Paint an Abstract Expressionist Flier for a Pottery Studio
Paint a ceramics studio flier with soak-stain colour pools, Kline-style dry-brush strokes, Pollock drops and a bold stacked title, all in Lopsy.
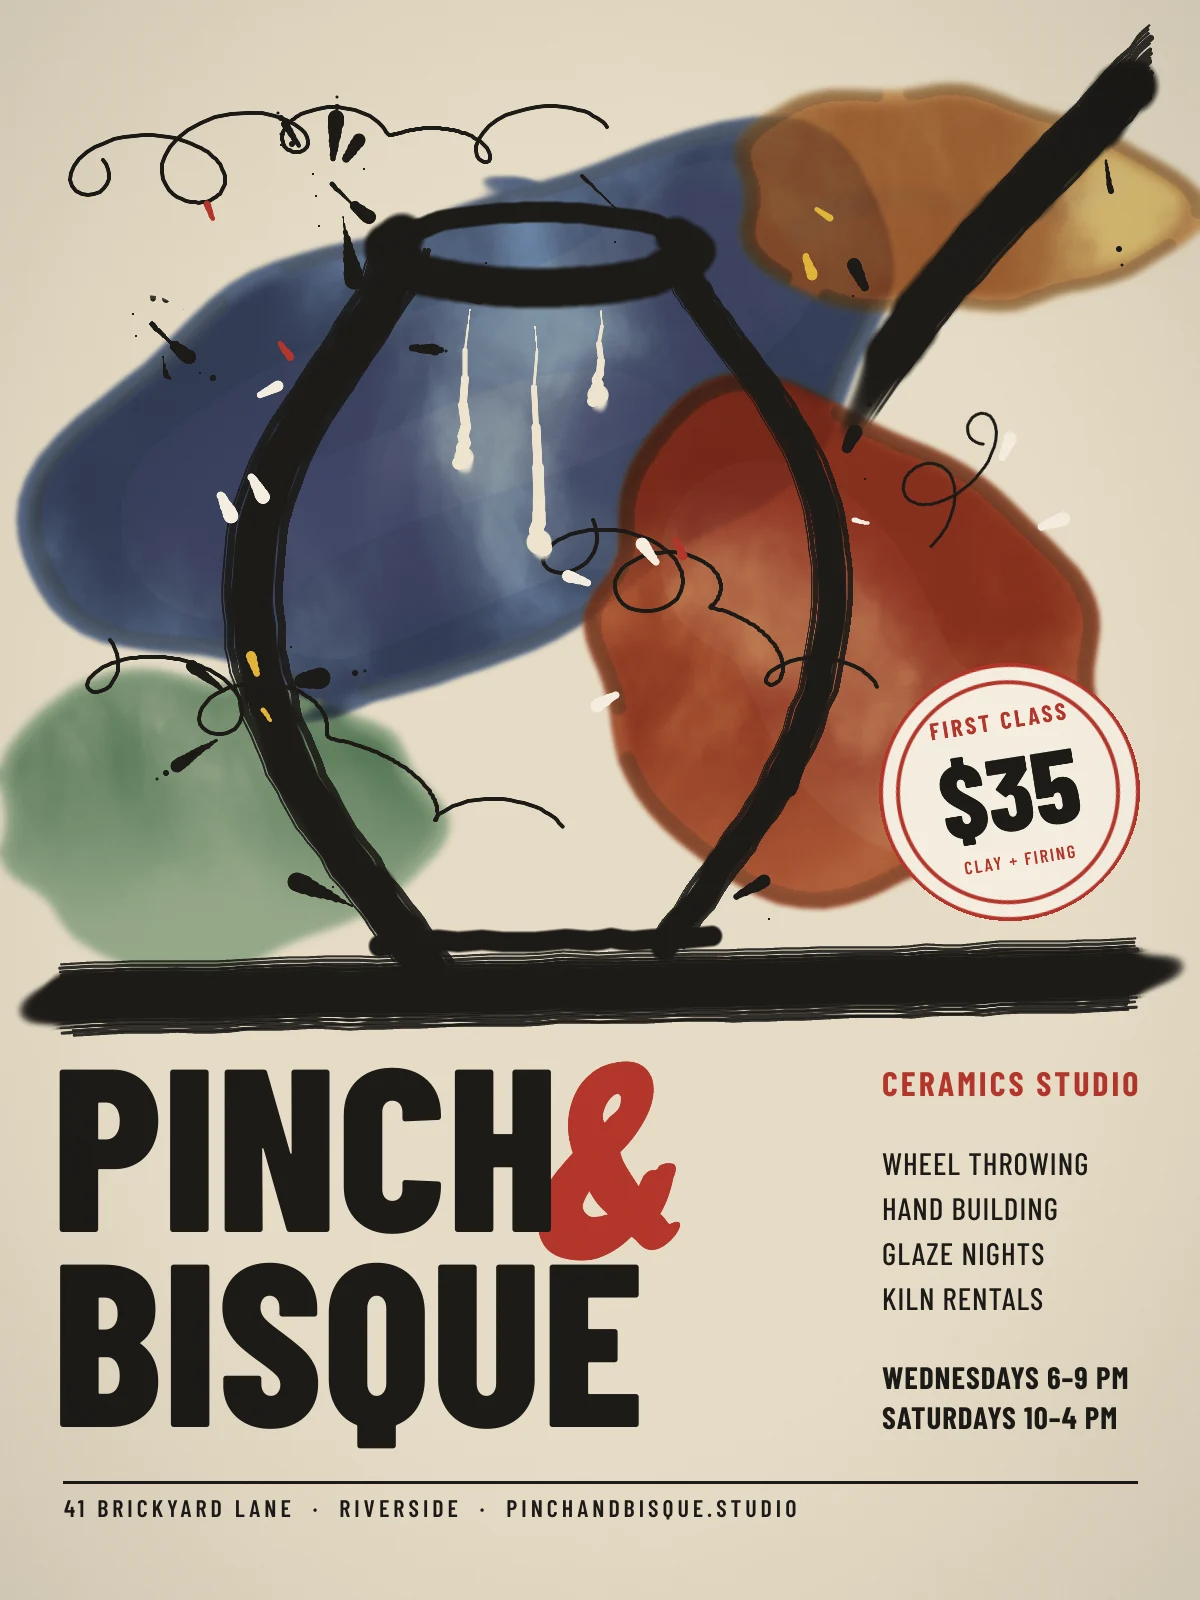
Abstract expressionism suits a pottery studio. The movement was about the hand, the gesture and the material, and so is throwing a pot. In this tutorial you'll paint a flier for Pinch & Bisque, an invented neighbourhood ceramics studio, on a 1200 × 1600 px page (a 3:4 flier, about 8 × 10.7 in at 150 dpi).
The top of the page is a painting, built from three ideas borrowed from the 1950s New York painters:
- Helen Frankenthaler's soak stains. She thinned paint until it ran like watercolour and poured it onto raw canvas. You'll get translucent pools with darker "tide lines" where the pigment settles at the edges.
- Franz Kline's black strokes. He made big, fast strokes with a house-painter's brush, so the edges break up into dry bristle streaks. You'll draw the pot and the potter's wheel this way, with a custom bristle brush.
- Jackson Pollock's drops and skeins. He flung paint off a stick, leaving teardrop splashes and long looping lines.
The bottom of the page is calm and gridded: a stacked condensed title, an info column and a footer. The contrast between the two halves is what makes the flier work.
Along the way you'll use:
- Add Noise, Motion Blur, Gaussian Blur and Smoke for the canvas and stains
- the Lasso, Elliptical Marquee, Select → Shrink / Feather and ⌘-click to select layer pixels
- Inner Glow, Stroke, and the Multiply, Overlay and Soft Light blend modes
- the Smudge, Dodge / Burn, Sponge, Eraser and Clone Stamp tools
- Edit → Define Brush… to make a bristle brush tip, plus brush Taper and Speed Size
- Copy, Paste, scaling and rotating with the Move tool, and rotating a whole group
- a layer mask with a gradient, and group adjustments (Hue / Saturation, Vignette)
- live text in Barlow Condensed and Knewave
The palette:
-
Raw canvas
-
Cobalt
-
its tide line
-
Terracotta
-
its tide line
-
Ochre
-
celadon
-
Ink
-
glaze cream
-
Splash cream
-
cadmium
-
red
Positions are given in document pixels as x, y where things need to line up. The status bar at the bottom of the window shows the pointer's X and Y. The stains and strokes are freehand, so match them roughly by eye from the screenshots.
Two habits will save you trouble. Before you start a new piece of text, click a layer that isn't text. Otherwise picking a font, size or colour restyles the selected text layer instead of setting up the new one. And start each new piece of text in an empty patch of canvas, then move it into place with the Move tool. A click on or just under existing text edits that text instead.
-
Prime a raw canvas
- Choose File → New and make a 1200 × 1600 px document.
- Click Background, set the foreground colour to and choose Edit → Fill.
- Double-click Layer 1 and rename it
Canvas Weave. Fill it with . - Choose Filter → Add Noise… with Amount
40and Mono, then Filter → Motion Blur… with Angle0and Distance7. That gives you horizontal threads. - Do it again for the vertical threads: Add Noise
30Mono, then Motion Blur with Angle90and Distance5. - Click the ✦ button on the layer's row to open the effects drawer, set the blend mode to Soft Light, then click the opacity figure on the row and drag it to
45%.
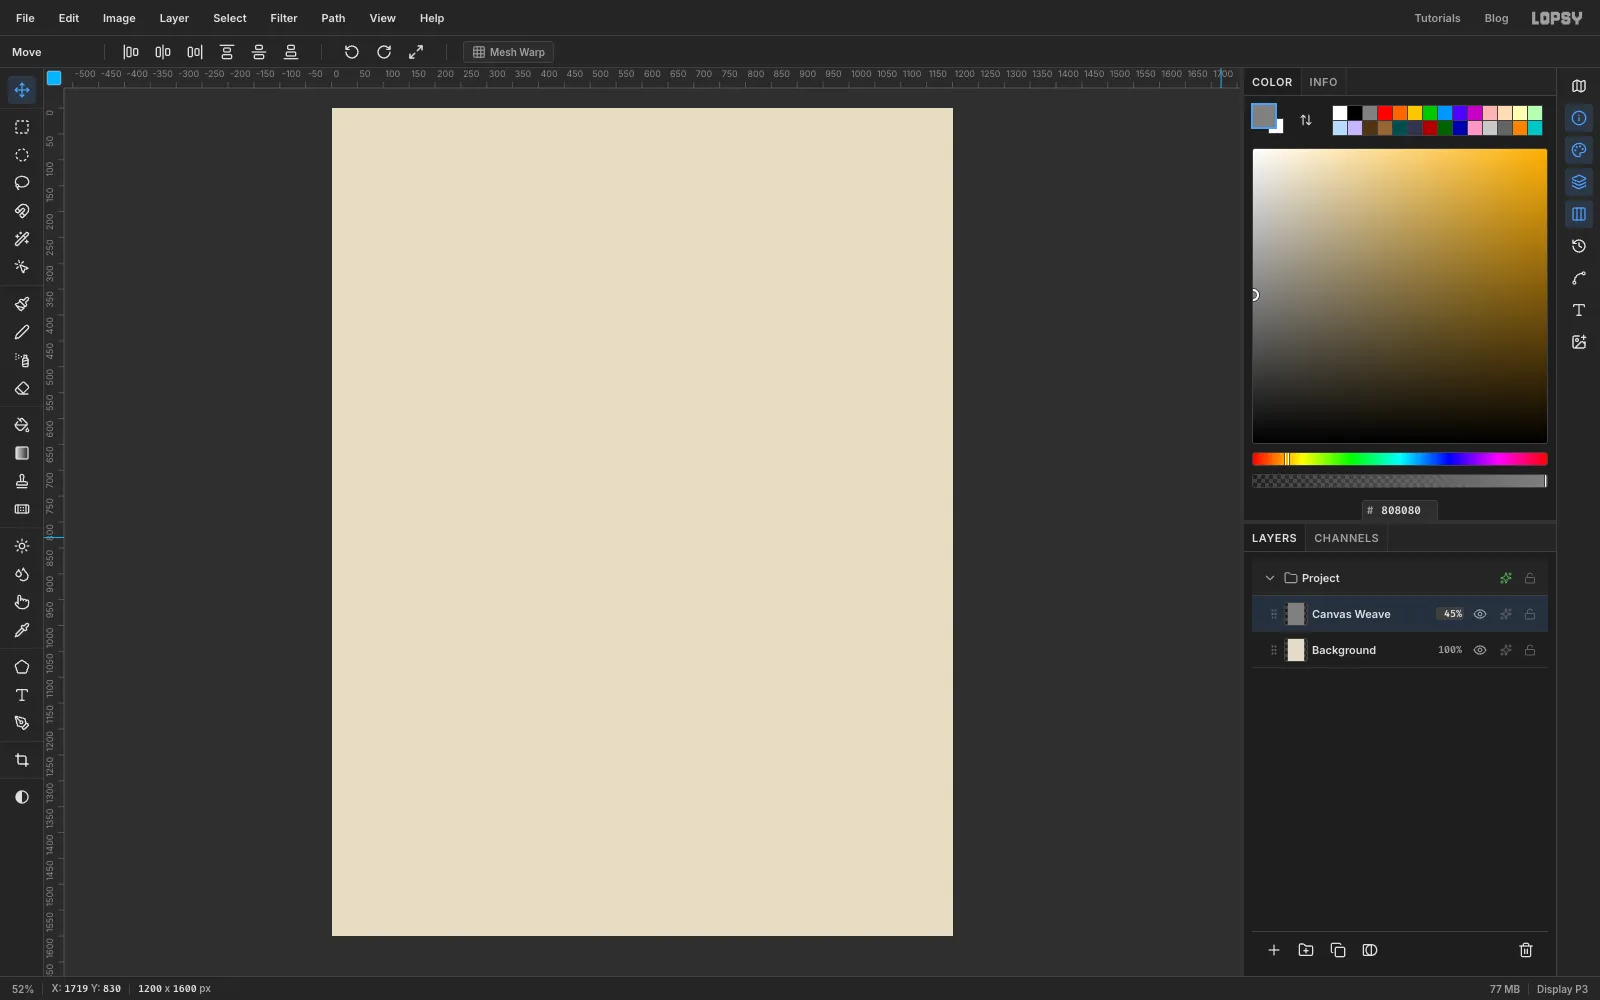
The grey disappears and leaves a faint cross-weave, like unprimed cotton duck.
-
Drop the layout guides
Click the top ruler at
x 64,600and1136to drop three vertical guides: the two margins and the centre. Then click the left ruler aty 64,1040and1536. The guide at1040is where the painting stops and the type starts.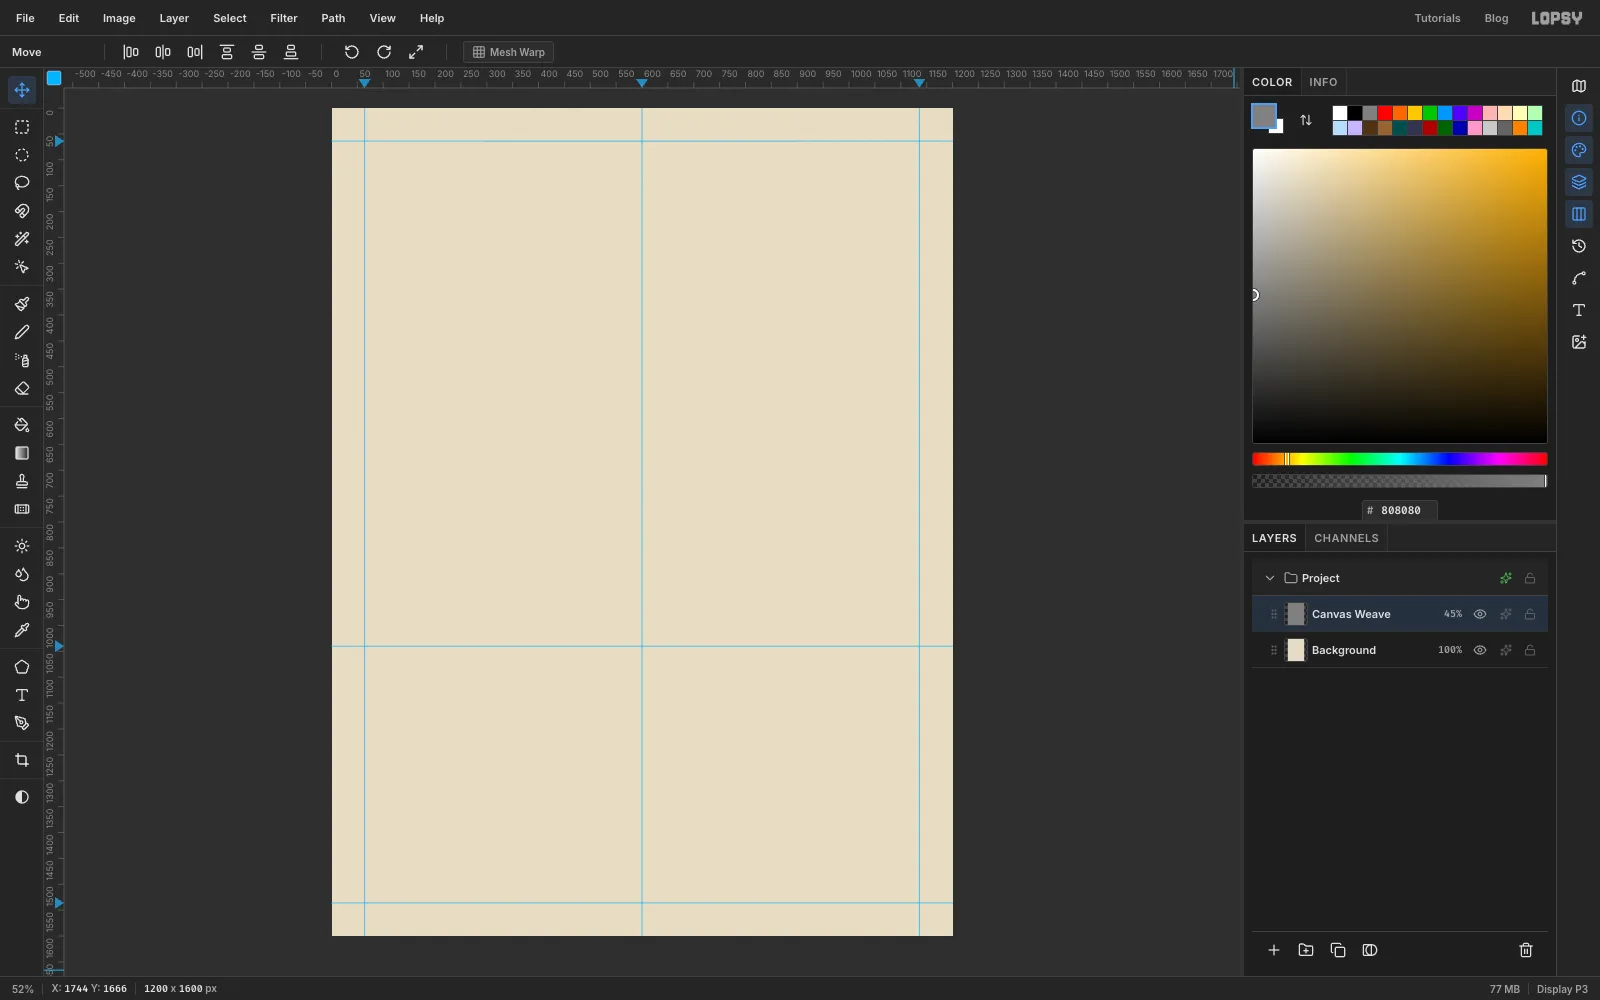
-
Lasso the first pour
- Click
Canvas Weaveand click Add Layer. Name itSplatter Blackand leave it empty for now. It will hold the black drops later, and it has to sit at the top level of the Layers panel, above the stains. - Click
Canvas Weaveagain and click New Group at the bottom of the Layers panel. Name the groupStains. It goes betweenCanvas WeaveandSplatter Black. - With
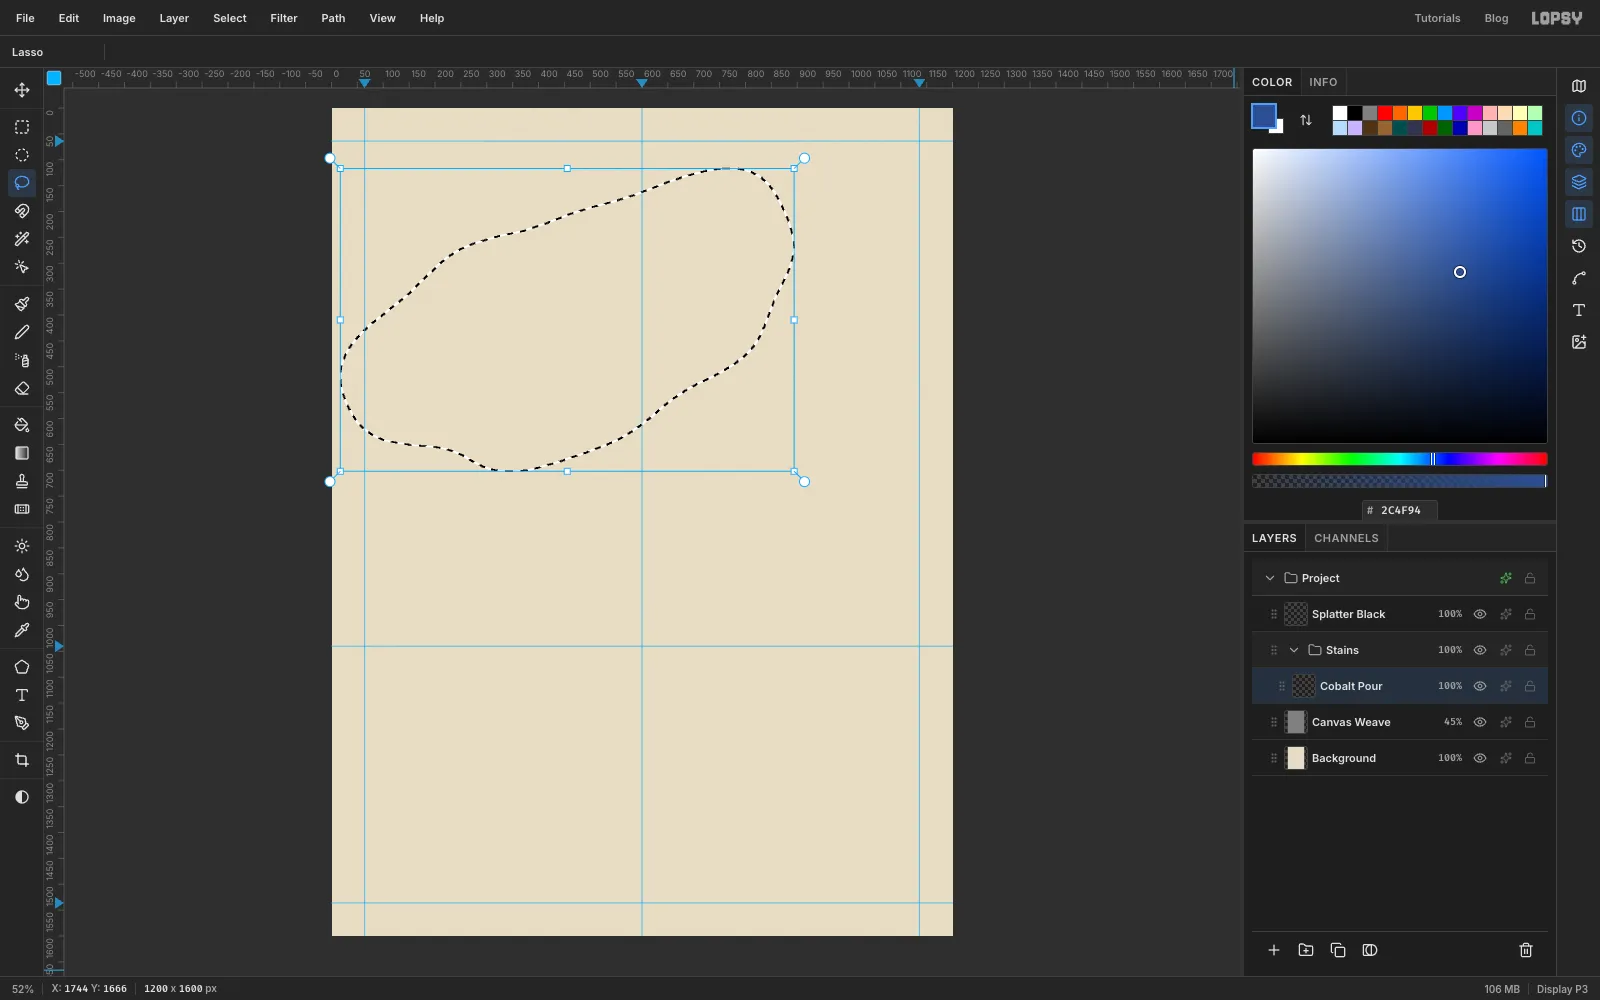
Stainsselected, click Add Layer (it goes inside the group) and name itCobalt Pour. - Pick the Lasso. Draw a lumpy oval about 820 px wide and 500 px tall, centred near
470, 420and tilted up to the right. Let the outline bulge in and out a little as you go: real poured paint never makes a clean oval.
- Click
-
Soak the pour into the canvas
- Set the foreground to , choose Edit → Fill and press Cmd+D to deselect.
- Choose Filter → Gaussian Blur… with Radius
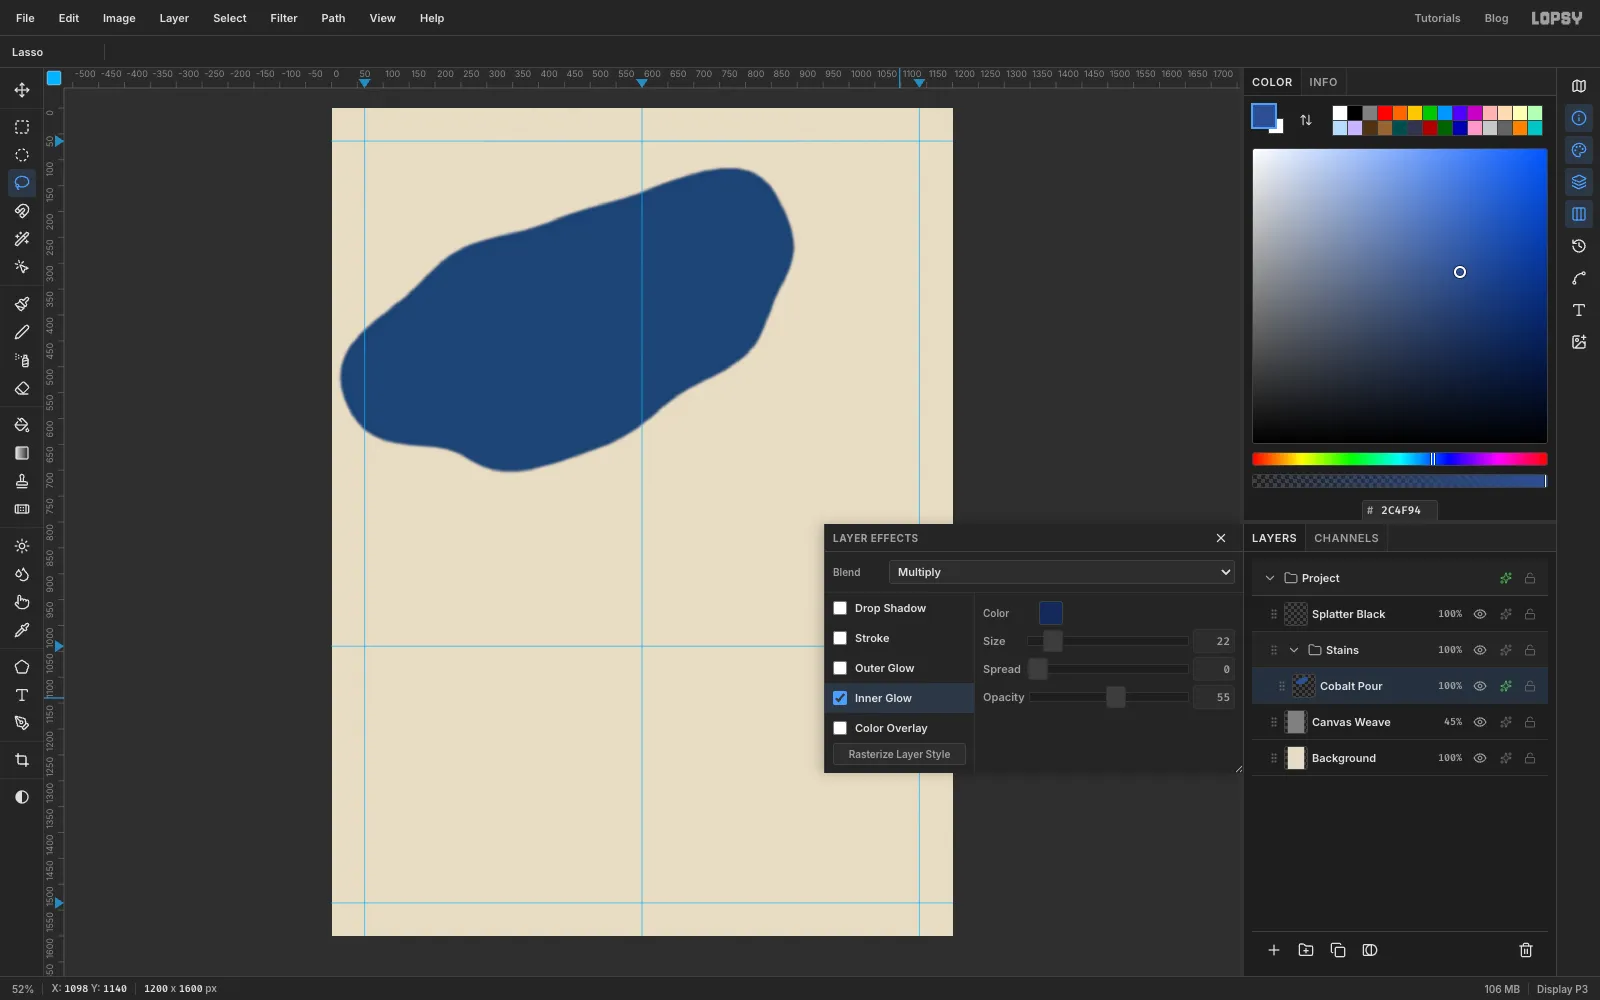
7. The hard lasso edge softens into a soaked-in edge. - Open the effects drawer and set the blend mode to Multiply, so the canvas weave shows through the paint.
- Turn on Inner Glow with colour , Size
22and Opacity55. This is the tide line: the darker rim where pigment collects as a pool dries. - Close the drawer and set the layer's opacity to
66%.
-
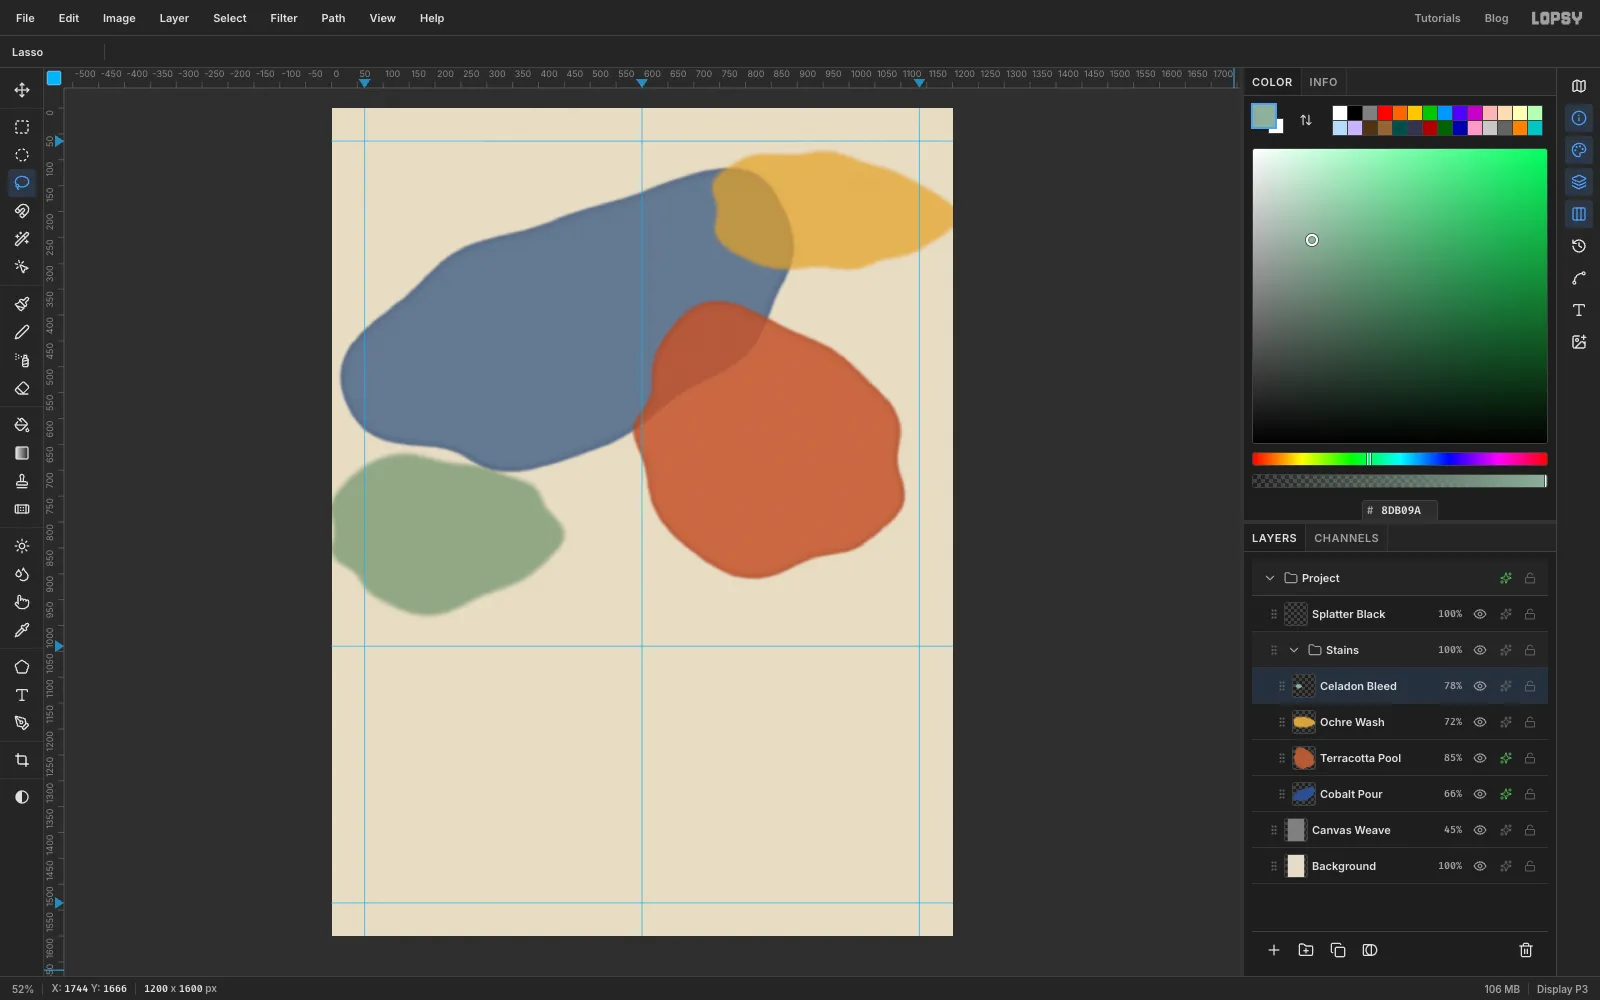
Pour the other three stains
Make each stain on its own new layer inside
Stains, the same way: Lasso, fill, Gaussian Blur, then blend mode and opacity.Terracotta Pool: about 600 × 430, centred near840, 650, tilted down to the right so it overlaps the blue. Fill with , Gaussian Blur7, blend mode Normal, Inner Glow in (size22, opacity55), opacity85%.Ochre Wash: about 420 × 250, centred near950, 200, running off the right edge. Fill with , Gaussian Blur10, Normal, opacity72%.Celadon Bleed: about 460 × 280, centred near210, 820, running off the left edge. Fill with , Gaussian Blur12, Multiply, opacity78%.
The terracotta and ochre stay on Normal on purpose. They overlap the blue a lot, and Multiply on top of Multiply turns those overlaps into brown-black mud. On Normal the overlaps stay coloured and translucent. The celadon can stay on Multiply because it's pale and only just touches the blue.
-
Let a few tendrils wick out
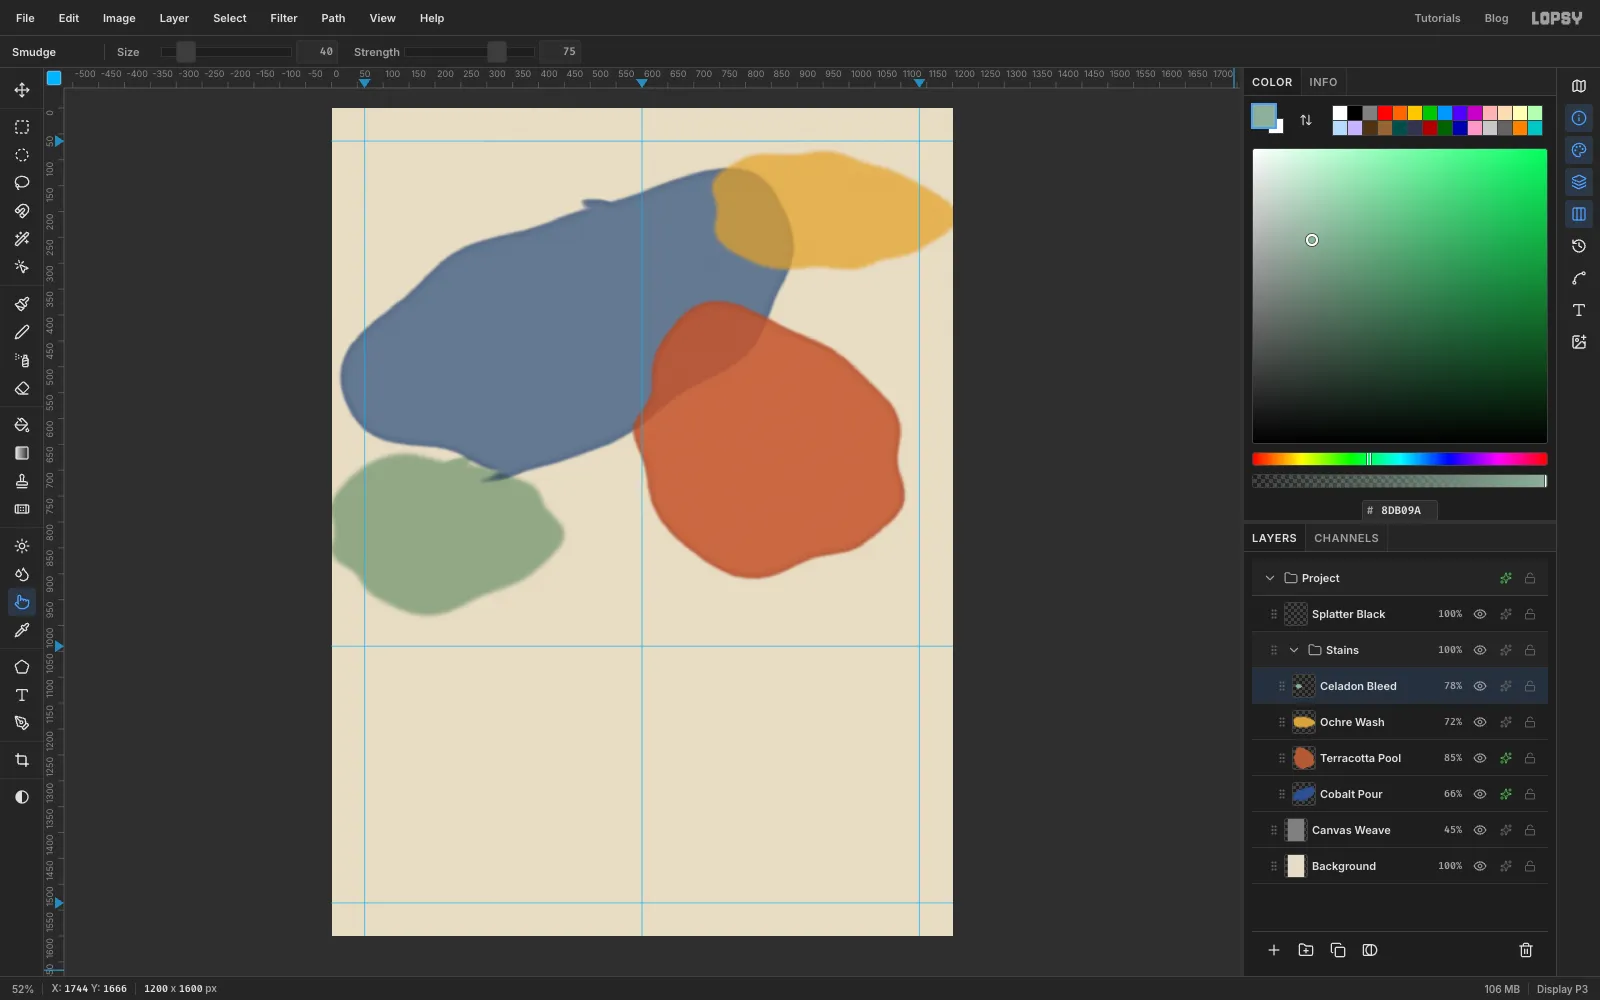
Thinned paint creeps along the canvas threads. Pick the Smudge tool with Size
40and Strength75.- On
Cobalt Pour, start just inside the edge and drag outward about 40 px, curving slightly as you go. Do it once on the upper edge and once at the lower left. - On
Celadon Bleed, drag one short tendril out of the right edge.
Keep it to these three. More tendrils start to look like fins.
- On
-
Dodge where the paint ran thin
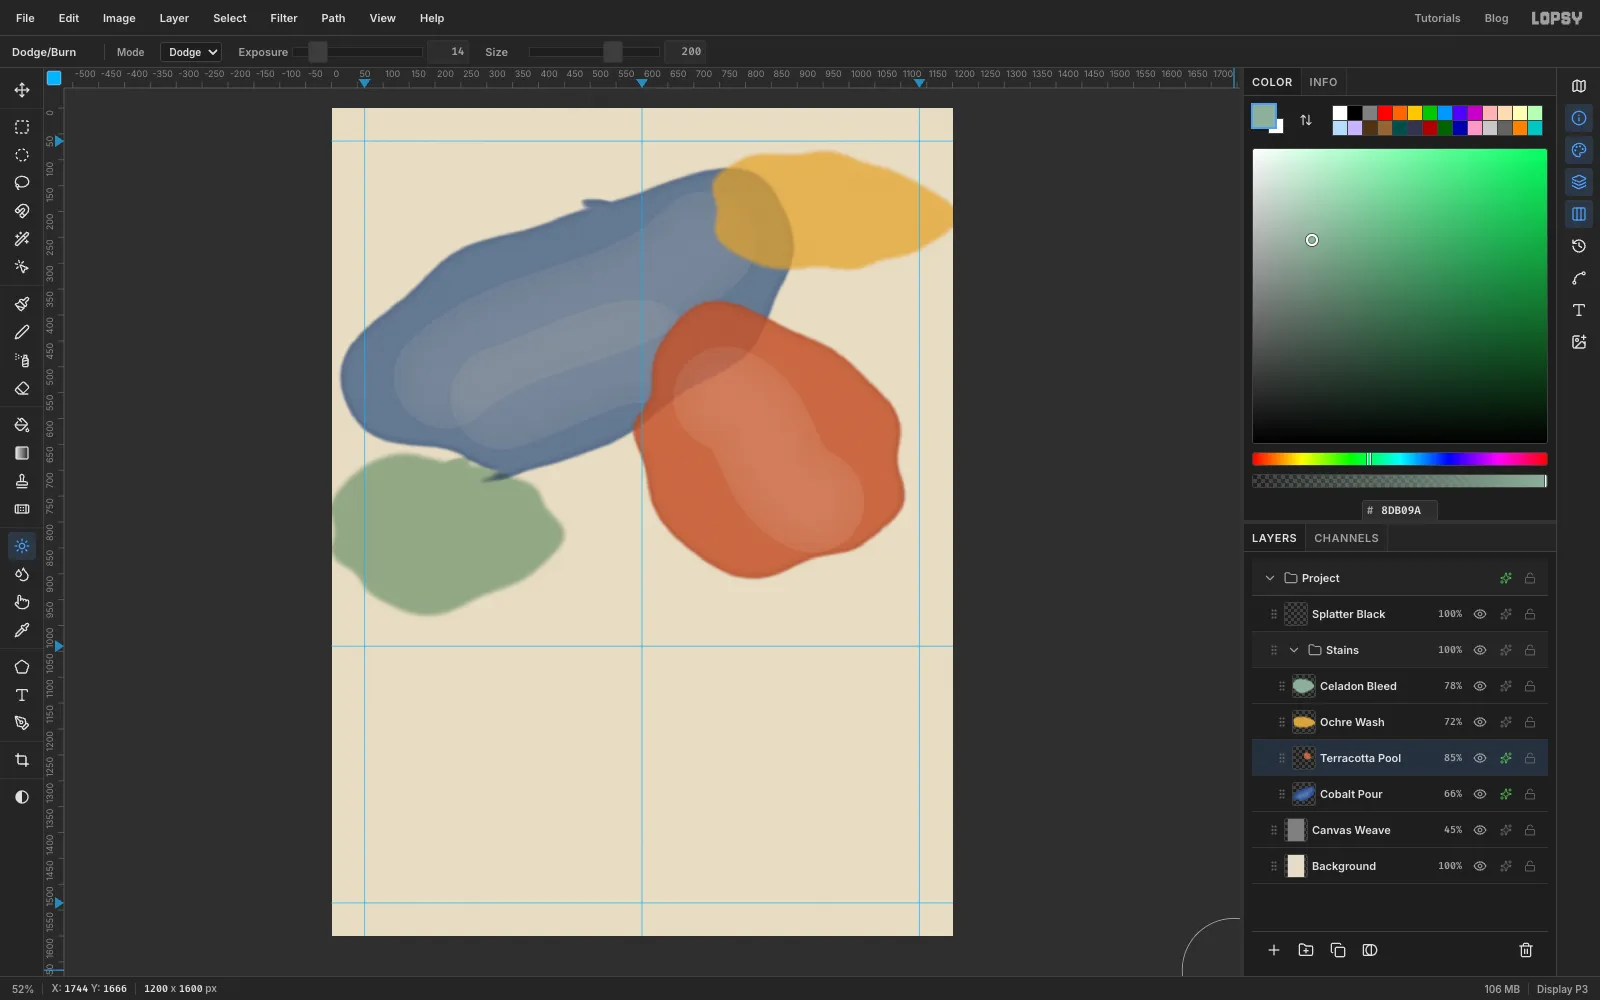
Pick the Dodge / Burn tool. Set Mode to Dodge, Exposure
14and Size200.- On
Cobalt Pour, make one long sweep from the lower left of the pool up to its top right, then a shorter sweep under it. - On
Terracotta Pool, make one sweep from its top left down through the middle.
These lighter paths read as places where the paint thinned out as it flowed.
- On
-
Burn the tide lines
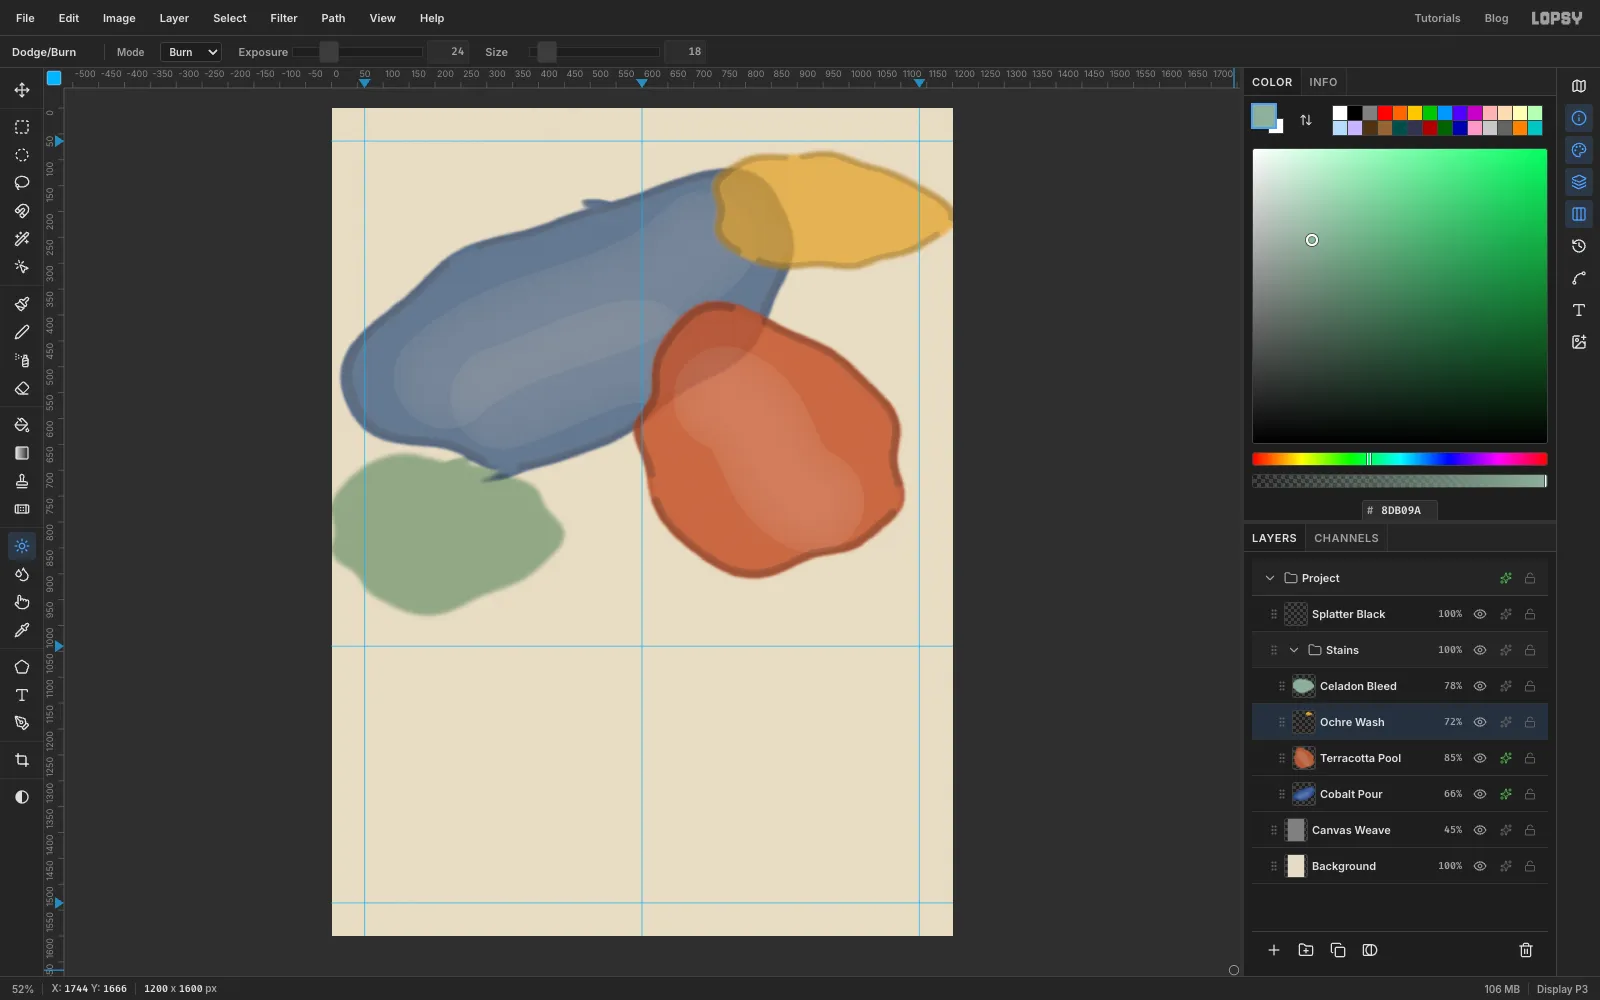
Switch Mode to Burn, with Exposure
24and Size18. OnCobalt Pour, trace all the way round the pool just inside its edge, in three overlapping arcs. Do the same onTerracotta PoolandOchre Wash.Each arc is its own undo step, so if one comes out too dark, press Cmd+Z and trace it again.
-
Sponge and cool the ochre
Straight ochre is a little loud next to the soft blues. Click
Ochre Wash, pick the Sponge tool with its defaults (Mode Desaturate, Strength50, Size30) and make one slow drag across the middle of the stain.Then choose Filter → Hue/Saturation… with Hue
-6and Saturation-18. That pulls it toward the colour of a fired glaze.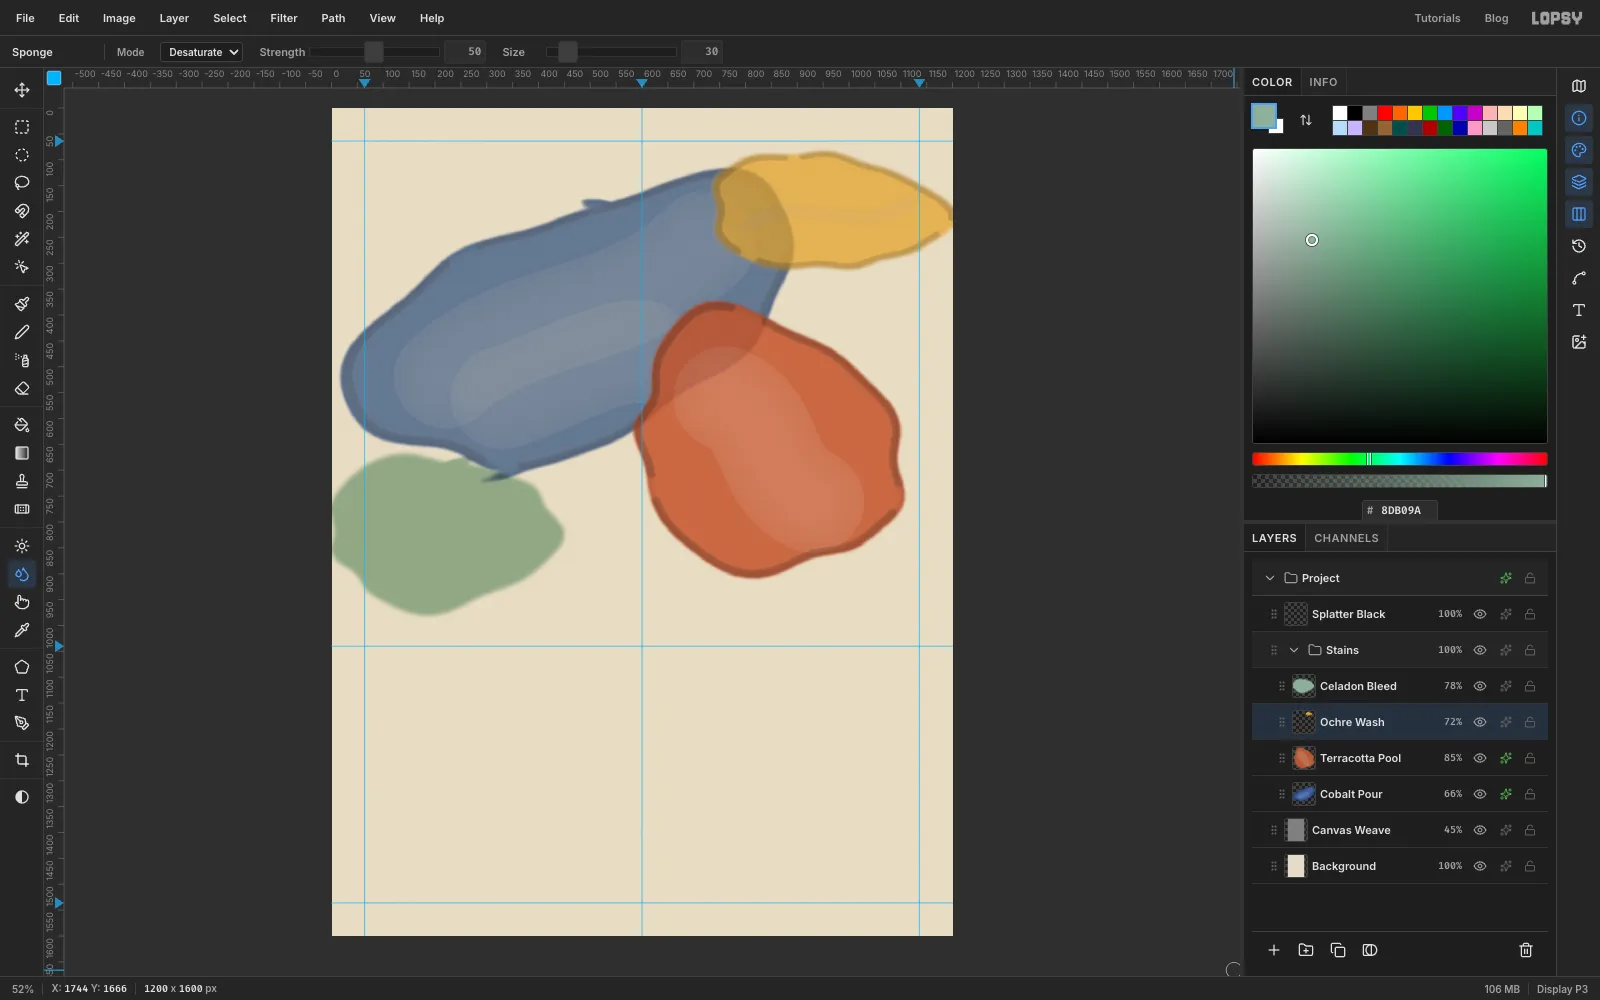
-
Select all four stains at once
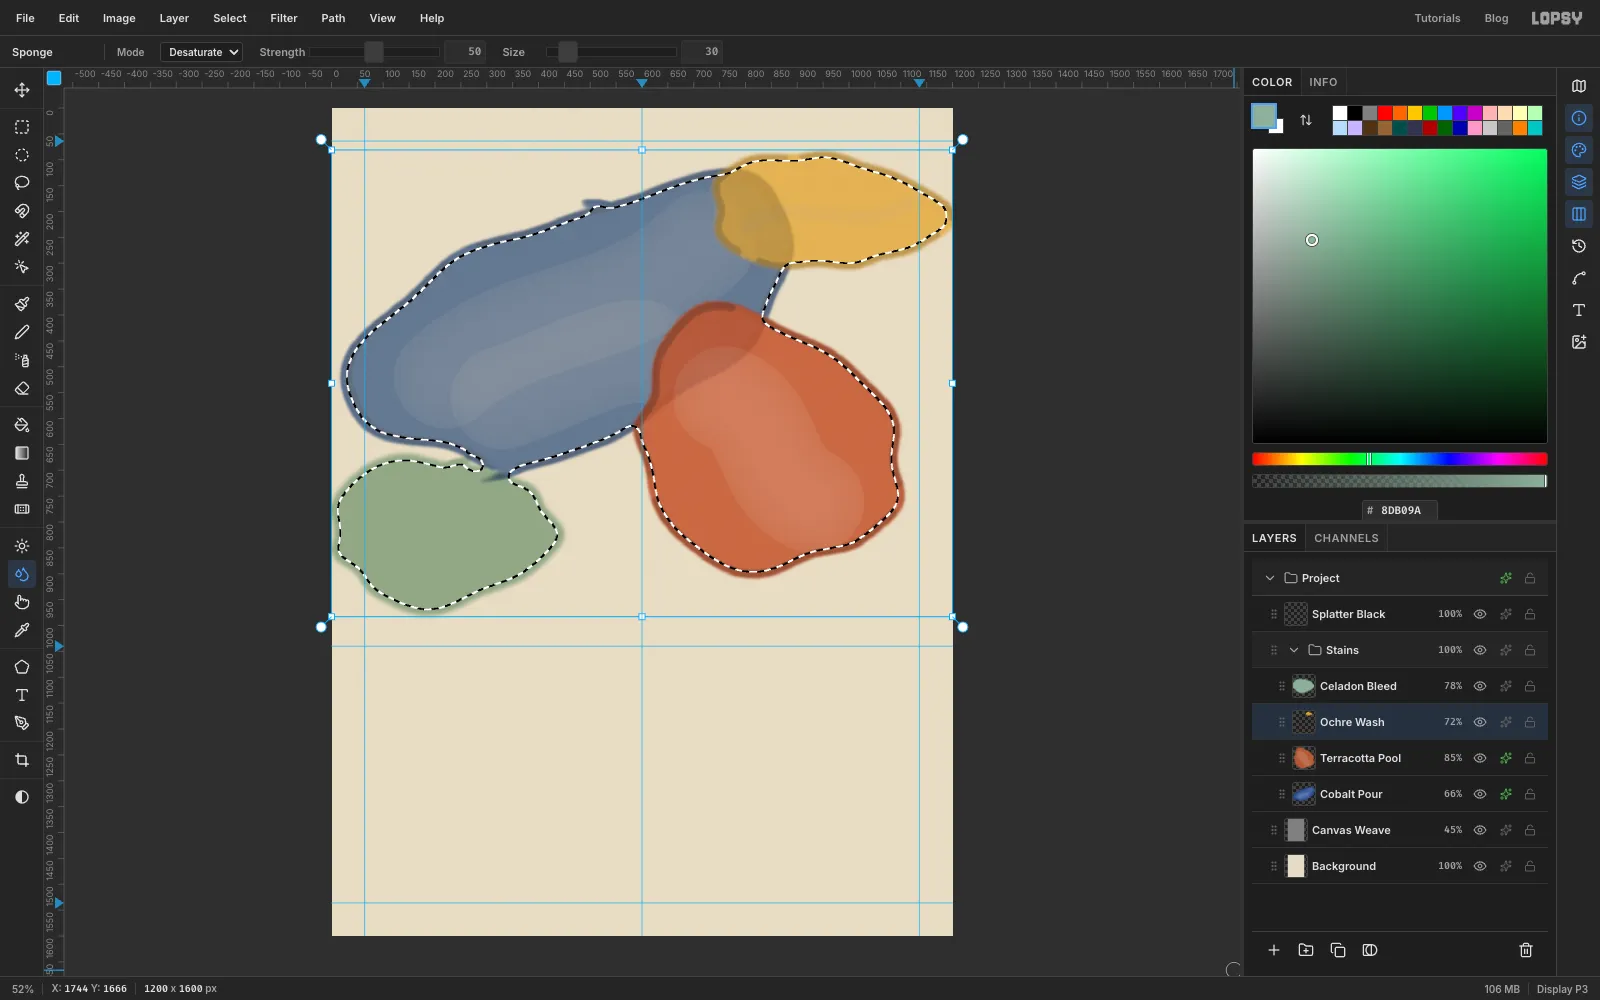
- Cmd-click the thumbnail of
Cobalt Pourto load its pixels as a selection. - Cmd+Shift-click the thumbnails of
Terracotta Pool,Ochre WashandCeladon Bleedto add each of them. - Choose Select → Shrink… with
12, then Select → Feather… with14.
Shrinking keeps the next texture off the very edges, so the tide lines stay crisp. Feathering softens the boundary so the texture doesn't stop at a visible line.
- Cmd-click the thumbnail of
-
Mottle the pigment with Smoke
- Click
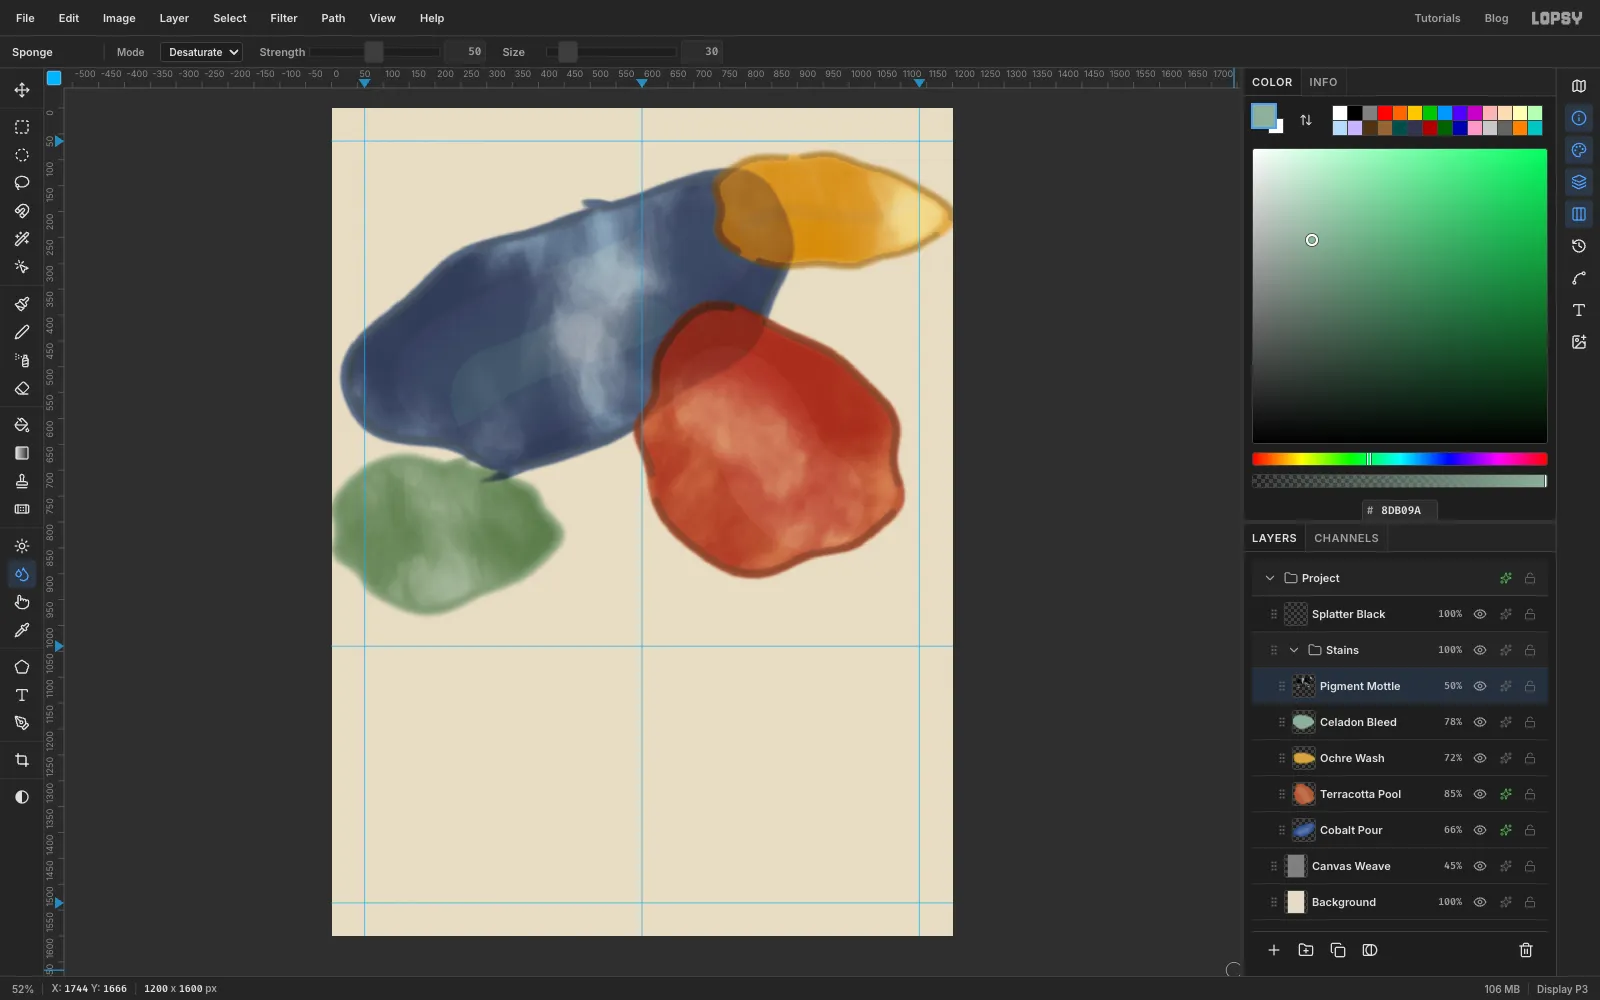
Celadon Bleedand click Add Layer. Name the new layerPigment Mottle. - With the selection still active, choose Filter → Smoke… with Scale
6and Turbulence70. Press Cmd+D. - Set the layer to Overlay at
50%.
The smoke turns the flat fills into pooled, uneven pigment.
- Click
-
Make a bristle brush tip
Kline's strokes break up at the edges because a big brush runs out of paint. You'll make a brush tip that's a column of bristles.
- Click
Splatter Blackand click New Group. Name itVessel. It goes aboveSplatter Black, at the top level. Inside it, add a layer calledKline Strokes. - Add one more layer called
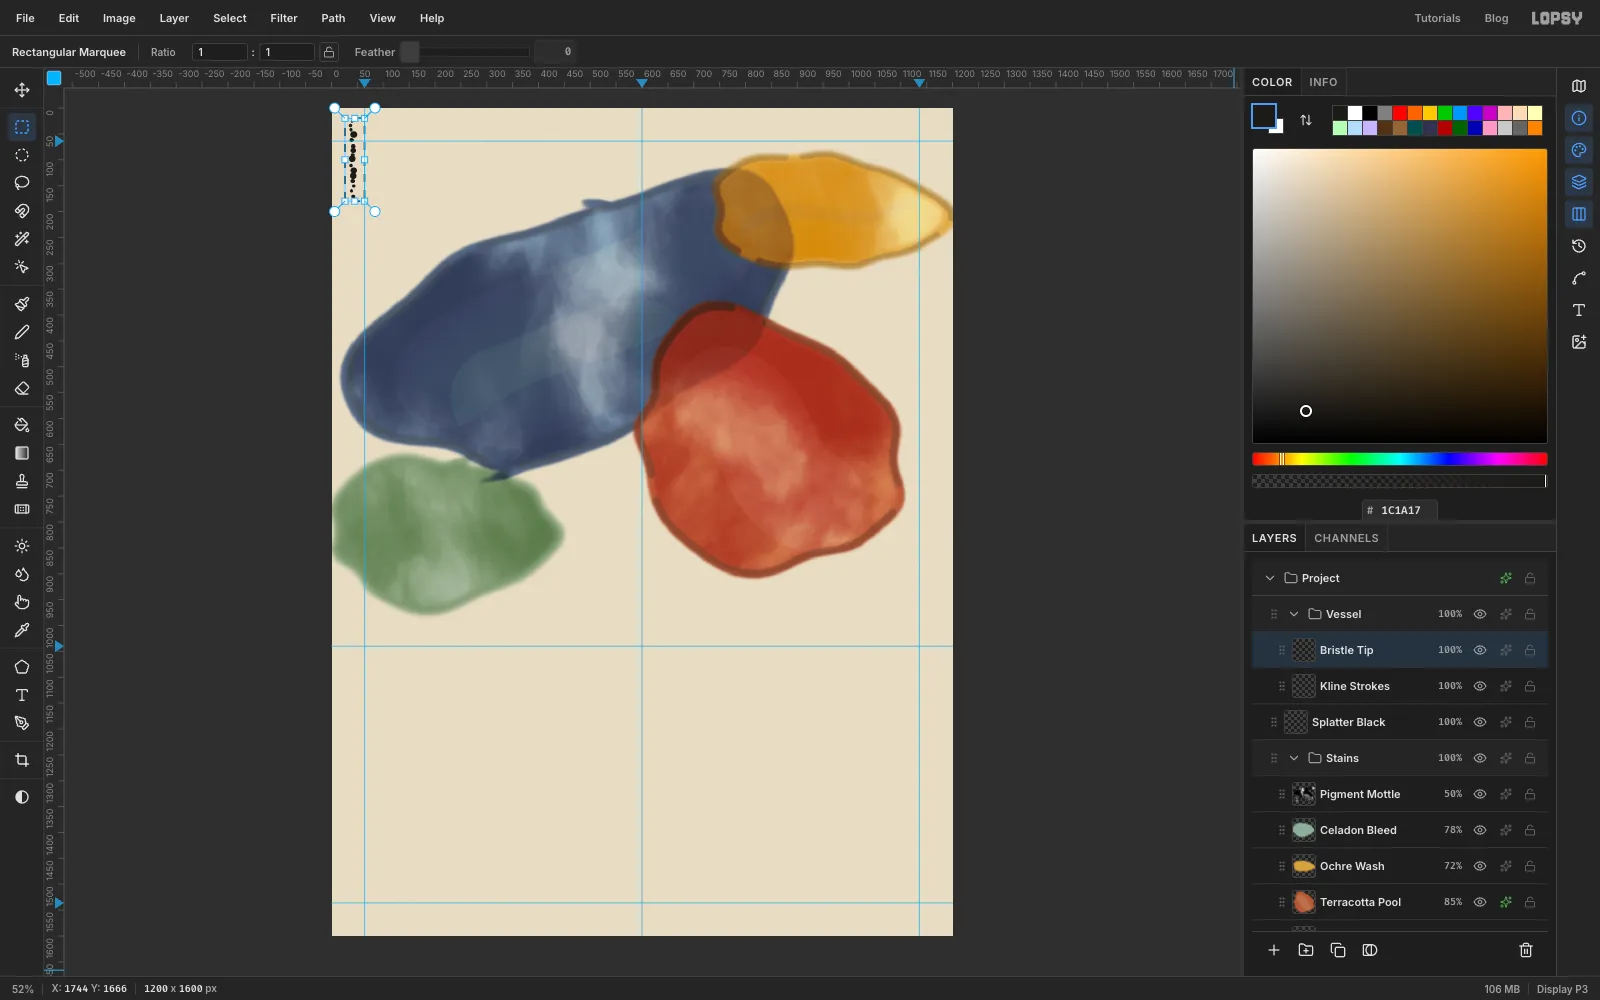
Bristle Tip. Set the foreground to , pick the Brush with the Hard Round preset and Hardness100. - Near the top-left corner, click a column of dots straight down from about
40, 26to40, 174. Vary the Size between6and15and leave small, uneven gaps. A wobble of a few pixels left and right makes it look hand-made. - Drag a Rectangular Marquee tightly around the column, choose Edit → Define Brush… and name it
Bristle Column. - Deselect and delete the
Bristle Tiplayer with the trash button. - Add a new
Bristle Tiplayer and do the same again, this time with the dots in a horizontal row from about26, 40to174, 40. Name that brushBristle Row, then delete the layer.
Each dot in the tip drags a streak when you paint. A column of dots makes streaks for strokes that run sideways, and a row of dots makes streaks for strokes that run downward.
- Click
-
Set up the stroke brush
Click
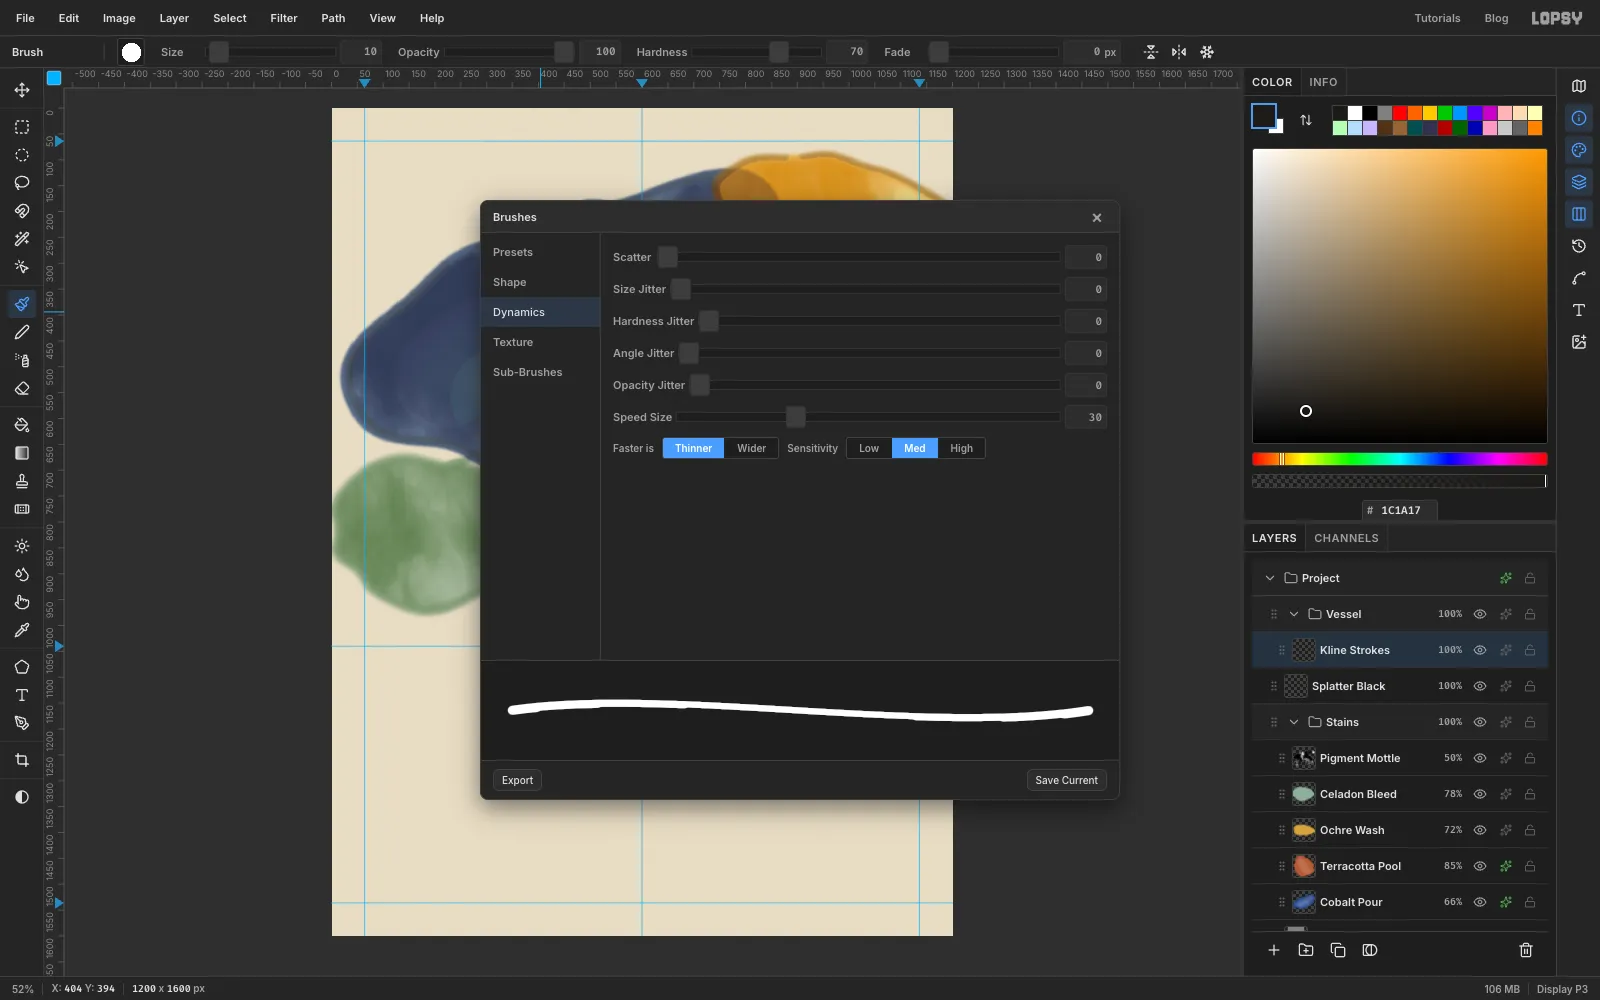
Kline Strokes. Open the Brushes dialog with the brush-tip button at the left of the Brush options bar. On Presets pick Hard Round. On Shape set Hardness70and Spacing4. On Dynamics set Speed Size30with Faster is Thinner.Speed Size thins a stroke where you move fast and fattens it where you slow down, like a real loaded brush. Close the dialog.
-
Paint the pot's lip
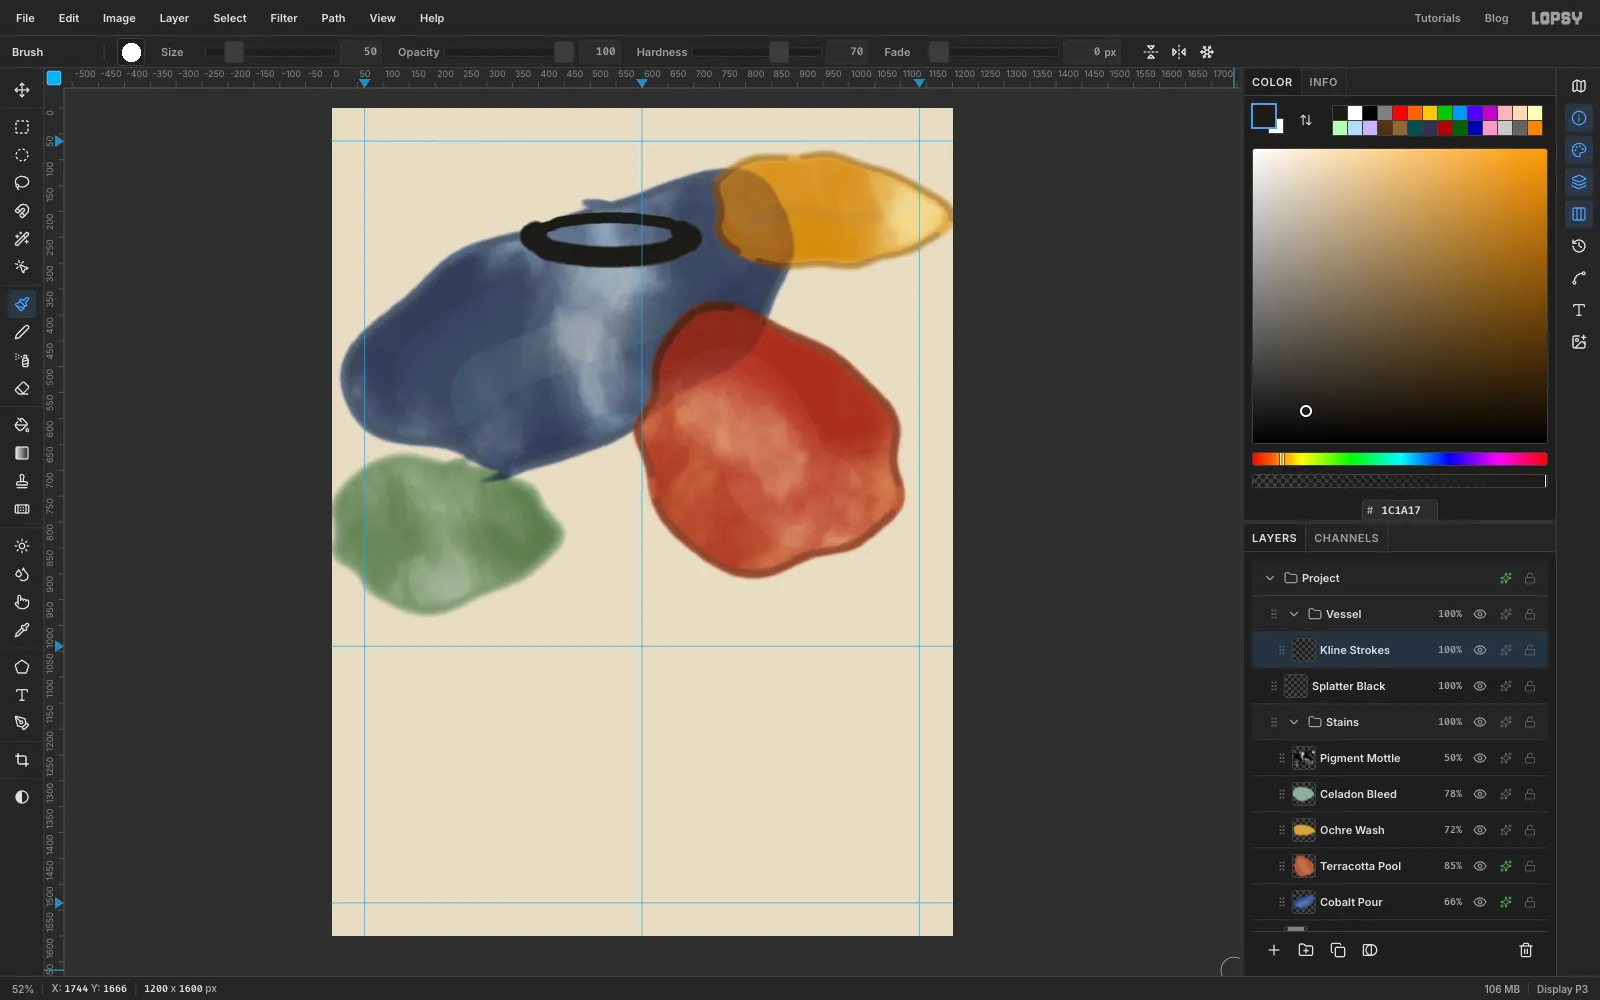
The rim is an ellipse centred on
540, 250, about 300 px wide and 76 px tall.- Set Size
26and paint the back half of the ellipse, from its left end over the top to its right end. - Set Size
50and paint the front half in one sweep, starting a little behind the left end, going round the bottom and carrying on past the right end.
A heavier front makes the rim read as a round opening seen from slightly above.
- Set Size
-
Throw the walls, foot, wheel and diagonal
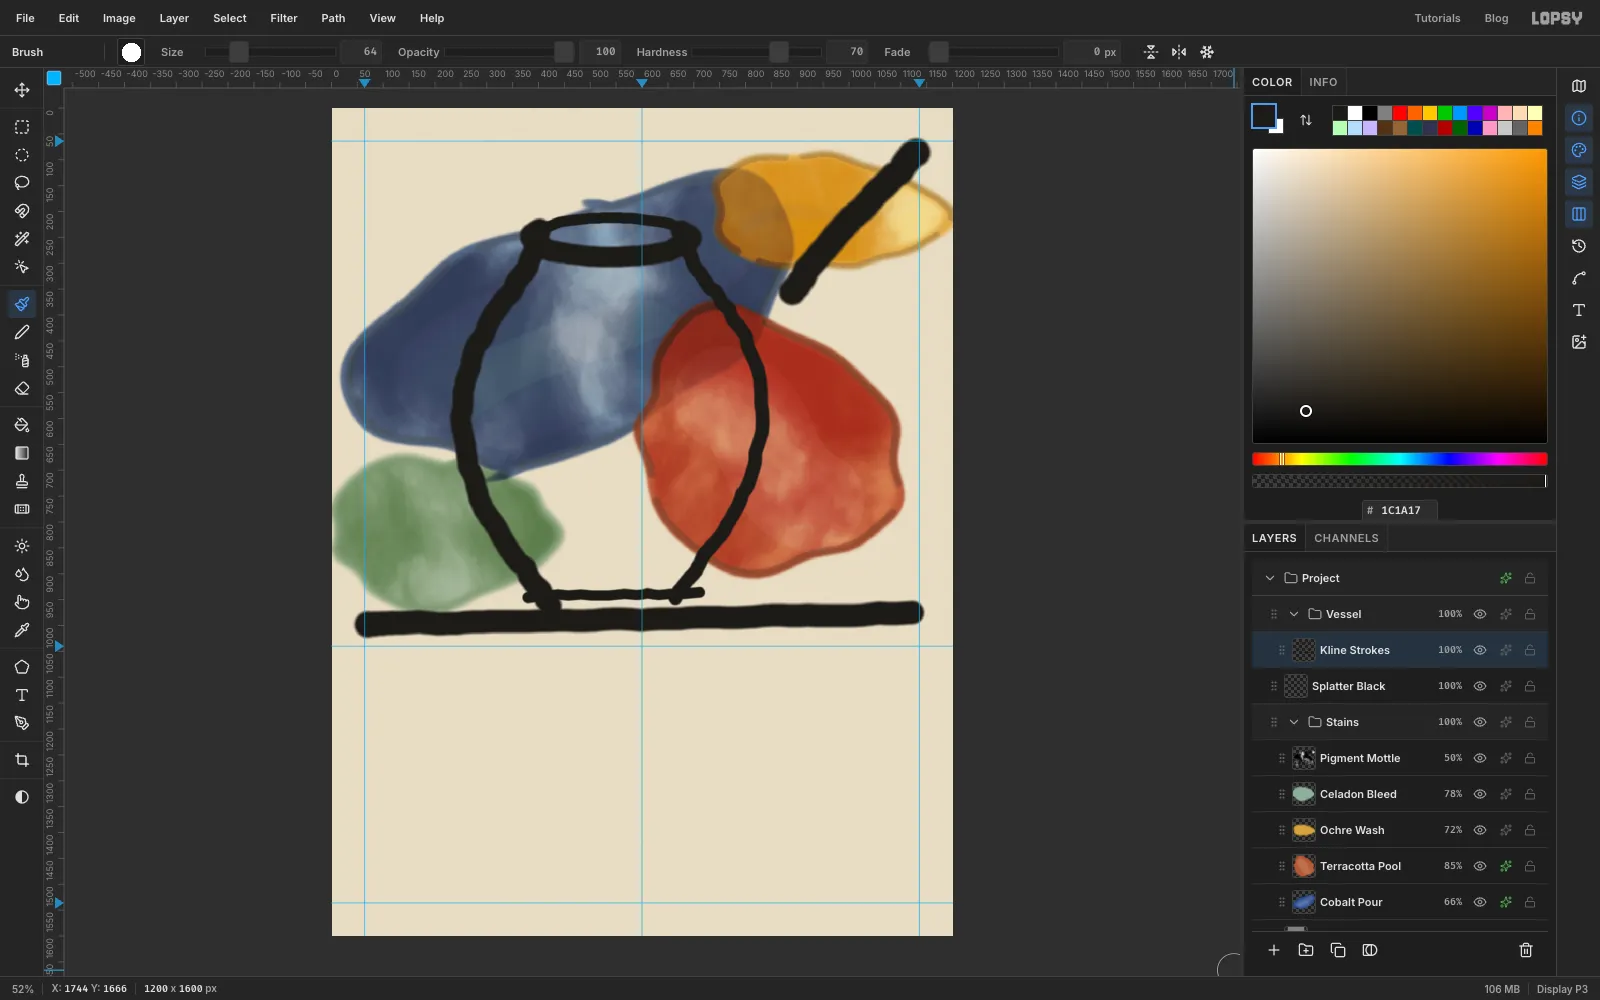
Paint each of these as one confident stroke. Don't go back over them.
- Left wall, Size
52: start at the left end of the rim, swell out to its widest (aboutx 250) halfway down, then curve back in to the foot at about424, 962. - Right wall, Size
34: start at the right end of the rim, swell out to aboutx 832, then curve back in to about664, 948. Making it lighter than the left wall gives the pot a light side and a shadow side. - Foot, Size
26: a slightly wavy line joining the bottoms of the two walls. - Wheel, Size
60: a long stroke across the page just above the1040guide, from near the left edge to near the right margin, rising very slightly. - Diagonal, Size
64: from near the top-right corner (about1130, 86) down to about890, 356, where it meets the top of the rust stain. It cuts in like the edge of a big Kline canvas.
- Left wall, Size
-
Drag the bristle brushes along the strokes
- Open the Brushes dialog, pick the
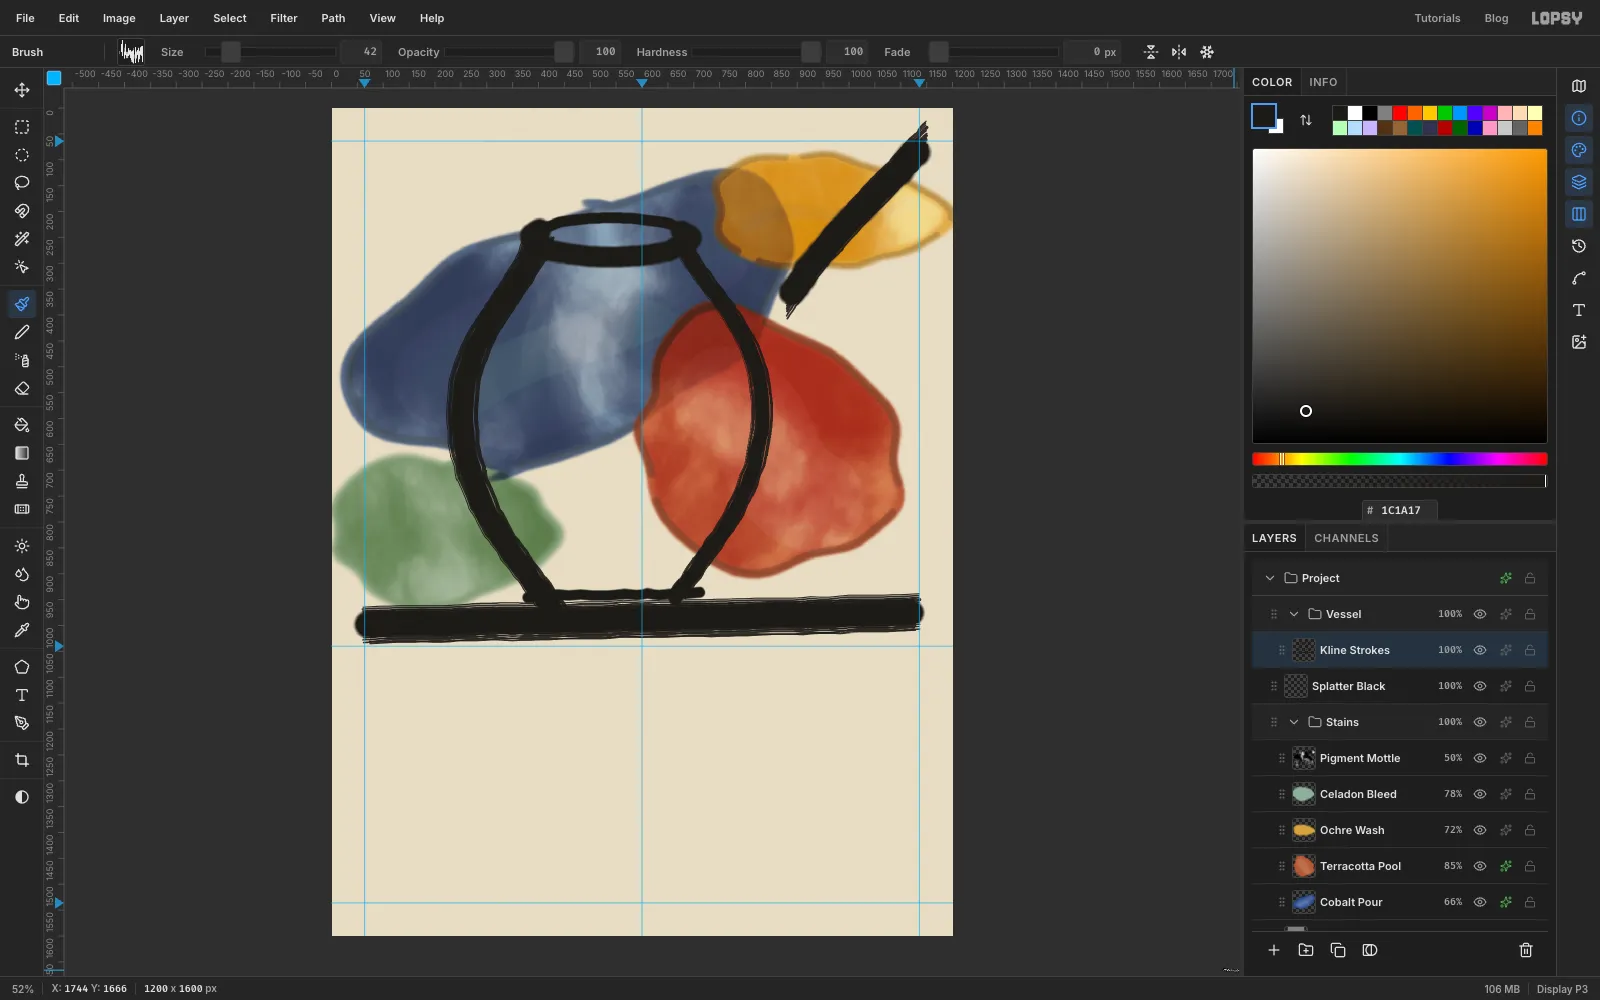
Bristle Columnpreset, set Spacing1and Speed Size0, and close it. - Paint along the wheel bar twice, once at Size
72and once at66, each running only about 10 px past the bar's ends. Then paint once along the diagonal at Size76. - Pick the
Bristle Rowpreset (Spacing and Speed Size stay as you just set them) and paint along the left wall at Size62and along the right wall at Size42.
Keep each bristle pass only a little wider than the stroke under it. That way the streaks fray the edges. Much wider, and they turn into ruled lines floating beside the stroke.
- Open the Brushes dialog, pick the
-
Smear the wet ends
Pick Smudge with Size
60and Strength80. Drag each end of the wheel bar outward, about 60 px past where it ends. Then drag the lower end of the diagonal down and to the left. This is the paint dragging as the brush lifts off.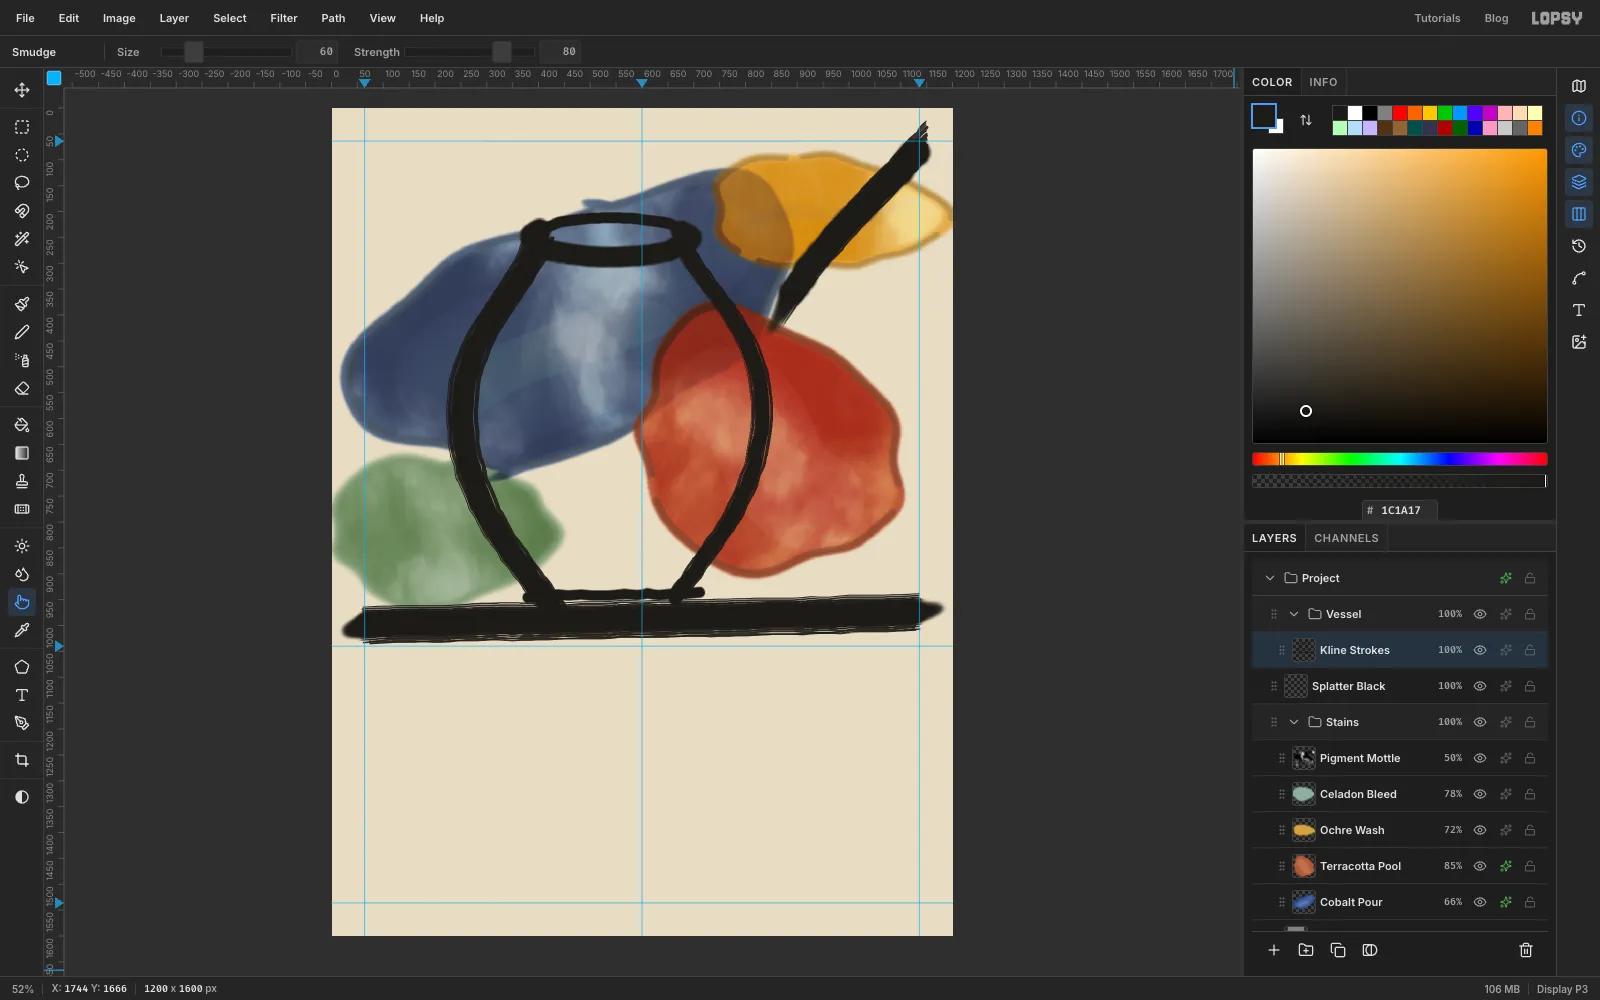
-
Run glaze off the lip
- Click
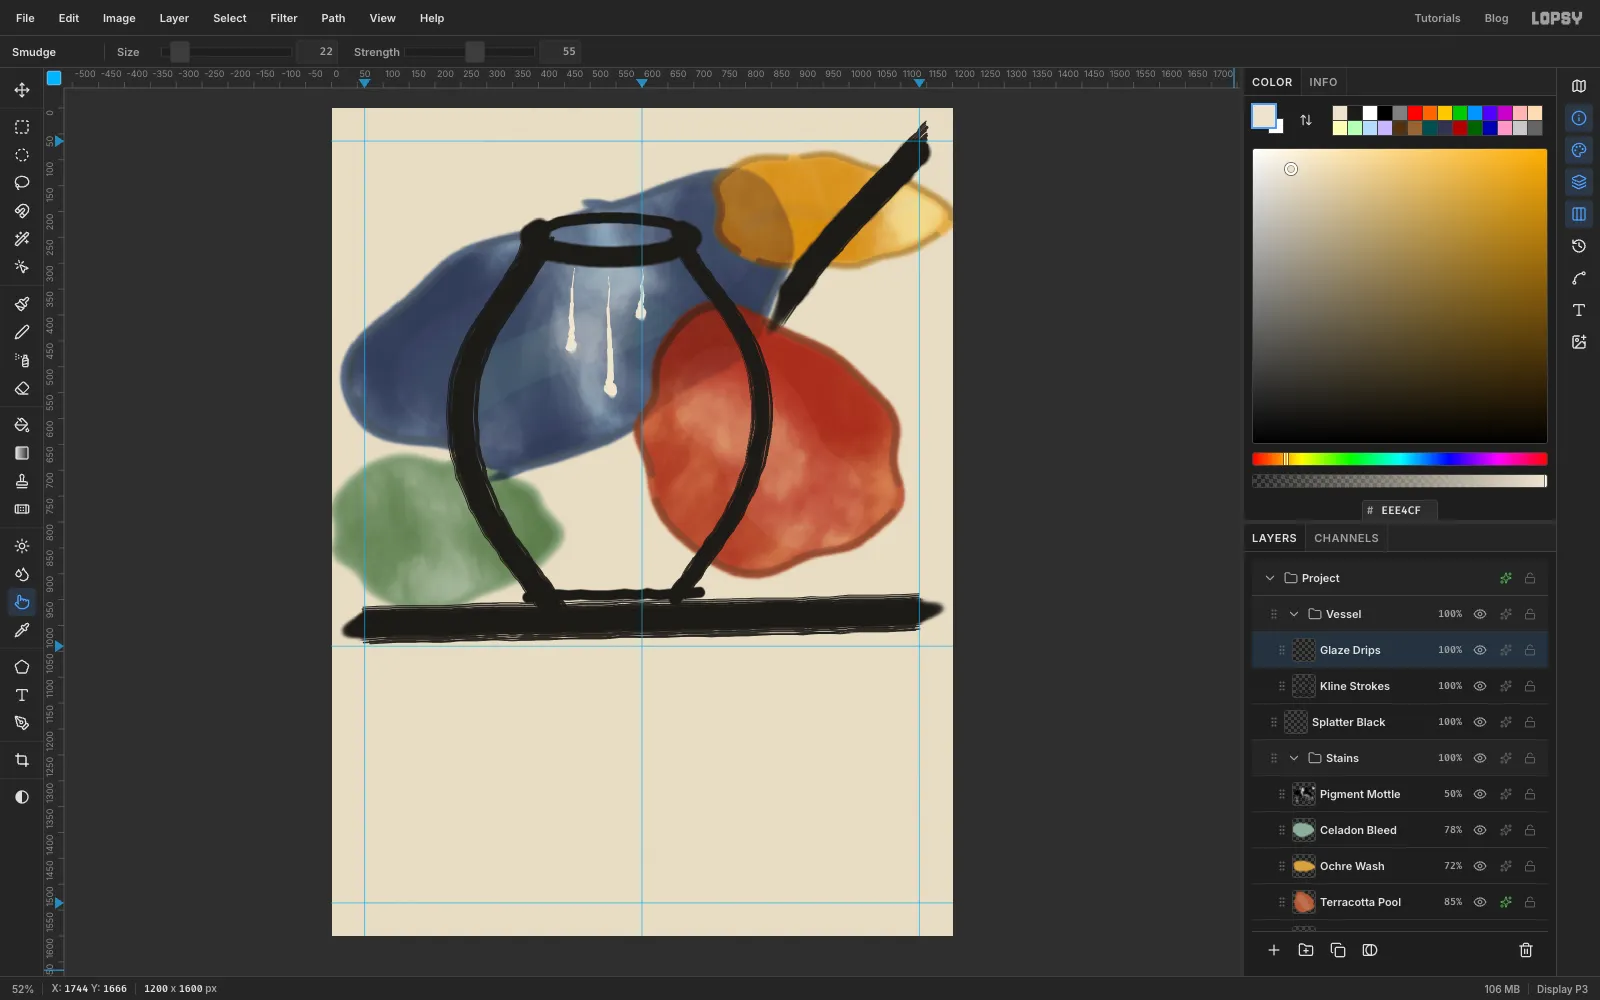
Kline Strokes, add a layer calledGlaze Dripsand set the foreground to . Pick the Brush, open the Brushes dialog and choose the Hard Round preset, with Hardness85and Speed Size0. - In the Brushes dialog's Shape tab, Taper makes a stroke start at a point and grow to full size over that many pixels. Each drip hangs from the front of the rim, at about
y 288. Paint each one from its bottom end up to the rim, so it starts thin and is full width where it leaves the lip. Reopen the dialog to set each drip's Taper before you paint it:
- at
x 468: 172 px long, Size14, Taper138 - at
x 534: 252 px long, Size16, Taper202 - at
x 602: 108 px long, Size12, Taper86
- Set Taper back to
0. At the bottom of each drip, click a dab about one and a half times the drip's size. Then click a smaller dab a few pixels to one side and lower, so each bead is lopsided. - With Smudge at Size
22and Strength55, drag each bead down about 18 px so it sags.
- Click
-
Load a brush for flung drops
Click
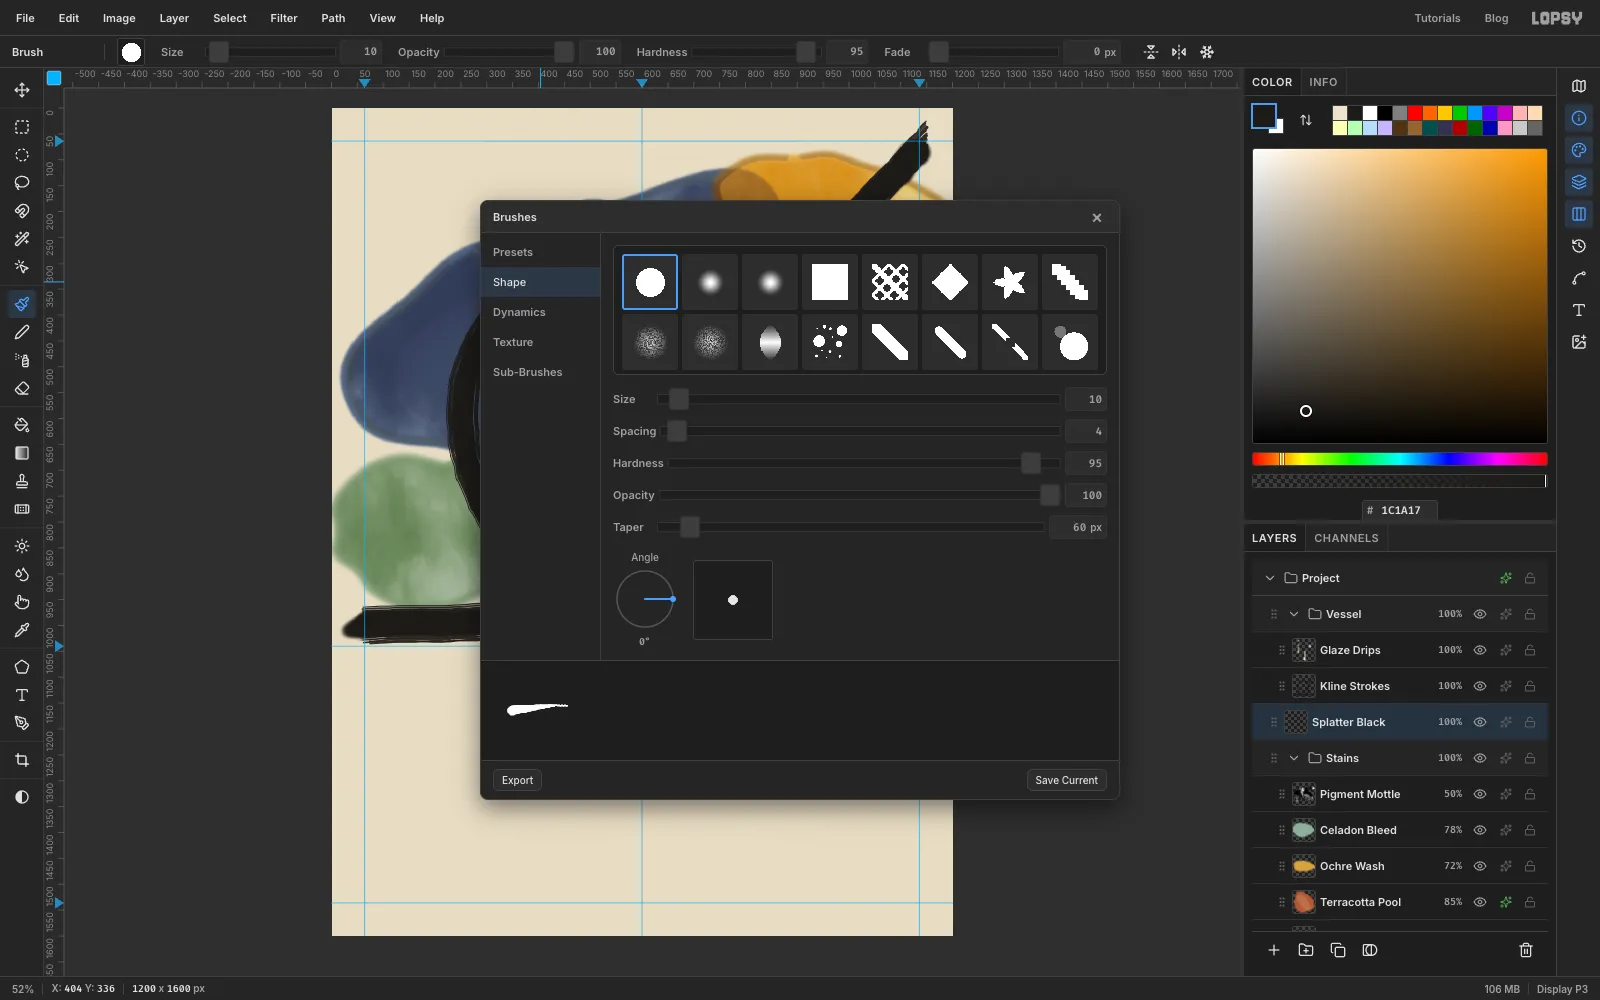
Splatter Black, pick the Brush again (Smudge is still selected from the last step) and set the foreground to . In the Brushes dialog pick Hard Round, set Hardness95and Taper60, and close it.A flung drop has a round head and a tail that thins to a point. With Taper on, drawing each drop from the end of its tail back to the head does that in one stroke.
-
Fling the black drops
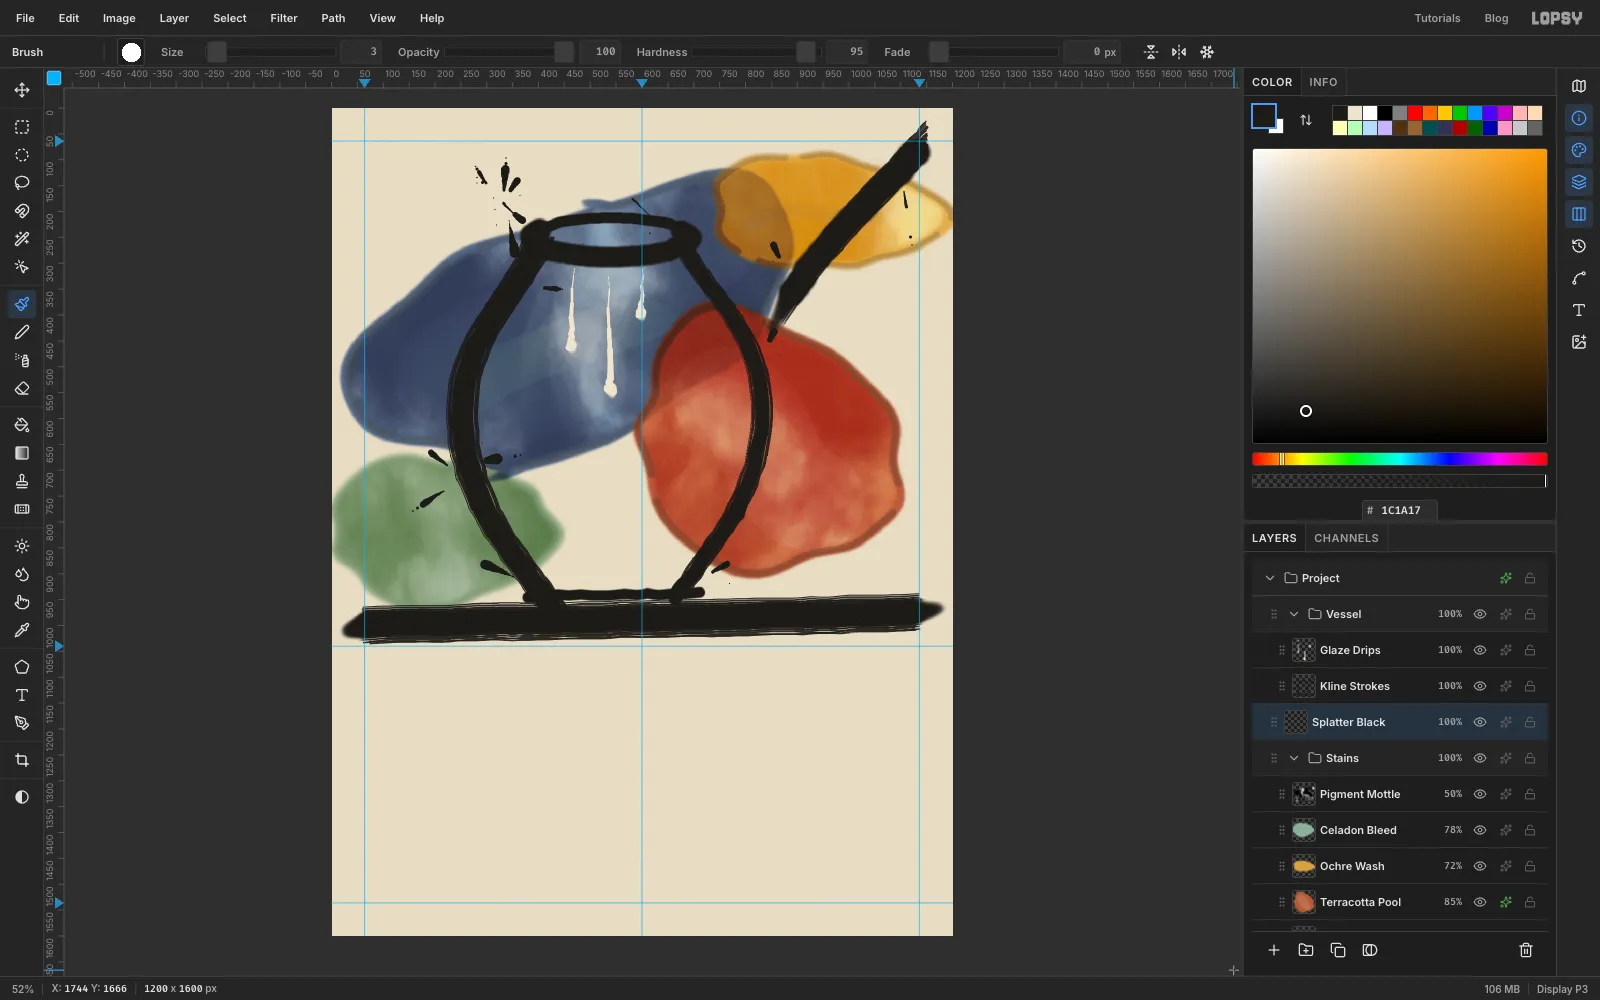
For each drop, press at the tip of the tail and drag 20–120 px back to where the drop landed. Point the tails in every direction.
- Put about seven around the left wall, five around the right wall and four near the diagonal, plus a little cluster around
330, 190above the rim. Keep them more than 170 px away from1008, 792, where the stamp will go. - Vary the Size a lot, from
5to28. A few big drops among many small ones looks thrown. Drops that are all the same size look stamped. - Set Size
7, then4, and click a few droplets just beyond the ends of some tails. Finish with a sprinkle of Size3specks. Taper only affects drags, so these single clicks come out as round dots.
- Put about seven around the left wall, five around the right wall and four near the diagonal, plus a little cluster around
-
Pour the skeins
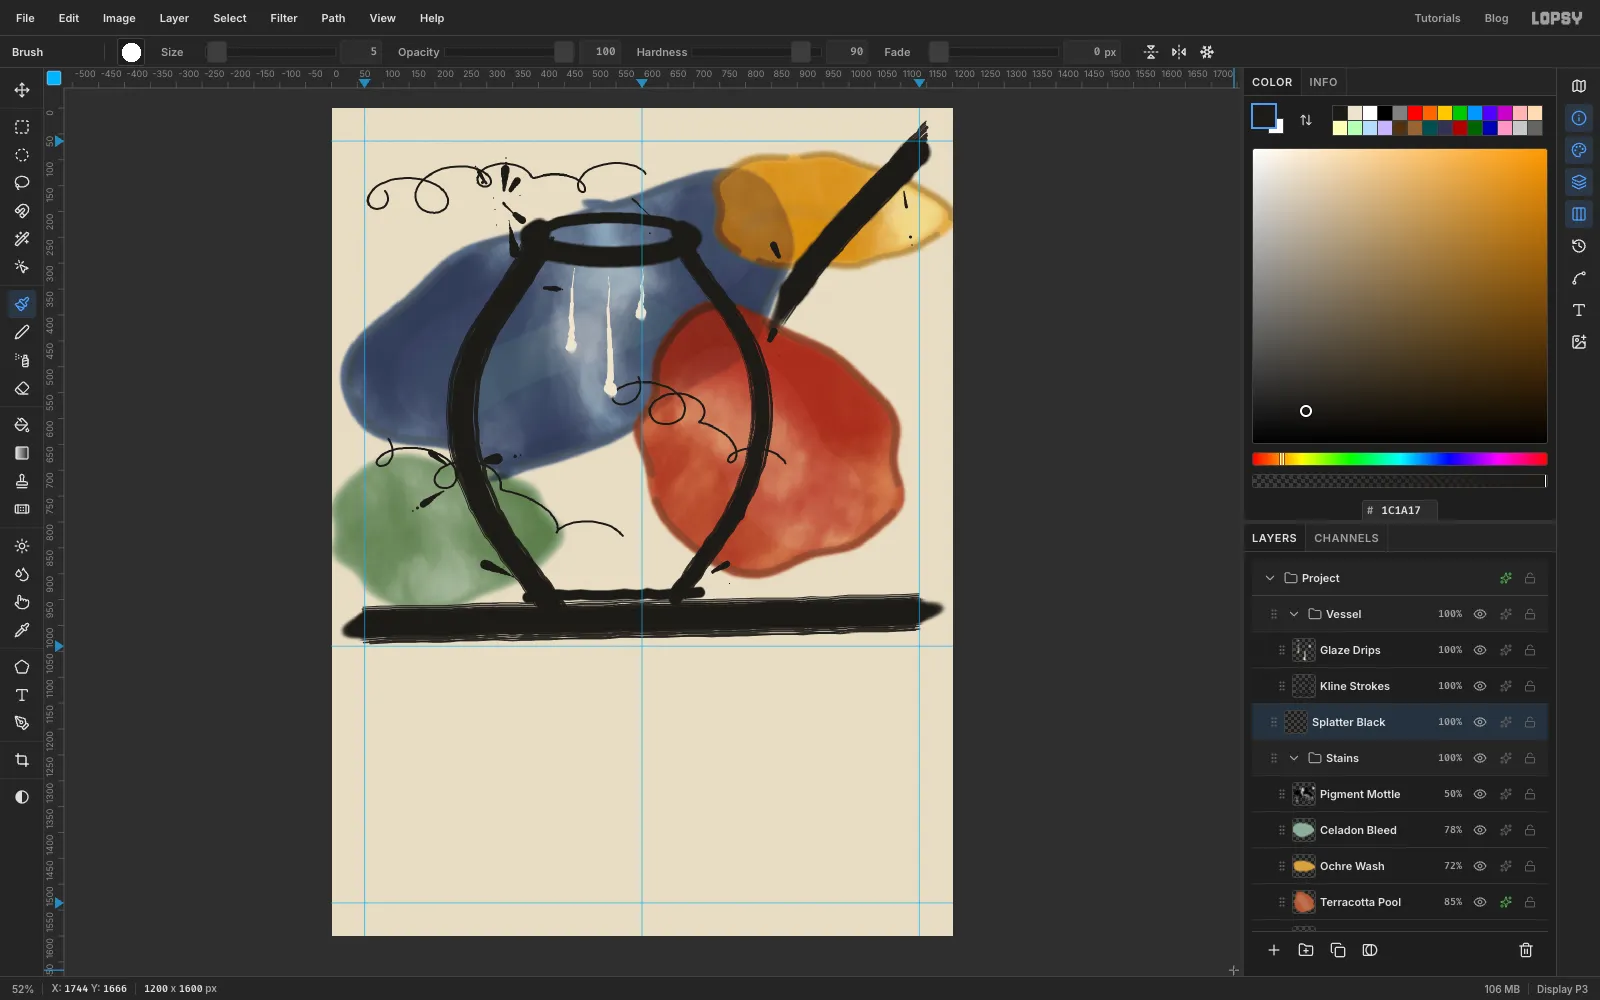
Set Taper back to
0and Size to5. Paint three long, continuous looping lines without lifting:- across the top, from about
70, 160to560, 120, with five loose loops - from
560, 520down to830, 680, crossing the rust stain - from
80, 640to520, 820, crossing the green stain
Keep the loops round and uneven, never angular. Pollock's lines curve because the paint is falling, not being drawn.
- across the top, from about
-
Add the coloured drops
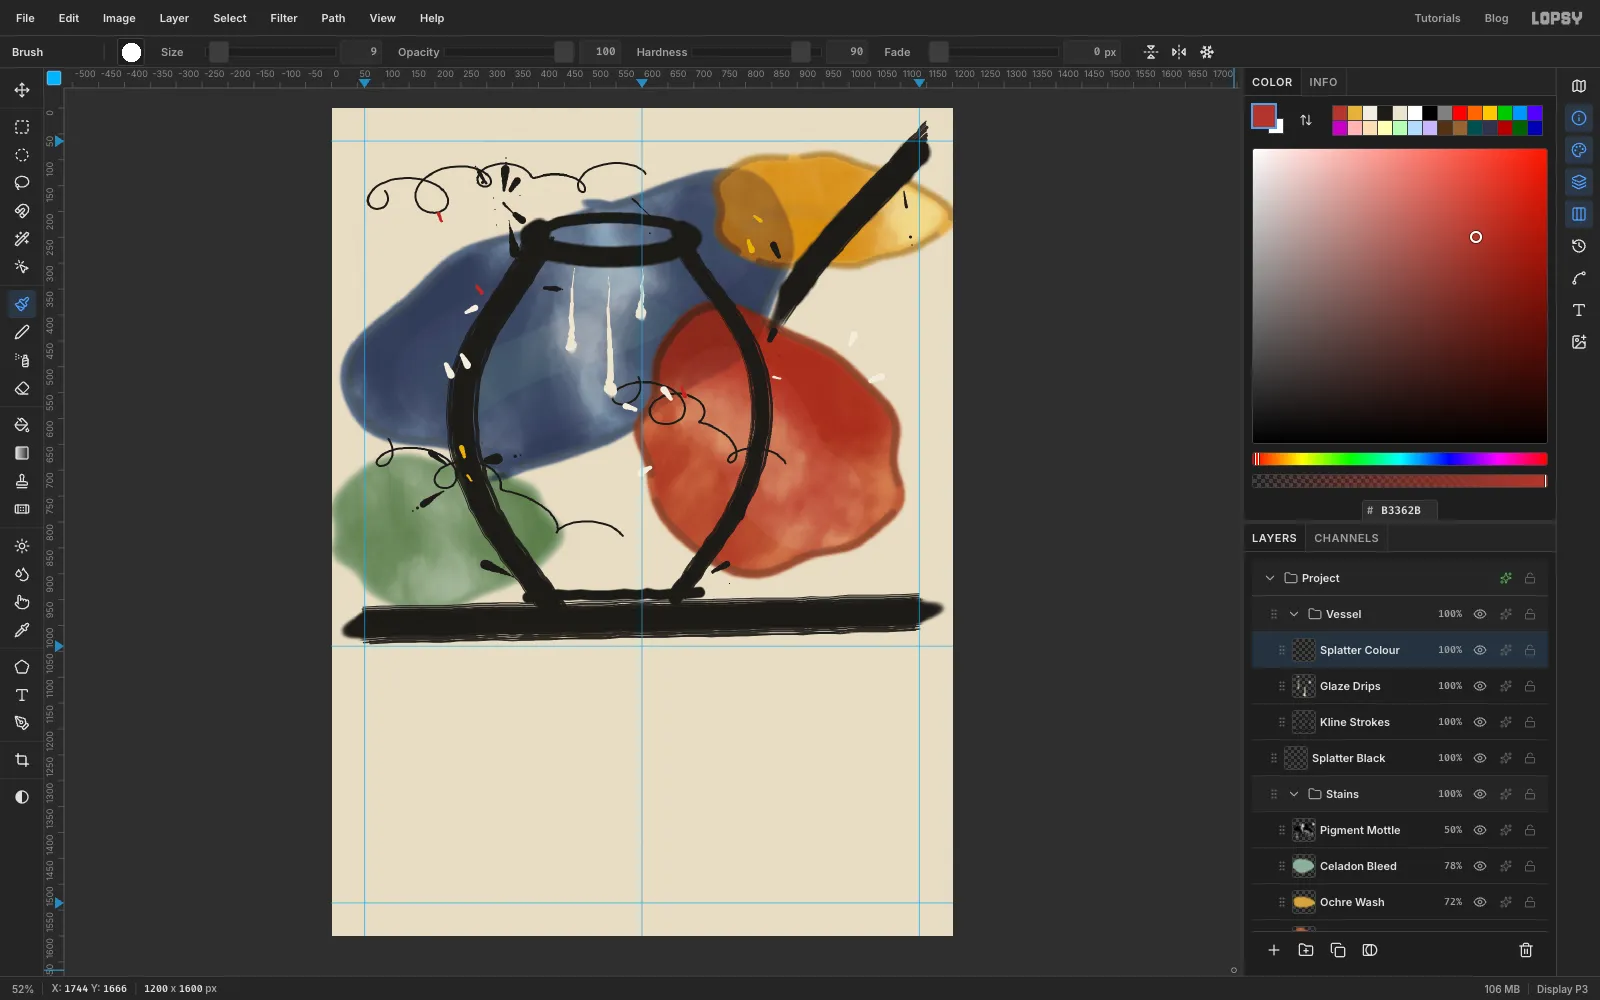
- Click
Glaze Dripsand add a layer calledSplatter Colour. Set Taper to50. - Flick nine short drops of (Size
6–16) over the blue and the rust, four of (Size5–12) and three of (Size5–11). Keep these tails short, just a little longer than the drop itself. - Set Taper back to
0.
Cream drops show up best on the dark stains. Keep the yellow and red sparse: they're accents.
- Click
-
Copy a few loops
The rust stain on the right could use a few more lines. Rather than paint new ones, borrow some.
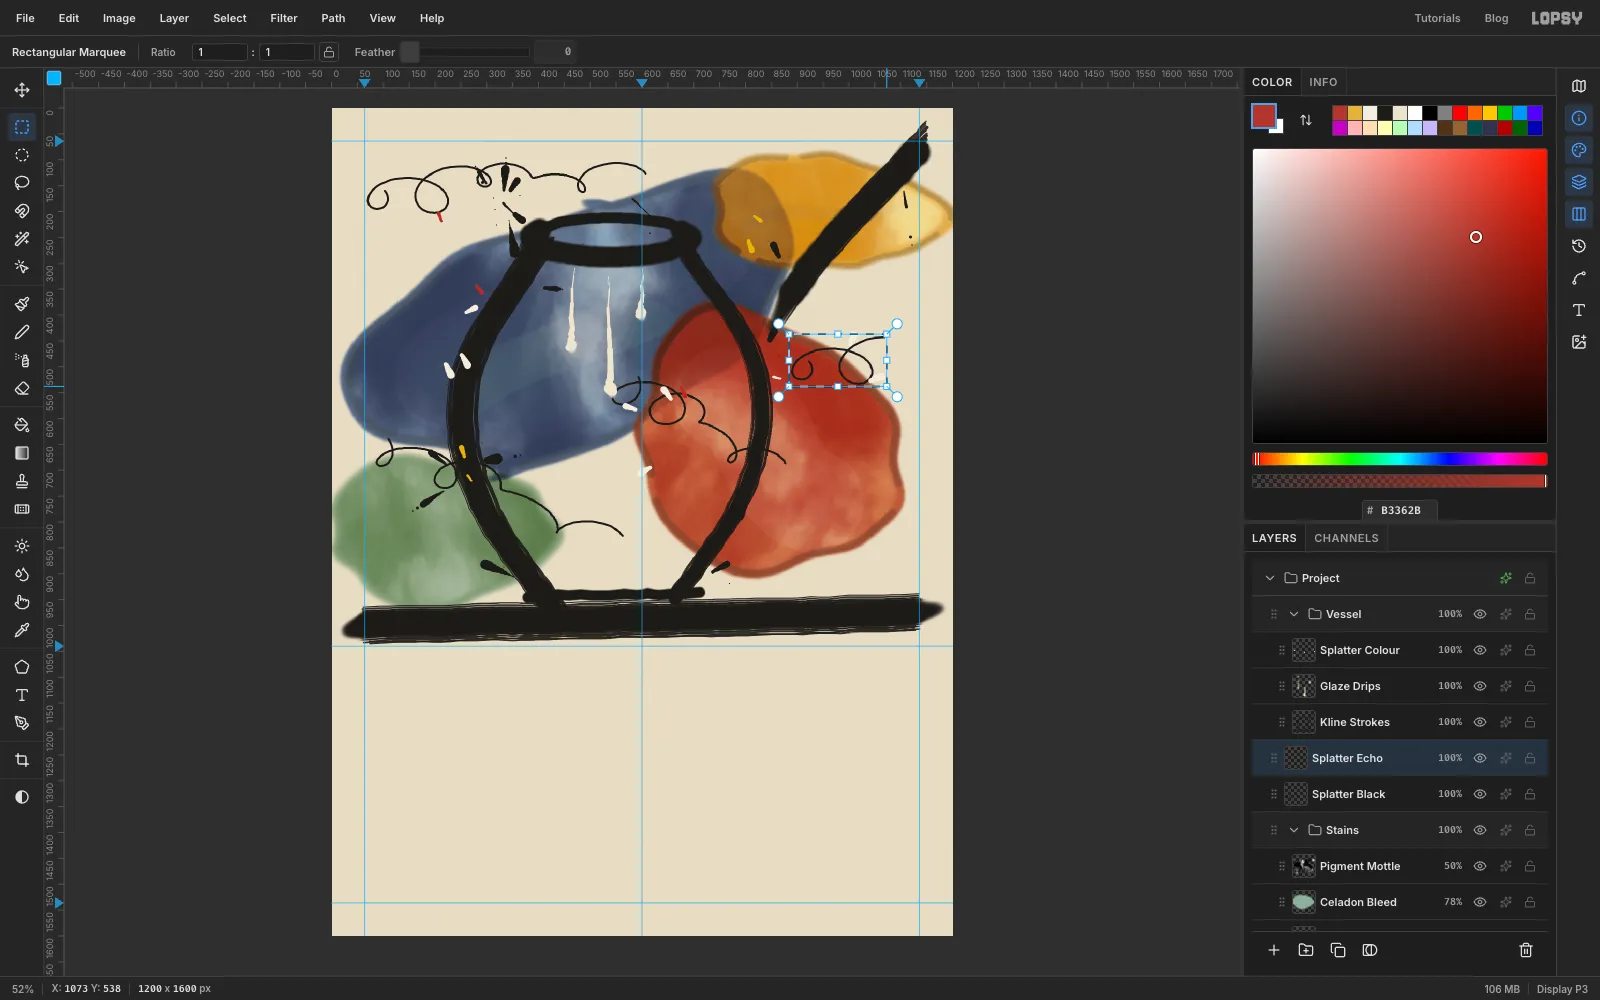
- Click
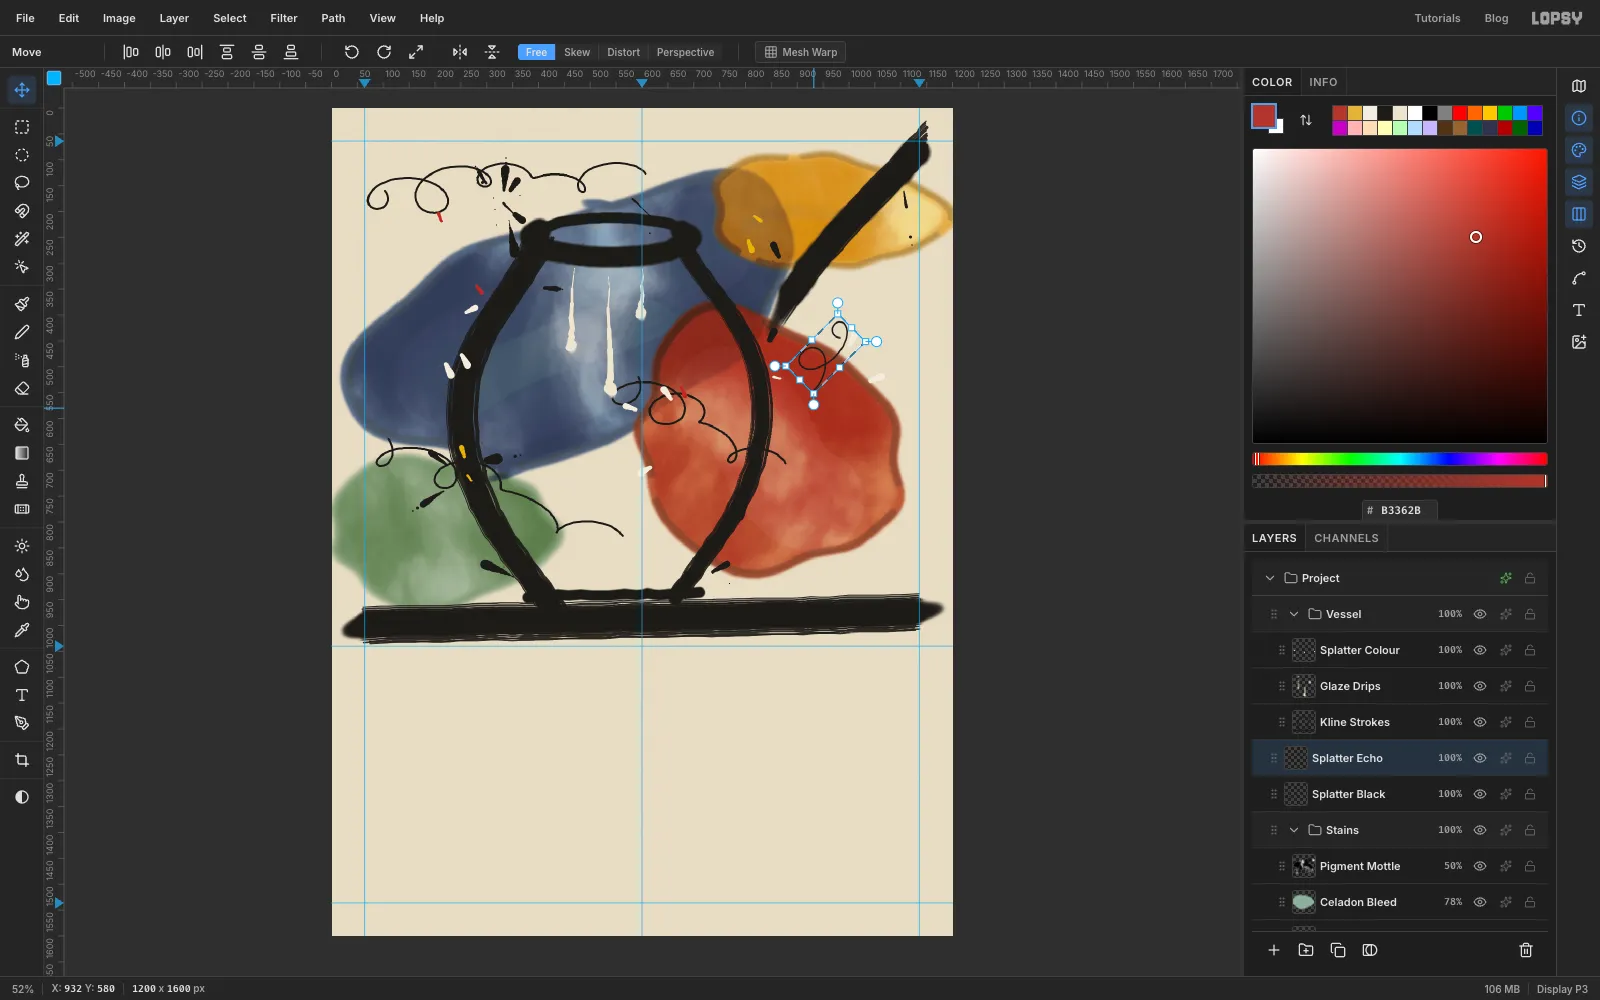
Splatter Black. With the Rectangular Marquee, drag a box around the two or three loops at the start of the first skein, at the top left. - Press Cmd+C, then Cmd+V. The copy lands on a new layer above, in the same spot, and the Move tool is picked for you. Rename the layer
Splatter Echo. - Drag the copy about 820 px right and 330 px down, onto the rust stain.
- Click
-
Scale the copy
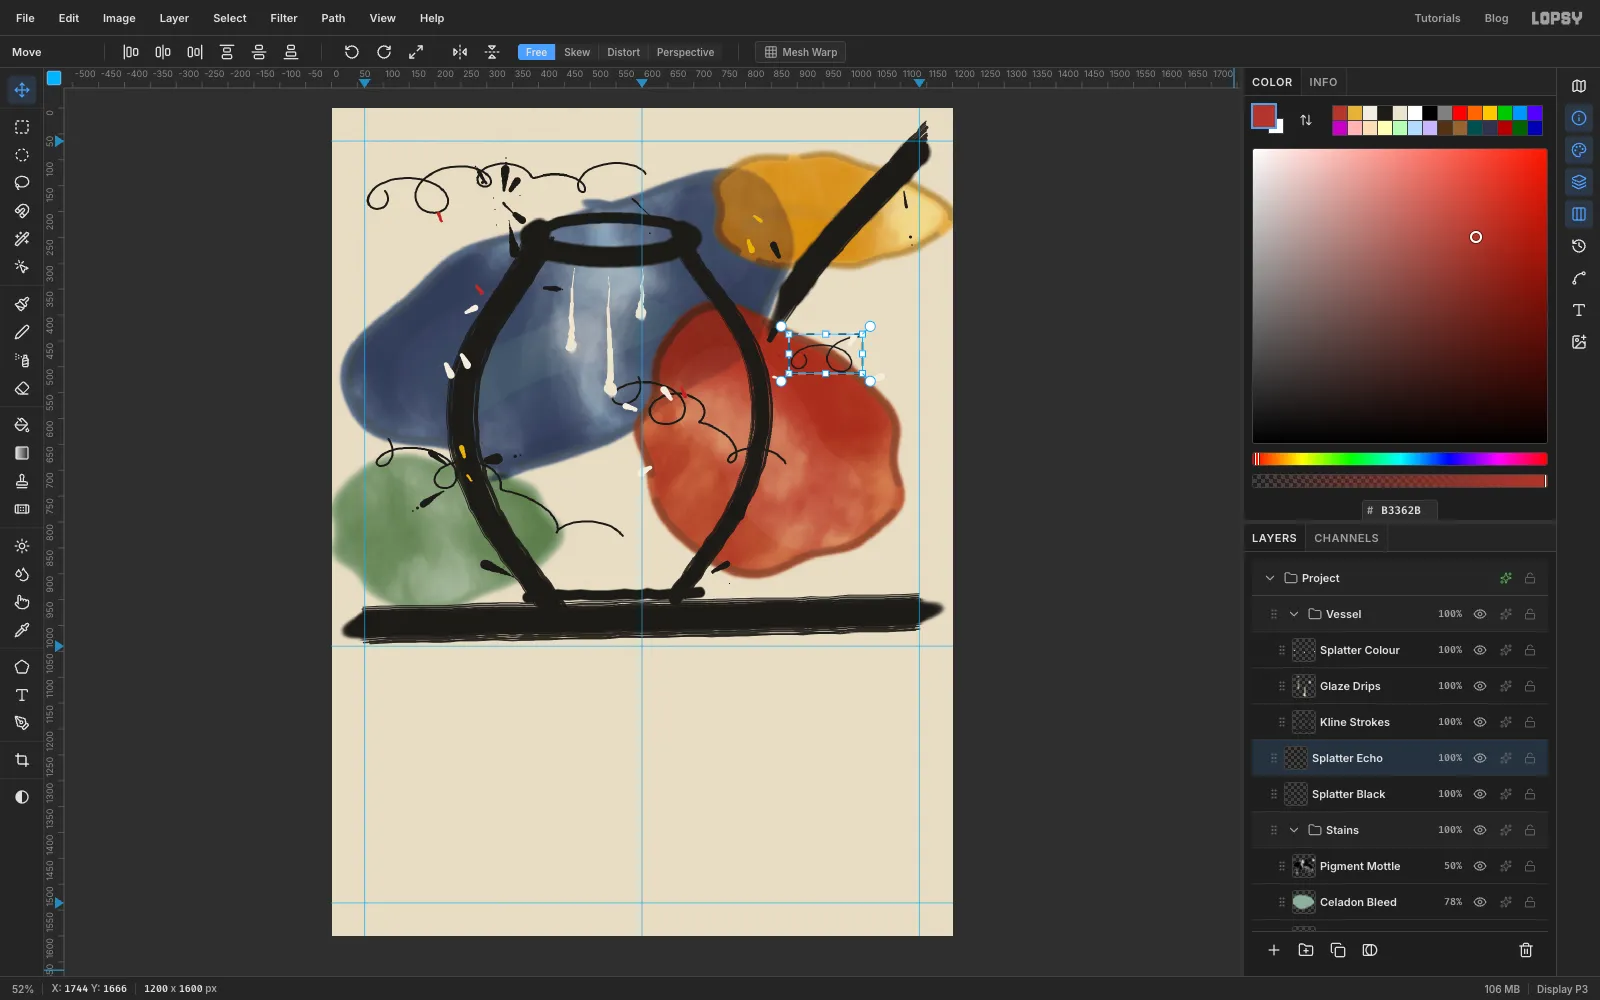
Draw a Rectangular Marquee tightly around the moved loops, so the transform box hugs them rather than the whole layer. Pick the Move tool, hold Cmd and drag the bottom-right corner handle inward until the box is about three quarters of its size. Cmd keeps the proportions.
-
Rotate the copy
Move the pointer just outside the top-right corner of the box until it shows the rotate cursor, then drag round until the loops are turned about 135°. Press Cmd+D to commit.
Turned and smaller, the loops read as a new throw rather than a copy. If you don't like where they landed, Cmd+Z steps back through the rotation, the scale and the move one at a time.
-
Rule the footer on a grid
- Click
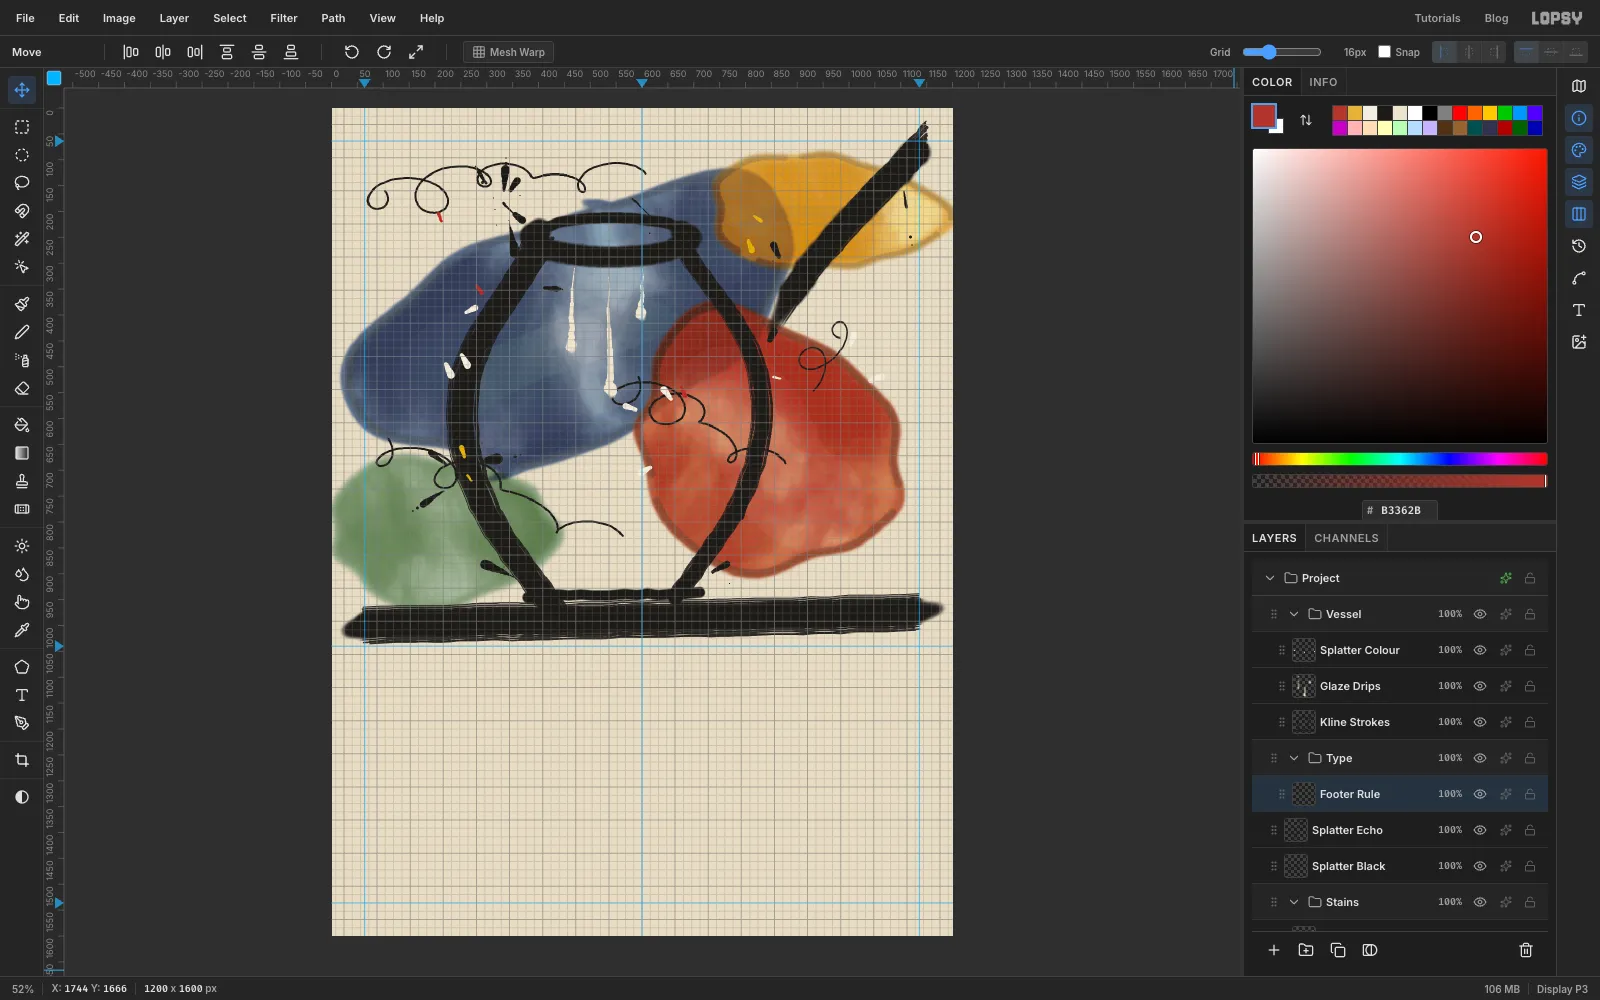
Splatter Echo, click New Group and name itType. Inside it, add a layer calledFooter Rule. - Choose View → Show Grid. The grid is a quick way to see how much room the bottom 560 px gives you: about two-thirds of the width for the title and one-third for the info column. If View → Snap to Grid is ticked, untick it, because the type won't sit on grid lines.
- Pick the Pencil, set Size
3and the colour to . Click at64, 1482, then hold Shift and click at1136, 1482for a straight rule between the margins. - Choose View → Show Grid again to hide the grid.
- Click
-
Stack the title
- Click
Footer Rule. Pick the Text tool, choose Barlow Condensed, set the weight to ExtraBold, Size232and colour . Click an empty spot, typePINCHand press Tab to finish. - With the Move tool, place it so the top-left of the P sits at
60, 1068, just under the bar. - Click
Footer Ruleagain and typeBISQUEthe same way. Place it with its left edge lined up with PINCH, leaving a gap of about 30 px between the bottom of PINCH and the top of BISQUE. - Double-click each text layer's name and rename it
PINCHandBISQUE, so they're easy to find later.
The left edges sit at
60rather than on the64guide on purpose. At this size the letters' side bearings make them look indented, and nudging them 4 px left lines them up by eye with the footer.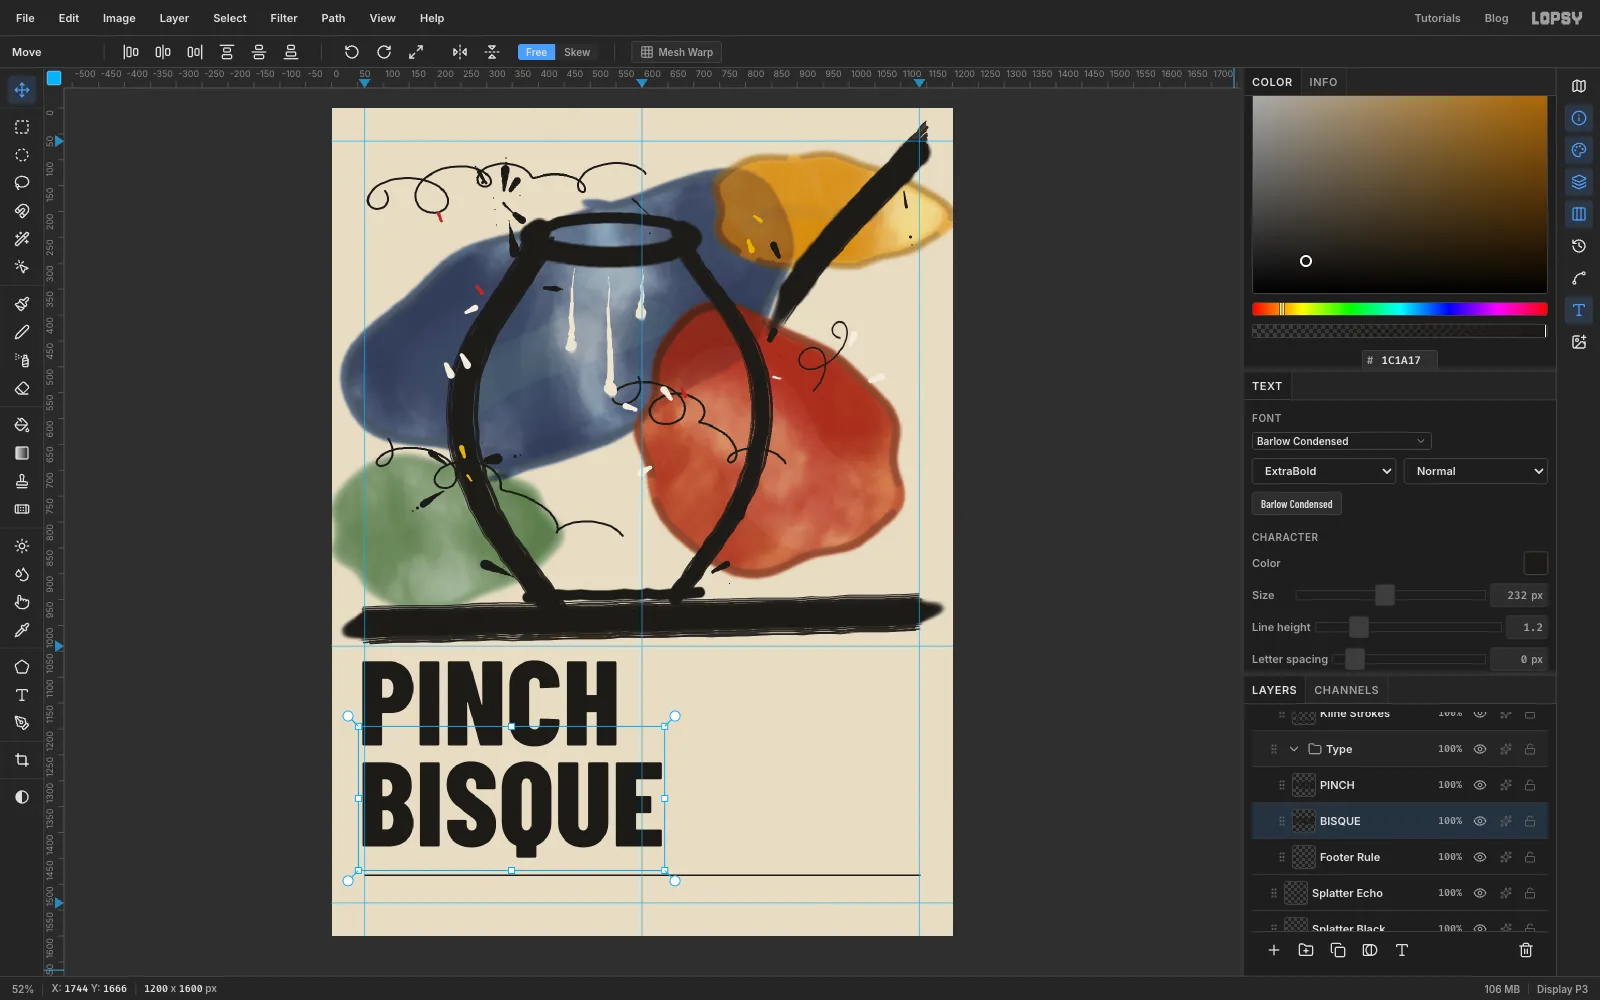
- Click
-
Add the ampersand, info column and footer
Click
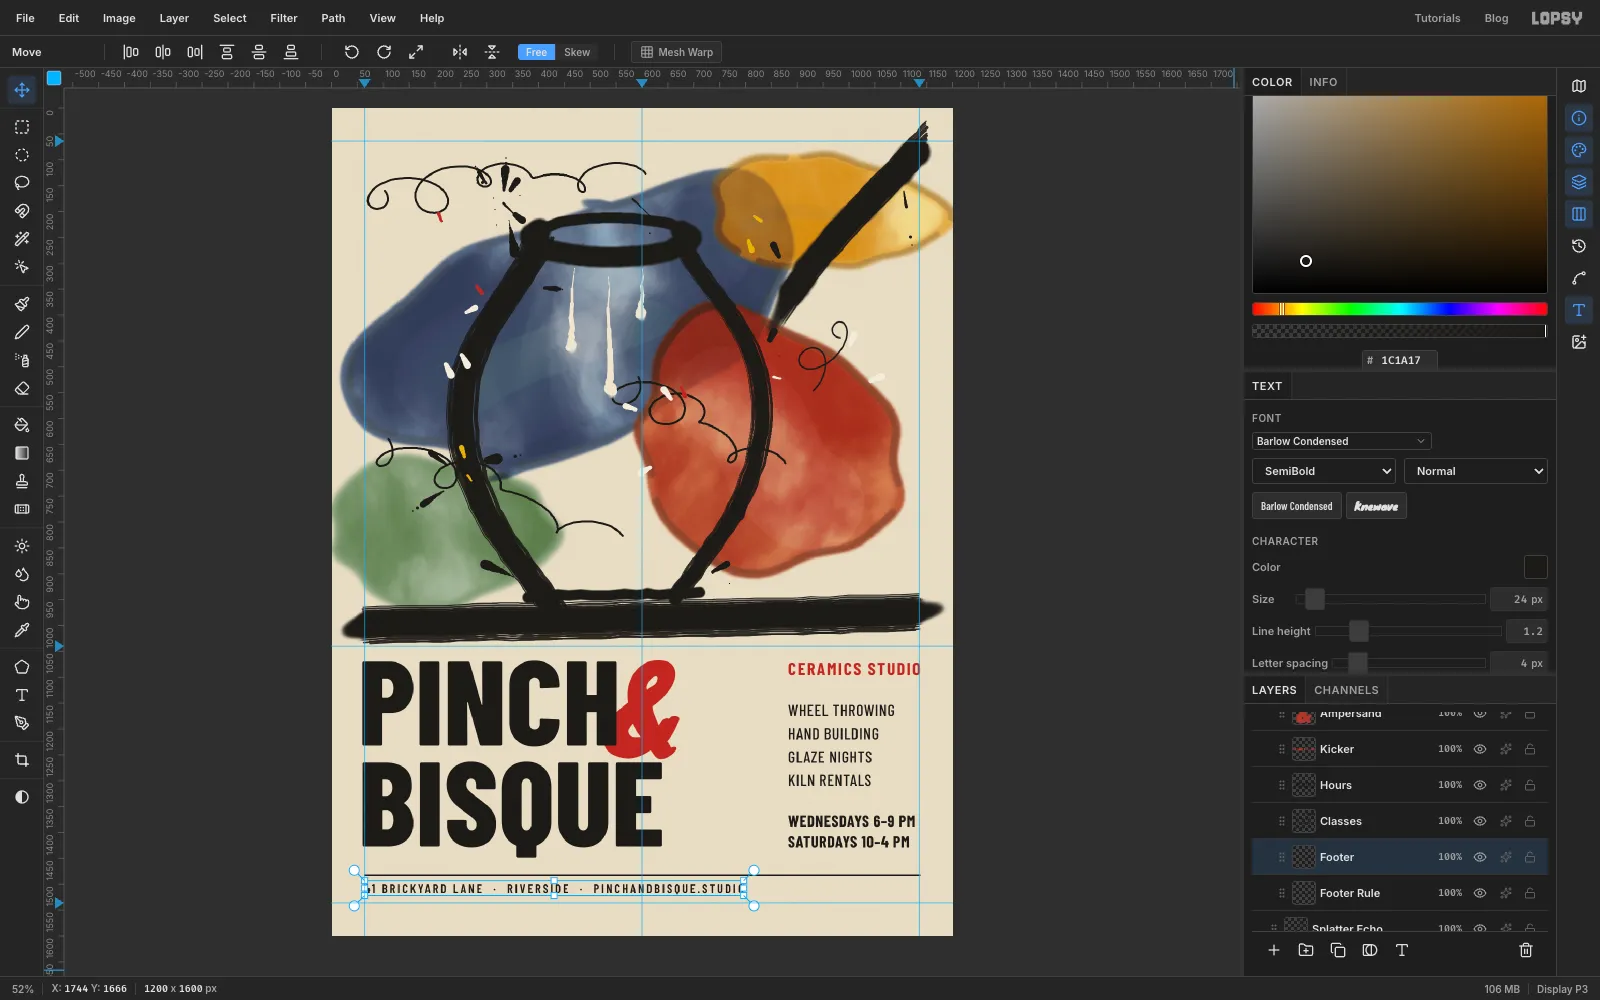
Footer Rulebefore each new piece of text, and rename each layer after you type it (the names are in bold below). The Text panel's Letter spacing and Line height carry over to the next piece of text, so set both every time. Where a step doesn't mention them, use letter spacing0and line height1.2.- Ampersand:
&in Knewave, Size210, colour . Place it so it overlaps the right stem of PINCH's H by about 24 px, with its bottom 6 px above BISQUE. - Kicker:
CERAMICS STUDIOin Barlow Condensed Bold, Size34, colour . In the Text panel set Letter spacing to3. Place it with its right edge on the1136guide and its top at1072, level with the top of PINCH. - Hours:
WEDNESDAYS 6–9 PMandSATURDAYS 10–4 PMon two lines (press Return between them), Barlow Condensed Bold31, , letter spacing1, Line height1.3. Line its left edge up with the kicker, and put its last baseline on BISQUE's baseline (abouty 1428). - Classes:
WHEEL THROWING,HAND BUILDING,GLAZE NIGHTSandKILN RENTALSon four lines, Barlow Condensed Medium31, , letter spacing1, line height1.45. Line it up on the same left edge, with equal gaps above and below it. - Footer:
41 BRICKYARD LANE · RIVERSIDE · PINCHANDBISQUE.STUDIO(two spaces either side of each dot), Barlow Condensed SemiBold24, , letter spacing4, with its top-left at64, 1500.
- Ampersand:
-
Cut the stamp rings
- Click
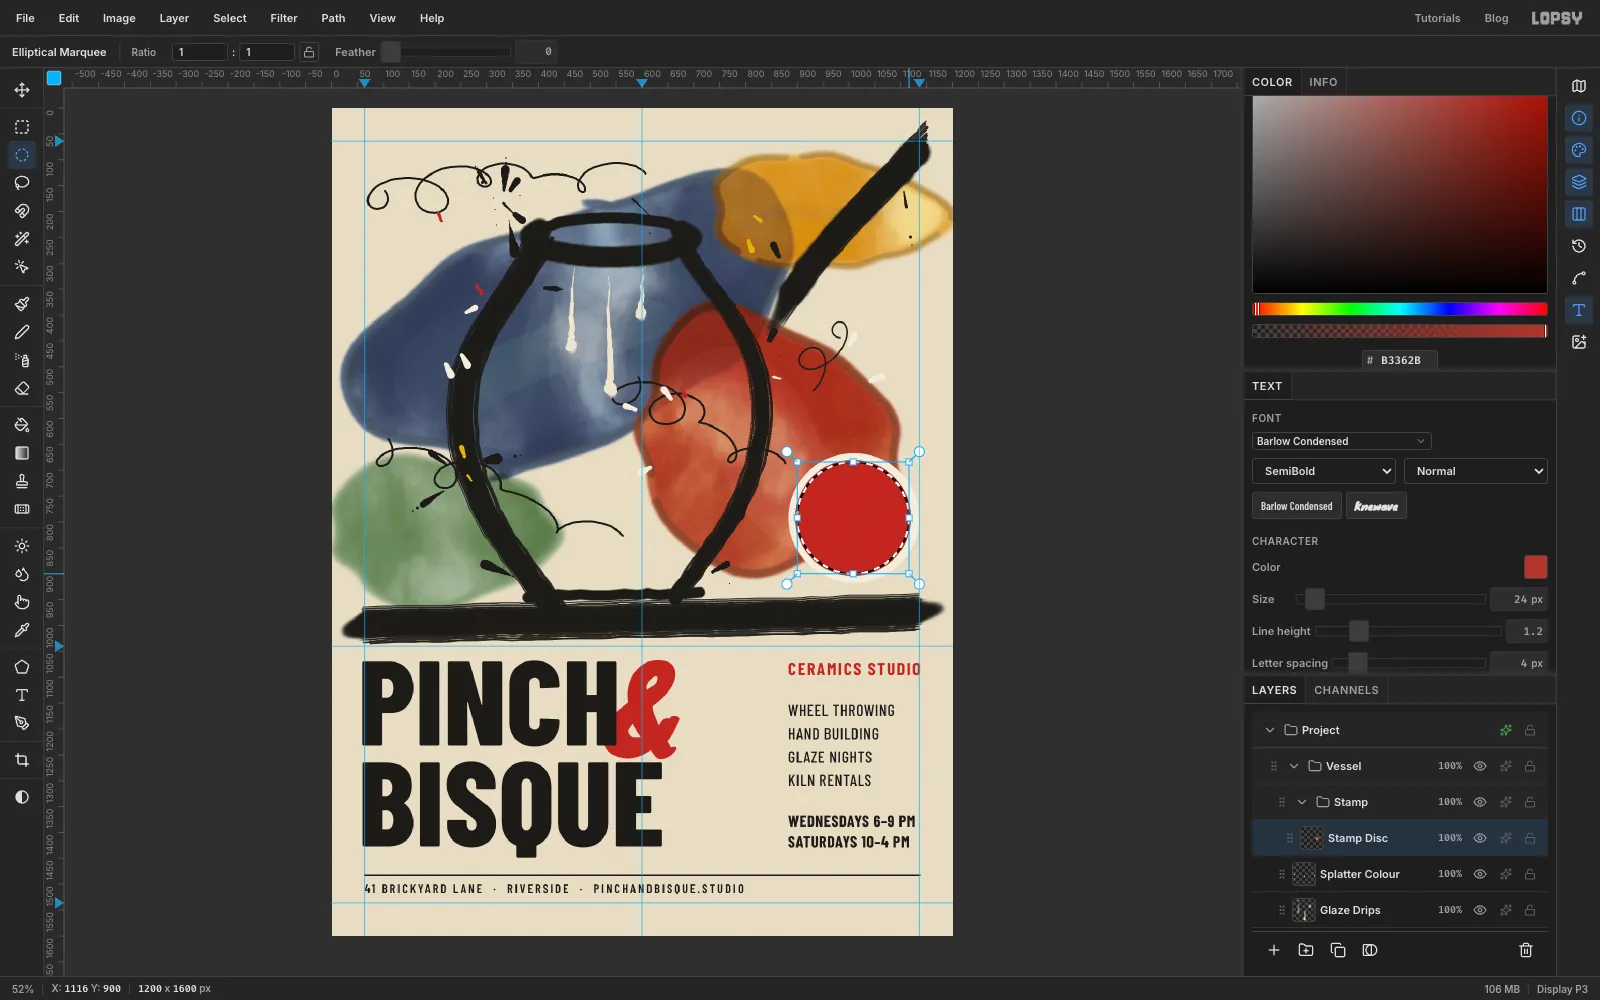
Splatter Colourand click New Group. Name itStamp. It sits at the top of theVesselgroup, over the painting. Inside it, add a layer calledStamp Disc. - With the Elliptical Marquee, draw a circle centred on
1008, 792with a radius of125, from883, 667to1133, 917. Set the foreground to and fill it. - Draw a circle on the same centre with radius
112, from896, 680to1120, 904. Set the foreground to and fill it. - Draw one more with radius
108, from900, 684to1116, 900. Set the foreground back to , fill it and deselect.
That leaves a thin red ring inside a cream disc.
- Click
-
Edge the stamp
Open the effects drawer for
Stamp Discand turn on Stroke with Width4in . Don't add a drop shadow: a stamp is printed flat on the paper, not stuck on top of it.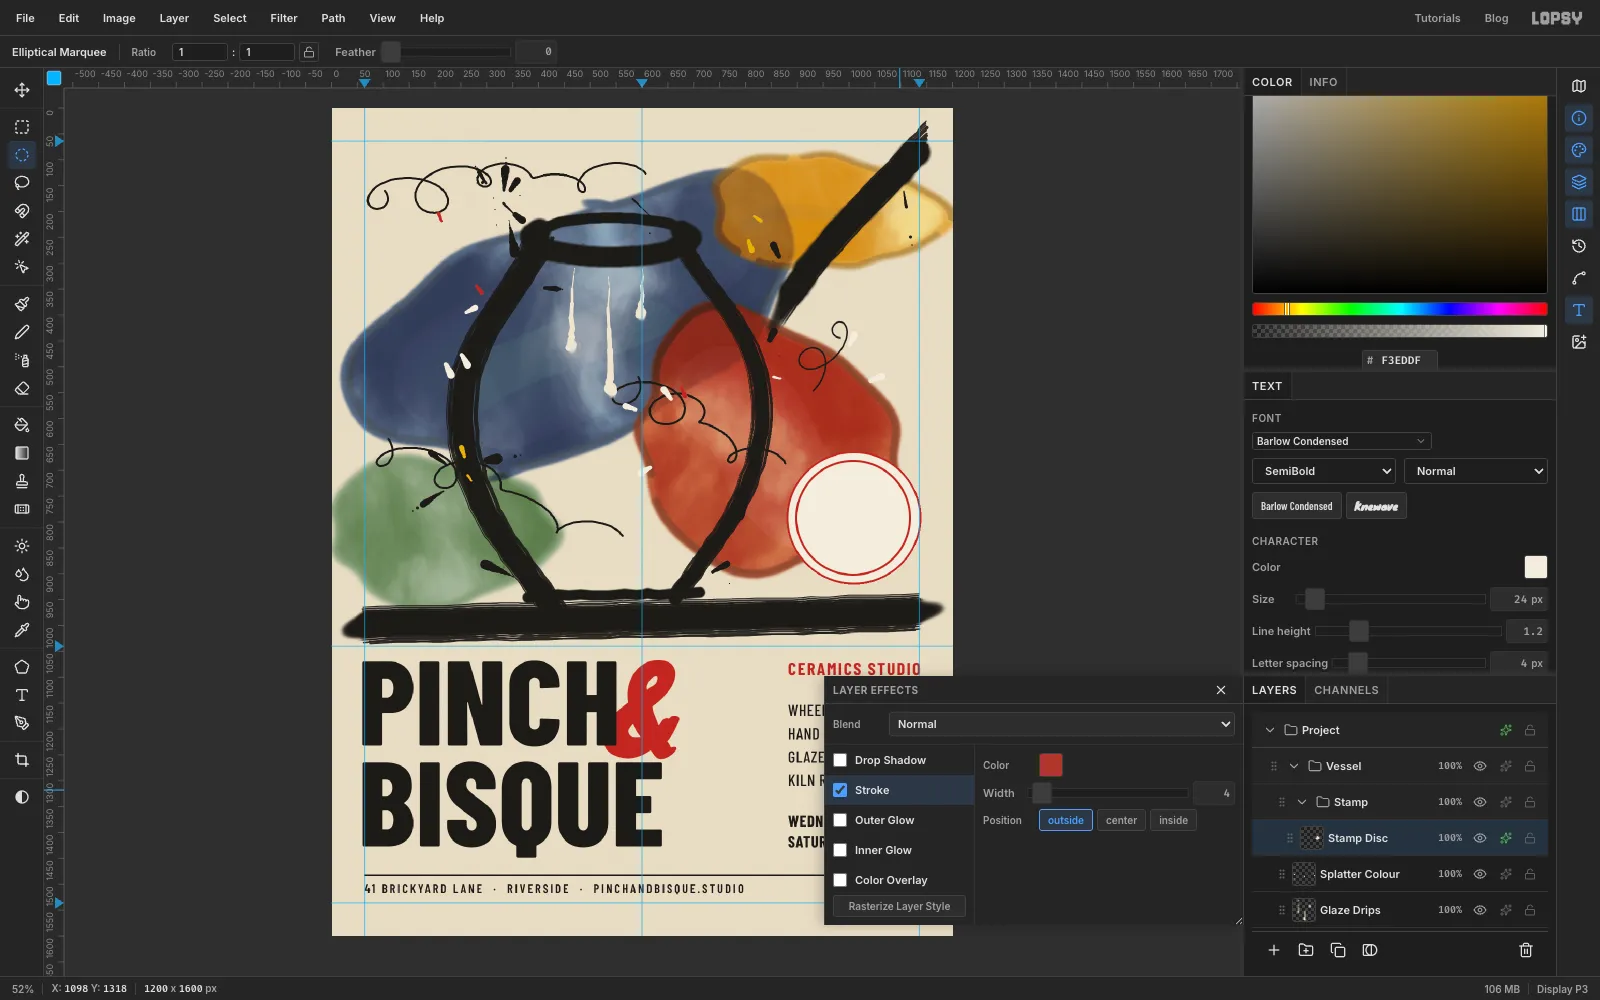
-
Set the stamp text
Click
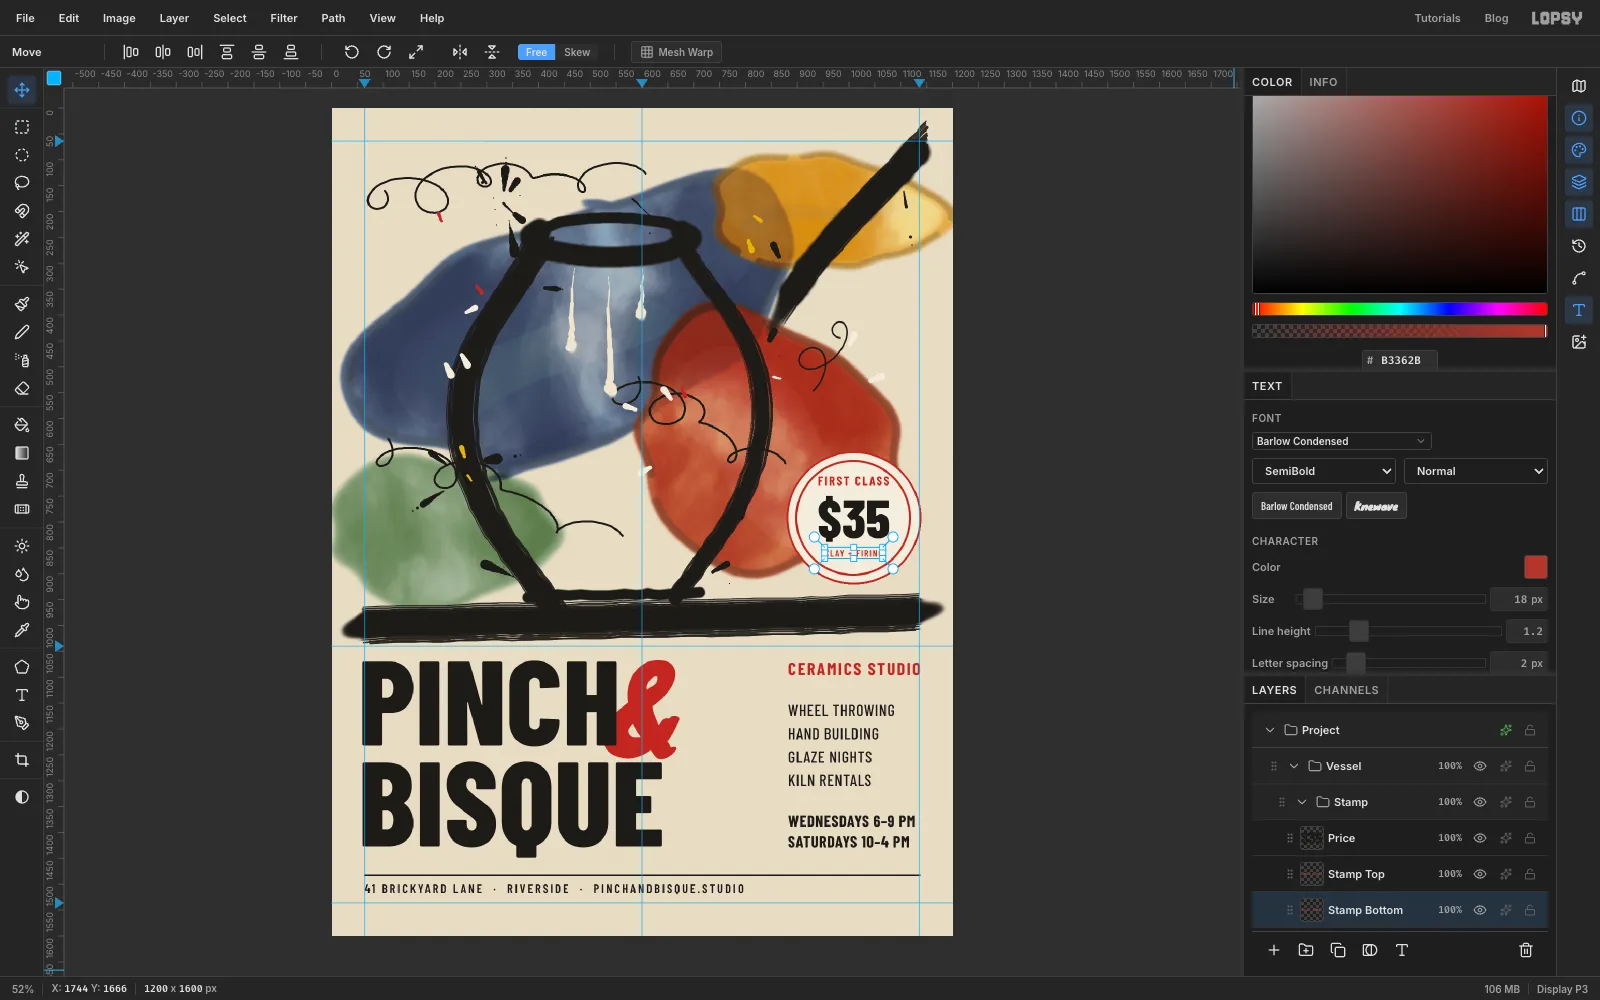
Stamp Discbefore each piece of text, centre each one onx 1008, and rename the layers as shown:- Price:
$35in Barlow Condensed ExtraBold104, , letter spacing0, with its top at750 - Stamp Top:
FIRST CLASSin Bold24, , letter spacing3, with its top at712 - Stamp Bottom:
CLAY + FIRINGin SemiBold18, , letter spacing2, with its top at854
Check that both small lines sit comfortably inside the red ring, with roughly equal space above FIRST CLASS and below CLAY + FIRING.
- Price:
-
Tilt the whole stamp
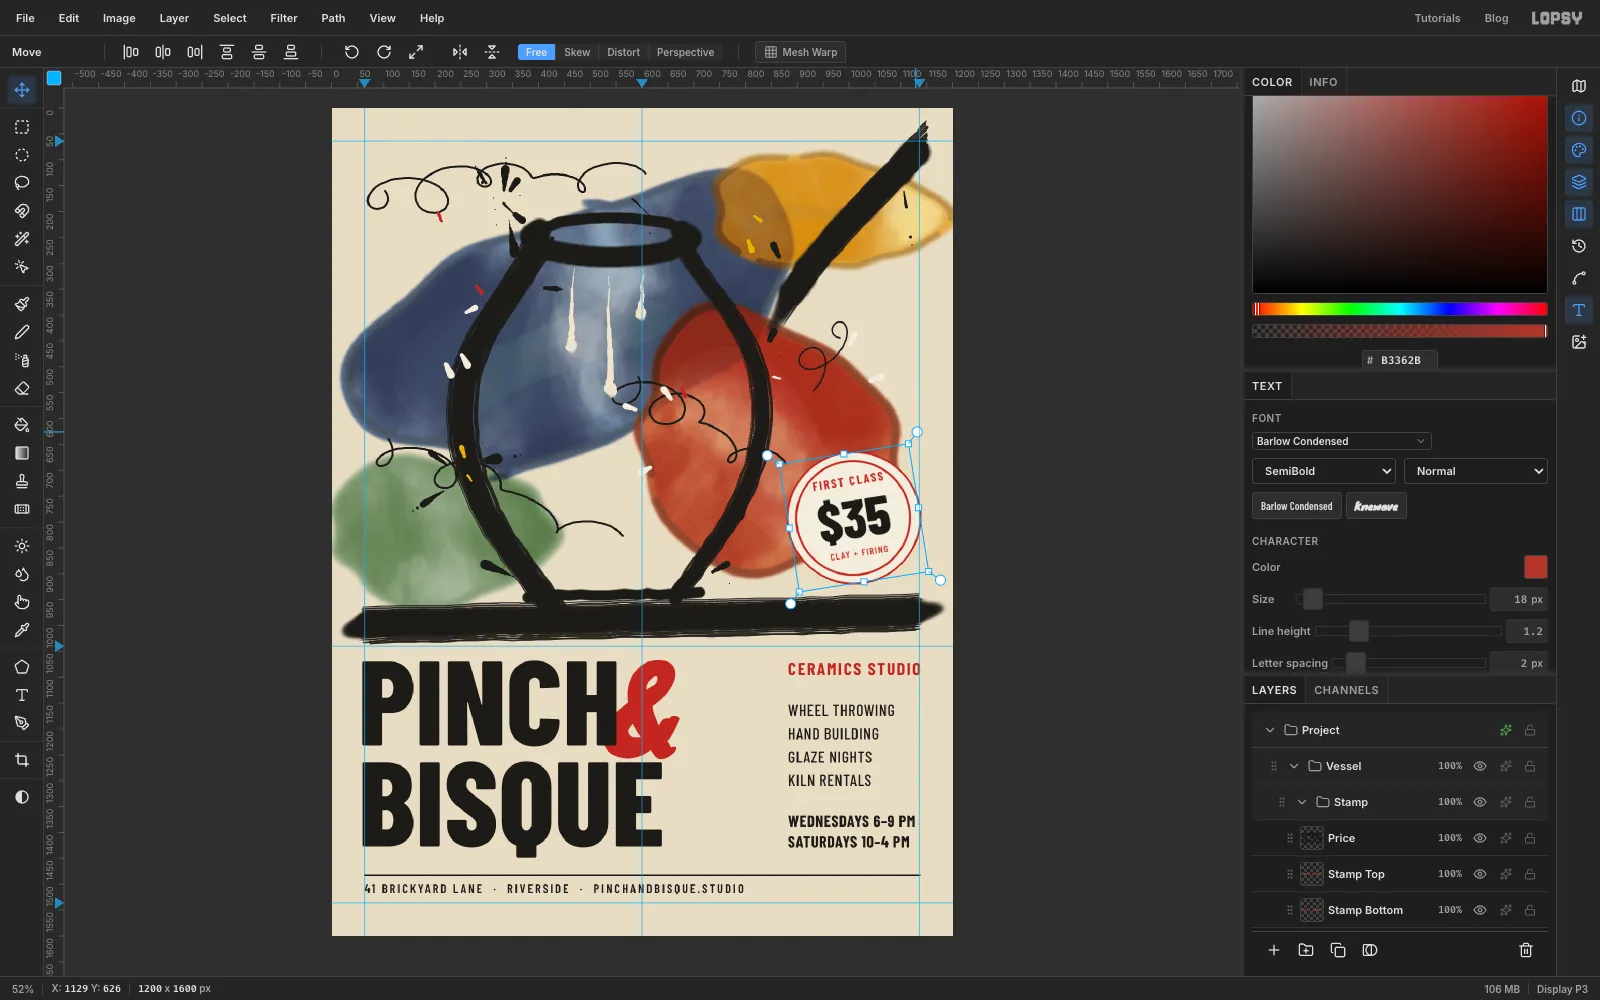
Click the
Stampgroup's row and press Cmd+D so nothing is selected. Pick the Move tool. The handles frame the whole group. Drag the rotate handle just outside the top-right corner a little anticlockwise, about 9°.Rotating the group turns the disc and all three lines of live text together, and the text stays editable.
-
Tilt the ampersand
The layout is set, so untick View → Show Guides to hide the guides. Then click the
Ampersandlayer and pick the Move tool. Its handles frame the whole line of text, which is taller than the glyph. Drag the rotate handle at the top-right corner about 10° anticlockwise. The ampersand leans like it was brushed on quickly.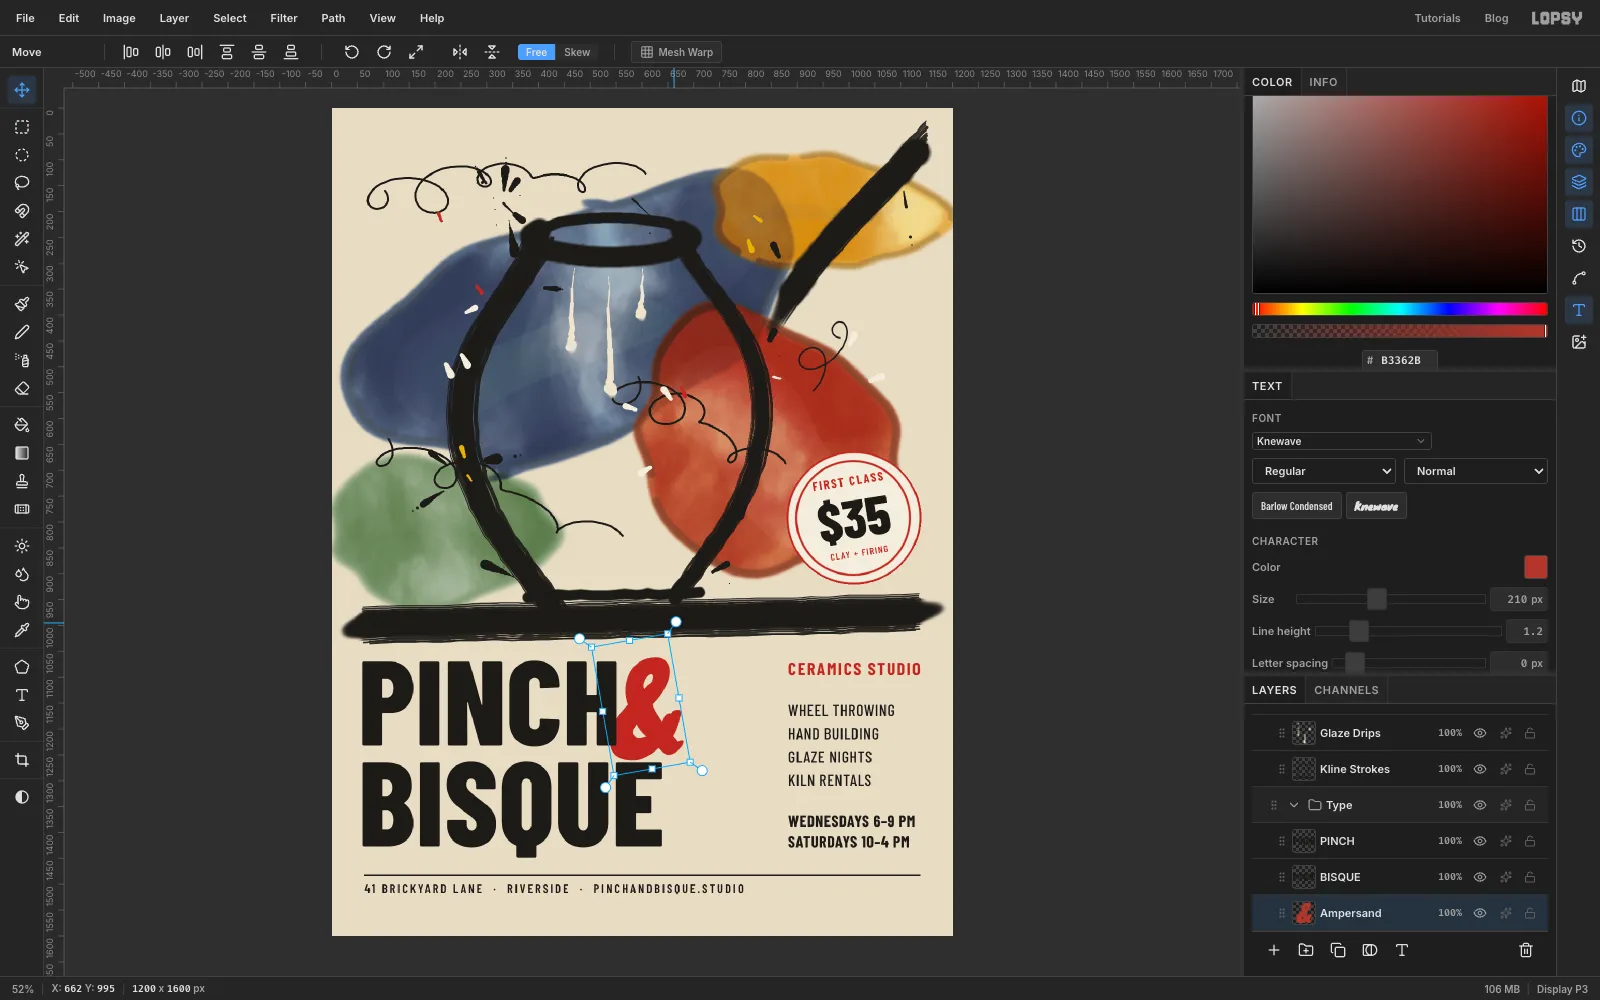
-
Fade the mottle above the wheel
- Click
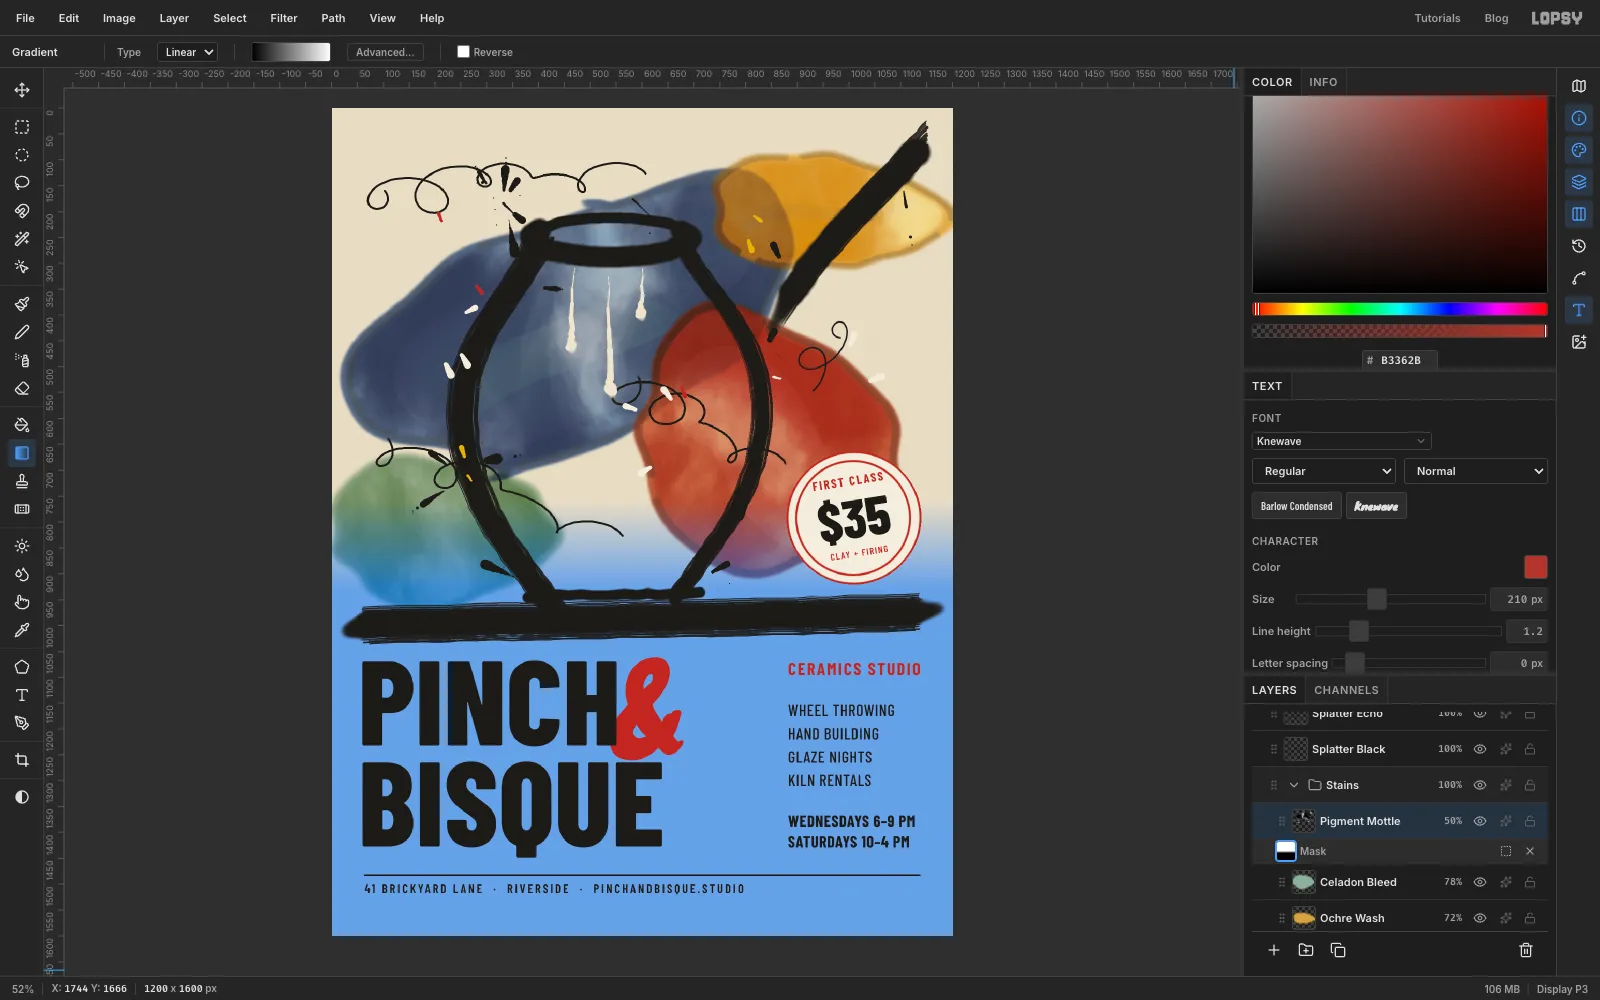
Pigment Mottleand click Add Mask at the bottom of the Layers panel. Click the mask thumbnail that appears under the layer's row, so you're painting on the mask instead of the layer. - Pick the Gradient tool, set a linear gradient from black to white, and drag from
600, 930straight up to600, 760.
The blue overlay shows where the mask hides the layer. The mottle now fades out before the wheel bar, so the stains look calmer near the type. Click the layer's name to leave mask editing.
- Click
-
Clone a few drops
With everything in place, the blue stain left of the pot looks a little empty. Click
Splatter Blackand pick the Clone Stamp with Size70. Alt-click the cluster of drops above the rim at about330, 190to set the source. Then paint one short dab around175, 340. The empty patch gets a few drops that match the rest.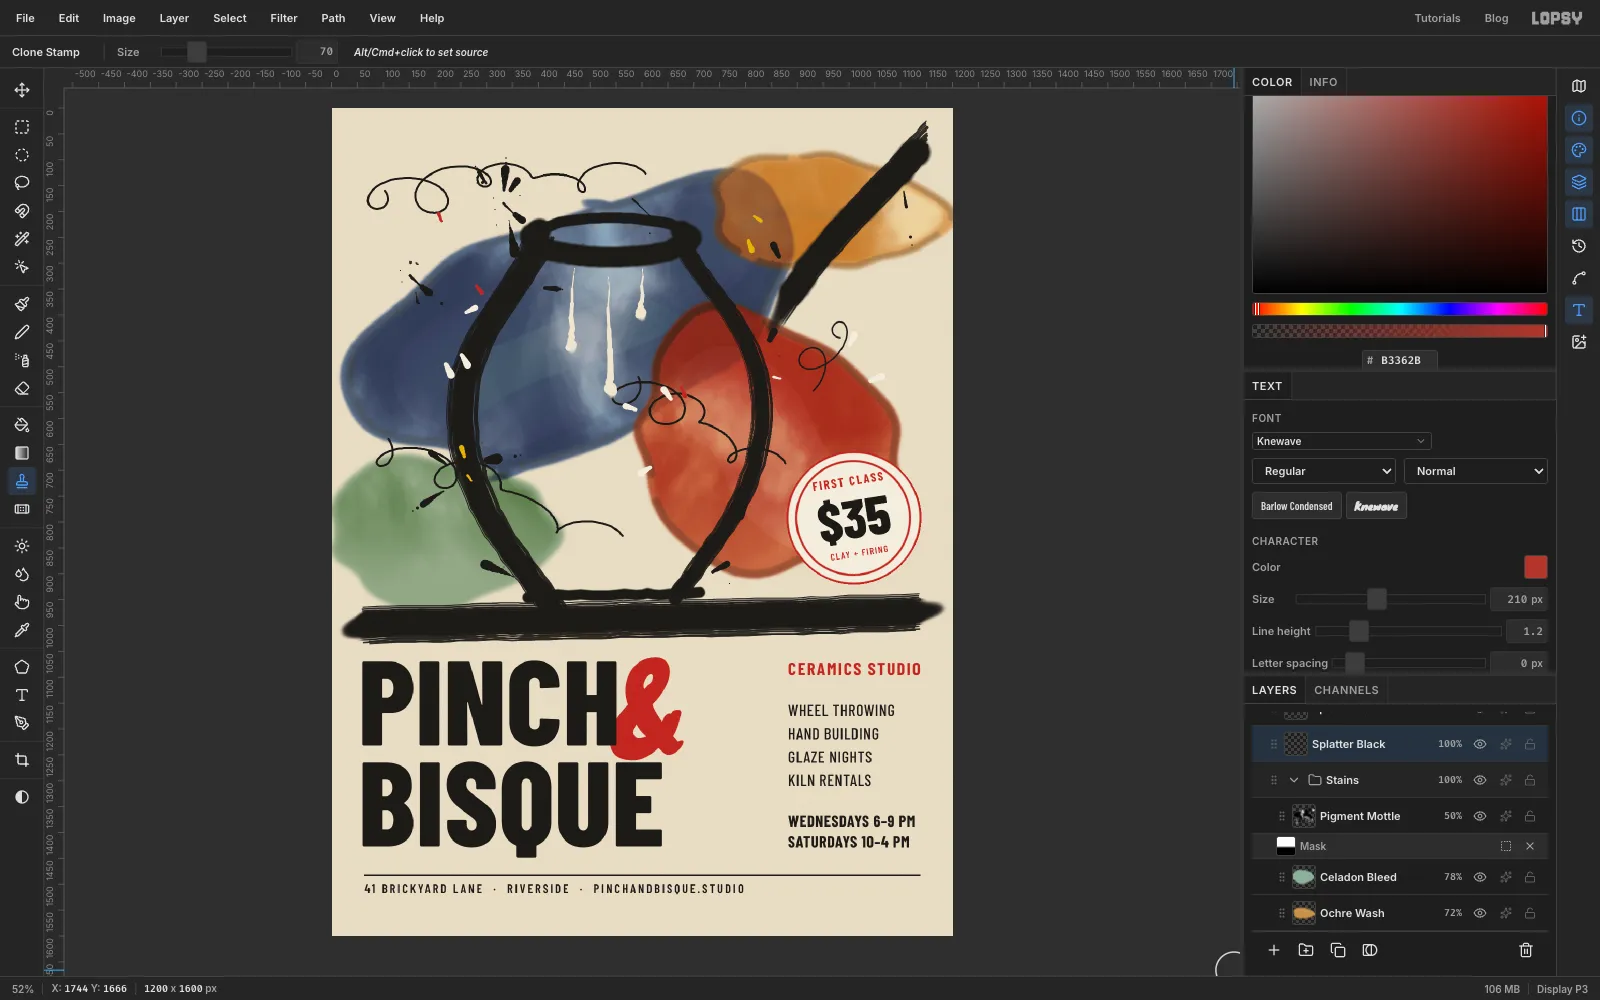
-
Grade the stains as a group
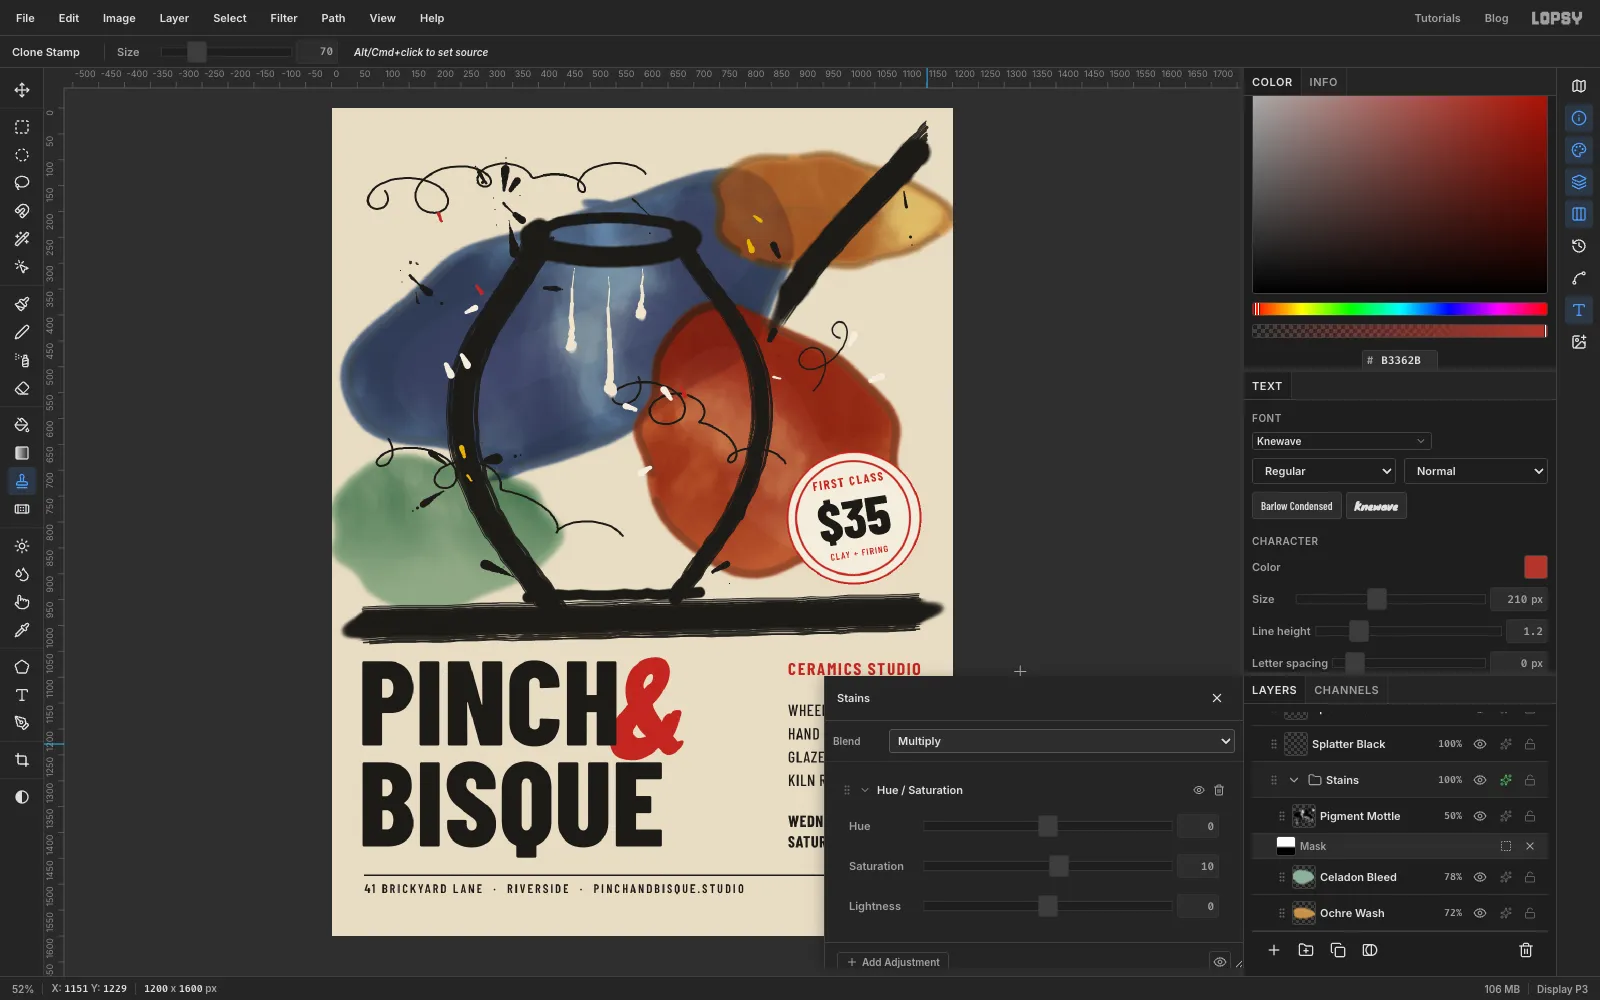
- Click the ✦ button on the
Stainsgroup's row. A group's drawer shows its blend mode and its adjustments. - Set the group's Blend to Multiply.
- Click + Add Adjustment, choose Hue / Saturation and set Saturation to
10.
Any adjustment makes the group render on its own first, so without the Multiply the blue pool would stop multiplying onto the canvas and turn hard and bright. Setting the whole group to Multiply puts that soaked-in look back.
- Click the ✦ button on the
-
Add a faint vignette
Click the ✦ button on the top
Projectgroup's row. It already has Levels, Curves, Exposure and Hue / Saturation, which every new document starts with and which do nothing until you change them. Click + Add Adjustment, choose Vignette and set it to12. The corners darken slightly and pull the eye in.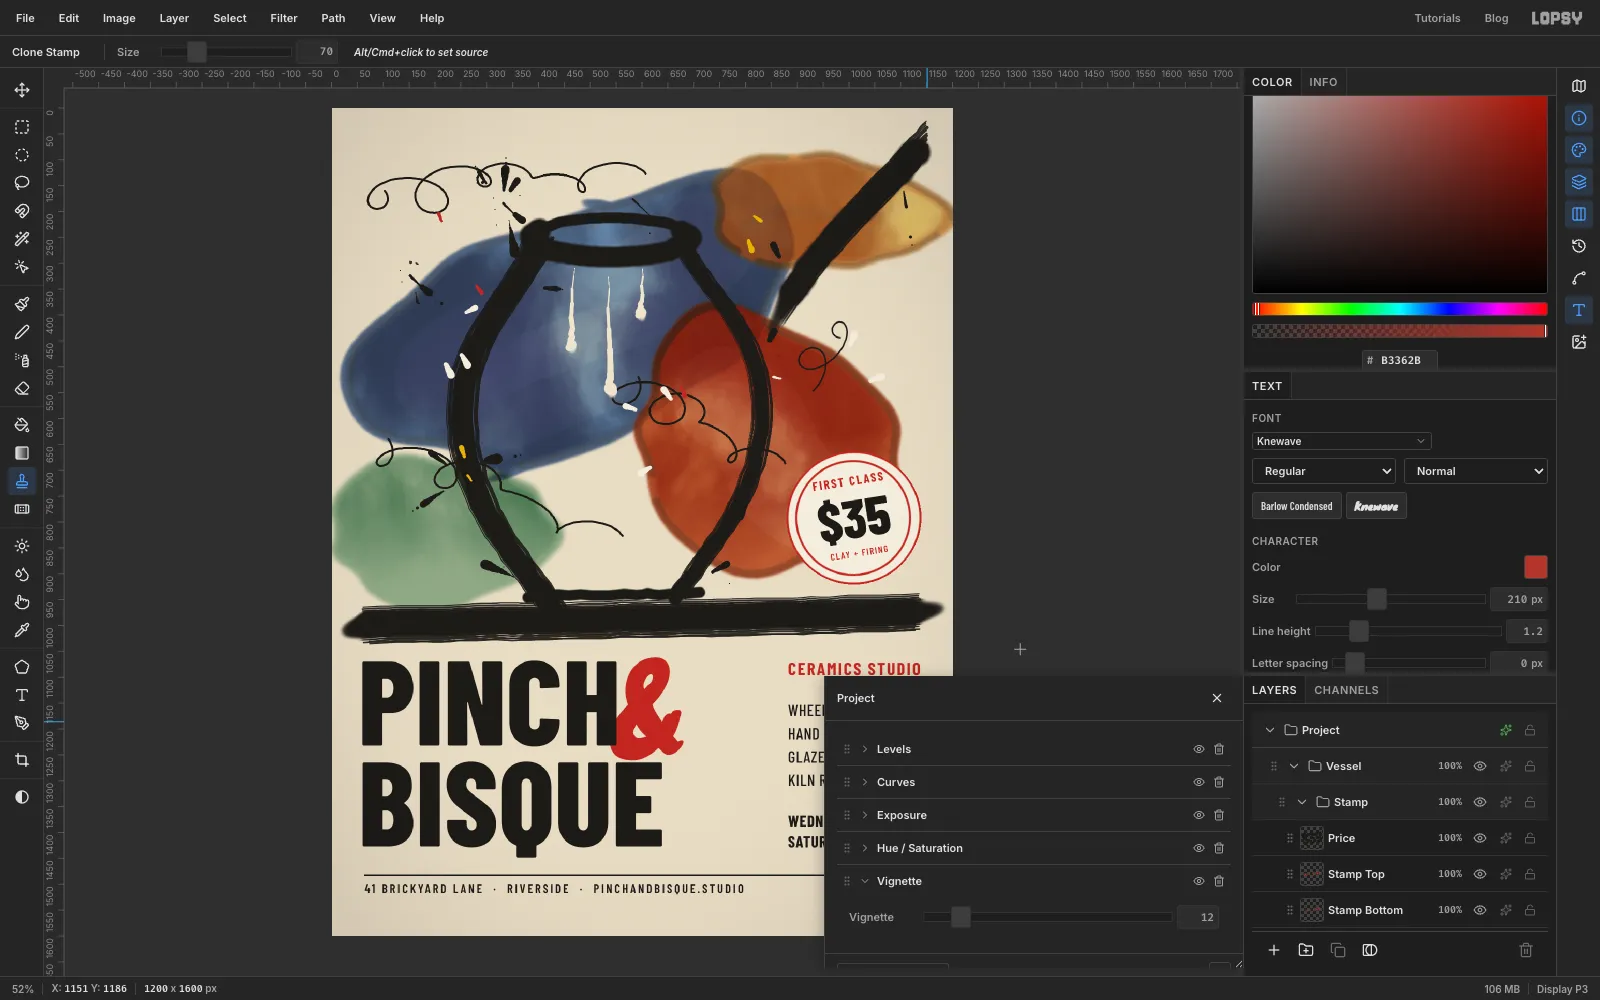
-
Finish with a print grain
- Click
Splatter Colour(insideVessel) and add a layer calledPrint Grain. - Fill it with , choose Filter → Add Noise… with Amount
22, Mono and Gaussian, and set it to Overlay at30%.
Print Grainsits near the top ofVessel, under only theStampgroup, andVesselis above everything else. So the grain covers the painting and the type alike, and they look printed on the same sheet. Export with File → Quick Export PNG, and save the project with File → Save Project so you can change the price and the hours next term.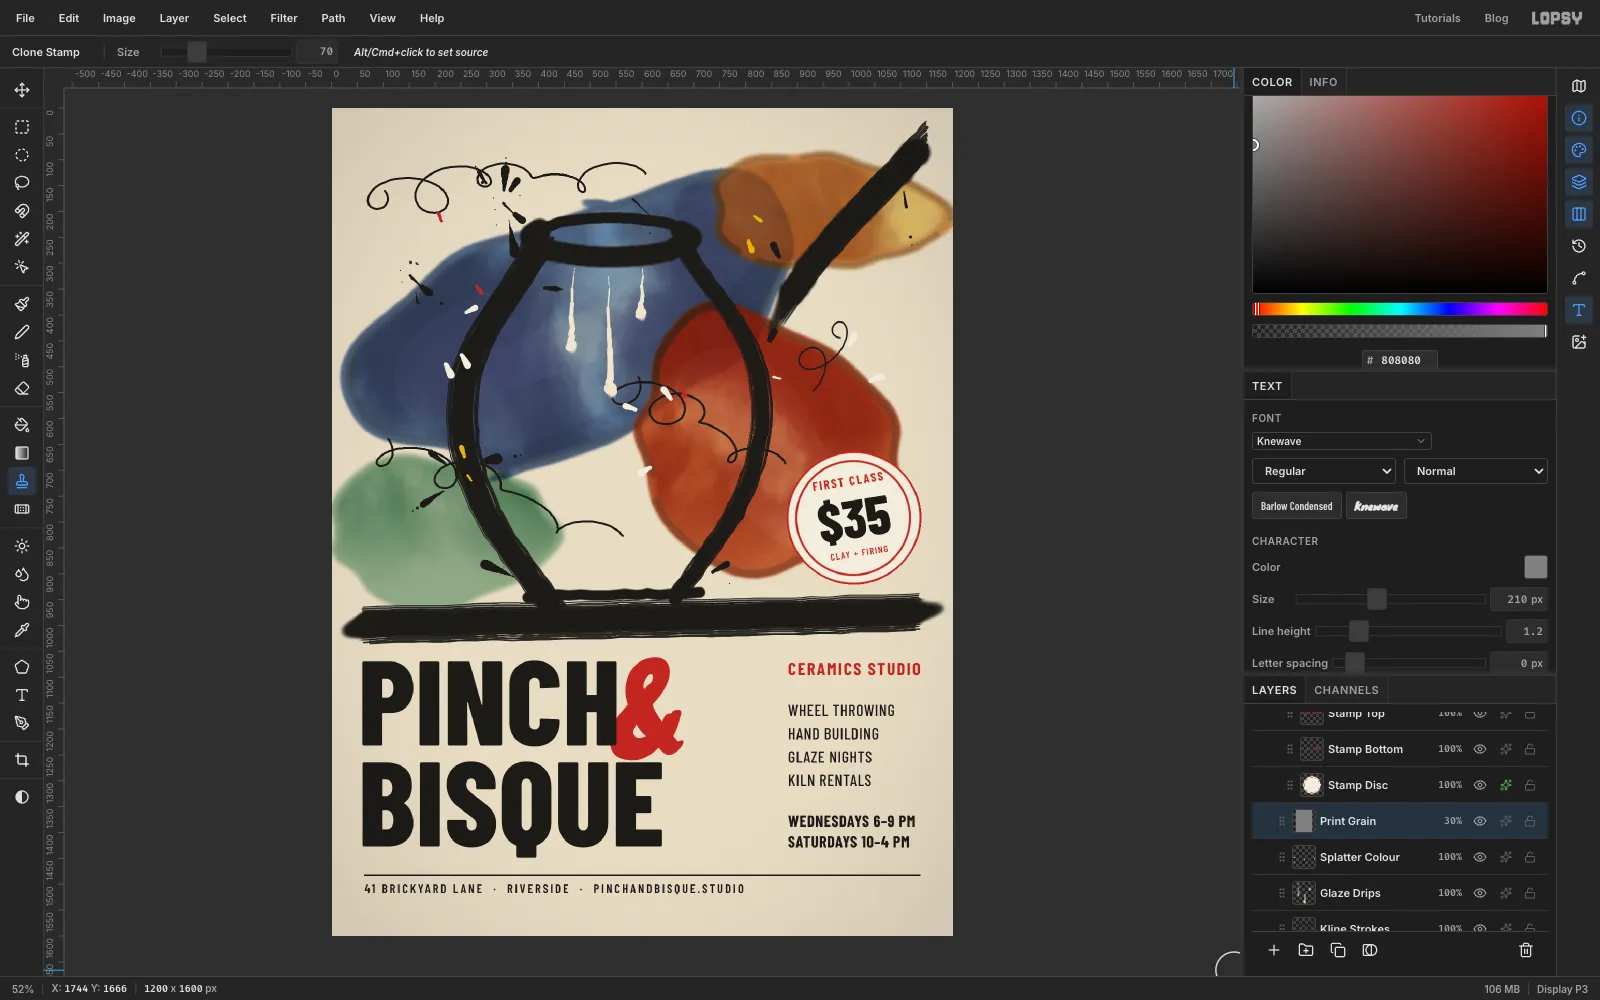
- Click