Design a Psychedelic Ice Cream Shop Flier
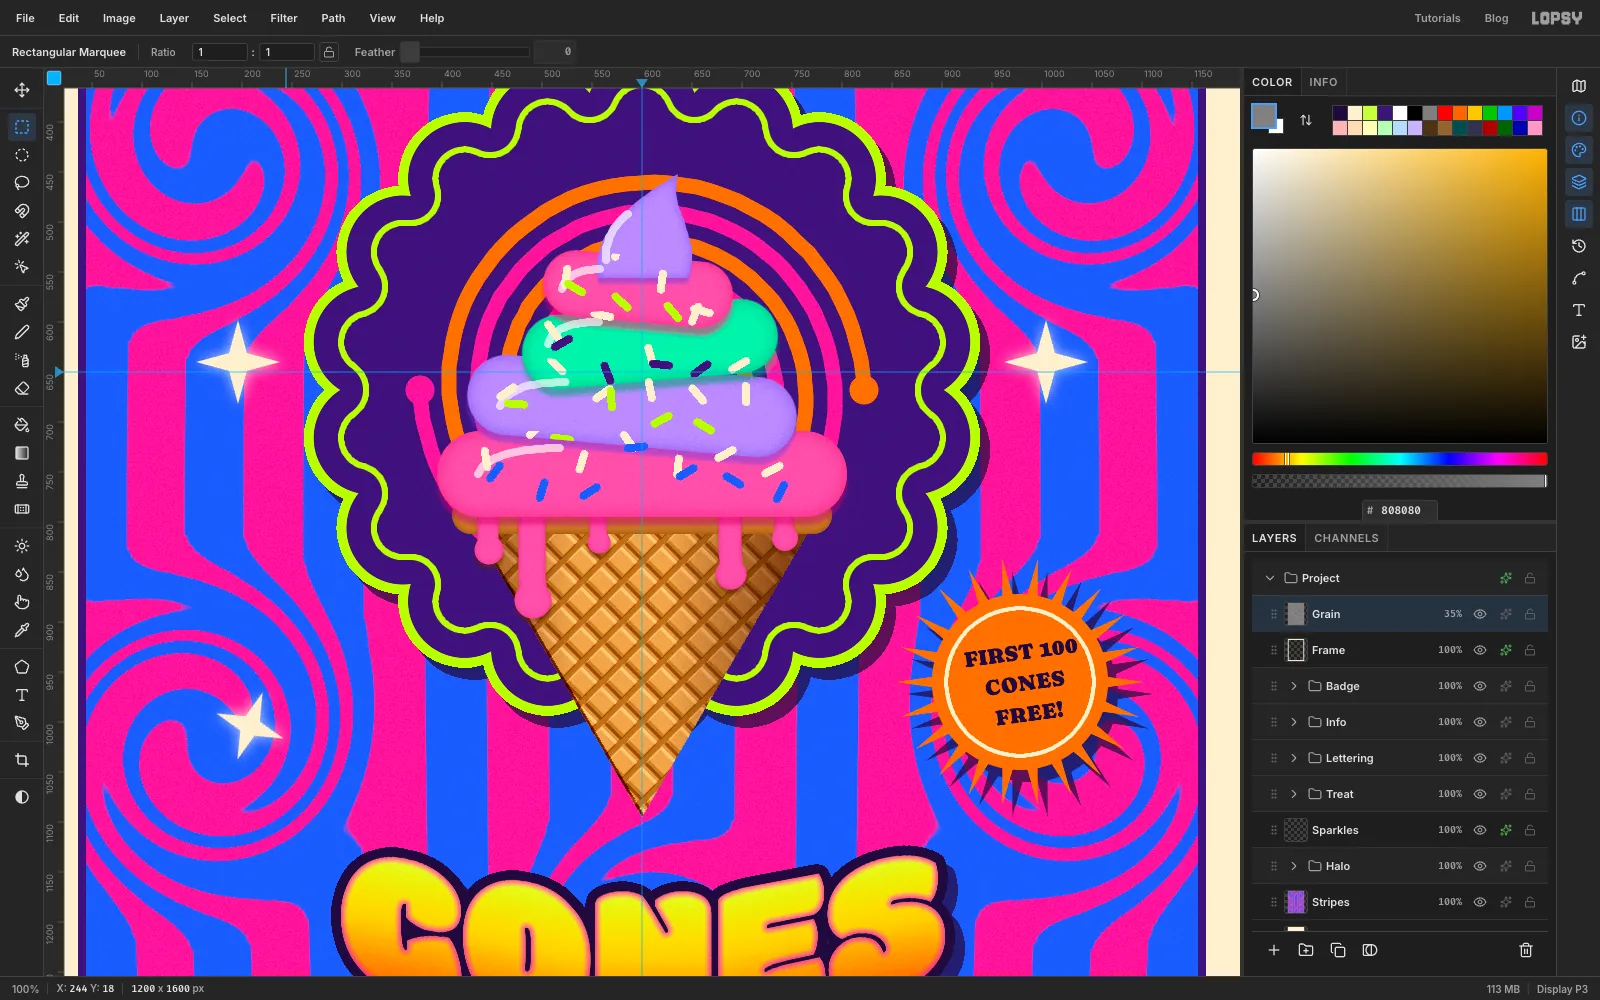
Make a 60s psychedelic flier in Lopsy with Liquify-twirled stripes, a waffle cone, a rainbow soft-serve swirl, sprinkles and Mesh Warp lettering.
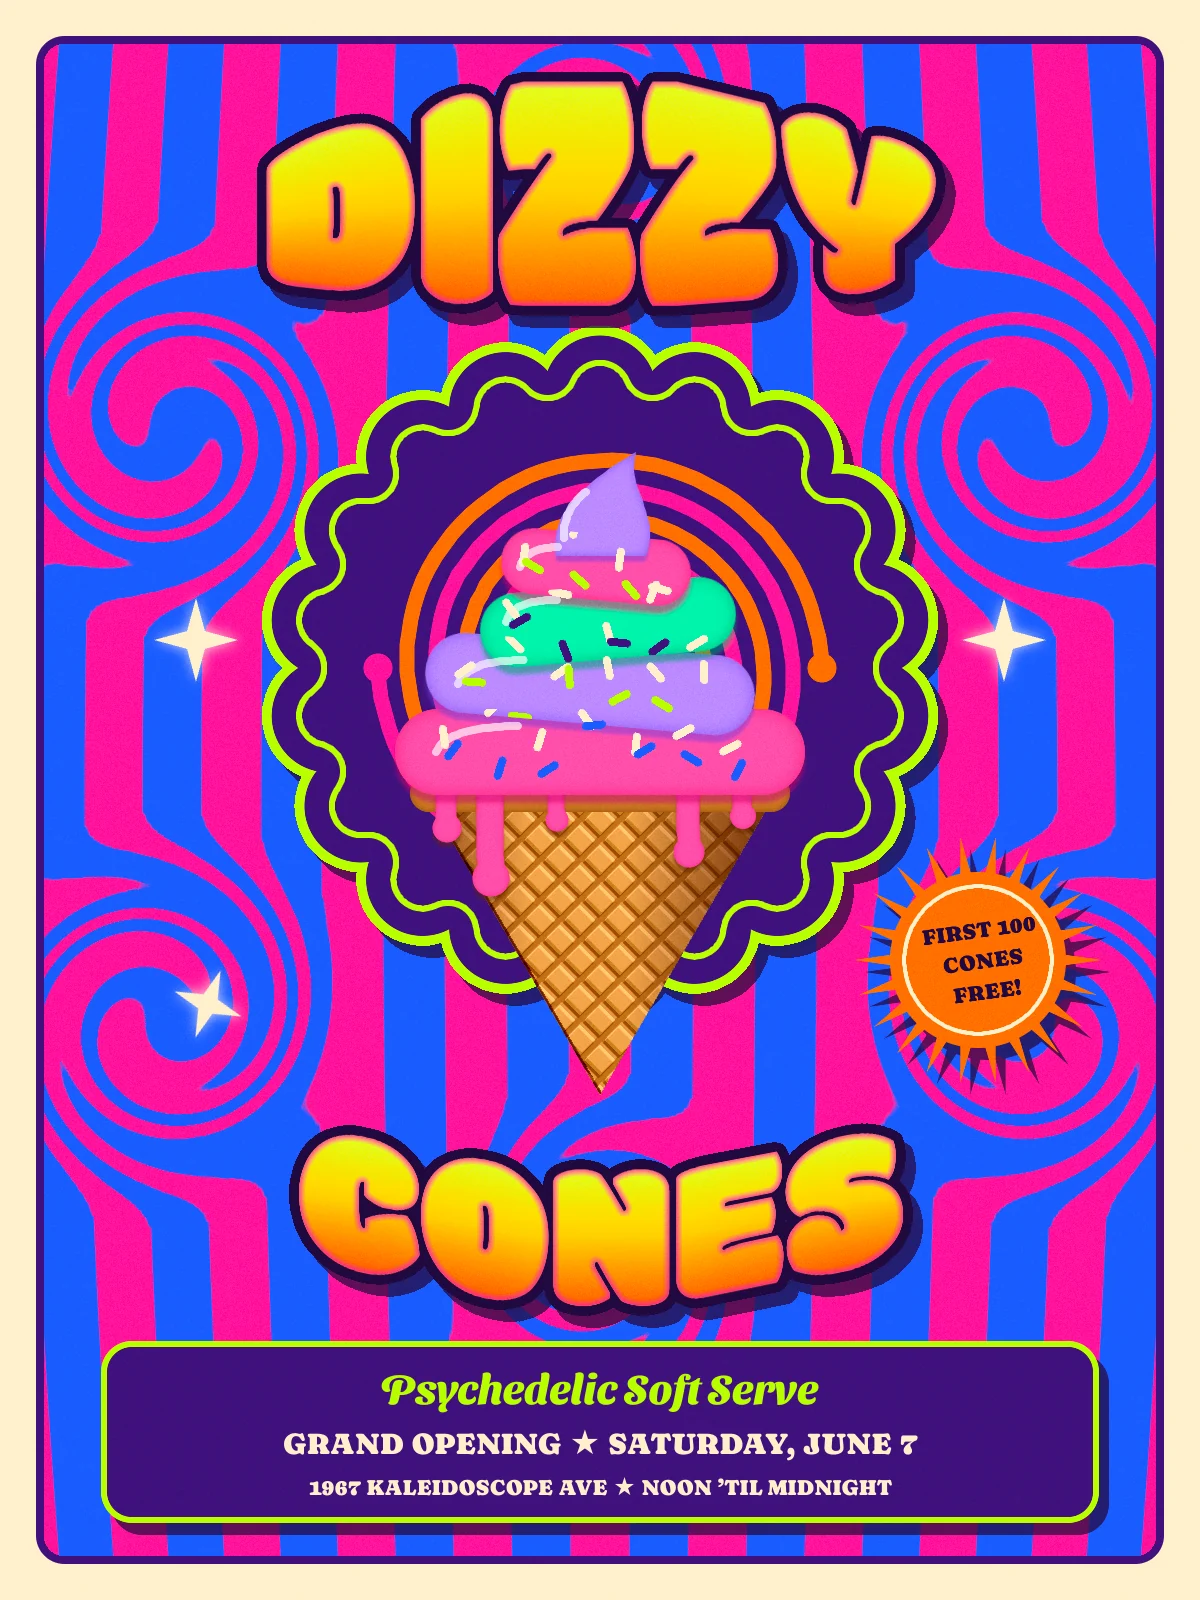
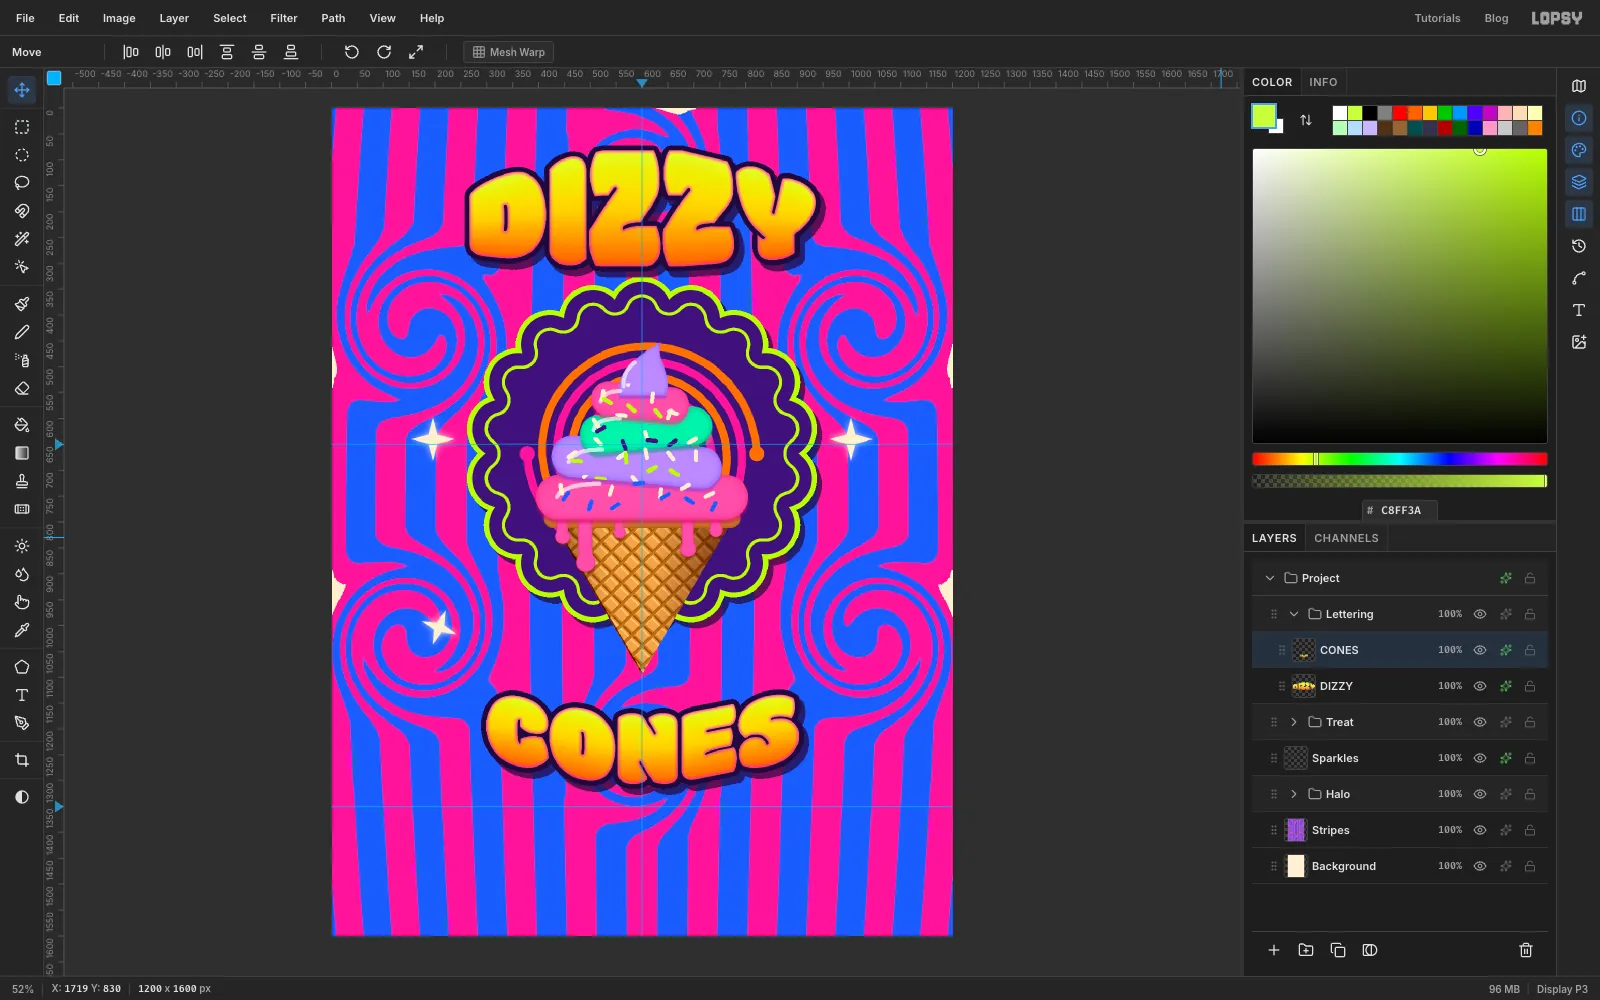
Late-60s San Francisco concert posters, especially Victor Moscoso's, got their buzz from a trick he learned in Josef Albers' colour classes. If you put two saturated colours of about the same lightness side by side, the edge between them seems to vibrate. Add bulging, melting lettering that fills its space and you have the psychedelic poster look.
In this tutorial you'll use that look for a small-business flier: a grand opening for Dizzy Cones, an imaginary soft-serve shop. The background is hot pink and electric blue stripes that you bulge and twirl. A rainbow cone sits in a scalloped halo, and the shop name bends around it. The flier is 1200 × 1600 px.
Along the way you'll use:
- Define Pattern and Fill with Pattern for the stripes and the waffle
- Lens Distortion and Liquify (Twirl) to make the stripes swirl
- the Brush with Radial Symmetry for a scalloped edge
- the Pen tool and Path to Selection for the cone, plus Emboss
- the Shape tool's click-to-size dialog for rounded tiers and the rim, and its grid snapping for the info panel
- rotation and scale handles, copy and paste, and Merge Down
- Define Brush with Scatter and Angle Jitter for sprinkles
- Mesh Warp to bend rasterized type
- Sunburst for a starburst badge, and text in Modak, Caprasimo and Sansita Swashed
- Stroke, Drop Shadow, Inner Glow and Outer Glow, and the Overlay blend mode
The palette:
-
Hot pink
-
electric blue
-
Violet
-
lime
-
orange
-
Waffle
-
lattice
-
rim
-
Cone shade
-
Pink scoop
colour and shade
-
Lilac scoop
-
Mint scoop
-
Title gradient
-
Ink
-
cream
-
grain grey
-
Set up the canvas and guides
Choose File → New, enter 1200 × 1600 and click Create. Click the Background row, set the foreground to cream and choose Edit → Fill.
Click the top ruler at
600to drop a vertical guide down the middle. Then click the left ruler at650, near the centre of the halo, and at1350, where the info panel will start.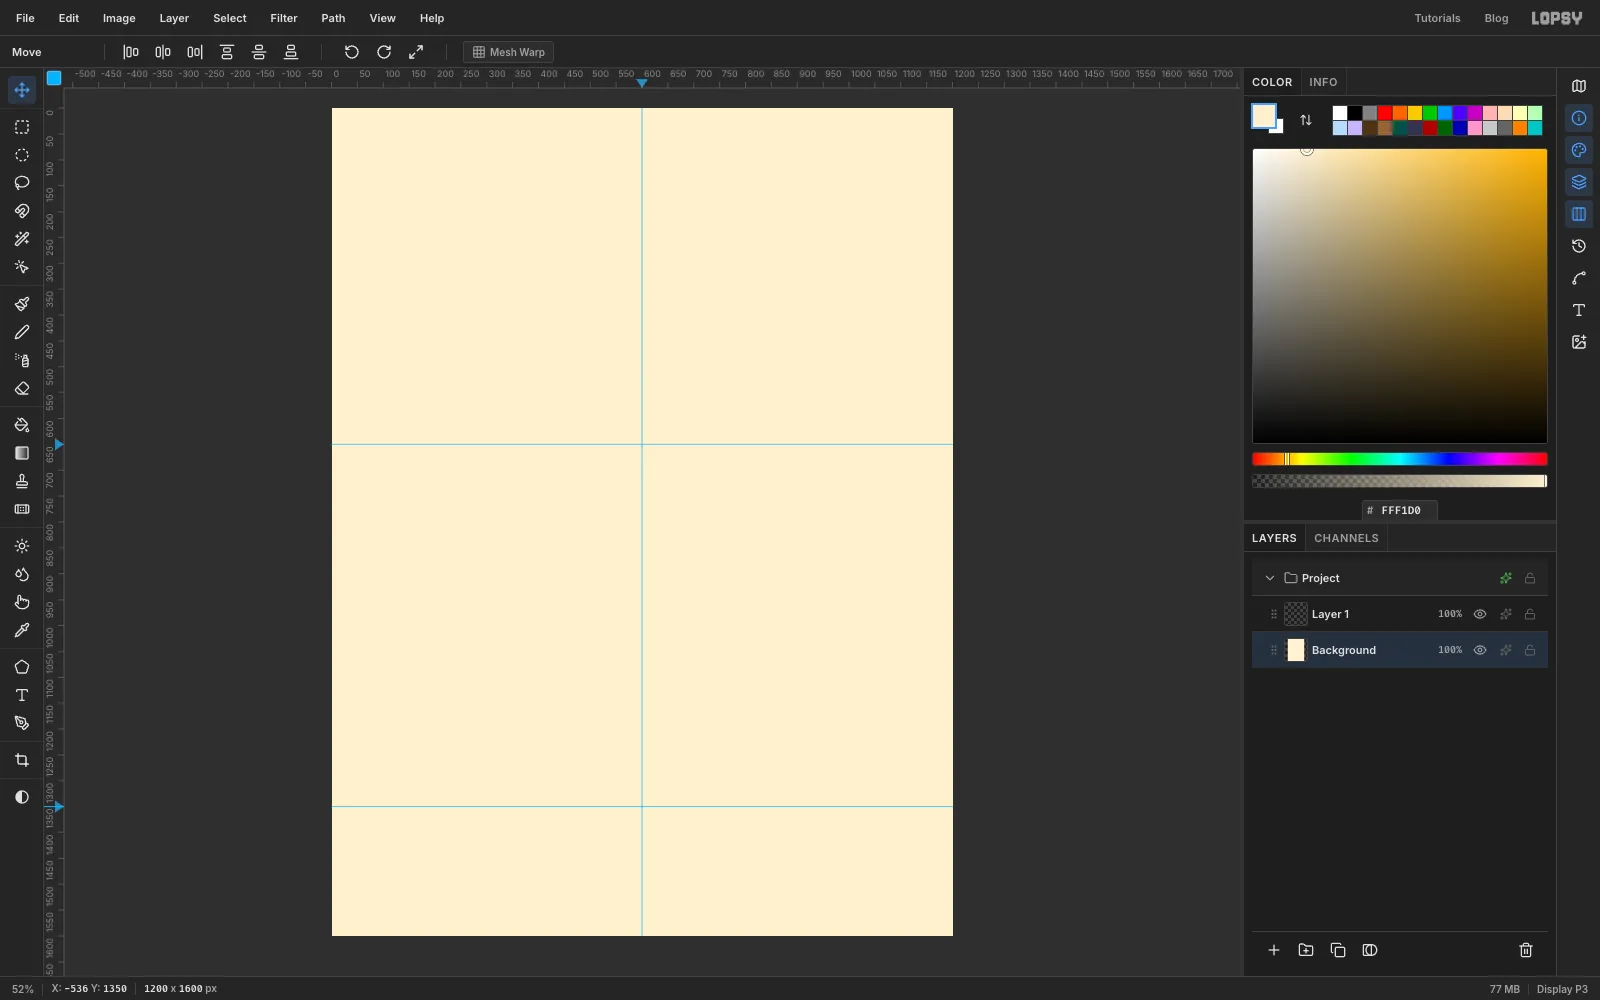
-
Make a two-stripe pattern tile
Click Layer 1 and rename it Stripe Tile. With the exact-corners dialog, select from
0, 0to48, 48and fill it with hot pink . Select from48, 0to96, 48and fill it with electric blue .Now select the whole tile,
0, 0to96, 48, and choose Edit → Define Pattern. Deselect, then delete the Stripe Tile layer with the trash button at the bottom of the Layers panel. The pattern stays saved.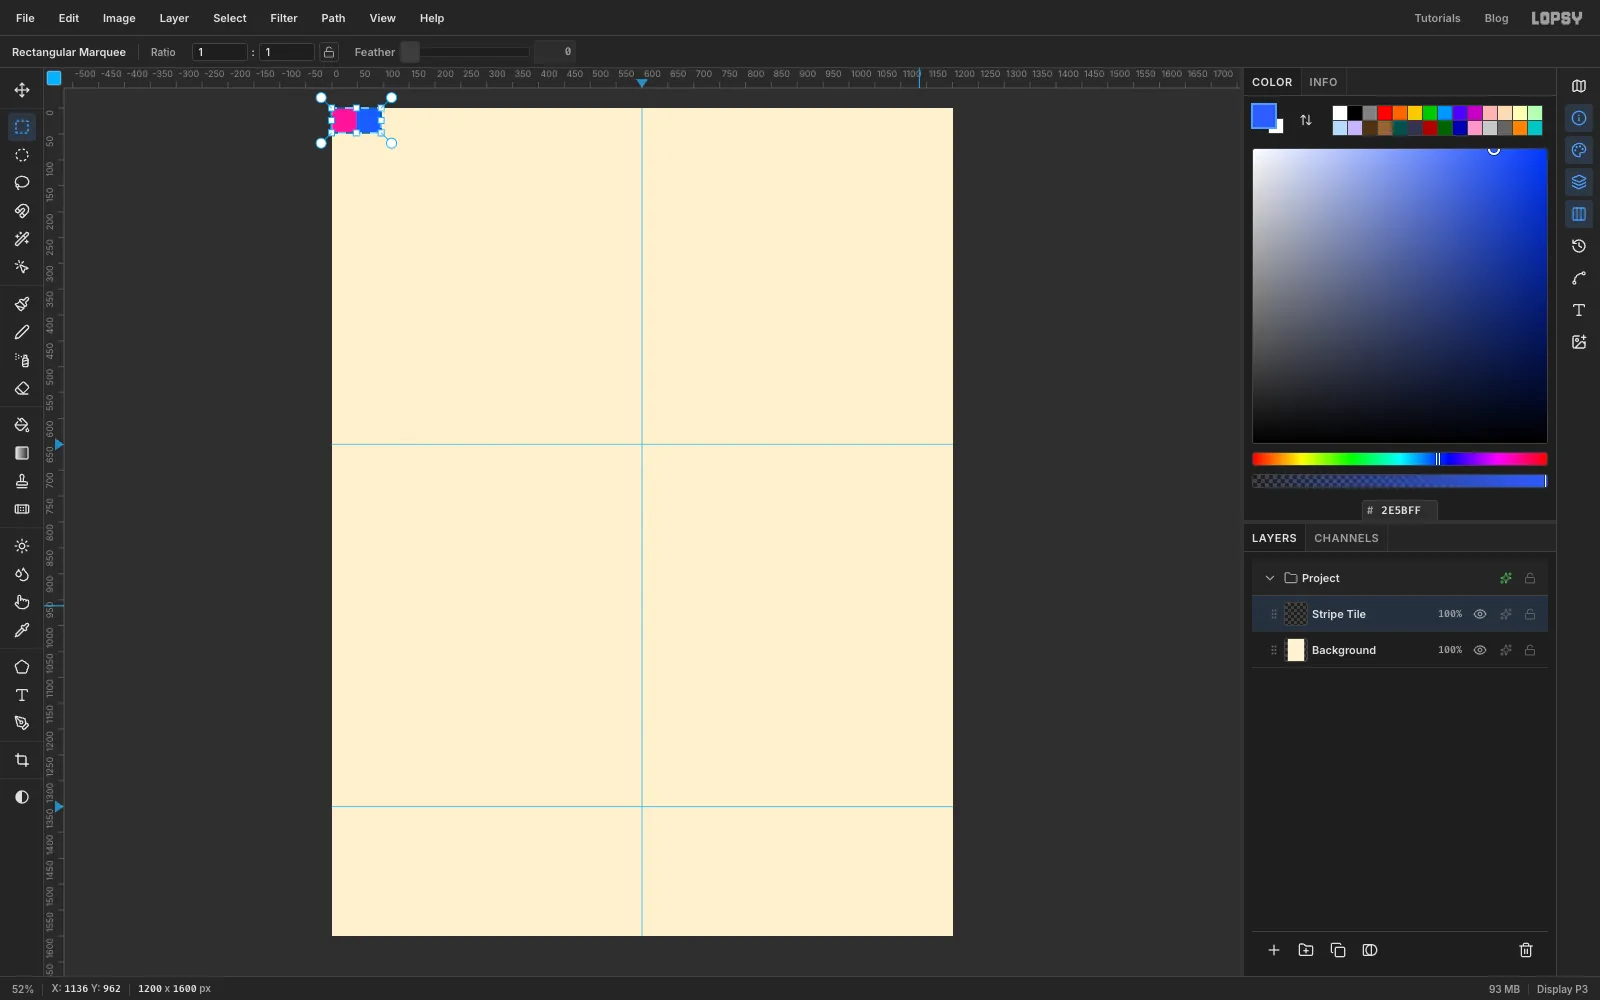
-
Fill the page with stripes
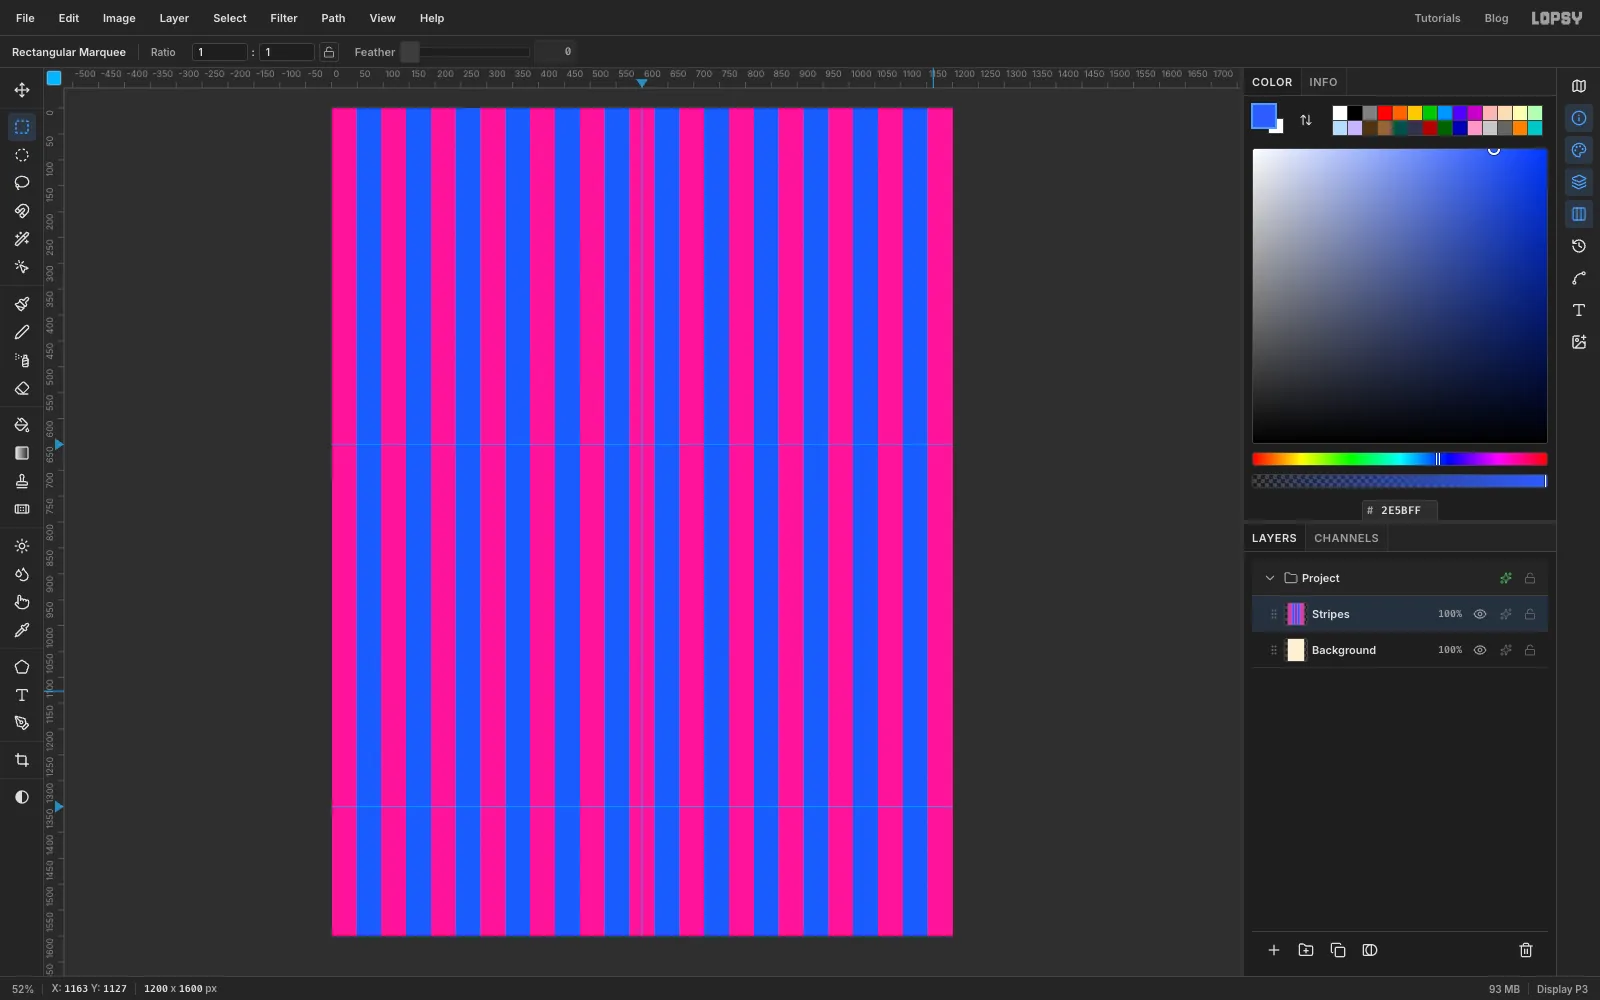
Click Background and add a new layer named Stripes. Choose Edit → Fill with Pattern…, pick the stripe tile and click Apply. The 48 px stripes line up so that a pink stripe runs straight down the centre guide.
-
Bulge the stripes with Lens Distortion
Choose Filter → Lens Distortion… and set Strength to
30and Zoom to130. Click Apply. Positive strength bows the stripes outward like a fish-eye lens. The zoom pulls the edges back in so nothing falls off the canvas.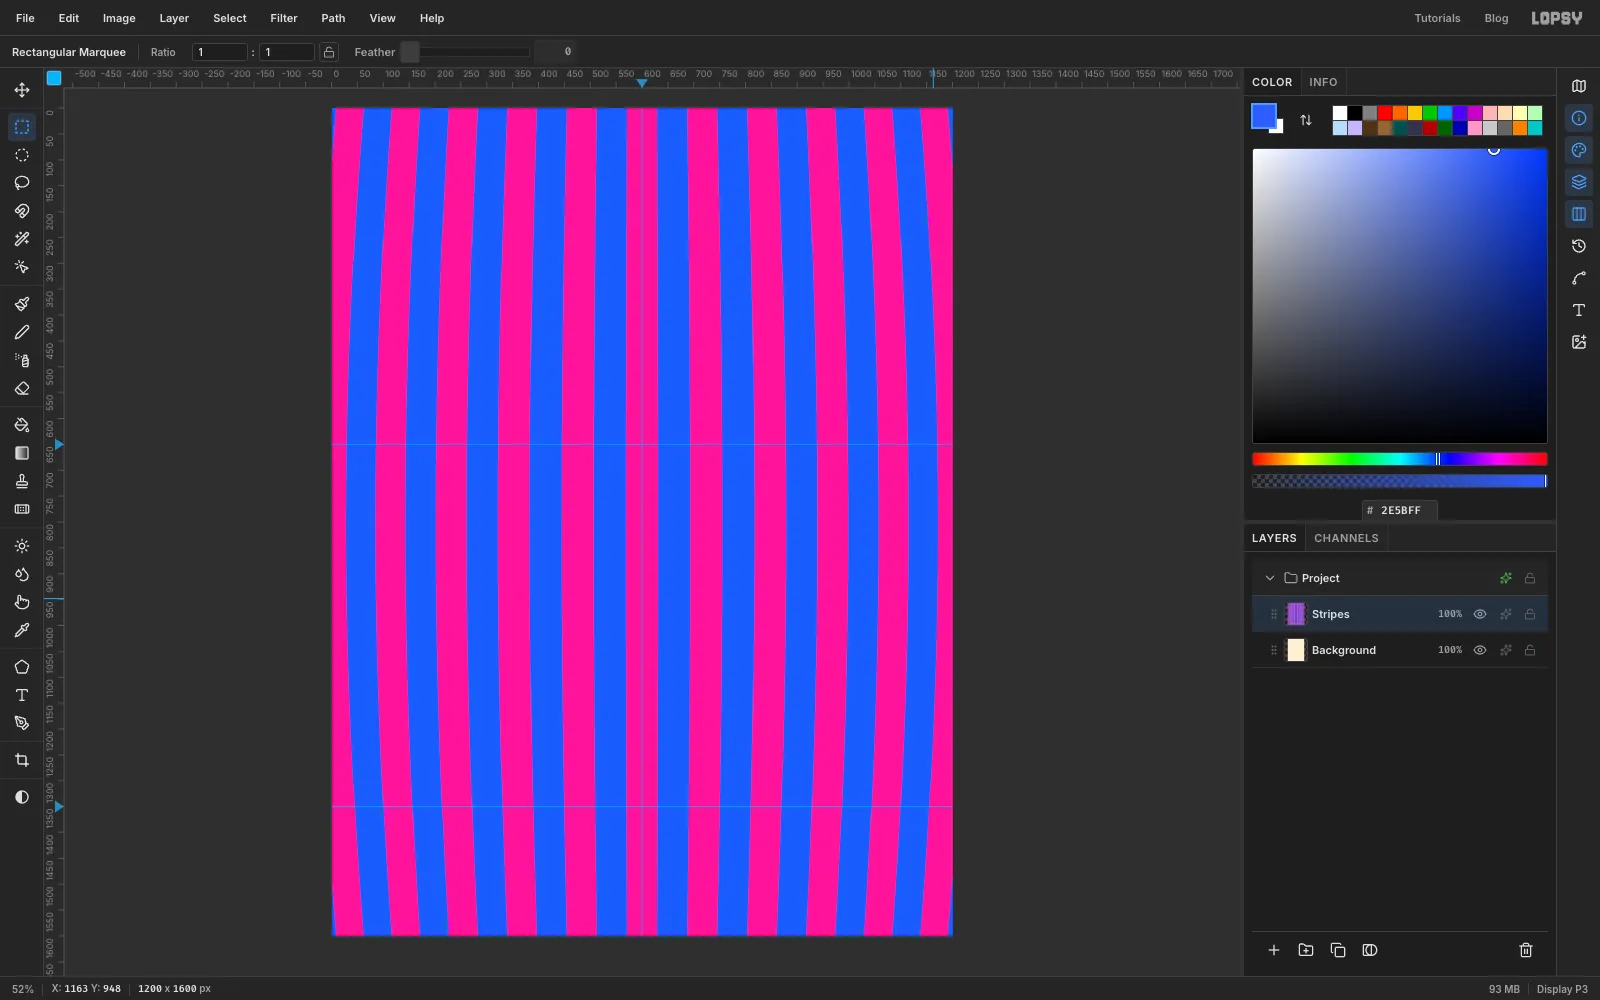
-
Twirl the stripes with Liquify
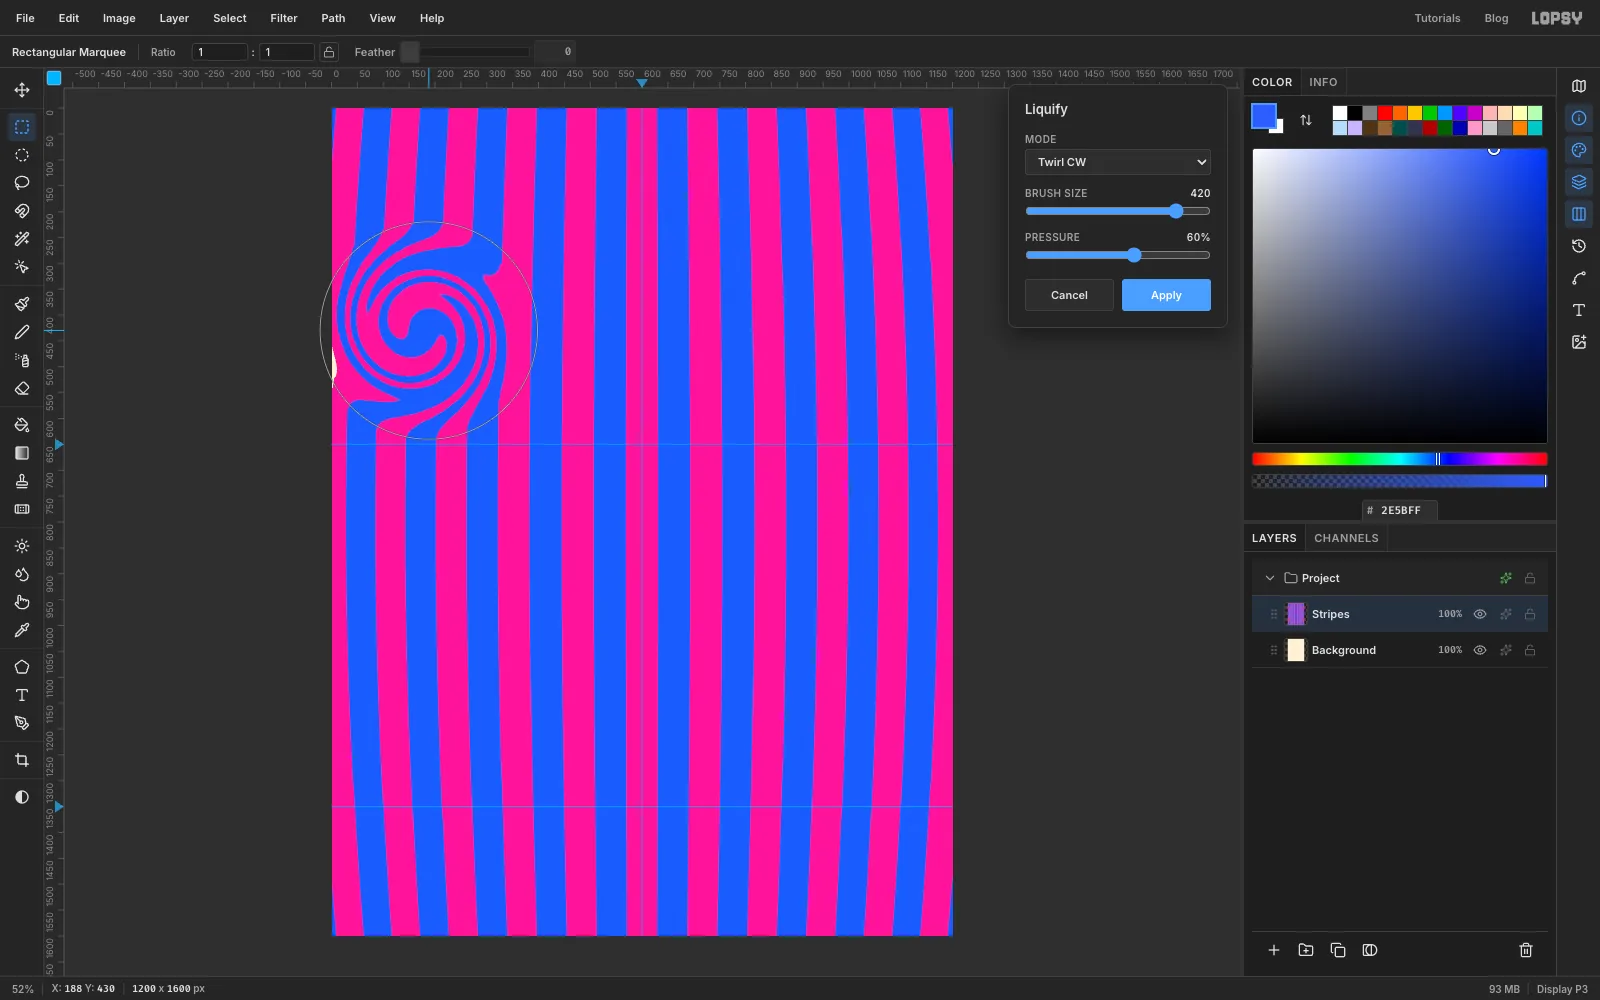
Choose Filter → Liquify…. Set Mode to Twirl CW, Brush Size to
420and Pressure to60%. Put the brush circle on the left edge at about170, 430. Hold the mouse down and move it round in small circles, about the size of a coin, five or six times. The stripes wind up into a spiral. Click Apply.Make five more swirls the same way, each with its own Filter → Liquify…:
- Twirl CCW at
1030, 430on the right - Twirl CCW at
160, 1020and Twirl CW at1040, 1020, low on each side - with Brush Size
360and Pressure50%: Twirl CCW at600, 140and Twirl CW at600, 1250
The two swirls on each side turn in opposite directions, so the page looks like marbled paper.
- Twirl CCW at
-
Cut the halo disc
With Stripes selected, click the New Group button and name the group Halo. Add a layer named Halo Disc.
Pick the Elliptical Marquee and use the exact-corners dialog to select from
324, 392to876, 944, a 552 px circle (radius 276) centred on600, 668. Fill it with violet and deselect.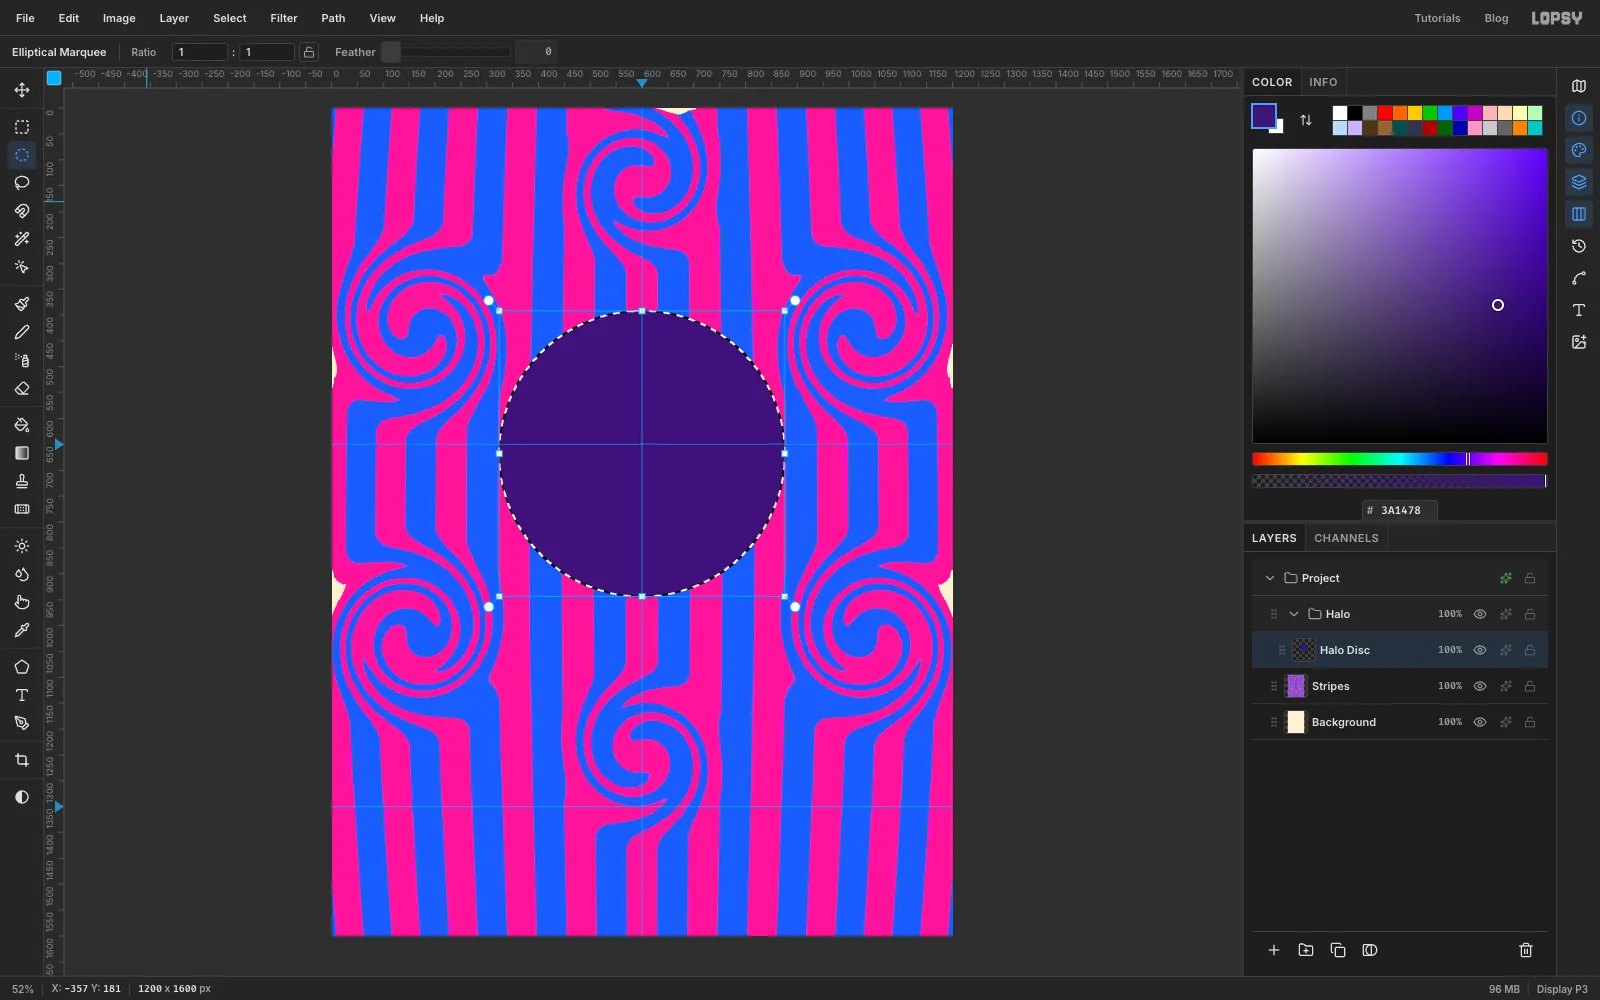
-
Scallop the edge with radial symmetry
Pick the Brush and set Size to
114, Hardness to100and Opacity to100. Click the snowflake Radial Symmetry button in the options bar and set Segments to18.Cmd-click the centre of the disc at
600, 668to move the symmetry centre there. Then click once on the top edge of the disc at600, 392. The one dab is copied 18 times around the circle, which gives the disc a scalloped edge. Turn Radial Symmetry off again.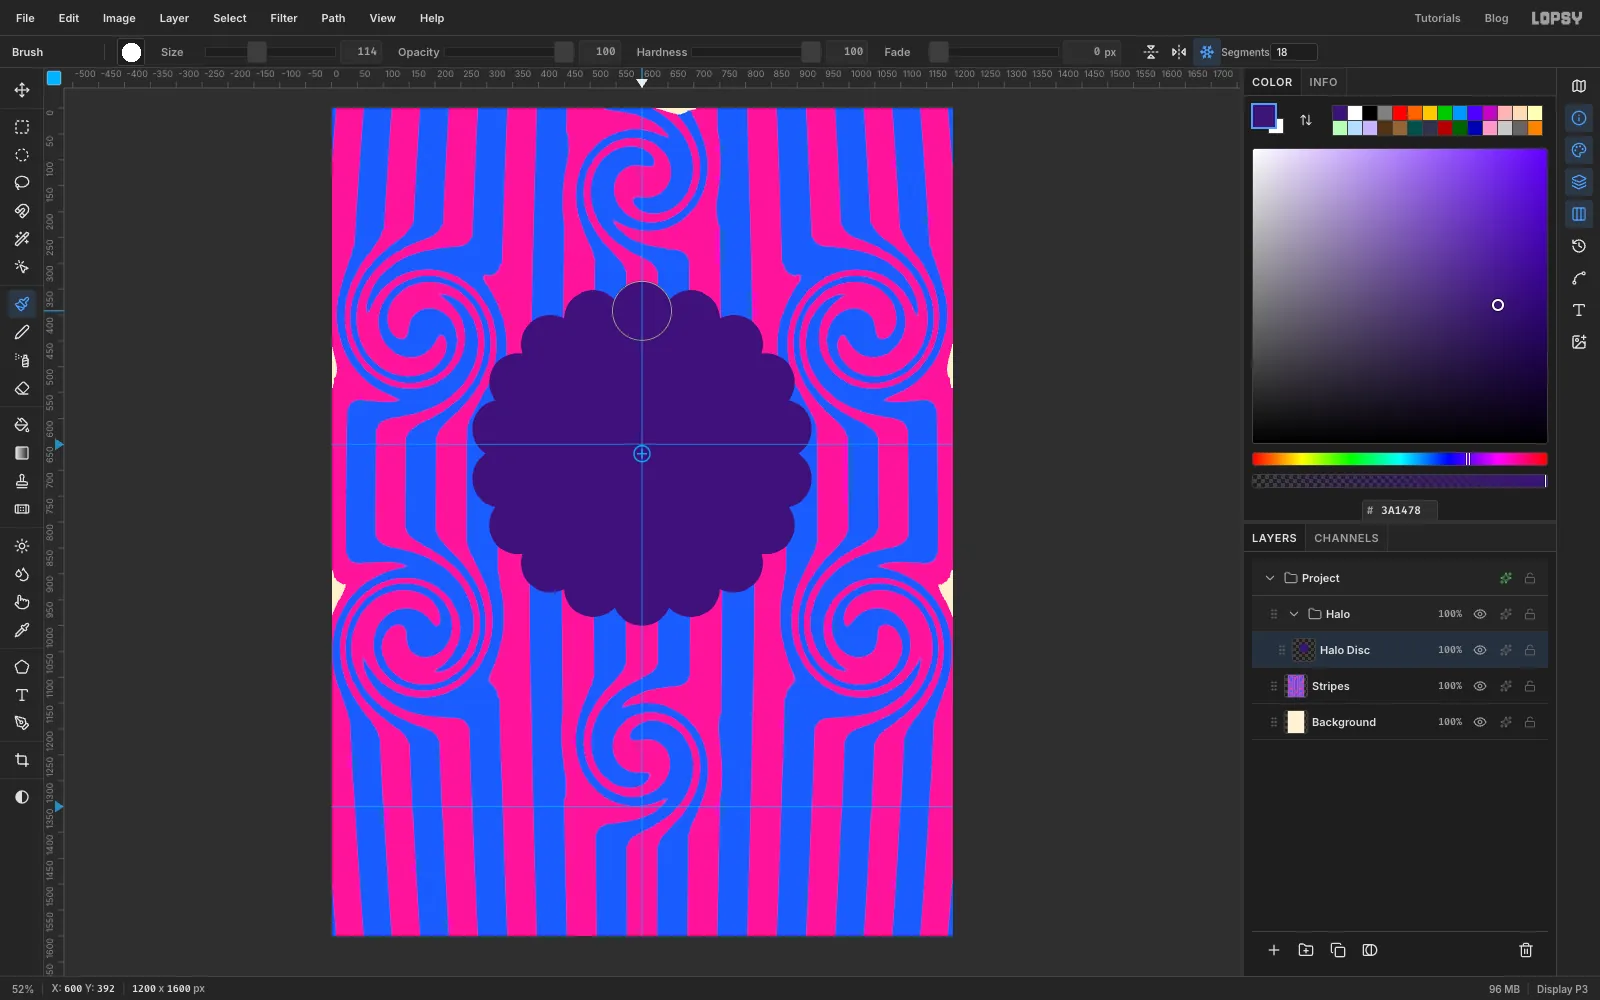
-
Outline and lift the halo
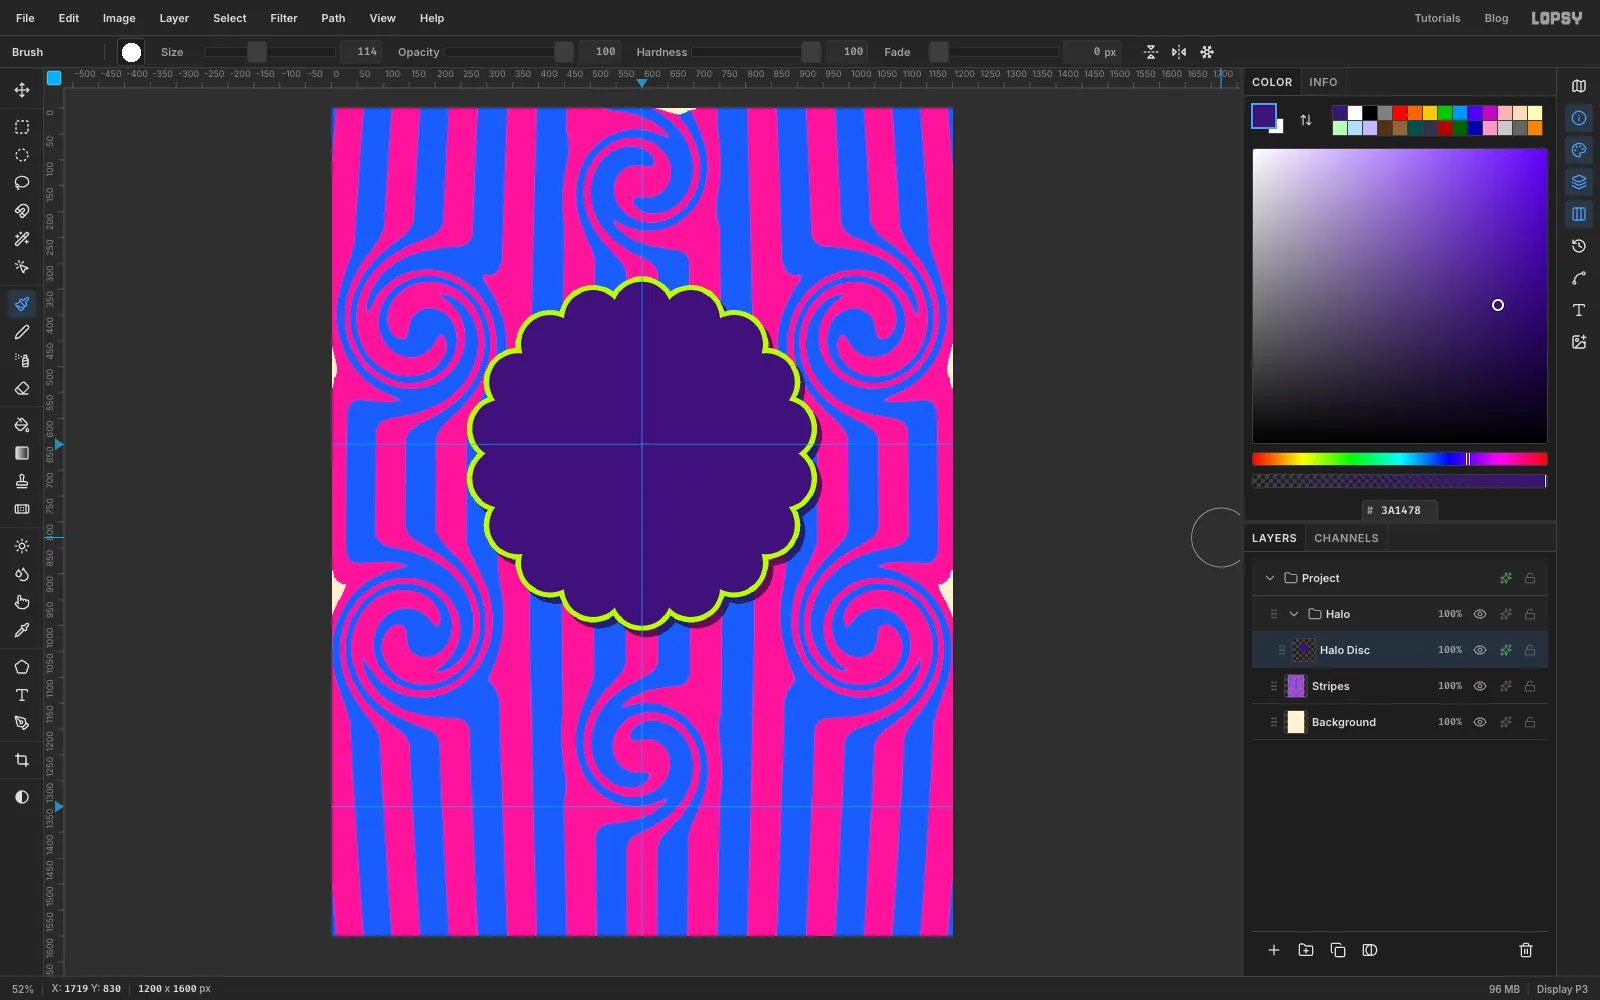
Open the Halo Disc effects drawer:
- Turn on Stroke, colour lime , Width
10. - Turn on Drop Shadow, colour ink , Offset X
10, Offset Y12, Blur1, Opacity75.
Every shadow on the flier uses these same numbers, so they all seem to come from one light.
- Turn on Stroke, colour lime , Width
-
Add a scalloped keyline
Add a layer named Halo Keyline. Cmd-click the Halo Disc thumbnail to load its shape as a selection. Choose Select → Shrink… and shrink by
24. Fill with lime.Shrink the selection again by
6and press Delete. That leaves a thin lime line that follows the scallops 24 px inside the edge. Deselect.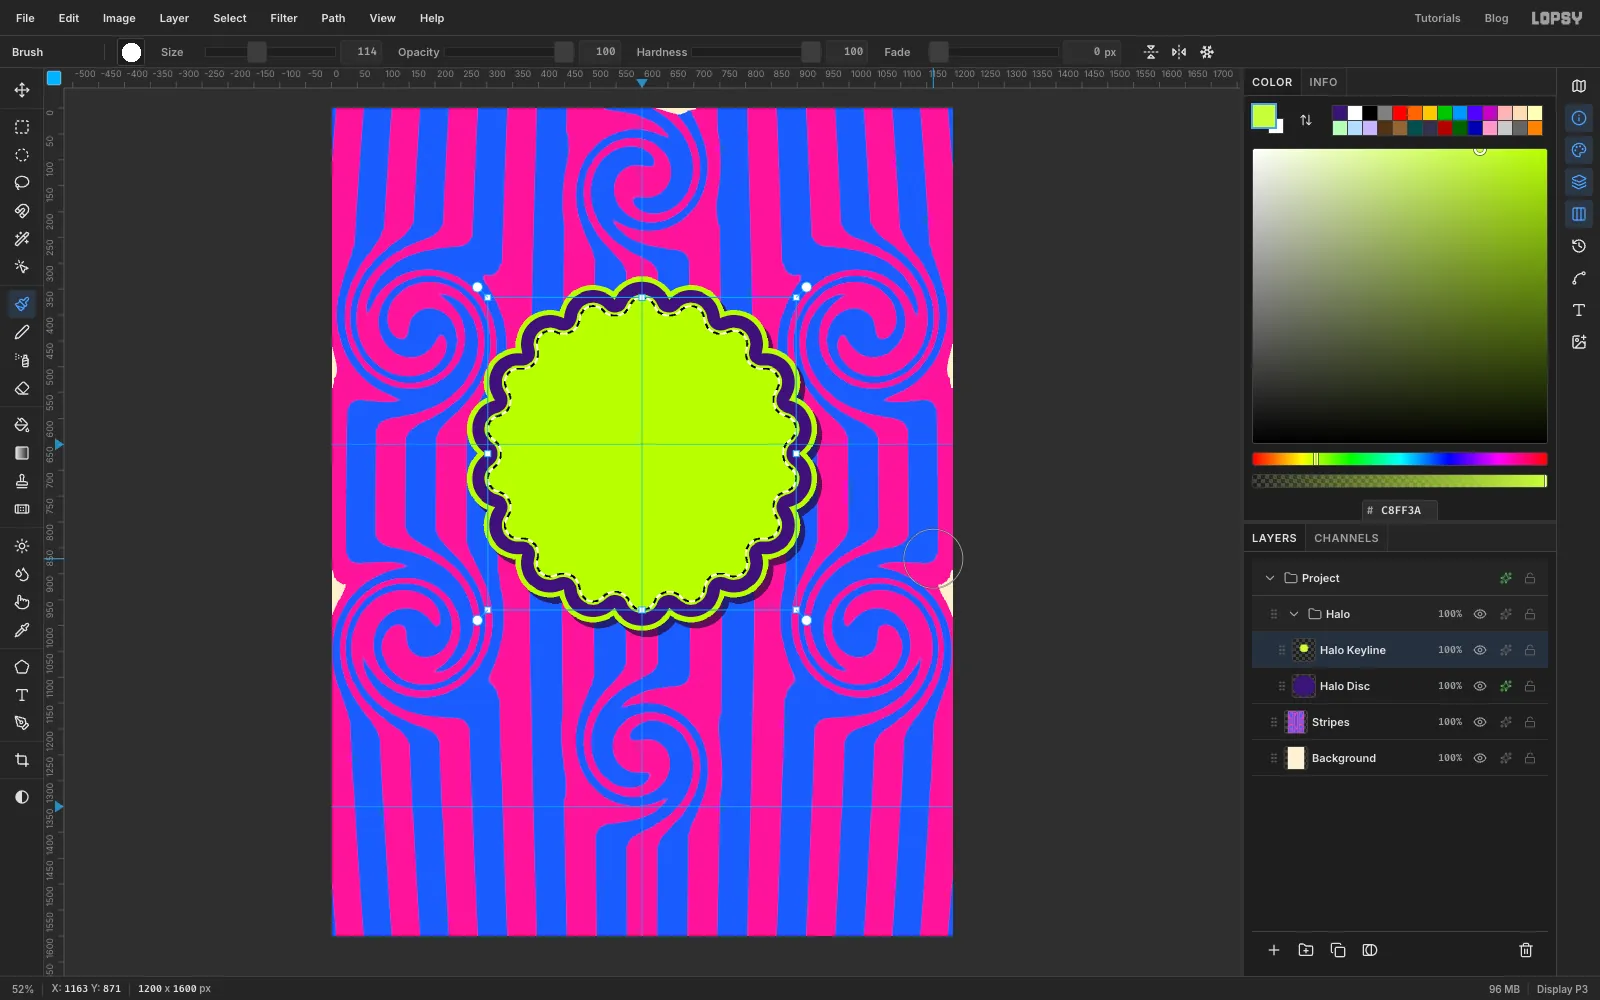
-
Paint the dizzy spiral
Add a layer named Spiral. With the Brush at Size
16, paint a hot pink spiral. Start at the centre and wind outward three and a half times, ending at the left side about 220 px from the centre. A smooth spiral is hard to paint in one go, so zoom in to 100% and paint it a half turn at a time, starting each stroke on the end of the last one. A little wobble is fine, because psychedelic posters were drawn by hand, and you can undo a turn and try again.Paint a second arm in orange that runs between the pink turns and ends on the right. Set the Size to
30and click once on the end of each arm. The ball ends look deliberate instead of chopped off. Most of the middle will be hidden behind the ice cream.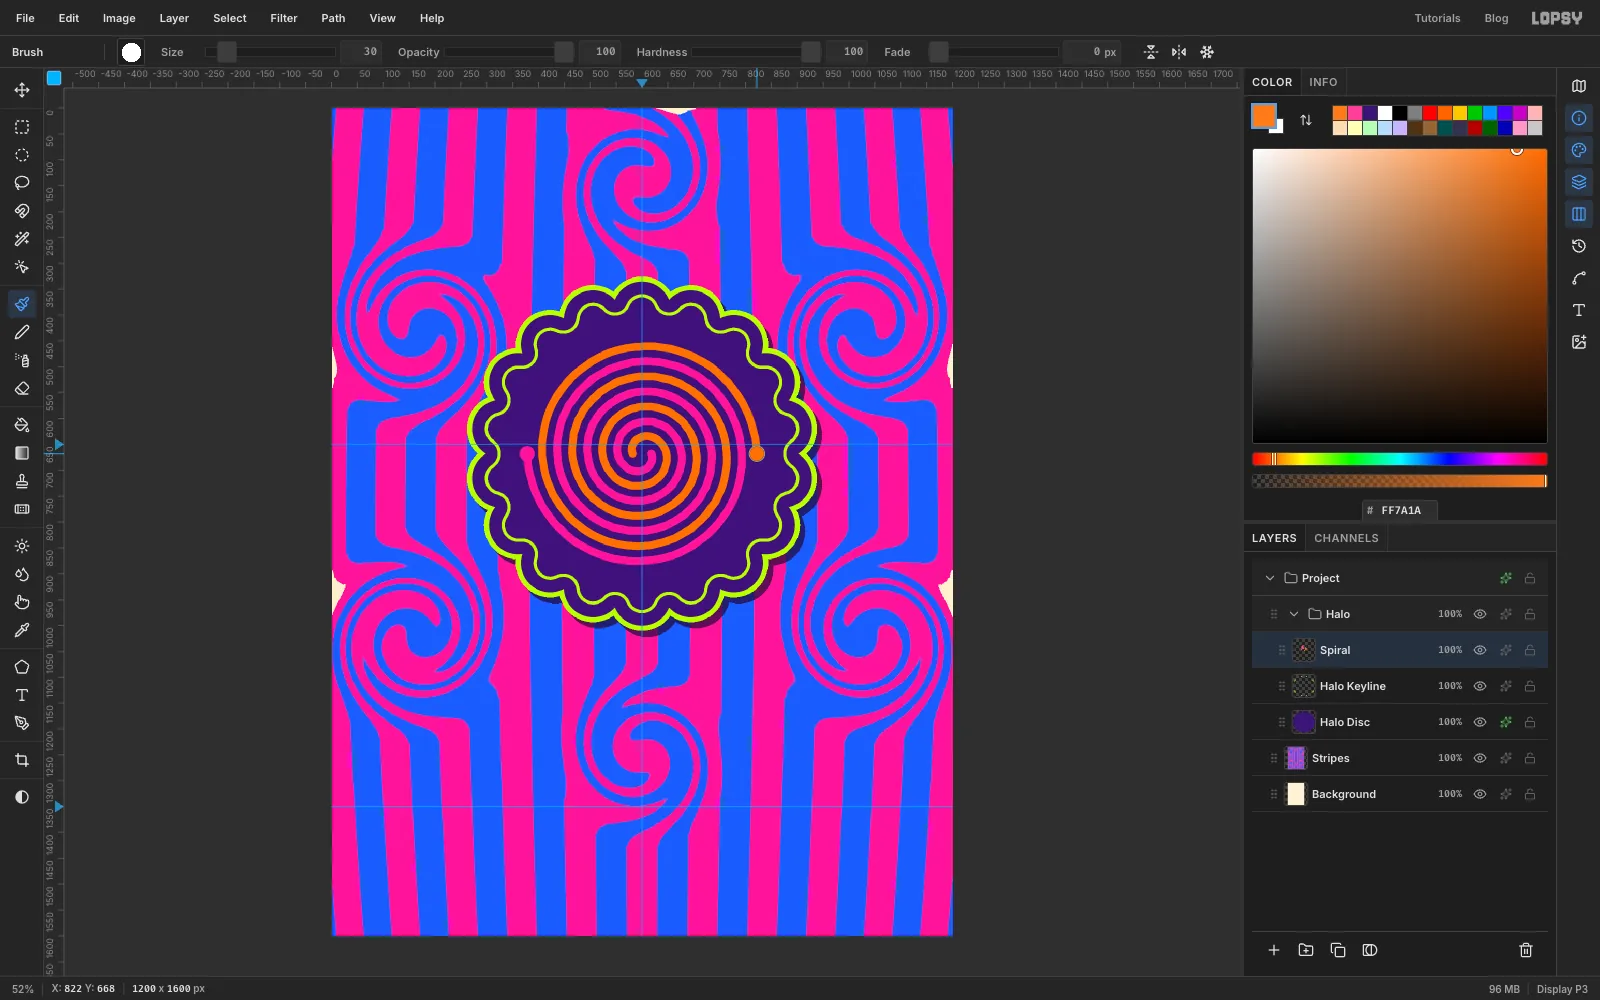
-
Draw a waffle tile
Collapse the Halo group, click it, and add a New Group named Treat. Inside it add another group named Cone, then a layer named Waffle Tile.
Pick the Pencil at Size
5with lattice brown . Click at100, 100and Shift-click at140, 140. Then click140, 100and Shift-click100, 140. Select exactly100, 100to140, 140, choose Edit → Define Pattern, deselect and delete the Waffle Tile layer.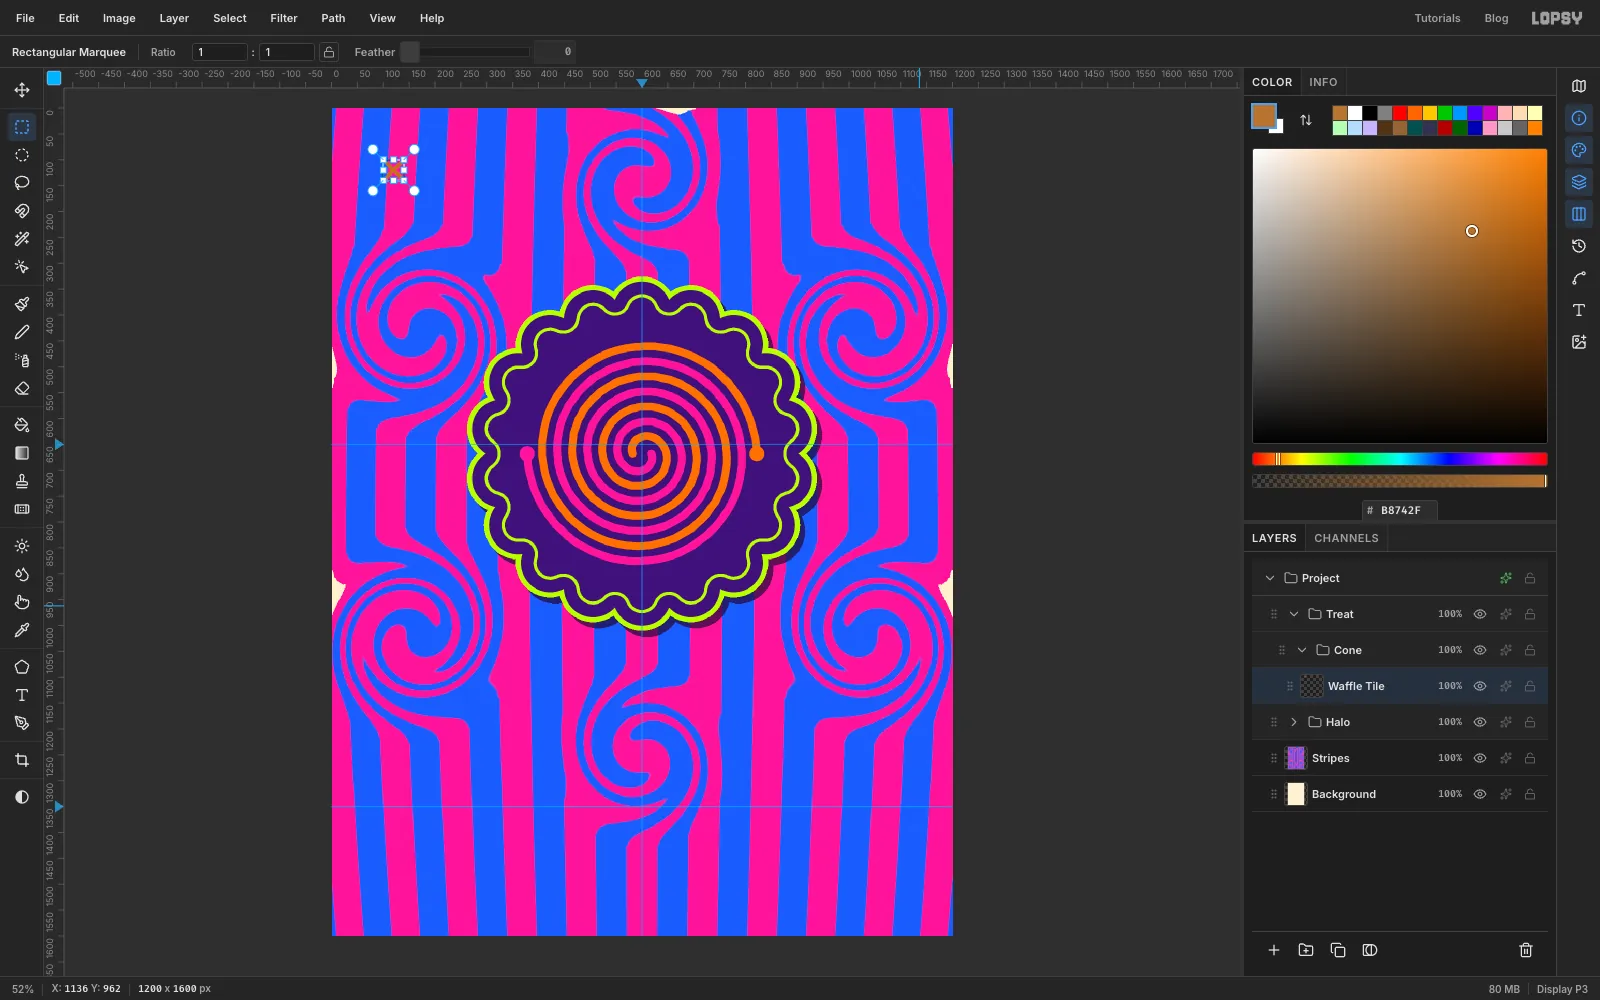
-
Draw the cone with the Pen tool
Add a layer named Waffle Cone. (Giving the layer a different name from its group keeps the two easy to tell apart.) Pick the Pen tool. Click the three corners of the cone:
428, 800on the left,772, 800on the right and the tip at600, 1095. Then click the first anchor again to close the path.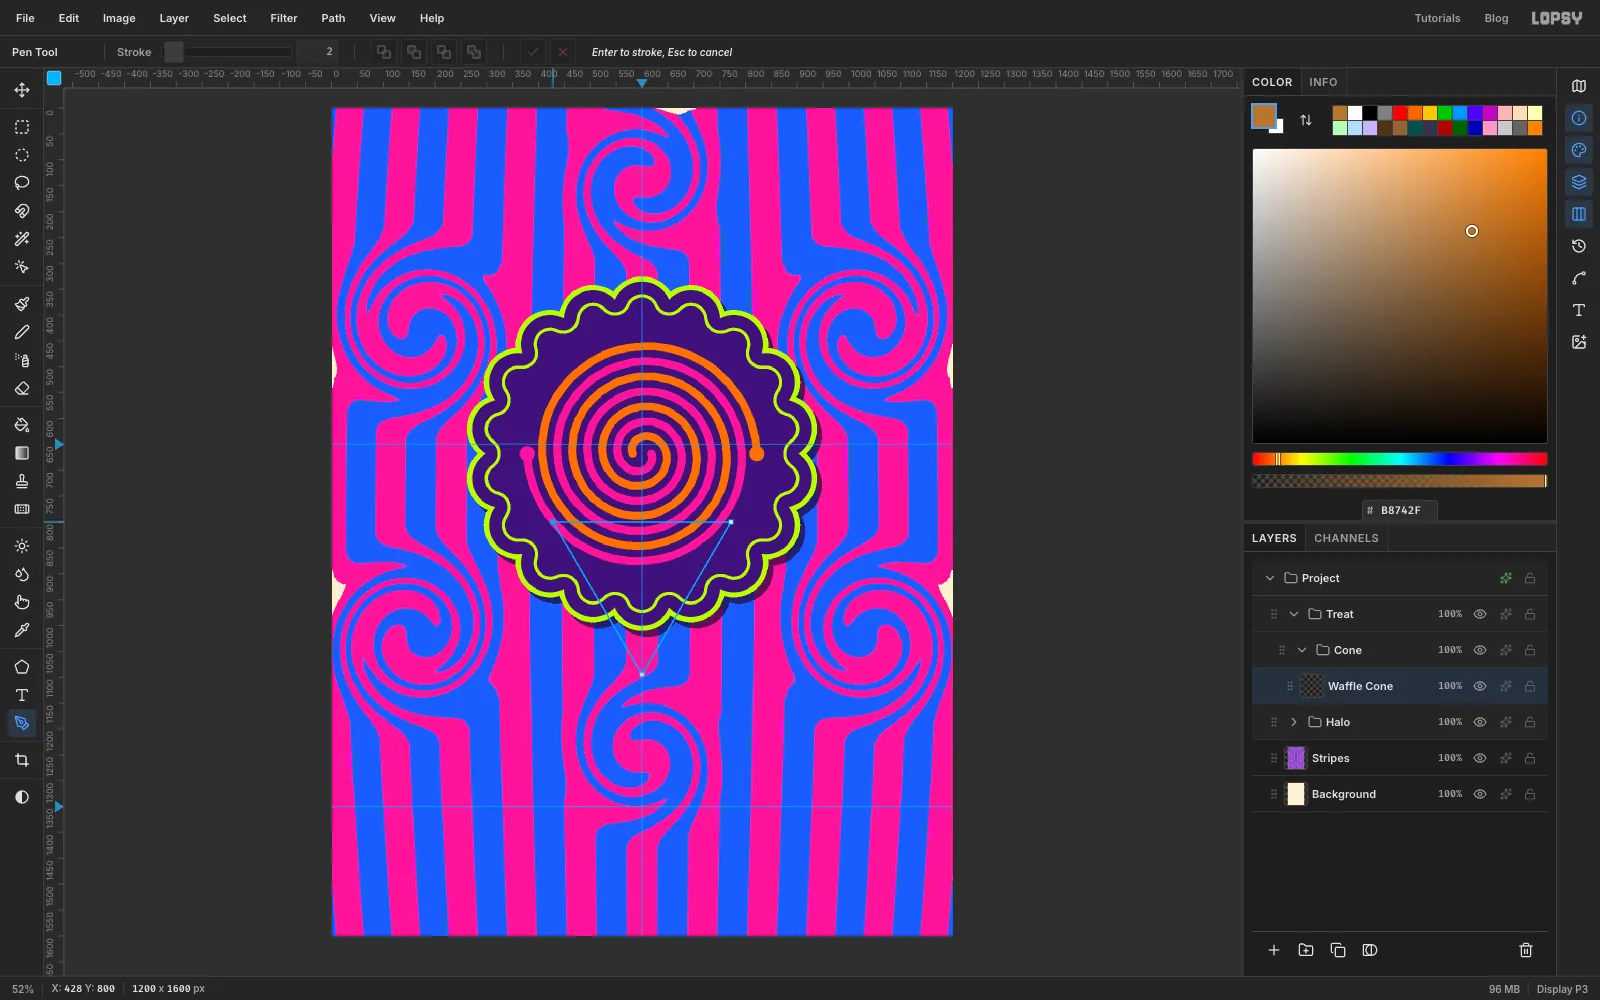
-
Fill the cone with the waffle pattern
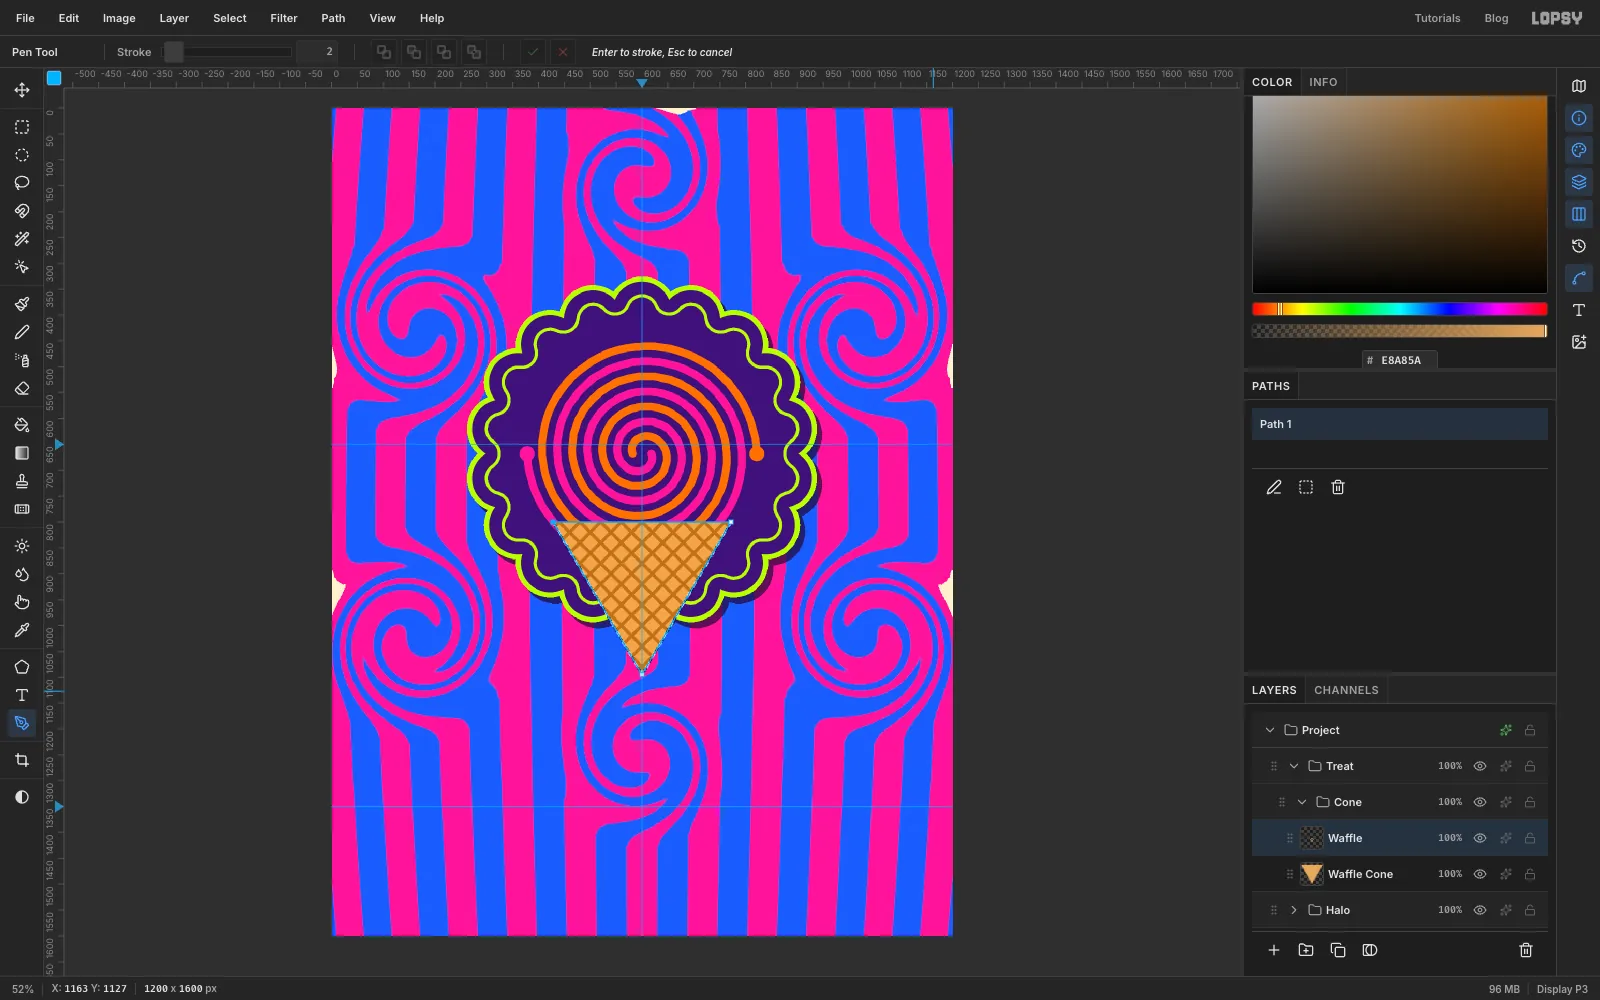
Open the Paths panel, click Path 1 if it isn't highlighted, and click the dashed-square Path to Selection button under the list. Fill the selection with waffle tan .
Keep the selection, add a layer named Waffle and choose Edit → Fill with Pattern… with the lattice tile. The pattern only fills the cone. Putting it on its own layer first means you can hide it, or undo just the pattern, while you check the scale. When it looks right, choose Layer → Merge Down to merge it into Waffle Cone.
-
Emboss the waffle
With the cone still selected, choose Filter → Emboss…. Set Angle to
120and Strength to35, and click Apply. The lattice lines now look pressed in and the squares between them puff up, like a real waffle cone.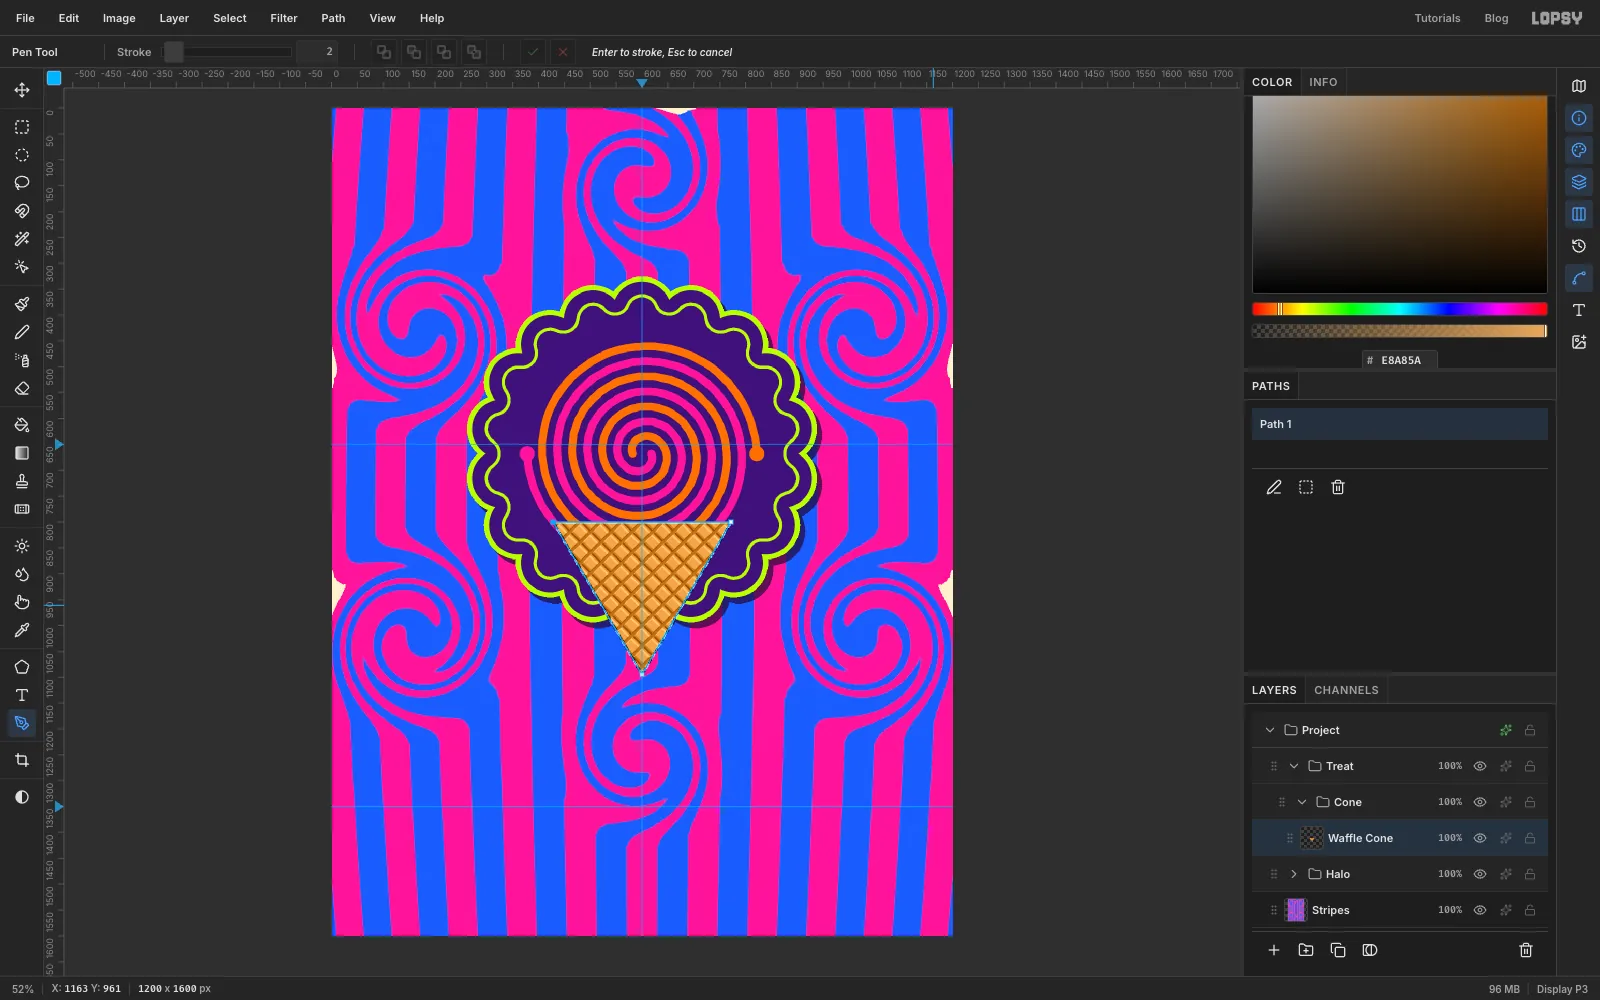
-
Shade the cone
Keep the selection and add a layer named Cone Shade. Pick the Gradient tool, Linear, and open Advanced…. Make four stops, all in (click the bar to add a stop):
- at the left end, Opacity 60%
- at 30%, Opacity 0%
- at 58%, Opacity 0%
- at the right end, Opacity 85%
Drag from the cone's left edge at
428, 900to its right edge at772, 900. Hold Cmd while you drag to keep the line level. Then set the layer's Blend to Multiply. The right side is darker because it faces away from the light, which comes from the upper left on this whole flier. Deselect, and delete Path 1 with the trash button in the Paths panel.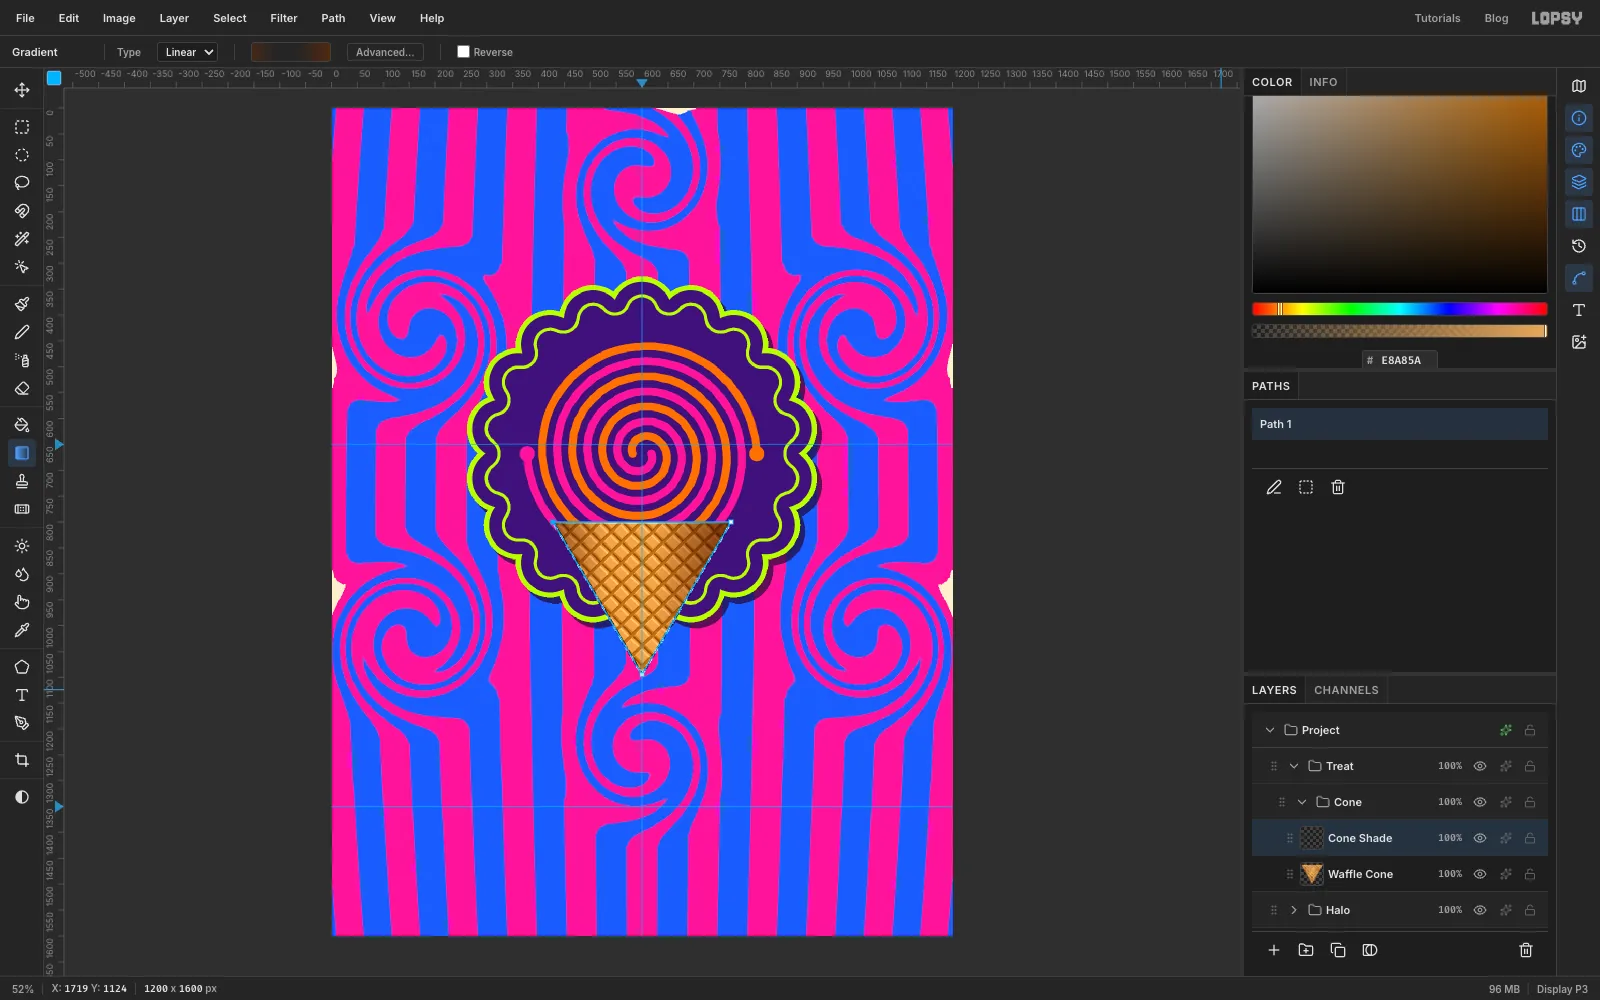
-
Roll the rim
Add a layer named Rim. Pick the Shape tool. Set Shape to Rectangle, Corner Radius to
19, the fill to rim brown and no stroke. Click once at600, 793without dragging. In the size dialog enter Width380and Height38, then click Create.In the Rim effects drawer turn on Inner Glow with colour , Size
10and Opacity70. That darkens the edges so the rim looks rolled.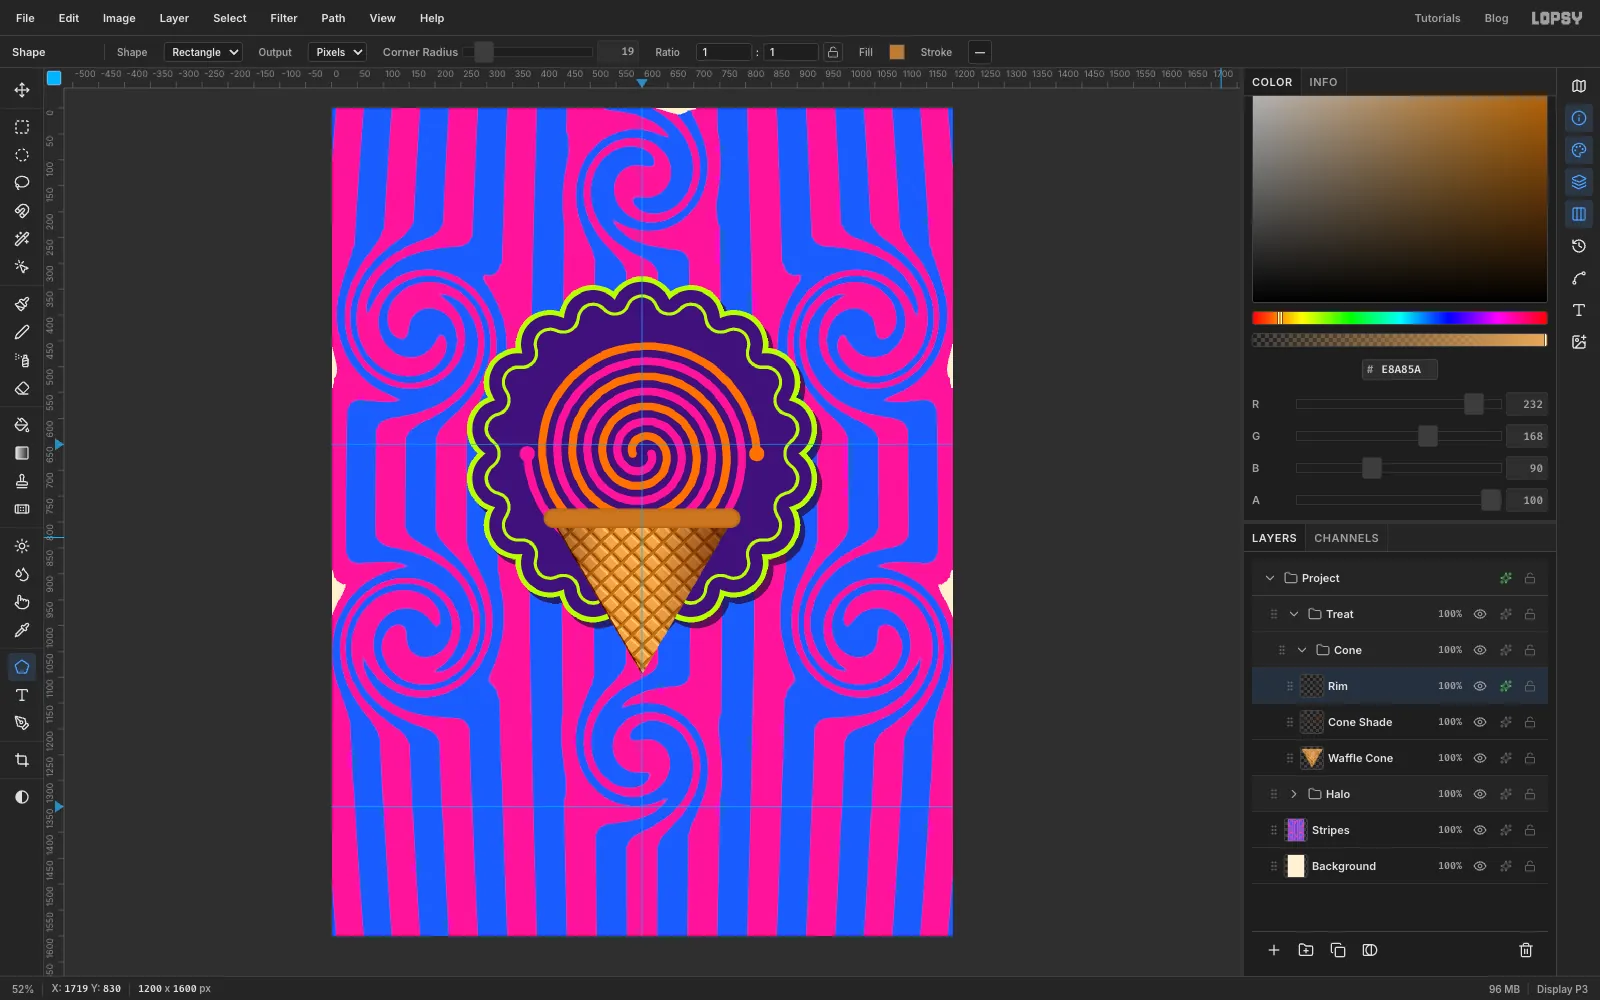
-
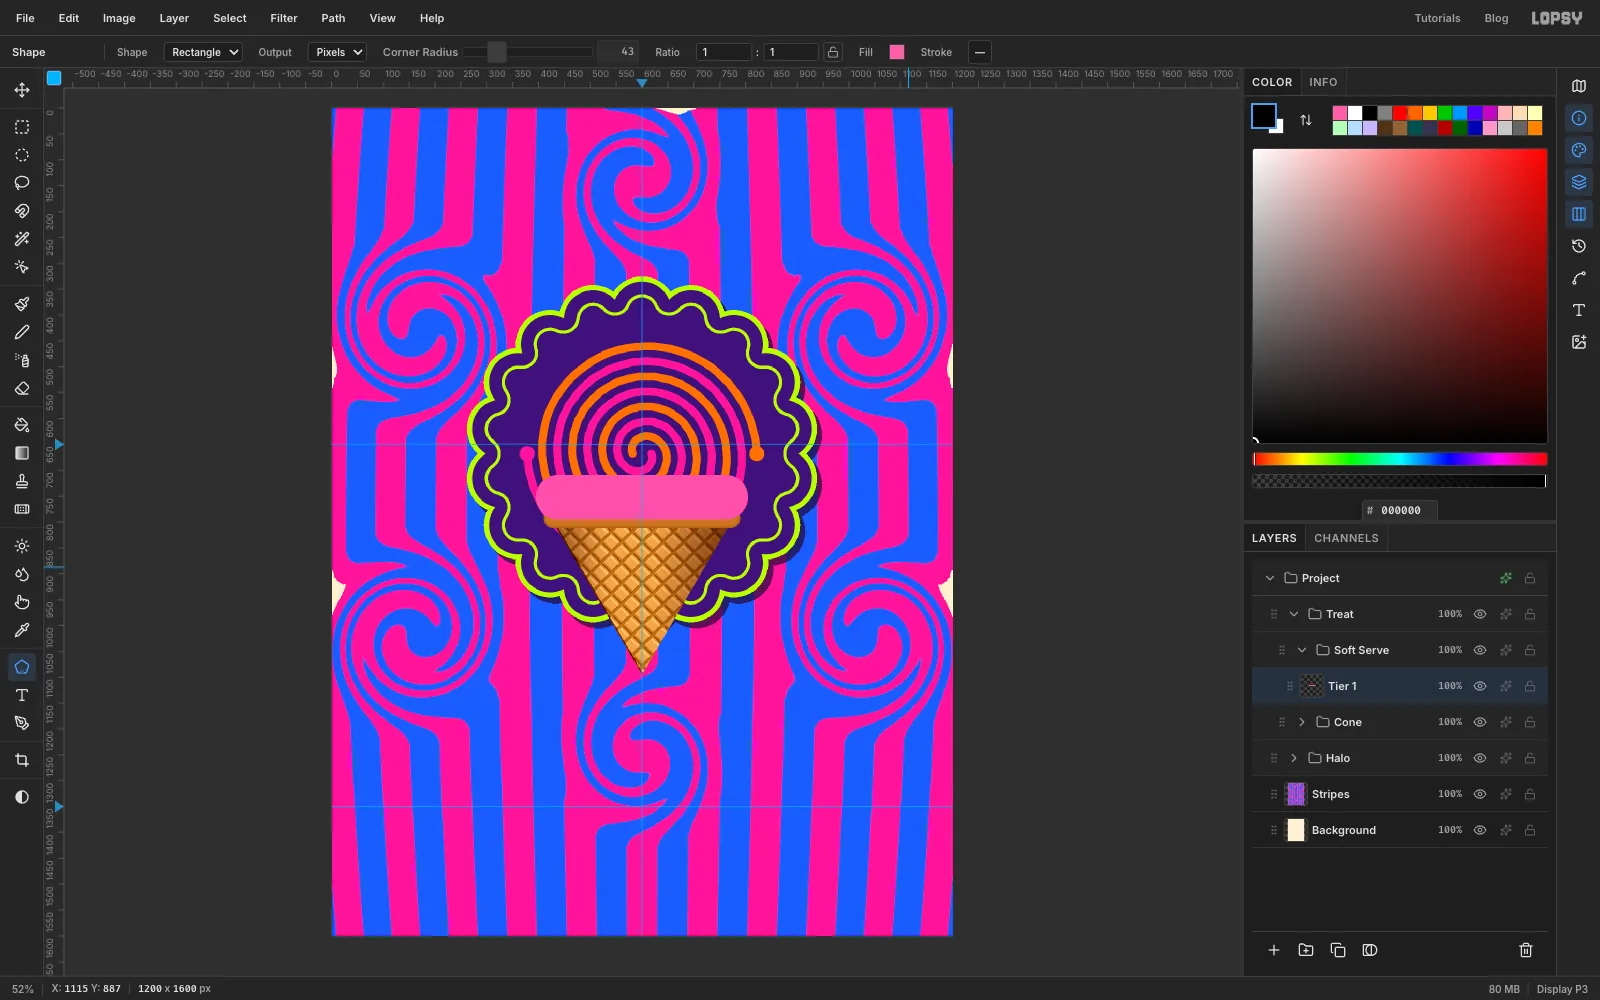
Shape the first scoop tier
Collapse the Cone group, click it, and add a group named Soft Serve. It sits above the cone. Add a layer named Tier 1.
With the Shape tool, set Corner Radius to
43(half the height) and the fill to pink . Click at600, 752and make it 410 × 86. Give it two effects in its own shade colour :- Inner Glow, Size
24, Opacity65 - Drop Shadow, Offset X
0, Offset Y8, Blur6, Opacity55
- Inner Glow, Size
-
Tilt a tier
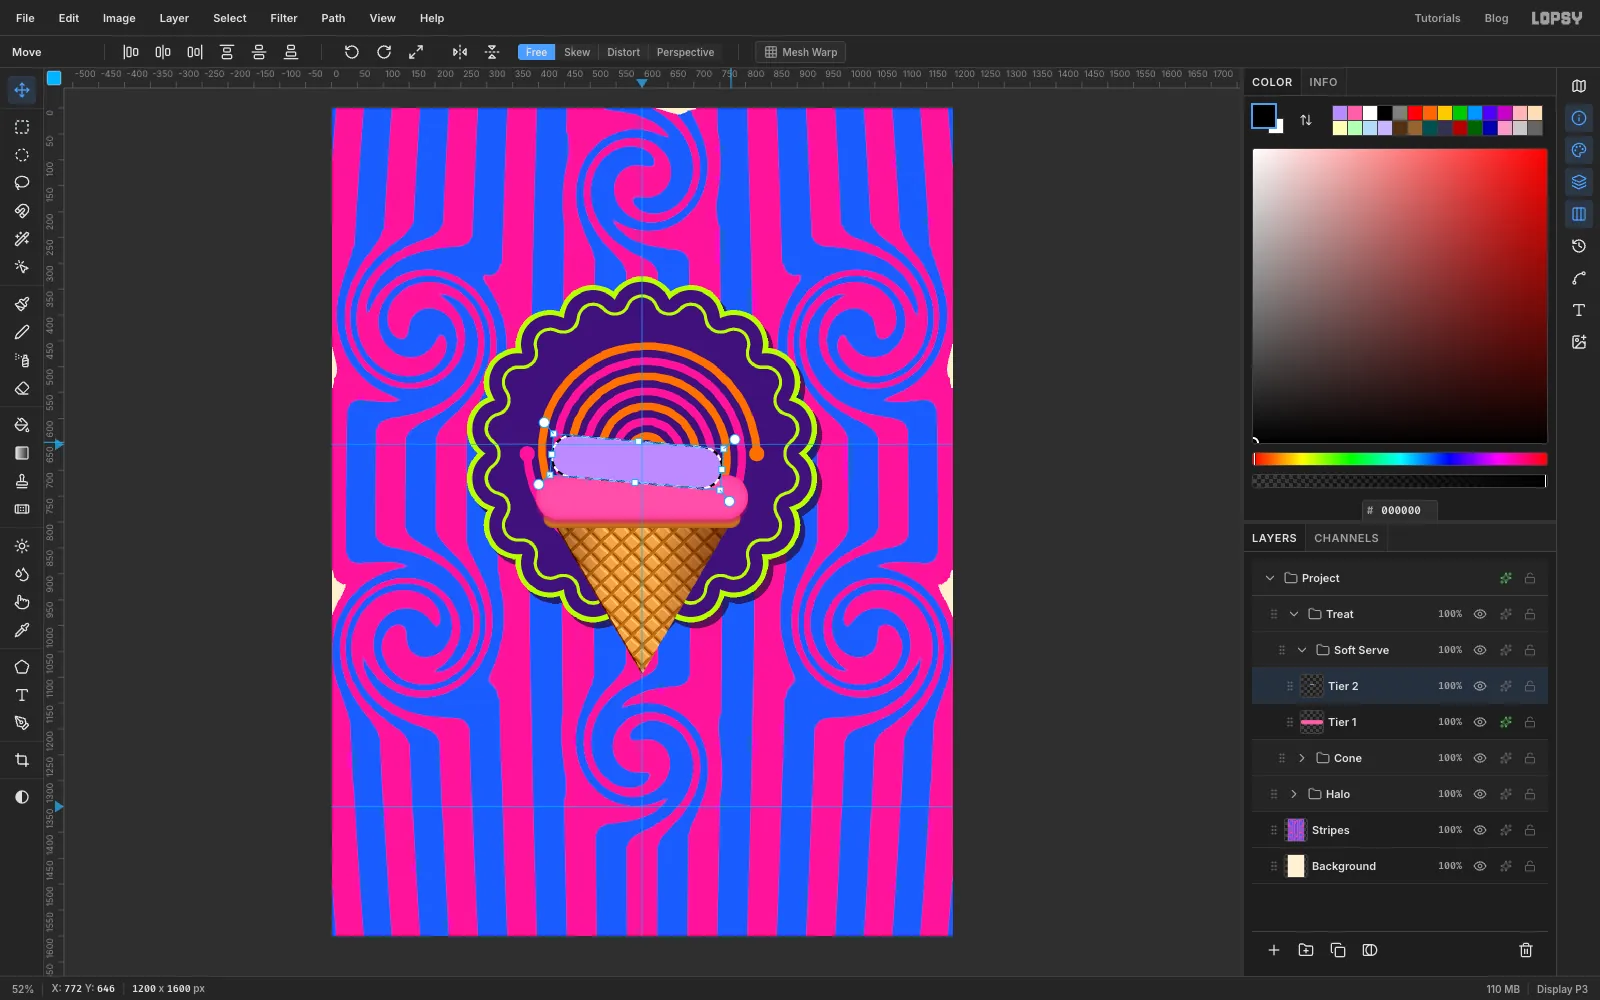
Add Tier 2 the same way: lilac , Corner Radius
40, click at590, 684and make it 330 × 80. Use the lilac shade for its Inner Glow (Size22) and its Drop Shadow. Everything else matches Tier 1: glow Opacity65, shadow0/8, Blur6, Opacity55.Cmd-click the Tier 2 thumbnail and pick the Move tool. Drag the round rotation handle just outside the top-right corner down a little, until the tier is turned about 5° clockwise. Press Cmd+D to apply the rotation and deselect.
-
Stack all four tiers
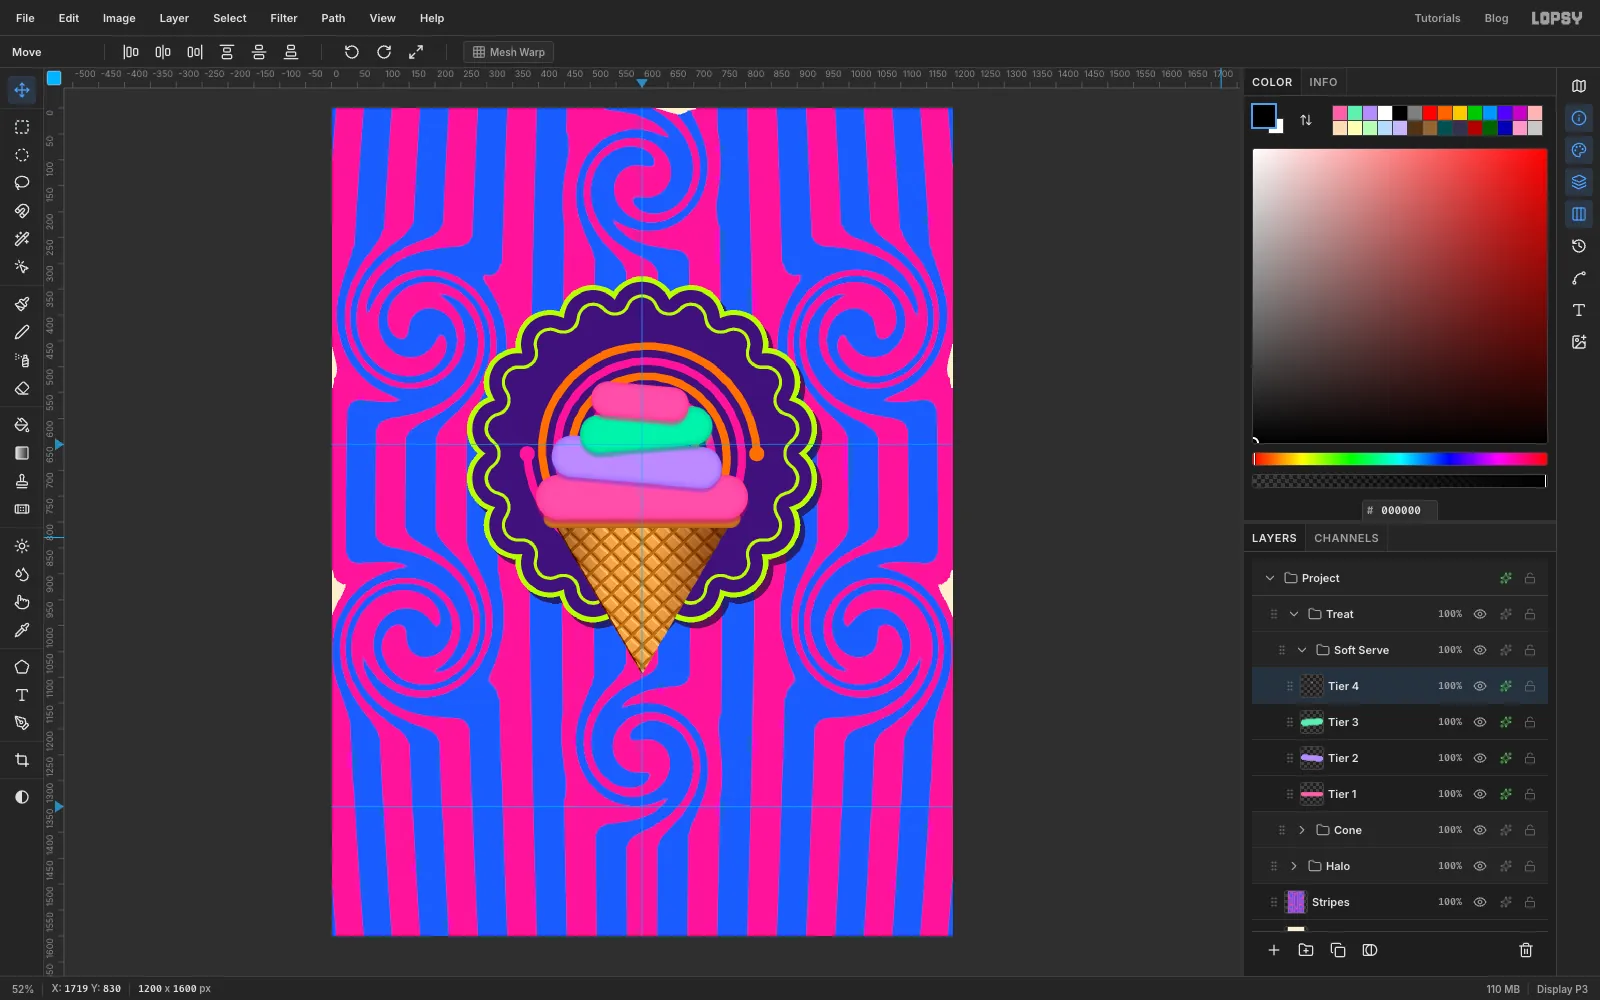
Add two more tiers the same way, with the same effect settings in each tier's own shade colour. Each one is narrower than the last, overlaps the one below by about 15 px, and tilts the opposite way:
- Tier 3: mint , radius
37, at608, 622, 256 × 74, shade , glow size21, rotated about 5° counter-clockwise - Tier 4: pink , radius
33, at596, 567, 190 × 66, shade , glow size18, rotated about 5° clockwise
The alternating tilts make the stack read as one twisted rope instead of four separate pills.
- Tier 3: mint , radius
-
Lasso the curl on top
Add a layer named Tip. With the Lasso, draw a teardrop. Start on the top tier at
556, 556, sweep up and to the right to a point at about636, 452, then curve back down to646, 556. Fill it with lilac and give it an Inner Glow in (Size14, Opacity65) and a Drop Shadow in (Offset X0, Offset Y6, Blur5, Opacity55).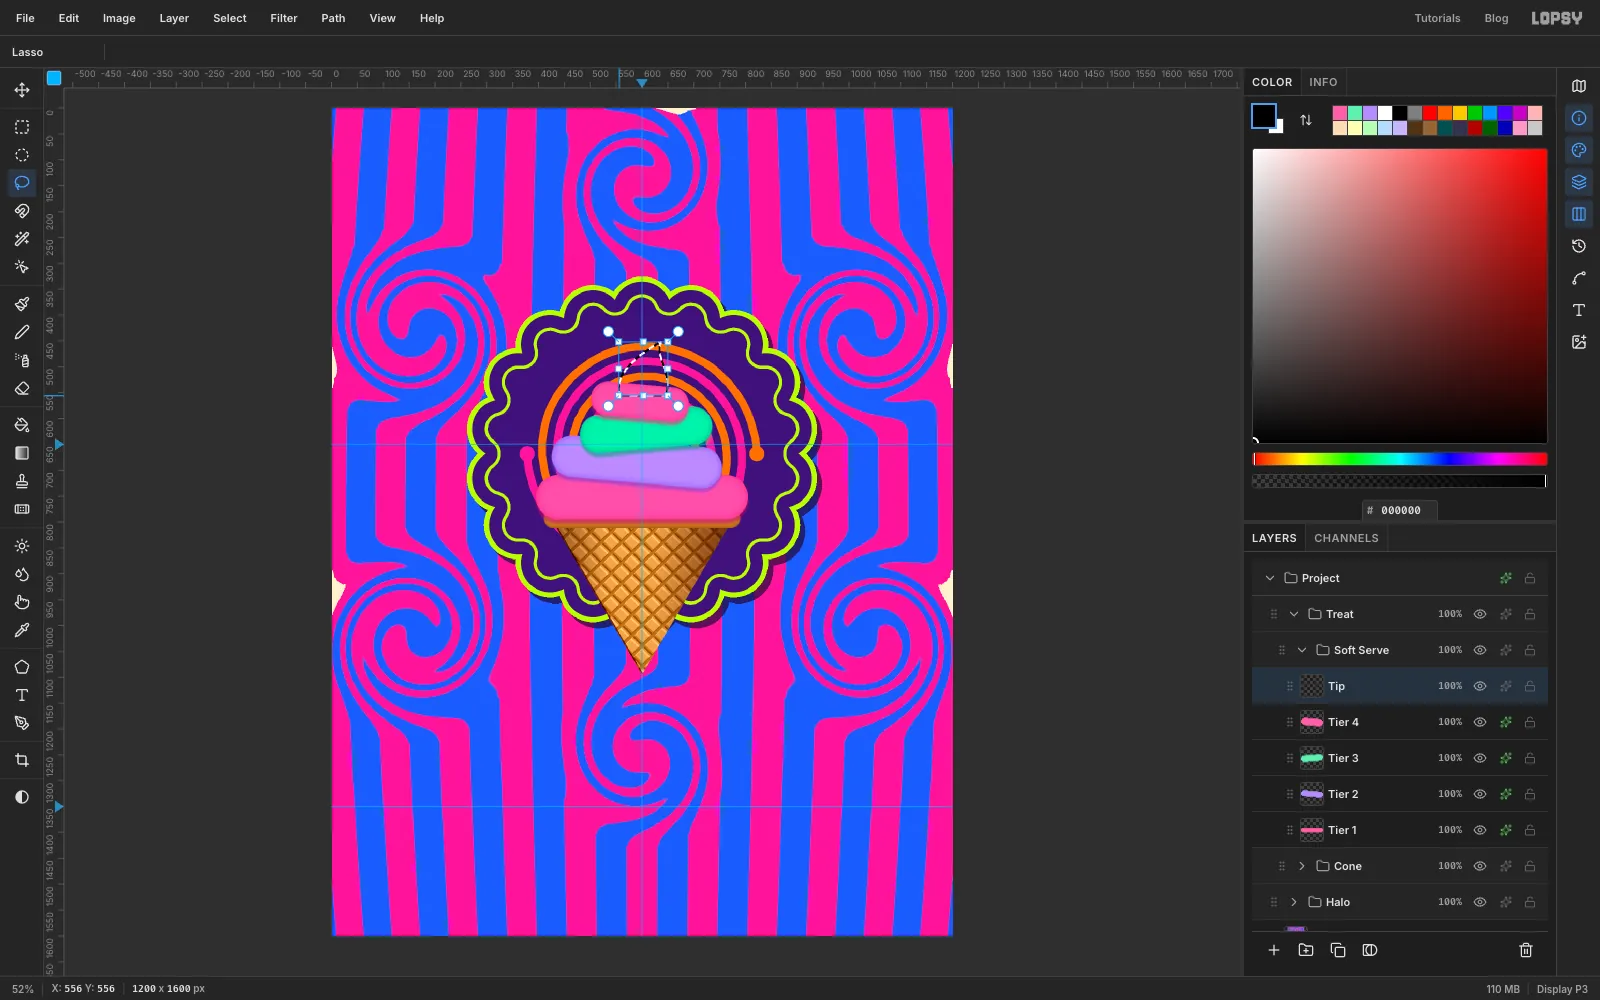
-
Add crisp highlights
Add a layer named Highlights. Use the Brush at Size
9, Hardness100, in white. On each tier, paint a short curved stroke on the upper left, following the round of the tier. Add one on the left side of the curl. Set the layer's opacity to 65%.Keep them all on the same side so the light stays in the upper left.
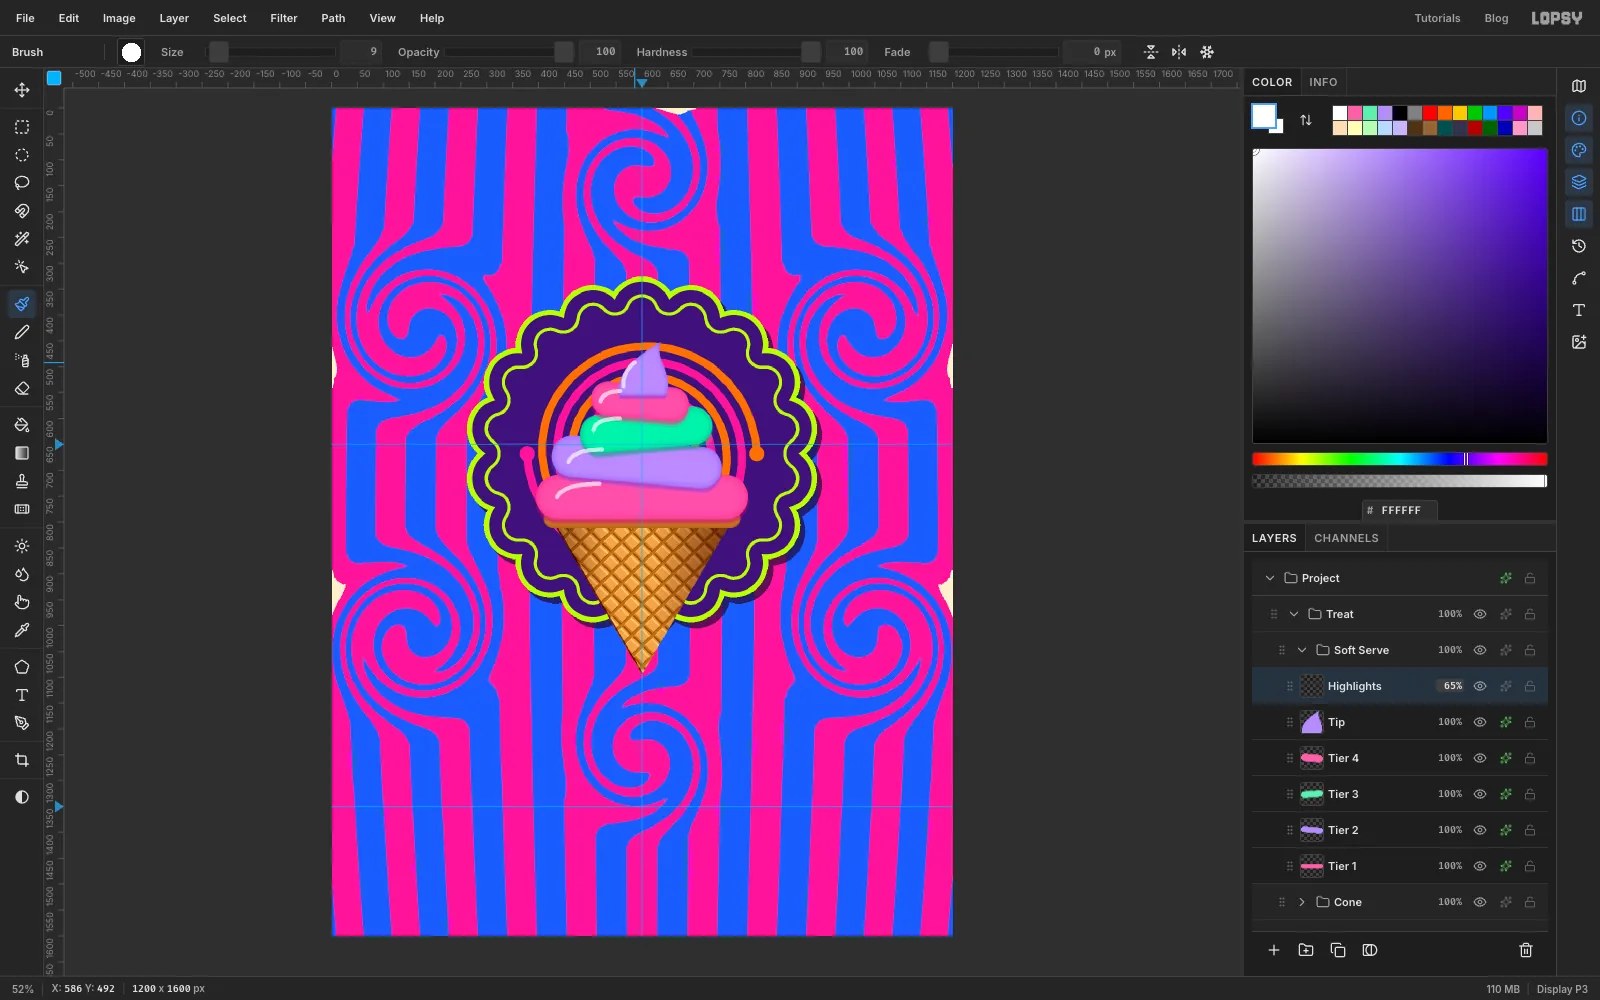
-
Drip over the rim
Expand Cone, click Rim and add a layer named Drips. It sits under the tiers, so the drips seem to come out from under the bottom scoop.
Use the Brush with Hardness
100and pink . Drag five short drips straight down fromy = 790, at aboutx = 446, 490, 556, 688and742. Use sizes between18and28, and end them at different heights between816and878. Raise the size a little and click once at the bottom of each drip to make a drop. Add an Inner Glow in (Size8, Opacity60) and a soft Drop Shadow in (Offset X0, Offset Y5, Blur4, Opacity50).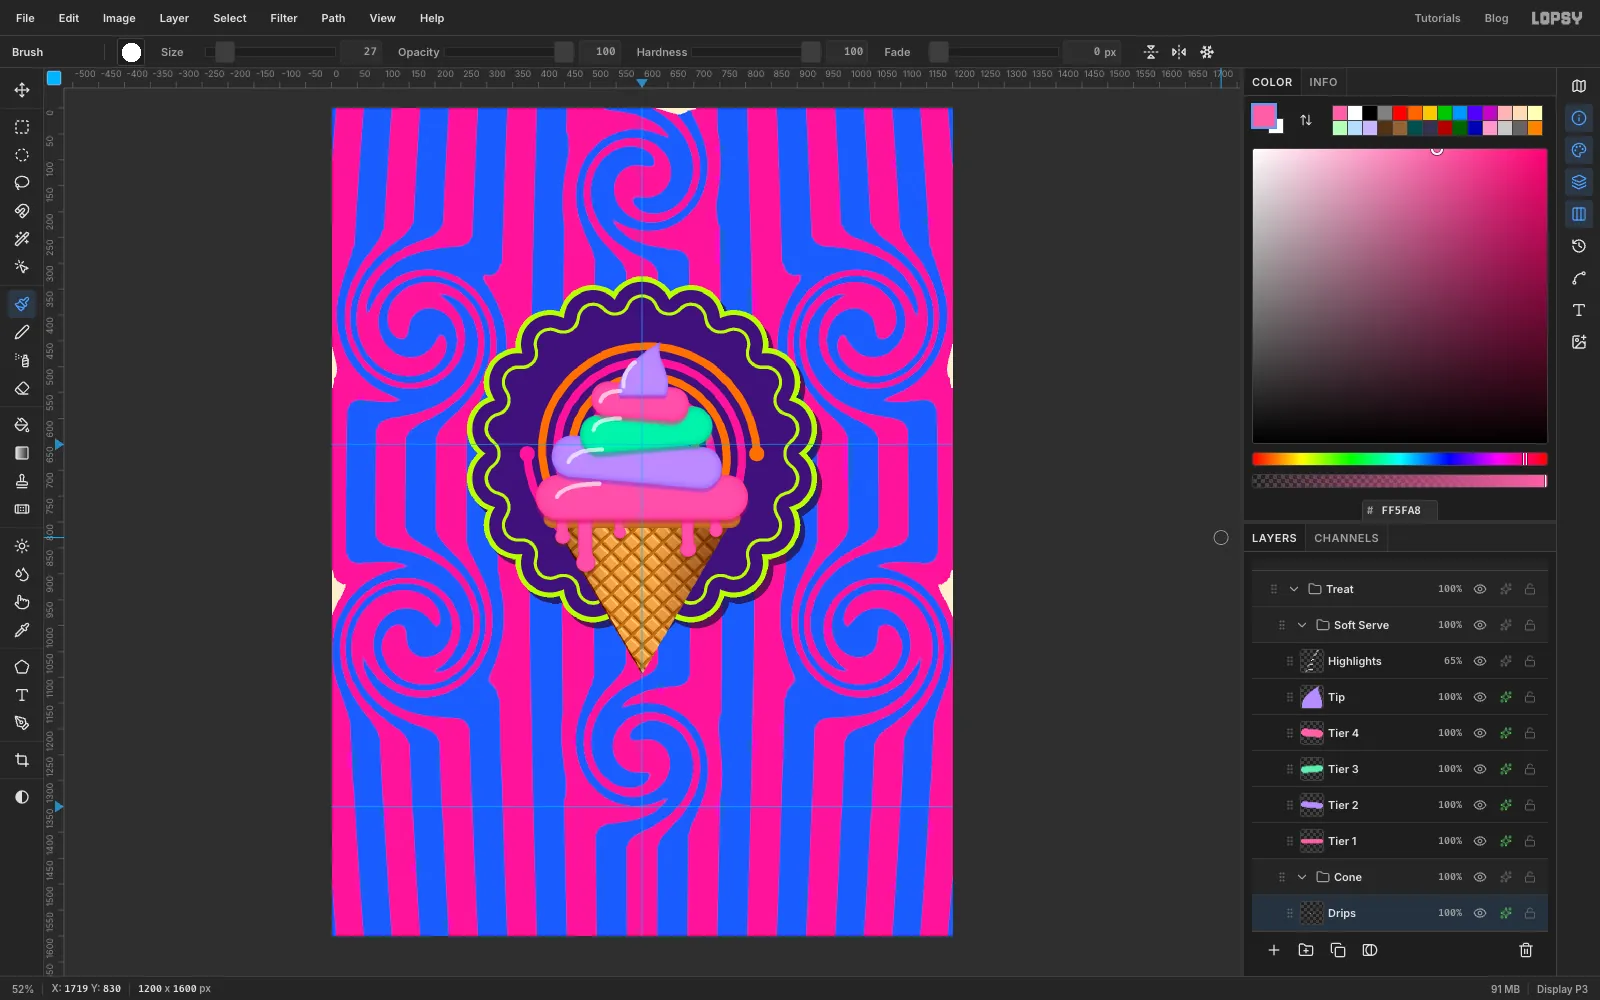
-
Make a sprinkle brush
Add a temporary layer. With the Shape tool (Rectangle, Corner Radius
4, fill black), click at150, 150and make it 8 × 24: one rounded sprinkle. Select134, 134to166, 166and choose Edit → Define Brush…. Name it Sprinkle, then delete the layer.Pick the Brush and click Open brush presets. Choose Sprinkle. On the Shape tab set Size
24and Spacing200. On the Dynamics tab set Scatter70and Angle Jitter100, so each sprinkle lands at a random angle.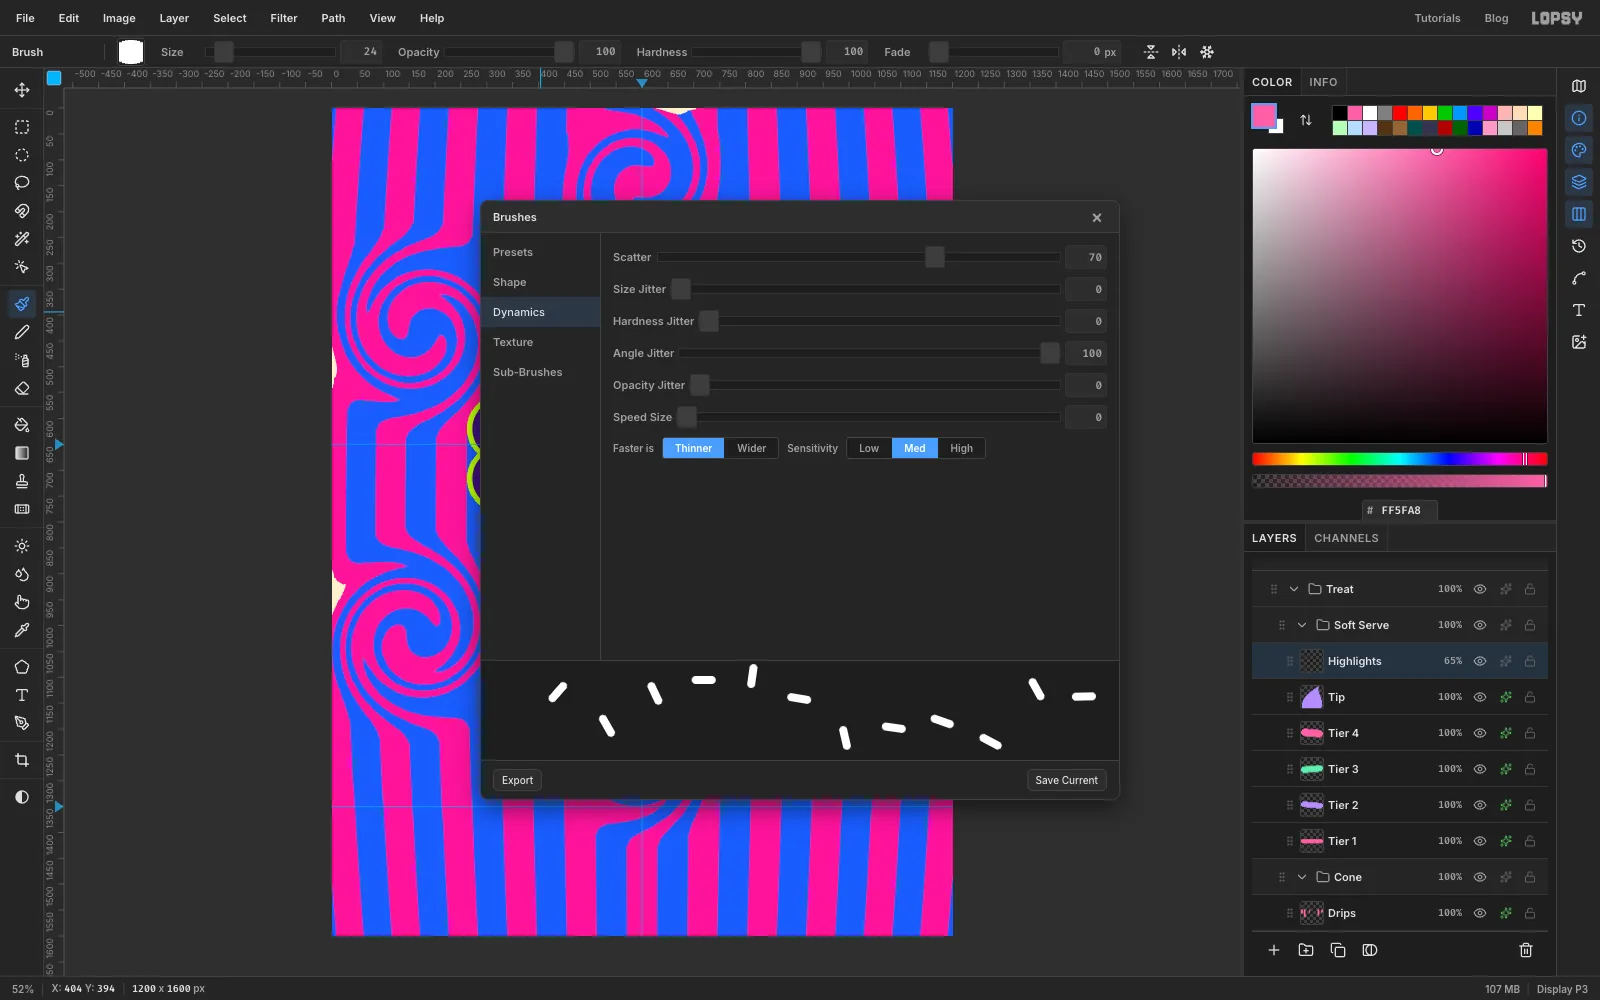
-
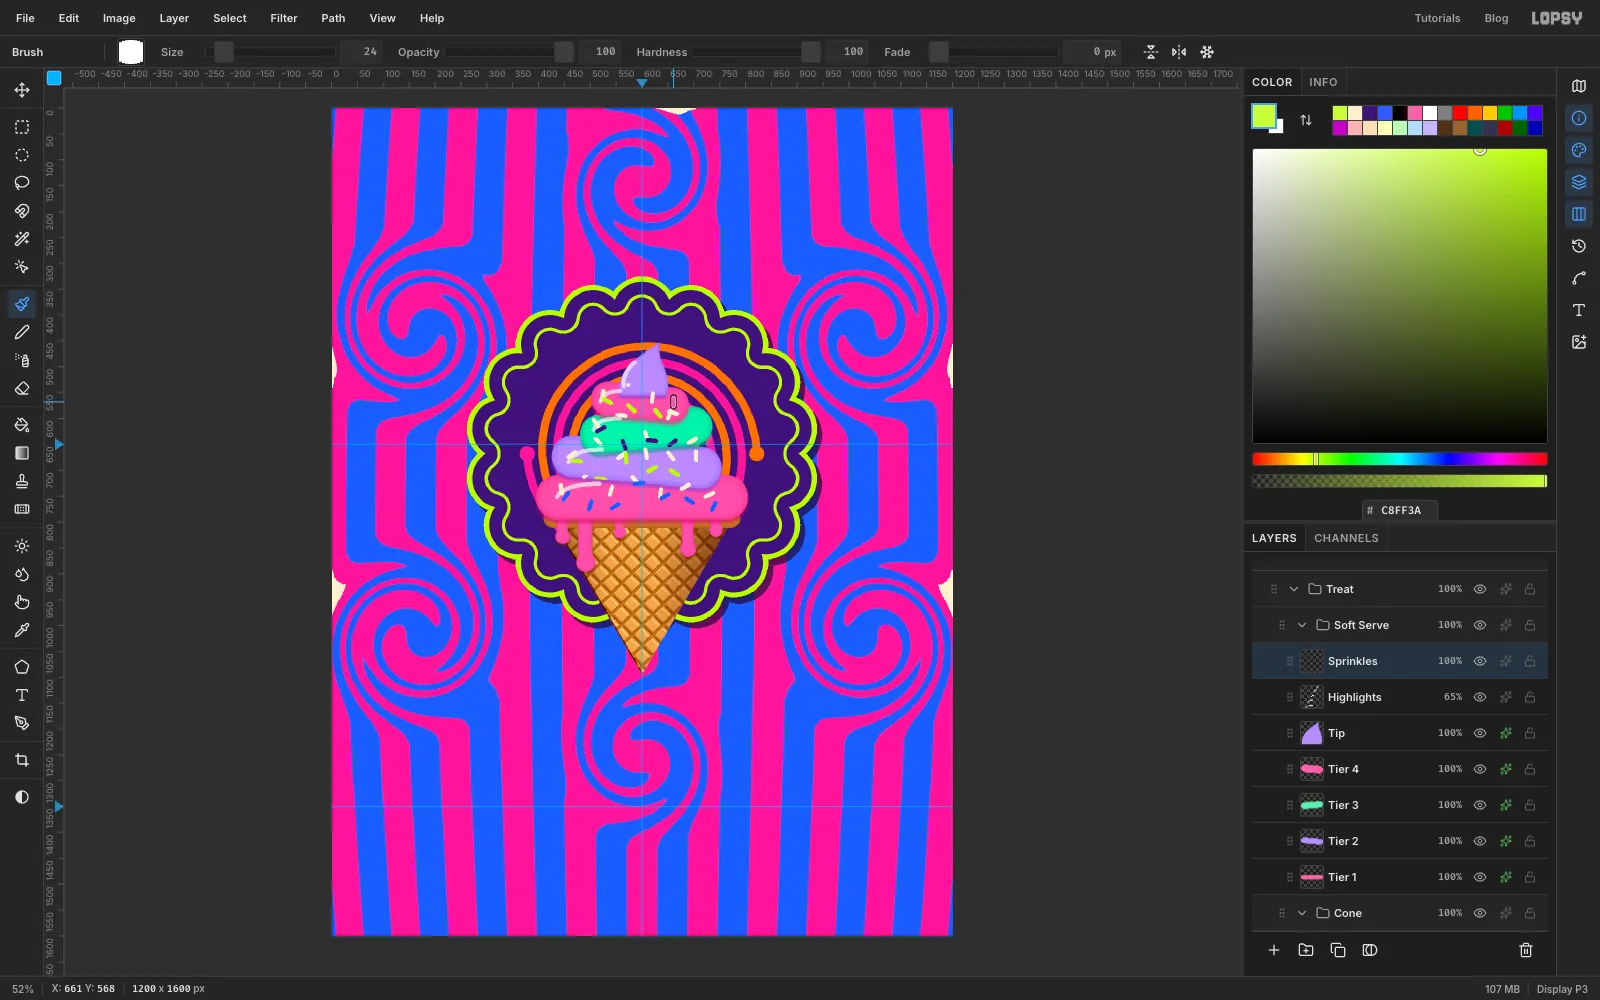
Sprinkle the scoops
Click Highlights and add a layer named Sprinkles.
Cmd-click the Tier 1 thumbnail, click the Sprinkles row again, and paint two wavy strokes across the middle of the tier. Make one in cream and one in a colour that stands out on it. The selection keeps the sprinkles on the scoop. Sprinkles sits above every tier, so keep the strokes below the edge of the tier above, or sprinkles will land on top of it where the two overlap. Repeat for each tier:
- Tier 1 (pink): cream and blue
- Tier 2 (lilac): cream and lime
- Tier 3 (mint): cream and violet
- Tier 4 (pink): cream and lime
Keep them off the bottom edge of Tier 1 so the drips stay clean. Deselect.
-
Draw a sparkle
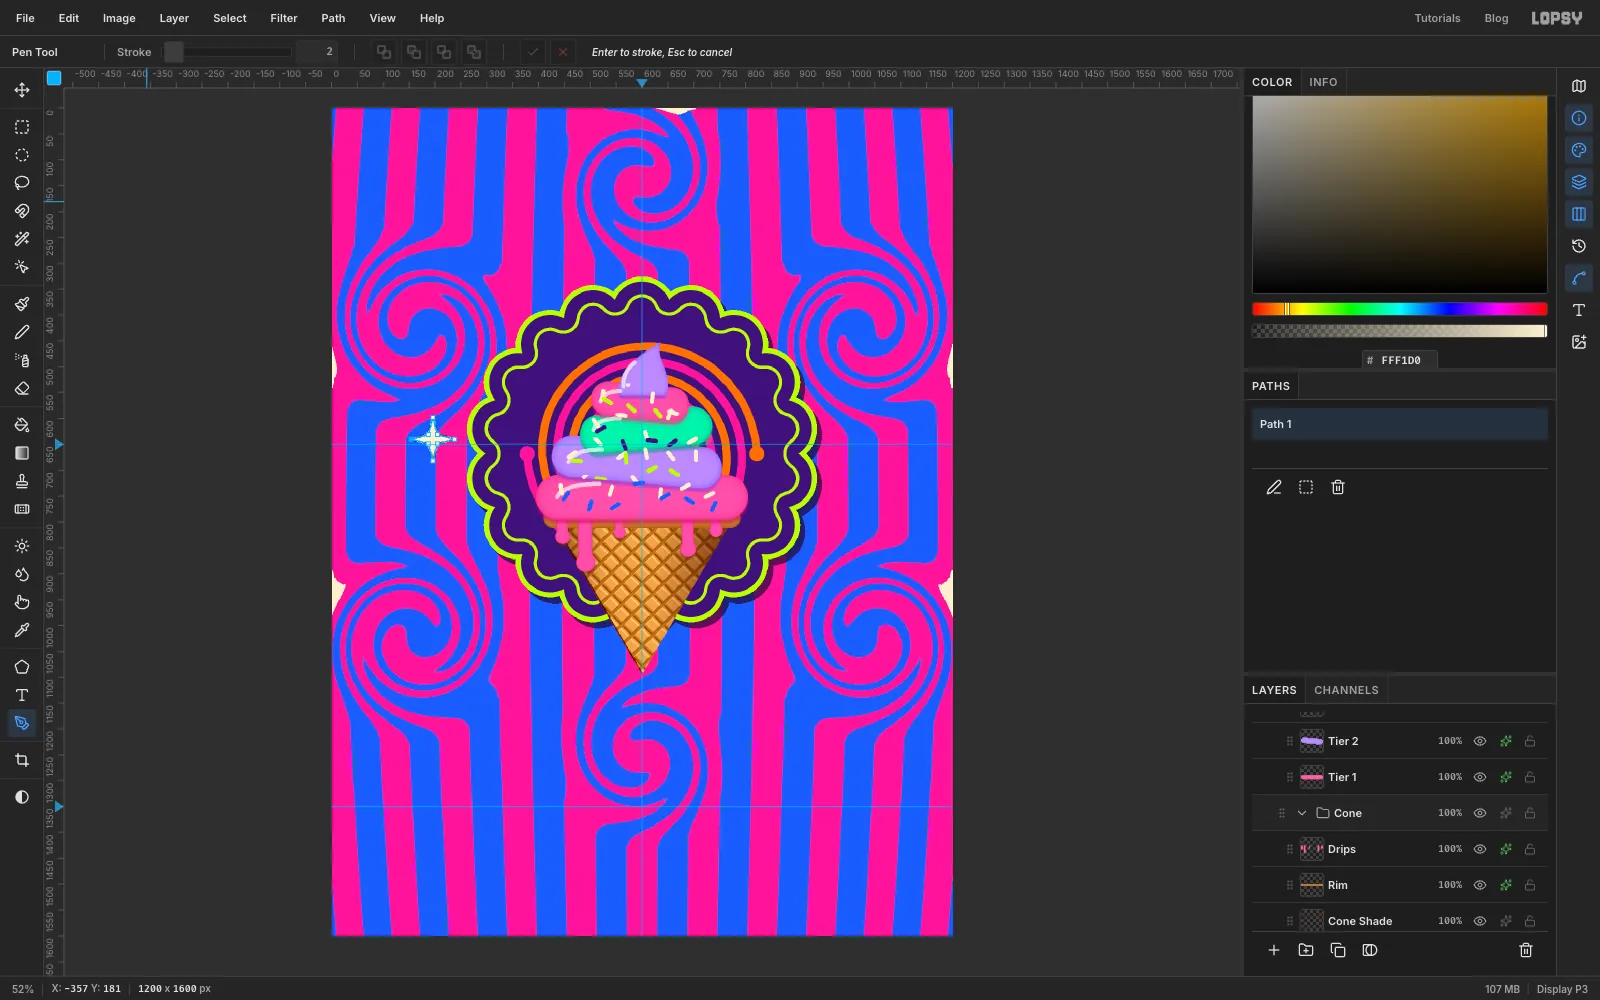
Collapse Treat, click Halo and add a layer named Sparkle 1. It sits between the halo and the ice cream. Draw a four-pointed star with the Pen tool in eight clicks, going round from the left tip:
- the tips:
154, 640(left),196, 598(top),238, 640(right) and196, 682(bottom) - between each pair of tips, a pinched point 9 px from the centre:
187, 631,205, 631,205, 649and187, 649
Click the first anchor again to close it. Then click Path to Selection in the Paths panel and fill with cream.
- the tips:
-
Copy, scale and rotate the sparkles
With the sparkle still selected, press Cmd+C. Delete Path 1 in the Paths panel and deselect. Press Cmd+V: the copy is pasted in place on a new layer above, which you can rename Sparkle 2. With the Move tool, drag it across to
1004, 640, so the two sparkles mirror each other across the halo.Paste again, rename the new layer Sparkle 3 and drag it down to
214, 1010. Cmd-click its thumbnail, hold Cmd and drag a corner handle inward until it's about 70% of the size. Then drag a rotation handle to turn it about 20°. Press Cmd+D.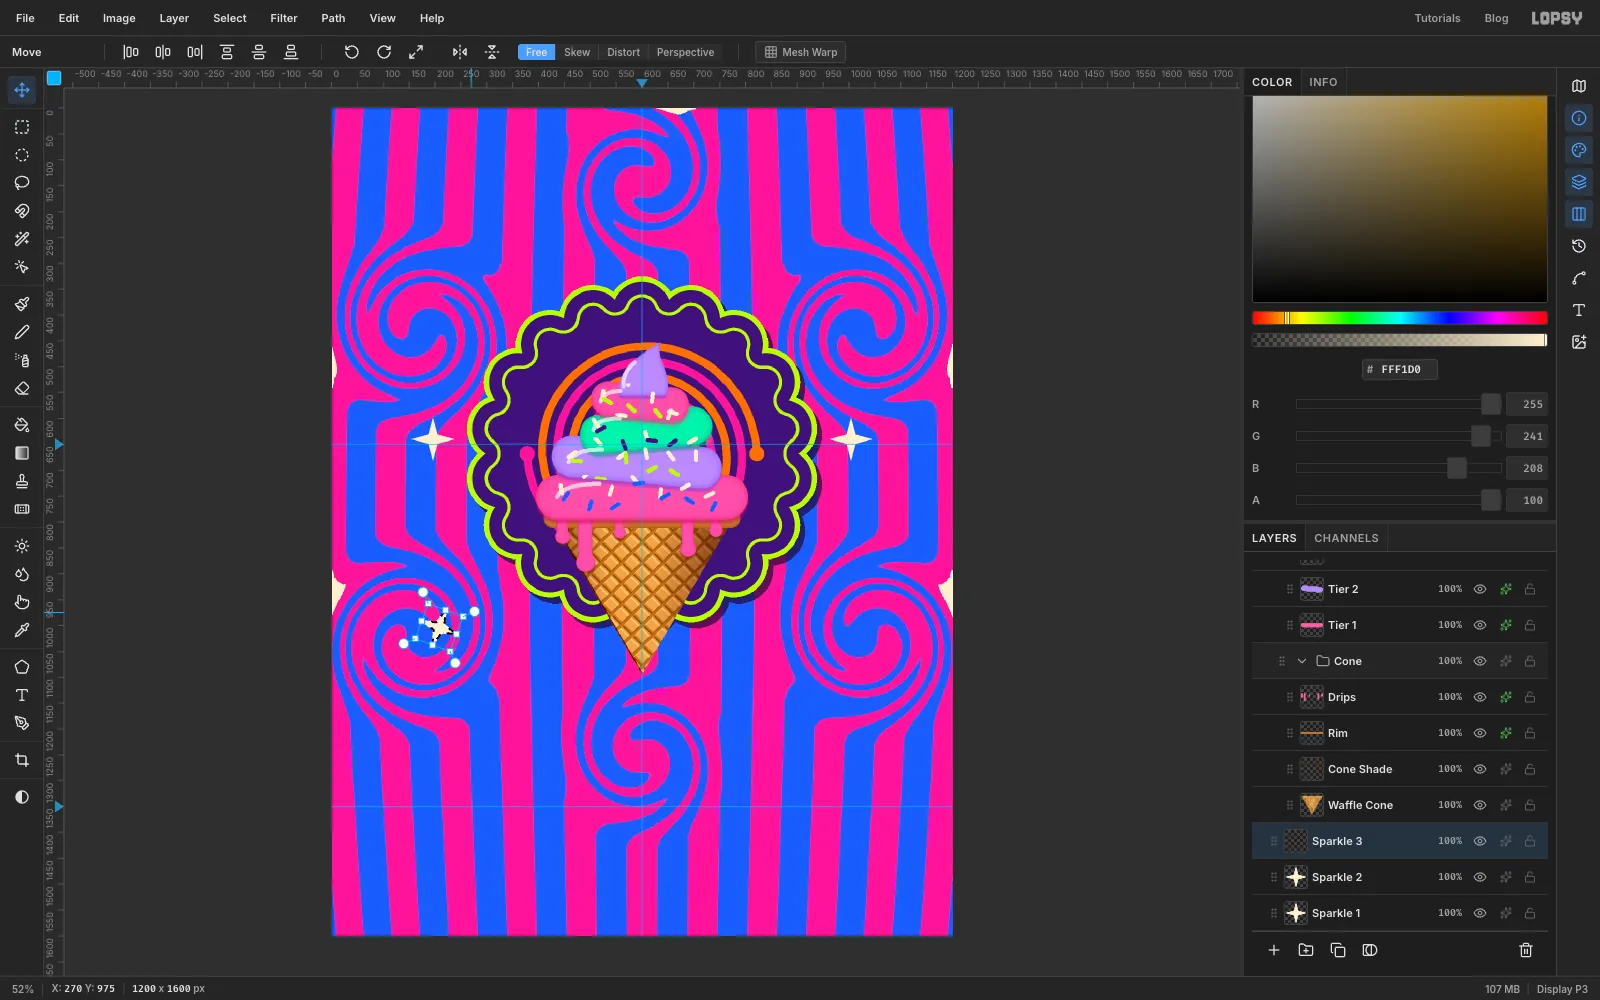
-
Glow the sparkles
Merge the copies into one layer: click Sparkle 3 and choose Layer → Merge Down, then do it once more with Sparkle 2. Rename the layer Sparkles. Give it an Outer Glow in white with Size
18and Opacity70.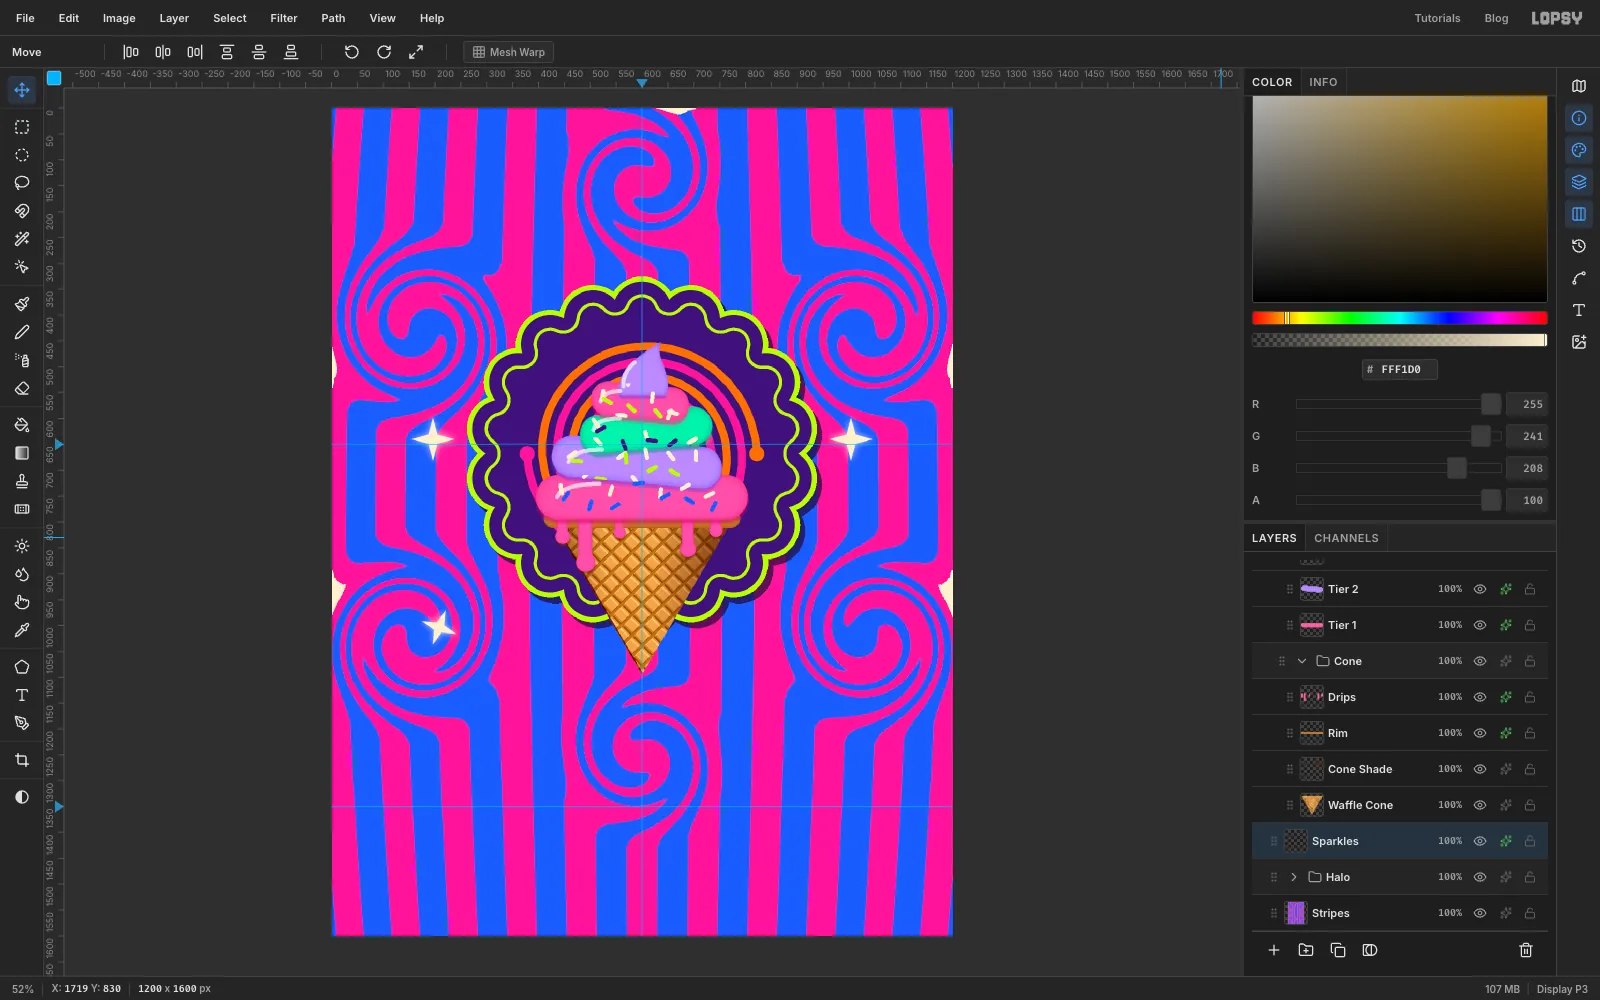
-
Type the title
Make sure Treat is collapsed, click it, and add a group named Lettering. Pick the Text tool and choose Modak at size
250, in lime. Click an empty spot near the top of the page and typeDIZZY. Commit it with the ✓ button.With the Move tool, nudge it with the arrow keys until it's centred on the middle guide with its middle at about
y = 209. Then click Rasterize Layer at the bottom of the Layers panel. The next steps need pixels.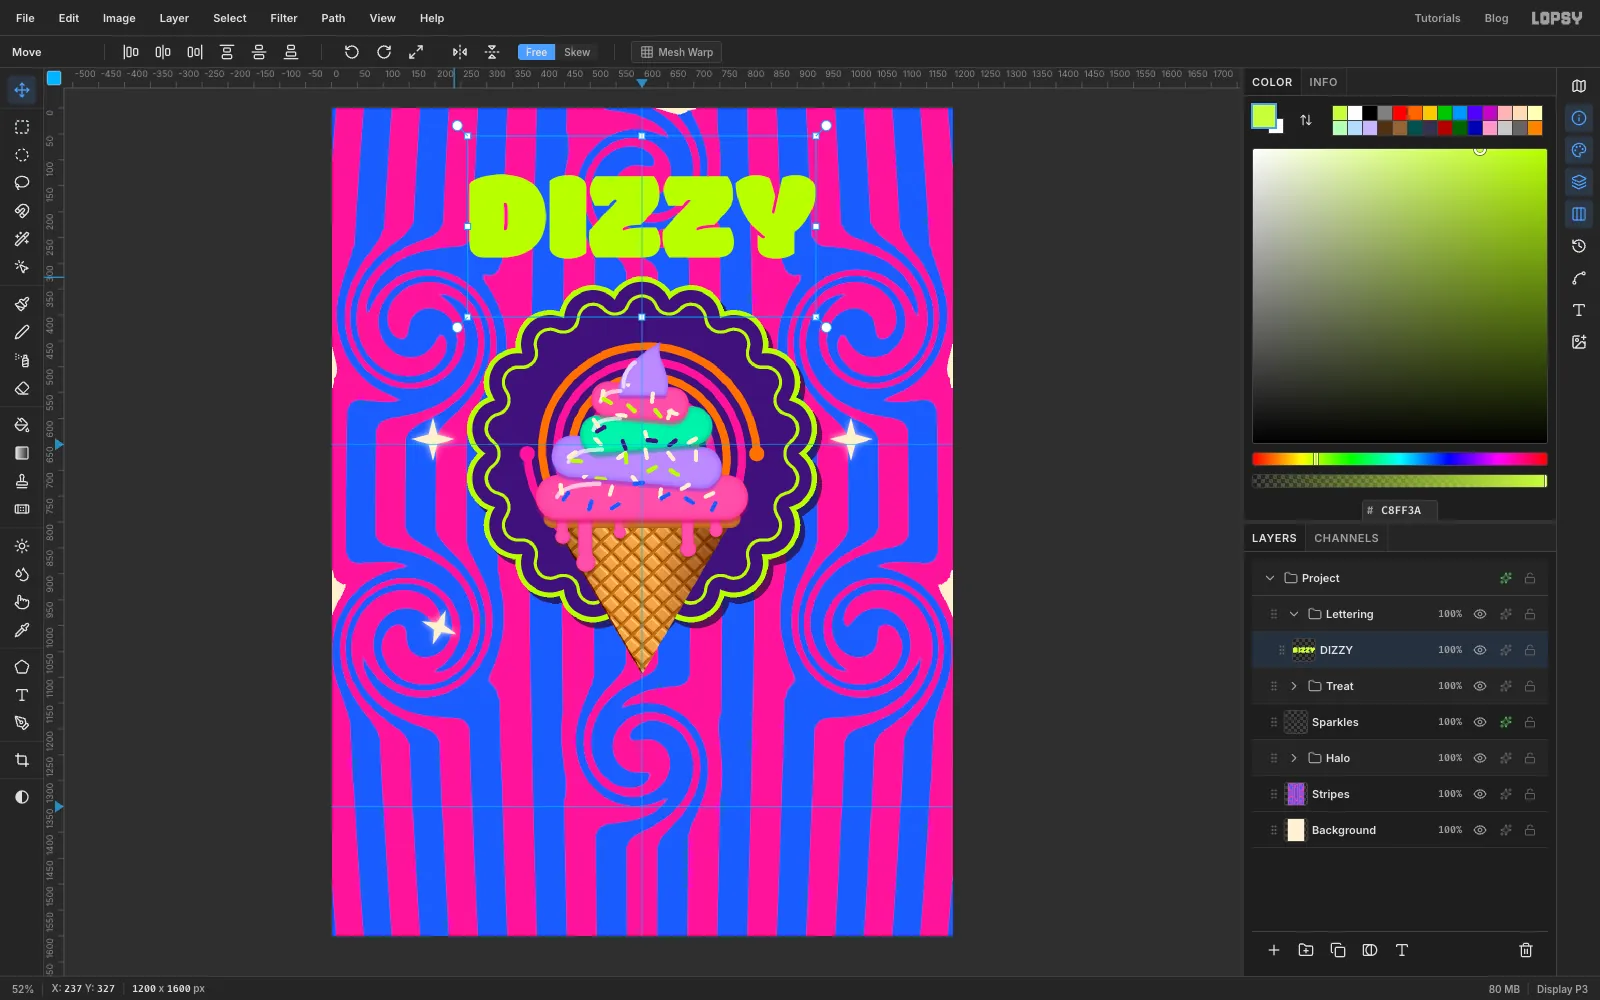
-
Fill the letters with a gradient
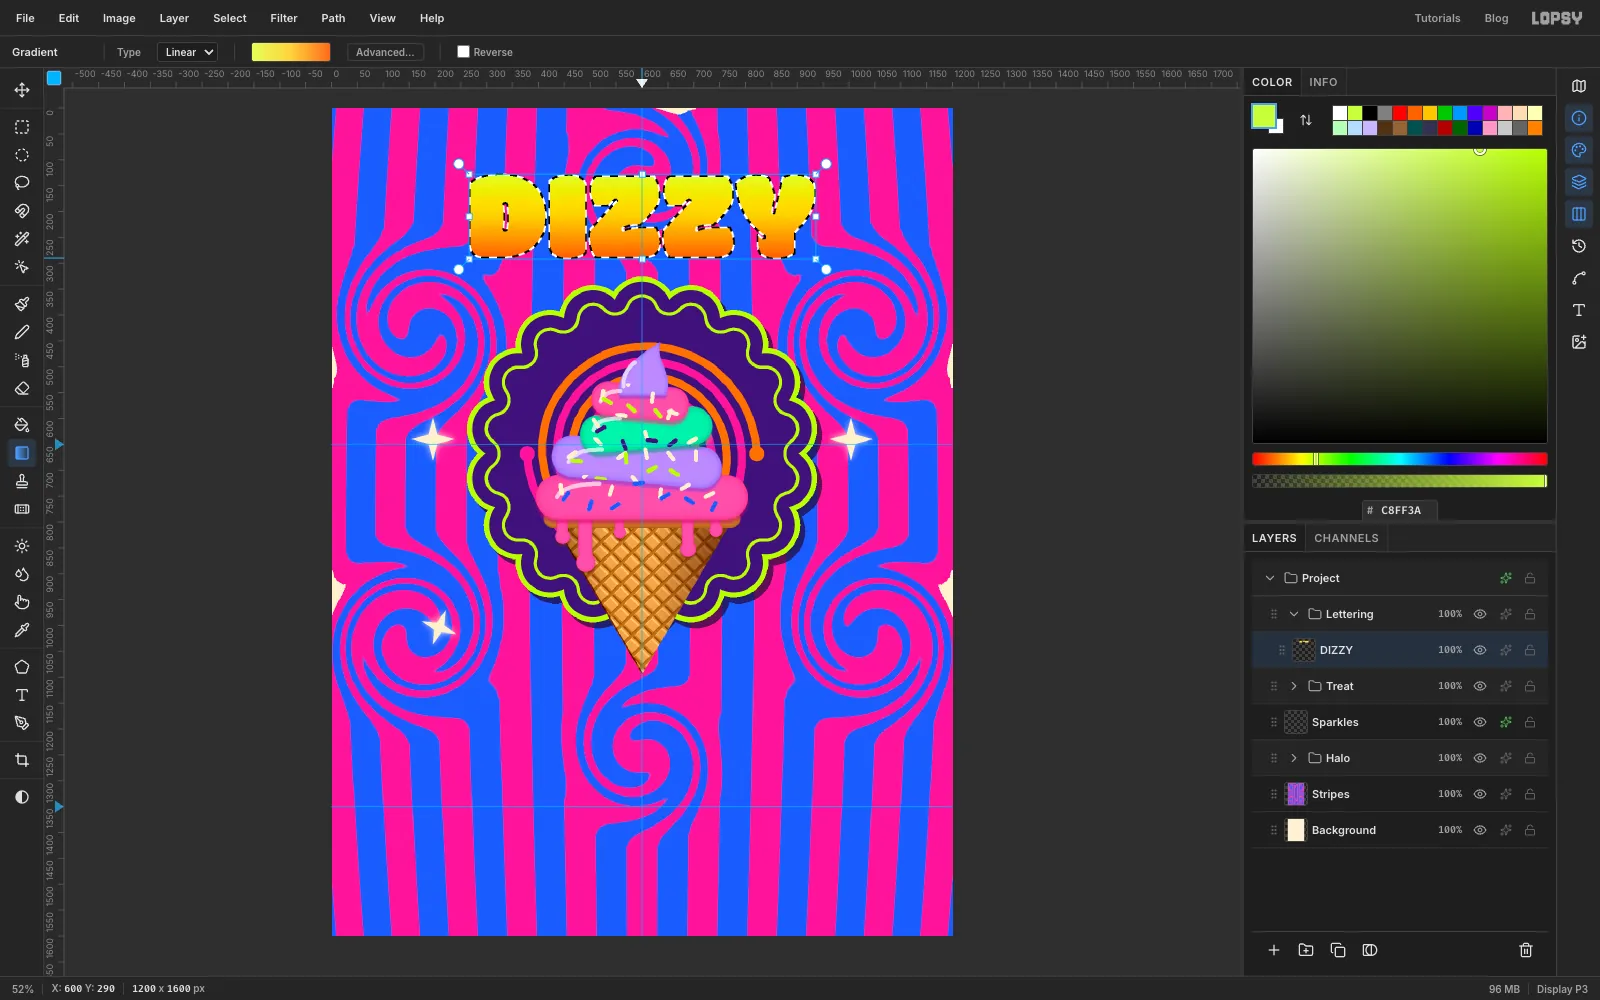
Cmd-click the DIZZY thumbnail to select the letters. Pick the Gradient tool, Linear, and open Advanced…. It still holds the four cone-shade stops, so delete one and set every stop's Opacity back to 100%. Then set three stops: at the left, in the middle and at the right. Drag from the top of the letters straight down to the bottom. The gradient only fills the letters. Deselect.
-
Bend the word with Mesh Warp
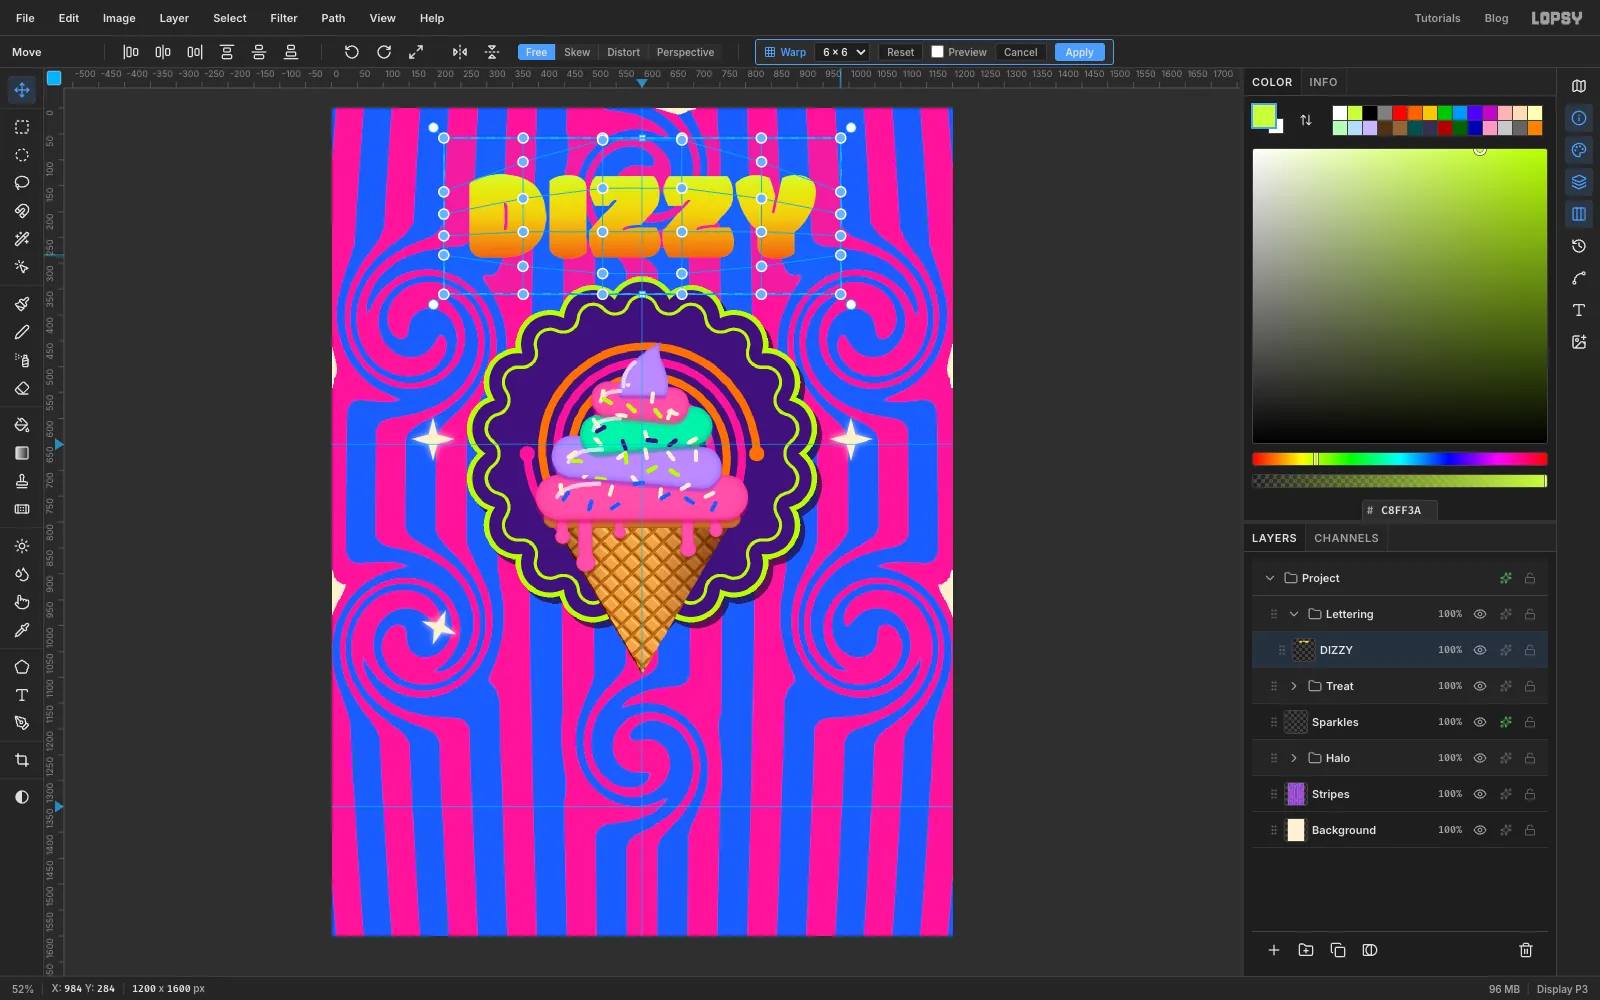
The aim is a classic swollen arch: the middle letters stretch taller while the D and Y squash down at the ends.
With the Rectangular Marquee, select a box around the word with about 50 px to spare on each side and 70 px above and below it. The warp can only move pixels inside this box, and the handles on its outer edge can't leave it, so this spare room is what lets the letters bend.
Pick the Move tool and click Mesh Warp in the options bar. Set the grid to 6 × 6. The top and bottom rows sit in the empty margin, so pull the rows that cross the letters. The status bar shows the pointer position, so you can measure each drag, and the Preview checkbox shows the result as you go. These are the moves used here:
- second row: the two middle points up about 56 px, the next ones out up about 14 px, and the end points down about 44 px
- third row: the middle points up about 24 px and the ends down about 26 px
- fourth row: just the end points down about 8 px
- fifth row: the middle points down about 20 px and the ends up about 16 px
Click Apply, then deselect.
-
Outline, shadow and inline
Give DIZZY three effects:
- Stroke in ink , Width
10 - the flier's Drop Shadow: ink,
10/12, Blur1, Opacity75 - Inner Glow in hot pink , Size
6, Spread70, Opacity100
The pink inline picks up the stripe colour, so the letters vibrate against the background instead of sitting on top of it.
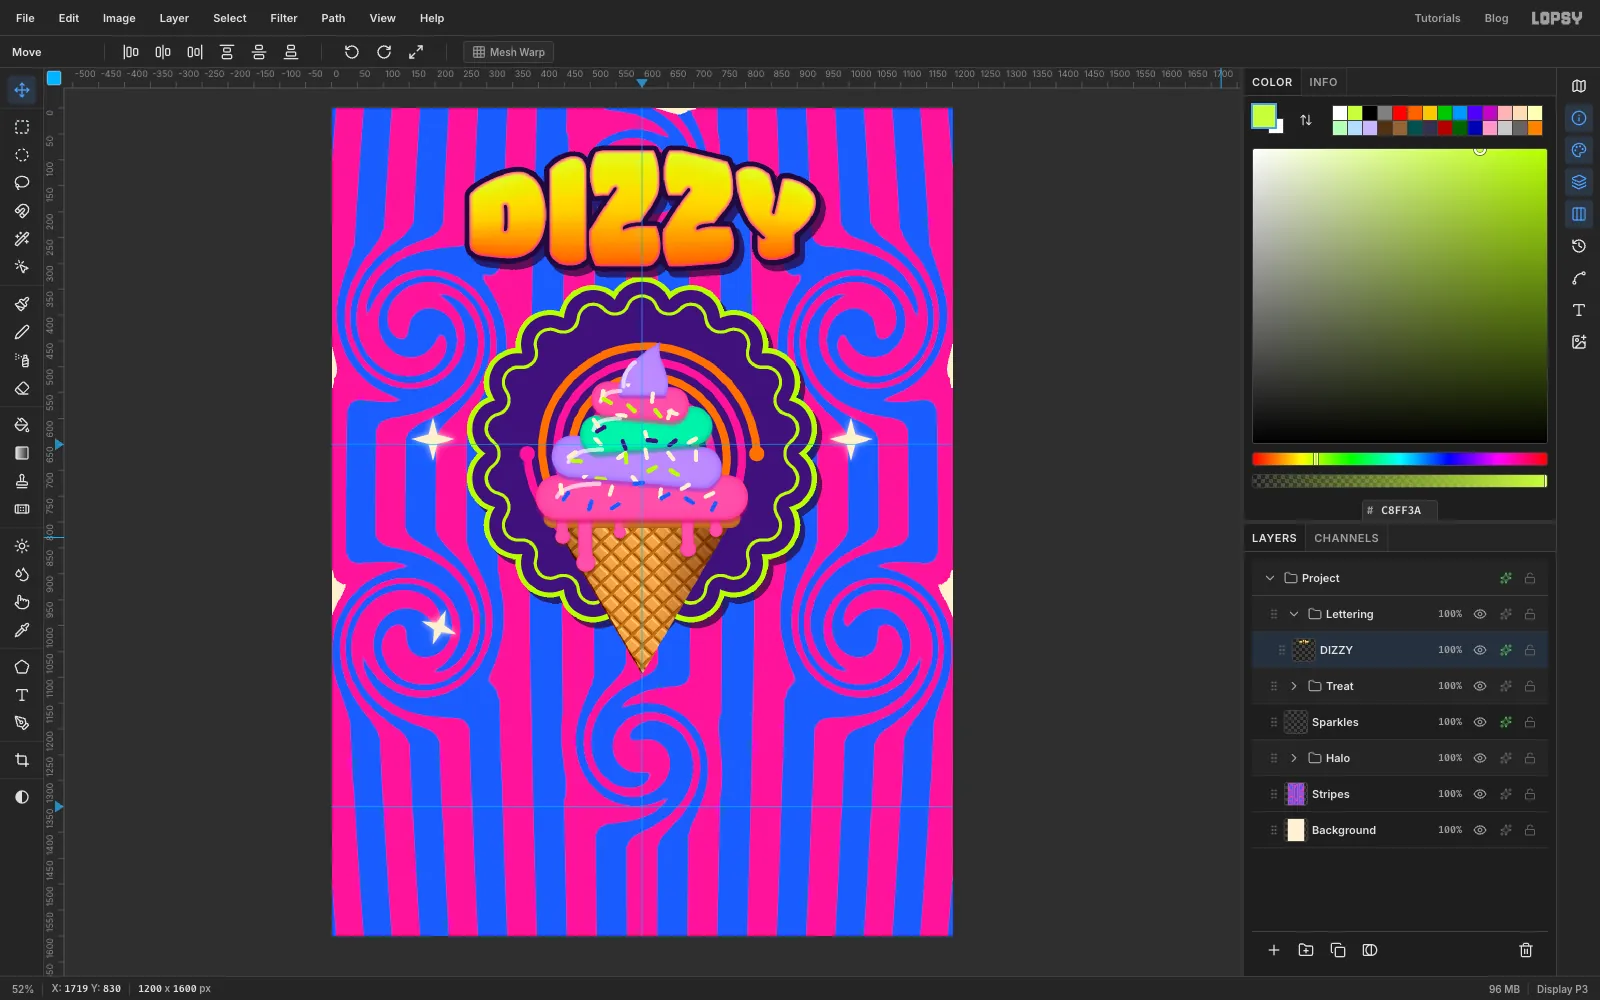
- Stroke in ink , Width
-
Repeat for CONES
Click Lettering and type
CONESin Modak at size200. Centre it at abouty = 1207, rasterize it and give it the same gradient.Warp it the other way, so it curves like a smile that cradles the cone tip. Draw the same roomy marquee around the word first. Then, with the same 6 × 6 grid, on rows two to five pull the two middle points down 26 to 34 px and lift the end points 20 to 30 px. Add the same three effects. Check that the cone tip clears the top of the O and N by about 30 px.
-
Draw the info panel on the grid
Collapse Lettering, click it, add a group named Info and a layer named Panel. Set the Shape tool to Rectangle, Corner Radius
28, fill violet, and stroke lime at Width6.Choose View → Show Grid and drag the Grid slider in the options bar to 8 px. Shapes grow from where you press, and both the centre and the corner snap to the grid. Press at
600, 1432and drag to about1096, 1520. The panel snaps to104–1096across and1344–1520down. Hide the grid again and give the panel the flier's Drop Shadow.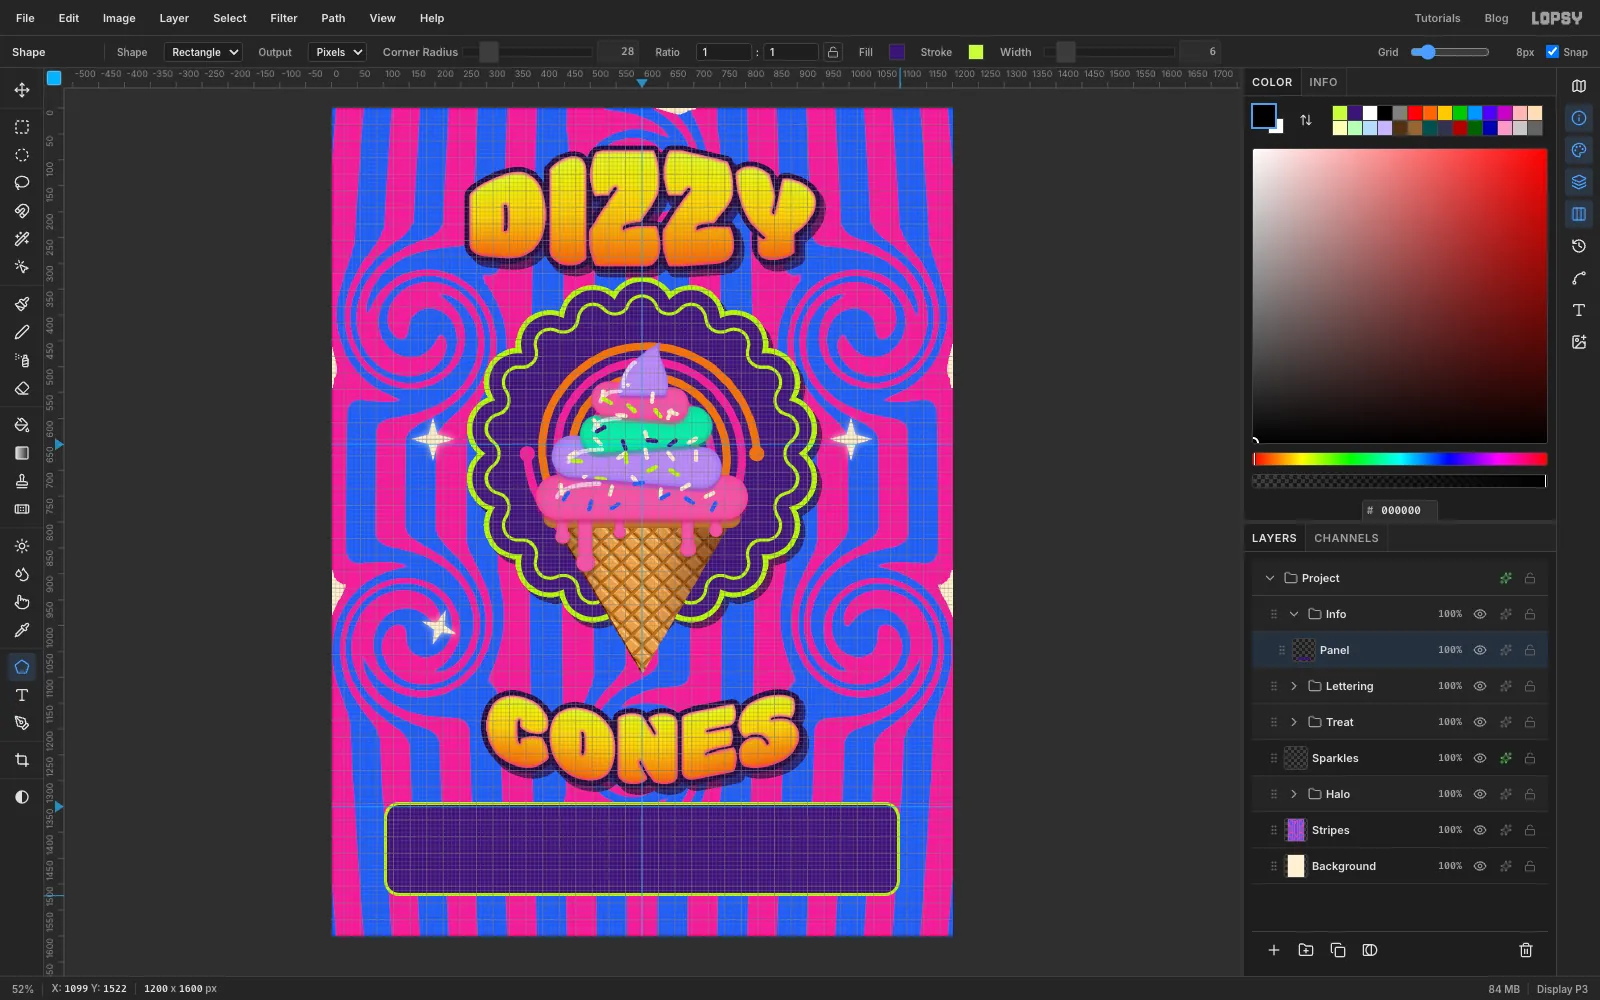
-
Set the panel type
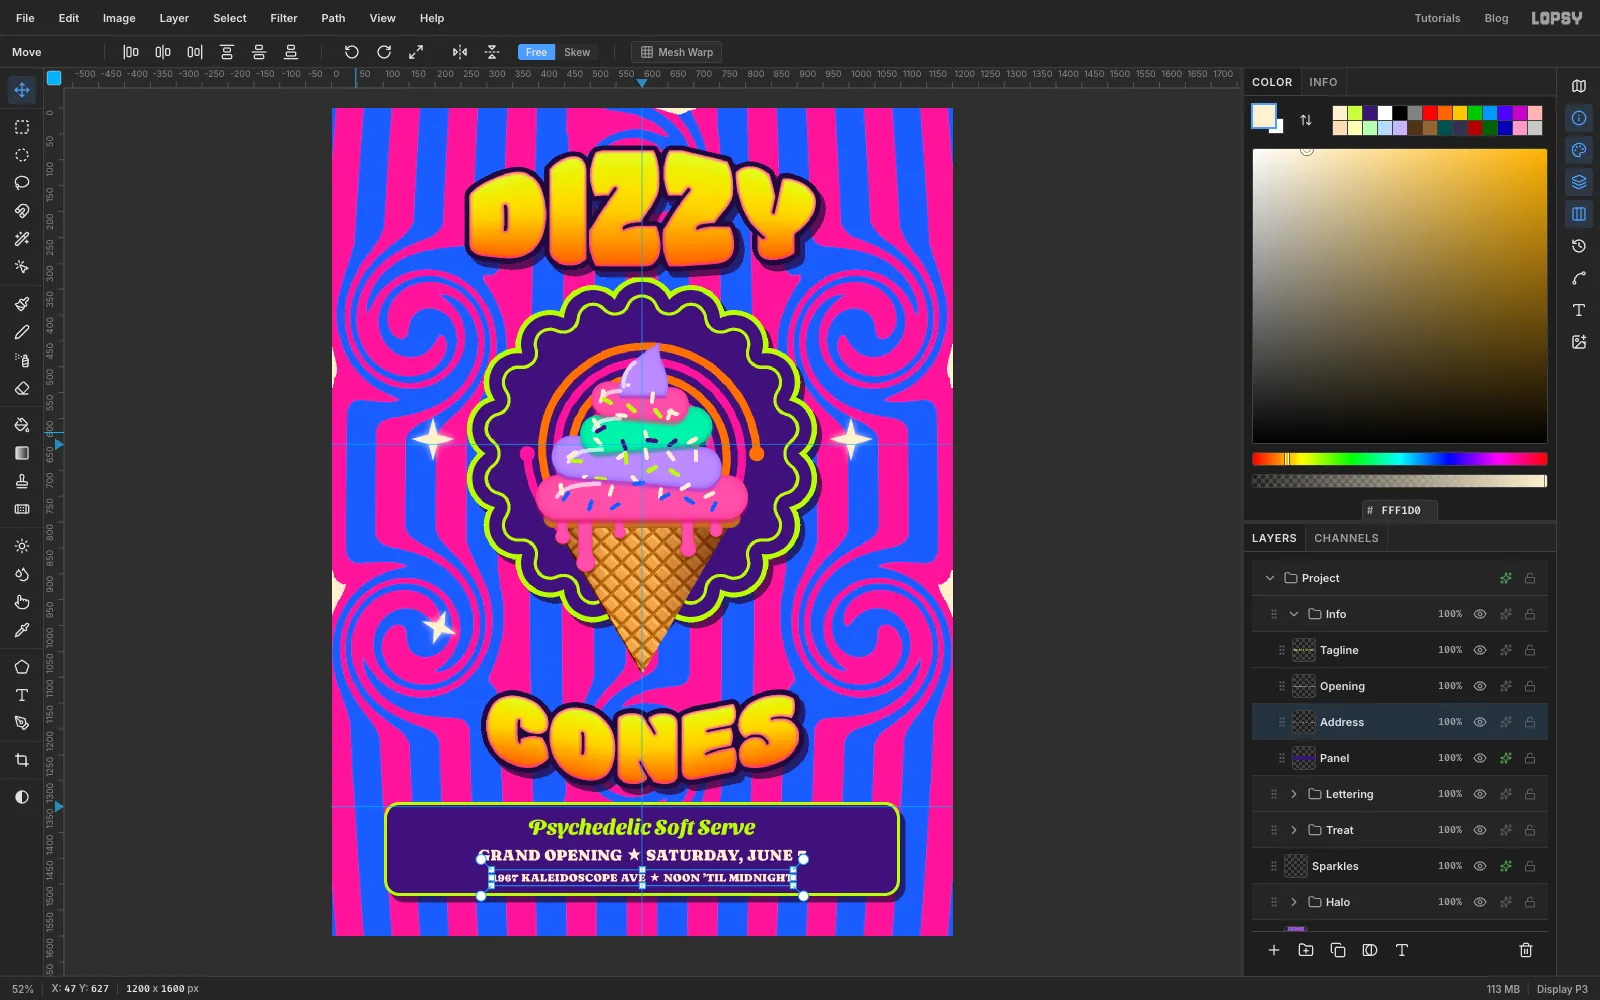
Click the Panel row before each new piece of text, so the Text tool's settings don't restyle the last one. To type ★ and ’ on a Mac, use the character viewer (Ctrl+Cmd+Space), or copy them from this page. Create each line over an empty part of the stripes, then nudge it into place, centred on the middle guide:
- Sansita Swashed, weight 800, size
42, lime:Psychedelic Soft Serve, centred aty = 1391 - Caprasimo, size
30, cream:GRAND OPENING ★ SATURDAY, JUNE 7, aty = 1444 - Caprasimo, size
22, cream:1967 KALEIDOSCOPE AVE ★ NOON ’TIL MIDNIGHT, aty = 1486
That leaves about 24 px between the text and the panel's outline at the top and at the bottom.
- Sansita Swashed, weight 800, size
-
Make a starburst badge
Collapse Info, click it, add a group named Badge and a layer named Burst. Set the foreground to orange and choose Filter → Sunburst…:
- Rays
22, Length9, Width100, Taper100 - Center X
82, Center Y60
Center X and Center Y are percentages of the document, so 82% of 1200 and 60% of 1600 put the centre at
984, 960. Length is a percentage of the distance to the farthest corner, so9makes spikes about 124 px long. High taper turns each ray into a spike that's widest at the centre, so you get a star badge.Still on Burst, with orange as the foreground, use the Elliptical Marquee dialog to select from
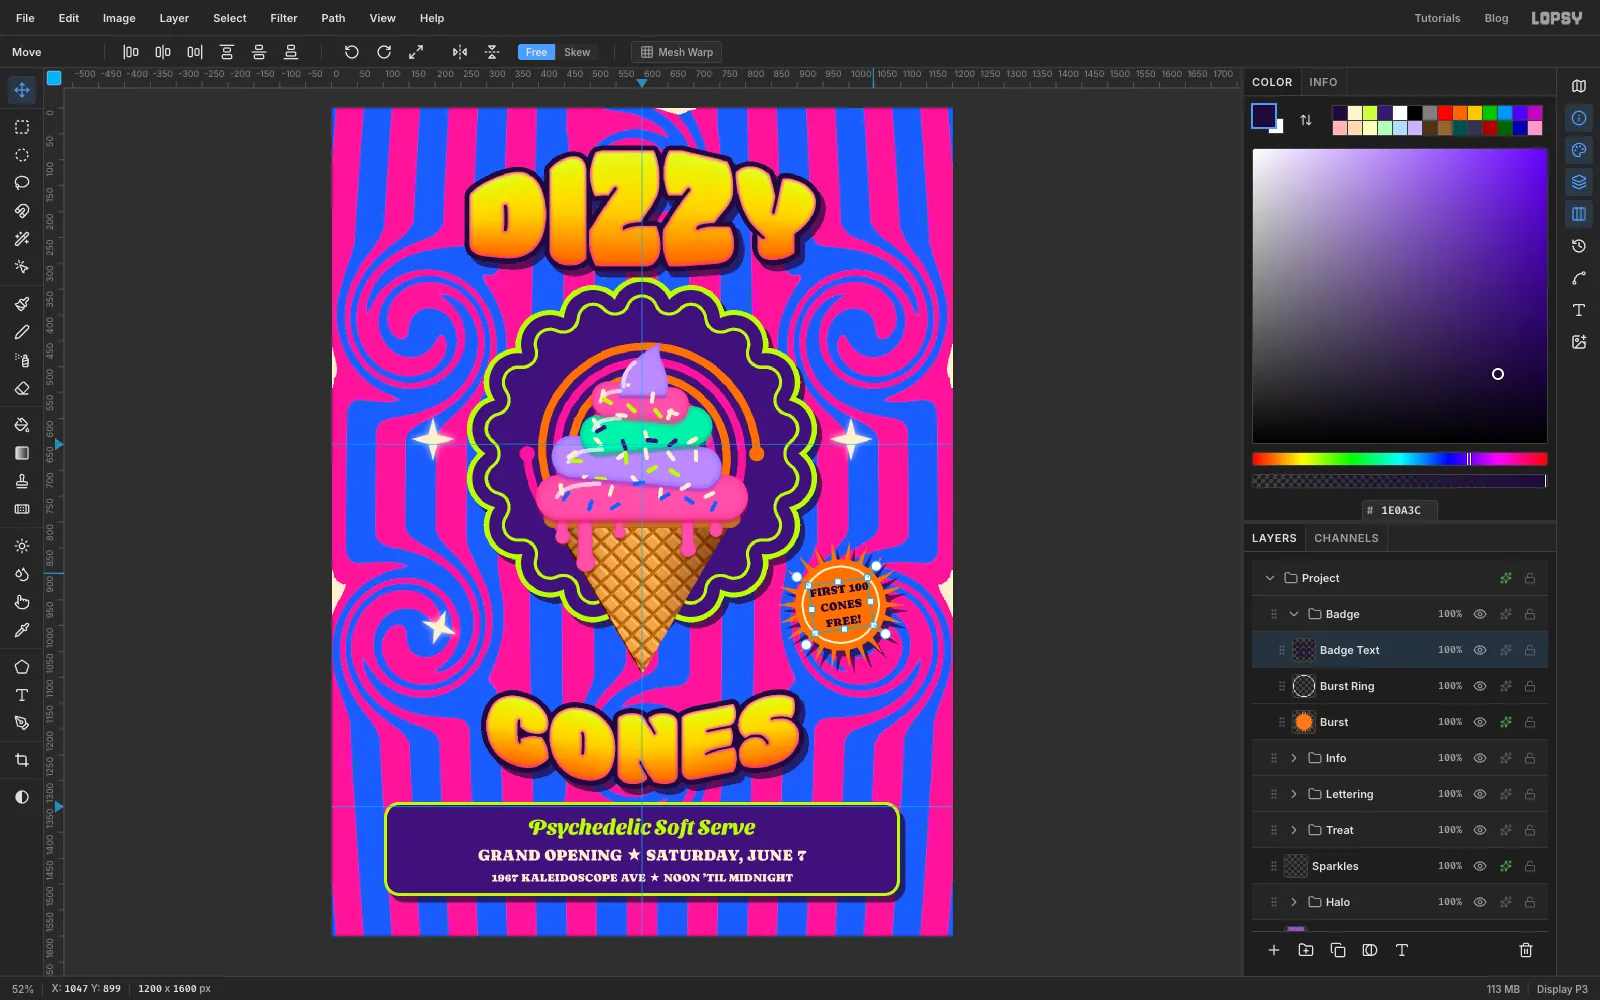
896, 872to1072, 1048and fill it. That gives the badge a solid core. Then shrink the selection by12. On a new layer named Burst Ring, fill the selection with cream, shrink it by4and press Delete to leave a thin ring. Give Burst the flier's Drop Shadow.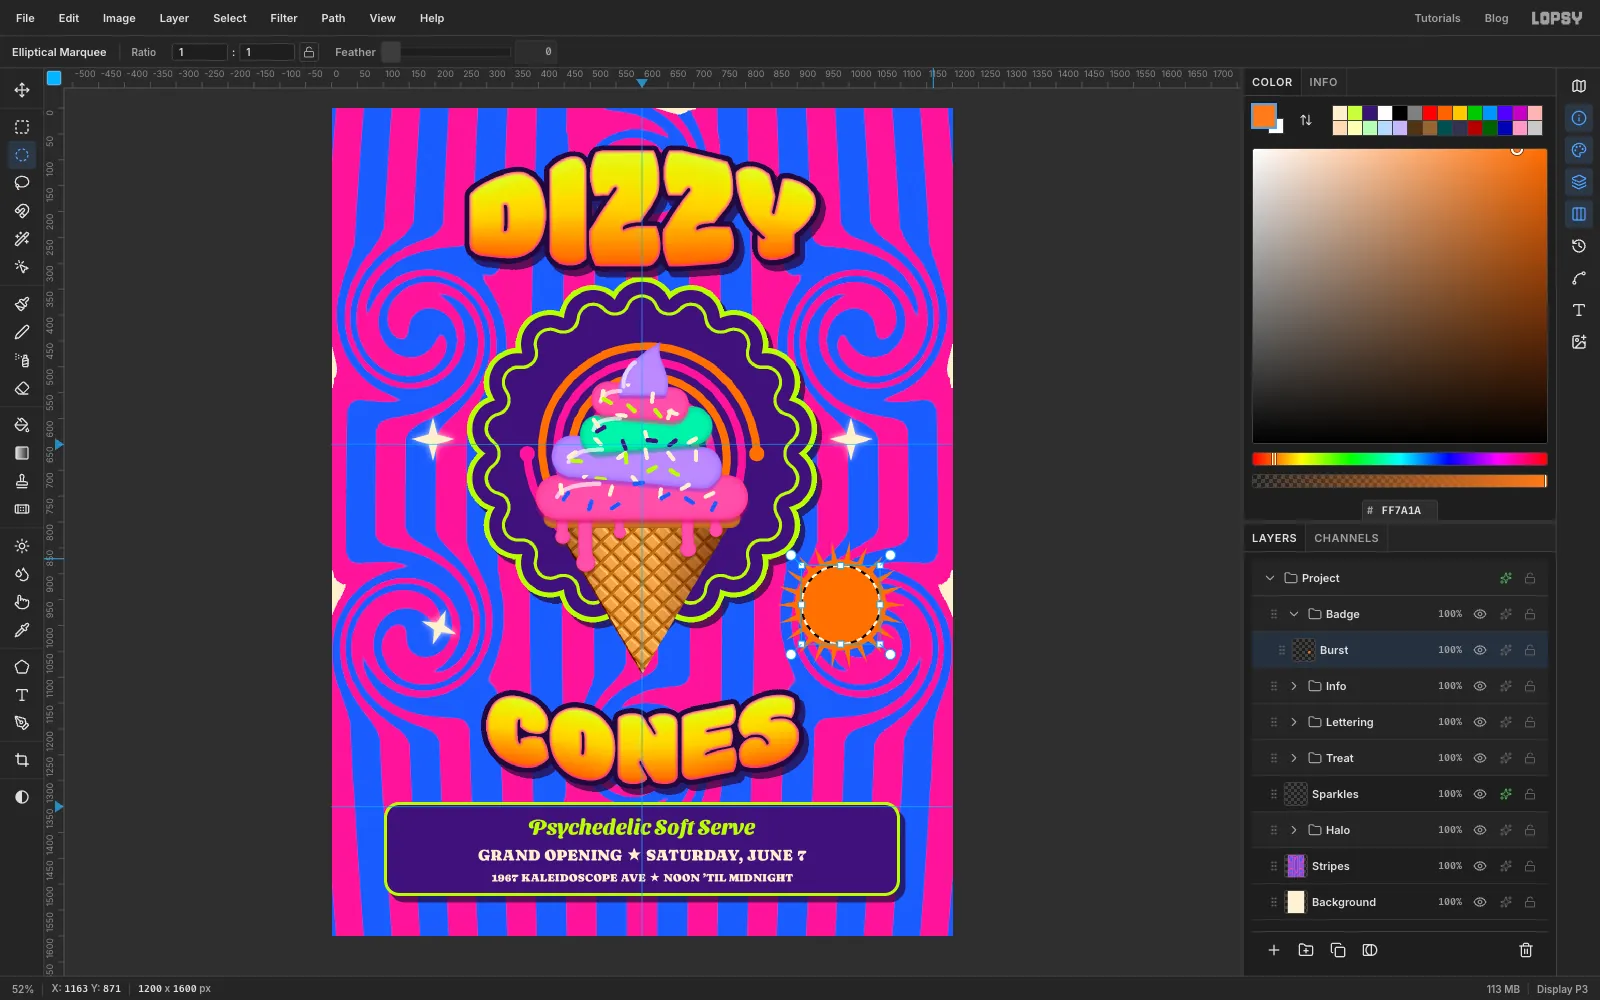
- Rays
-
Add the badge text and tilt it
Click Burst Ring. Pick the Text tool with Caprasimo at size
22in ink, and set Align to Center. TypeFIRST 100, press Enter, typeCONES, press Enter and typeFREE!. Commit it, name the layer Badge Text, and nudge it to the middle of the ring.With the Move tool, drag a rotation handle to tilt the text about 8° counter-clockwise, then press Cmd+D. A rotation turns around the text box, not the letters, so nudge it back to the centre of the ring. Leave at least 8 px between the letters and the cream ring.
-
Cut the frame
Collapse Badge, click it, and add a layer named Frame. Set the foreground back to cream and fill the whole layer. Select from
36, 36to1164, 1564, then choose Select → Shrink…28followed by Select → Grow…28. Shrinking and growing by the same amount rounds the corners. Press Delete to cut the window and deselect.Give the frame a Stroke in violet, Width
8. The stroke goes on the inside edge of the window, like a keyline.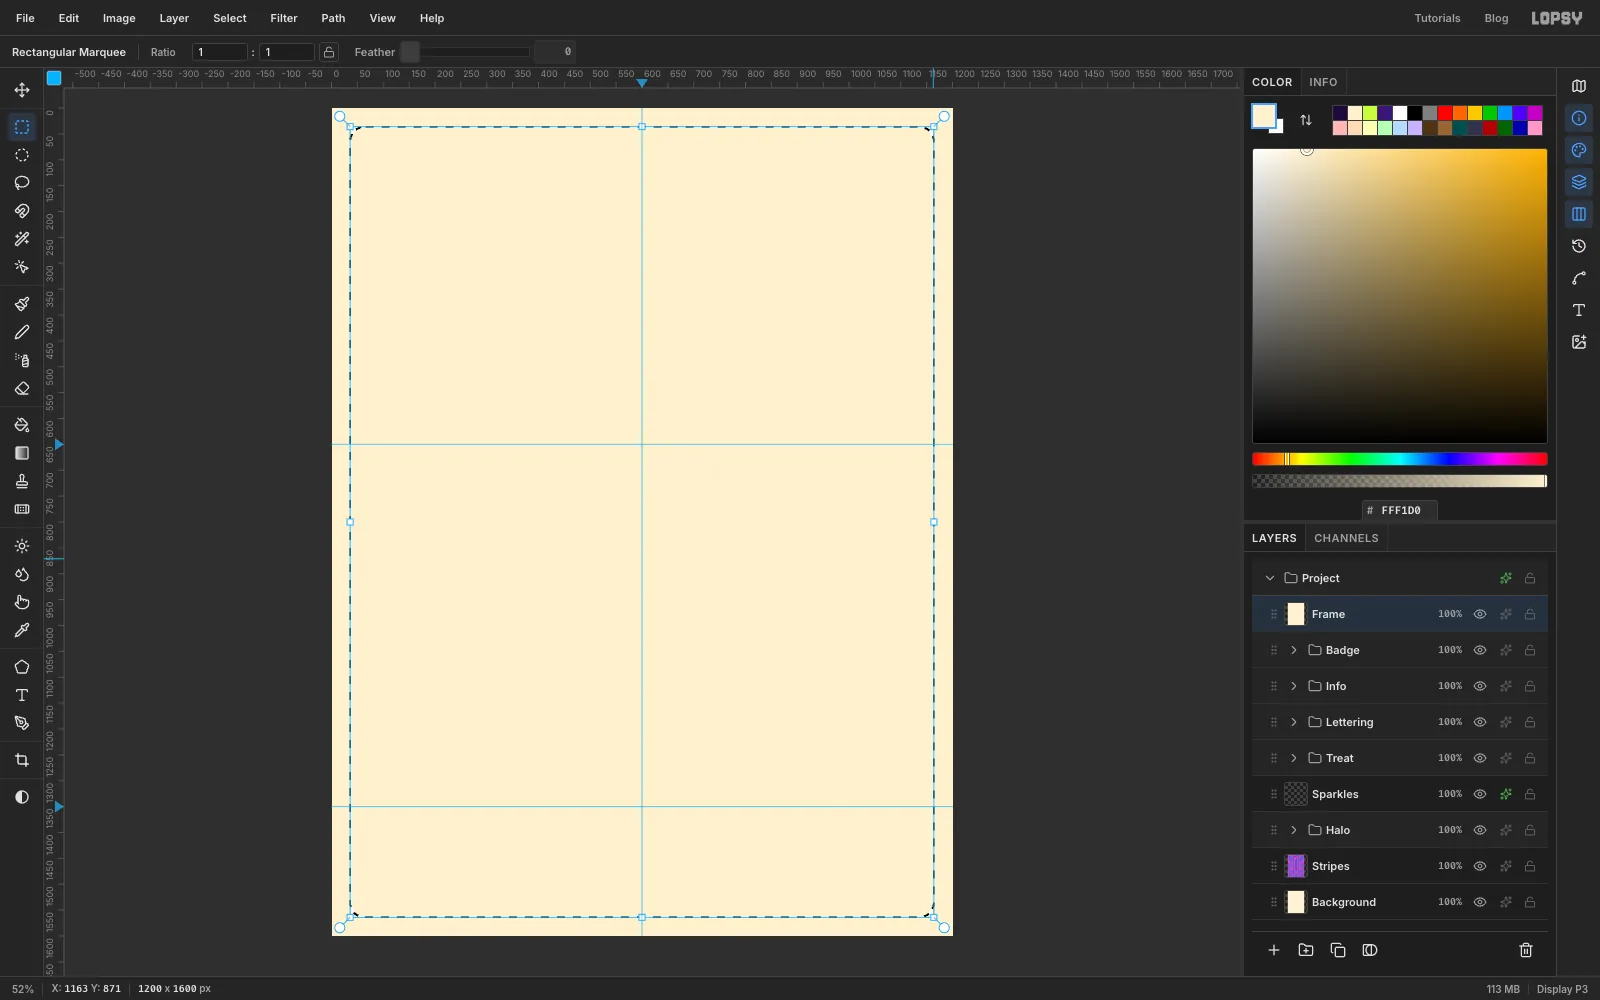
-
Add print grain
Add a layer named Grain at the top. Fill it with grey and choose Filter → Add Noise… with Amount
40and Mode set to Mono. Set the layer's Blend to Overlay and its opacity to 35%. Mid grey disappears in Overlay, so only the noise shows, as a fine grain that makes the flat colours look printed. It's too fine to see at fit-to-screen zoom, so choose View → Actual Size to check it.Export with File → Quick Export PNG, and save the project with File → Save Project so you can come back and change the date for the next event.