Make an Americana Wright Brothers Movie Poster in Lopsy
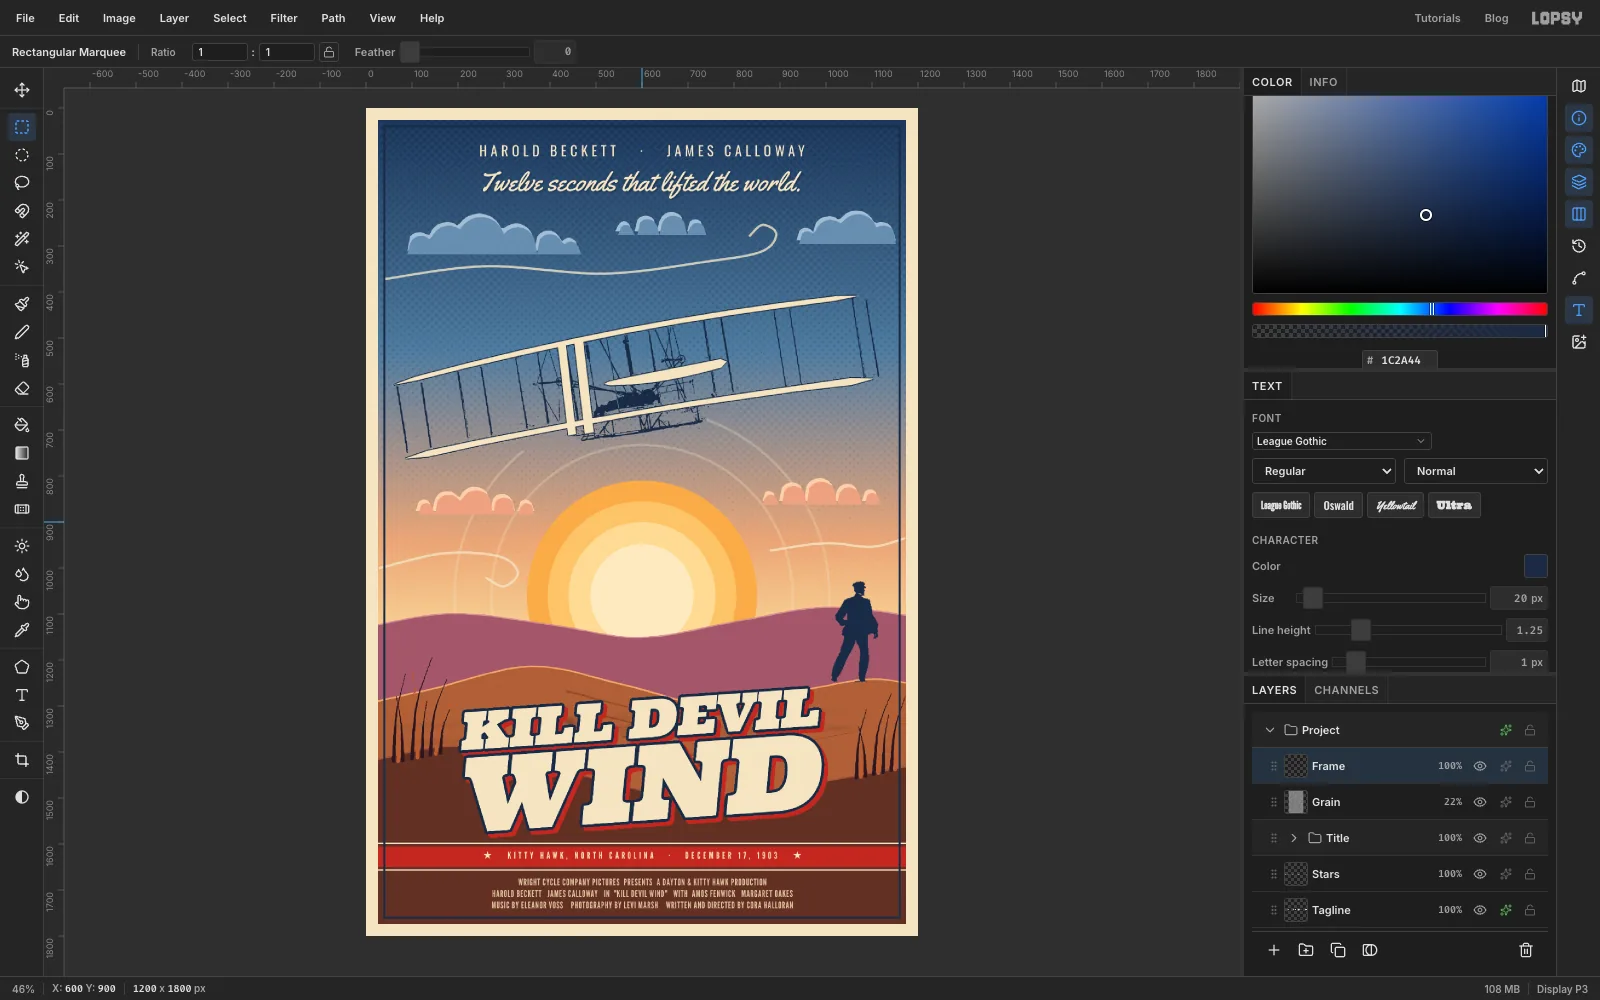
Turn the 1903 first-flight photo into a 1950s Americana movie poster in Lopsy, with a screen-print sun, dunes, a traced Wright Flyer and skewed slab-serif type.
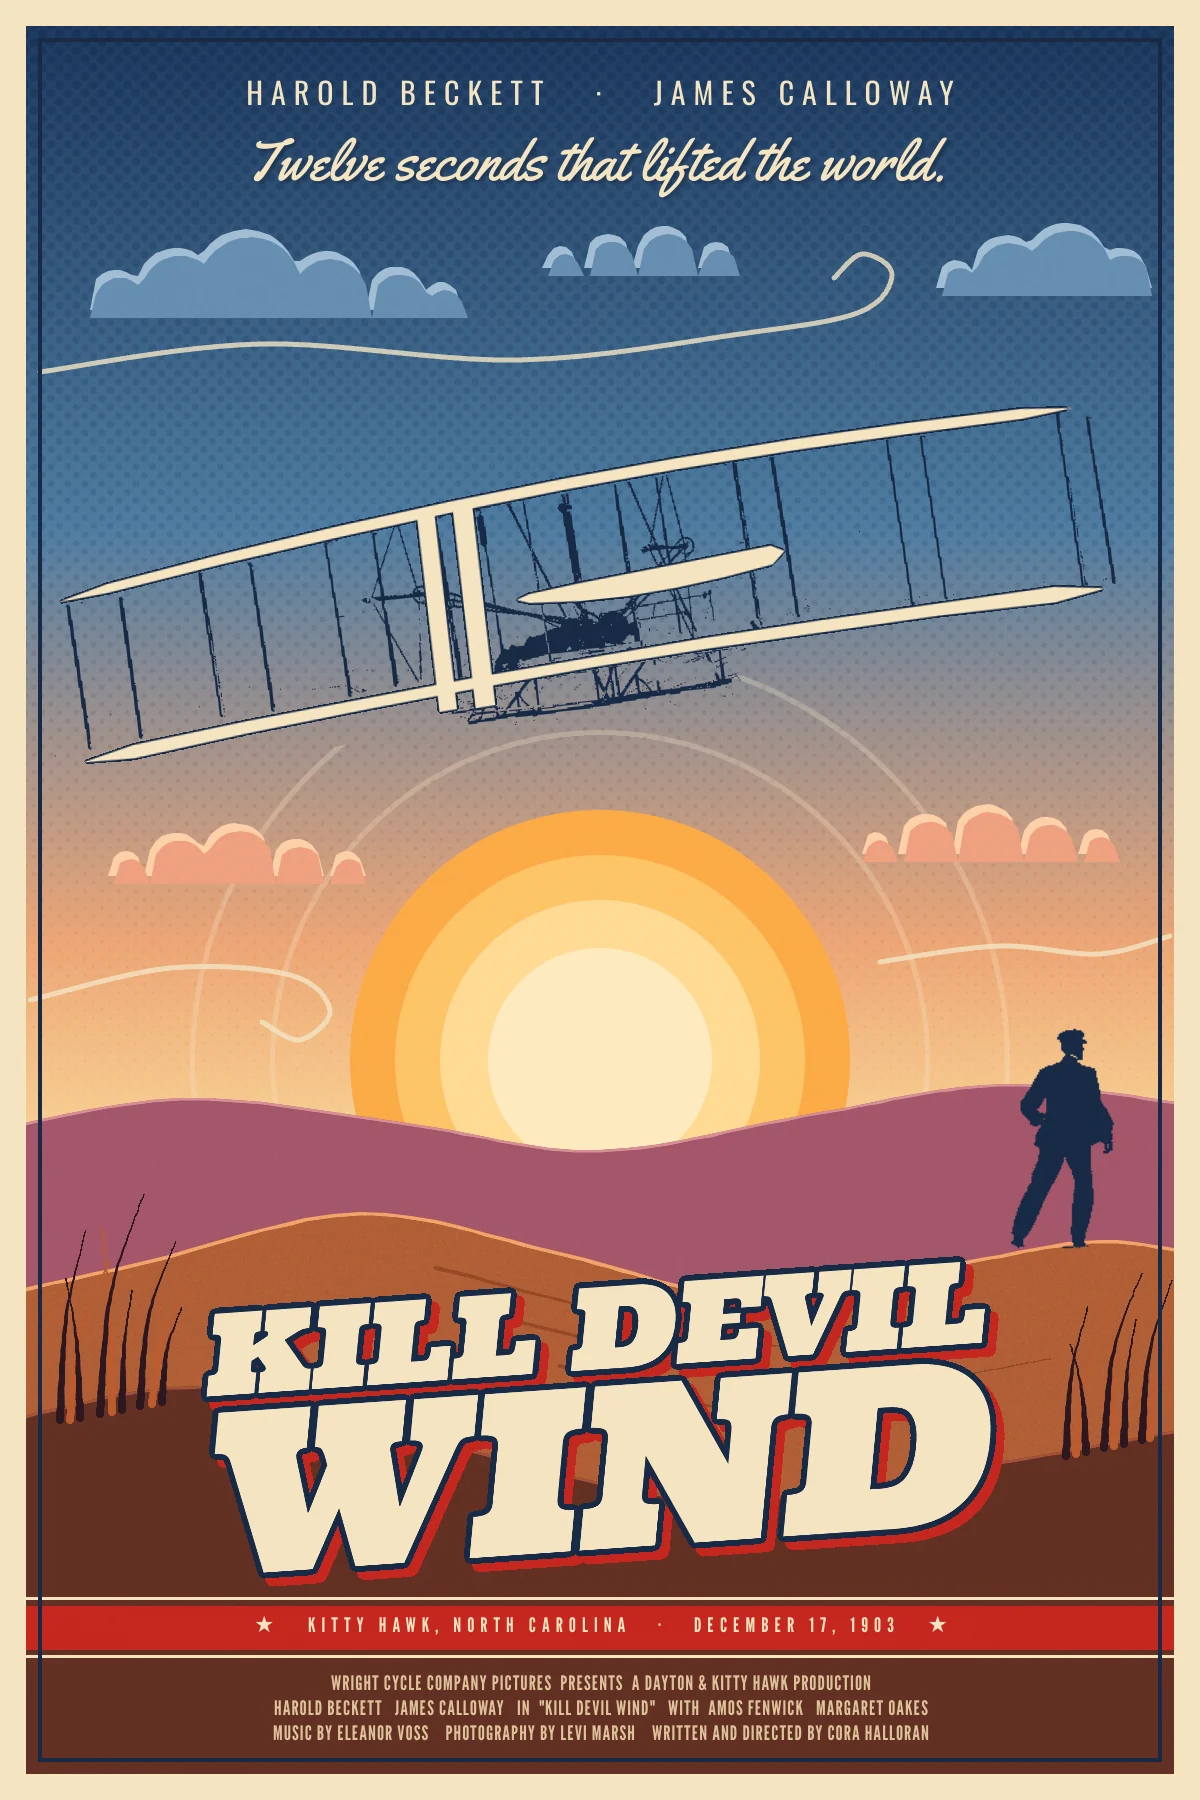
Mid-century travel posters and Hollywood one-sheets sold the American landscape in a handful of flat inks: a sky that fades from navy to apricot, a sun drawn as stacked discs, a hero shape in silhouette and a slab-serif title with a hard offset shadow. This tutorial uses those tricks for a made-up film, Kill Devil Wind, about the Wright brothers' first powered flight at Kill Devil Hills, near Kitty Hawk, on 17 December 1903.
It's a 1200 × 1800 px one-sheet (the 2:3 movie poster shape). The sky, sun and dunes are drawn by hand. The Flyer and Wilbur come from the famous photograph of that first flight: you'll trace the wings, pull the rigging out with a Threshold, and turn Wilbur into a silhouette.
The photo is Wright First Flight 1903Dec17 (full restore 115).jpg) on Wikimedia Commons. It was taken by John T. Daniels and is in the public domain. Download the 3840 px version and crop it to a wide strip around the Flyer and Wilbur, about 2360 × 820 px, with a little sky above the top wing and some sand below the skids. Any editor will do, or open it in Lopsy and use the Crop tool.
The cast and crew names on the poster are invented.
Along the way you'll use:
- the Gradient tool, Halftone, Elliptical Marquee exact sizes and Select → Shrink
- the Lasso and Edit → Fill for clouds, dunes and the Flyer's wings, and the Pen tool for wind lines
- the Brush with Taper, inside a layer's own selection, for rim light, ripples and beach grass
- Copy and Paste in place, Threshold, the Magic Wand, the Pencil and the Eraser on the photo
- layer effects (Stroke, Color Overlay, Drop Shadow), Group Layers, and moving, scaling, flipping and rotating with the Move tool, with undo and redo
- live Text in Ultra, Oswald, Yellowtail and League Gothic, skewed and rotated without rasterizing
- ruler guides with Snap to Guides, Add Noise and a border made from marquees
The palette:
-
Sky
-
Sun
-
core
-
High clouds
-
cloud rim
-
Low clouds
-
cloud rim
-
Dunes rose
-
rust
-
umber
-
Rim light
-
ripples
-
Beach grass
-
Ink navy
-
cream
-
flag red
-
billing tan
Positions are given in document pixels. Watch X and Y in the status bar at the bottom of the window as you move the pointer. Hand-drawn shapes like the clouds, dunes and grass only need to be close.
-
Set up the poster and paint the sky
- Choose File → New, set Width
1200and Height1800, and click Create. - Choose View → Show Rulers if the rulers aren't showing.
- Double-click Layer 1 in the Layers panel and rename it
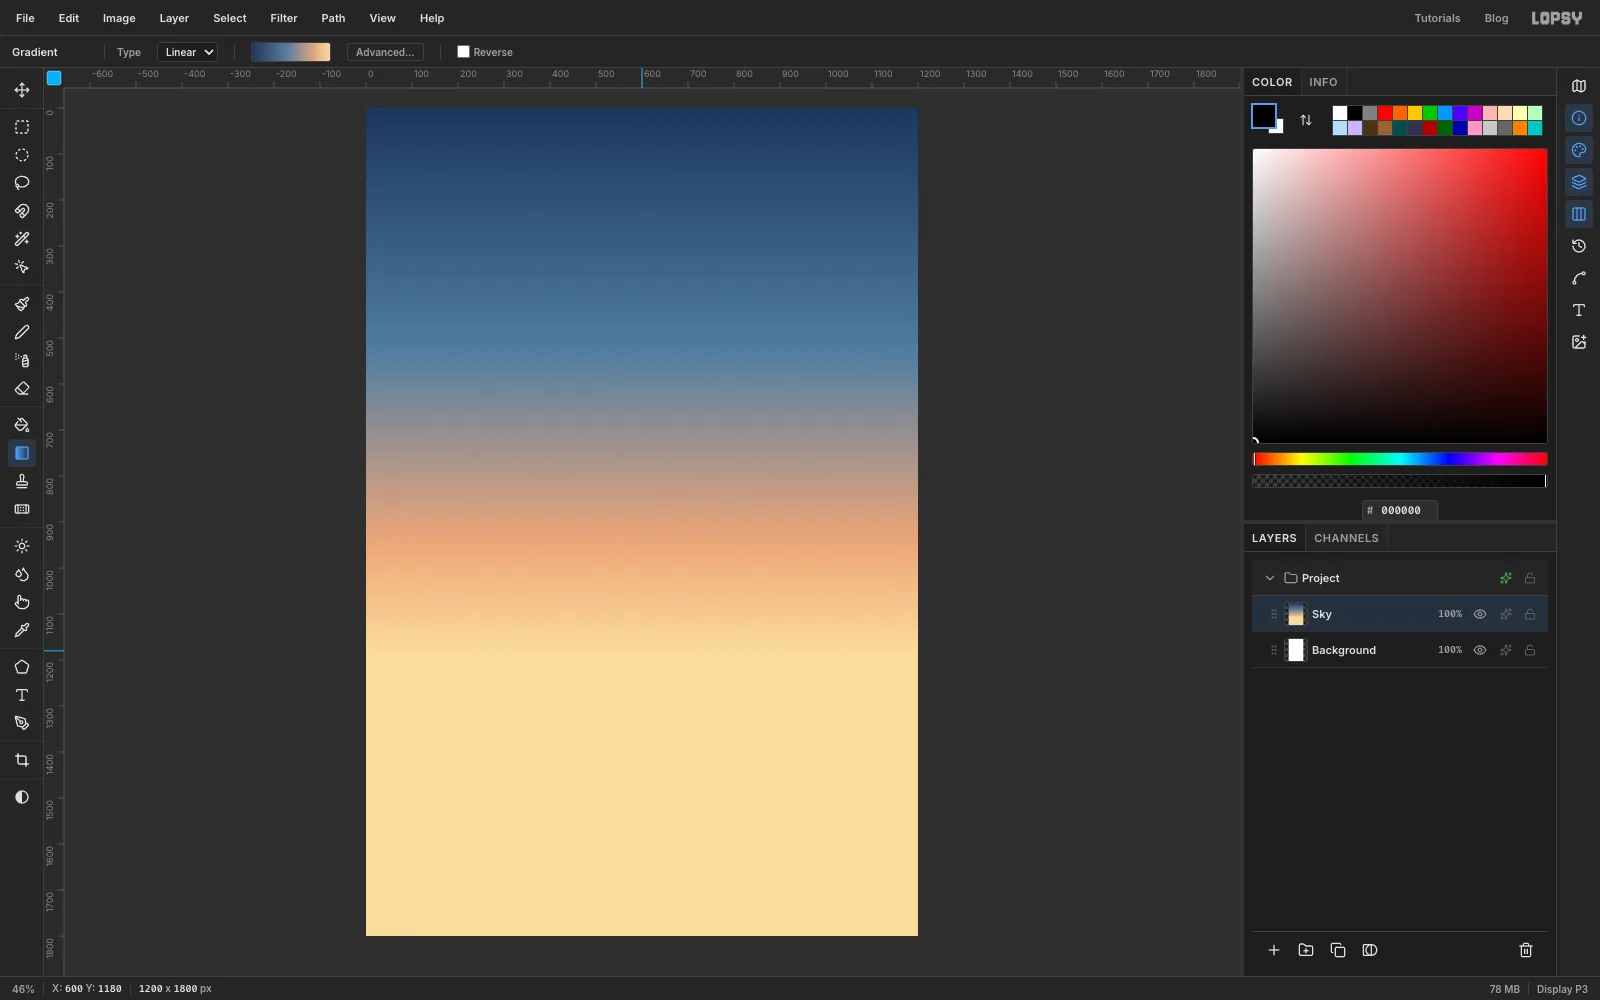
Sky. - Pick the Gradient tool and set Type to Linear. Click Advanced…, set the left stop to and the right stop to with the Hex color field. Click the bar about halfway along to add a stop and make it , then click at about 80% for a fourth stop, . Click Done.
- Drag straight down from the top edge of the canvas to
y 1180. Everything below that stays pale gold. The dunes will cover it.
- Choose File → New, set Width
-
Add a halftone print texture
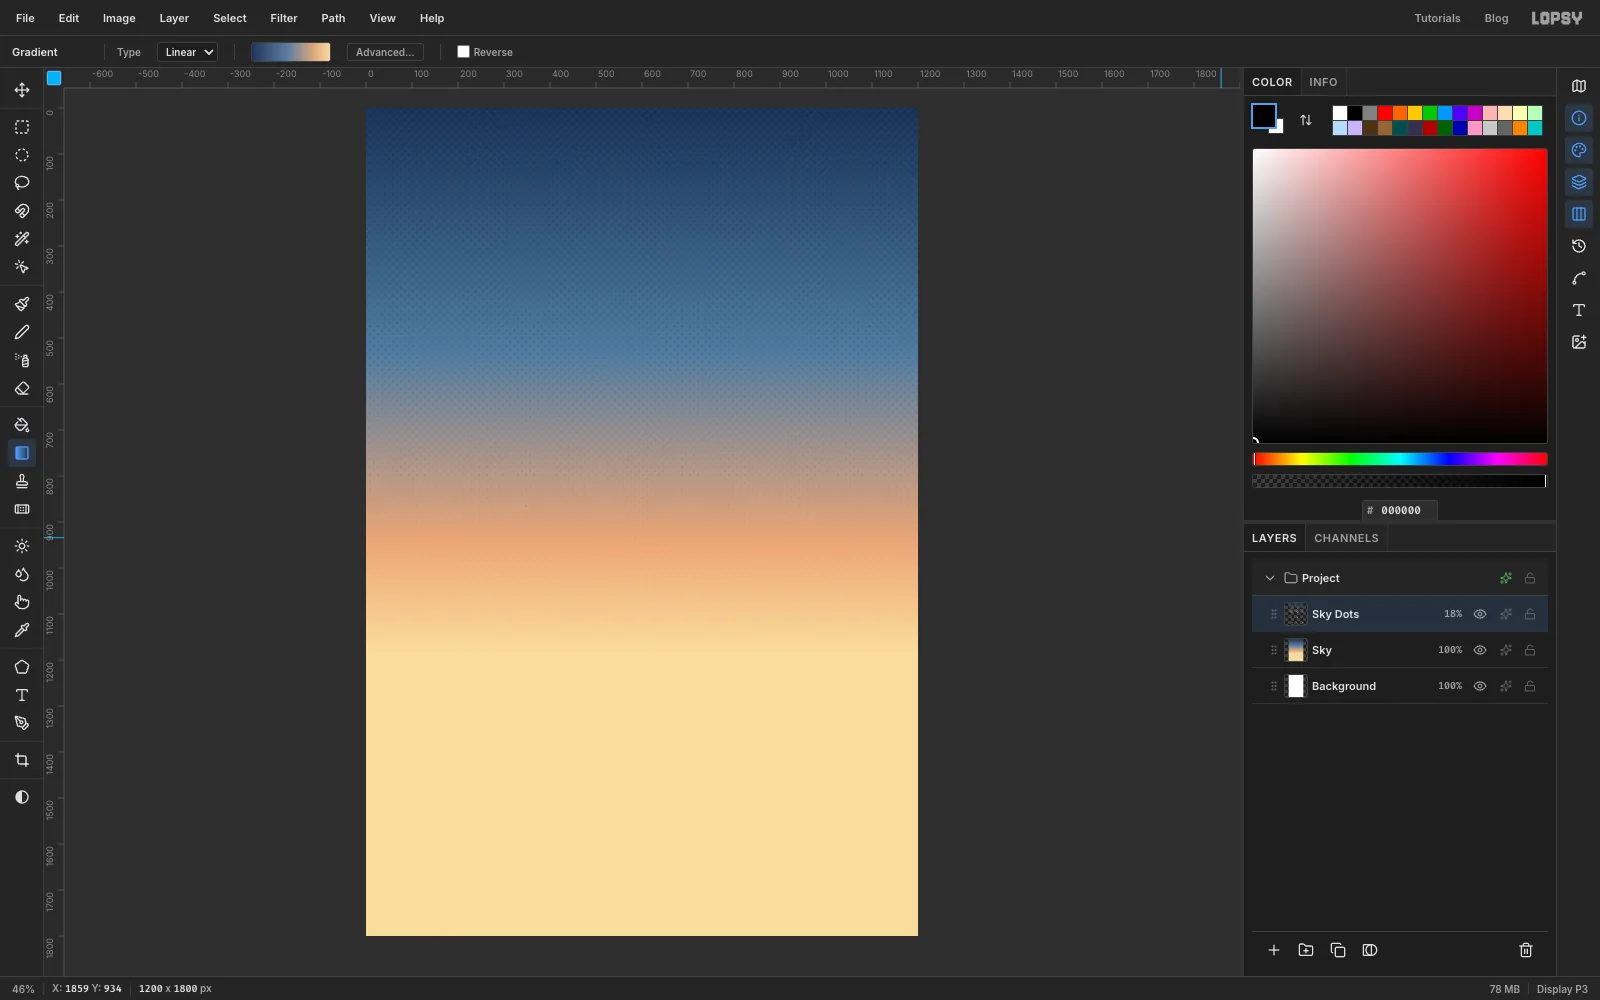
Old posters were printed, so the sky gets a faint dot screen.
- With
Skyselected, click Duplicate Layer at the bottom of the Layers panel and rename the copySky Dots. - Choose Filter → Halftone…, set Dot Size to
12, leave Angle at45, and click Apply. - Open the layer's effects drawer with the effects button on its row, set the blend mode to Multiply, and close the drawer.
- Click the opacity on the
Sky Dotsrow and set it to18%. The dots should be barely there.
- With
-
Draw the halo rings
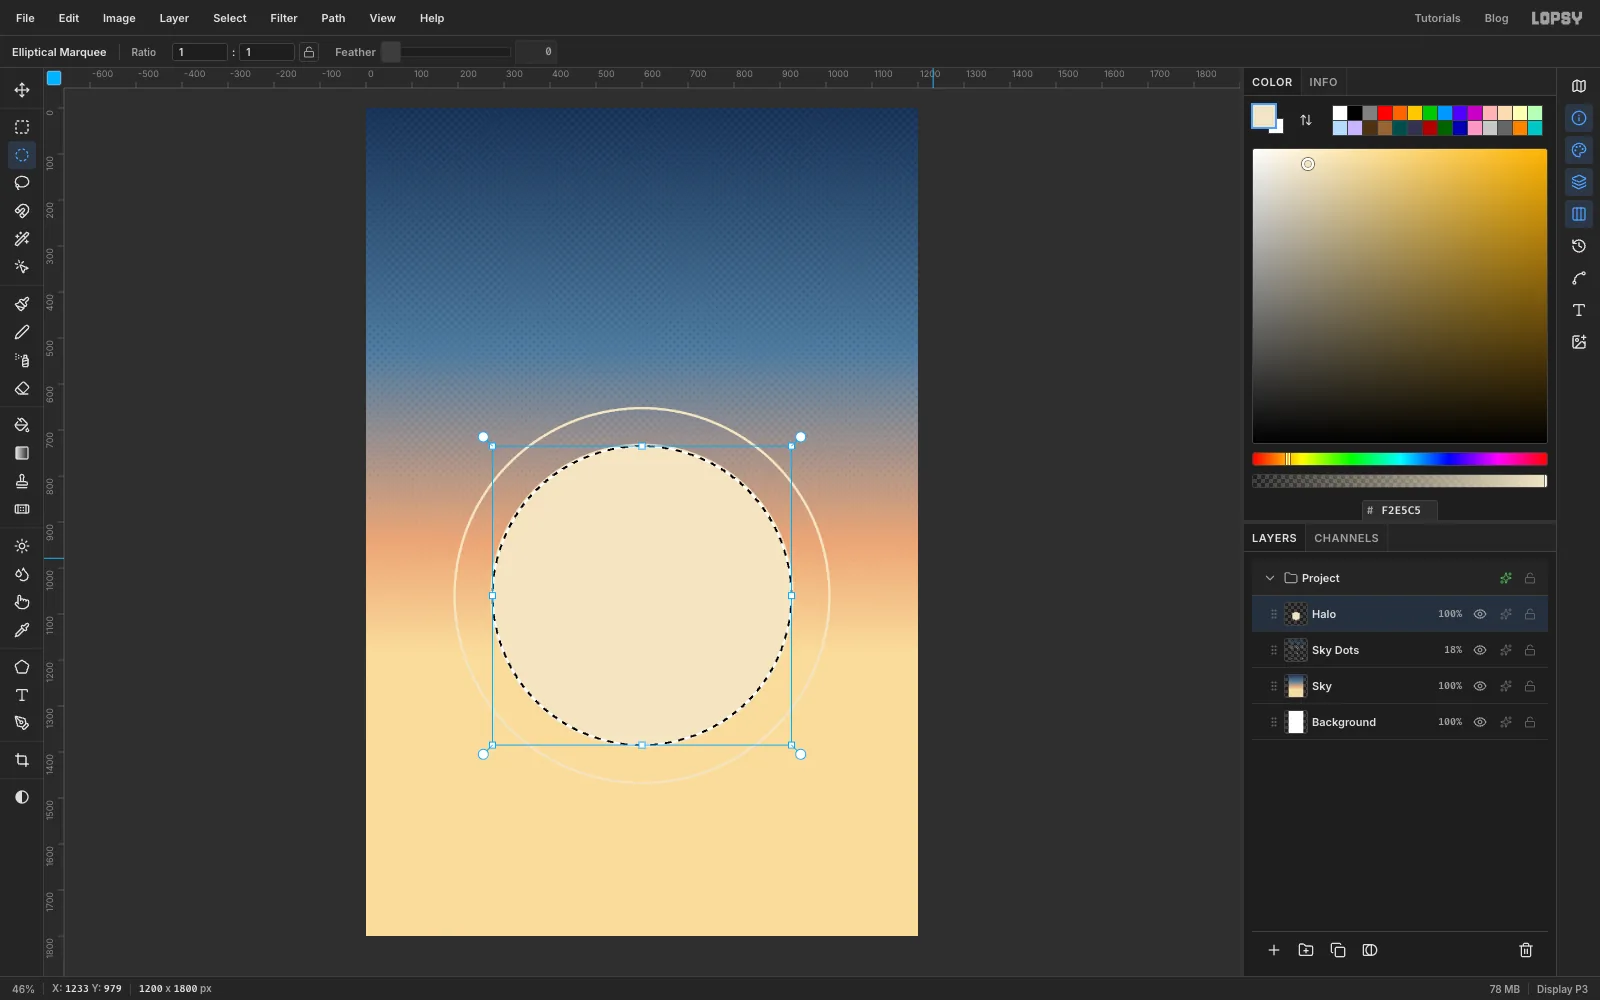
Two thin rings around the sun hint at the sun's glare and, later, at the Flyer breaking through it.
- Click Add Layer and name it
Halo. Set the foreground colour to . - Pick the Elliptical Marquee and click the canvas once without dragging. In the dialog, set From to
190,650and To to1010,1470, and press Enter. That's a circle of radius 410 aroundx 600,y 1060. - Choose Edit → Fill, then Select → Shrink… with Amount
5, and press Delete. You're left with a 5 px ring. - Do the same for a radius-330 circle: From
270,730, To930,1390. Fill, shrink by5and delete. - Press Cmd+D and set the layer's opacity to
28%.
- Click Add Layer and name it
-
Build a screen-printed sun
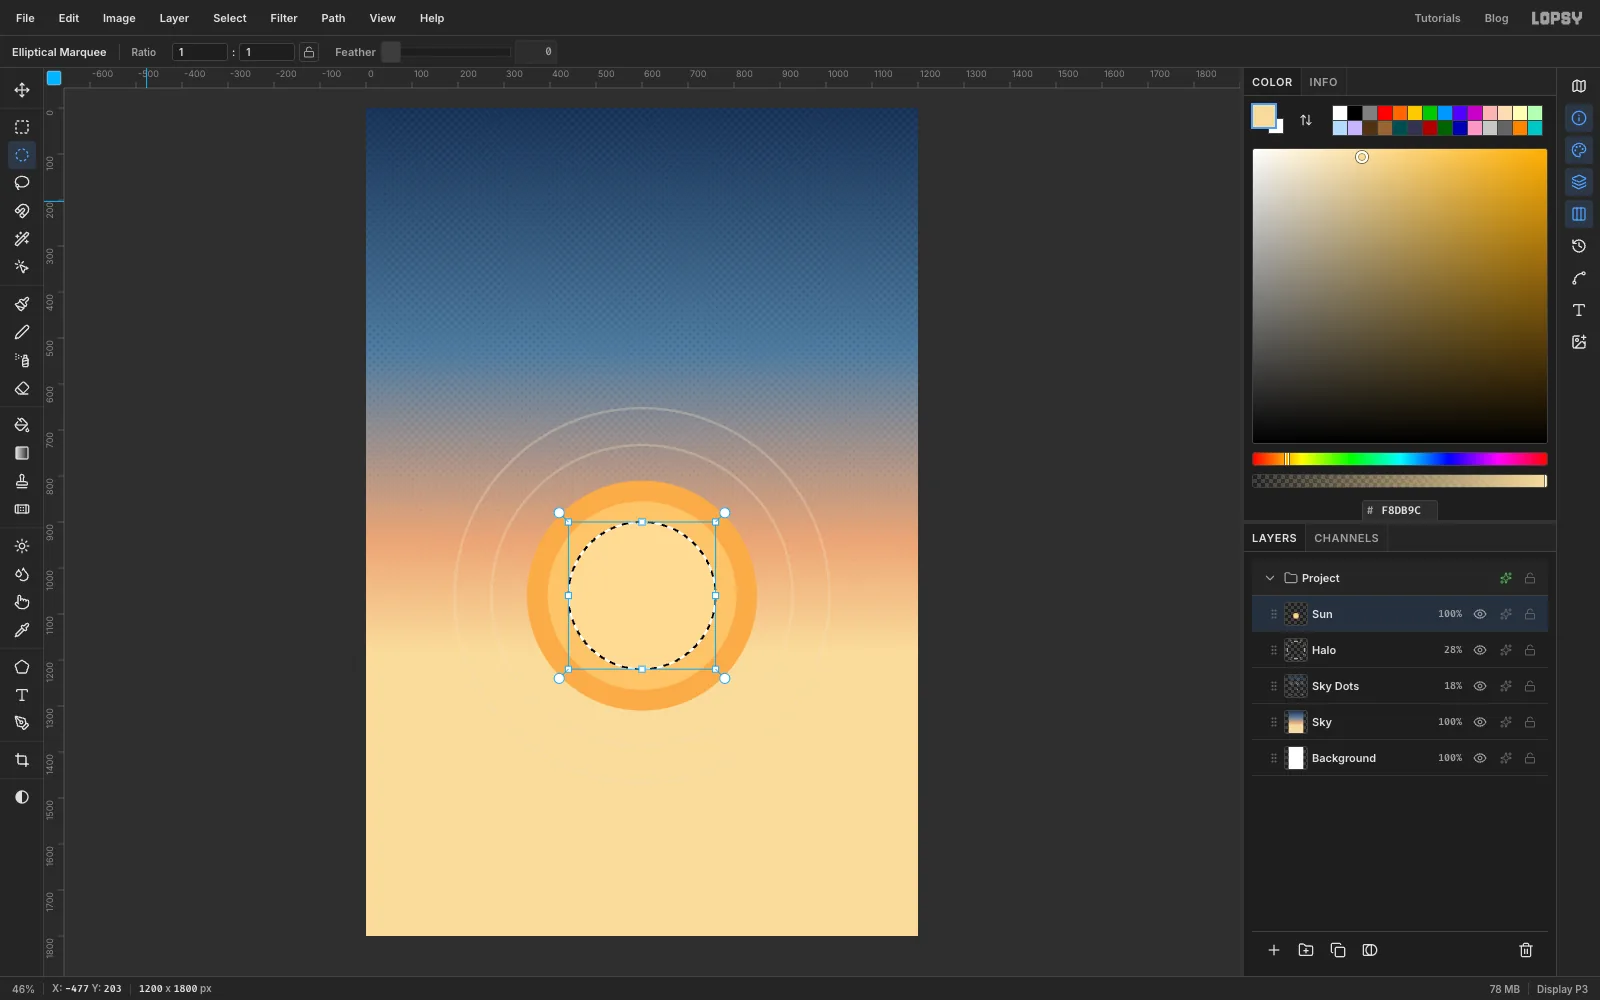
A soft gradient sun looks airbrushed. Four flat discs look printed.
- Click Add Layer and name it
Sun. - Make four circles centred on
x 600,y 1060with the Elliptical Marquee dialog, filling each with Edit → Fill before you make the next one:
- radius
250(from350,810to850,1310): - radius
205(from395,855to805,1265): - radius
160(from440,900to760,1220): - radius
112(from488,948to712,1172):
- Press Cmd+D.
- Click Add Layer and name it
-
Draw flat cloud bands
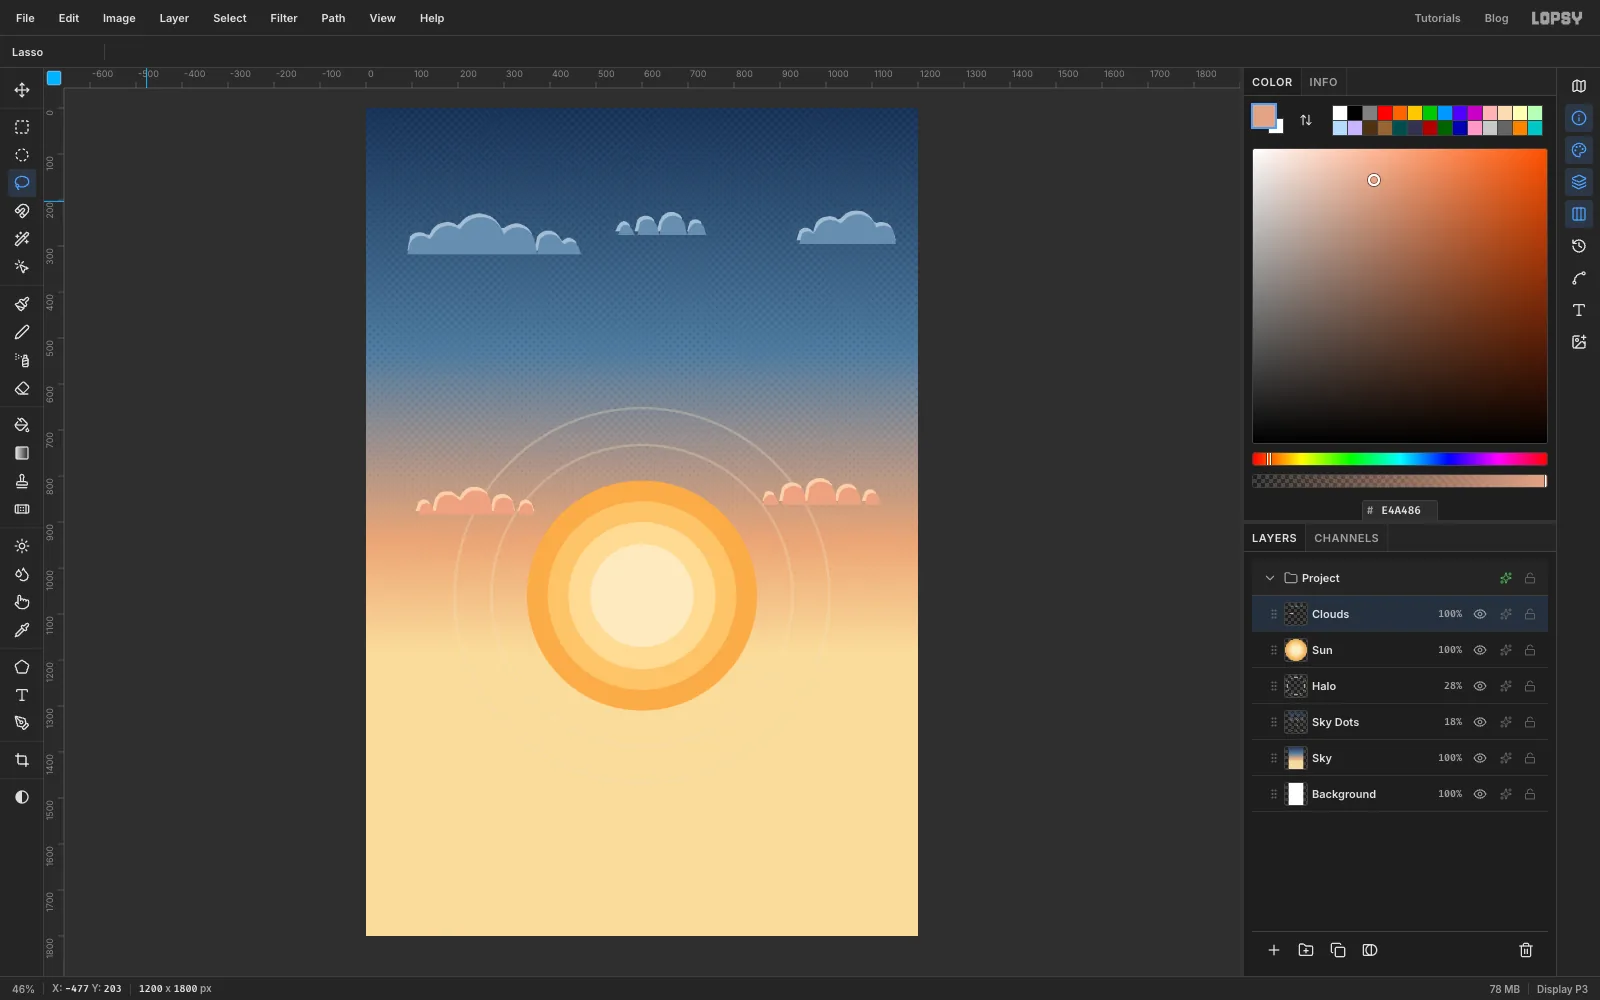
Americana clouds are flat-bottomed rows of bumps in two tones.
- Click Add Layer and name it
Clouds. - Set the colour to the rim tone . With the Lasso (
L), draw the big cloud at the left, between abouty 240andy 310and fromx 60tox 470: start at the bottom-left, drag a row of five or six round bumps along the top, then come straight back along a flat bottom to where you started. Choose Edit → Fill. - Draw two more the same way: a small one in the middle around
y 230–270(x 530–750), and one at the right aroundy 240–290(x 930–1160). Leave clear sky above them for the tagline. - Set the colour to . Lasso each cloud again, about 8 px lower and starting a few pixels to the right, and fill it. The paler rim peeks out along the tops of the bumps.
- Repeat with the warm tones for two low clouds either side of the sun: rims in , bodies in , with their flat bottoms at about
y 880on the left (x 90–380) andy 860on the right (x 850–1130). - Press Cmd+D.
- Click Add Layer and name it
-
Draw the wind lines with the Pen
- Click Add Layer and name it
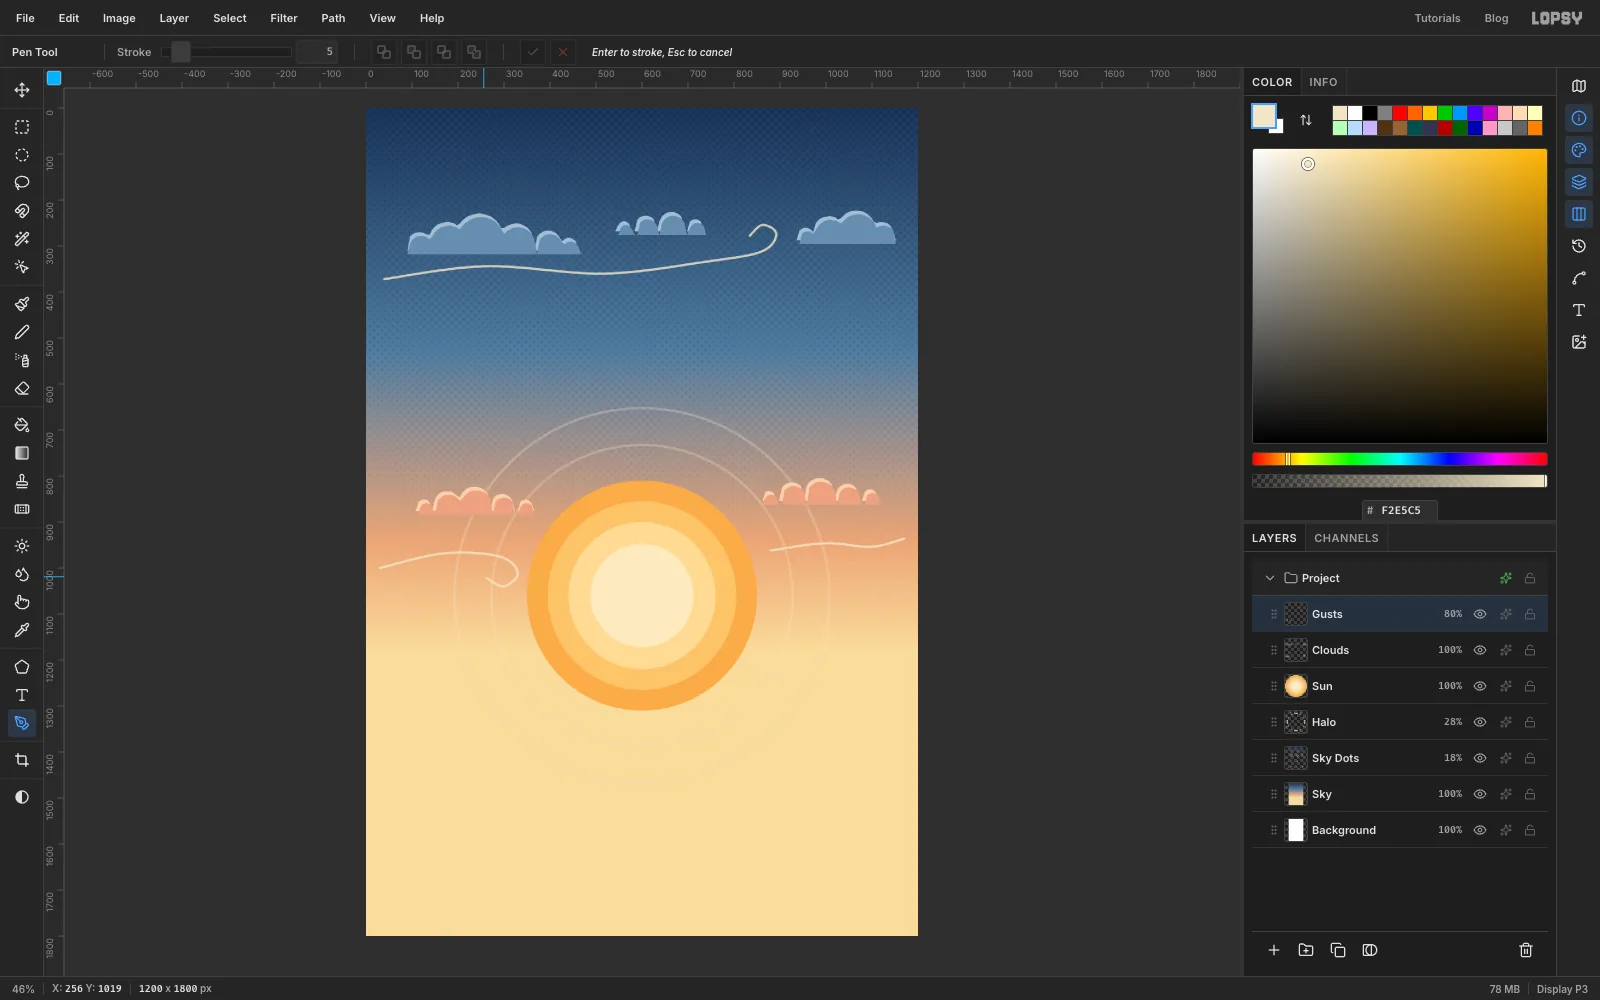
Gusts. Set the colour to . - Pick the Pen tool (
P) and set Stroke to5. - Draw a long, gently waving line across the sky below the clouds, from the left edge at about
y 370to aboutx 860,y 310. Drag at each point to pull out smooth handles. Finish with three short points that curl back on themselves, like a breath of wind. Press Enter to stroke it. - In the Paths panel, click Delete Path so the overlay goes away. The stroke stays.
- Draw a short line on the right of the sun at about
y 950, fromx 880to the right edge, and a short line with a curl at the left, from the left edge aty 1000to aboutx 330, curling back nearx 260,y 1020. Press Enter and delete each path. - Set the layer's opacity to
80%.
- Click Add Layer and name it
-
Lasso the three dunes
- Click New Group at the bottom of the Layers panel and name it
Dunes. Layers you add now go inside it. - Click Add Layer and name it
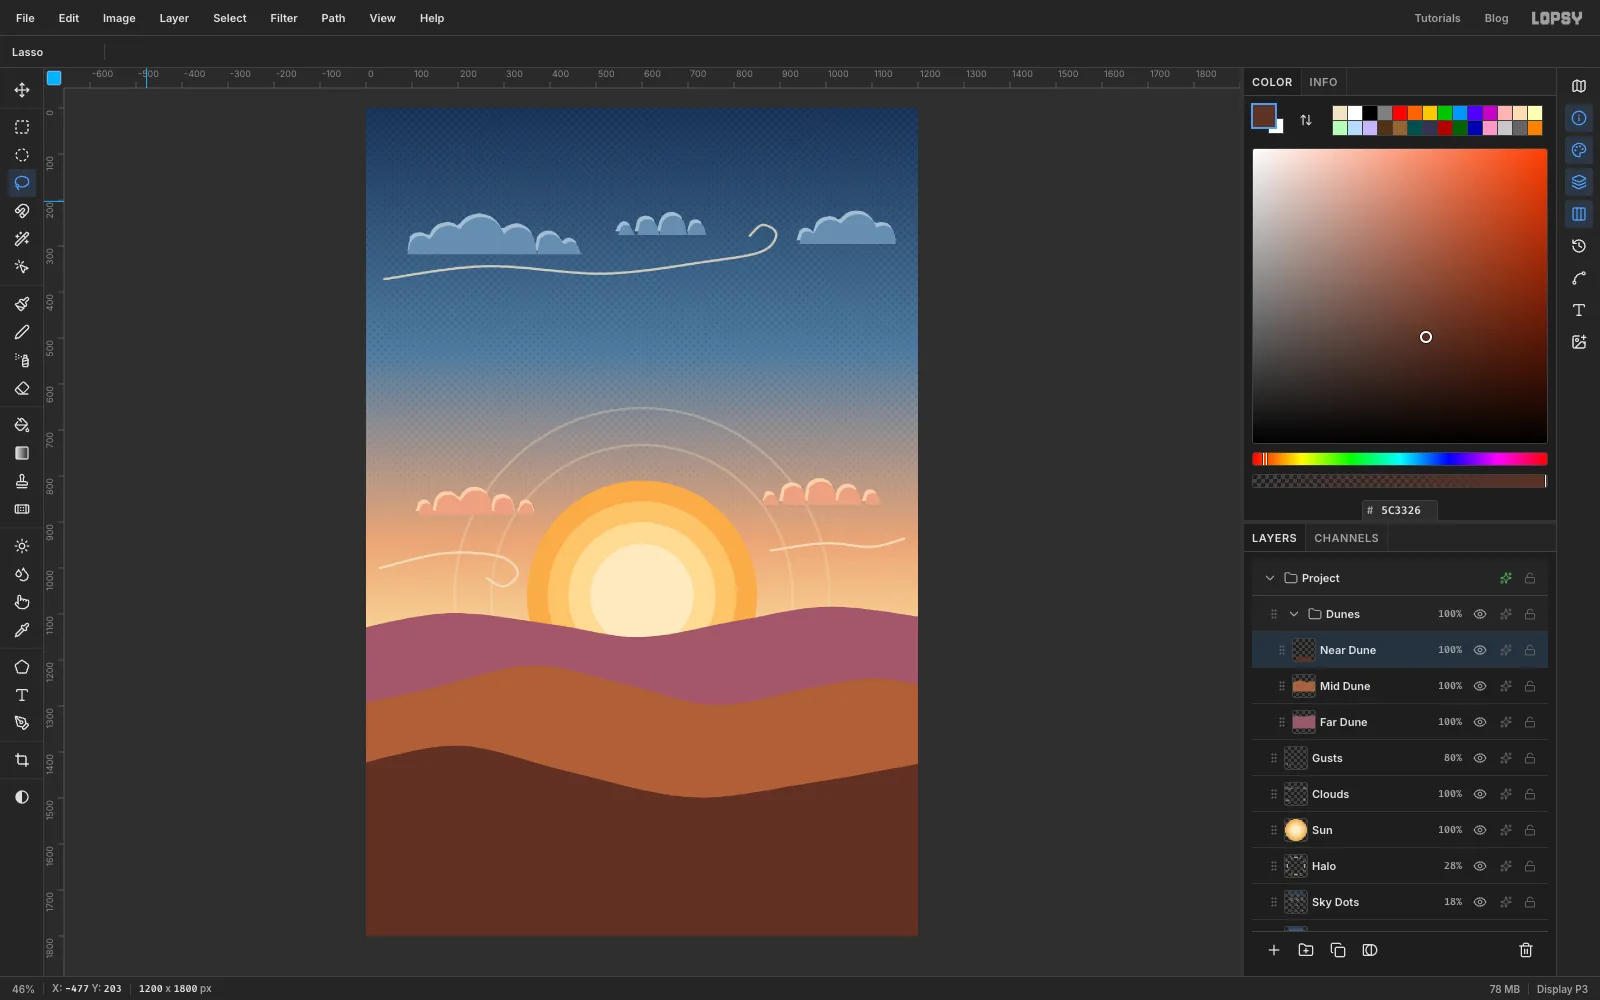
Far Dune. With the Lasso, drag a gently rolling line from just off the left edge at abouty 1135, dipping to abouty 1150in the middle so the sun sinks behind it, and rising to abouty 1085nearx 1010. Carry on off the right edge, then go down below the canvas, across, and back up to the start. Set the colour to and choose Edit → Fill. - Add a layer called
Mid Duneand lasso a second line: a crest at aboutx 360,y 1212, a hollow atx 760,y 1300, and a rise toy 1240nearx 1100, closing it below the canvas the same way. Fill it with . - Add
Near Dune: fromy 1430at the left, a hump nearx 200,y 1386, a low point atx 700,y 1500, and up toy 1420at the right edge, again closing below the canvas. Fill it with . Press Cmd+D.
- Click New Group at the bottom of the Layers panel and name it
-
Add rim light and wind ripples
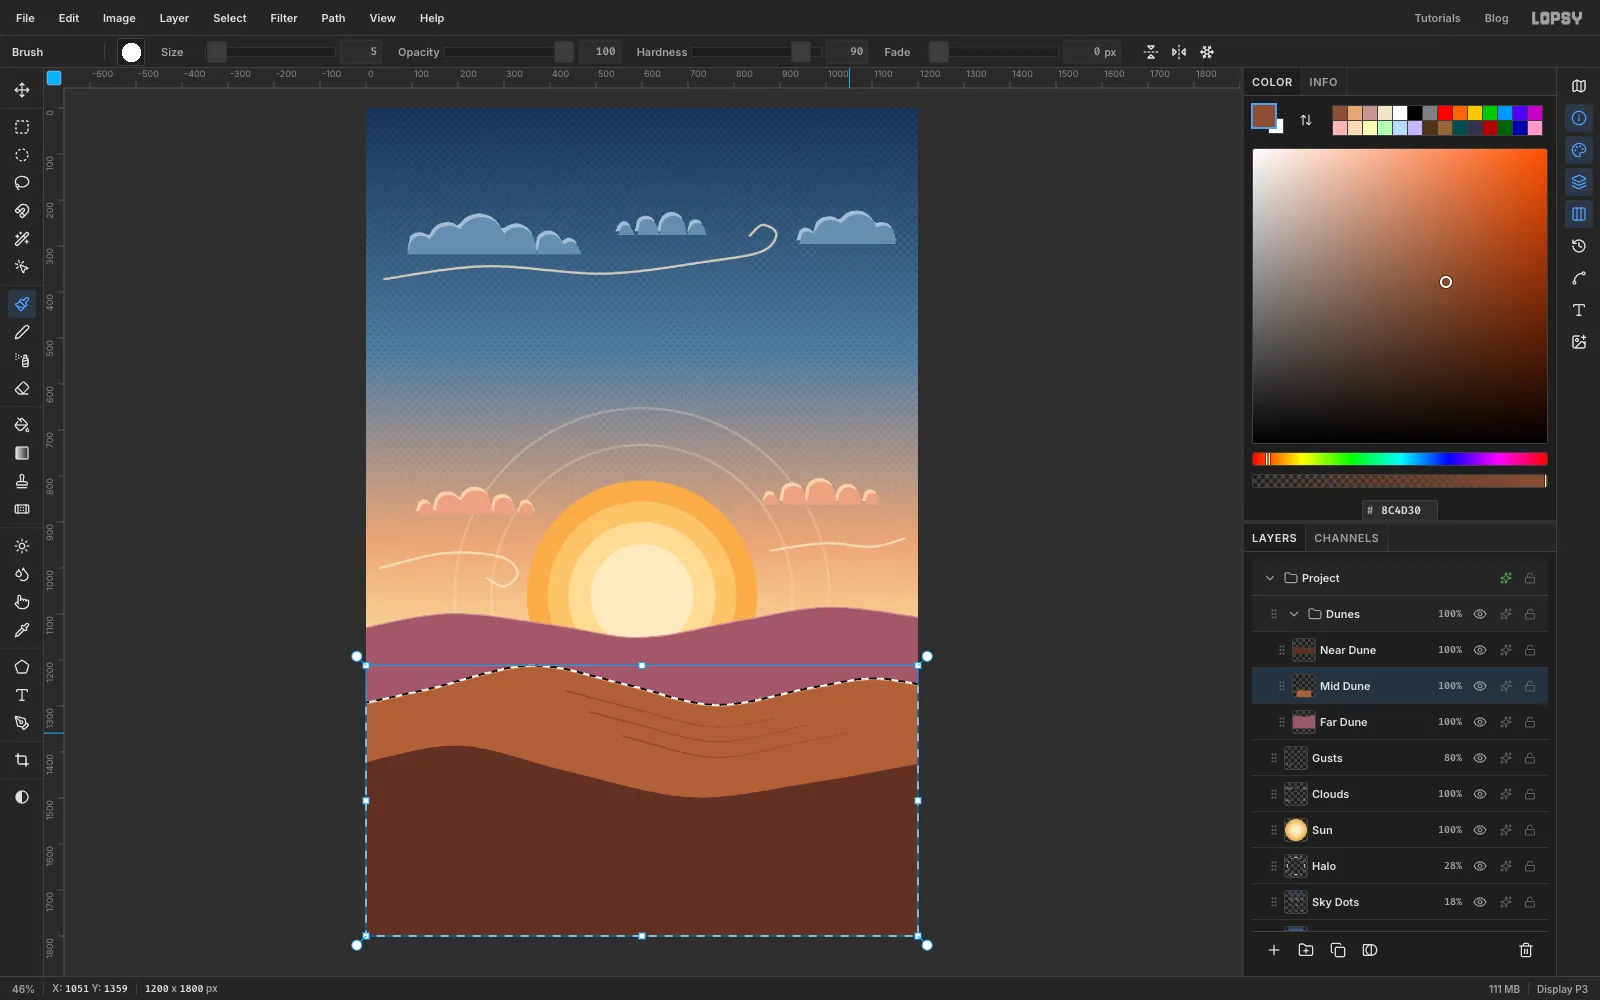
The sun is behind the dunes, so each crest catches a thin line of light. Painting inside each dune's own selection keeps the edges crisp.
- Cmd-click the
Mid Dunethumbnail to load its outline as a selection, and click its row to make it active. - Pick the Brush. Open the brush settings (the tip thumbnail at the left of the options bar) and set Size
12, Hardness100, Taper0. Set the colour to and paint along the dune's top edge. Only the lower half of the brush lands inside the selection, so you get a crisp rim. - For the ripples, set the colour to and the brush Size to
5. In the brush settings, set Taper to400. Taper is a distance: the stroke thins to nothing over that many pixels. Paint three lines that follow the crest's curve on the lee side, about 50, 80 and 115 px below it, starting atx 430,480and540and running to the right for about 350–400 px each. - Press Cmd+D and set Taper back to
0. Do the rim onFar Dunewith at size10, and onNear Dunewith at size10, each inside its own Cmd-click selection. Leave those two without ripples. - Press Cmd+D, click
Mid Duneand run Filter → Add Noise… with Amount8and Mono, for a little sand grain.
- Cmd-click the
-
Paint the beach grass
- Click
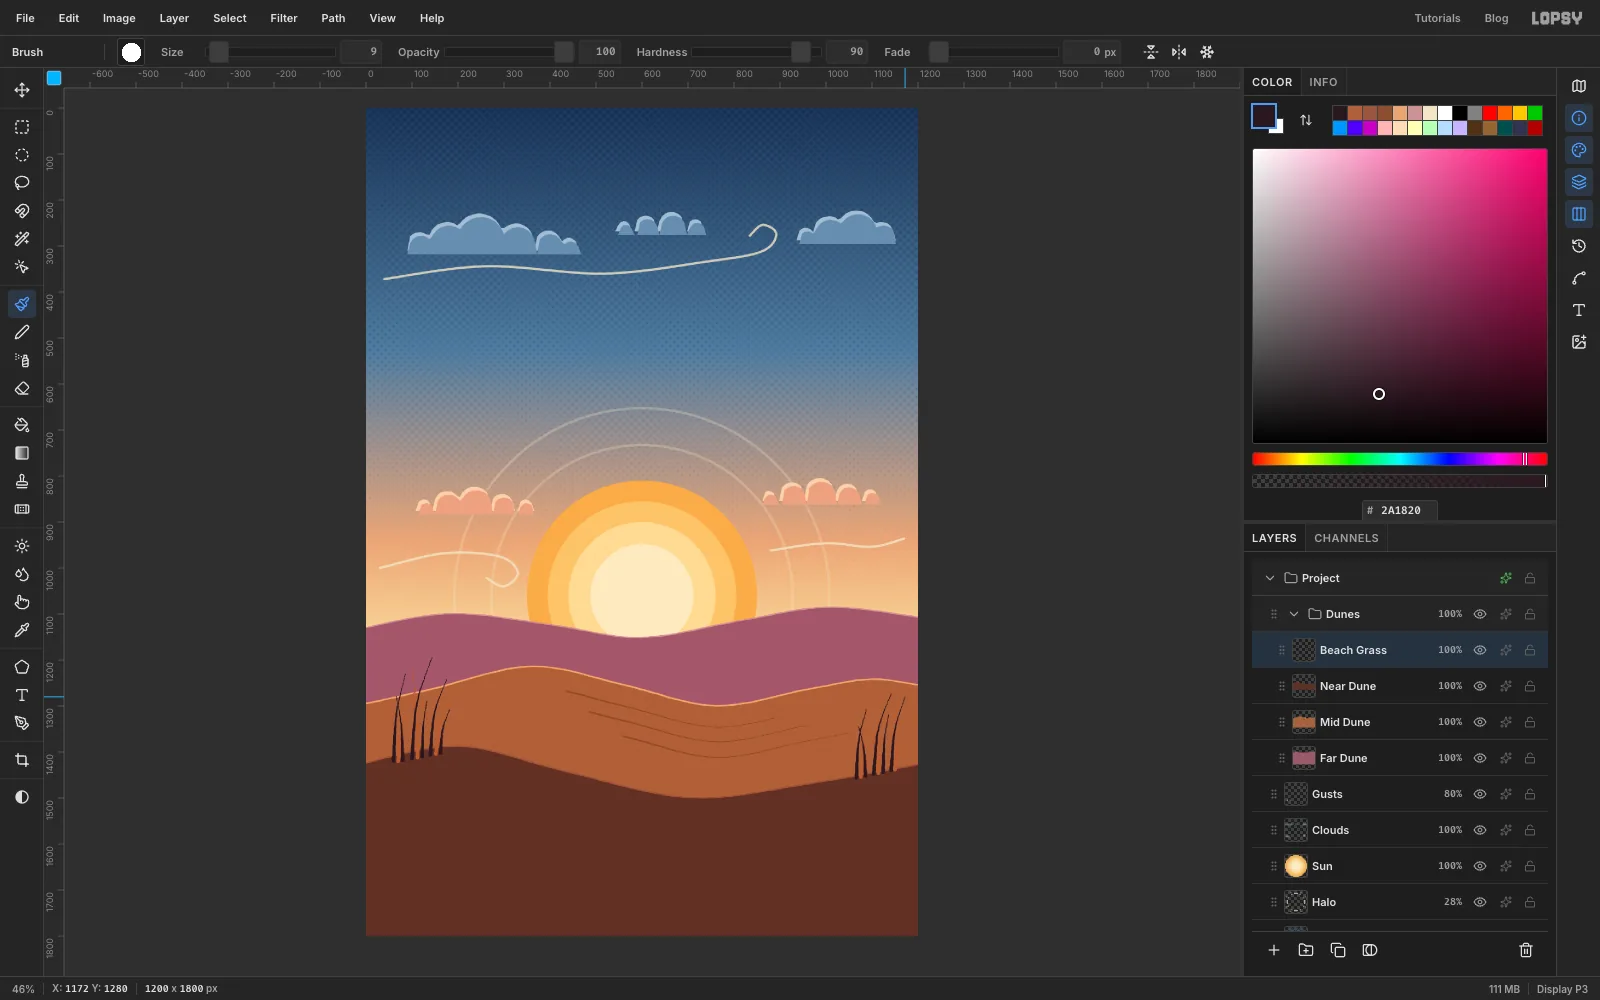
Near Dune, click Add Layer and name itBeach Grass. - Set the brush Size to
9, Hardness100, and Taper to roughly the length of each blade (try180). Each stroke starts full width at the root and thins to a point. - Set the colour to and paint three blades in each clump: from the near dune's edge near
x 70–150on the left andx 1080–1150on the right, each 110–190 px tall, mostly leaning right with the wind and one leaning back. - Switch to and paint five or six more blades per clump in front, at different heights between 95 and 220 px. Keep the tips at least 40 px away from where the title will go (roughly
x 210–990) and inside the frame (x 50–1150).
- Click
-
Drop in the 1903 photo
- Click the collapse arrow on the
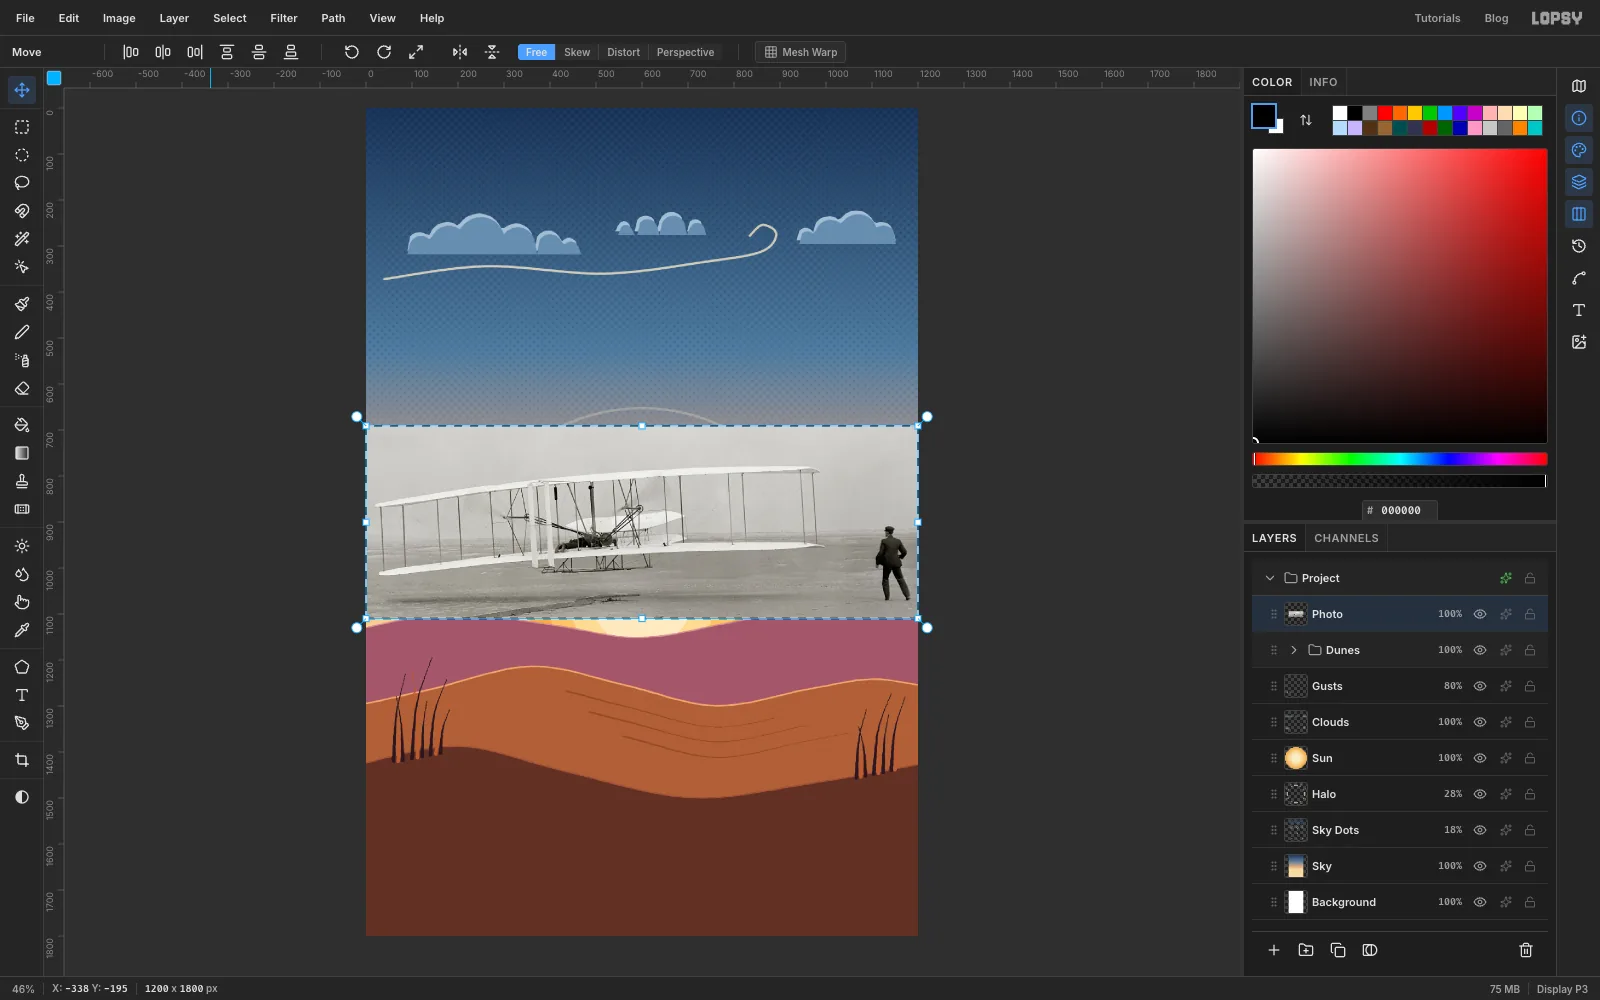
Dunesgroup, then click the group's row so the photo lands above it. - Drag your cropped photo onto the canvas. Lopsy puts it on a new layer and fits it to the poster's width, about 1200 × 419 px, centred vertically. The top of the photo is at about
y 691. - Rename the layer
Photo.
- Click the collapse arrow on the
-
Lift Wilbur onto his own layer
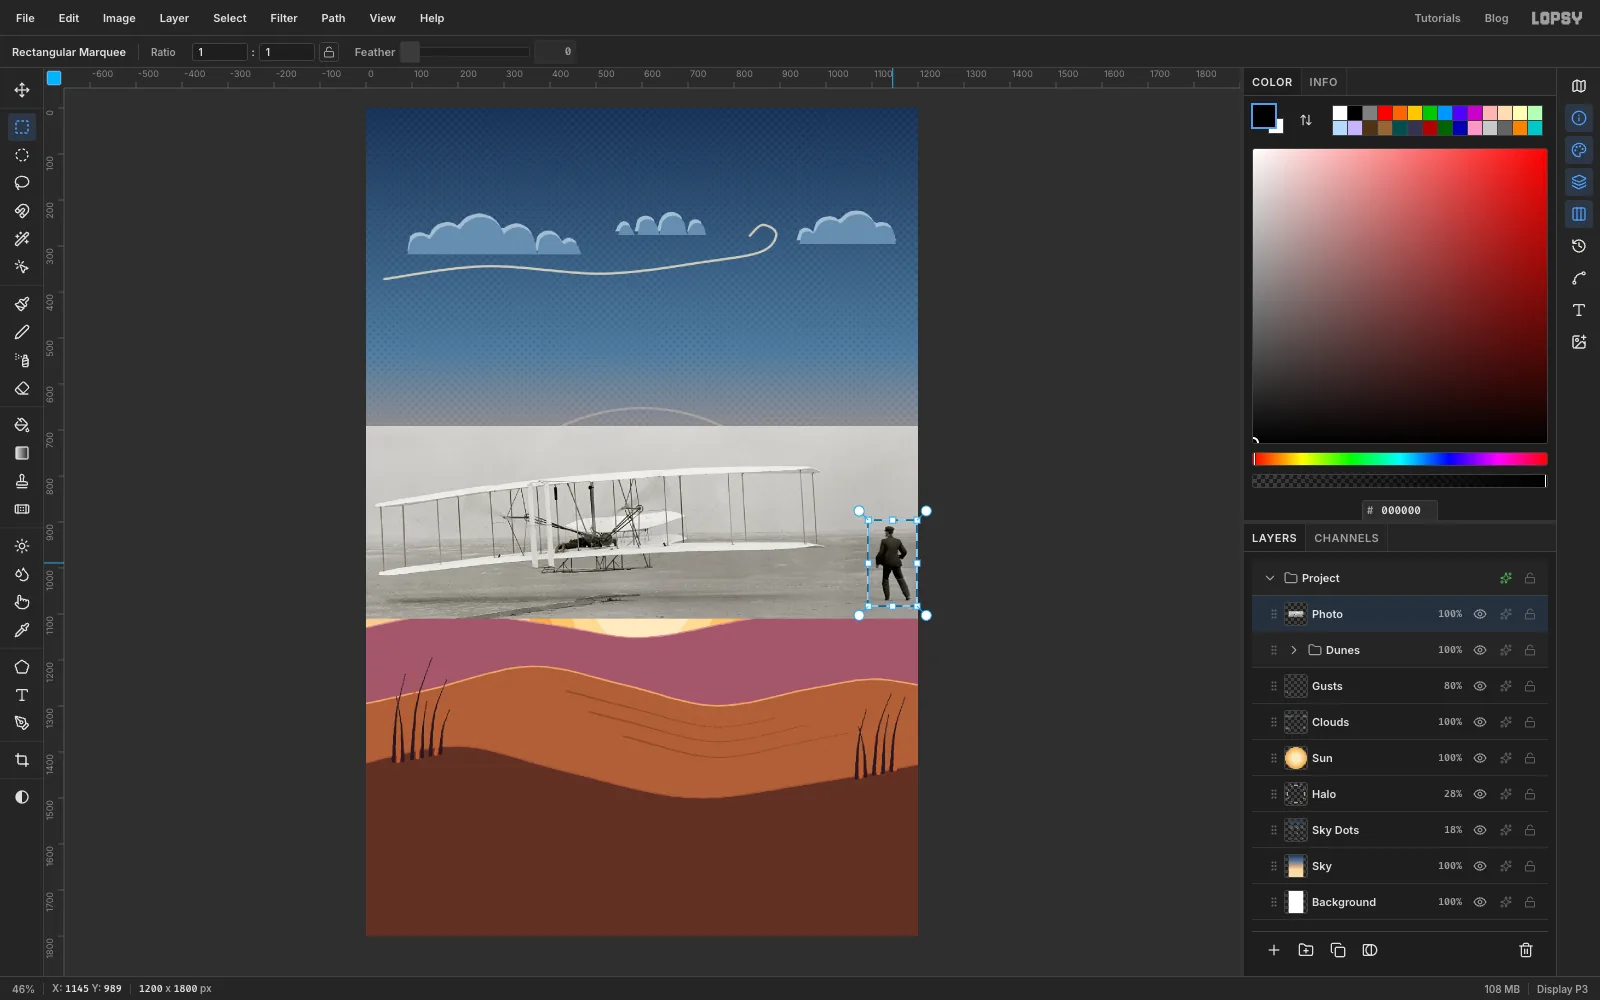
- With the Rectangular Marquee, drag a snug box around Wilbur at the right edge of the photo, from just above his cap to just below his feet, keeping clear of the wing tip.
- Press Cmd+C, then Cmd+V. The copy pastes in place on a new layer. Rename it
Wilbur.
-
Turn Wilbur into a silhouette
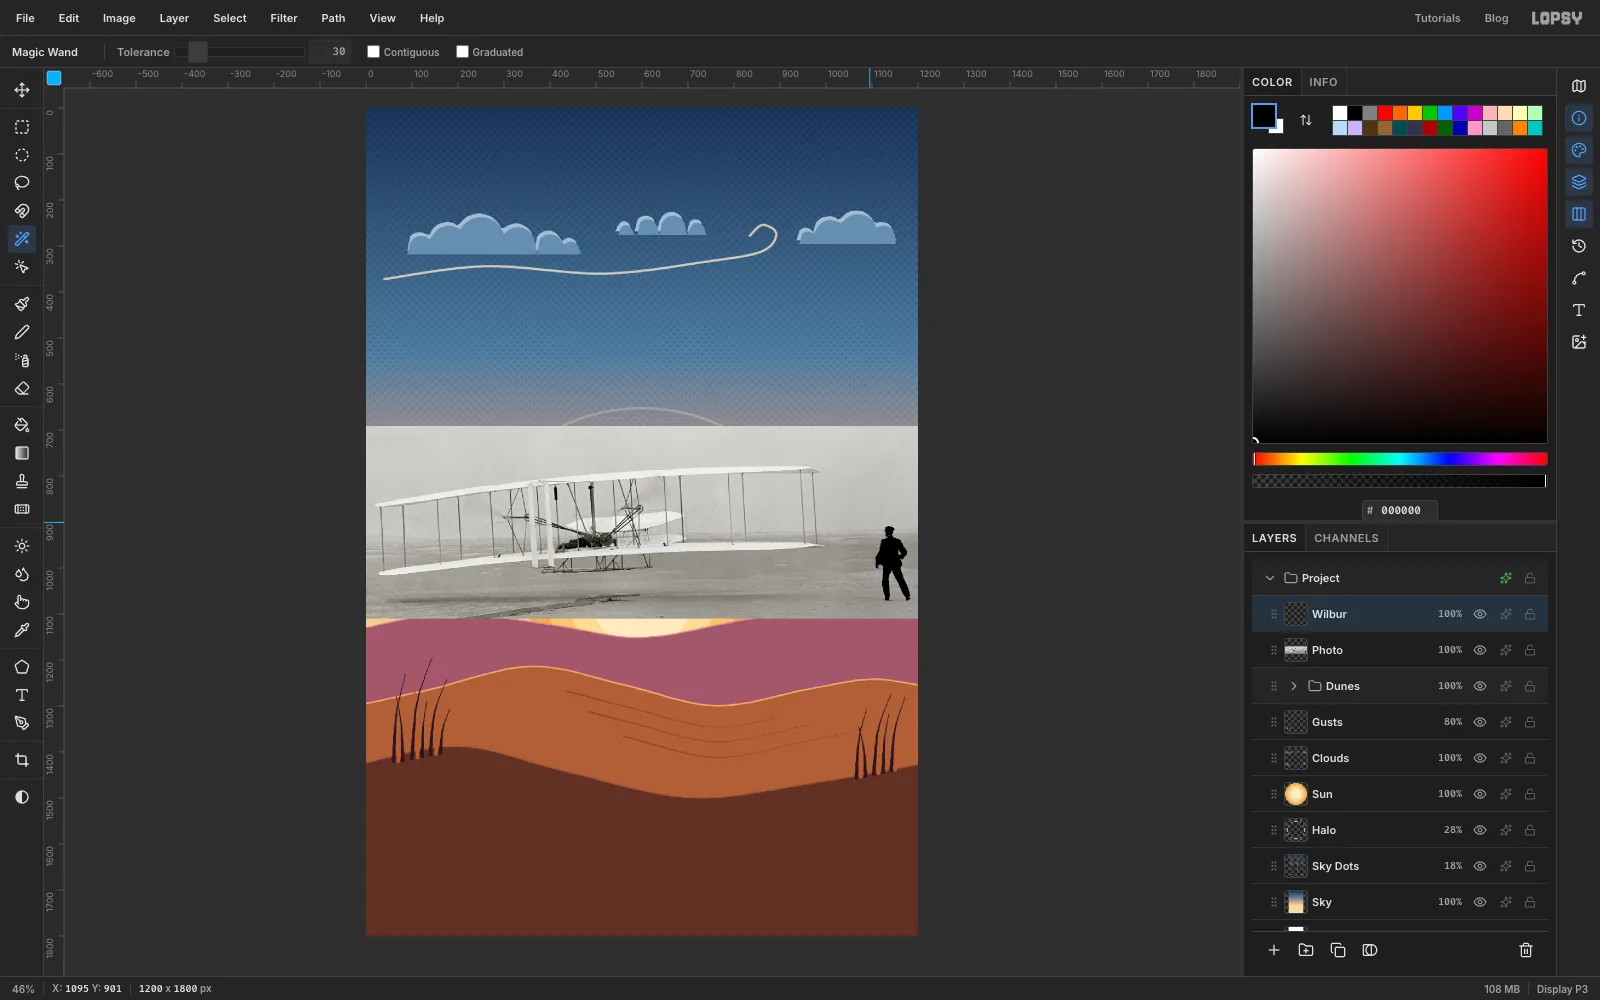
- Choose Filter → Threshold…, set Level to
110, and click Apply. Wilbur goes black and the sand goes white. - Pick the Magic Wand, set Tolerance to
30, untick Contiguous, and click the white sand. Press Delete, then Cmd+D.
- Choose Filter → Threshold…, set Level to
-
Trace the wings
A threshold of the wings leaves ragged edges, so trace them instead. The photo underneath is your guide.
- Click
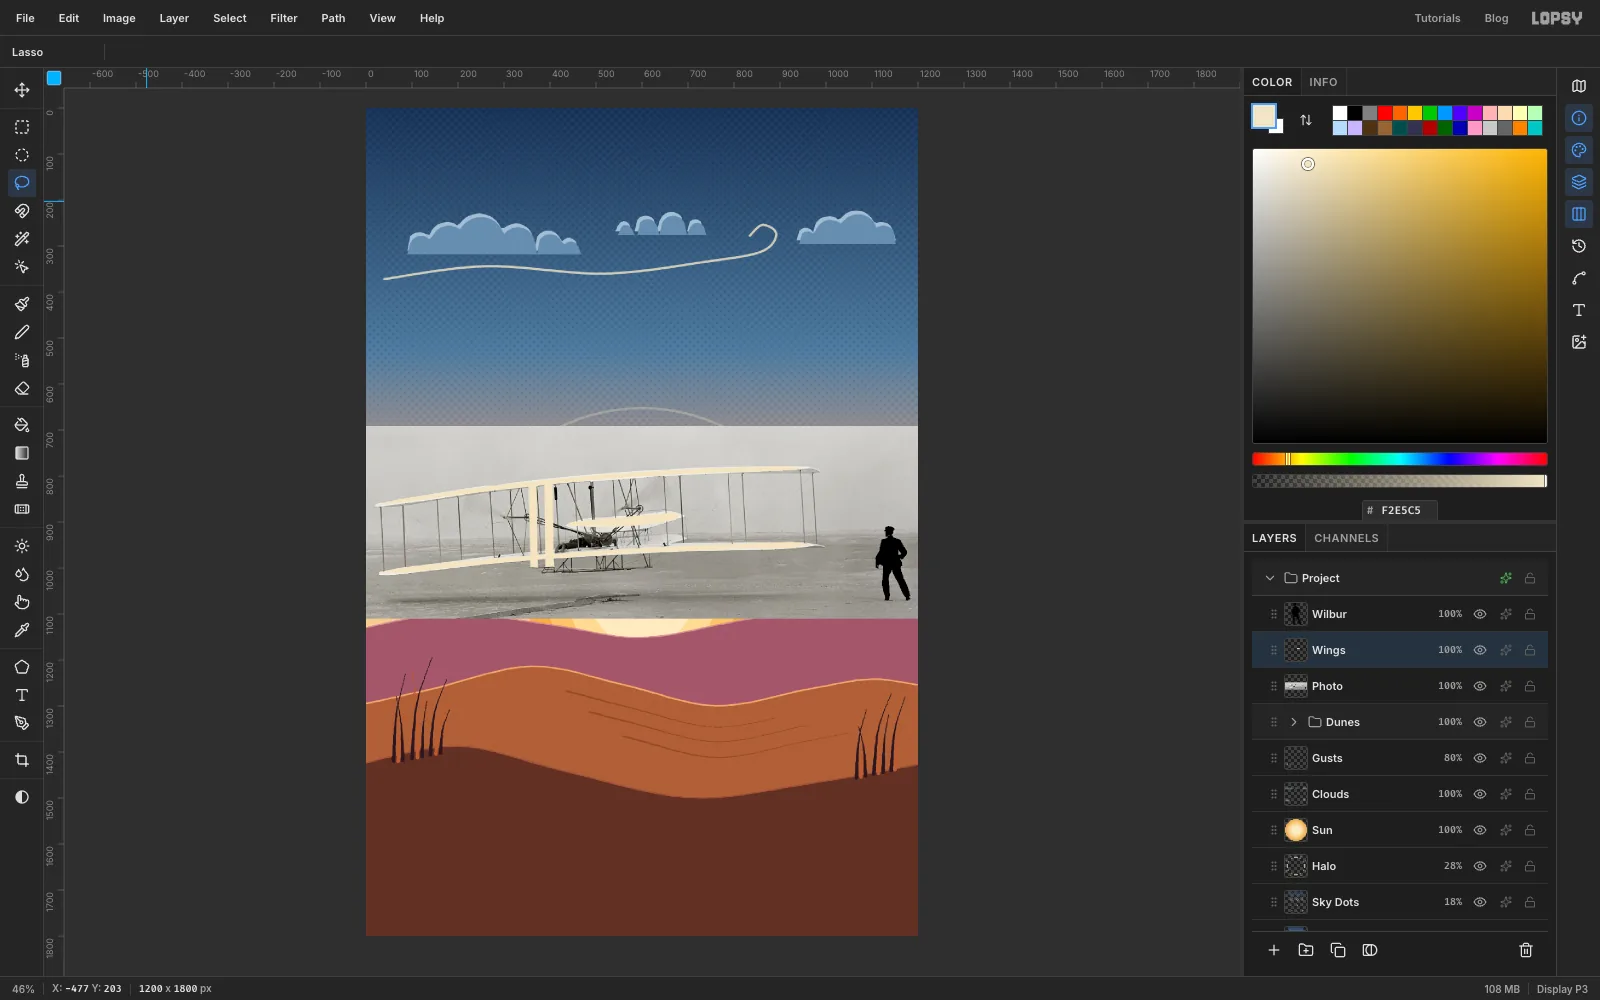
Photo, click Add Layer and name itWings. Set the colour to . - Zoom in so the Flyer fills the window. With the Lasso, drag along the top edge of the upper wing from its left tip to its right tip, then back along its bottom edge. Wings are thin, so stay just outside the photo's white. Choose Edit → Fill.
- Trace and fill the lower wing the same way, and the long pale elevator shape in the middle of the Flyer.
- Finish with the two white posts that stand up at the front of the Flyer, just left of centre, as two thin rectangles from the top wing down to the skids.
- Press Cmd+D.
- Click
-
Pull the rigging out with a threshold
- Click
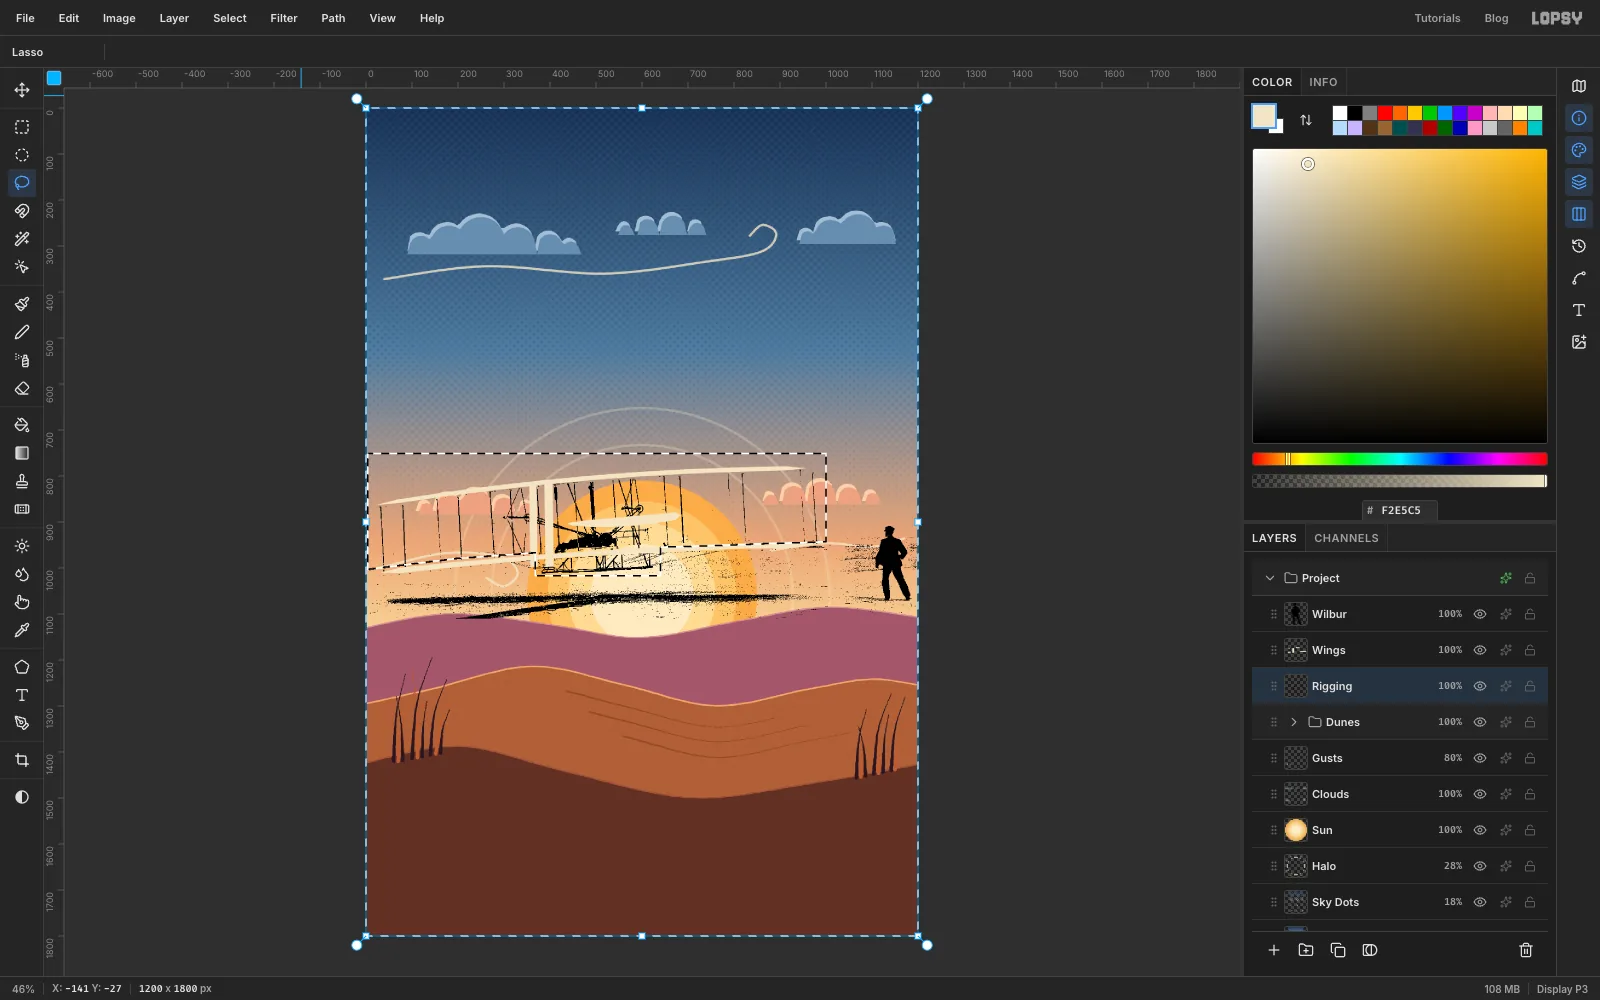
Photoand rename itRigging. - Run Filter → Threshold… with Level
135. The struts, wires, engine and the pilot go black. - With the Magic Wand (Contiguous still off), click the white sky and press Delete.
- With the Lasso, draw around the Flyer itself: above the top wing, down past the lower wing's ends, and under the skids in the middle. Leave out Wilbur's old spot and the sand. Choose Select → Inverse and press Delete, then Cmd+D.
- Click
-
Re-ink the struts
The threshold breaks some of the thin struts into dashes. Ink them back in by hand.
- Pick the Pencil (
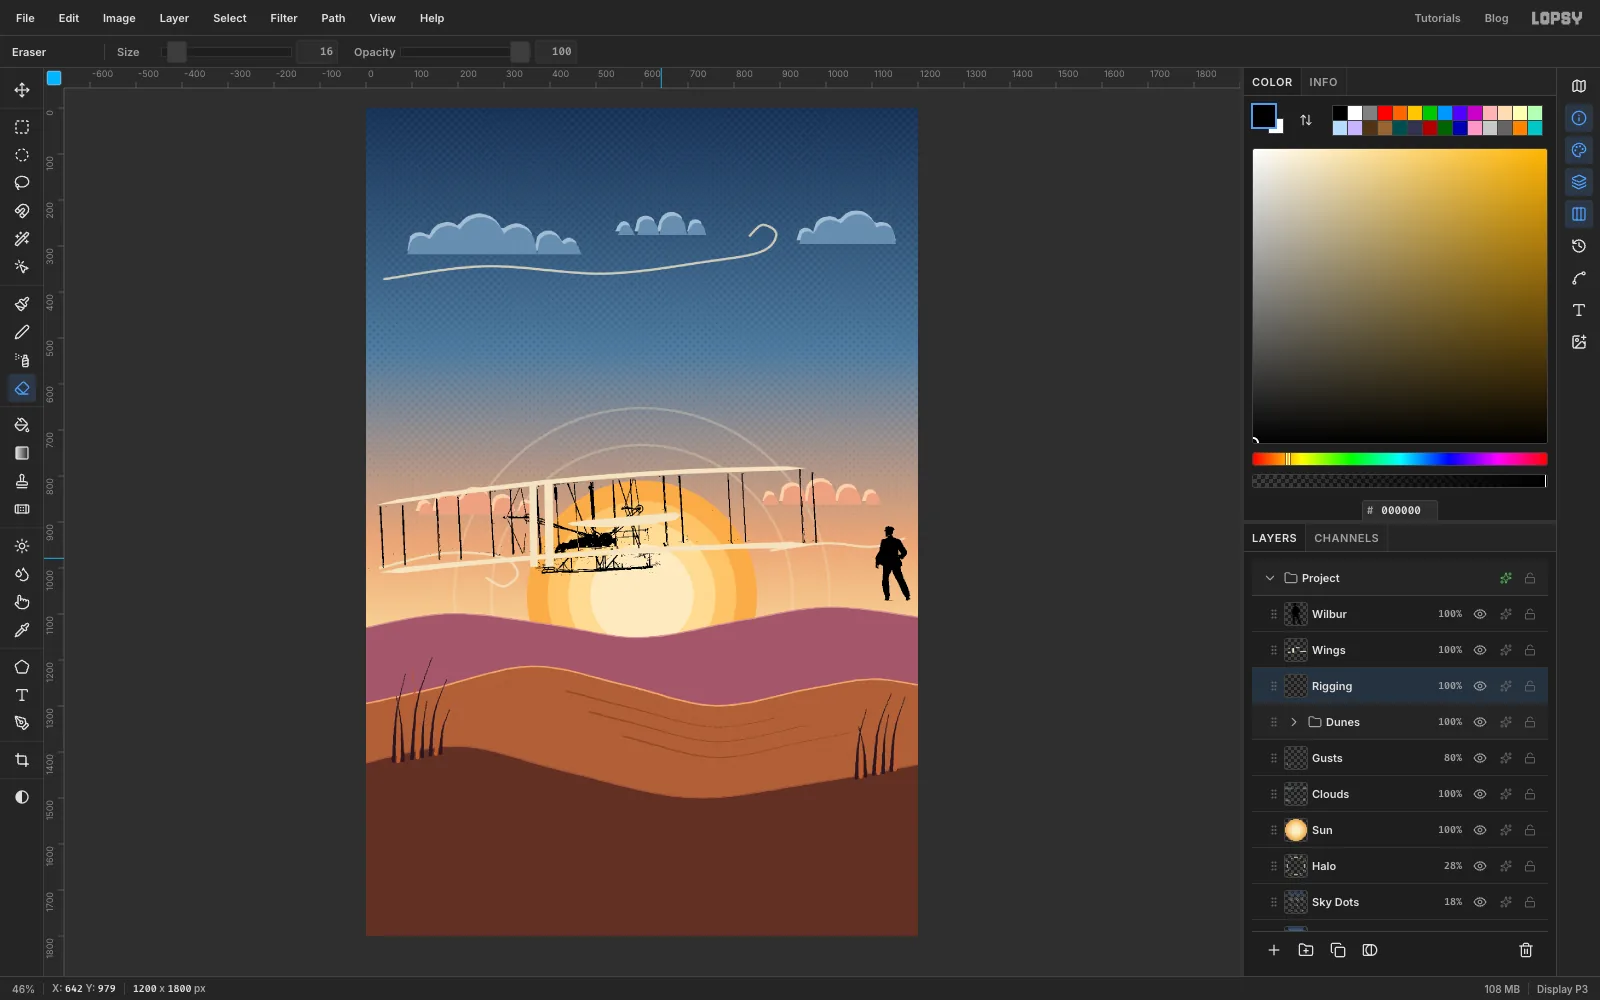
N), set Size to2and the colour to black. - For each upright strut, click where it meets the top wing and Shift-click where it meets the bottom wing. There are fourteen: two near each wing tip, and the rest spaced along both sides of the engine.
- Pick the Eraser (
E) at Size16and wipe away the leftover sand speckle between the skids under the engine, and any dust just past the skids' right-hand ends.
- Pick the Pencil (
-
Ink the Flyer and Wilbur
- Click
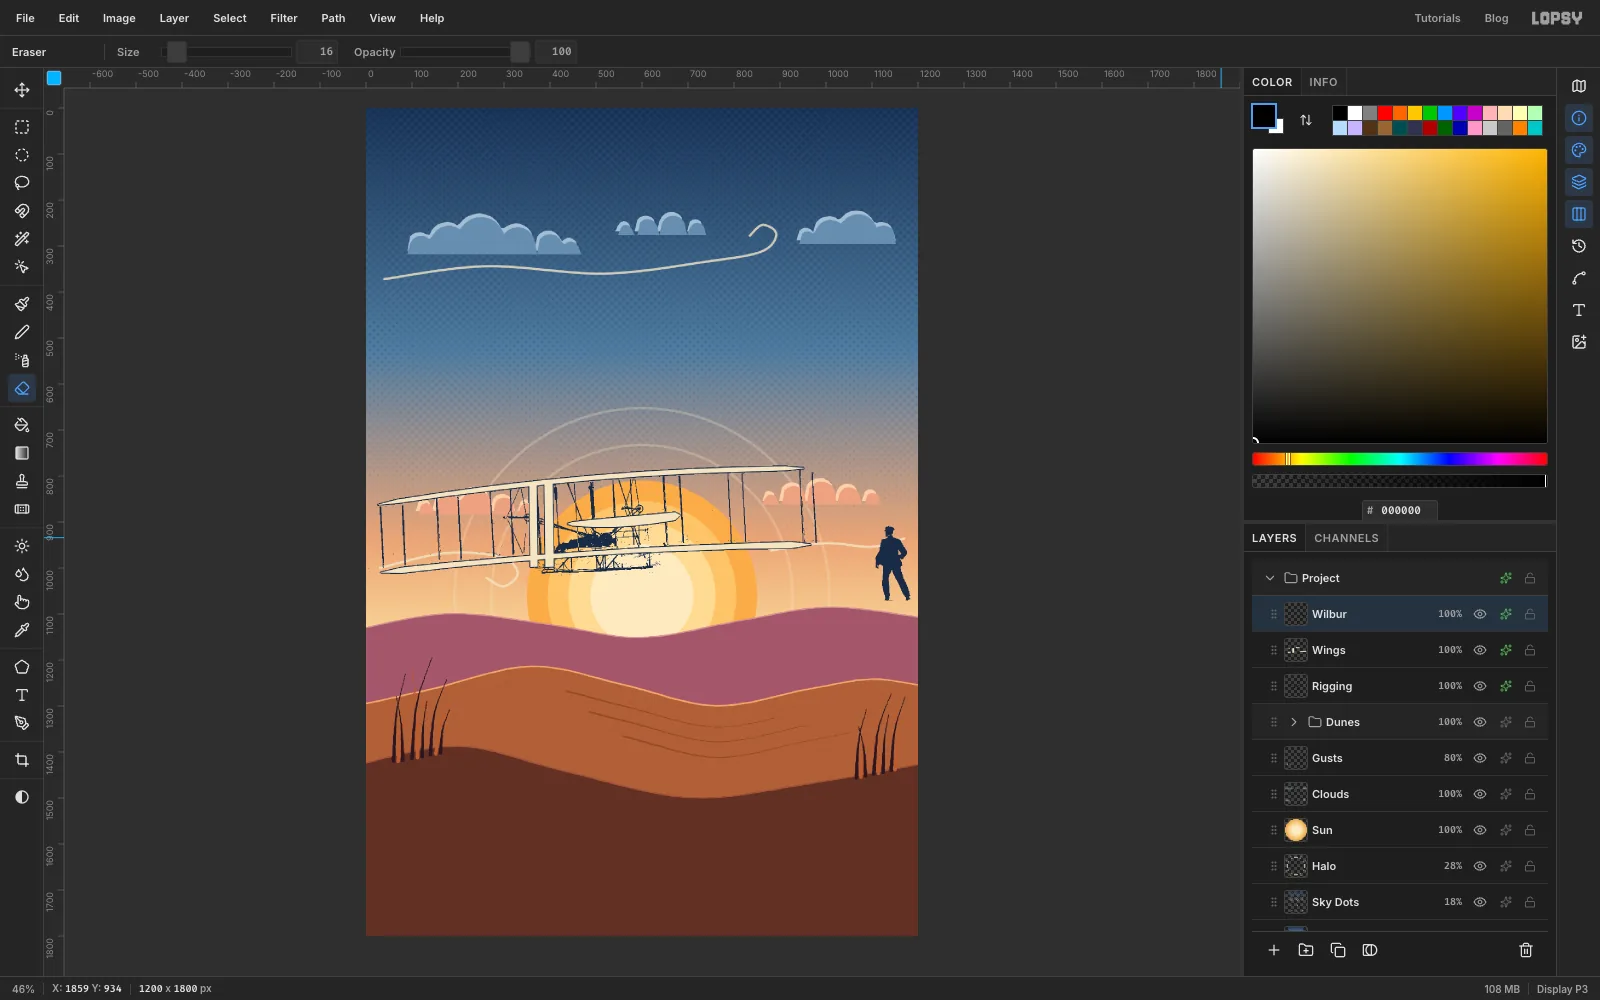
Wings, open its effects drawer and turn on Stroke with Width2and the colour . - Click
Riggingand turn on Color Overlay in . - Do the same Color Overlay on
Wilbur. The whole poster now uses one navy ink.
- Click
-
Group the Flyer
- Click
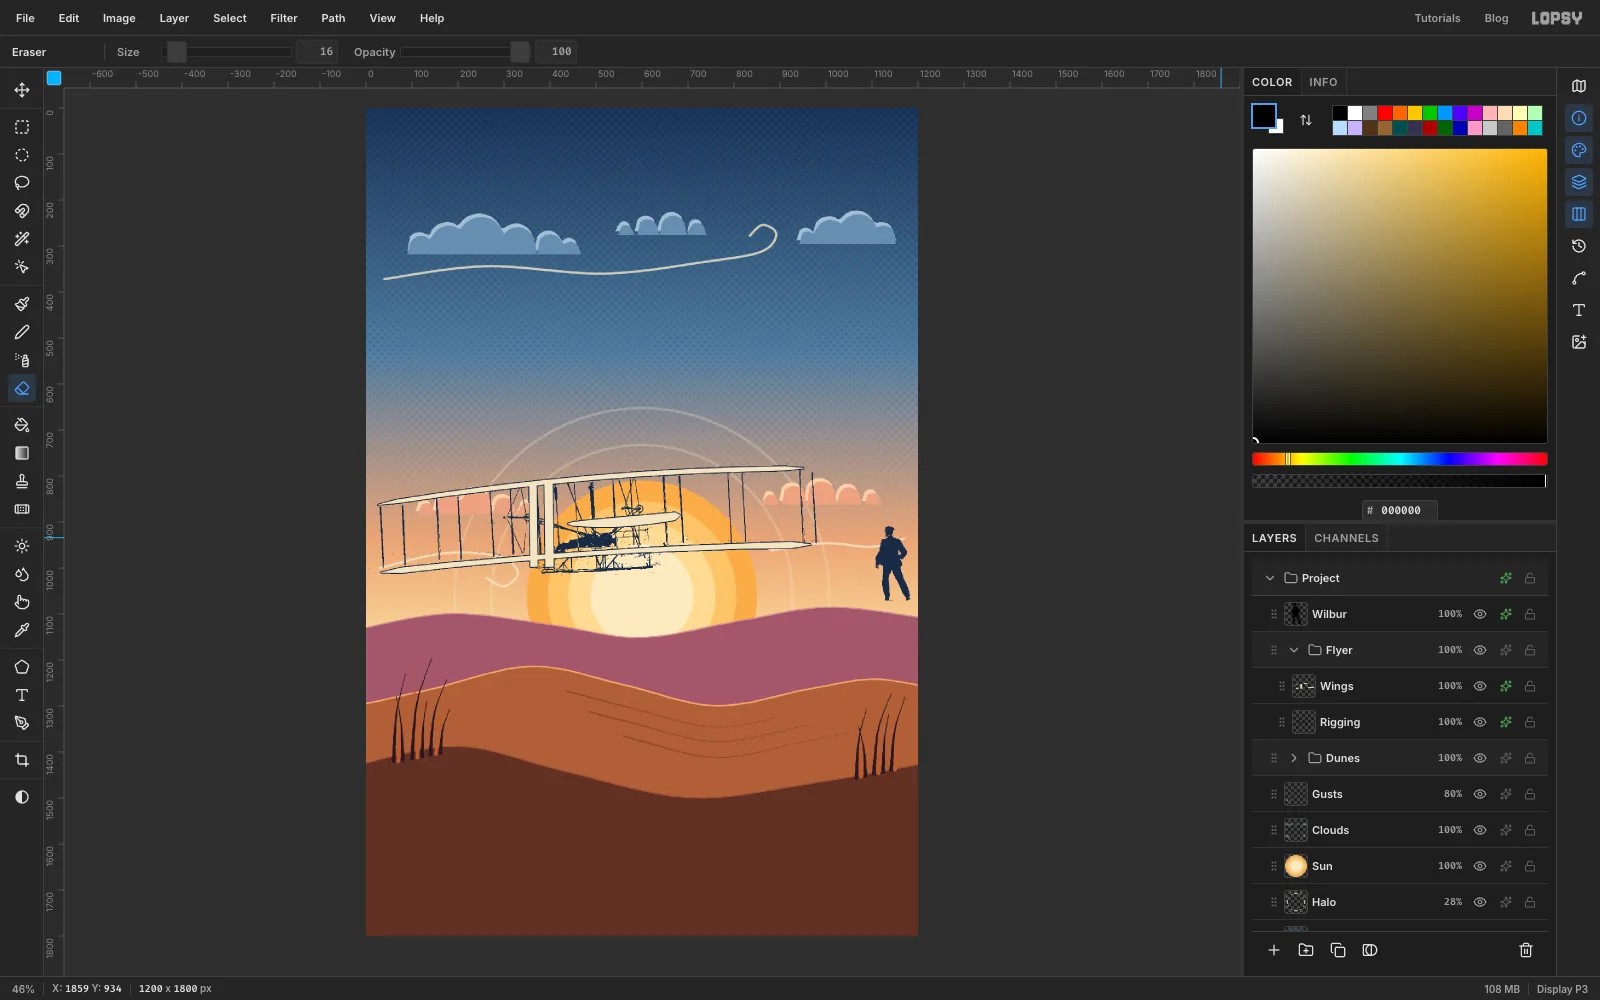
Wings, then Shift-clickRiggingso both are selected. - Click Group Layers at the bottom of the Layers panel and rename the group
Flyer.Wingsstays aboveRigginginside it.
- Click
-
Move and scale the Flyer as one piece
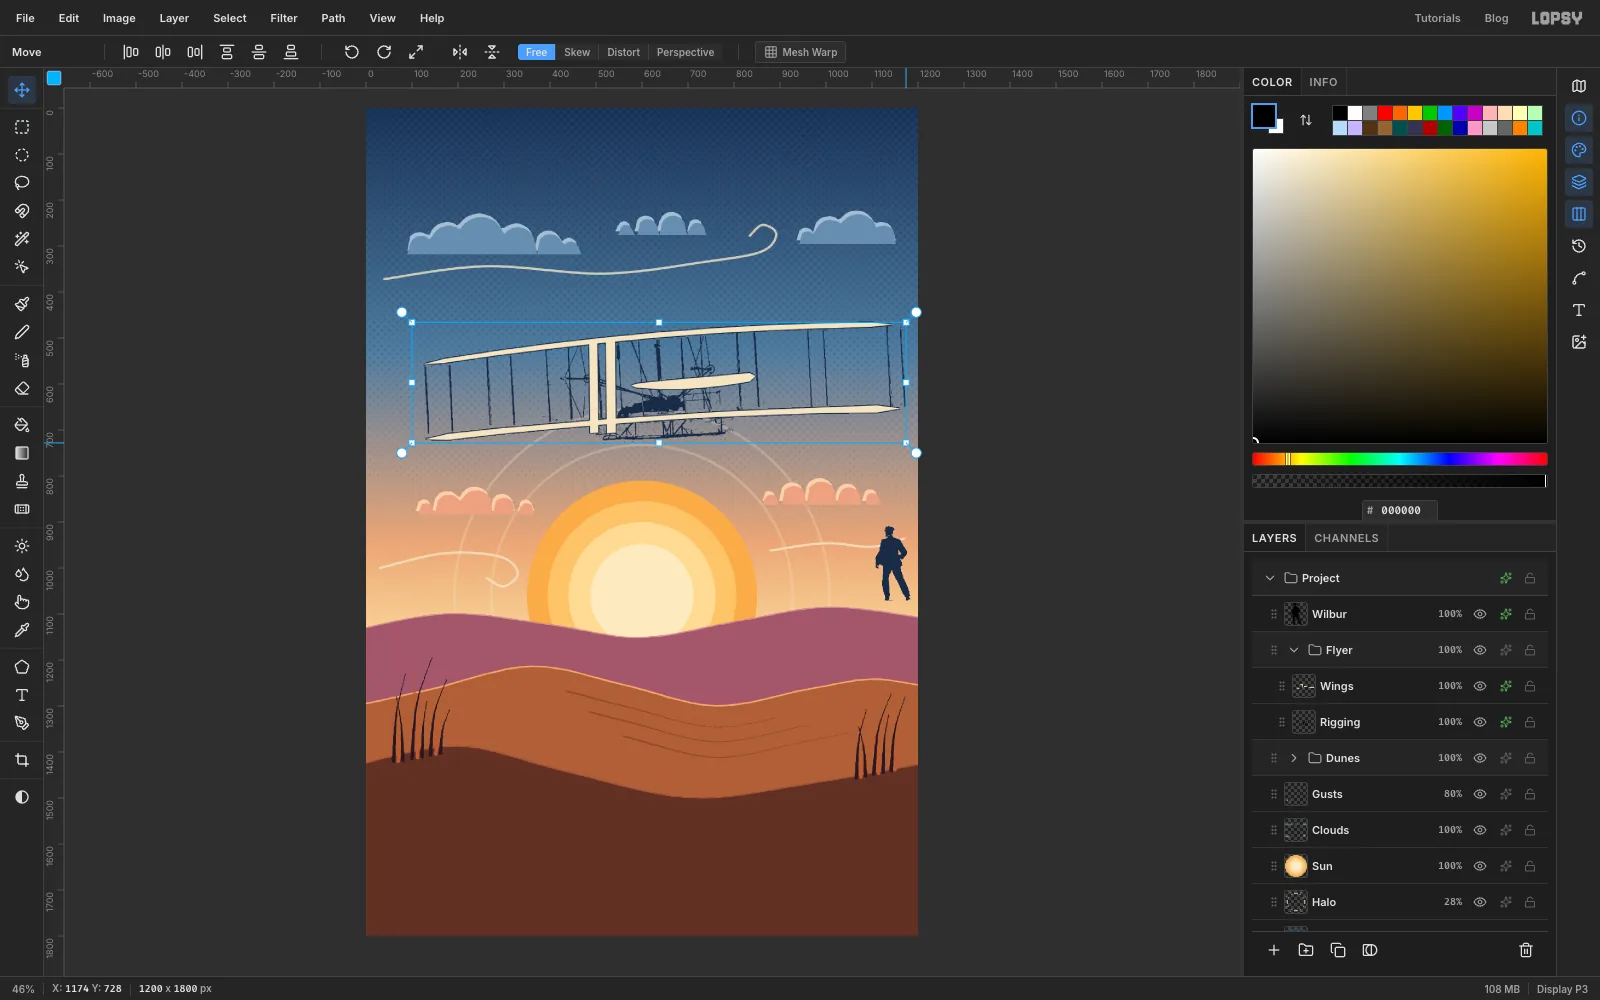
With a group selected and no marquee, the Move tool's handles frame everything in the group.
- Press Cmd+D to make sure nothing is selected, and pick the Move tool (
V). - Drag the Flyer up until it's centred at about
x 588,y 585, above the sun. - Hold Cmd and drag the bottom-right corner handle outward until the Flyer is about 10% bigger, roughly 1050 px wide. Cmd keeps the proportions.
- Press Cmd+D to make sure nothing is selected, and pick the Move tool (
-
Tilt the Flyer into a climb
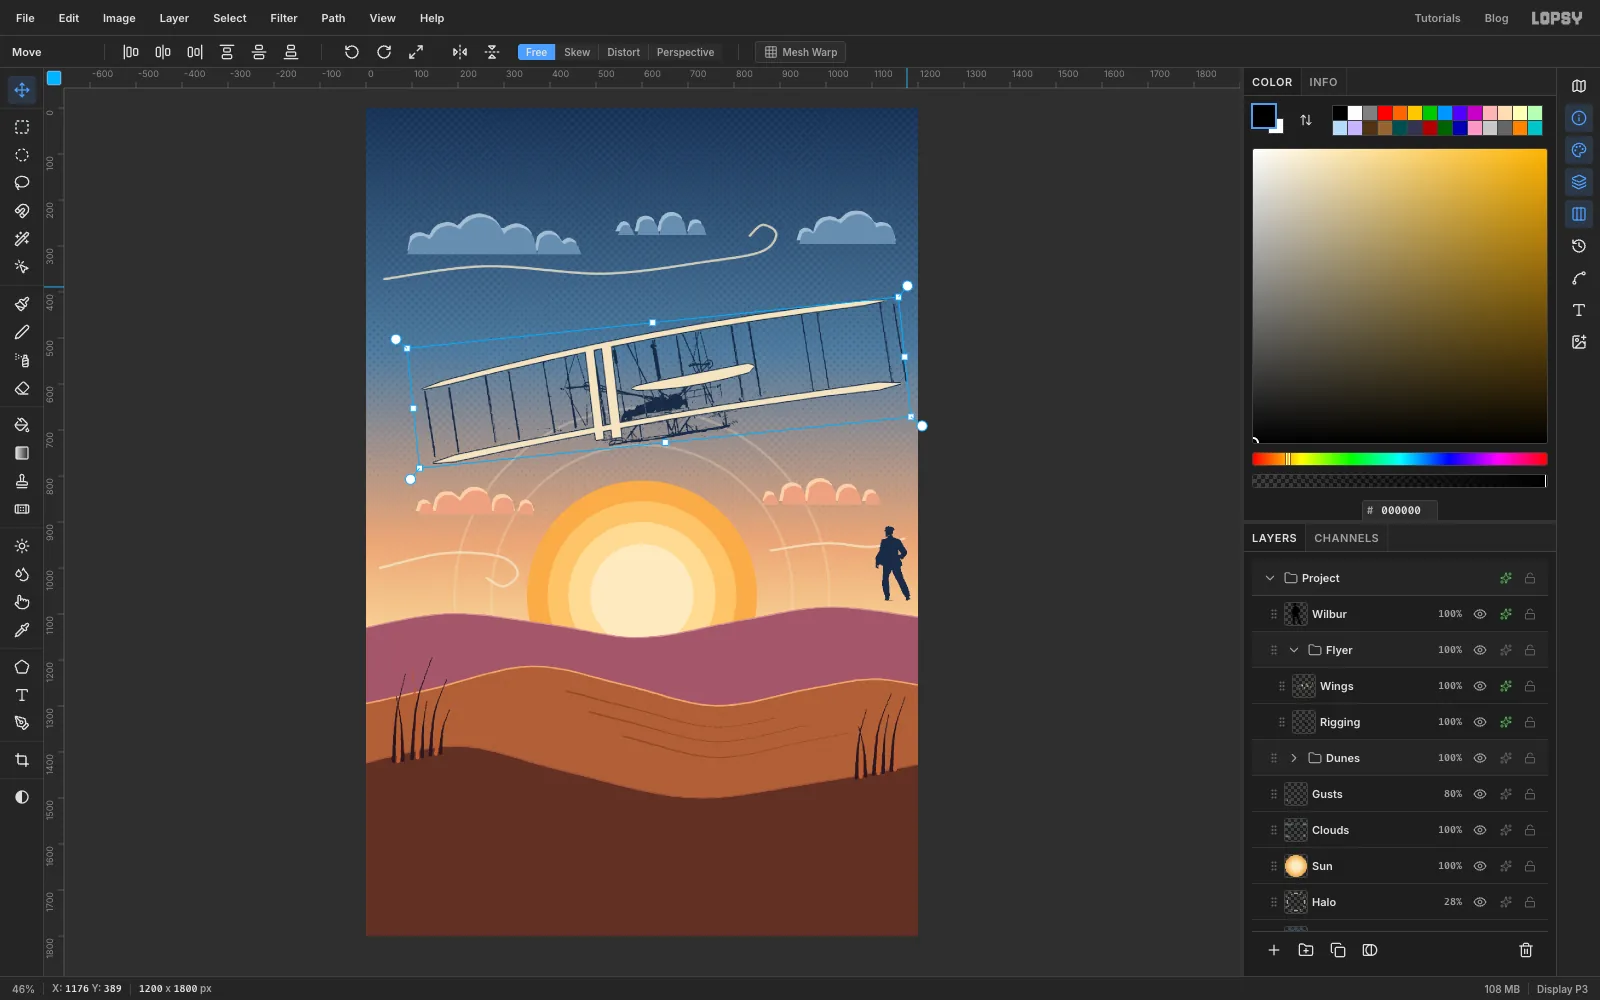
- Drag the round rotation handle at the top-right corner upward, about 6°, so the Flyer climbs toward the right.
- Press Escape to finish. Rotating and scaling shift it a little, so drag it back until it's centred at about
x 588,y 585again. - Press Cmd+Z three times and watch that last move, the tilt and the scale come off, then Cmd+Shift+Z three times to bring them back exactly as they were.
-
Flip and enlarge Wilbur
- Click
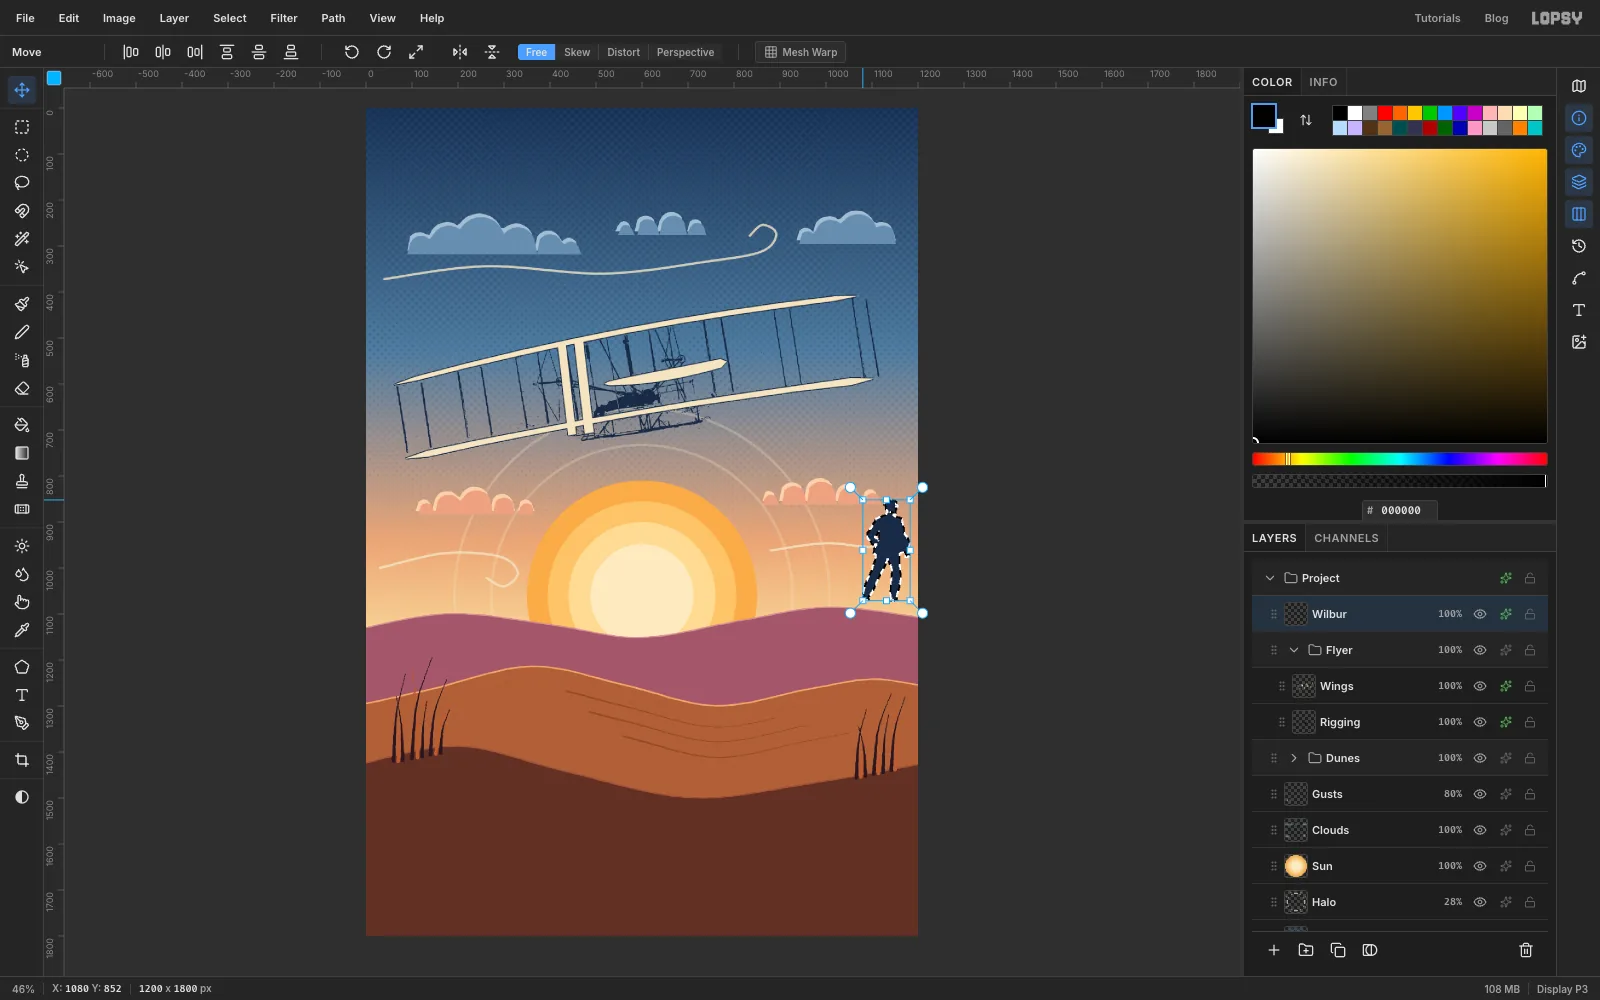
Wilburand Cmd-click its thumbnail to select him. - With the Move tool, click Flip Horizontal in the options bar so he faces the Flyer.
- Hold Cmd and drag his top-left handle up and out until he's about 135% of his size, about 220 px tall. Press Cmd+D.
- Click
-
Stand Wilbur on the dune
Drag Wilbur down onto the right-hand crest of the rust dune, so he's centred at about
x 1062with his feet aty 1247, right on the rim light. Leave at least 40 px between him and the frame edge.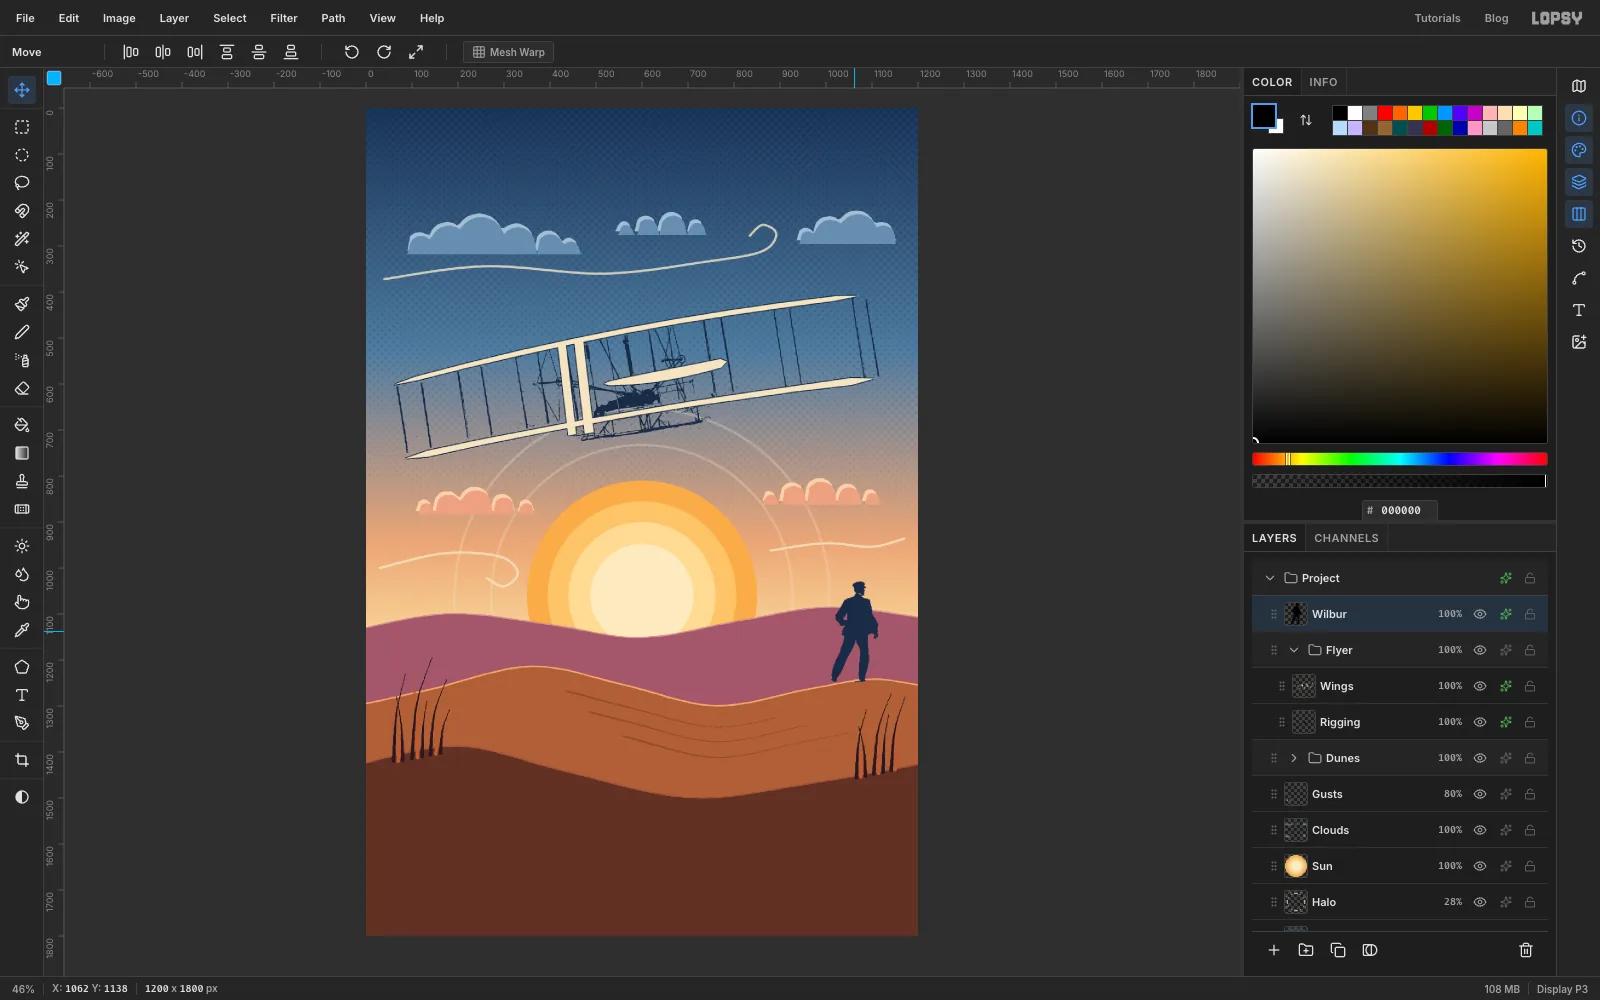
-
Knock the halo out around the Flyer
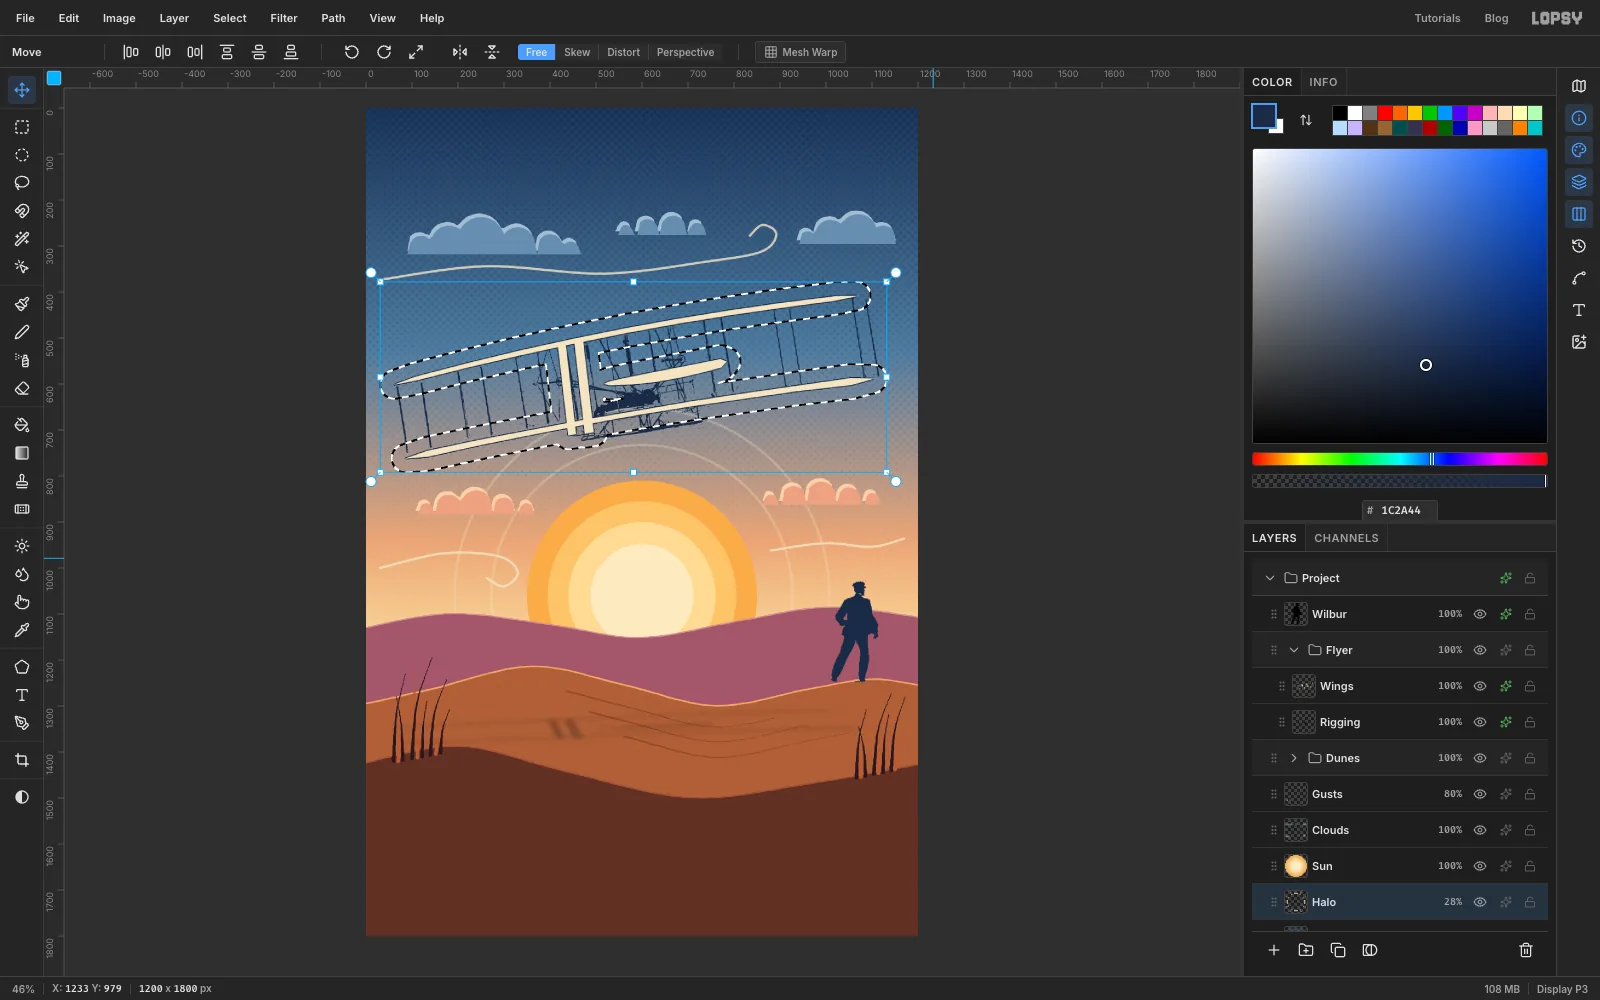
The halo rings shouldn't run into the wings.
- Click
Halo, then Cmd-click theWingsthumbnail. - Choose Select → Grow… with Amount
30and press Delete. The rings now stop well short of the Flyer. Press Cmd+D.
- Click
-
Set the title
Text options restyle whichever text layer is selected, so start each new line from a plain raster layer.
- Click
Wilbur, click Add Layer and name itType Anchor. Leave it empty. - Pick the Text tool (
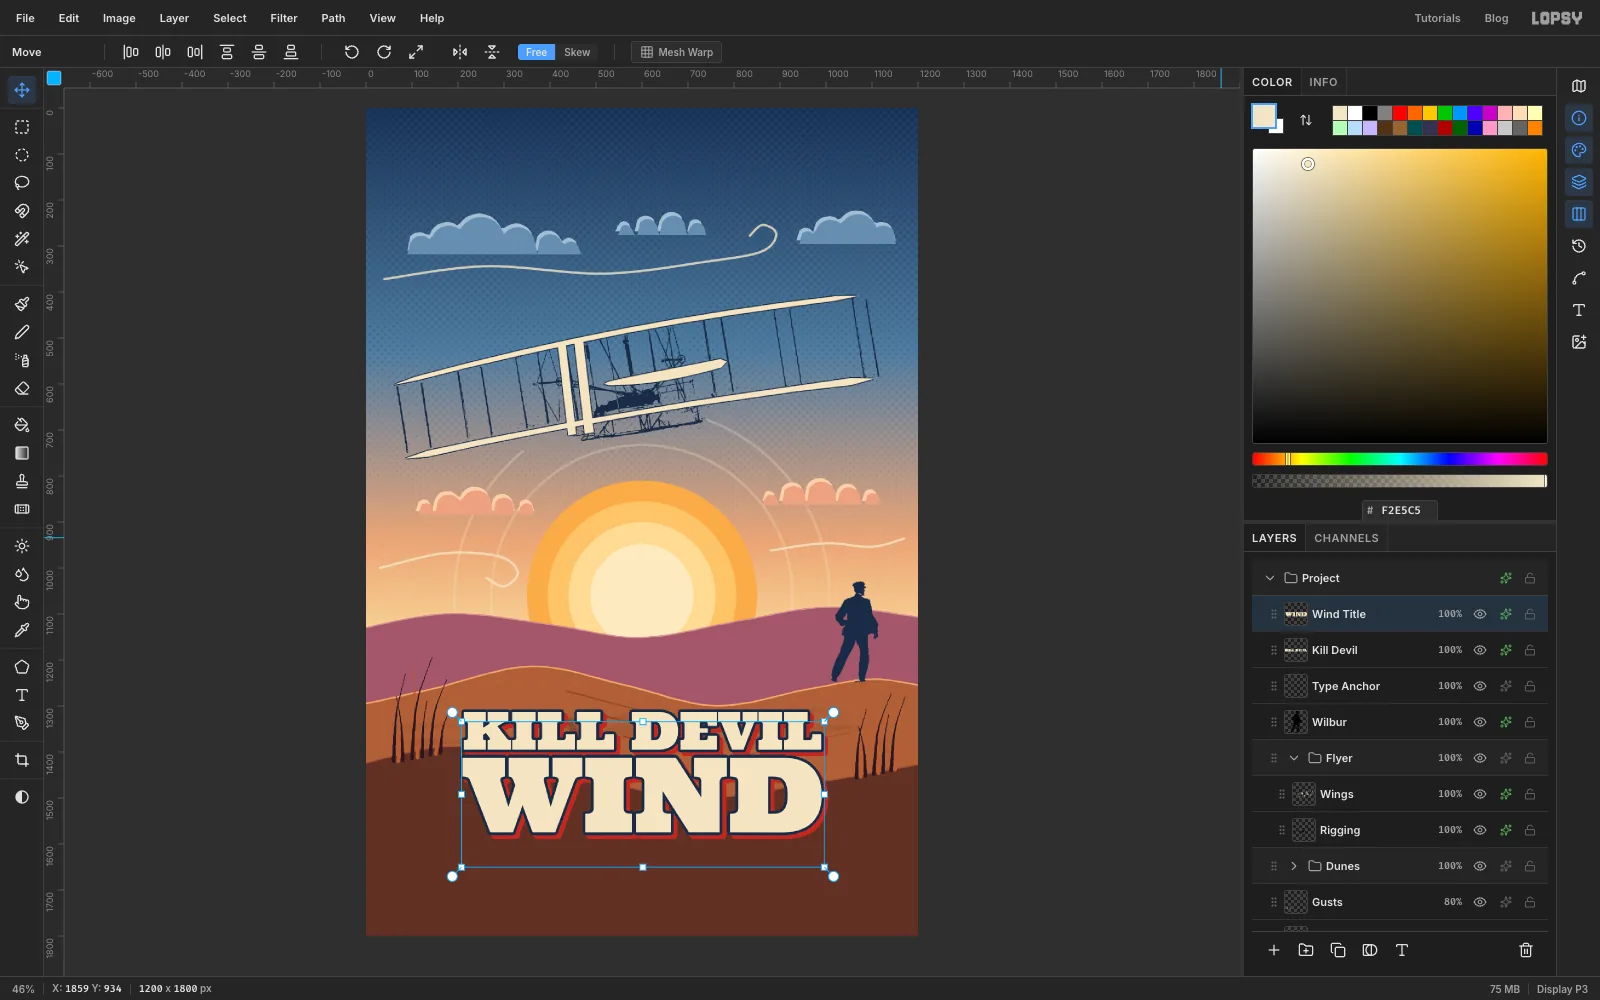
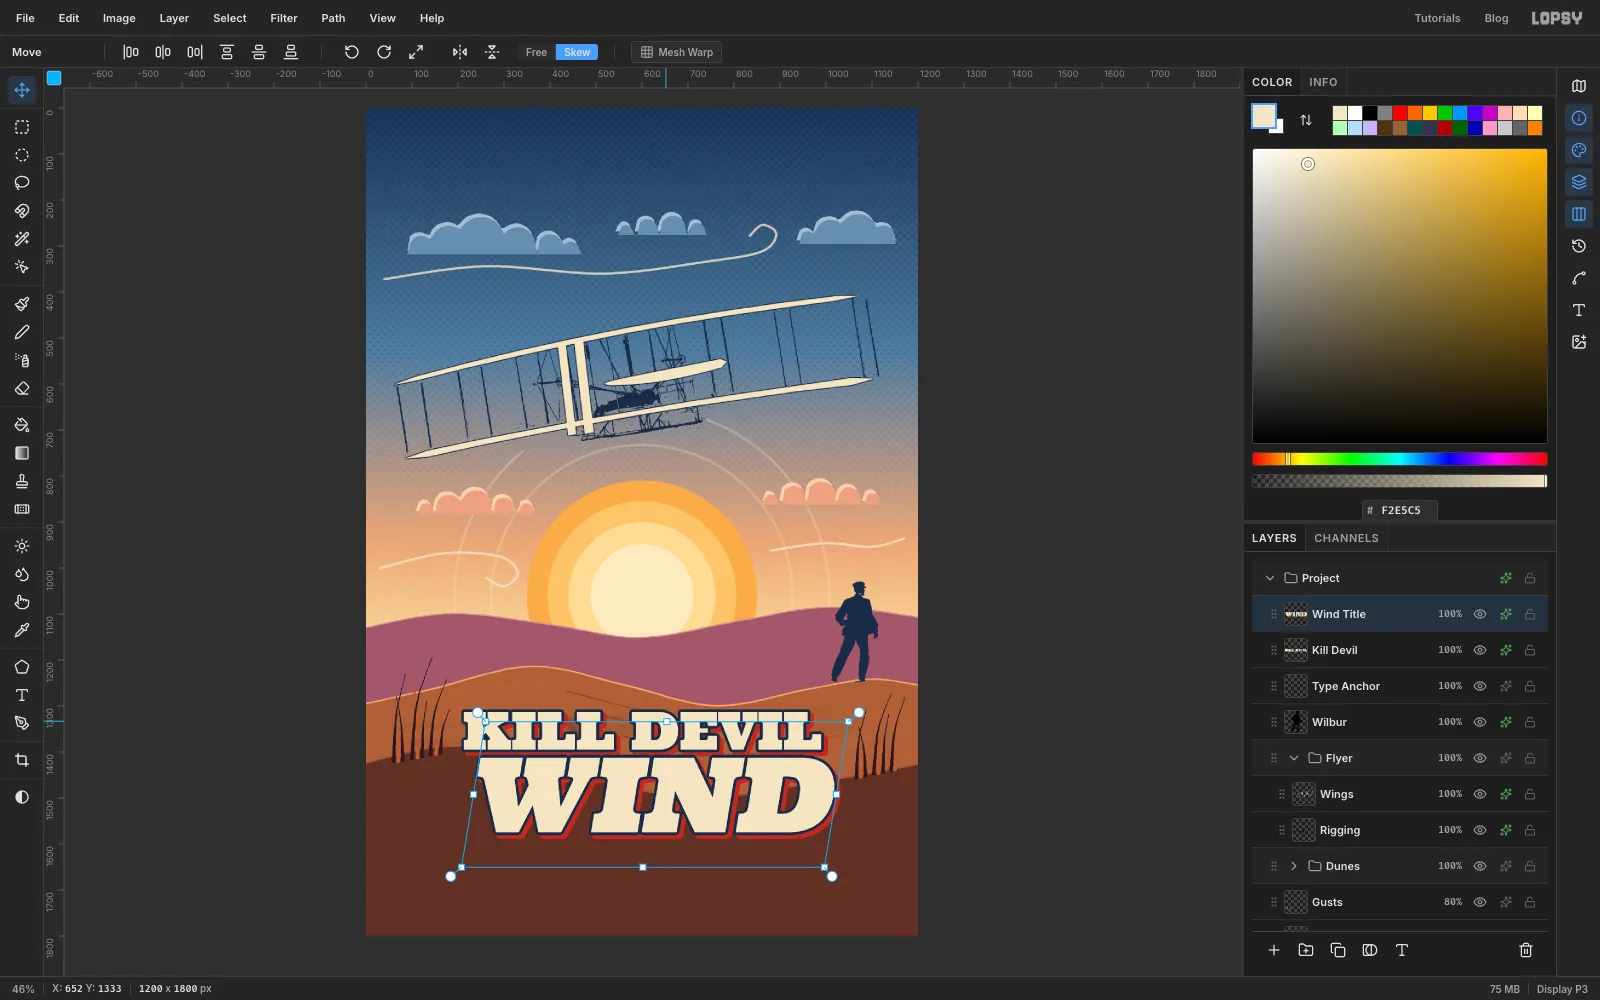
T). Choose Ultra, Size226, Align Center, and the colour . With Center set, the point you click becomes the middle of the line. Click atx 600,y 1380, typeWINDand press Tab. Double-click the new layer's name and rename itWind Title. - Click
Type Anchoragain. Set Size to114, click higher up in empty space atx 600,y 1190, typeKILL DEVILand press Tab. Rename the layerKill Devil. (Clicking inside the WIND text box would edit WIND instead, which is why you start higher.) - Switch to the Move tool and nudge
Kill Devildown with the arrow keys (hold Shift for 10 px steps) until the letters run from abouty 1312toy 1394. NudgeWind Titleso its letter tops sit at abouty 1412, about 18 px under KILL DEVIL. - On each of the two layers, turn on Stroke with Width
6in , and Drop Shadow with Offset X8, Offset Y8, Blur0, Opacity100and the colour . A zero blur gives the hard offset shadow of a two-colour print.
- Click
-
Skew the title forward
Text stays live when you transform it, so you can lean it like italics without rasterizing.
- Click
Wind Title, pick the Move tool and click Skew in the options bar. - Drag the top-middle handle about 50 px to the right. The bottom stays put and the letters lean forward.
- Skewing shifts the letters right, so nudge
Wind Titlewith the arrow keys until it's centred onx 600again. - Do the same on
Kill Devil, dragging only about 26 px so both lines lean at the same angle, and re-centre it. Click Free to leave Skew mode.
- Click
-
Group and tilt the title
- Click
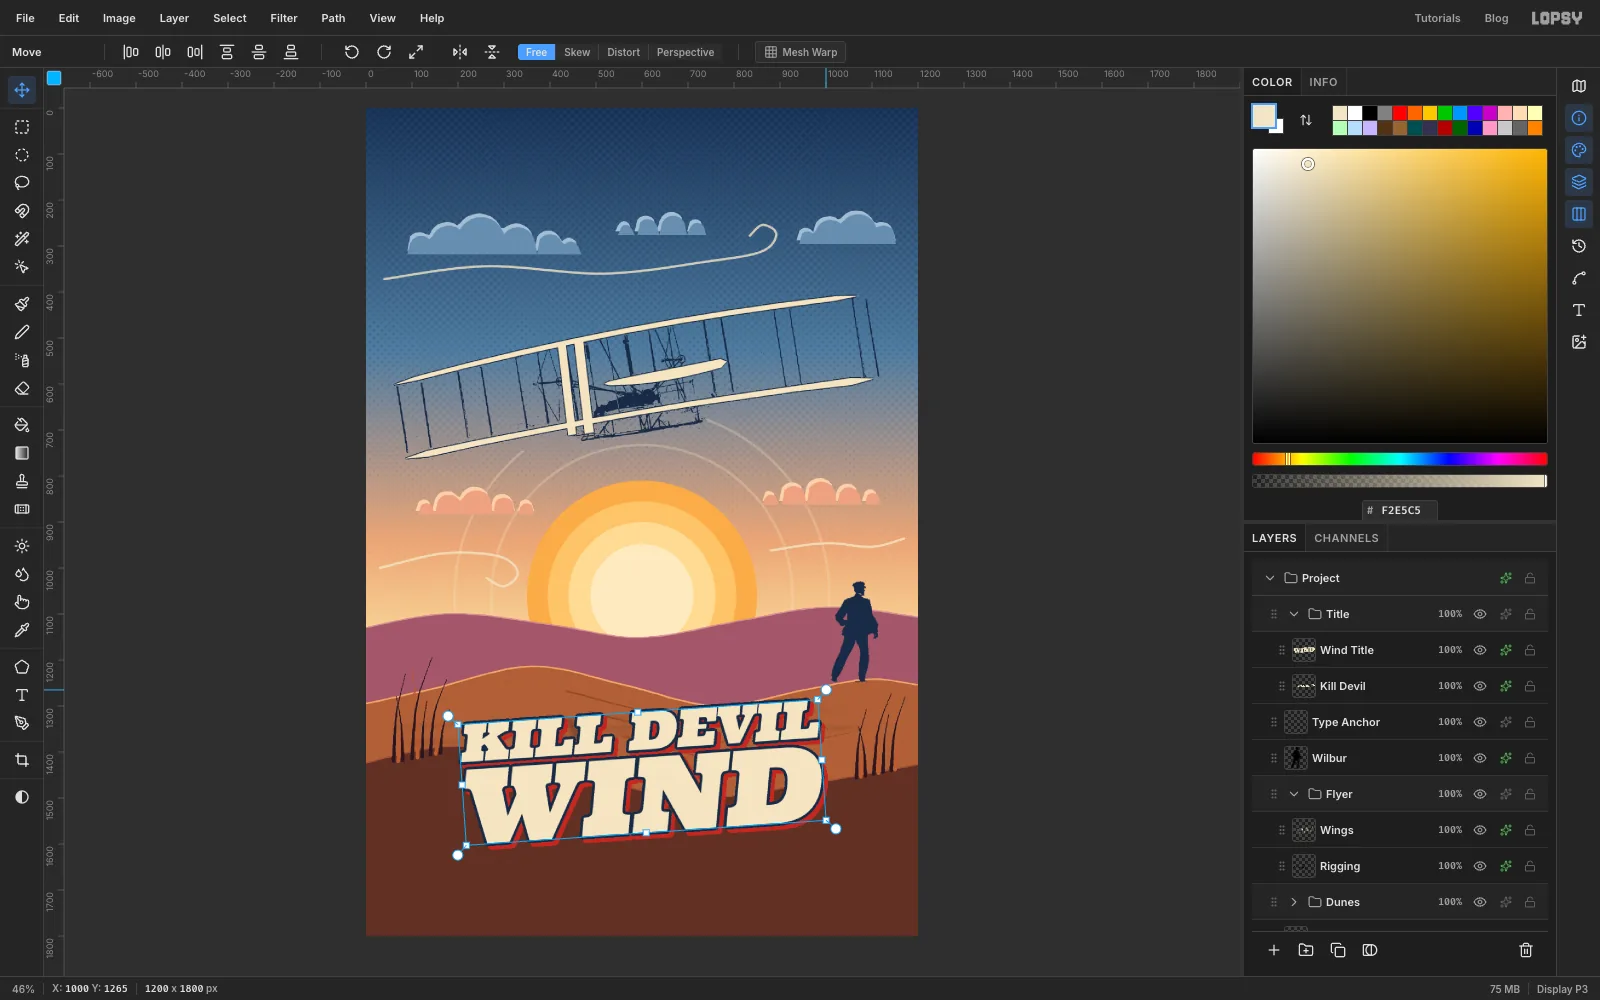
Kill Devil, Shift-clickWind Title, click Group Layers and rename the groupTitle. - Press Cmd+D, then drag the top-right rotation handle up about 4° so the title climbs with the Flyer. Press Escape.
- With the group still selected, drag it up about 26 px. It moves as one piece and leaves room for the ribbon below.
- Press Cmd+Z and Cmd+Shift+Z a couple of times to check the tilt and the move come off and go back cleanly.
- Click
-
Set the names and the tagline
- Click
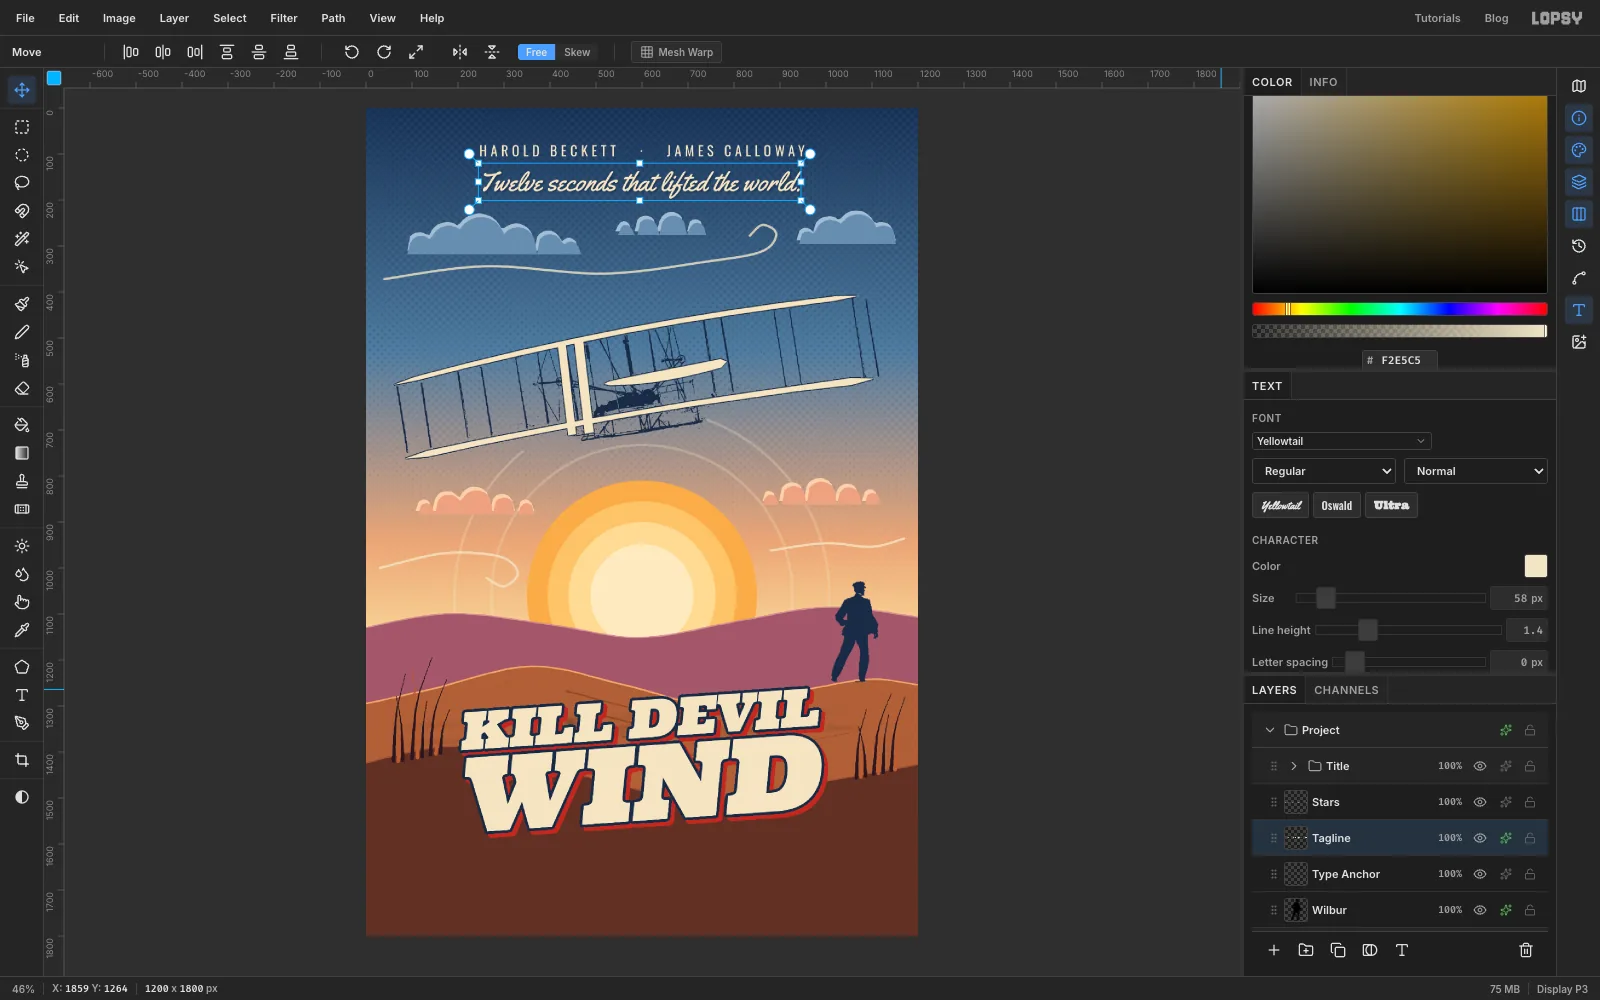
Type Anchor. With the Text tool, choose Oswald, Size30(Align is still Center), click atx 600,y 72and typeHAROLD BECKETT · JAMES CALLOWAY(three spaces either side of the dot). Press Tab and rename the layerStars. - Open the Text panel and set Letter spacing to
8. With the Move tool and arrow keys, fine-tune it so the letters are centred onx 600at abouty 92. - Click
Type Anchoragain, choose Yellowtail at Size58, click atx 600,y 130and typeTwelve seconds that lifted the world.Press Tab and rename itTagline. New text keeps the last letter spacing, so set it back to0for the script. Nudge it so it's centred at abouty 166. - Give the tagline a soft Drop Shadow: offset
3/3, Blur4, Opacity60, in .
- Click
-
Draw the date ribbon on guides
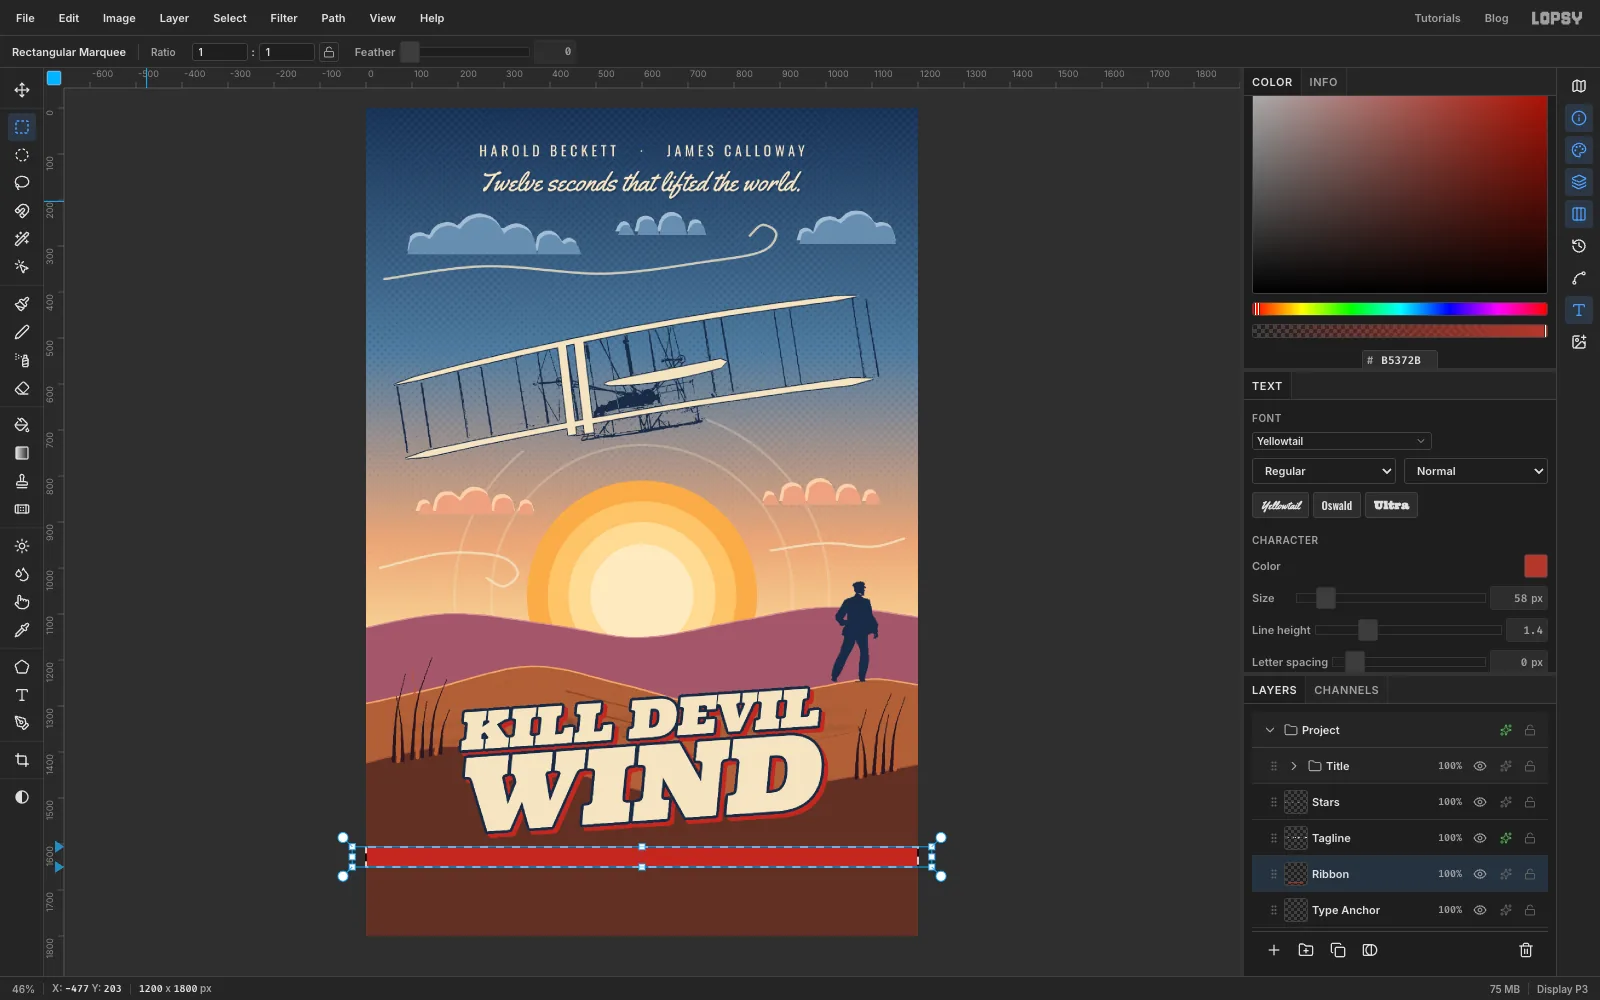
- Check that View → Snap to Guides is ticked. Click the left ruler at
y 1606and again aty 1650to place two guides. - Click
Type Anchor, click Add Layer and name itRibbon. - With the Rectangular Marquee, drag from just off the left edge a little above the top guide to just off the right edge a little below the bottom guide. The top and bottom edges snap onto the guides.
- Fill it with and press Cmd+D.
- With the Pencil at Size
3and the colour , click the left edge aty 1599and Shift-click the right edge for a cream rule above the band. Do the same aty 1657for one below it.
- Check that View → Snap to Guides is ticked. Click the left ruler at
-
Add the date line and billing block
- Click
Ribbonso the new text goes above it. With the Text tool, choose Oswald, Size26, colour . The ribbon sits inside the WIND text's box, so click just below it atx 600,y 1690and type★ KITTY HAWK, NORTH CAROLINA · DECEMBER 17, 1903 ★. You can copy the stars from this page. Press Tab, rename the layerDate Line, and set Letter spacing to6. - With the Move tool, nudge it up with Shift+arrow until it's centred in the red band, about
x 600,y 1630. It's all capitals with no descenders, so centre the letters themselves. - Click
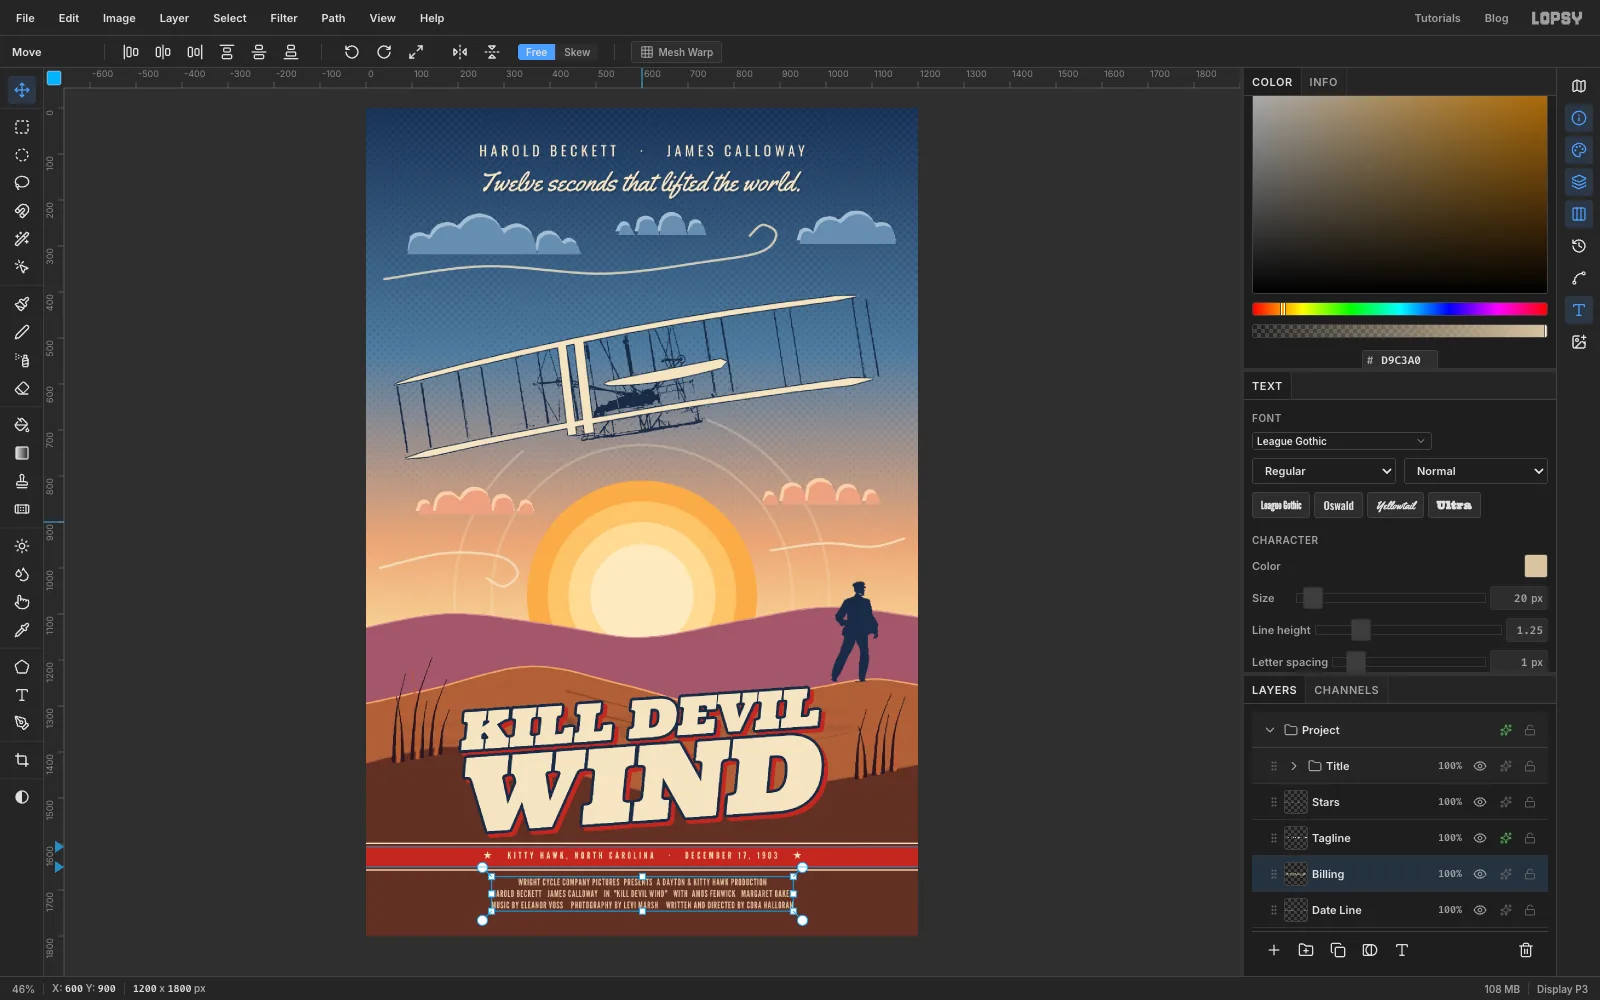
Ribbonagain, then with the Text tool choose League Gothic, Size20and the colour . Click atx 600,y 1682and type the billing block as three lines (press Enter between them), then press Tab and rename the layerBilling:
WRIGHT CYCLE COMPANY PICTURES PRESENTS A DAYTON & KITTY HAWK PRODUCTIONHAROLD BECKETT JAMES CALLOWAY IN "KILL DEVIL WIND" WITH AMOS FENWICK MARGARET OAKESMUSIC BY ELEANOR VOSS PHOTOGRAPHY BY LEVI MARSH WRITTEN AND DIRECTED BY CORA HALLORAN
- Set Letter spacing to
1and Line height to1.25, then nudge the block so it's centred at aboutx 600,y 1707, with even space between the lower cream rule and the bottom of the poster.
- Click
-
Add grain and a poster border
- Untick View → Show Guides.
- Click the
Titlegroup's row (collapsed), click Add Layer and name itGrain. Choose Select → All, fill it with , and press Cmd+D. - Run Filter → Add Noise… with Amount
30and Mono. Set the blend mode to Overlay and the opacity to22%. - Add a layer called
Frame. Pick the Rectangular Marquee, click the canvas once without dragging, set From26,26and To1174,1774, and press Enter. Choose Select → Inverse, set the colour to and choose Edit → Fill. - In the same way, select from
38,38to1162,1762and fill it with . Then select from42,42to1158,1758and press Delete, leaving a 4 px navy keyline. Press Cmd+D. - Choose File → Save Project to keep the layers, and File → Quick Export PNG for the poster.