Make a Bauhaus Stencil Plate Contact Sheet
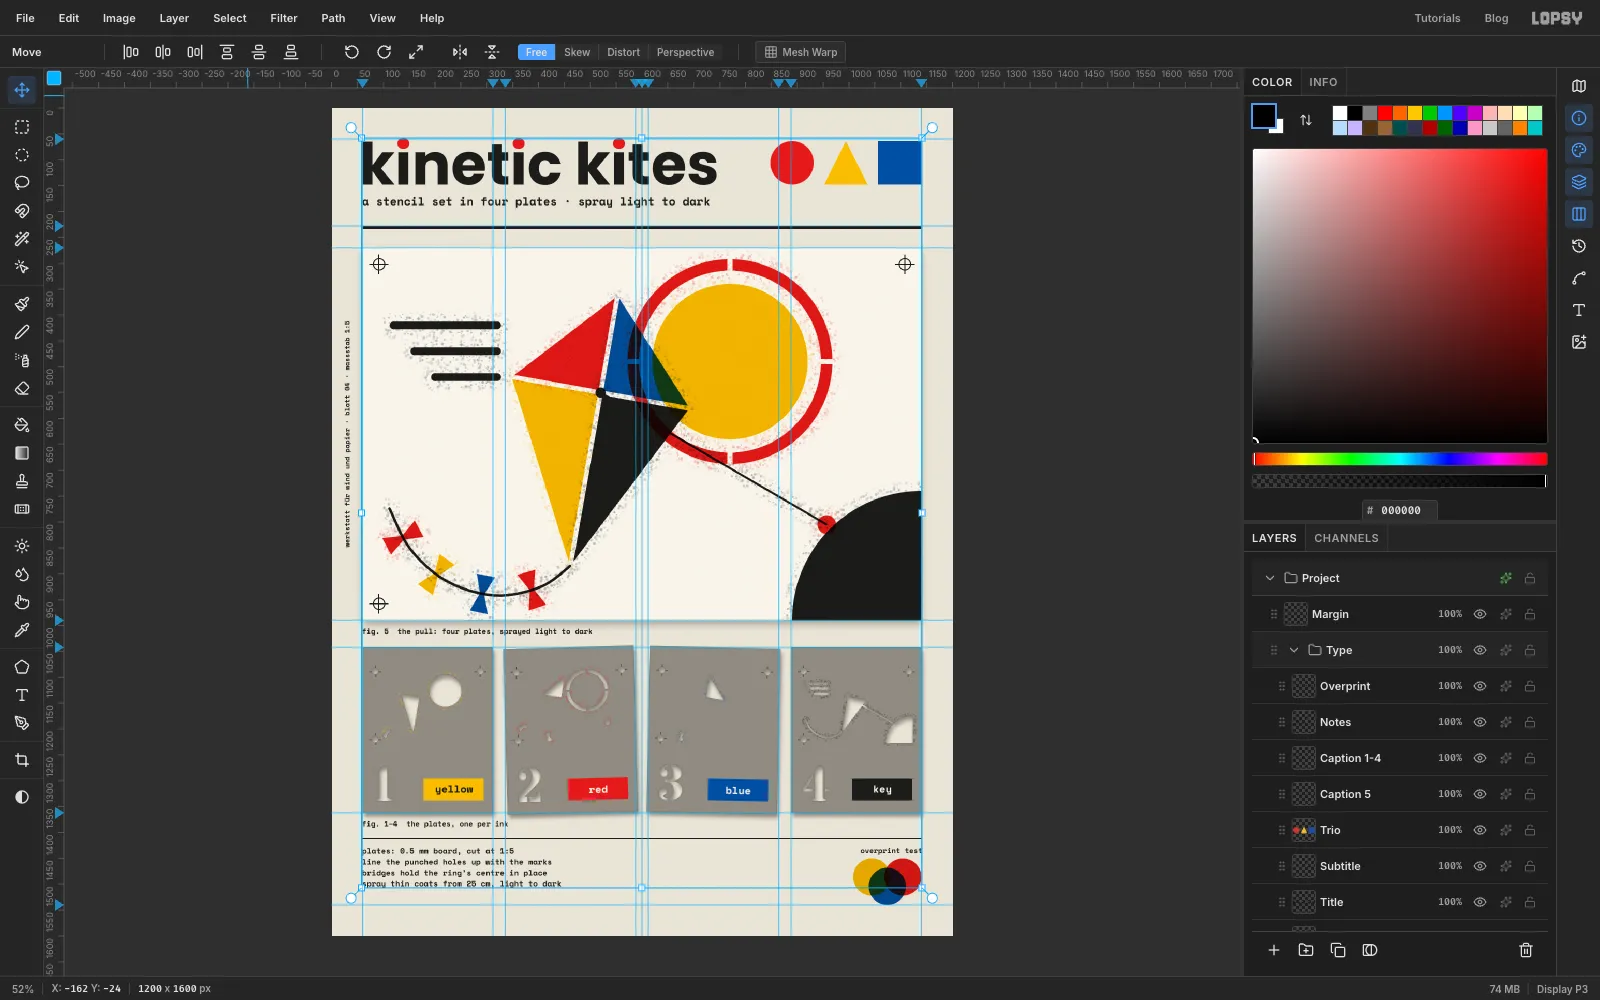
Spray a Bauhaus kite print from four overprinting inks in Lopsy, then cut matching yellow, red, blue and key stencil plates and lay them out as a contact sheet.
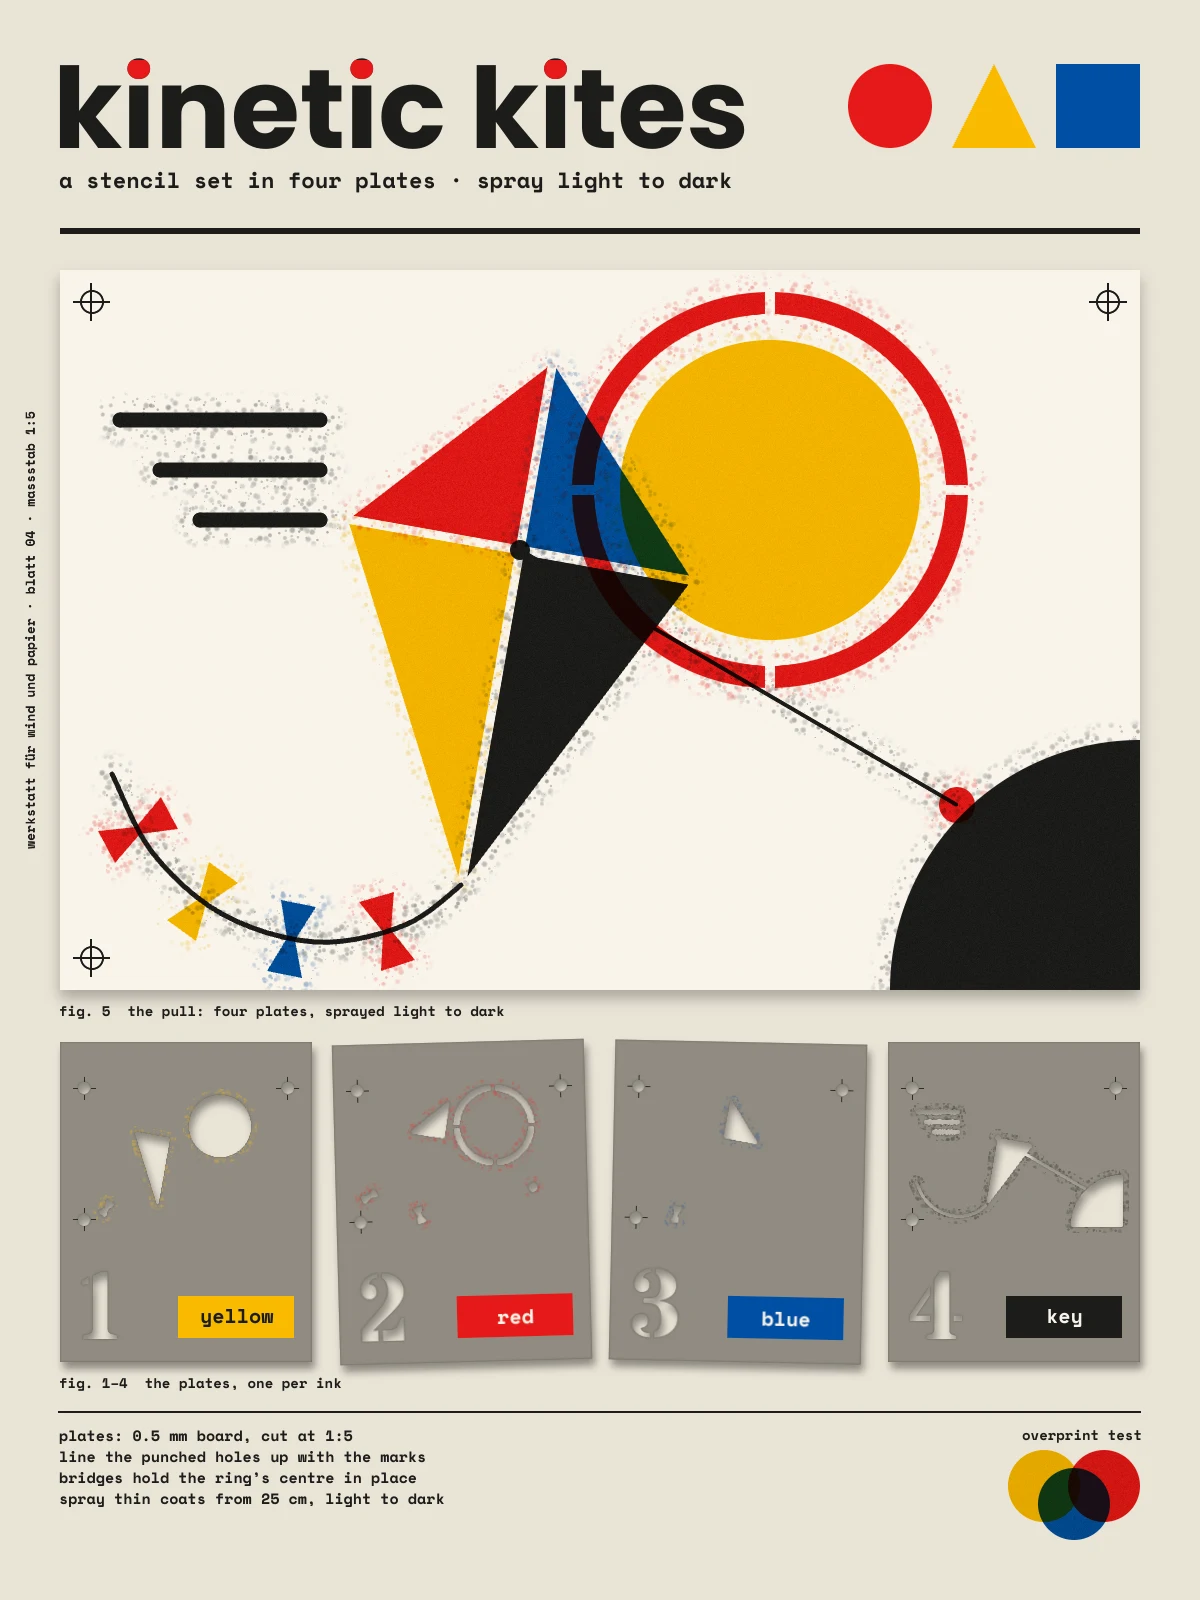
A stencil print in several colours is really several prints. You cut one plate per ink, spray them one after another, and the colours mix wherever two inks land on top of each other. This tutorial makes that process into a poster. You'll spray a Bauhaus kite from four inks, then cut the four plates that would print it and lay them out underneath, like a contact sheet of the job.
The Bauhaus part is the vocabulary: a circle, a triangle and a square, the three primaries plus black, lowercase geometric type, and a strict grid. The stencil part is in the details. The plates have bridges that hold loose centres in place, registration holes to line them up, and overspray where paint drifted past the cut.
Along the way you'll use:
- guides, Snap to Guides, and the grid with Snap at 4 px
- four ink layers in Multiply, so overlapping inks mix like real overprints
- the Pen tool with Path to Selection for exact triangles, and an open Pen path stroked with Enter
- Cmd-click on a thumbnail to load a layer's shape as a selection, then Delete to cut through other layers
- Shift, Alt and Shift+Alt marquee drags to add, subtract and intersect
- Select → Grow, Shrink and Feather
- the Spray tool, Gaussian Blur and Add Noise for a sprayed finish
- copy and paste, a Cmd-drag scale to one fifth, a Move-tool drag, and two small rotations
- Drop Shadow and Inner Glow on the boards
- live text in Poppins, Space Mono and Stardos Stencil, including a text layer rotated 90°
- Group Layers, plus a quick undo and redo check
The palette is three primaries and black on warm paper, with a grey board for the plates:
-
Paper
-
print sheet
-
Yellow
-
red
-
blue
-
key
-
Board
-
board shade
-
Grain
on an Overlay layer
-
Set up the paper and guides
Open Lopsy. In the New Document dialog, set Width to
1200and Height to1600, choose a White background and click Create.- Select Background, set the foreground colour to and choose Edit → Fill. With nothing selected it fills the whole layer.
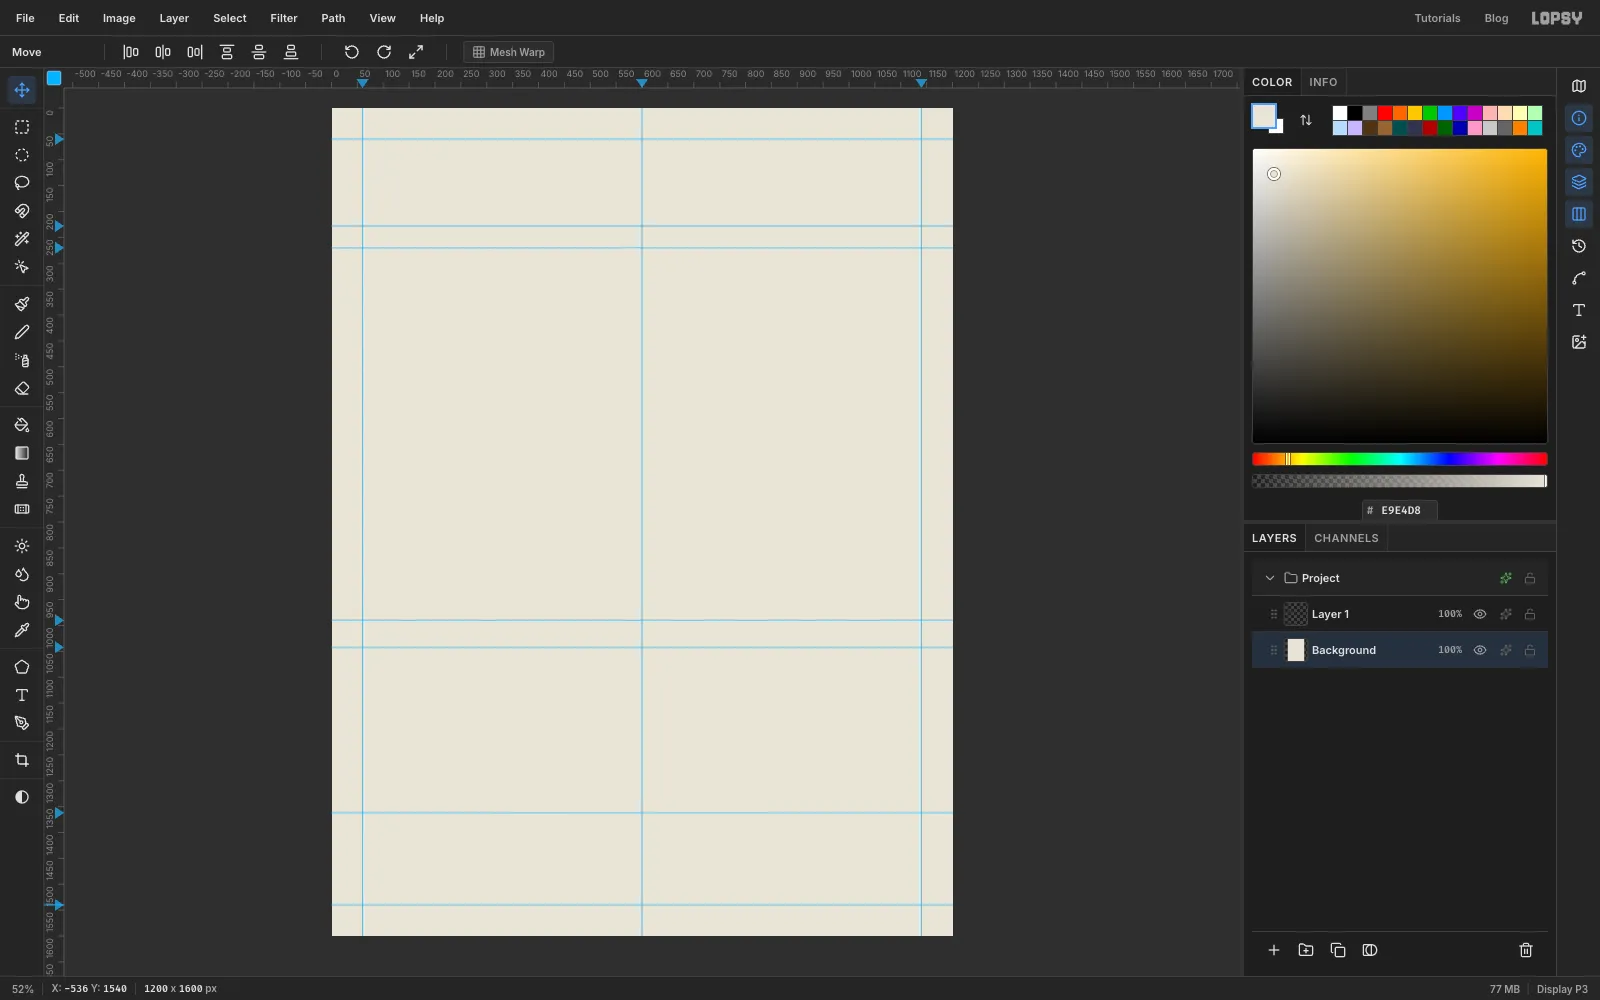
- Click the top ruler at
60,600and1140for the side margins and the centre line. - Click the left ruler at
60,228,270,990,1042,1362and1540. From the top, those are the top margin, the header rule, the top and bottom of the print, the top and bottom of the plates, and the bottom margin.
-
Lay down the print sheet
The print is a lighter sheet of paper lying on the page. Rename Layer 1 to
Sheetby double-clicking its name.Pick the Rectangular Marquee (M) and drag from near the
60, 270guide crossing to near1140, 990. Snap to Guides is on by default, so both corners land exactly on the guides. Set the foreground to , choose Edit → Fill and deselect with Cmd+D.Open the layer's effects with the ✦ button on its row, tick Drop Shadow and set Offset X
0, Offset Y8, Blur22and Opacity28. Close the drawer.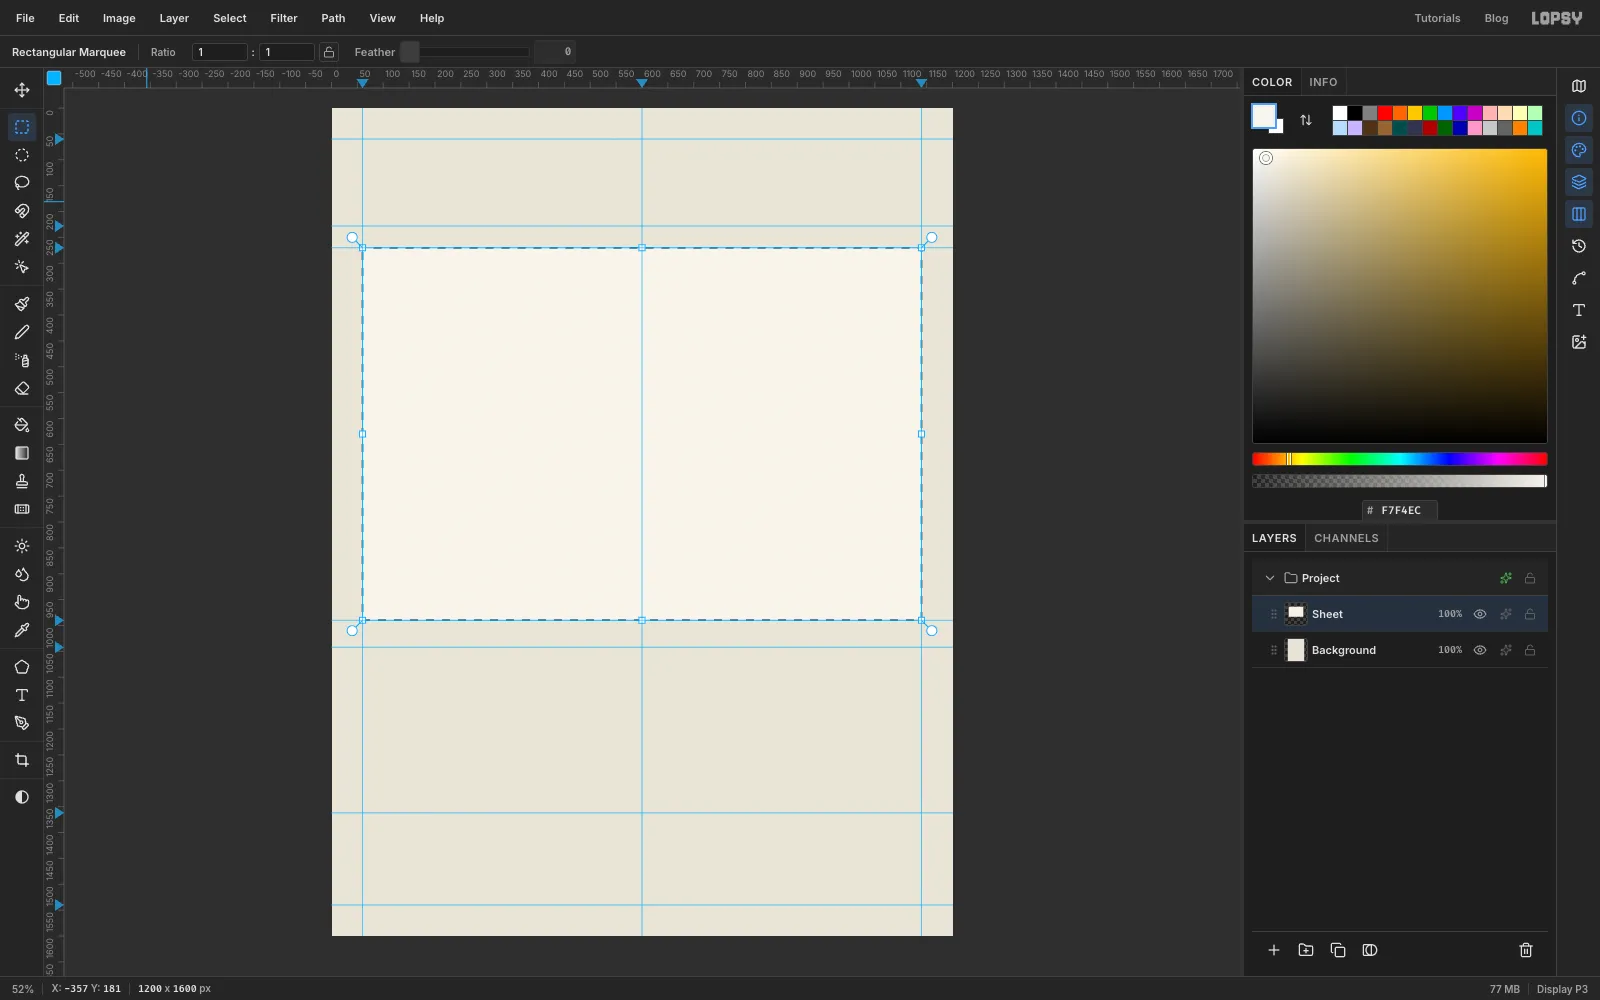
-
Draw the kite on four ink layers
Each ink gets its own layer. Click Add Layer four times and name the new layers
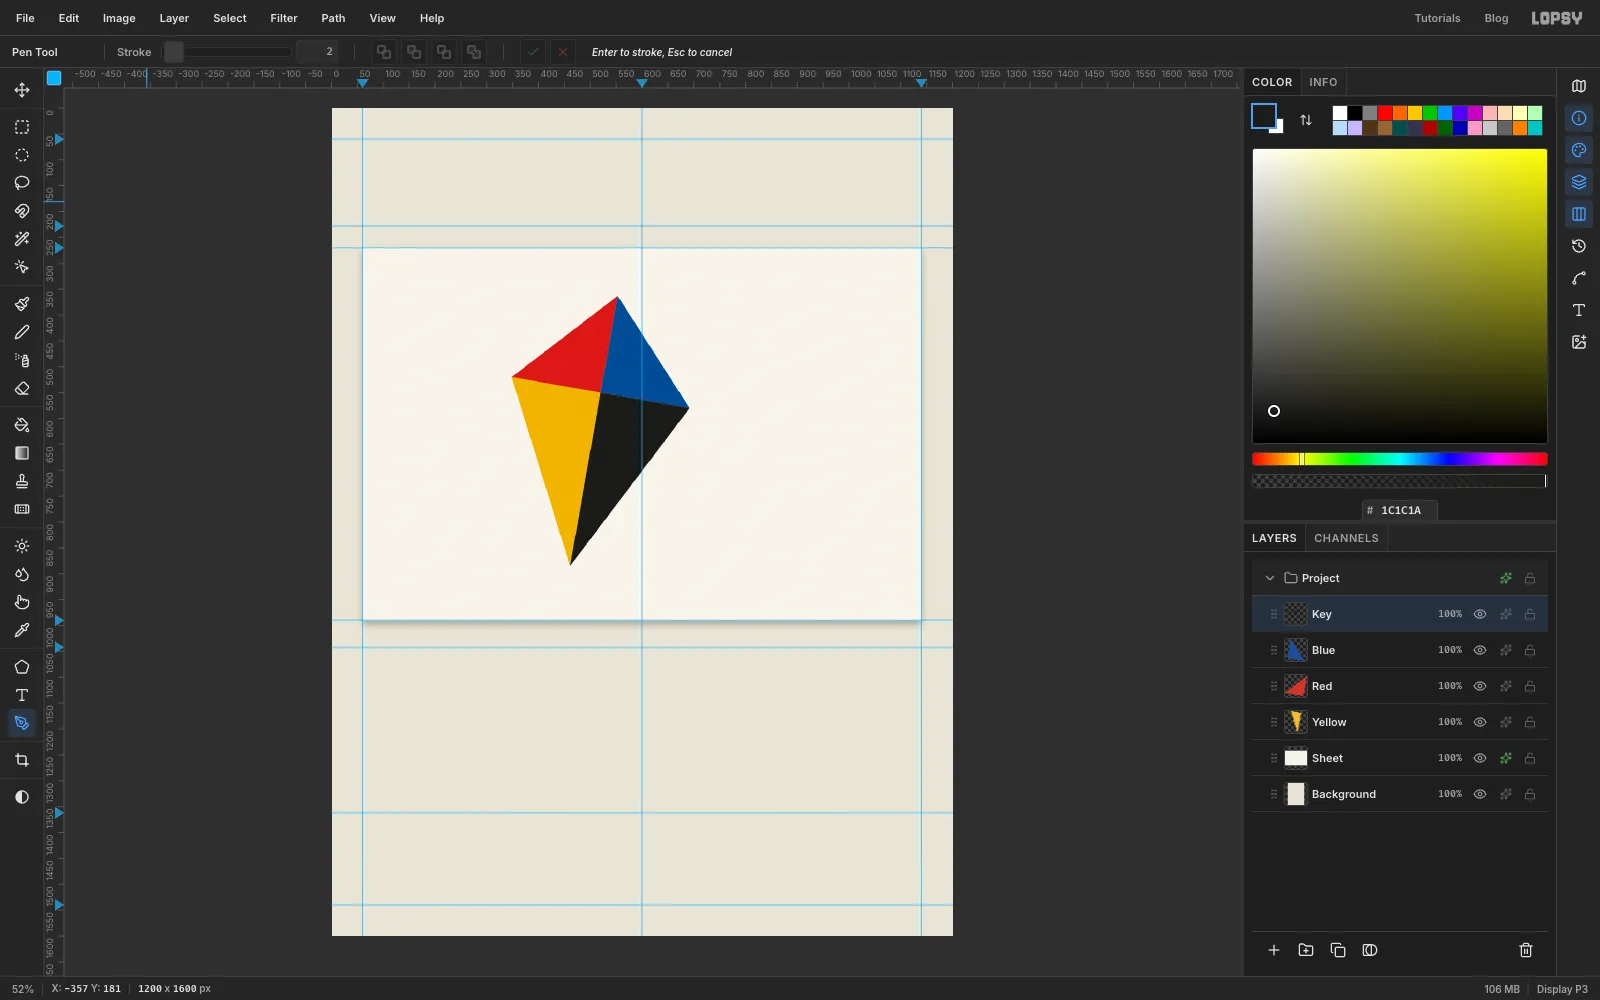
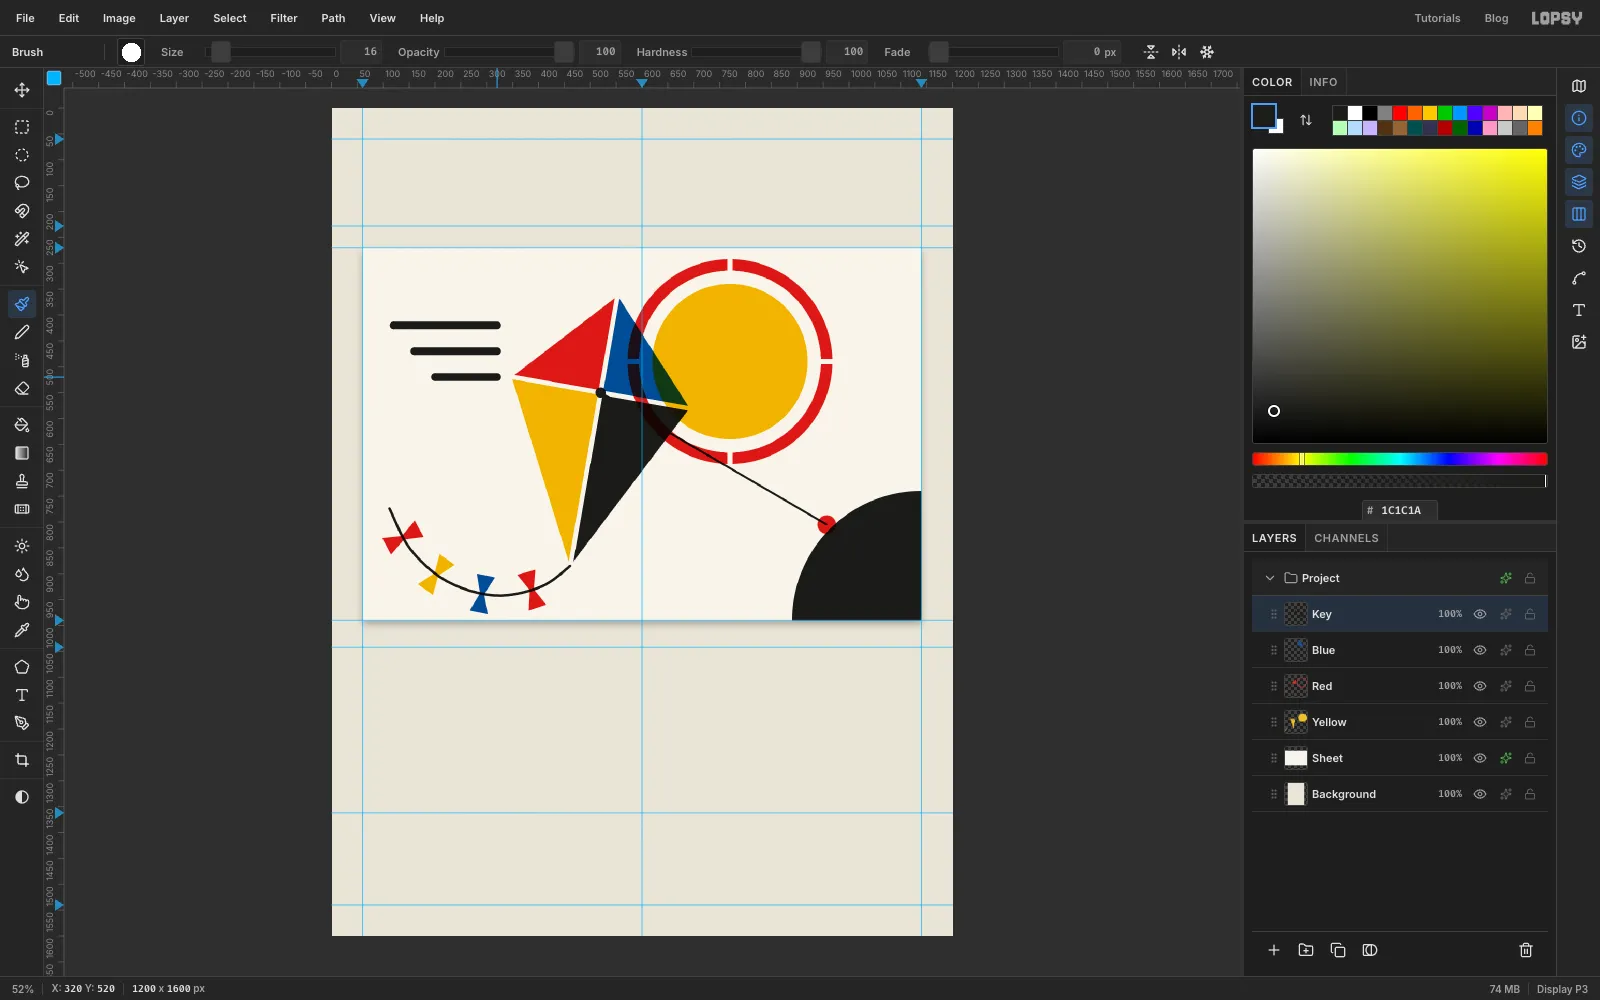
Yellow,Red,BlueandKey, from the bottom up. "Key" is the printer's name for black. Open each layer's effects and set its blend mode to Multiply. Multiply mixes colours the way ink does, so wherever two inks overlap you'll get a darker mix instead of one hiding the other.The kite is four triangles that meet where the spars cross. Its corners are at about:
- top
553, 363 - left
348, 520 - right
692, 580 - bottom
461, 885 - spars crossing
520, 550
For each triangle, select its layer and pick the Pen tool (P). Click its three corners, then click the first corner again to close the path. In the Paths panel, click Path to Selection, then Delete Path. Fill with the layer's colour and deselect.
- Red: top, left, crossing
- Blue: top, crossing, right
- Yellow: left, bottom, crossing
- Key: crossing, right, bottom
- top
-
Cut the spars through every ink
The spars are thin gaps that show the paper through all four inks. Add a layer called
Spars. Pick the Brush (B), open the brush presets with the tip thumbnail in the options bar, choose Hard Round and set Size to10.Click the kite's top tip, then hold Shift and click its bottom tip. That paints a straight line between the two clicks. Do the same from the left tip to the right tip.
Now Cmd-click the
Sparsthumbnail in the Layers panel. The two lines become a selection. Select each ink layer in turn,Yellow,Red,BlueandKey, and press Delete on each. Deselect, then delete theSparslayer with the bin button.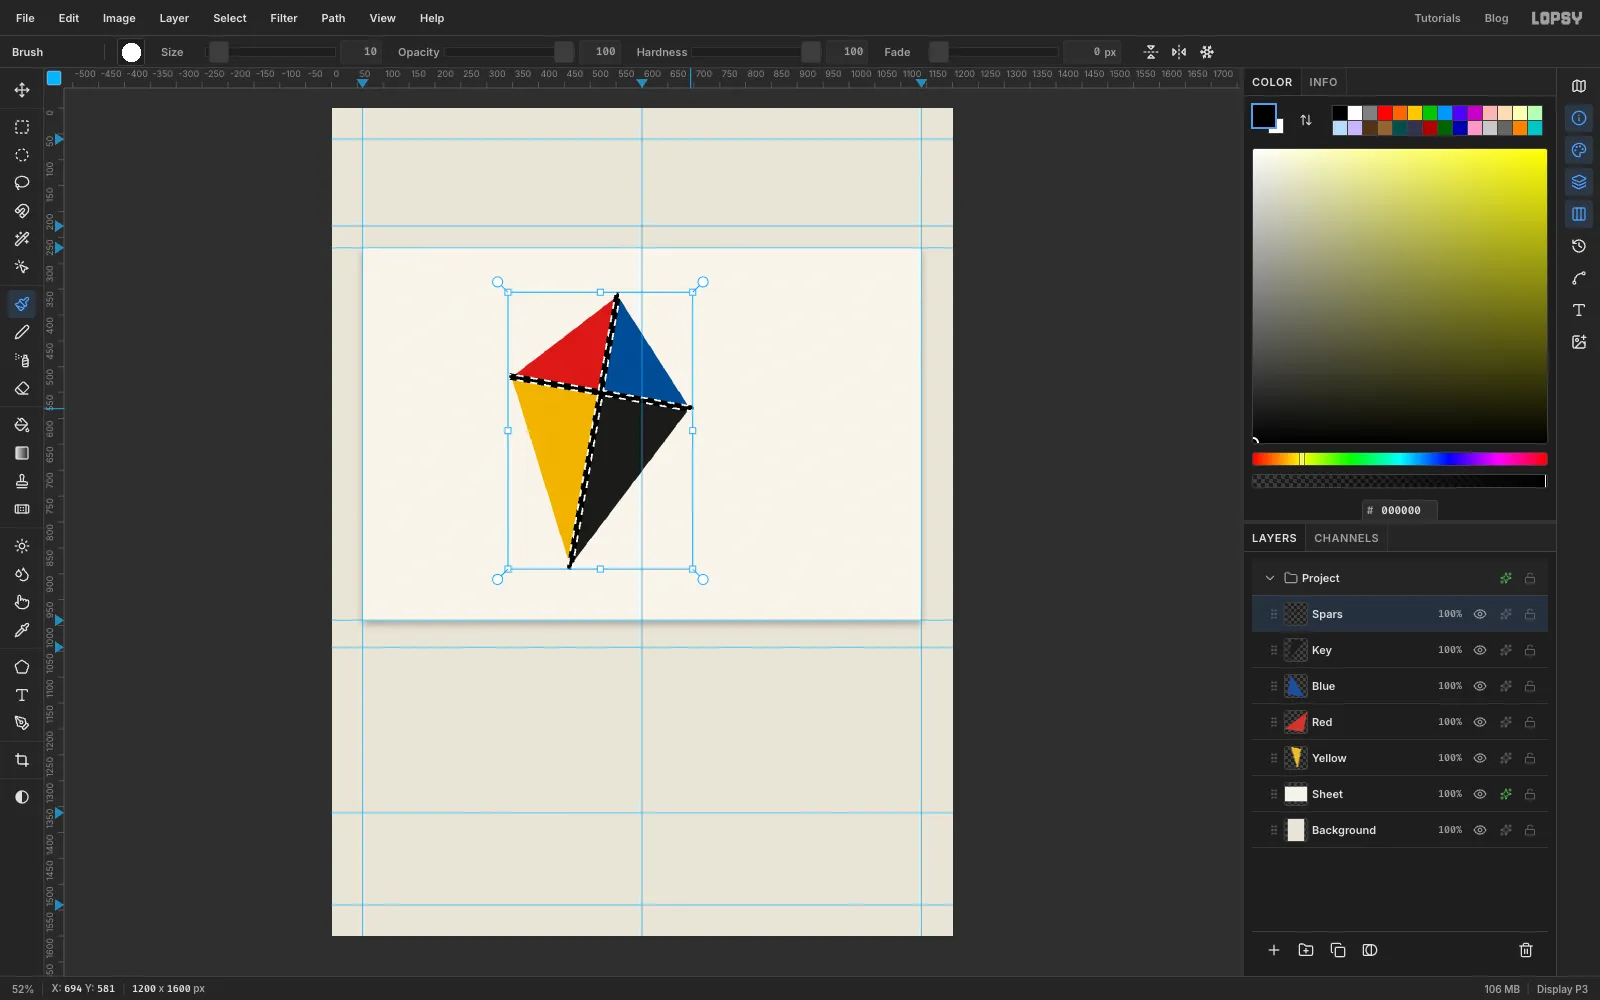
-
Add the sun and its bridged ring
Select
Yellow. Click once with the Elliptical Marquee and enter the corners620, 340and920, 640. That's a 300 px circle centred at770, 490. Fill with yellow and deselect. Where the sun overlaps the blue triangle it turns green, and over the black it stays black. That's Multiply at work.Select
Redand make a bigger circle the same way, from572, 292to968, 688. Fill it red. Choose Select → Shrink…, enter22and press Delete to clear the middle. You're left with a red ring.A real stencil can't cut a ring, because the middle would fall out. It keeps thin bridges instead. Deselect, then click once with the Rectangular Marquee and enter
765, 284to775, 696. That's a 10 px bar straight down through the sun's centre. Zoom in, hold Shift and drag a matching bar across, from564, 485to976, 495. Press Delete and deselect. The ring now has four gaps.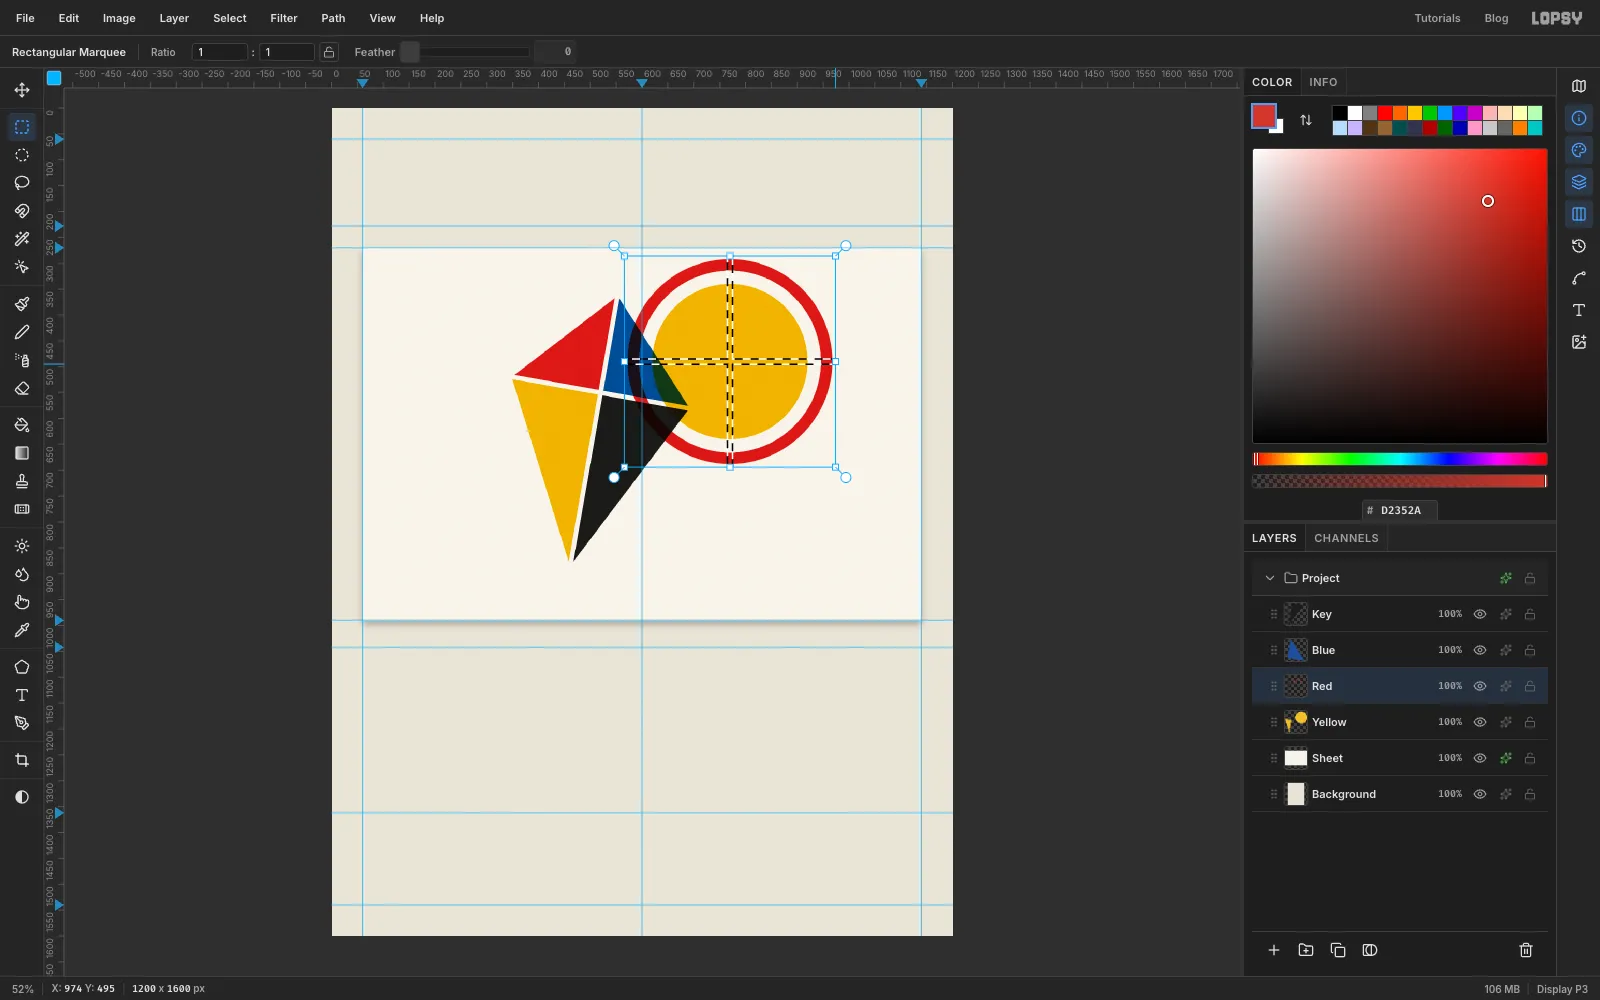
-
Tie on the tail and bowties
Select
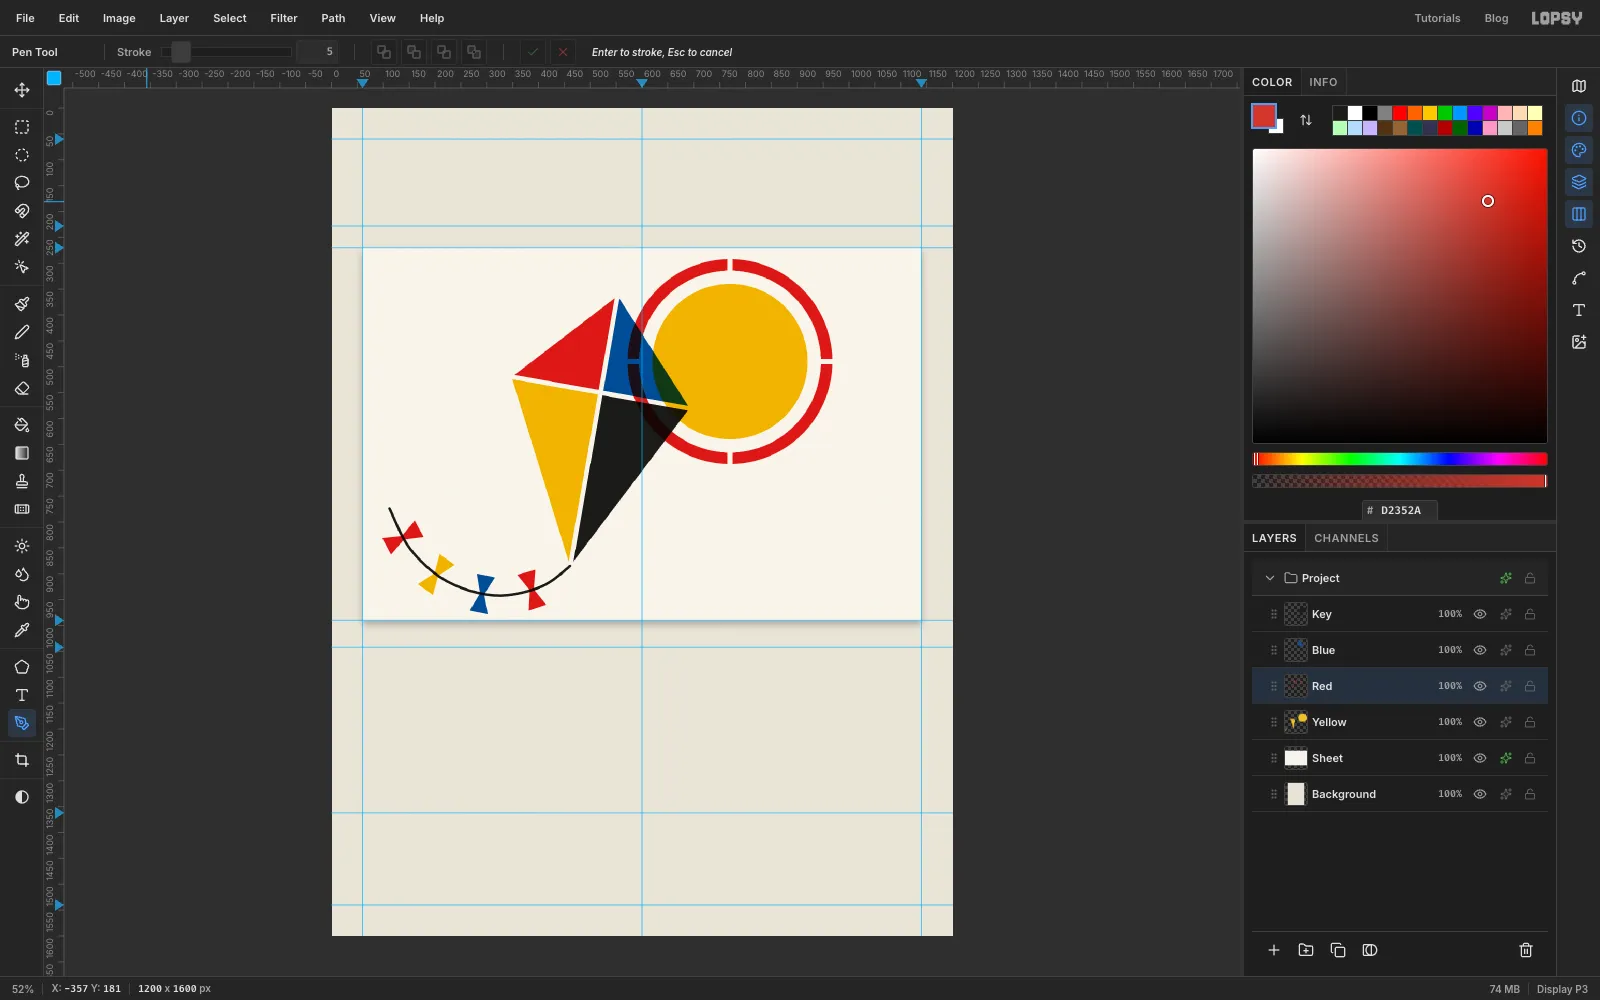
Keyand set the foreground to . Pick the Pen tool and set Stroke to5in the options bar.Start at the kite's bottom tip,
461, 885. For each point, press and drag about 40 px in the direction the curve is heading, which pulls out a smooth handle:- down and left to about
405, 925 - along the bottom to
315, 942 - curving up through
222, 914and152, 852 - ending at
112, 774
Press Enter. The path is stroked with the foreground colour. Delete the path in the Paths panel.
The bowties sit across the string, with their knots on it at about:
387, 931in red, on theRedlayer291, 939in blue, onBlue203, 902in yellow, onYellow138, 830in red again
Each one is a closed six-point Pen shape, about 72 px wide and 36 px tall. Picture a line through the knot at right angles to the string. The two wing tips on one side sit 36 px out along that line and 18 px either side of it, and the other two mirror them. Between each pair of tips, click a point 4 px from the knot, so the bowtie pinches to an 8 px waist on the string. Go round the six points in order and click the first one again to close the shape. Then use Path to Selection, fill with the layer's colour and deselect.
- down and left to about
-
Add the hill, the flyer and the string
Stay on
Key. Pick the Brush again with Size5. Click where the spars cross, then Shift-click at957, 805. This is the line from the kite to the person flying it. Click once with the Elliptical Marquee and enter510, 540to530, 560for a 20 px circle on the spars' crossing. Fill it black for the bridle knot.The hill is a quarter of a circle in the sheet's corner. With the Elliptical Marquee, drag from
890, 740to1390, 1240. That's a 500 px circle centred on the sheet's bottom-right corner. It's fine for it to run off the canvas. Then hold Shift+Alt and drag a rectangle over the whole sheet. Shift+Alt keeps only the overlap, so the selection becomes a quarter-disc inside the sheet. Fill it black and deselect.Select
Red, deselect, and make a 36 px circle from939, 787to975, 823, at the end of the string, for the flyer. It sits half on the hill. Fill it red.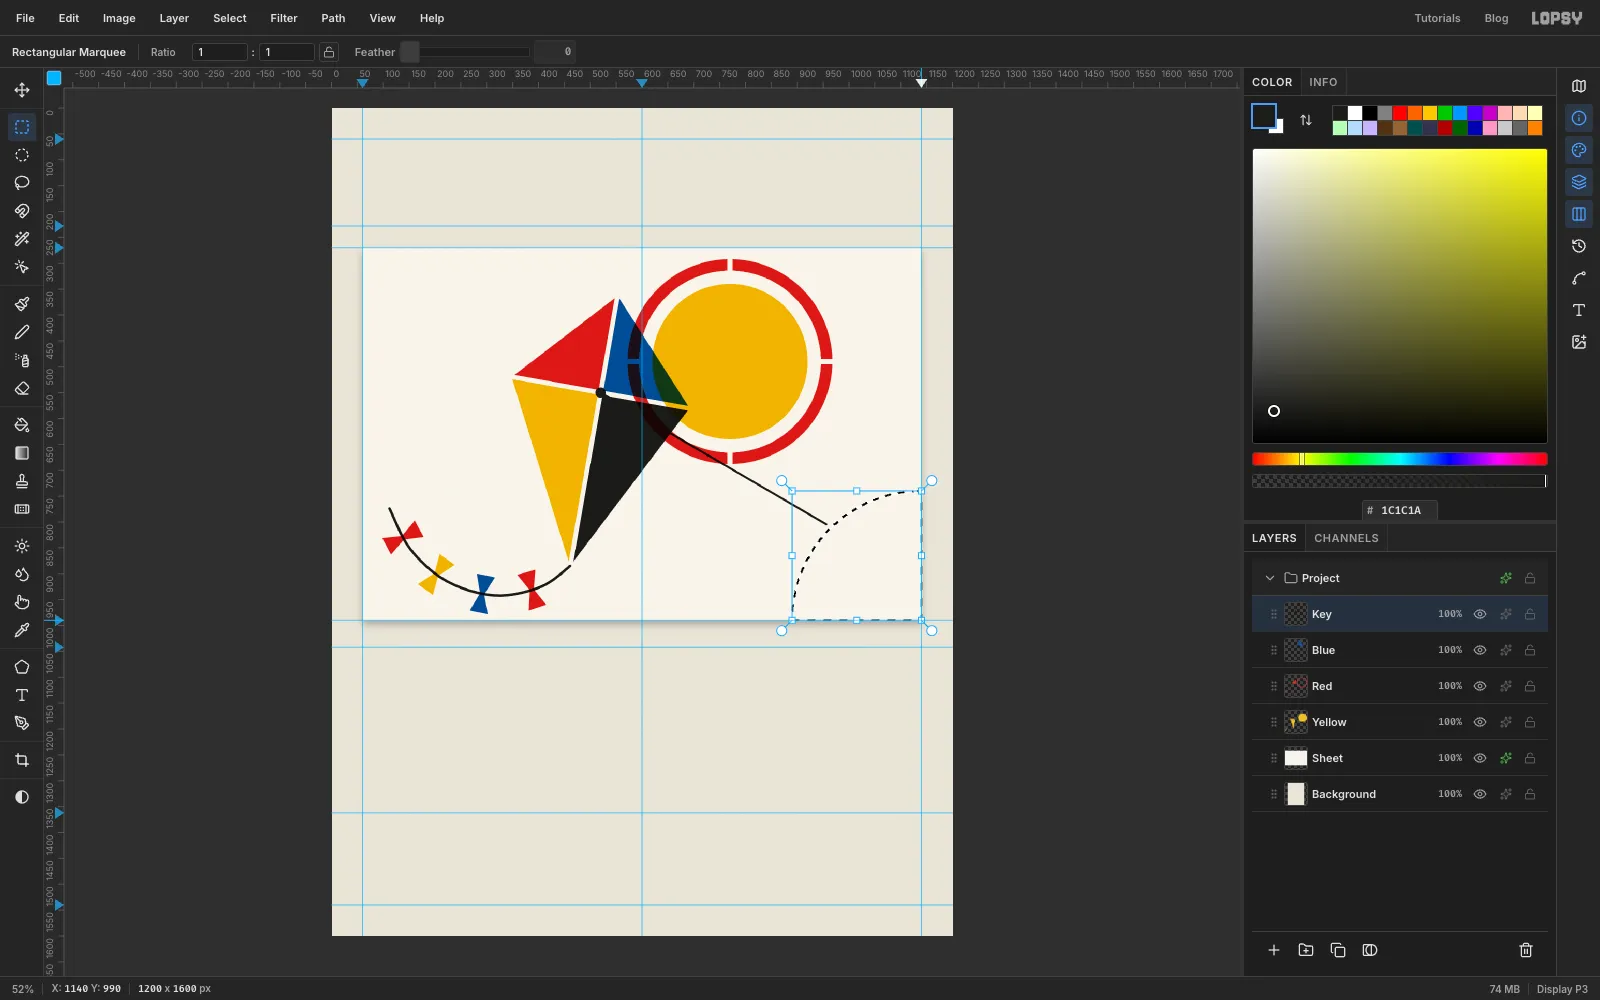
-
Add speed lines
Back on
Key, set the Brush to Size16. Draw three straight lines with a click and a Shift-click. They all end atx 320, each a little shorter:120, 420to320, 420160, 470to320, 470200, 520to320, 520
Rounded ends and a shrinking stack read as motion, which is why this is a kinetic kite.
-
Spray each ink
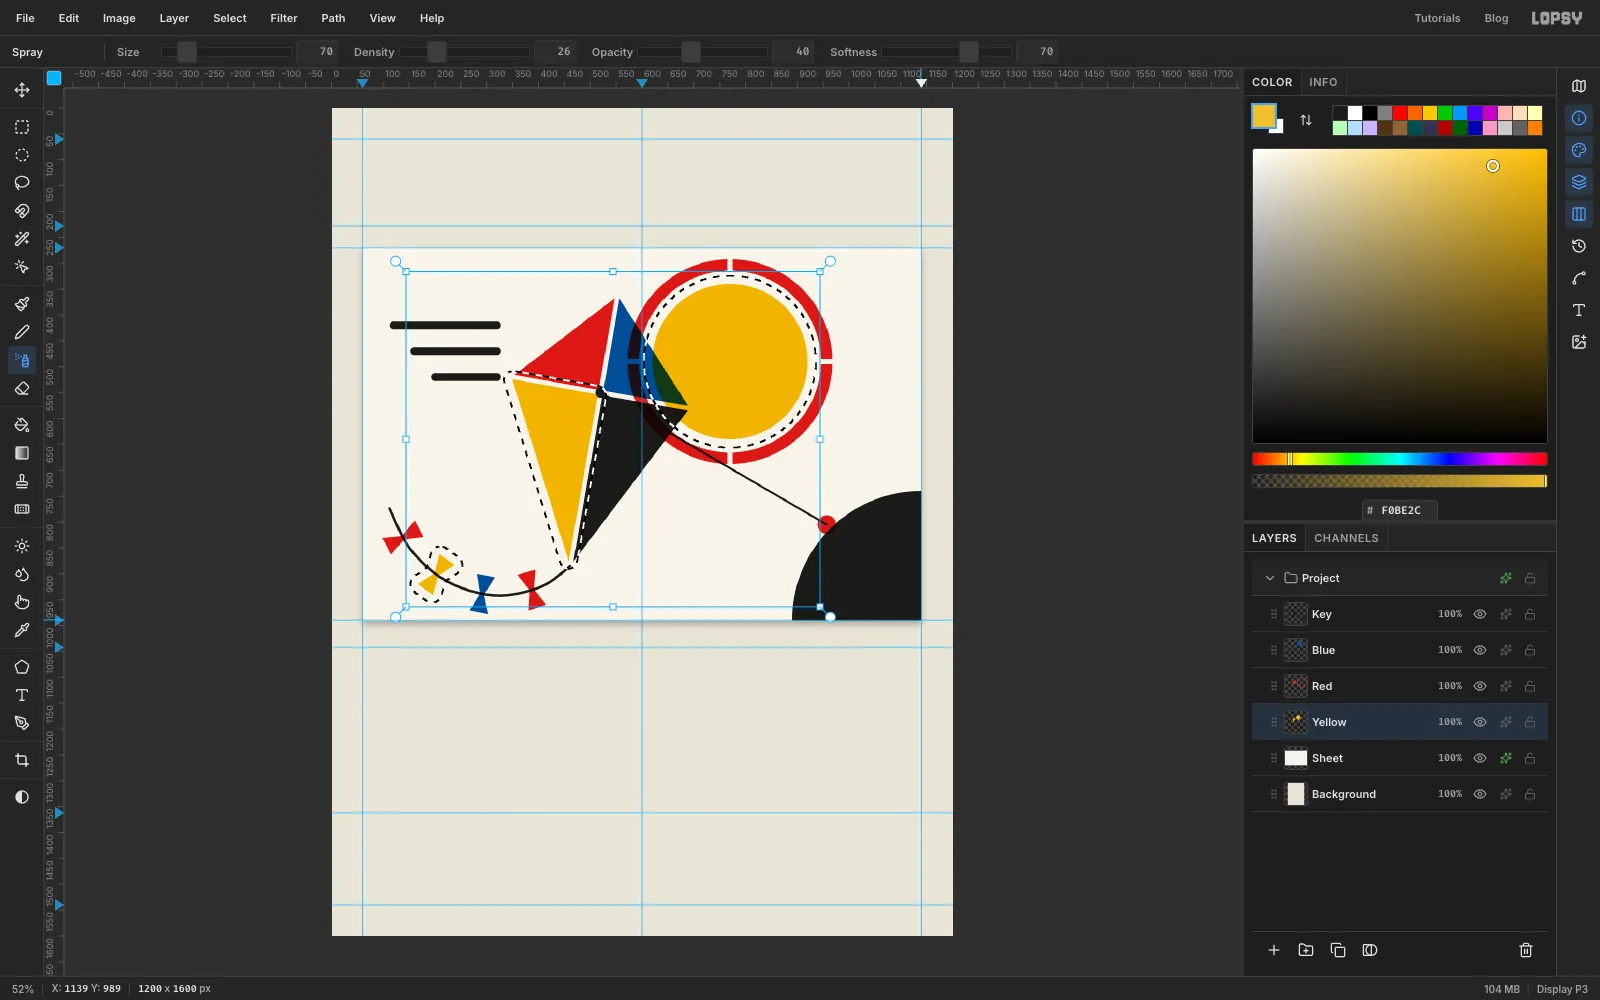
So far everything is crisp, like vector art. A sprayed stencil has soft edges and a haze of droplets just past the cut. Do this for each ink layer in turn, starting with
Yellow:- Choose Filter → Gaussian Blur… with Radius
1.5. That softens the edges a little. - Cmd-click the layer's thumbnail to select its shapes.
- Choose Select → Grow…
16, then Select → Feather…8. - Hold Shift+Alt and drag a rectangle over the sheet, so the haze can't land outside the print.
- Pick the Spray tool (J). Set Size
70, Density26and Opacity40, leave Softness at70, and set the foreground to the layer's ink. - Sweep back and forth across the whole selection. Only the band around each shape picks up droplets. Inside the shapes they land on solid ink and vanish.
- Deselect and choose Filter → Add Noise… with Amount
14, Mono and Gaussian. That gives the solid ink a sprayed grain.
- Choose Filter → Gaussian Blur… with Radius
-
Add paper grain
Select
Keyand add a layer calledGrain. Select the sheet with the exact-corners dialog (60, 270to1140, 990), fill it with and deselect.Run Add Noise with Amount
30, Mono and Gaussian. Set the layer's blend mode to Overlay and its opacity to35%. On Overlay, mid-grey disappears, and only the noise is left to texture the paper and the ink.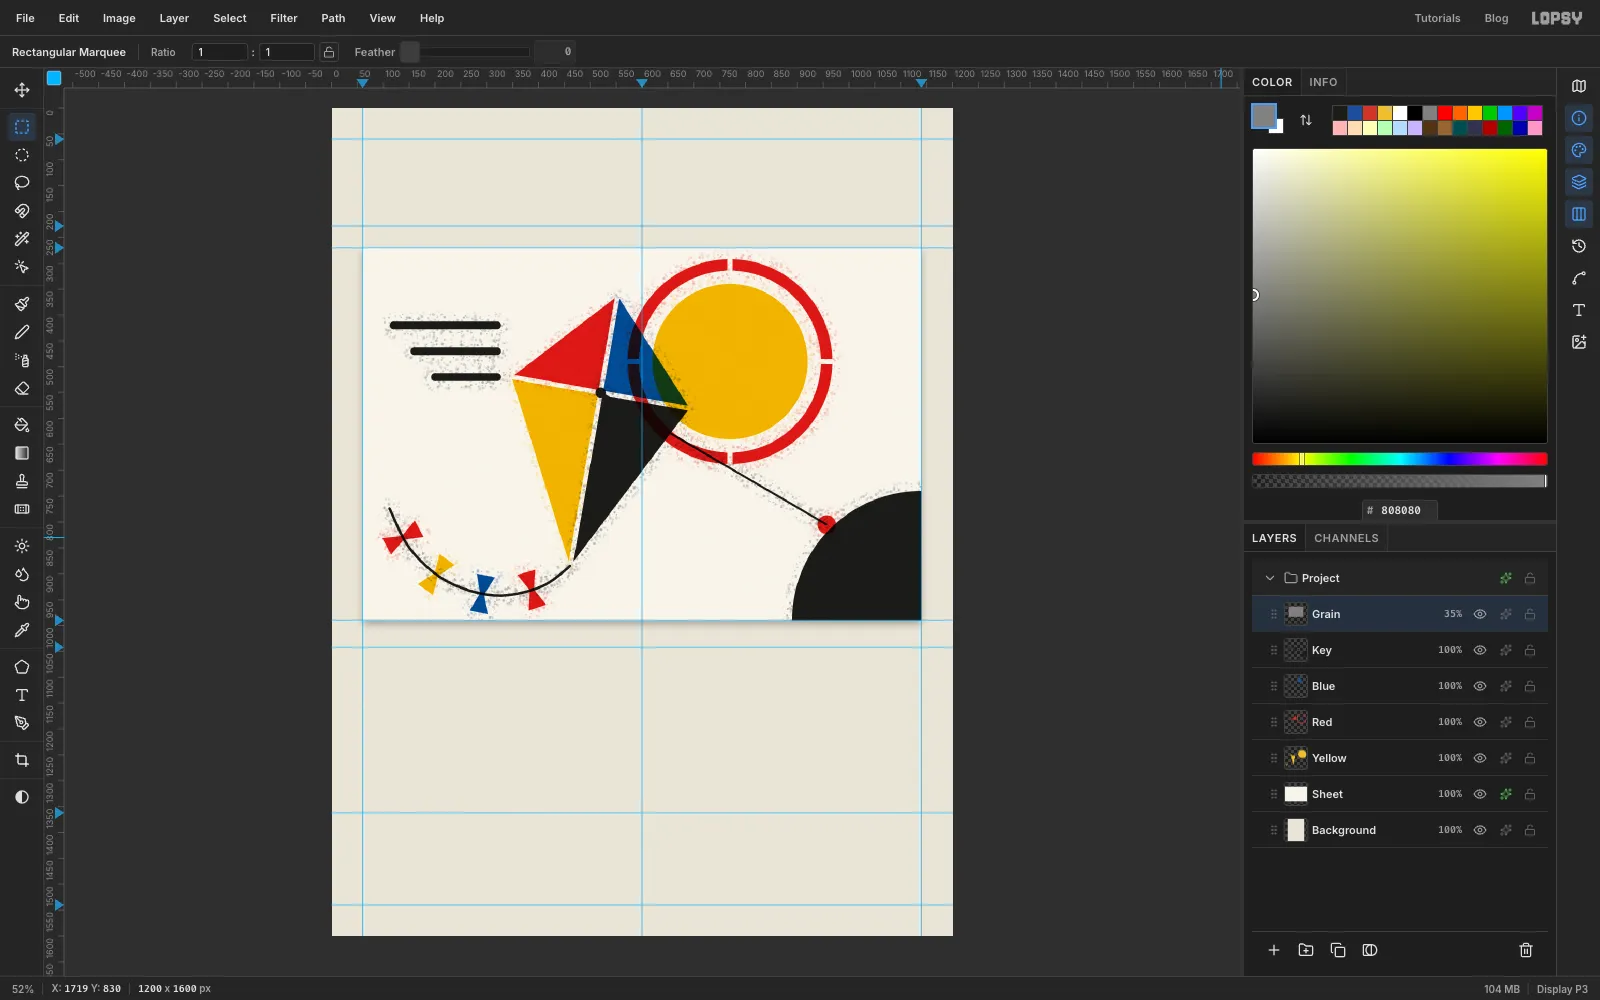
-
Add registration marks
Printers line up each plate with registration marks. Add a layer called
MarksaboveGrain.Pick the Shape tool (U), choose Ellipse, remove the fill and set a stroke of Width
2. Click once at92, 302. A Shape Size dialog opens, where you enter22×22. Repeat at1108, 302and92, 958. The bottom-right corner would be under the hill, so it doesn't get a mark.Pick the Pencil (N) at Size
2. Through each circle, draw a 36 px horizontal and a 36 px vertical line with a click and a Shift-click.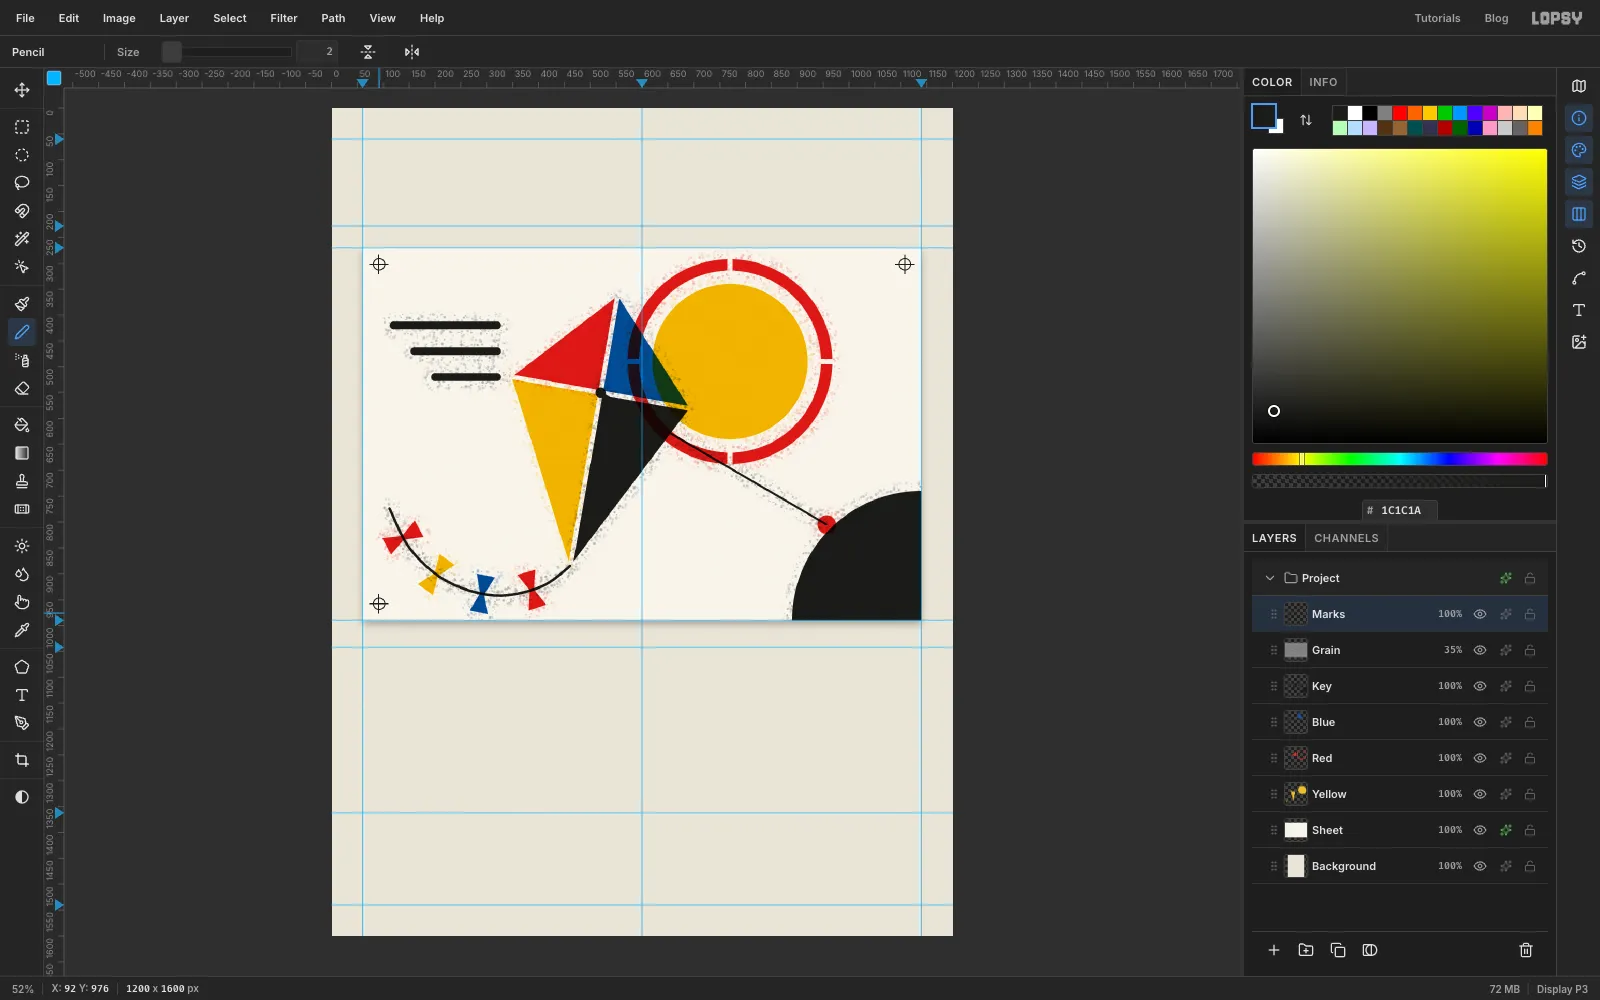
-
Lay out four boards
The plates are four boards, 252 px wide with 24 px gutters. Add guides at
312,336,588,612,864and888on the top ruler.Select Background and add a layer called
Boards, so the boards sit under the print. With the Rectangular Marquee, drag the first board between the guides from60, 1042to312, 1362. Hold Shift and add the other three:336–588,612–864and888–1140, all from1042to1362. Fill with and deselect.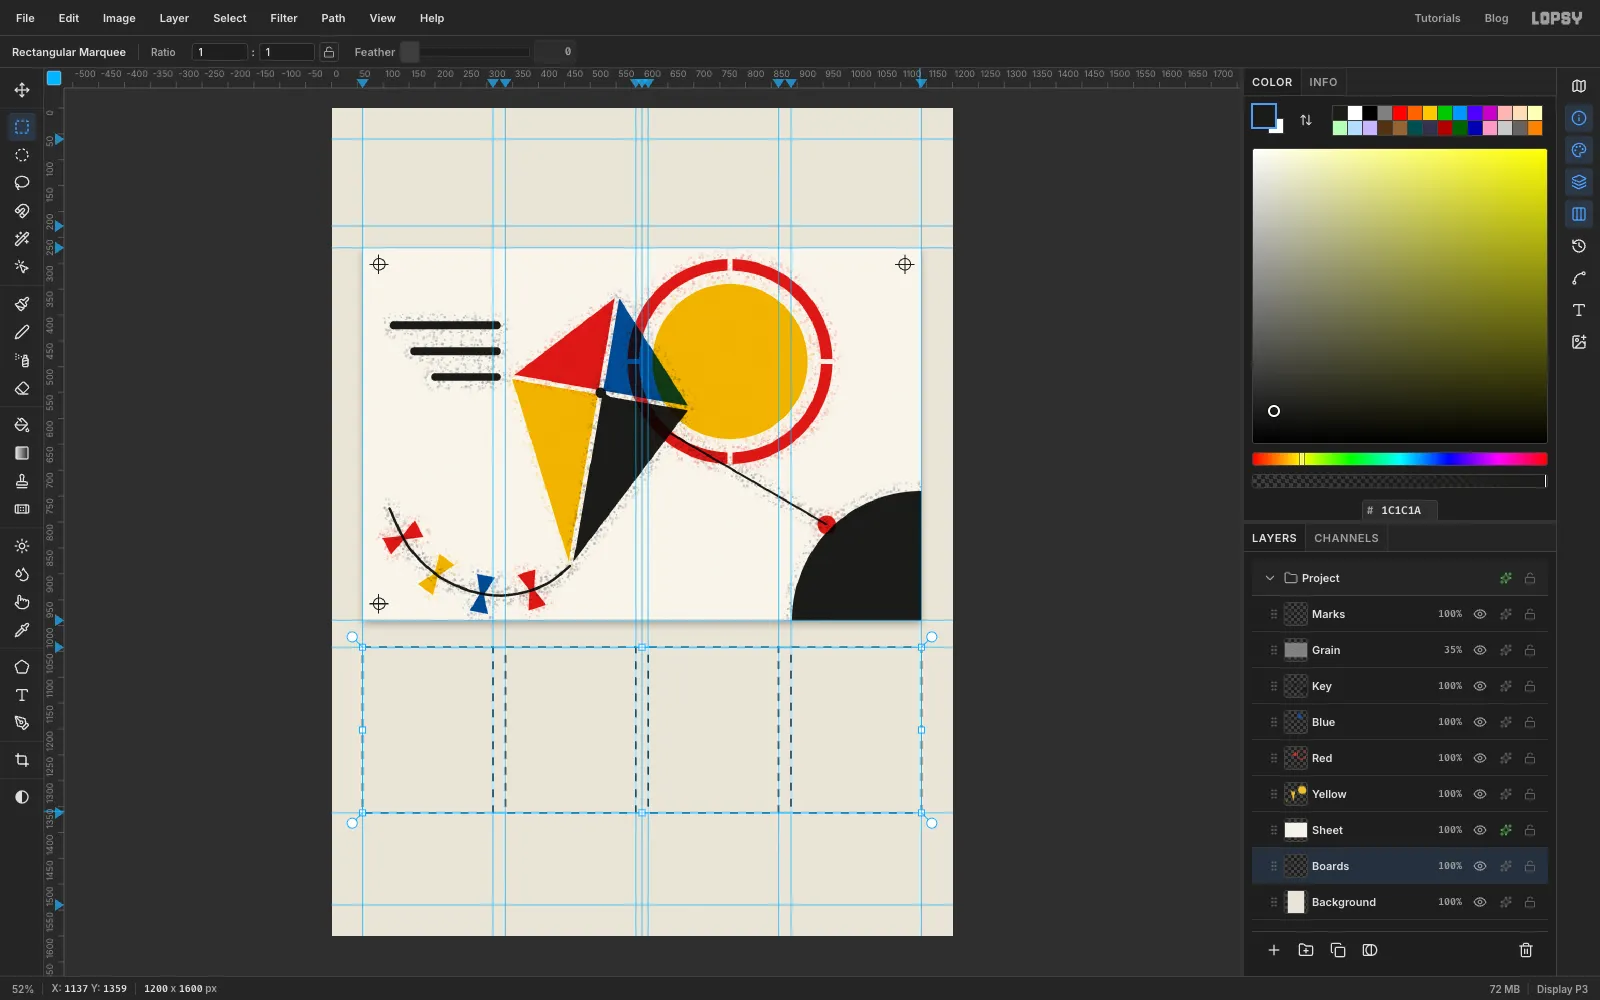
-
Shrink a copy of the yellow ink
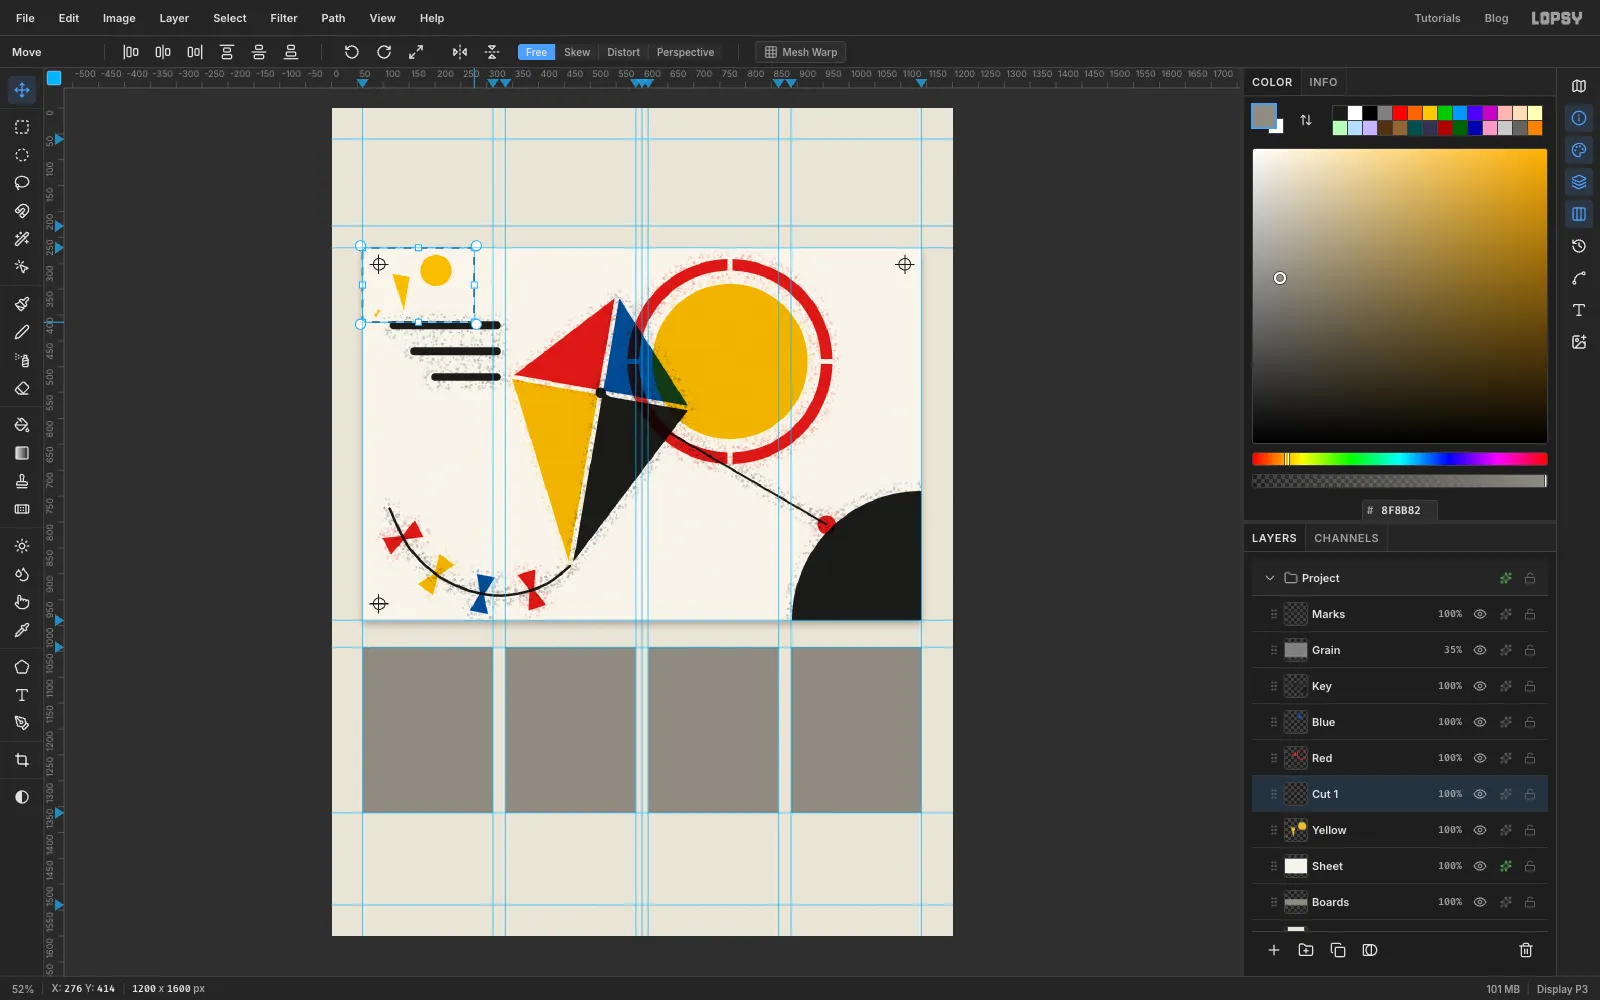
Each plate is cut from a copy of its ink at 1:5 scale. Start with yellow.
- Select
Yellow, select the sheet with the exact-corners dialog, and press Cmd+C then Cmd+V. The copy lands in place on a new layer. Rename itCut 1. - Deselect, then select the sheet rectangle again with the exact-corners dialog. Pick the Move tool (V).
- Hold Cmd and drag the bottom-right corner handle up and to the left. Cmd keeps the proportions, and the top-left corner stays put. Stop when the box is 216 × 144 px, with its bottom-right corner at
276, 414. Zoom in on that corner if you need to land it exactly. - Press Cmd+D to commit the scale.
- Select
-
Move the copy onto plate 1
Draw a marquee around the small copy, from
60, 270to276, 414. With the Move tool, drag it down so its top-left corner sits at78, 1082. That's 18 px in from the board's left edge and 40 px below its top. Move drags don't snap to guides, so get close, then nudge with the arrow keys to land it exactly. Press Cmd+D.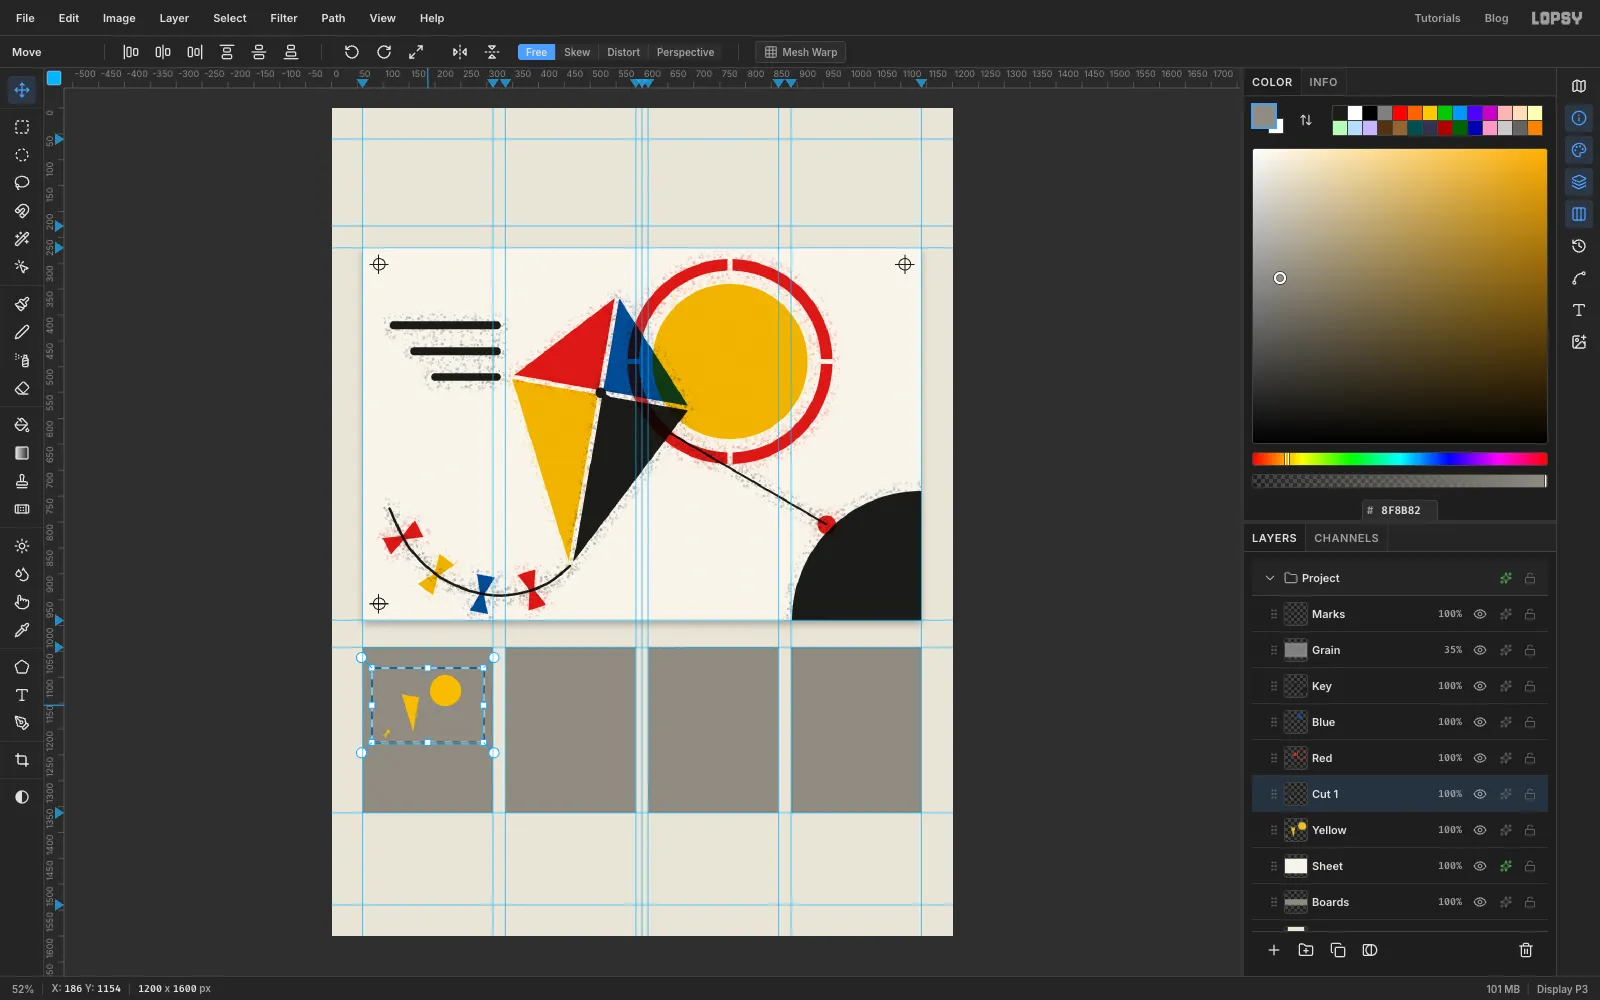
-
Dust the board with overspray
A used plate has paint around every hole. Cmd-click the
Cut 1thumbnail, choose Select → Grow…7, and selectBoards. With the Spray tool at Size46, Density40and Opacity45, and yellow as the foreground, zigzag over the cut area.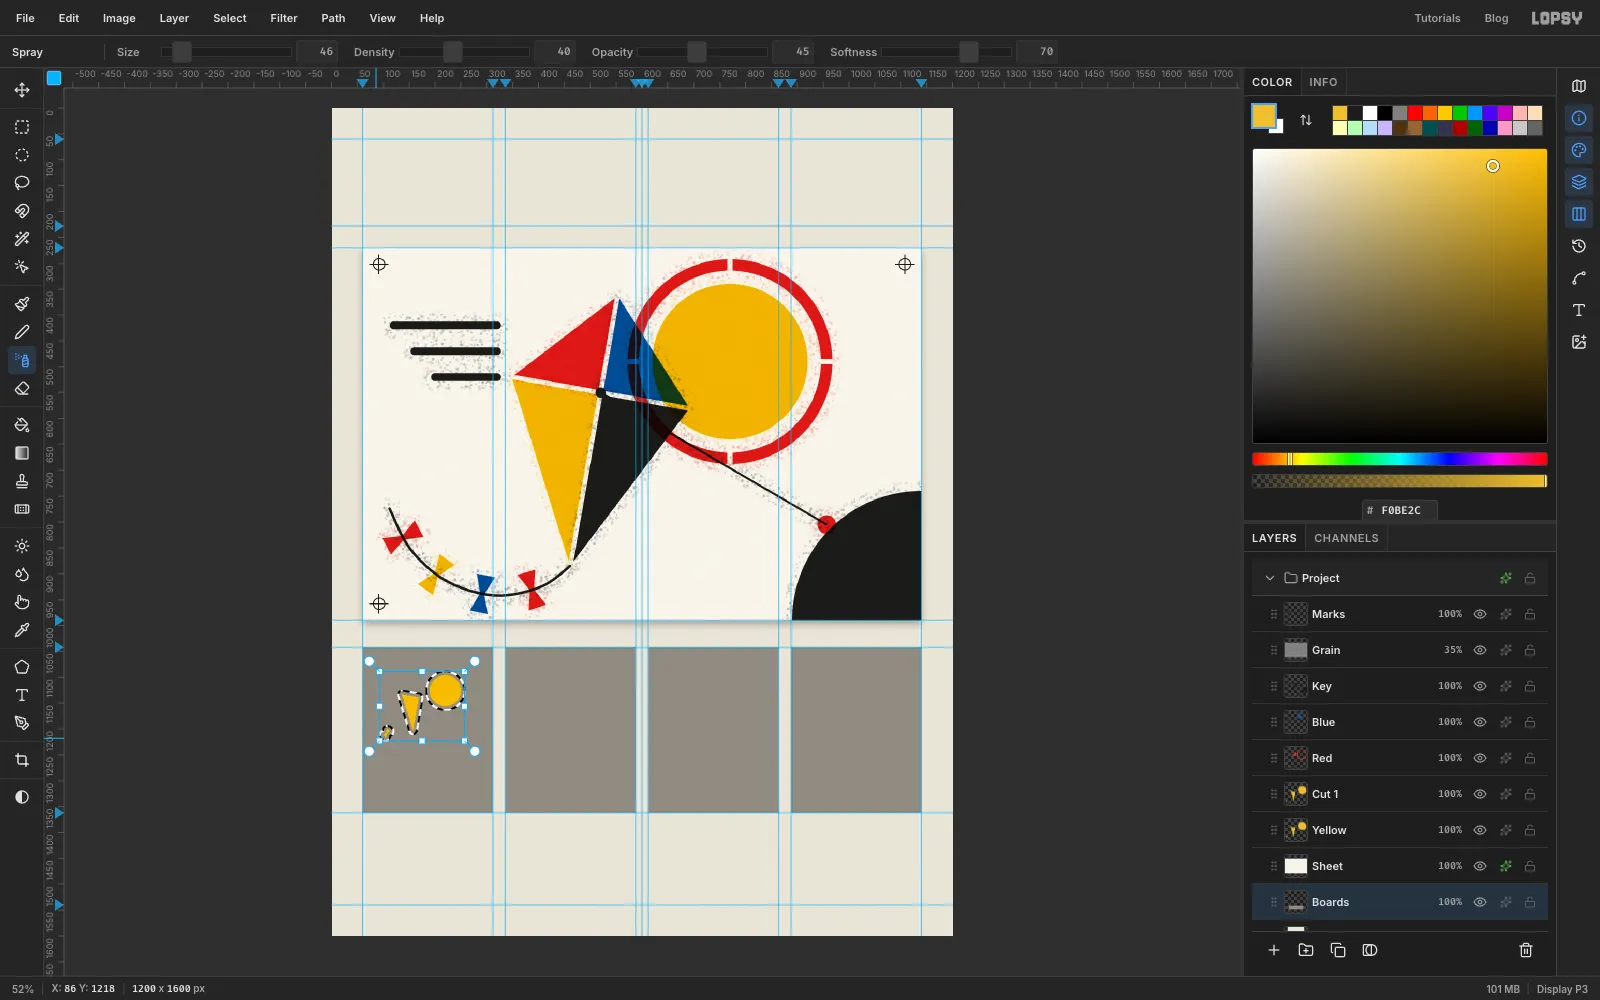
-
Cut the plate, then the other three
Cmd-click the
Cut 1thumbnail again and choose Select → Grow…1. The extra pixel keeps thin parts like the string open once they're scaled down. SelectBoards, press Delete, deselect, and delete theCut 1layer. The yellow shapes are now holes, and the paper shows through.Repeat everything from Shrink a copy of the yellow ink to here for each of the other inks. Name the copies
Cut 2,Cut 3andCut 4, and spray each board with its own ink:- Plate 2: the
Redlayer, with its copy's top-left corner at354, 1082 - Plate 3: the
Bluelayer, at630, 1082 - Plate 4: the
Keylayer, at906, 1082
The red ring needs its bridges at the small size too. After you move the red copy onto plate 2, drag a 5 px bar down through the small ring's centre (about
496, 1126), Shift-add a 5 px bar across, and press Delete onCut 2before you spray and cut.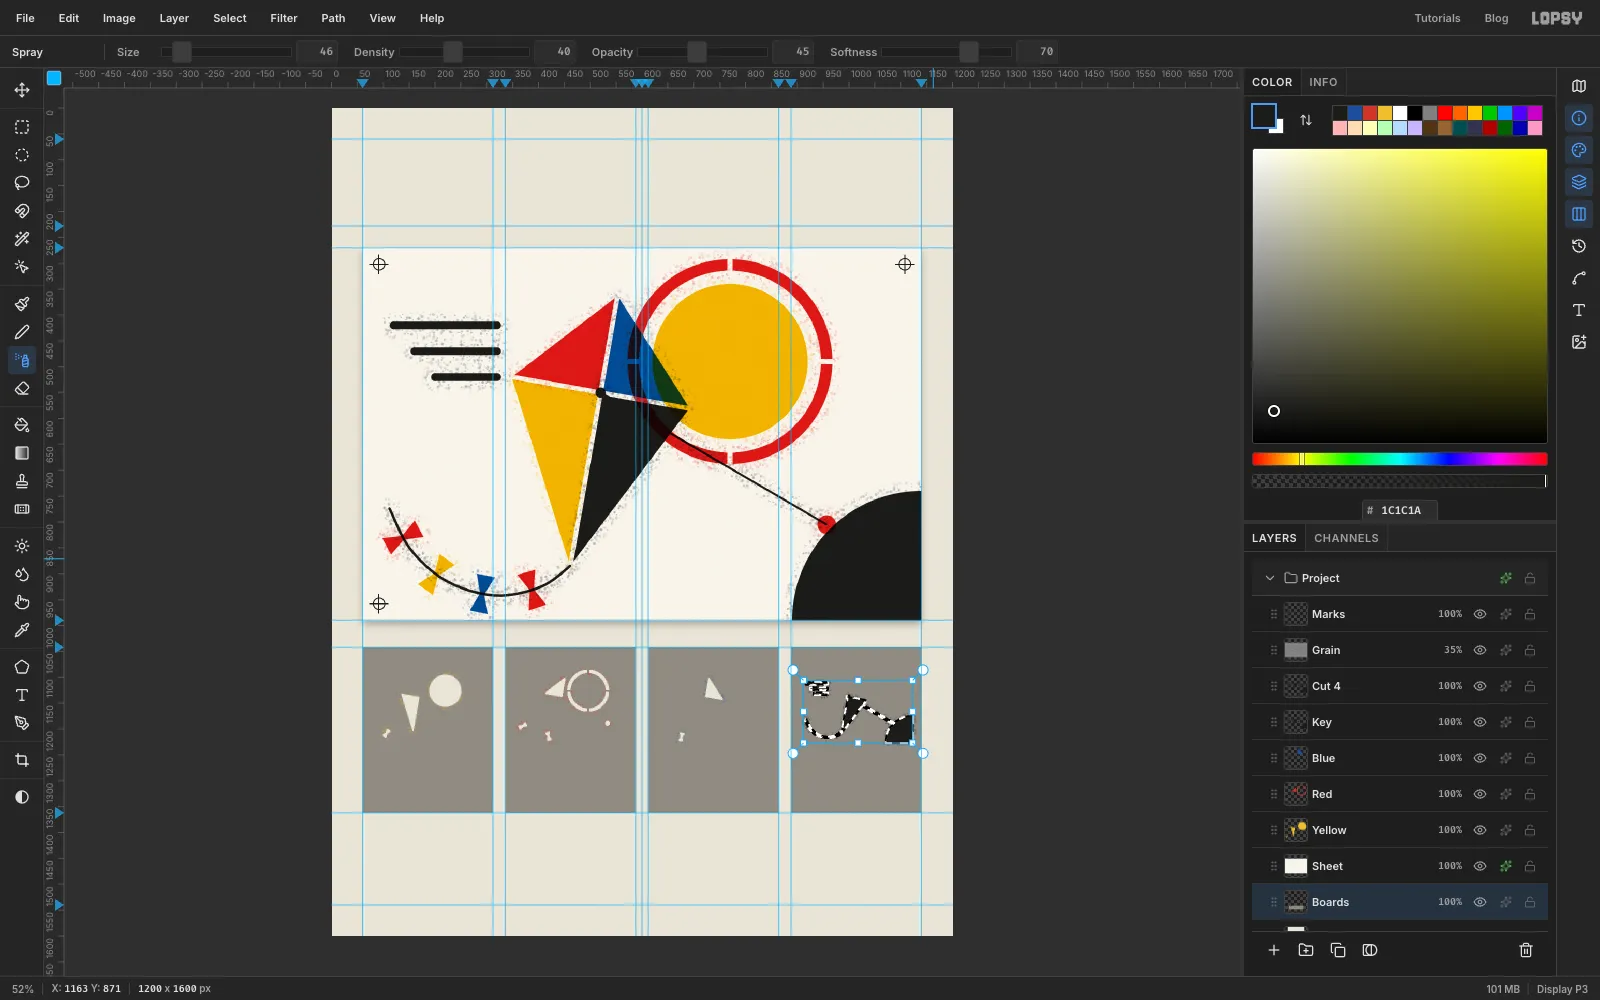
- Plate 2: the
-
Punch the registration holes
Each plate needs holes where the print has its crosshairs, scaled by the same 1:5. On plate 1 they're at
84, 1088,288, 1088and84, 1220. On the other plates, add 276, 552 and 828 to the x values.With
Boardsselected, Shift-add a 12 px circle at each spot with the Elliptical Marquee. Press Delete and deselect. Then pick the Pencil at Size1with , and scratch four short ticks around each hole, like a cross with its middle punched out.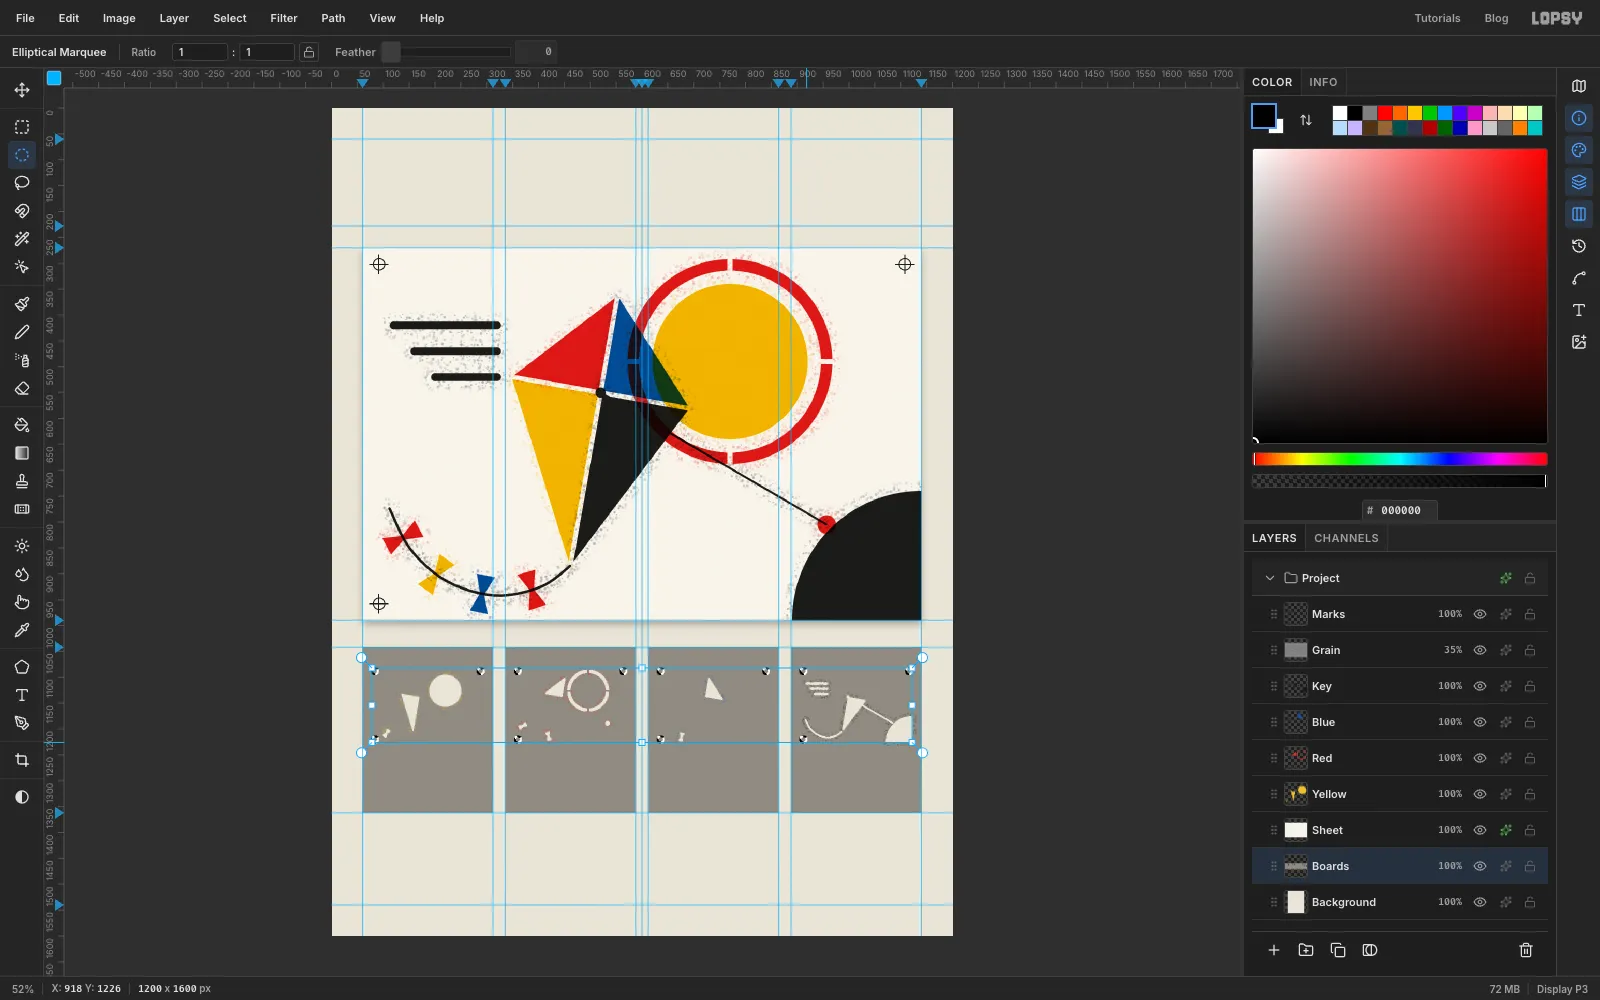
-
Cut a stencil number into each board
With
Boardsselected, pick the Text tool (T). Choose Stardos Stencil, Bold, size96and , click in empty space and type1. Press Tab to finish, then click Rasterize Layer at the bottom of the Layers panel.Move the number to the bottom-left of plate 1, 22 px in from the edge, with its foot on the line
y 1338. Cmd-click its thumbnail, selectBoards, press Delete and delete the number layer. Do the same for2,3and4.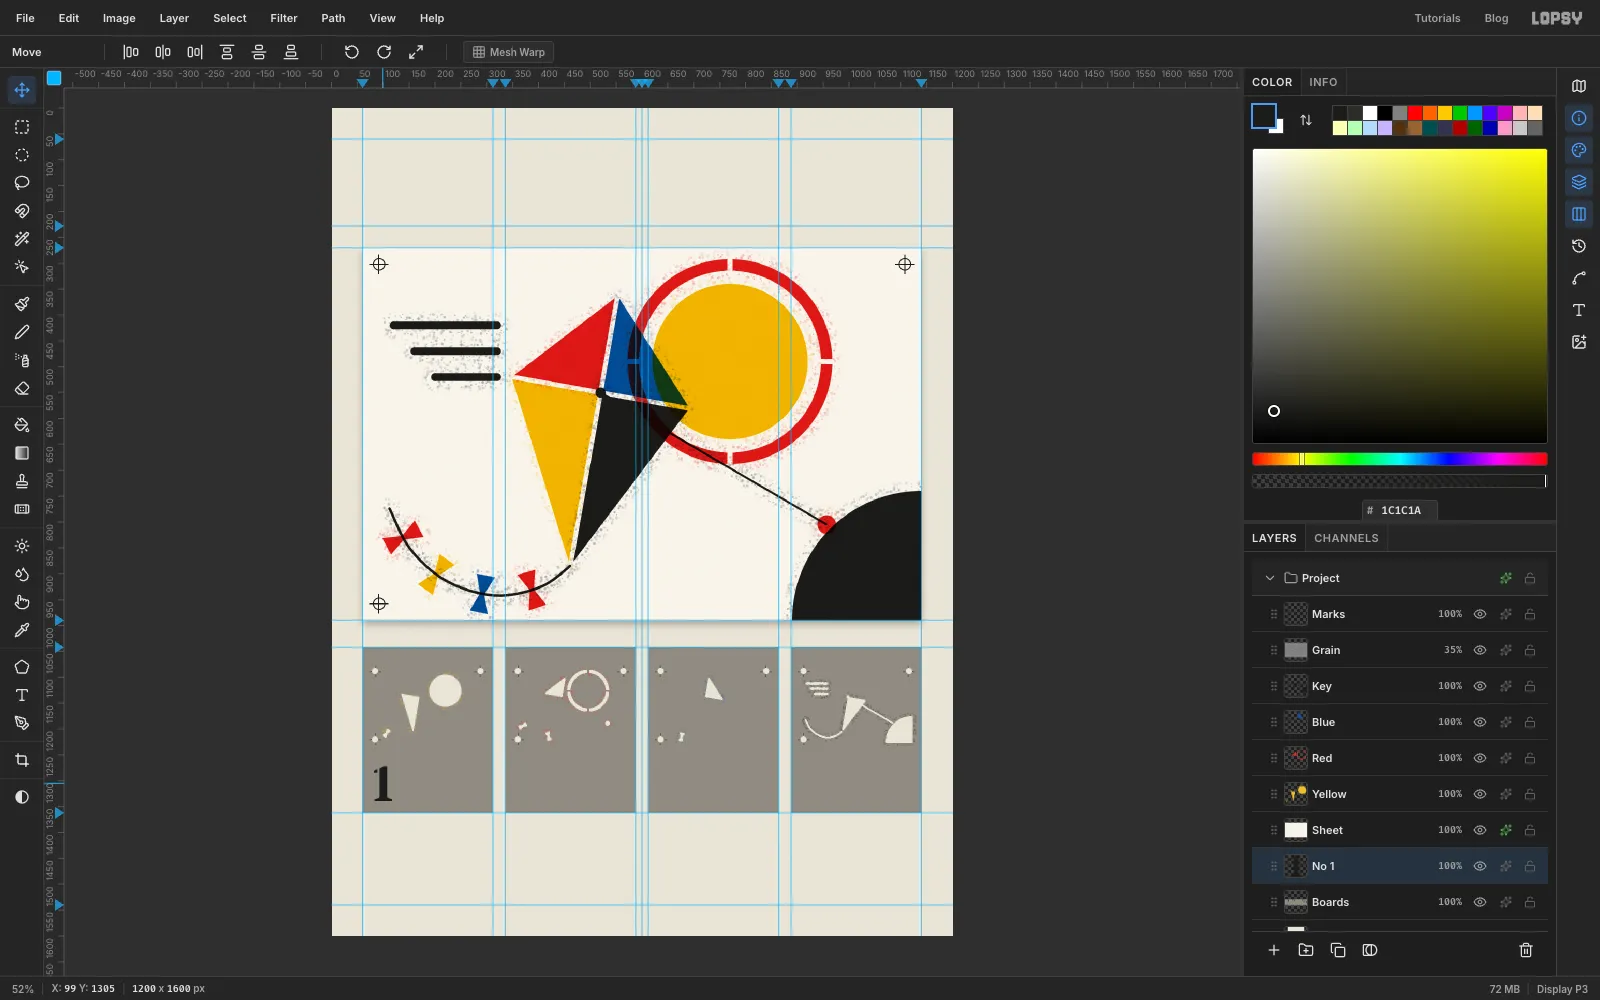
-
Label each plate with its ink
On
Boards, make a 116 × 42 px tab at the bottom-right of each plate, from 118 px to 234 px in from its left edge and fromy 1296to1338. Fill each with its plate's ink.Select
Boards, so each label is created directly above it. Type each label in Space Mono, Bold, size20:yellowin , andred,blueandkeyin . Rasterize it, centre it on its tab, and choose Layer → Merge Down to bake it into the board. The tab's bottom edge lines up with the foot of the stencil number beside it.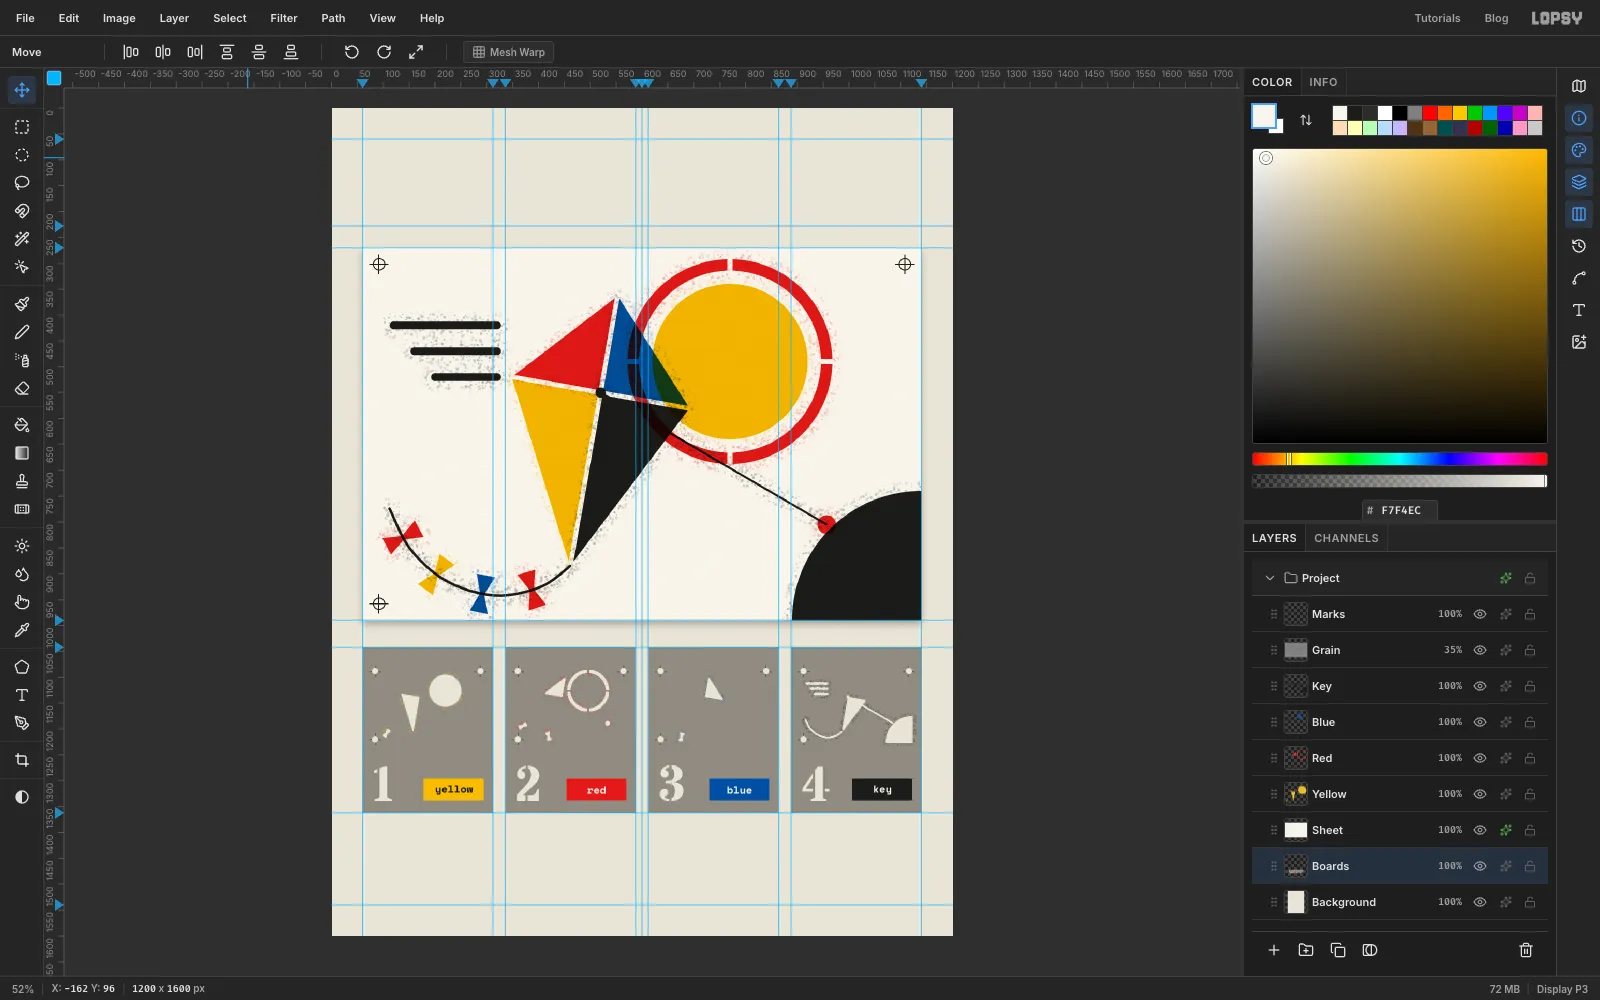
-
Knock two plates askew
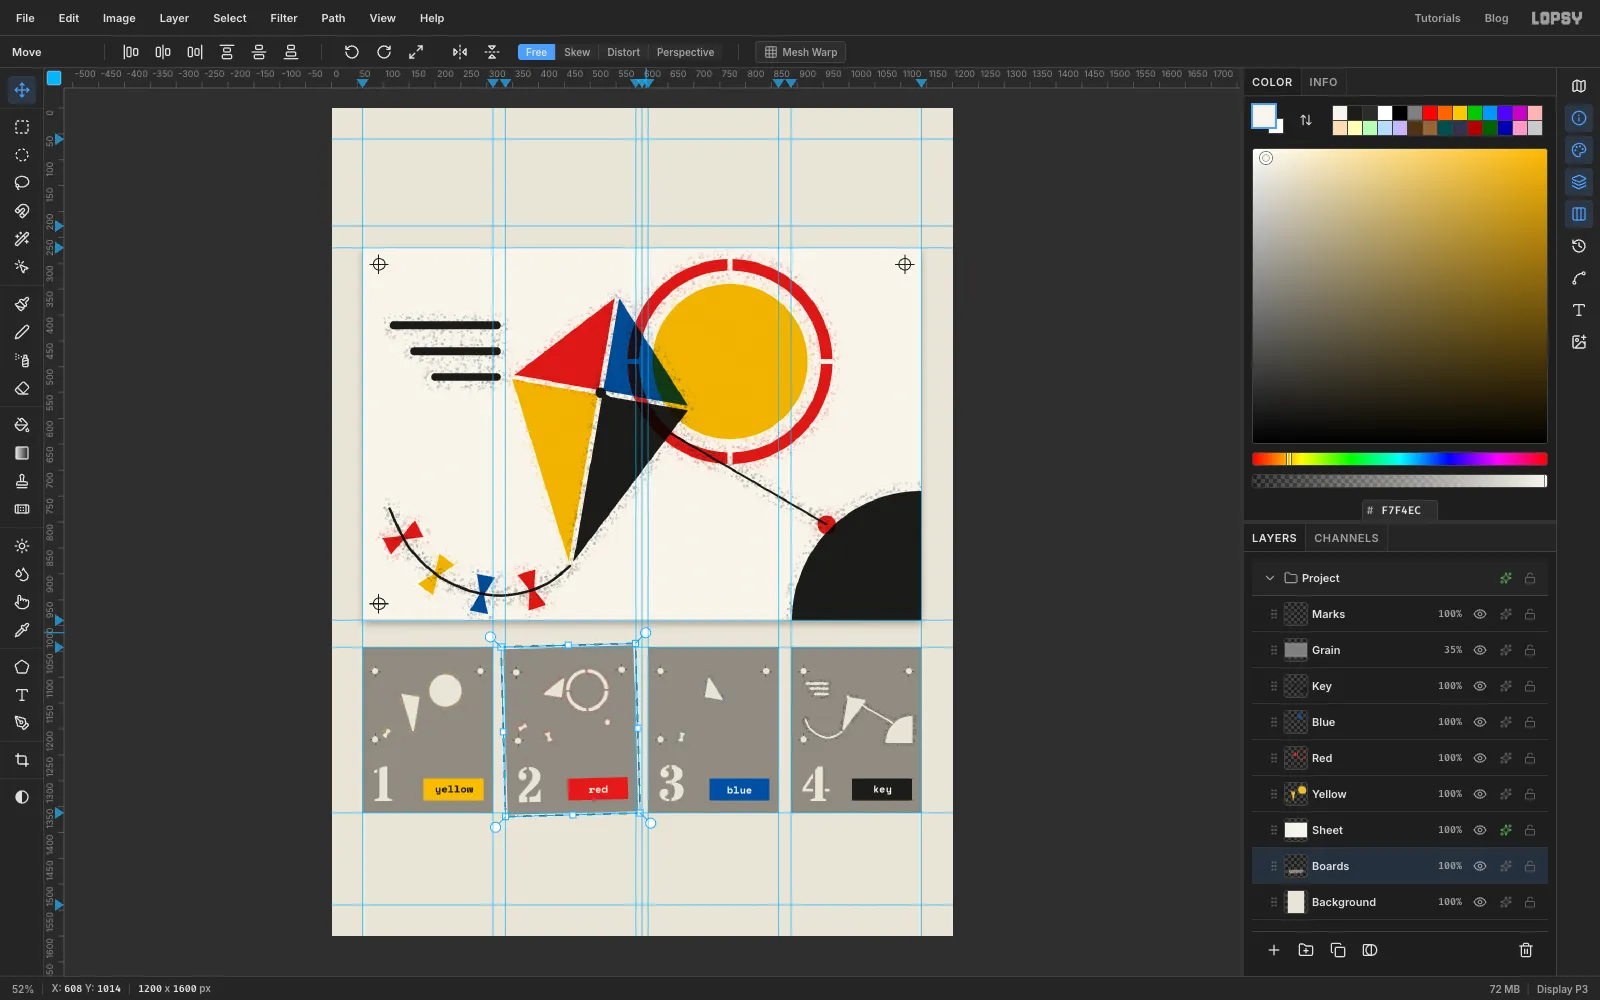
Plates on a bench never sit perfectly straight. Draw a marquee a few pixels outside plate 2. With the Move tool, drag the white circle handle beyond the top-right corner a little counter-clockwise, about 1.5°. Press Cmd+D.
Do the same for plate 3, about 1° clockwise. Keep the turns small so no corner pokes past its gutter.
-
Give the boards thickness
Open the effects for
Boards. Tick Drop Shadow and set Offset X3, Offset Y7, Blur12and Opacity40. Tick Inner Glow and set Size3, Opacity50and the colour to . The glow darkens the edge of every hole, so the cuts look like they go through card.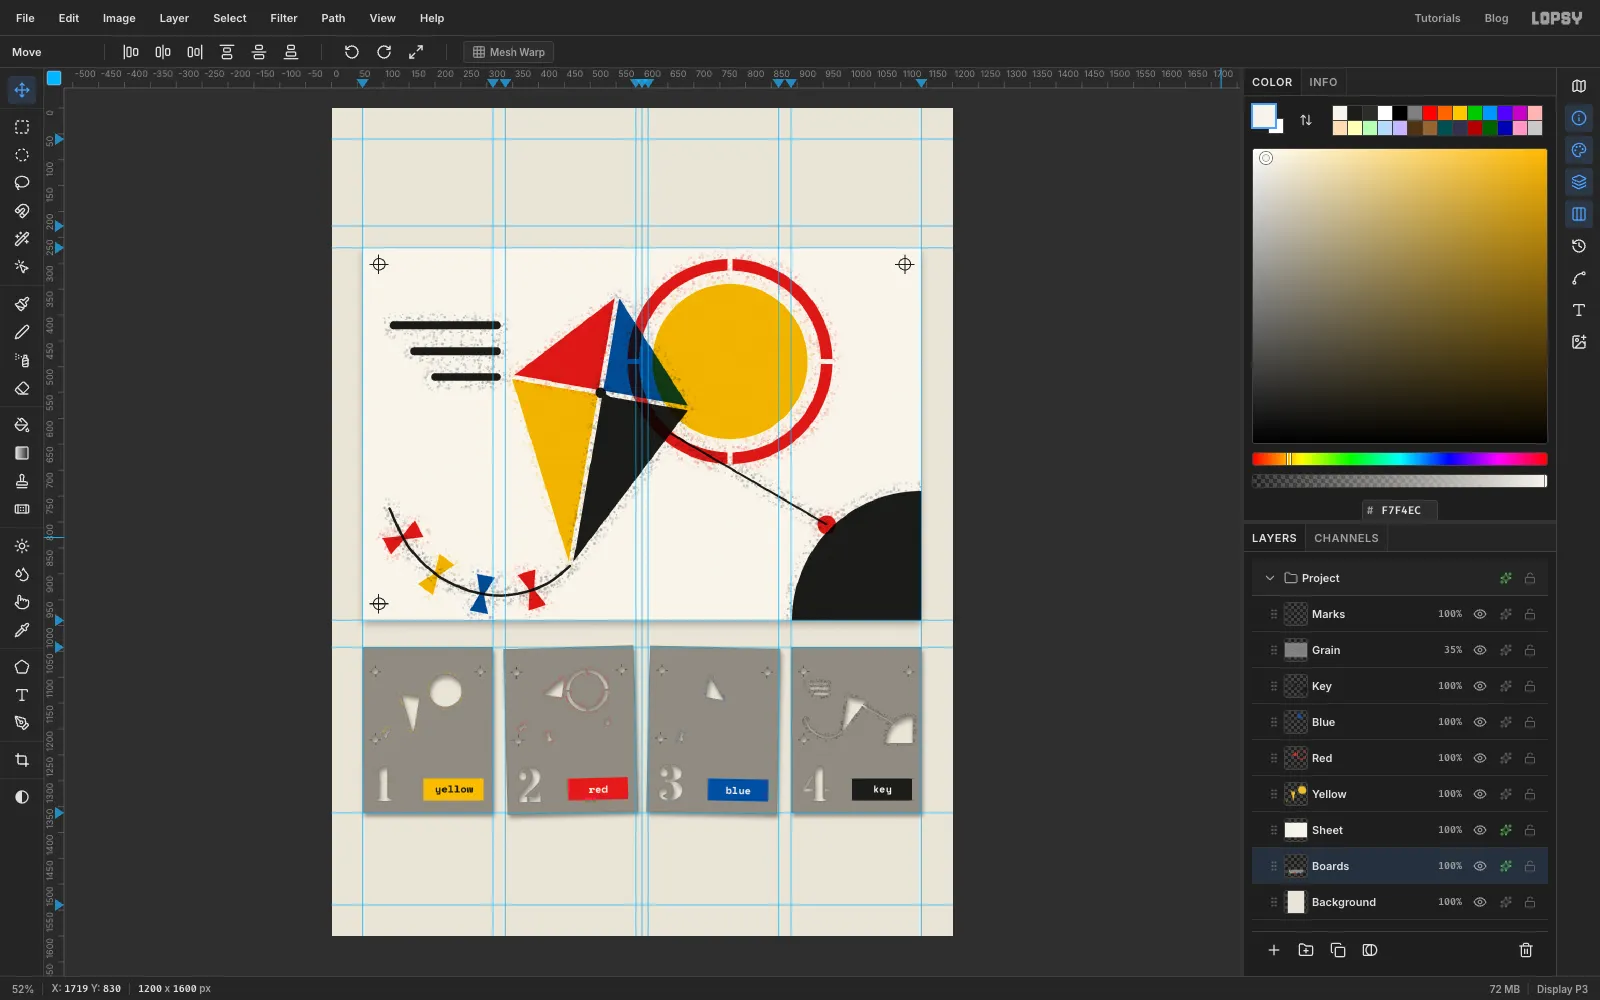
-
Set the title and dot the i's in red
Select
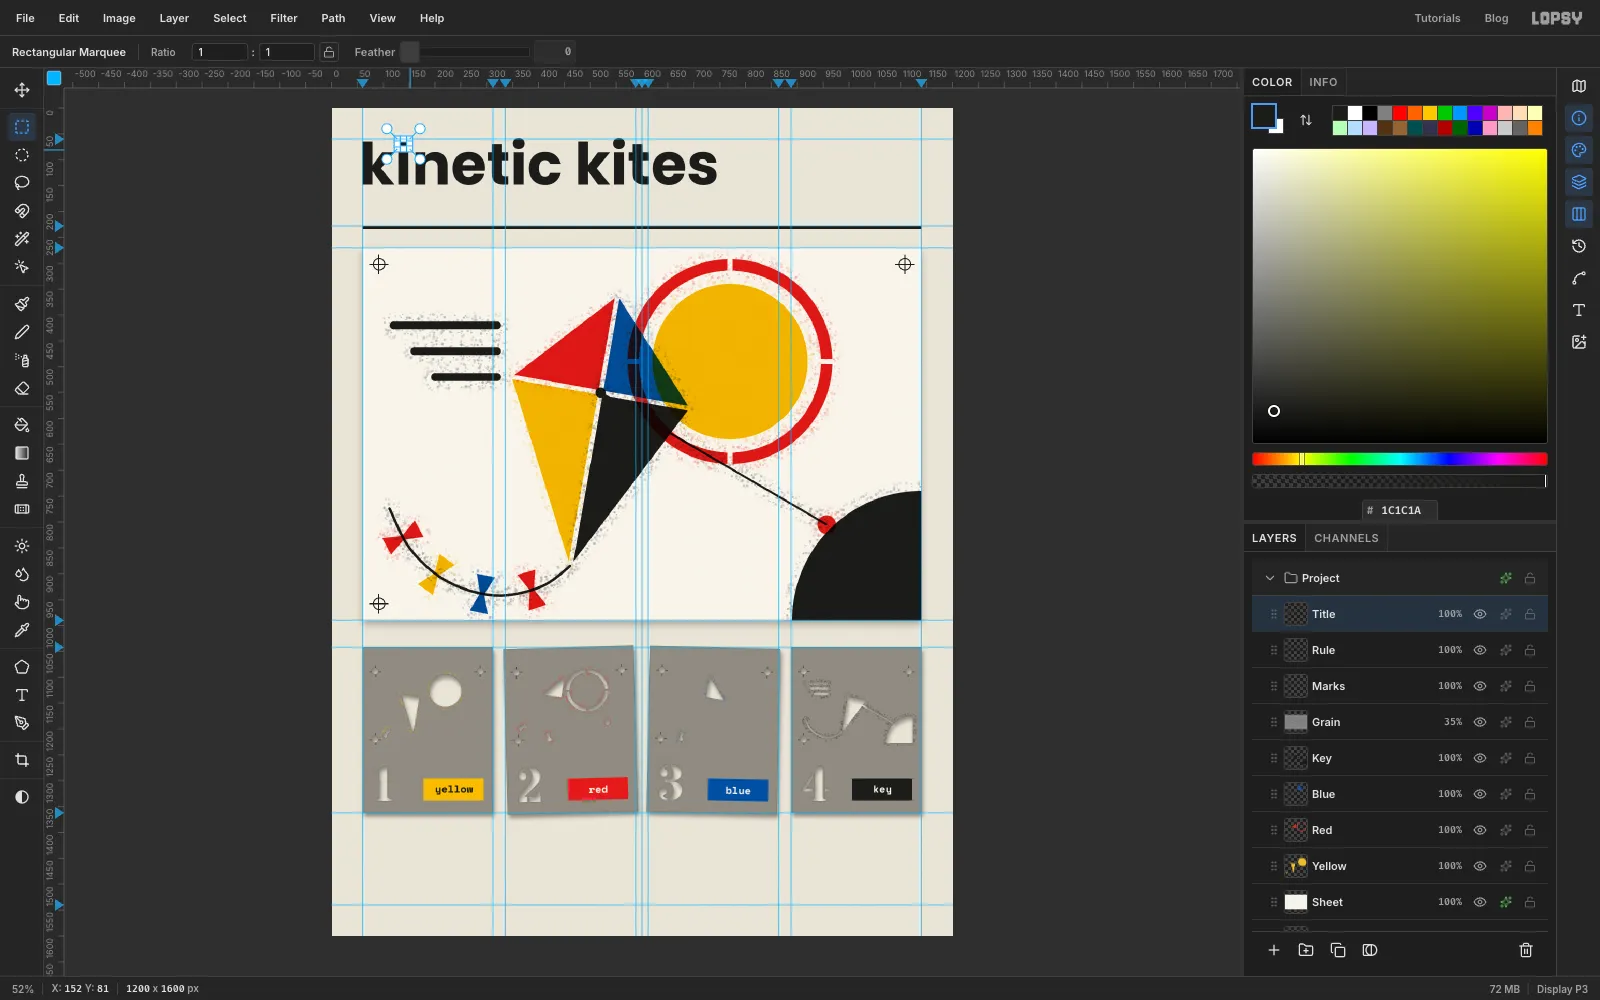
Marksand add a layer calledRule. Use the exact-corners dialog for a 6 px bar from60, 228to1140, 234, and fill it with .Type
kinetic kitesin Poppins, Bold, size112, , and rename the layerTitle. Rasterize it and move it so its left edge is on the60guide, with the tops of the k's aty 58. That puts the baseline at148, the same line the shapes in the next steps stand on. The tall letters poke 2 px above the margin, which reads as optically aligned.Cmd-click the title's thumbnail. Then, with the Rectangular Marquee, hold Shift+Alt and drag a small box around the dot of the first i. Only the dot stays selected. Fill it with red and deselect. Repeat for the other two i's.
-
Add the subtitle
Type
a stencil set in four plates · spray light to darkin Space Mono, size22, and name the layerSubtitle. Rasterize it and place it on the60guide, with its top aty 172. That leaves the same space above the rule as there is between the rule and the print.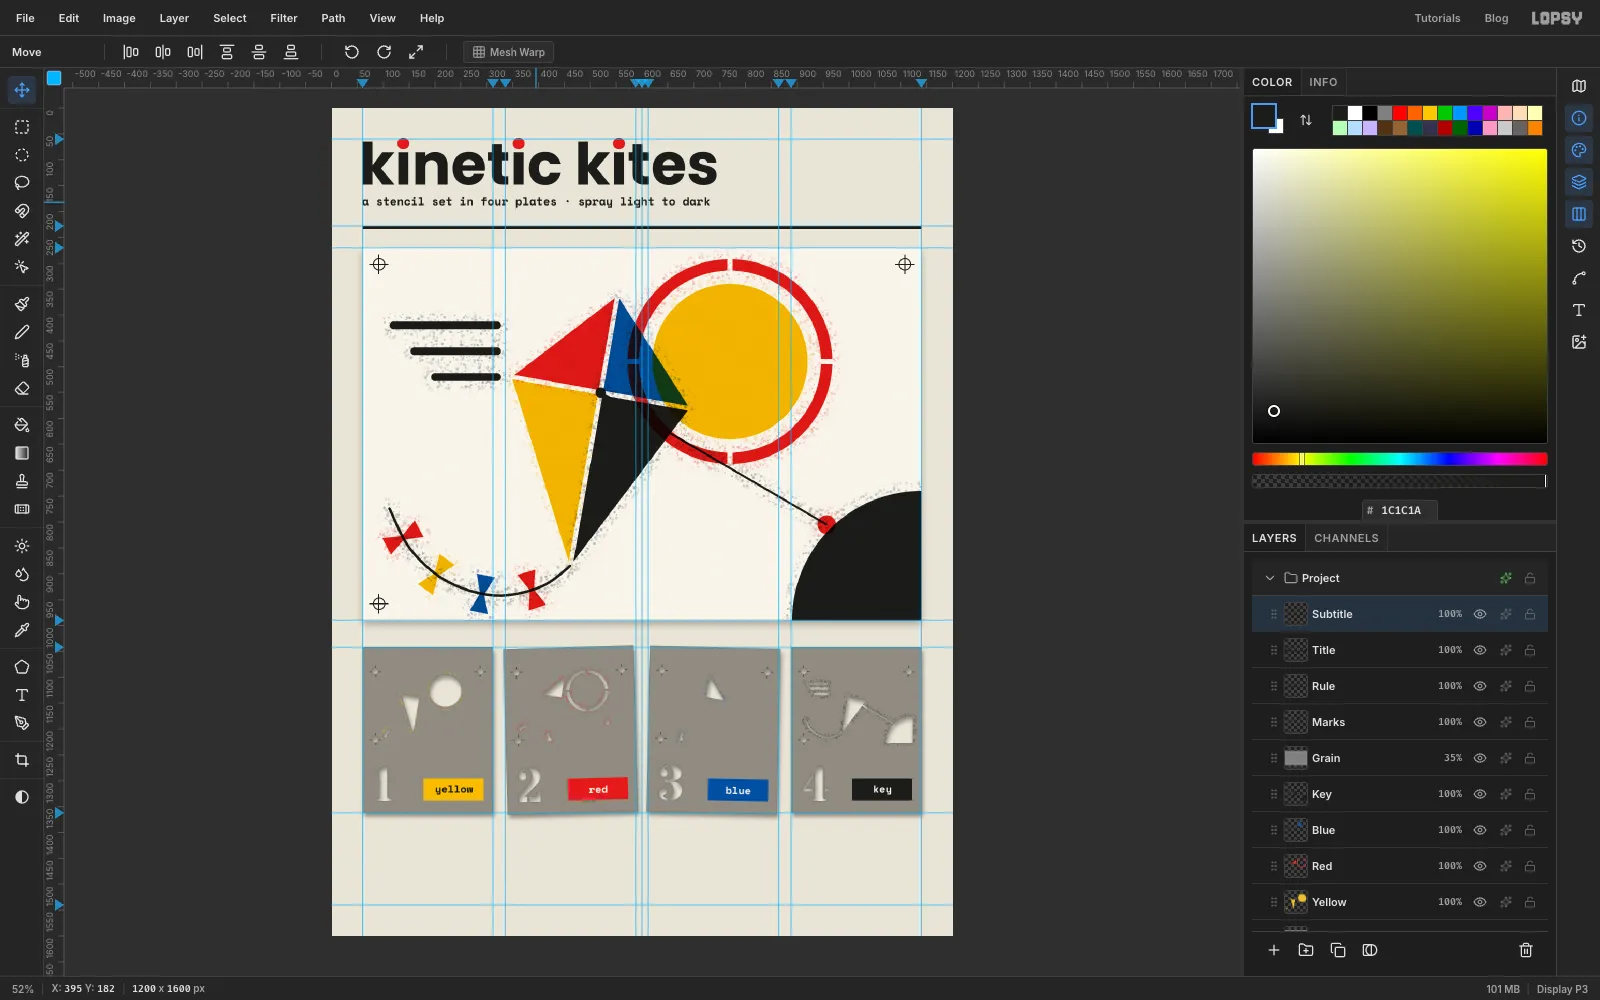
-
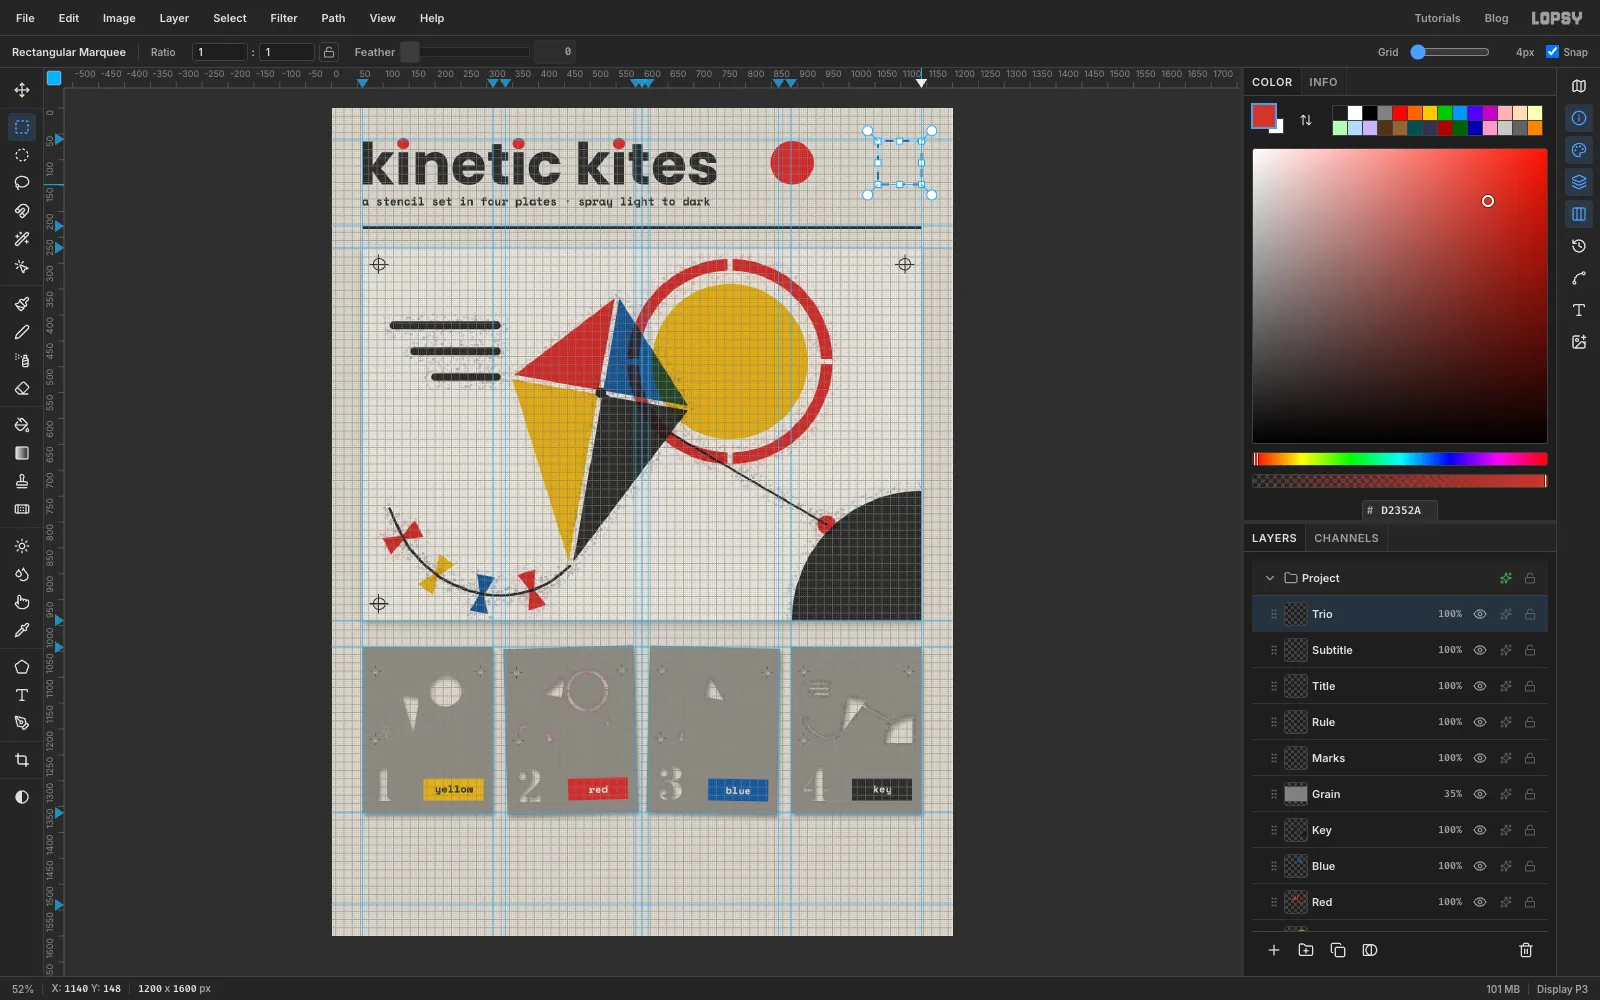
Draw the circle, triangle and square on the grid
Add a layer called
Trio. Choose View → Show Grid, drag the Grid slider in the options bar all the way left to 4px, and make sure Snap is ticked. Then turn off View → Snap to Guides. Otherwise the plate guides at864and888pull the circle's corner and squash it into an oval.Each shape is 84 px, from
y 64to the title's baseline at148, with 20 px between them:- Circle: drag the Elliptical Marquee from
848, 64to932, 148and fill it red. - Square: drag the Rectangular Marquee from
1056, 64to1140, 148and fill it blue. - Triangle: the Pen ignores the grid, so watch the status bar as you click
952, 148,994, 64and1036, 148. Close the path, then use Path to Selection and fill it yellow.
Turn the grid off and Snap to Guides back on.
- Circle: drag the Elliptical Marquee from
-
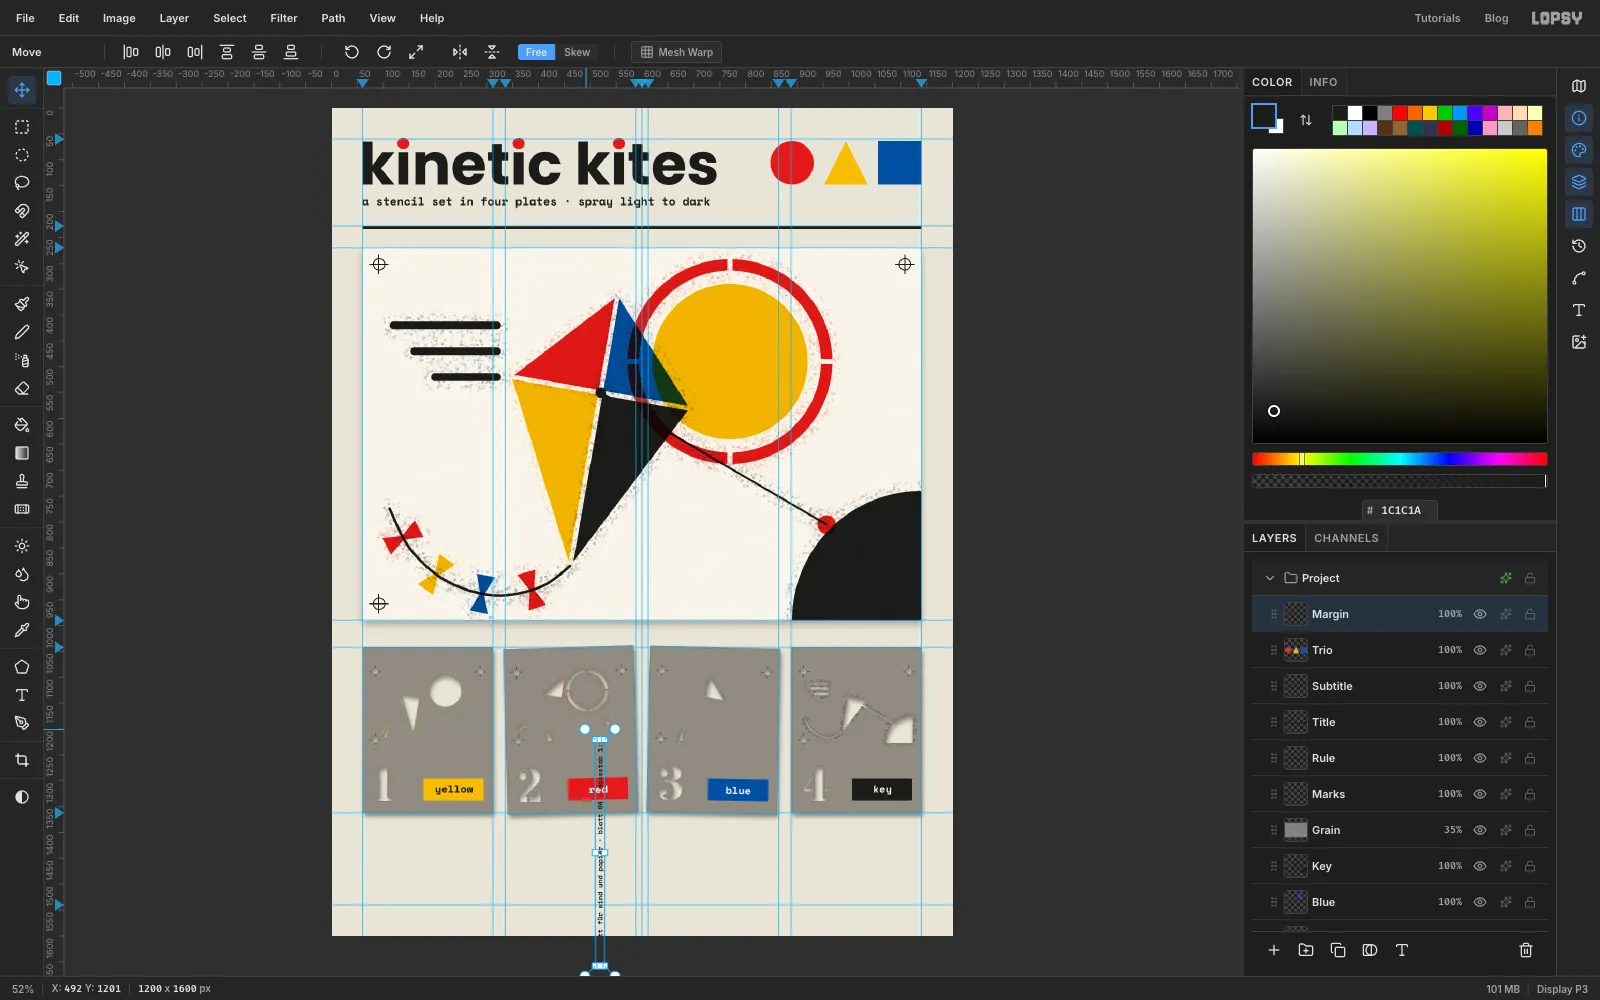
Rotate a line of text into the margin
Type
werkstatt für wind und papier · blatt 04 · massstab 1:5in Space Mono, size13, in an empty part of the canvas, and name the layerMargin. Leave it as live text.With the Move tool, the text layer shows its own handles. Hold Cmd and drag the top-right rotation handle counter-clockwise. Cmd snaps to 15° steps, so stop at 90°. Move the text into the left margin, centred on the print, about 30 px from the page edge. It now reads from bottom to top.
-
Add the captions and the footer
Type two captions in Space Mono, size
14, rasterize them and put both on the60guide:fig. 5 the pull: four plates, sprayed light to dark, 16 px under the print. Name itCaption 5.fig. 1–4 the plates, one per ink, 16 px under the plates. Name itCaption 1-4.
Select
Ruleand pick the Pencil at Size2with . Click60, 1412and Shift-click1140, 1412for the footer rule.Type the plate notes in Space Mono, size
15, as four lines:- plates: 0.5 mm board, cut at 1:5
- line the punched holes up with the marks
- bridges hold the ring's centre in place
- spray thin coats from 25 cm, light to dark
Name the layer
Notes, rasterize it and place it at60, 1430.The overprint test shows what Multiply does, so it goes on the real ink layers. Make three 72 px circles with the exact-corners dialog: yellow on
Yellowfrom1008, 1450to1080, 1522, red onRedfrom1068, 1450to1140, 1522, and blue onBluefrom1038, 1468to1110, 1540. The red one touches the right margin. Draw a marquee around the three and run Add Noise (14, Mono, Gaussian) on each of the three layers, so they match the print. Finally typeoverprint testin Space Mono, size14, name itOverprint, and right-align it to the1140guide aty 1430.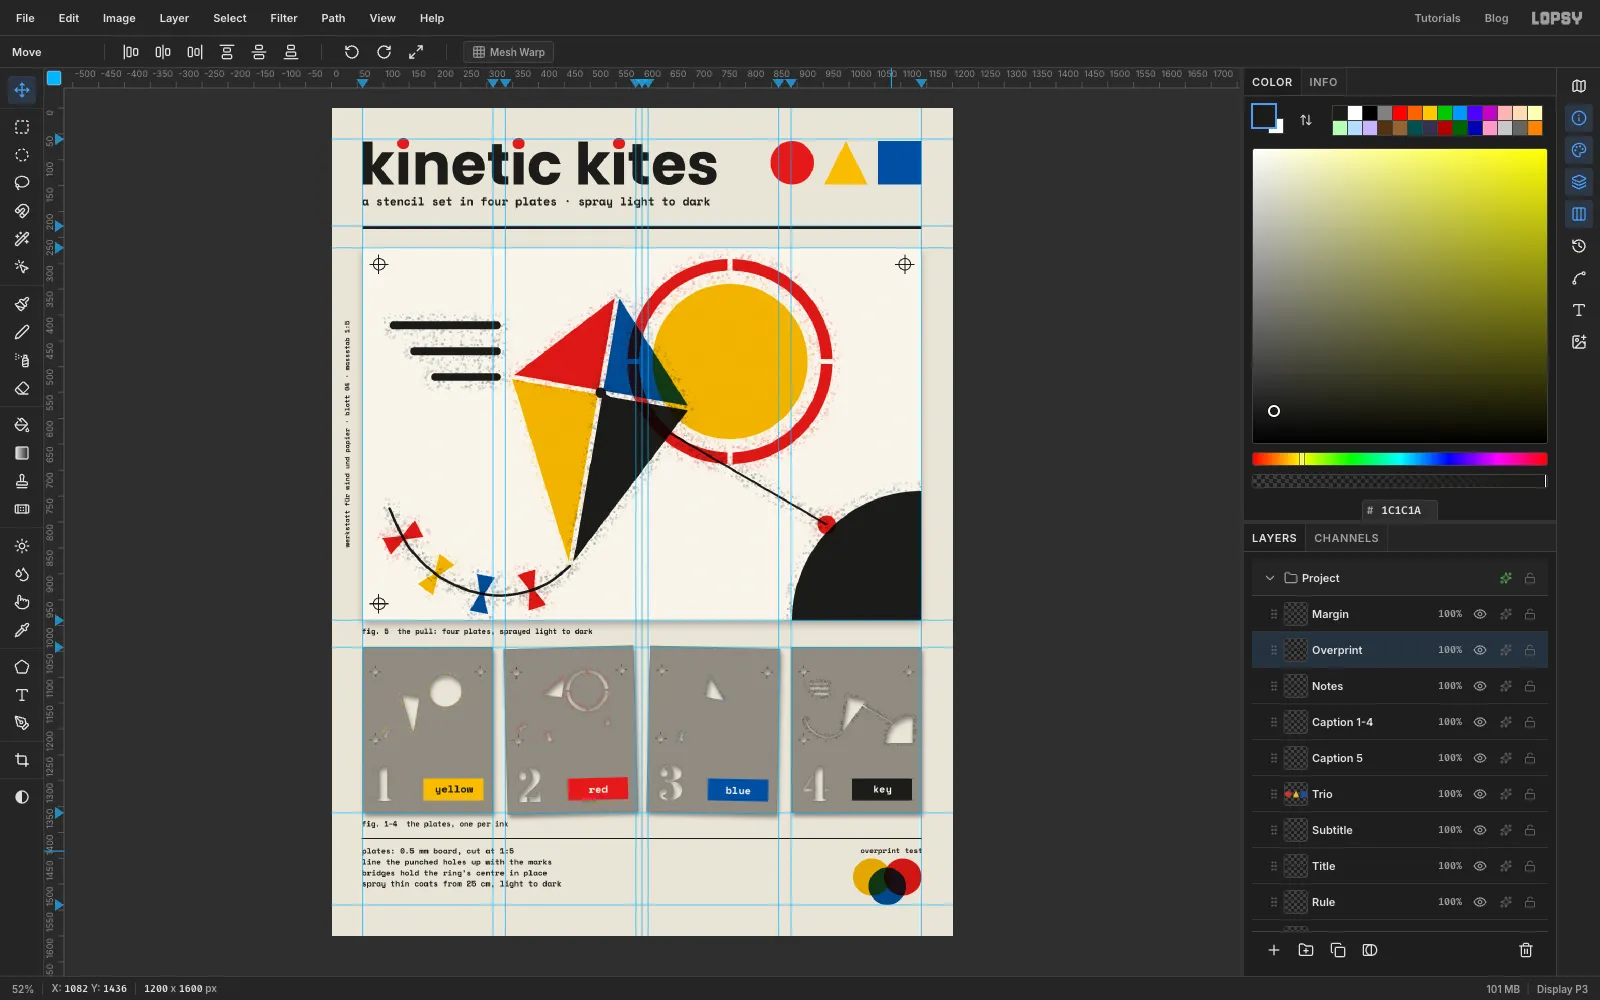
-
Group the layers and check undo
Click
Sheet, then Shift-clickMarksto select everything from the sheet up to the marks. Choose Layer → Group Layers and name the groupPull. Do the same fromRuleup toOverprintand call itType. The liveMargintext sits above them and can stay outside both groups. The overprint circles live on the ink layers, so they belong toPulltoo.Select the
Pullgroup, pick the Move tool and press Shift+→ three times. The whole print moves 30 px, overprint circles included. Press Cmd+Z three times to put it back. Each press of Shift+→ is its own step, so it takes three undos.Save with File → Save Project, and export with File → Quick Export PNG.