Make an Infographic Bonsai Stencil Contact Sheet
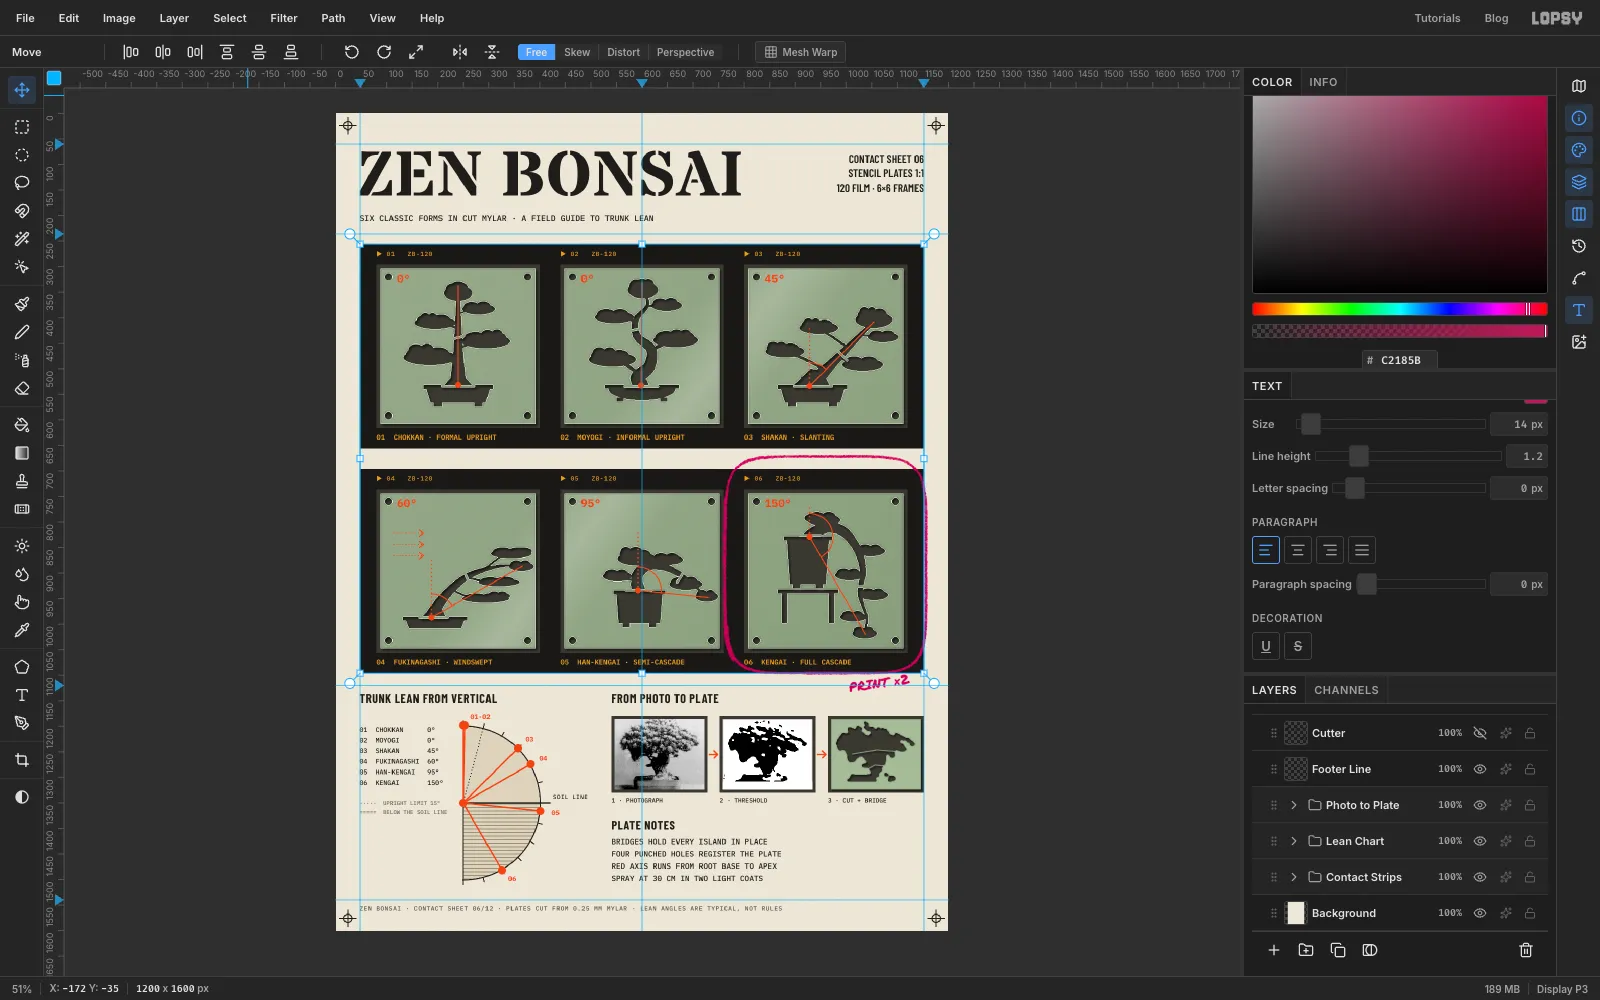
Cut six bonsai stencil plates in Lopsy, lay them out as a 120 film contact sheet, then add trunk-lean diagrams, a protractor chart and a photo-to-plate strip.
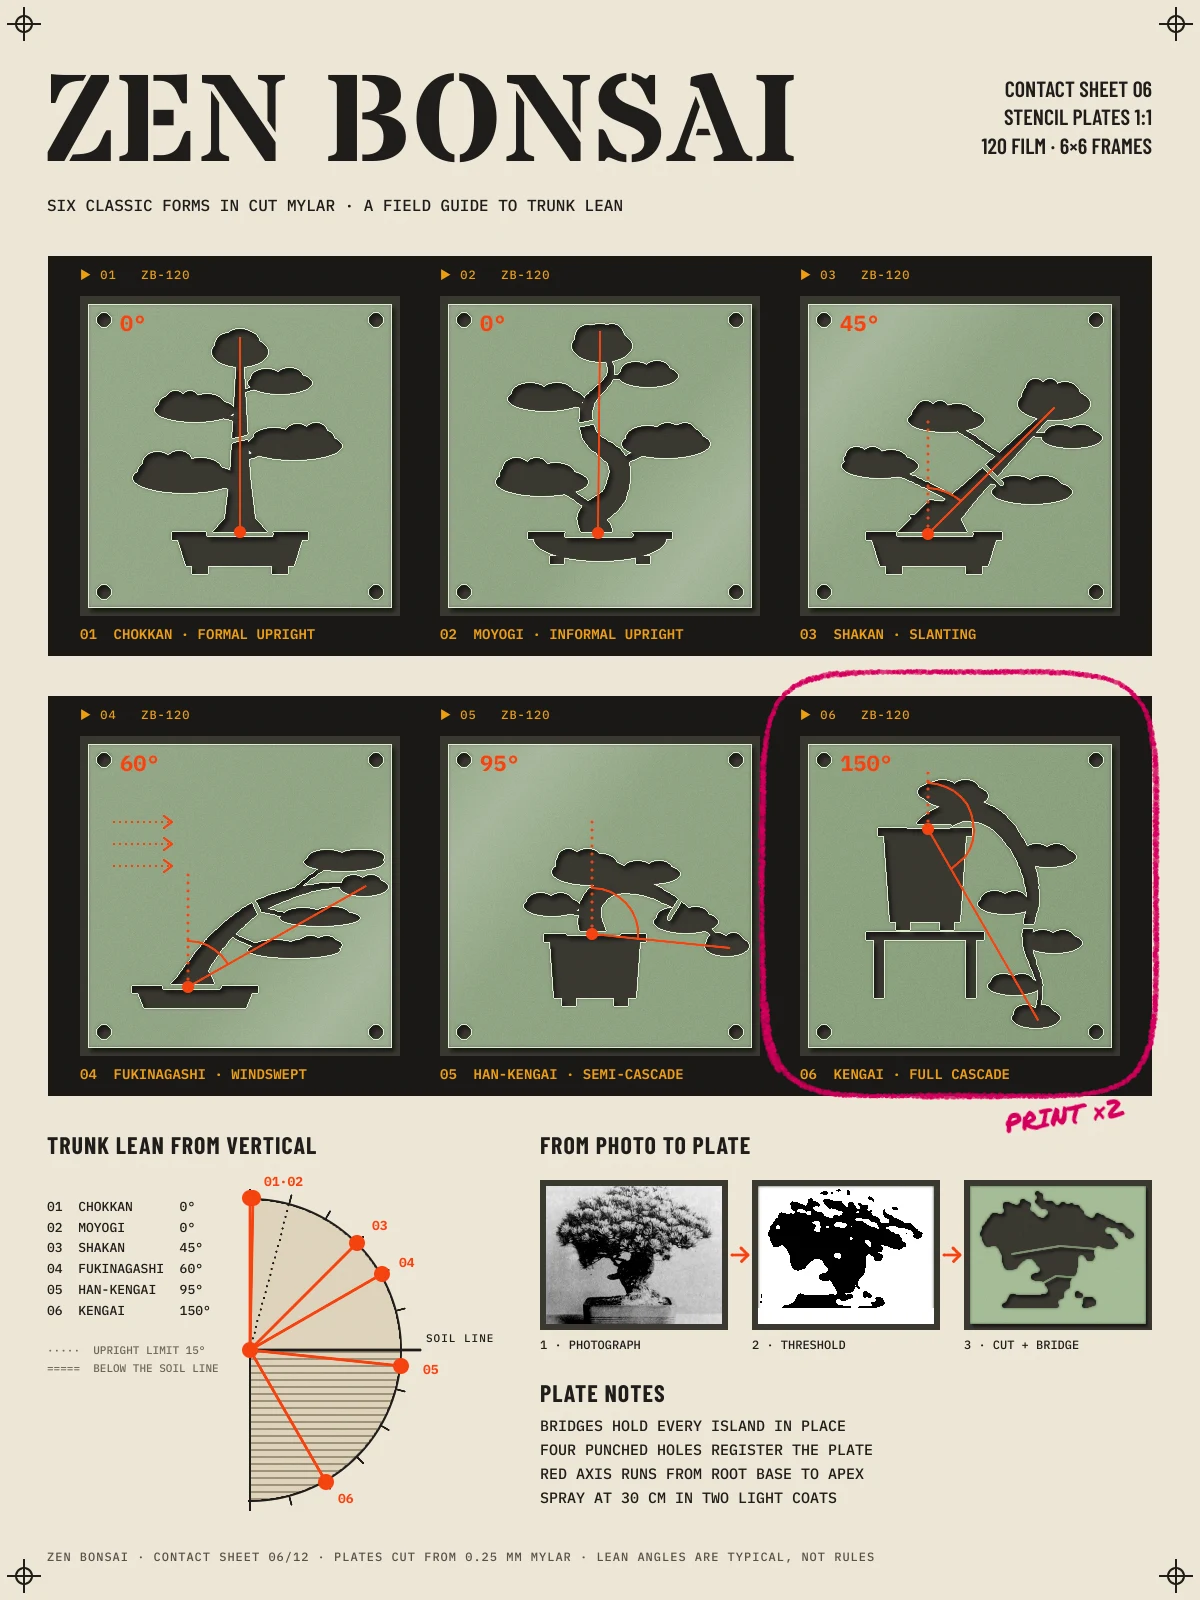
Bonsai growers sort trees by one number: how far the trunk leans from straight up. A formal upright stands at 0°. A cascade hangs its tip below the bottom of the pot. This tutorial turns that one idea into a poster. You'll cut six bonsai styles out of stencil plates, photograph them onto two strips of medium-format film, mark the lean on every frame, and plot all six on a protractor.
The piece is two things at once. It's a stencil contact sheet: cut plates, bridges and registration holes, frame numbers, and a grease pencil marking the frame to print. It's also an infographic: one accent colour for data, numbered frames, a chart, and notes that explain the marks.
Along the way you'll use:
- guides, the grid and Snap to lay out the film and frames
- Shift, Alt and Shift+Alt marquee drags to add, subtract and intersect selections
- a Cutter layer, a Cmd-click on its thumbnail and Delete to cut real holes through the plates
- copy and paste, a 45° rotation on the transform handles, and arrow-key nudges
- the Brush with Taper for trunks, and the Eraser for stencil bridges
- Inner Glow, Drop Shadow and an inside Stroke for cut Mylar, plus a Soft Light sheen
- Define Pattern and Fill with Pattern, and Radial Symmetry for the chart's ticks
- a dropped photo, Desaturate, Gaussian Blur, Threshold, the Magic Wand, and Grow / Shrink to clean a selection
- live text in Stardos Stencil, IBM Plex Mono, Barlow Condensed and Permanent Marker, including a right-aligned text box and a rotated note
- Group Layers to tidy everything at the end
The palette is warm paper and film black, with one green for the plates and two inks for the marks:
-
Paper
-
ink
-
chart tint
-
hatching
-
Film
-
bench
-
Mylar
-
plate bevel
-
plate glow
-
Data vermilion
-
edge-print amber
-
Grease pencil
-
Set up the paper, guides and grid
Open Lopsy. In the New Document dialog, set Width to
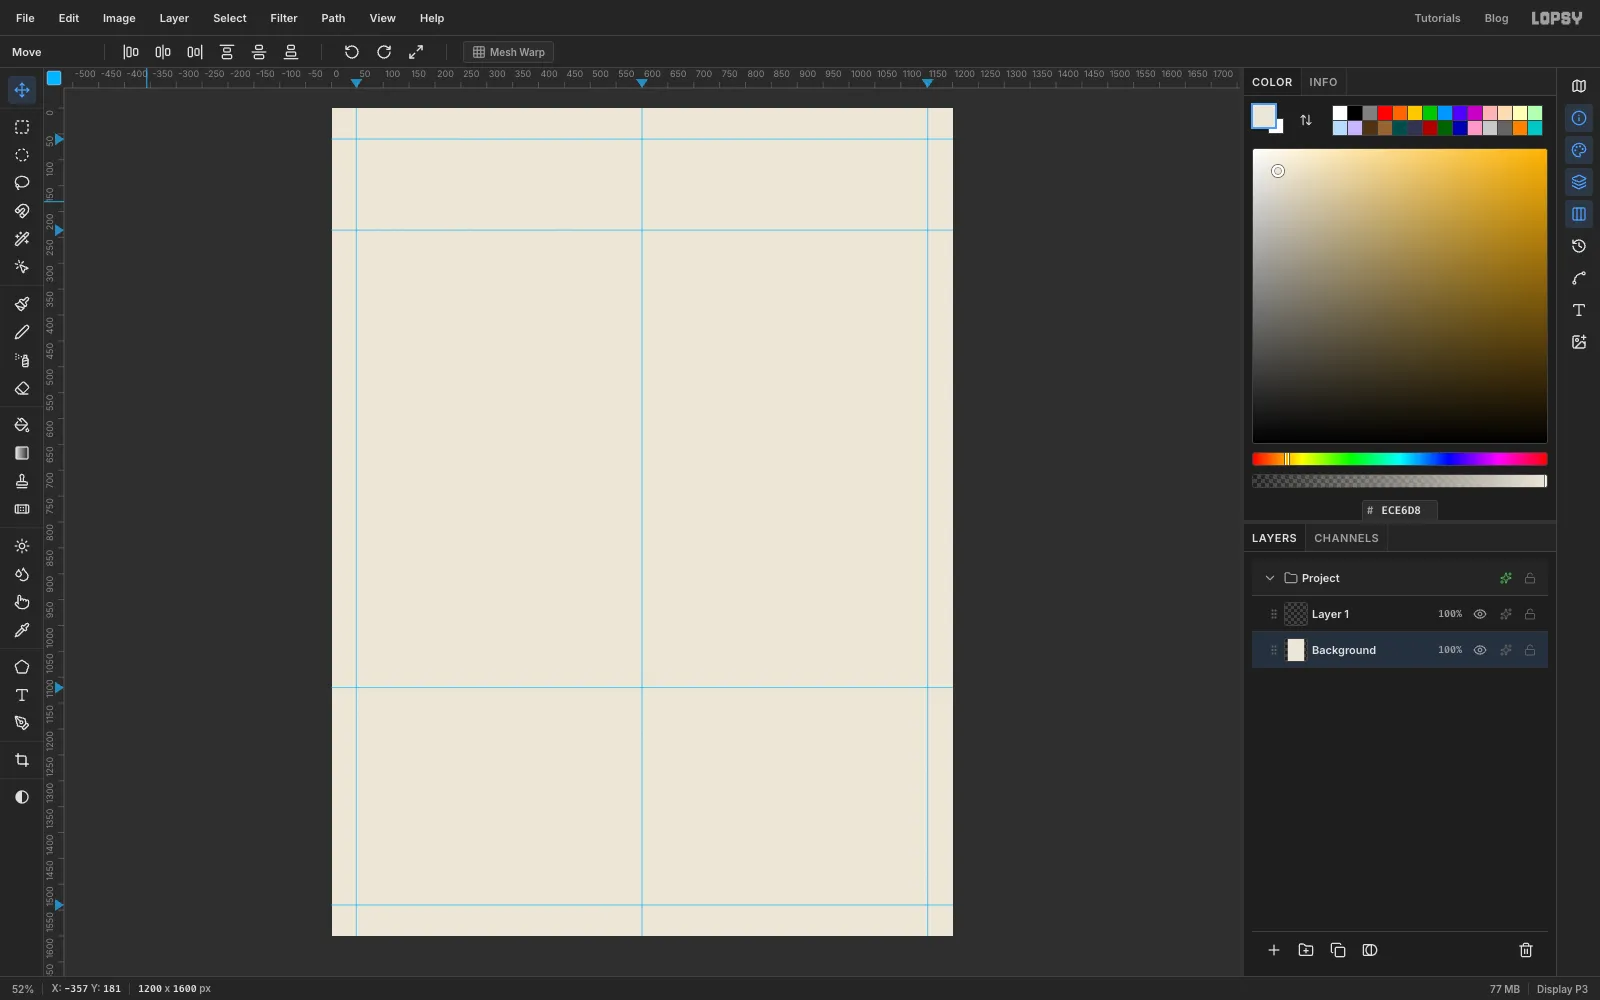
1200and Height to1600, choose a White background and click Create.- Leave Layer 1 where it is, at the top of the stack. Later it becomes the paper grain.
- Select Background, set the foreground colour to and choose Edit → Fill. With nothing selected, it fills the whole layer.
- Click the top ruler at
48,600and1152. Those are the side margins and the centre line. - Click the left ruler at
60,236,1120and1540. Those are the top margin, the bottom of the header, the top of the footer and the bottom margin.
-
Lay down two film strips
Select Background and click Add Layer at the bottom of the Layers panel. New layers go directly above the selected one. Double-click the new layer's name and call it
Film.Choose View → Show Grid, drag the Grid slider in the options bar to 8px and make sure Snap is ticked. Every corner in the next three steps falls on that 8 px grid.
Pick the Rectangular Marquee (M). Drag the first strip from
48, 256to1152, 656: from the left guide to the right guide, 400 px tall. Hold Shift and drag the second strip from48, 696to1152, 1096. Shift adds the second rectangle to the first. Set the foreground to , choose Edit → Fill, then deselect with Cmd+D.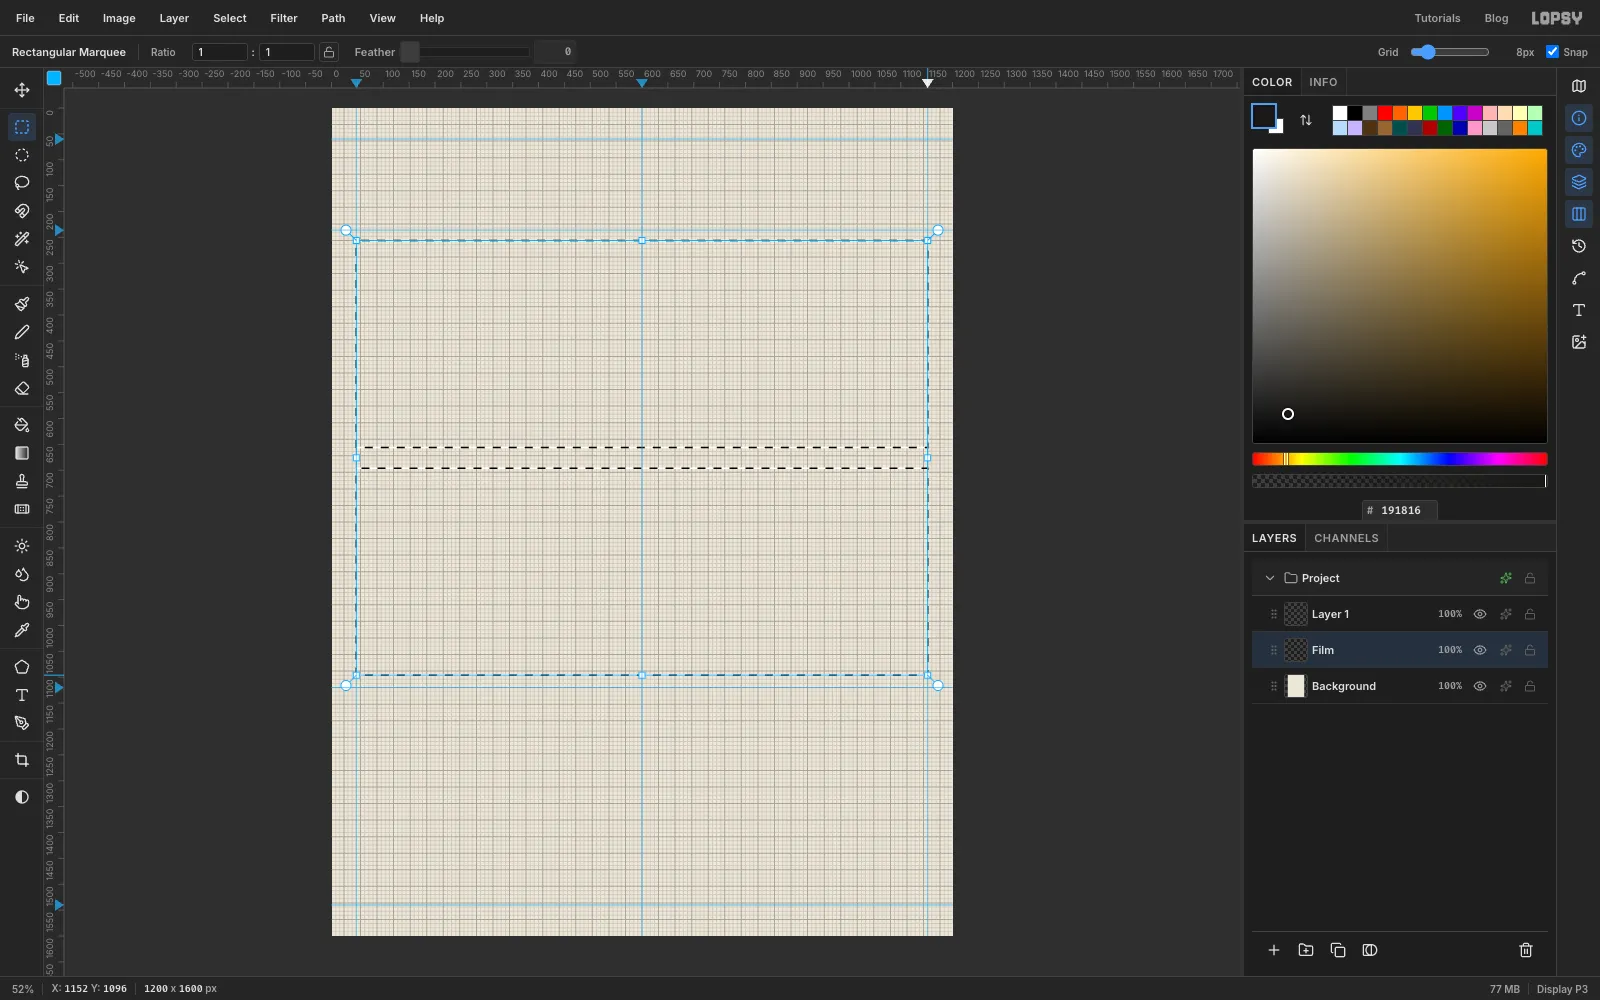
-
Cut six frame windows
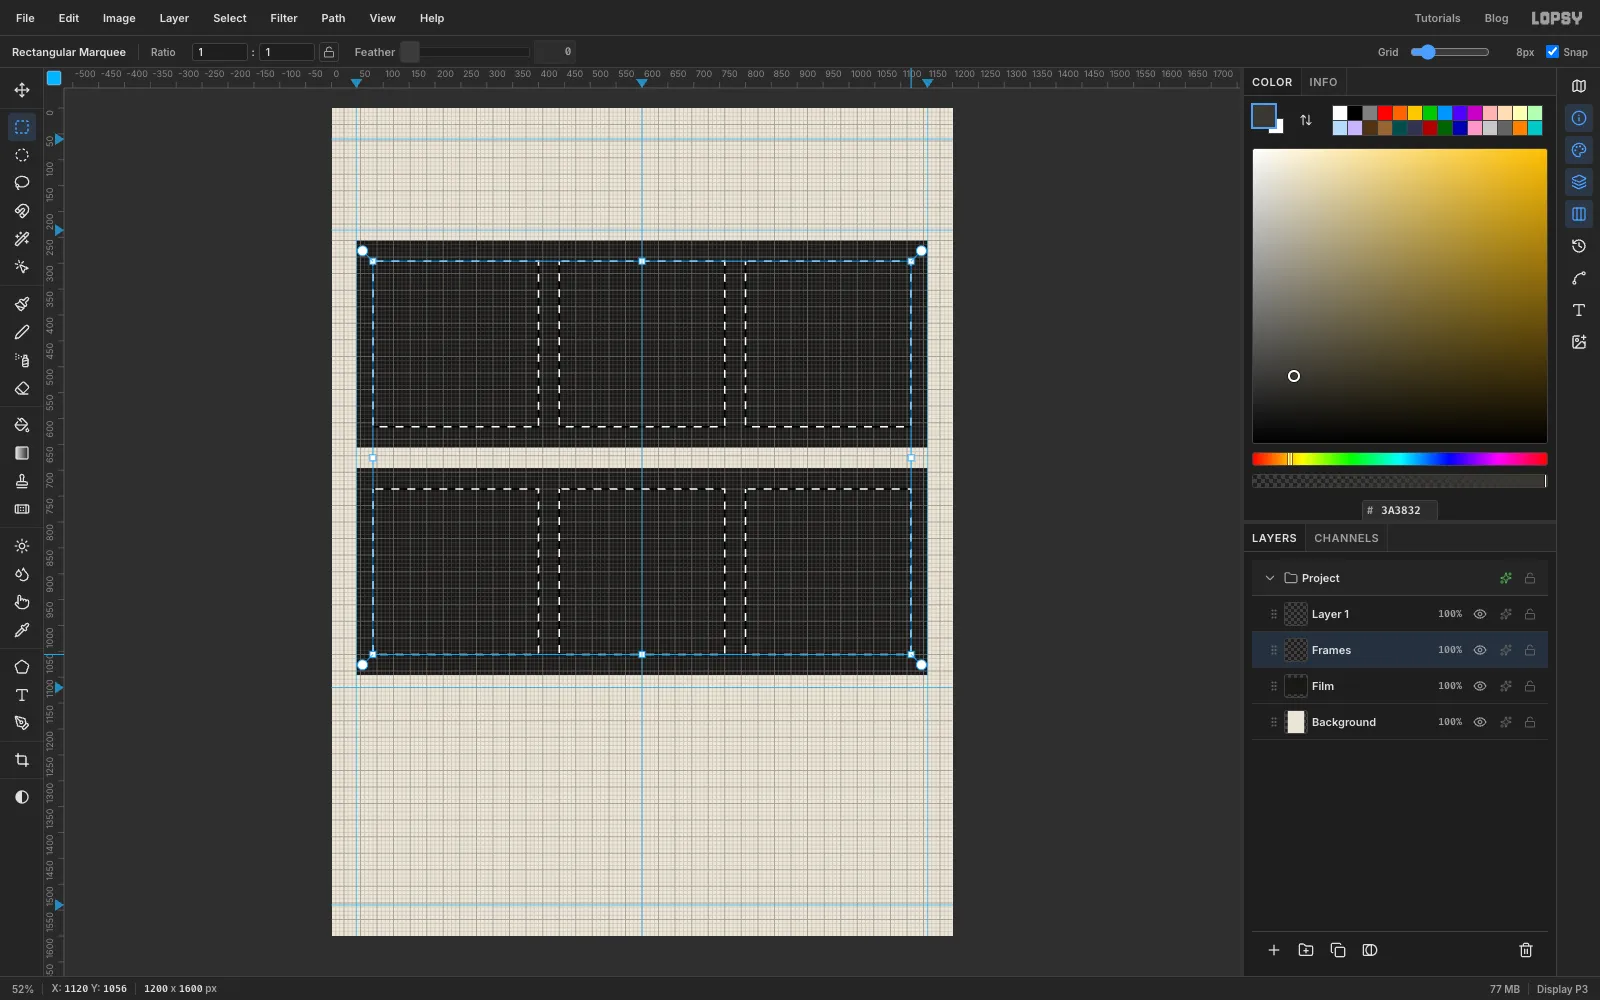
Add a layer called
Frames. A 120 film frame is square, so make six 320 × 320 squares, three per strip:- top row from
y 296, starting atx 80,440and800 - bottom row from
y 736, at the same three x positions
Drag the first square, then hold Shift for the other five. Leave 40 px of film above the frames for the edge print and 40 px below for the captions. Fill with , the bench the plates were photographed on, and deselect.
- top row from
-
Add the Mylar plates
Add a layer called
Plates. Each plate is 8 px smaller than its frame on every side, so draw six 304 × 304 squares starting at88, 304,448, 304,808, 304and the same three x positions aty 744. Shift-add them as before.Fill with . Deselect, then turn the grid off with View → Show Grid. Run Filter → Add Noise… with Amount
6and pick Mono, so the plates have a slight tooth.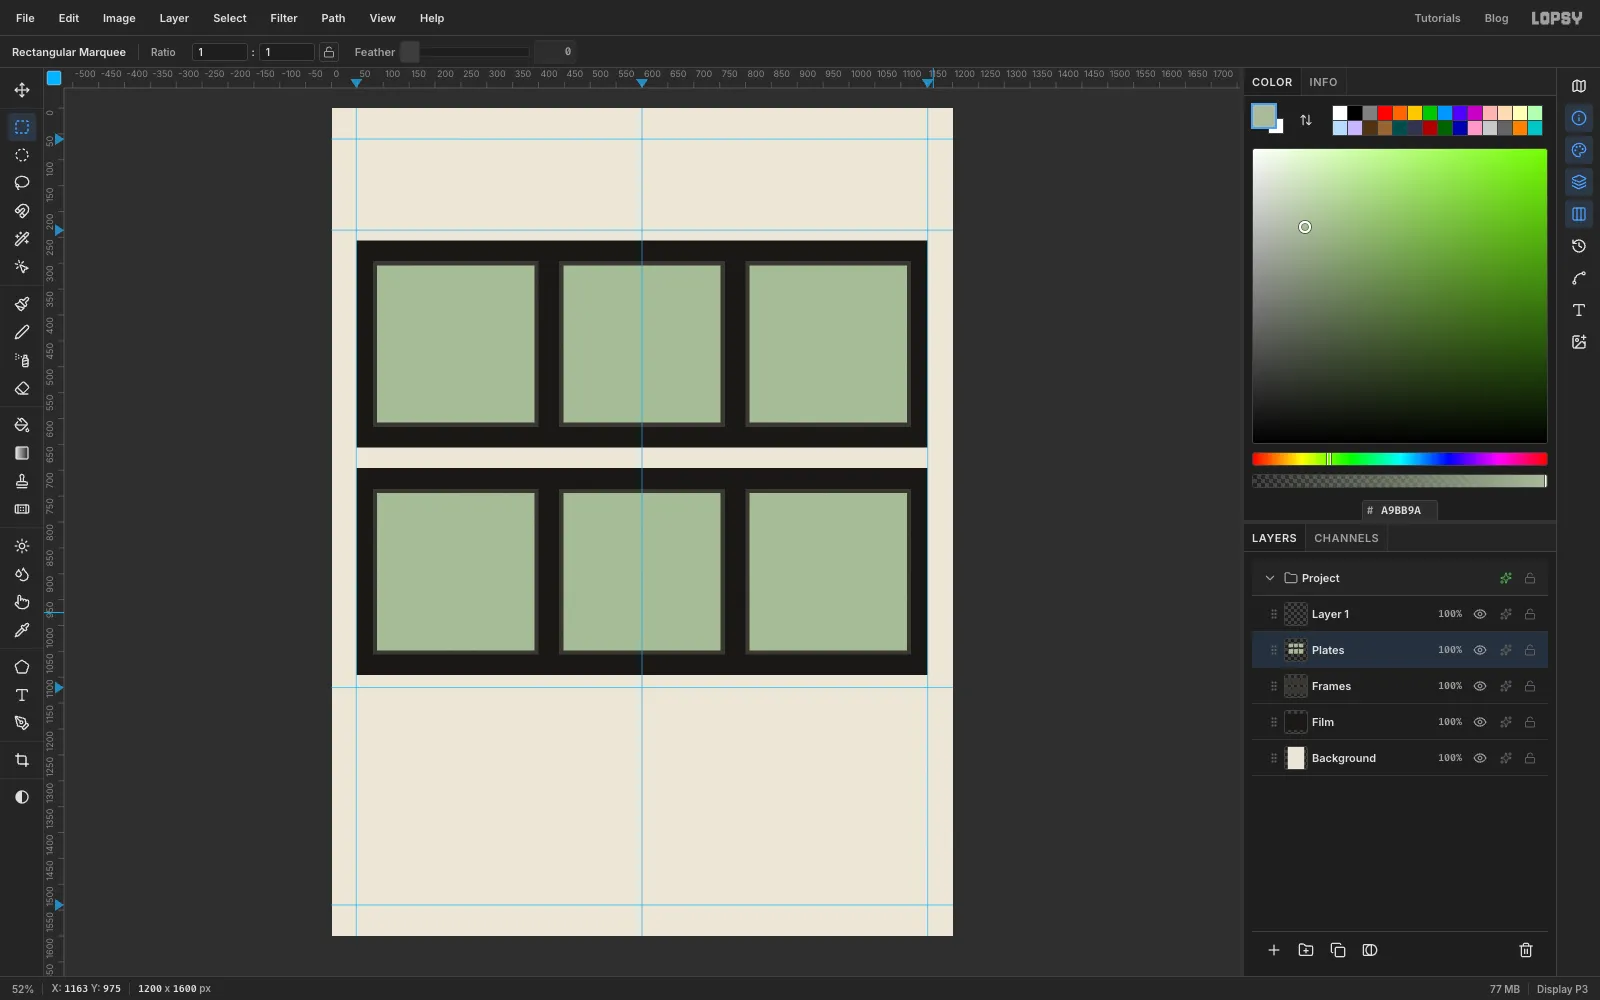
-
Start the Cutter with the formal upright
Every tree is drawn on one black Cutter layer, then cut out of the plates in one go. Add a layer called
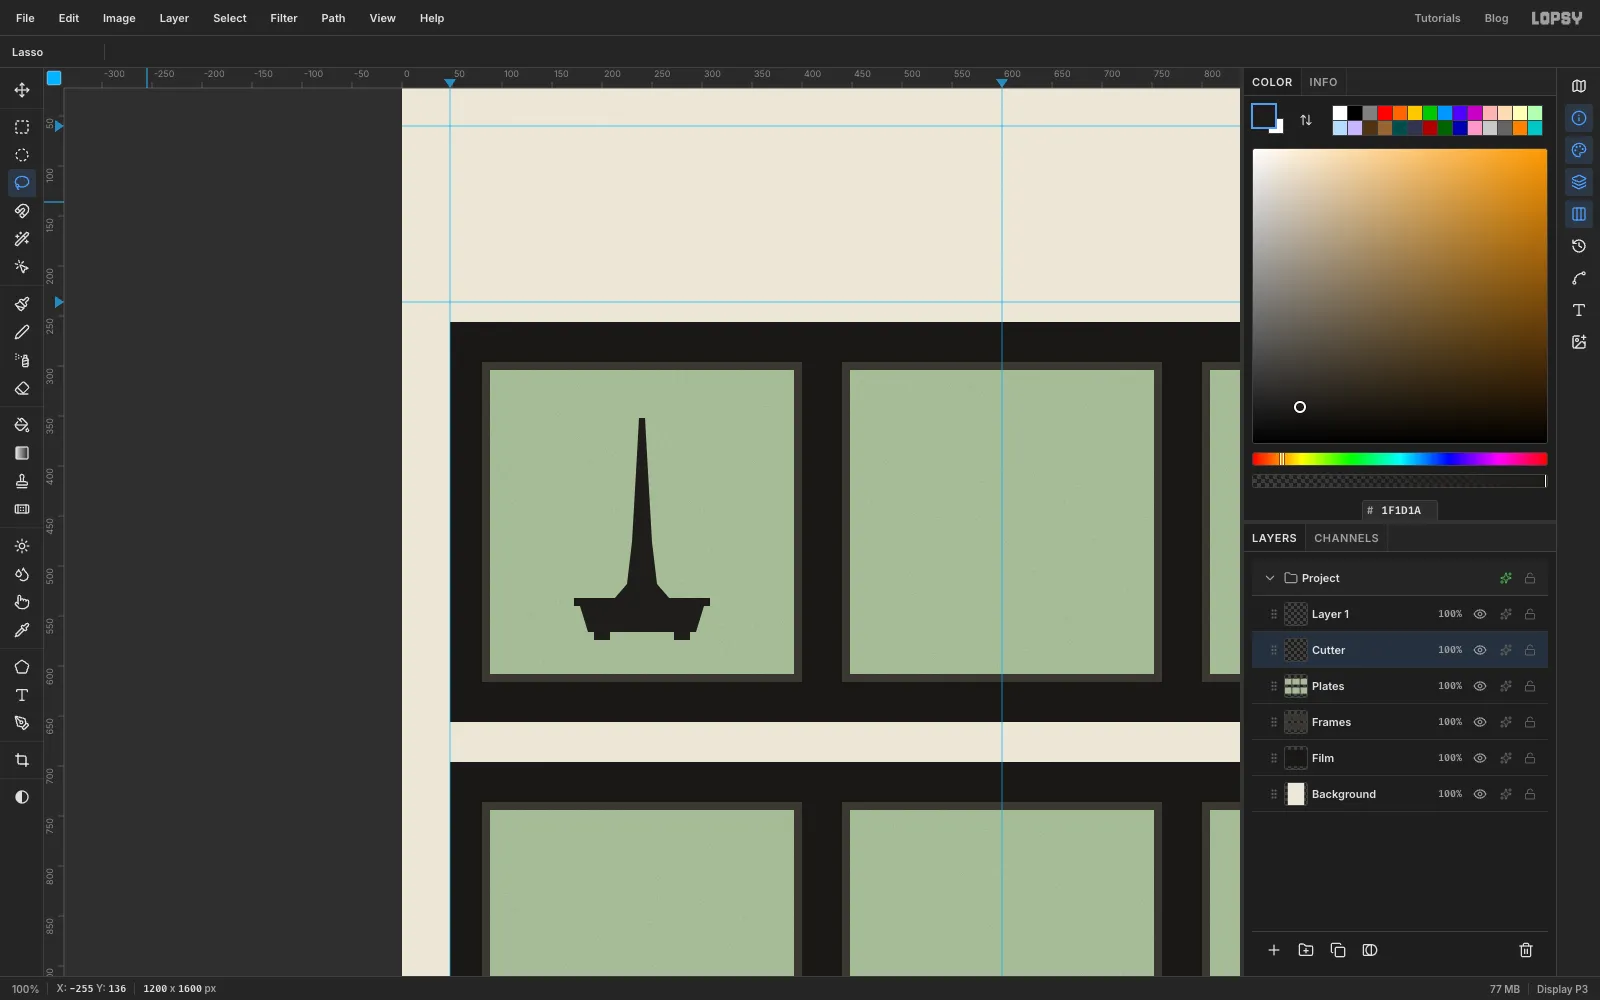
CutterabovePlatesand set the foreground to . Zoom to 100% on frame 01 (Cmd and the scroll wheel, or Cmd+=).The first tree is Chokkan, the formal upright. It's a straight trunk over a rectangular pot.
- Pot. With the Rectangular Marquee, drag a thin rim about 136 × 8 px across the lower third of the plate (it starts at
172, 532in this frame). Shift-add two small feet, about 16 × 8 px, under where the pot will end. Then pick the Lasso (L), hold Shift and trace the pot's body under the rim: a trapezoid a little narrower at the base, about 26 px deep. Fill and deselect. - Trunk. With the Lasso, trace a long spike that stands on the middle of the rim. Make it about 56 px wide at the ground, flaring out at both sides like roots, and taper it to about 6 px at the top, 180 px higher. Fill and deselect.
- Pot. With the Rectangular Marquee, drag a thin rim about 136 × 8 px across the lower third of the plate (it starts at
-
Copy the pot into frame 03
The slanting style in frame 03 uses the same pot. Draw a marquee around the pot, press Cmd+C and then Cmd+V. Lopsy pastes a copy on its own layer in exactly the same place and switches to the Move tool.
Deselect, then nudge the copy two frames to the right with the arrow keys. Two frames is 720 px, but stop 26 px short, at 694 px, so the pot sits left of centre and leaves room for the lean. Shift+→ moves 10 px at a time, so that's 69 presses and then 4 more with plain →. Choose Layer → Merge Down to put it back on
Cutter.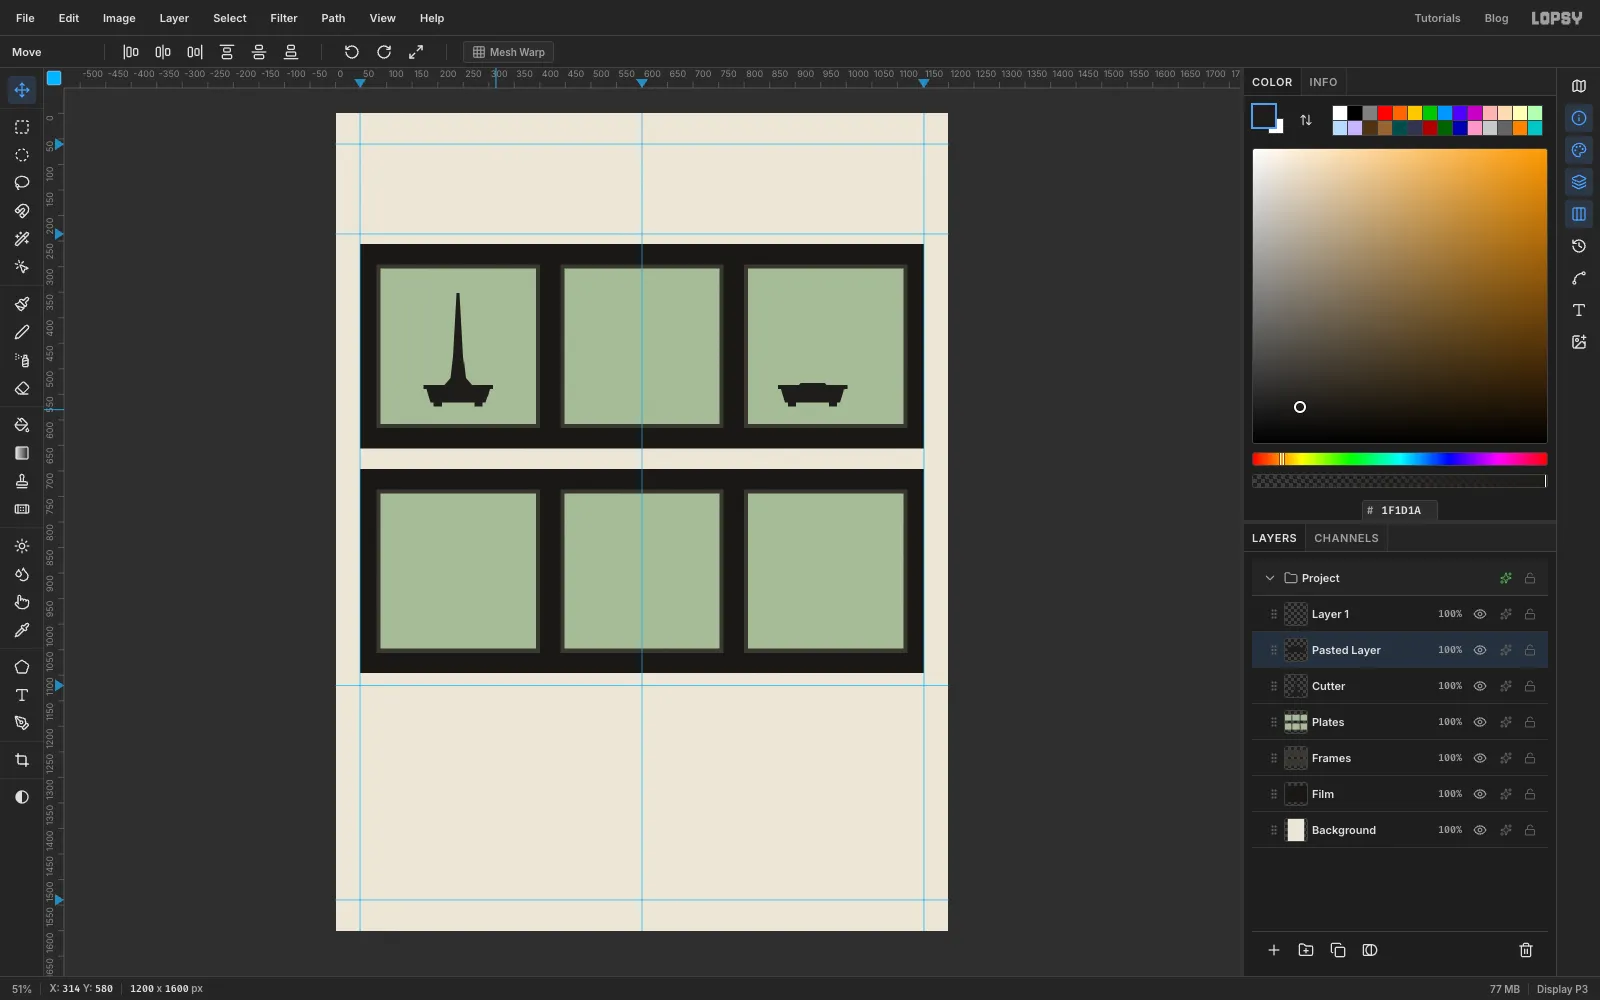
-
Rotate a copy of the trunk 45°
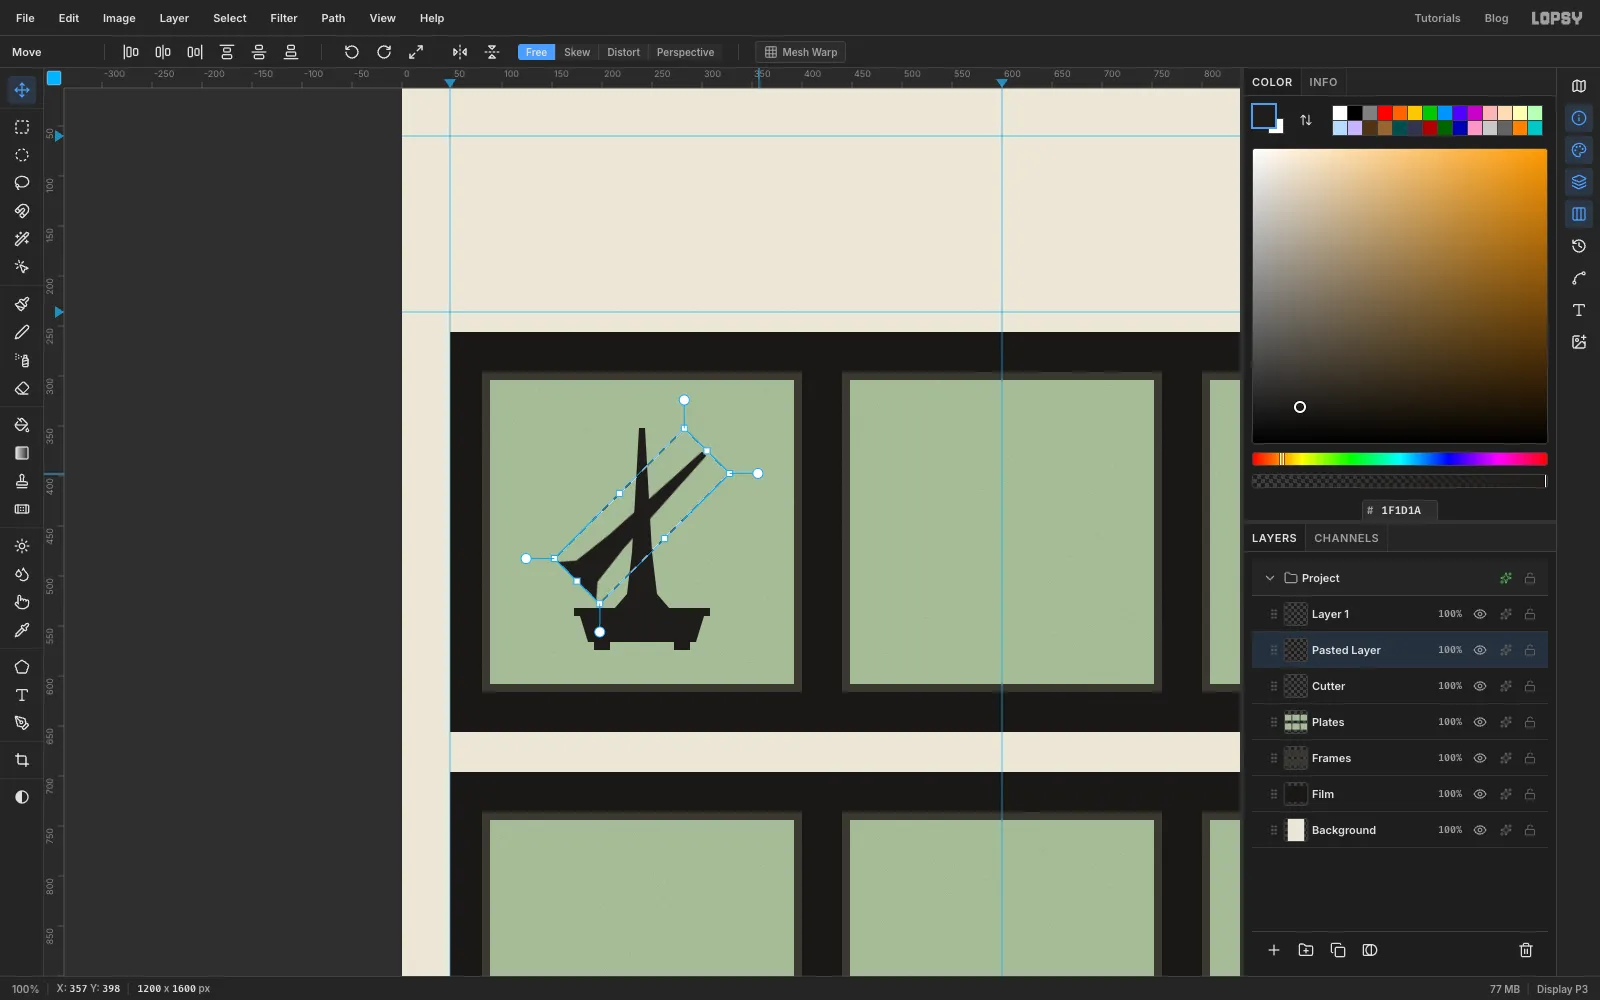
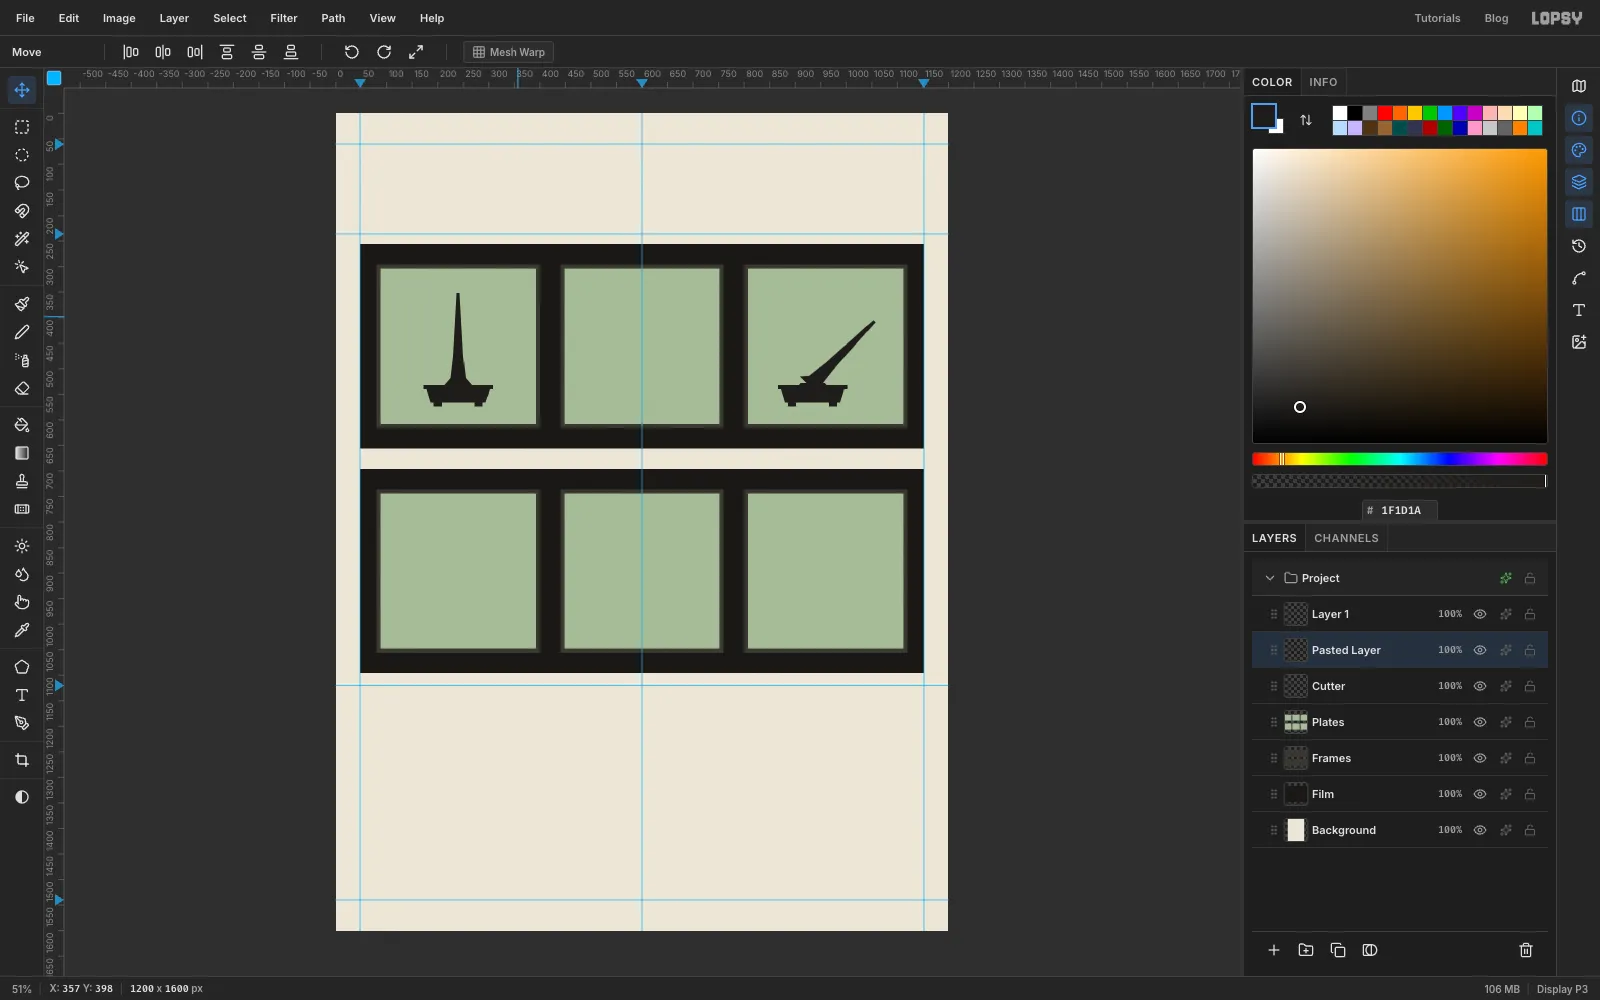
A slanting tree is an upright tree tipped over. Draw a marquee around the frame 01 trunk only, from just above its tip to just above the pot rim, then copy and paste it. Paste selects the copy and switches to the Move tool, so its transform handles are already showing.
Point just outside the top-right corner until the cursor turns into the rotate arrow. Hold Cmd and drag clockwise. Cmd snaps the angle to 15° steps, so stop at the third step, 45°. Press Cmd+D to commit the rotation.
-
Move the leaning trunk into frame 03
Nudge the rotated trunk with the arrow keys until its base sits on the left half of the frame 03 pot rim. It's about two frames right and a little down, roughly 752 px right and 29 px down. Choose Layer → Merge Down.
The rotation leaves the trunk's base cut off at an angle. Zoom in, and with the Lasso trace a low root flare over it: a wedge about 70 px wide at the rim that rises 30 px along the trunk. Fill it.
-
Build cloud pads with Shift-added ellipses
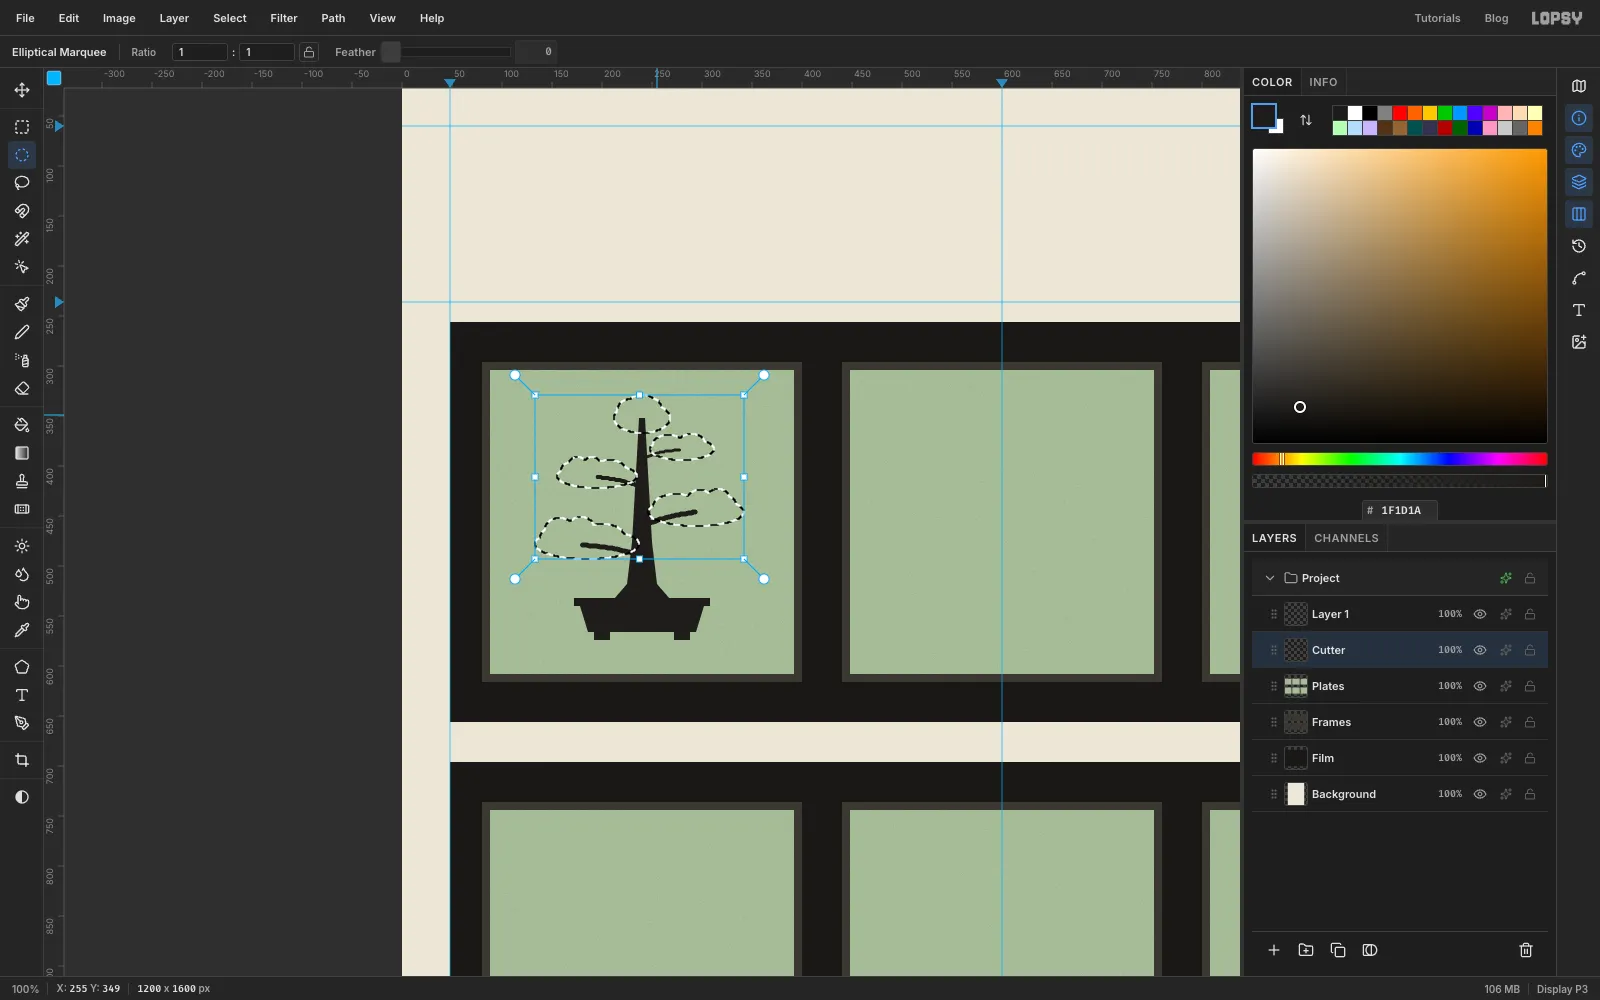
Bonsai foliage is clipped into flat clouds called pads. Each pad here is one wide, flat ellipse with two smaller domes on its top edge.
Back on frame 01, pick the Elliptical Marquee. Drag a flat ellipse about 104 × 30 px for the lowest pad on the left. Hold Shift and add two domes overlapping its top edge, each about half as wide. Shift-add the other pads up the trunk the same way, alternating left and right and getting smaller towards the top. Finish with a rounder apex pad on the tip.
Fill the whole selection at once and deselect.
-
Connect the pads with branches
Pick the Brush (B) and open the brush settings with the tip thumbnail at the left of the options bar. Choose Hard Round, set Hardness to
100, Spacing to5and Taper to0.Paint a short branch from the trunk to the middle of each pad. Use Size
6for the low branches and4near the top. Frame 01 is done.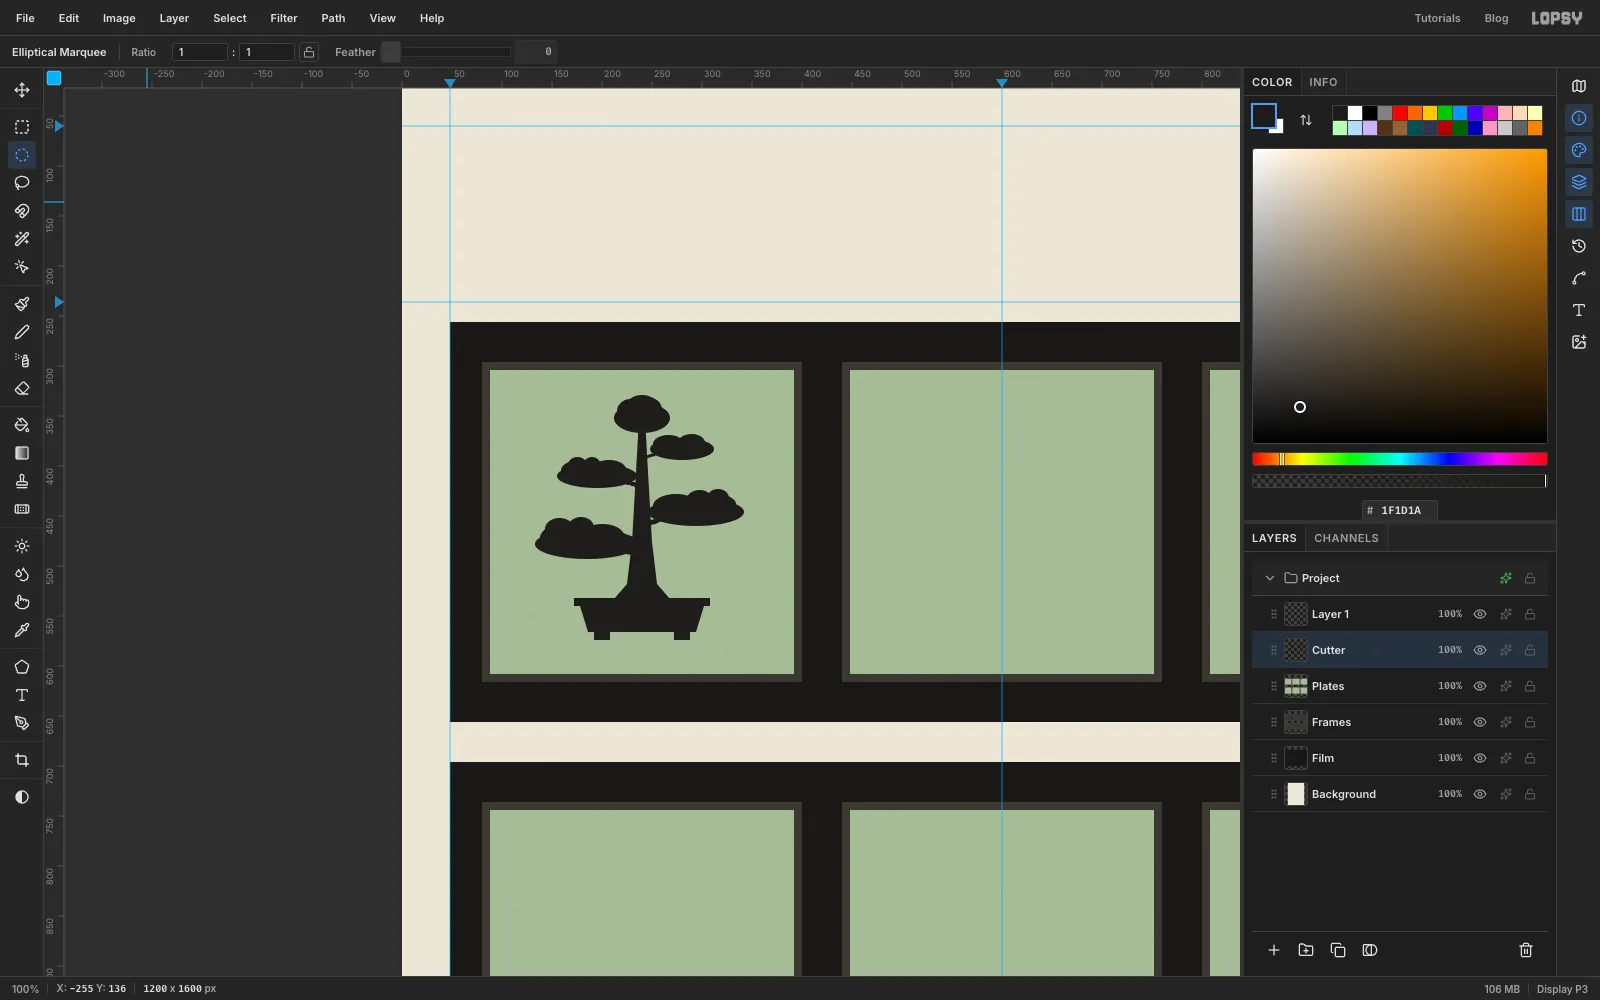
-
Shape a bowl pot with a subtract
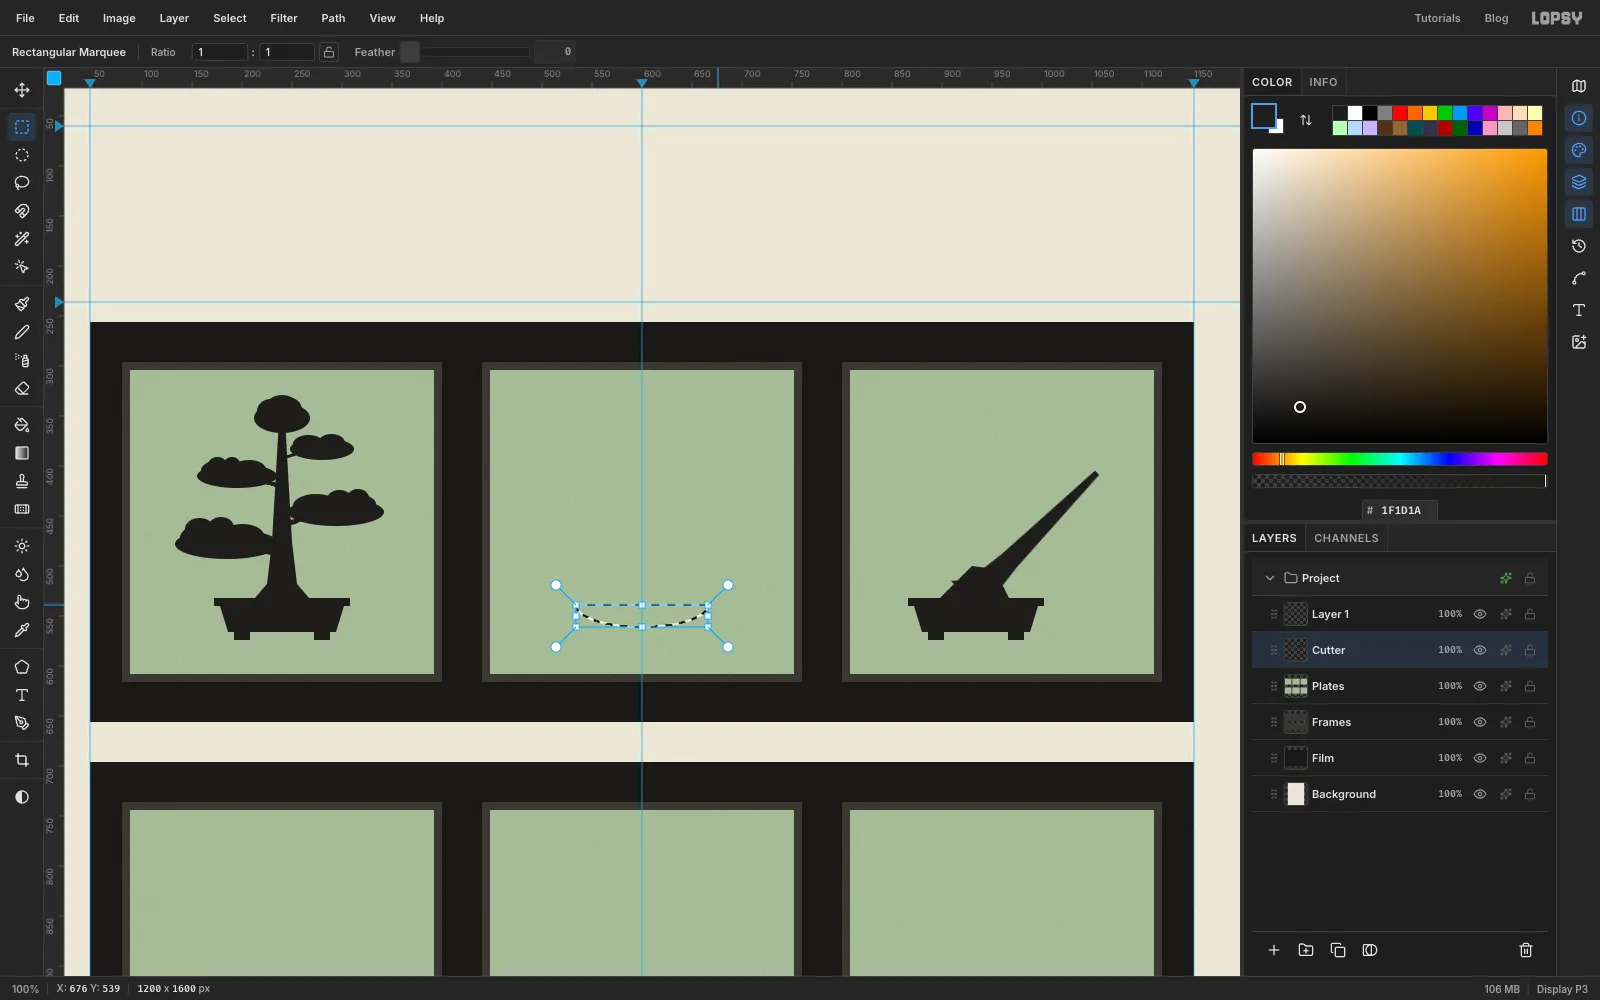
Frame 02 is Moyogi, the informal upright, in a shallow oval pot.
- With the Elliptical Marquee, drag an ellipse about 132 × 44 px centred on the pot's rim line.
- Switch to the Rectangular Marquee, hold Alt and drag a rectangle over the top half of the ellipse. Alt subtracts it, so only the lower half is left: a bowl.
- Hold Shift and add a rim of about 144 × 7 px across the top of the bowl and two small feet under it.
Fill and deselect.
-
Paint a tapered S-curve trunk
Taper shrinks the brush as the stroke goes on, so a stroke that starts at the root thins out towards the tip.
Open the brush settings and set Size to
30and Taper to270. The S below rises about 200 px, so the path along its bends is about 230 px long. A Taper a bit longer than that thins the tip to about 15% of the root's width without letting it vanish. Starting at the middle of the rim, drag up in a gentle S: left, then right, then left, then back over the root. Each bend should be about 30 px out from the centre line. Always drag trunks from the root, because Taper thins the stroke from where it starts.Add the pads and branches as in frame 01, with each pad on the outside of a bend. Then set Taper back to
0, because it carries over to the next stroke.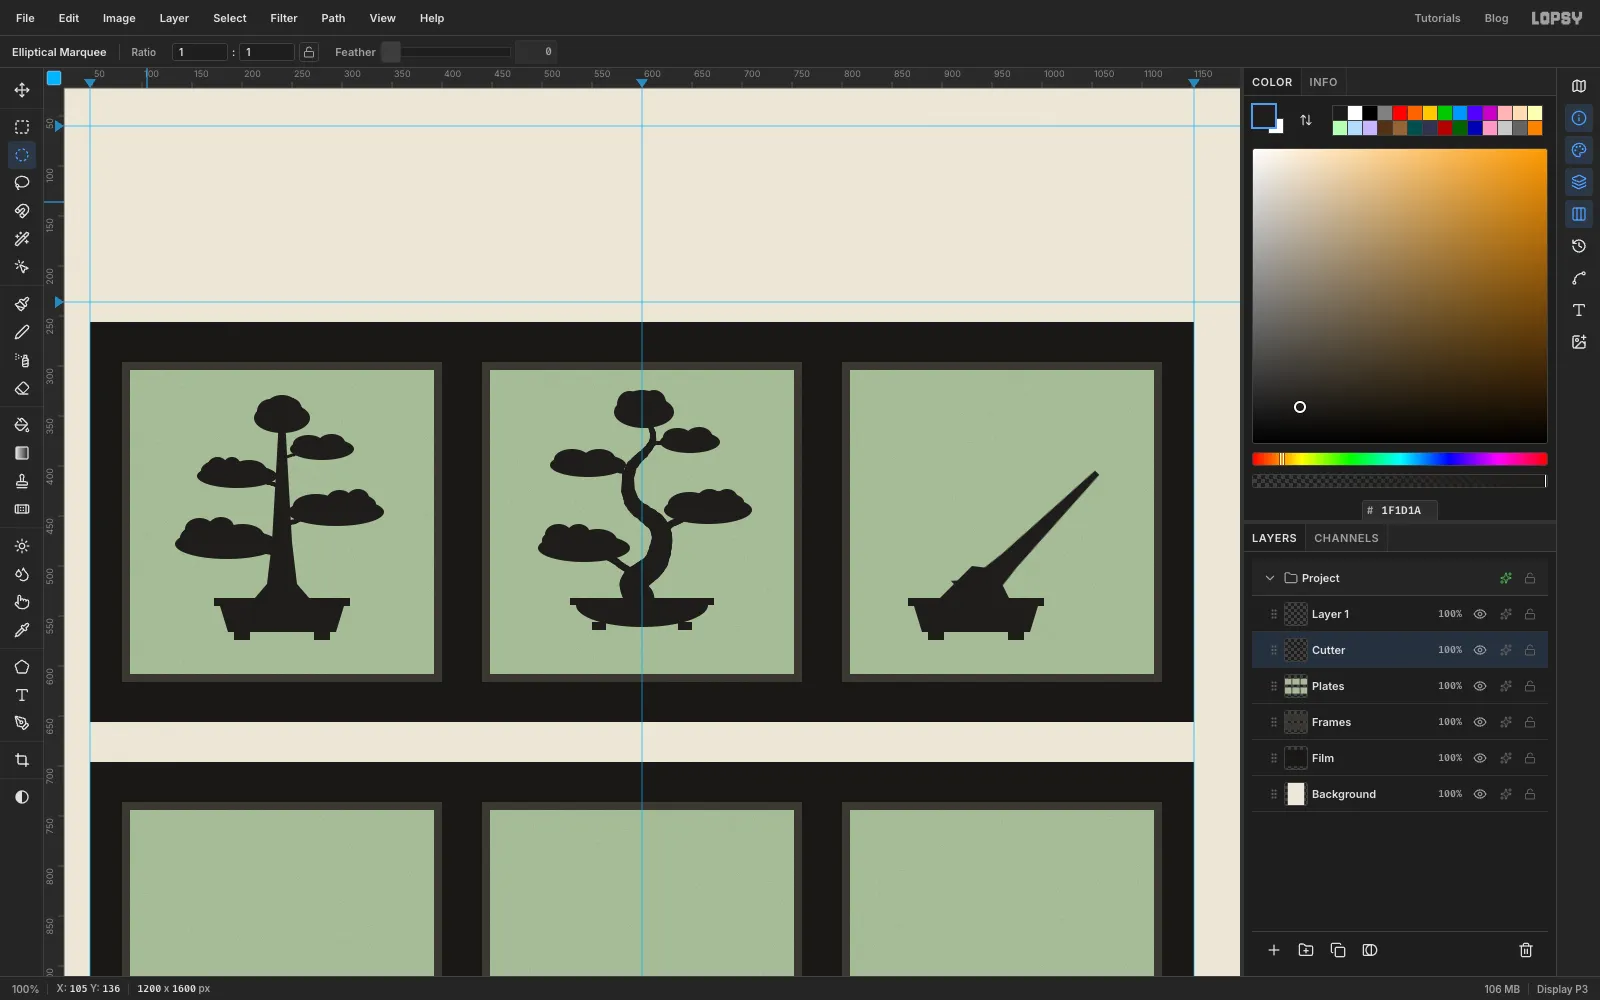
-
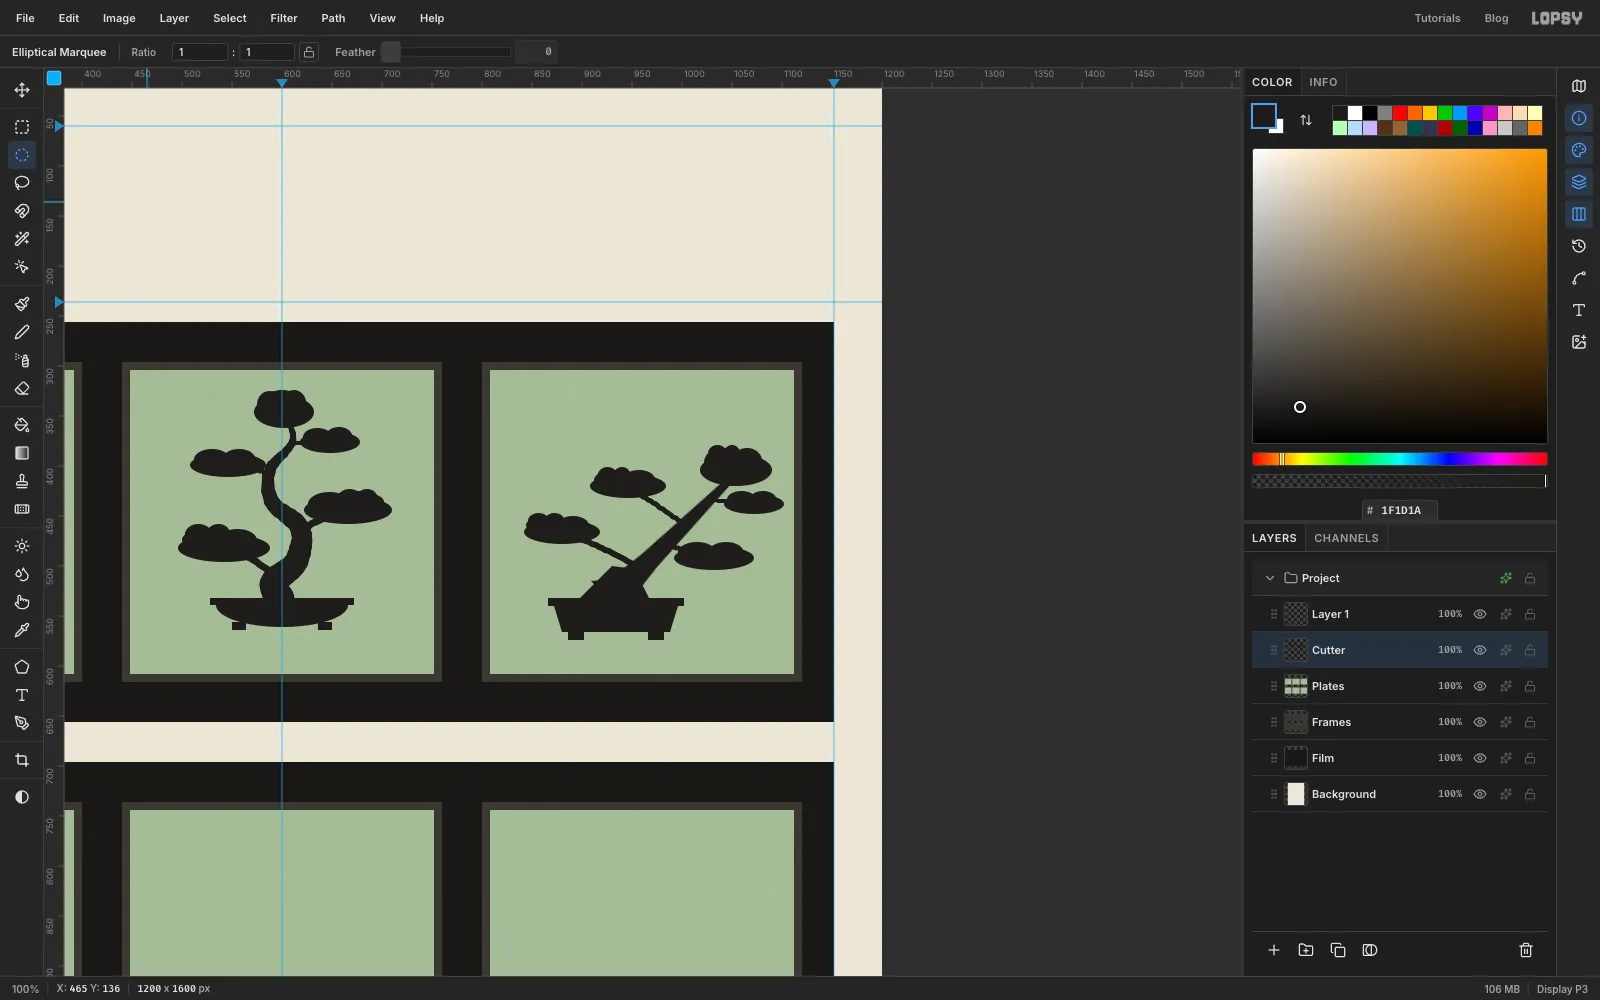
Finish the slanting tree
On frame 03, add the Shakan pads. A slanting tree needs a counterweight, so put one low pad out on the left, uphill from the lean. Then add pads along both sides of the trunk and a big apex pad at its tip. Join them with branches as before.
-
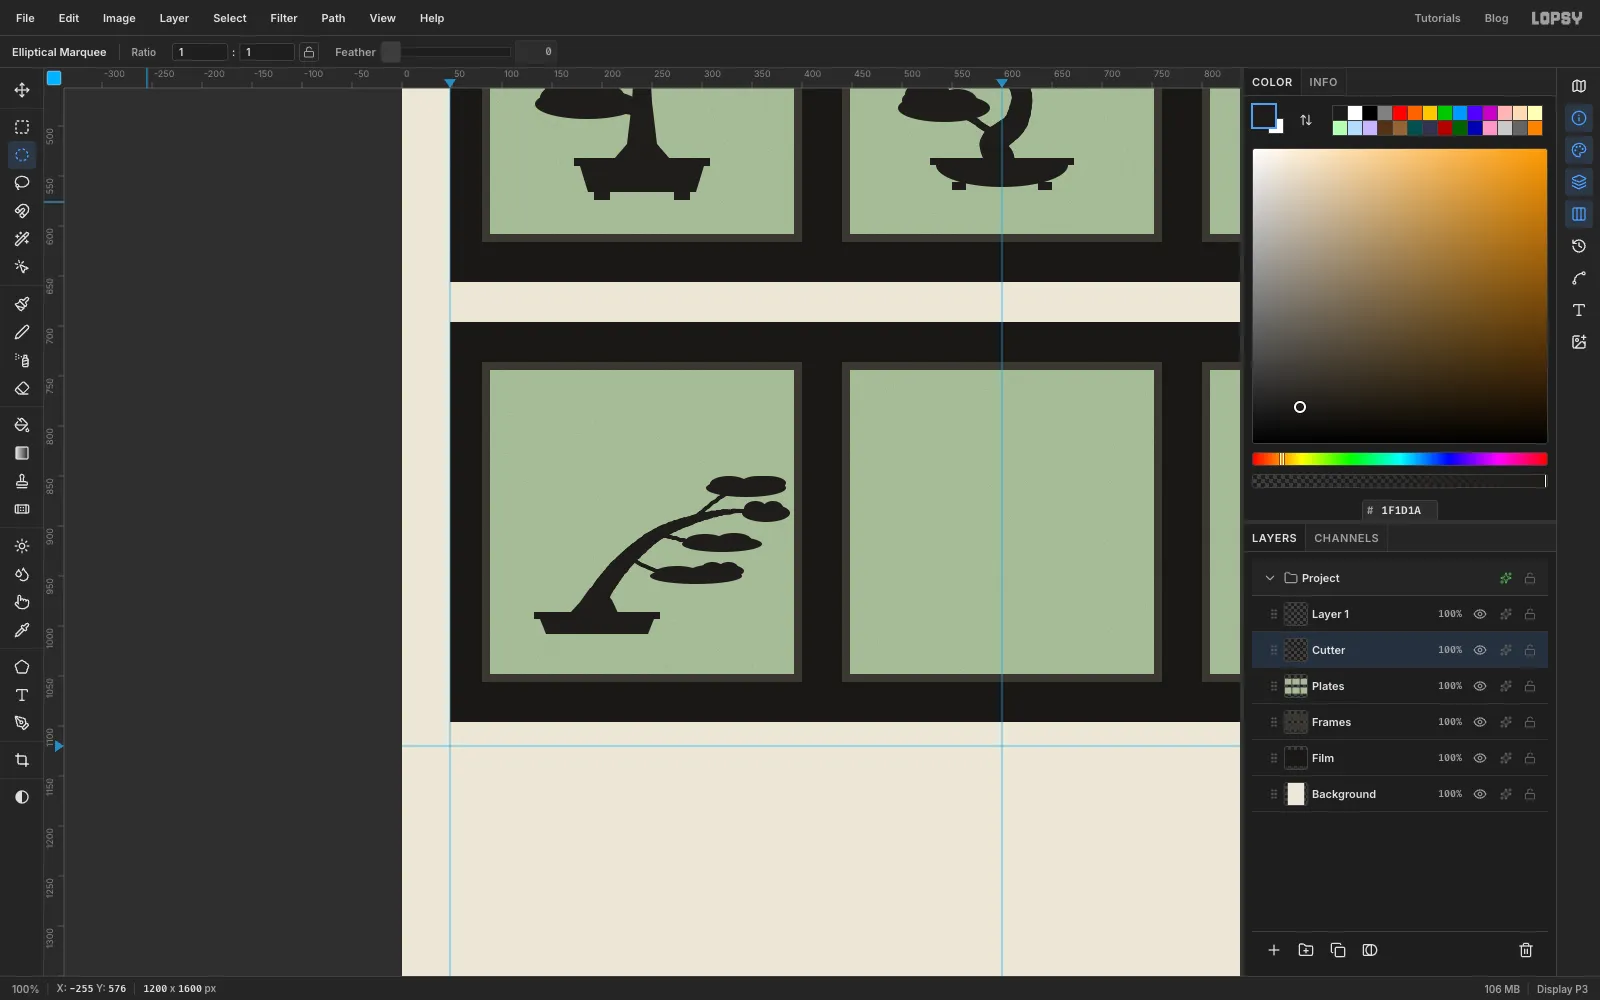
Paint the windswept tree
Frame 04 is Fukinagashi, the windswept tree. Everything streams one way, as if a gale blew from the left.
- Pot: a low slab. Use a rim of about 126 × 7 px on the left third of the plate, and Shift-lasso a shallow body under it.
- Trunk: Size
24, Taper250(the sweep is about 210 px long). Start on the rim near the left end of the pot and sweep up and to the right, ending near the top-right corner of the plate. Set Taper back to0. - Root flare: lasso a small wedge where the trunk meets the rim, so the trunk looks planted instead of balanced on a point.
- Pads: long and thin, about 80–90 × 16 px, all hanging off the right-hand side of the trunk. Use Hard Round branches at Size
5, all pointing downwind.
-
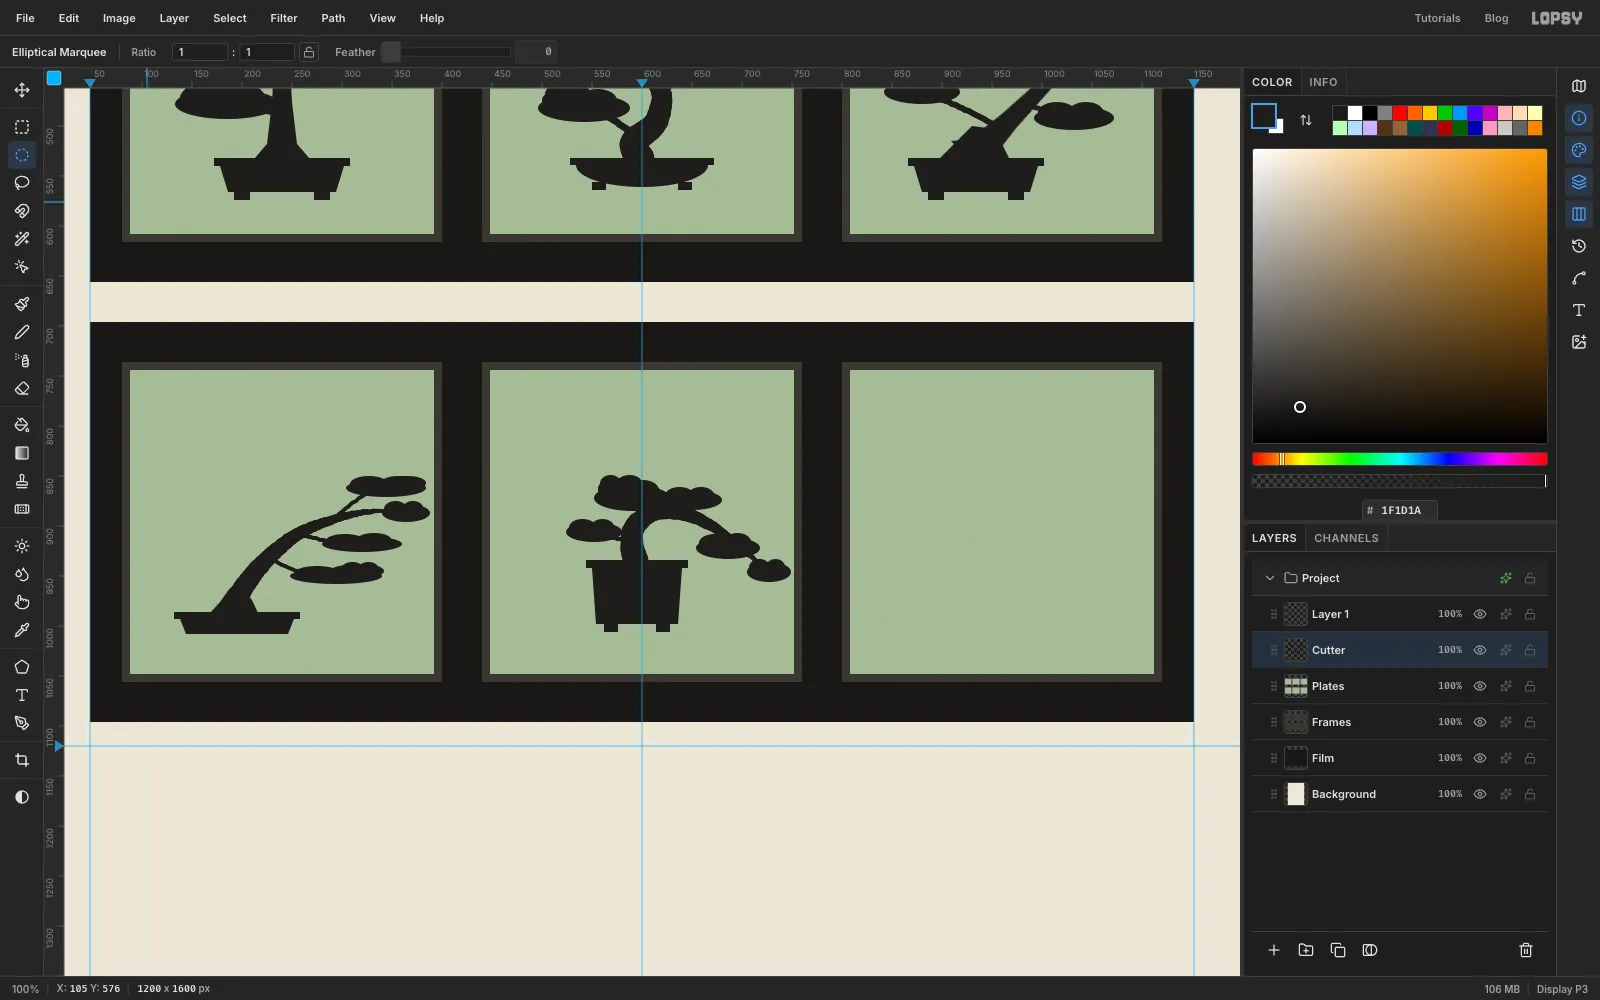
Paint the semi-cascade
Frame 05 is Han-kengai, the semi-cascade. The trunk arcs out over the rim, and its tip ends roughly level with it.
- Pot: deep and narrow. Use a rim of about 102 × 8 px with a body about 56 px deep, plus two feet.
- Trunk: Size
26, Taper230(about 195 px of path). Rise about 30 px from the middle of the rim, then curve right and down. Stop just to the right of the pot, about level with the rim. Set Taper back to0. - Pads: a crown over the bend, one pad tucked under the left side, and two pads along the falling arm. The last pad marks the tip.
-
Paint the full cascade on a stand
Frame 06 is Kengai, the full cascade. Its tip falls below the bottom of the pot, so the pot needs a stand to hang from.
- Pot: tall. Use a rim of about 94 × 8 px near the top-left of the plate, a body about 86 px deep that narrows slightly, and two feet.
- Stand: Shift-add a 118 × 8 px table top under the feet and two 10 px legs, each about 58 px long.
- Trunk: Size
26, Taper340(about 290 px of path). Start on the rim, rise briefly, arc right over the rim and then fall almost straight down past the table, wobbling slightly. End near the bottom of the plate. Set Taper back to0. - Pads: a crown over the rim, then small pads alternating left and right down the fall.
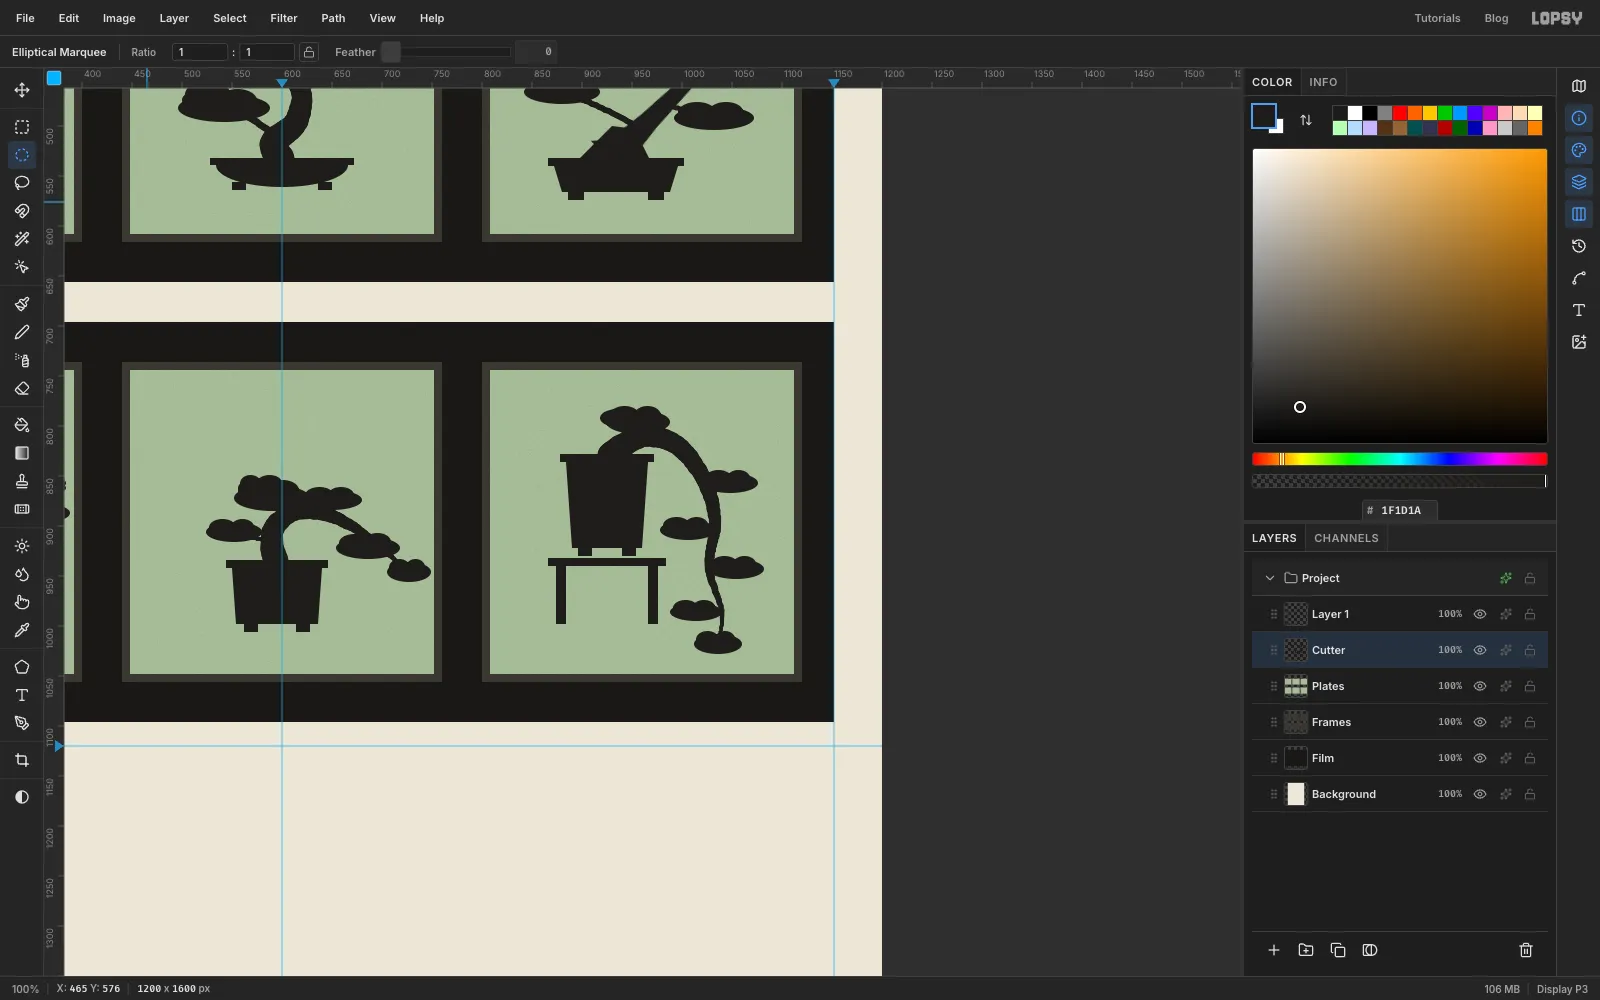
Zoom out with Cmd+0. All six trees are on the Cutter.
-
Add bridges and registration holes
A real stencil can't have a hole that cuts the plate in two, and loose pieces fall out. Bridges are thin strips of plate left uncut to hold things together. Here they also make the plates read as stencils at a glance.
- Pick the Eraser (E) and set Size to
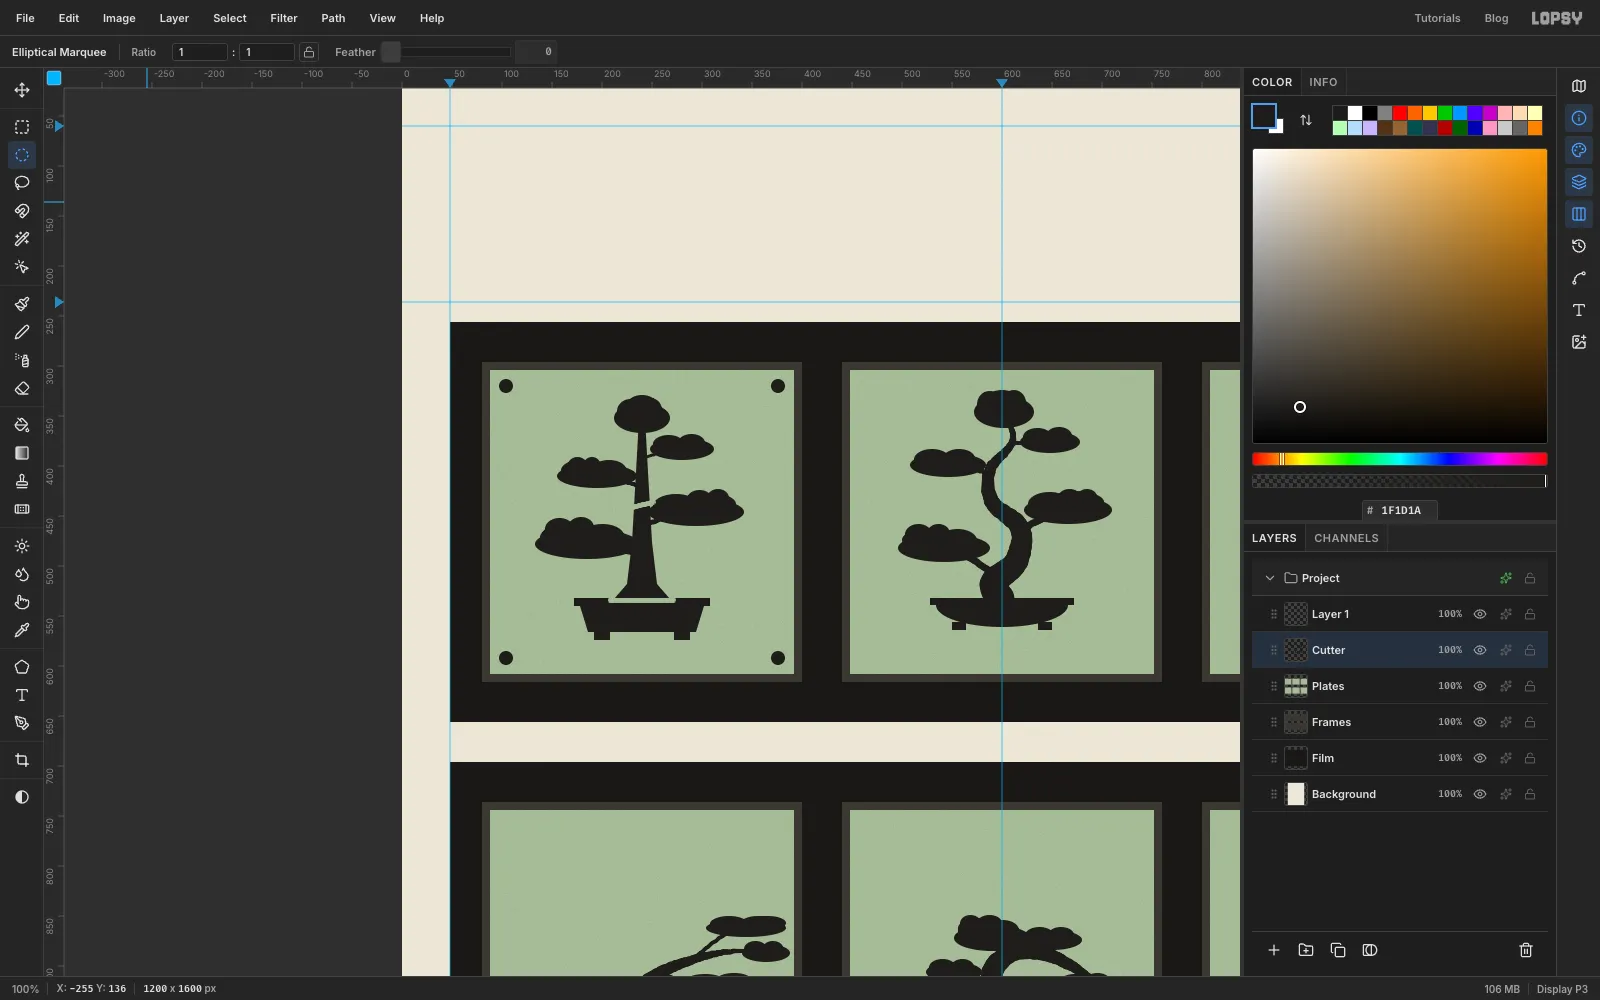
5. - On each tree, click on one side of the trunk and Shift-click on the other to erase a straight line across it. Add one bridge across the trunk's base, along the top of the pot rim, so the tree is separate from the pot. Add a second across the trunk higher up.
- For the registration holes, use the Elliptical Marquee to Shift-add four 14 px circles on every plate, one near each corner and 16 px in from both edges (24 in all). Fill them. They'll become punched holes that line each plate up on paper.
- Pick the Eraser (E) and set Size to
-
Load the Cutter as a selection
Cmd-click the
Cutterthumbnail in the Layers panel. Every black pixel on it becomes a selection. Then click thePlatesrow, so the selection now targets the plates.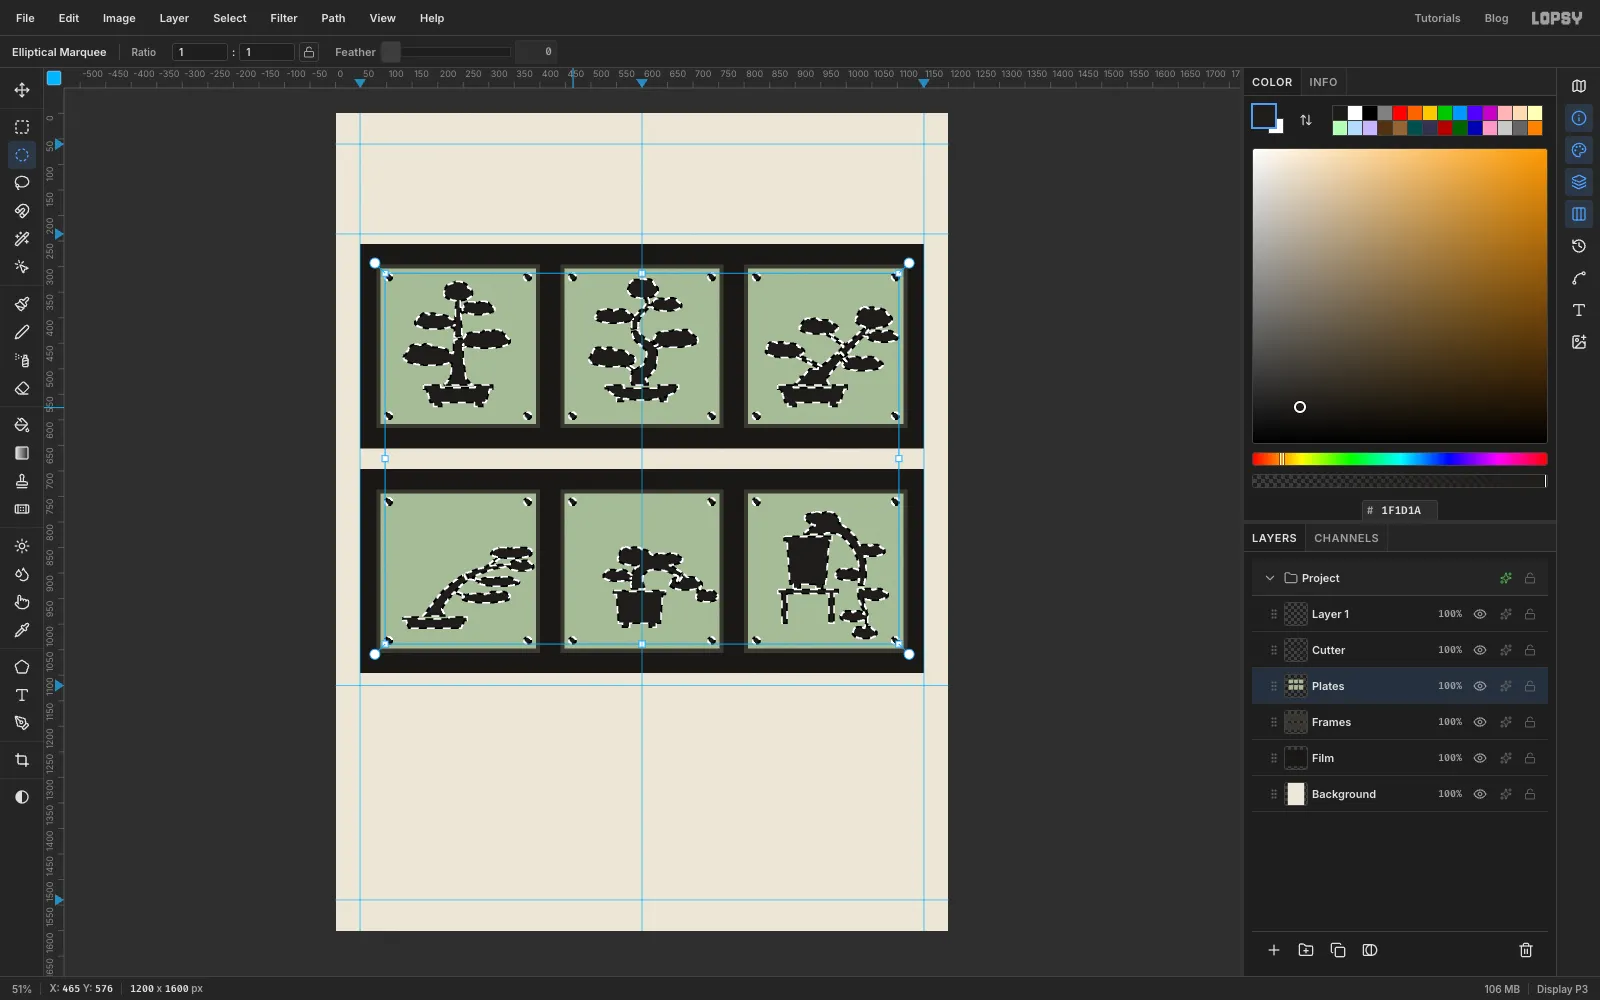
-
Cut the trees out of the plates
Press Delete. The trees, pots and holes are cut out of the green, and the bench shows through. Deselect, then click the eye on
Cutterto hide it. Keep the layer, because it's your master drawing if you ever need to recut a plate.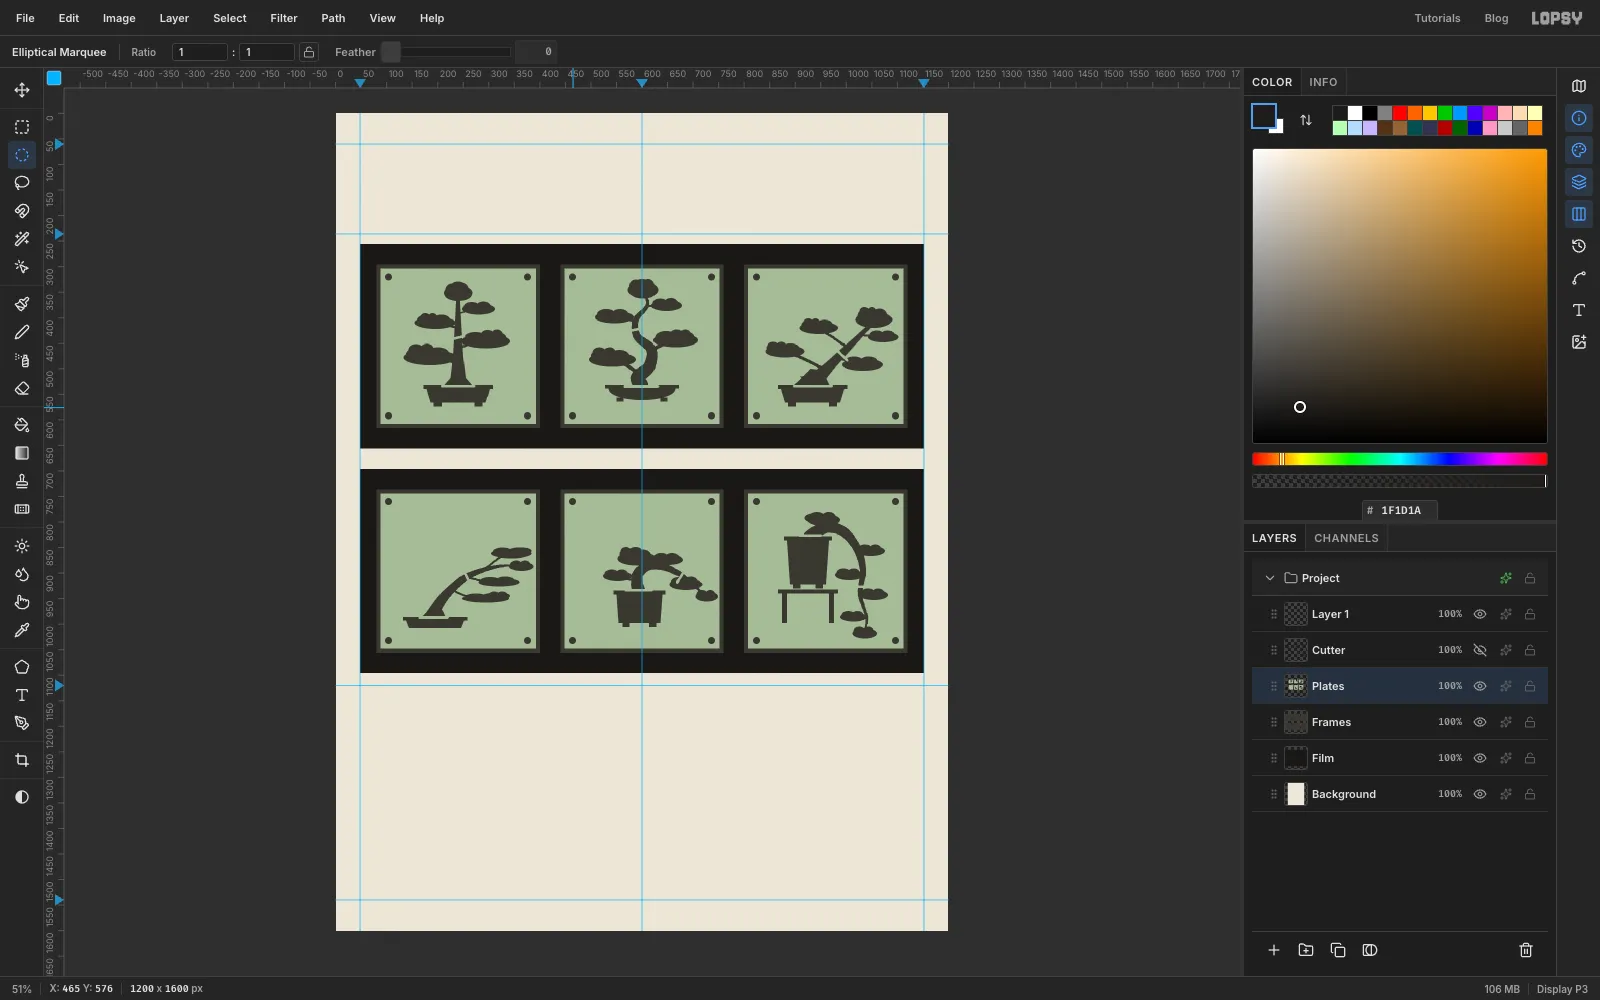
-
Give the plates thickness
Select
Platesand click its Layer effects button (the sparkle at the end of its row).- Inner Glow: colour , Size
6, Opacity70. This darkens every cut edge, so the Mylar looks thick. - Drop Shadow: colour , Offset X
3, Offset Y4, Blur6, Opacity70. The plates now sit just above the bench, so shadow falls into the holes too. - Stroke: colour , Width
1, position inside. This is the bright bevel where the knife cut the plastic.
Close the drawer.
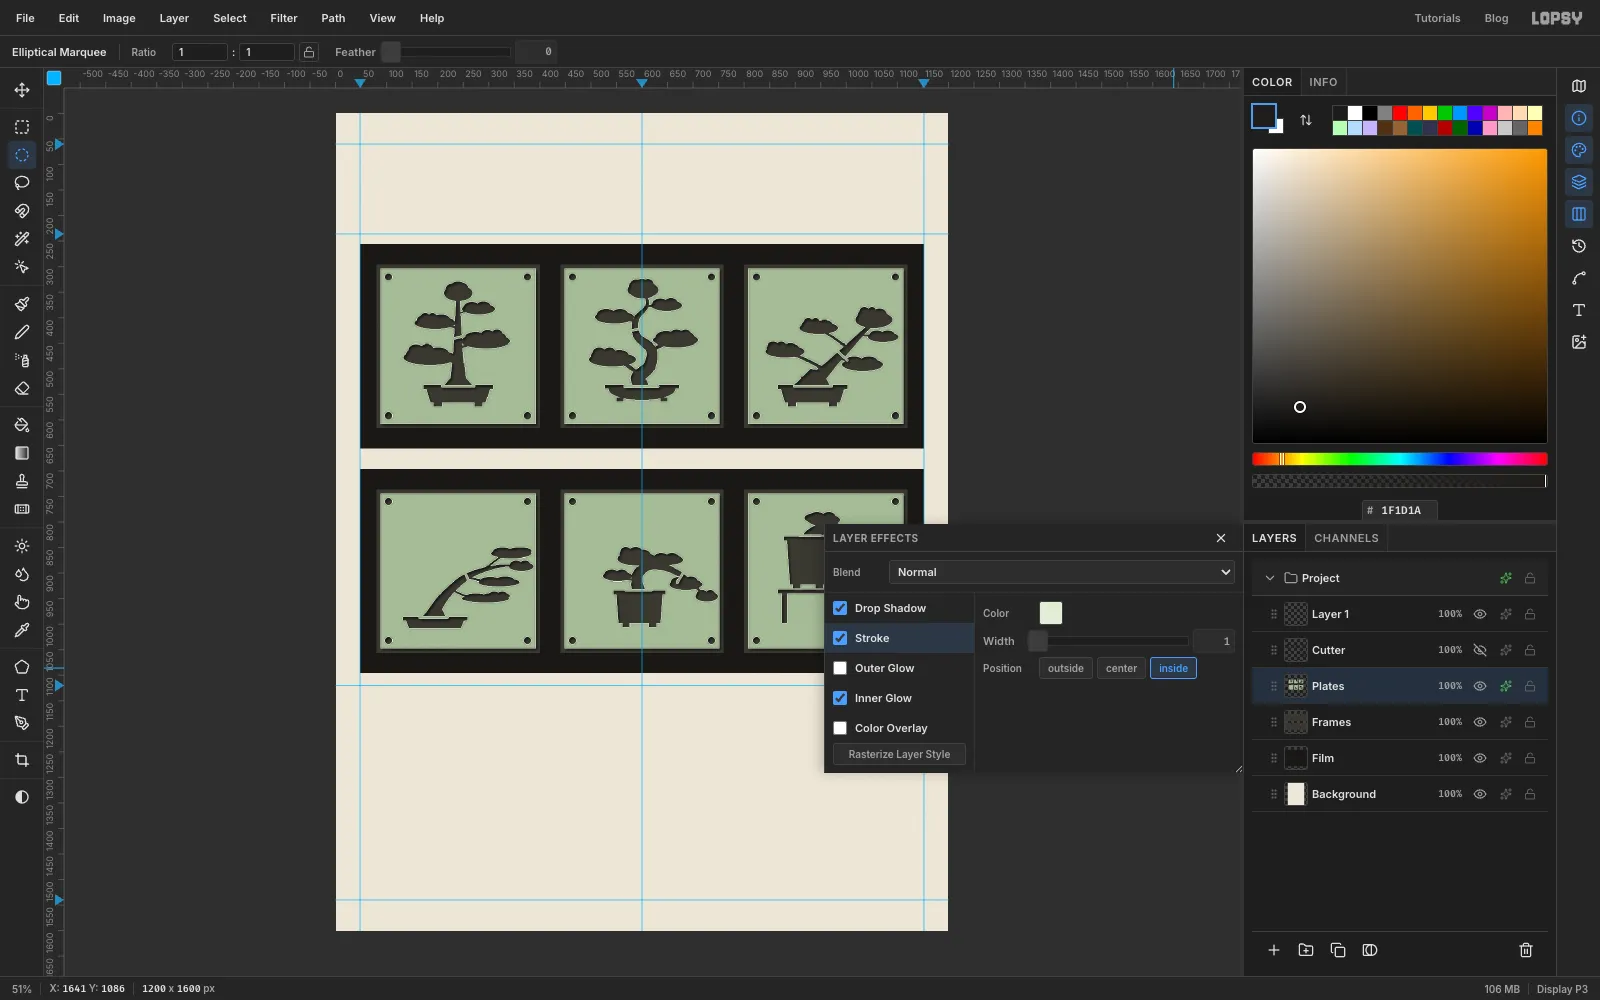
- Inner Glow: colour , Size
-
Add a sheen and a little translucency
Add a layer called
SheenabovePlatesand Cmd-click thePlatesthumbnail to select the plate shapes.Pick the Gradient tool, set Type to Linear and open Advanced…. Use five stops: at 0%, at 42%, at 50%, at 58% and at 100%. Drag from the top-left of the first strip to the bottom-right of the second. Deselect, set the layer's blend mode to Soft Light and its opacity to
45%.Mid grey does nothing on Soft Light, so only the white band and the darker ends show. Last, set
Platesto86%opacity so a hint of the bench shows through the plastic.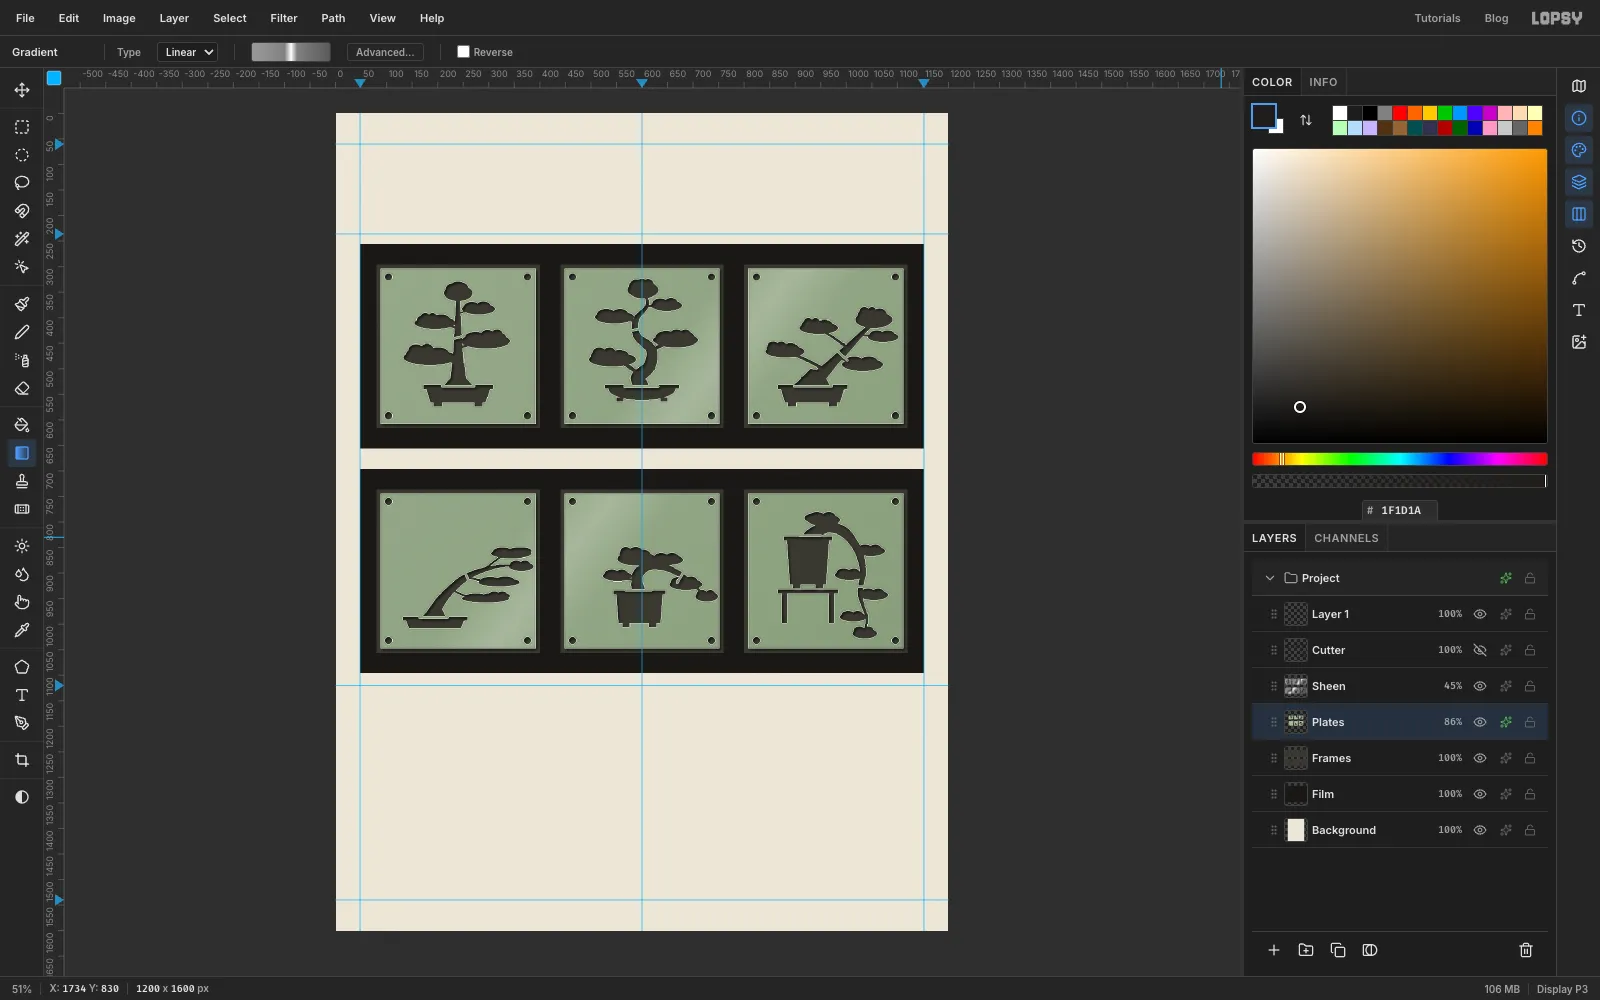
-
Draw the lean axis on each frame
Now the infographic layer. Click
Sheen, then add a layer calledAxesabove it, so the marks don't pick up the Soft Light tint. Set the foreground to . Turn off View → Snap to Guides while you work on this layer, because the dots are small.On each frame:
- Plumb line (leaning trees only): with the Brush at Size
4, Taper0and Spacing200(the maximum), drag straight up from the root about 110 px. The wide spacing turns the stroke into dots. - Axis: set Size
3and Spacing5. Click the root, then Shift-click the tip of the tree. - Angle arc: click a point 46 px up the plumb line, then Shift-click your way round to the axis in short steps.
- Root dot: a 12 px circle with the Elliptical Marquee, filled.
On frame 04, add three dotted wind arrows on the left, each with a small chevron head.
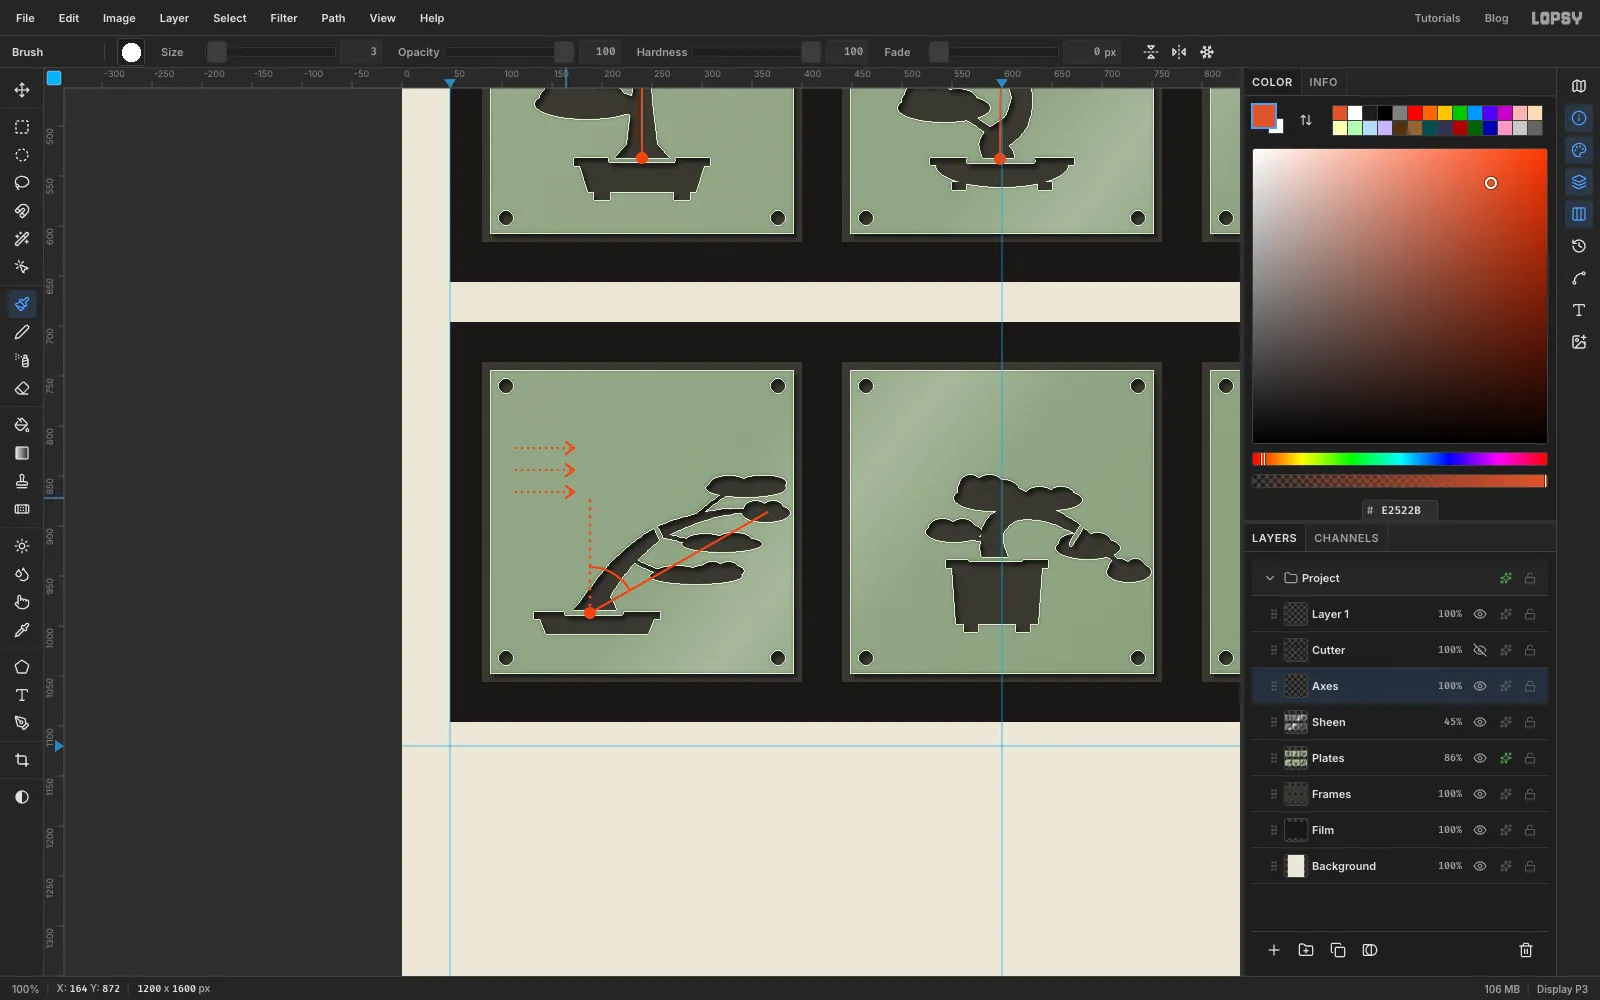
- Plumb line (leaning trees only): with the Brush at Size
-
Check all six overlays
For the two upright trees, the axis is the plumb line, so skip the dotted line and the arc. The tag you add later says 0°. Turn Snap to Guides back on.
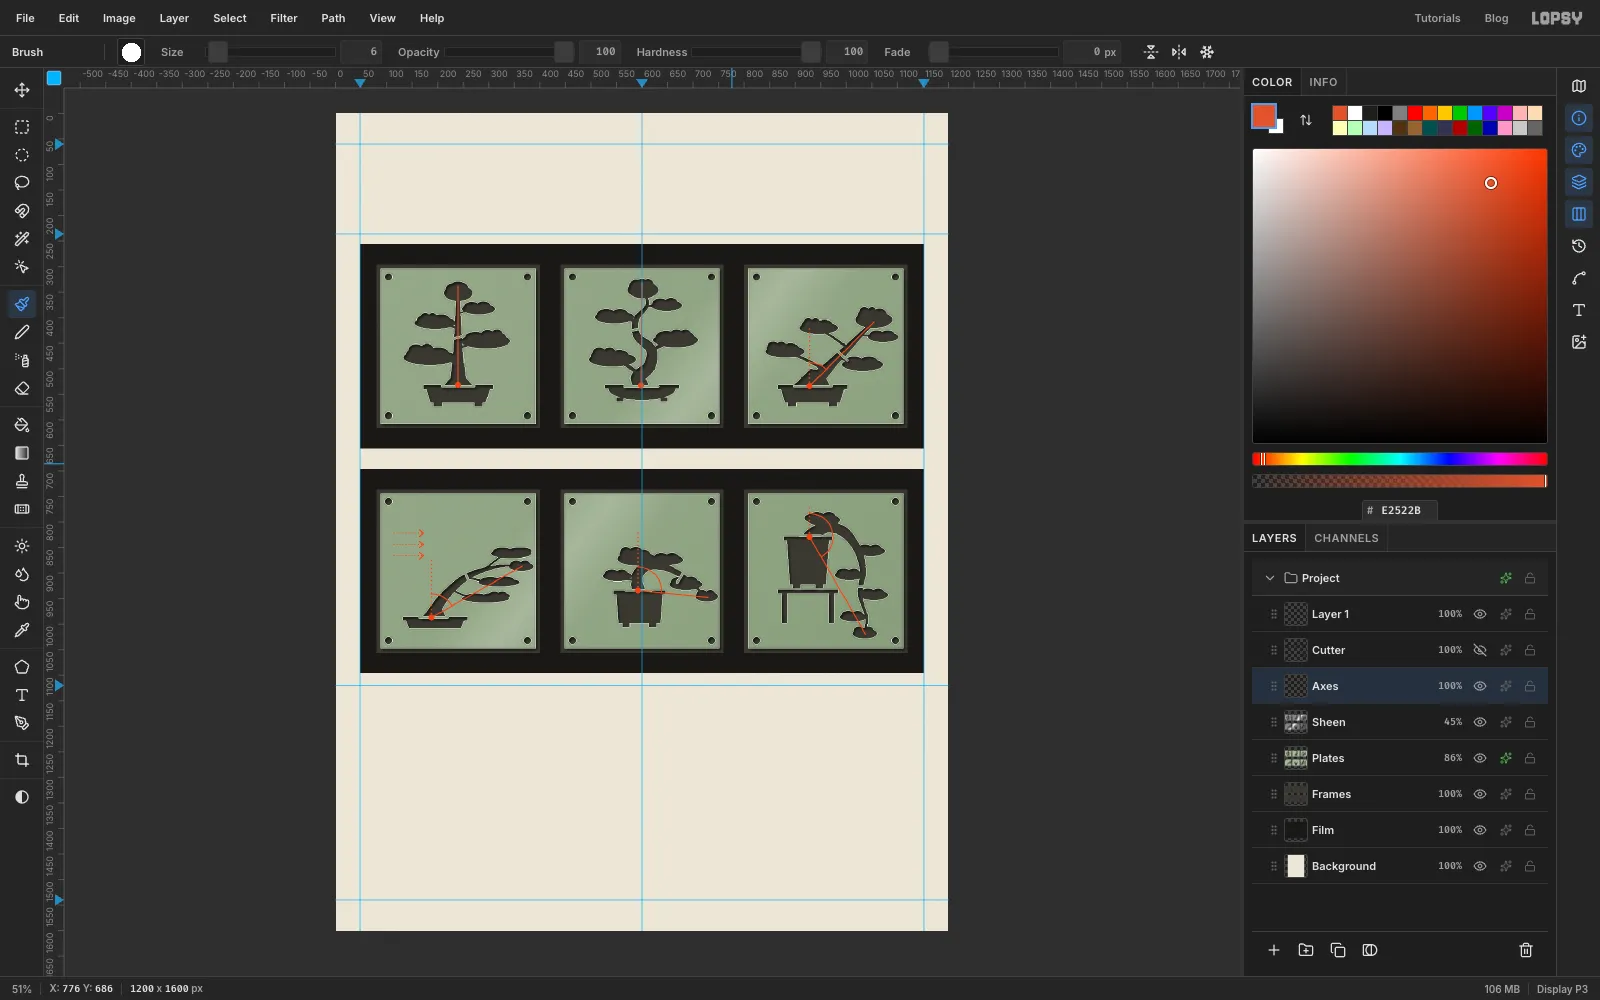
-
Start the lean chart with a half disc
The footer's chart is a protractor that plots all six leans. Its centre is
250, 1350and its radius is 152.First, rename Layer 1 (still at the top of the stack) to
Paper Grain. It gets its grain at the very end. Then click theAxesrow and add a layer calledChart. With the Elliptical Marquee, drag a circle from98, 1198to402, 1502. Then, with the Rectangular Marquee, hold Alt and drag over the circle's left half to subtract it. Fill with and deselect.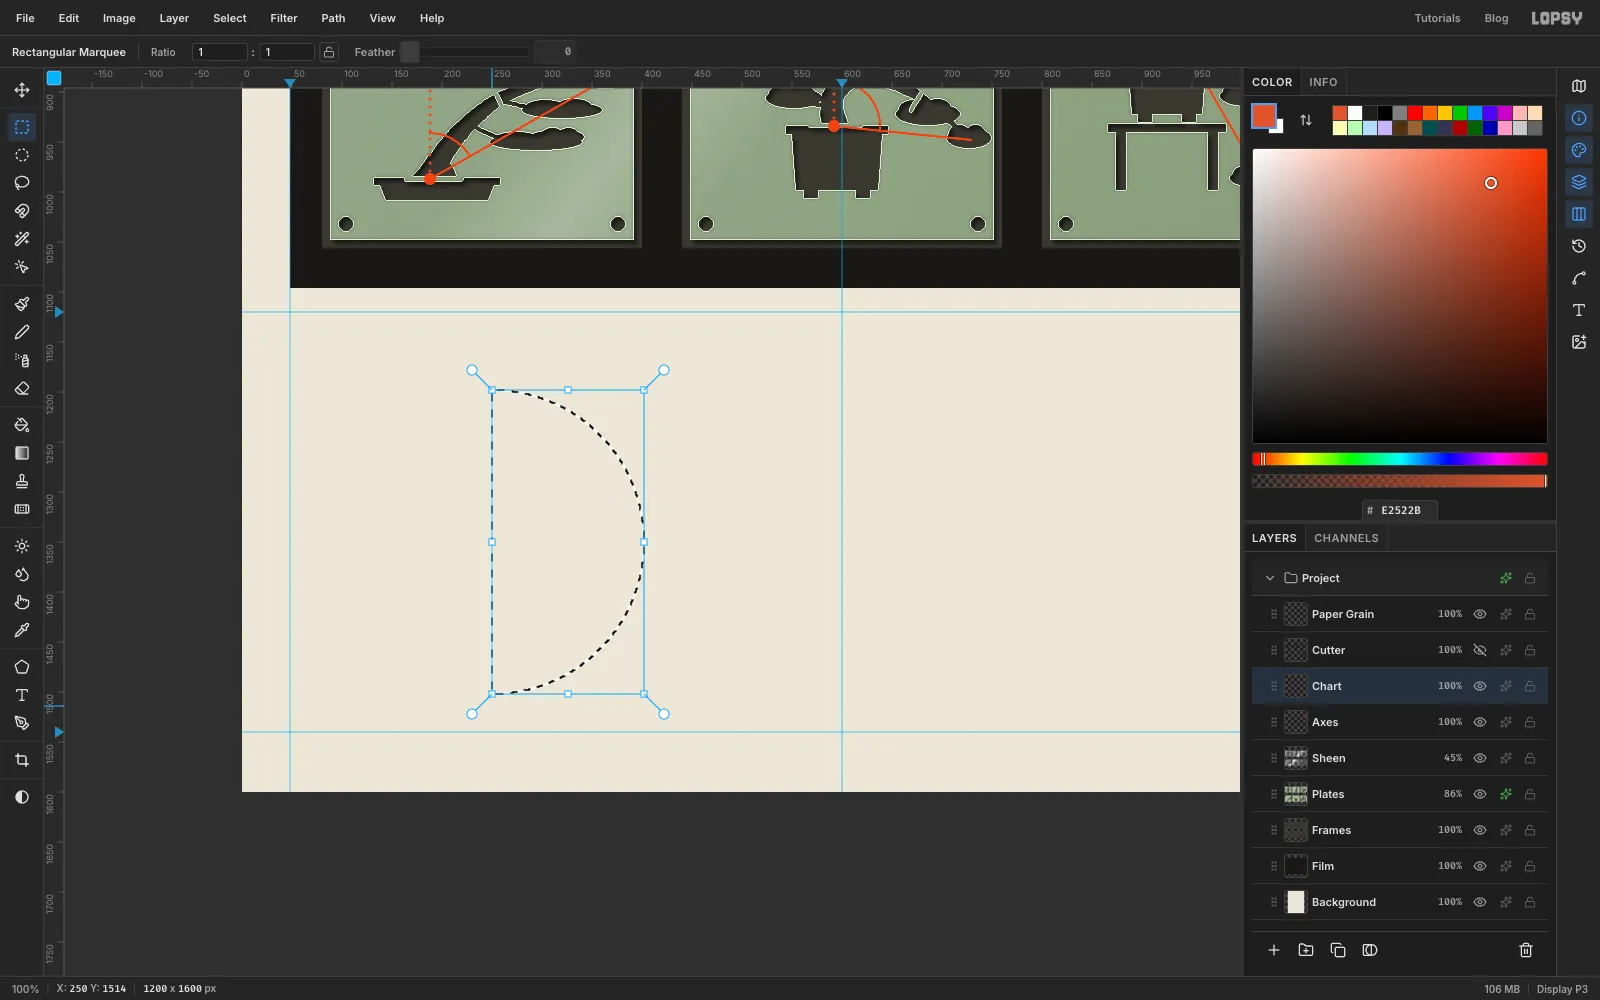
-
Hatch the cascade zone with a pattern
Any tree that leans past 90° drops below the soil line, so that quarter gets hatching.
- Make the tile. Add a layer called
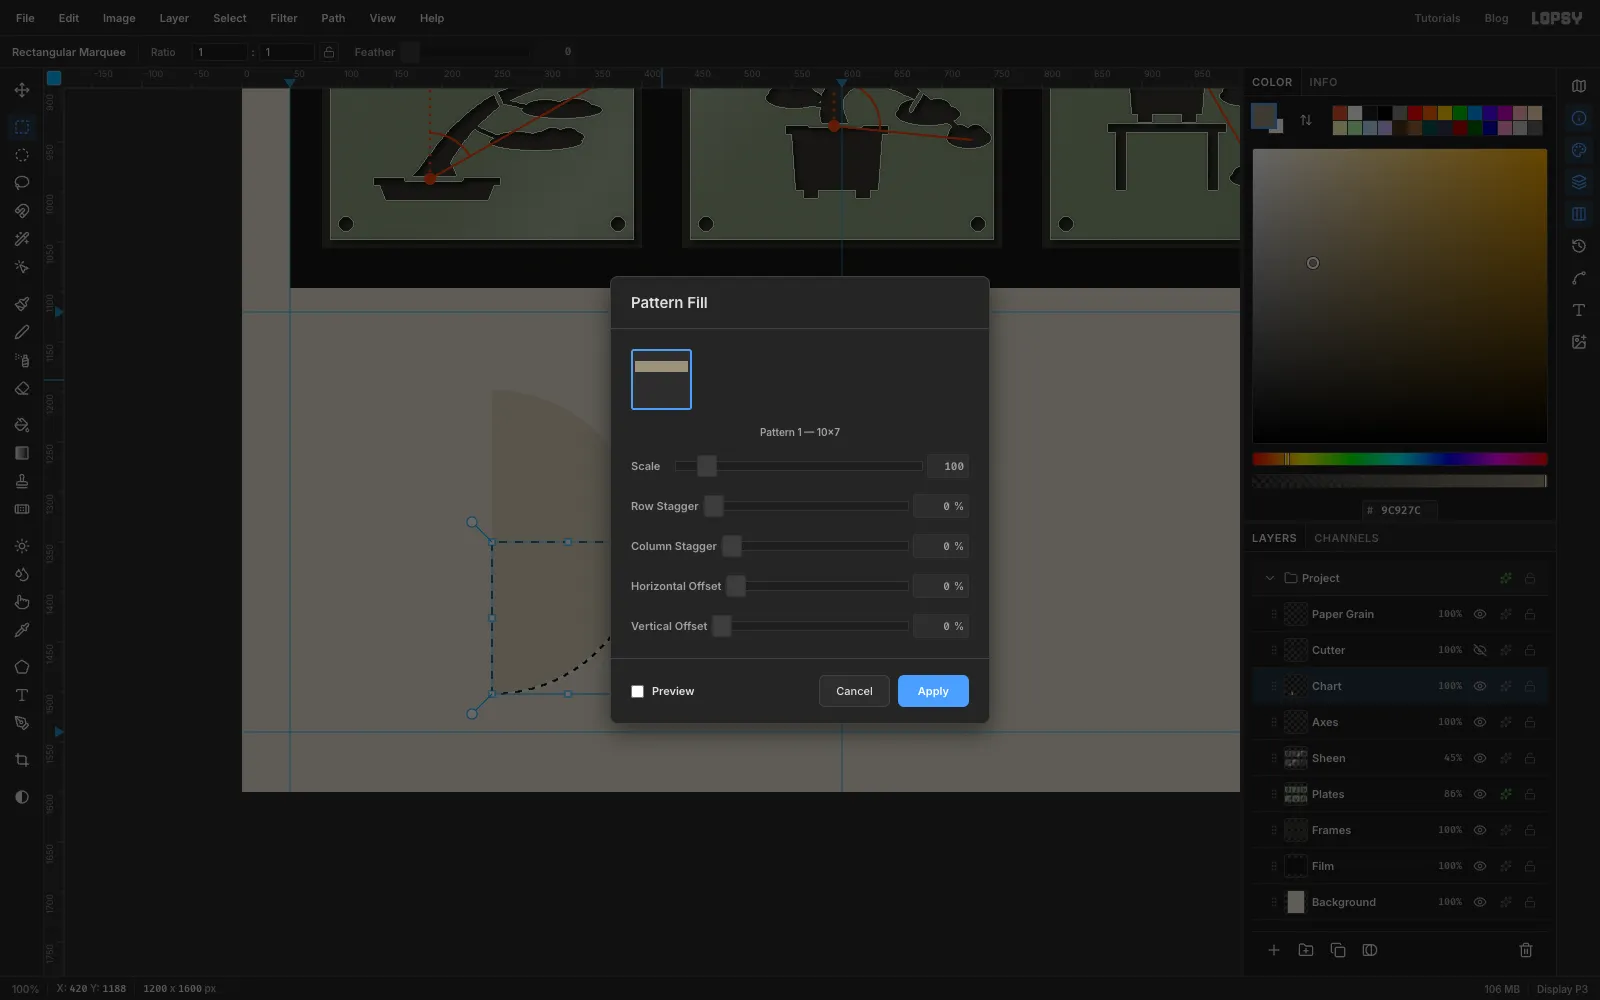
Tile. In an empty corner of the footer, click once (without dragging) with the Rectangular Marquee. The Rectangular Selection dialog opens, where you can type exact corners. Select a 10 × 2 px strip and fill it with . Then select 10 × 7 px from the same corner and choose Edit → Define Pattern. Delete theTilelayer with the trash button. - Select the zone. On
Chart, draw the same circle again. Then hold Shift+Alt and drag a rectangle from the centre down and right past the circle. Shift+Alt keeps only the overlap: the lower-right quarter. - Choose Edit → Fill with Pattern…, pick your stripe and click Apply. Deselect.
- Make the tile. Add a layer called
-
Draw the ring and tick it with radial symmetry
Add a layer called
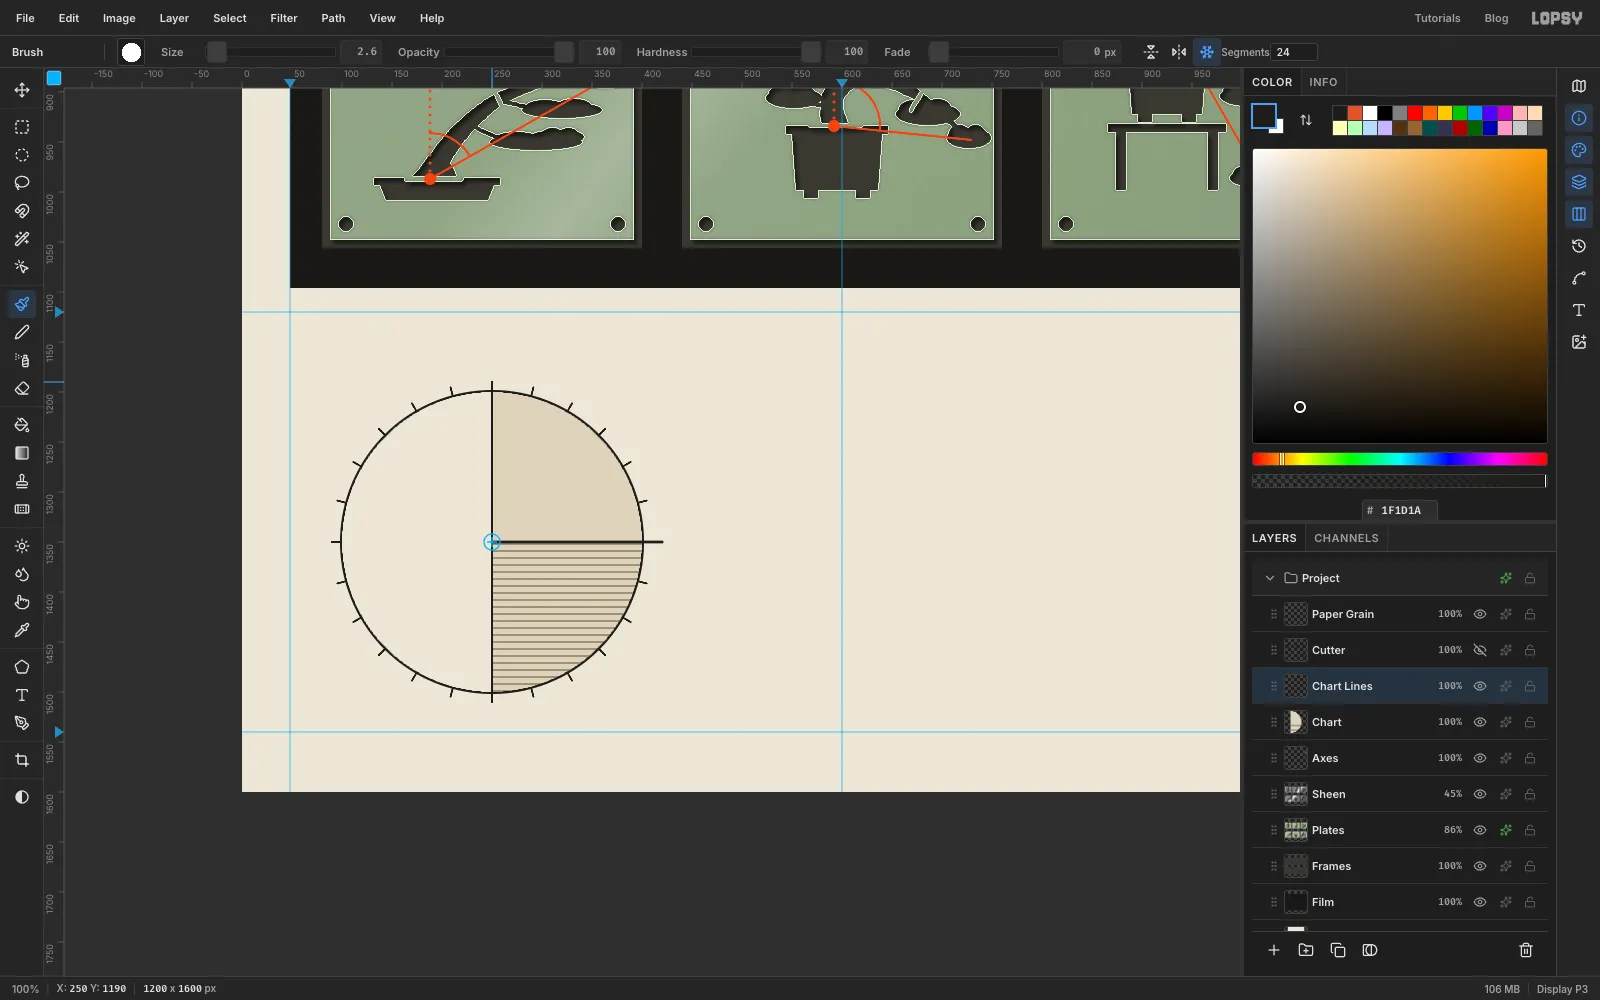
Chart Linesand set the foreground to .- Ring: select the circle again, fill it, choose Select → Shrink… by
2and press Delete. A 2 px ring is left. - Diameter: Brush at Size
2.6and Spacing5. (Below about 2.5 px the brush barely paints.) Click the top of the ring and Shift-click the bottom. - Soil line: Size
4. Click the centre and Shift-click 18 px past the ring on the right. - Ticks: click Radial Symmetry in the Brush options bar and set Segments to
24(one every 15°). Cmd-click the chart's centre to move the symmetry centre there. Drag a short stroke 8 px straight up from the top of the ring. Lopsy repeats it 24 times round the circle. Click Radial Symmetry again to turn it off. - Draw a marquee over everything left of the centre and press Delete, so the ring and ticks only run round the right half.
- Add the 15° "upright limit" as a dotted ray. Use Size
3and Spacing200, from the centre to the ring at about289, 1203.
- Ring: select the circle again, fill it, choose Select → Shrink… by
-
Plot the six leans
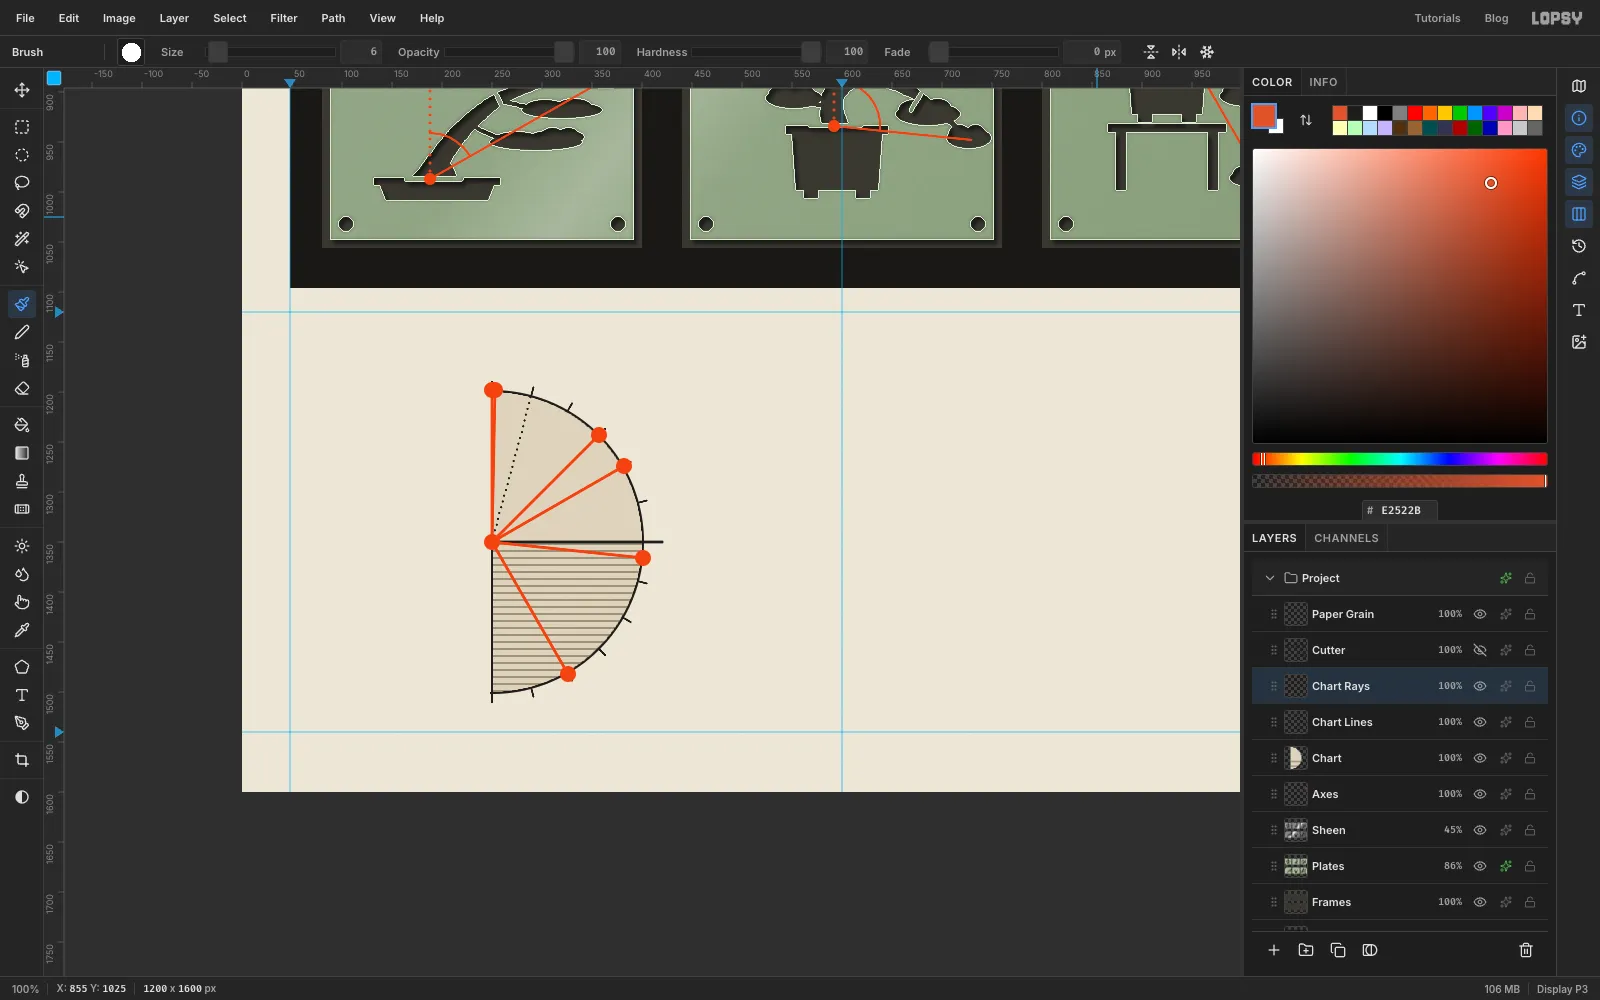
Add a layer called
Chart Raysand set the foreground to . With the Brush at Size4and Spacing back to5, click the centre and Shift-click each point on the ring:- 0° (frames 01 and 02):
250, 1198 - 45°:
357, 1243 - 60°:
382, 1274 - 95°:
401, 1365 - 150°:
326, 1482
Turn Snap to Guides off again. Shift-add a 16 px circle at the end of each ray and one at the centre, then fill. Turn snapping back on.
- 0° (frames 01 and 02):
-
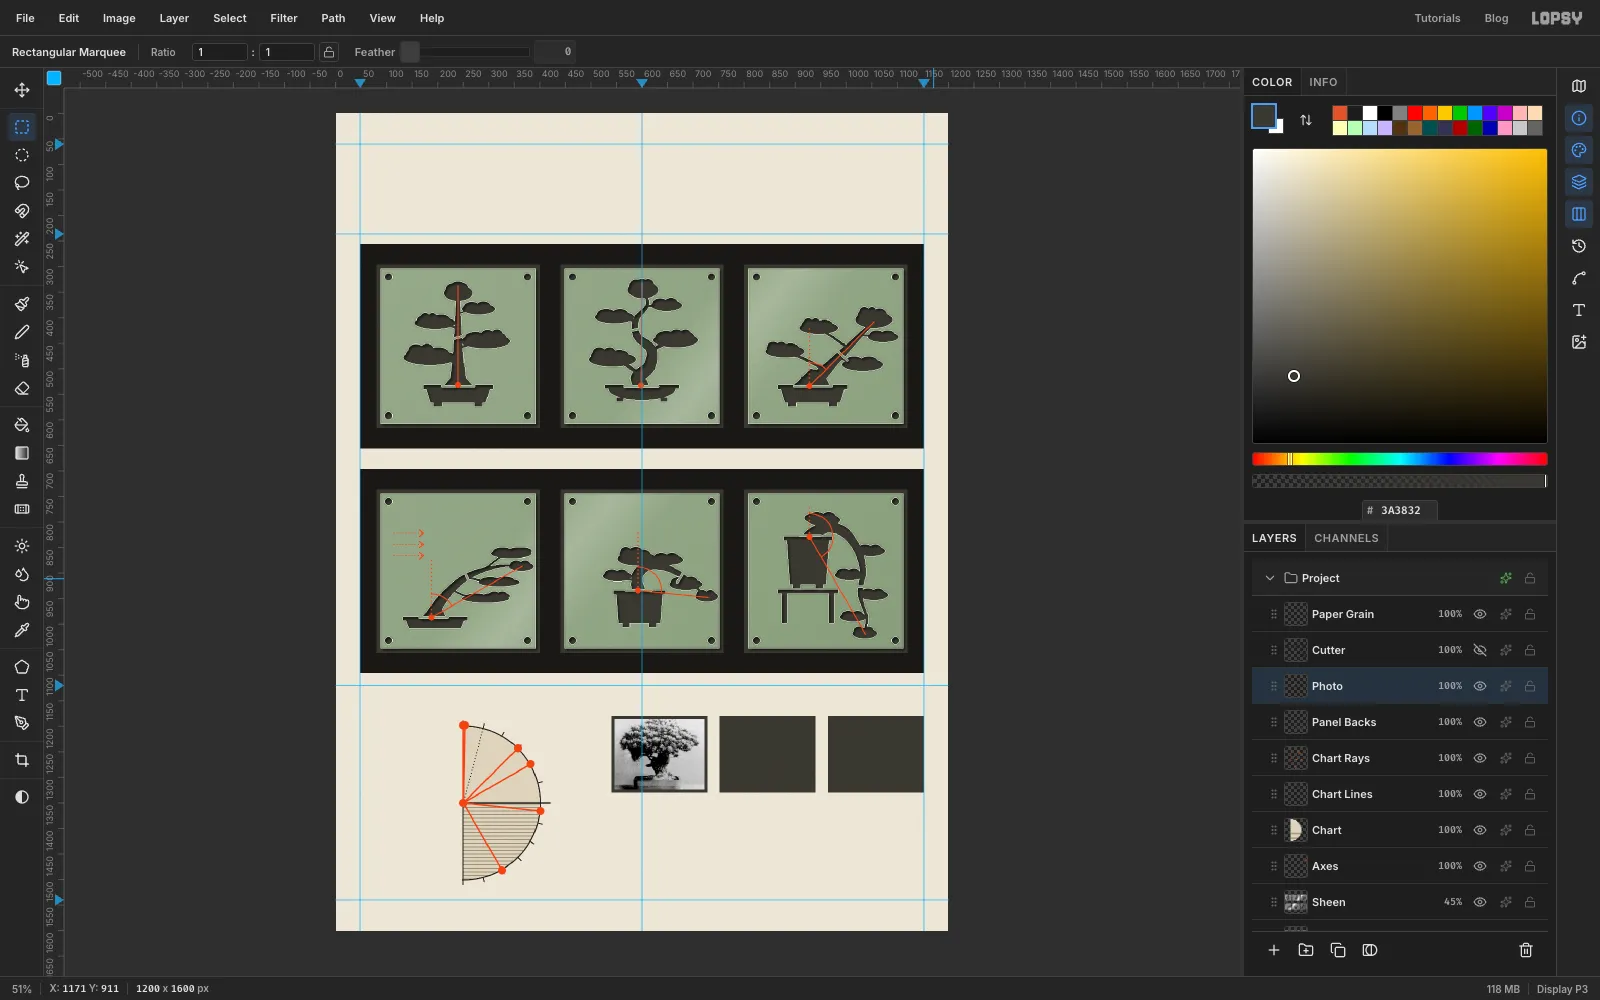
Bring in a reference photo
The right half of the footer shows how a photo becomes a plate. The photo is Sandai Shogun, a public-domain 1920s image of a pine bonsai, from Wikimedia Commons.
- Add a layer called
Panel Backs. Shift-add three 188 × 150 rectangles at540, 1180,752, 1180and964, 1180, and fill with . - Drag the photo file onto the canvas. It lands at the top-left, selected. Hold Cmd and drag its bottom-right handle in until it's about 279 px wide (Cmd keeps the proportions). Press Cmd+D. Rename the layer
Photo. - Nudge it with the Move tool until the tree is centred on the first panel.
- Draw a marquee 6 px inside the first panel, choose Select → Inverse and press Delete, so the photo is trimmed to the panel with a dark border all round. Deselect.
- Choose Filter → Desaturate, then Filter → Brightness/Contrast… with Contrast
25.
- Add a layer called
-
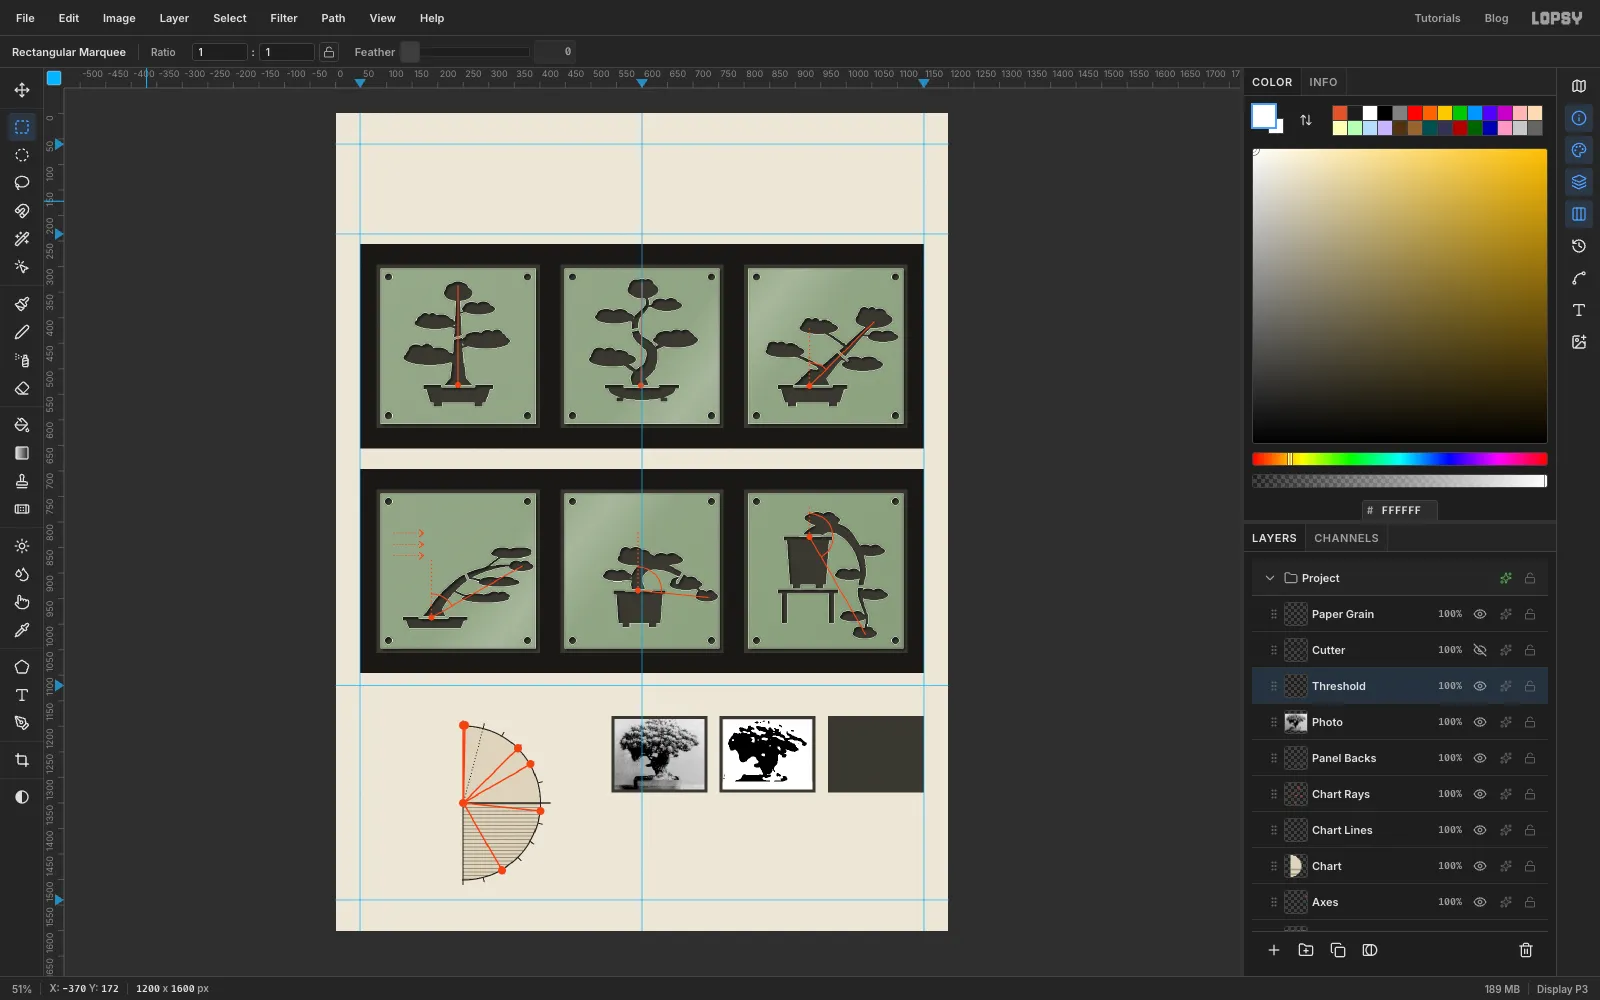
Threshold a copy
Choose Layer → Duplicate Layer and rename the copy
Threshold. Switch to the Move tool (V) and nudge it 212 px right into the second panel: Shift+→ 21 times, then → twice.A knife can't follow pine needles. Run Filter → Gaussian Blur… at Radius
4so the needles clump into masses, then Filter → Threshold… at Level140.The blur smeared the edges outward, so trim it again: marquee 6 px inside the panel, Select → Inverse, Delete. Then select the bottom 16 px inside the panel and fill it white to drop the table's shadow.
-
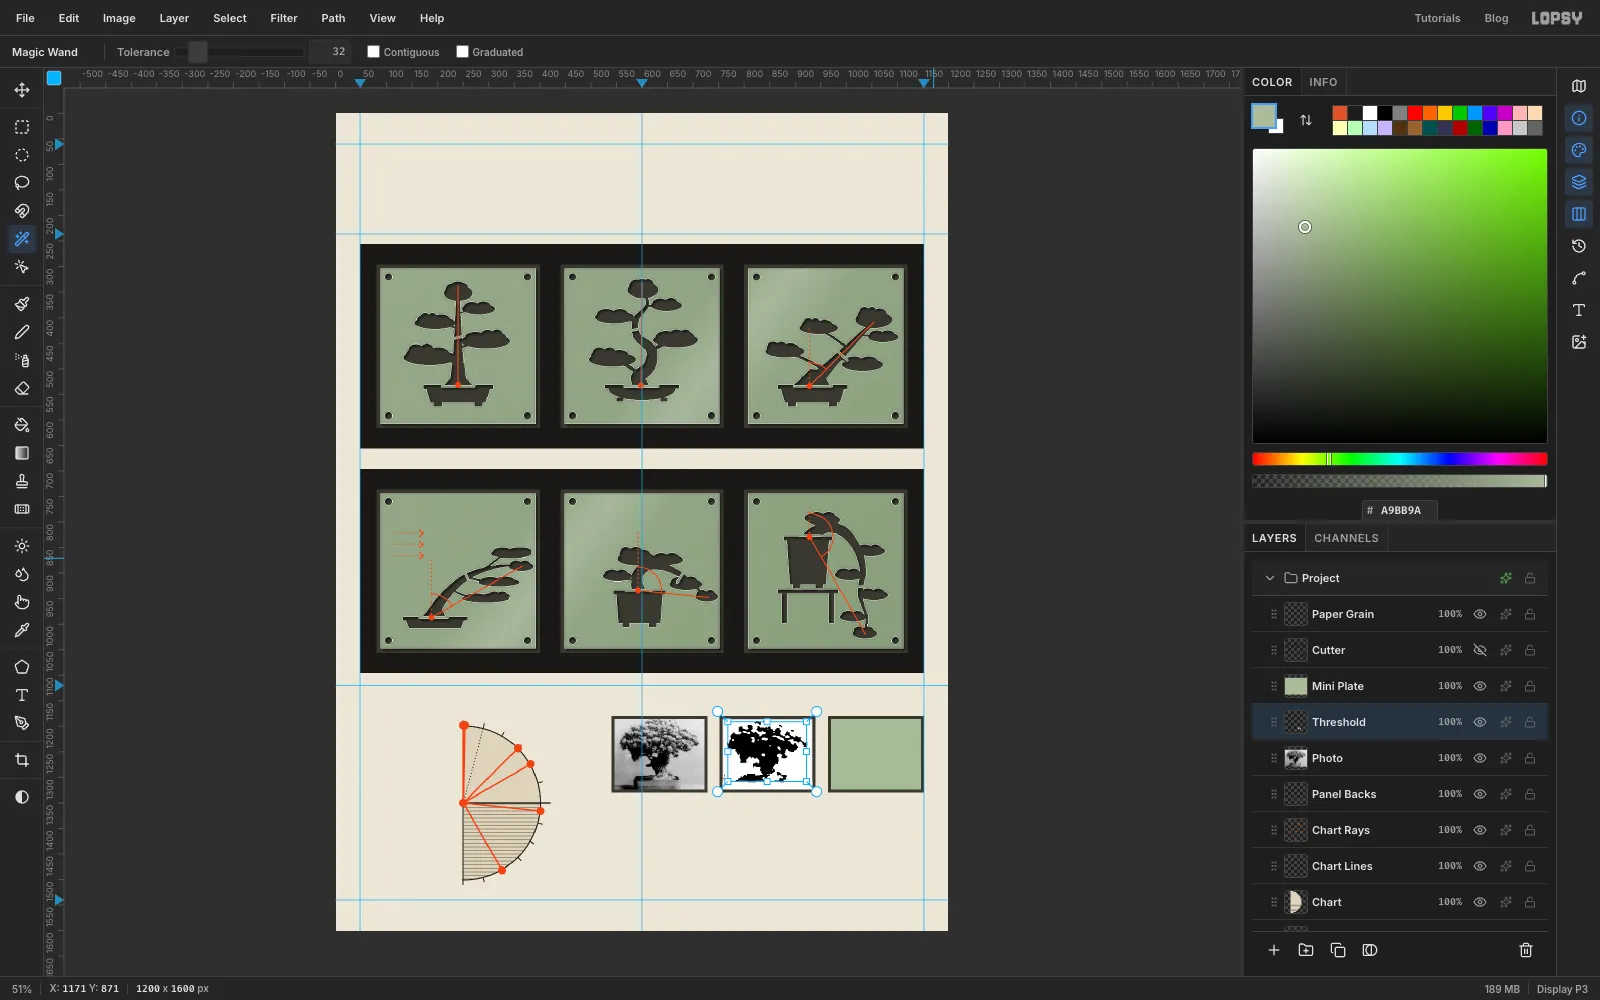
Select the black and clean it up
First make the card to cut. Add a layer called
Mini Plateand fill a rectangle 6 px inside the third panel with , then deselect.Click the
Thresholdrow. Pick the Magic Wand (W), untick Contiguous and click on the black trunk. Every black pixel in the panel is selected.Now clean the selection up for cutting:
- Select → Grow…
3, then Select → Shrink…3. This closes small gaps, which would be plate islands that fall out. - Select → Shrink…
2, then Select → Grow…2. This removes specks too small to cut.
Tick Contiguous again when you're done with the wand.
- Select → Grow…
-
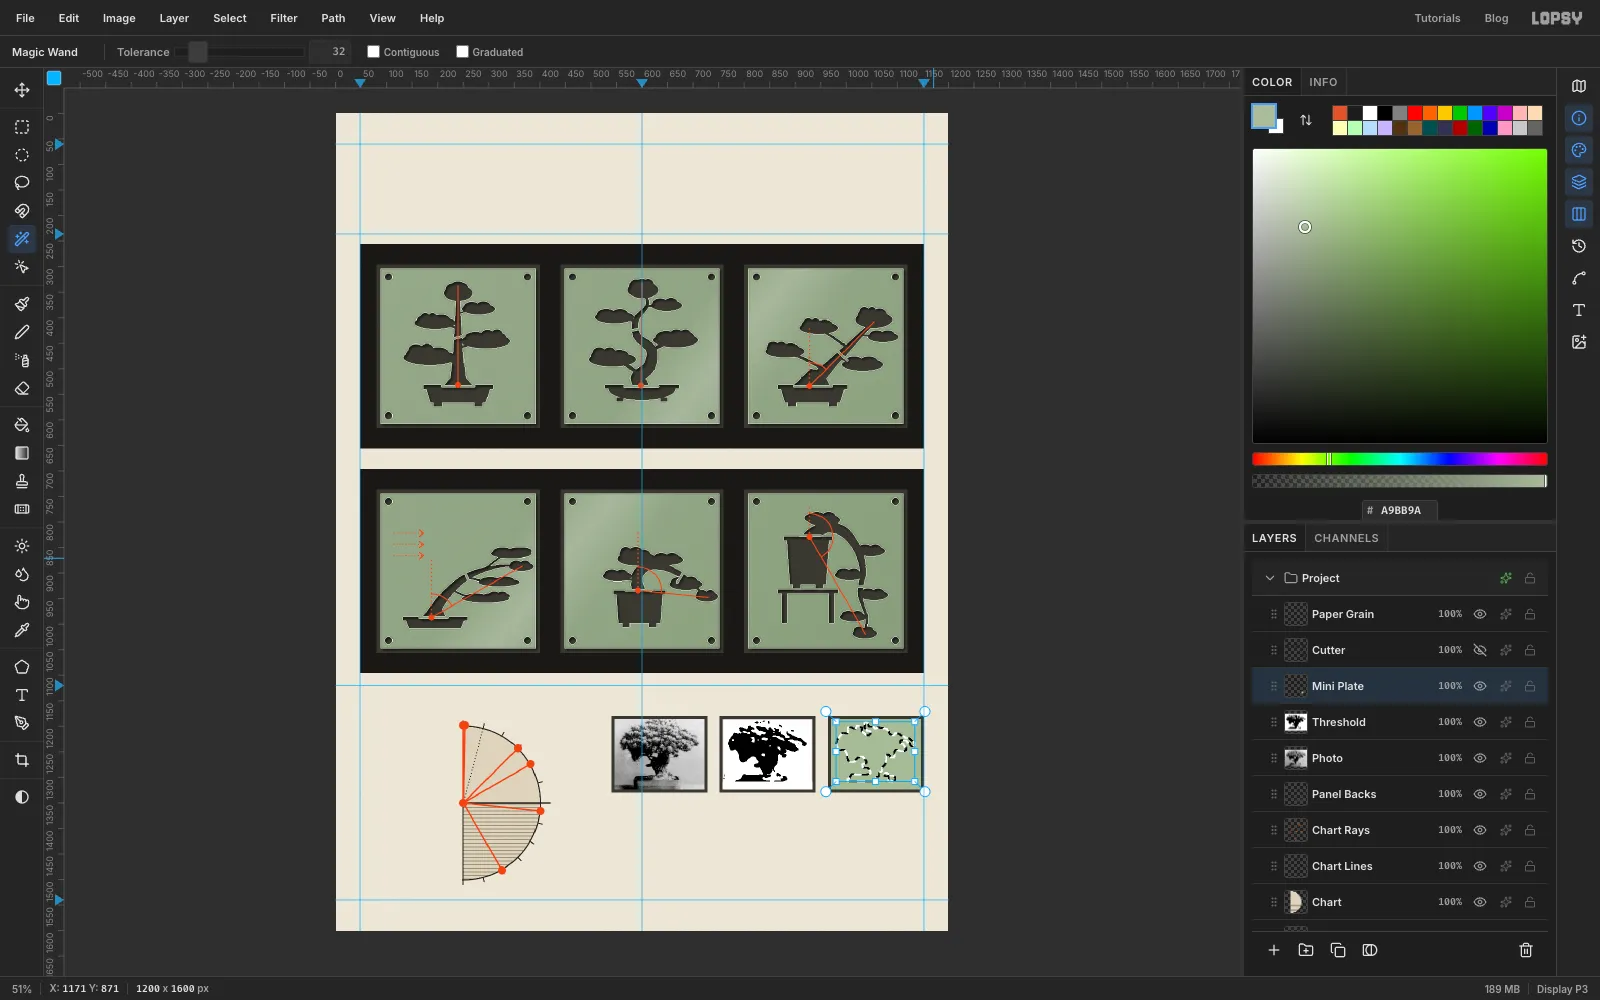
Slide the selection over and cut the mini plate
- With the Magic Wand still active, press Shift+→ 21 times and → twice. With a selection tool active, the arrow keys move the selection outline 212 px and leave the pixels where they are.
- Click the
Mini Platerow and press Delete.
-
Finish the photo-to-plate strip
Deselect. On
Mini Plate, paint two bridges across the trunk and canopy with the Brush at Size3in . Shift-click three points for each so they bend with the branches.Give the mini plate the same treatment as the big plates, a little smaller: Inner Glow at Size
4, Opacity70, and Drop Shadow with offsets2/3, Blur4, Opacity70.Add a layer called
Arrows. With the Brush at Size4, Spacing5, in vermilion, draw a 16 px arrow with a small chevron head in each gap between the panels.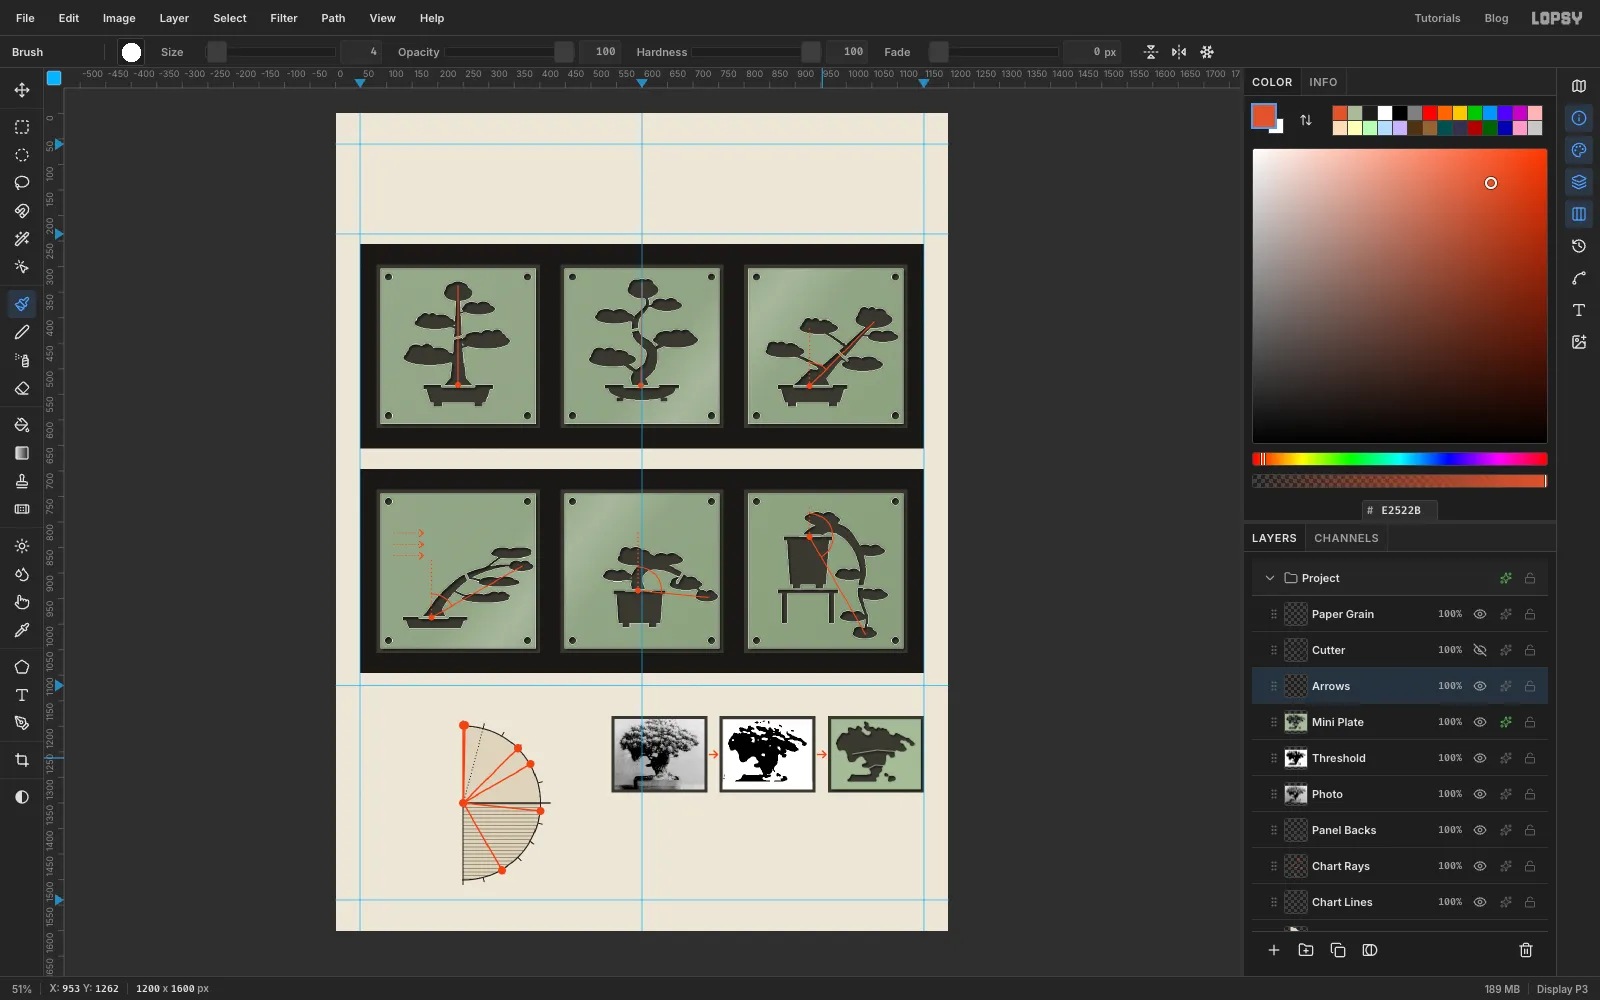
-
Set the type
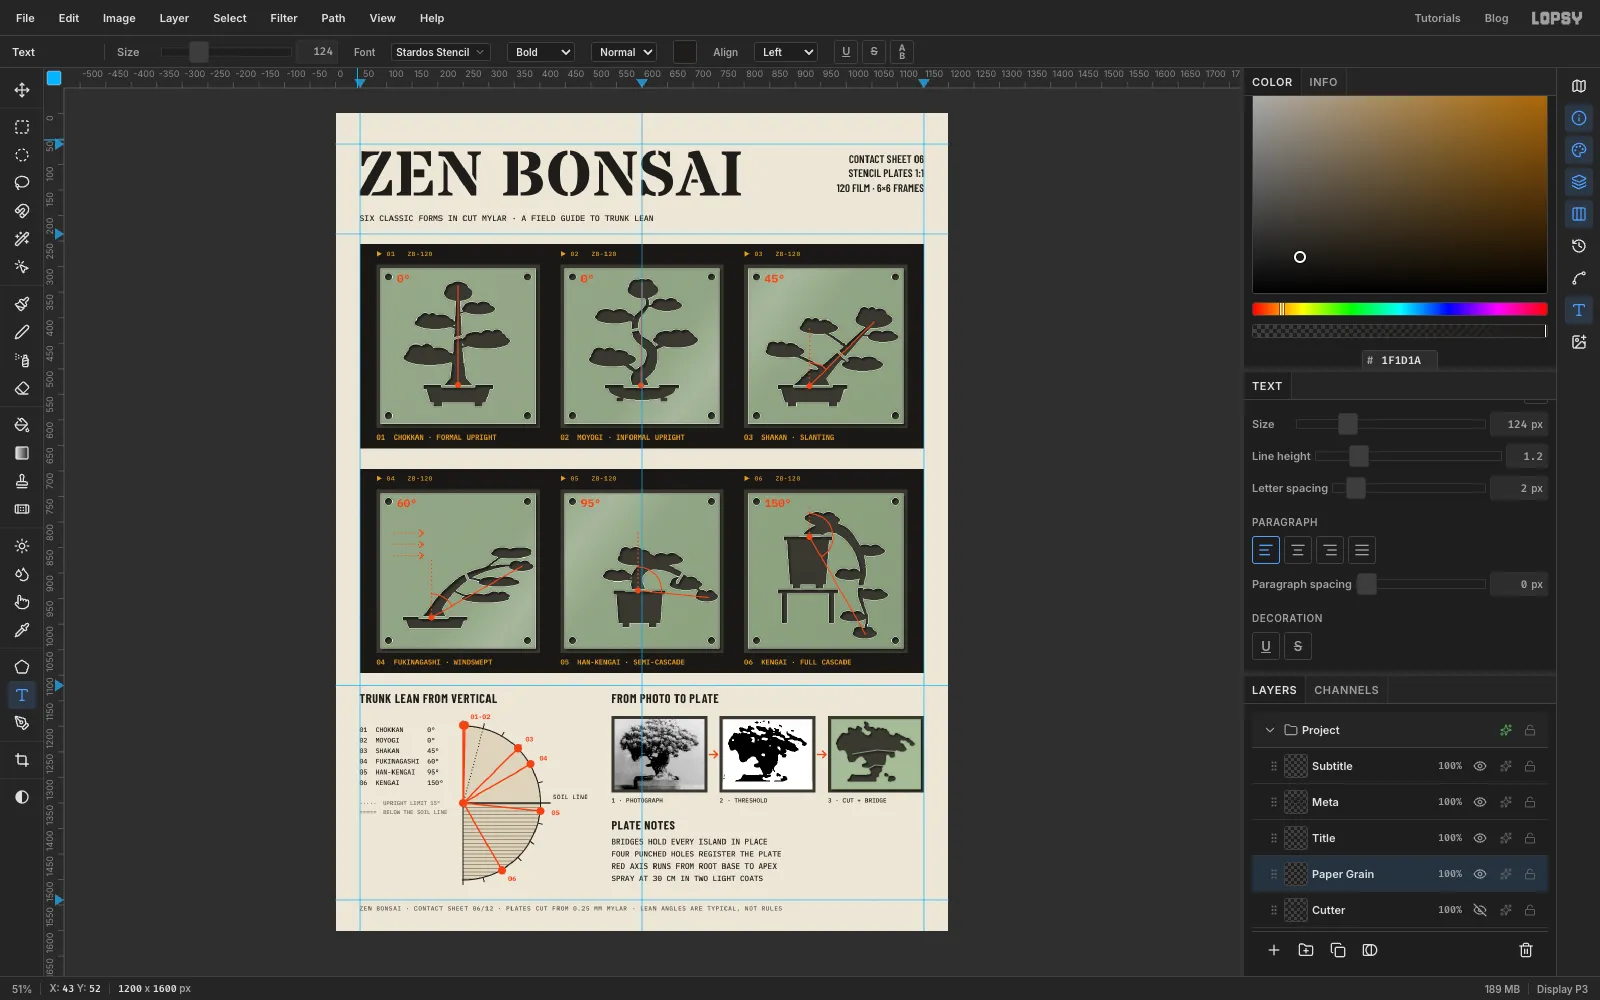
Pick the Text tool (T). Before each new piece of text, click a picture layer, not a text layer, in the right group. With a text layer selected, changing the font or size restyles that layer instead. Press Tab to commit each one. Create text from the bottom of the page upward, in the order below: a click inside an existing text box edits that text instead of starting new.
- Footer line (click
Arrows): one line of Plex Mono12in along the bottom margin. - Photo strip (click
Arrows). HeadingFROM PHOTO TO PLATEin Barlow Condensed Bold24. Captions1 · PHOTOGRAPH,2 · THRESHOLDand3 · CUT + BRIDGEunder the panels in Plex Mono12. ThenPLATE NOTESand four lines of notes in Plex Mono15at Line height1.6. - Chart (click
Chart Rays). The headingTRUNK LEAN FROM VERTICALis Barlow Condensed Bold24with Letter spacing1. The legend is a six-line Plex Mono Medium13table at Line height1.6. Under it, a two-line key reads····· UPRIGHT LIMIT 15°and===== BELOW THE SOIL LINE. Set it in11px, grey . Each ray gets a vermilion Bold13number just outside its dot, and the soil line gets a smallSOIL LINE. - Film (click
Axesfirst). Use IBM Plex Mono in amber . Above each frame, at Medium12, type▶ 01 ZB-120and so on, 12 px below the strip's top edge. Below each frame, at SemiBold14, type the caption, for example01 CHOKKAN · FORMAL UPRIGHT, 12 px above the strip's bottom edge. In each plate's top-left corner, beside the punched hole, add the angle tag in Bold22, vermilion:0°,0°,45°,60°,95°,150°. - Header (click
Paper Grain, so the type sits above the grain and stays crisp).ZEN BONSAIis Stardos Stencil Bold124with Letter spacing2, its left edge on the 48 guide. Under it, the subtitle is Plex Mono Medium16. For the spec block, set Align right in the Text panel first. Then drag a text box from about880, 74to the right margin guide, and type three lines in Barlow Condensed SemiBold22at Line height1.3. A dragged box respects alignment, so the lines end exactly on the 1152 guide. Set Align left again afterwards, because alignment carries over to the next text.
- Footer line (click
-
Grain, registration marks and a grease pencil
- Grain: select
Paper Grain. It sits above everything except the header type. Fill it with , run Add Noise at Amount28, Mono and Gaussian, set it to Overlay and drop the opacity to40%. - Registration marks: add a layer called
Reg Marks. In each corner, fill an 18 px circle centred 24 px in from both edges, Shrink it by2and delete the inside. Then draw a 32 px cross through it with the Brush at Size2.6. - Grease pencil: add a layer called
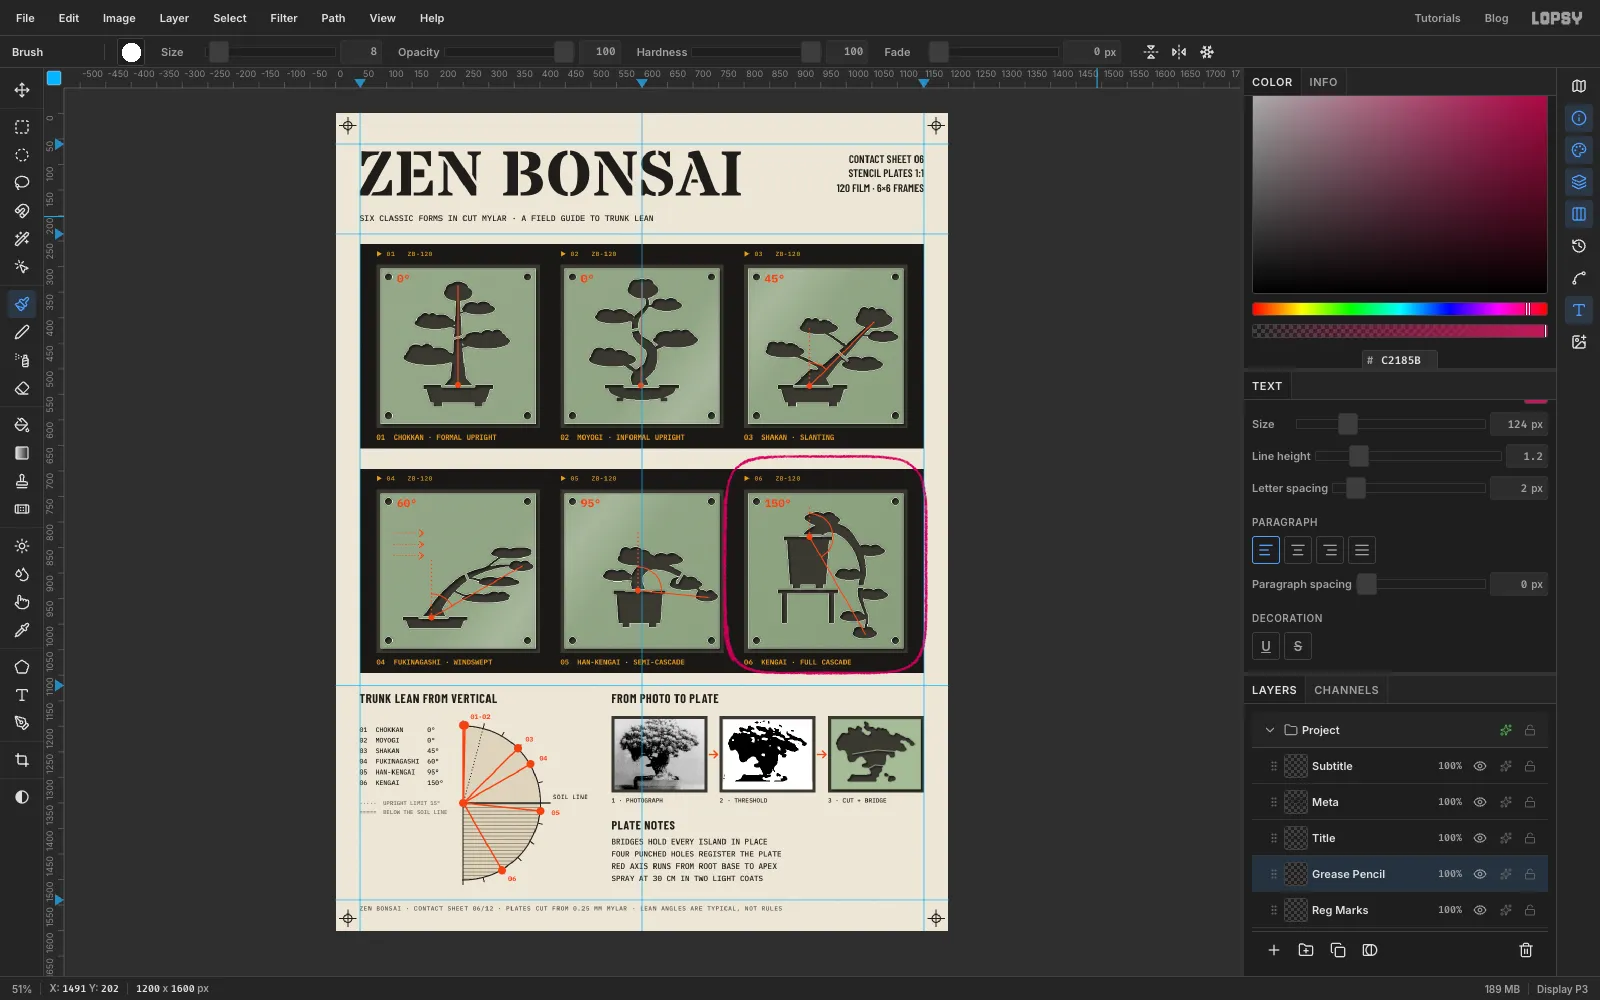
Grease Pencilwith the foreground at . In the brush settings, set Size8, Hardness45, and on the Dynamics tab Size Jitter30, Opacity Jitter35and Scatter6. That gives the waxy, broken line of a china marker. Draw one loose, boxy loop round frame 06. Start at its bottom-left, go up the gap on its left, across the paper above the strip, down the right edge and back along the bottom. Keep the line outside the frame number and caption, and overlap the start a little at the end. Reset the jitters and Scatter to0afterwards.
- Grain: select
-
Add a rotated grease-pencil note
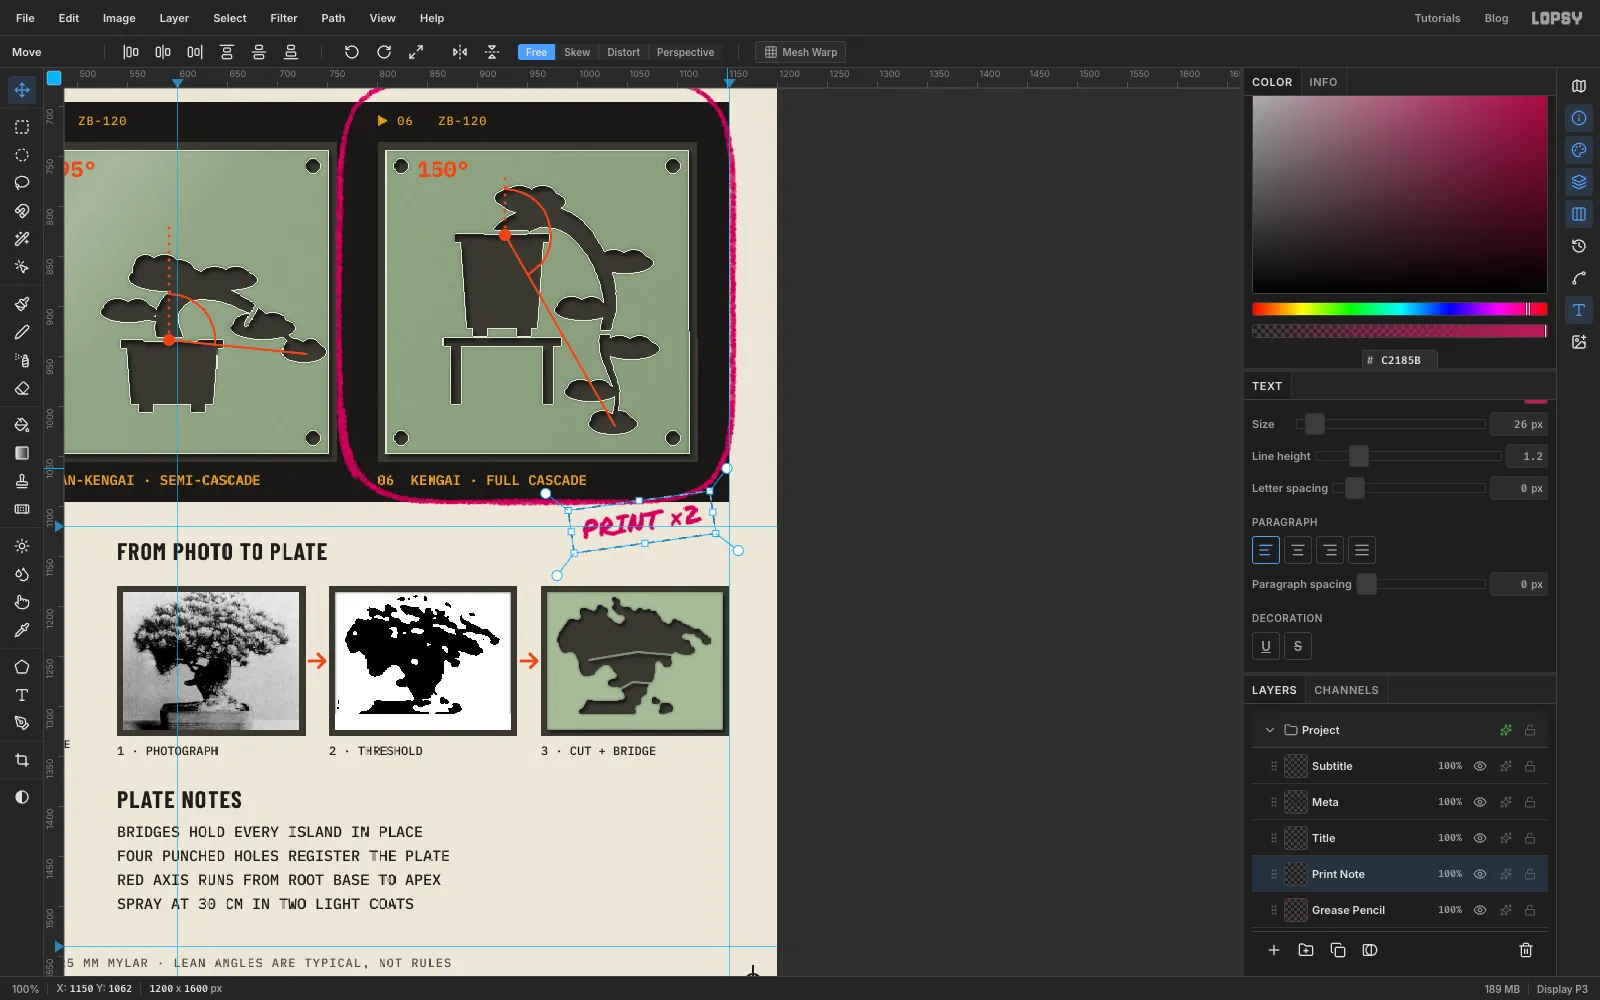
With
Grease Pencilselected, add text in Permanent Marker26, :PRINT ×2. Put it on the paper just under the loop. Click Rasterize Layer at the bottom of the Layers panel so you can rotate it as pixels.Draw a marquee around the words with a little room to spare. With the Move tool, drag the rotate handle about 8° anticlockwise, then press Cmd+D. Choose Layer → Merge Down to put the note on the grease-pencil layer.
-
Group the layers
Four groups keep the file manageable. For each one, click its top layer, Shift-click its bottom layer to select the run, choose Layer → Group Layers and rename the group:
Header: the title, subtitle and spec blockPhoto to Plate: the notes and captions down toPanel BacksLean Chart: the ray numbers and legend down toChartContact Strips: the captions, tags and edge print down toFilm
Collapse them. Now you can select a group and nudge the whole section with the Move tool. Choose File → Save Project to keep the layers, then File → Quick Export PNG for the finished sheet.