Make a Blueprint-Style Embroidered Gear Patch
Design a gear-shaped iron-on patch in Lopsy with a blueprint kiwi traced from a lithograph, Sunburst gears, pattern-fill grids and arched title type.
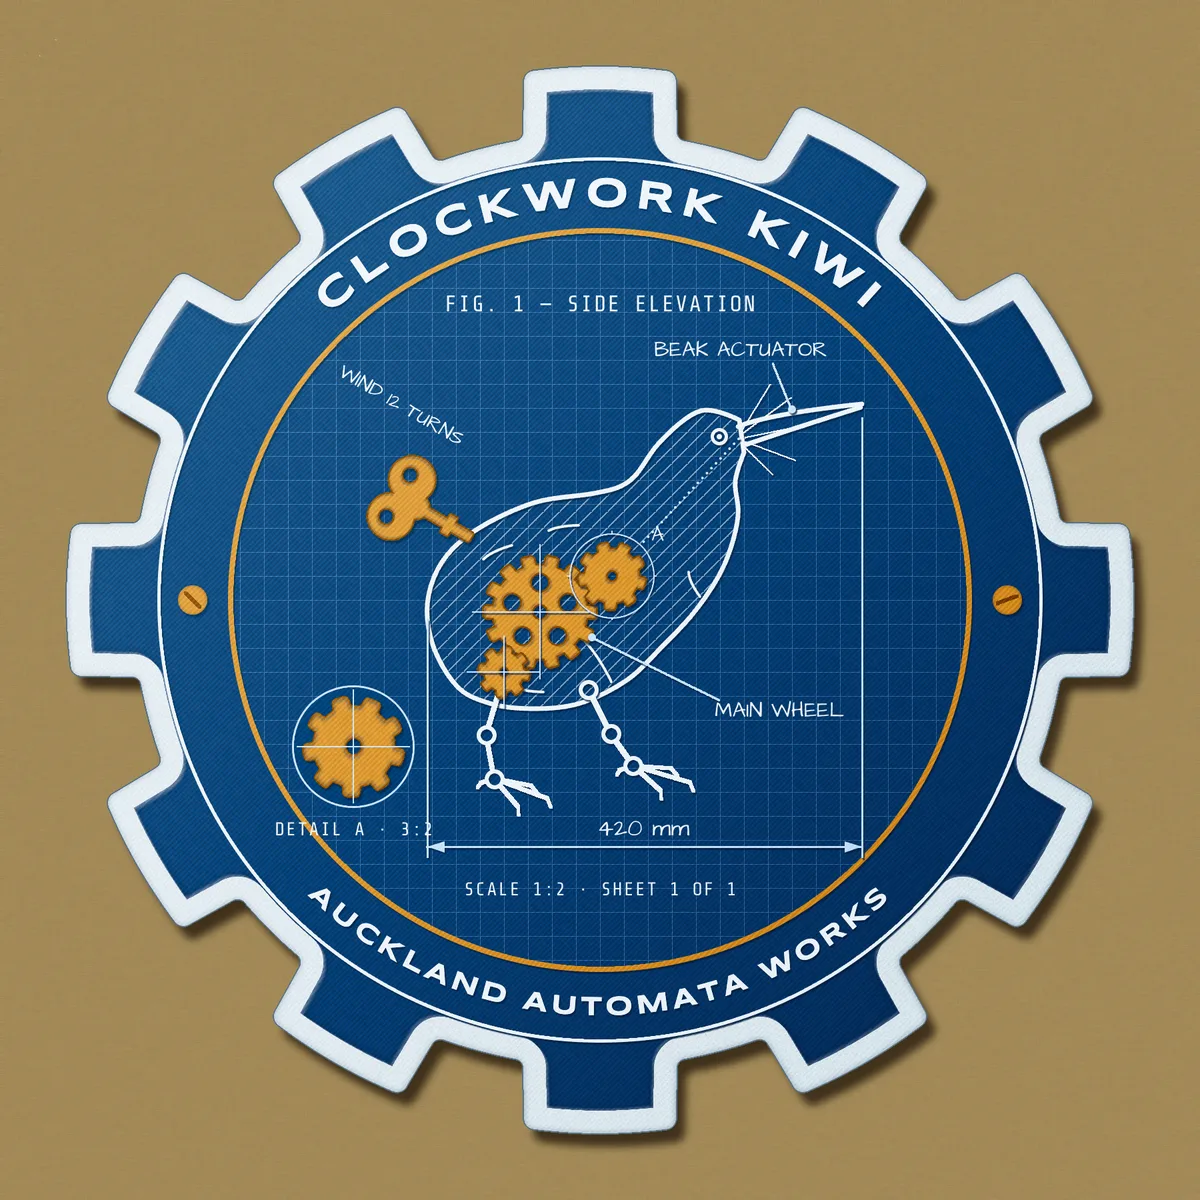
Blueprints are the working drawings engineers used before computers. They are white lines on a deep blue ground, with dimension arrows, centre marks and tidy little hand-lettered notes. Turn one into an embroidered patch and you get something that looks like a souvenir from a workshop that never existed.
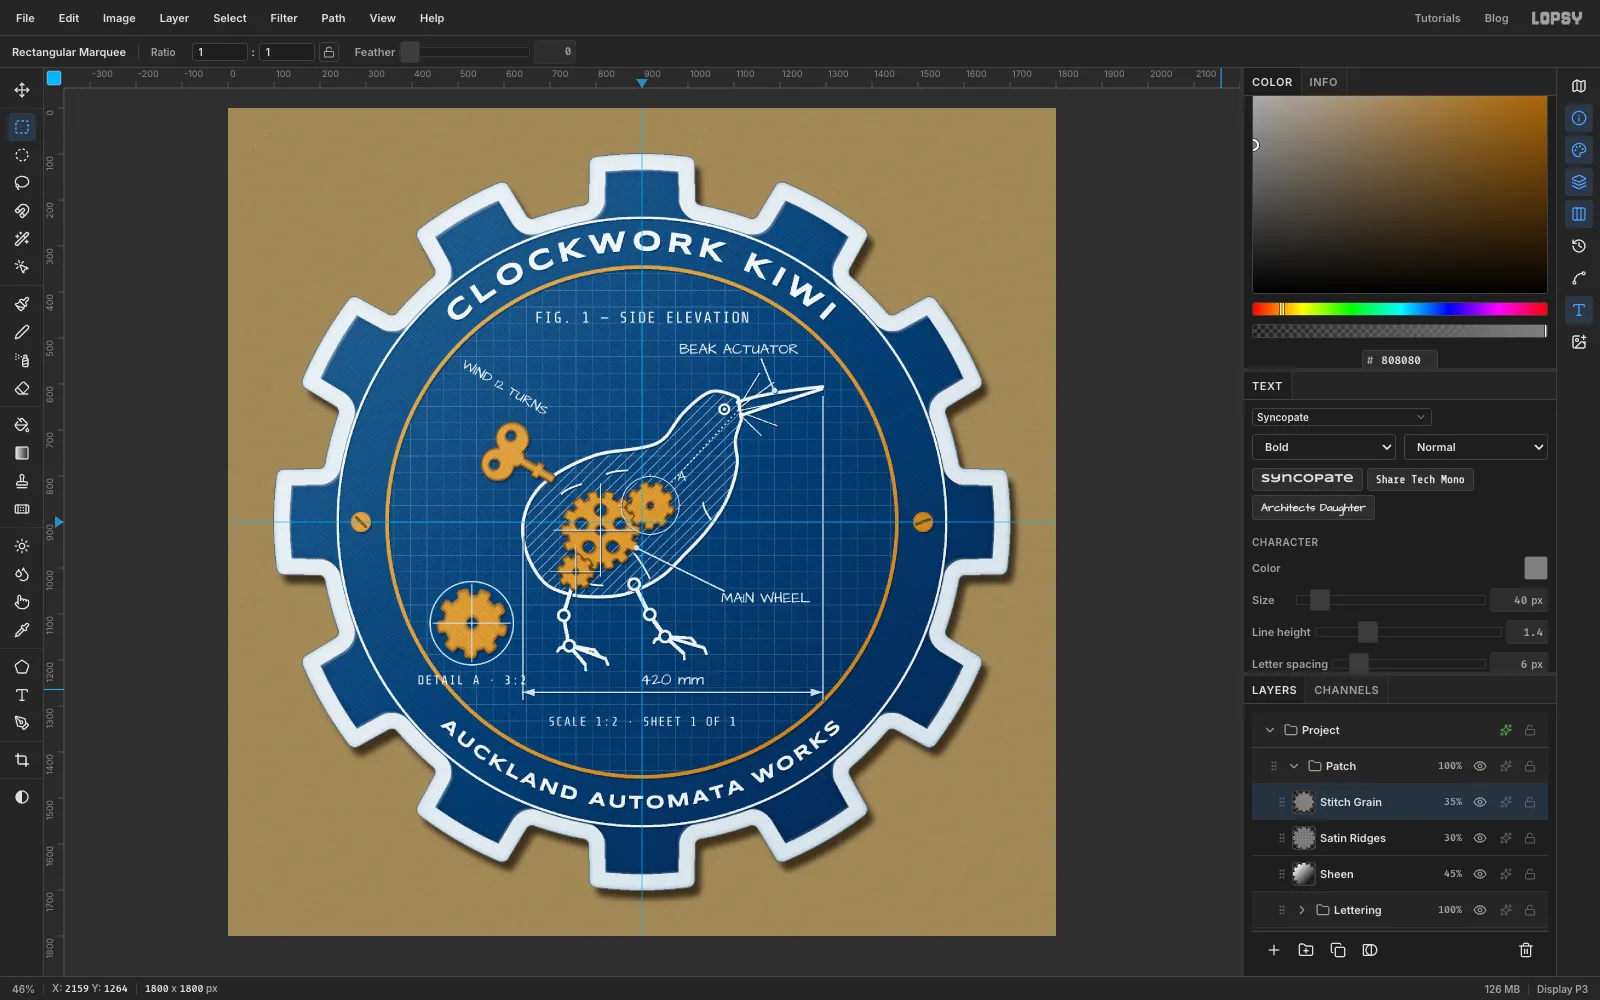
In this tutorial you'll make Clockwork Kiwi, an 1800 × 1800 px iron-on patch for an imaginary maker, Auckland Automata Works. It's a picture of the patch lying on a khaki canvas bag. The finished patch has:
- a die-cut gear-shaped edge in white satin stitch, made with the Sunburst filter
- a navy twill field with a blueprint grid you make from a tiny pattern tile
- a kiwi traced with the Pen from a 19th-century lithograph, with mechanical legs
- three brass gears showing through its body, and a wind-up key in its back
- hatching, centre marks, a dimension line, callouts and a Detail A inset
- the title and maker's name arched around a band, on paths
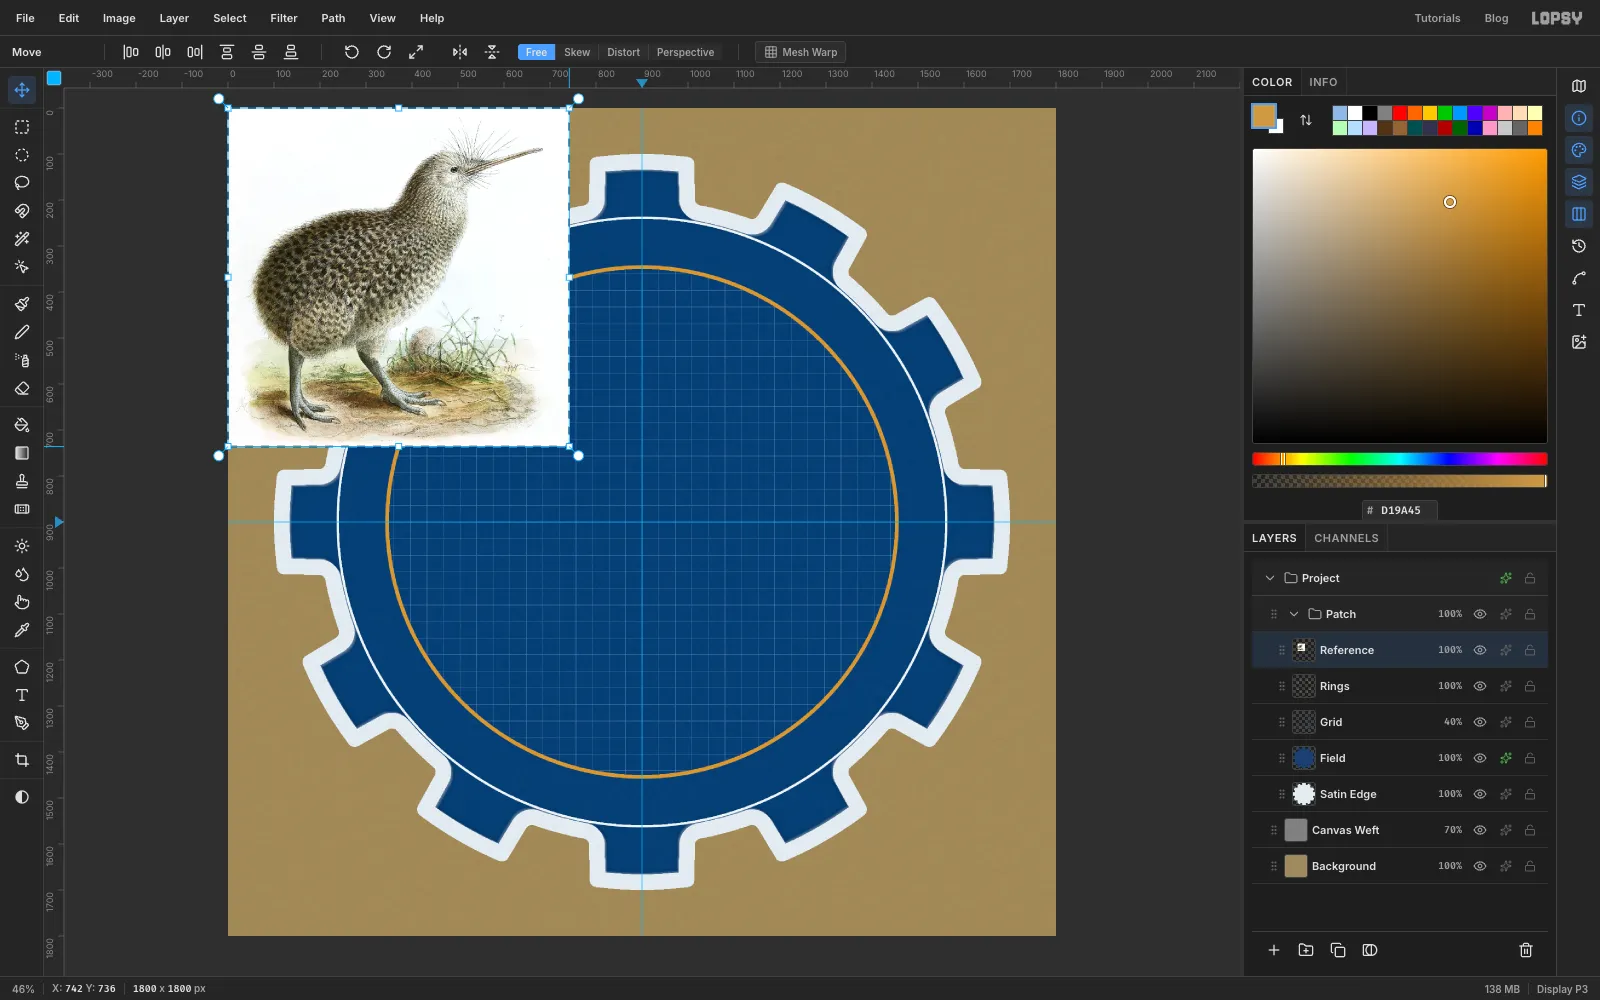
The kiwi is traced from a public-domain plate of a little spotted kiwi by John Gerrard Keulemans, published between 1875 and 1878, Apteryx owenii 0.jpg on Wikimedia Commons. Download it before you start. The 1237 px wide version is the one used here. Any side-on kiwi photo will work, but your outline will differ from mine.
The tools you'll use:
- Filter → Sunburst, Add Noise, Motion Blur, Radial Blur and Gaussian Blur
- the Elliptical and Rectangular Marquee, the Lasso, Grow, Shrink, Inverse and the Magic Wand
- Edit → Define Pattern and Fill with Pattern
- the Pen, Pencil, Brush and Gradient, with Shift-click straight lines
- Copy, Paste, and the Move tool's scale and rotate handles
- the Text tool on paths, with Syncopate, Architects Daughter and Share Tech Mono from the font picker
- Drop Shadow, Inner Glow and Stroke, and the Overlay, Multiply and Soft Light blend modes
- New Group and collapsed groups
The palette:
-
Canvas
-
patch shadow
-
Satin edge
-
thread white
-
satin shading
-
edge line
-
Field navy
-
grid blue
-
pale drafting blue
-
deep navy
-
Detail A ground
-
Brass
-
brass shadow
-
Weave the canvas backdrop
Open Lopsy. In the New Document dialog, set Width and Height to
1800and click Create. Delete the emptyLayer 1with the bin button at the bottom of the Layers panel.- Click Background, set the foreground to and choose Edit → Fill.
- Filter → Add Noise…: Amount
30, Mono, Gaussian. - Filter → Motion Blur…: Angle
0, Distance12. The specks become horizontal threads. - Add a layer named
Canvas Weft. Fill it with , add noise (Amount40, Mono, Gaussian) and run Motion Blur at Angle90, Distance12. - Set its blend mode to Overlay and its opacity to 70%.
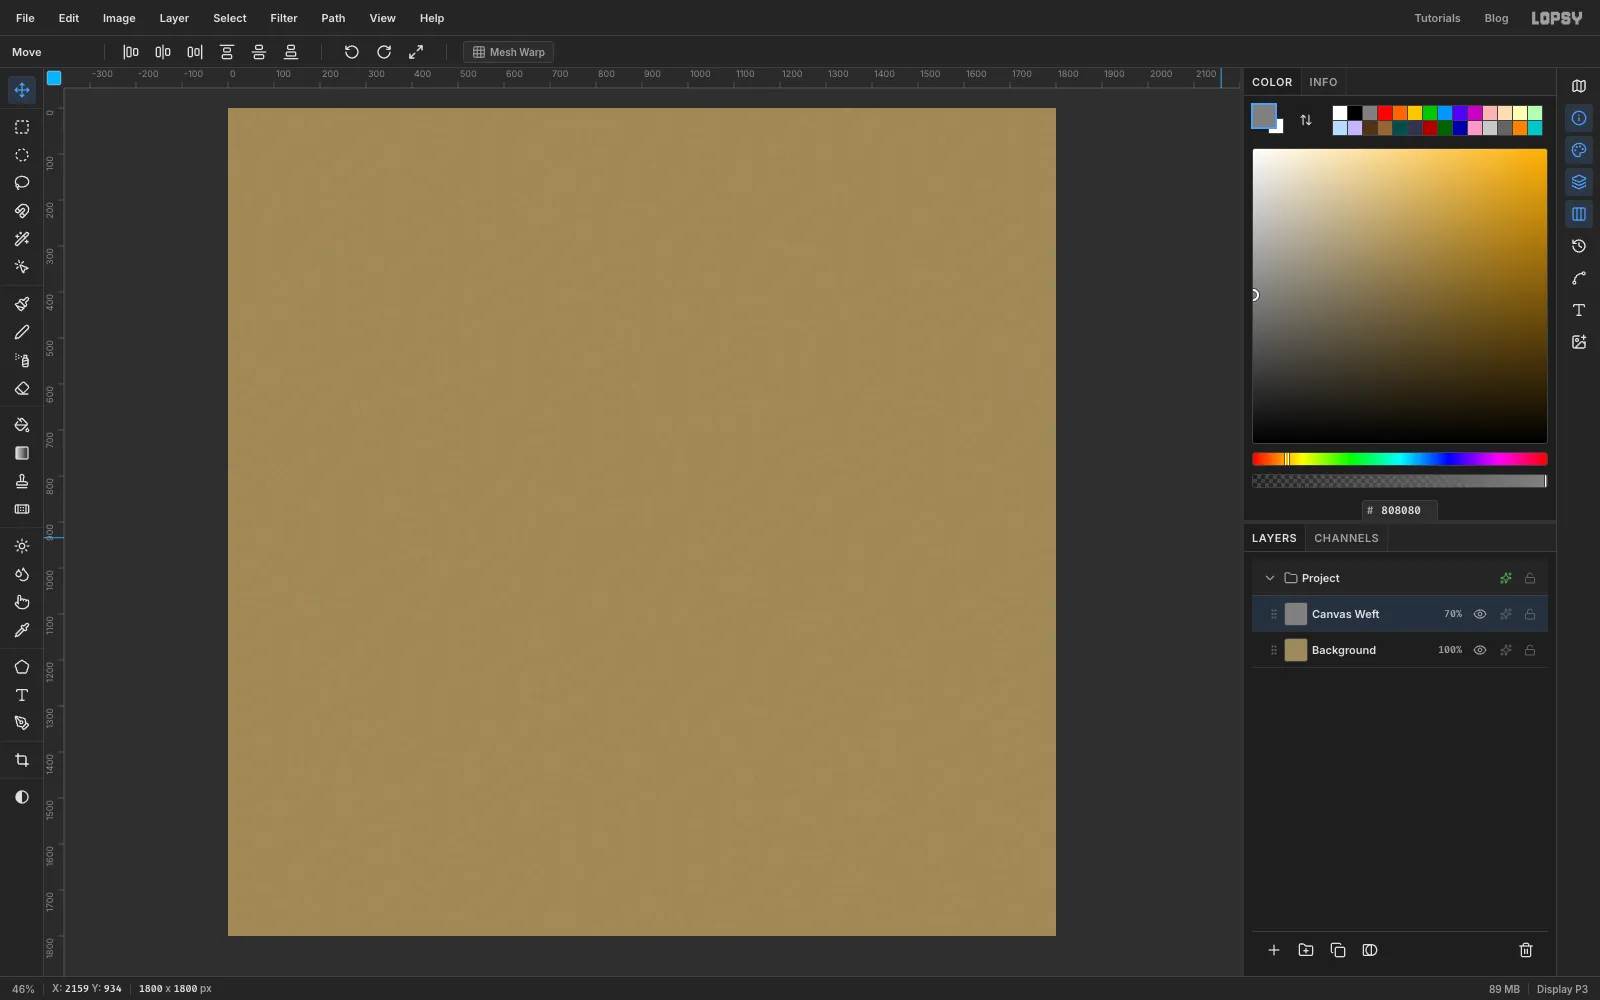
The grey layer disappears in Overlay mode, so only its vertical streaks are left, crossing the horizontal ones. That reads as a woven fabric.
-
Cut gear teeth with Sunburst
- Click the top ruler at 900 and the left ruler at 900 to drop a guide through the centre in each direction.
- Click
Canvas Weft, click the New Group button and name the groupPatch. With the group selected, add a layer namedSatin Edge. It goes inside the group. - Draw a circle of radius 800: click once with the Elliptical Marquee and enter
100, 100to1700, 1700. - Set the foreground to and choose Filter → Sunburst…. Set Rays
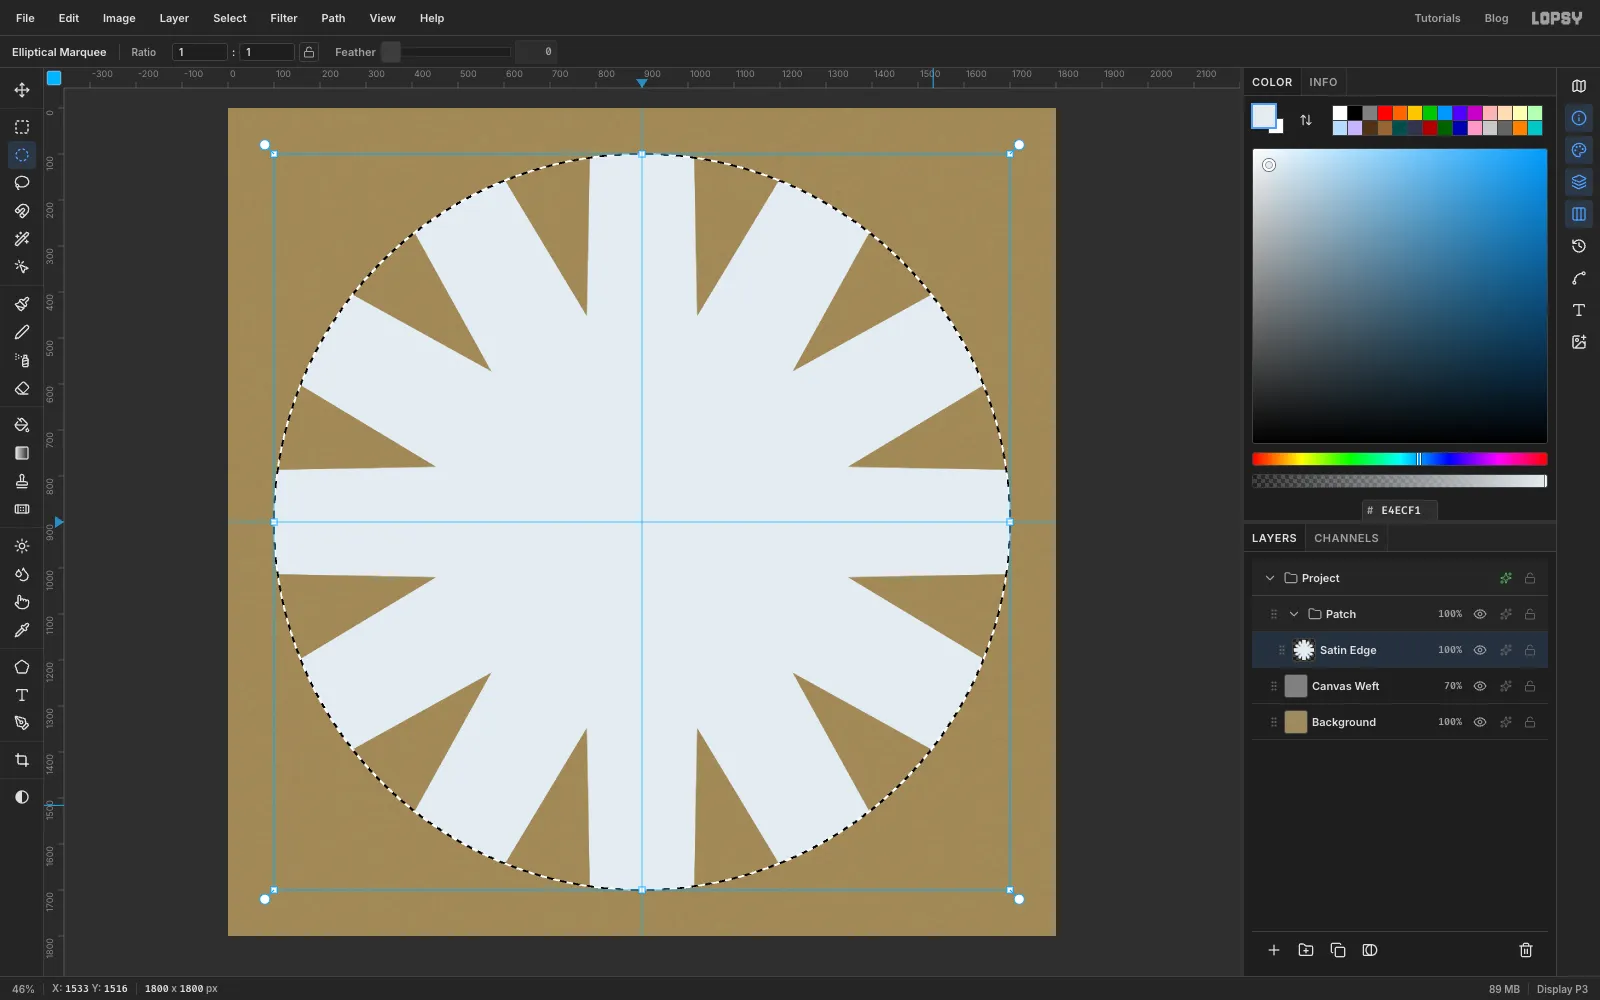
12, Width44, Taper58and Length150. Leave Center X and Center Y at50. Click Apply.
A Taper of 50 makes parallel-sided beams. A little more than 50 makes each beam narrow slightly towards its tip, like a real gear tooth. The marquee trims the beams to the length of the teeth.
-
Fill the hub and round the corners
- Select a circle of radius 700 (
200, 200to1600, 1600) and choose Edit → Fill. You now have a gear blank. Press Cmd+D. - Cmd-click the
Satin Edgethumbnail to select its pixels. - Choose Select → Shrink…
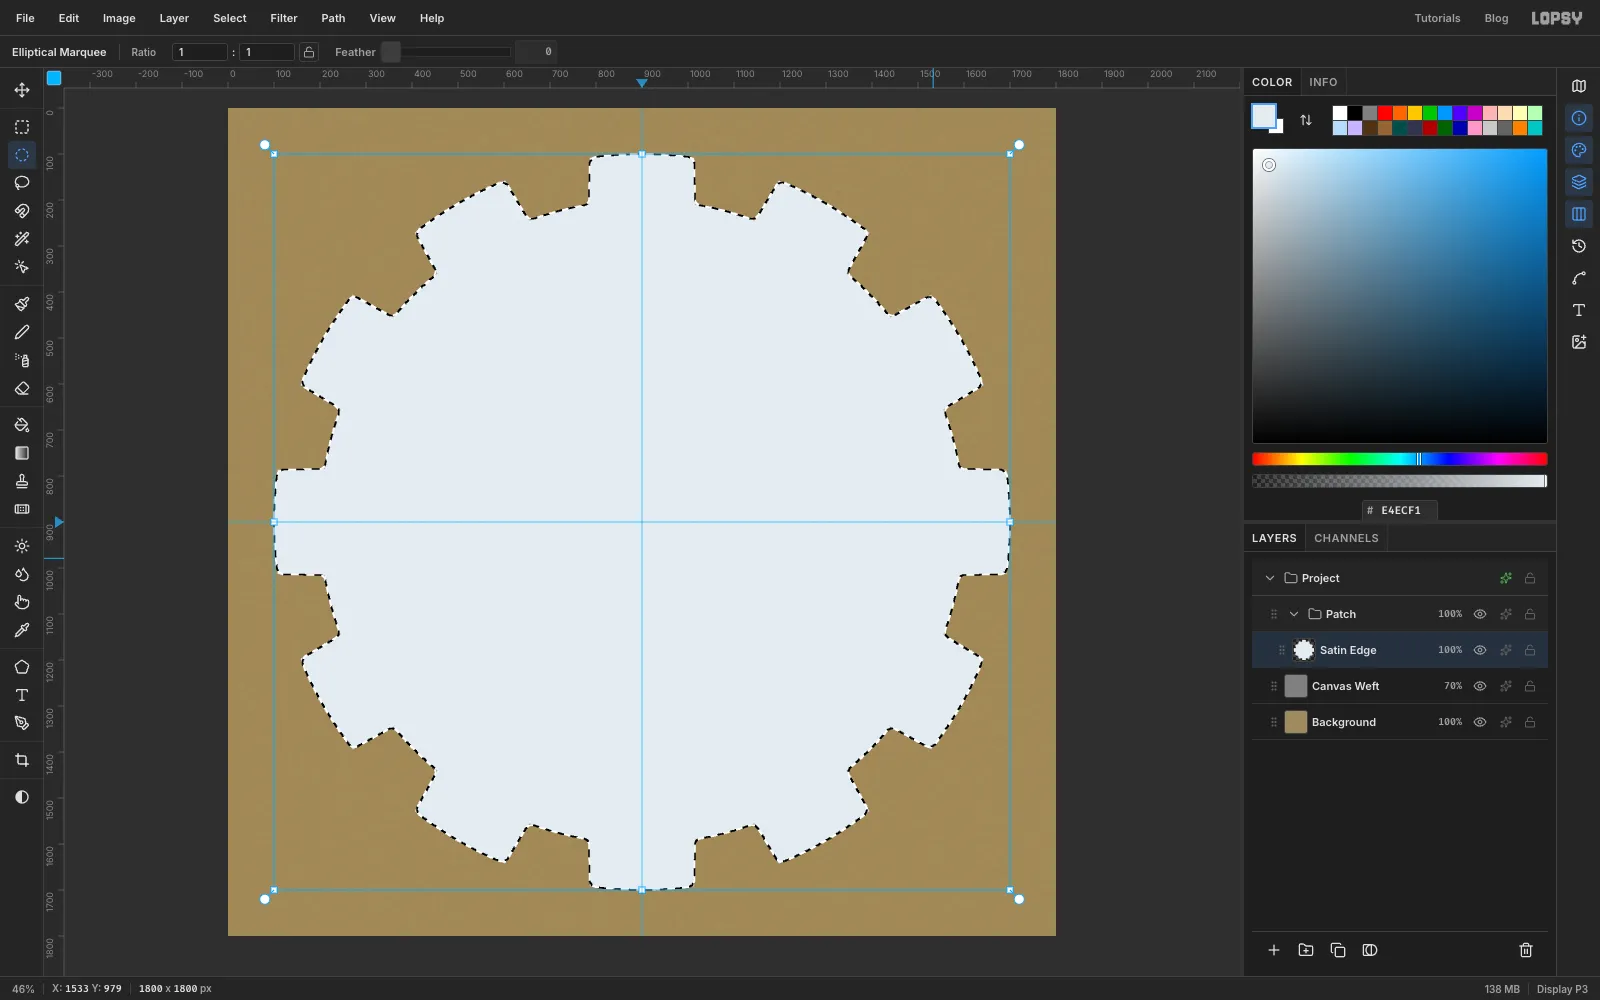
14, then Select → Grow…28, then Select → Shrink…14again. - Choose Edit → Fill, then Select → Inverse, press Delete and deselect.
Shrinking then growing rounds off the outside corners of the teeth. Growing then shrinking fills in the inside corners between them. The Fill adds the filled-in corners. Inverse and Delete trim away the sharp tips.
- Select a circle of radius 700 (
-
Give the edge a satin texture
- Cmd-click the
Satin Edgethumbnail again. - Filter → Add Noise…: Amount
70, Mono, Gaussian. - Filter → Radial Blur…: Amount
6. Deselect.
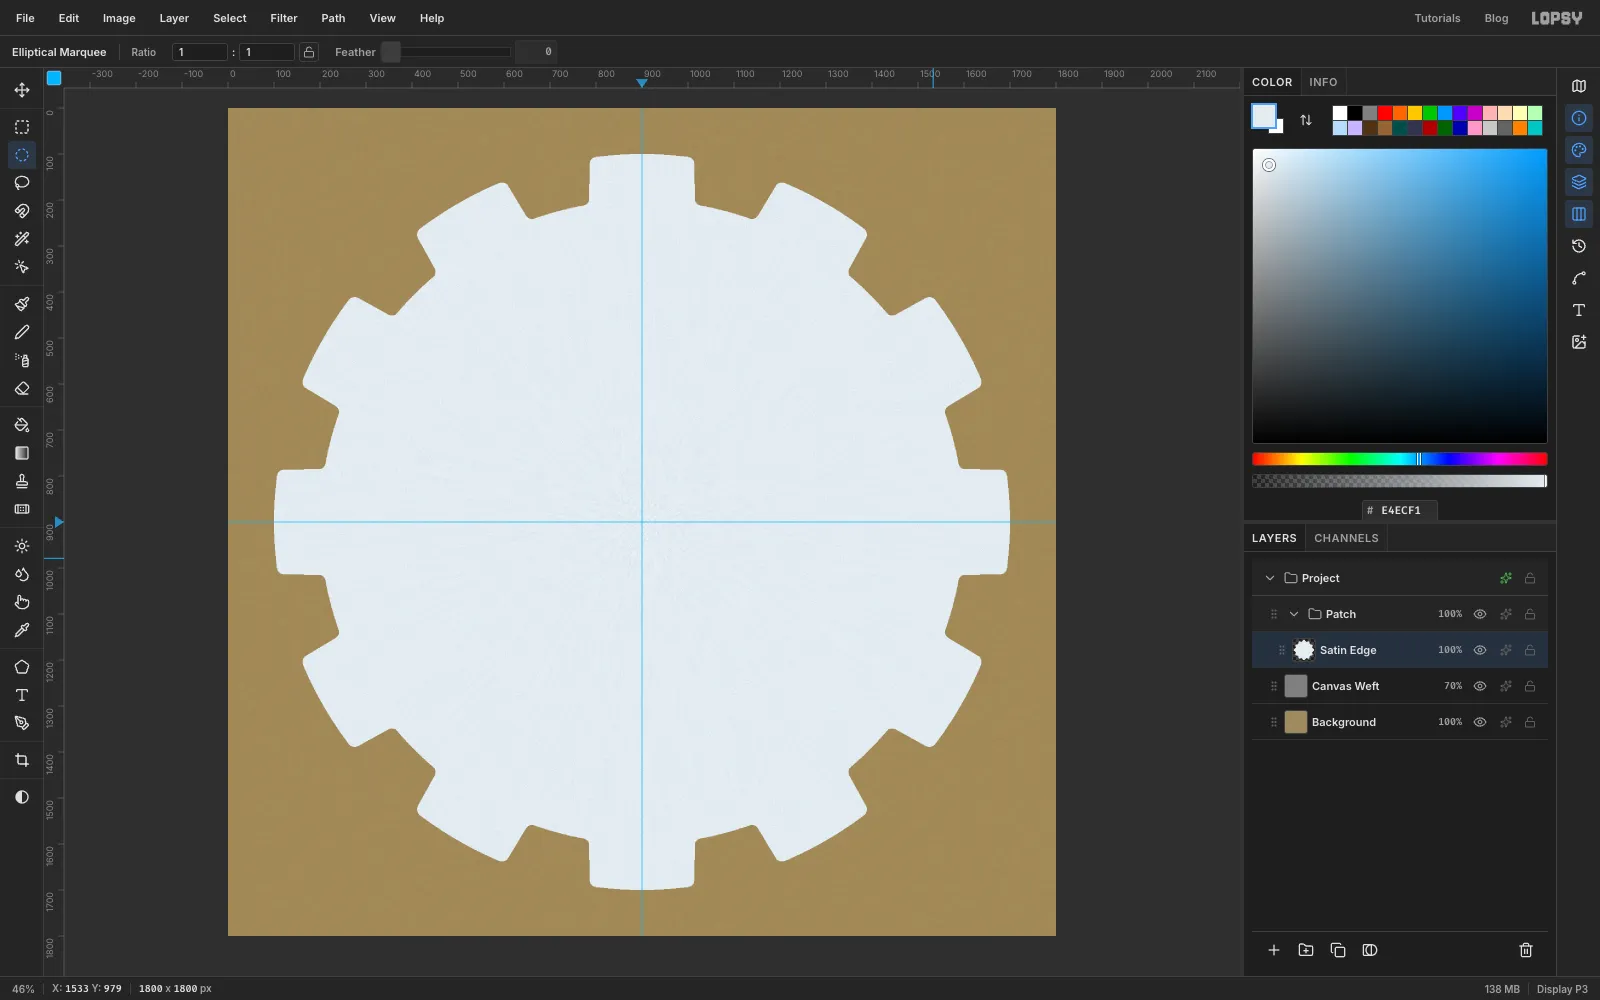
Radial Blur spins around the centre of the canvas, which is also the centre of the gear. The noise is smeared into short arcs that run around the patch, the way satin stitches wrap a merrowed edge.
- Cmd-click the
-
Lay down the twill field
- With
Satin Edgeselected, add a layer namedField. Cmd-click theSatin Edgethumbnail and choose Select → Shrink…34. - Fill with . Add noise (Amount
40, Mono, Gaussian), then Motion Blur at Angle45, Distance14. Deselect. - Open the layer's effects (the ✦ button on its row) and turn on Inner Glow: Size
22, Spread0, Opacity70, colour .
The 45° streaks are the diagonal ribs of twill fabric. The dark inner glow makes the field look sunk below the raised satin edge.
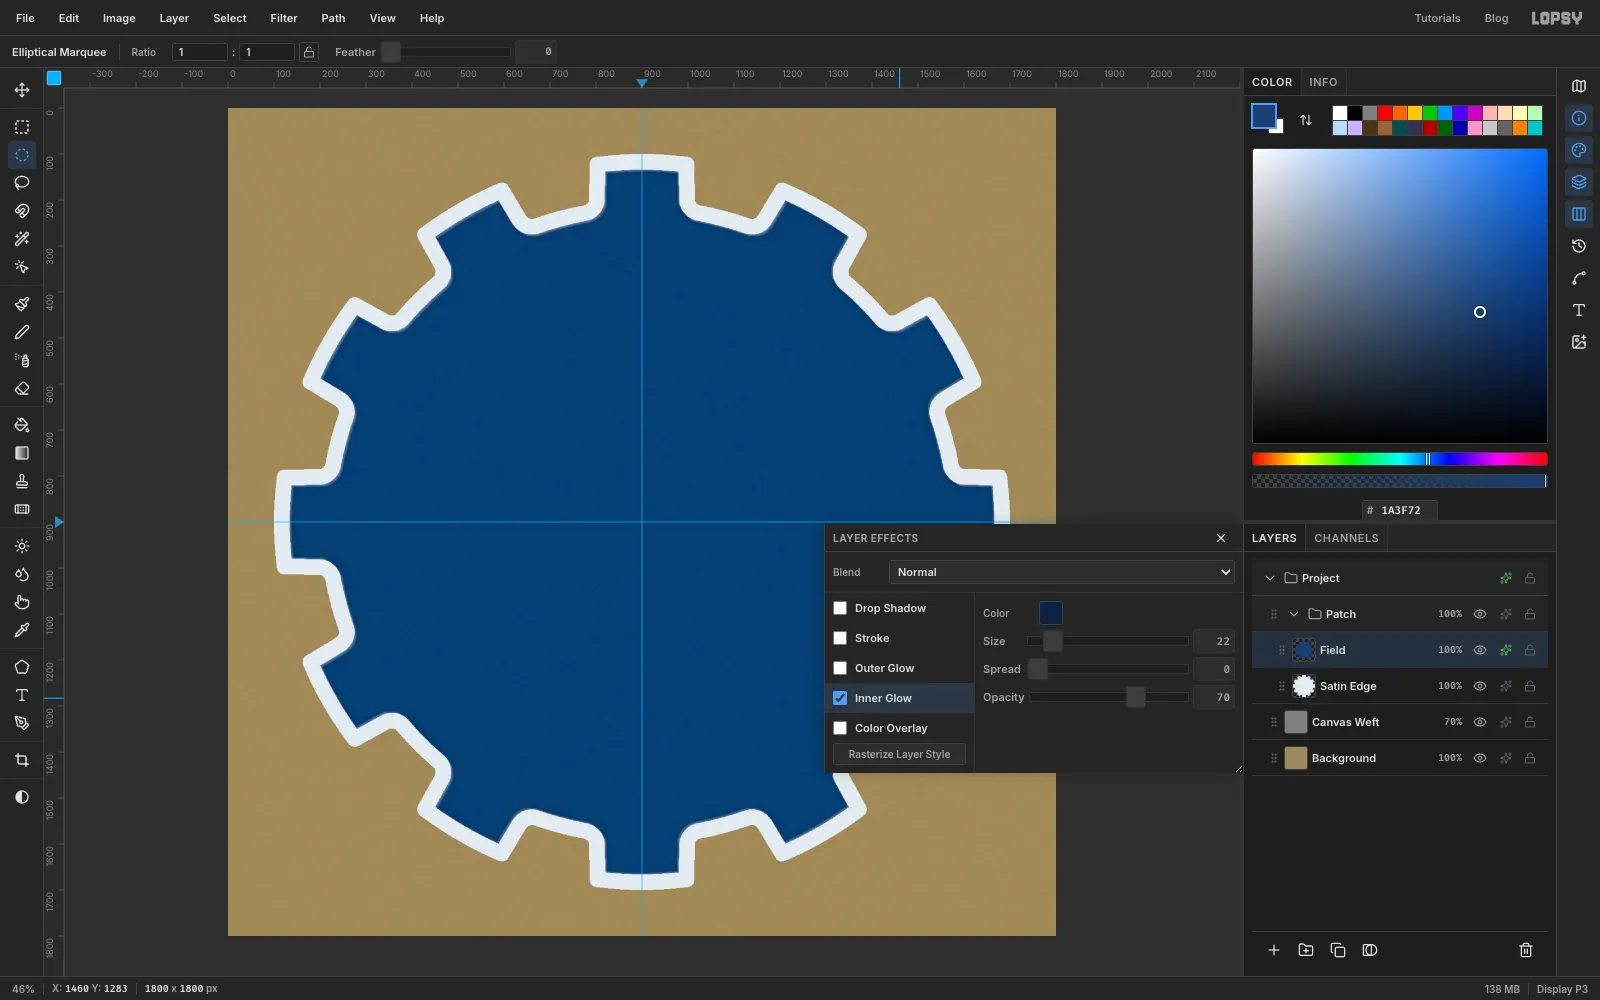
- With
-
Draw a grid tile
A blueprint needs a grid, and a pattern is the easiest way to get a perfect one.
- Close the effects drawer. With
Fieldselected, add a layer namedGrid. - Pick the Pencil, set Size
2and the foreground to . - Zoom in on the top-left corner of the canvas. Click at
36, 36and Shift-click at71, 36for a line along the top of the tile. Click at36, 37and Shift-click at36, 71for its left side. - Click once with the Rectangular Marquee and enter
36, 36to72, 72. - Choose Edit → Define Pattern, then press Delete to clear the tile and deselect.
The tile is 36 px because 900 divides by 36 exactly, so a grid line will run straight through the centre of the patch.
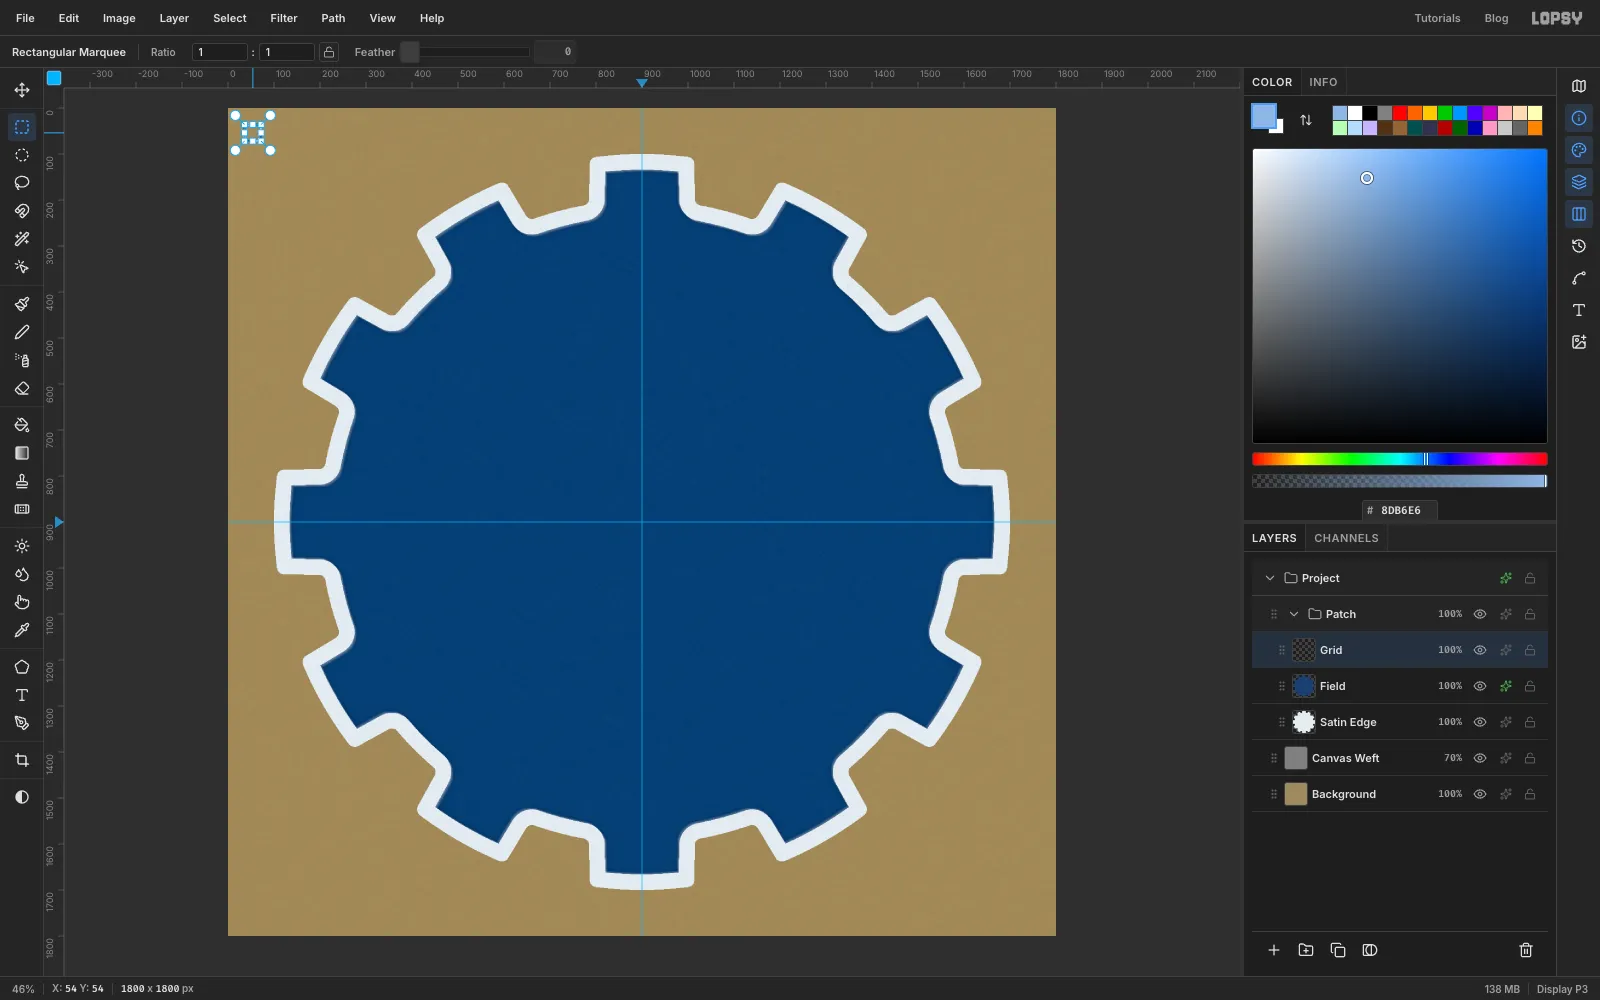
- Close the effects drawer. With
-
Fill the field with the grid
- With nothing selected, choose Edit → Fill with Pattern…, pick your tile and click Apply. The grid covers the whole layer.
- Select a circle of radius 552 (
348, 348to1452, 1452). Choose Select → Inverse, press Delete and deselect. - Set the
Gridlayer's opacity to 40%.
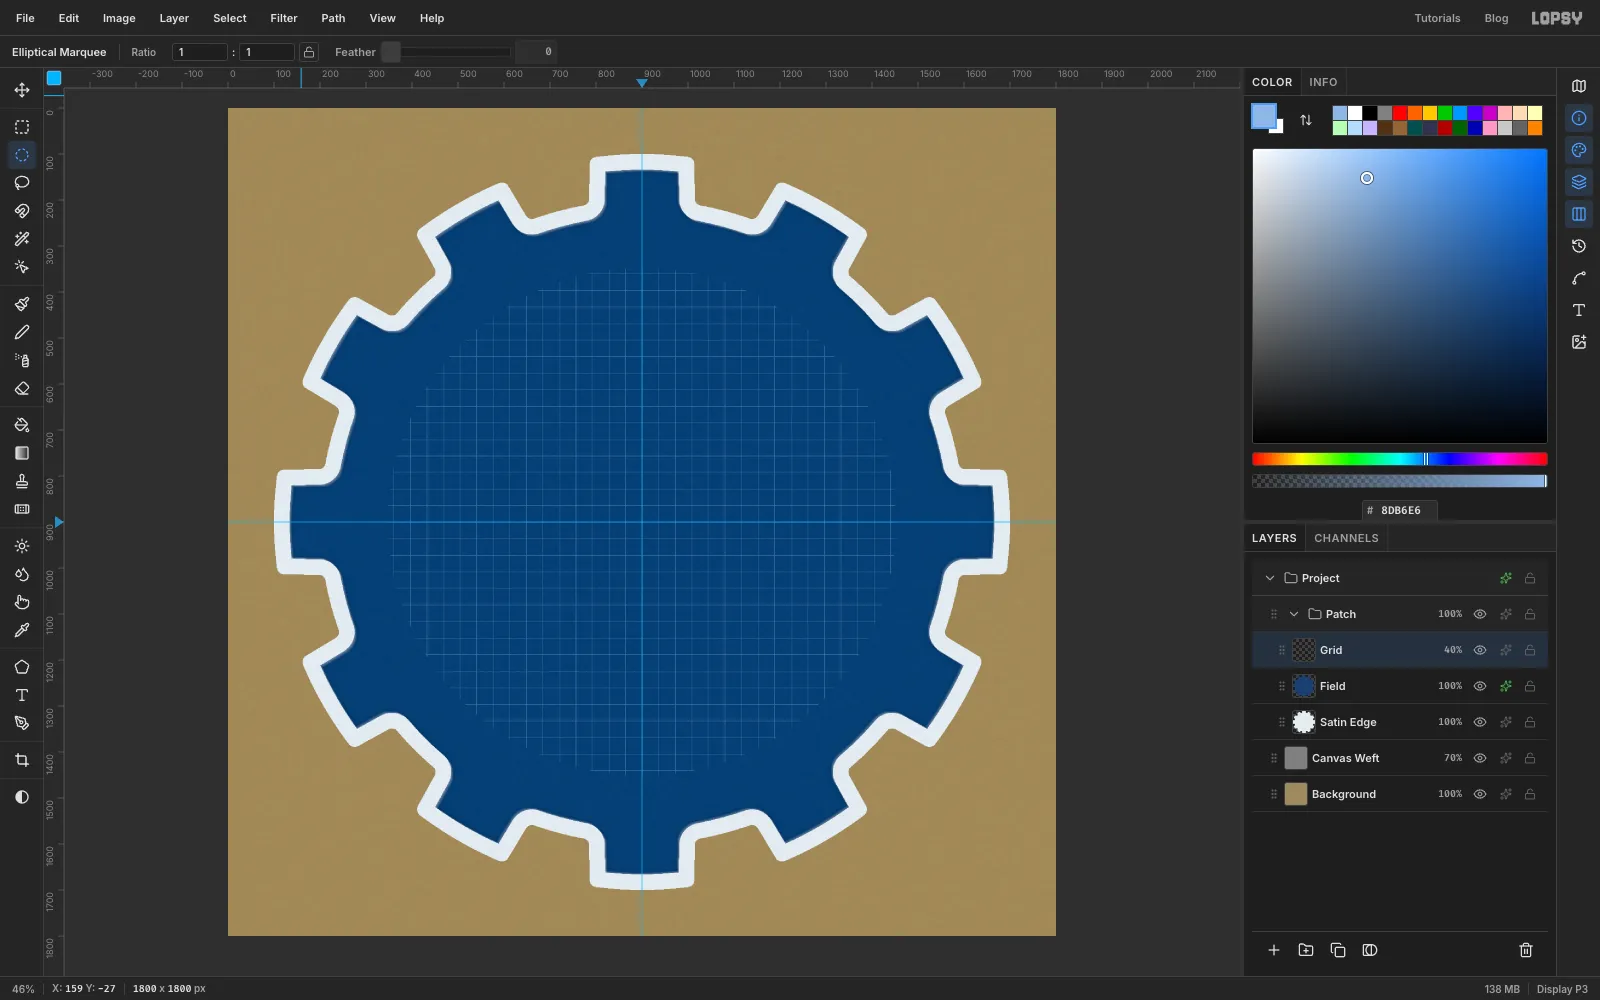
-
Stitch two rings
Add a layer named
Rings. Make the outer ring first, because each ring deletes everything inside it on this layer.- Select a circle of radius 664 (
236, 236to1564, 1564), fill it with , choose Select → Shrink…5and press Delete. - Select a circle of radius 558 (
342, 342to1458, 1458), fill it with , shrink by8and press Delete. Deselect.
The gap between the two rings is the band for the title. The brass ring frames the drawing.
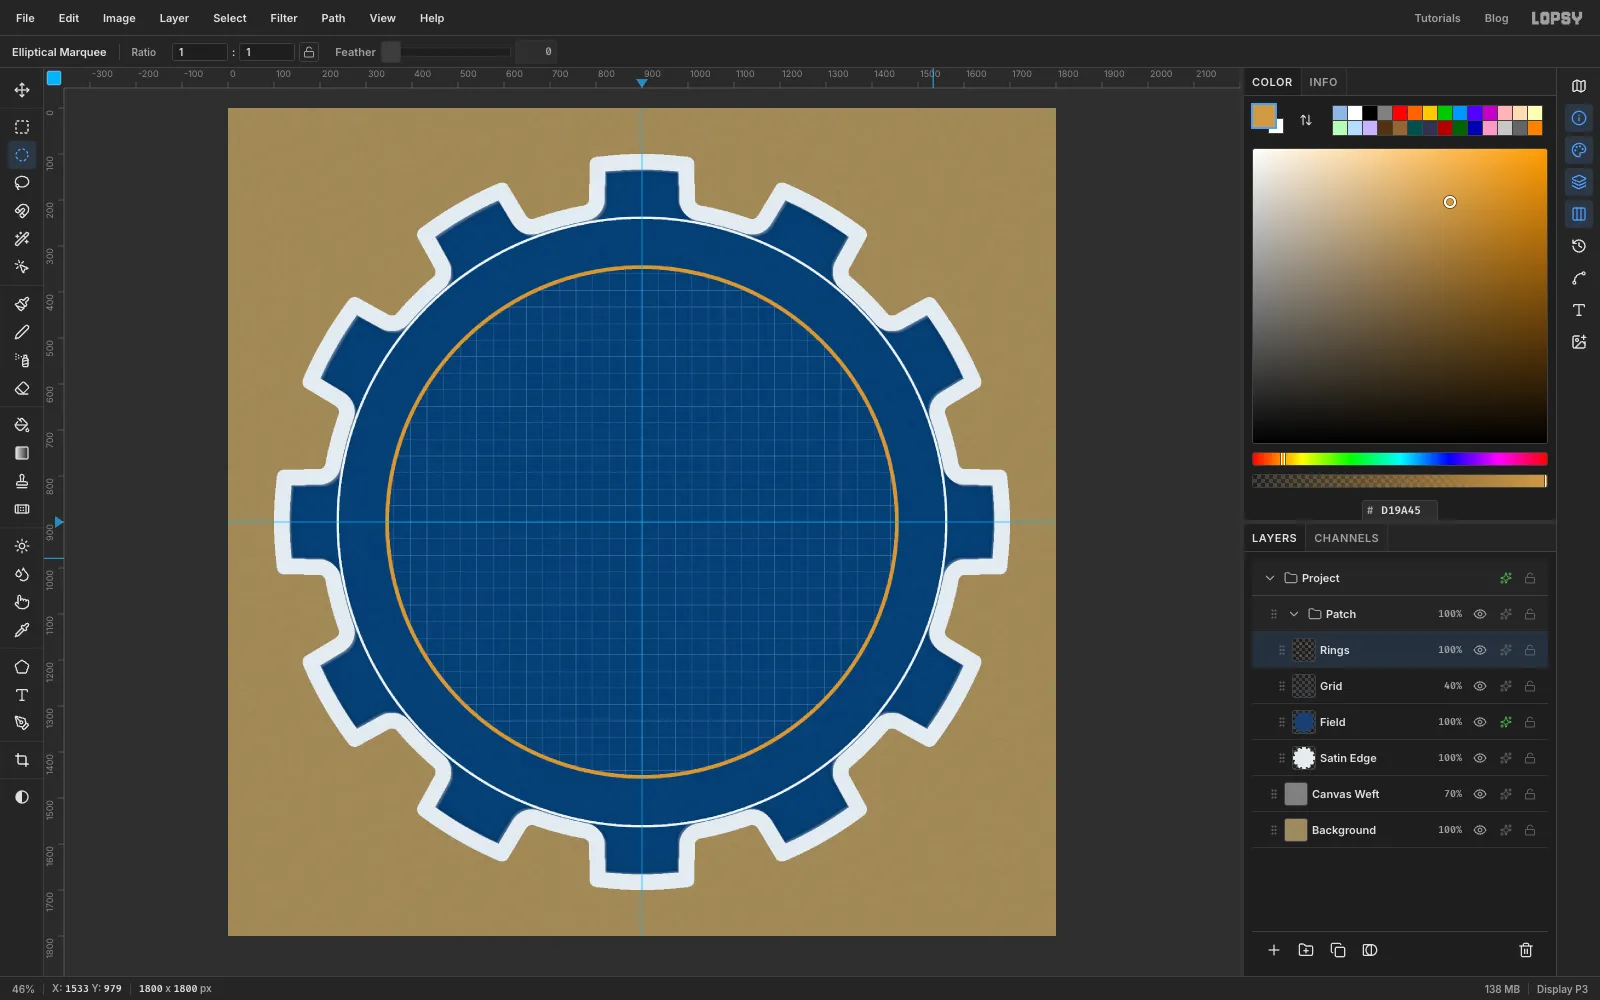
- Select a circle of radius 664 (
-
Bring in the reference plate
- Click
Ringsso the photo lands above it, then drag the downloaded kiwi plate onto the canvas. It arrives at full size in the top-left corner, already selected. Rename the layerReference. - Hold Cmd and drag the bottom-right corner handle up and to the left until the image is about 742 px wide. That's 60% of its size. Press Cmd+D to commit.
Holding Cmd keeps the proportions while you scale.
- Click
-
Place the reference and fade it
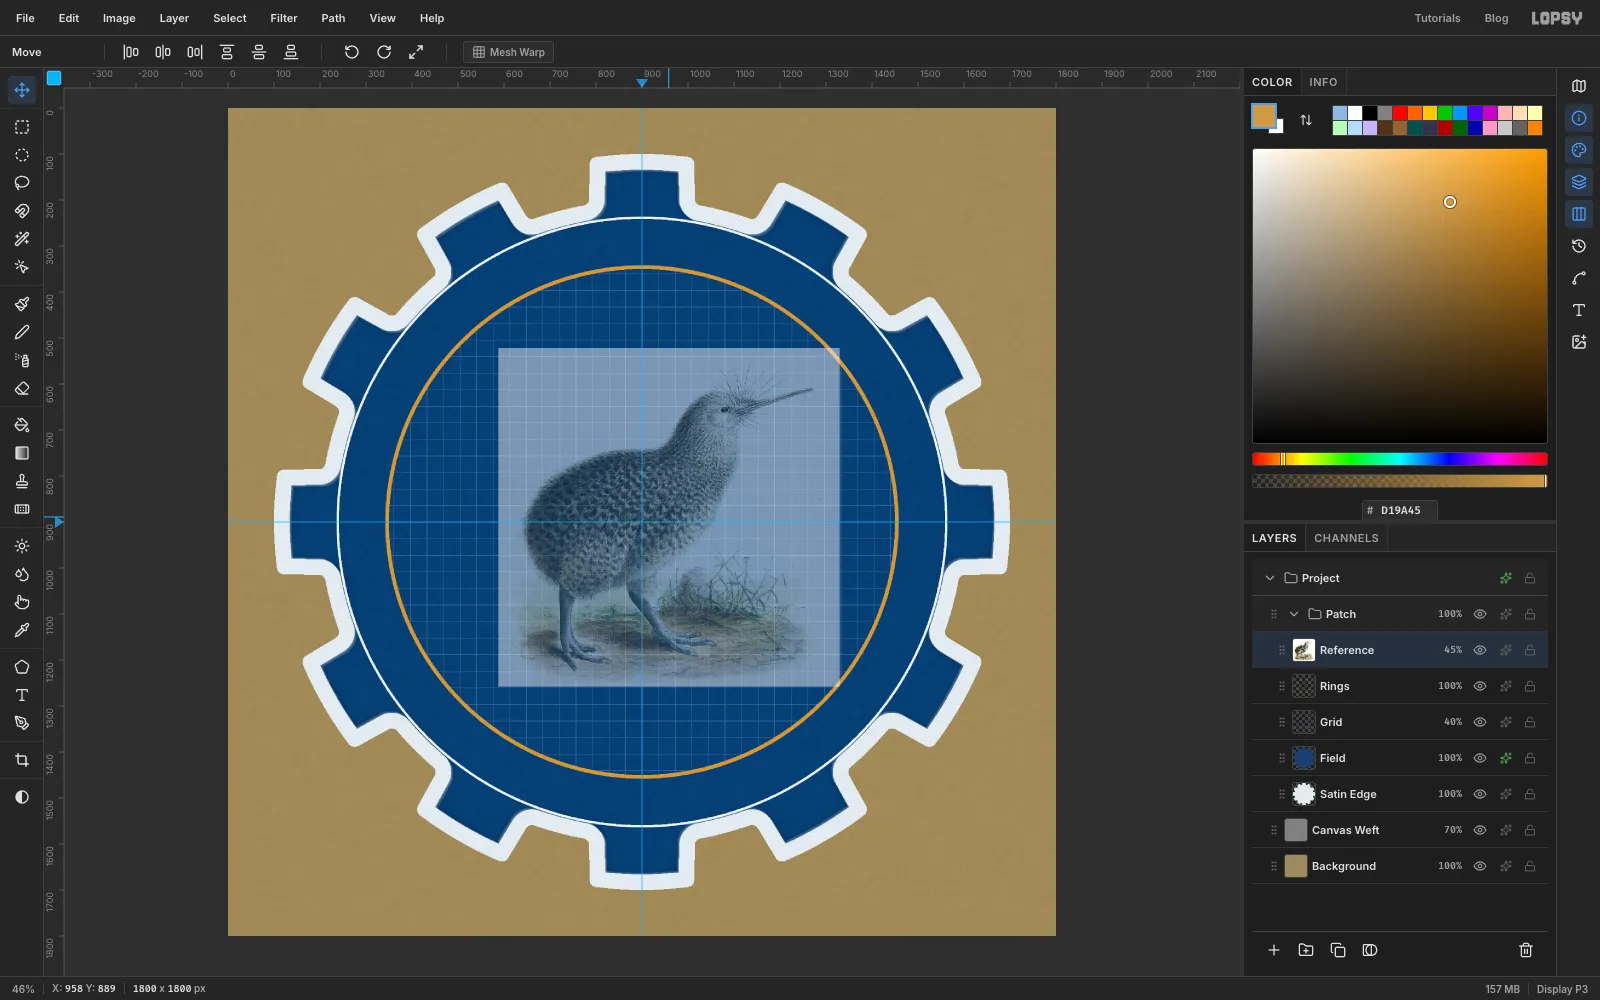
- With the Move tool, drag the plate so its top-left corner is at about
588, 522. The bird should sit a little right of centre, with room for a key behind its back. - Lower the layer's opacity to 45%, so your white lines will show clearly over it.
- With the Move tool, drag the plate so its top-left corner is at about
-
Trace the body with the Pen
- Add a layer named
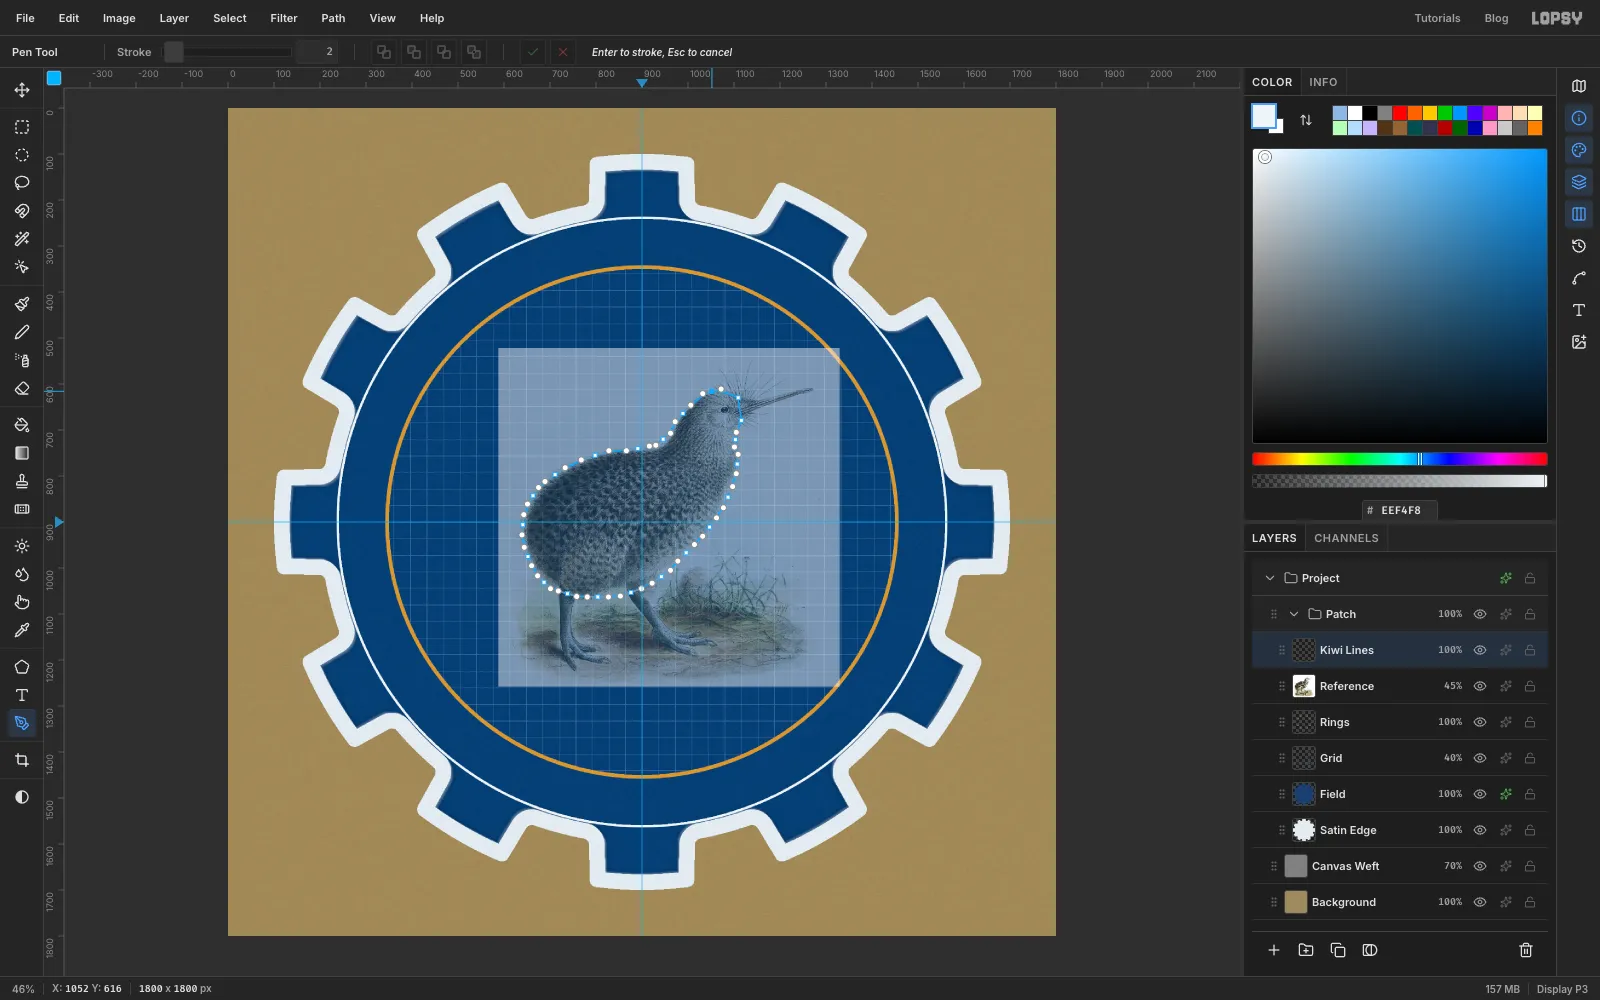
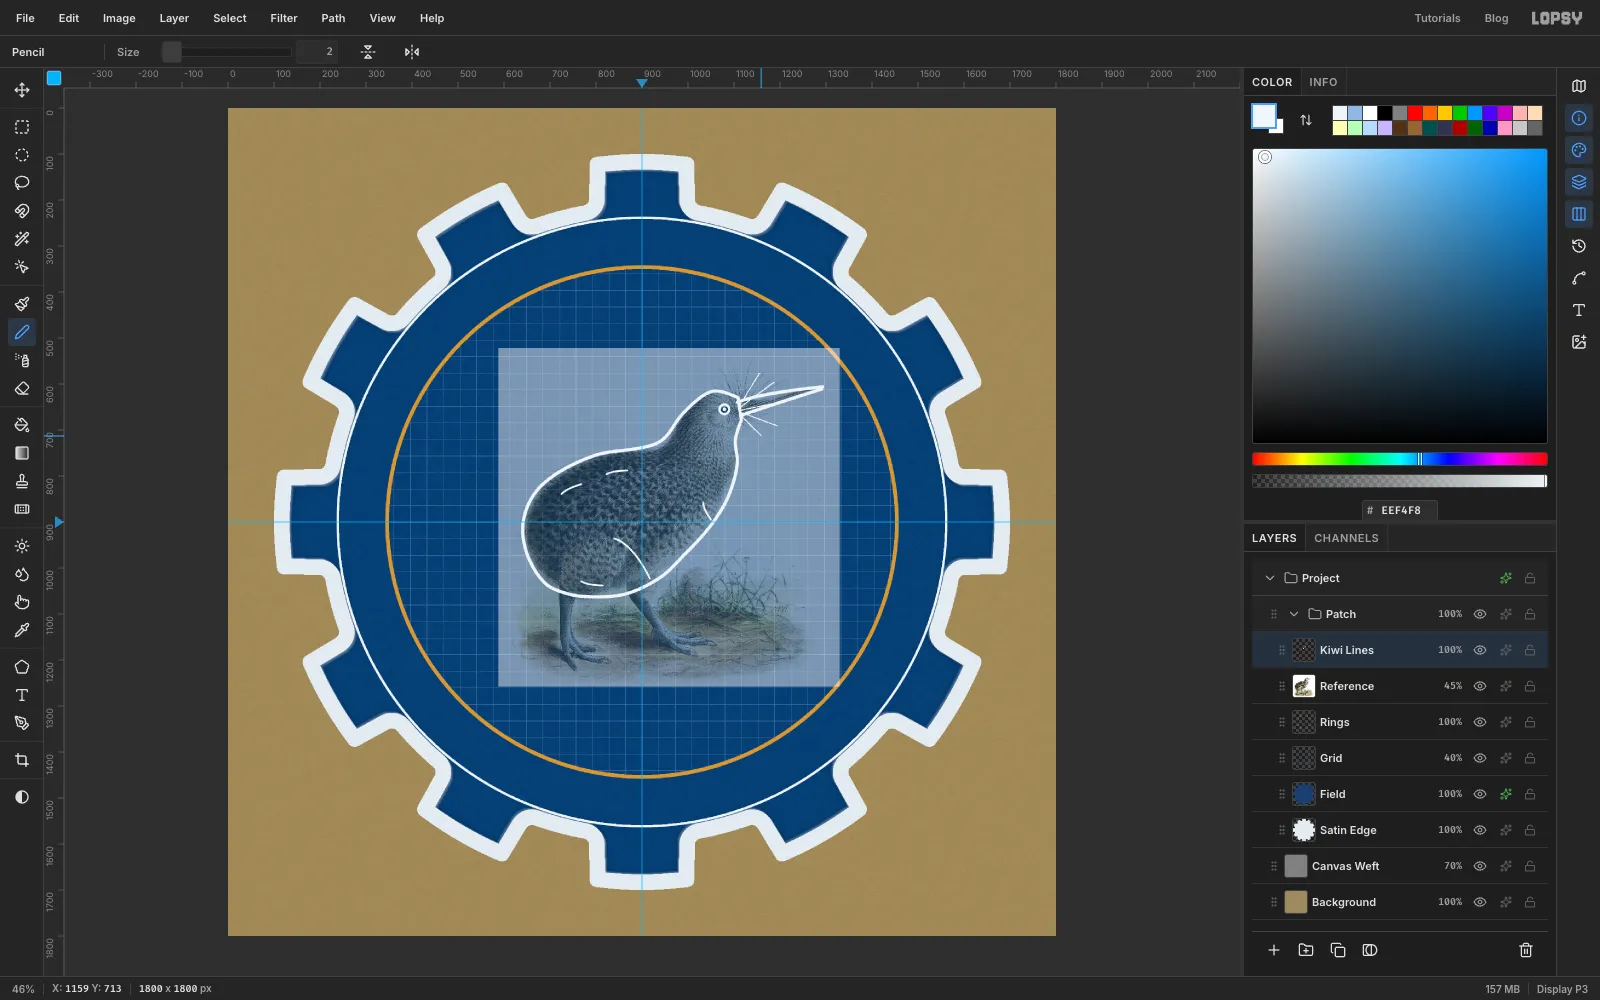
Kiwi Linesand set the foreground to . - Pick the Pen. Start at the crown of the head and work round the bird clockwise, over the head, down the front of the neck and chest, along the belly and up over the rump and back. Press and drag a little along the outline at each anchor, so the curve stays smooth. About 20 anchors is plenty.
- Where the bill meets the head, at the forehead and at the chin, click without dragging to make two sharp corners.
- Leave out the legs, the bristles and the grass. Close the path by clicking on the first anchor.
- Set the Pen's Stroke to
7and press Enter. The path is stroked in white thread. - Open the Paths panel and delete the path, so its blue outline doesn't get in the way.
- Add a layer named
-
Draw a longer, curved bill
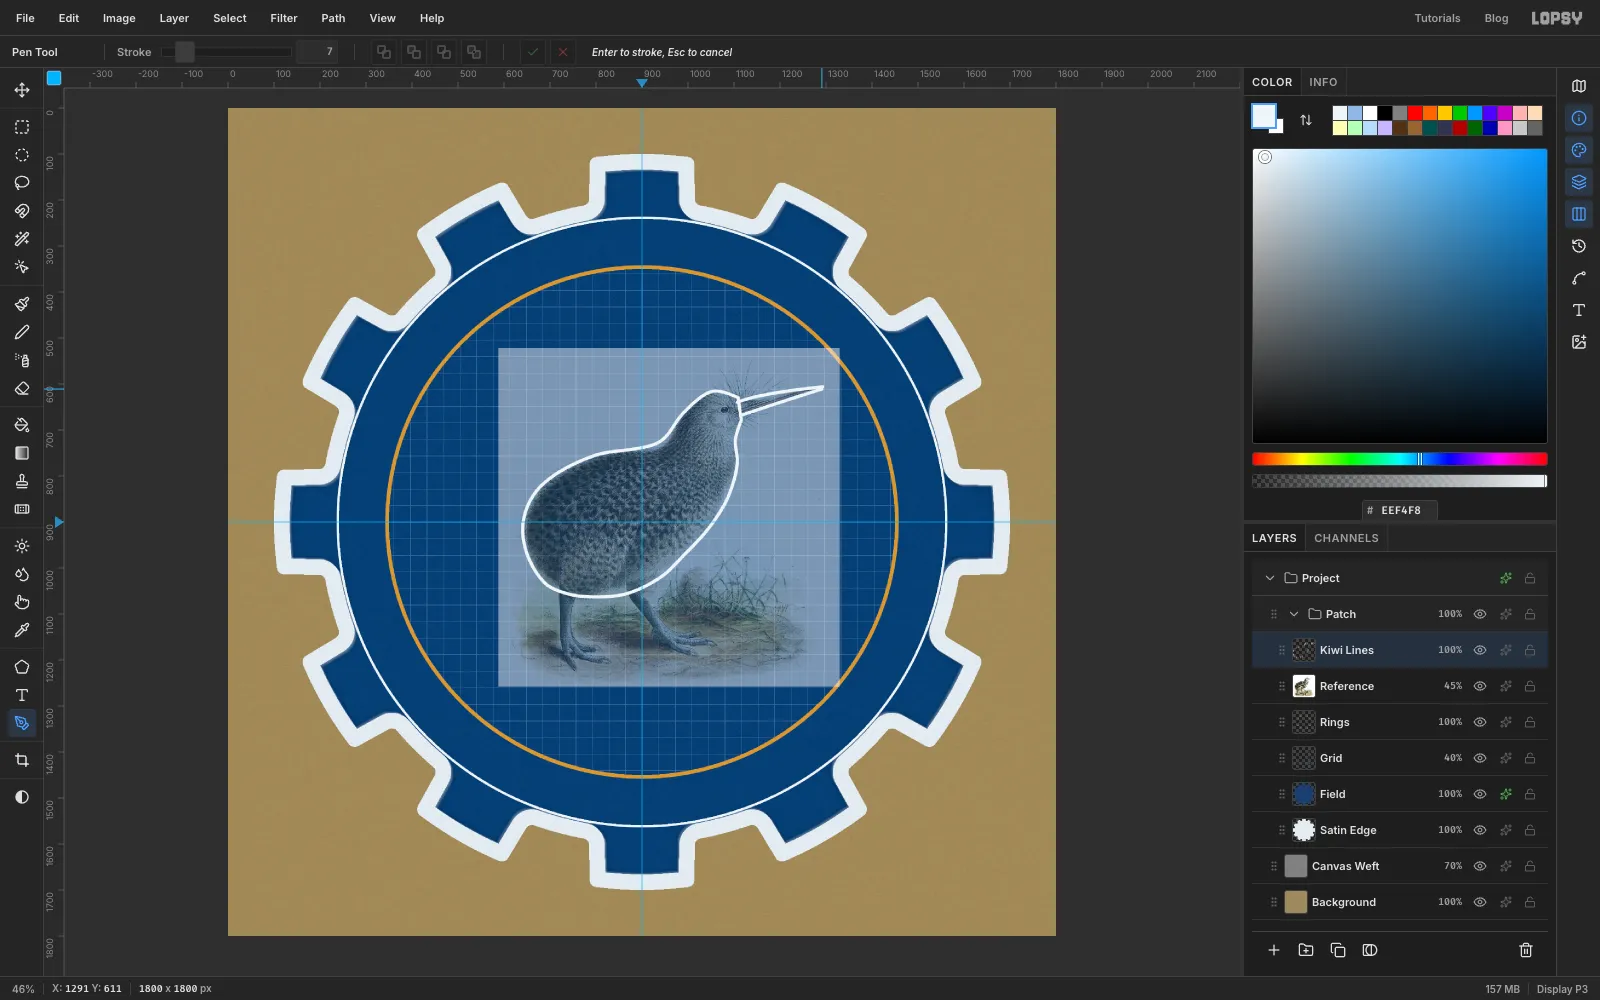
Kiwis have a long bill that curves gently downward, so draw it a bit longer than the plate shows.
- With the Pen and Stroke
7, press at the top of the bill base, about1108, 640, and drag up and to the right to about1156, 619. Then click at the tip, about1293, 606. Press Enter. Delete the path. - Do the same for the lower edge: press at about
1116, 668, drag to about1174, 648, click at1291, 611and press Enter. Delete the path.
Dragging the first handle higher than the straight line makes the bill bow upward and then droop to the tip.
- With the Pen and Stroke
-
Add feathers, an eye and whiskers
- Feathers: with the Pen at Stroke
4, draw five short two-anchor curves inside the body. Put two along the back, one near the belly, one on the chest, and a longer one from the middle of the body down to the front leg for the thigh. Press, drag a little sideways, click the end, then press Enter. Delete each path when you've stroked it. - Eye: select a circle of radius 13 around the eye in the plate (centre about
1079, 655). Fill it, shrink by5and press Delete. Then fill a circle of radius 4 at the same centre. - Whiskers: with the Pencil at Size
2, draw five whiskers fanning up, forward and down from the base of the bill. For each one, click at the base of the bill, then Shift-click where the whisker ends.
- Feathers: with the Pen at Stroke
-
Build mechanical legs
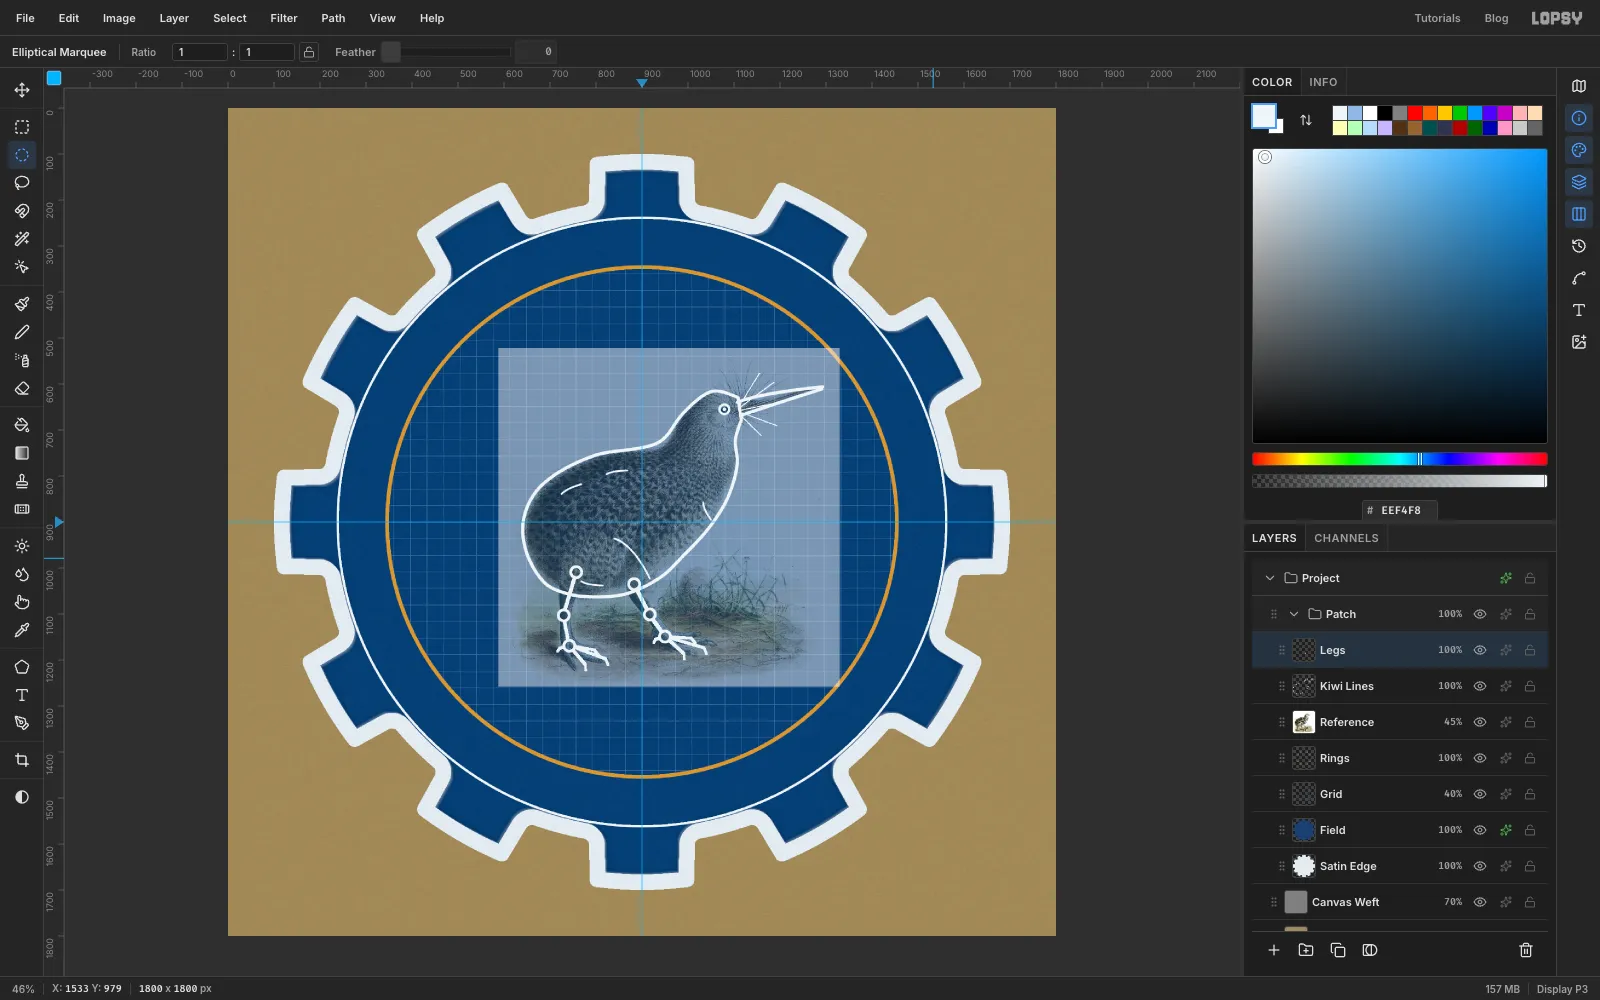
This kiwi is a machine, so its legs are jointed rods.
- Add a layer named
Legs. Pick the Pencil at Size7. - For each leg, click at the hip just inside the belly, Shift-click at the knee, then Shift-click at the ankle. Follow the legs in the plate. Put the left hip at
756, 1009, because a gear will sit there. - Set Size
6and draw the toes: three fanning forward from each ankle and a short hind toe pointing back. Click the ankle again before each toe's Shift-click. - Set Size
5and add a short claw tick angled down at the end of each forward toe. - Make a pivot at each hip, knee and ankle: select a circle of radius 15, fill it, shrink by
6and press Delete.
- Add a layer named
-
Make the main gear
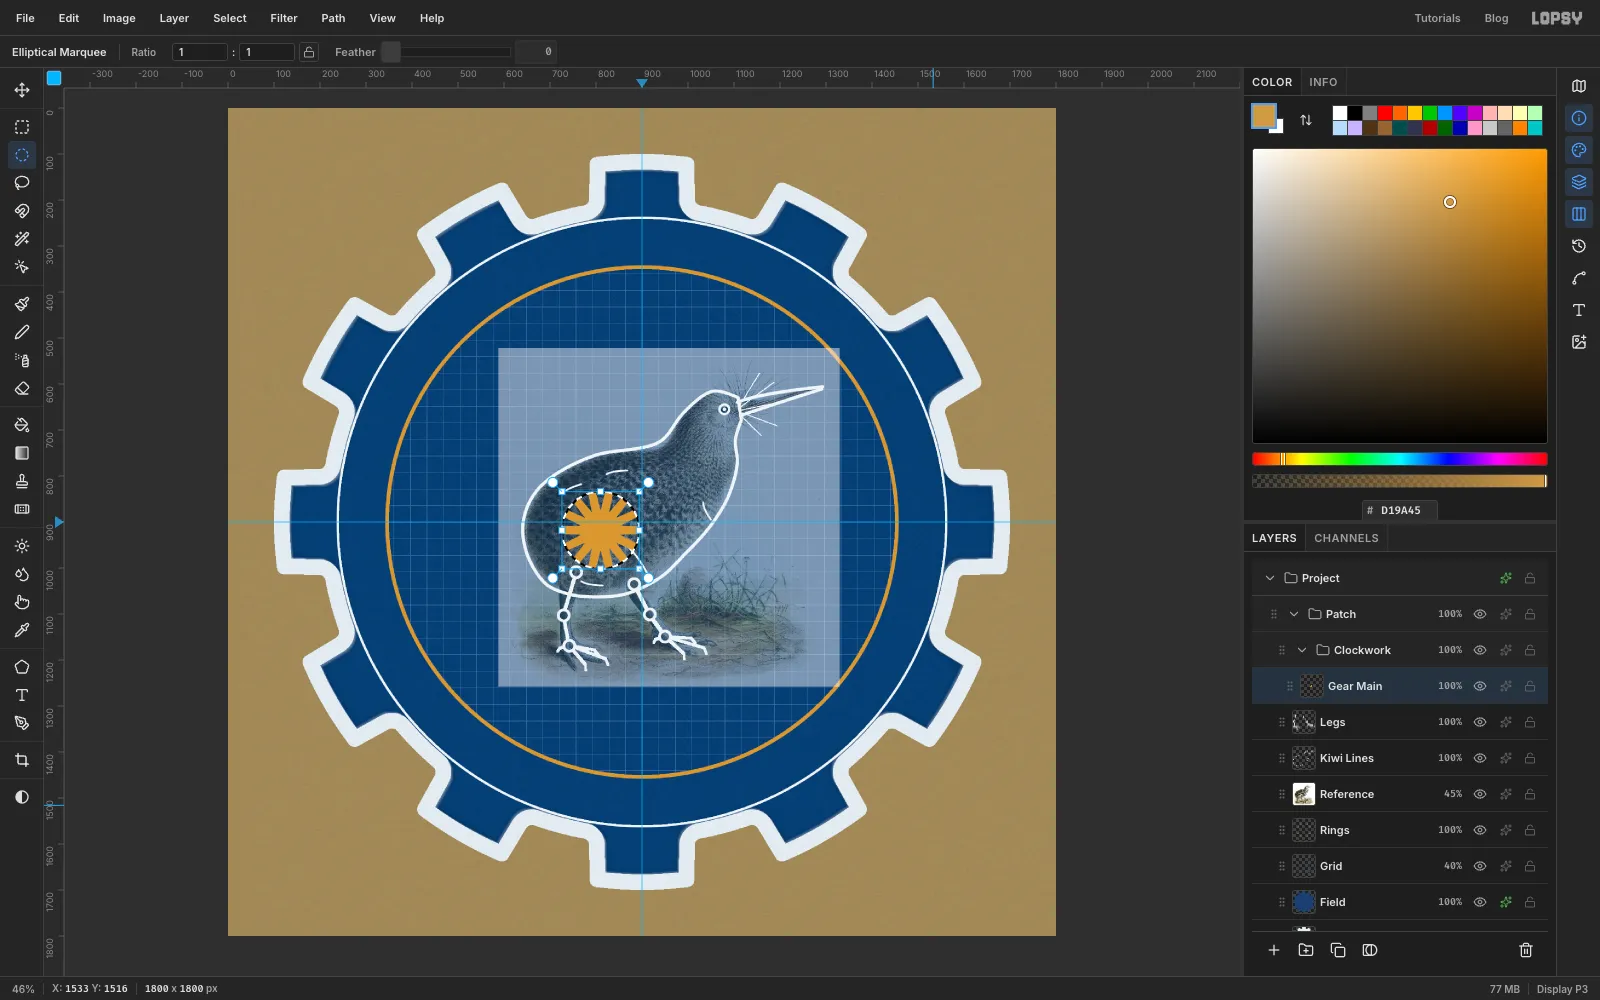
The gears use the same Sunburst trick as the patch, but much smaller.
- Click
Legs, make a New Group namedClockworkand add a layer inside it namedGear Main. - Select a circle of radius 84 around
810, 918, that is726, 834to894, 1002. Set the foreground to . - Filter → Sunburst…: Rays
14, Width76, Taper58, Length8, Center X45, Center Y51. - Fill a circle of radius 70 at the same centre. Then select a radius-12 circle and press Delete to punch the hub.
- Punch five windows of radius 15, centred at
810, 874,852, 904,836, 954,784, 954and768, 904. They're spaced evenly around a circle 44 px from the centre. Deselect.
- Click
-
Add the pinion and crank, and mesh them
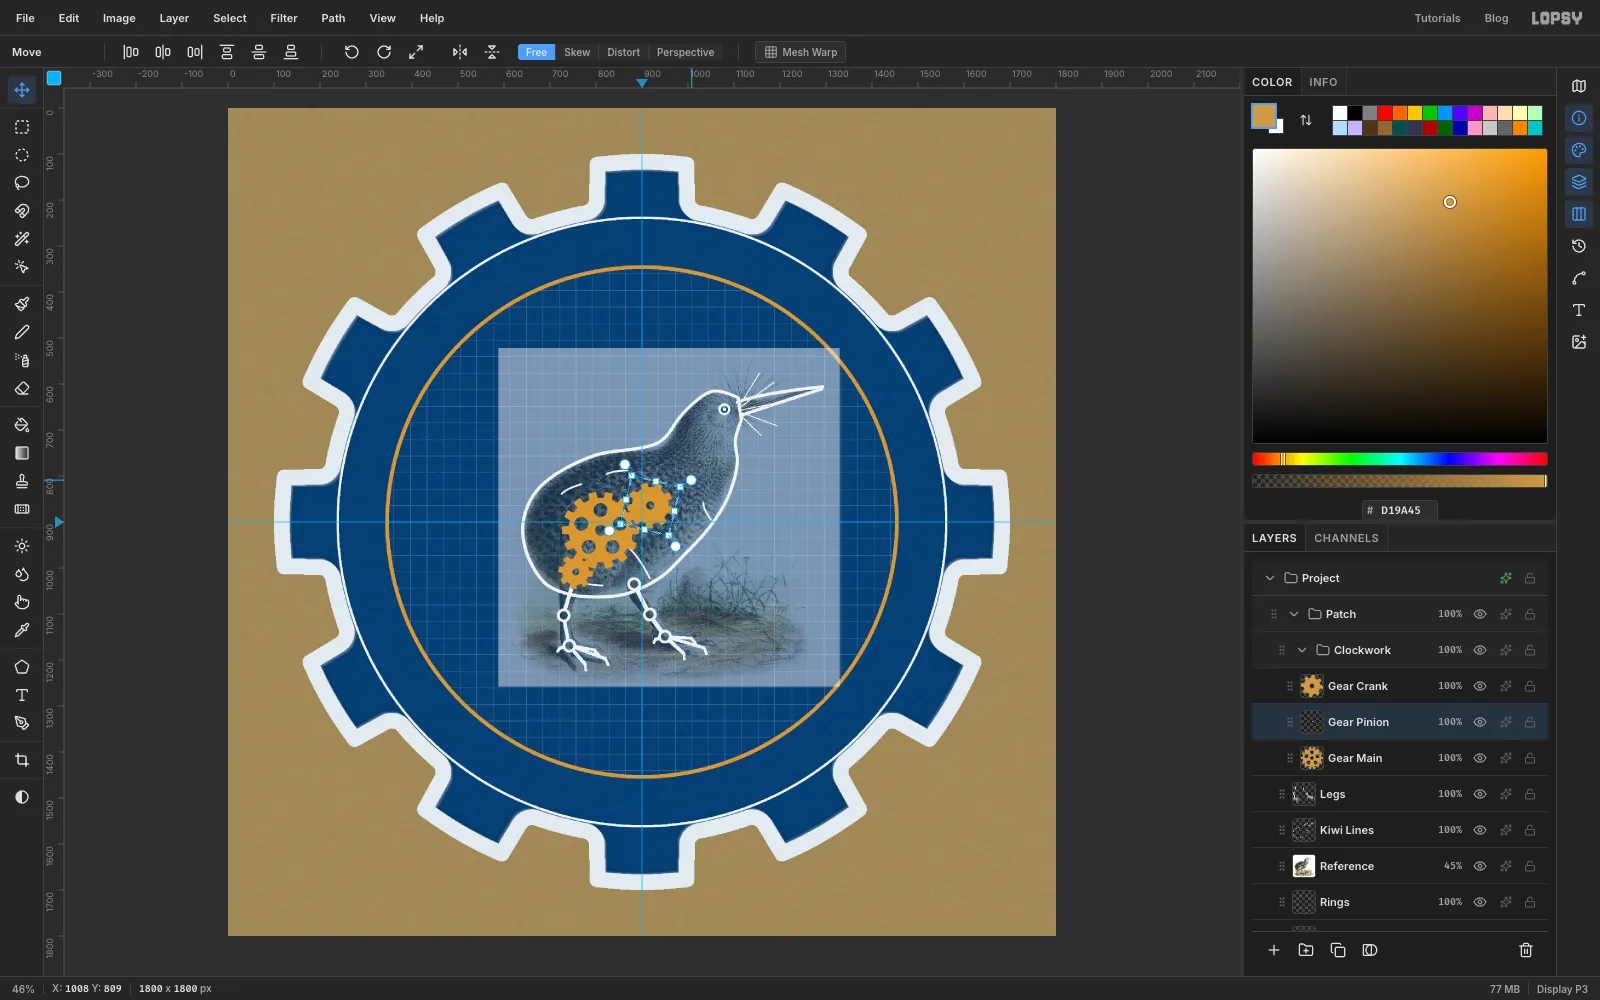
Make two more gears with the same recipe: tip circle, Sunburst, fill the root circle, delete the hub. Give each its own layer inside
Clockwork.- Add a layer named
Gear Pinion. Select the tip circle868, 814to968, 914. Run Sunburst with Rays9, Width71, Taper58, Length5, Center X51, Center Y48. Fill the root circle878, 824to958, 904, then delete the hub909, 855to927, 873. - Add a layer named
Gear Crank. Tip circle718, 970to794, 1046. Sunburst Rays8, Width45, Taper58, Length5, Rotation8, Center X42, Center Y56. Root circle727, 979to785, 1037, hub748, 1000to764, 1016. It sits on the left hip. - The pinion's teeth hit the big gear's teeth. Click
Gear Pinion, press Cmd+D, and with the Rectangular Marquee draw a square just around it, from864, 810to972, 918. - With the Move tool, drag from just outside the top-right corner to rotate it about 13° clockwise, so its teeth drop between the big gear's teeth. Press Cmd+D to commit.
- Add a layer named
-
Build the wind-up key
Build the key lying flat. You'll turn it afterwards.
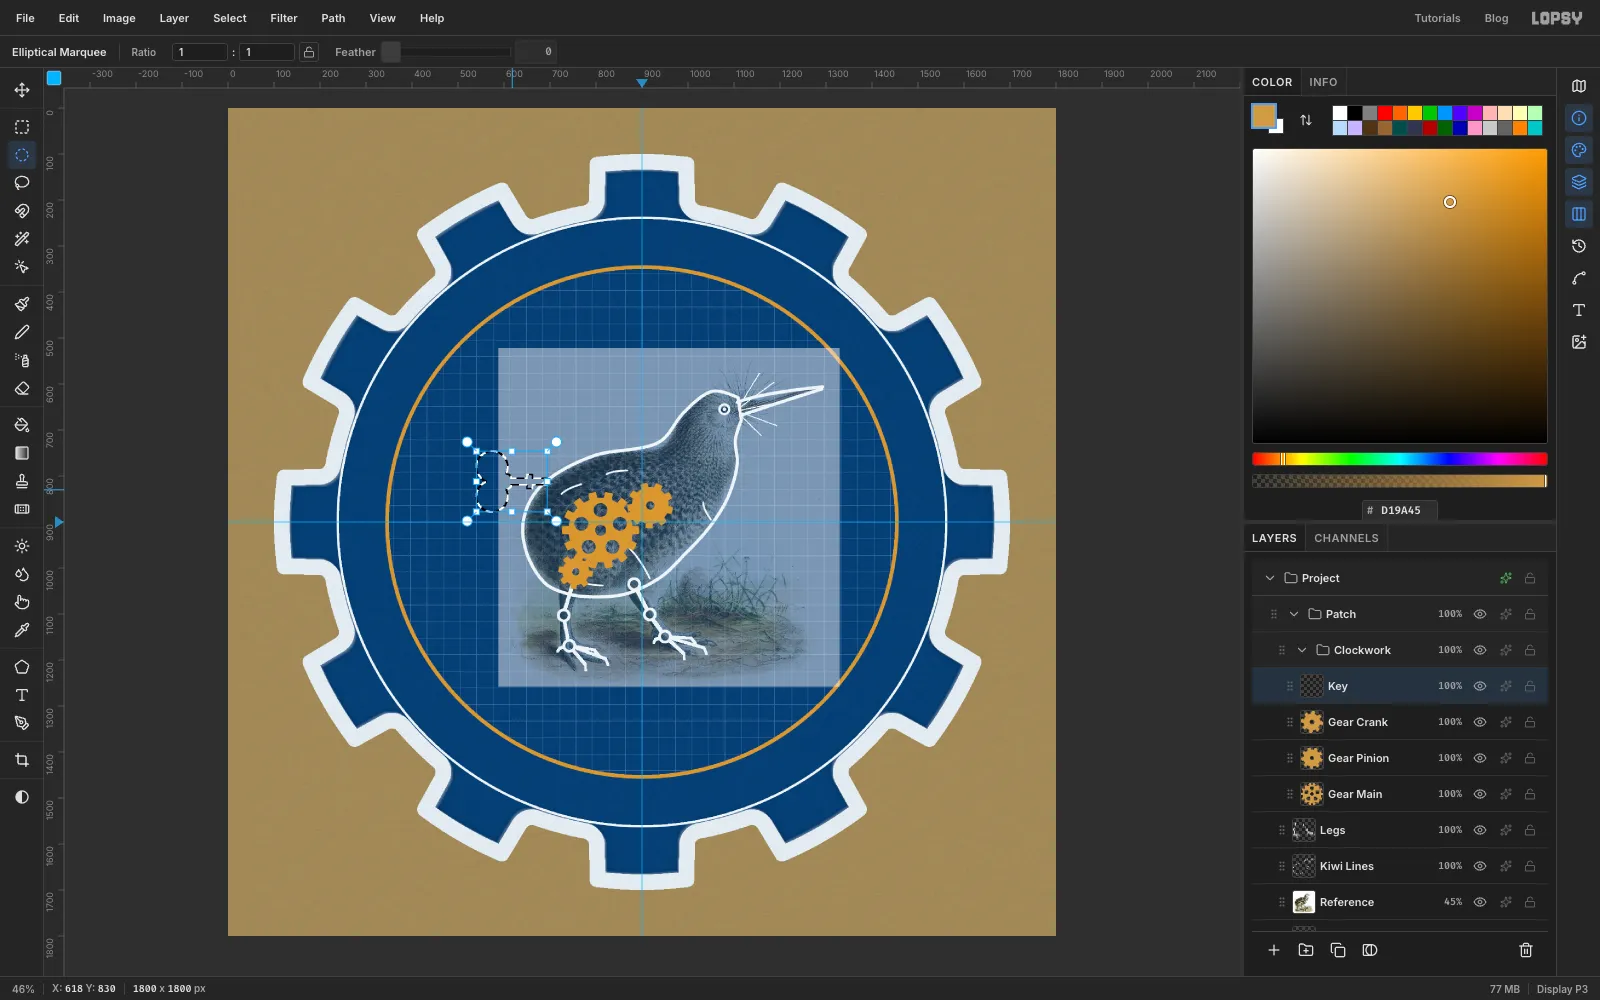
- Add a layer named
Key. Press Cmd+D, pick the Rectangular Marquee and drag the shaft from614, 805to694, 819. - Hold Shift and drag a collar across it, from
650, 797to662, 827. Holding Shift adds to the selection. - Switch to the Elliptical Marquee. Hold Shift and drag the two lobes of the bow, from
540, 746to608, 814and from540, 810to608, 878. Then add a round boss where the bow meets the shaft, from582, 794to618, 830. Zoom in so you can land the corners exactly. - Fill with and deselect.
- Drag a circle from
555, 763to581, 789, Shift-drag a second from555, 835to581, 861, and press Delete for the two holes in the bow. Deselect.
- Add a layer named
-
Turn the key into the back
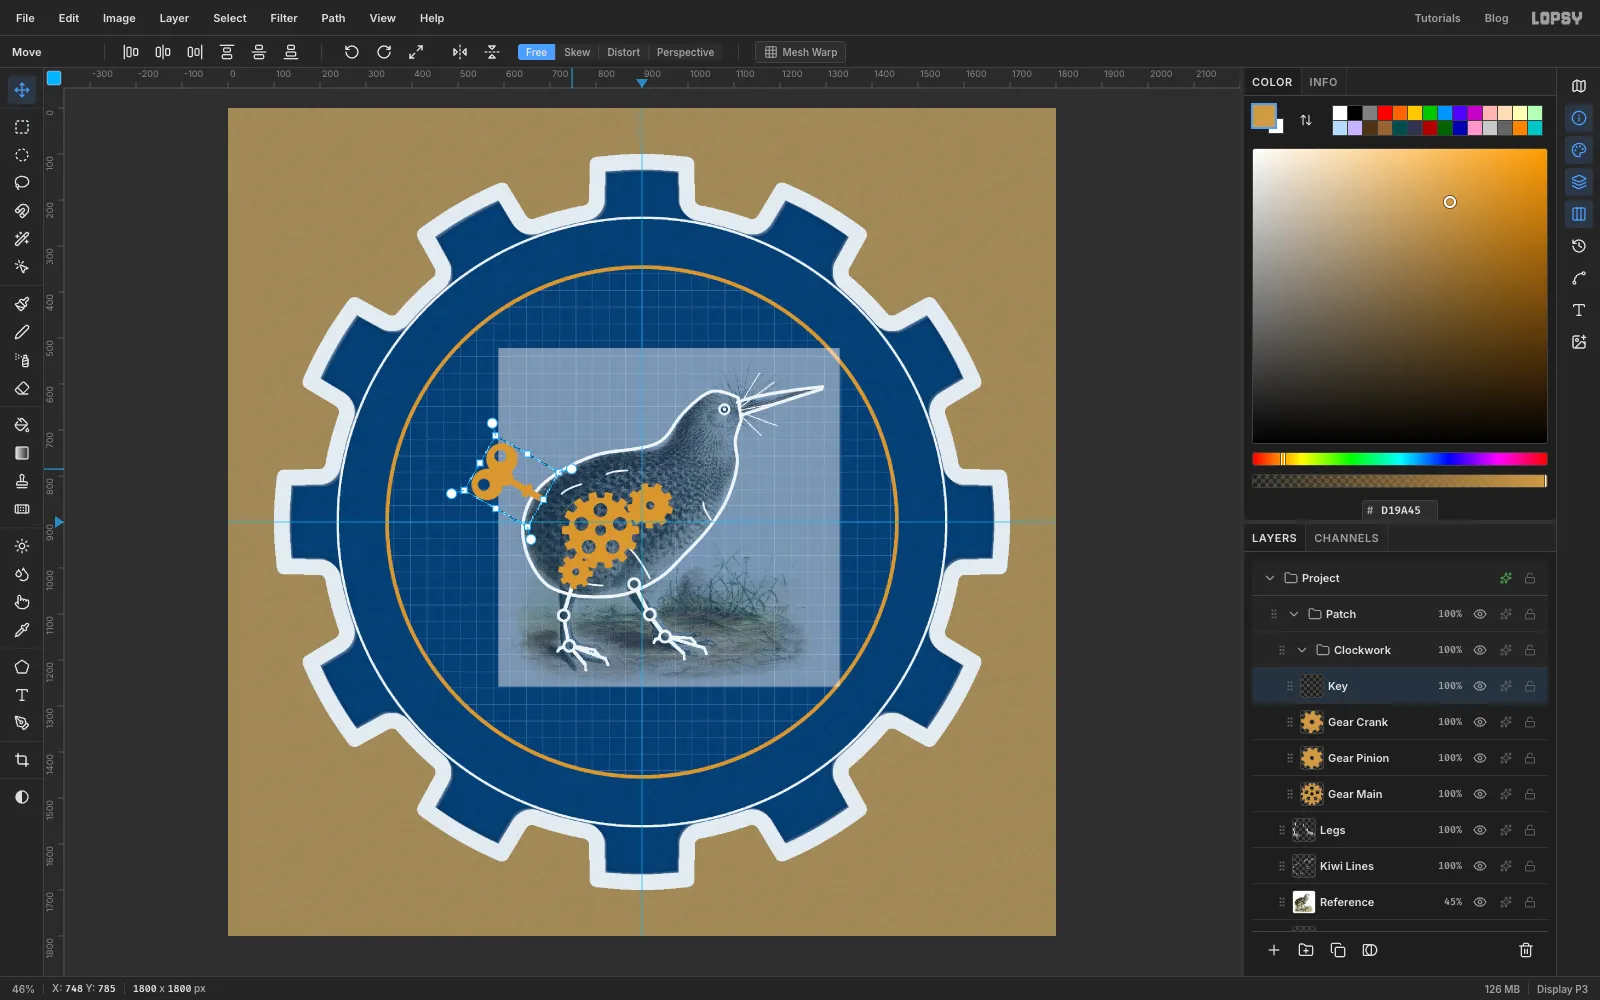
- With the Rectangular Marquee, draw a box a few pixels bigger than the key all round.
- With the Move tool, drag just outside a corner to rotate it 30° clockwise, so the bow rises up and to the left. Press Cmd+D.
- Drag the key so the end of its shaft just touches the kiwi's back, at about
706, 806.
-
Give the brass a satin finish
Do this to
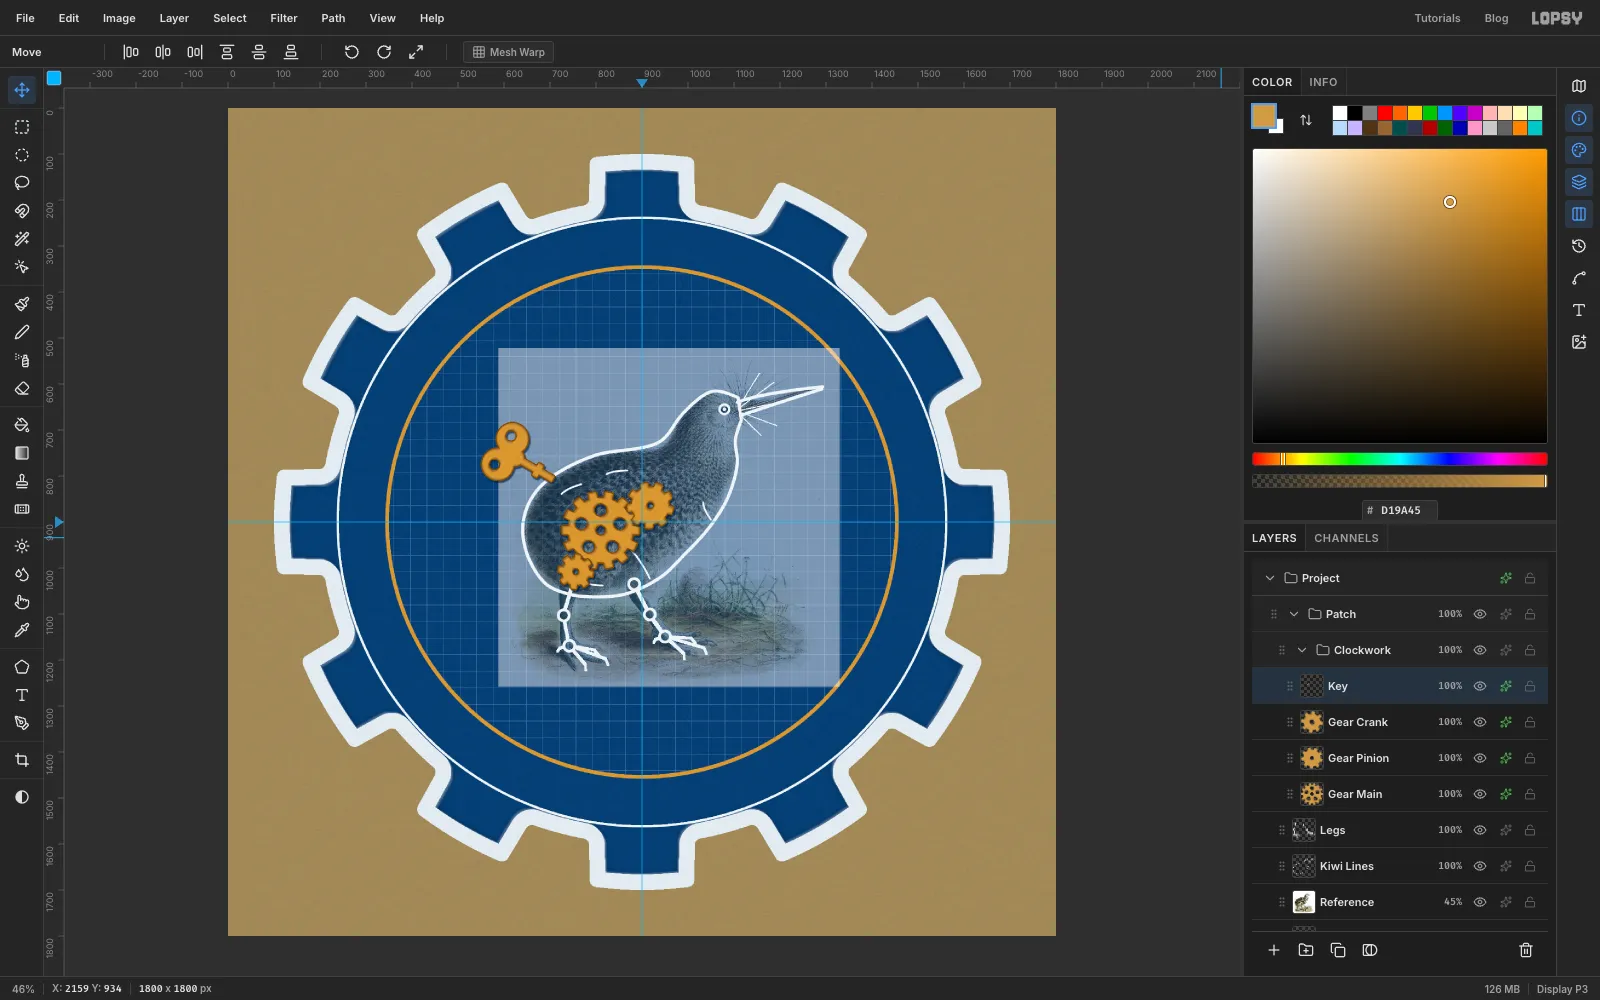
Gear Main,Gear Pinion,Gear CrankandKeyin turn:- Cmd-click the thumbnail, add noise (Amount
45, Mono, Gaussian) and run Motion Blur at Distance9. Give each part its own Angle:30,120,60and120. Deselect. - Add a Stroke effect, Width
3, colour . - Add a Drop Shadow: Opacity
70, Offset X3, Offset Y4, Blur3, colour .
Changing the angle from part to part makes neighbouring gears catch the light differently, like satin-stitched fills laid in different directions.
- Cmd-click the thumbnail, add noise (Amount
-
Select the inside of the body
- Hide the
Referencelayer with its eye button. You're done tracing. - Click
Referenceand add a layer namedHatching. - With the Pencil, Size
2, colour , draw one diagonal in an empty corner of the canvas: click at60, 84and Shift-click at84, 60. Click once with the Rectangular Marquee, enter60, 60to84, 84, choose Edit → Define Pattern, press Delete and deselect. - Click
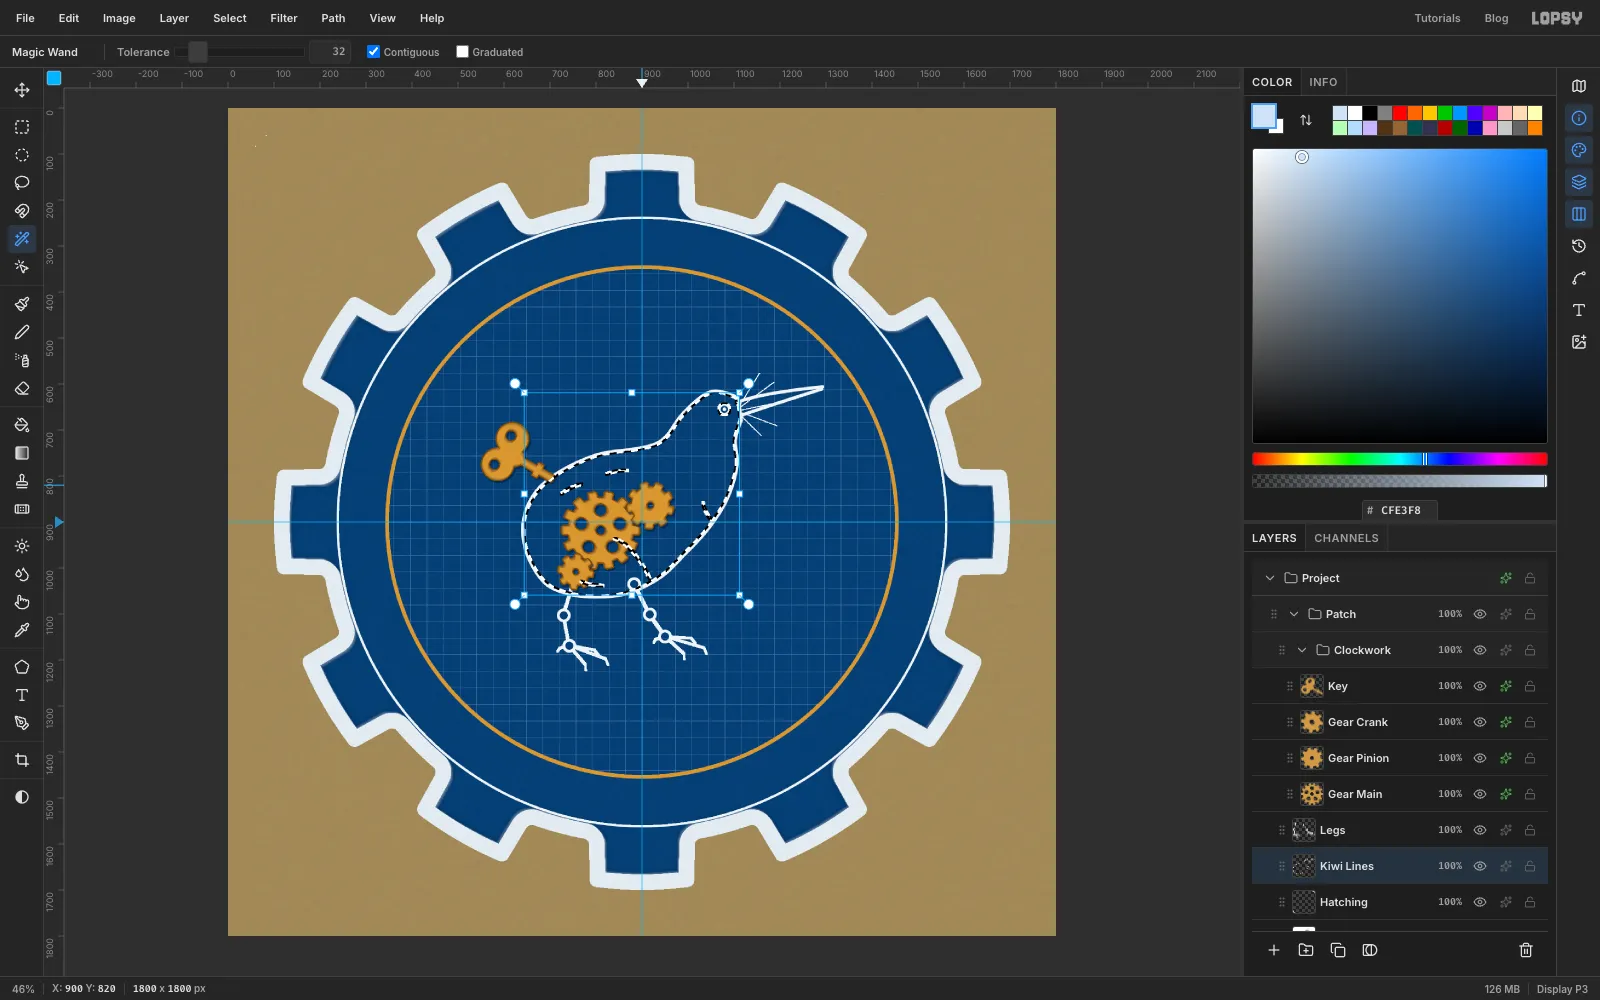
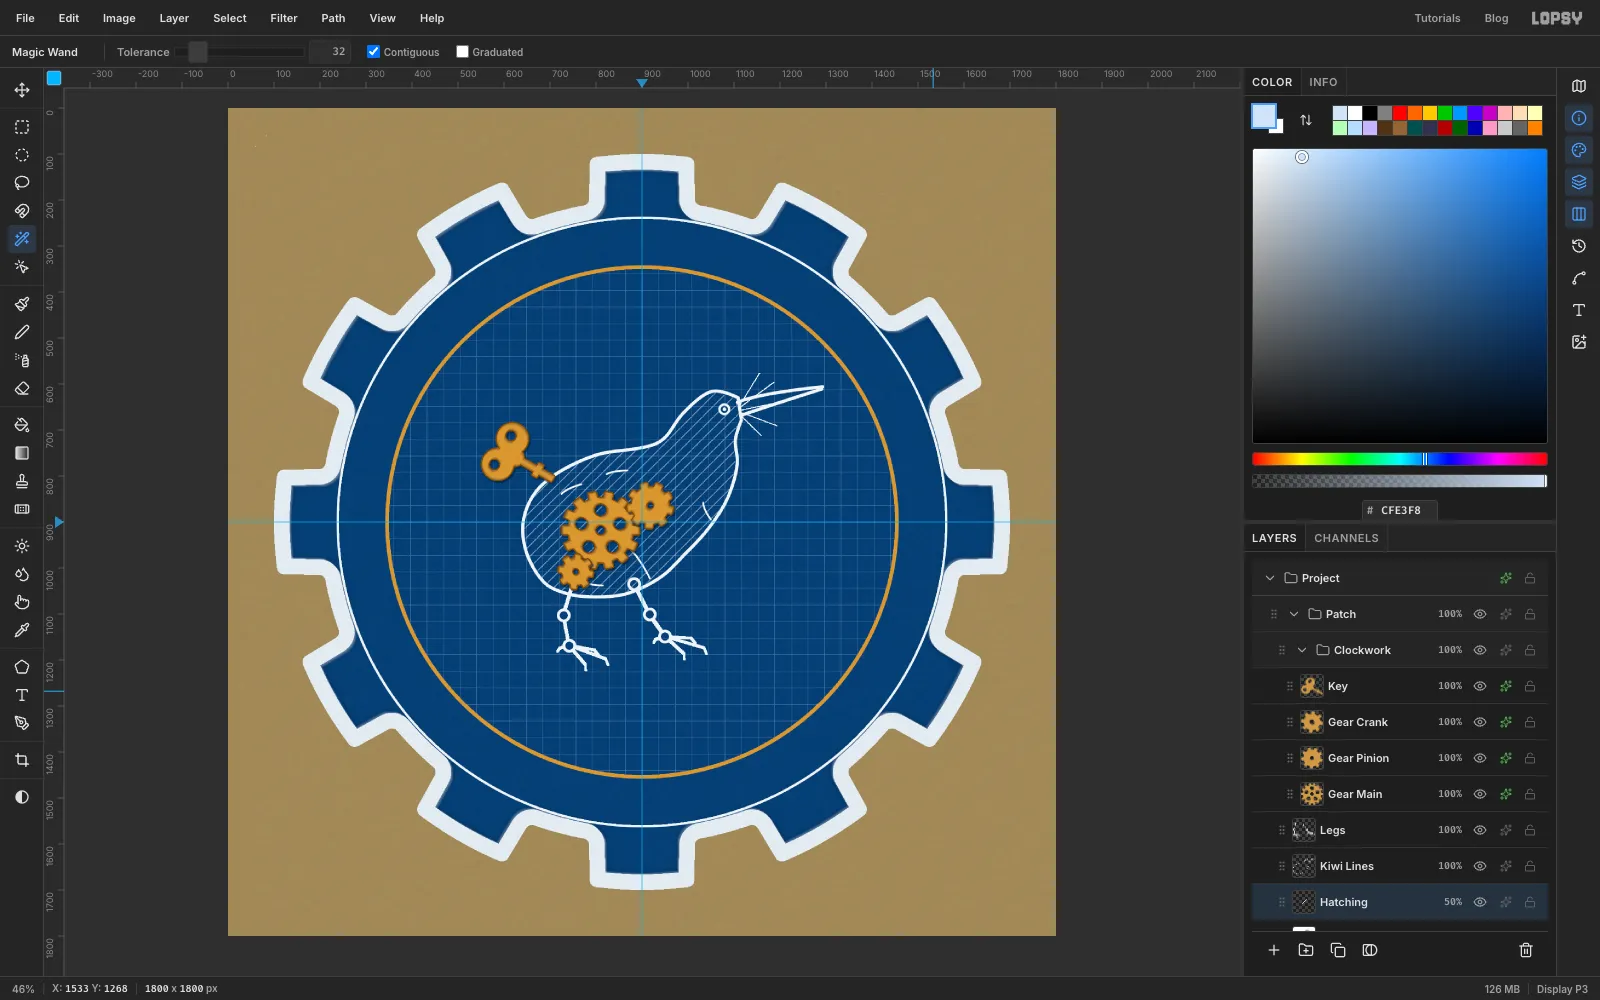
Kiwi Lines, pick the Magic Wand with Contiguous on, and click anywhere inside the body. The wand reads only the active layer, so it fills the whole inside of the outline and ignores the gears.
- Hide the
-
Hatch the body
Click
Hatching. The selection stays. Choose Edit → Fill with Pattern…, pick the diagonal tile and click Apply. Deselect and set the layer to 50% opacity.On a real blueprint, hatching means "this has been cut open". Here it tells you you're looking at a cross-section through the clockwork bird.
-
Add centre marks, a hidden rod and a dimension
- Collapse the
Clockworkgroup, click its row and make a New Group namedDrafting Notes. Add a layer inside it namedDrafting. - Centre marks: Pencil Size
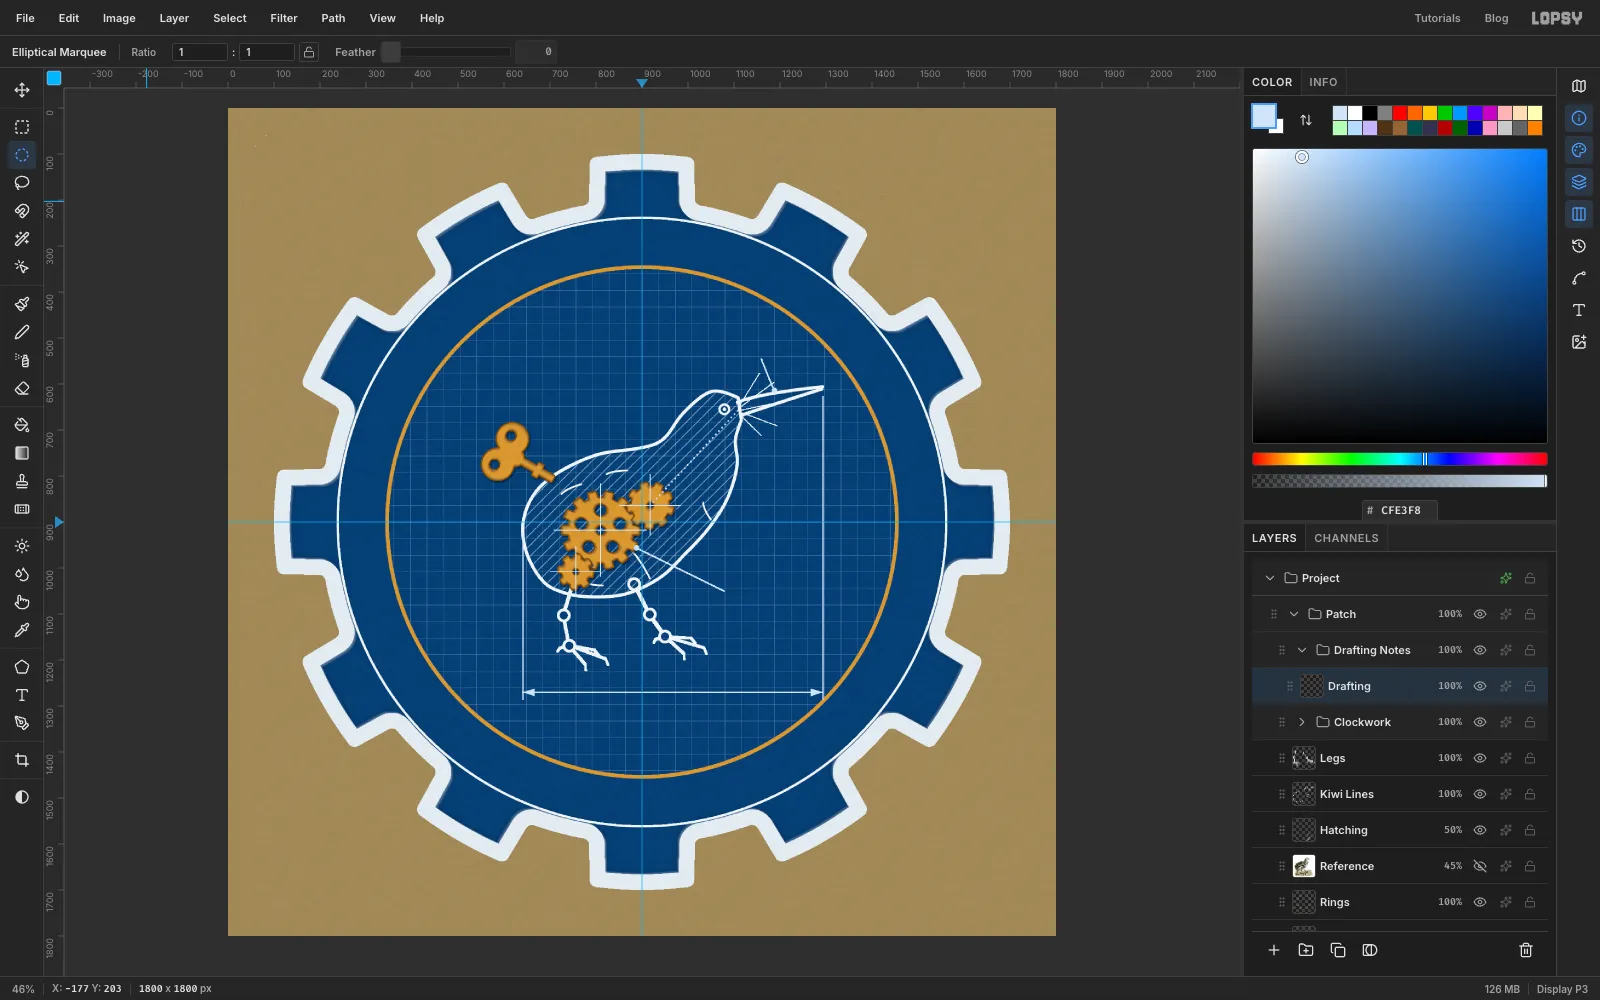
2, . Draw a horizontal and a vertical line through each gear's centre, reaching about 16 px past its teeth. - Hidden rod: pick the Brush and open the brush settings. Set Size
5, Hardness100and Spacing260. Click the pinion's centre and Shift-click the base of the bill, about1111, 655. The wide spacing turns the line into dots. Set Spacing back to10afterwards. - Dimension: with the Pencil at Size
3, draw an extension line straight down from the rump (641, 930to641, 1286) and one from the bill tip (1293, 628to1293, 1286). Join them with a dimension line at y = 1270. - Arrowheads: zoom in on each end of the dimension line. With the Lasso, draw a small triangle whose point touches the extension line and whose base sits on the dimension line about 26 px in, roughly 17 px tall. Hold Shift while you draw the second one at the other end, then fill both with and deselect.
- Leaders: with the Pencil at Size
3, draw a line from1078, 1050to the edge of the main gear at888, 956, and one from1160, 545to the top of the bill at1188, 614. Fill a radius 6 dot at the gear end and the bill end.
- Collapse the
-
Letter the callouts
Each label is its own text layer. Click
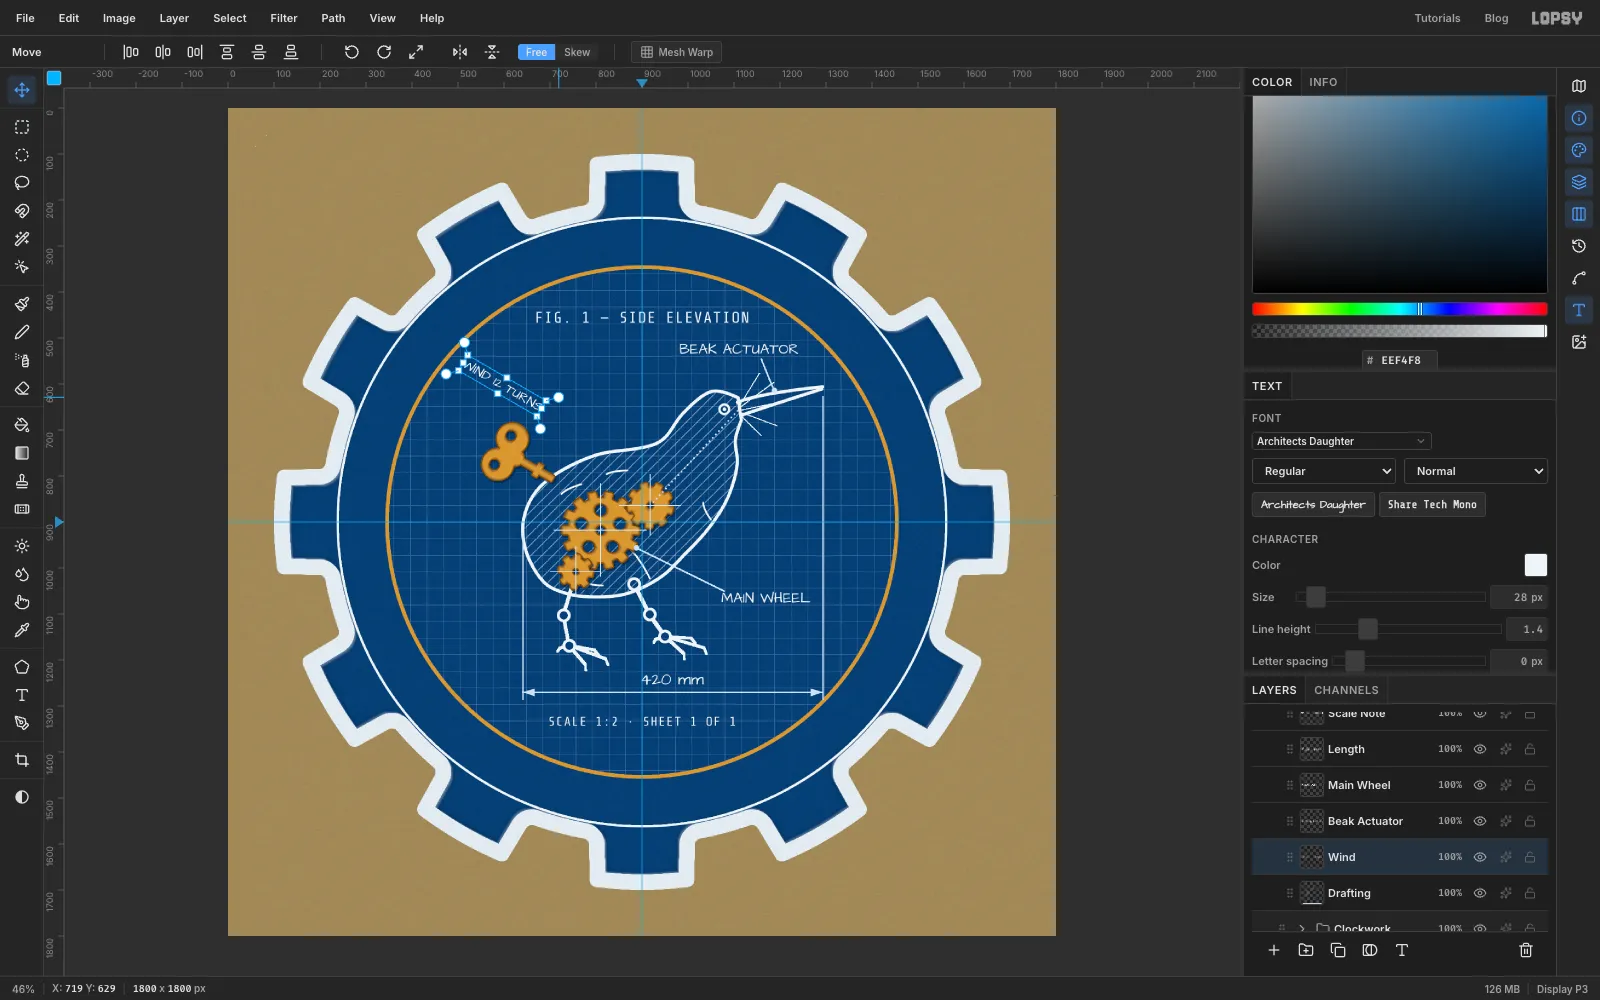
Draftingbefore you start each one, click with the Text tool in an empty part of the canvas, type, press Tab, then nudge it into place with the Move tool and arrow keys. Set Letter spacing for every label, because it carries over from the last one. Rename each layer with the name in brackets, so you can find it later.FIG. 1 — SIDE ELEVATION(Fig Caption) in Share Tech Mono, Size34, , letter spacing2, centred at900, 454.SCALE 1:2 · SHEET 1 OF 1(Scale Note) in Share Tech Mono 28, spacing2, centred at900, 1332.420 mm(Length) in Architects Daughter 36, spacing0, centred on the dimension line just above it, at966, 1242.MAIN WHEEL(Main Wheel) in Architects Daughter 32 at the end of its leader, centred at1168, 1062, andBEAK ACTUATOR(Beak Actuator) above the bill, centred at1110, 522.WIND 12 TURNS(Wind) in Architects Daughter 28, centred at about596, 600. Rotate it 30° clockwise with its own corner handle so it runs parallel to the key.
-
Check the callouts
Every label needs a little air. Look at each one and make sure none touches a line it doesn't belong to. The bottom of
420 mmshould clear the toes, andWIND 12 TURNSshould float clear of the key.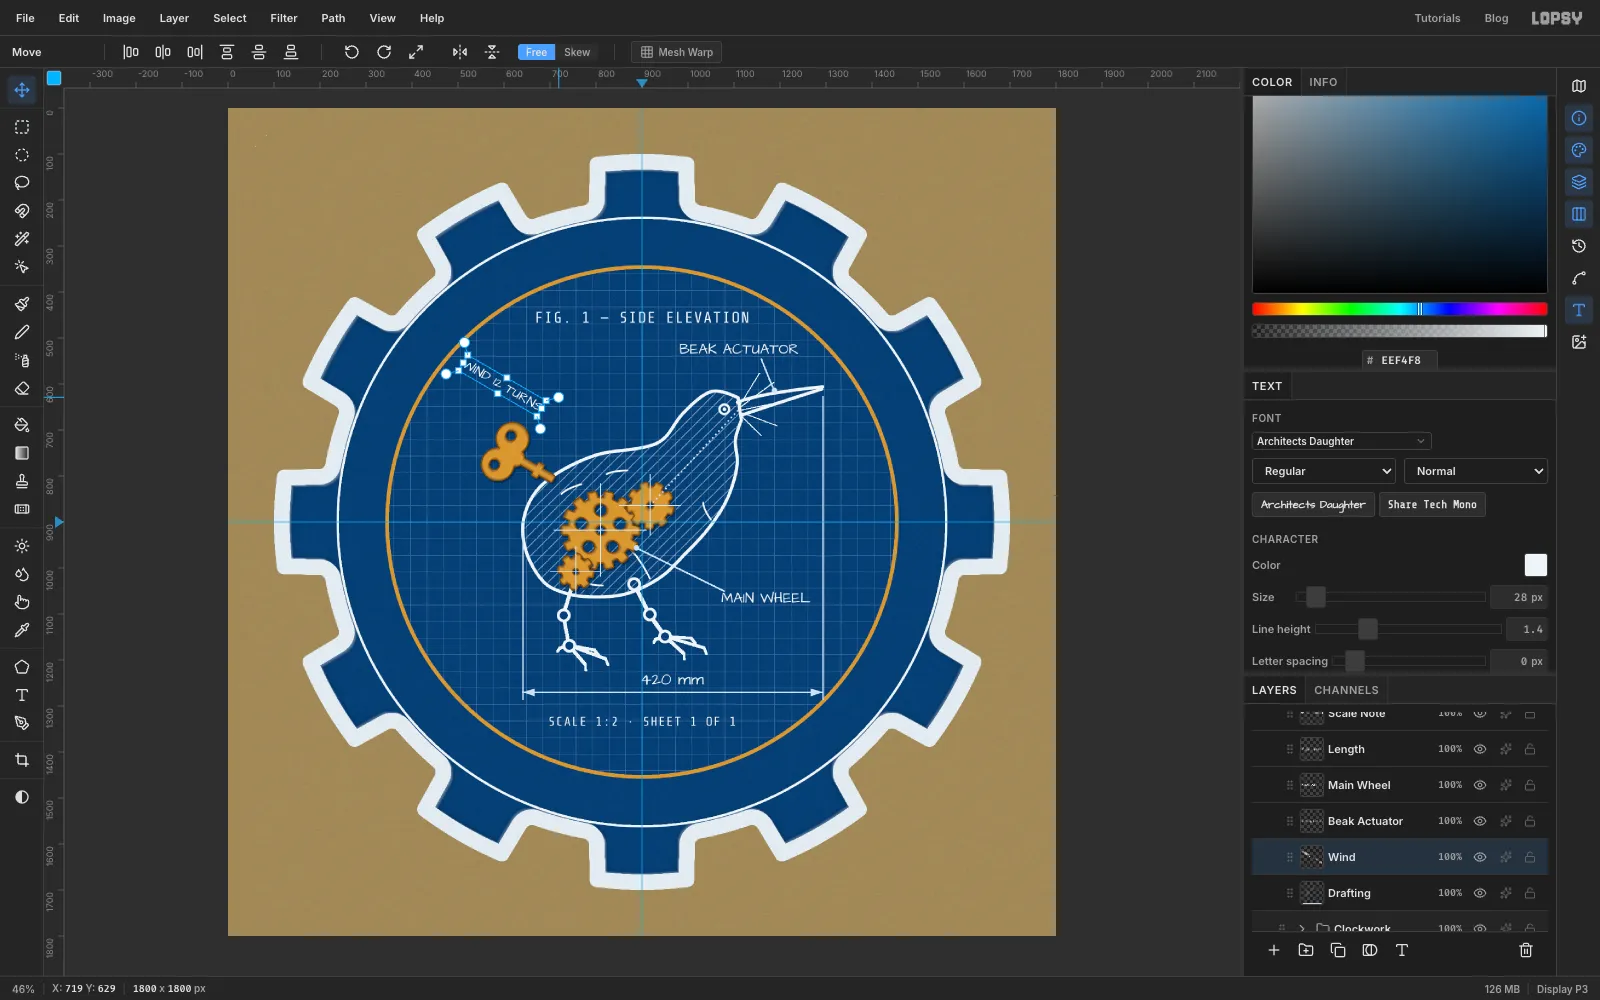
-
Copy the pinion for Detail A
Blueprints enlarge small parts in a round "detail" view. The lower left of the drawing is empty, so it goes there.
- On
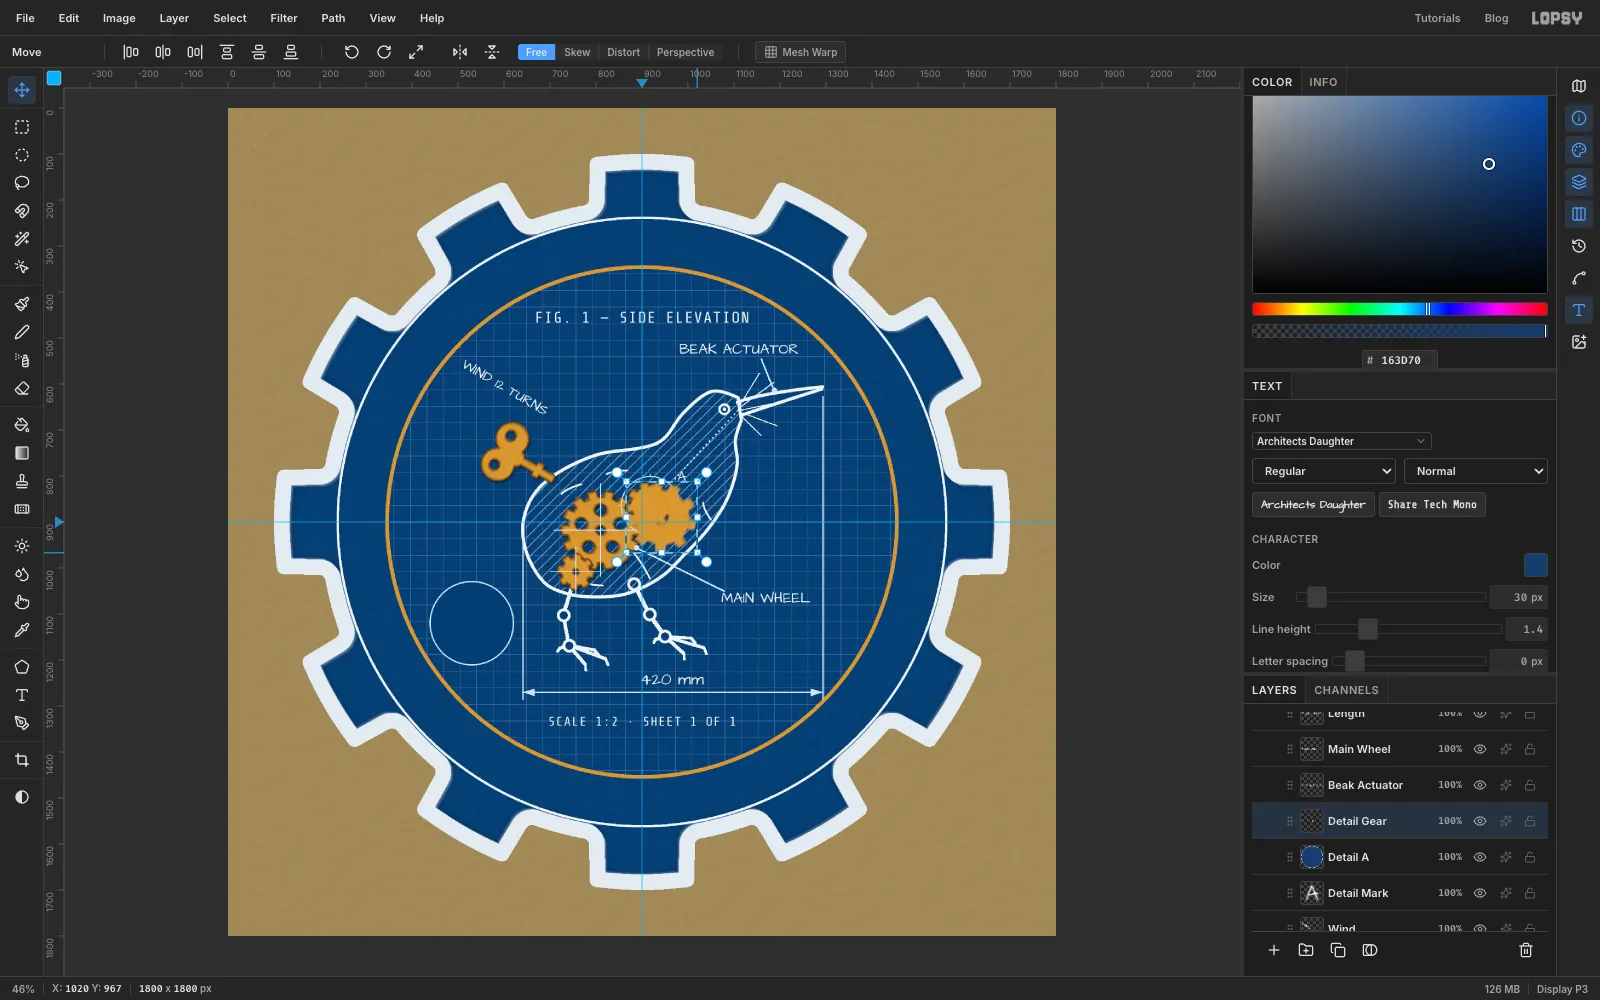
Drafting, ring the pinion: select a radius 64 circle around it (854, 800to982, 928), fill it with , shrink by2and press Delete. Add anAin Architects Daughter 30, , just above its top-right edge, centred at about986, 800. - Add a layer named
Detail A. Fill a radius 92 circle at530, 1120with , shrink by3and press Delete. Then fill a radius 89 circle at the same centre with . - Click
Gear Pinion. With the Rectangular Marquee, draw a box just around it (864, 810to972, 918) and press Cmd+C. ClickDetail Aand press Cmd+V. The copy is pasted in place, aboveDetail A. Rename itDetail Gear. - Press Cmd+D and draw the same box around the copy. With the Move tool, Cmd-drag its bottom-right corner handle out until it is 1.5 times as wide. Press Cmd+D.
- On
-
Finish the detail view
- Drag
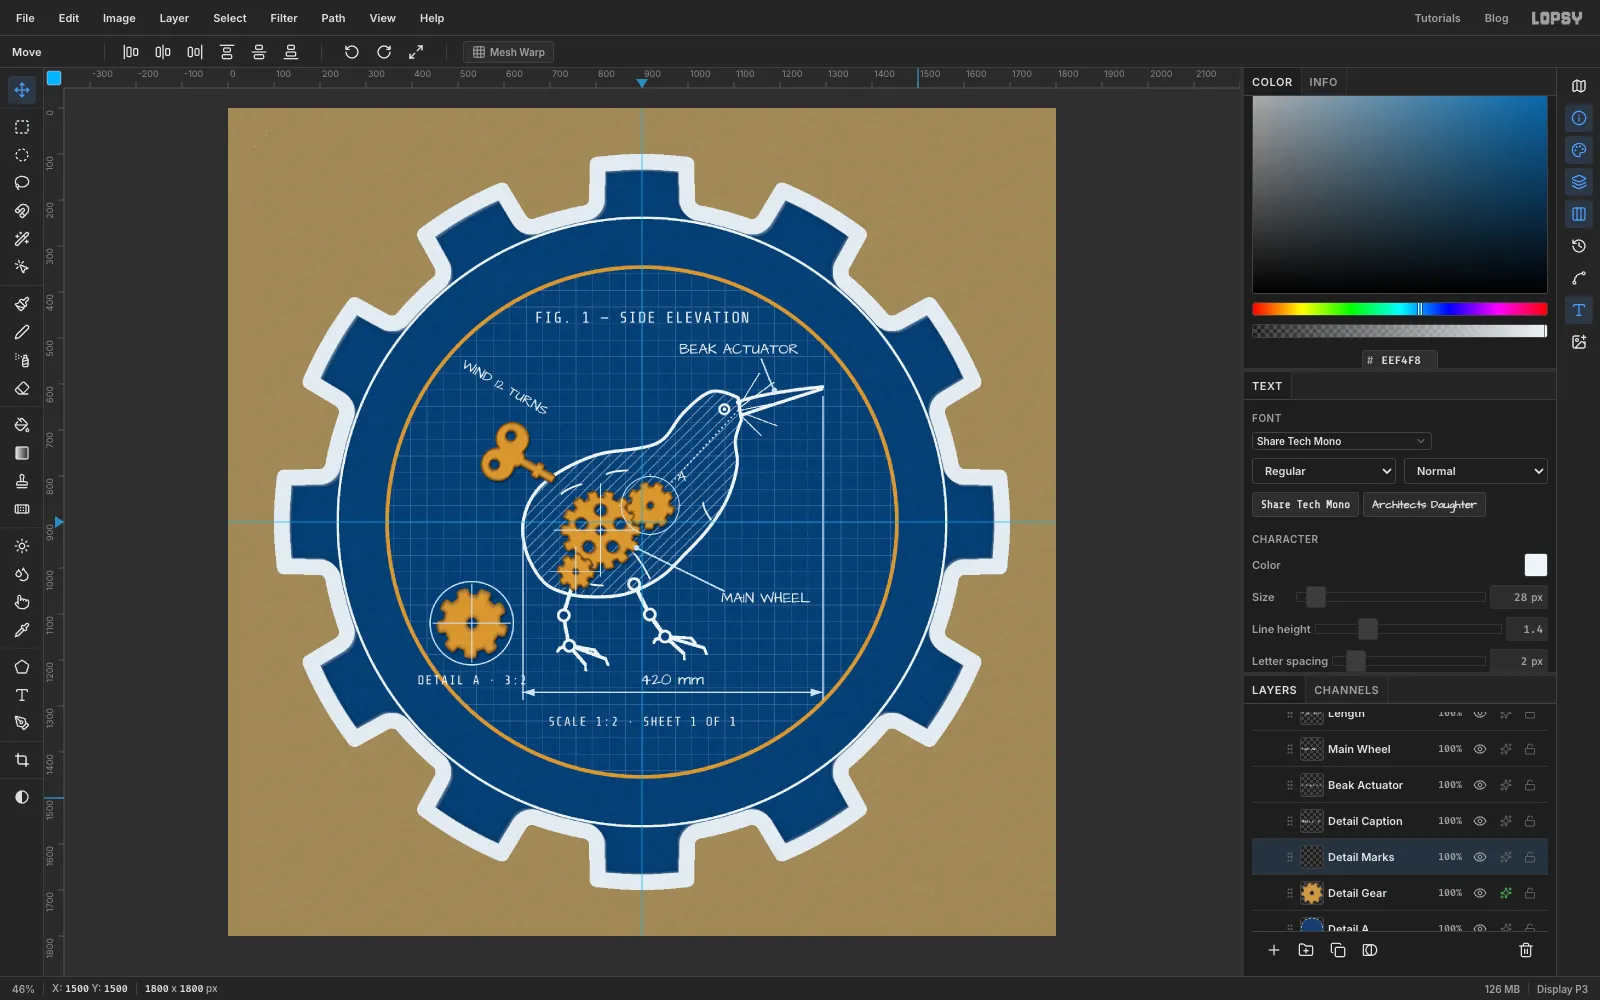
Detail Gearinto the middle of the bubble. - Scaling softened its stitches, so Cmd-click the thumbnail and re-stitch it: noise Amount
45, Mono, Gaussian, then Motion Blur Angle60, Distance9. Give it the same Stroke and Drop Shadow as the other gears. - Add a layer named
Detail Marks. With the Pencil at Size2and the foreground set back to , draw a crosshair through the centre of the bubble. - Caption it
DETAIL A · 3:2in Share Tech Mono 28, , spacing2, centred about 30 px below the bubble.
- Drag
-
Draw an arc for the title
- Collapse
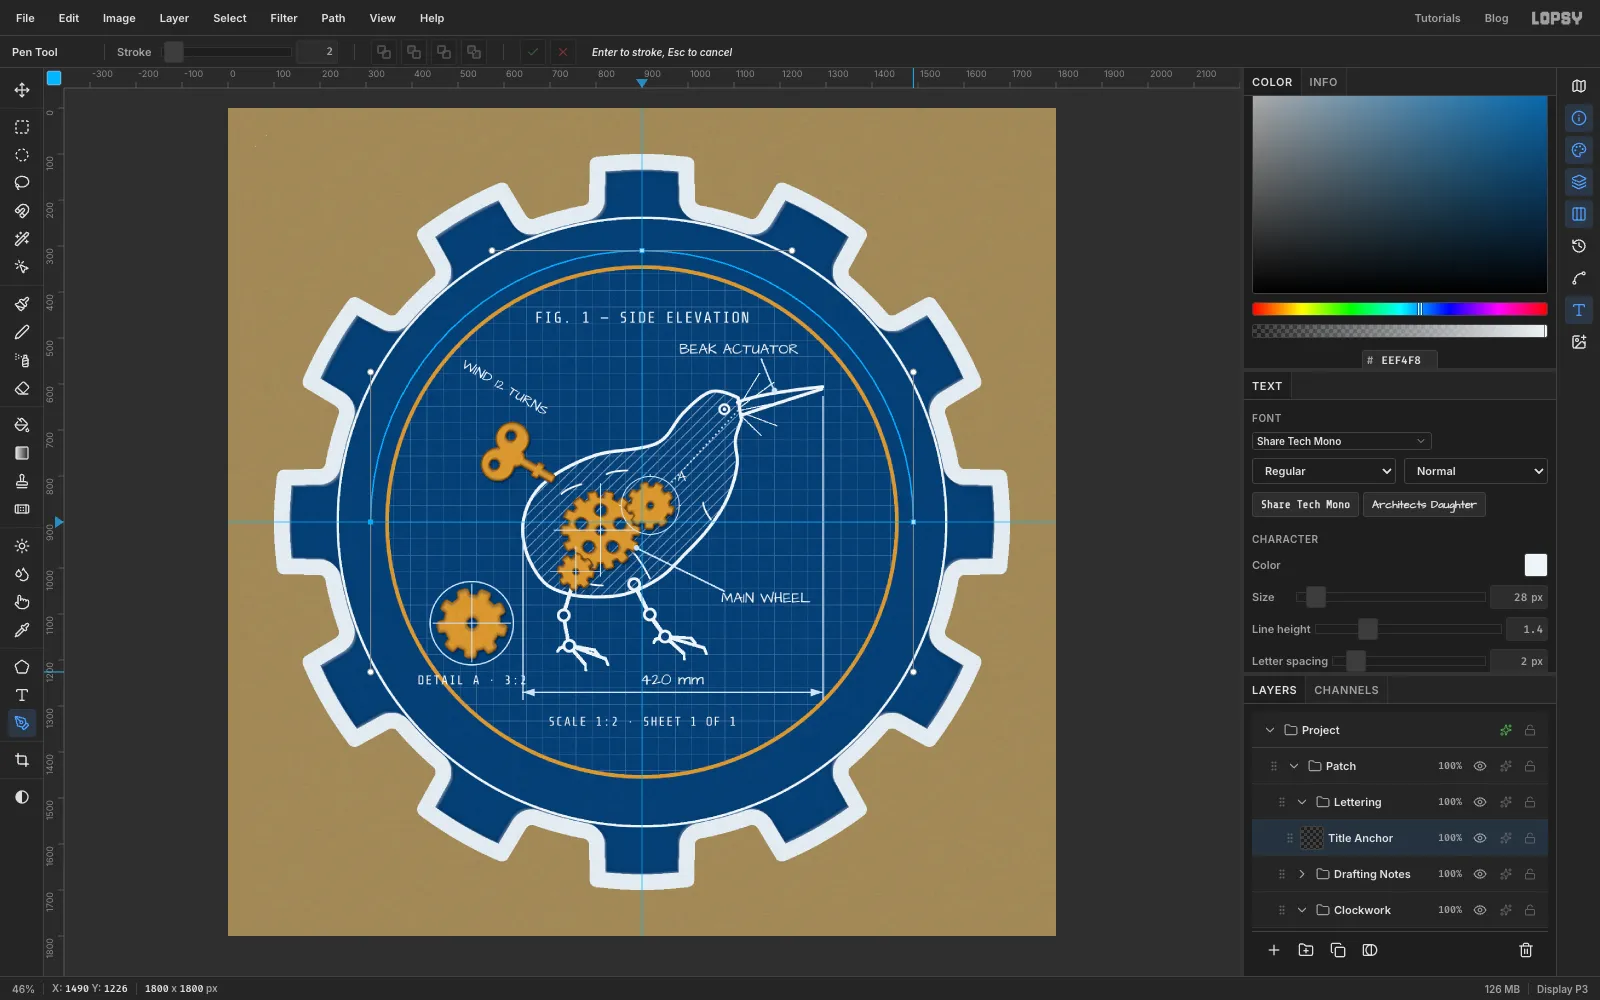
Drafting Notes, click its row and make a New Group namedLettering. Add a layer inside it namedTitle Anchor. New text needs a normal layer to start from. - With the Pen, draw a half circle of radius 590. Press at
310, 900and drag straight up to310, 574. Press at the top,900, 310, and drag right to1226, 310. Press at1490, 900and drag straight down to1490, 1226. - Click the ✓ (Commit path) button in the options bar. Don't press Enter, which would stroke it.
The radius puts the letters' baseline a little inside the middle of the band. The capitals then rise to fill it evenly.
- Collapse
-
Put the title on the path
- With
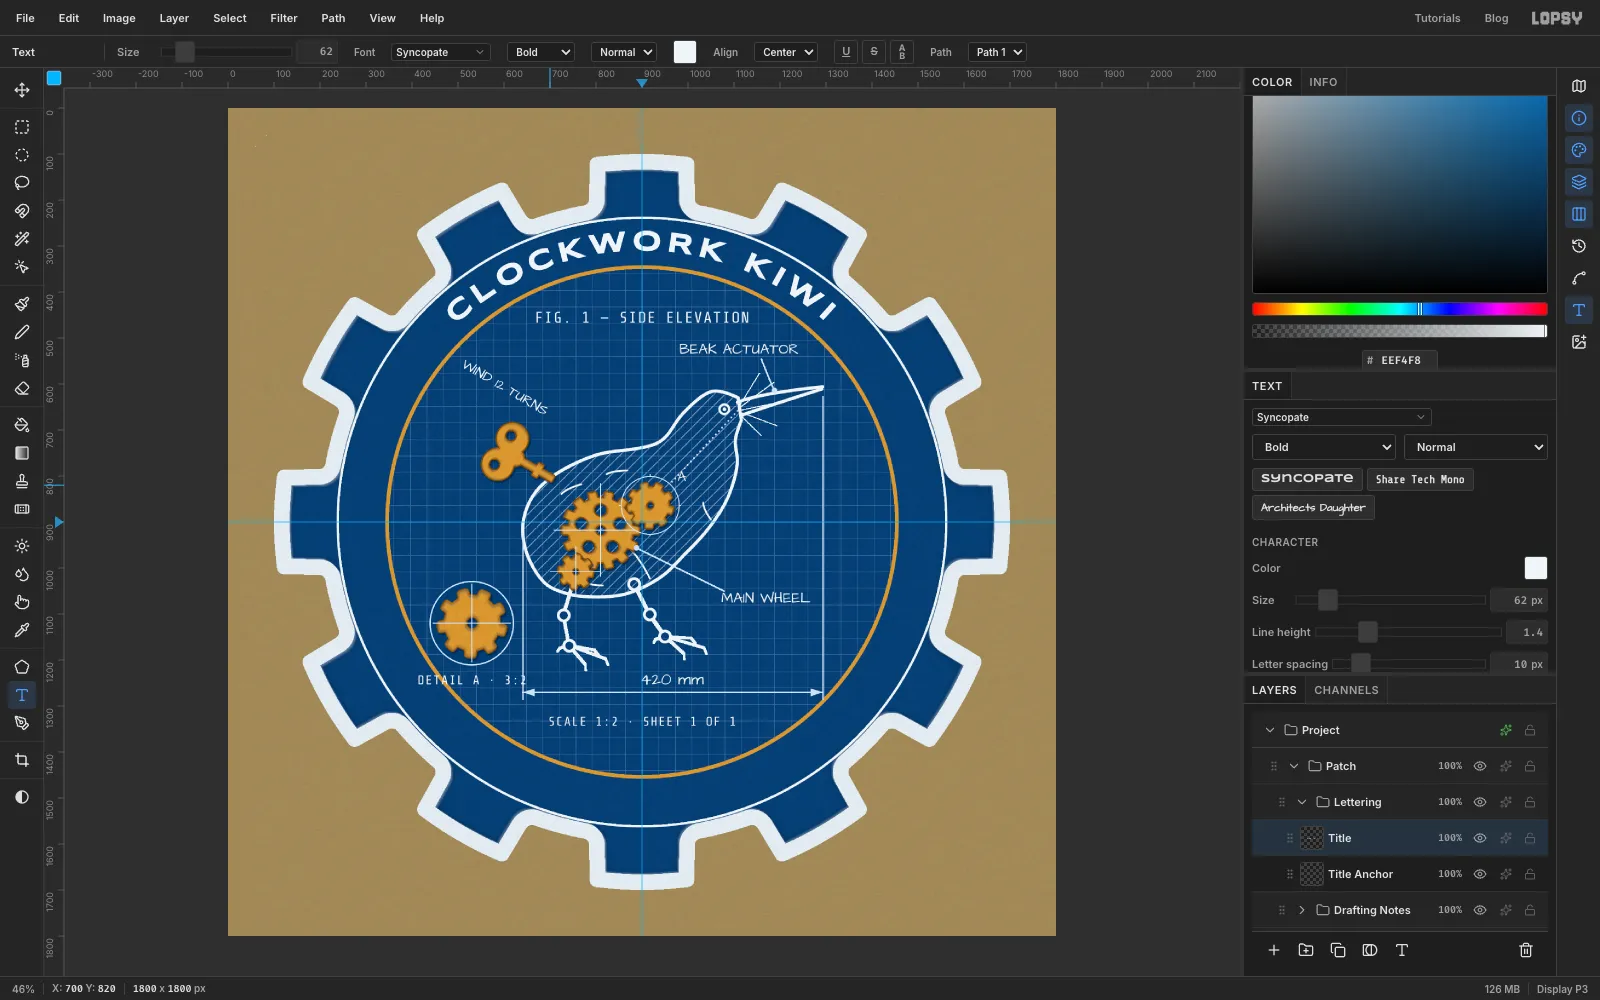
Title Anchorselected, pick the Text tool. Choose Syncopate, weight Bold, Size62, colour . - Click in an empty spot, type
CLOCKWORK KIWIand press Tab. Rename the layerTitleand set Letter spacing to10. - In the options bar, choose your path (for example
Path 1) in the Path menu, then set the alignment to Center. - Click the path's row in the Paths panel to deselect it and hide the outline.
Check the seating: the gap from the brass ring to the bottom of the letters should match the gap from the tops of the letters to the white ring.
- With
-
Set the maker's name and the screws
- Click
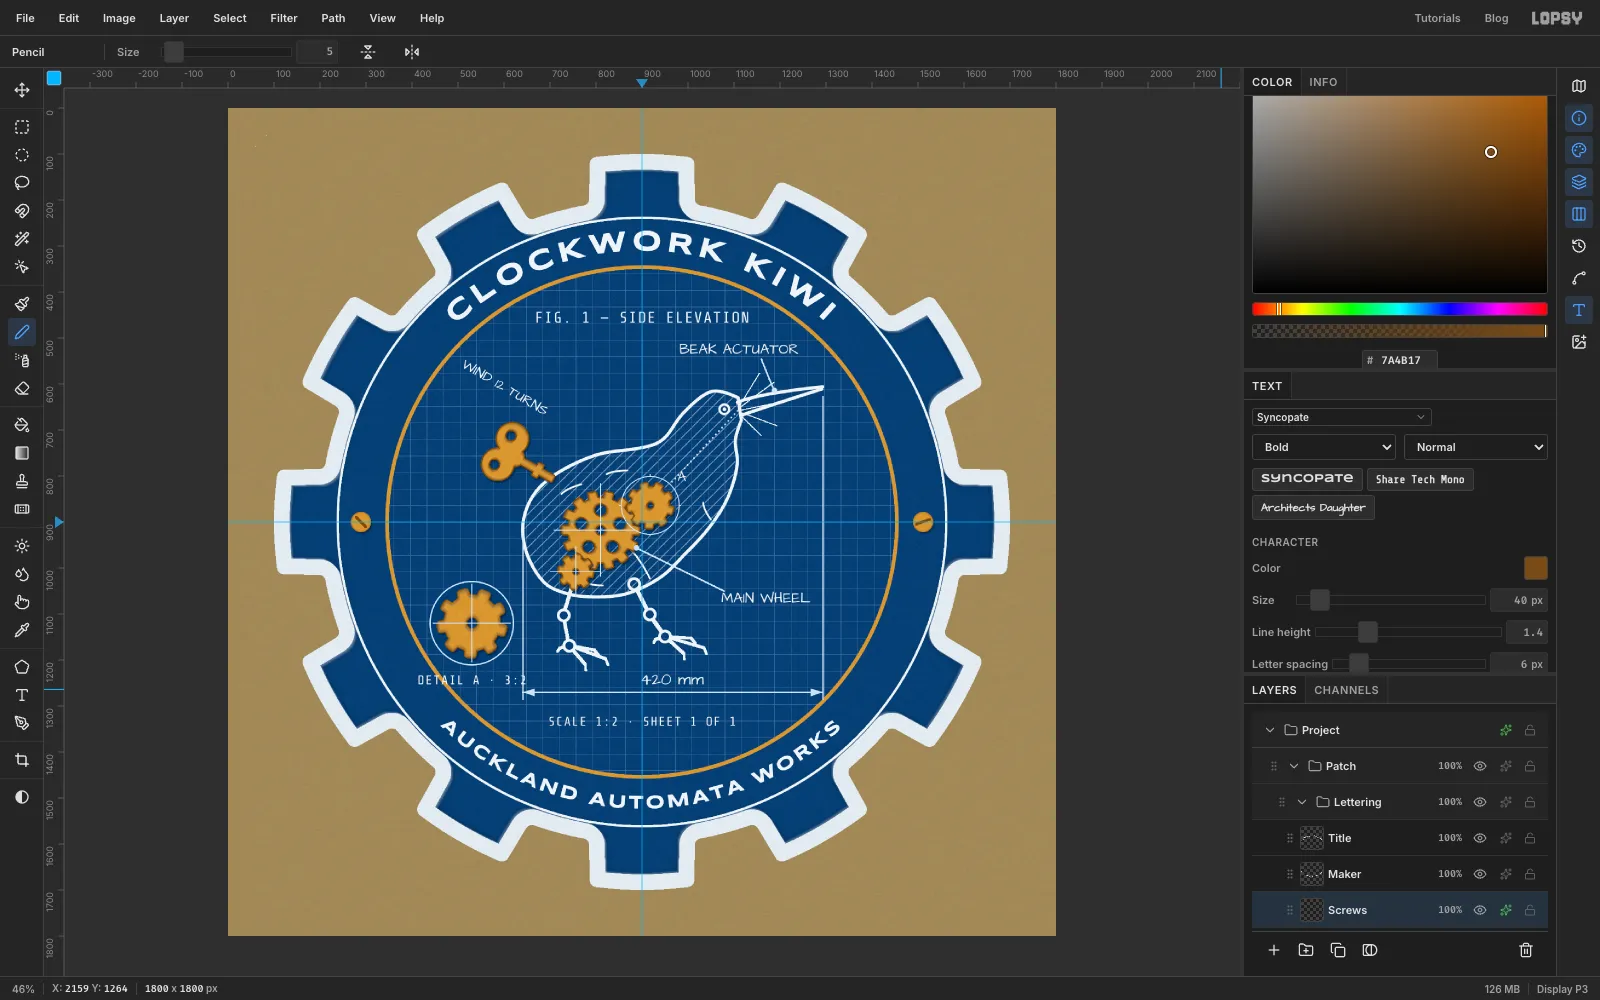
Title Anchor. Draw the bottom arc the same way, but with radius 623 and running through the bottom. Press at277, 900and drag down to277, 1244. Press at900, 1523and drag right to1244, 1523. Press at1523, 900and drag up to1523, 556. Click ✓. - Type
AUCKLAND AUTOMATA WORKSin Syncopate Bold 40, , letter spacing6. Rename the layerMakerand put it on the new path, centred. The path runs left to right through the bottom, so the letters stand upright and hang inward from the path. That's why this radius is bigger than the top one. - Add a layer named
Screws. Fill radius 22 circles at289, 900and1511, 900with brass. Draw a slot across each with a Size5Pencil in , at different angles. Give the layer an Inner Glow (Size8, Spread0, Opacity80, ) and the brass Drop Shadow.
- Click
-
Raise the thread
Embroidery stands up off the fabric, so the main thread layers get a small shadow. The thin callouts stay flat, as fine lettering would be stitched.
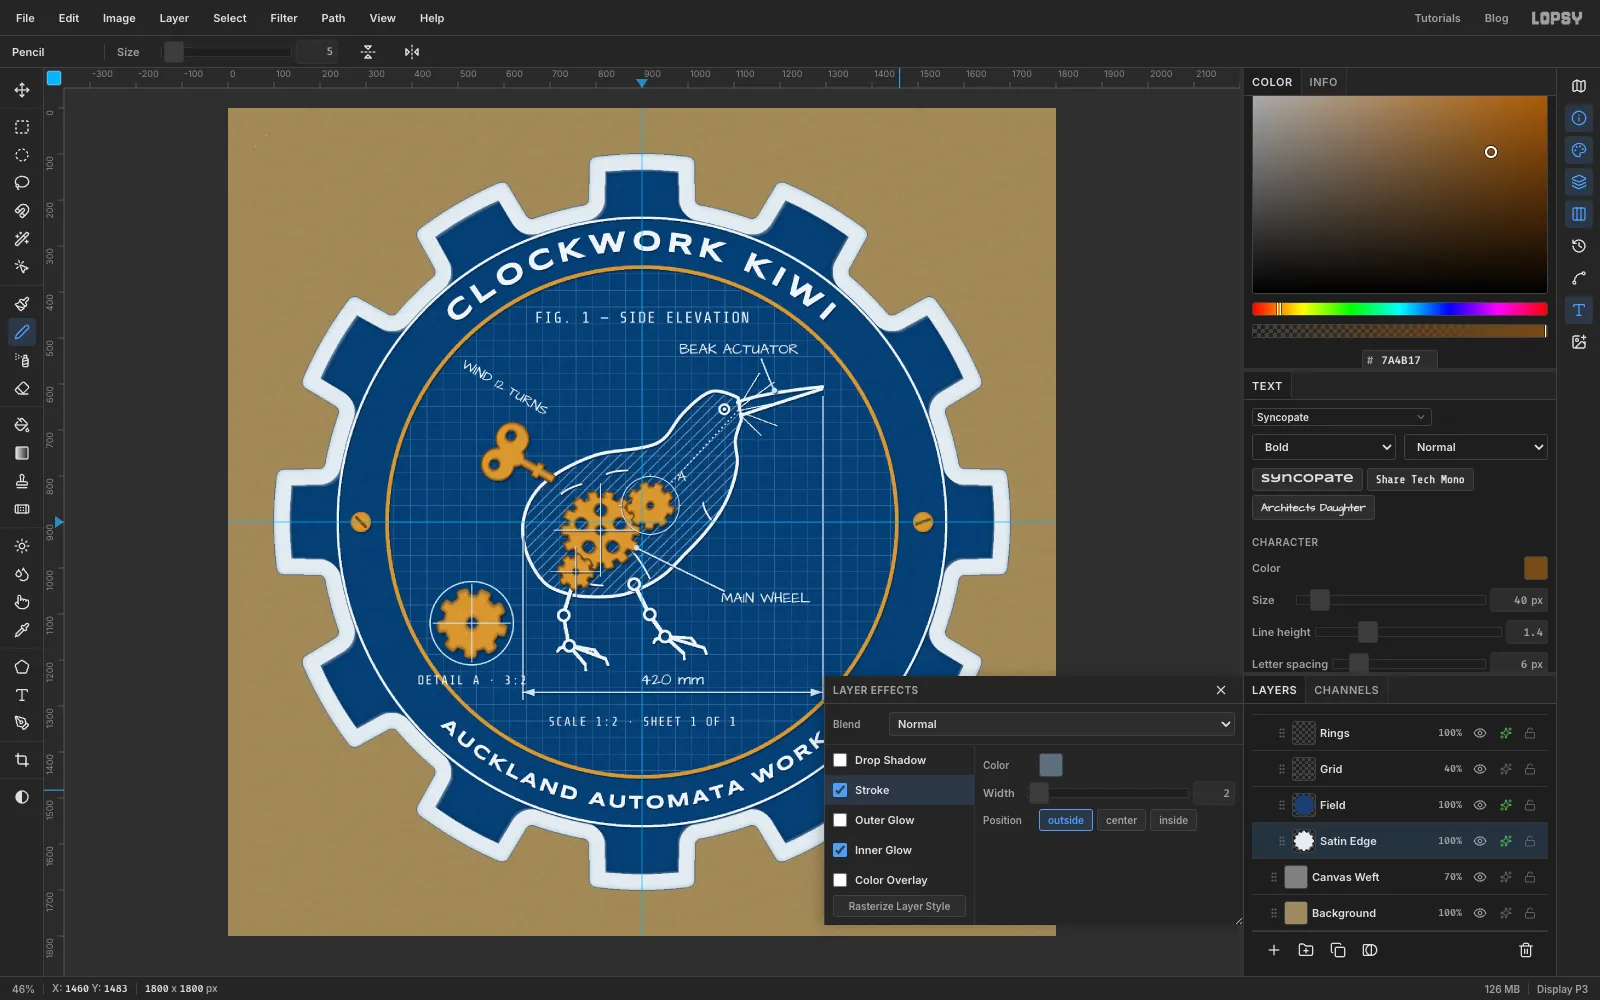
- Add a Drop Shadow to
Kiwi Lines,Legs,Drafting,Rings,TitleandMaker: Opacity75, Offset X2, Offset Y3, Blur2, colour . - On
Satin Edge, add an Inner Glow (Size14, Spread0, Opacity60, ) for the roll of the satin. Add a Stroke (Width2, ) for the heat-cut edge.
- Add a Drop Shadow to
-
Cast the patch's shadow
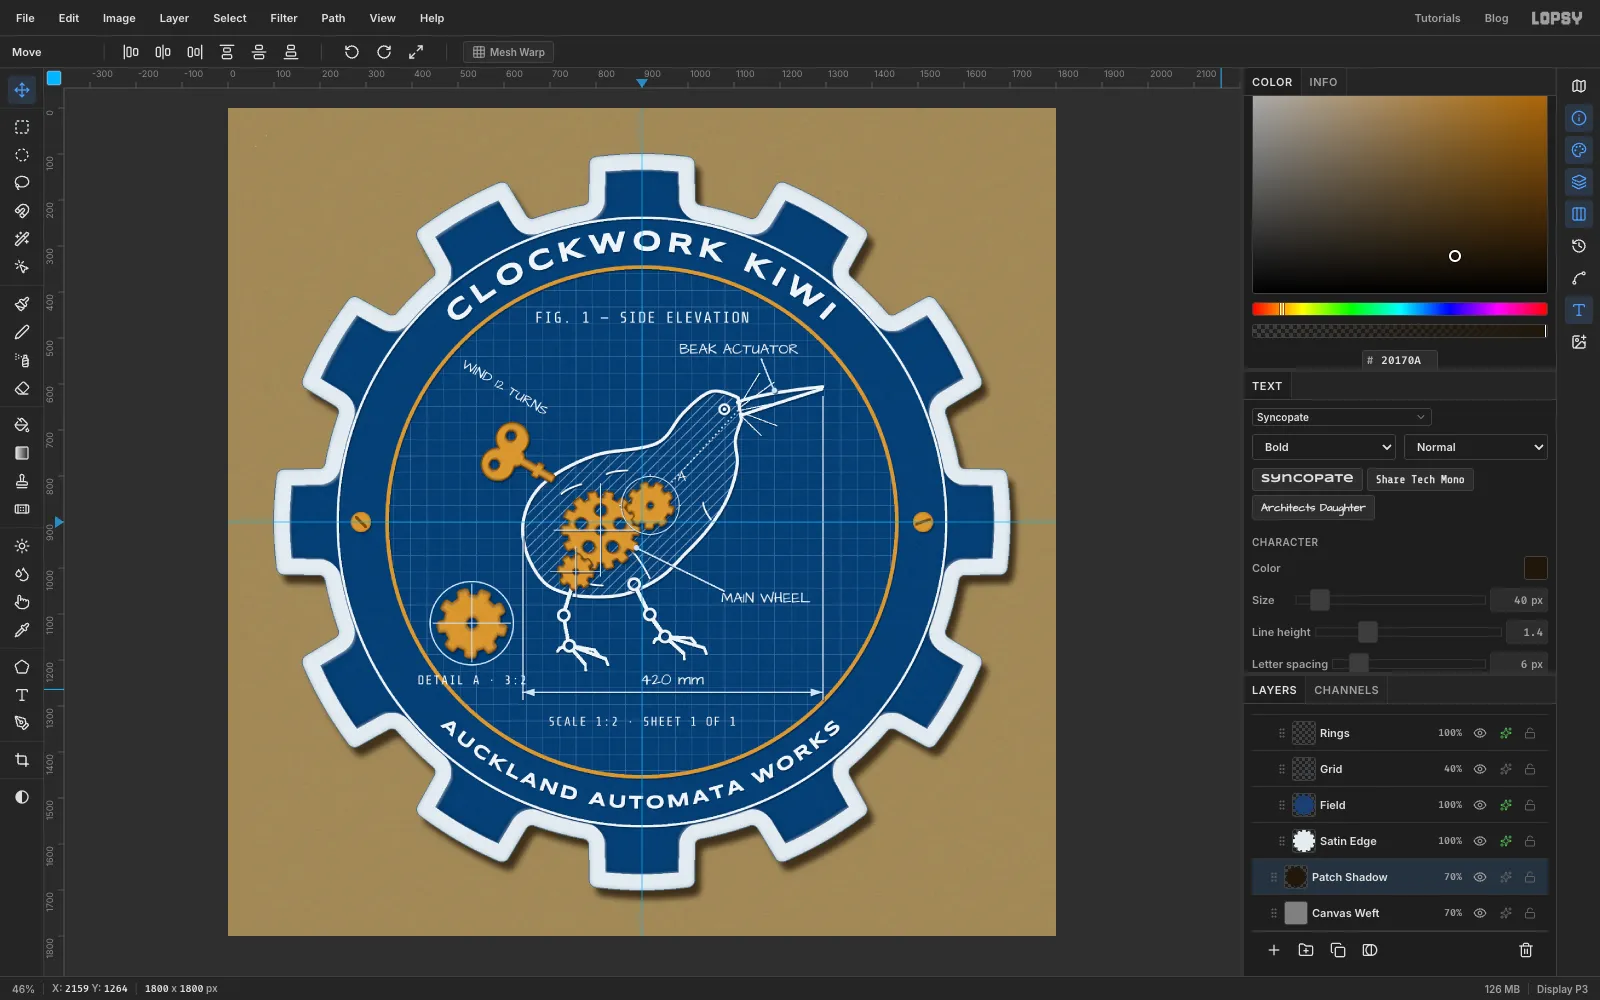
- Click
Canvas Weftand add a layer namedPatch Shadow. It lands just under thePatchgroup. - Cmd-click the
Satin Edgethumbnail, fill with and deselect. - Filter → Gaussian Blur…: Radius
18. - With the Move tool, nudge it 14 px right and 20 px down. Each Shift+arrow press moves it 10 px, and each plain arrow press moves it 1 px.
- Set it to Multiply at 70%.
- Click
-
Light the patch and make a ridge tile
- Collapse
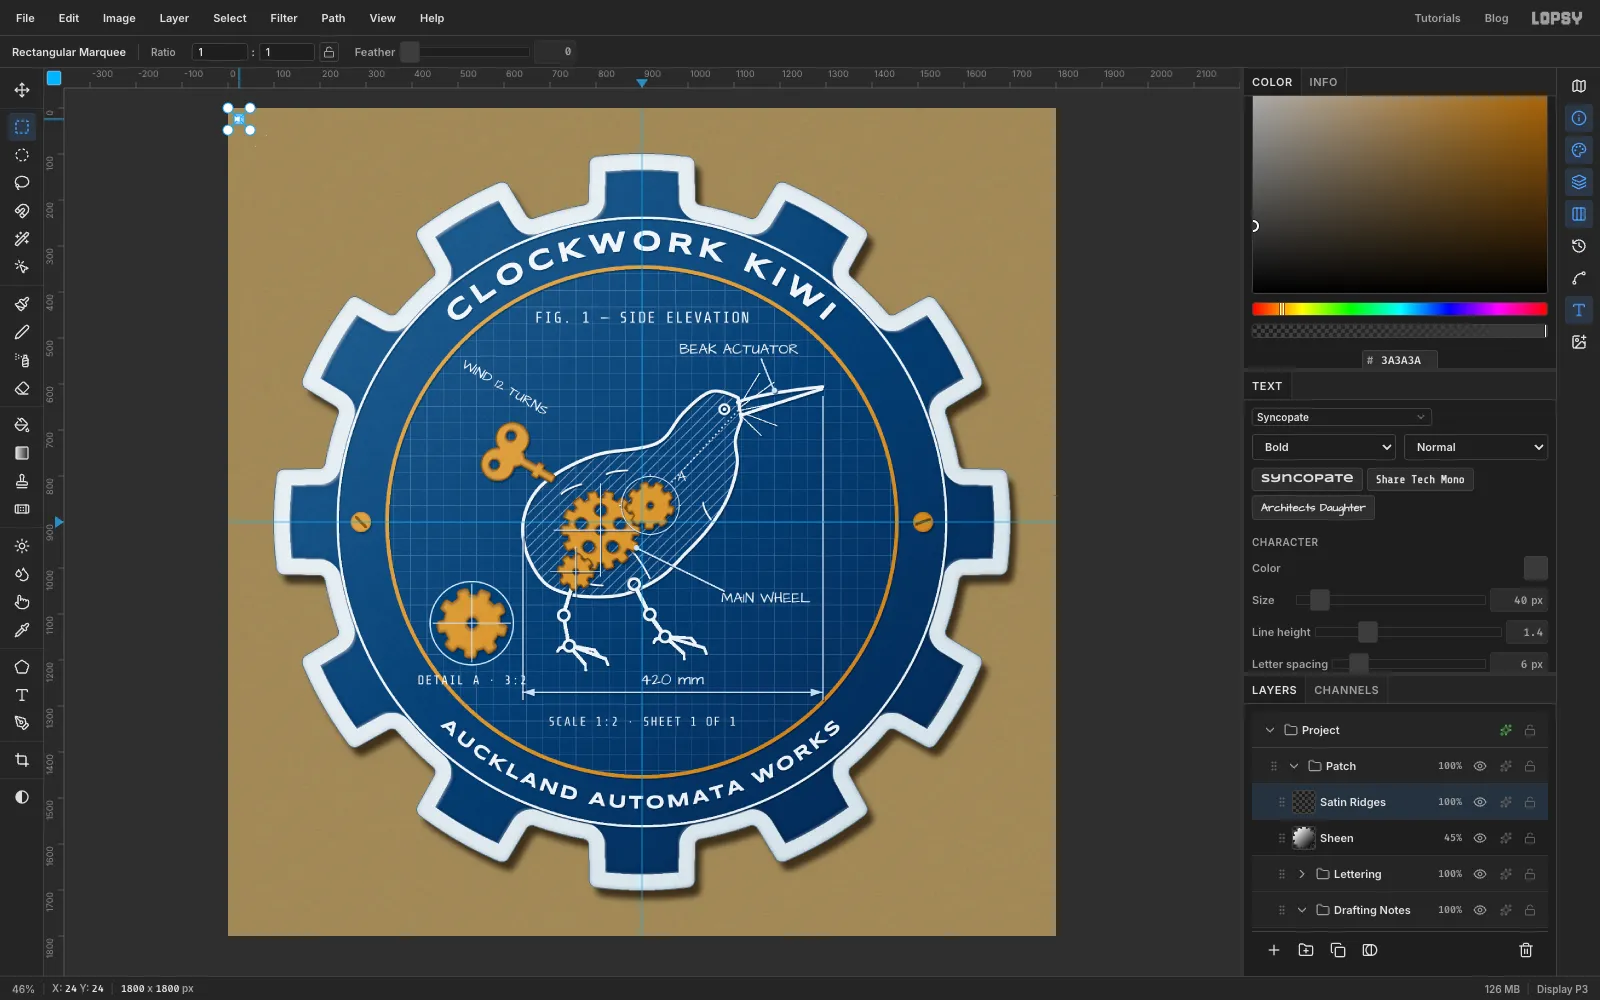
Lettering, click its row and add a layer namedSheen. It lands at the top of thePatchgroup. - Cmd-click the
Satin Edgethumbnail. Pick the Gradient tool, choose Linear, click Advanced… and set the two stops to and . Click Done, then drag from330, 330to1470, 1470. Deselect and set the layer to Soft Light at 45%. - Real satin stitch catches the light in fine diagonal ridges, so draw them as a tiny tile. Add a layer named
Satin Ridges. Click once with the Rectangular Marquee, enter20, 20to28, 28, fill with and deselect. - With the Pencil at Size
1, draw a light diagonal across the tile in , from20, 27to27, 20. Then add two short dark diagonals in , one in each of the other corners:24, 27to27, 24, and20, 23to23, 20. - Select
20, 20to28, 28again, choose Edit → Define Pattern and press Delete. - Cmd-click the
Satin Edgethumbnail, choose Edit → Fill with Pattern… with the new tile, deselect, and set the layer to Overlay at 30%.
- Collapse
-
Add stitch grain
- With
Satin Ridgesselected, add a layer namedStitch Grain. Cmd-click theSatin Edgethumbnail, fill with , add noise (Amount60, Mono, Gaussian) and run Motion Blur at Angle45, Distance6. Deselect and set it to Overlay at 35%. - Save with File → Save Project, then File → Quick Export PNG.
Zoom out and squint. The white satin edge should read first, then the title, then the kiwi. The brass parts should be the only warm colour inside the patch. If anything competes with the kiwi, it's usually a callout that's too big or too bright.
- With