Design a Brutalist Concrete Invitation
Make a brutalist invitation in Lopsy with board-formed concrete built from filters, a duotone photo oculus, wall-to-wall type and worn ink.
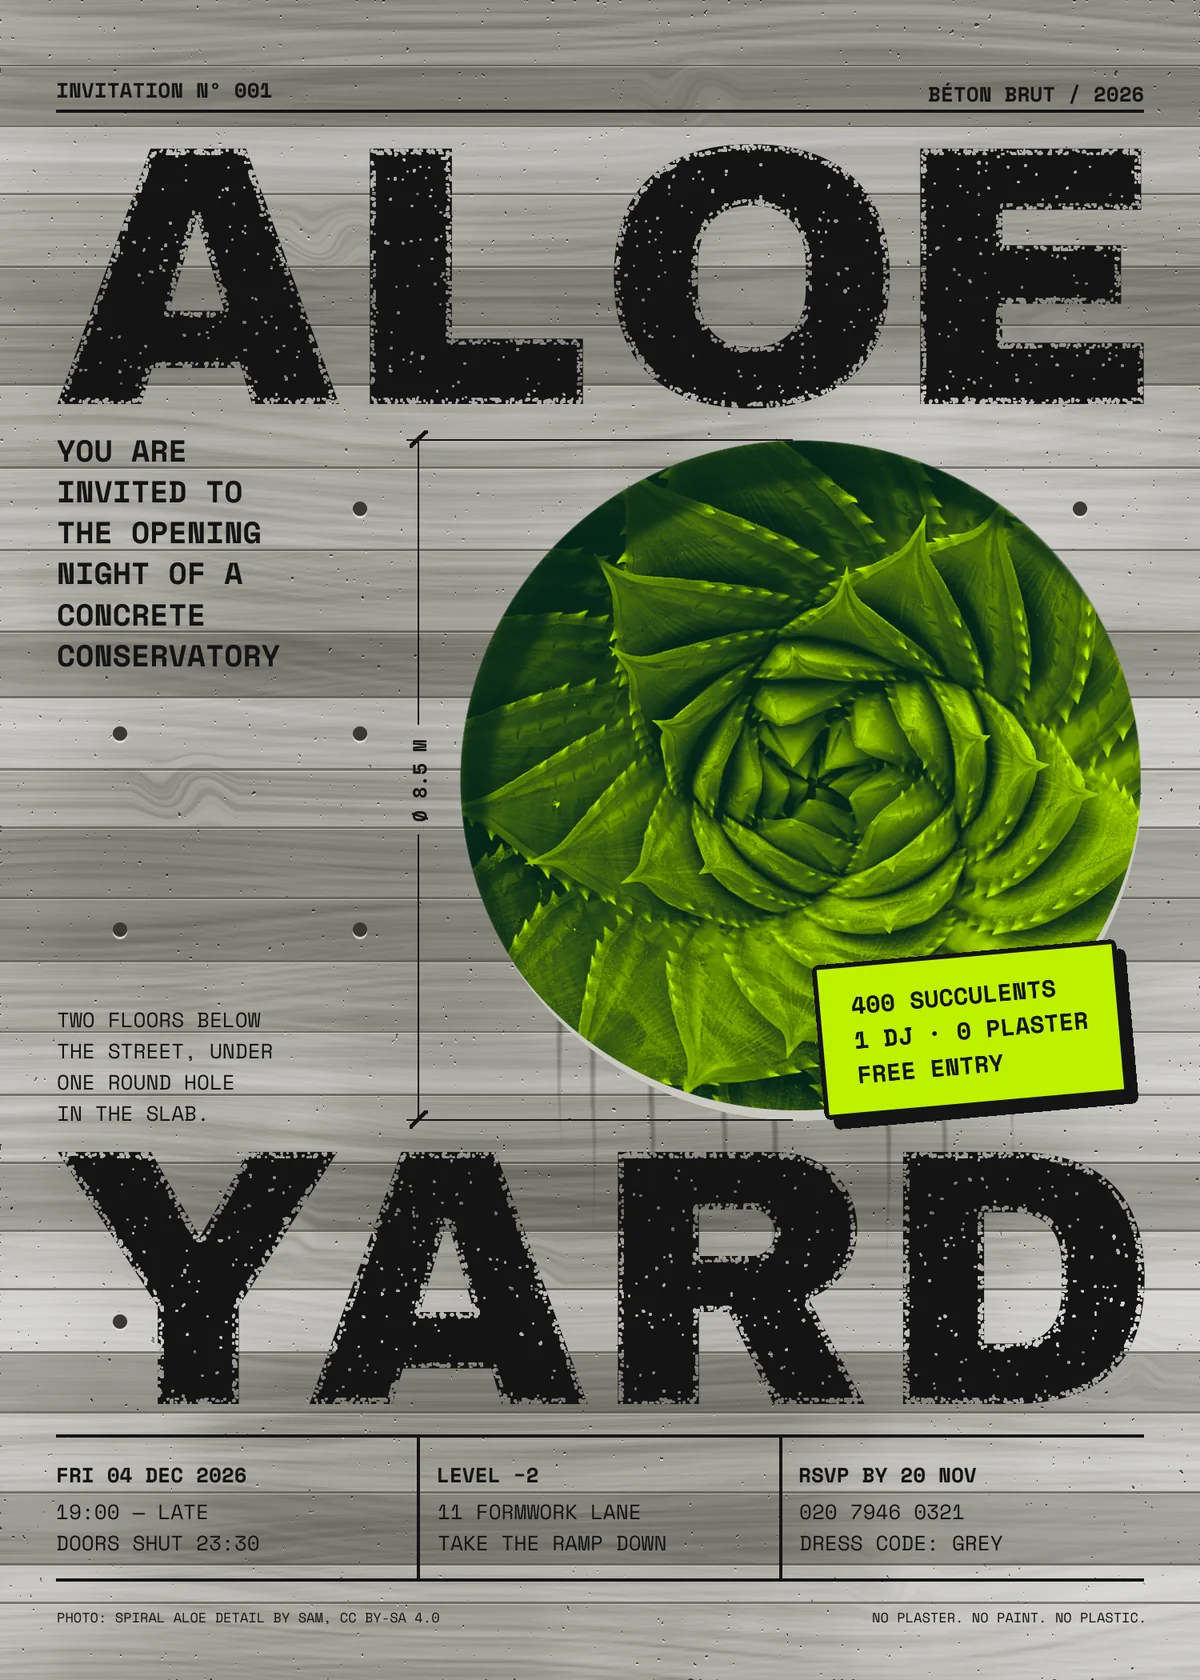
Brutalism takes its name from béton brut, French for "raw concrete". The buildings leave their concrete bare, and you can still see the marks of the wooden boards it was poured against: plank lines, wood grain, little air holes and the round plugs where the formwork was tied together. Brutalist graphic design borrows that honesty. The grid is left exposed, type is set big and blunt, and there's one loud colour against a lot of grey.
In this tutorial you'll make a 1500 × 2100 px invitation for Aloe Yard, an imaginary concrete conservatory two floors underground, lit by a single round skylight called an oculus. It has:
- a board-formed concrete wall built entirely from noise, Clouds, Fibers, Liquify and selections
- a round hole in the wall with a spiral-aloe photo inside it, duotoned green with a Gradient Map
- an ALOE / YARD wordmark stretched from margin to margin, with worn, pitted ink
- monospaced copy, an architect's dimension line, a ruled table and a tilted sticker
The tools you'll use:
- Add Noise, Motion Blur, Gaussian Blur, Brightness/Contrast, Threshold, Clouds and Fibers
- Image → Rotate 90°, used as a trick to turn Fibers sideways, and Liquify's Twirl mode
- the Rectangular and Elliptical Marquee with Shift to add and Alt to subtract, Select → Inverse, Shrink and Grow, and the Magic Wand
- the Pencil and Brush with Shift-click straight lines, and the Brush's Taper and Fade
- the Drop Shadow and Stroke layer effects, and the Multiply and Soft Light blend modes
- a group Gradient Map, the Move tool's scale and rotate handles on a layer, on live text and on a group, and Rasterize Layer
The fonts are Archivo Black for the wordmark and Space Mono for everything else. Both are free Google Fonts in Lopsy's font picker.
The photo is Spiral Aloe detail by Sam on Wikimedia Commons (CC BY-SA 4.0). Download the 1280 px version. The card credits it in its small print.
The palette:
-
Concrete
-
plank shade
-
joints
-
Tie holes
-
hole lip
-
oculus rim
-
Ink
-
rain
-
Duotone
the sticker uses the same acid green
-
Set up the page and its guides
- Open Lopsy. In the New Document dialog set Width
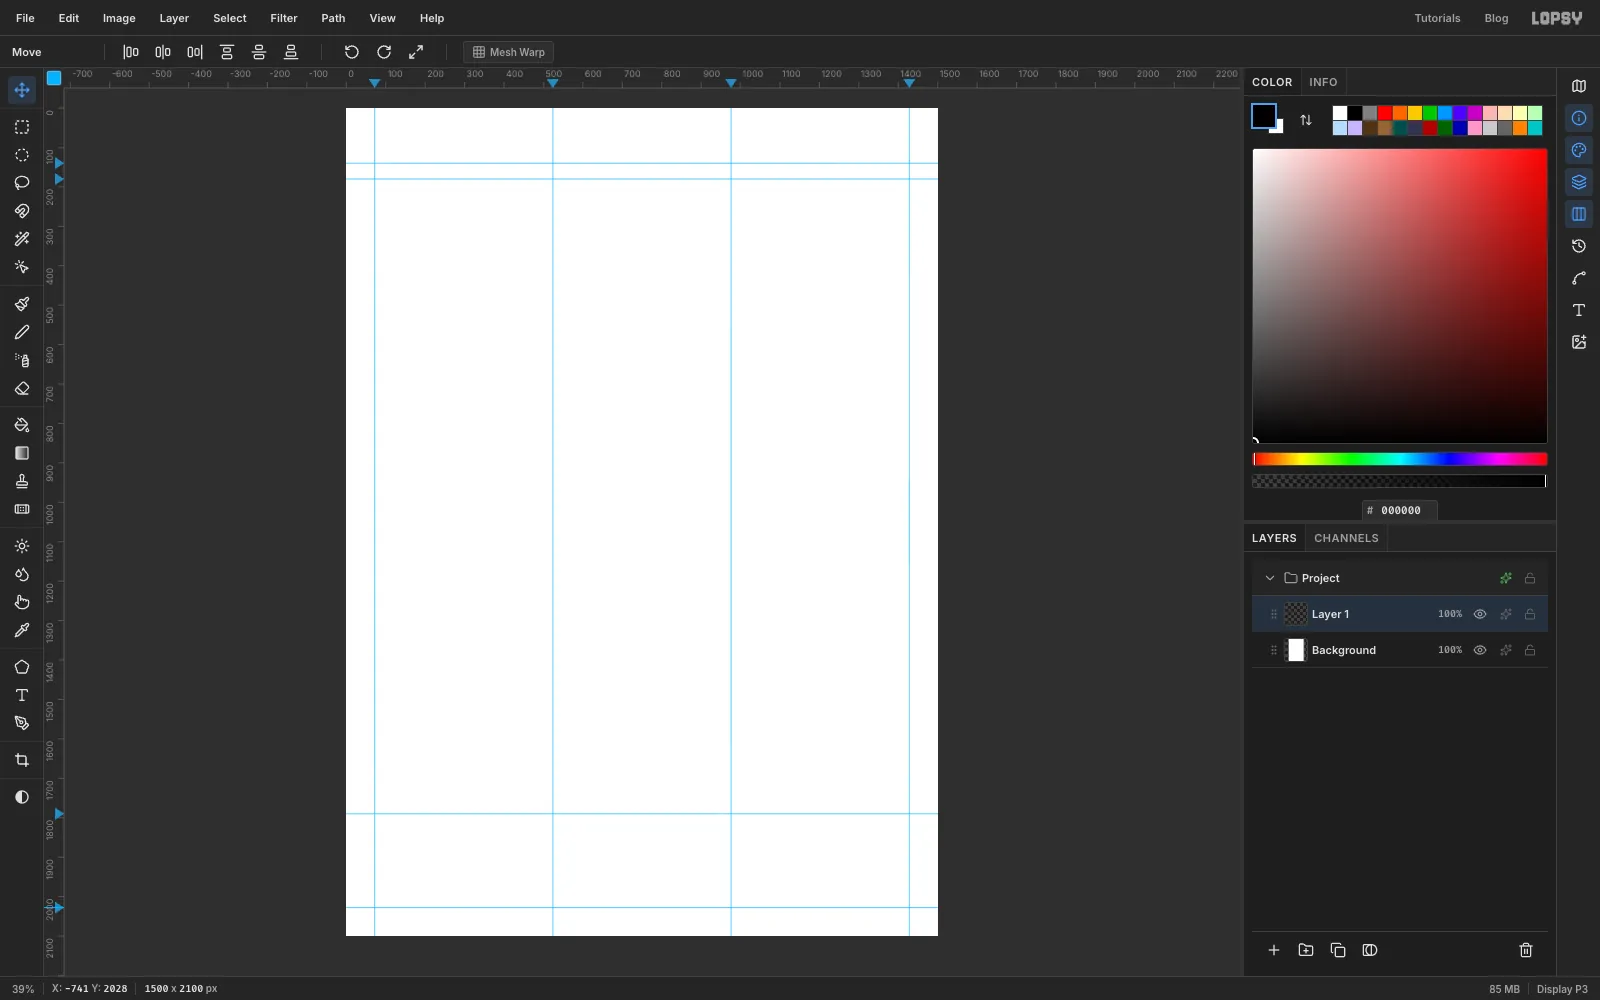
1500and Height2100, and click Create. - Click the top ruler at 72, 524, 976 and 1428 for vertical guides: the left and right margins and the two column lines of the table you'll draw at the bottom.
- Click the left ruler at 140, 180, 1790 and 2028 for horizontal guides: the header rule, the top of the wordmark, the table's top rule and the bottom margin.
- Double-click
Layer 1in the Layers panel and rename itConcrete.
- Open Lopsy. In the New Document dialog set Width
-
Pour the concrete
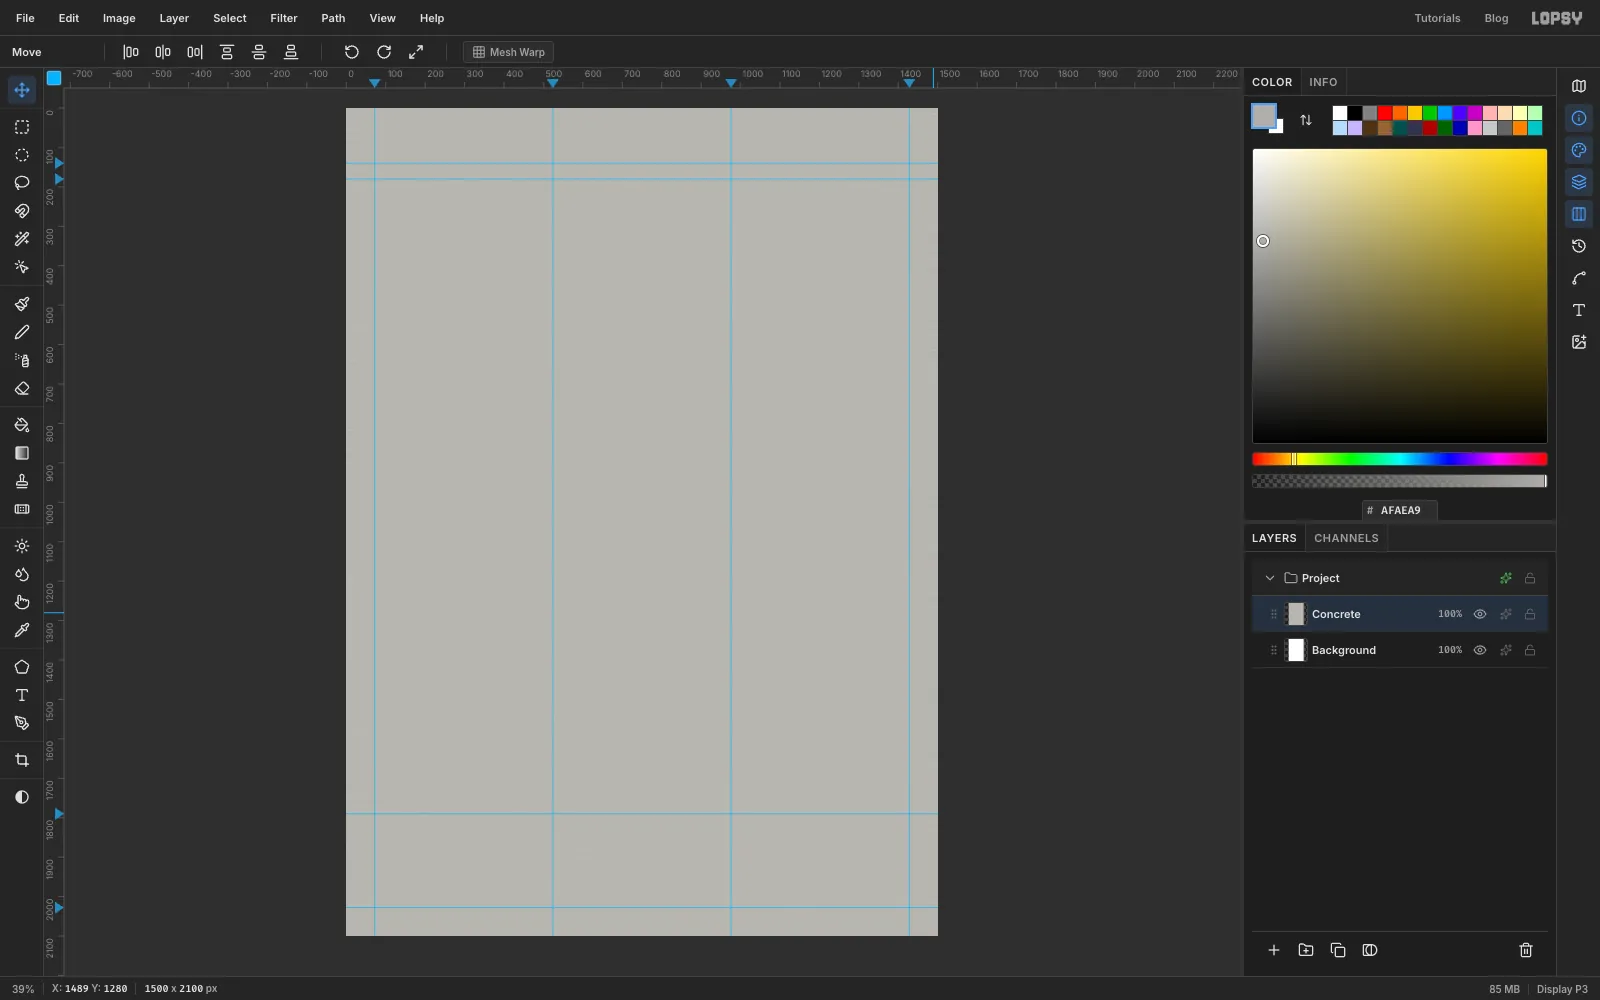
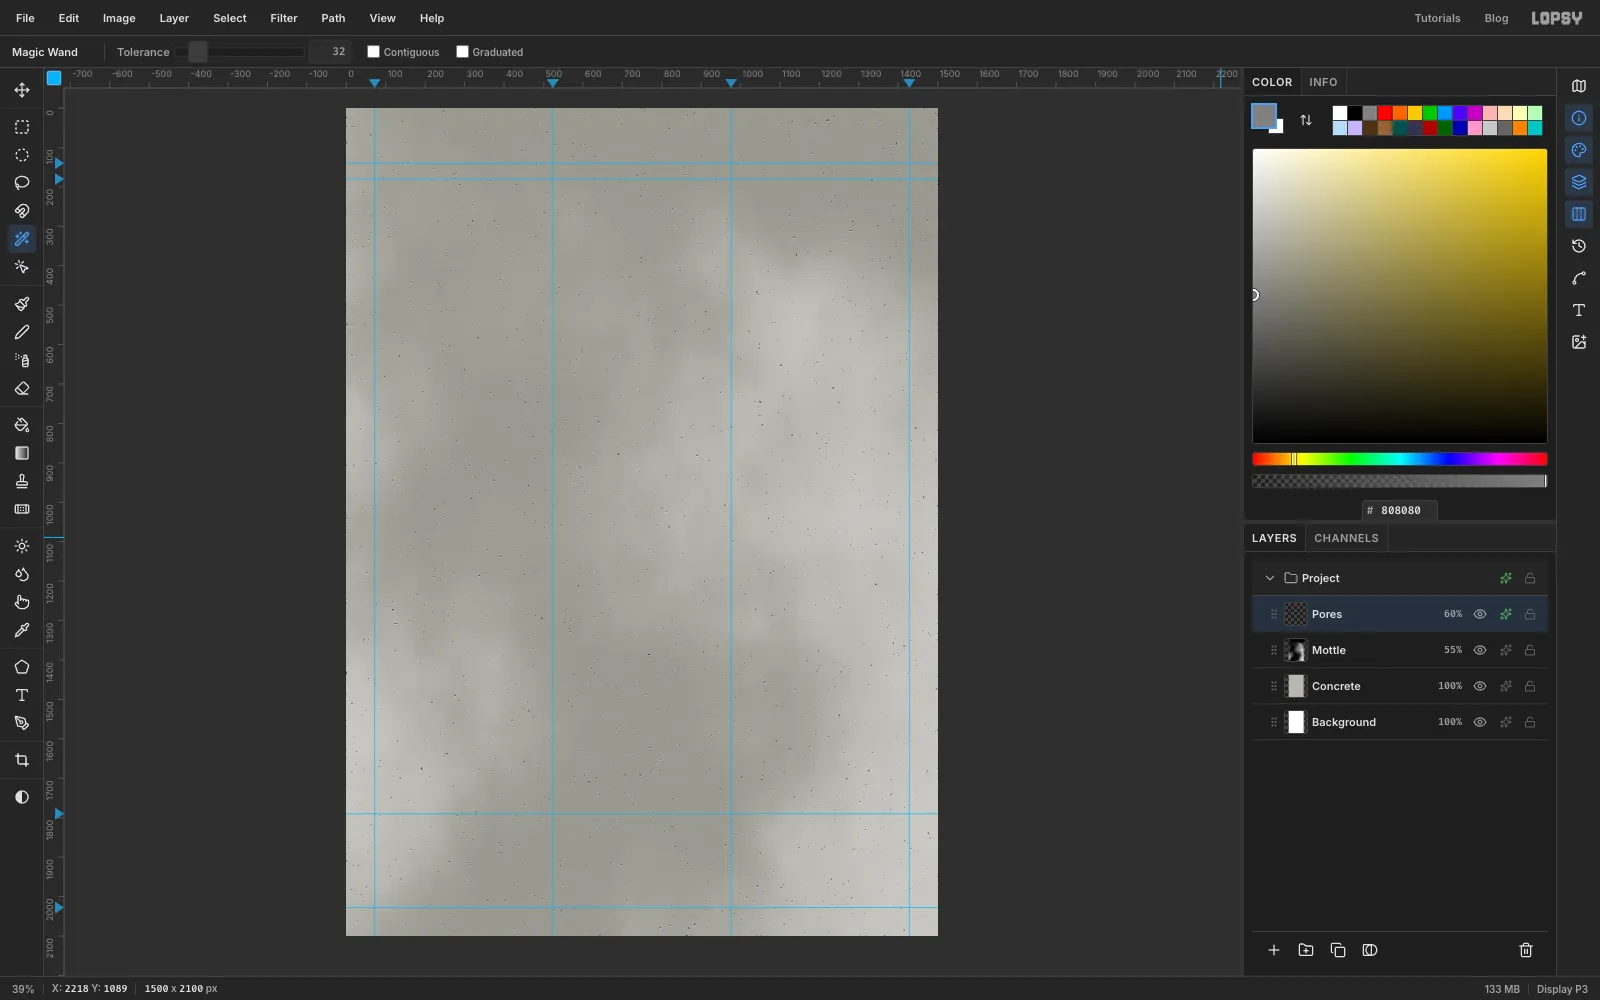
Concrete starts as flat grey with a grain in it.
- Type
AFAEA9into the Color panel's hex field and choose Edit → Fill. With nothing selected, Fill covers the whole layer. - Choose Filter → Add Noise…, set Amount to
32, pick Mono and Gaussian, and click Apply. - Choose Filter → Motion Blur… with Angle
0and Distance90. The speckle smears into horizontal streaks, like the grain the boards leave behind. - Filter → Brightness/Contrast…: leave Brightness at
0, set Contrast to18, and apply. - Run Add Noise once more at Amount
8(Mono, Gaussian) to put some fine grit back on top.
- Type
-
Add soft mottling
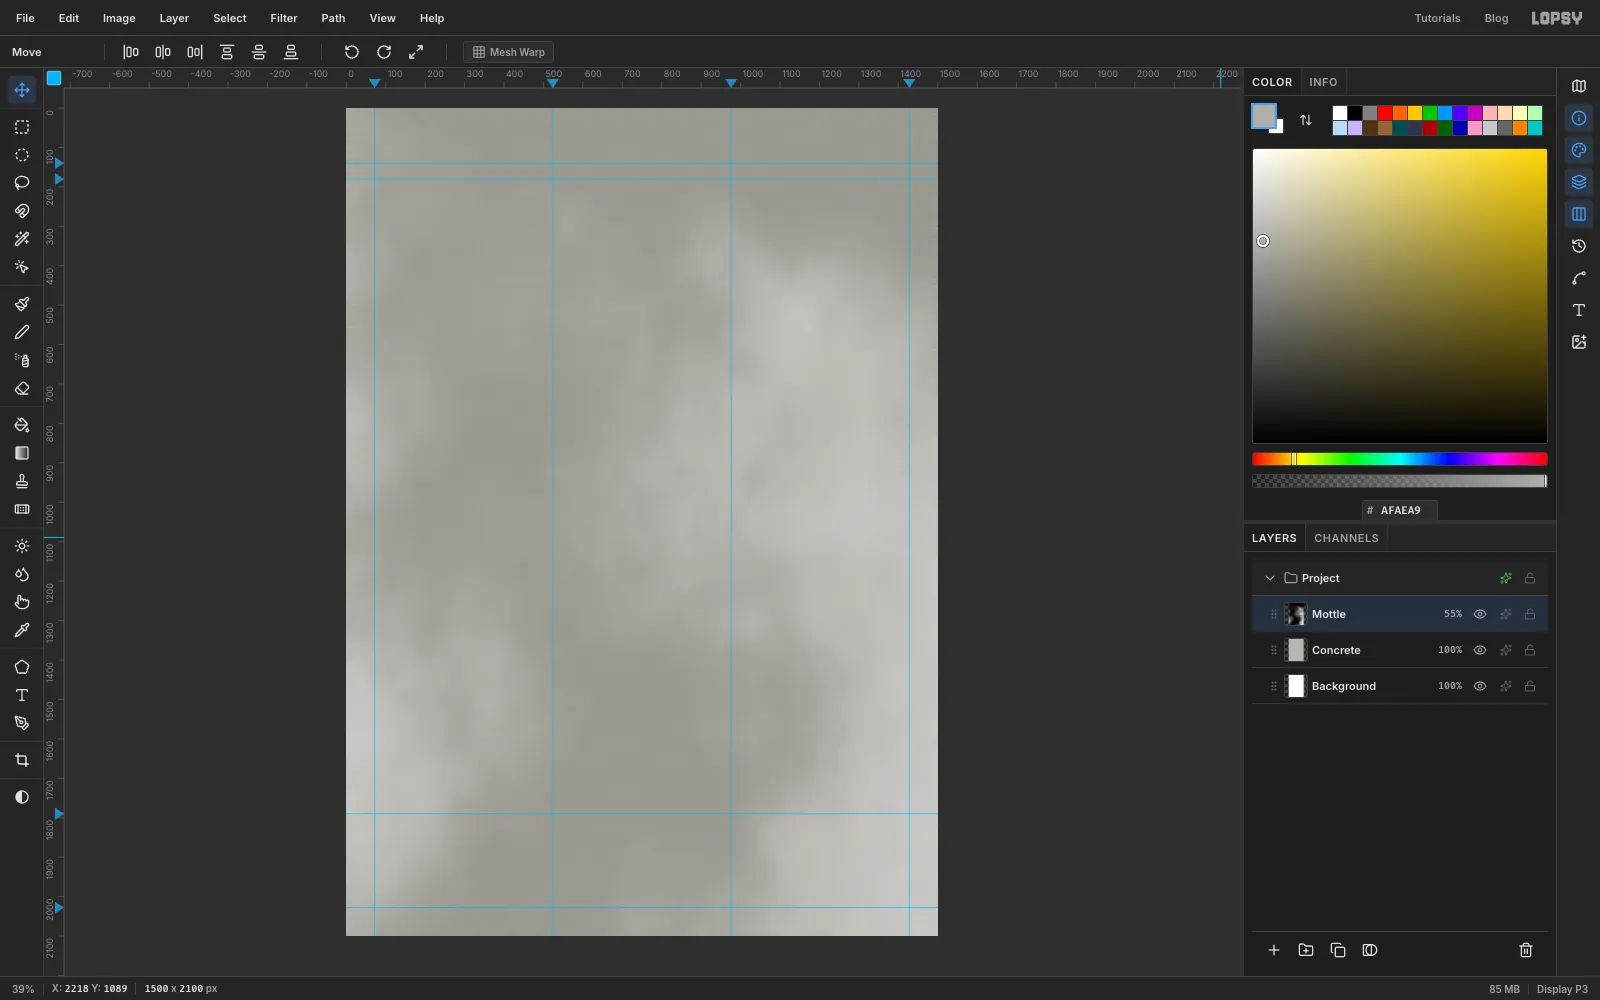
Real concrete dries unevenly, so the wall needs big, soft patches of light and dark.
- Click Add Layer (+) and name it
Mottle. - Choose Filter → Clouds…, set Scale to
2(a low scale gives large blobs) and apply. - Open the layer's effects with the ✦ button on its row and set its Blend mode to Soft Light. Close the drawer and set the layer's opacity to 55%.
- Click Add Layer (+) and name it
-
Make the bugholes
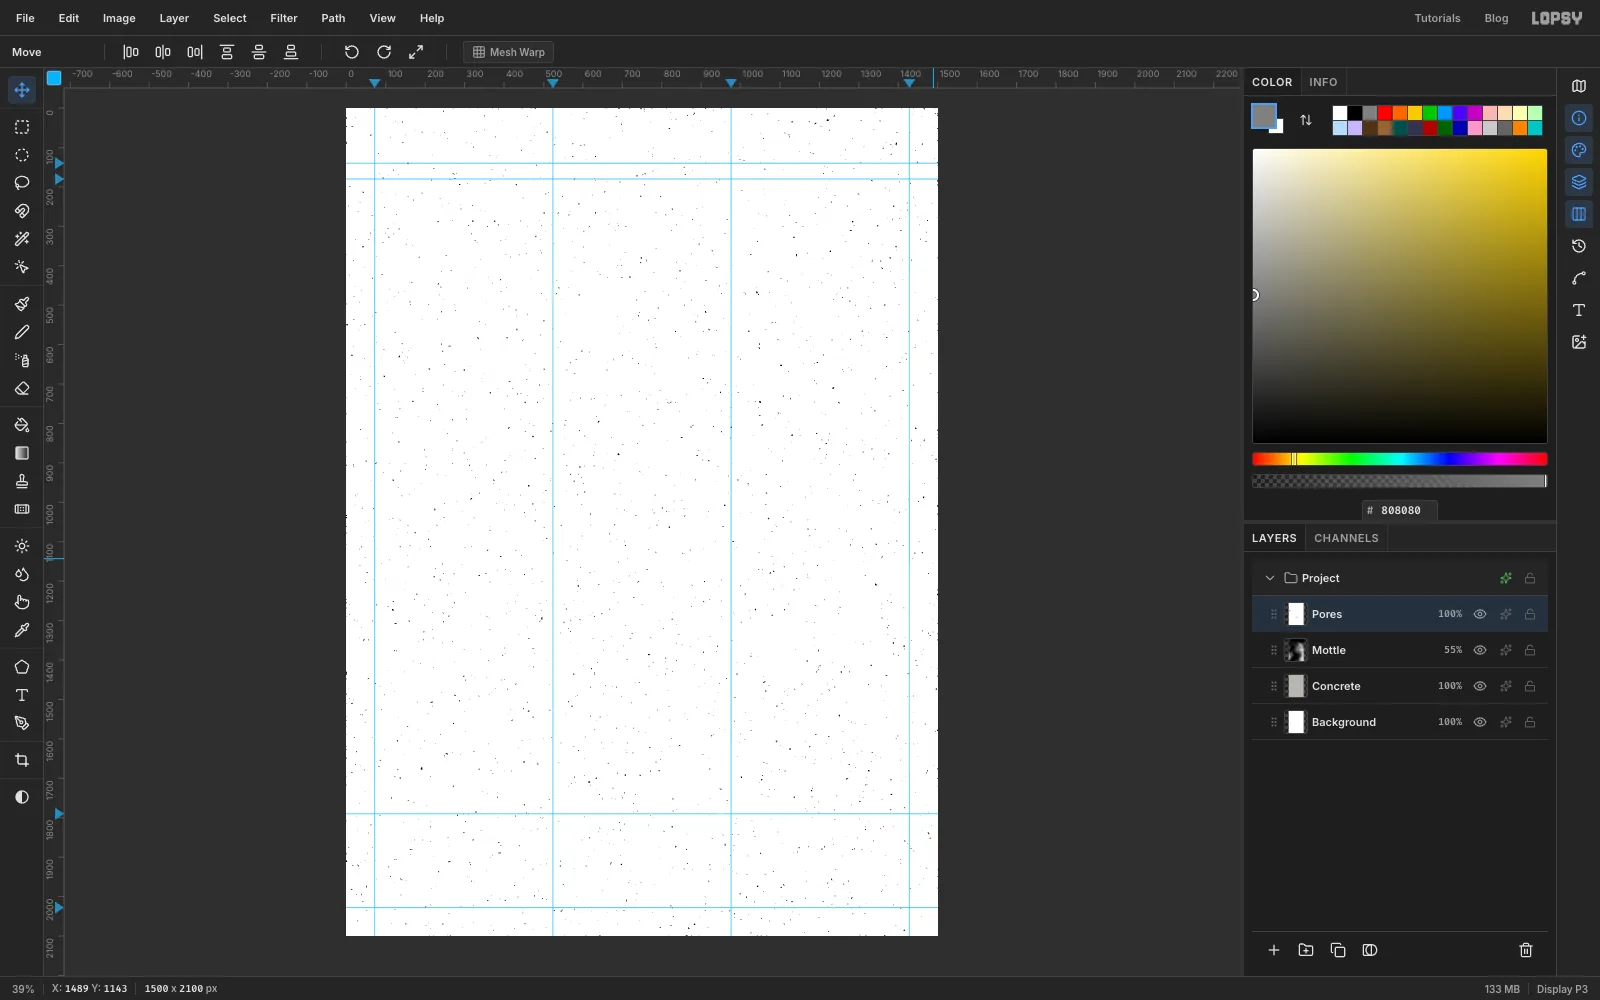
Bugholes are the small air pockets left in the surface of poured concrete. You'll make them from blurred noise. Blurring first means the Threshold leaves clumps instead of single pixels.
- Add a layer named
Pores. Fill it with . - Add Noise at Amount
100, Mono, Uniform. - Filter → Gaussian Blur… with Radius
4. - Filter → Threshold…. Turn on Preview and drag Level down until only a sparse scatter of dark clumps is left, about
111. Apply.
- Add a layer named
-
Cut the bugholes out and give them a lip
- Pick the Magic Wand (W) and untick Contiguous in the options bar. Click any white area of the
Poreslayer, so every white pixel is selected at once. - Press Delete and then Cmd+D. Only the dark clumps are left.
- Open the layer's effects and enable Drop Shadow: colour , Offset X
0, Offset Y2, Blur1, Spread0, Opacity80. A pale shadow under a dark hole reads as light catching its lower edge. - Close the drawer and set the layer's opacity to 60%.
- Pick the Magic Wand (W) and untick Contiguous in the options bar. Click any white area of the
-
Turn the page to make wood grain
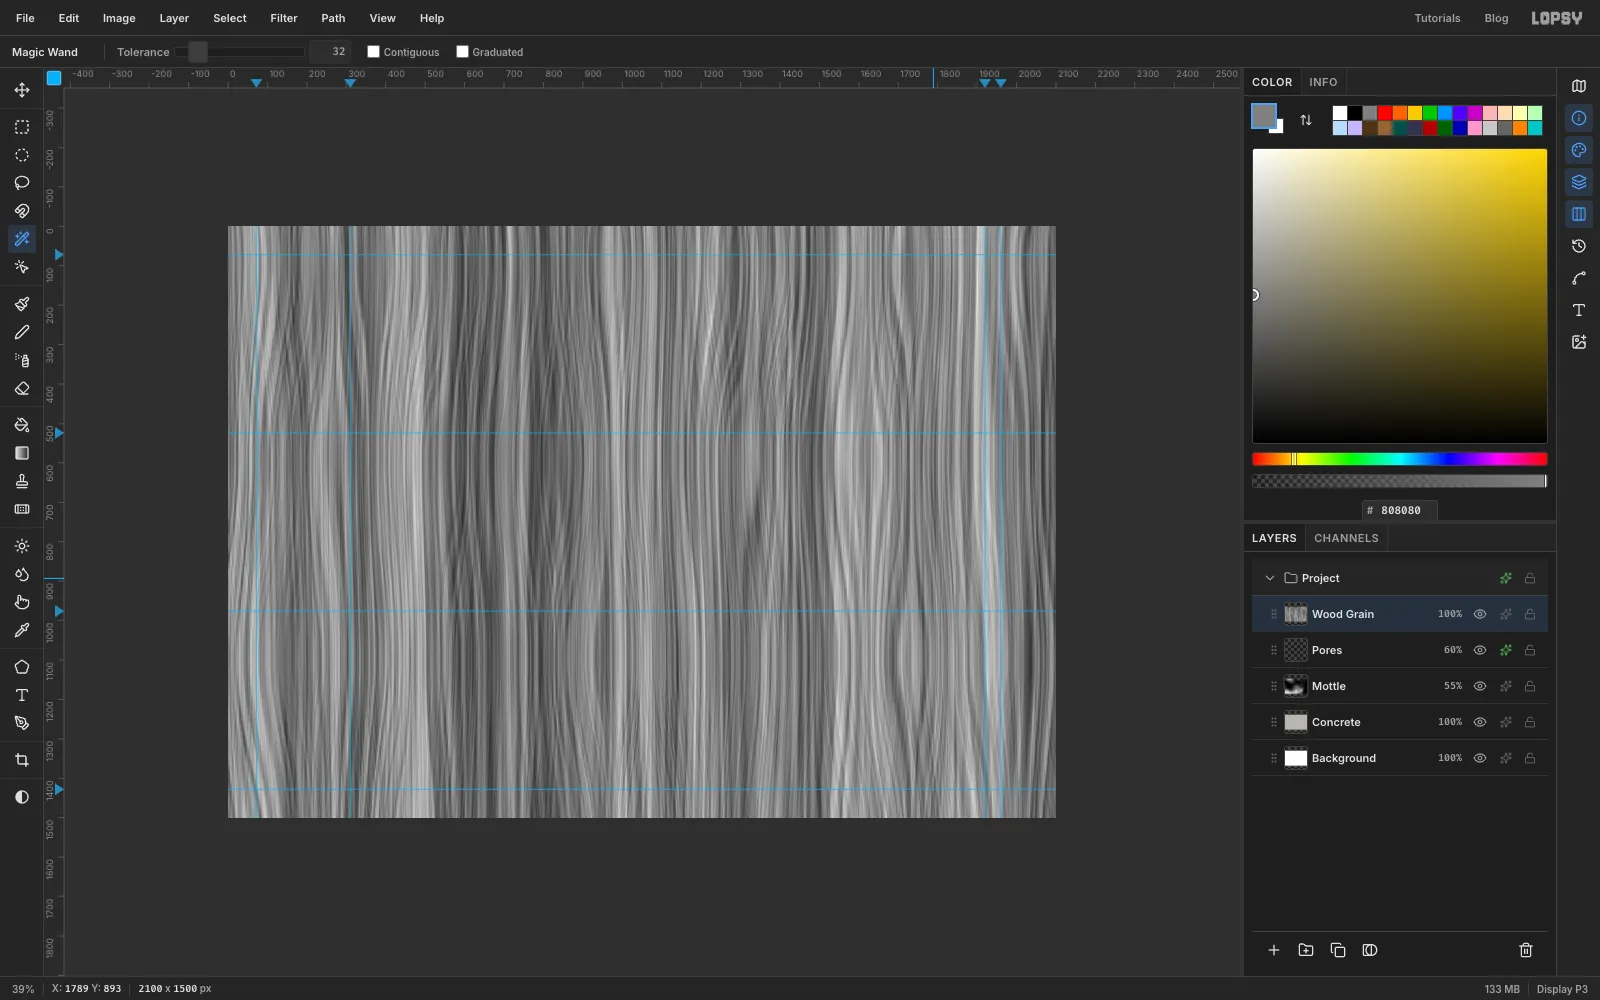
The wood grain comes from Fibers, but Fibers always runs vertically and the grain needs to run along the planks. The fix is to turn the whole document on its side first.
- Choose Image → Rotate 90° CW. The page is now 2100 wide and 1500 tall.
- Add a layer named
Wood Grain. - Choose Filter → Fibers…, set Variance
28and Strength48(higher strength gives straighter strands), and apply. - Choose Image → Rotate 90° CCW to stand the page back up. The fibers now run across it.
-
Twist knots into the grain
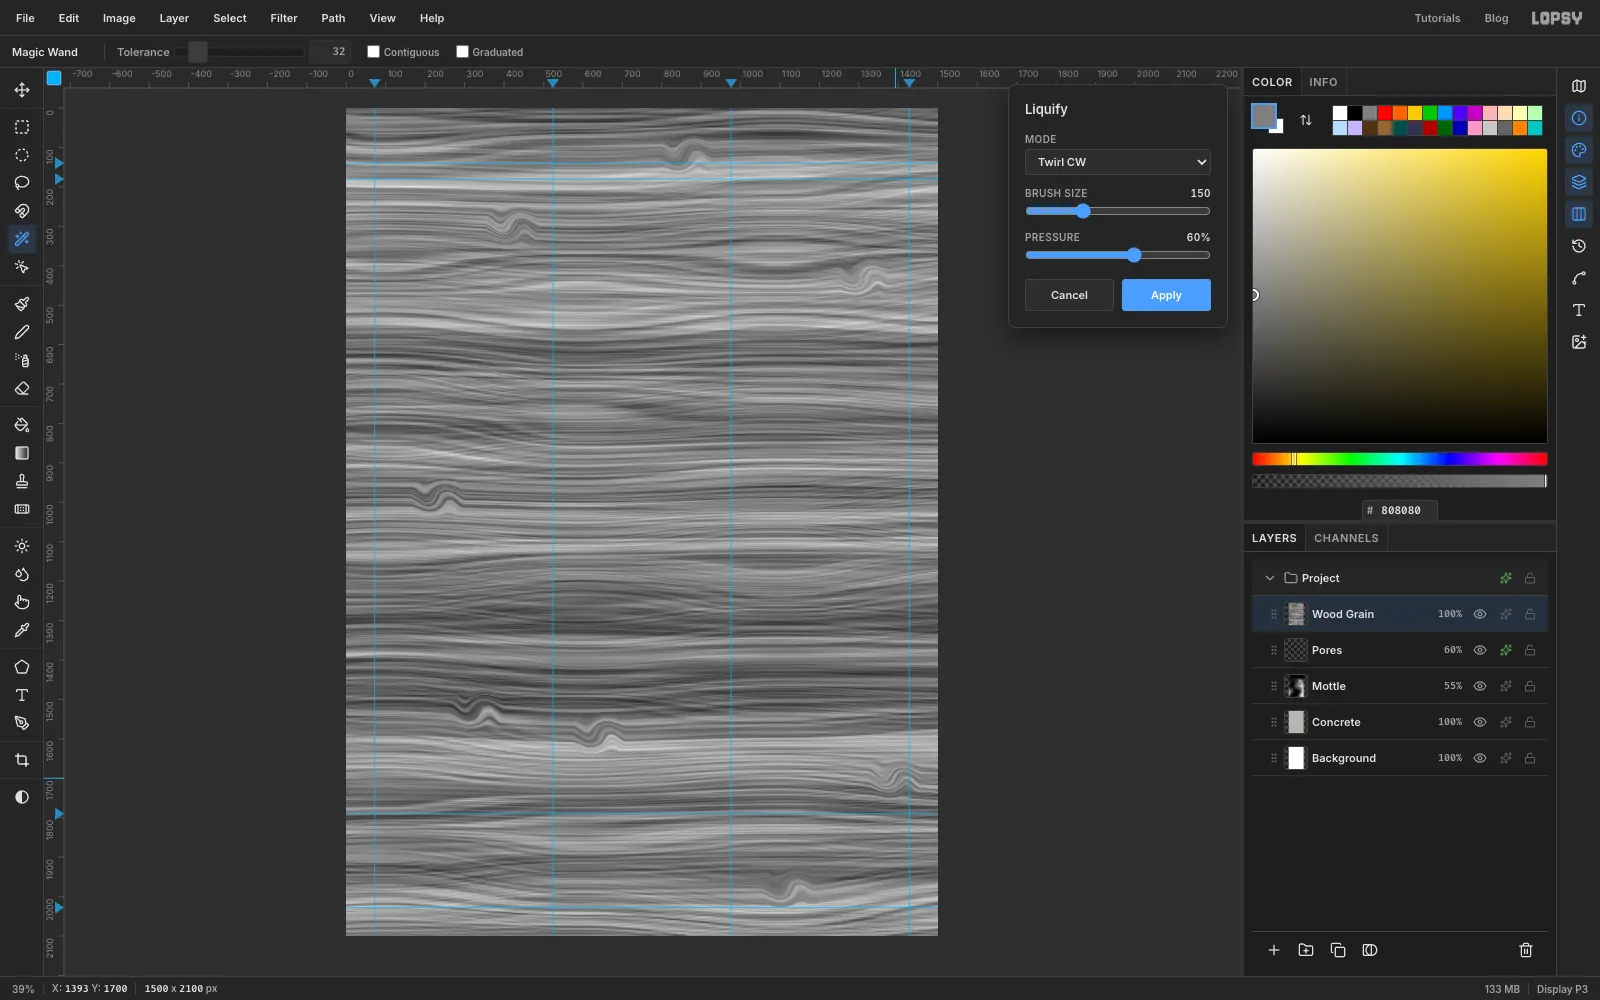
- With
Wood Grainstill active, choose Filter → Liquify…. - Set Mode to Twirl CW, Brush size to
150and Pressure to60. - Press on a spot of grain and hold for about half a second, jiggling the mouse very slightly on the spot so the twirl keeps going. Each hold twists the fibers into a small knot.
- Make about eight knots, spread out over the wall. Put most of them in places that will stay open concrete, such as the left edge halfway down and the right side near the top.
- Click Apply. Set the layer's blend mode to Soft Light and its opacity to 85%.
- With
-
Shade the boards one by one
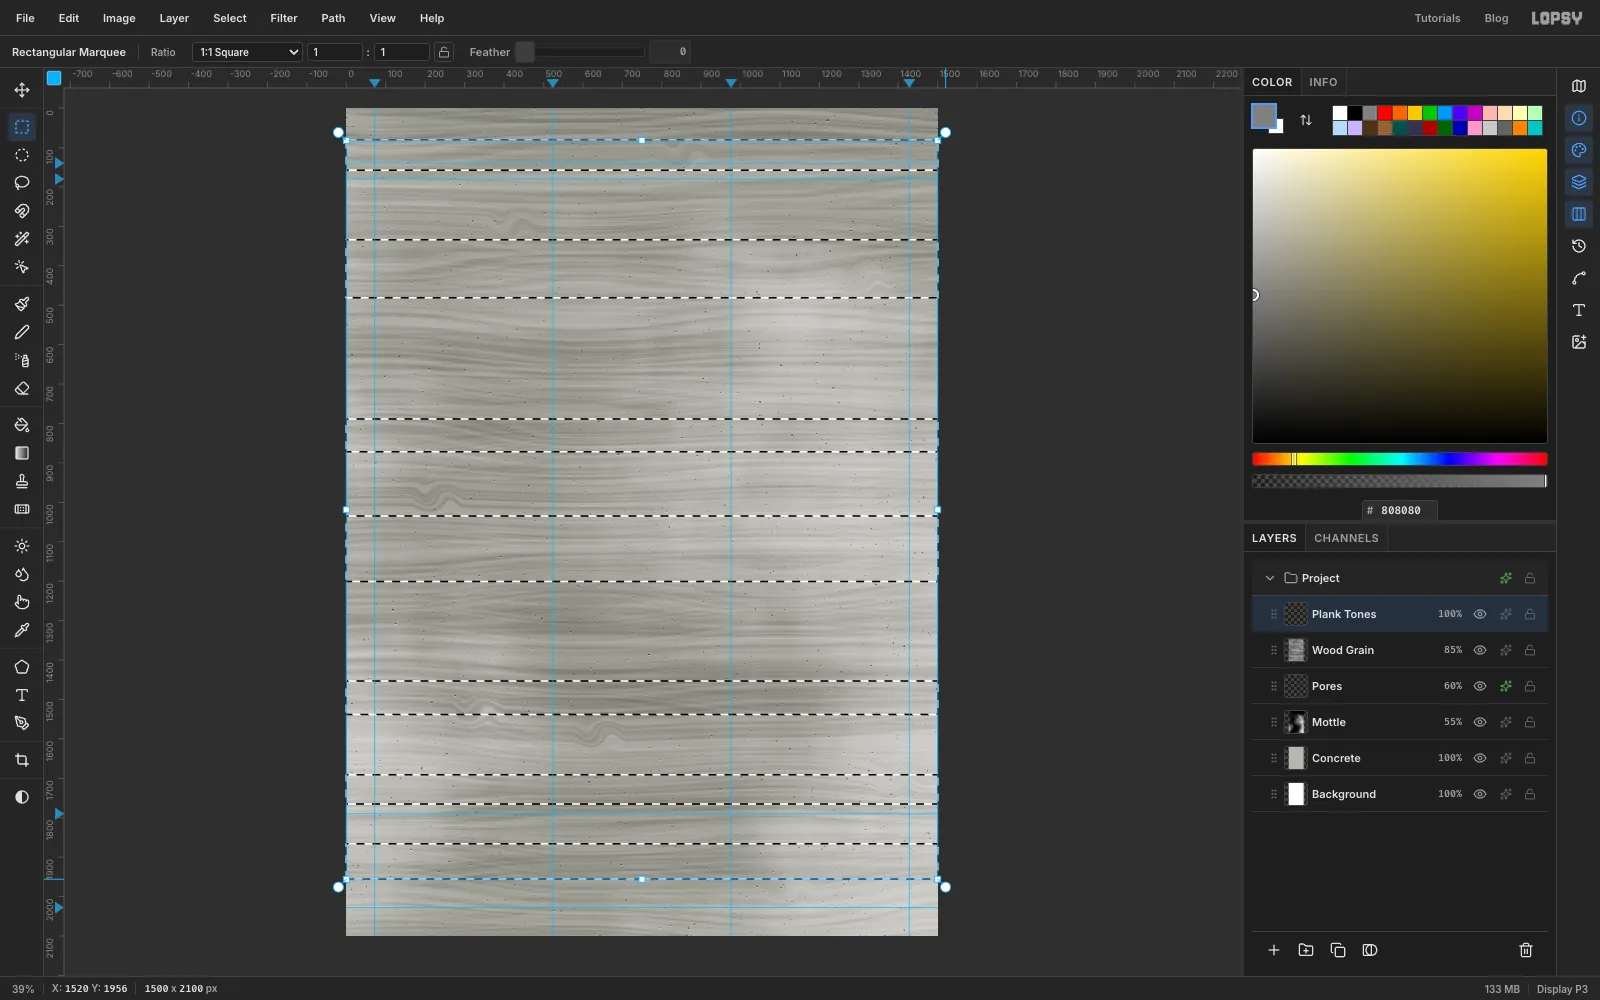
Each board in the formwork leaves the concrete a slightly different shade. The boards are uneven heights, between about 70 and 100 px.
- You'll be drawing a lot of small shapes near the guides now, so turn off View → Snap to Guides. That stops them jumping onto a guide.
- Add a layer named
Plank Tones. With the Rectangular Marquee (M), drag a band across the full width, from just off the left edge to just off the right edge, from y82to158. Hold Shift and drag more bands from334to407,407to481,789to872,1035to1123,1123to1201,1453to1538,1691to1765and1866to1956. - Fill with , deselect, set the layer to Multiply and its opacity to 40%.
- Add a layer named
Plank Lights. Shift-add bands for158–242,585–687,872–962,1290–1368,1612–1691and1956–2004. Fill them with white, deselect, and set the opacity to 18%.
-
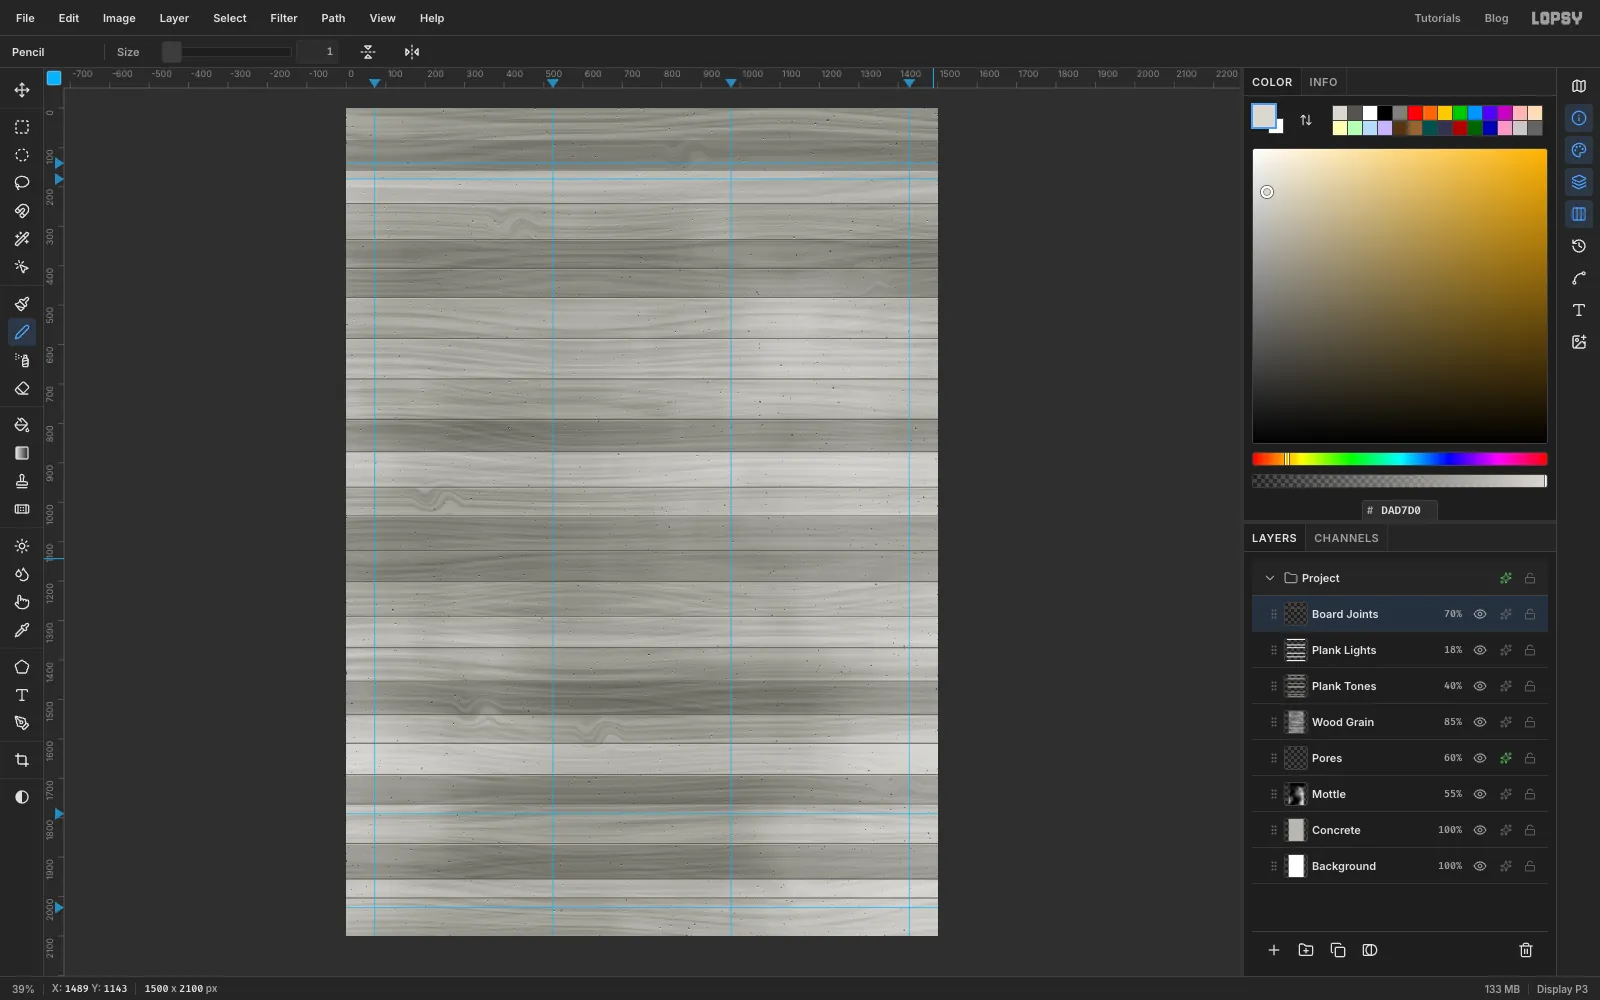
Draw the board joints
- Add a layer named
Board Joints. Pick the Pencil (N) at Size3and colour . - For each joint, click at the left edge of the canvas and Shift-click at the right edge to draw a straight line. Draw joints at y
82,158,242,334,407,481,585,687,789,872,962,1035,1123,1201,1290,1368,1453,1538,1612,1691,1765,1866,1956and2004. These spacings are uneven on purpose, and they're chosen to fall between the lines of type you'll add later. - Switch the Pencil to Size
1and colour , and draw a second line 2 px below each joint. That pale line is the lit lip of the board below. - Run Gaussian Blur with Radius
1to soften the joints, and set the layer's opacity to 70%.
- Add a layer named
-
Plug the form-tie holes
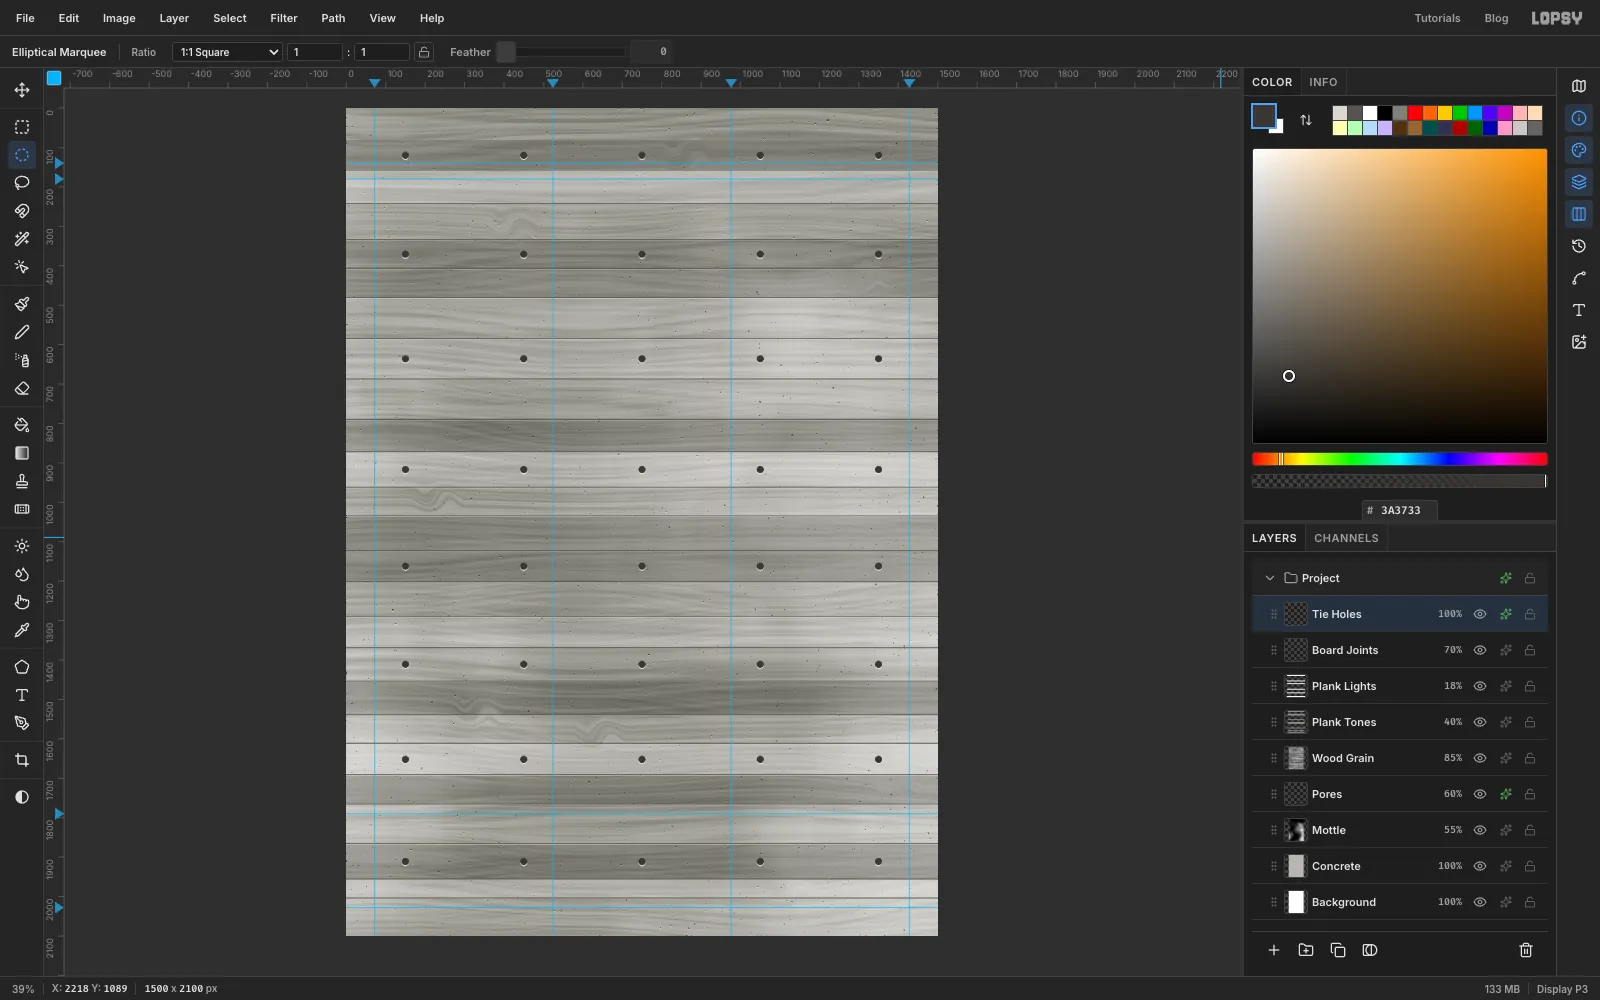
Formwork is held together with steel ties, and they leave neat rows of round holes.
- Add a layer named
Tie Holes. Zoom in so the small circles are easy to judge. With the Elliptical Marquee, drag an 18 px circle centred on150, 120. Hold Shift and drag the same size of circle at x450,750,1050and1350on that row. - Shift-add the same five circles on the rows at y
371,636,917,1162,1411,1652and1911. Each row sits in the middle of every third board. - Fill with and deselect.
- Add a Drop Shadow: colour , Offset X
0, Offset Y3, Blur1, Spread0, Opacity85. Some of these holes will clash with the type later, and you'll delete those near the end.
- Add a layer named
-
Cut the aloe photo into a disc
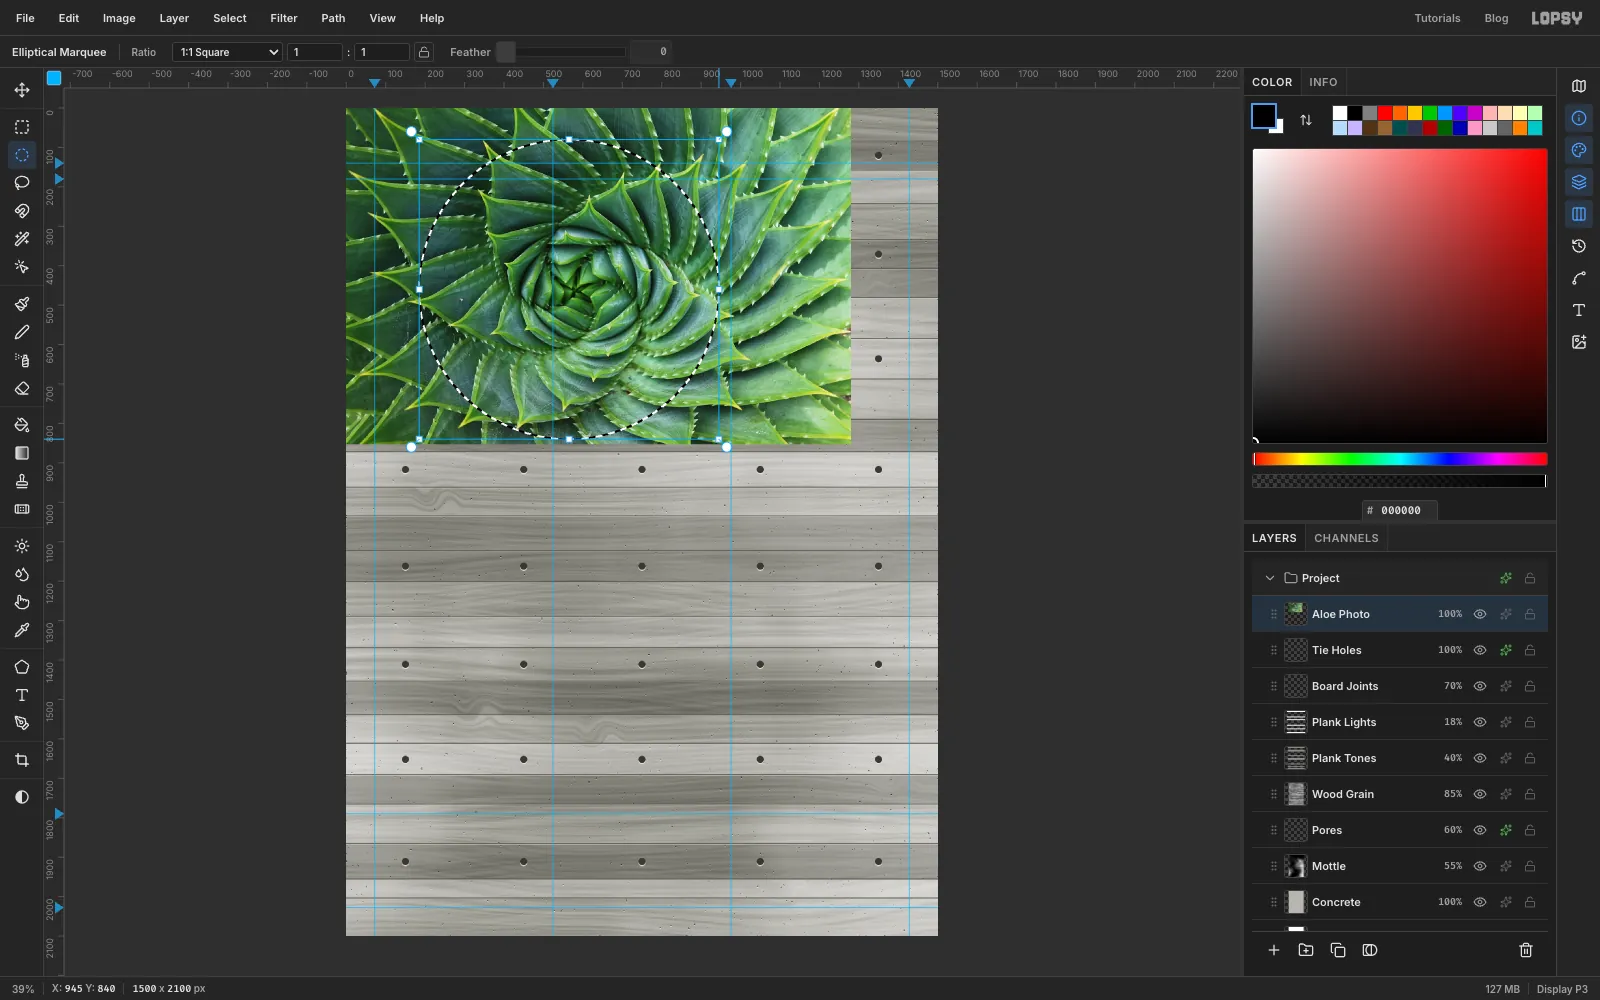
- Drag the downloaded aloe photo from your desktop onto the canvas. It arrives as a new layer at the top-left corner, already selected and with the Move tool picked. Press Cmd+D to drop the selection, then rename the layer
Aloe Photo. - Find the tight heart of the spiral, at about
565, 460on the photo. With the Elliptical Marquee, drag a 760 px circle centred on it, from185, 80to945, 840. - Choose Select → Inverse, press Delete, then deselect. Only the disc is left.
- Drag the downloaded aloe photo from your desktop onto the canvas. It arrives as a new layer at the top-left corner, already selected and with the Move tool picked. Press Cmd+D to drop the selection, then rename the layer
-
Scale the disc to fit the oculus
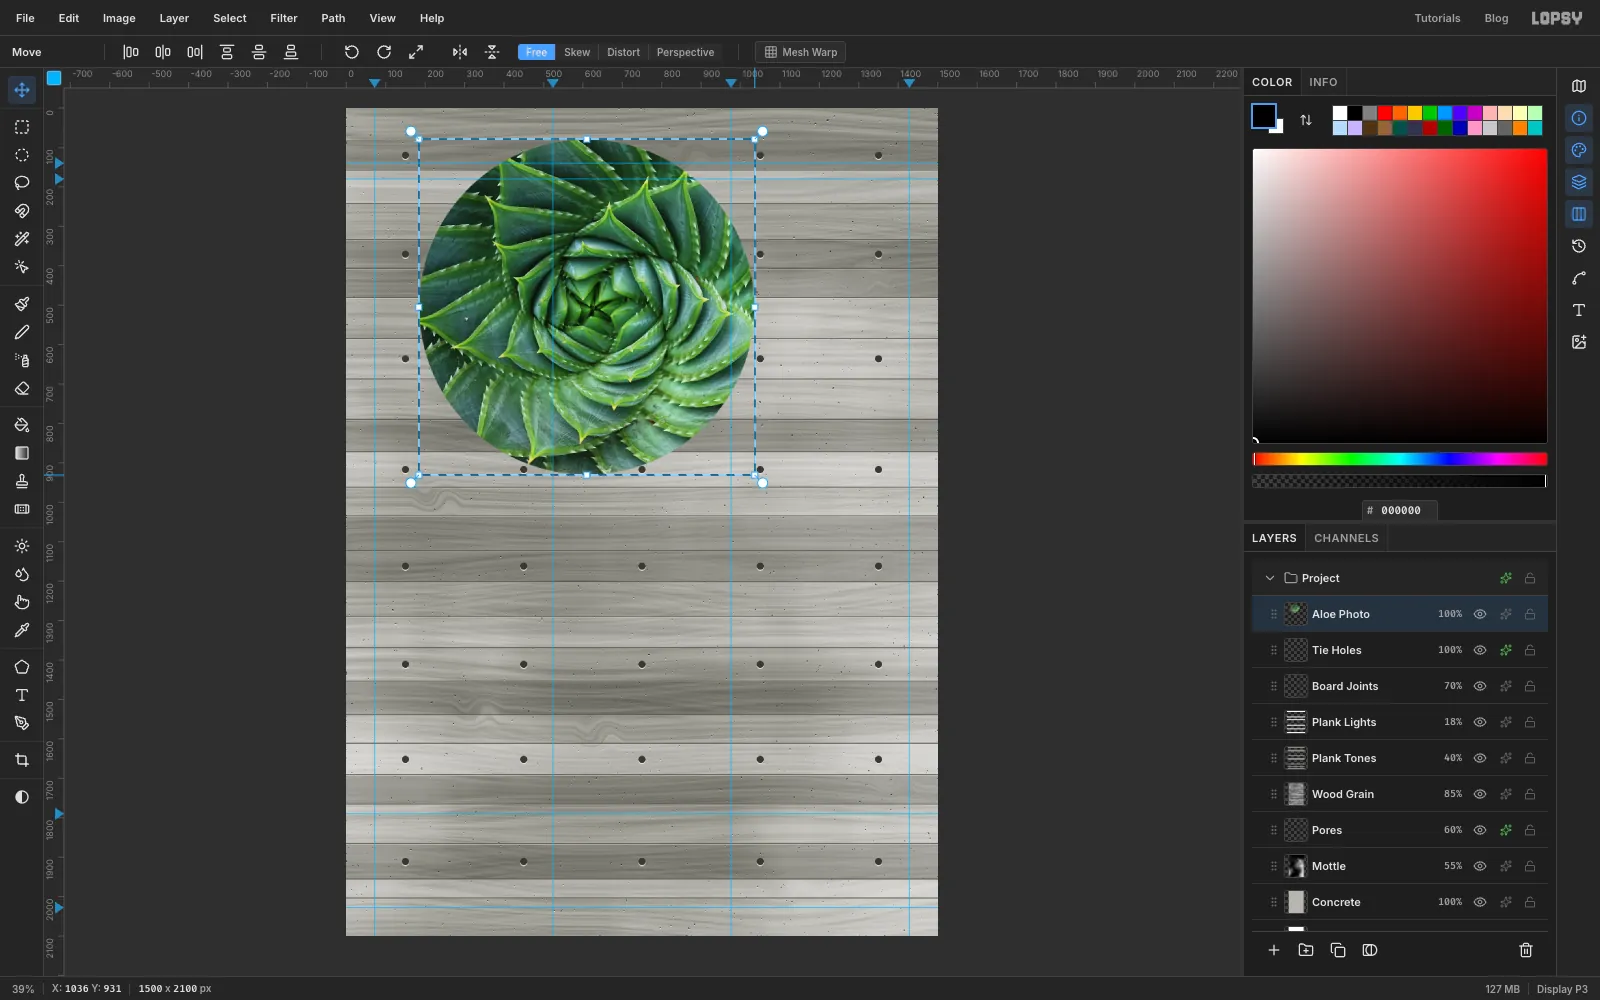
The oculus is an 850 px circle, from
575, 550to1425, 1400.- Draw a Rectangular Marquee just around the disc, from
184, 79to946, 841. - Switch to the Move tool (V). Hold Cmd (to keep the proportions) and drag the bottom-right corner handle out by about 90 px each way, until the disc is 850 px across.
- Press Cmd+D to commit the scale.
- Drag the disc from its middle until it sits in the oculus area, centred on
1000, 975. Use the arrow keys to nudge it exactly into place.
- Draw a Rectangular Marquee just around the disc, from
-
Strip the colour out
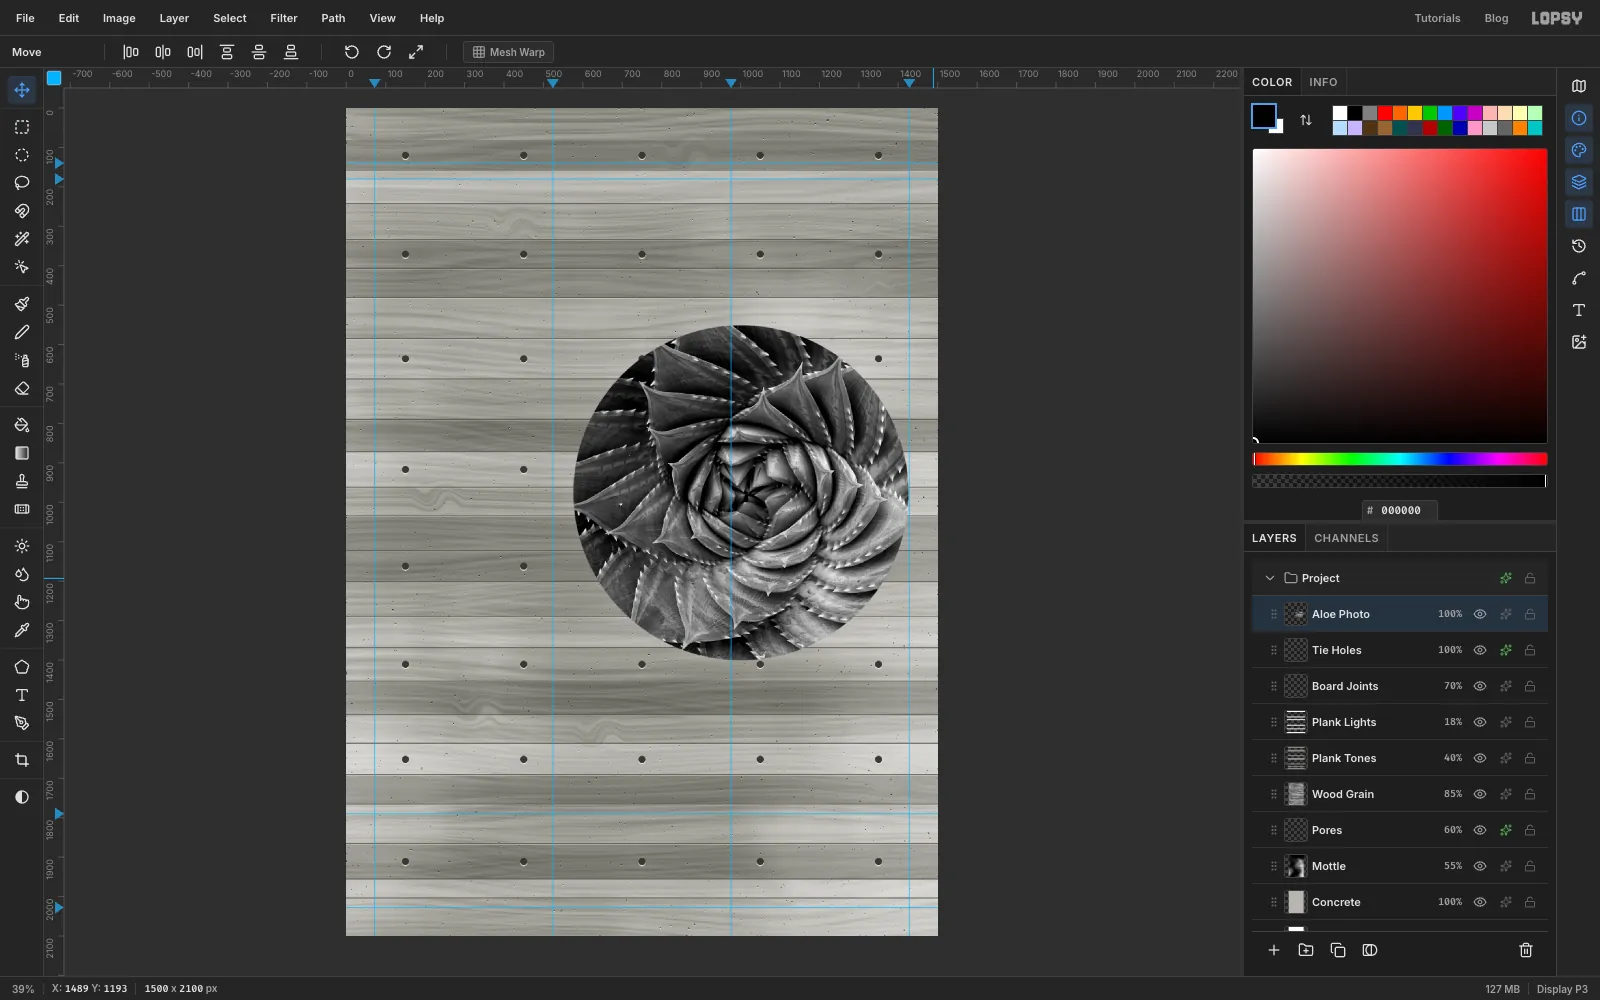
- Choose Filter → Desaturate.
- Filter → Brightness/Contrast… with Contrast
30. The Gradient Map you'll add shortly works from these greys, so good contrast gives a punchier duotone.
-
Shade the top of the hole
A hole cut through a thick wall is shadowed along one side. Here the light comes from the lower right, so the shadow falls along the top left.
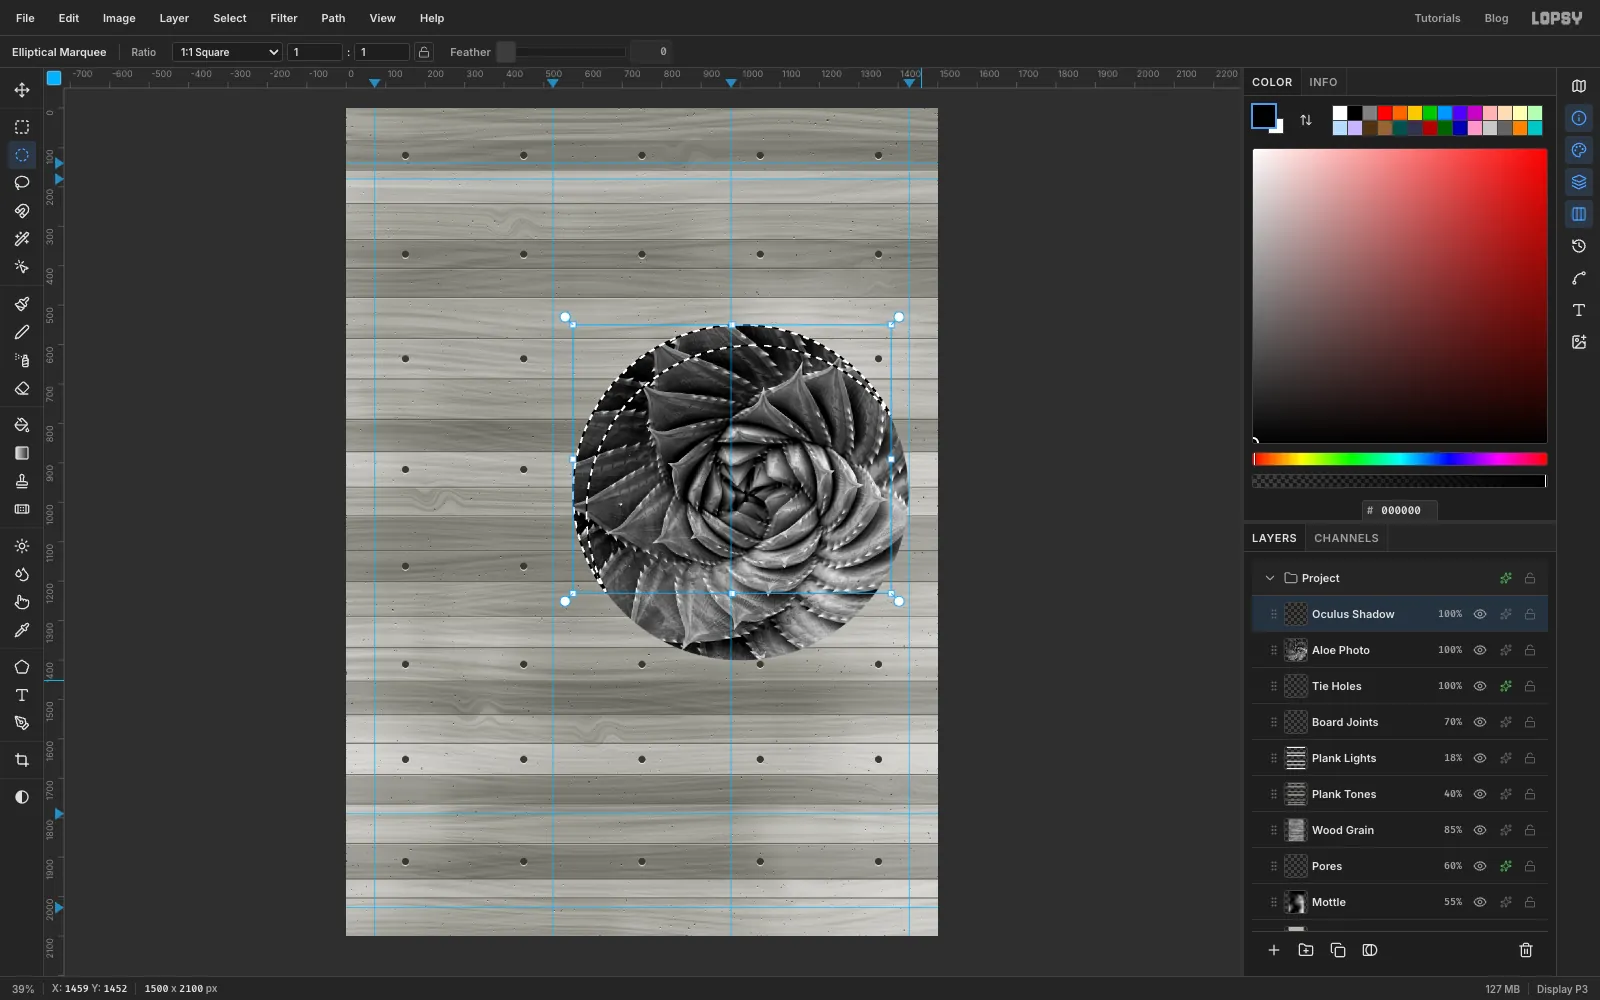
- Add a layer named
Oculus Shadow. With the Elliptical Marquee, drag the oculus circle, from575, 550to1425, 1400. - Hold Alt and drag the same size of circle again, shifted 34 px right and 52 px down (from
609, 602to1459, 1452). This subtracts most of it and leaves a crescent along the top-left edge. - Fill it with black and deselect. Run Gaussian Blur with Radius
18. - The blur spreads past the rim, so trim it back. Select the oculus circle again, choose Select → Inverse and press Delete. Deselect, then set the layer to Multiply at 80%.
- Add a layer named
-
Light the lower lip
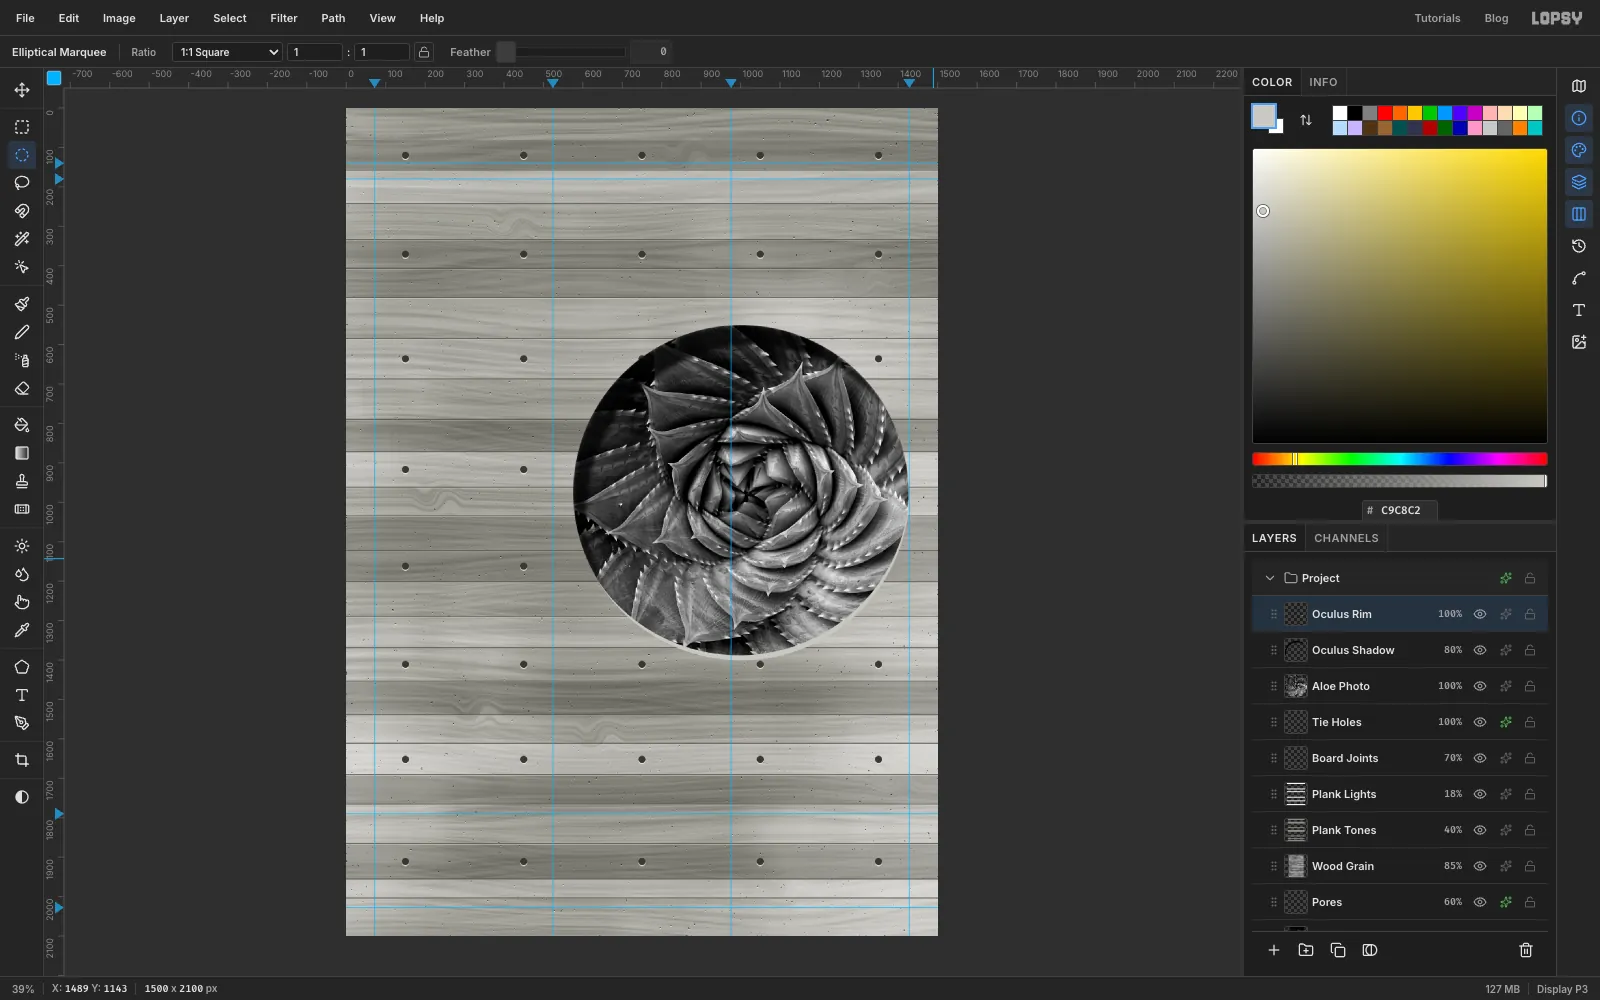
- Add a layer named
Oculus Rim. Select a circle 1 px bigger than the oculus (574, 549to1426, 1401). - Hold Alt and subtract the same circle moved 9 px left and 13 px up (
565, 536to1417, 1388). What remains is a thin crescent on the lower right. - Fill it with , deselect, and blur it with Radius
1. This is the sunlit edge of the cut concrete.
- Add a layer named
-
Duotone the aloe with a Gradient Map
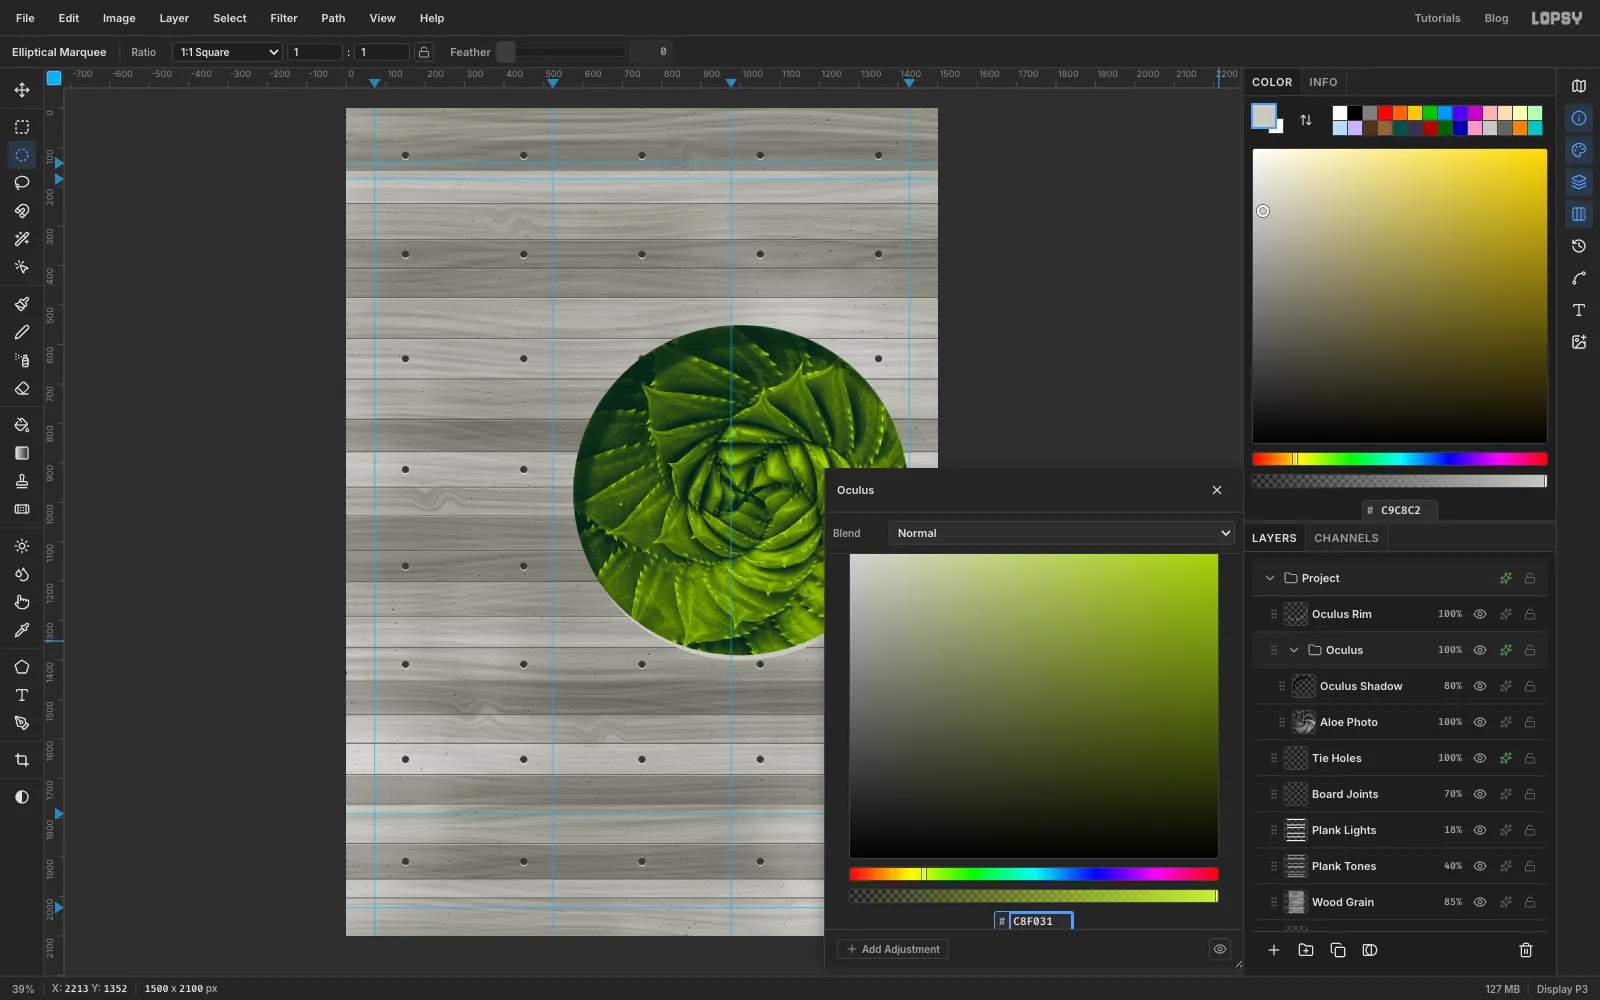
- Click
Aloe Photo, then Shift-clickOculus Shadowso both are selected. Choose Layer → Group Layers and rename the groupOculus. - Click the group's ✦ button to open its Adjustments drawer. Click Add Adjustment and choose Gradient Map.
- Click the left stop and type
0E2418in its hex field. Click the right stop and typeC8F031. The darks become deep moss and the lights become acid lime. The shadow inside the group turns green with the photo, so it looks like shade on the leaves. - Close the drawer.
- Click
-
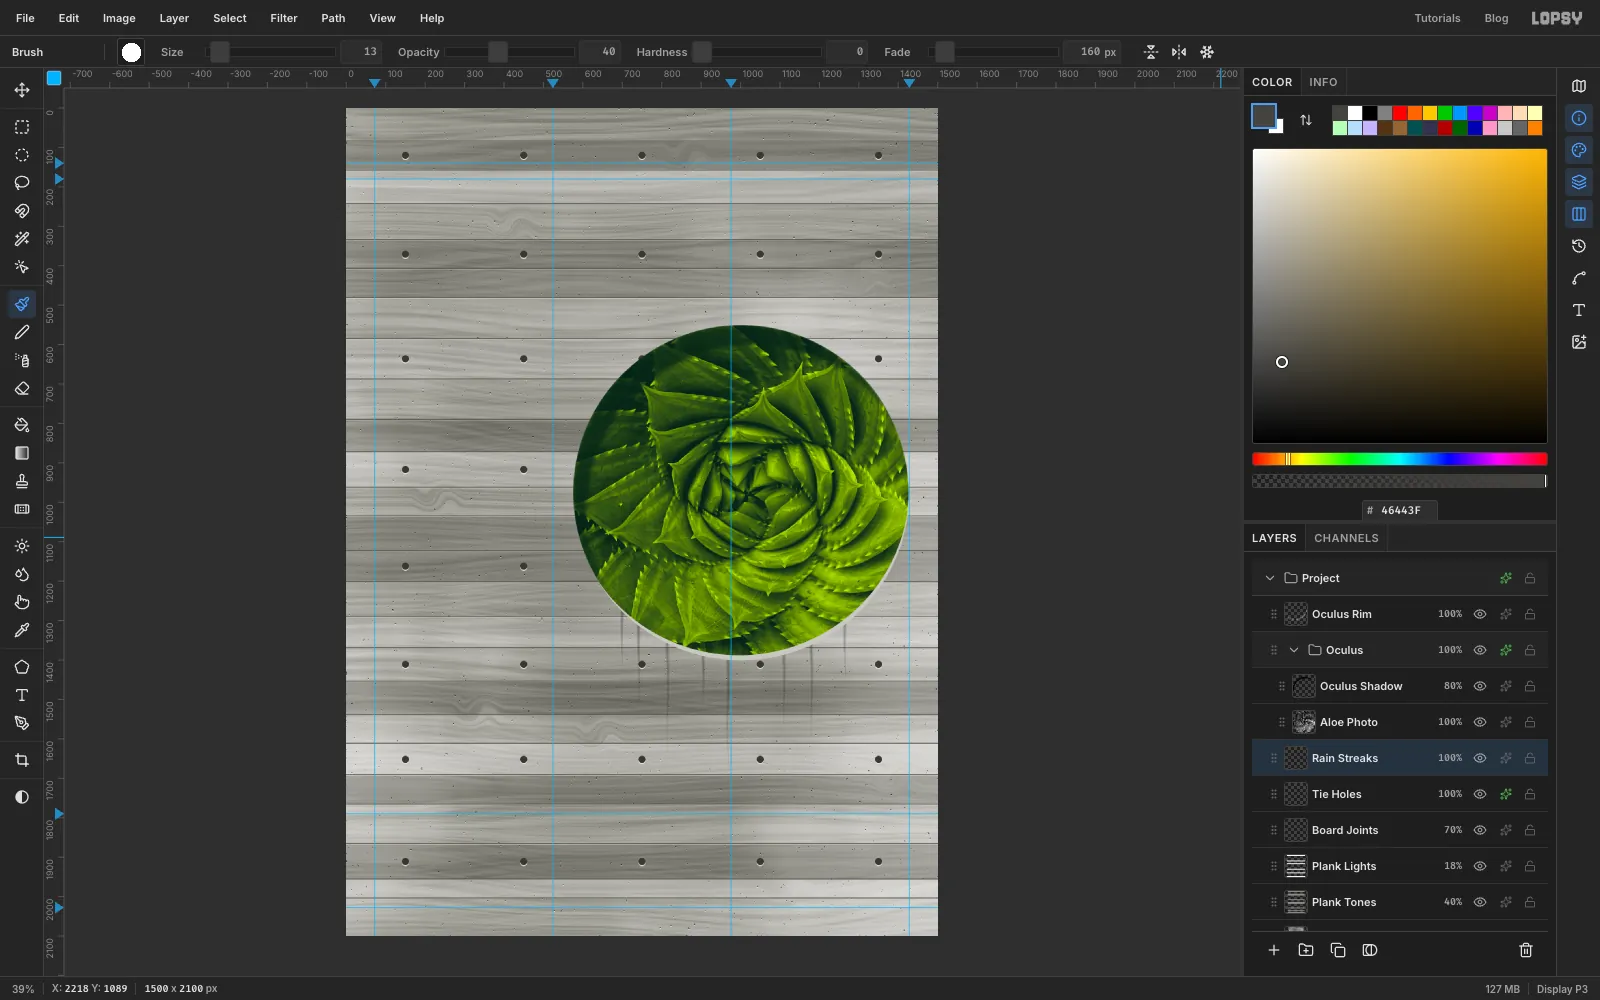
Let the rain streak down from the lip
Water dripping off the edge of a hole leaves dark streaks that start strong and fade out.
- Click
Tie Holesand add a layer namedRain Streaksabove it. - Pick the Brush (B) at Size
13, Hardness0, Opacity40, colour . - Open the Brushes window with the brush-tip button at the left of the options bar and, on its Shape tab, set Taper to a little more than the length of the streak you're about to draw. Then set Fade in the options bar to that length. Both start counting from where you press, so always start at the lip and drag straight down.
- Draw about eight streaks starting at the lower edge of the hole, between x
700and1265, from 150 to 320 px long. Change Taper and Fade for each one so they don't all end at the same point. - Set the layer to Multiply. Then set Fade back to
0and Taper to0, so later brush strokes aren't affected.
- Click
-
Set the table text
Create all the small type before the giant wordmark. The wordmark's line boxes are huge, and a click inside one would edit it instead of starting a new text layer.
- Click
Oculus Rim, the top layer of the image so far, so a raster layer is active. New layers go directly above the active one, and if a text layer were active, changing the Text options would restyle it. - Start with the right-hand column. Pick the Text tool (T) and set Space Mono Regular, size
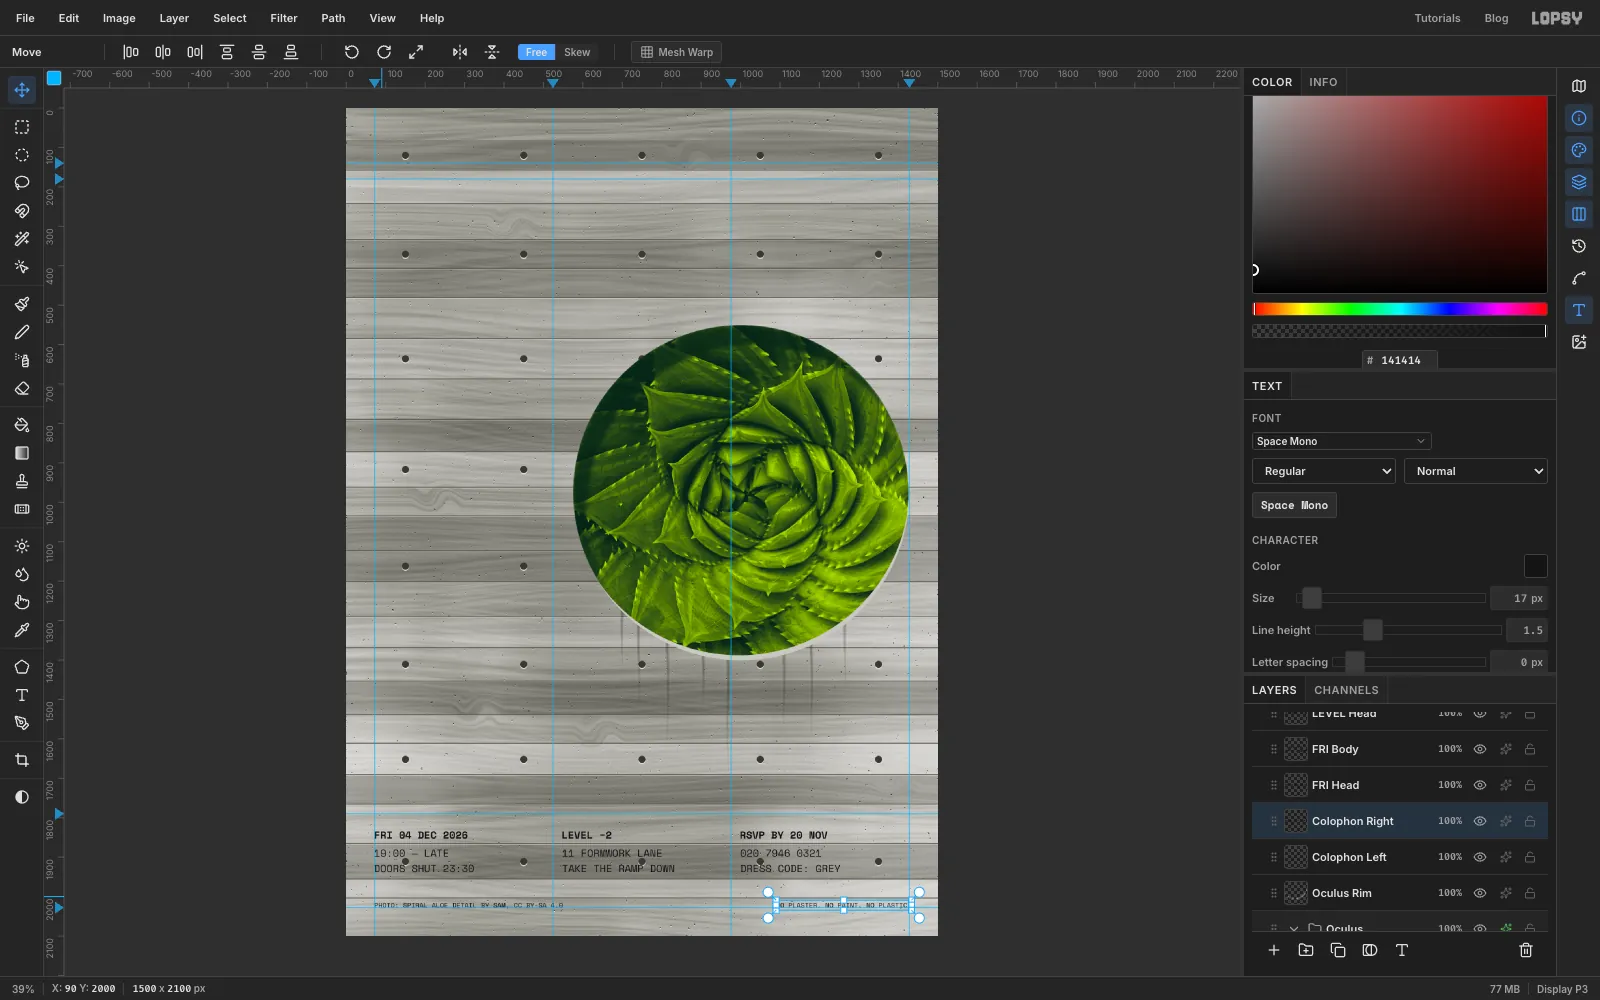
26, colour , and Line height1.5in the Text panel. Click in empty space and type020 7946 0321, press Enter, typeDRESS CODE: GREY, and press Tab to finish. With the Move tool, nudge it so the text starts at x1000and its first cap tops sit at y1880. - Click
Oculus Rimagain, pick the Text tool, switch Space Mono to Bold, and typeRSVP BY 20 NOV. Move it to x1000, with its cap tops at y1834, just above the two lines you typed. - Middle column: click
Oculus Rim, type11 FORMWORK LANE/TAKE THE RAMP DOWNin Regular and move it to x548, cap tops at y1880. Then clickOculus Rimagain and typeLEVEL −2in Bold at x548, cap tops at y1834. - Left column: the same again at x
72, with19:00 — LATE/DOORS SHUT 23:30in Regular andFRI 04 DEC 2026in Bold above it. - For the small print, click
Oculus Rimand use Space Mono Regular at size17. PutPHOTO: SPIRAL ALOE DETAIL BY SAM, CC BY-SA 4.0at the left margin andNO PLASTER. NO PAINT. NO PLASTIC.with its right edge on x1428. Sit both with their cap tops at y2016.
- Click
-
Add the invitation copy
- Click
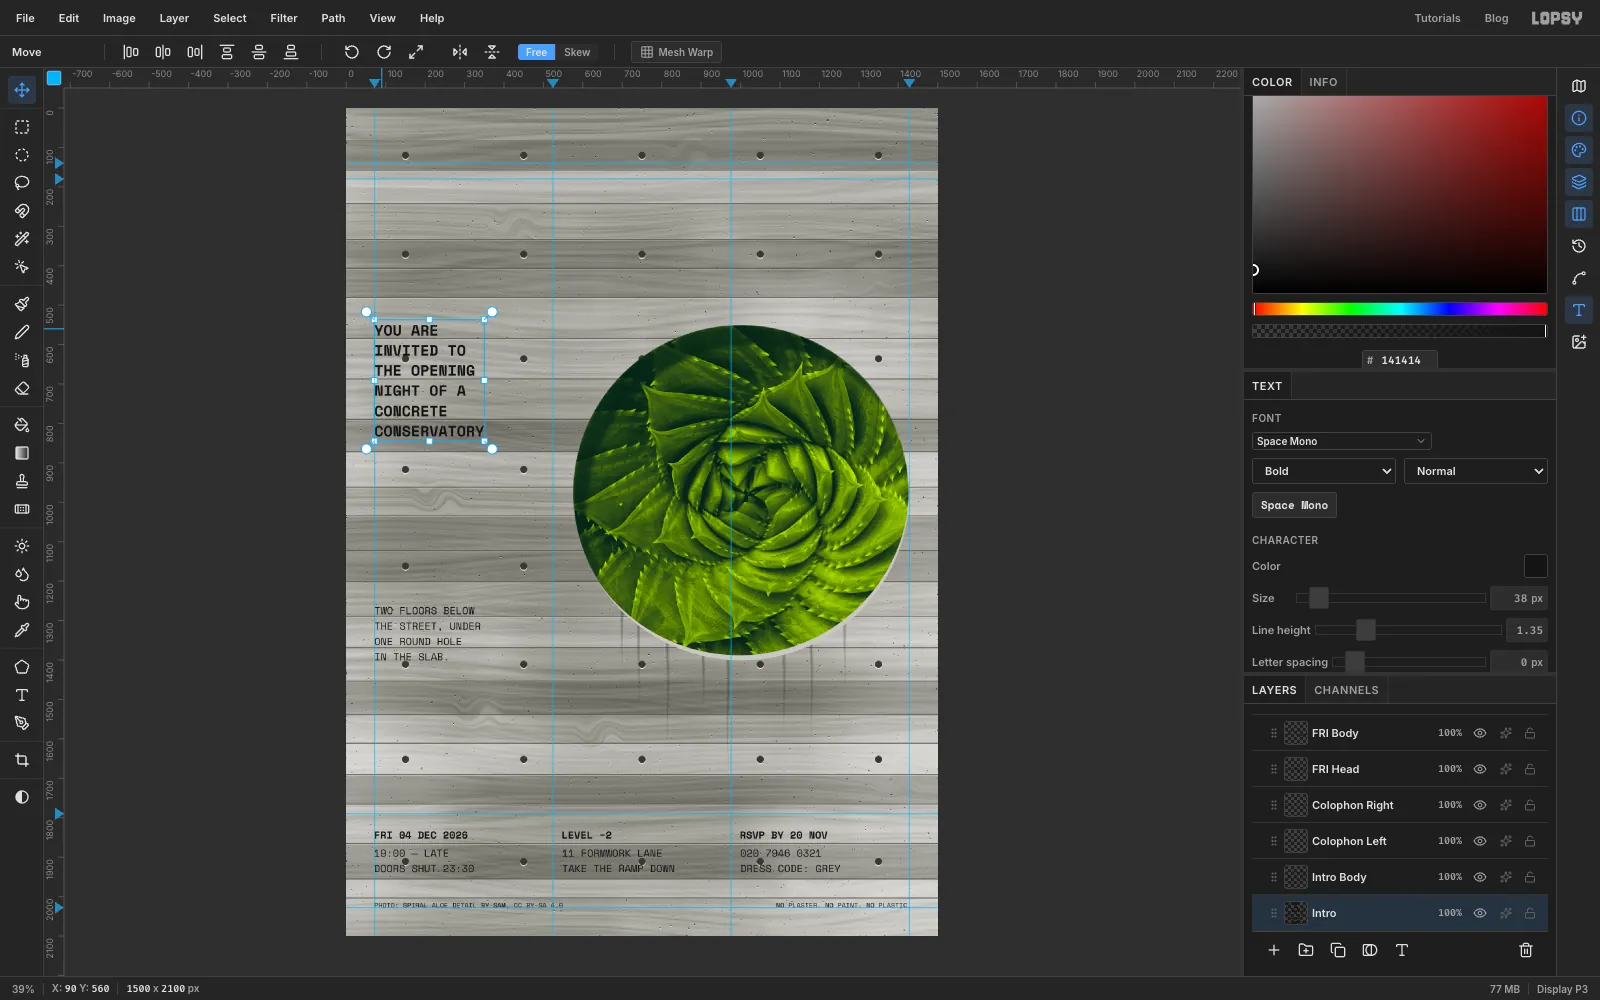
Oculus Rimagain so a raster layer is active, pick the Text tool, and set Space Mono Regular, size26, Line height1.5, and type the four linesTWO FLOORS BELOW/THE STREET, UNDER/ONE ROUND HOLE/IN THE SLAB.Nudge it to the left margin so its last line sits on y1400, level with the bottom of the oculus. - Click
Oculus Rimonce more, then set Bold at size38, Line height1.35, and typeYOU ARE/INVITED TO/THE OPENING/NIGHT OF A/CONCRETE/CONSERVATORY. Nudge its first cap top to y550, level with the top of the oculus. Lining both blocks up with the hole ties the left column to the image.
- Click
-
Add the header line
- Click
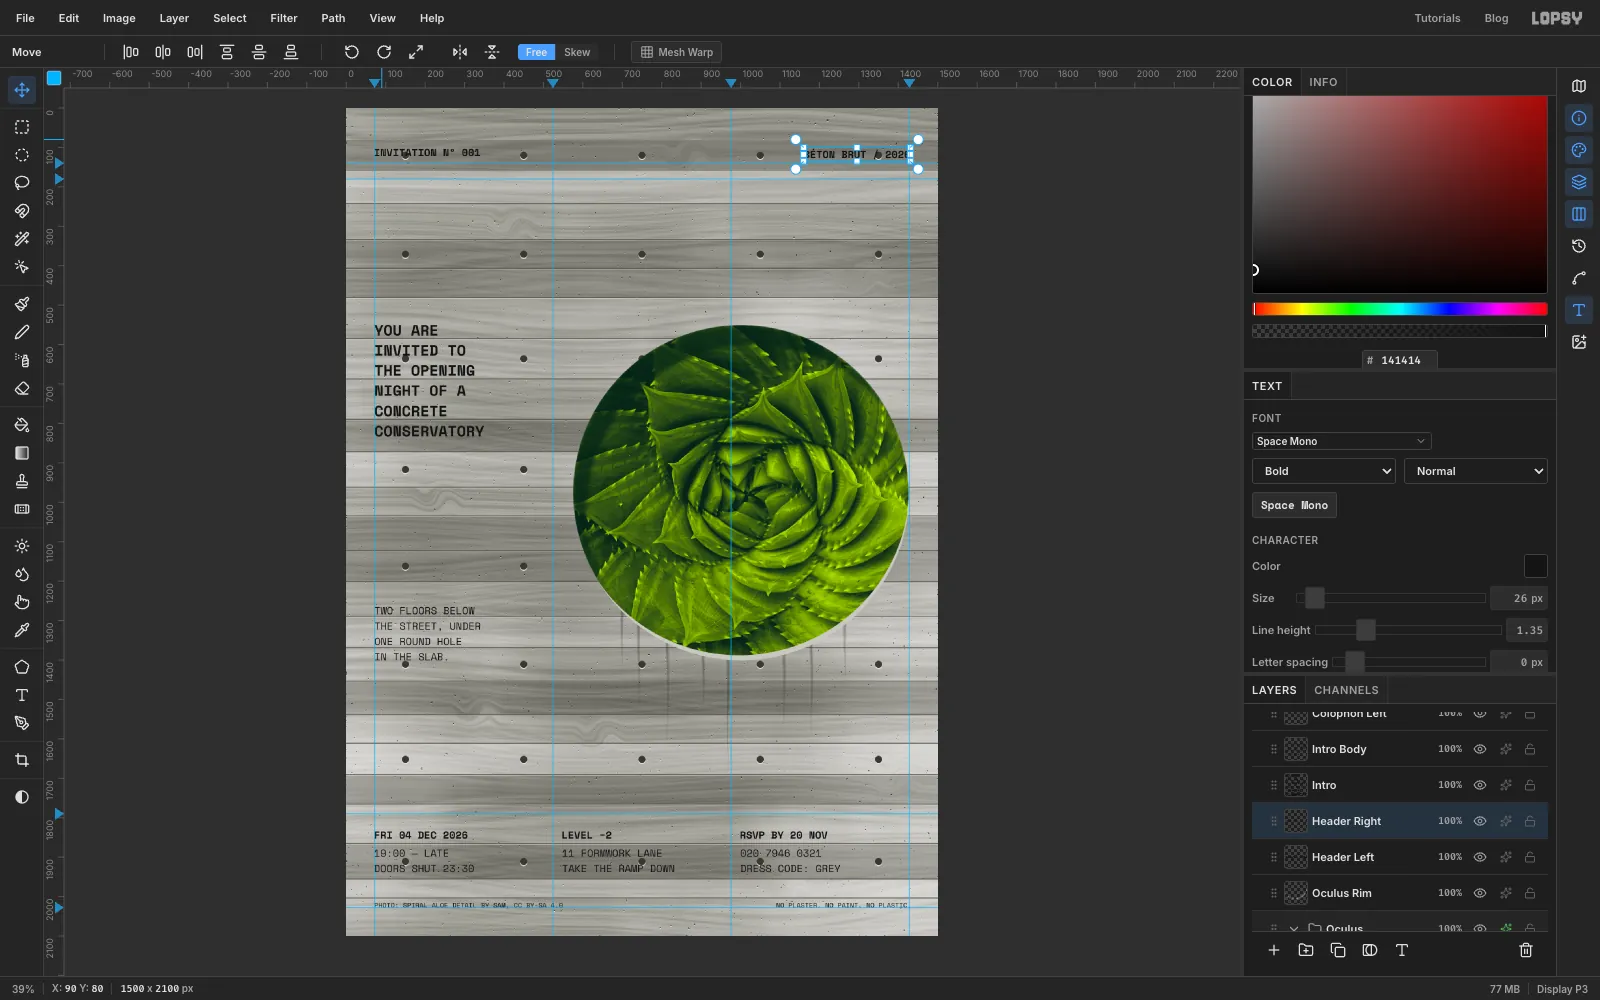
Oculus Rim, pick the Text tool, and typeBÉTON BRUT / 2026in Space Mono Bold26near the top right. Move its right edge to x1428. - Click
Oculus Rimagain and typeINVITATION Nº 001the same way at the left margin, with its cap tops at y103. The º is the ordinal indicator: Option+0 on a Mac keyboard. - Nudge the right-hand label up or down until the two share a baseline.
- Click
-
Rule the grid
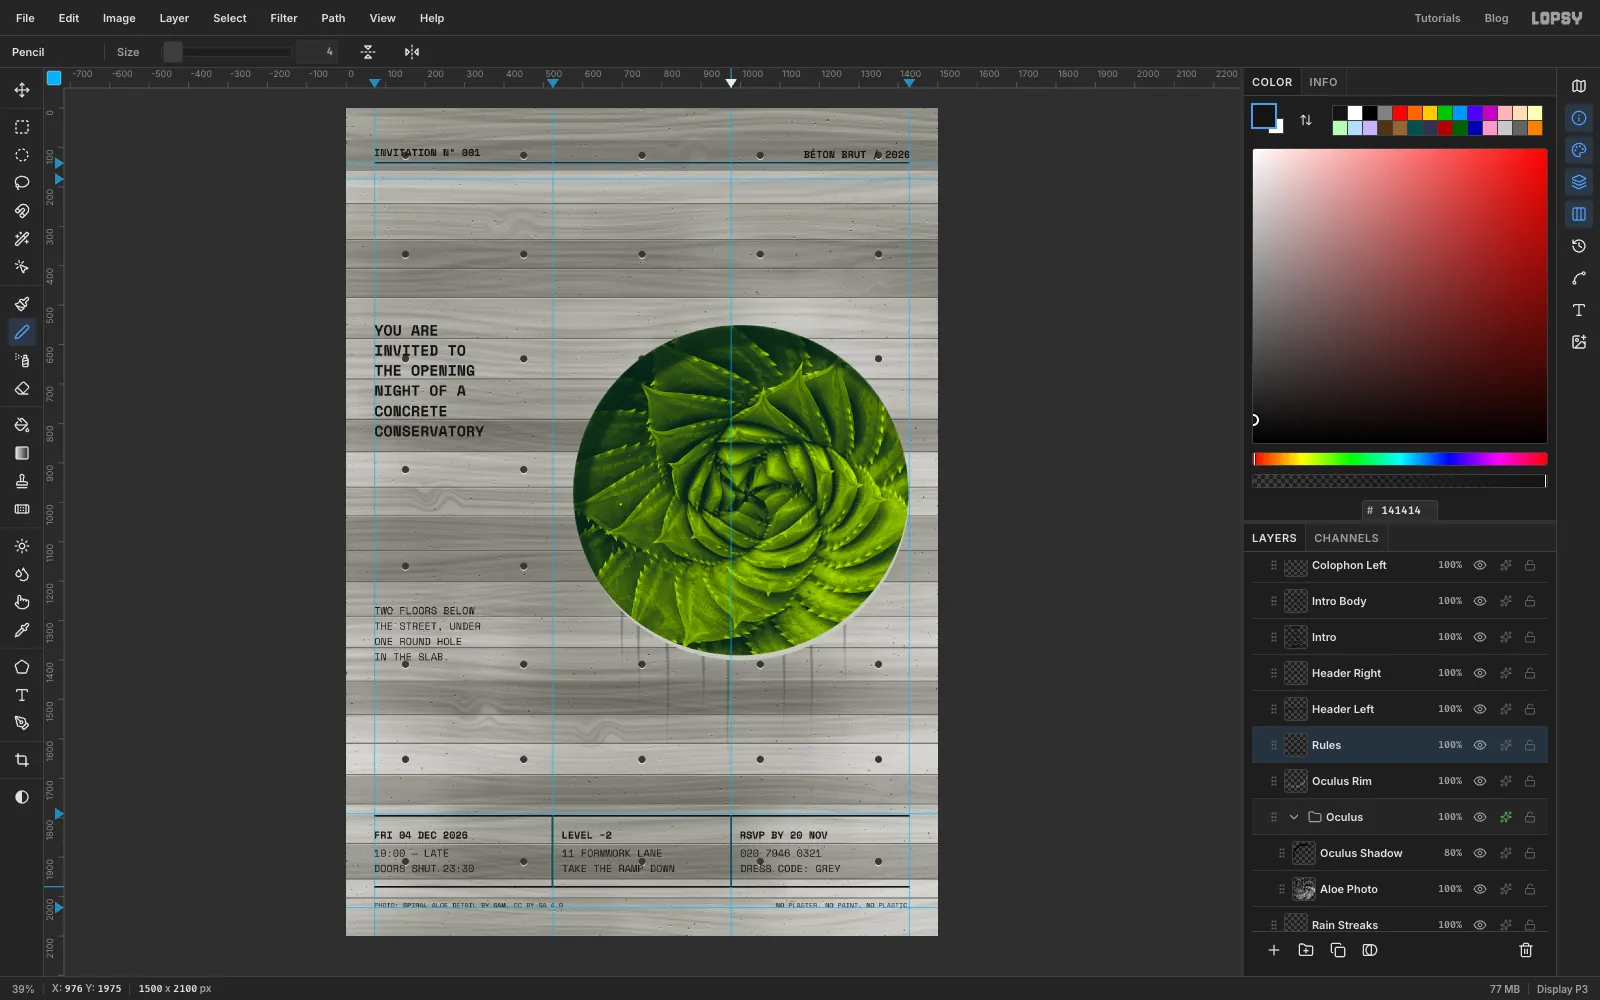
- Click
Oculus Rimand add a layer namedRules. Pick the Pencil at Size4in . - Shift-click straight lines from the left margin to the right margin at y
140,1795and1975. - Draw the two column dividers from
524, 1795down to524, 1975, and from976, 1795down to976, 1975. The table now reads as three closed cells.
- Click
-
Dimension the oculus
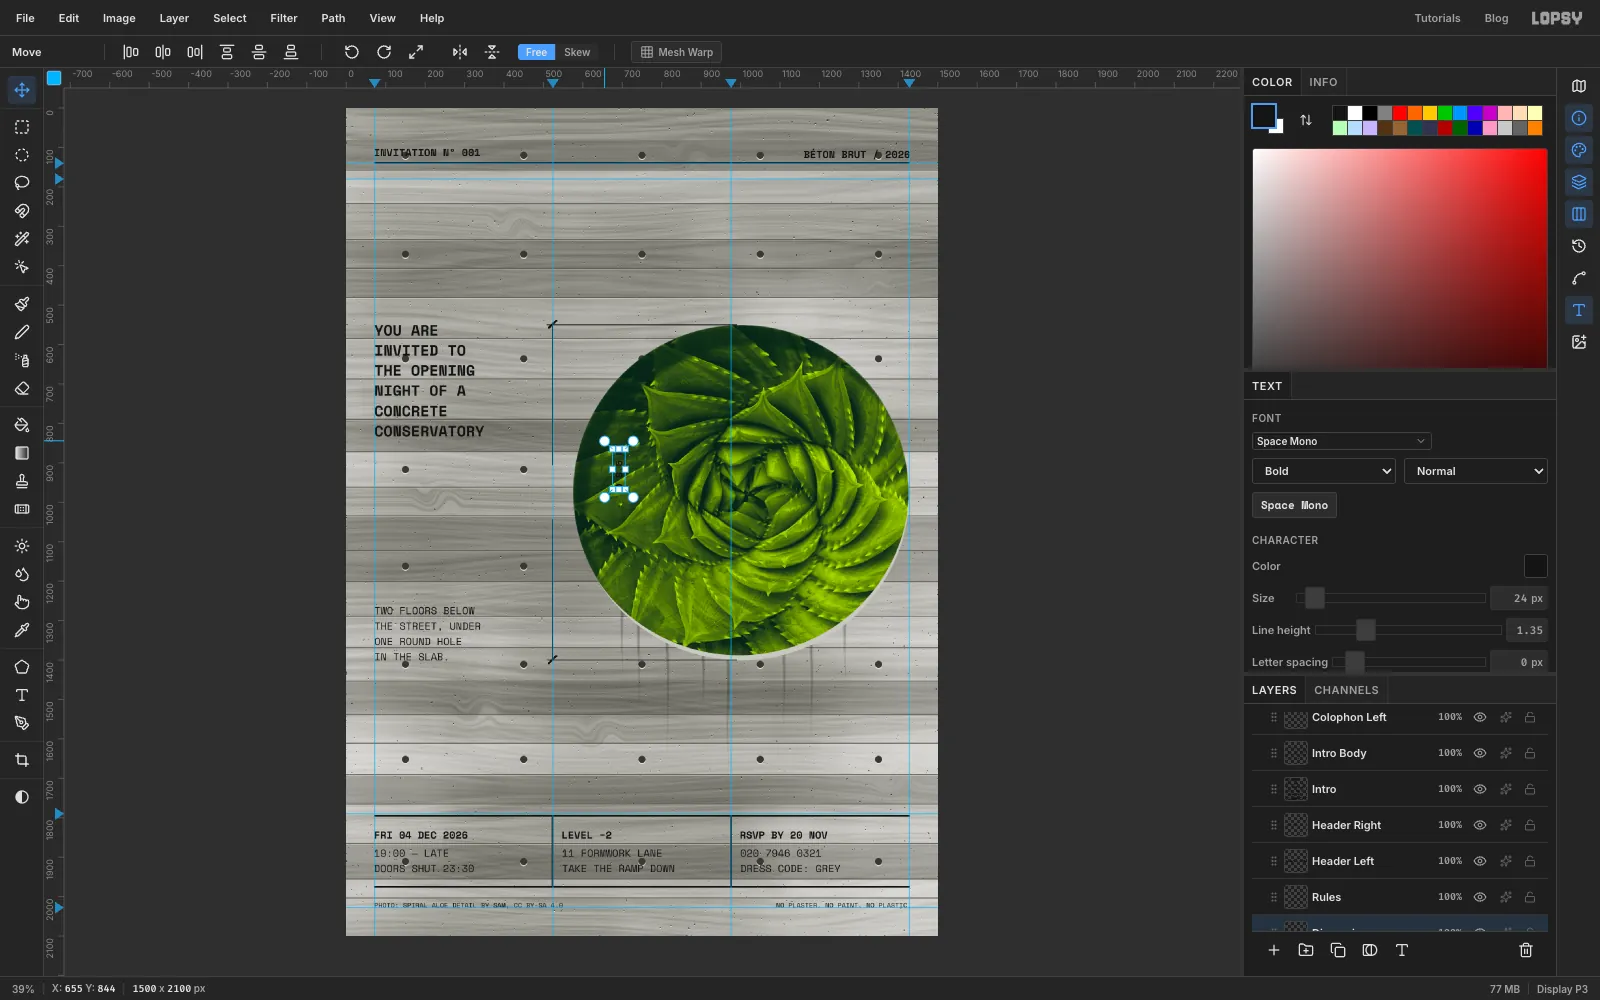
Architects mark sizes on their drawings with a dimension line: a line with short angled ticks at each end and the measurement written alongside.
- Still on
Rules, set the Pencil to Size2. Draw a vertical line at x524, the same x as the table's first divider, from y550to905. Draw a second one from1045to1400, leaving a gap for the label. - Draw horizontal extension lines from
510, 550to990, 550, and from510, 1400to990, 1400. They reach almost to the edge of the circle. - At Size
4, draw a short 45° tick through each end of the dimension line: from515, 559to533, 541at the top, and from515, 1409to533, 1391at the bottom. - Click
Oculus Rim, pick the Text tool and typeØ 8.5 Min Space Mono Bold24anywhere clear of other text. The screenshot shows it typed over the photo, where it's hard to see. Switch to the Move tool and drag the corner rotation handle, holding Cmd to snap, until the label turns −90° and reads from bottom to top. - Press Cmd+D, then drag the label into the gap in the dimension line, centred on
524, 975.
- Still on
-
Make the sticker
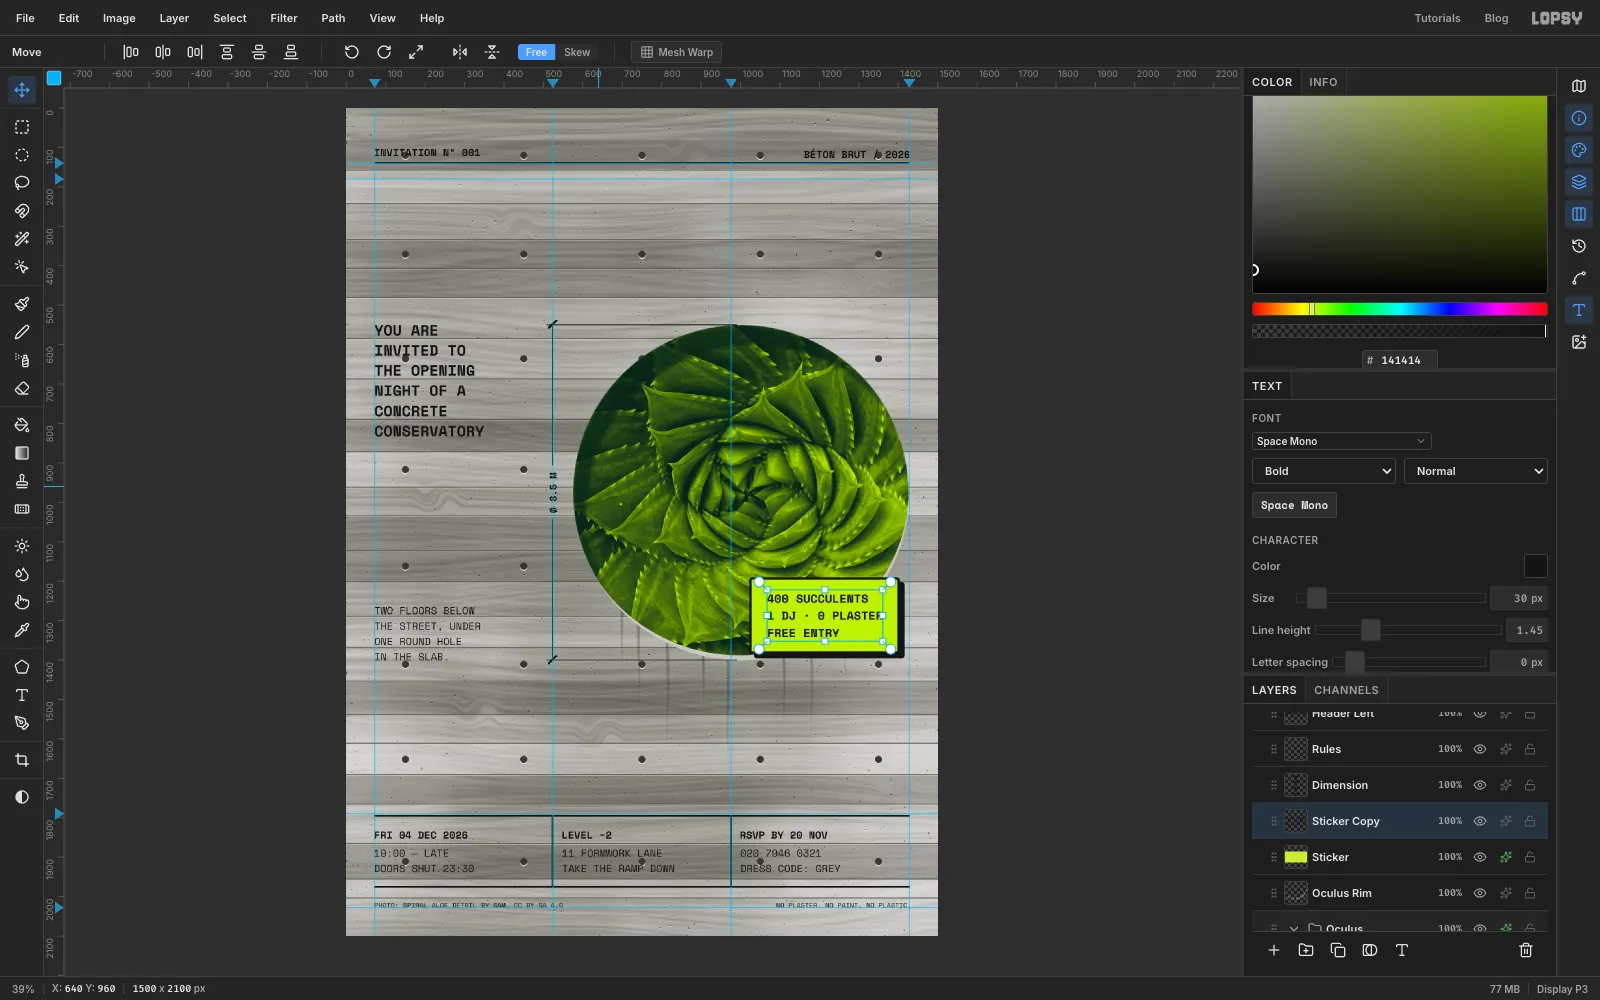
- Click
Oculus Rim, add a layer namedSticker, and with the Rectangular Marquee drag from1028, 1196to1398, 1378. Fill it with and deselect. - Open its effects. Enable Drop Shadow in with Offset X
12, Offset Y12, Blur0, Spread0and Opacity100, for a hard printed shadow. - Enable Stroke: Width
6, colour , position outside. Outside keeps the border clean on every edge once the sticker is tilted. - With
Stickeractive, pick the Text tool and type400 SUCCULENTS/1 DJ · 0 PLASTER/FREE ENTRYin Space Mono Bold30, Line height1.45. Nudge it to sit 40 px in from the sticker's left edge and 37 px down from its top. The text lands above the sticker because new layers go directly above the active one. Double-click the new layer's name and rename itSticker Copy.
- Click
-
Set the wordmark wall to wall
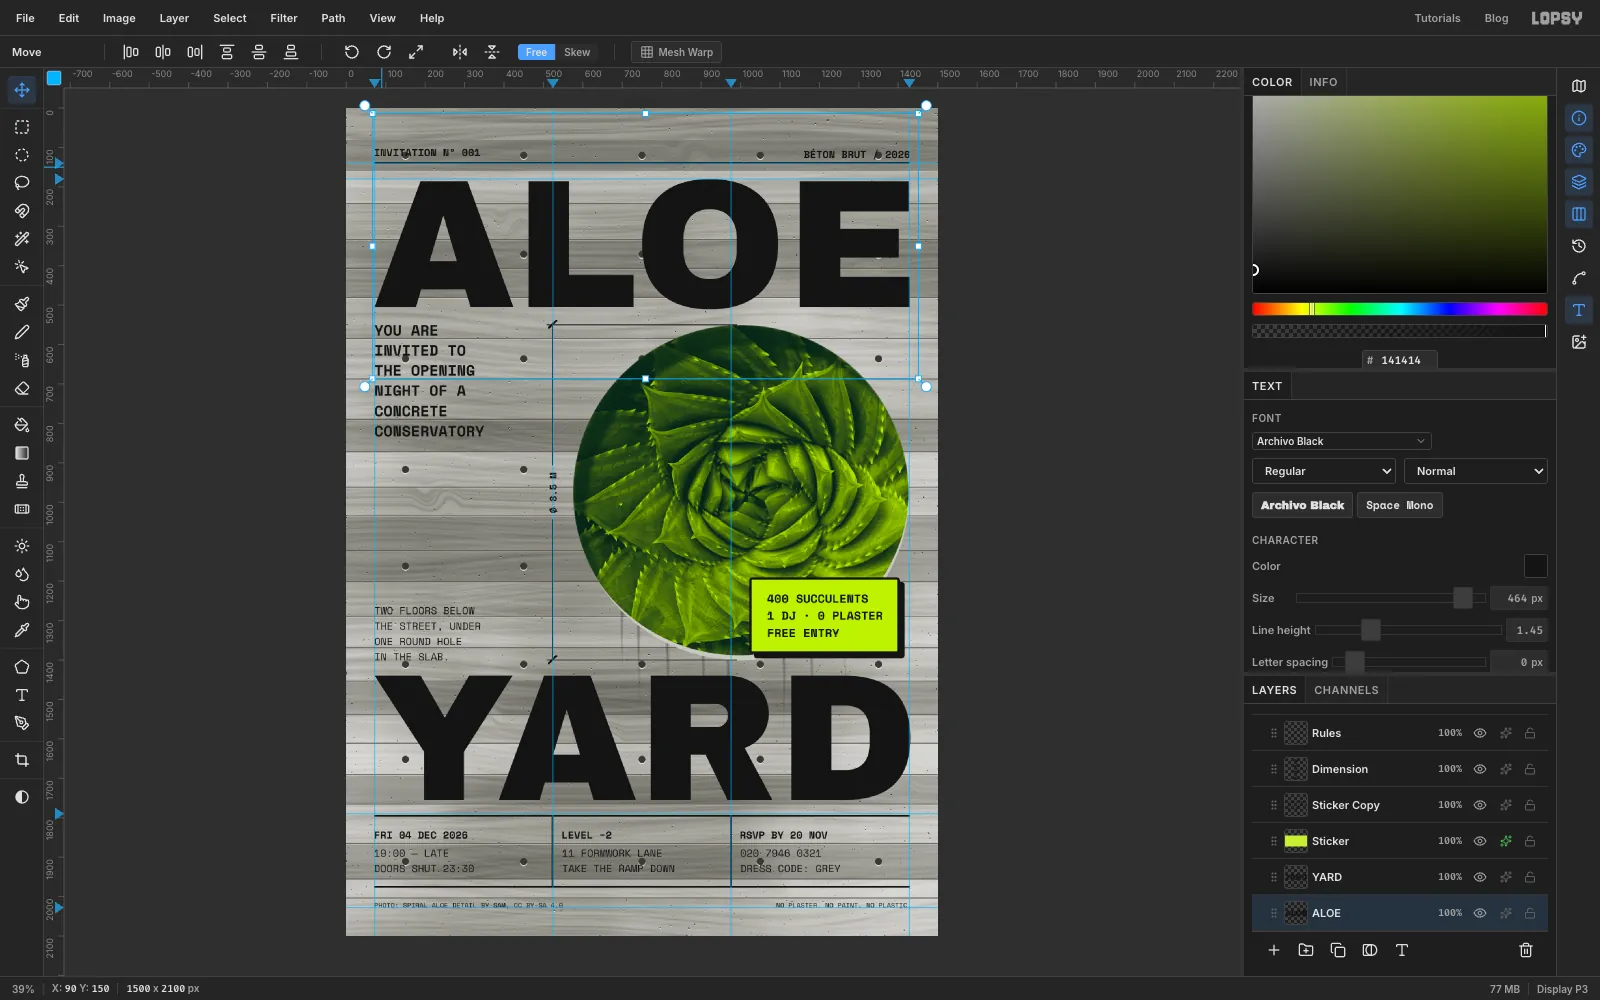
- Click
Oculus Rimagain. Set the Text tool to Archivo Black, size458, colour . - Click in empty space below the second paragraph and type
YARD, then press Tab. With the Move tool, nudge it so its left edge sits on the left margin. - If its right edge doesn't land on the right margin (x
1428), keepYARDselected, pick the Text tool and change Size in the Text panel by a few points, without clicking the canvas. Check the width again, then move it so its cap tops sit at y1440. - Click
Oculus Rimagain before startingALOE, or the next size change would restyle YARD. MakeALOEthe same way at about size464, with its cap tops on the y180guide. Two different sizes make two different words fill exactly the same width, and that forced fit is a brutalist habit.
- Click
-
Even out the letter gaps
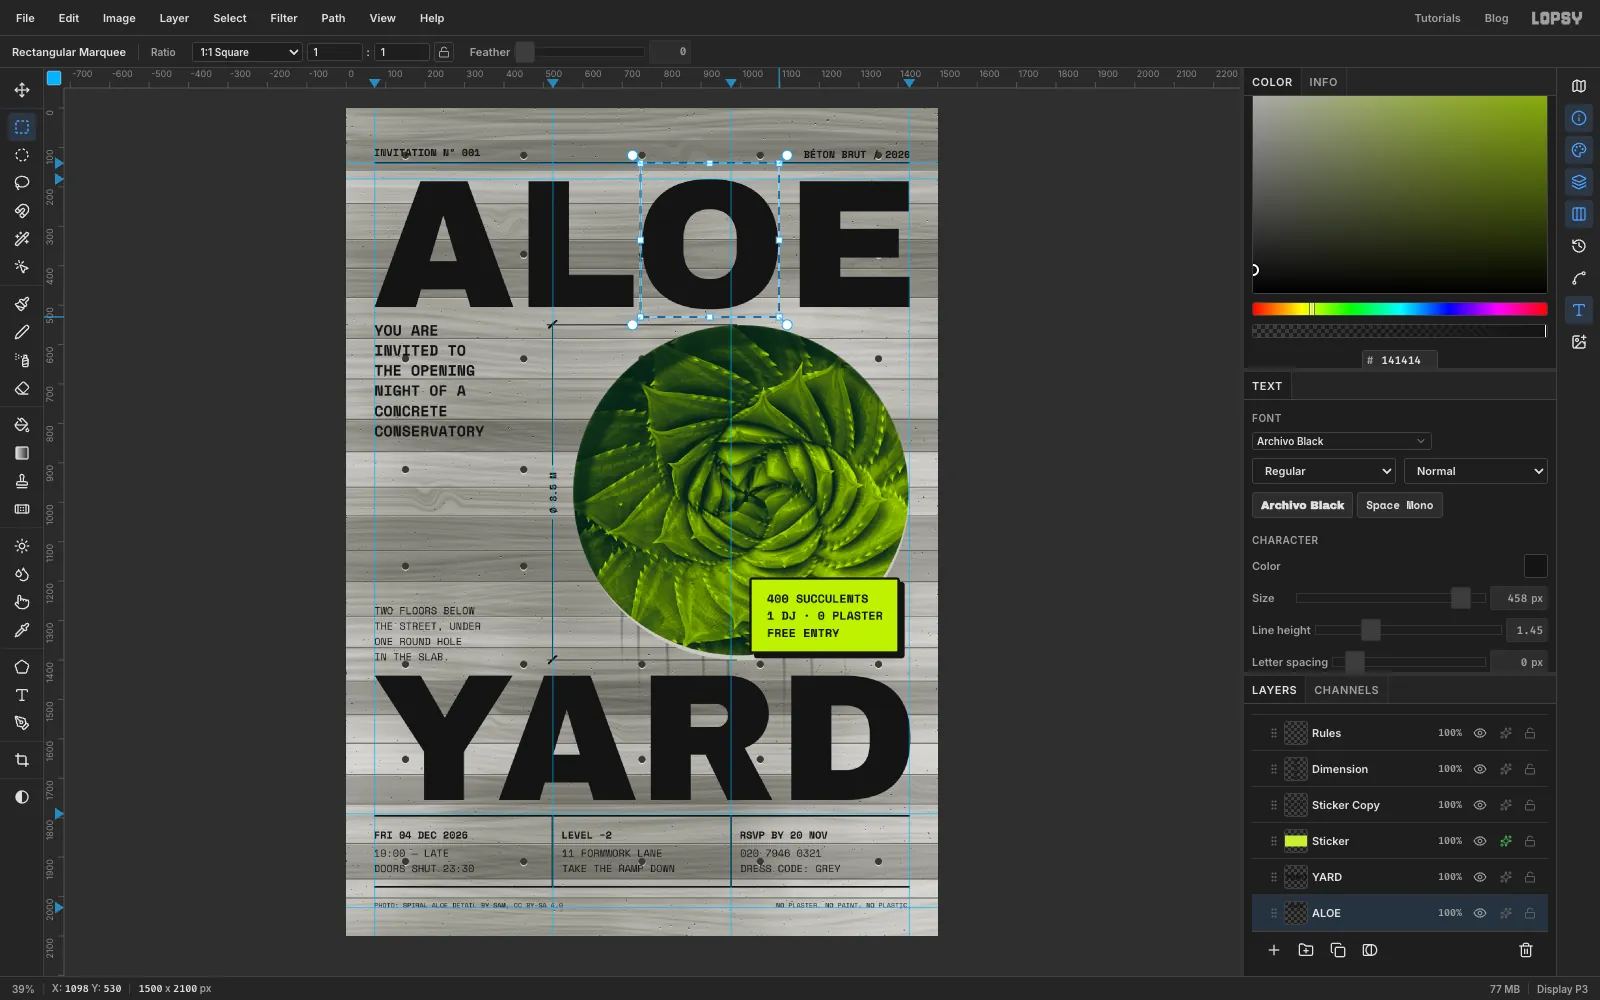
Forced to width, the gaps in ALOE come out uneven: the L and O nearly touch, and there's a wide hole before the E.
- Click
ALOEand click Rasterize Layer at the bottom of the Layers panel. Do the same forYARD, since the worn ink later needs pixels to cut into. - With
ALOEactive, marquee tightly around just the O, from the right edge of the L to the left edge of the E. - Switch to the Move tool and press the right arrow until the gaps either side of the O match. That's about 17 px (Shift+arrow moves 10 at a time). Press Cmd+D.
- Click
-
Clear the clutter behind the type
- Click
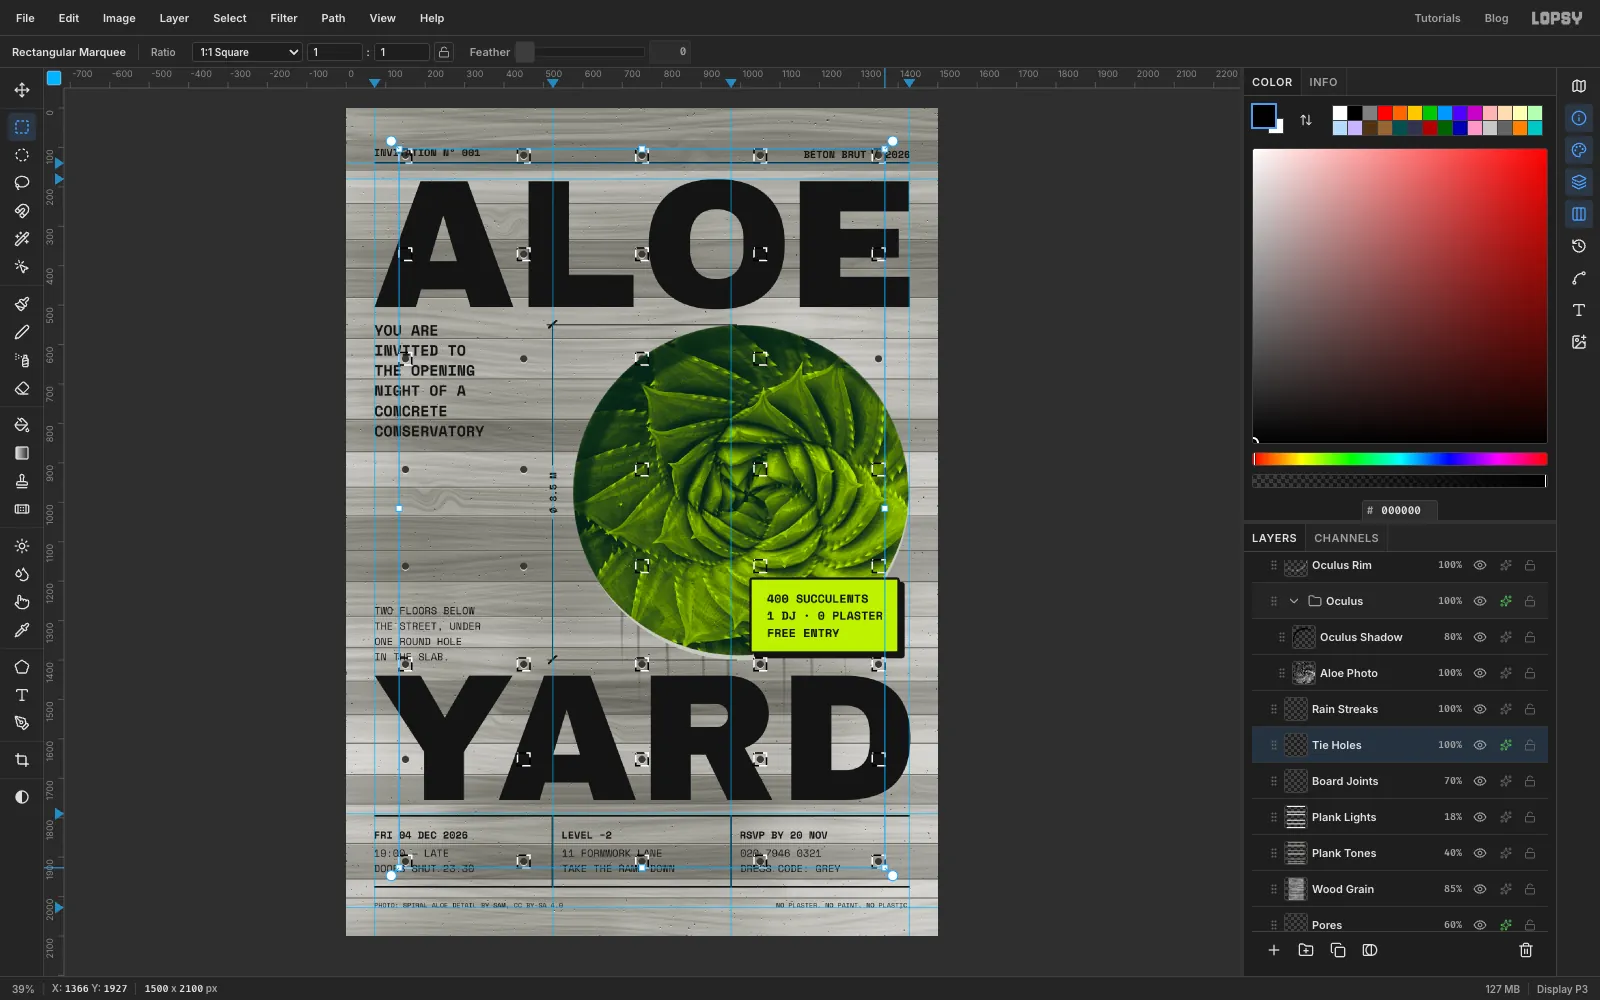
Tie Holes. Only seven holes sit in open concrete well clear of the type, the rules, the table, the oculus and the sticker. They are at450, 636,1350, 636,150, 917,450, 917,150, 1162,450, 1162and150, 1652. Hold Shift and drag a small square marquee around each of the other holes, press Delete once to remove them all, and deselect. A few holes are enough to say "formwork", and they no longer fight the type. - Click
Pores, and Shift-marquee a box about 8 px bigger than each block of small type: the header, both paragraphs, the label, the table text and the colophon. Press Delete. Bugholes right next to 26 px type look like stray punctuation.
- Click
-
Tilt the sticker
- Click
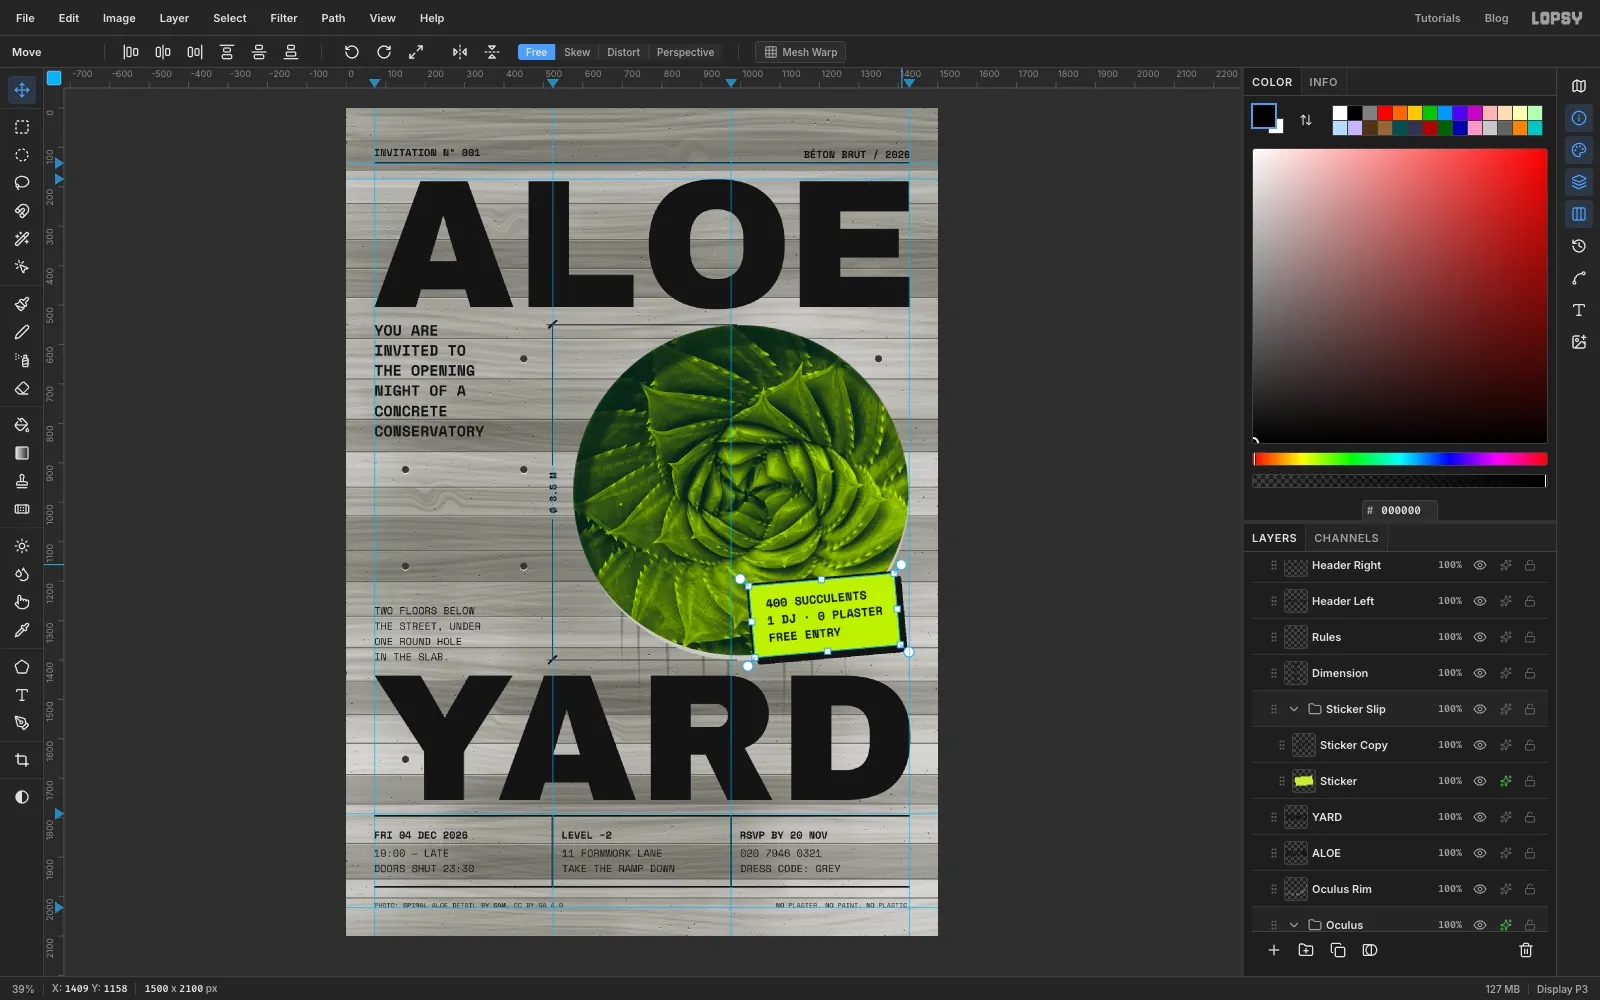
Sticker, Shift-clickSticker Copy(the sticker's text layer), choose Layer → Group Layers and name the groupSticker Slip. - With the group selected and nothing marqueed, switch to the Move tool. Drag the rotation handle just outside the group's top-right corner to turn it 5° anticlockwise. The text, the fill, the border and the shadow all turn together.
- Press Cmd+D to commit.
- Click
-
Select the letters
For the worn ink you'll punch small holes through the letters, so the wall shows through them.
- Click
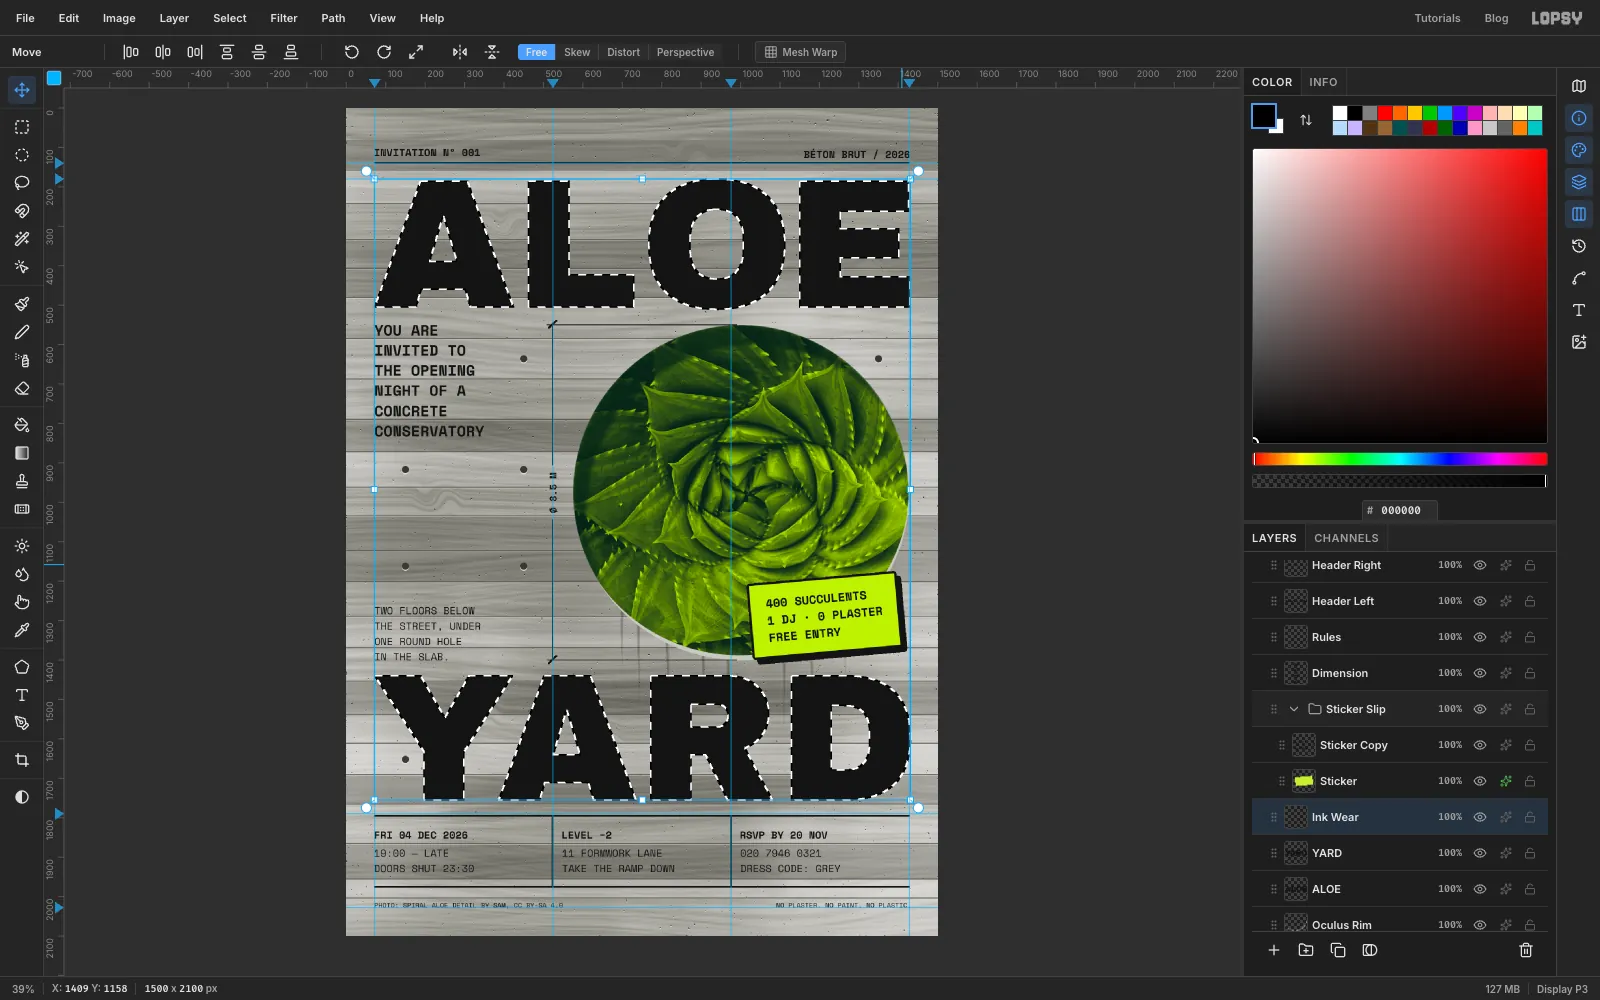
YARDand add a layer namedInk Wearabove it. - Cmd-click the
ALOEthumbnail to load its letters as a selection. Then Cmd+Shift-click theYARDthumbnail to add its letters too. - Click
Ink Wearand fill the selection with . Run Add Noise (Amount100, Mono, Uniform), then Gaussian Blur at Radius3.
- Click
-
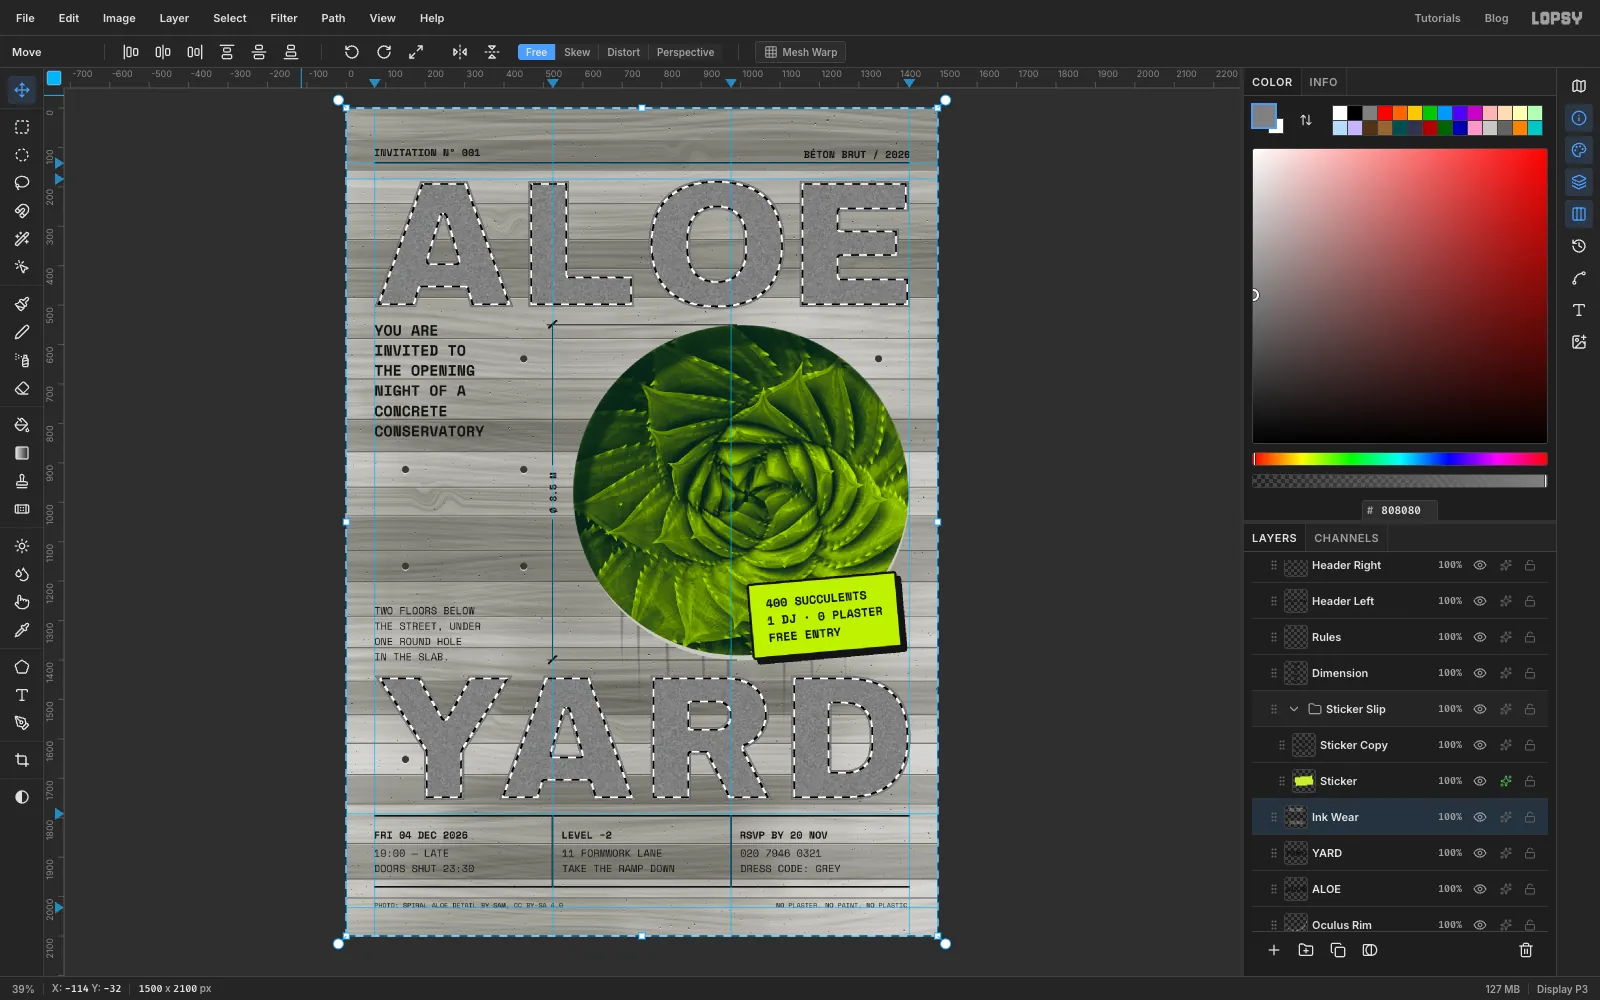
Make the edges wear faster
Ink wears fastest at the edges of letters, so make the noise a little brighter there.
- Choose Select → Shrink… and shrink by
7px. Then choose Select → Inverse. You now have a band just inside each letter's edge (plus everything outside the letters, where the layer is empty anyway). - Run Brightness/Contrast with Brightness
6, then deselect.
- Choose Select → Shrink… and shrink by
-
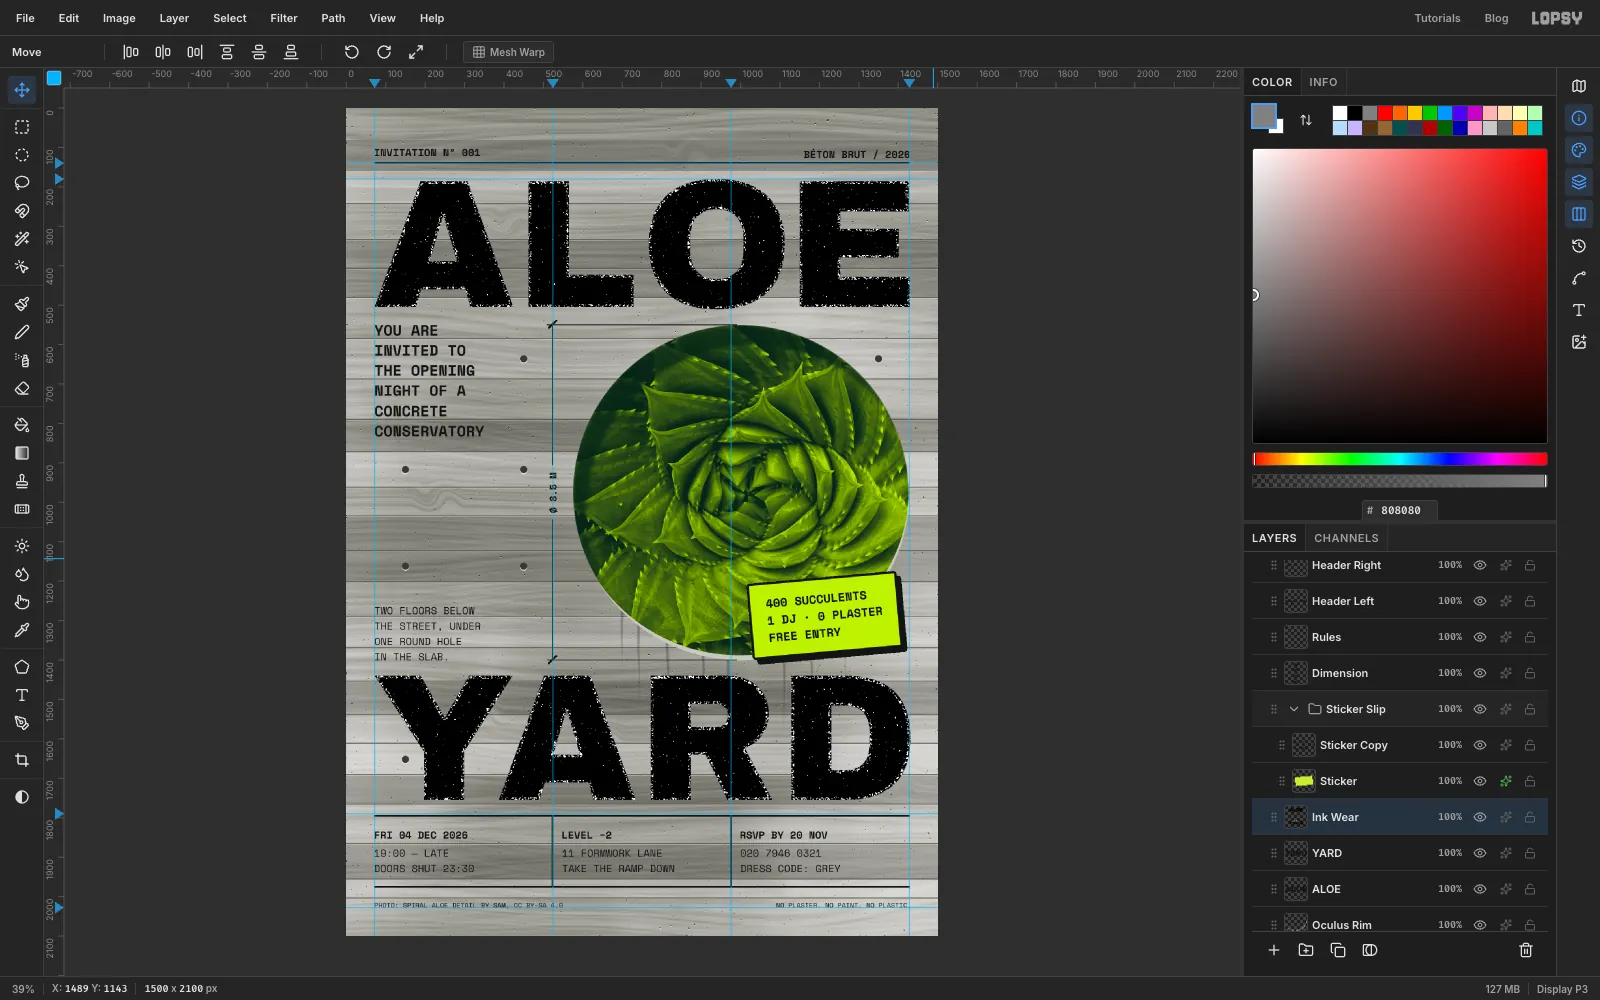
Threshold the wear map
- Choose Filter → Threshold… with Preview on. Drag Level until only a light sprinkling of white clumps shows, about 4% of the letters. That's a Level of around
149. Apply.
- Choose Filter → Threshold… with Preview on. Drag Level until only a light sprinkling of white clumps shows, about 4% of the letters. That's a Level of around
-
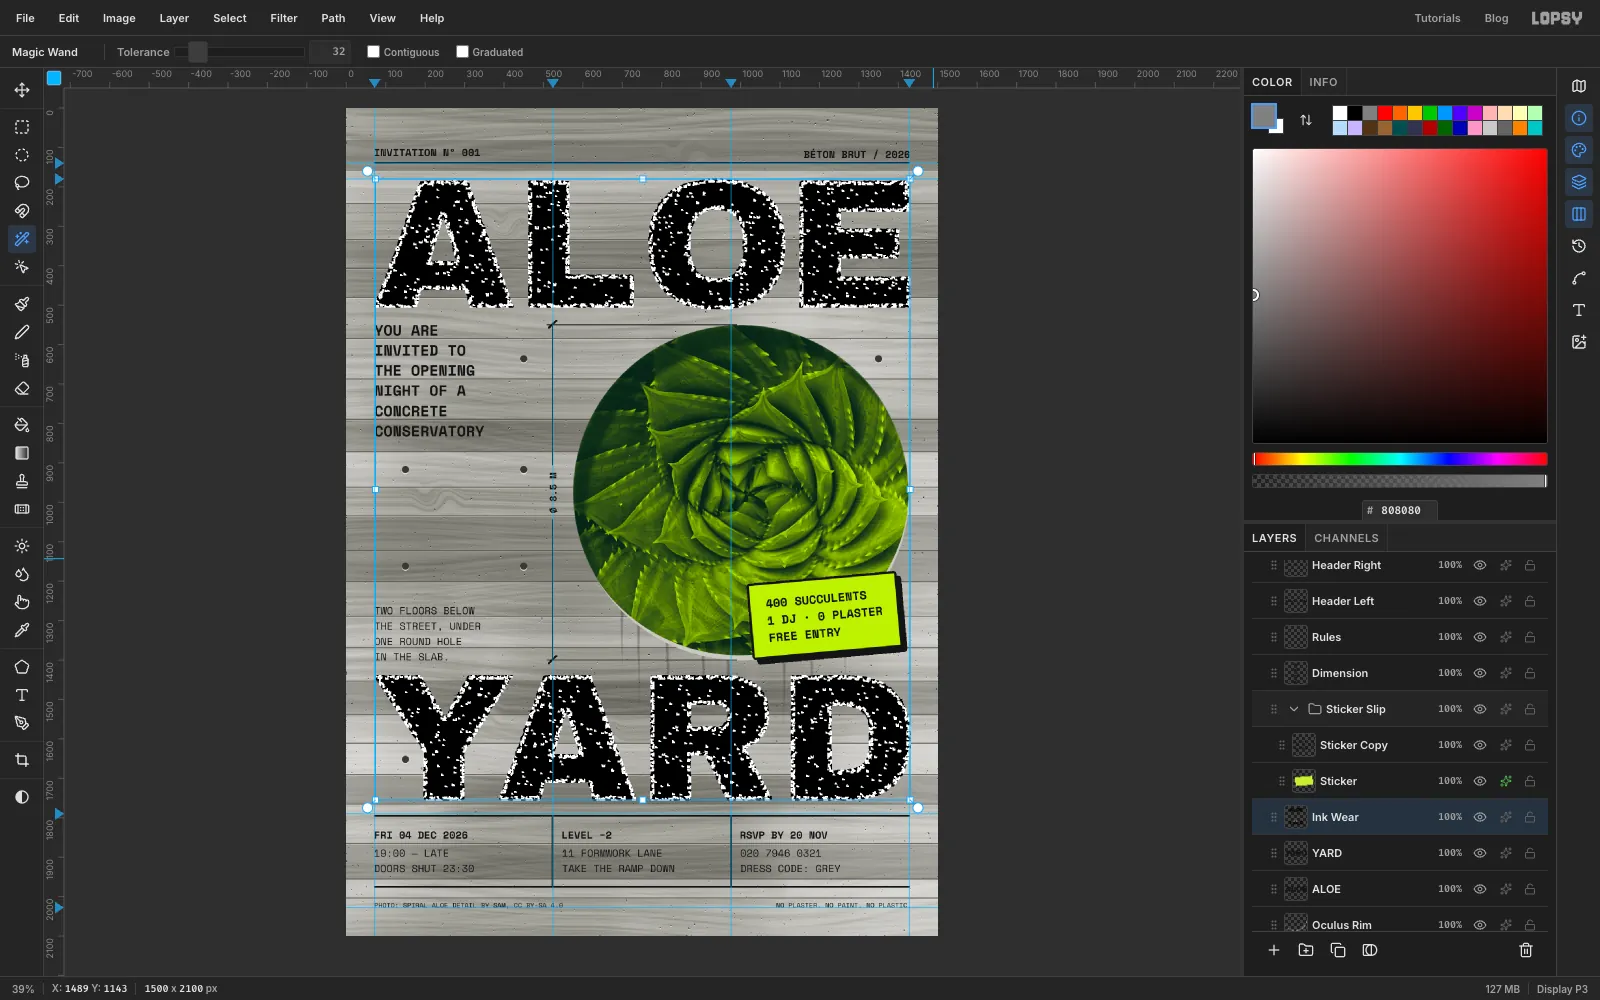
Select the voids
- Pick the Magic Wand with Contiguous off, and click one of the white clumps on
Ink Wear. All of them are selected. - Choose Select → Grow… and grow by
1px. This takes the selection into the letters' soft edge pixels, so a void that reaches the edge bites right through the outline instead of leaving a thin dark rim. - Hide
Ink Wearwith its eye button.
- Pick the Magic Wand with Contiguous off, and click one of the white clumps on
-
Punch the voids out and tidy up
- Click
ALOEand press Delete. Then clickYARDand press Delete. The wall's grain and joints now show through the worn letters. Deselect. - Select
ALOEand Shift-clickYARD, choose Layer → Group Layers, and name the groupWordmark. - Save with File → Save Project, and export with File → Quick Export PNG.
To see how the layers and groups fit together, open the project from the Follow along box at the top of this page and click through the Layers panel. Hidden layers like
Ink Wearare still there to look at.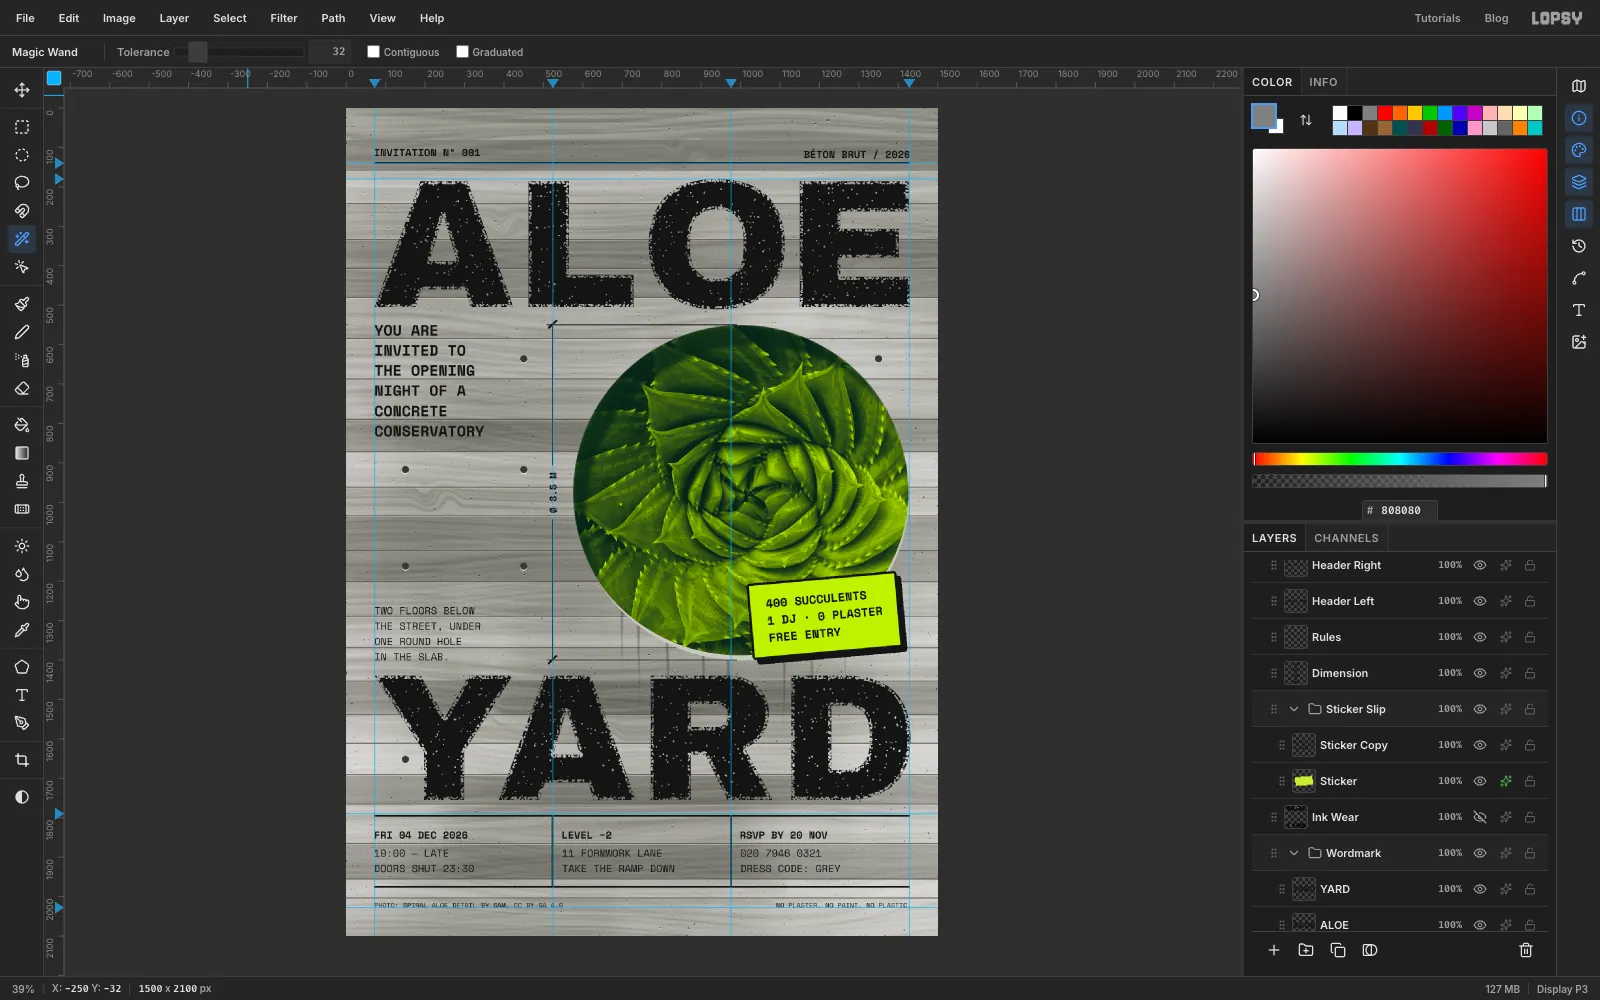
- Click