Design a Duotone Magazine Cover from an Arctic Fox Photo
Turn a fox photo into a two-ink duotone magazine cover in Lopsy, with gradient maps, a masthead tucked behind the ears, cover lines, a badge and a barcode.
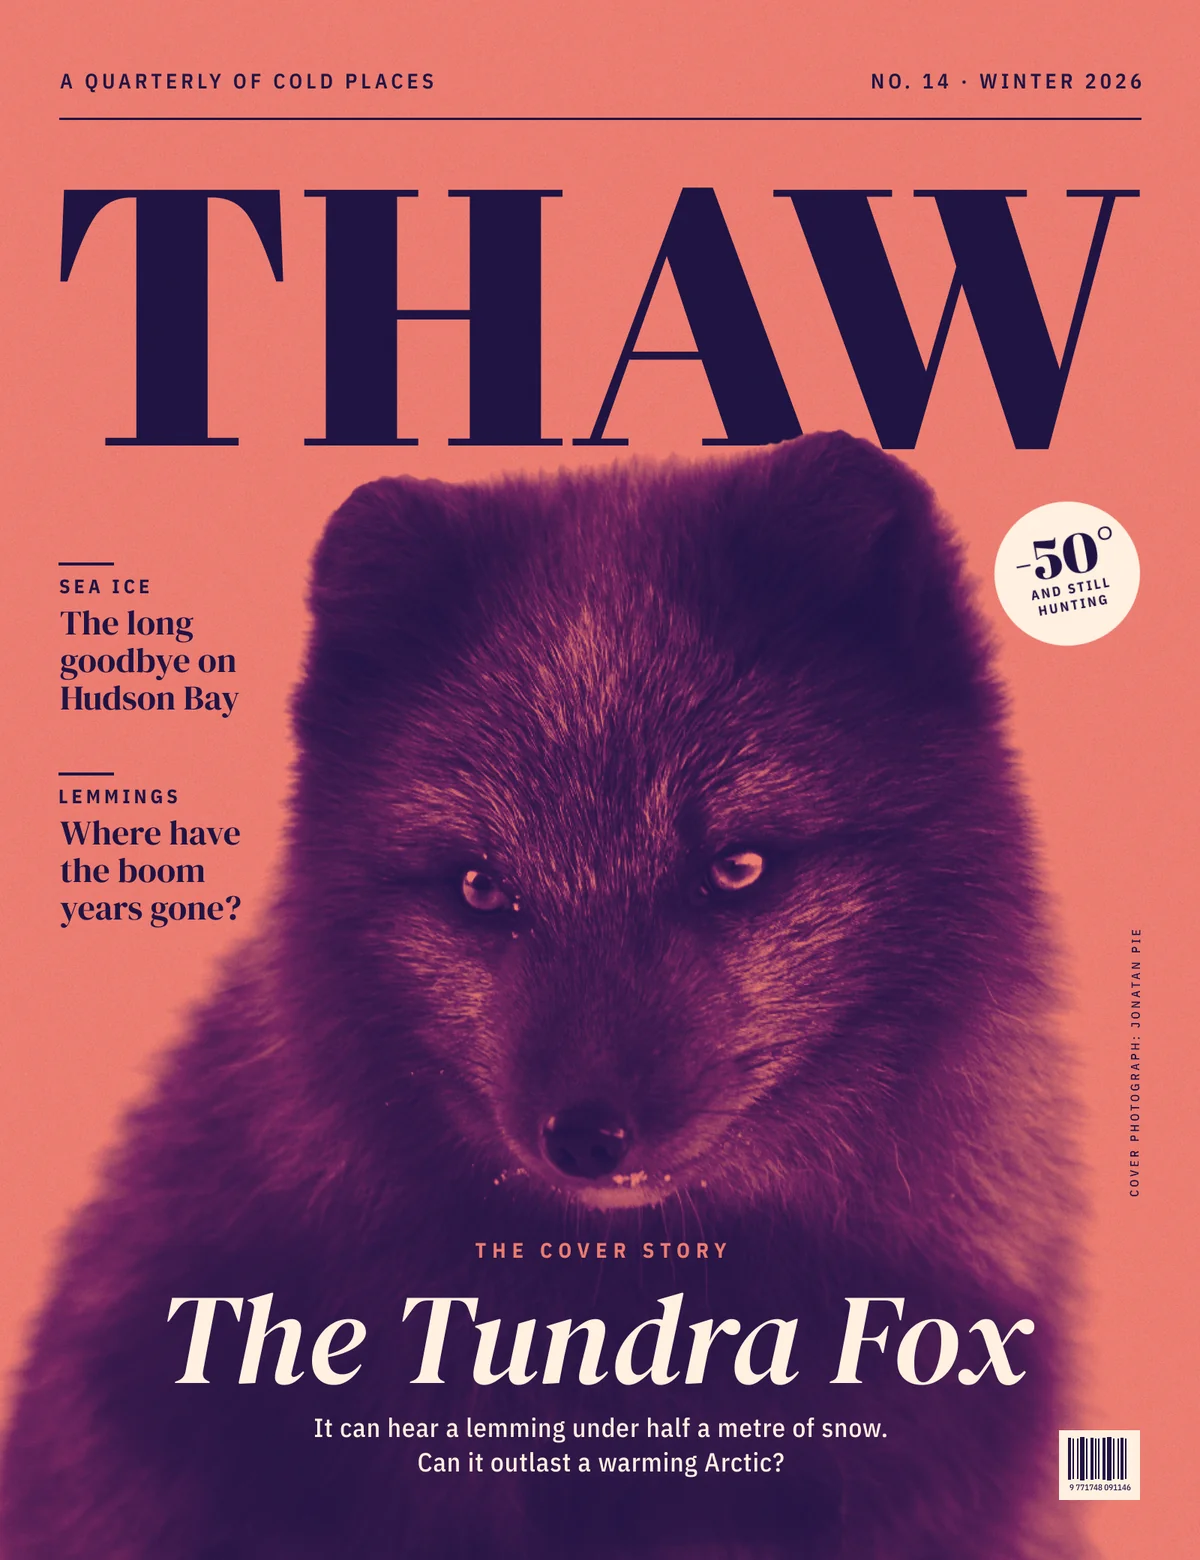
A duotone prints a photo in just two inks: a dark one for the shadows and a bright one for the highlights. It's one of the oldest tricks in magazine design. It makes any photo look printed rather than snapped, and it ties the picture to the type, because the type uses the same inks.
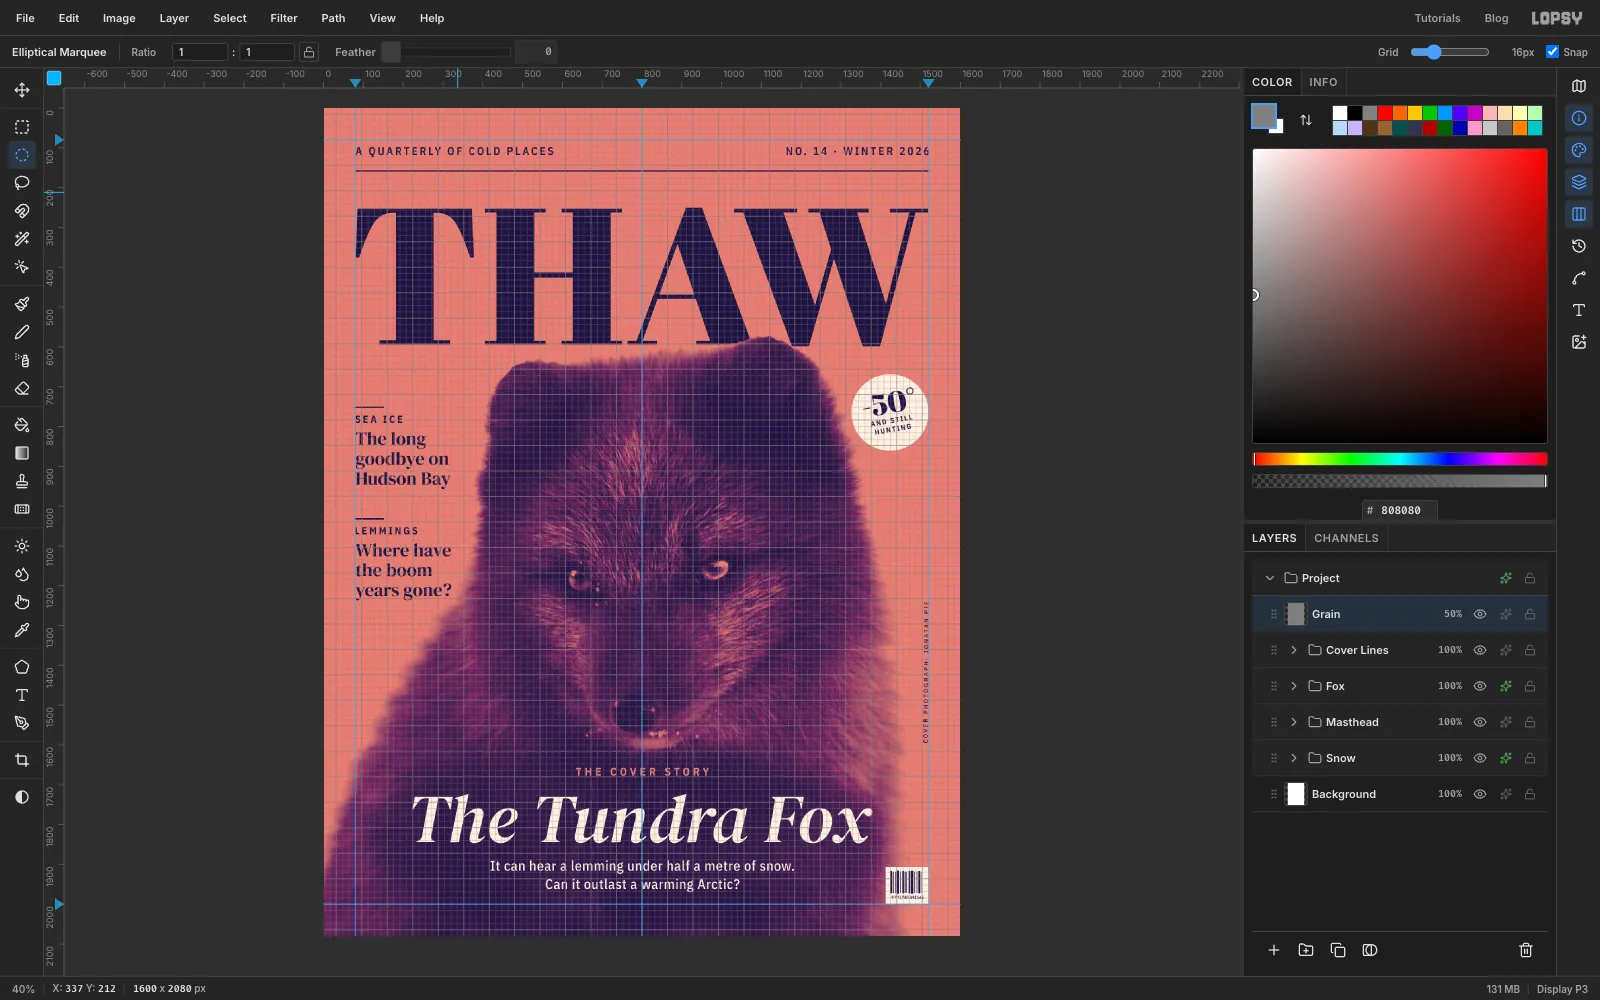
In this tutorial you'll make THAW, the cover of an imaginary quarterly about cold places. A blue-morph Arctic fox sits in deep violet ink on a flat coral page. Its ear tucks over the masthead, and the cover lines sit in the margin beside it. You'll build it at 1600 × 2080 px, roughly the shape of a real magazine.
The photo is Posing for a portrait.jpg) by Jonatan Pie on Wikimedia Commons. It's in the public domain (CC0), so you can use it freely. Download a version about 2,500 px wide. Any portrait of a dark animal against snow or a pale sky works the same way.
Along the way you'll use:
- pasting and scaling a photo, the Eyedropper, and filling with the Rectangular Marquee
- the Magic Wand, Inverse, Shrink, Grow, Feather, and Shift-add and Shift+Alt-intersect marquees
- Gradient Map and Curves adjustments on layer groups
- text in Abril Fatface, DM Serif Display and IBM Plex Sans Condensed, with letter spacing and alignment
- the Pencil for straight rules and barcode bars, and Merge Down
- rotating a selection and a line of live text with the Move tool's rotate handle
- the Clone Stamp, Burn, Add Noise, the Overlay blend mode and layer opacity
- ruler guides, Snap to Guides and the grid
The palette:
-
Duotone map
-
Violet ink
masthead, strap and cover lines
-
Coral
the page and the cover-story kicker
-
Cream
title, dek, badge and barcode box
-
Grain grey
in Overlay mode
-
Set up the canvas and margin guides
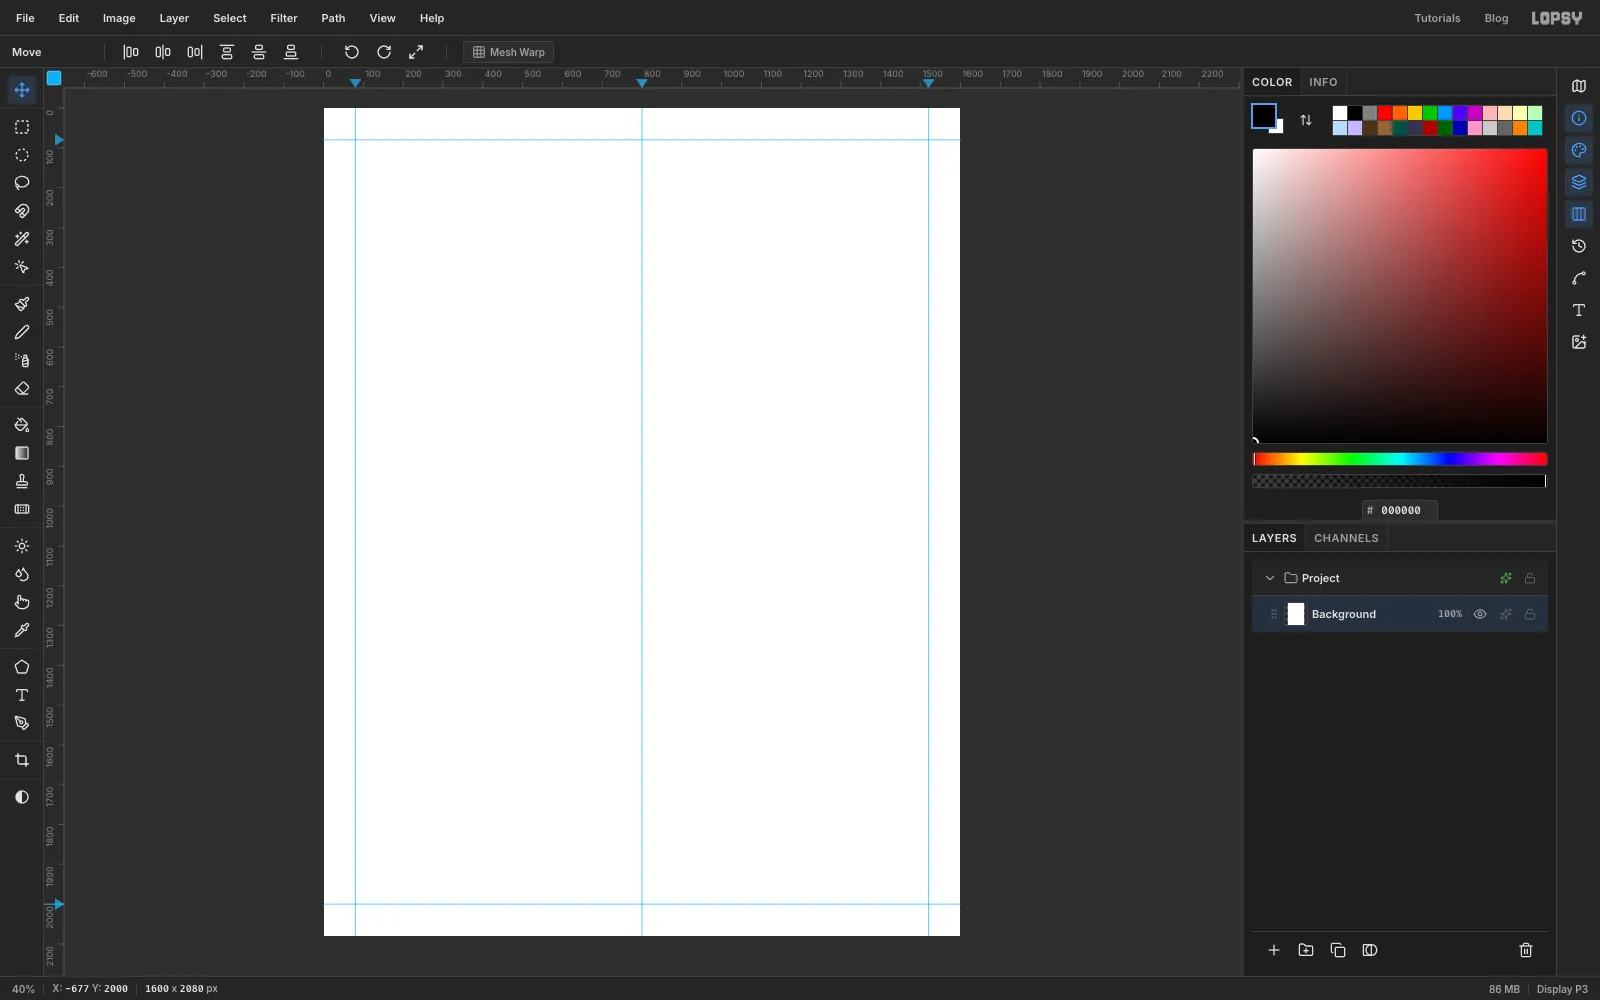
Choose File → New, enter 1600 × 2080 pixels with a White background and click Create. The new document comes with an empty Layer 1. Select it and delete it with the trash button at the bottom of the Layers panel.
Click the top ruler at 80, 800 and 1520 to drop three vertical guides: the left margin, the centre line and the right margin. Click the left ruler at 80 and 2000 for the top and bottom margins. Every piece of type will hang off these.
-
Paste the fox photo into a group
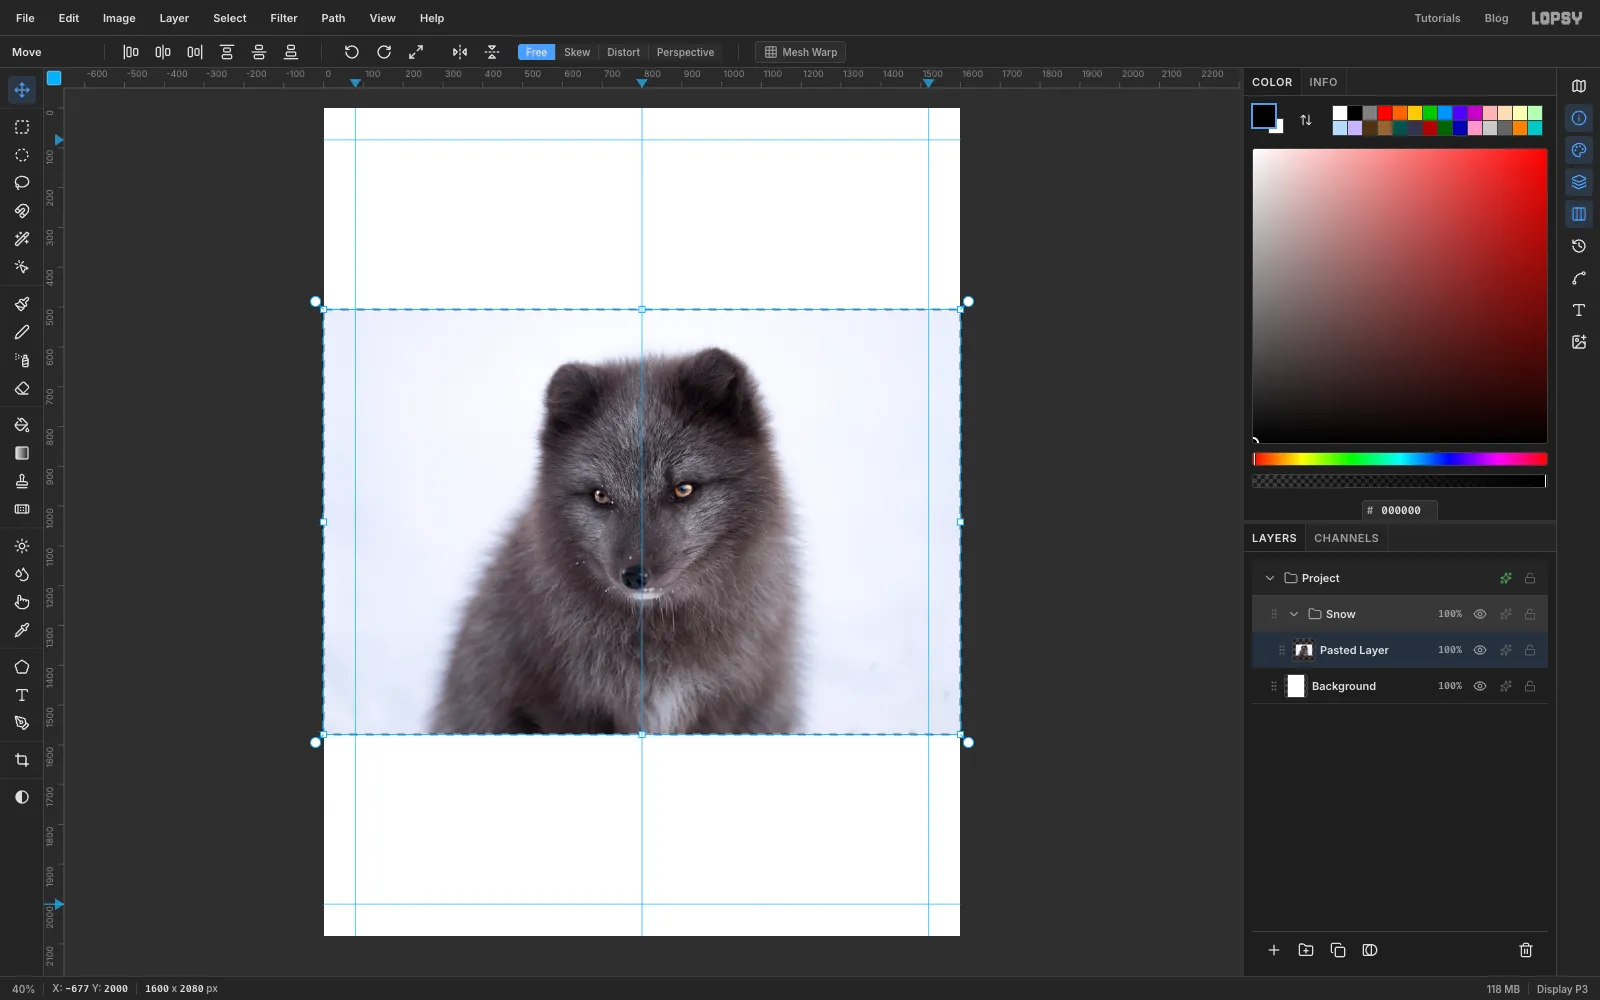
Click New Group at the bottom of the Layers panel and name the group Snow. Open the downloaded photo in another app, copy it, and press Cmd+V in Lopsy. The pasted layer lands inside Snow. The photo is wider than the canvas, so Lopsy shrinks it to fit and switches to the Move tool with the photo selected.
-
Scale the photo up
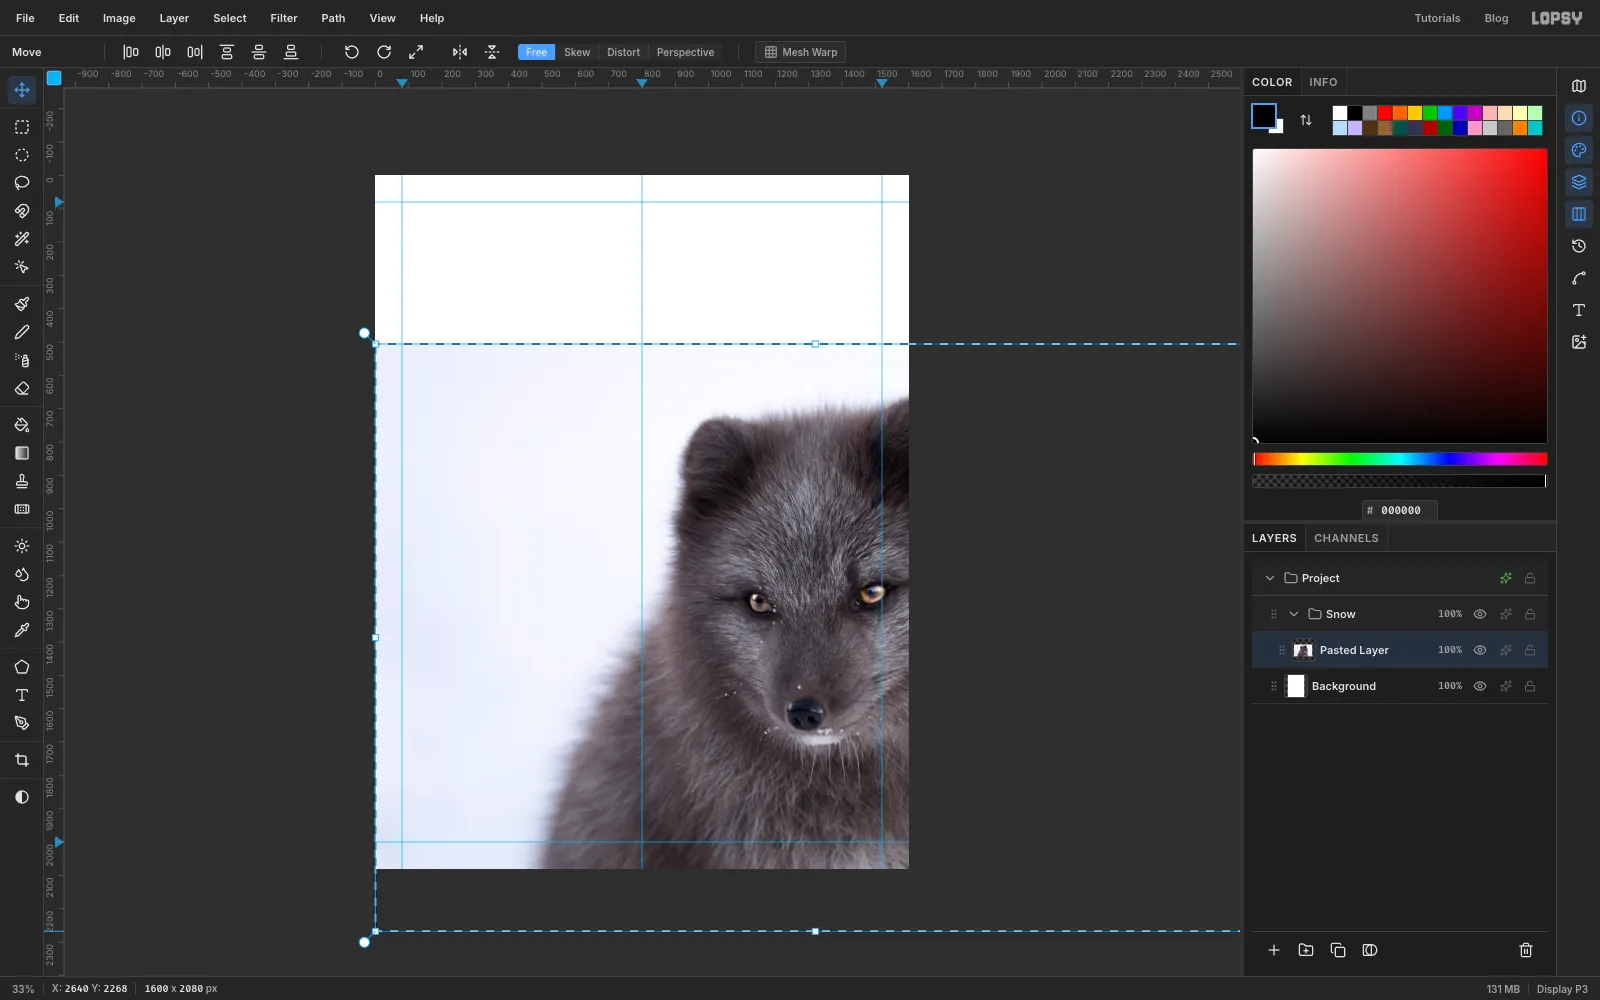
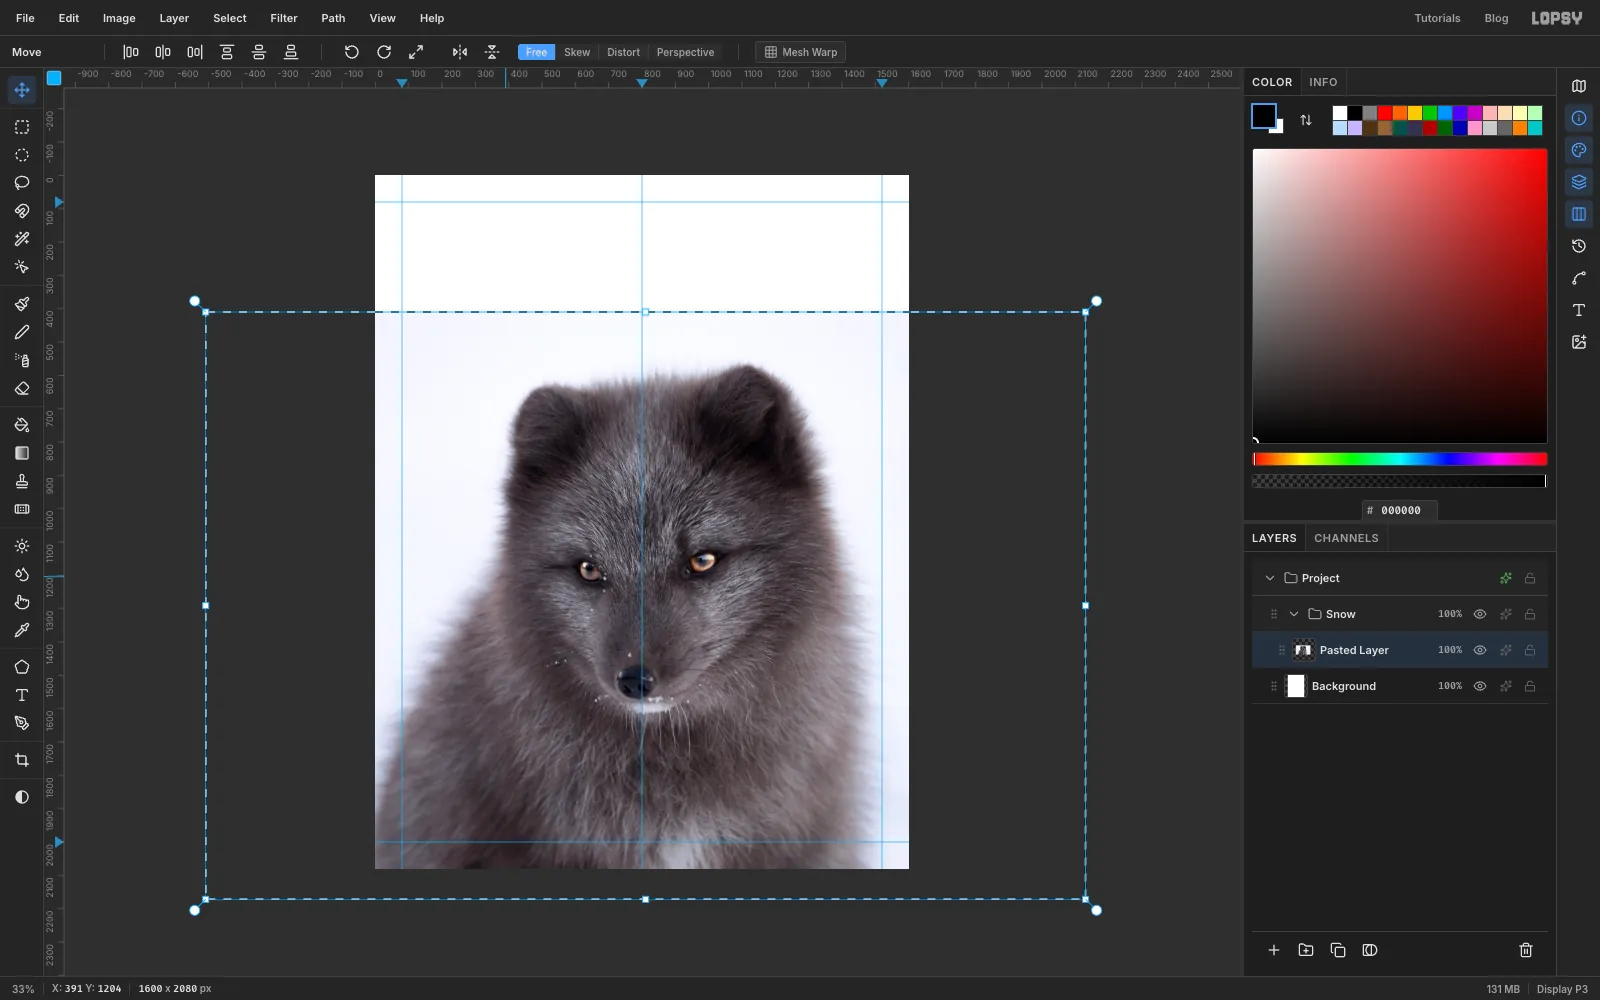
At canvas width the fox is too small for a cover. Press Cmd+- to zoom out so you can see past the edges. Then hold Cmd and drag the bottom-right corner handle out until the photo is about 165% of its fitted size, roughly 2,640 px wide. The status bar's X readout under the pointer gives you the position of the corner as you drag. Cmd keeps the proportions.
-
Centre the face
Drag inside the transform box to move the photo. Put the fox's nose on the centre guide, its ear tips about a quarter of the way down the page, and the photo's bottom edge past the bottom of the canvas. The face should be big: the shoulders run off both sides. Press Cmd+D to commit, then double-click the layer name and rename it Photo.
-
Fill the empty sky with snow
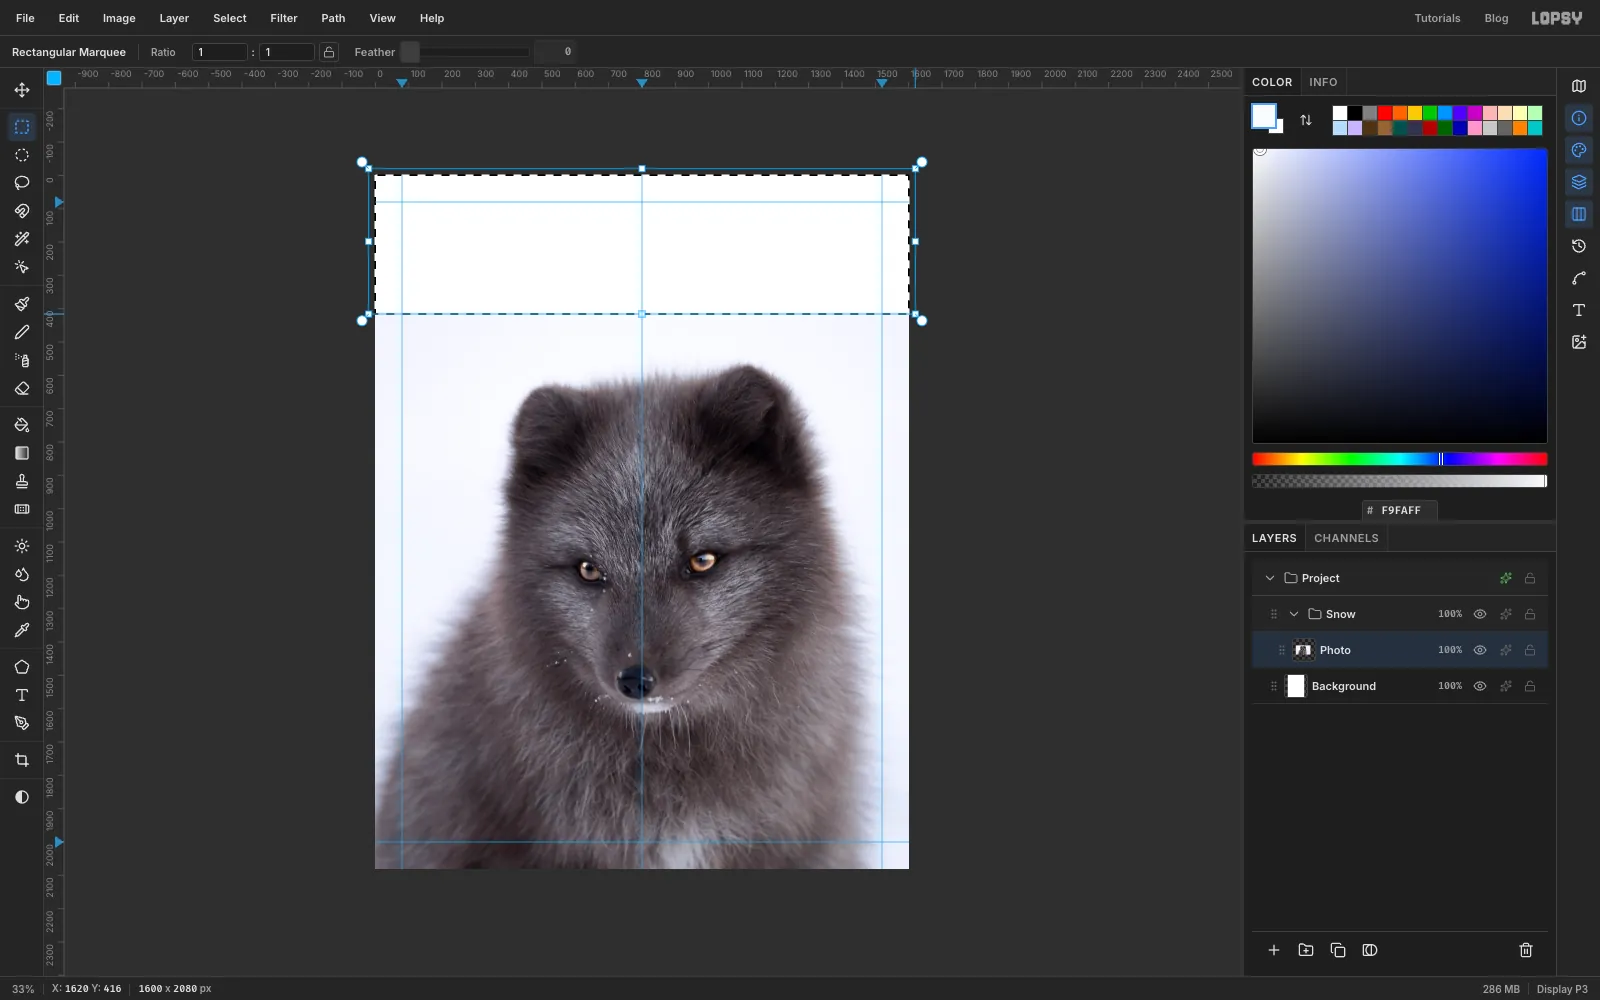
There's a white band above the photo with nothing in it. Pick the Eyedropper and click the snow just below the photo's top edge. That makes the snow colour the foreground. Pick the Rectangular Marquee and drag from above the top-left corner of the canvas to just past the right edge, ending a few pixels below the top of the photo. Choose Edit → Fill, then Cmd+D.
Don't worry about a faint seam. In a moment every pale tone turns into the same flat coral.
-
Select the snow with the Magic Wand
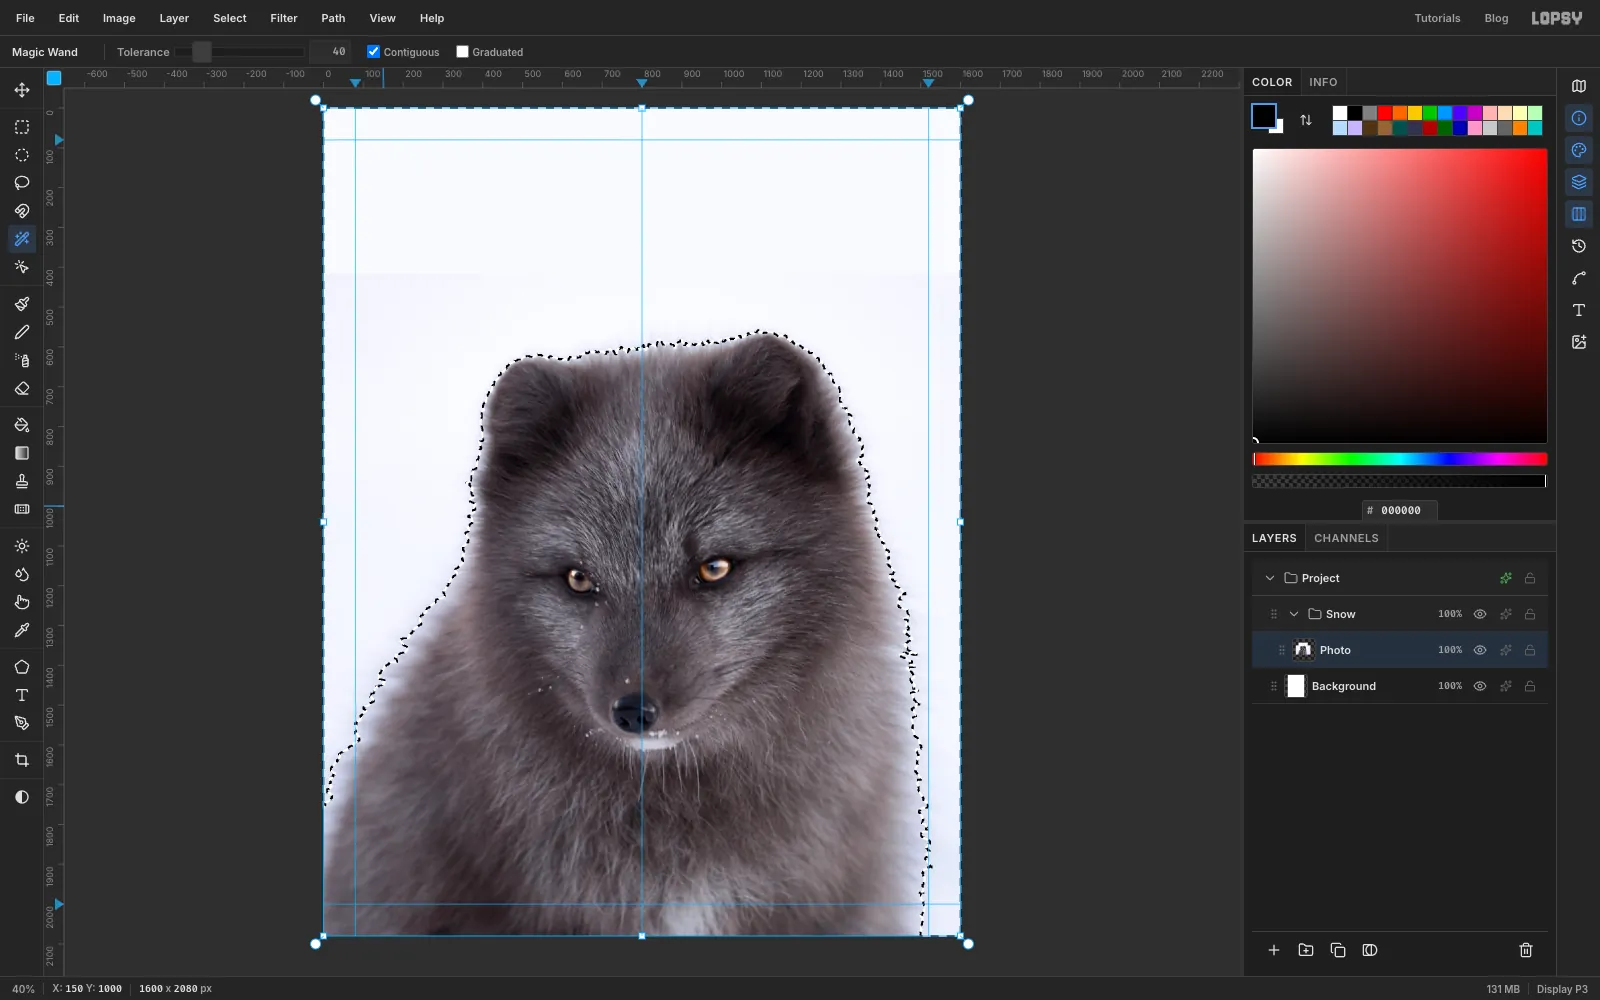
Pick the Magic Wand, set Tolerance to 40 and leave Contiguous on. Click the snow to the left of the fox. The snow around the fox is one connected area, so a single click selects all of it, right up to the fur.
-
Invert and soften the selection
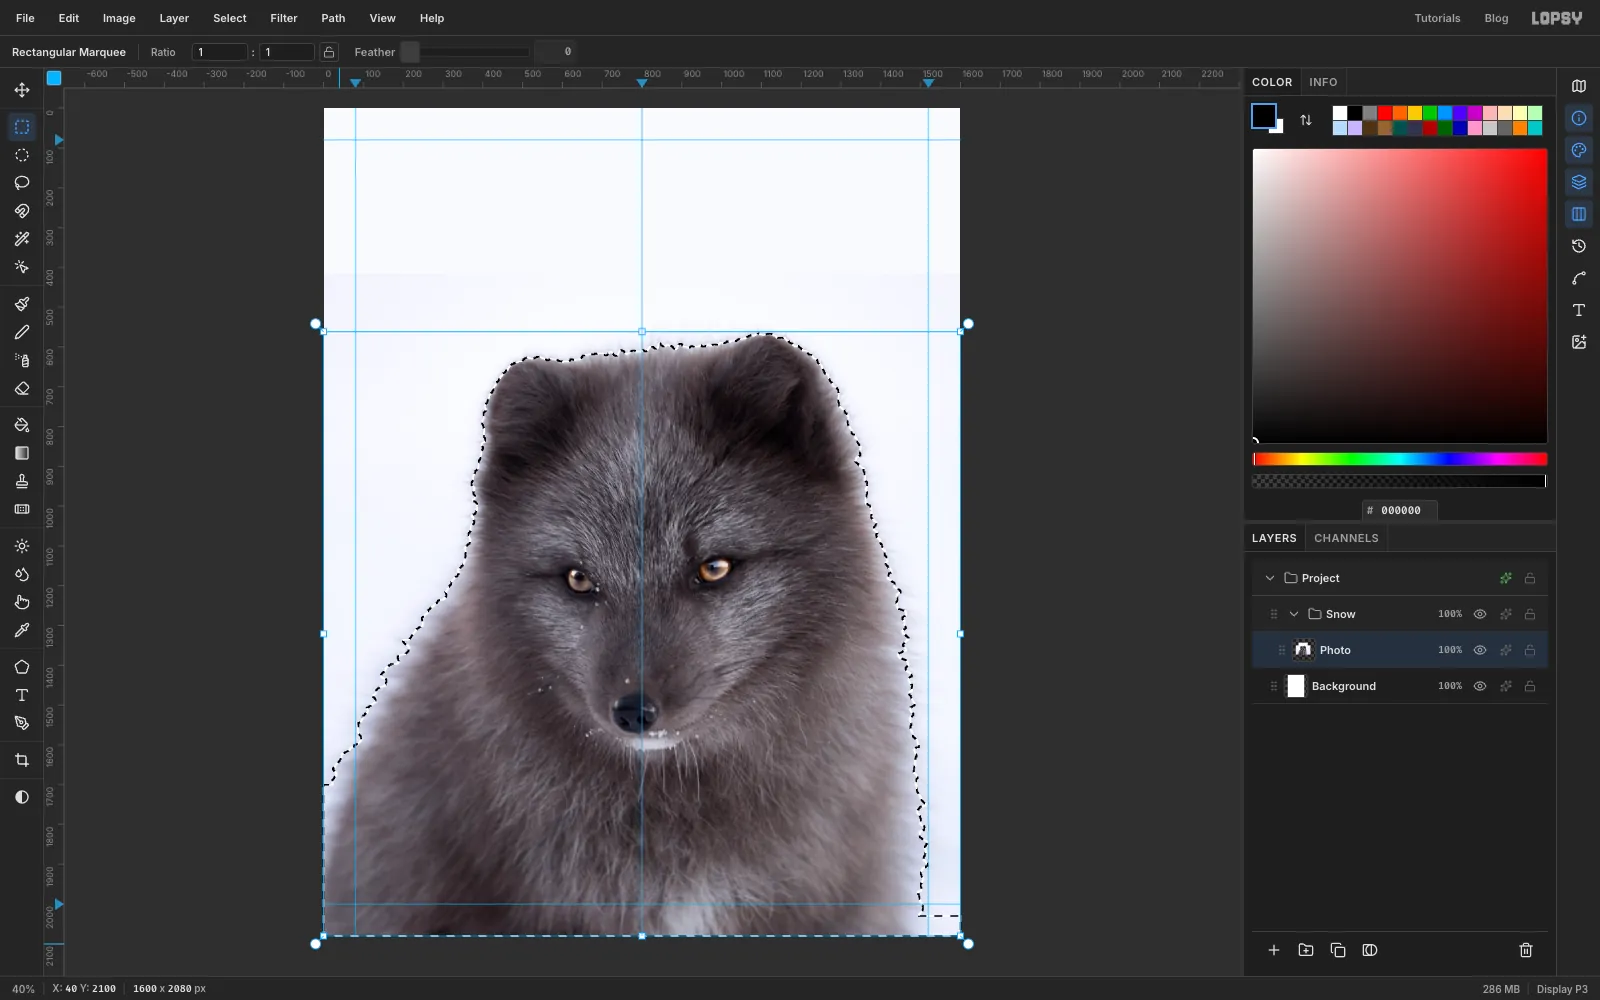
Choose Select → Inverse so the fox is selected instead. Then:
- Select → Shrink… by 4 px. That trims off the pale halo of snow caught in the fur tips.
- Select → Feather… by 3 px. That keeps the edge soft, like fur.
Shrink also pulls the selection 4 px in from the canvas edges, which would leave a thin gap where the fox runs off the page. Pick the Rectangular Marquee, hold Shift and drag a thin strip along the bottom edge, starting and ending outside the canvas. Do the same up the lower part of the left edge. Shift adds each strip to the selection.
-
Copy the fox into its own group
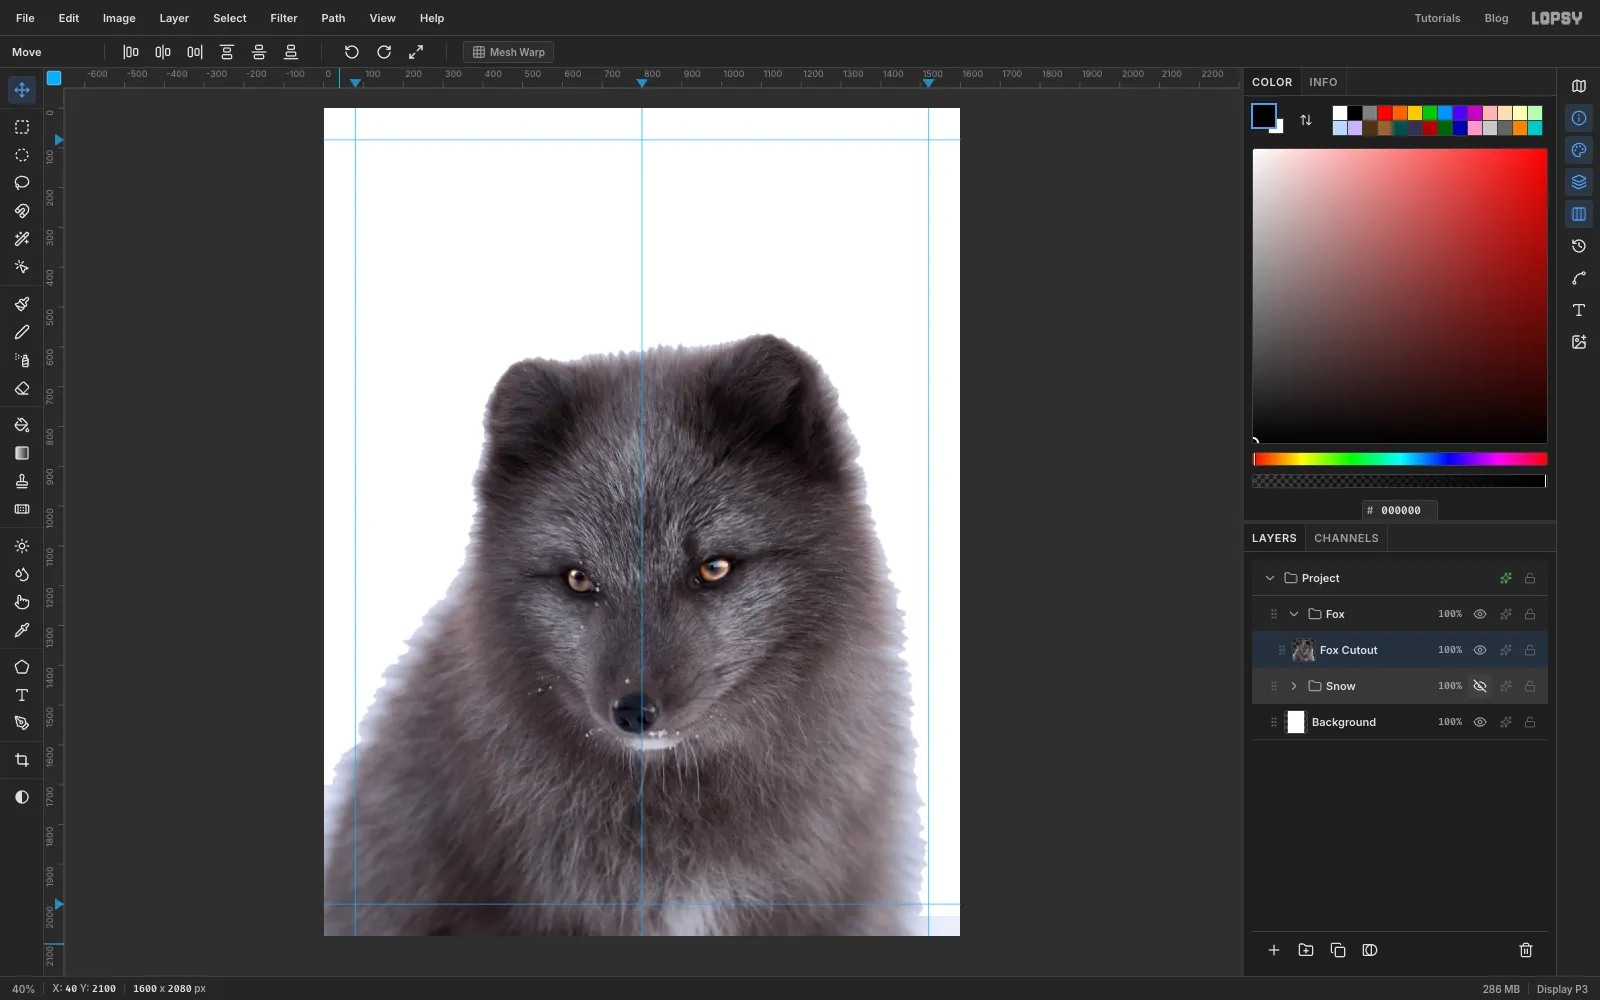
Press Cmd+C. Collapse the Snow group with its arrow and click its row, then click New Group and name it Fox. Because Snow was collapsed, Fox is created next to it, not inside it. Press Cmd+V: the fox pastes into Fox in exactly the same place. Rename the layer Fox Cutout.
Click the eye on Snow to hide it and check the cutout on white, then show it again.
-
Fill the fox out of the background
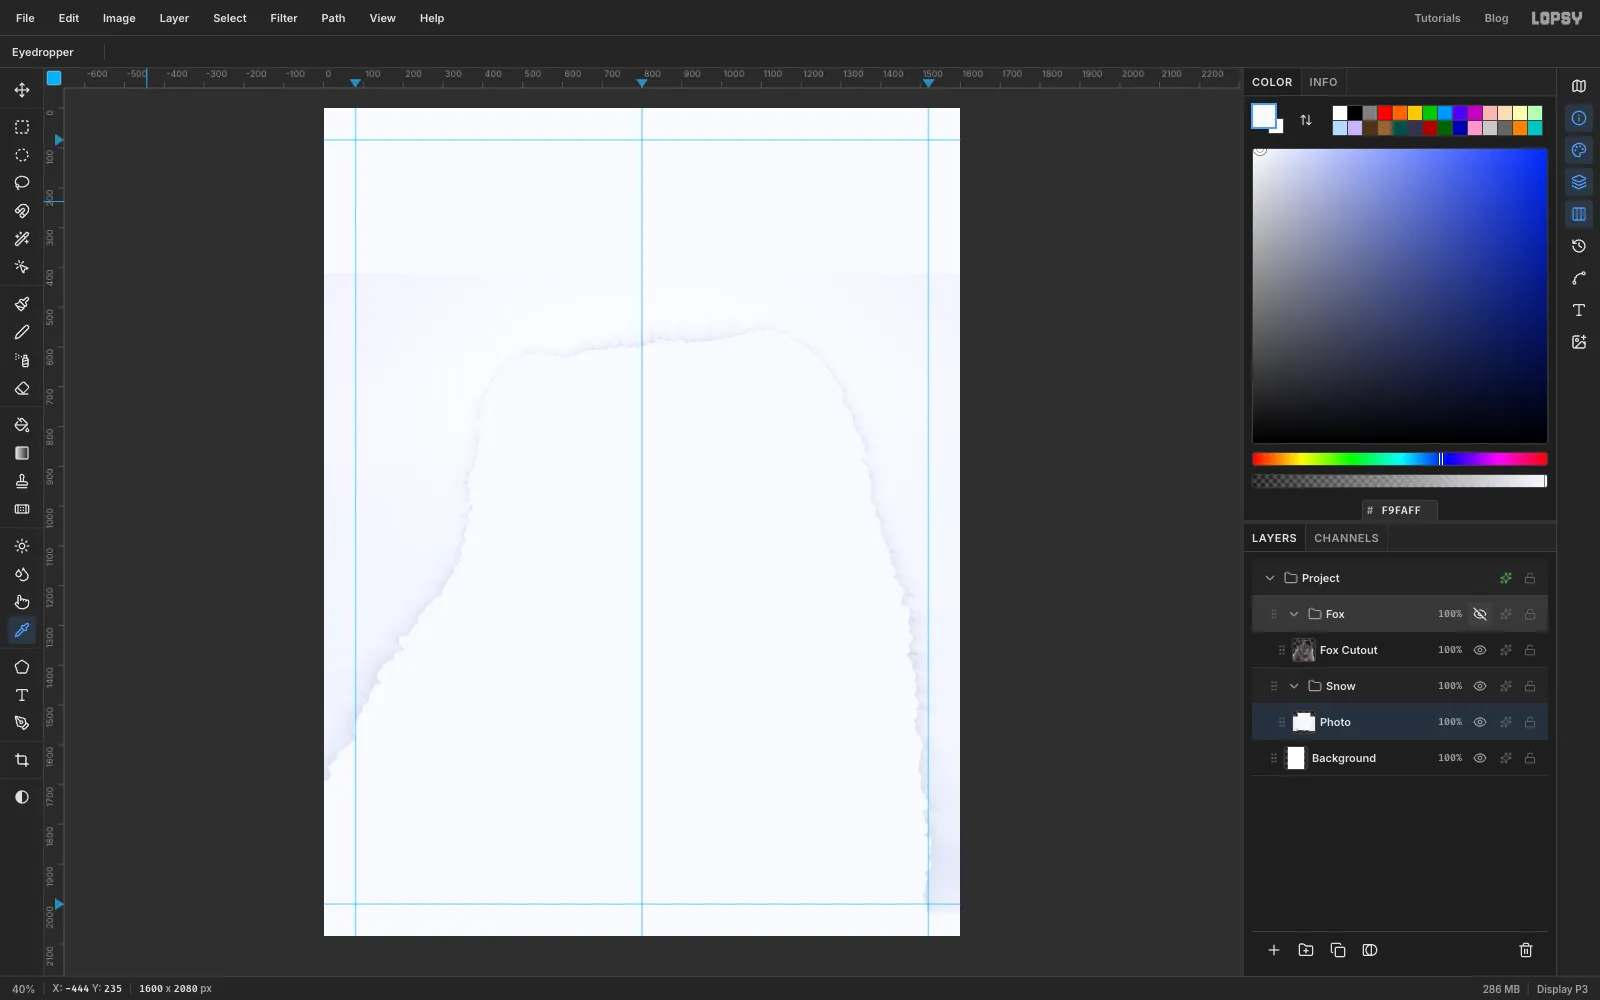
The original fox is still in Photo, underneath the cutout. Later, a faint ghost of its outline would show around the cutout's edge. Remove it now:
- Cmd-click the Fox Cutout thumbnail to load the fox's shape as a selection.
- Choose Select → Grow… by 10 px.
- Expand Snow, click Photo, and sample the snow with the Eyedropper again.
- Choose Edit → Fill, then Cmd+D.
Hide Fox for a moment to see the result: Photo is now just snow. Then show Fox again.
-
Map the snow to two inks
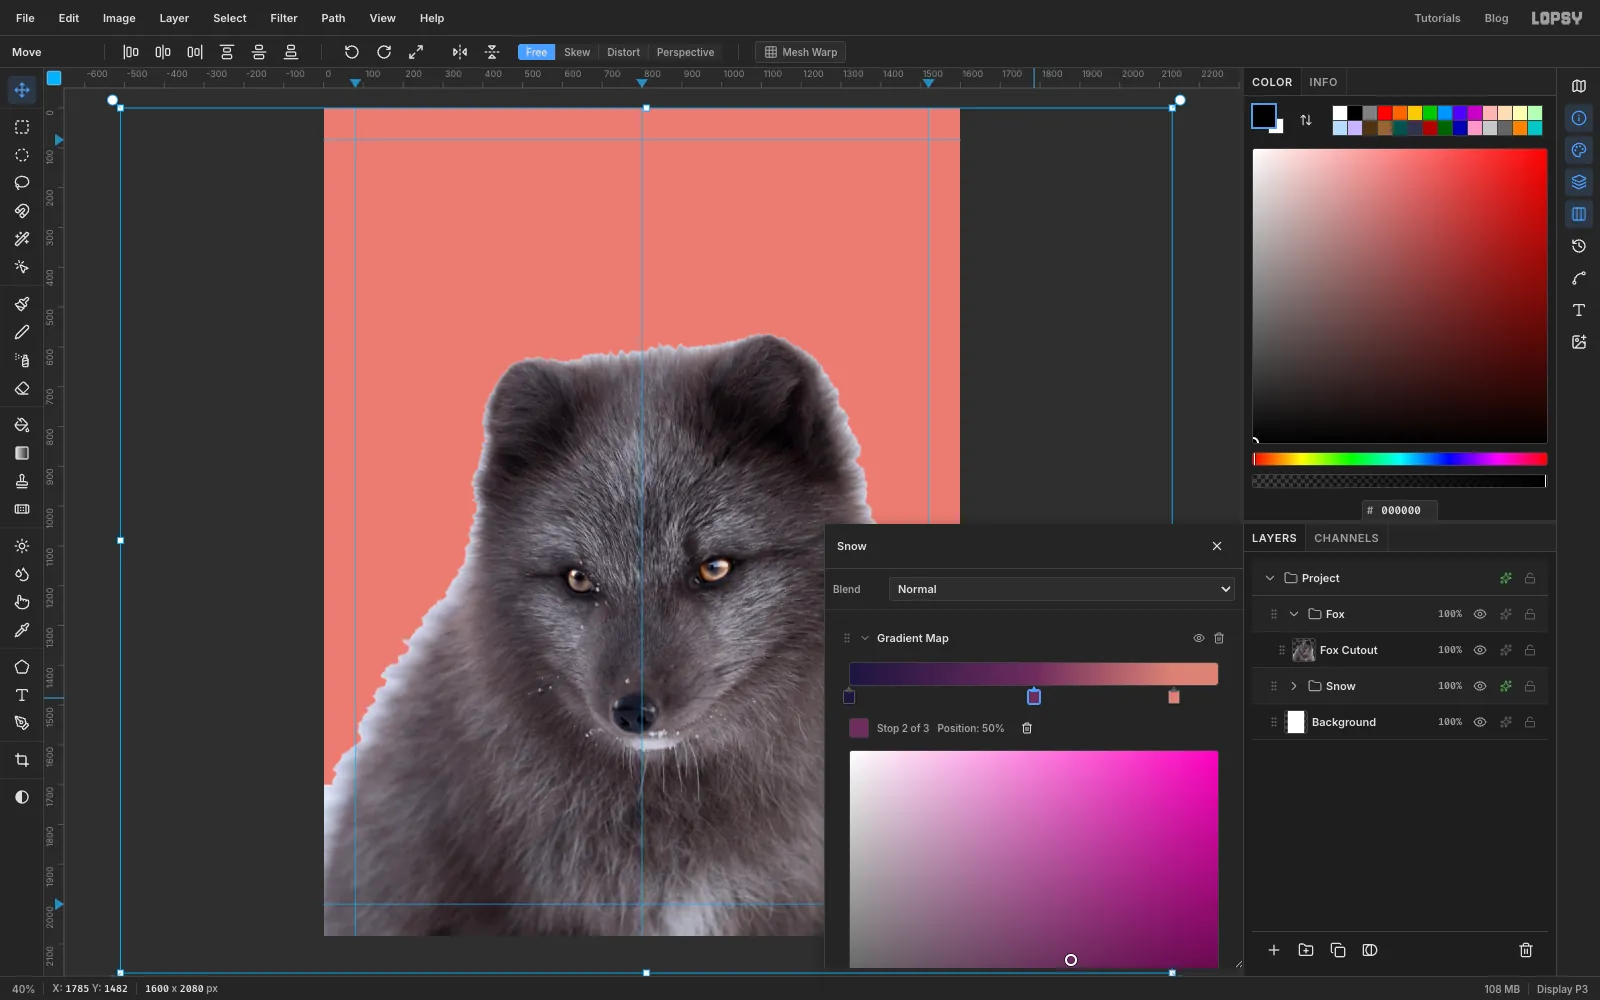
Click the effects button on the Snow group's row to open its drawer. Click Add Adjustment and choose Gradient Map. A gradient map recolours every pixel by its brightness: the left end of the bar paints the shadows and the right end paints the highlights.
- Click the left stop and type in the Hex field.
- Click the right stop, type , and drag the stop left to 88%.
- Click the handle row at 50% to add a stop, and type .
Anything brighter than 88% now comes out as solid coral, so all the snow, and the seam from earlier, turns into one flat ink.
-
Add contrast to the fox with Curves
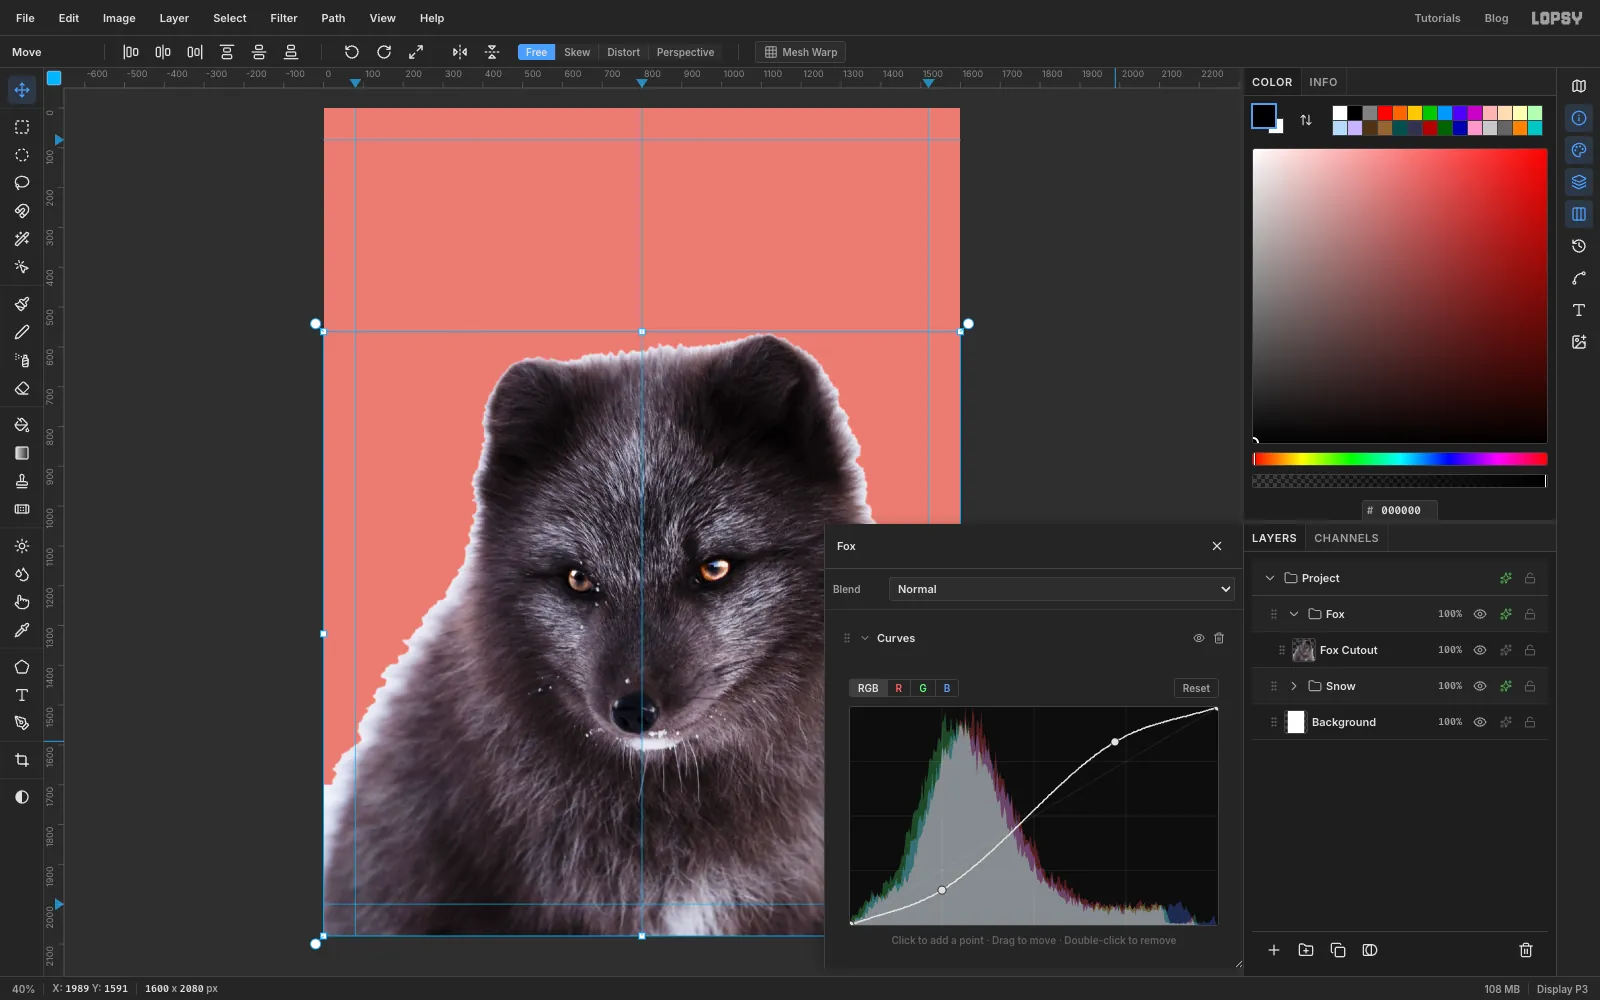
Open the Fox group's drawer, click Add Adjustment and choose Curves. Click on the diagonal a quarter of the way along and drag that point down a little. Then click three quarters of the way along and drag that point up a little. The gentle S-curve deepens the shadows and lifts the highlights, so the fur keeps its texture when it's mapped to ink.
-
Map the fox with the same inks
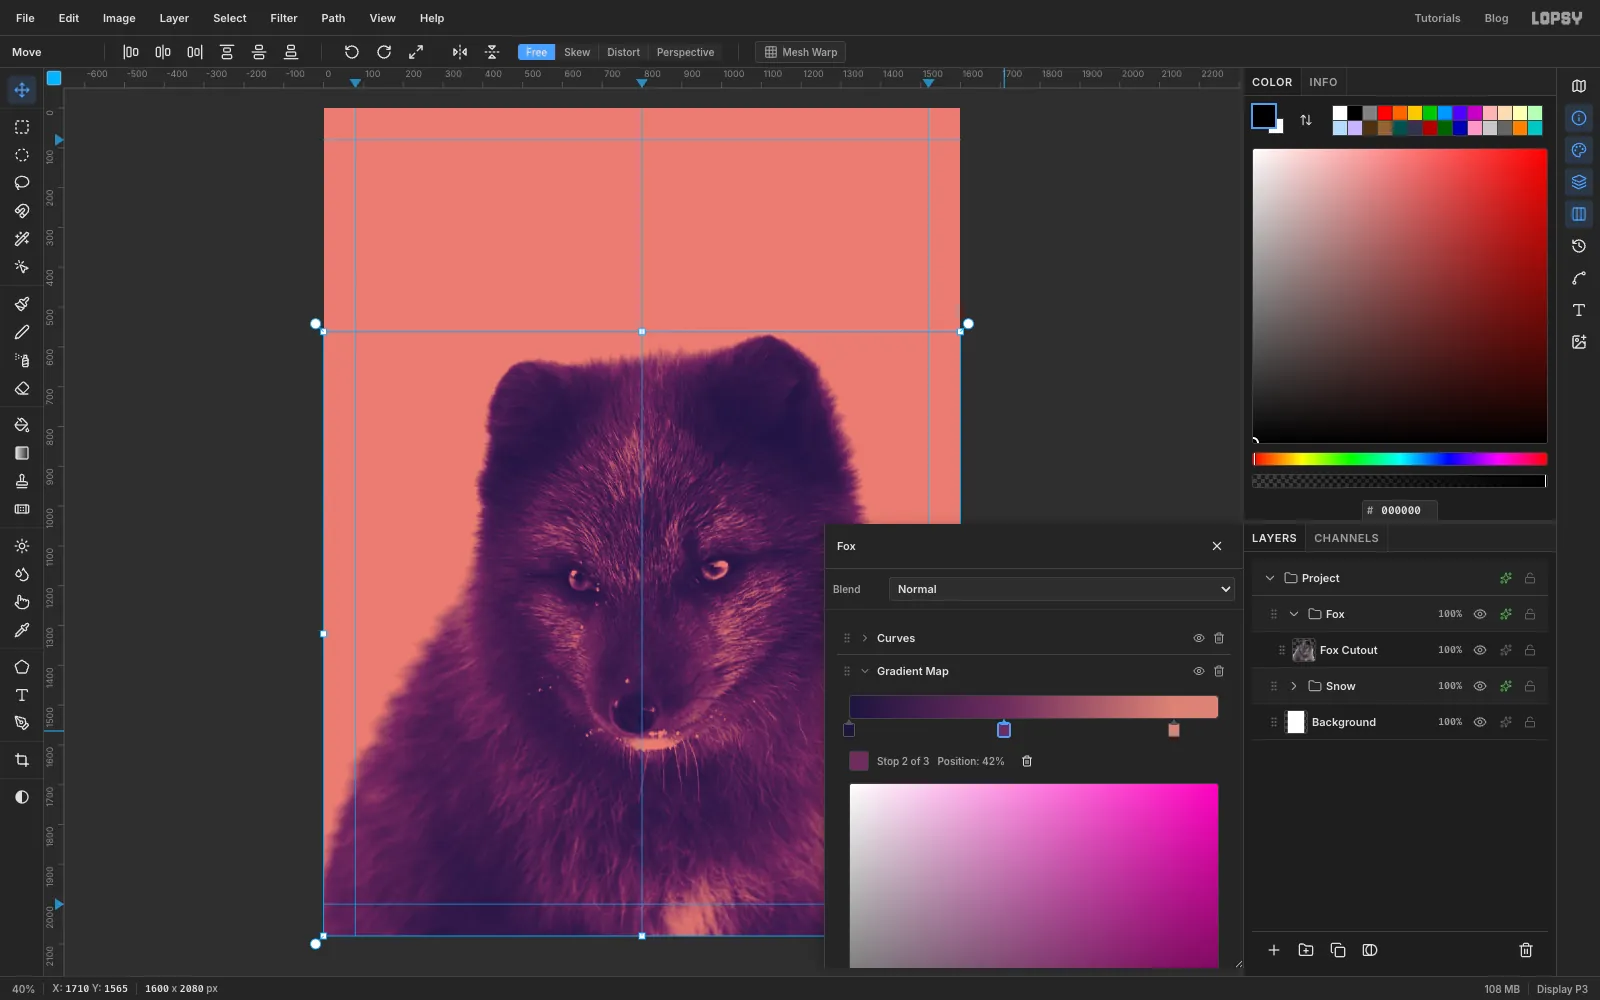
Still in the Fox drawer, add a second Gradient Map with the same three colours: at 0%, at 42% and at 88%. The plum stop sits a little further left than on the snow. That lifts the fox's midtones, so the brow and muzzle keep their shape instead of sinking into one dark plum mass. The Curves node sits above the map in the list, so the contrast is added first and then the ink is mapped. The fox turns deep violet with plum fur and coral catchlights in the eyes.
Each group has its own map. That's what lets the masthead slide between them.
-
Set the masthead behind the ears
Collapse Fox and Snow, click the Snow row and click New Group. Name it Masthead. It sits above Snow and below Fox, so anything in it goes behind the fox but in front of the coral.
With the Masthead row selected, pick the Text tool. Set the font to Abril Fatface, Size 487 and the text colour to . Click near the top of the page, type
THAWand press Tab to commit. Switch to the Move tool and nudge the word with the arrow keys (Shift moves 10 px at a time) until the T's serif touches the left guide and the tops of the letters sit about 250 px down. At this size the word runs exactly from margin to margin, and the fox's right ear tucks over the foot of the W.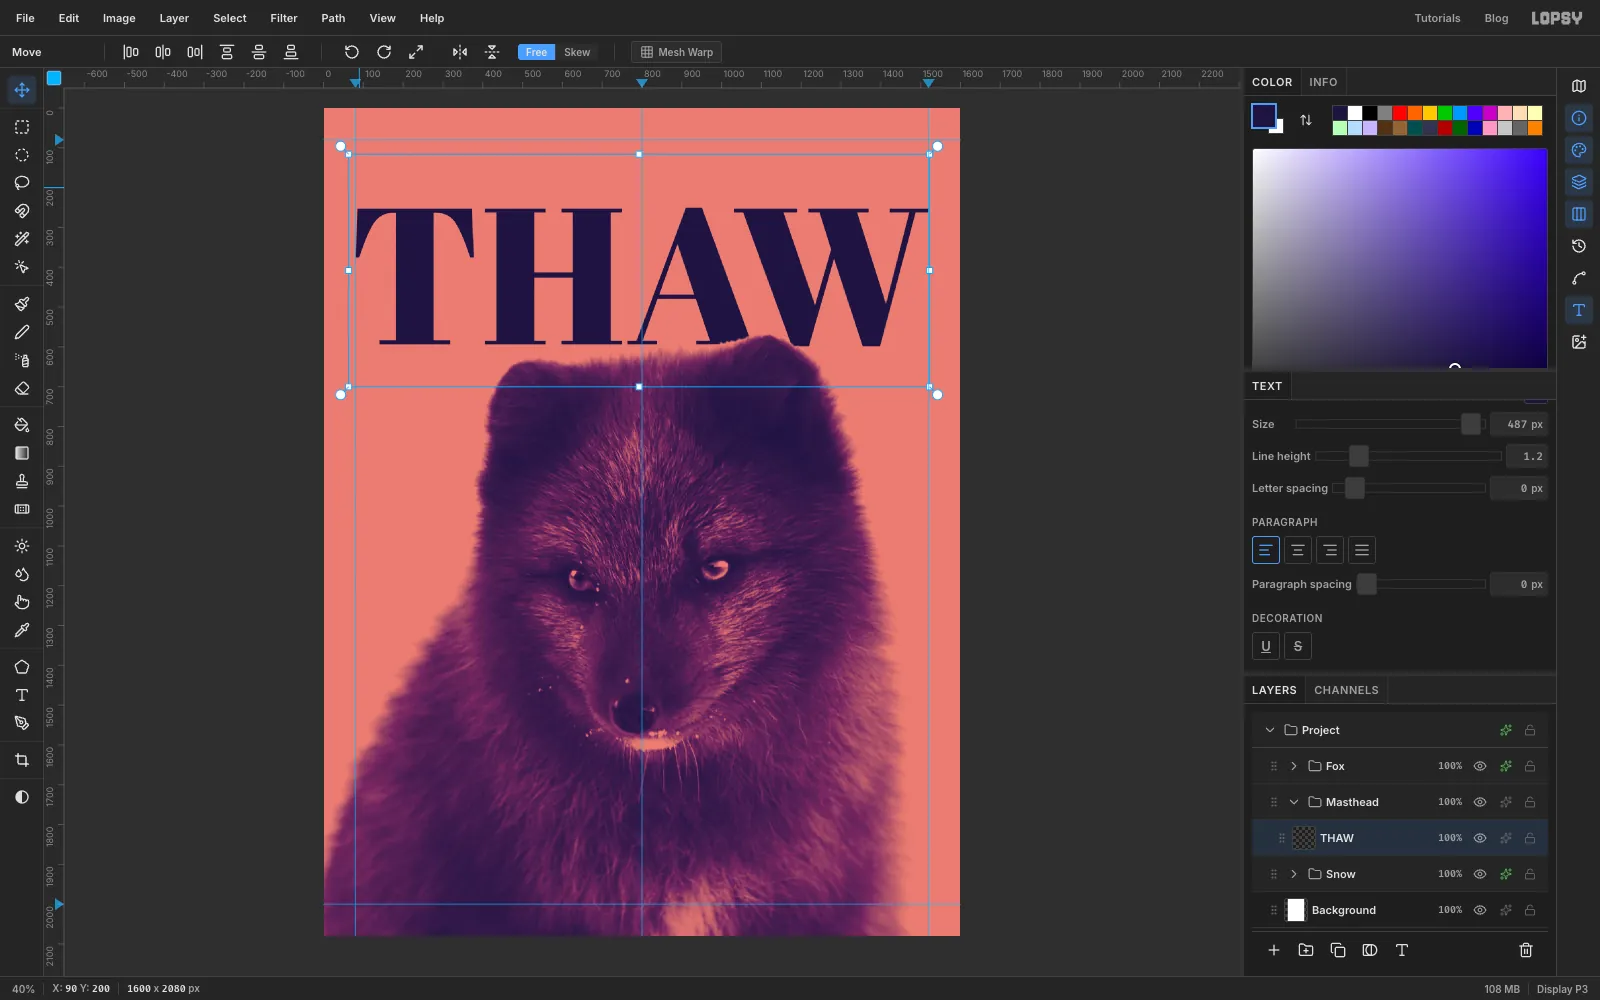
-
Add the strap line
Click the Masthead row again before you change any text settings. Otherwise the new settings restyle THAW. Set IBM Plex Sans Condensed, weight SemiBold, Size 28, and in the Text panel Letter spacing 5.
Click in the empty space above THAW and type
A QUARTERLY OF COLD PLACES. Nudge it so it starts on the left guide, with the tops of its capitals about 18 px below the top margin guide.For the right-hand side, click the Masthead row again, then choose Align right in the Text panel. Click just left of the right guide at the same height and type
NO. 14 · WINTER 2026. With Align right, the point you click becomes the line's right edge. To get the middle dot, copy it from this page and paste it. Nudge the line onto the right guide.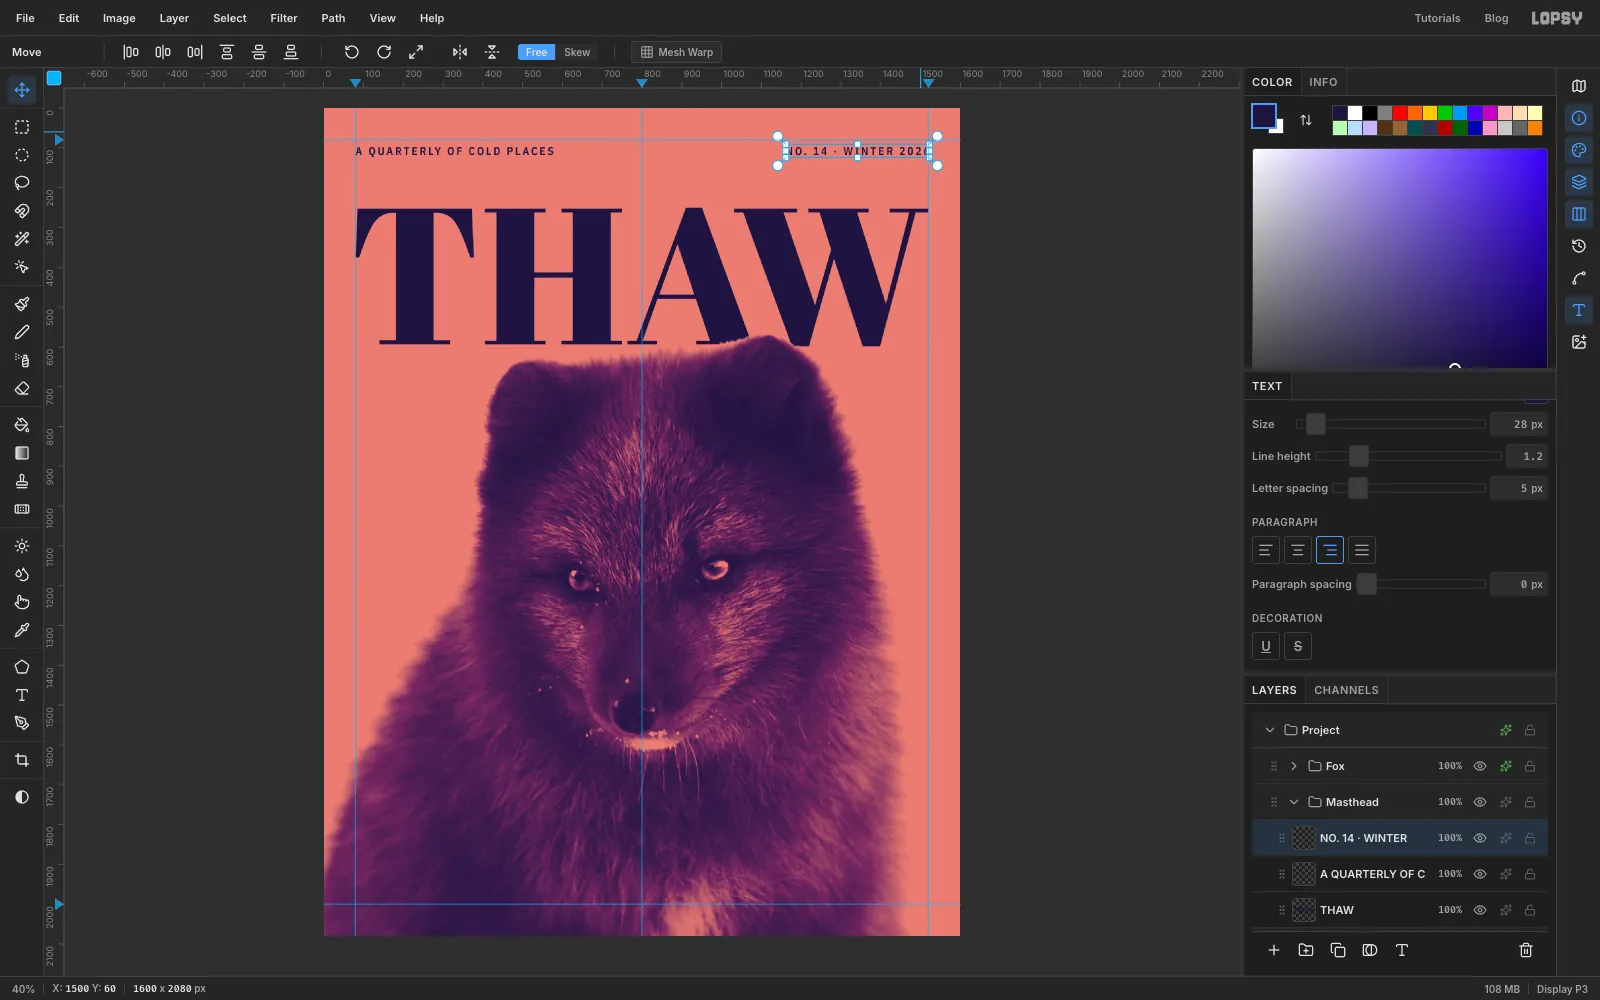
-
Draw a rule under the strap
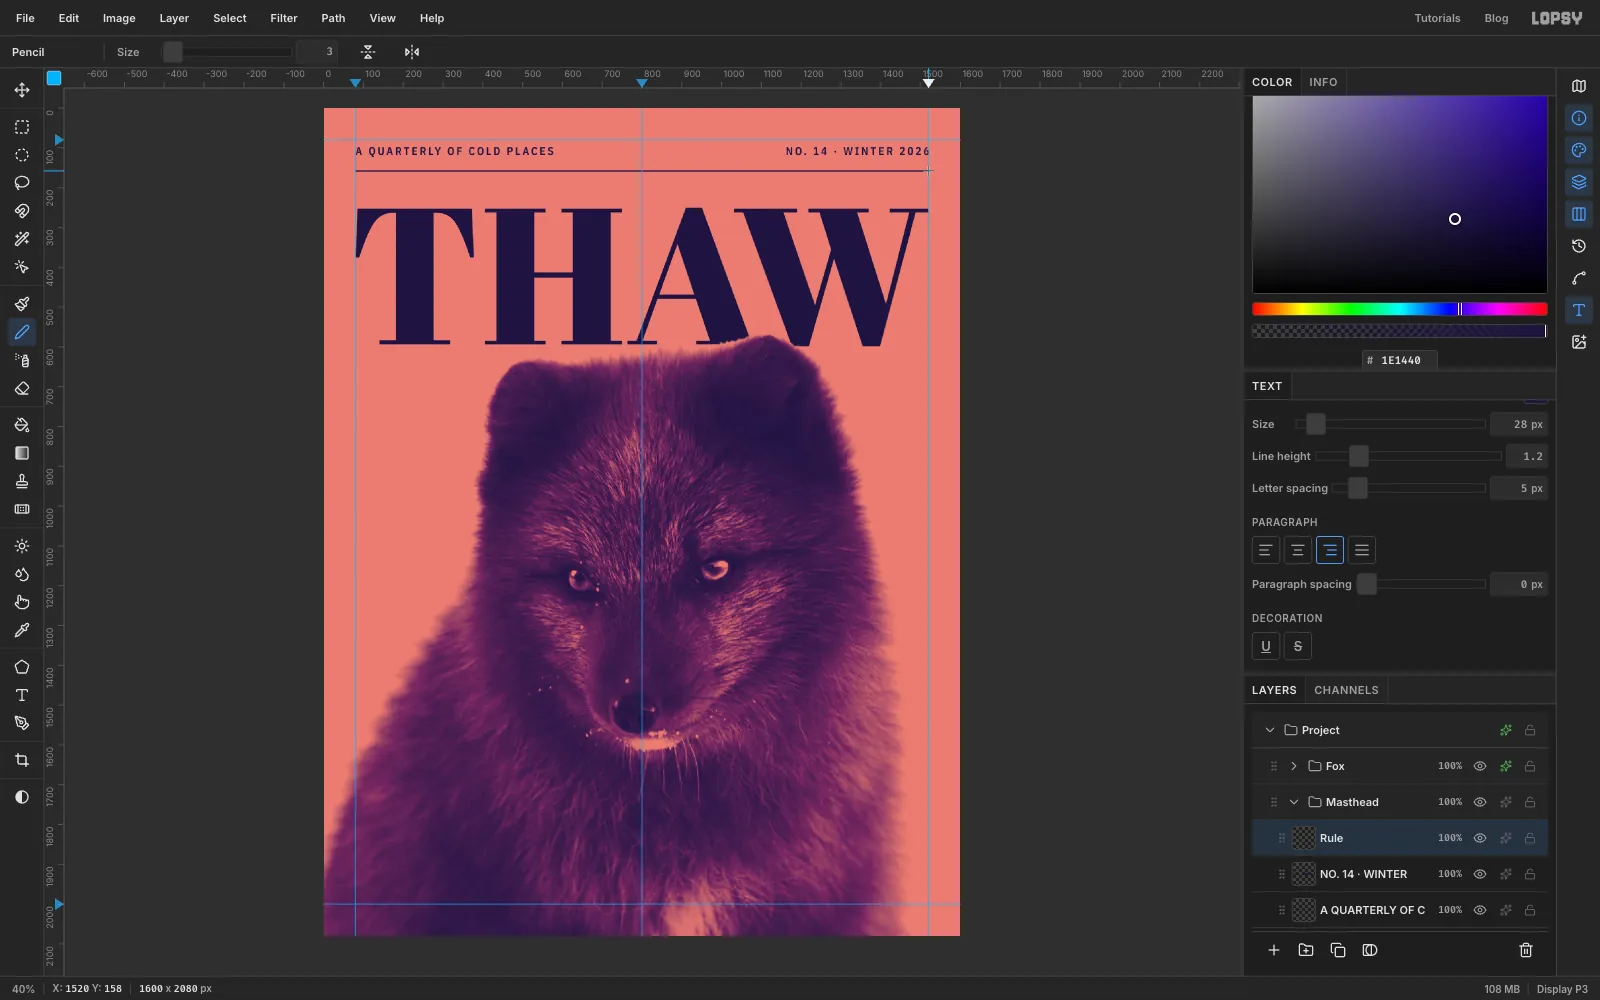
Click the Masthead row, click Add Layer and name it Rule. Set the foreground to , pick the Pencil at Size 3, and click on the left guide about 40 px below the strap. Hold Shift and click on the right guide at the same height. The Pencil draws a dead-straight line between the two clicks.
-
Write the side cover lines
Click the collapsed Fox row and click New Group. Name the new group Cover Lines. It sits on top, so its text stays above the fox.
Add a layer called Rules inside it. With the Pencil at Size 4, draw a 70 px rule from the left guide about a third of the way down, and a second one about 280 px lower.
Each cover line is two text layers. Click the Cover Lines row before each one, so your settings don't restyle the last text:
- The kicker
SEA ICEin IBM Plex Sans Condensed Bold, Size 26, Letter spacing 5, Align left, colour , starting 20 px under the rule. - The headline in DM Serif Display, Size 46, Line height 1.08, letter spacing back to 0. Press Enter between the lines: The long / goodbye on / Hudson Bay.
Repeat under the second rule with
LEMMINGSand Where have / the boom / years gone?. Nudge each block onto the left guide. Keep the lines short: the fox's cheek is only about 300 px away.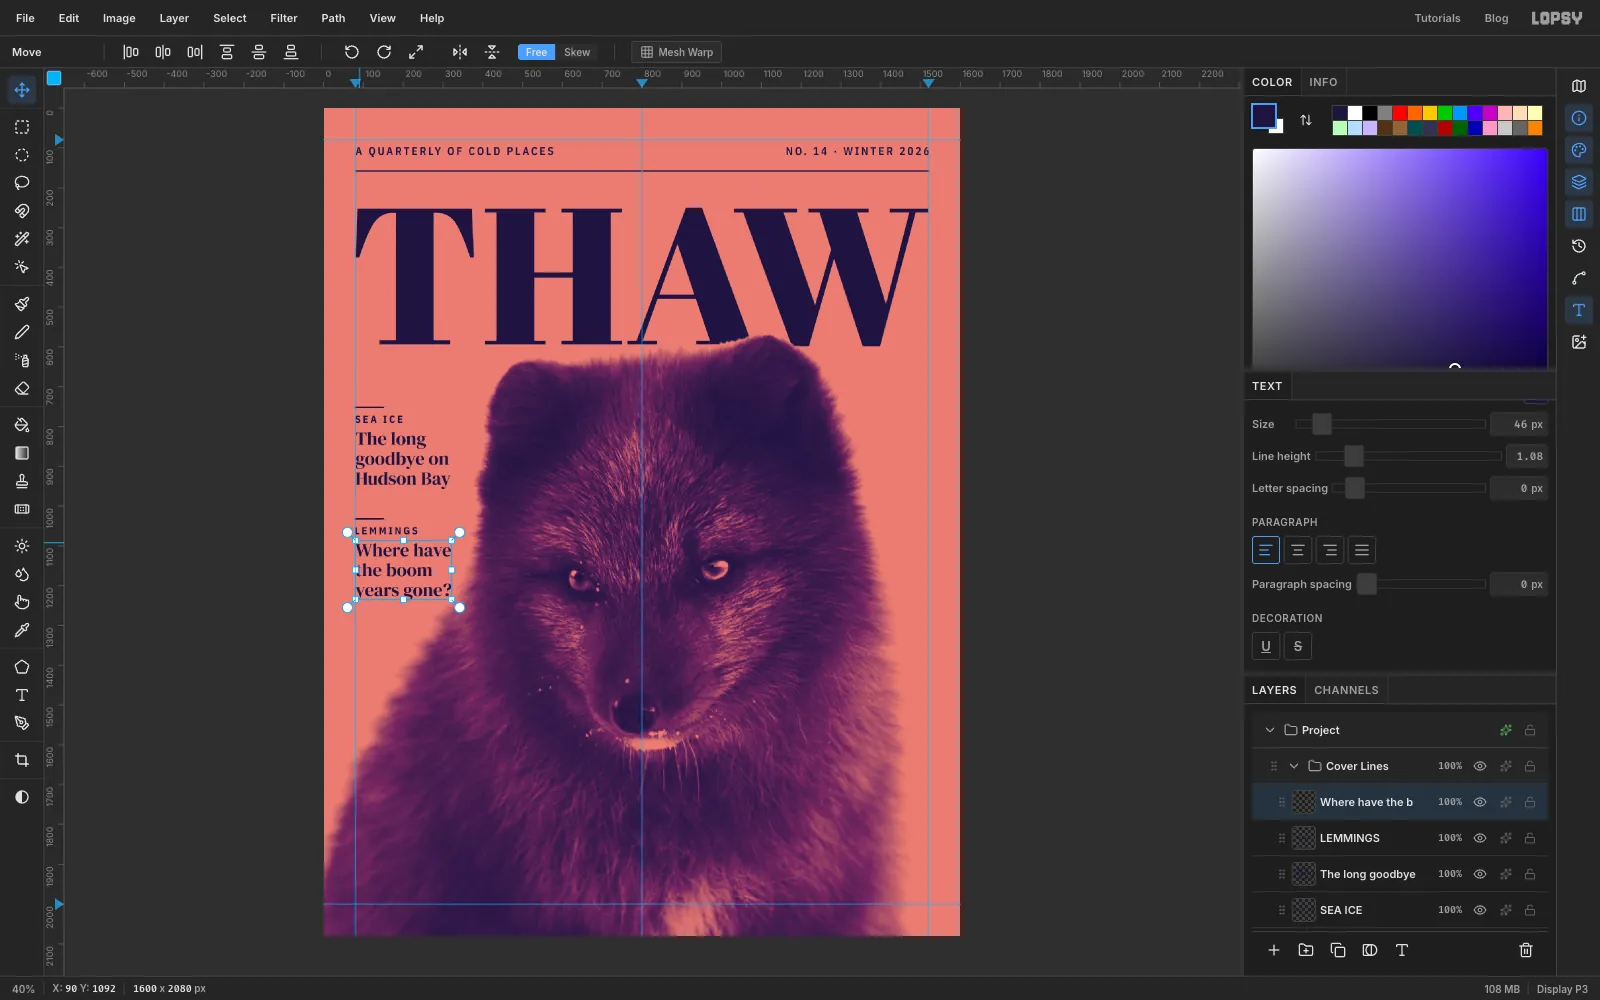
- The kicker
-
Set the cover story
The story block sits over the dark fur of the chest, so it's set in cream. As before, click the Cover Lines row before you change the settings for each piece. Make the pieces from the bottom up. The Text tool edits any text whose box you click inside, so clicking below existing text could add to it instead of starting a new layer.
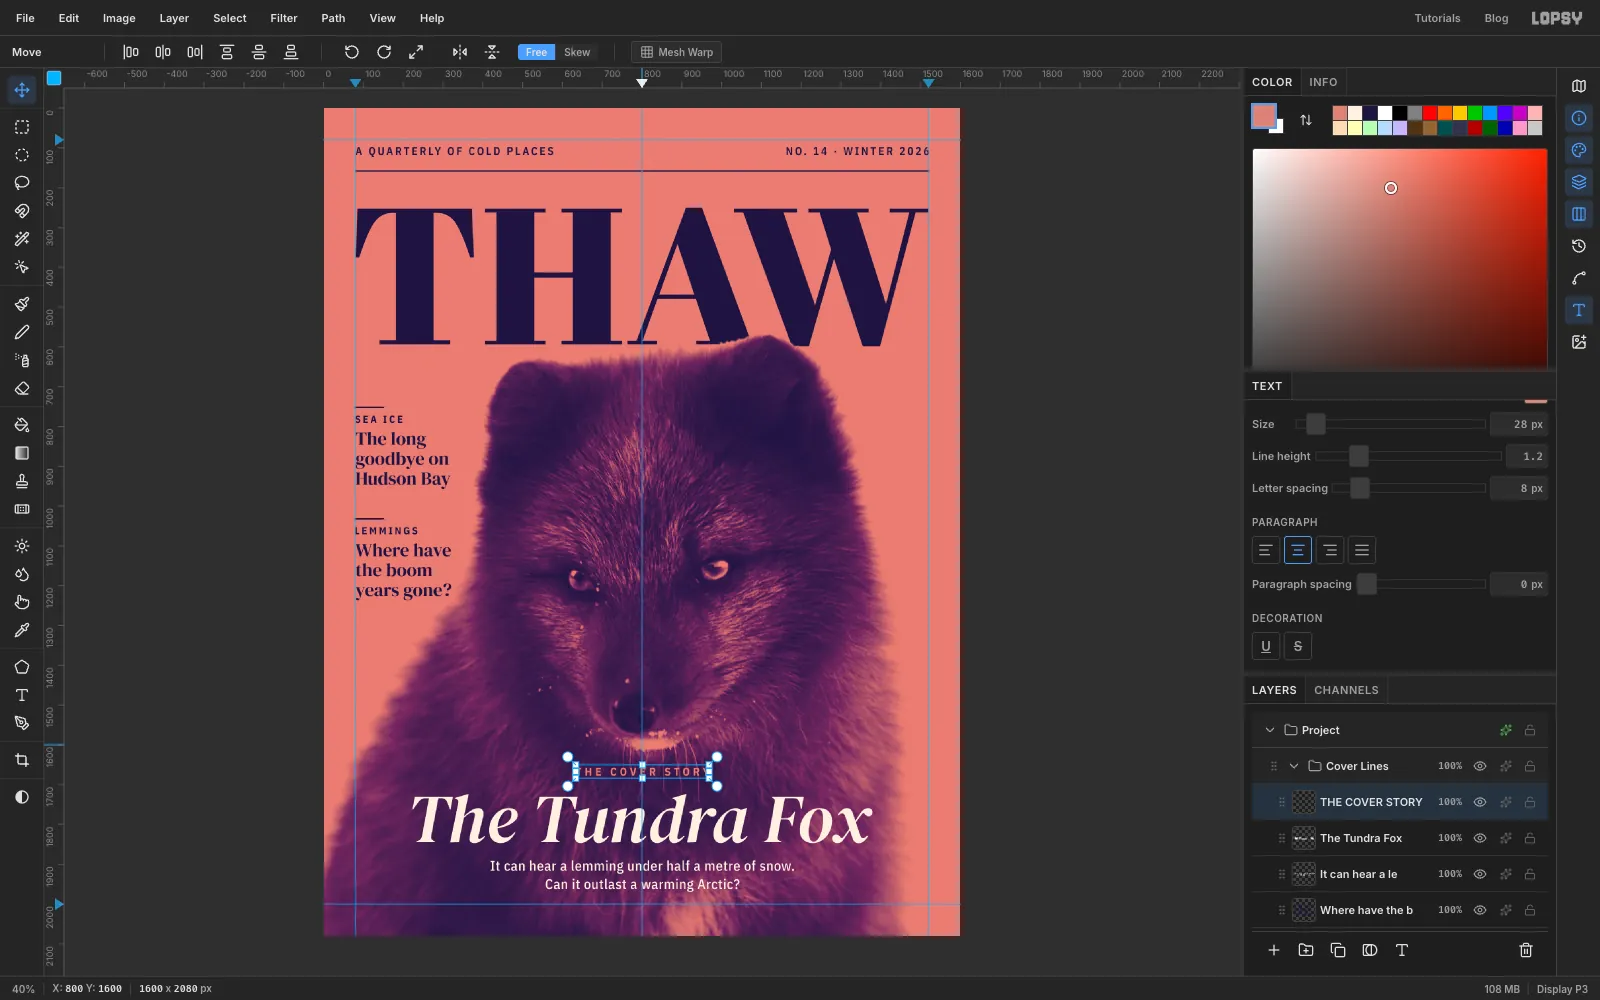
- The dek. IBM Plex Sans Condensed Medium, Size 35, Line height 1.3, Letter spacing 1, colour , Align center. Click on the centre guide near the bottom and type It can hear a lemming under half a metre of snow., Enter, Can it outlast a warming Arctic?
- The title. DM Serif Display, Italic, Size 172, Letter spacing 0, still cream and centred. Click on the centre guide well above the dek and type The Tundra Fox. Nudge it so its baseline sits about 45 px above the top of the dek.
- The kicker. IBM Plex Sans Condensed Bold, Size 28, Letter spacing 8, colour . Type
THE COVER STORYabove the title and leave about 45 px between it and the title's capitals.
-
Cut a disc for the badge
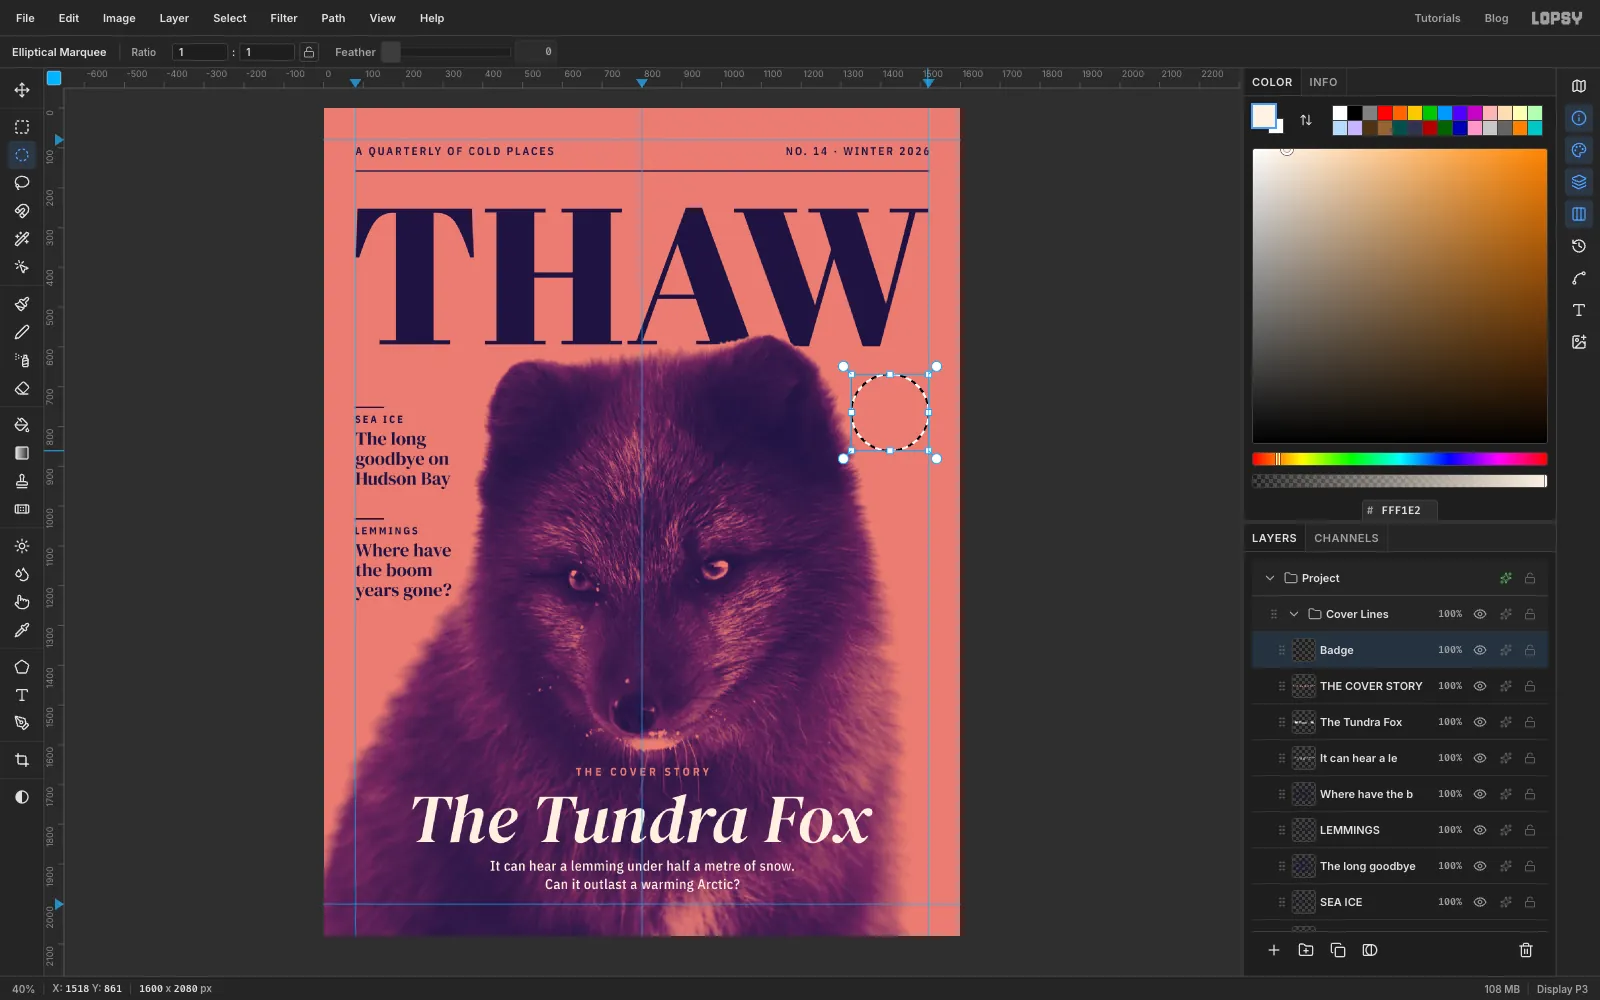
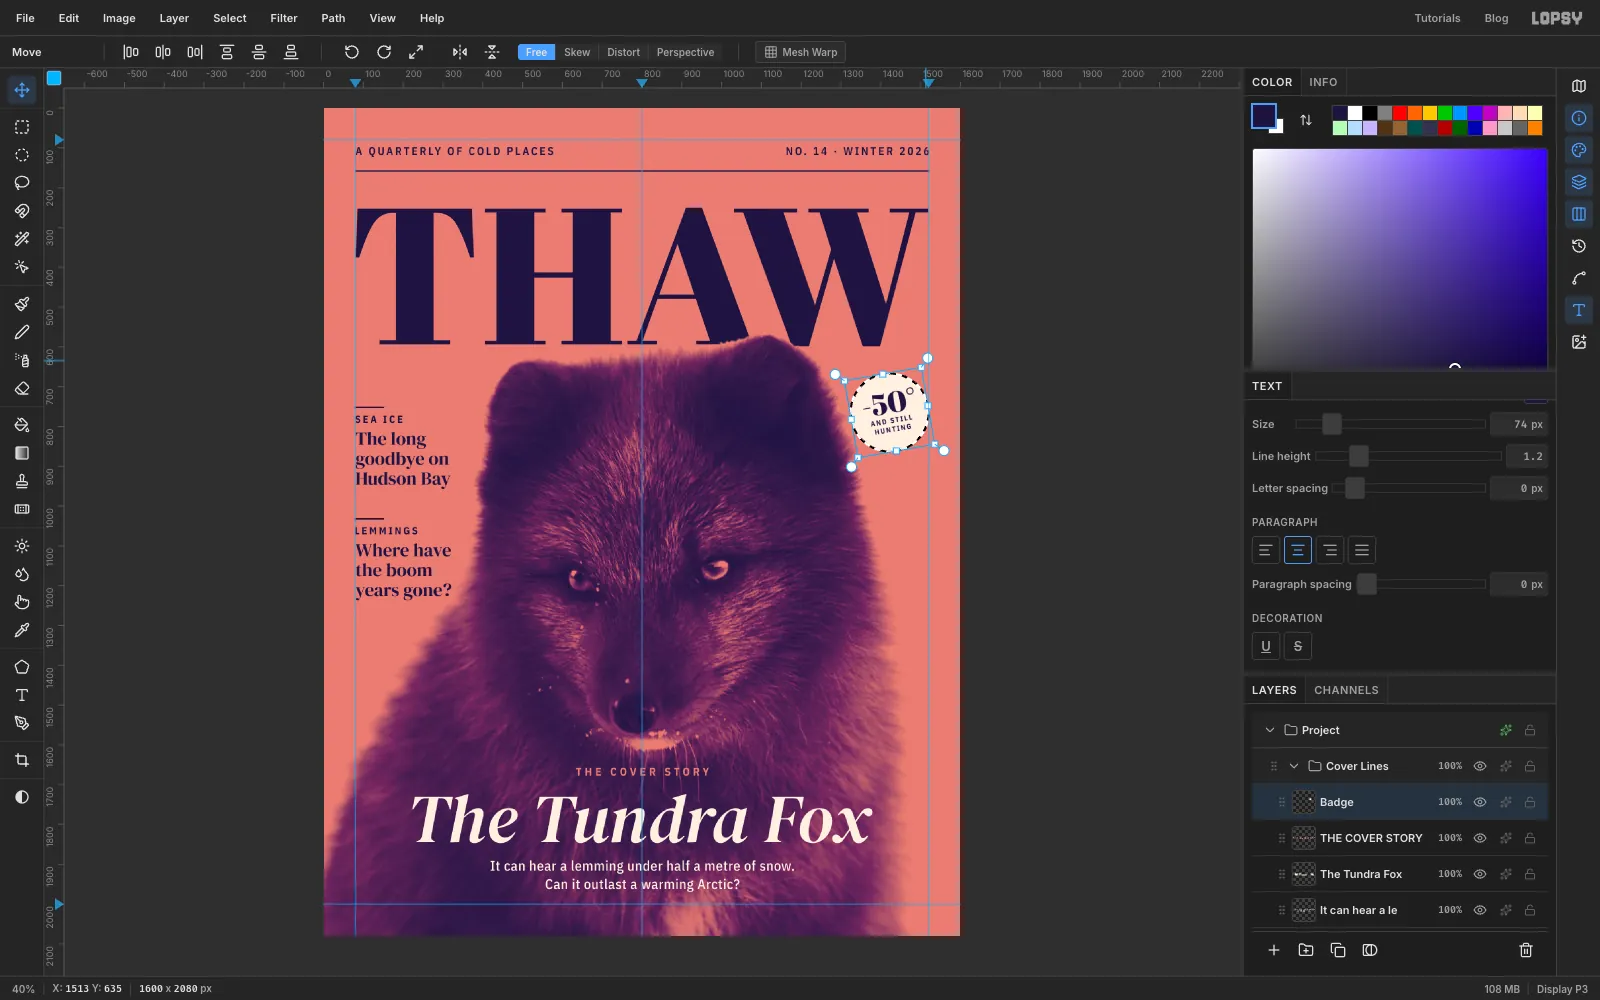
Click Cover Lines and add a layer called Badge. Set the foreground to . Pick the Elliptical Marquee, hold Cmd and drag a circle about 190 px across. Cmd keeps the marquee a perfect circle. Place it in the coral to the right of the fox's head, about 25 px clear of the fur, with its right edge on the right guide. Choose Edit → Fill and Cmd+D.
-
Type the badge
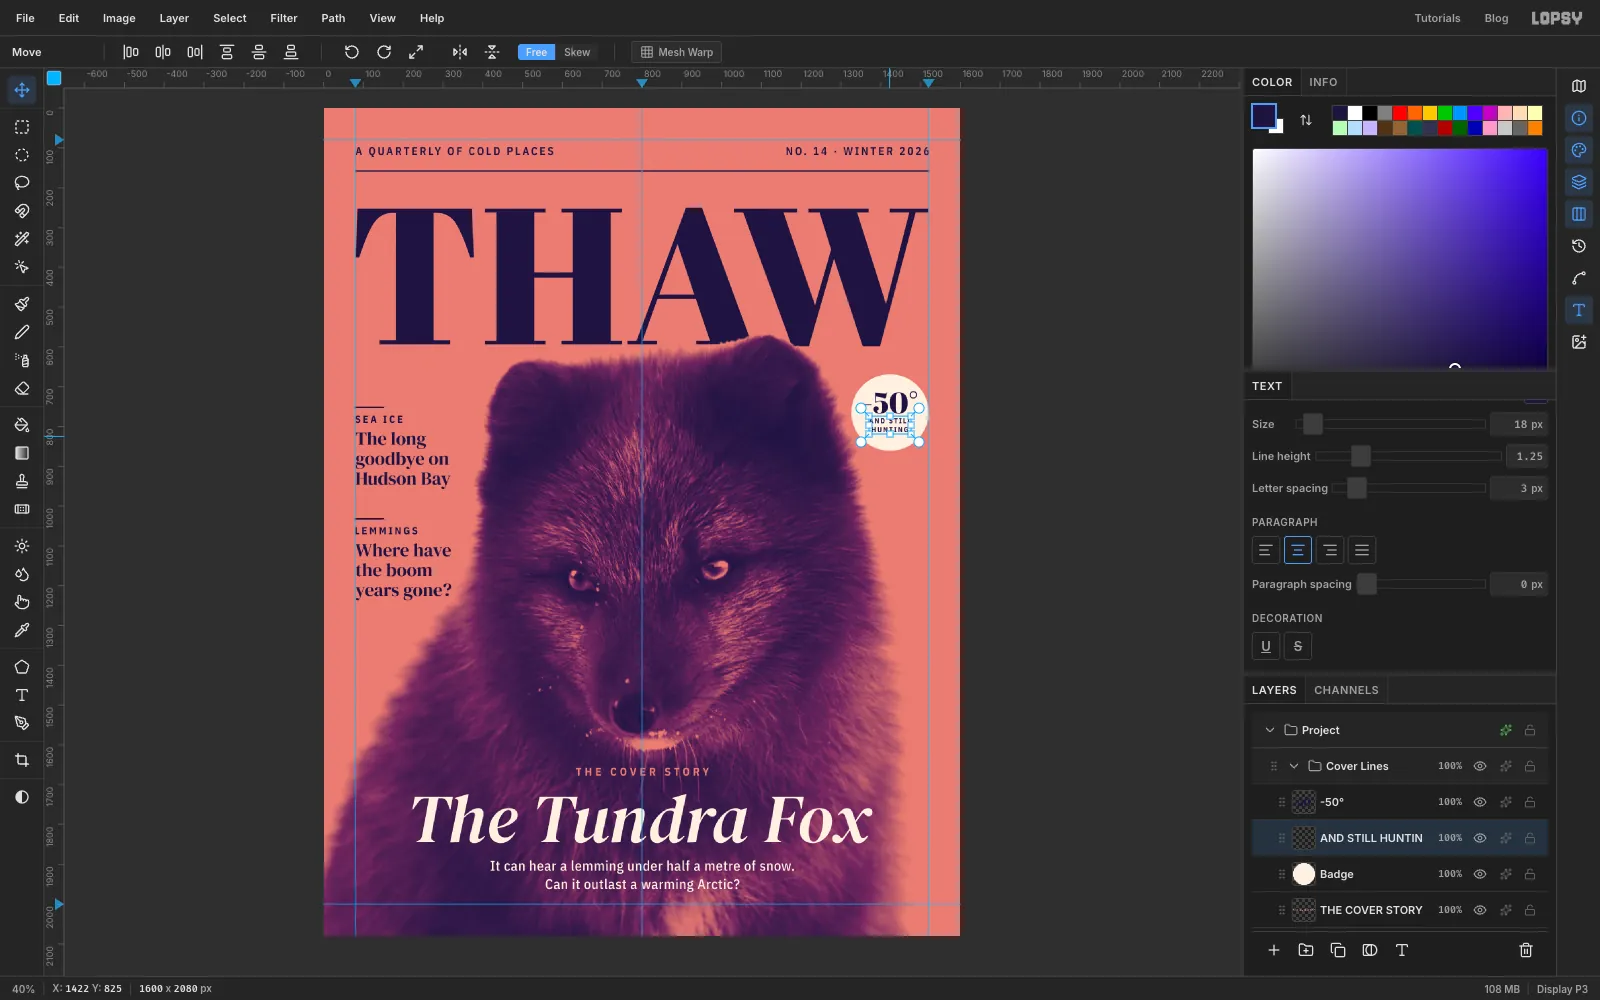
Click the Badge row and set Abril Fatface, Size 74, Letter spacing 0, Align center, colour . Click above the disc and type
-50°(paste the degree sign). Use the ordinary hyphen: Abril's true minus sign is a hairline, and next to these heavy numerals it reads as a dash.Click Badge again and set IBM Plex Sans Condensed Bold, Size 18, Letter spacing 3, Line height 1.25. Click below the disc and type AND STILL / HUNTING. Nudge both into the disc so the stack is centred, with the number about 12 px above the small type.
-
Merge the badge and tilt it
Click the top text layer of the badge and choose Layer → Merge Down twice. The number, the label and the disc become a single Badge layer. Draw an elliptical marquee just around the disc, pick the Move tool, and drag the rotate handle outside the box's top-right corner anticlockwise until the badge tilts slightly, about 10° (less than one 15° snap). Press Cmd+D to commit.
-
Add a barcode box
Click Cover Lines and add a layer called Barcode. In the bottom-right corner, drag a small box about 110 px wide and a little less tall, from below and right of the title's x down to where the right and bottom guides meet. Snap to Guides is on by default, so the right and bottom edges land exactly on the guides. Fill it with cream. It should sit almost entirely on coral, clear of the fur and the title.
Switch the foreground to and zoom in to 400% or more. Draw the bars with the Pencil: click at the top of a bar and Shift-click at the bottom. Use Size 2, 4 and 6 for thin, medium and thick bars, with gaps of 2 or 4 px. About 20 bars, mixing the widths at random, looks like a real barcode. Click the Barcode row and finish with the digits
9 771748 091146in IBM Plex Sans Condensed Medium, Size 11, Letter spacing 0, Align center, centred under the bars. Leave the same 12 px of cream on all four sides.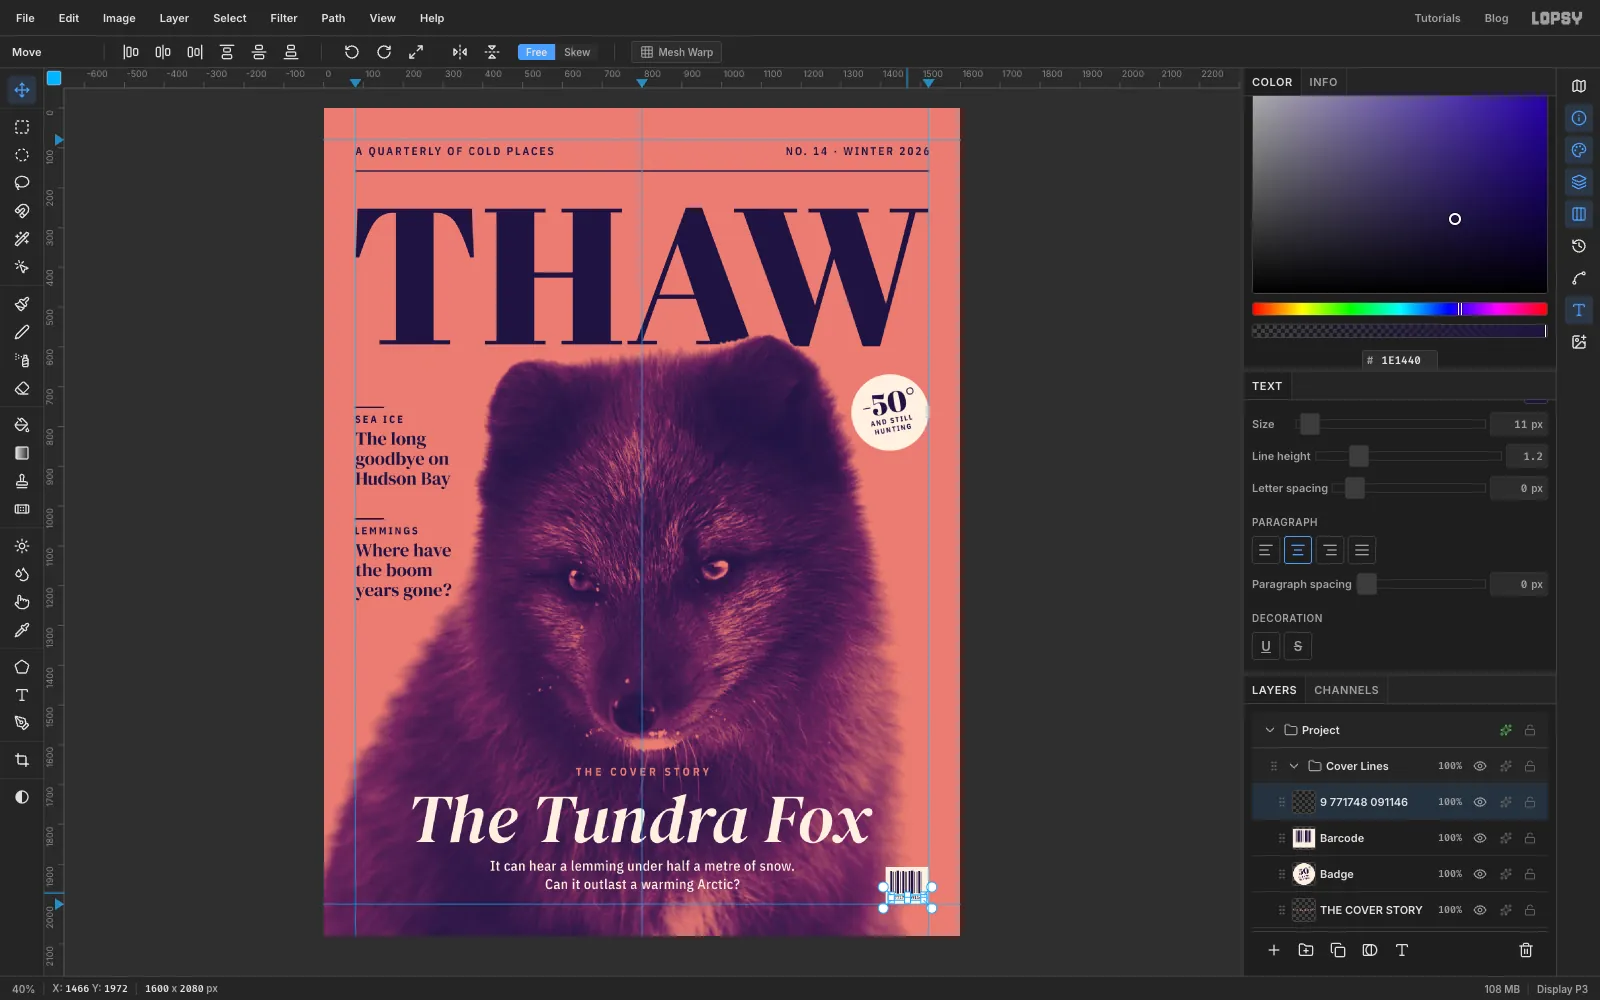
-
Run a photo credit up the margin
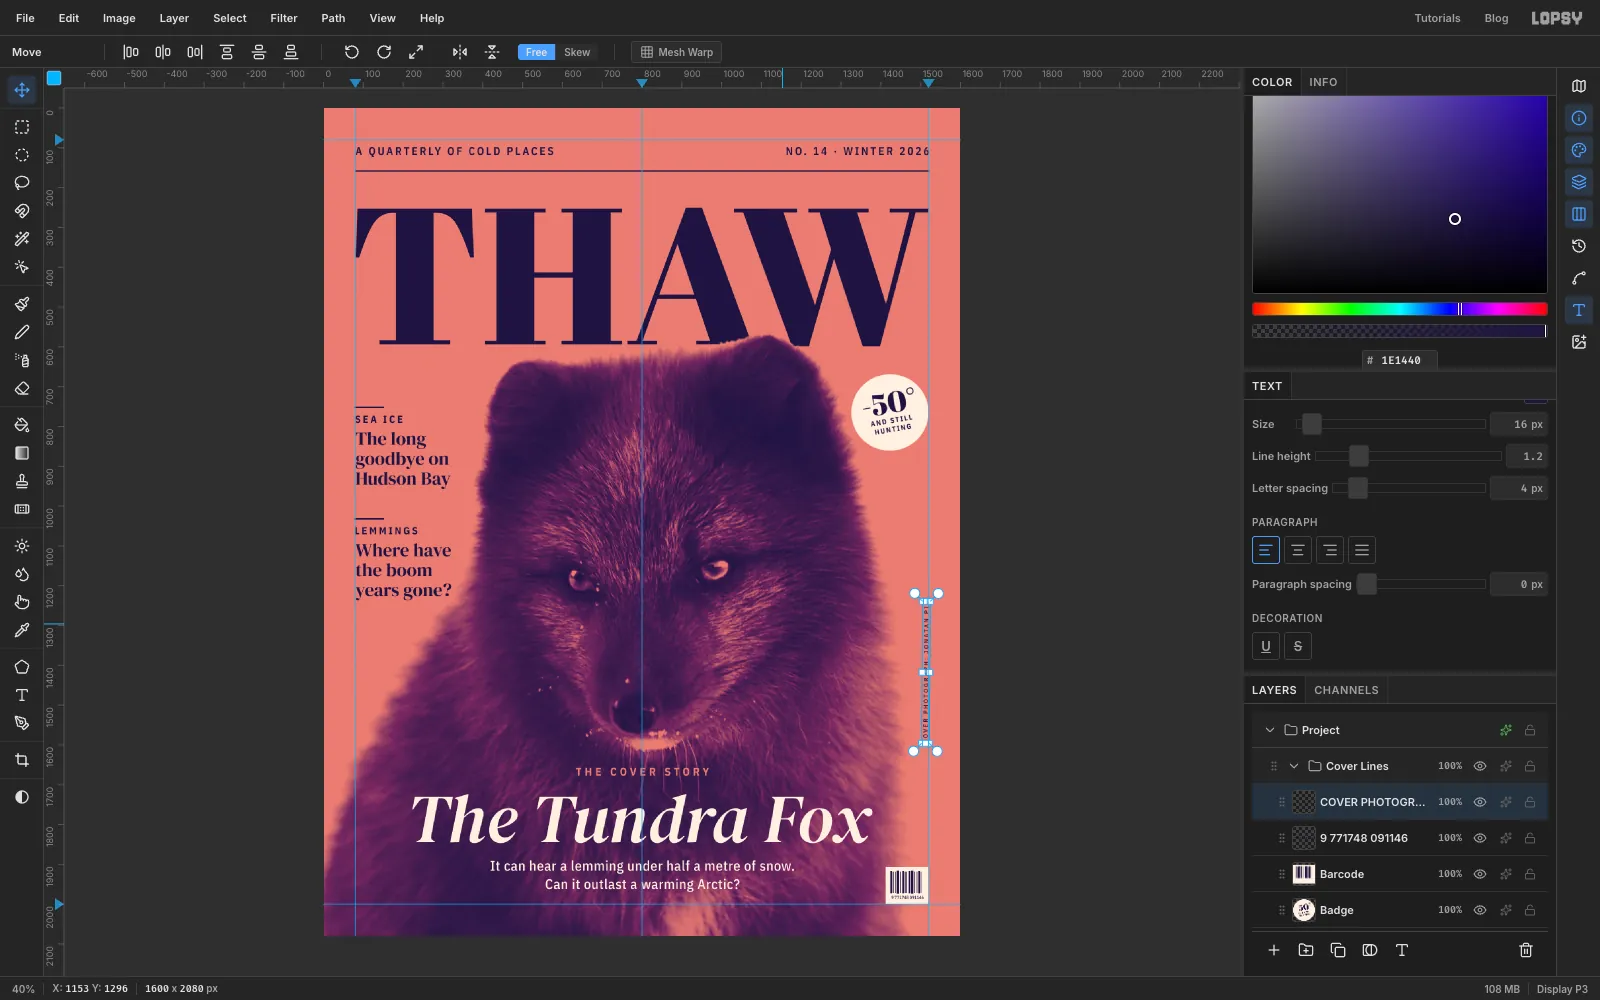
The strip of coral between the badge and the barcode is too narrow for a cover line, but it's the classic spot for a photo credit. Click Cover Lines, set IBM Plex Sans Condensed Medium, Size 16, Letter spacing 4, Align left, colour , and type
COVER PHOTOGRAPH: JONATAN PIEanywhere in empty space.Pick the Move tool. Hold Cmd and drag the rotate handle at the text's top-right corner anticlockwise until the line stands upright. Cmd snaps the angle to 15° steps, so it stops exactly at 90°, and the rotation sticks as soon as you let go. Nudge the credit with the arrow keys onto the right guide, centred in the gap between the badge and the barcode. It reads from bottom to top, as spine and margin credits usually do.
-
Clean up the fur under the masthead
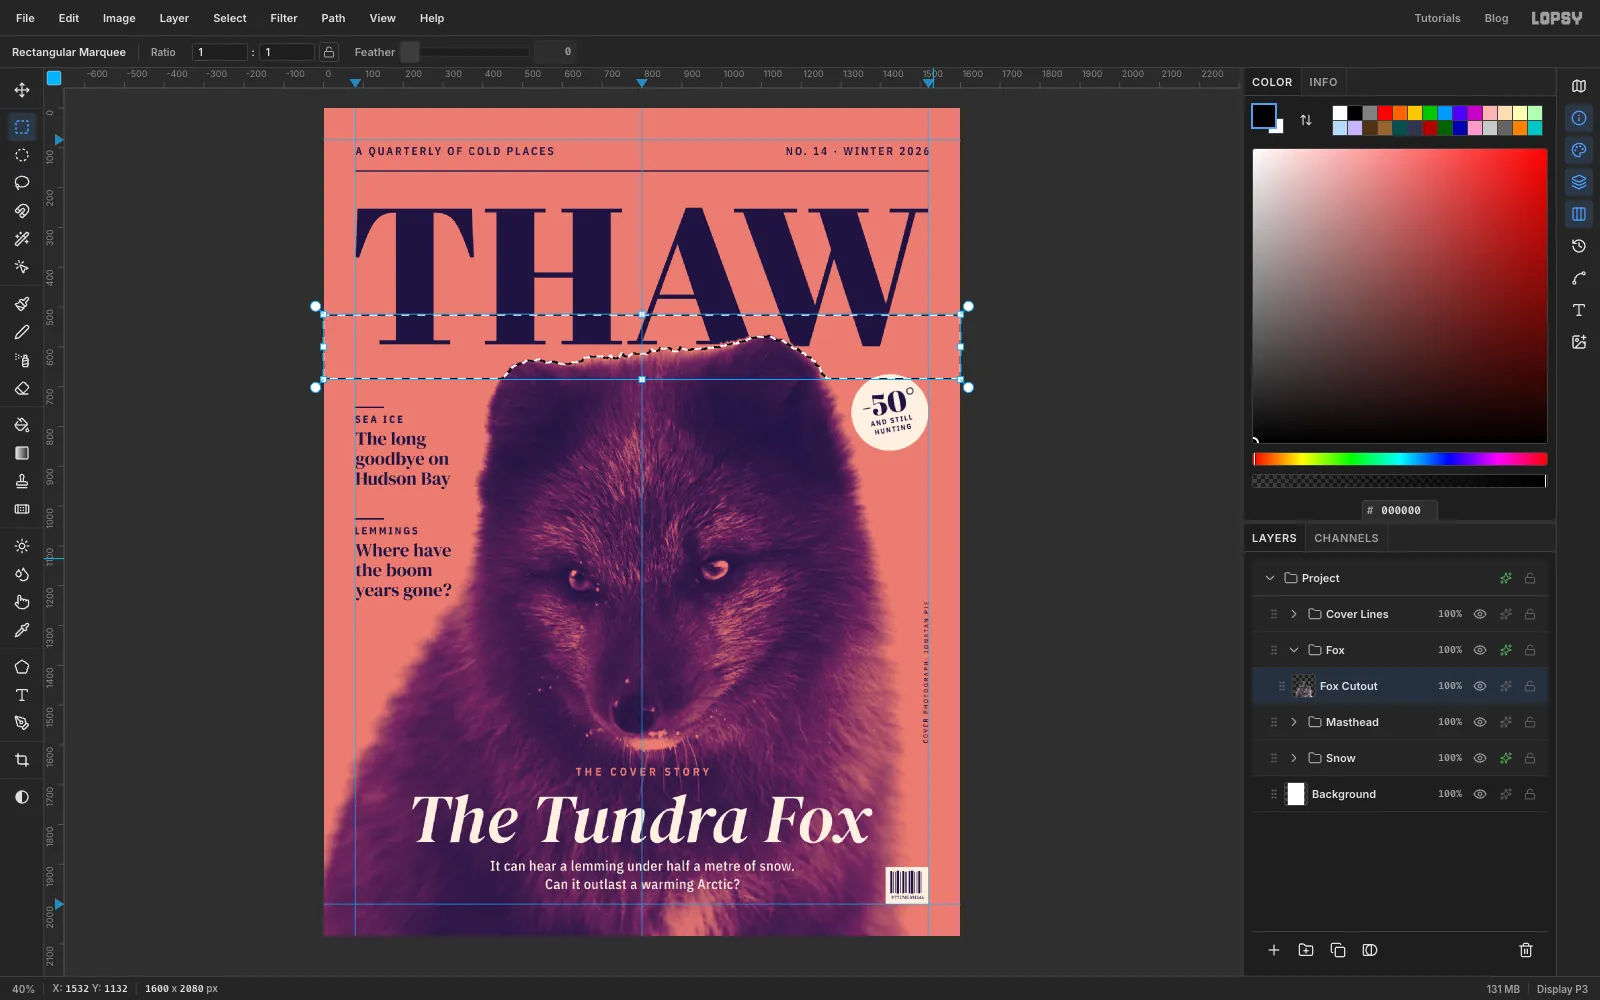
Zoom in where the ear crosses the masthead. The very tips of the fur are pale, so they print as a thin coral fringe against the violet letters. Trim it back just in that area:
- Expand Fox, click Fox Cutout, then Cmd-click its thumbnail.
- Choose Select → Shrink… by 6 px, then Select → Inverse.
- With the Rectangular Marquee, hold Shift+Alt and drag a band across the whole page from just above the ears to just below the bottom of the masthead. Shift+Alt keeps only the part of the selection inside the band.
- Select → Feather… by 2 px, press Delete, then Cmd+D.
-
Clone out the snow crumbs
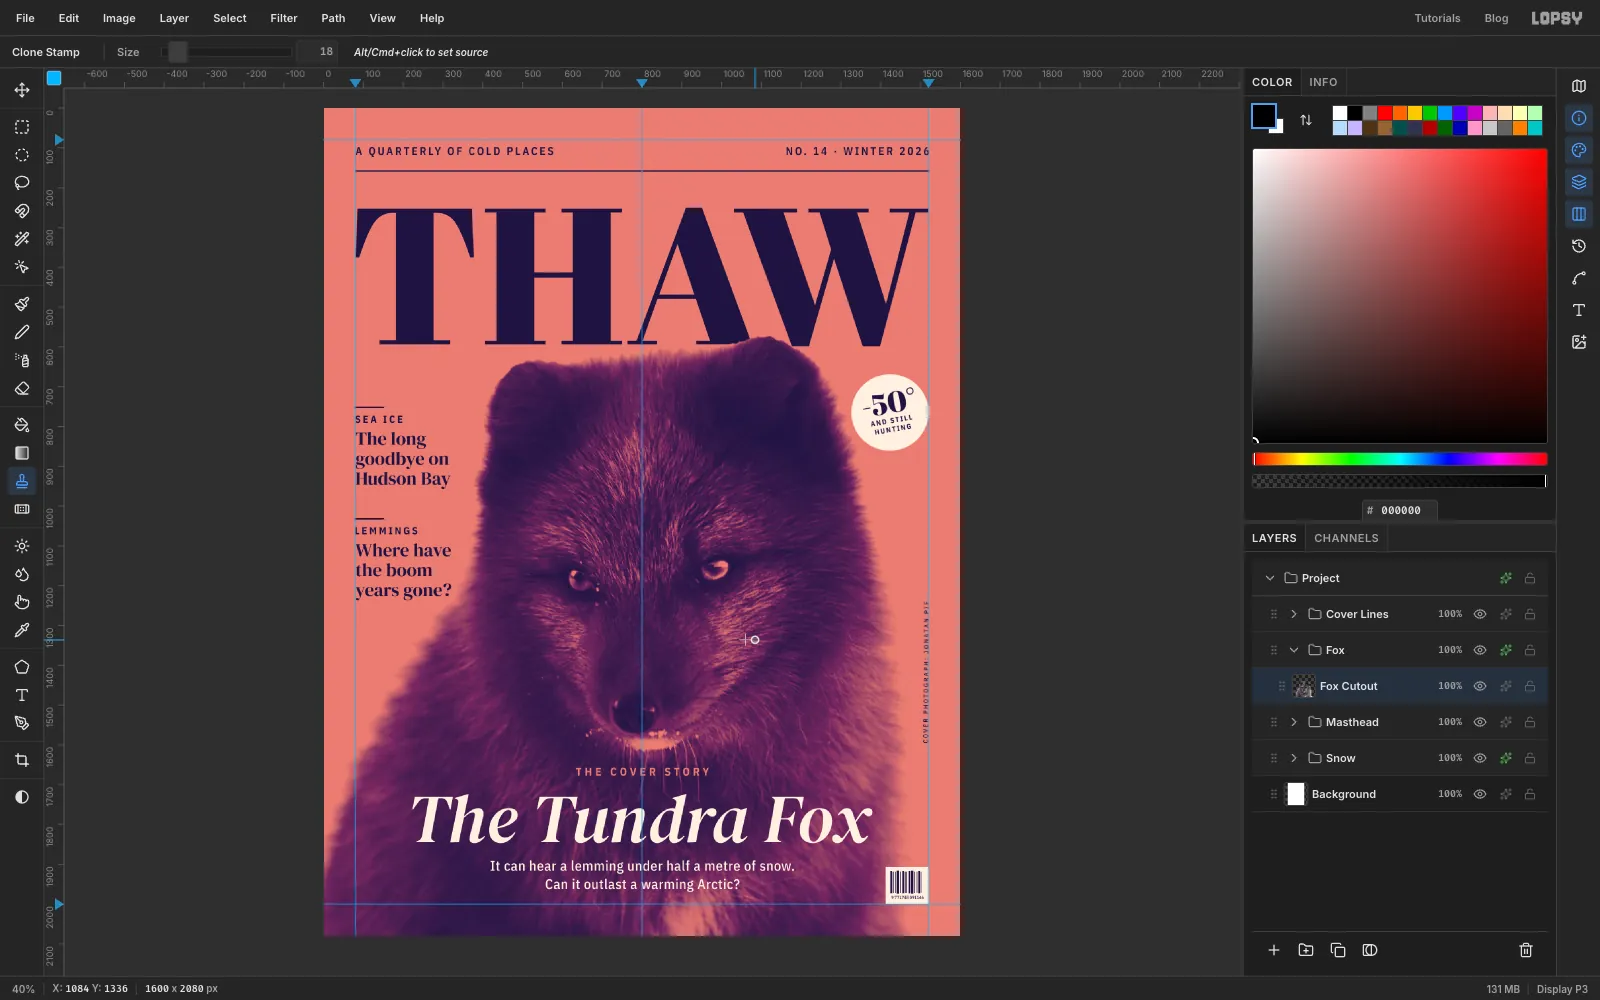
The fox has crumbs of snow on its nose and cheeks. In the duotone they show up as bright coral specks. Pick the Clone Stamp at Size 18. Alt-click clean fur just left of the first crumb to set the source, then click once on each of the bigger crumbs on the bridge of the nose and the cheeks. The source follows each click, so it always copies fur from just to the left. A few tiny specks can stay, since they read as texture, and leave the white lip alone: it's real fur.
-
Burn down the pale bib
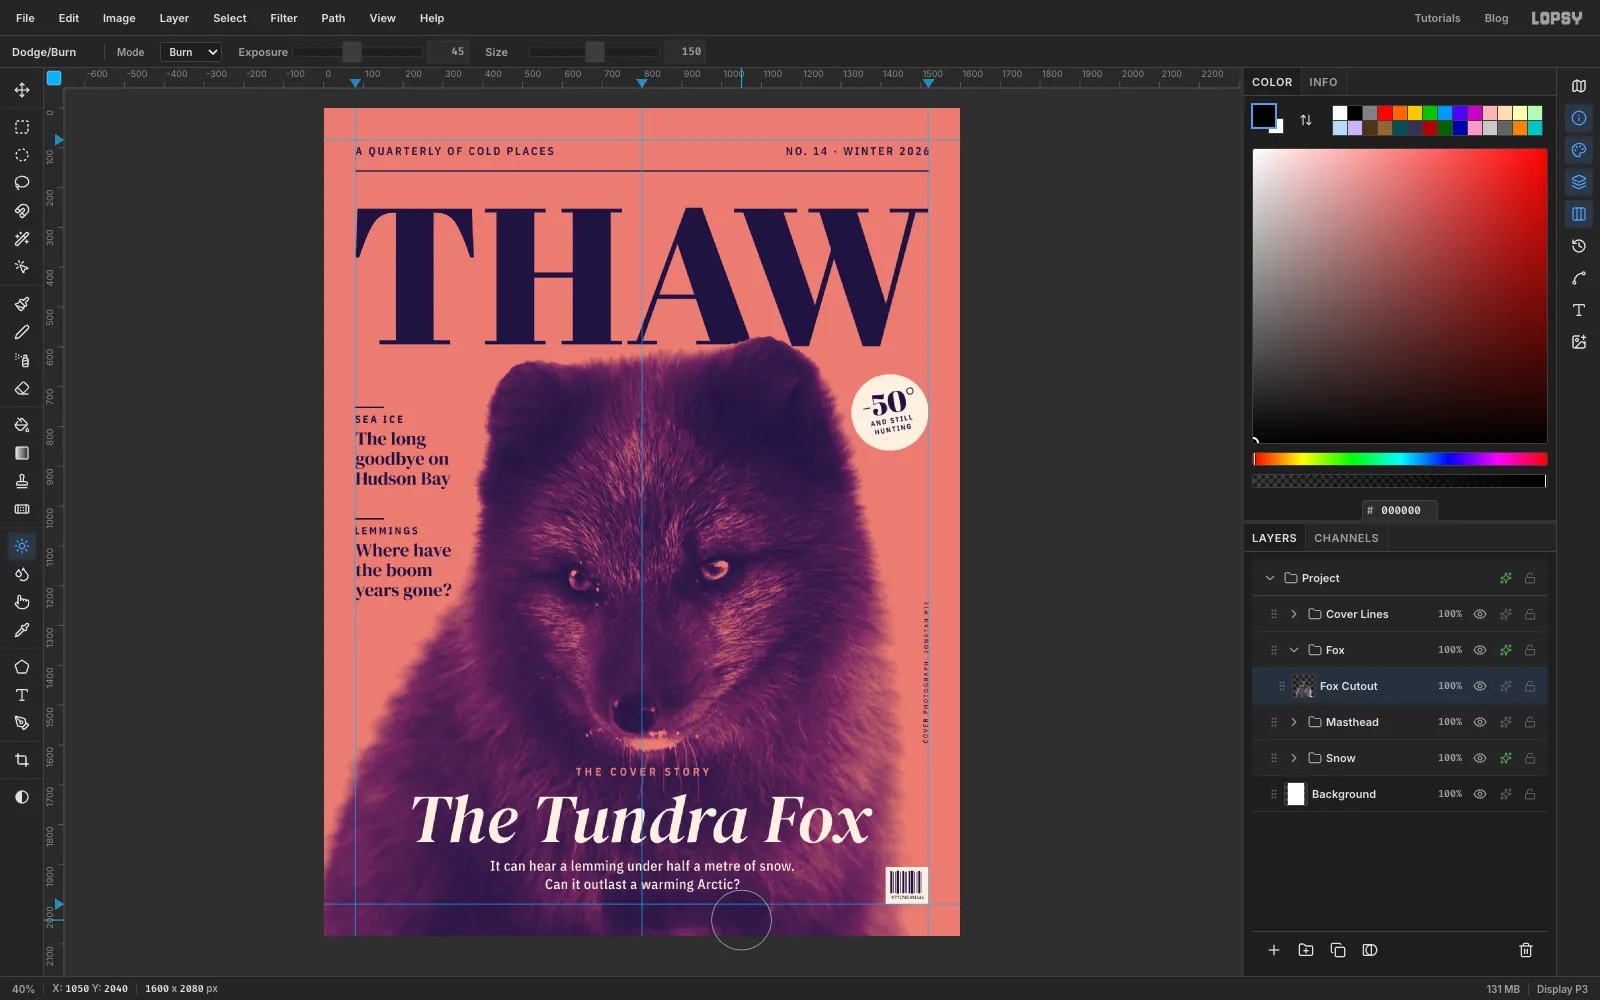
The fox's white bib sits right under the dek and makes it harder to read. With Fox Cutout still selected, pick the Dodge tool, switch it to Burn, and set Exposure 45 and Size 150. Drag two slow strokes across the bib. Each stroke darkens the fur a step, and because it's inside the Fox group it darkens towards the violet ink.
-
Shade the fur behind the title
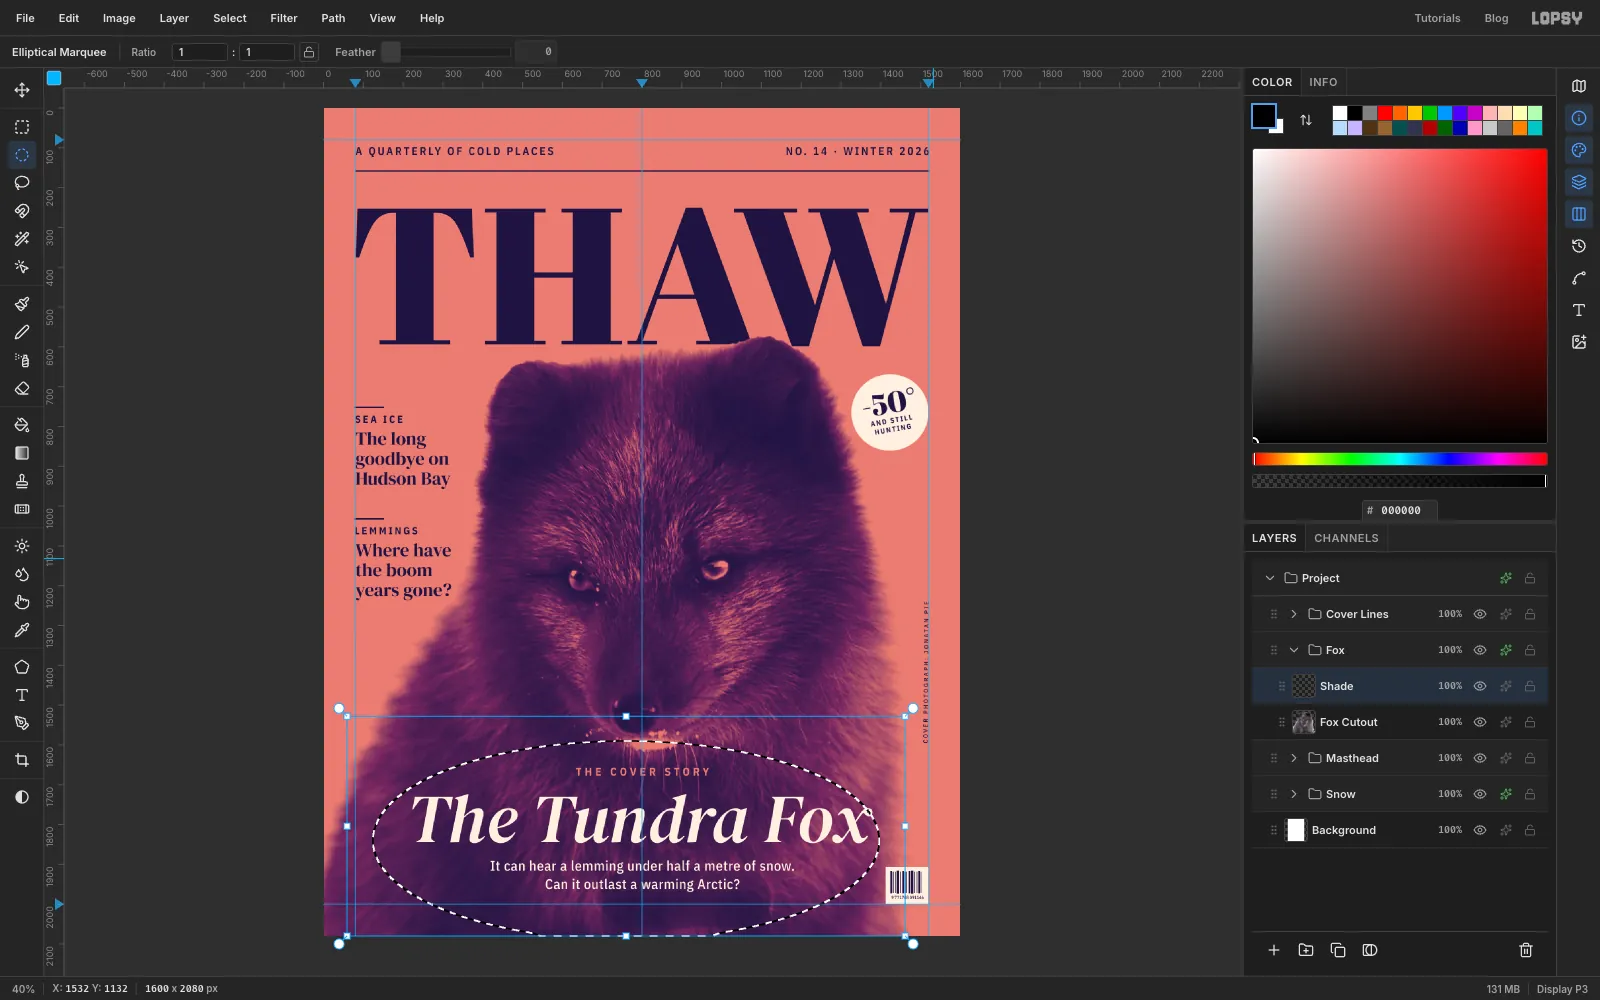
Add a layer called Shade above Fox Cutout, inside the Fox group. Set the foreground to black. Draw a wide Elliptical Marquee across the chest, from just inside the left edge to the barcode and from above the kicker to off the bottom of the page. Apply Select → Feather… at 90 px, choose Edit → Fill, then Cmd+D. Set the layer's opacity to 45% from the opacity button on its row.
Because Shade is inside the Fox group, the black is mapped to violet ink, so the chest gets deeper without turning grey.
-
Add print grain
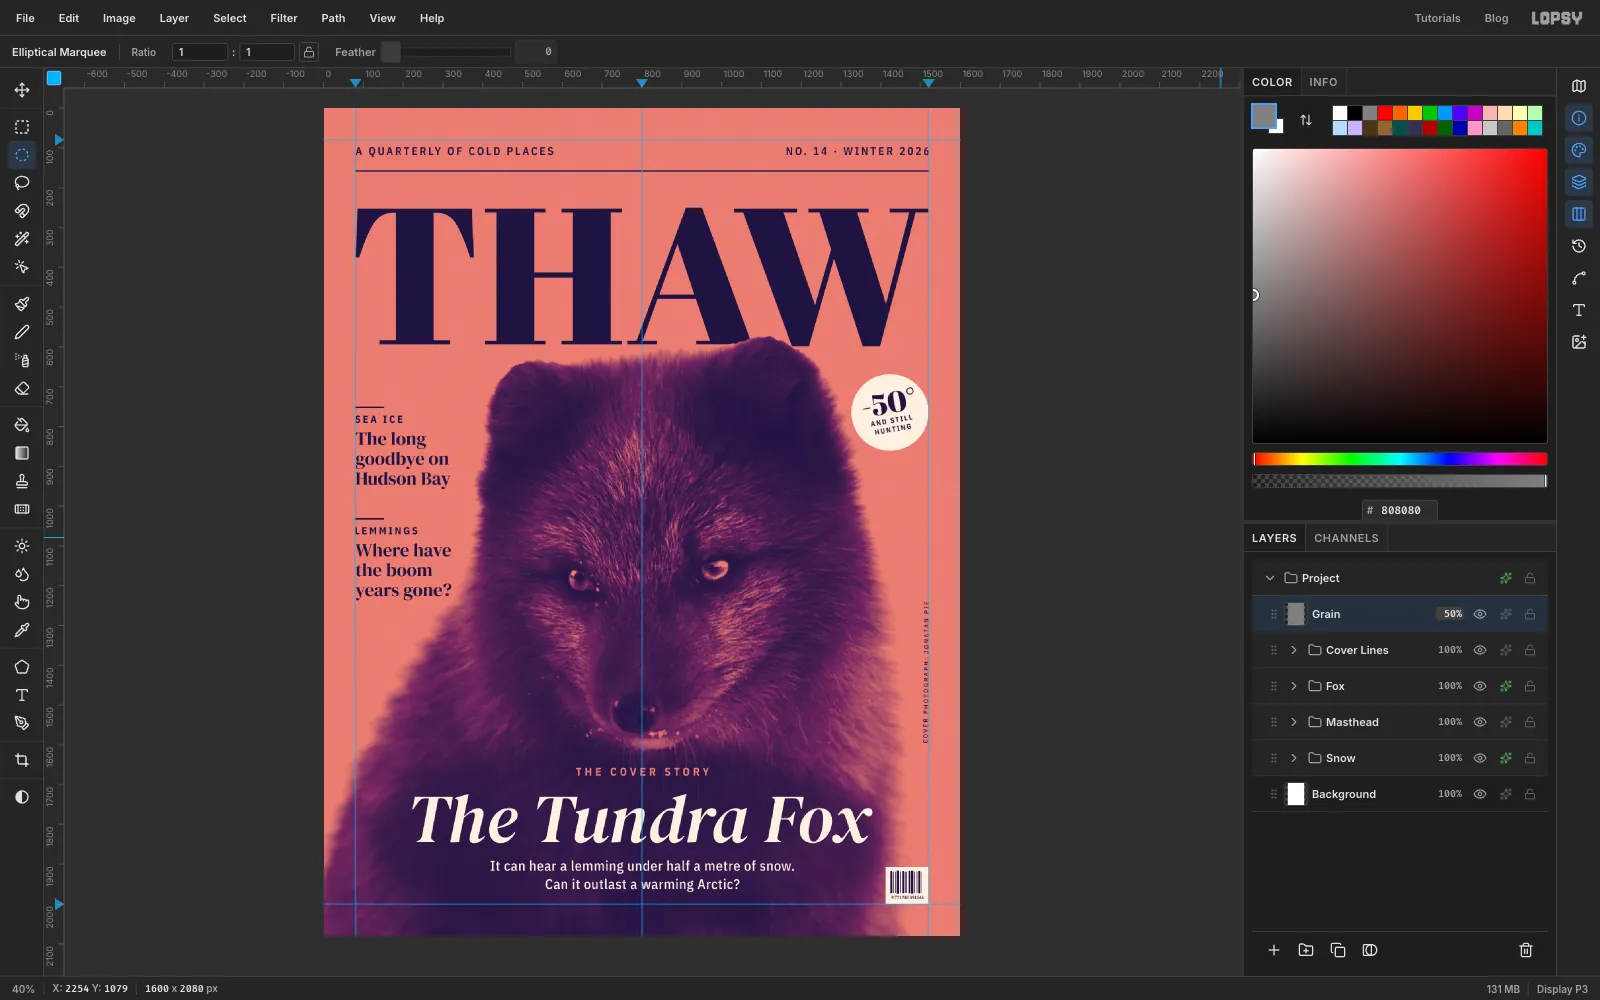
Collapse Fox and Cover Lines, click the Cover Lines row and add a layer called Grain. Because the group is collapsed, the new layer goes above everything instead of inside it. Set the foreground to , choose Select → All, then Edit → Fill. Run Filter → Add Noise… with Amount 50, Mono and Gaussian. Open the layer's drawer, set the blend mode to Overlay, and lower the opacity to 50%. Mid grey disappears in Overlay, and only the noise is left: the flat coral and the fur now share one printed texture.
-
Check the alignment with the grid and guides
Choose View → Show Grid and look down the left margin. The T of THAW, the strap, the rules and both cover lines should all start on the same line. The masthead's W, the right strap, the badge, the credit and the barcode should all stop at the right guide. Nudge anything that's off, then choose View → Show Grid again to hide it.
Save with File → Save Project and export with File → Quick Export PNG.