Design a Duotone T-Shirt from a Rainforest Photo
Turn a public-domain waterfall photo into a two-ink duotone t-shirt design in Lopsy with a Gradient Map, palm silhouettes, halftone and path text.
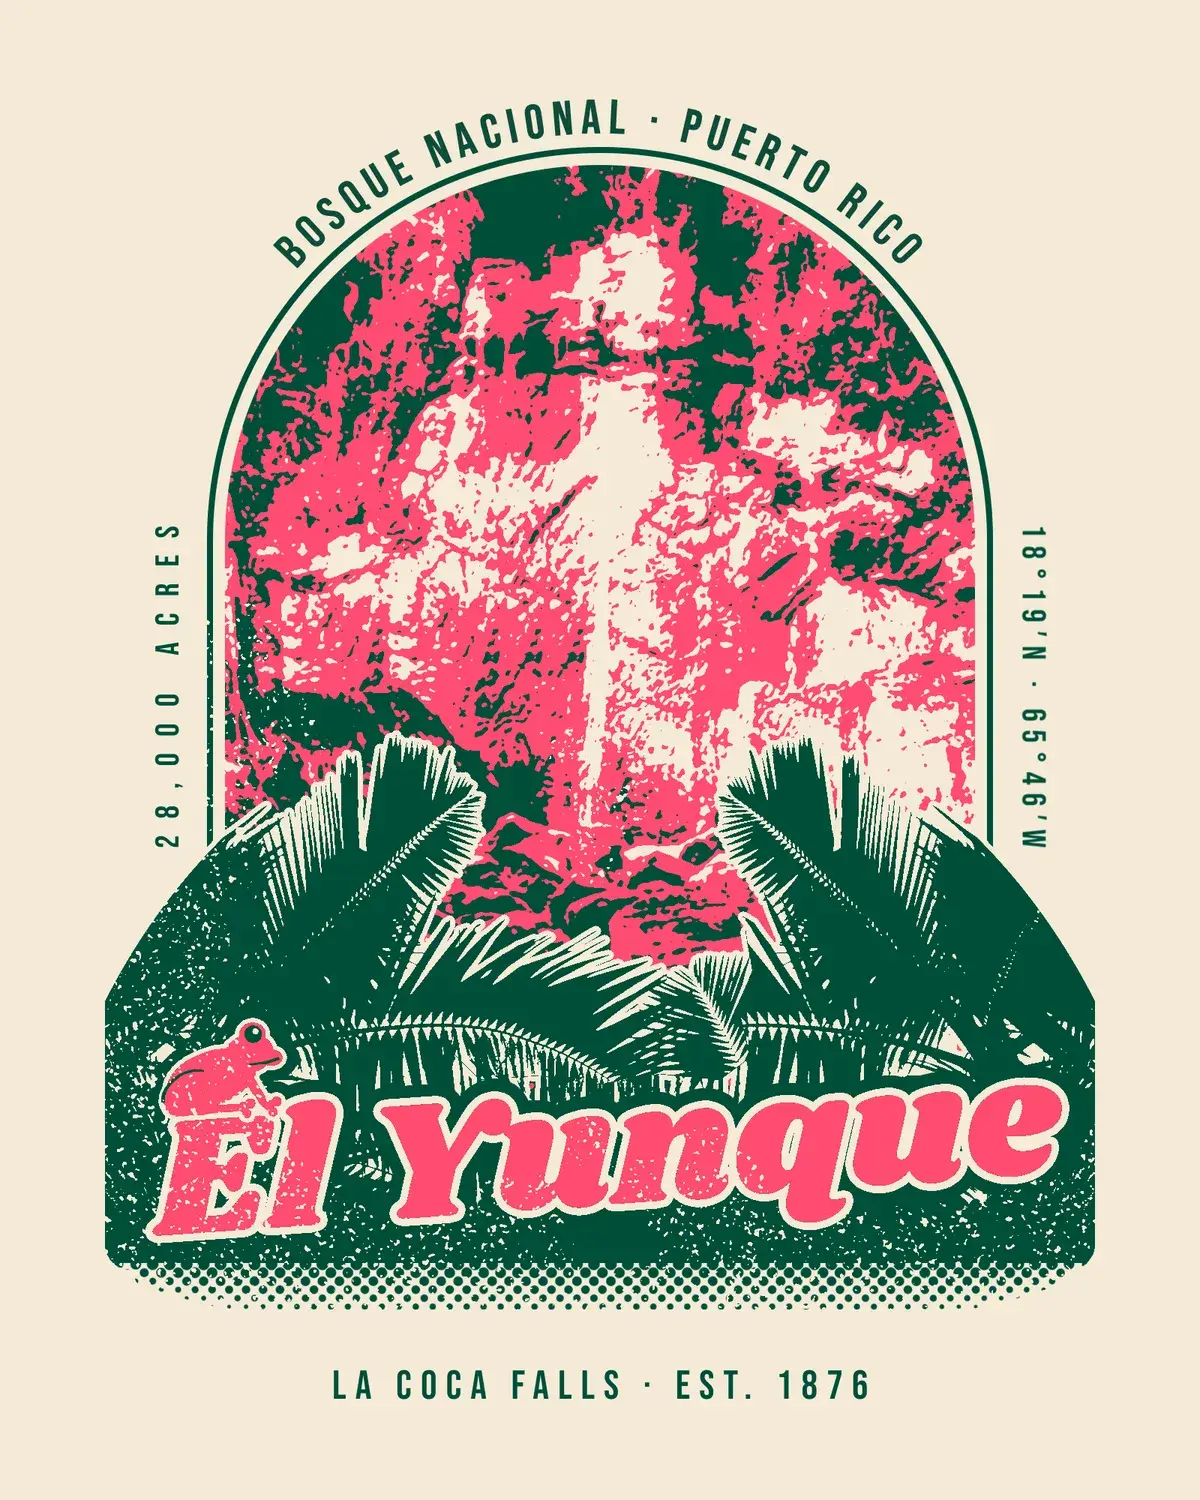
A duotone prints a photo with just two inks. On a t-shirt that's a real advantage: every ink is another screen at the print shop, and a two-ink design costs far less than full colour while still reading as a photograph.
This tutorial builds a souvenir tee for El Yunque National Forest in Puerto Rico, the only tropical rainforest in the U.S. National Forest System. It uses two public-domain photos from Wikimedia Commons:
20180317-OC-PJK-4858 TONED.jpg, La Coca Falls, a USDA photo by Preston Keres.Canopy at El Yunque National Forest (29777835063).jpg, a palm canopy shot by Roy Hewitt, USFWS.
Every colour in the finished design is one of three:
-
Shirt
the fabric, not an ink
-
Emerald ink
-
Hibiscus ink
Work on a 1600 × 2000 px document. That's a 4:5 print area, and its width divides by four, which keeps layer masks well behaved.
-
Draw the arch window and its keyline
- Create a 1600 × 2000 document and fill the Background with the shirt colour (Edit → Fill with no selection). Rename it
Shirt. - Click the top ruler at x 300, 800 and 1300, and the left ruler at y 220, 720 and 1480, to drop guides.
- Turn on View → Show Grid, set the grid to 4 px and leave Snap on, so every marquee lands on whole numbers.
- On a new Arch layer, fill the emerald into an Elliptical Marquee circle from (300, 220) to (1300, 1220), then into a Rectangular Marquee from (300, 720) to (1300, 1480). Together they make the arch.
- On a new Keyline layer, fill a bigger arch the same way (circle radius 524, rectangle 276–1324 wide down to 1504). Then marquee the same shape at radius 515 and press Delete on each part.
That leaves a 9 px emerald ring with a 15 px gap around the window. The Arch layer is only a stencil, so hide it once the photo is in place.
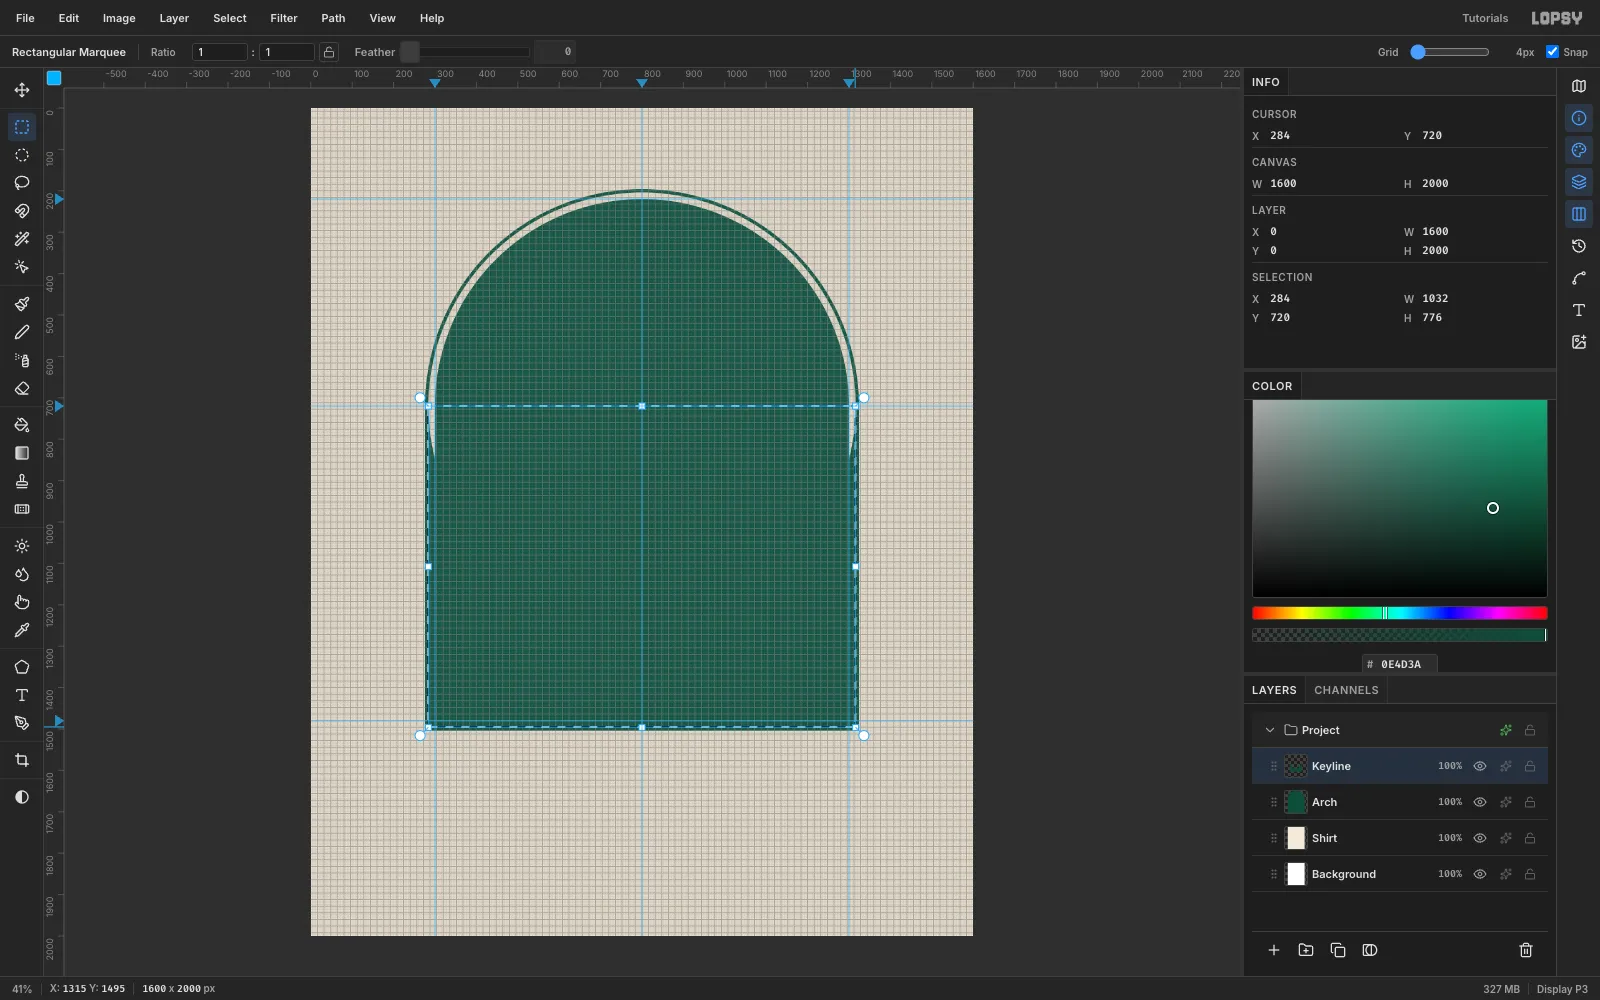
- Create a 1600 × 2000 document and fill the Background with the shirt colour (Edit → Fill with no selection). Rename it
-
Paste and scale the waterfall photo
- Click New Group in the Layers panel and name it
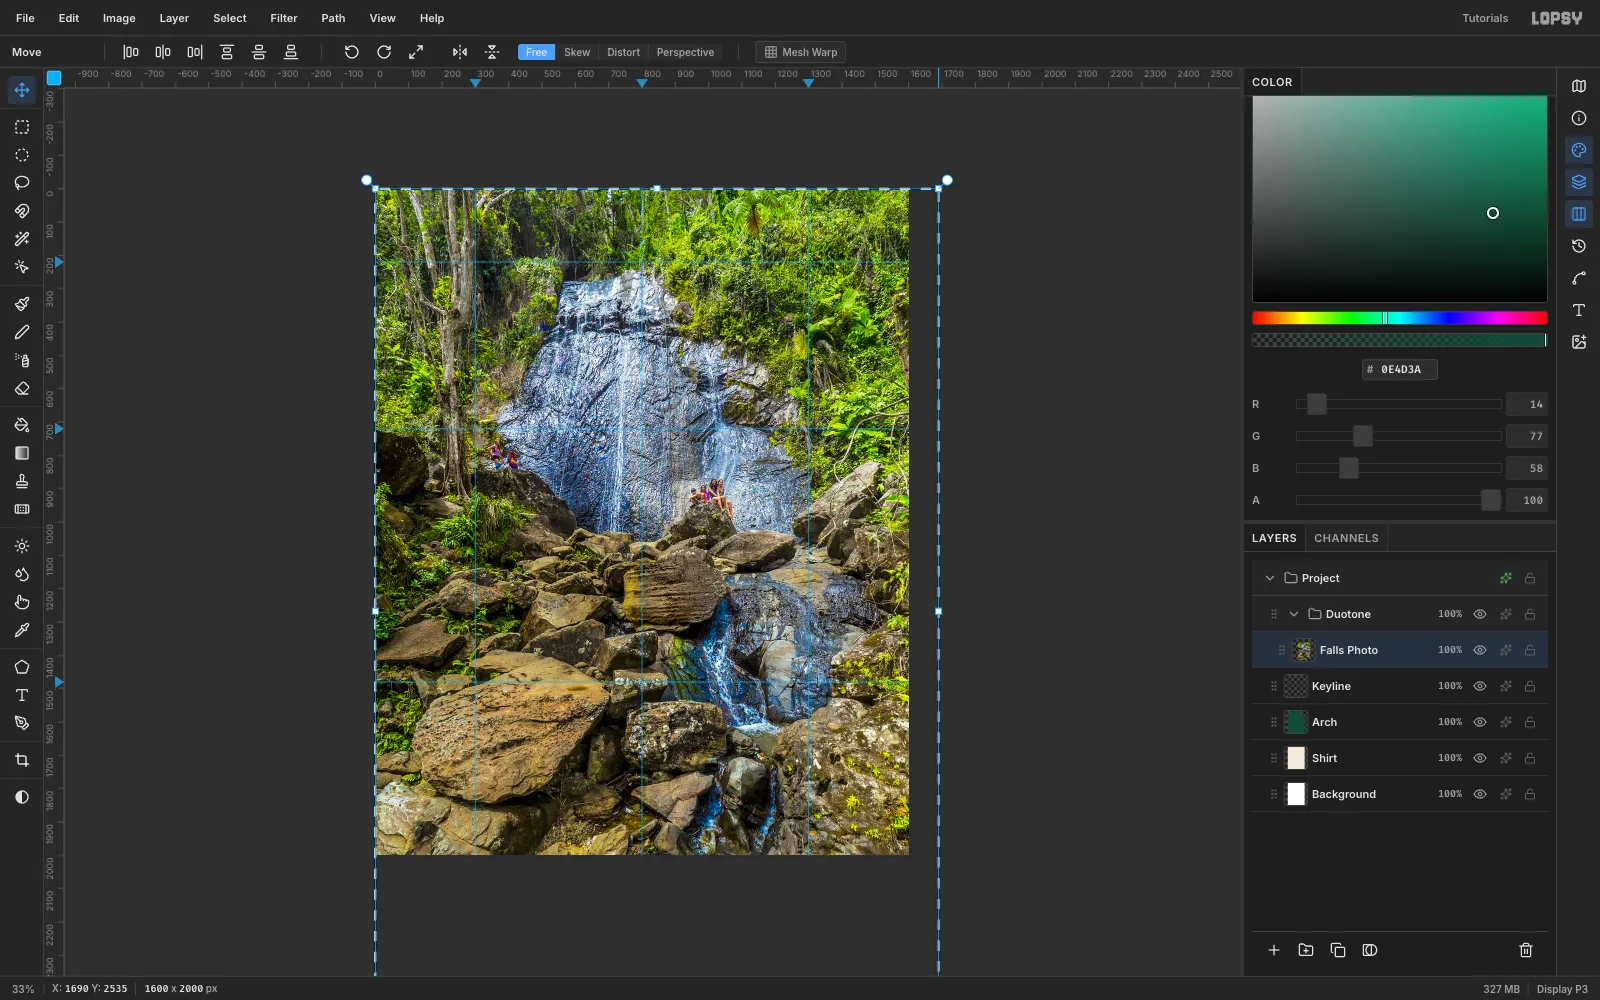
Duotone. - Copy the La Coca Falls photo (scaled to 1300 px wide) and press Cmd+V. Lopsy centres the paste inside the group and switches to the Move tool.
- Hold Cmd and drag the bottom-right handle out until the photo is about 1690 × 2535, roughly 130%. Zoom out with Cmd+- first so the handle stays on screen.
- Press Cmd+D to commit, then drag the photo so the white cascade runs straight down the middle guide. Rename the layer
Falls Photo.
Scaling up crops in on the falls, so the cascade fills the whole height of the arch.
- Click New Group in the Layers panel and name it
-
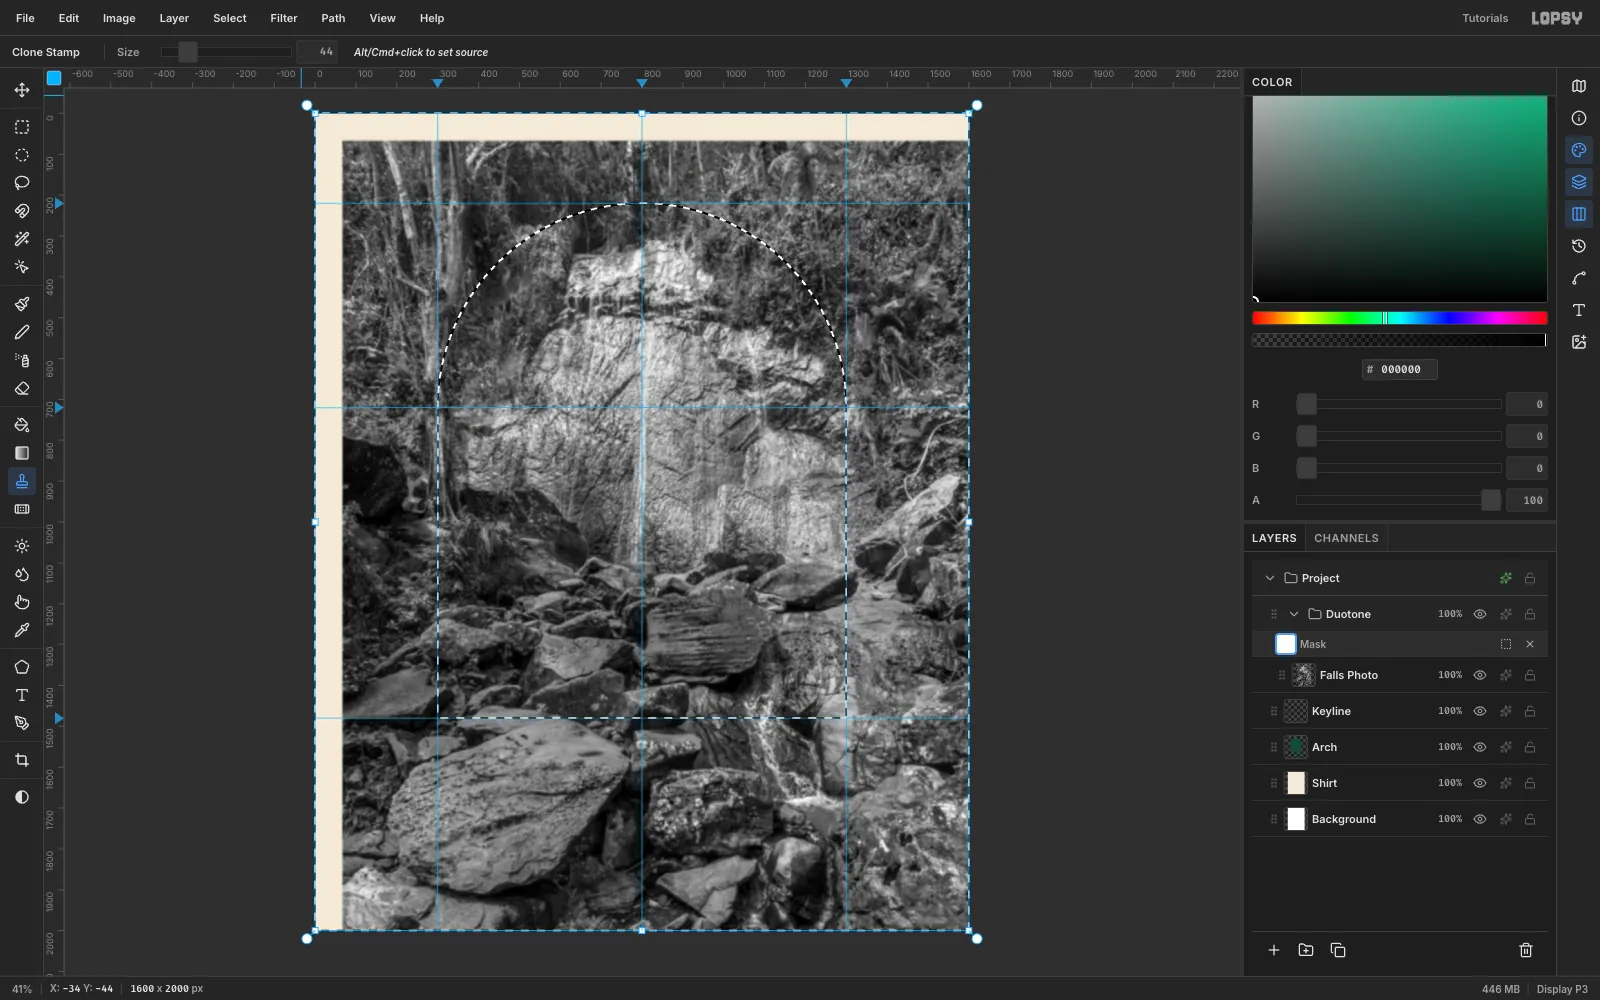
Clone out the hikers
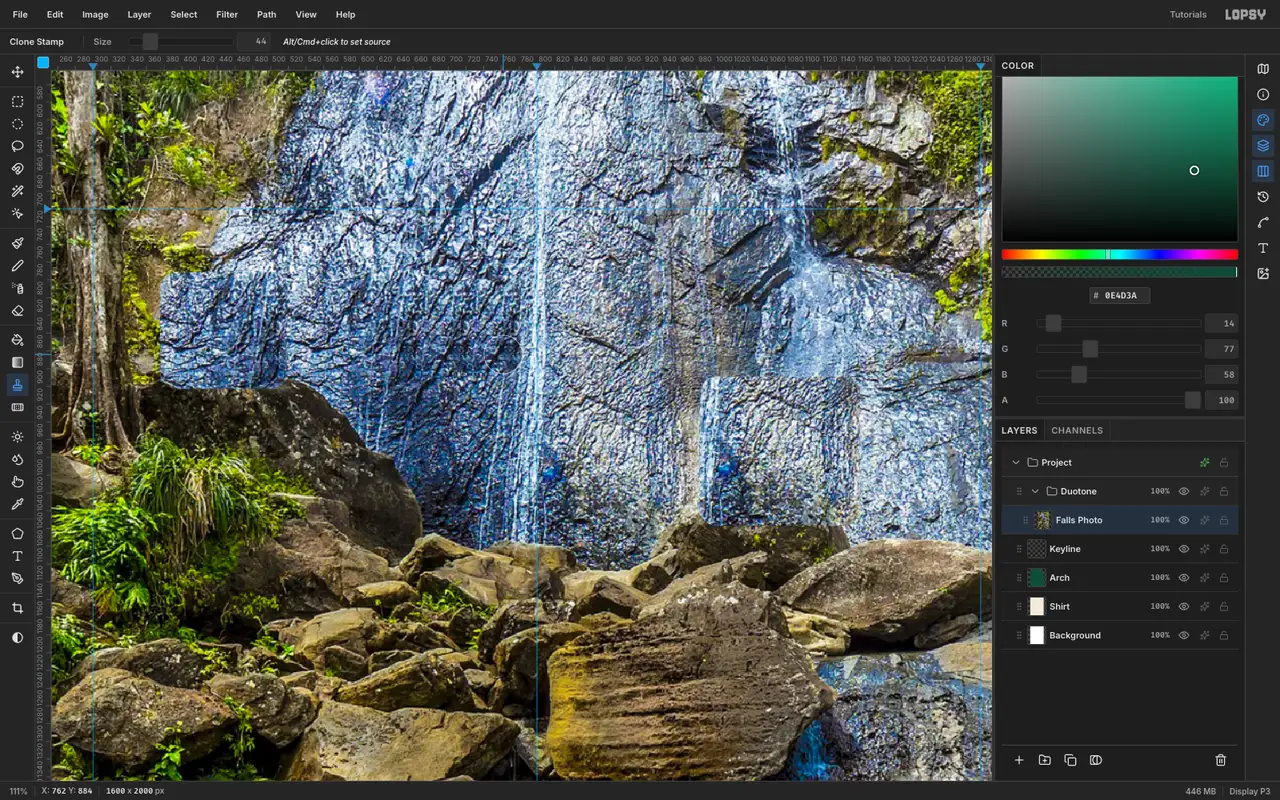
The photo has a group of hikers climbing the rocks, which you don't want on a shirt.
- Zoom in with Ctrl and the scroll wheel.
- Pick the Clone Stamp (Size 44).
- Alt-click a patch of plain rock at the same height as the hikers, then paint over them in short horizontal strokes.
- Re-sample for each group, so the texture comes from nearby.
The Clone Stamp is aligned: the offset from your first Alt-click stays fixed for every stroke after it. Keep the source to one side of the hikers, never above or below them.
-
Clip the photo to the arch
- With Falls Photo active, run Filter → Desaturate, then Filter → Gaussian Blur with radius 6. The blur wipes out fine rock texture that would otherwise turn into noisy speckle in the duotone.
- Select the Duotone group and click Add Mask, then click the mask row (Edit mask for Duotone).
- Cmd-click the Arch thumbnail to load the arch as a selection, and run Select → Inverse.
- Set the foreground to black and choose Edit → Fill. In mask mode this fills the mask, not the pixels.
The photo now only shows inside the arch. Because the mask is on the group, anything else you put in the group is clipped too.
-
Map the photo to two inks
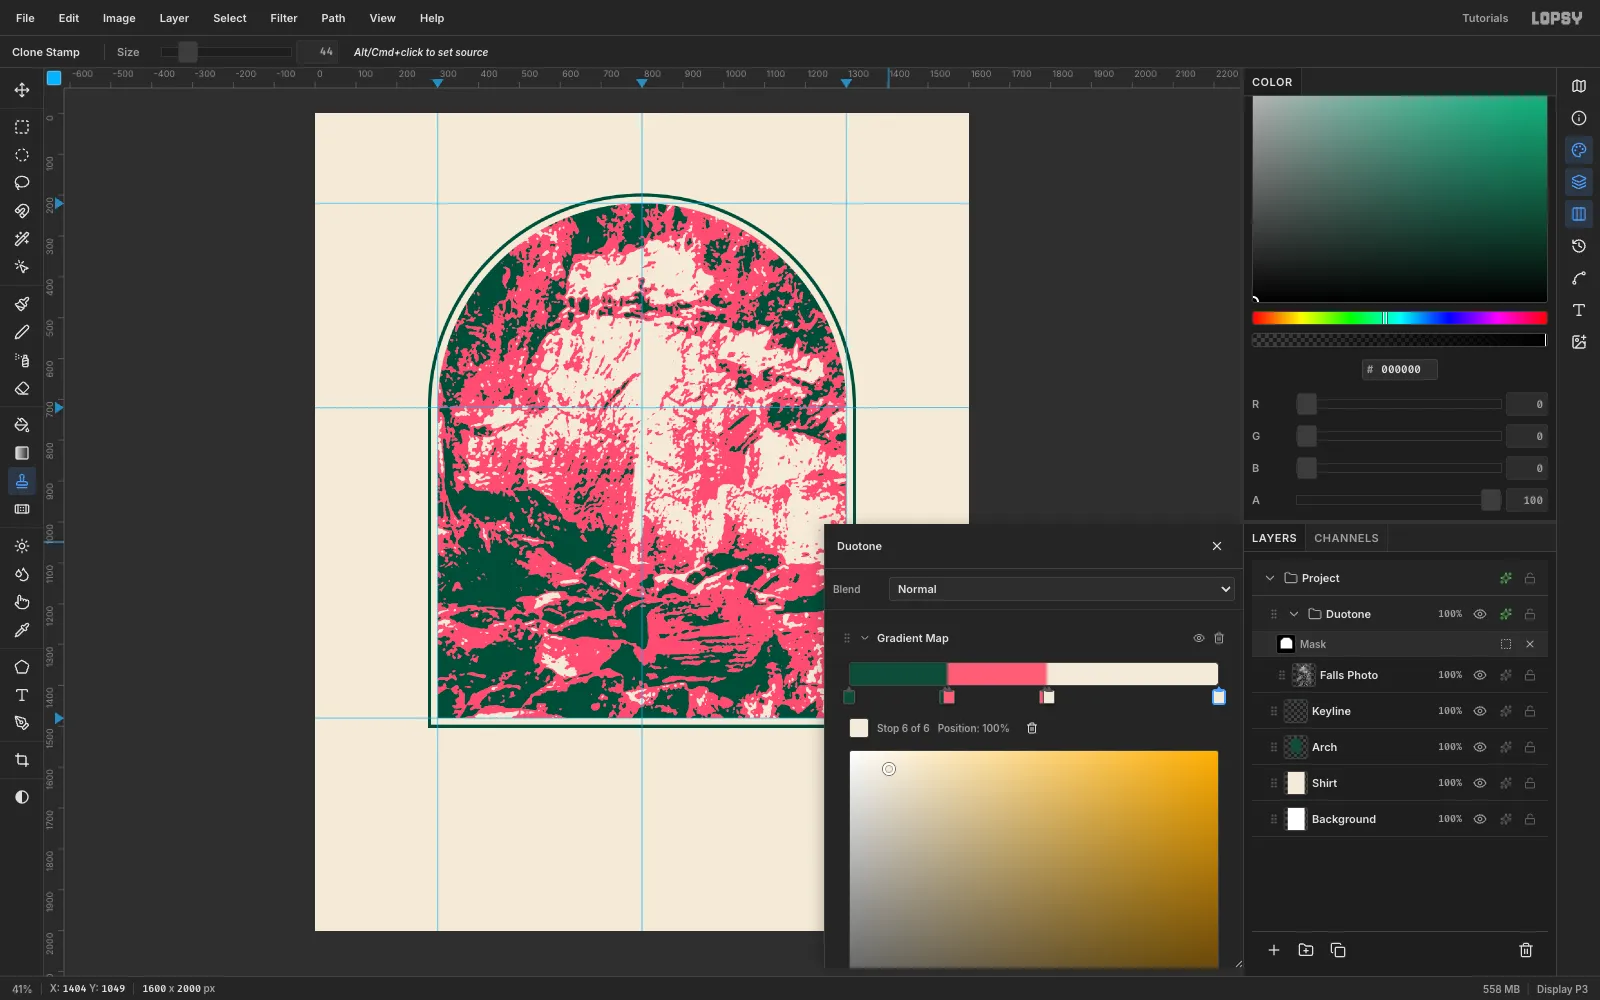
- With the Duotone group selected, open the effects drawer and choose Add Adjustment → Gradient Map.
- Click the gradient bar to add stops until there are six, then set them in pairs so each tone band is flat:
- 0% and 26%: emerald
- 27% and 55%: hibiscus
- 56% and 100%: shirt
Using pairs of stops only 1% apart gives hard edges between the bands, so the result separates cleanly into two screens. Shadows print emerald, mid-tones print pink, and the highlights are bare shirt.
-
Give the falls a source
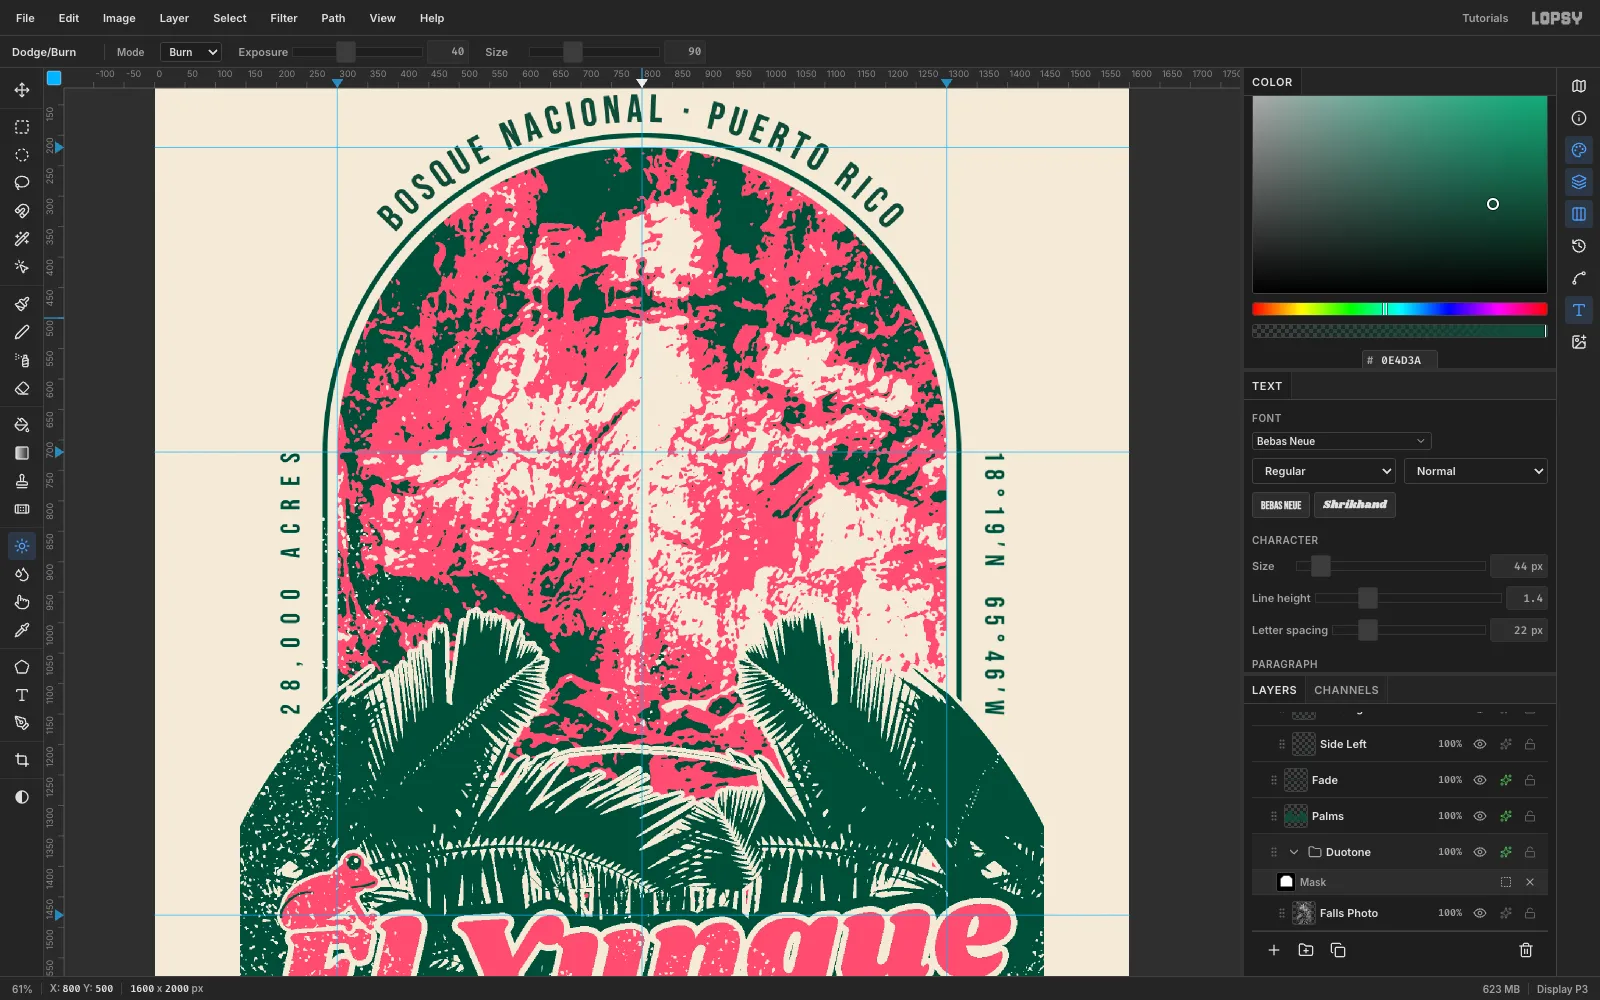
At first the top of the cascade blended into pale rock and read as sky. Fix it on the photo, not the map:
- Select Falls Photo and pick Dodge / Burn.
- Set Mode to Burn, Exposure to 40 and Size to 90.
- Drag four vertical strokes down the rock on either side of the cascade, from the top of the arch to about y 580.
The burned rock drops below the bone threshold, so the water now has pink and emerald walls from top to bottom and reads as a waterfall.
-
Cut palm silhouettes from a photo
- Click Keyline, paste the palm canopy photo (scaled to 1320 px wide) and press Cmd+D.
- Drag its row above the Duotone group and rename it
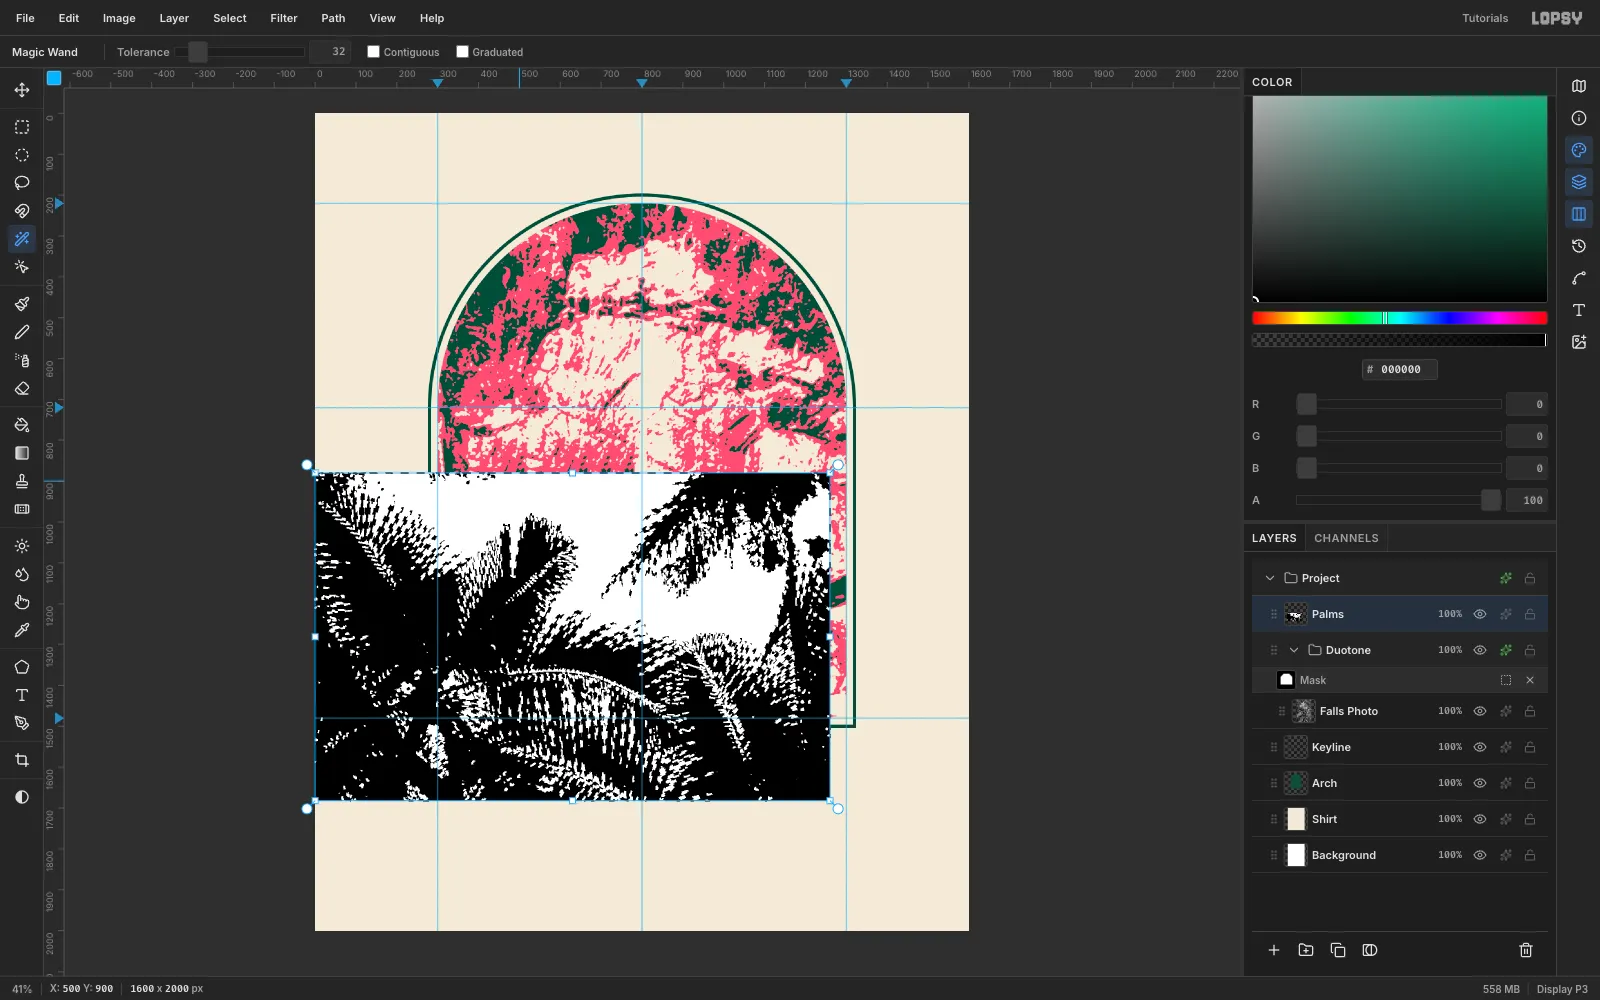
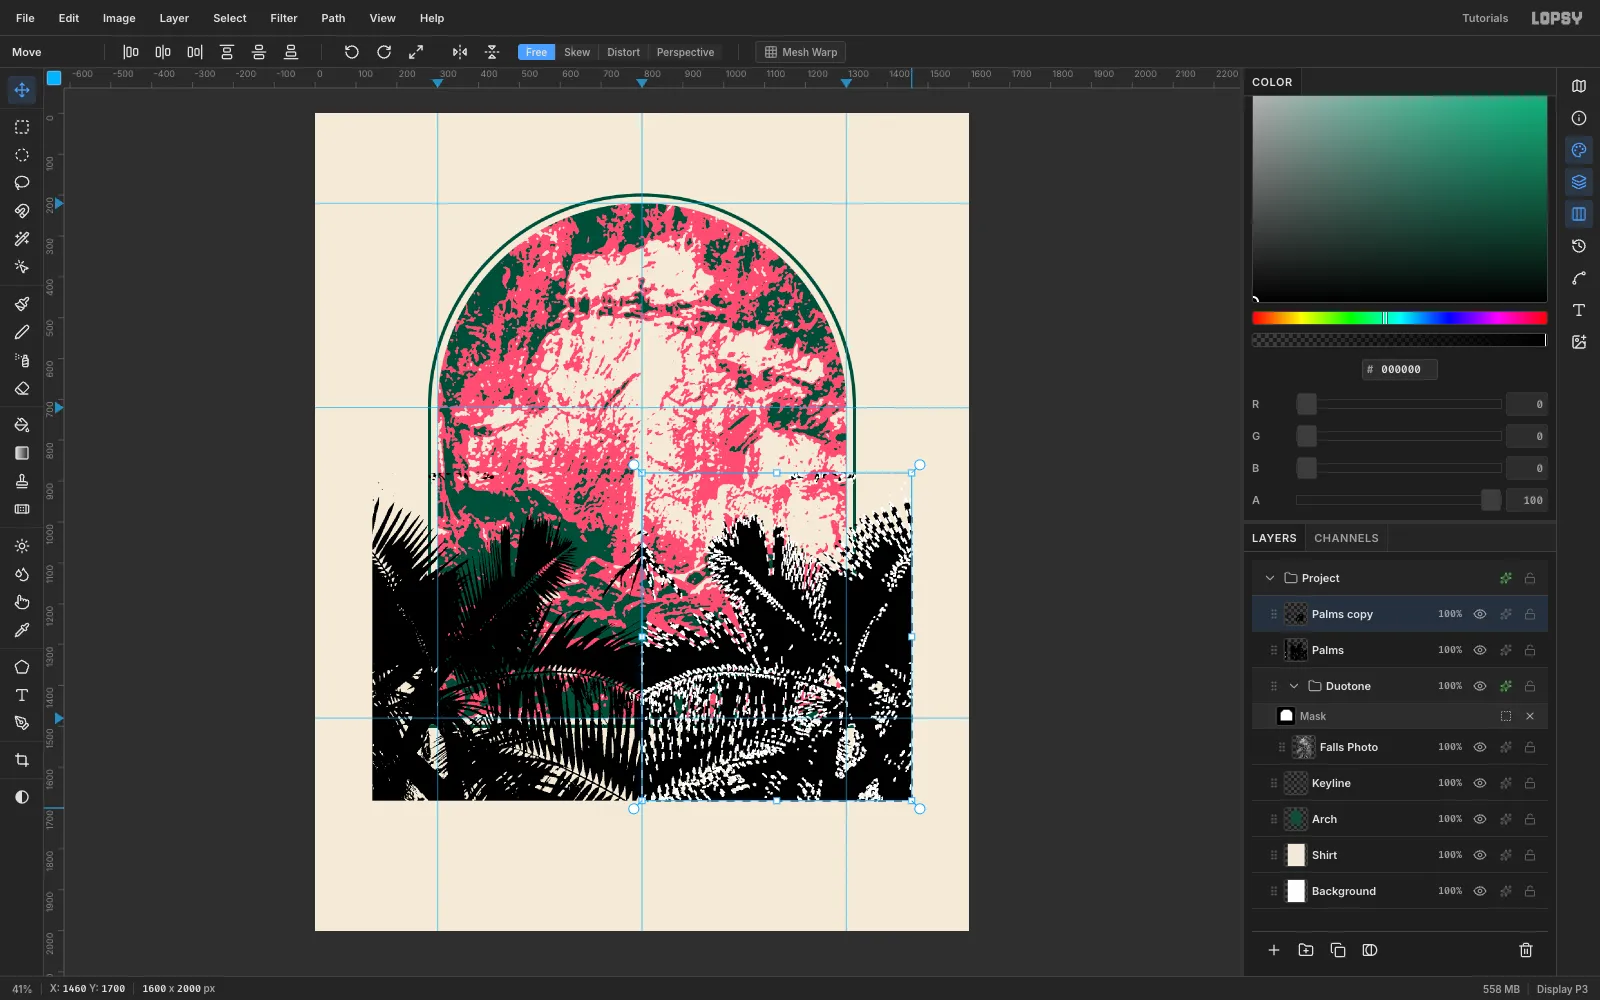
Palms. Move it to (−60, 880). - Run Filter → Desaturate, then Filter → Threshold at 150. The fronds become solid black against white sky.
- Pick the Magic Wand, untick Contiguous, click the sky and press Delete.
- Marquee the right half of the layer (x 800 and up) and press Delete, and delete the strip left of x 140 too.
You now have the left half of a frame of palms.
-
Mirror the palms into a symmetric frame
- Switch to the Move tool and choose Layer → Duplicate Layer. The copy lands 10 px right and 10 px down, so press Shift+Left and Shift+Up once each to put it back.
- Marquee a box centred on x 800, from (140, 870) to (1460, 1700).
- Click Flip Horizontal in the Move options bar. It flips around the marquee's centre, so the copy mirrors exactly onto the right side.
- Press Cmd+D, then Layer → Merge Down.
- Round off the band: Elliptical Marquee centred on (800, 1762) with radii 760 × 860, Select → Inverse, Delete. Then marquee everything below y 1672 and delete that too.
The two big palms now make a V that leads the eye up to the falls.
-
Break up the mirror seam
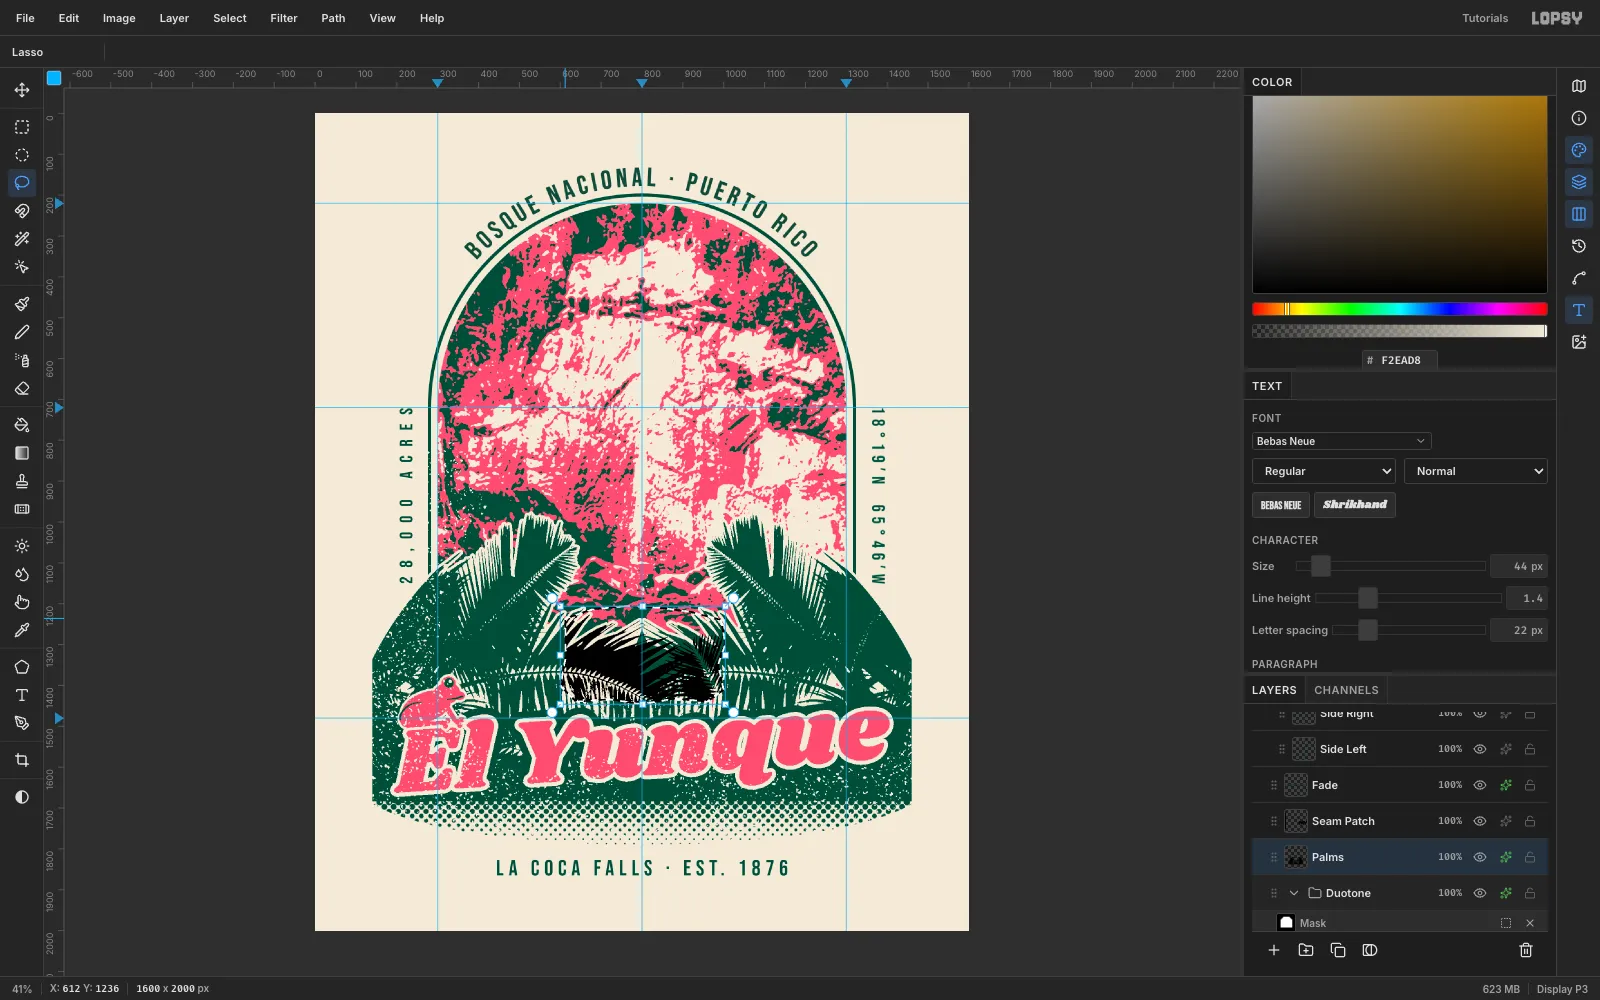
A perfect mirror leaves a tell-tale "inkblot" right at the centre, which here is the base of the waterfall. Cover it with real, un-mirrored fronds:
- Paste the canopy photo again as
Seam Patch, put it in the same place, then Desaturate and Threshold 150. - Lasso the centre of the band (roughly x 600–1000, y 1206–1446), Select → Inverse, and Delete everything outside it. Magic-wand the white and delete it as before.
- On Palms, lasso the same outline and delete it, so the patch fills the hole.
- Select Seam Patch and choose Layer → Merge Down.
Give Palms a Color Overlay in emerald and an outside Stroke of 7 px in shirt . The bone outline separates the fronds from the emerald band behind them.
- Paste the canopy photo again as
-
Dissolve the band into halftone dots
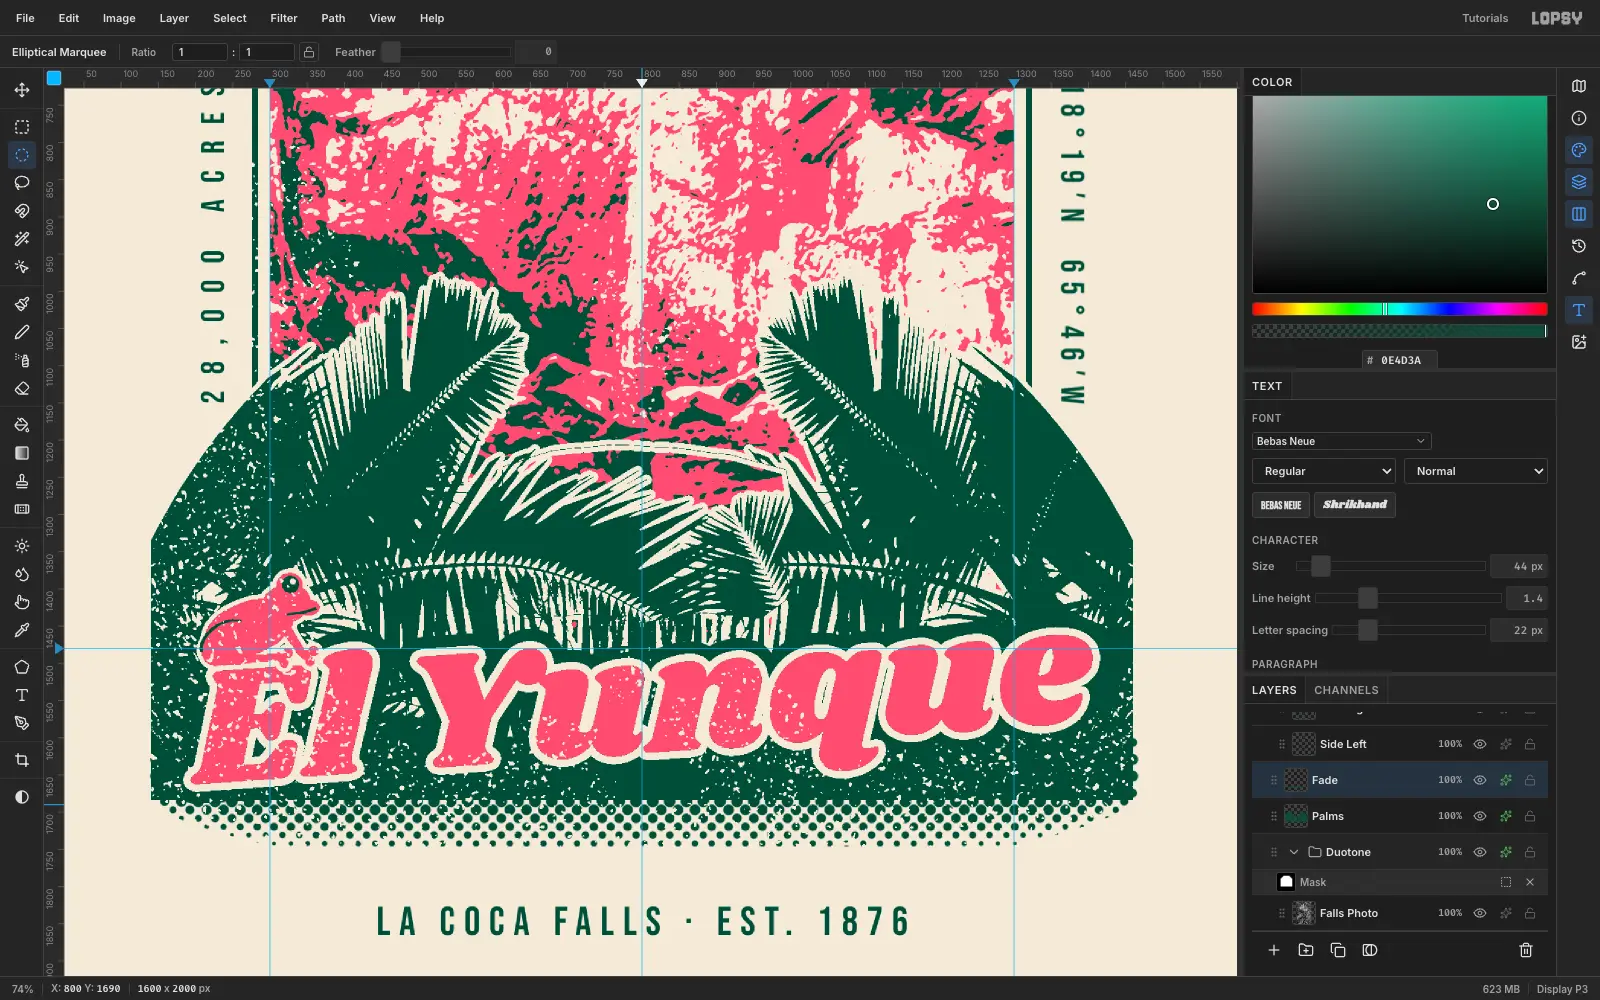
- Add a Fade layer above Palms.
- Set the Gradient tool's stops to black → light grey . Marquee (140, 1600)–(1460, 1800) and drag a Linear gradient from y 1684 down to y 1782.
- Elliptical Marquee centred on (800, 1640), radii 700 × 150. Run Select → Inverse, then Select → Feather 36, and Edit → Fill with white. The dots will now shrink to nothing toward the curved edge instead of being sliced by it.
- Press Cmd+D and run Filter → Halftone with Dot Size 16, Angle 45 and Softness 1.
- Fill a solid emerald strip from y 1620 to 1684, so the dots grow out of the band. Delete anything below y 1746, where dots would be too small to print.
- Add a Color Overlay in emerald.
Finally, round the band's two bottom corners with a small lasso (about a 34 px radius), deleting on both Palms and Fade.
-
Set the script title with a halo
- Select a raster layer (Fade) so the text options don't restyle an existing text layer.
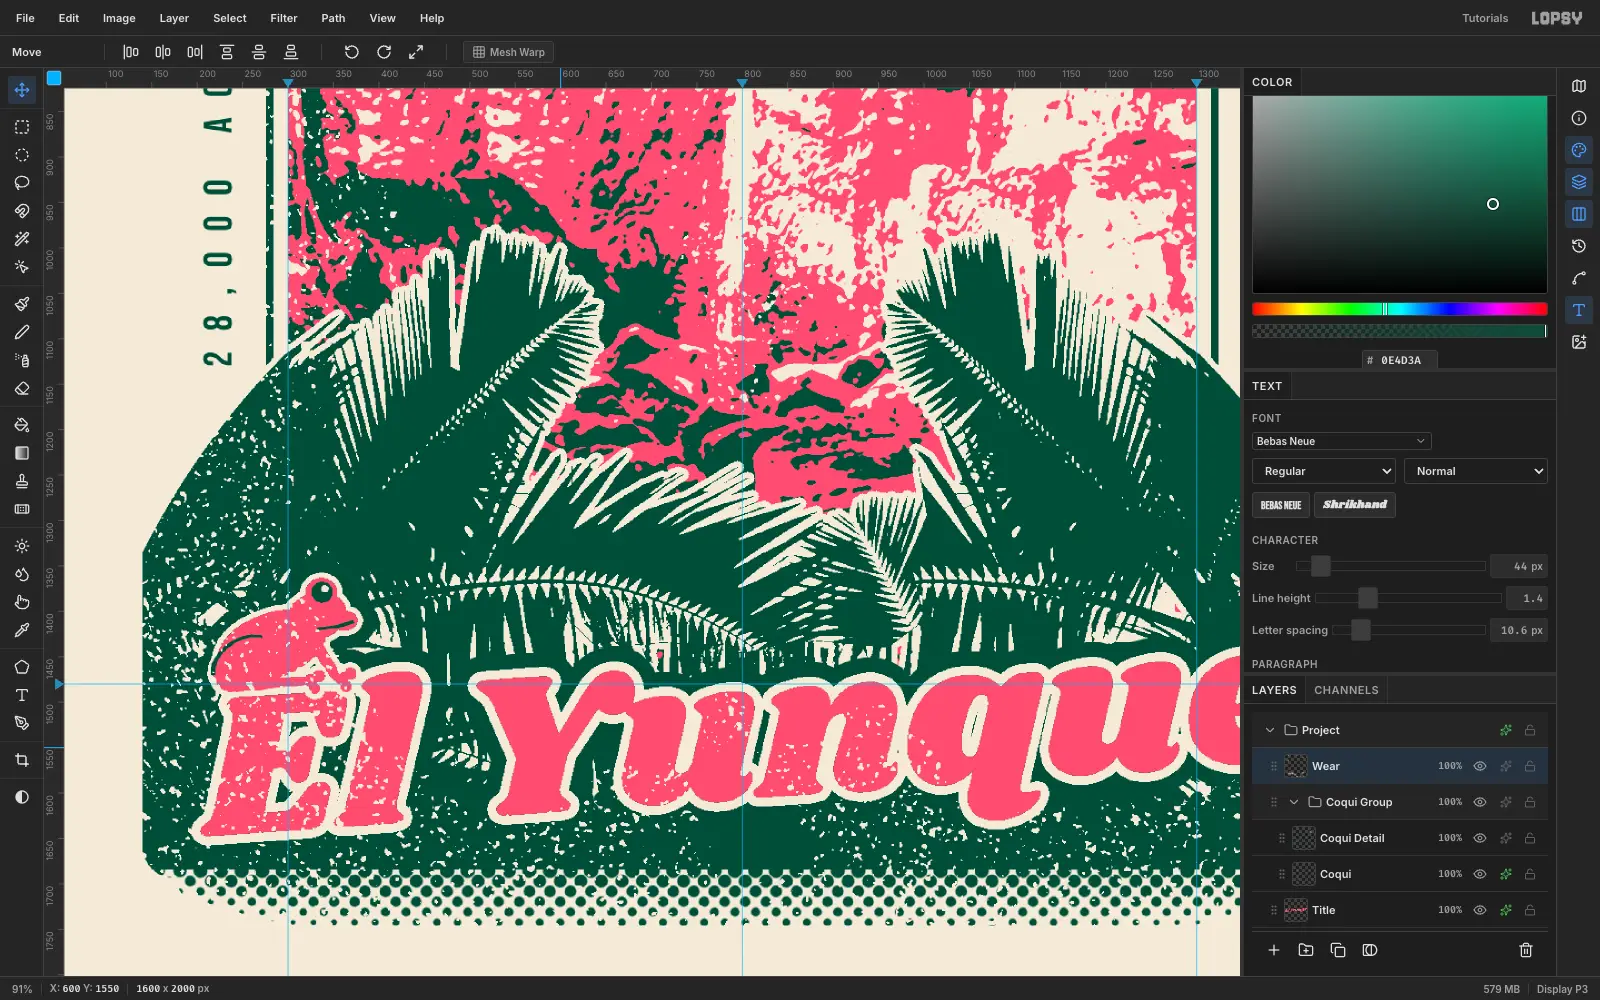
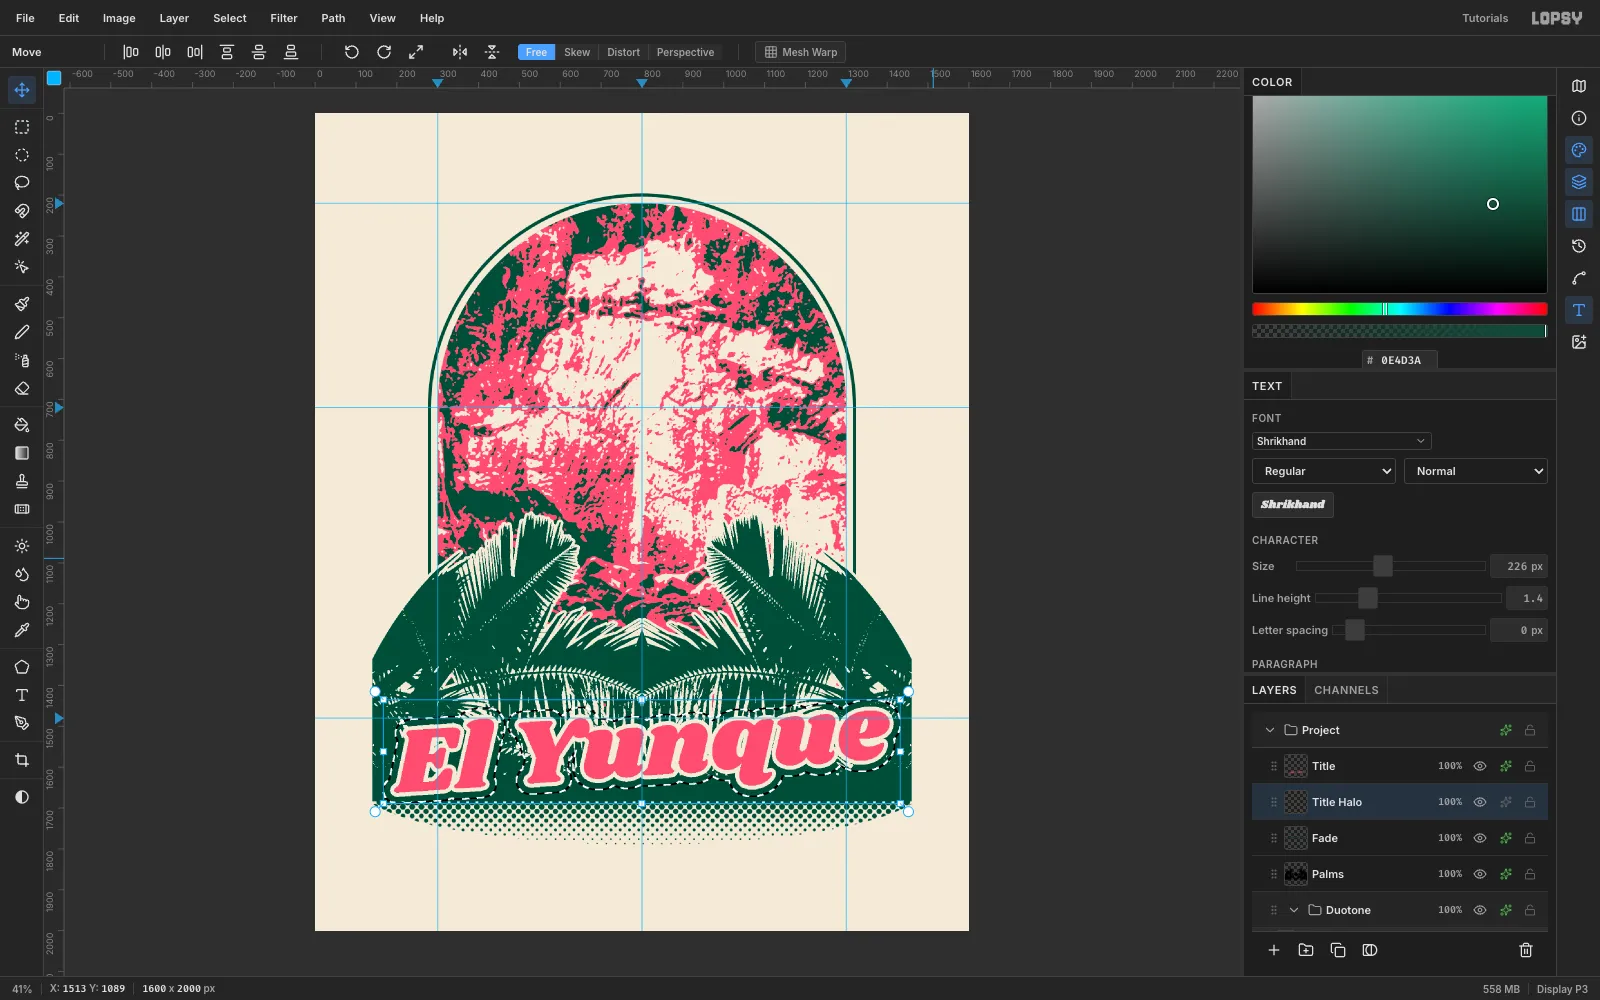
- Pick the Text tool with Shrikhand, 226 px, colour . Click in empty canvas near the top and type
El Yunque, then press Tab. - Click Rasterize Layer. Marquee the title with a few pixels to spare, switch to Move and drag just outside the top-right corner to rotate it −4°. Press Cmd+D.
- Move it so it's centred on x 810 with its lowest ink at y 1647. That gives the "E" about 37 px of emerald below it.
- Add an outside Stroke of 10 px in shirt .
- On a new Title Halo layer below the title, Cmd-click the title's thumbnail, run Select → Grow 26 and fill it emerald.
The emerald halo gives the script its own shape to sit on, so it stays readable over the busy fronds.
-
Curve the forest name over the arch
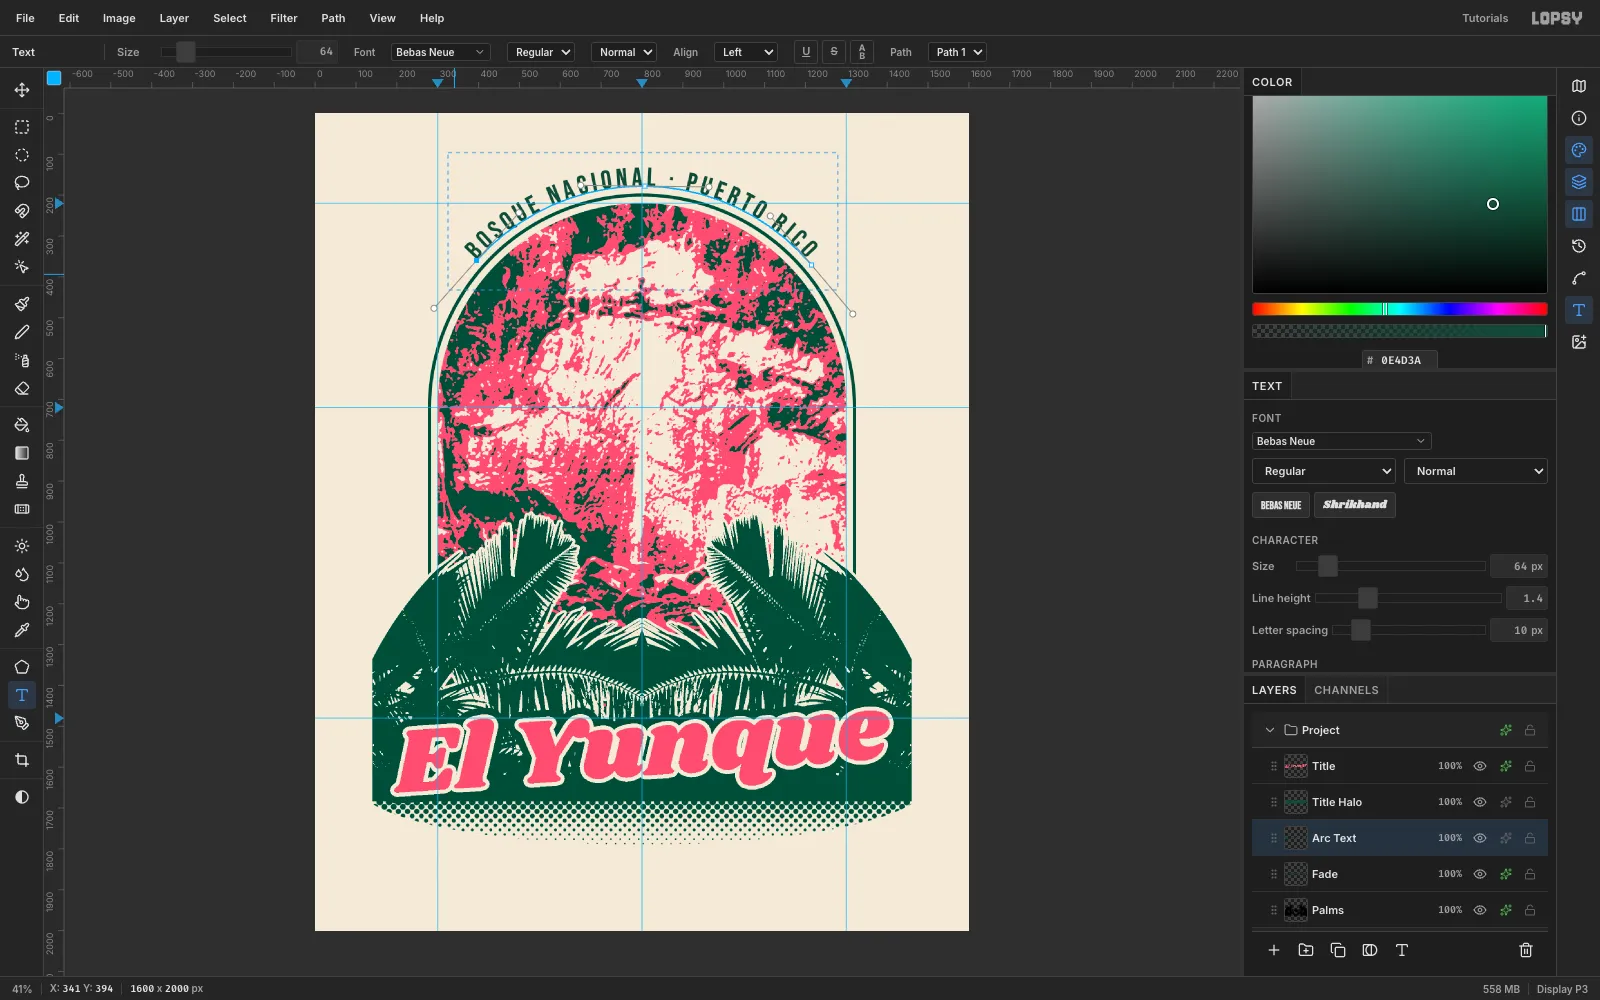
- With Fade active, open the Text panel and set Letter spacing to 10.
- Set straight text in Bebas Neue at 64 px, emerald:
BOSQUE NACIONAL · PUERTO RICO. Its width is 906 px. - With the Pen tool, draw a three-anchor arc centred on the arch (800, 720) with radius 542. Span it slightly more than 906 px, centred on the top of the arch, and click Commit path.
- Select the text layer and pick the path in the options bar's Path menu.
The glyphs sit on the outside of the arc, 18 px clear of the keyline all the way round. Hide the path afterwards by clicking its row in the Paths panel.
-
Add the side labels and footer
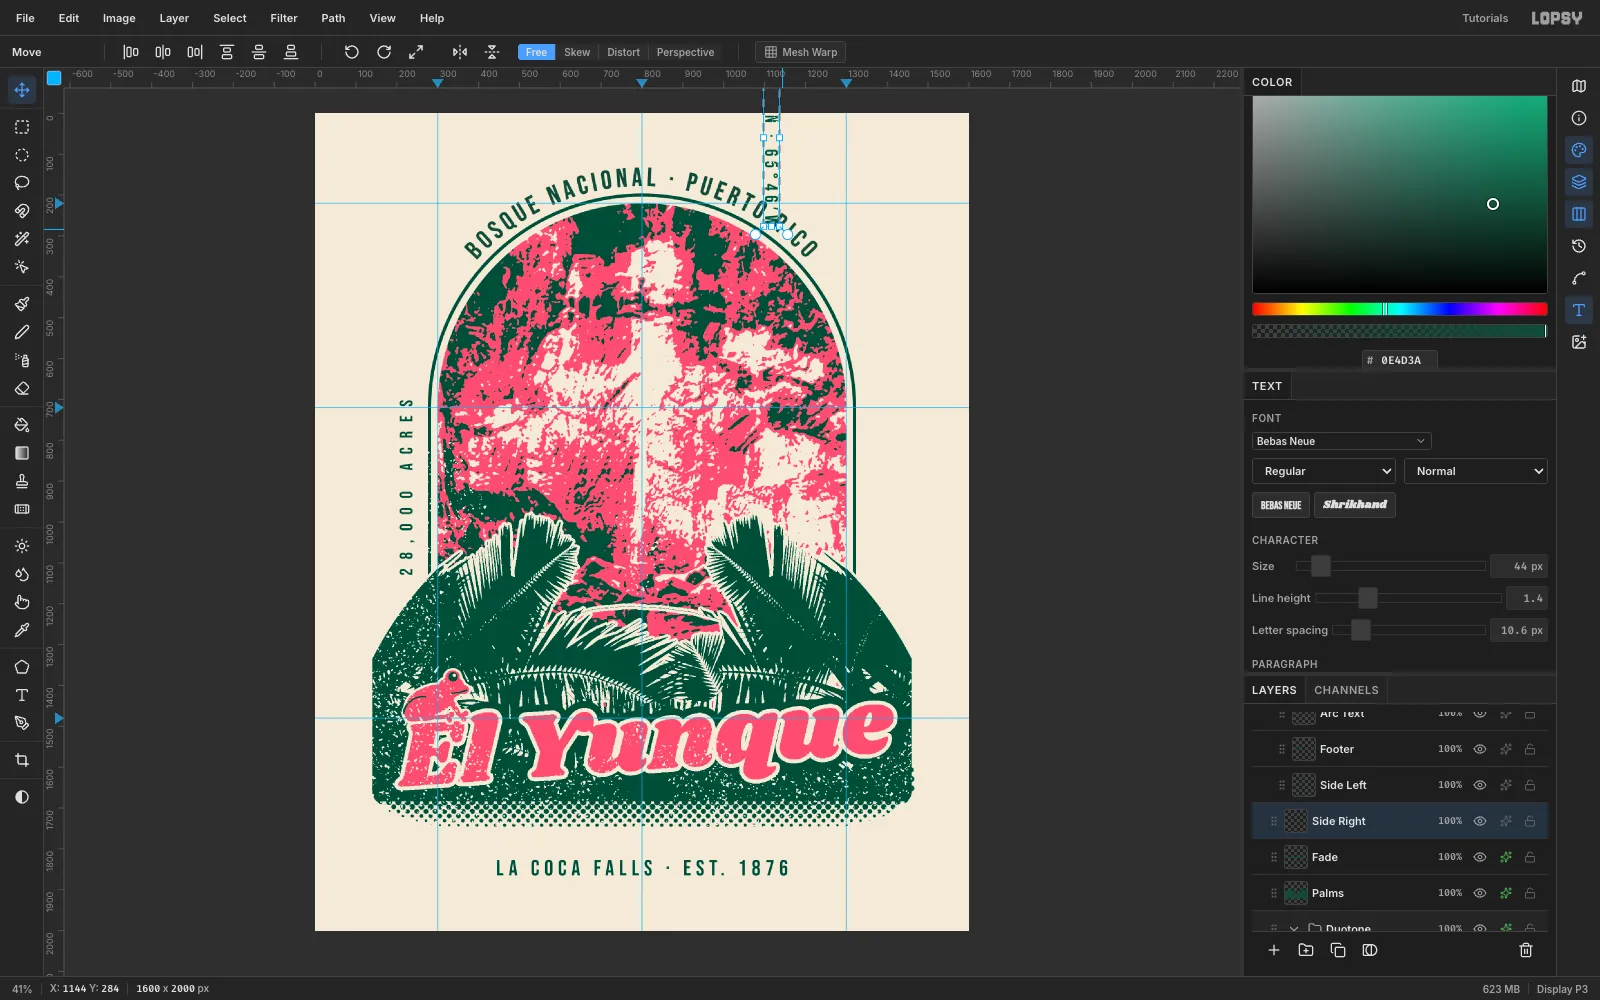
- Set the footer
LA COCA FALLS · EST. 1876in Bebas Neue 54 px with letter spacing 12. Click Align center horizontally, then nudge it to y 1826. - Set
28,000 ACRES(spacing 22) and18°19′N · 65°46′W(spacing 10.6) at 44 px. Adjust the spacing until both are exactly 428 px long, so they read as a pair. - Rasterize each label and rotate it with the Move tool: −90° on the left, +90° on the right.
- Move them to x 206 and x 1362, spanning y 702–1129. That centres them on the arch's straight walls, about 40 px from the keyline.
Reset the Text panel's letter spacing to 0 afterwards, because it carries over to the next text.
- Set the footer
-
Perch a coquí on the title
The coquí is the tiny tree frog whose "ko-KEE" call fills El Yunque at night. It's a nice detail for people who know the forest.
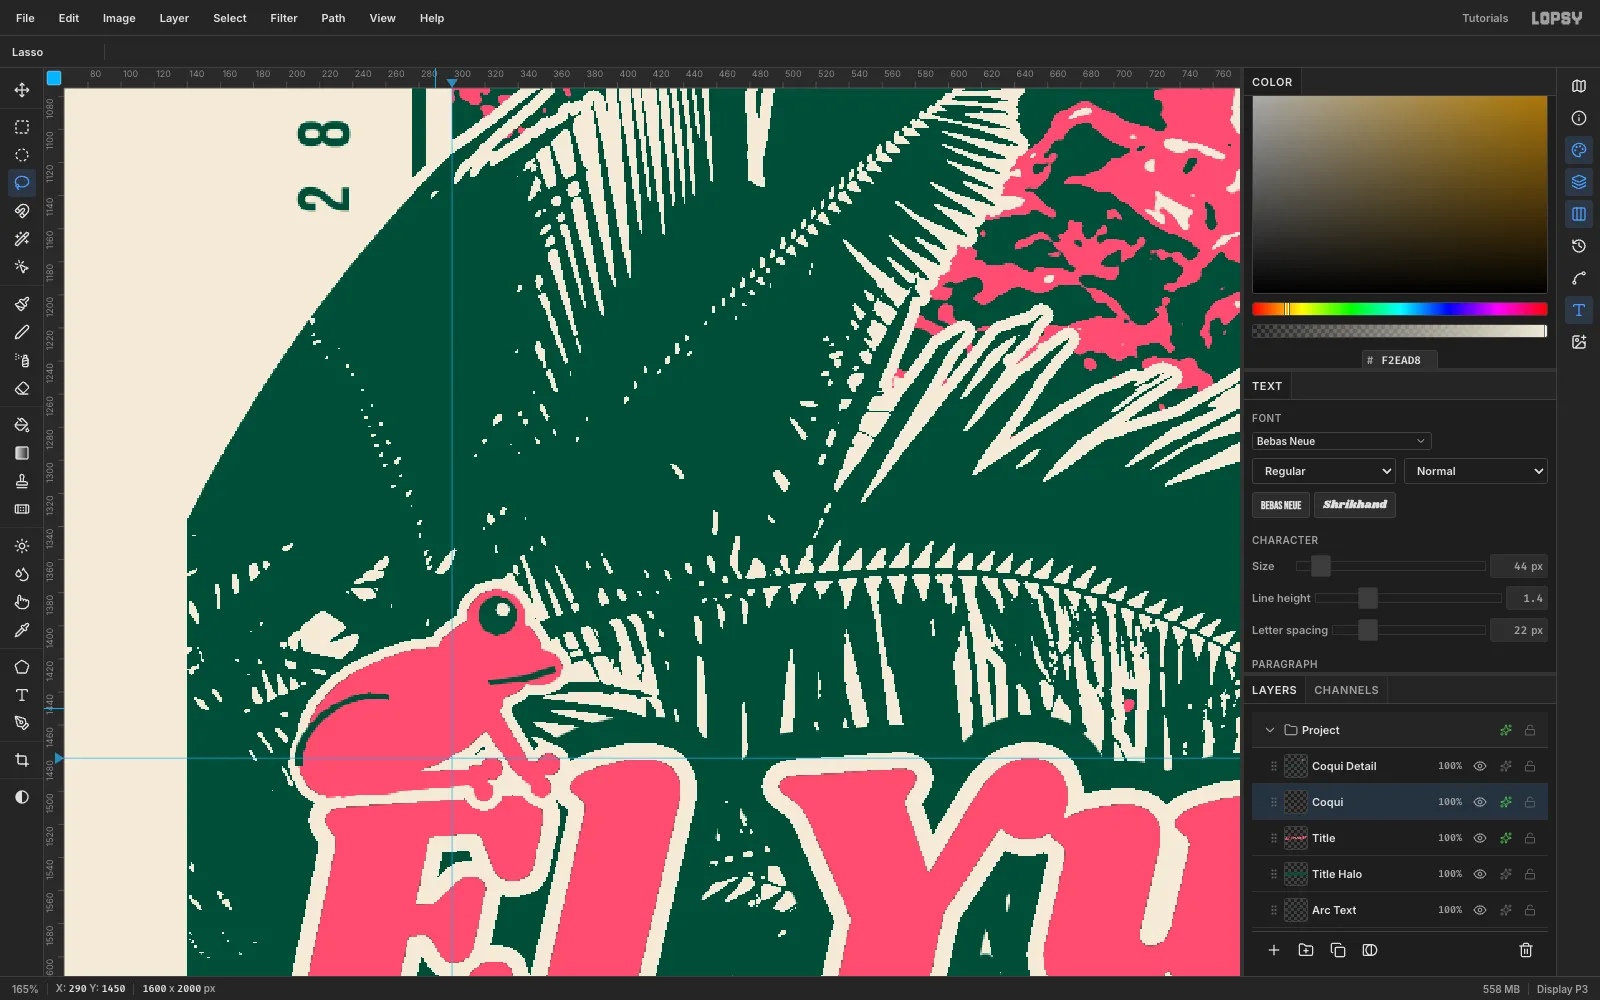
- On a new Coqui layer above the title, build the frog from filled Lasso shapes in hibiscus pink:
- a body, a head and a snout
- an eye bump that breaks the top of the head
- a folded thigh
- a front arm
- six round toe pads
- On Coqui Detail, fill the eye and the leg and mouth lines emerald, and add a tiny bone highlight in the eye.
- Give Coqui a 6 px bone Stroke.
- Group the two layers and move the group so the feet sit on the top of the "E".
- On Palms, Cmd-click the Coqui thumbnail, Select → Grow 20 and fill emerald. That clears the fronds behind its outline.
-
Add screen-print wear
- Add a Noise layer, fill it mid-grey and run Add Noise at 100, Mono, Gaussian.
- Run Gaussian Blur 5, then Threshold at the value that leaves about 8% white. For this noise that was 132.
- Magic-wand a white speck (Contiguous off), click Add Layer, fill the selection with the shirt colour and name the layer
Wear. Delete the Noise layer. - On a Clouds layer, run Clouds (Scale 3) and Threshold it at its 62% quantile. Magic-wand the black, switch to Wear and press Delete. Delete the Clouds layer.
- Marquee over the footer, the side labels and the arched text, and delete the wear there so small type stays sharp.
The specks are only on some areas: heavy on the band's left and on "El Yu", light elsewhere. That reads as a worn print rather than a filter laid over the whole design.
Export with File → Quick Export PNG. For the print shop, the emerald and pink areas separate into two screens, and everything bone is bare shirt.