Design a Cartographic Map Emblem Logo
Build an antique sea-chart logo in Lopsy with contour-tinted fjords, waterlines, rhumb lines, a compass rose, a ribbon wordmark and seal text on a path.
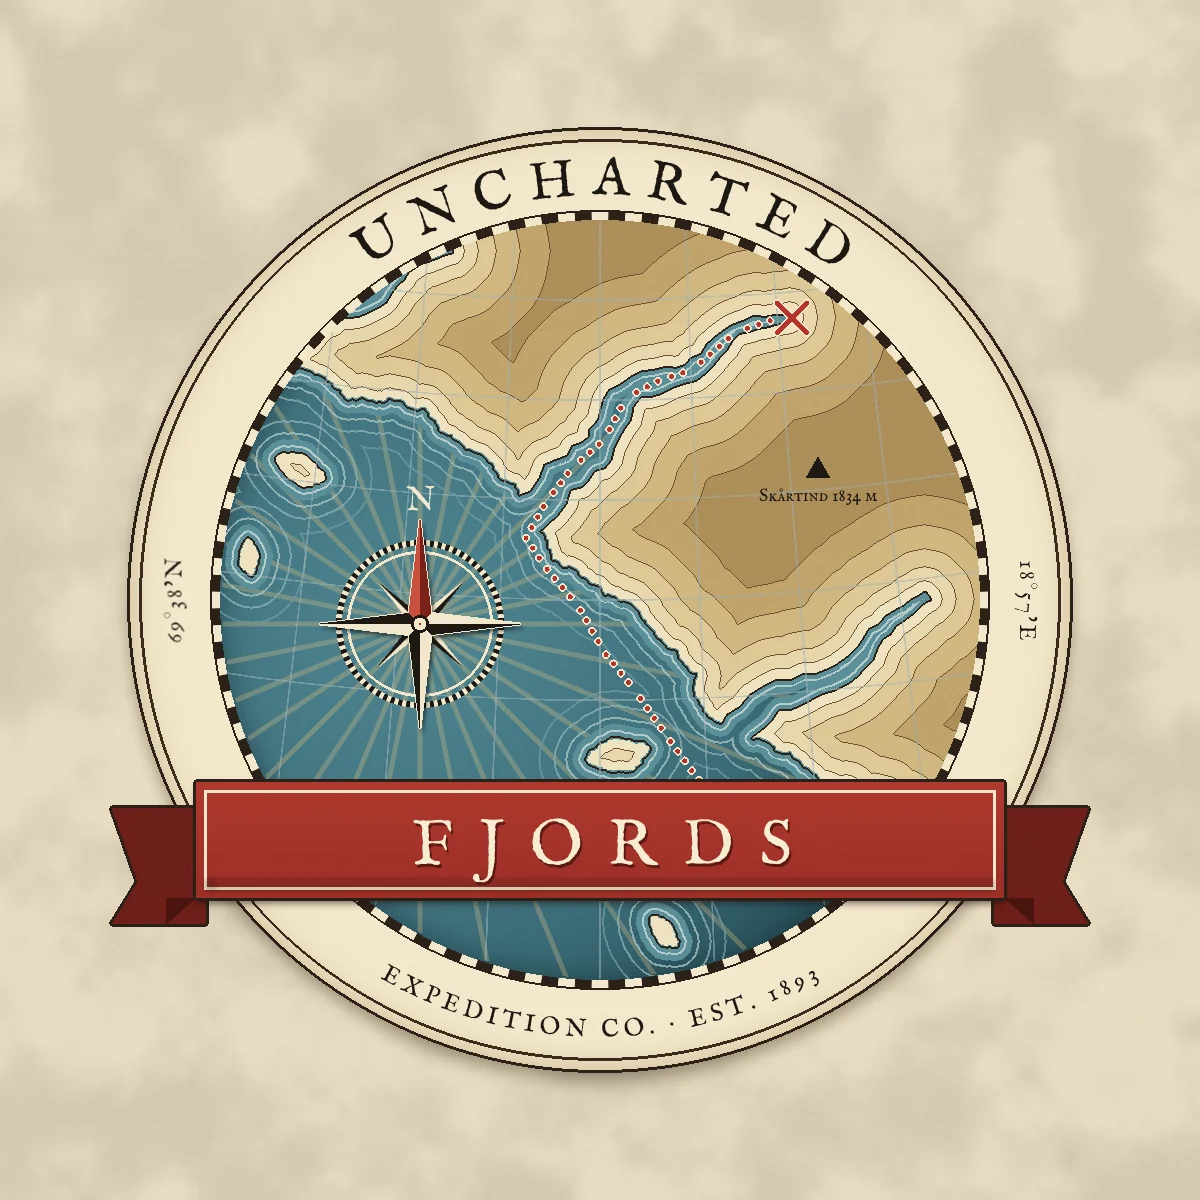
Antique sea charts are full of ready-made graphic devices: rhumb lines fan out of a compass rose, engraved waterlines ripple round every coast, contour tints step up into the hills, and a chequered degree border frames it all. In this tutorial you'll turn those devices into an emblem logo for an imaginary outfitter, Uncharted Fjords Expedition Co.
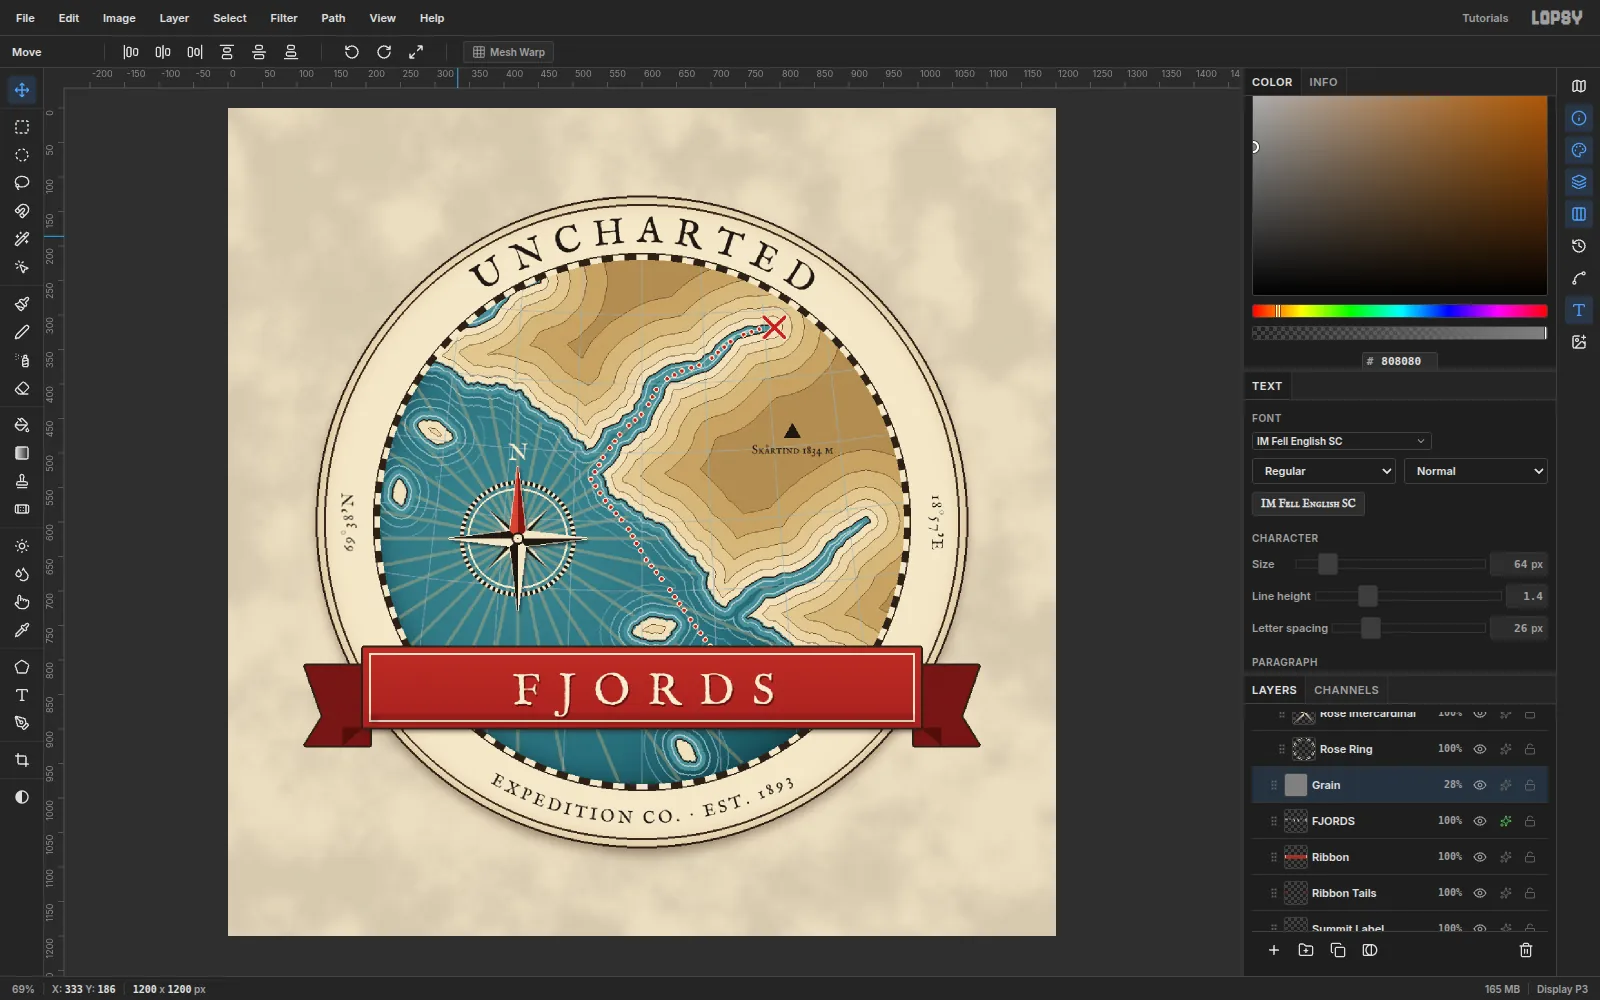
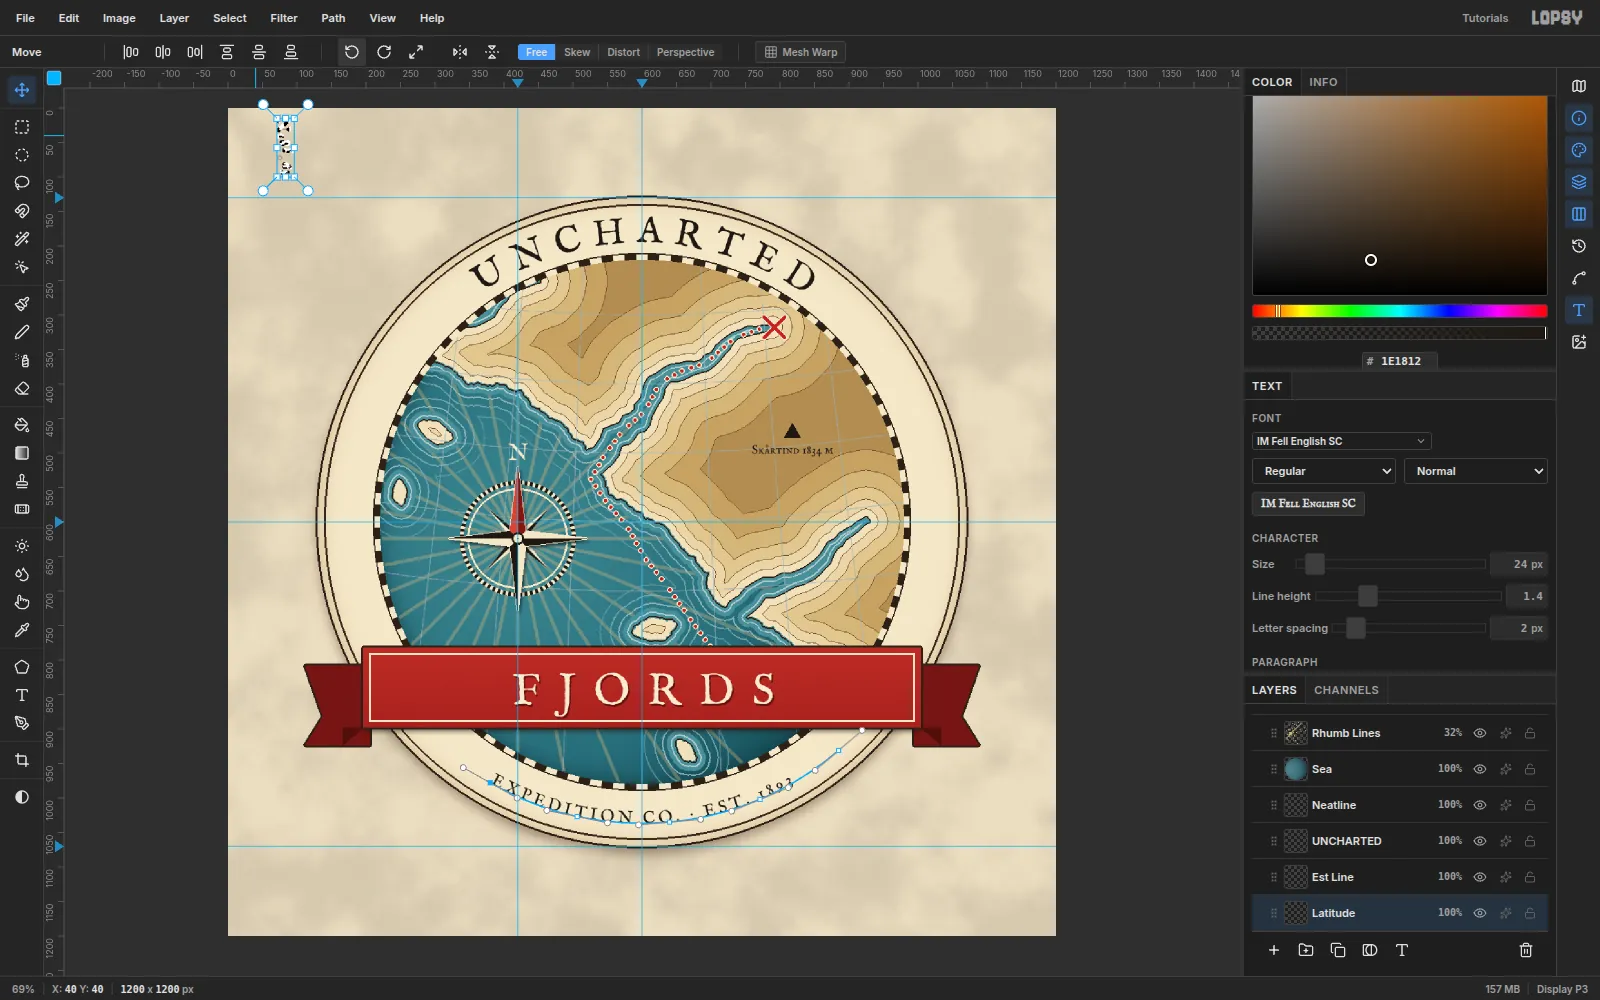
The chart shows a rocky northern coast cut by three fjords. A dotted expedition route runs up the longest one to an X. UNCHARTED arches over the top, a red ribbon carries FJORDS, and the coordinates sit on the rim.
Almost every shape is a selection that you fill, grow, shrink or invert. The Sunburst filter draws both the degree border and the rhumb lines, and the Pen tool gives the seal lettering its curves.
The palette:
- Paper
#E9DDC3, plate cream#F2E7CB, ink#2B2118 - Sea
#4F8591→#3A6B78→#1F404A, waterlines#CFE0DC - Land
#EFE2C0stepping down to#AD8E59, contour ink#6E5234 - Ribbon red
#AE3A2E/#9A2E26, route red#B8322A
Every face is IM Fell English SC, a revival of 17th-century type that suits old maps. Its figures are old-style and its J drops below the baseline, and you'll allow for both.
-
Create the document and guides
Create a 1200 × 1200 document. Everything is centred on (600, 600), so click the top ruler at x =
600and the left ruler at y =600to drop a centre cross. Add horizontal guides at y =130and1070, the top and bottom of the emblem, and a vertical guide at x =420. That last one marks the compass rose's centre, which sits at (420, 624).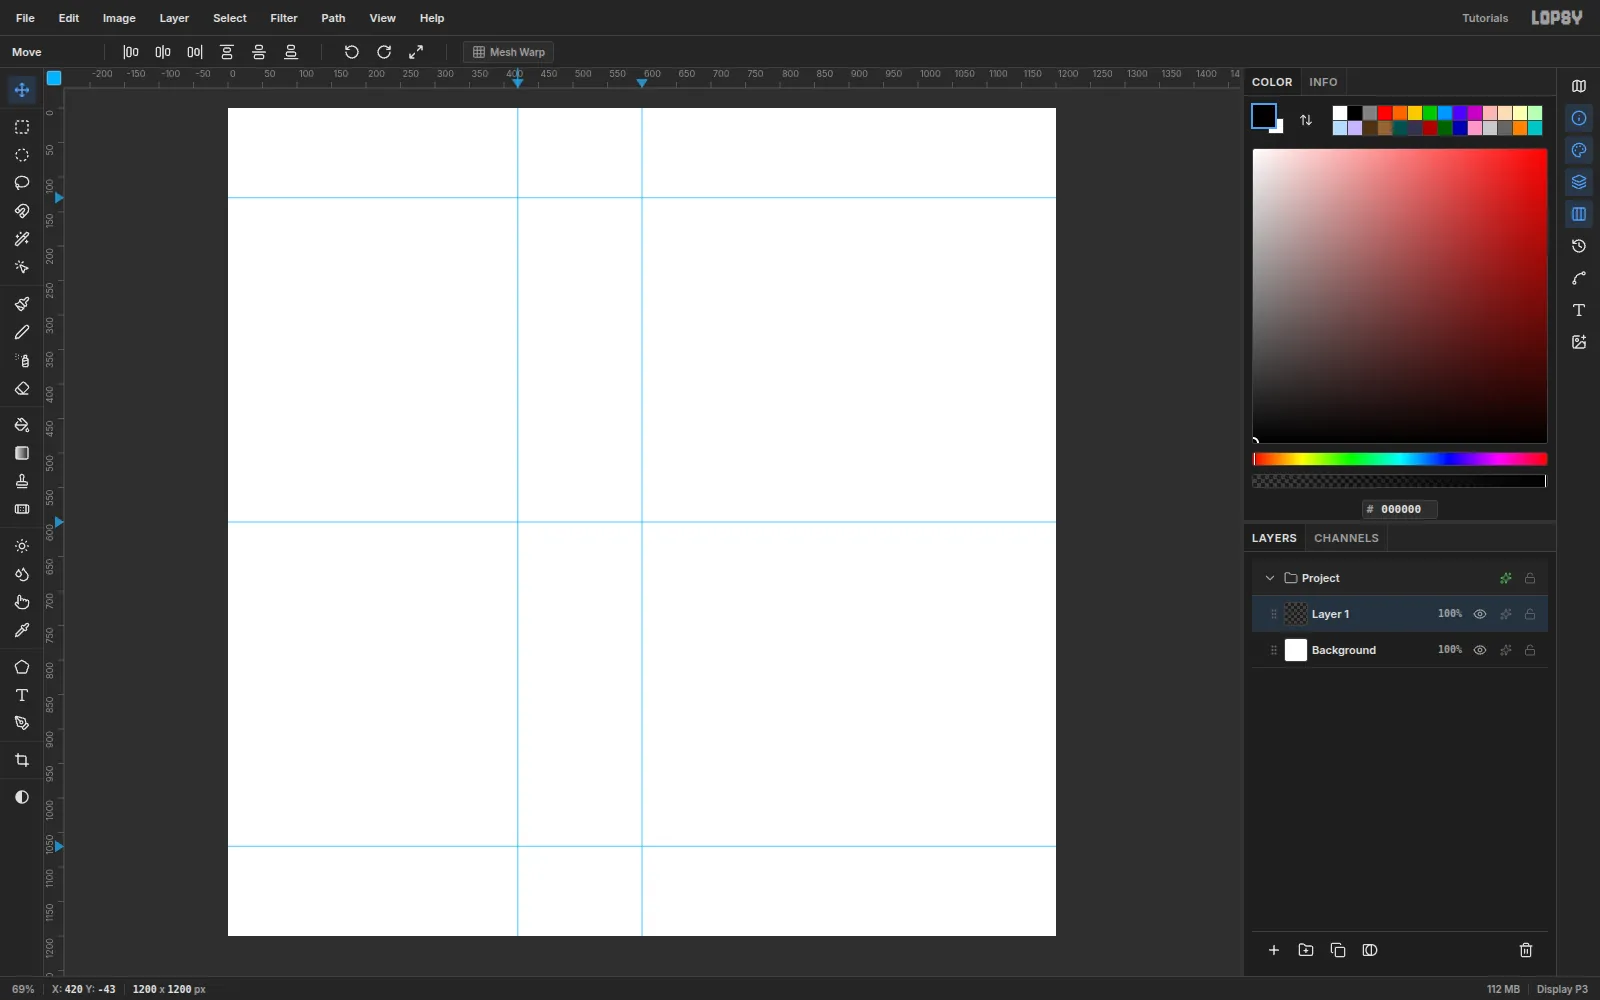
-
Lay down the parchment
Click
Background, set the foreground to#E9DDC3and choose Edit → Fill. RenameLayer 1toPaper Mottleand run Filter → Clouds… at Scale14. Open its effects drawer, set the blend mode to Multiply, and drop the layer to9%opacity. The result is a quiet mottle, not a cloudy sky.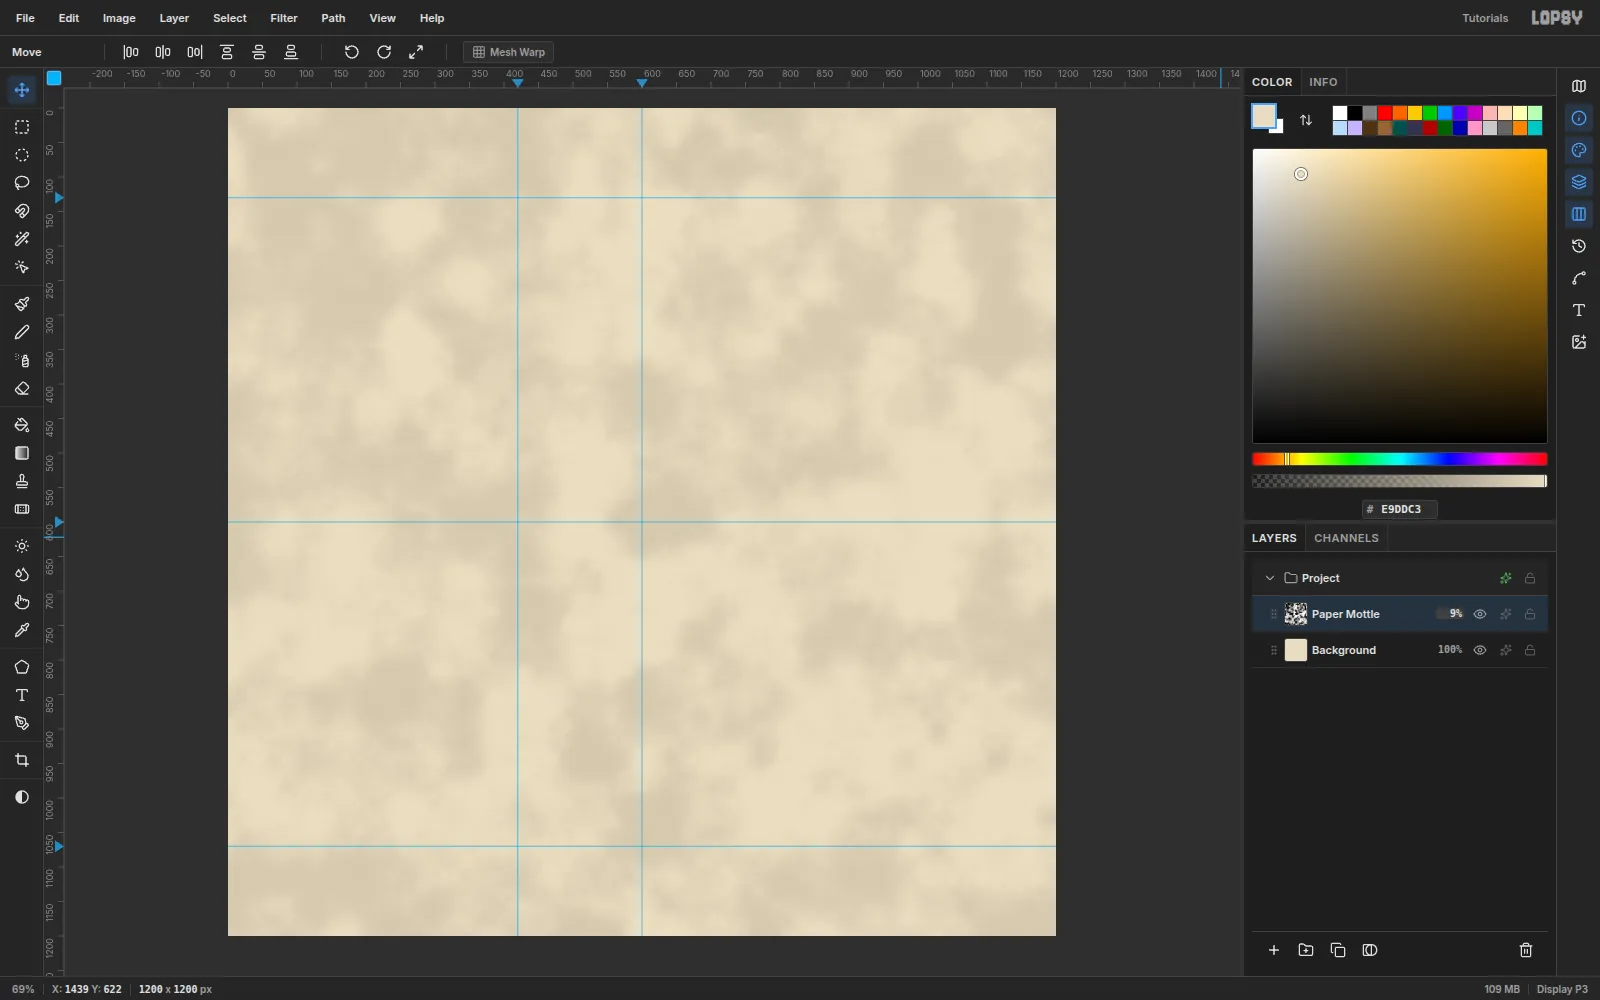
-
Make the plate and its double rule
Add a layer named
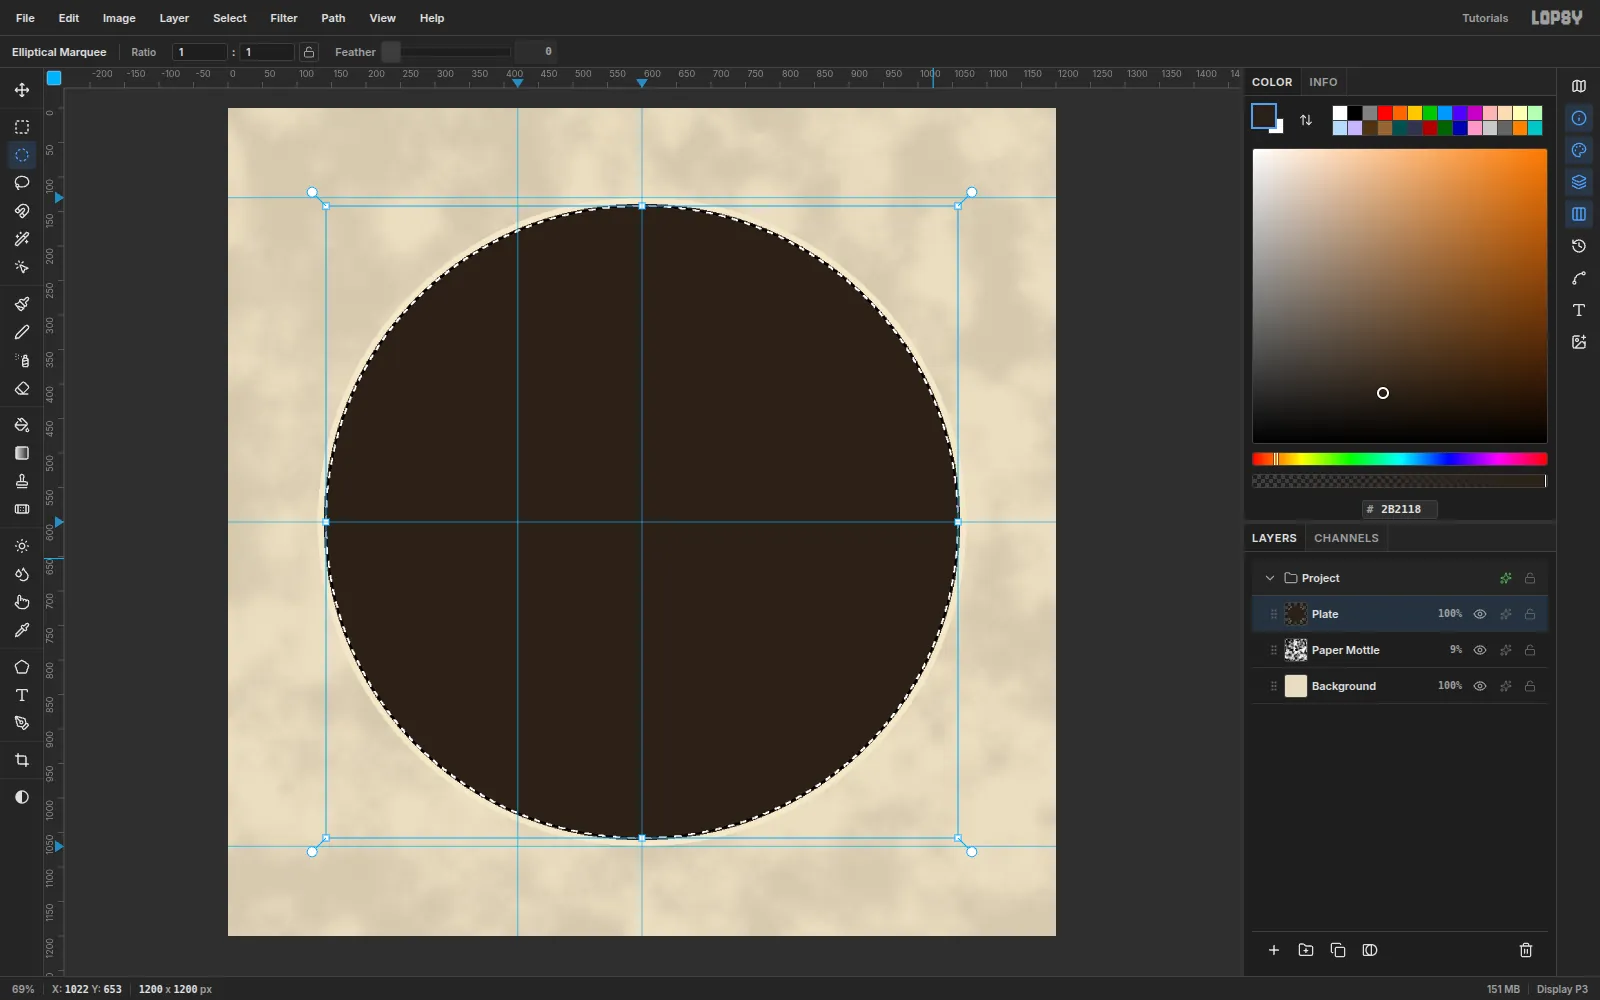
Plate. With the Elliptical Marquee, drag from (130, 130) to (1070, 1070) for a 470 px radius disc. Fill it with#F2E7CB.Now build a double rule:
- Choose Select → Shrink…
8and fill with the ink#2B2118. - Choose Select → Shrink…
2and fill with the cream again.
That leaves a 2 px ink ring 8 px inside the rim. Press Cmd+D.
In the effects drawer, add these effects:
- Stroke
3px in ink. - Inner Glow, Size
46, Opacity45,#9C7A45, for an aged rim. - Drop Shadow with Offset Y
10, Blur26, Opacity45,#3A2A14.
Click Rasterize Layer Style so the effects become pixels. Baked effects keep a big document fast.
- Choose Select → Shrink…
-
Draw the degree bars with Sunburst
Add a layer named
Neatline. Select a disc from (212, 212) to (988, 988) (radius 388) and fill it with ink. Set the foreground to the plate cream.Choose Filter → Sunburst… with these settings, then click Apply:
- Rays
72, Width50, Taper0 - Center X
50, Center Y50
Half of every slot turns cream, so you get alternating wedges.
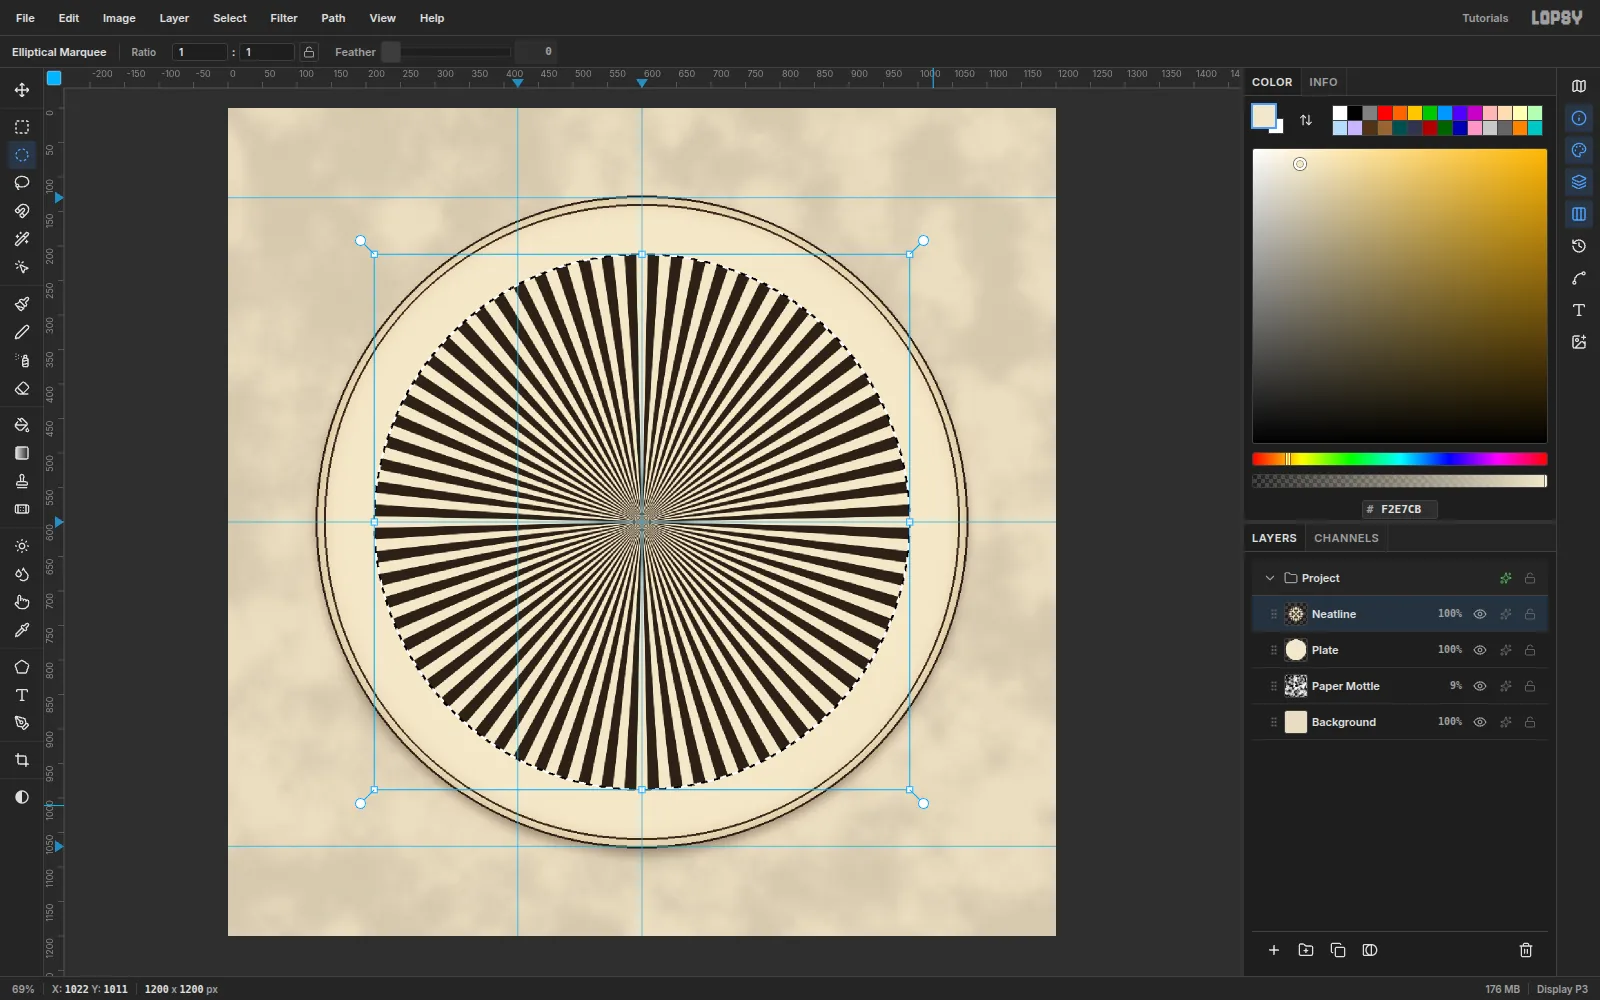
- Rays
-
Hollow out the neatline
Select the radius 380 disc, from (220, 220) to (980, 980), and press Delete. Only an 8 px band of alternating bars is left, like the degree border of an old chart. Deselect, add a
2px ink Stroke, and rasterize the layer style.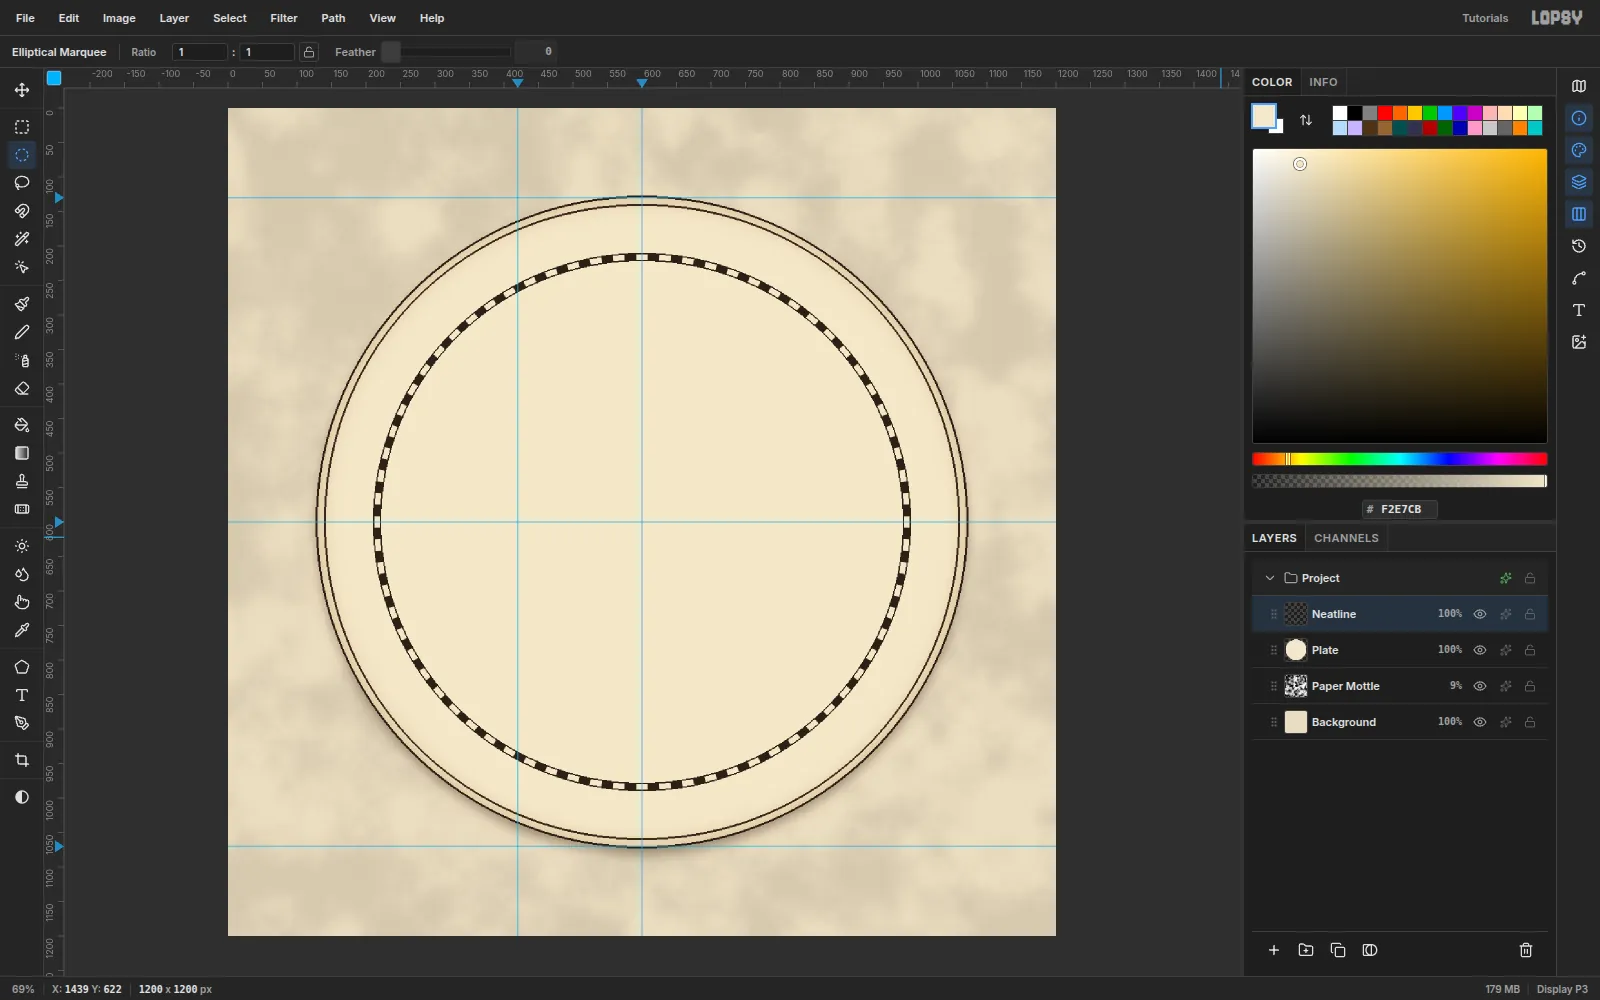
-
Fill the sea
Add a layer named
Seaand select the radius 380 disc again. Pick the Gradient tool, set it to Radial, and open Advanced…. Set three stops:#4F8591at 0%#3A6B78at 60%#1F404Aat 100%
Drag from the compass centre (420, 624) to (980, 624), so the water is lightest where the rose will sit. Deselect. Add an Inner Glow of Size
40, Opacity55in#12272Dto darken the edge, then rasterize.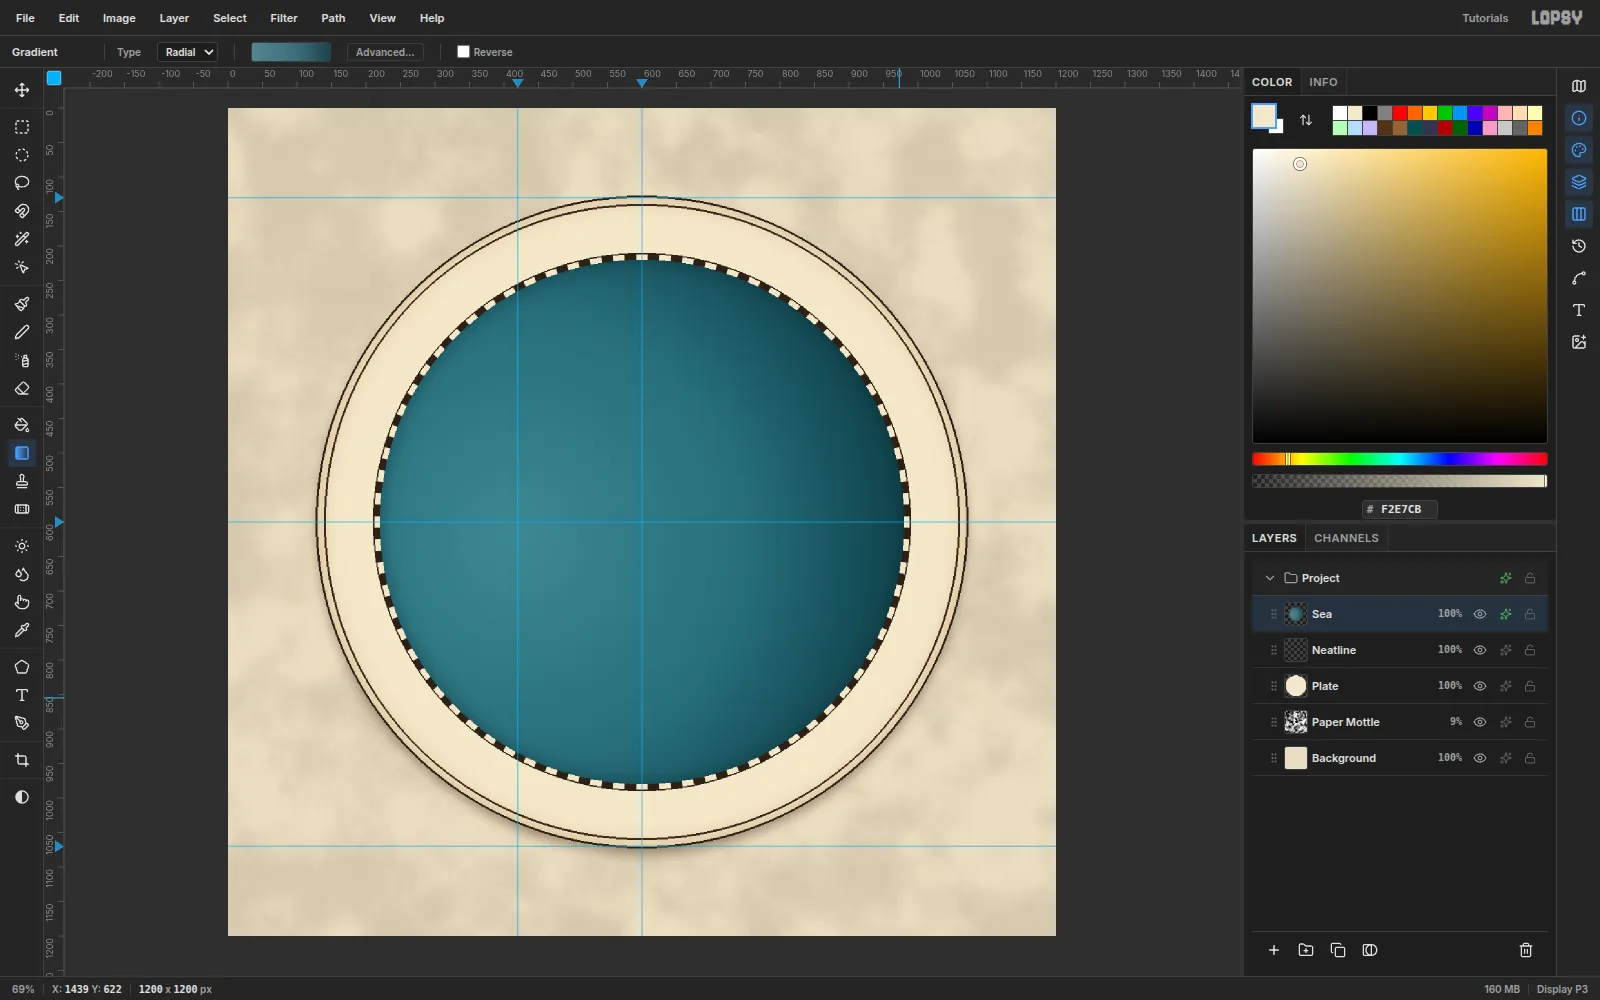
-
Fan out the rhumb lines
Add
Rhumb Lines. Select a radius 378 disc so the lines stop at the border, and set the foreground to#D9BE84. Run Sunburst again with these settings:- Rays
32, Width5, Taper50 - Center X
35, Center Y52
Taper 50 gives parallel-sided lines instead of wedges. The centre is 35% and 52% of 1200 px, which is exactly (420, 624). Deselect and set the layer to
32%opacity.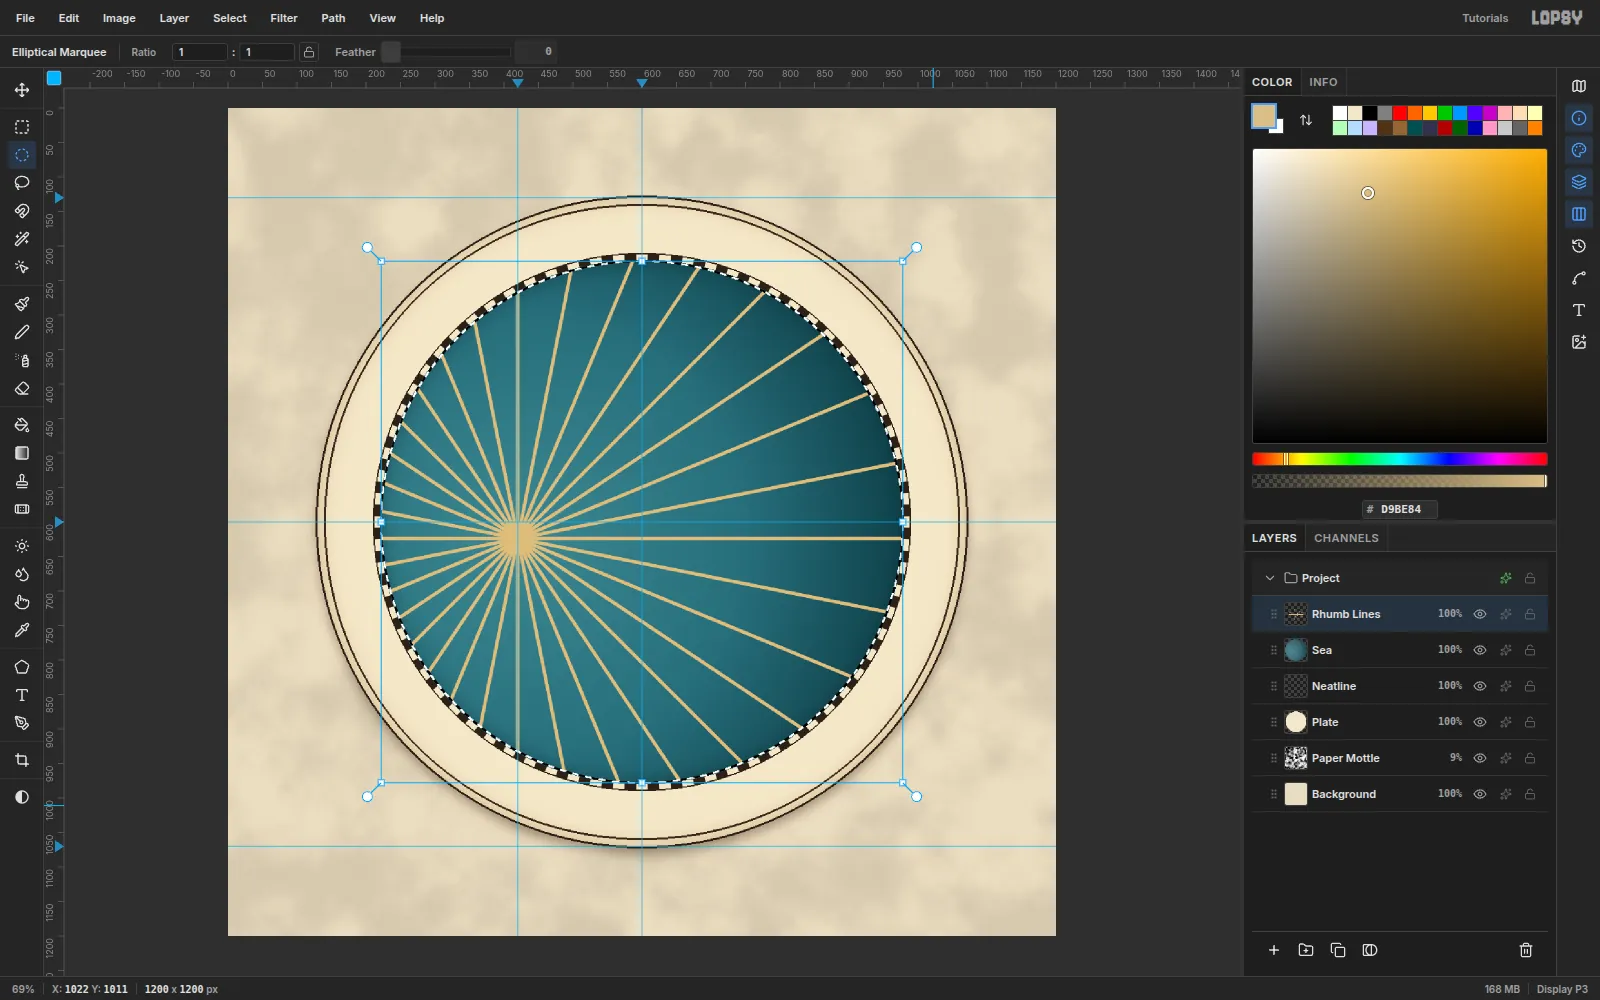
- Rays
-
Lasso the coastline
Add a layer named
Land. With the Lasso, draw a rocky coast that enters at the left edge around y = 250. Pass through roughly these points, then close the selection round the top-right corner, outside the canvas:(250, 318), (425, 408), (552, 560), (700, 702), (885, 800), (1200, 905)
Keep the line nervous and jagged. Real coasts double back on themselves.
Choose Select → Feather…
1to soften the stair-steps, then fill with#EFE2C0.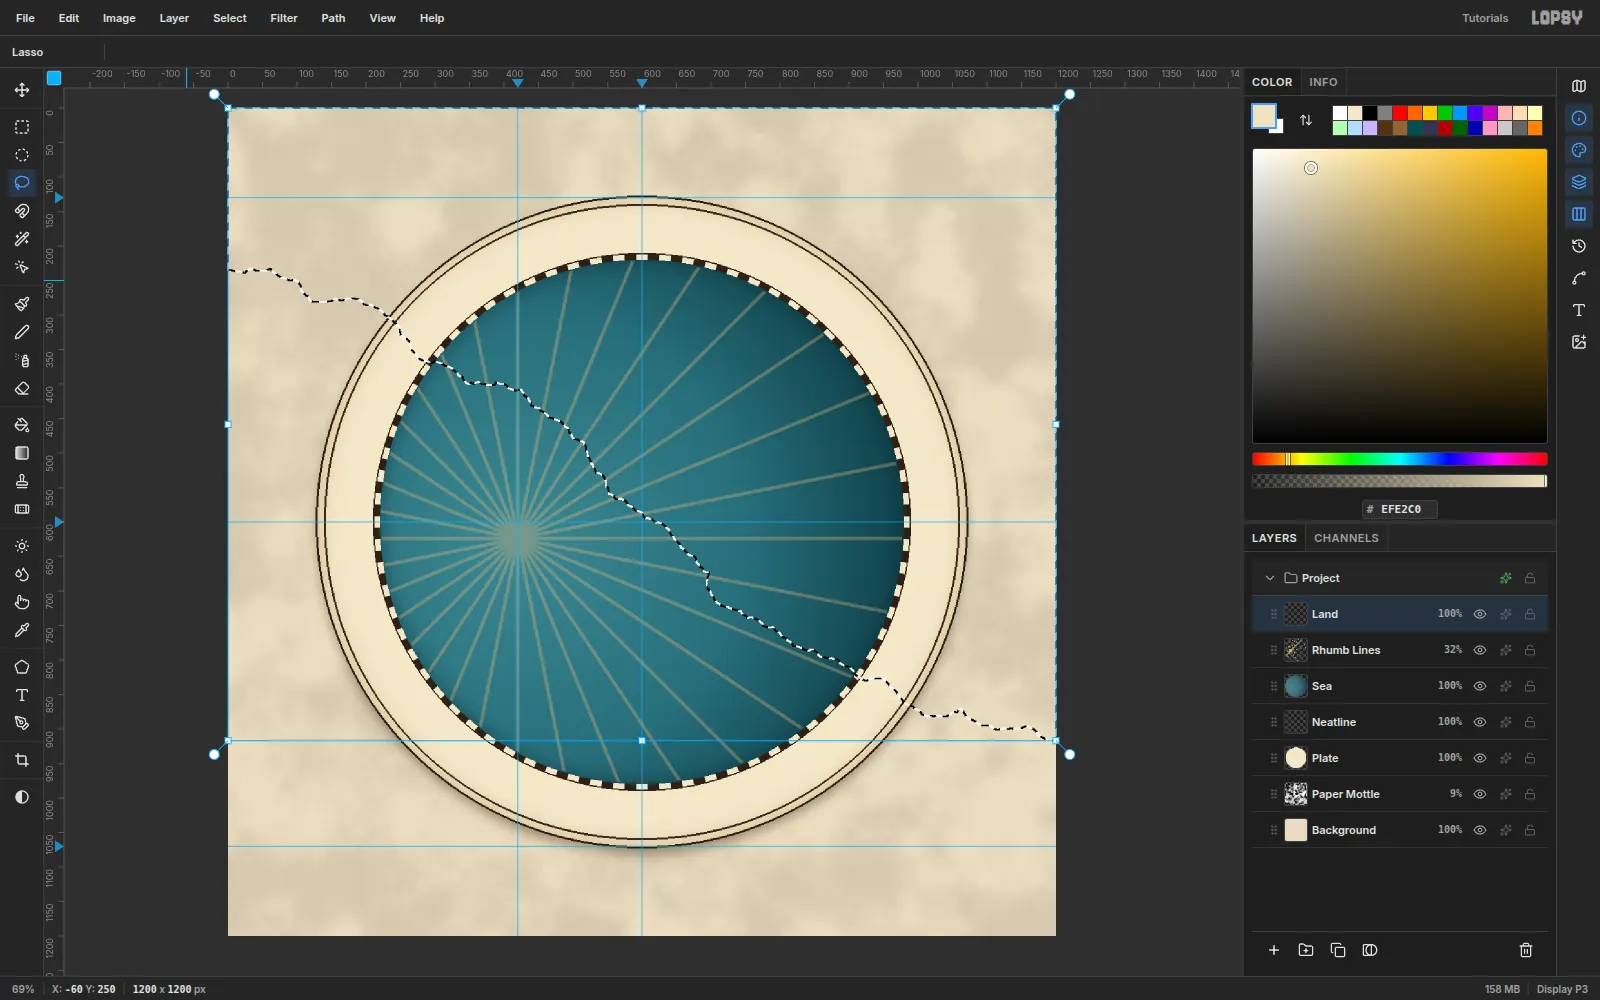
-
Cut the fjords
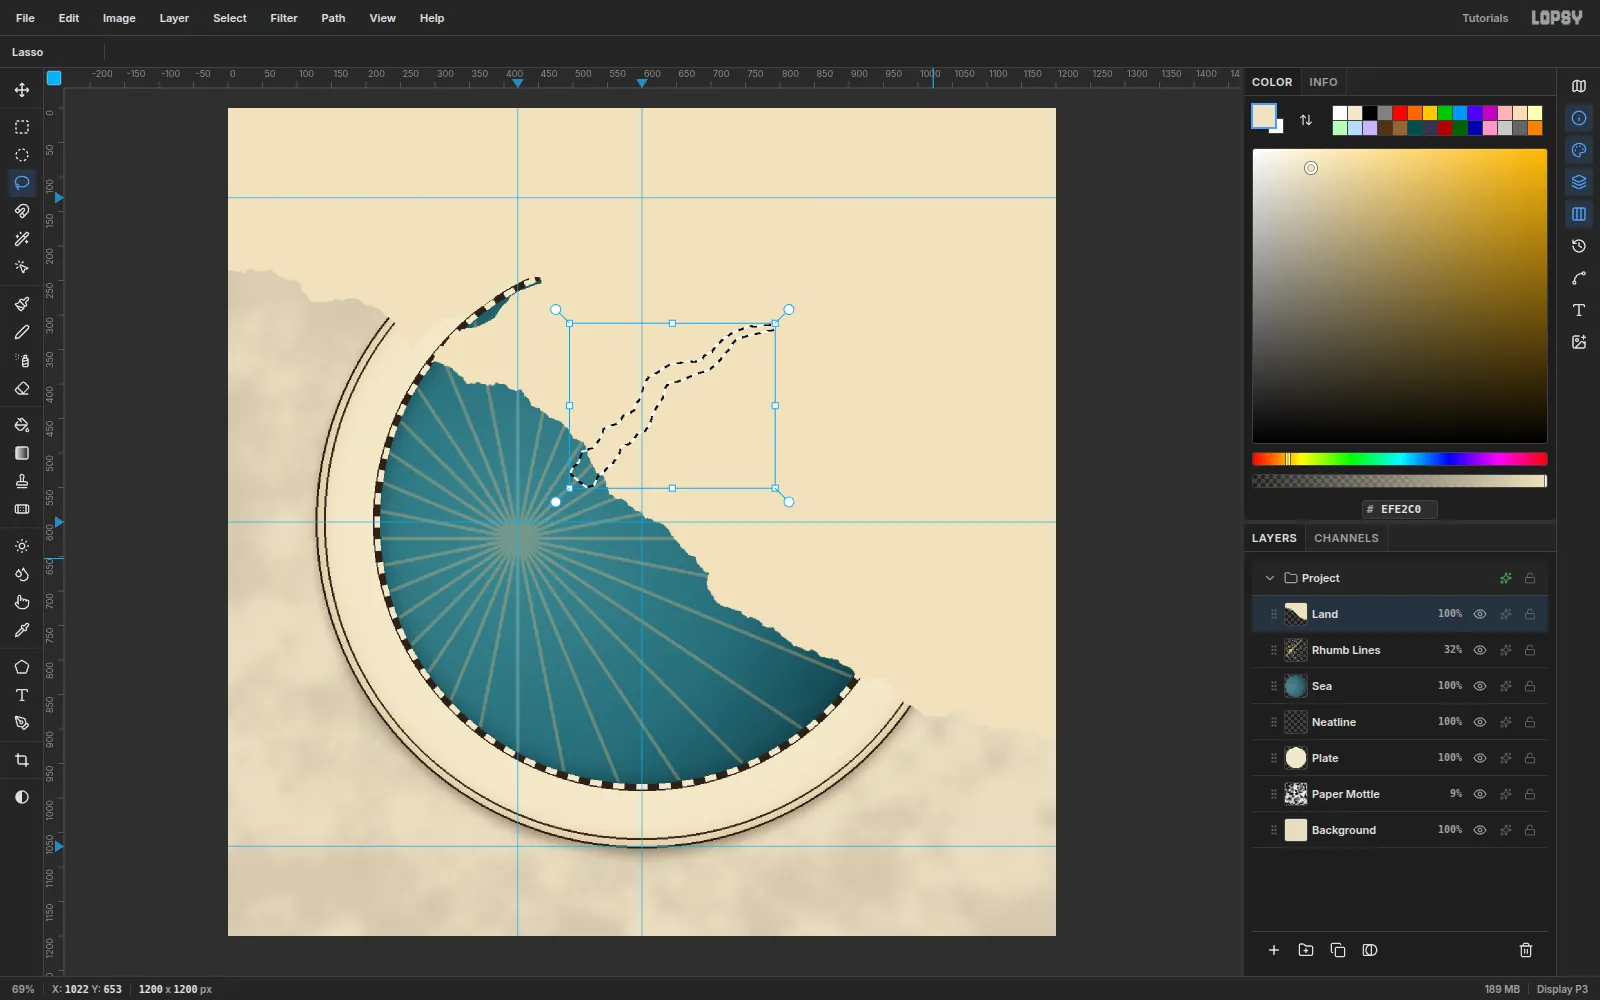
Fjords are long, narrow channels that get thinner toward their heads. For each one, lasso a wiggling channel about 30–40 px wide at the mouth and 8 px wide at the head. Feather it by
1, then press Delete.- A short one from (272, 368) up to (452, 250).
- The main fjord, from (508, 540) through (604, 440) and (690, 372) to its head at (792, 318).
- One from (722, 752) through (842, 676) to (928, 596).
-
Copy, rotate and scale the skerries
Lasso a small ragged island, about 52 × 30 px, at (300, 470) on
Landand fill it. To make an archipelago:- Marquee the island and press Cmd+C, then Cmd+V. The copy is pasted in place.
- Drag the copy with the Move tool.
- Cmd-click its thumbnail to select it, then turn it with a corner rotation handle and resize it with Cmd held on a corner scale handle.
Make three copies:
- 60° at 70% scale, at (252, 566)
- −35° at 125% scale, at (612, 752)
- 25° at 75% scale, at (668, 938)
Try Cmd+Z three times and Cmd+Shift+Z three times on the last one. The skerry steps back through scale, rotate and move, then returns exactly. Finally, Layer → Merge Down each copy into
Land.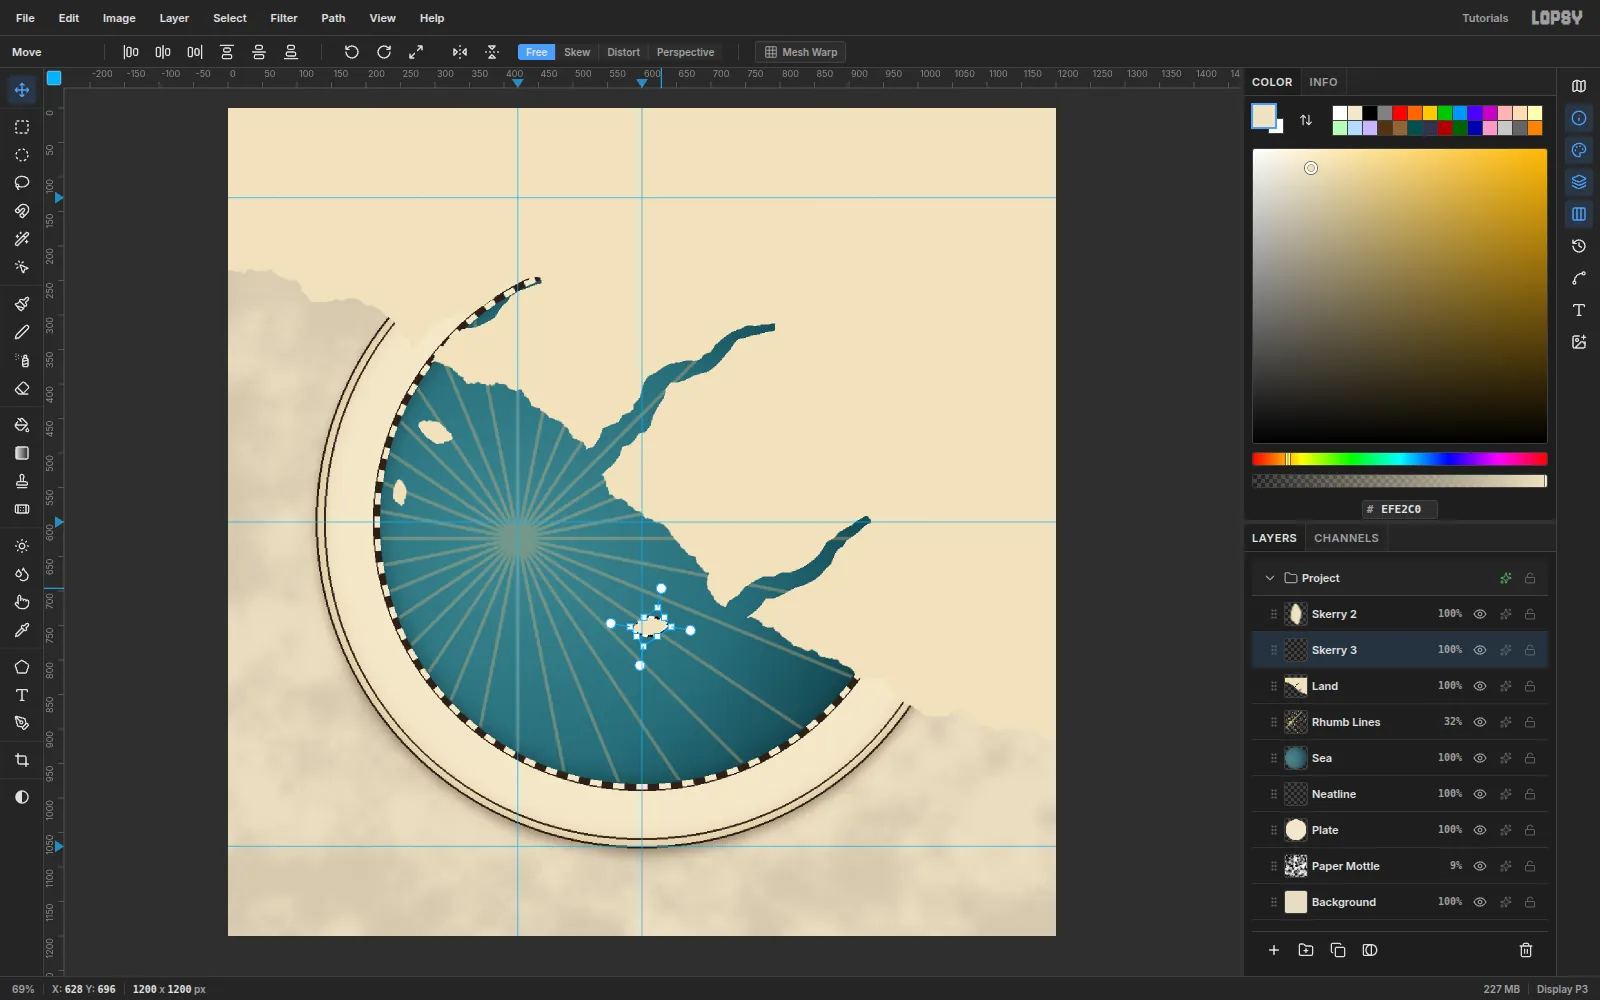
-
Step the contours inland
Contour tints (hypsometric tints) colour land by height. Here each band is simply the coast pushed further inland.
First give
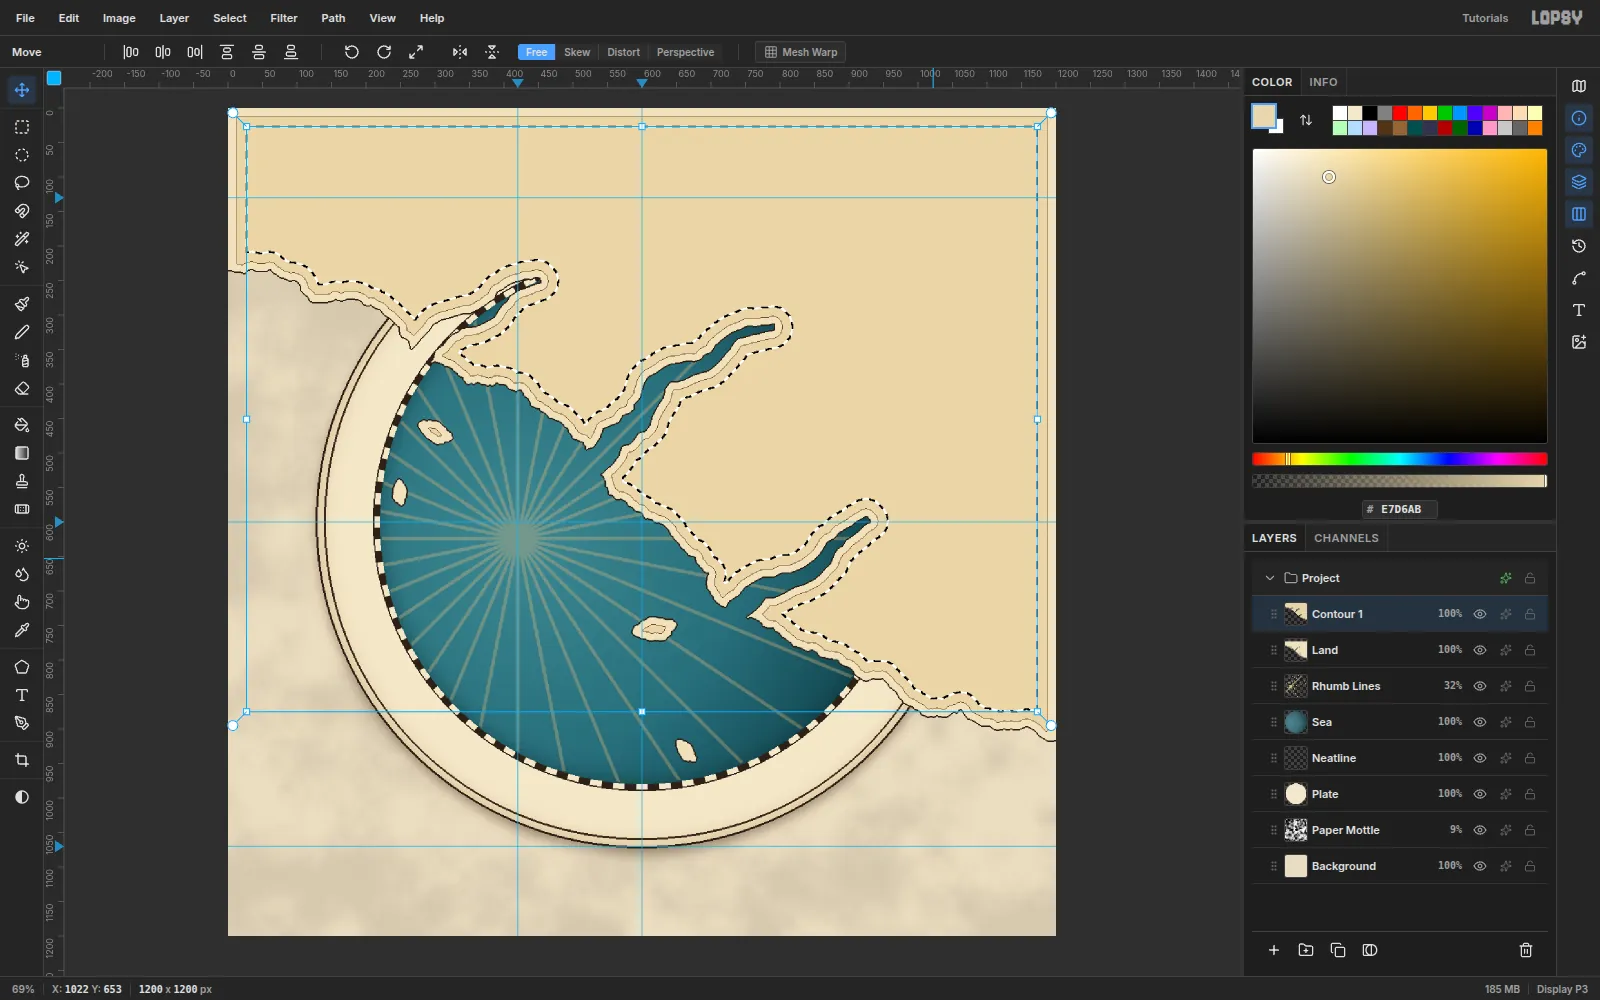
Landa2px ink Stroke for the coastline and rasterize it. Then repeat these steps for each band:- Cmd-click the previous layer's thumbnail.
- Choose Select → Shrink… by the amount below.
- Add a layer named
Contour 1,Contour 2and so on. - Fill it, then give it a
1px#6E5234Stroke and rasterize.
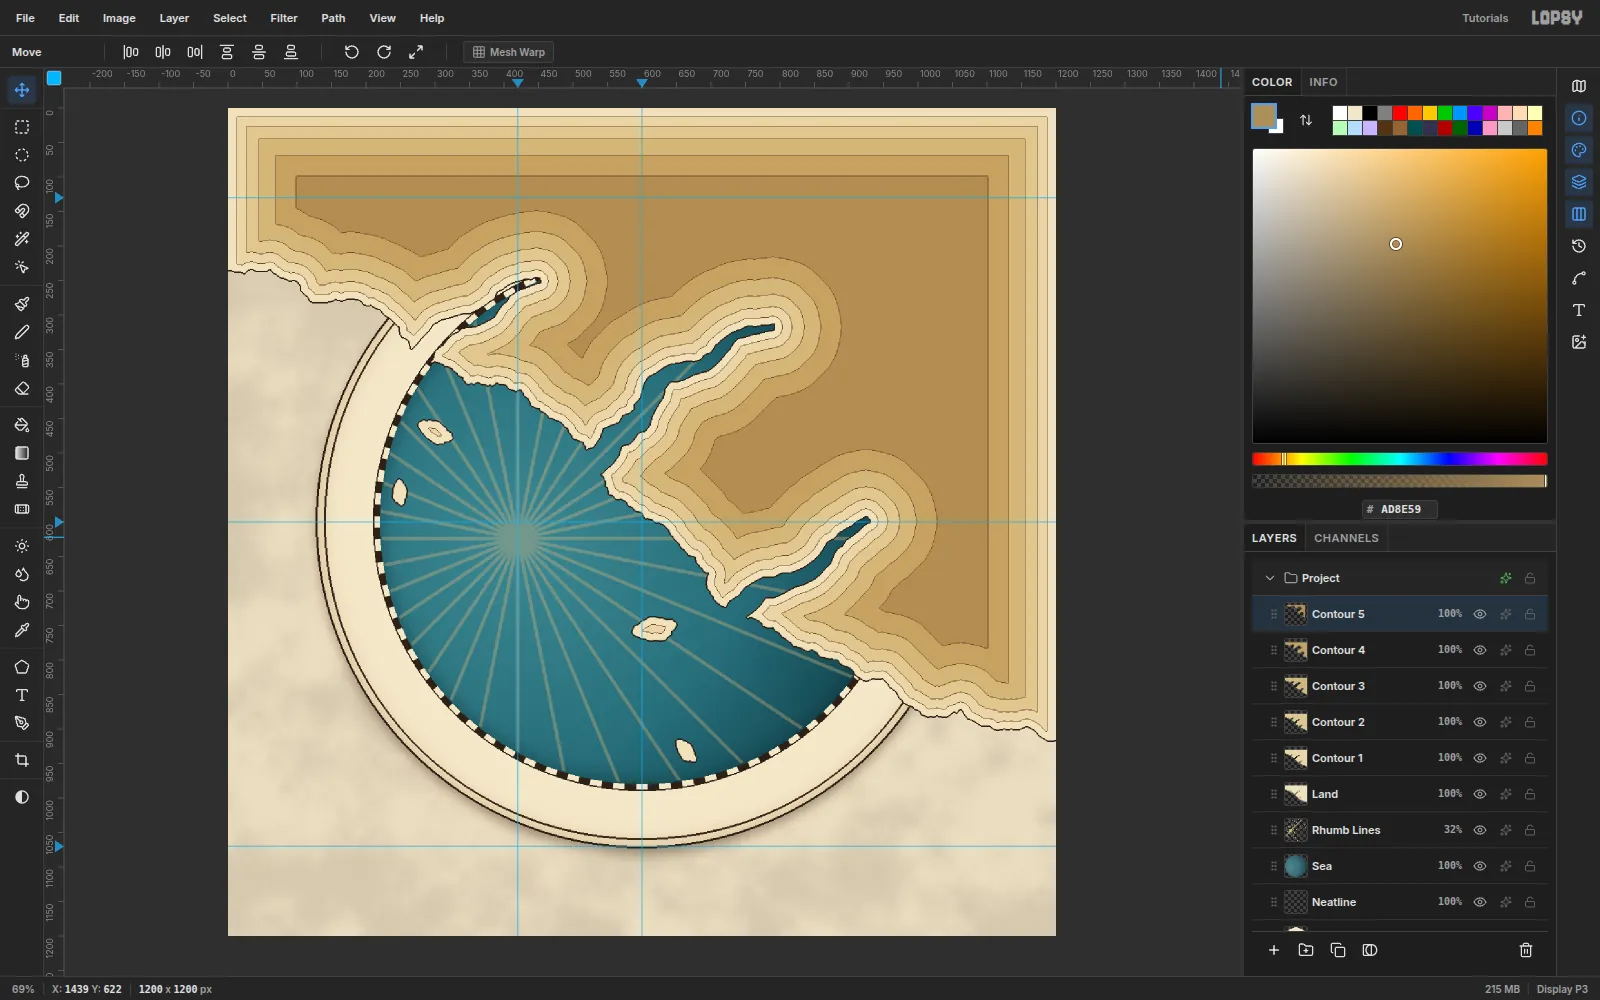
Contour 1: Shrink12, fill#E7D6ABContour 2: Shrink14, fill#DDC895Contour 3: Shrink18, fill#D0B780Contour 4: Shrink24, fill#C1A36BContour 5: Shrink30, fill#AD8E59
-
See the hills appear
Because each band shrinks from the one before, the bands follow every headland and fjord. The stroke on each band reads as an engraved contour line.
-
Engrave the waterlines
Click
Rhumb Linesand addShallows. Cmd-clickLand, choose Select → Grow…12and fill with#5A8E98.Add
Waterlines. Each ring is made in two moves: grow and fill, then grow 2 px less and delete. Work from the outermost ring inward, because each Delete clears everything nearer the coast.- Grow
46, fill#6E989F - Grow
31, fill#8AAEB2 - Grow
19, fill#A9C6C6 - Grow
6, fill#CFE0DC
Set the layer to
75%opacity.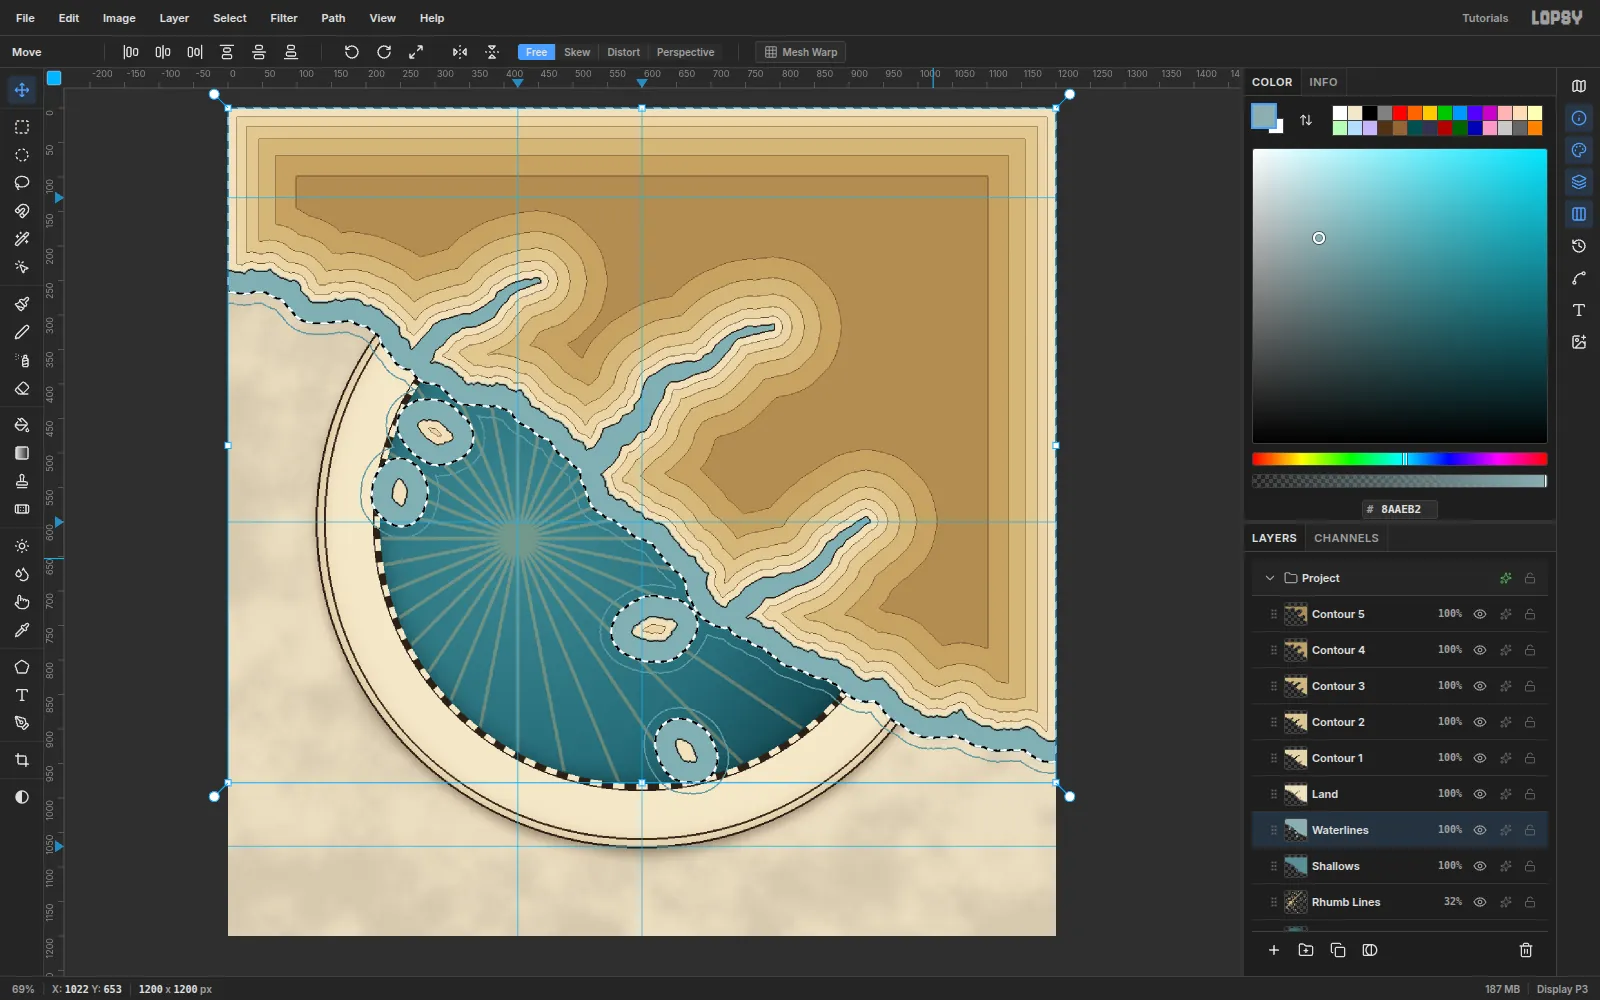
- Grow
-
Clip everything to the sea disc
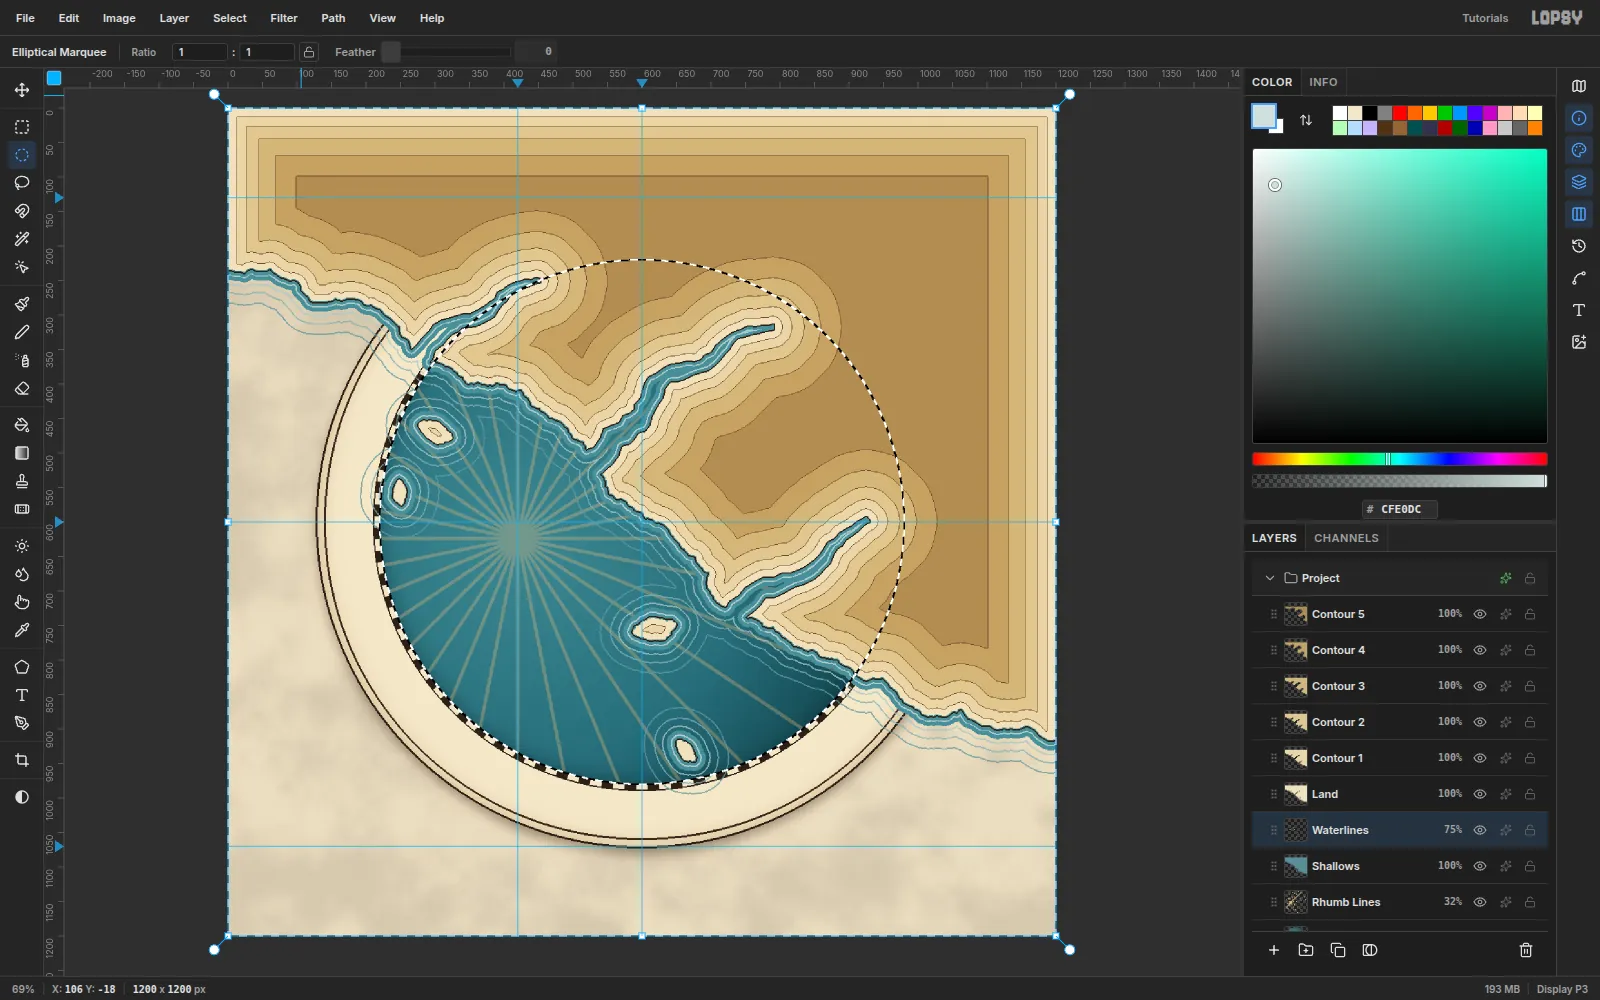
The land and rings run far past the chart. Select the radius 380 disc and choose Select → Inverse. Then click each of these layers and press Delete:
ShallowsWaterlinesLandContour 1toContour 5
Deselect.
-
Draw a conic graticule
Old charts often use a conic projection. The meridians lean toward a pole off the top of the map, and the parallels curve around it.
Add
GraticuleaboveContour 5and select a radius 379 disc. Set the Brush to Size2, Hardness100, Spacing10, colour#9DB0B6.- Meridians: click at y = 200, then Shift-click at y = 1000. Each line points at (600, −1900) and crosses y = 600 at x = 300, 400 … 900.
- Parallels: draw them every 100 px with Shift-click chains that follow circles round the same point.
Set the layer to
55%opacity.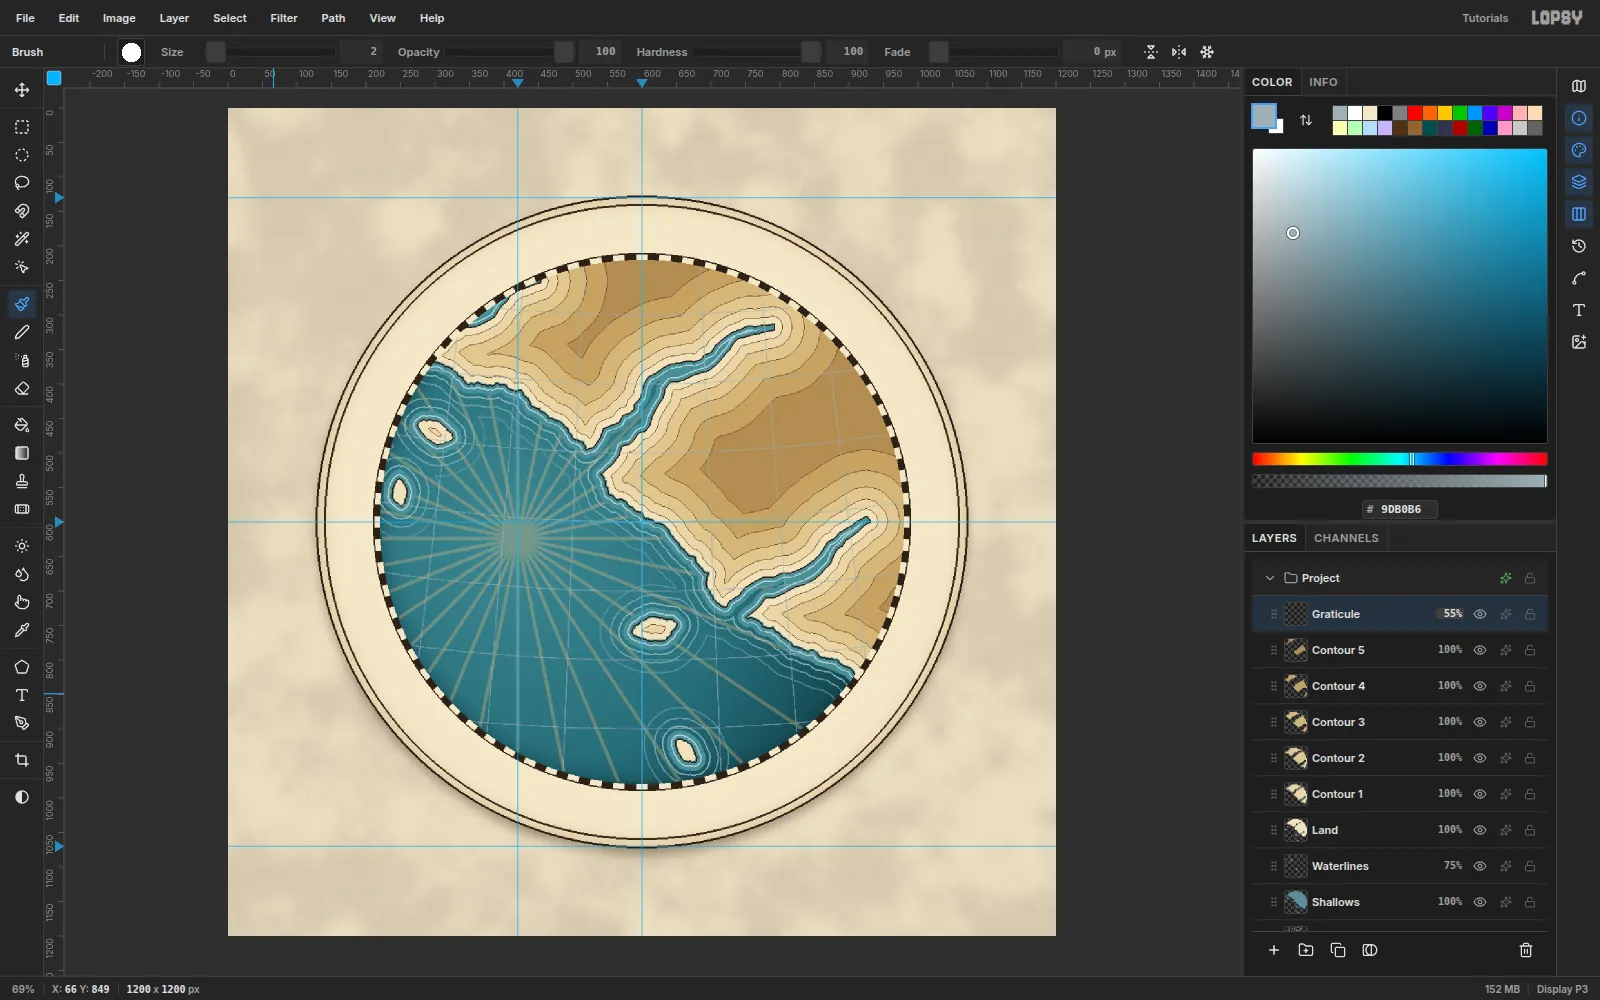
-
Build the compass degree ring
Add
Rose Ringand select a radius 84 disc on (420, 624). Fill it with#1E1812.Run Sunburst with Rays
64, Width50, Taper0, and Center35/52. Delete a radius 78 disc to leave the ticks.For a hairline inside the ticks, select a radius 73 disc and fill it cream. Then choose Shrink
2and delete.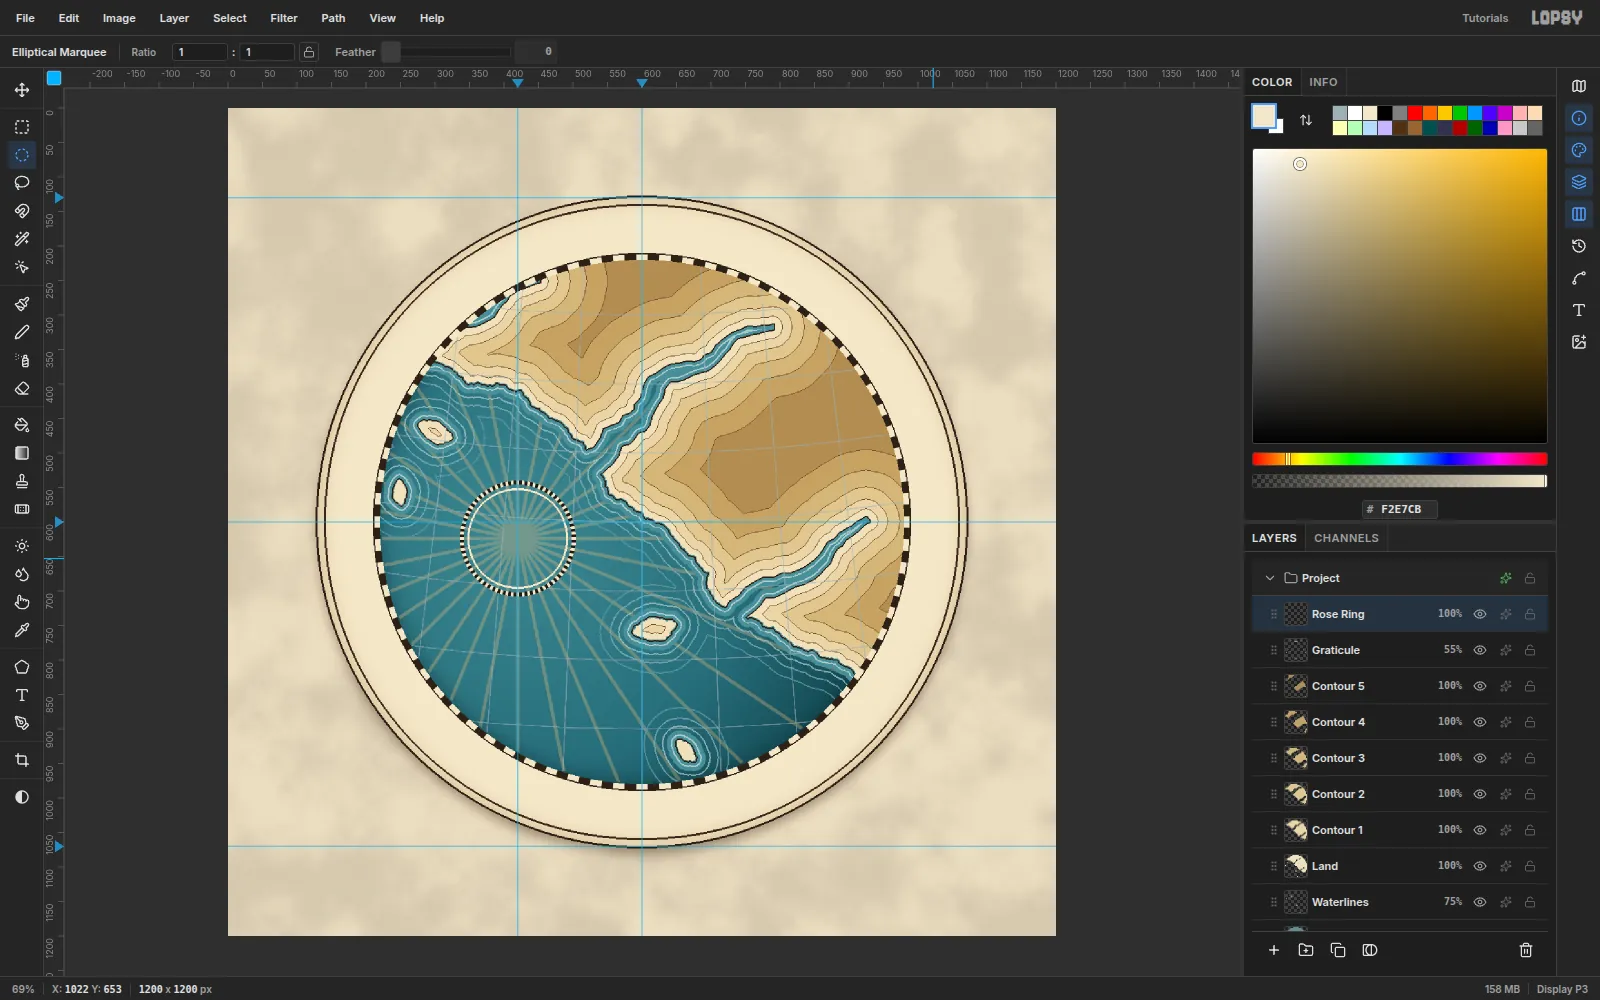
-
Draw the cardinal star
Add
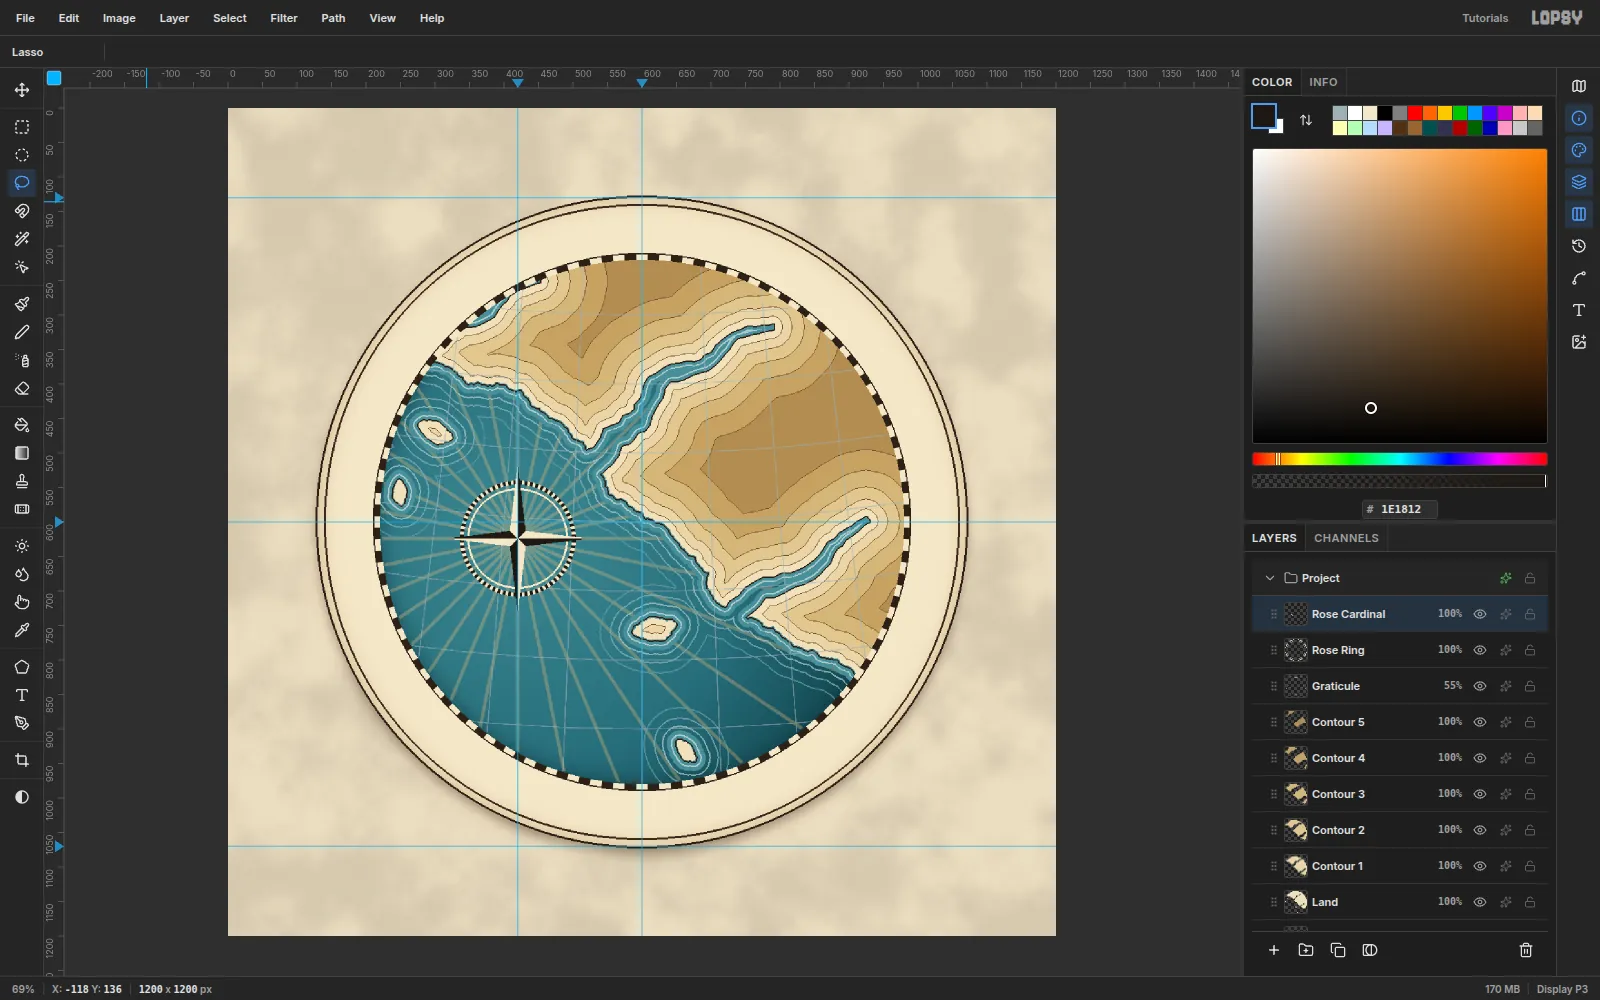
Rose Cardinal. Each point is two thin triangles, lassoed and filled:- Light half: centre, tip, and a shoulder 16 px out at 45° on the left. Fill it cream.
- Dark half: the same on the right. Fill it
#1E1812.
Make the points 104 px long, pointing north, east, south and west. The split shading makes the star look faceted.
-
Rotate a copy for the intercardinals
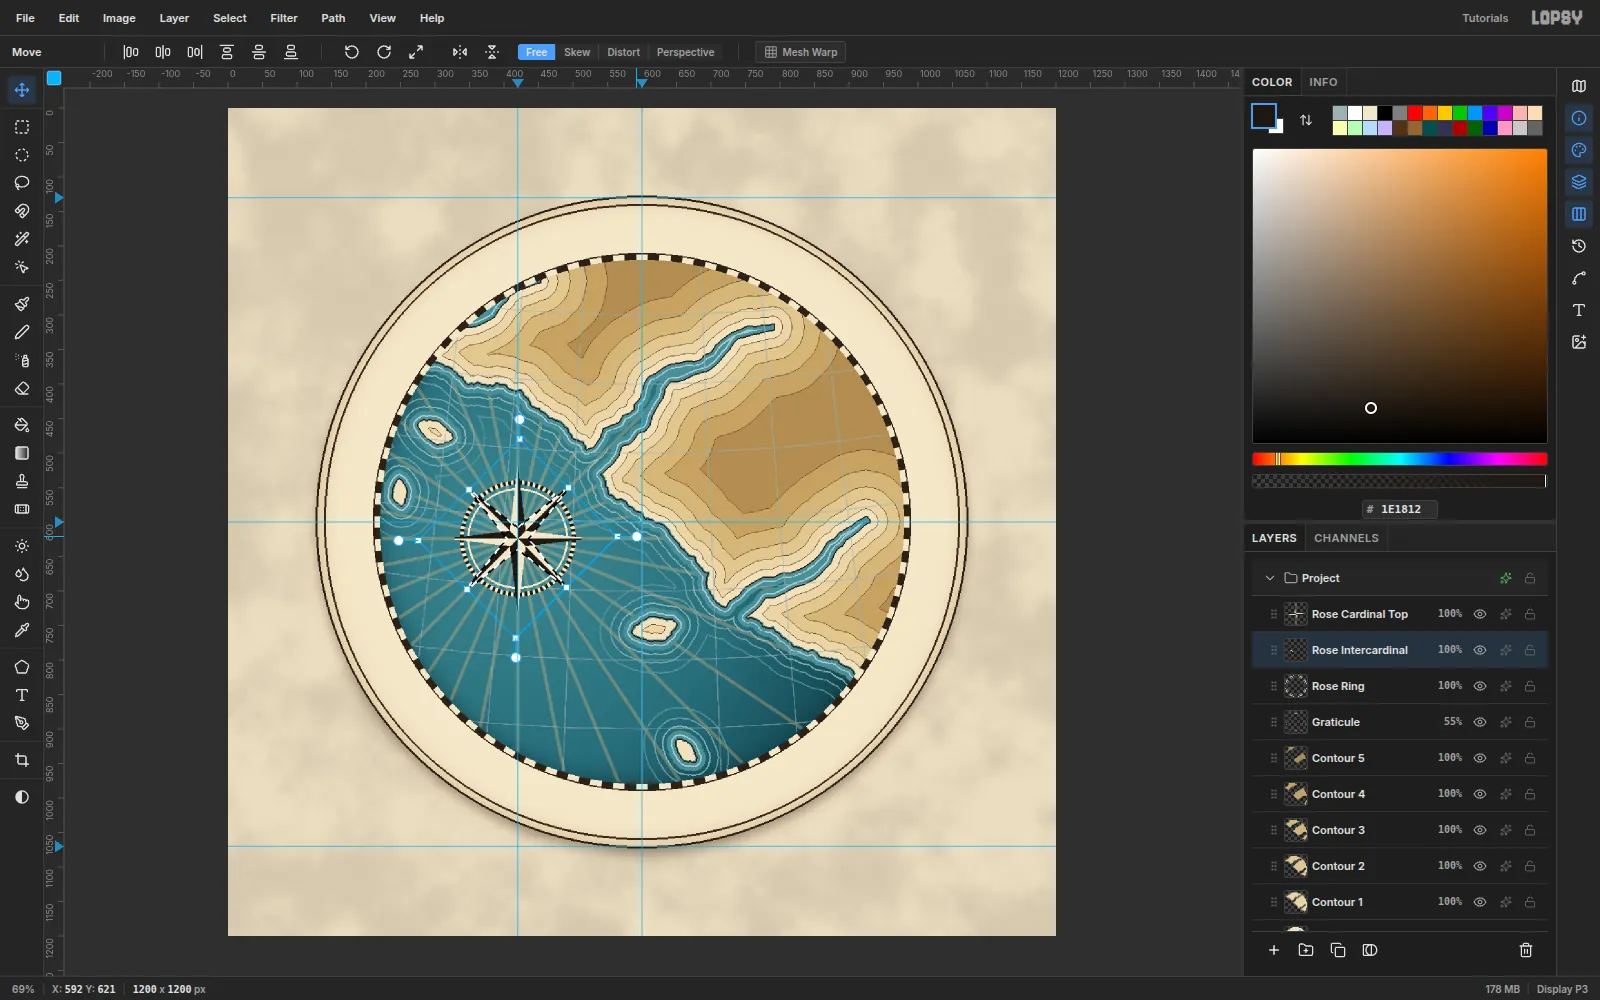
Marquee the star, press Cmd+C and Cmd+V, and name the pasted copy
Rose Cardinal(it lands on top). Rename the original underneathRose Intercardinal.Cmd-click its thumbnail, pick the Move tool, and drag a corner rotation handle with Cmd held. Cmd snaps rotation to 15° steps, so stop at exactly 45°.
-
Scale the intercardinals to 60%
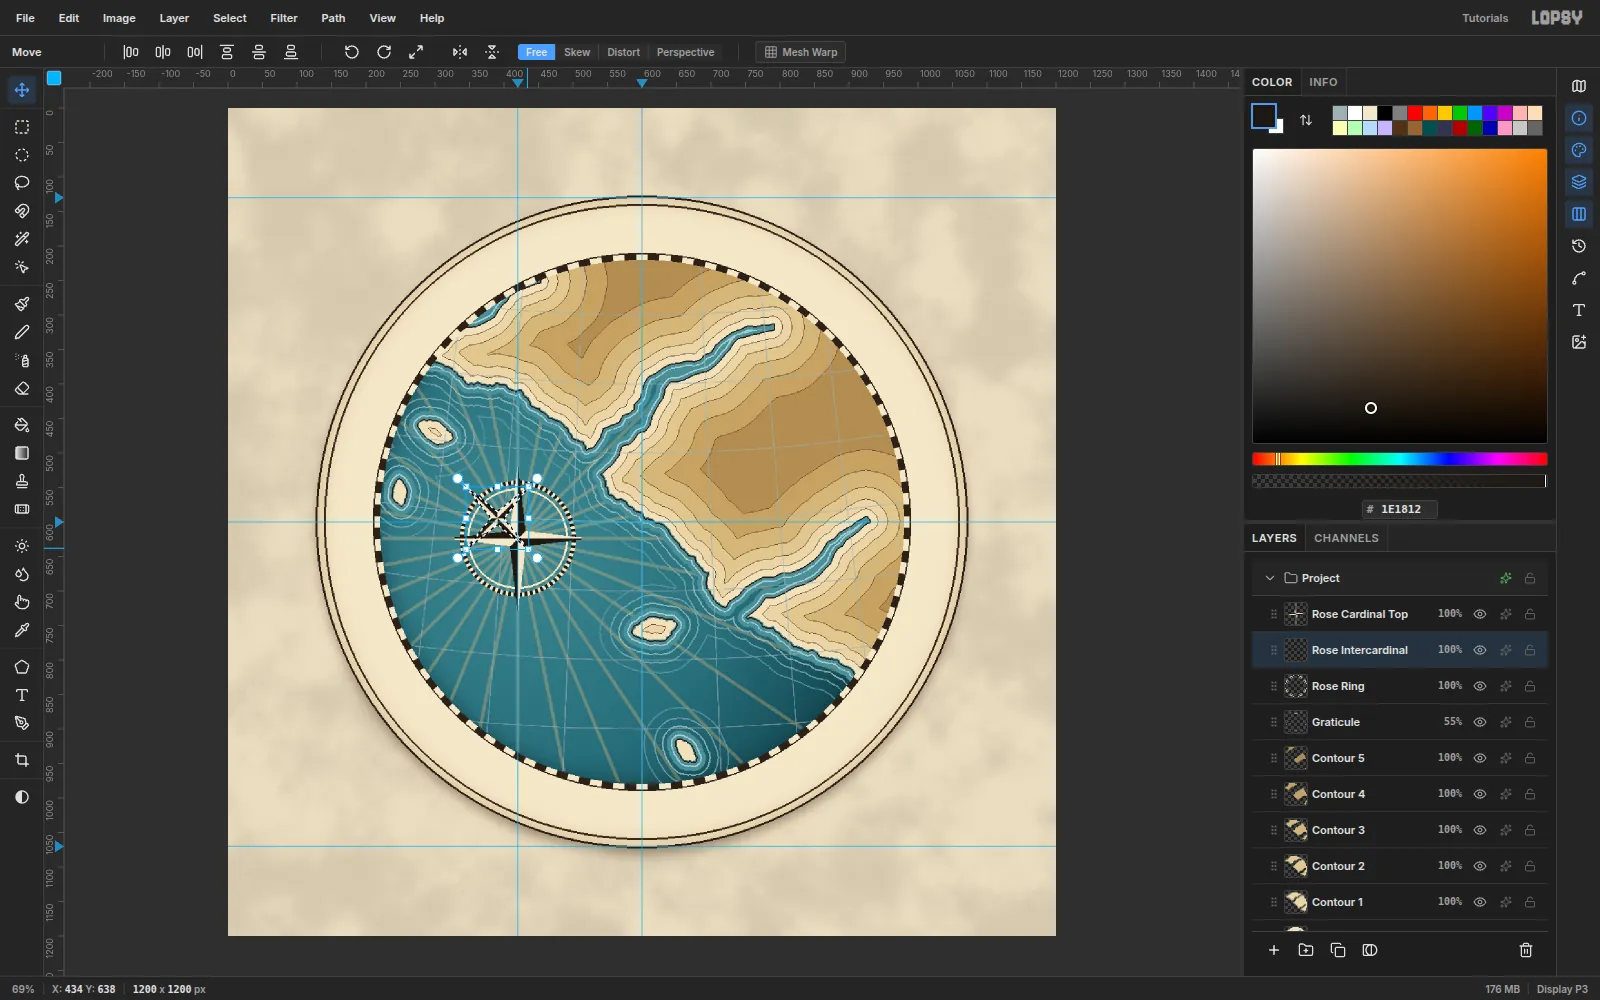
Deselect and Cmd-click the thumbnail again. Hold Cmd and drag a corner scale handle inward until the star is 60% of its size. Nudge it back onto (420, 624) with the arrow keys.
Select the top
Rose Cardinaland give it effects:- Stroke
1px in cream. - Drop Shadow with Offset
3,4, Blur6, Opacity60,#050D14.
Rasterize the layer style.
- Stroke
-
Add the red north point and hub
Add
Rose Northand refill the north point's two halves in#C8503Eand#7A2118.Build the hub from a radius 9 disc:
- Fill it with
#1E1812. - Shrink
2and fill with cream. - Shrink
4and fill with red.
Finally, set an N in IM Fell English SC at
34px in#F4E9CE. Nudge it so it's centred 22 px above the north tip.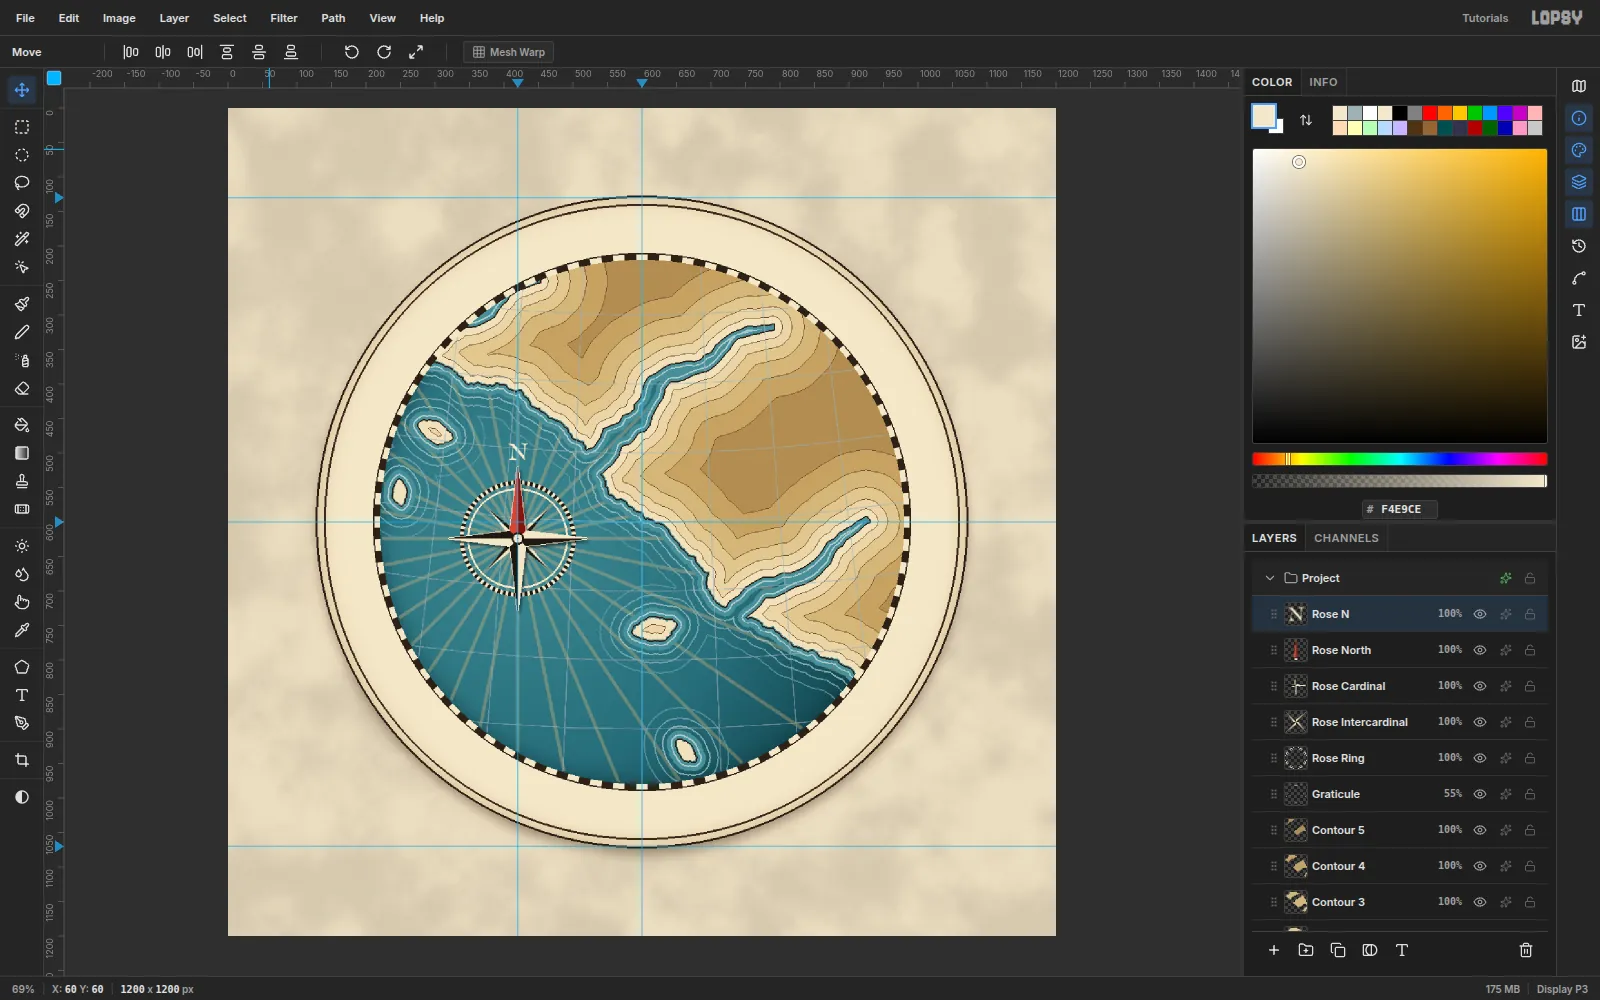
- Fill it with
-
Group the rose and test a snapped move
Click
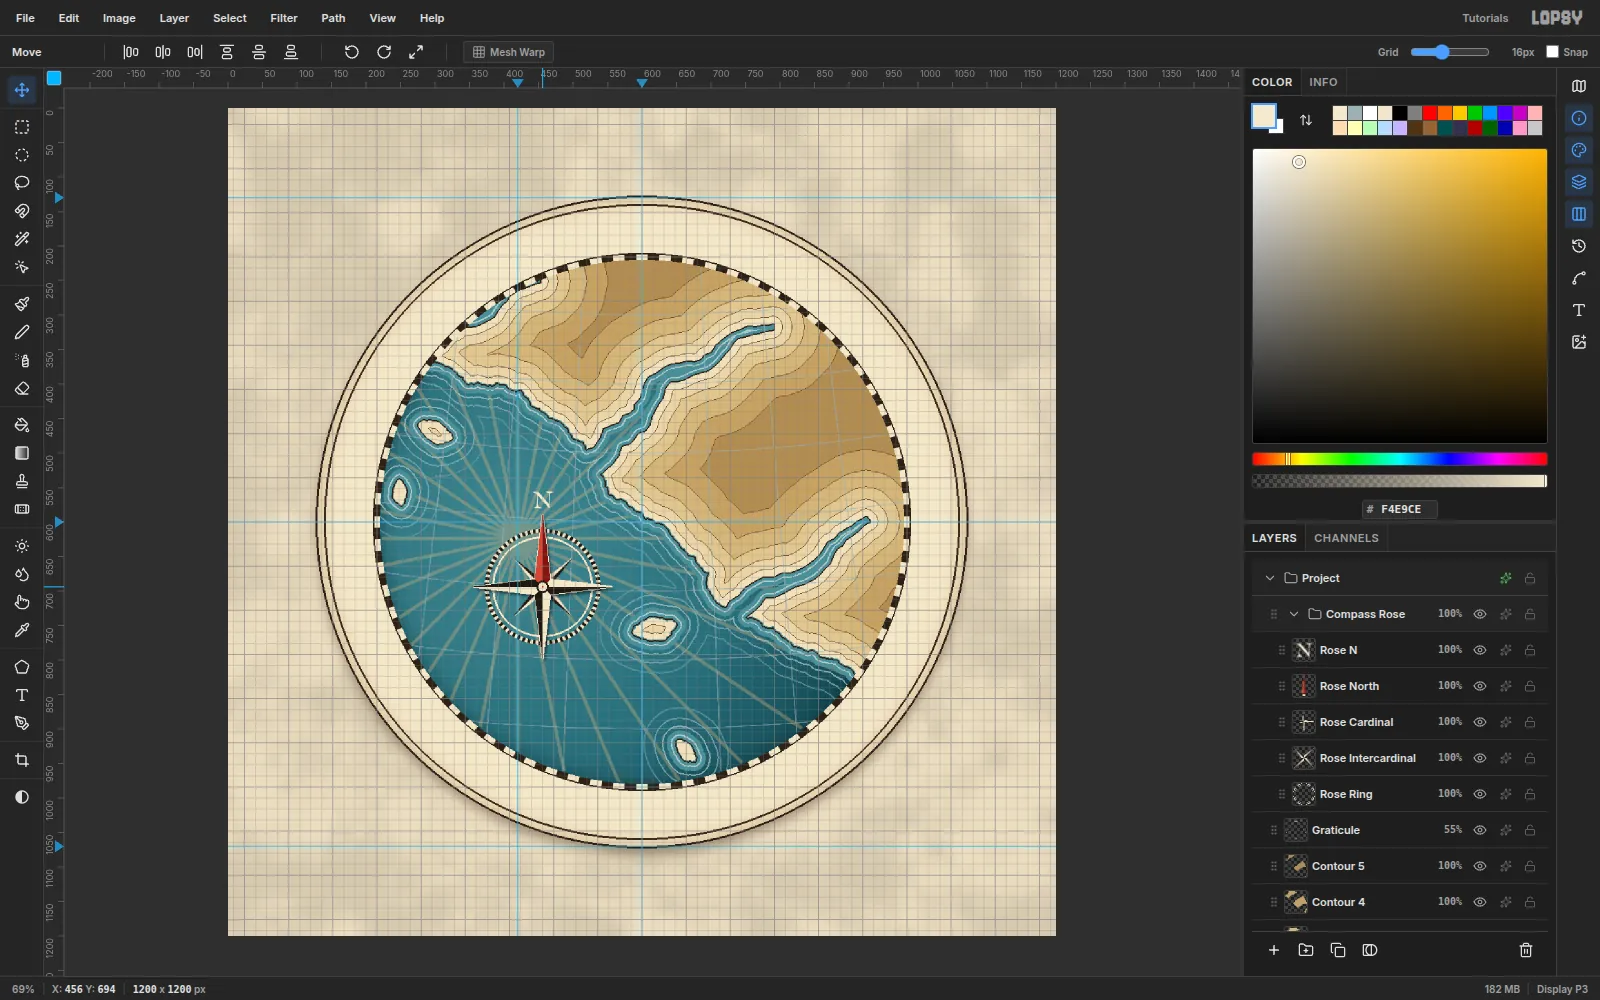
Rose Ring, Shift-clickRose N, and choose Layer → Group Layers. Rename the groupCompass Rose.Turn on View → Show Grid and View → Snap to Grid. With the group active, drag it with the Move tool. Every piece travels together and snaps to the grid. Press Cmd+Z to put it back, because the rhumb lines are centred on the original spot. Cmd+Shift+Z and Cmd+Z again check that the move redoes and undoes cleanly. Turn the grid and snapping off.
-
Plot the route and the summit
Add
RouteaboveGraticule. Set the Brush to Size6, Hardness100, Spacing200. At 200% spacing every dab stands alone, so the stroke becomes a dotted line.In
#B8322A, click (706, 790) and Shift-click your way through the sea, past the compass, and up the fjord's centre to (772, 320).Set Spacing back to
10and draw a 30 px X centred on (792, 318). Give the layer a2px cream Stroke so the dots read against the water, then rasterize.Add
Summitand fill a 24 px triangle at (818, 470) with#1E1812. Under it, setSkårtind 1834 min IM Fell English SC at18px.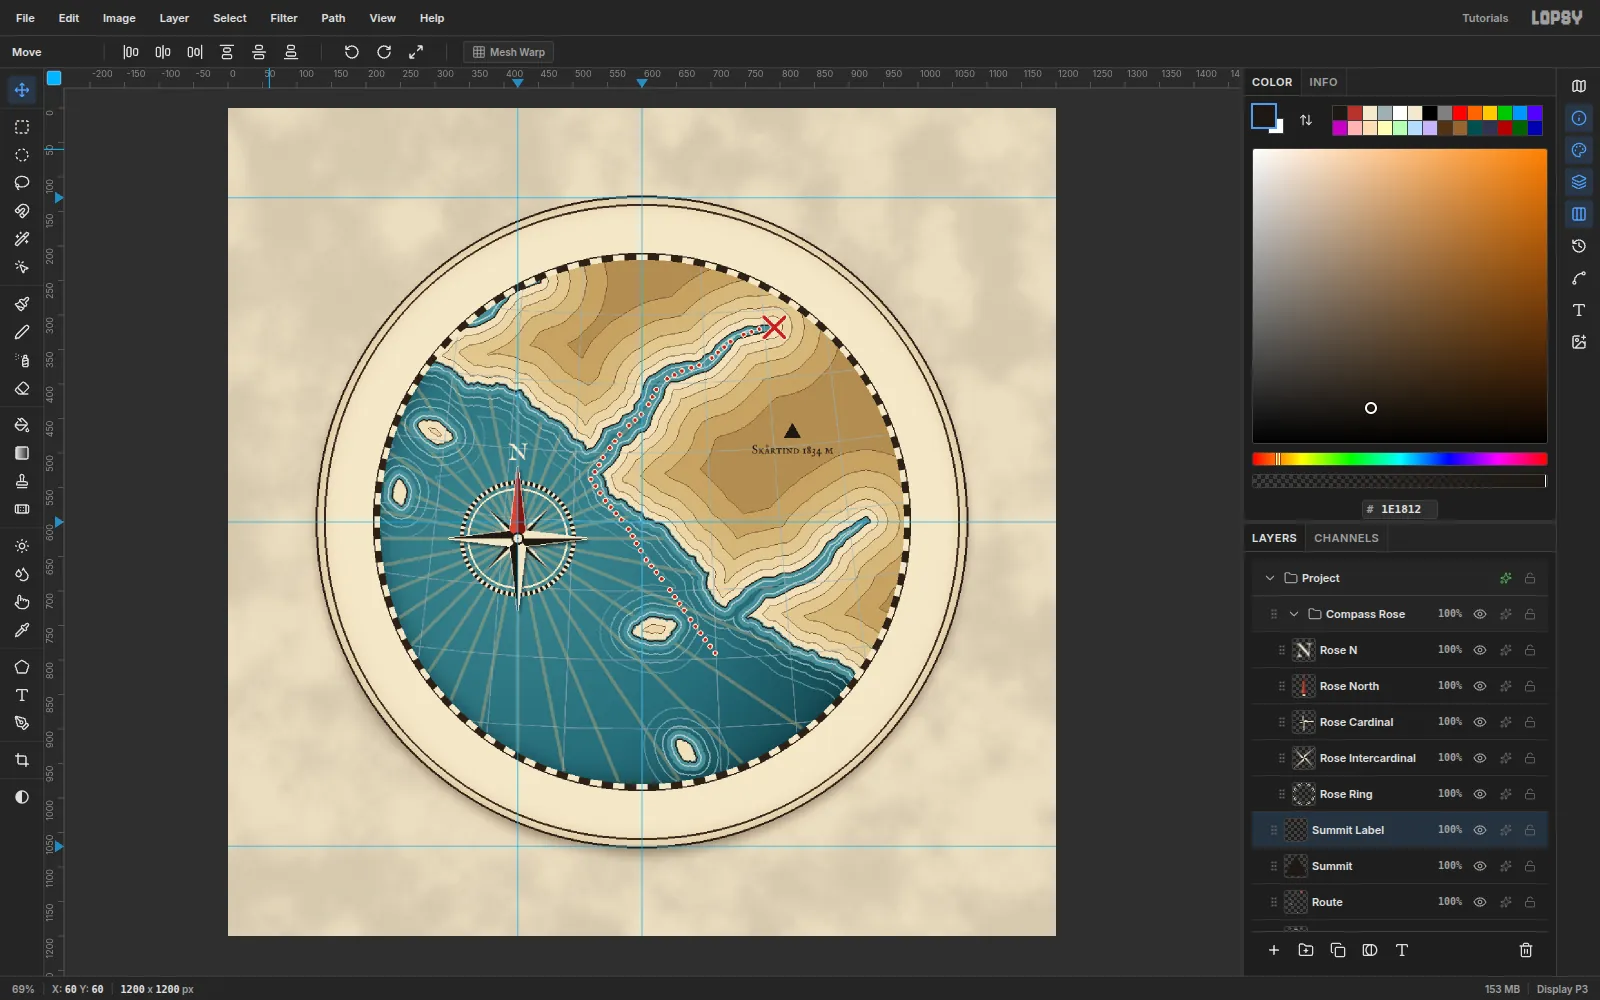
-
Build the ribbon
Click
Summit Labelso the new layers stay outside the Compass Rose group.- Add
Ribbon Tailsand lasso two swallow-tailed ends. Each one sits 26 px lower than the band and reaches 84 px past it. Fill them#6E1F1A. - Fill the small fold triangles
#4A150F. - Add a
3px ink Stroke and rasterize.
Add
Ribbonand marquee the band from (196, 782) to (1004, 898). Fill it with a near-flat vertical gradient from#AE3A2Eto#9A2E26.For the inner rule:
- Shrink
7and fill cream. - Shrink
2and repaint the gradient, leaving a hairline rule.
Add a
3px ink Stroke and a soft Drop Shadow, then rasterize.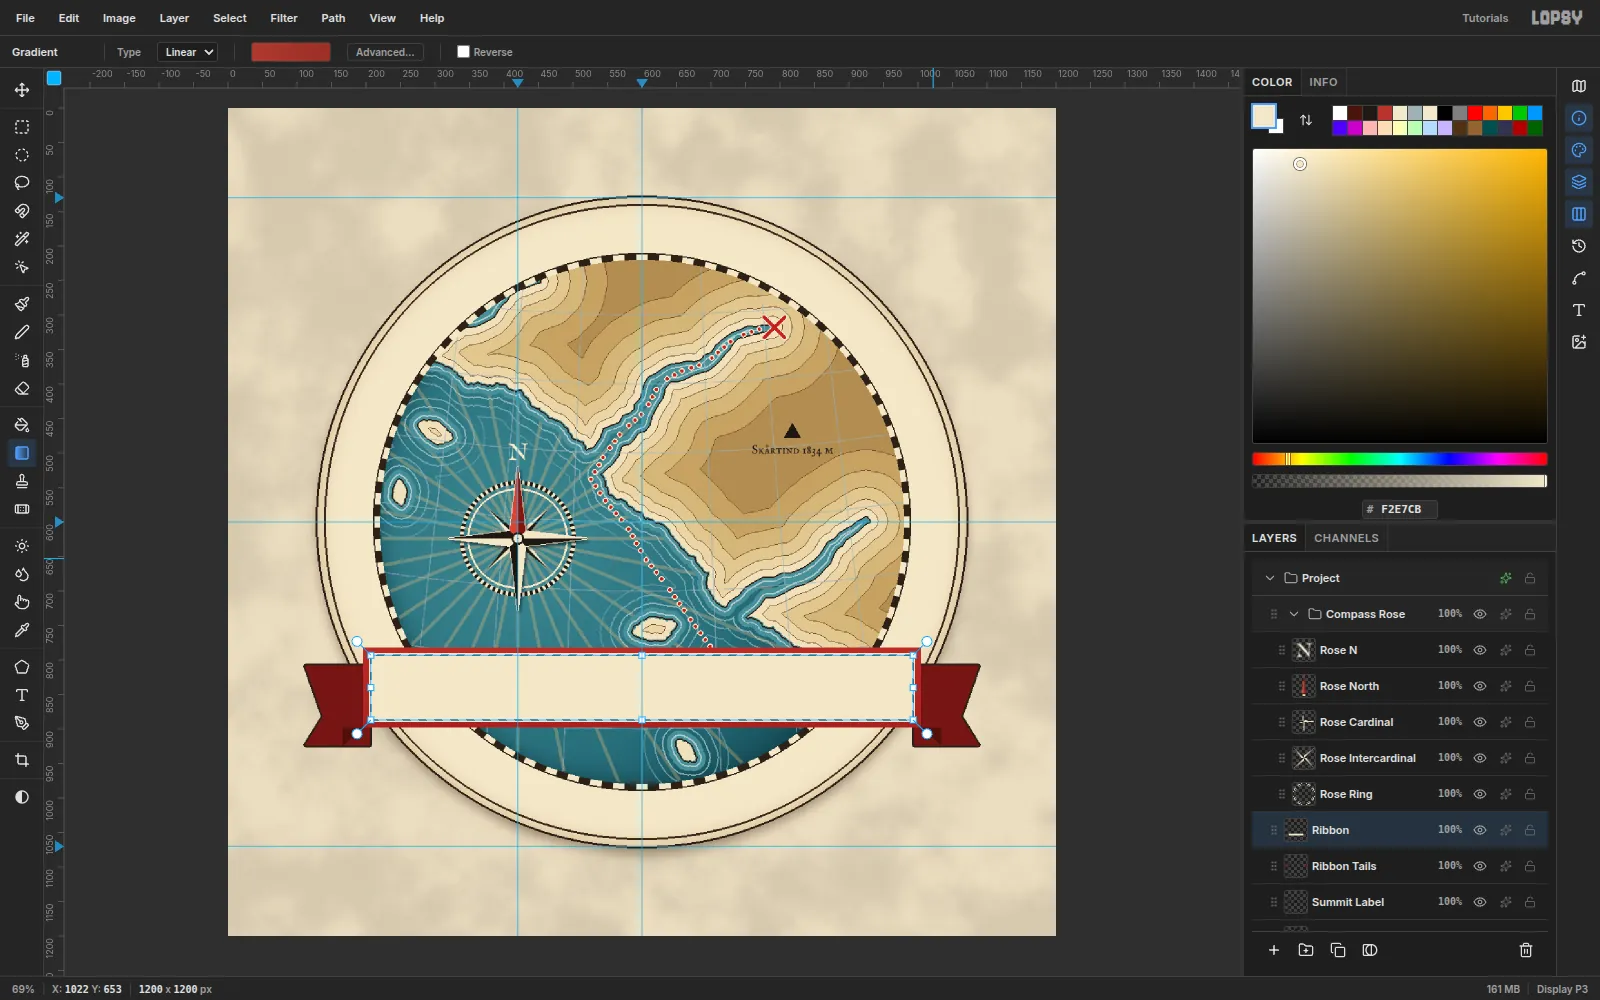
- Add
-
Set and recolour the wordmark
With the Text tool at
64px, IM Fell English SC and#1E1812, click an empty corner of the canvas and typeFJORDS. Press Tab.In the Text panel, set Letter spacing to
26. Click into the word again, press Cmd+A, and change the colour to#F6ECD2. The selected text updates as you pick. Press Tab.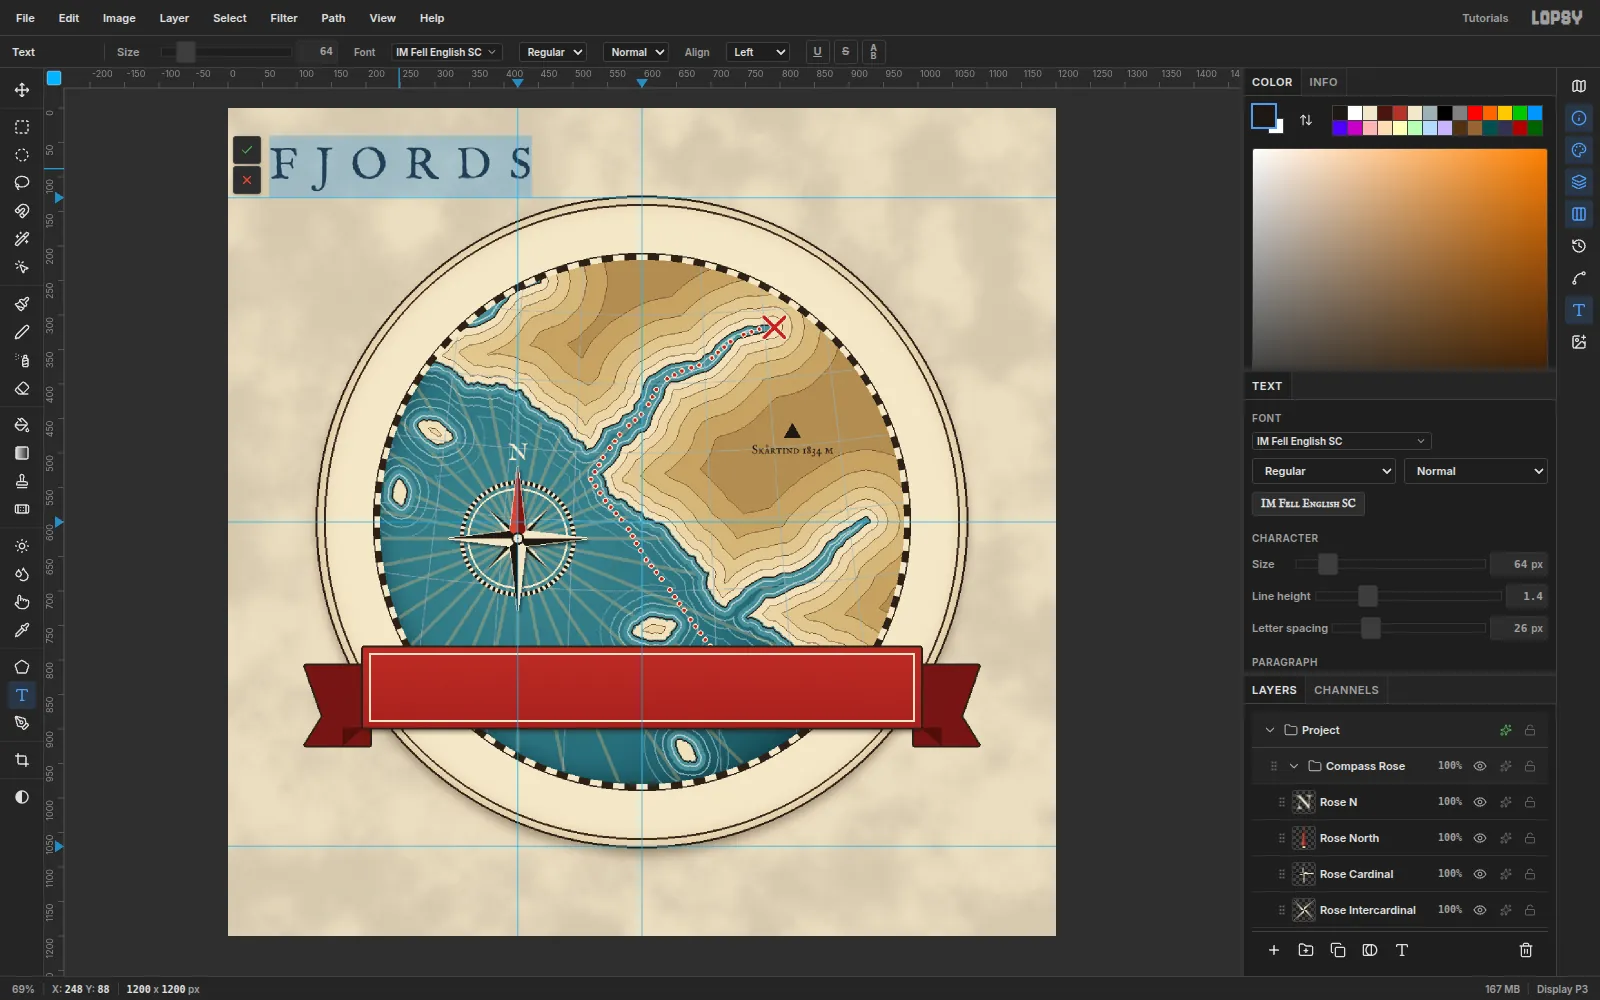
-
Seat the wordmark in the ribbon
Centre the word on the capitals, not on its bounding box. The J hangs about 0.28 em below the baseline, so a box-centred word would ride high.
Move it so the caps sit halfway between the inner rules, at y ≈ 840. The J then clears the bottom rule by about 8 px, with about 25 px above and below the caps. Add a crisp Drop Shadow: Offset
2,3, Blur0, Opacity70,#3D0F0A.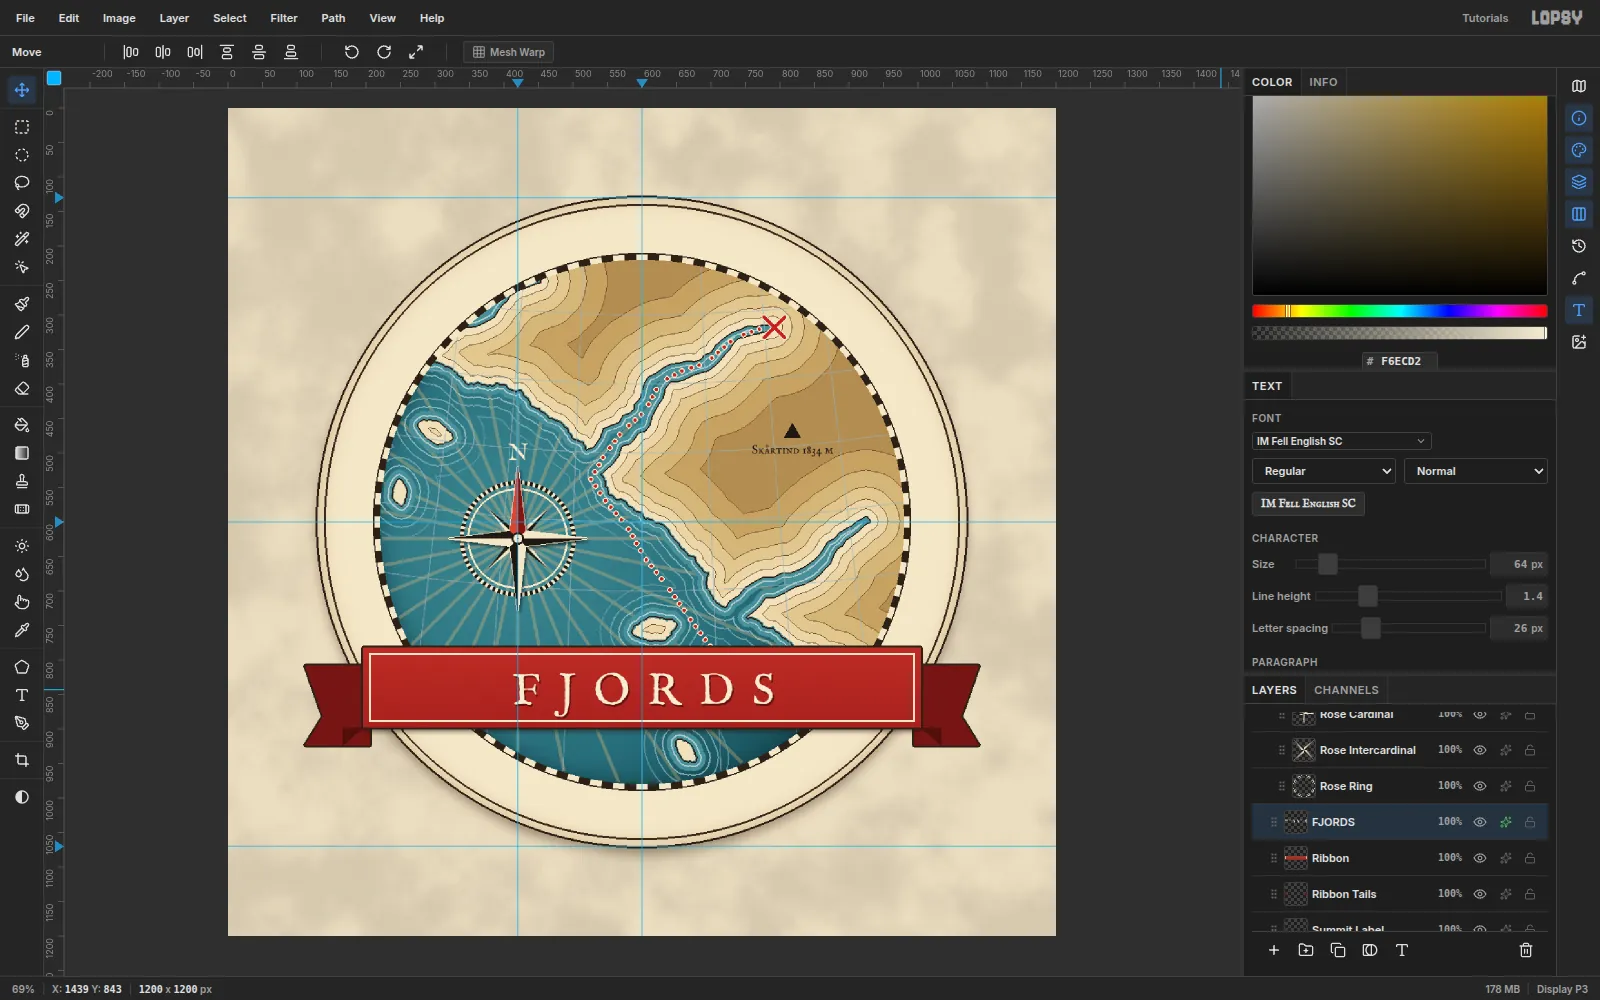
-
Arch UNCHARTED over the top
Click
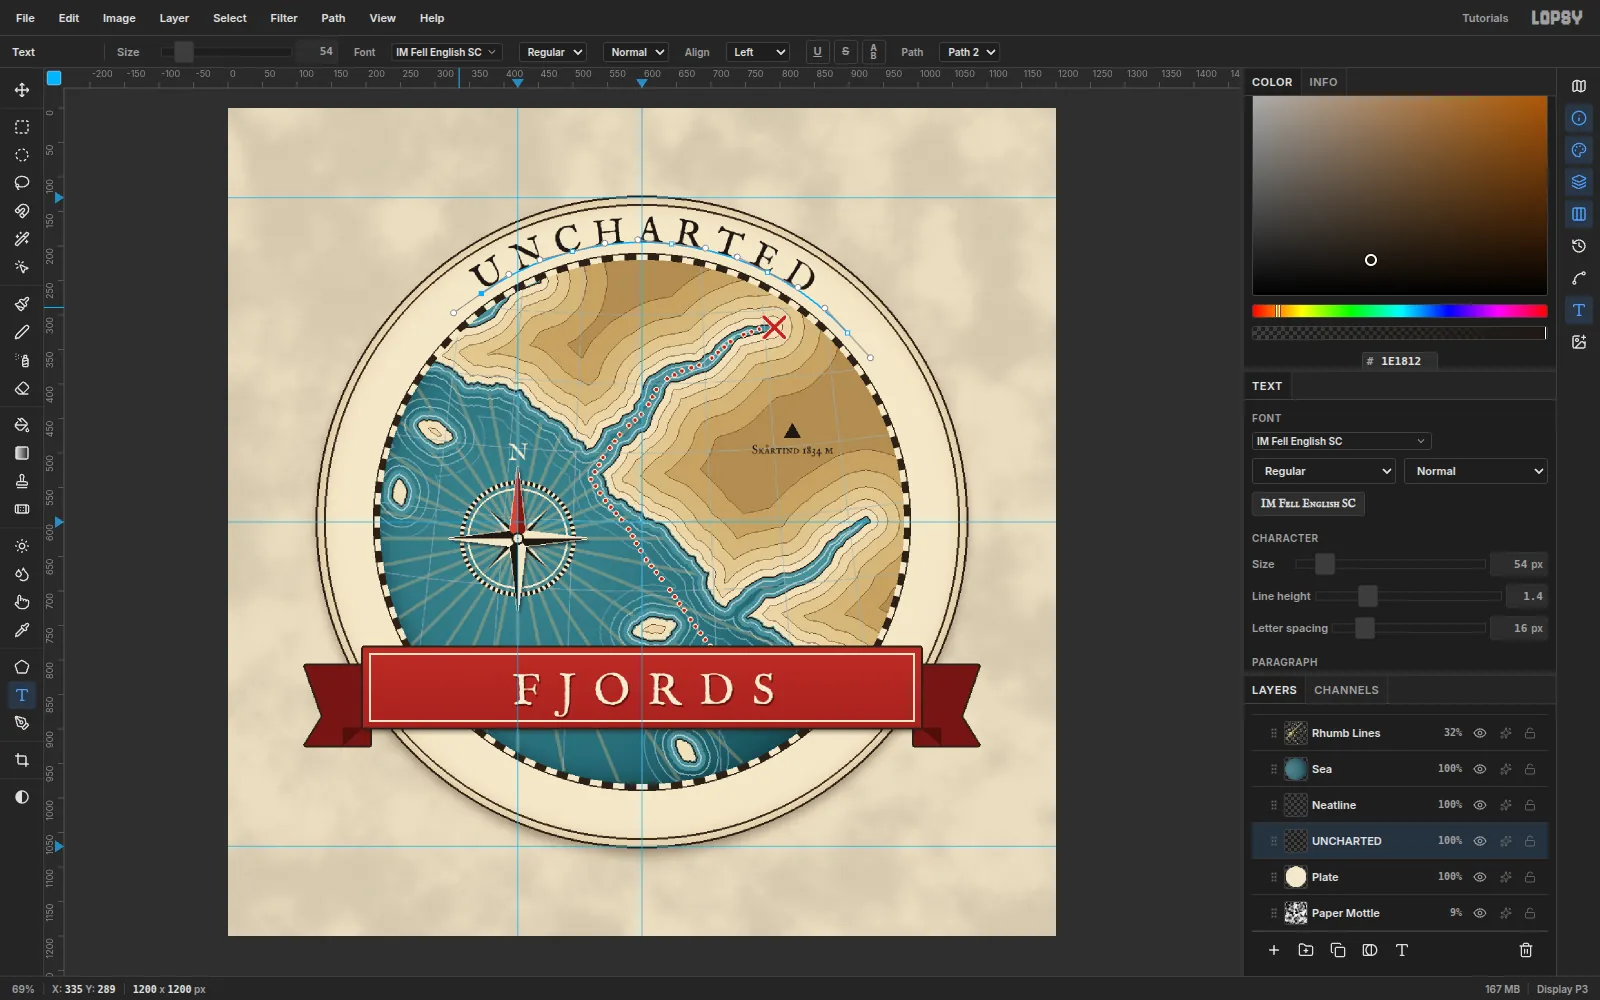
Plateand setUNCHARTEDat54px, letter spacing16, in#1E1812. Press Tab.Pick the Pen tool. Text on a path starts at the path's first anchor, so the first anchor sets where the word begins. Press at each anchor below and drag to the handle point to pull out a smooth curve. Together they trace a 405 px circle round (600, 600):
- (367, 269) → (407, 241)
- (499, 208) → (546, 196)
- (643, 197) → (691, 202)
- (782, 238) → (825, 260)
- (898, 325) → (931, 361)
Click ✓ Commit path. Select the
UNCHARTEDlayer with the Text tool and pick the path in the options bar's Path dropdown. The caps now sit midway between the neatline and the plate's inner rule.If the word lands a little off centre, deselect the path in the Paths panel and draw a fresh arc a degree or two earlier or later. With the old path selected, Pen clicks edit it instead of starting a new one.
-
Set the bottom seal line
Set
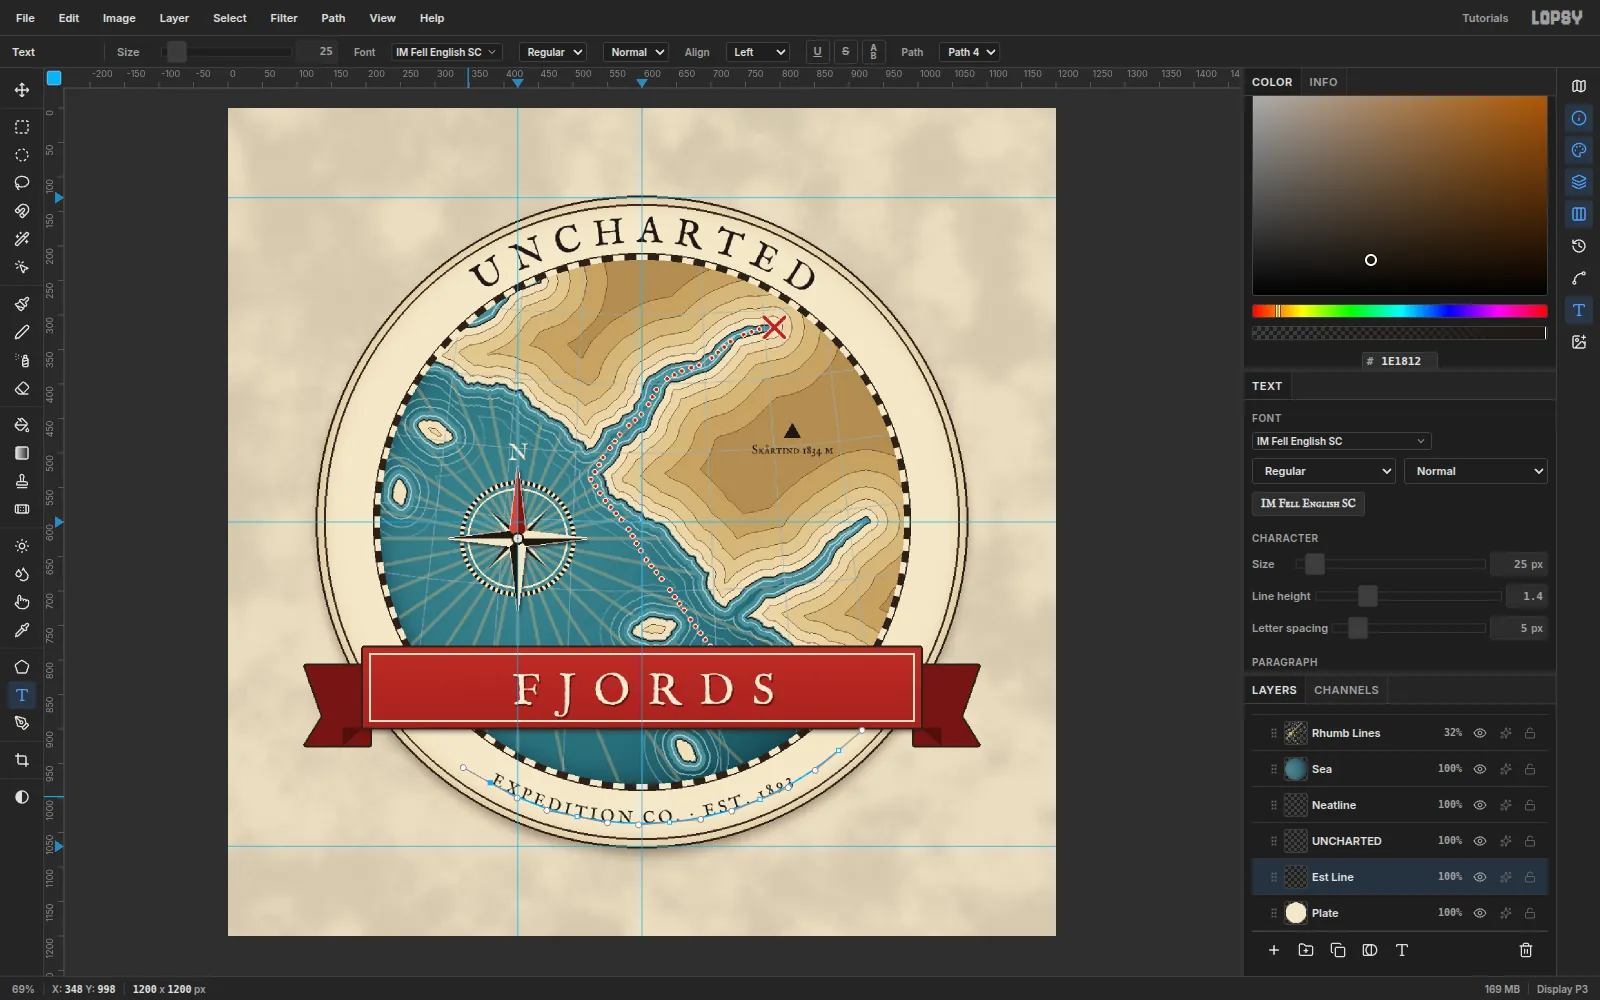
EXPEDITION CO. · EST. 1893at25px with letter spacing5. For text along the bottom, the path must run left to right, so its letters face inward and read the right way up. Its radius is 437 px, so the caps fill the same band as UNCHARTED:- (380, 978) → (419, 1000)
- (506, 1027) → (550, 1036)
- (640, 1035) → (685, 1031)
- (771, 1002) → (812, 985)
- (885, 931) → (919, 902)
Commit the path and bind the text to it.
-
Turn the coordinates upright
Set
69°38'Nand18°57'Eat24px with letter spacing2. IM Fell has no prime sign, so use a straight apostrophe.- Latitude: Cmd-click the label's thumbnail, pick the Move tool and click Rotate 90° CCW in the options bar. It now reads upward.
- Longitude: turn it the other way by dragging a rotation handle with Cmd held, which snaps it to exactly 90°.
Centre each label in the rim band, at (175, 600) and (1025, 600).
-
Finish with shading and grain
Select
Ribbon, pick Dodge/Burn in Burn mode, and set Exposure14and Size18. Click at (210, 885) and Shift-click at (990, 885) to shade the foot of the ribbon.Click
FJORDSand addGrain. Fill it with#808080, then run Filter → Add Noise… with Mono, Gaussian and Amount24. Set the layer to Overlay at28%. The grain gives the flat fills a printed, paper-like tooth.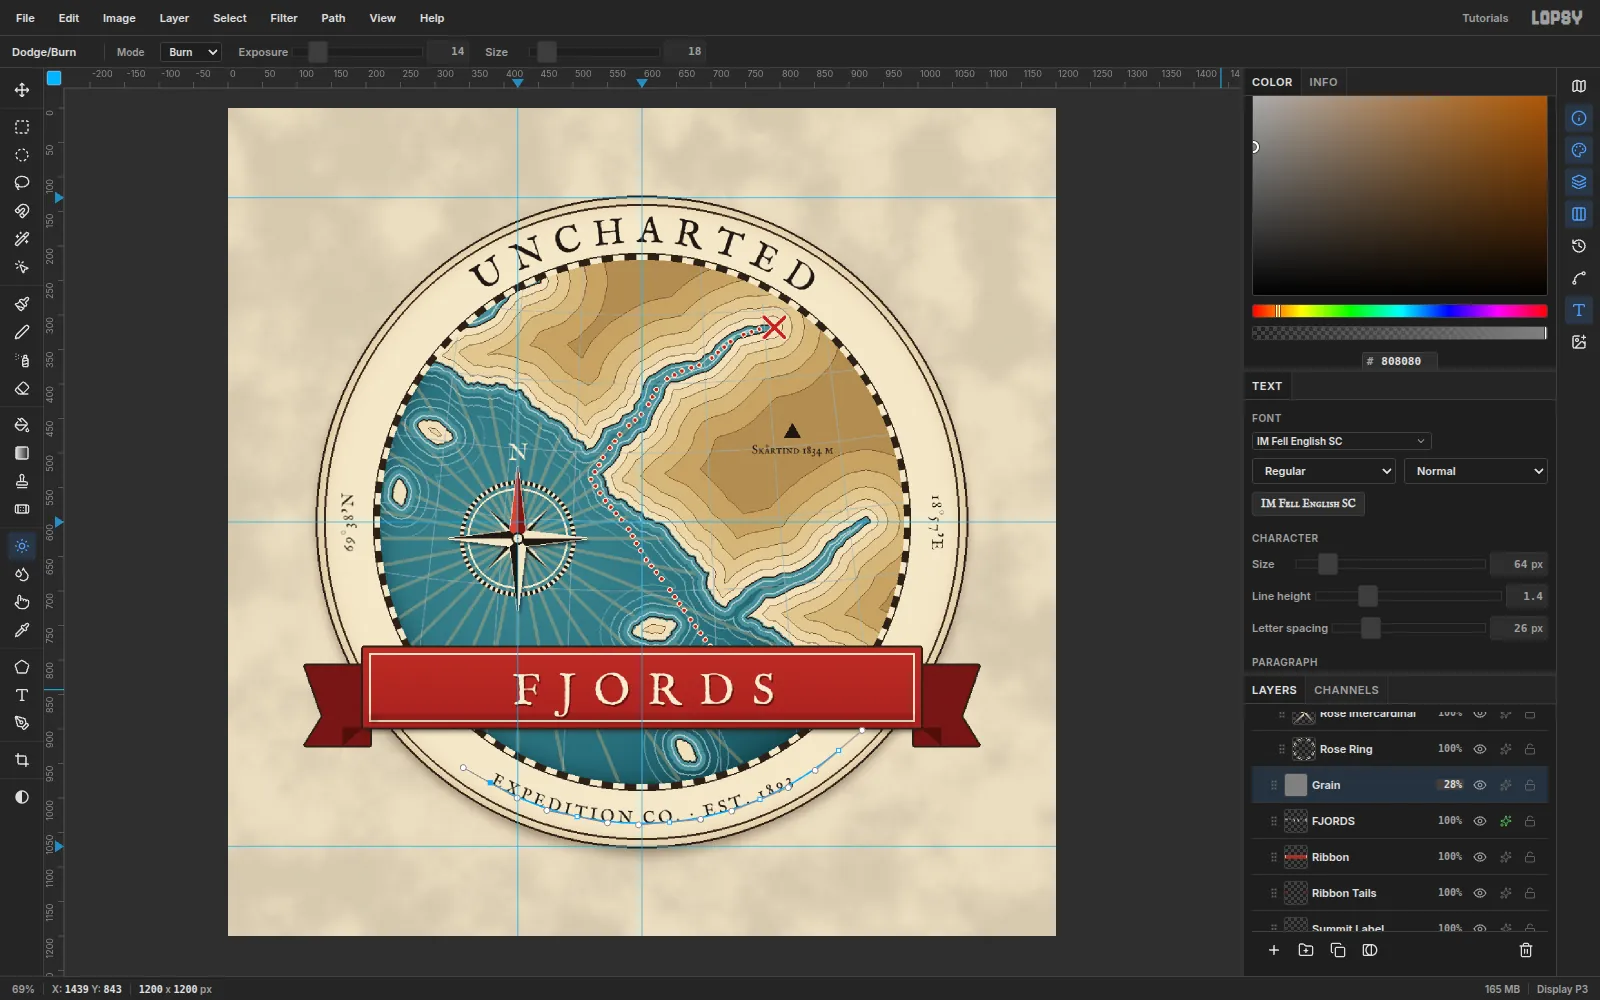
-
Export the logo
Turn off View → Show Guides and check the whole emblem. Choose File → Quick Export PNG for the artwork.
A mark this detailed is for print, signage and hero use. For favicons and social avatars, save a simplified version: hide the graticule, waterlines and coordinates, and keep the compass rose and red X on the cream disc.