Design a Cyberpunk Neon Dragon Logo
Build a glitchy cyberpunk bar logo in Lopsy with Sunburst rays, a neon dragon silhouette, RGB-split type, vertical Japanese text and HUD details.
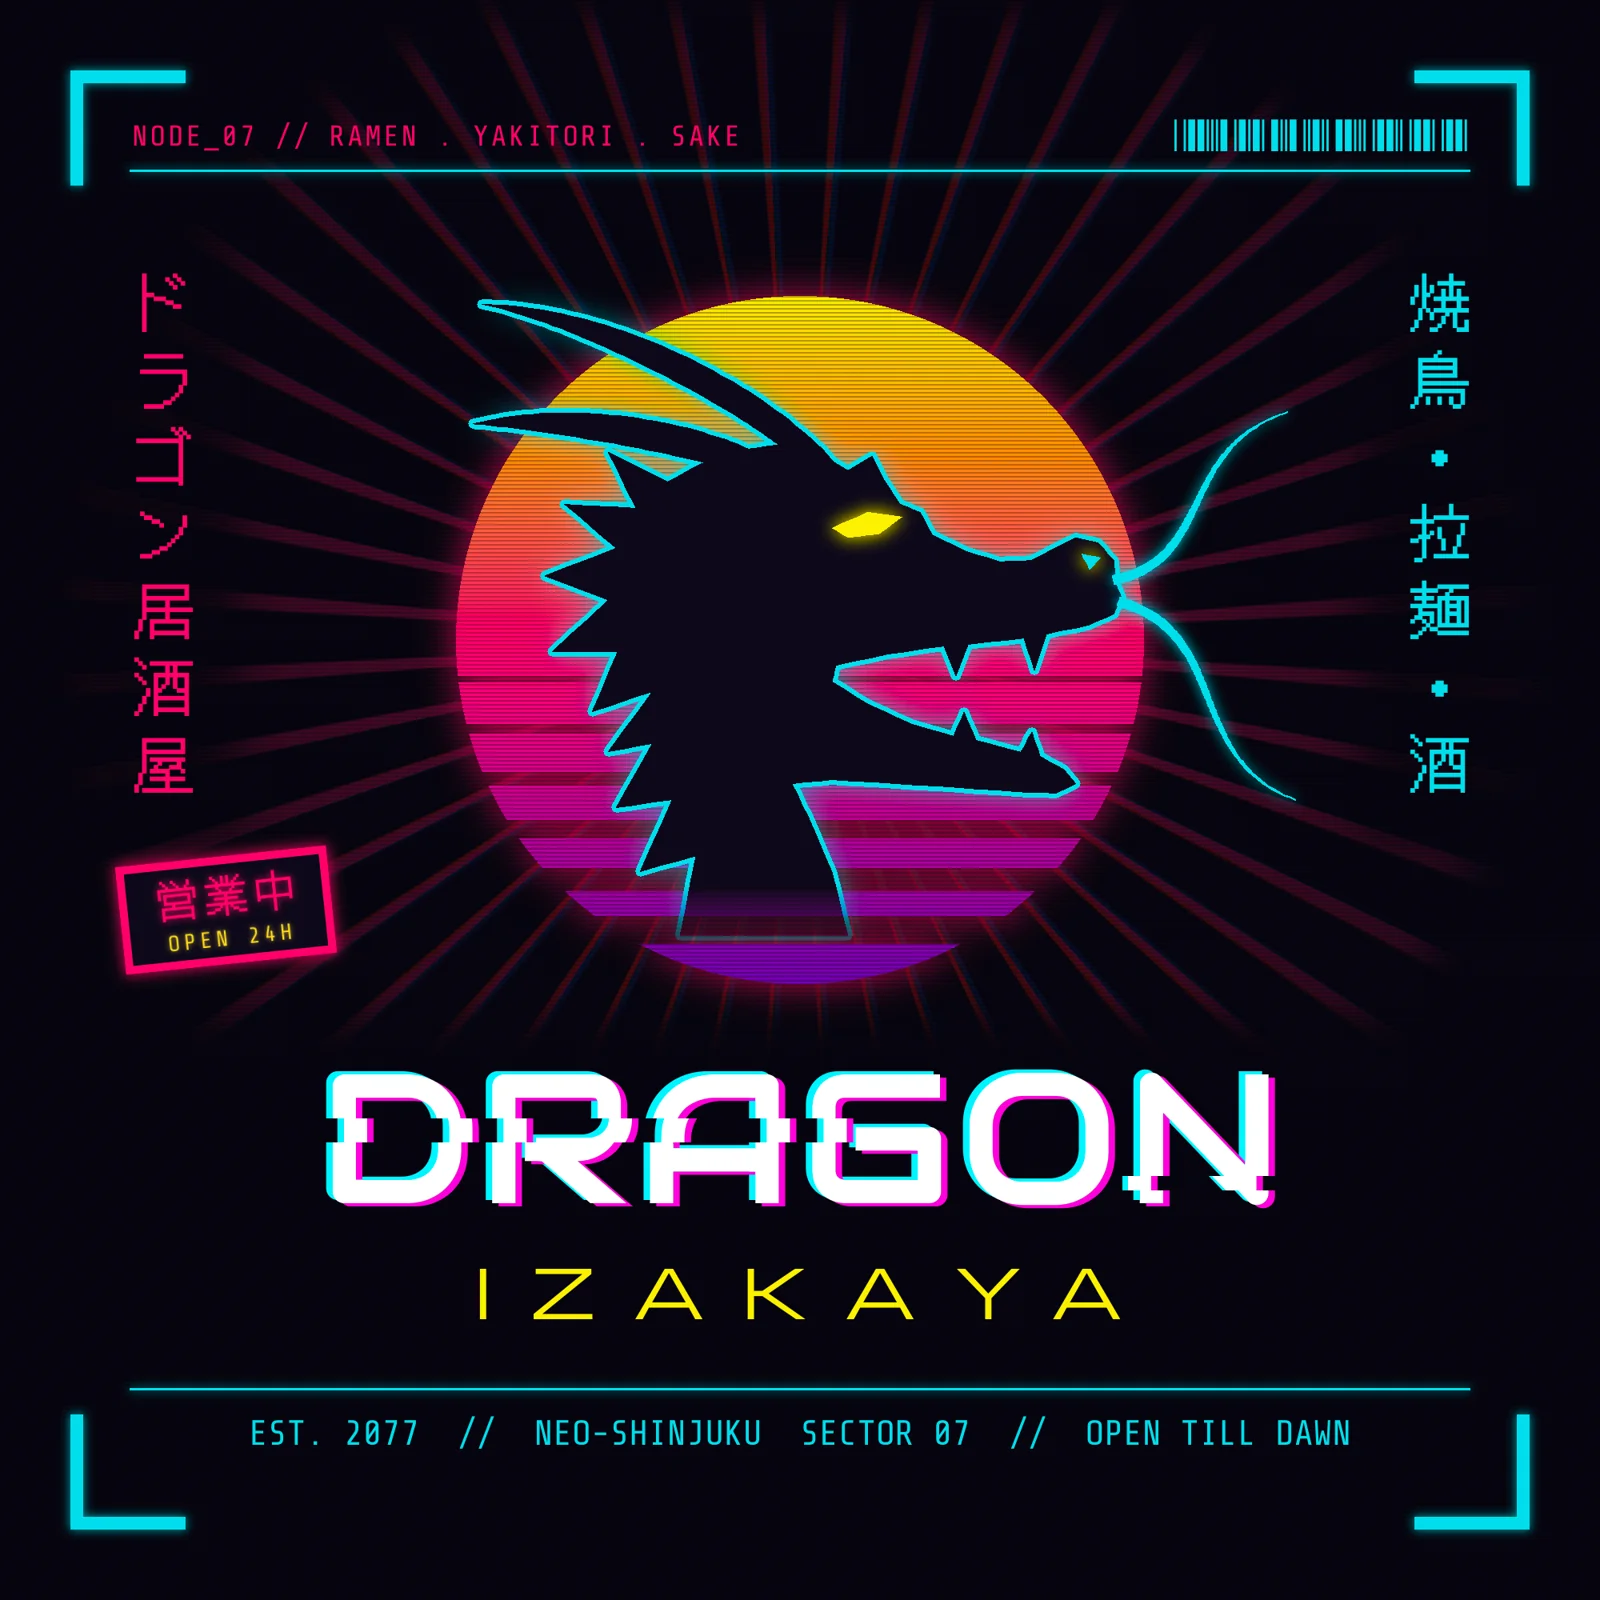
Cyberpunk branding is neon on near-black, half-broken on purpose. You get a glowing emblem, a chromatic split on the type, stray HUD read-outs and Japanese signage.
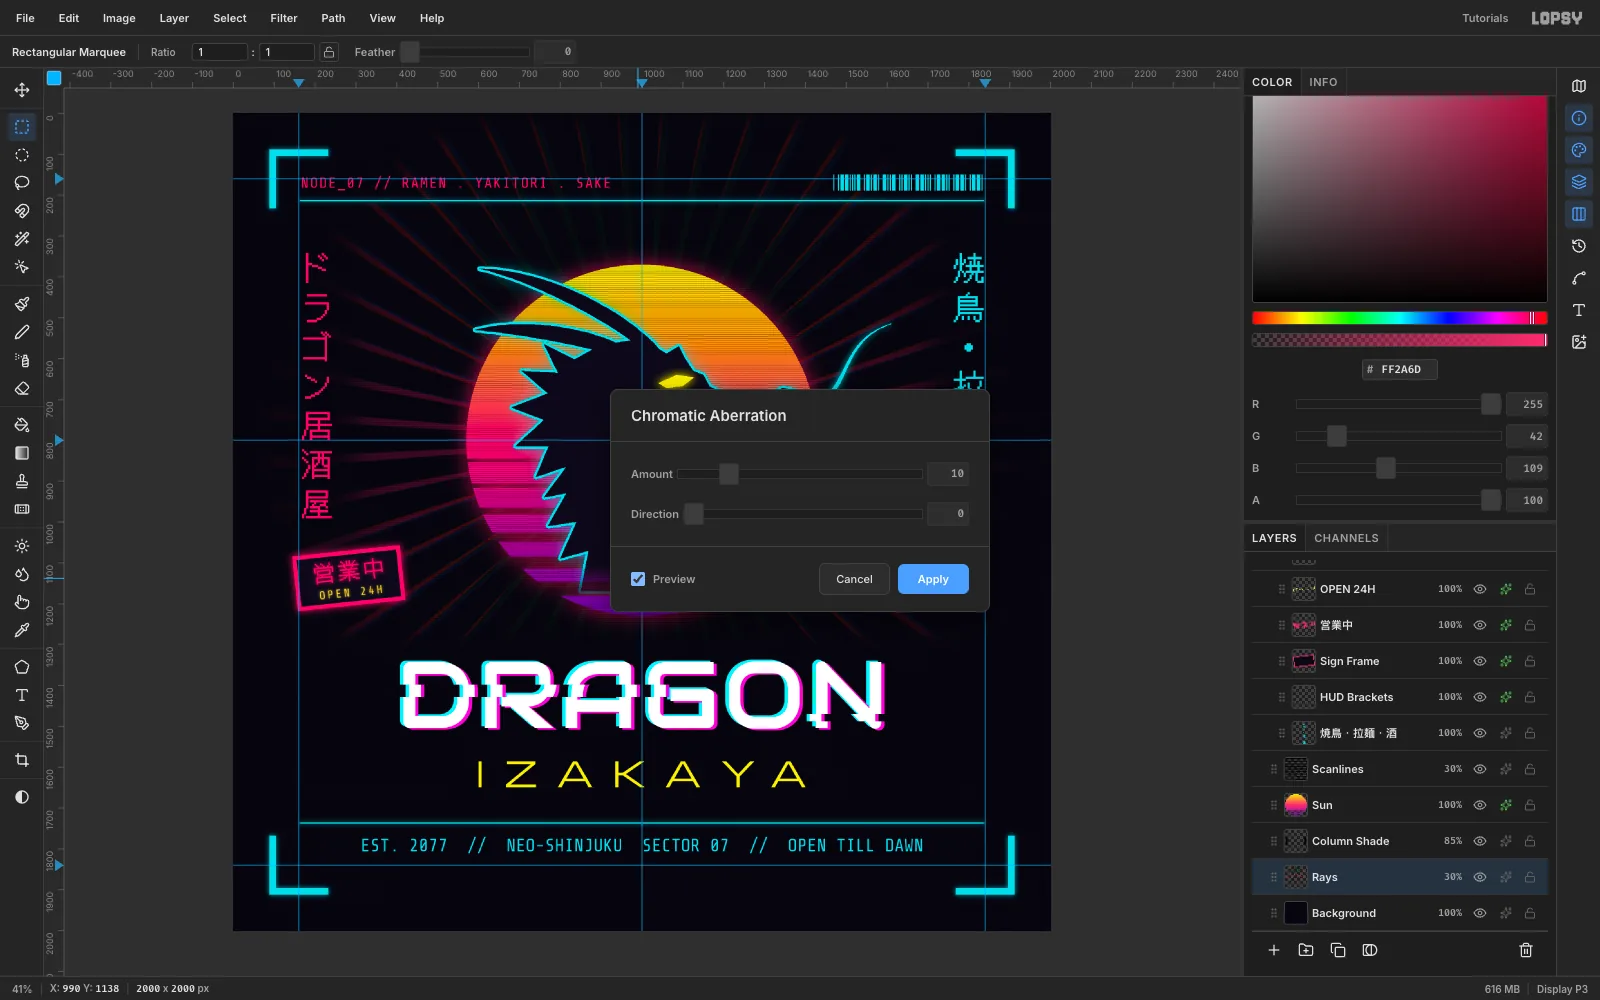
In this tutorial you'll make Dragon Izakaya, a 2000 × 2000 px logo for a fictional all-night bar in Neo-Shinjuku. Everything is drawn in Lopsy. The dragon is lasso polygons over a striped synthwave sun, the rays come from the Sunburst filter, and the glitch is RGB offsets plus two sliced strips of the title nudged sideways.
The palette:
- Night:
#07050F, silhouette#0C0818 - Neon: cyan
#05D9E8, magenta#FF2A6D, toxic yellow#F9F002 - Sun gradient:
#F9F002→#FF2A6D→#6A0DAD - Split: cyan
#00F0FF, magenta#FF2BD6, sign yellow#FFE14D
-
Set up the canvas and guides
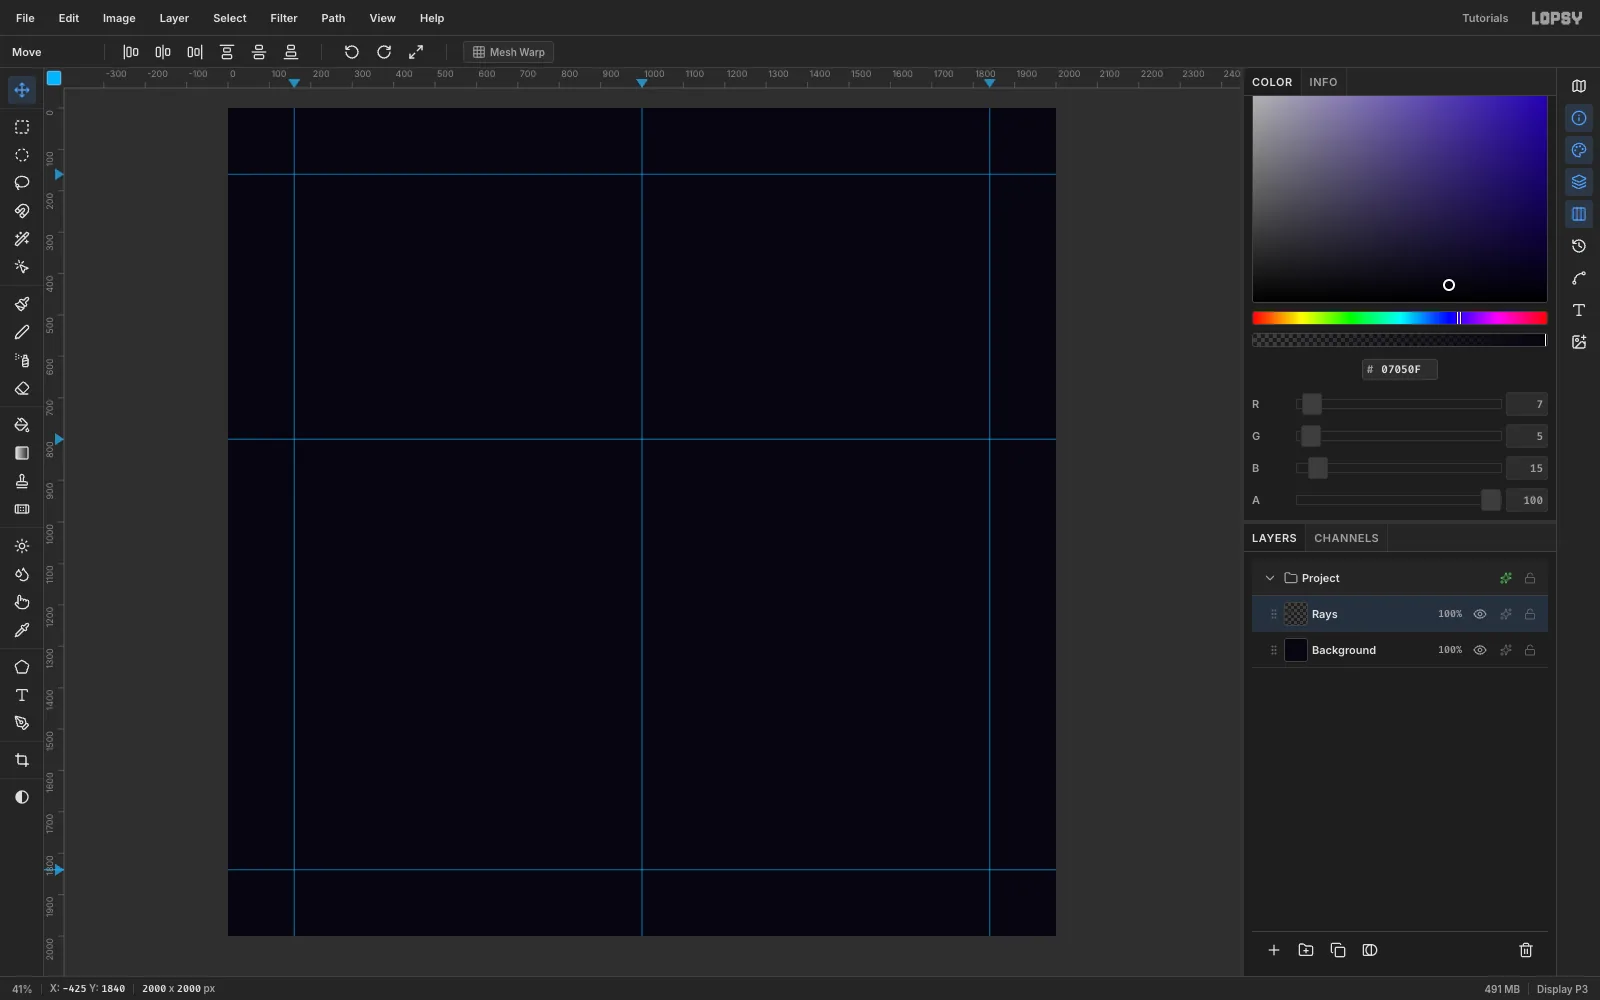
Choose File → New, set the unit to Pixels, and create a 2000 × 2000 document with a white background.
- Select the Background layer, set the foreground to
#07050F, and choose Edit → Fill (with nothing selected, it fills the whole layer). - Click the top ruler at 160, 1000 and 1840 to add vertical guides.
- Click the left ruler at 160, 800 and 1840.
The outer guides are your safe margin. The sun will sit on the 1000 × 800 crossing.
- Select the Background layer, set the foreground to
-
Cut a soft window for the rays
Rename Layer 1 to Rays. The rays shouldn't streak behind the title, so limit them before you draw them:
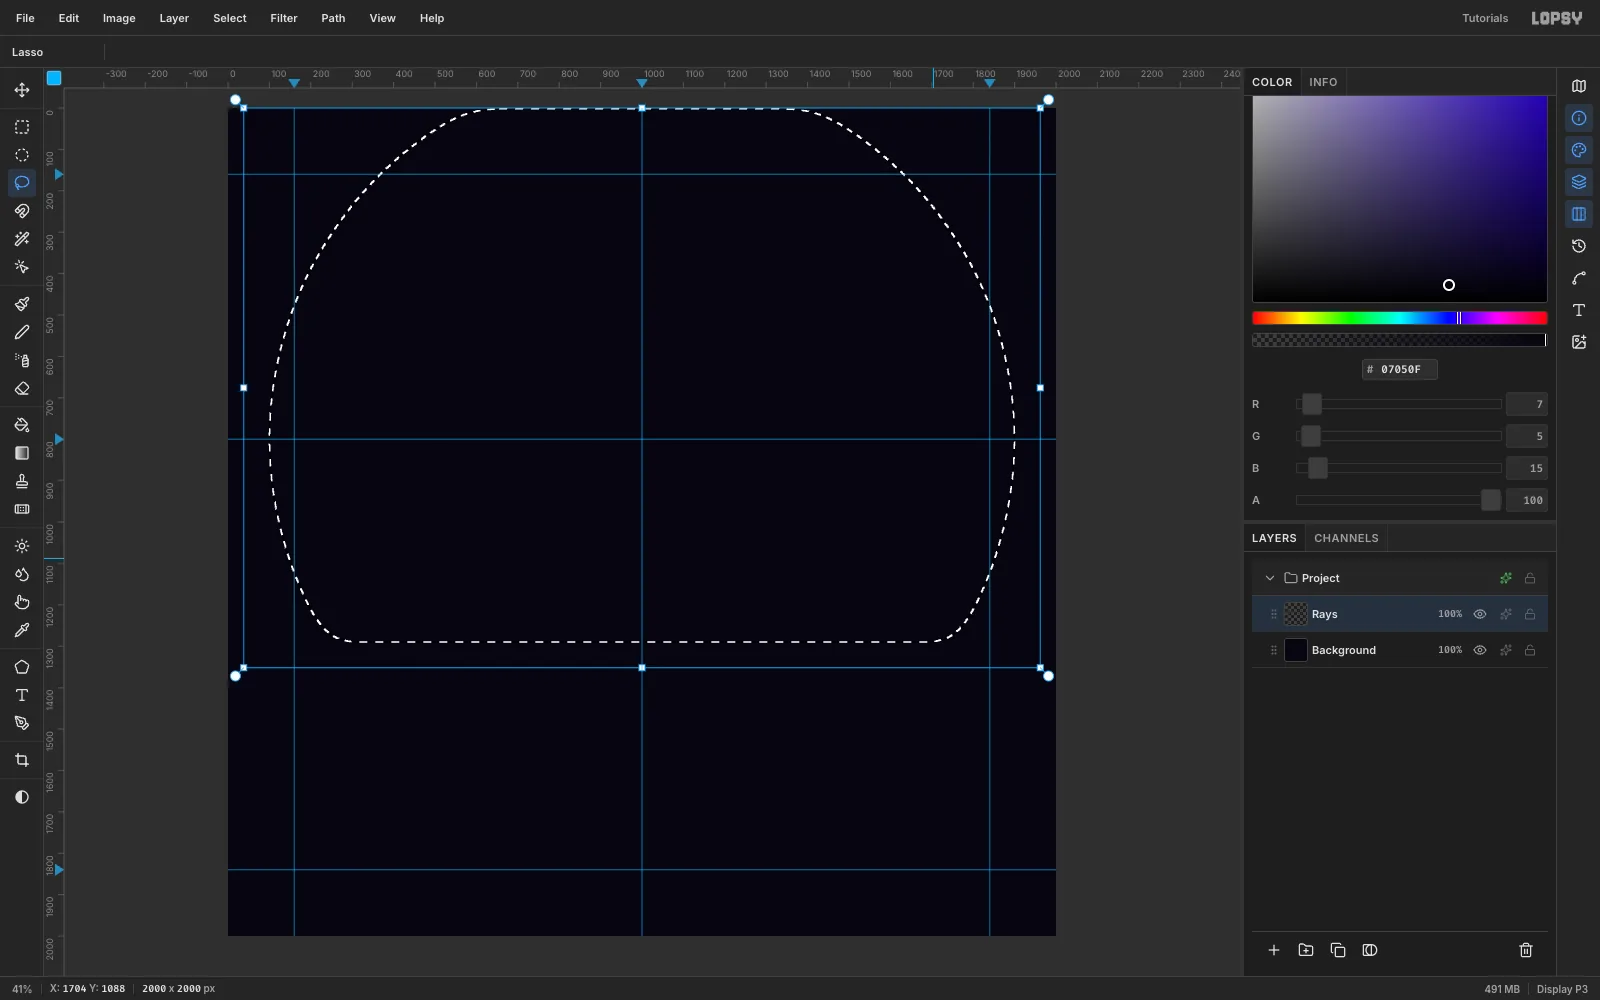
- With the Lasso, trace a circle of radius about 900 around (1000, 800), but run the bottom flat along y 1290.
- Choose Select → Feather… and set 120.
Filters respect the selection, feather included, so the rays will fade out at its edge.
-
Paint rays with the Sunburst filter
Set the foreground to magenta
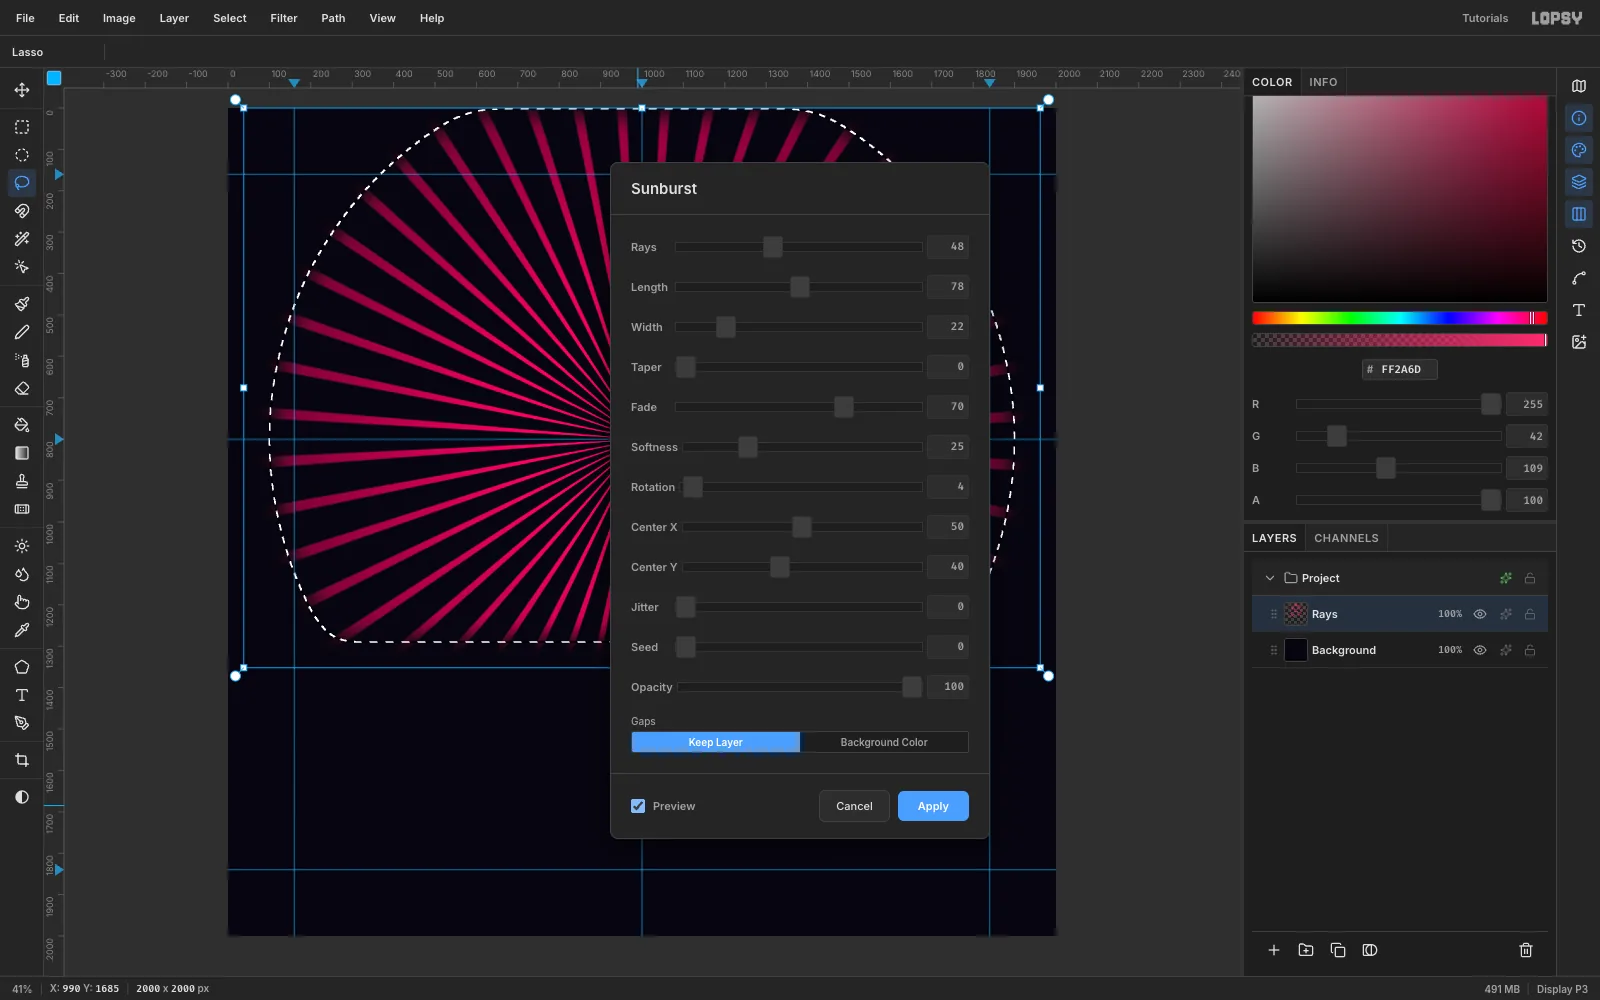
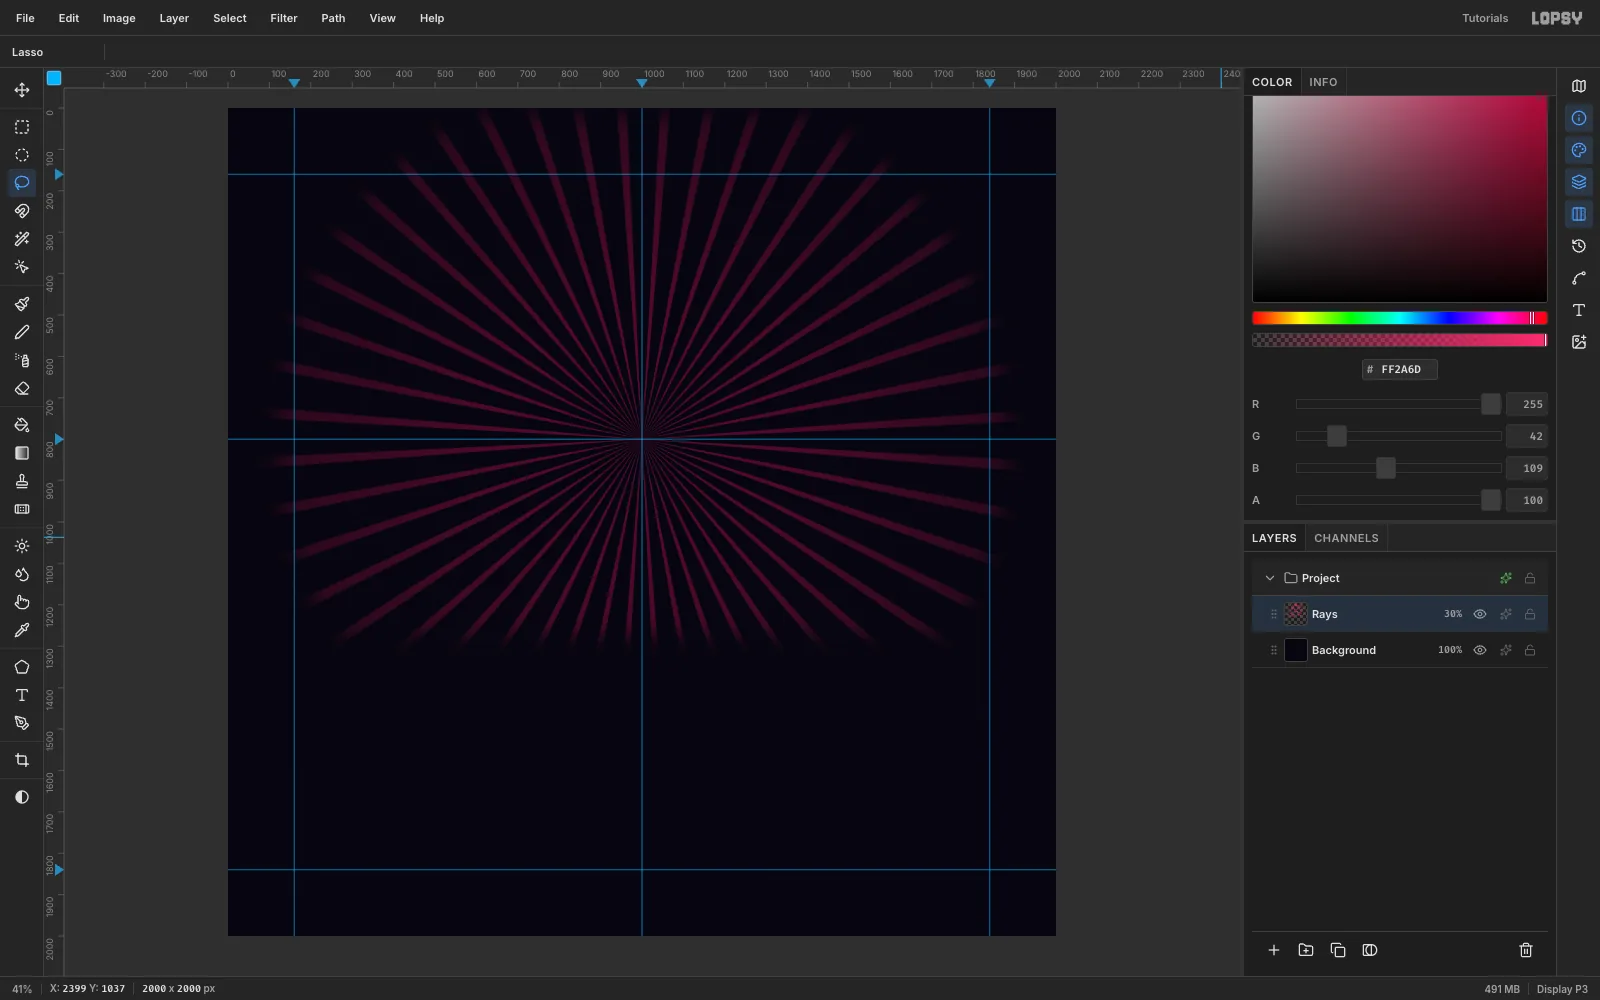
#FF2A6Dand choose Filter → Sunburst…:- Rays 48, Length 78, Width 22, Taper 0
- Fade 70, Softness 25, Rotation 4
- Center X 50, Center Y 40 (that's the 800 guide)
- Opacity 100, Gaps Keep Layer
Tick Preview to check it, then Apply and press Cmd+D.
-
Knock the rays back
Open the Rays layer's effects drawer, set the blend mode to Screen, then set the layer opacity to 30%.
At full strength the rays turn into dirty stripes. At 30% they read as light and leave room for the neon on top.
-
Draw the synthwave sun
Add a layer called Sun:
- With the Gradient tool, open Advanced… and set three stops:
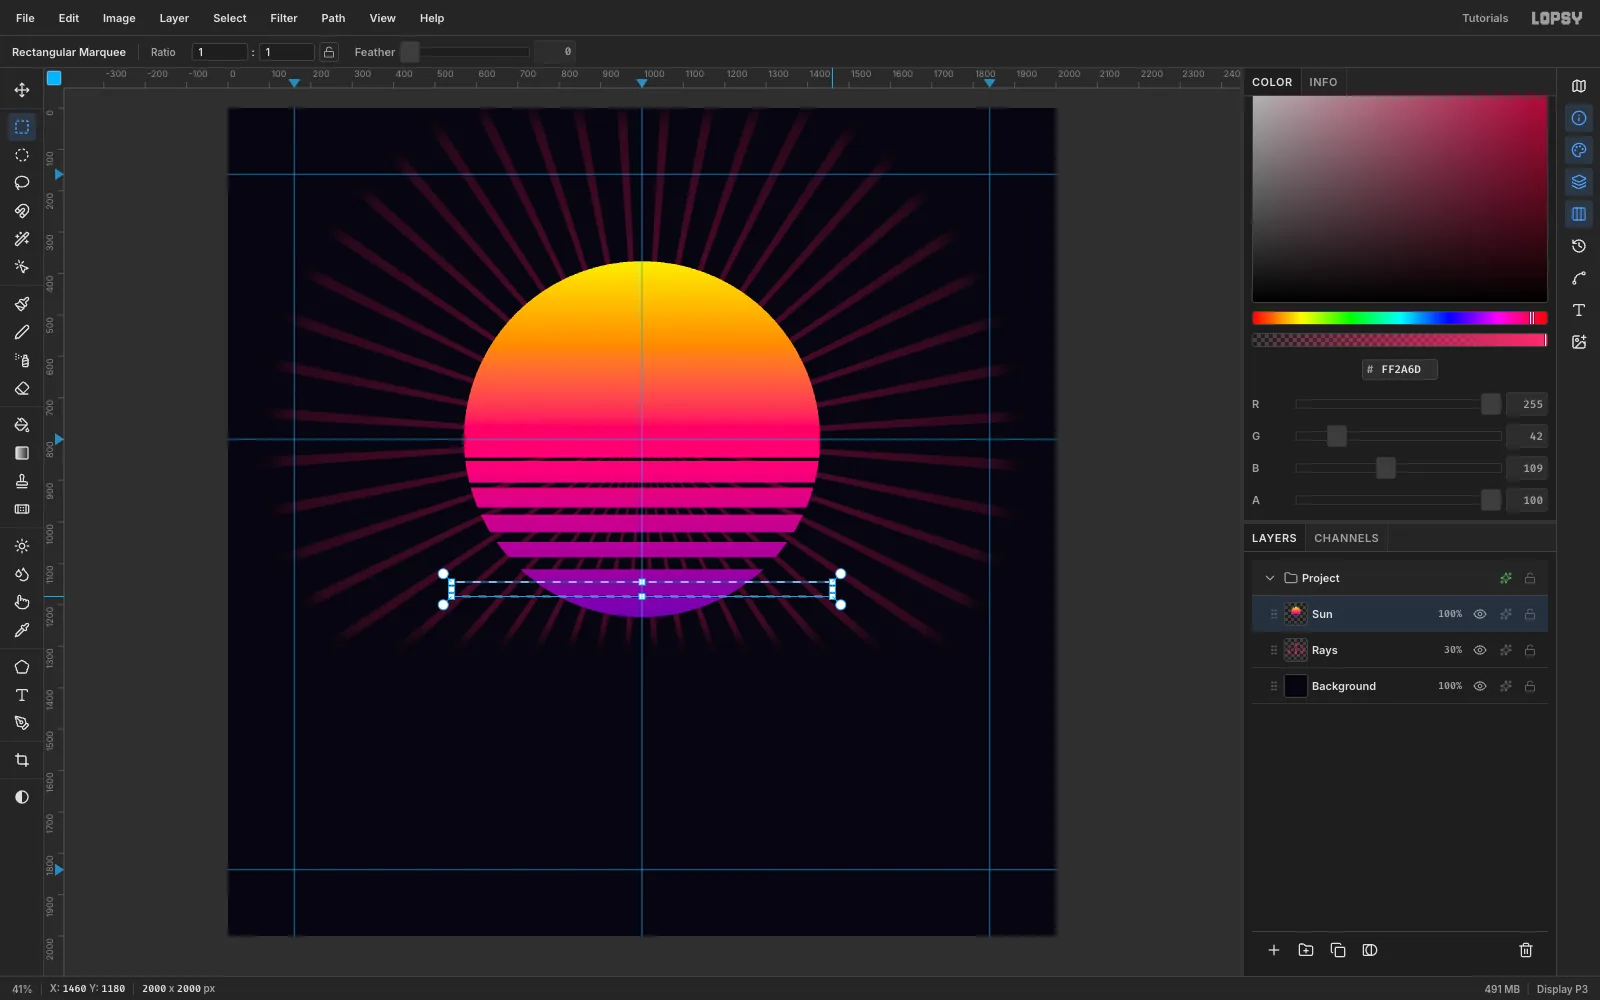
#F9F002at 0%,#FF2A6Dat 50% and#6A0DADat 100%. - Draw an Elliptical Marquee circle, radius 430, centred on (1000, 800).
- Drag a Linear gradient from its top (y 370) straight down to its bottom (y 1230).
Now cut the slits. Each one is a Rect Marquee from x 540 to 1460, then Delete. They get taller as they go down:
- y 845 (8 px tall), 905 (12), 965 (17), 1025 (23), 1085 (29) and 1145 (35)
- With the Gradient tool, open Advanced… and set three stops:
-
Give the sun a glow
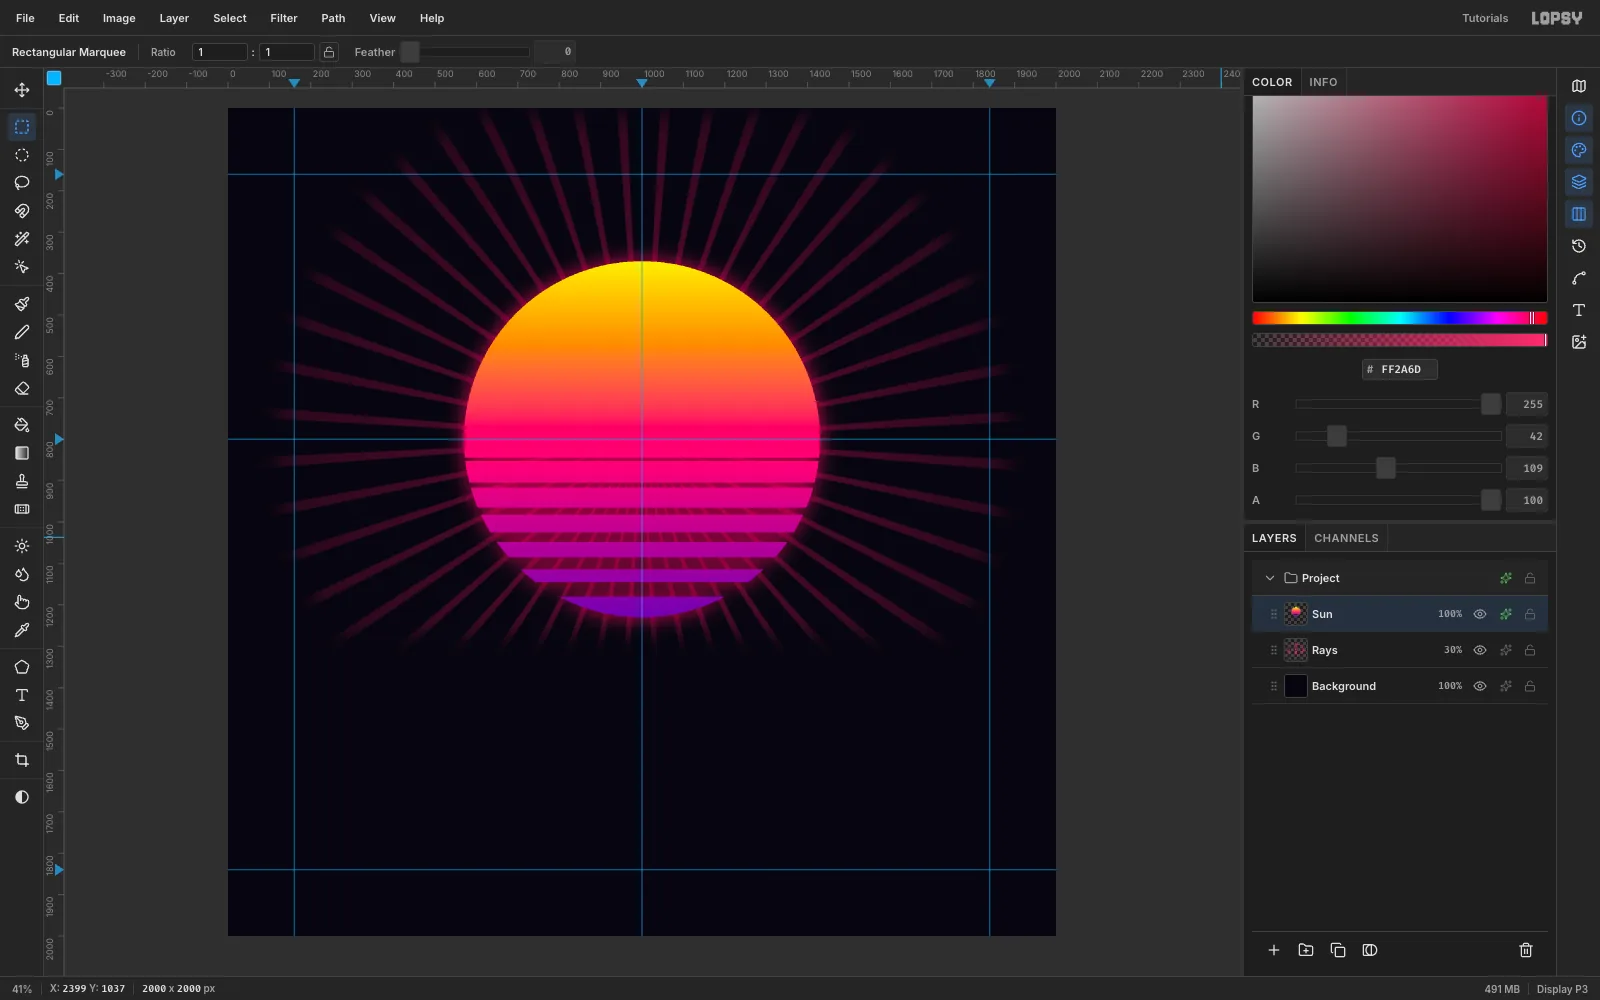
Deselect, open the Sun's effects drawer and enable Outer Glow:
- Colour
#FF2A6D - Size 70, Spread 10, Opacity 70
- Colour
-
Lasso the dragon silhouette
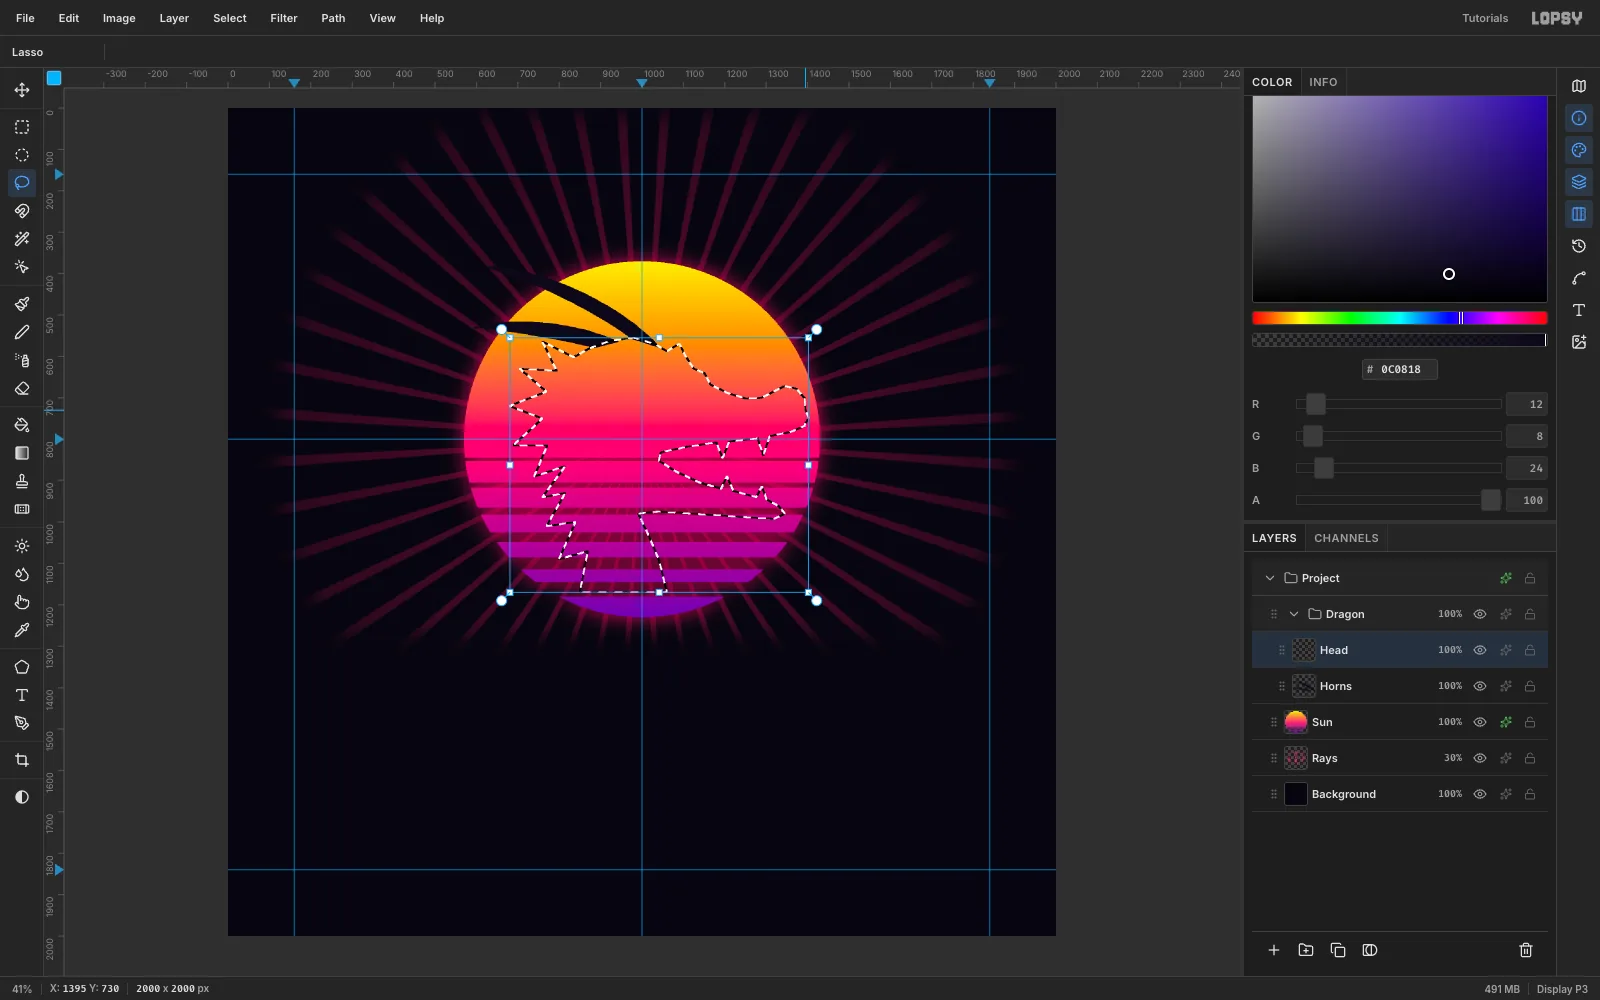
Click New Group, name it Dragon, and add a layer called Horns inside it. Set the foreground to
#0C0818.Lasso two long horns sweeping back from the forehead, and fill each one:
- Tips at about (600, 380) and (590, 530)
- Bases around x 885–1045 at y 560–580
Add a Head layer and lasso the whole head in one pass, then Edit → Fill:
- Snout. Start at the nose (1395, 730), bump up over a nostril, and run along the brow to a pointed brow ridge at (1090, 570).
- Mane. Drop down the back of the skull as a row of sharp spikes, about 70–90 px deep, from (760, 565) to (815, 865).
- Neck. Keep going into a neck with smaller dorsal spikes that ends flat at y 1170.
- Jaws. Come back up the throat. Draw an open lower jaw with two upward fangs, then the upper jaw with two downward fangs back to the nose.
Deselect, click the Head row and choose Layer → Merge Down. Rename the result Dragon Head.
-
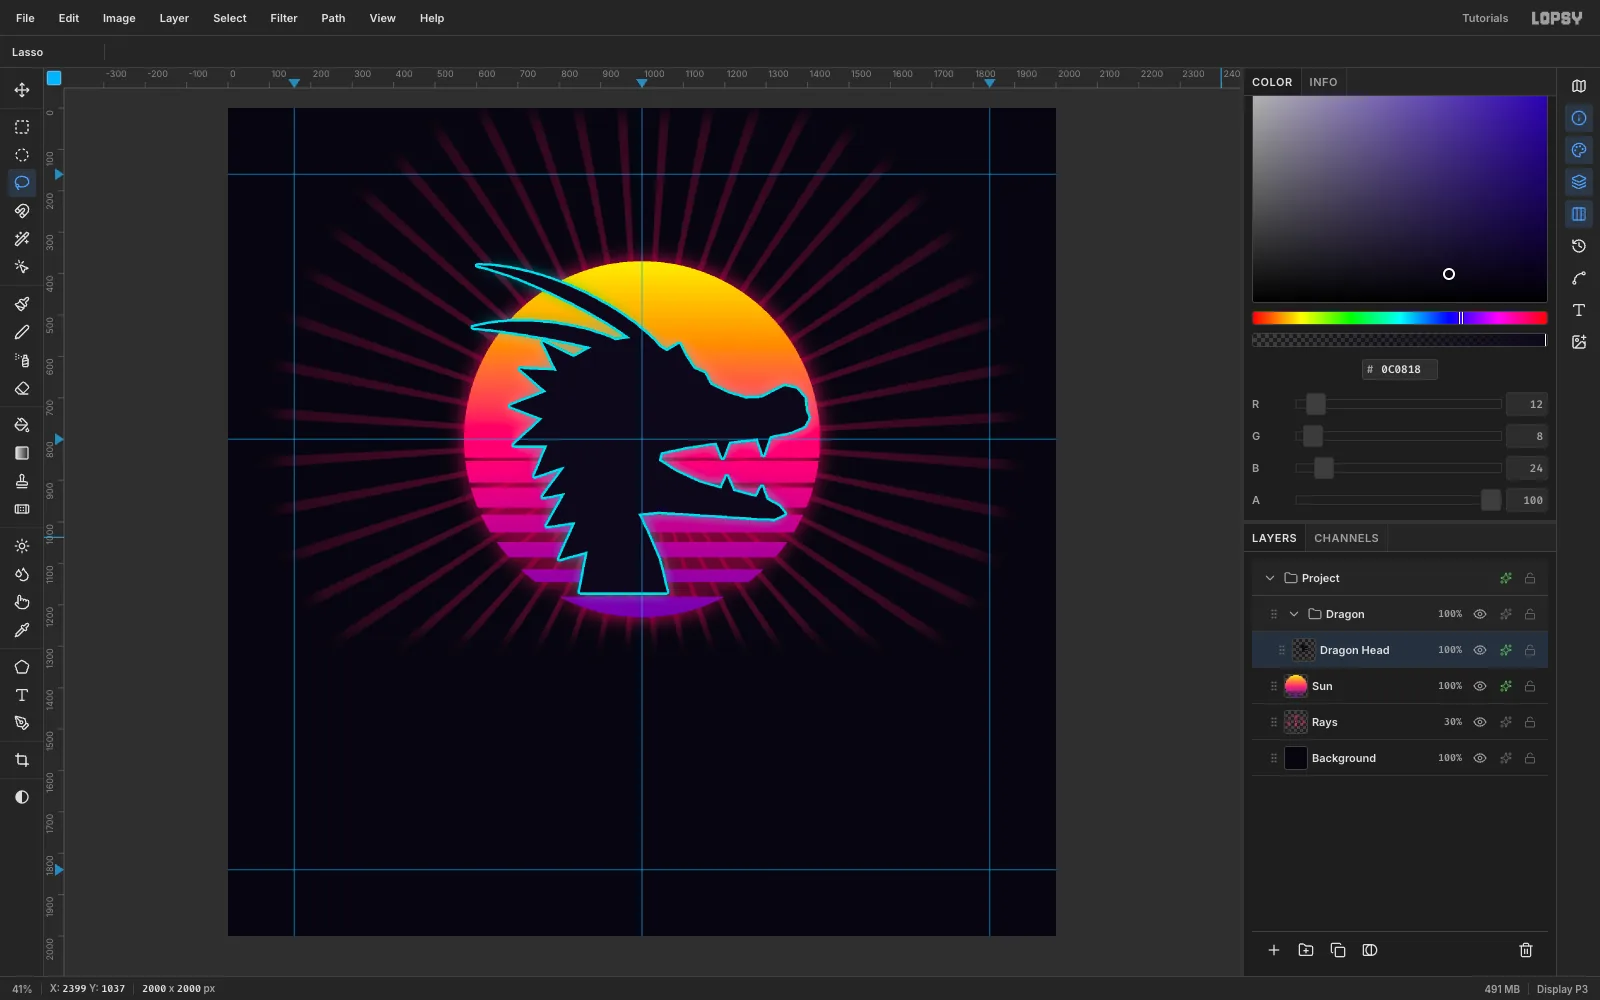
Outline it in neon
On Dragon Head, enable two effects:
- Stroke: colour
#05D9E8, Width 6, position Outside - Outer Glow: colour
#05D9E8, Size 50, Spread 4, Opacity 60
A dark silhouette against a bright disc is the strongest shape in the logo, so keep the fill a flat near-black.
- Stroke: colour
-
Add the eye and tapered whiskers
Add an Eye layer:
- Lasso a narrow slanted slit at about (1040–1130, 640–672). Fill it
#F9F002. - Lasso a small nostril triangle and fill it
#05D9E8. - Give the layer an Outer Glow in
#F9F002: Size 28, Spread 20, Opacity 90.
Add a Whiskers layer. Draw each whisker as a thin ribbon with the Lasso: go out along one side of an S-curve and come back along the other side. Start about 13 px wide at the lip and end in a point.
- The upper whisker curls up from (1392, 725) to (1610, 515).
- The lower whisker curls down from (1398, 752) to (1620, 1000).
Fill both
#05D9E8and add an Outer Glow (#05D9E8, Size 22, Spread 10, Opacity 85). A tapered ribbon looks like a whisker; a stroke of one width looks like a cable.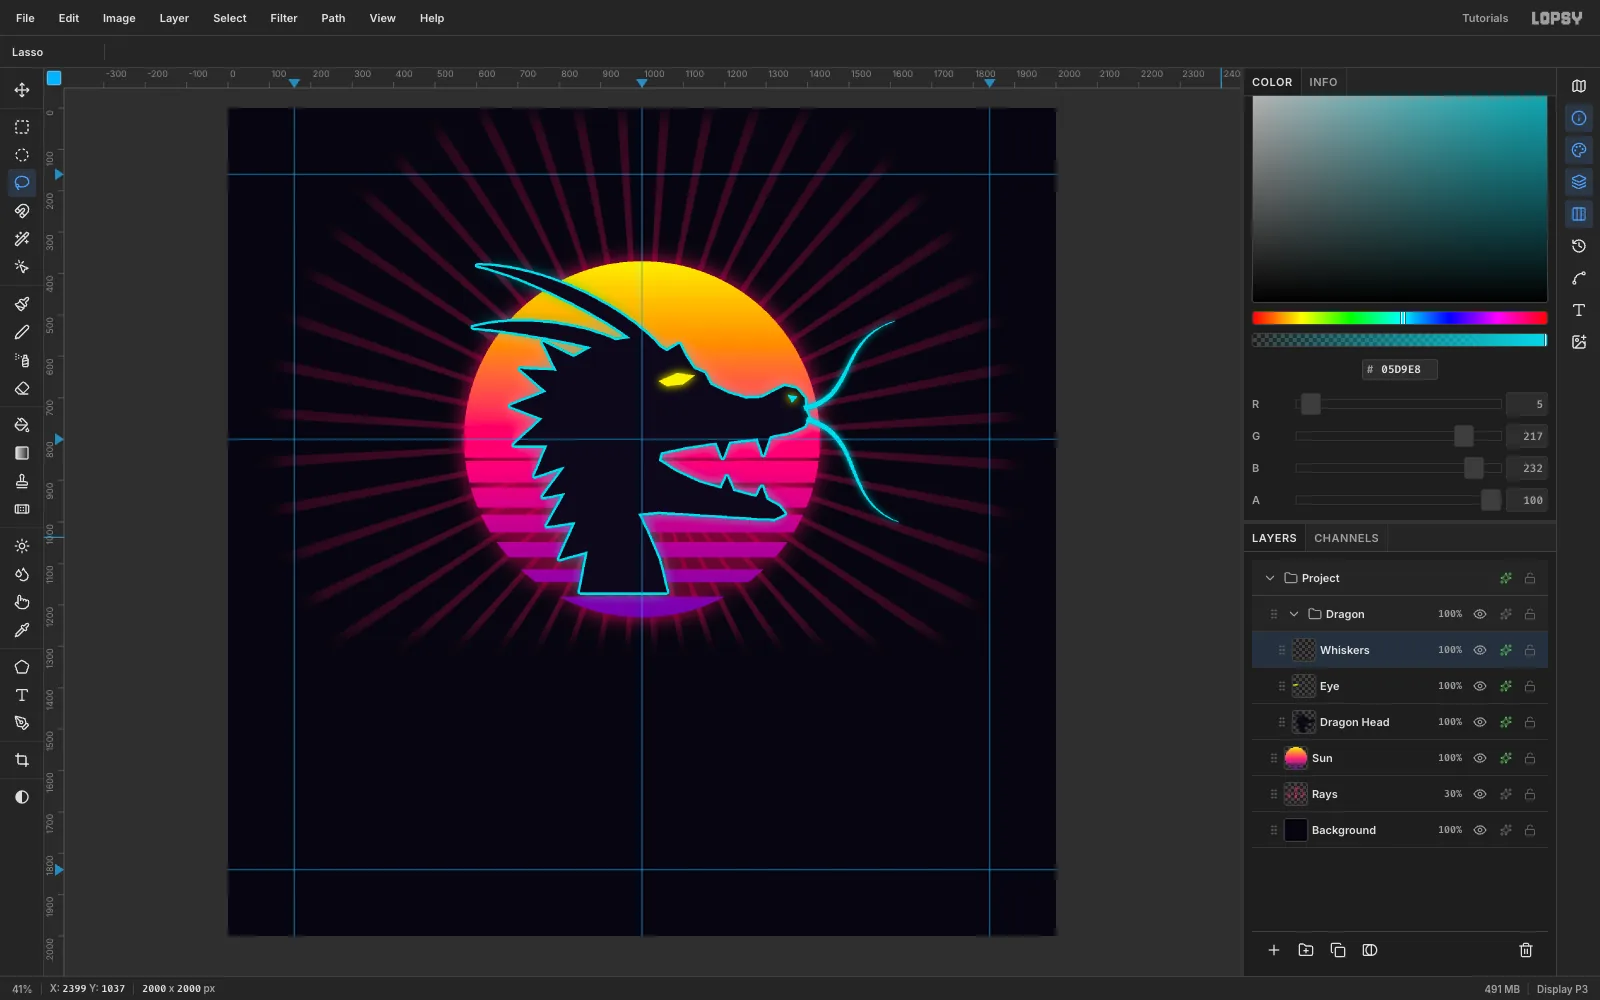
- Lasso a narrow slanted slit at about (1040–1130, 640–672). Fill it
-
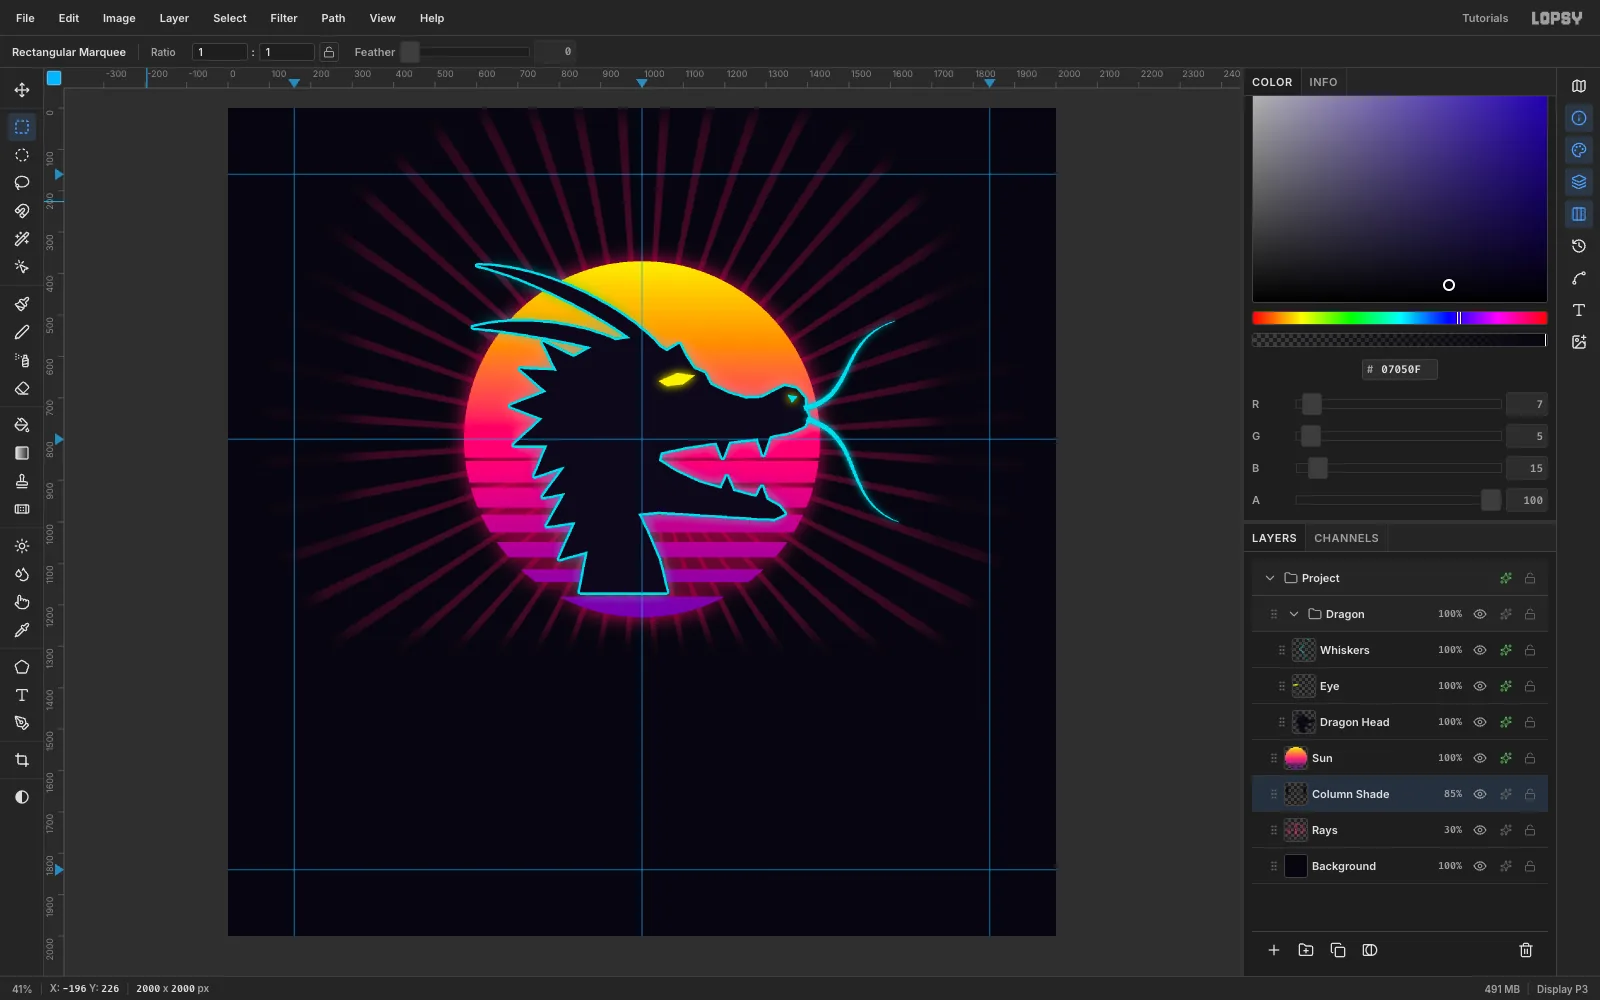
Shade behind the side text
Click the Rays row and add a layer called Column Shade:
- Pick the Rect Marquee and set Feather to 60 in the options bar.
- Marquee x 110–300, y 300–1050 and fill it
#07050F. - Do the same at x 1700–1890.
Set Feather back to 0 and the layer opacity to 85%. The Japanese columns will sit on these calm panels instead of on the rays.
-
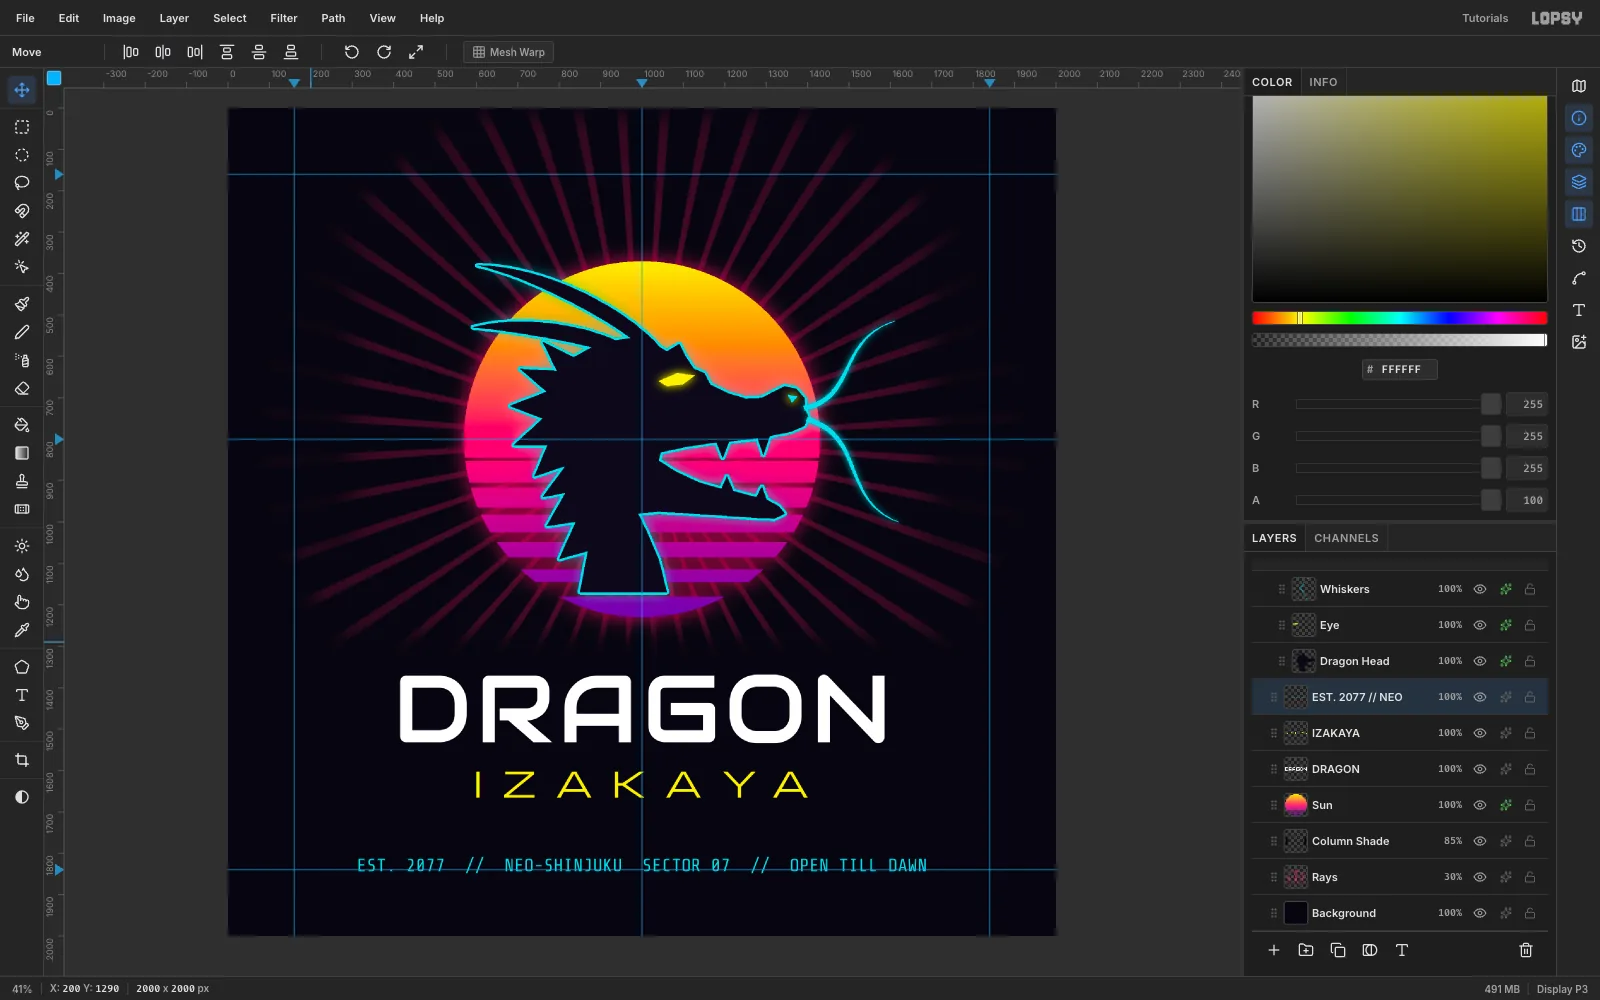
Set the type
Create text in empty canvas, bottom line first, so the Text tool never grabs an existing line. Keep a raster layer (like Sun) selected when you change fonts: with a text layer selected, changing the font restyles that layer.
- Footer: Share Tech Mono, size 44,
#05D9E8, letter spacing 0. TypeEST. 2077 // NEO-SHINJUKU SECTOR 07 // OPEN TILL DAWN. - IZAKAYA: Michroma, size 84,
#F9F002, letter spacing 46. - DRAGON: Audiowide, size 230,
#FFFFFF, letter spacing 10.
Select each one with the Move tool and click Align center horizontally. Then nudge them (Shift + arrow keys move 10 px) so the caps tops sit at:
- DRAGON y ≈ 1340
- IZAKAYA y ≈ 1586
- footer y ≈ 1770
- Footer: Share Tech Mono, size 44,
-
Split the title into RGB
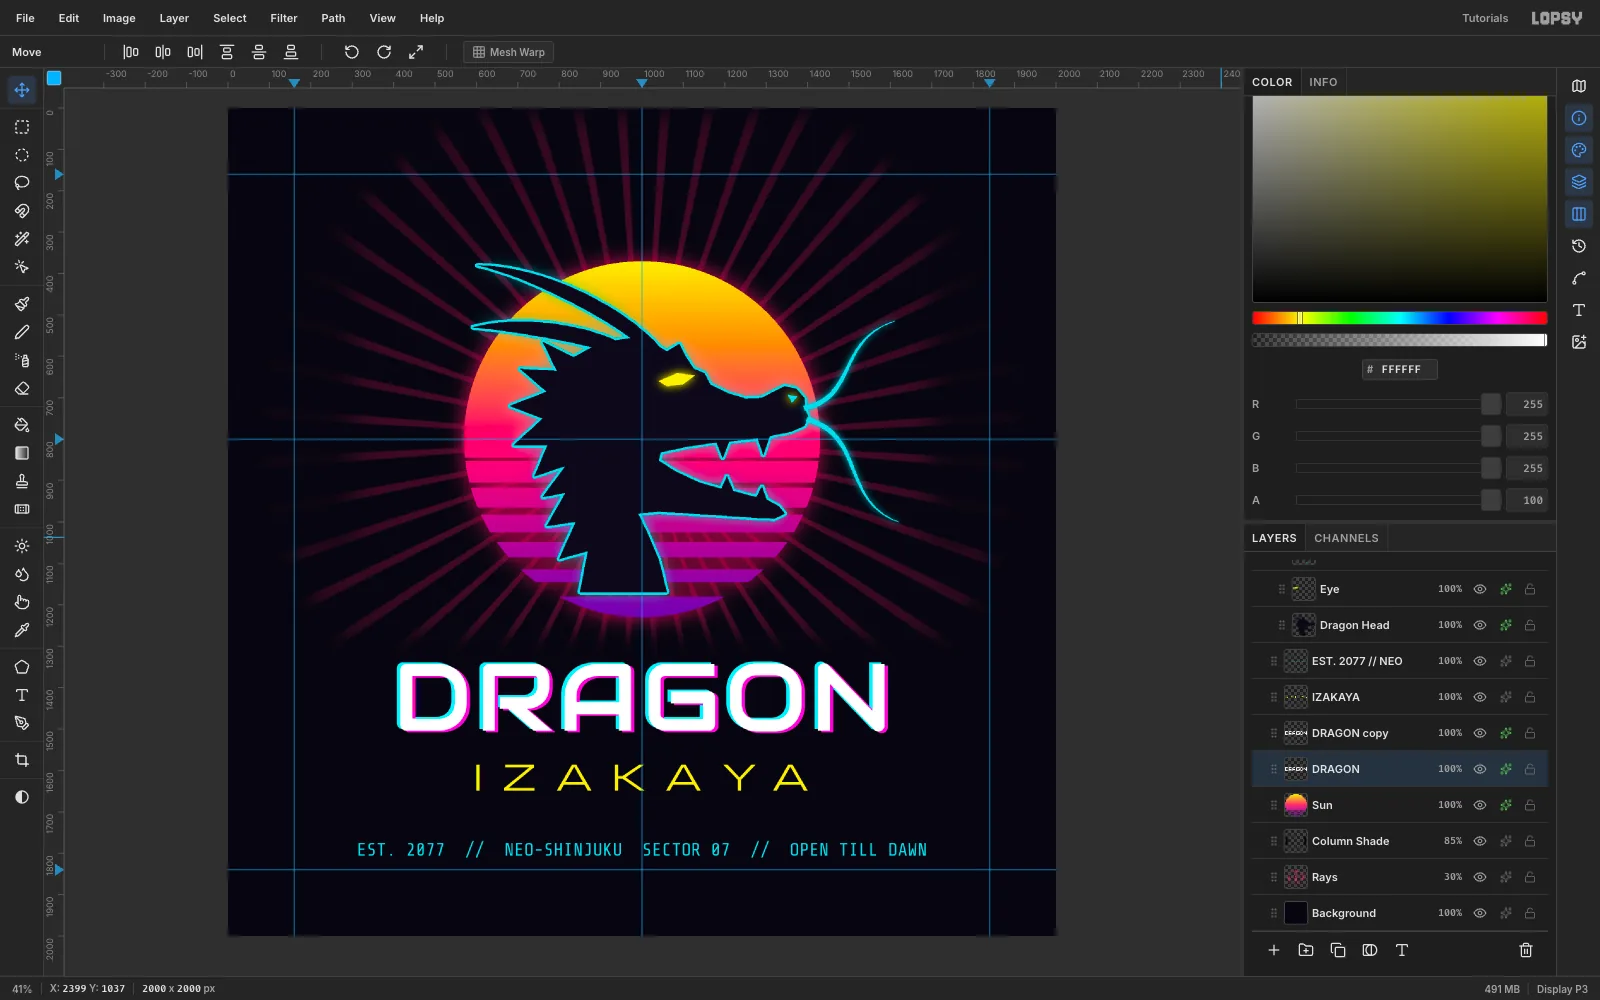
- Select DRAGON and click Duplicate Layer. The copy lands 10 px down and right, so nudge it back until the two line up exactly.
- On the copy (the top layer), add a Drop Shadow:
#FF2BD6, Offset X 8, Offset Y 4, Blur 0, Opacity 100. That gives a hard magenta offset. - Select the original underneath and nudge it 8 px left and 4 px up.
- Give the original a Color Overlay in
#00F0FF.
-
Glitch two slices
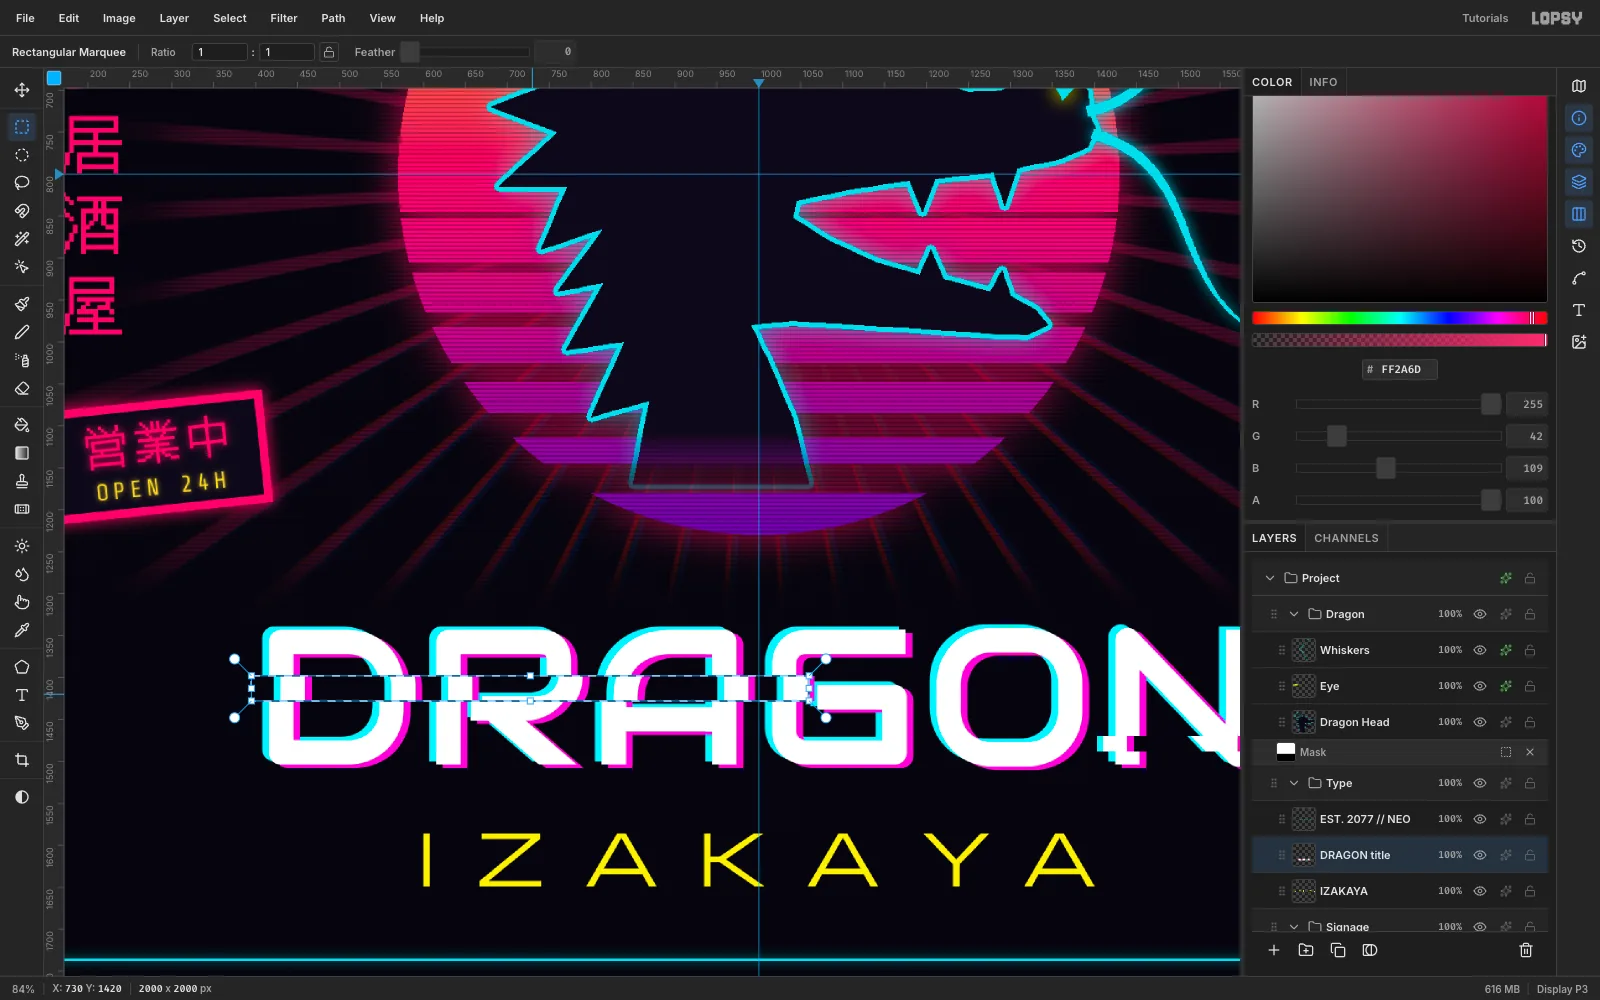
Select each DRAGON layer and click Rasterize Layer. Then click the copy and Merge Down (the merge bakes the shadow and overlay in). Rename it DRAGON title.
Now tear it in two places:
- Rect Marquee x 395–1060, y 1398–1428 (through D-R-A). Switch to Move and drag the strip 13 px right, then press Cmd+D.
- Marquee x 1418–1625, y 1470–1488 on the N and drag it 14 px left.
Keep the tears off the O, and keep each shifted piece overlapping its own stroke. If a strip lands in empty counters, it reads as a strikethrough.
-
Stack the Japanese columns
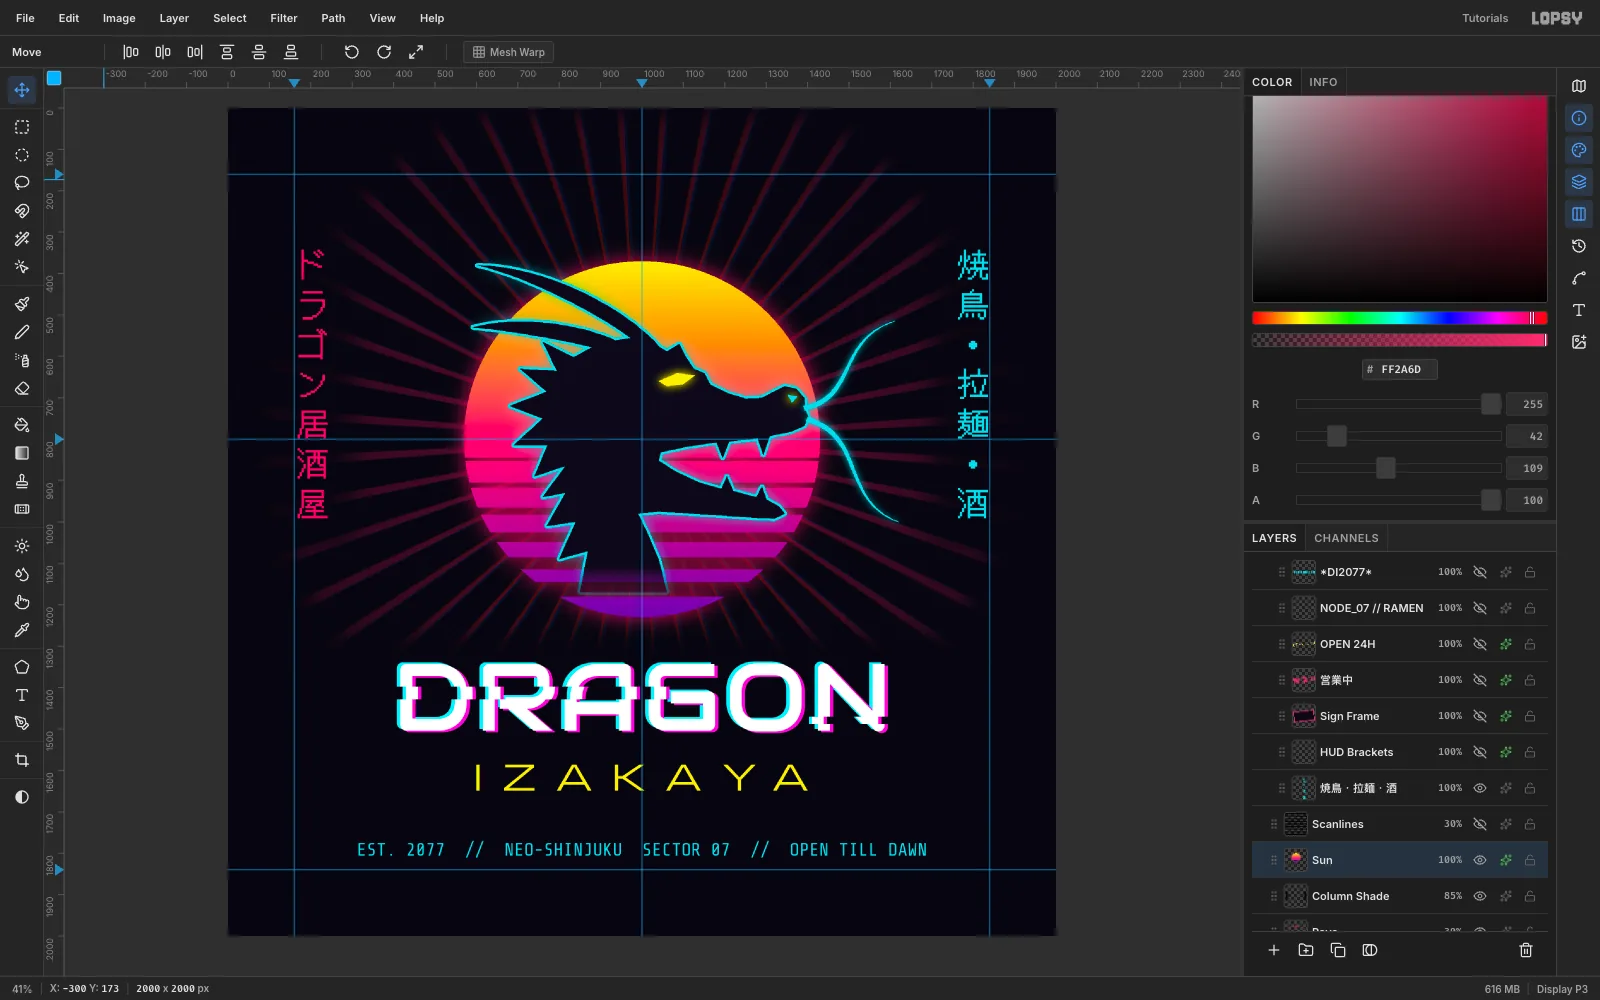
With Sun selected, pick the Text tool:
- Choose DotGothic16 at size 78 and turn on Vertical text (the A-over-B toggle in the options bar).
- Click at (150, 330) and paste
ドラゴン居酒屋with Cmd+V. Commit with Tab and set Letter spacing 18 in the Text panel. - Do the same at (1745, 330) with
焼鳥・拉麺・酒in#05D9E8.
Turn the toggle off again afterwards. Selecting a vertical text layer loads its settings into the tool, so check the toggle before you create horizontal text.
-
Frame it with HUD brackets and rules
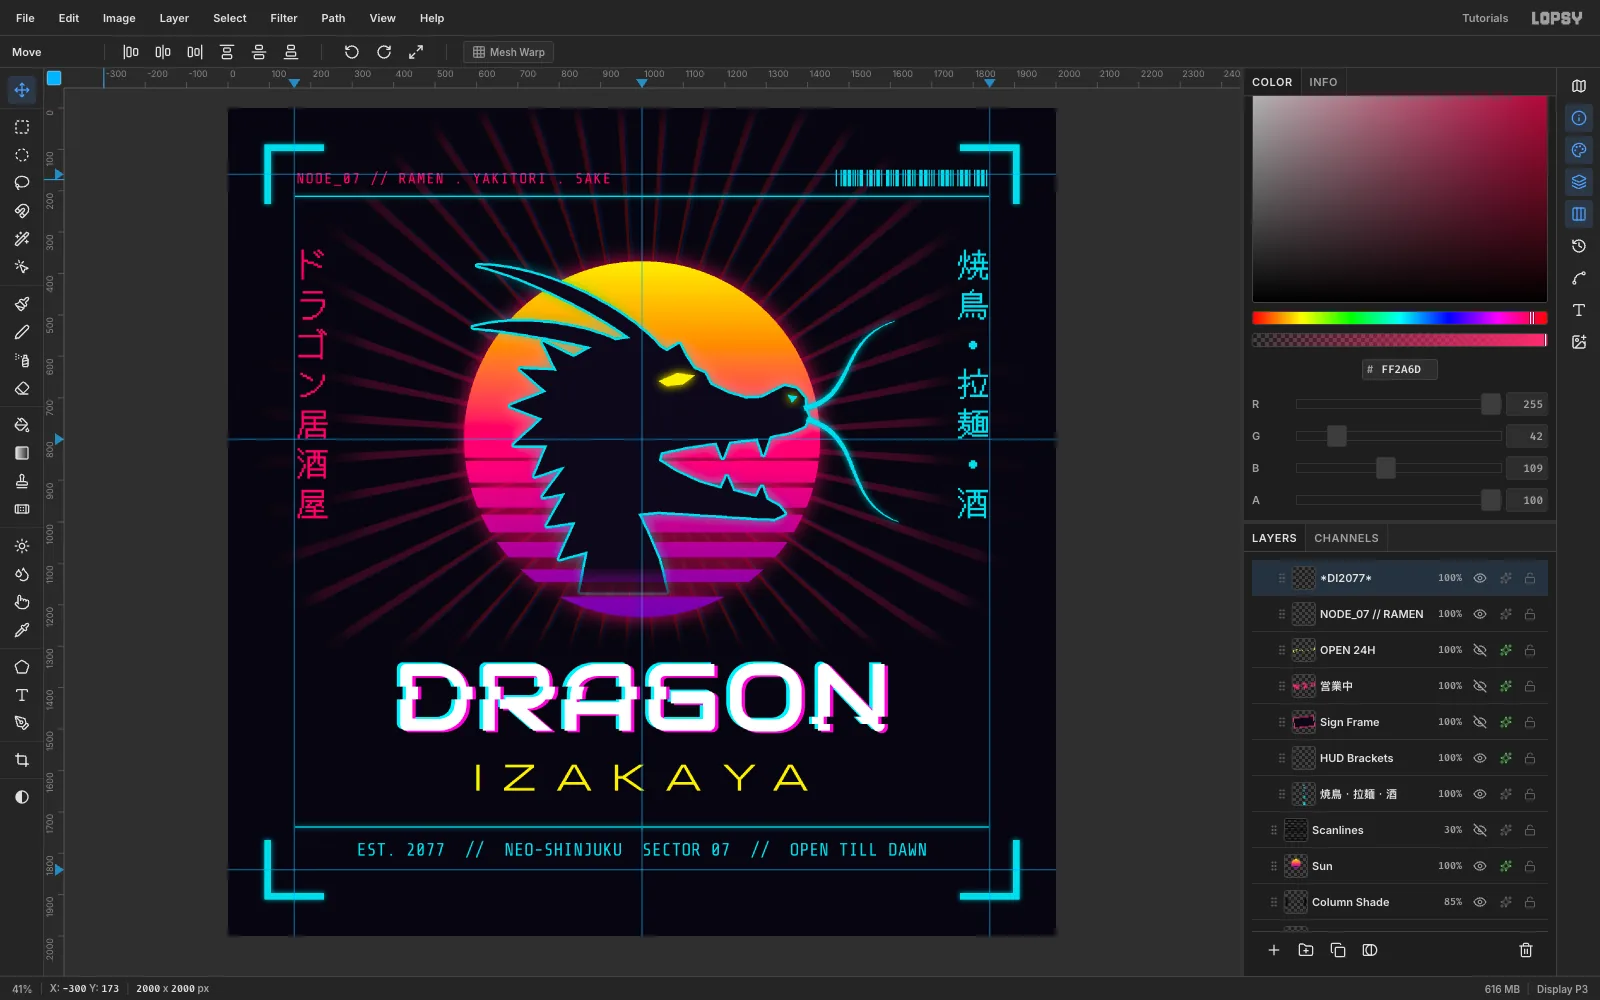
Add a HUD Brackets layer. Choose View → Show Grid (it turns Snap on), then fill eight Rect Marquee bars in
#05D9E8. Each is 16 px thick and 144 px long, making an L in each corner 88 px from the edge. Hide the grid again and untick Snap to Grid.On the same layer, fill two 3 px rules from x 162 to 1838:
- one at y 212
- one at y 1735
Give the layer an Outer Glow (
#05D9E8, Size 18, Spread 10, Opacity 70).Add the top labels:
- Left:
NODE_07 // RAMEN . YAKITORI . SAKEin Share Tech Mono 36,#FF2A6D, letter spacing 3, left edge at x 167. - Right:
*DI2077*in Libre Barcode 39, size 96,#05D9E8, right edge at x 1833.
-
Squash the barcode
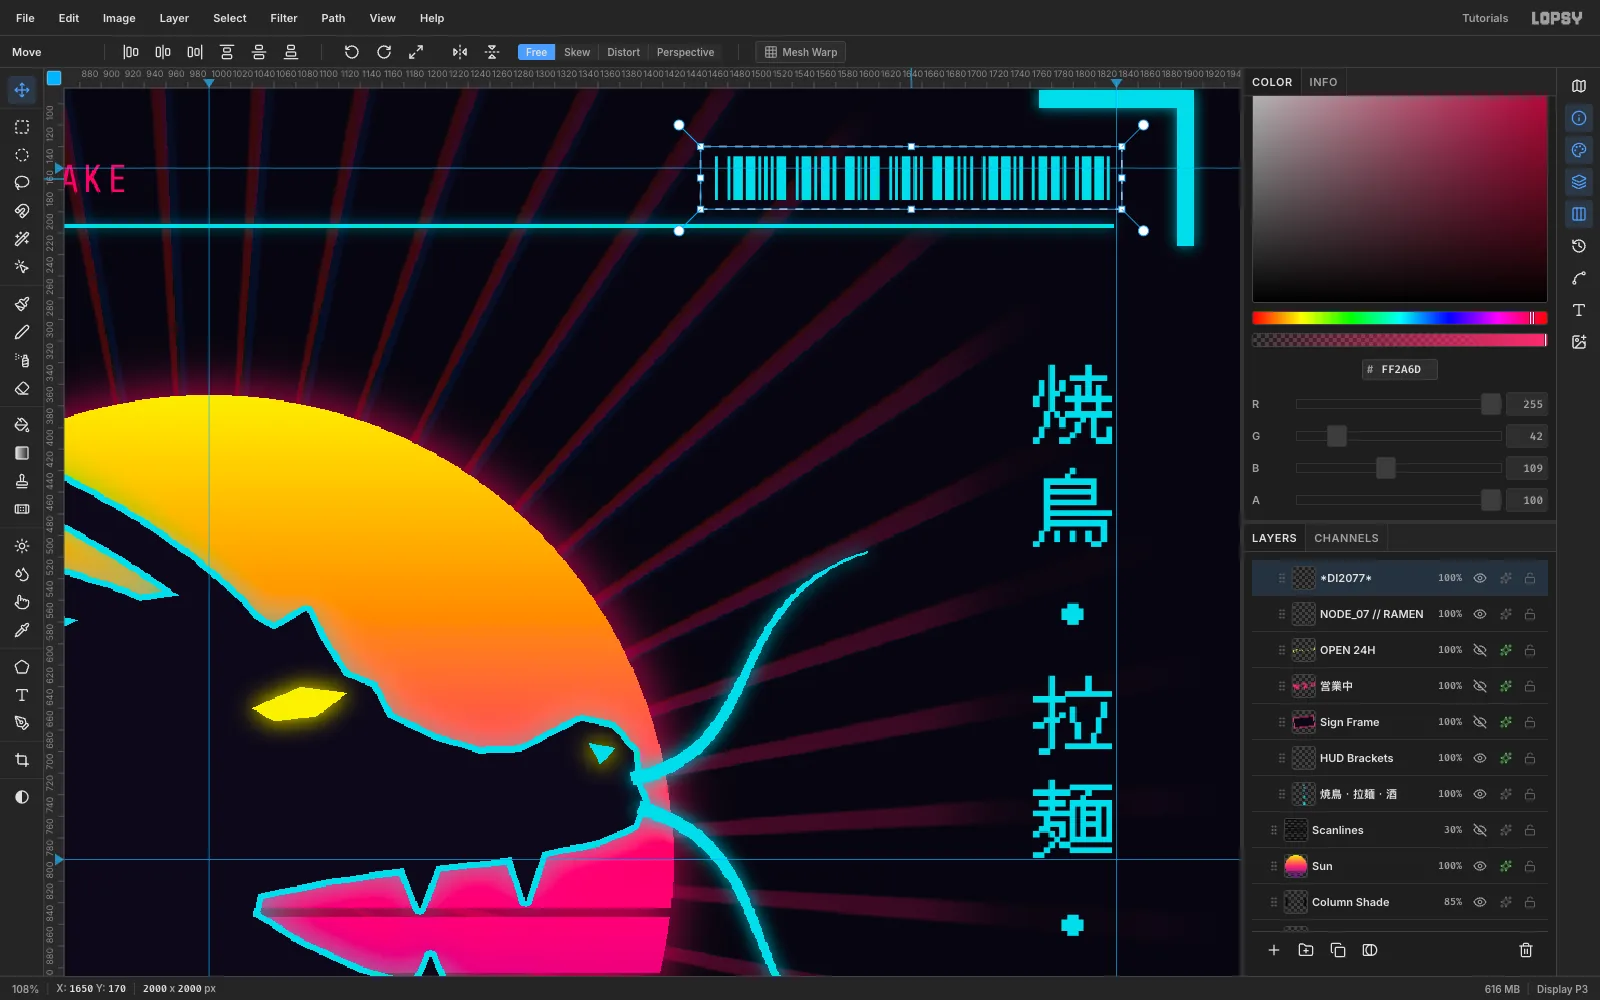
The barcode is taller than the label beside it. Rasterize it, draw a Rect Marquee around it, switch to Move, and drag the top-middle handle down until the bars are 40 px tall. Press Cmd+D, then nudge it so its bottom lines up with the label's baseline.
-
Build the neon sign
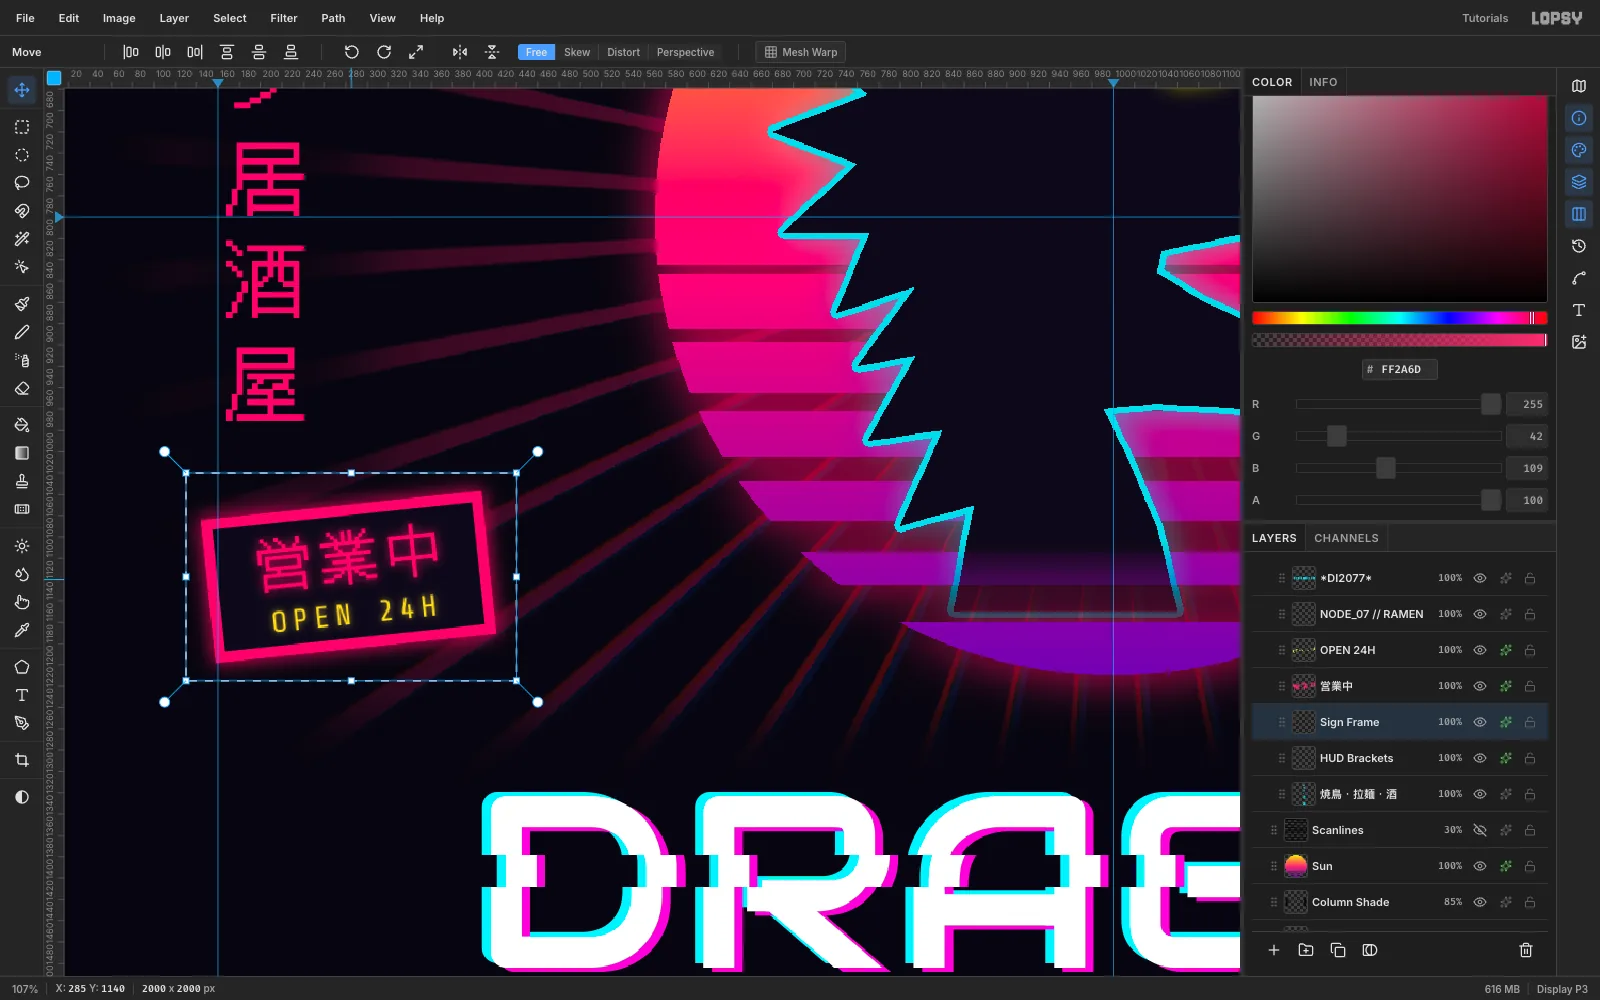
In the Signage area (select HUD Brackets), add a Sign Frame layer:
- Fill a
#FF2A6Drectangle from (150, 1070) to (415, 1205). - Select → Shrink… by 9, press Delete, then fill the inside
#0C0818. - Add an Outer Glow (
#FF2A6D, Size 24, Spread 10, Opacity 80).
Add two texts:
OPEN 24H: Share Tech Mono 28,#FFE14D, letter spacing 5. Glow#FFE14D, Size 10, Opacity 60.営業中: DotGothic16 54,#FF2A6D, letter spacing 7, pasted in. Glow#FF2A6D, Size 14, Opacity 70.
Centre both on the frame with 14 px of padding above and below.
Rasterize the two texts. Then tilt all three layers by the same amount:
- Select a layer and Rect Marquee (130, 1050) to (435, 1225).
- With Move, drag the rotate handle just off the top-right corner about −6°.
- Press Cmd+D.
Repeat with the identical marquee and drag on the other two layers.
- Fill a
-
Fade the neck and add scanlines
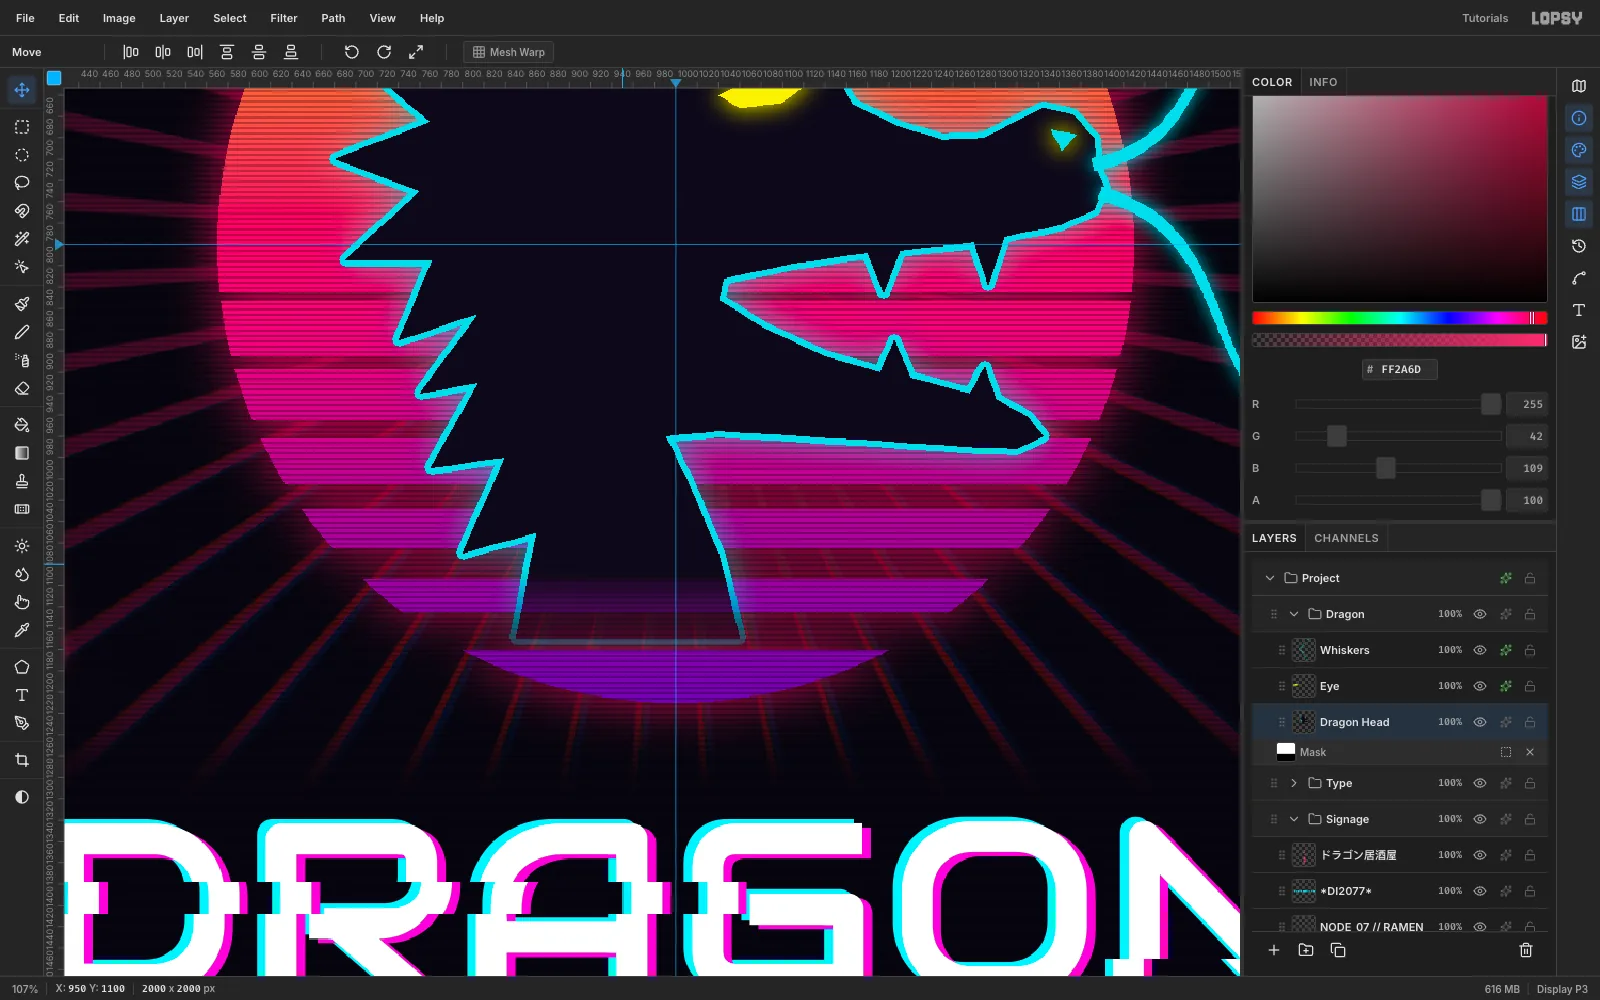
The flat end of the neck looks like a pedestal. Select Dragon Head and click Rasterize Layer Style in its effects drawer, so the stroke and glow become pixels.
- Click Add Mask, then click the Mask row.
- With the Gradient tool (black → white, Reverse on), drag from y 1105 down to y 1195.
The neck and its outline now dissolve into the stripes.
For the CRT texture, define a 200 × 5 tile with one 2 px black line and use Edit → Fill with Pattern… on a Scanlines layer directly above Sun, at 30% opacity. It textures the sun and rays but leaves the title crisp.
-
Group, add chromatic fringing and export
Tidy the stack:
- Shift-click EST… and DRAGON title and choose Layer → Group Layers. Name it Type.
- Do the same for the signage and HUD layers (Signage).
Finally, select Rays and run Filter → Chromatic Aberration… (Amount 10, Direction 0) for a faint red and blue fringe.
File → Save Project, then File → Quick Export PNG.