Make a Chrome Heart Valentine's Day Card
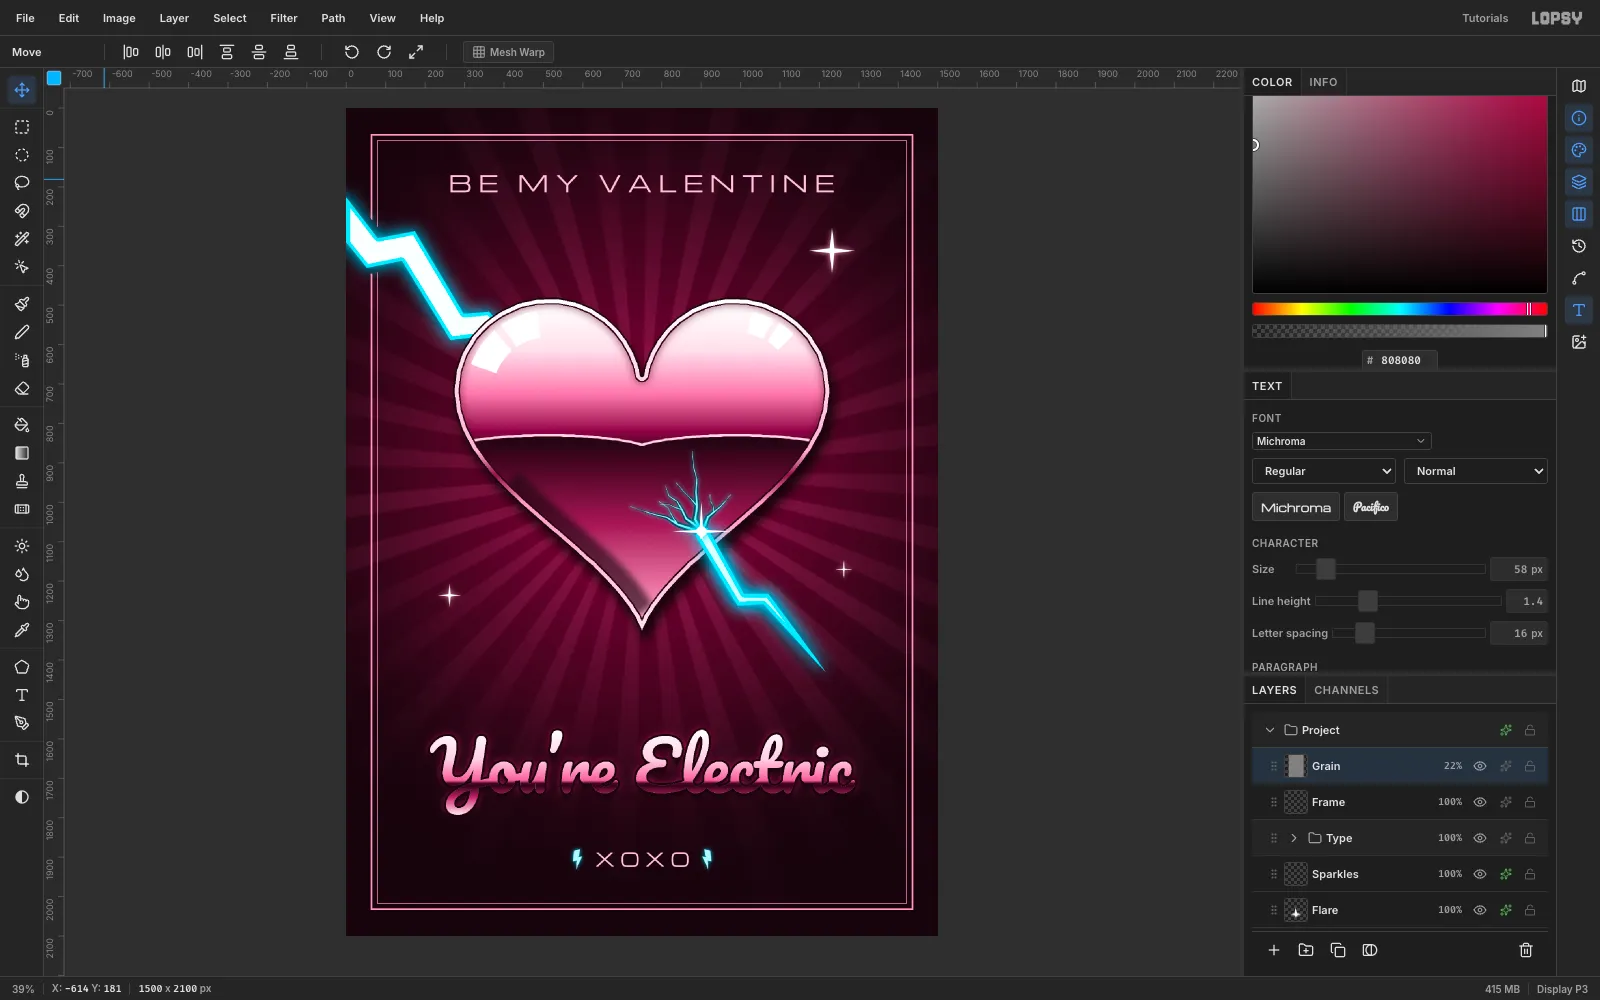
Build a glossy chrome heart pierced by a glowing lightning bolt in Lopsy, with gradients, Shrink, layer effects, a masked Sunburst and chrome script type.
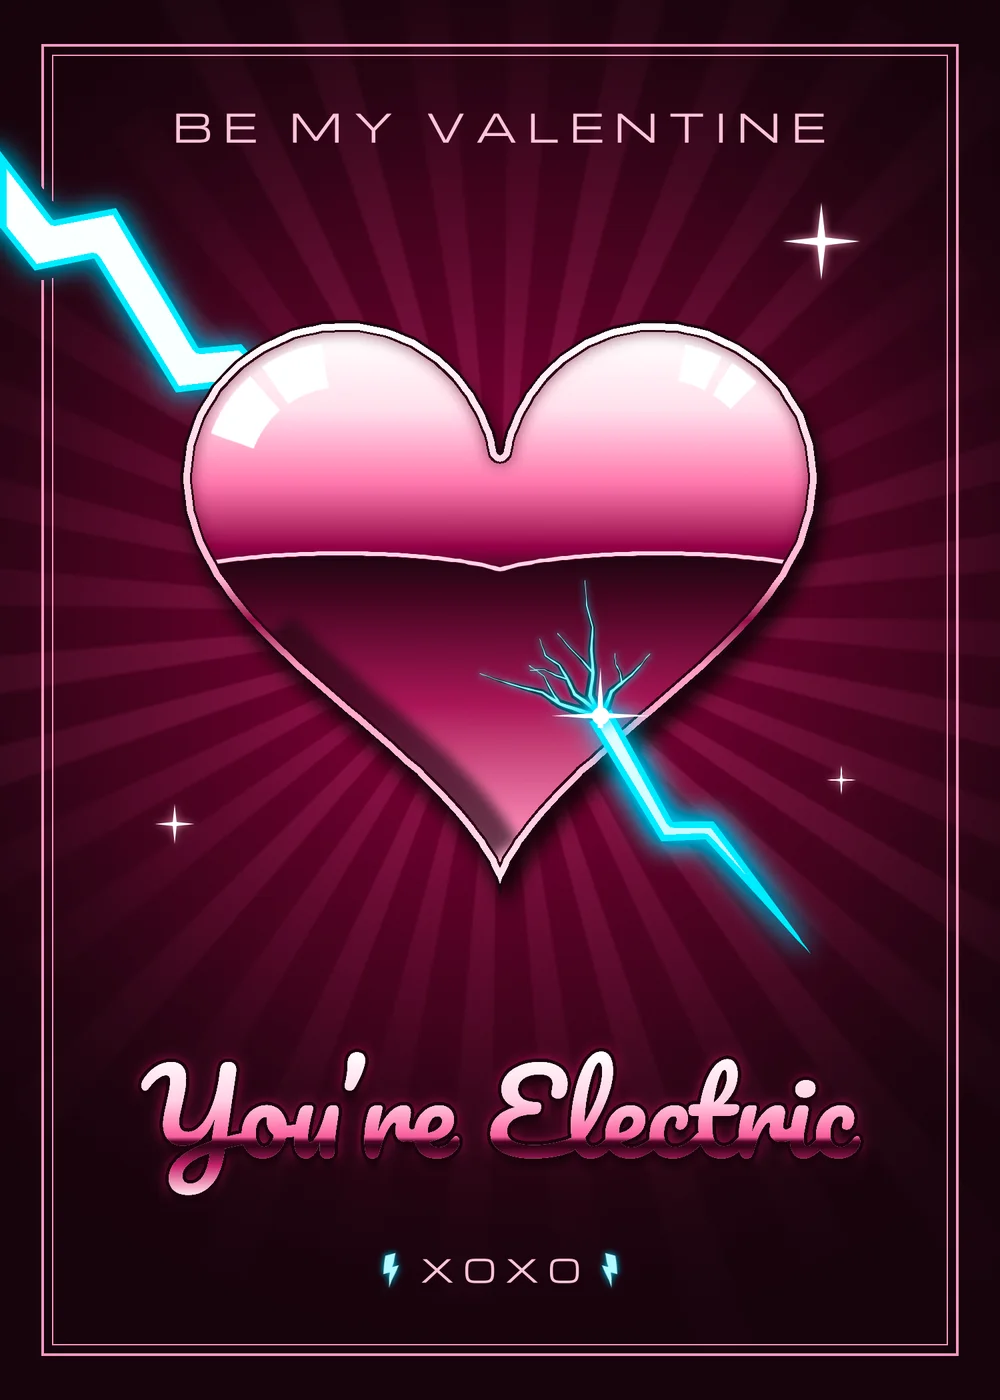
Chrome lettering and chrome hearts are all over Valentine's merch right now. The Y2K "liquid metal" look is back.
Chrome is easier to fake than it looks. A polished surface just reflects its surroundings, so you paint a sky (light, getting darker toward the horizon), a hard horizon line, and a ground (dark at the horizon, lighter toward you). Add a few hard white window reflections and the eye reads metal.
In this tutorial you'll make a 5 × 7 card, You're Electric: a rosy chrome heart with a cyan lightning bolt through it.
Along the way you'll use:
- the Lasso and Select → Shrink / Inverse / Feather / Grow
- the Gradient tool with the Advanced gradient editor
- Filter → Sunburst, Add Noise and a gradient layer mask
- Outer Glow, Inner Glow, Stroke and Drop Shadow effects
- copy and paste, the rotate handle, the Move tool's Flip Horizontal and Merge Down
- the grid with Snap, a guide, and Group Layers
- the Google fonts Michroma and Pacifico
The palette:
- black cherry
#14040Cwith a magenta glow#9A1646 - rosy chrome from white
#FFFFFFthrough pink#F48AB4to near-black#2A0614 - electric cyan
#3FE8FFwith a white core - blush pink
#FFC7DBfor the small type and#FF9EC2for the frame
-
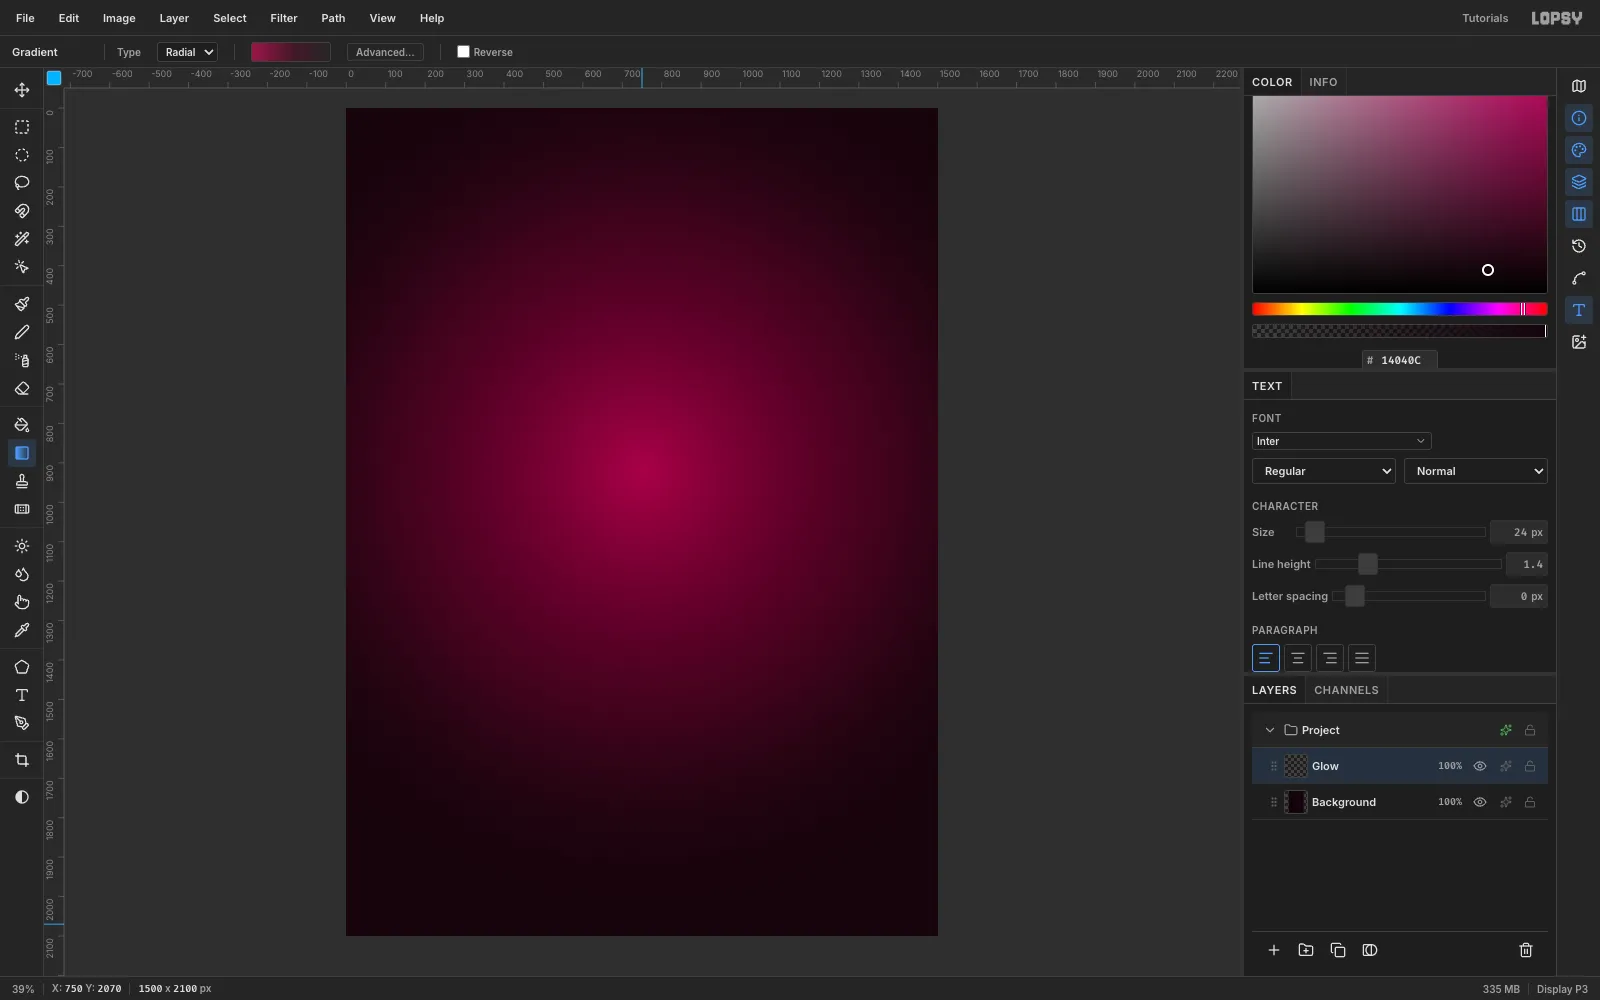
Make the canvas and a velvet glow
Create a 1500 × 2100 px document (File → New, unit Pixels). That's a 5 × 7 inch card at 300 ppi.
- Select the Background layer, set the foreground to
#14040C, and choose Edit → Fill. - Rename Layer 1 to Glow. Pick the Gradient tool, set Type to Radial, and open Advanced….
- Set three stops:
#9A1646at 0,#5A0C2Aat 55% (opacity 55%), and#14040Cat 100% with opacity 0. - Drag from the centre of the future heart (750, 920) straight down about 1150 px.
- Select the Background layer, set the foreground to
-
Burst rays with the Sunburst filter
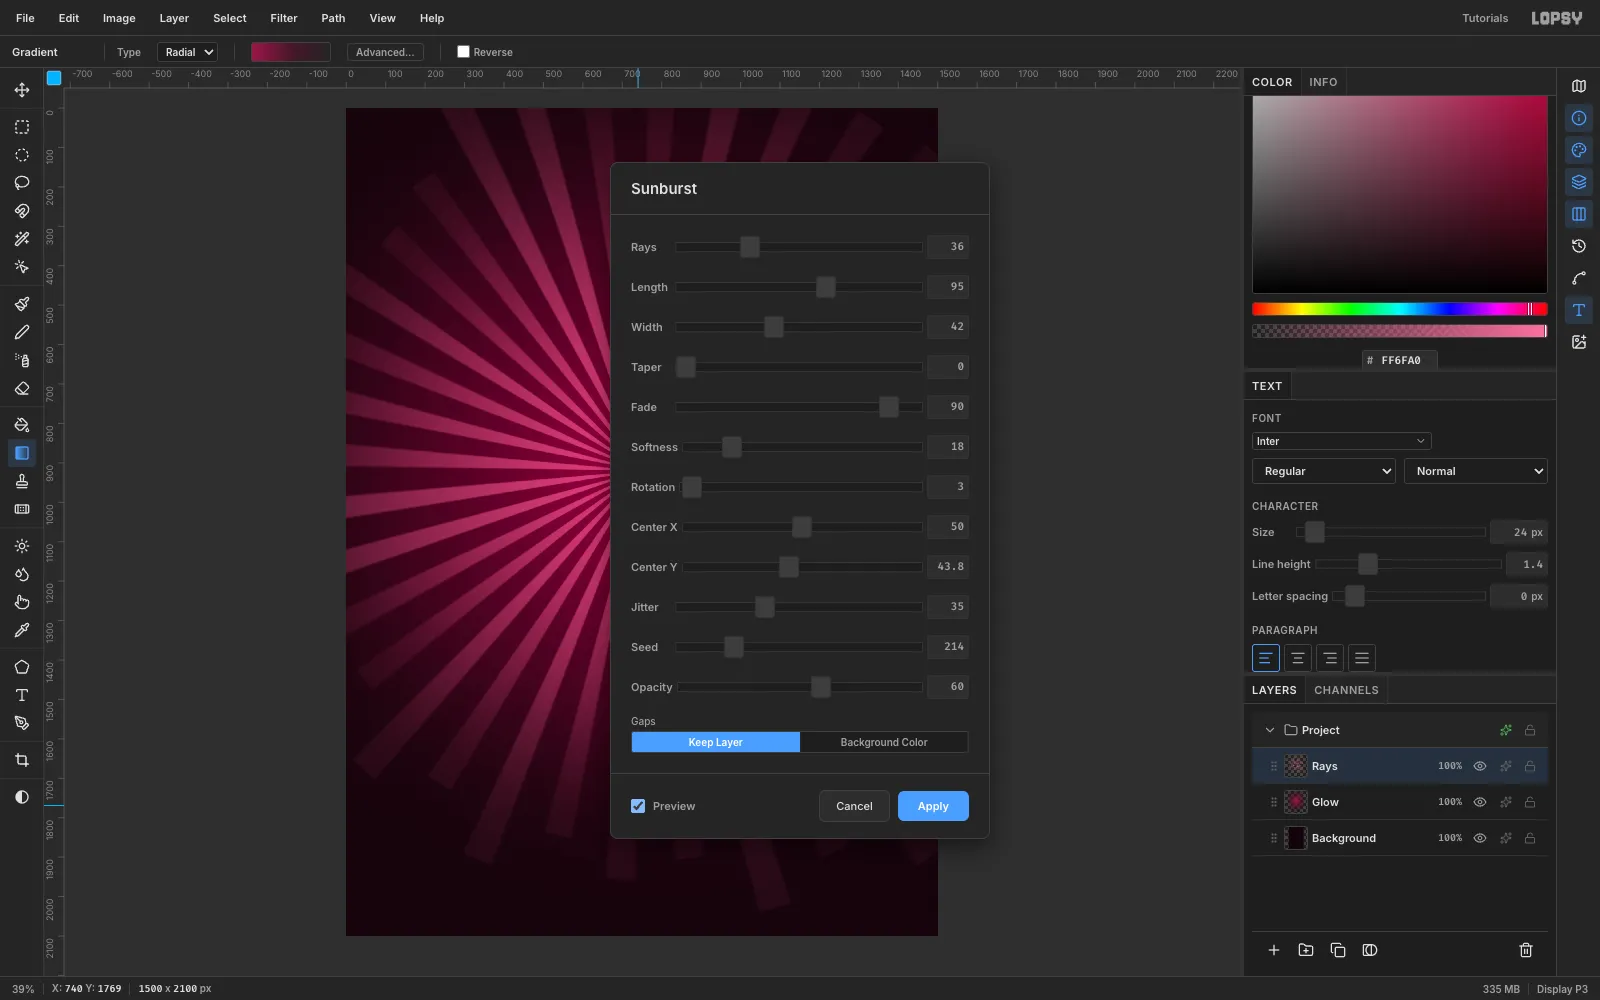
Add a layer called Rays, set the foreground to
#FF6FA0, and choose Filter → Sunburst. Tick Preview so you can see it.Use these settings:
- Rays 36, Length 95, Width 42, Taper 0
- Fade 90, Softness 18, Rotation 3
- Center X 50, Center Y 43.8 (the rays should fan out from behind the heart)
- Jitter 35, Seed 214, Opacity 60
- Gaps: Keep Layer
Click Apply. Then set the layer's blend mode to Screen in the effects drawer, and its opacity to 30%.
-
Fade the rays with a layer mask
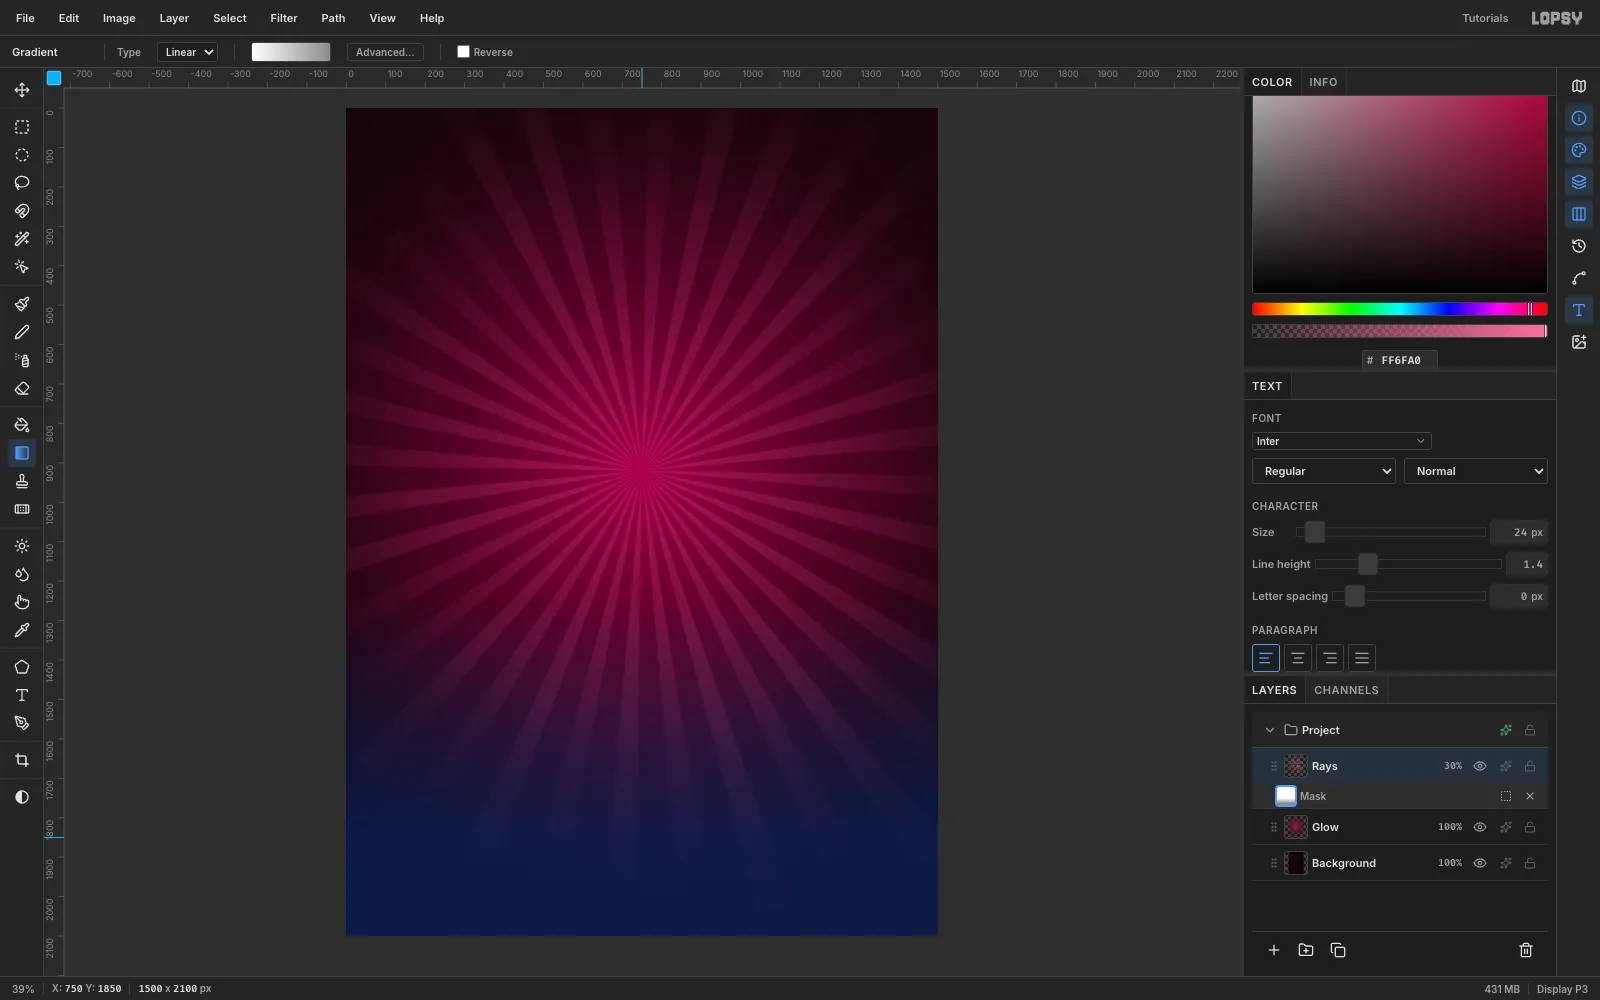
The rays will sit behind the headline later, so fade them out toward the bottom.
- With Rays selected, click Add Mask in the Layers panel footer, then click the mask thumbnail (Edit mask for Rays).
- With the Gradient tool, set a Linear gradient from white to
#8C8C8C. - Drag from y 1250 down to y 1850.
The blue tint is Lopsy's mask-edit overlay; it disappears when you click the layer row again.
-
Lasso the lightning bolt
Add a layer called Bolt Back. With the Lasso, draw a jagged bolt:
- It starts off the left edge at about y 170 and runs down-right to a point at about (1230, 1440).
- Make it about 70 px wide at the tail, tapering to a sharp tip.
- Put two sharp zig-zags near the tail and two near the tip, and leave the middle straight (that part will be hidden behind the heart).
Start the lasso on the canvas, not over the ruler: a press on the ruler adds a guide instead.
Fill it with
#3FE8FF(Edit → Fill). Keep the selection.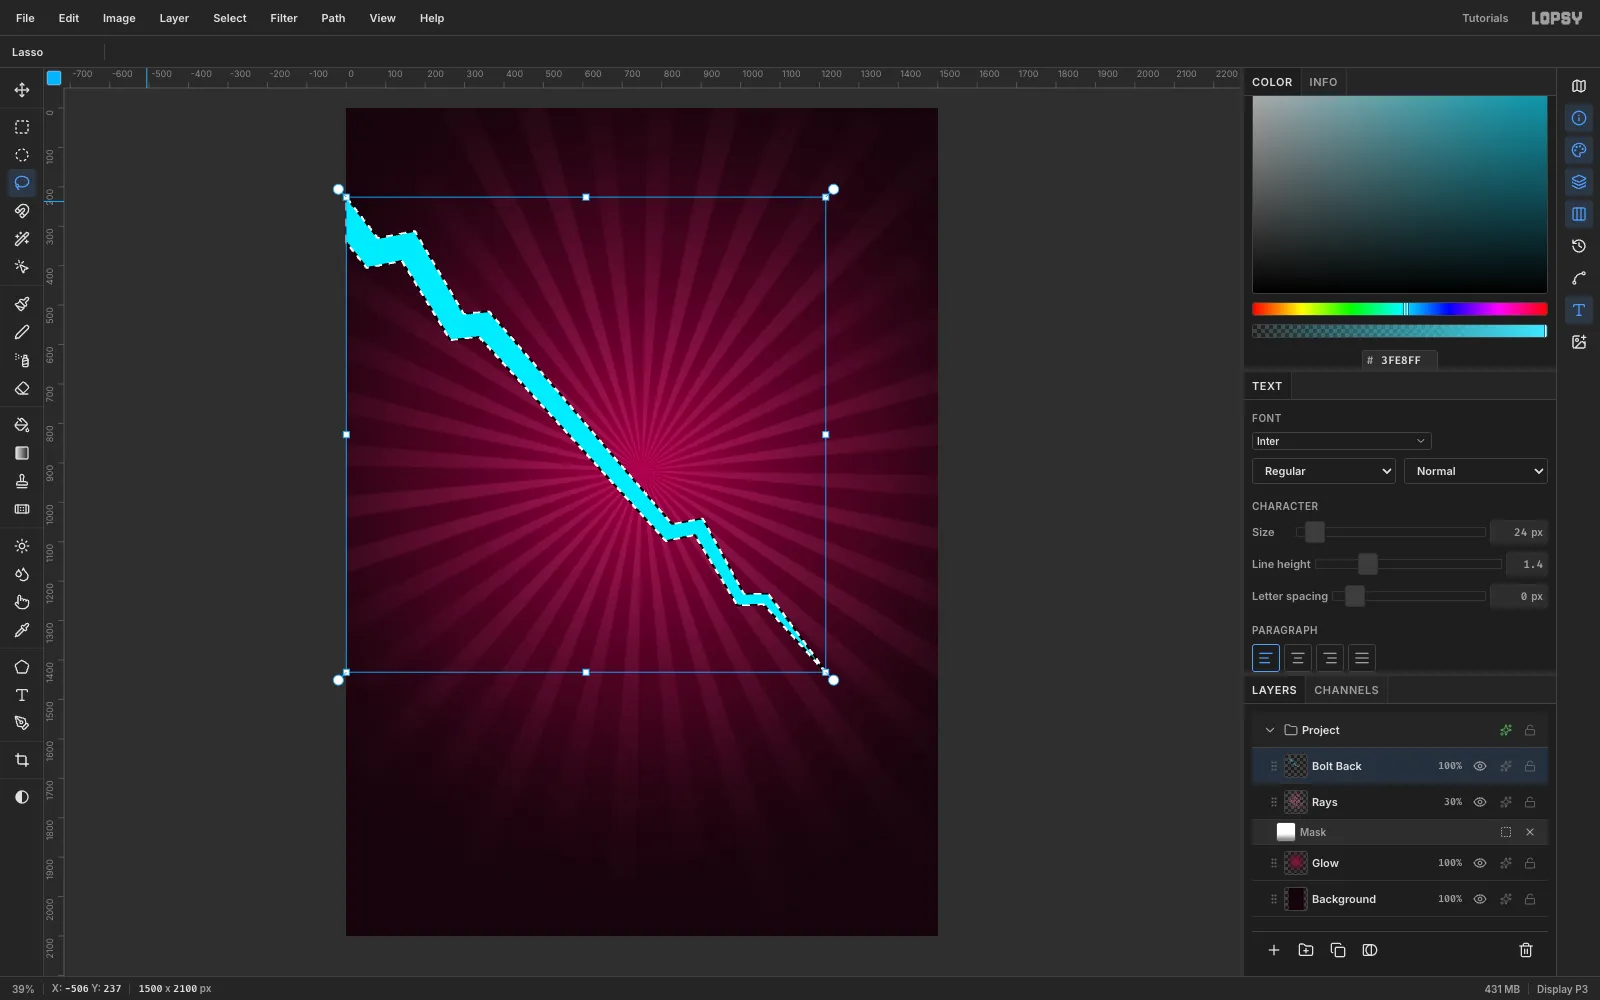
-
Give the bolt a white-hot core
With the bolt still selected, choose Select → Shrink and shrink by 9 px.
Then draw a Linear gradient along the bolt from its tail to its tip, with stops
#FFFFFF→#F2FFFF(70%) →#BDF6FF. Only the core is filled, so a thin cyan edge stays around it.Deselect (⌘D). Open the layer's effects and turn on Outer Glow: colour
#1FD6FF, Size 55, Spread 14, Opacity 95.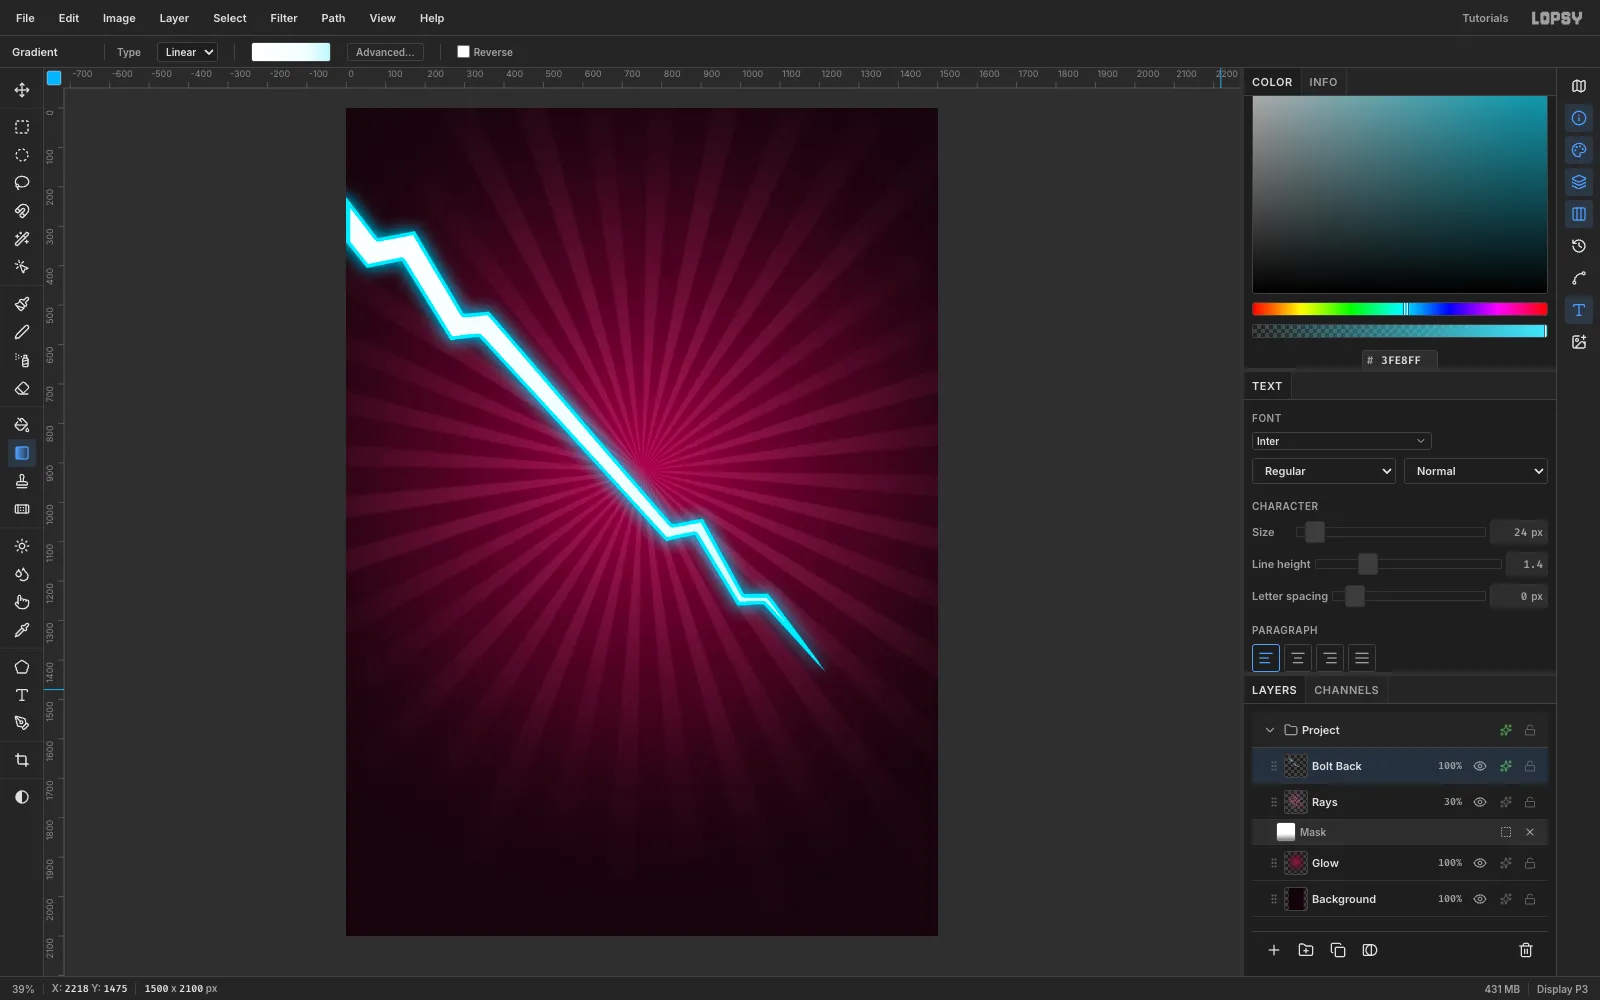
-
Build the heart's bevelled rim
Click Bolt Back, then New Group and call it Heart. Add a layer inside it called Heart Rim.
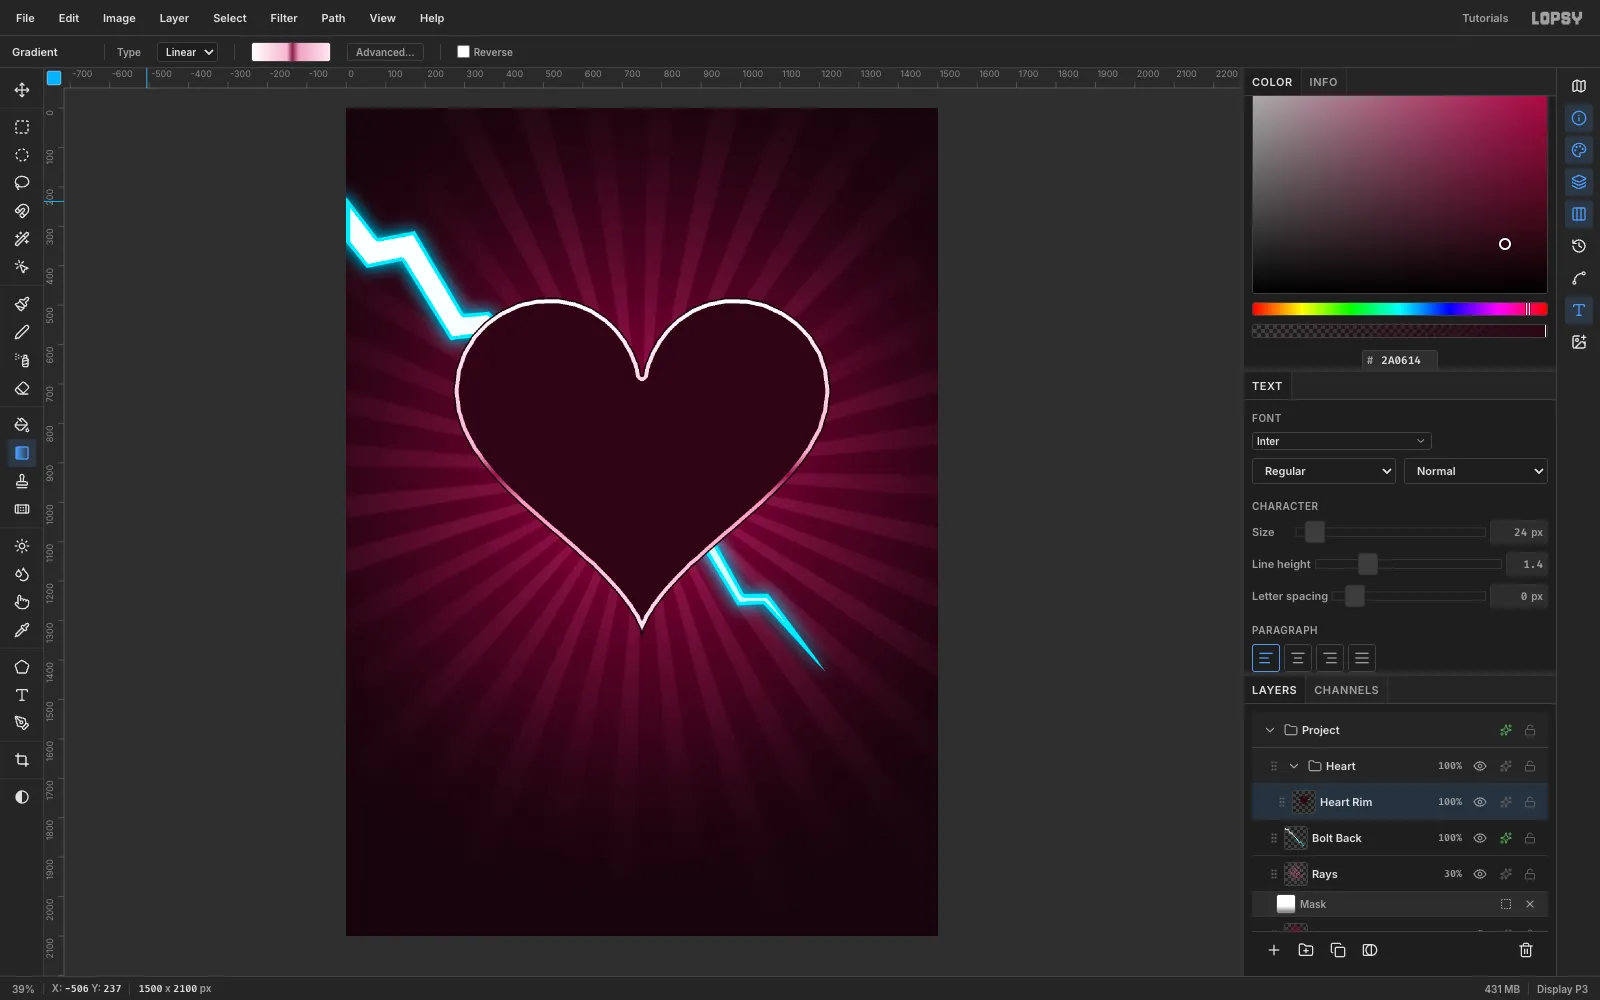
Lasso a heart about 960 px wide and 870 px tall, centred on x 750, with its top at y 480. Round lobes and a sharp tip matter more than exact numbers.
Now build the rim in three passes, keeping the selection active between them:
- Fill the heart with
#1A0610for a dark outer keyline. - Shrink 4 px, then drag a vertical gradient over the whole heart (y 480 → 1347):
#FFFFFF0,#F7B5CF45%,#8A1E4852%,#F0A0C060%,#FFE9F2100%. - Shrink 9 px more and fill with
#2A0614. This leaves a bright bevel between two dark lines.
- Fill the heart with
-
Paint the sky reflection
Add a layer called Sky. Lasso the heart again, then Shrink 17 px so the face sits inside the rim.
Drag a vertical gradient from y 500 to y 880 with these stops:
#FFFFFF0#FFE1EC35%#F48AB470%#C2306A93%#7A1238100%
(In the last step you'll darken the bottom of this sky further.)
Give Sky an Inner Glow in
#5A0F2E(Size 34, Opacity 70). The edges darken slightly, which rounds the form.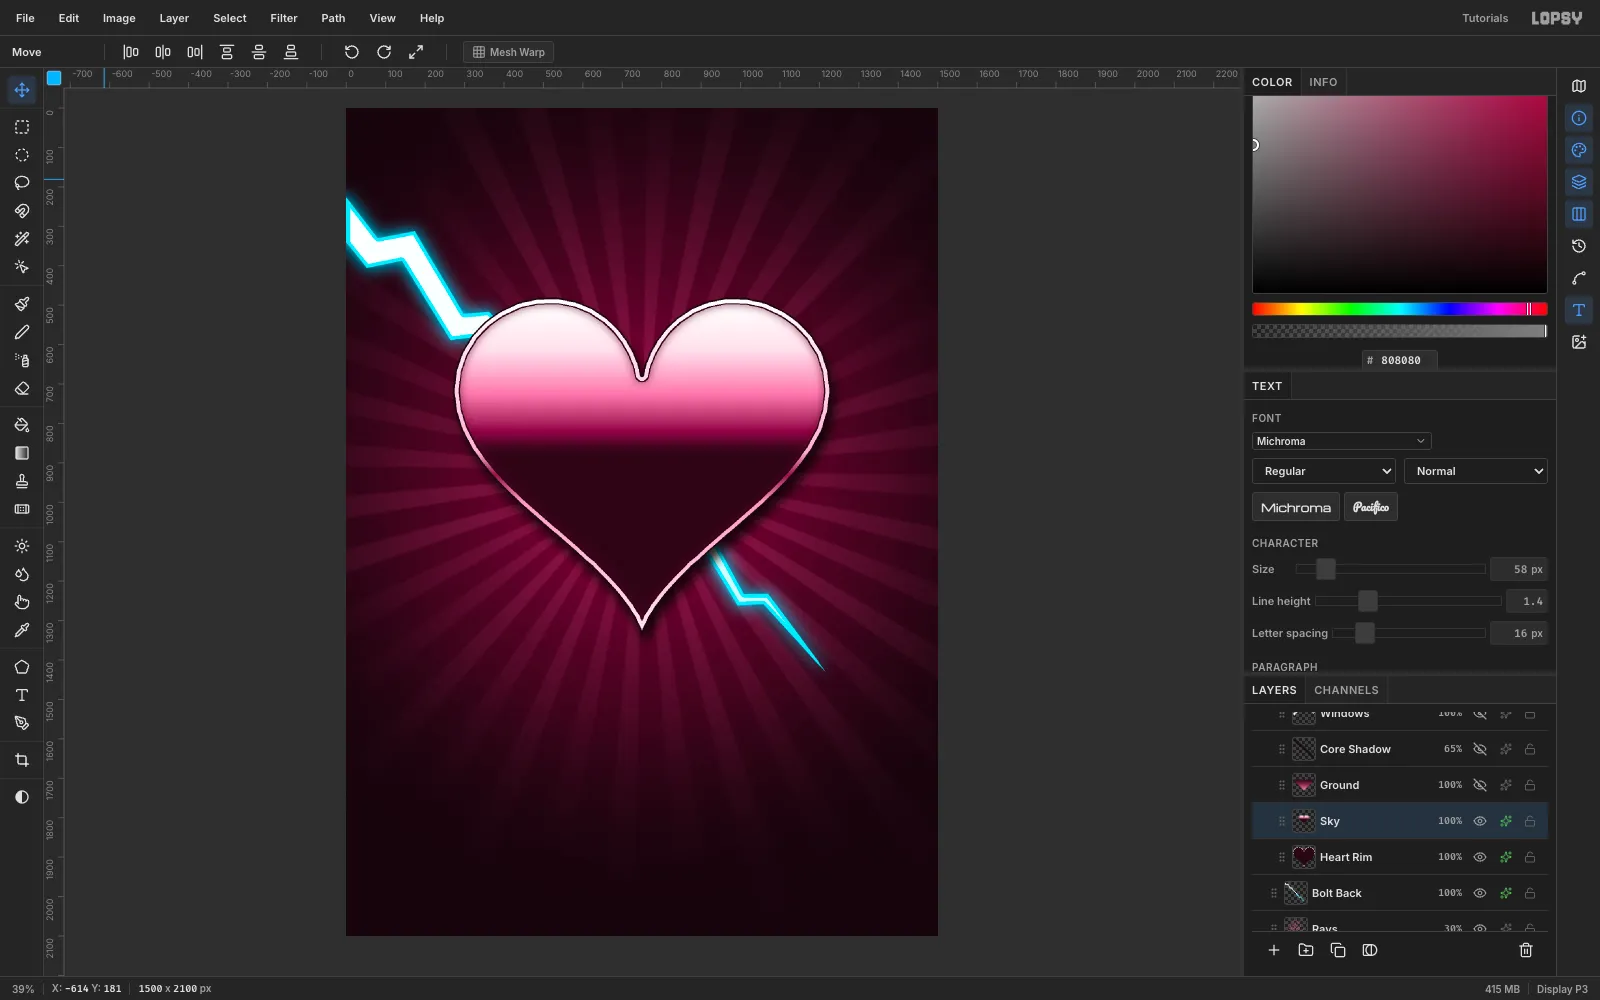
-
Cut a curved horizon
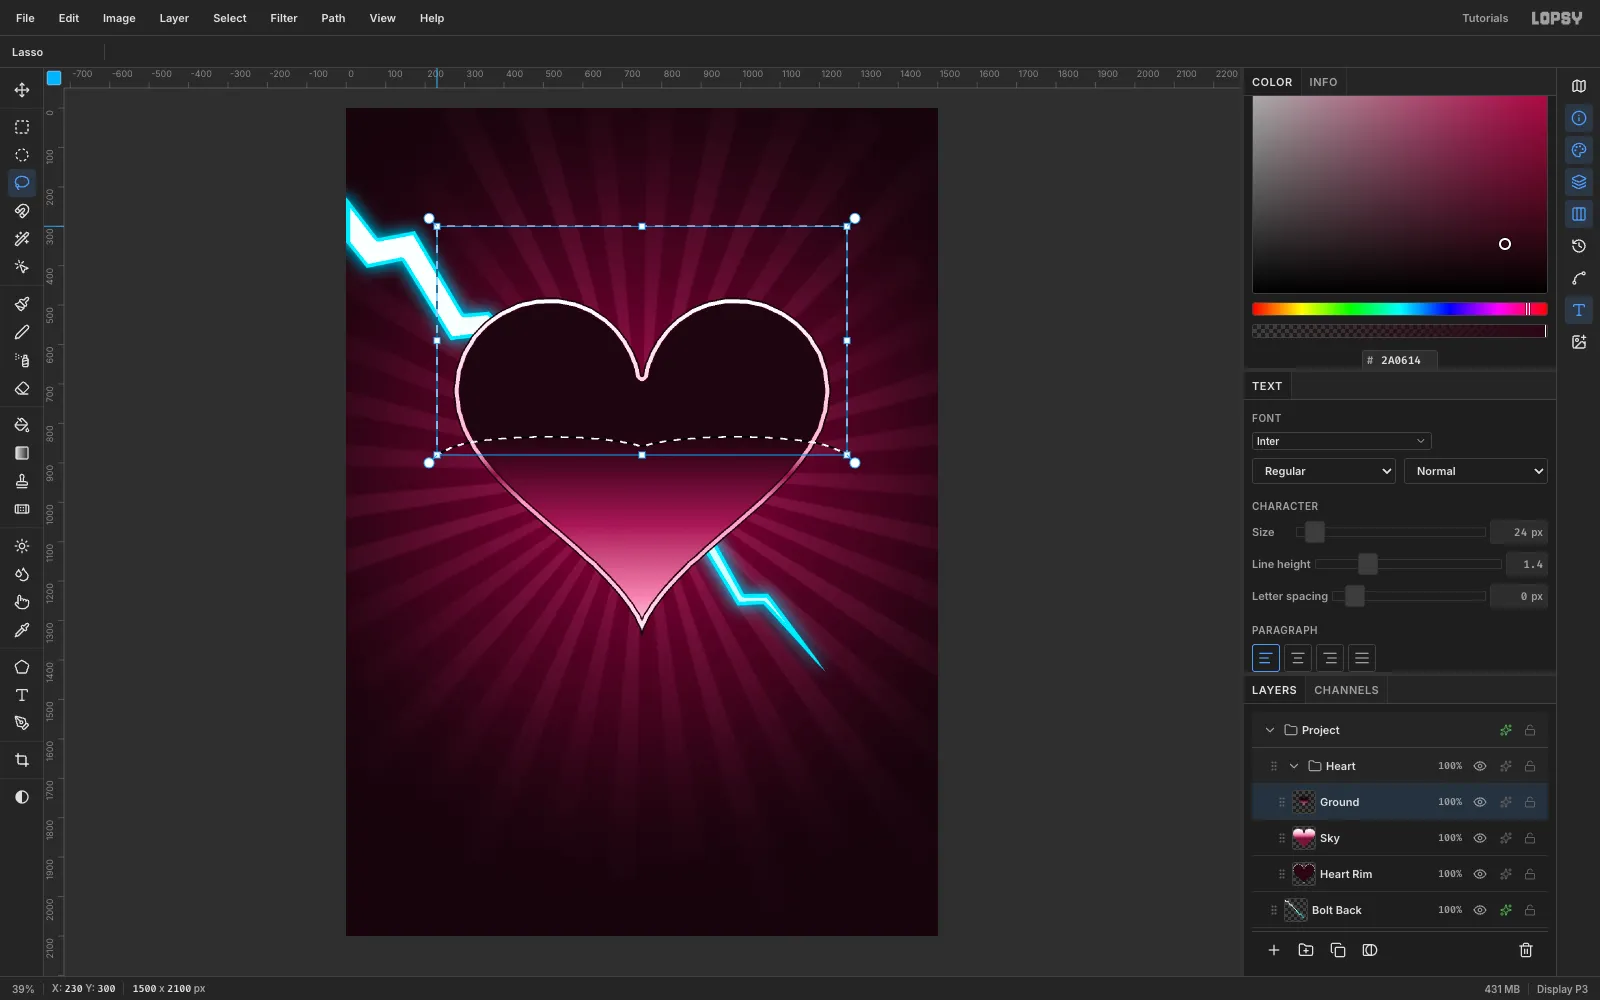
Add a layer called Ground above Sky. Lasso the heart, Shrink 17, and drag a vertical gradient from y 830 to y 1340:
#1A06100#3A0A1E12%#9C285645%#E788AE80%#FFE3EE100%
This covers the whole face for now.
Now lasso everything above the horizon. The horizon should follow the form: arch it gently over each lobe (about 45 px higher over each lobe centre) and dip it at the middle of the heart. Press Delete.
A dead-straight horizon is what makes chrome look like a sticker.
-
Add a glint on the horizon
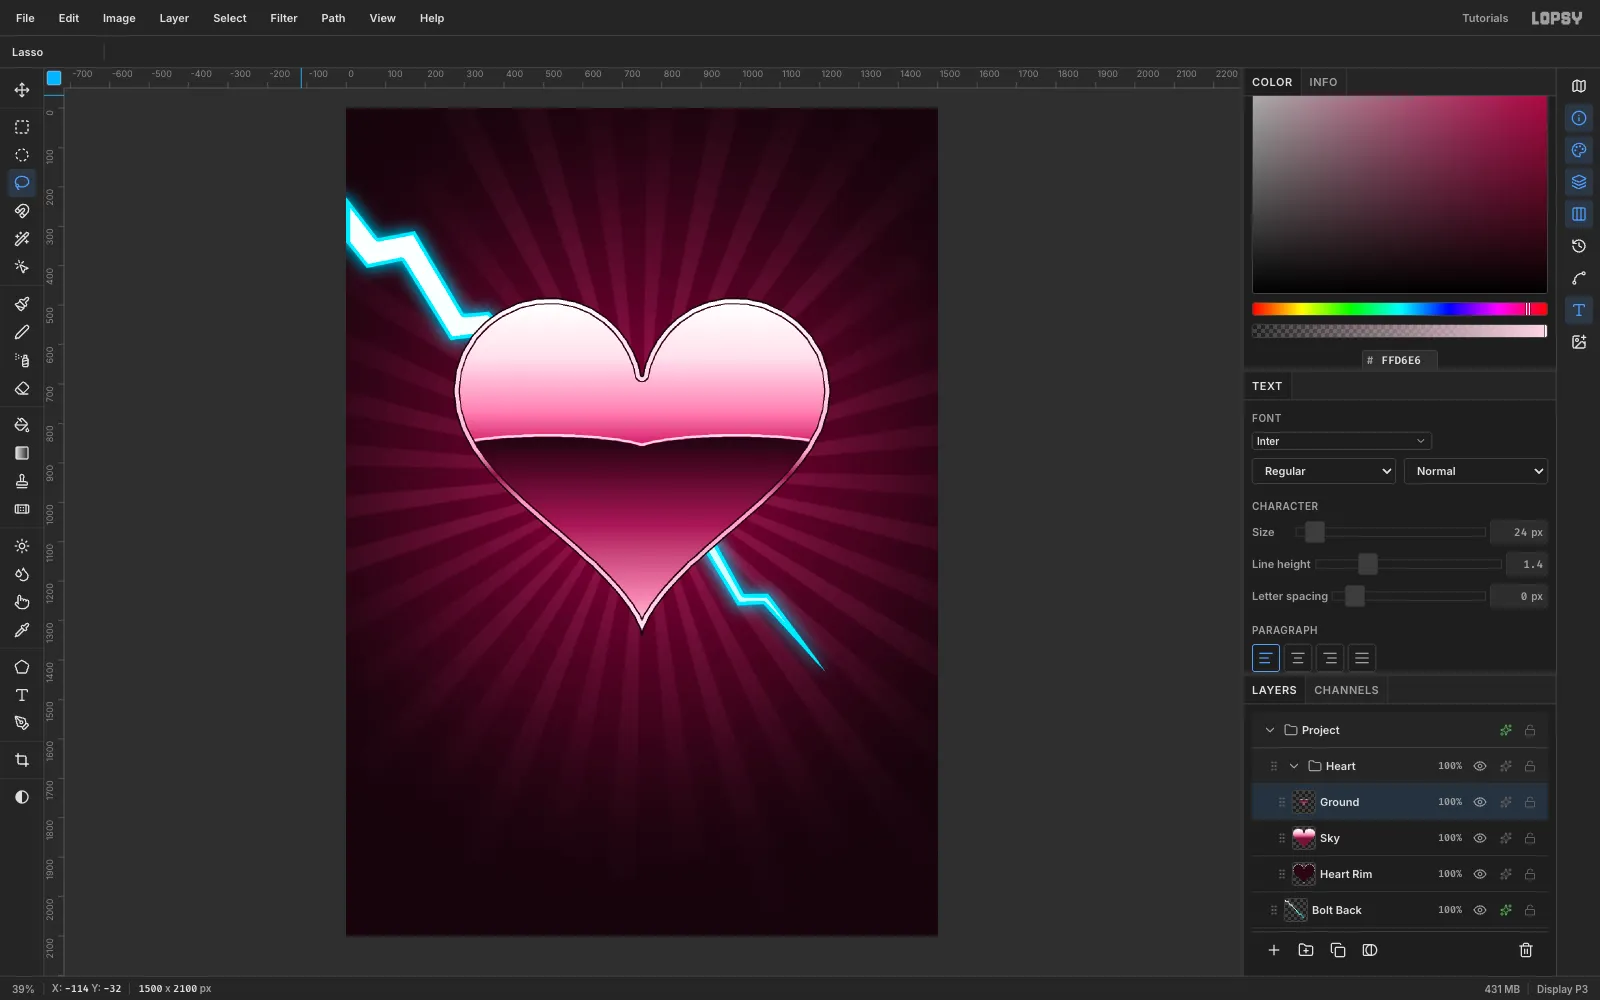
On the Ground layer:
- Set the foreground to
#FFD6E6and lasso a thin ribbon, 6 px tall, just above the horizon line. Fill it. - To trim the ribbon's ends, lasso the heart, Shrink 17, choose Select → Inverse, and press Delete.
The bright line against the near-black ground is the strongest chrome cue on the whole card.
- Set the foreground to
-
Windows and a core shadow
Add a layer called Core Shadow. Lasso a crescent about 45 px wide just inside the lower-left edge, from the horizon down to the tip. Choose Select → Feather 18, fill
#1A0610, and trim it to the face with the same Shrink 17 / Inverse / Delete trick. Set the layer to 65%.Add a layer called Windows. Lasso two curved "window pane" bands on the upper left of the left lobe, following its curve. On the right lobe, lasso two smaller ones.
Feather each selection by 1 px before you fill it white. That anti-aliases the edge without softening it; the reflections must stay hard.
Finally give Heart Rim a Drop Shadow:
#070003, X 10, Y 26, Blur 40, Opacity 85.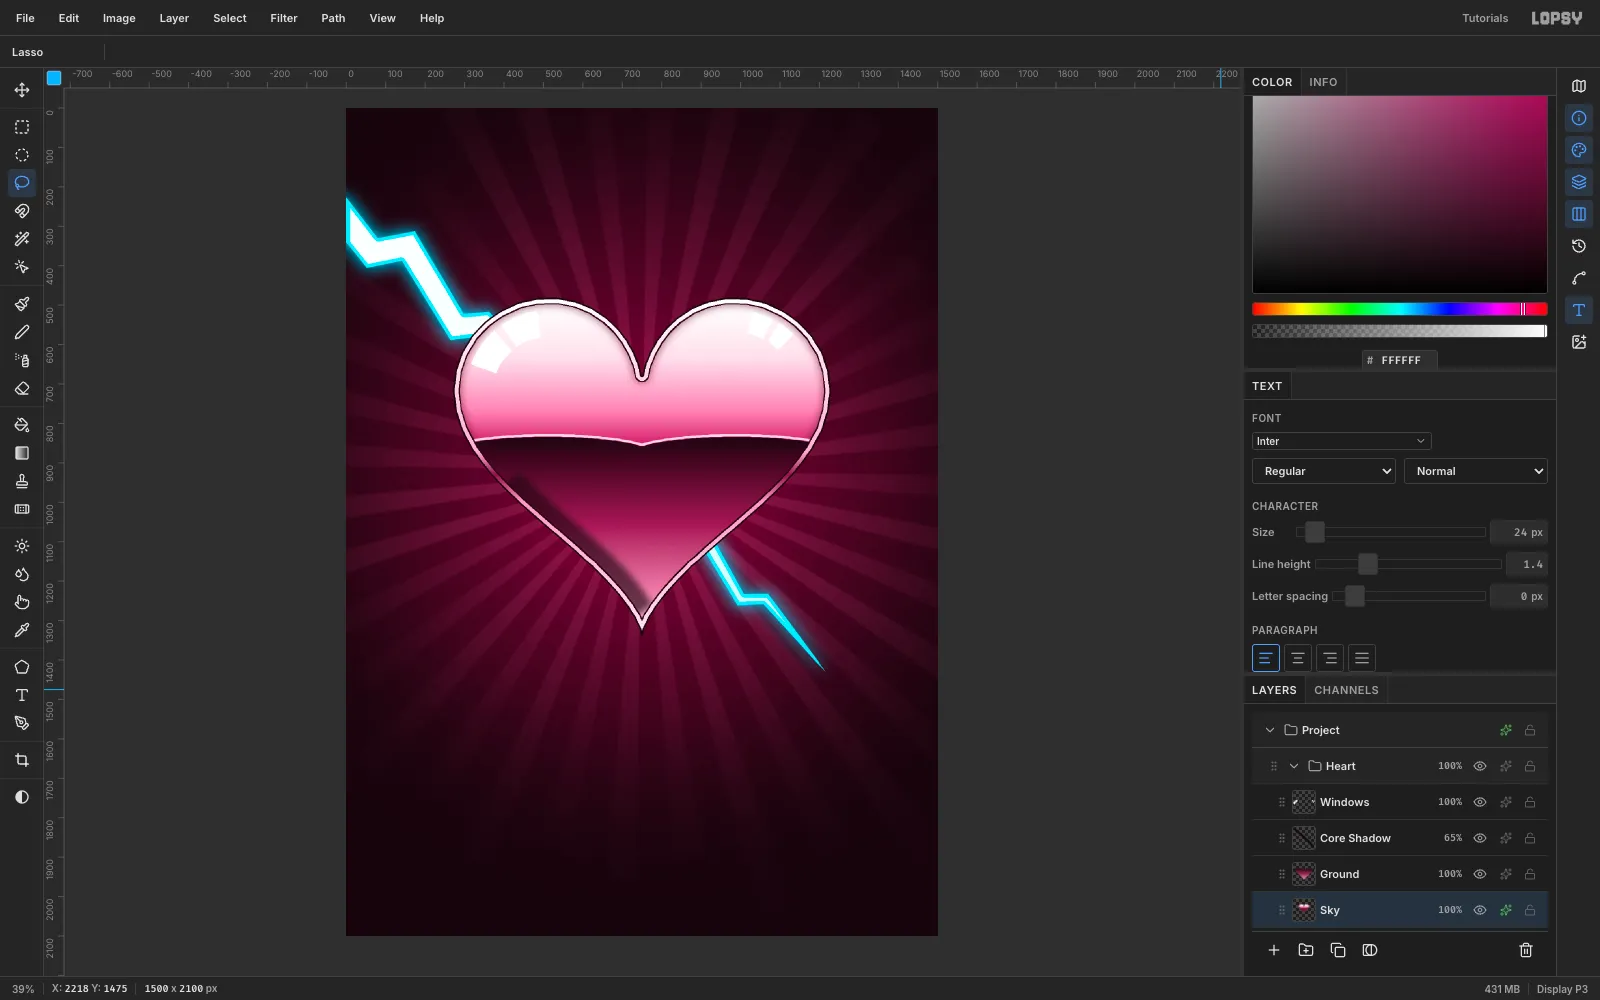
-
Copy the tip of the bolt
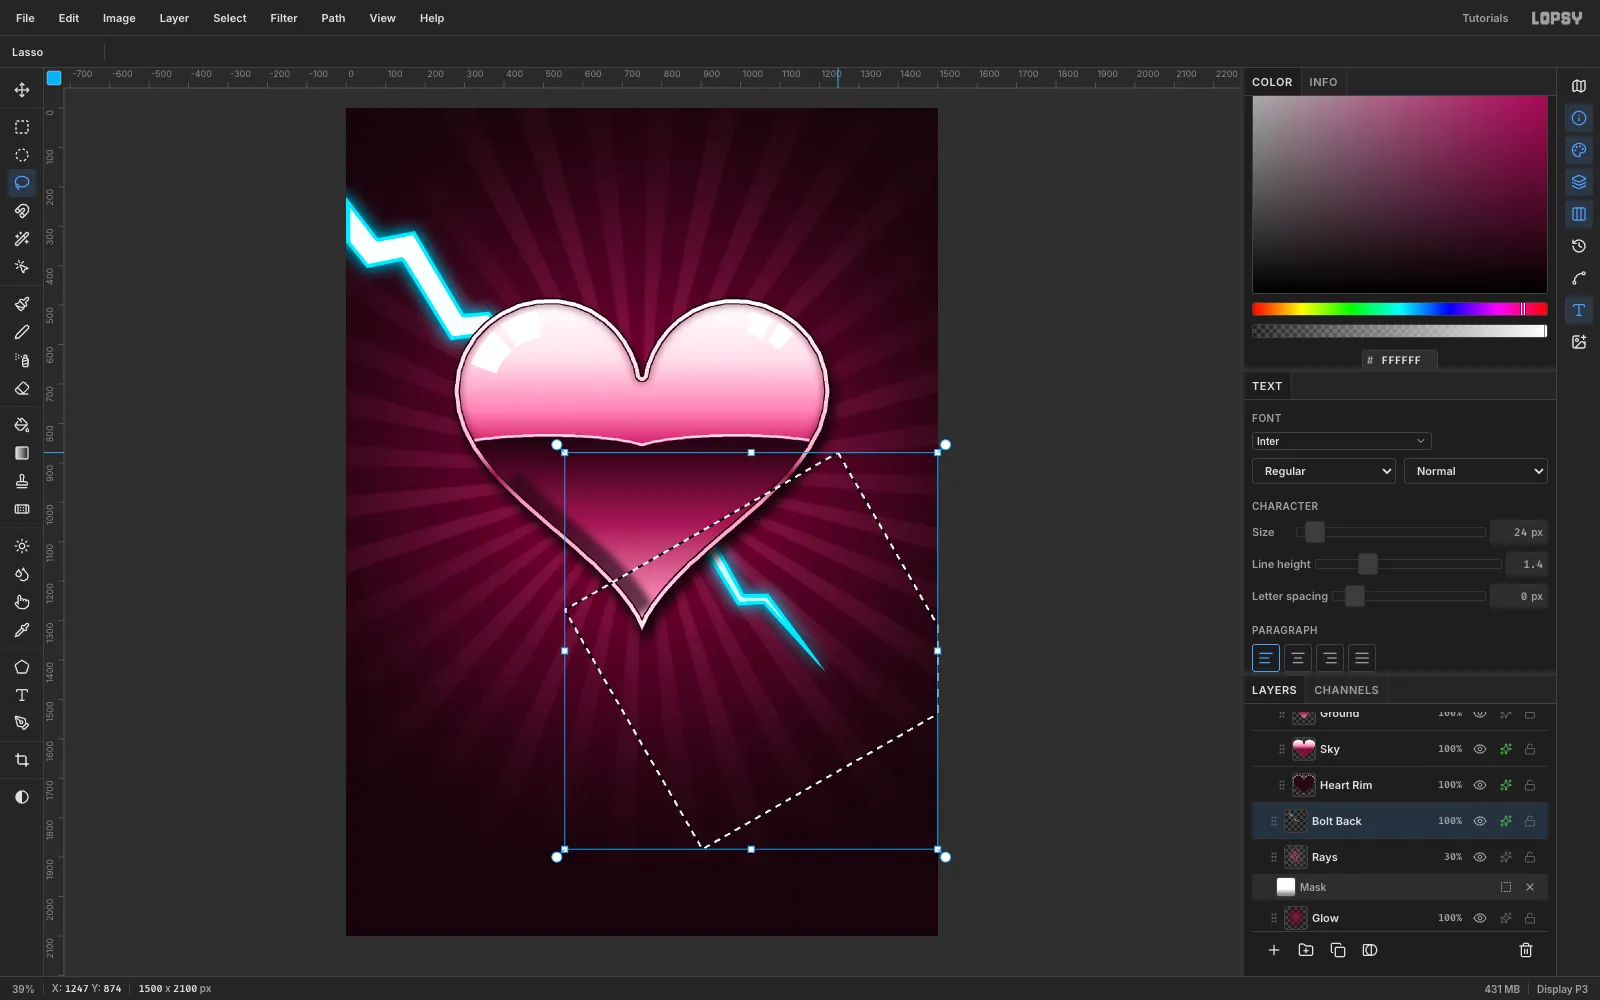
The bolt should look like it pierces the heart: behind it at the top left, bursting out of the front at the lower right.
- Click Bolt Back.
- Lasso a big four-sided area that starts about 50 px inside the heart, where the bolt exits, and covers everything toward the tip. Make its top edge perpendicular to the bolt.
- Press ⌘C, wait a moment, then press ⌘V. The pasted copy lands right above Bolt Back in the same place.
-
Put the tip in front of the heart
Rename the pasted layer Bolt Front. Collapse the Heart group and drag Bolt Front by its grip until it sits above the group.
Pasting copies pixels, not effects, so add the same Outer Glow (
#1FD6FF, 55 / 14 / 95).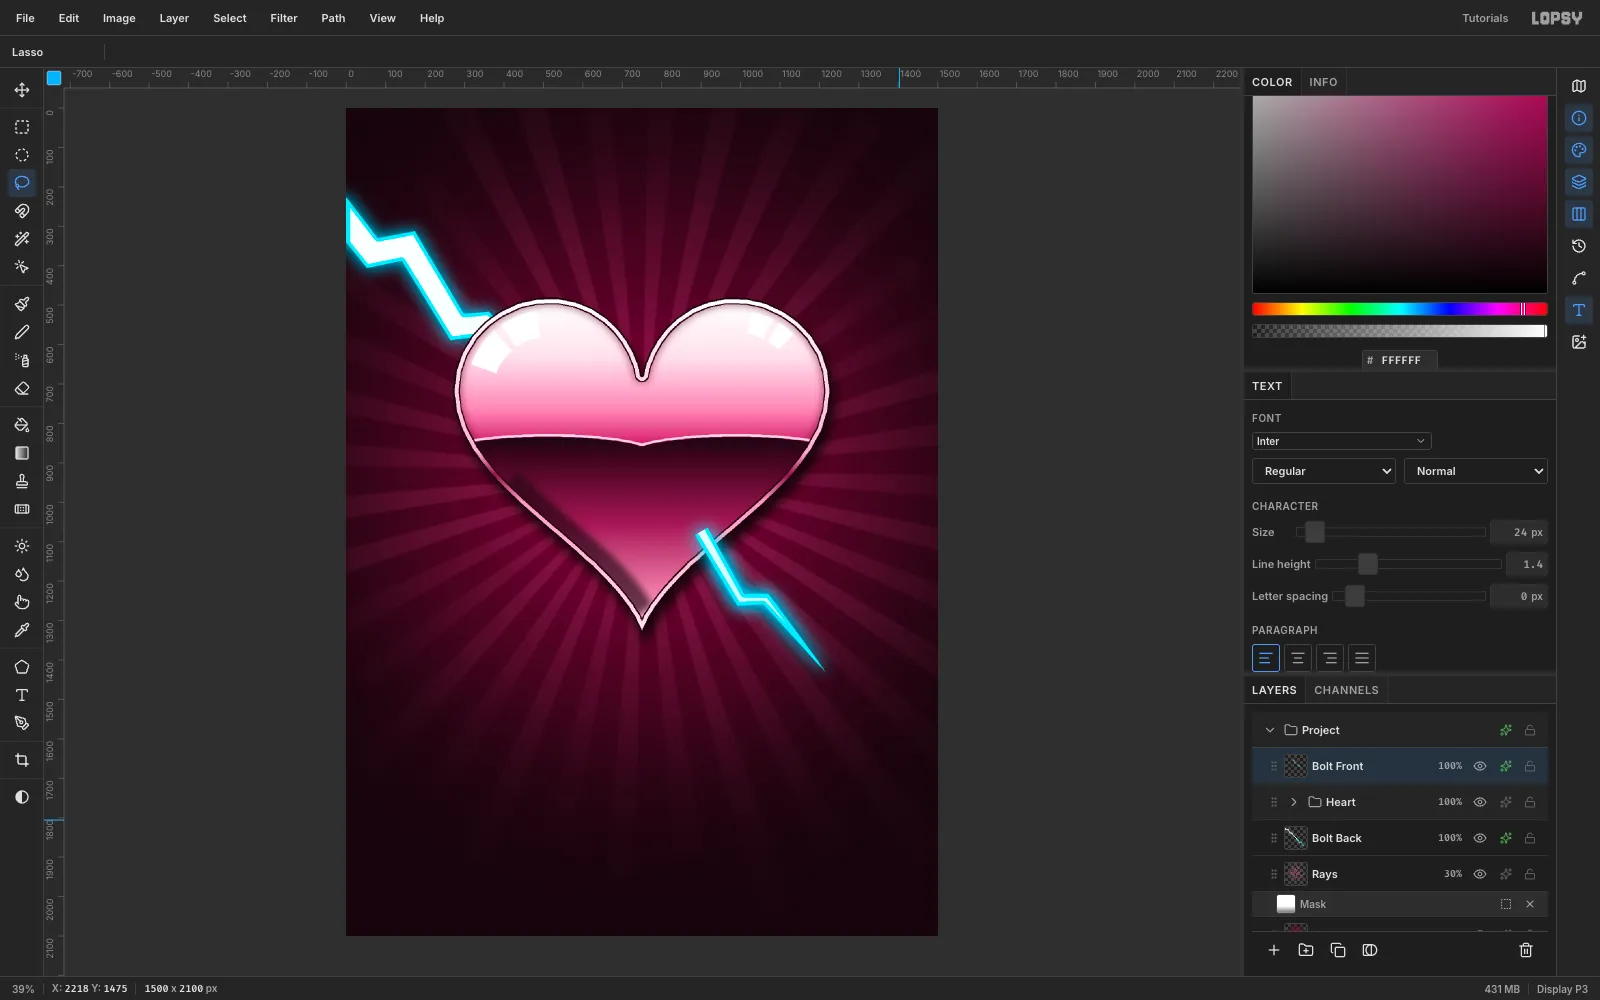
-
Crack the chrome
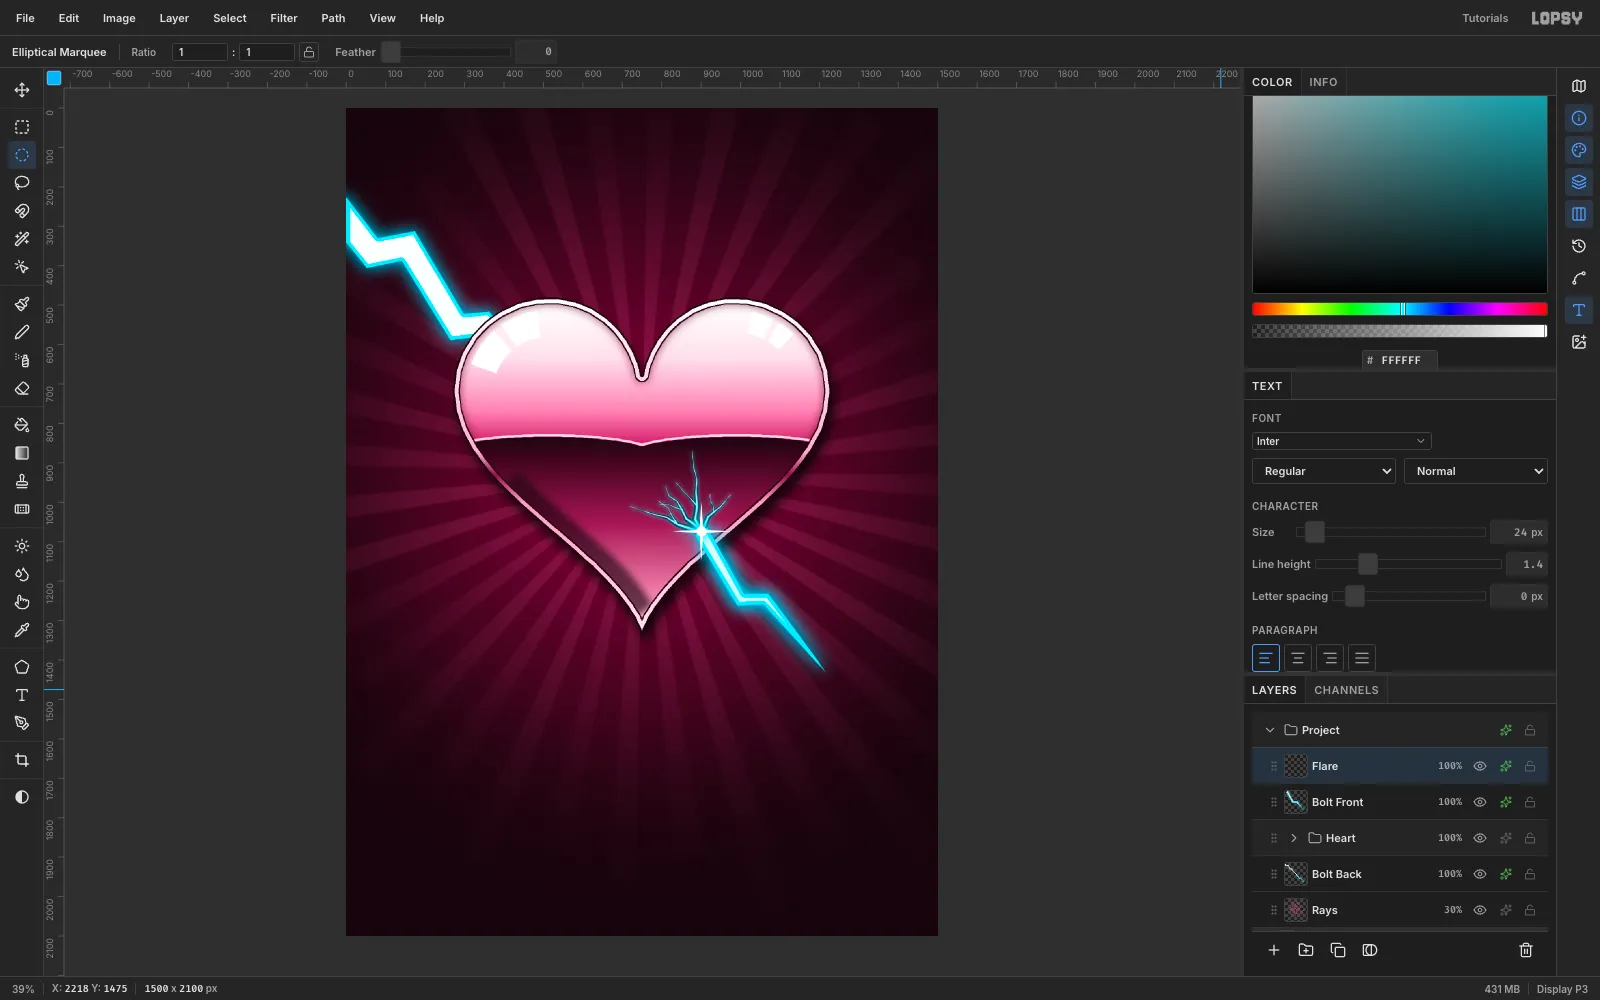
Expand Heart and click Windows. Add two layers above it: Fissures and Crack Cores.
- On Fissures, lasso four tapered cracks that radiate from the exit point, each with one side branch. Make them about 18 px wide at the root and 1 px at the tip. Fill them
#14030A. - On Crack Cores, lasso thinner copies (about a third of the width) along the same lines and fill them
#A8F9FF. - Give Crack Cores an Outer Glow:
#1FD6FF, Size 14, Spread 20, Opacity 100.
Then click Bolt Front and add a layer called Flare. Fill a four-point star (radius about 74 px, very thin points) and a small circle in white at the exit point. Give it the same cyan Outer Glow (Size 30, Spread 16).
The flare hides the flat cut end of Bolt Front.
- On Fissures, lasso four tapered cracks that radiate from the exit point, each with one side branch. Make them about 18 px wide at the root and 1 px at the tip. Fill them
-
Set the greeting
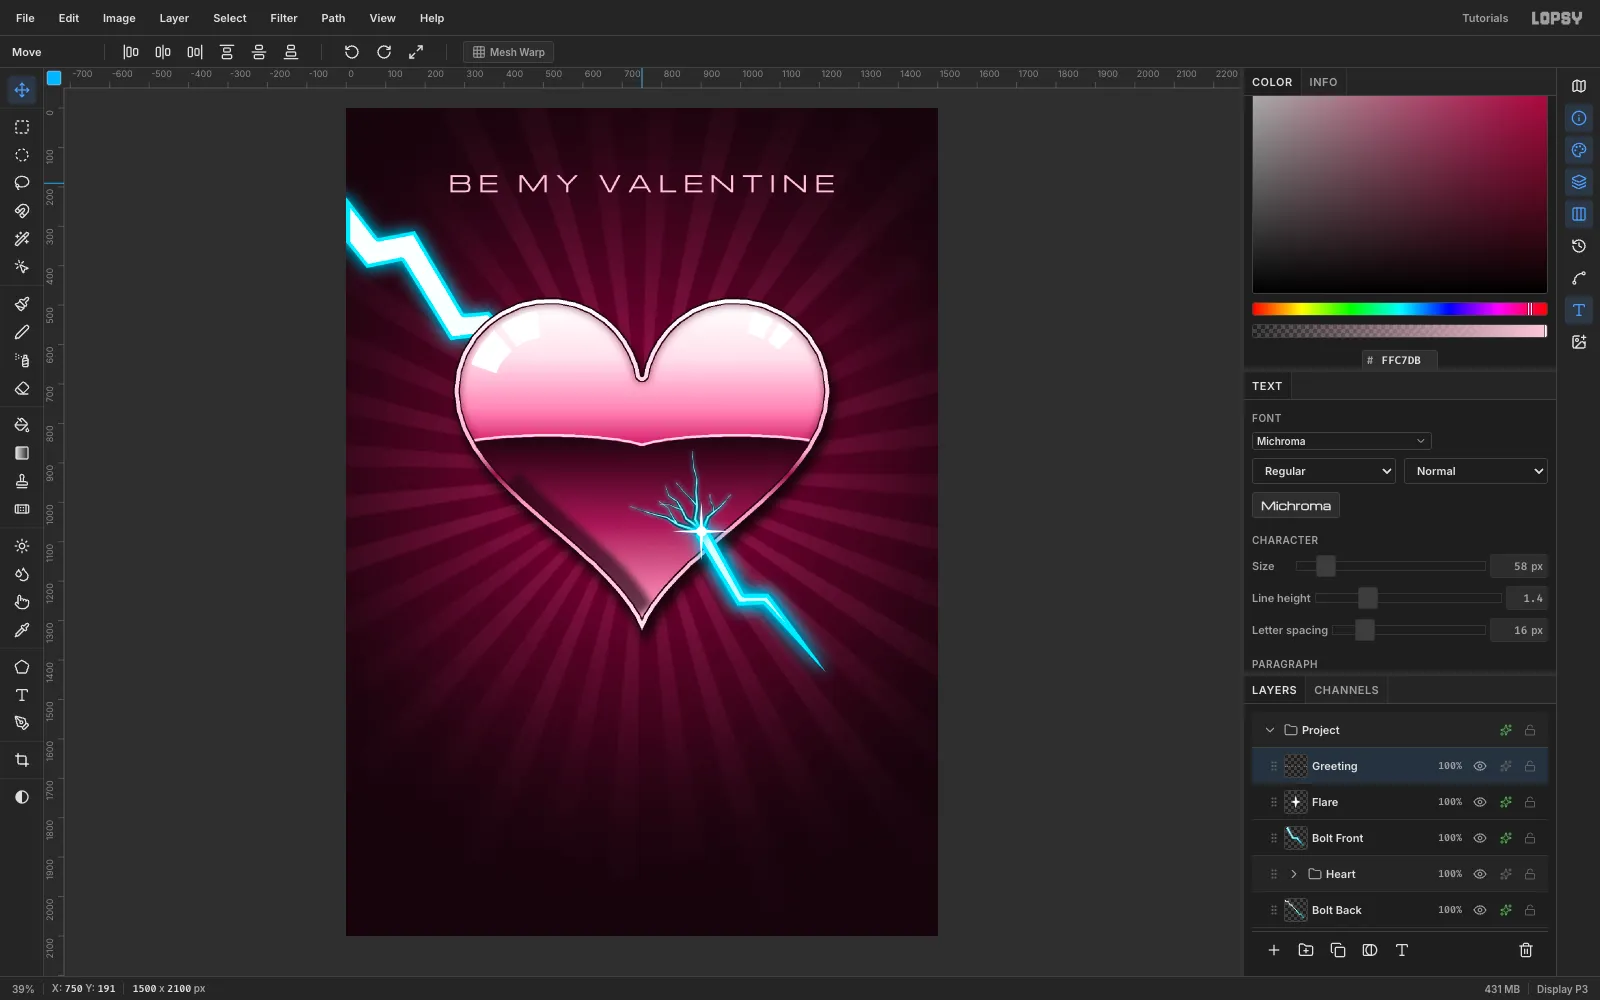
With a raster layer active (click Flare), pick the Text tool, choose Michroma, and set Size 58 and colour
#FFC7DB.Click in empty space and type BE MY VALENTINE. Press Tab to commit.
In the Text panel set Letter spacing 16. Then move the line so its caps sit at y 170, centred on x 750.
BE MY VALENTINE has no apostrophe, so the wide tracking doesn't open a hole the way VALENTINE'S would.
-
Type the script headline
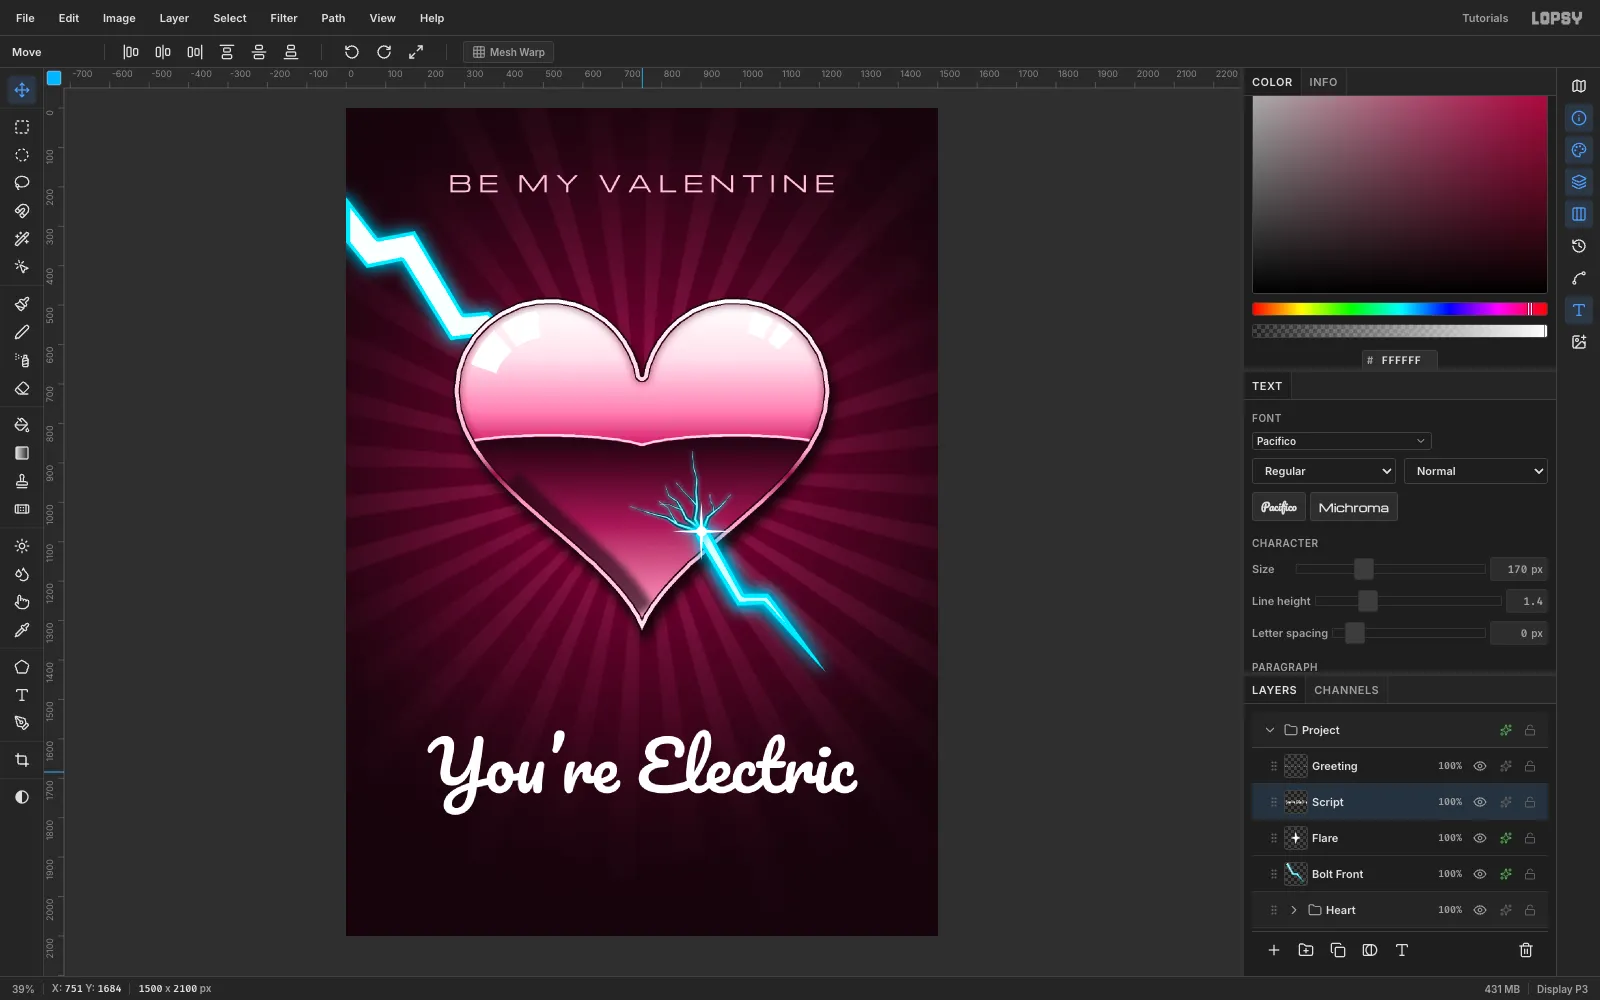
Click Flare again. Don't start new type while a text layer is active: changing the font or size would restyle that layer.
Choose Pacifico, Size 170, white, and type You’re Electric (with a curly ’).
The Text panel still holds the greeting's letter spacing. Set it back to 0 for this layer. Then centre it with its top at y 1577.
-
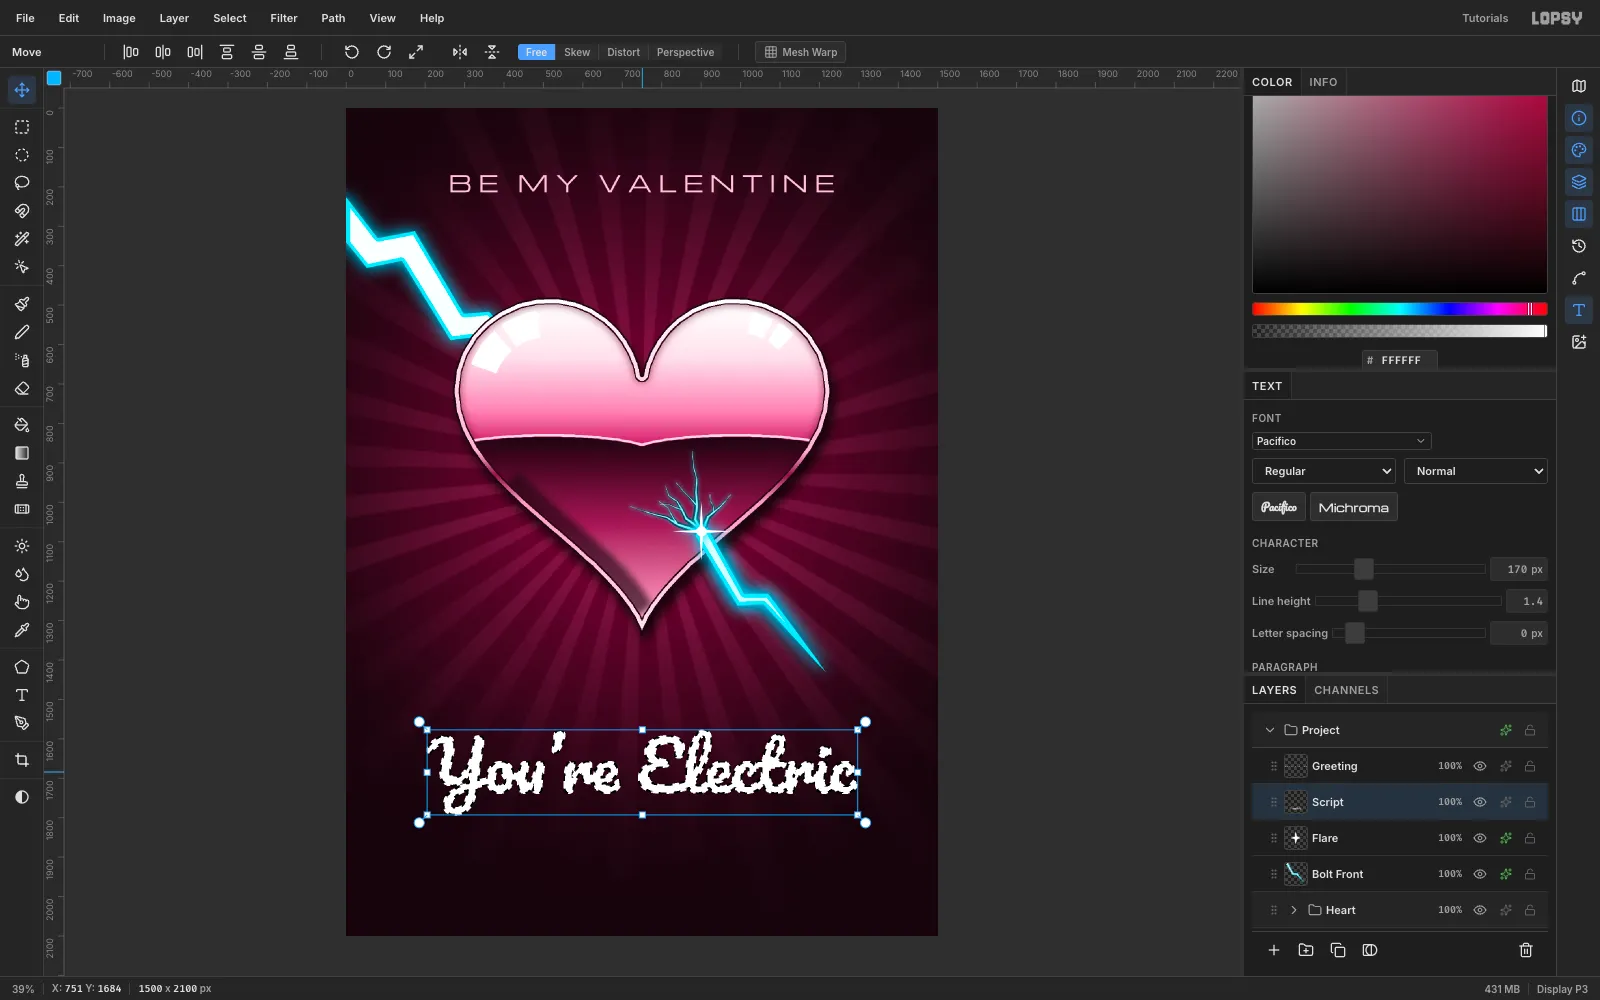
Load the script as a selection
- With Script selected, click Rasterize Layer in the Layers panel footer.
- ⌘-click the layer's thumbnail. That loads the letters' alpha as a selection.
-
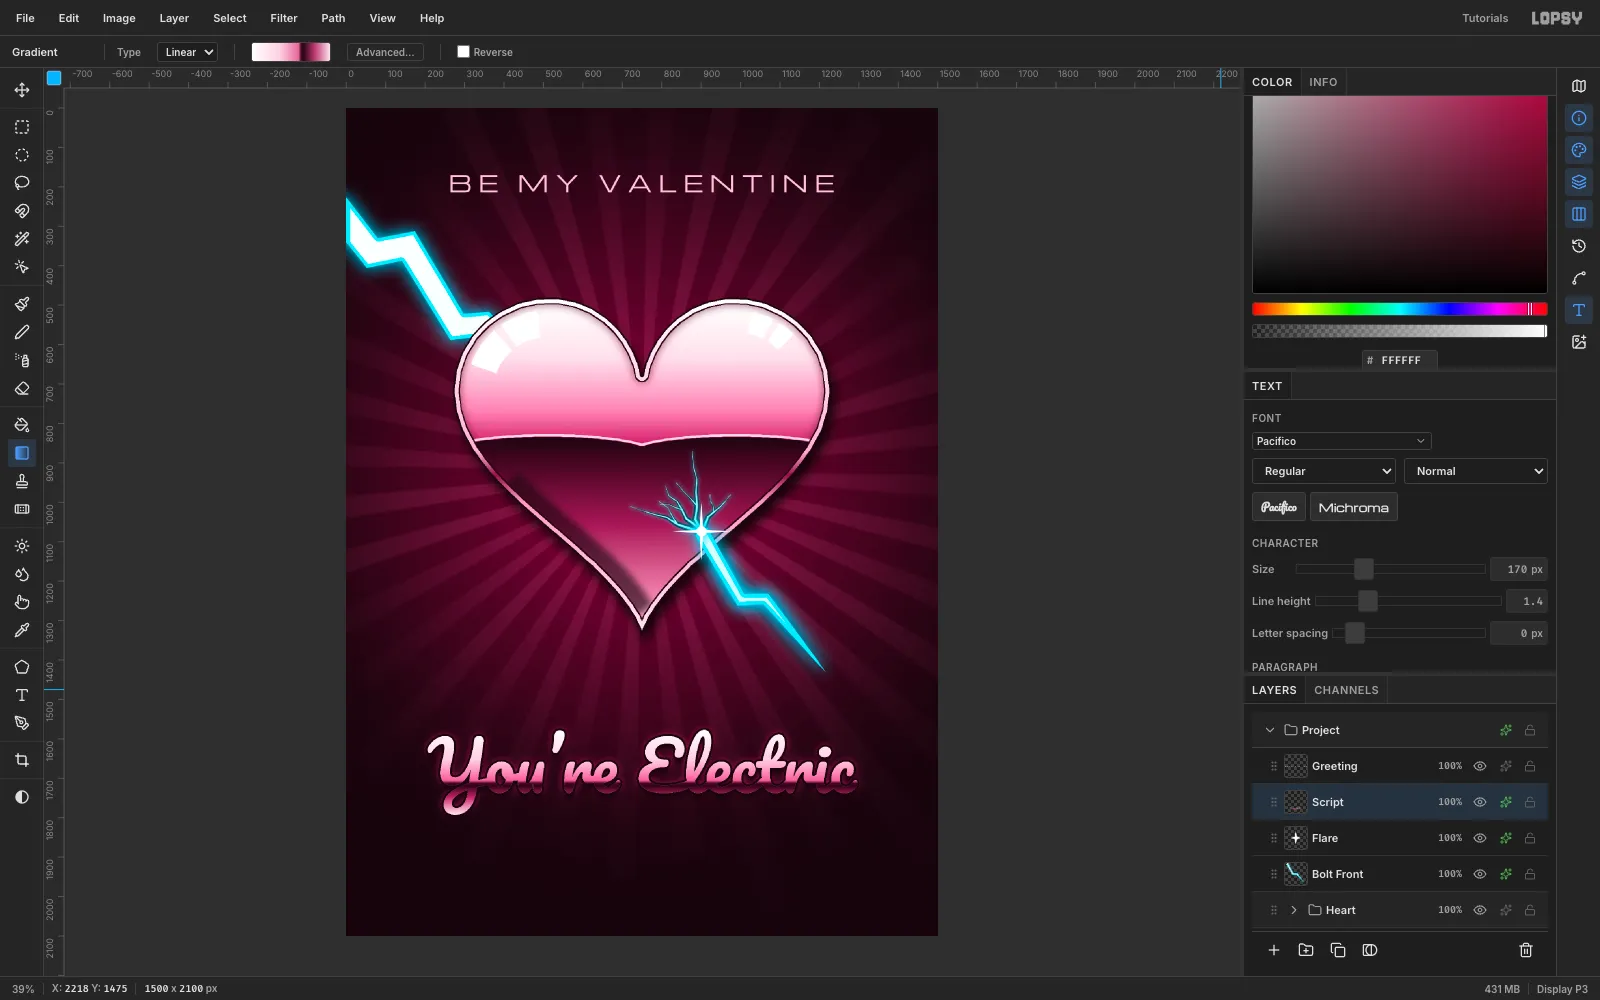
Chrome the script
Drag a vertical gradient from the top of the letters to the bottom of the descenders. Use the same horizon idea, with the horizon just under the x-height:
#FFFFFF0#FFD0E235%#E4679A60%#4A0C2663%#2A061466%#B8336B80%#FFE2EE100%
Deselect, then add three effects:
- Stroke: outside, 5 px,
#1A030C - Outer Glow:
#FF3D8B, Size 30, Spread 8, Opacity 70 - Drop Shadow:
#050002, X 0, Y 14, Blur 16, Opacity 80
-
XOXO and a mini bolt
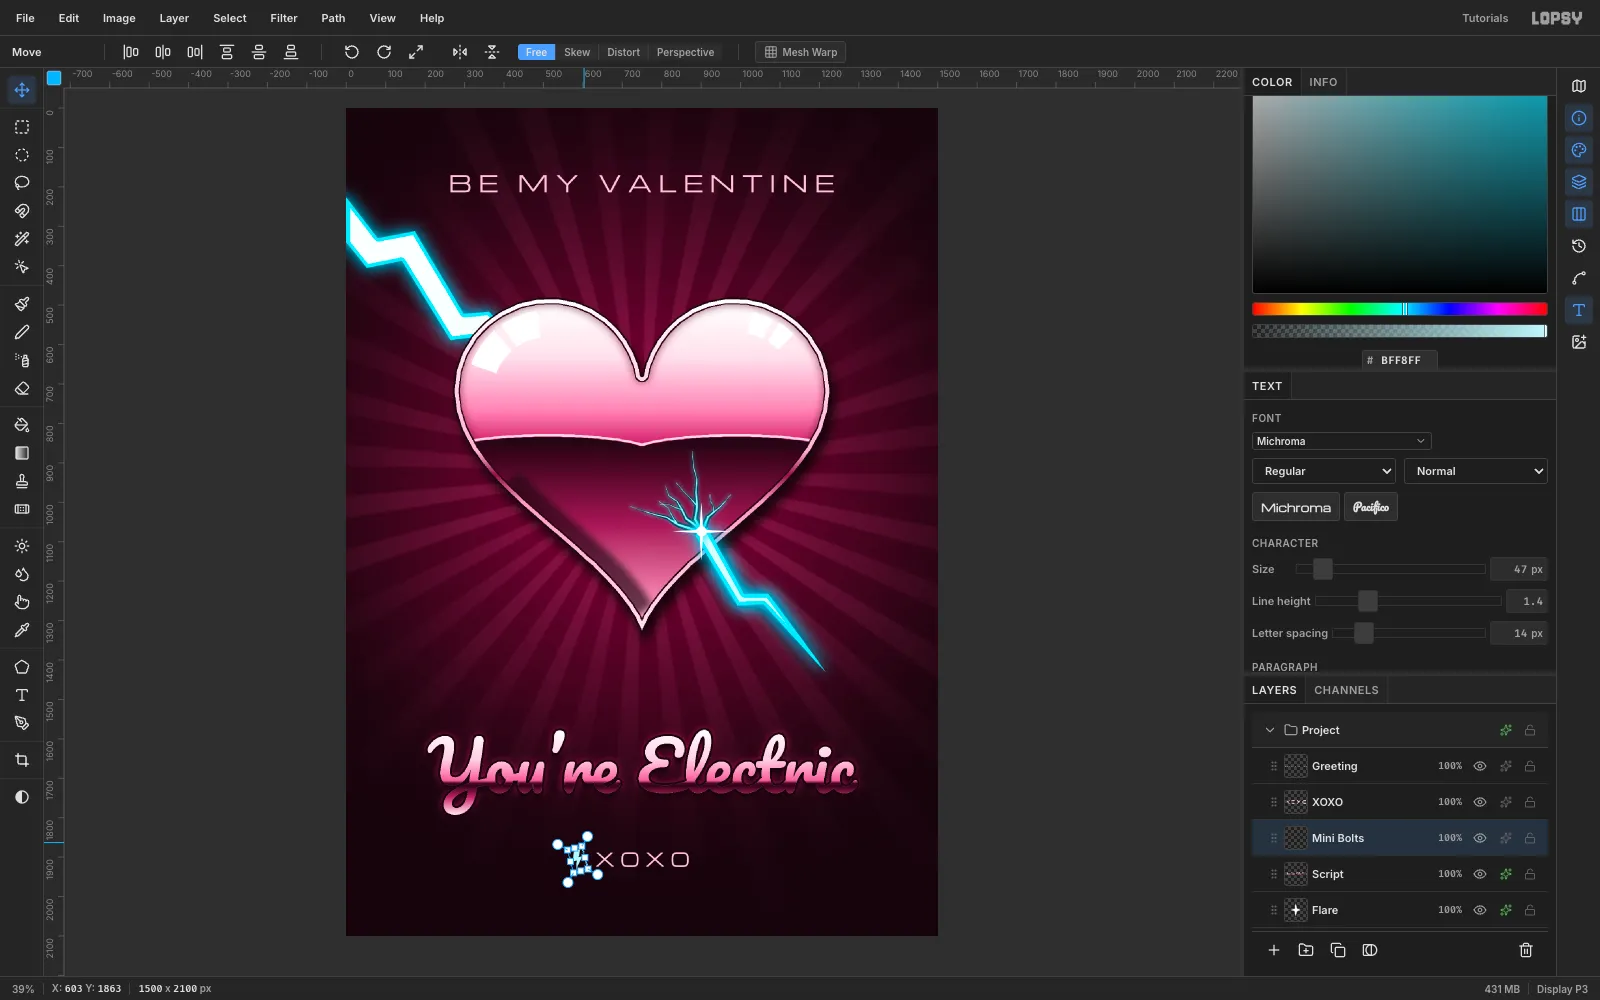
Type XOXO in Michroma 47,
#FFC7DB, with Letter spacing 14. Centre it with its caps at y 1888, about 90 px below the script and 90 px above the inner frame line.Add a layer called Mini Bolts. Lasso a small classic bolt about 27 × 48 px, 32 px to the left of the X, and fill it
#BFF8FF.To tilt it:
- Marquee around it and switch to the Move tool.
- ⌘-drag the rotate handle (just outside the top-right corner) to −15°.
- Press ⌘D to commit.
-
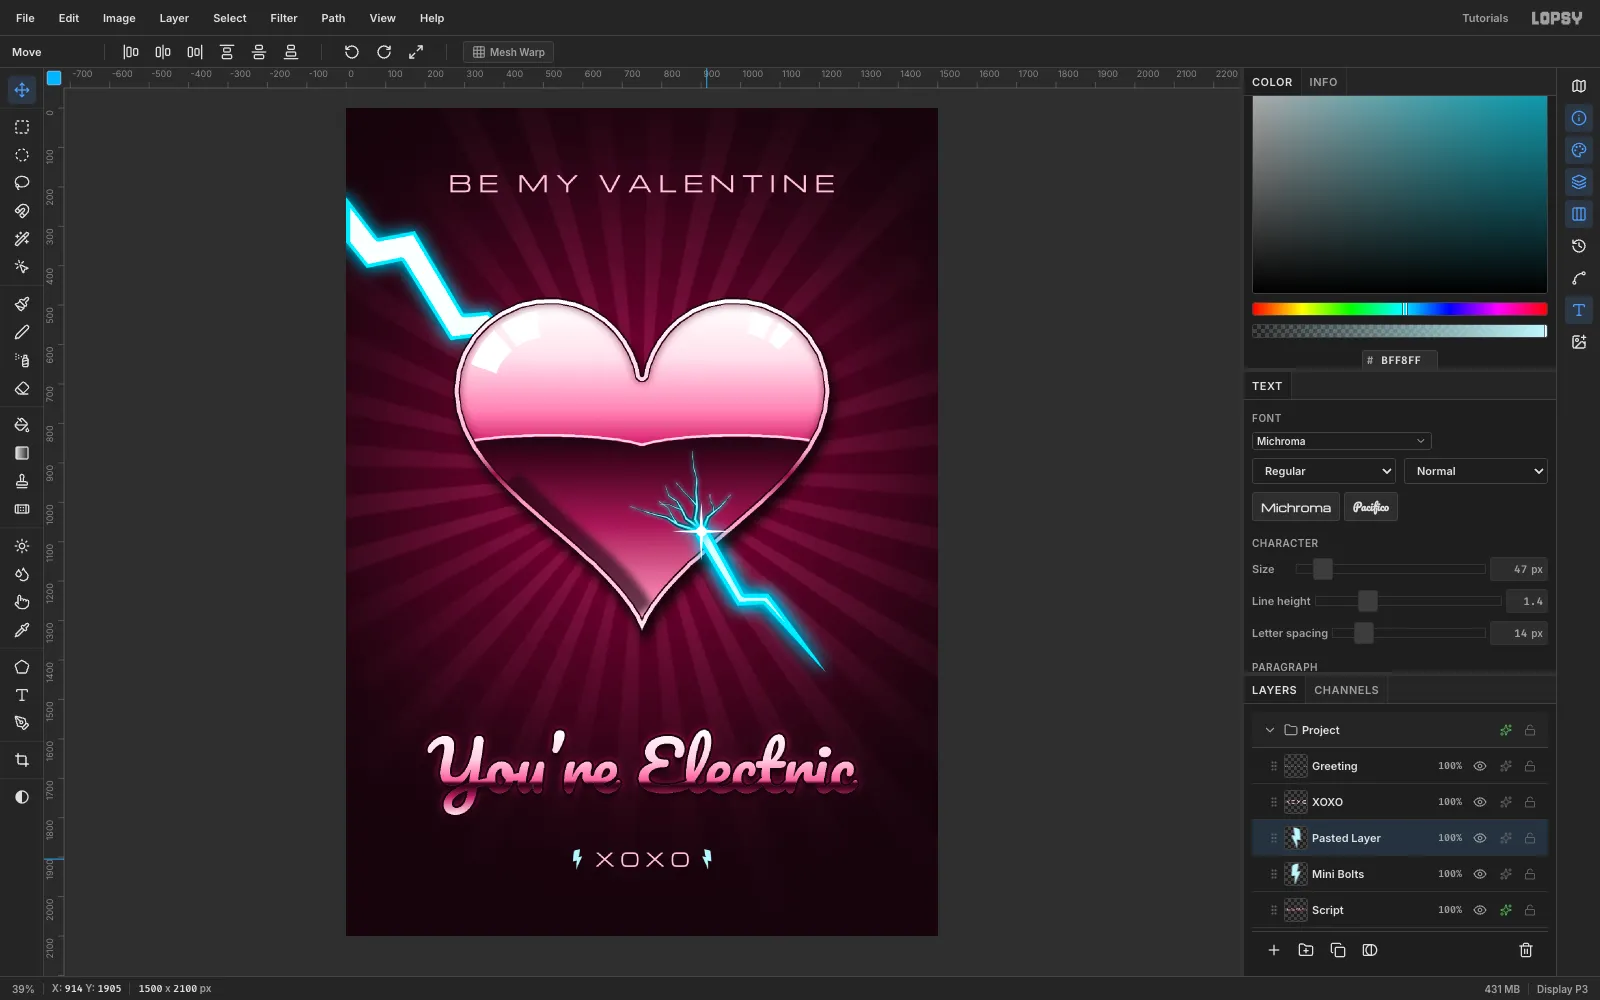
Mirror it to the other side
- Marquee the mini bolt, copy it, wait a moment, and paste. Marquee the pasted copy with the same rectangle.
- Click Flip horizontal in the Move tool's options bar, then press ⌘D.
- Drag the copy to the right of XOXO so both bolts are the same distance from the centre line. Here that's x 574–598 and x 902–926, which mirror exactly around x 750.
- Merge Down the copy into Mini Bolts. Give that layer a cyan Outer Glow (Size 14, Spread 10).
-
Scatter a few sparkles
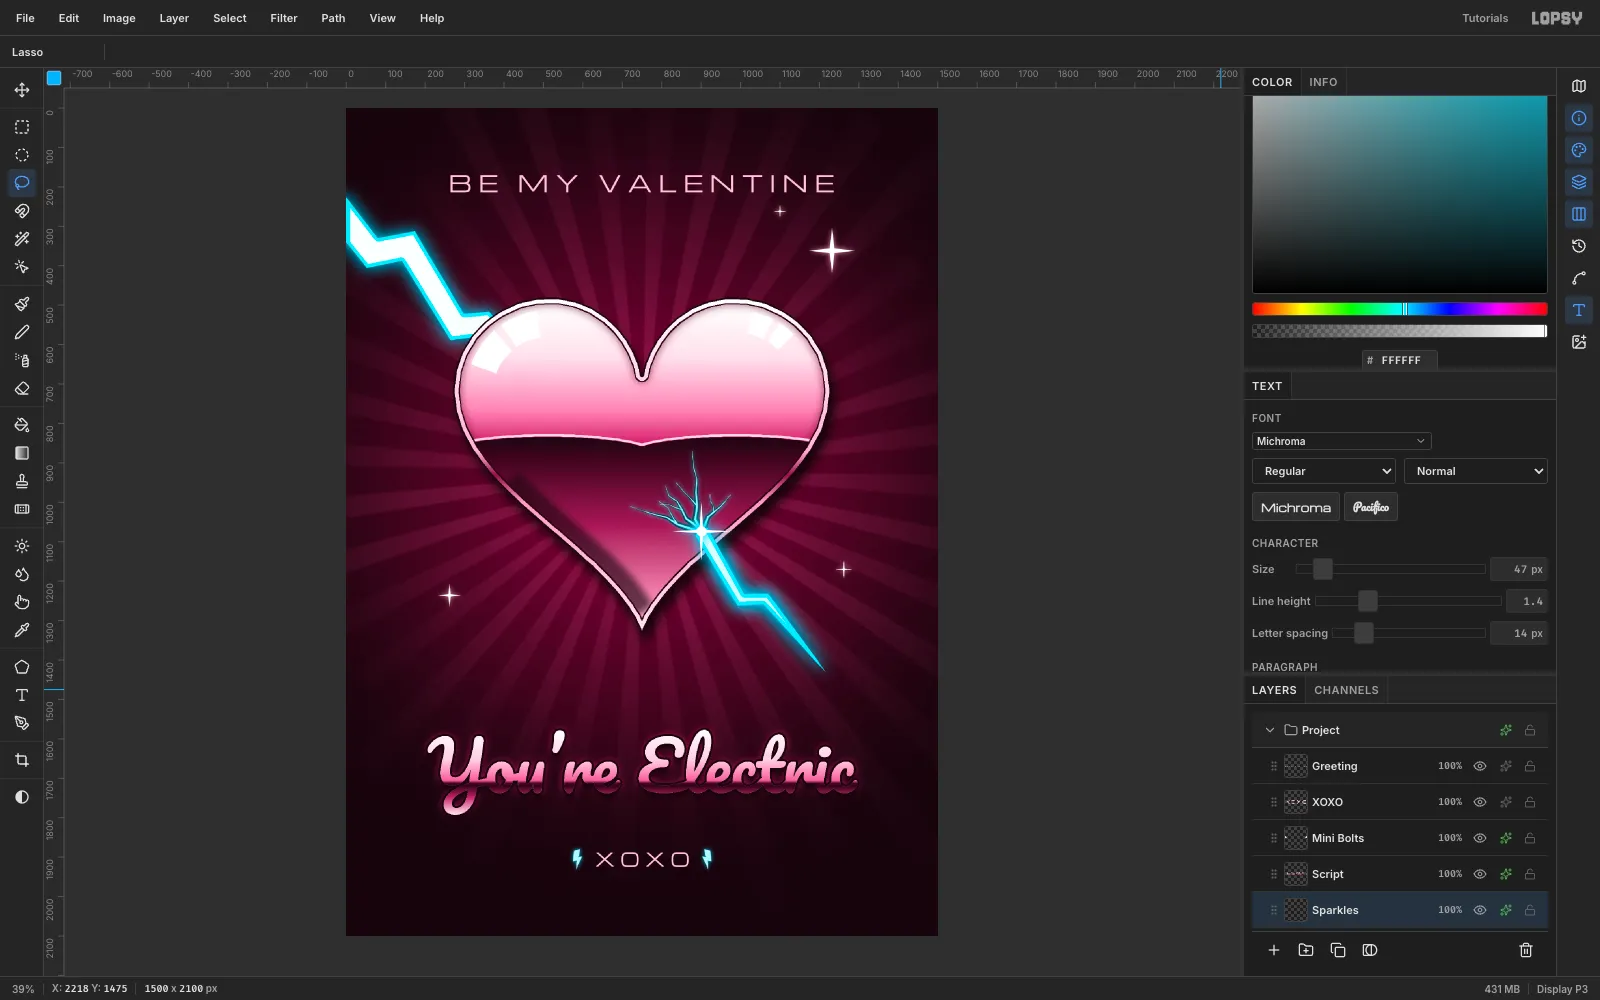
Click Flare and add a layer called Sparkles. Lasso a few thin four-point stars in white:
- one large, radius about 58, at the upper right
- two or three small ones in the empty space
Keep them at least 60 px from any type. Give the layer an Outer Glow in
#FFB3D1(Size 18, Spread 10, Opacity 85).Resist adding more: identical sparkles scattered everywhere read as clip art.
-
Snap a double frame to the grid
Click the top text layer and add a layer called Frame.
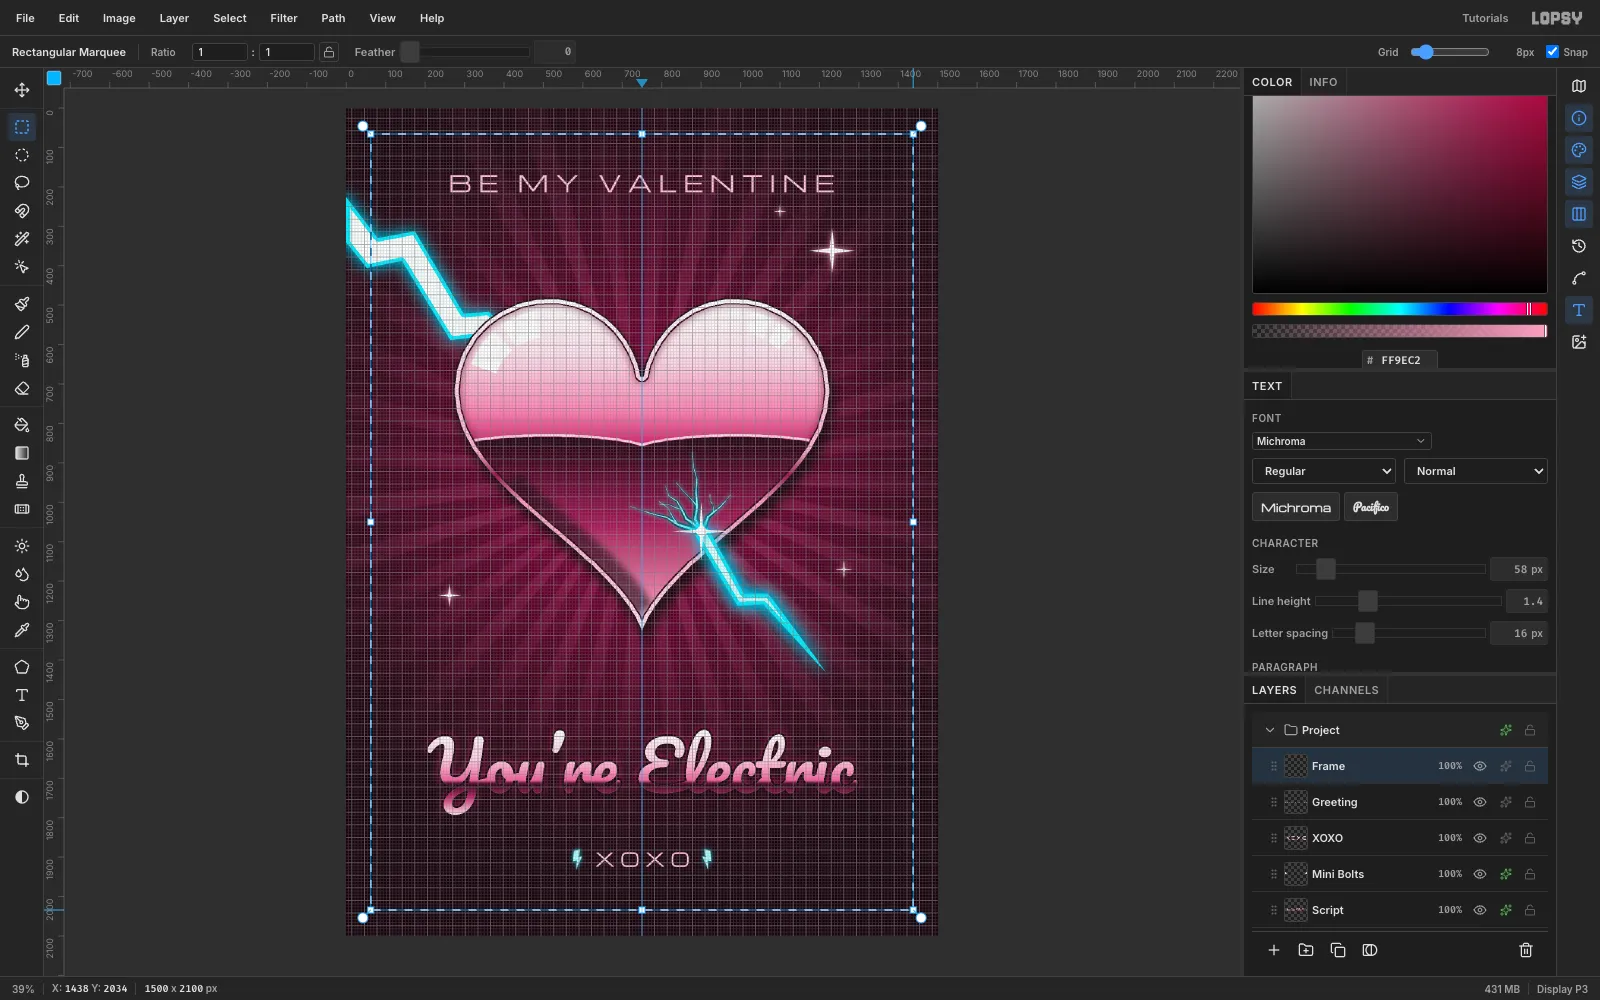
- Choose View → Show Grid and set Grid to 8 px in the options bar. Snap turns on with it.
- Click the top ruler at 750 to drop a centre guide. Use it to check that the heart and every line of type are centred.
- With the Rectangular Marquee, drag from (62, 66) to (1438, 2034). Fill it with
#FF9EC2, Shrink 3, and Delete to leave a 3 px outline. - Repeat 16 px further in, from (78, 82) to (1422, 2018), with Shrink 1, for a hairline.
-
Let the bolt break the frame
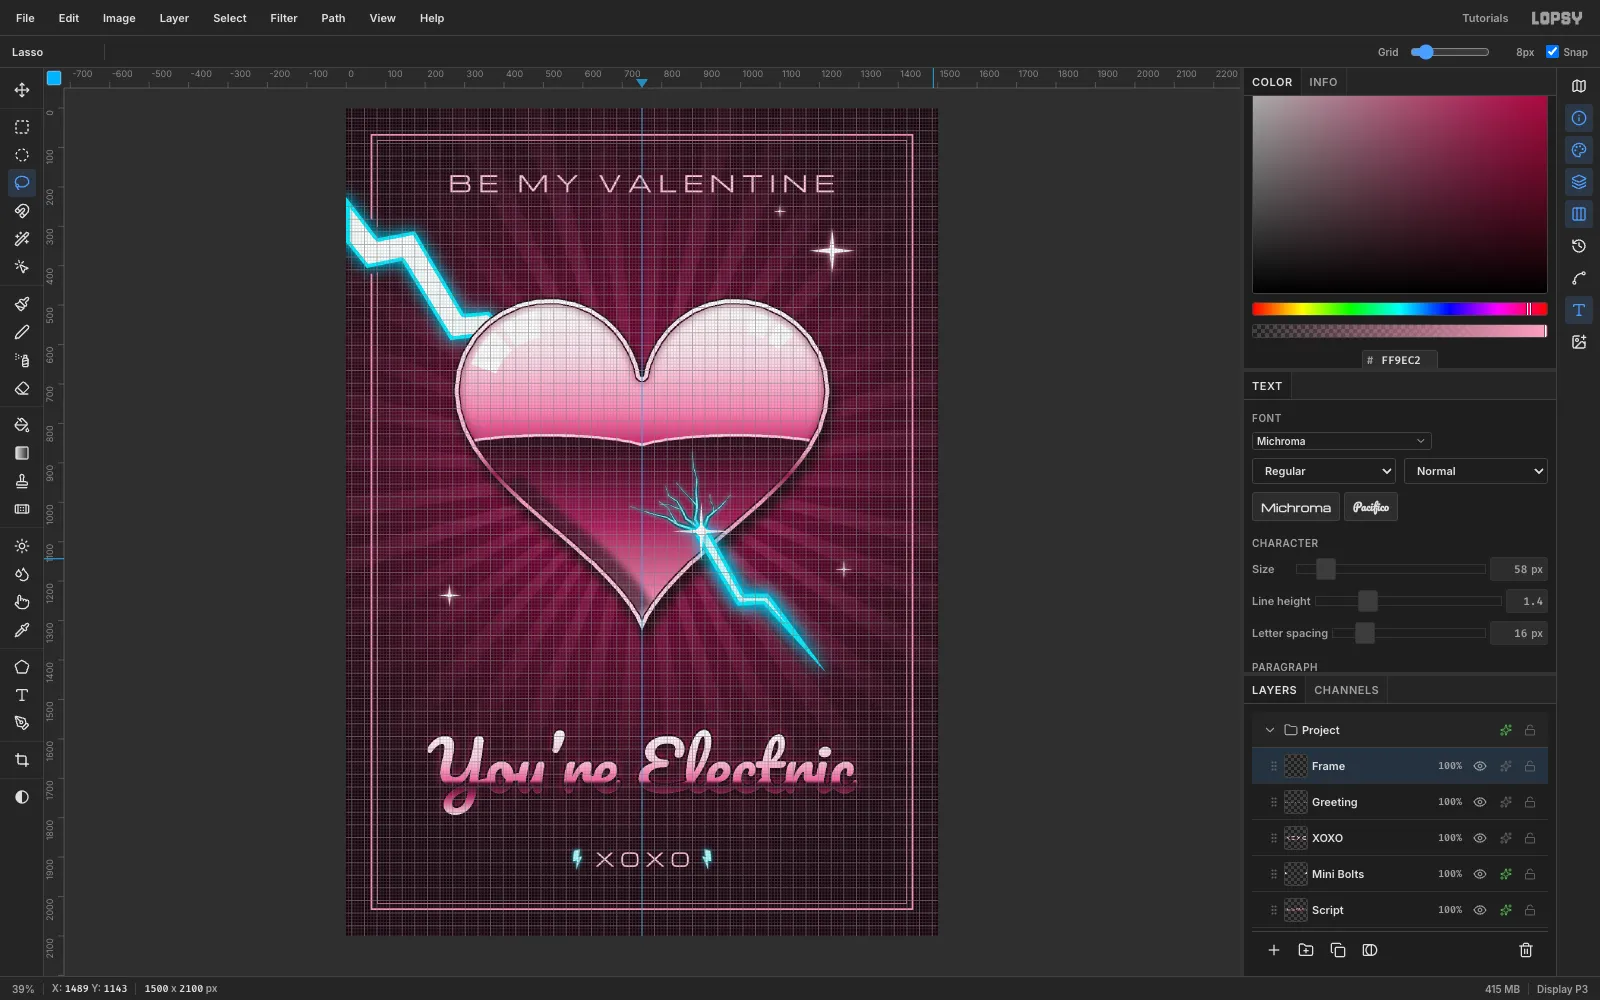
A bolt that sneaks behind the frame looks timid. Make it break through instead:
- On Frame, lasso the bolt's outline again.
- Choose Select → Grow 16, then press Delete.
The frame now stops short on both sides of the bolt. Hide the grid and choose Edit → Clear Guides when you're done.
-
Add fine grain
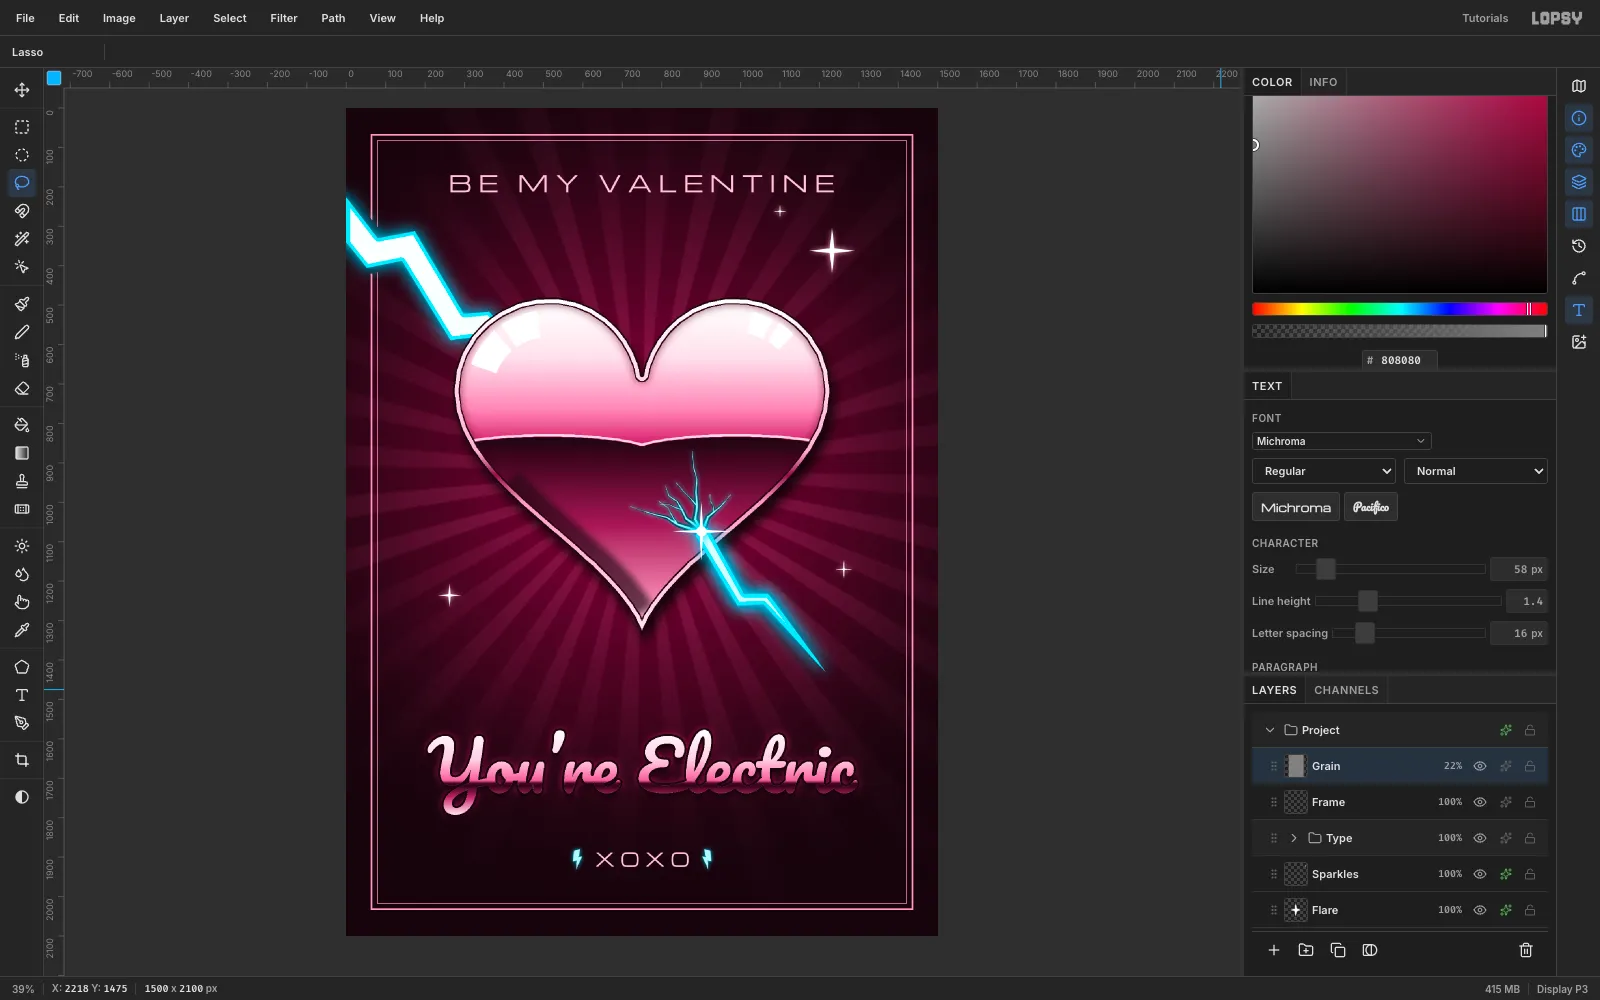
Click Frame and add a layer called Grain.
- Fill it with
#808080. - Choose Filter → Add Noise: Mono, Gaussian, Amount 40.
- Set the blend mode to Overlay and the opacity to 22%.
Mid-grey is invisible in Overlay, so only the noise shows. It takes the digital edge off the gradients without dirtying the chrome.
Finally, select the Script, XOXO, Mini Bolts and Greeting rows (click the first, Shift-click the last). Choose Layer → Group Layers and name the group Type. You can now move all the lettering as one piece.
- Fill it with
-
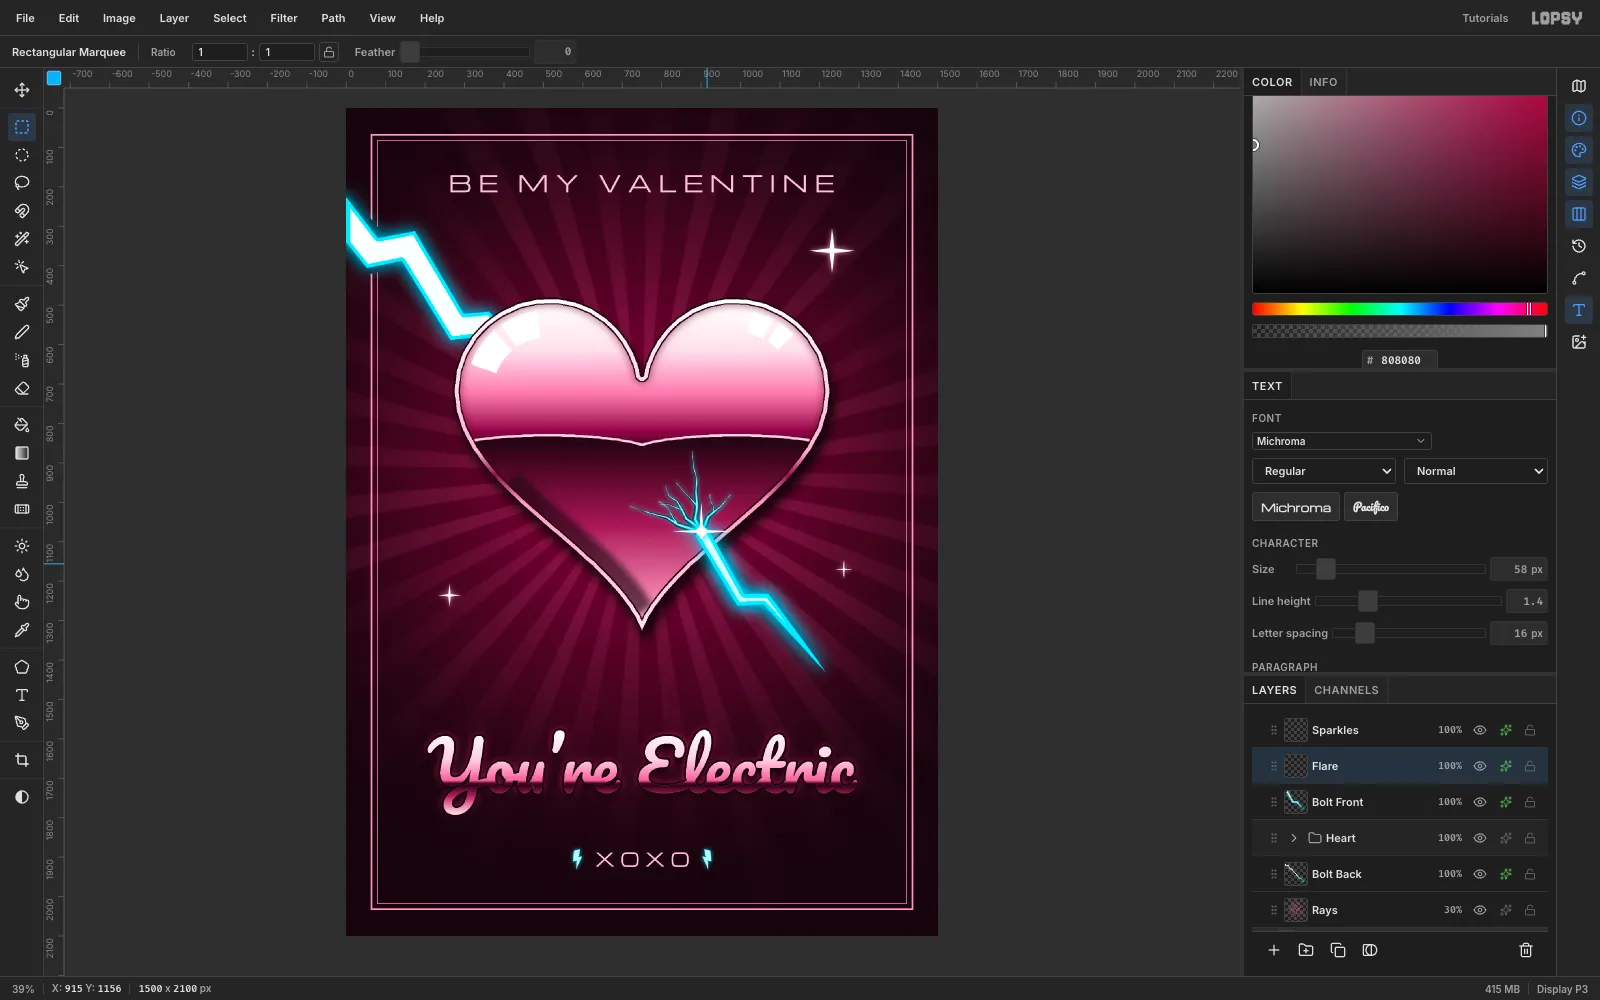
Darken the sky toward the horizon
Step back and look at the heart. If it reads as pink candy rather than metal, it needs darker darks.
Re-lasso the heart, Shrink 17, and redraw the Sky gradient (y 500 → 880) so it plunges almost to black just above the horizon:
#FFFFFF0#FFE1EC30%#EC7CA860%#8A1A4884%#3A0A1E95%#2A0614100%
Two small clean-ups at the same time:
- delete the small sparkle that crowded BE MY VALENTINE
- trim the flare's lower point, which ran down the bolt like a stray white sliver
-
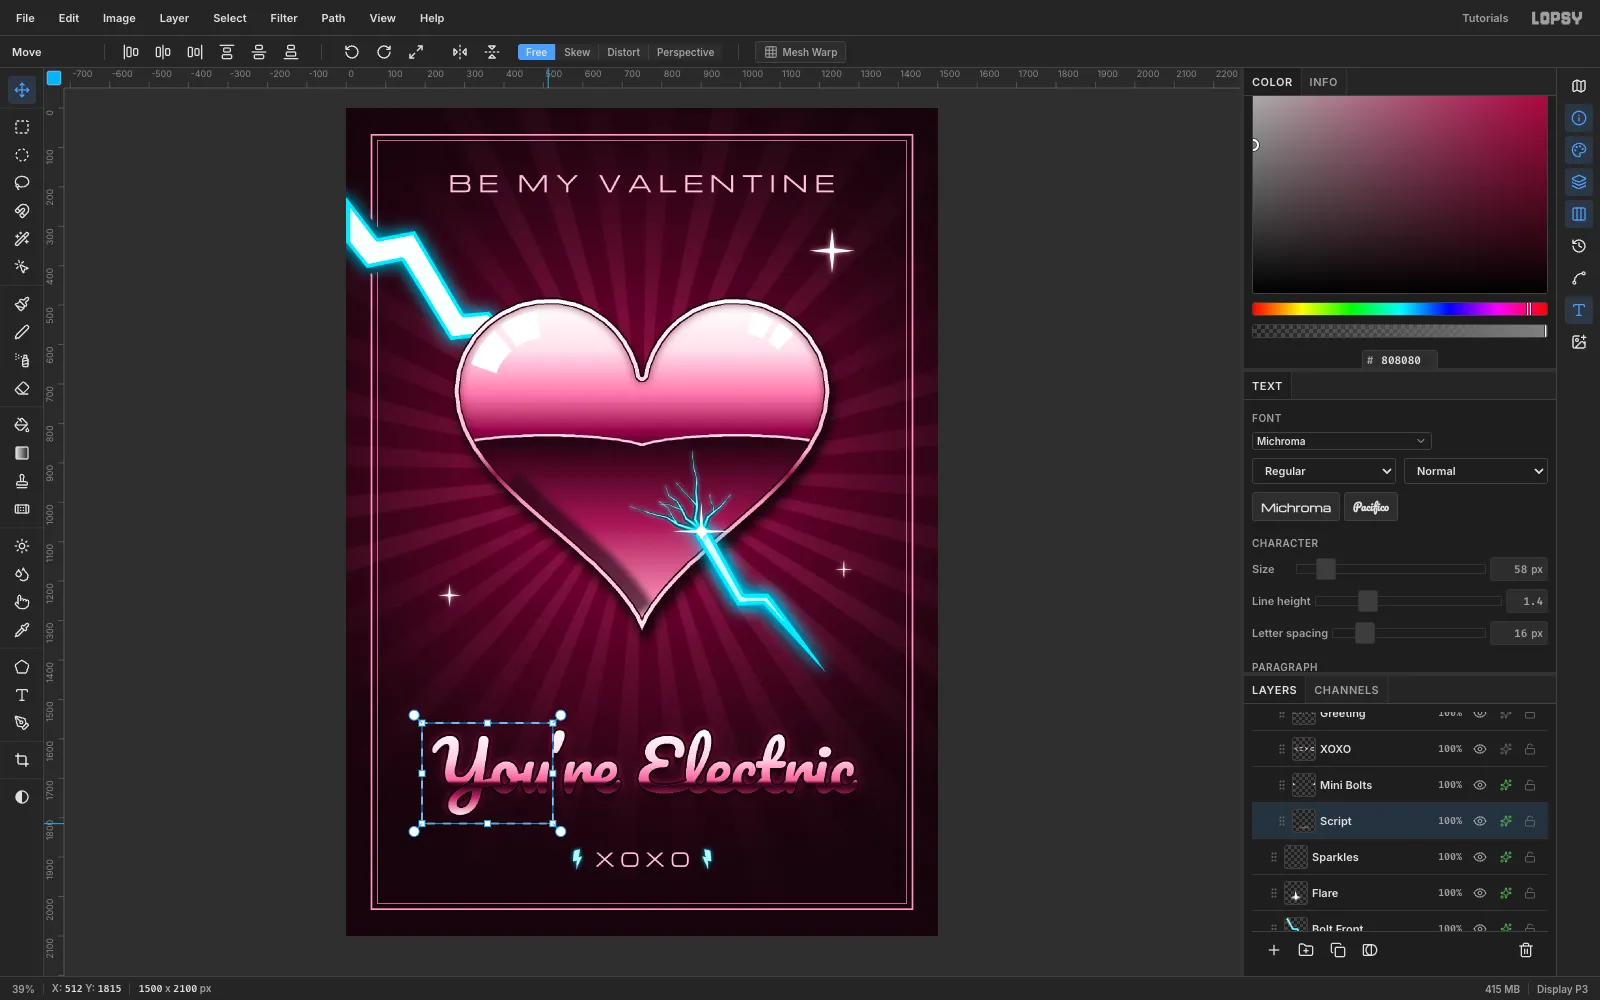
Kern the apostrophe
Pacifico leaves a wide gap before the apostrophe, so You're reads as You 're.
- On the Script layer, marquee just the word You.
- With the Move tool, press → 12 times to close the gap. Press ⌘D.
- Nudge the whole layer 6 px left so the headline is centred again.
-
Export the card
Save the project with File → Save Project, then File → Quick Export PNG for print.
Things to try next:
- swap the bolt's cyan for gold to make an anniversary card
- change the words (You Light Me Up, Zap!)
- turn the bolt into Cupid's arrow; the pierce trick is the same