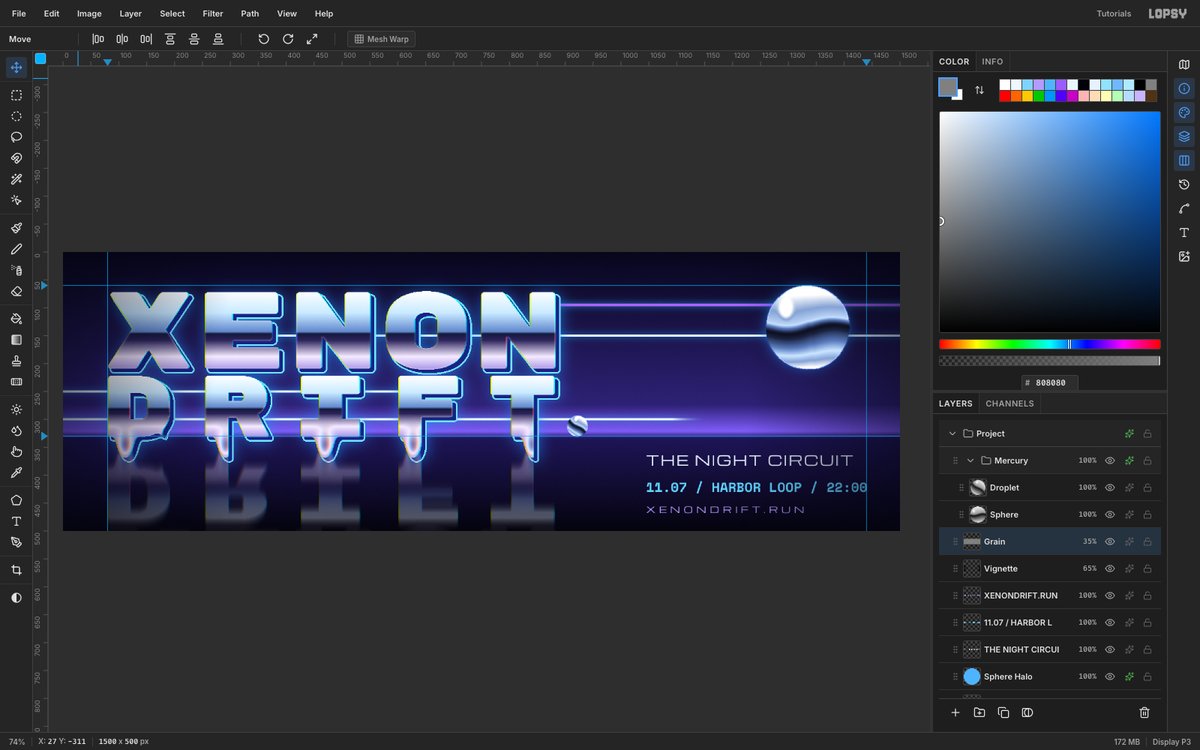
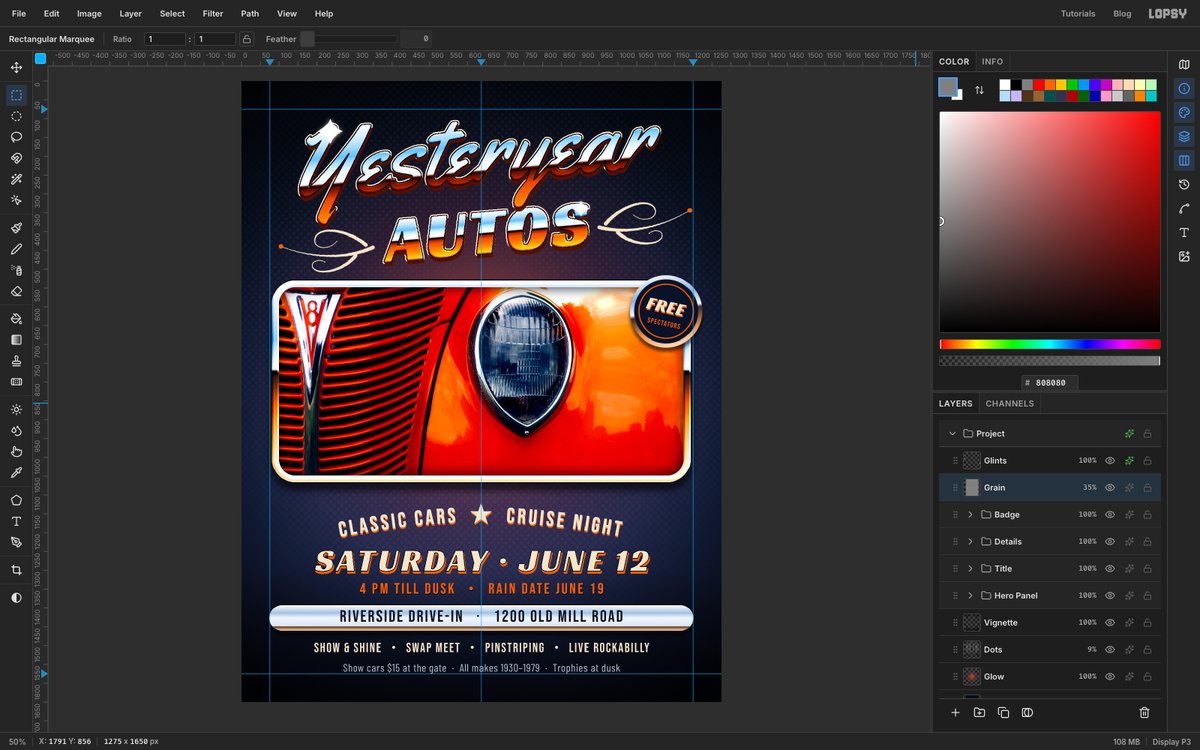
Design a Chrome Yakitori Bar Menu with Neon Type
Make a late-night yakitori bar menu in Lopsy with 80s chrome lettering, a neon script, a red paper lantern, a glazed skewer and a two-column price list.
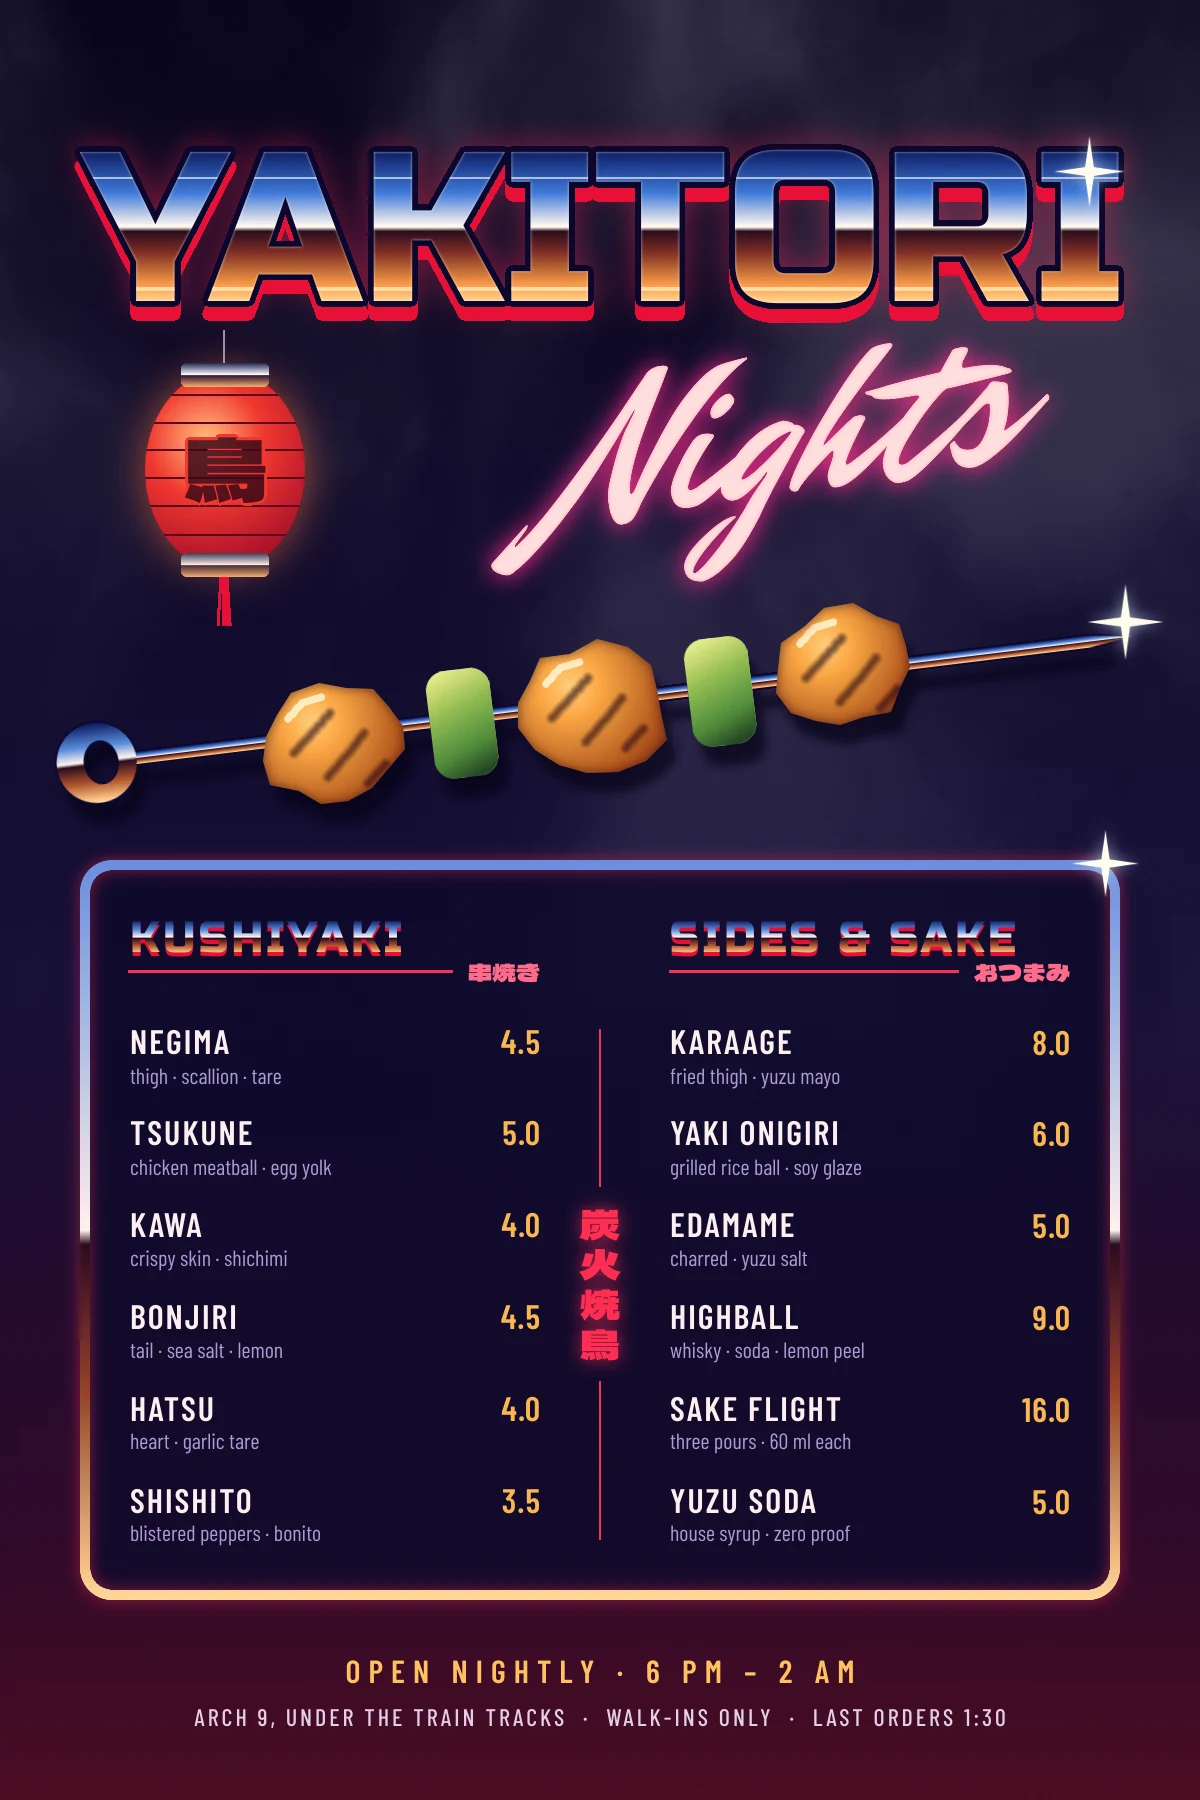
This tutorial designs the menu for an imaginary late-night yakitori bar, Yakitori Nights, tucked under a railway arch. Yakitori is chicken grilled on skewers over charcoal, and the bars that serve it are lit by red paper lanterns and fill up after the trains stop. The menu borrows the look of 1980s chrome lettering: heavy capitals that seem to mirror a sky, a horizon and a sunset, with a hot neon script underneath. The canvas is 1200 × 1800 px, a 2:3 portrait, the shape of a 4 × 6 in card. For a large print, build it at double size.
The trick behind all chrome is one idea. A polished surface has no colour of its own; it reflects what's around it. The top half of a letter shows the sky and gets lighter towards the horizon. Then there's a hard bright line, and directly under it the dark ground starts, warming up towards the bottom. Every chrome element on this menu (title, headings, skewer, lantern caps and frame) uses the same kind of gradient: sky over ground, with a hard break in the middle. A soft blend reads as plastic; the hard line reads as metal.
Everything is drawn in Lopsy from gradients, selections and type, with no photos.
Along the way you'll use:
- ruler guides with snapping, groups, dragging a layer into a group, and moving a whole group with the arrow keys
- the Gradient tool with multi-stop gradients from the Gradient Editor, linear and radial
- the Rectangular and Elliptical Marquee and the Lasso, with adding, subtracting and intersecting selections, Select → Shrink, and Cmd-clicking a layer thumbnail to select its pixels
- the Shape tool (rectangles with rounded corners) and the Pencil for straight lines
- the Move tool's rotate and scale handles, on a selection, a text layer and a pasted layer
- Smoke, Gaussian Blur and Add Noise
- a layer mask painted with a gradient
- Text in Russo One, Mr Dafoe, Barlow Condensed and Dela Gothic One, including vertical Japanese text, line height and paragraph spacing from the Text panel
- Stroke, Drop Shadow, Outer Glow and Inner Glow, the Screen and Overlay blend modes, and a Color Grading adjustment on the whole image
The palette:
-
Night sky
-
Title chrome
-
Small chrome
-
Frame chrome
-
Outline ink
-
offset red
-
neon rim
-
Neon script
-
neon glow
-
inner glow
-
Lantern
-
ribs
-
kanji
-
cord
-
glow
-
Glazed chicken
-
char
-
Scallion
-
Panel
82% opacity
-
dish names
-
descriptions
-
prices
-
labels
-
Footer amber
-
footer lavender
-
glint glow
-
Set up the canvas and paint the night sky
Create a new document
1200×1800px with a white background. If the rulers aren't showing, turn on View → Show Rulers. Click the top ruler at x80,600and1120, and the left ruler at y80,600,860and1600. The outer vertical guides are the margins, the middle one is the centre line, and the horizontal guides mark where the title, the illustration and the menu panel begin and end.- Double-click
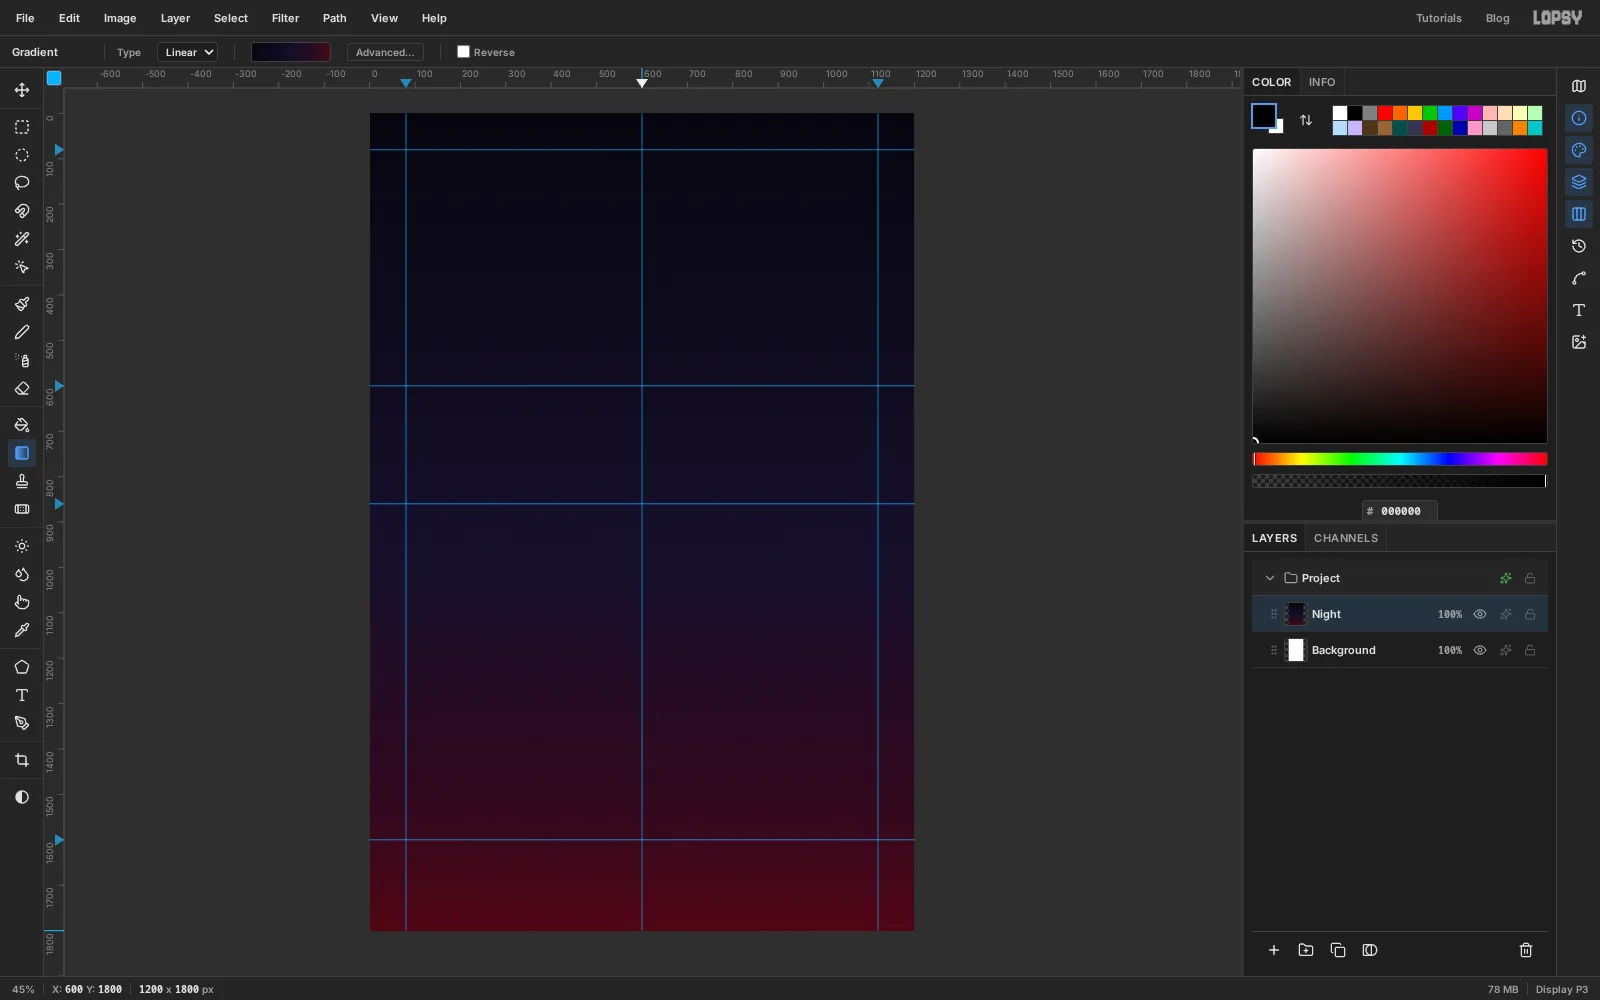
Layer 1and rename itNight. - Pick the Gradient tool, set Type to Linear and open Advanced…. Make four stops: at the left end, at about 55%, at about 85% and at the right end.
- Shift-drag from the top edge of the canvas to the bottom edge.
The bottom of the menu glows faintly red, like a grill.
- Double-click
-
Render grill smoke
Click Add Layer and rename the new layer
Smoke. Choose Filter → Smoke…, set Scale to3and Turbulence to70, and click Apply. The filter generates a fresh pattern every time, so yours will look different. Click the circular Regenerate button in the dialog if you'd like another one.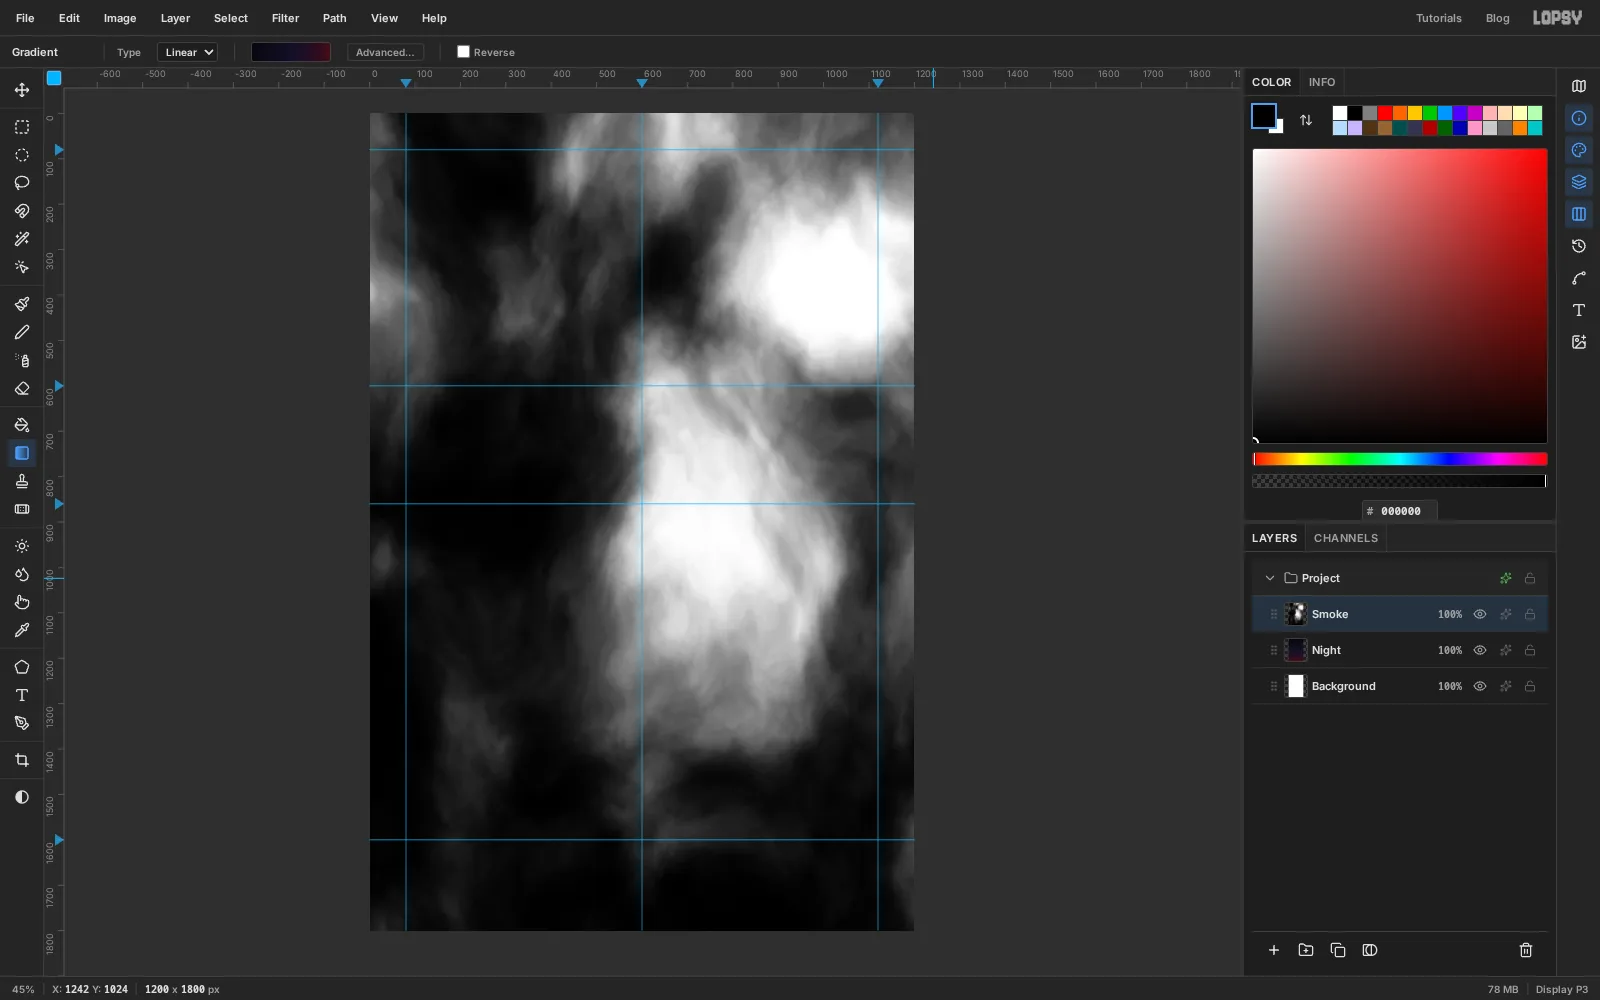
-
Fade the smoke with a layer mask
- Open the layer effects for
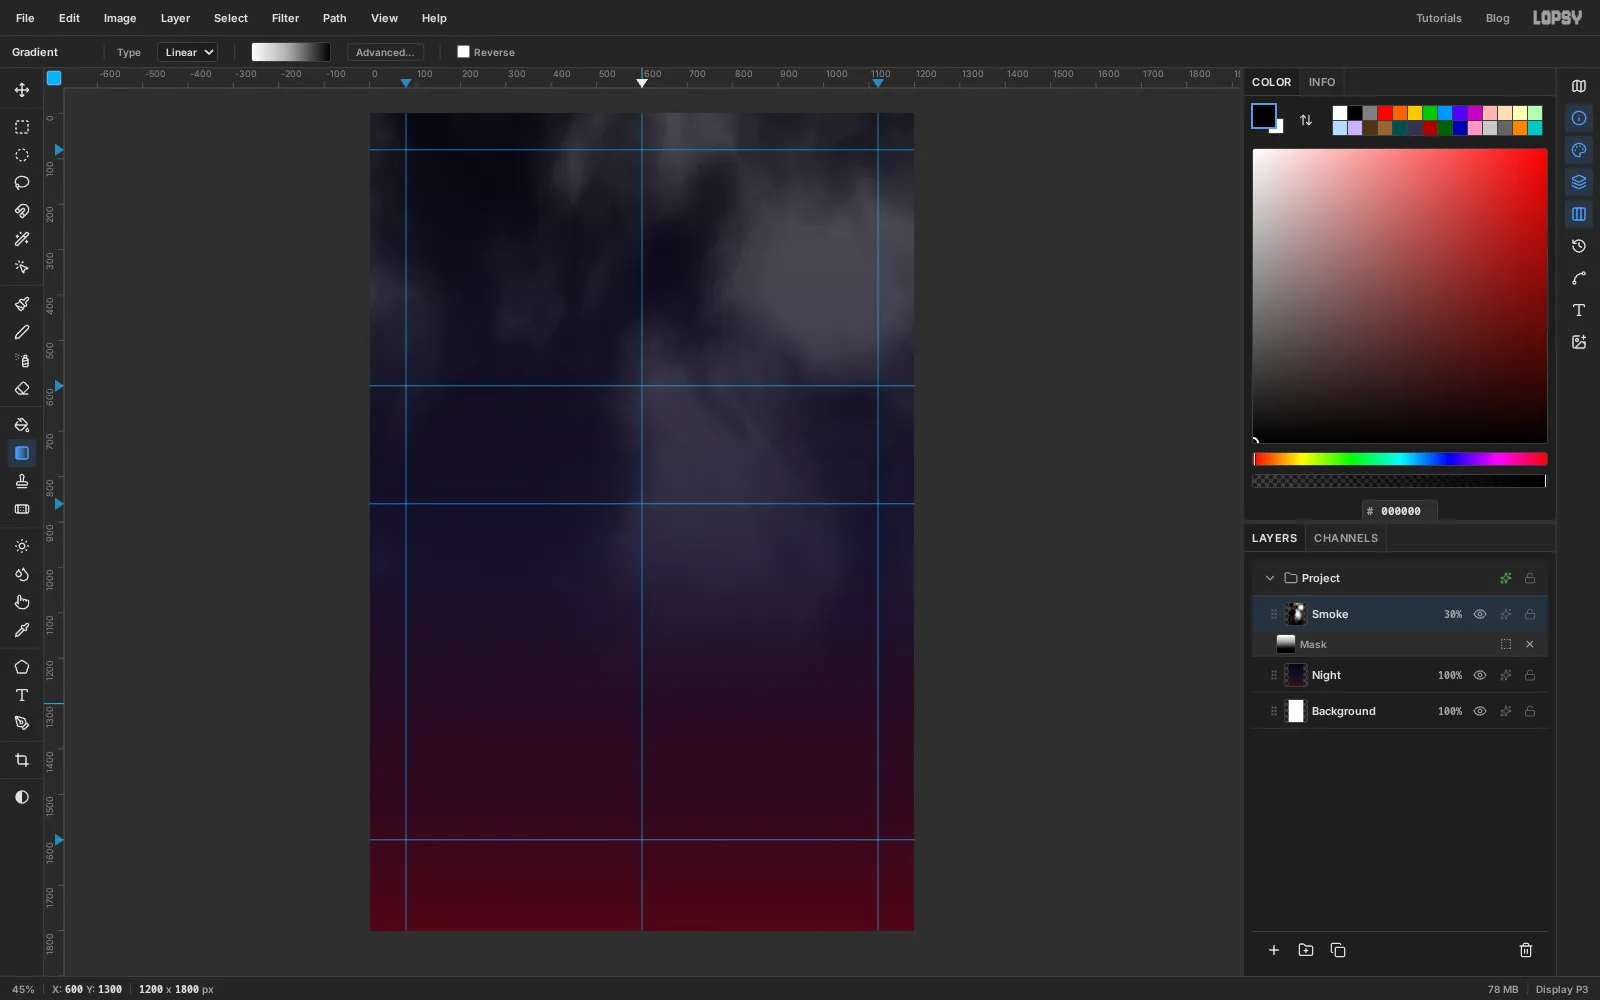
Smoke(the sparkle button on its row) and set Blend to Screen, so only the light parts of the smoke show. Click the opacity on the row and drag it down to30%. - Click Add Mask at the bottom of the Layers panel, then click the white Mask thumbnail under the row. This switches to mask editing, and painting now hides or reveals the layer instead of changing its pixels.
- With the Gradient tool, set three stops: white at the left, at about 45%, and black at the right. Shift-drag from the top of the canvas down to about y
1300. - Click the
Smokename on its row to go back to editing pixels.
The smoke now drifts across the top and dies away before the menu panel, which keeps the price list easy to read.
- Open the layer effects for
-
Type the title
Pick the Text tool. Set the foreground colour to white, choose Russo One in the font menu and set Size to
213. Click near the top-left guide intersection and typeYAKITORI, then press Tab to commit.Switch to the Move tool and drag the text so its left edge snaps to the guide at x
80and the tops of the letters sit at about y150. At this size the word runs right across to the x1120guide. If yours is a little wide or narrow, select the layer, pick the Text tool and nudge Size until it fits between the guides.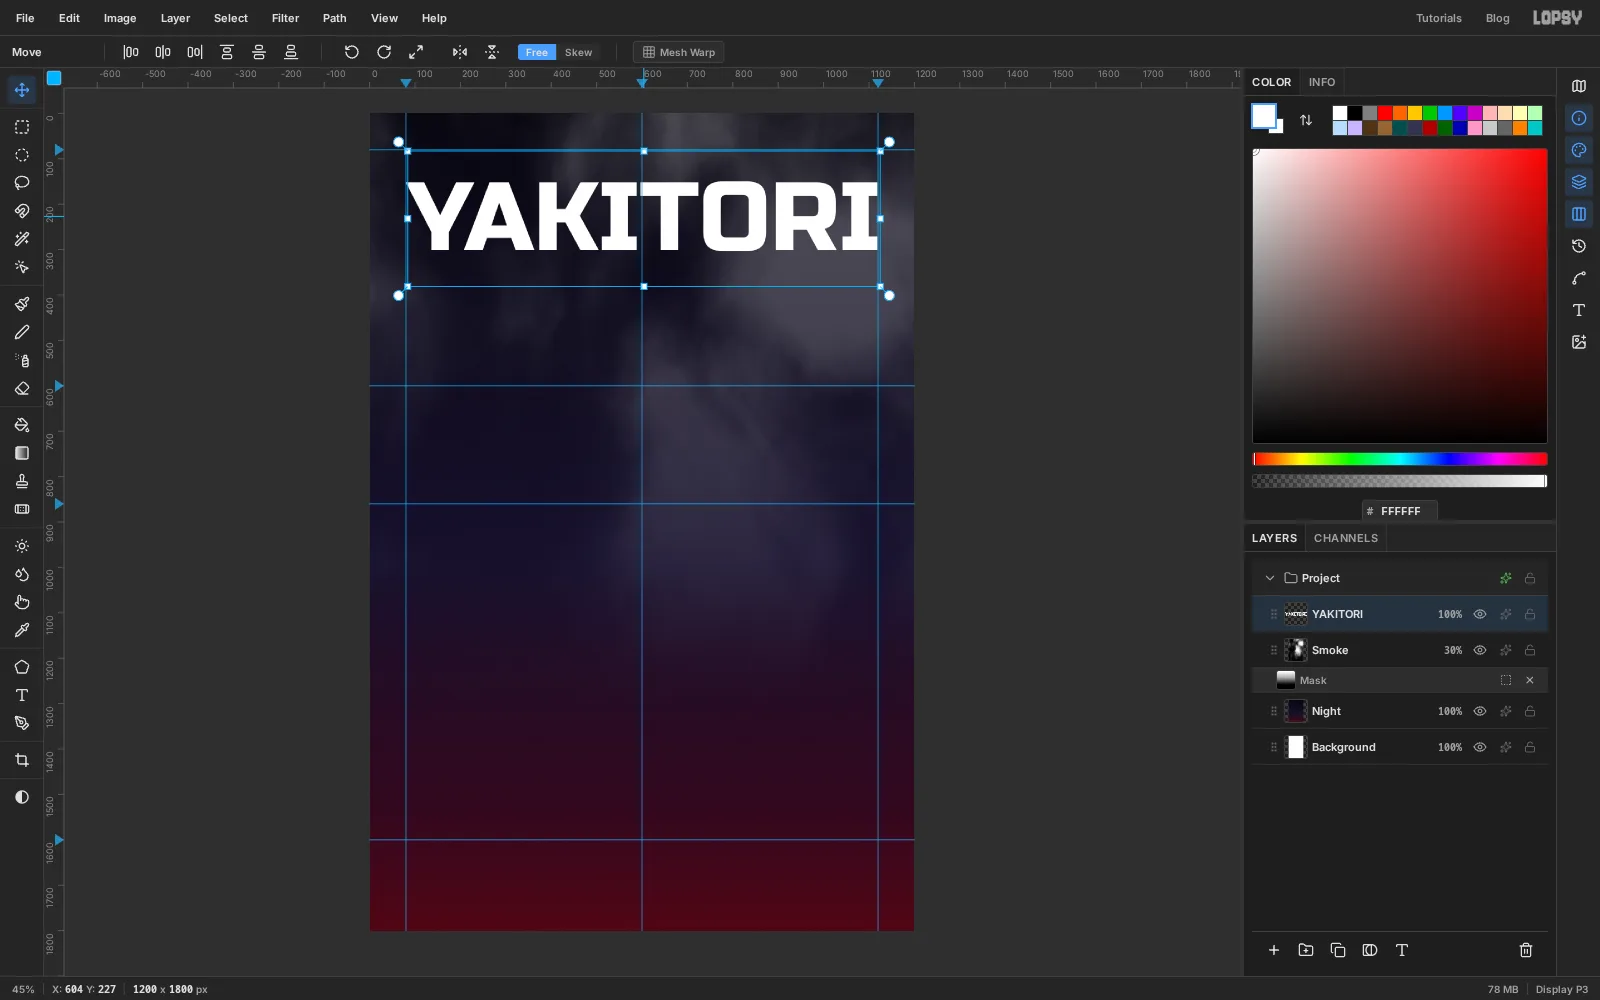
-
Fill the title with chrome
The text layer stays as an editable source. The chrome goes on a layer above it.
- Cmd-click the
YAKITORIthumbnail in the Layers panel to select the letter shapes. - Click Add Layer and rename it
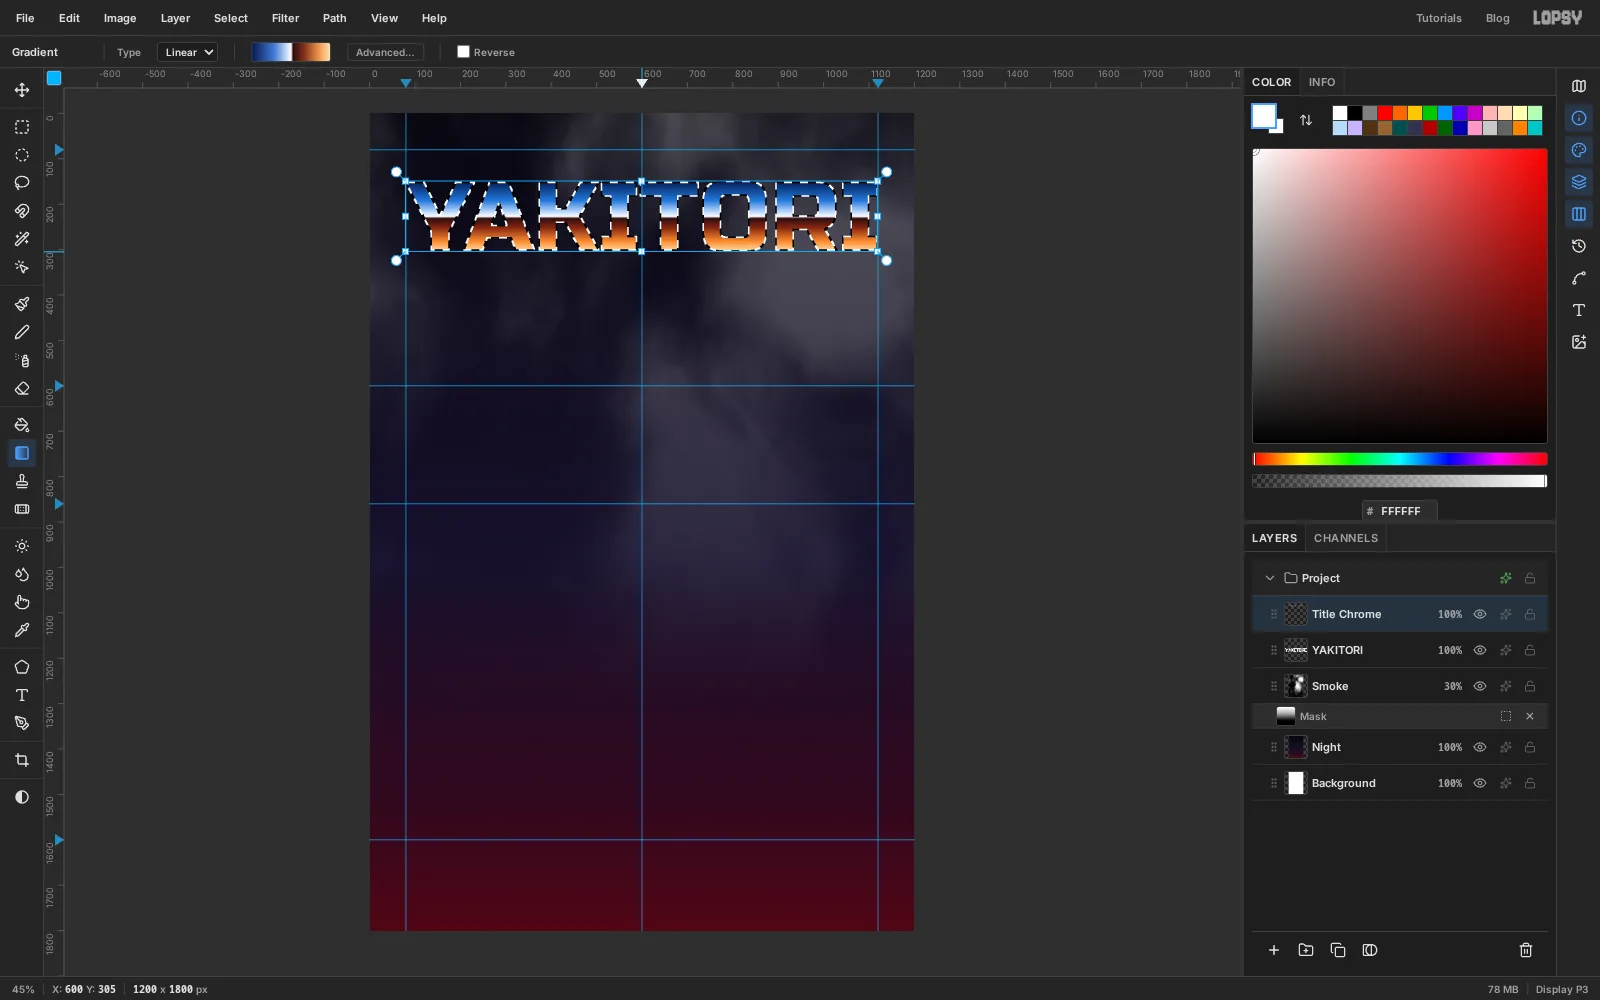
Title Chrome. - With the Gradient tool, make eight stops: at 0%, at 28%, at 47%, at 50%, at 53%, at 66%, at 86% and at 100%. The white stop and the dark stop sit only three percent apart. That close pair is the horizon.
- Shift-drag from the very top of the letters to the very bottom (about y
149to y305; watch the status bar). - Press Cmd+D, then click the eye on the
YAKITORIrow to hide the white text underneath.
- Cmd-click the
-
Outline the chrome and give it a red offset
Open the layer effects for
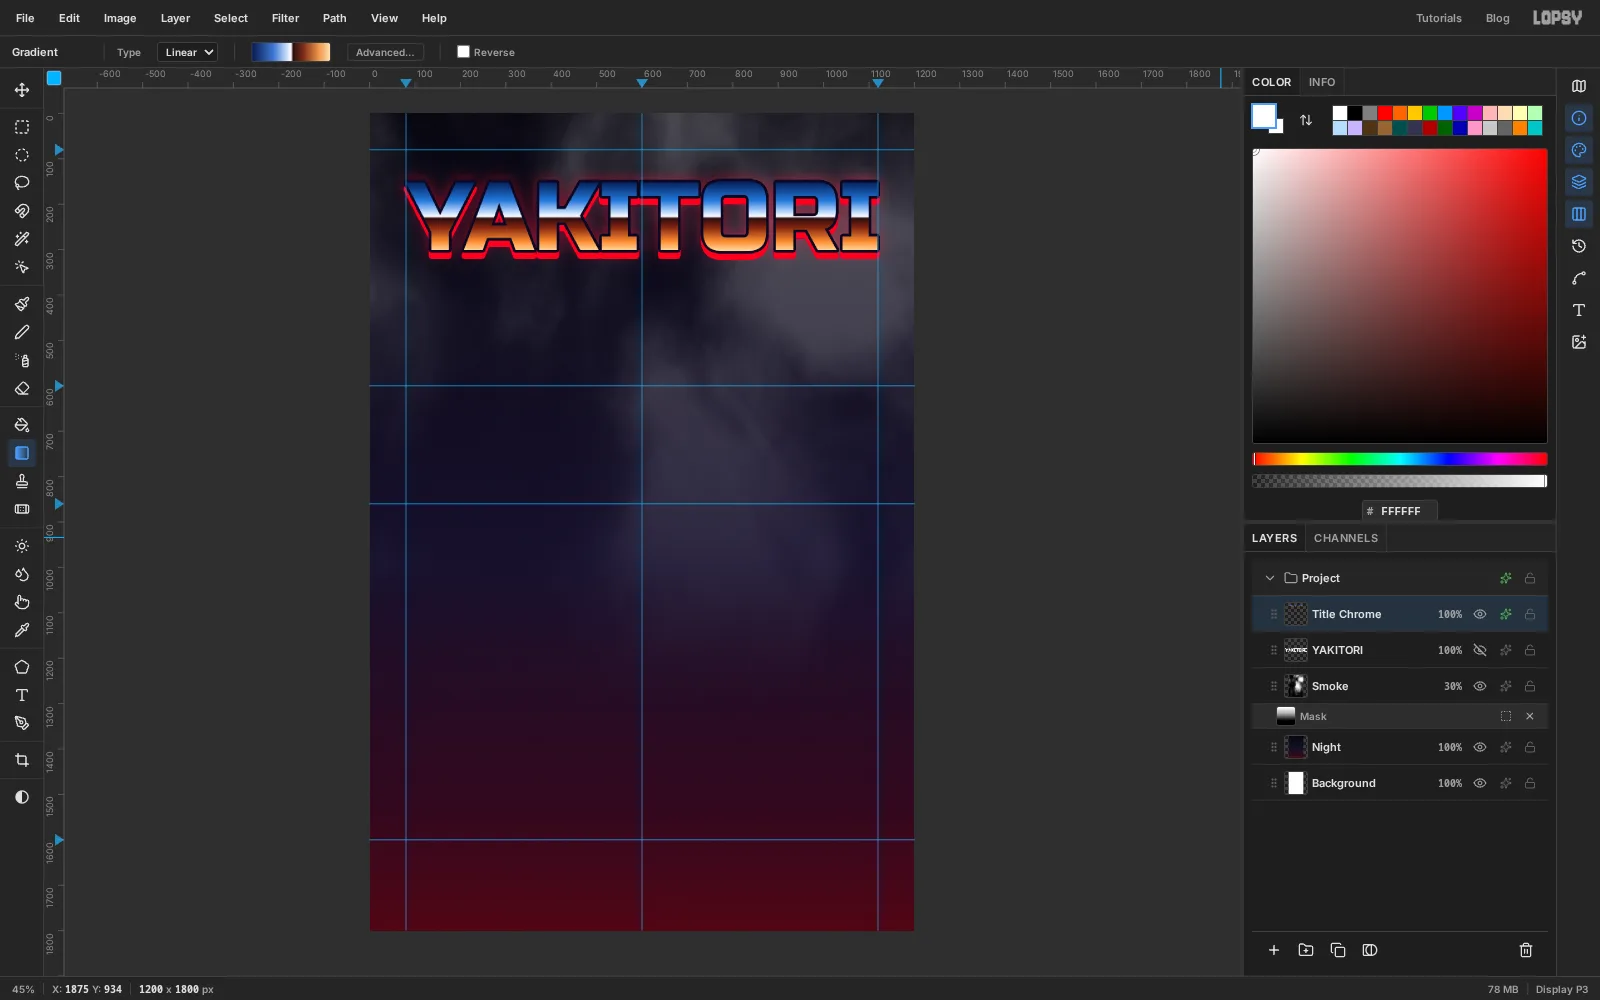
Title Chromeand turn on three effects:- Stroke: Width
6, Outside, colour . - Drop Shadow: Offset X
0, Offset Y14, Blur0, Spread6, Opacity100, colour . With no blur, the shadow becomes a hard red extrusion, a classic 80s logo move. - Outer Glow: Size
48, Spread0, Opacity45, colour .
- Stroke: Width
-
Write the neon script
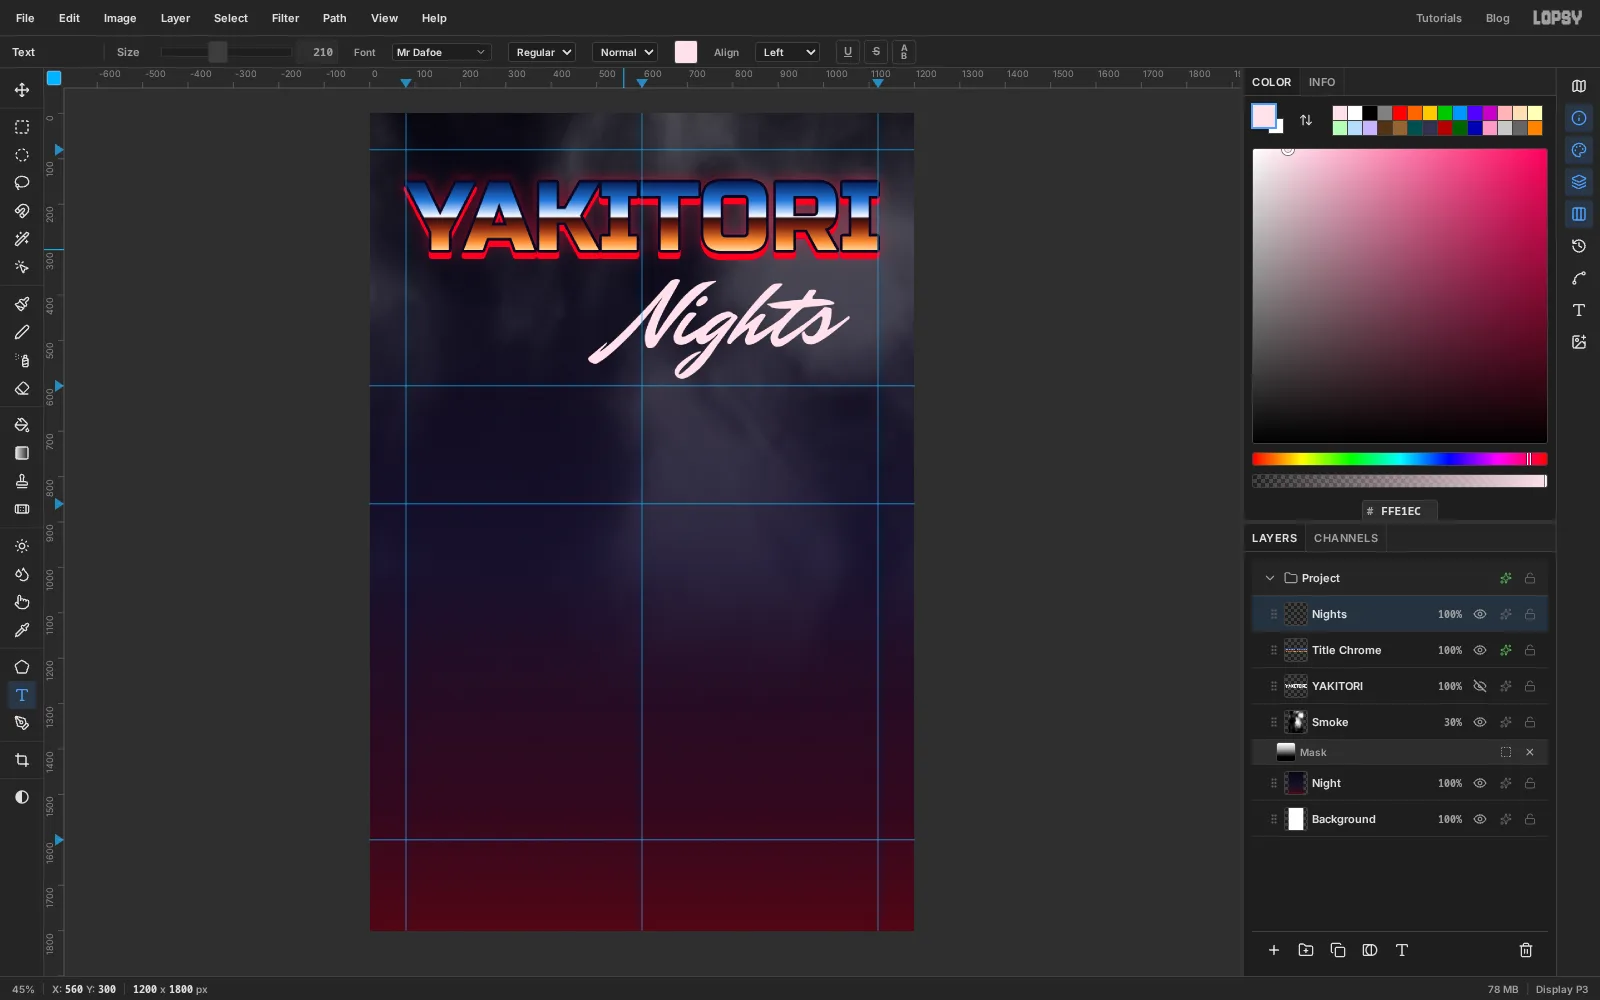
Set the foreground colour to . With the Text tool, choose Mr Dafoe at Size
210, click in an empty spot under the title at about560, 360, typeNightsand press Tab.Click away from the title when you start the text. A click on an existing text layer opens it for editing instead of starting a new one.
-
Light it up
Open the layer effects for
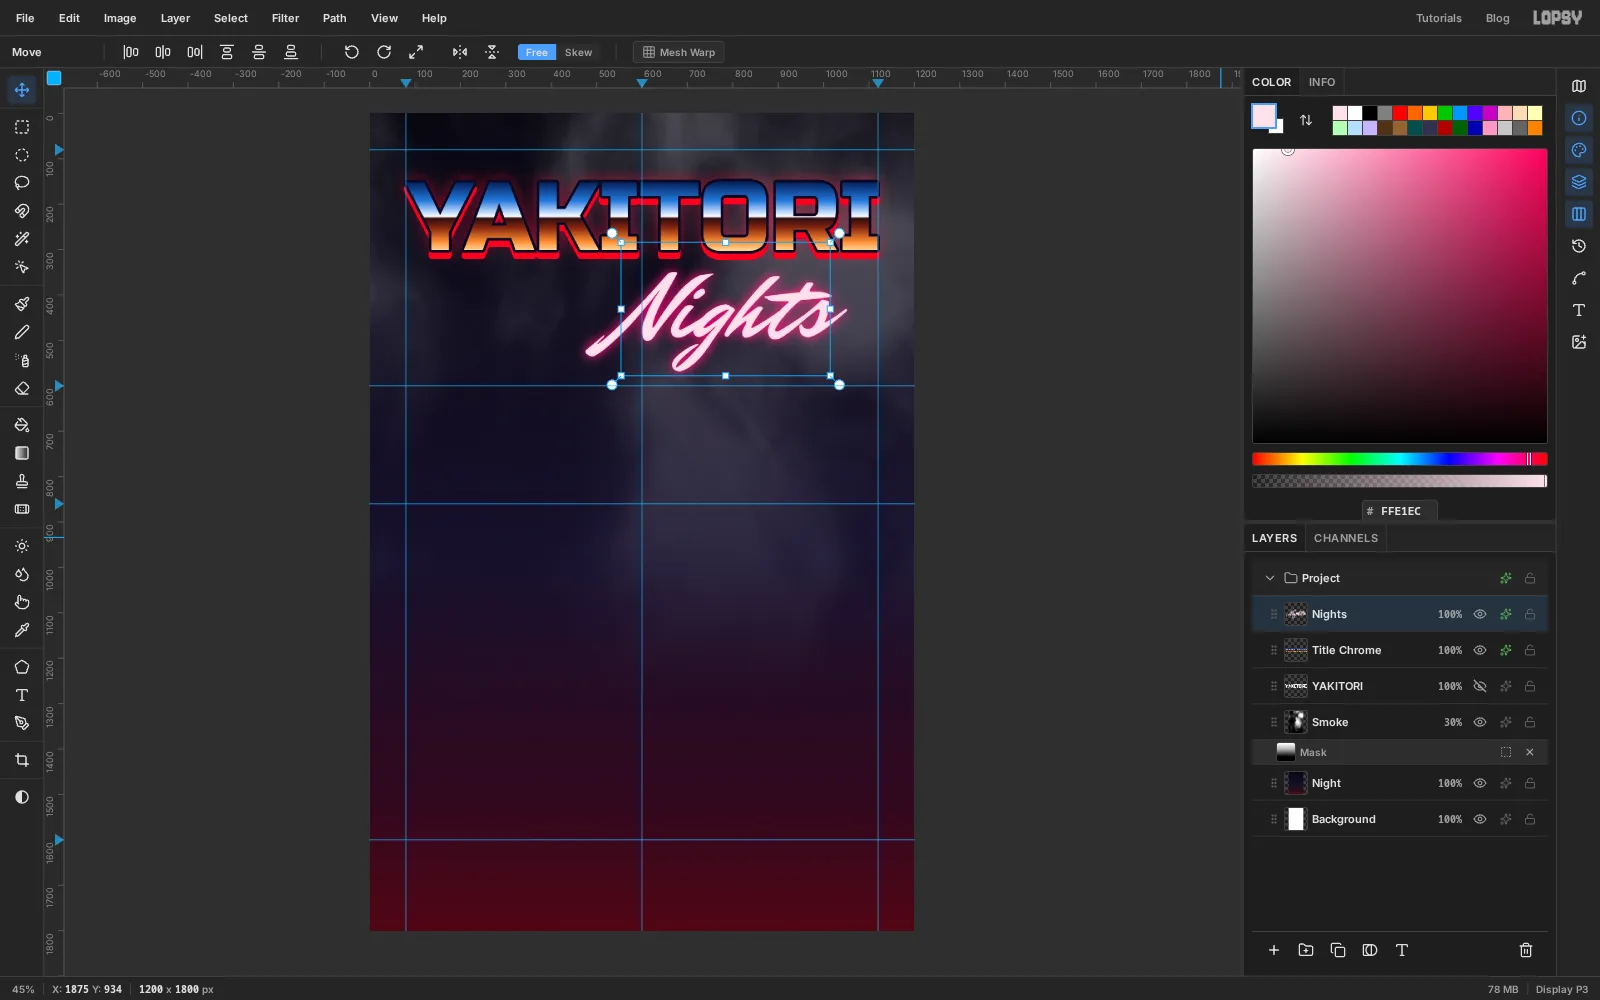
Nights:- Outer Glow: Size
34, Spread10, Opacity95, colour . - Inner Glow: Size
6, Spread0, Opacity70, colour .
Real neon has a nearly white core and a coloured halo. The pale fill gives the core, and the two glows do the rest.
- Outer Glow: Size
-
Tilt the script under the title
Switch to the Move tool with
Nightsactive. Handles appear around the text without needing a selection. Drag the round rotation handle outside the top-left corner down until the text has turned about 8° anticlockwise, and press Enter. Then drag the text up so the top of the N tucks just under the red offset of the title. The script now rises to the right, the way a signwriter would hang it.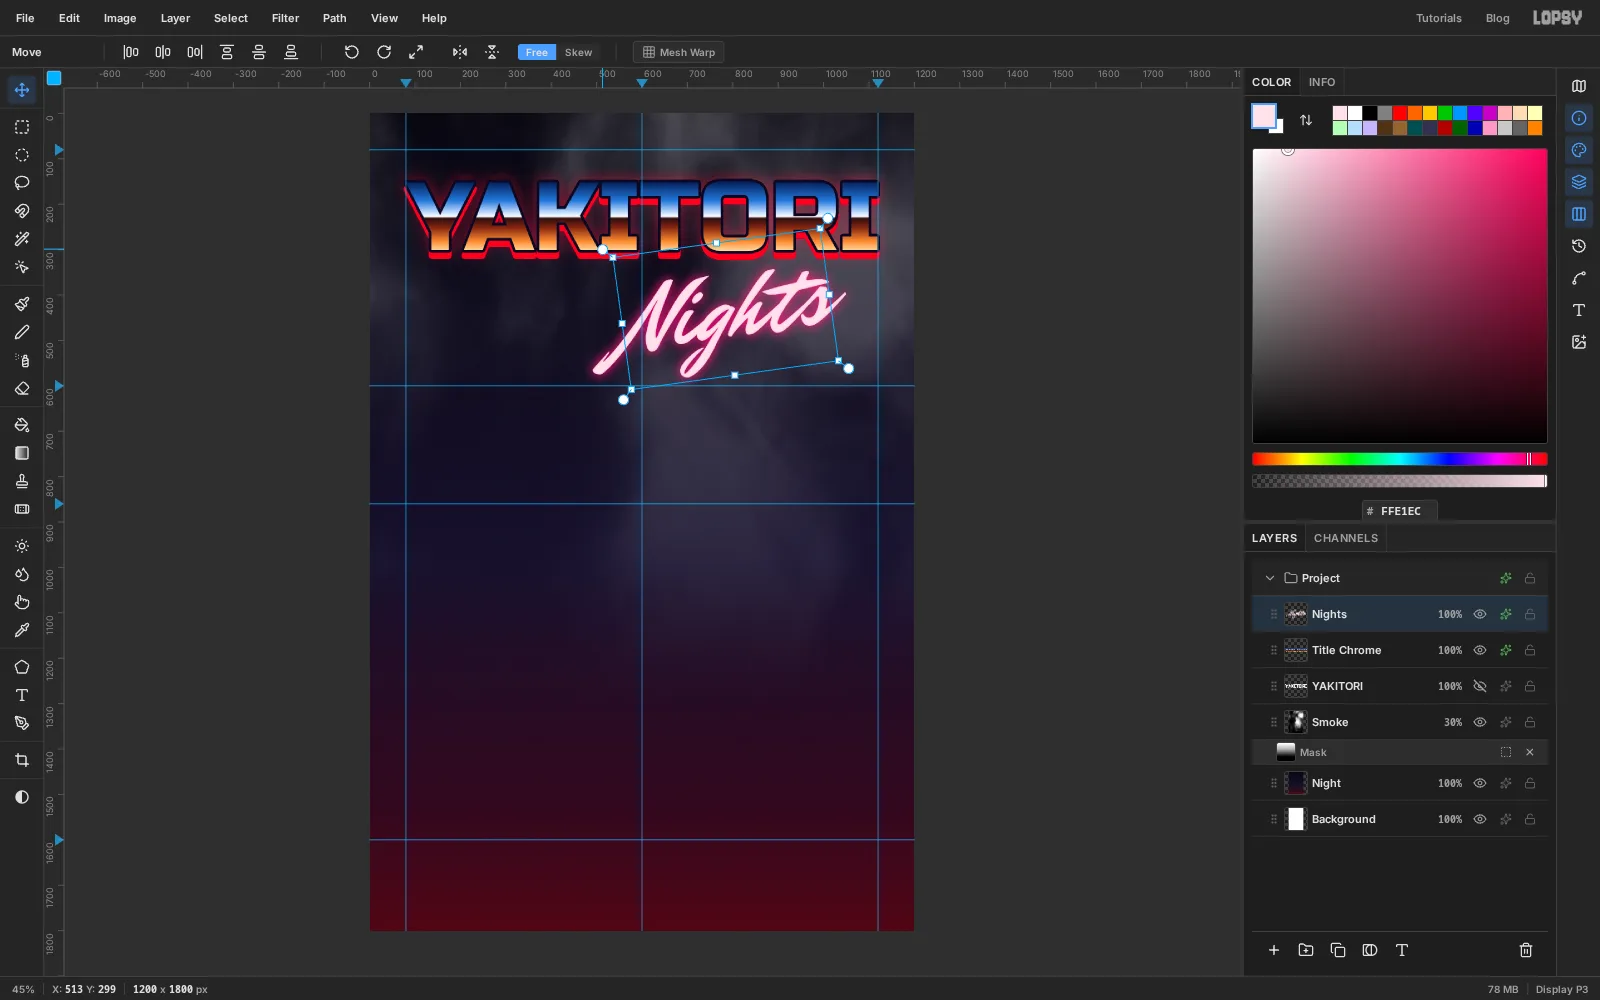
-
Draw the paper lantern
- Click the
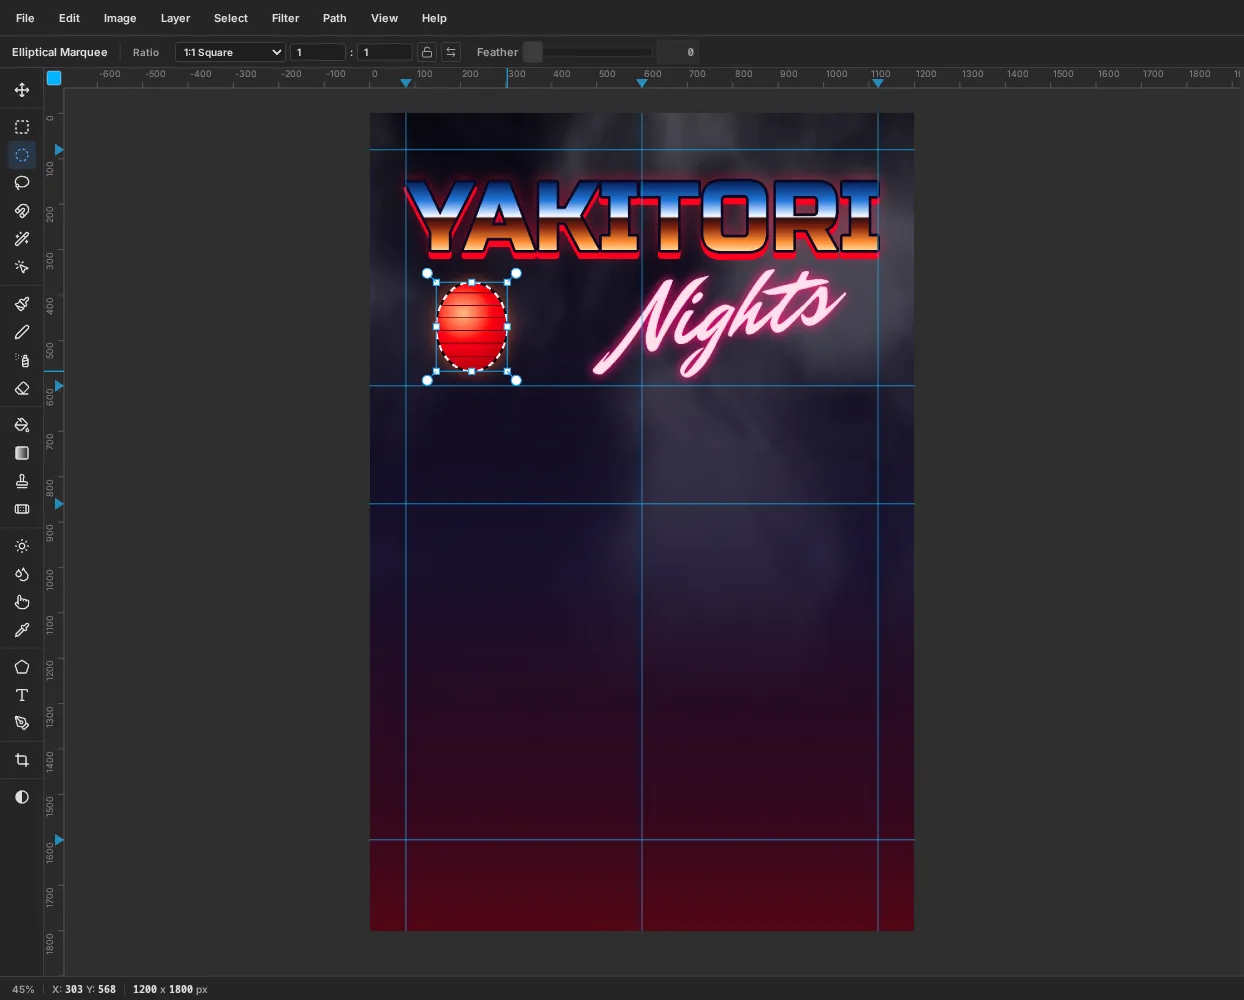
Nightsrow, then click New Group and rename the groupLantern. Click Add Layer and rename the layerPaper. - With the Elliptical Marquee, drag a tall oval about 160 px wide and 200 px tall in the empty space left of
Nights, centred near225, 470. - With the Gradient tool set to Radial, make four stops: , at 35%, at 80% and . Drag from a little above and left of the oval's centre out to its lower-right edge, so the lantern looks lit from inside.
- Pick the Pencil, set Size to
2and the colour to . Click left of the oval and Cmd+Shift-click right of it to draw a level rib. Repeat for six evenly spaced ribs. The selection keeps the lines inside the oval. - Press Cmd+D. Give
Paperan Outer Glow: Size90, Opacity60, colour .
- Click the
-
Add chrome caps, a cord and a tassel
- Click Add Layer and rename it
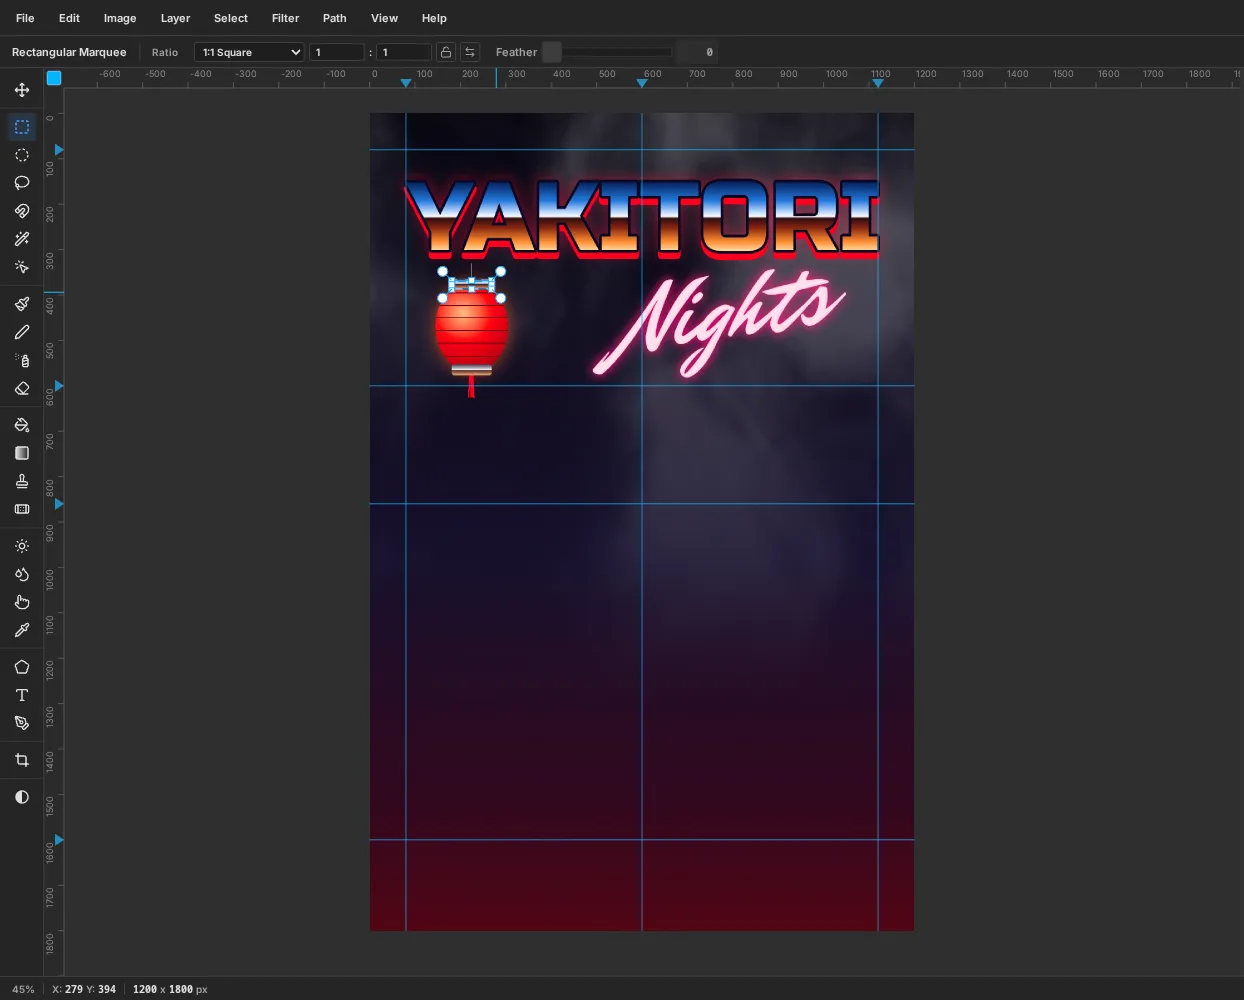
Caps. Pick the Shape tool, set Shape to Rectangle, Corner Radius to6and the fill to . - The Shape tool grows a shape from its centre, so press at the middle of the top of the lantern and drag outwards until the cap is about 88 × 24 px. Draw a matching cap at the bottom.
- To chrome each cap separately, Cmd-click the
Capsthumbnail, pick the Rectangular Marquee, and hold Shift+Alt while you drag a rectangle around just the top cap. Shift+Alt intersects, so only the top cap stays selected. - Set the Gradient tool to Linear with the small chrome stops: , at 30%, at 48%, at 52%, at 75% and . Shift-drag from the top of the cap to its bottom. Repeat steps 3 and 4 for the bottom cap.
- With the Pencil at size
2and colour , click just under the title's red offset above the lantern and Cmd+Shift-click the top cap straight below to hang the cord. Switch to size3and and draw four short lines down from the bottom cap for a tassel.
- Click Add Layer and rename it
-
Mark the lantern and group it
Lanterns outside yakitori bars carry a kanji. 鳥 (tori) means "bird".
- Click the
Capsrow. Set the foreground colour to , pick the Text tool with Dela Gothic One at84, click on the lantern and type鳥, then press Tab. - Centre it on the paper with the Move tool or the arrow keys, set its opacity to
85%, and add a Stroke of width3in , so the ribs don't seem to cut through the character. - If the text landed outside the group, drag its grip (the dotted handle at the left of the row) onto the middle of the
Lanterngroup row to drop it in.
Click the
Lanterngroup row and switch to the Move tool. The handles now frame the whole lantern, and dragging moves all three layers together.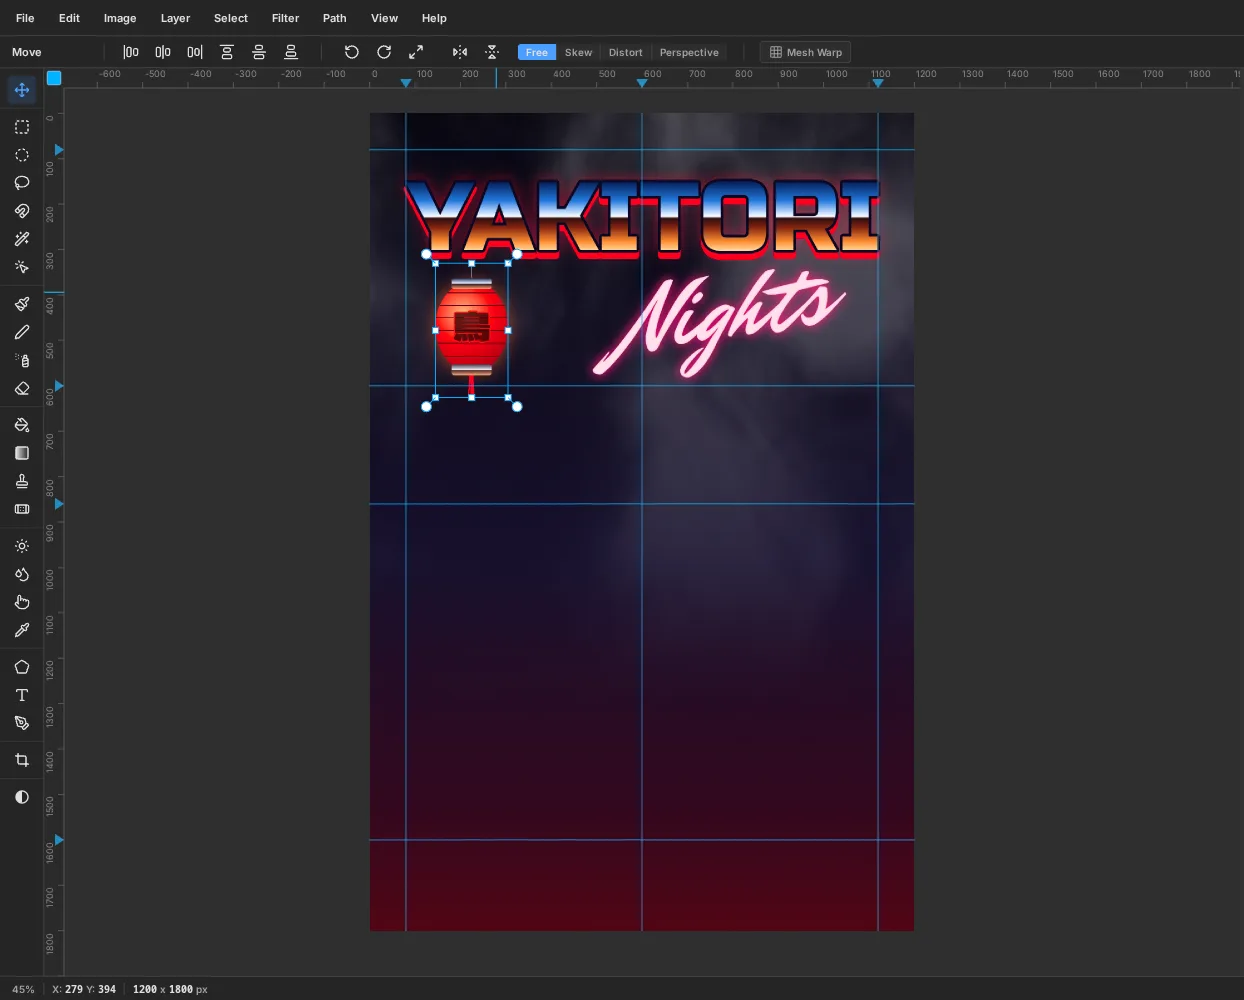
- Click the
-
Draw the skewer rod flat
The rod will end up tilted, but draw it level first. A chrome gradient across a 12 px rod needs a perfectly square drag, and that's easy with Shift held on a level shape.
- Collapse the
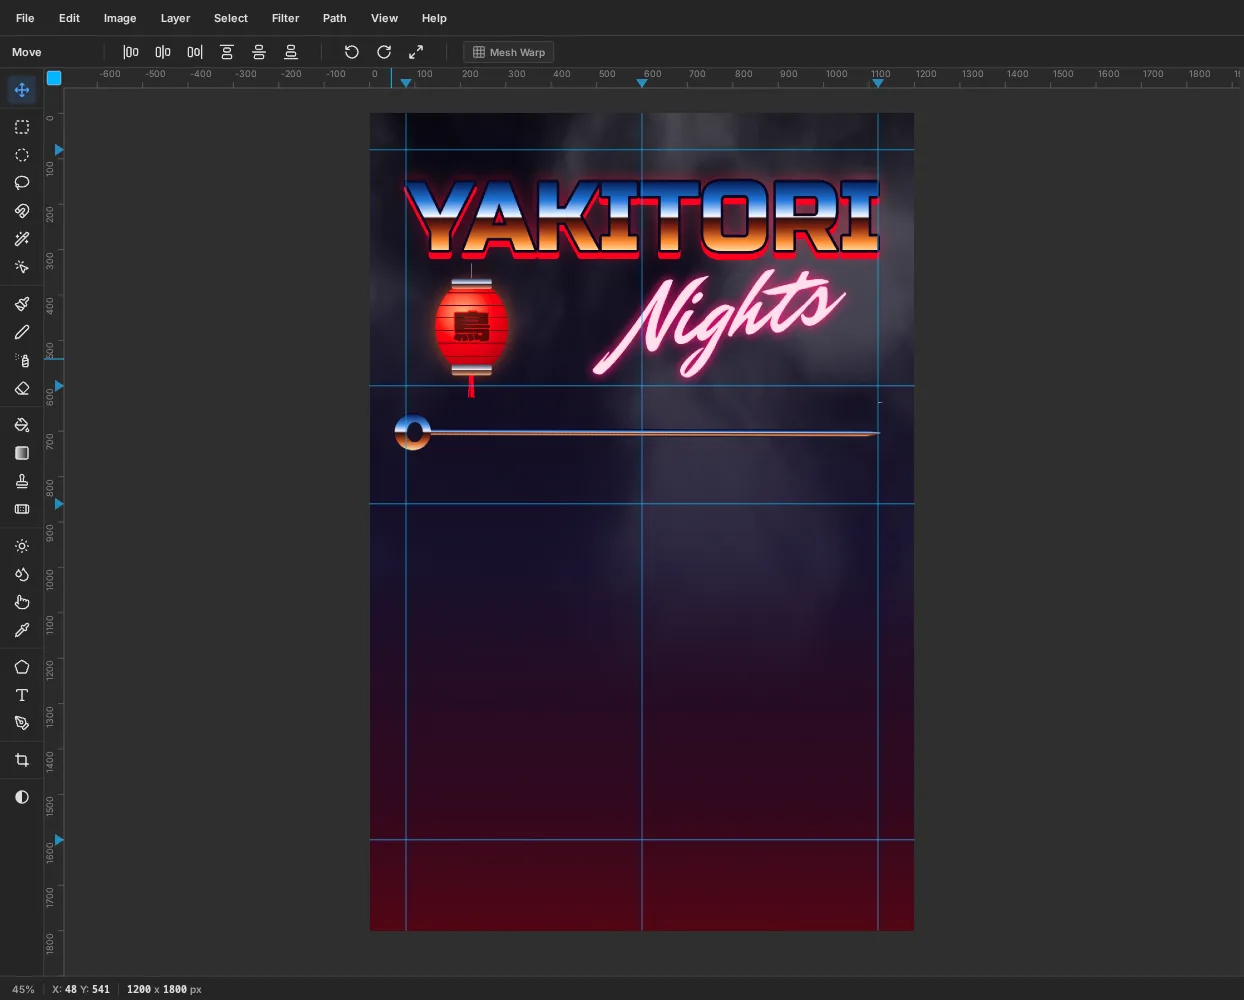
Lanterngroup with the arrow on its row, keep the row selected, then click New Group and rename itSkewer. Add a layer inside it namedRod. - With the Lasso, click out a long, thin rod about 12 px thick along y
686, running from just inside the left margin guide (x130) to just past the right one. Bring the last 40 px or so to a point at the right end. Click on each corner and double-click to close, so the edges stay straight. - Shift-drag the small chrome gradient from the top edge of the rod to the bottom edge.
- Press Cmd+D. With the Elliptical Marquee, hold Shift and drag an 80 px circle at the left end of the rod. Then hold Alt and drag a 44 px circle in its middle to cut a hole. Fill the ring with the same gradient, top to bottom.
- Add a Stroke of
2px in toRod.
- Collapse the
-
Tilt the rod
Draw a rectangular marquee around the rod and ring, switch to the Move tool and drag the rotation handle outside the top-left corner until the rod has turned about 7° anticlockwise. The tip now points up towards the right, echoing the slant of
Nights. Press Enter and Cmd+D.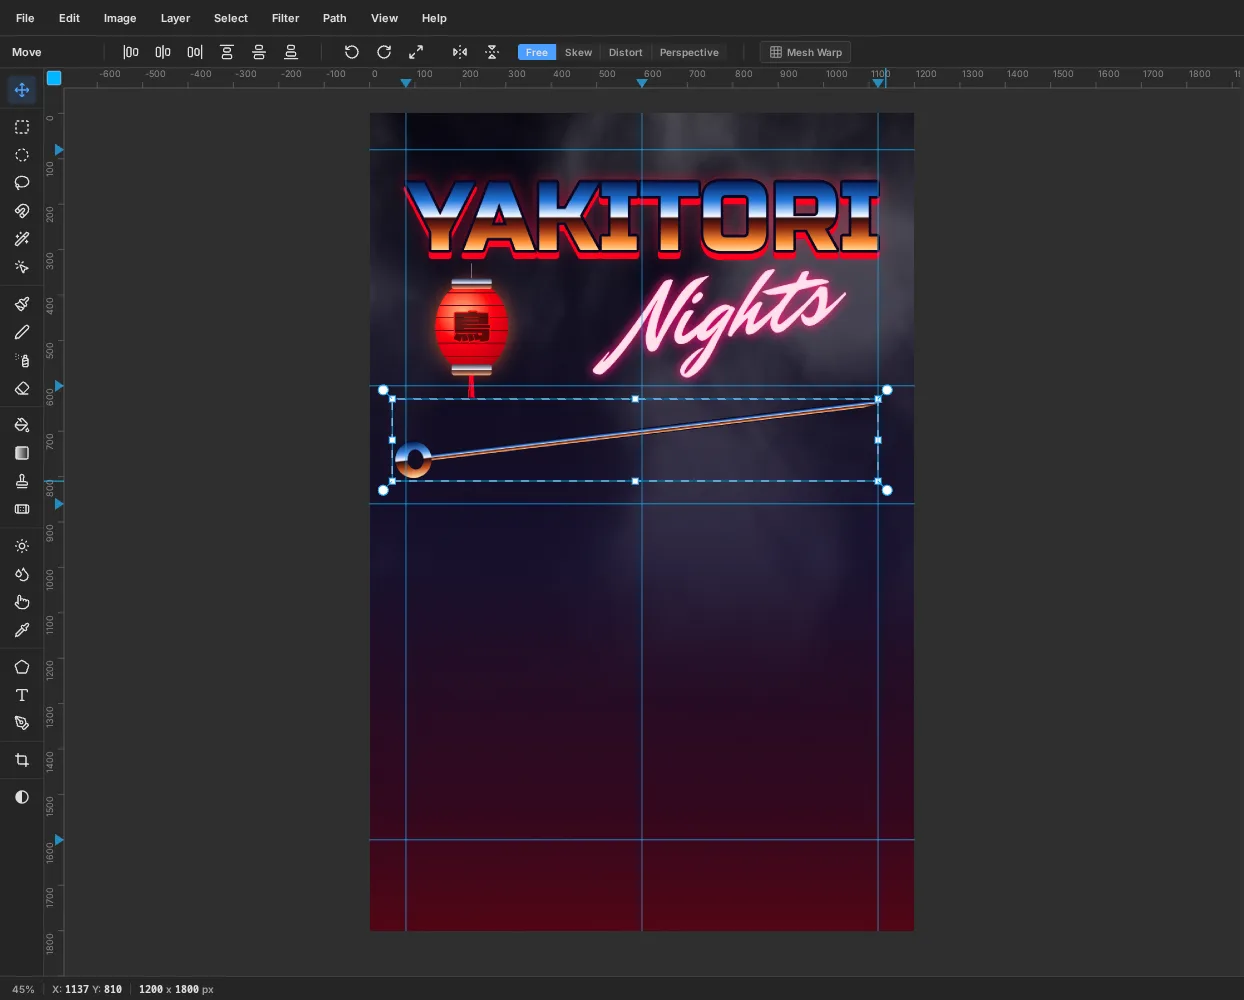
-
Cut a lumpy piece of chicken
Grilled thigh isn't square. Each piece should be lumpy, and each one should be different.
Click Add Layer and rename it
Chicken 1. With the Lasso, click about sixteen points in a rough oval about 150 × 125 px on the left third of the rod, tilted a little. Vary how far out each point is, so the outline bulges and dents.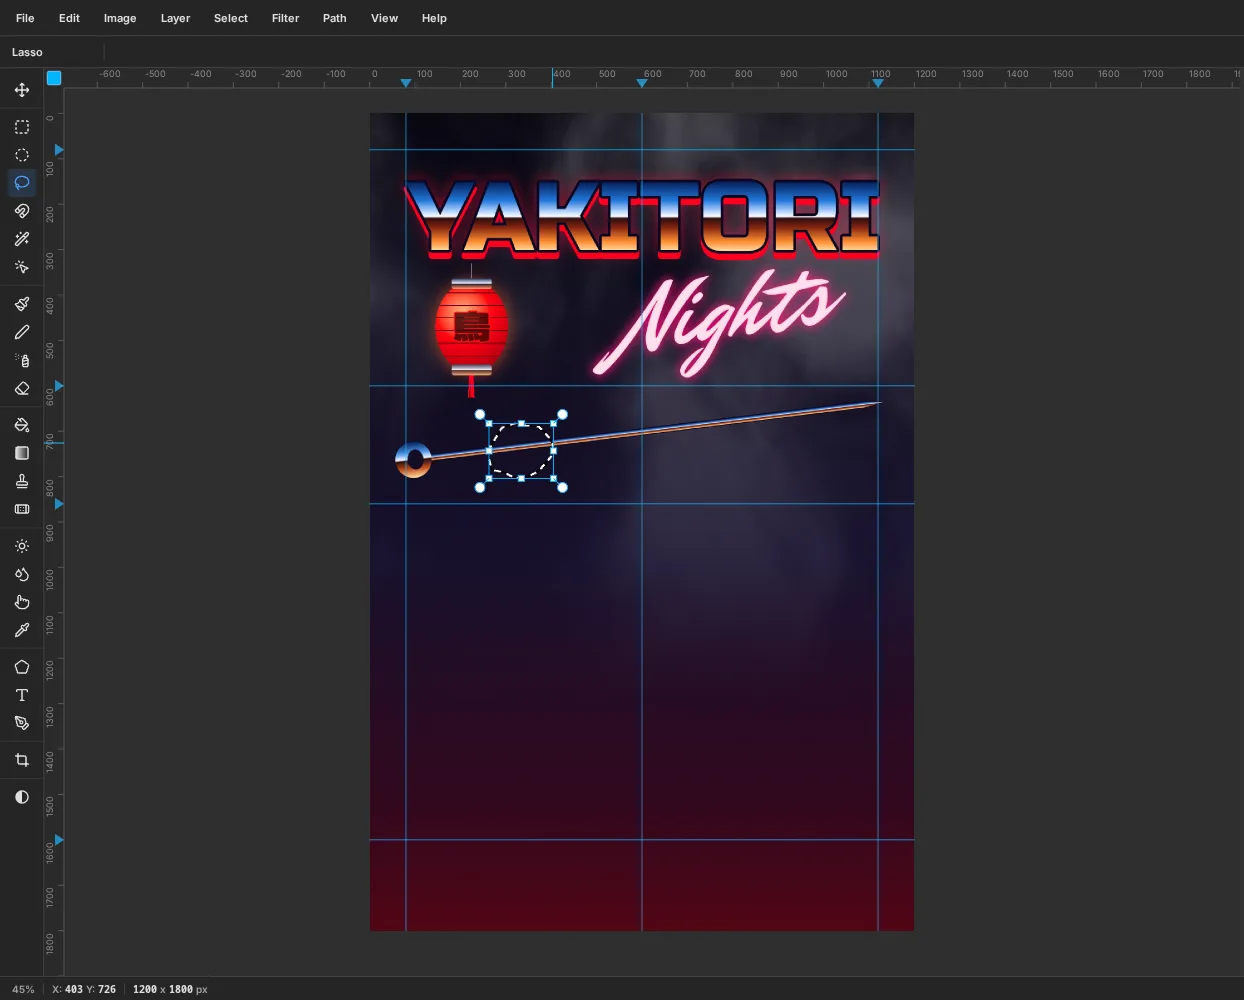
-
Glaze and char it
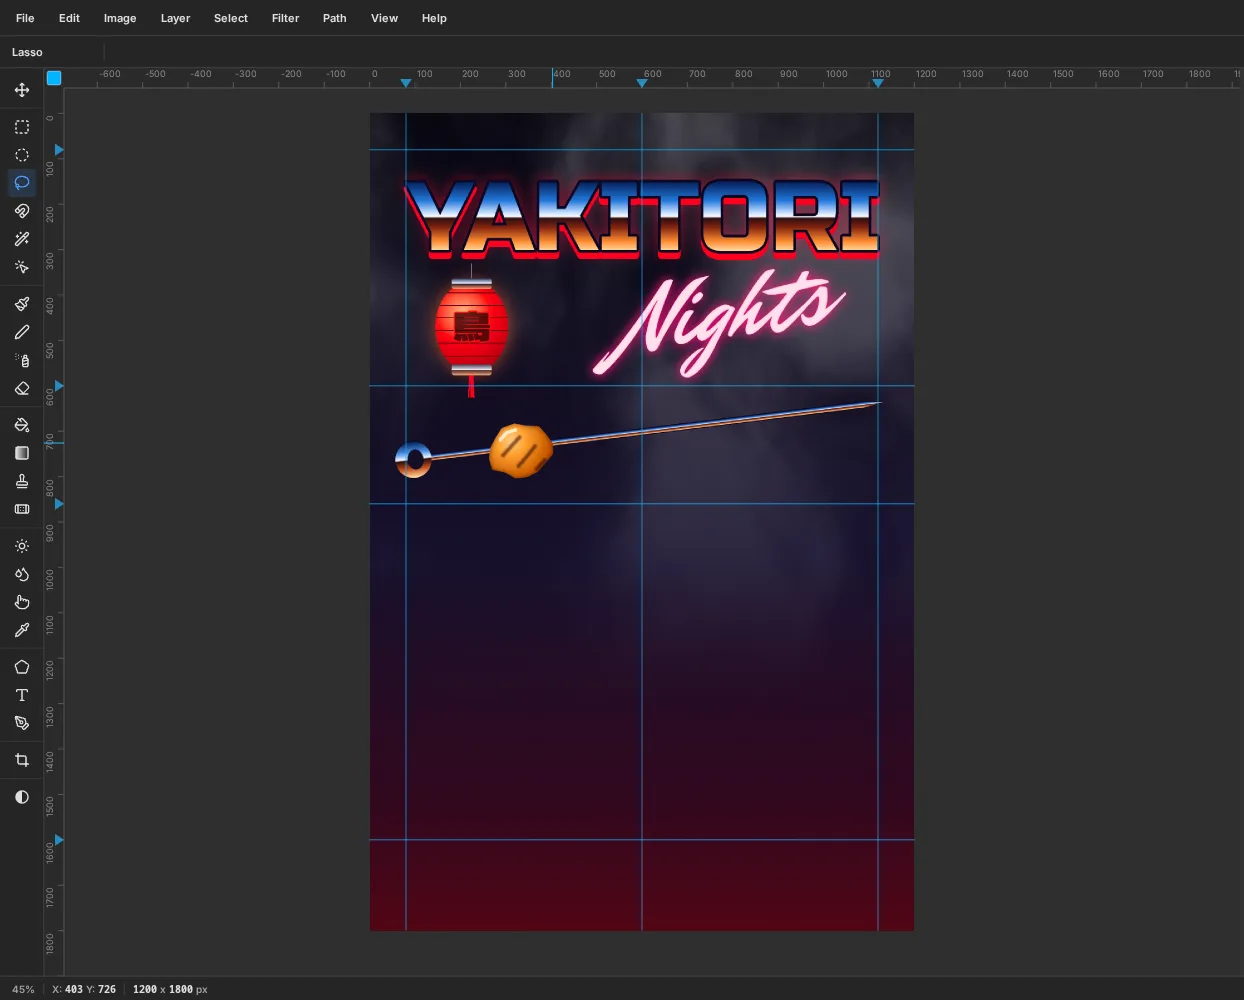
- Set the Gradient tool to Radial with four stops: , at 25%, at 70% and . Drag from just up and left of the centre out to the lower-right edge.
- Pick the Brush with Size
16, Hardness0and Opacity60, and the colour . Paint two or three short diagonal streaks for grill marks, each a slightly different length. The selection keeps them on the chicken. - Set the Brush to size
9, hardness70, opacity90and colour , and paint one short curved stroke near the upper left. That's the shine on the tare glaze. - Press Cmd+D and add an Inner Glow of size
16, opacity60, in to darken the edges.
-
Add more chicken and the scallions
- Make
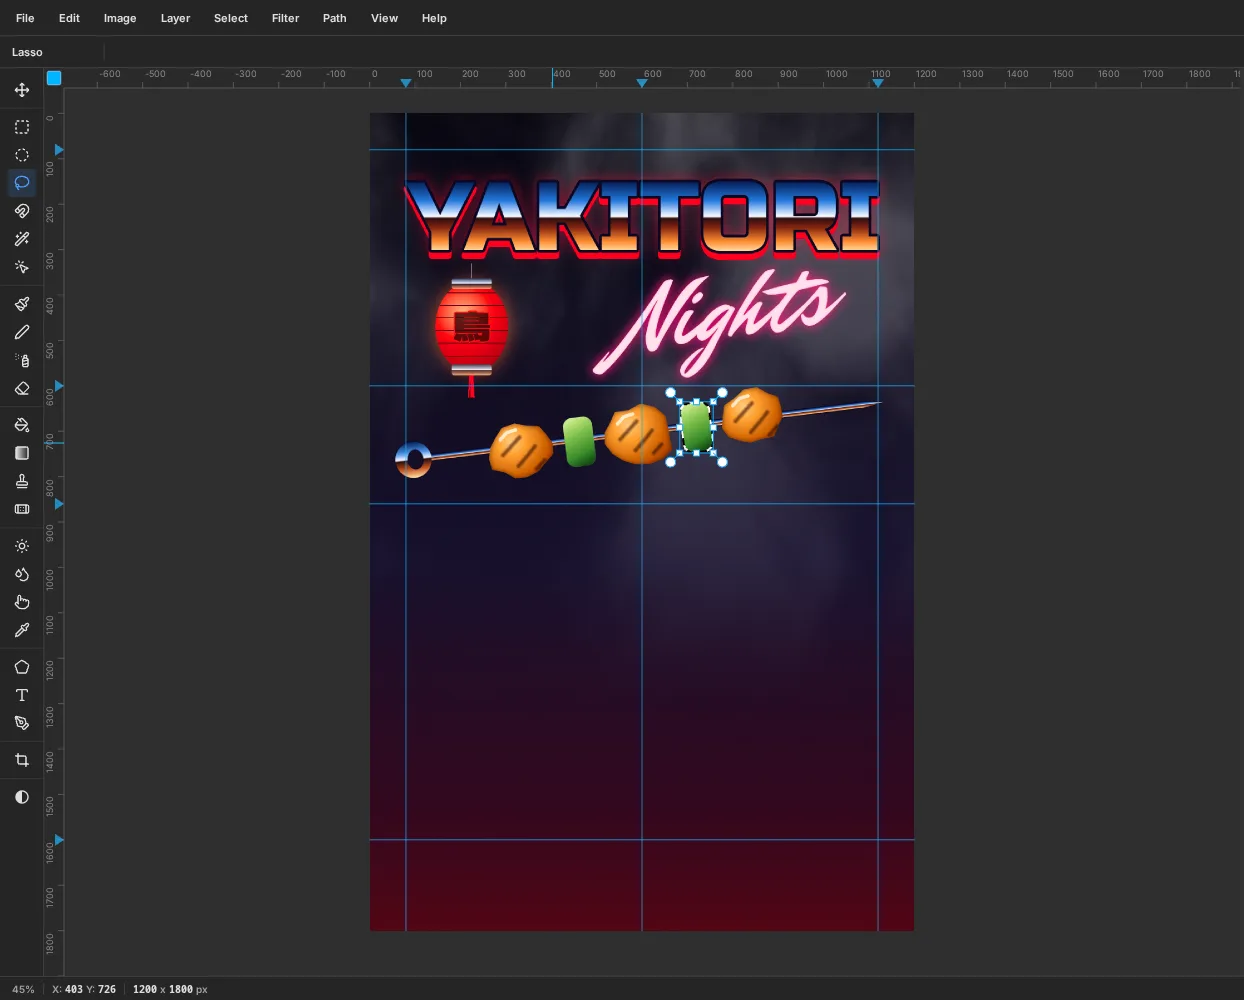
Chicken 2andChicken 3the same way, a little further along the rod each time. Change the outline, the tilt and the char marks so no two pieces match. - For the scallions (negi), add a layer named
Negi 1. Pick the Shape tool, set Rectangle with Corner Radius20and any fill, and drag from the rod between the first two pieces out to make a 64 × 108 px pill. - Cmd-click its thumbnail and fill it with a Linear gradient: , at 35%, at 75% and , dragged from its upper-left to its lower-right corner. The light then comes from the same upper left as the chicken highlights.
- Copy it with Cmd+C, paste with Cmd+V, rename the pasted layer
Negi 2and drag it between the second and third pieces. Rotate both scallions with the Move tool's handle so they sit square to the tilted rod.
- Make
-
Cast one shadow under the whole skewer
- Click the
Rodrow, then click Add Layer and rename itSkewer Shadow. Drag its grip down so it sits underRod. - Cmd-click the
Rodthumbnail, then Cmd+Shift-click each chicken and scallion thumbnail to add them to the selection. - With
Skewer Shadowactive, fill with and press Cmd+D. - Choose Filter → Gaussian Blur… with Radius
14. With the Move tool, press Shift+Right once and Shift+Down twice to offset it, and set the layer opacity to70%.
Finally, click the
Skewergroup row and press Shift+Down once and Down six times to move the whole skewer 16 px lower. That gives the script and the skewer a little room from each other.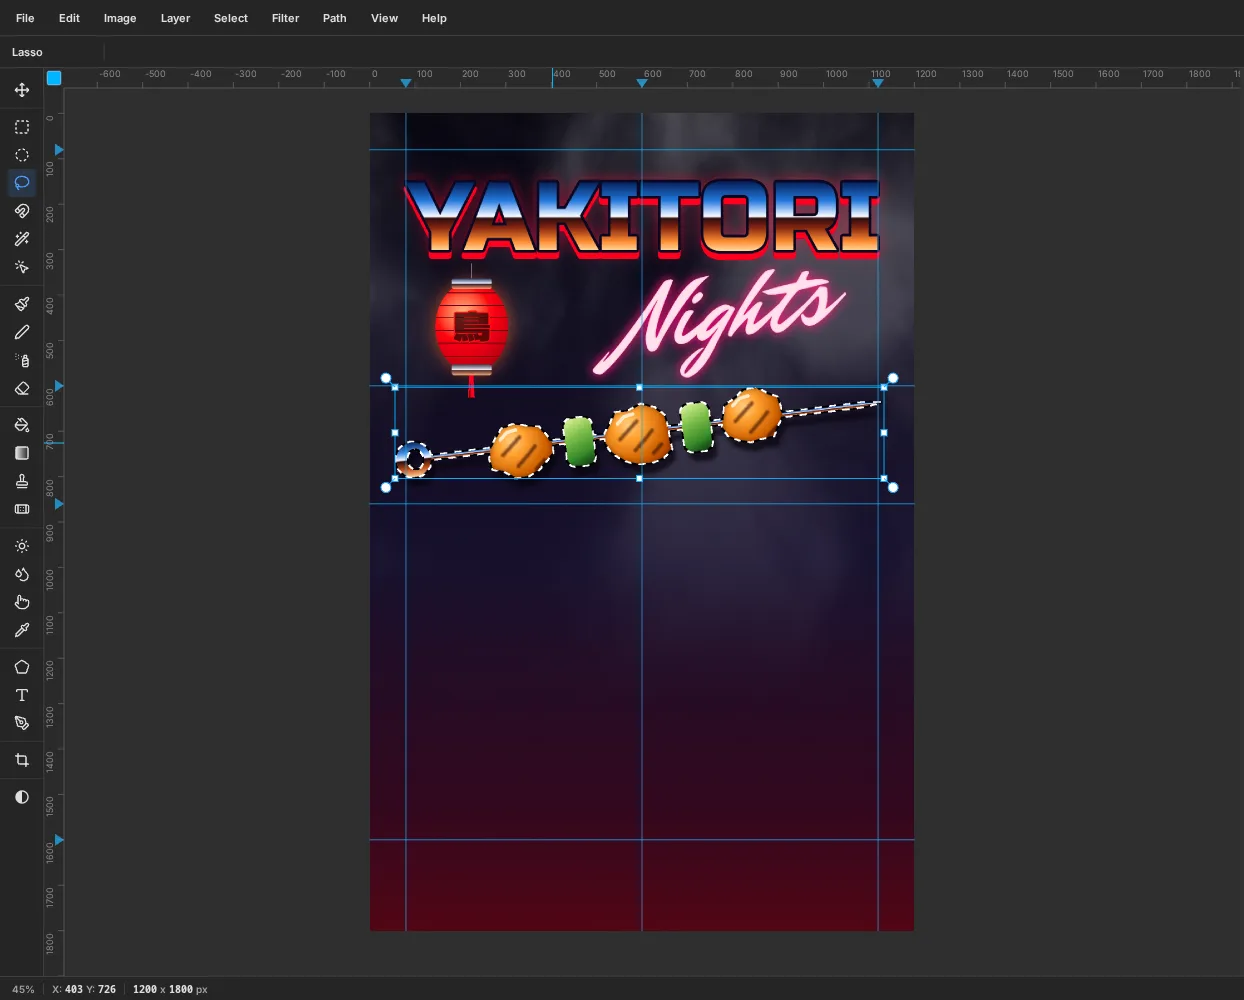
- Click the
-
Build the menu panel and its chrome frame
- Collapse the
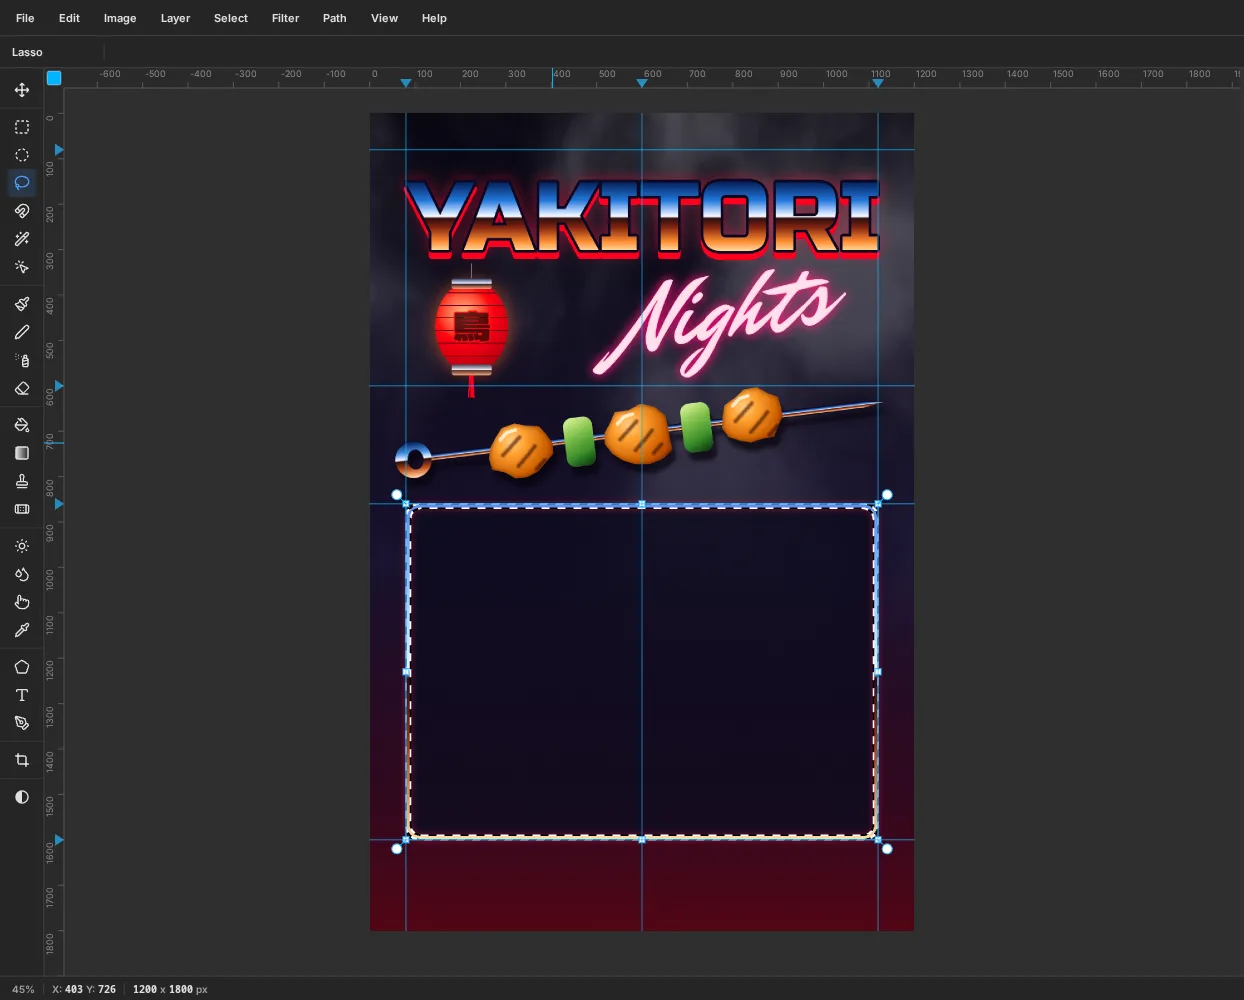
Skewergroup, keep its row selected, then click Add Layer and rename itMenu Panel. - Pick the Shape tool, Rectangle, Corner Radius
32. Open the fill swatch, set it to and drag its opacity bar to about 82%. - Press at the centre point
600, 1230and drag out to where the x1120and y1600guides cross. The panel grows from the centre and fills the space between all four guides. - Cmd-click the
Menu Panelthumbnail, click Add Layer and rename itMenu Frame. - Make a Linear gradient with six stops: , at 45%, at 50%, at 52%, at 72% and . Shift-drag from the top of the panel to the bottom. The whole frame is one chrome sheet, with its horizon running across the middle.
- Choose Select → Shrink… with
10, press Delete to clear the middle, and press Cmd+D. A 10 px chrome frame is left. - Give
Menu Framean Outer Glow: Size22, Opacity55, colour .
- Collapse the
-
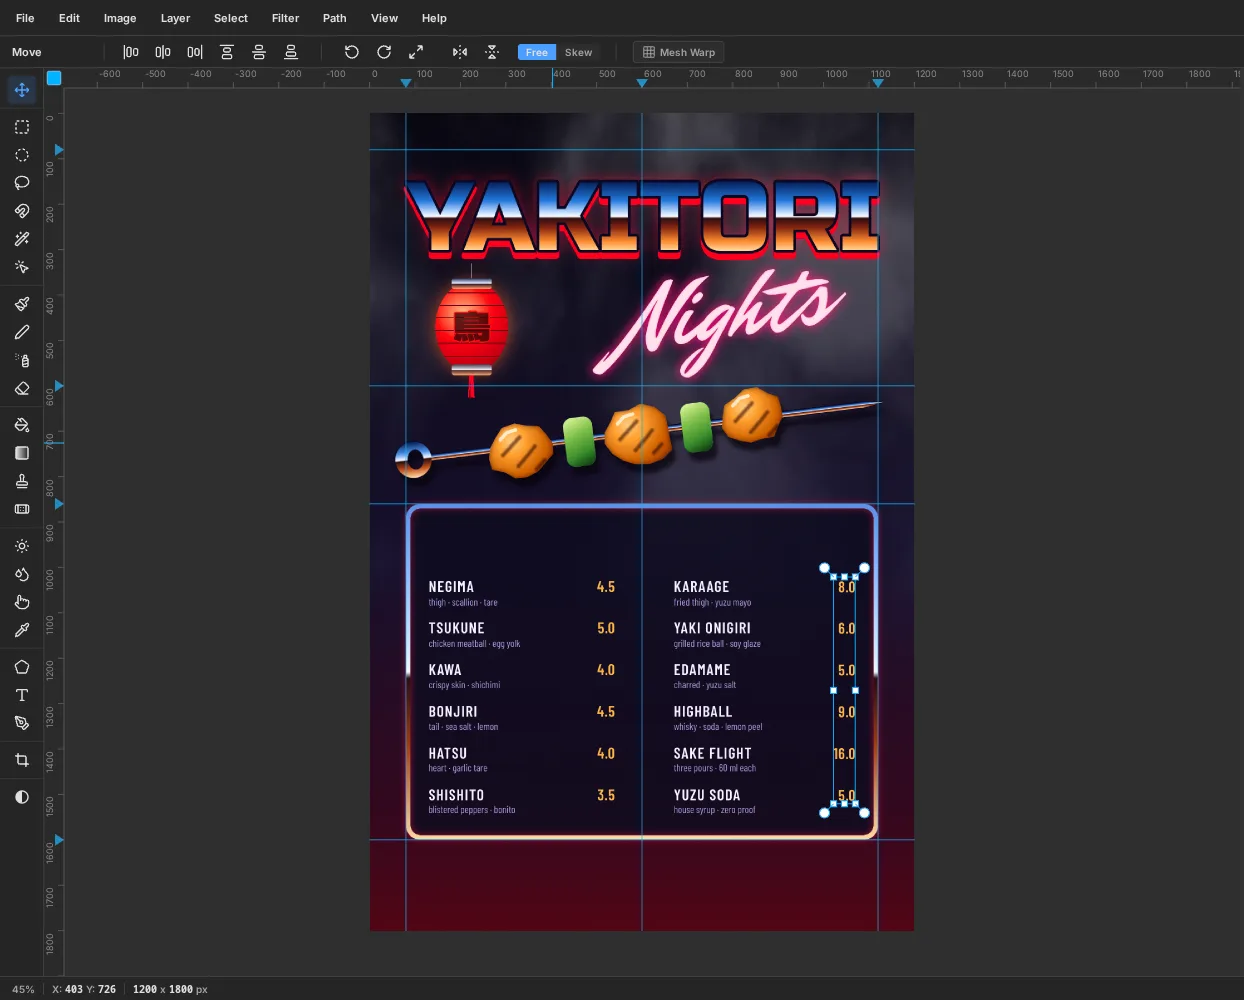
Set the first column
Each column is three text layers: dish names, descriptions and prices. They all use the same row pitch, so they line up.
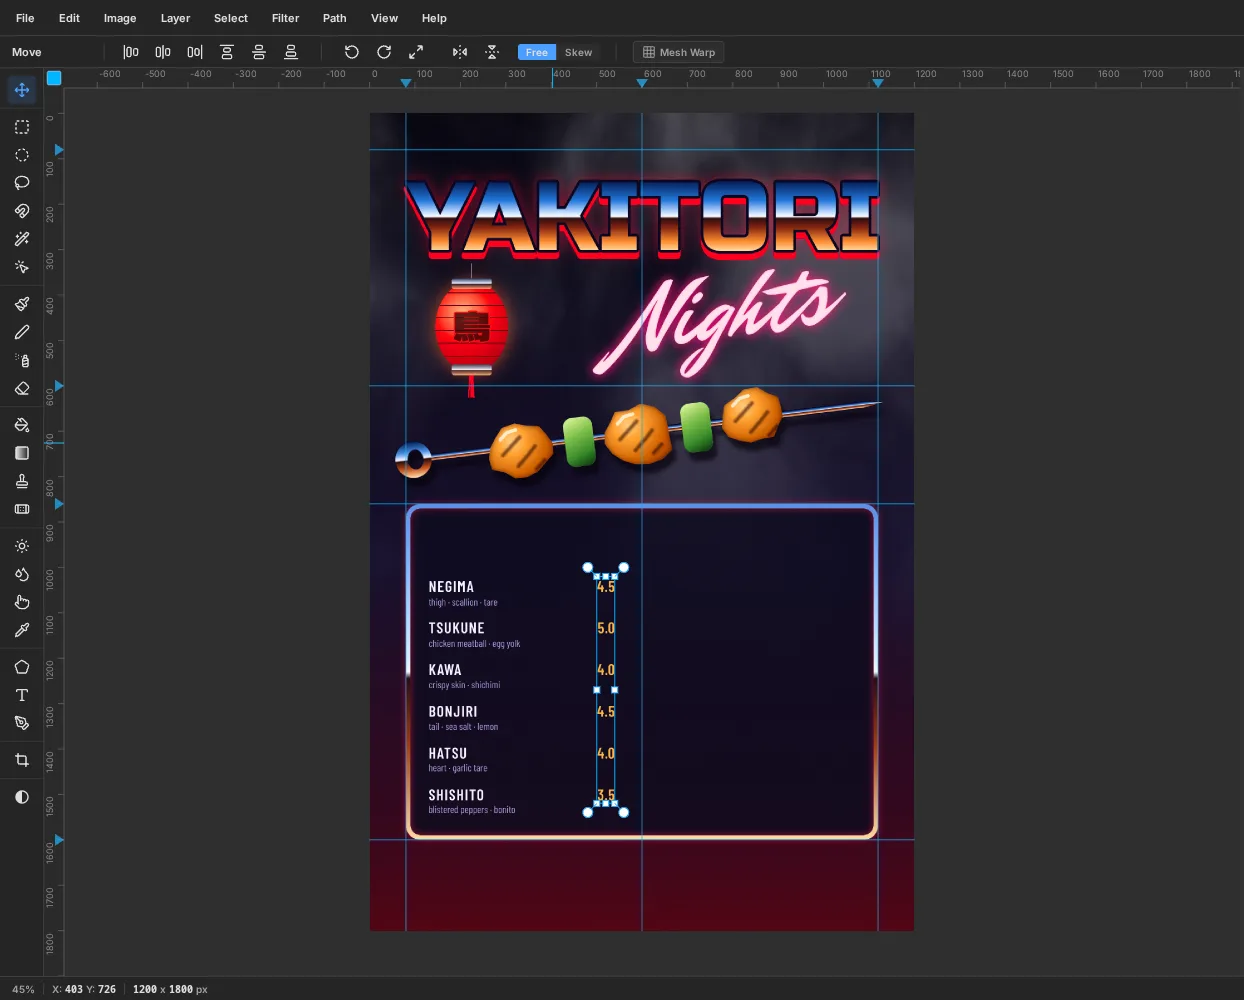
- Descriptions. Click
Menu Frameand pick the Text tool. Set the colour to and choose Barlow Condensed, Regular, size22. Click at130, 1062and type the six descriptions, pressing Enter between them: thigh · scallion · tare, chicken meatball · egg yolk, crispy skin · shichimi, tail · sea salt · lemon, heart · garlic tare, blistered peppers · bonito. Press Tab. Open the Text panel and set Line height to1.2and Paragraph spacing to65. The descriptions go in first because a click inside an existing text block edits it; with them in place, the names block starts in clear space just above. - Names. Click
Menu Frameagain. Set the colour to and choose Barlow Condensed, SemiBold, size34. Click at130, 1020, just above the first description, and type NEGIMA, TSUKUNE, KAWA, BONJIRI, HATSU, SHISHITO on separate lines. In the Text panel set Line height1.2, Paragraph spacing51and Letter spacing2. Each name now sits on its description. Both blocks share a 92 px row pitch (22 px × 1.2 + 65 for the descriptions, 34 px × 1.2 + 51 for the names), which keeps them paired all the way down. - Prices. Click
Menu Frame. Set the colour to , keep Barlow Condensed SemiBold at34, and set Align to Right. Click at540, 1025and type 4.5, 5.0, 4.0, 4.5, 4.0, 3.5 on separate lines. Use Line height1.2, Paragraph spacing51and Letter spacing1. Then use the Move tool's arrow keys to line the tops of the prices up with the tops of the names.
Writing every price with one decimal place keeps the column tidy.
- Descriptions. Click
-
Set the second column
Repeat the three blocks for the right column, starting at x
670with the prices right-aligned at x1070:- Names: KARAAGE, YAKI ONIGIRI, EDAMAME, HIGHBALL, SAKE FLIGHT, YUZU SODA
- Descriptions: fried thigh · yuzu mayo, grilled rice ball · soy glaze, charred · yuzu salt, whisky · soda · lemon peel, three pours · 60 ml each, house syrup · zero proof
- Prices: 8.0, 6.0, 5.0, 9.0, 16.0, 5.0
Check the right blocks against the left ones. If a block came out a few pixels lower, select it and nudge it up with the arrow keys until both columns share the same rows.
-
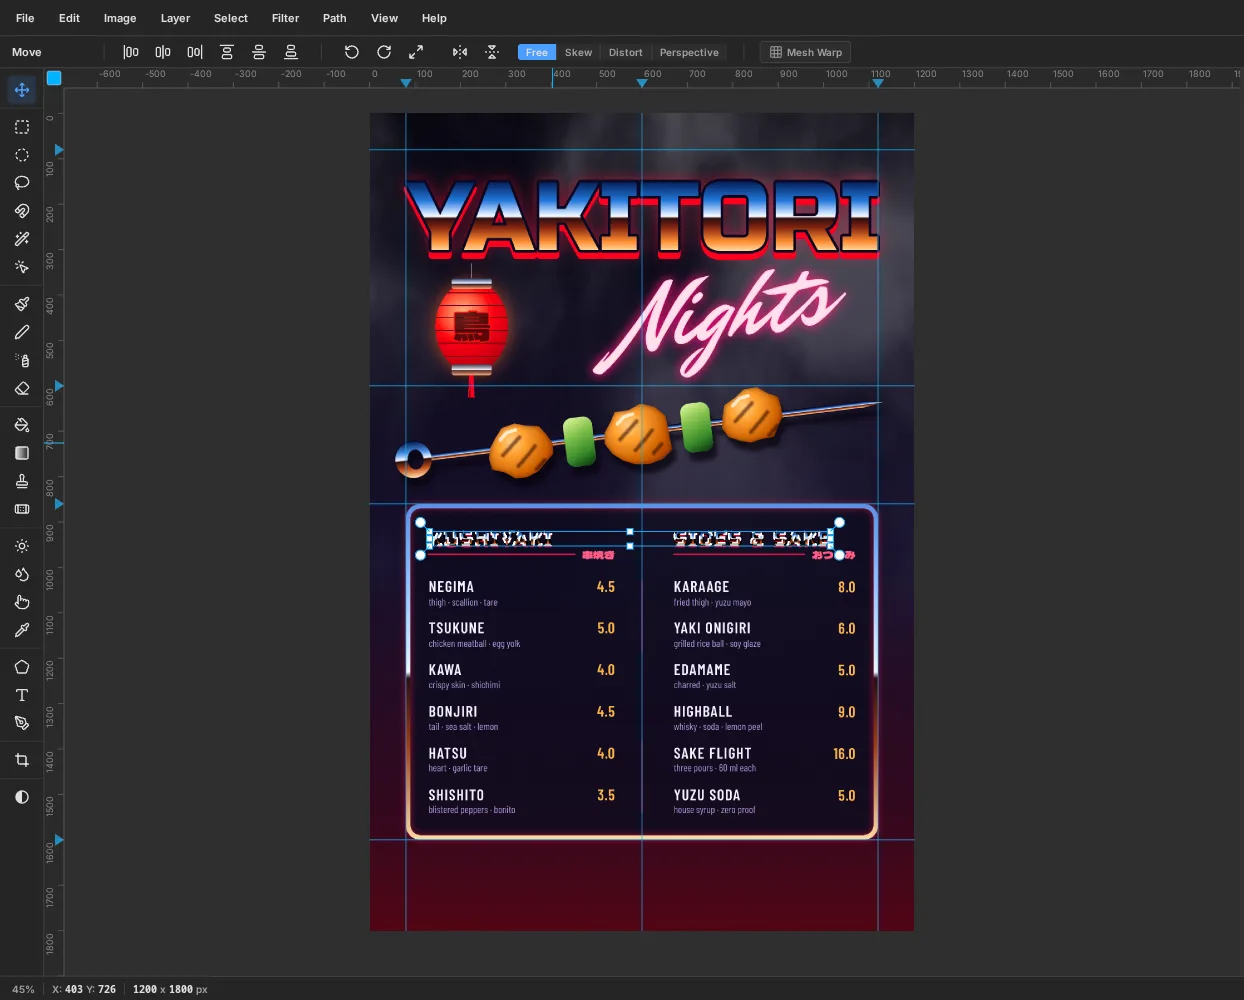
Chrome the section headings and add the rules
- Click
Menu Frame, pick the Text tool, set the colour to white and choose Russo One at44with Letter spacing3. TypeKUSHIYAKIat130, 912andSIDES & SAKEat670, 912. - Cmd-click the
KUSHIYAKIthumbnail and Cmd+Shift-clickSIDES & SAKE. Add a layer namedHeading Chrome, Shift-drag the small chrome gradient from the top of the letters to the bottom, press Cmd+D, and hide the two white text layers. - Give
Heading Chromea Drop Shadow with Offset Y4, Blur0and colour , the same hard red as the title. - Click
Menu Frame, choose Dela Gothic One at24in , set Align to Right, and type串焼き(kushiyaki, "grilled skewers") at x540andおつまみ(otsumami, "small plates") at x1070. Nudge them so they sit on the same line as the rules you'll draw next (y972). - Add a layer named
Rules. With the Pencil at size3and , click at130, 972and Cmd+Shift-click just short of the left label to draw a level line. Holding Cmd snaps the angle to 15° steps, so the line stays perfectly horizontal. Do the same on the right from x670. - Switch the Pencil to size
2and draw two upright lines down the middle: click at600, 1030and Cmd+Shift-click at600, 1187, then click at600, 1383and Cmd+Shift-click at600, 1540. The gap is for the divider in the next step.
- Click
-
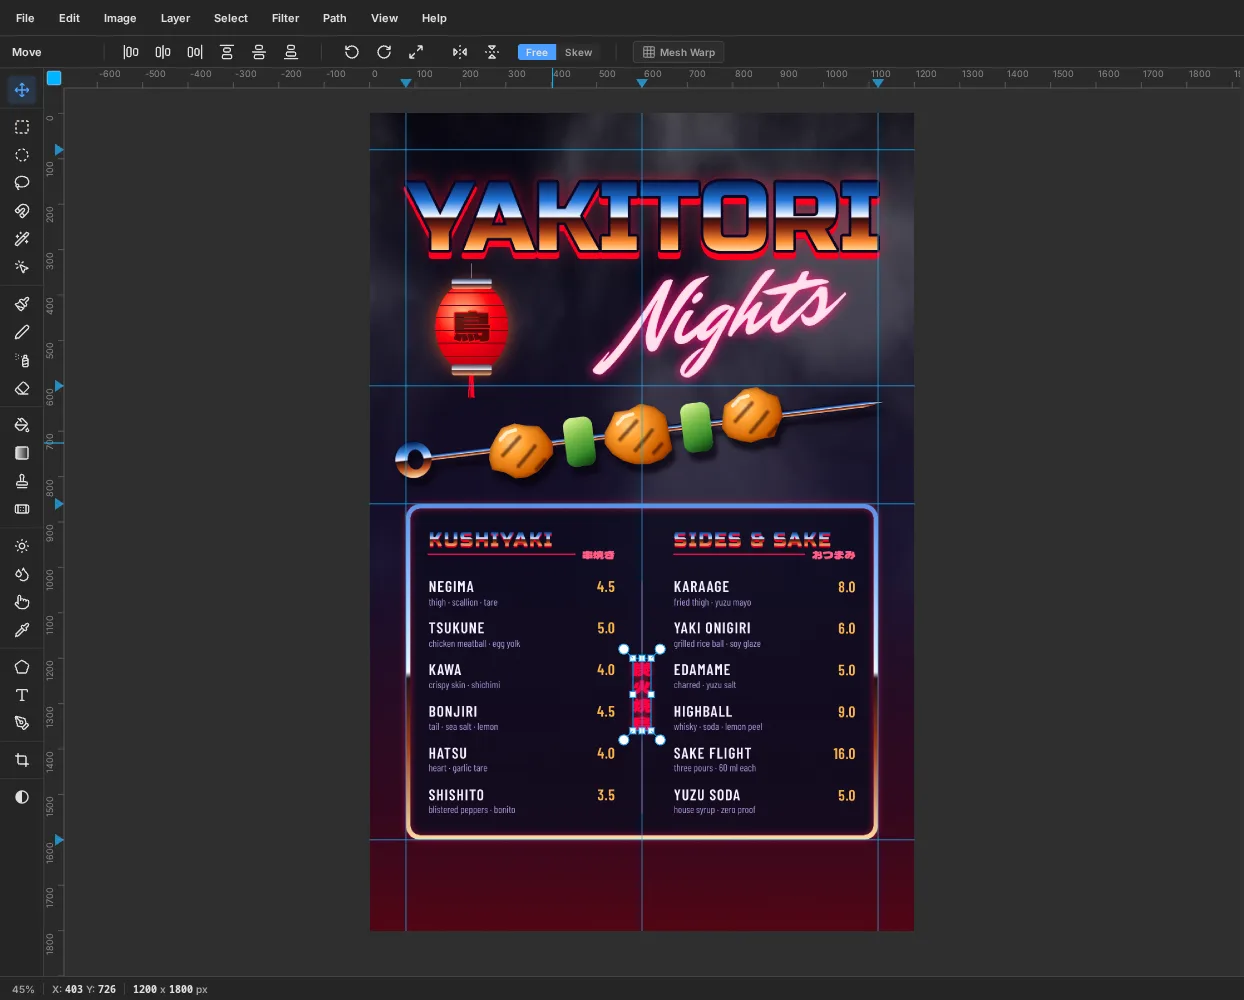
Add the vertical divider
- Click
Menu Frame. Choose Dela Gothic One at40in and click Toggle vertical text in the options bar. - Click in the gap and type
炭火焼鳥(sumibi yakitori, "charcoal-grilled chicken"). Press Tab. - Use the Move tool to centre it on x
600and halfway between the two lines, about y1285. The gap above and below should be the same. - Give it an Outer Glow: Size
26, Opacity70, colour .
- Click
-
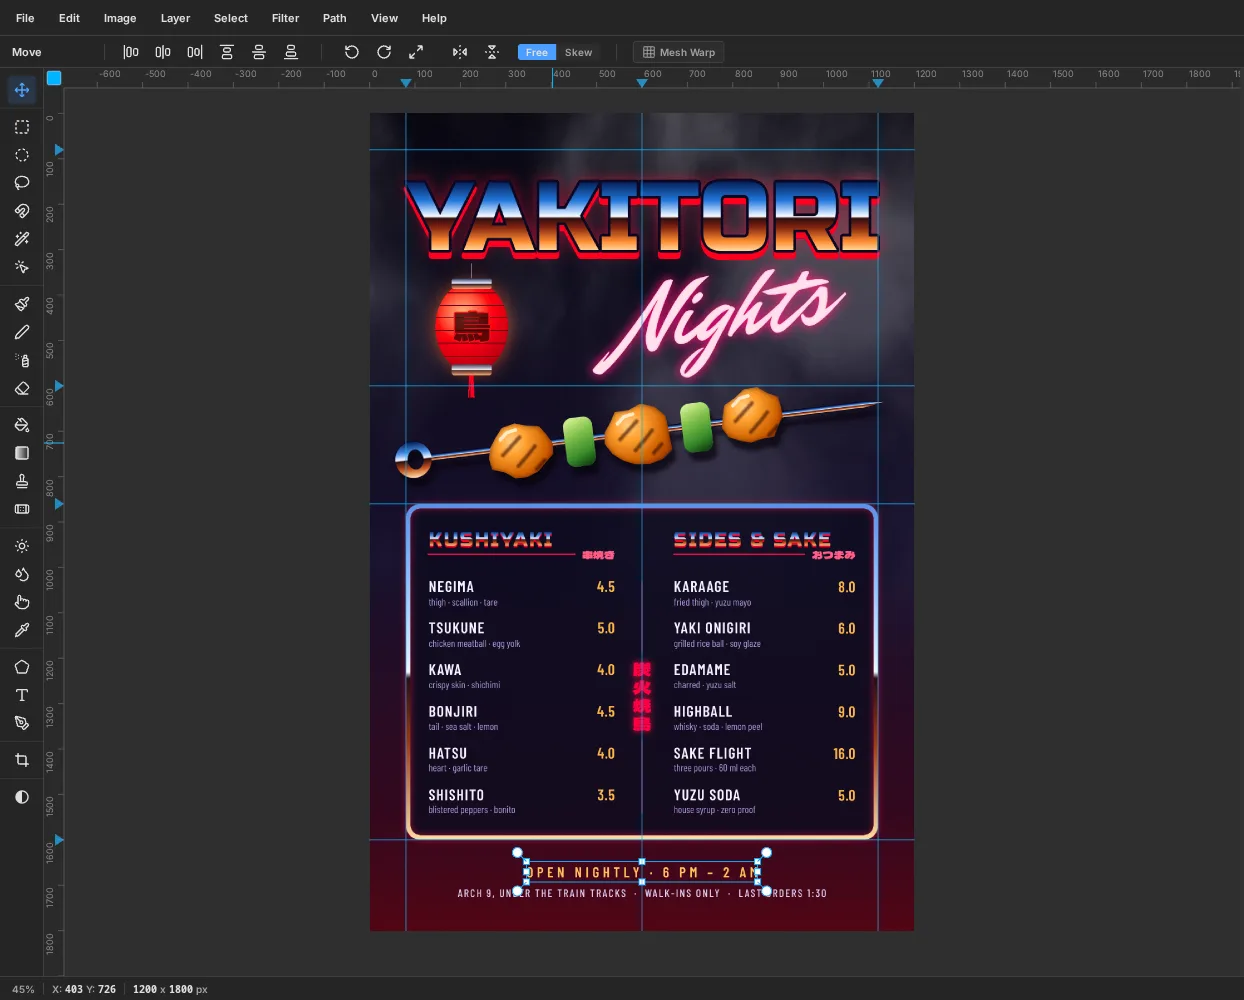
Set the footer
Click
Menu Frame, pick the Text tool and set Align to Center so the click point becomes the middle of the line.OPEN NIGHTLY · 6 PM – 2 AMin Barlow Condensed SemiBold32, , Letter spacing8, clicked at600, 1648.ARCH 9, UNDER THE TRAIN TRACKS · WALK-INS ONLY · LAST ORDERS 1:30in Barlow Condensed Medium24, , Letter spacing3, clicked at600, 1700.
The hours are the line people look for, so they get the larger, warmer type.
-
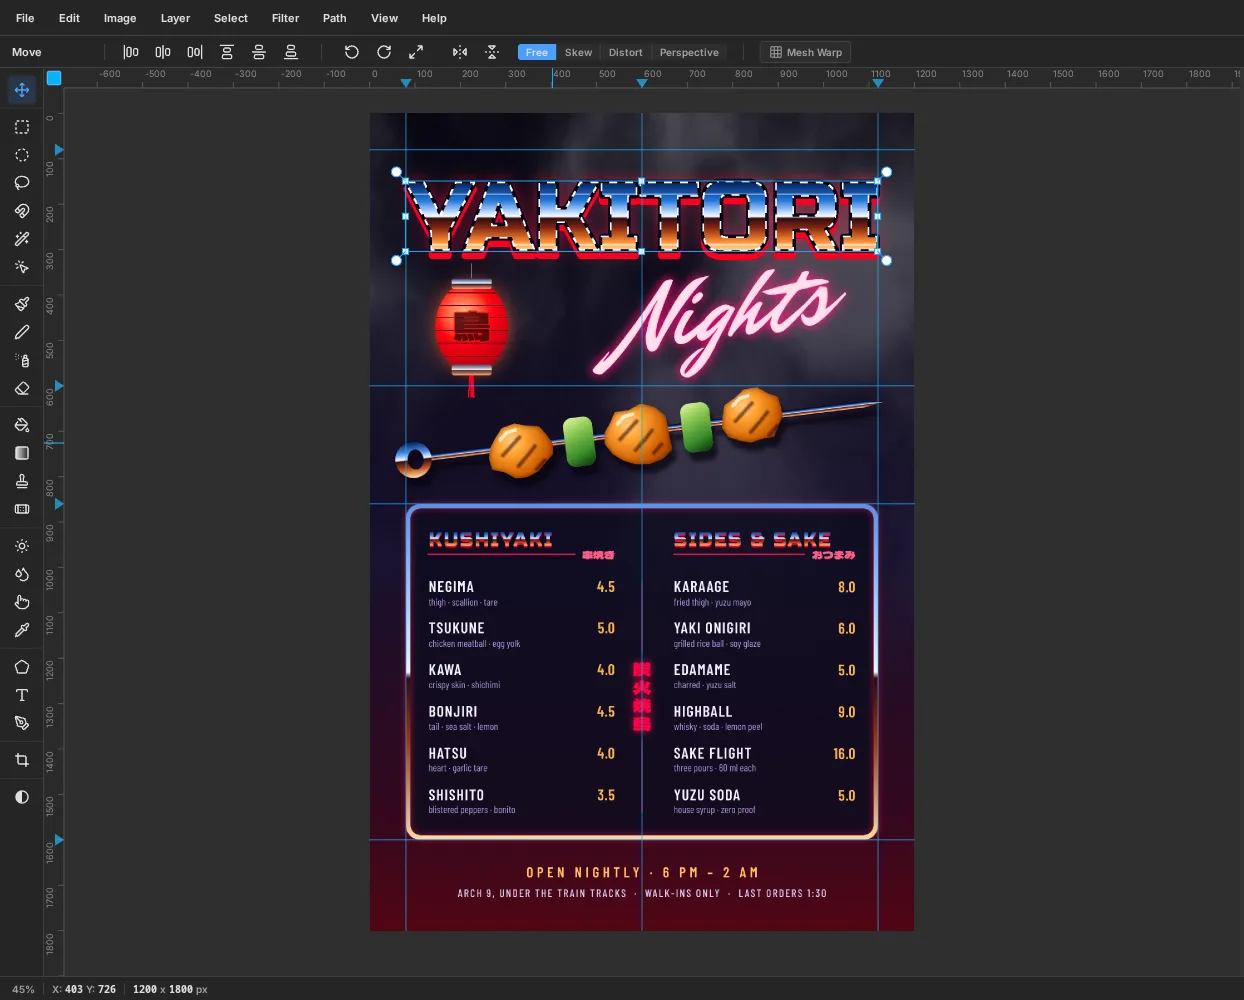
Polish the title's metal
- Add an Inner Glow to
Title Chrome: Size4, Spread0, Opacity70, white. It puts a specular rim on every edge. - Click the
Title Chromerow, Cmd-click its thumbnail, then click Add Layer and rename itTitle Shine. - With the Pencil at size
4in , click left of the title about 15 px above the bottom of the letters (y289) and Cmd+Shift-click right of it. That's the sunset reflecting in the bottom curve of the letters. Switch to size2in and draw another line about a third of the way down the sky half (y178) for a cloud reflection in the sky half. - Press Cmd+D and set
Title Shineto70%opacity.
- Add an Inner Glow to
-
Add a few star glints
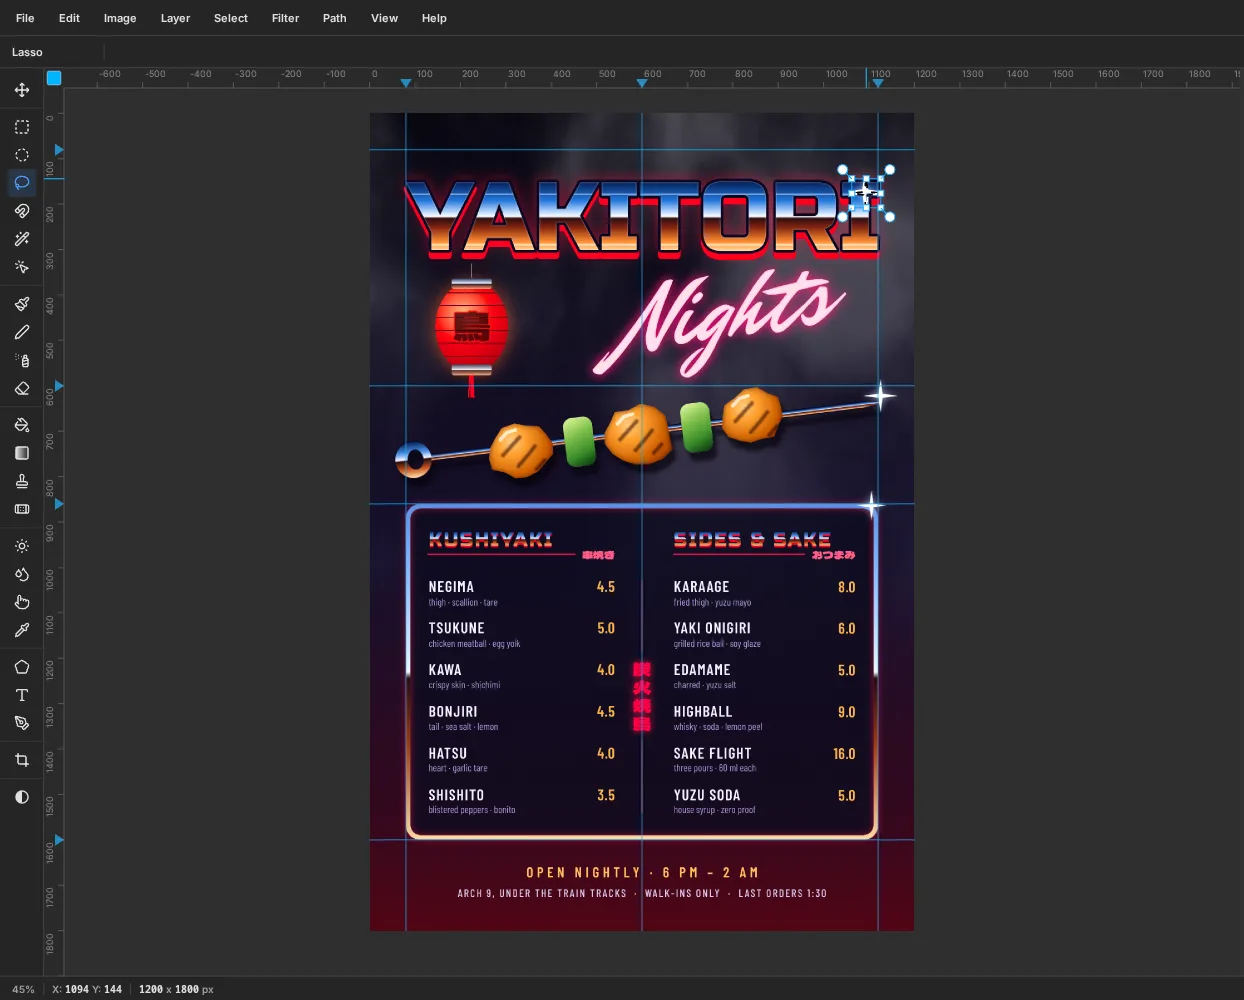
- At the top of the stack, add a layer named
Glints. With the Lasso, click an eight-point star: four long points (up, right, down, left) and four very short ones between them. Fill it with white and press Cmd+D. - Give
Glintsan Outer Glow: Size22, Opacity85, colour . - Draw a marquee around the star, copy it, and paste it twice. Drag the copies onto the tip of the skewer and the top-right corner of the panel. Drag a corner handle with Cmd held, which keeps the star's proportions, to make each one a different size.
- Select each pasted layer and choose Layer → Merge Down until they're all part of
Glints, so they share its glow.
Three glints is enough. They mark the brightest points of the metal. A dozen would just look like confetti.
- At the top of the stack, add a layer named
-
Grade the colour
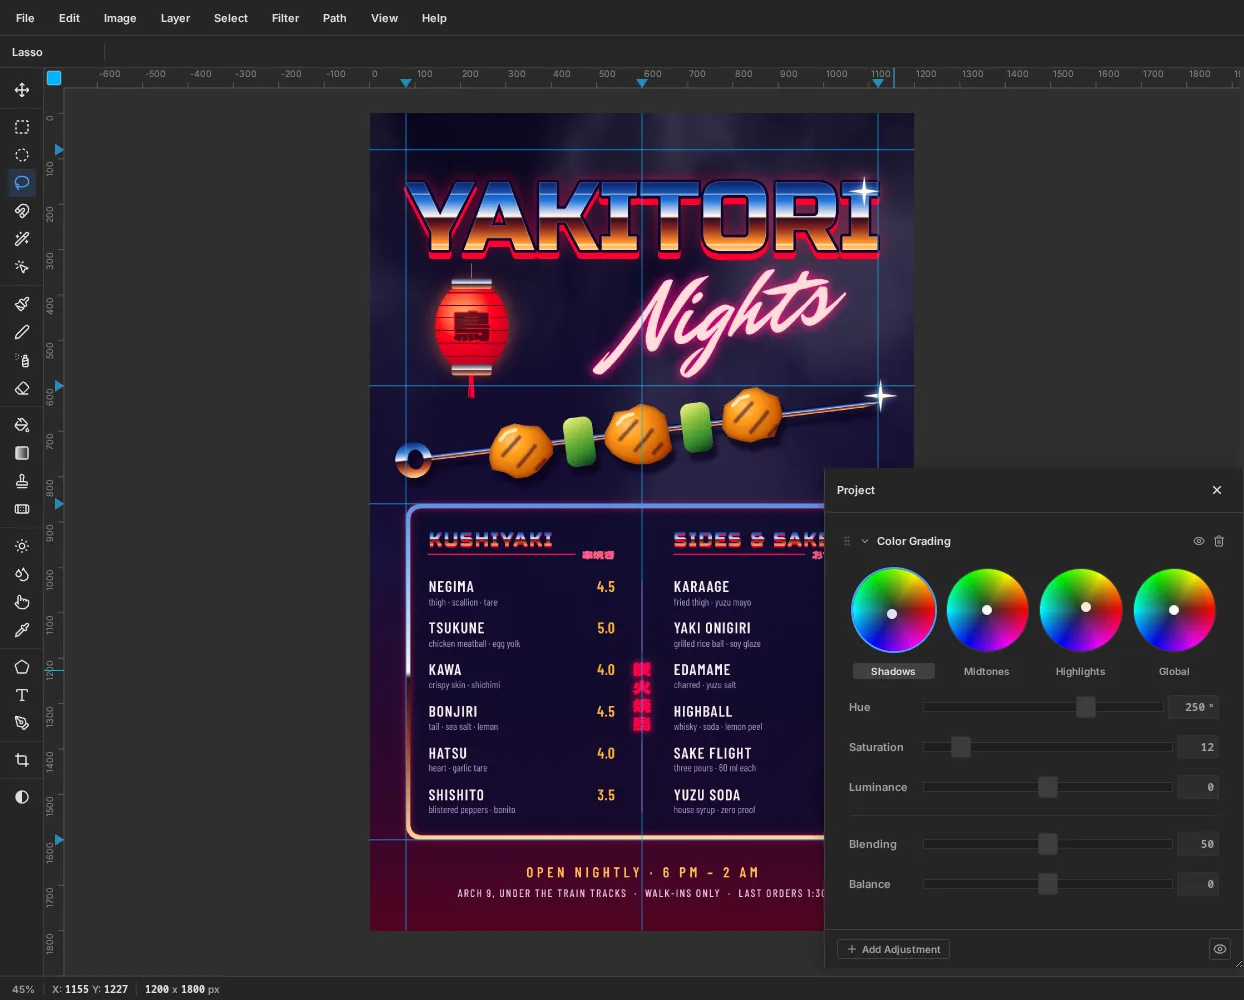
Click the effects button on the
Projectrow at the top of the Layers panel to open its adjustments, click Add Adjustment and choose Color Grading.- Click Shadows and set Hue to
250and Saturation to12, a cool indigo. - Click Highlights and set Hue to
28and Saturation to15, a warm amber.
Cool shadows and warm highlights are the look of a night street lit by lanterns. Keep the shadow saturation low. Higher values tint the blacks a flat blue, because the grade adds colour even to pure black.
- Click Shadows and set Hue to
-
Add grain and finish
- At the top of the stack, add a layer named
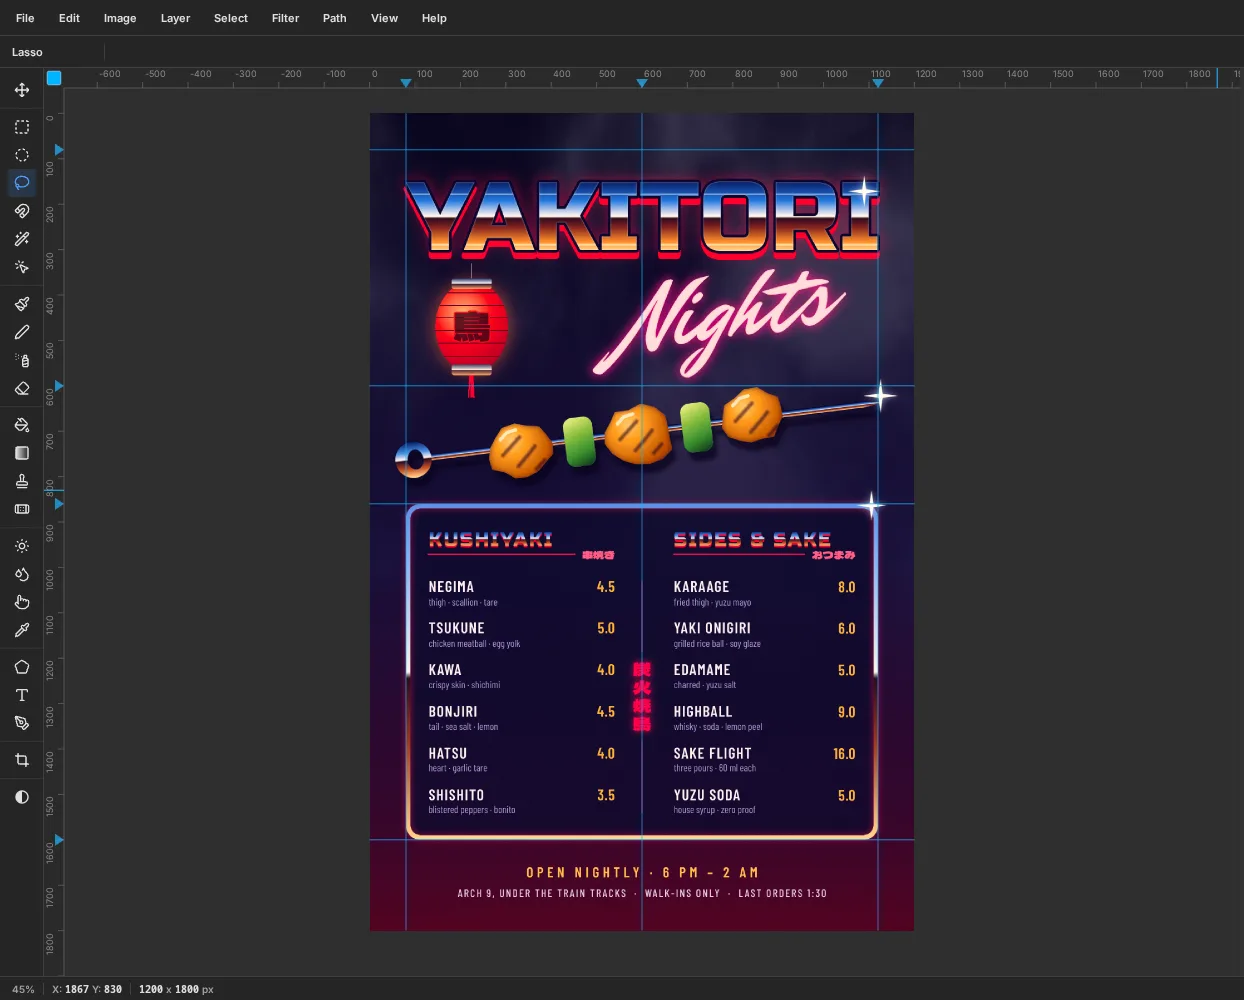
Grain, fill it with , and choose Filter → Add Noise… with Amount30, Mono and Gaussian. - Open its layer effects and set Blend to Overlay, then set the row's opacity to
35%. Mid-grey disappears in Overlay, leaving just a fine print-like texture. - Lower
Smoketo20%so the title has a little more contrast against it.
Export with File → Quick Export PNG and save the layered file with File → Save Project.
- At the top of the stack, add a layer named