Design a Cut-Paper Collage Website Landing Page
Mock up a ukulele club homepage as a paper collage with torn edges, a halftone photo print, a die-cut ukulele sticker, tape, a rubber stamp and event cards.
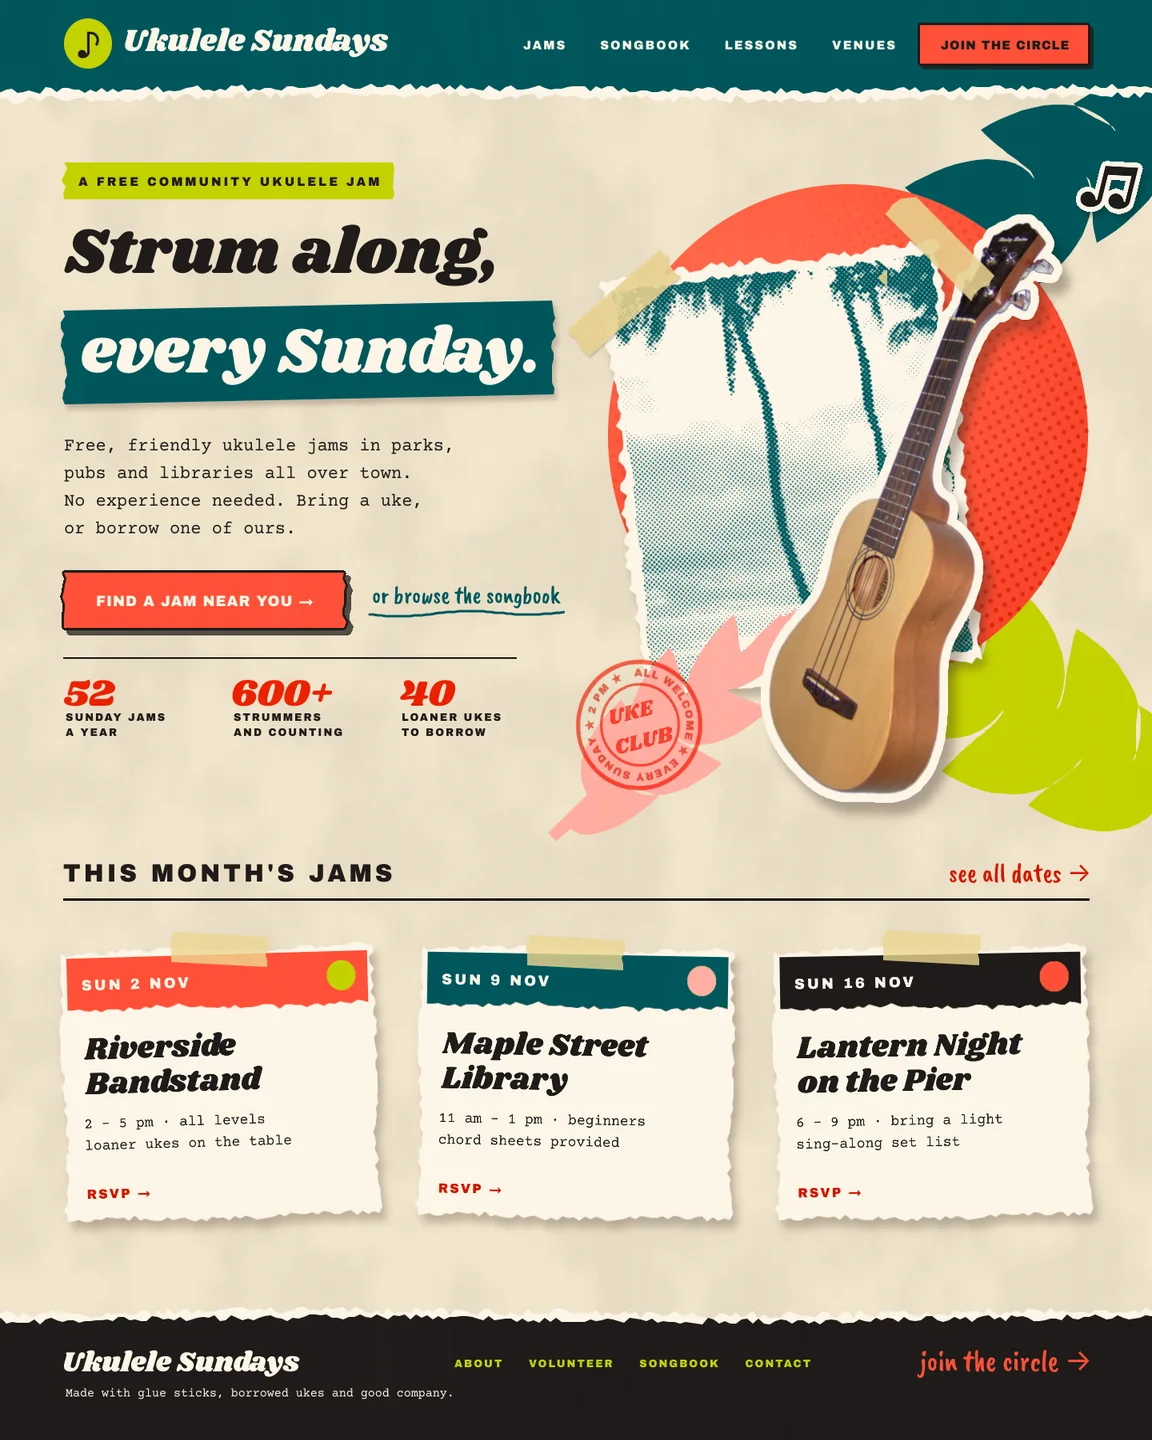
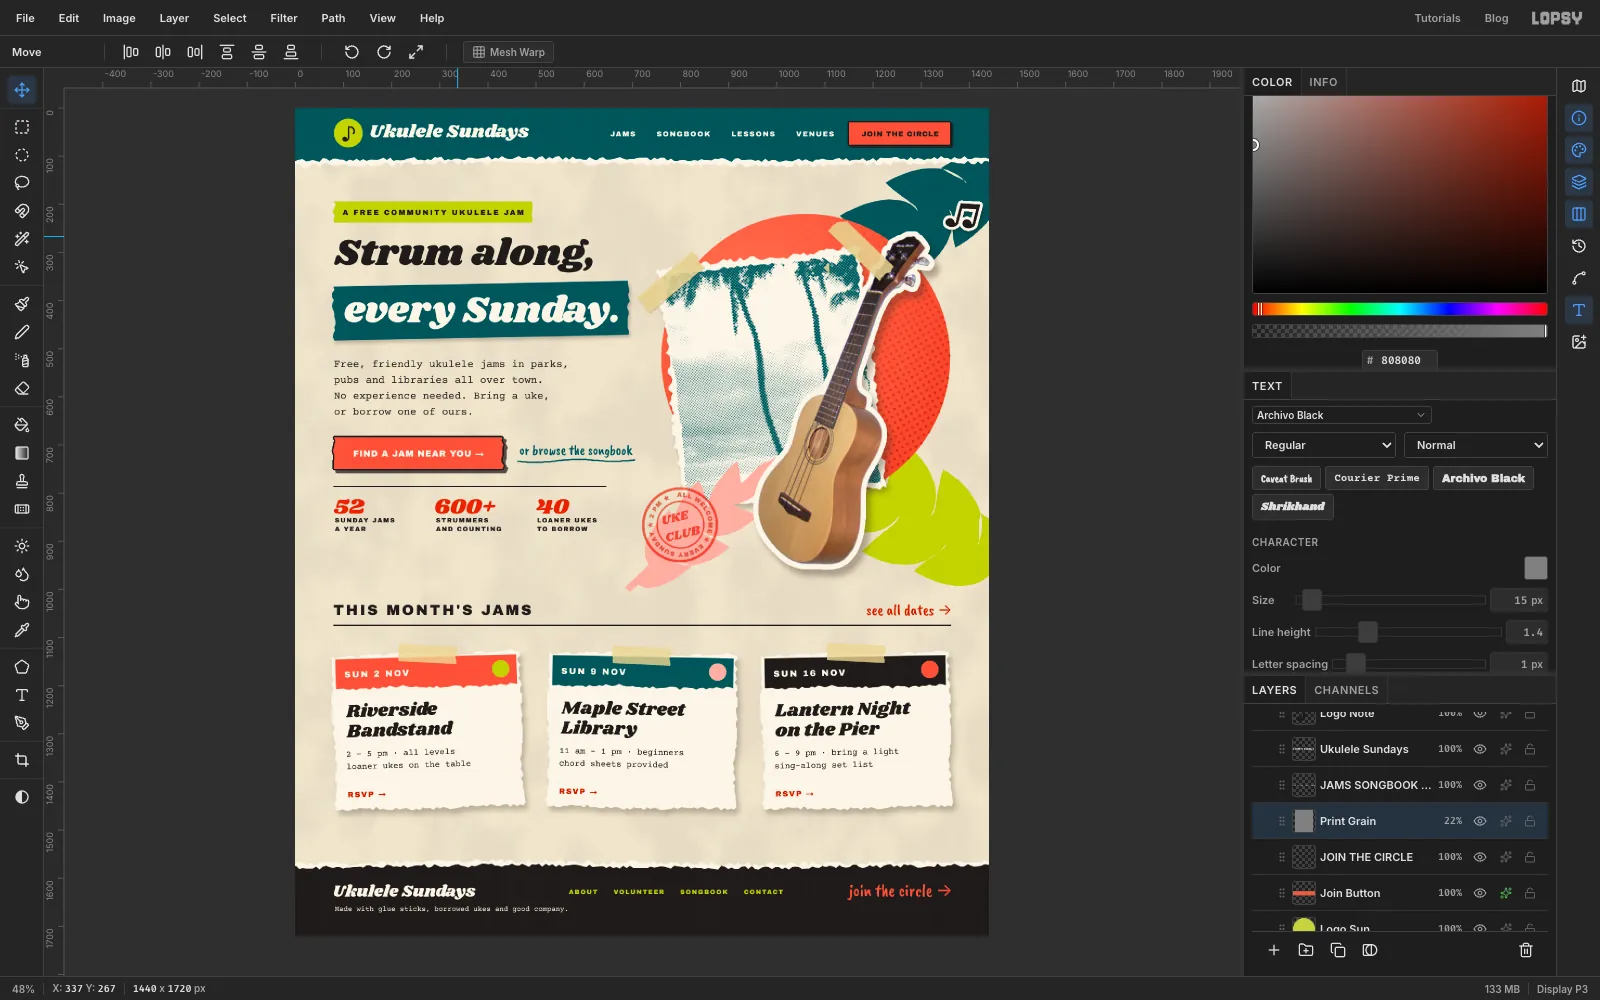
Collage is a good fit for anything that's run by volunteers. A homepage made of torn paper, tape and rubber stamps says "this is homemade and you're welcome here", which is exactly what a free community music club wants to say. In this tutorial you'll mock up the desktop homepage for Ukulele Sundays, an invented weekly ukulele jam. Under the paper it's still a real website layout, with a nav bar, a hero with a headline and buttons, a stats row, event cards and a footer, on a 1440 × 1720 px page (1440 px is the usual desktop design width).
The collage pieces are:
- a torn-paper nav strip and footer, each with a white fibrous edge showing where the paper ripped
- a paper sun with a radial gradient and a halftone dot texture that fades out across it
- big Matisse-style cut-paper leaves
- an old photo of palm trees, printed in teal halftone on torn paper and taped down
- a ukulele photo cut out of its backdrop and given a thick sticker border
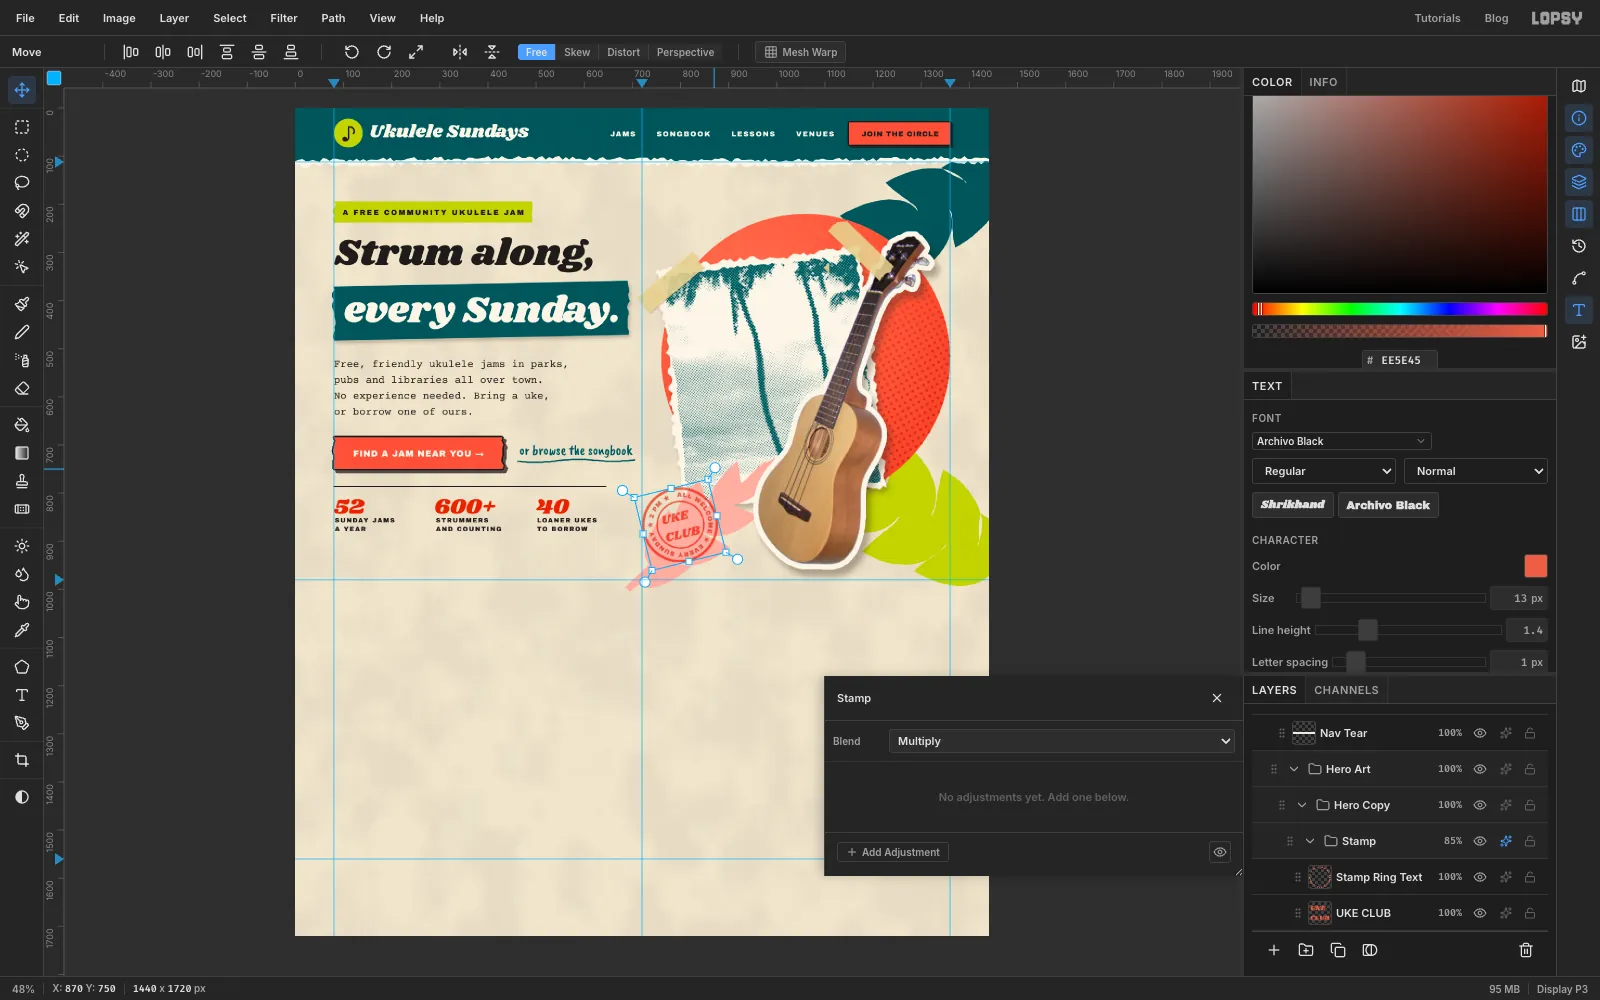
- a round rubber stamp with its words set on a circle
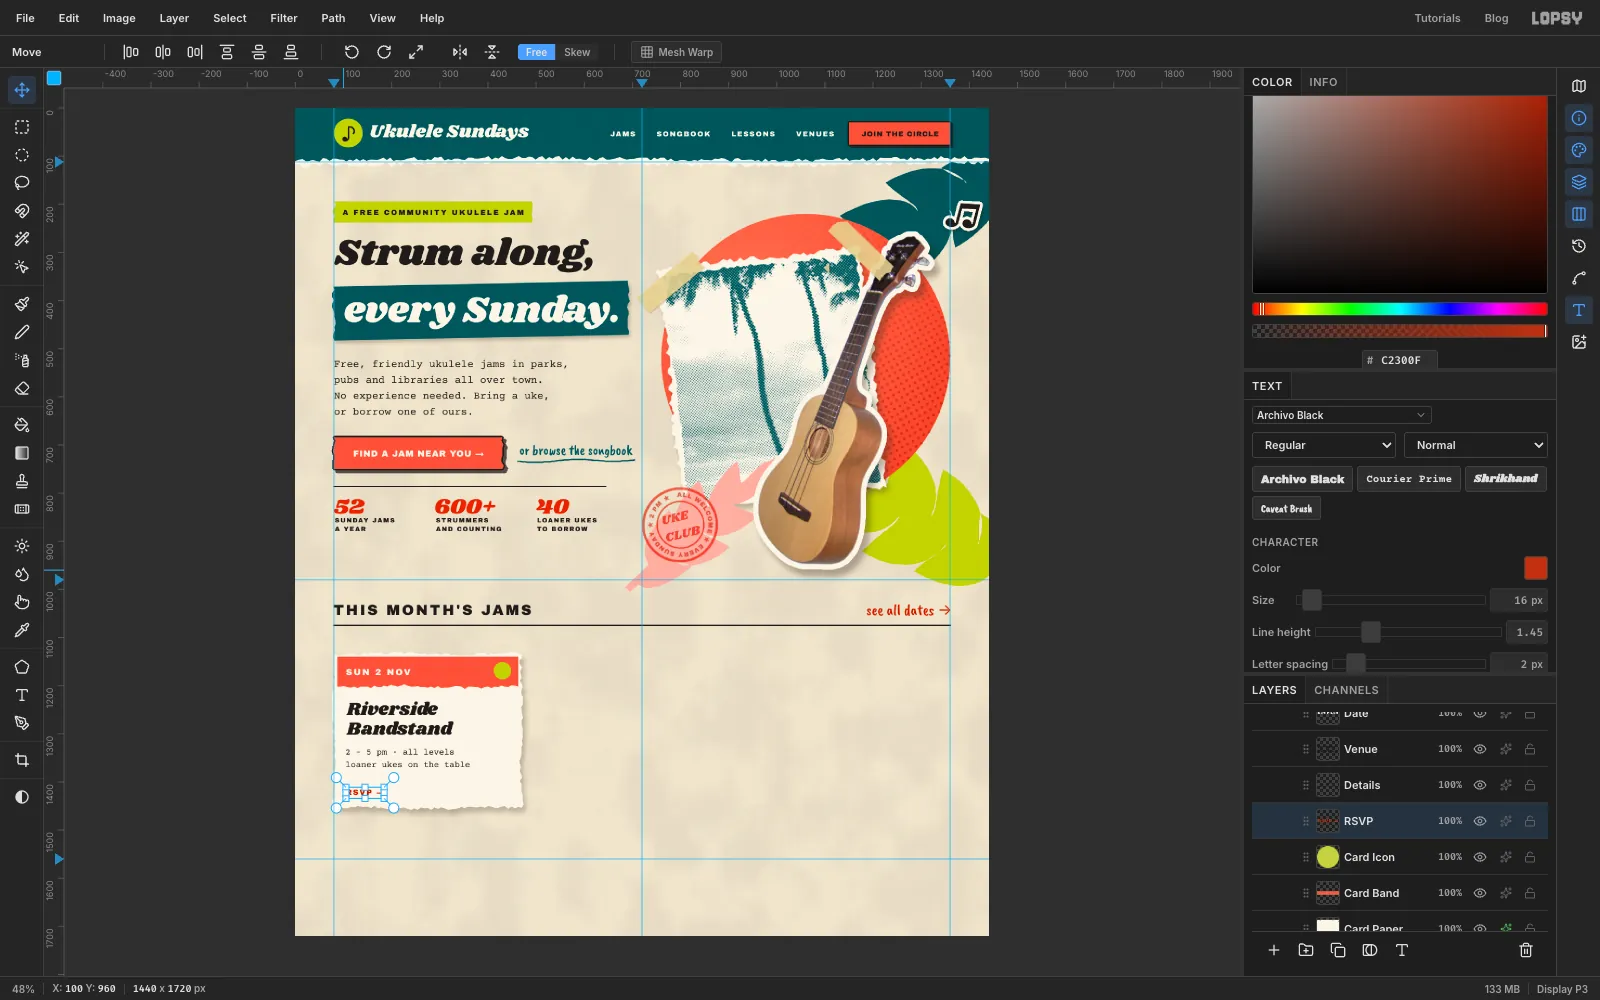
- three event cards cut from the same paper, each tilted slightly and pinned with tape
You'll need two public-domain photos from Wikimedia Commons:
- Ukulele 105.jpg by Villanueva, a ukulele on a plain white backdrop. Download the original (559 × 1119 px).
- Boat and Palm tree outline at a Hawaiian beach LCCN2011631266.tif by Carol M. Highsmith (Library of Congress). Download the 960 px-wide JPEG version.
Along the way you'll use:
- ruler guides, Add Noise, Clouds and Fibers for the paper
- the Lasso for every torn edge and leaf, and Edit → Fill
- the Elliptical Marquee, Shrink, Grow and Select → Inverse
- the Gradient tool, a layer mask, and the Halftone, Desaturate and Brightness/Contrast filters
- dropping in photos, the Magic Wand, and scaling and rotating with the Move tool's handles
- Copy, Paste, Duplicate Layer on a whole group, and rotating groups
- the Shape tool making a path, and text on a path
- live text in Shrikhand, Archivo Black, Courier Prime and Caveat Brush
- the Stroke, Drop Shadow and Color Overlay effects, and the Multiply, Overlay and Soft Light blend modes
The palette:
-
Kraft paper
-
torn-edge cream
-
Deep teal
-
Coral
-
sun gradient
-
sun dots
-
Lime
-
blush
-
Ink
-
Masking tape
-
Dark coral for small text
-
stat numbers
Positions are given in document pixels as x, y wherever things need to line up. The status bar at the bottom of the window shows the pointer's X and Y. Freehand shapes like the torn edges and leaves only need to be roughly right.
One habit will save you a lot of trouble with text. Before you start a new piece of text, click a raster layer (any layer that isn't text). If a text layer is still selected, picking a font, size or colour restyles that layer instead of setting up the new one. Each step says which layer to click. Also, start every new piece of text by clicking in an empty patch of canvas, then move it into place with the Move tool. A click on or just under existing text edits that text instead of starting a new one.
I renamed layers as I went (double-click a name), so the screenshots show names like Date, Venue and Stat 52. Yours can keep the names Lopsy gives them. Lopsy names text layers after their text, and a dropped photo arrives as a new raster layer.
A new group goes inside whichever group is selected when you click New Group. In this tutorial that means each section's group ends up nested inside the one before it (Hero Copy inside Hero Art, Stamp and Jams inside Hero Copy, and so on). That's expected. It doesn't change how anything looks, and collapsing groups keeps the panel tidy.
-
Set up the paper and guides
- Choose File → New and make a 1440 × 1720 px document.
- Click the top ruler at
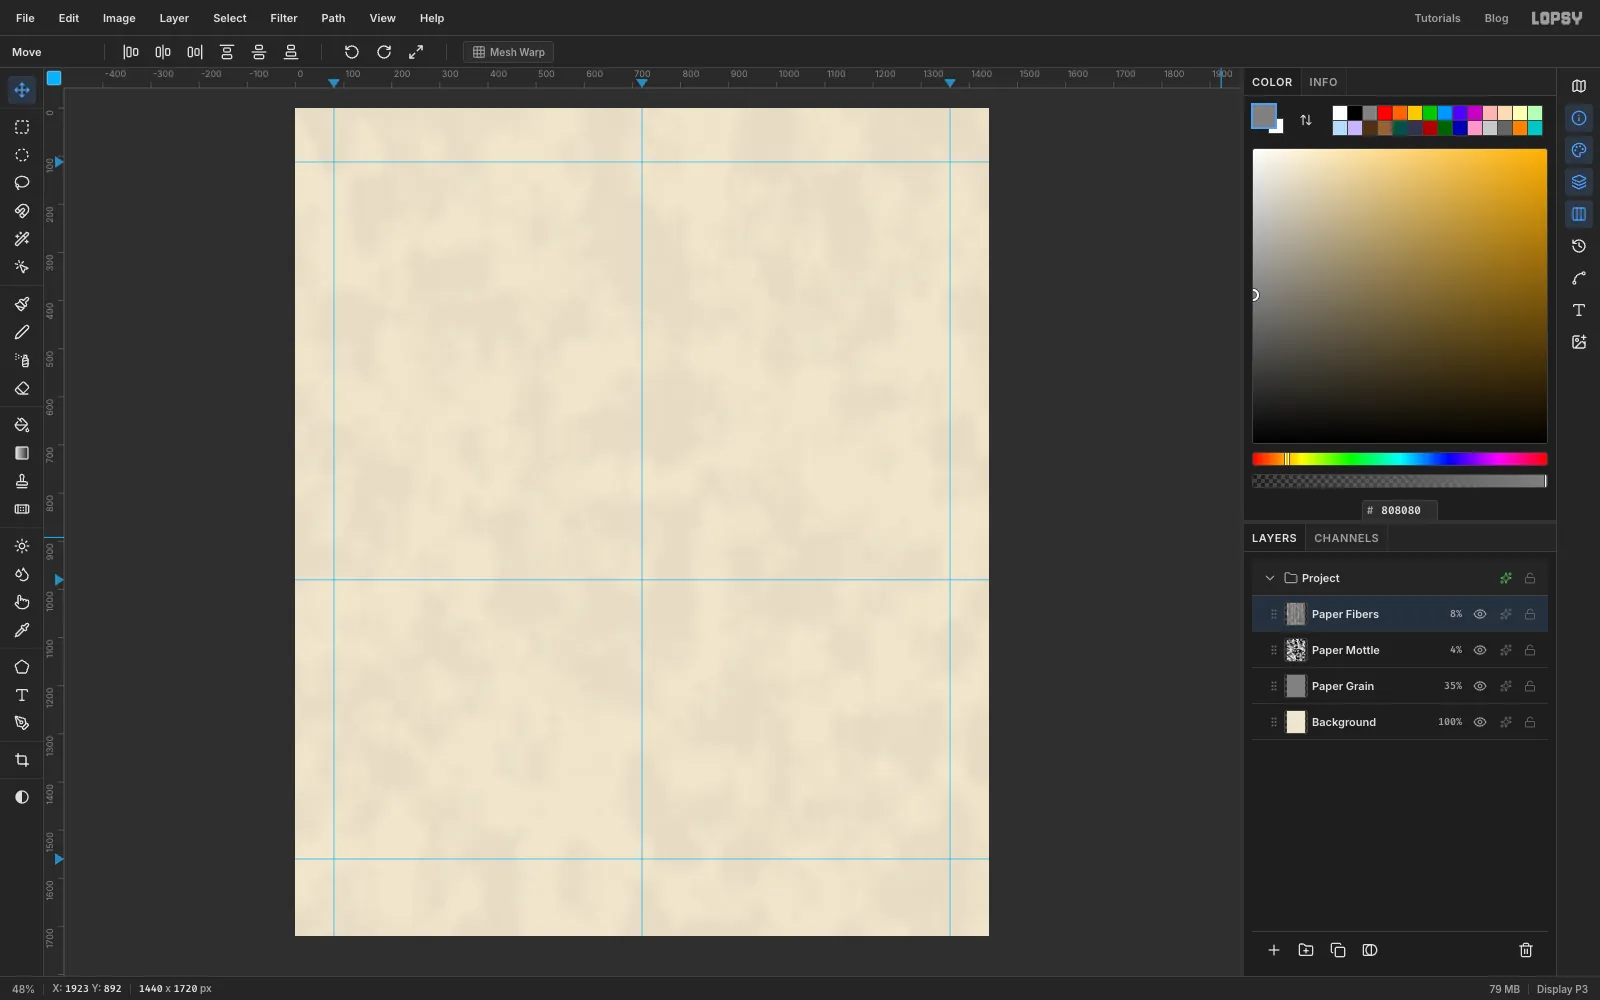
x 80,720and1360to drop three vertical guides. The outer two are the page margins and the middle one splits the hero into text on the left and pictures on the right. Click the left ruler aty 112(the bottom of the nav),980(the bottom of the hero) and1560(the top of the footer). - Click Background, set the foreground colour to and choose Edit → Fill.
- Double-click Layer 1 and rename it
Paper Grain. Fill it with , then choose Filter → Add Noise… with Amount16, Mono and Gaussian, and click Apply. Click the ✦ button on the layer's row to open the effects drawer and set the blend mode to Overlay. Then click the opacity figure on the layer's row and drag it to35%. The grey disappears and only the speckle is left. - Click Add Layer and name it
Paper Mottle. Choose Filter → Clouds… with Scale20. Set it to Multiply at4%for a faint unevenness, like real paper. - Add one more layer called
Paper Fibers. Choose Filter → Fibers… and click Apply with the defaults. Set it to Soft Light at8%. This layer stays at the very top of the Layers panel the whole time (every new group goes in below it), so the faint fibres run across every scrap of paper you add.
-
Tear the nav strip
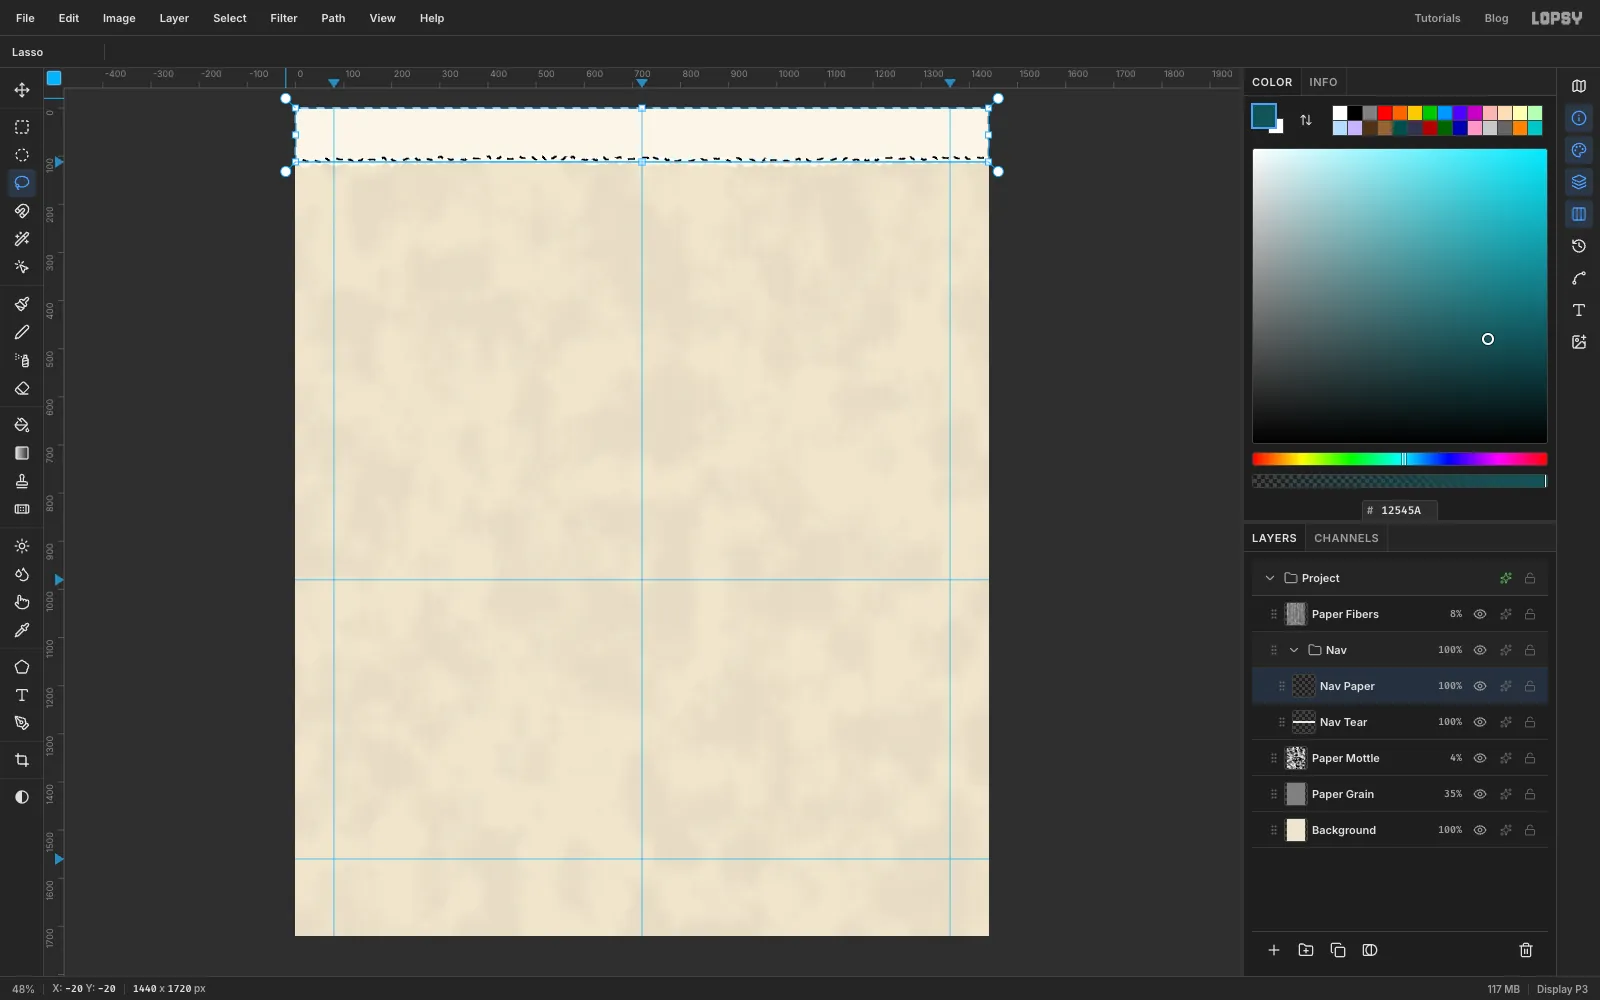
Torn paper shows a white core along the rip. You'll fake that with two lassos: a cream one, and a teal one just above it with a slightly different tear.
- Click
Paper Mottle, then click New Group at the bottom of the Layers panel and name itNav. Click Add Layer (it goes inside the group) and name itNav Tear. - Pick the Lasso. Start off the canvas above the top-left corner, go across above the top edge to past the top-right corner, come down to
y 125, then drag back to the left along a slightly ragged line aroundy 120. Wiggle the pointer up and down a few pixels as you go: small, irregular steps look torn. Finish off the canvas and let go. Set the foreground to , choose Edit → Fill and press Cmd+D. - Add a layer called
Nav Paper. Draw the same shape again with the Lasso, but bring the ragged edge about 10 px higher (aroundy 110). Fill it with and deselect.
The cream strip peeks out unevenly below the teal, like the white core of torn card.
- Click
-
Build the nav bar
- Add a layer called
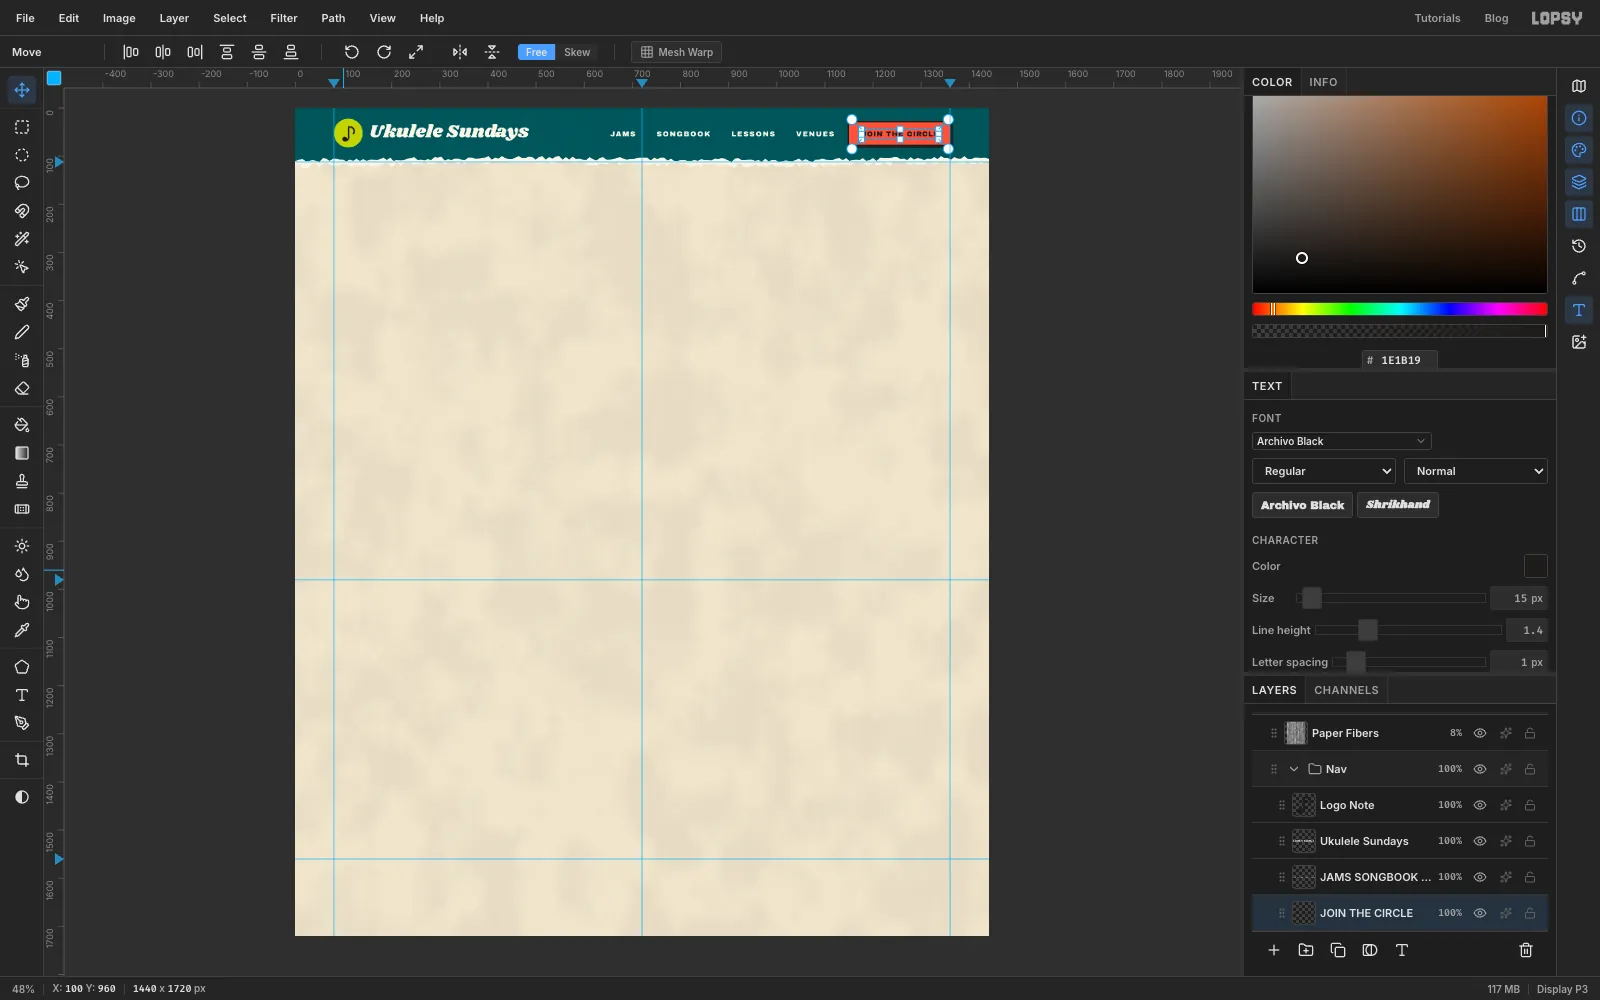
Logo Sun. With the Elliptical Marquee, drag a 60 × 60 circle from80, 22to140, 82. Fill it with and deselect. - With
Logo Sunstill selected, pick the Text tool and set Archivo Black, size40, colour . Click in an empty part of the page and type a music note, ♪. (Copy it from this page and paste it with Cmd+V.) Press Tab to finish. With the Move tool, drag it into the middle of the lime disc. - Click
Logo Sunagain. Set Shrikhand, size38, colour , and typeUkulele Sundays. Move it so it starts atx 156, lined up with the middle of the disc. - Click
Logo Sun. Set Archivo Black, size15, and typeJAMS SONGBOOK LESSONS VENUESwith six spaces between the words. Open the Text panel and set Letter spacing to2. Move the links so they end atx 1118, level with the logo. - Add a layer called
Join Button. Click once with the Rectangular Marquee (no drag) to open its size dialog, and enter1150, 30to1360, 76. Fill it with and deselect. - Open the effects drawer for
Join Button. Turn on Stroke with Width3in , and Drop Shadow with Offset X4, Offset Y4, Blur0, Opacity75and colour . A shadow with no blur reads as a solid block behind the button, the way a paper cut-out casts a shadow. - Click
Join Button. TypeJOIN THE CIRCLEin Archivo Black15, , letter spacing1, and centre it on the button. - Click the arrow on the
Navrow to collapse the group.
- Add a layer called
-
Cut the back leaves
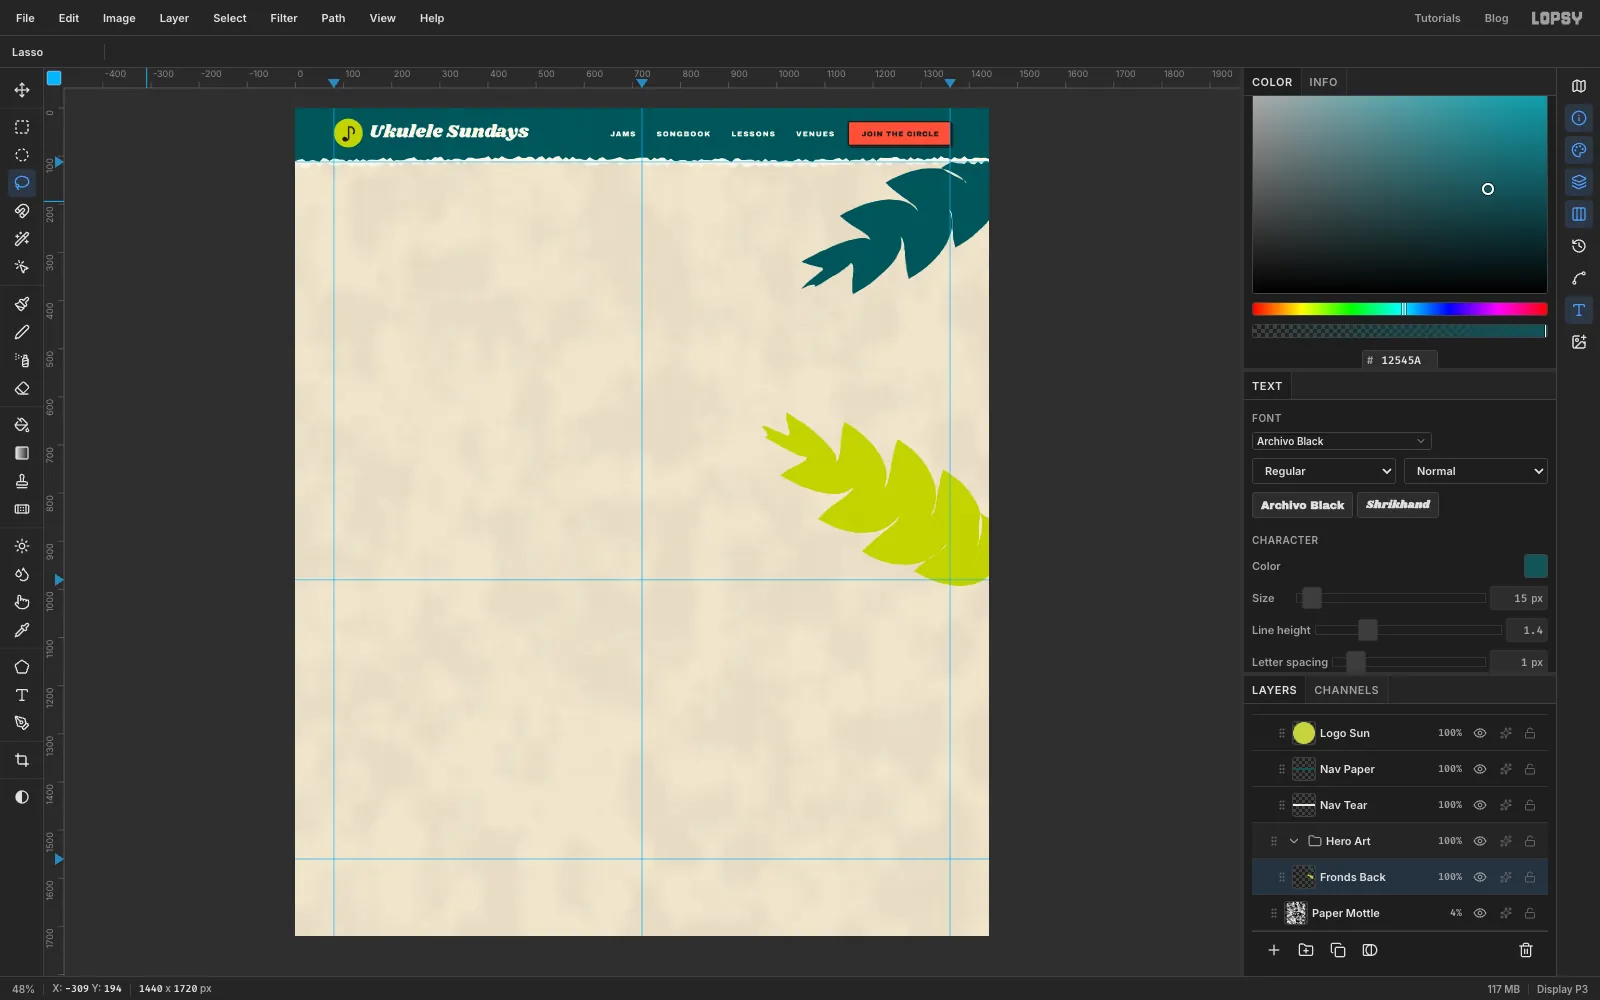
These are the big Matisse-style leaves that sit behind the sun. Each one is a single Lasso shape: a stem, then pointed, curving lobes that alternate down both sides and lean toward the tip.
- Click
Paper Mottleand add a group calledHero Art. Inside it, add a layer calledFronds Back. - Draw the lime leaf with the Lasso. Start off the right edge of the page at about
y 1000and aim the leaf up and to the left, so its tip ends around970, 670. Work up one side first, swinging out to a point and back in to the stem five times. Round the tip, then come back down the other side with the lobes set halfway between the first side's lobes. The widest lobes, about 120 px out from the stem, are in the middle of the leaf. Fill it with . - Draw a teal leaf the same way, starting off the top-right corner and hanging down to the left, with its tip near
1075, 360. Give it four lobes a side. Fill it with and deselect.
Most of each leaf will end up behind the sun. Only the lobes that stick out past it matter.
- Click
-
Draw the paper sun
- Add a layer called
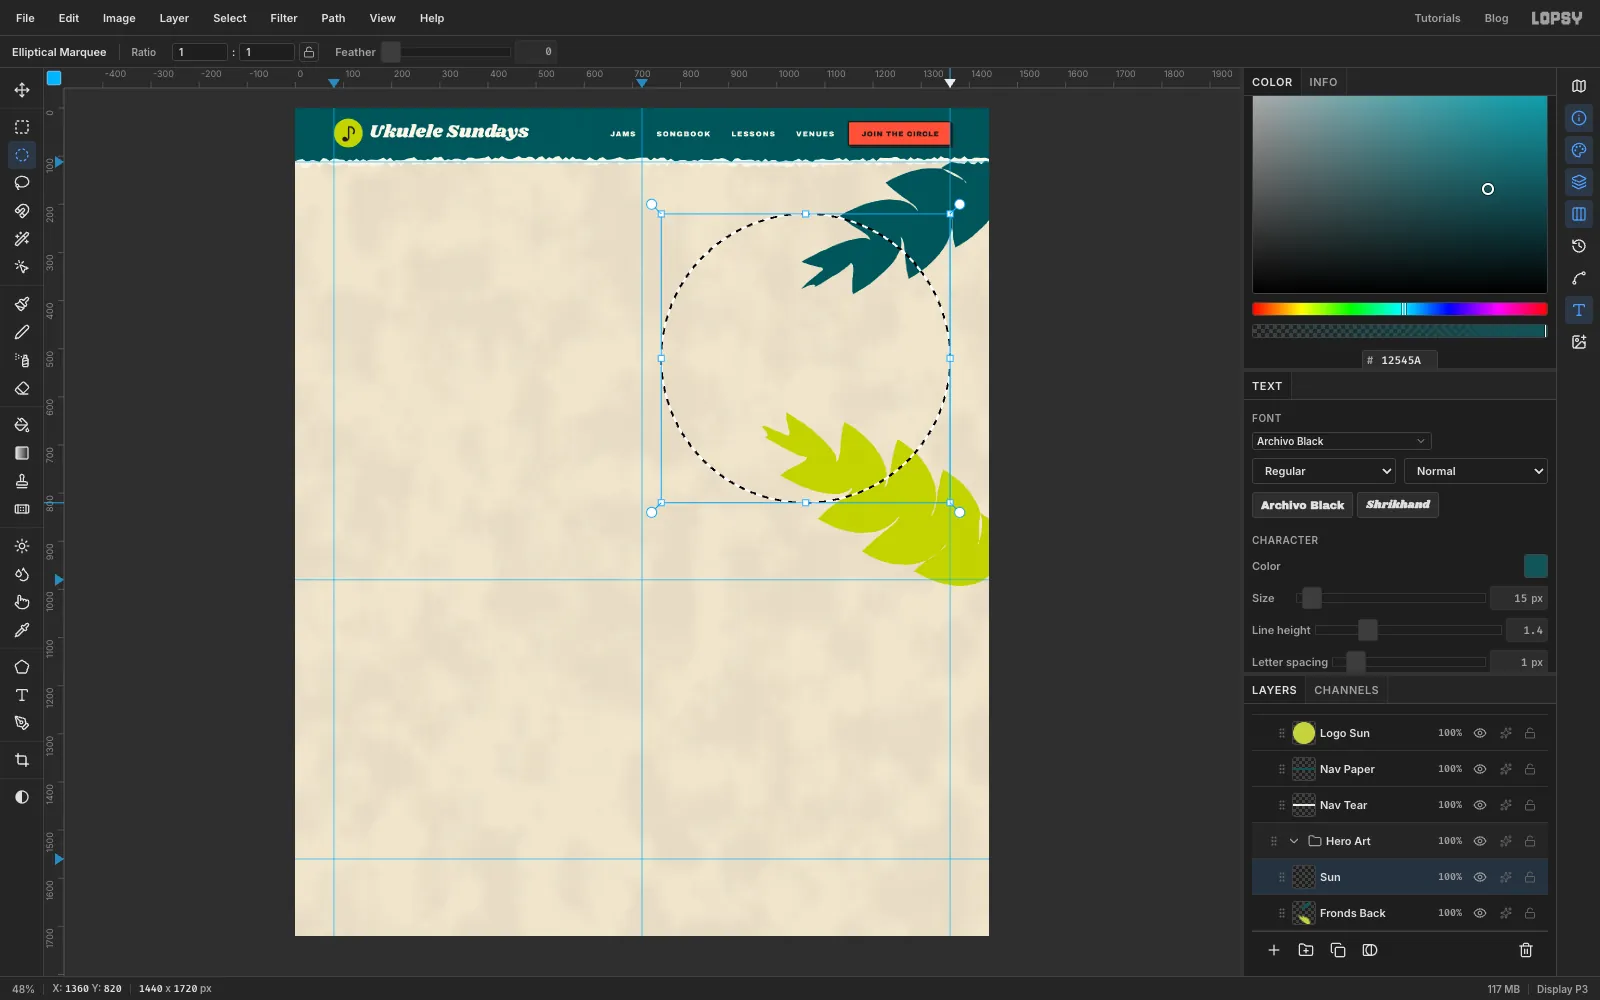
Sun. - With the Elliptical Marquee, drag a 600 px circle from
760, 220to1360, 820. Its centre is1060, 520. Hold Cmd while you drag if you want it to stay a perfect circle. Don't use Shift: with a selection tool, Shift adds to the selection.
- Add a layer called
-
Fill the sun with a gradient
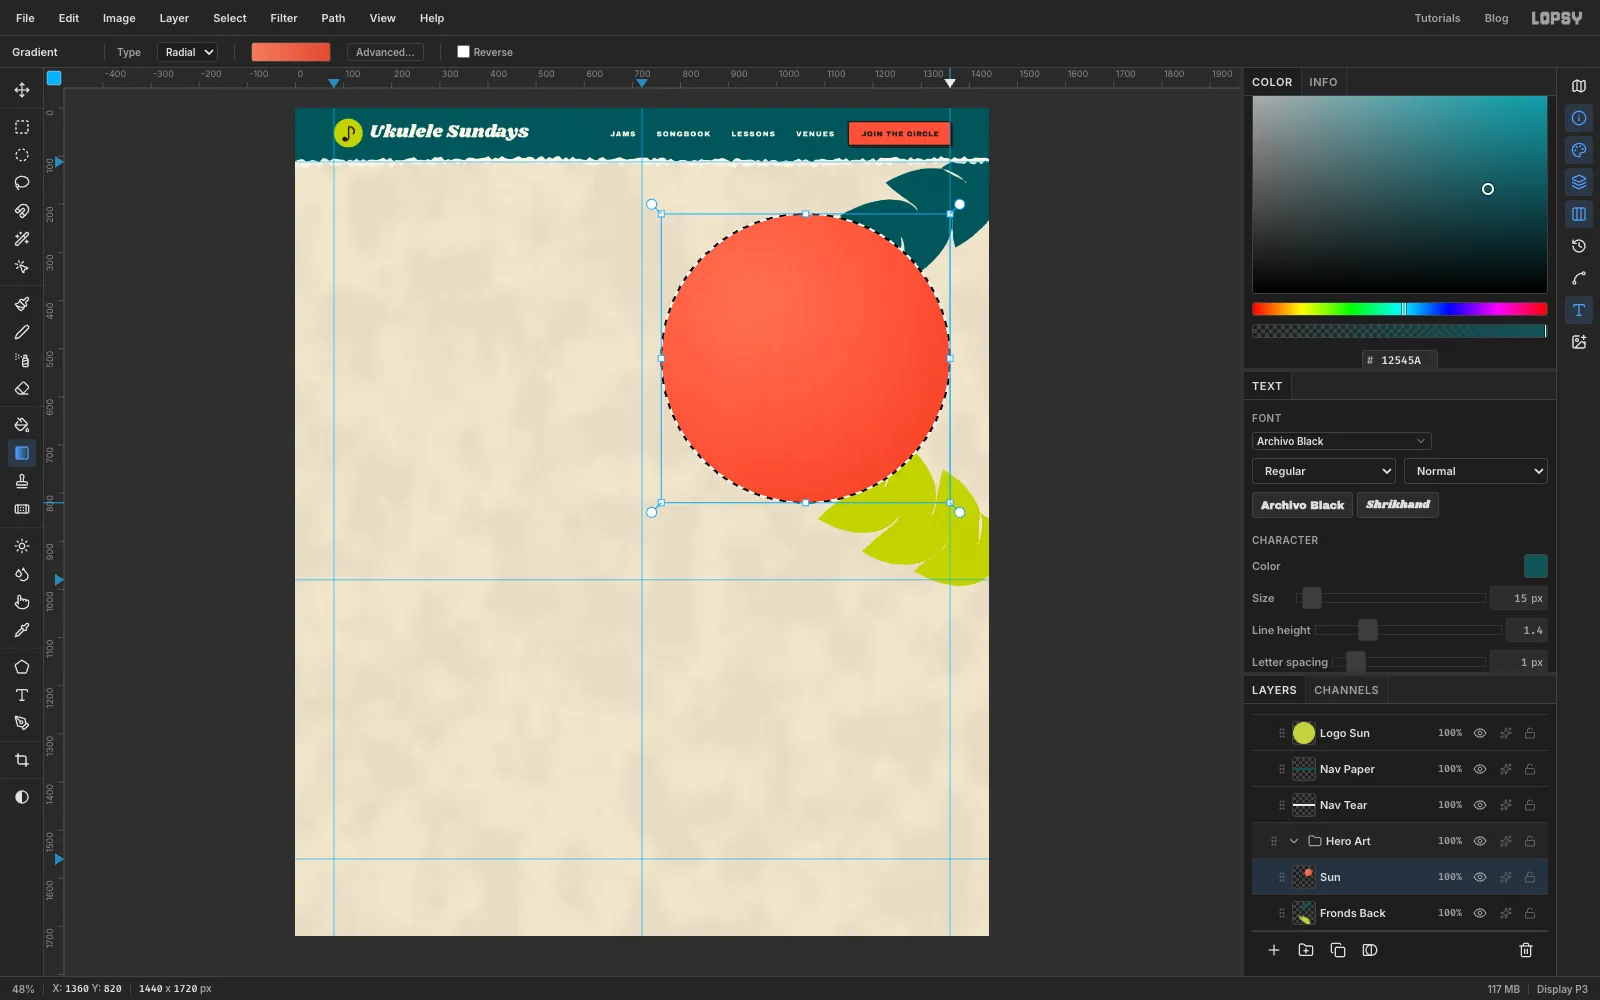
- Pick the Gradient tool and set Type to Radial. Click Advanced…, click the left stop and type into the Hex color field, then click the right stop and make it . Click Done.
- Drag from about
950, 400, up and to the left of the centre, out to the bottom-right edge of the circle at about1360, 820. The gradient only fills inside the selection, so you get a disc that looks lit from the top left. - Press Cmd+D.
-
Add halftone dots and fade them with a mask
- Add a layer called
Sun Dots. Cmd-click theSunthumbnail to load the disc as a selection. Fill it with and deselect. - Choose Filter → Halftone… with Dot Size
9, Density0.7and Angle30, and click Apply. The solid disc turns into dots. - Set
Sun Dotsto Multiply at40%. It looks like a second print colour laid over the paper. - Click Add Mask at the bottom of the Layers panel, then click the mask thumbnail on the row to edit the mask. The canvas shows a blue tint while you work on a mask.
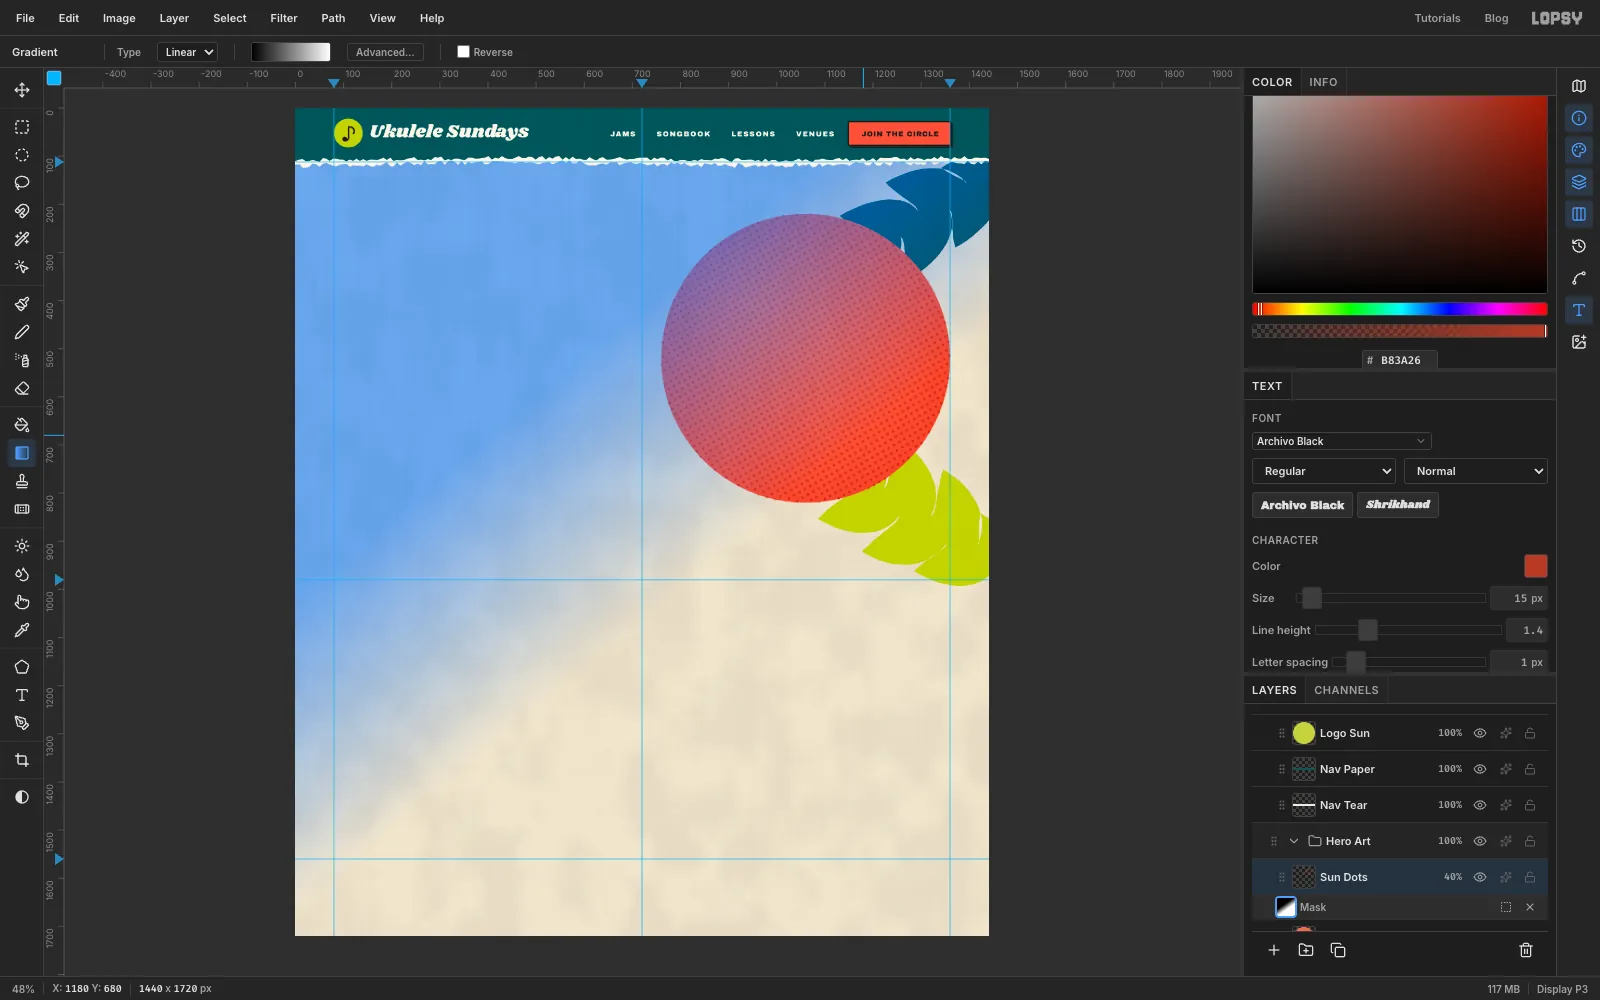
- Pick the Gradient tool, set Type to Linear, and make a black-to-white gradient in Advanced… ( on the left stop, on the right). Drag from the top left of the sun, about
860, 300, to about1180, 680. The dots fade away on the lit side and stay strong at the bottom right.
Click the layer thumbnail (not the mask) when you're done, so later fills go on pixels.
- Add a layer called
-
Add the front leaf
Add a layer called
Fronds FrontaboveSun Dots. Lasso a smaller leaf with four lobes a side, starting at about690, 1000and pointing up and to the right toward the sun's lower-left edge. Fill it with and deselect.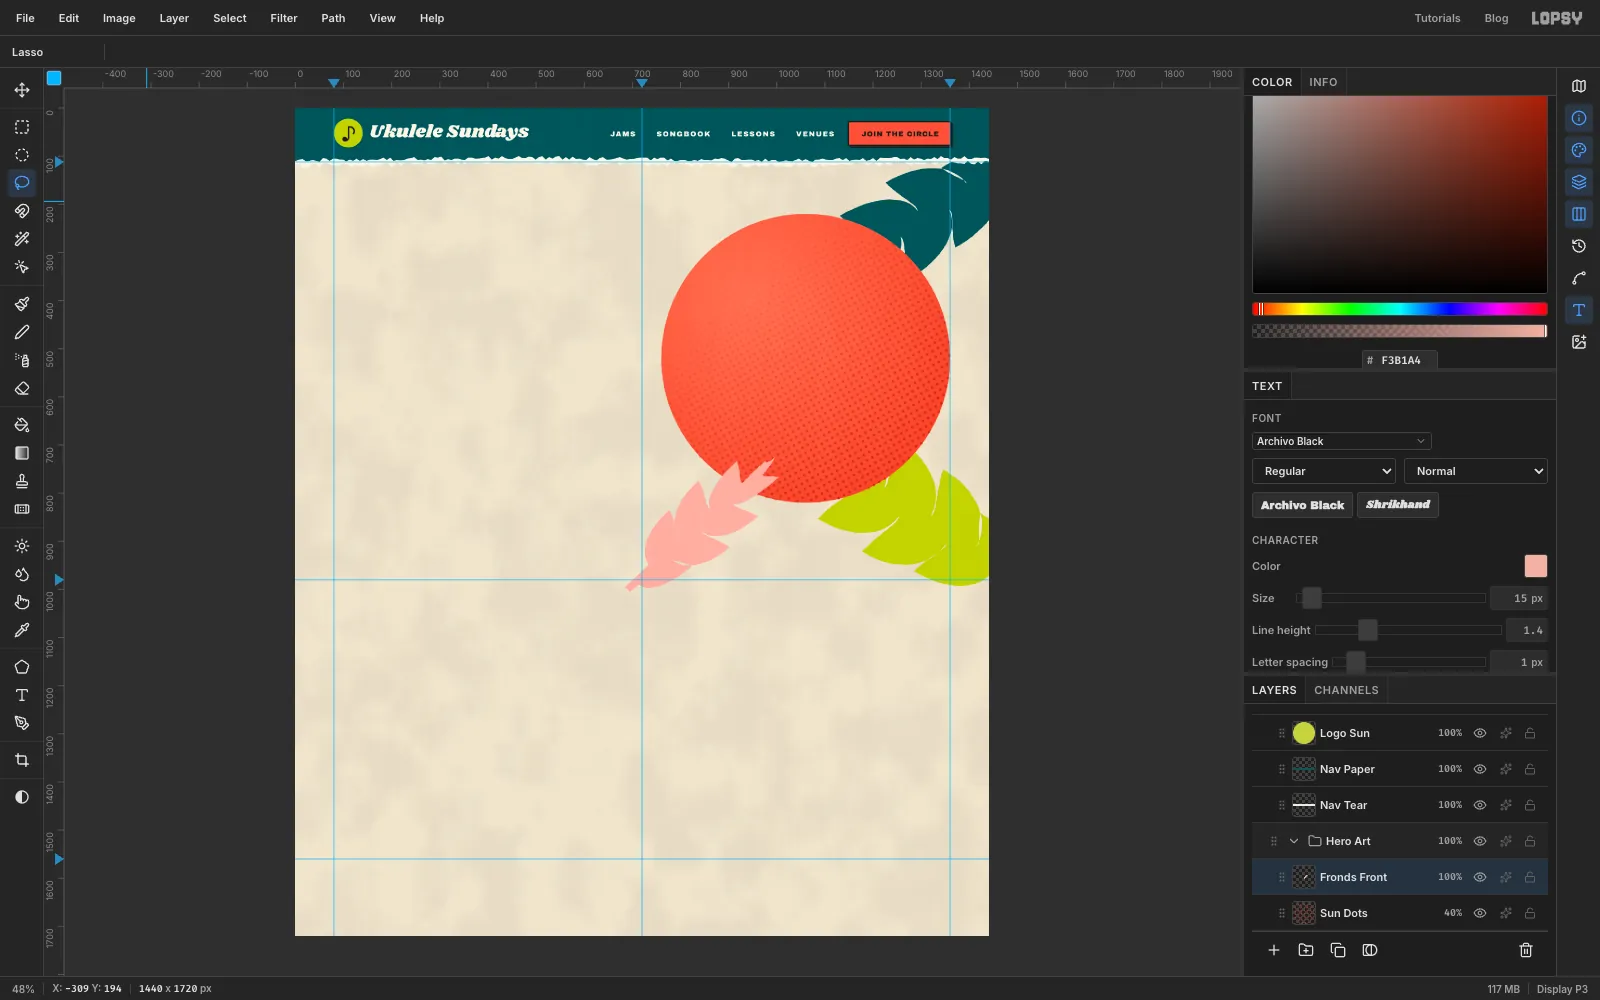
-
Drop in the palm photo
- Click
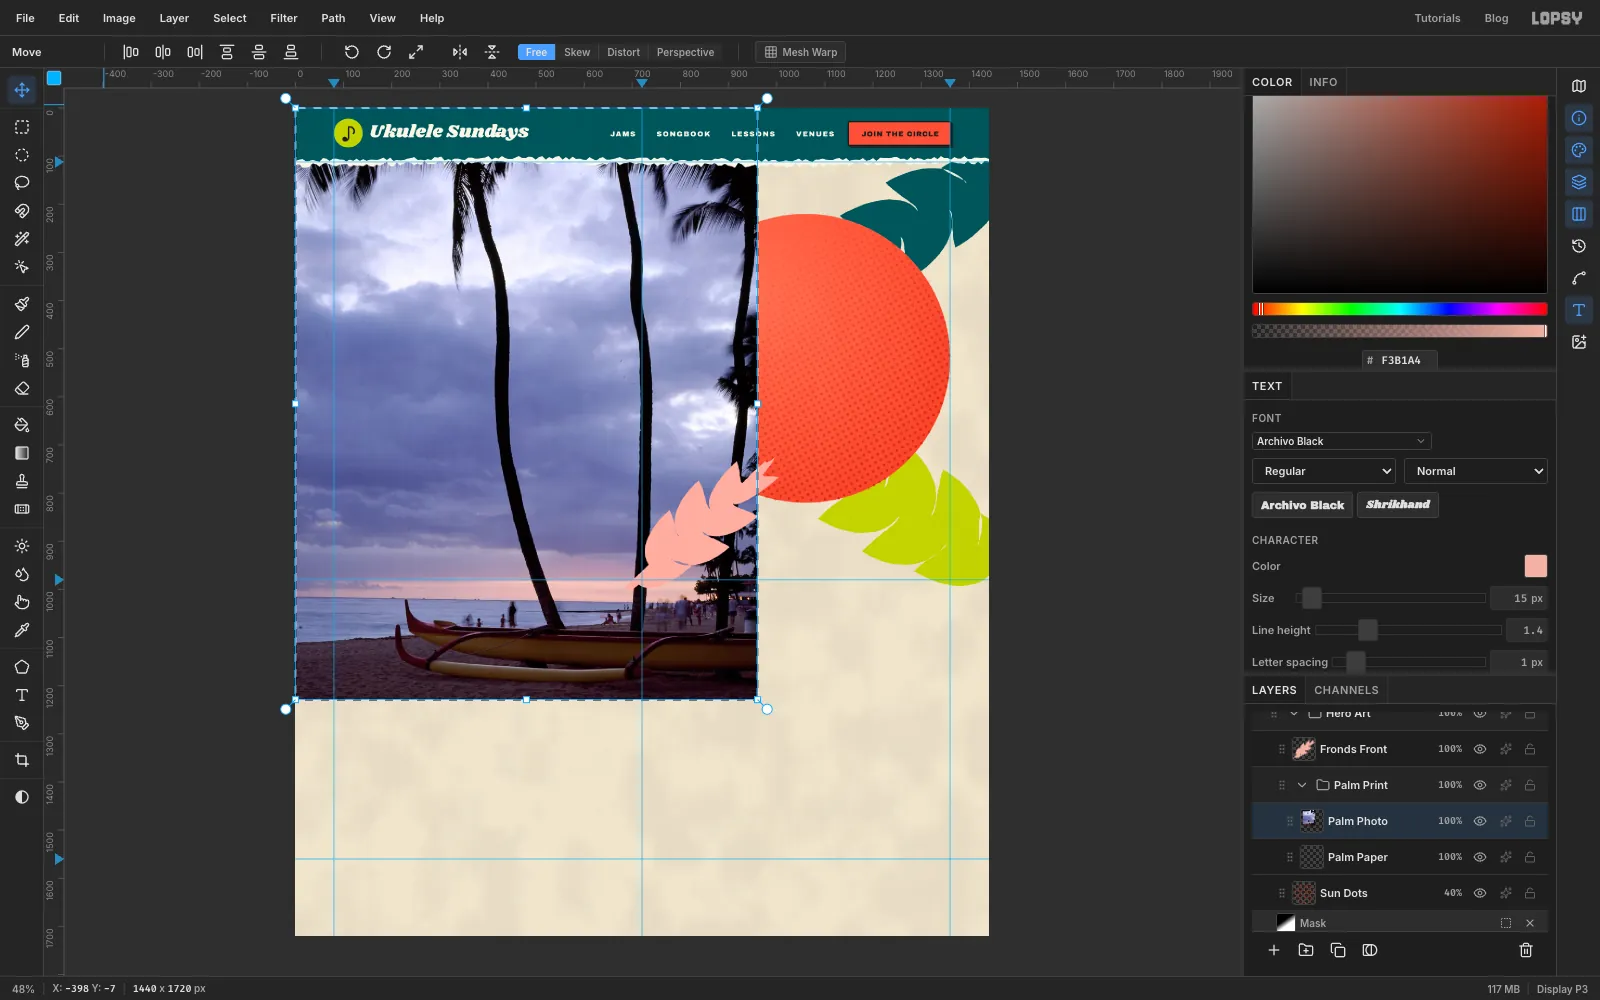
Sun Dots, then click New Group and name itPalm Print. Inside it, add a layer calledPalm Paper. Leave it empty for now. - Drag the palm tree JPEG from your computer onto the canvas. It lands in the top-left corner at its full size, already selected, with the Move tool active. Rename the new layer
Palm Photo.
- Click
-
Scale the photo down
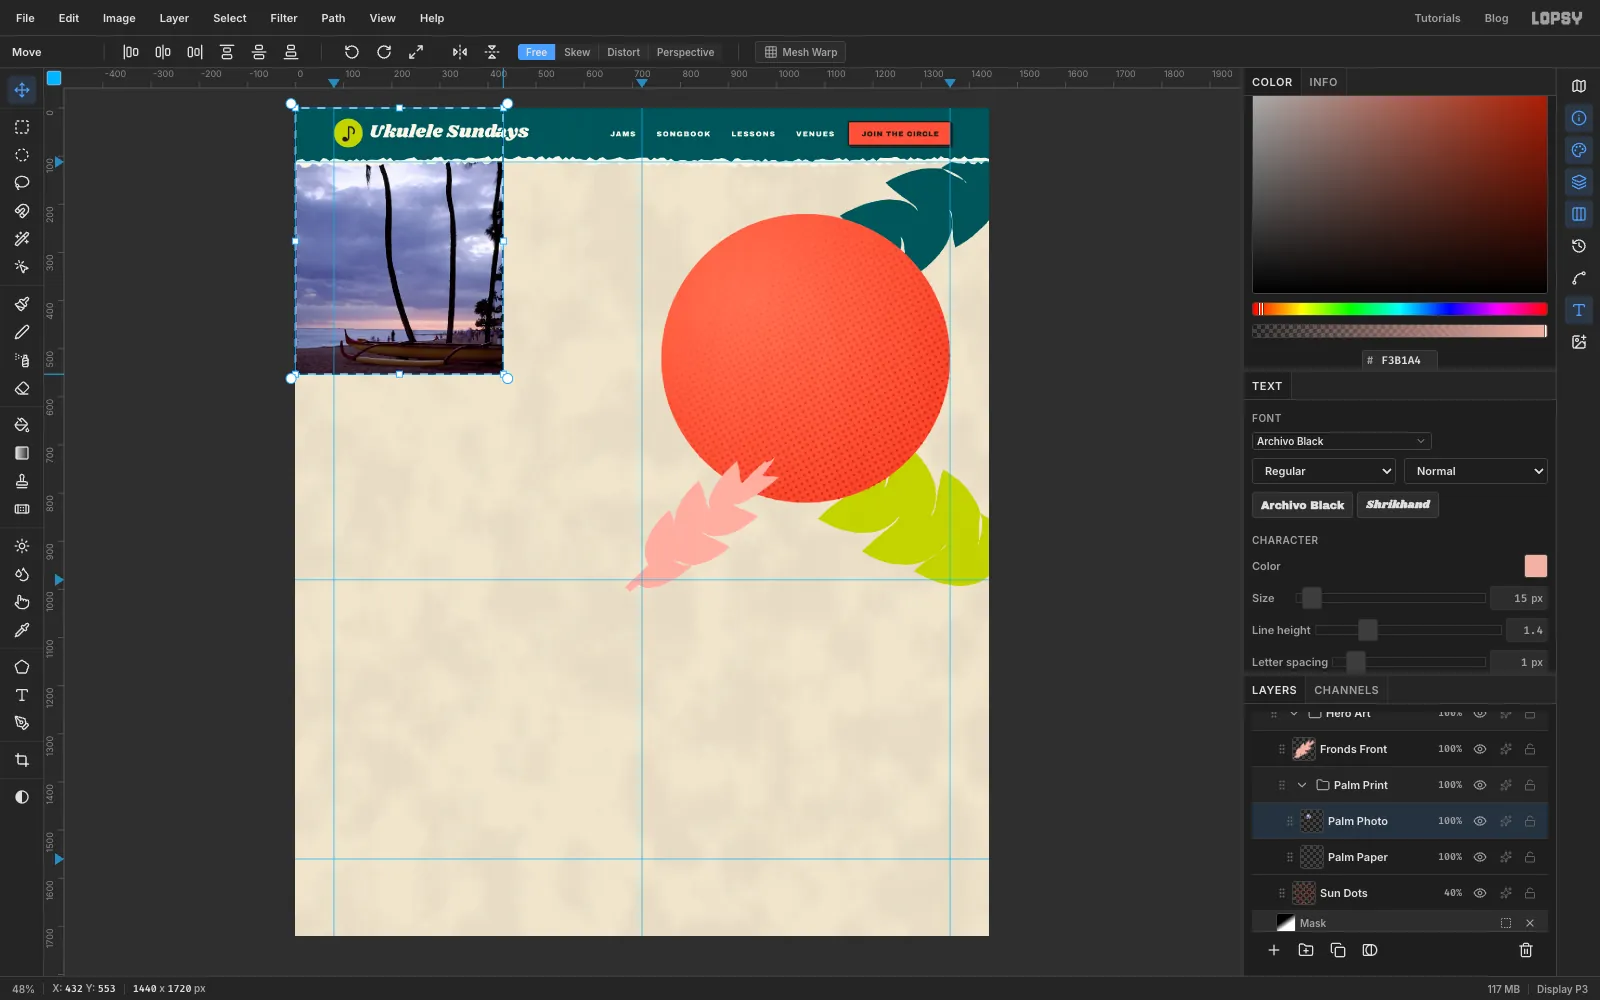
Hold Cmd and drag the bottom-right corner handle up and to the left until the photo is about 432 × 553 px. Holding Cmd keeps the proportions. Press Cmd+D to finish the transform.
-
Print it in teal halftone
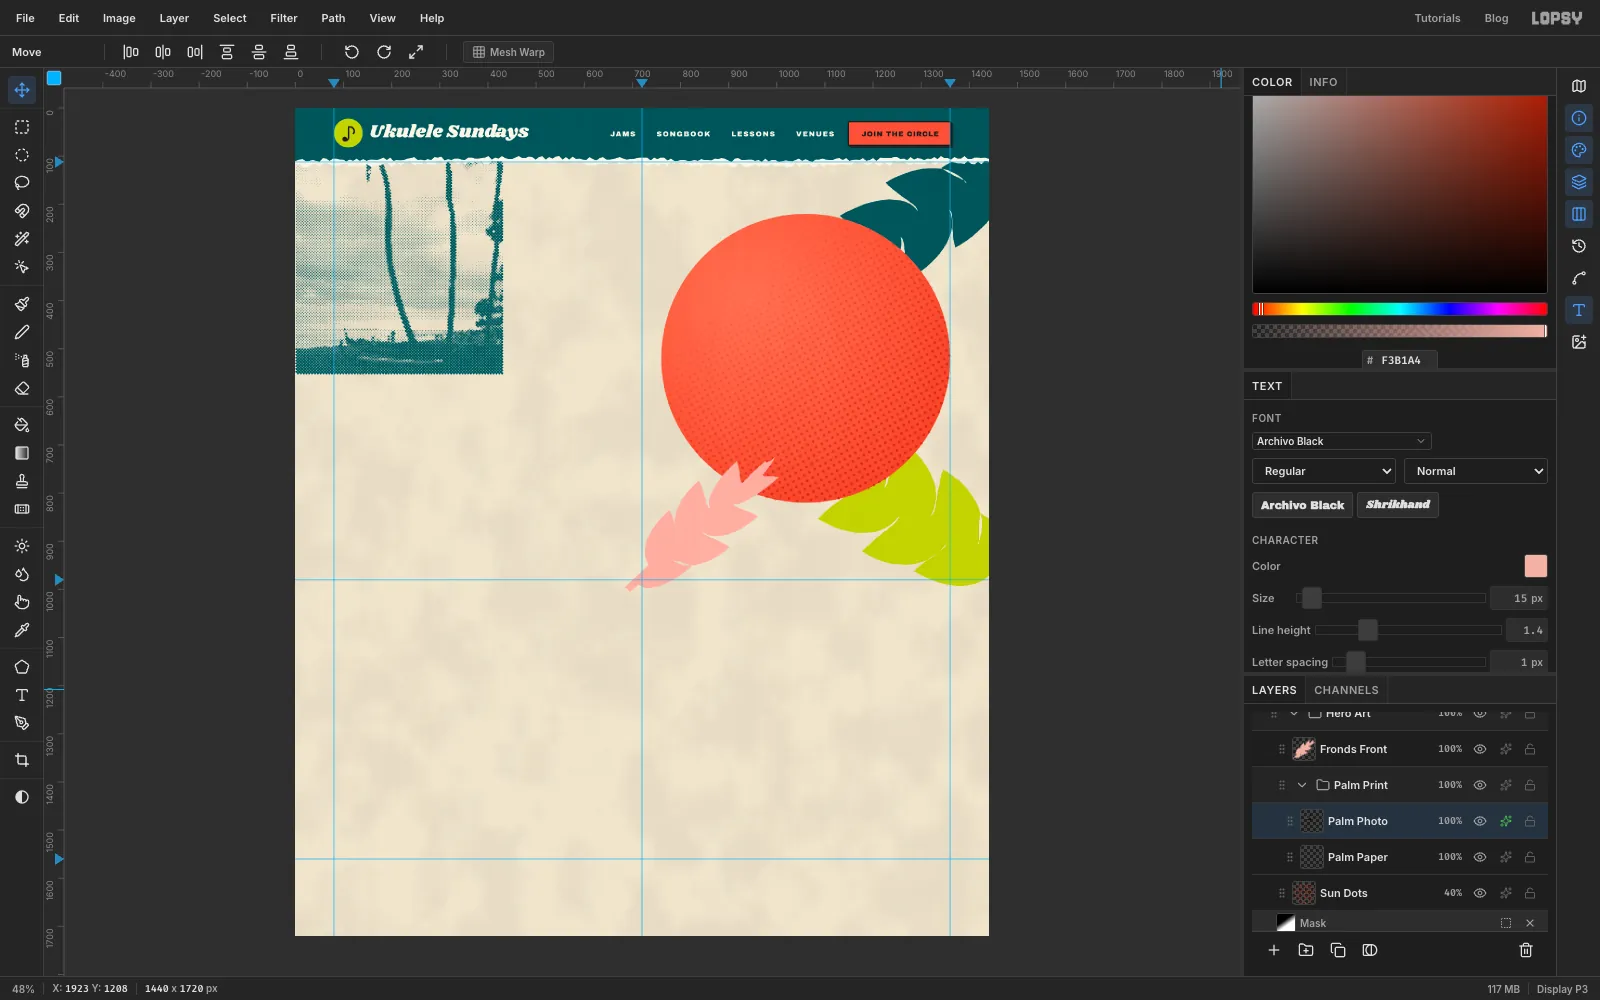
- Choose Filter → Desaturate.
- Choose Filter → Brightness/Contrast… with Contrast
55and Brightness4. The trunks get darker while the sky stays light, which gives the halftone something to work with. - Choose Filter → Halftone… with Dot Size
5, Density1.2and Angle45. The white areas between the dots become transparent. - Open the effects drawer and turn on Color Overlay in . Every dot is now teal ink.
- With the Move tool, drag the photo so it's centred at about
990, 585, over the left half of the sun.
-
Tear the photo's edges
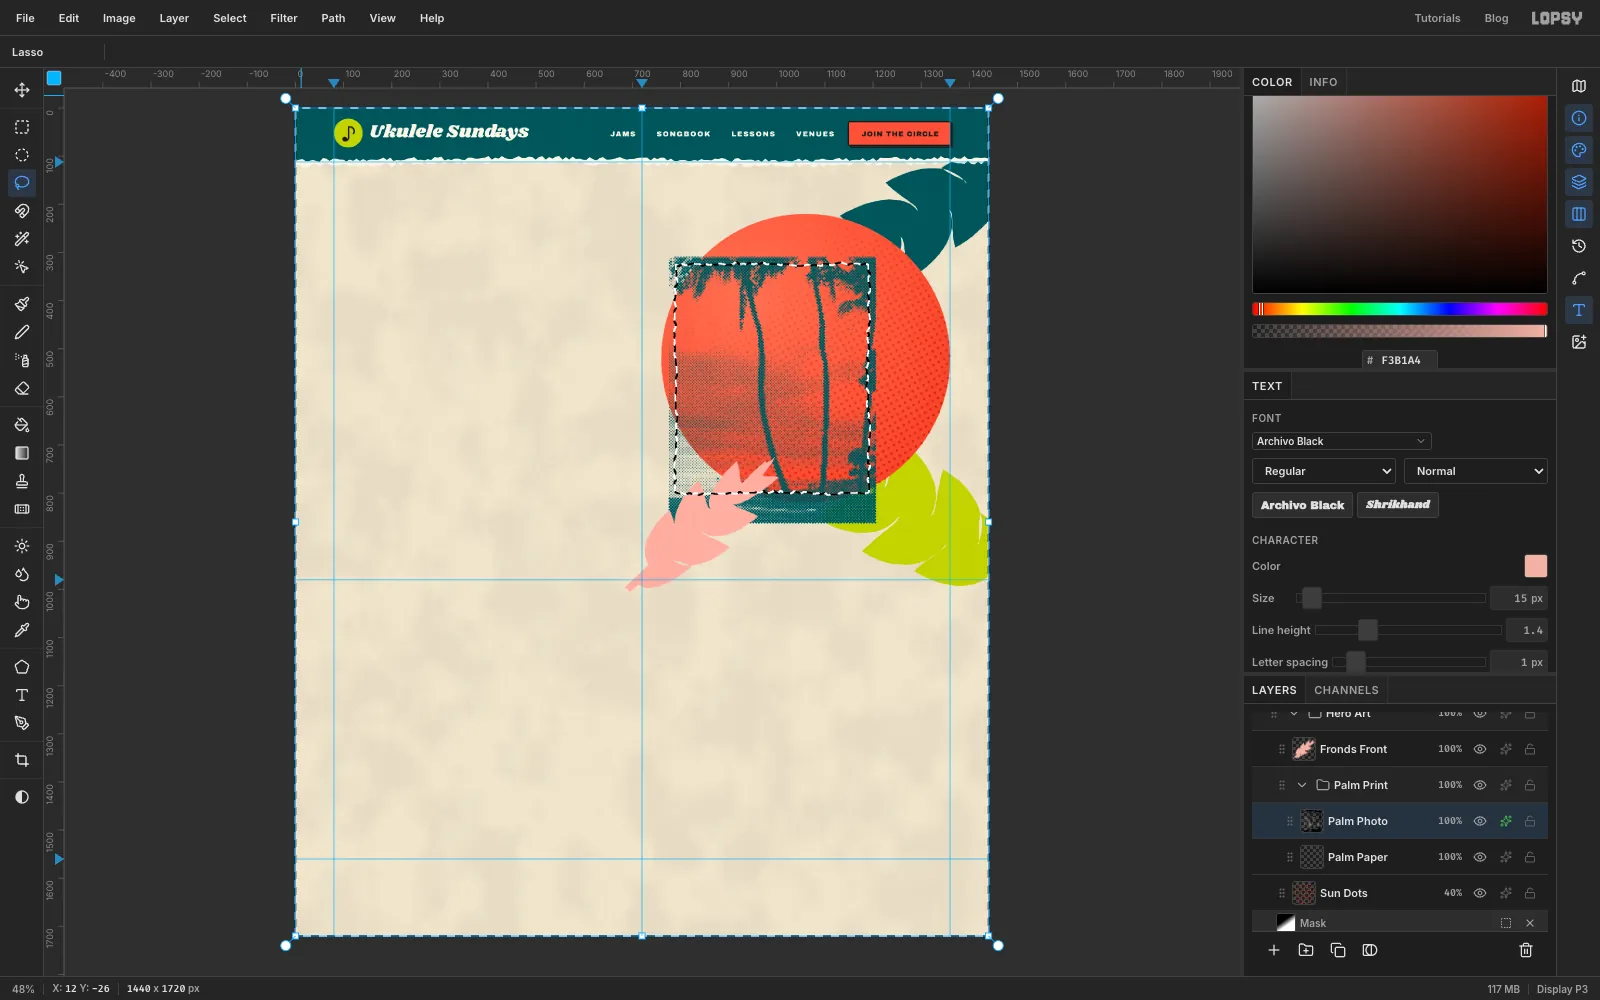
- With the Lasso, draw a ragged rectangle about 16 px inside the photo's edges. Bring the bottom edge up about 60 px from the bottom so you lose the busy, dark beach at the bottom of the shot.
- Choose Select → Inverse and press Delete. Press Cmd+D.
-
Back the print with paper
- Click
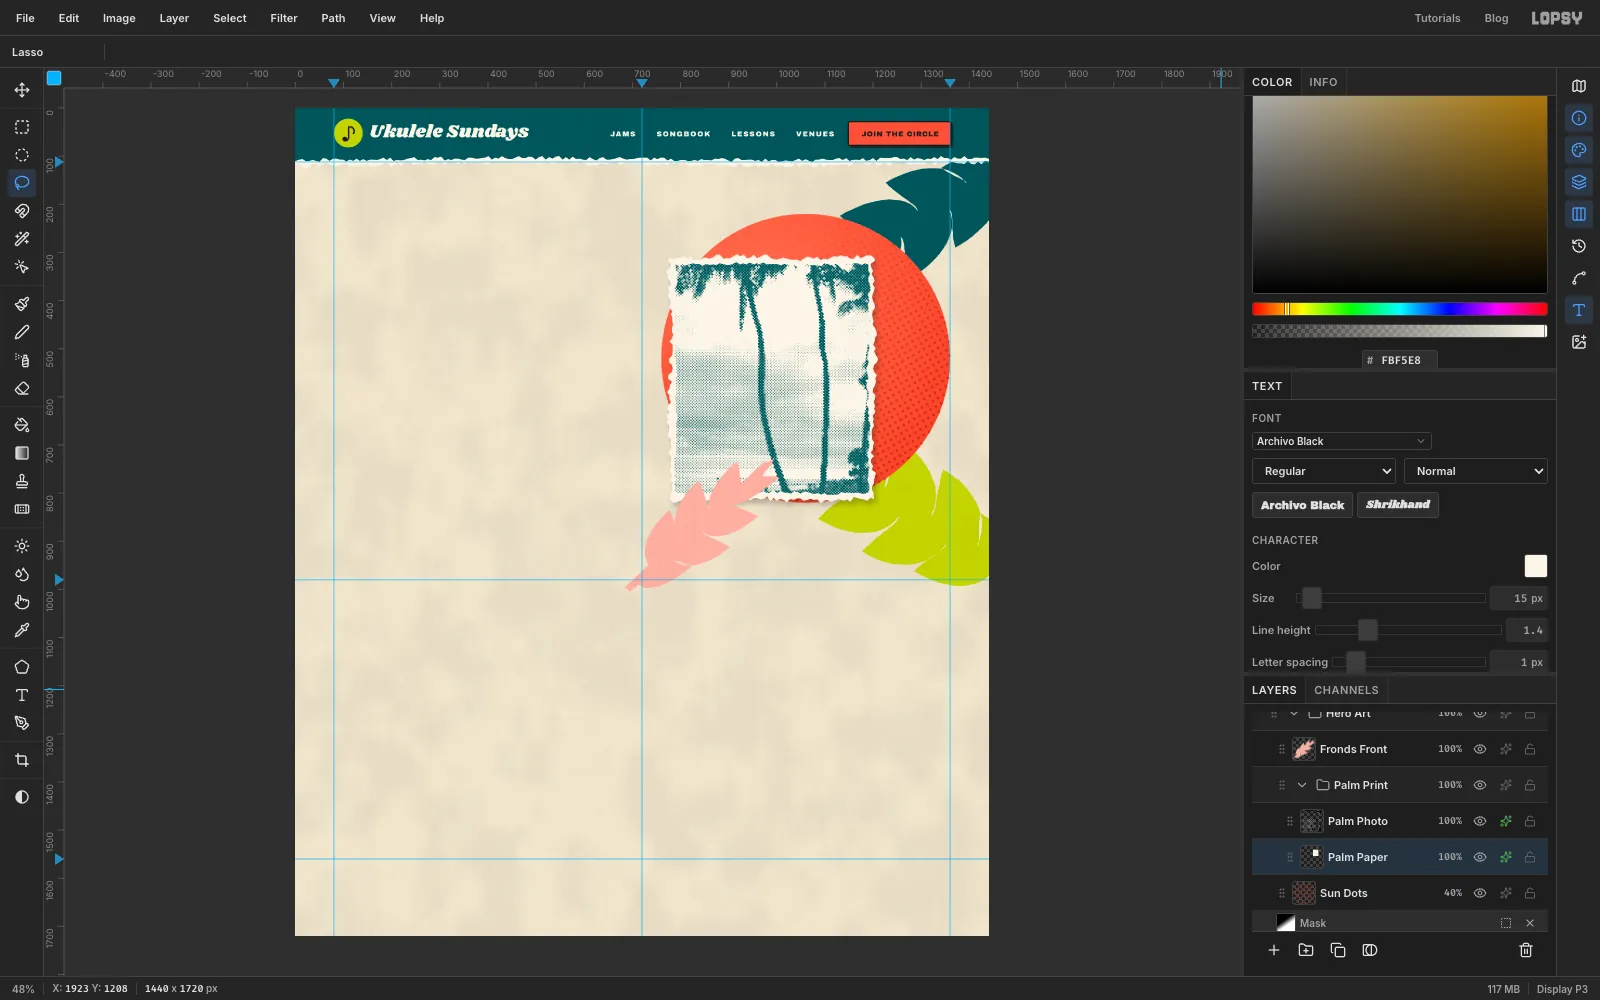
Palm Paper. Lasso a ragged rectangle just a few pixels outside the photo's torn edge, fill it with and deselect. The uneven cream margin makes the print look like it was torn out of a book. - Give
Palm Papera Drop Shadow: Offset X6, Offset Y9, Blur16, Opacity30, colour . A soft, warm shadow lifts the paper off the page without looking digital.
- Click
-
Tilt the whole print
- Click the
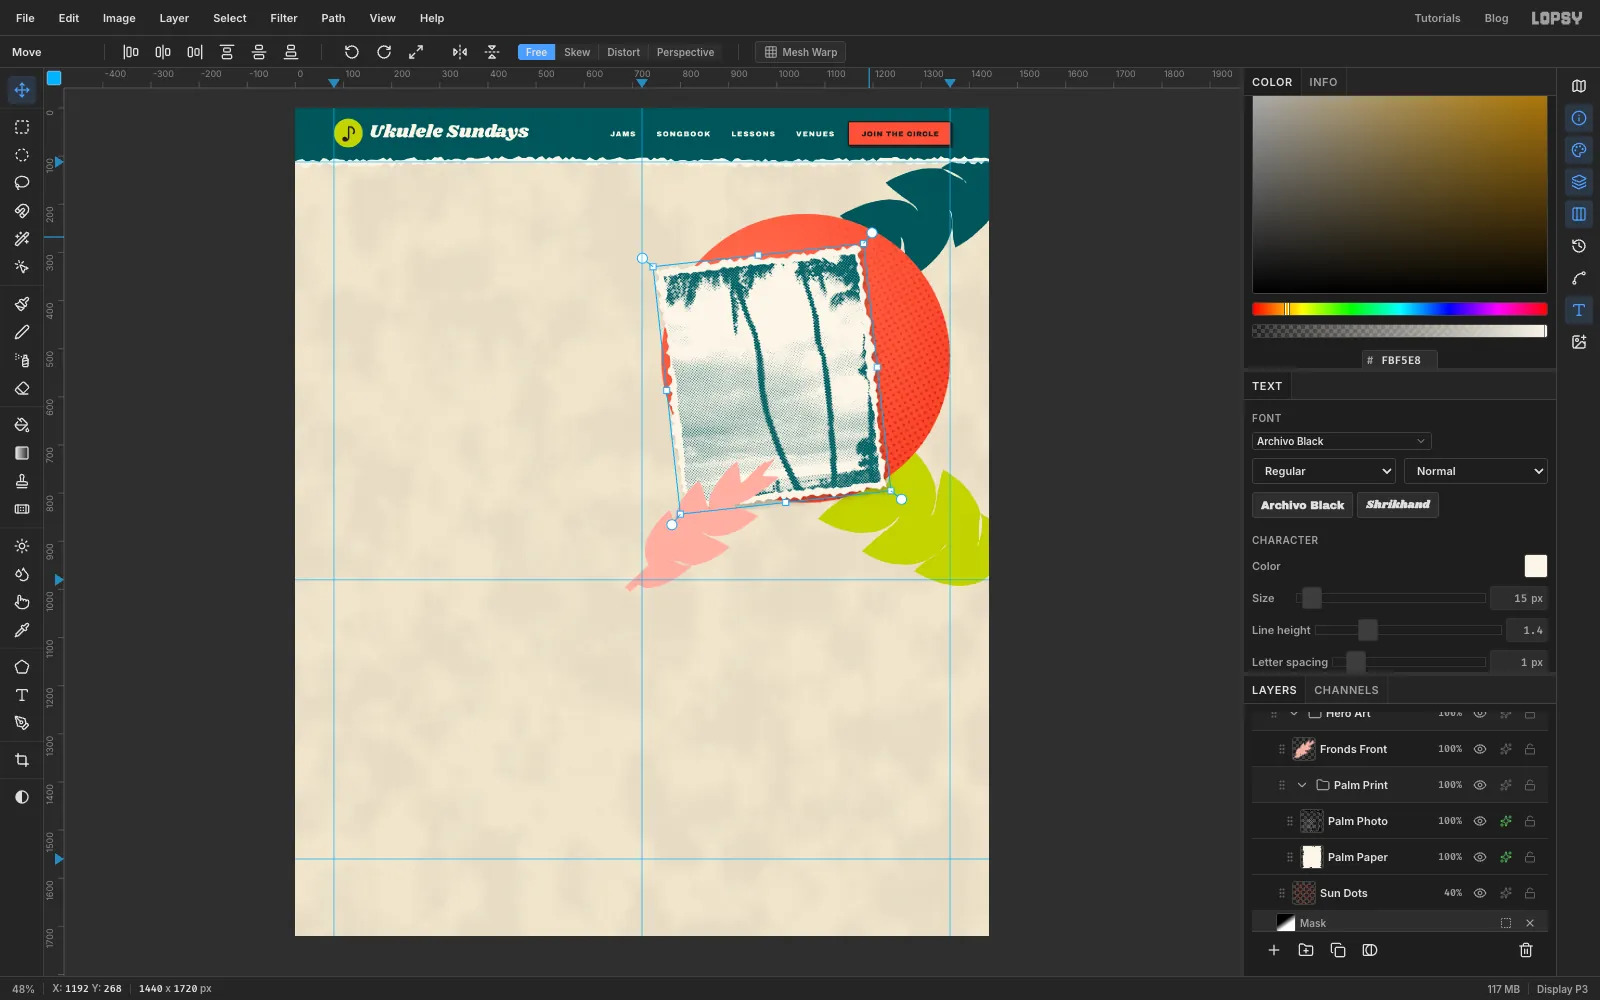
Palm Printgroup row and pick the Move tool. A transform box appears around both layers. - Hover just outside the top-right corner until the pointer turns into a crosshair, then drag a short way to the left to turn the print about 6° counter-clockwise. Press Cmd+D.
Turning the group keeps the photo and its paper backing together.
- Click the
-
Cut the ukulele out of its backdrop
- Click
Fronds Frontand add a group calledUke. Inside it, add a layer calledUke Edgeand leave it empty. - Drag the ukulele photo onto the canvas and rename its layer
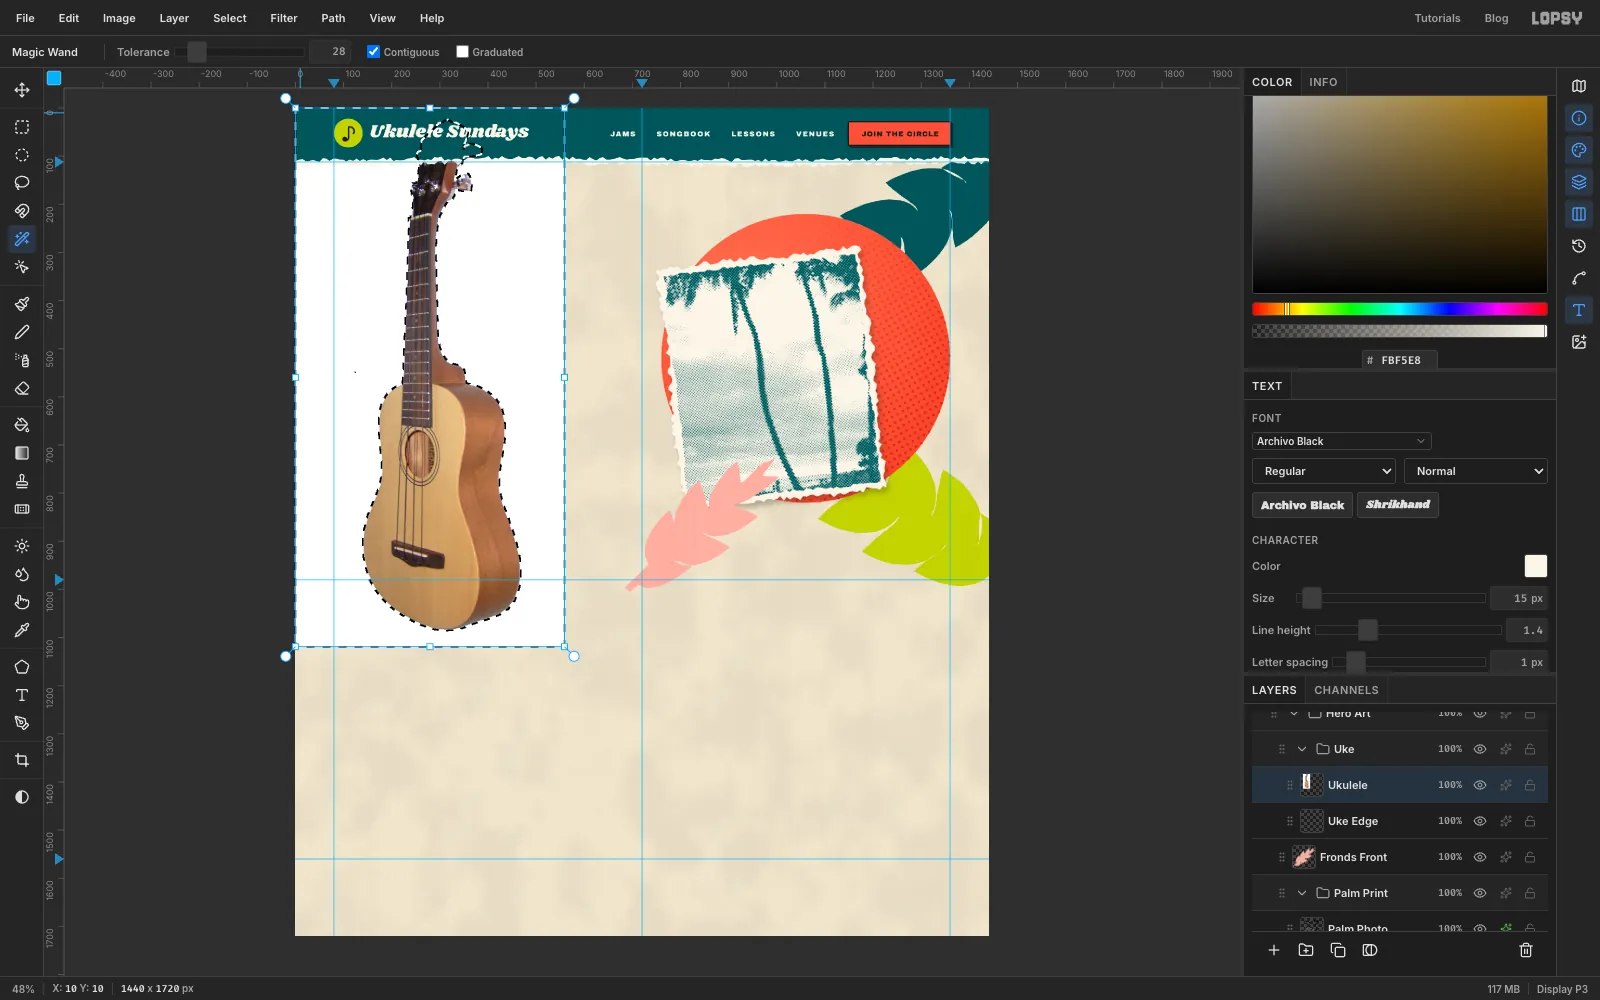
Ukulele. Press Cmd+D. - Pick the Magic Wand, set Tolerance to
28and click the white backdrop near the corner. The white backdrop all round the ukulele is selected in one click. - Press Delete, then Cmd+D.
- Click
-
Scale the ukulele
- With the Rectangular Marquee, select the whole photo area (the top-left
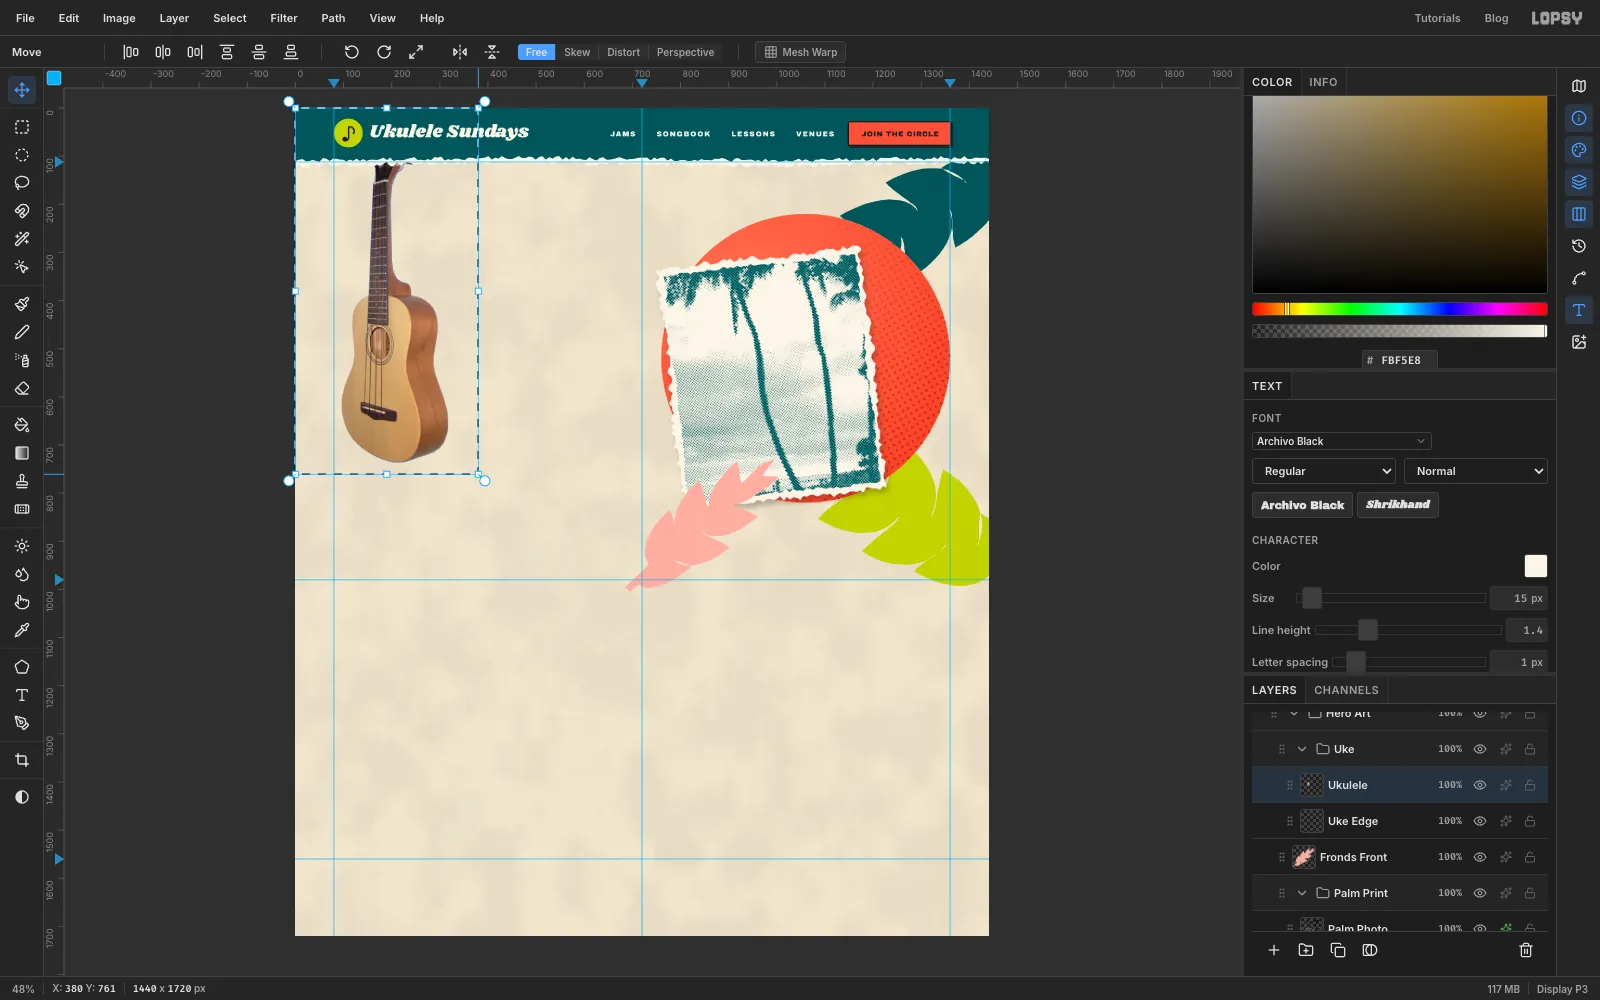
559 × 1119px), then switch to the Move tool so the transform handles appear. - Hold Cmd and drag the bottom-right handle in until the ukulele is about 380 × 761 px, 68% of its size. Press Cmd+D.
- With the Move tool, drag the ukulele across so it's centred at about
1150, 600, over the right side of the sun.
Move it before you rotate it. If you rotate it up in the corner, its tilted body would hang off the canvas.
- With the Rectangular Marquee, select the whole photo area (the top-left
-
Lean the ukulele
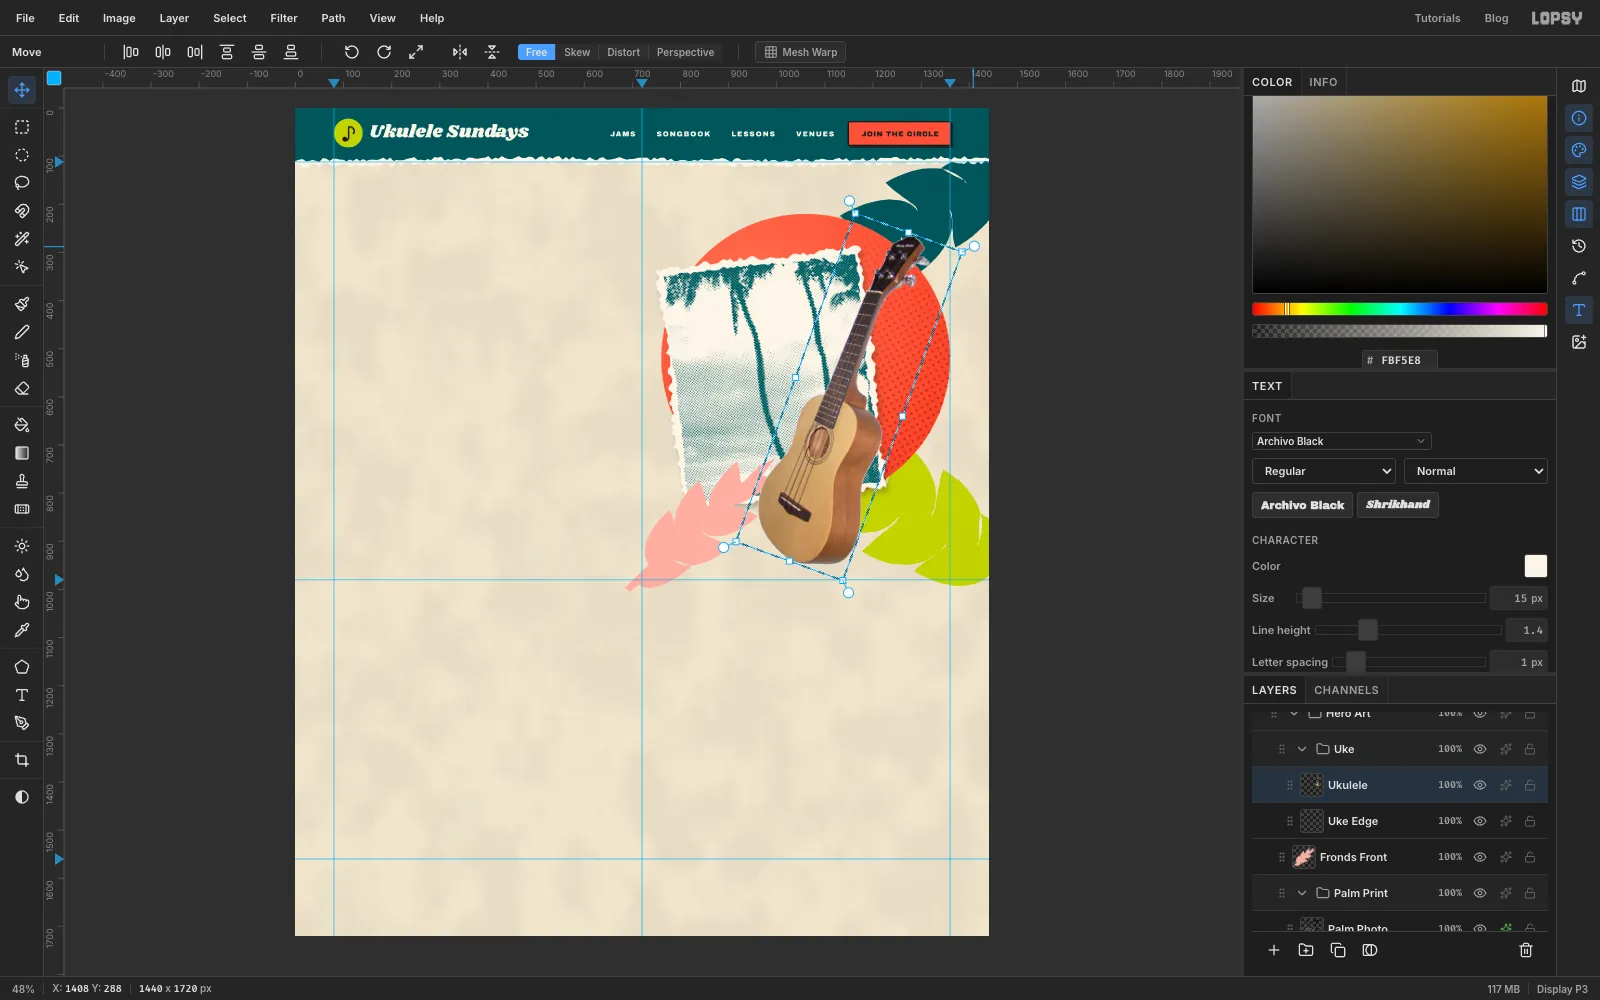
Marquee around the ukulele and switch to the Move tool. Hover just outside the top-right corner of the box until the pointer becomes a crosshair, then drag to turn it about 20° clockwise. Its headstock leans out over the top of the sun. Press Cmd+D.
-
Give it a sticker border
- Cmd-click the
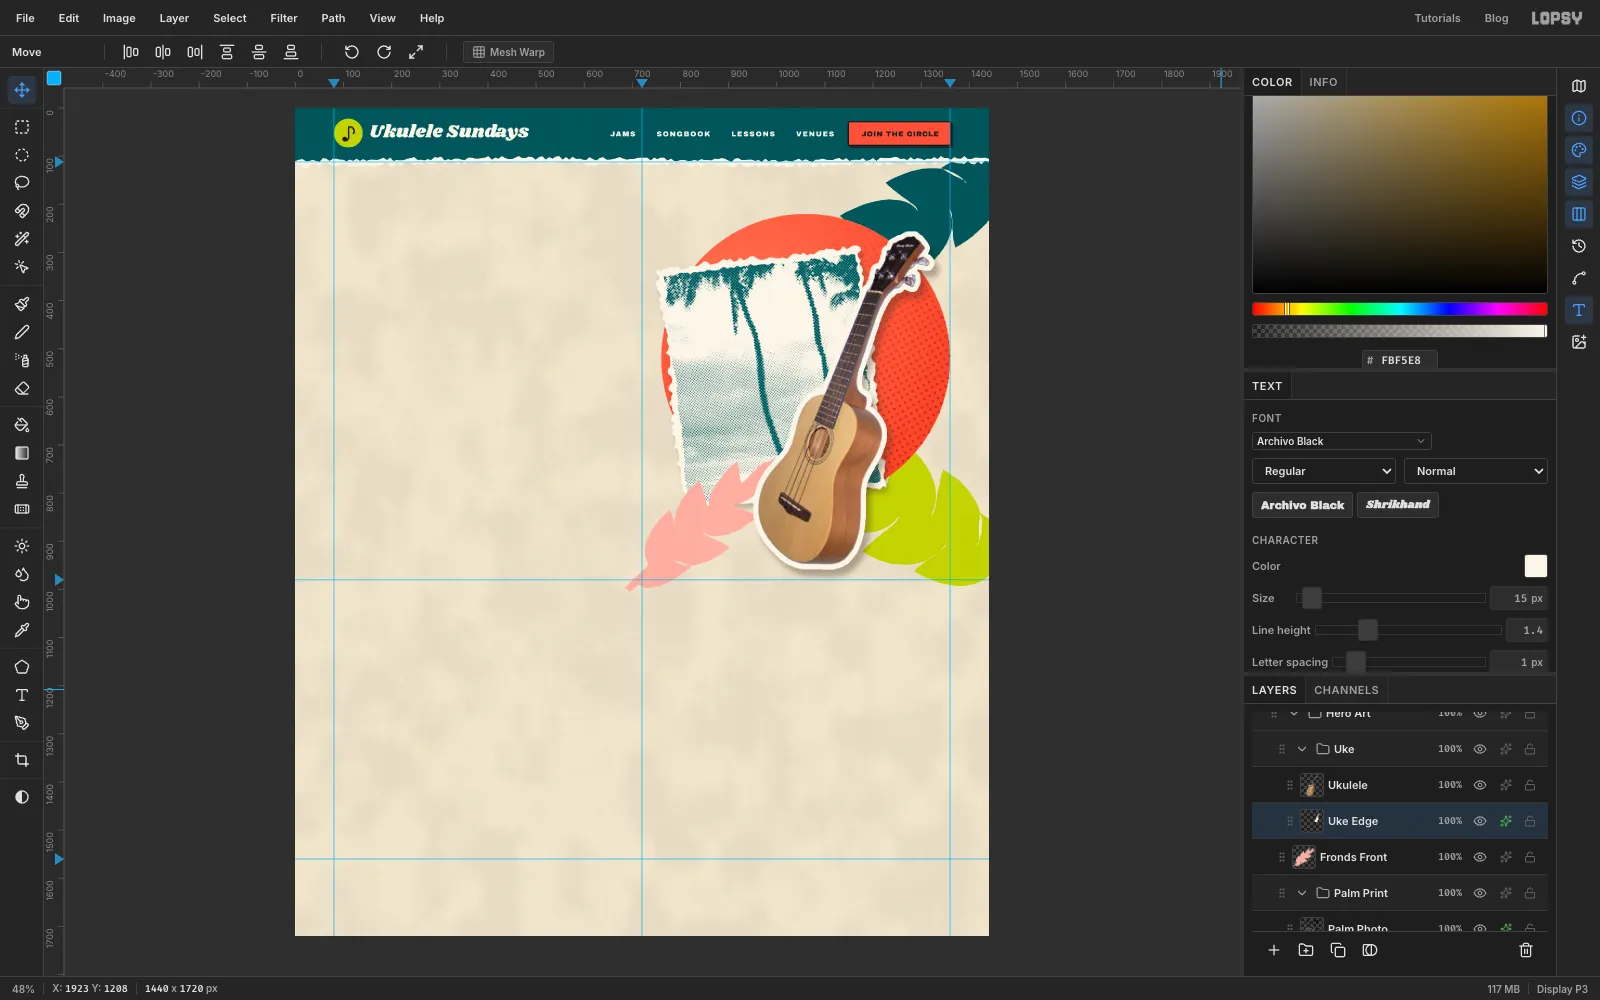
Ukulelethumbnail to select its outline. - Choose Select → Grow…, enter
10and click Apply. - Click
Uke Edge, fill it with and deselect. BecauseUke Edgesits under the ukulele, you only see a 10 px cream rim. - Give
Uke Edgea Drop Shadow with Offset X10, Offset Y14, Blur18, Opacity35and colour . The ukulele is now a sticker sitting on top of the collage.
- Cmd-click the
-
Pin things down with masking tape
- Click the
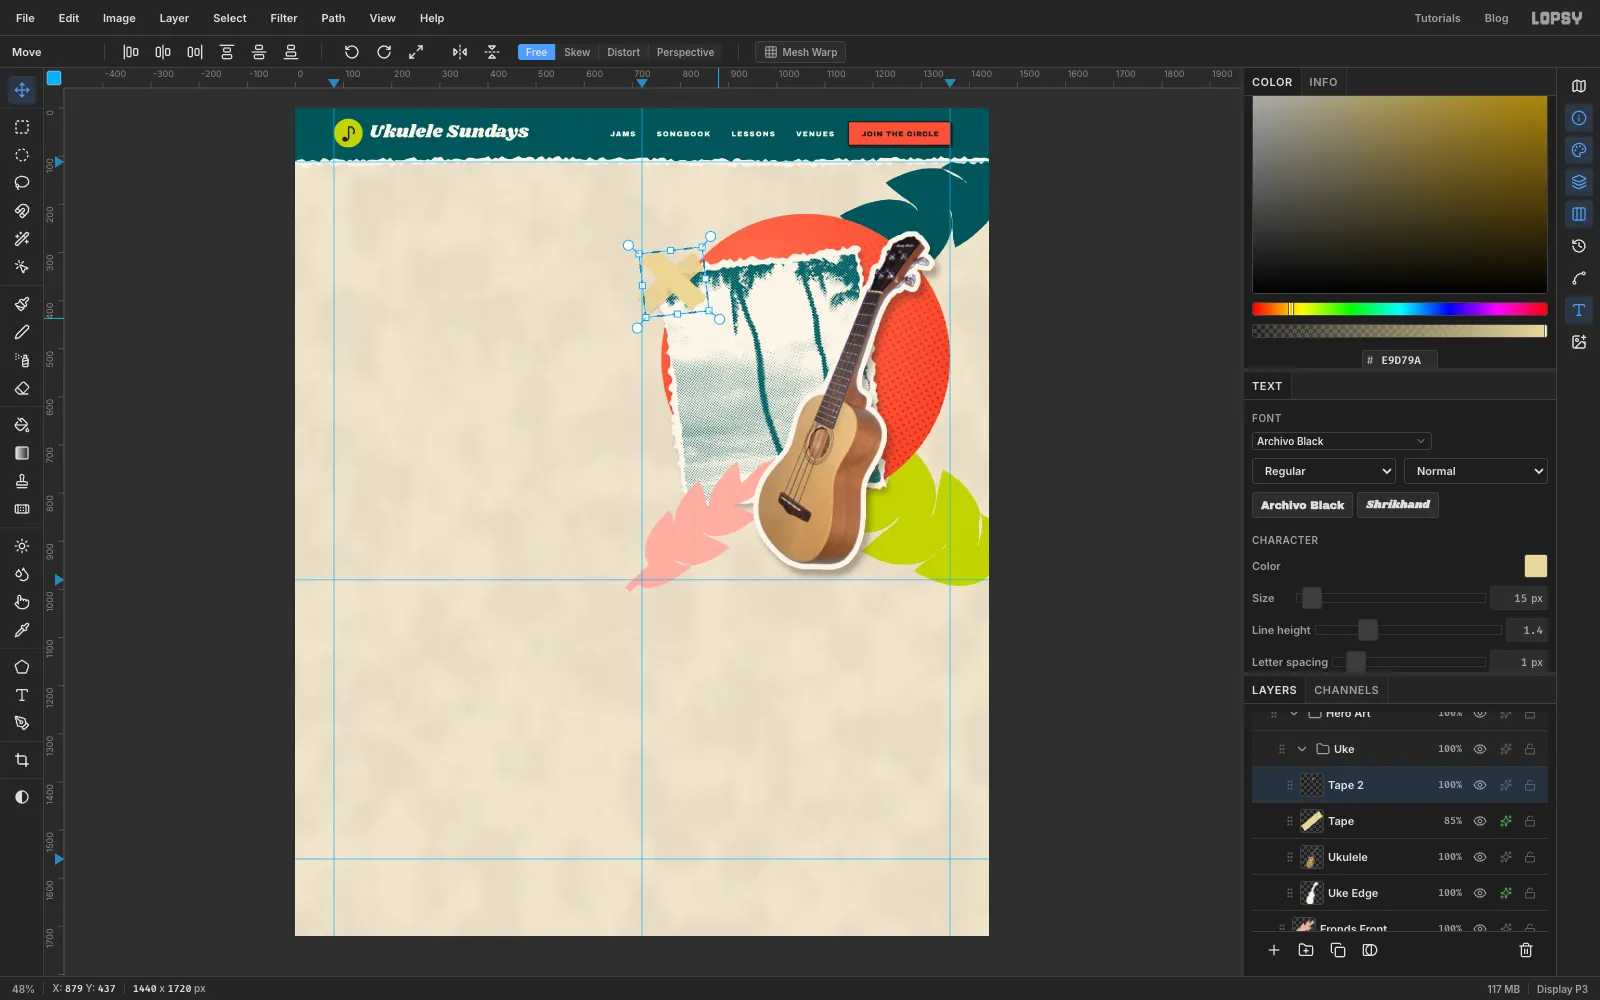
Ukulelelayer and add a layer calledTape(it goes at the top of theUkegroup). - Lasso a strip about 150 × 42 px with roughly straight long sides and ragged short ends, tilted about 40° so it runs from lower left to upper right. Place its centre about 30 px in from the print's top-left corner, so it covers the corner and holds it down. Fill it with and deselect.
- Set
Tapeto85%opacity so the print shows through a little. Add a Drop Shadow of Offset X1, Offset Y2, Blur3, Opacity22in , just enough to lift the tape's edge. - Cmd-click the
Tapethumbnail, press Cmd+C then Cmd+V. The copy pastes in place on a new layer. Rename itTape 2. - The paste selects the copy and switches to the Move tool for you. Drag from just outside its top-right corner to turn it about 80° clockwise. Press Cmd+D, then drag it up onto the ukulele's headstock at about
1170, 296. - Set
Tape 2to85%and give it the same small shadow.
- Click the
-
Add the kicker label
- Collapse
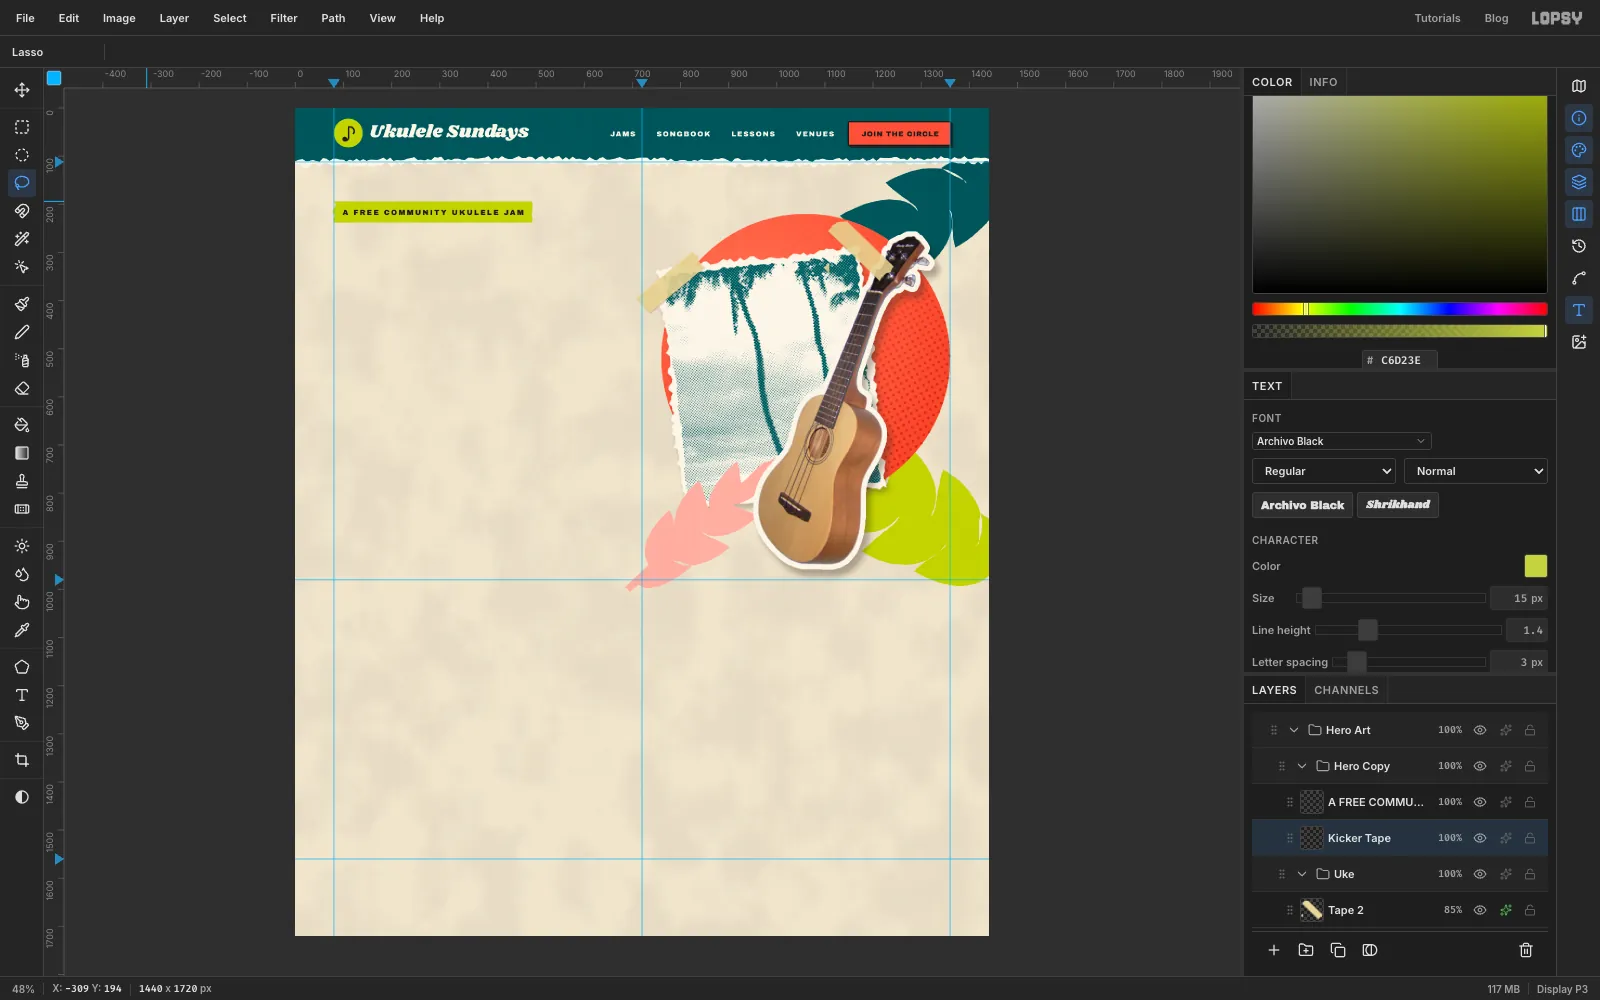
Hero Art. Click it and add a group calledHero Copy. Inside it, add a layer calledKicker Tape. - With
Kicker Tapeselected, typeA FREE COMMUNITY UKULELE JAMin Archivo Black, size15, colour , letter spacing3. Move it so it starts atx 98and sits centred ony 216. - Click
Kicker Tape. Lasso a strip fromx 80to about 18 px past the end of the text, fromy 194toy 238, with ragged left and right ends. Fill it with and deselect.
- Collapse
-
Set the headline
- Click
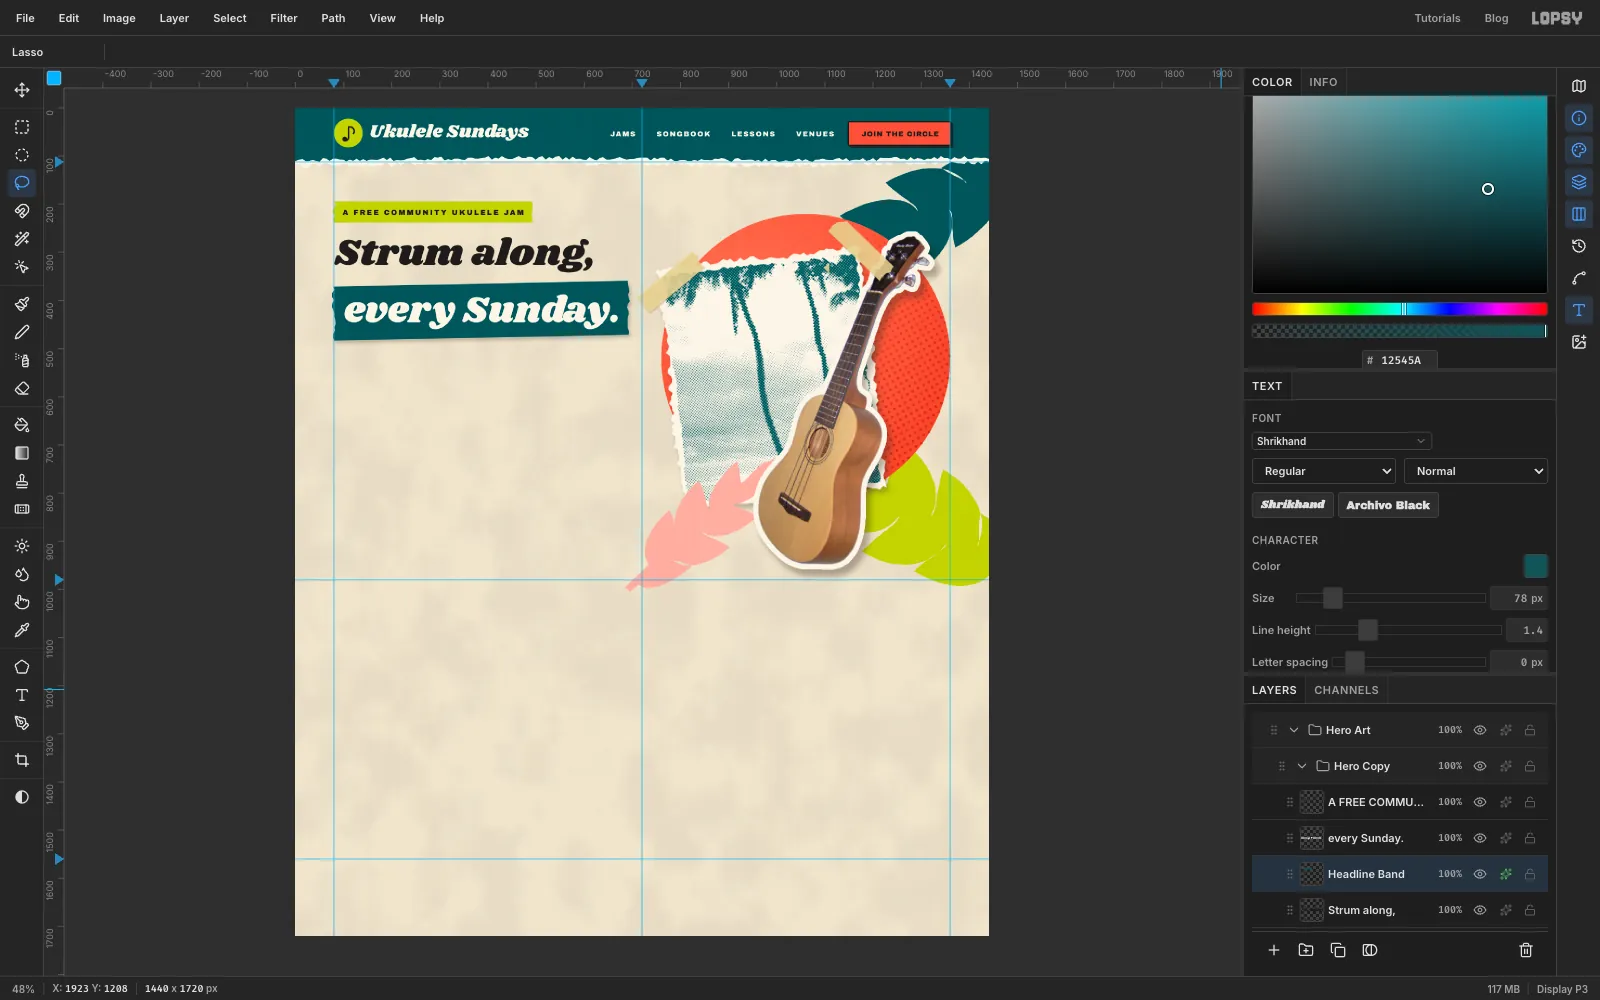
Kicker Tape. TypeStrum along,in Shrikhand, colour , letter spacing0. Start at size96, then lower the Size until the line fits between thex 80guide and aboutx 620. That's about78px. Move it so its left edge is on thex 80guide and the top of the capital S is aty 268. - Add a layer called
Headline Banddirectly above the headline text. - With
Headline Bandselected, typeevery Sunday.in Shrikhand at the same size, in . Move it so it starts atx 102, with enough room under the g in "along" for the teal strip to fit between the two lines. - Click
Headline Band. Lasso a teal strip that leaves about 22 px around the words on the left and right and about 20 px above and below. Give it ragged ends and tilt it a degree or so, as if it were glued down by hand. Fill it with and deselect. - Give
Headline Banda Drop Shadow: Offset X4, Offset Y6, Blur10, Opacity25, colour .
- Click
-
Write the body copy and buttons
- Click
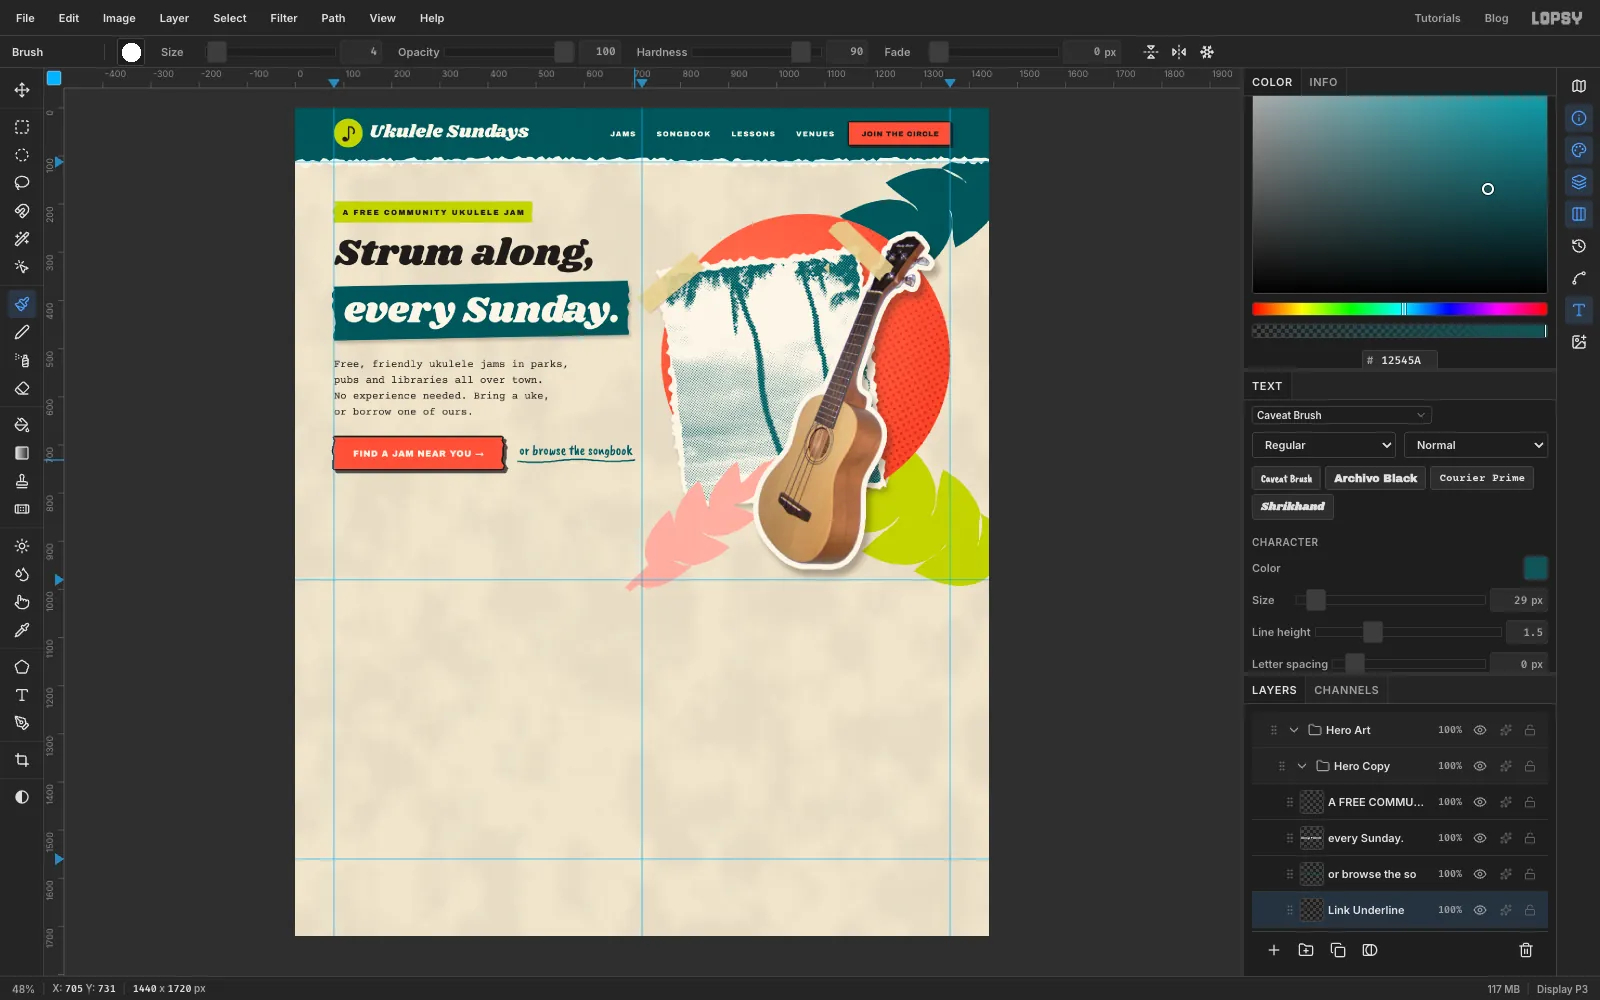
Headline Band. Pick Courier Prime, size22, colour , and make sure Letter spacing is0. Letter spacing carries over from the last text you set. Type these four lines, pressing Enter between them:
Free, friendly ukulele jams in parks,pubs and libraries all over town.No experience needed. Bring a uke,or borrow one of ours.In the Text panel, set Line height to
1.5. Move the text tox 80, about 64 px below the teal strip.- Add a layer called
CTA Button. Lasso a 350 × 66 px rectangle atx 80, about 48 px under the paragraph, with ragged short ends. Fill it with , deselect, and give it the same Stroke (3, ) and solid Drop Shadow as the nav button, but with both offsets at6. - Click
CTA Button. TypeFIND A JAM NEAR YOU →in Archivo Black18, , letter spacing1(paste the arrow), and centre it on the button. - Add a layer called
Link Underlineabove the button text. Typeor browse the songbookin Caveat Brush, size29, colour . Place it 36 px to the right of the button, level with the button's middle. - Click
Link Underline. Set the foreground to , pick the Brush at Size4, set Hardness to90in the brush settings, and drag a loose, slightly wavy line under the link from one end to the other.
- Click
-
Add a stats row
Websites love a row of numbers. It also fills the space under the buttons.
- Add a layer called
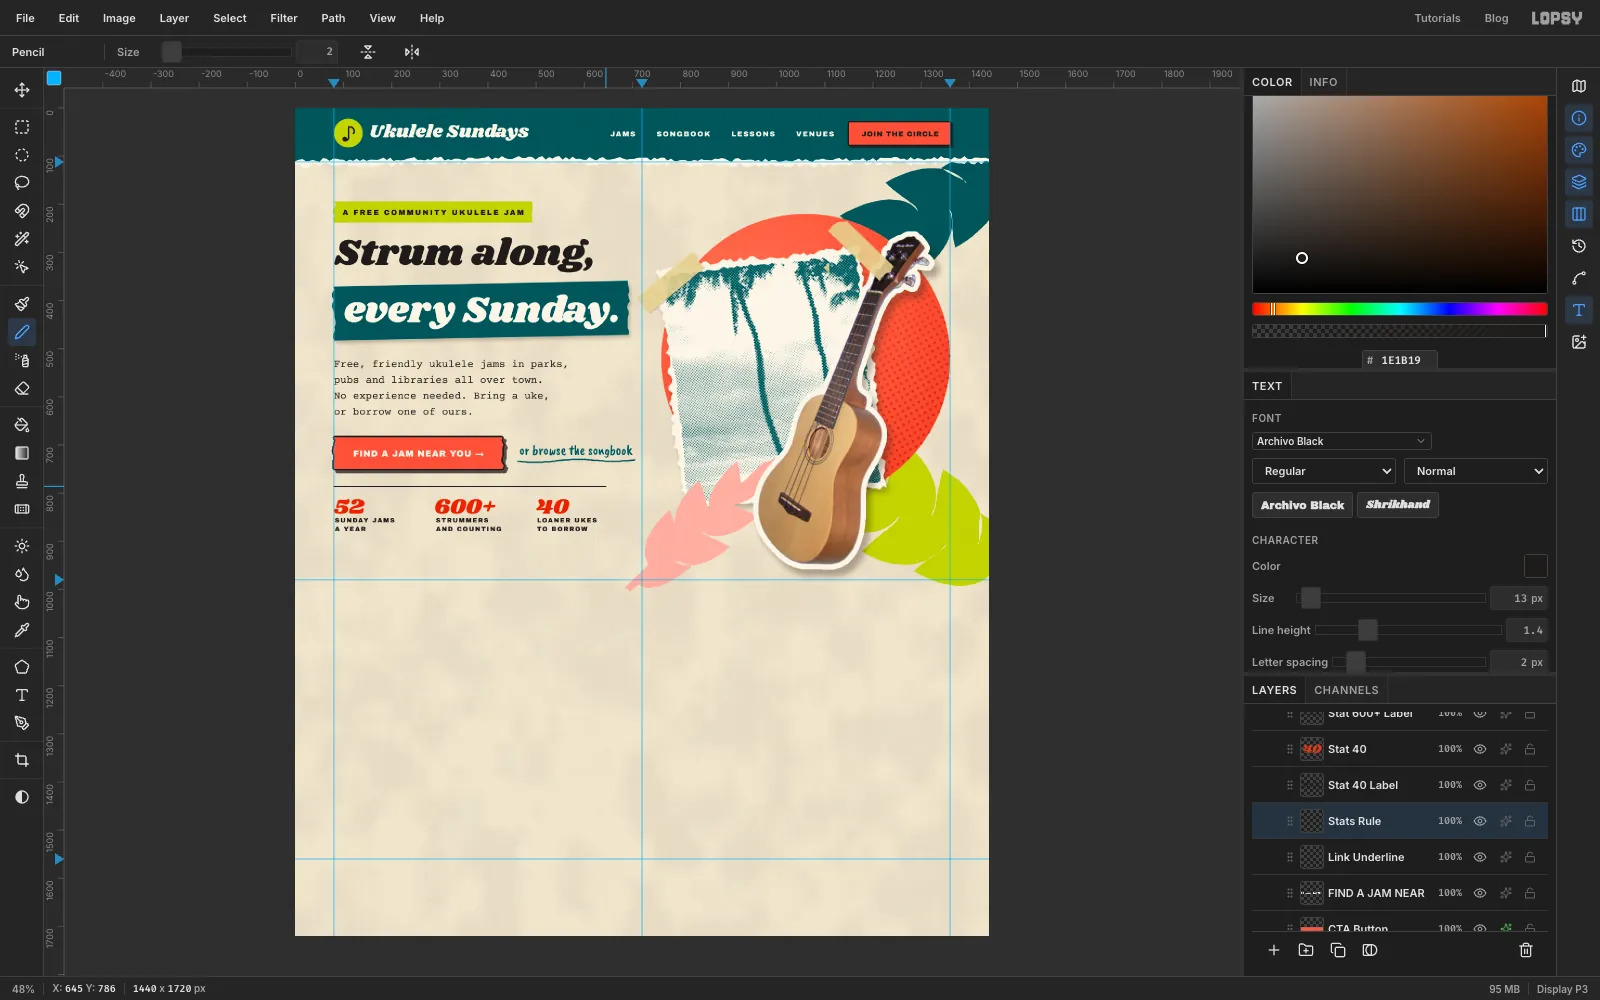
Stats Rule. With it selected, type52in Shrikhand46, colour . That's darker than the button coral so it reads better as small type on cream. Move it tox 80, with its top aty 812. - Click
Stats Ruleand typeSUNDAY JAMSEnterA YEARin Archivo Black13, , letter spacing2. Put it 10 px below the number. - Repeat for
600+withSTRUMMERS/AND COUNTINGatx 290, and40withLOANER UKES/TO BORROWatx 500. ClickStats Rulebefore each one. - Click
Stats Rule. Set the foreground to , pick the Pencil at Size2, click at80, 786and Shift-click at645, 786to draw a straight rule above the stats.
- Add a layer called
-
Make the stamp rings and a circle path
- Collapse the open groups, click
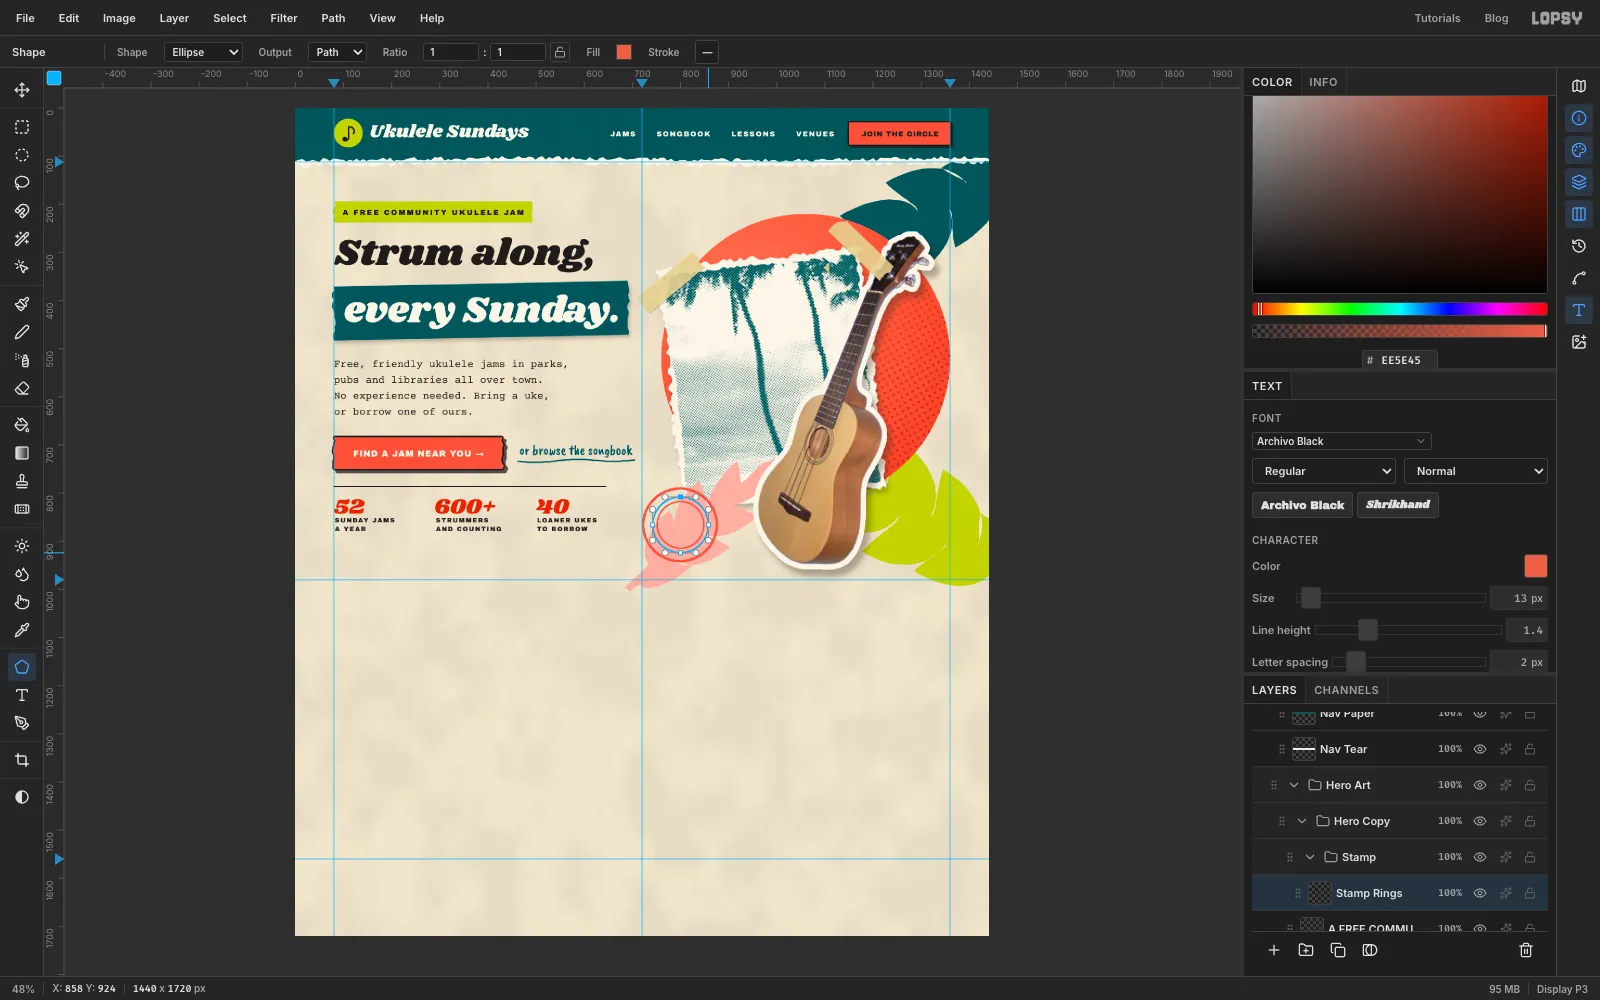
Hero Copyand add a group calledStamp. Inside it, add a layer calledStamp Rings. - With the Elliptical Marquee, drag a circle from
722, 788to878, 944(centre800, 866). Fill it with . Choose Select → Shrink…, enter5, and press Delete. That leaves a 5 px ring. Deselect. - Drag a 100 px circle from
750, 816to850, 916, fill it, shrink it by3and press Delete for the inner ring. Deselect. - Pick the Shape tool. Set Shape to Ellipse and Output to Path. Shapes are drawn from the centre outward, so press at the stamp's centre,
800, 866, and drag to858, 924. That makes a circle path with a radius of about 58 px, running between the two rings.
- Collapse the open groups, click
-
Set the stamp text on the circle
- Click
Stamp Rings. TypeALL WELCOME ★ EVERY SUNDAY ★ 2 PM ★in Archivo Black13, , letter spacing1. Paste the stars. - With the new text selected, choose the circle in the Path dropdown on the Text tool's options bar, and set Align to Center. The words wrap around the ring. If the end runs into the start, lower the size or the letter spacing a little.
- Click
Stamp Rings, set Align back to Left, and typeUKEEnterCLUBin Shrikhand26, . The two lines share a left edge, so the longer CLUB steps out to the right a little, which suits a hand-cut rubber stamp. Move the block into the middle of the stamp. - Click the ✦ button on the
Stampgroup's row to open its drawer, and set the blend mode to Multiply. Click the group's opacity figure and set it to85%. The ink now darkens whatever it's stamped on, like real ink. - Text on a path can't be turned along with the rest of a group, so bake it first. Click the ring text layer (Lopsy names it
ALL WELCOME ★ …) and click Rasterize Layer at the bottom of the Layers panel. Open the Paths panel, click the circle path and click Delete Path. You don't need the path any more. - Click the
Stampgroup and, with the Move tool, drag from just outside the top-right corner to turn it about 14° counter-clockwise. Press Cmd+D.
- Click
-
Add a music-note sticker
- Open the
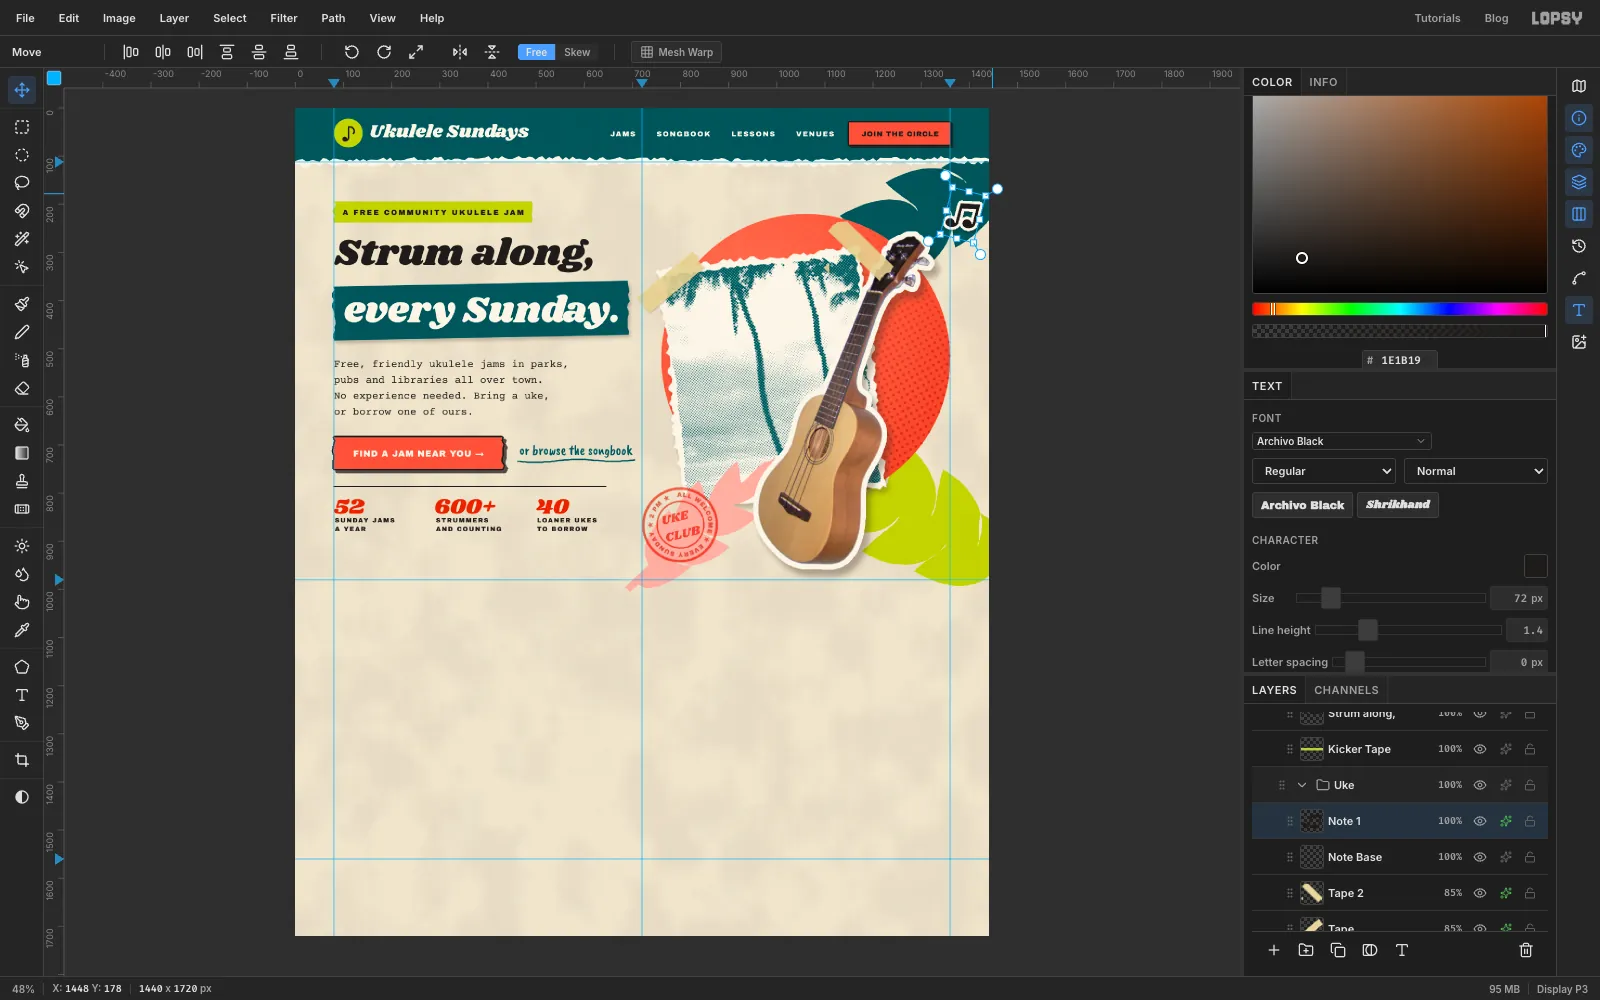
Hero ArtandUkegroups and clickTape 2, so the note lands at the top of theUkegroup. (The project file also has an emptyNote Baselayer here. It only marks the spot, and you can skip it.) - Type ♫ in Archivo Black
72, . Move it to about1385, 222, on the teal leaf in the top-right corner. - Give it a Stroke of
6in and a Drop Shadow with Offset X4, Offset Y6, Blur8, Opacity30in . That's the same die-cut sticker look as the ukulele. - With the Move tool, hover just outside the note's top-right corner until you see the crosshair, and drag to tilt it about 14° clockwise. Text stays live while you rotate it.
- Open the
-
Head the events section
- Collapse everything, click
Hero Copyand add a group calledJams. Inside it, add a layer calledSection Rule. - With
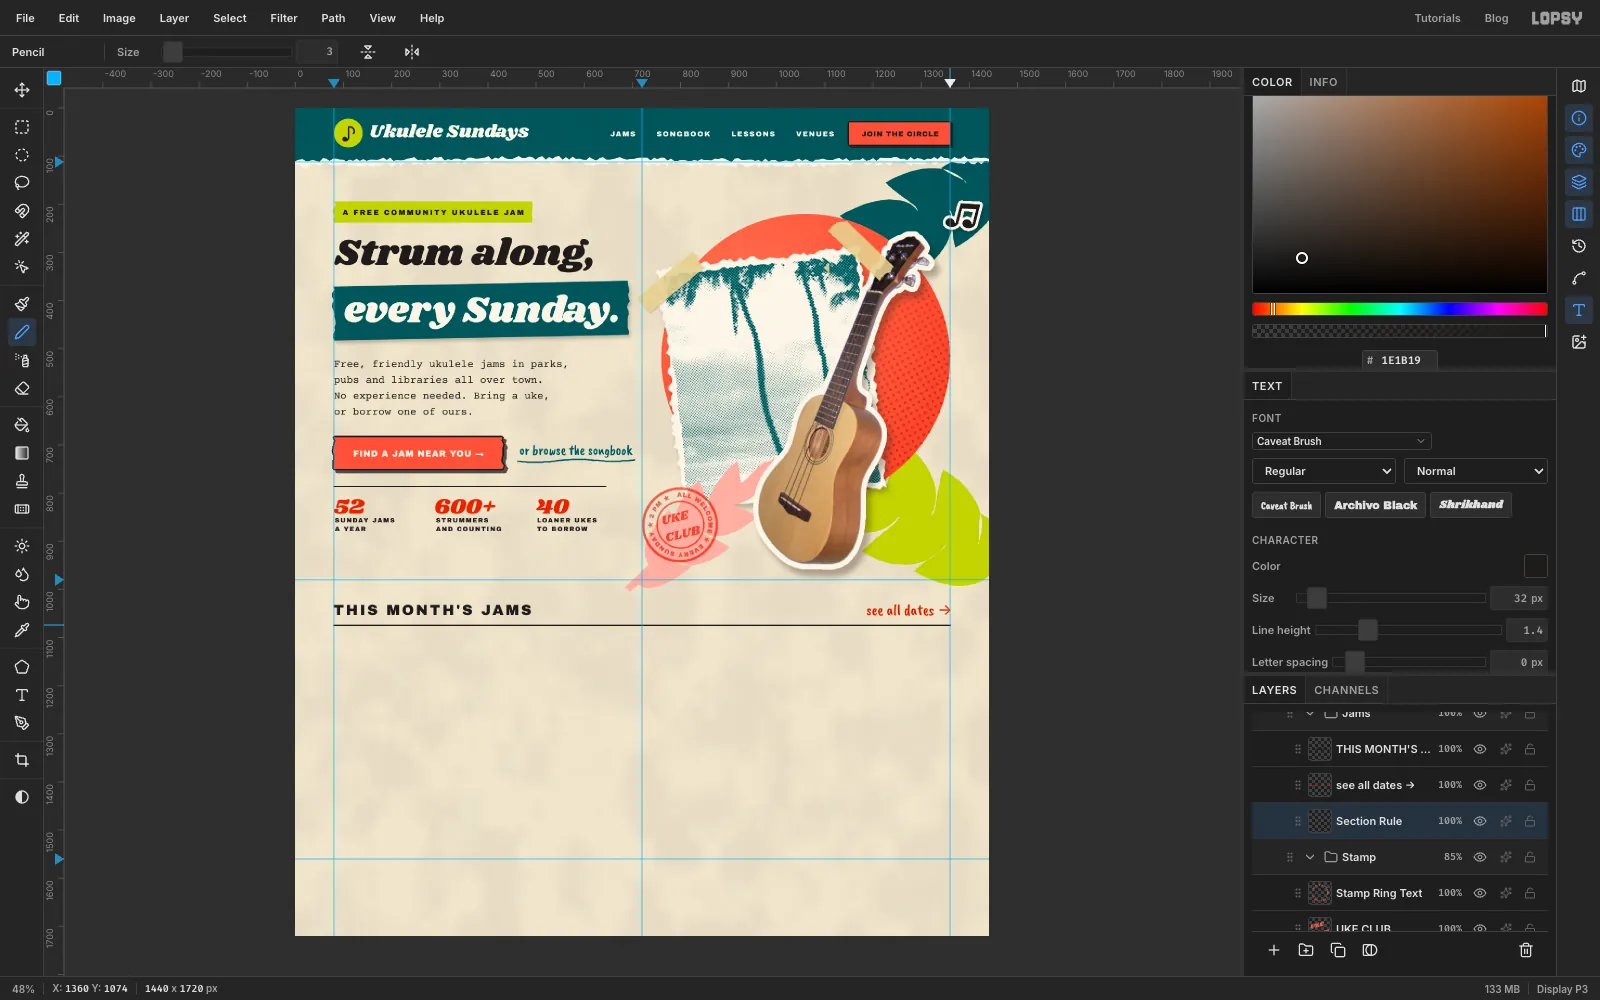
Section Ruleselected, typeTHIS MONTH'S JAMSin Archivo Black30, , letter spacing4. Move it tox 80with its top aty 1032. - Click
Section Ruleand typesee all dates →in Caveat Brush32, . Line its right end up with thex 1360guide, level with the heading. - Click
Section Rule. Set the foreground back to , pick the Pencil at Size3, click at80, 1072and Shift-click at1360, 1072.
- Collapse everything, click
-
Build the first card
- Click
Section Rule, add a group calledCard 1, and inside it a layer calledCard Paper. - Lasso a ragged rectangle from
80, 1134to470, 1454(390 × 320 px). Fill it with , deselect, and give it a Drop Shadow of6/10, Blur16, Opacity28, in . - Add a layer called
Card Band. Lasso a band across the top of the card, about 60 px tall, keeping its sides just inside the card's torn edges so no coral pokes out. Give it a ragged bottom edge. Fill it with . - Add a layer called
Card Icon. With the Elliptical Marquee, draw a 36 px circle near the band's right end, from412, 1151to448, 1187, fill it with and deselect. - With
Card Iconselected, add the text, clickingCard Iconbefore each new piece:
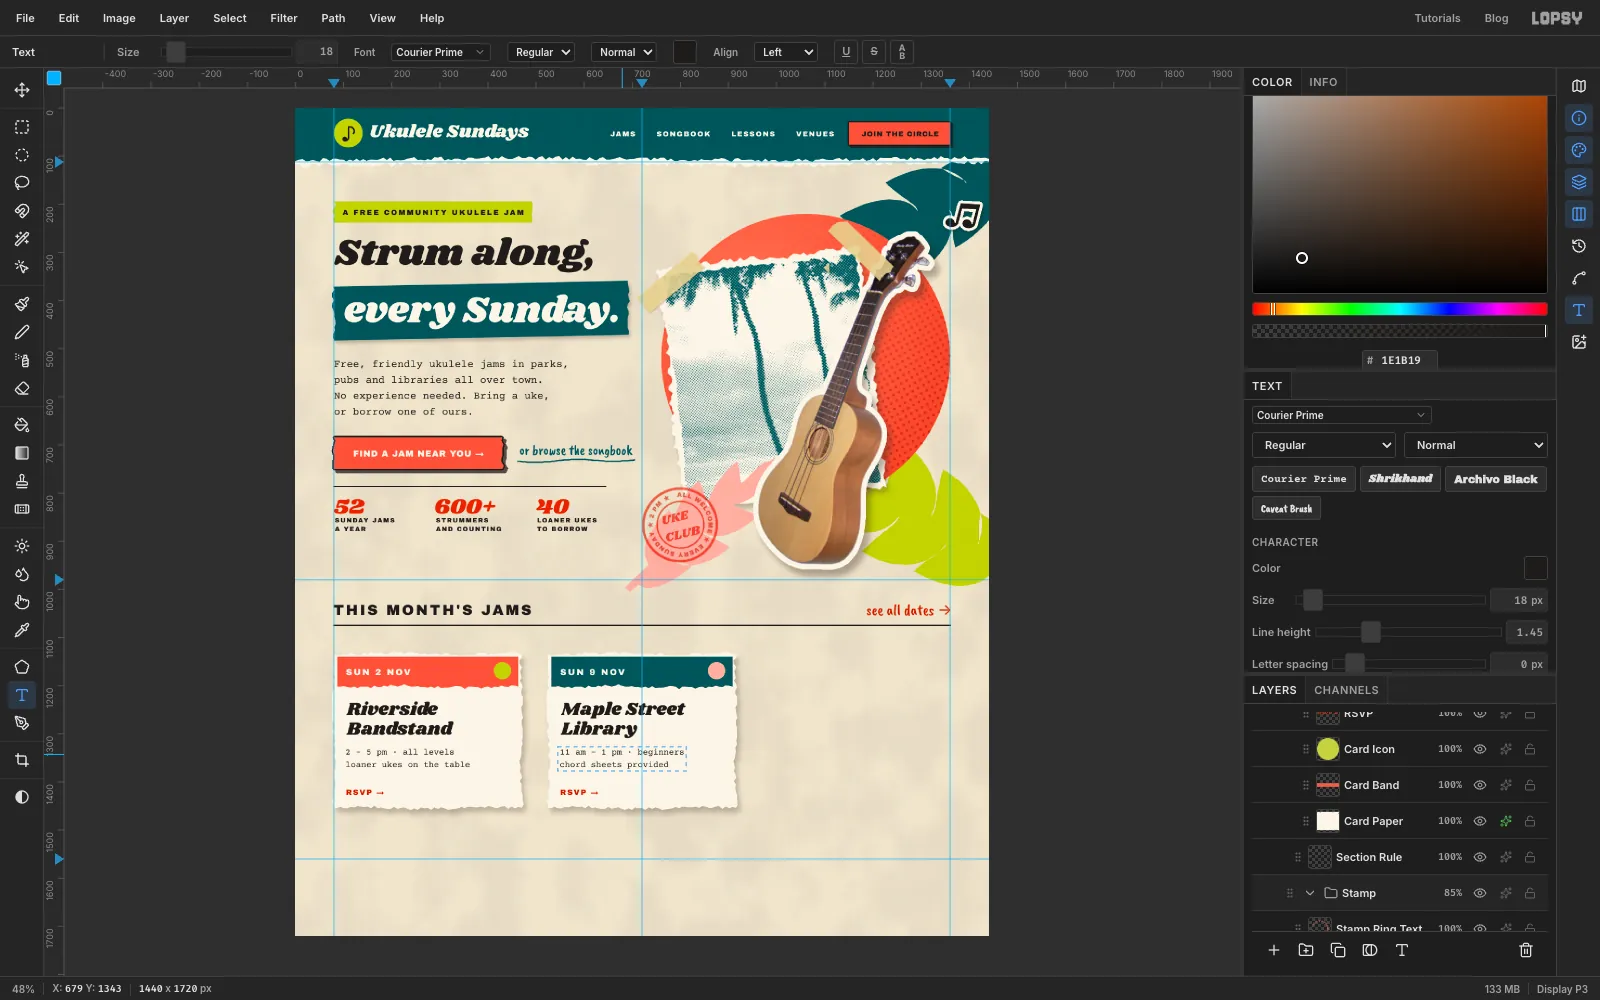
SUN 2 NOVin Archivo Black18, , letter spacing3, atx 106, centred on the band.RiversideEnterBandstandin Shrikhand38, , Line height1.1, atx 106, with its top aty 1232.2 – 5 pm · all levelsEnterloaner ukes on the tablein Courier Prime18, , Line height1.45, 30 px below the title.RSVP →in Archivo Black16, , letter spacing2, near the bottom of the card with a comfortable margin under it.
- Click
-
Duplicate it for the other two dates
- Click the
Card 1group row and choose Layer → Duplicate Layer. The copy lands exactly on top of the original. Rename itCard 2. - With the Move tool, drag the copy to the right so its left edge sits at
x 525, which is 445 px along. Watch X in the status bar as you drag, and finish with the arrow keys. The whole card moves as one. - Recolour the band: Cmd-click the
Card Band copythumbnail, click that layer, set the foreground to and choose Edit → Fill. Do the same for the icon with . Deselect. - Retype the text. Click a raster layer in the card, pick the Text tool, click inside
SUN 2 NOVon the new card, press Cmd+A and typeSUN 9 NOV. Press Tab. Do the same for the title (Maple StreetEnterLibrary) and the details (11 am – 1 pm · beginnersEnterchord sheets provided). - Duplicate
Card 2to makeCard 3(its layers are named… copy copy), move it another 445 px right tox 970, and recolour its band to and its icon to . Change the text toSUN 16 NOV,Lantern NightEnteron the Pier, and6 – 9 pm · bring a lightEntersing-along set list.
- Click the
-
Tilt the cards
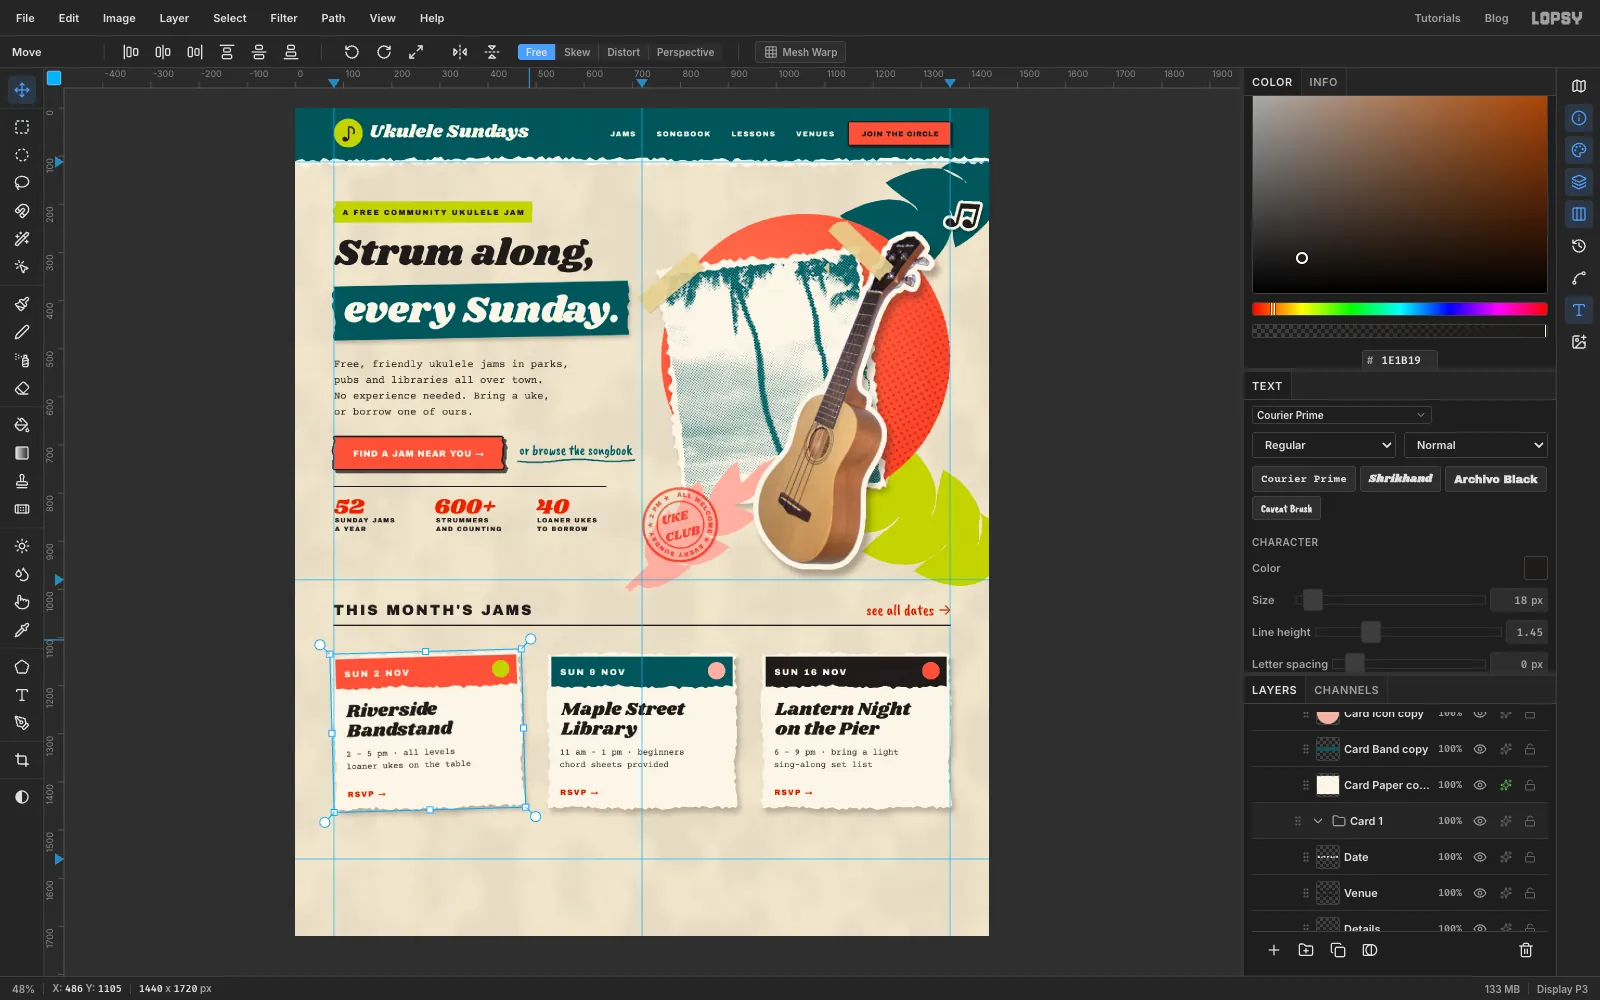
Paper that's been pinned up by hand is never quite straight. Click each card group in turn and, with the Move tool, drag from just outside its top-right corner to turn it a little:
Card 1: about 1.5° counter-clockwiseCard 2: about 1° clockwiseCard 3: about 1° counter-clockwise
Press Cmd+D after each one. The text inside turns with its card and stays editable.
-
Tape the cards up
- Click the
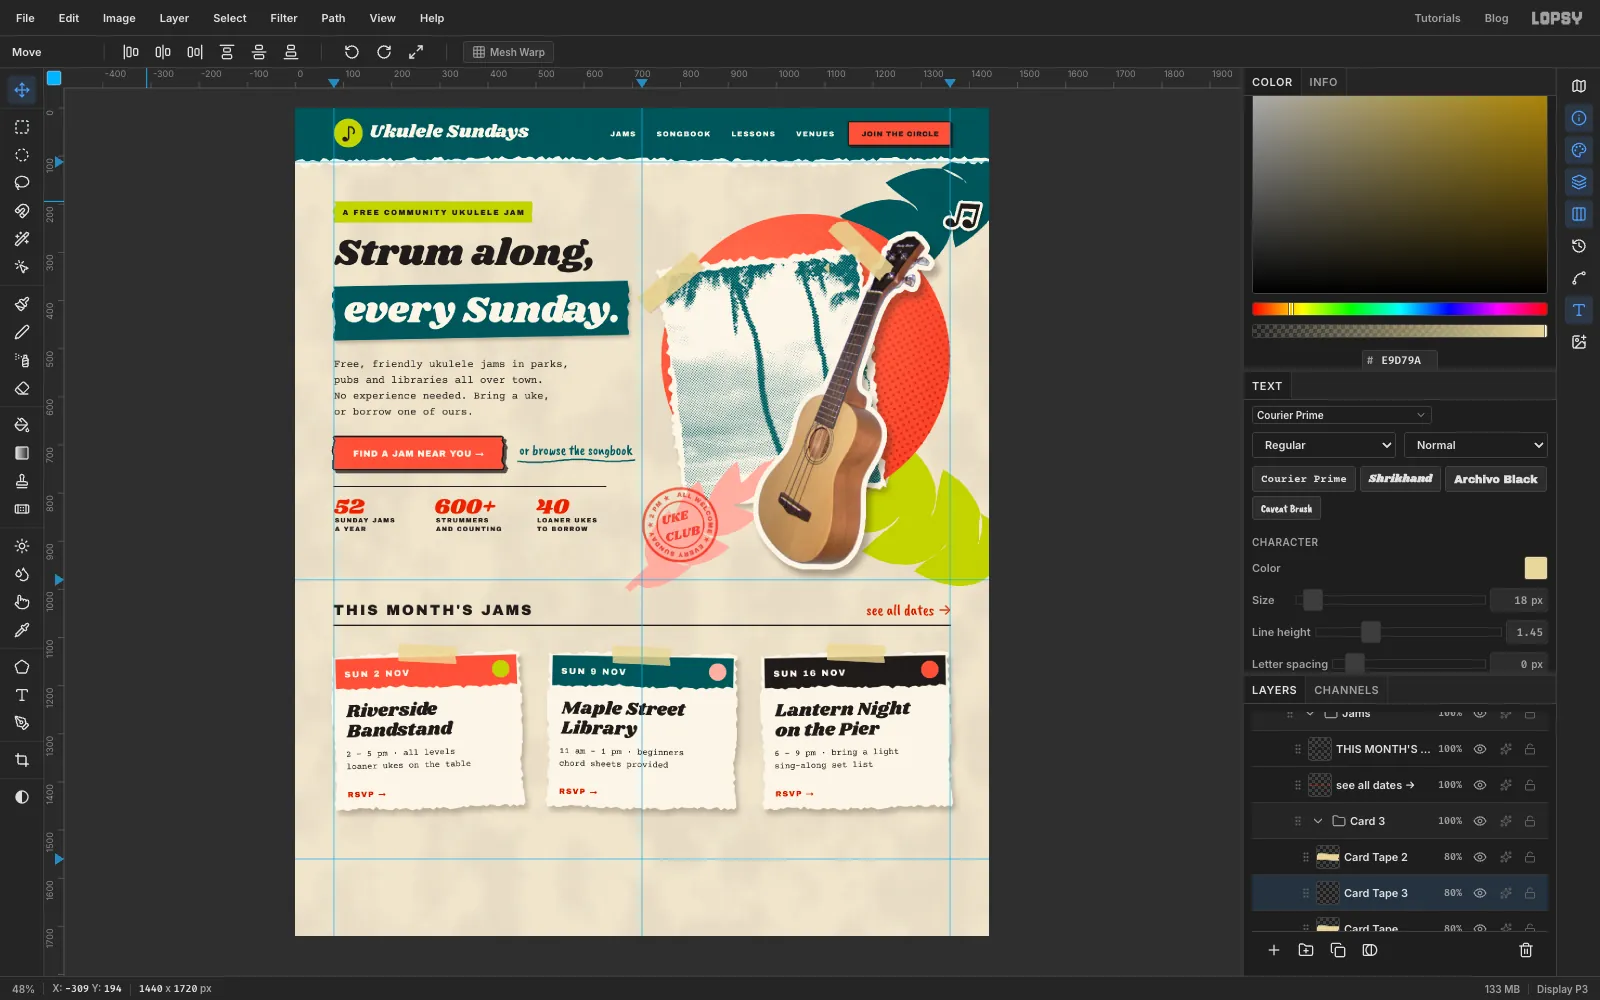
Card 3group row and click Add Layer. The new layer goes inside the group, at the top. Name itCard Tape. All three strips will live together here, above every card. If you'd rather each card carried its own tape when you move it, add each strip inside its own card's group instead. - Lasso a 120 × 36 px strip across the top centre of the first card, half on the card and half above it, with ragged ends and a very slight tilt. Fill it with , deselect, and set the layer to
80%. - Click
Card Tape, Cmd-click its thumbnail, and press Cmd+C and Cmd+V. With the Move tool, drag the copy across onto the top of the second card, a few pixels lower than the first so the strips don't look stamped out. Use the arrow keys for the last few pixels. Set it to80%. - Do it once more for the third card.
- Click the
-
Tear the footer
- Collapse the groups, click
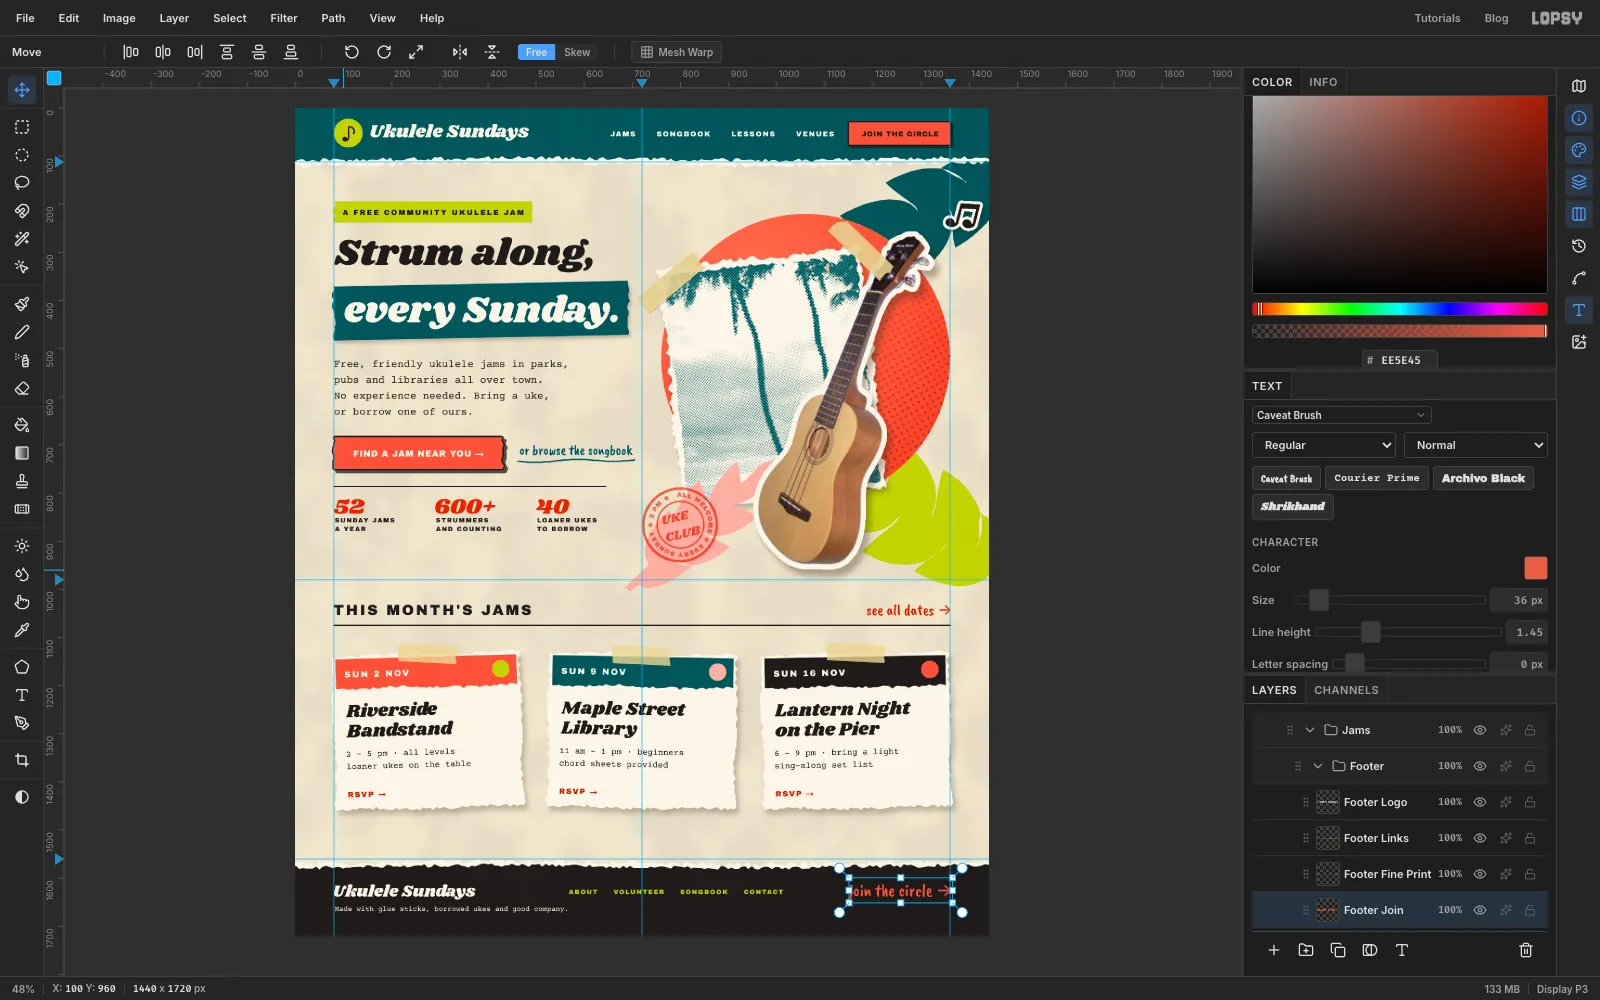
Jamsand add a group calledFooter. Inside it, addFooter TearandFooter Paperlayers, the same way as the nav. - On
Footer Tear, Lasso from below the bottom of the page up to a ragged top edge aroundy 1568, and fill it with . OnFooter Paper, draw the same shape with its ragged edge about 8 px lower and fill it with . - Click
Footer Paperbefore each piece of text:
Ukulele Sundaysin Shrikhand34, , atx 80, centred ony 1628ABOUT VOLUNTEER SONGBOOK CONTACTin Archivo Black13, , letter spacing2, centred onx 790at the same heightMade with glue sticks, borrowed ukes and good company.in Courier Prime15, , 14 px under the wordmarkjoin the circle →in Caveat Brush36, , ending at thex 1360guide. Bright coral is fine here, because it's on black.
- Collapse the groups, click
-
Finish with a print grain
- Open the
Navgroup, clickJOIN THE CIRCLEand add a layer calledPrint Grain. TheNavgroup sits above all the others, so the grain covers everything except the nav's own text above it. - Fill it with , choose Filter → Add Noise… with Amount
12, Mono and Gaussian, set it to Overlay at22%. - Choose View → Show Guides to hide the guides and look at the page as a whole.
One shared grain makes the separate photos, papers and inks look like they were printed together. Export it with File → Quick Export PNG, and save the project with File → Save Project so you can come back and change the dates next month.
- Open the