Design a Technical Illustration Website Landing Page
Mock up a dark landing page in Lopsy with a hatched cutaway of a camera lens, glass built from circle selections, a traced ray path, callouts and UI cards.
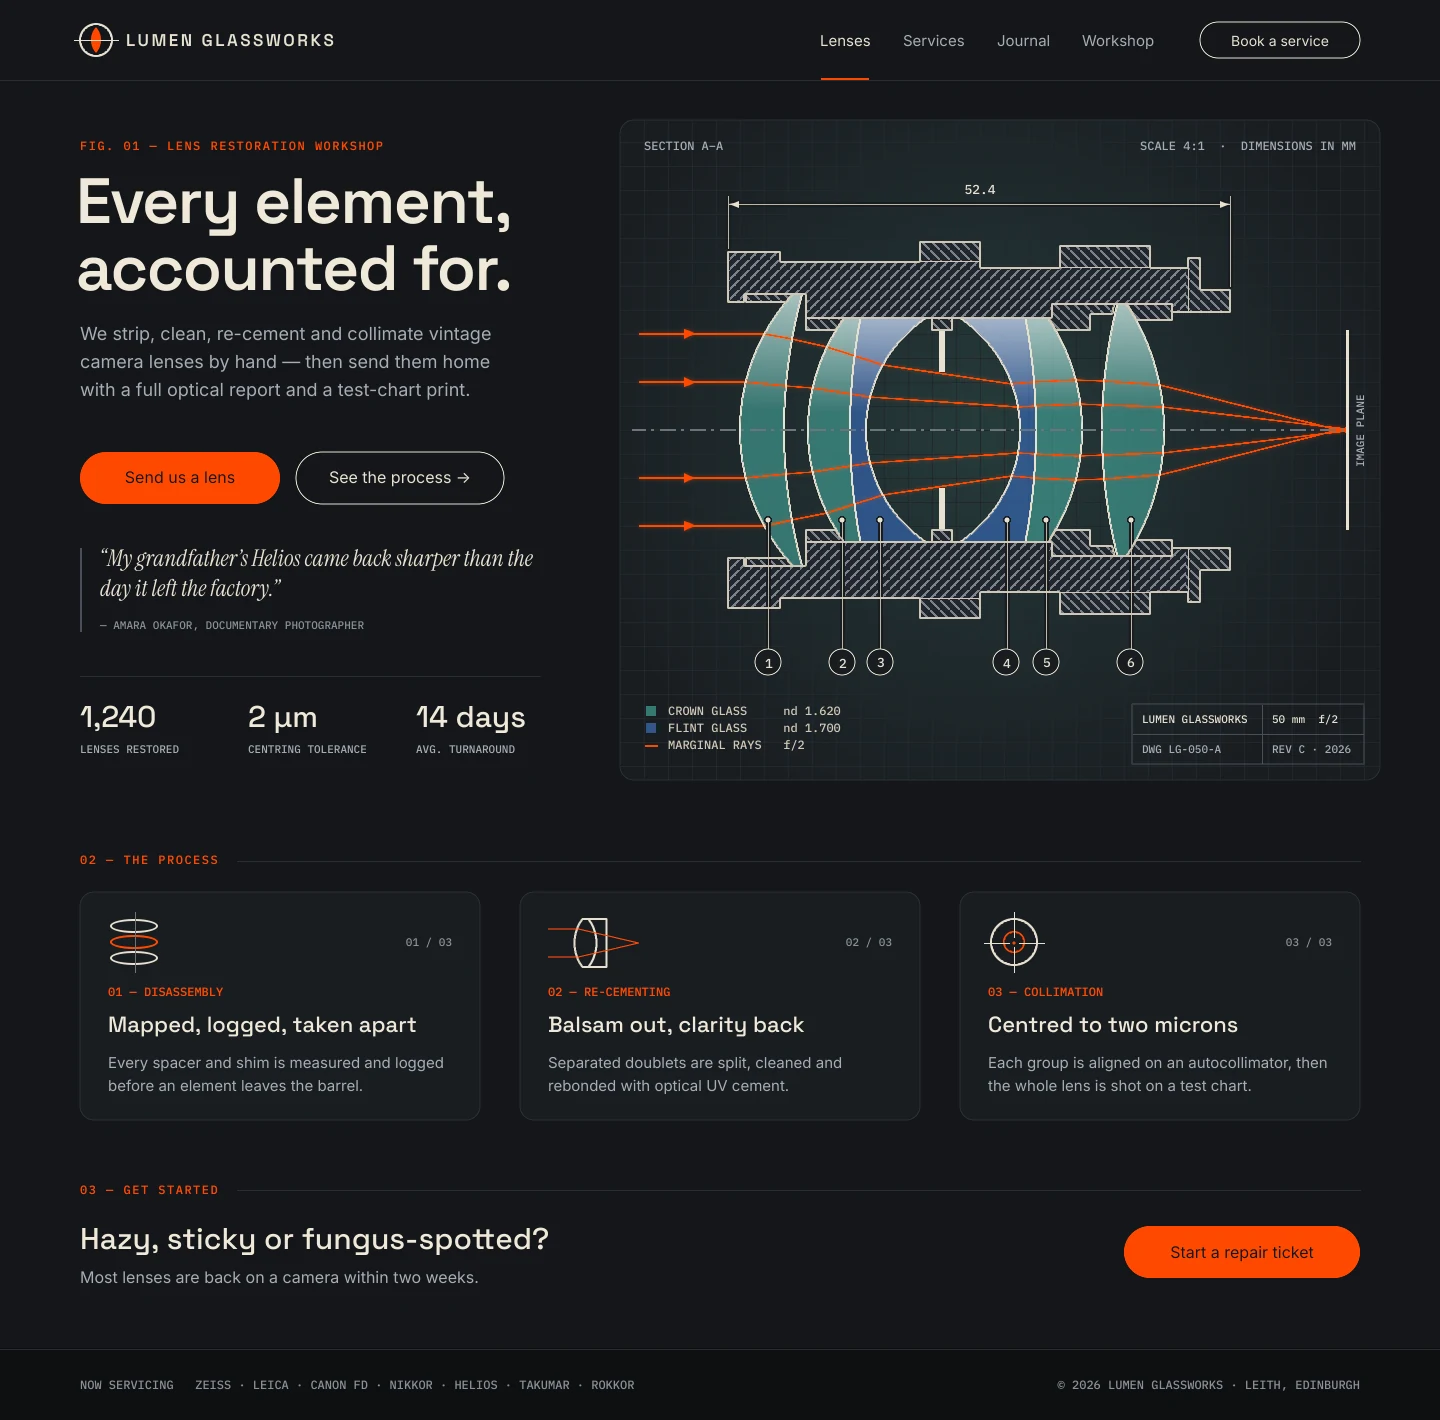
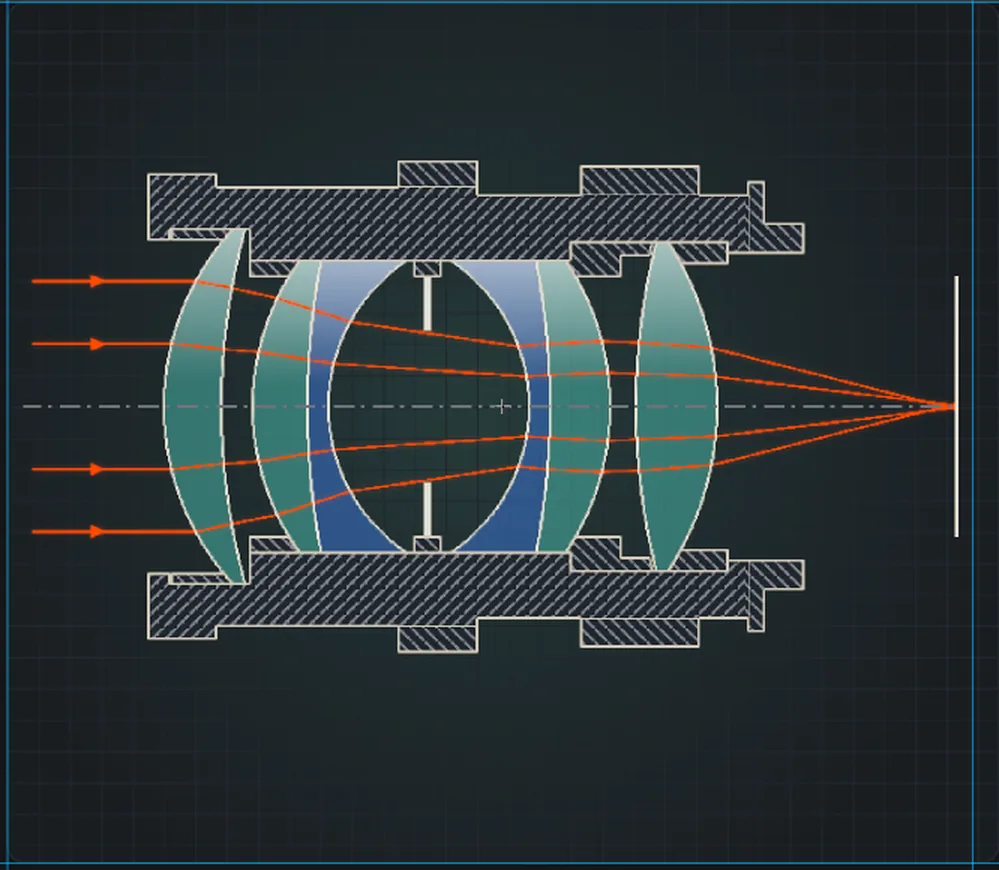
Technical illustration makes a great hero for a website. One honest cutaway drawing tells visitors you know how the thing works. This tutorial mocks up a desktop landing page for Lumen Glassworks, an invented workshop that restores vintage camera lenses. The hero is a cross-section of a classic double-Gauss lens, the six-element design inside most 50 mm lenses. It has a hatched metal barrel, glass elements, a ray trace and drafting-style callouts, next to the headline, buttons and stats you'd find on a real page.
The fun part is the glass. Every lens surface is a slice of a sphere, so in a section drawing each surface is an arc of a circle. Each element is built from exactly that: a rectangle intersected with one circle and trimmed by another.
Along the way you'll use:
- the Elliptical and Rectangular Marquee with Shift+Alt to intersect and Alt to subtract
- Define Pattern and Fill with Pattern for section hatching, an engineering grid and a dash-dot centre line
- a radial gradient, dithered with Add Noise
- Grow and Shrink to outline parts
- the Outer Glow and Stroke effects
- the Shape tool for the panel, pill buttons and cards
- live text in Space Grotesk, Inter, IBM Plex Mono and Instrument Serif italic
- Rotate 90°, scaling, Duplicate Layer, group nudging and Canvas Size
The palette is near-black with warm off-white ink, glass in teal and blue, and one safety orange:
-
Background
-
panel
-
panel glow
-
footer
-
Ink
-
headline
-
outlines
-
leaders
-
Grey text
-
rules
-
Hatch lines
-
section fill
-
grid
-
Crown glass
-
flint glass
-
Accent orange
-
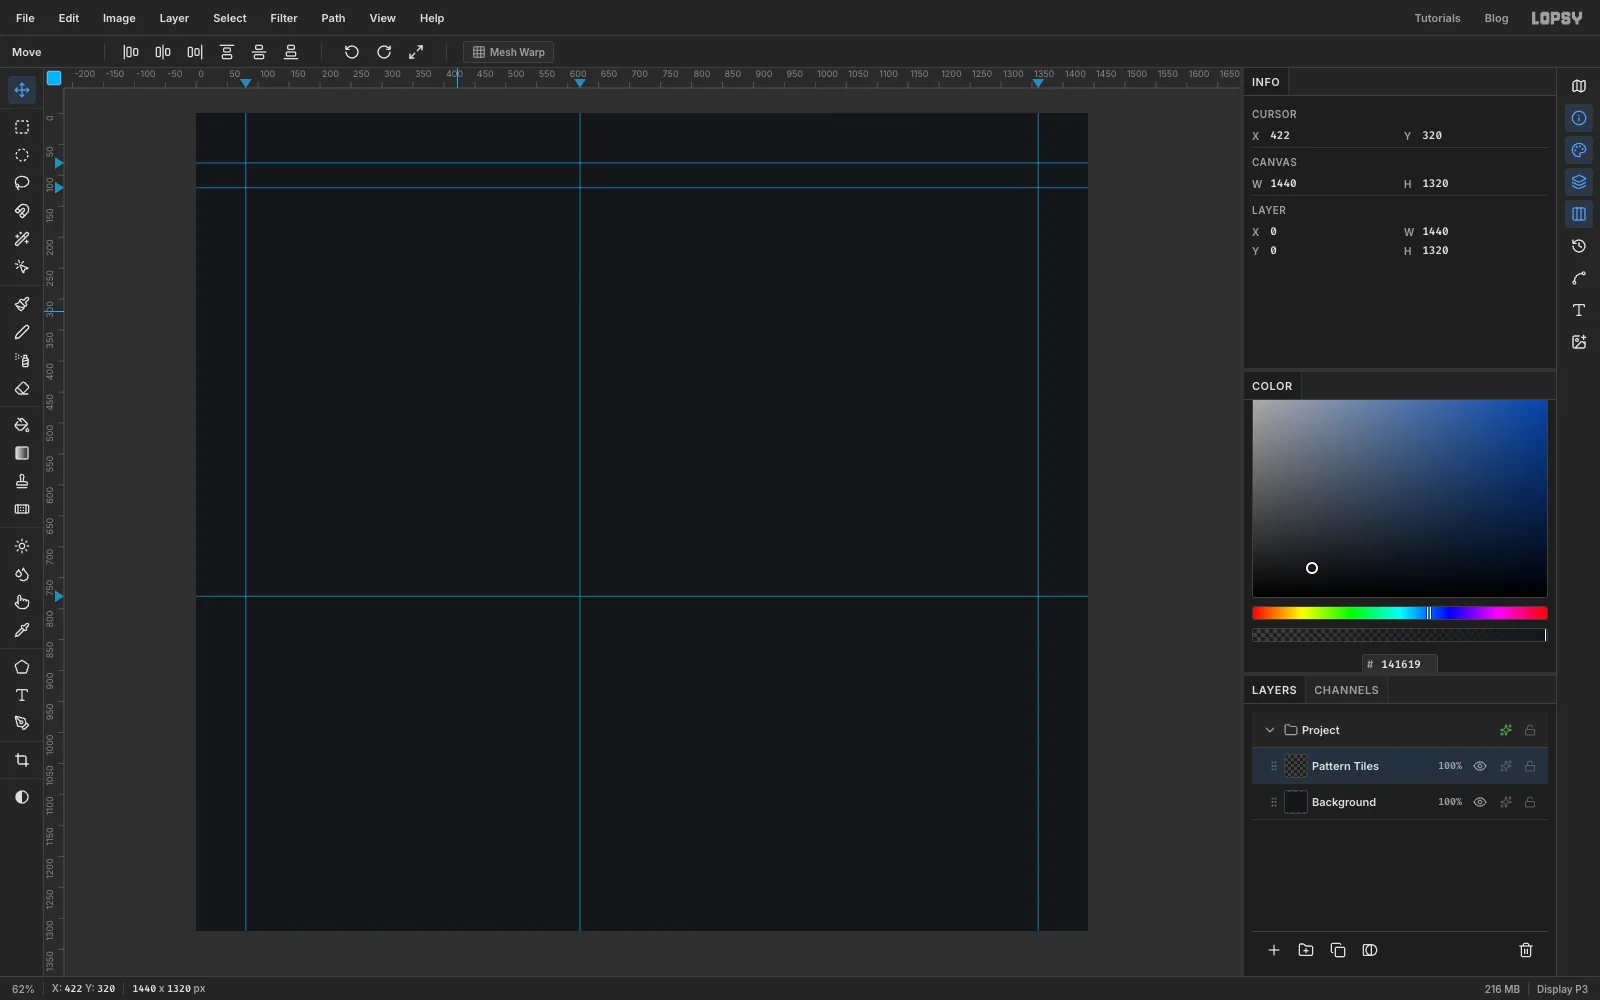
Set up the page and guides
Open Lopsy. In the New Document dialog, set Width to
1440and Height to1320, a common desktop frame. Click Create.- Select Background, set the foreground colour to and choose Edit → Fill. With nothing selected, it fills the whole layer.
- Double-click Layer 1 and rename it
Pattern Tiles. You'll use it as a scratch area in the next step. - Click the top ruler at
80and1360for the page margins, and at620where the drawing panel starts. - Click the left ruler at
80(the bottom of the nav bar), then at120and780(the top and bottom of the hero). - Turn off View → Snap to Guides. Many of the small marquees you'll draw sit a few pixels from a guide, and snapping would pull them onto it.
-
Draw four pattern tiles
Patterns do the tedious drafting work. Zoom into an empty corner of
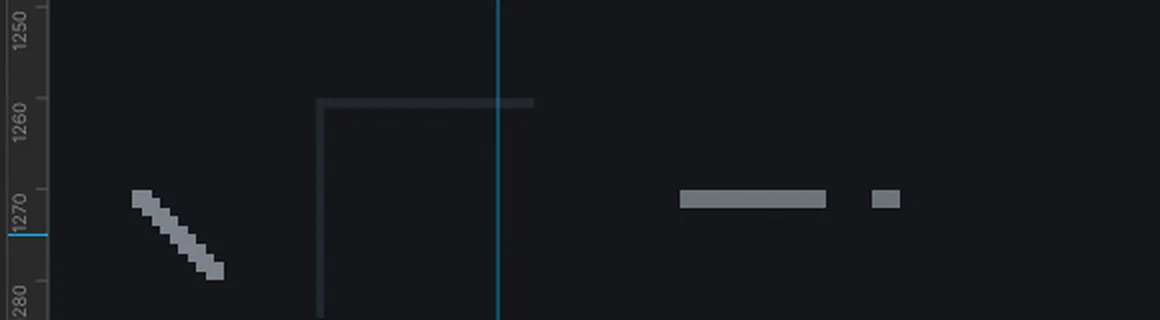
Pattern Tiles.- Forward hatch. Draw a 10 × 10 px rectangular marquee. Pick the Pencil at Size
2and colour . Click just outside the box's bottom-left corner, then Shift-click just outside its top-right corner. The selection clips the line into a clean diagonal. Choose Edit → Define Pattern. With a selection active, only the selected pixels become the tile. - Back hatch. Do the same in a second 10 × 10 box, this time running from the top-left corner to the bottom-right.
- Grid. In a 24 × 24 box, fill a 1 px strip along the top and another down the left side with . Then select the whole 24 × 24 box and define it.
- Dash-dot. In a 30 × 2 box, fill a 16 px dash, leave a 5 px gap, fill a 3 px dot and leave the last 6 px empty. Define the whole box, empty end included, so the gaps repeat.
The Pattern Fill dialog now lists Patterns 1 to 4 in that order.
- Forward hatch. Draw a 10 × 10 px rectangular marquee. Pick the Pencil at Size
-
Draw the drawing panel and its glow
- Select
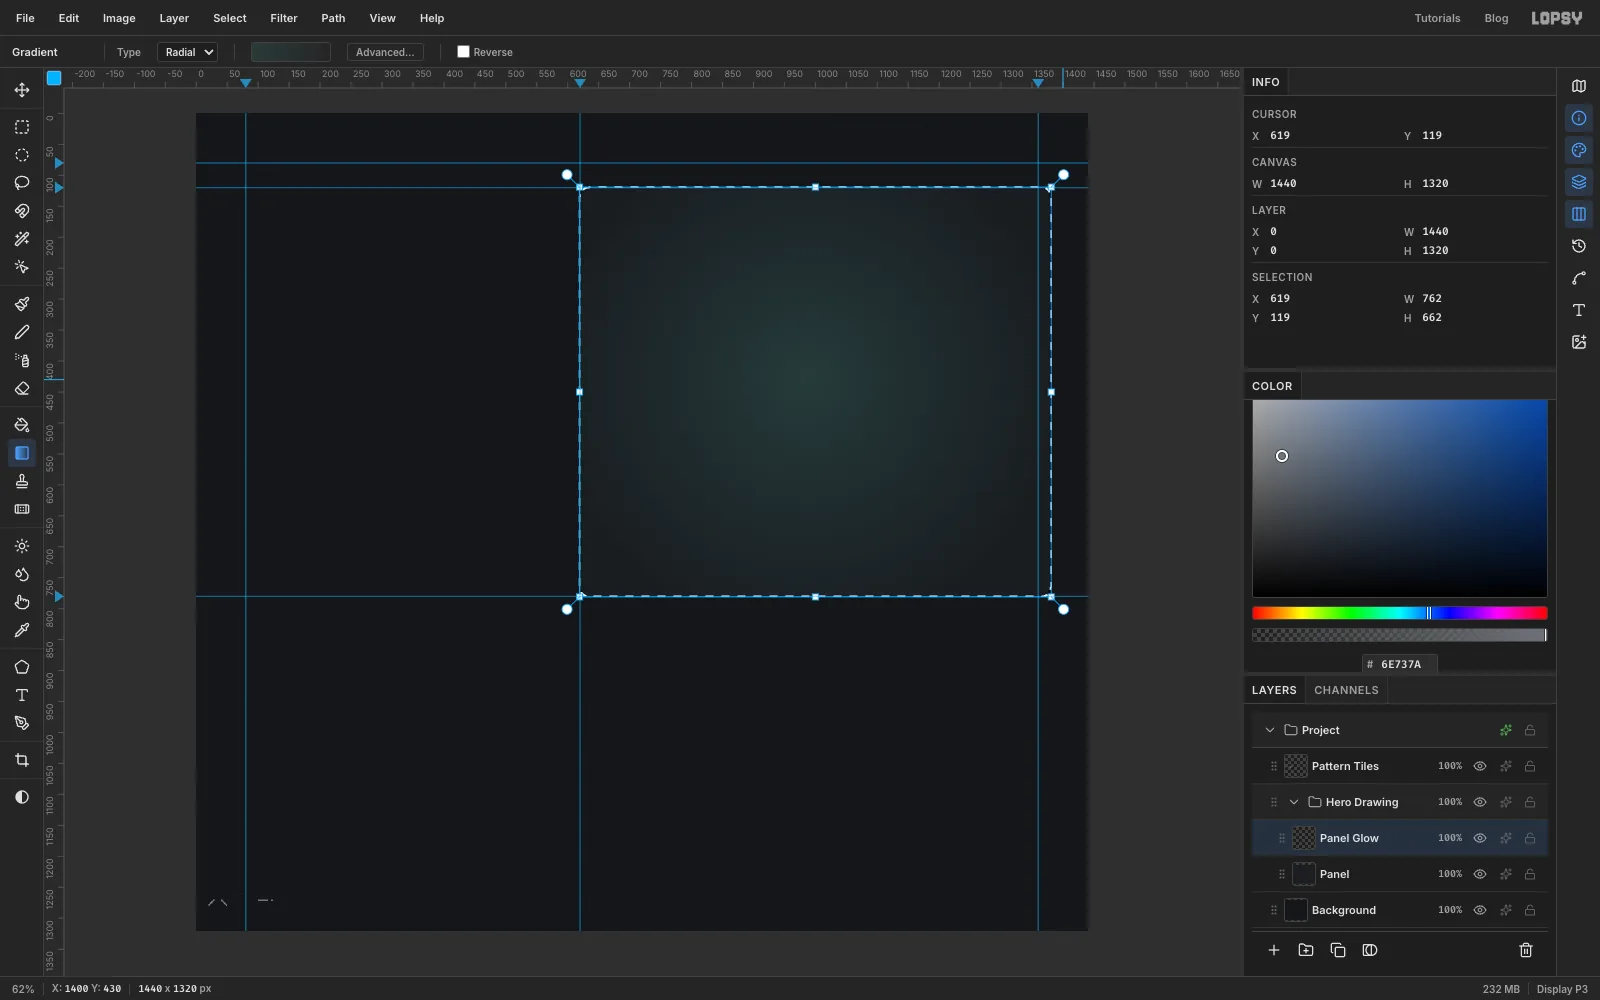
Backgroundand click New Group in the Layers panel. Name itHero Drawing, then click Add Layer and name the new layerPanel. - Pick the Shape tool and set Shape to Rectangle, Corner Radius to
14, Fill to , and add a Stroke of at Width1. - Shapes grow from where you press. Press at the panel's centre, (1000, 450), and drag to its bottom-right corner, (1380, 780). The panel bleeds 20 px past the right margin guide, and everything inside it stays within the guide.
- Add a layer named
Panel Glowand Cmd-click thePanelthumbnail to select its shape. - Pick the Gradient tool and set it to Radial. Click Advanced…, then set both stops to with the right-hand stop at
0opacity. Drag from the middle of the lens area, about (985, 430), out past the panel's right edge.
The glow stops the panel looking flat and pulls the eye to the drawing.
- Select
-
Dither the glow with noise
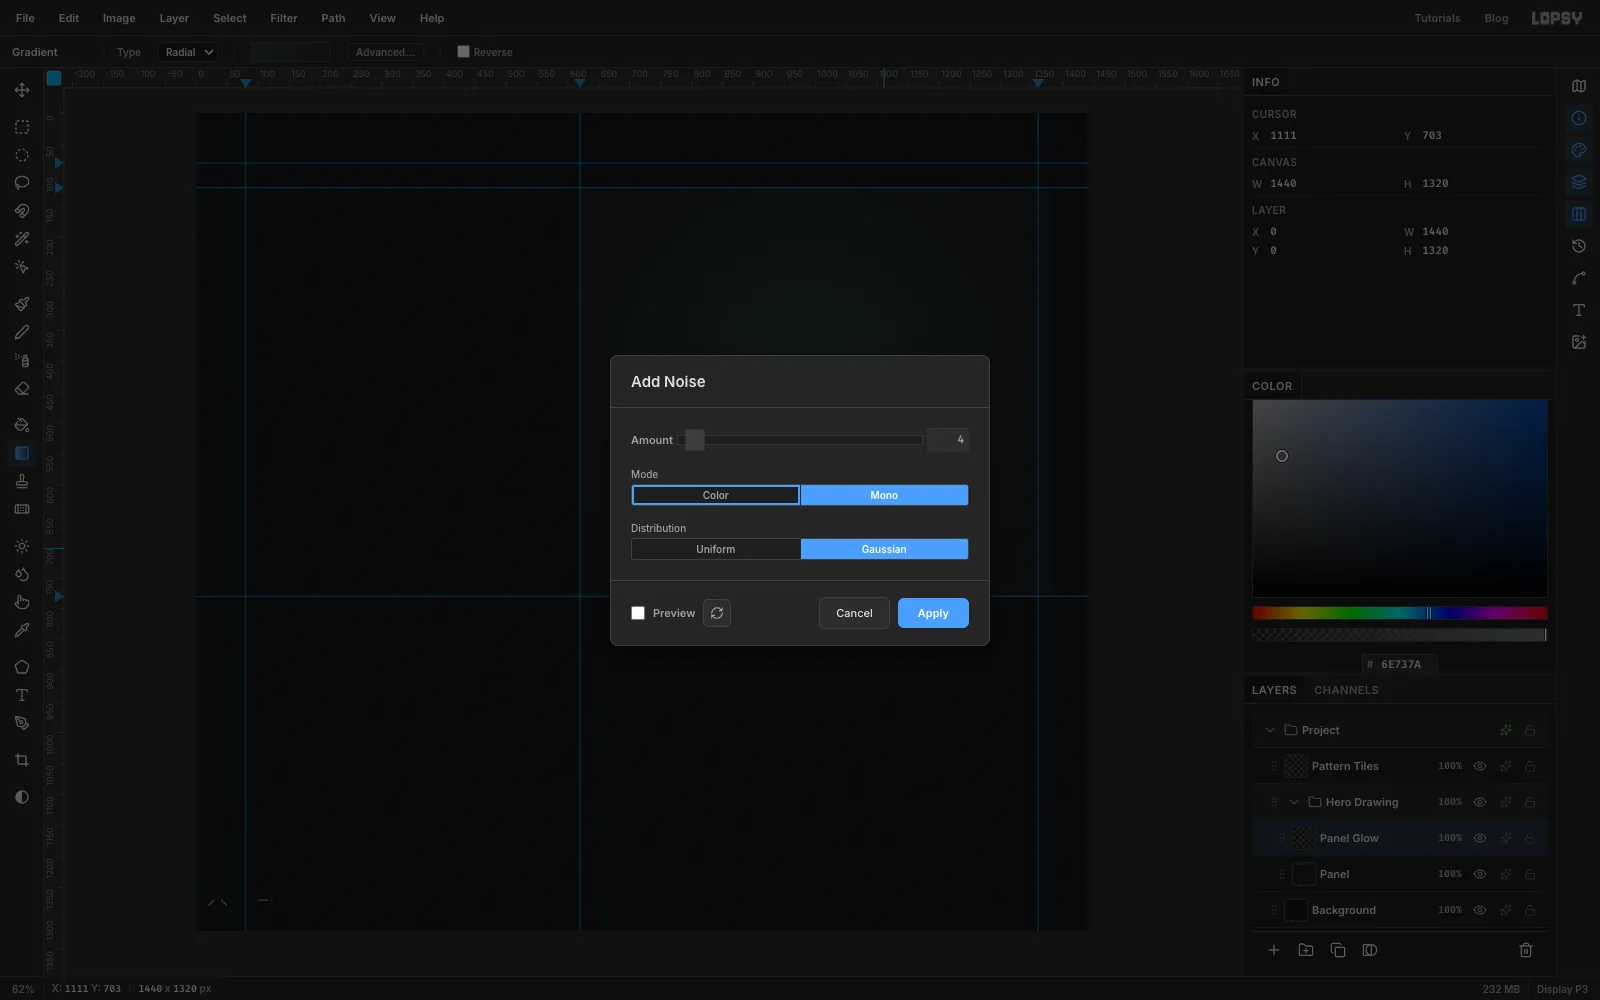
A dark, slow gradient can show as visible rings on some screens. A pinch of noise breaks them up.
- With
Panel Glowselected, choose Filter → Add Noise…. - Set Amount to
4, click Mono and Gaussian, and click Apply.
The grain is too fine to read as texture. You'll just notice that the rings are gone.
- With
-
Fill an engineering grid
The lens will sit on a horizontal optical axis at y
430, with its front at x740. The grid should line up with both.- Add a layer named
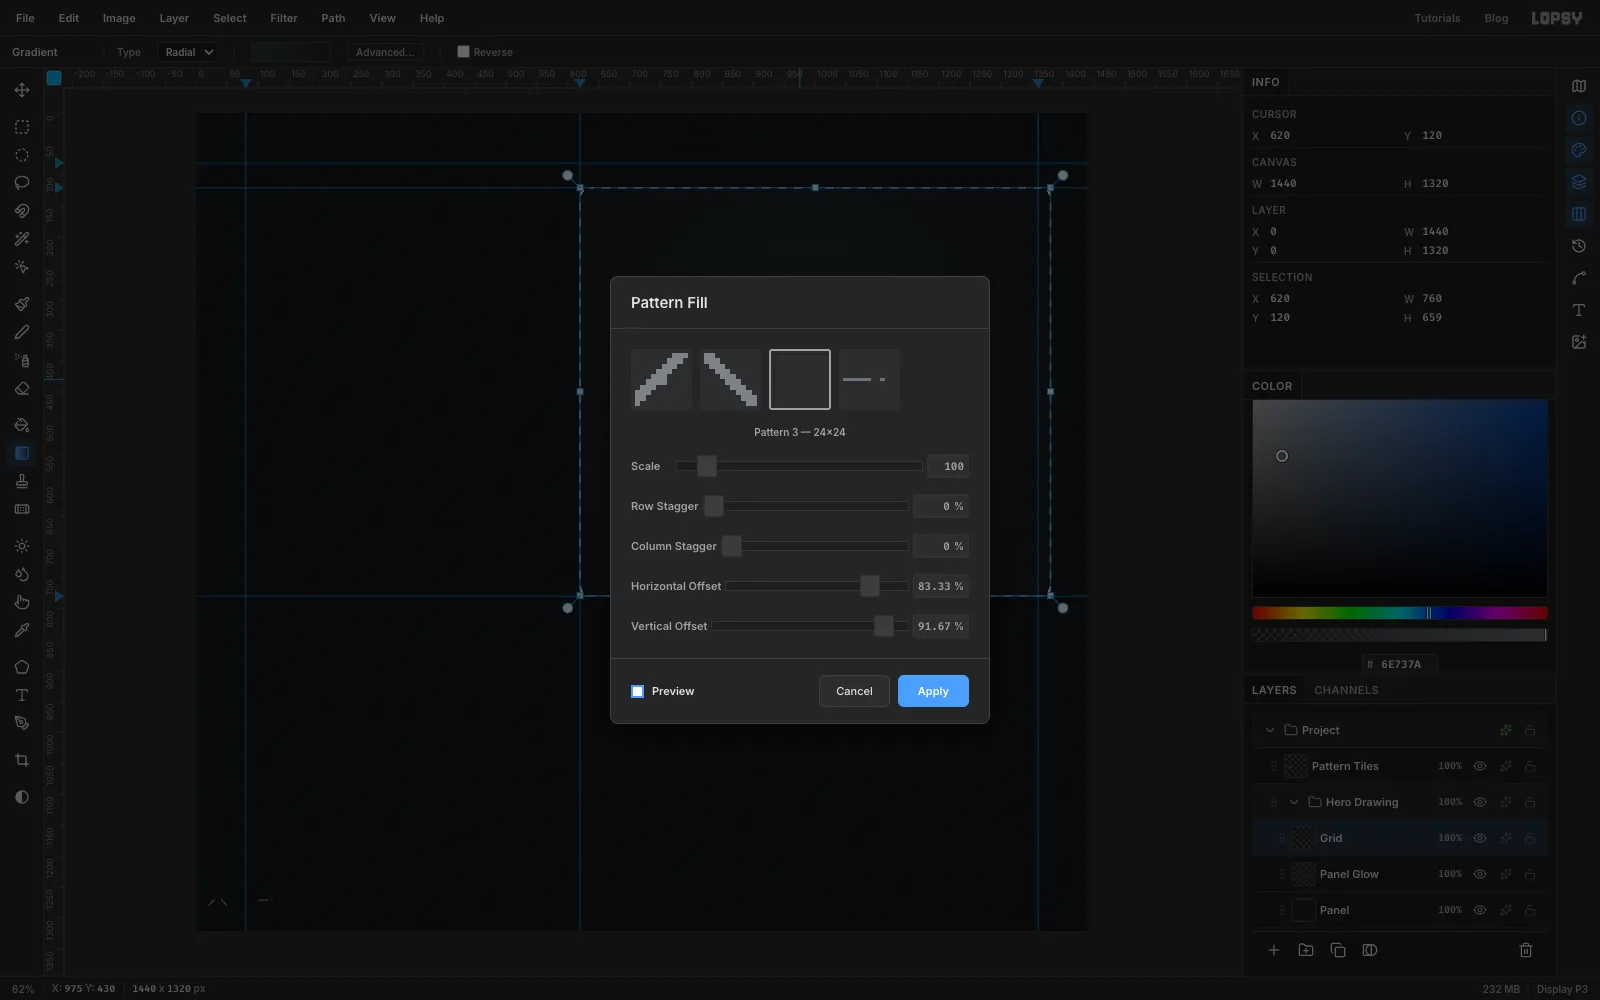
Grid. Cmd-click thePanelthumbnail, then choose Select → Shrink… by1px so the grid stays inside the border. - Choose Edit → Fill with Pattern… and pick the 24 × 24 grid tile.
- Set Horizontal Offset to
83.33%and Vertical Offset to91.67%. Those are 20 px and 22 px of the 24 px tile, the amounts that put grid lines on x 740 and y 430. Click Apply and deselect.
- Add a layer named
-
Lasso the barrel in section
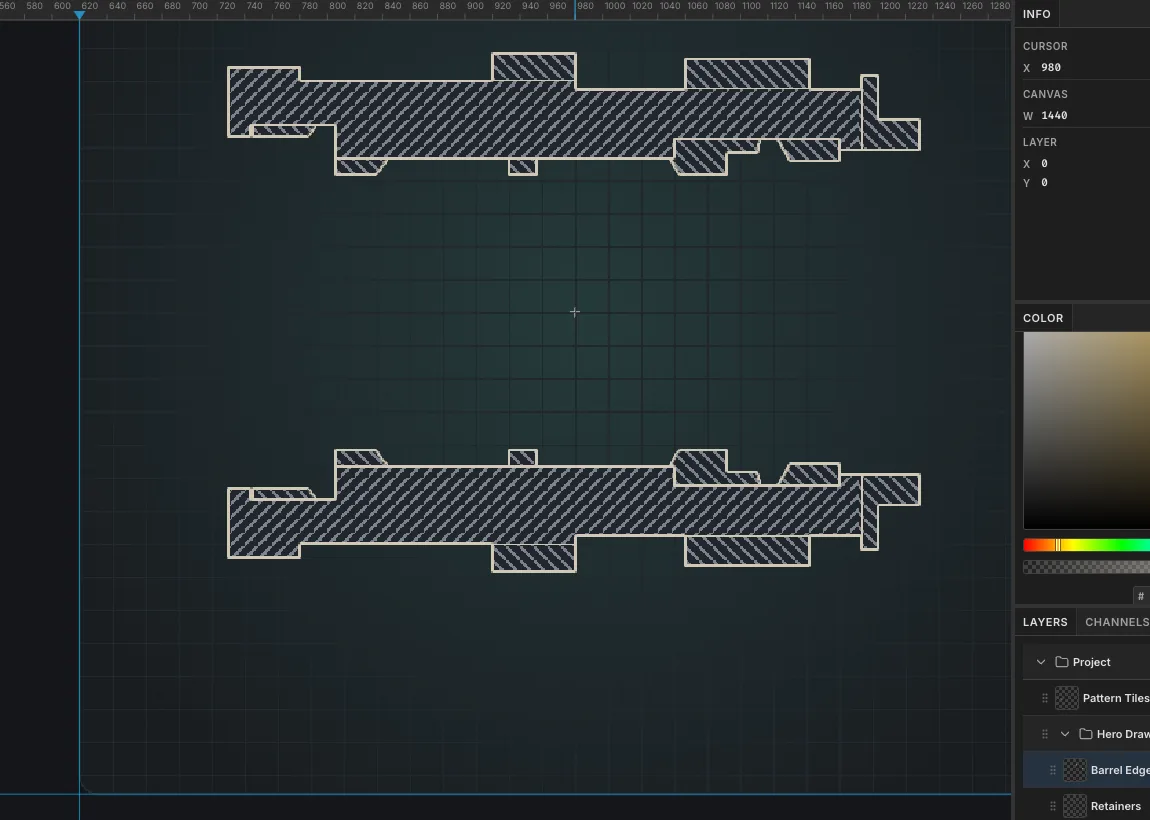
A section view slices the lens down its axis, so the metal barrel shows twice: once above the axis and once mirrored below it.
- Add a layer named
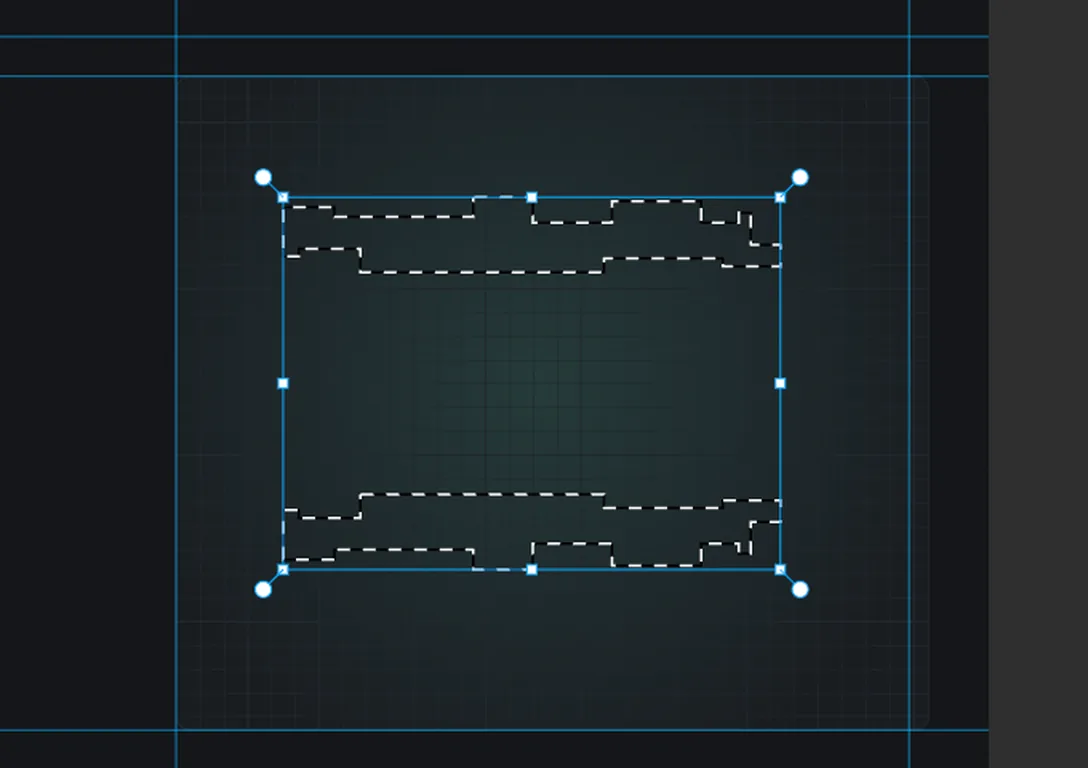
Barrel Section. - Pick the Lasso and drag around the top wall, corner to corner. From left to right it has:
- a front name ring
- a long tube whose inner wall steps down where the middle glass sits
- a raised aperture ring, which sets the f-number
- a wider focus ring
- a stepped bayonet, the mount that locks into the camera
- Hold Shift and lasso the same shape mirrored below the axis. Every y becomes 860 − y.
- Add a layer named
-
Hatch the parts in opposite directions
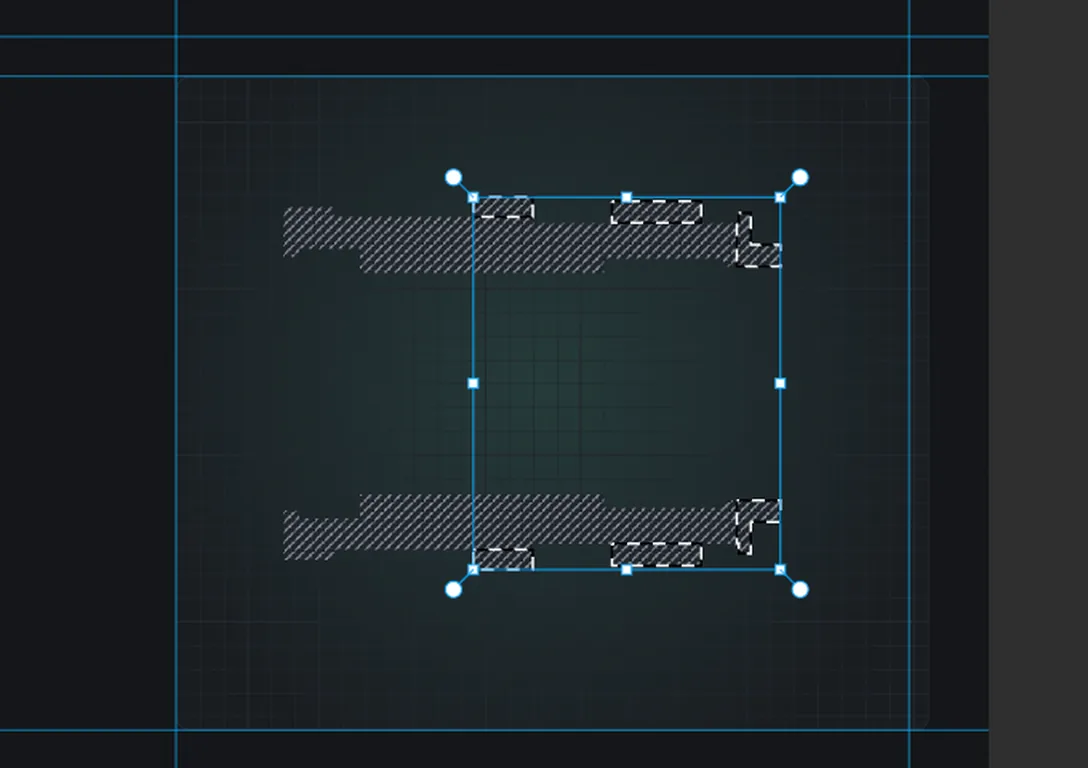
- Fill the selection with (Edit → Fill). Then choose Edit → Fill with Pattern…, pick the forward hatch and click Apply. Deselect.
- In a section drawing, separate parts are hatched in opposite directions, so the rings mustn't read as one casting with the tube.
- Cmd-click the
Barrel Sectionthumbnail. - Shift+Alt-drag a rectangle over the bayonet, from (1186, 200) to (1250, 660). That intersects the selection down to just the mount.
- Shift-drag a rectangle over each raised ring to add it: (920, 242)–(980, 262) and (1060, 246)–(1150, 268), plus their mirrors (920, 598)–(980, 618) and (1060, 592)–(1150, 614).
- Fill with again, then Fill with Pattern using the back hatch. The solid fill covers the old hatch first.
-
Add the retaining rings
Glass doesn't float. Each element is clamped by a threaded retaining ring or rests against a spacer. Without them the drawing looks wrong to anyone who has opened a lens.
- Add a layer named
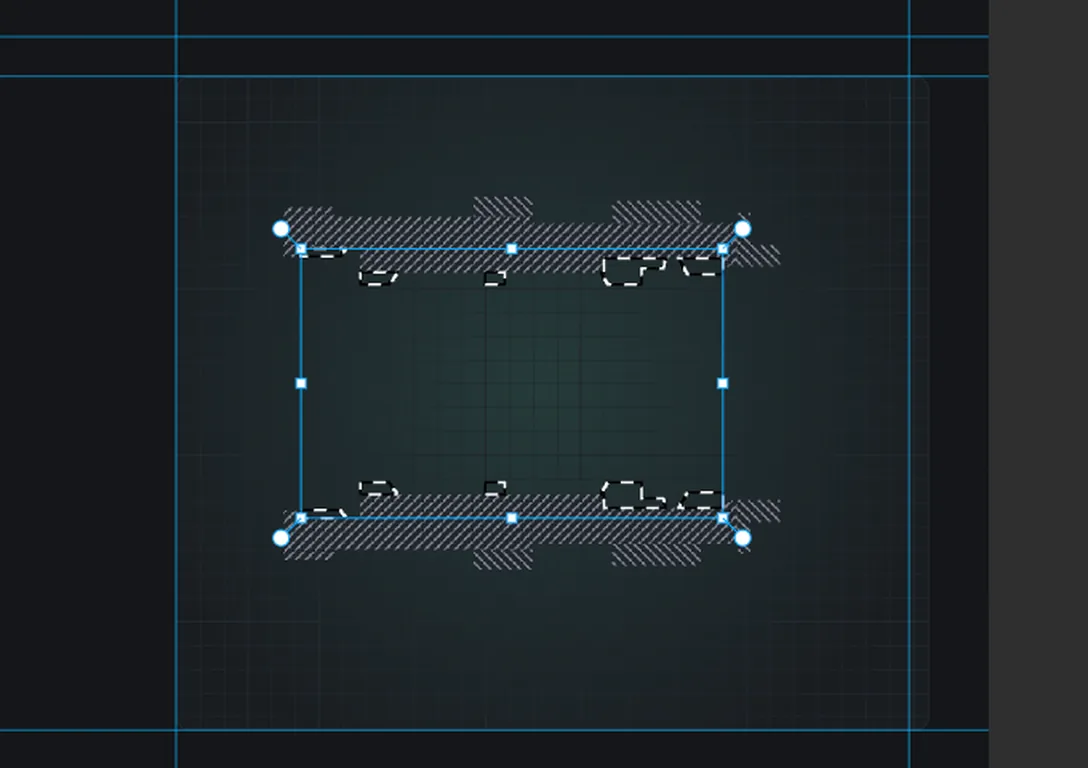
Retainers. - Lasso these five rings above the axis, then Shift-lasso each one's mirror below it:
- front ring: (746, 294), (791, 294), (791, 295), (785, 302), (746, 302)
- ring ahead of the first pair: (806, 318), (843, 318), (835, 330), (806, 330)
- stop ring, which will hold the iris: a box from (932, 318) to (952, 330)
- spacer between the rear pair and the last element: (1052, 304), (1114, 304), (1112, 314), (1090, 314), (1090, 330), (1056, 330), (1049, 318), (1052, 318)
- rear ring: (1127, 304), (1172, 304), (1172, 320), (1136, 320)
- Fill with , then with the back hatch, the same direction as the rings they belong with.
The slanted corners follow the curve of the glass that will sit against them.
- Add a layer named
-
Outline every part
- Add a layer named
Barrel Edgesand set the colour to . - Cmd-click the
Barrel Sectionthumbnail, choose Select → Grow… by1px and Edit → Fill. Then choose Select → Shrink… by2px and press Delete. That leaves a 2 px line centred on the edge. - Repeat with the
Retainersthumbnail. - For the seams between the tube and its rings, select each ring's rectangle again, Fill, Shrink by
1and Delete. Use the Pencil at Size1to Shift-click a short vertical line where the bayonet meets the tube, at x 1188.
- Add a layer named
-
Build a lens element from circles
Zoom out to about 50%, or further, so the big circles fit on screen. They hang off the canvas, which is fine.
- Select
Retainersand add three layers:Glass, thenGlass Shineabove it andGlass Edgesabove that. They sit underBarrel Edges, so the barrel outlines stay on top. - For the Shine gradient, set the Gradient tool to Linear, click Advanced…, and set both stops to white, the left at
55%opacity and the right at0%. - Build the first element on
Glass:
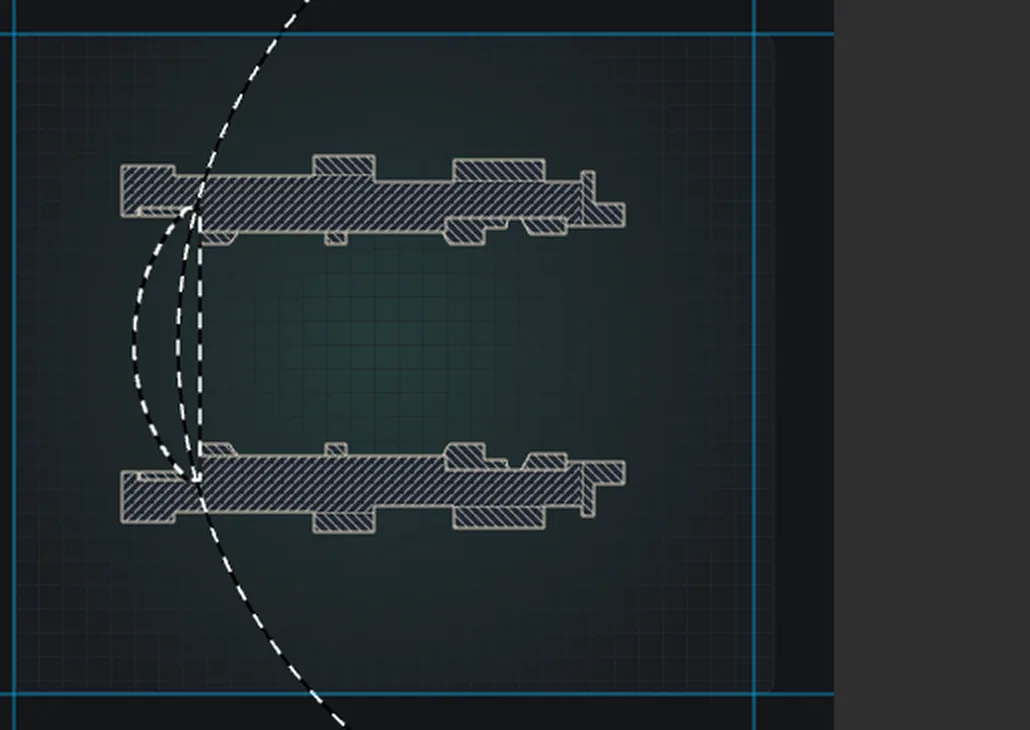
- Height: with the Rectangular Marquee, drag from (736, 294) to (806, 566).
- Front surface: a circle centred on (940, 430) with a radius of
200. With the Elliptical Marquee, hold Shift+Alt and drag its bounding box, from (740, 230) to (1140, 630). Only the overlap stays selected. - Back surface: a circle centred on (1304, 430) with a radius of
520. Hold Alt and drag from (784, −90) to (1824, 950) to cut away everything behind it.
- Fill it with .
- Select
Glass Shineand drag the gradient from the element's top edge down to just above the axis. - Select
Glass Edges, Grow by1, fill with , Shrink by2and press Delete.
- Select
-
Build the other five elements
Repeat the recipe from the last step for each element. Shift+Alt keeps the inside of a circle and Alt removes it. The two halves of each cemented pair share one circle, so they fit together with no gap. Boxes run from y 318 to y 542 unless noted, and every circle is centred on the axis at y 430.
- Element 2 (crown): box x 804–865. Keep inside a circle at x 998, radius 190. Remove inside one at x 1450, radius 600.
- Element 3 (flint): box x 846–930. Keep inside x 1450, radius 600. Remove inside x 1001, radius 135.
- Element 4 (flint): box x 956–1040. Remove inside x 885, radius 135. Keep inside x 436, radius 600.
- Element 5 (crown): box x 1021–1086. Remove inside x 436, radius 600. Keep inside x 882, radius 200.
- Element 6 (crown): box x 1098–1168, from y 304 to y 556. Keep inside x 1622, radius 520, and inside x 934, radius 230.
To draw a circle, drag from (centre − radius, 430 − radius) to (centre + radius, 430 + radius). Crown glass gets , and the denser flint glass gets the bluer . Give each element its shine and edge before you start the next one, while its selection is still live.
When all six are done, set the
Glasslayer's opacity to 45% so the grid shows through.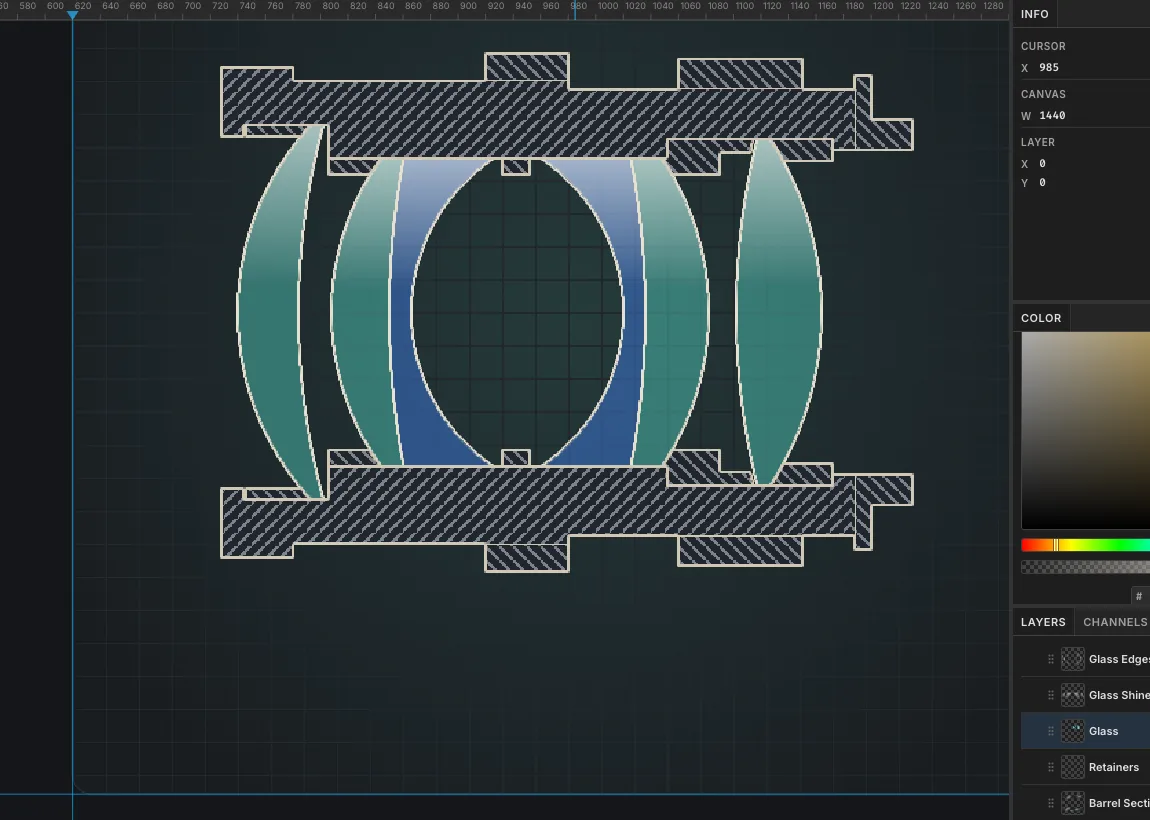
-
Add the iris and trace the rays
- Select
Glass Edgesand add a layer namedIris. With the Rectangular Marquee, select x 939–945 from y 330 to y 372, Shift-add x 939–945 from y 488 to y 530, and fill both with . The gap between them is the aperture. - Select
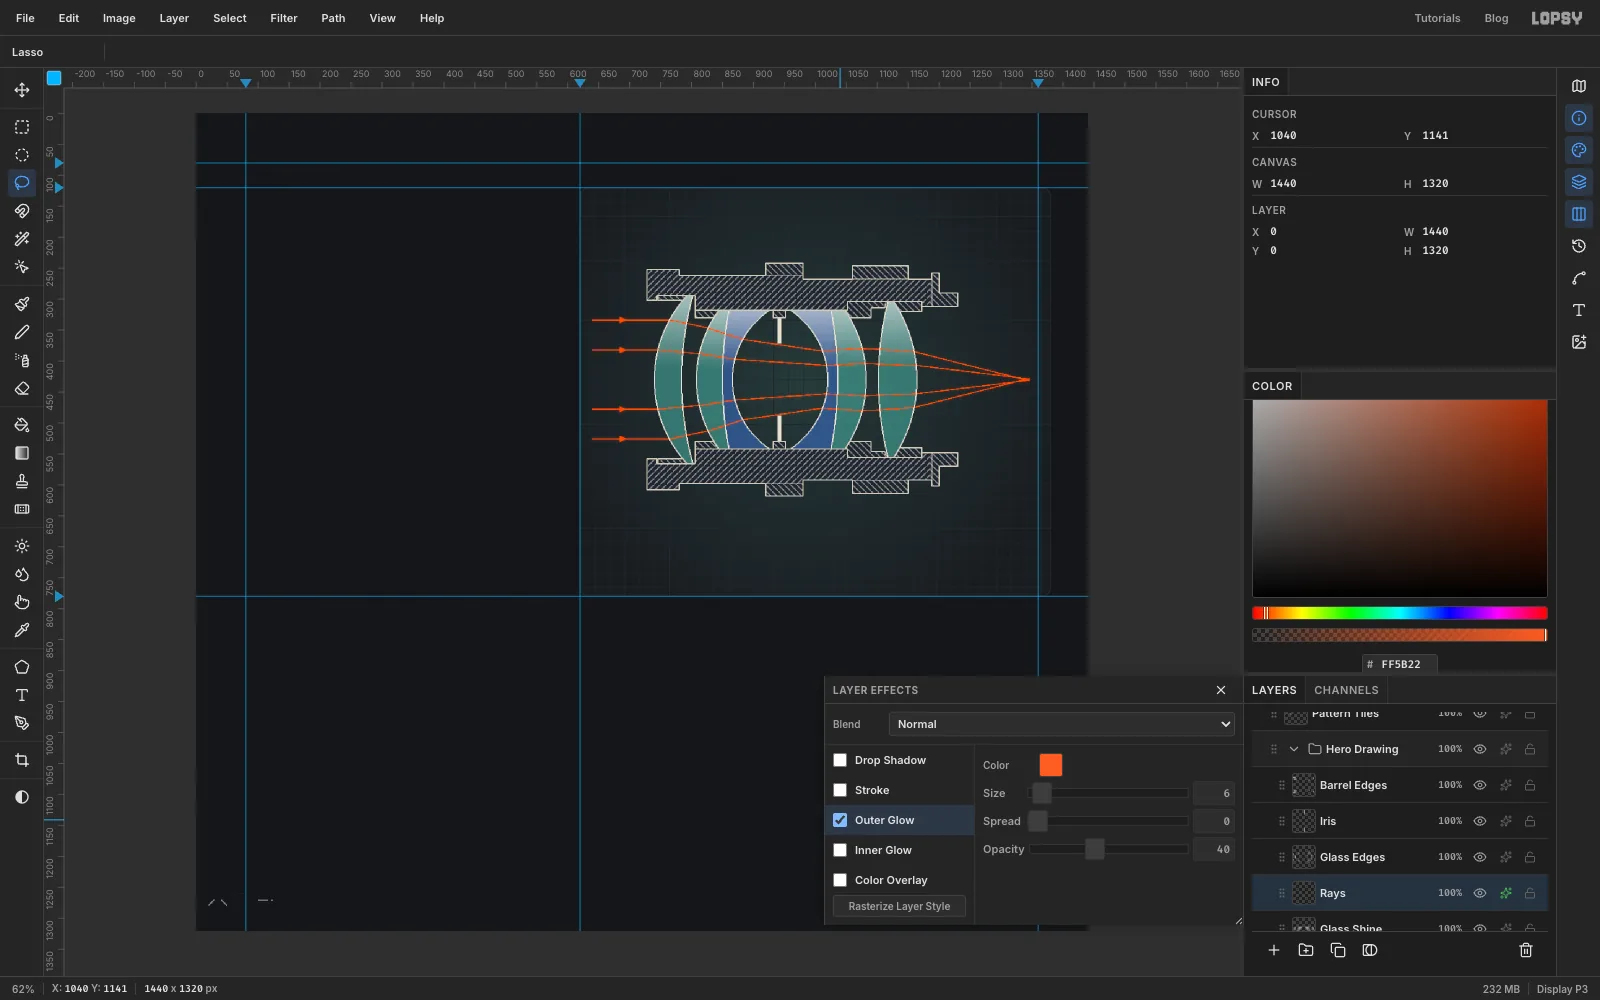
Glass Shineand add a layer namedRays. Pick the Brush at Size2, Hardness100, colour . - Draw four rays that enter parallel to the axis at y 334, 382, 478 and 526. For each one, click at the panel's left edge, Shift-click where it meets each glass surface, and finish at the focus point on the axis, (1346, 430).
The top ray bends at (764, 334), (792, 340), (827, 347), (855, 356), (883, 365), (1012, 384), (1034, 382), (1076, 380), (1104, 381) and (1160, 385). The bottom ray mirrors it. Converging (positive) elements bend a ray toward the axis and the blue diverging ones bend it slightly away, so the path wobbles before it closes on the focus. The outermost rays should just graze the iris.
- Lasso a small arrowhead on each incoming ray around x 690, Shift-adding each one, and fill.
- Click the fx button on the
Raysrow and turn on Outer Glow: colour , Size6, Spread0, Opacity40.
- Select
-
Add the centre line and image plane
- Select
Glass Edgesand add a layer namedAxis. Select a 2 px tall strip from (632, 429) to (1349, 431), choose Edit → Fill with Pattern… and pick the dash-dot tile. In drafting, a dash-dot line marks a centre line. - Add a layer named
Image Planeand fill a 3 px wide bar from (1346, 330) to (1349, 530). That's where the film or sensor sits.
- Select
-
Draw leaders with a dark halo
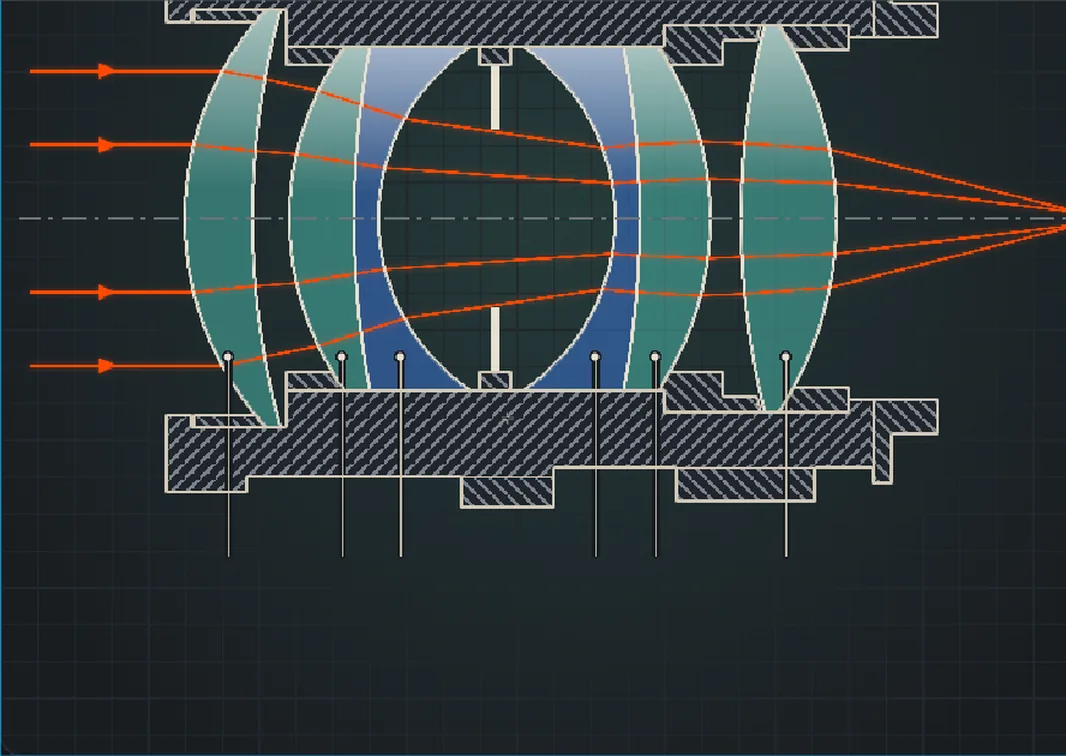
Leaders are the thin lines that connect a part to its number.
- Add a layer named
Leaders. Use the Pencil at Size1in . - Pick a point inside each element at y 520, at x
768,842,880,1006,1046and1130. Click there, then Shift-click straight below at y 649. - Brush a
6px dot of at the top of each leader. Drafters use a dot when a leader points at a surface, and an arrow when it points at an edge. - Turn on the Stroke effect for
Leaders: colour , Outside, Width2. The thin dark halo keeps each leader readable where it crosses the hatching.
- Add a layer named
-
Number the balloons
- Add a layer named
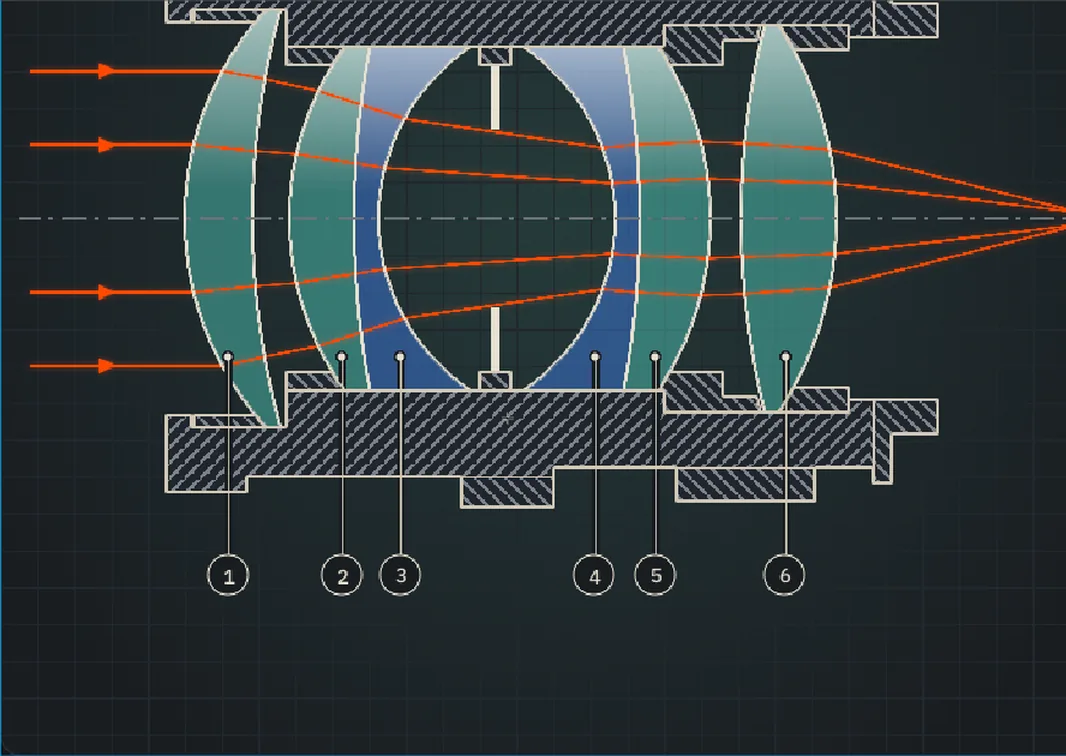
Balloons. Pick the Shape tool, set it to Ellipse, and set Fill to and Stroke to at width1. - For each leader, press at (x, 662) and drag to (x + 13, 675). That gives identical 26 px circles centred 13 px below each leader's end, and their dark fill hides the end of the line.
- Add an empty layer named
Type AnchoraboveBalloons. - Select
Type Anchor, pick the Text tool, and set IBM Plex Mono Medium, size13, Align center, colour . For each balloon, click 8 px above its centre and type its number. Point text hangs from the click point, so that puts the digit in the middle of the circle.
Balloons 2–3 and 4–5 sit in pairs, matching the two cemented doublets.
- Add a layer named
-
Add the dimension, legend and title block
- Dimension. On
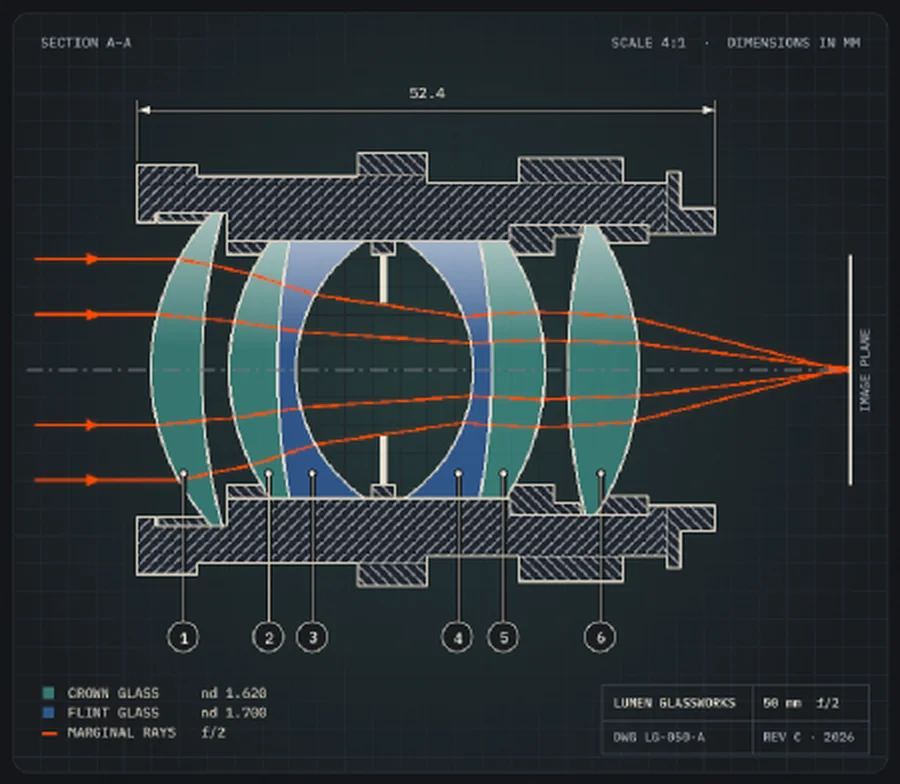
Leaders, Shift-click two extension lines up from the barrel's front and back ends: x 728 from y 248 to y 196, and x 1230 from y 286 to y 196. Draw a dimension line between them at y 204 and lasso a small arrowhead at each end. Then, fromType Anchor, add52.4in Plex Mono 13, centred just above the line. - Captions. Add
SECTION A–Aat the panel's top left andSCALE 4:1 · DIMENSIONS IN MMright-aligned at the top right, both in Plex Mono 12, . - Legend. Add three lines in Plex Mono 12, :
CROWN GLASS nd 1.620,FLINT GLASS nd 1.700andMARGINAL RAYS f/2. nd is the refractive index, and marginal rays are the outermost rays the aperture lets through. The monospace font lines the values up in a column. - Swatches. Add a
Legend Swatcheslayer. Click the Eyedropper on a crown element, then fill a 10 × 10 px square beside the first line. Do the same with a flint element for the second line, so each swatch matches the glass as it actually reads. Fill a short orange bar for the rays. - Title block. Add a
Title Blocklayer. With the Shape tool, set no fill and a 1 px stroke, then press at (1248, 734) and drag to (1364, 764). Pencil one line across the middle and one down at x 1262. Add four size-11 labels:LUMEN GLASSWORKS,DWG LG-050-A,50 mm f/2andREV C · 2026. - Rotated label. Add
IMAGE PLANEin Plex Mono 11. With the Move tool, click Rotate 90° CCW in the options bar, then use the arrow keys to nudge it just right of the image plane, centred on the axis.
- Dimension. On
-
Make the logo mark
The logo reuses the lens trick at a tiny scale.
- Select
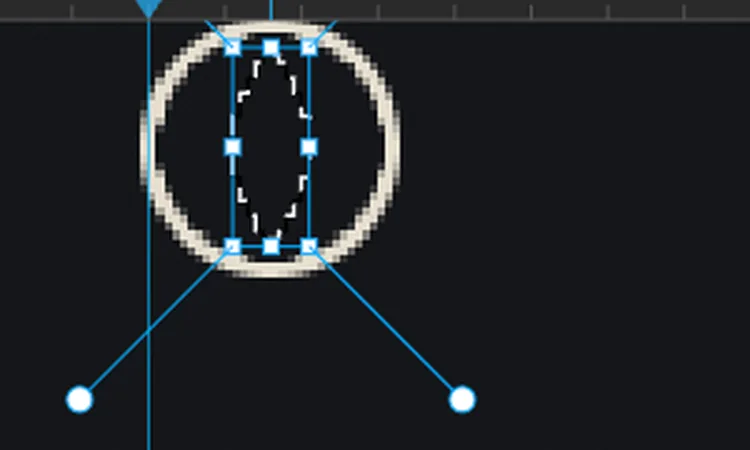
Pattern Tiles, which sits outside every group, and click New Group. Name itNavand add a layer namedLogo Mark. - Ring. Drag a circle from (79, 23) to (113, 57) and fill it with . Then Shrink by
2and press Delete. - Lens. Drag a circle from (63, 21) to (101, 59), then Shift+Alt-drag one from (91, 21) to (129, 59). The overlap is a narrow lens. Fill it with orange.
- Pencil a 1 px cream line through the middle, from x 74 to x 118. It reads as an optical axis.
- Select
-
Build the nav bar
- Add a
Nav Rulelayer and Shift-click a 1 px line across the page at y 80. - Add a
CTA Pilllayer. With the Shape tool, draw a Rectangle with Corner Radius18, no fill and a 1 px stroke, pressing at (1280, 40) and dragging to (1360, 58). - Add an empty
Nav Type Anchorlayer and set this type from it:
LUMEN GLASSWORKSin Space Grotesk SemiBold 17, at x 126 beside the logo. Select it and set Letter spacing to2.5in the Text panel. Then select the anchor again and set Letter spacing back to0, because Text panel settings also become the defaults for your next text.Lenses,Services,JournalandWorkshopin Inter Medium 15, starting at x 820 and 34 px apart. Make the current page,Lenses, and the others .Book a servicein Inter SemiBold 14, centred in the pill.
- On
Nav Rule, fill a 2 px orange bar underLenses, sitting on the rule. That marks the current page.

- Add a
-
Set the hero copy
Make a
Hero Copygroup the same way asNav. Add the shapes first, so the text you create afterwards sits on top of them.- Add a Primary Button layer: a Rectangle, radius
26, fill , no stroke, pressed at (180, 486) and dragged to (280, 512). - Add a Secondary Button layer: the same, but with no fill and a 1 px cream stroke, pressed at (400, 486) and dragged to (504, 512).
- Add a Rules layer. Shift-click a divider from (80, 684) to (540, 684), and fill a 2 px bar from y 556 to 640 at x 80 for the quote.
- Add an empty
Copy Anchorlayer and set the text from it:
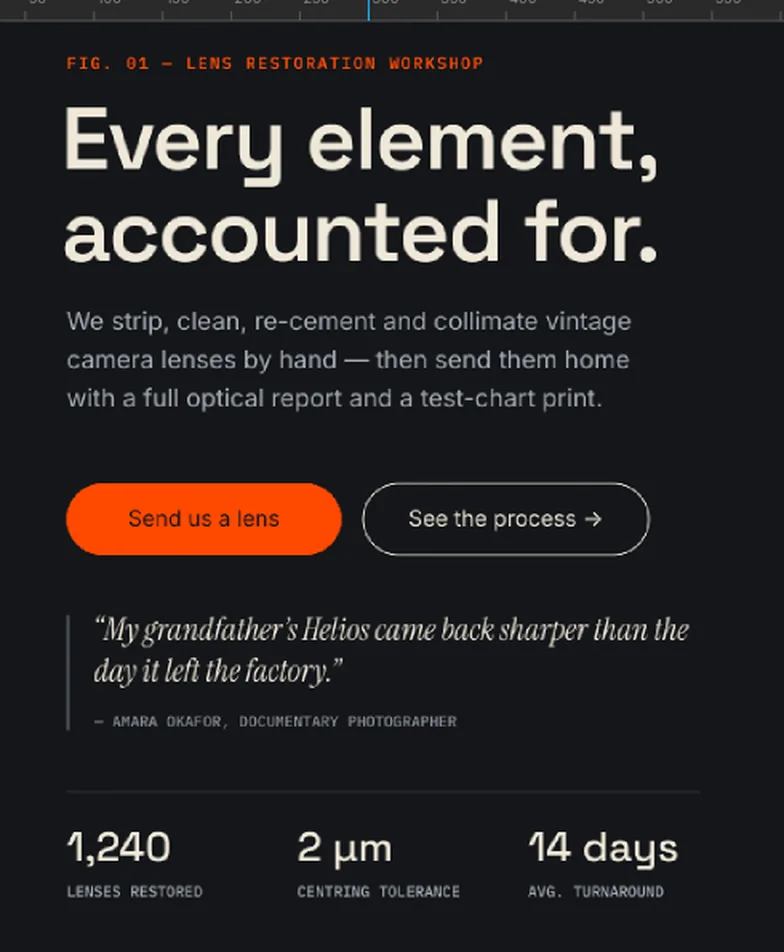
- Eyebrow at (80, 146):
FIG. 01 — LENS RESTORATION WORKSHOPin IBM Plex Mono Medium 12, orange, letter spacing1.5. - Headline at (76, 176):
Every element,andaccounted for.on two lines, Space Grotesk SemiBold 64, , Line height1.05, Letter spacing-1.5. Big display type looks better slightly tightened. - Body: drag a text box from (80, 328) to (520, 440) so it wraps. Use Inter 18, , line height
1.55: "We strip, clean, re-cement and collimate vintage camera lenses by hand — then send them home with a full optical report and a test-chart print." To collimate means to align the elements precisely on the axis. - Button labels, Inter 16, Align center, clicked at the middle of each button:
Send us a lensin SemiBold , andSee the process →in Medium cream. - Quote: a text box from (100, 552) to (540, 620) in Instrument Serif Italic 23, line height
1.3: "“My grandfather’s Helios came back sharper than the day it left the factory.”" Under it, at (100, 626), add— AMARA OKAFOR, DOCUMENTARY PHOTOGRAPHERin Plex Mono 11, . - Stats at y 704, x 80, 248 and 416:
1,240,2 µmand14 daysin Space Grotesk Medium 30. Under each, at y 750, addLENSES RESTORED,CENTRING TOLERANCEandAVG. TURNAROUNDin Plex Mono 11, .
- Add a Primary Button layer: a Rectangle, radius
-
Nudge the column into line
Now compare the eyebrow with
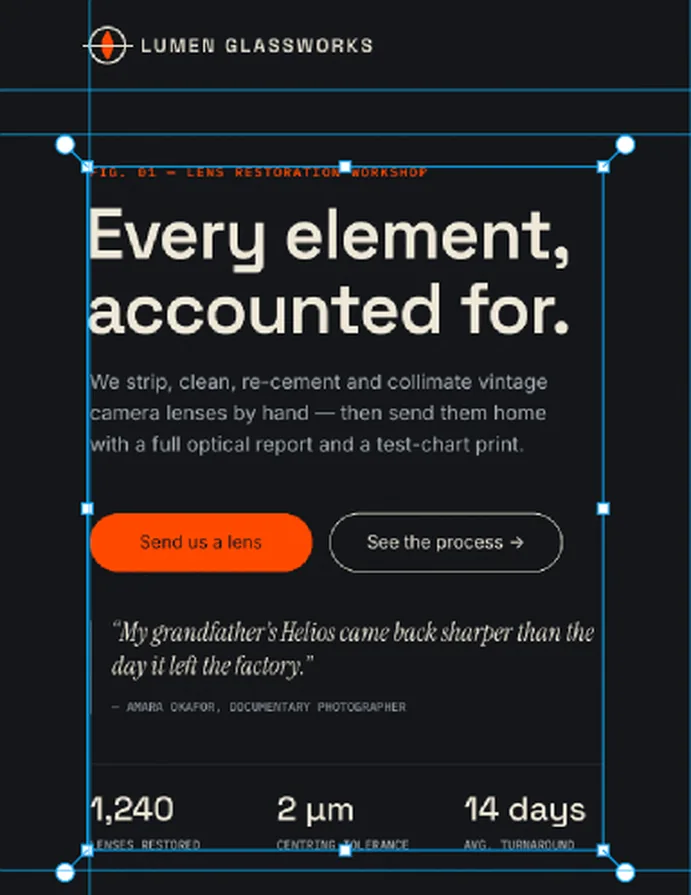
SECTION A–Ain the panel. The column sits 8 px lower, and when two tops are that close the gap looks like a mistake. Lining them up makes it look deliberate.- Collapse
Hero Copyand click its row so the whole group is active. - With the Move tool, press the up arrow 8 times. Every button, text and rule moves together.
The stat labels now line up with the bottom row of the title block too.
- Collapse
-
Duplicate the process cards
- Make a
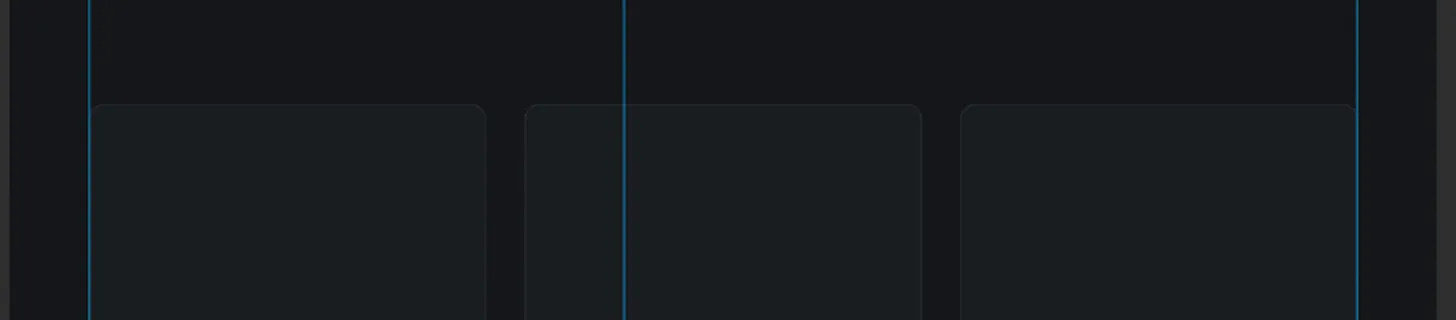
Process Cardsgroup and add a layer namedCard 1. - Draw a Rectangle with radius
14, fill and a 1 px stroke, pressing at (280, 1006) and dragging to (480, 1120). - Choose Layer → Duplicate Layer, rename the copy
Card 2, click its row, and drag it 440 px to the right with the Move tool. Keep an eye on the Info panel's layer position. - Duplicate
Card 2the same way to makeCard 3.
Keep all three cards identical. In a static mockup, a "hover" highlight on one card just looks stuck.
- Make a
-
Draw the icons, the doublet at double size
Each icon goes on its own layer above the cards, drawn in cream and orange lines.
- Icon Rings (card 1): three ellipse rings, 48 × 14 px, stacked 16 px apart around (134, 942). For each, drag the outer ellipse, then Alt-drag a 44 × 10 px ellipse inside it to hollow it out, and fill. Make the middle ring orange and the others cream, and Pencil a thin grey axis through the stack.
- Icon Reticle (card 3): around (1014, 942), make a cream ring 48 px across and 2 px thick with Shrink, and a thin orange ring 22 px across inside it. Pencil four crosshair arms with a gap in the middle, and brush an orange dot at the centre.
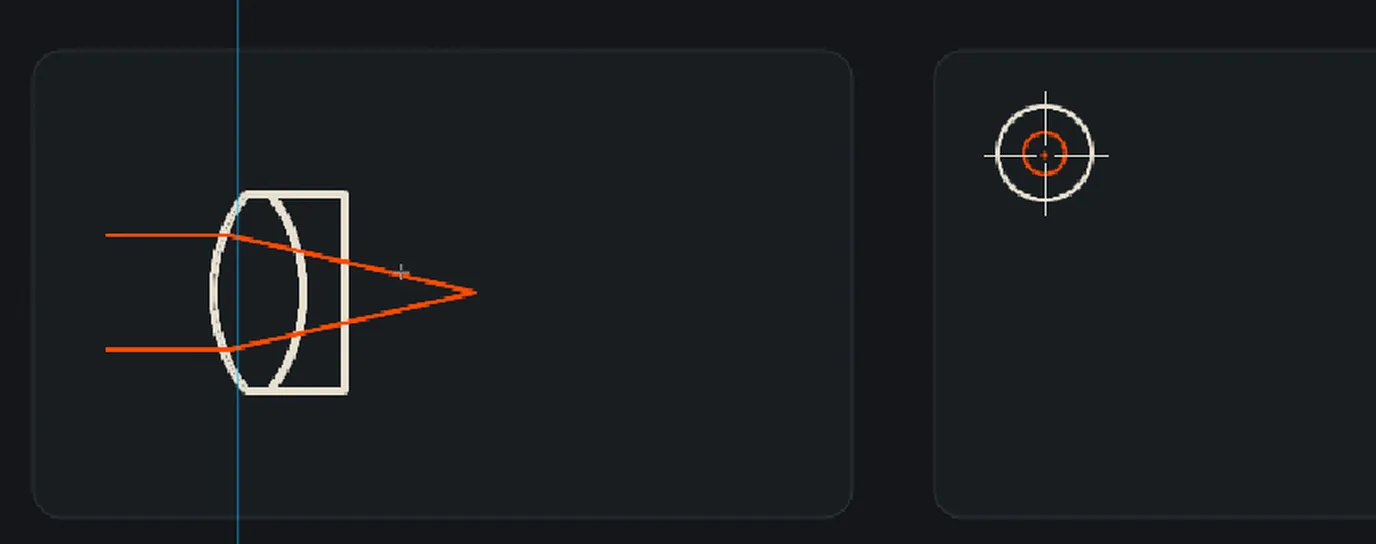
- Icon Doublet (card 2): small icons are easier to draw big, so draw this one at twice its final size over the middle of card 2. Work around a centre point (cx, cy):
- Biconvex lens: a box from (cx − 32, cy − 48) to (cx + 12, cy + 48). Shift+Alt a circle of radius 80 centred 80 px right of the box's left edge, then another centred 80 px left of its right edge.
- Plano-concave lens: a box from (cx − 20, cy − 48) to (cx + 32, cy + 48). Alt-subtract the second circle above. The flat back is just the box edge.
- Outline each lens with Grow
2, Fill, Shrink4and Delete. Then brush two orange 3 px rays that run in parallel and converge to a point past the lens.
-
Scale the doublet and place it
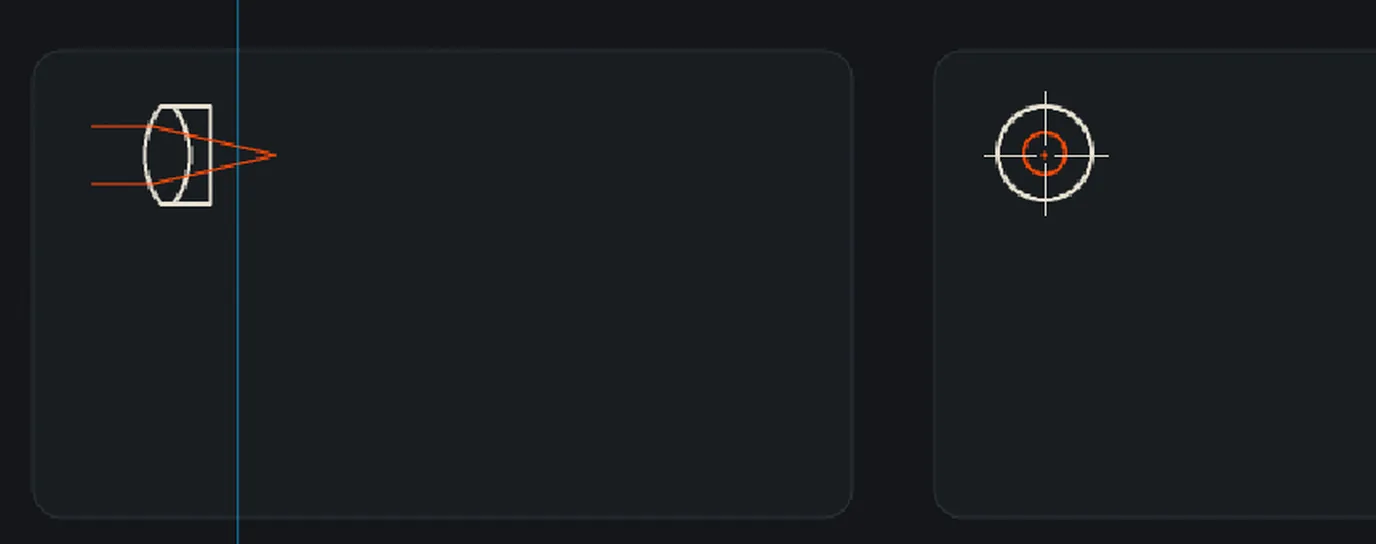
- Draw a rectangle marquee just around the doublet drawing and switch to the Move tool.
- Hold Cmd and drag the bottom-right handle halfway toward the top-left one. That scales it to 50% in proportion, and the 4 px outlines become 2 px, matching the other icons.
- Press Cmd+D, then drag the doublet so its left edge sits 28 px inside the card, on the text margin, and its middle is level with the other icons at y 942.
-
Write the card text
- Add
Section RuleandCards Anchorlayers above the icons. - From
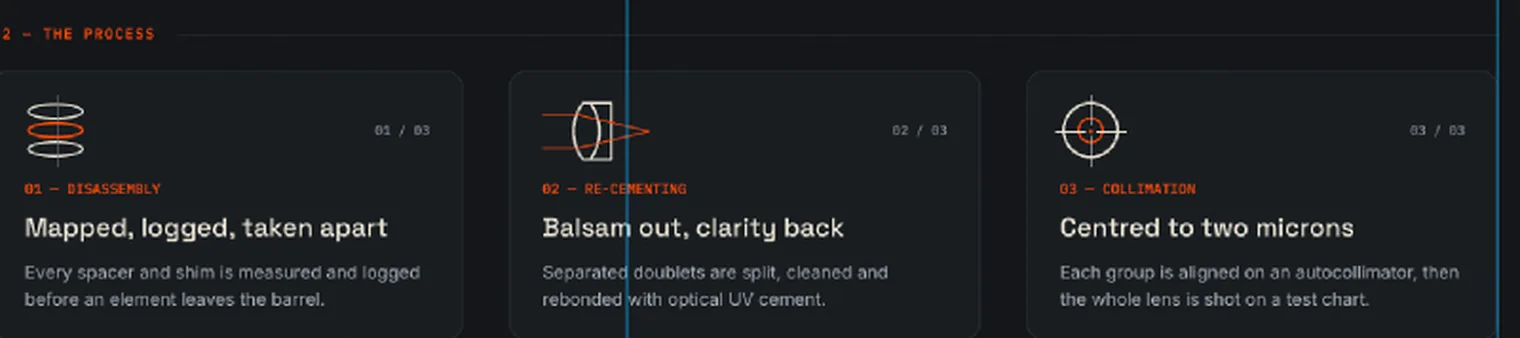
Cards Anchor, type02 — THE PROCESSat (80, 852) in Plex Mono 12, orange, letter spacing 1.5. OnSection Rule, Shift-click a hairline from just past it to the right margin. - For each card, start 28 px in from its left edge:
- a step label at y 984 in orange Plex Mono 12
- a title at y 1009 in Space Grotesk Medium 22
- a body text box from y 1052 to y 1106 in Inter 15, , line height 1.5
- a right-aligned
01 / 03counter in Plex Mono 11, ending 28 px from the card's right edge and centred on the icon's height
- Use this copy:
01 — DISASSEMBLY, "Mapped, logged, taken apart", "Every spacer and shim is measured and logged before an element leaves the barrel."02 — RE-CEMENTING, "Balsam out, clarity back", "Separated doublets are split, cleaned and rebonded with optical UV cement."03 — COLLIMATION, "Centred to two microns", "Each group is aligned on an autocollimator, then the whole lens is shot on a test chart."
- Add
-
Add a closing CTA and footer
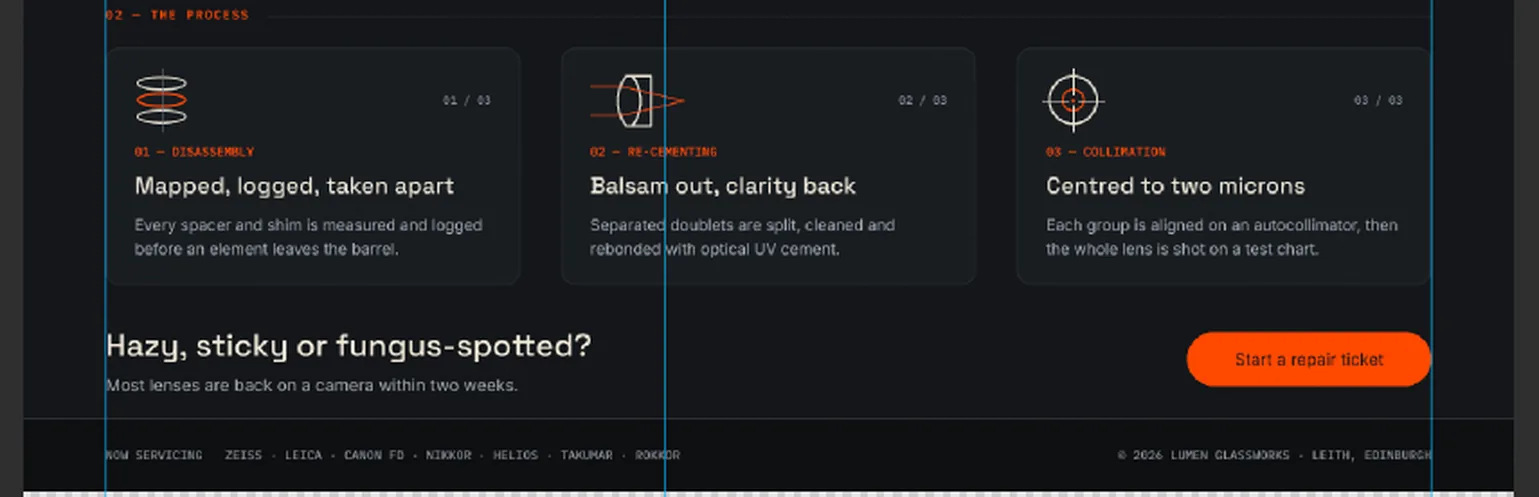
A landing page should end with an action, not just a footer. Make a
Footergroup aboveBackground.- Footer bar. Add a
Footer Barlayer. Fill from y 1248 to the bottom of the page with , and Shift-click a rule along its top. - Button. Add a
Closing Buttonlayer: an orange Rectangle with radius26, pressed at (1242, 1192) and dragged to (1360, 1218). - Text. Add an empty
Footer Anchorlayer and set the type from it, lowest and rightmost first, so no click lands on text you've already made:
Start a repair ticket, Inter SemiBold 16, , centred on the button.Most lenses are back on a camera within two weeks., Inter 16, , at (80, 1206).Hazy, sticky or fungus-spotted?, Space Grotesk Medium 30, at (80, 1158).- In the footer, in Plex Mono 12 :
NOW SERVICING ZEISS · LEICA · CANON FD · NIKKOR · HELIOS · TAKUMAR · ROKKORon the left, and© 2026 LUMEN GLASSWORKS · LEITH, EDINBURGHright-aligned to the margin.
Look at the spacing. The row is jammed between the cards and the footer, and it doesn't read as its own section.
- Footer bar. Add a
-
Give the page more room
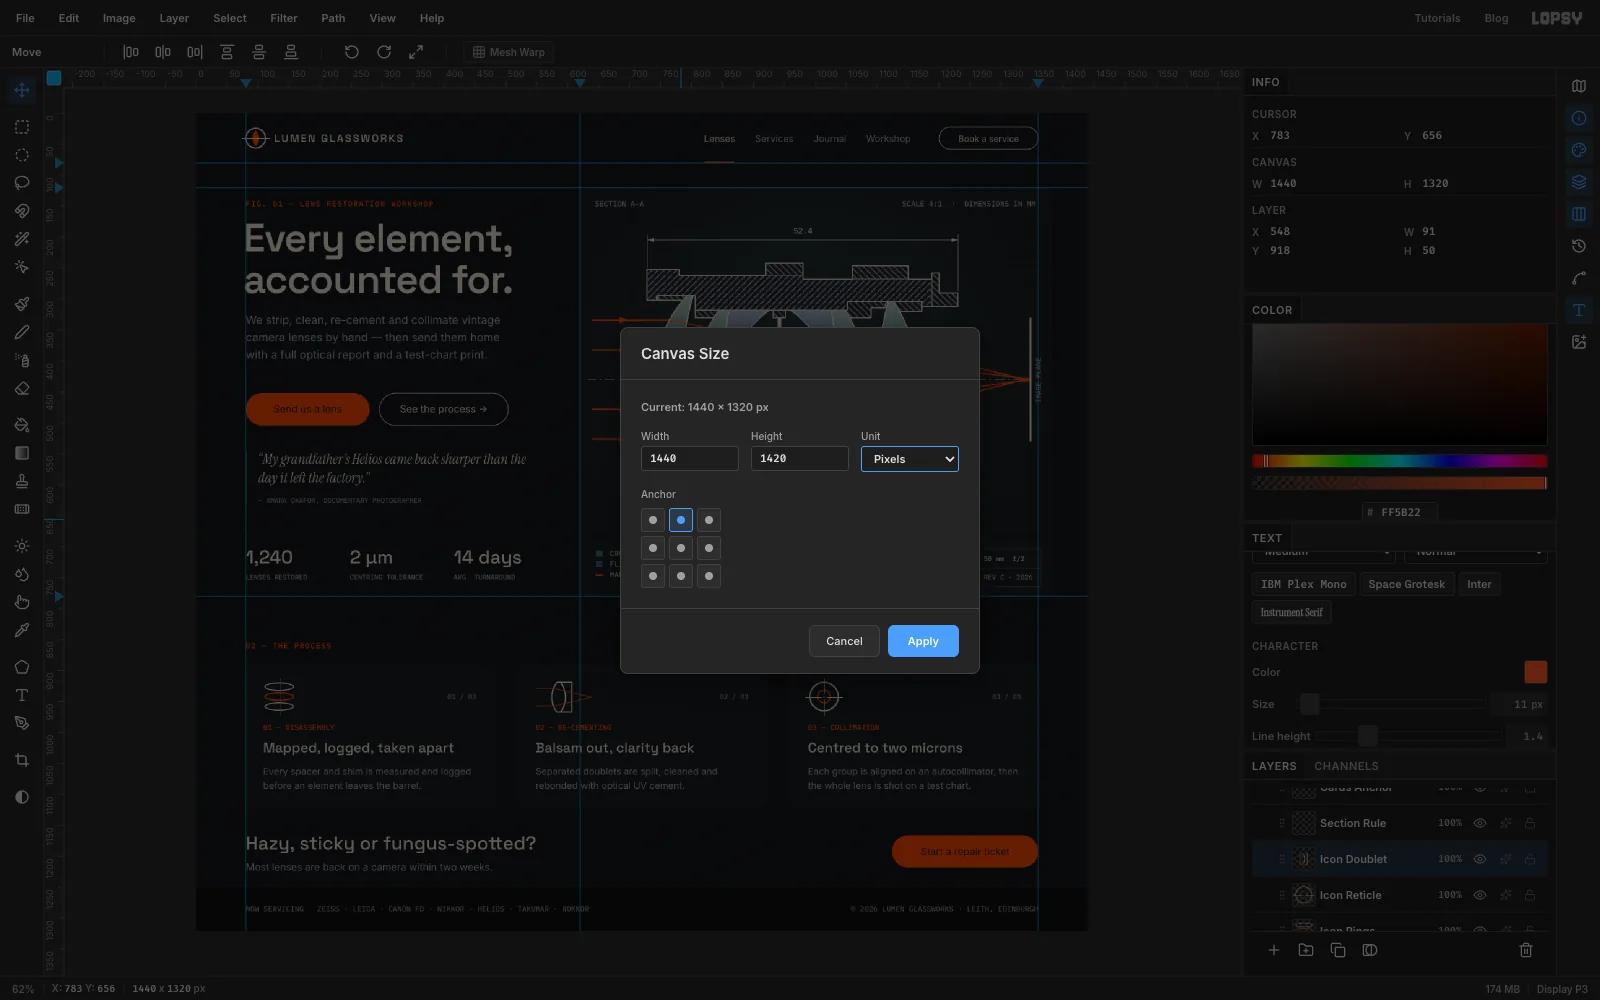
- Choose Image → Canvas Size….
- Click the top-centre anchor so everything stays put and the new space is added at the bottom. Set Height to
1420and click Apply. - The new strip is transparent, so select
Backgroundand Edit → Fill it with again.
-
Space out the closing row
- Click
Footer Bar, then Cmd-click the two footer text layers. With the Move tool, press Shift and the down arrow 10 times to move them 100 px down to the bottom of the page. - Select the closing button, headline, subline and button label the same way, and move them down 60 px.
- From
Footer Anchor, add03 — GET STARTEDat (80, 1182) in orange Plex Mono 12 with letter spacing 1.5. On aClosing Rulelayer, Shift-click a hairline from just past it to the margin, matching section 02.
The row now has its own section heading and room to breathe. To finish, delete the
Pattern Tileslayer; your patterns stay in the Pattern Fill dialog. You can also delete the empty anchor layers. Choose File → Quick Export PNG for the mockup and File → Save Project to keep every layer editable.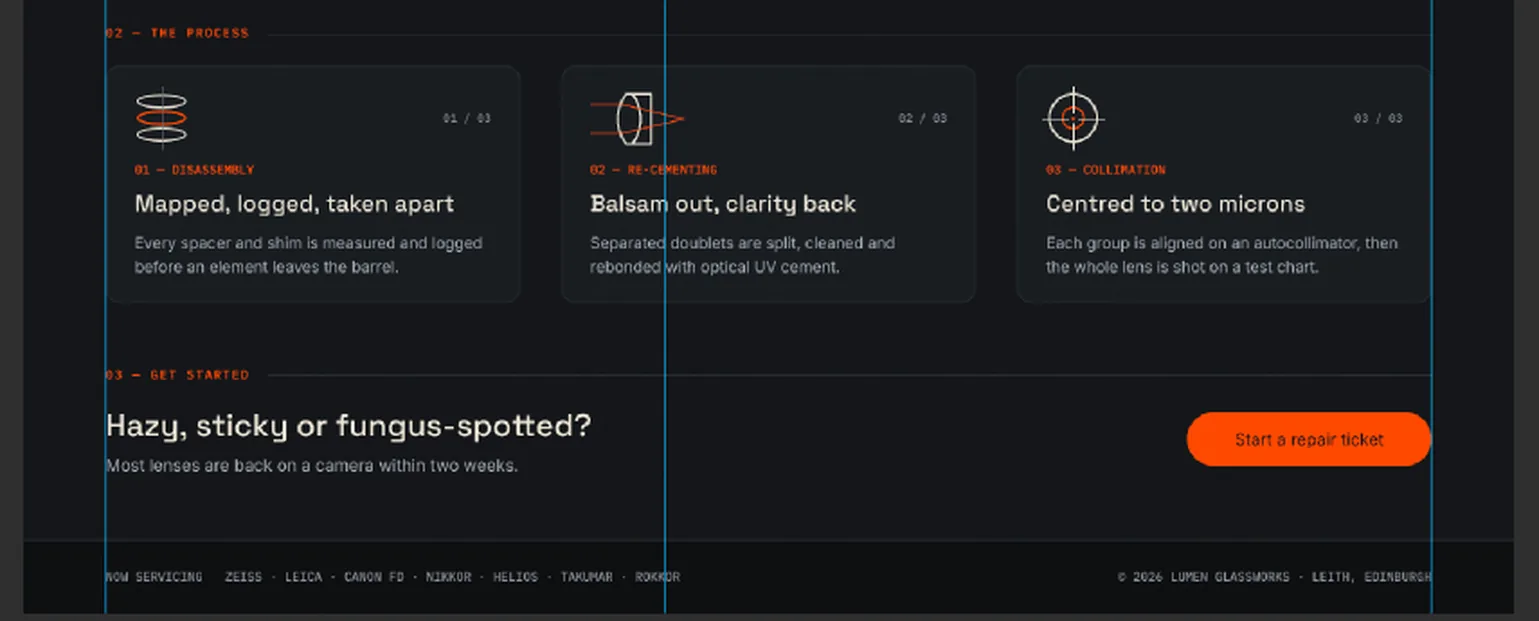
- Click