Make an Isometric Cutaway Flyer with Glowing Mushrooms
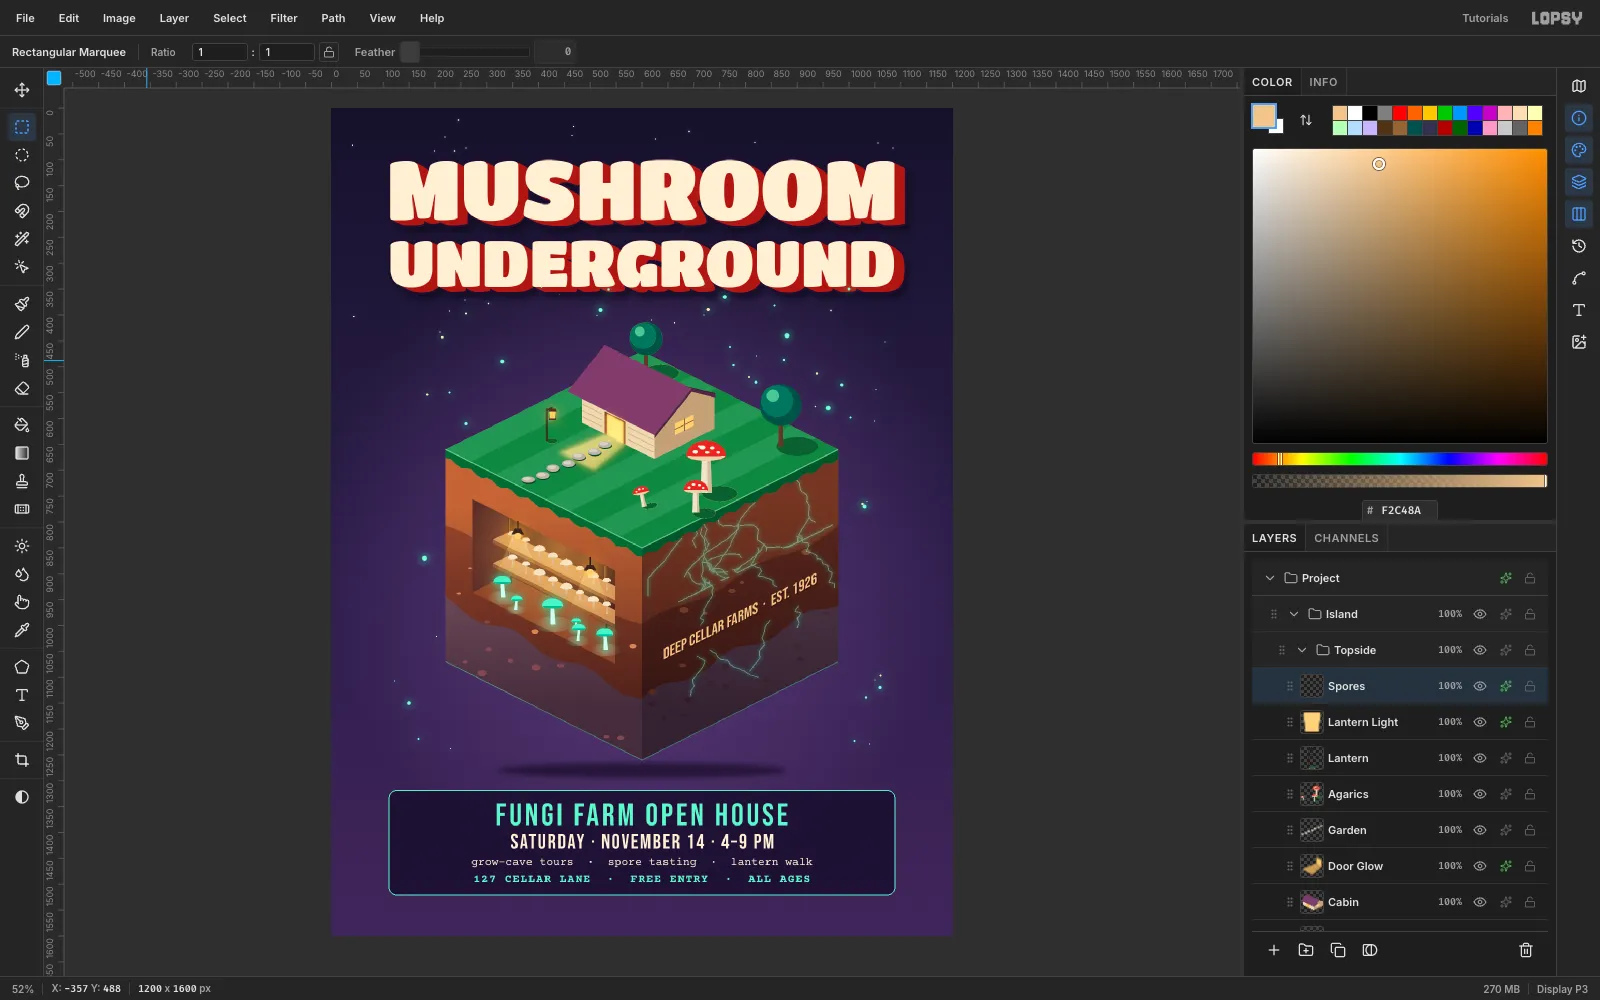
Build a floating isometric slice of earth with a lit grow cave, skewed type and an extruded 3D title in Lopsy, then set the event details on a snapped grid.
Isometric illustration draws a 3D scene with no vanishing point. Every edge runs along one of three axes, so a whole diorama can be built from flat polygons. A cutaway slices part of the object away to show what's inside.
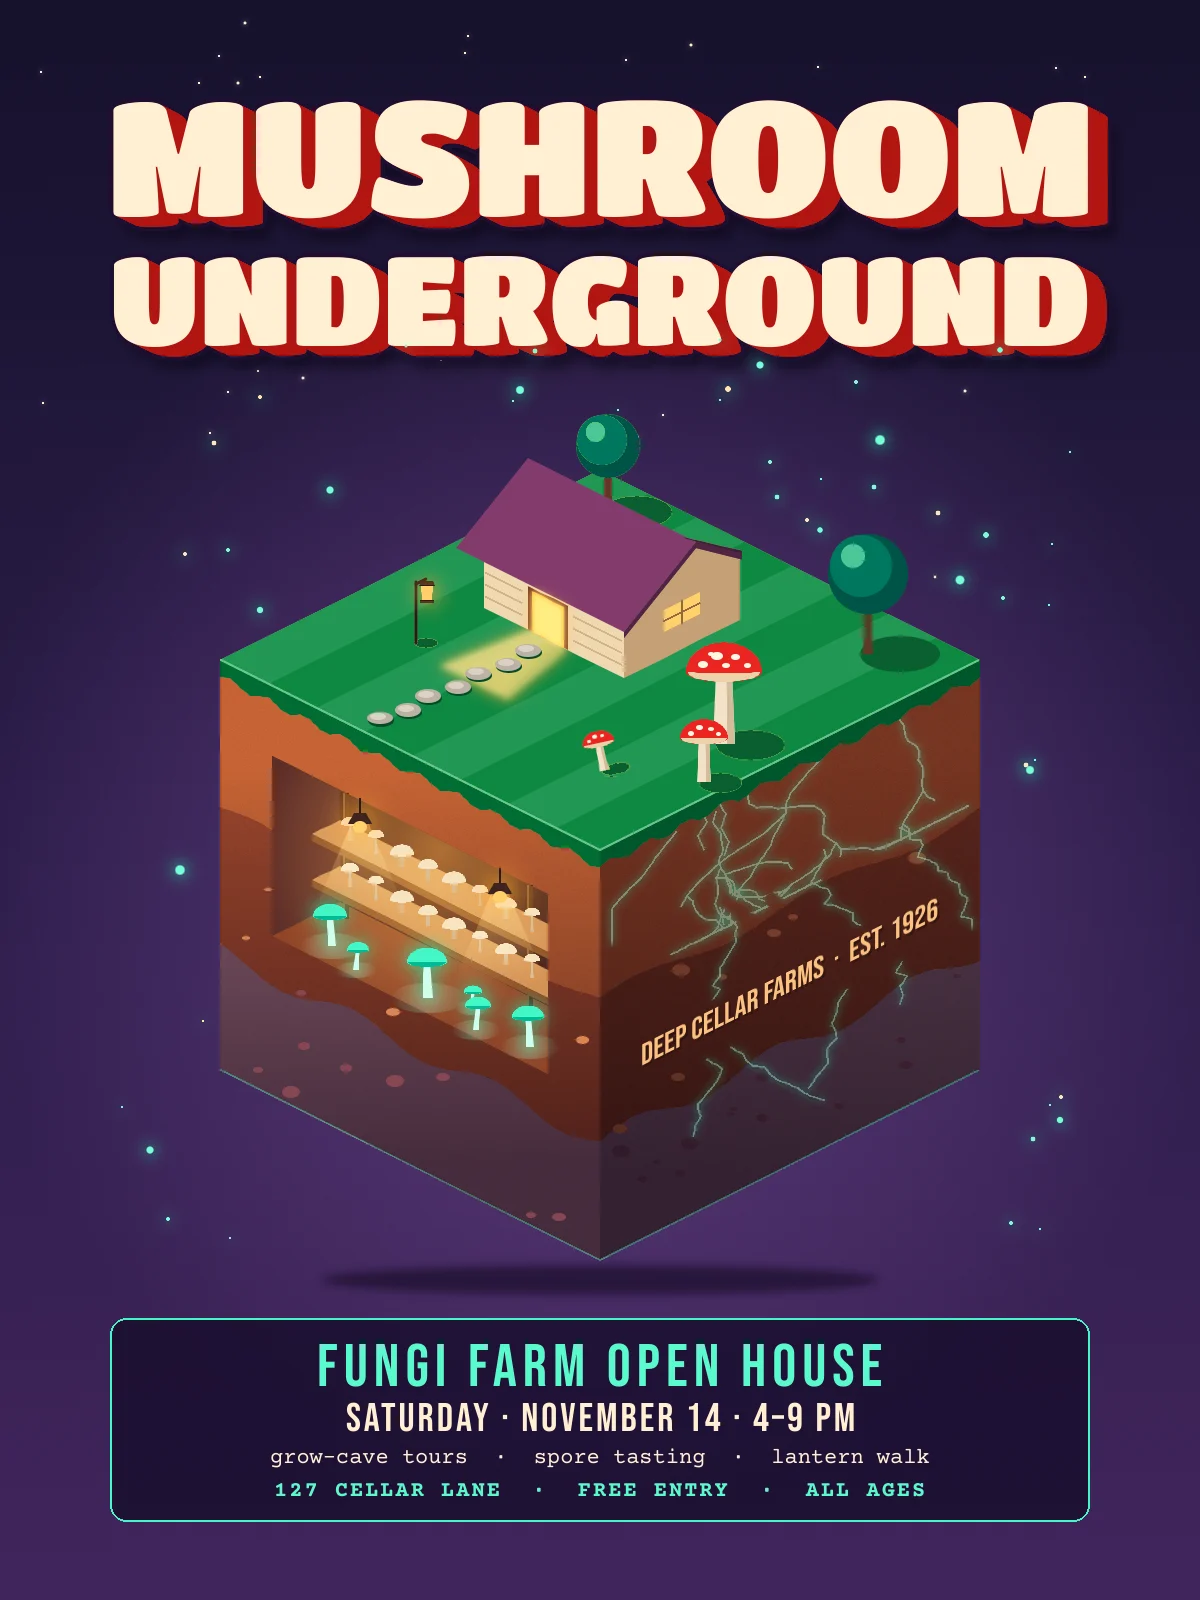
This tutorial builds a flyer for Mushroom Underground, a made-up open house at a fungi farm. It's a floating block of earth with the following:
- A cabin on the grass.
- A lit grow cave cut into one face.
- Glowing mycelium threading through the other face, with the farm's name skewed onto the soil.
You'll draw everything with the Lasso, so it helps to know the one rule of 2:1 isometric: every horizontal edge climbs 1 px for every 2 px across. Vertical edges stay vertical. The block's corners in this tutorial are:
- Top face: back (600, 470), right (980, 660), front (600, 850) and left (220, 660).
- Bottom corners: left (220, 1070), front (600, 1260) and right (980, 1070).
Palette:
-
Night sky
-
Lit soil
-
Shaded soil
-
Night grass
-
turf
-
Glow mint
-
lamp amber
-
Title cream
-
extrusion red
-
fly agaric red
-
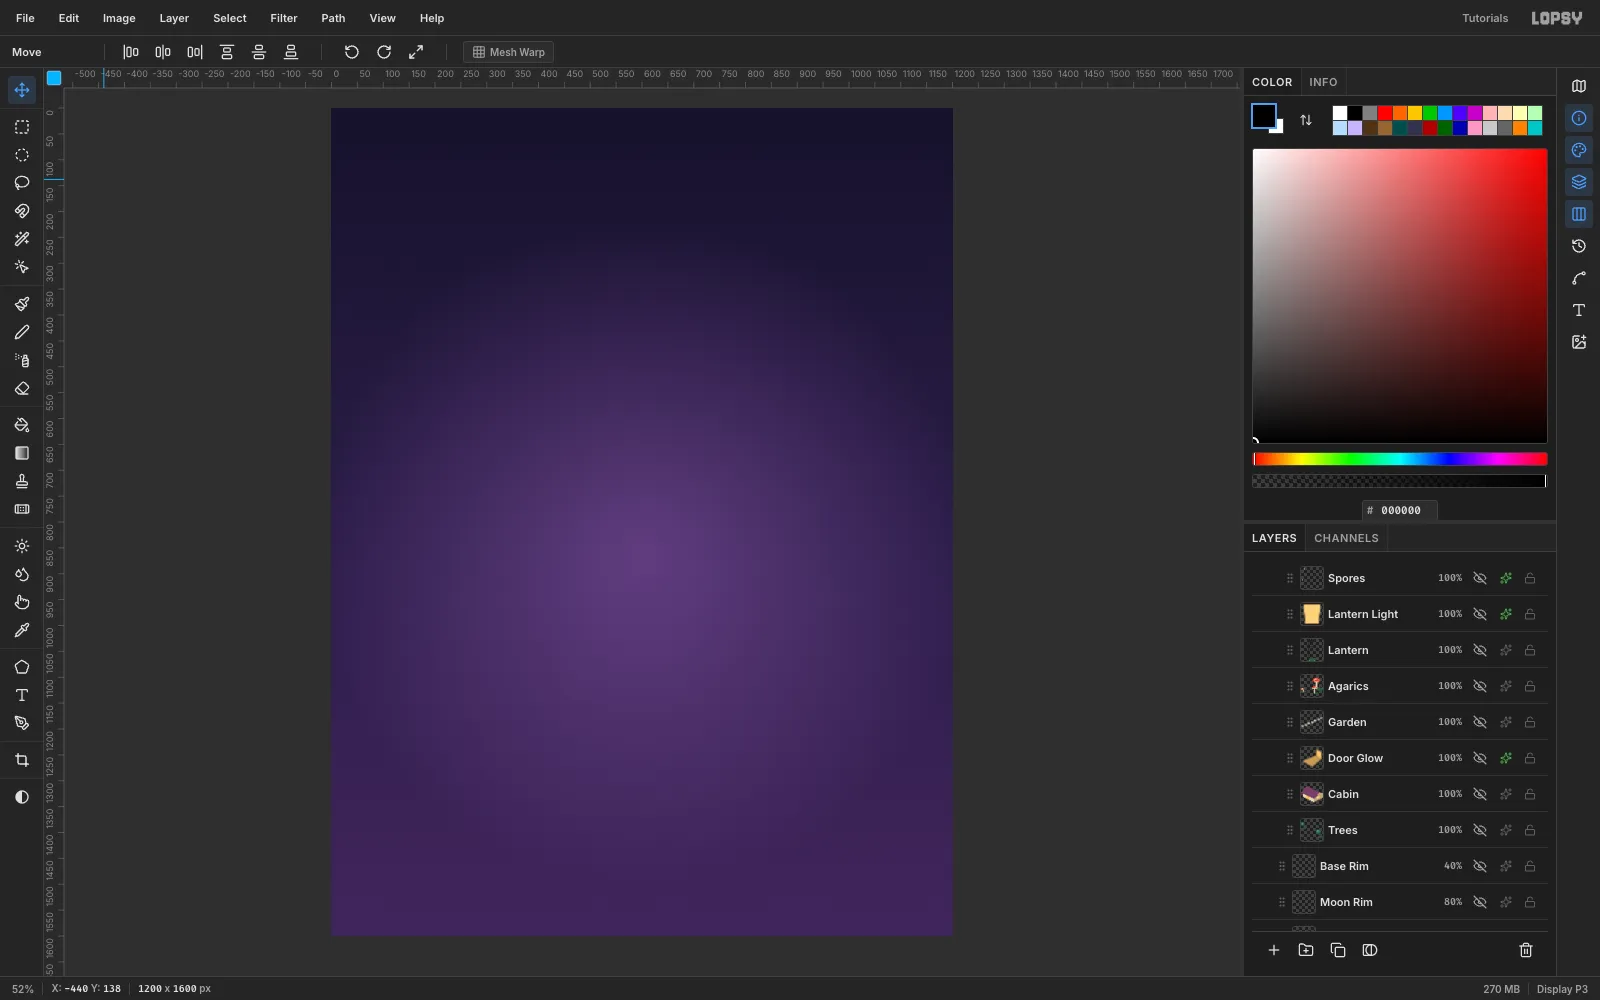
Paint the night sky
- Create a 1200 × 1600 px document with a white background.
- Rename
Layer 1toNight Sky. - Pick the Gradient tool and open Advanced…. Set three stops: , at 55%, and .
- Drag from the top of the canvas to the bottom.
Next, add the glow behind the island:
- Add a layer named
Auraand switch the gradient Type to Radial. - Use one colour, , at 70% opacity fading to 0%.
- Drag from (600, 860) down to (600, 1500).
- Set the layer's Blend to Screen and its opacity to 55%.
-
Lasso the block's faces
Click New Group and name it
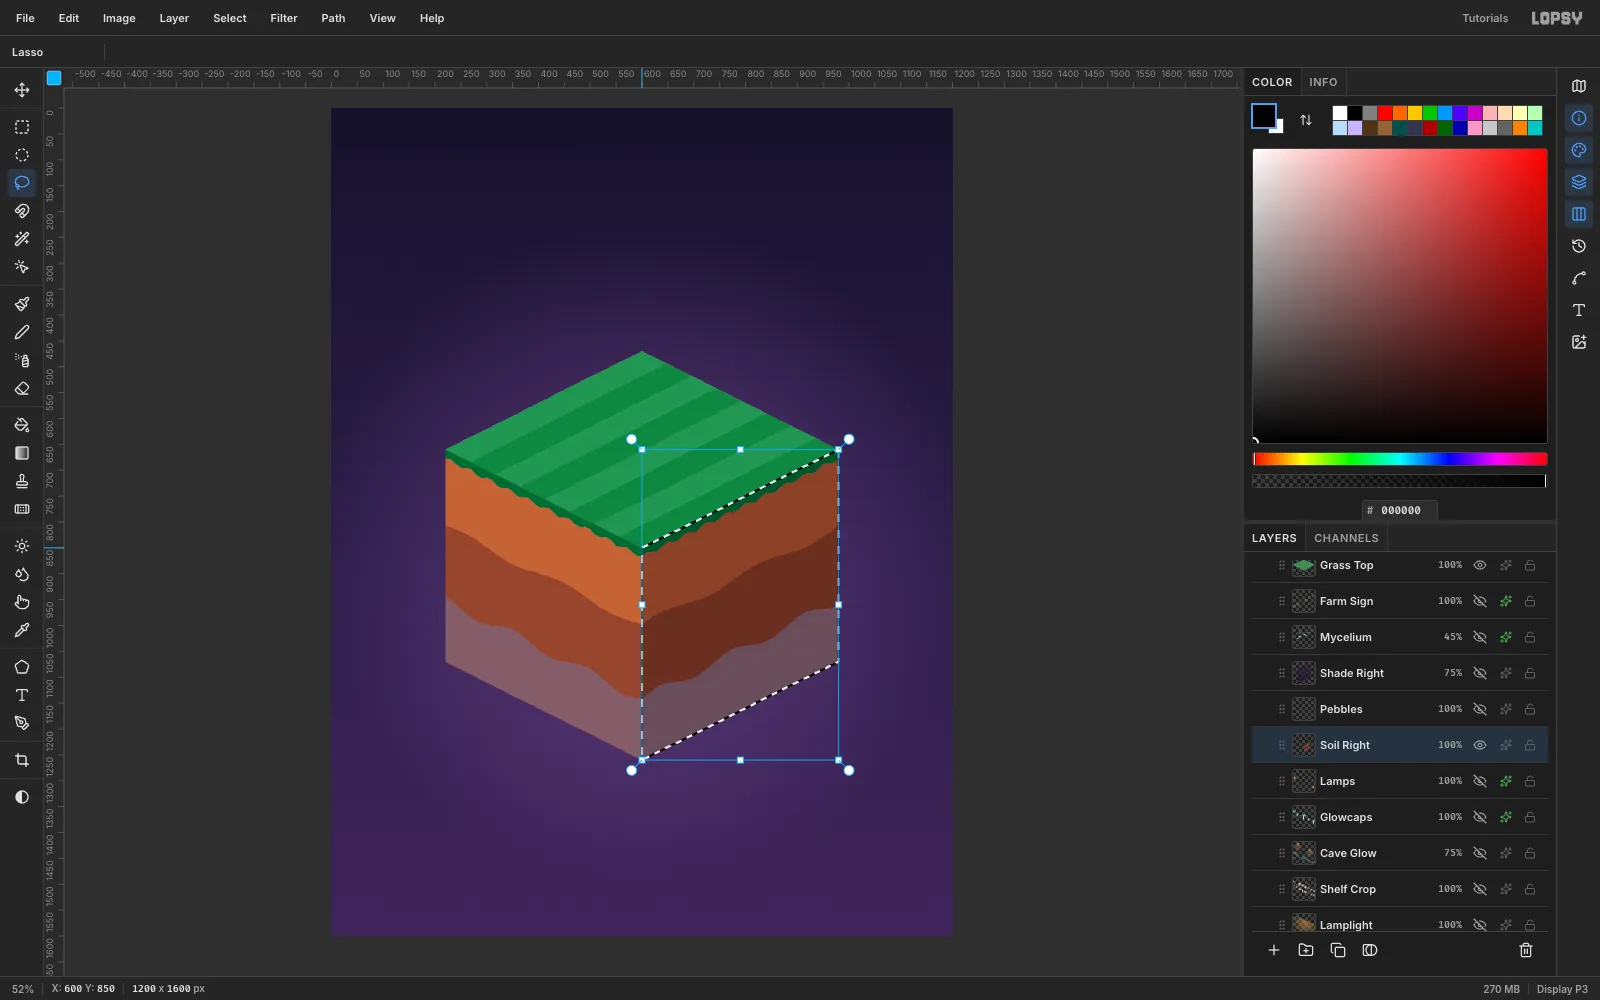
Island. Every block layer goes inside it.- Soil Left: lasso the left face and fill it with (Edit → Fill). Then lasso two wavy bands down to the bottom edge: fill subsoil from about 140 px below the top edge, and bedrock from about 282 px below it.
- Soil Right: do the same on the right face with the darker , and . Start each wave where the left one ends, so the bands wrap around the corner.
- Grass Top: lasso the diamond and fill . Add four lighter stripes, 48 px wide, running parallel to the right edge.
- Turf Edge: lasso a scalloped band about 17 px deep under both top edges. Fill it on the left and on the right.
-
Cut the grow cave
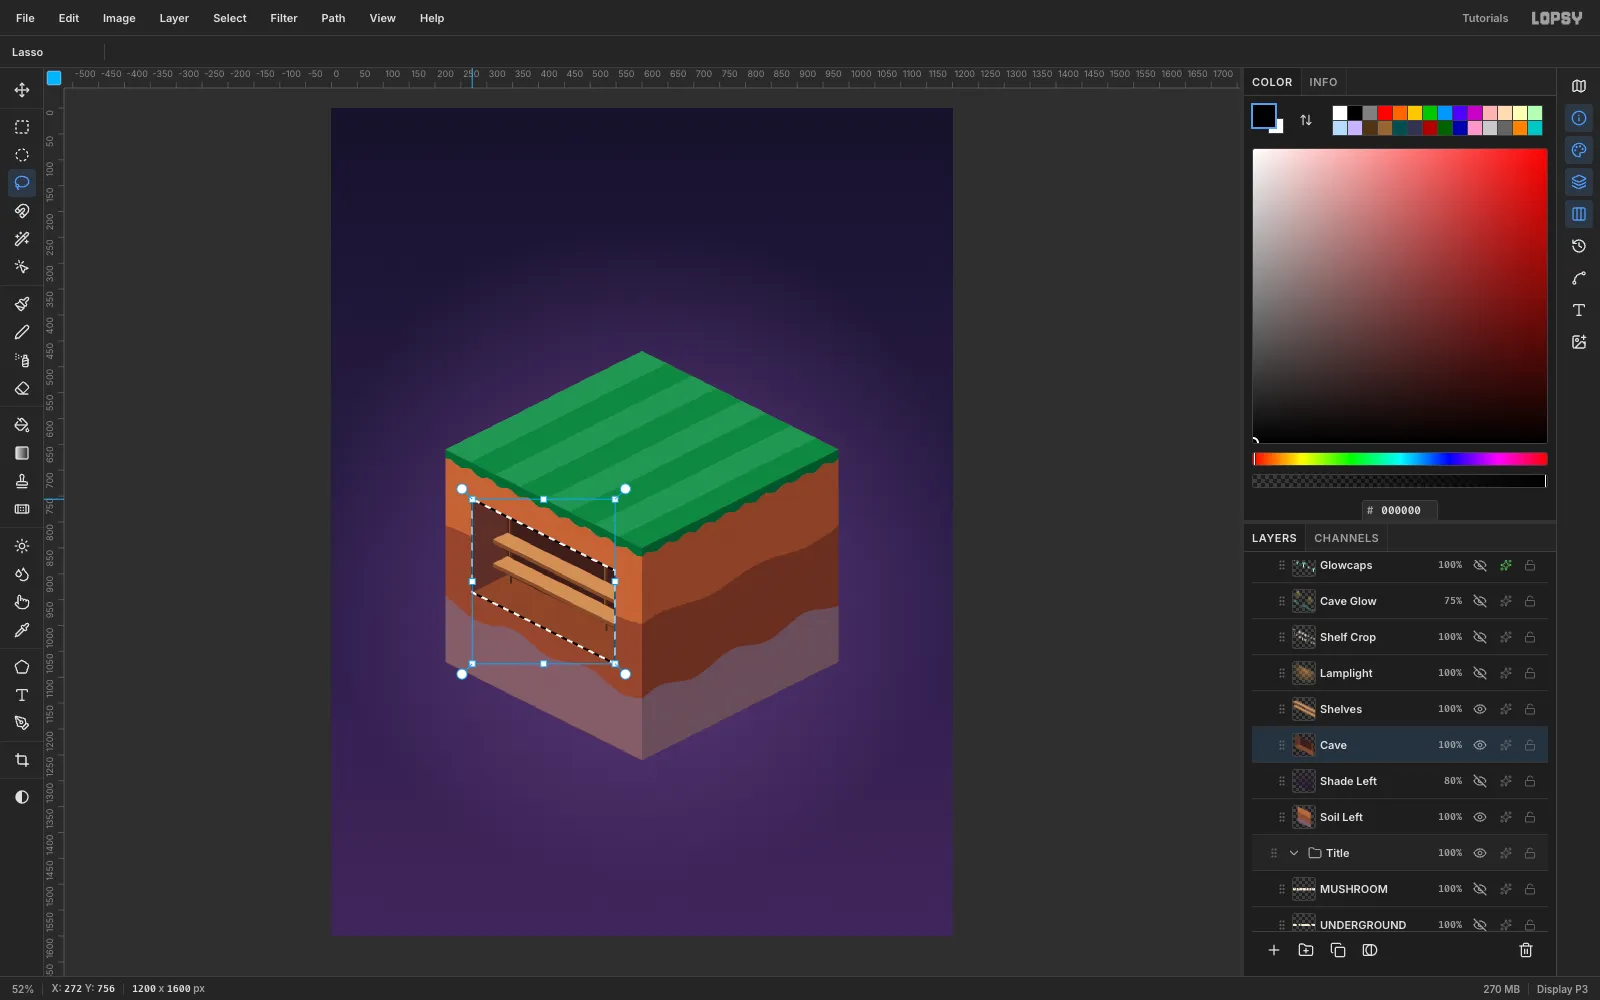
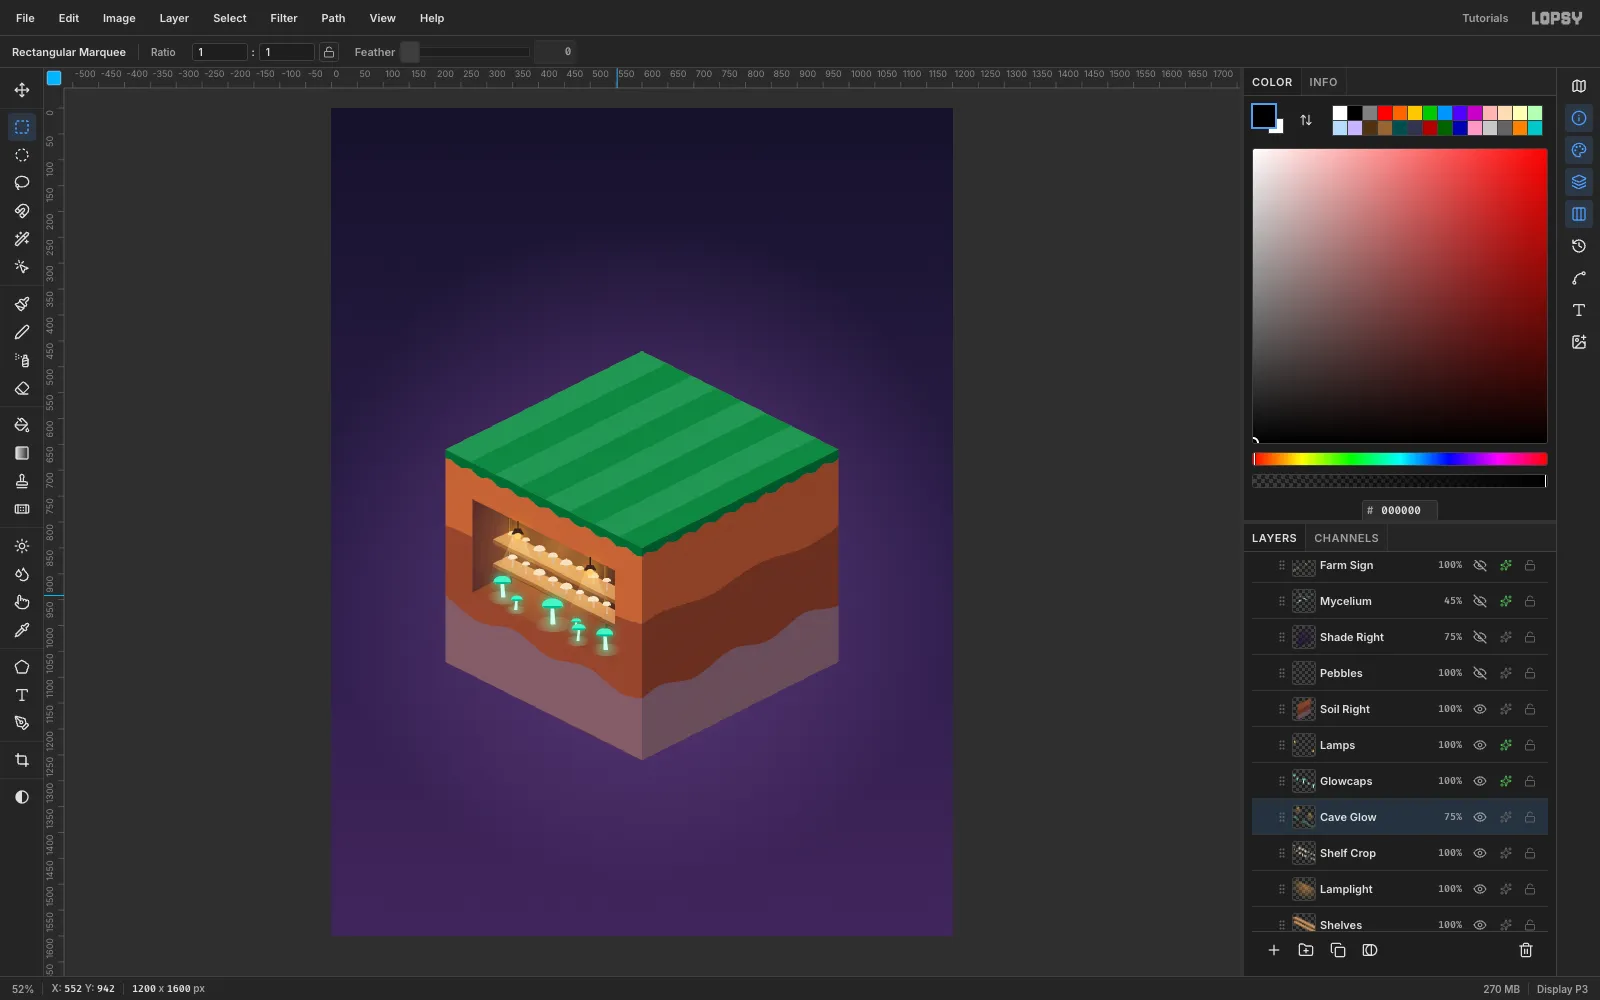
A recess in the left face shows three inner surfaces: the back wall, the floor, and the side wall nearest the left corner. The ceiling faces down, so you never see it.
- Add a
Cavelayer aboveSoil Left. Lasso the opening at (272, 756), (548, 894), (548, 1074), (272, 936) and fill it for the back wall. - Lasso the sliver along the left edge that slants up to the right and fill it for the side wall. Fill the strip along the bottom for the floor.
- On a
Shelveslayer, lasso two planks parallel to the opening's top edge. Fill each plank's top and its front edge . - Back on
Cave, fill two 6 px posts in at x 346 and x 530. The planks cover them where they cross.
Depth in isometric pushes things up and to the right. A back wall 34 units deep shows up 68 px higher than the opening, so only its lower part is visible.
- Add a
-
Grow one shelf, then copy it
- On a
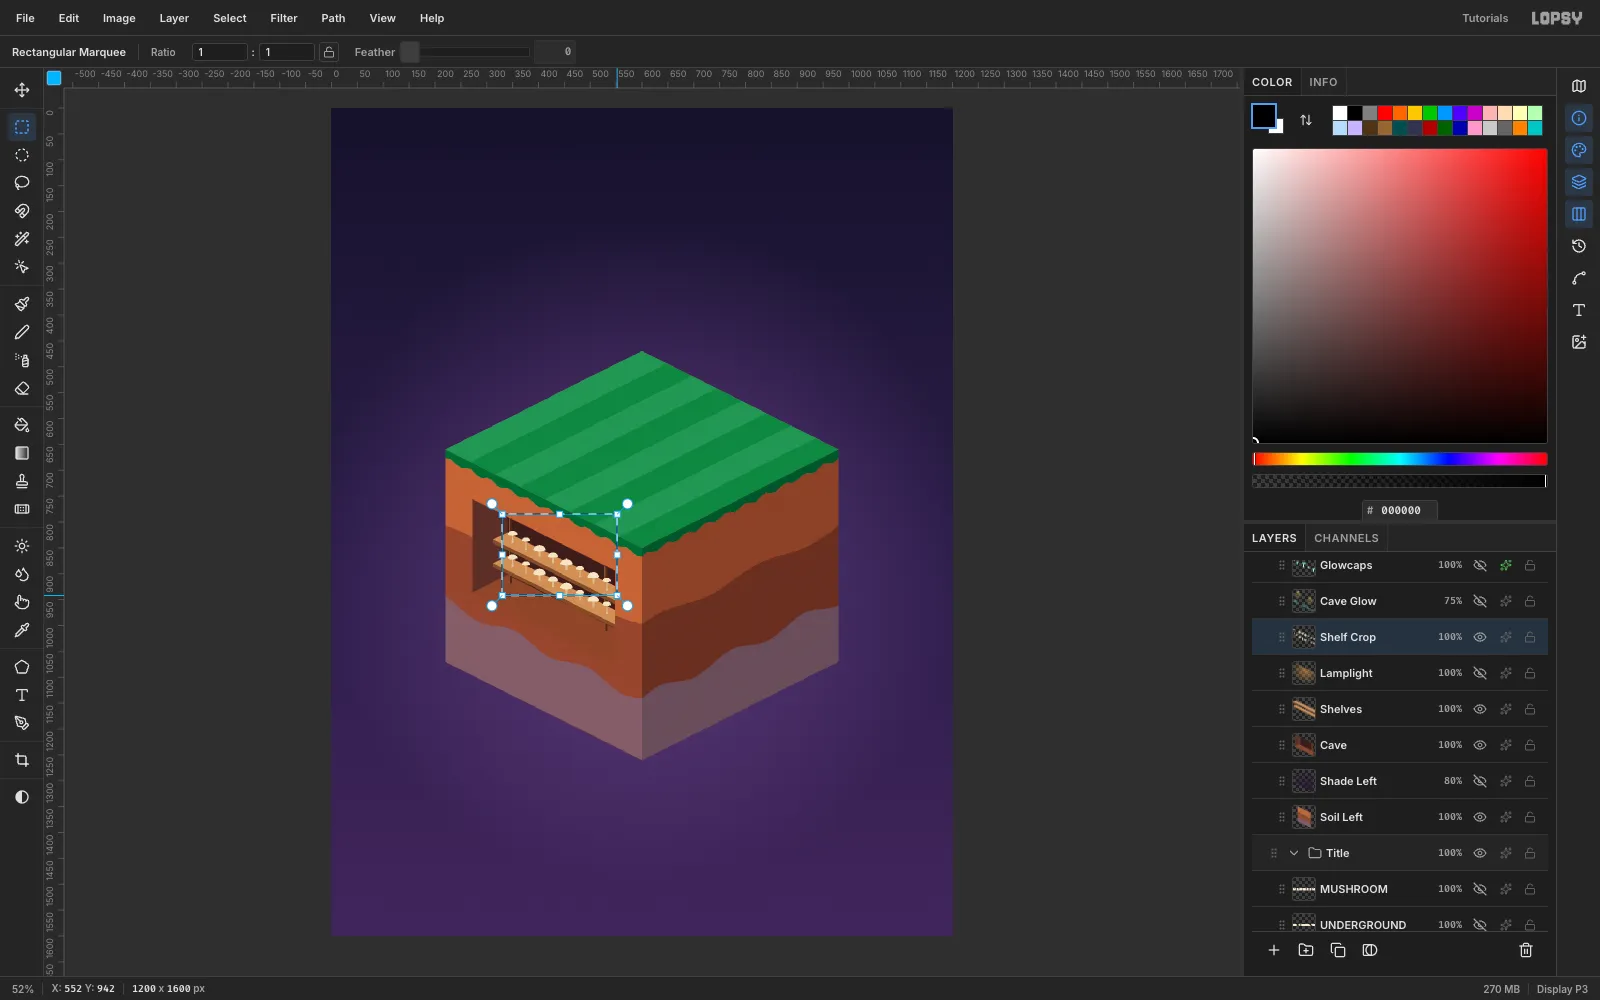
Shelf Croplayer, draw eight small button mushrooms along the upper shelf. Lasso each stem as a tapered quad in , then each cap as a half-dome in . - Marquee the row from (330, 785) to (552, 942). Press Cmd+C, wait a moment, then press Cmd+V. The paste lands in place on a new layer.
- With the Move tool, press Shift+Down four times and Down six times. That's 46 px, exactly one shelf lower.
- Choose Layer → Merge Down.
- On a
-
Light the cave
Glowcaps.
- On a
Glowcapslayer, draw six mushrooms 16–36 px tall standing on the floor. Use stems, caps and a thin gill band under each cap. - Give the layer an Outer Glow in : Size 26, Spread 10, Opacity 80.
Lamps.
- On a
Lampslayer, hang two lamps from the opening's top edge at x 360 and x 500. Each is a 2 px cord, a dark shade and a bulb. - Add an Outer Glow in with Size 34 and Spread 30.
Cave light.
- Add a
Lamplightlayer and lasso the cave opening. Drag a Radial gradient of at 55% fading to 0% across it, then set the layer to Screen. The selection keeps the light inside the cave. - On a
Cave Glowlayer, lasso a cone under each lamp. Fill it with a linear gradient that fades downward. - Put a flat ellipse under each glowcap and fill it with a radial gradient.
- Set the layer to Screen at 75%.
- On a
-
Grow the mycelium
- On a
Pebbleslayer, scatter small elliptical marquee fills a shade lighter than each band. Keep them out of the cave. - On a
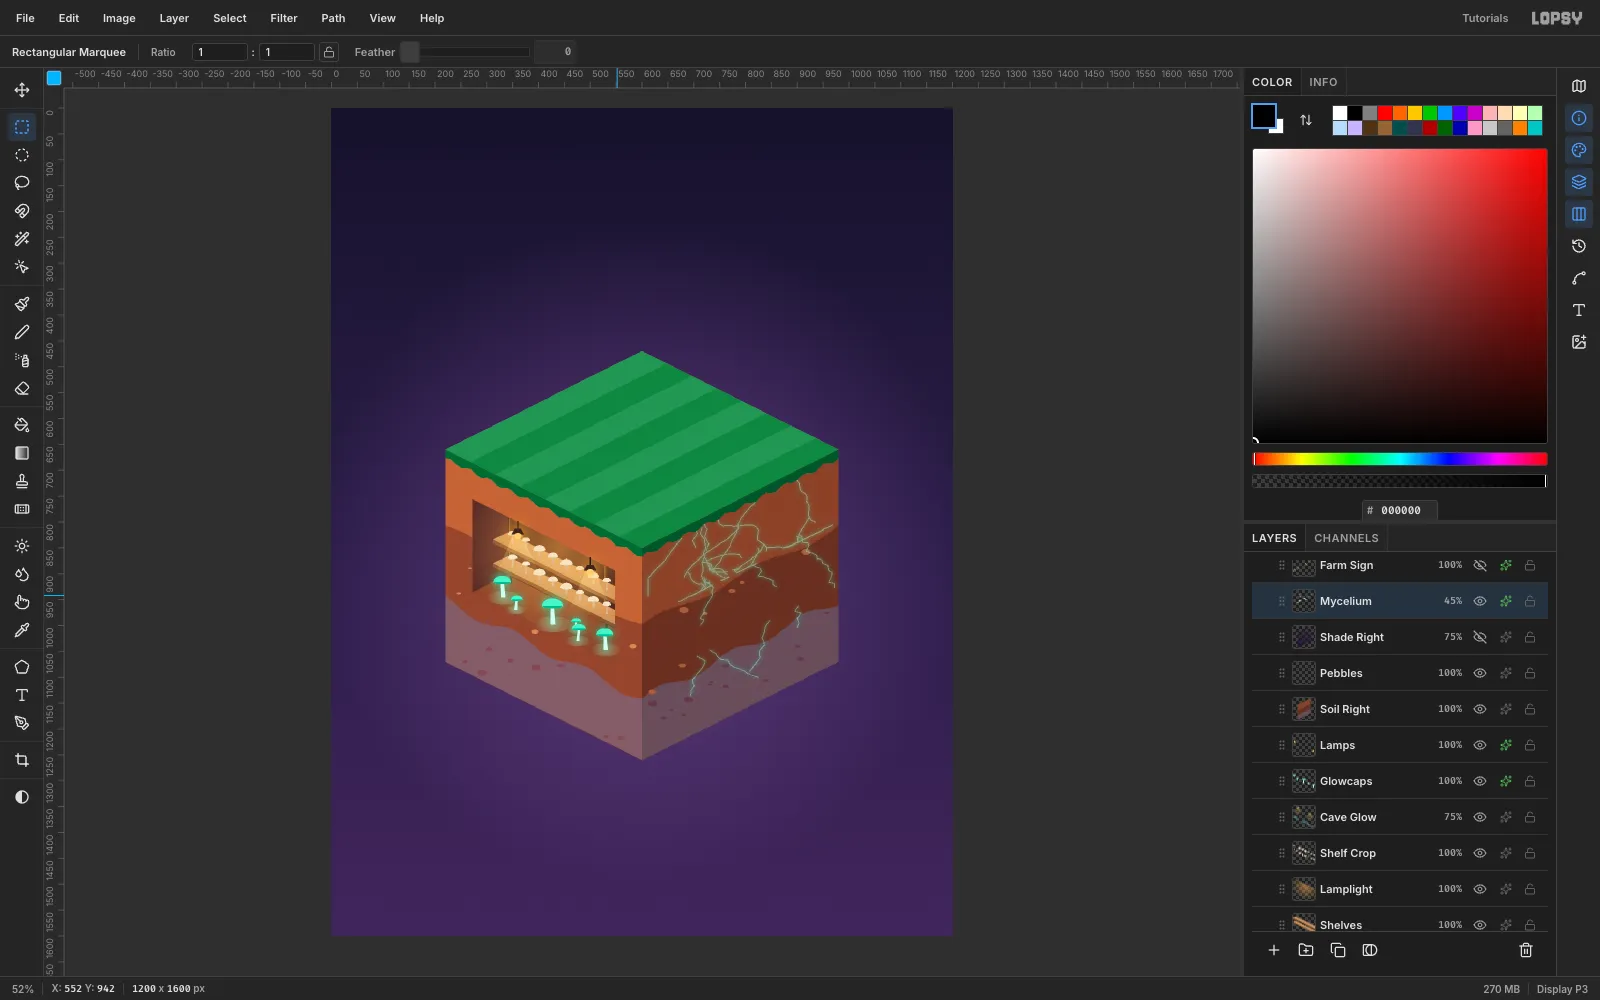
Myceliumlayer, set the Brush to Size 2 and Hardness 90 in . Drag branching, wandering strokes down from the right face's top edge. Start some right under where the fly agarics will stand, so the threads read as their roots. Carry a few deep into the bedrock, and wrap one around the front corner under the cave. - Add an Outer Glow in at Size 12, Opacity 70.
- Where strokes knot together, thin them out with the Eraser at Size 16.
- Set the layer's opacity to 45%, so the threads glow without turning into cracked glass.
- On a
-
Skew the farm's name onto the soil
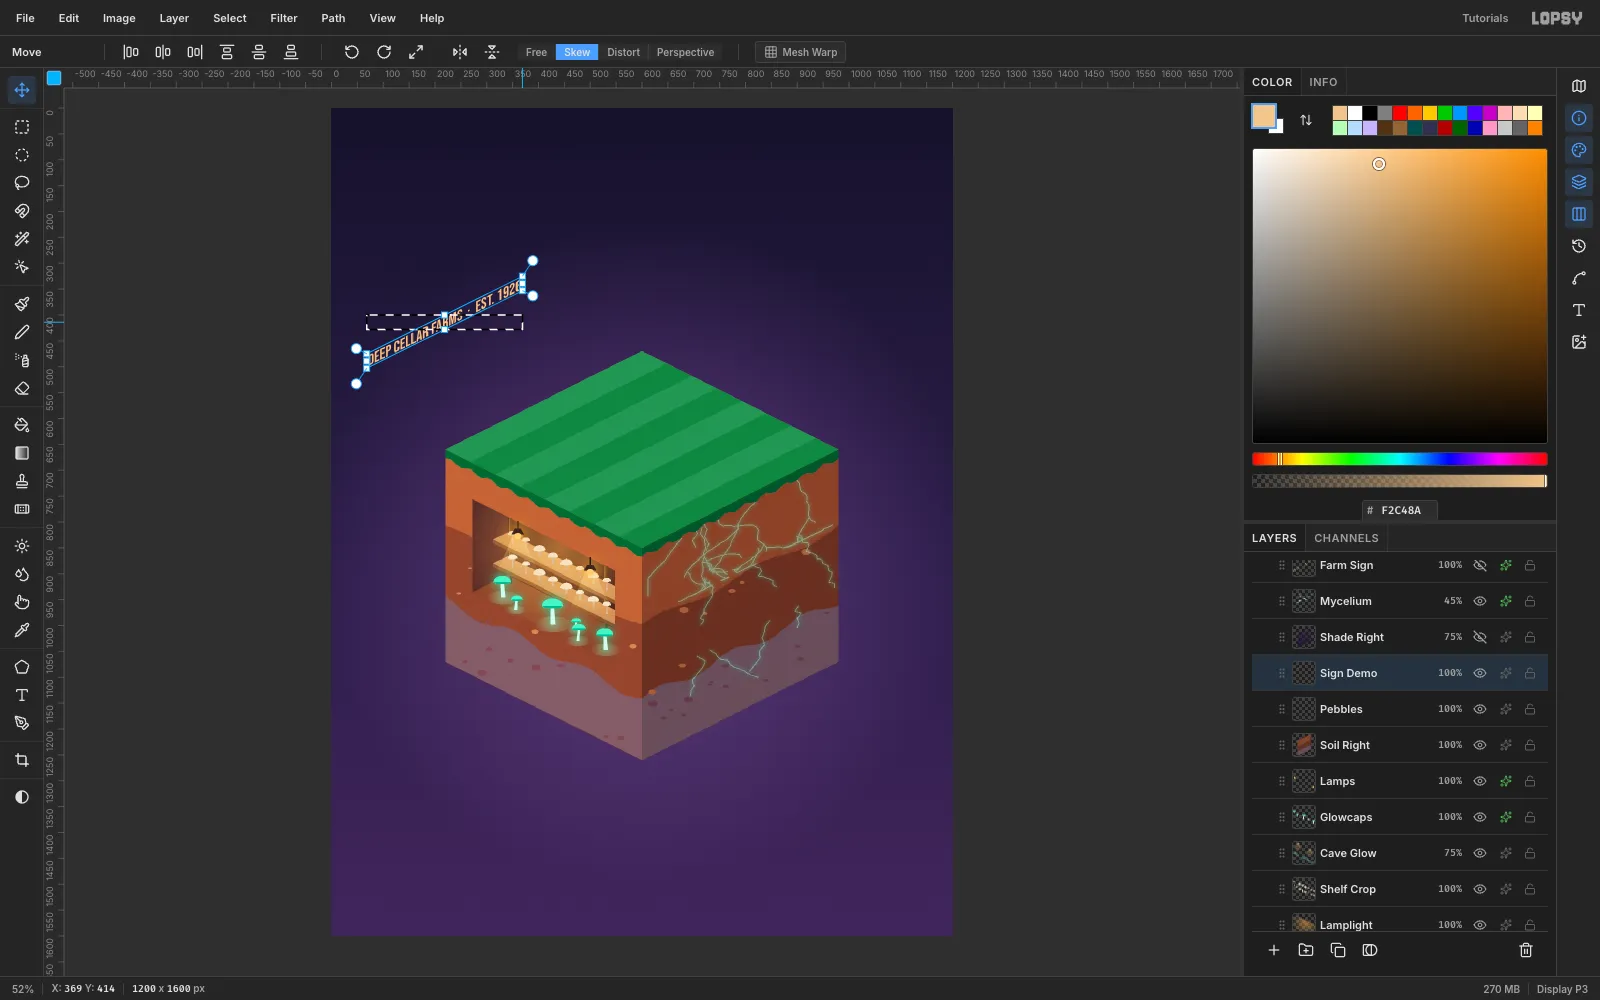
Text on the right face has to follow that face's plane. The baseline climbs 1 px per 2 px, but the letter stems stay vertical. That's a vertical shear, not a rotation.
- In an empty patch of sky, type
DEEP CELLAR FARMS · EST. 1926in Bebas Neue at 30 px, then click Rasterize Layer. - Marquee around it, switch to the Move tool, and click Skew in the options bar.
- Drag the right-edge handle straight up by a quarter of the text's width (about 75 px for this line). Press Cmd+D.
- Name the layer
Farm Signand move it so its bottom-left corner sits at (642, 1065) on the right face. - Add a Color Overlay of and a hard Drop Shadow in : Offset 2 / 2, Blur 0, Opacity 80. This gives a carved look.
- Drag
Farm SignaboveMycelium. Then lasso a band about 26 px above and below the lettering and delete it onMycelium, so no threads cross the words.
- In an empty patch of sky, type
-
Shade and texture the faces
- Shade Left: add this layer just above
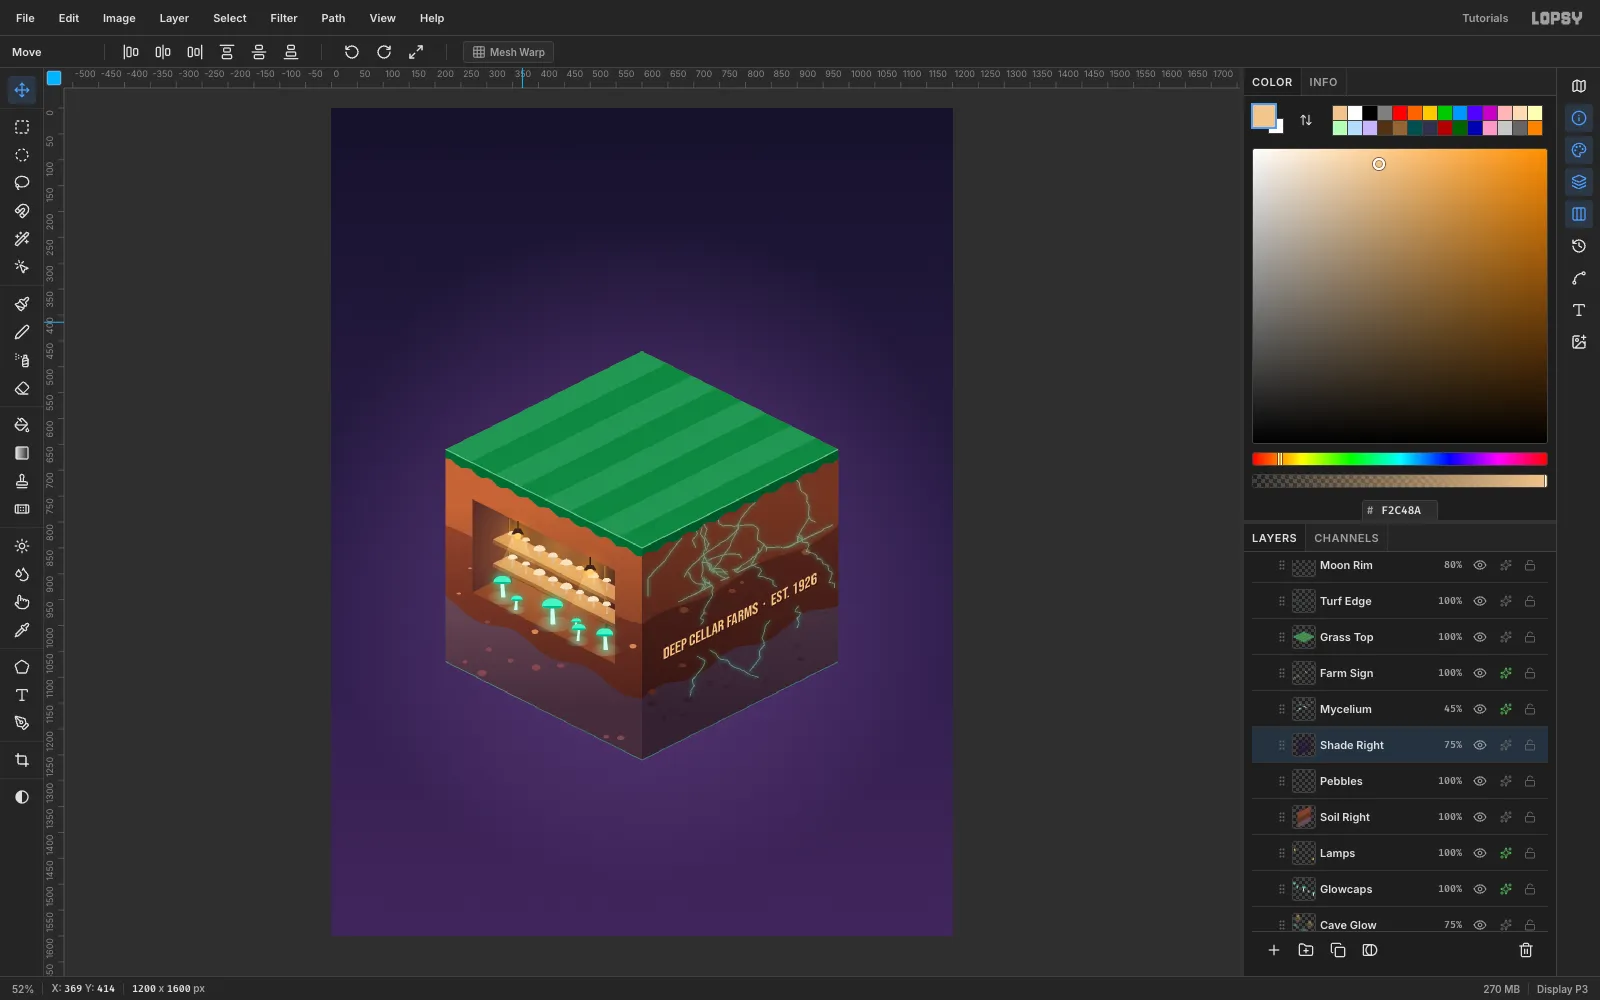
Soil Left, so it darkens the soil but not the cave. Lasso the left face and drag a linear gradient from at 0% to 70%, top to bottom. Set it to Multiply at 80%. - Shade Right: add this layer above
Pebbles. Do the same on the right face, but from 25% to 80%, so the shaded side stays darker all the way down. Set it to Multiply at 75%. - On each soil layer, run Filter → Add Noise… with Amount 10, Mono and Gaussian for grain.
- Lasso each bedrock band and run Brightness/Contrast… at Brightness +14, so the bottom of the block doesn't sink into the sky.
- Brush a 3 px line along the two front top edges on a
Moon Rimlayer at 80%. Hold Shift and click to draw straight lines. Add a 2 px line along the bottom edges on aBase Rimlayer at 40%.
- Shade Left: add this layer just above
-
Build the cabin and trees
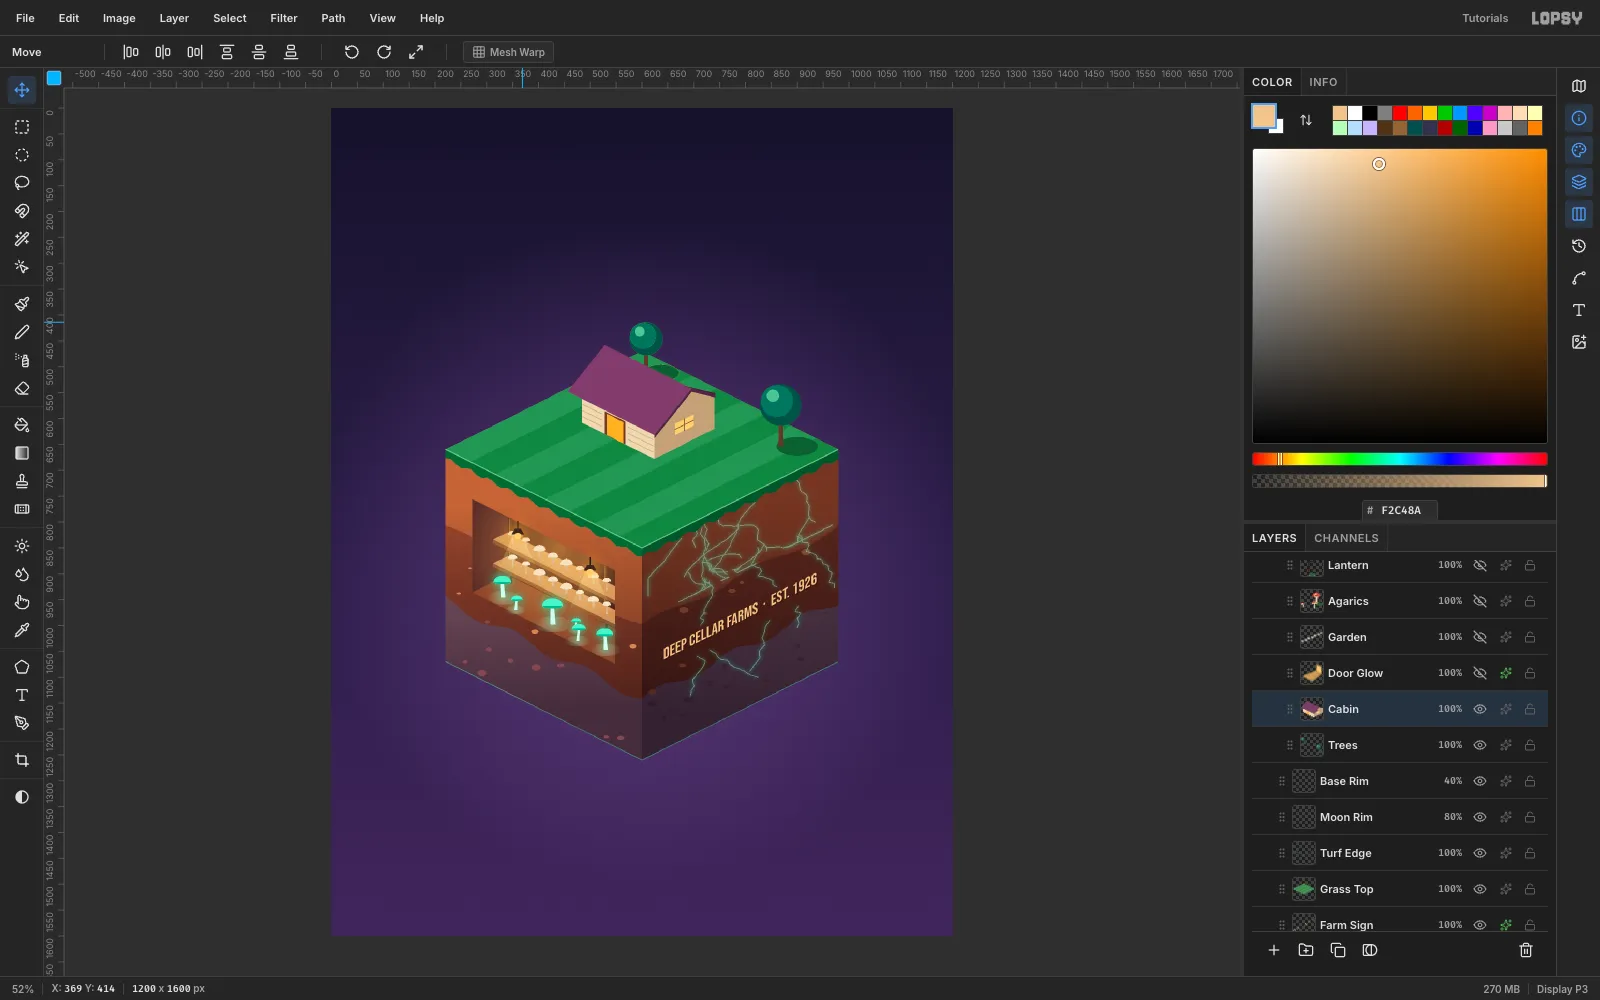
Make the grass layer active and click New Group for a
Topsidegroup.Cabin layer:
- Fill the long wall that faces left in and the gable end in . Light comes from the upper left.
- Brush 2 px siding lines parallel to the wall's bottom edge.
- Fill the door with a inner panel, and fill the window .
- Fill the front roof slope , with a fascia along the gable. The back slope faces away, so you never draw it.
Trees layer:
- Each tree is a dark ellipse shadow on the grass to its right, then a trunk.
- Build the canopy from three circles: , then offset up and left, then a small highlight.
- The trees stand behind the cabin, so drag
TreesbelowCabinin the Layers panel.
-
Add the garden and fly agarics
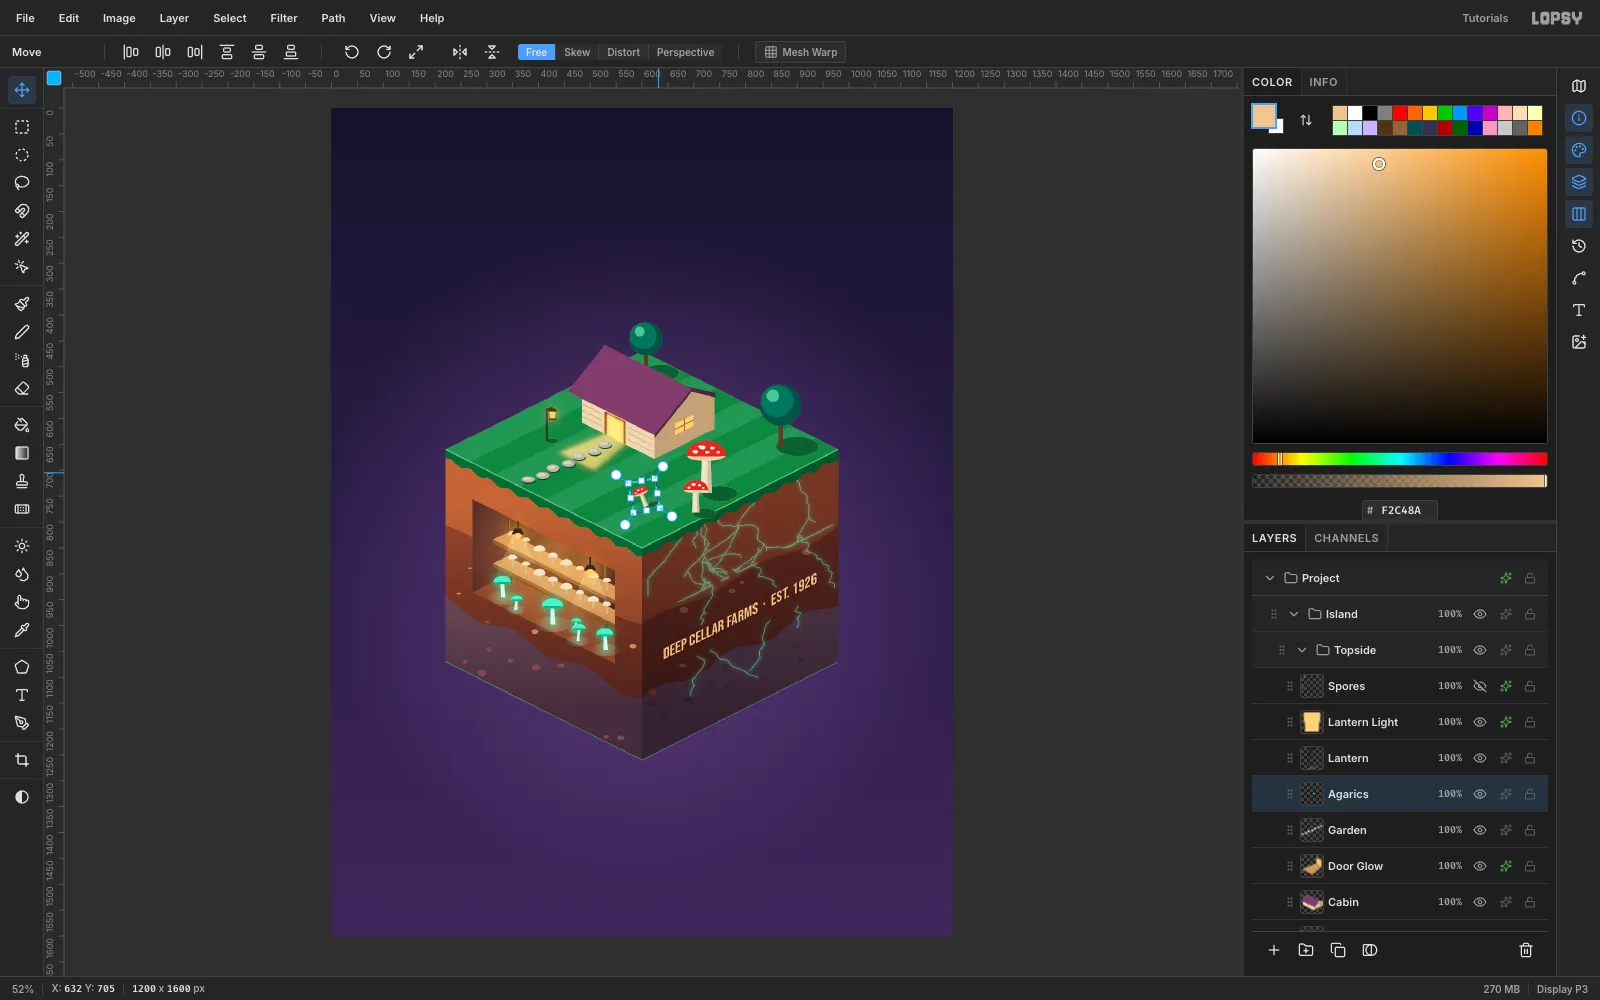
- Door Glow. Lasso a trapezoid running out from the door toward the left edge. Fill it with a fading gradient, run Gaussian Blur at 9, and set the layer to Screen.
- Garden. Lay seven stepping stones as 26 × 13 ellipses. Run them straight out of the door, down and to the left, which is the direction the door faces. Put a dark offset copy under each stone, then add a light highlight.
- Agarics. Draw three fly agarics: stems, domed caps, gills and spots. Give each a dark cast shadow.
- Lean the small agaric. Marquee the smallest one, switch to Move, and drag its rotate handle about −12°. Press Cmd+D.
- Lantern. Draw a lantern post at the left. Marquee just the lamp head, cut it with Cmd+X, and paste it with Cmd+V, which puts it back in place on its own layer. Give only that layer an amber Outer Glow, so the post stays crisp.
-
Set the title
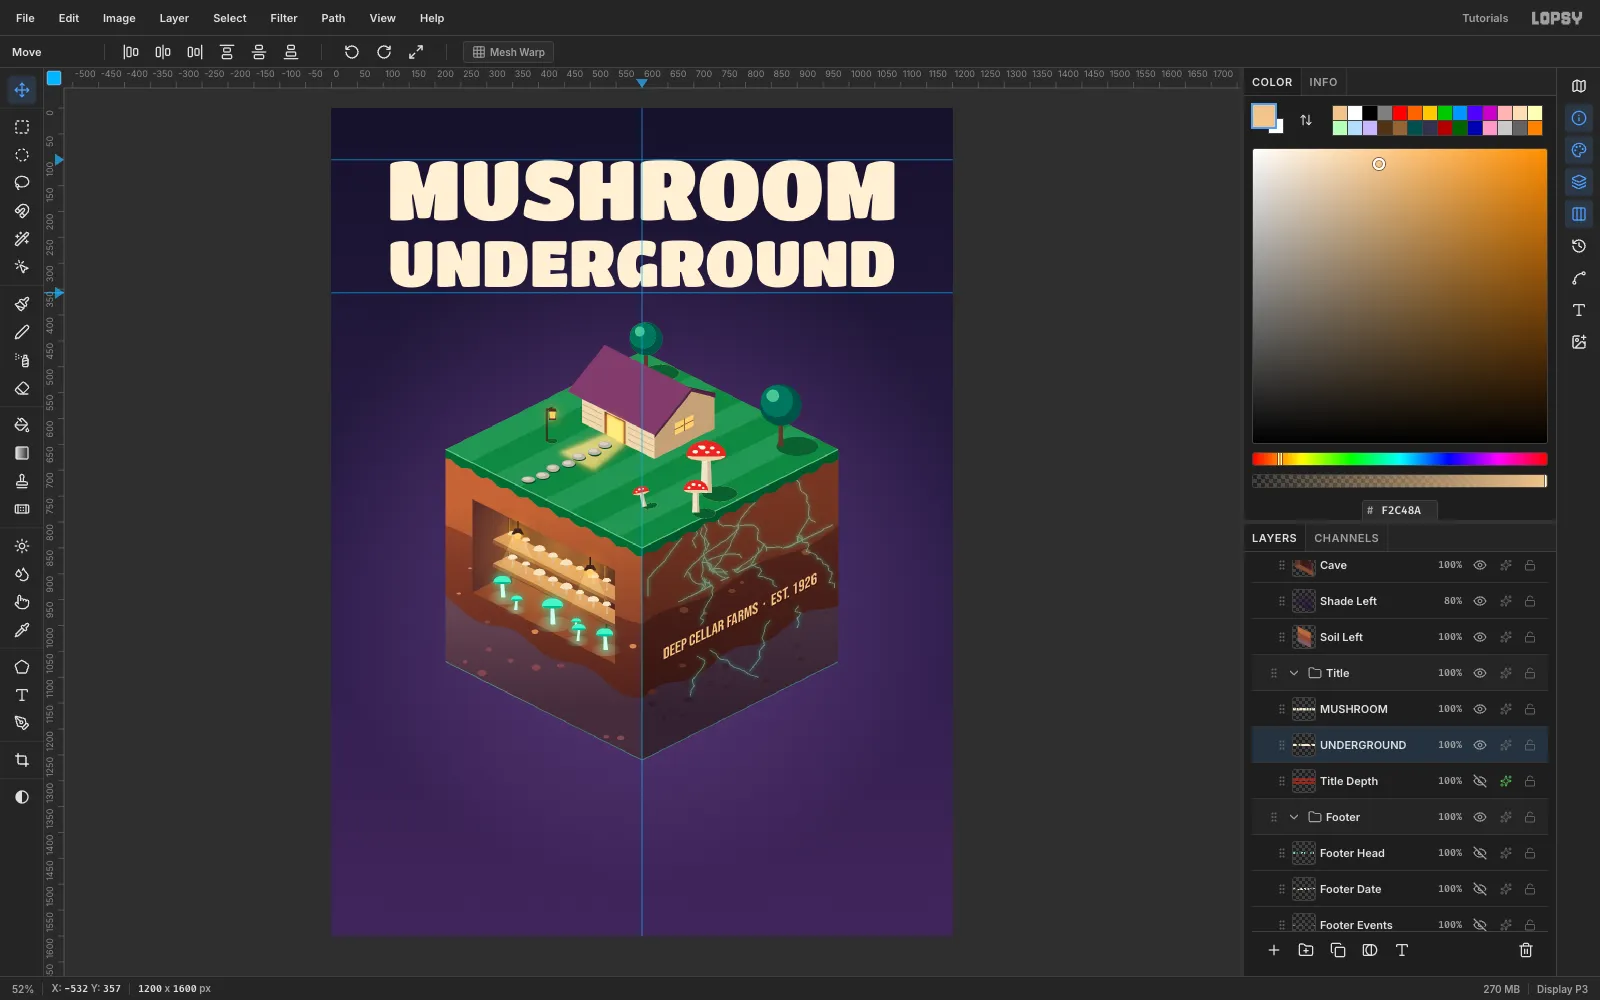
- Cmd-click the top ruler near the middle to drop a guide at exactly half the width.
- Click the left ruler at y 100 and y 357 to mark the title band.
- Type
MUSHROOMin Titan One at 162 px andUNDERGROUNDat 125 px, both in . Those sizes make both lines exactly 974 px wide. - Move them so they're centred on the guide, with ink tops at y 100 and y 256.
-
Extrude the title in 3D
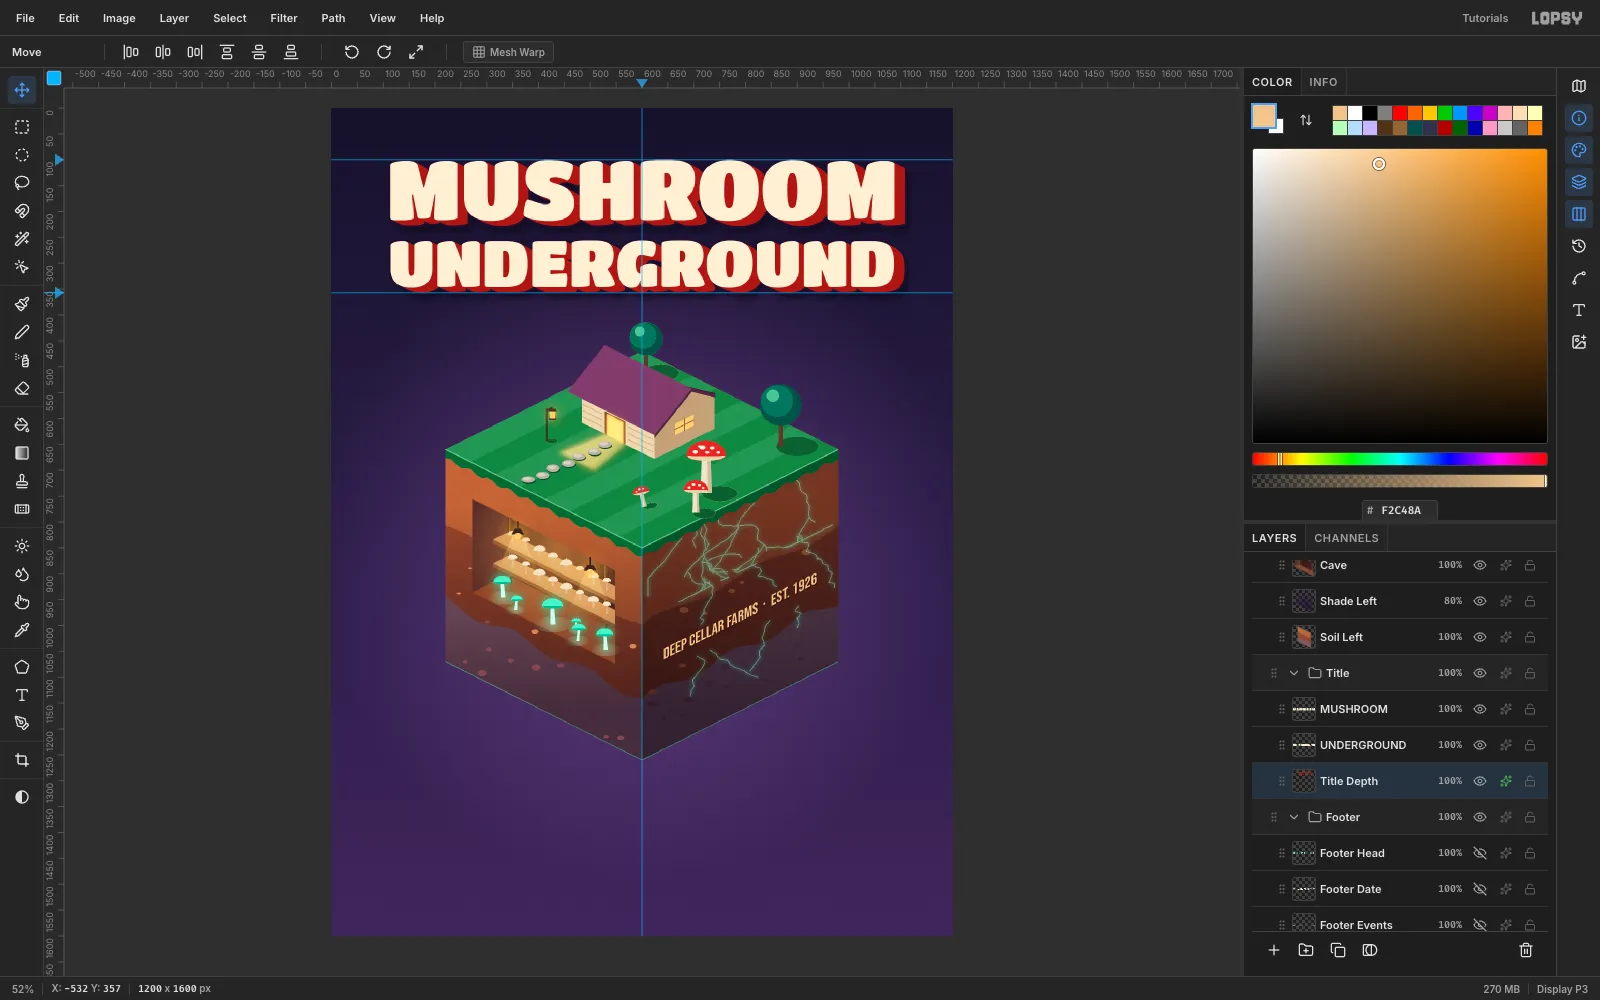
First, make a flat red copy of both lines:
- Select each text line and click Duplicate Layer.
- Click the copy's row before doing anything else (#804). Otherwise, the next nudge moves the original too.
- Rasterize each copy and move it back by −10 / −10, onto its source line.
- Drag both copies under the text, then Merge Down into one layer named
Title Depth.
Then build the depth by doubling:
- Duplicate
Title Depth, click the copy's row, and move it by (+2, +1). That's the isometric direction. - Merge it down.
- Repeat with (+4, +2), (+8, +4) and (+6, +3).
Four merges give a solid extrusion 20 px across and 10 px down.
Finish it:
- Add a Color Overlay of and click Rasterize Layer Style to bake it in.
- Add a Stroke (Width 4, ) and a soft Drop Shadow (8 / 12, Blur 18, 65%).
-
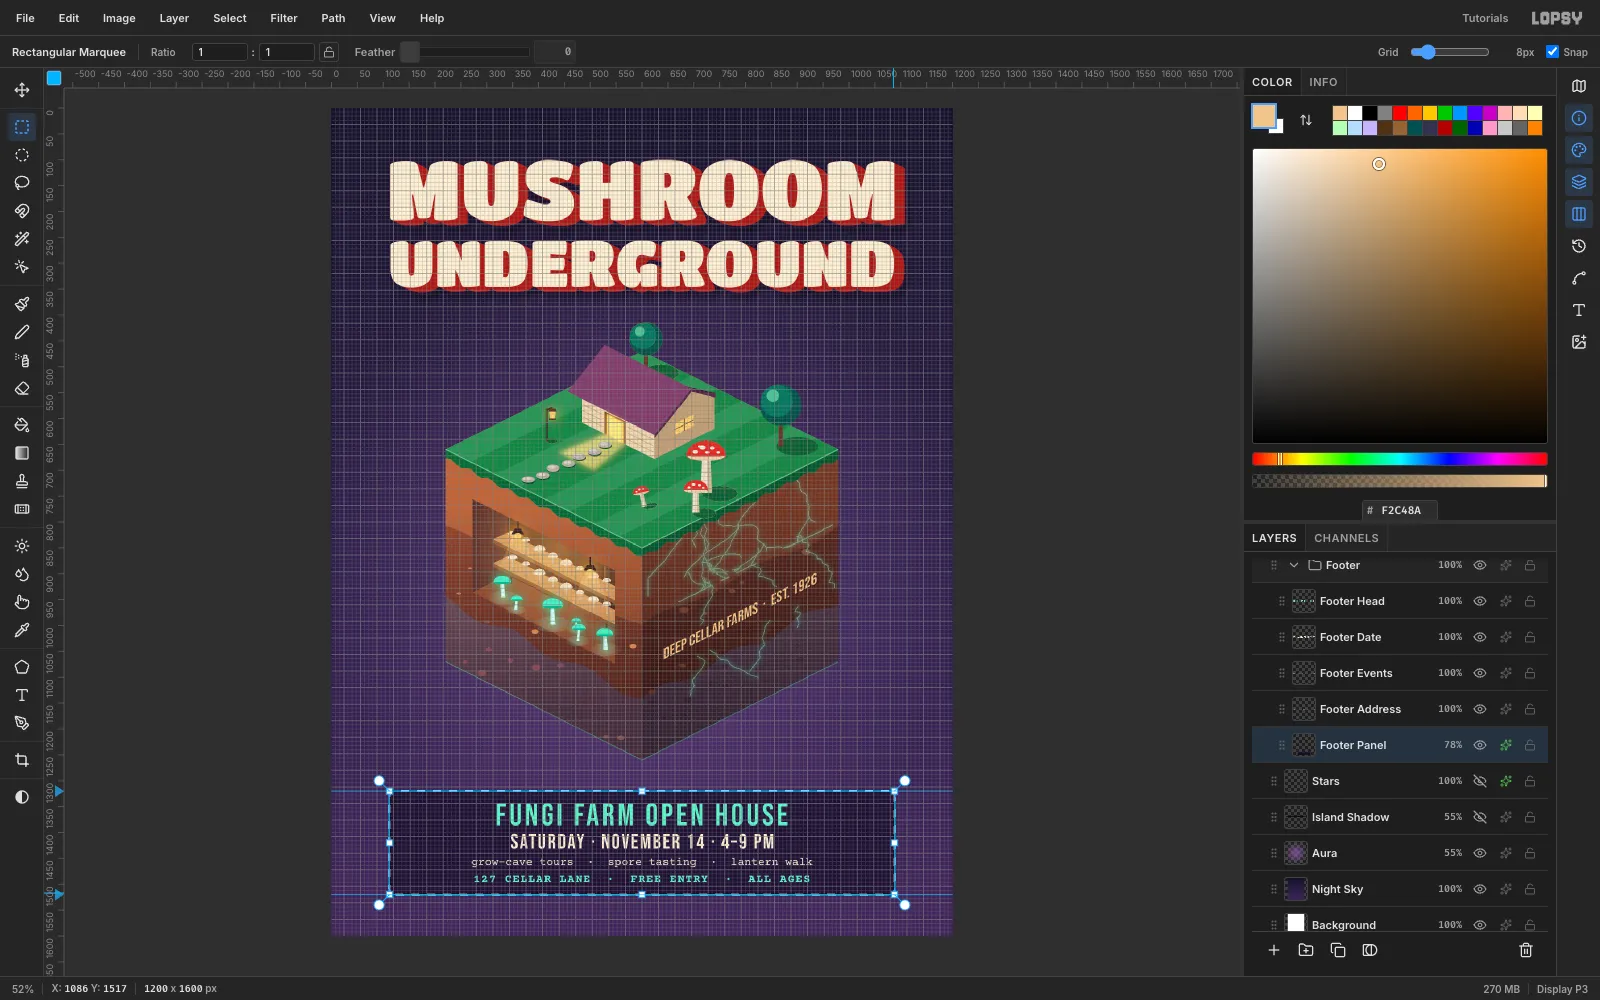
Set the event details on a grid
Panel.
- Press Cmd+' to show the grid and set Grid size to 8 px. Snap turns on with it.
- Drag a marquee from about (114, 1323) to (1086, 1517). It snaps to exactly (112, 1320) – (1088, 1520).
- Run Select → Shrink by 14, then Select → Grow by 14 to round the corners.
- Fill it on a
Footer Panellayer at 78%, and add a 2 px Stroke.
Lines. Centre each line on x 600, leaving 23 px above the first line and below the last:
FUNGI FARM OPEN HOUSEin Bebas Neue 60 px, mint, letter spacing 6, ink top at y 1343.SATURDAY · NOVEMBER 14 · 4–9 PMin Bebas Neue 40 px, cream, letter spacing 3, ink top at y 1402.grow-cave tours · spore tasting · lantern walkin Courier Prime 22 px, cream, ink top at y 1448.127 CELLAR LANE · FREE ENTRY · ALL AGESin Courier Prime Bold 22 px, mint, letter spacing 2, ink top at y 1483.
Set the letter spacing in the Text panel while each line is still the active layer.
-
Release the spores
- Stars. On a
Starslayer, click single 2–4 px brush dabs around the sky. Add a small cream Outer Glow. - Spores. On a
Sporeslayer at the top ofTopside, dab 3–12 px dots, mostly with a few . Cluster them above the agarics and around the block. Give them an Outer Glow in at Size 22, Spread 18, Opacity 90. - Spores painted over the cabin or grass look like noise on the drawing. Lasso the island's silhouette on
Sporesand press Delete. - Shadow. Under the
Islandgroup, fill a 560 × 30 ellipse centred on (600, 1280) with . Run Gaussian Blur at 14 and set it to 55%. The block now floats above the panel with some breathing room.
Export with File → Quick Export PNG, and save the project with File → Save Project so you can come back to any layer.
- Stars. On a