Design a Grunge Record Store App Mockup
Mock up a grunge record-store app in Lopsy, with a spray-painted stencil logo on concrete, two phone screens, filter-made album covers and a tilted phone group.
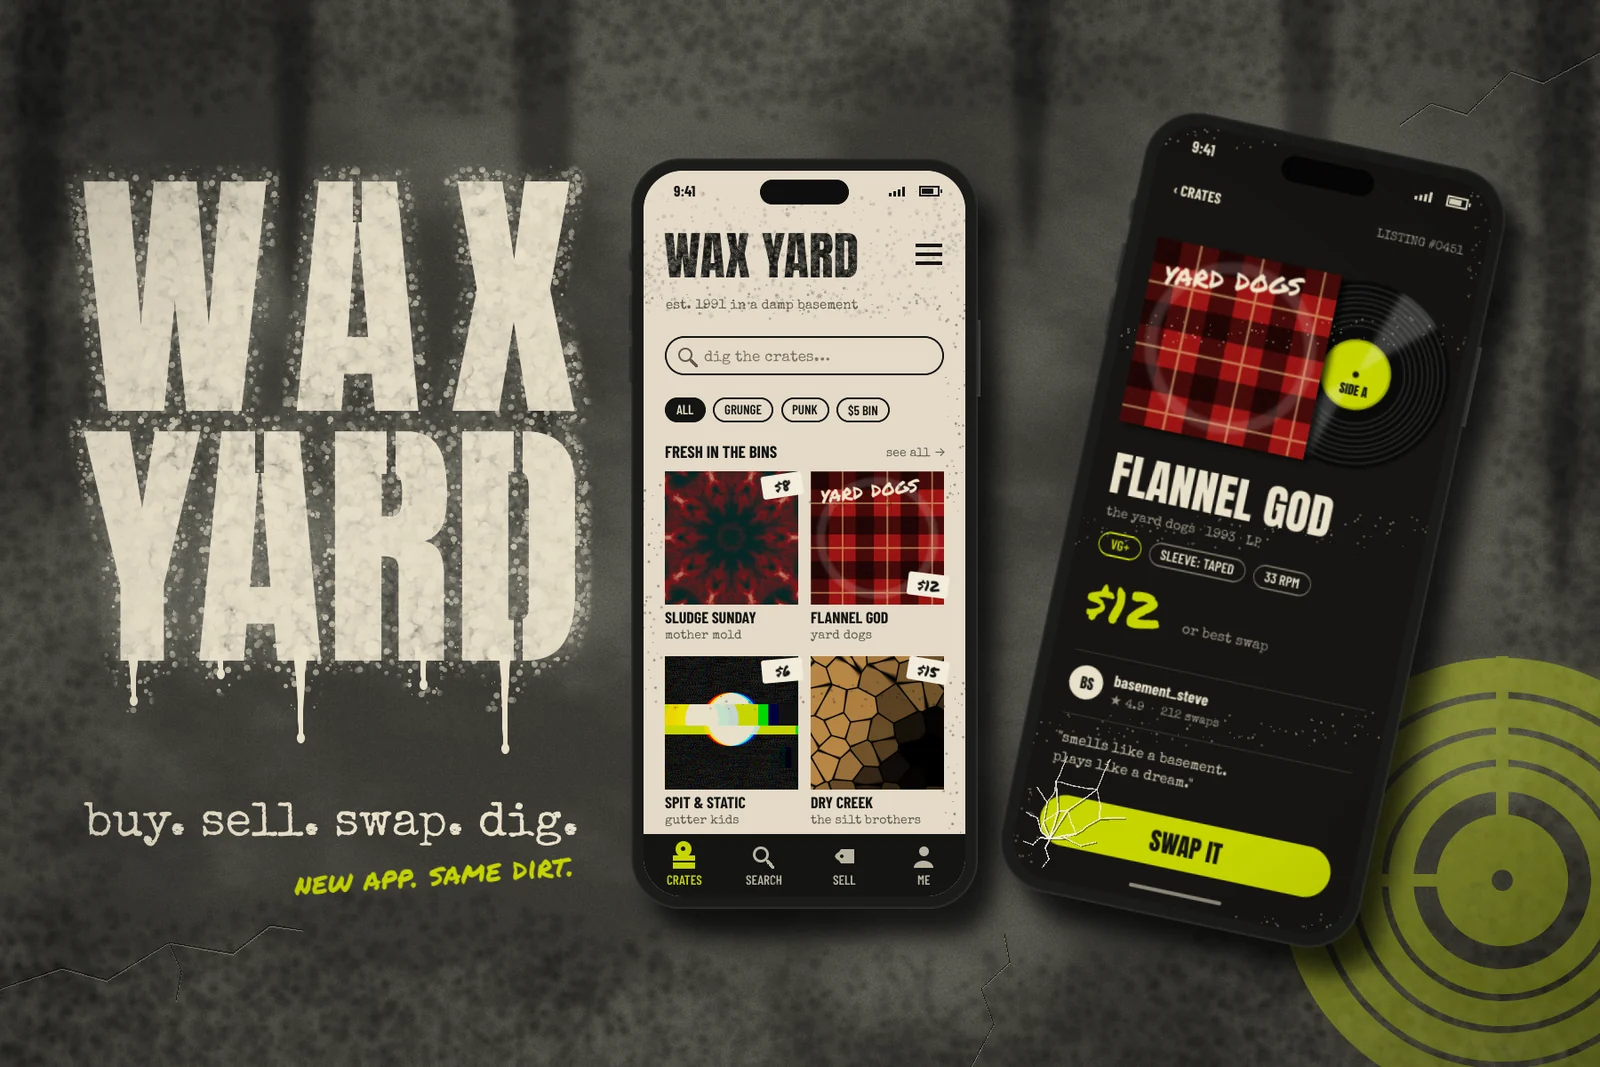
Most app mockups sit on a clean gradient. This one sits on a basement wall. You'll design Wax Yard, an imaginary app for buying, selling and swapping used vinyl. The presentation borrows from 90s grunge print: stencils, spray paint, photocopier dust and David Carson-style rough edges. The app screens underneath still follow real UI rules, so the type lines up, the tap targets are a sensible size and the hierarchy reads.
There are three parts on an 1800 × 1200 canvas:
- The wall: concrete built from Clouds, Emboss and noise, with sprayed grime, water stains and cracks, and a WAX YARD logo sprayed through a stencil made from type.
- Browse screen: a light phone with a header, a search bar, filter chips and a grid of four album covers, each made with a different filter: Kaleidoscope, a woven plaid, Pixel Stretch and Voronoi.
- Listing screen: a dark phone with a record sliding out of its flannel sleeve and a big SWAP IT button. The whole phone is grouped and tilted with one transform.
Everything is drawn in Lopsy. The fonts are Anton for display type, Special Elite for typewriter text, Barlow Condensed for UI labels and Permanent Marker for hand-written prices.
The palette:
-
Concrete
-
grime
-
cracks
-
Bone
-
light screen
-
stickers
-
Ink
-
phone body
-
dark screen
-
Flannel red
-
plaid bands
-
pinstripe
-
Cover gradient map
-
Chartreuse accent
-
label rim
-
Mud tint
-
grey text
Every Lopsy document starts with a top-level Project group, and the parts below are built as groups inside it. The screenshots were taken from the finished project file with the later layers hidden, so the Layers panel sometimes lists layers you haven't made yet.
-
Pour a concrete wall
Open Lopsy and create an 1800 × 1200 pixel document.
- Base. Select Background, set the foreground to and choose Edit → Fill. Run Filter → Add Noise… at Amount 9, Mono, Gaussian.
- Mottling. Rename Layer 1 to
Concrete. Set the foreground to black and the background to white, then run Filter → Clouds… at Scale 7. Follow it with Filter → Emboss… at Angle 135 and Strength 40. Set the layer to Overlay at 22%. - Pits. Add a layer called
Pitsand fill it with mid grey . Run Add Noise at 45 (Mono, Gaussian), Gaussian Blur at 1, then Emboss at 135 / 55. Set it to Overlay at 60%. The tiny bumps catch the light from the top left, like poured concrete.
Select
ConcreteandPitsand choose Layer → Group Layers. Name the groupWall. Background stays outside it.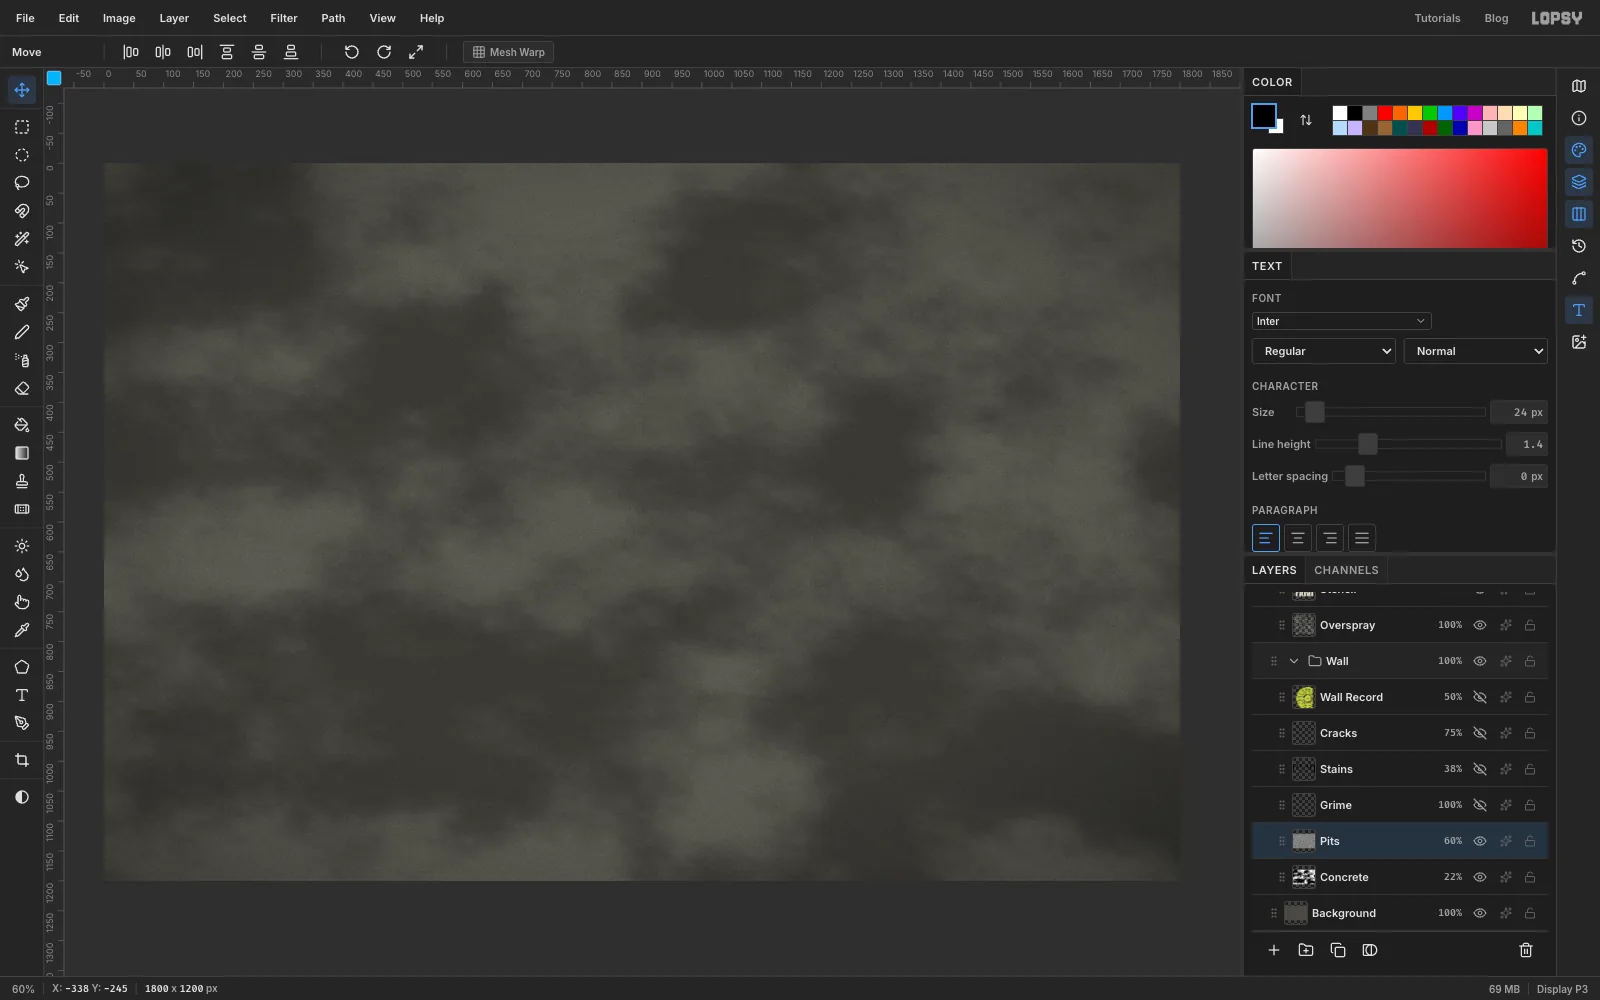
-
Add grime, water stains and cracks
Add three more layers inside
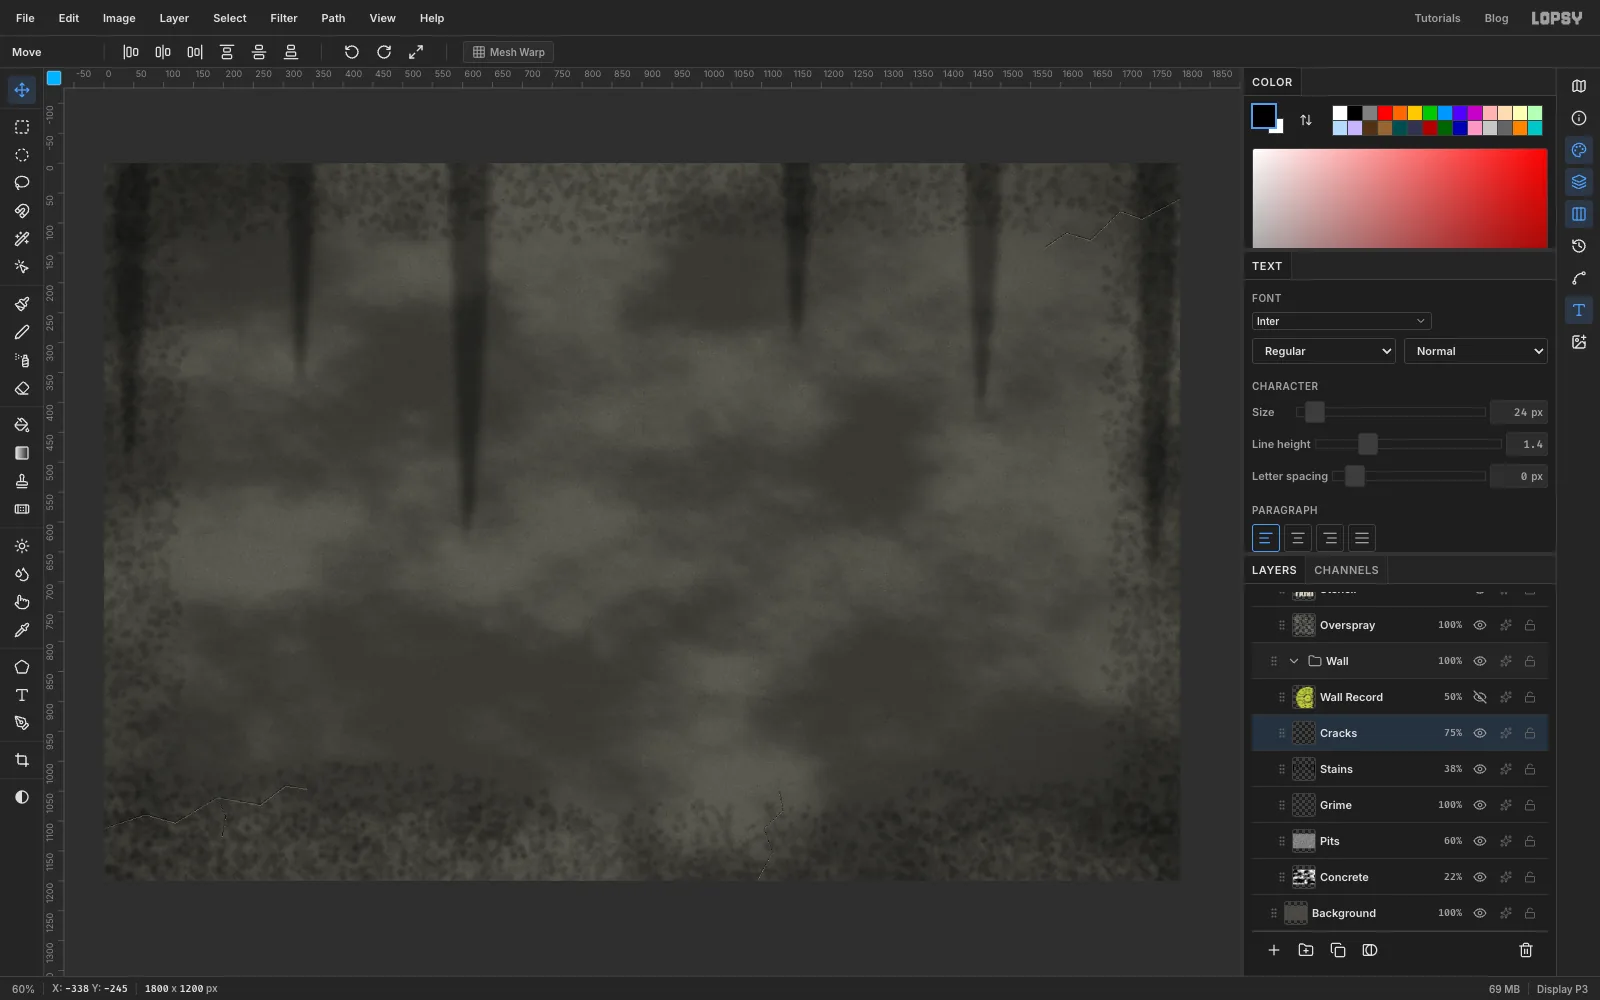
Wall:- Grime. Pick the Spray tool with foreground , Size 220, Density 90, Opacity 35 and Softness 85. Spray along all four edges and heaviest along the bottom. Run Gaussian Blur at 5 and set the layer to Multiply.
- Stains. With the Lasso, draw a long thin wedge that starts above the top edge and tapers to a point lower down. Choose Select → Feather… at 14 and fill it with black. Make five or six of these, all different lengths. Run Add Noise at 30 and a Motion Blur at Angle 90, Distance 18, so the streaks look wet. Set the layer to Multiply at 38%.
- Cracks. With the Pencil at Size 1, click and Shift-click a jagged zig-zag in a corner, with one short branch. Draw it once in , then again 1–2 px higher in , so each crack has a dark line with a light lip underneath. Set the layer to 75%.
-
Turn type into a stencil
A real stencil gives you hard edges where the card was, and soft overspray around it. You'll get both by spraying through a selection made from type.
Click the Project group and click New Group. Name it
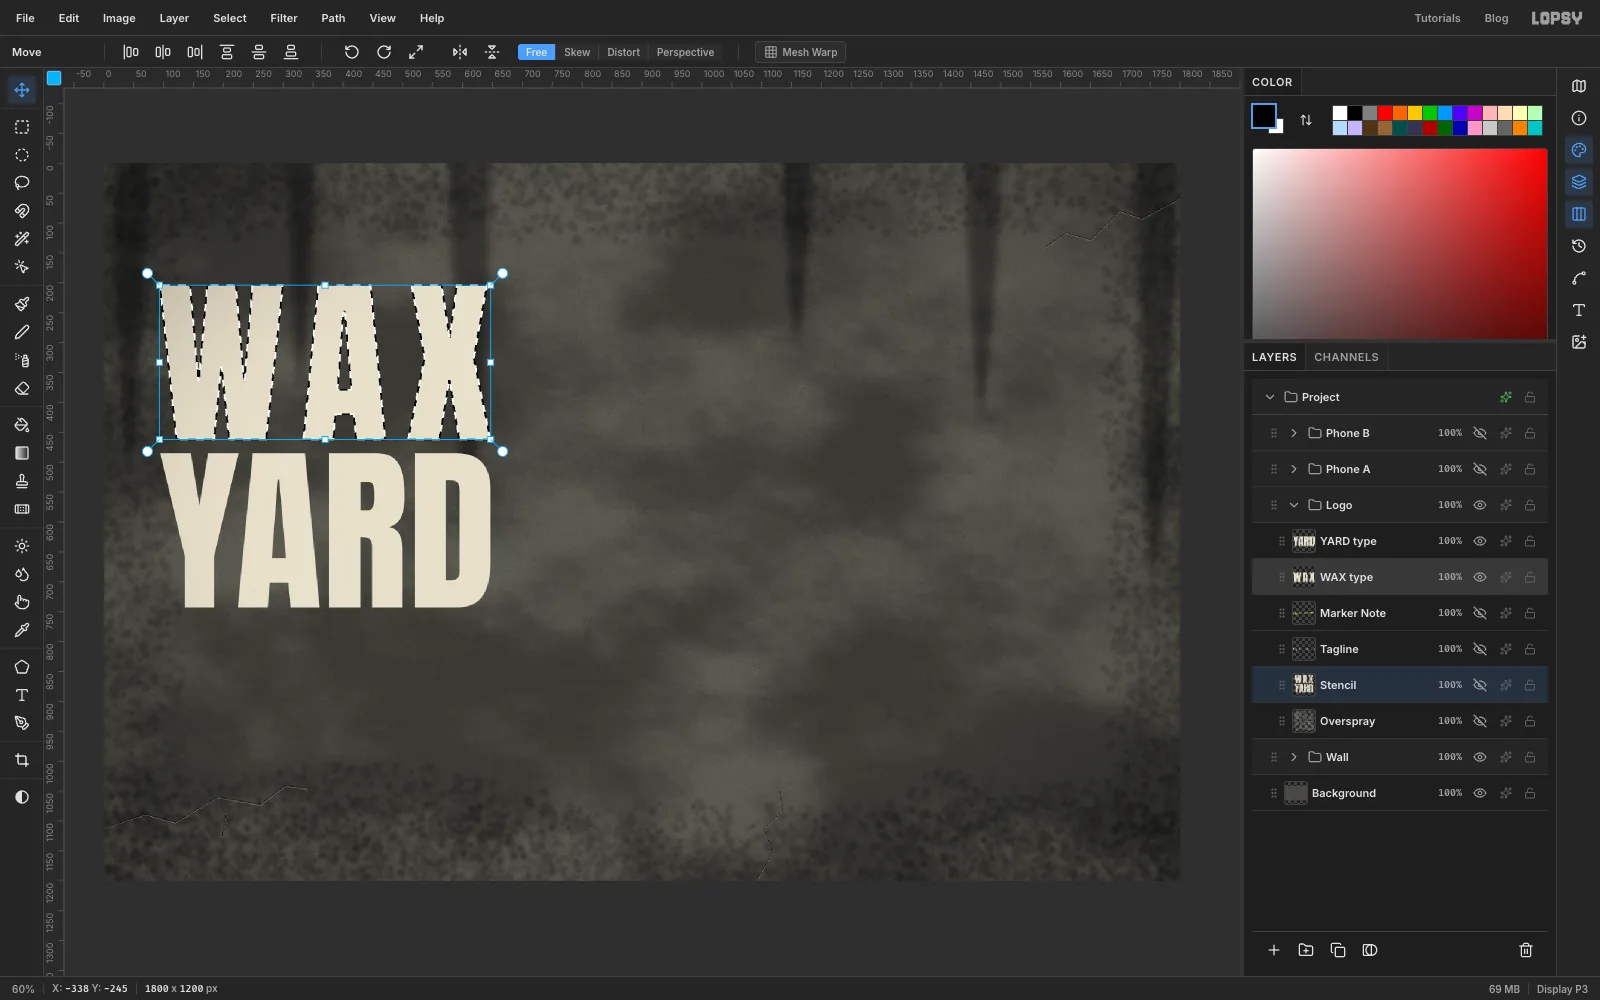
Logoand add a layer inside it calledStencil.Pick the Text tool, choose Anton at 300 px in bone , and click near the left edge, about halfway down. Type
YARDand press Tab. Then click above it to typeWAX. Creating the lower line first means your click for the second line can't land inside the first text box. In the Text panel, give WAX a Letter spacing of 30, so both words are the same width.With the
Stencillayer active, Cmd-click the WAX thumbnail to load the letters as a selection. Then spray two passes:- Overspray. Select → Grow… by 12 and Select → Feather… by 16. Spray across the word at Size 140, Density 50, Opacity 22, Softness 100.
- Paint. Cmd-click the thumbnail again for a crisp selection. Spray back and forth over it at Size 200, Density 100, Opacity 100, Softness 40 until the letters are solid, with a bit of spray texture left.
Do the same for YARD, then hide both text layers.
-
Cut stencil bridges and add drips
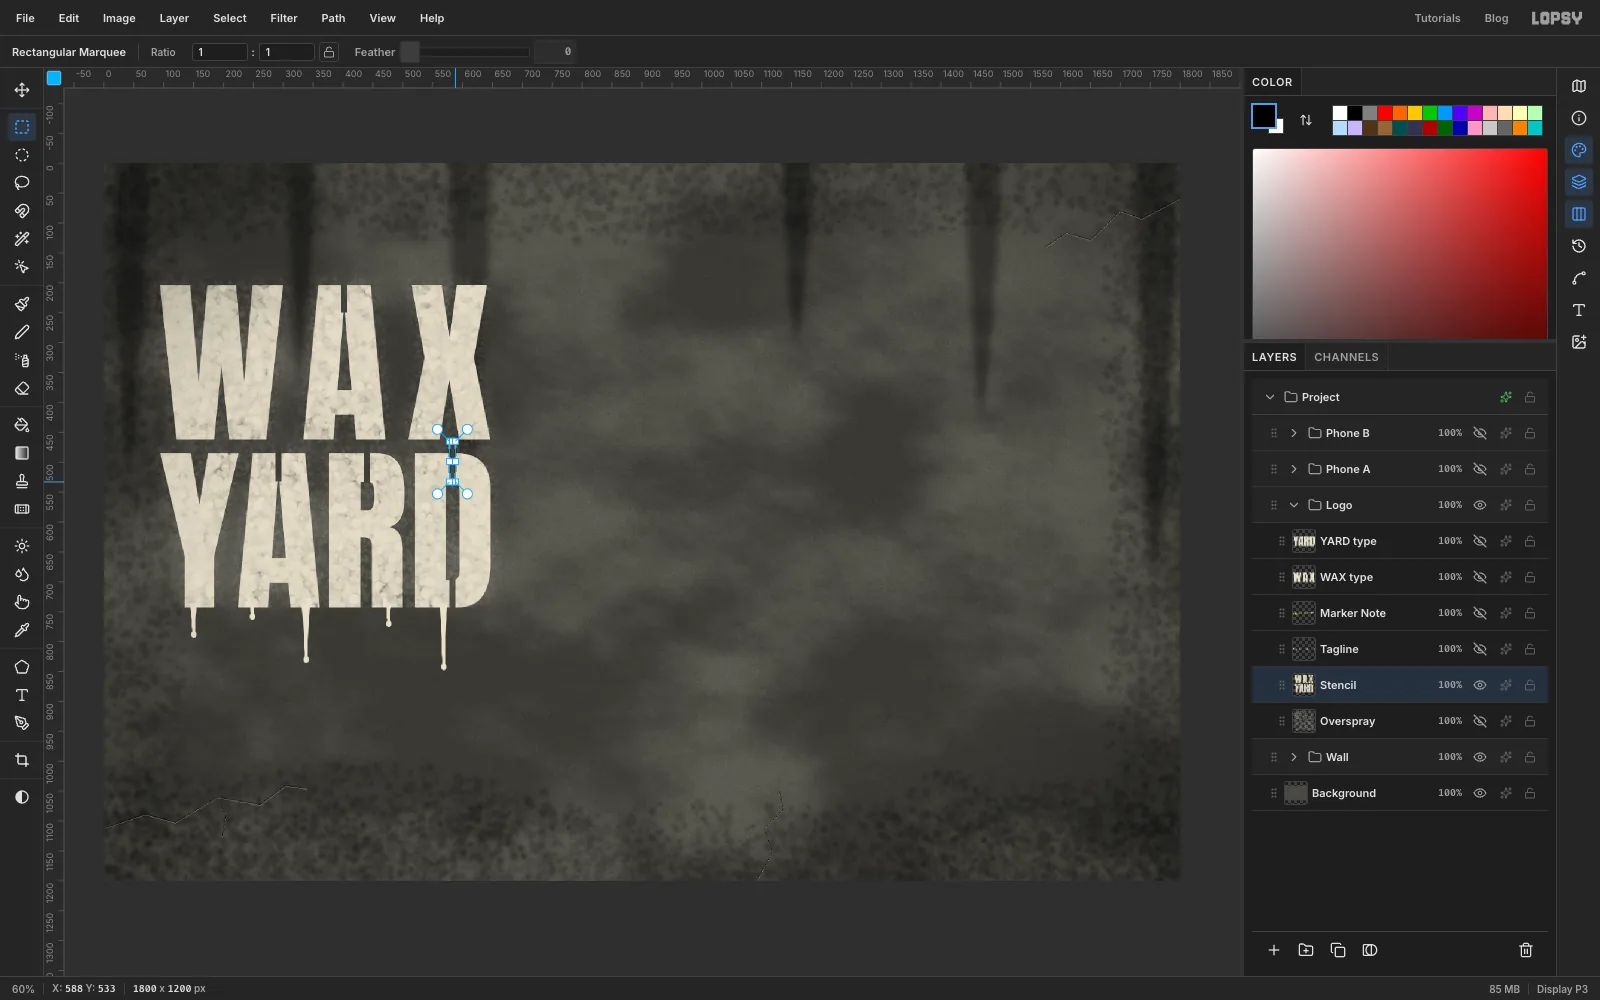
A cardboard stencil can't hold the floating middle of an A, R or D, so stencil letters have little bridges cut through them. On
Stencil, drag a narrow Rectangular Marquee, about 10 px wide, from the outside edge of the letter into each enclosed counter and press Delete. WAX needs one bridge through the top of the A. YARD needs one in the A, one at the top of the R and one at the top and bottom of the D.Then make the paint run. With the Lasso, draw each drip as a long, narrow wedge hanging from the bottom edge of a letter: wide at the top and pinched to a few pixels at the bottom. Fill it with bone. Then use the Elliptical Marquee to add a slightly taller-than-wide blob at the tip. Make five drips with different lengths and widths, offset from the centres of the letters. Short ones look as convincing as long ones.
-
Speckle the overspray and add the tagline
Add a layer called
Oversprayand drag it belowStencilin the Layers panel.- Halo. Cmd-click the
Stencilthumbnail, Grow by 4 and Feather by 22. Spray in bone at Size 120, Density 80, Opacity 45, Softness 100. - Speckle. Cmd-click
Stencilagain, Grow by 16 and Feather by 6. Spray in bone at Size 70, Density 10, Opacity 85, Softness 0. Hard, separate dots are what real aerosol leaves behind.
For the tagline, set
buy. sell. swap. dig.in Special Elite at 54 px in bone, about 150 px below the bottom of YARD, and line up its left edge with the W. Setnew app. same dirt.in Permanent Marker at 34 in chartreuse , and line up its right edge with the D. Rasterize the note (the Rasterize Layer button in the Layers panel), marquee it, and drag the Move tool's rotate handle about 4° counter-clockwise.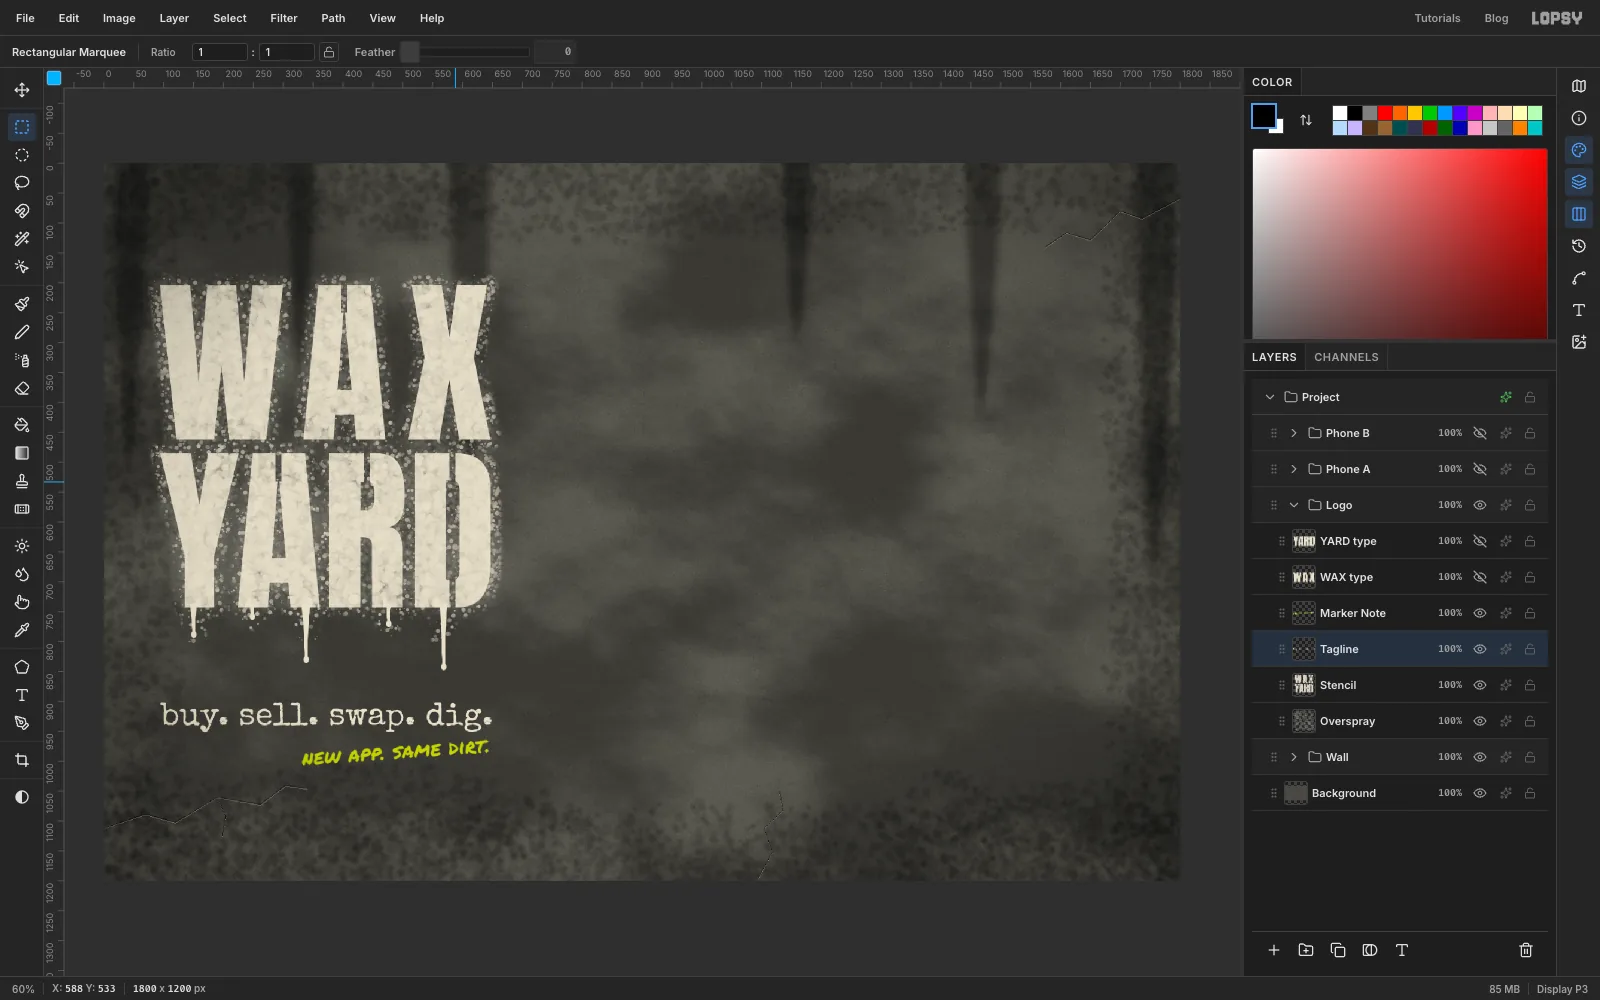
- Halo. Cmd-click the
-
Build the first phone
Click Project and make a new group called
Phone A. Everything in a phone uses the Shape tool set to Rectangle. It draws from the centre outwards, so start each drag at the point where you want the middle of the phone, just right of the canvas centre.- Body. On a layer called
Body A, set the shape fill to and Corner Radius to 56. Drag out a 390 × 844 rectangle. - Screen. On a new layer
Screen A, use and Corner Radius 44, and draw it 14 px smaller on every side. - Camera island. On
Island A, draw a 100 × 28 pill in with Corner Radius 14, 12 px below the top of the screen. - Buttons. Back on
Body A, marquee three small slivers on the left edge (silent switch and volume) and one longer one on the right, and fill them with .
Draw a dark
Phone Bgroup the same way, leaving a 100 px gap to its right. Name its layersBody B,Screen BandIsland B, and use a screen and a pure black island.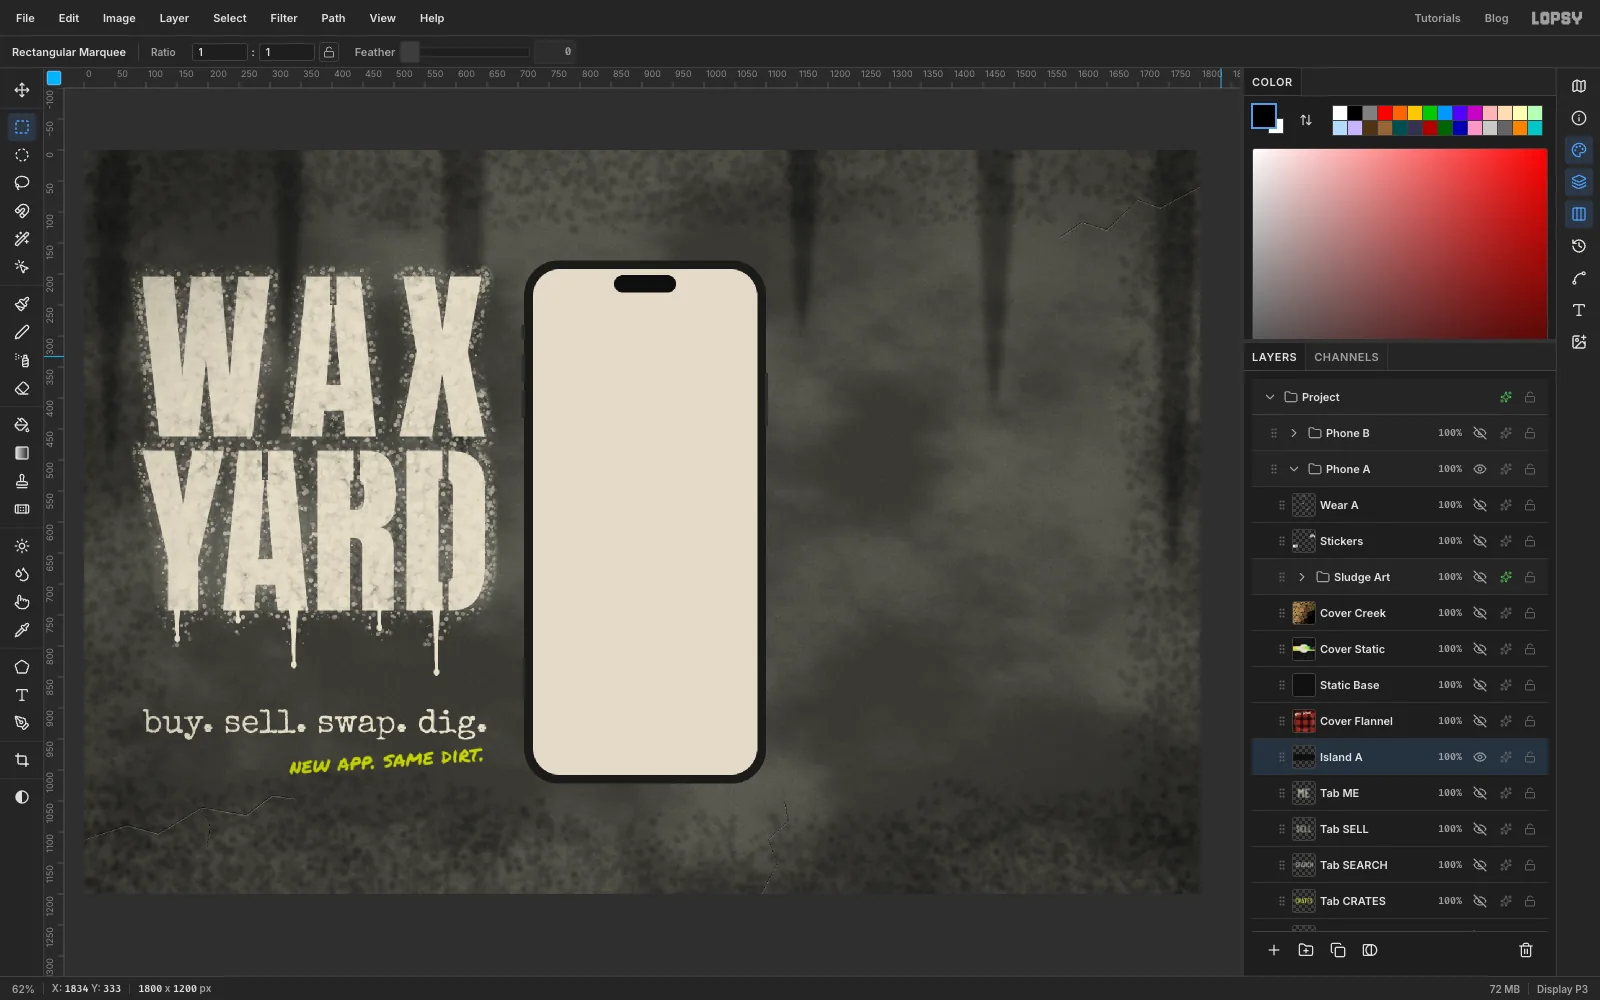
- Body. On a layer called
-
Make a kaleidoscope album cover
The browse screen shows a two-by-two grid of 150 px album covers with a 14 px gap. The grid starts 24 px in from the left edge of the screen, about 340 px below its top. Leave room above it for the header, search bar and chips, which come later. The first cover is psychedelic sludge.
- Inside
Phone A, add a layer calledCover Sludge. Press D for black and white, then run Filter → Clouds… at Scale 14, then Filter → Kaleidoscope… with Segments 10 and Rotation 0. - The mandala fills the whole canvas, so shrink it. Marquee a square around its centre, switch to the Move tool and Cmd-drag the bottom-right corner handle inwards to about a fifth of the size. Drag the mandala up into the top-left slot of the grid and press Cmd+D to commit.
- Marquee the 150 × 150 slot, choose Select → Inverse and press Delete to trim everything outside the cover.
Clouds paints in greys, so the colour comes from an adjustment. With
Cover Sludgeselected, choose Layer → Group Layers and name the groupSludge Art. In the group's effects drawer, click Add Adjustment → Gradient Map. Set the stops to , at about 55% and . The shadows turn to a deep teal and the highlights to bone, with oxblood in between. Click a stop and type its colour into the Hex field.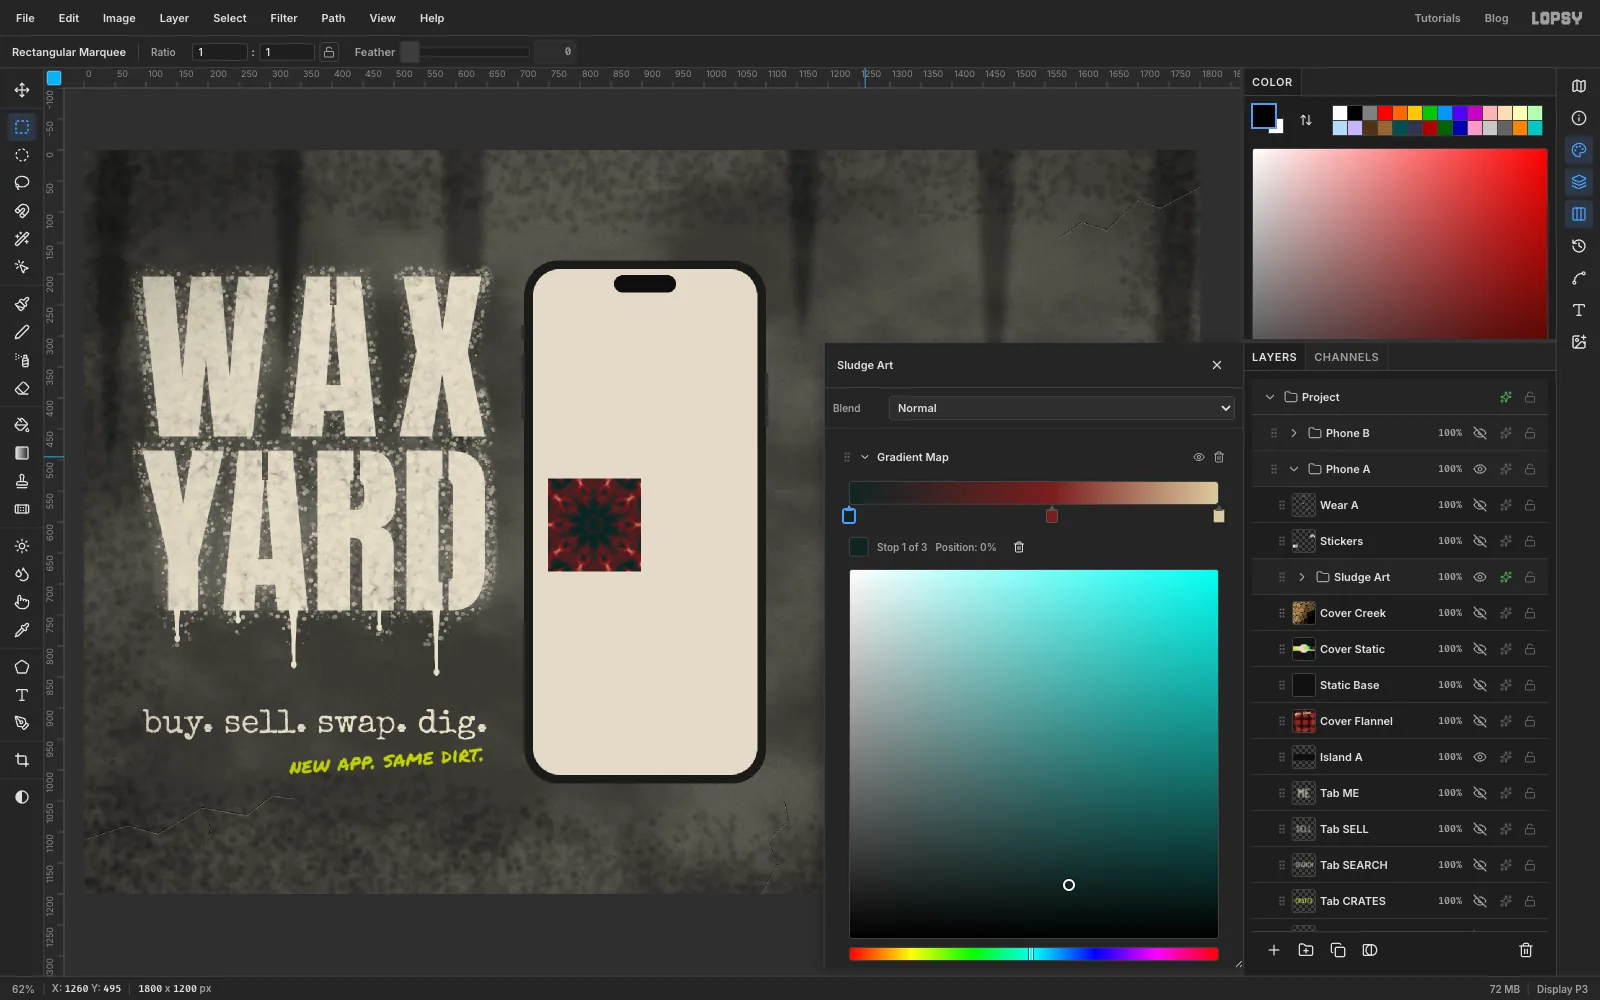
- Inside
-
Weave a flannel sleeve
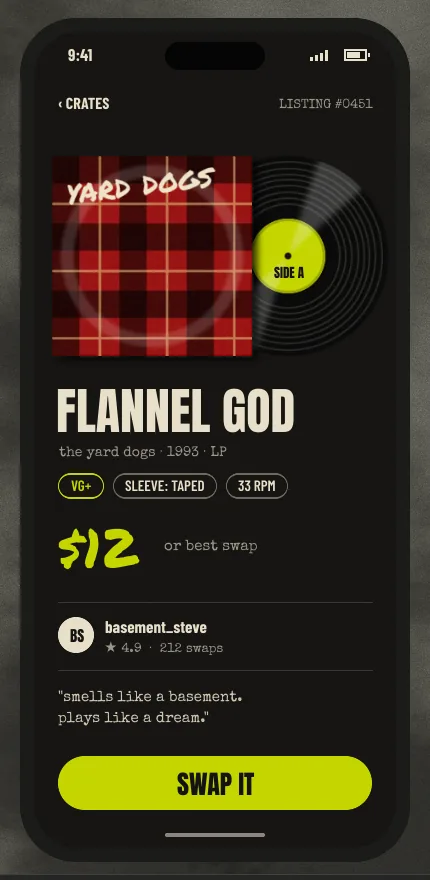
Nothing says grunge like flannel. Build the sleeve big on the dark phone, so it can be the listing screen's hero, and copy it into the grid later.
- On a layer called
SleeveinsidePhone B, marquee a 250 px square near the top of the screen and fill it with . - On a layer called
Plaid H, marquee a 34 px horizontal band across the square. Hold Shift and drag two more bands, evenly spaced, to add them to the selection. Fill with , then set the layer to Multiply at 62%. - Do the same with three vertical bands on a layer called
Plaid V. Where the bands cross, the colour goes darker, which is how woven checks look. - On a layer called
Plaid Lines, use the Pencil at Size 3 in . Click and Shift-click a thin line through the middle of every red gap. Set the layer to 55%. - Merge from the bottom up: select
Plaid Hand choose Layer → Merge Down, then do the same forPlaid VandPlaid Lines. Merge Down keeps the lower layer's blend mode, so merging into the NormalSleevelayer bakes everything in as you see it. - Marquee the sleeve and give it a fabric weave: Add Noise at 18 (Mono, Gaussian), then Motion Blur at Angle 45, Distance 2.
Ring wear. Real sleeves wear a pale ring where the record pushes against them. Drag an elliptical marquee almost the size of the sleeve, then hold Alt and drag a slightly smaller one on the same centre to leave a thin ring. Feather it by 4. Pick the Dodge tool at Exposure 14 and Size 40, and trace once around the ring.
Band name. Type
yard dogsin Permanent Marker at 40 in bone, rasterize it, tilt it about −7° with the rotate handle, and Merge Down onto the sleeve. Finally, marquee the sleeve and Cmd-drag a corner to shrink it to about 200 px.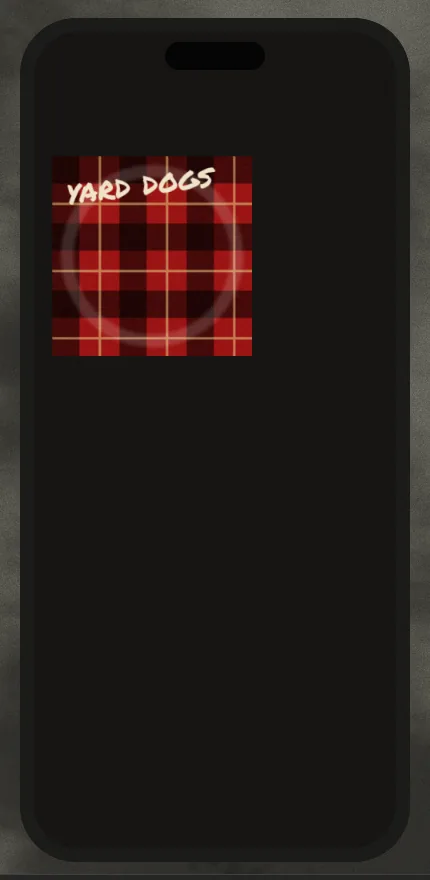
- On a layer called
-
Fill the grid with covers
Flannel God. Marquee the sleeve and press Cmd+C. Click a layer inside
Phone Aand press Cmd+V. Lopsy pastes in place, selects the pasted pixels and switches to the Move tool. Cmd-drag the corner handle in to about 75% (150 px), drag the copy into the top-right slot and press Cmd+D.Spit & Static. Add a layer called
Static Baseand fill the bottom-left slot with . Add a layer above it calledCover Static.- Fill the slot with again and run Add Noise at 55 (Mono, Uniform) for TV static.
- Marquee a 34 px bar across the middle and fill it with chartreuse. Then fill a 60 px circle in the centre with bone.
- Run Filter → Pixel Stretch… with Amount 40, Bands 50, Seed 88 and RGB Split 0.5. Then run Filter → Chromatic Aberration… at Amount 3.
- Trim it with Select → Inverse and Delete. The black base fills the gaps that the stretched bands leave behind.
Pixel Stretch has a Seed slider, so try a few seeds until one breaks the disc in an interesting place.
Dry Creek. On a layer called
Cover Creek, marquee a square about 50 px bigger than the bottom-right slot all round. Run Clouds at Scale 10, then Filter → Voronoi… with Cells 45, Edge Width 3 and Seed 12. Voronoi colours each cell from the pixel at its centre, so it needs content around the edges too, or the outer cells come out empty. Trim back to the slot. Then add a layer filled with over the slot, set it to Multiply, and Merge Down. Now the cells look like dried mud.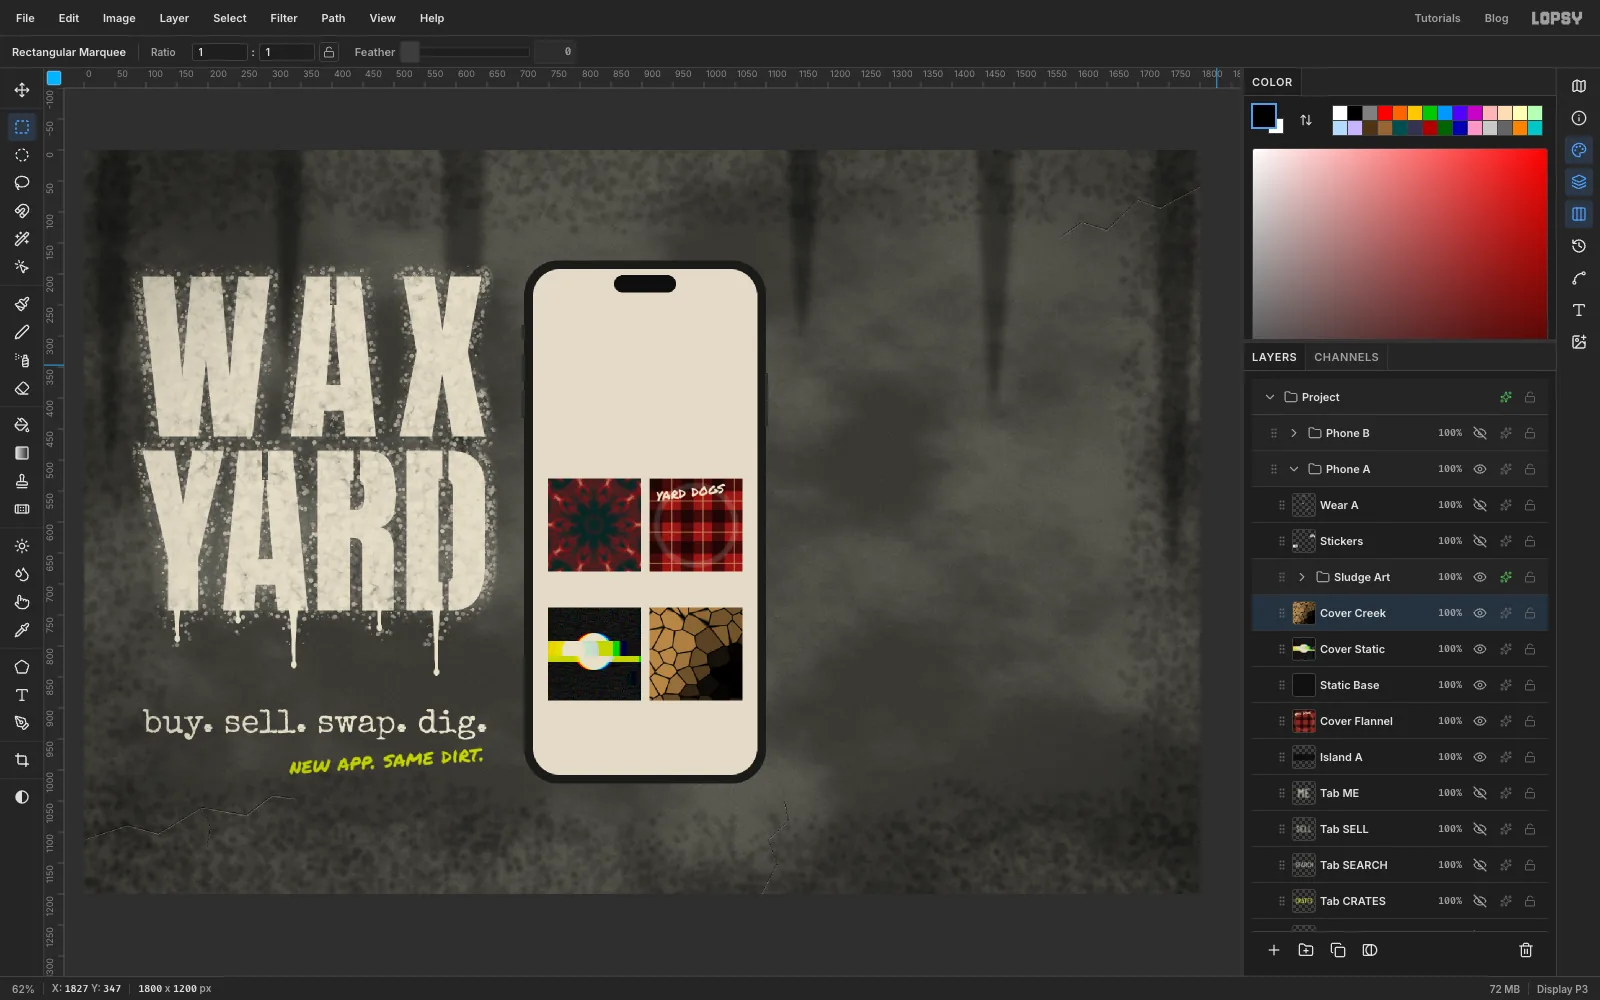
-
Lay out the browse screen
Work from the bottom of the screen upwards. A text-tool click inside an existing text box edits that text instead of starting a new one, so placing the lower lines first keeps your clicks in empty space.
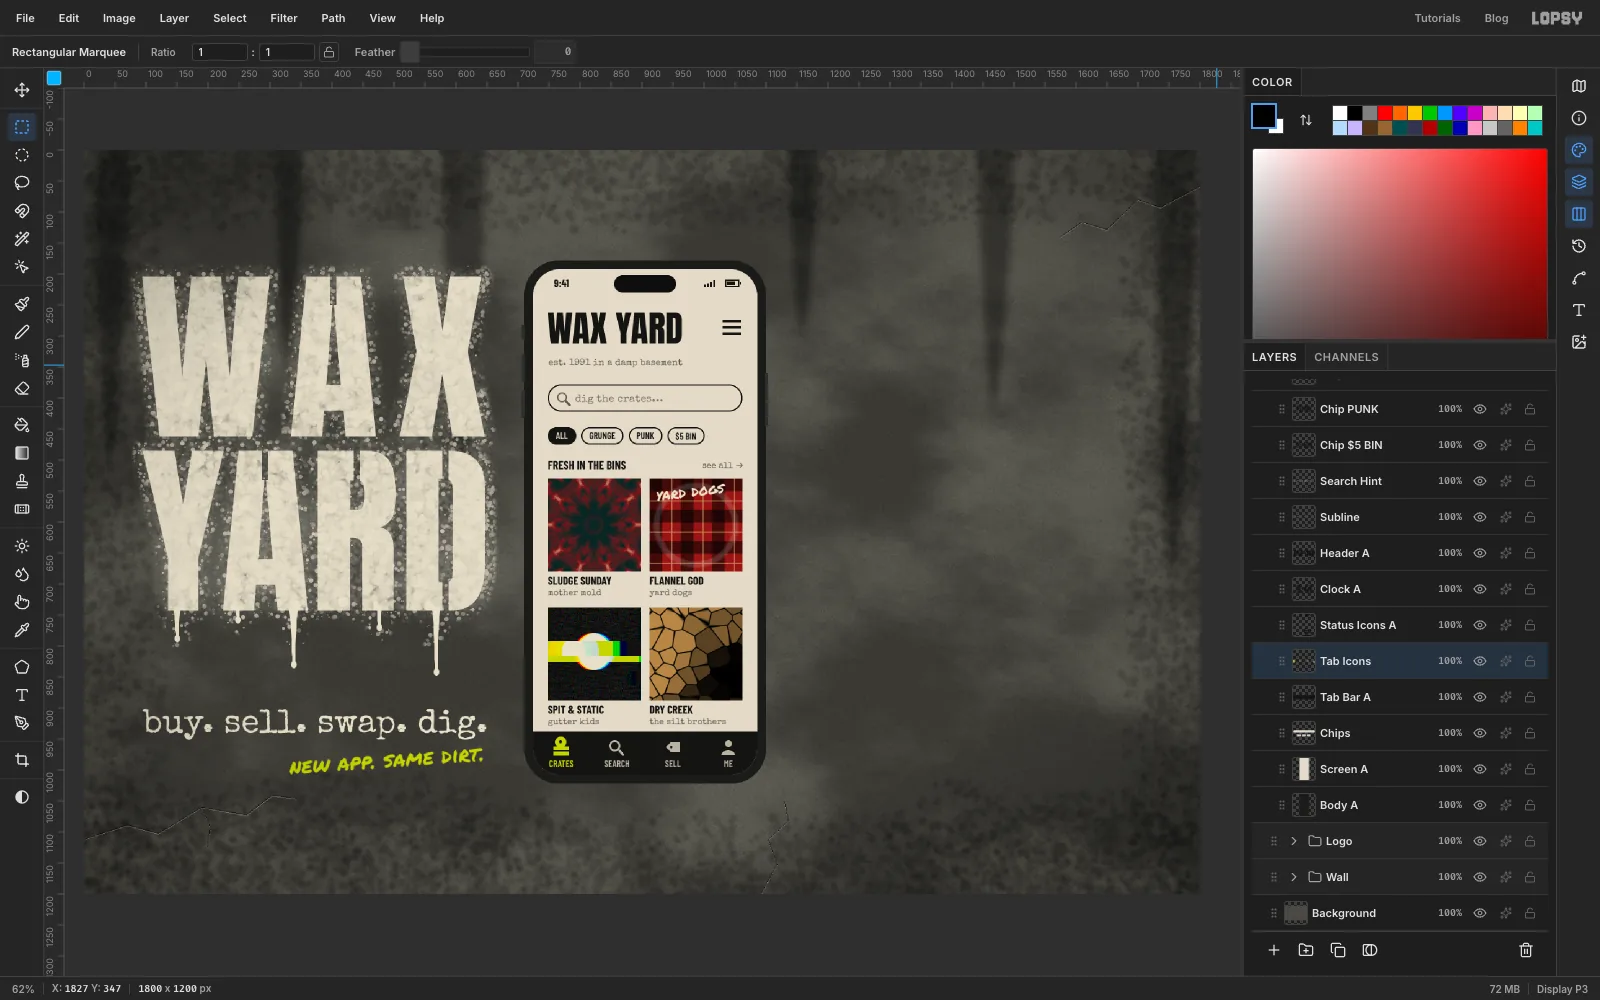
- Tab bar. Add a layer called
Tab Bar A. Cmd-click theScreen Athumbnail, then hold Shift+Alt and drag a rectangle across the bottom 70 px of the screen. That keeps only the overlap, so the bar inherits the screen's rounded corners. Fill it with . - Tab icons. On a
Tab Iconslayer, build four simple icons from marquees: a record on a crate in chartreuse for the active tab, and a magnifier, a price tag and a person in . Hold Alt while dragging to cut holes, such as the record's centre and the magnifier's lens. - Tab labels. Set
CRATES,SEARCH,SELLandMEin Barlow Condensed 600 at 15, centred under each icon. MakeCRATESchartreuse and the rest . - Cover captions. Under each cover, set the title in Barlow Condensed 700 at 18 in . Put the artist just below it in Special Elite at 14 in , with both aligned to the cover's left edge. The four are SLUDGE SUNDAY / mother mold, FLANNEL GOD / yard dogs, SPIT & STATIC / gutter kids and DRY CREEK / the silt brothers.
- Section label. Set
FRESH IN THE BINSin Barlow Condensed 700 at 19, andsee all →in Special Elite at 14, right-aligned to the grid. - Chips. Type
ALL,GRUNGE,PUNKand$5 BINin Barlow Condensed 600 at 15, about 13 px apart. On aChipslayer underneath, use the Shape tool to draw a 29 px tall black pill behind each one, with the corner radius set to half its height. Then draw a slightly smaller bone pill on top of each, leaving a 2 px outline. LeaveALLas a solid black pill with bone text, to show it's selected. - Search bar. Draw a larger 44 px tall pill the same way, with a magnifier ring and handle at its left end and
dig the crates…in Special Elite at 17 in . - Header. Set
WAX YARDin Anton at 58 in andest. 1991 in a damp basementin Special Elite at 15 below it. Draw a three-line menu icon with the Pencil at Size 4, right-aligned to the grid. - Status bar. Add
9:41in Barlow Condensed 700 at 17, plus four signal bars and a battery icon drawn from small marquees.
- Tab bar. Add a layer called
-
Price stickers and photocopy dust
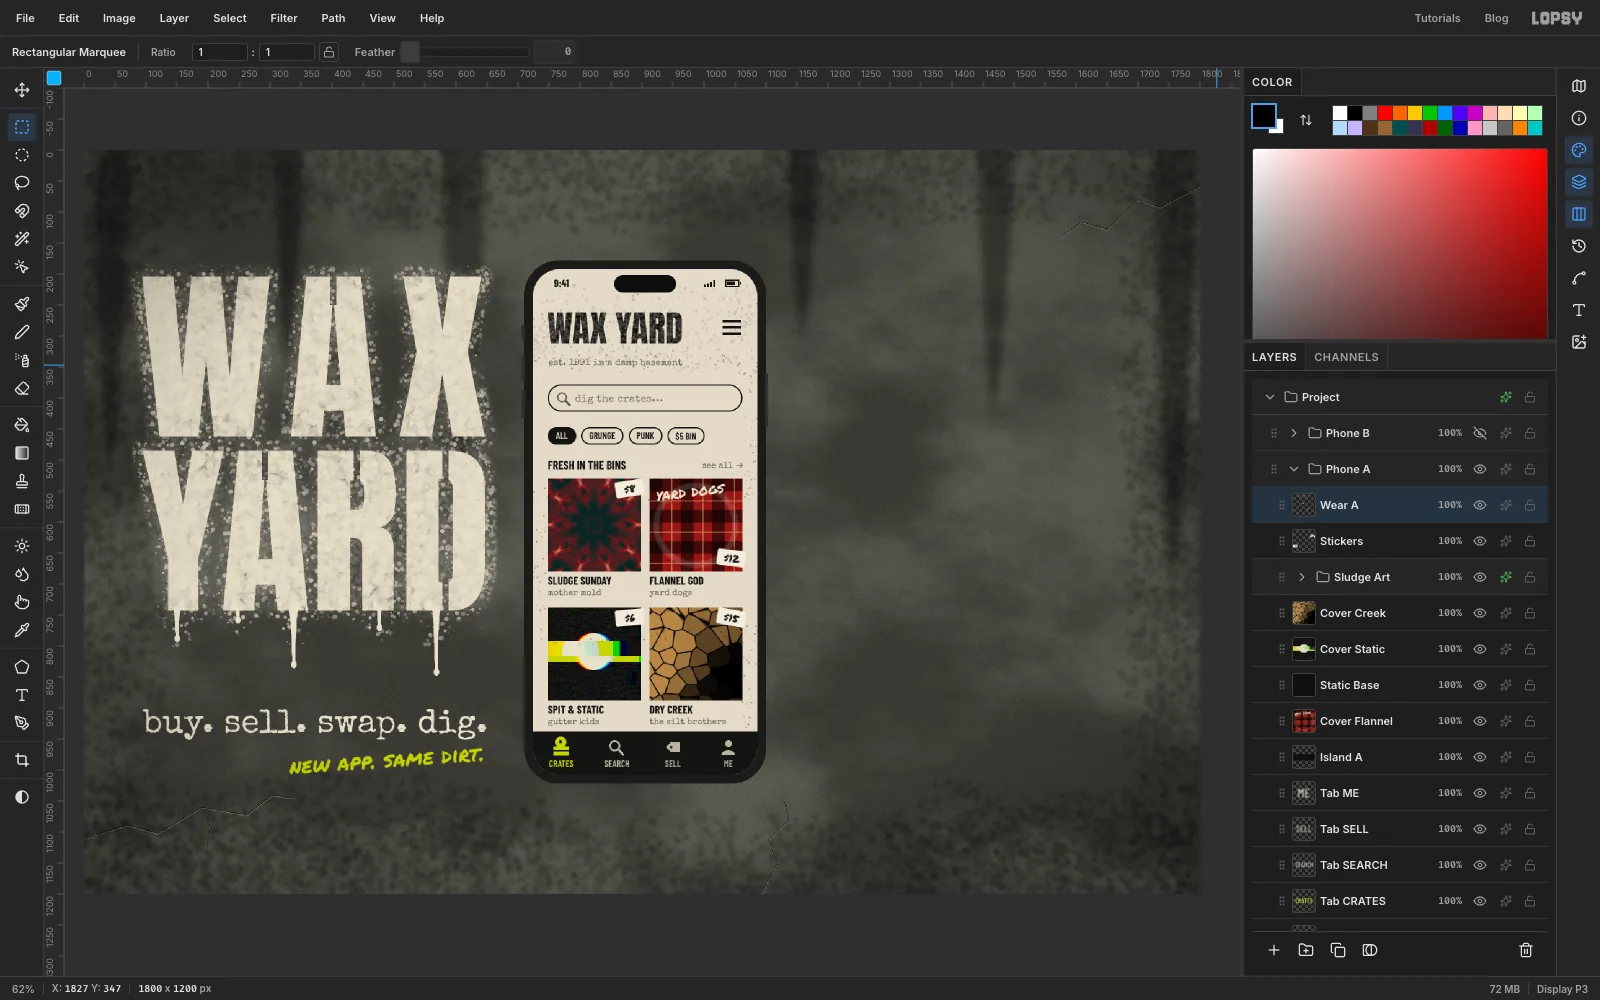
Price stickers. For each cover:
- Add a layer at the top of
Phone Aand draw a 46 × 26 bone rectangle with Corner Radius 3. - Write the price (
$8,$12,$6,$15) in Permanent Marker at 17 in and centre it on the sticker. - Rasterize the price, Merge Down onto the sticker, and rotate the sticker 5–9° with the rotate handle. Alternate the direction from one cover to the next.
Put the sticker in a corner that doesn't hide anything. On the flannel cover, the bottom-right corner keeps
yard dogsreadable.Toner dust. Add a layer called
Wear A:- With bone selected, spray over the header at Size 70, Density 30, Opacity 100, Softness 0. This knocks pinholes into the black letters, like a tired photocopier.
- Switch to black and spray lightly around the header at Density 6.
- Cmd-click the
Screen Athumbnail and give the whole screen one pass at Size 40, Density 2, Opacity 45. - Choose Select → Inverse and press Delete, so no dust lands on the bezel.
Keep the dust sparse. If the small caption text starts to break up, undo and go lighter.
- Add a layer at the top of
-
Slide a record out of the sleeve
Add a layer called
RecordbelowSleeve.- Fill a circle about 236 px across, centred just right of the sleeve, with .
- Grooves. Zoom in. Use the Elliptical Marquee to drag a circle on the same centre, then hold Alt and drag one just a couple of pixels smaller, to leave a hairline ring. Fill it with . Make eight of these rings, a little unevenly spaced, from just inside the rim to about halfway in.
- Label. Fill a circle about 88 px across with chartreuse. Give it a thin rim of (the same circle with a slightly smaller one cut out), and delete a small spindle hole in the middle.
- Sheen. On a
Record Sheenlayer, lasso two thin wedges from the centre out to the rim, on opposite sides. Feather them by 6 and fill with white. Cmd-click theRecordthumbnail, Select → Inverse and Delete to clip the sheen to the disc, then set the layer to 20%. - Label text. Set
SIDE Ain Anton at 13 in , just below the spindle hole.
Now give the sleeve its depth. Marquee the record, Cmd-drag its corner in to about 85% and drag it right until the whole label clears the sleeve. Press Cmd+D to commit. Then add a Drop Shadow to
Sleevewith Offset X 6, Offset Y 4, Blur 10 and Opacity 70, so the sleeve sits on top of the record.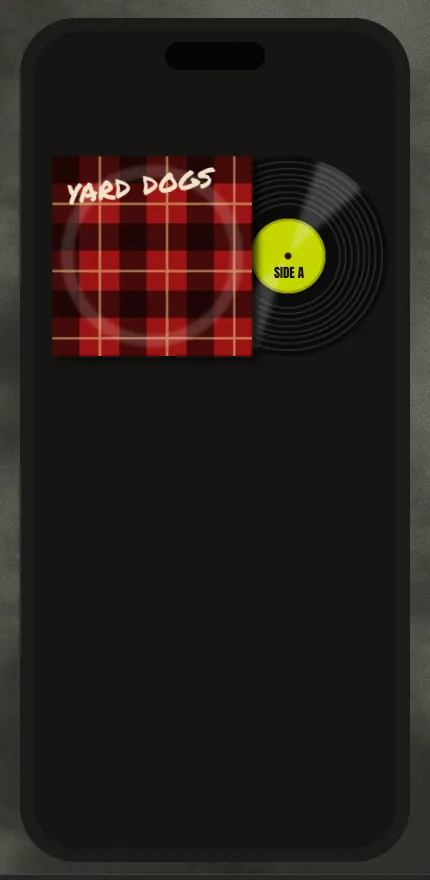
-
Lay out the listing screen
Again, work up from the bottom. Keep everything on a 38 px left margin.
- Button. On a
UI Blayer, draw a 314 × 54 chartreuse pill with Corner Radius 27, 30 px above the bottom of the screen. SetSWAP ITin Anton at 26 in , centred on it both ways. Add a 100 × 5 grey home bar under it. - Quote. Type
"smells like a basement.on one line andplays like a dream."on the next, in Special Elite at 15 in . - Seller row. Draw two hairline dividers with the Pencil at Size 1 in . Between them, add a bone circle 36 px across with
BSin Anton, the namebasement_stevein Barlow Condensed 700 at 17, and★ 4.9 · 212 swapsin Special Elite at 13 in . - Price. Set
$12in Permanent Marker at 54 in chartreuse. Putor best swap(Special Elite 15) right next to it, sitting on the same baseline. Text floating far from what it describes is easy to miss. - Chips.
VG+,SLEEVE: TAPEDand33 RPMin Barlow Condensed 600 at 15 in bone, with thin outlined pills made like the browse screen's: a pill with a one on top. Outline the VG+ chip and its text in chartreuse to flag the condition. - Title.
FLANNEL GODin Anton at 50 in bone, withthe yard dogs · 1993 · LPin Special Elite at 14 under it. - Top bar.
‹ CRATESon the left andLISTING #0451on the right, then the clock, signal and battery as on the first phone, in bone.
- Button. On a
-
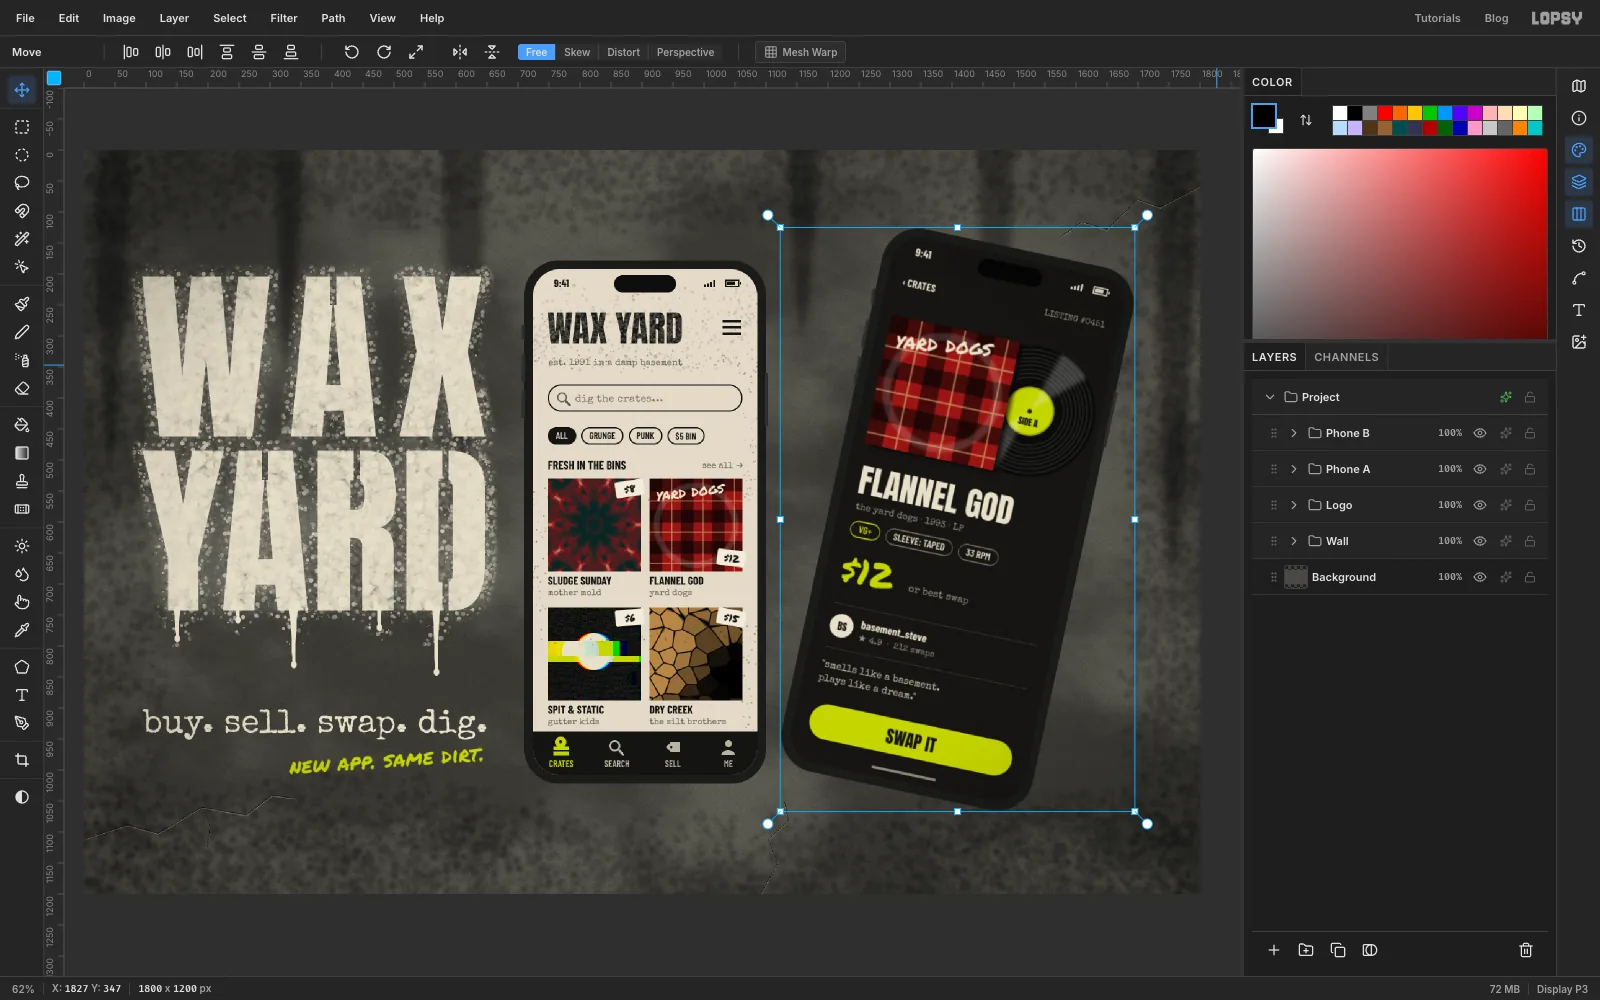
Tilt the listing phone
A second phone at exactly the same angle and size makes a mockup look like a spreadsheet. Give the listing phone some attitude.
- Click the
Phone Bgroup row and choose the Move tool with nothing selected. Lopsy draws one transform box around everything in the group. - Drag the rotation handle (just outside the top-right corner) about 12° clockwise.
- Cmd-drag a corner handle out about 6%, so the listing phone is slightly bigger than the browse phone and clearly the hero.
- Drag inside the box to set it beside the browse phone, about 25 px away, and nudge it up so it sits a little higher. Press Cmd+D to commit.
- Click the
-
Crack the glass and spray a record on the wall
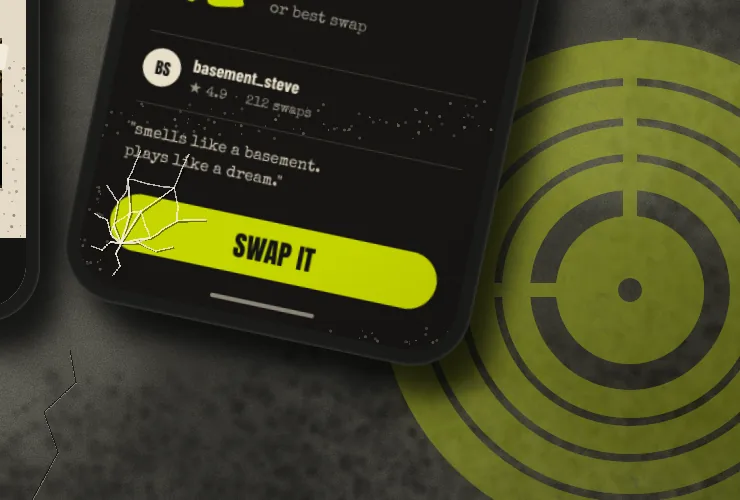
Cracked glass. Inside
Phone B, add a layer calledGlass B, and Cmd-click theScreen Bthumbnail so nothing spills onto the bezel.- Pick a point just inside the bottom-left corner of the screen as the impact. Choose the Brush with the Hard Round preset.
- Draw seven or eight cracks out from that point in black at Size 2, Opacity 45.
- Go over each crack again in , a hair up and to the left of the dark line. Start thick (about Size 3) near the impact and drop to Size 1 for the tips, so the lines taper.
- Join neighbouring cracks with a few short, kinked lines to make the spiderweb.
- Spray a little bone dust over the screen at Density 2, Opacity 40.
Wall record. In the
Wallgroup, add a layer calledWall Recordand build one compound selection centred near the bottom-right corner:- Drag an elliptical marquee about 500 px across.
- Hold Alt and drag a slightly smaller circle on the same centre, then hold Shift and drag one a little smaller again. That leaves a solid outer ring and adds the next one back.
- Keep alternating Alt and Shift towards the centre until you have four rings with thin gaps between them. Finish with a solid label in the middle and a small spindle hole cut out of it.
- Shift-drag two narrow bars, one up from the label and one to its left. These are the stencil bridges that hold the rings together.
Spray the selection solid in chartreuse, then add a feathered overspray pass like the logo's. Set the layer to 50%, so it reads as old paint behind the phone rather than another button.
-
Shadows and a vignette
Add the phone effects last, so they don't distract you while you lay out the screens.
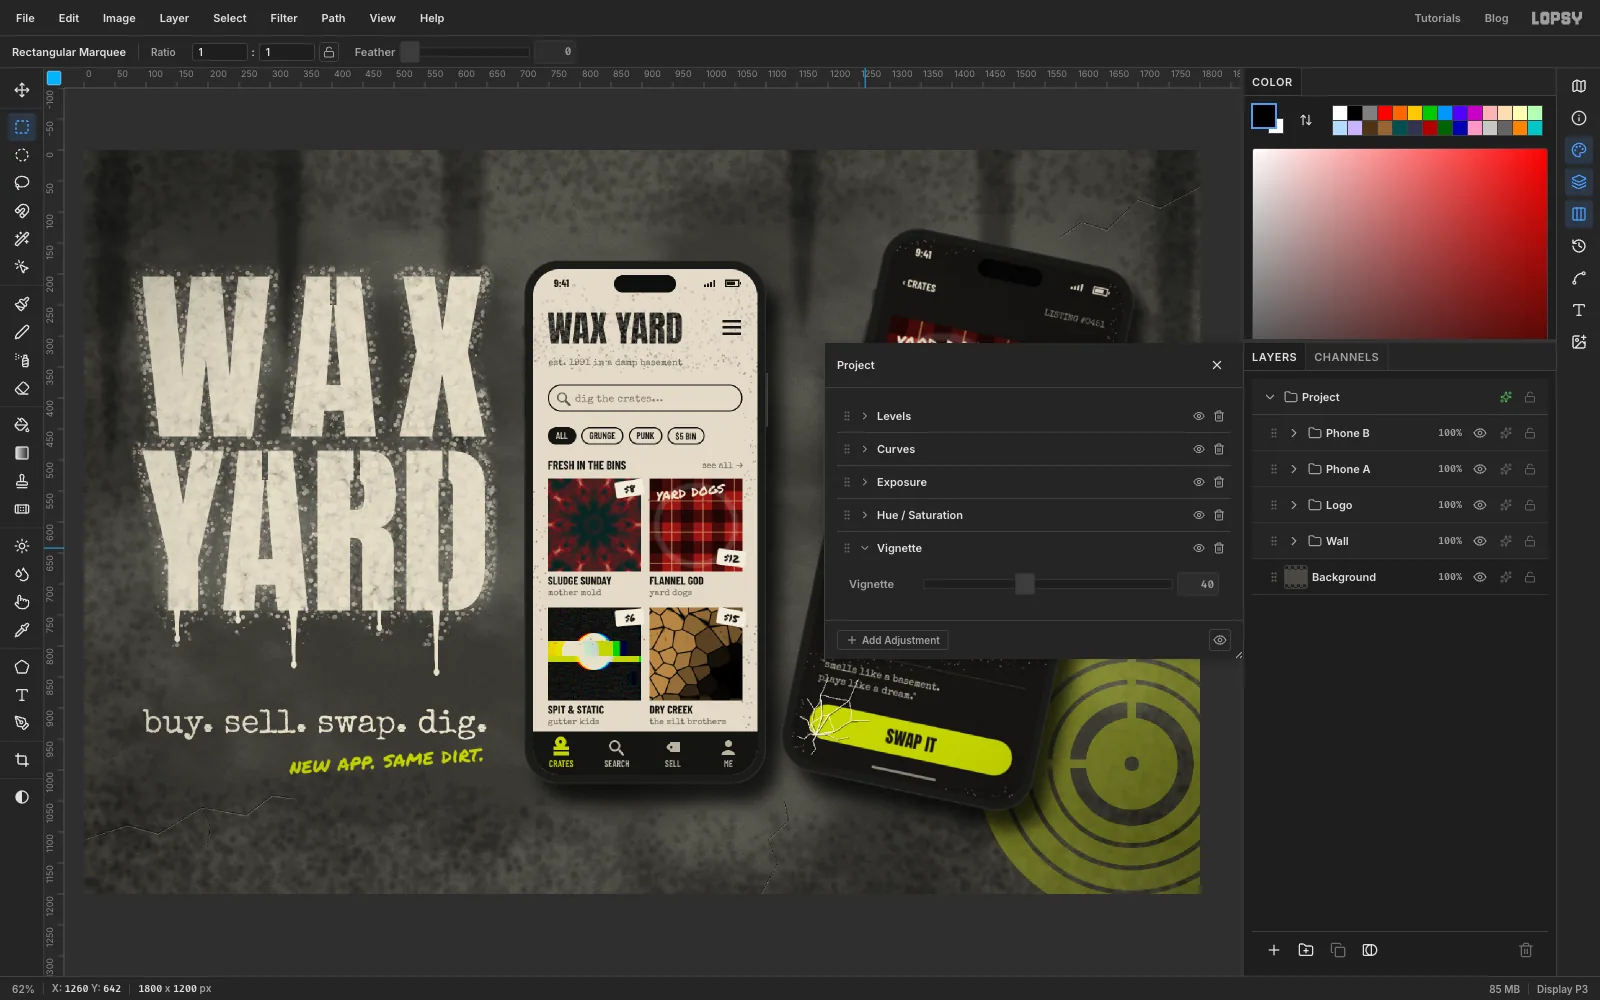
- Give
Body AandBody Bthe same Drop Shadow: Offset X 22, Offset Y 32, Blur 40, Opacity 75. One light source for both phones keeps the scene believable. - Add an Inner Glow to each body in at Size 5, Opacity 55. It reads as a metal rim catching light.
- Choose Layer → Adjustment Layer…. In Lopsy that opens the Project group's adjustments, which already holds neutral Levels, Curves, Exposure and Hue / Saturation nodes. Click Add Adjustment → Vignette and set it to 40 to darken the corners and pull the eye to the phones.
Save with File → Save Project, then File → Quick Export PNG.
- Give