Design Constructivist Movie Concept Art from Photo Cut-Outs
Build a Soviet constructivist film key frame in Lopsy. Halftone a wolf photo, threshold a lineman, rule poles and wires, and seat a title in a wedge.
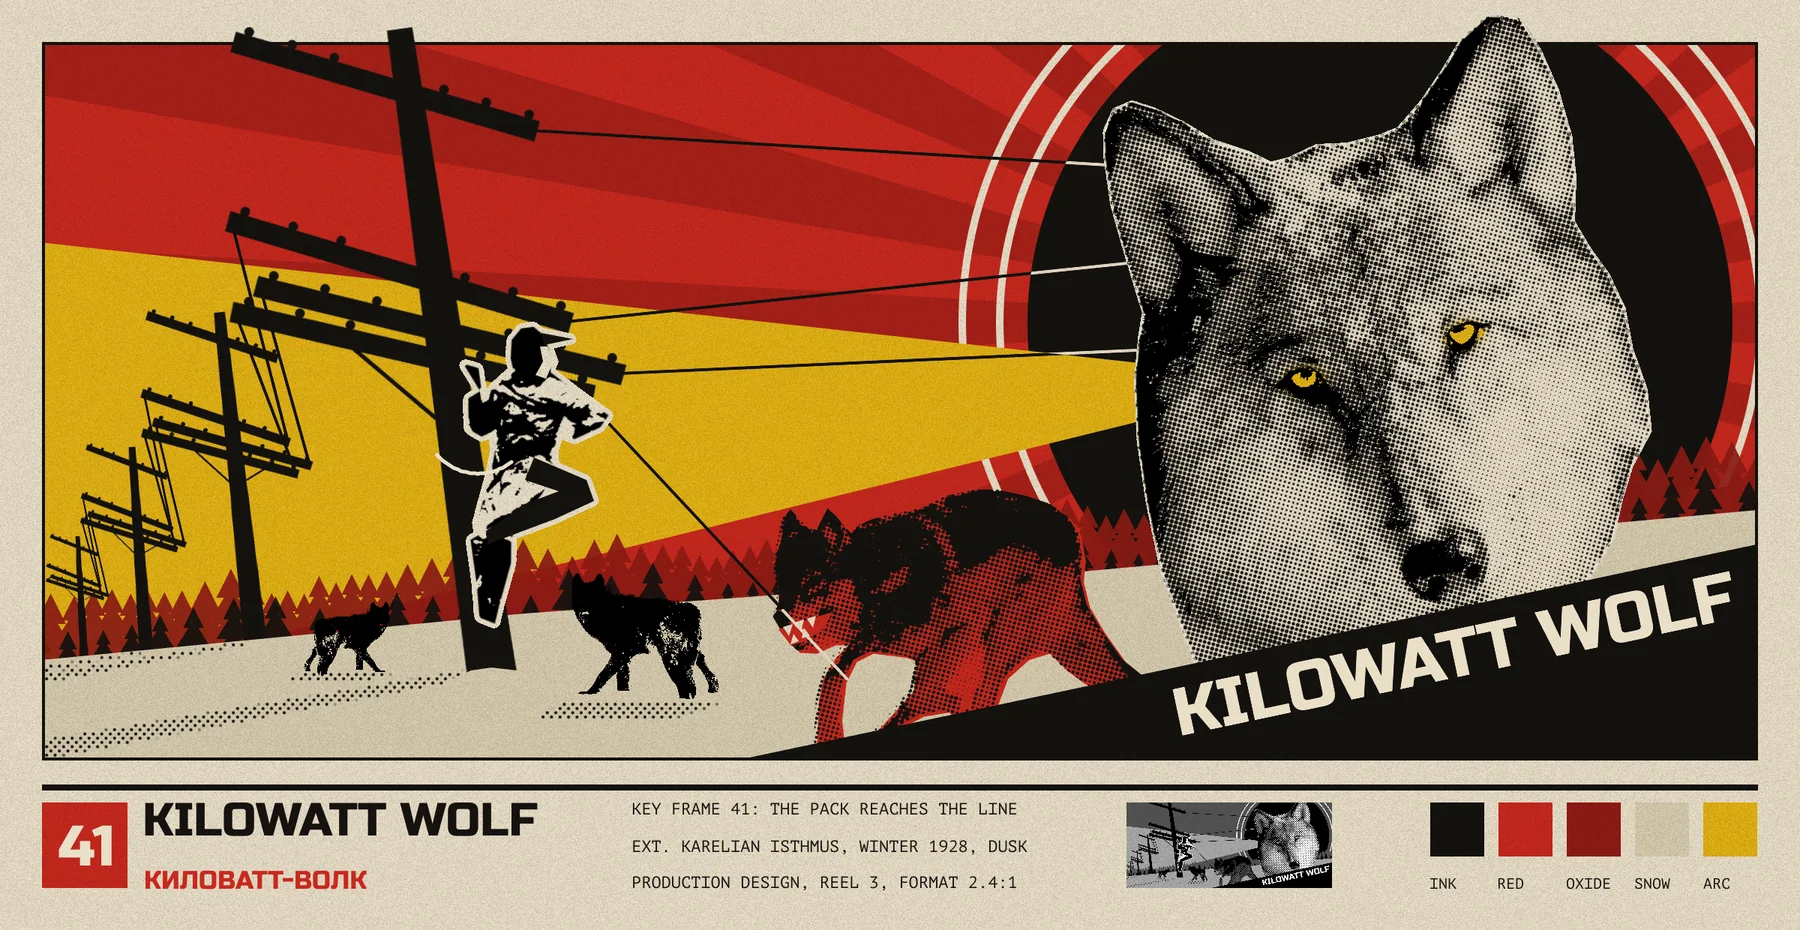
In the 1920s the Stenberg brothers made Soviet film posters by enlarging film stills and tilting them hard against flat colour. Alexander Rodchenko shot pylons and towers from below until they turned into pure diagonals. A few loud parts did the work: a red plane, a black circle, a wedge, a photograph cropped far too big.
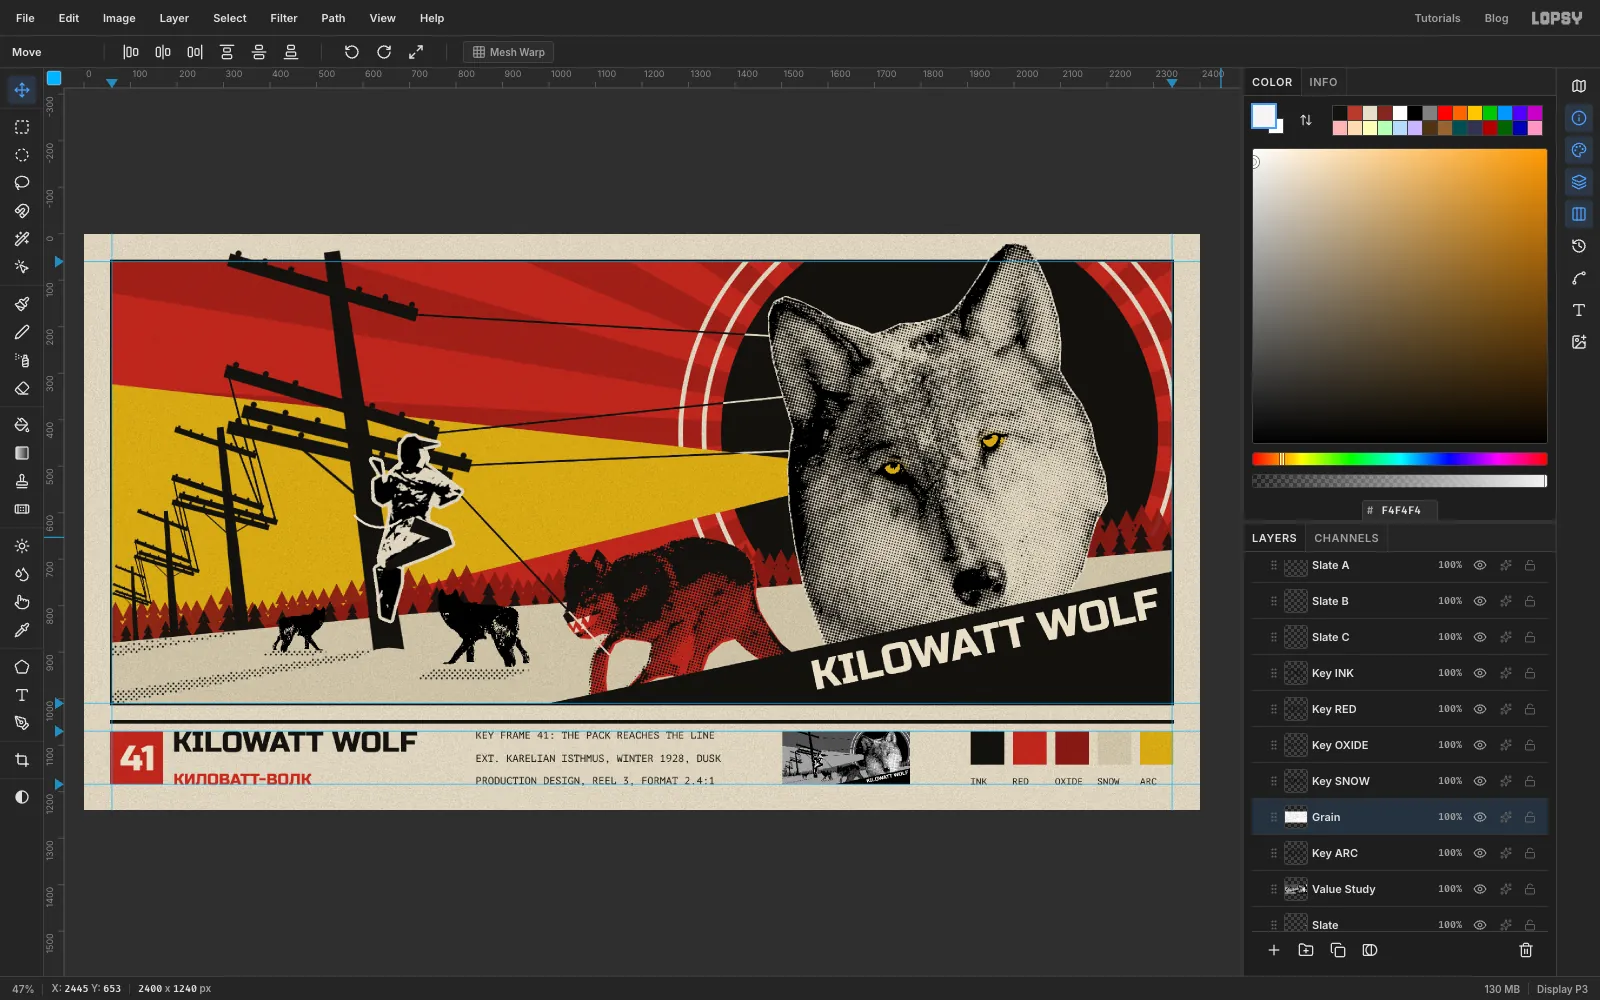
In this tutorial you'll use that language for a production-design board for a made-up film, Kilowatt Wolf. In the winter of 1928 a lineman stringing the first power line across Karelia is hunted by a wolf pack. This is key frame 41, the moment the lead wolf bites the wire.
You'll build a sky from flat shapes, paint a forest with a brush tip you make yourself, and trace a telephone pole from an archive photo. Then you'll turn four photos into print: Threshold for solid ink shapes, Halftone for fur, and a flat colour plate set slightly off register. A slate strip along the bottom turns the picture into a concept board.
You'll need four public-domain photos from Wikimedia Commons. Download each one at 1920 px wide or larger (the original file is fine). Lopsy shrinks anything bigger than the canvas to fit and centres it, but a smaller download stays small in the top-left corner and the sizes below won't match.
- Lineman climbing telephone pole, U.S. National Archives
- Wolf portrait, Jacob W. Frank, National Park Service (the big head)
- Wolf 7 in Rose Creek pen, Jim Peaco, National Park Service (the running wolf, by a fence)
- Wolf in Lamar Valley, Yellowstone National Park (the black wolf on snow)
The palette:
-
Paper
-
snow
-
Red
-
oxide
-
Ink
-
Arc yellow
A few habits come up in almost every step:
- Deselect before the next selection. Press Cmd+D when you finish with one. A marquee drag that starts inside a live selection moves it instead of making a new one.
- Exact shapes use a dialog. With nothing selected, click once with a marquee tool without dragging. A dialog opens where you type the From and To corners. Negative numbers are fine.
- Straight-edged shapes use the Pen. Press P and click each corner, starting from the left-most one, because the path's floating ✓ and ✗ buttons sit just left of the first anchor. Click the first anchor again to close the shape. In the Paths panel, click Path to Selection, then Delete Path. Then choose Edit → Fill and press Cmd+D.
- Transforms need the Move tool. Press M and draw a marquee around the pixels, press V, then drag the handles. Hold Cmd on a corner to keep the proportions. Press Cmd+D to commit before you start the next transform.
- Positions are document pixels. The status bar at the bottom left shows the cursor's X and Y, and the rulers track it too. "About" means judging by eye is fine.
-
Set up the board and cut the picture window
Open Lopsy. In the New Document dialog, set Width to
2400and Height to1240, choose Pixels and a White background, and click Create.Click the top ruler at
60and2340to drop two vertical guides. Then click the left ruler at60,1010,1070and1184for four horizontal ones. The picture goes between the first pair, the slate between the second.The active layer is
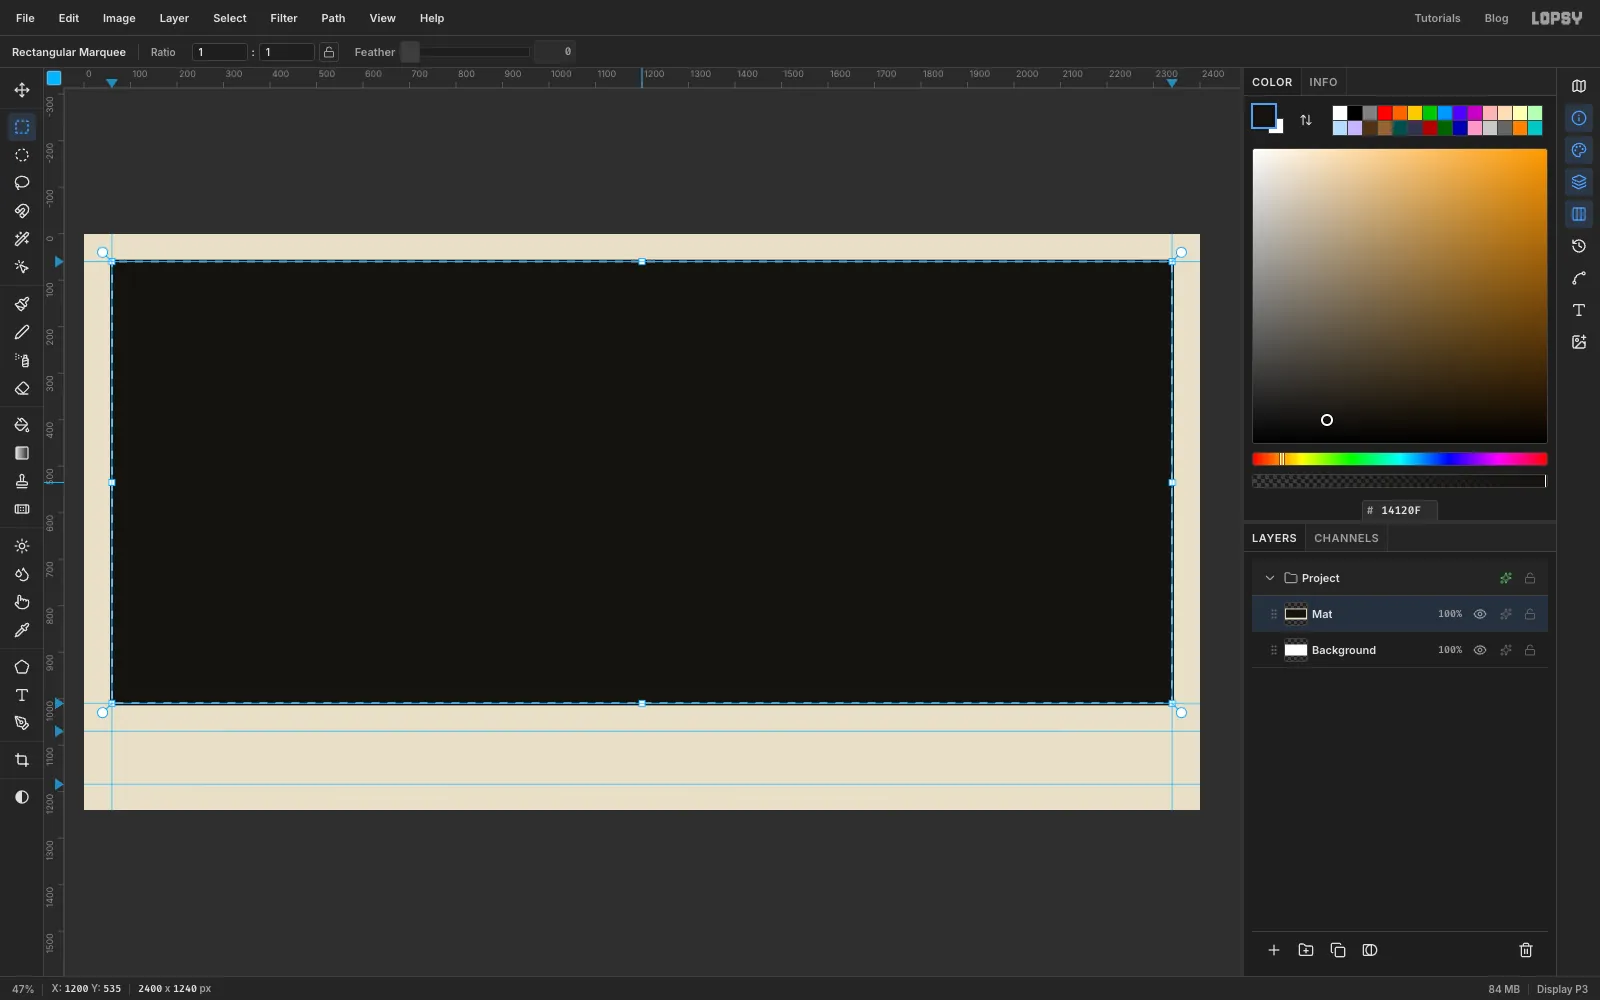
Layer 1. Double-click its name and call itMat. This layer is a paper mount with a window in it, and it will trim everything you paint below it.- Set the foreground to paper and choose Edit → Fill.
- Press M for the Rectangular Marquee and click once on the canvas. Enter From
56, 56and To2344, 1014, then press Enter. - Set the foreground to ink , choose Edit → Fill, and press Cmd+D.
- Click once again and enter From
60, 60and To2340, 1010. - Press Delete, then Cmd+D.
That leaves a window with a thin black keyline around it.
-
Build the red sky with a sunburst
Click the
Backgroundrow, set the foreground to paper and choose Edit → Fill.Click New Group at the bottom of the Layers panel. It lands above Background and under Mat. Name it
Picture. Everything you add next goes inside it.Click Add Layer, name it
Sky, set the foreground to red and choose Edit → Fill.Add a layer named
Raysand set the foreground to oxide . Open Filter → Sunburst and enter:- Rays
28 - Length
150 - Width
50 - Center X
76.7 - Center Y
34.7
Click Apply, then click the opacity figure on the layer's row and set it to
55%. The rays lead the eye to the spot where the wolf's head will go.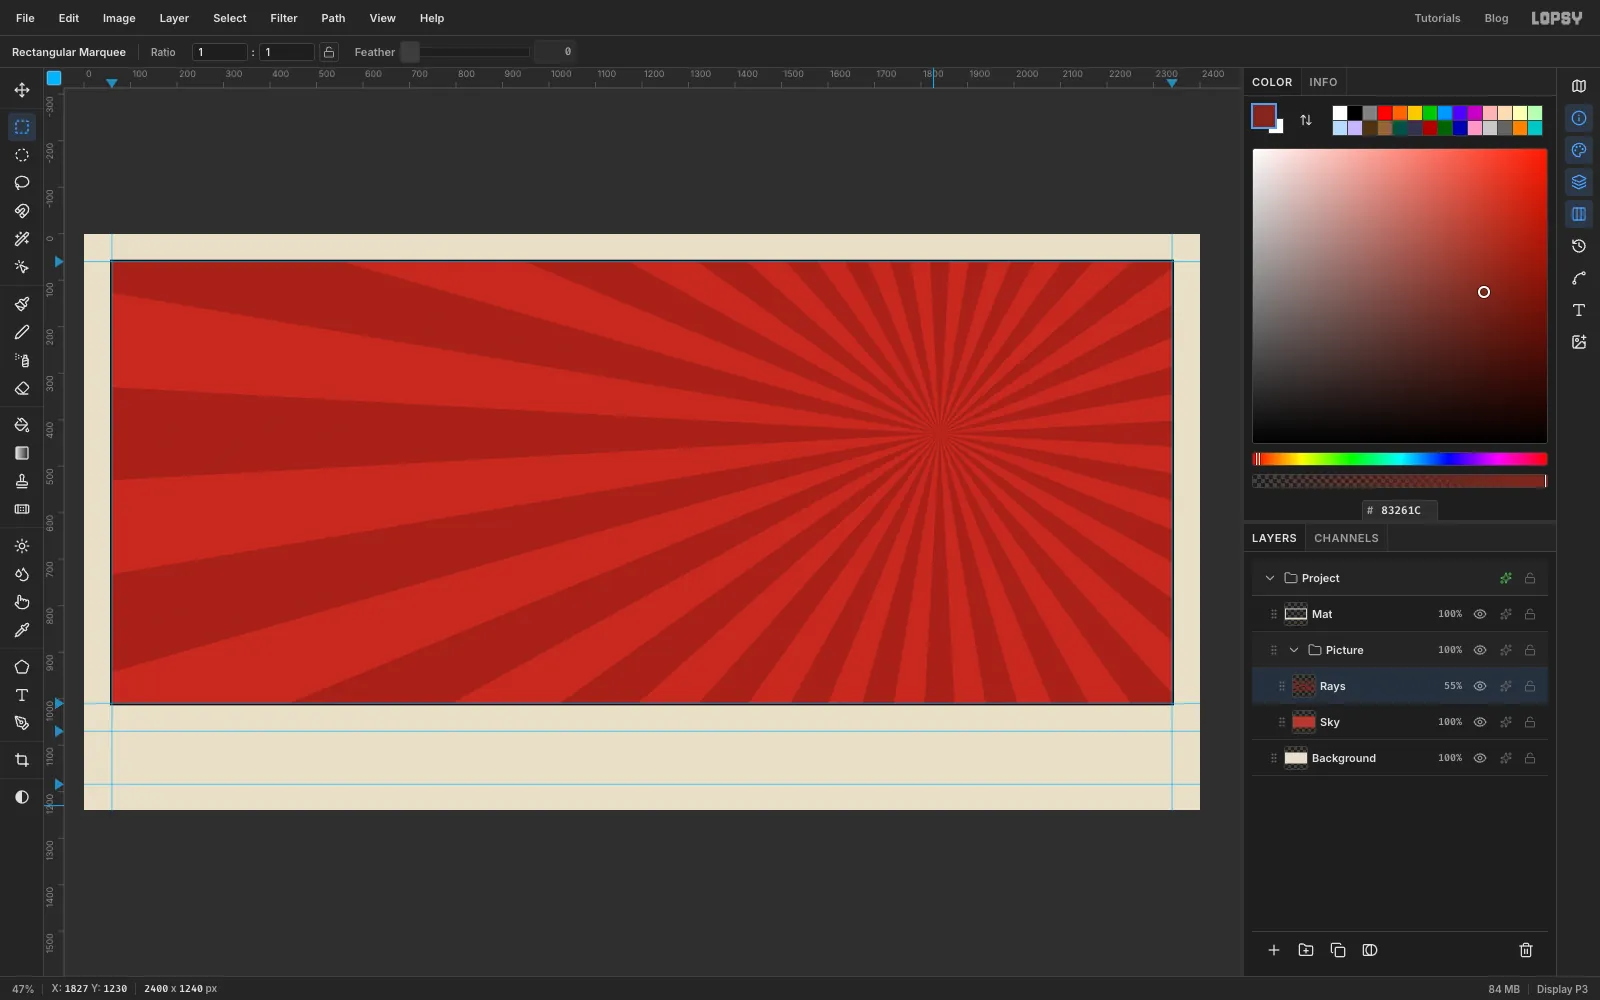
- Rays
-
Draw two signal rings
Concentric circles are a Stenberg signature, and here they also read as a radio signal. They run off the top of the canvas, so the corner dialog is the easy way to get them exact.
Add a layer named
Ringsand set the foreground to paper . Pick the Elliptical Marquee in the toolbox and click once for each of these:- Enter From
1278, -132and To2402, 992, choose Edit → Fill, then press Cmd+D. - Enter From
1288, -122and To2392, 982, press Delete, then Cmd+D. - Enter From
1328, -82and To2352, 942, choose Edit → Fill, then press Cmd+D. - Enter From
1338, -72and To2342, 932, press Delete, then Cmd+D.
The forest will stand in front of the rings' lower ends, and they'd show through the gaps between its trees. Press L for the Lasso and drag around everything below a line running from
1200, 770on the left to the right edge of the canvas at abouty 640. Press Delete, then Cmd+D.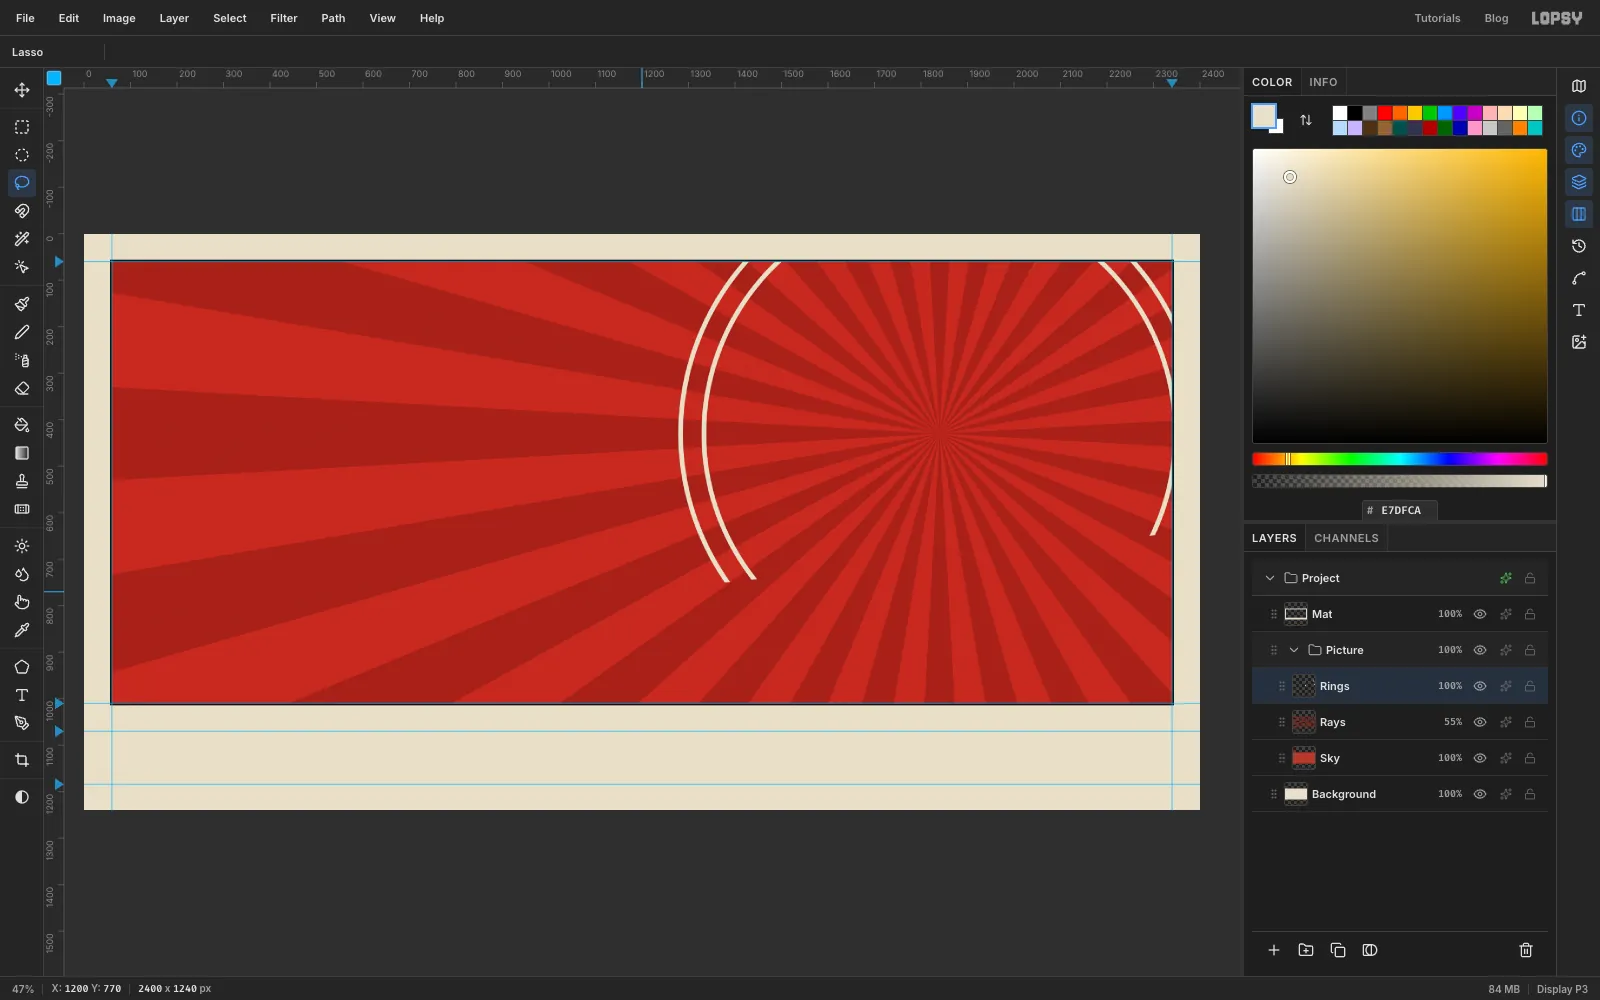
- Enter From
-
Add the black disc
Add a layer named
Discand set the foreground to ink . With the Elliptical Marquee, click once and enter From1370, -40and To2310, 900. Choose Edit → Fill, then press Cmd+D.The light fur of the wolf will stand out against this black.
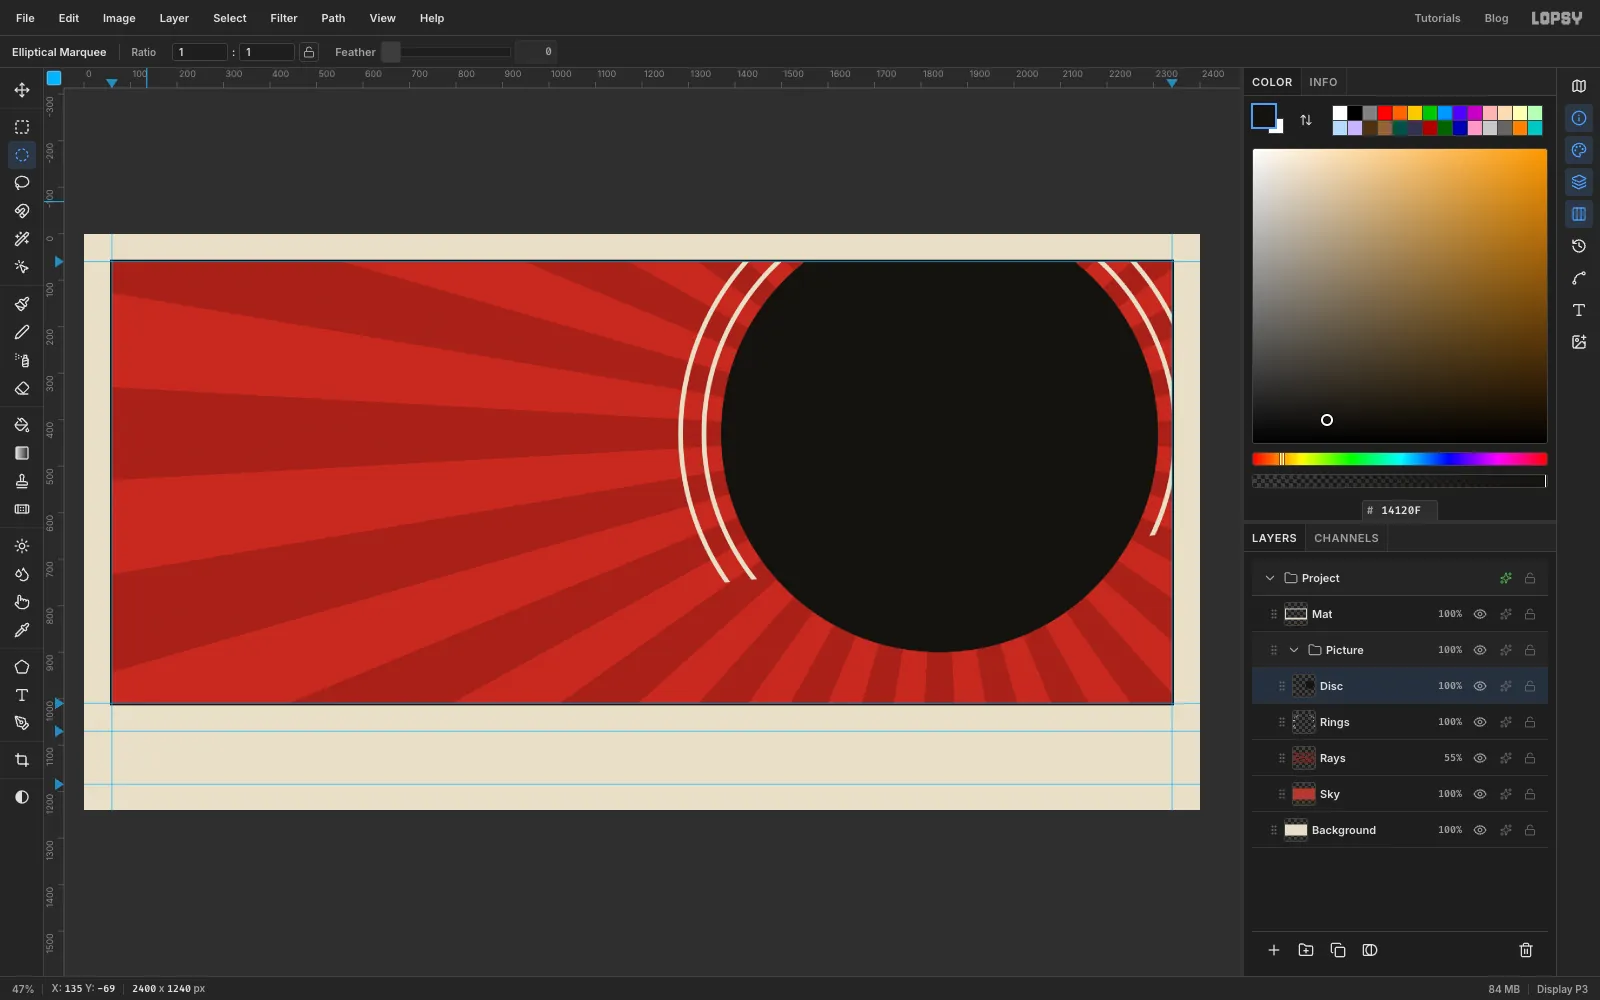
-
Cut the yellow beam
Add a layer named
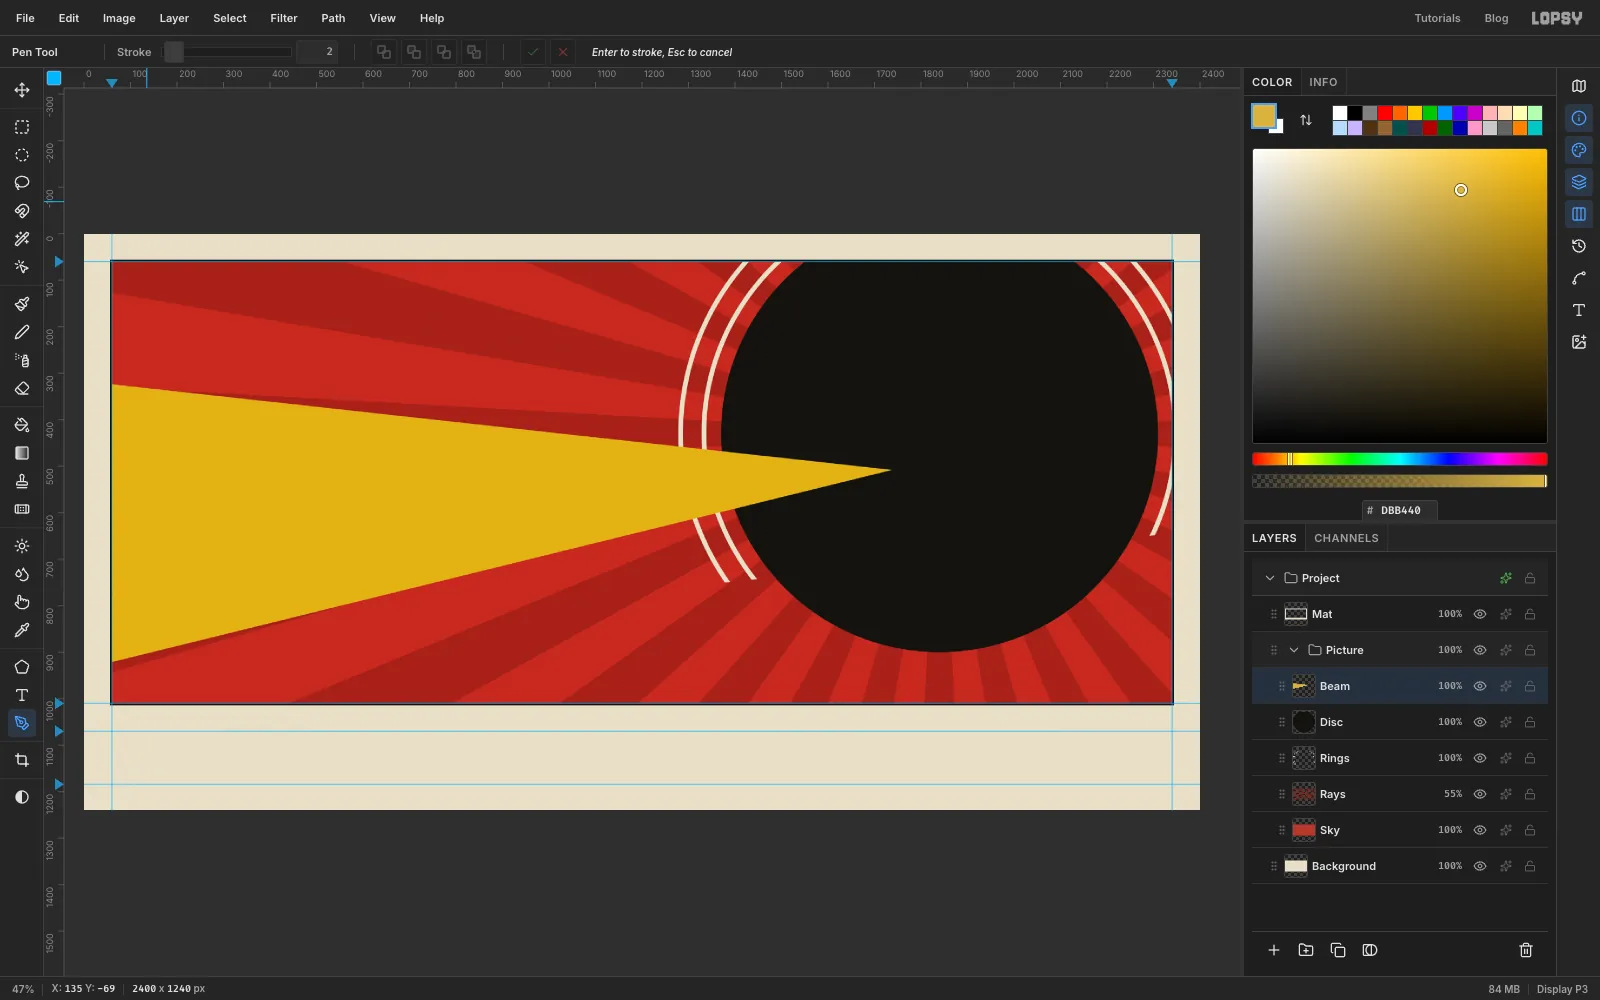
Beamand set the foreground to arc yellow .Press P and draw a long, thin triangle with the Pen. Start at the left edge of the canvas at about
y 320. Click the tip at1738, 508, inside the disc, which is where the wolf's eye will sit. Click the left edge again at abouty 930, then click the first anchor to close it. Going past the left guide is fine, because the Mat trims it.Make it a selection in the Paths panel, delete the path, choose Edit → Fill, then press Cmd+D.
-
Make a spruce brush tip
Add a layer named
Spruce Tipand set the foreground to ink. With the Pen, draw a fir tree about 300 px tall in empty sky: a stepped outline with three tiers, wider at each step down. Fill it the same way.Press M and drag a marquee just outside the tree. Choose Edit → Define Brush..., name it
Spruceand confirm. Press Cmd+D, then click Delete Layer at the bottom of the Layers panel to throw the drawing away. The new tip stays on the brush.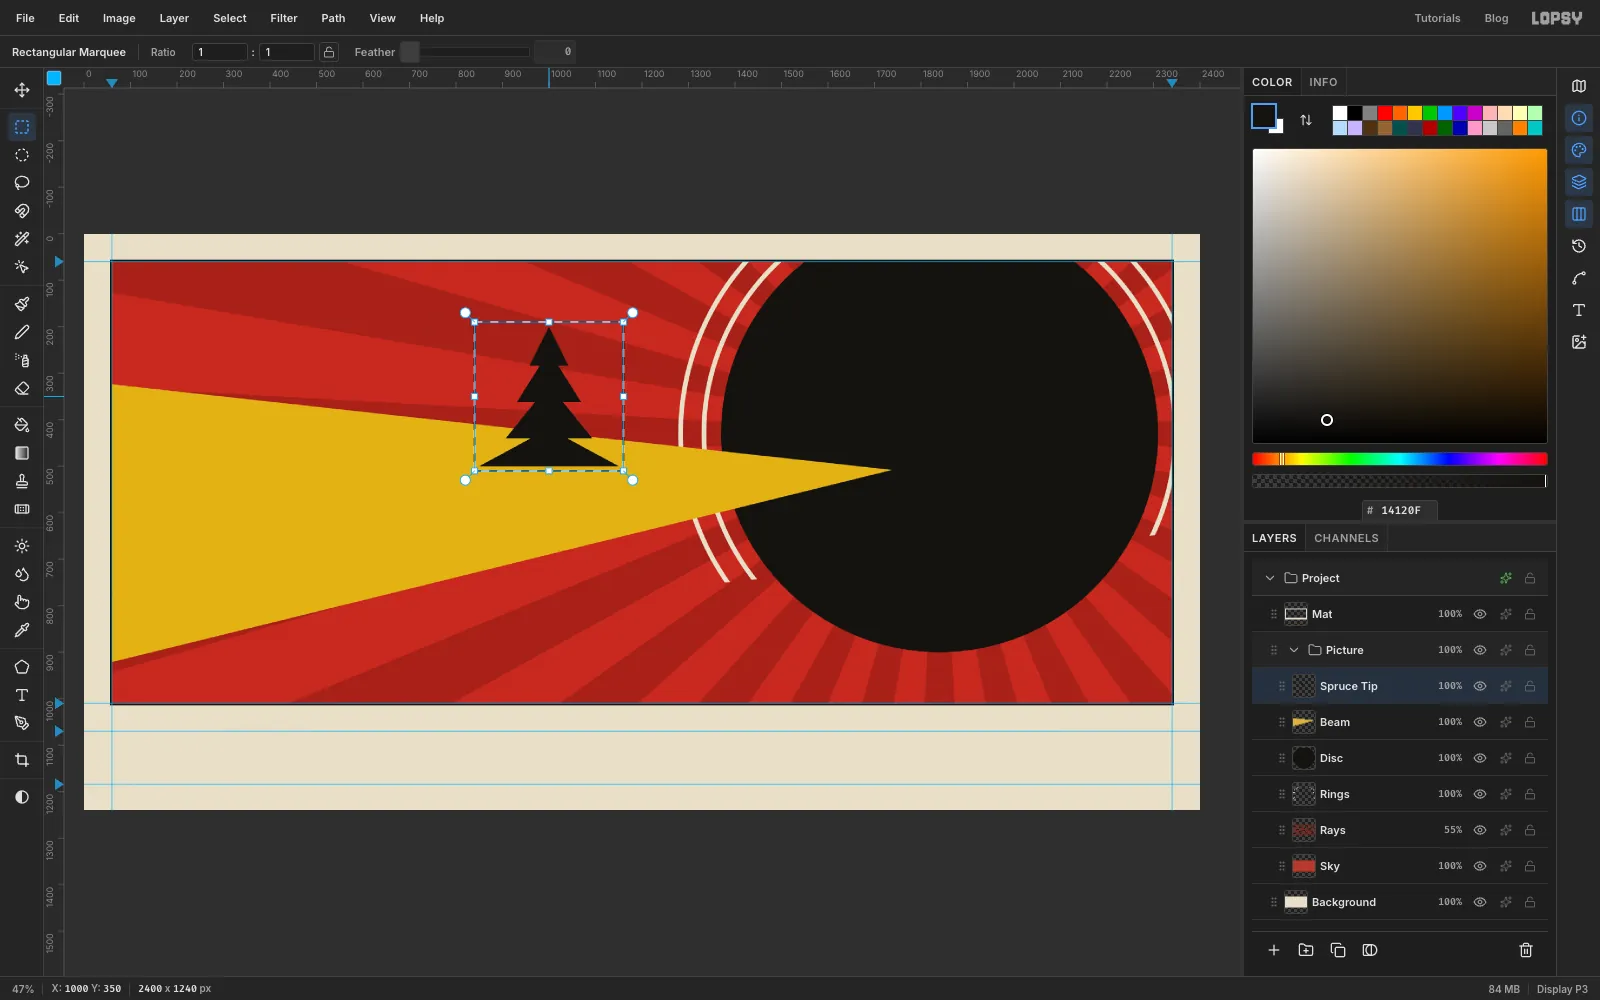
-
Paint the far forest
Click the
Beamrow, then add a layer namedFar Forest. Set the foreground to oxide and press B for the Brush.Click the brush thumbnail at the left of the options bar to open Brushes. On the Shape tab set Size to
170and Spacing to22. On the Dynamics tab set Scatter to6and Size Jitter to45. Close the window.Click the left edge of the canvas at about
y 860. Hold Shift and click the right edge at abouty 655. A straight stroke of mixed trees climbs the frame, and this slope is the composition's main diagonal.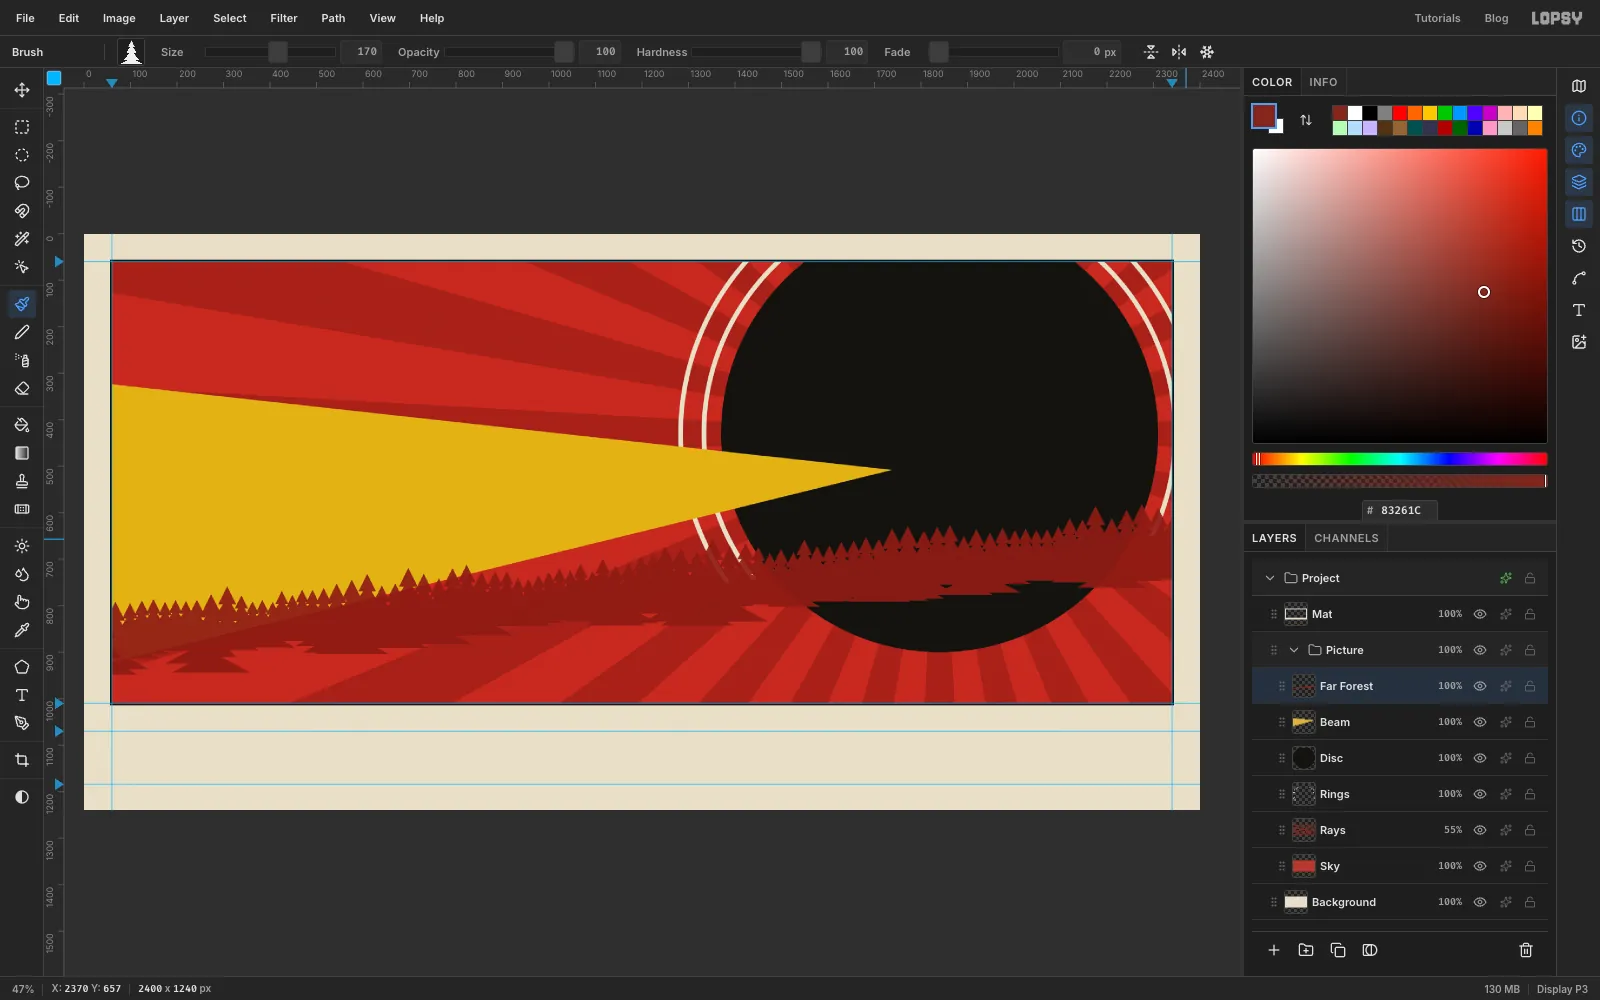
-
Paint the near forest
Add a layer named
Near Forestand set the foreground to ink. In Brushes, set Size to110, Spacing to55, Scatter to8and Size Jitter to60. Close the window.Click the left edge at about
y 885, then Shift+click the right edge at abouty 680. These smaller, sparser, darker trees sit in front of the oxide ones and give the treeline depth.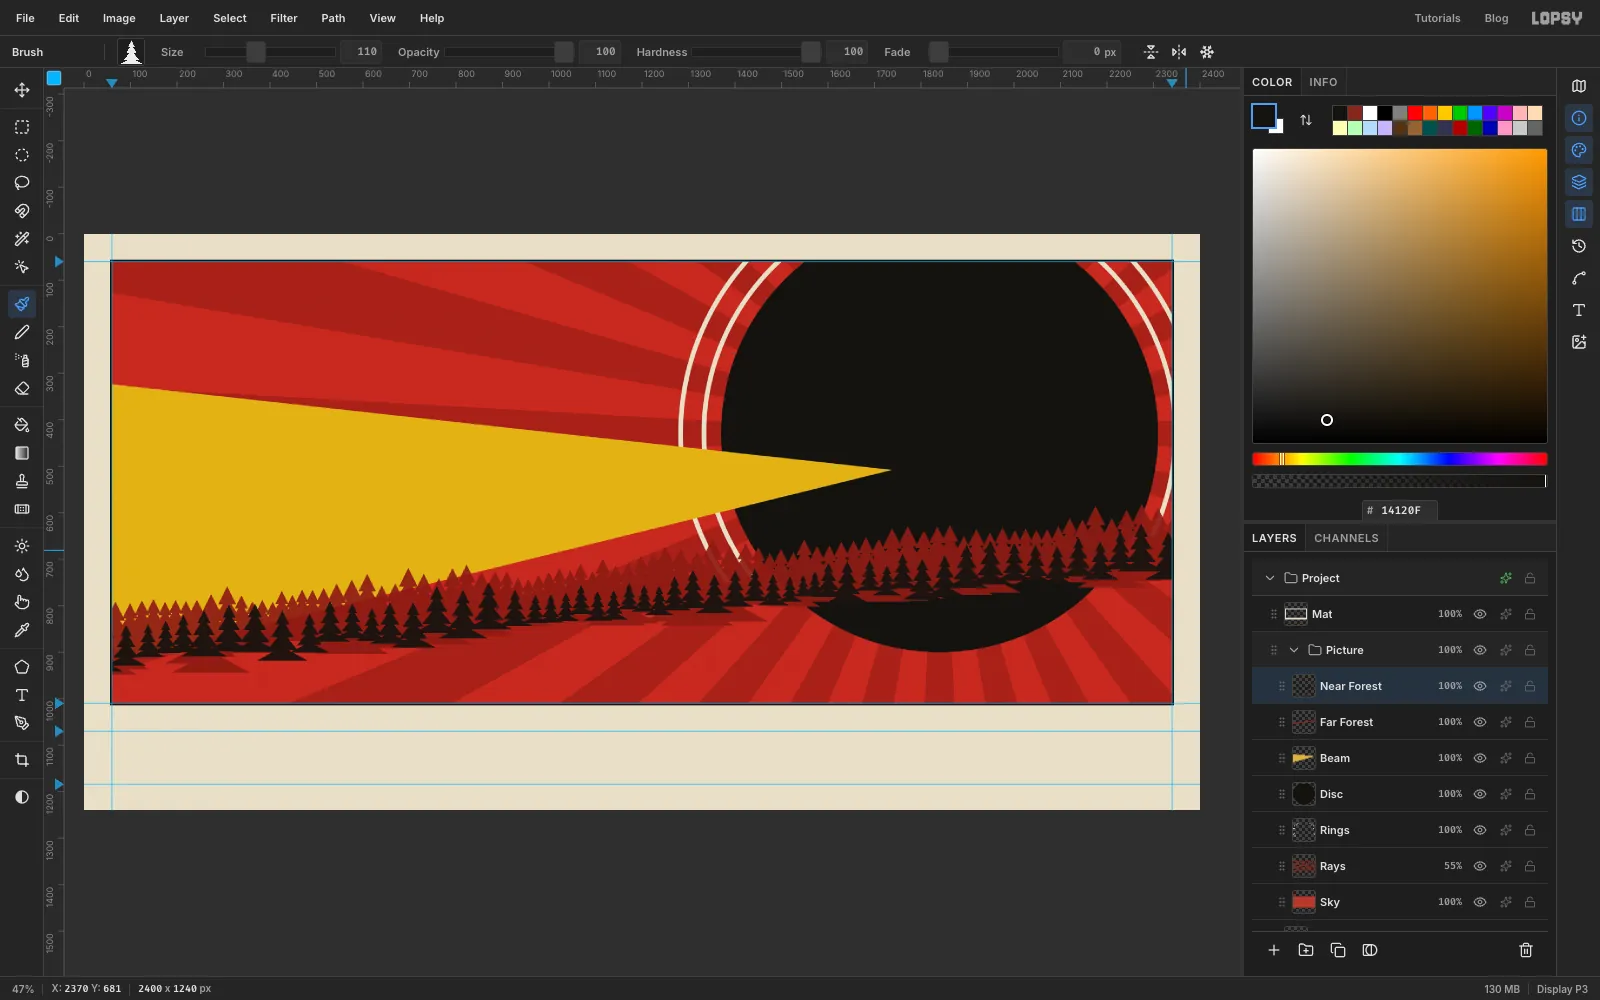
-
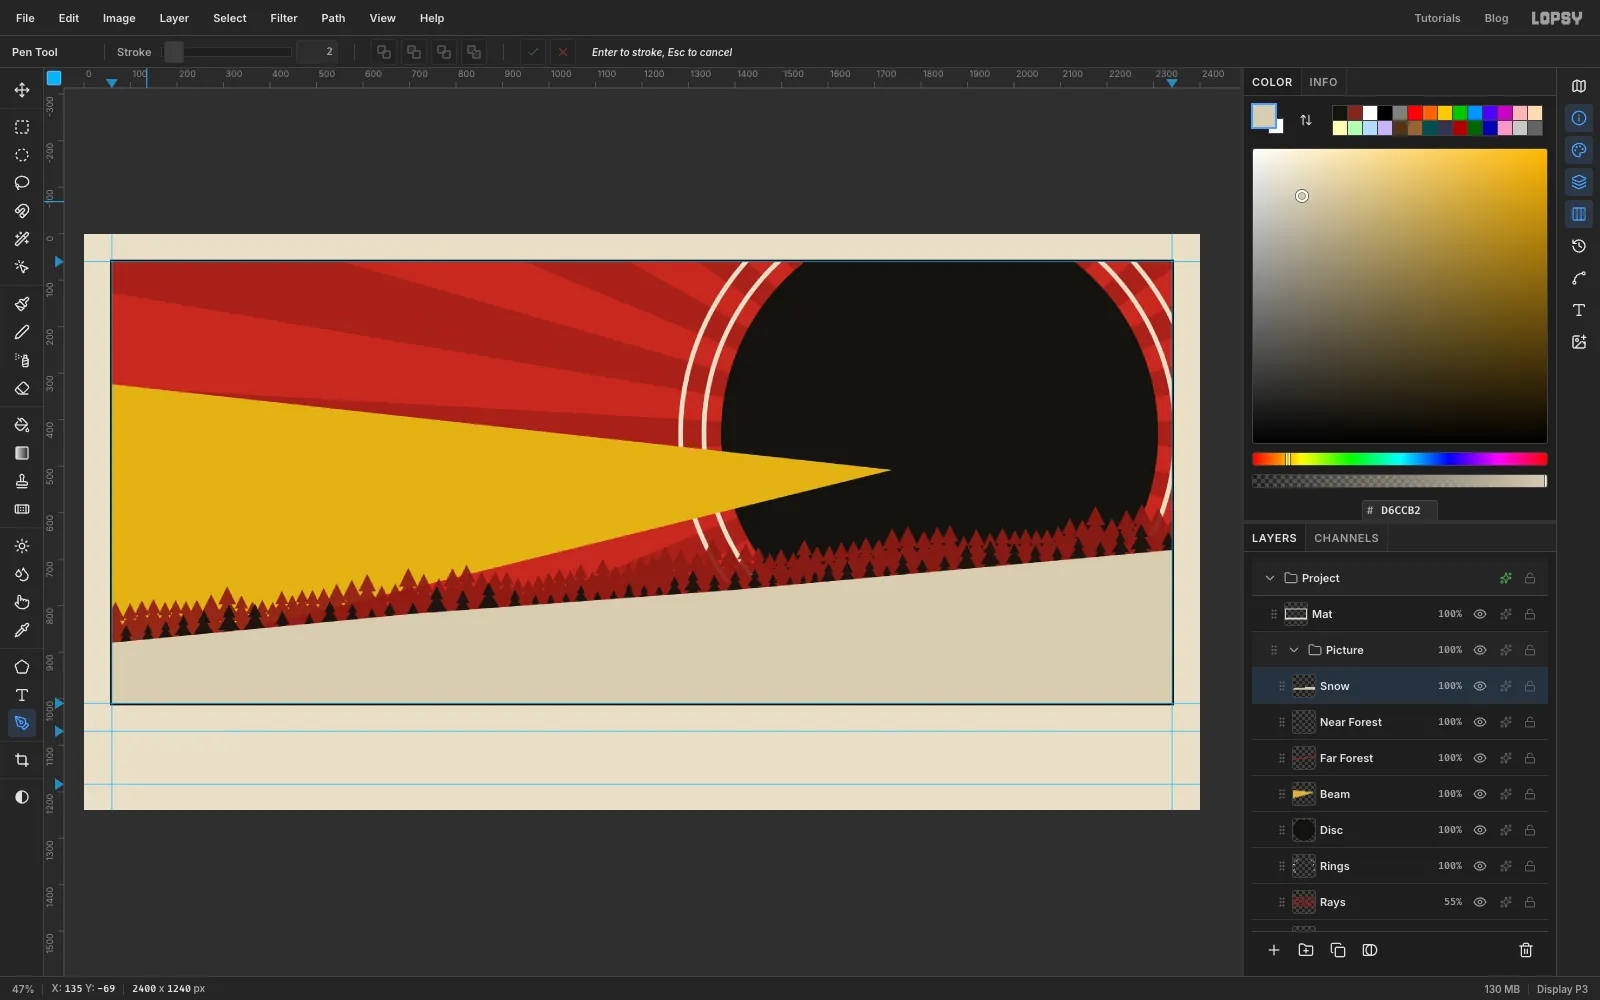
Lay the snow slope
Add a layer named
Snowand set the foreground to snow .With the Pen, start at the left edge of the canvas at about
y 880and click up to the right edge at abouty 680, through the bottom of the near trees so their trunks disappear. Then click down the right edge to below the frame, across to the left edge, and back to the start. Fill it the same way.The snow is one step darker than the paper, so the picture still reads as a closed rectangle.
-
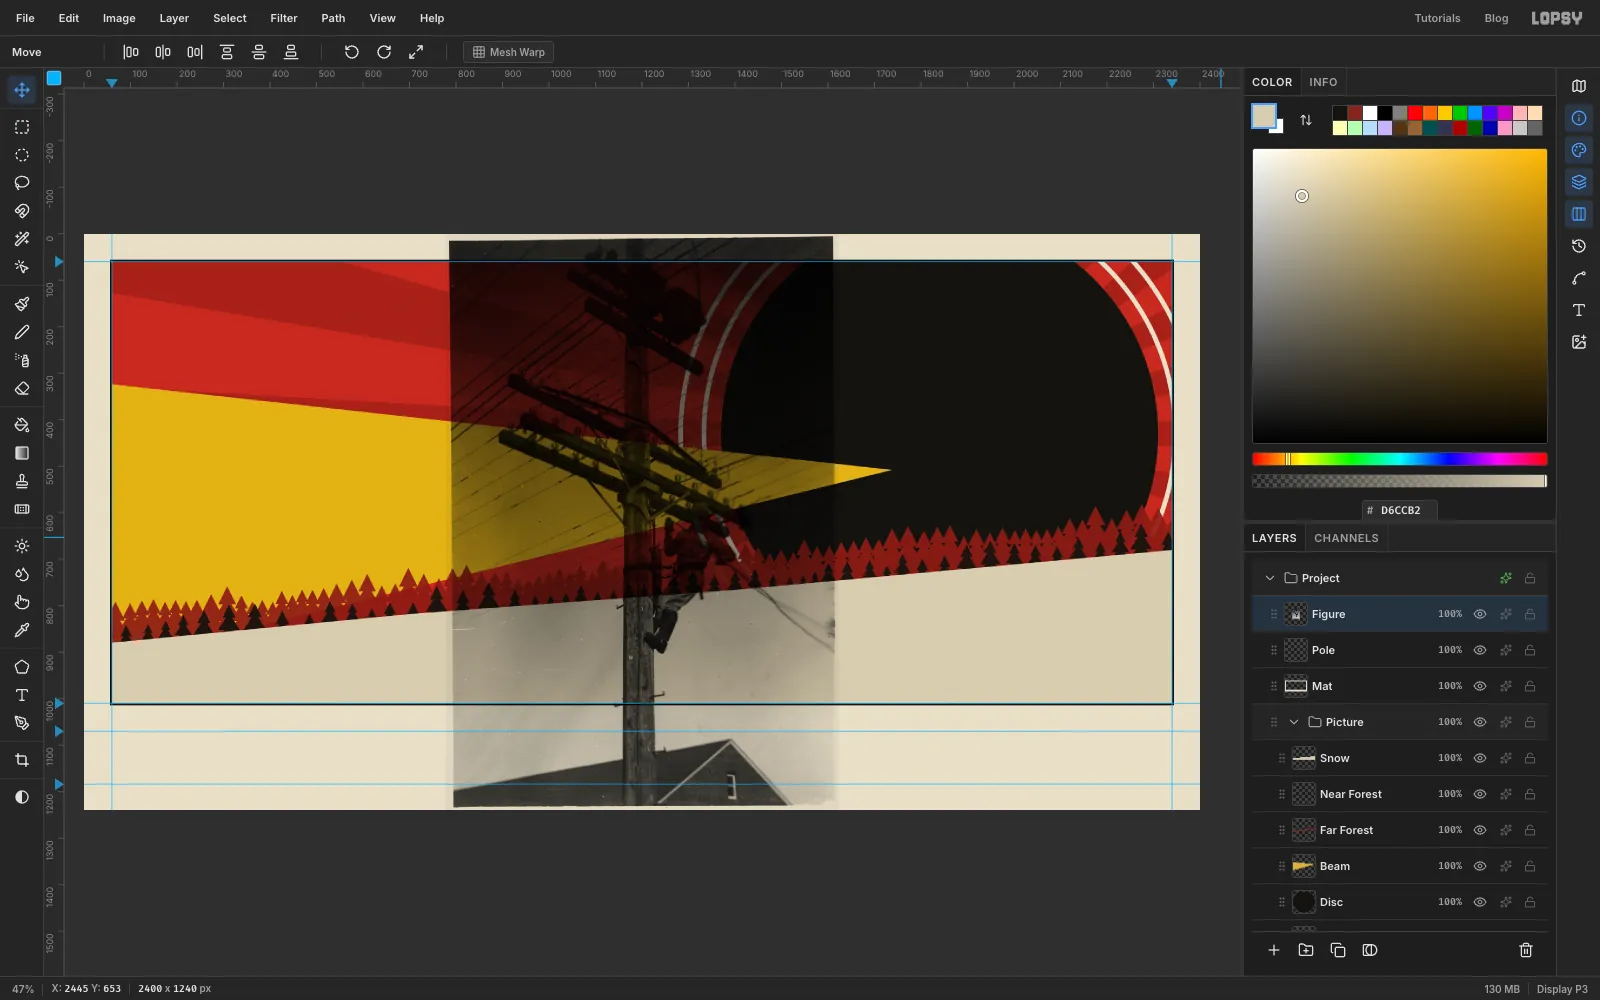
Bring in the lineman photo
Click the
Matrow and add a layer namedPole. It sits above Mat, so it can break out of the frame.Drag the lineman photo from your computer onto the canvas. It's taller than the document, so Lopsy shrinks it to fit and centres it. It arrives selected on a new layer above Pole. Press Cmd+D and rename the layer
Figure.Click the ✦ button on its row to open the effects drawer, set Blend to Multiply and close the drawer. You'll draw on the layer underneath, and Multiply lets those black shapes show through the photo as you trace.
-
Trace the pole shaft
Thresholding this pole gives a crumbly, burnt-looking shape, because the sky in the photo gets dark near the top. Constructivist work wants ruled geometry, so trace it with clean flat shapes instead.
Click the
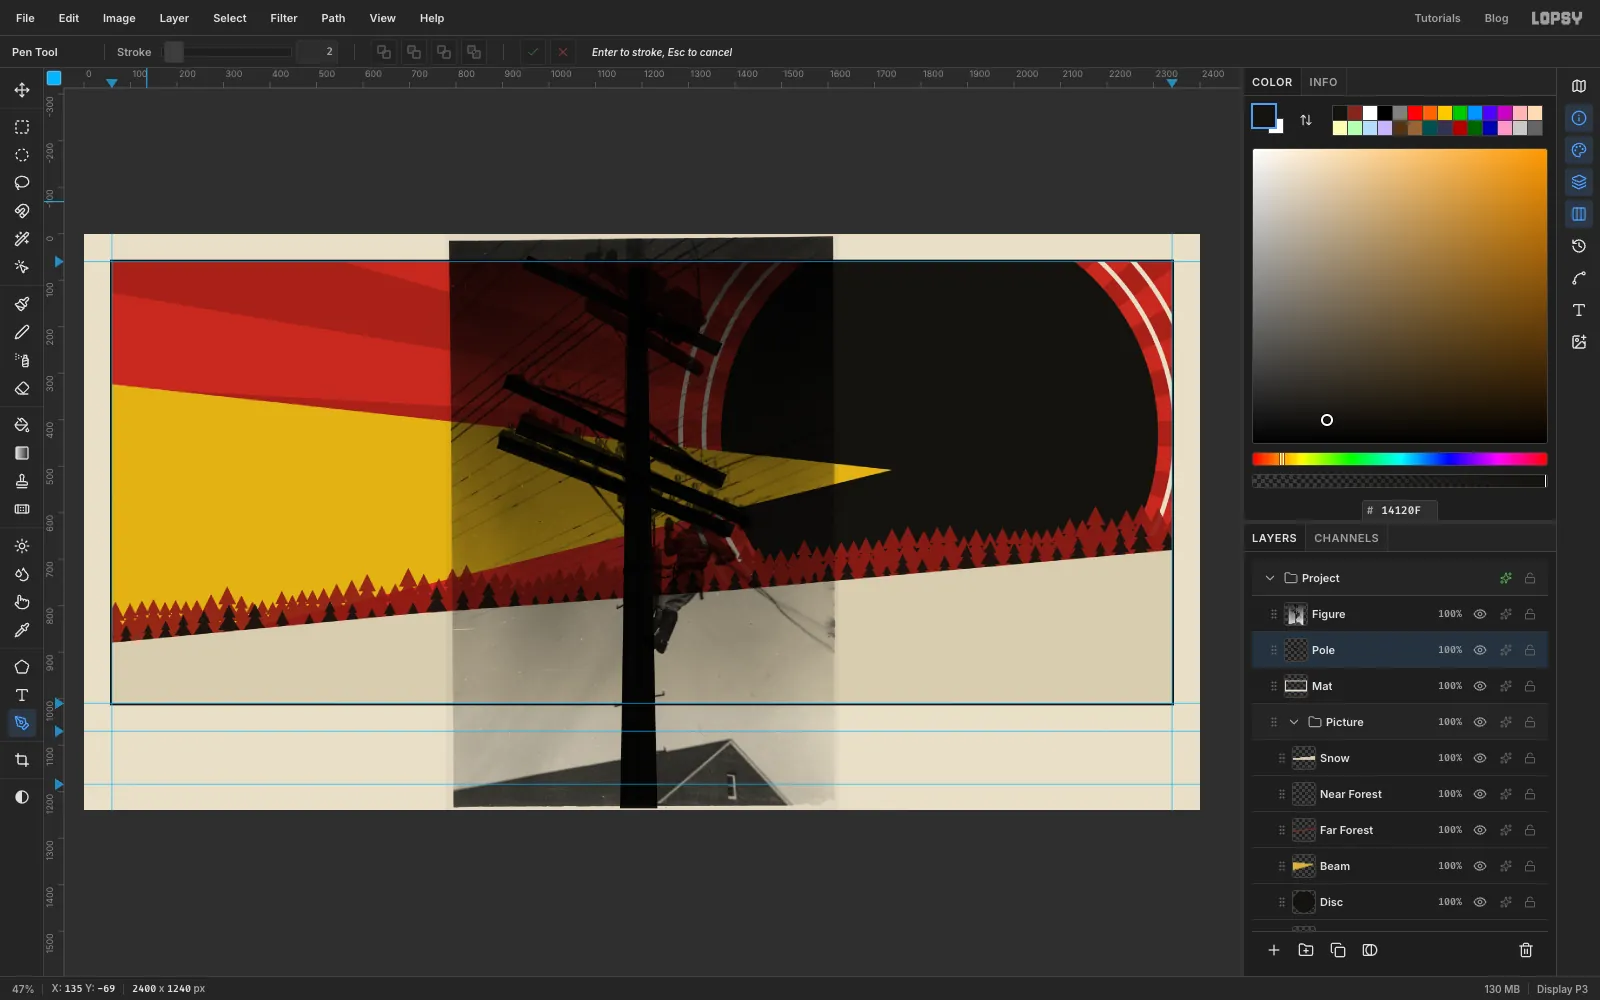
Polerow and set the foreground to ink. With the Pen, draw a tall, narrow taper down the middle of the photo's pole. Start about 75 px below the top of the canvas, where it's about 40 px wide, and widen it to about 80 px at the bottom of the canvas. Fill it.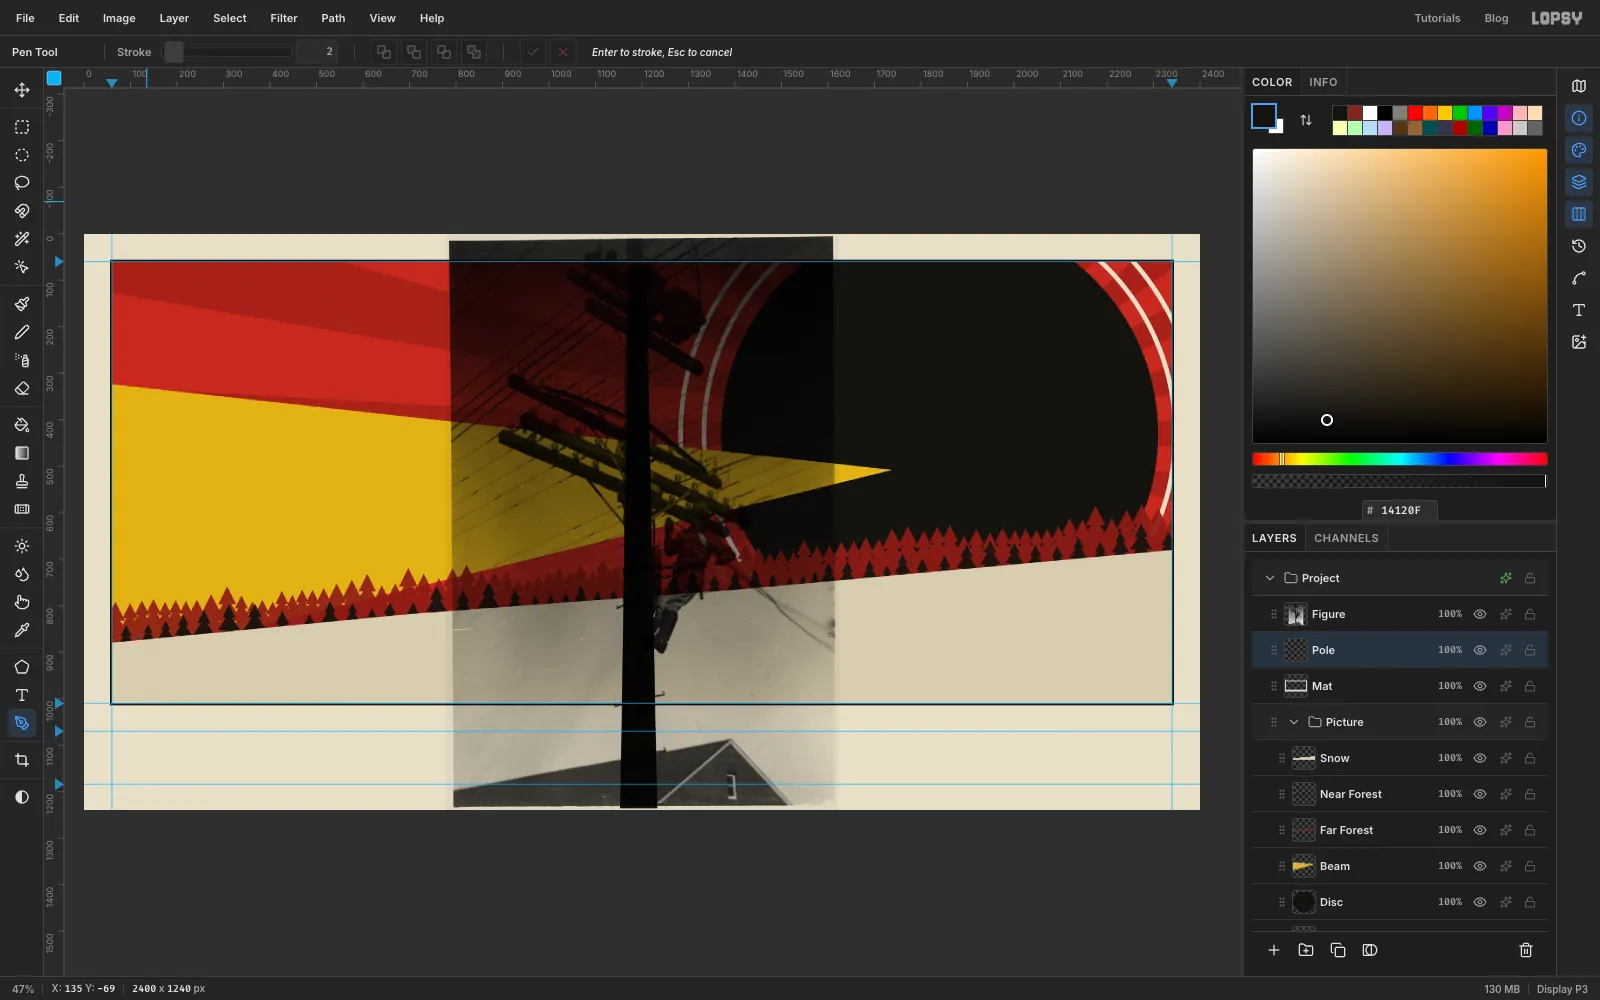
-
Trace four crossarms
With the Pen, draw a long bar about 30 px thick over each of the three crossarms in the middle of the photo, following their slant, and fill each one.
Then draw a fourth bar higher up, around where the transformers hang in the photo, at the same angle. It replaces that clutter with a clean crown and becomes the top line of the pole.
-
Add insulators and braces
Press B, click the brush thumbnail, and on the Presets tab pick Hard Round. That also clears the Spruce settings. Close the window and set Size to
15in the options bar.Click six dots along the top edge of each crossarm, three on each side of the shaft. Keep them evenly spaced, so the regular beat reads as insulators.
Set Size to
7. For each brace, click on the shaft below the lowest arm, then Shift+click up onto the arm. Do one on each side.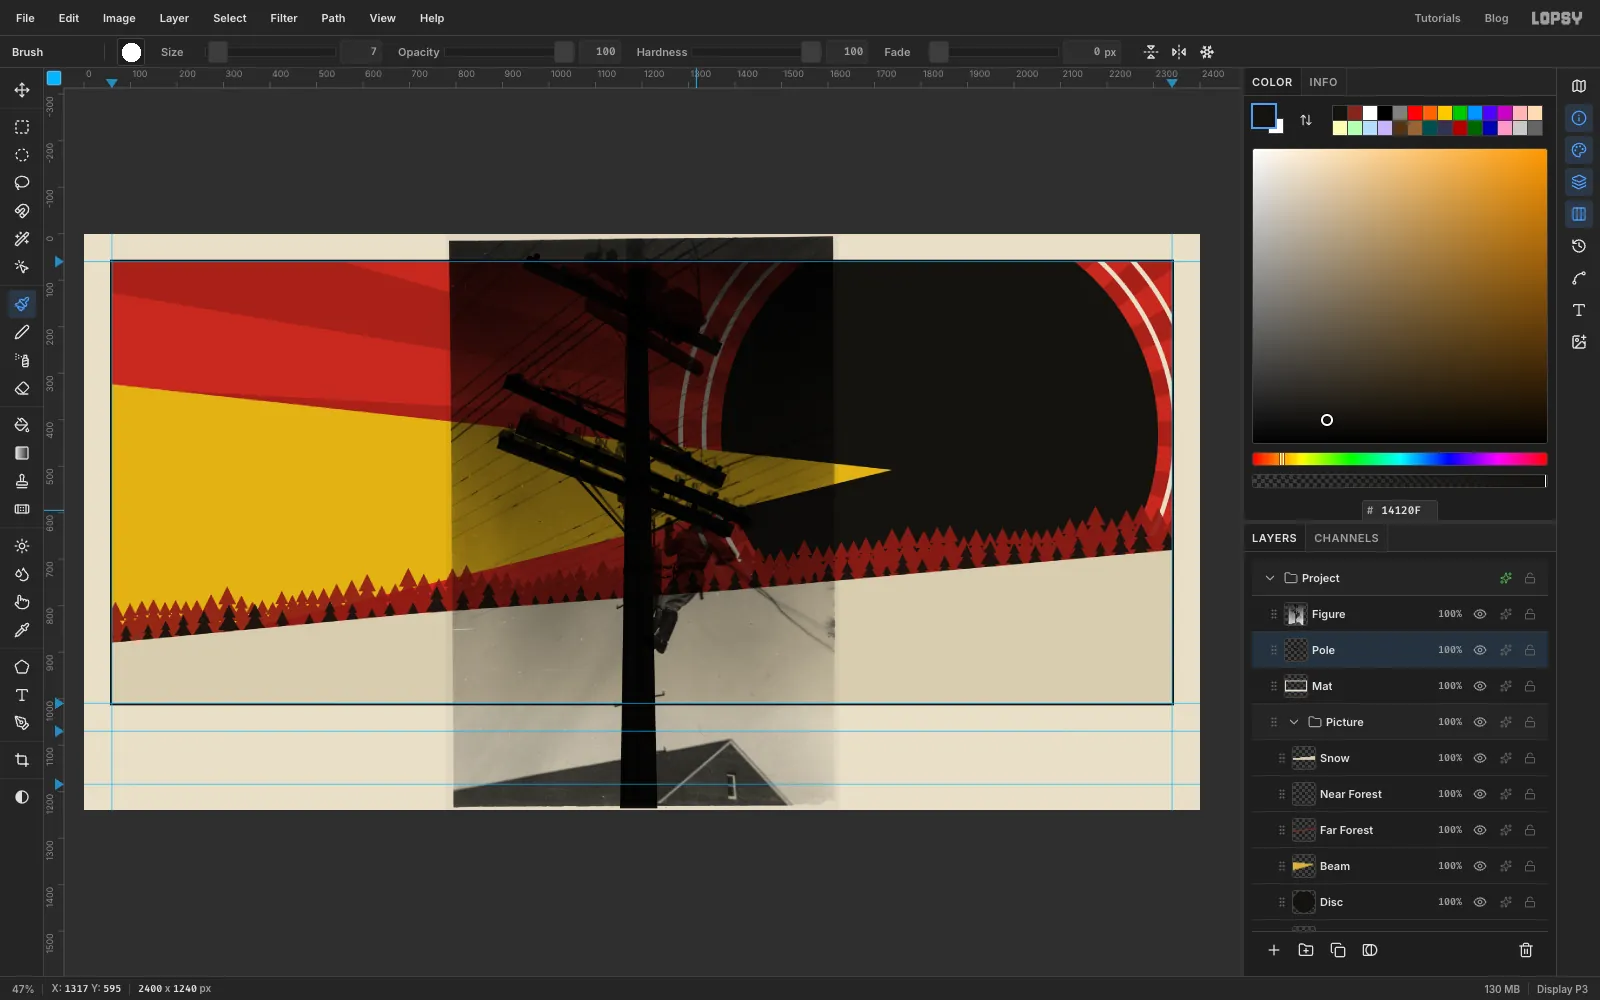
-
Hide the photo
Click the eye on the
Figurerow to hide the photo for now, then click thePolerow. You now have a clean drawing to reuse: three more copies of it will march away across the snow.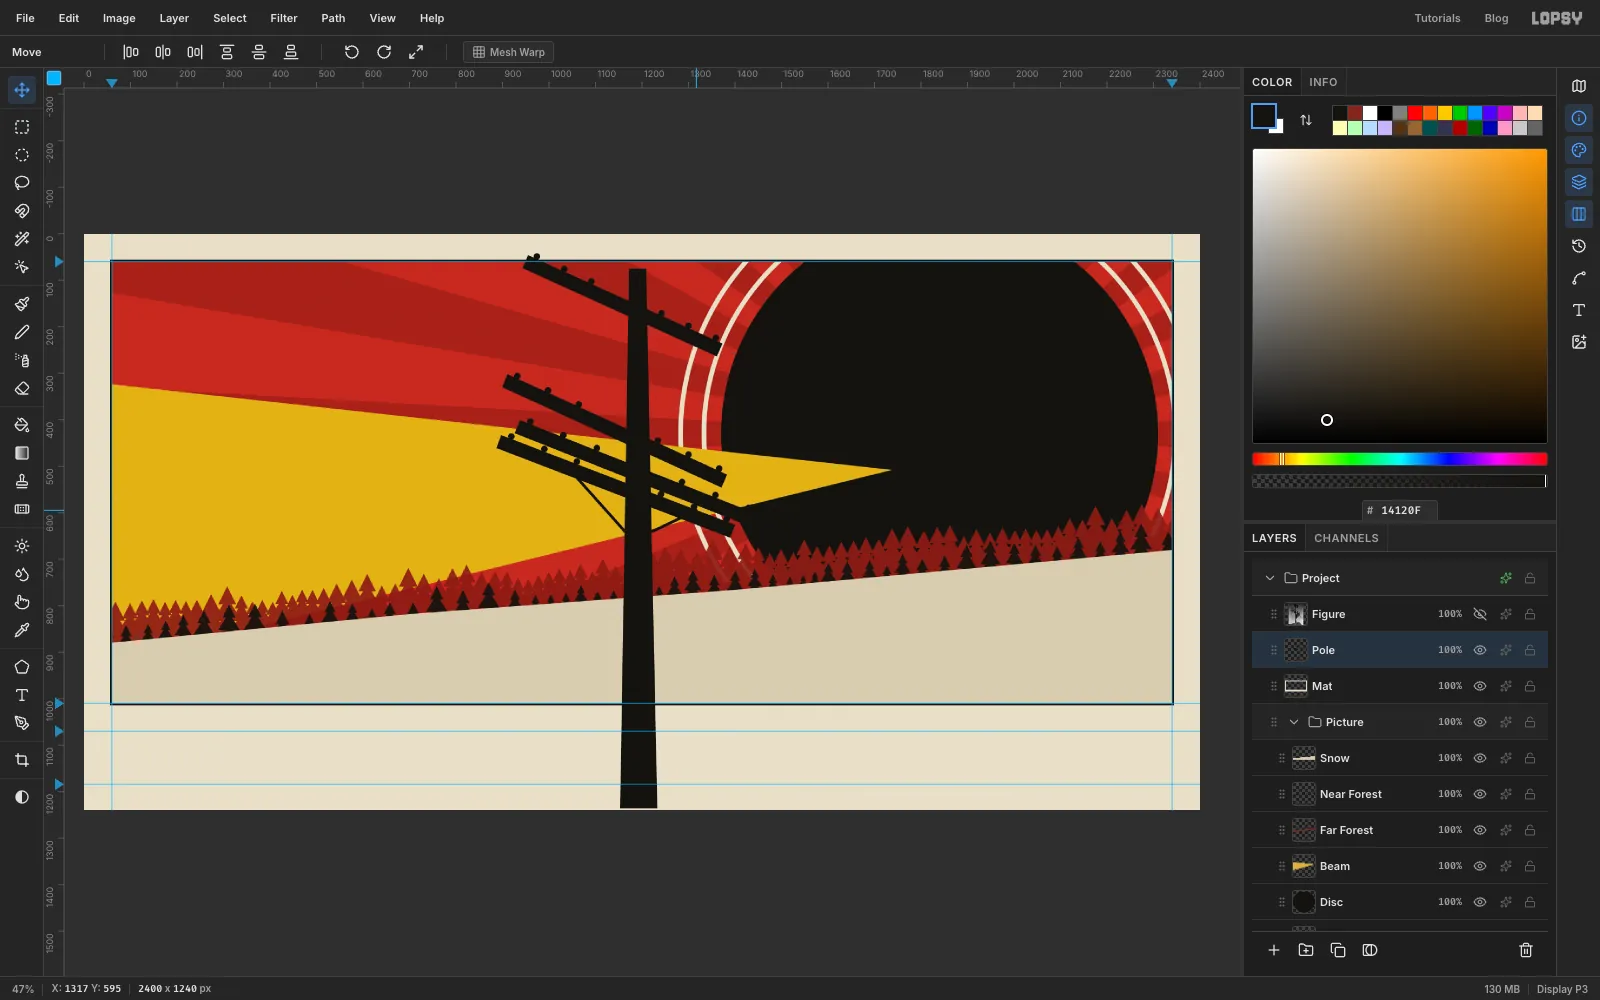
-
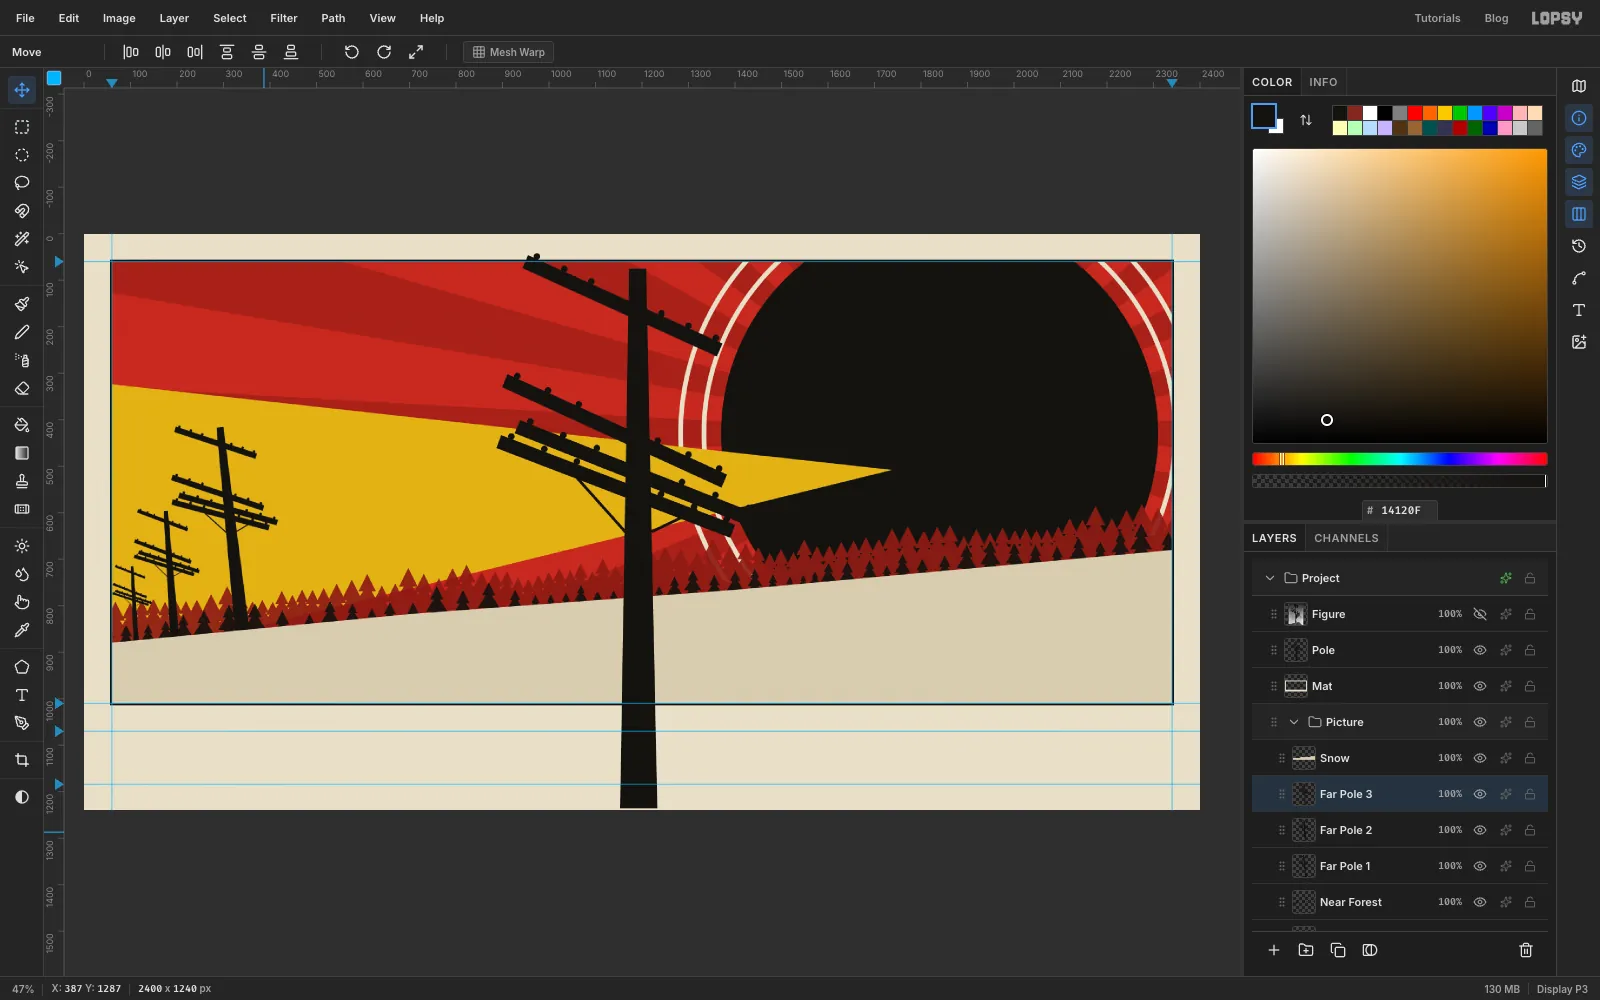
Make the first far pole
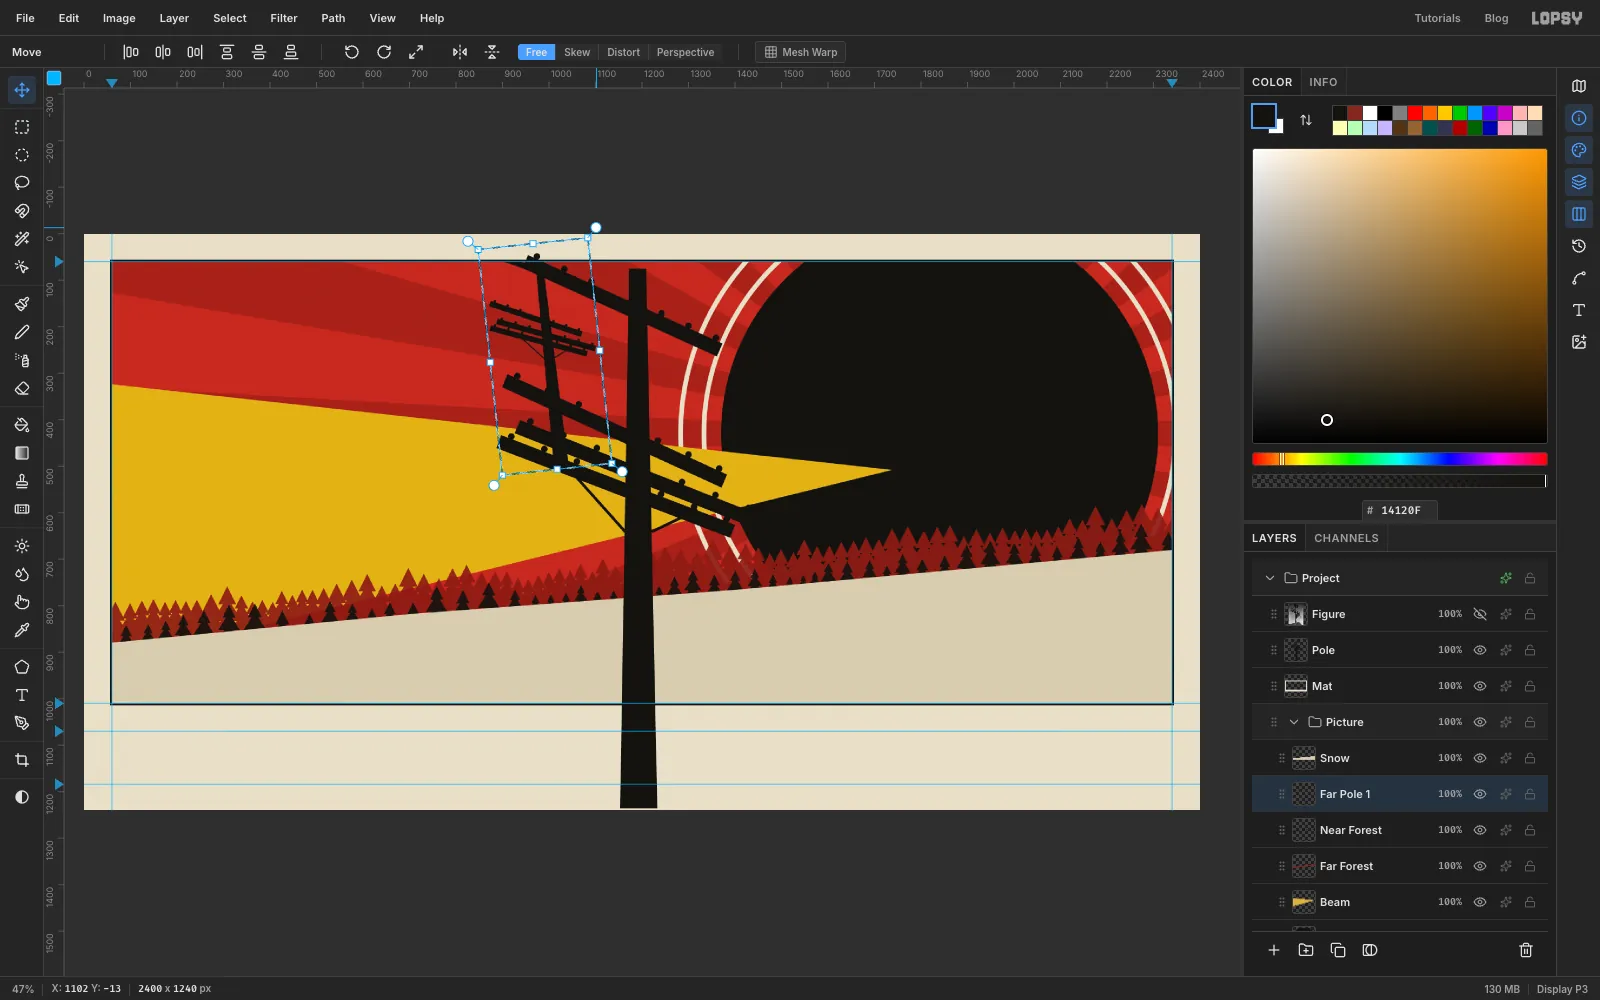
Press M and drag a marquee around the whole pole drawing. Press Cmd+C, then Cmd+D. Click the
Near Forestrow and press Cmd+V. The copy lands in place above Near Forest, so it's inside the Picture group and behind the snow. Rename itFar Pole 1and press Cmd+D.Now shrink and tilt it, one transform at a time:
- Press M and marquee the copy, press V, hold Cmd and drag the bottom-right corner handle inward until it's about 475 px tall (about 40%). Press Cmd+D.
- Press M and marquee the smaller copy, press V, and drag the round handle just outside a corner to tilt it about 6° counter-clockwise, which moves the top sideways by about a tenth of its height. Press Cmd+D.
- With the Move tool, drag the pole so its base is on the snow line, about 340 px from the left of the canvas. The snow hides the foot.
-
March the poles into the distance
With
Far Pole 1still active, press Cmd+V again and name the new layerFar Pole 2. Press Cmd+D, then repeat the same steps: about 300 px tall (25%), tilted about 4°, with its base about 200 px from the left.Do it once more for
Far Pole 3: about 180 px tall (15%), tilted about 3°, with its base about 110 px from the left.The spacing and height both shrink as they go, which gives you perspective without any construction lines.
-
Tilt the main pole
Click the
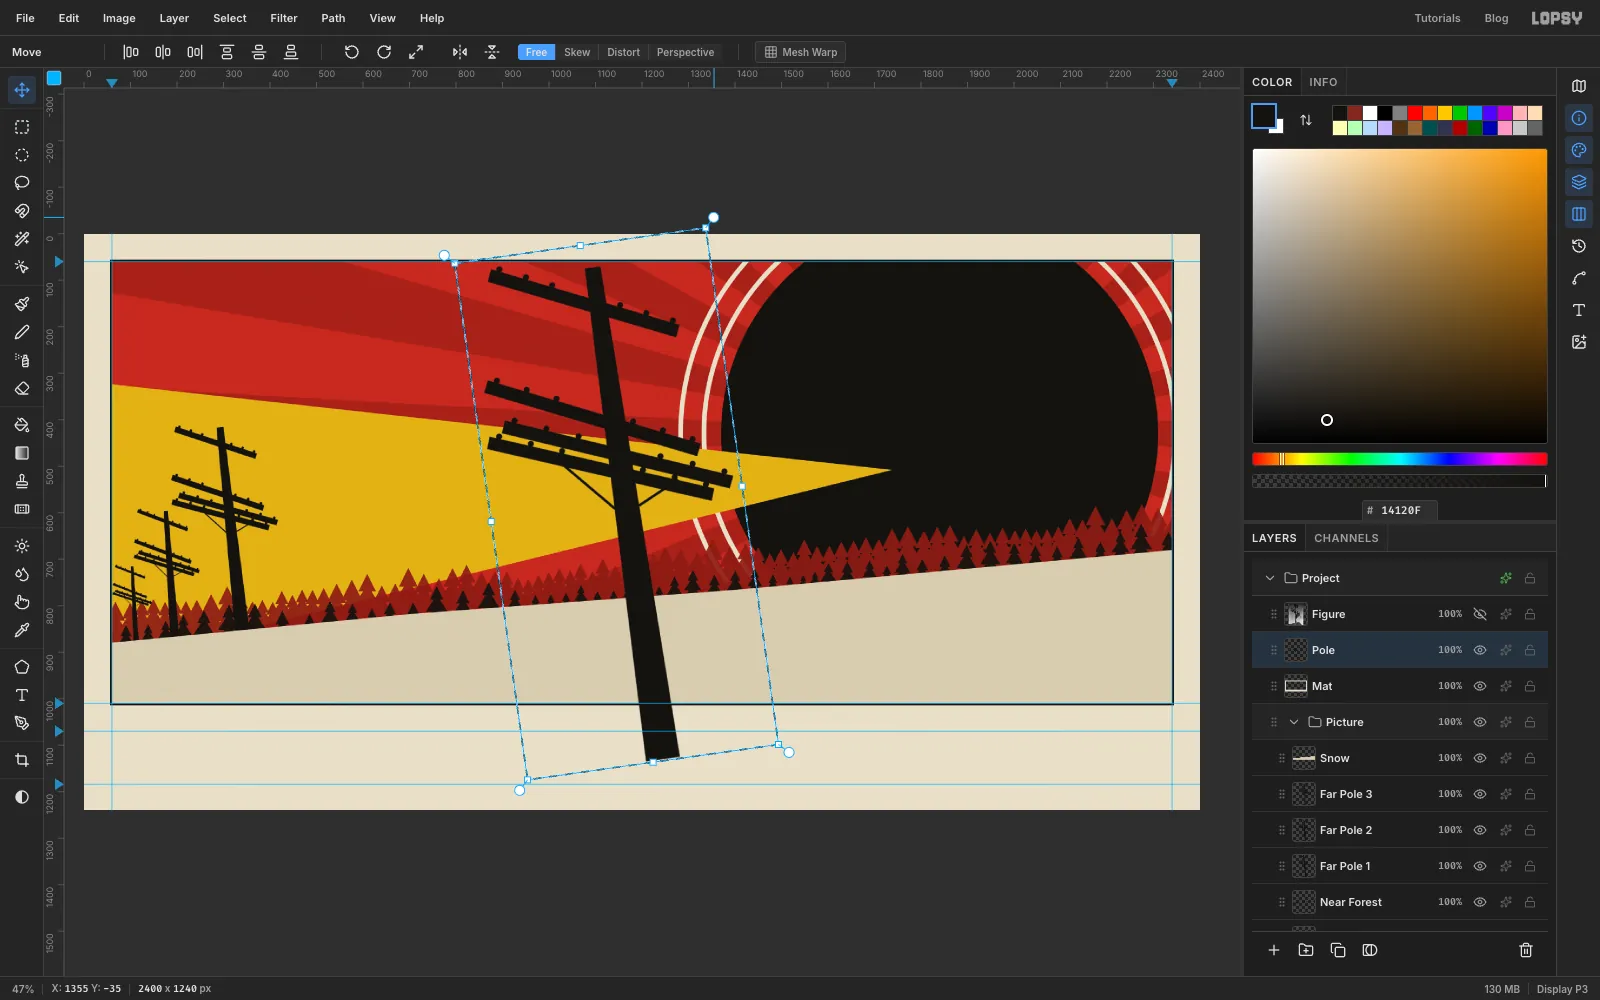
Polerow. Press M and marquee the drawing, press V, then Cmd-drag the bottom-right corner inward until it's about 1095 px tall (about 92%). Press Cmd+D.Press M, marquee it again, press V and use a round handle to rotate it about 8° counter-clockwise. Press Cmd+D. Tilting everything off the vertical is the fastest way to make a picture feel constructivist.
-
Plant the main pole
With the Move tool, drag the pole left until its base is about 650 px from the left of the canvas. Its top should rise through the top of the frame and stop about 20 px short of the canvas edge. This break out of the frame is why the pole sits above the Mat.
The foot now hangs over the snow and the margin. Press L, lasso around the part of the shaft below about
y 905, press Delete, then Cmd+D.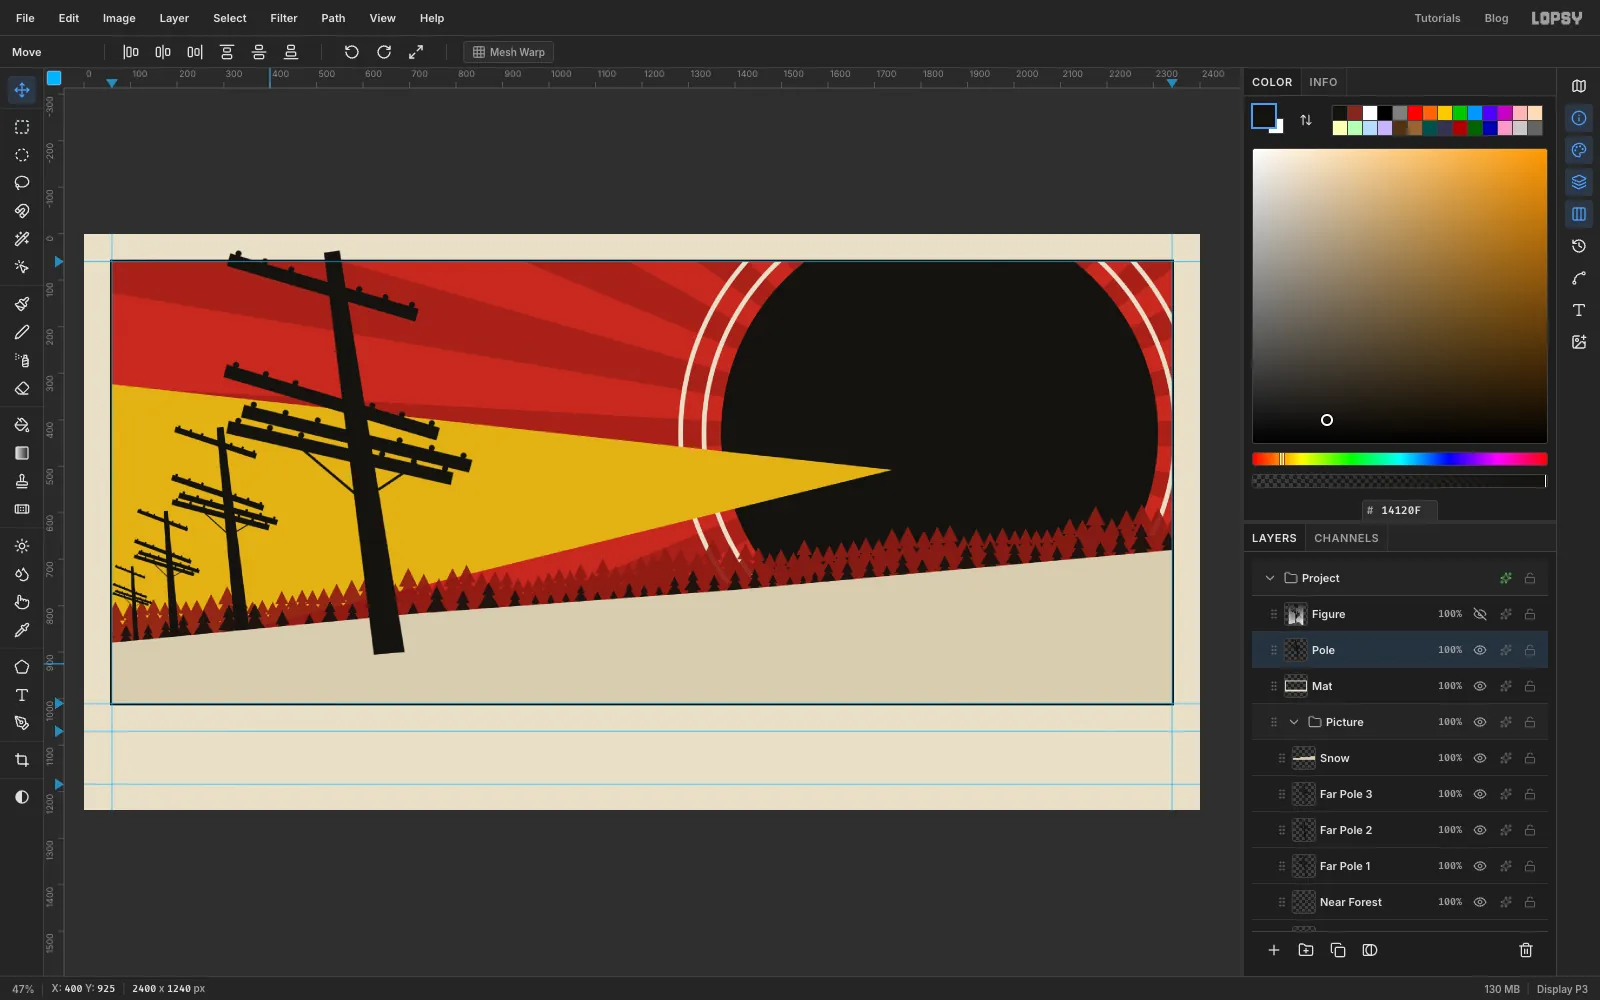
-
Threshold the lineman
Click the eye on the
Figurerow to show it again and click the row. Open the ✦ drawer, set Blend back to Normal and close it.Run Filter → Gaussian Blur with Radius
1, which stops the edges coming out hairy. Then run Filter → Threshold with Level58. At that level there's enough white left in his jacket and trousers to show the folds.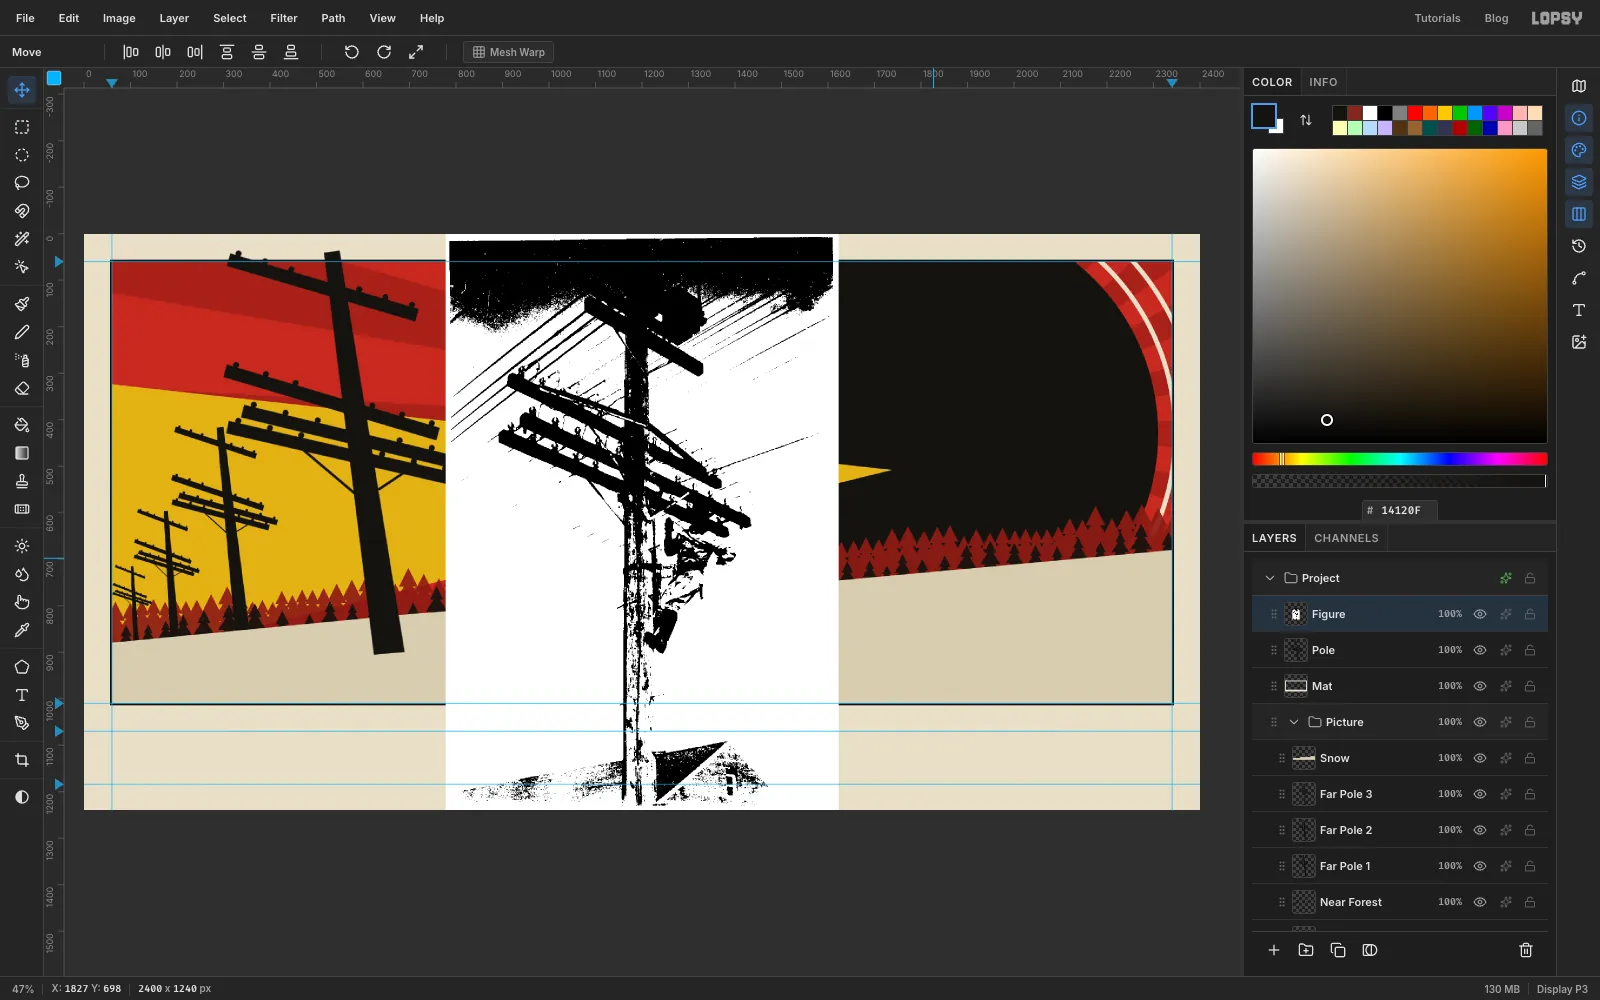
-
Cut the lineman out
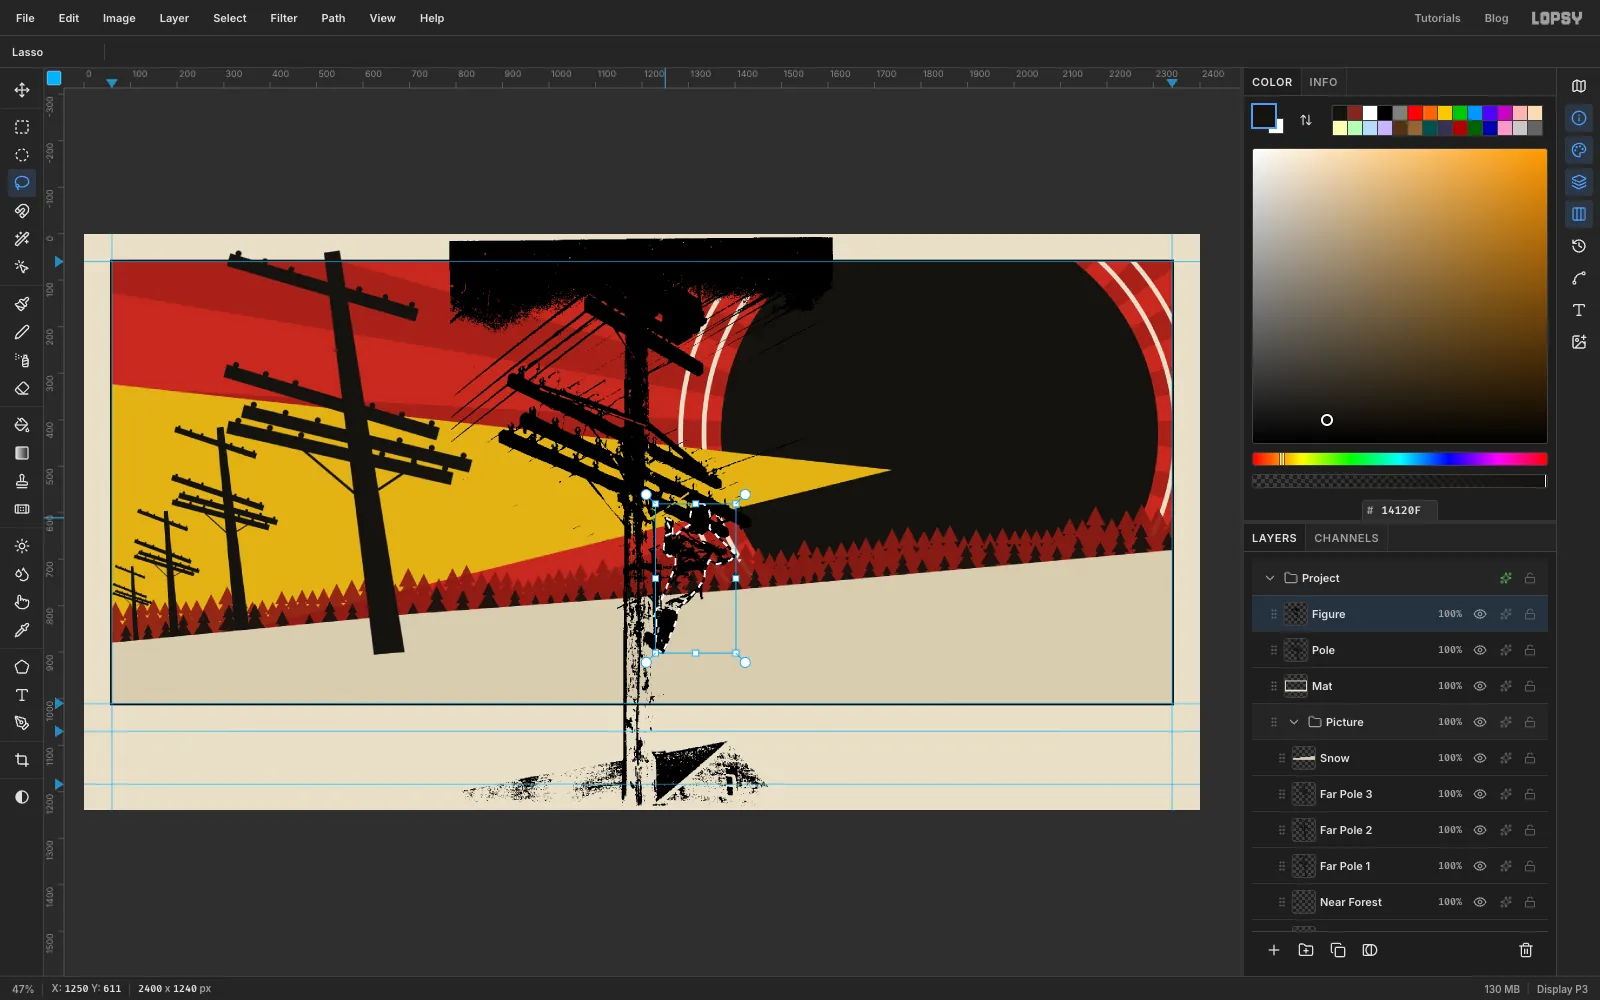
Press W for the Magic Wand, untick Contiguous in the options bar, and click anywhere white. Every white pixel is selected. Press Delete, then Cmd+D.
Press L and lasso tightly around the man alone, from his cap to his boots, leaving out the pole and the crossarms. Keep this selection live for the next step.
-
Put a cream plate behind him
The holes in his clothes are see-through for now, so the yellow would show through them. With the selection still live, click the
Polerow and add a layer namedFigure Plate, which sits just under Figure. Set the foreground to paper and choose Edit → Fill.Click the
Figurerow, choose Select → Inverse and press Delete to clear everything outside him. Press Cmd+D. Then choose Layer → Merge Down and rename the merged layerFigure.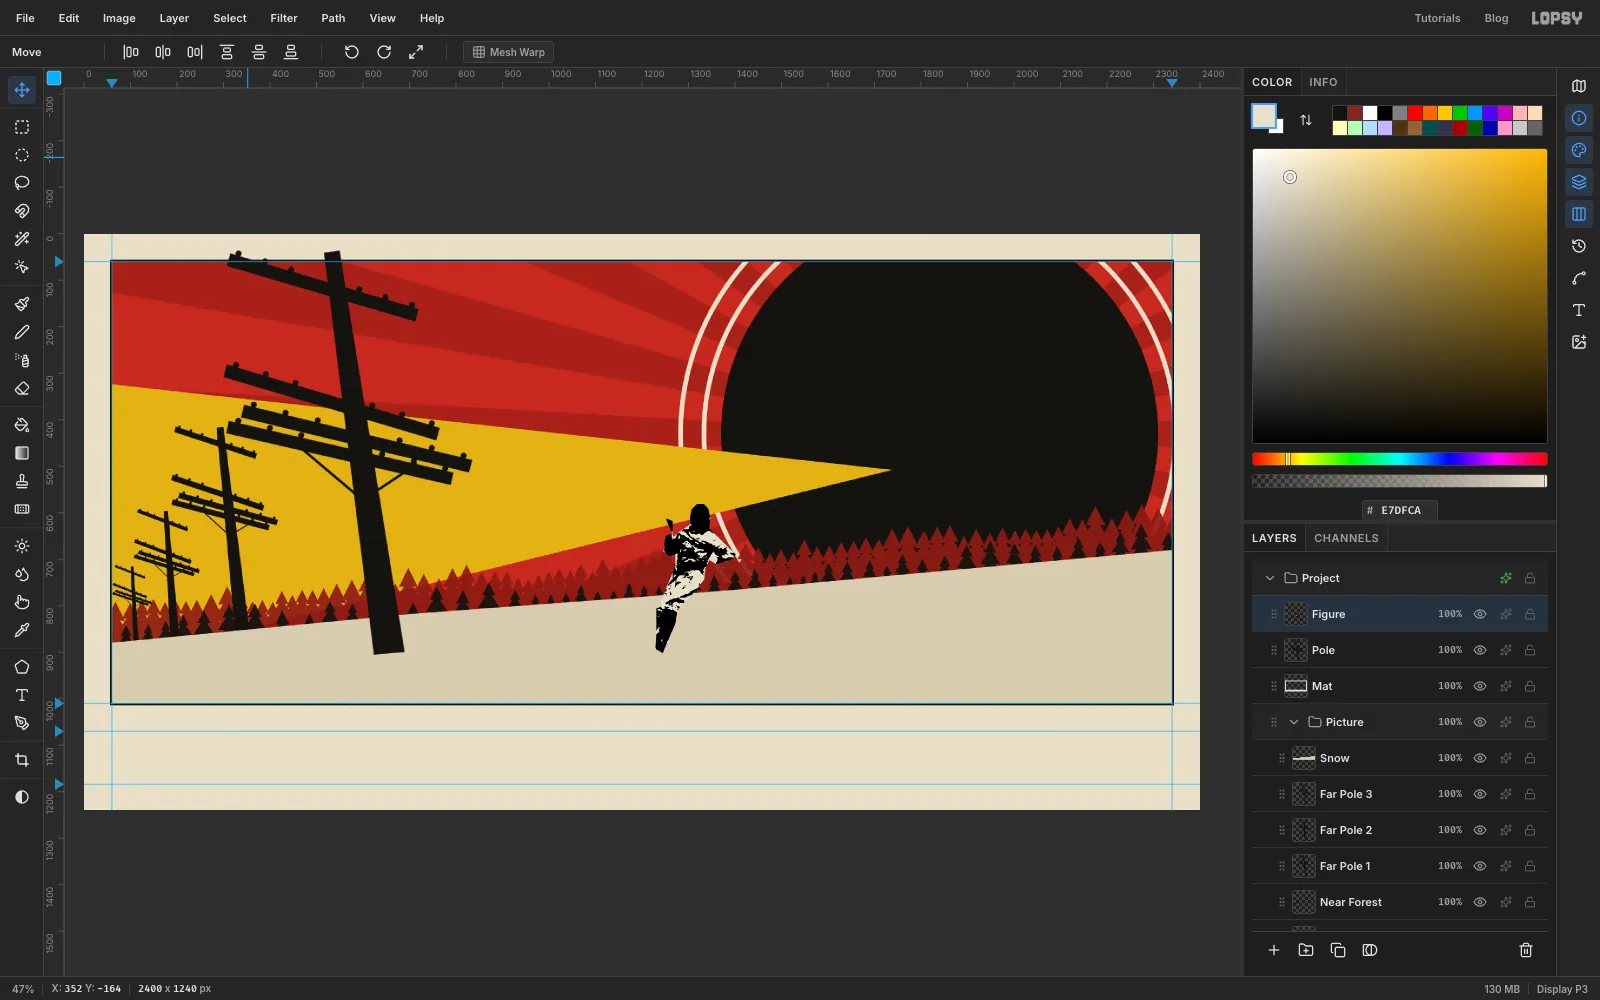
-
Scale the lineman up and put him on the pole
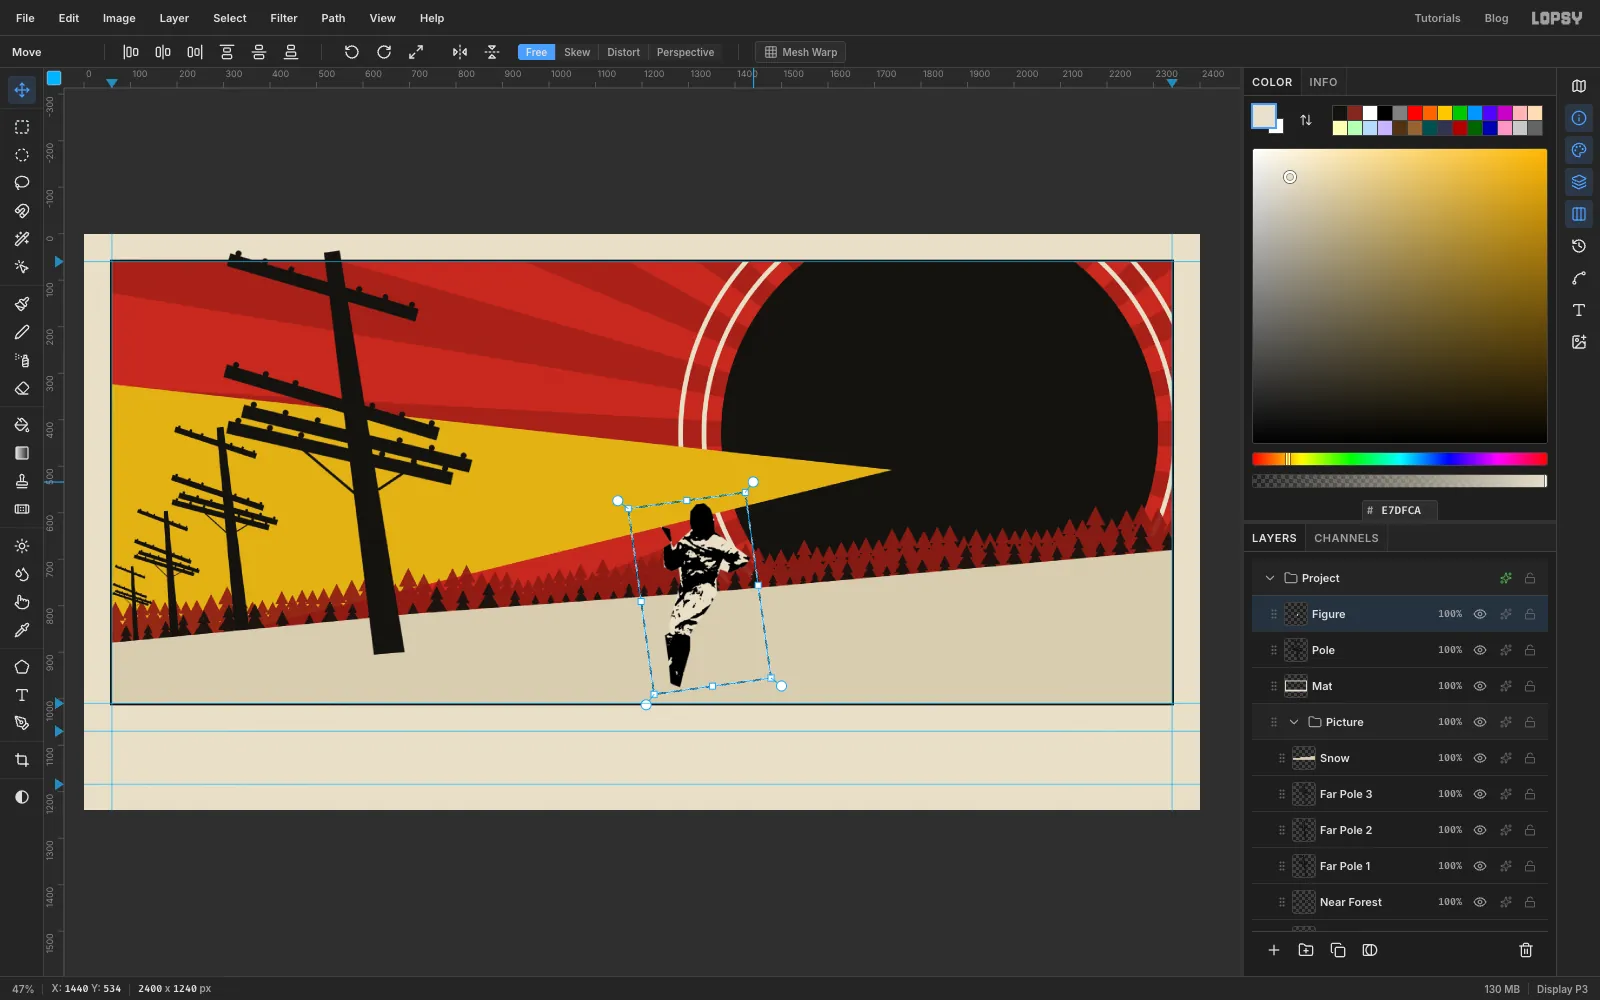
True to the photo, he'd be lost against the pole, so make him bigger than life:
- Press M and marquee him, press V, and Cmd-drag the bottom-right corner outward until he's about 390 px tall (about 120%). Press Cmd+D.
- Press M, marquee him again, press V, and rotate him about 8° counter-clockwise to match the pole. Press Cmd+D.
- Drag him so his lower boot and raised glove overlap the right edge of the pole, just below the lowest crossarm.
-
Give him a climbing pose
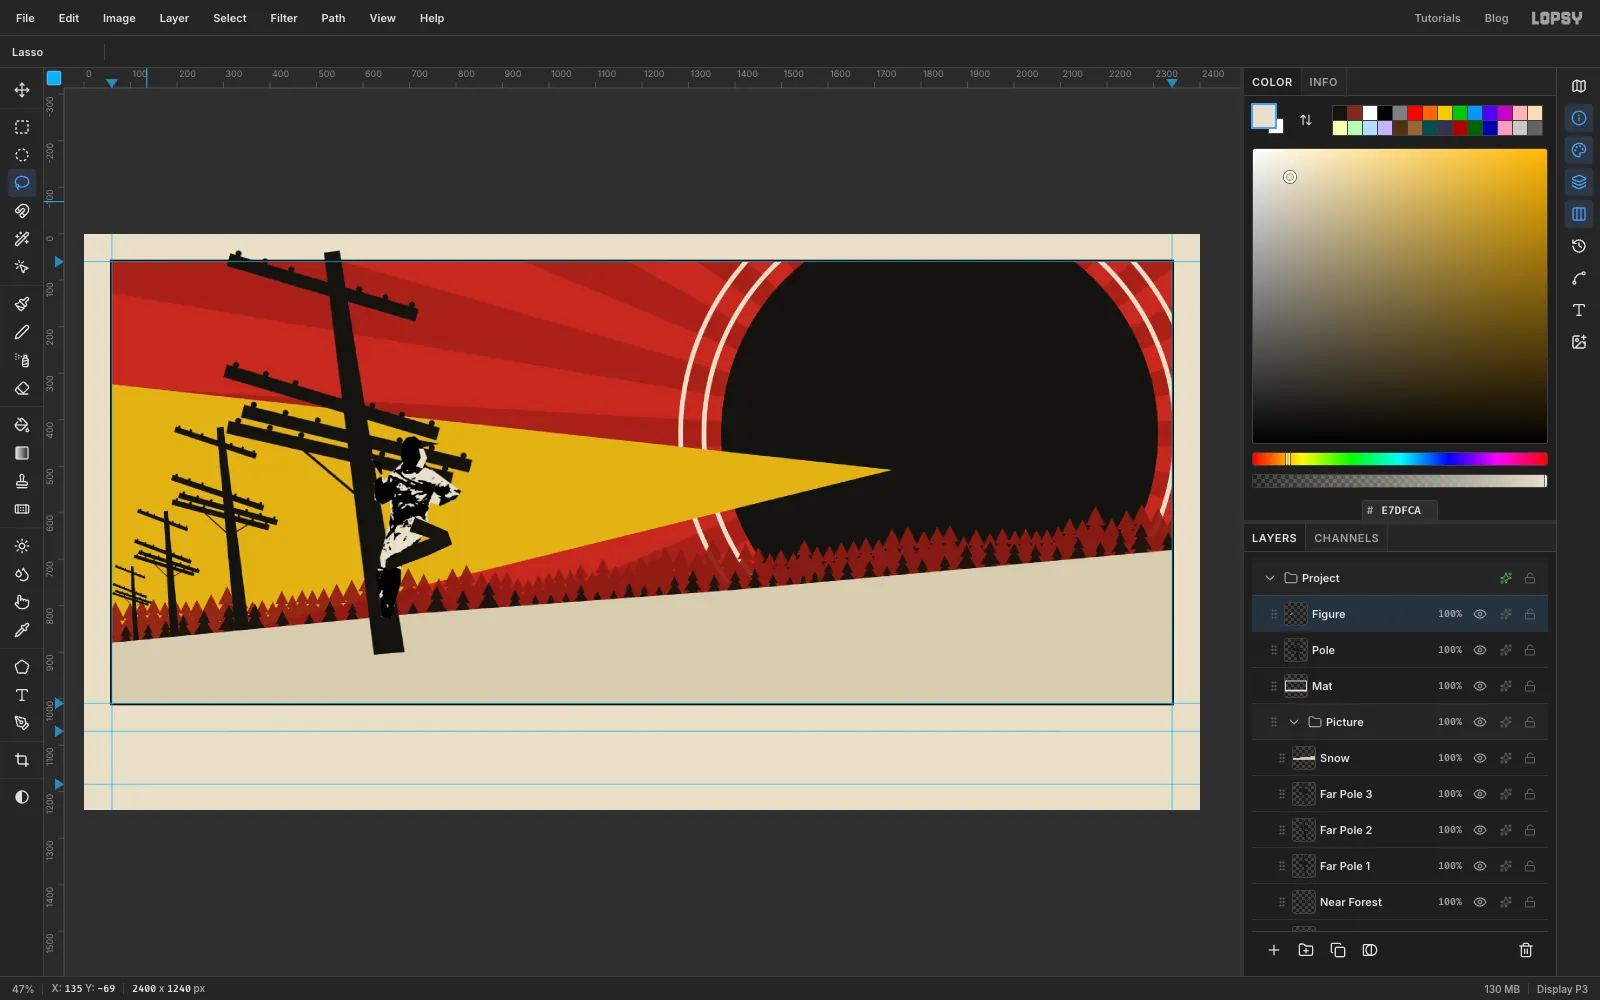
The photo gives you one visible leg and a dark head, which doesn't say "climbing". Zoom in, because these shapes are only a few pixels on screen at fit-to-window. Paint the rest directly on the
Figurelayer. Press L, and use the Lasso, Edit → Fill and Cmd+D for each shape:- With the foreground set to ink, draw a bent leg: from his hip out to the right to a knee, then back in to a pointed toe that digs into the pole.
- Still in ink, draw a small triangle sticking out from the right of his head for a cap peak.
- With the foreground set to paper , draw a thin crescent down the right side of his head, which reads as a jaw lit by the wolf's beam.
-
Add a keyline and safety belt
Open the ✦ drawer on
Figure, turn on Stroke, set Width to7and the colour to paper , and close the drawer. The cut-paper outline holds him out from the black pole and the busy forest.Add a layer named
Belt. With the foreground still on paper, press B and set Size to6. Drag one curved stroke from his hip, sagging across the front of the pole and out the far side. Now he's strapped on.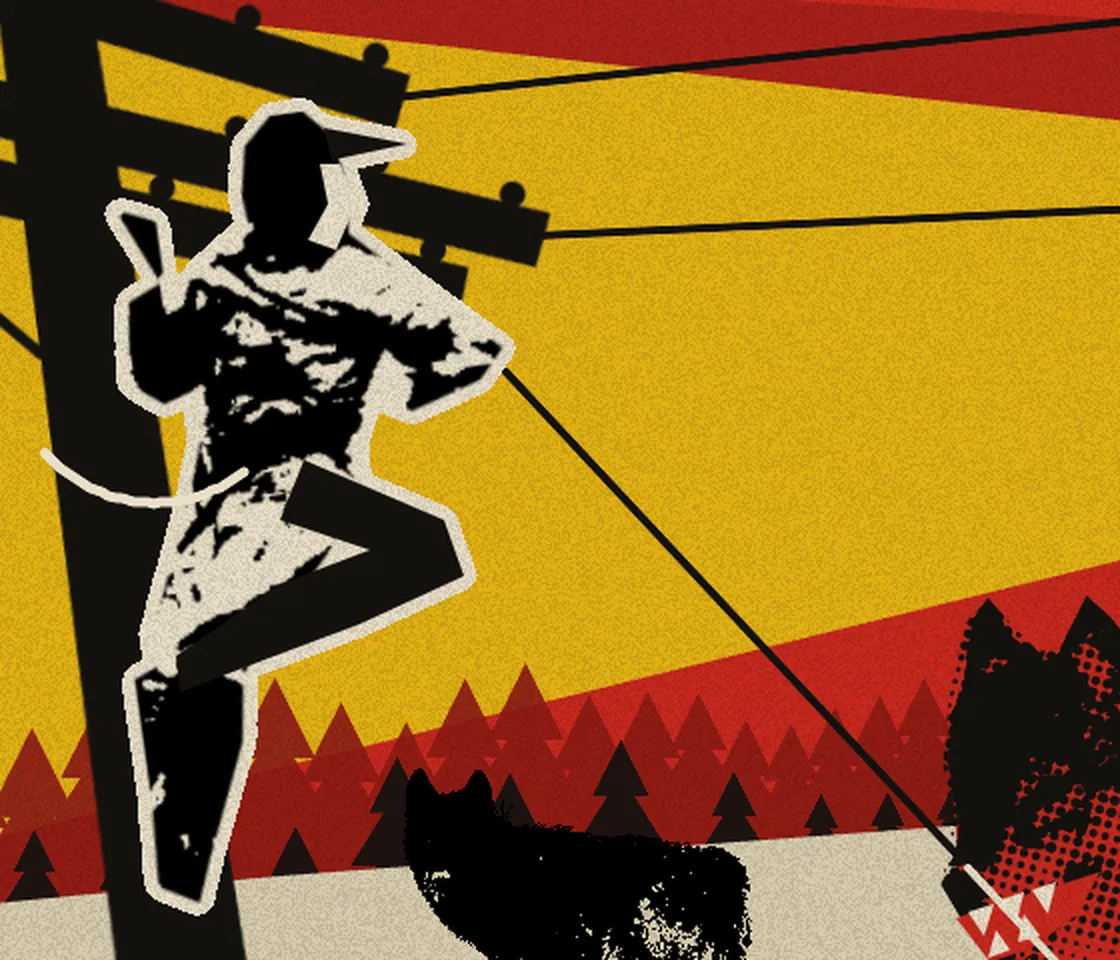
-
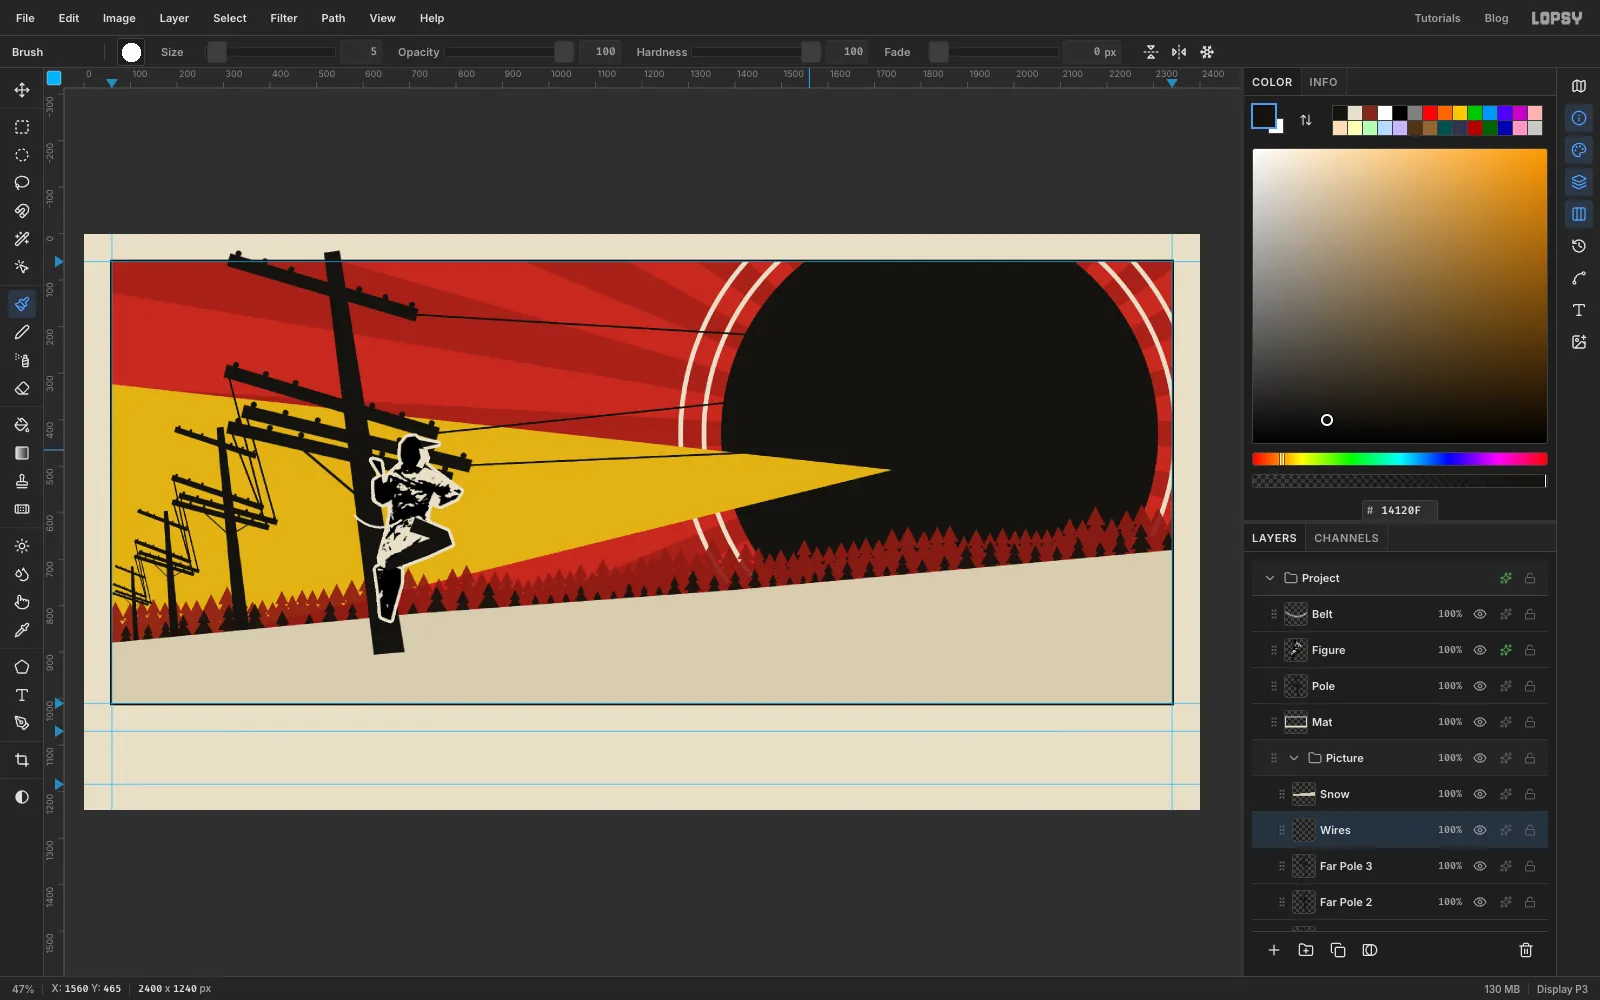
Rule the power lines
Click the
Far Pole 3row and add a layer namedWires, so they pass behind the snow and the Mat. Set the foreground to ink and press B. The Brush is still on Hard Round. For each wire, click one end, then Shift+click the other.- At Size
5, join the left end of each of the main pole's lower three arms to the right end of the matching arm on Far Pole 1. - At Size
4, do the same from Far Pole 1 to Far Pole 2. - At Size
3, do the same from Far Pole 2 to Far Pole 3. - Back at Size
5, start three wires from the right ends of the main pole's top three arms, and run each one to aboutx 1560, aty 225,345and465. The wolf's head will hide those ends.
- At Size
-
Select the disc without the beam
Those wires disappear black-on-black where they cross the disc, so that stretch needs repainting in a light colour.
Hold Cmd and click the
Disclayer's thumbnail to select the circle, then click theWiresrow. Press L, hold Alt and lasso around the part of the beam that crosses the disc, following the beam's edges. That subtracts it, so only black disc stays selected.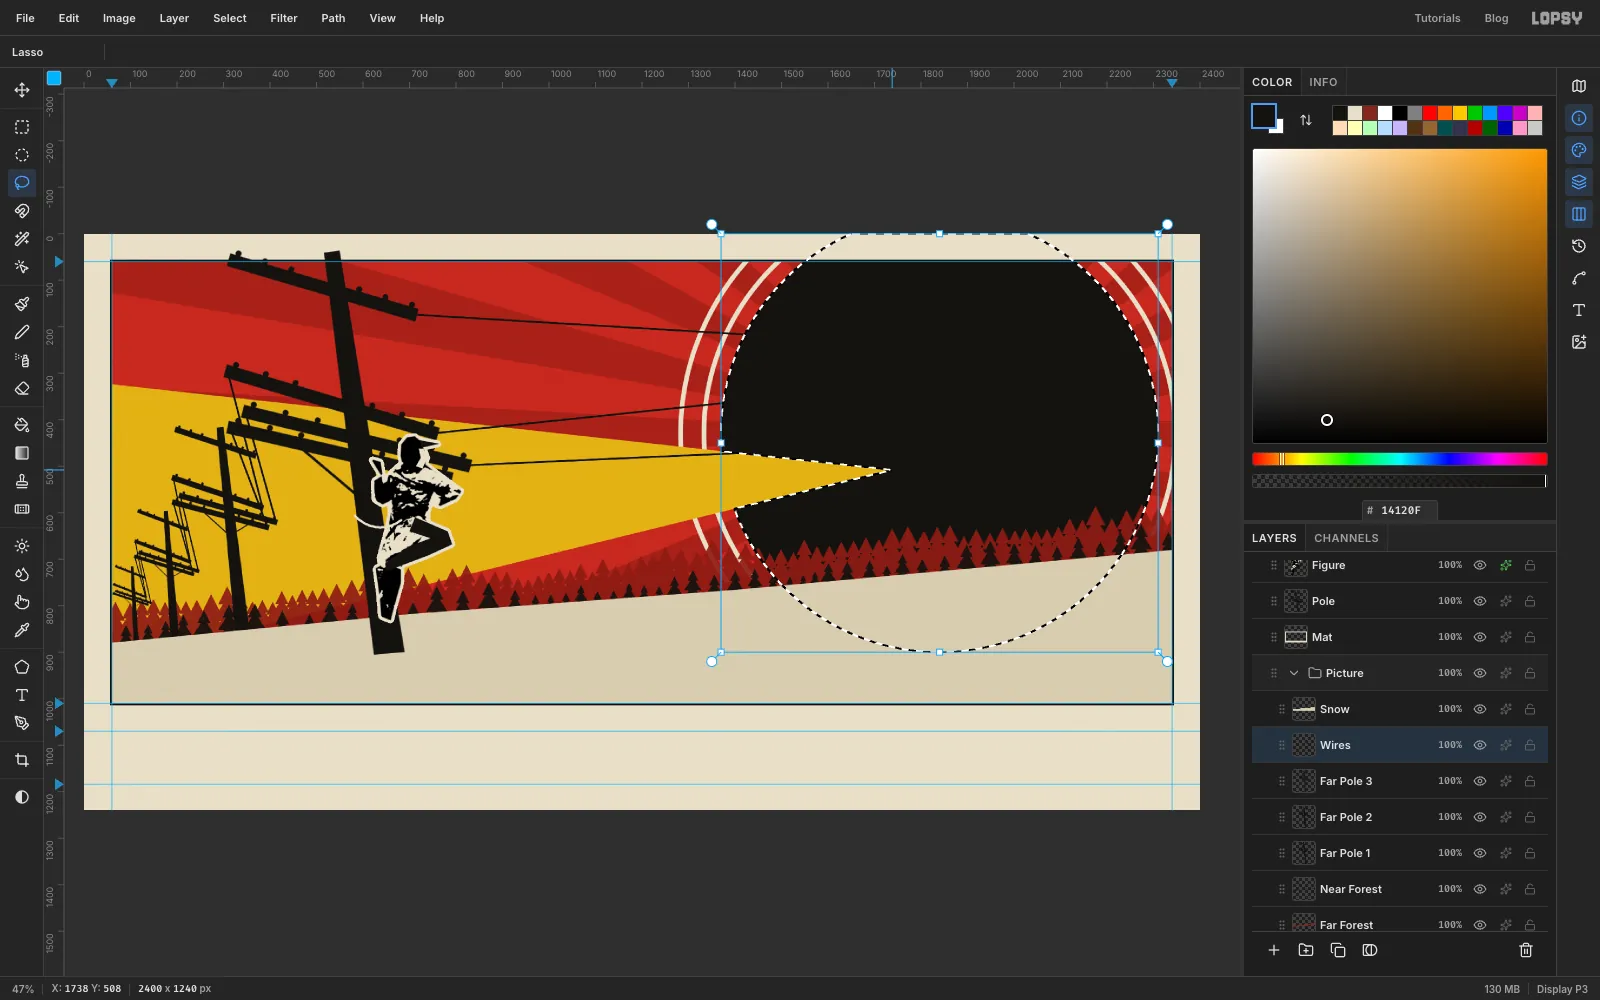
-
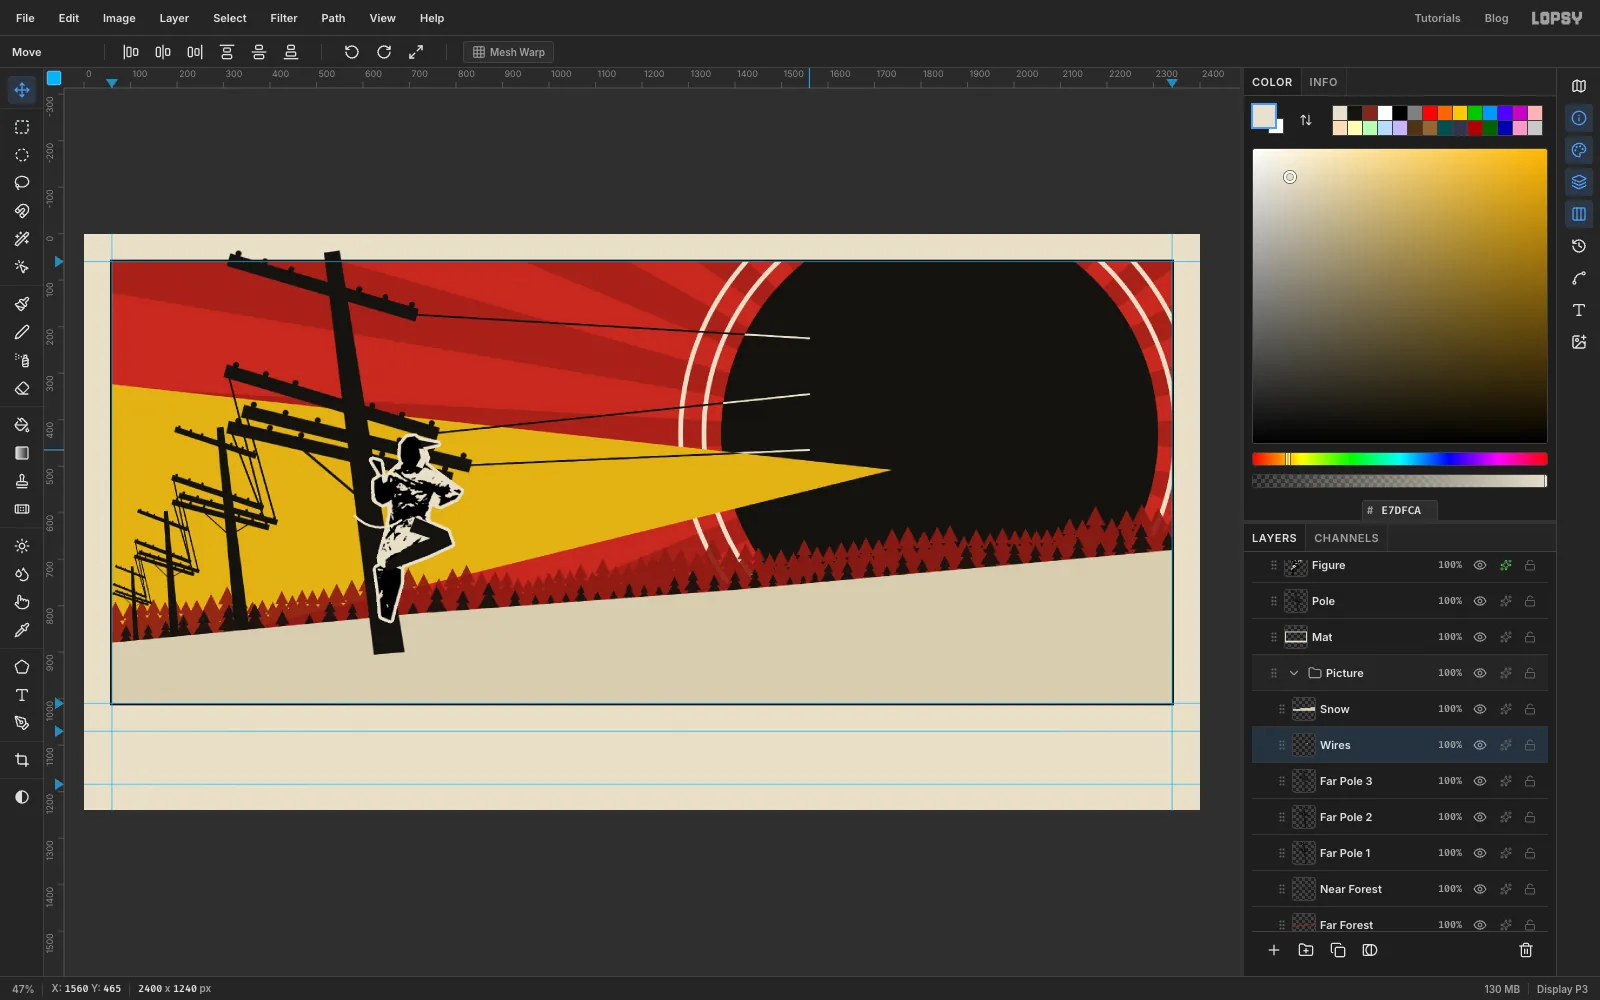
Repaint the wires in cream
Set the foreground to paper and press B. With Size still at
5, repaint the same three strokes: click at the arm, then Shift+click atx 1560. Only the part inside the selection takes paint, so each wire switches cleanly from black to cream at the disc's edge.Press Cmd+D.
-
Bank snow at the pole and lasso the wolf's head
Click the
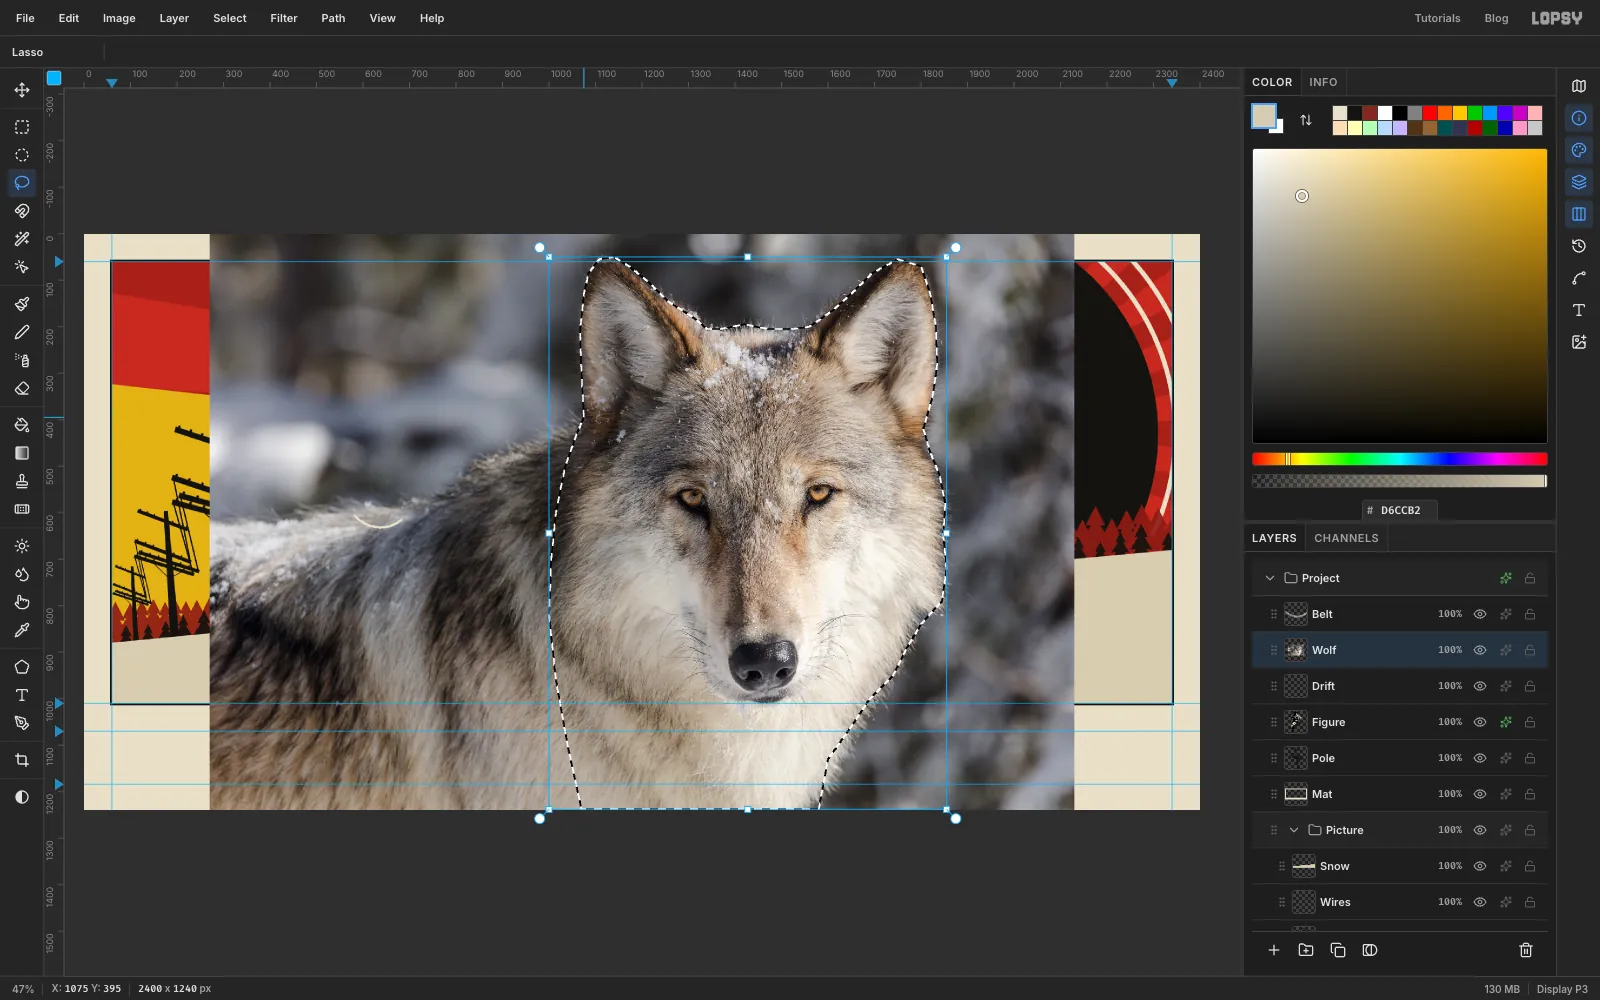
Figurerow and add a layer namedDrift. Set the foreground to snow , press L, lasso a low mound around the foot of the main pole, and choose Edit → Fill. Press Cmd+D. This little bite of snow plants the pole.Drag the wolf portrait onto the canvas. Press Cmd+D and rename the layer
Wolf.Press L and lasso around the head: over each ear, down the cheeks and fur, and straight down both sides of the neck to the bottom of the photo. Use long, confident lines down the neck. Think of it as a scissor cut, and let the edges stay clean.
-
Cut out the head
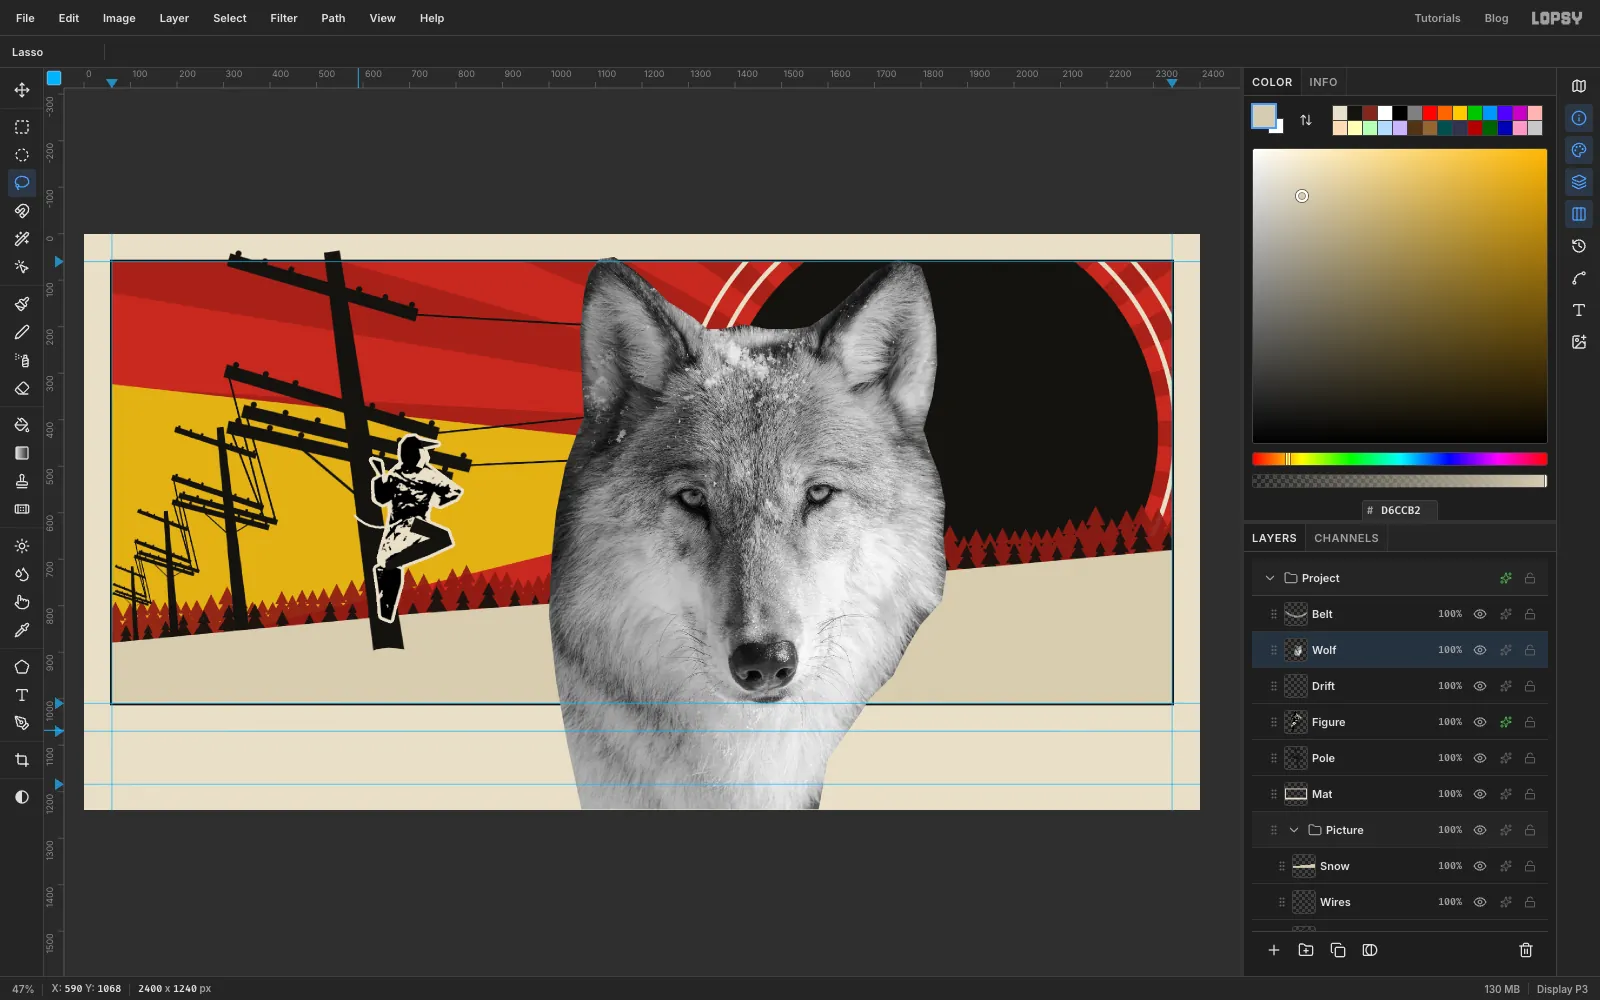
Choose Select → Inverse, press Delete, then Cmd+D. Then choose Filter → Desaturate.
-
Scale and tilt the head
- Press M and marquee the head, press V, and Cmd-drag the bottom-right corner inward until it's about 955 px tall (about 80%). Press Cmd+D.
- Press M, marquee it again, press V, and rotate it about 14° counter-clockwise. A level, calm head looks like a nature photo, and this tilt makes it lean in. Press Cmd+D.
- With the Move tool, drag the head so its left eye, the one nearer the lineman, sits on the tip of the yellow beam. Its right ear should break the top of the frame and stop about 20 px short of the canvas edge.
Press M, click once and enter From
1300, 1010and To2380, 1200. Press Delete, then Cmd+D. That trims the neck at the bottom of the frame.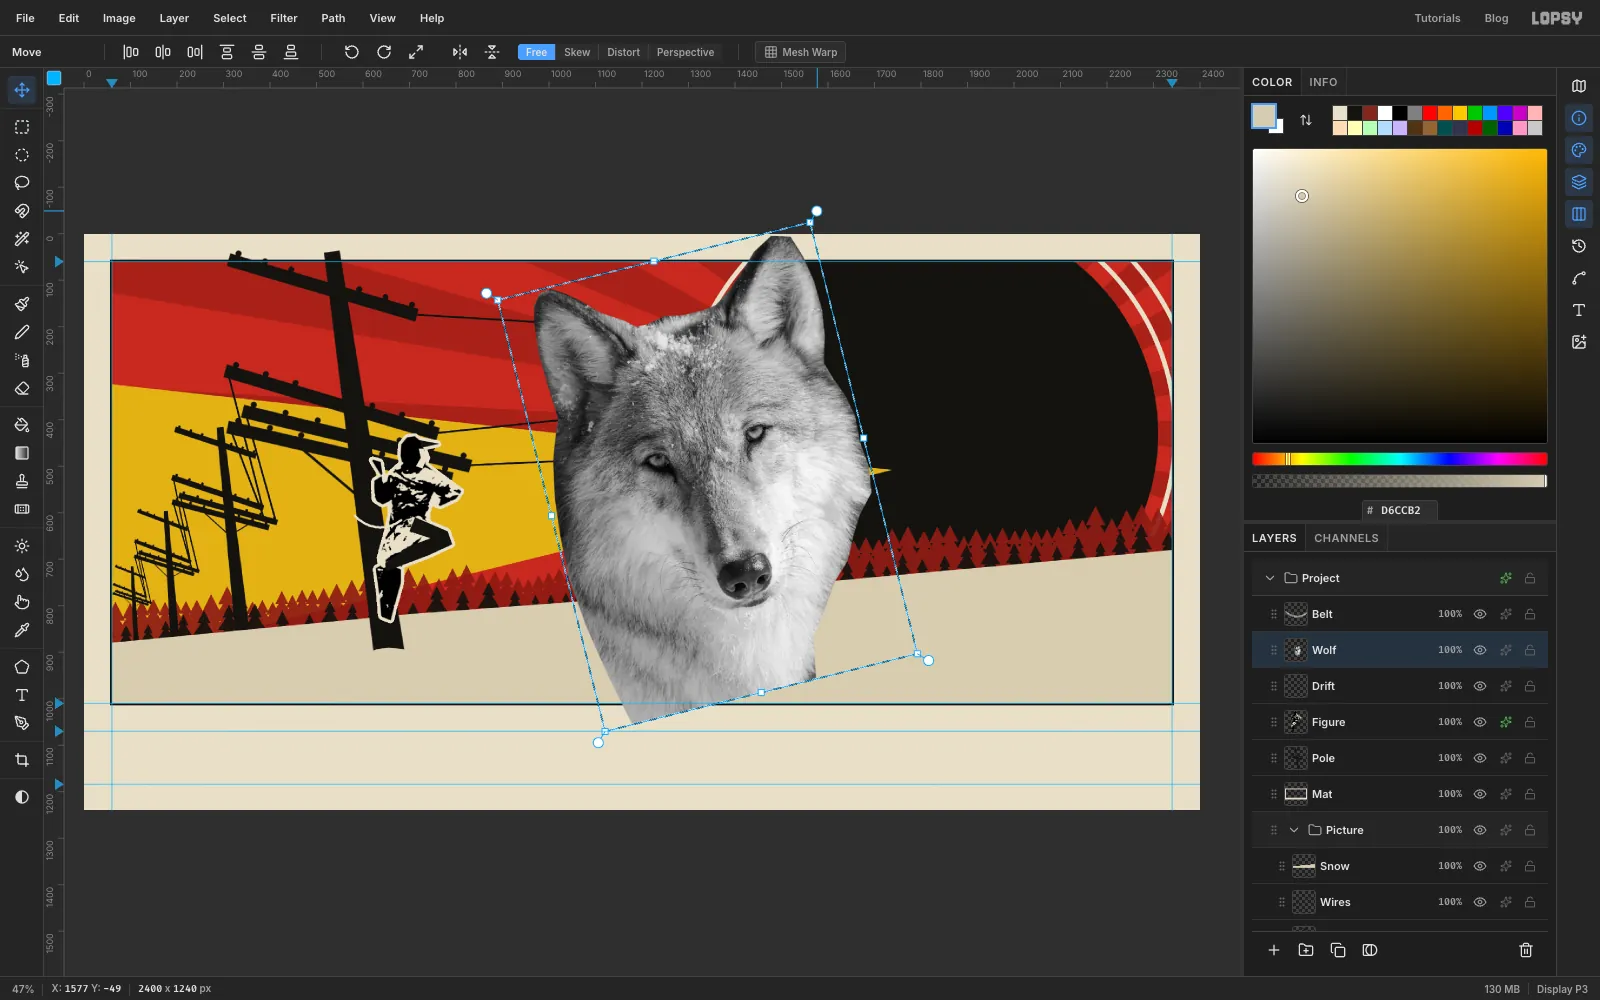
-
Add a paper base
Hold Cmd and click the
Wolfthumbnail to select its shape. Click theDriftrow and add a layer namedWolf Base, which sits just under Wolf. Set the foreground to paper , choose Edit → Fill, then press Cmd+D.Open the ✦ drawer, turn on Stroke, set Width to
3and the colour to paper, and close it. The rim stops the dark ear melting into the black disc.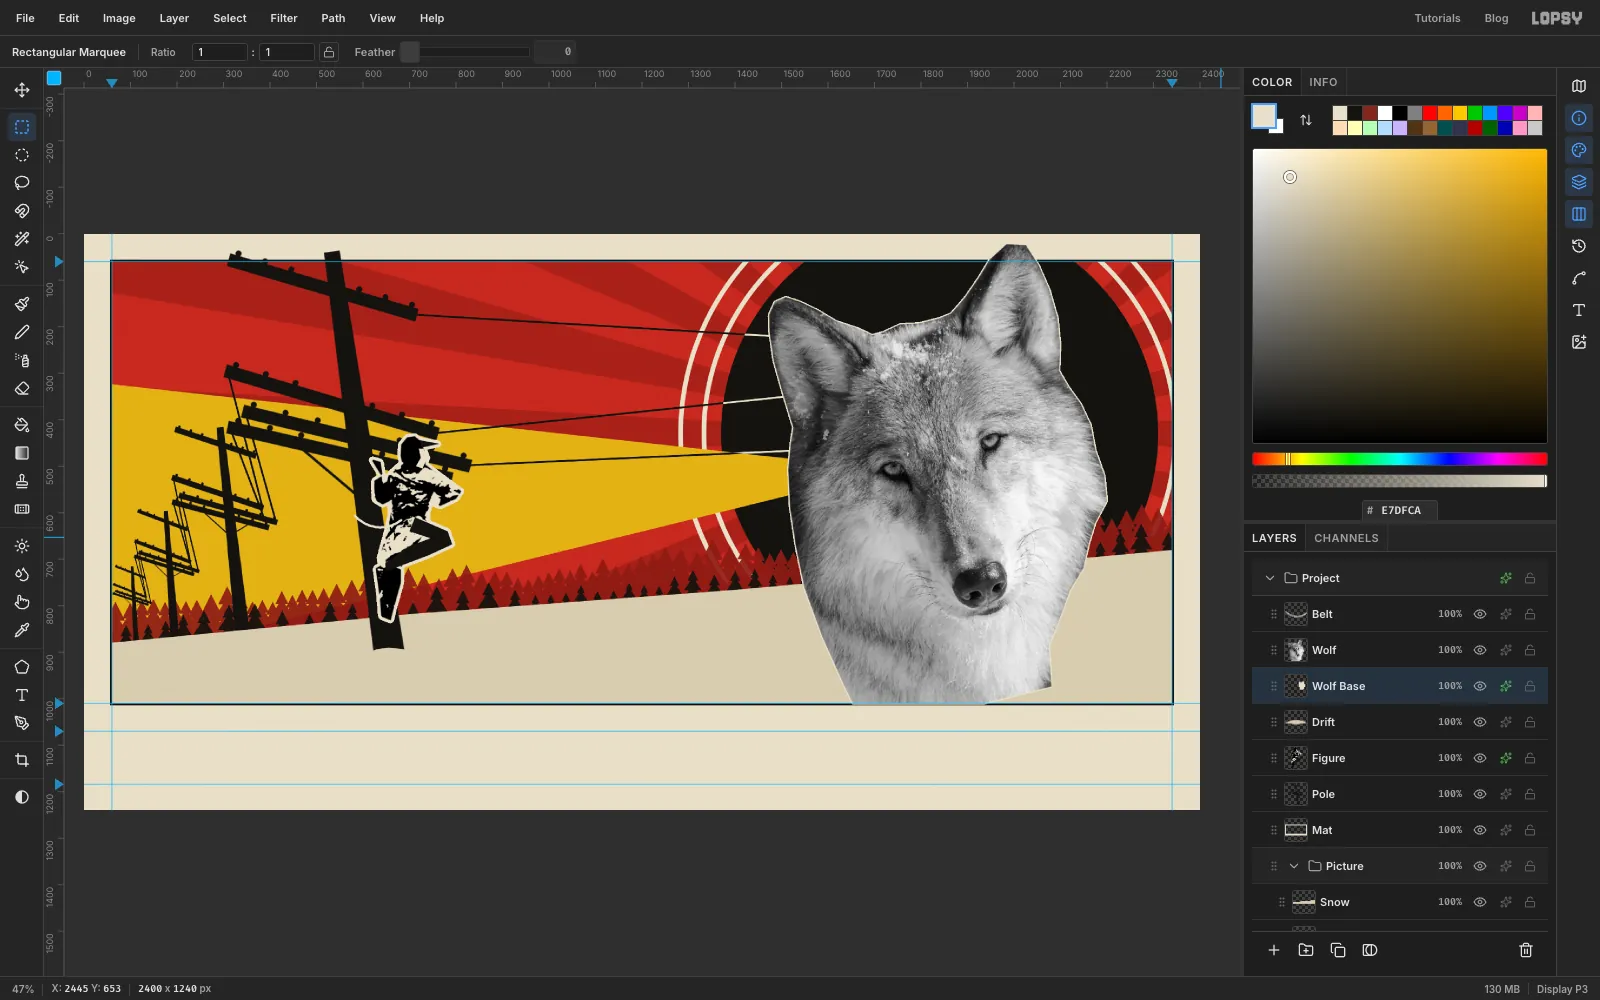
-
Print the fur as a halftone
Click the
Wolfrow, choose Layer → Duplicate Layer and name the copyWolf Key. You'll come back to it in the next step. Click theWolfrow again and rename itWolf Ink.- Run Filter → Brightness/Contrast with Brightness
-32and Contrast34. Without this, the pale cheek prints almost no dots. - Run Filter → Halftone with Dot Size
6, Angle75and Softness1. - Open the ✦ drawer, turn on Color Overlay, set the colour to ink and close it. Halftone dots keep the photo's greys until you do.
Halftone can put dots just past the cut, so trim again. Press M, click once, enter From
1300, 1010and To2380, 1200, press Delete, then Cmd+D.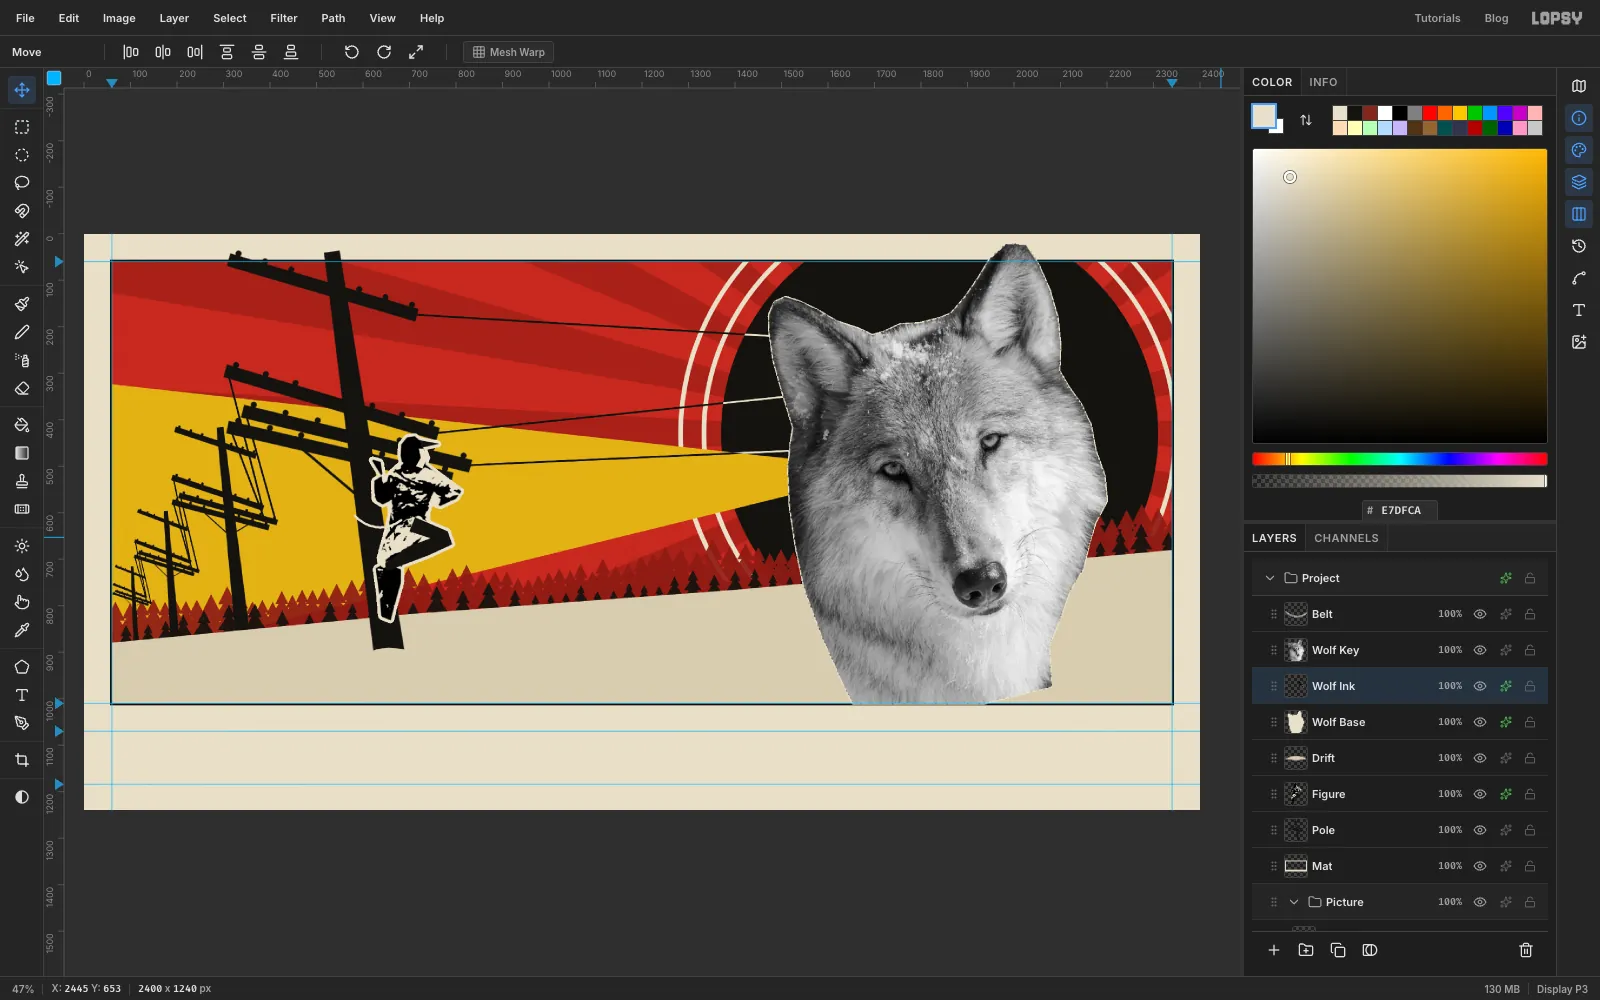
- Run Filter → Brightness/Contrast with Brightness
-
Light the eyes and add solid blacks
With
Wolf Inkstill active, add a layer namedWolf Eyesand set the foreground to arc yellow . Press L and lasso an almond over each iris, filling with Edit → Fill and pressing Cmd+D after each one. Open the ✦ drawer, turn on Outer Glow, set Size to26, Opacity to80and the colour to arc yellow, then close it.Click the
Wolf Keyrow and run Filter → Threshold with Level66. Press W, check Contiguous is still off, click white, press Delete, then Cmd+D. This top layer holds the solid blacks: pupils, eyelids, nose and the deep fur. Now the face has real weight, and the yellow is the only colour on it.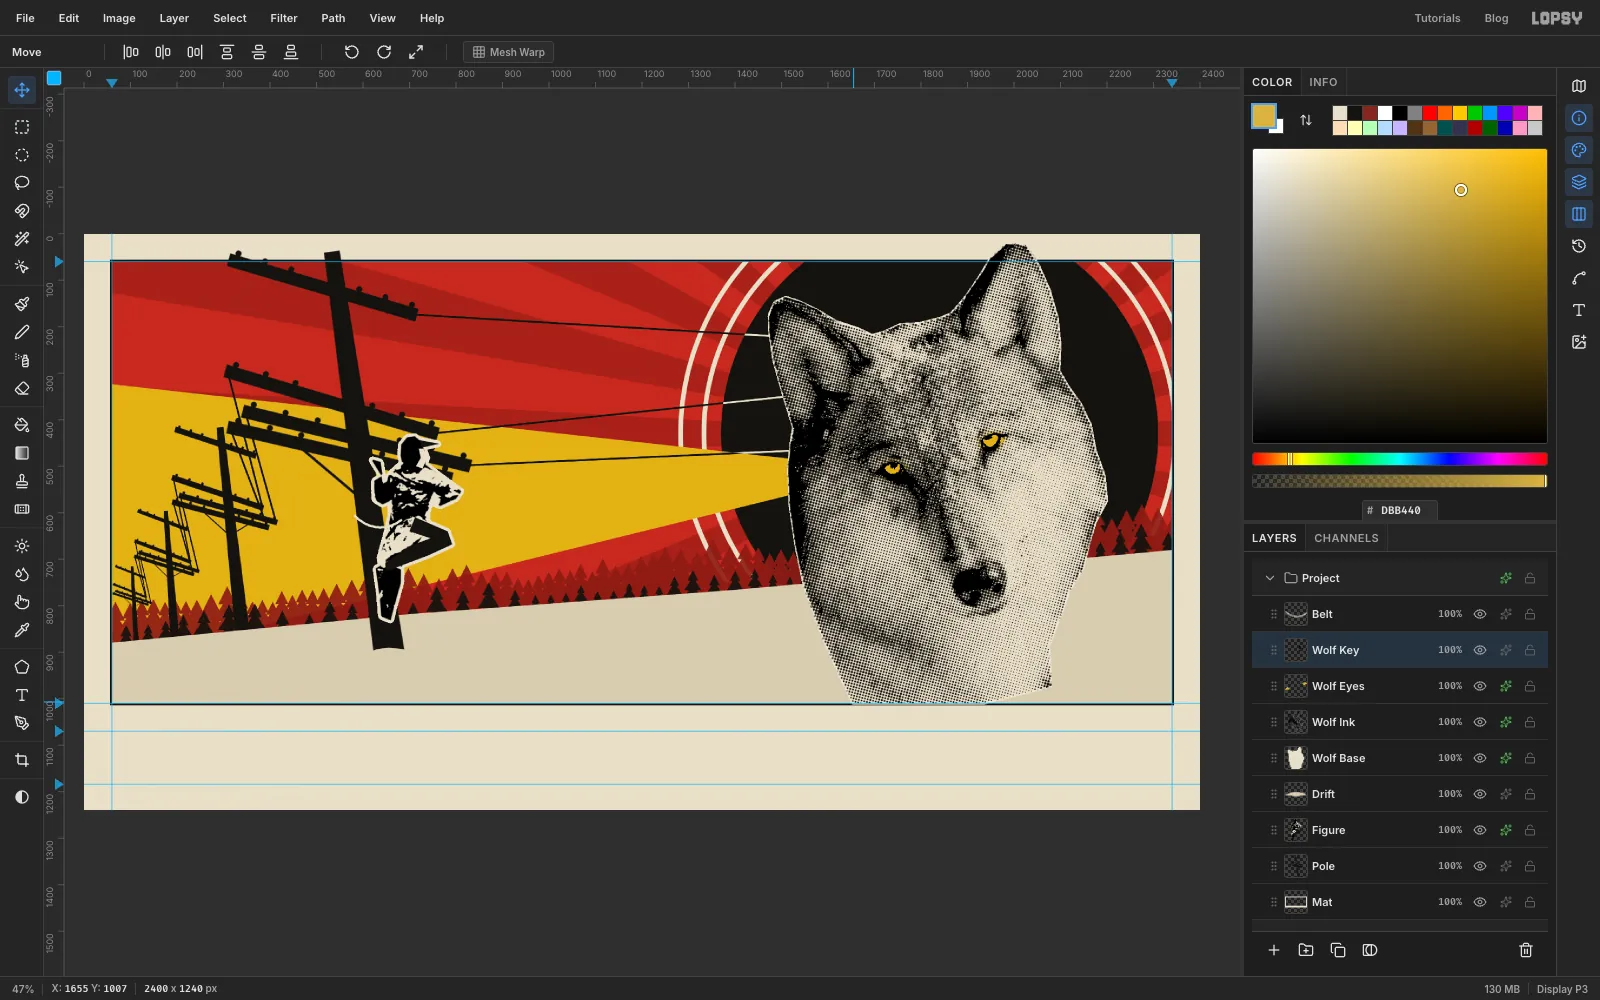
-
Add halftone shadows on the snow
Click the
Snowrow and add a layer namedSnow Shade. Set the foreground to grey . Draw and fill each of these shapes with the Pen:- A long thin band from the foot of the main pole, running left and slightly downhill to the bottom-left corner of the frame.
- A shorter band from the foot of Far Pole 1, and a shorter one again from Far Pole 2, at the same angle.
- Two short flat patches on the snow, for the wolves you'll add soon: one left of the main pole and one to its right.
Run Filter → Halftone with Dot Size
8, Angle45and Softness1. Then open the ✦ drawer, turn on Color Overlay with ink , and close it. The shadows print as dots of ink, so the palette gains no new grey.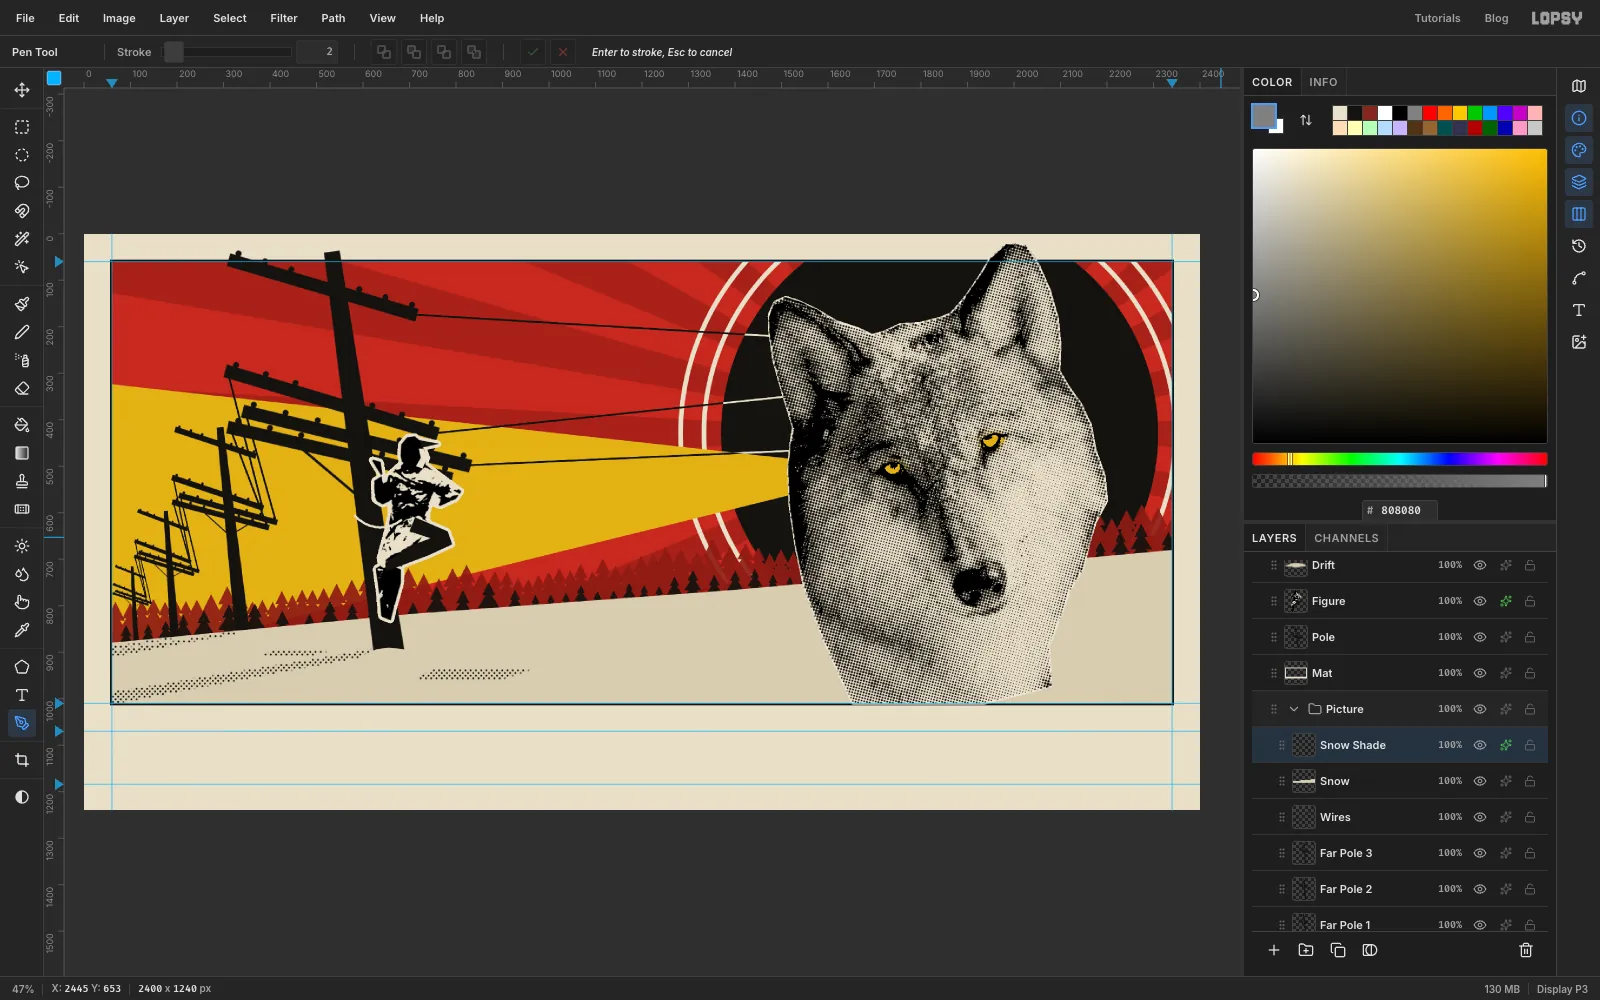
-
Pull the wire taut
Add a layer named
Cableand set the foreground to ink. Press B and set Size to5.Click on the hand he's reaching out to the right, away from the pole, then Shift+click on the snow near the middle of the picture, at about
1068, 839. The line comes out dead straight, and that matters: a slack curve reads as a man walking his dog, and a taut one reads as a fight.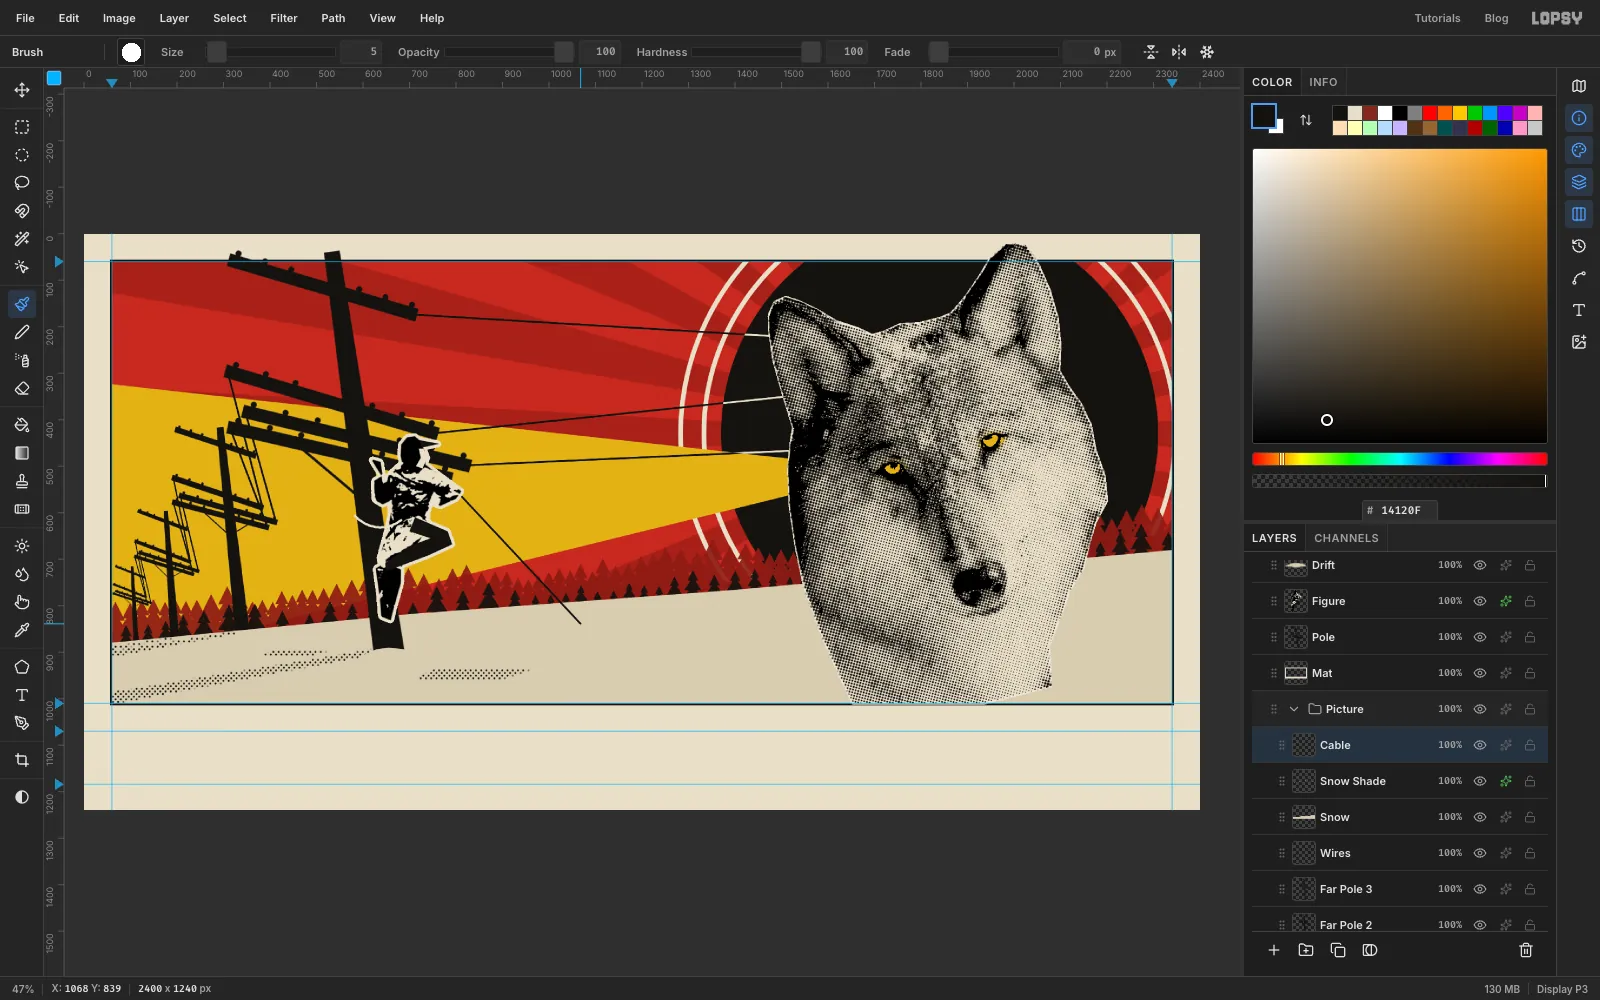
-
Bring in the lead wolf
With
Cablestill active, drag the running wolf photo onto the canvas. It lands inside the Picture group, so the frame and the head stay on top. Press Cmd+D and rename the layerLeap Photo. This wolf is mid-stride with its jaws open, which suits the story.Choose Filter → Desaturate, then Layer → Duplicate Layer, and name the copy
Leap Key.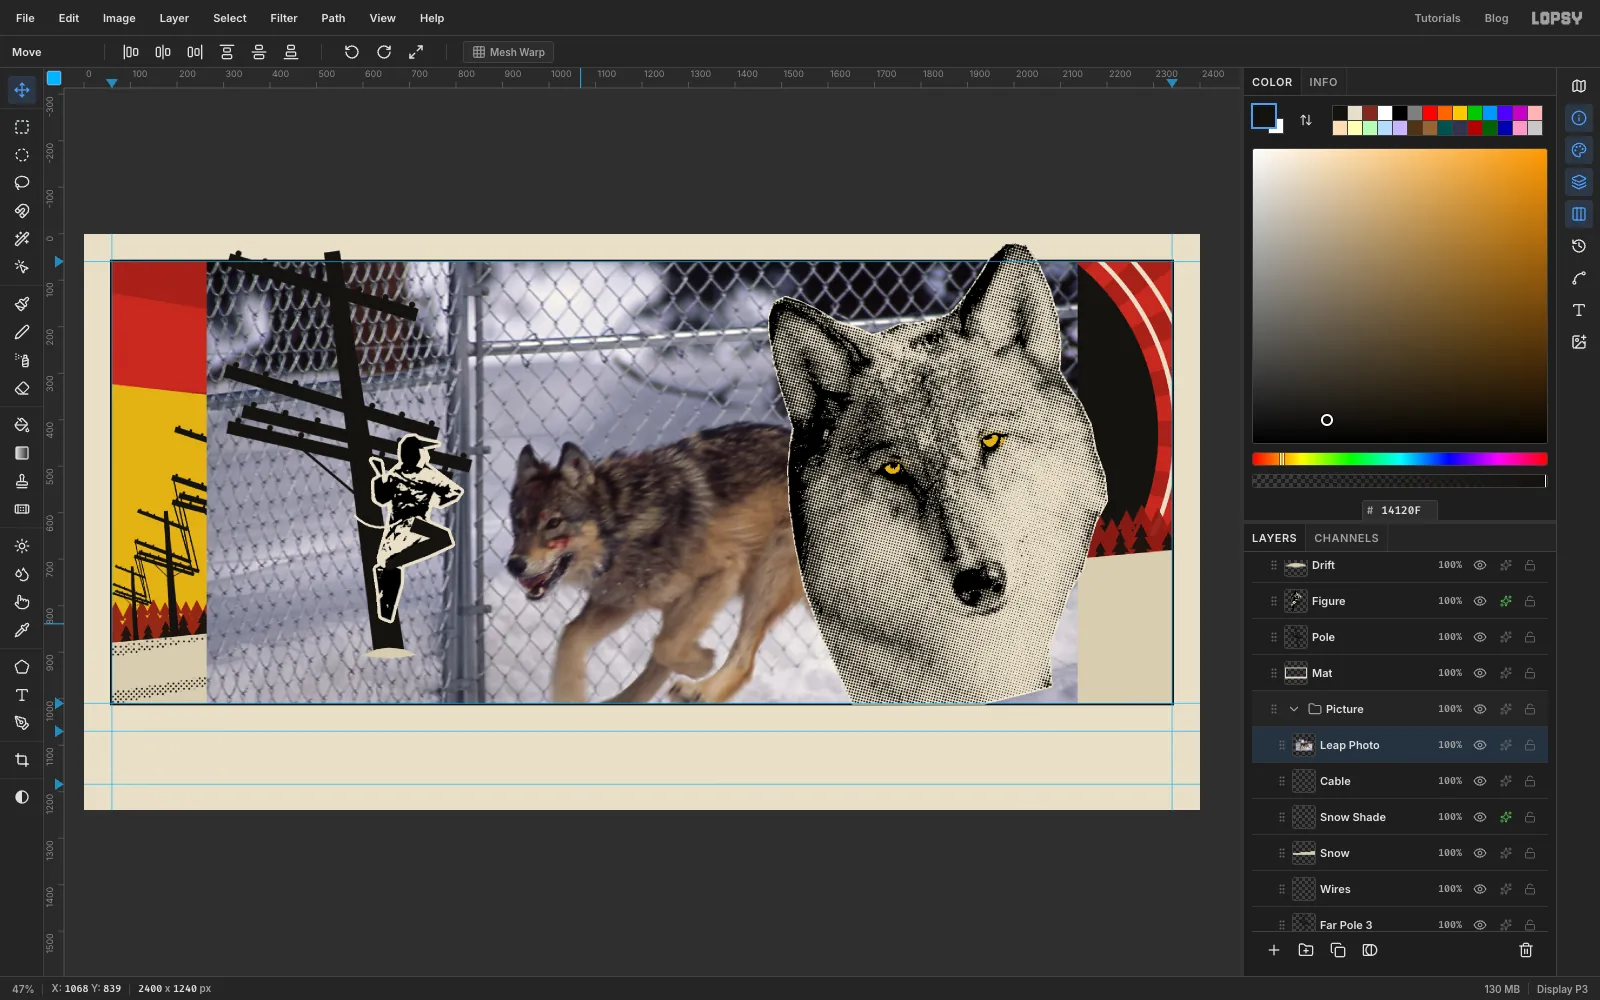
-
Print the lead wolf in ink
With
Leap Keyactive:- Run Filter → Gaussian Blur with Radius
1.5, then Filter → Threshold with Level80. - Press W, click white with Contiguous off, press Delete, then Cmd+D.
Click the
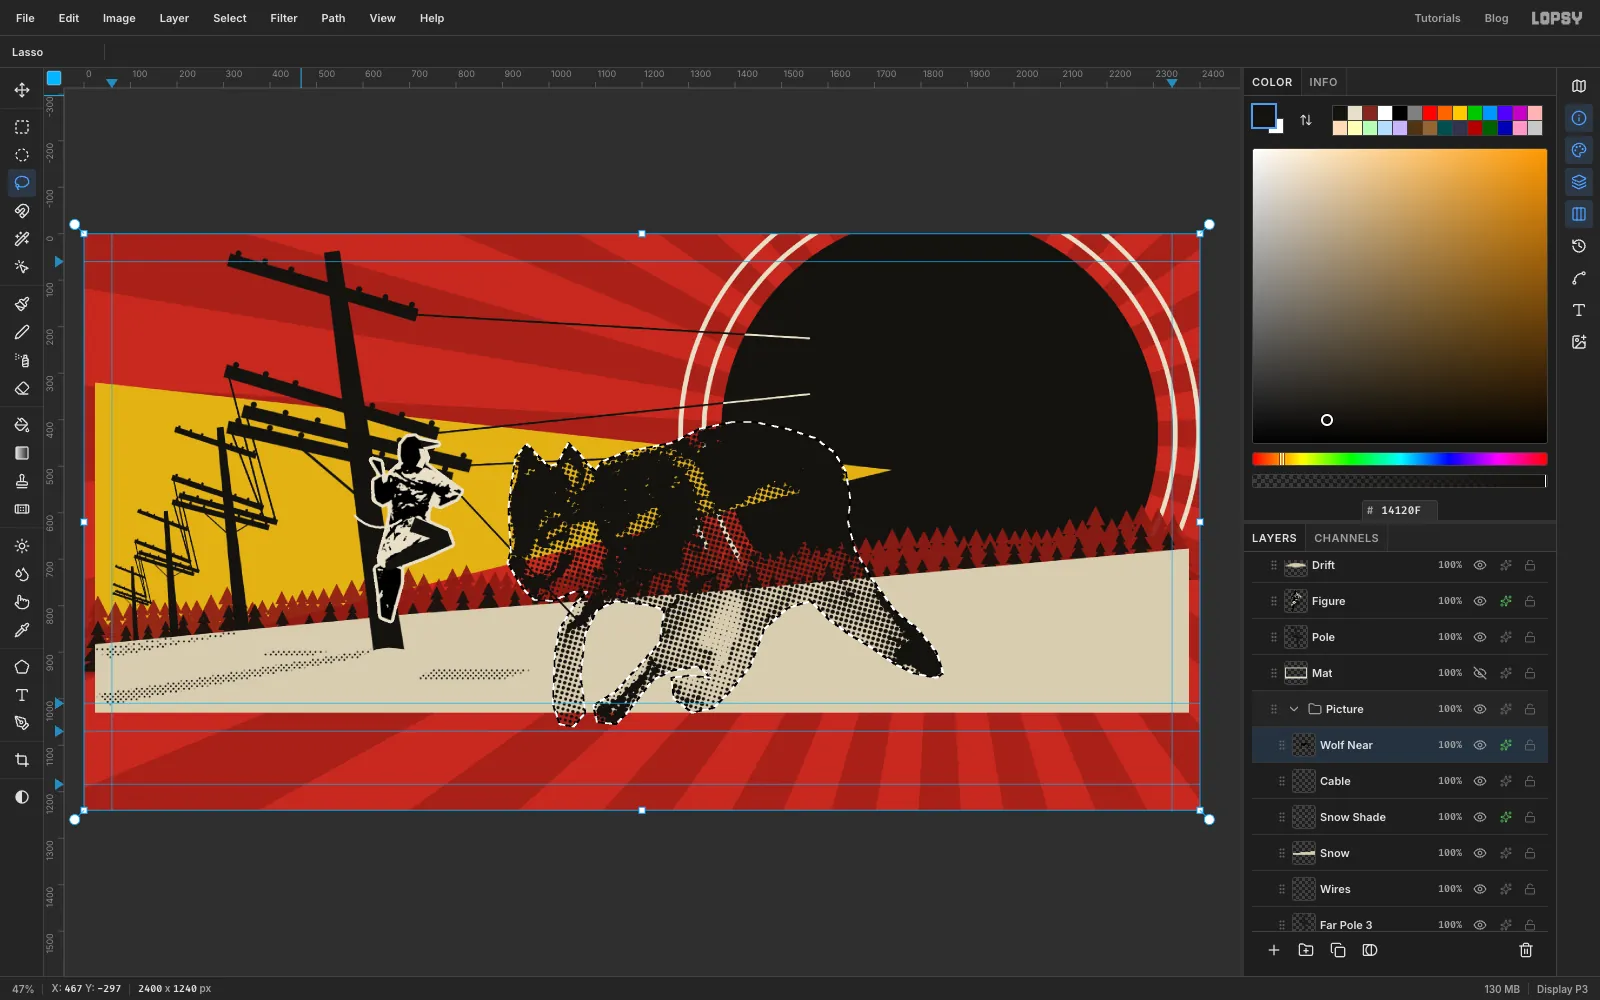
Leap Photorow. Run Filter → Brightness/Contrast with Brightness-14and Contrast40, then Filter → Halftone with Dot Size11, Angle75and Softness1. The dots are larger than the head's because they'll shrink with the wolf.Click the
Leap Keyrow, choose Layer → Merge Down, and rename the resultWolf Near. Open the ✦ drawer, turn on Color Overlay with ink , and close it.The big head and the Mat are hiding the wolf's rump, tail and lower legs. Click the eyes on
Wolf Base,Wolf Ink,Wolf Eyes,Wolf KeyandMatto hide them for now, then click theWolf Nearrow.Press L and lasso closely around the wolf, including its legs and tail and leaving out the fence. Choose Select → Inverse and press Delete. Choose Select → Inverse again to get the wolf's outline back, and keep it live.
- Run Filter → Gaussian Blur with Radius
-
Slide a red plate underneath
Click the
Cablerow and add a layer namedFur Plate. Press L, then tap the arrow keys 8 times right and 6 times down to slide the selection outline off the wolf. Set the foreground to red , choose Edit → Fill, then press Cmd+D. That small offset is the misregistered second colour of a real print run.Click the
Wolf Nearrow, choose Layer → Merge Down, and rename the resultWolf Near.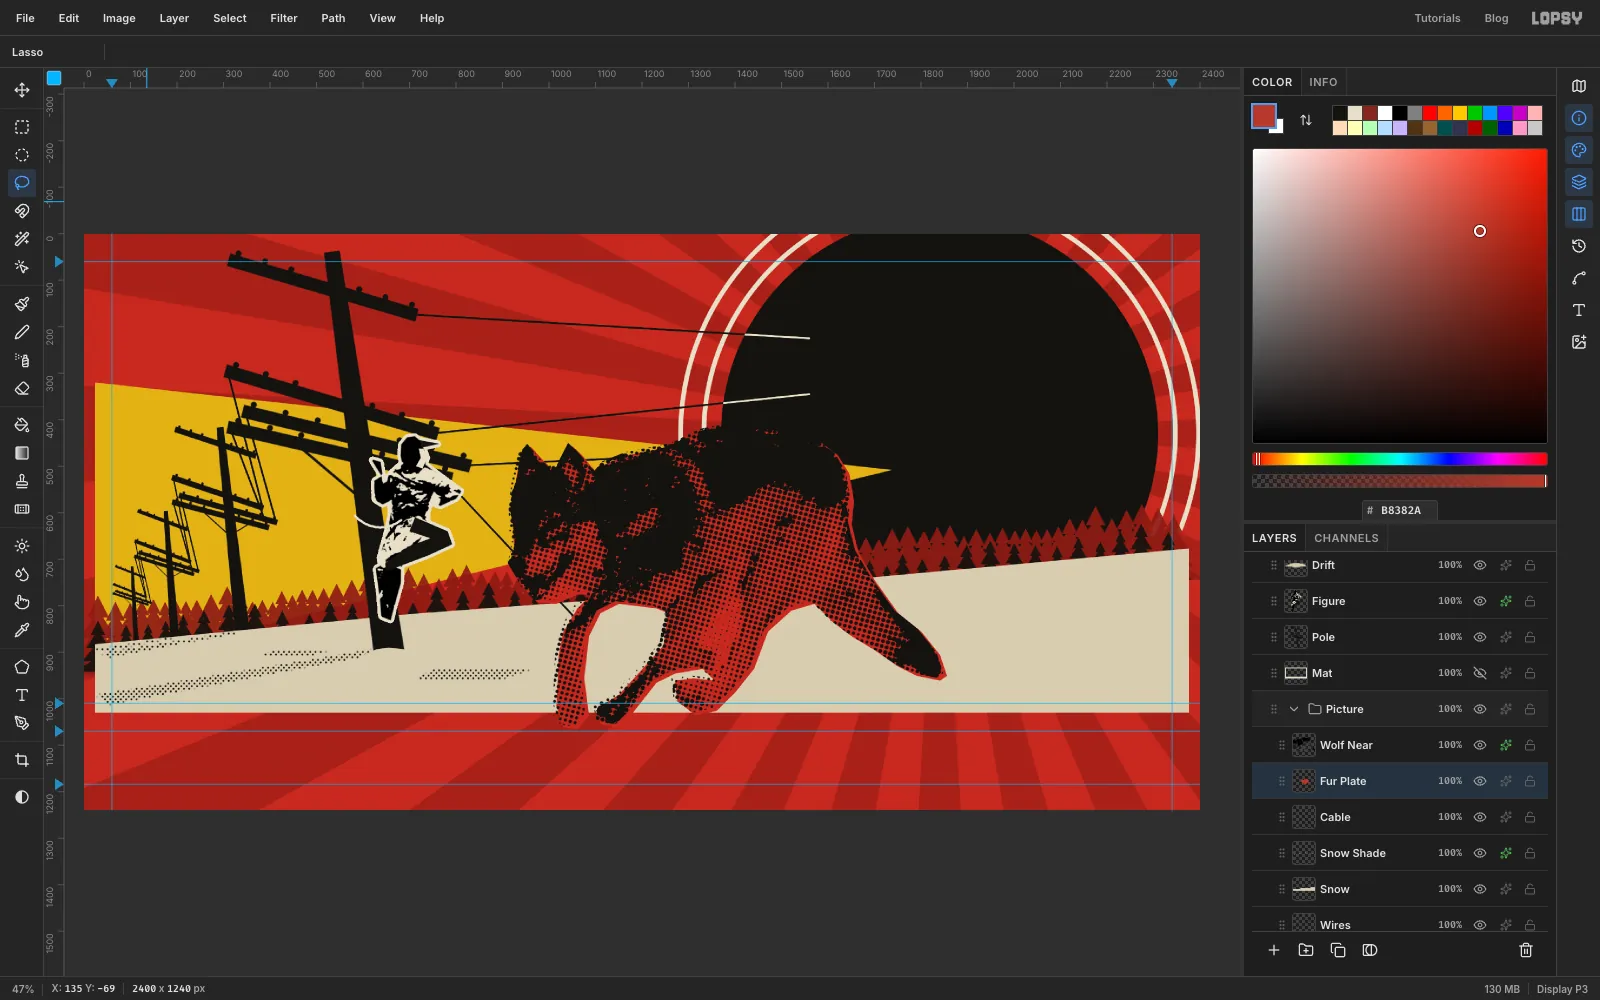
-
Send the wolf down the slope
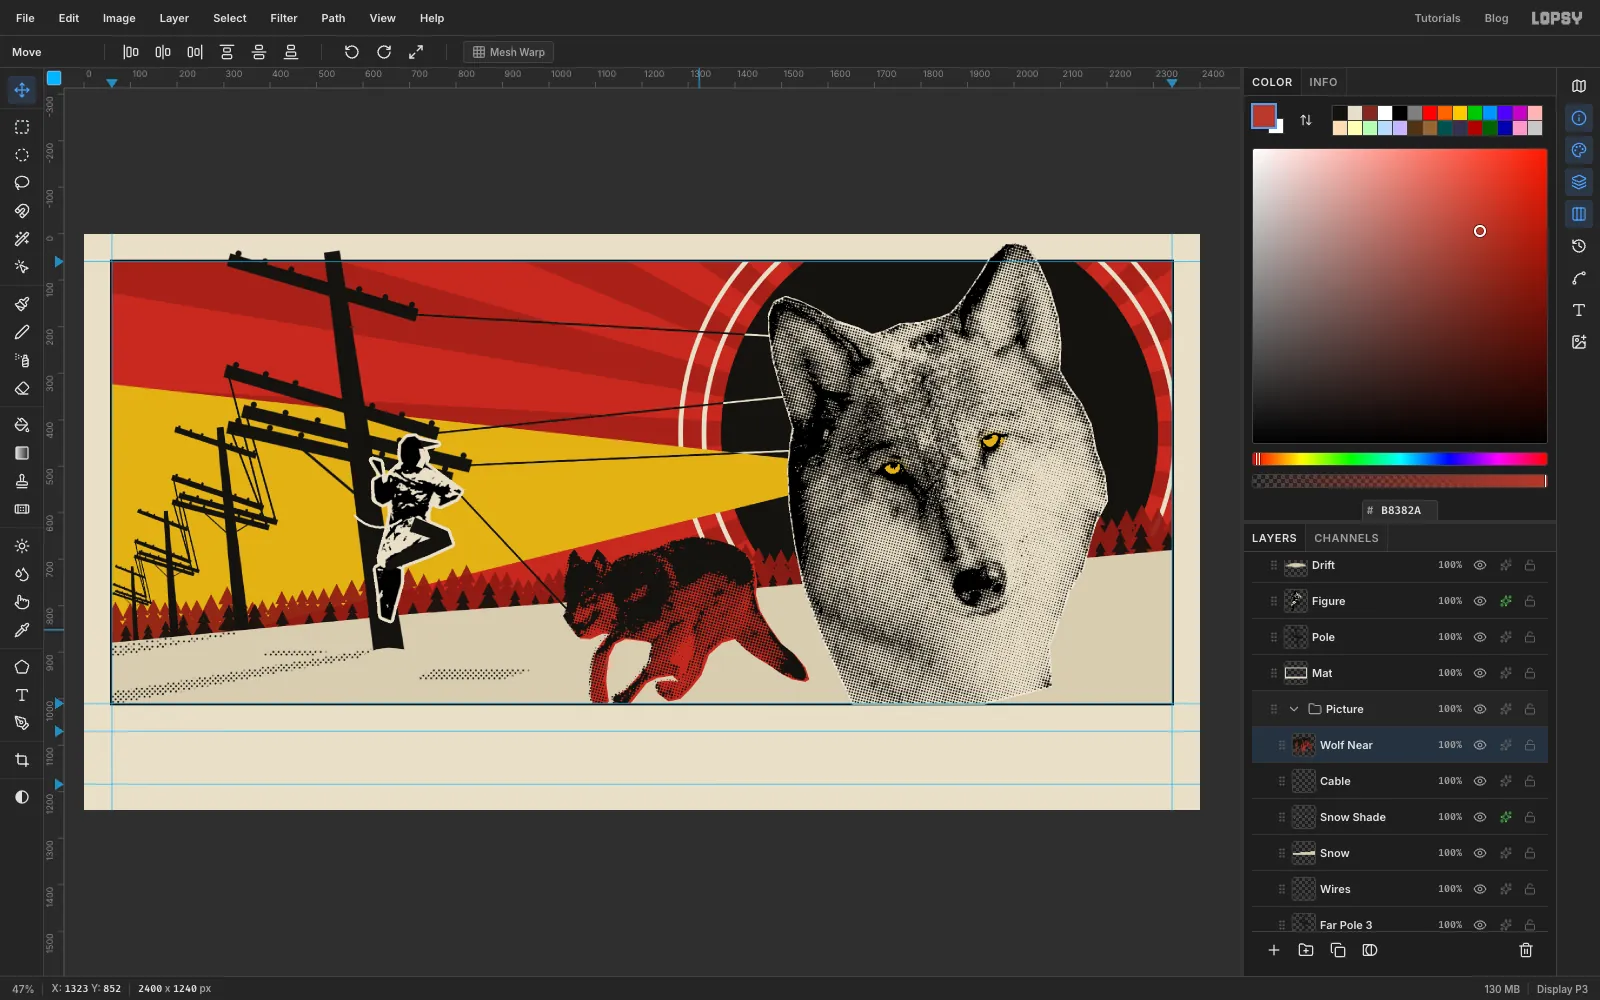
Press M and marquee the wolf, press V, and Cmd-drag the bottom-right corner inward until it's about 525 px wide (about 56%). Press Cmd+D.
Click the same five eyes to bring those layers back.
With the Move tool, drag the wolf so the wire's end falls inside its open mouth. Don't worry about its rump and back legs coming close to the big head, because a foreground shape will cover them soon.
-
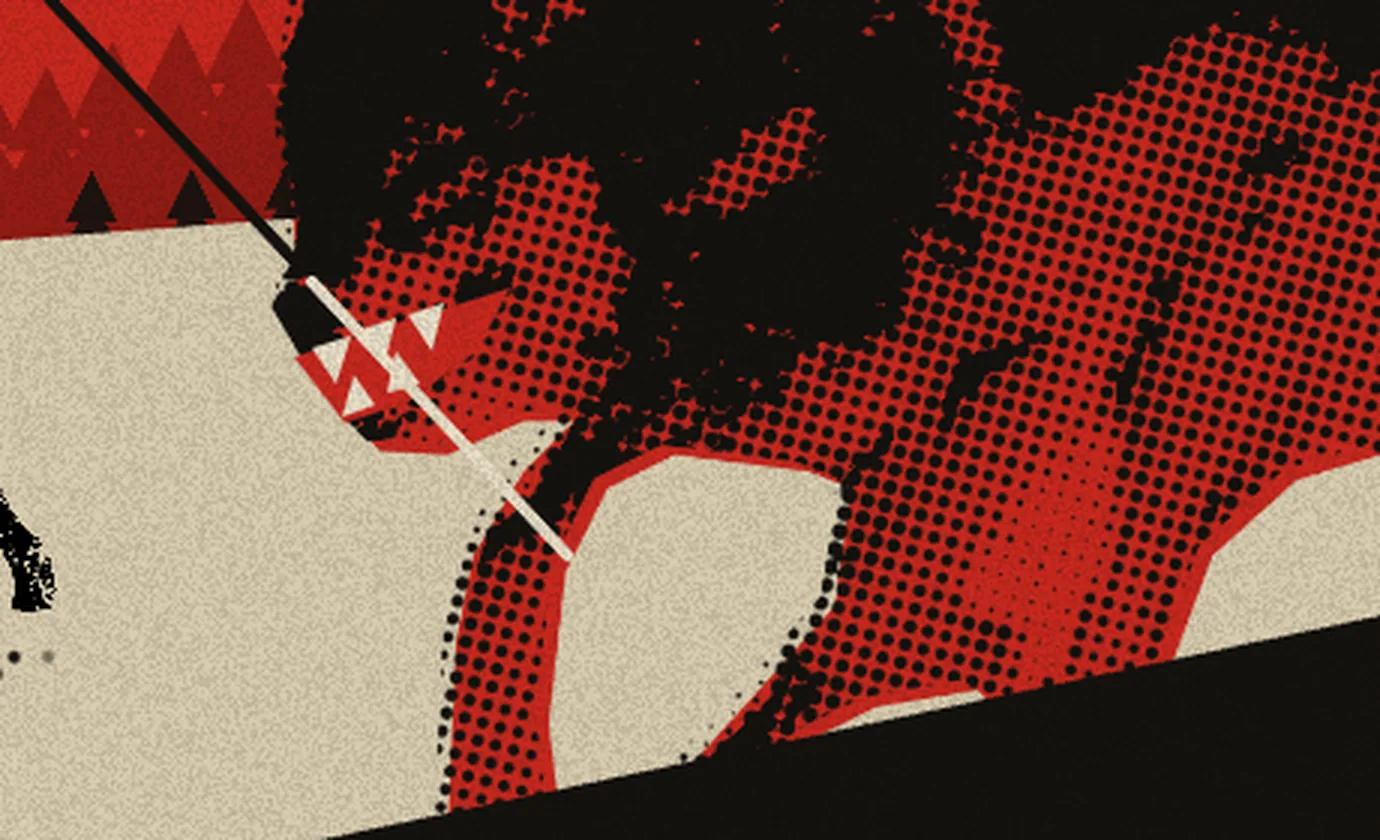
Show the bite
A black muzzle with a line touching it doesn't say "bite" yet. Click the
Wolf Nearrow and add a layer namedBite. Zoom in, because the teeth are only a few pixels on screen at fit-to-window.- Set the foreground to red and press L. Lasso a wedge for the open mouth, between the upper lip and the lower jaw, and fill it. Press Cmd+D.
- Set the foreground to paper . Lasso three small triangles pointing down from the upper lip and two pointing up from the lower jaw, filling each one and pressing Cmd+D.
- Press B and keep Size at
5. Click on the wire a little before the mouth, then Shift+click about 90 px past the mouth along the same line.
Now the wire goes in one side of the jaws in cream and comes out the other.
-
Bring in the black wolf
Click the
Cablerow and drag the black wolf photo onto the canvas. Press Cmd+D and rename the layerBlack Wolf. A dark animal on white snow is a ready-made silhouette, so this one needs no careful lasso.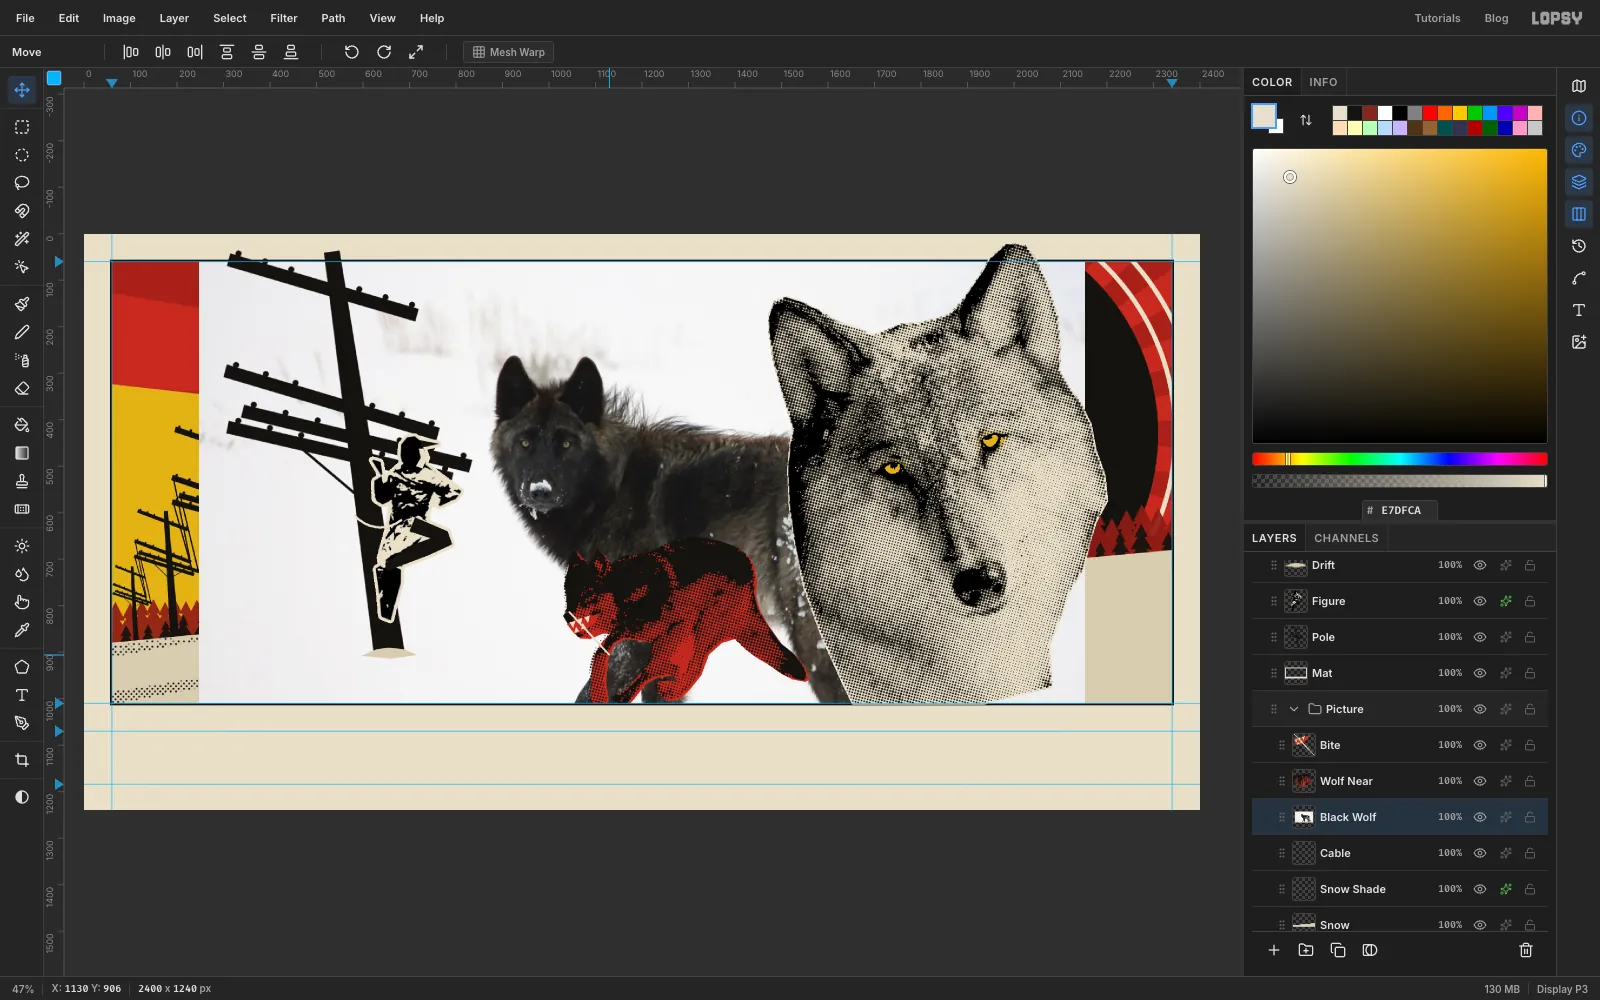
-
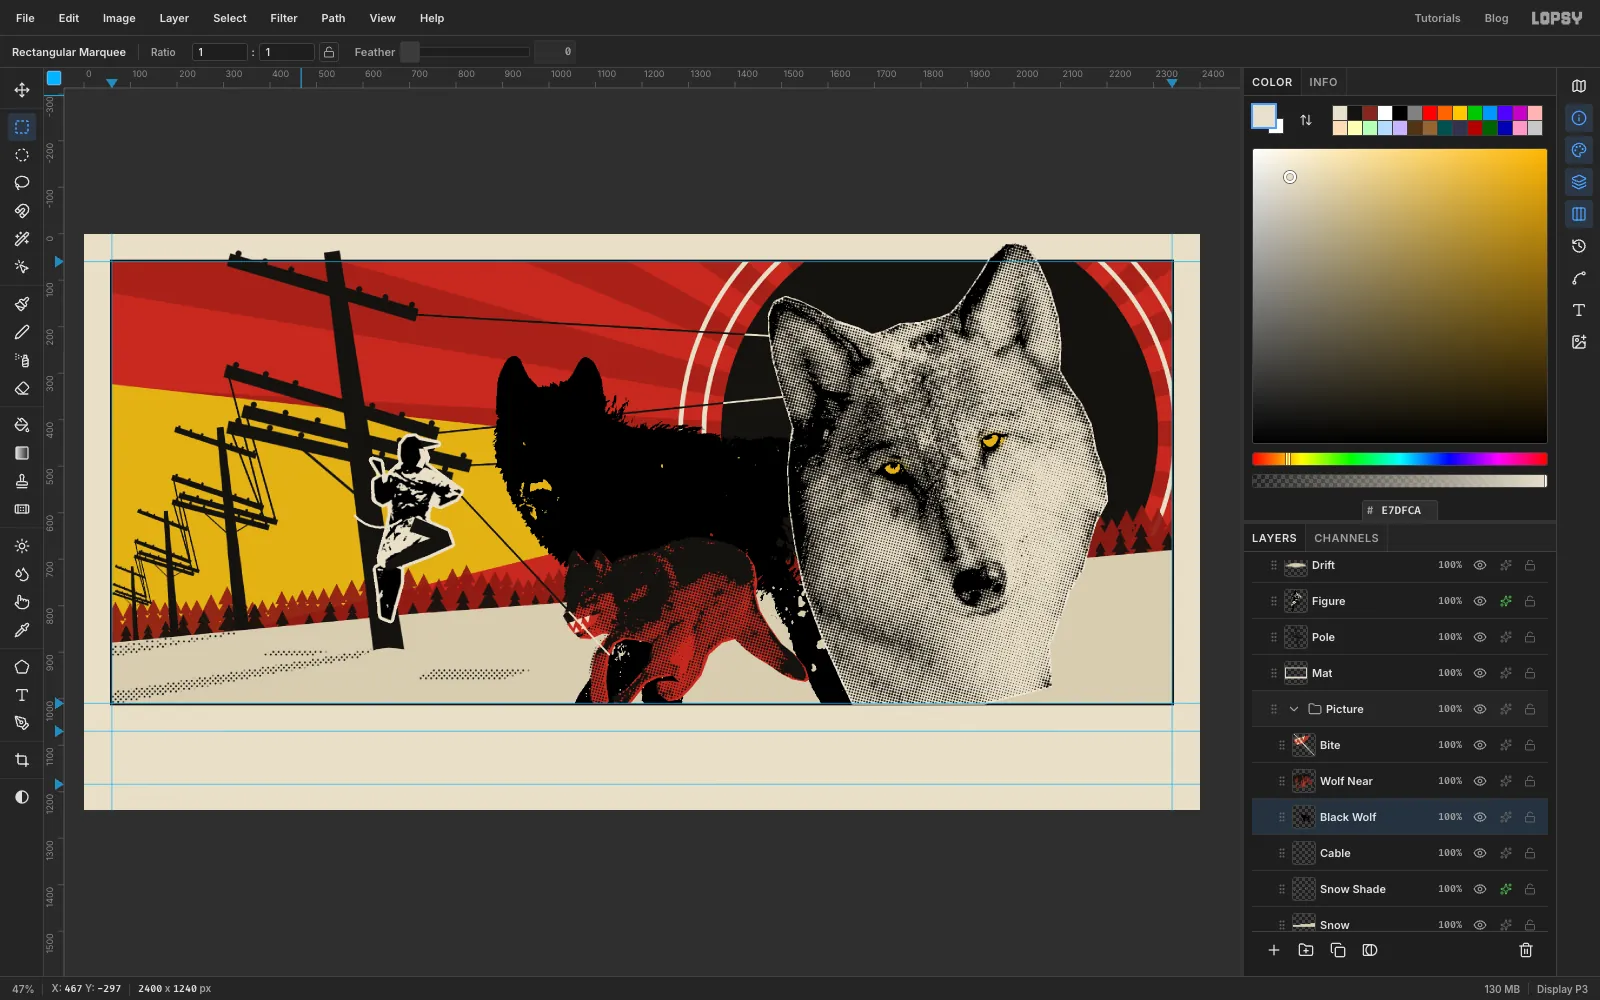
Threshold the black wolf
- Choose Filter → Desaturate.
- Run Filter → Gaussian Blur with Radius
1.5, then Filter → Threshold with Level110. - Press W, click white with Contiguous off, press Delete, then Cmd+D.
- Press M, click once and enter From
847, 240and To1967, 1215. The box runs past the frame and behind the big head, because the rest of the wolf is back there. Choose Select → Inverse, press Delete, then Cmd+D. This clears any stray specks from the snow.
-
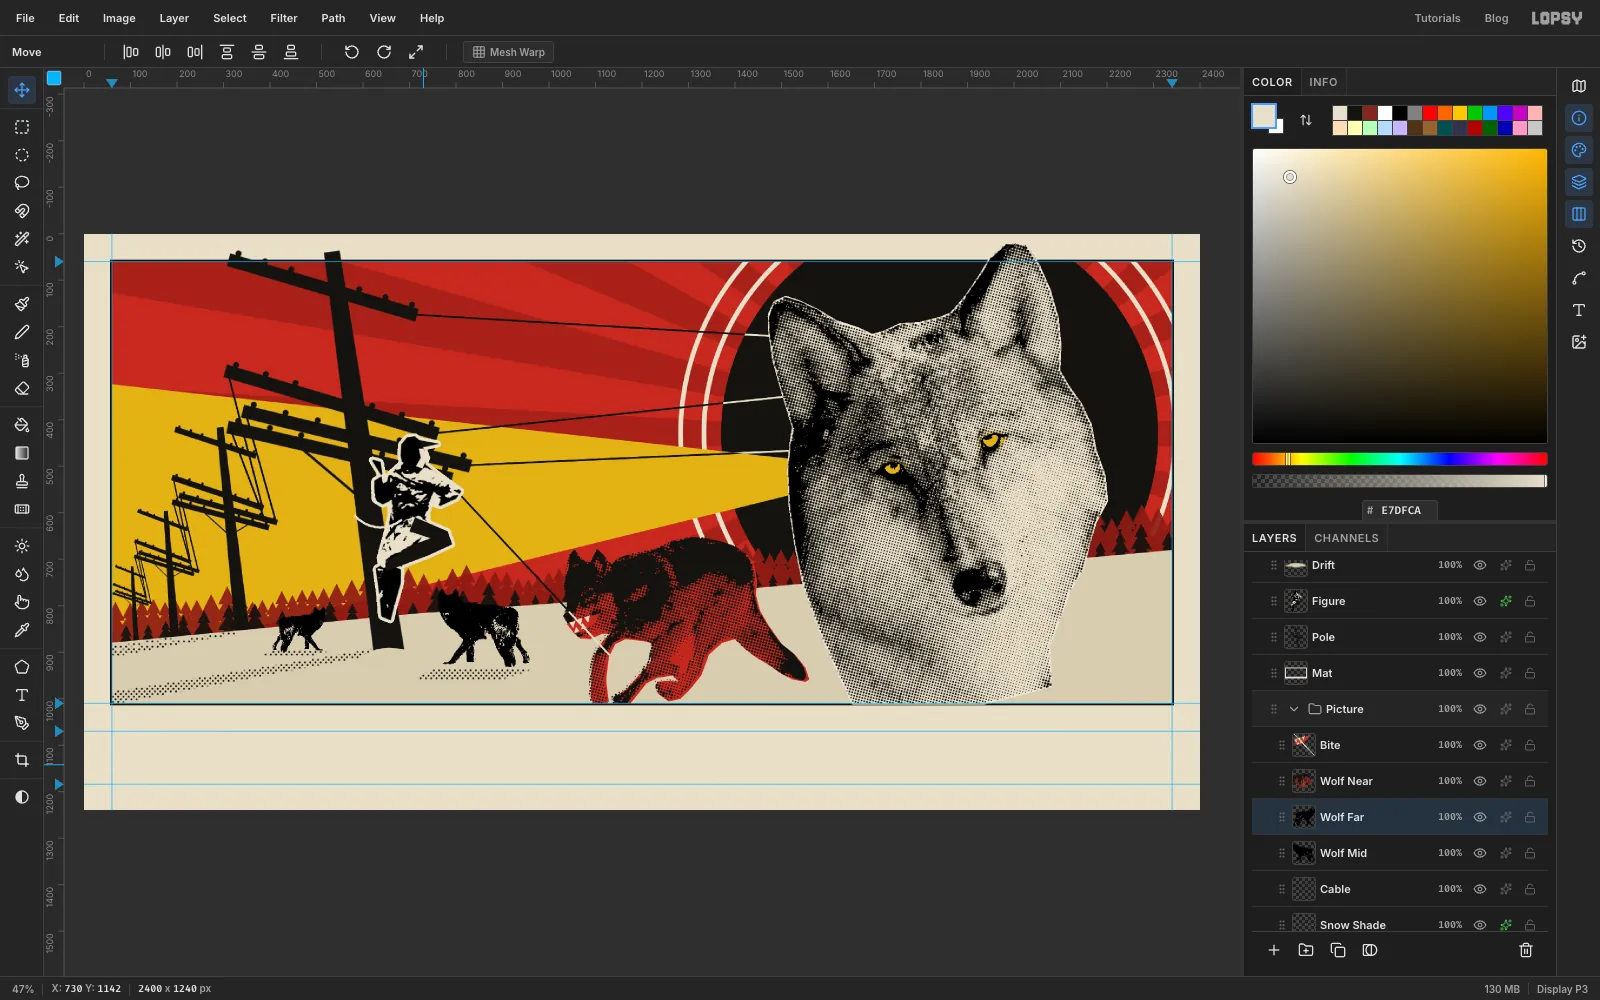
Place the rest of the pack
Press M, click once and enter the same corners, press Cmd+C, and keep the selection. Rename the layer
Wolf Mid.- Press V and Cmd-drag the bottom-right corner inward until the wolf is about 200 px wide (about 19%). Press Cmd+D.
- Drag it onto the snow just left of the red wolf, over the dotted patch to the right of the pole.
- Press Cmd+V and name the new layer
Wolf Far. Press Cmd+D, then choose Image → Flip Horizontal so it faces the pole. - Press M, click once and enter the same corners again, press V, and Cmd-drag the corner inward until the wolf is about 115 px wide (about 11%). Press Cmd+D.
- Drag it to the other side of the pole, over the dotted patch to the left of it.
The lineman is now surrounded.
-
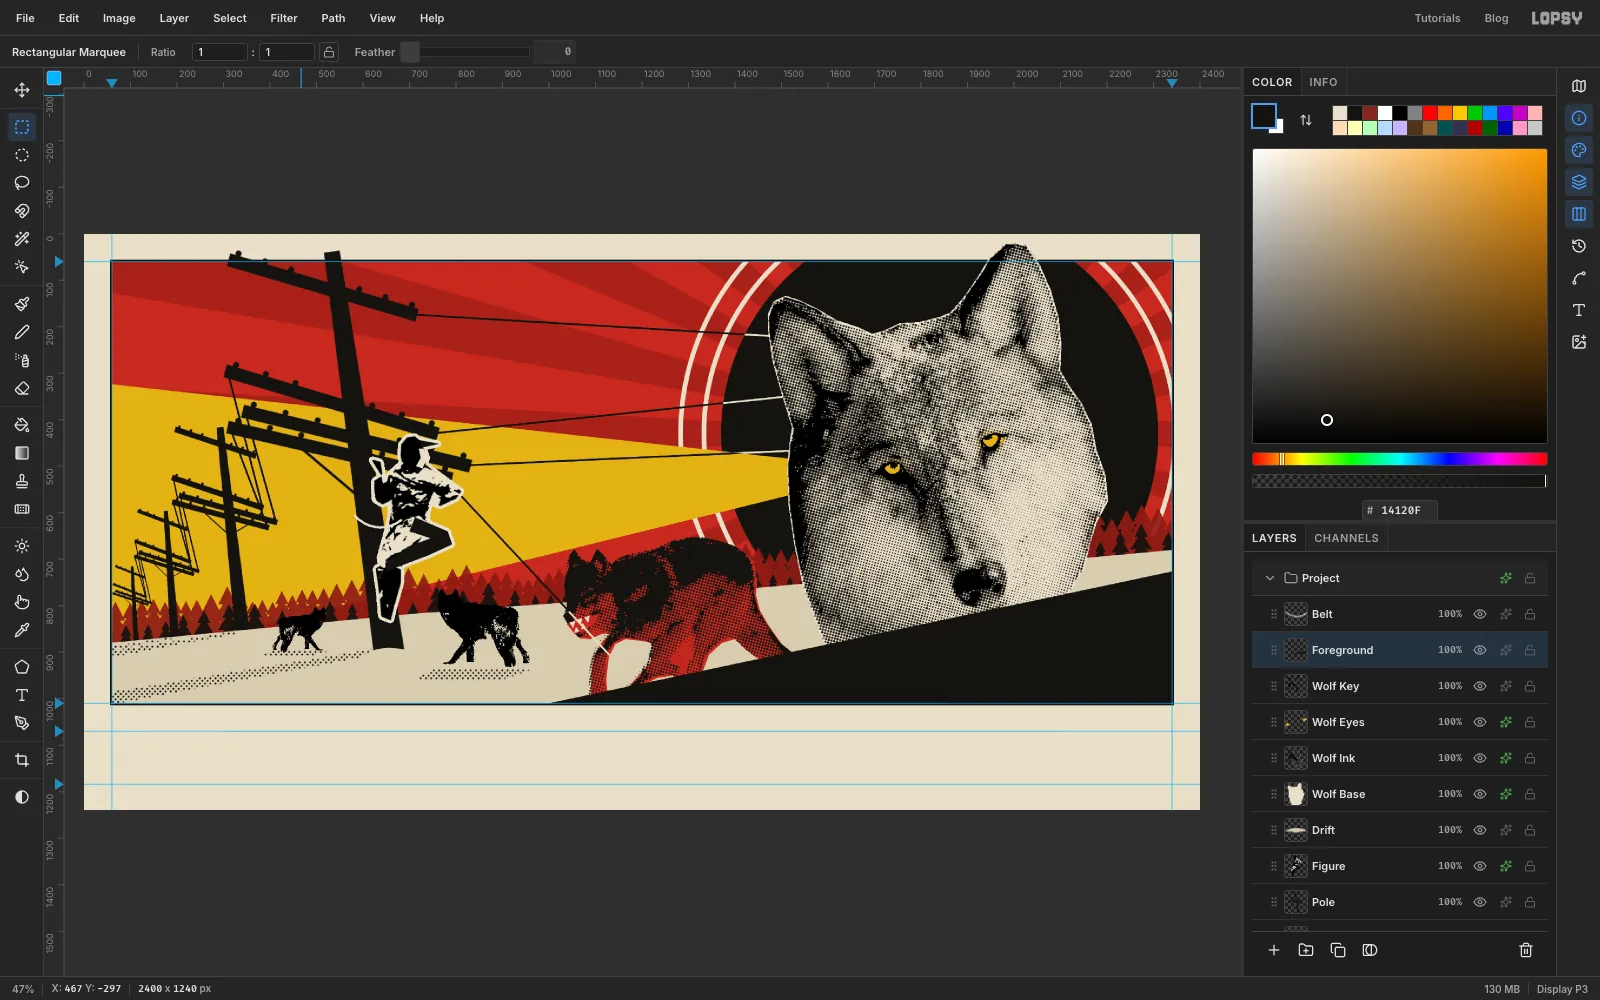
Lay the foreground wedge
Click the
Wolf Keyrow and add a layer namedForeground. Set the foreground colour to ink . With the Pen, draw a shape whose top edge rises from about1000, 1010to the right of the frame at abouty 726, and let its bottom and right sides run past the keyline. Fill it and press Cmd+D.This layer sits above the Mat, so trim the overshoot. Press M, click once and enter From
56, 56and To2344, 1014. Choose Select → Inverse, press Delete, then Cmd+D.The wedge seats the head, hides the lead wolf's rump so the animal seems to burst out from behind it, and gives you a black field for the title.
-
Set the title
With
Foregroundactive, press T for the Text tool. In the options bar, set Size to90, choose the font Russo One and set the text colour to paper .Click at about
1460, 880, typeKILOWATT WOLFand press Tab to commit. Rename the layerTitle.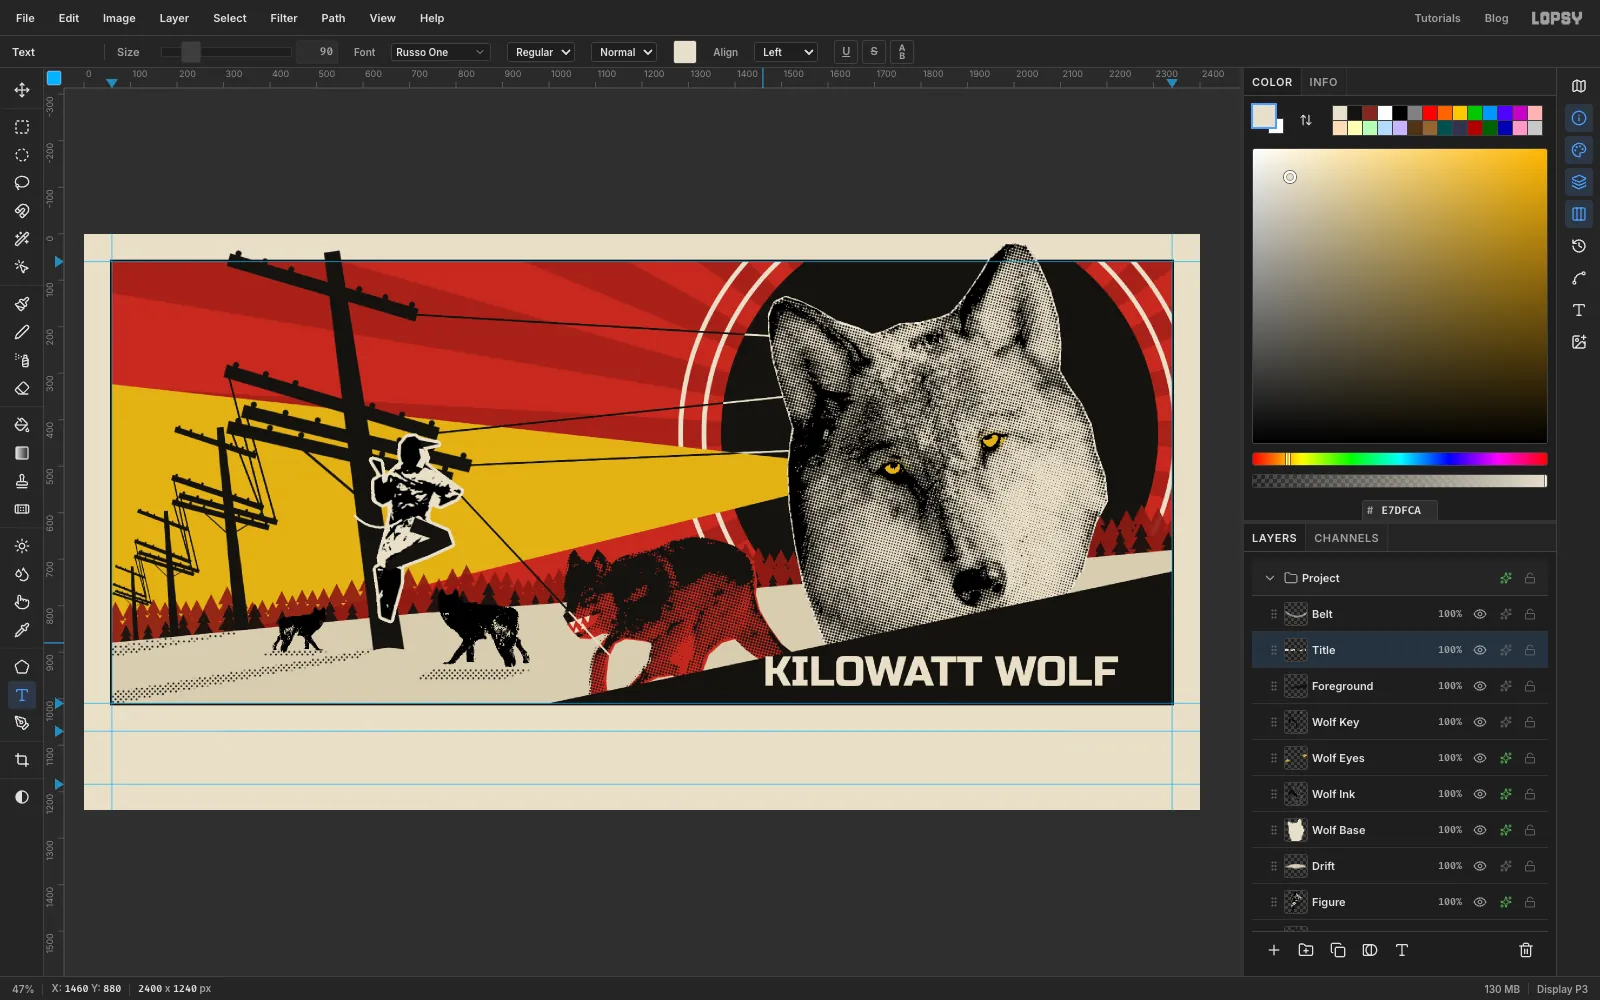
-
Rotate the title and seat it in the wedge
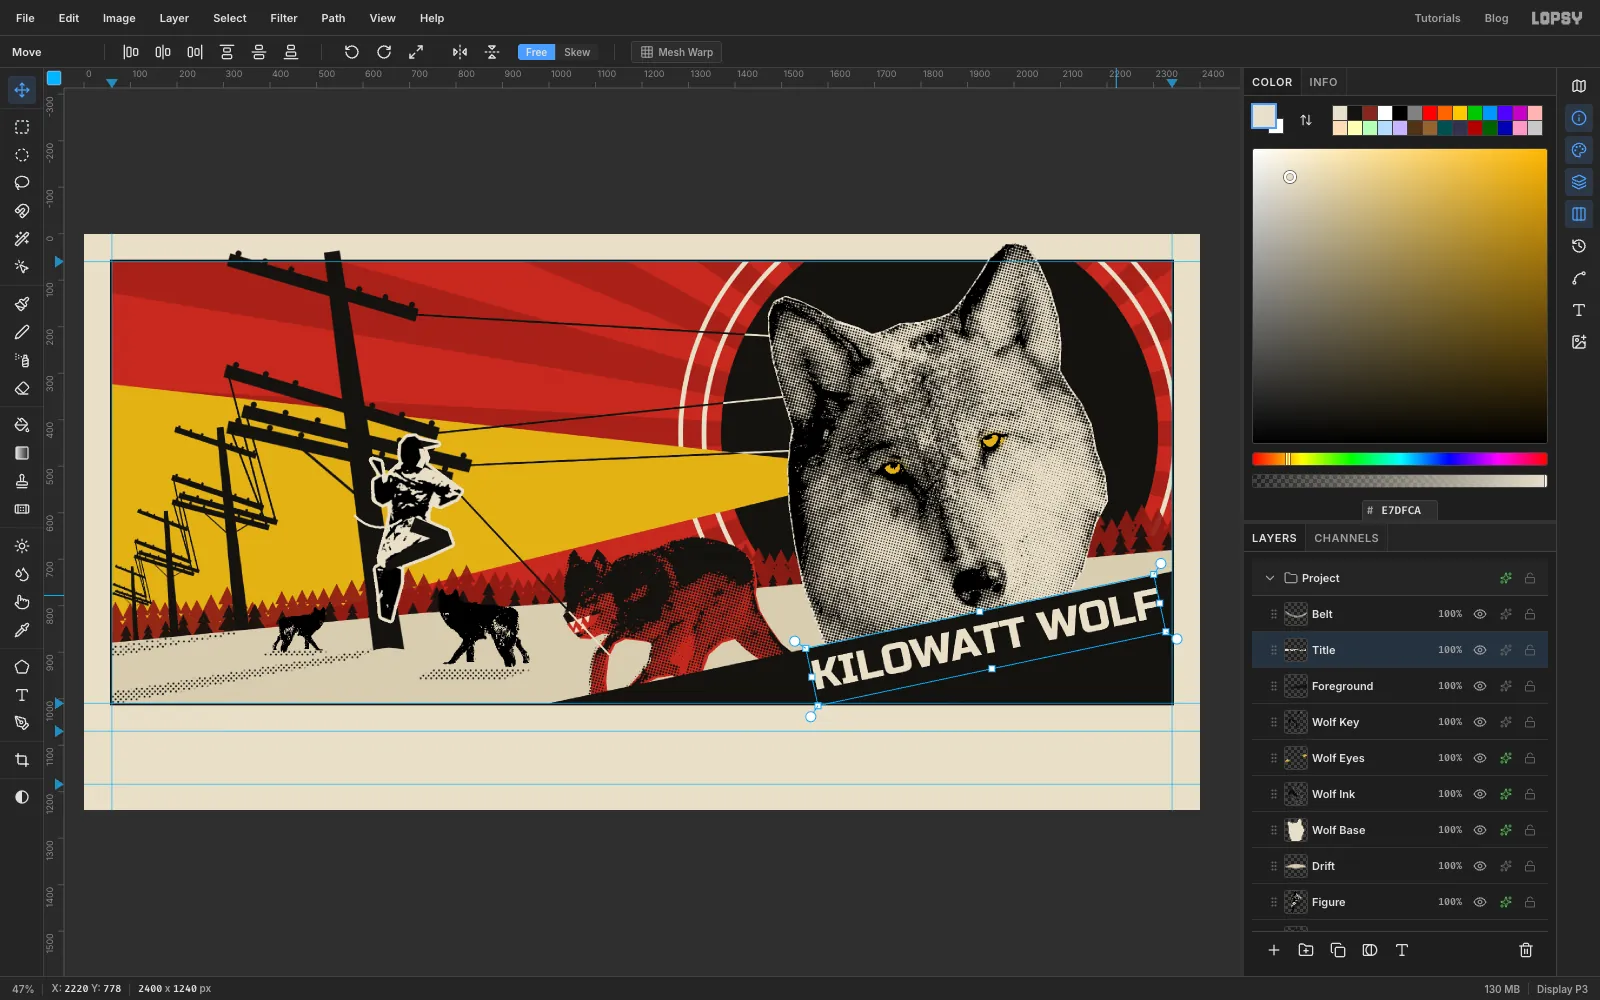
Press V. A text layer shows its transform box without a marquee, and it stays editable after you rotate it. Drag the round handle at the top-right corner about 12° counter-clockwise, so the text runs parallel to the wedge's top edge.
Nudge it with the arrow keys, adding Shift for 10 px steps. Aim for an even margin of about 30 px: above the letters along the slanted edge, between the F and the right of the frame, and below the foot of the K. If you can't get all three, change the Size rather than crowding an edge.
-
Block out the slate
Click the
Foregroundrow and add a layer namedSlate, so the slate sits under the title.For the rule, set the foreground to ink and press N for the Pencil. Set Size to
8, click at60, 1050, then Shift+click at2340, 1050.Press M and use the click-once dialog for the rest, with Edit → Fill and Cmd+D each time. The frame number box is red , From
56, 1070To170, 1184.Then add five 72 px colour chips, all from
y 1070toy 1142. They start atx 1907,1998,2089,2180and2271, filled in that order with ink, red, oxide, snow and arc yellow.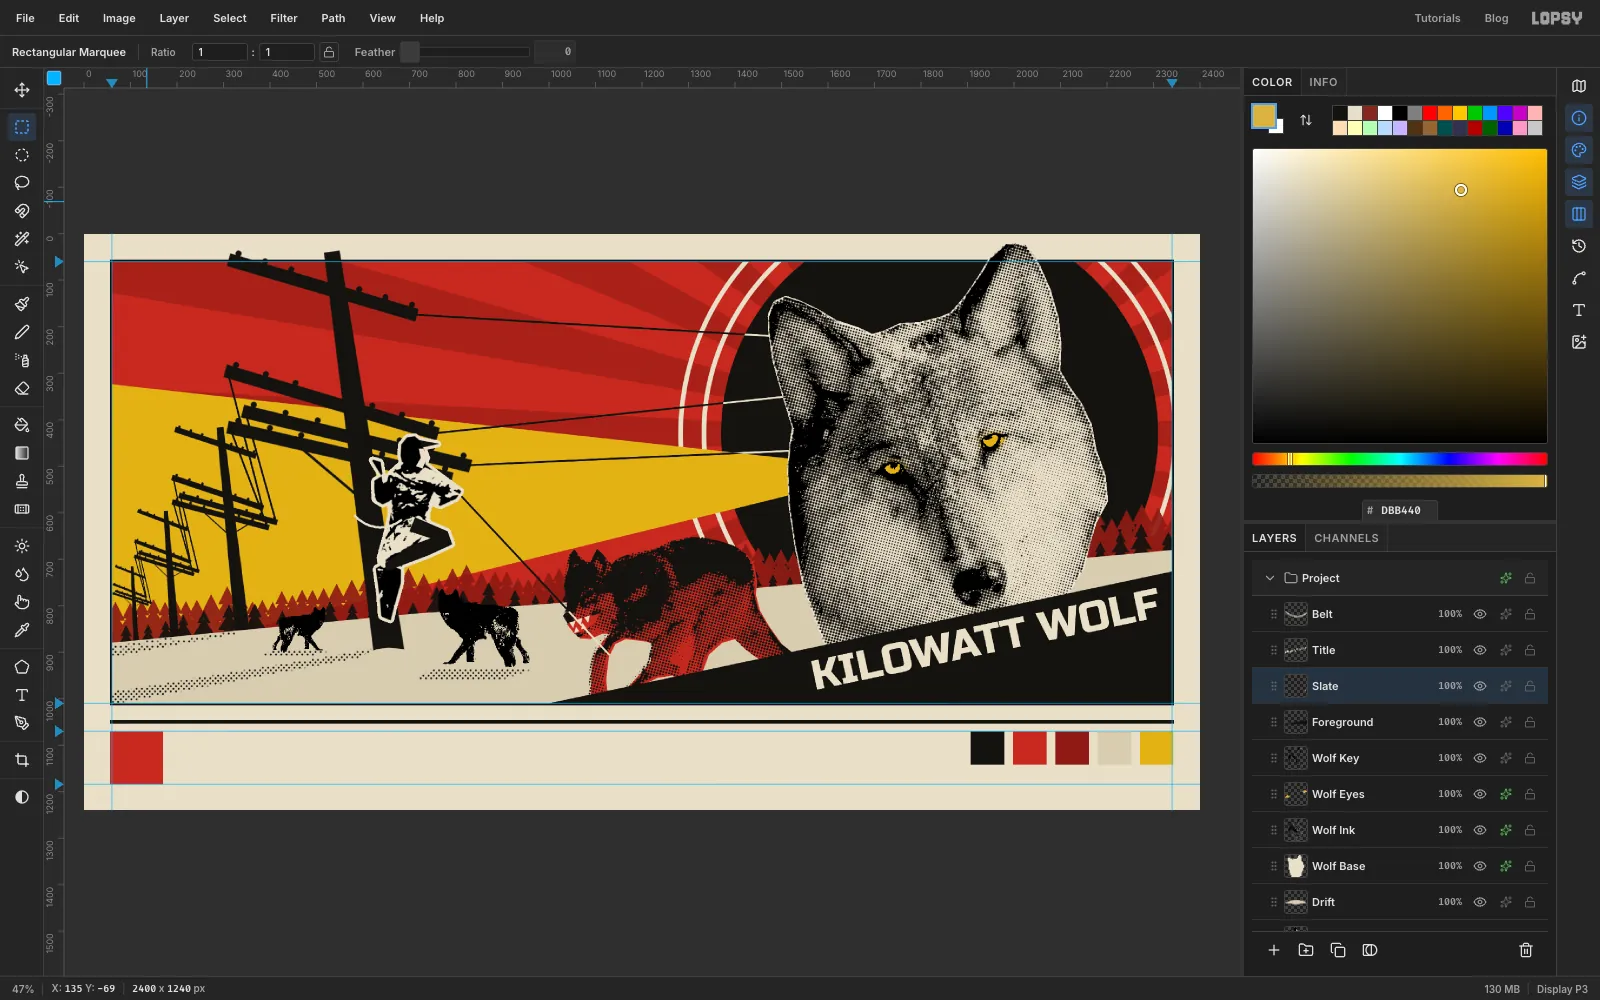
-
Set the slate type
For each line below, click the
Slaterow first, so the Text tool starts a new layer instead of restyling the last one. Press T, set the font, size and colour in the options bar, click an empty spot on the canvas, type the text and press Tab. Then press V and nudge with the arrow keys to line it up. Text layers name themselves after their text. The screenshots show them renamed (Slate A,Key ARCand so on), which is optional.41in Russo One, Size76, paper, centred in the red box.KILOWATT WOLFin Russo One, Size62, ink, 24 px right of the box with the tops of its letters on the1070guide.КИЛОВАТТ-ВОЛКin Russo One, Size34, red, directly below at the same left edge, with its base on the1184guide. Copy the text from this page and paste it with Cmd+V while the text is being edited.
In PT Mono, Size
22, ink, set three lines atx 844, one layer each. Space them evenly, with the first on the top guide and the last on the bottom guide:KEY FRAME 41: THE PACK REACHES THE LINEEXT. KARELIAN ISTHMUS, WINTER 1928, DUSKPRODUCTION DESIGN, REEL 3, FORMAT 2.4:1
Under the chips, in PT Mono, Size
20, ink, label themINK,RED,OXIDE,SNOWandARC, each at its chip's left edge with its base on the bottom guide.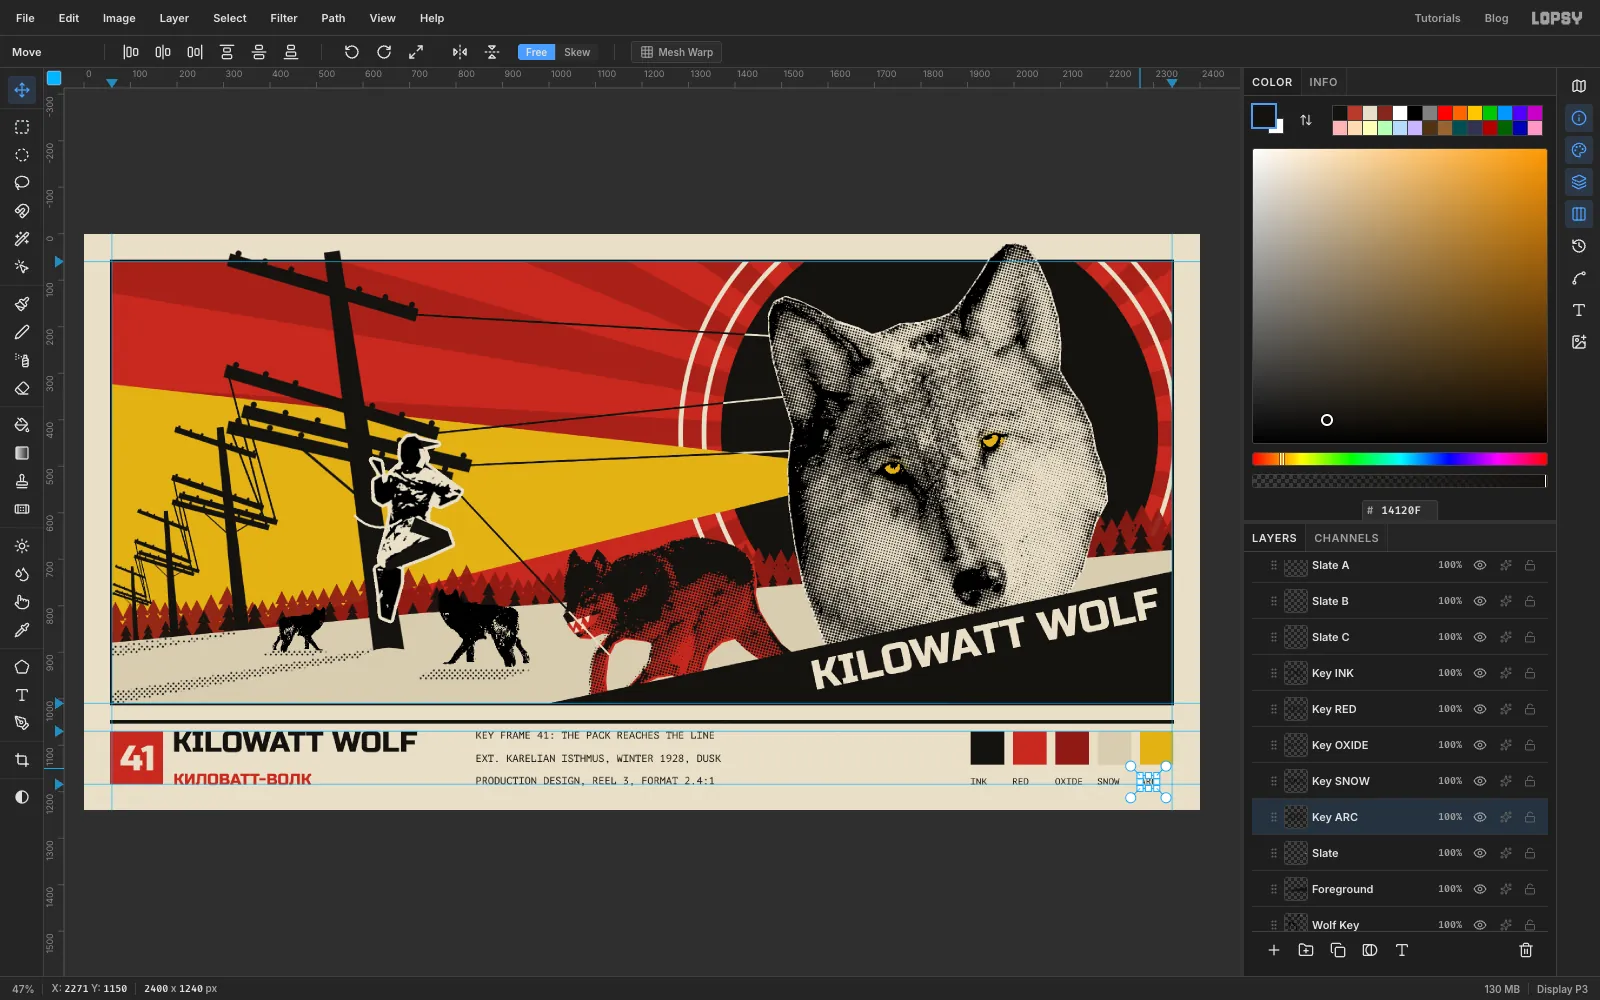
-
Add a value study
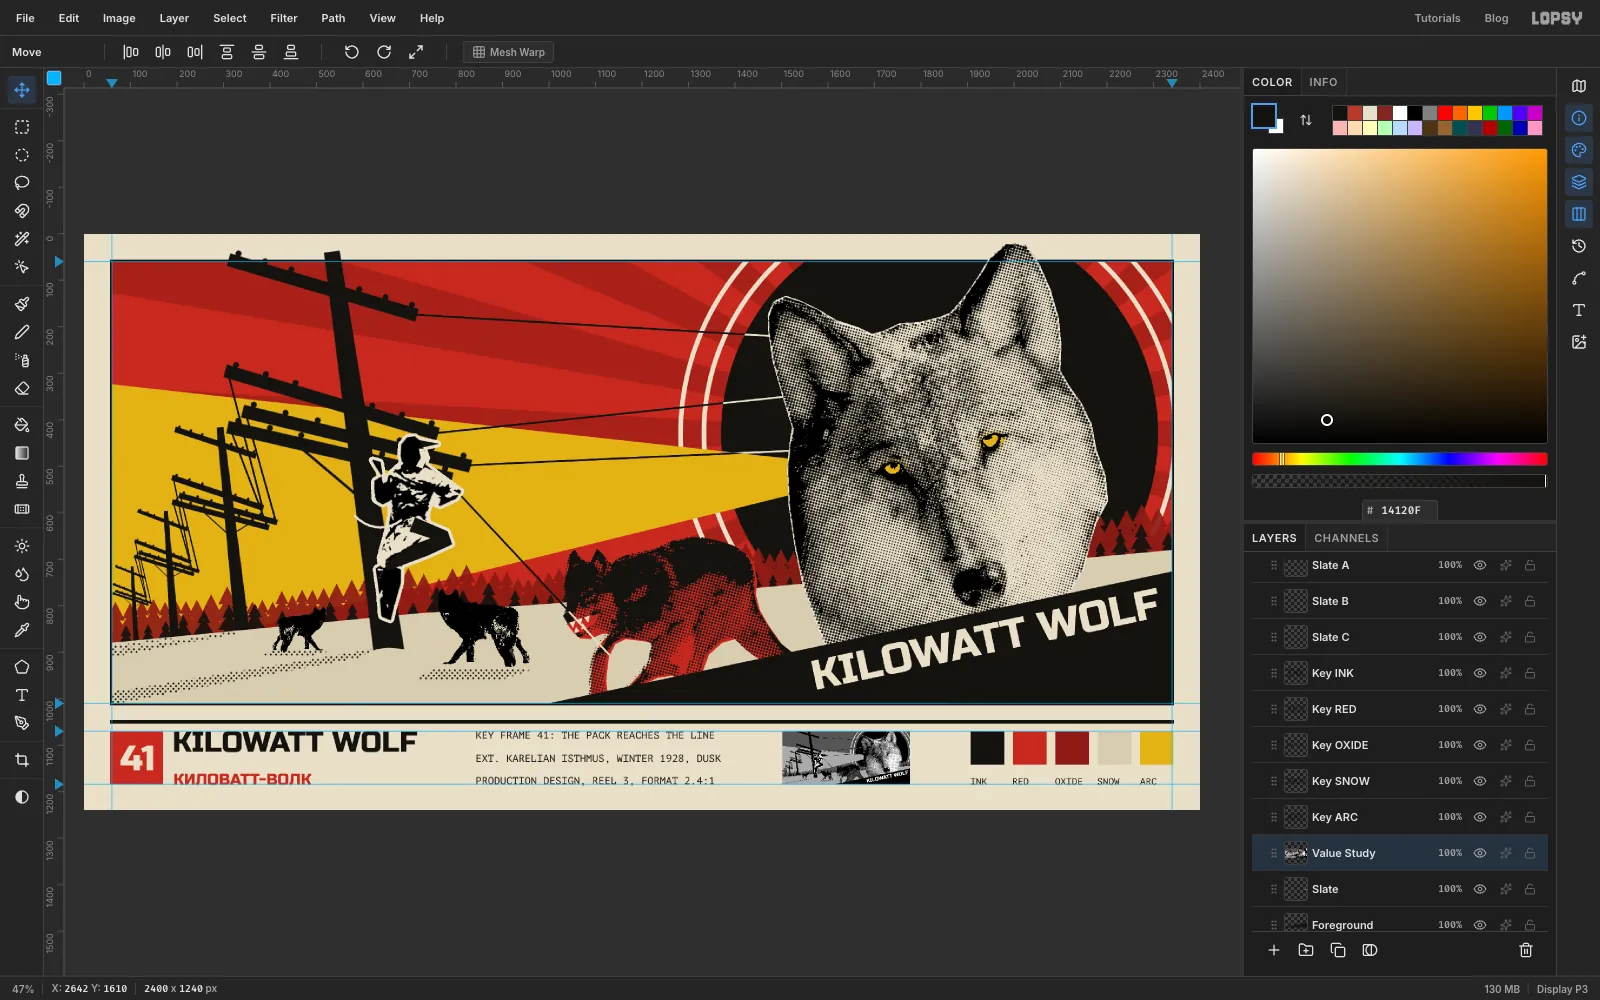
Concept artists check that a frame still reads with no colour at all, and yours can show its working.
- Press M, click once and enter From
60, 60To2340, 1010. - Press Cmd+Shift+C for Copy Merged, then Cmd+D.
- Click the
Slaterow and press Cmd+V. Name the layerValue Studyand press Cmd+D. - Run Filter → Desaturate, then Filter → Posterize with Levels
4. - Press M, click once and enter From
60, 60To2340, 1010again, press V, and Cmd-drag the corner inward until it's 114 px tall (about 12%). Press Cmd+D. - Drag it into the gap between the scene notes and the chips, with its top on the
1070guide. Make the gap on each side about the same.
- Press M, click once and enter From
-
Add paper grain and export
Click the
ARCrow, the last label you set, and add a layer namedGrain. Set the foreground to and choose Edit → Fill.Run Filter → Add Noise with Amount
45and Mono selected. Open the ✦ drawer, set Blend to Multiply and close it. The near-white layer only adds fine speckle, so the flat colours stop looking like screen colours. The title and the slate lines above it stay crisp.Choose File → Save Project to keep your layers, then File → Quick Export PNG for the finished key frame.
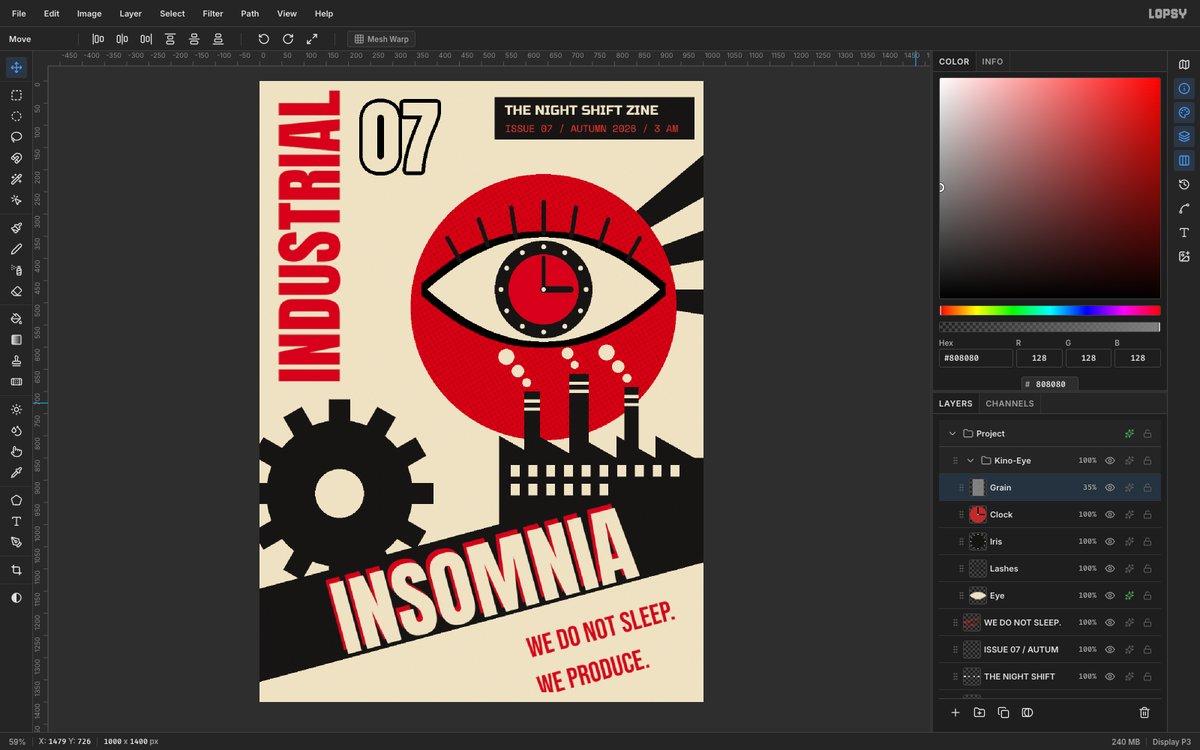
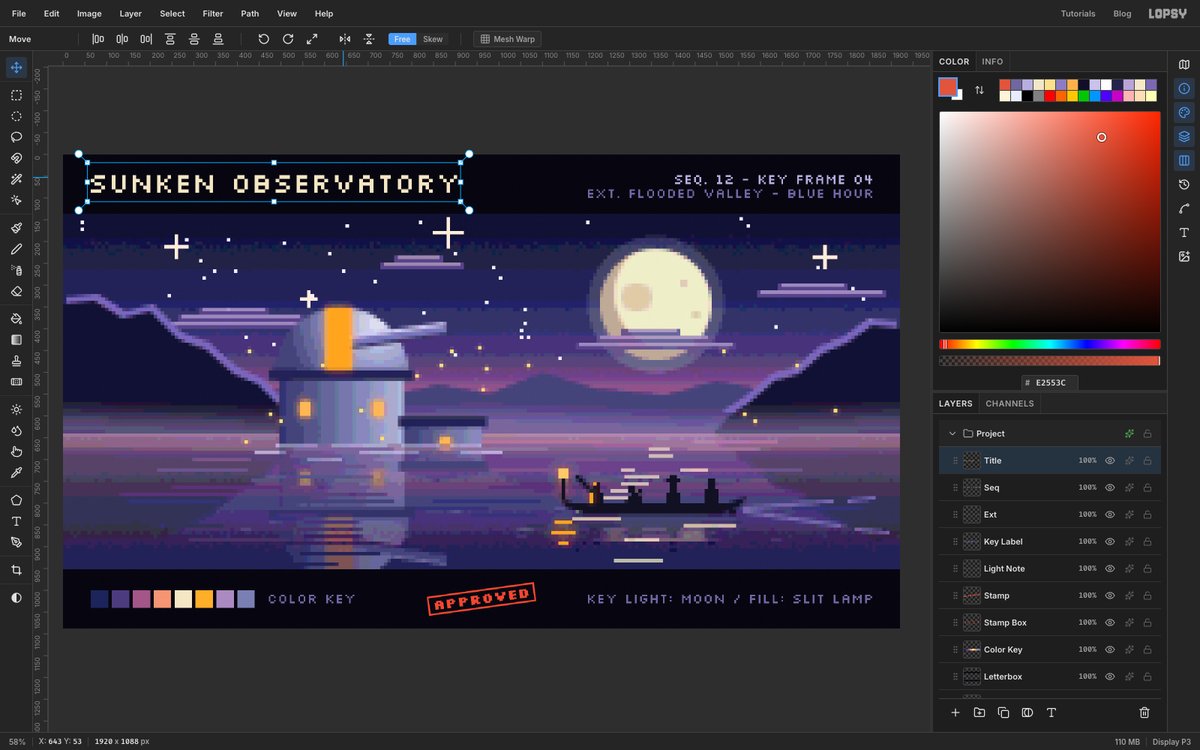
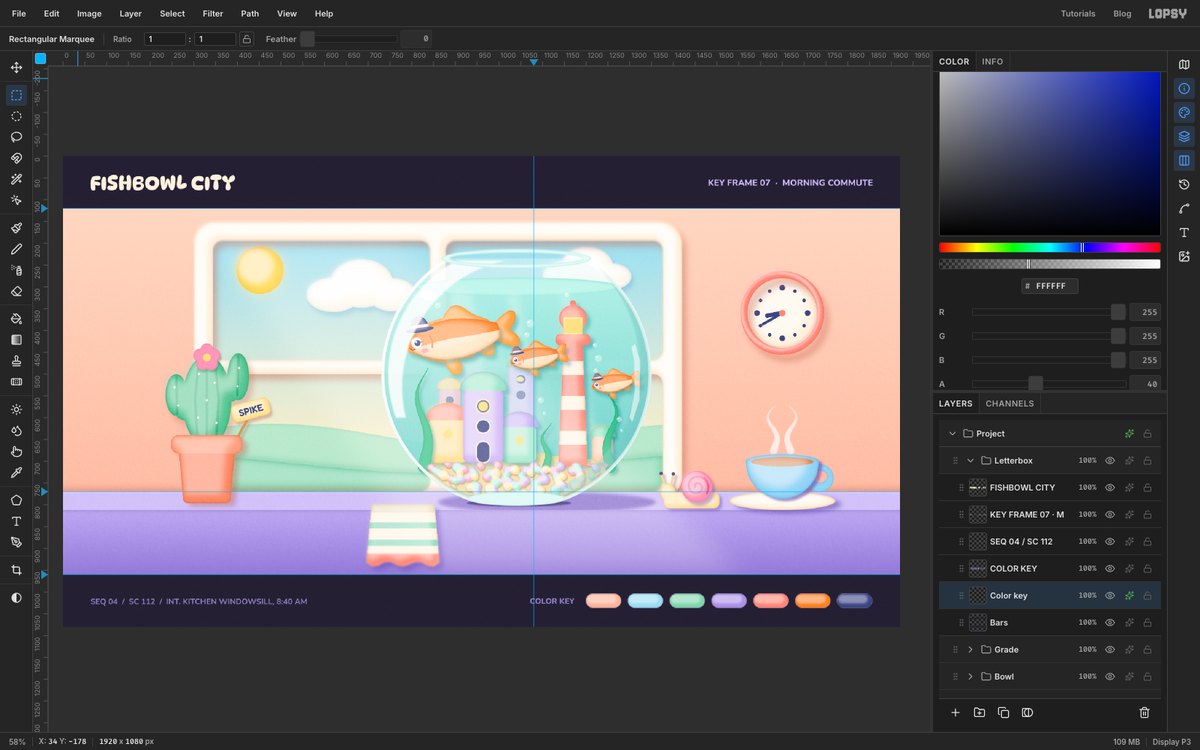
For another take on this style, try the constructivist zine cover. For a different kind of film key frame, try pixel-art concept art of a sunken observatory.