Design a Cyberpunk Robotaxi App Mockup in Lopsy
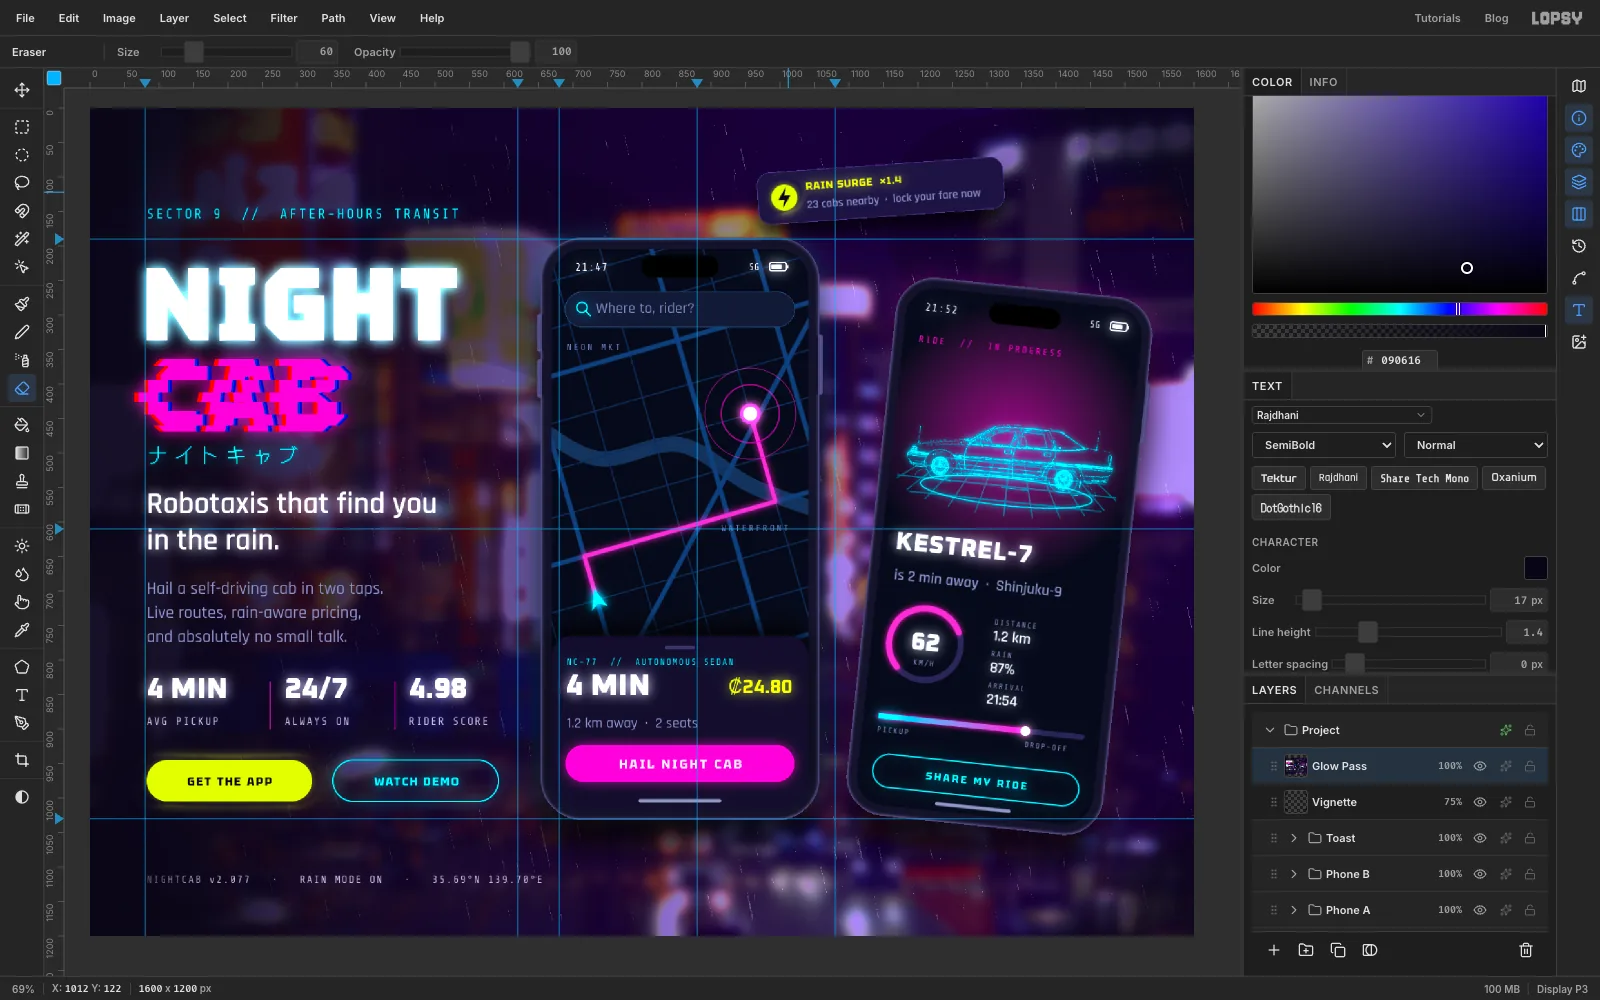
Build a rain-soaked cyberpunk app mockup in Lopsy, with a neon bokeh street, a glitched headline, a glowing map route and a hologram car made from a photo.
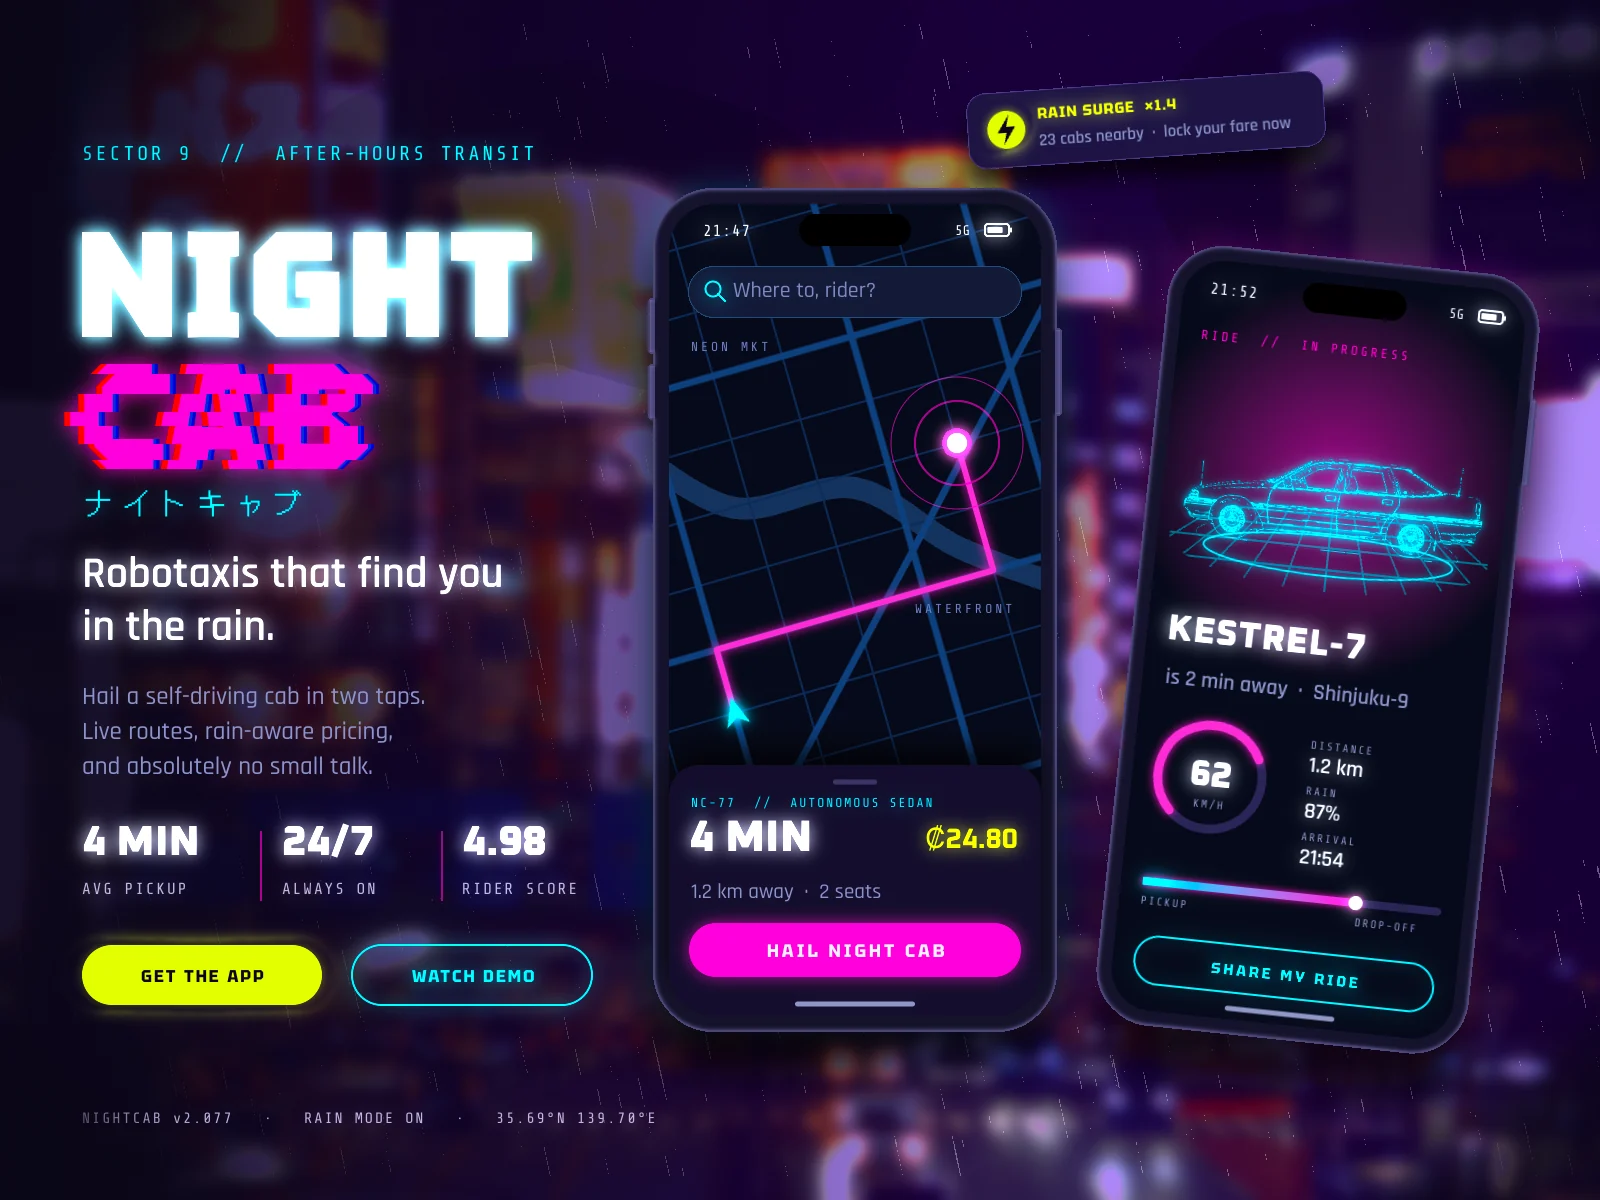
Cyberpunk lives at night, in the rain, under signs you can't quite read. As an interface style it borrows that mood and keeps the screens themselves clean:
- neon on near-black: hot magenta and electric cyan, with one acid yellow saved for the thing you should tap
- glow everywhere it matters: soft halos on type, routes and buttons, as if the light bleeds into wet air
- glitch as decoration: chromatic fringes and sliced, shifted letterforms
- holograms and wireframes: objects drawn as thin glowing lines instead of solid shapes
In this tutorial you'll use all four for Night Cab, a made-up robotaxi app for a city that never stops raining. The left column is the pitch. The centre phone shows a map with your cab's route, and a second, tilted phone shows the ride in progress with a hologram of the car. The board is 1600 × 1200 px.
You'll need two photos from Wikimedia Commons, both released into the public domain (CC0):
- Shinjuku - Shinjuku255.jpg by lumoplank, a night street in Shinjuku covered in neon signs. Download the 1920 px version.
- 1991 Holden Caprice (VQ) armoured car side.jpg by Epsom Rd Studios, a sedan photographed side-on against white. Download the 1920 px version.
The tools you'll use:
- Color LUT, Gaussian Blur, Bloom and the Burn tool to turn a busy photo into soft neon bokeh
- Add Noise, Threshold and Motion Blur to make rain
- Chromatic Aberration and arrow-key nudges on thin marquees for a glitch
- the Shape tool, with corner radius and its click-for-exact-size dialog, for phones, pills and rings
- the Brush, Pencil, Pen, Gradient and Eraser tools
- the Magic Wand and Find Edges to turn a car photo into a wireframe
- Cmd-click on a layer thumbnail, Select → Inverse, Feather and the Elliptical Selection dialog
- rotating and scaling with the Move tool's handles, on one layer, on two layers at once, and on whole groups
- layer effects (Drop Shadow, Stroke, Inner Glow, Outer Glow, Color Overlay) and the Multiply, Screen and Lighten blend modes
- Copy Merged for a final glow pass
The palette is violet night with neon accents:
-
Night
-
violet grade
-
Neon magenta
-
electric cyan
-
acid yellow
-
Ice white
-
muted lilac
-
label lilac
-
Phone body
-
rim
-
screen
-
sheet
-
Map streets
-
alleys
-
canal
-
Track
-
toast card
-
search pill
-
grab handle
-
Pill outline
-
toast outline
-
bezel glow
-
home bar
-
map labels
The type is five Google fonts: Tektur for the headline and buttons, Oxanium for numbers, Rajdhani for sentences, Share Tech Mono for small labels, and DotGothic16 for the katakana.
-
Set up the board and drop in the street photo
Choose File → New and make a document 1600 wide and 1200 high. Click the top ruler at 80, 620, 680, 880 and 1080 to drop vertical guides, and the left ruler at 190, 610 and 1030 for horizontal ones. The first two vertical guides frame the left column of type. The rest mark the edges and centre of the first phone.
A new document keeps all its layers inside a group called Project, with a Background layer and an empty Layer 1. Click Background, set the foreground to and choose Edit → Fill.
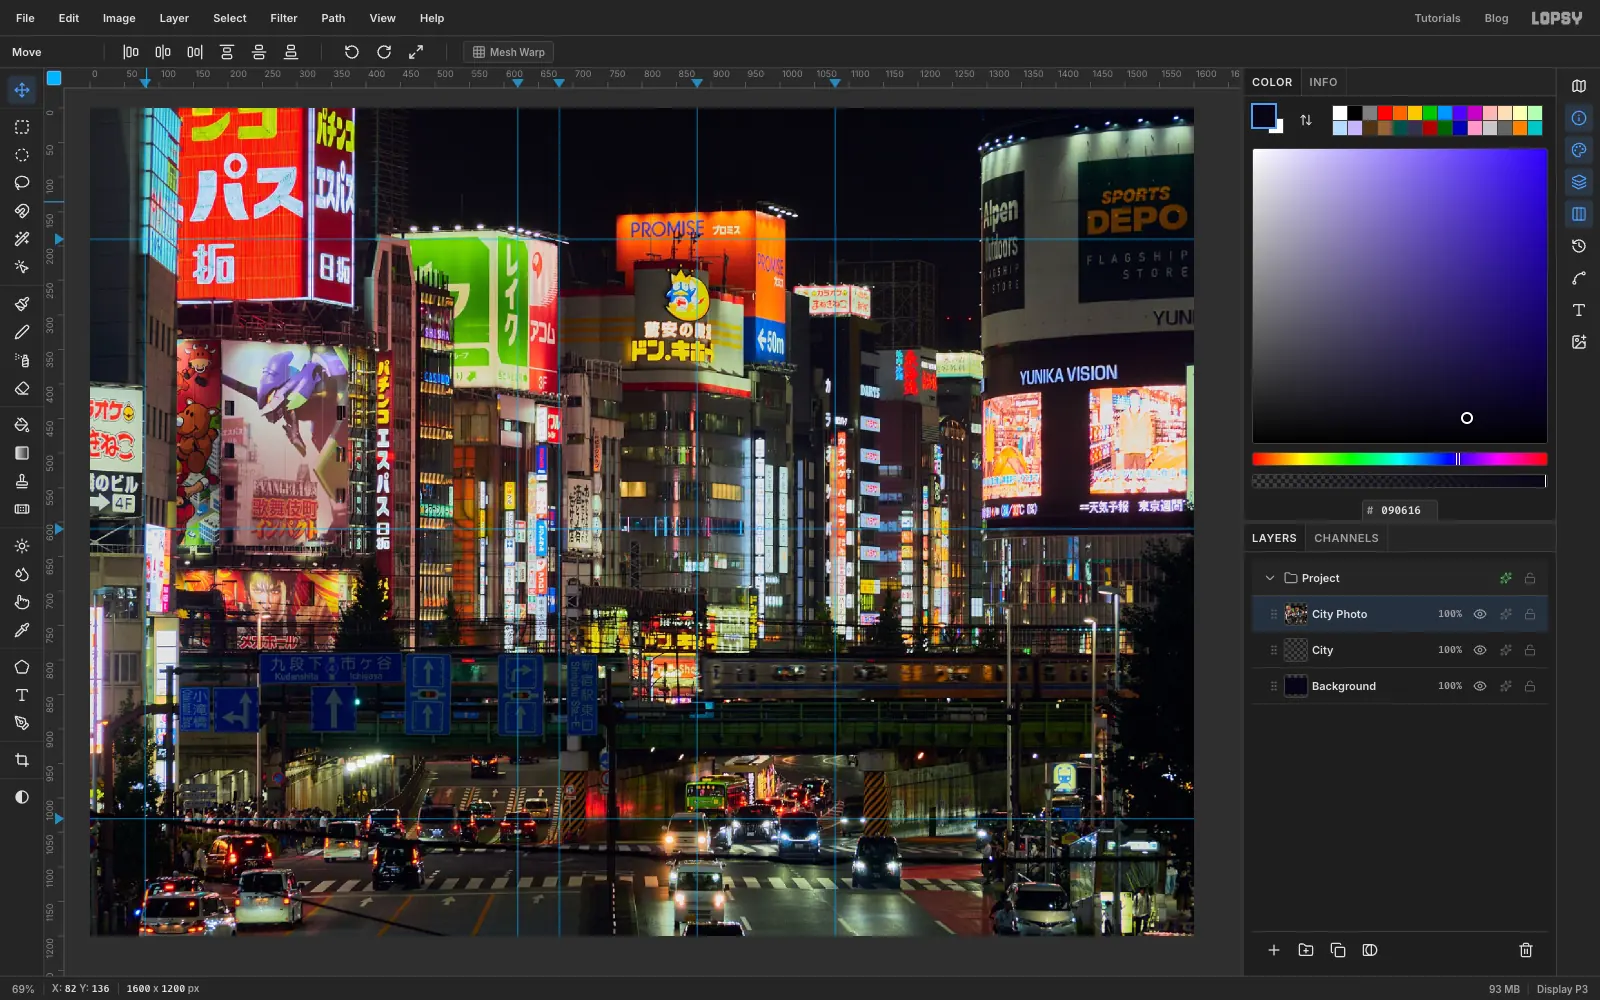
Drag the Shinjuku photo from your desktop onto the canvas. Lopsy puts it on a new layer, scales it to fit the canvas (it's the same 4:3 shape) and selects it. Press Cmd+D and rename the layer City Photo. The empty layer underneath it (renamed City in the screenshot) isn't needed, so click it and delete it with the bin button under the Layers panel.
-
Push the photo into neon
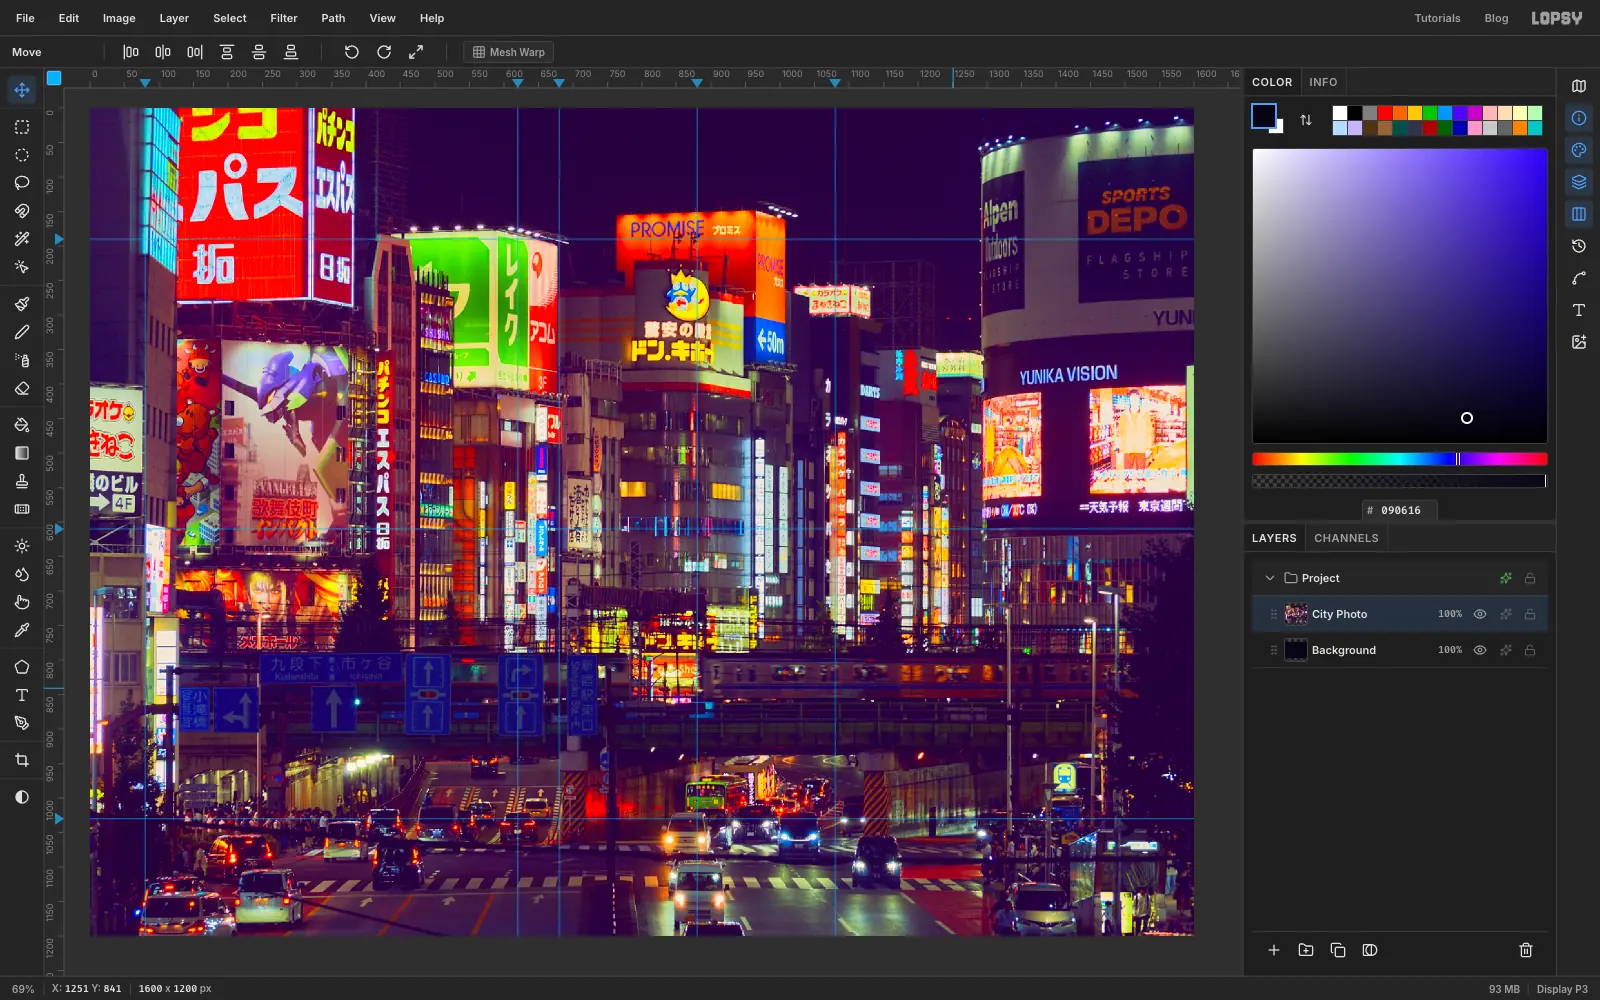
Choose Filter → Color LUT…, click the Cyberpunk preset and leave Intensity at 100%. Click Apply.
A LUT is a colour lookup table. It remaps every colour in the photo at once, the way a film grade does. This one pushes highlights towards pink and shadows towards violet, which gets you most of the way to the cyberpunk palette in one click.
-
Melt it into bokeh
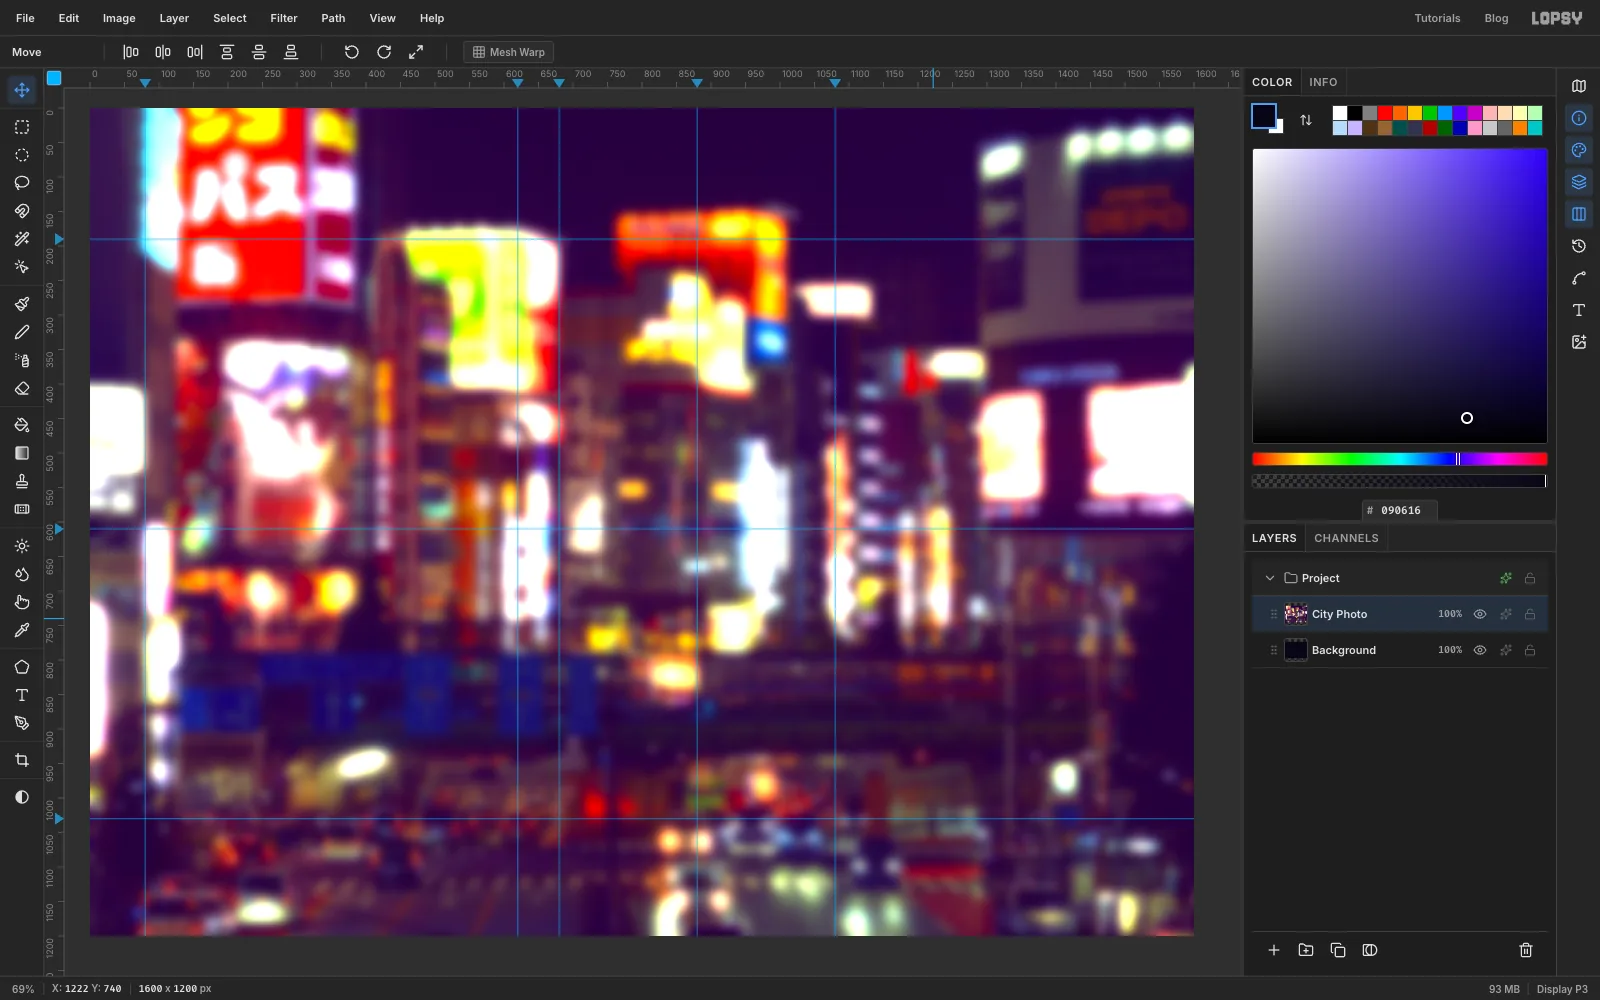
The phones are the subject, so the city should be atmosphere, not detail. Choose Filter → Gaussian Blur… with Radius 22. The signs dissolve into soft blobs and none of their lettering can be read any more.
Then choose Filter → Bloom… with Threshold 55, Soft Knee 60, Radius 28 and Intensity 130. Bloom picks out only the brightest areas and adds a glow around them, so the lights look as if they're shining through wet air.
-
Burn down the hot spots
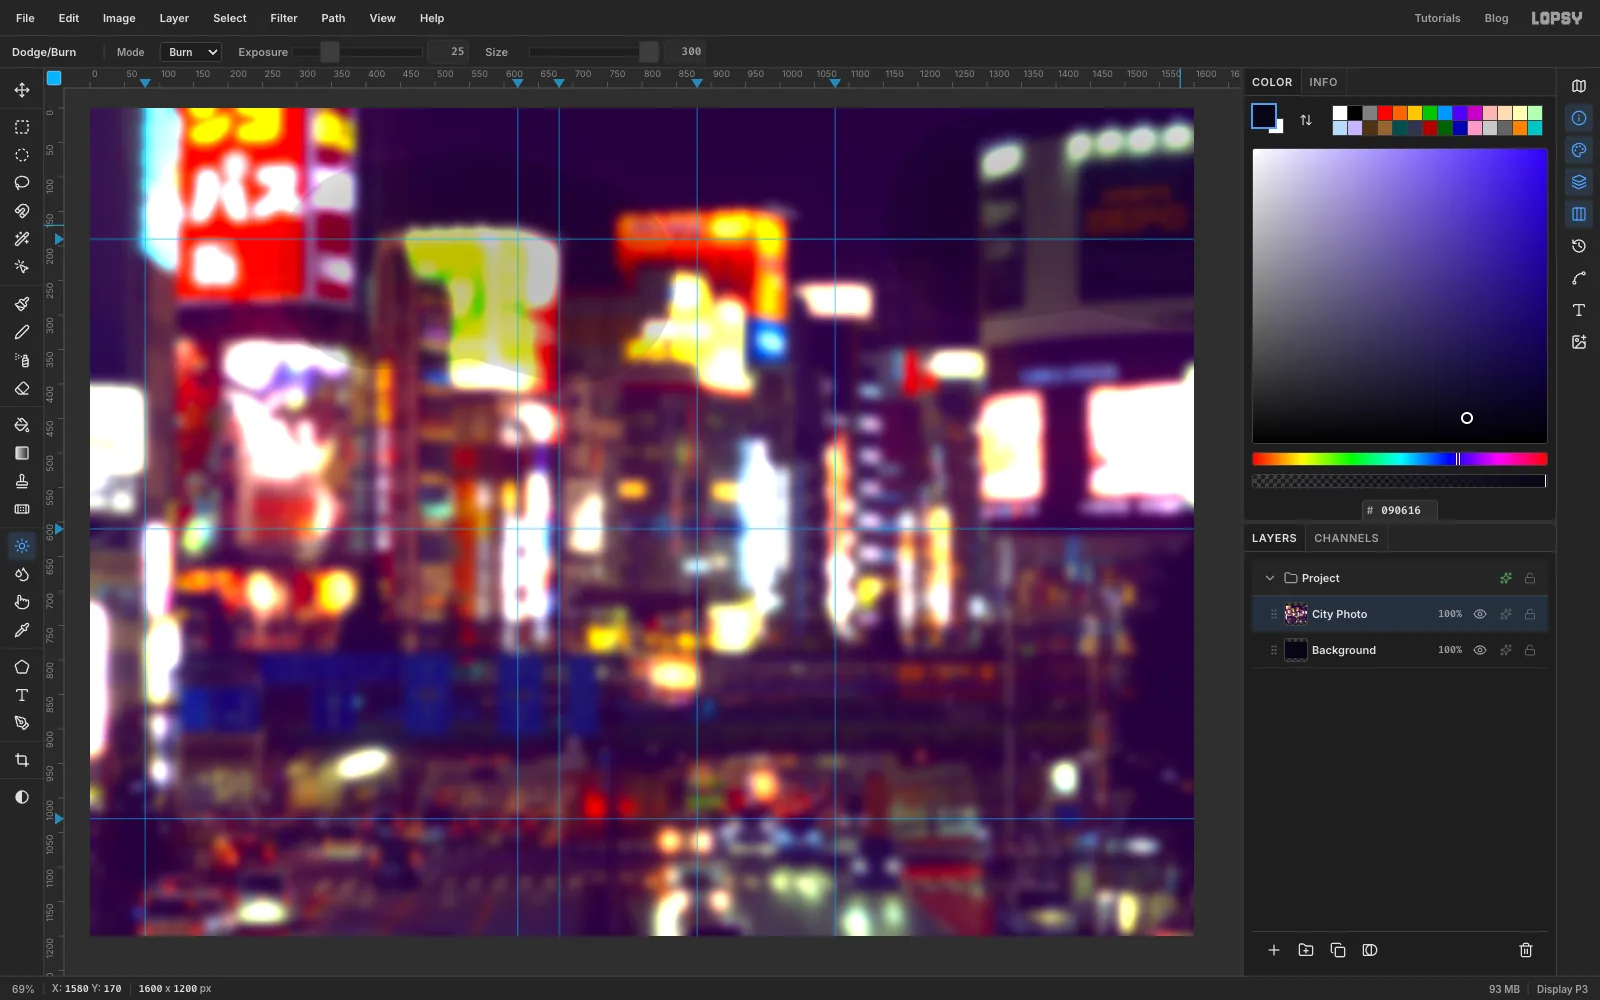
A couple of blobs are bright enough to fight the type that will sit over them. Pick the Dodge tool (O). In the options bar set the mode to Burn, Exposure 25 and Size 300.
Make one slow sweep just under the top guide, from the middle of the left column across to the first phone guide. That's behind the right half of the headline, where the brightest red and yellow signs are. Then make one sweep across the bright block of signs in the top-right corner. Burn darkens what you paint over, a little more with each pass, so stop at one pass each.
-
Grade it violet and shade the left side
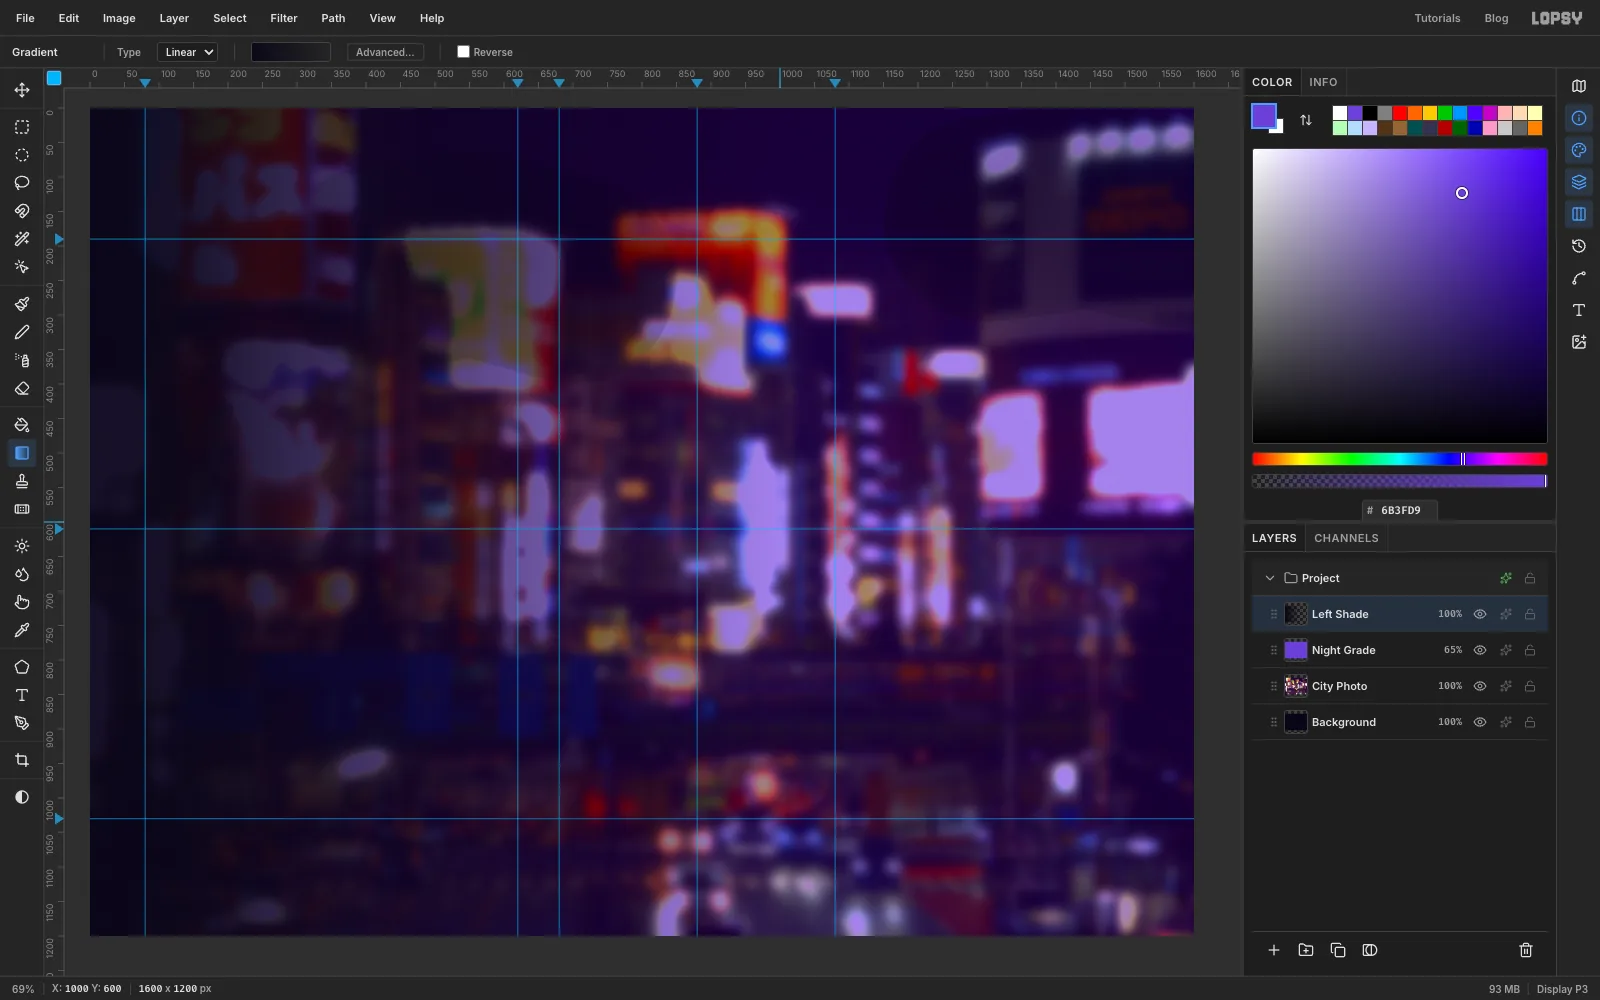
Click Add Layer and name it Night Grade. Fill it with violet , then set its blend mode to Multiply and its opacity to 65%. On Multiply, the violet tints everything below it without hiding it.
Add another layer called Left Shade. Pick the Gradient tool, set Type to Linear and click Advanced…. Set both stops to , then give the left stop 92% opacity and the right stop 0%. Click Done. Drag horizontally across the middle of the canvas from about x 120 to x 1000. The left side, where the headline and body copy will go, fades to almost black.
-
Make rain
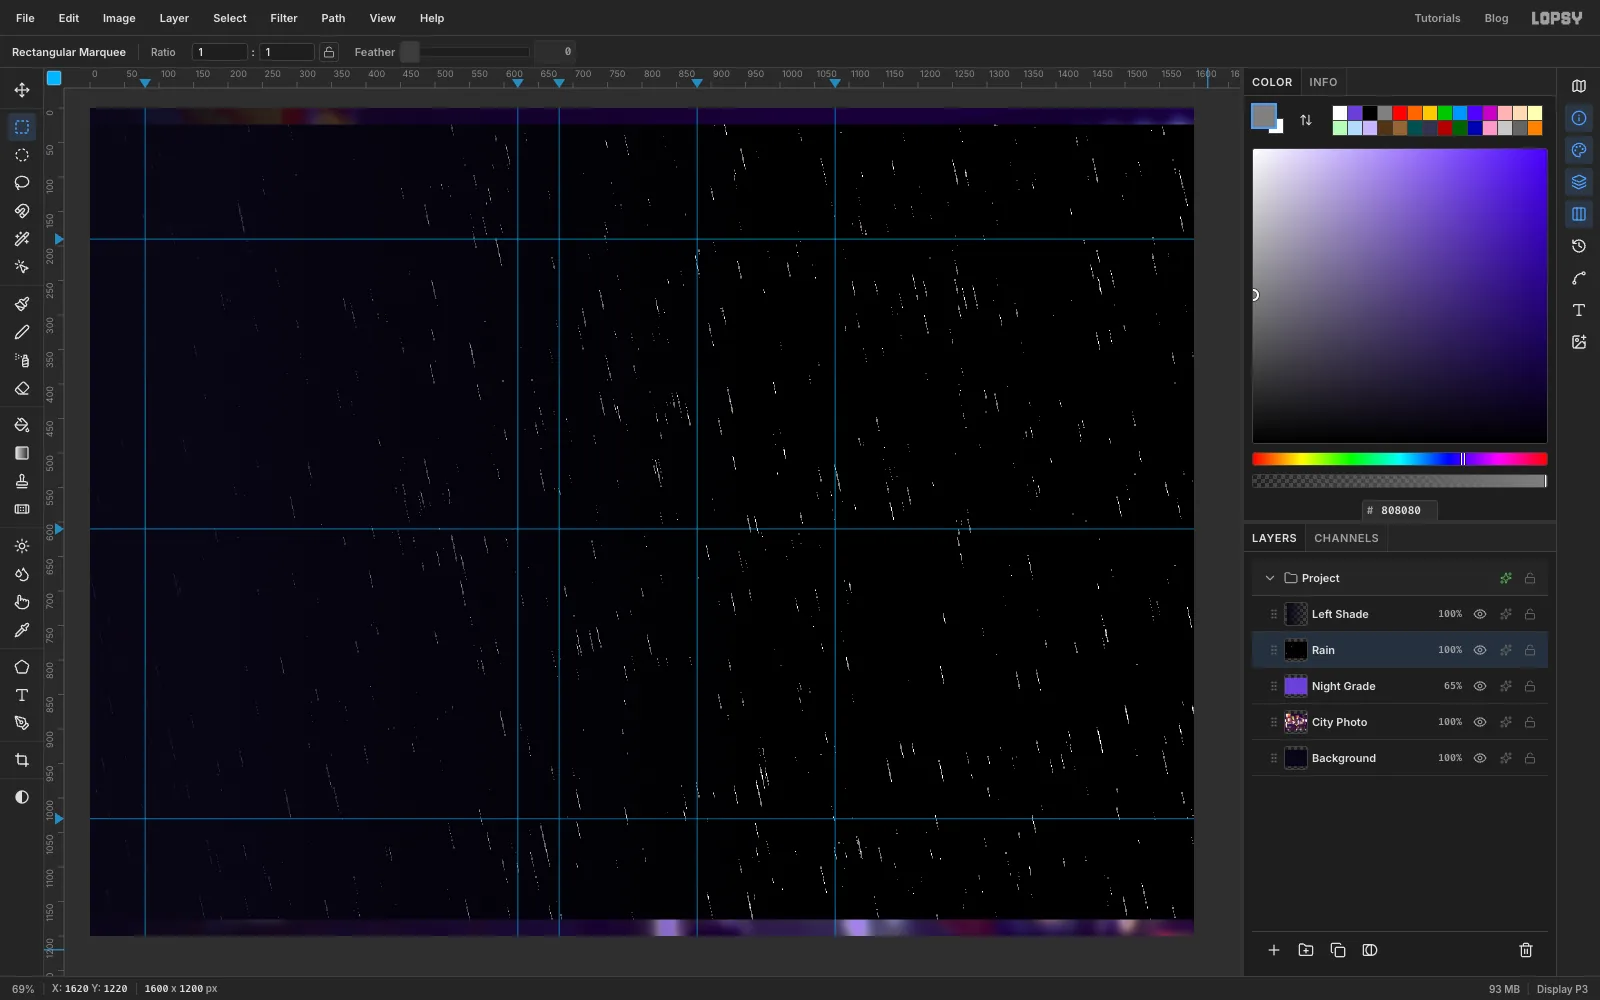
Click Night Grade and add a layer called Rain. It lands between the grade and the shade, so the shade will dim the rain behind the copy later. Fill it with mid-grey .
Rain takes four filters:
- Filter → Add Noise…: Amount 100, Mono, Gaussian. The grey turns to static.
- Filter → Gaussian Blur… with Radius 1, then Filter → Threshold… with Level 168. Only the brightest specks survive as small white dots, about one pixel in two hundred.
- Filter → Motion Blur…: Angle 78, Distance 40. Each dot is smeared into a faint, slanted streak.
- Filter → Threshold… again, this time with Level 12. The faint streaks snap back to crisp white lines.
Motion Blur repeats the pixels at the canvas edge, so the top and bottom rows end up with a few smeared wedges. Draw a marquee across the full width of the top 24 px, press Delete, do the same at the bottom, and deselect.
-
Screen the rain
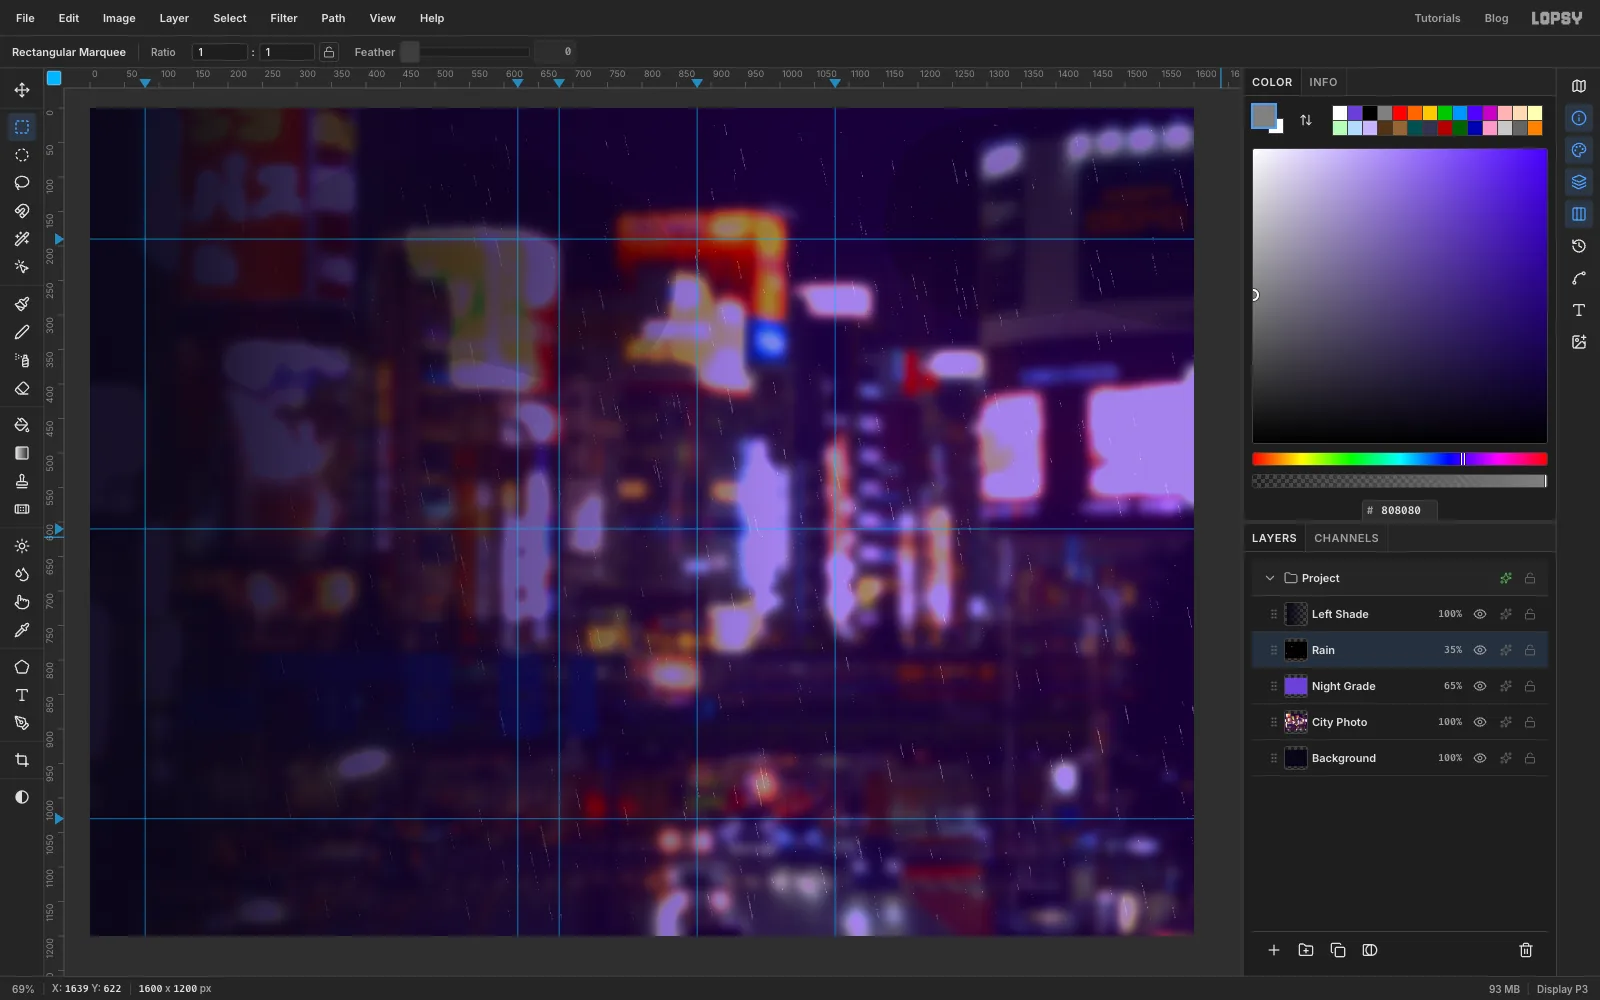
Set the Rain layer's blend mode to Screen and its opacity to 35%. Screen drops out the black, so only the white streaks show. At 35% they read as fine rain rather than scratches. Because the layer sits under Left Shade, the rain fades out on the left.
-
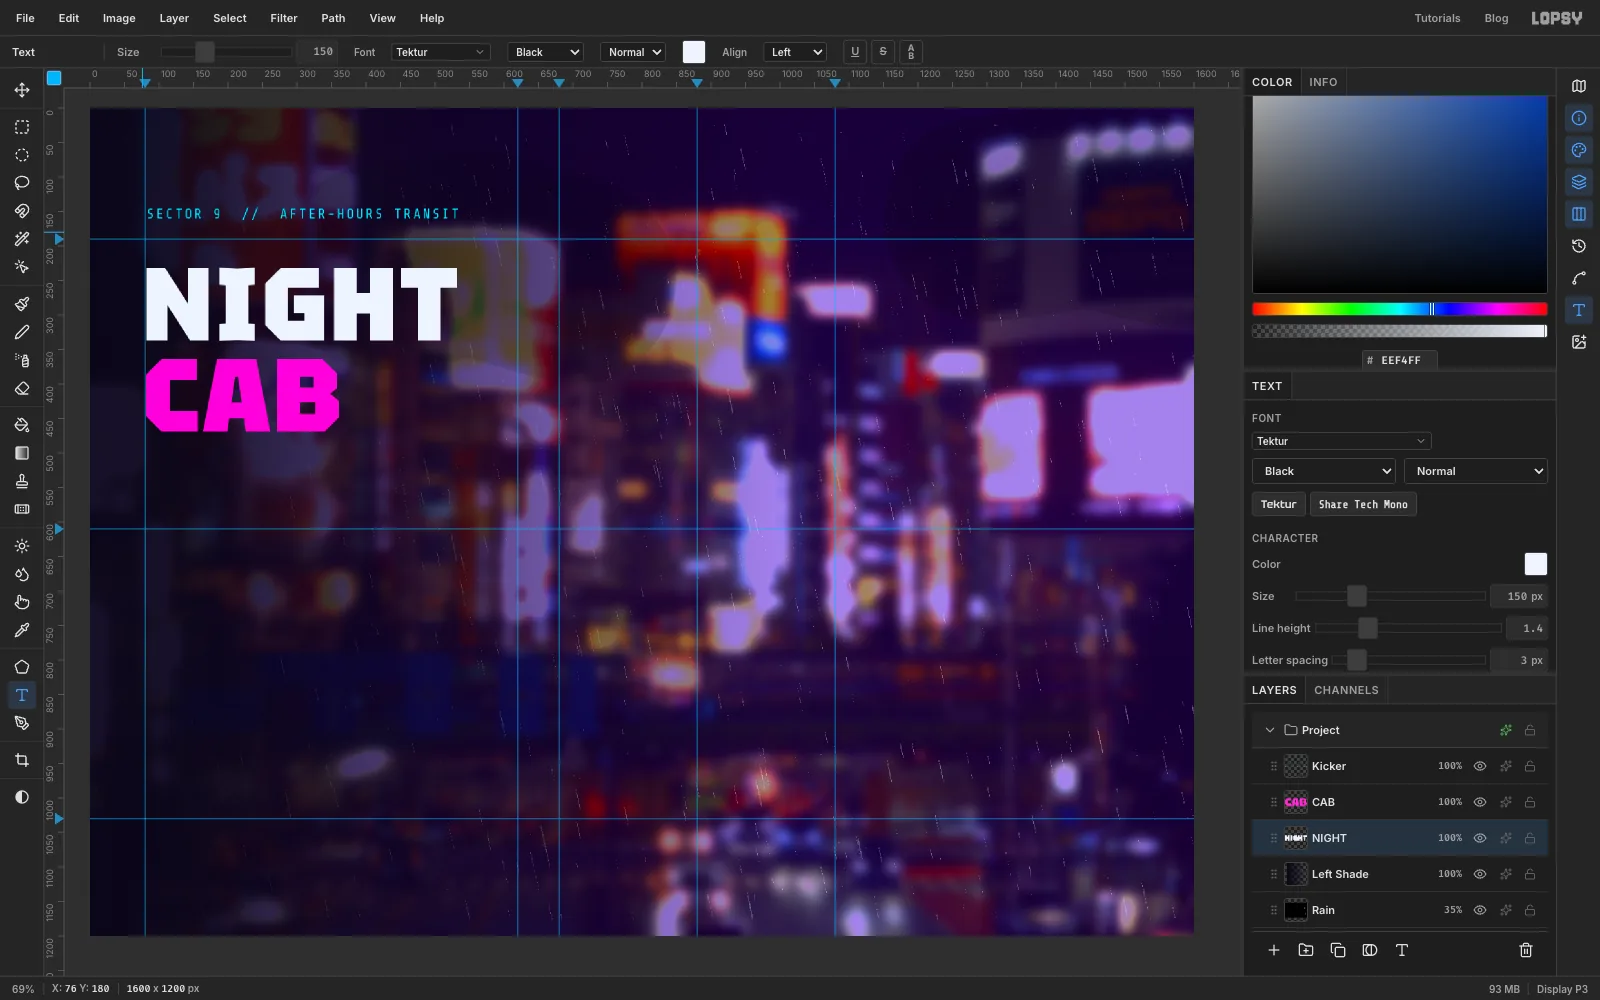
Set the headline
Click Left Shade so new type stacks above it. Pick the Text tool. Set Share Tech Mono, Size 20, colour cyan , and click at the top of the left column, just inside the first guide (about x 82, y 140). Type
SECTOR 9 // AFTER-HOURS TRANSITand press Tab to finish. Name the layer Kicker, then open the Text panel and set Letter spacing to 3.The two headline words are big and close together, so type the lower one first. Click Left Shade again, set Tektur, weight Black, Size 150 and colour . Click just inside the first guide, about two thirds of the way down to the middle guide, type
CABand press Tab. Name it CAB. Then click Left Shade, set the colour to ice white and click just inside the first guide, level with the top horizontal guide, forNIGHT. Name it NIGHT. The word spans most of the column, leaving a little air before the second guide.New text picks up the settings of the last text you set, so both words keep the Kicker's 3 px letter spacing. That's fine here: a little tracking suits a wide display face.
-
Glitch CAB
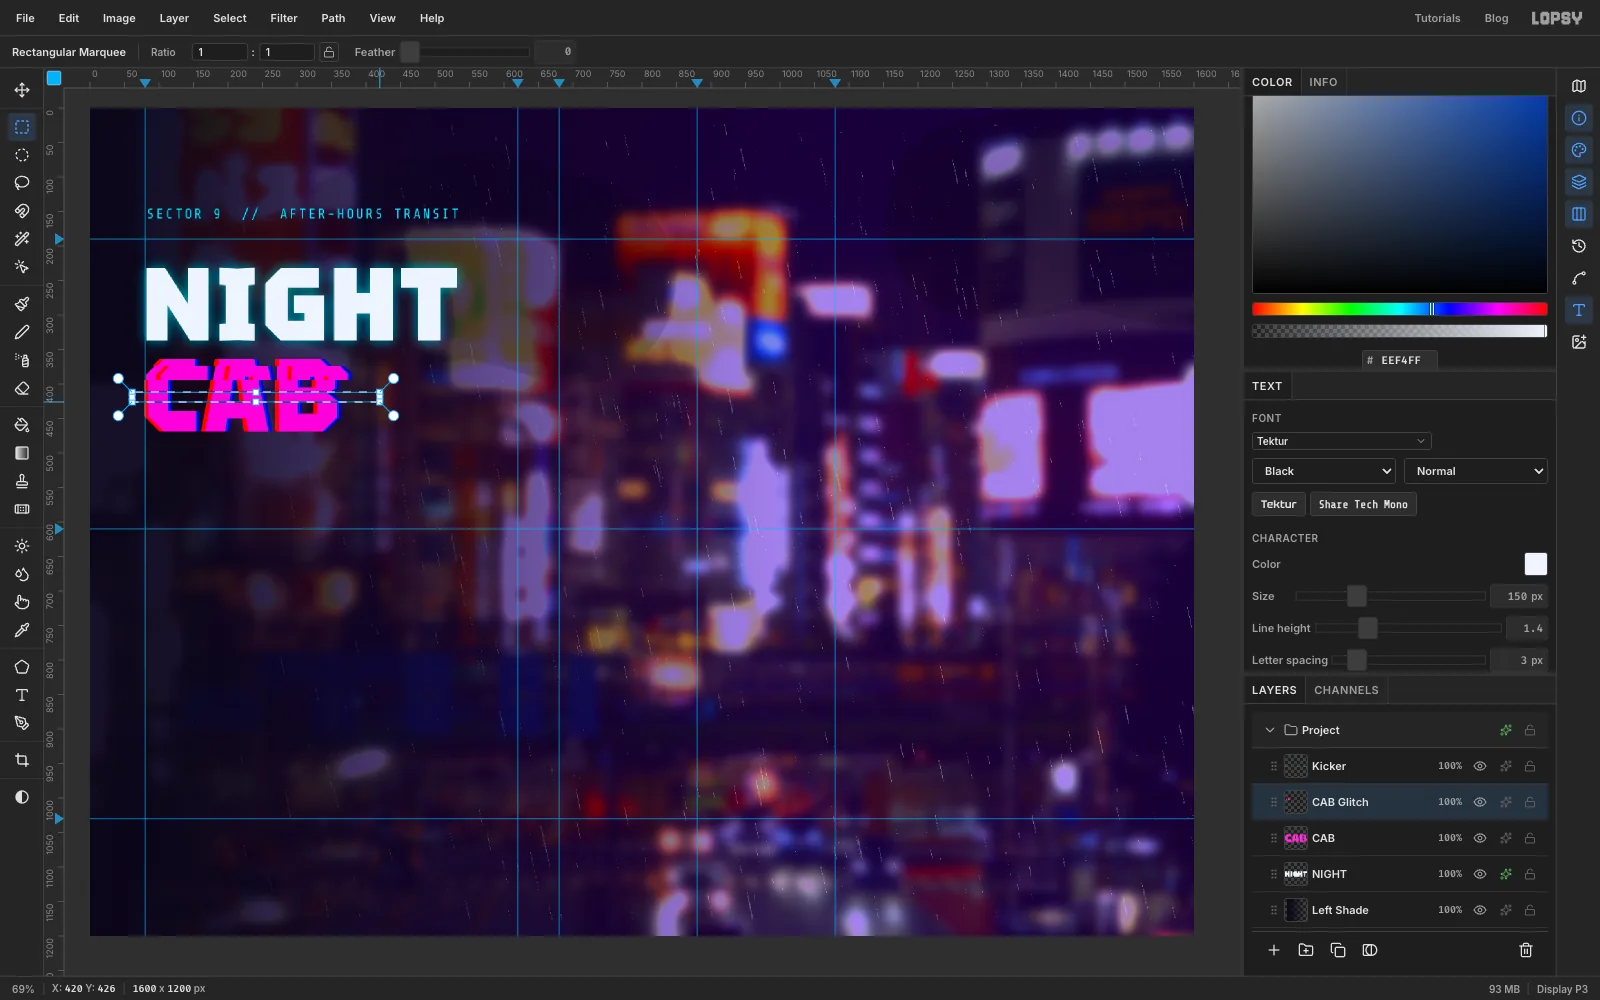
Keep the live text and glitch a copy. Click CAB and choose Layer → Duplicate Layer. Name the copy CAB Glitch and click Rasterize Layer at the bottom of the Layers panel.
Choose Filter → Chromatic Aberration… with Amount 3 and Direction 0. It pulls the red and blue channels a few pixels apart, the classic fringe of a cheap screen.
Now slice it. Draw a thin Rectangular Marquee right across the word, wider than the letters, about 20 px tall and near the top. Press V for the Move tool and slide the strip 18 px to the right: press Shift+Right once (10 px) and then Right eight times (1 px each). Then do two more strips the same way:
- a strip about 14 px tall through the middle of the word, moved 14 px left (Shift+Left once, then Left four times). The screenshot shows this one selected, after the first strip has moved.
- a strip about 16 px tall through the lower third, moved 10 px right (Shift+Right once)
Press Cmd+D when you're done.
-
Make the headline glow
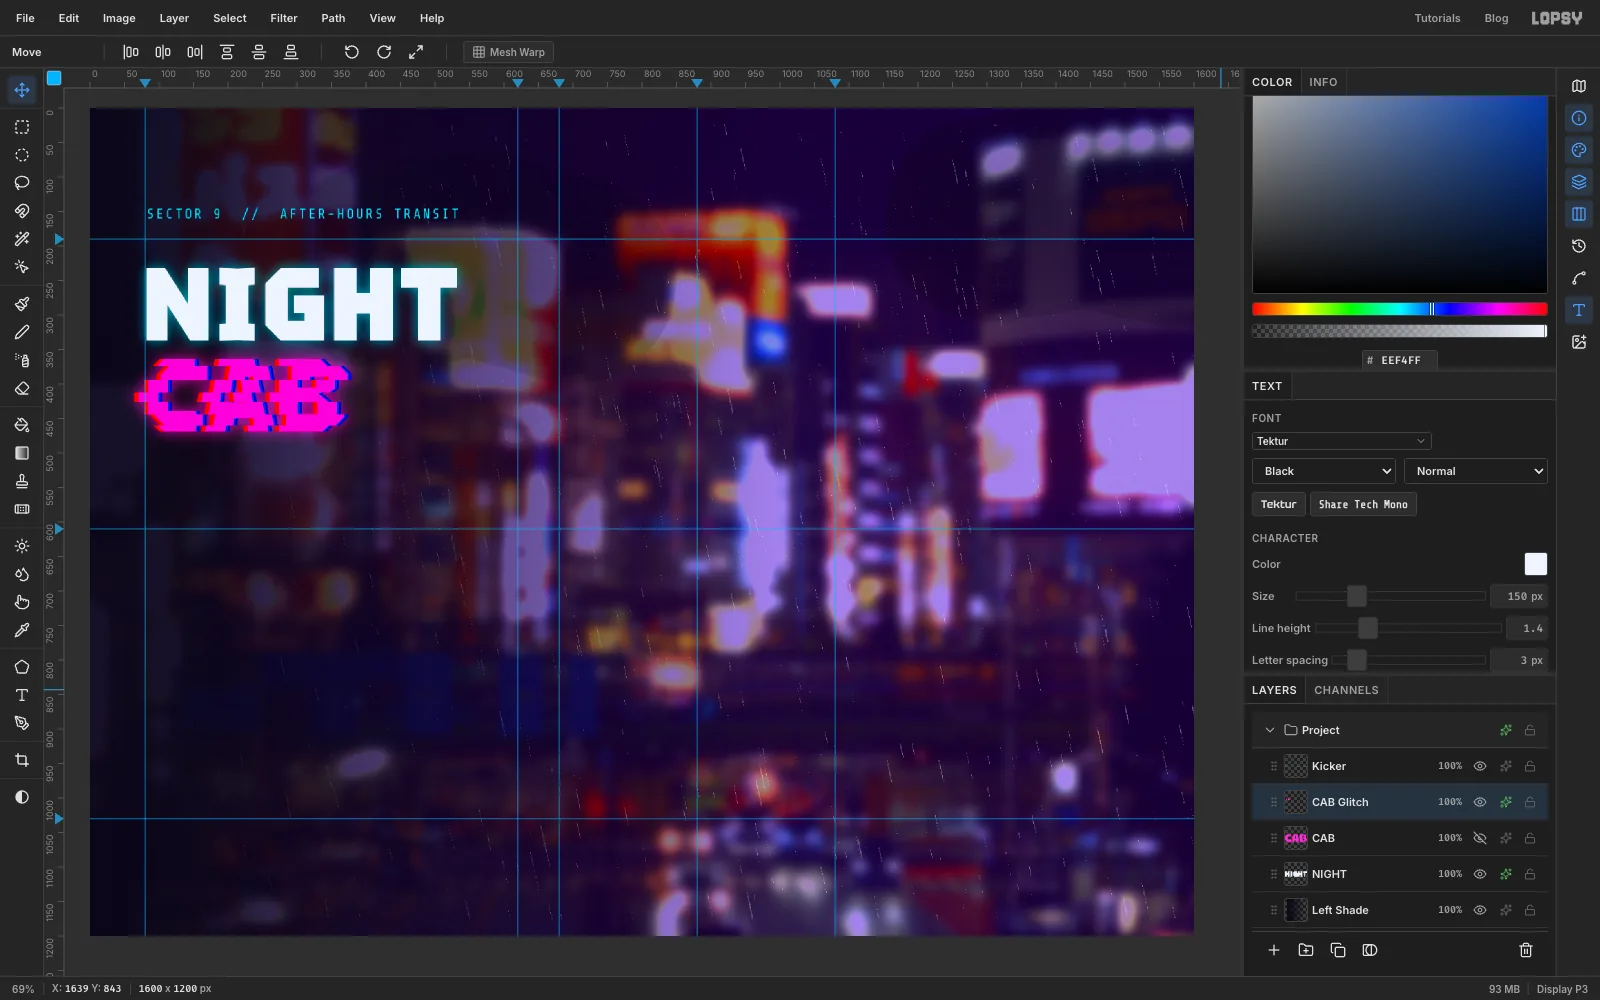
Click NIGHT, open its effects with the sparkle button on its row and turn on Outer Glow: colour , Size 26, Spread 0, Opacity 70. Give CAB Glitch an Outer Glow in , Size 30, Opacity 75.
Hide the original CAB with its eye button. It stays in the file as an editable backup.
-
Add the katakana, tagline and body copy
Work from the bottom up again. Click Left Shade, set Rajdhani, weight Medium, Size 25, colour and Letter spacing 0. Click just inside the first guide, a little more than halfway down the canvas (about y 680), and type the body copy on three lines, pressing Enter between them:
Hail a self-driving cab in two taps./Live routes, rain-aware pricing,/and absolutely no small talk.Name it Body. Then click Left Shade, set SemiBold, Size 44 and , click about 130 px above the body copy and type
Robotaxis that find youEnterin the rain.Name it Tagline and set Line height to 1.2 in the Text panel, so the two lines hold together.For the katakana, click Left Shade, set DotGothic16, Size 28, cyan , and click somewhere empty, such as the bottom of the canvas. Paste or type
ナイトキャブ("night cab"), press Tab, name it Katakana and set Letter spacing to 10. Then press V and drag it, finishing with the arrow keys, so it lines up with the left edge of the text column about 22 px under CAB.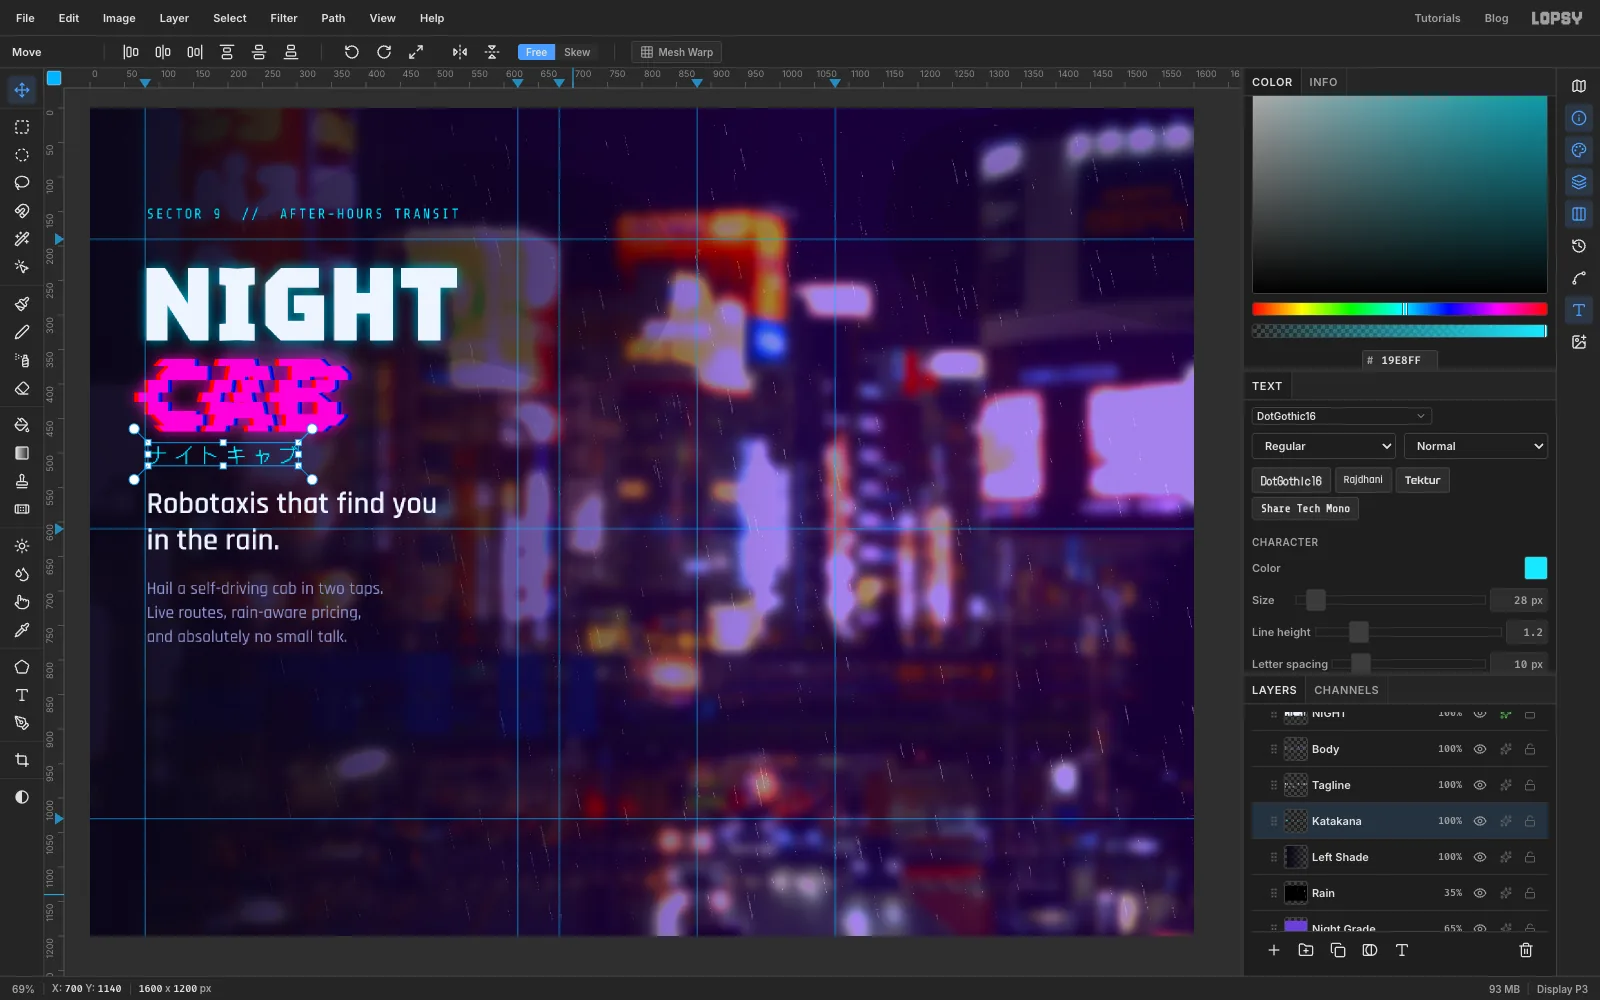
-
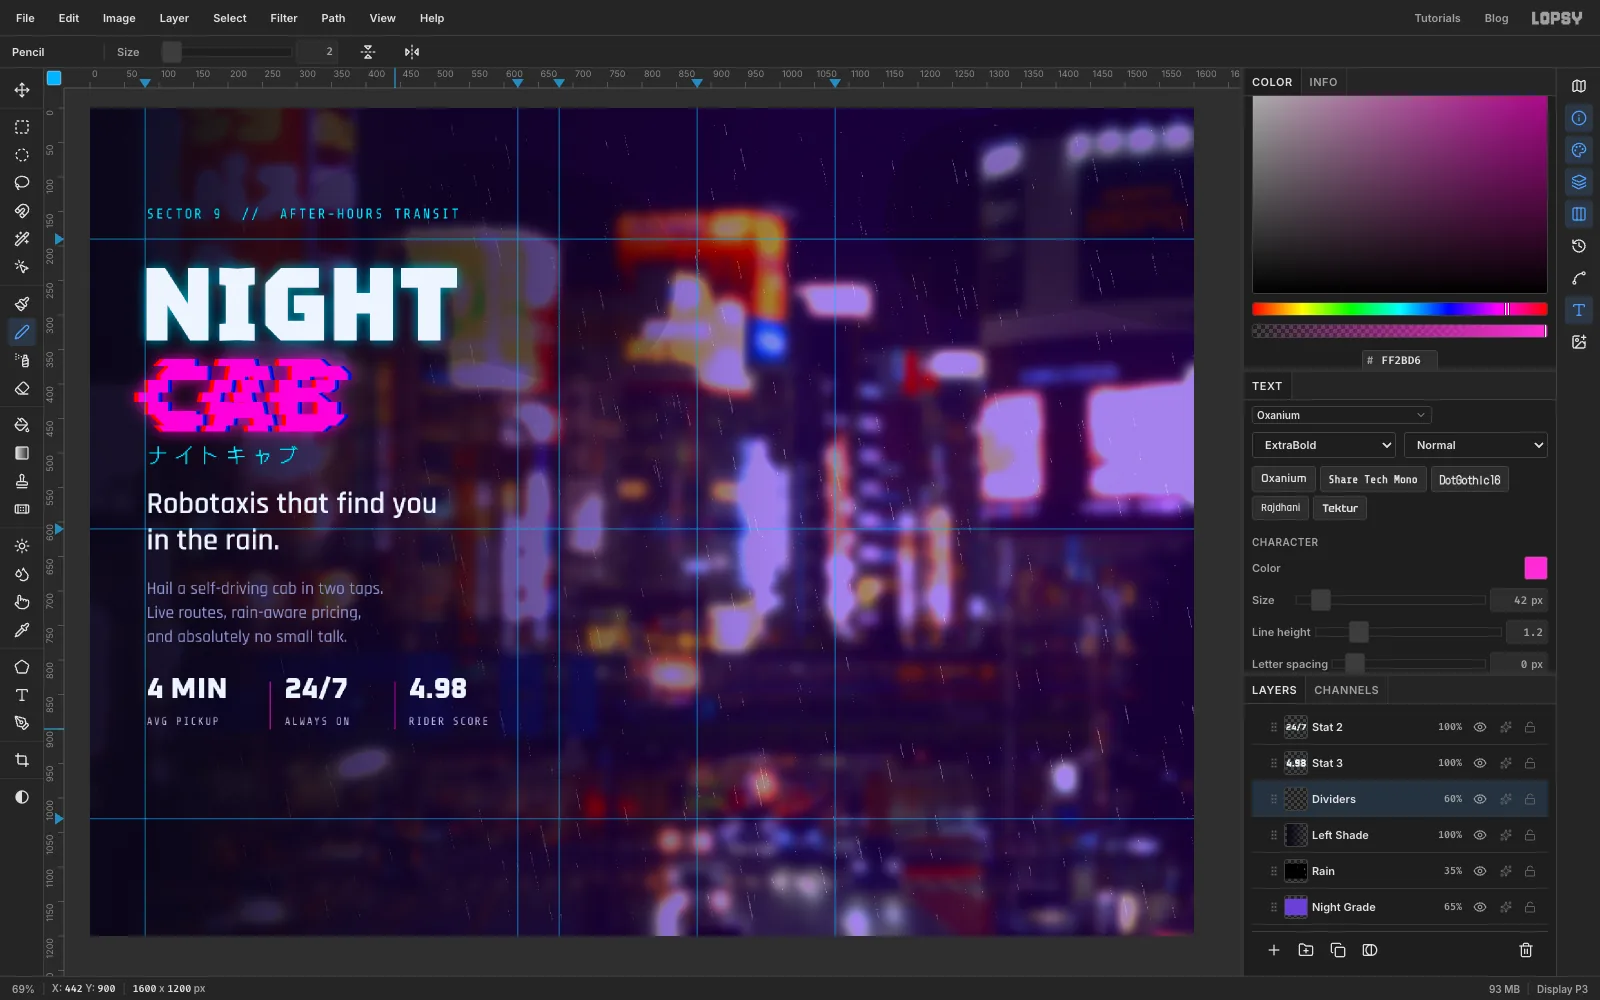
Add the stats row
The labels go in first because they sit lower. Click Left Shade, set Share Tech Mono, Size 16, and Letter spacing 2. Type
AVG PICKUPat about x 82, y 880,ALWAYS ONat x 282 andRIDER SCOREat x 462, clicking Left Shade before each one.Then the numbers: Oxanium, weight ExtraBold, Size 42, . Type
4 MIN,24/7and4.98at the same three x positions, at y 818. Oxanium's 7 and 4 are plain and easy to read, which matters for data.For the dividers, add a layer called Dividers. Pick the Pencil at Size 2 with magenta . Click at x 262 level with the top of the numbers and Shift-click straight below it, level with the bottom of the labels. That draws a straight line. Do the same at x 442, then set the layer's opacity to 60%.
-
Draw two pill buttons
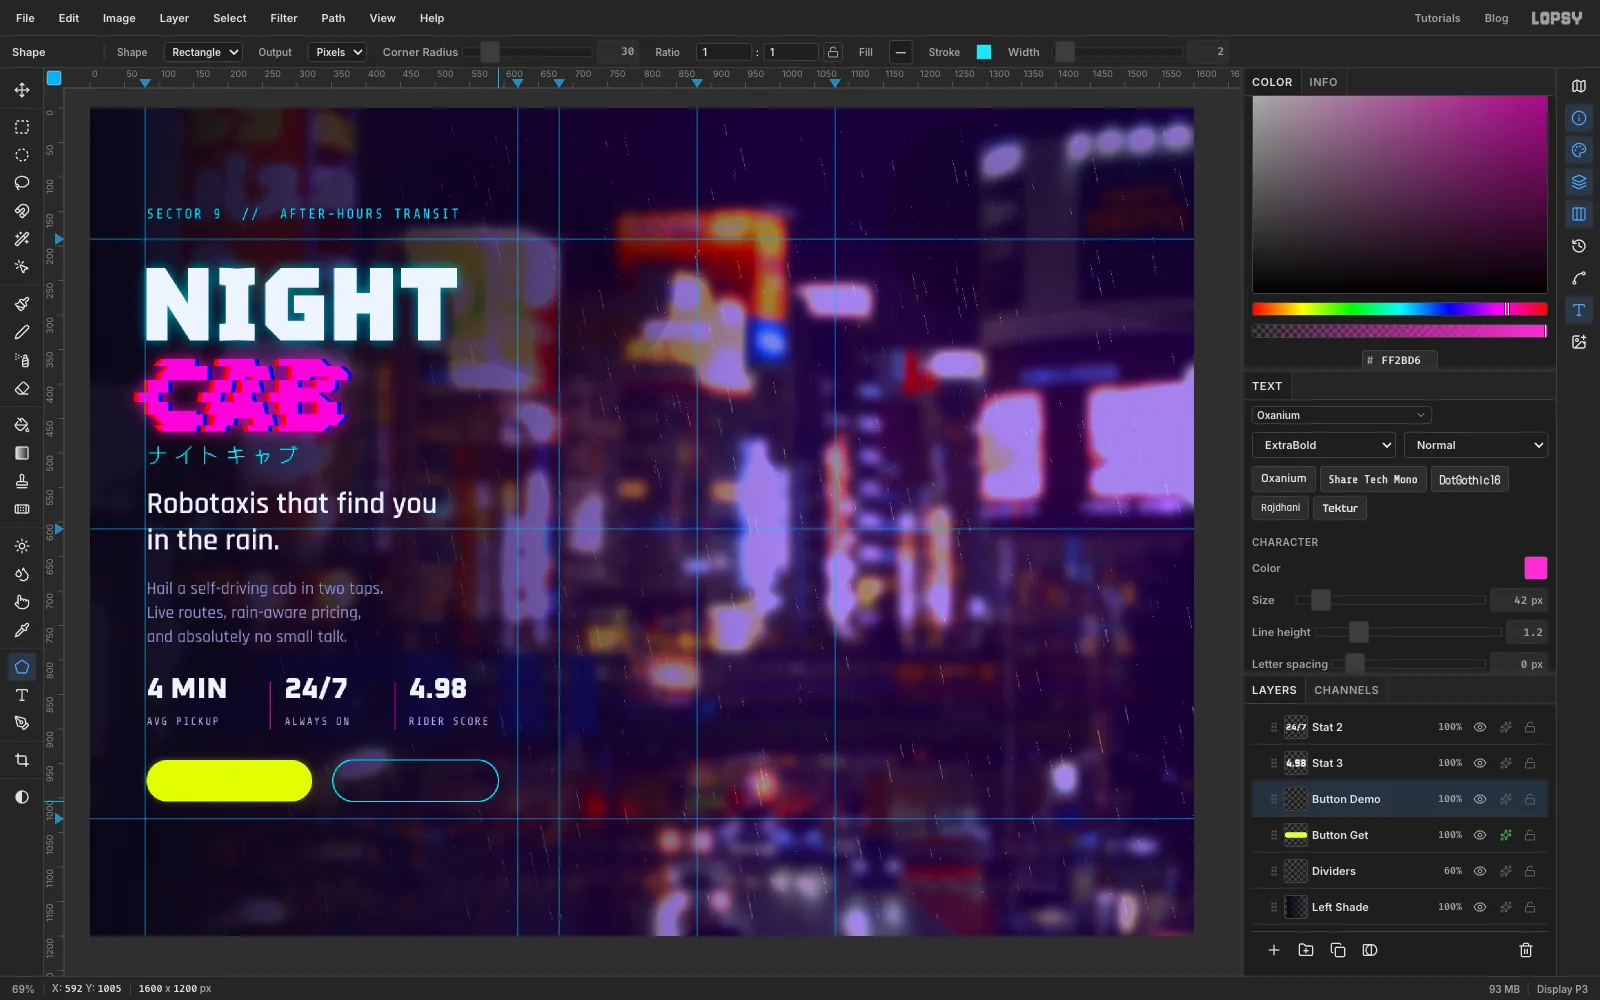
Add a layer called Button Get. Pick the Shape tool and set Shape to Rectangle, Output to Pixels and Corner Radius to 30. Click the Fill swatch and type
E8FF3A. If there's a stroke, click its swatch and Remove stroke.Shapes grow outwards from their centre, which is where you press. Press at the centre of where the first button goes, about 120 px in from the first guide and 75 px below the stat labels, and drag out until the pill is 240 × 60. A corner radius of half the height turns a rectangle into a pill. Give it an Outer Glow in , Size 16, Opacity 30. Keep the glow small. A big yellow halo on violet turns muddy.
Add a layer called Button Demo. Remove the fill, set the stroke to cyan with Width 2, and drag another 240 × 60 pill from a point 270 px to the right of the first one's centre, leaving a 30 px gap between them.
-
Label the buttons and add a footer
Type each label in empty space, then move it into its pill. Set Tektur, weight Bold, Size 17, Letter spacing 2. Type
WATCH DEMOin cyan andGET THE APPin night . Press V and drag each label into the middle of its pill, then nudge it with the arrow keys until the space above and below the letters is equal and the space on the left matches the space on the right.Finish the column with a footer: Share Tech Mono, Size 15, , Letter spacing 2, at about x 82, y 1110:
NIGHTCAB v2.077 · RAIN MODE ON · 35.69°N 139.70°E.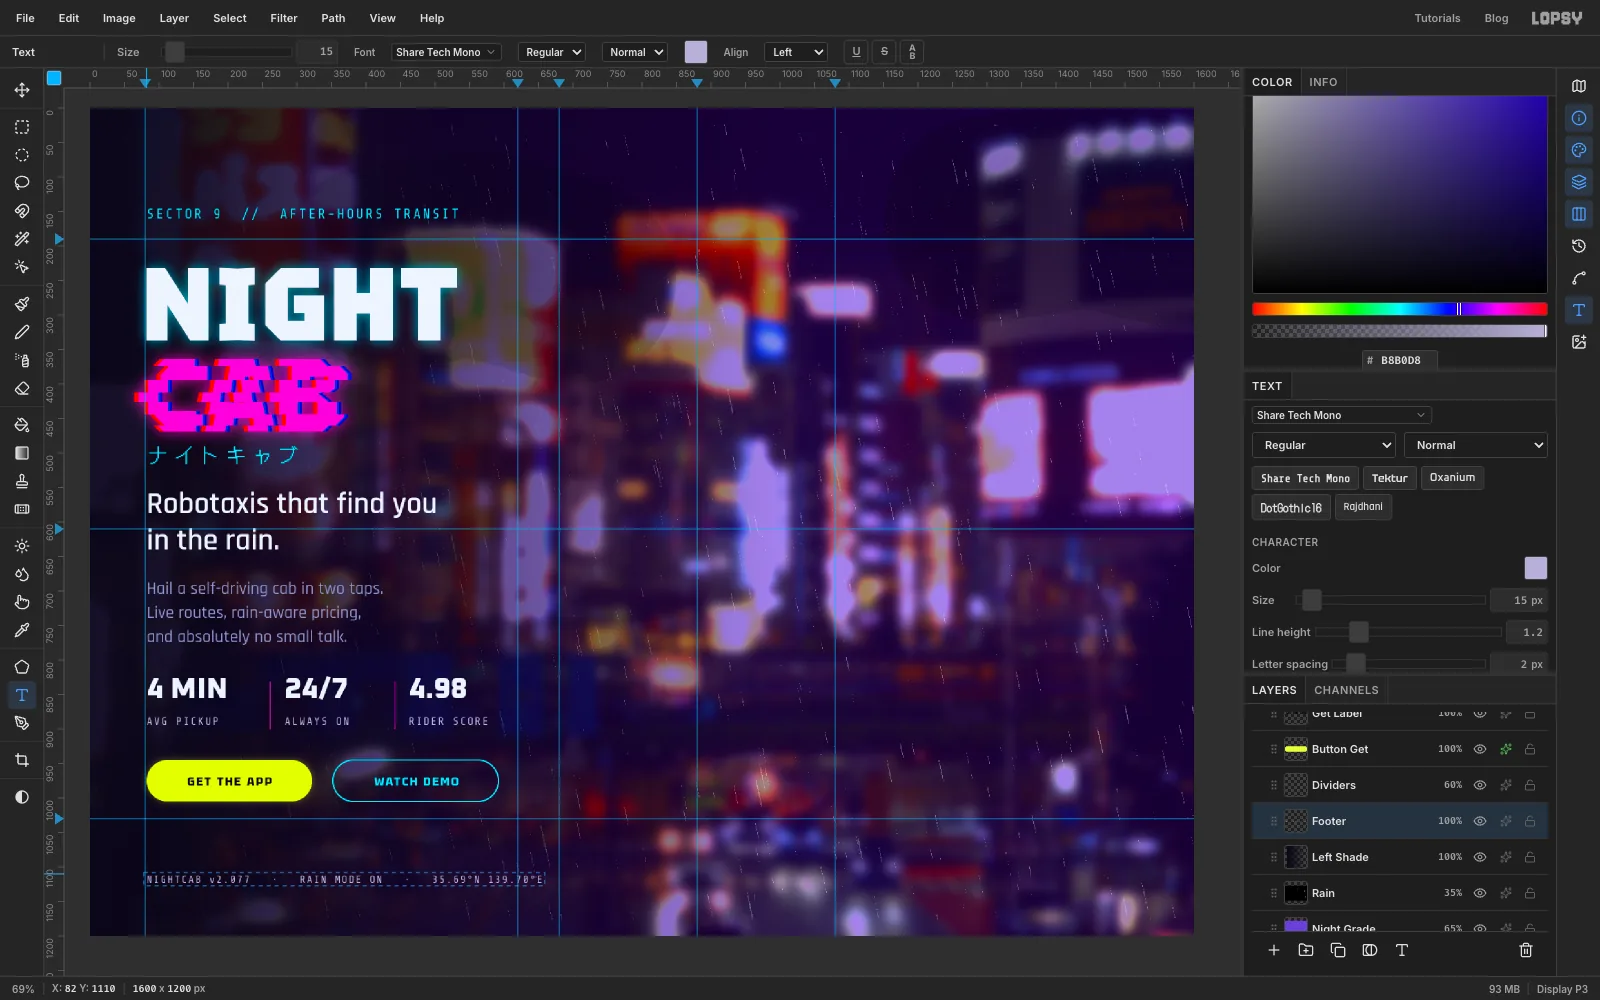
-
Draw the first phone from the guides
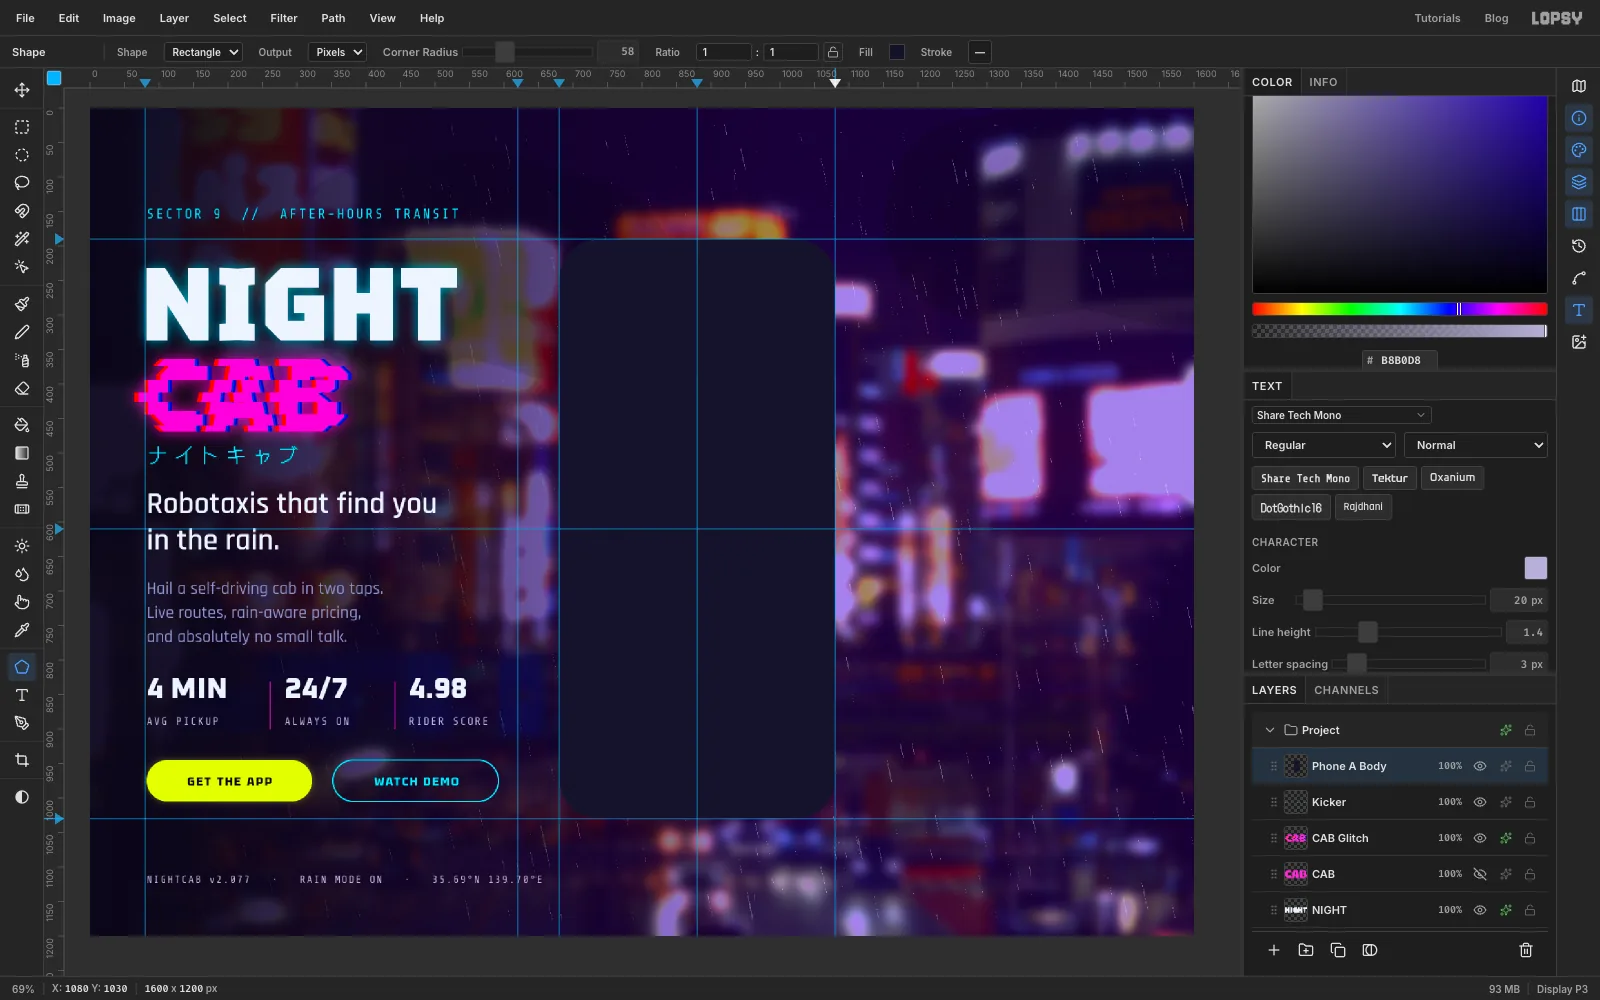
Click Kicker, the top layer, and add a layer called Phone A Body. Pick the Shape tool: Rectangle, Corner Radius 58, no stroke, fill .
Press exactly where the middle vertical guide crosses the middle horizontal guide, and drag to where the right guide crosses the bottom guide. Shapes snap to guides, so you get a 400 × 840 body standing precisely in its frame.
-
Add the bezel effects and the screen
First the side buttons. Set the foreground to the rim colour . Still on Phone A Body, draw three thin marquees just outside the body and choose Edit → Fill for each: one 5 px wide and about 84 px tall on the right edge, a third of the way down, and two shorter ones on the left edge for the volume keys. Because they're on the body's layer, they pick up its effects too.
Open Phone A Body's effects and turn on four of them:
- Drop Shadow: black, Offset X 0, Offset Y 40, Blur 60, Opacity 75
- Stroke: , Width 2, for a metal rim
- Inner Glow: , Size 6, Opacity 60, a soft highlight just inside the edge
- Outer Glow: cyan, Size 50, Opacity 22, the light of the city catching the phone
Add a layer called Screen A. Set the fill to and Corner Radius to 46. Click once, without dragging, on the centre guide crossing. In the dialog type 372 × 812 and click Create. The screen sits exactly 14 px inside the body all the way round.
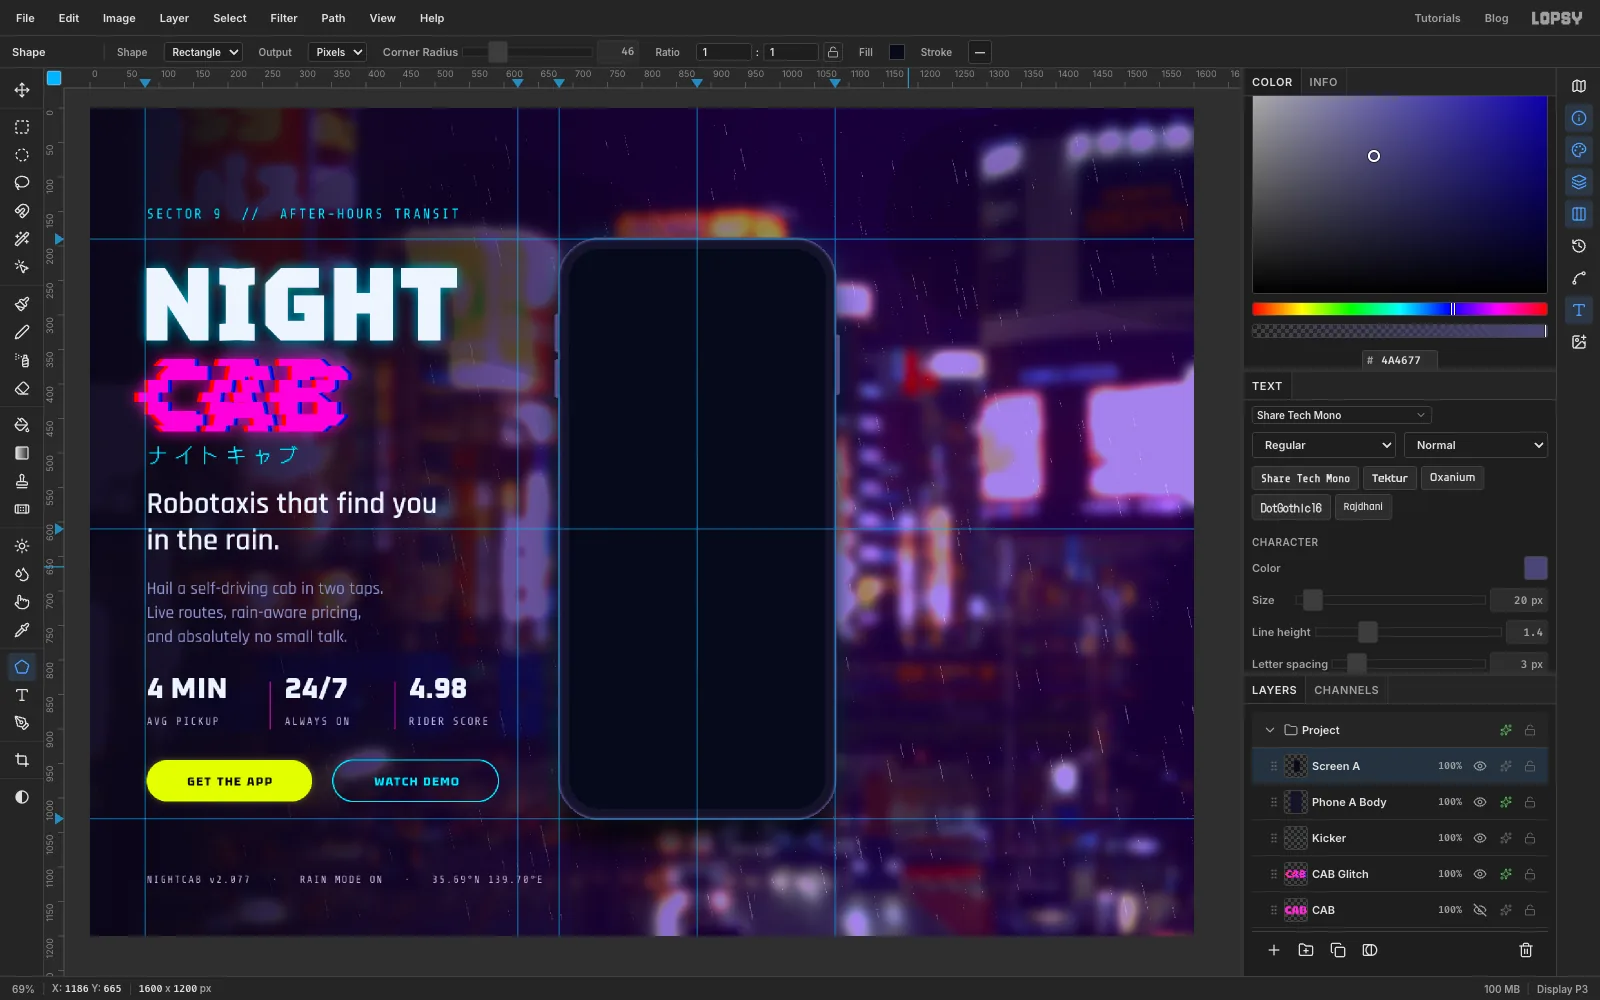
-
Paint a street grid
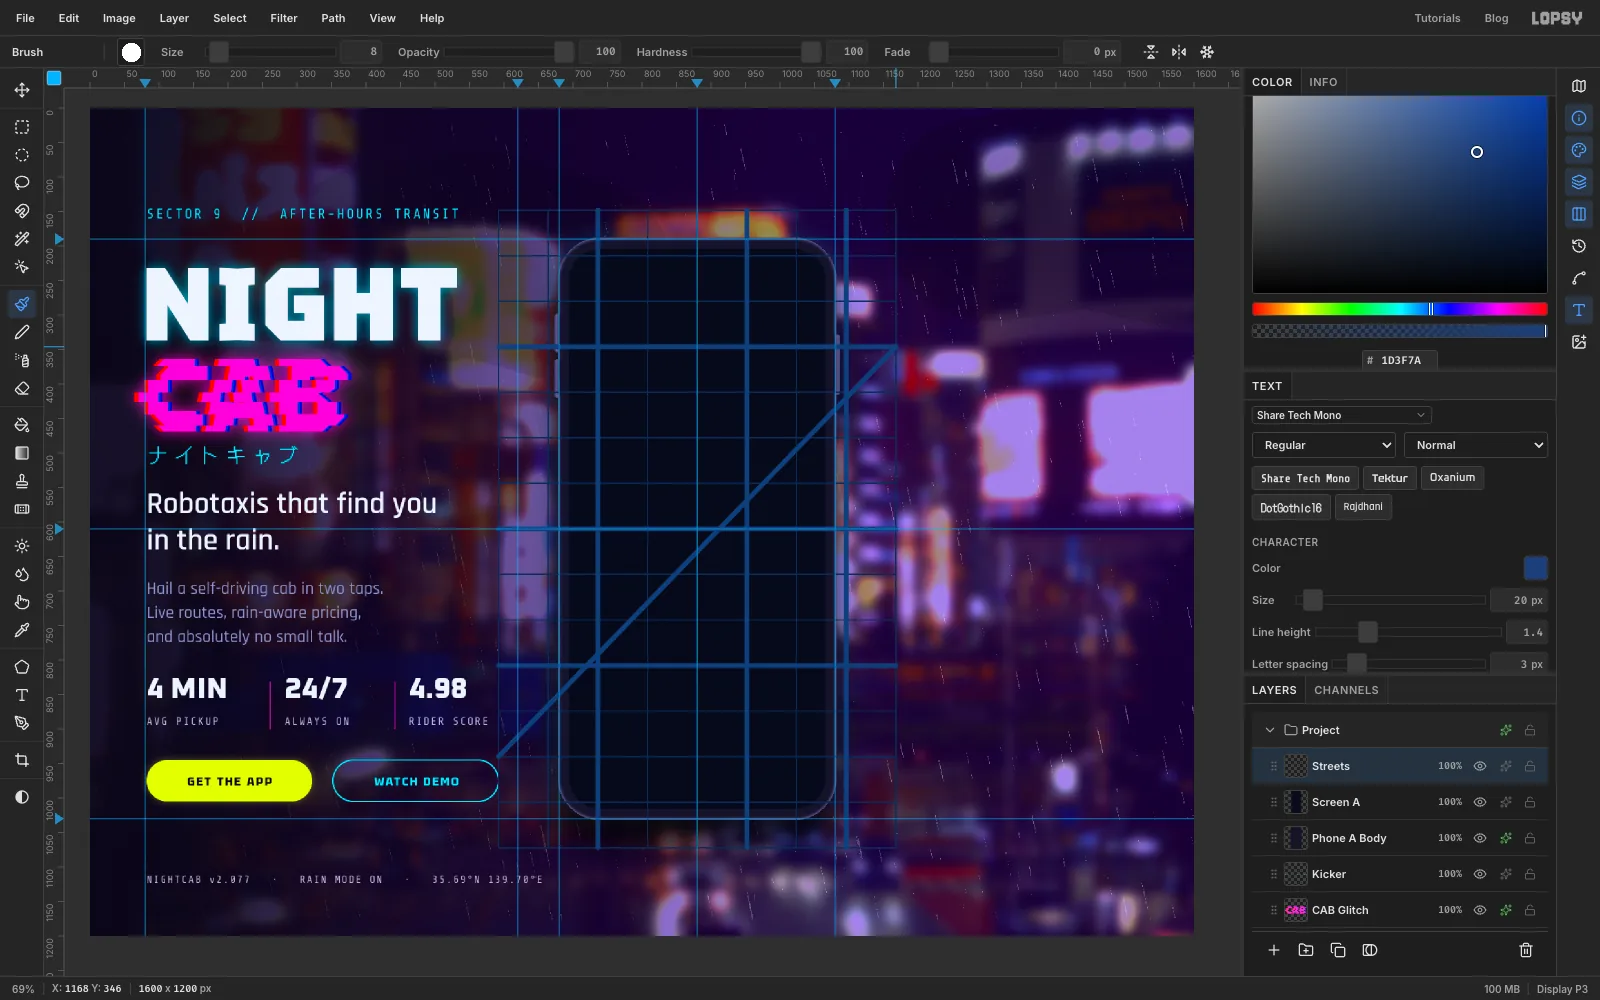
Add a layer called Streets. Pick the Brush and, in the Brushes panel, set Hardness 100 and Spacing 10 for clean lines.
The grid is drawn straight and much bigger than the phone, because it gets rotated and trimmed afterwards. Make it spill well past the phone on every side. Every line is a click at one end and a Shift-click at the other:
- Alleys. Set Size 3 and . Rule nine evenly spaced vertical lines, 72 px apart, with the middle one on the phone's centre guide. Run them from just under the top of the canvas to just above the bottom. Then rule fifteen horizontal lines 66 px apart, the middle one on the centre guide, across the same width.
- Avenues. Set Size 8 and . Paint over three of the vertical lines (the second line left of the centre guide, the first line right of it, and the second line in from the right edge) and three of the horizontal ones (the middle one, one four blocks up and one three blocks down). Irregular spacing reads more like a real city.
- A boulevard. Still at Size 8, draw one long diagonal from near the bottom-left corner of the grid to near its top-right corner.
You can skip the alleys where an avenue goes. It looks the same.
-
Draw the route with the Pen
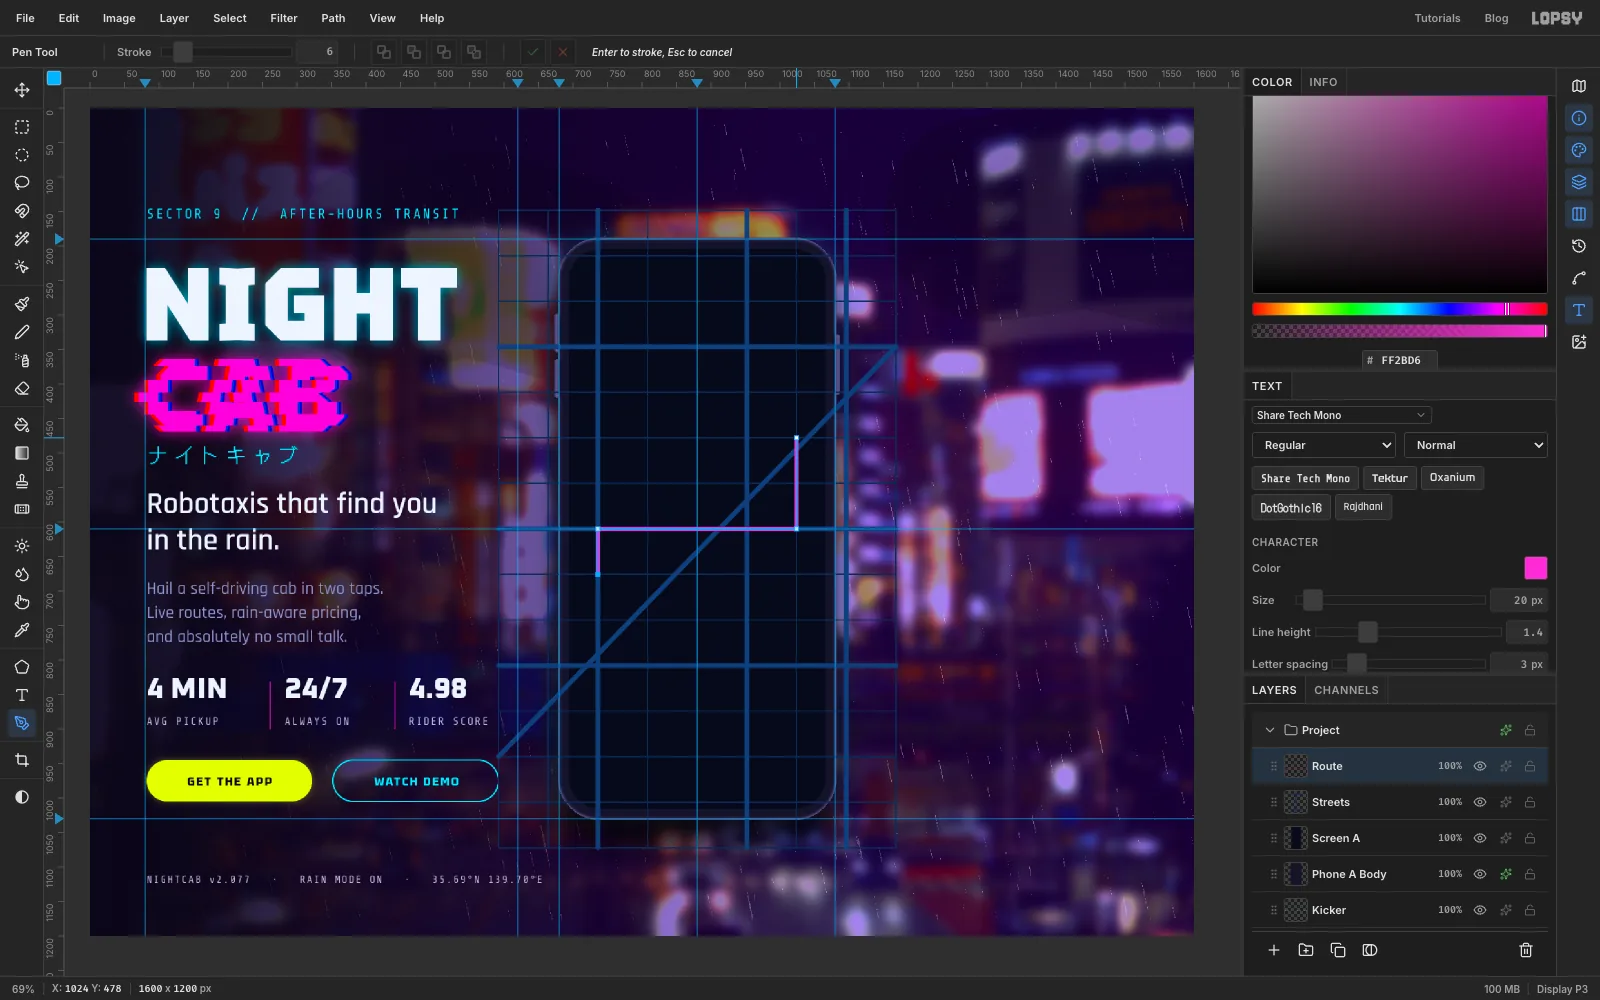
Add a layer called Route and set the foreground to magenta . Pick the Pen (P) and set Stroke to 6 in the options bar.
The route follows the grid, turning at crossings. Click four corner points: start on the left-hand avenue one block below the middle street, go up to the middle street, turn right for four blocks, then go up two blocks. Press Enter. Lopsy strokes the path with the foreground colour.
-
Rotate the streets and route together
A map that runs square to the screen looks like graph paper. Tilting it makes it feel like a real city.
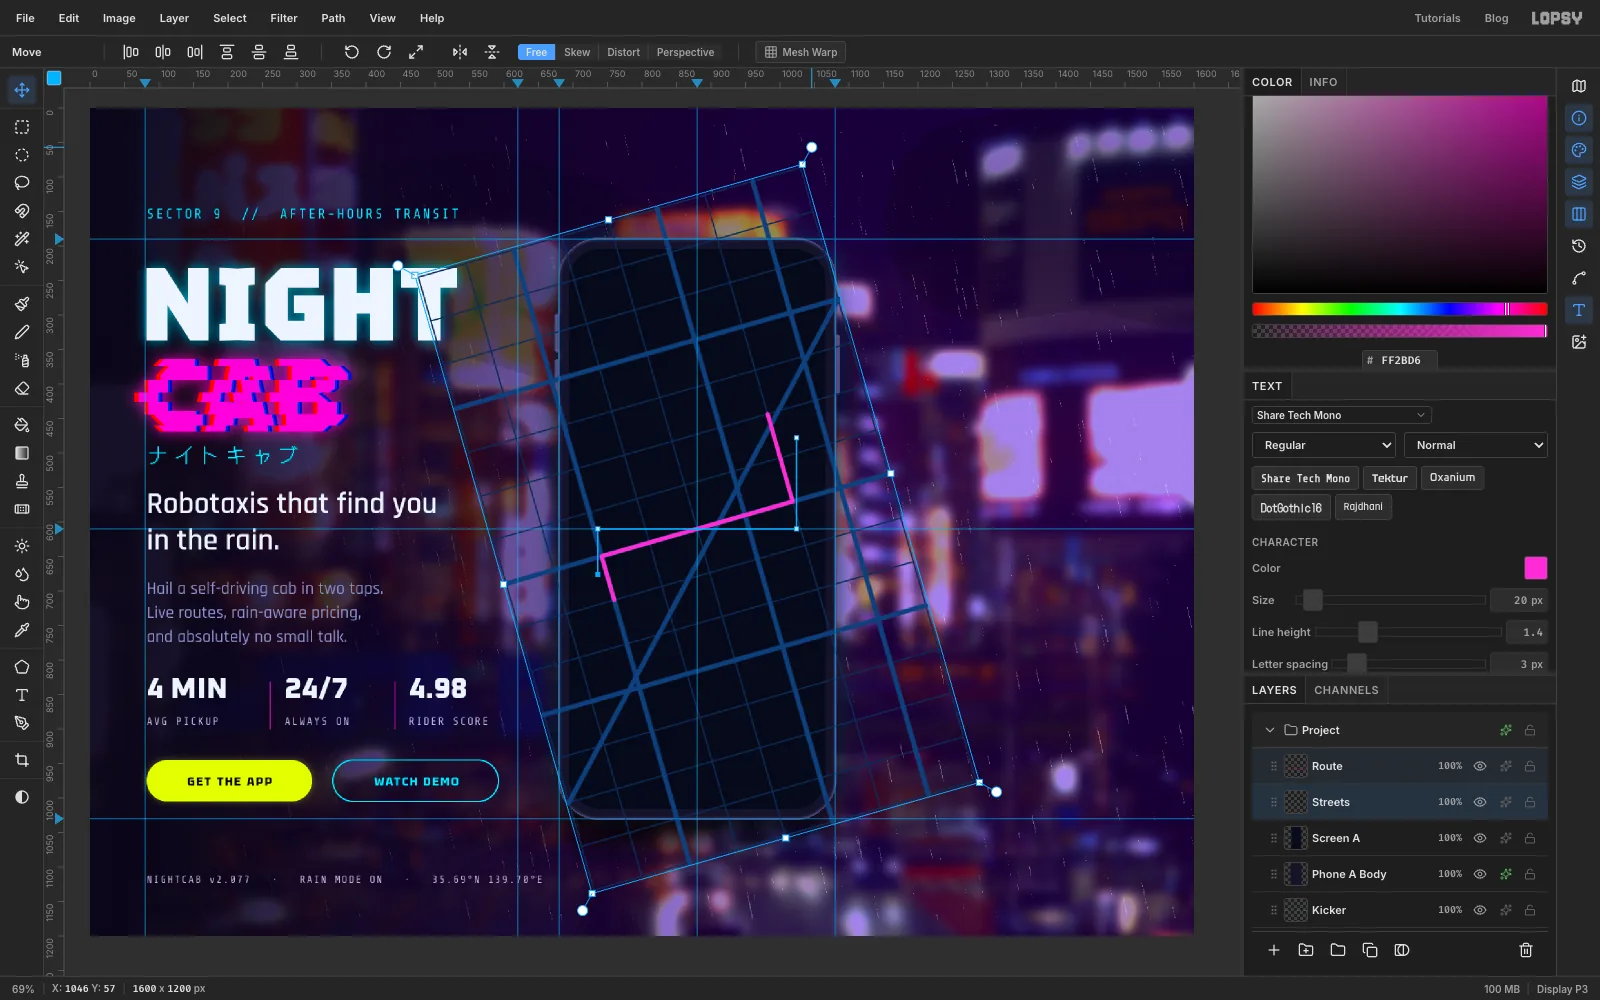
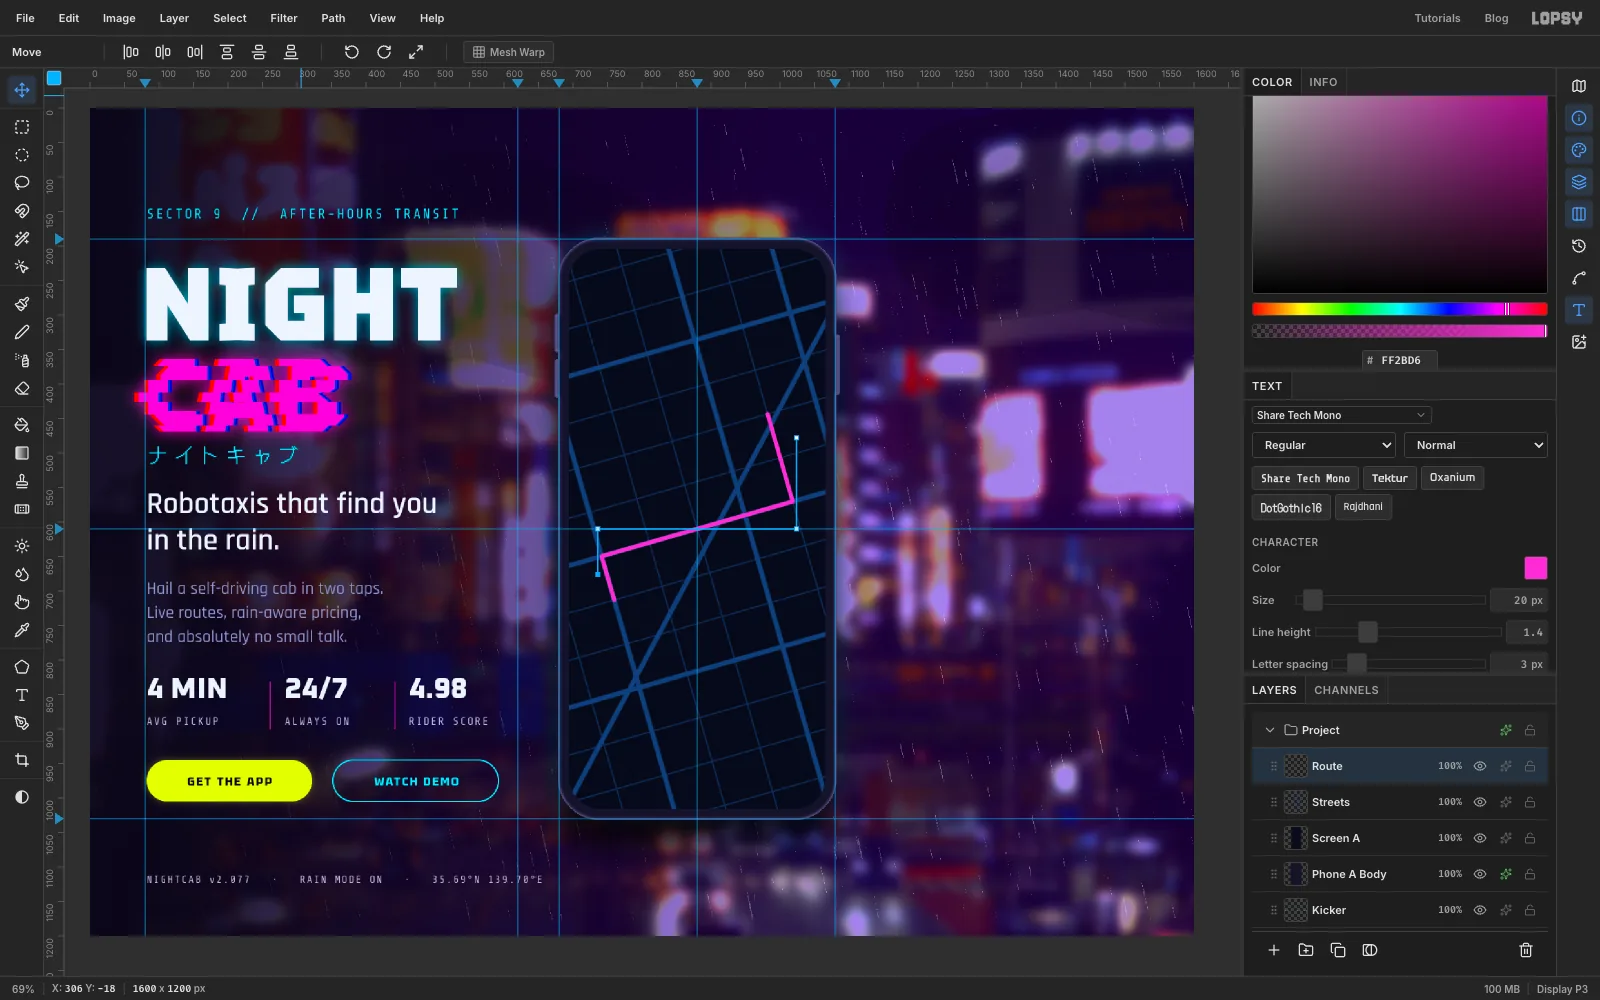
Press Cmd+D. In the Layers panel click Streets, then Cmd-click Route, so both are selected. Press V. With two layers selected and no marquee, the Move tool's handles frame both layers together. Drag the round rotate handle beyond a corner about 16° anticlockwise and release. The route stays on its streets because they turn as one.
Open the Paths panel and delete the route path. You only needed it to draw the stroke.
-
Trim the map to the screen
Click Streets. Cmd-click the Screen A thumbnail to load the screen's shape as a selection, choose Select → Inverse and press Delete. Press Cmd+D, then do the same for Route.
Everything outside the rounded screen is gone, and the map fills it right to its corners.
-
Add a canal and make the route glow
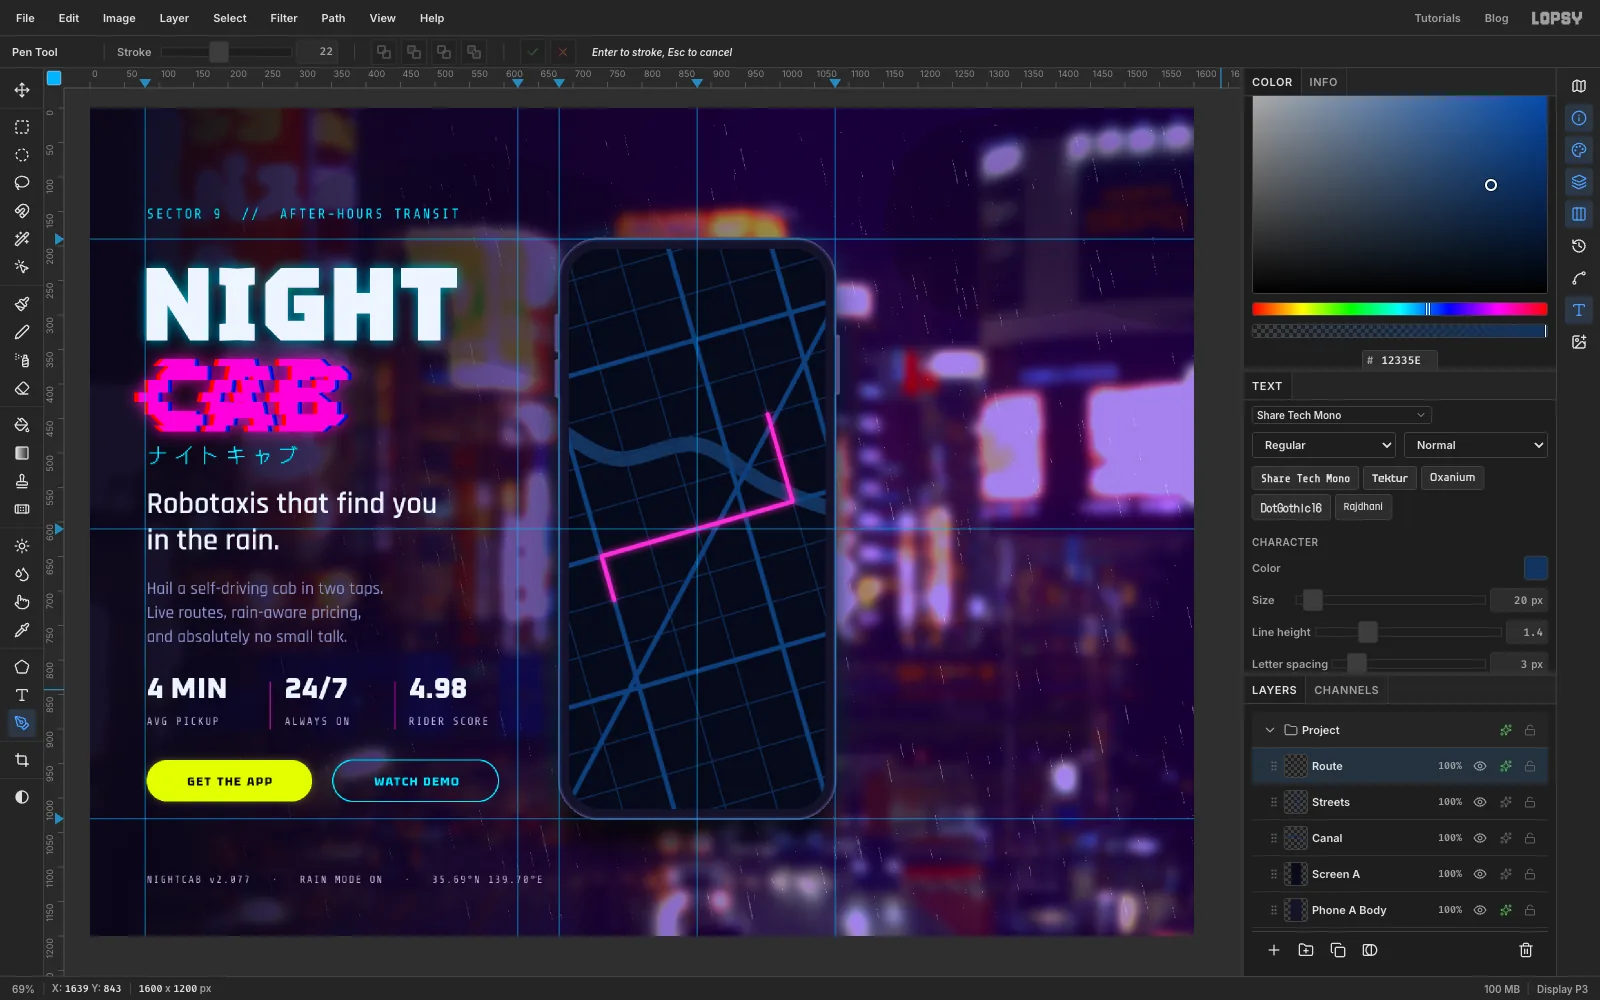
Click Screen A and add a layer called Canal, so it sits under the streets. Set the foreground to and the Pen's Stroke to 22. Draw a gentle S-curve with five points, from just off the left edge of the screen, a little above the middle, to just off the right edge a little lower down. Press and drag a short way at each point so the curve stays smooth, then press Enter. Delete the path, then trim Canal to the screen the same way as before.
Click Route and give it an Outer Glow in magenta, Size 14, Opacity 90. The route now reads as light on a dark map.
-
Add the pickup pin and a car marker
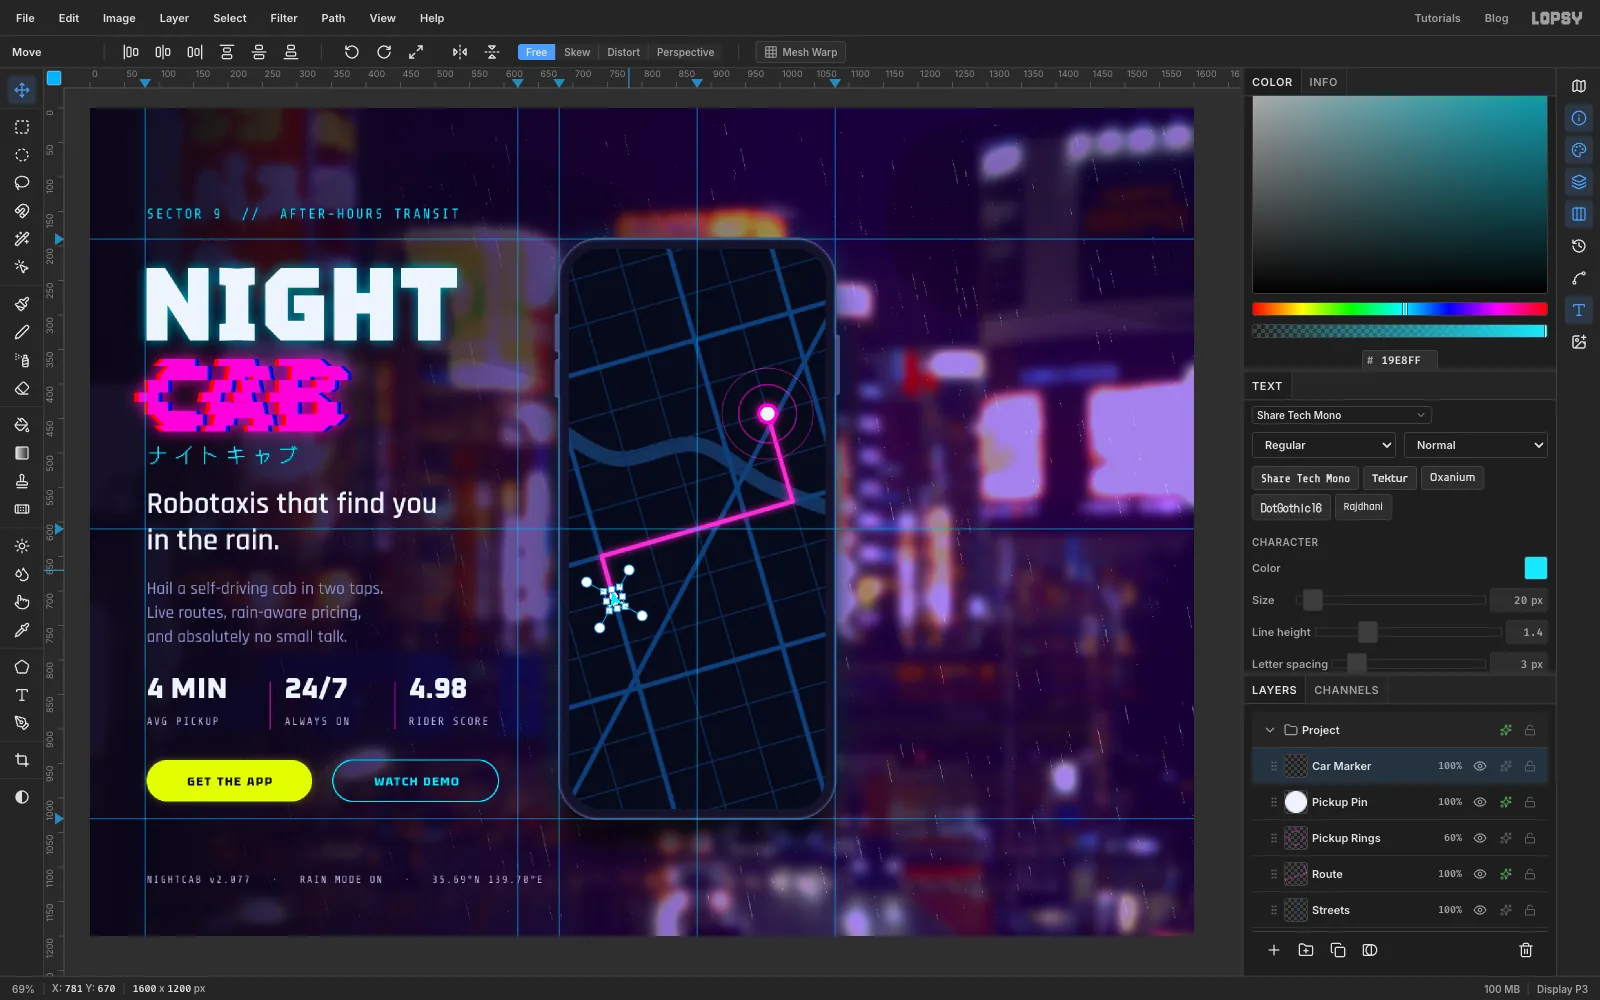
Add a layer called Pickup Rings. Pick the Shape tool with Shape set to Ellipse. Remove the fill, set the stroke to magenta with Width 2, and drag an 84 px circle from the end of the route. Draw a second, 132 px circle from the same point with Width 1. Set the layer to 60% opacity.
Add Pickup Pin and draw a 20 px circle filled with at the same point. Give it a magenta Stroke of 5 and an Outer Glow of 18.
For the car, add a layer called Car Marker. With the Pen, click four corners of an arrowhead around the start of the route: the lower-left point, the tip about 30 px above it, the lower-right point, and a notch in the middle of the base. Click the first point again to close it. In the Paths panel click Path to Selection and then Delete Path. Fill with cyan and press Cmd+D.
Now Cmd-click the Car Marker thumbnail, so the transform box hugs the arrow. (A selection made with Path to Selection spans the whole document, so its handles would sit at the canvas corners.) Press V, drag the rotate handle about 16° anticlockwise so the arrow points up its street, and deselect. Add a cyan Outer Glow of 14.
-
Label two districts
Click Car Marker and use Share Tech Mono, Size 13, , Letter spacing 3 to add
NEON MKTnear the top left of the map andWATERFRONTjust under the canal on the right. Tiny, quiet labels make it read as a real map without competing with the route.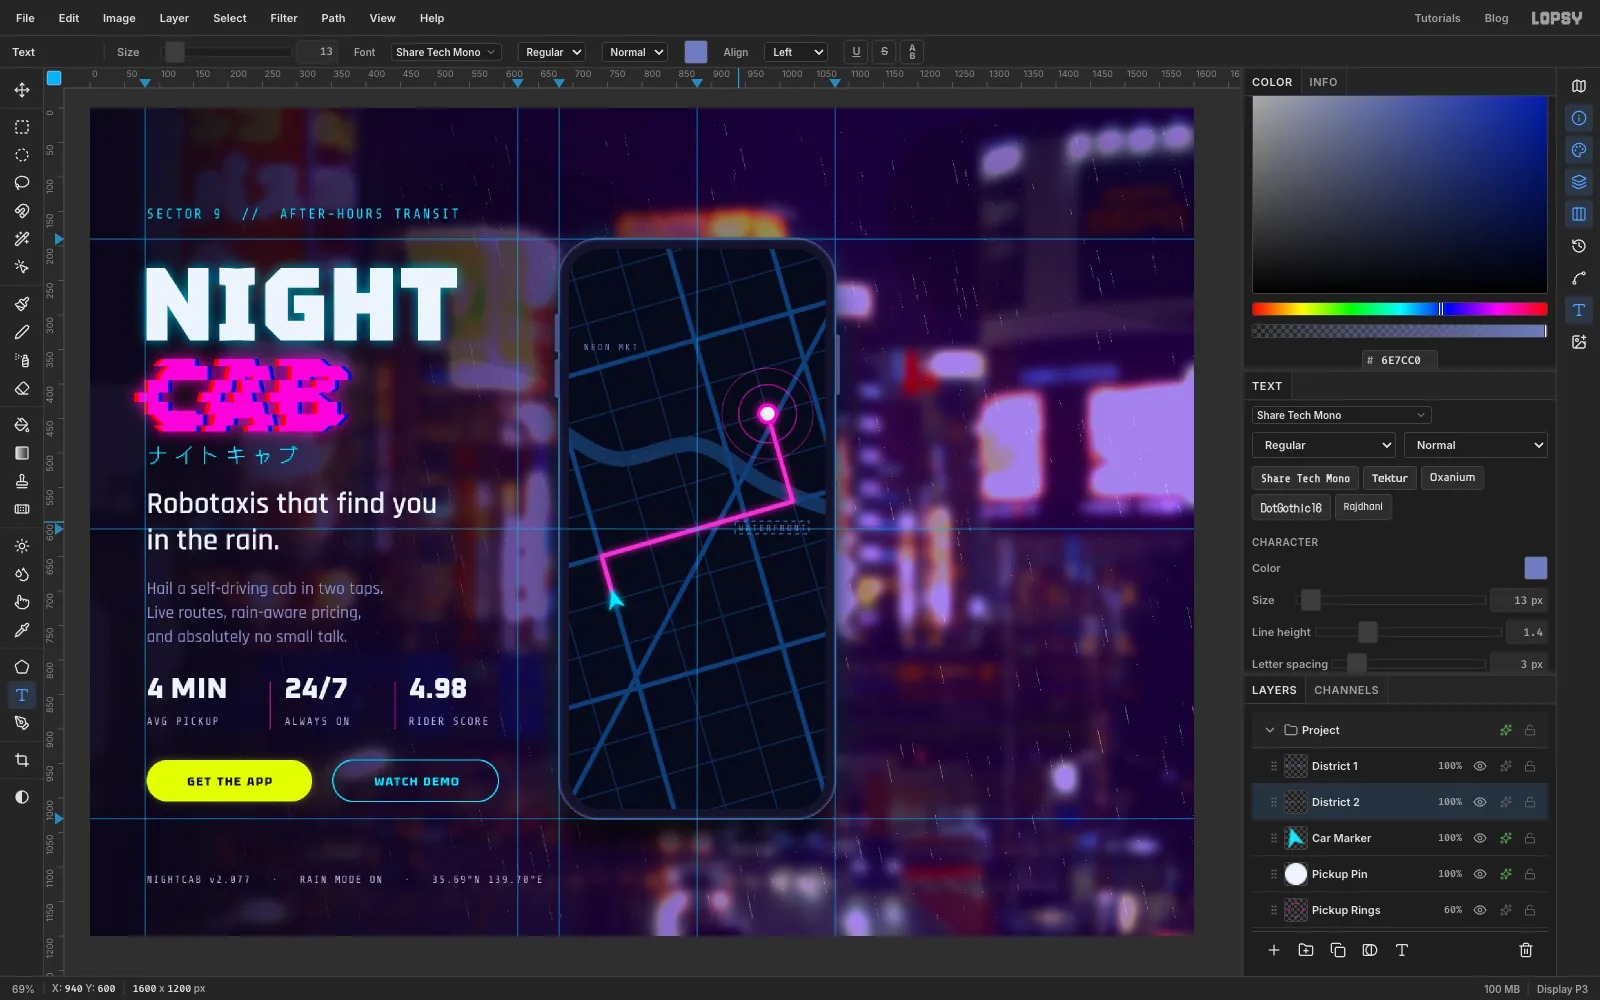
-
Build the bottom sheet and the phone chrome
All of these are Rectangle shapes made with a single click and the size dialog, centred on the middle guide:
- Sheet. Add a layer called Sheet. Fill , Corner Radius 30, 372 × 280, clicked at y 905. It runs off the bottom of the screen, so trim it to the screen the same way as the map. Give it a Drop Shadow with Offset Y −18, Blur 36, Opacity 70, so it lifts off the map.
- Chrome. Add a layer called Chrome and make three shapes on it: a 44 × 5 grab handle in at y 782, a 120 × 5 home indicator in at y 1004, and a 112 × 32 black camera notch at y 230. Use Corner Radius 3 for the thin bars and 16 for the notch.
- Search pill. On a layer called Search Pill: , Radius 25, 332 × 50 at y 292, with a 1 px Stroke in .
- Search icon. On a layer called Search Icon: a 15 px cyan ring (Ellipse, no fill, stroke 2) near the left end of the pill, and a short handle drawn with the Pencil at Size 2 in cyan, a click and a Shift-click going down and to the right.
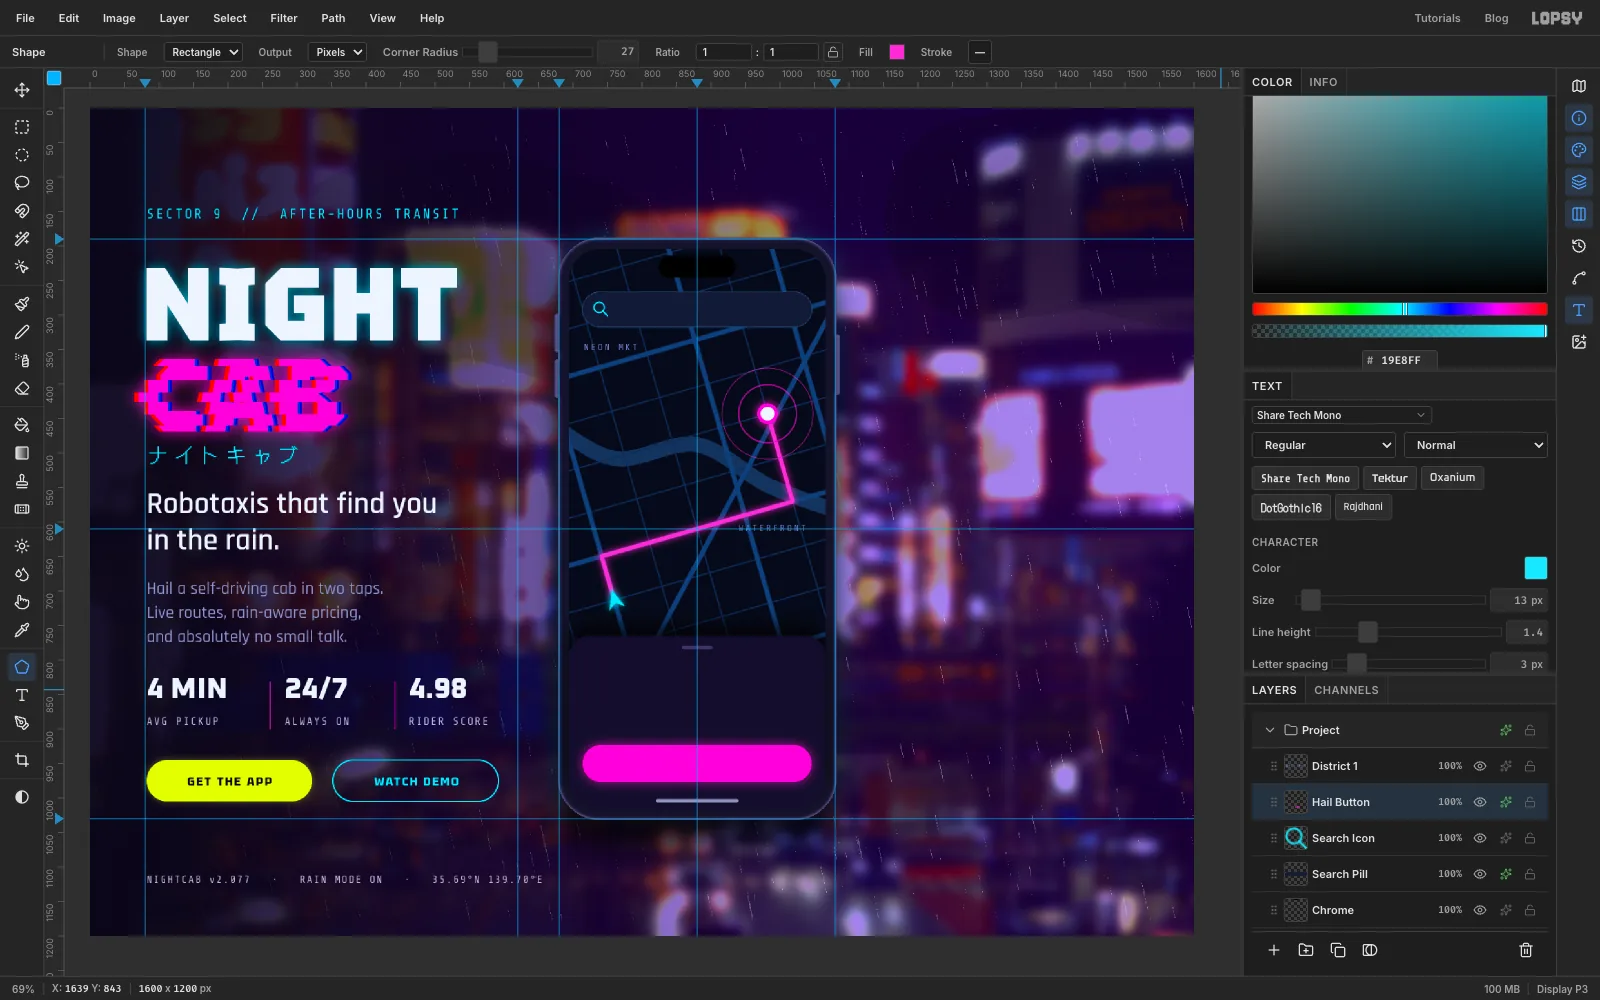
- Hail button. On a layer called Hail Button: magenta, Radius 27, 332 × 54 at y 950, with a magenta Outer Glow of 24 at 60%.
-
Type the map screen
Click Hail Button before each new line, and type from the bottom of the sheet upwards:
HAIL NIGHT CABin Tektur Bold 18, ice white, Letter spacing 3, typed in empty space and dragged into the middle of the button1.2 km away · 2 seatsin Rajdhani Medium 21, , under the ETA₡24.80in Oxanium Bold 28, acid yellow, moved so its right edge lines up with the sheet's right margin4 MINin Oxanium ExtraBold 44, ice white, at the sheet's left margin. Then move the price up or down so the bottoms of the two numbers sit on the same lineNC-77 // AUTONOMOUS SEDANin Share Tech Mono 13, cyan, Letter spacing 2, at the top of the sheet
Then click Search Icon and add
Where to, rider?in Rajdhani Medium 22 () inside the pill,21:47in Share Tech Mono 16 at the top left of the screen, and5Gin Share Tech Mono 14 at the top right, both in ice white . Use for the search text, a touch dimmer than the body lilac, so it reads as a placeholder.For the battery, click Chrome and use the Shape tool's size dialog three times next to the
5G: a 24 × 12 outline (no fill, ice-white stroke 2, Radius 3), a 15 × 6 ice-white bar inside it, slightly left of centre, and a 2 × 5 nub on its right end.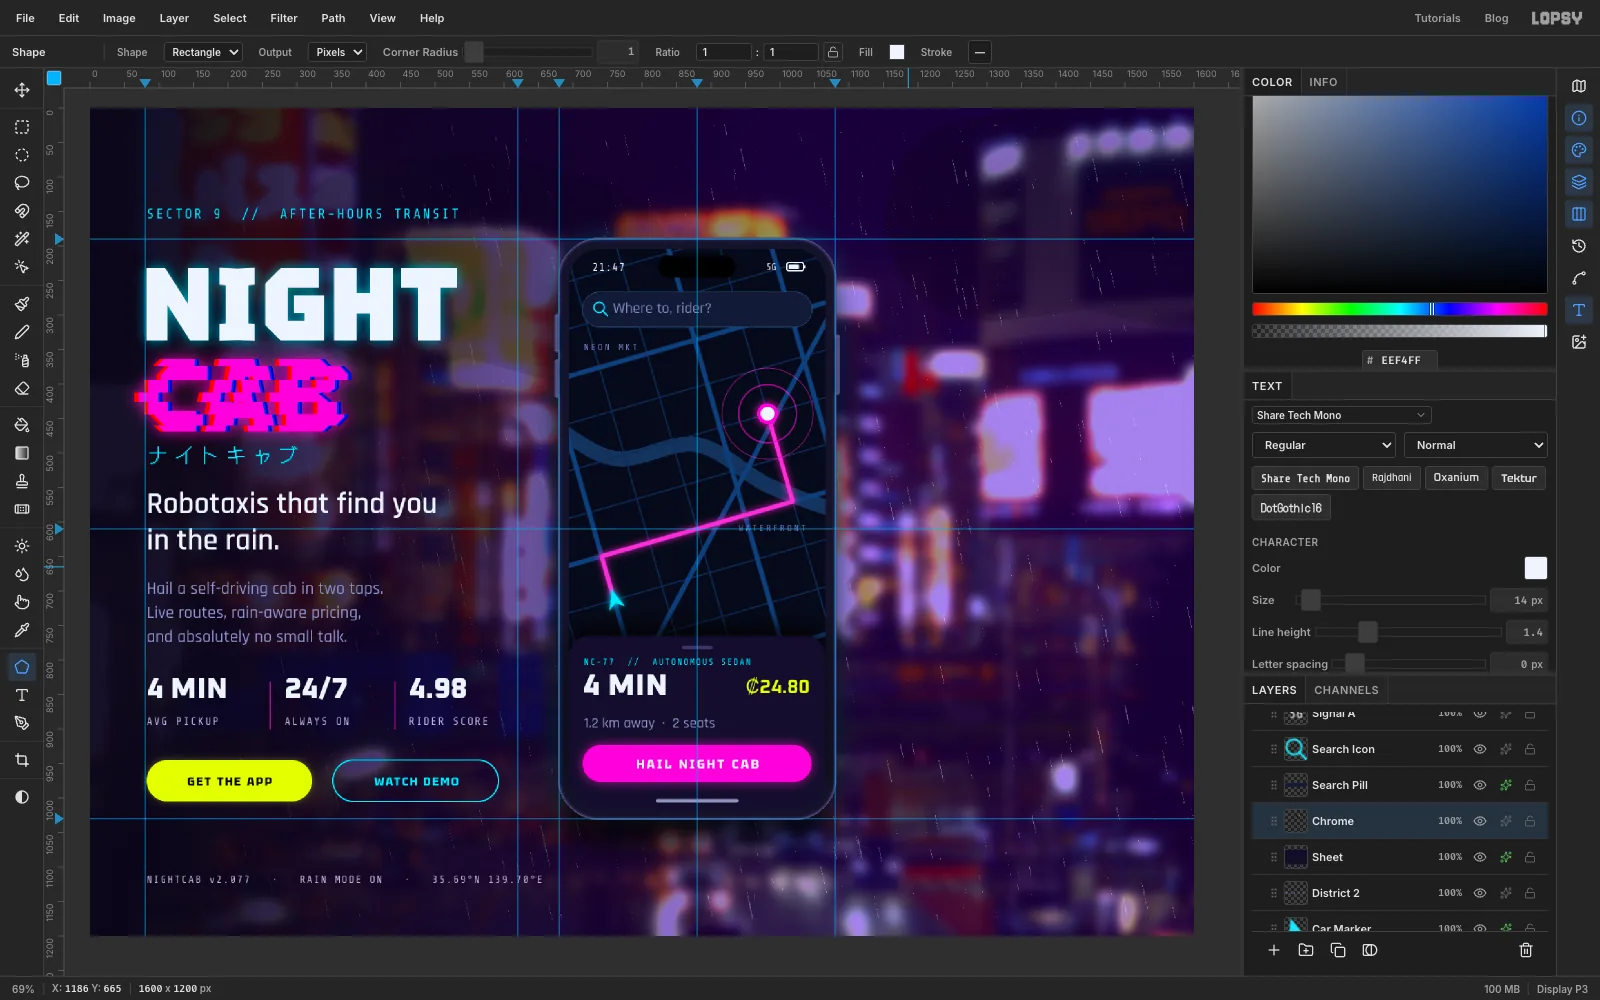
-
Start the second phone with a holo stage
Click the top layer in the Layers panel and add Phone B Body. Use the Shape tool's size dialog for a 370 × 780 body with Corner Radius 54 in , clicked in the middle of the space right of the first phone, a little lower than its centre. Add a side button, then give it the same four effects as the first phone, but with a magenta Outer Glow. Add Screen B: 344 × 754, Radius 42, , clicked at the same point.
Add a layer called Chrome B now too, with the same black notch and home indicator as the first phone. The battery icon comes later.
For the stage light, add a layer called Stage Glow and Cmd-click the Screen B thumbnail. Pick the Gradient tool, set Type to Radial and click Advanced…. Set both stops to magenta , the left one at 55% opacity and the right one at 0%, then click Done. Drag from about a quarter of the way down the screen to about halfway down. The glow stays inside the screen because the selection limits it. Deselect.
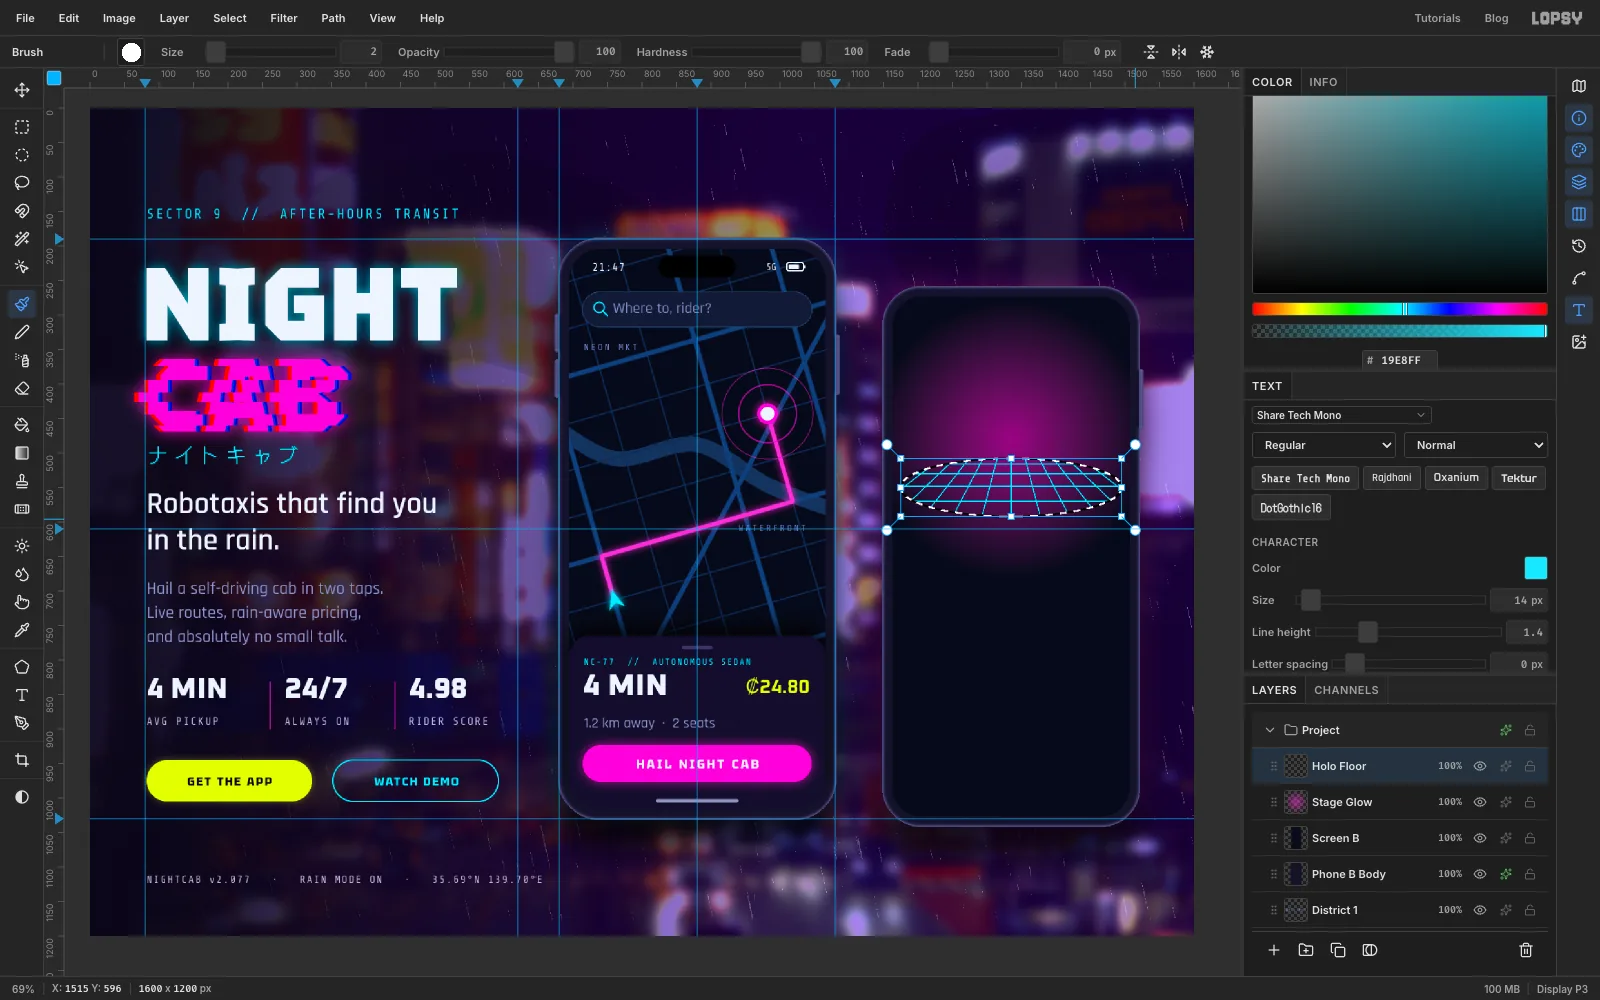
Add a layer called Holo Floor. Draw an Elliptical Marquee about 320 × 84, centred a little above the middle of the screen. Pick the Brush at Size 2 in cyan. Pick a vanishing point about 120 px above the ellipse's centre. For each of thirteen fan lines, click on the vanishing point and then Shift-click a point 110 px below the ellipse's centre. Space those end points 60 px apart, so the fan spreads well past both sides. Then draw five horizontal lines across, bunched up near the back of the ellipse and spreading out towards the front. The selection keeps every stroke inside the ellipse, so you get a glowing floor in perspective. Deselect and set the layer to 45% opacity.
-
Add the platform ring
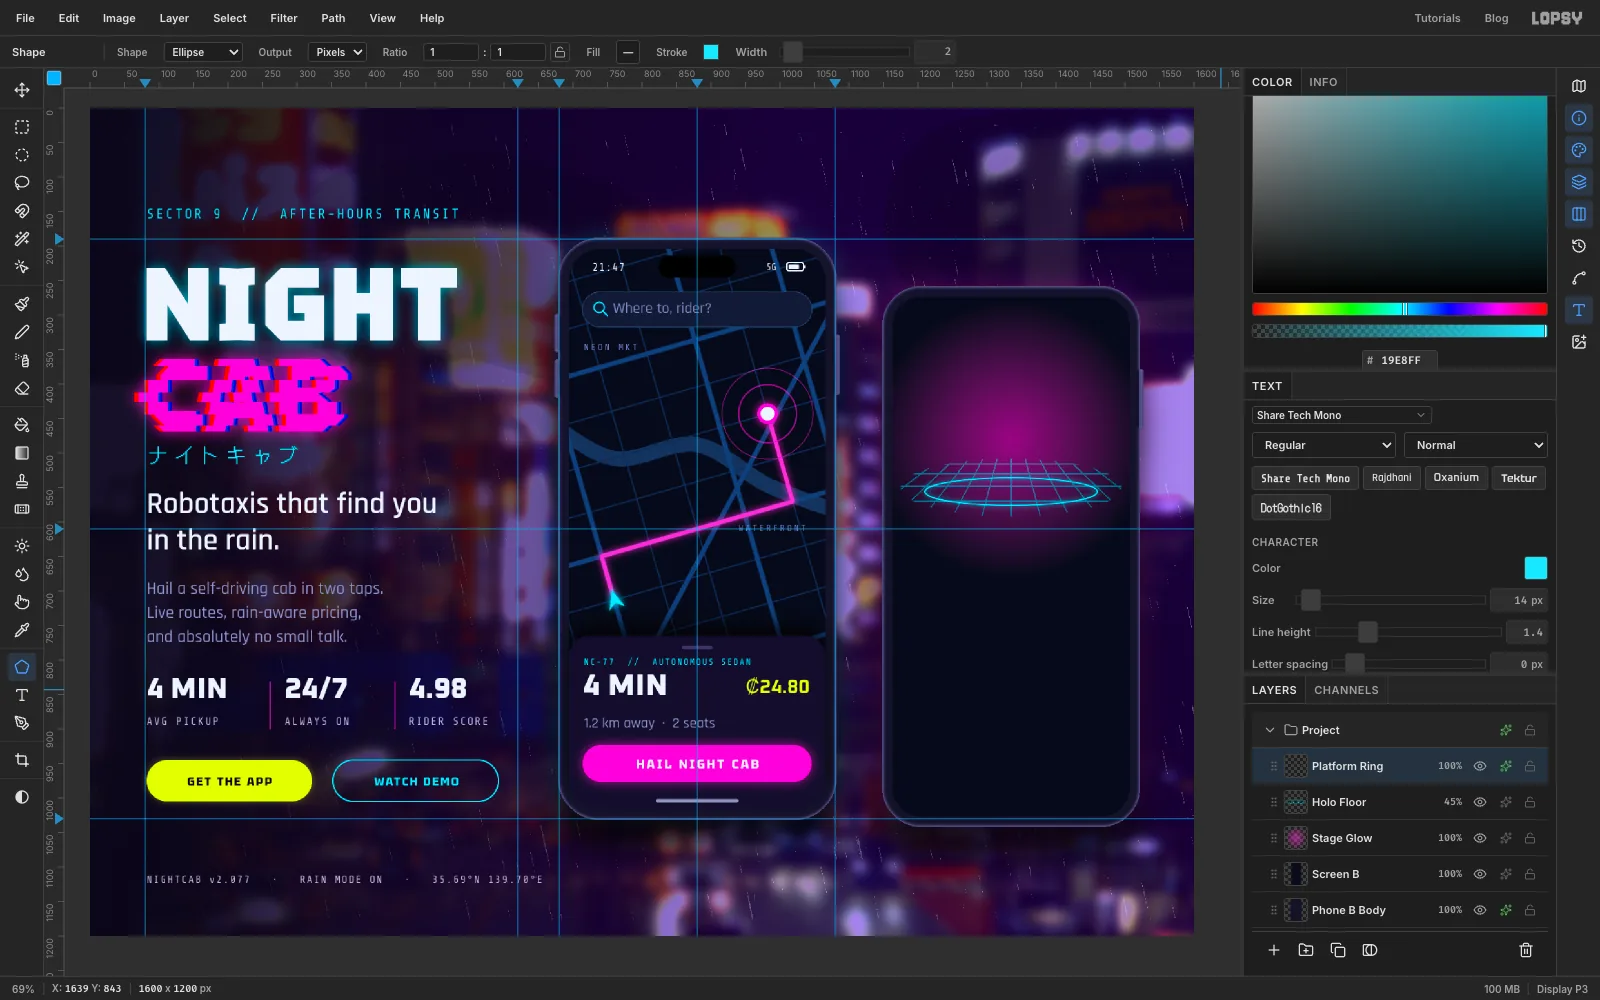
Add a layer called Platform Ring. Draw an Ellipse with no fill and a 2 px cyan stroke, about 250 × 40, centred on the floor. Give it a cyan Outer Glow of 12 at 90%.
-
Drop in the sedan and cut it out
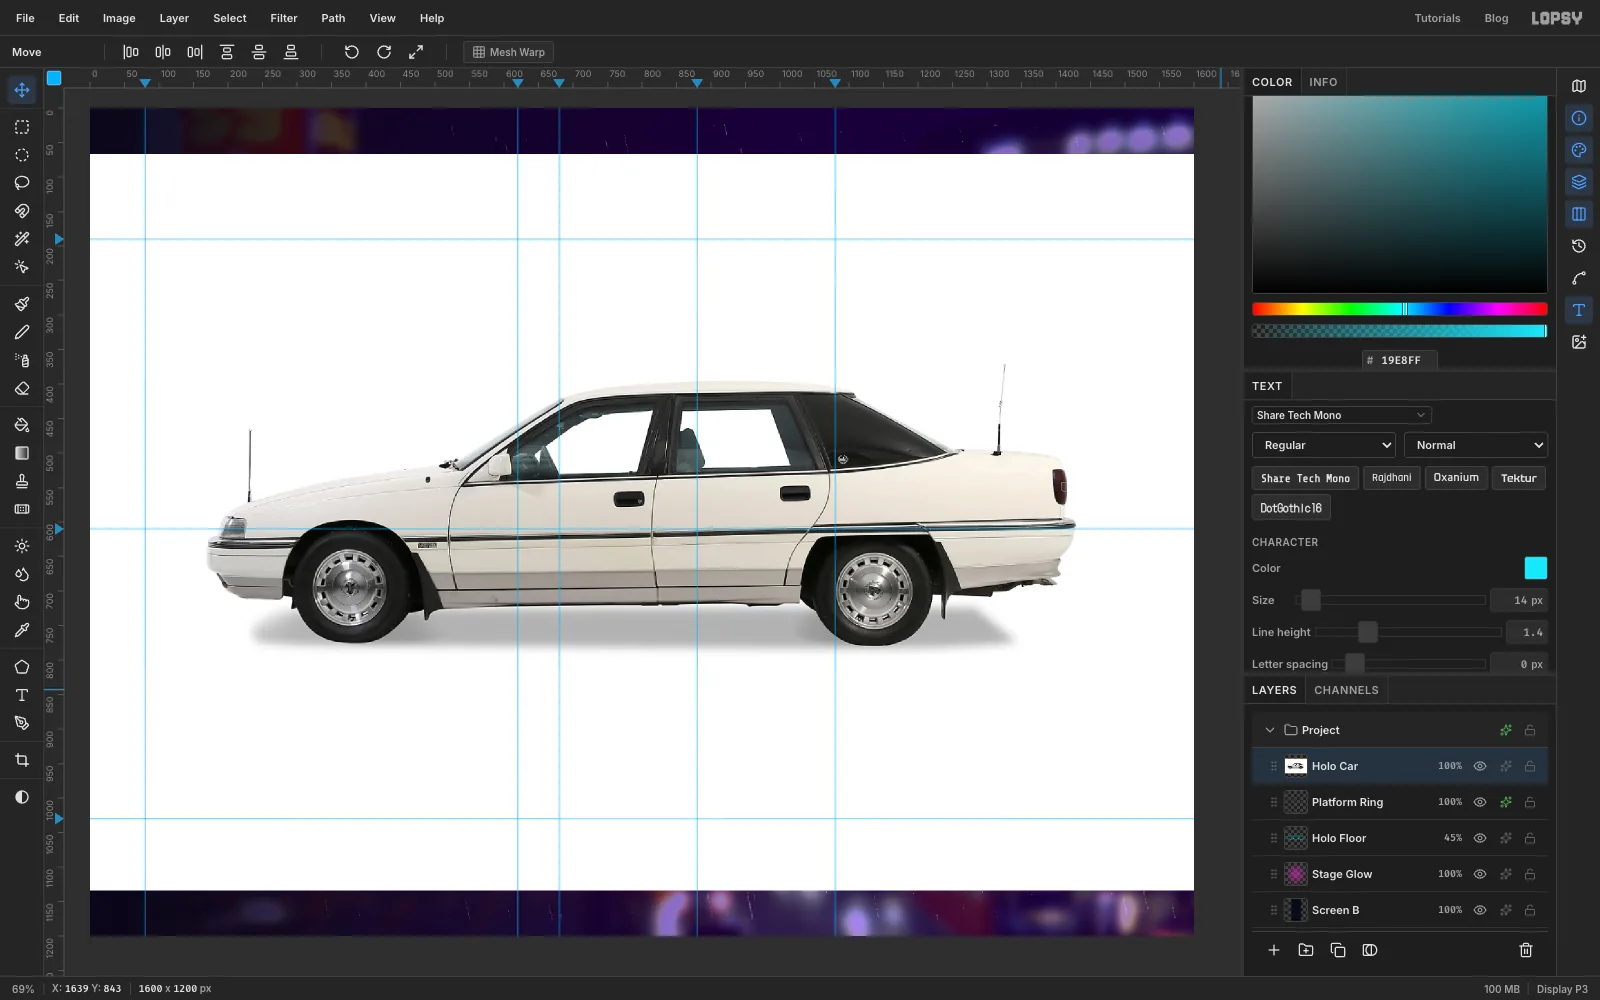
Drag the sedan photo onto the canvas. It arrives scaled to the canvas width and selected. Press Cmd+D and name the layer Holo Car.
Pick the Magic Wand (W) with Tolerance 24 and Contiguous on. Click the white background and press Delete, then deselect. The car is cut out. A soft grey ground shadow under the tyres stays behind, and that's fine: it becomes part of the hologram's base.
-
Turn the car into a wireframe
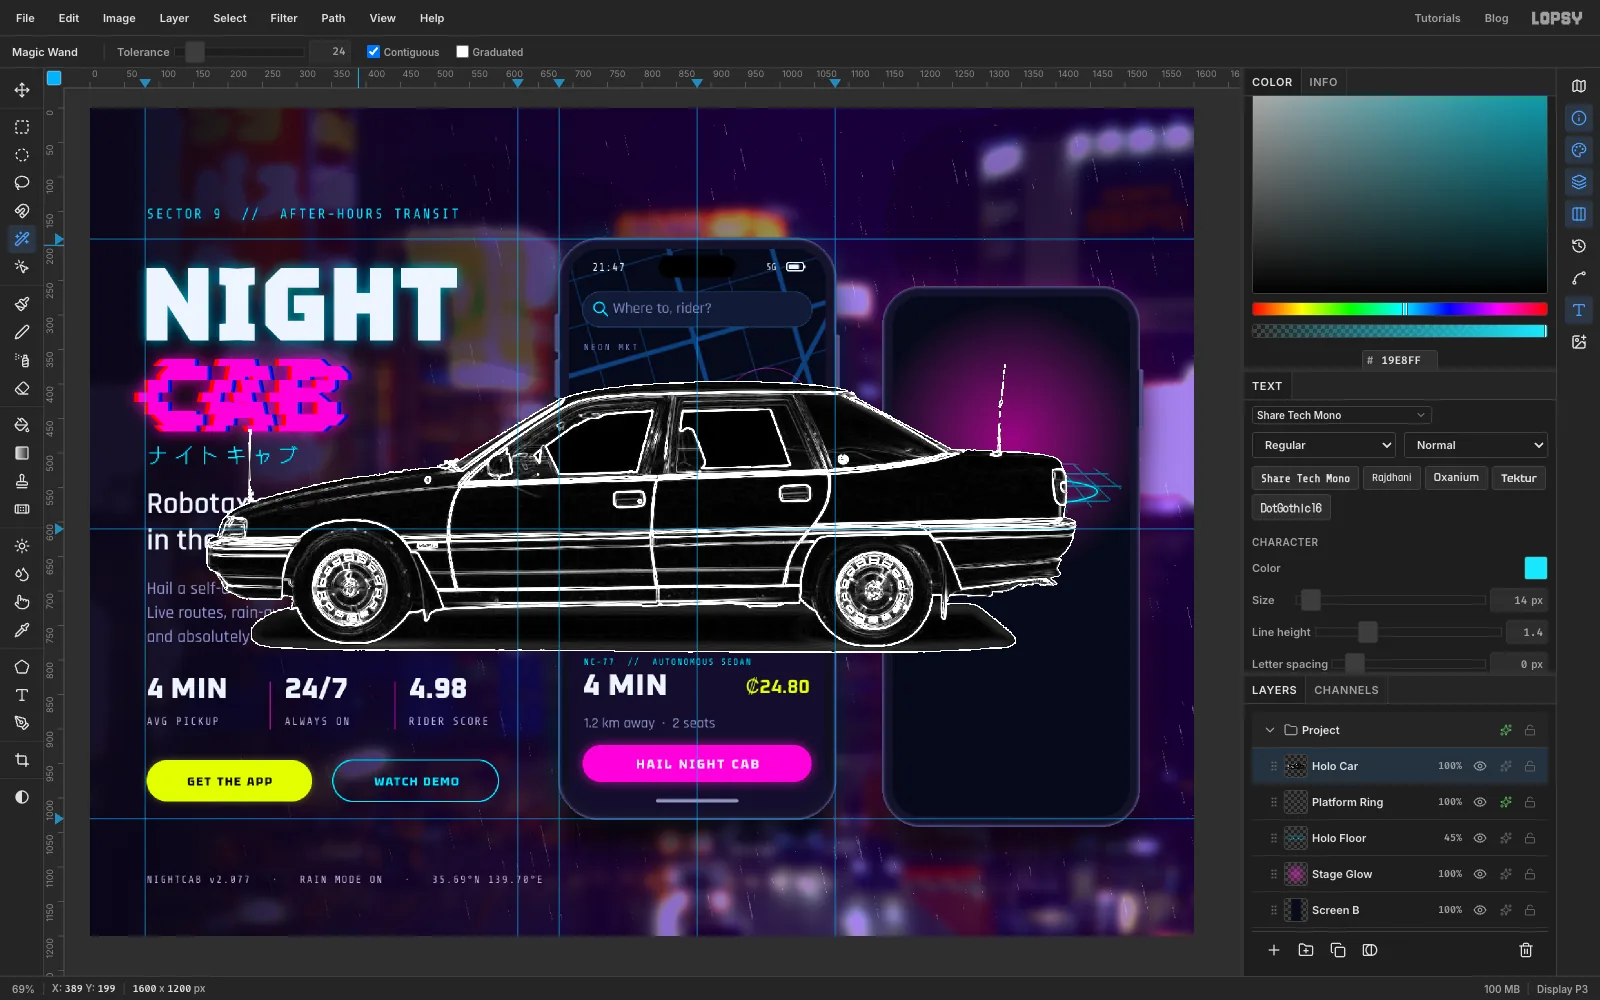
Choose Filter → Desaturate, then Filter → Find Edges. Find Edges marks the places where brightness changes sharply, so every panel line, window frame, wheel and badge becomes a thin white line. Everything flat turns black.
-
Knock out the black
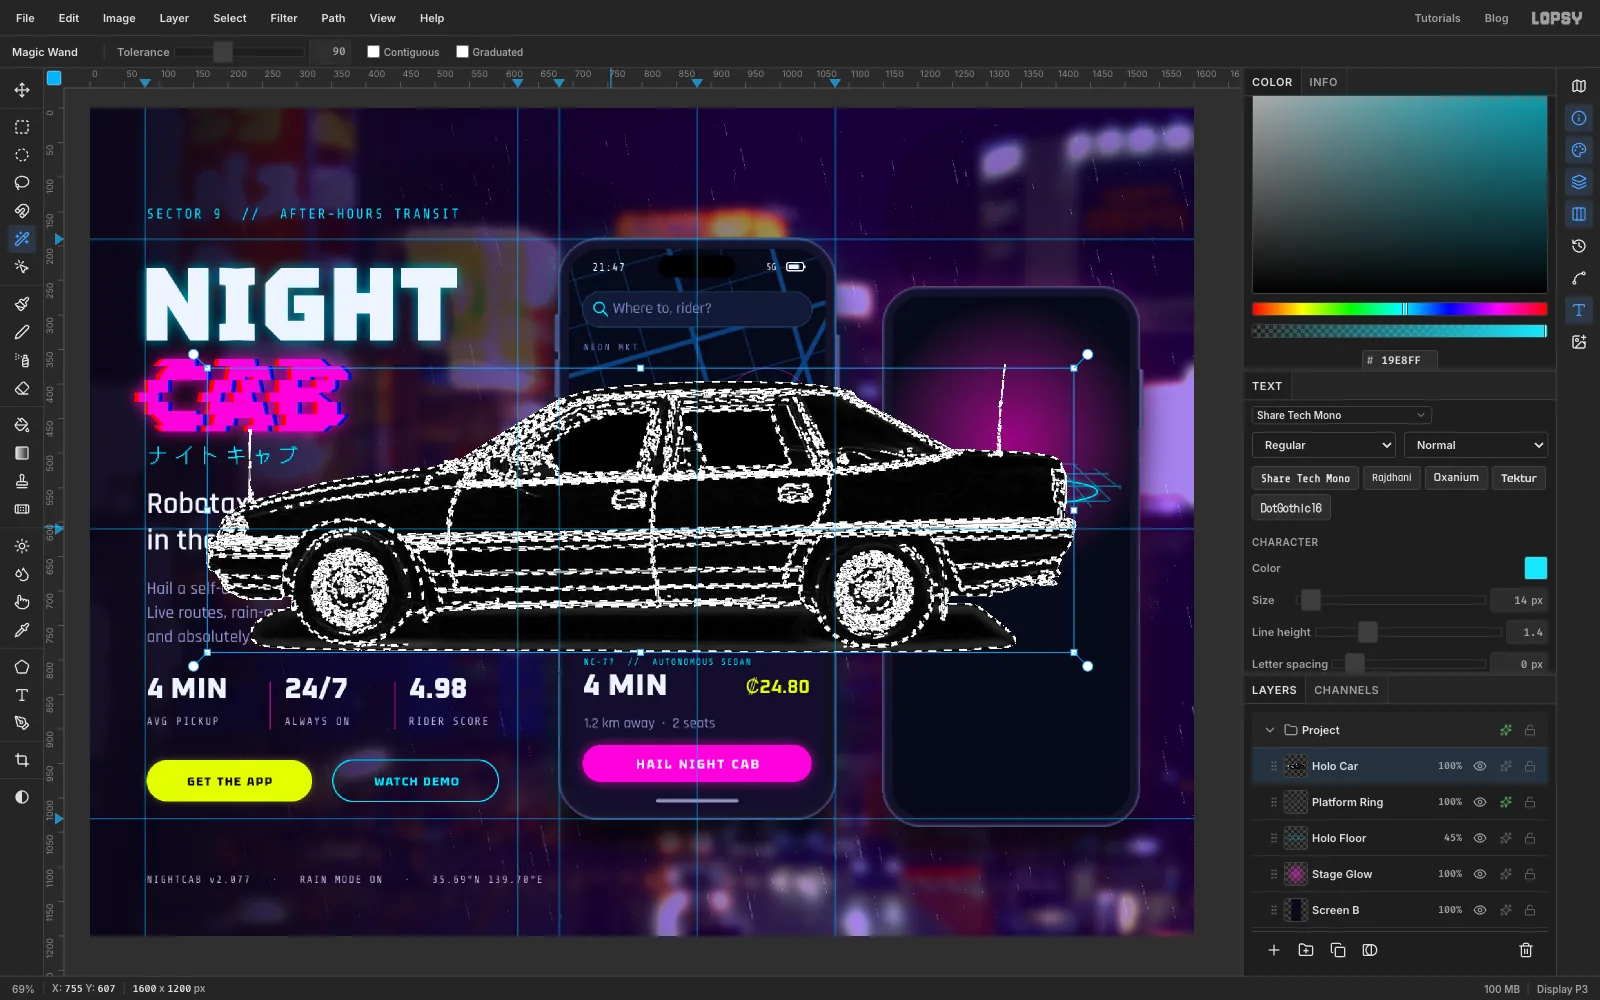
Pick the Magic Wand again. Set Tolerance to 90 and turn Contiguous off. Click in the middle of a large black panel, such as a door. With Contiguous off, the wand selects every dark pixel on the layer, not just the ones touching where you clicked. Press Delete and deselect.
Make sure you click solid black. If you land on one of the white lines, the wand selects the lines instead.
-
Shrink the hologram onto the stage
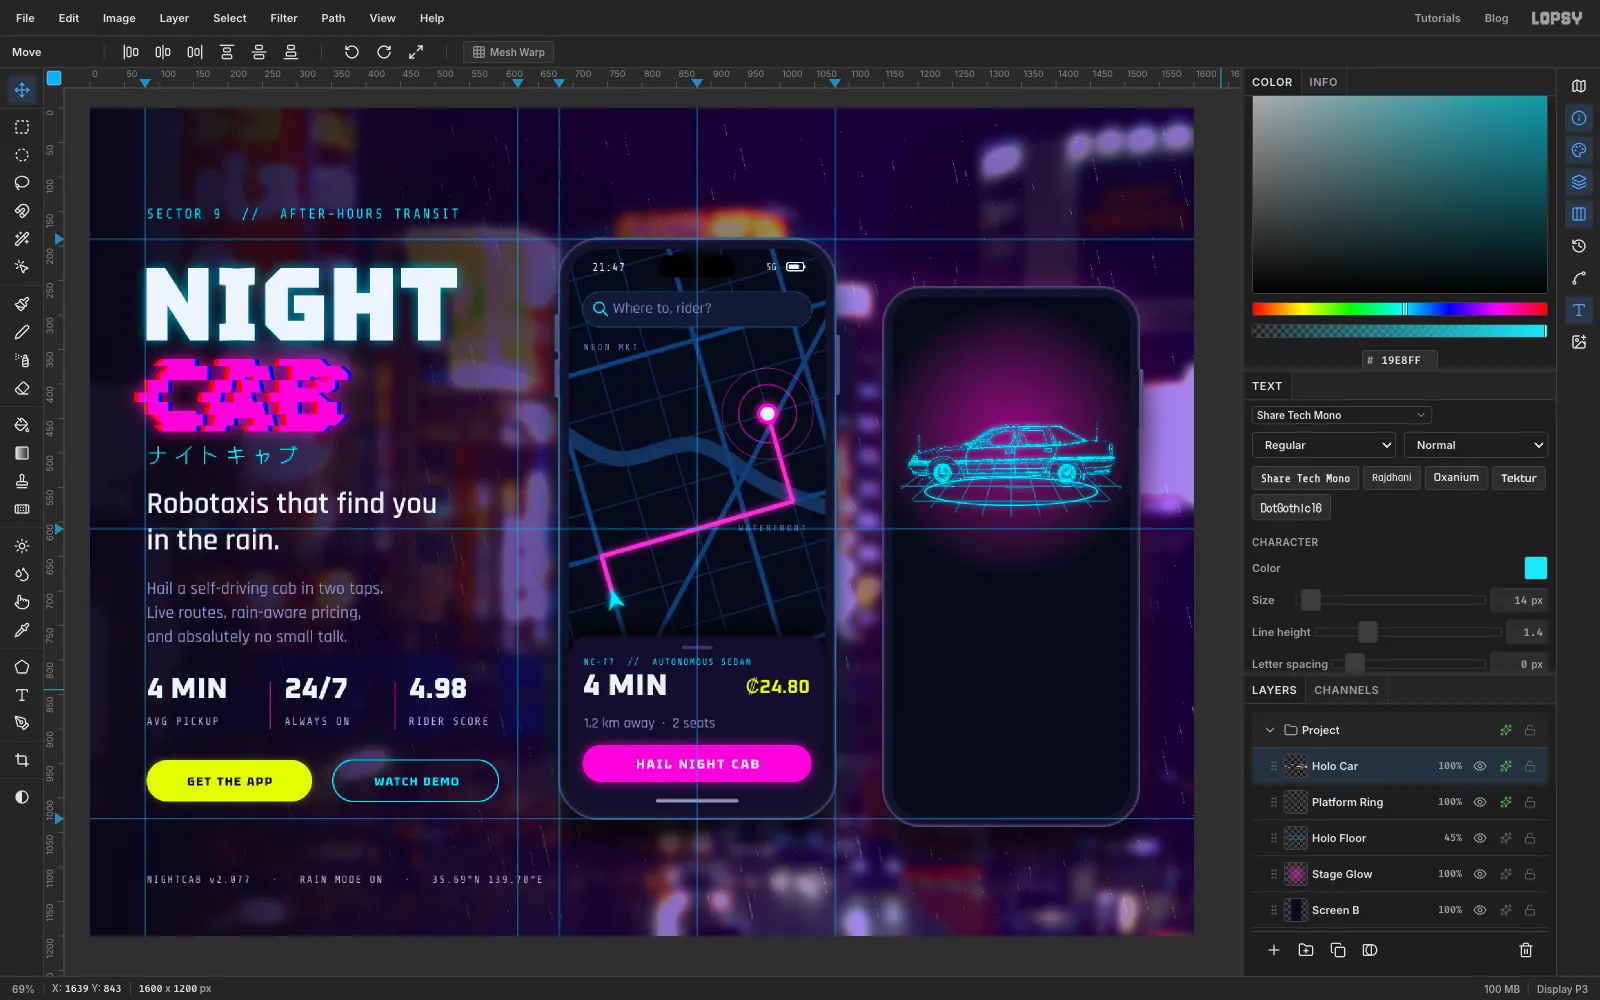
Cmd-click the Holo Car thumbnail to select its pixels. Press V, hold Cmd and drag the bottom-right corner handle inwards until the car is about 300 px wide. Holding Cmd keeps its proportions. Scaling the wireframe down after Find Edges, rather than before, keeps the lines thin and clean. Press Enter and deselect.
Drag the car onto the stage so its wheels rest on the platform ring. Then give it a cyan Color Overlay and a cyan Outer Glow of 10 at 90%. The white lines turn into glowing cyan light.
-
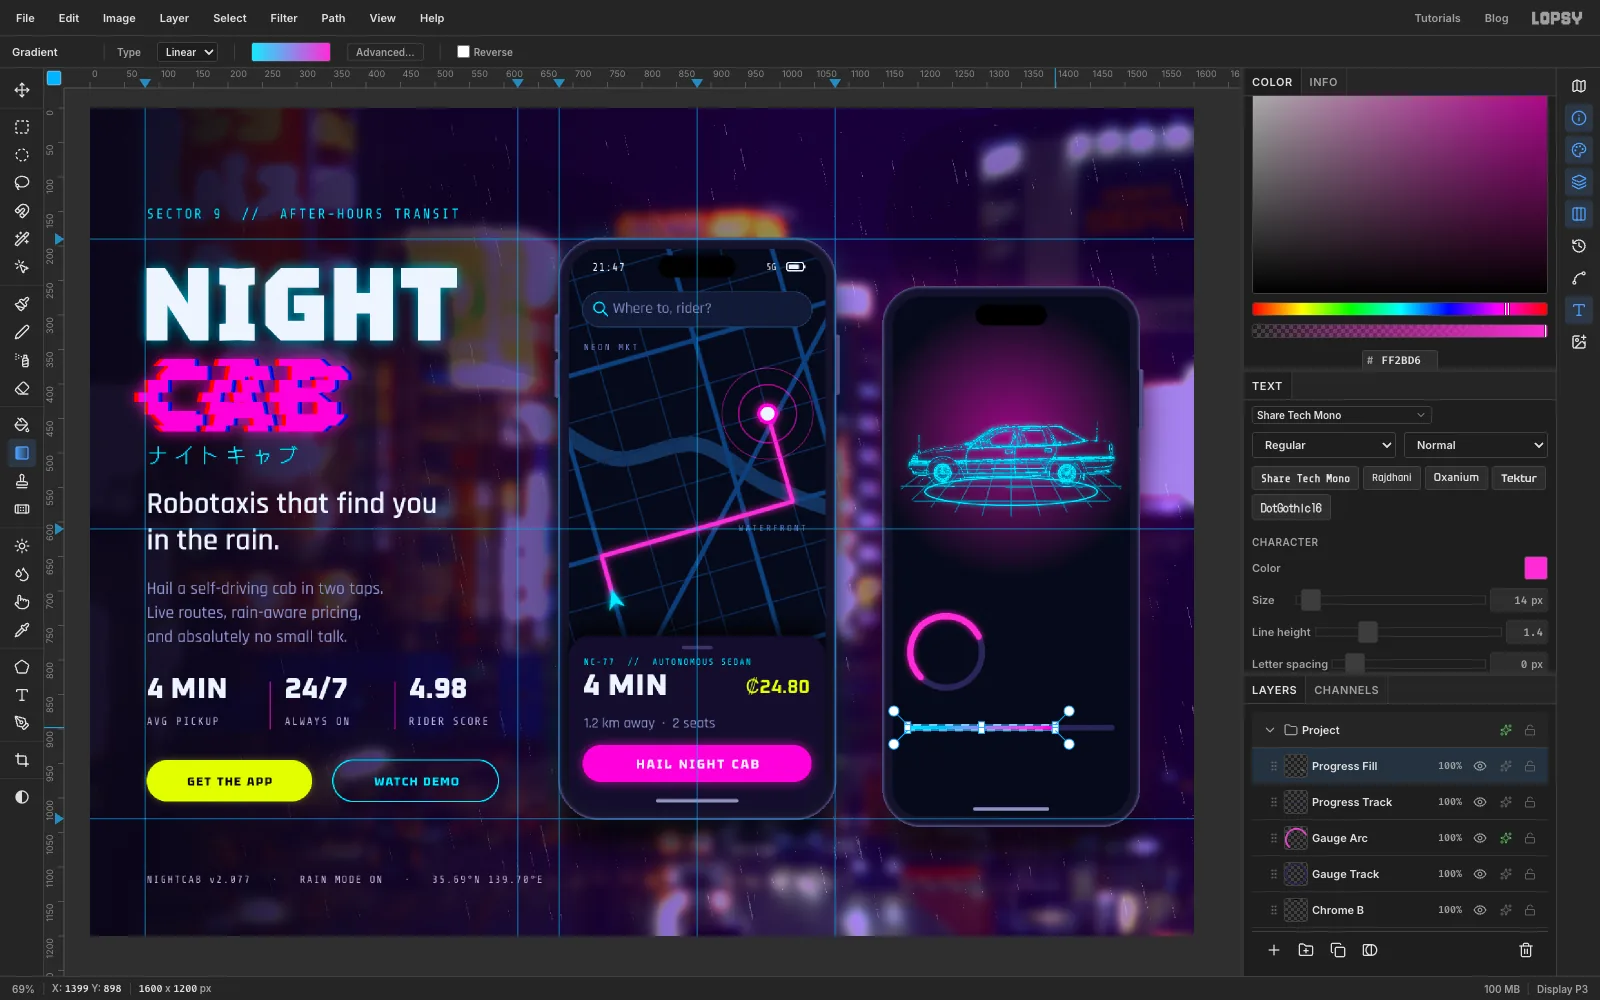
Add a speed gauge and a progress bar
For the gauge, add Gauge Track and click a 104 × 104 Ellipse with no fill and a 9 px stroke in , at the left of the screen, its left edge lined up with the screen's text margin. Add Gauge Arc, set the foreground to magenta and the Pen's Stroke to 9, and draw a curve over the ring's lower left round through the top to its right side, about 200° of the circle. Press Enter, delete the path and add a magenta Outer Glow of 12.
For the progress bar, add Progress Track and click a 300 × 8 rectangle in with Radius 4, below the gauge. Add Progress Fill and draw a marquee over the left 70% of the track. Set the Gradient to Linear, click Advanced… and set the stops to cyan and magenta , both at 100% opacity (the stage glow's transparent stop is still in there otherwise). Drag from the left end of the marquee to its right end. Deselect, then add a 14 px ice-white dot at the end of the fill with a magenta glow.
Finish with Share Button: a 300 × 48 outlined pill (no fill, cyan stroke 2, Radius 24) near the bottom of the screen.
-
Type the ride screen
Click Share Button before each line. As before, type labels that sit below other text first:
SHARE MY RIDEin Tektur Bold 15, cyan, Letter spacing 3, centred in its pillPICKUPandDROP-OFFin Share Tech Mono 11, , Letter spacing 2, under the two ends of the bar1.2 km,87%and21:54in Rajdhani SemiBold 22, ice white, stacked right of the gauge, then their labelsDISTANCE,RAINandARRIVALin Share Tech Mono 11, , Letter spacing 2, just above each oneKM/Hin Share Tech Mono 11, , and62in Oxanium ExtraBold 36, ice white, both centred in the gaugeis 2 min away · Shinjuku-9in Rajdhani SemiBold 22, , andKESTREL-7in Oxanium ExtraBold 36, ice white, above it, both at the screen's left marginRIDE // IN PROGRESSin Share Tech Mono 13, magenta, Letter spacing 3, under the notch21:52in Share Tech Mono 16 and5Gin Share Tech Mono 14, both ice white, in the status bar
Finally, click Chrome B and add the battery icon next to the
5G, just as you did for the first phone.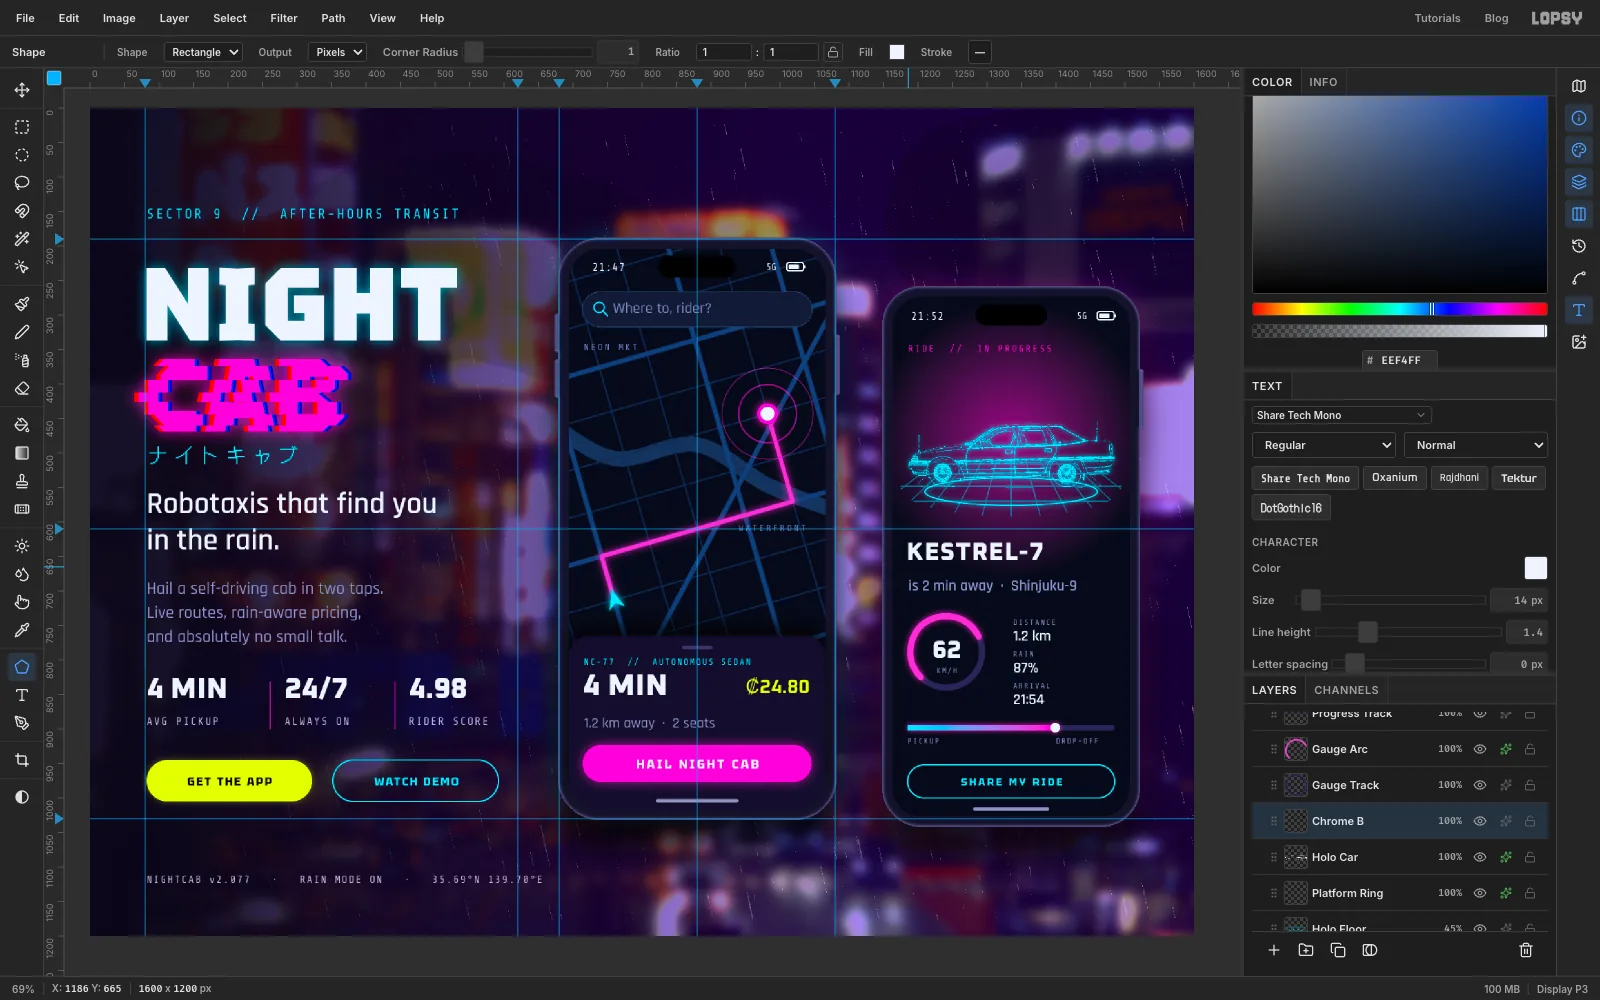
-
Group the second phone and tilt it
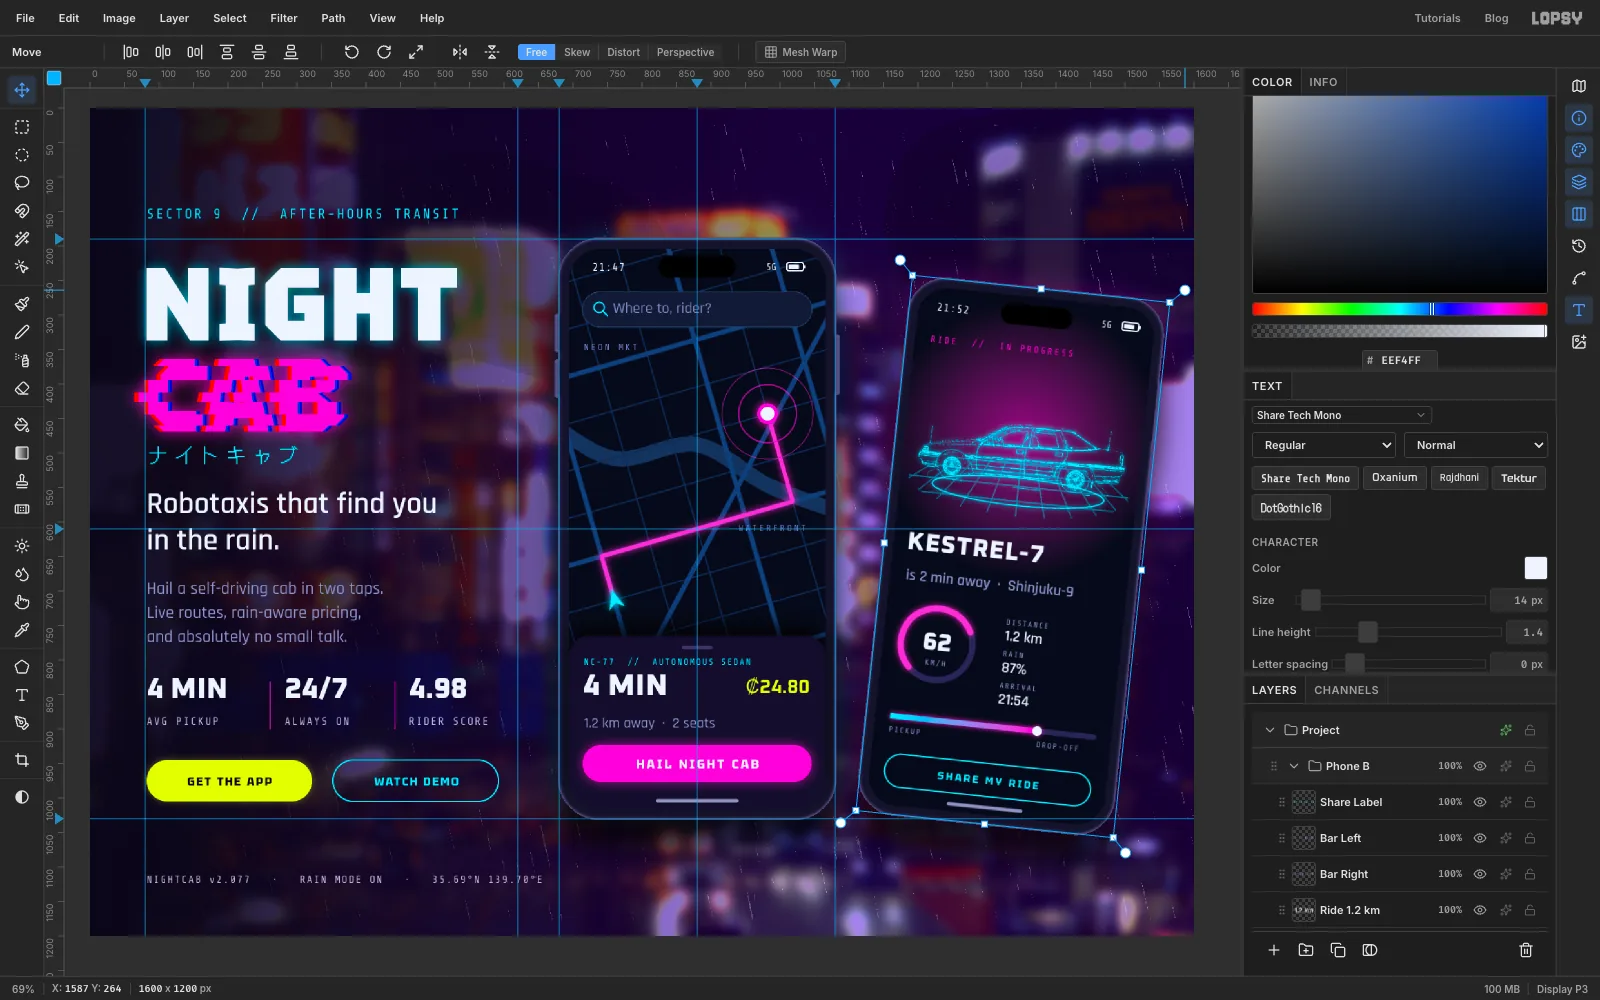
In the Layers panel click the topmost layer of the second phone, then Shift-click Phone B Body to select the whole range. Choose Layer → Group Layers and name the group Phone B.
With the group selected, press V. The handles frame everything in the group. Drag the rotate handle about 6° clockwise. The text stays live and the effects turn with it. A tilted second phone is the classic app-store presentation: it breaks the grid and makes the pair feel picked up rather than pasted down.
-
Group the rest and rebalance
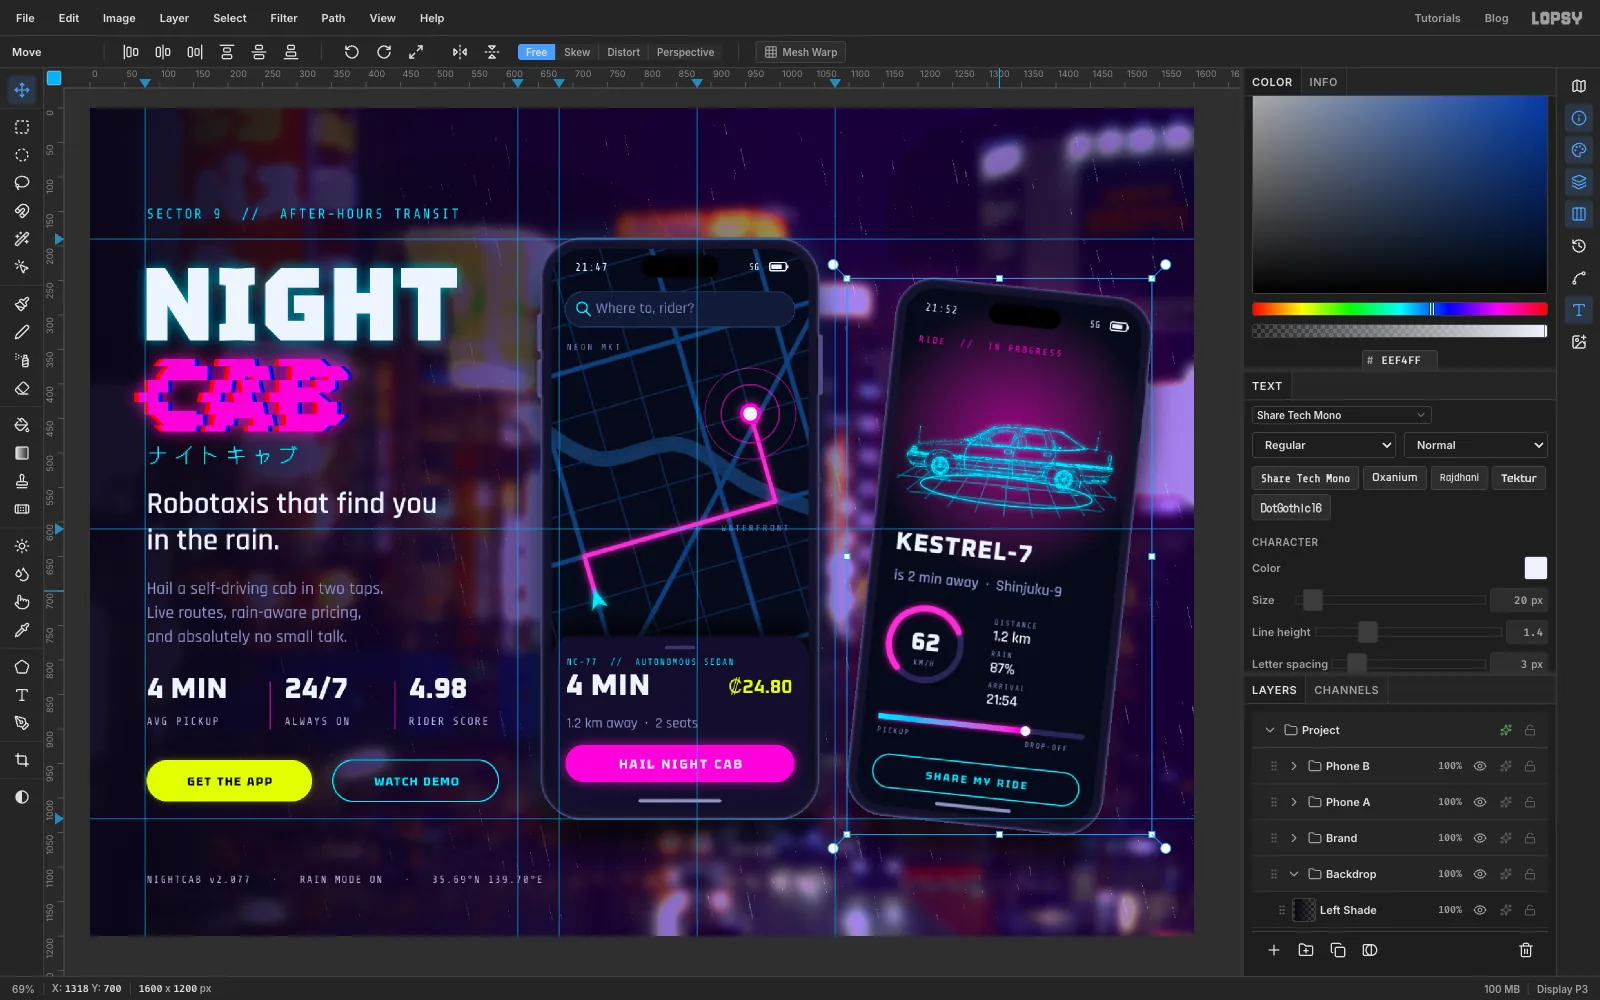
Collapse Phone B. Group the first phone's layers into Phone A the same way: click the row just under Phone B and Shift-click Phone A Body. Group the type and buttons of the left column (from Kicker down to the row just above Left Shade) into Brand. Group Left Shade down to City Photo into Backdrop.
Now look at the margins. The tilted phone sits closer to the right edge than the type does to the left. Click the Phone A group and drag the phone about 30 px to the left, then click Phone B and drag it about 17 px left. Moving a group moves everything in it, effects and live text included.
-
Float a notification between the phones
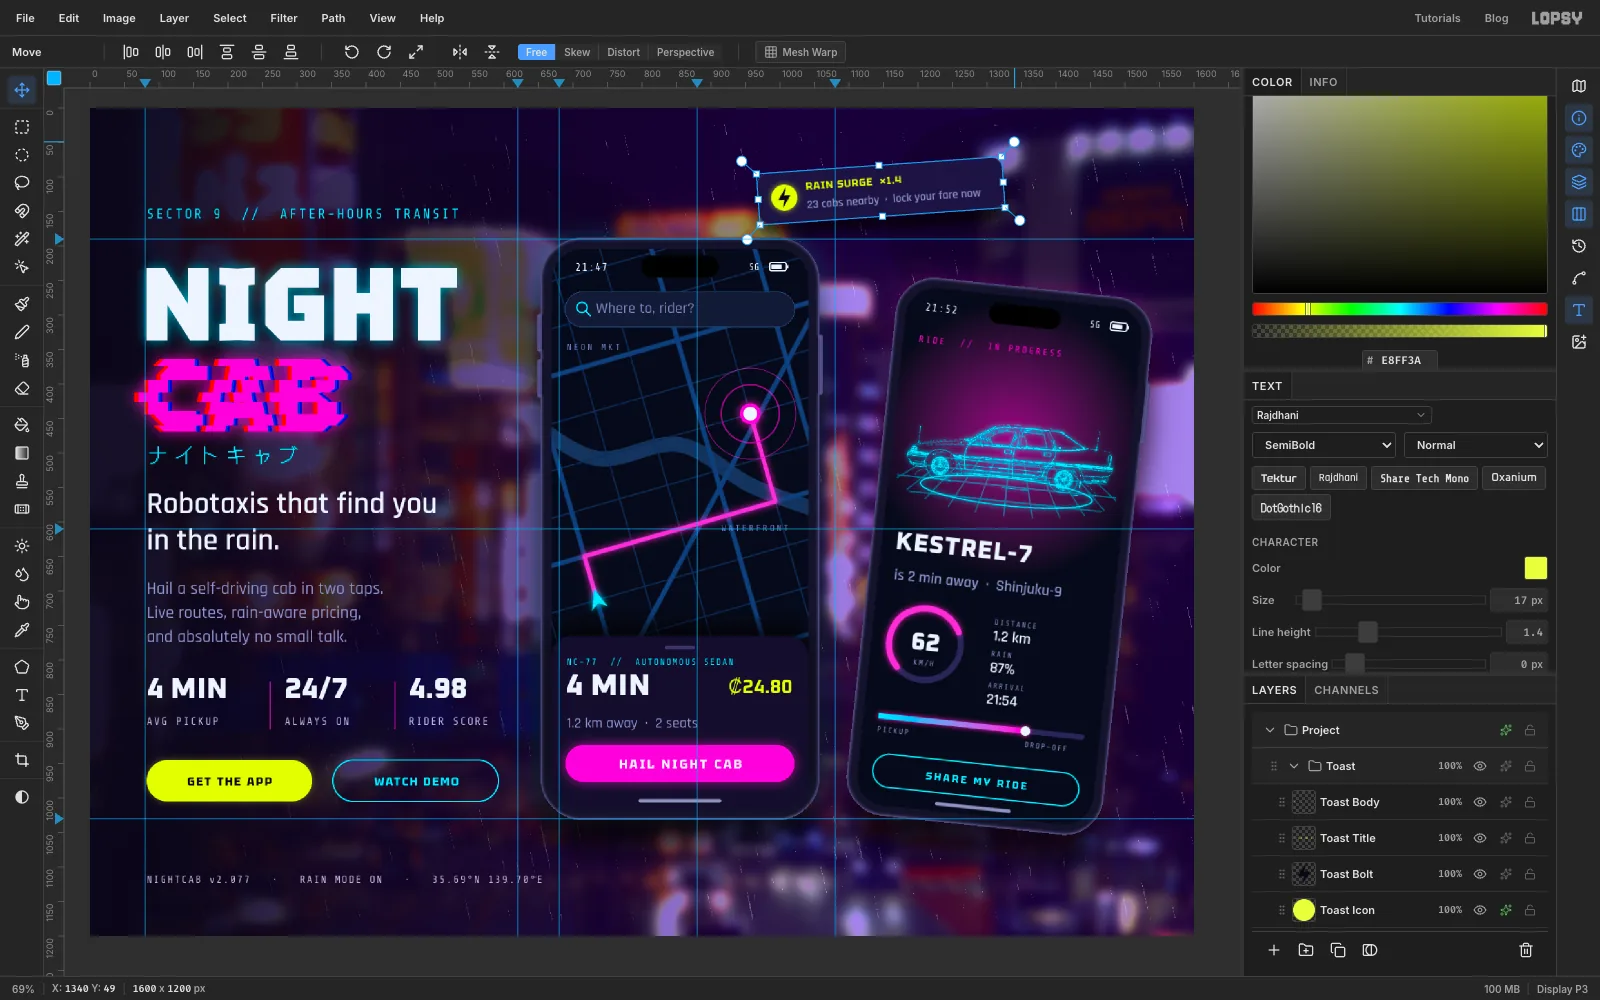
Click the Project group at the top of the Layers panel, then Add Layer. A new layer added while a group row is selected lands at the top of that group. Name it Toast Card, and click a 356 × 74 rectangle with Radius 18 in above the gap between the two phones. Give it a 1 px Stroke and a Drop Shadow with Offset Y 18, Blur 30, Opacity 70.
Add Toast Icon: a 38 px acid-yellow circle near the card's left end, with a yellow glow. For the lightning bolt, add Toast Bolt and make six Pen clicks for a zigzag bolt inside the circle. Close it, click Path to Selection and fill it with night .
Type
RAIN SURGE ×1.4in Tektur Bold 15, acid yellow, and below it23 cabs nearby · lock your fare nowin Rajdhani SemiBold 17, , both starting just right of the icon.Group the card's five layers into Toast, press V and rotate the group about 4° anticlockwise. A slight tilt makes it look like it just popped up.
-
Darken the edges with a feathered vignette
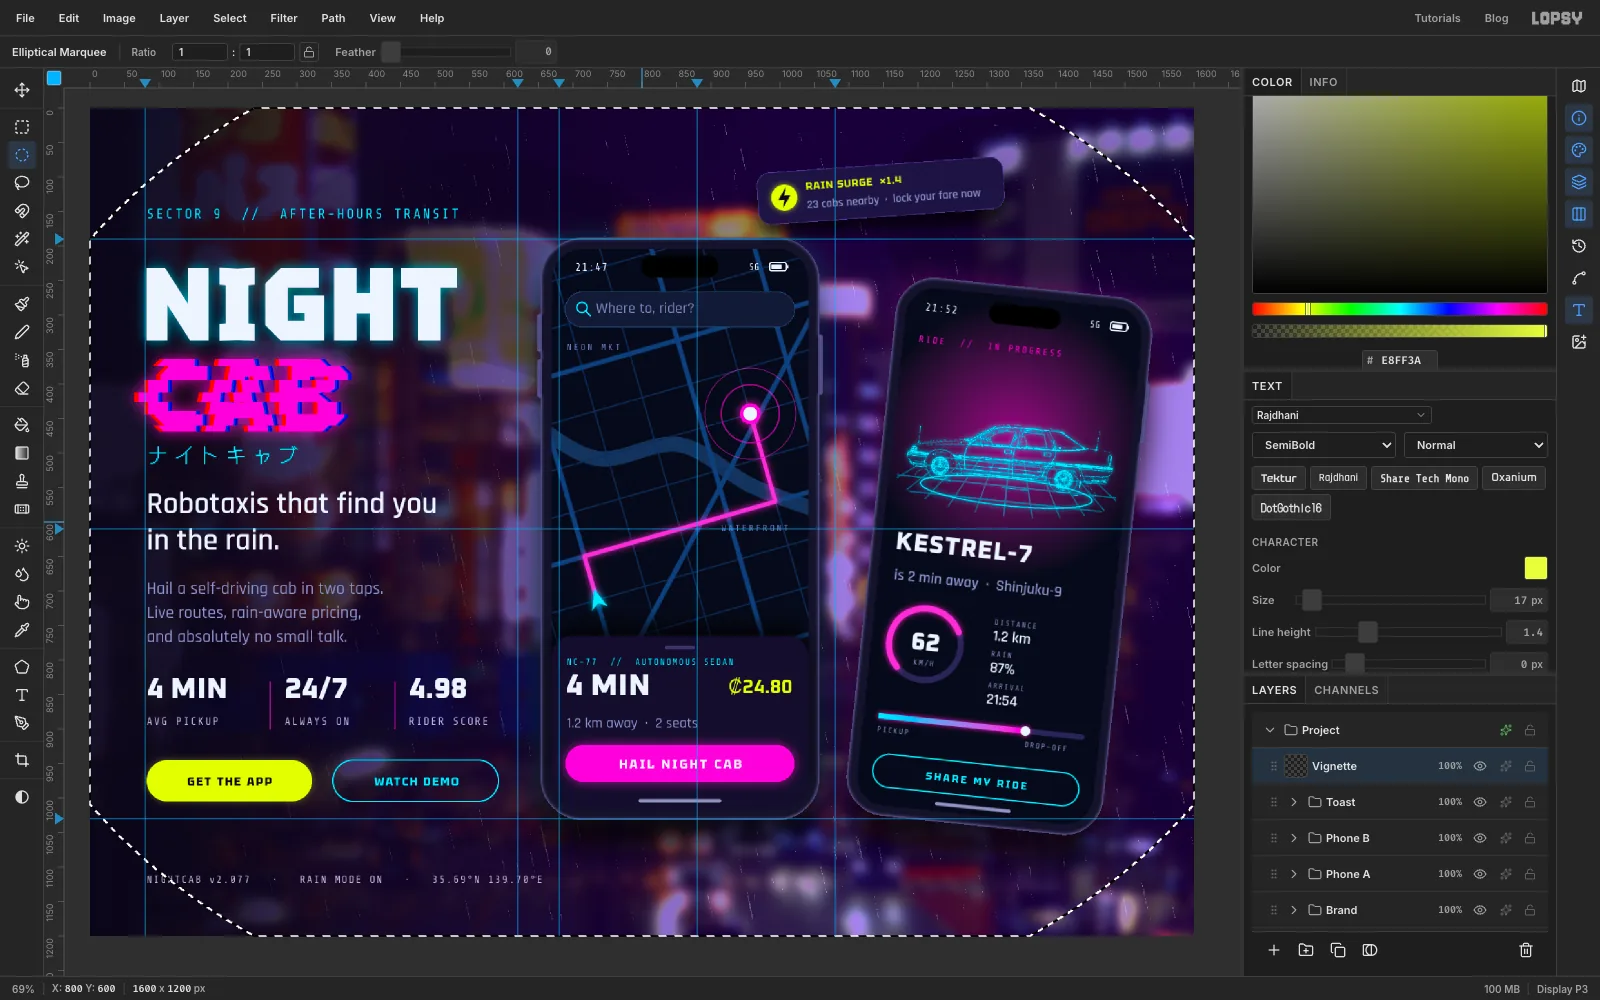
Click Project and add a layer called Vignette. Pick the Elliptical Marquee and click once on the canvas without dragging. In the Elliptical Selection dialog, type From X −160, Y −140 and To X 1760, Y 1340. The box can run past the canvas, so the ellipse just clips the corners.
Choose Select → Inverse, then Select → Feather… with 200. Fill with night , deselect, and set the layer to 75% opacity. The corners darken softly and pull the eye into the middle.
-
Add a bloom glow pass
Neon in a photo glows a bit more than vector shapes do. Fake it with one more Bloom over a flattened copy of everything:
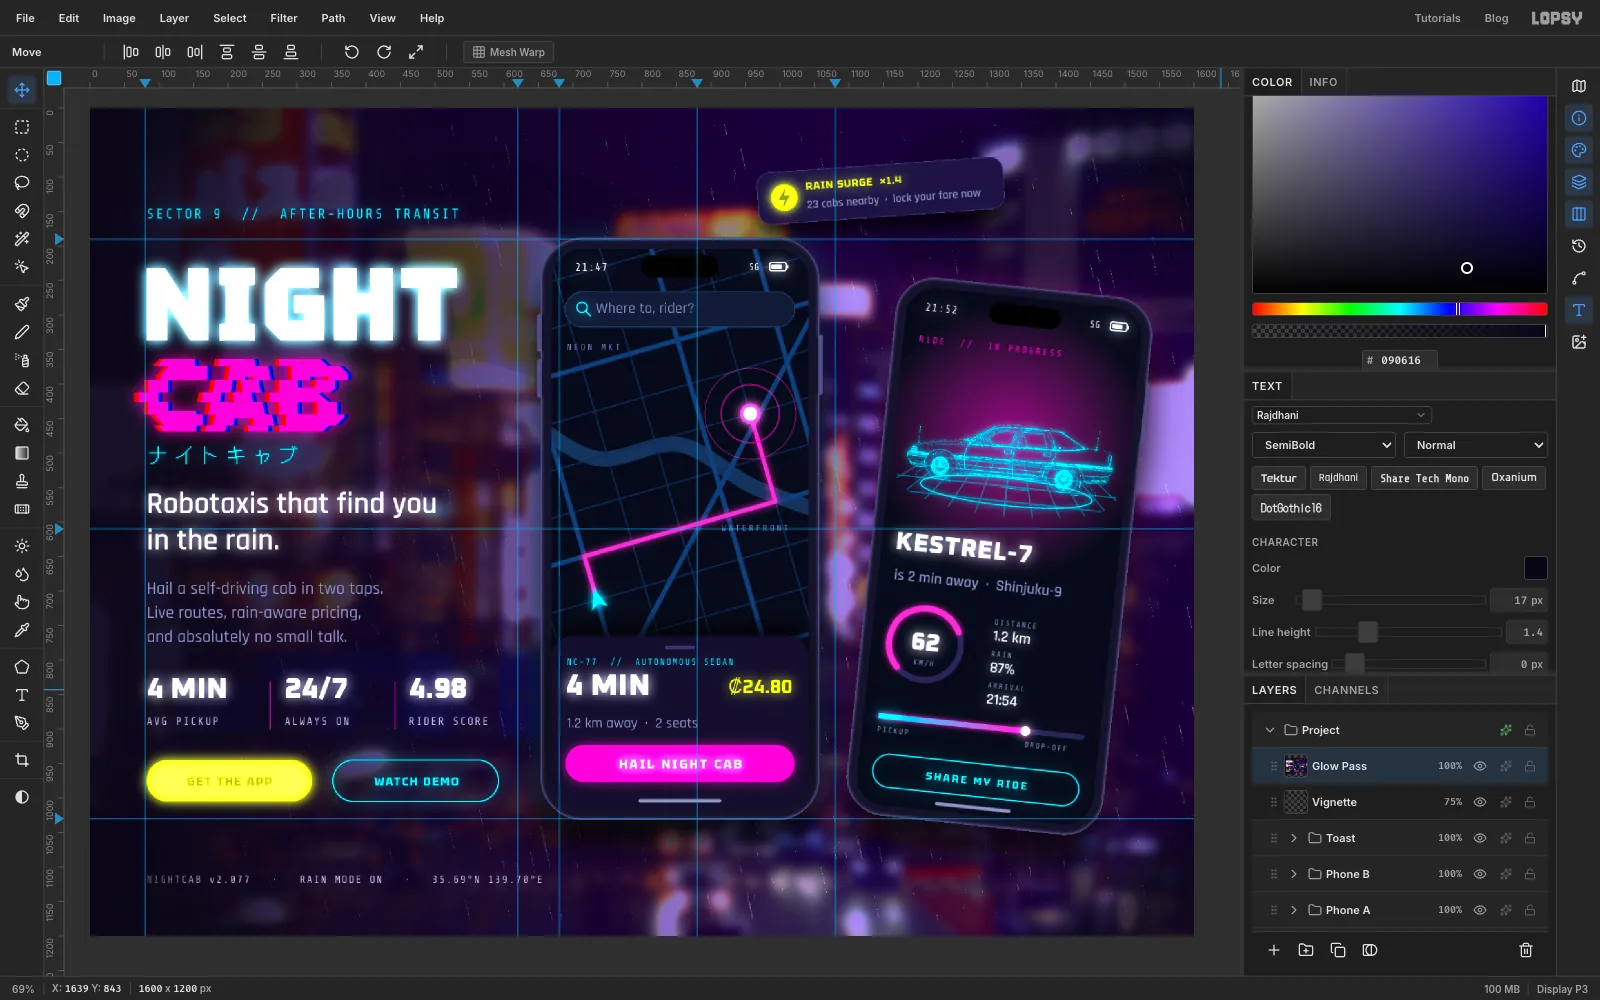
- Press Cmd+A, choose Edit → Copy Merged, then press Cmd+V. Copy Merged copies what you see, all layers combined, and the paste lands in place as a new layer. Name it Glow Pass and deselect.
- Choose Filter → Bloom… with Threshold 70, Soft Knee 40, Radius 26 and Intensity 100.
- Set the layer's blend mode to Lighten.
Lighten only lets a pixel through where it's brighter than what's underneath. So the glow pass adds halos around bright things, but never darkens or muddies anything else.
-
Wipe the glow off the buttons
The bloom is lovely on the headline and the hologram, but it floods the two solid buttons and washes out their labels. Keep Glow Pass selected, pick the Eraser at Size 80 and drag once along the GET THE APP pill. Switch to Size 60 and drag once along the HAIL NIGHT CAB button. Give the toast's lightning icon a quick dab too. The buttons' own glows are still there underneath.
Choose File → Save Project to keep an editable copy, and File → Quick Export PNG for the finished image.