Make a Dadaist Photomontage Album Cover
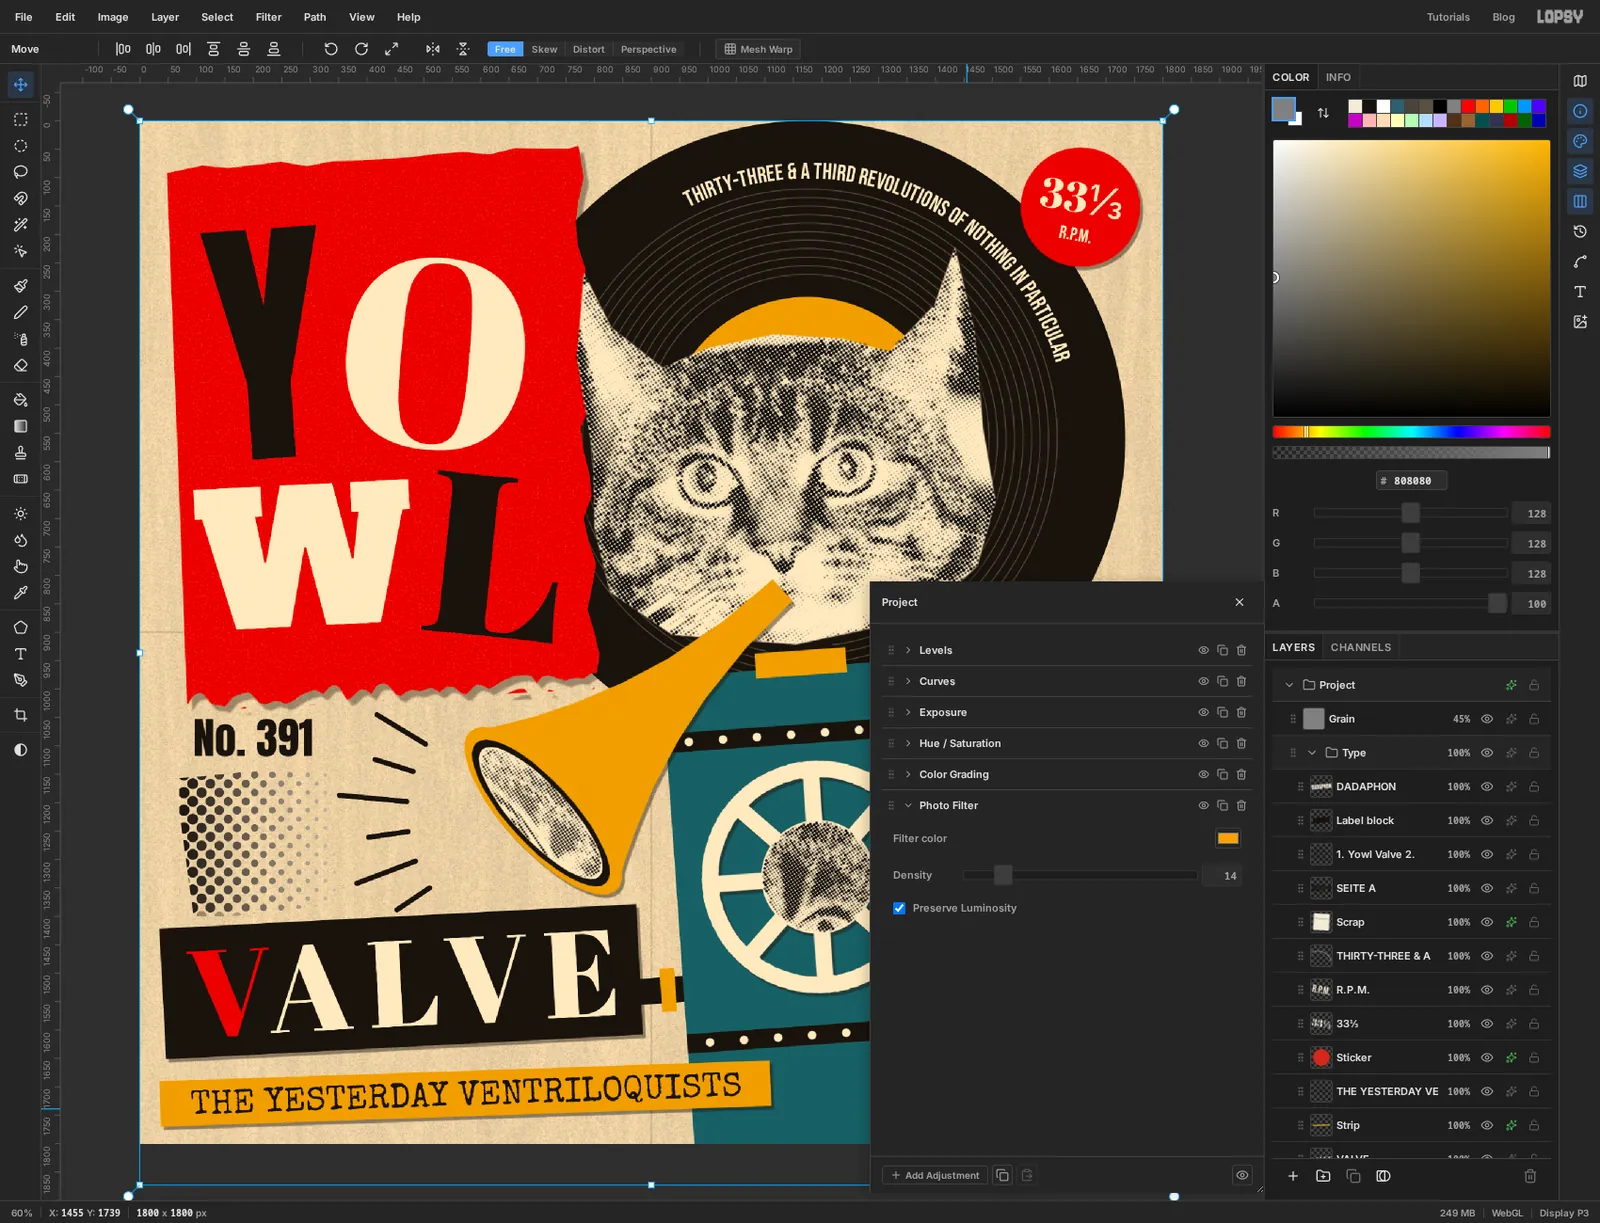
Cut a cat photo into halftone newsprint, bolt it onto a paper boiler with a gramophone horn and set a ransom-note title in Lopsy.
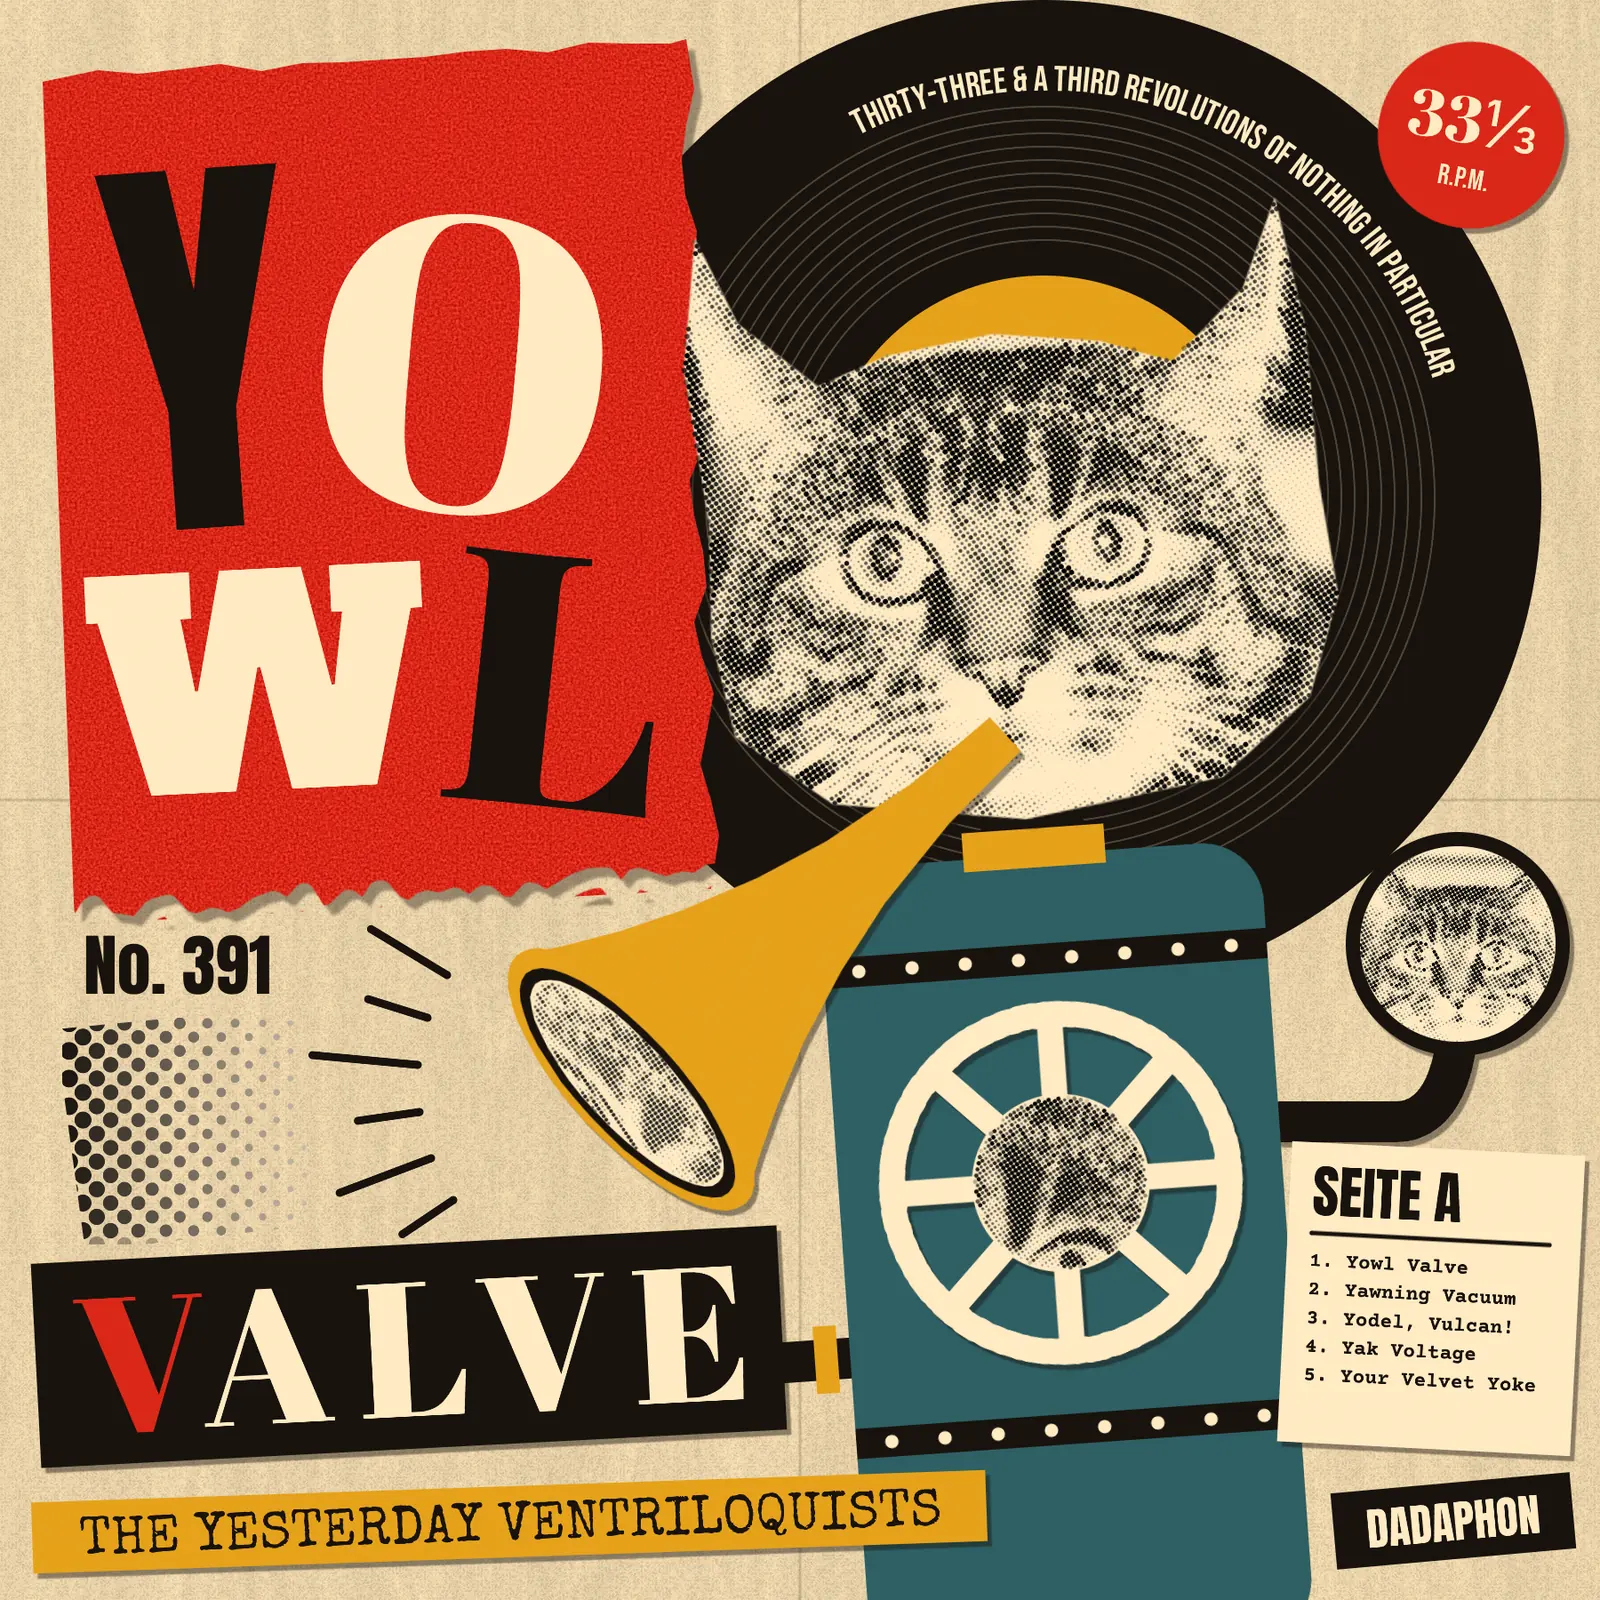
Berlin Dada artists like Hannah Höch and Raoul Hausmann built pictures with scissors and paste. They cut photographs out of newspapers, stuck heads onto machines, and set type from whatever was lying around the print shop. In this tutorial you'll make a record sleeve the same way: a cat's head becomes a newsprint cut-out, its body is a boiler with a valve wheel, and a gramophone horn does the yowling.
The cover is 1800 × 1800 px. Everything on it is a flat piece of "paper" on its own layer, so the work is mostly cutting shapes with selections and deciding what overlaps what.
Along the way you'll use:
- the Lasso for scissor cuts, with Select → Inverse and Delete to throw away the rest of a photo
- Filter → Halftone to turn photographs and a gradient into newsprint dots
- the Move tool's handles to scale, squash and rotate pieces, on one layer and on several at once
- the Brush with Radial Symmetry for a valve wheel, and Shift-click for straight lines
- the Pen tool for pipes and for a curved path that text follows
- groups, so a whole figure can be rotated or moved as one piece
- seven typefaces from the font browser, Letter spacing, and a single letter in a second colour
- Texture, Fibers, Add Noise and a Photo Filter adjustment for the paper
The palette:
-
Paper
-
cream
-
Ink
-
Red
-
Mustard
-
Teal
You'll also need a photo of a cat looking straight at the camera. Any sharp, front-facing photo works. The one used here is 1100 × 1300 px. If you open the project file, the photo is already in it.
-
Make the paper
Choose File → New, set the size to 1800 × 1800 px and click Create. Double-click
Layer 1in the Layers panel and rename itPaper. TypeE7DCC2into the Color panel's hex field, press Cmd+A, choose Edit → Fill, then press Cmd+D.Flat colour looks like a screen, so rough it up. Choose Filter → Texture, pick Rough, set Amount to 14, Size to 4 and Detail to 70, and click Apply.
Click Add Layer at the bottom of the Layers panel and name the new layer
Fibres. Choose Filter → Fibers, set Variance to 20 and Strength to 6, and apply. It fills the layer with grey streaks. Click the layer's effects button (the sparkle icon on its row), set the blend mode to Multiply and close the drawer. Then click the100%on the row and drag the slider down to about 14%. The streaks become the grain of the paper.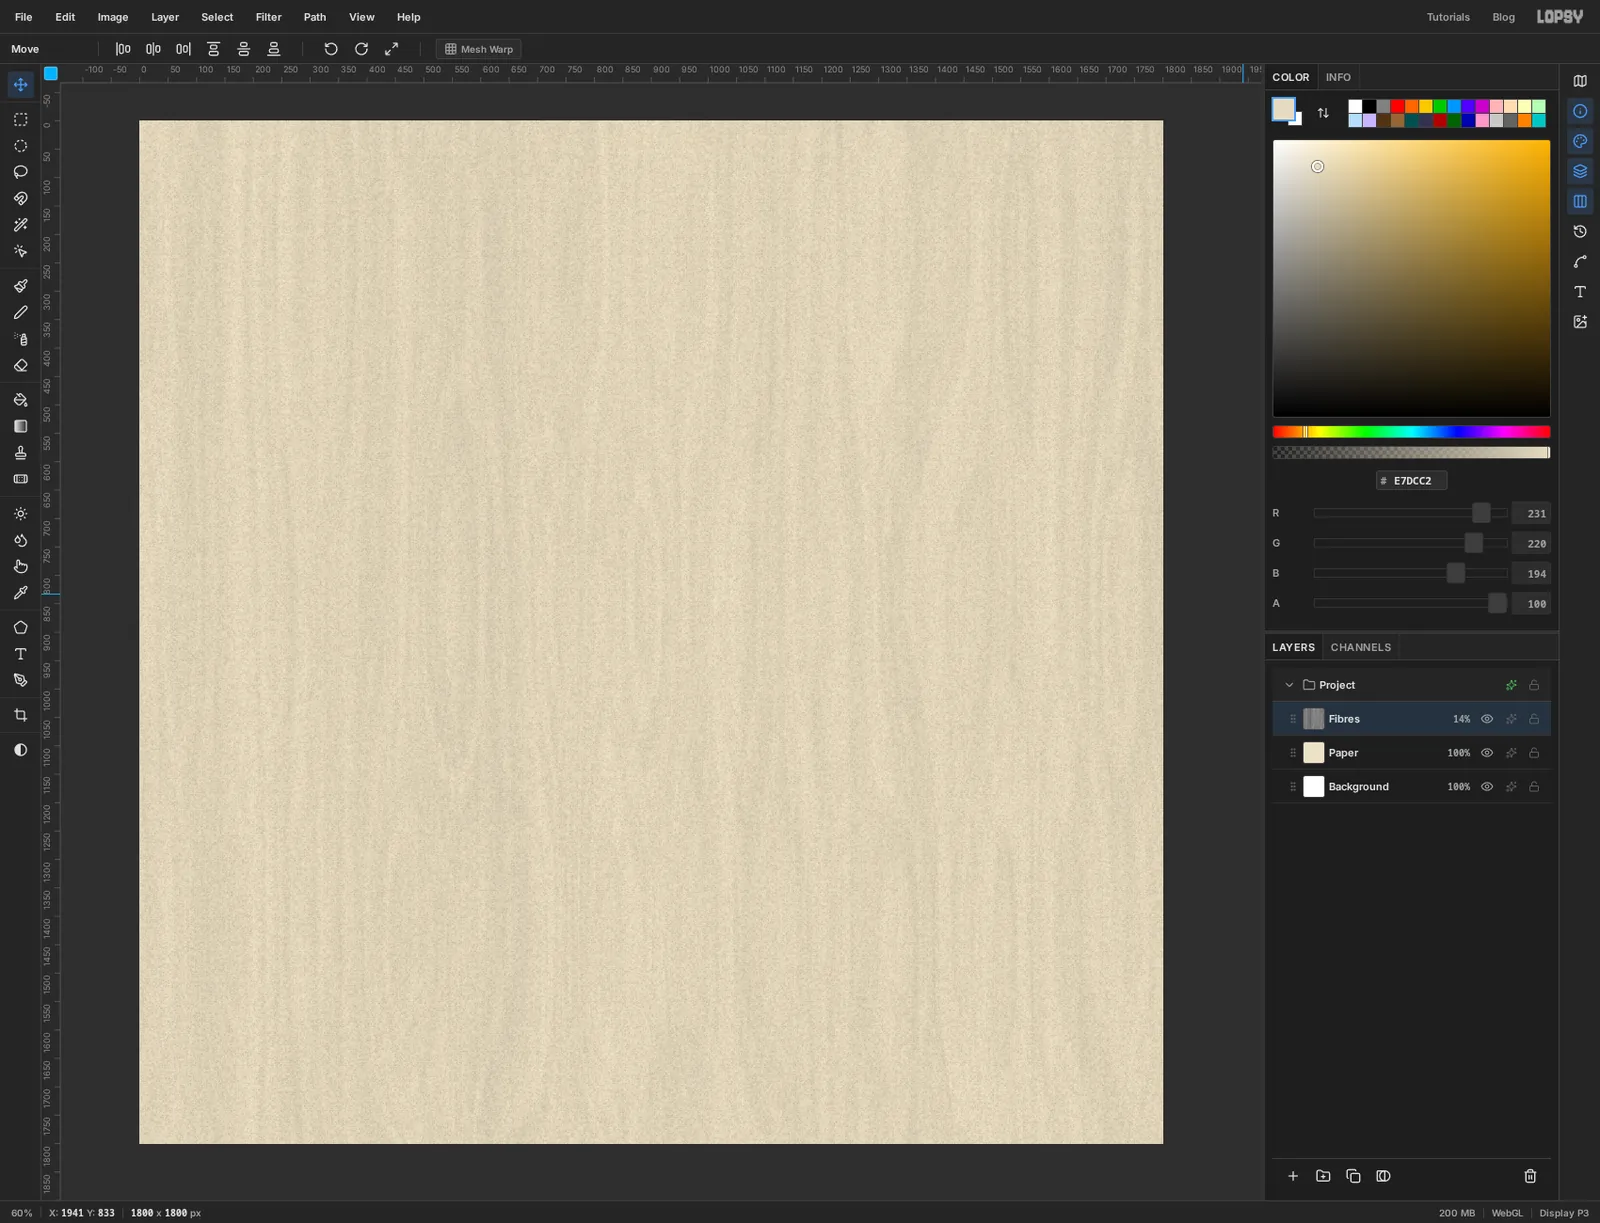
-
Fold it in four
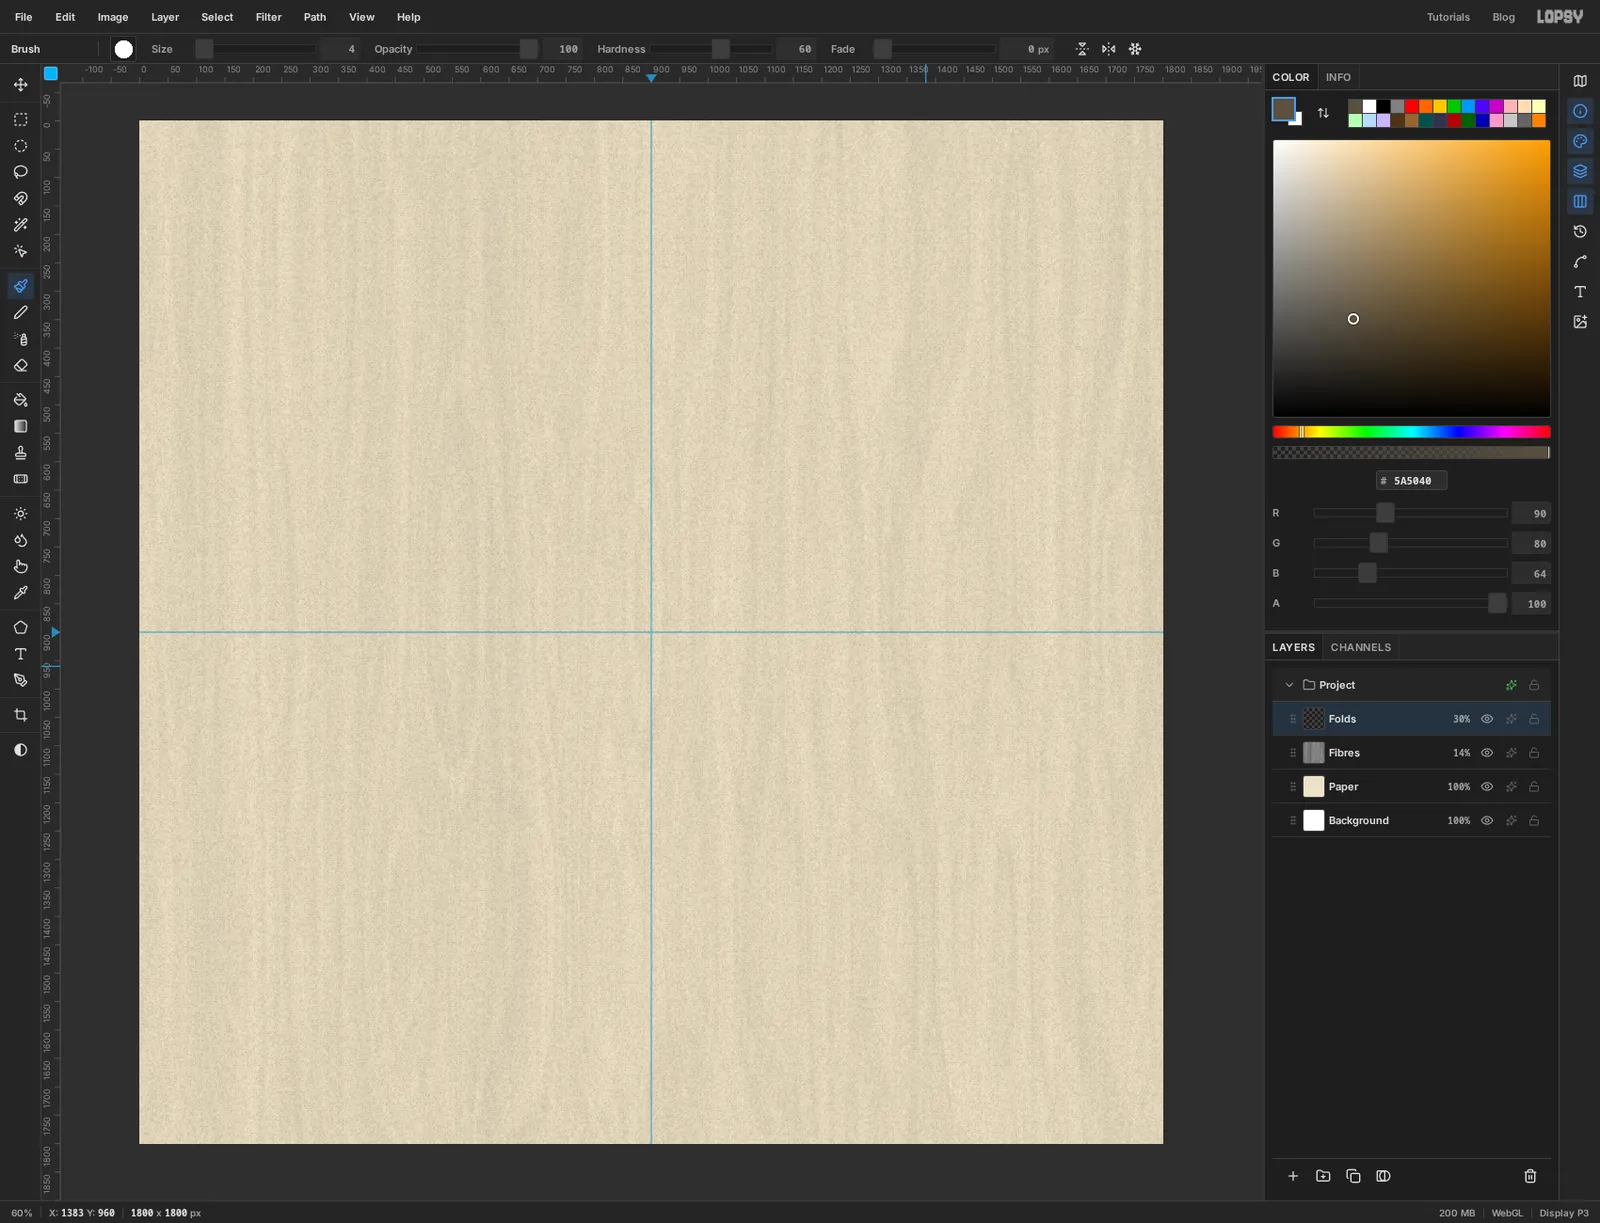
A record sleeve that has been in a drawer since 1920 has been folded. Hold Cmd and click the ruler along the top of the canvas near the middle. With Cmd held, the guide jumps to the nearest simple fraction, so it lands exactly on the half-way line. Do the same on the left ruler.
Add a layer called
Folds. Pick the Brush, set Size to 4 and Hardness to 60, and set the colour to a grey-brown, . Click once where the vertical guide meets the top edge, then hold Shift and click where it meets the bottom edge. Shift-click draws a straight line from the last click. Draw the horizontal crease the same way.Choose Filter → Gaussian Blur with a Radius of 2, then lower the layer's opacity to about 30%. Choose Edit → Clear Guides when you're done.
-
Drag a record
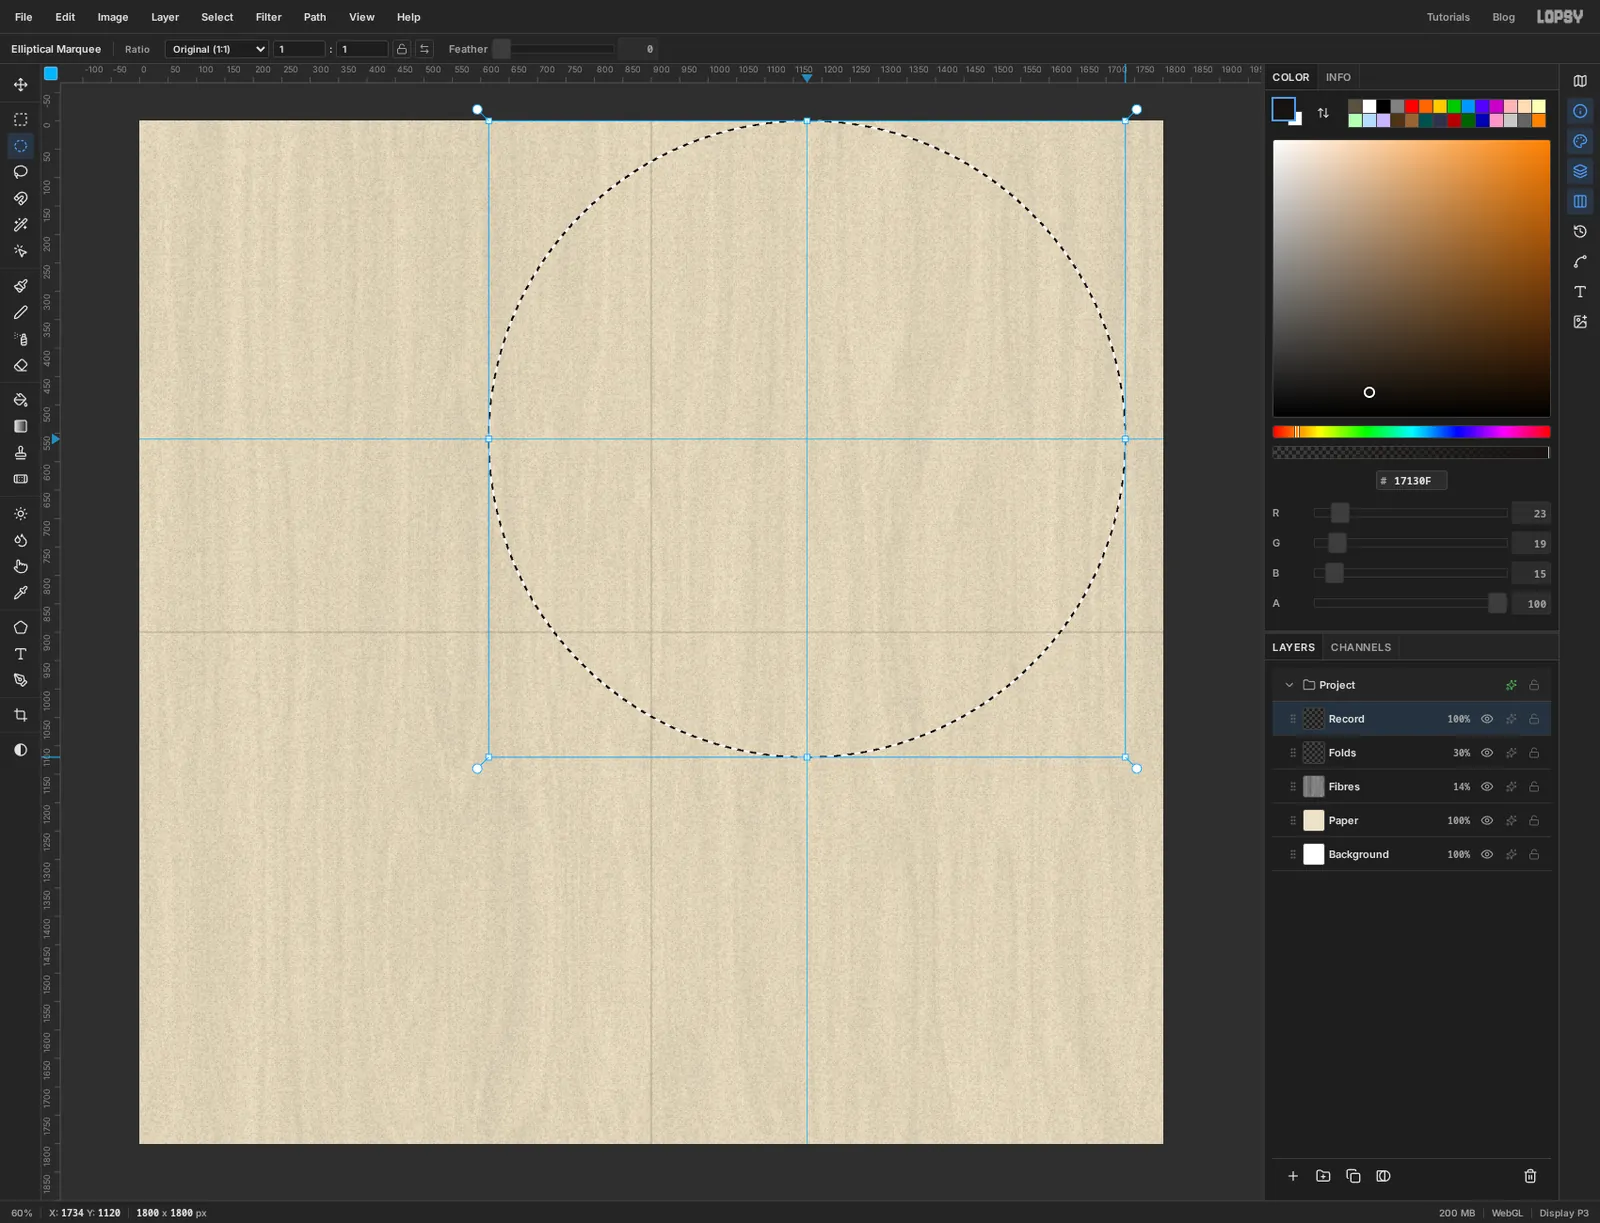
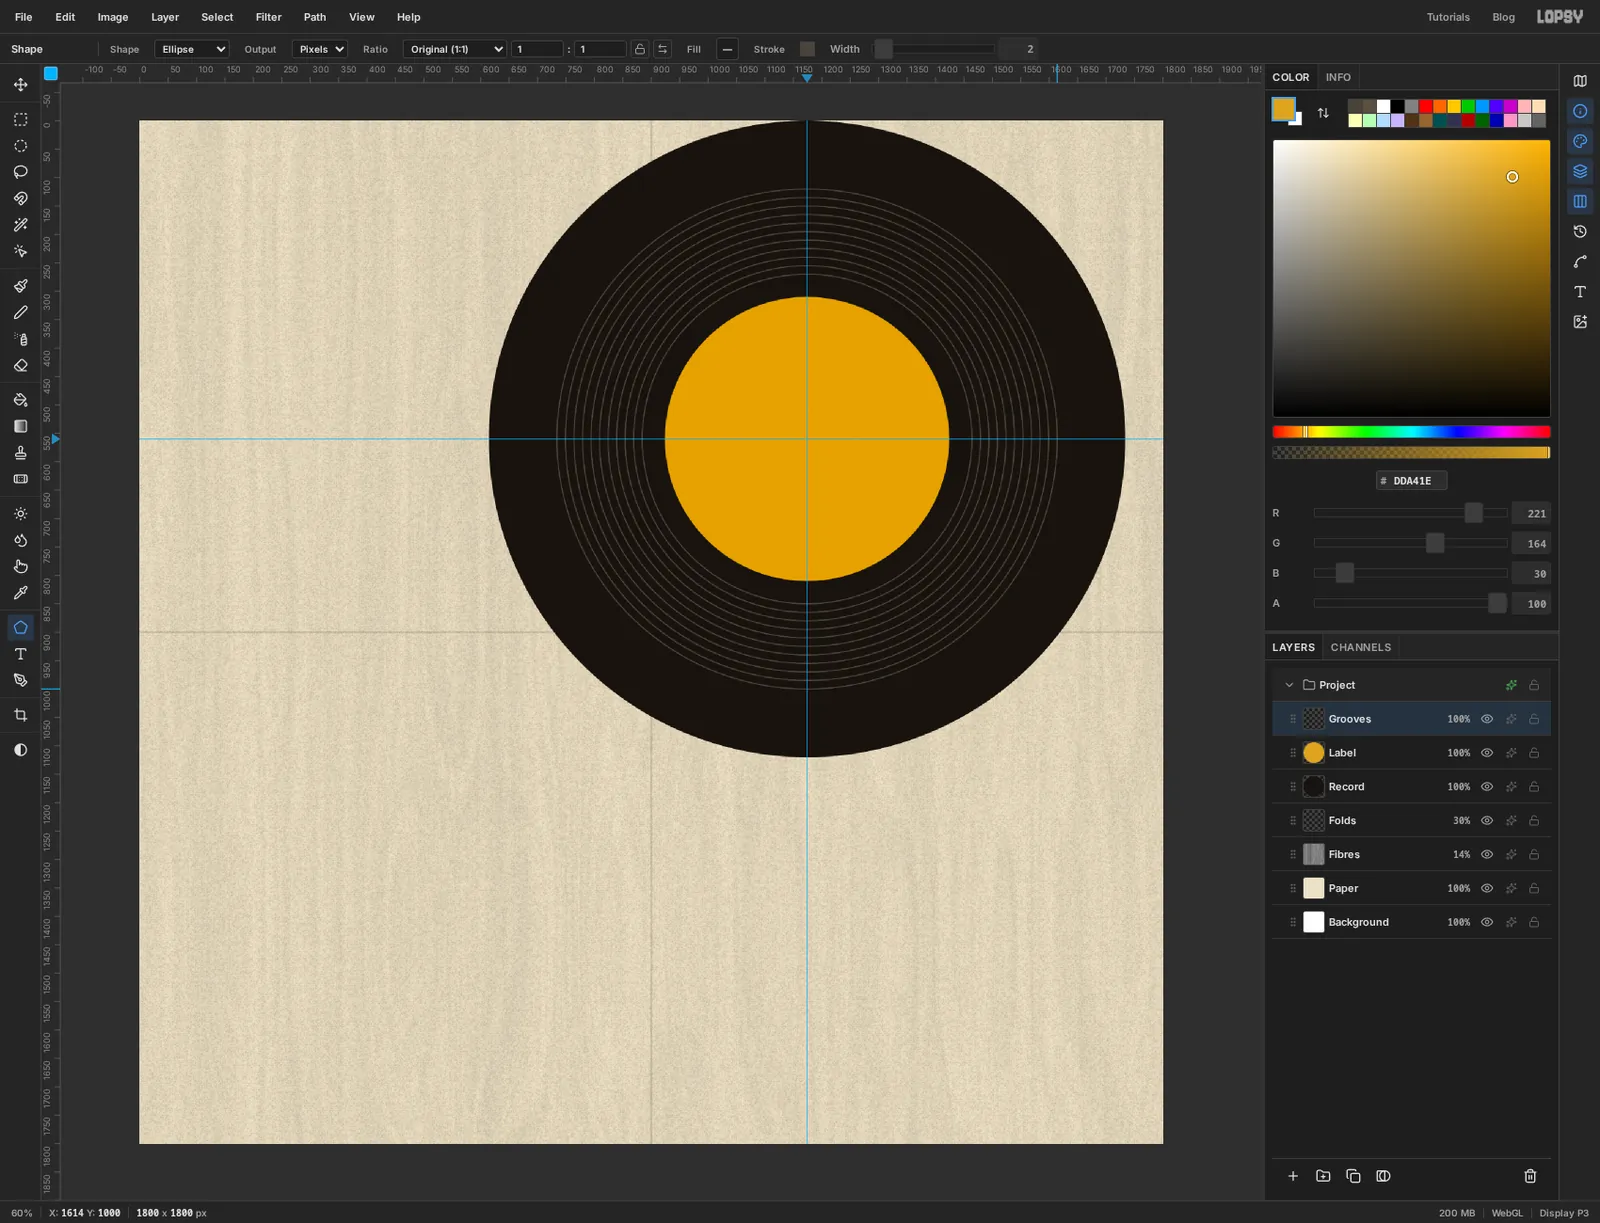
The record is the biggest shape on the cover, so it goes in first. Click the top ruler at about 1174 and the left ruler at about 560 to drop two guides. Where they cross is the centre of the record.
Add a layer called
Record. Pick the Elliptical Marquee. Start dragging from the top edge of the canvas at about 614, 0, then hold Cmd as you drag down and to the right to about 1734, 1120. Cmd forces a perfect circle, and you'll want it for every circle on this cover. The circle should touch the top of the page and sit centred on the guides. If it's off, press Cmd+D and drag again.Set the colour to ink and choose Edit → Fill, then press Cmd+D.
-
Add the label and the grooves
Add a layer called
Label. With the Elliptical Marquee and Cmd held, drag a circle of about 500 px across, centred on the guides: from 924, 310 to 1424, 810. Fill it with mustard and deselect.Add a layer called
Groovesand pick the Shape tool. Set Shape to Ellipse. Click the Fill swatch and choose Remove fill. Click the Stroke button, type4A443Bfor a dark grey, and set Width to 2.A shape grows outward from the point where you press, and that point snaps to guides. So press exactly where the guides cross and drag outward, holding Cmd again to keep the ring round. Draw the first one just outside the label, about 290 px from the centre, then keep going outward in steps of about 15 px until you have eleven rings. The last one should stop about 120 px short of the record's edge. That empty band is where the text will go later.
Choose View → Show Guides to hide the guides for now.
-
Cut a sheet of red paper
Add a layer called
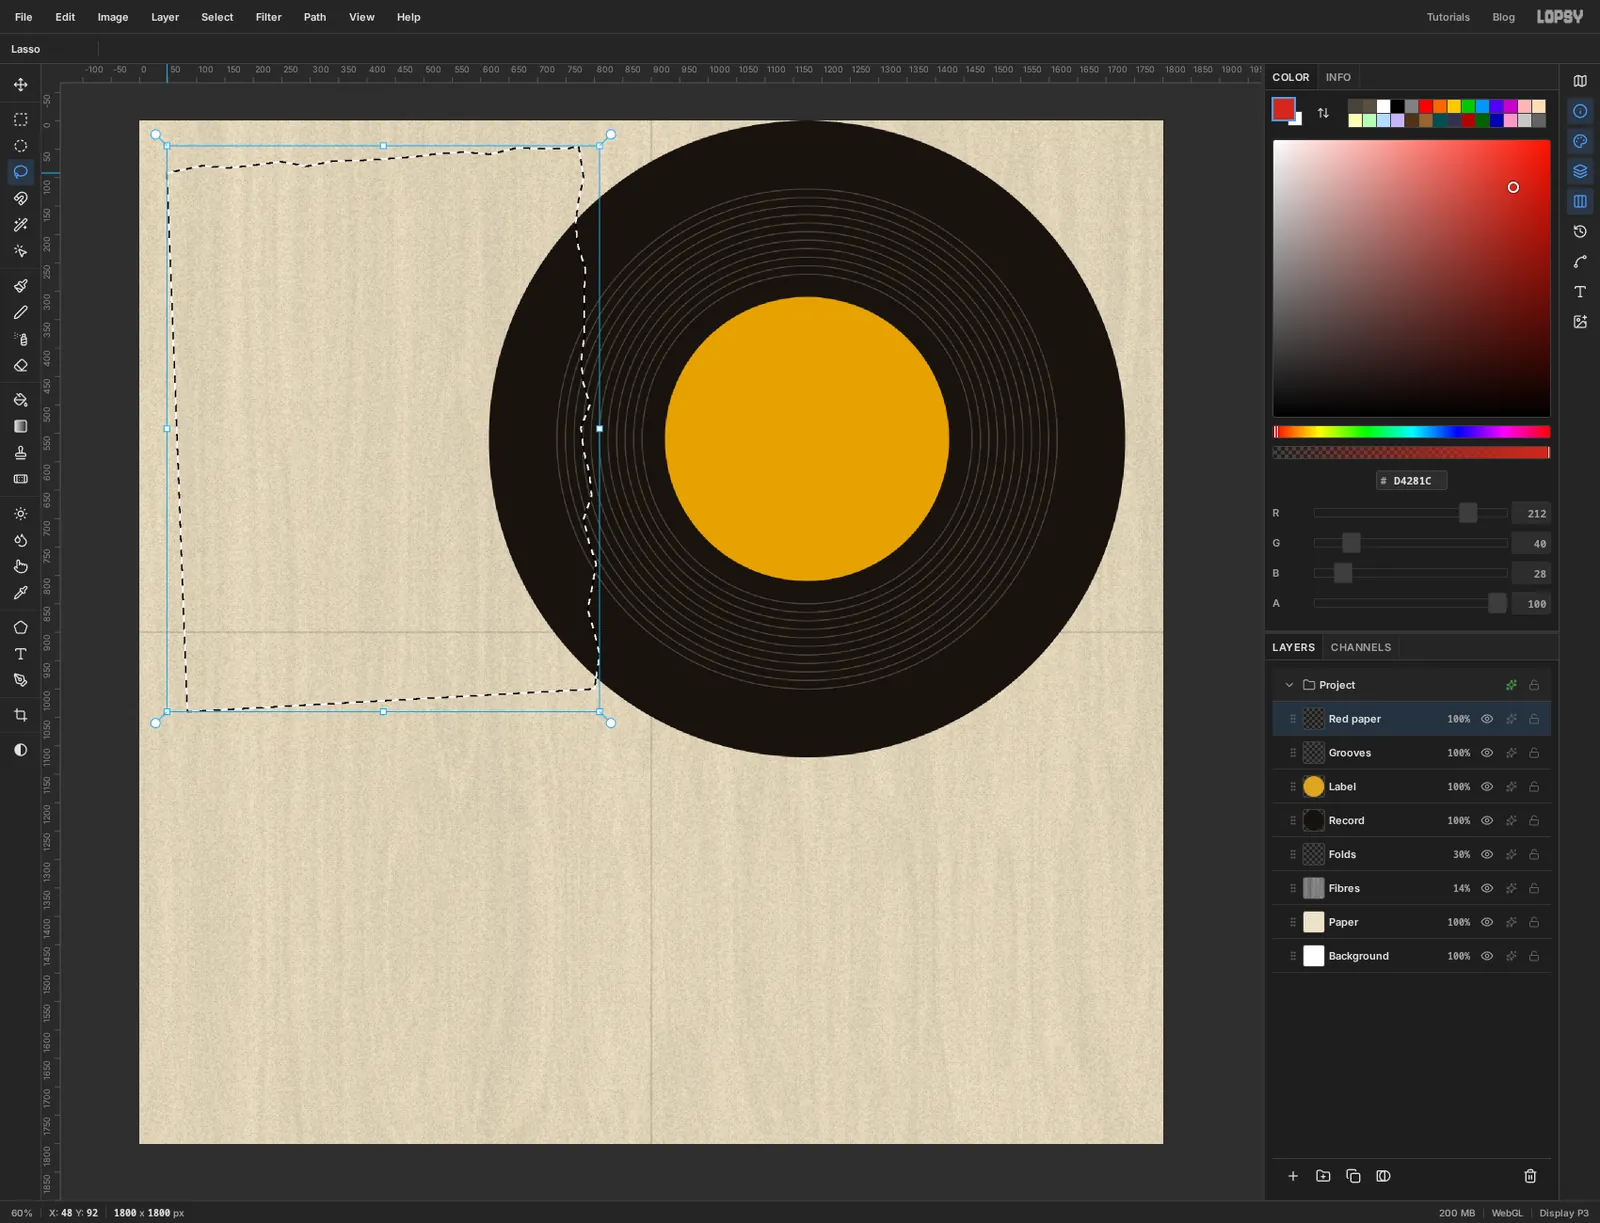
Red paper. Pick the Lasso and draw a big, slightly crooked rectangle by hand. Start just inside the top-left corner of the page, wobble along the top to a little left of centre (x about 780), come down the right side to just past the horizontal fold, go straight back along the bottom, and return up the left side. Let the top and right edges shake a little as you go. The sheet should cover the left edge of the record.Set the colour to red , choose Edit → Fill and press Cmd+D.
-
Tear the bottom edge
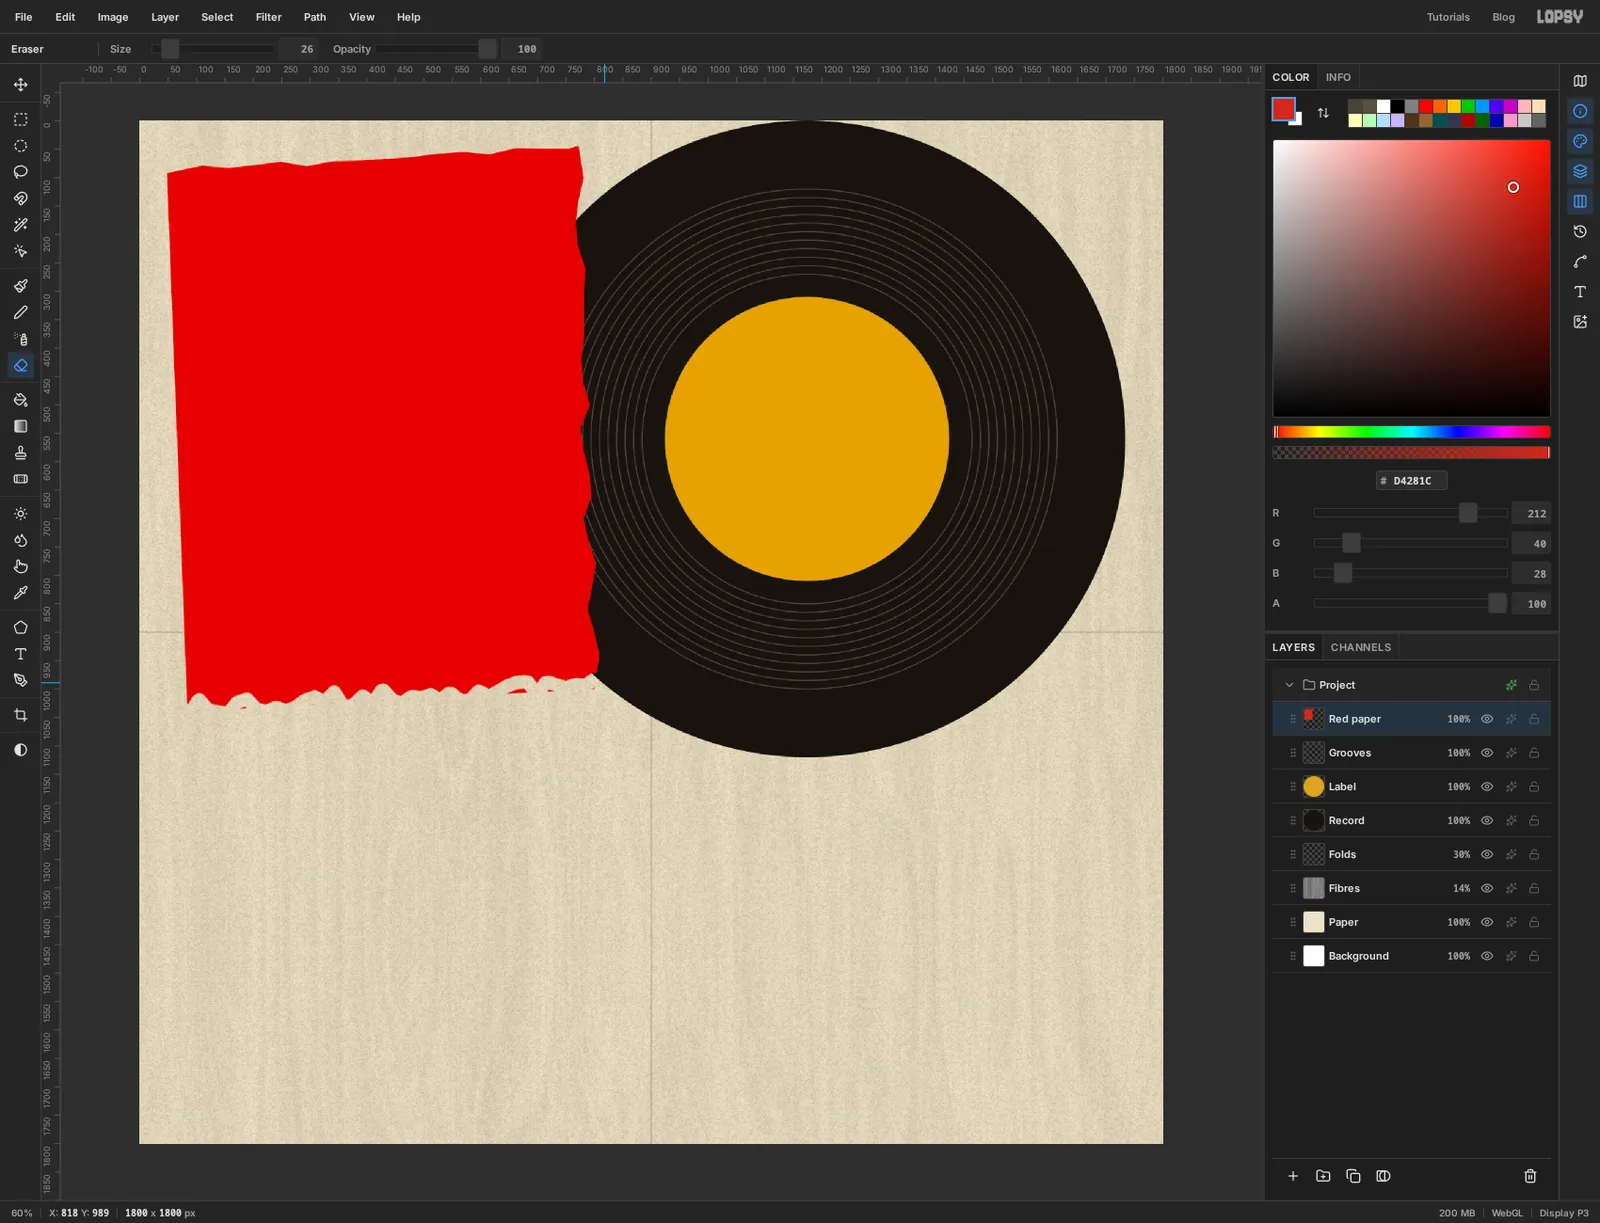
Three sides are scissor cuts. Make the fourth a tear. Pick the Eraser and set Size to about 26. Starting just left of the sheet's bottom corner, drag along the bottom edge in one go, jiggling the cursor up and down by 10 or 15 px as you travel. The eraser bites an uneven line out of the paper and leaves a few scraps hanging. If it looks too regular, press Cmd+Z and try again with a shakier hand.
Give the sheet some tooth with Filter → Texture: pick Grain, Amount 16, Size 3, Detail 60.
Now lift it off the page. Click the layer's effects button and tick Drop Shadow. Set Offset X to 9, Offset Y to 11, Blur to 4 and Opacity to 38, and set the Shadow color to the ink colour. Paper shadows are short and hard. A big soft shadow would make the sheet look like it's floating.
-
Draw a pipe with the Pen
The machine starts with a stub of pipe. Add a layer called
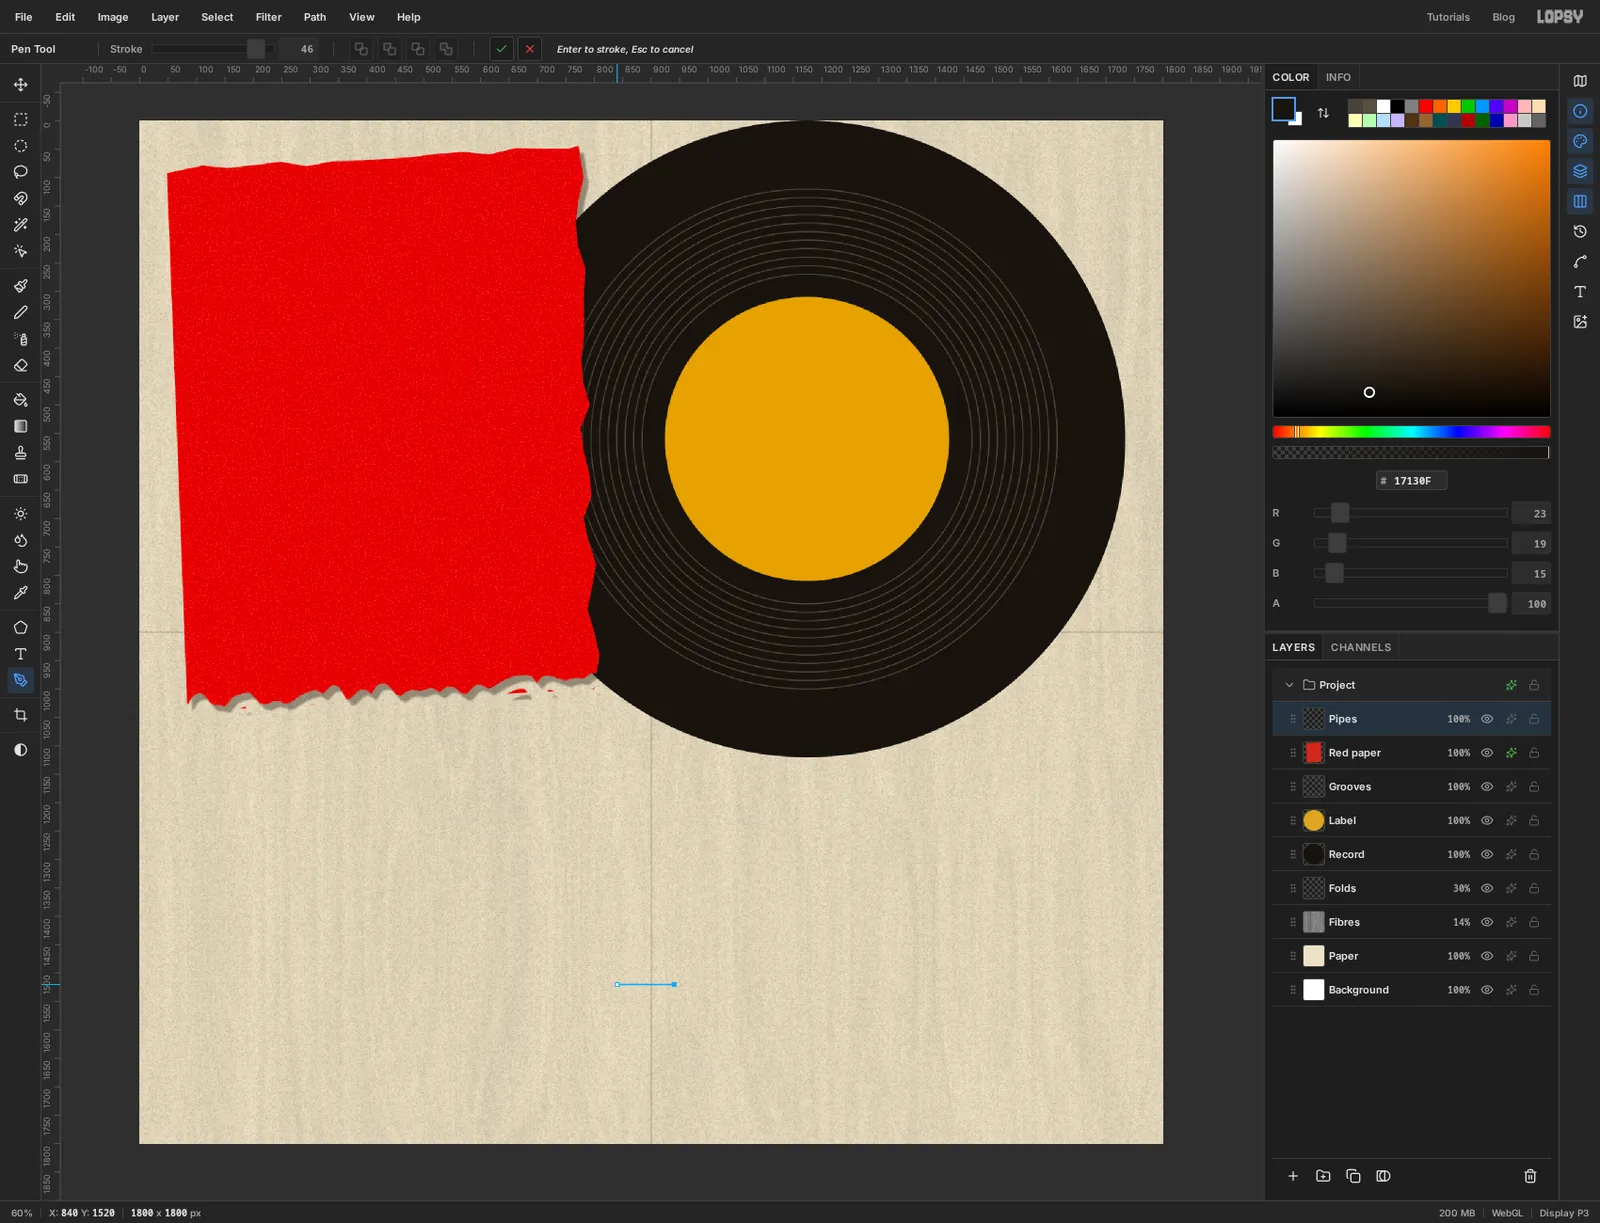
Pipes, set the colour to ink, and pick the Pen tool. Set Stroke to 46 in the options bar.Click once at about 940, 1520 and once at 840, 1520, then press Enter. Enter strokes the path with the current colour at the Stroke width, with rounded ends. The path's outline stays on screen afterwards. To clear it, click an empty part of the canvas with the Pen and then click the Cancel path ✗ in the options bar.
Add a collar where the pipe will meet the boiler: with the Rectangular Marquee, drag a small upright box across the pipe a little in from its right end, at about x 884 to 910, and 76 px tall. Fill it with mustard. The boiler will cover the pipe to the right of it.
-
Build the boiler
Add a layer called
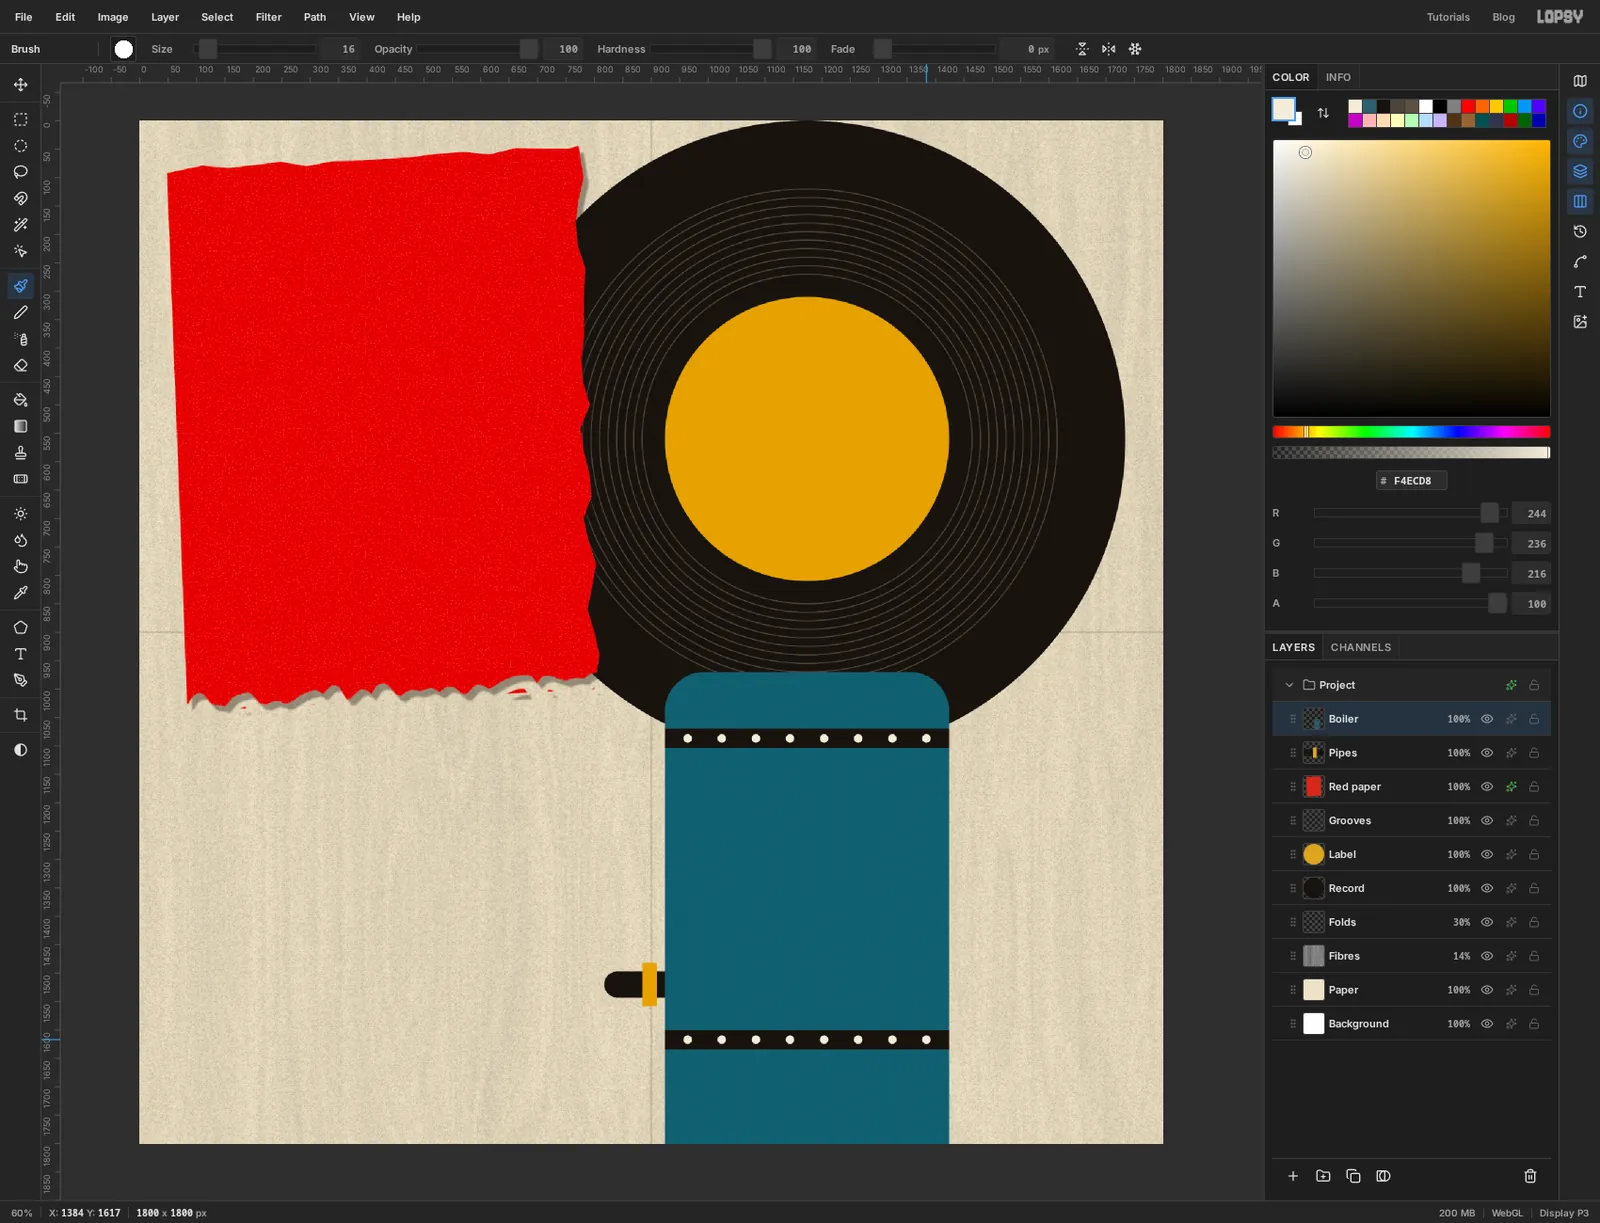
Boiler. Pick the Shape tool and set Shape to Rectangle. Click the Fill button and type2C5F6Efor teal, click the Stroke swatch and choose Remove stroke, and set Corner Radius to 70.Press at about 1174, 1420 and drag down and to the right until the cursor is well below the canvas, around 1424, 1870. The body comes out 500 px wide with its top at about 970, and it runs off the bottom of the page.
Add the two bands with the Rectangular Marquee. Drag a strip 34 px tall right across the boiler at about y 1070 and fill it with ink. Do the same at about y 1600.
For the rivets, pick the Brush, set Size to 16 and Hardness to 100, choose cream , and click eight times along each band, about 60 px apart.
-
Paint one spoke, get eight
Add a layer called
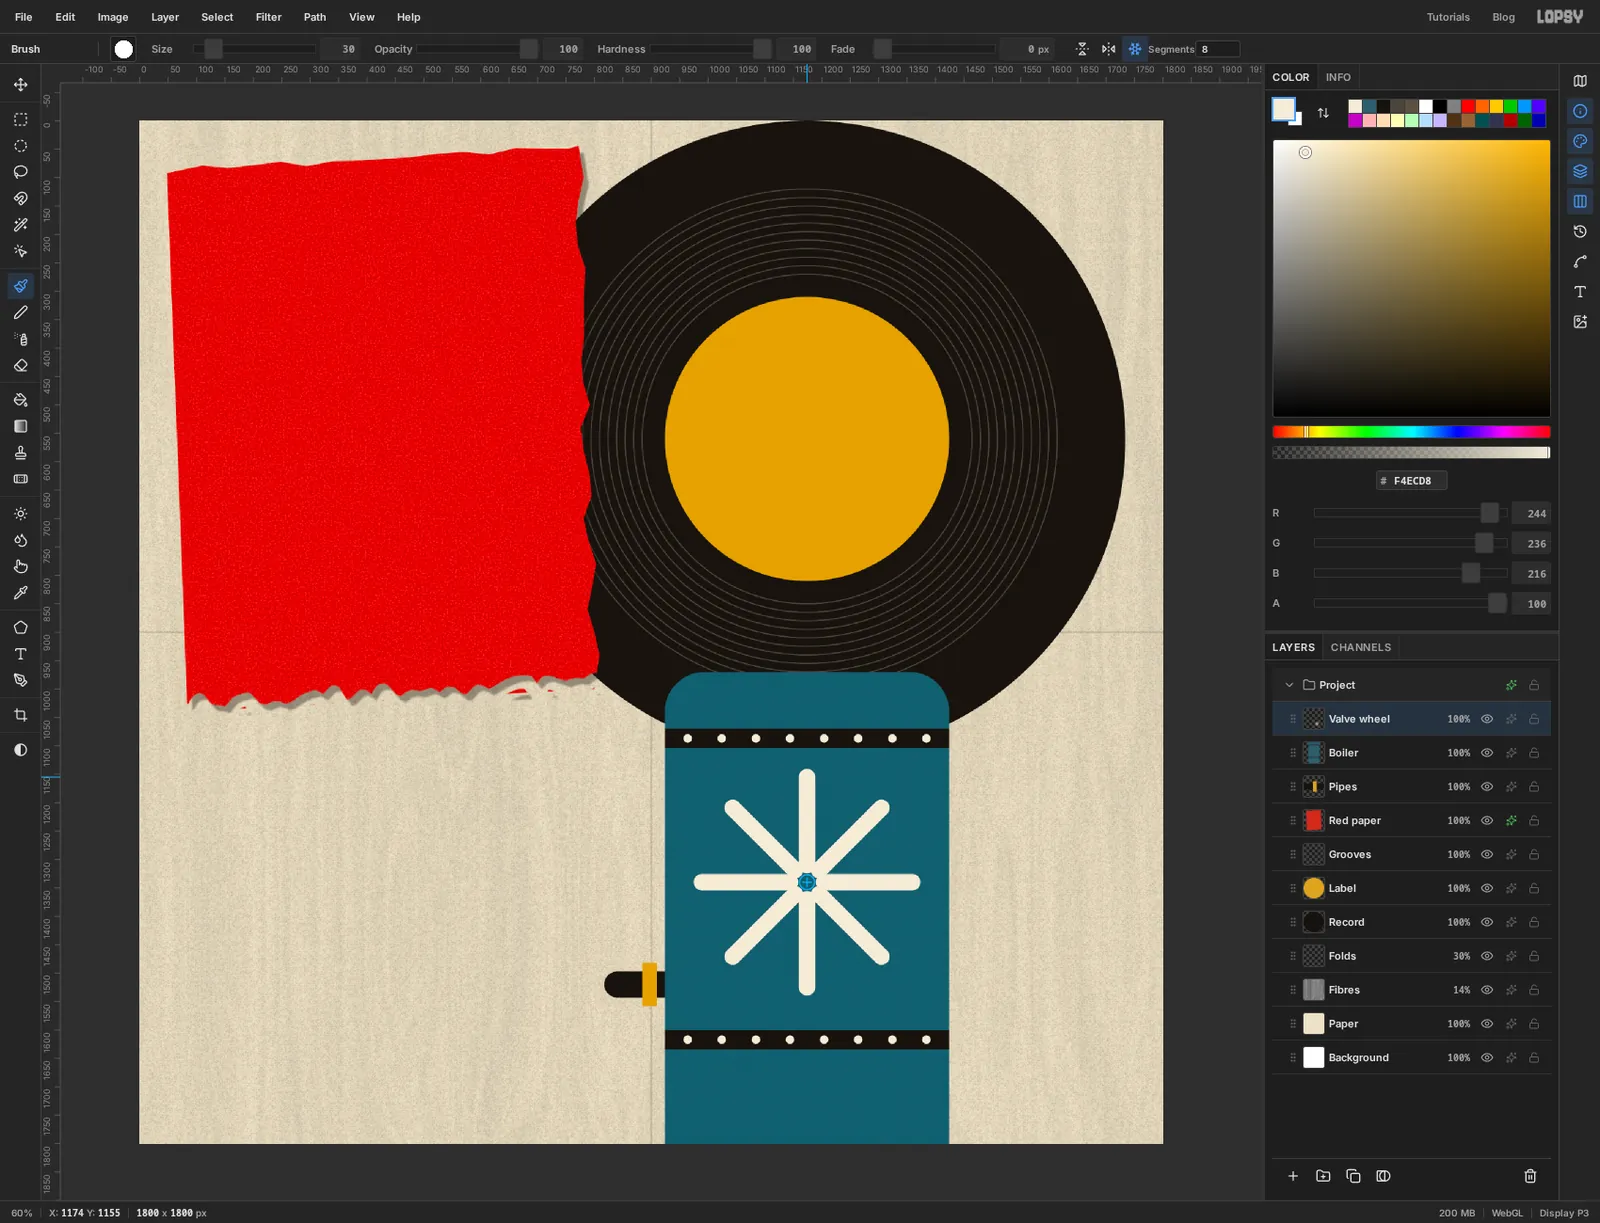
Valve wheel. With the Brush still selected, set Size to 30 and click Radial Symmetry in the options bar. It starts at 8 segments, which is what you want.Symmetry turns around a centre point that starts in the middle of the canvas. Move it by holding Cmd and clicking in the middle of the boiler, at about 1174, 1340. A small crosshair marks the spot.
Now click about 30 px above the crosshair, hold Shift and click about 185 px above it. One straight spoke appears, and seven copies appear with it.
-
Close the rim
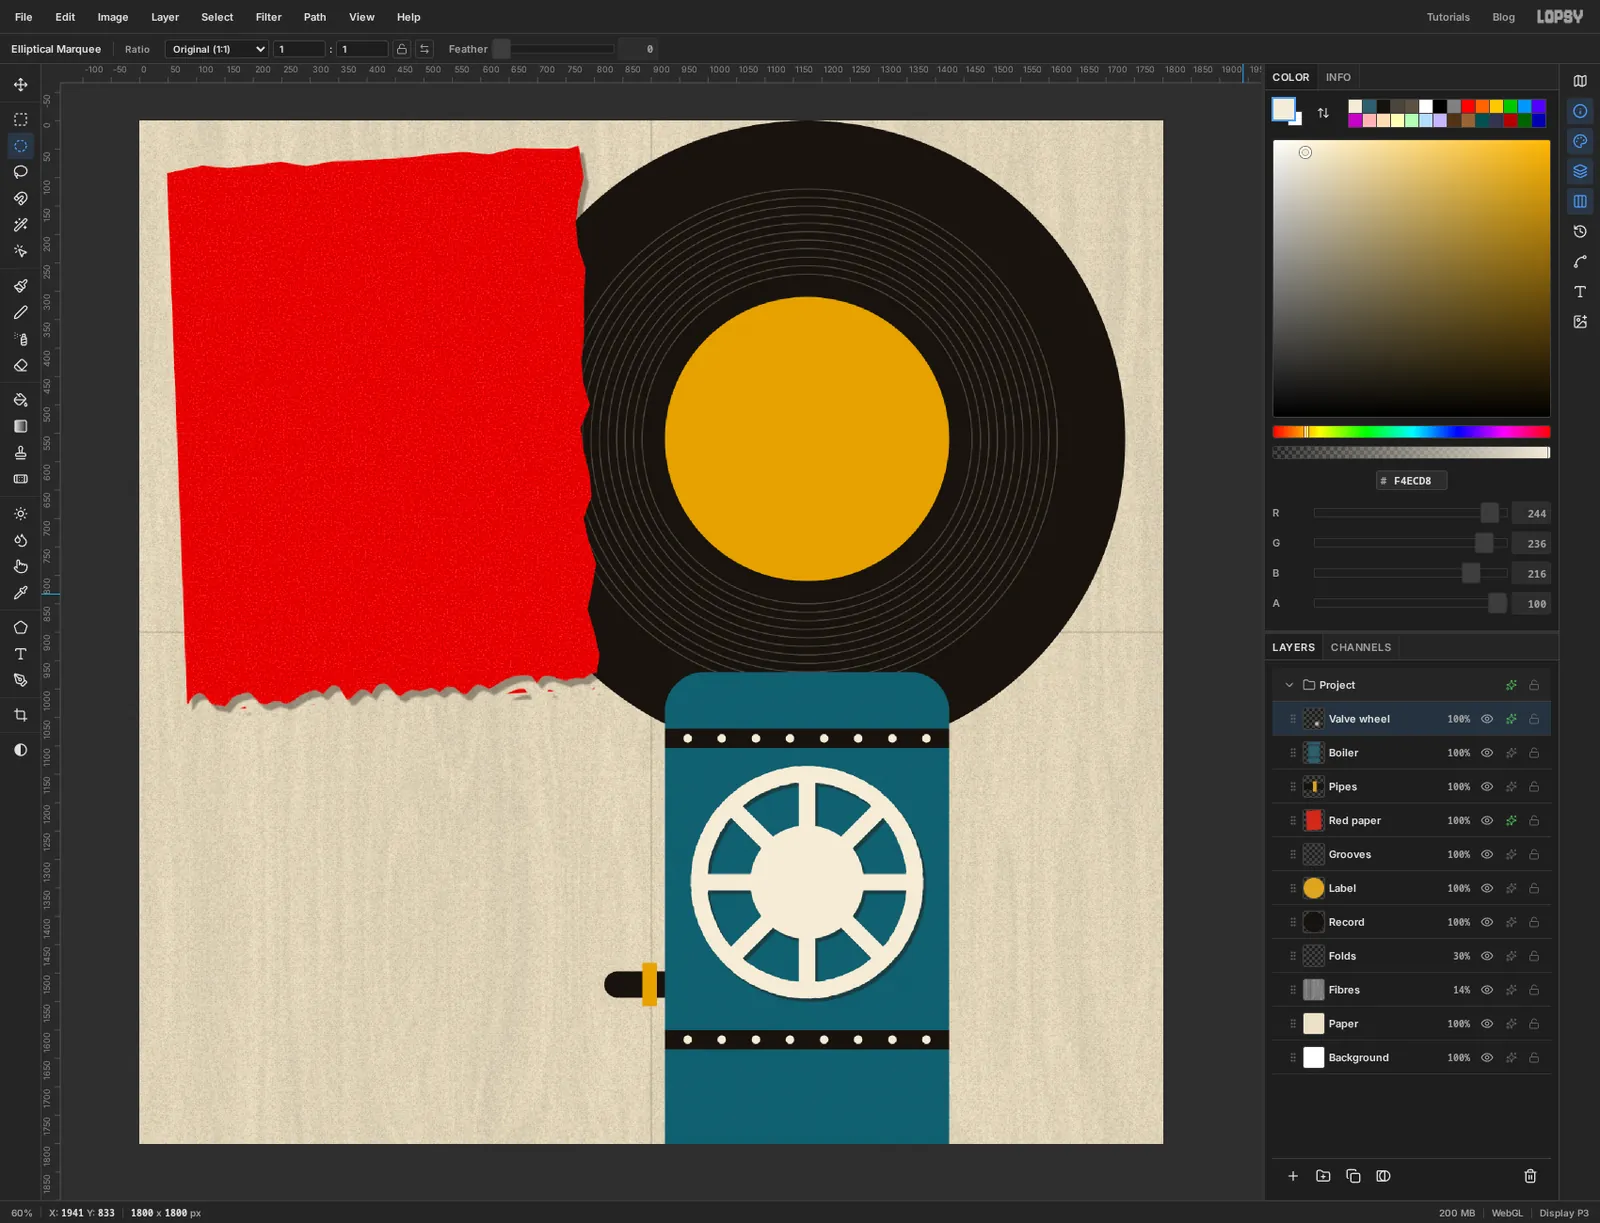
Starting at the top of the vertical spoke, drag a short arc to the right along the rim, as far as the next spoke. Each of the eight copies draws its own eighth of the circle, and together they close the rim. It doesn't have to be a perfect arc.
Click Radial Symmetry again to switch it off. This matters: while symmetry is on, a Cmd-click anywhere moves the centre point, whatever tool you're holding.
Give the wheel a hub. With the Elliptical Marquee and Cmd held, drag a circle about 200 px across over the middle of the wheel and fill it with cream.
Add a Drop Shadow to this layer too, but a tighter one: Offset X 5, Offset Y 6, Blur 2, Opacity 45. You'll use these same four numbers for every small piece from here on.
-
Paste the photo
The head needs something to stand on first. Add a layer called
Neck. With the Rectangular Marquee, drag an upright box about 116 px wide above the middle of the boiler, from 1112, 830 down to 1228, 980, and fill it with ink. Then drag a wider, shorter collar across its base, from 1090, 940 to 1250, 984, and fill it with mustard.Now copy your cat photo to the clipboard. Opening it in a browser tab, right-clicking and choosing Copy Image is the quickest way. Back in Lopsy, press Cmd+V.
The photo arrives as a new layer in the top left corner, already selected, and Lopsy switches to the Move tool. Rename the layer
Cat head.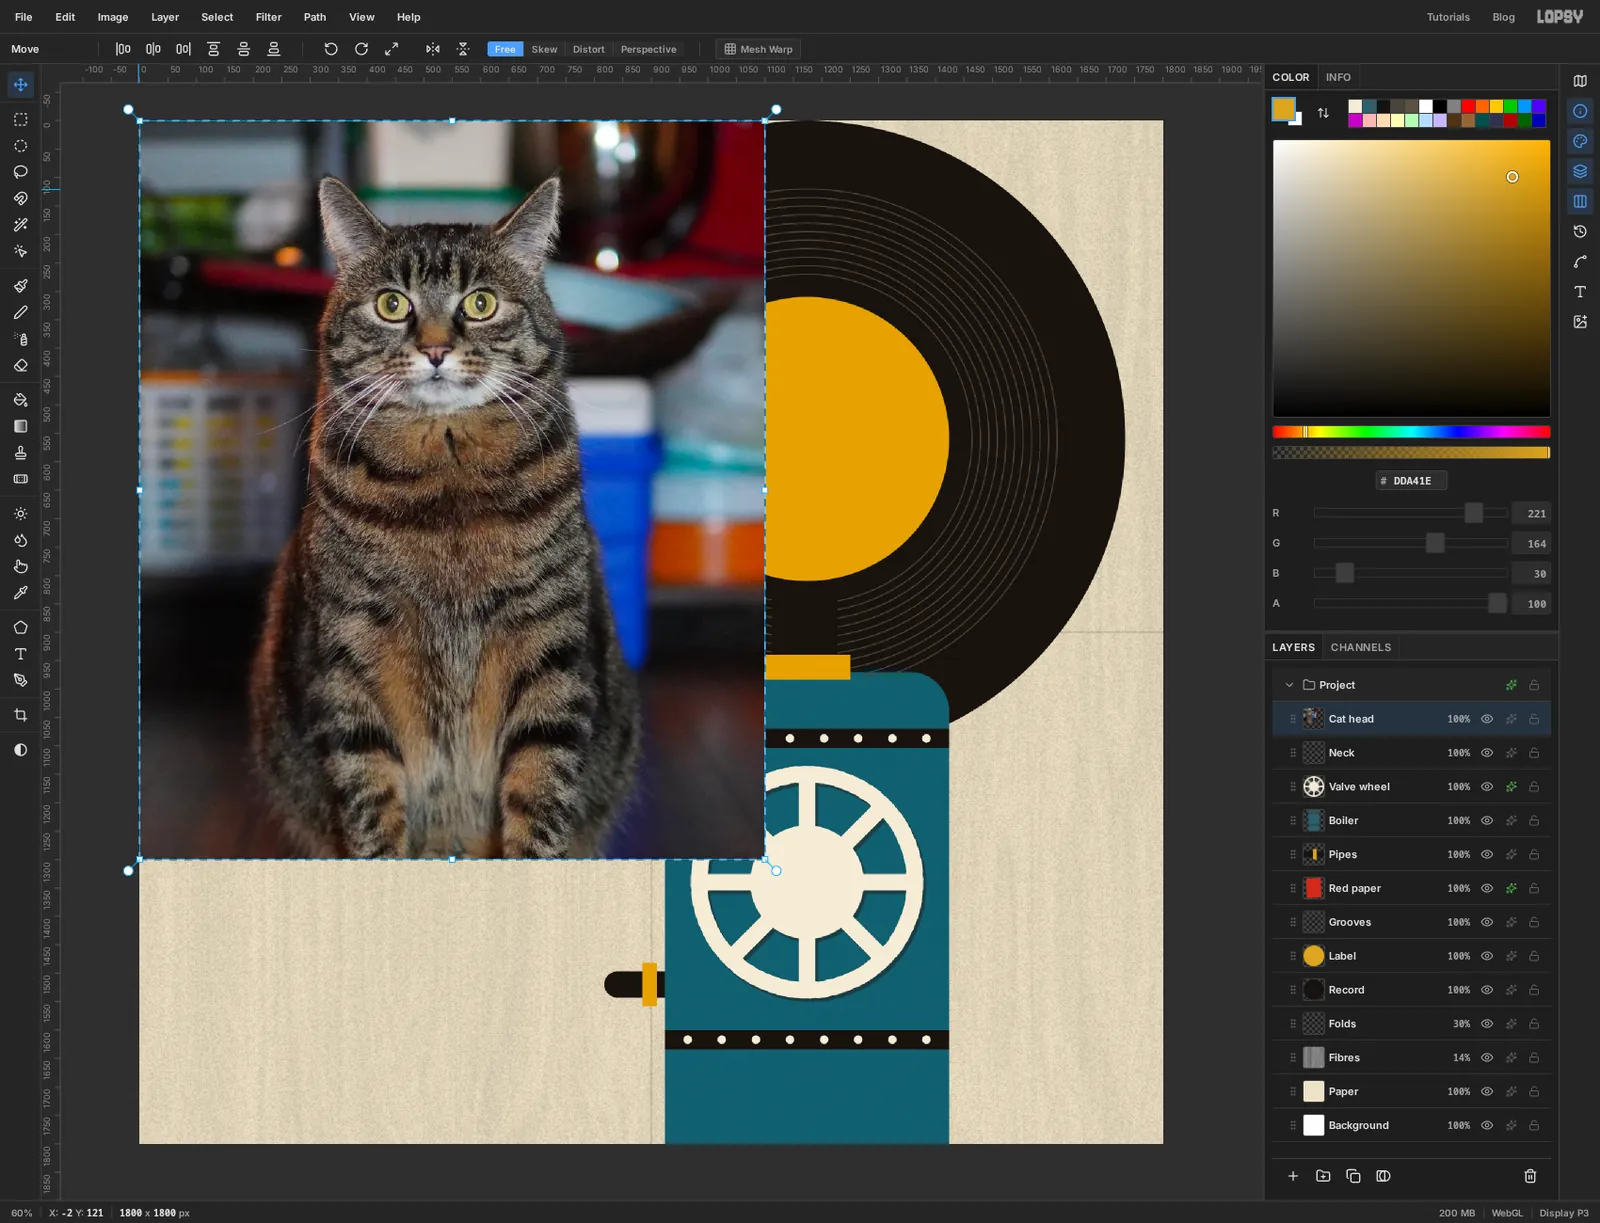
-
Cut out the head
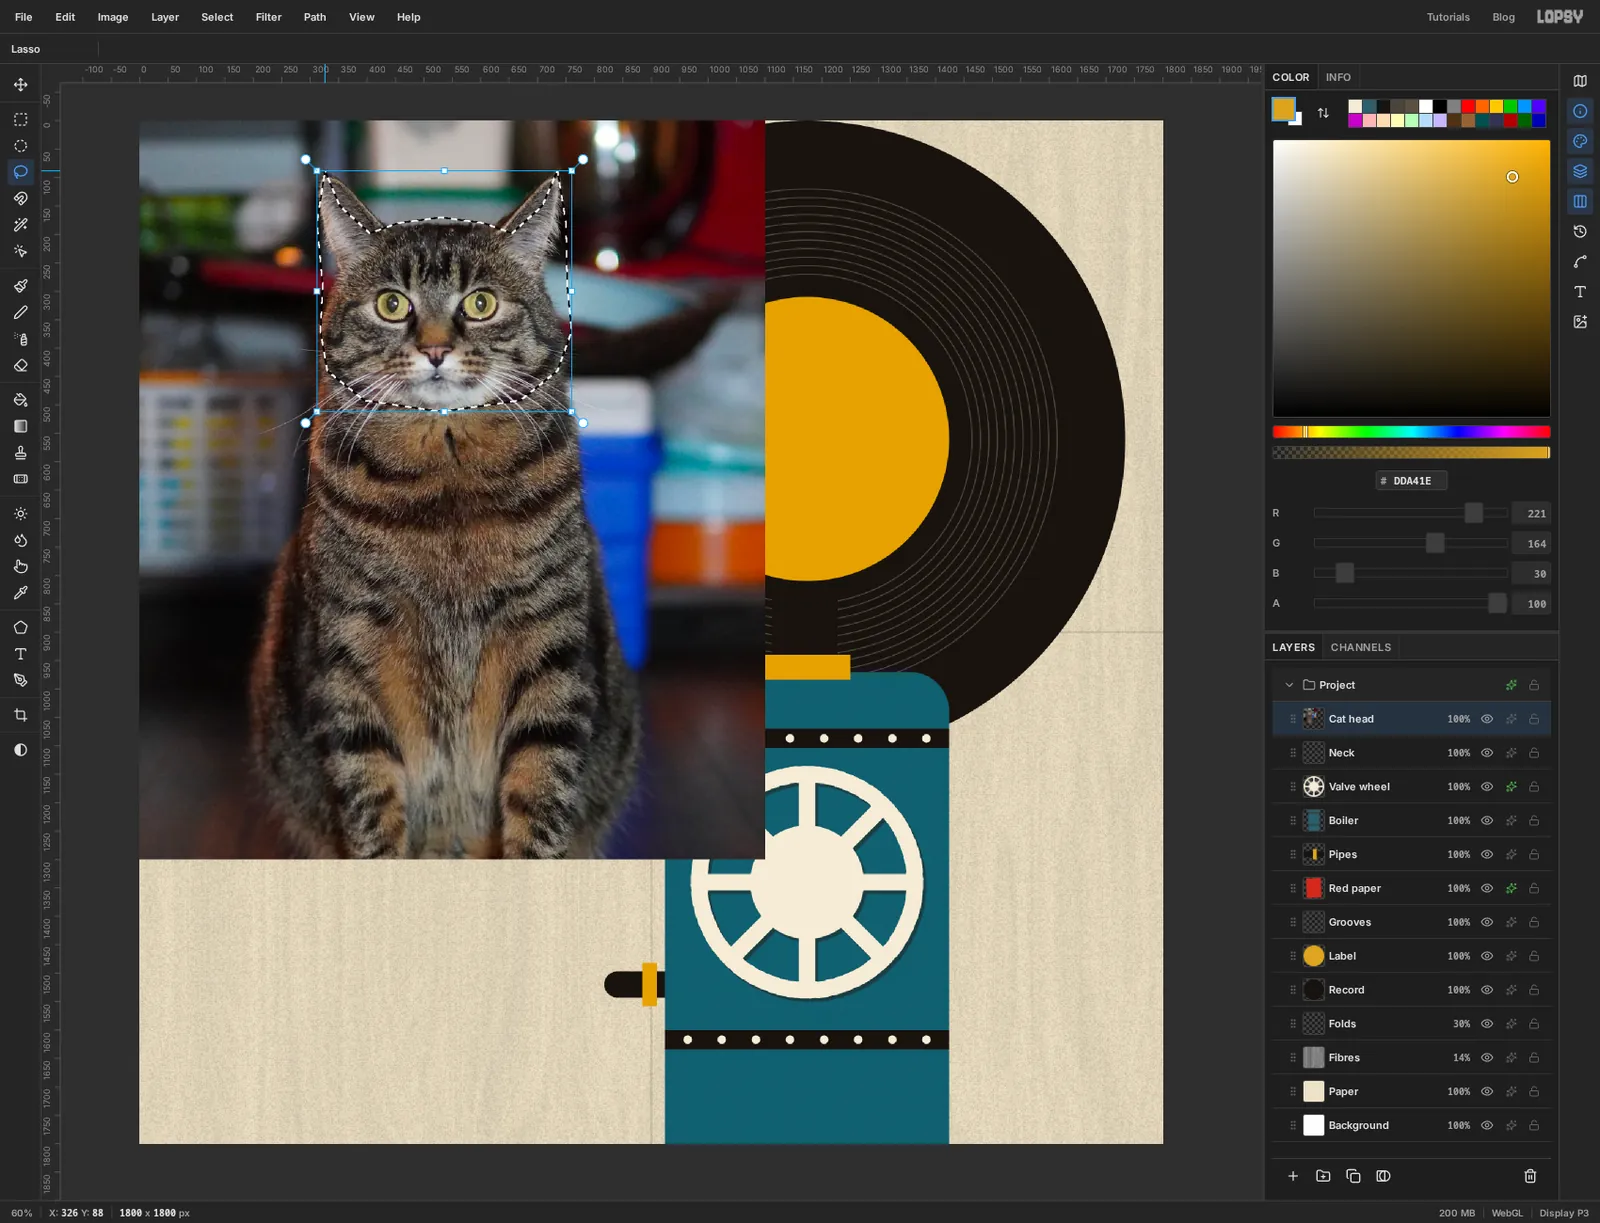
Pick the Lasso and draw around the head. Go up the outside of one ear, down into the dip between the ears, up and over the other ear, down the cheek, straight across under the chin, and back up the other cheek. Don't try to follow the fur. Cut it in straight snips the way you would with scissors, and cut the whiskers off.
-
Throw away the rest and scale it up
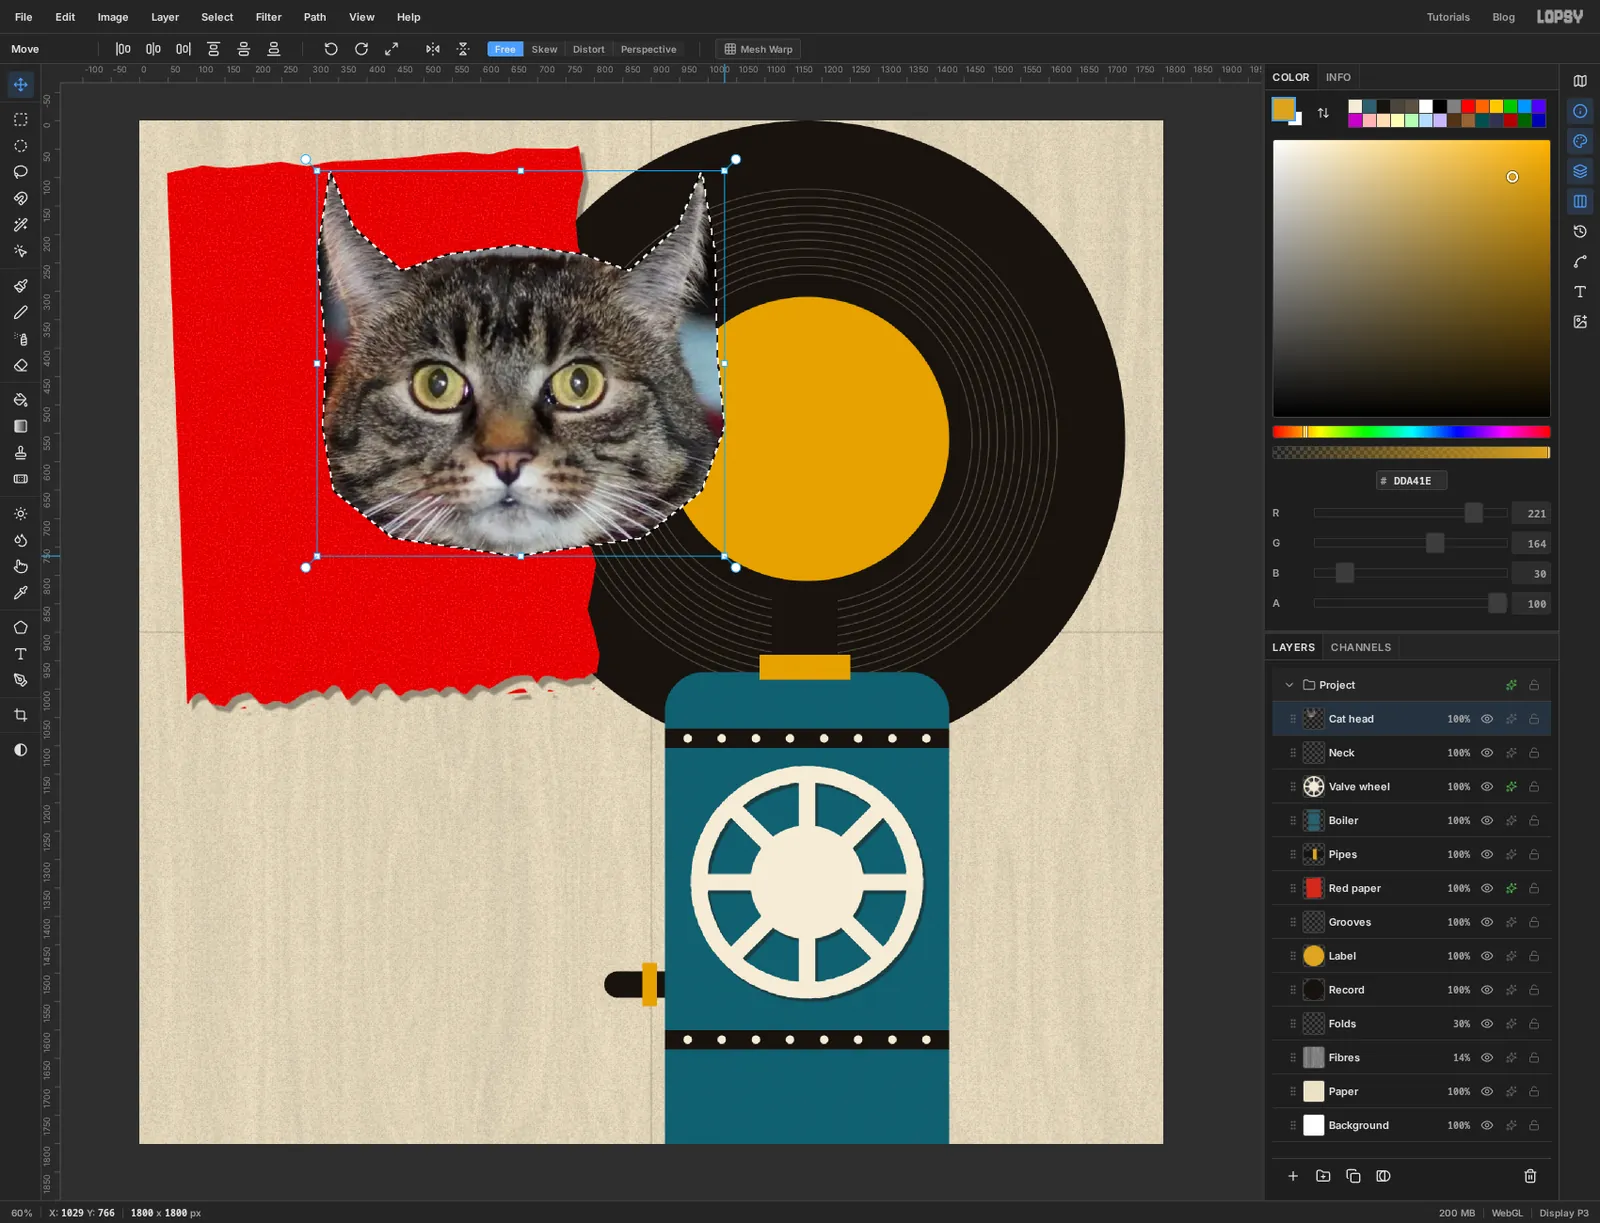
Press Cmd+Shift+I to invert the selection, press Delete, then press Cmd+Shift+I again. The head is all that's left of the photo, and it's selected again.
Pick the Move tool. Hold Cmd and drag the bottom-right handle outward until the head is about 720 px wide. Cmd keeps the proportions. A cat's head that's far too big for its body is the look you want.
Press Cmd+D to finish.
-
Move it into place and take the colour out
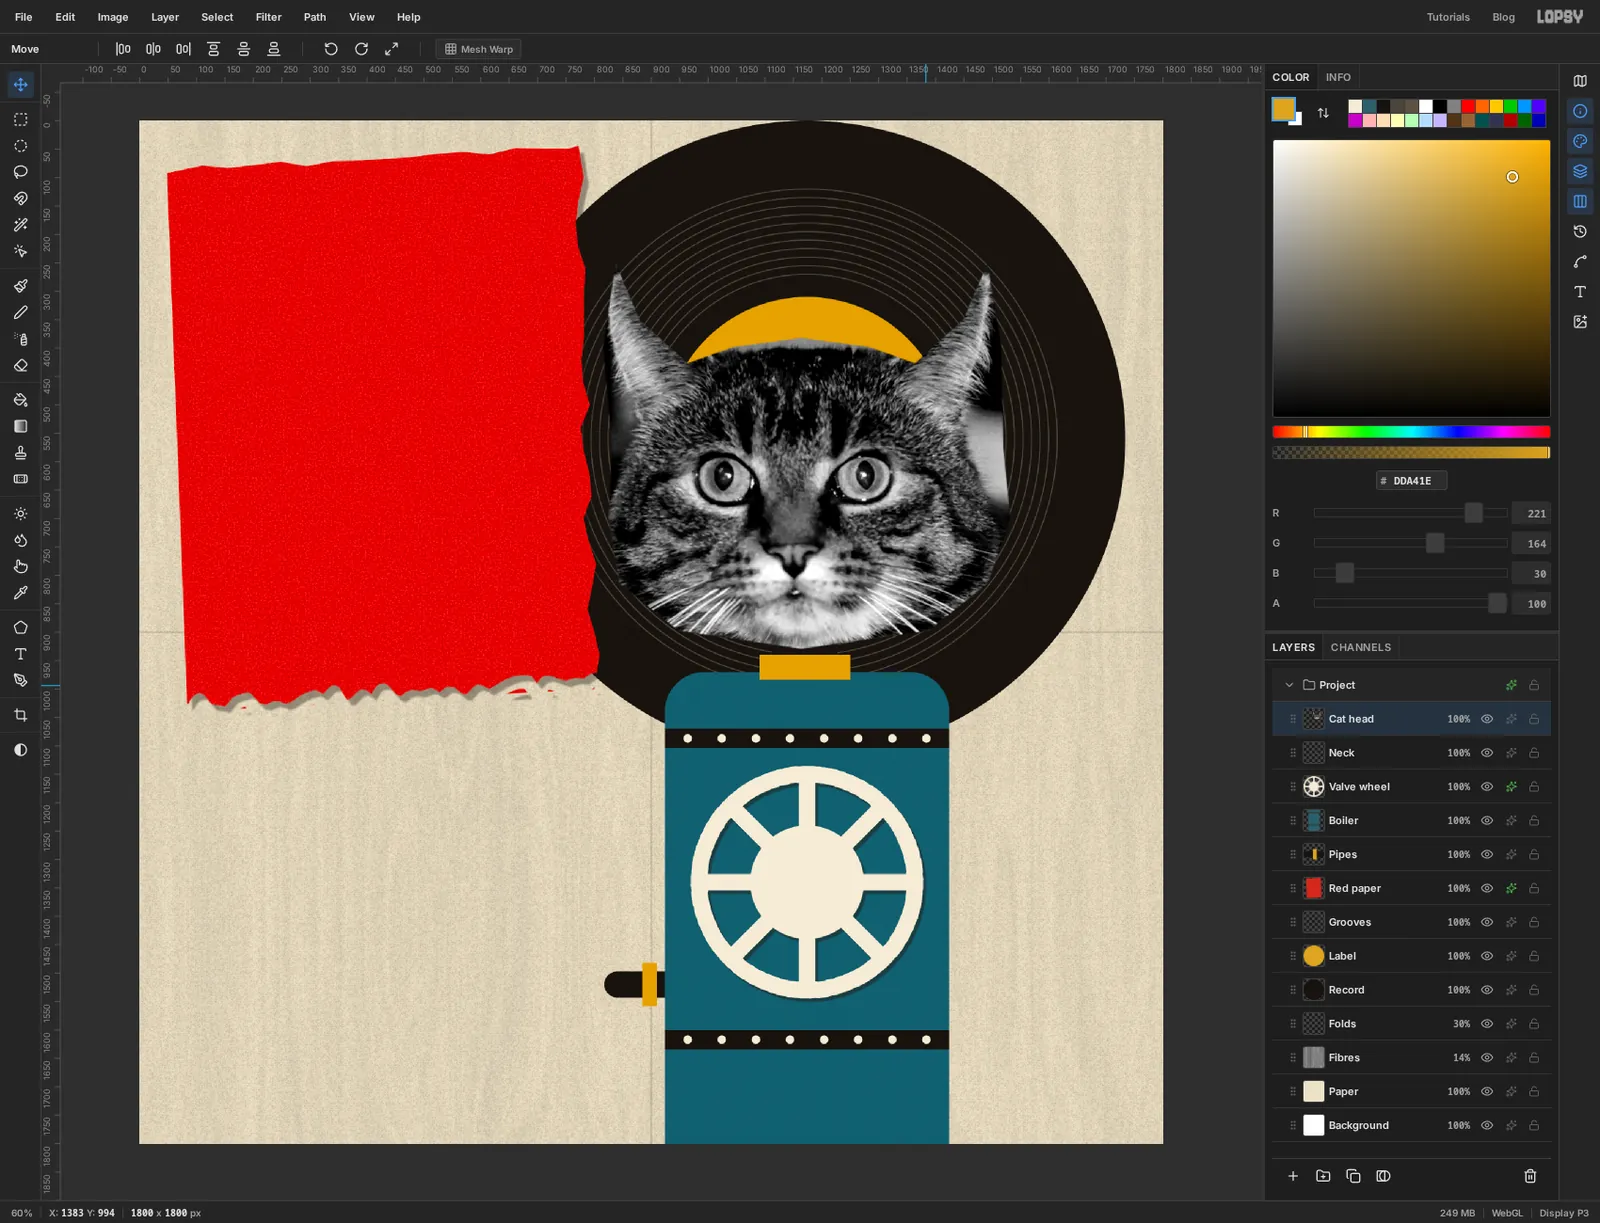
Still with the Move tool, drag the head over the record so that its chin overlaps the top of the black neck. Its top-left corner ends up near 816, 250. The mustard label should show as an arch between the ears.
Choose Filter → Desaturate, then Filter → Brightness/Contrast with Contrast at 45. The harder the contrast, the better the next steps work.
-
Put paper behind the head
In a moment the photo becomes black dots with nothing between them. It needs paper to be printed on. Click the
Necklayer and add a layer calledHead backing, which lands just under the head.Hold Cmd and click the
Cat headlayer's thumbnail. That loads the head's outline as a selection without changing which layer you're on. Fill it with cream and deselect.Add a Drop Shadow to
Head backingwith the larger settings from the red paper: 9, 11, 4 and 38. The shadow goes on the backing because a shadow on the dots would put one under every dot.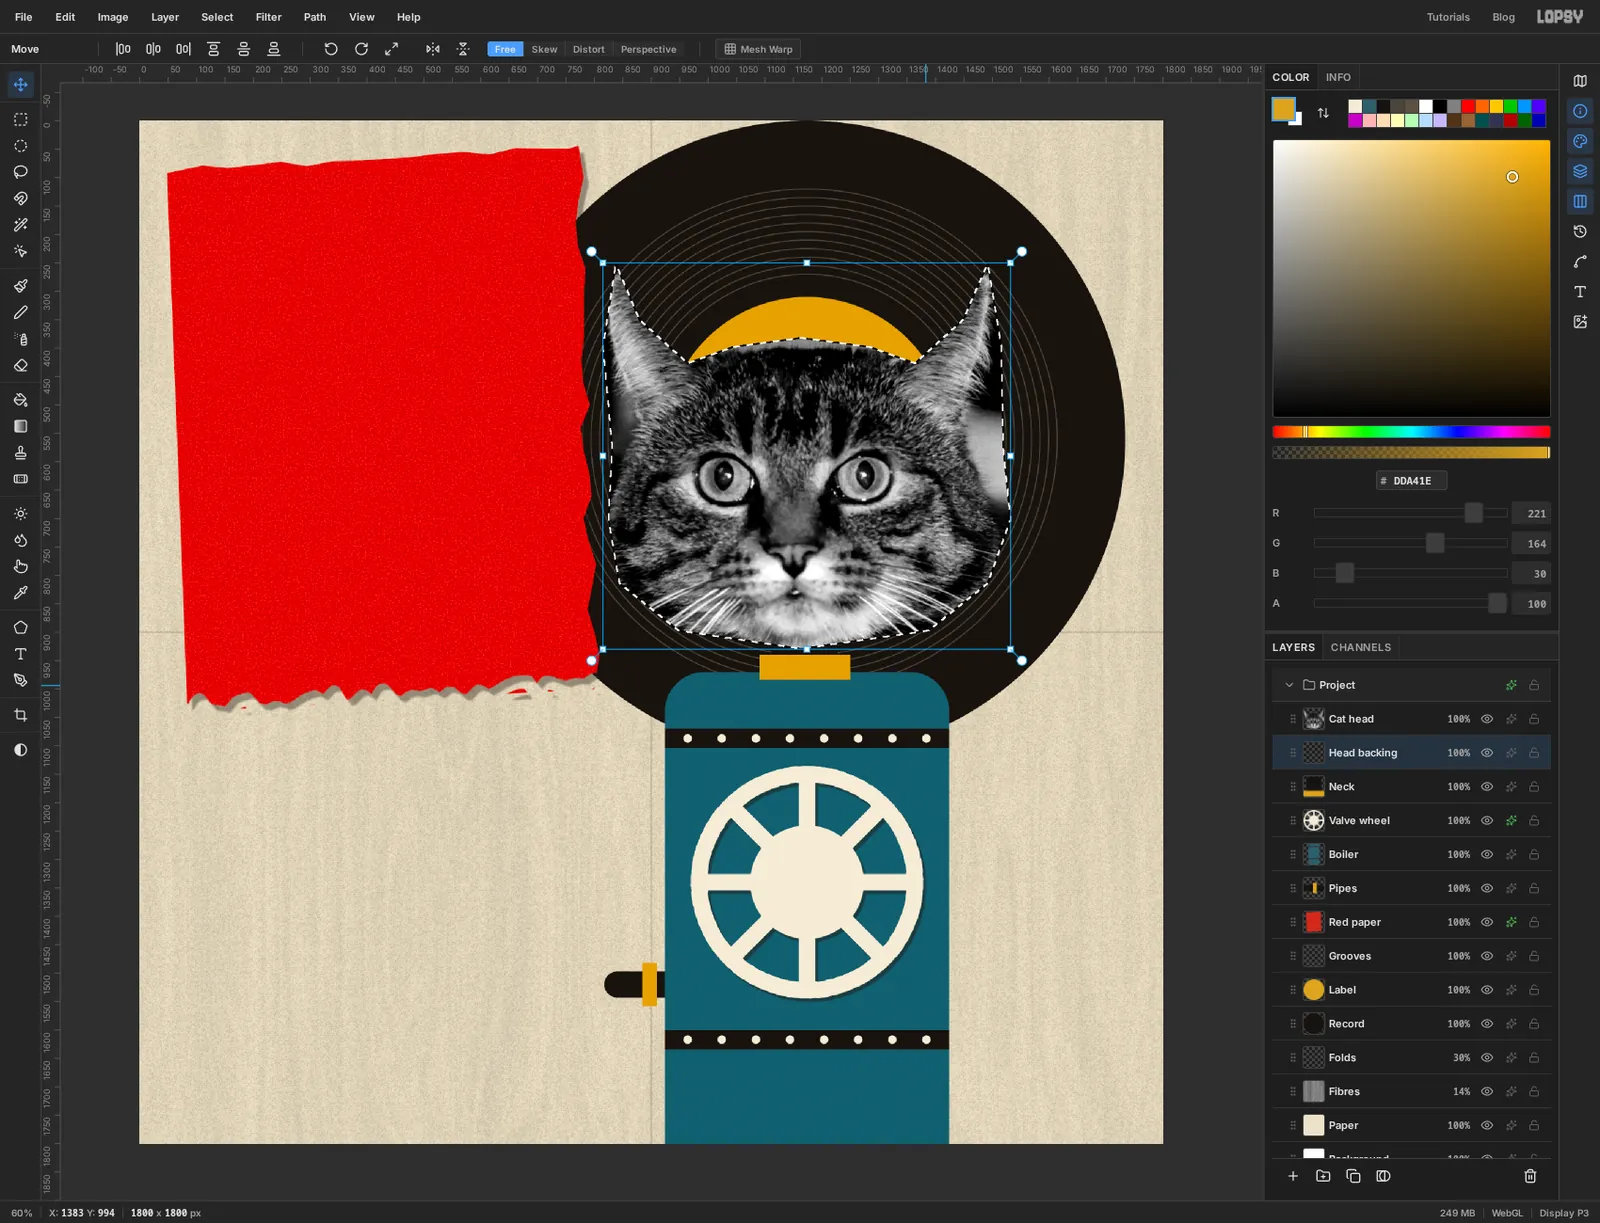
-
Cut a horn
Click the
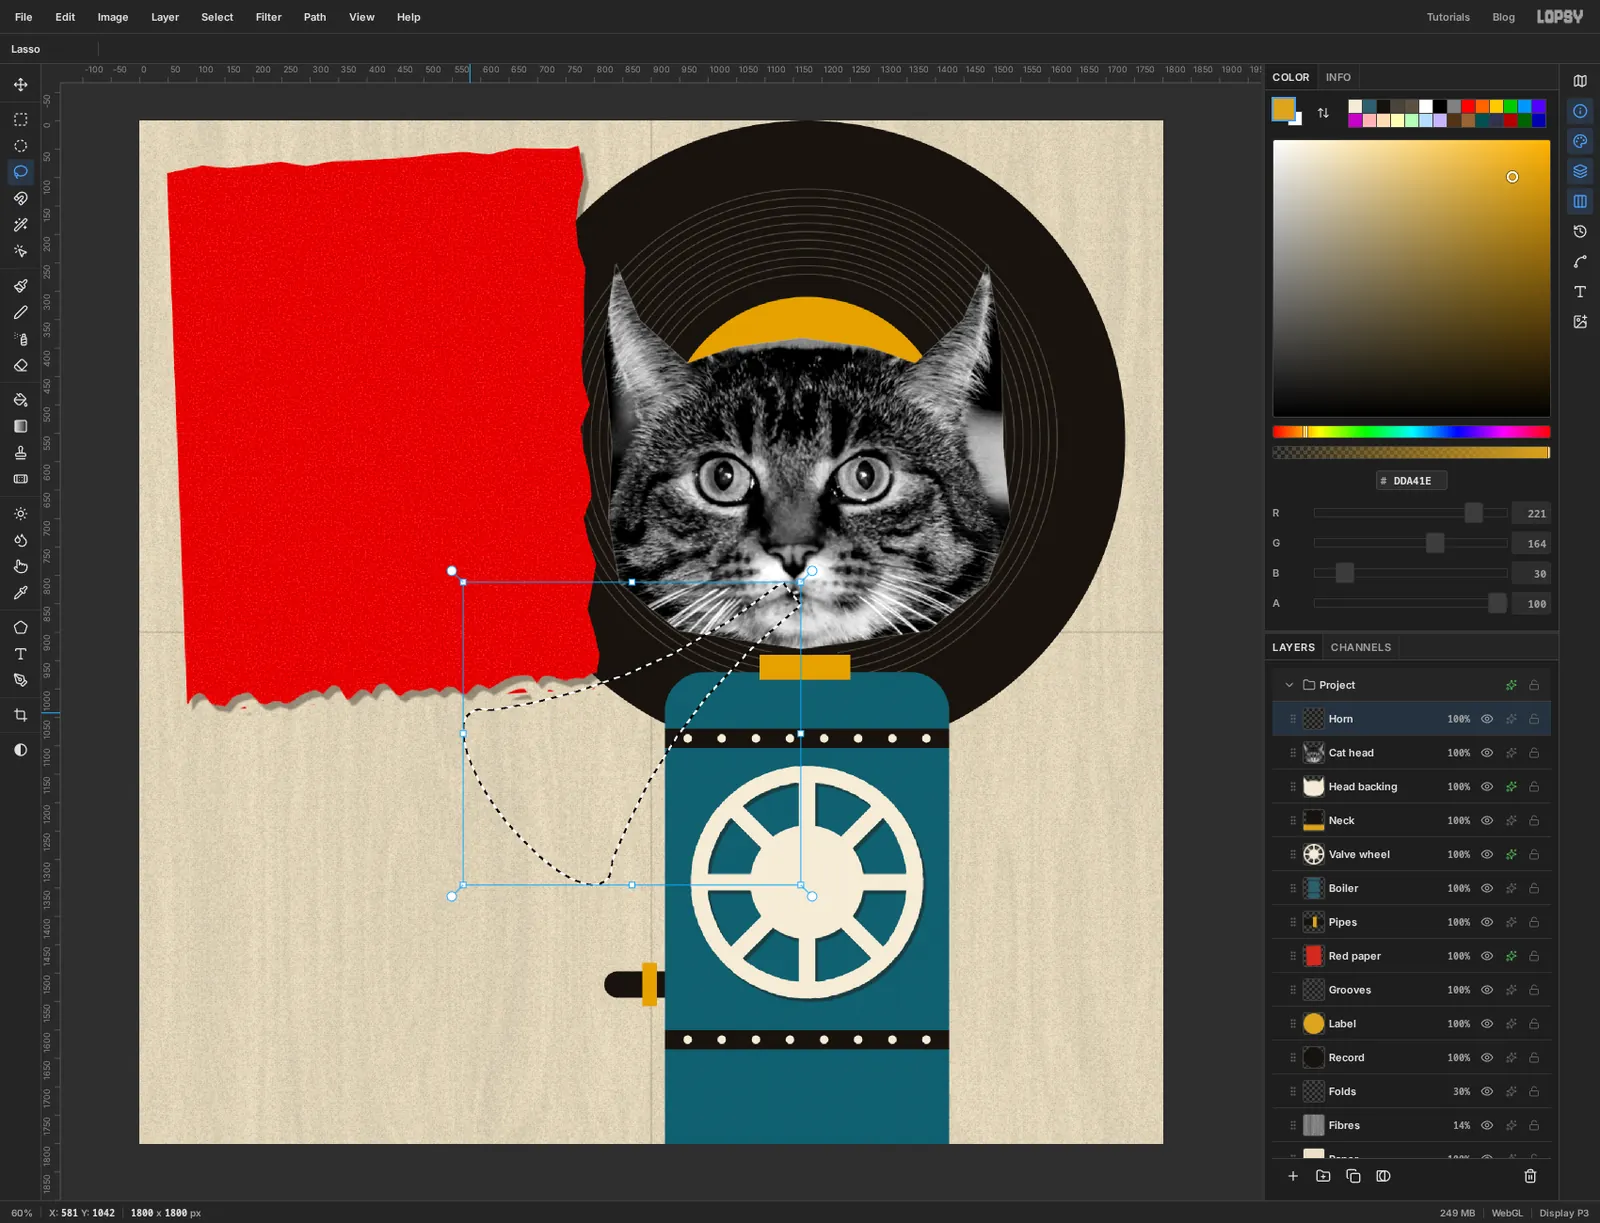
Cat headlayer and add a layer calledHornabove it.With the Lasso, draw a long cone. Start at the cat's mouth, about 1147, 832, where it should be only 50 px wide. Run it down and to the left, flaring as it goes, until it's about 380 px wide where it ends near 700, 1190.
Now hold Shift and lasso an oval over the wide end, about 380 px long and 140 px across, tilted to sit square on the end of the cone. Shift adds to the selection, so the cone gets a rounded mouth.
-
Fill the horn and its bell
Fill the selection with mustard and deselect.
Lasso a slightly smaller oval inside the wide end and fill it with ink. That's the inside of the bell. Lasso a smaller oval again inside that one and fill it with cream. Something is going to look out of it.
Add the small Drop Shadow (5, 6, 2, 45) to the
Hornlayer.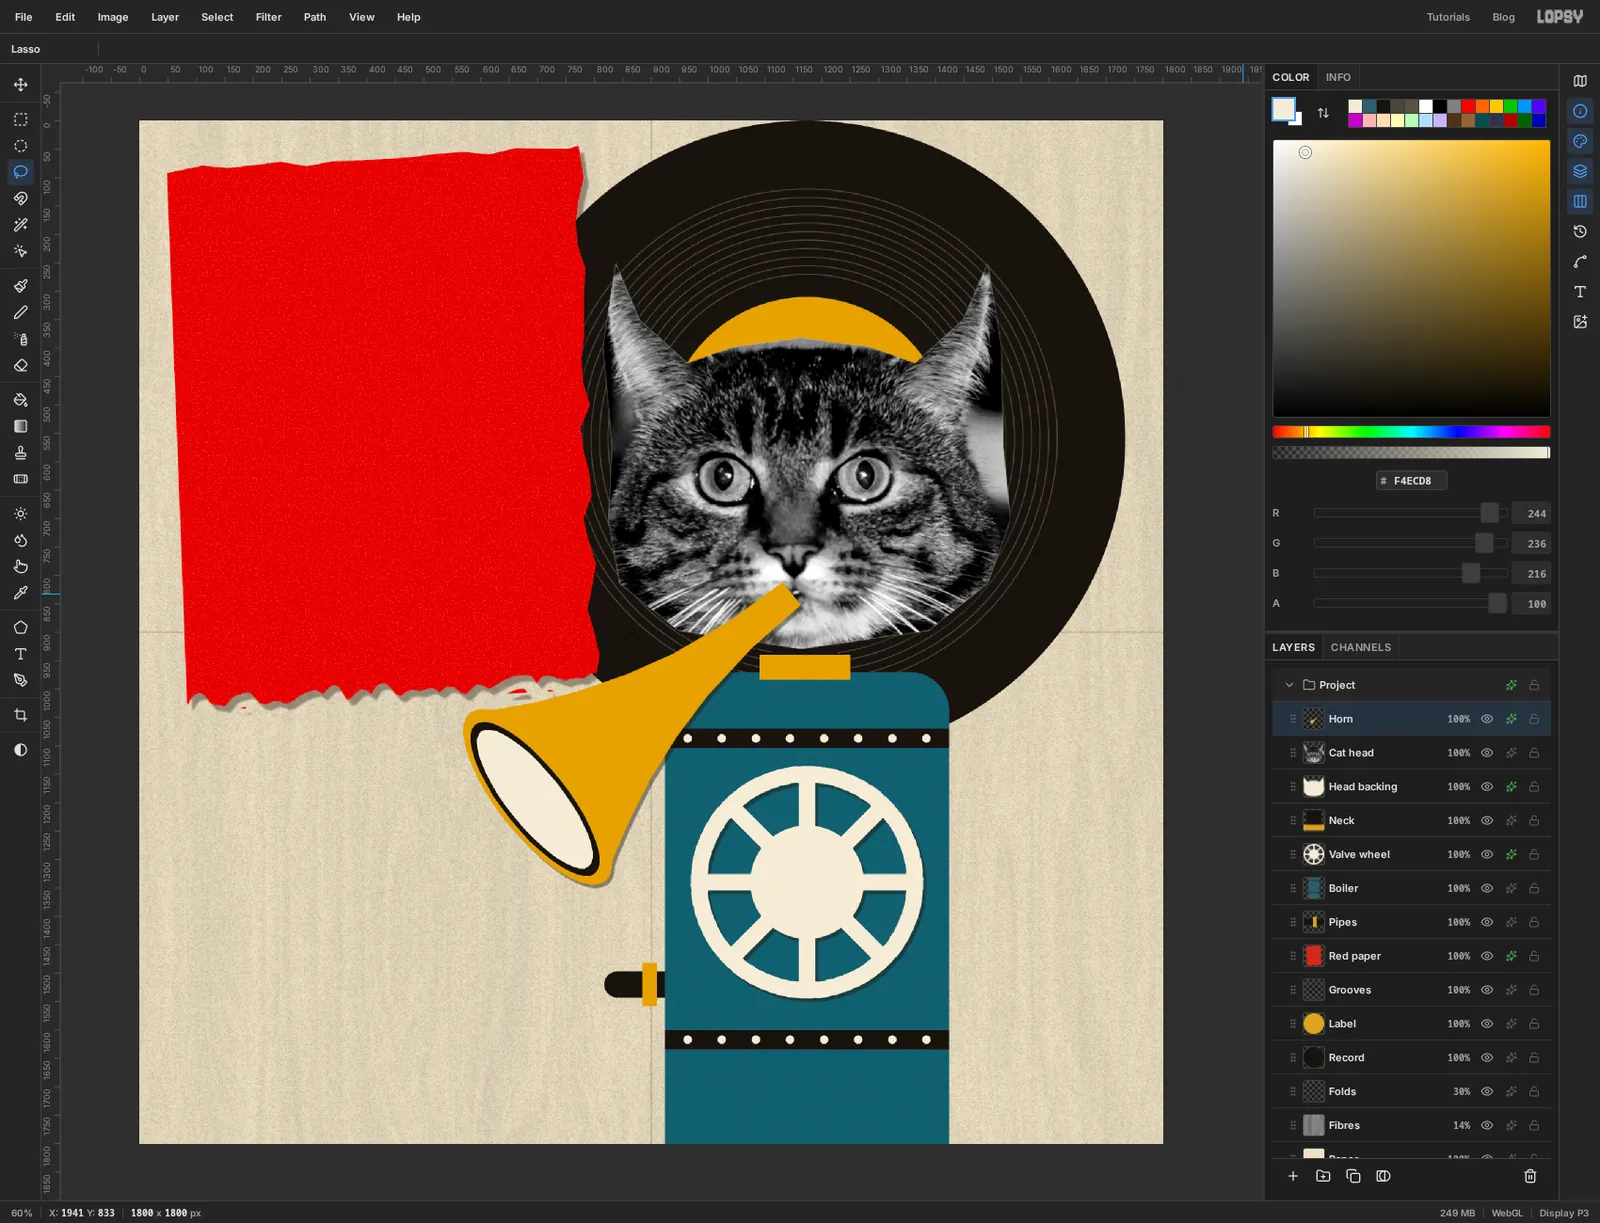
-
Borrow an eye
Dada montage repeats body parts at the wrong size in the wrong place. Click the
Cat headlayer, pick the Elliptical Marquee, and with Cmd held drag a circle about 170 px across around one of the cat's eyes. Press Cmd+C.Click the
Hornlayer, then press Cmd+V. The copy lands exactly where it came from, as a new layer above the horn. Rename itBell eye.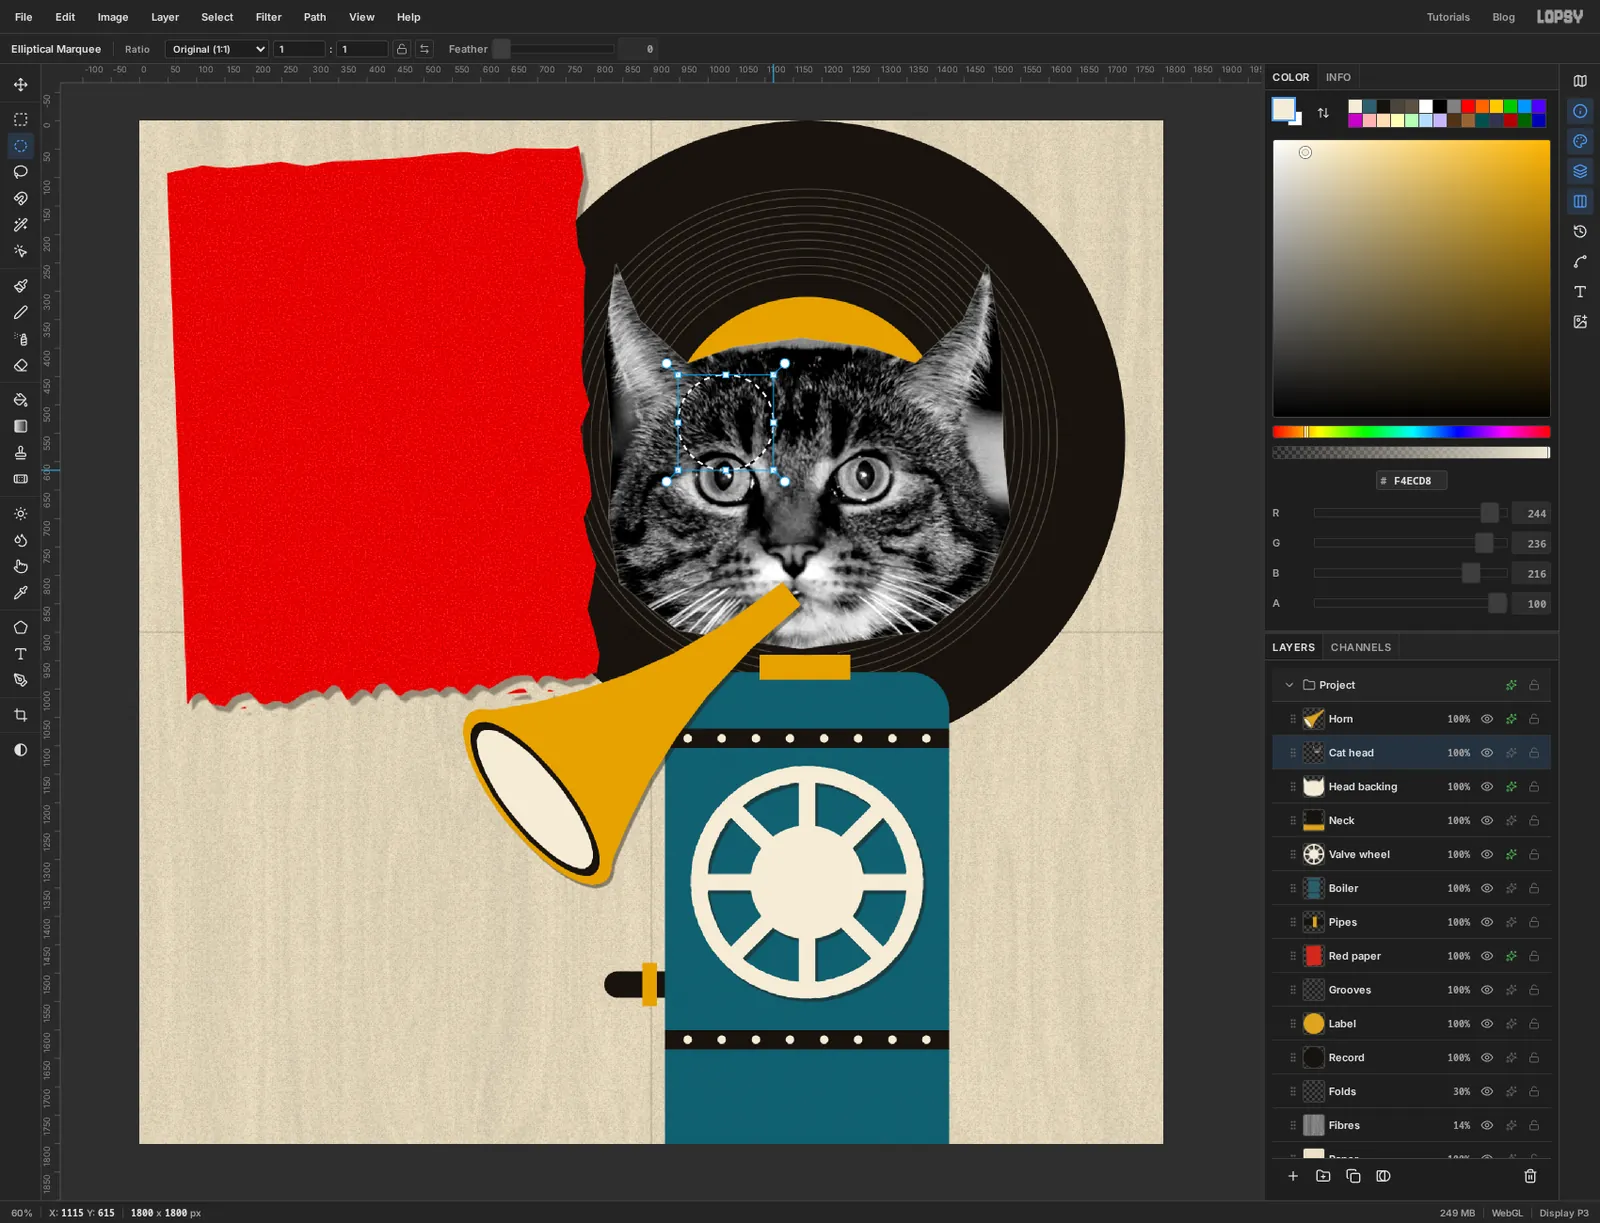
-
Squash it
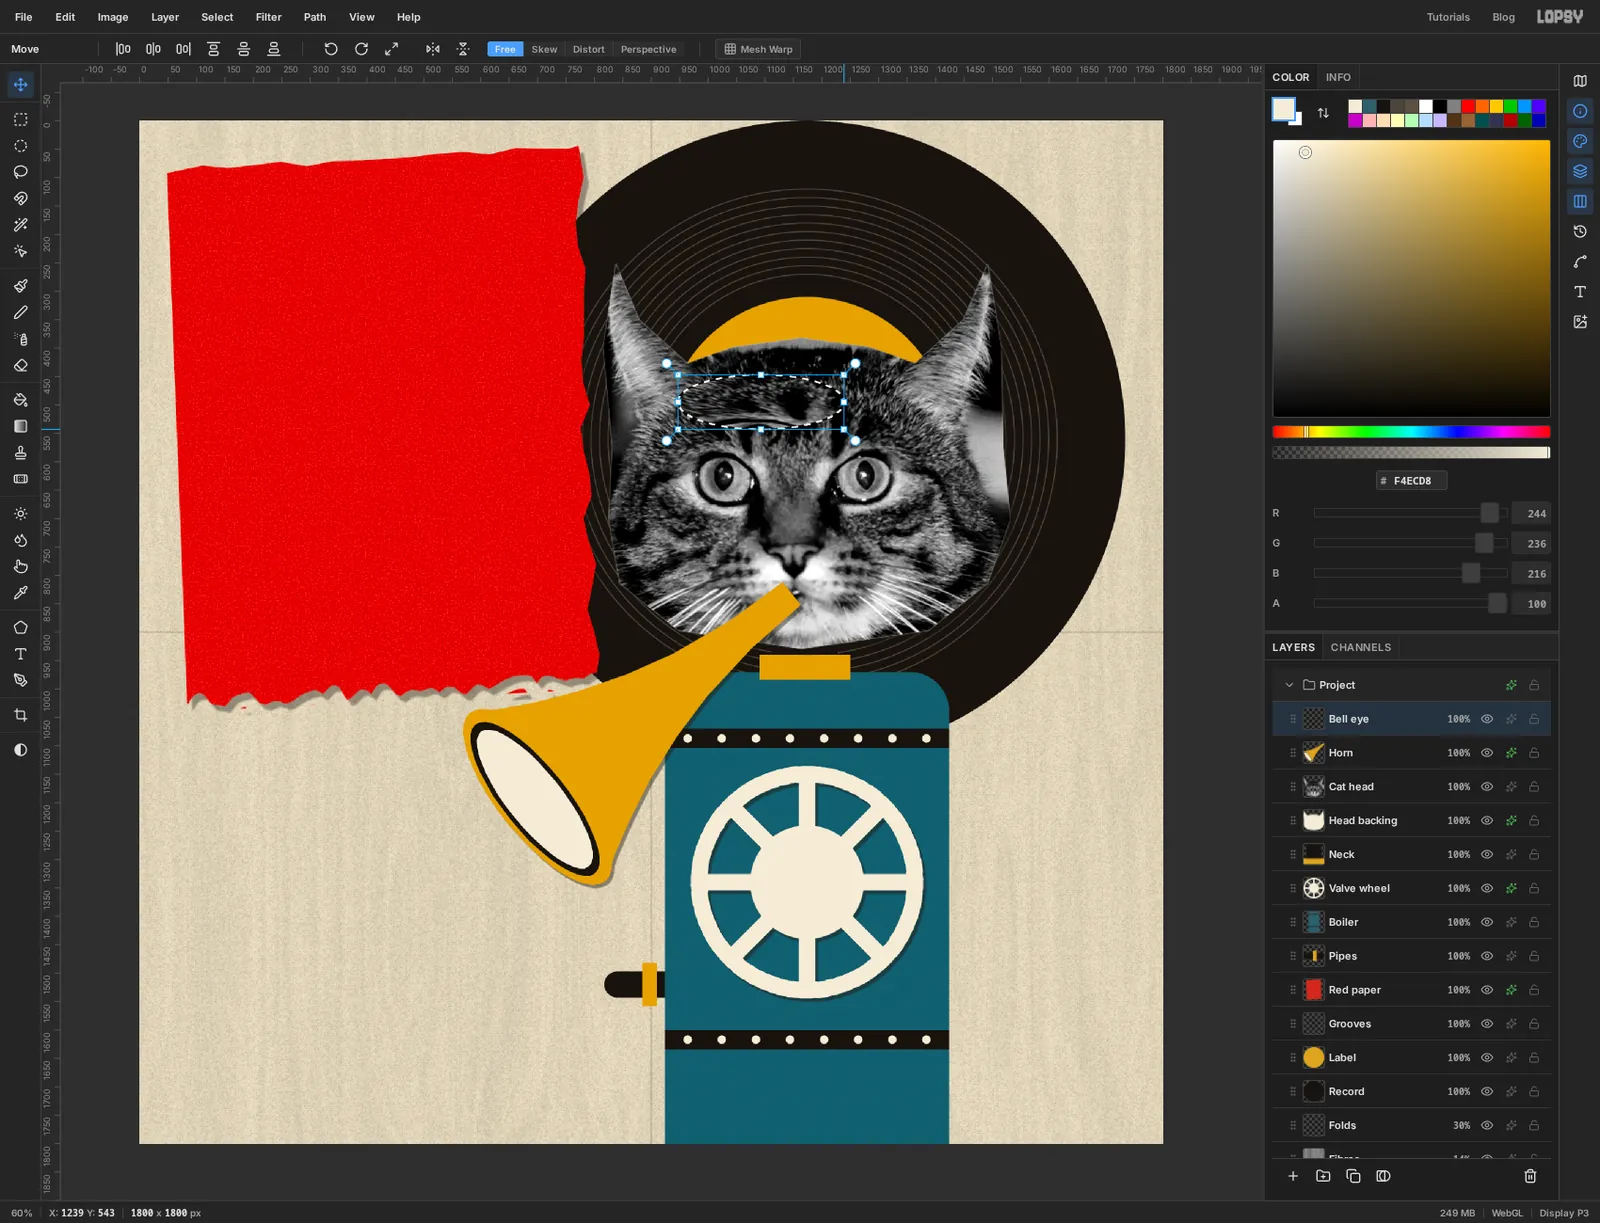
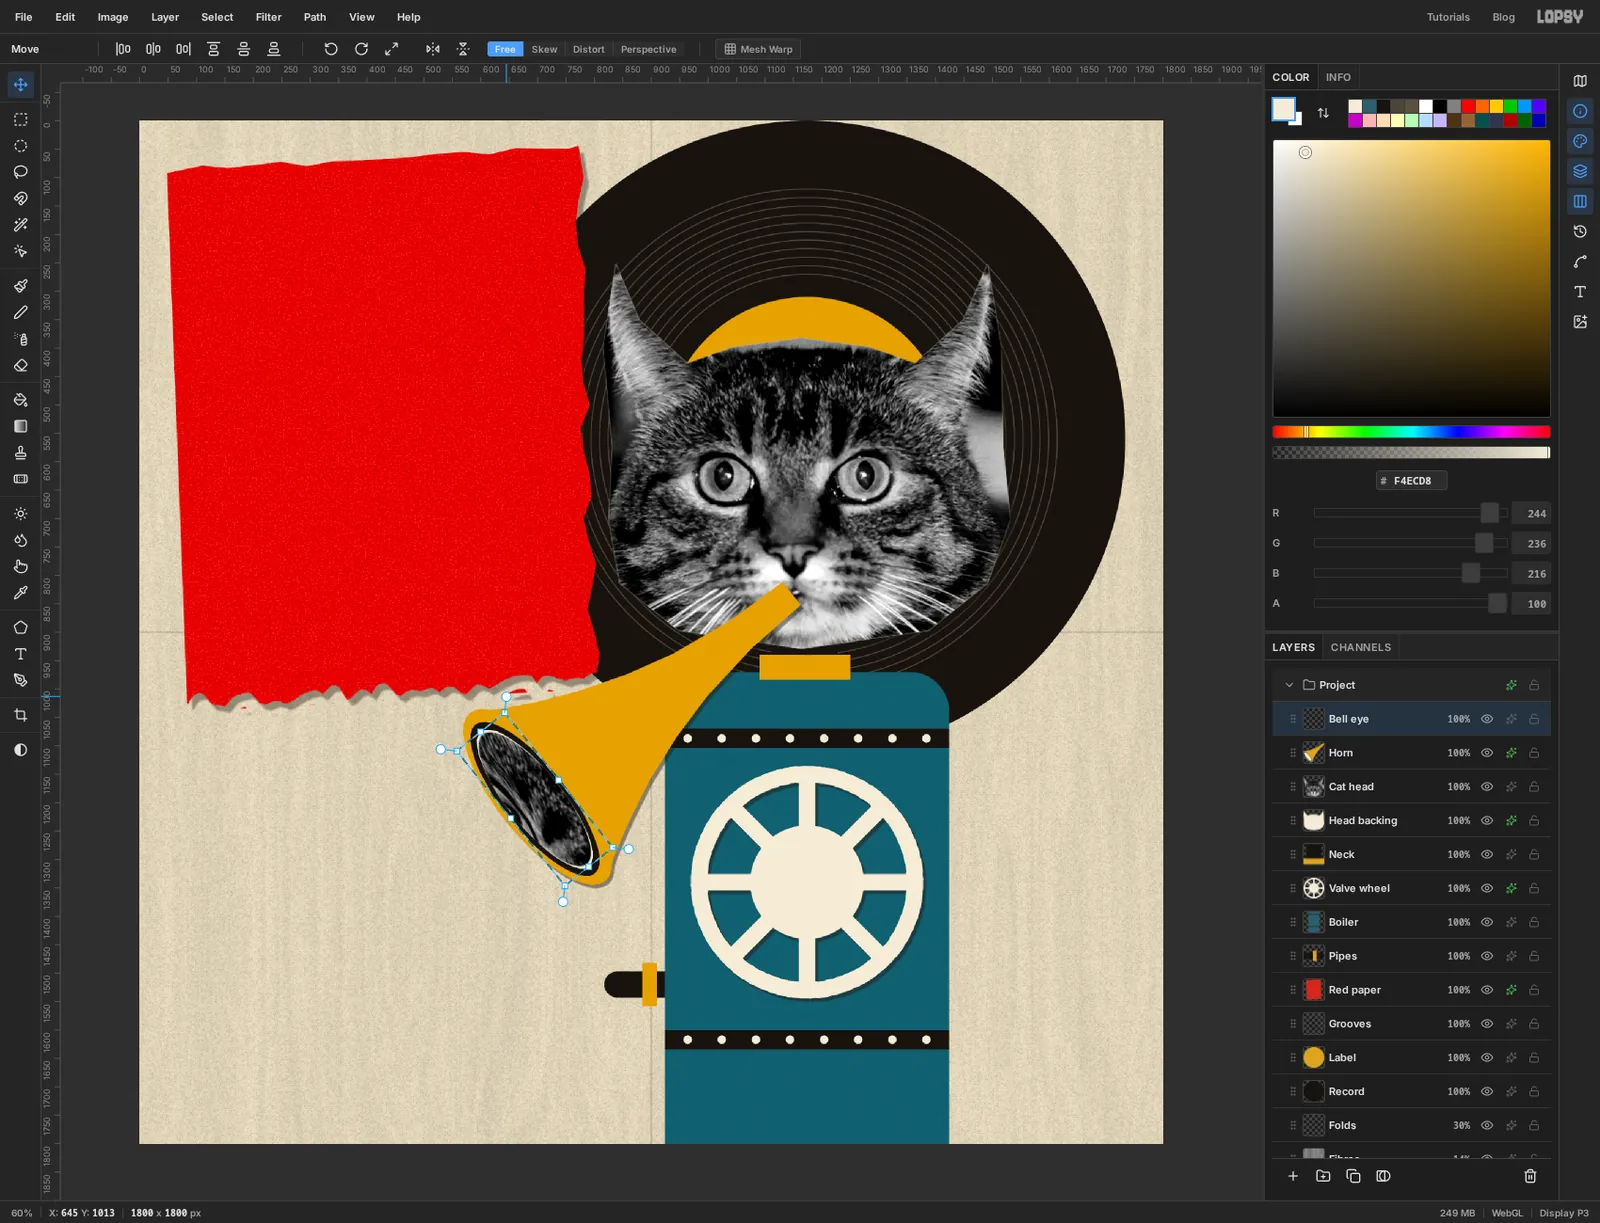
The paste left you on the Move tool with handles around the eye. This time don't hold Cmd. Drag the bottom-right handle to the right and upward at the same time, until the circle is a flat oval about 290 px wide and 95 px tall. That's the eye seen at a steep angle, the way the horn's bell is.
Press Cmd+D.
-
Turn it to fit the bell
Drag the oval down onto the horn's bell. A plain pixel layer only shows handles around a selection, so drag a Rectangular Marquee loosely around the oval and switch back to the Move tool. Rotation handles are the round ones just outside each corner. Drag one clockwise by about 50° until the oval lines up with the cream oval in the bell.
Press Cmd+D, then brighten it so it will print clearly: Filter → Brightness/Contrast, Brightness 30, Contrast 30.
-
Put the other eye in the wheel
Do it again with the other eye. Click
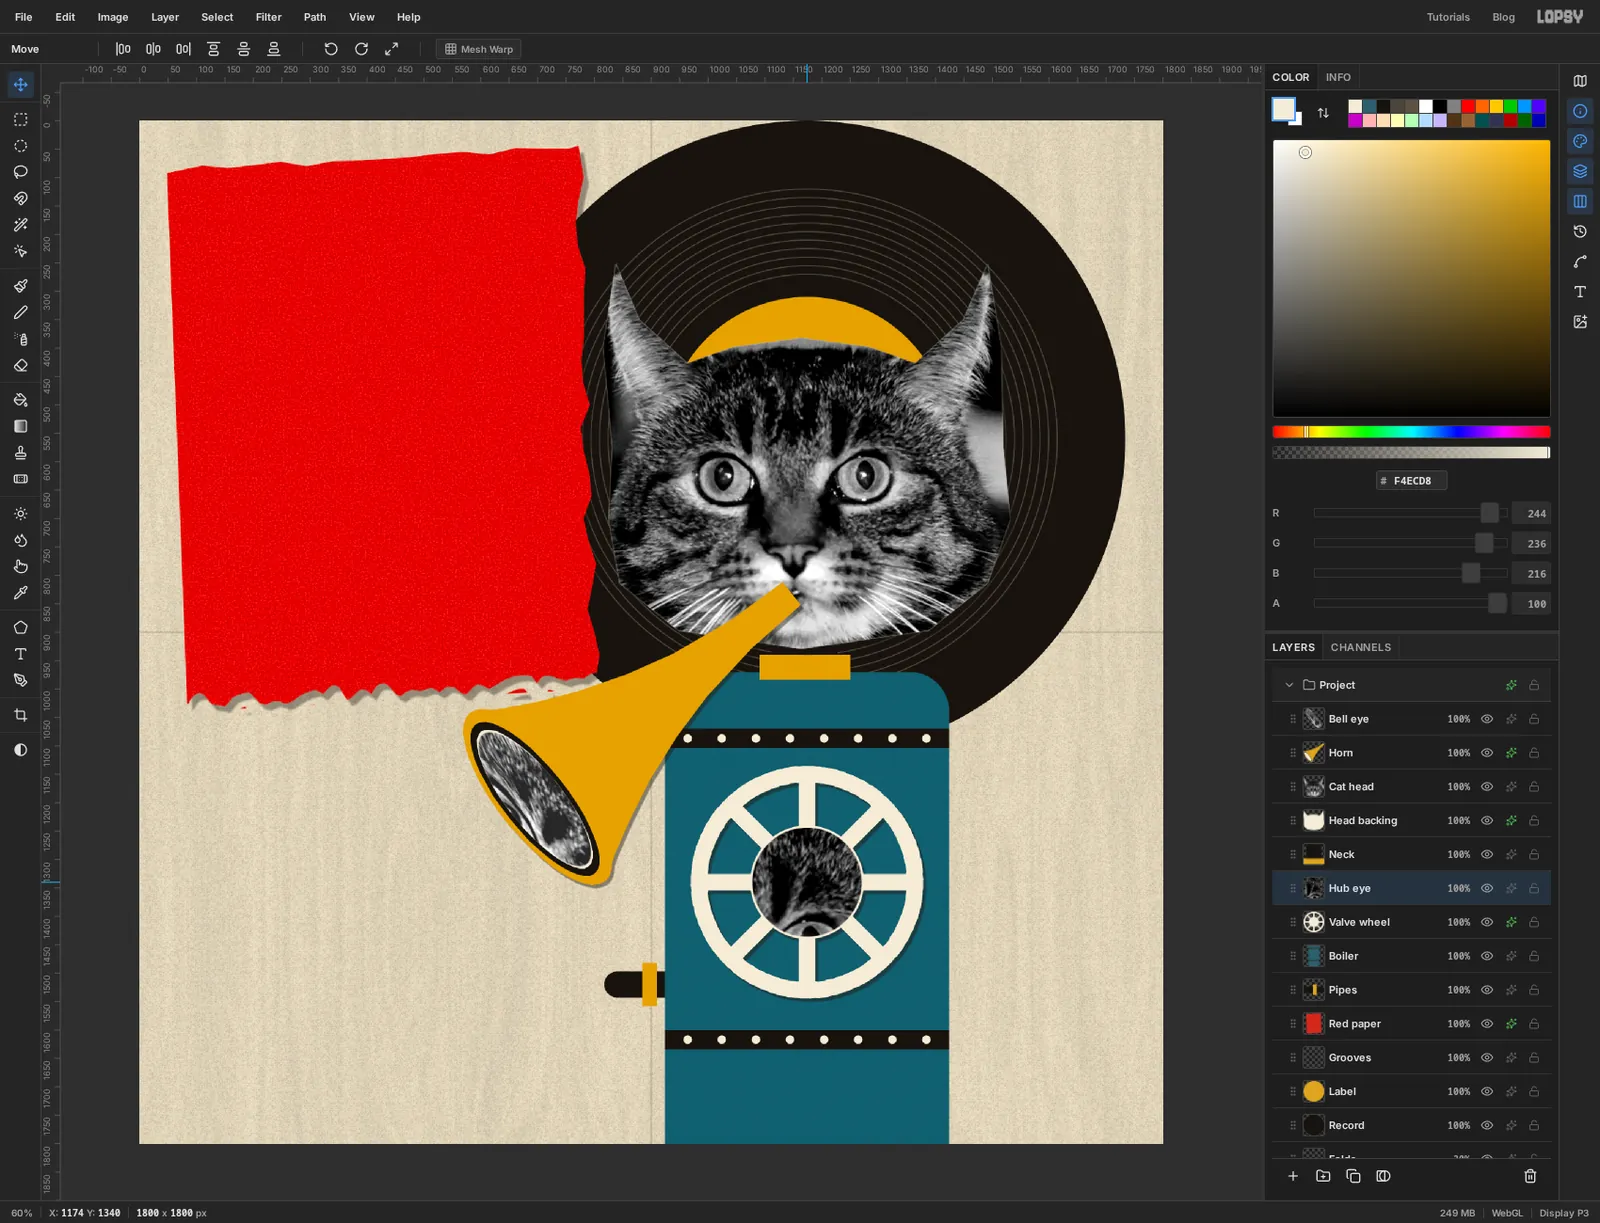
Cat head, marquee the second eye, press Cmd+C, click theValve wheellayer and press Cmd+V. Rename the new layerHub eye.Hold Cmd and drag a corner handle outward a little, until the circle is about 190 px across. Press Cmd+D, then drag it onto the hub of the wheel.
-
Print everything as newsprint
Now for the step that makes the photographs belong to 1920. Click the
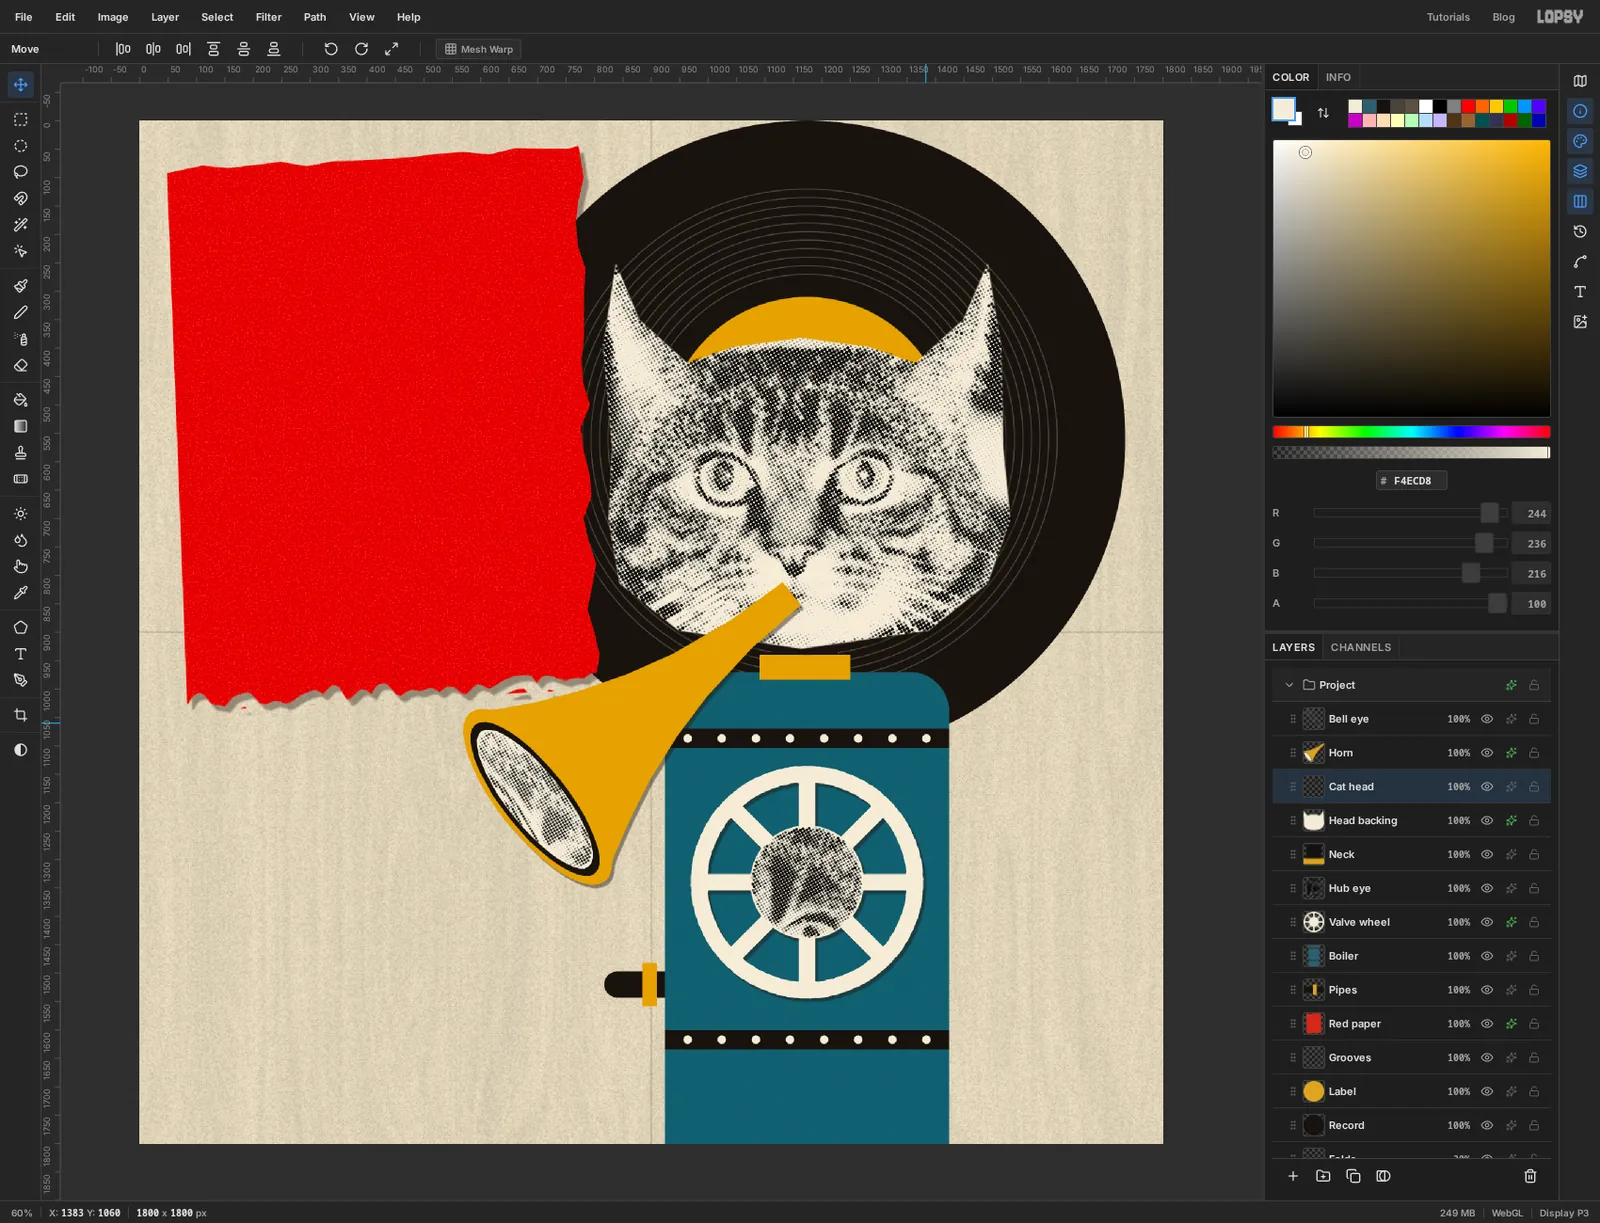
Hub eyelayer and choose Filter → Halftone. Set Dot Size to 5, Angle to 30 and Softness to 0.6, and apply. Do the same onBell eye. Then clickCat headand run it once more with Dot Size at 6.Halftone turns each tone into a black dot of a matching size and leaves white empty. That's why the head needed a cream backing, and why the two eyes sit on cream shapes.
-
Group the figure
Click the
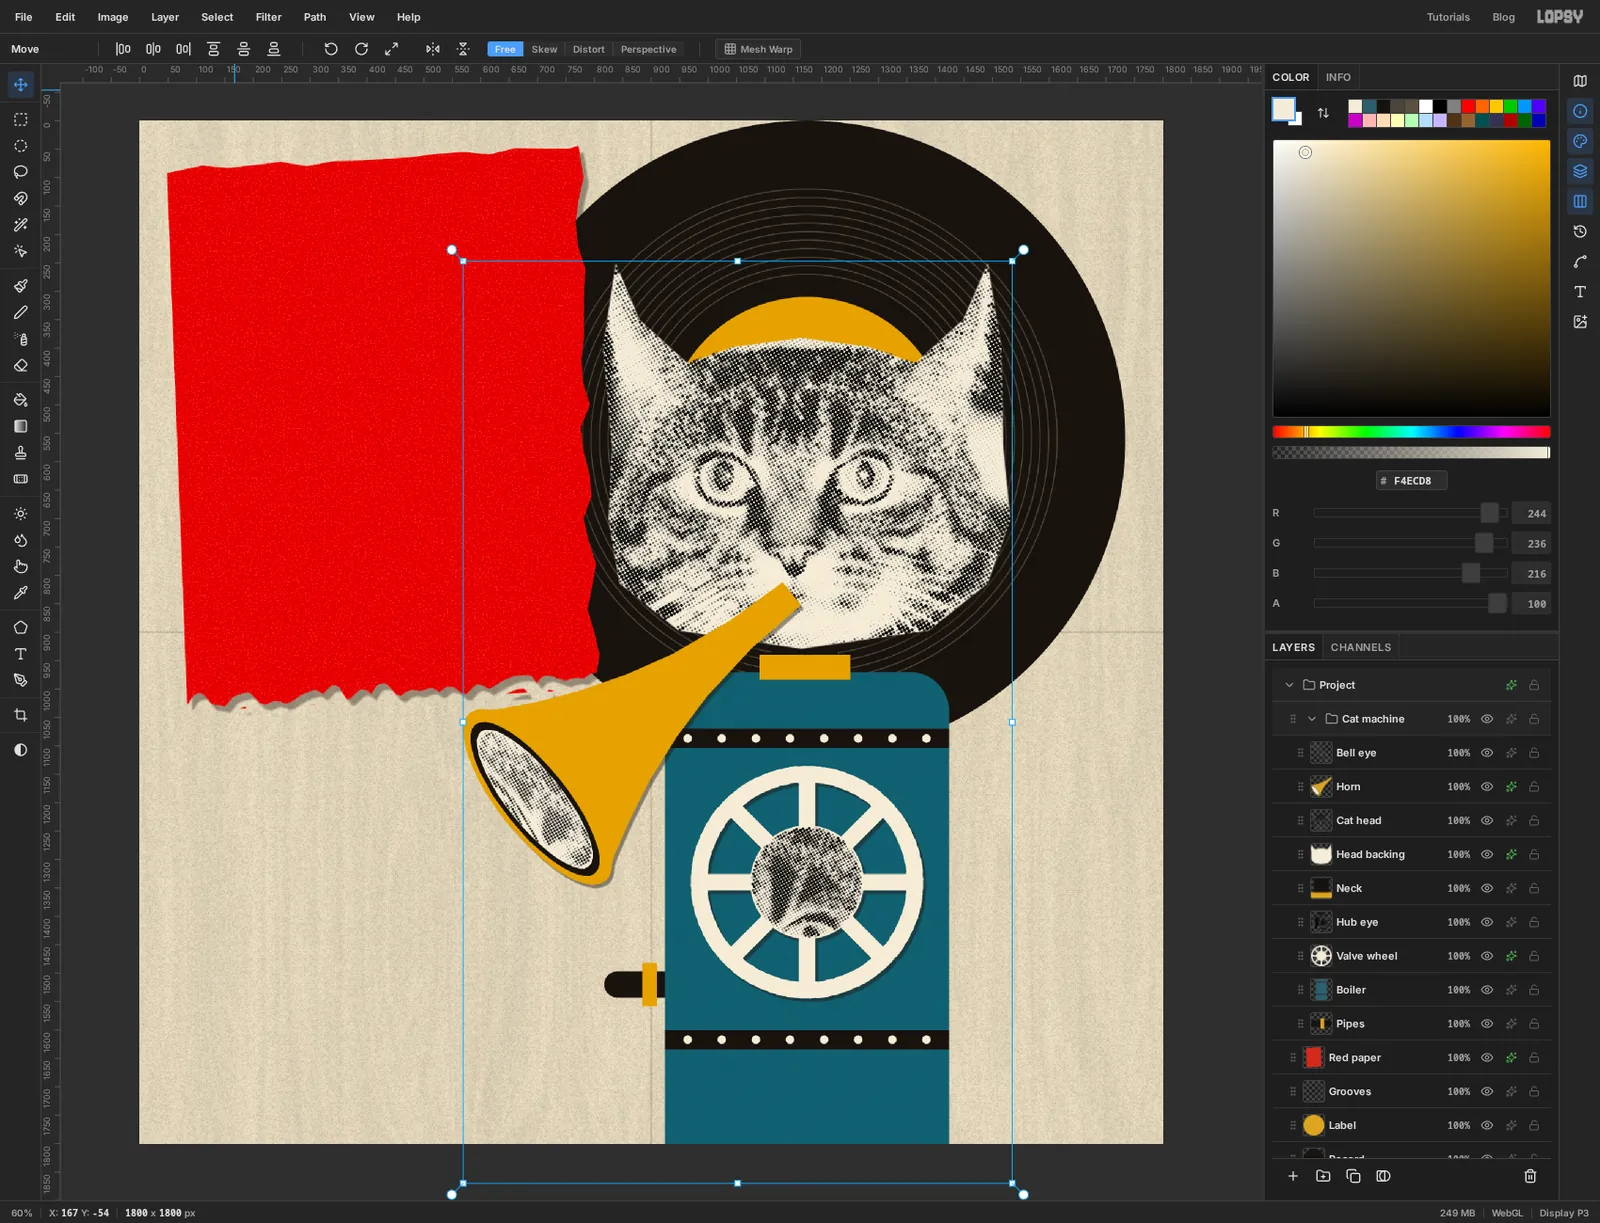
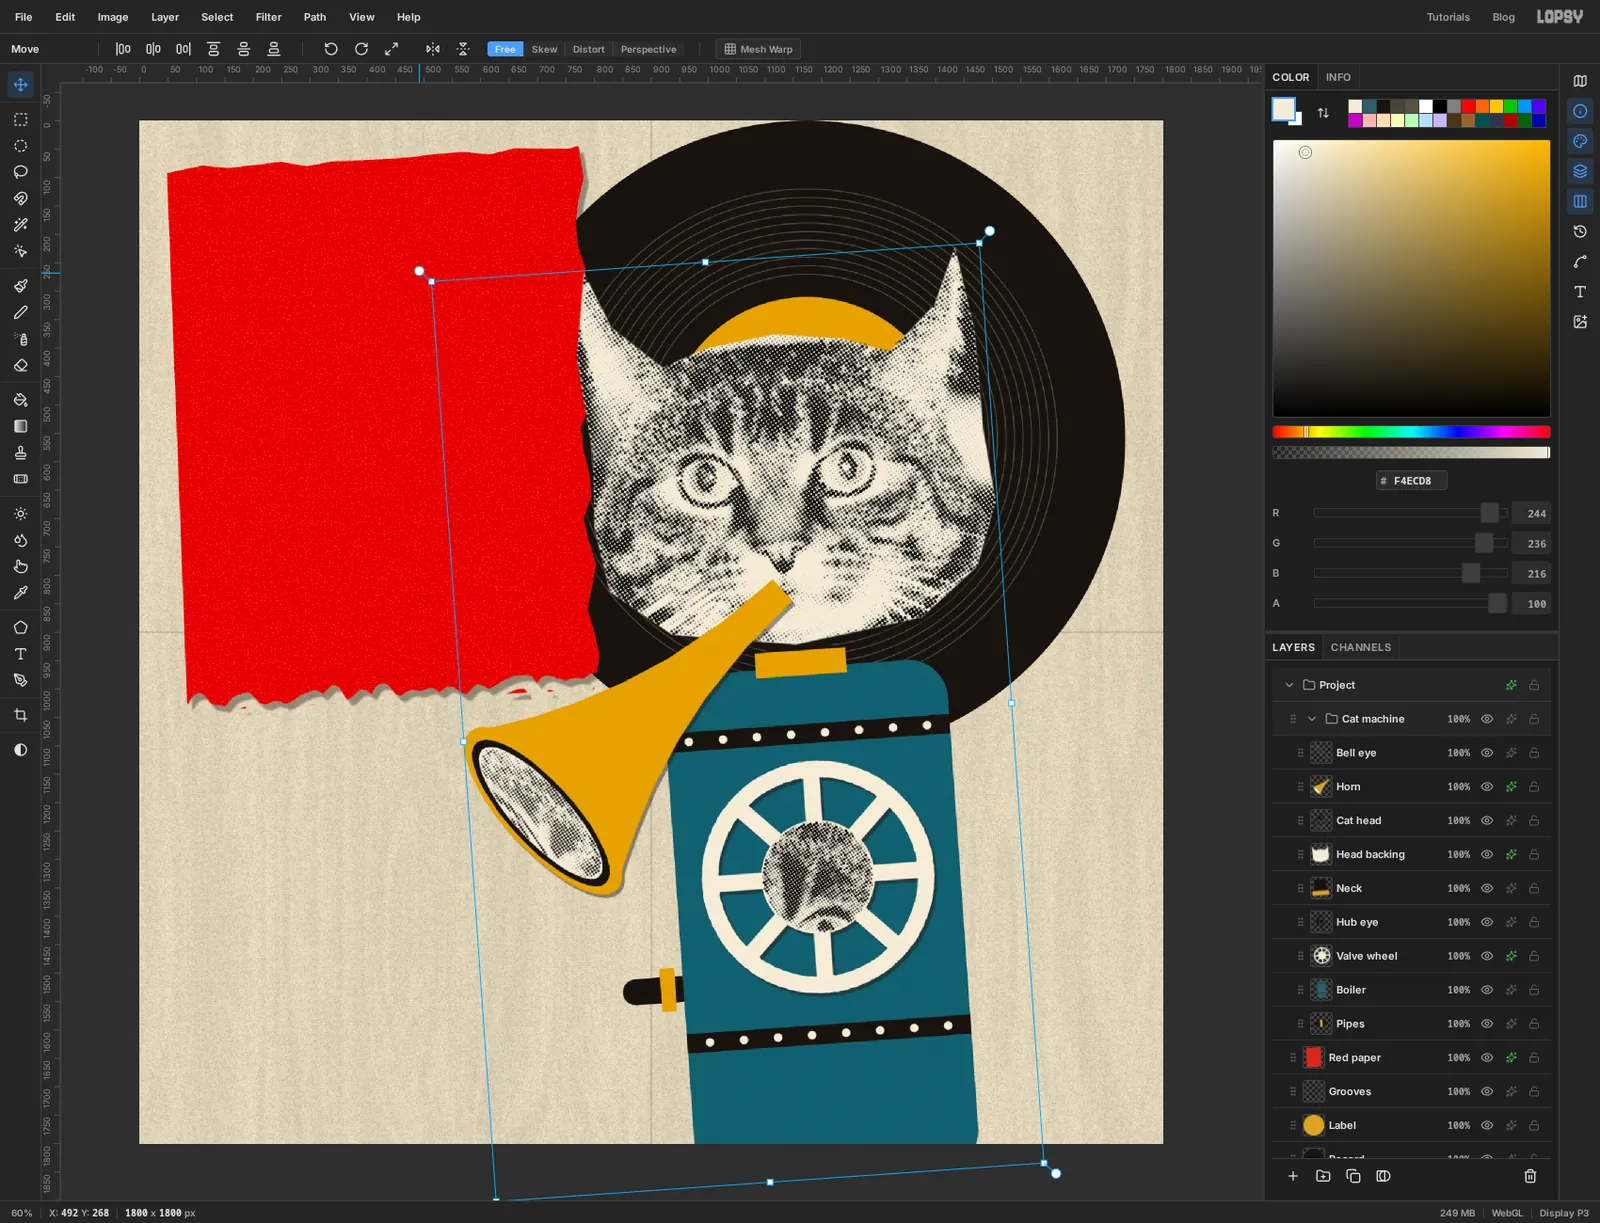
Bell eyelayer at the top, scroll down, hold Shift and clickPipes. Everything from the horn down to the pipe is selected. Choose Layer → Group Layers, then double-click the new group's name and call itCat machine.Click the group's row and pick the Move tool. The handles now frame the whole figure.
-
Tip the whole thing over
Drag a rotation handle to turn the figure about 4° anticlockwise. Every layer in the group turns together, shadows included. Press Cmd+D.
A figure that stands straight looks like an illustration. One that leans looks like it was pasted down in a hurry.
-
Add a pressure gauge
Click the
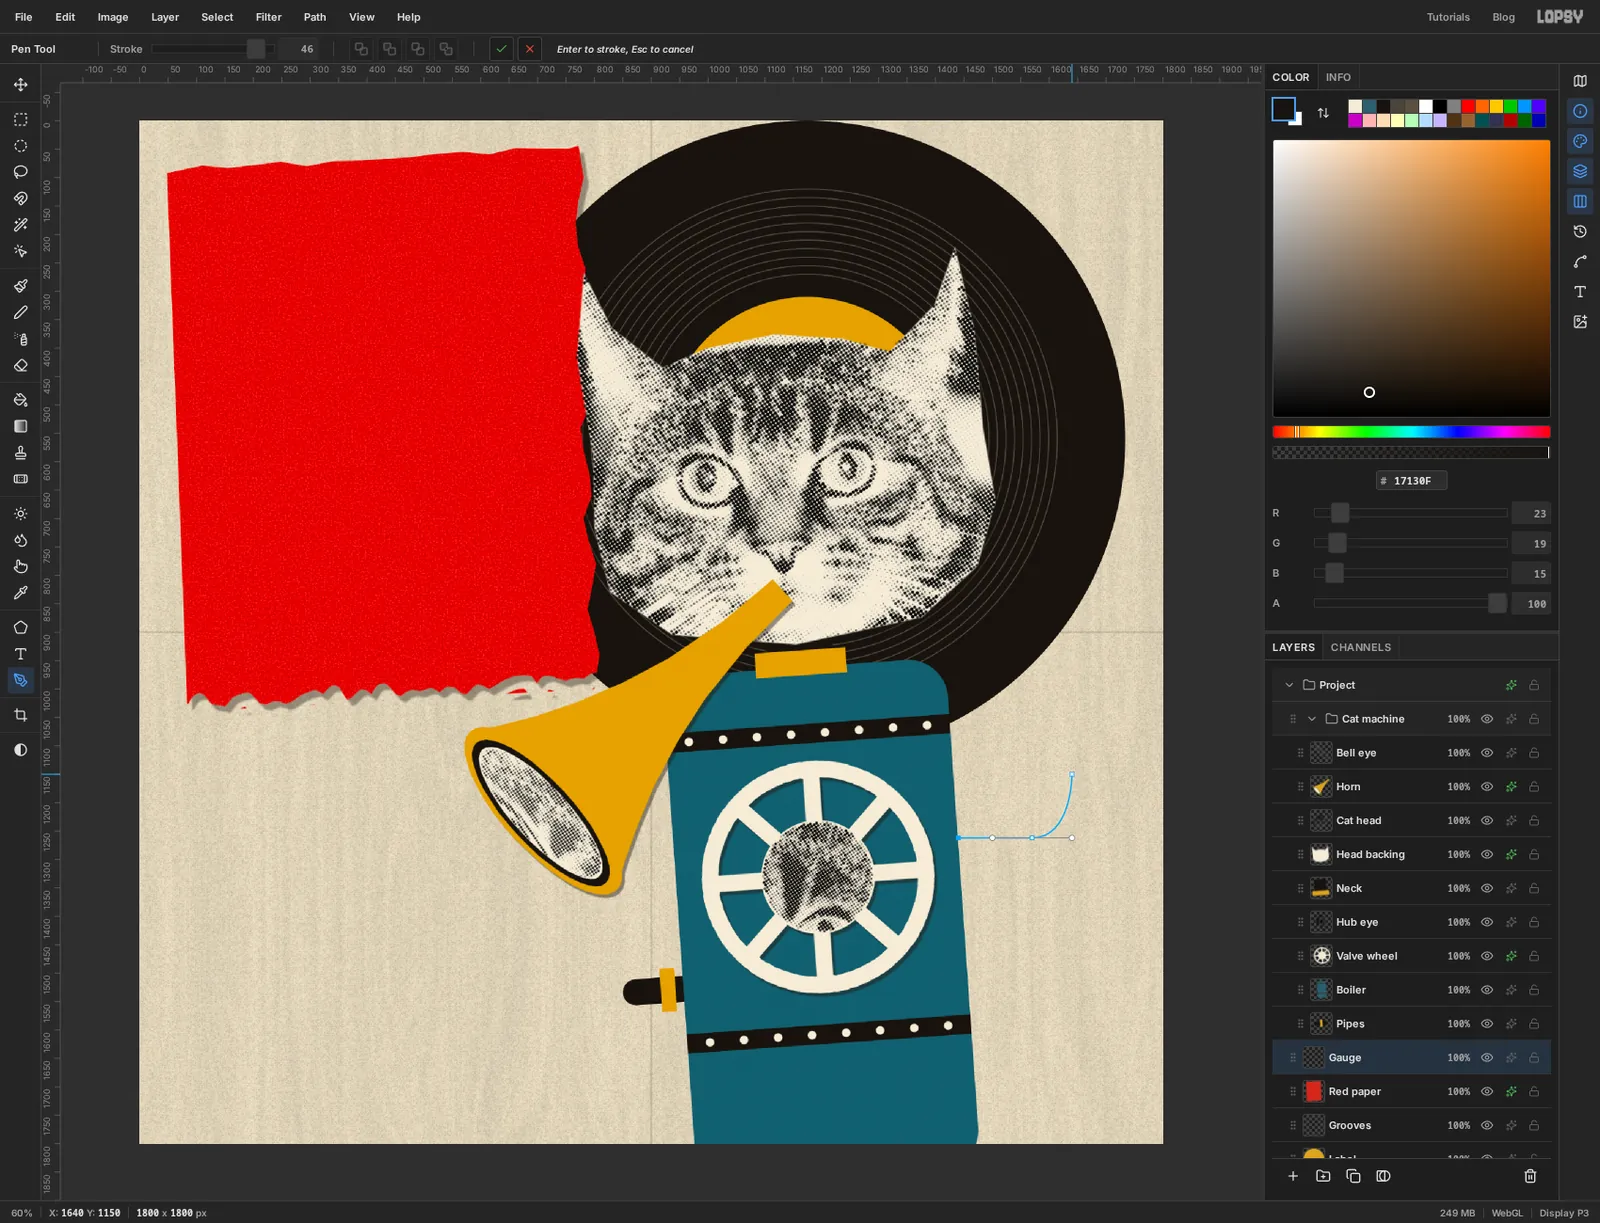
Red paperlayer, which sits just under the group, and add a layer calledGauge.Pick the Pen, with ink as the colour and Stroke still at 46. Click on the boiler's right edge at about 1440, 1262. For the second anchor, press at 1570, 1262 and drag about 70 px to the right before letting go. Dragging pulls out curve handles. Click a third time above and to the right, at 1640, 1150. The path runs straight out of the boiler and bends upward. Press Enter to stroke it, then clear the outline with a click on empty canvas and Cancel path.
With the Elliptical Marquee and Cmd held, drag a circle about 250 px across at the top of the pipe, centred near 1640, 1062, and fill it with ink. Drag a second circle about 220 px across inside it and fill that with cream. Add the small Drop Shadow.
-
Cut a second, smaller cat
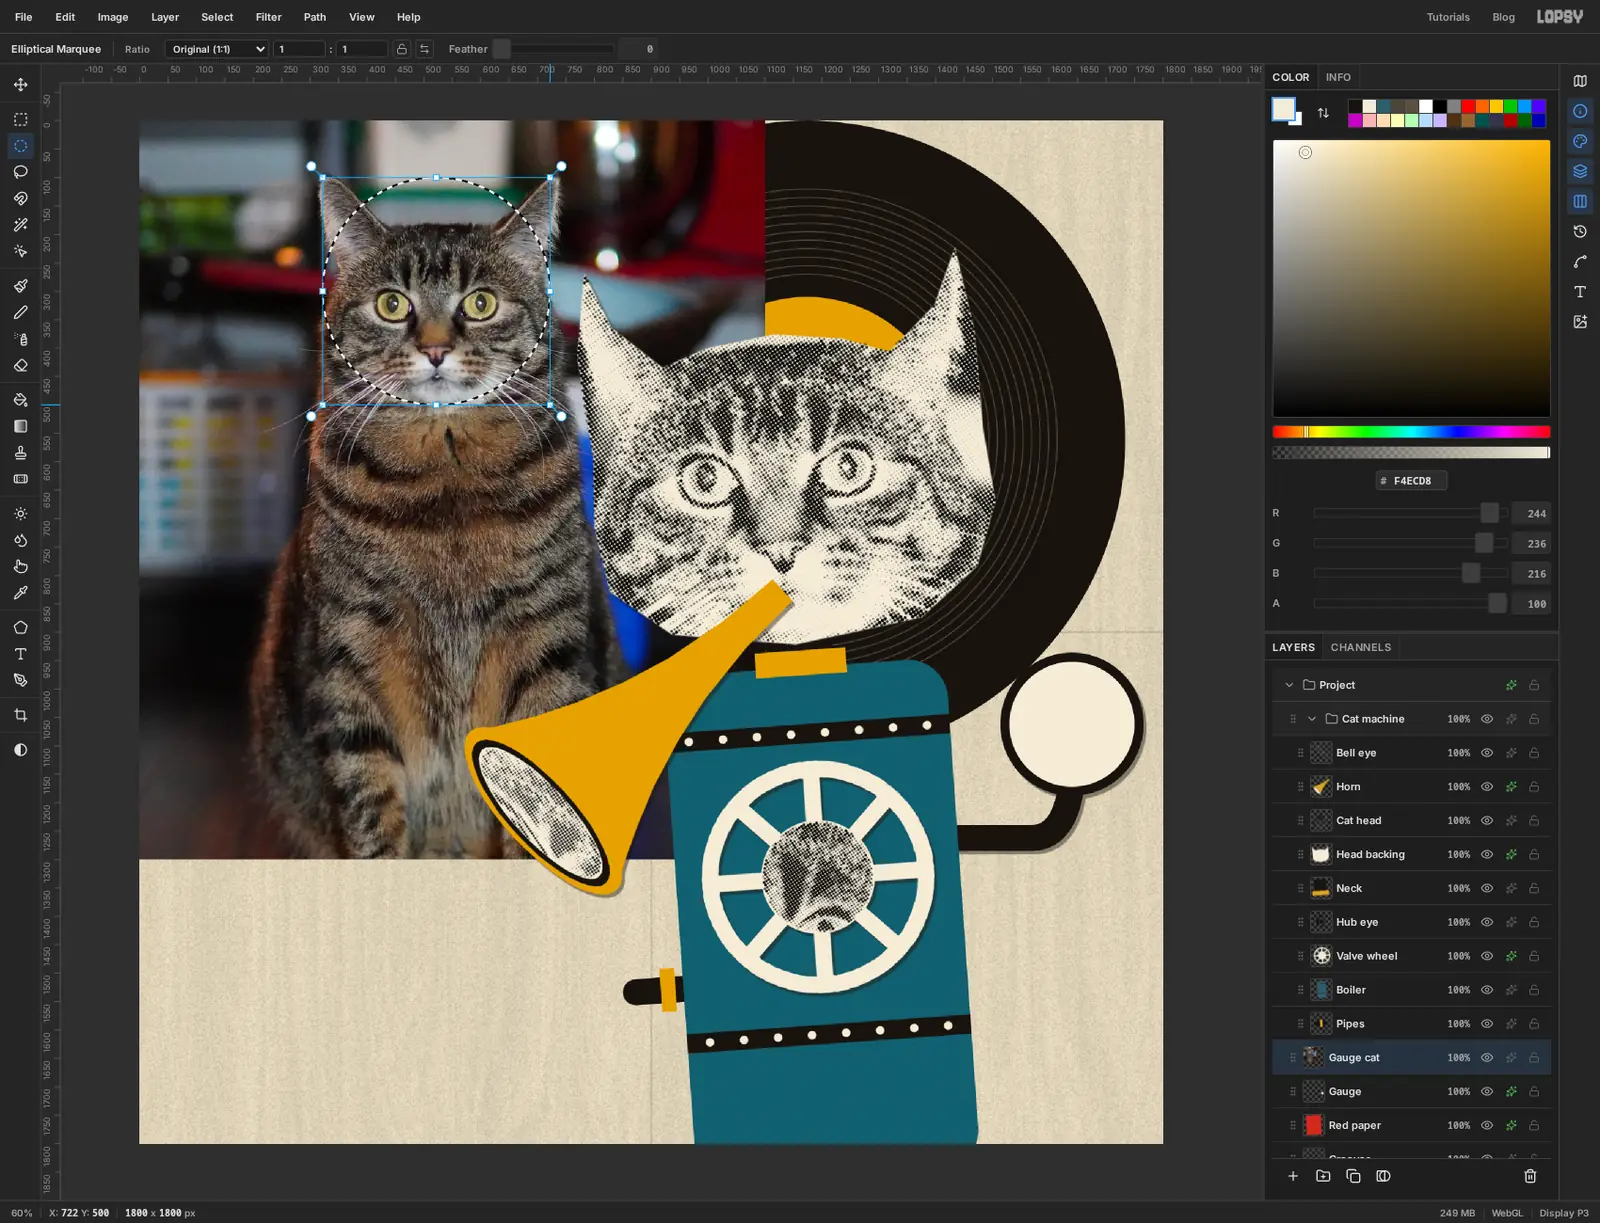
You've copied two eyes since the photo, so copy the cat photo to the clipboard again, then press Cmd+V. Rename the layer
Gauge cat.This time cut a circle. With the Elliptical Marquee and Cmd held, drag a circle about 400 px across around the face, taking in the eyes, nose and forehead. Press Cmd+Shift+I, Delete, Cmd+Shift+I.
-
Shrink it into the gauge
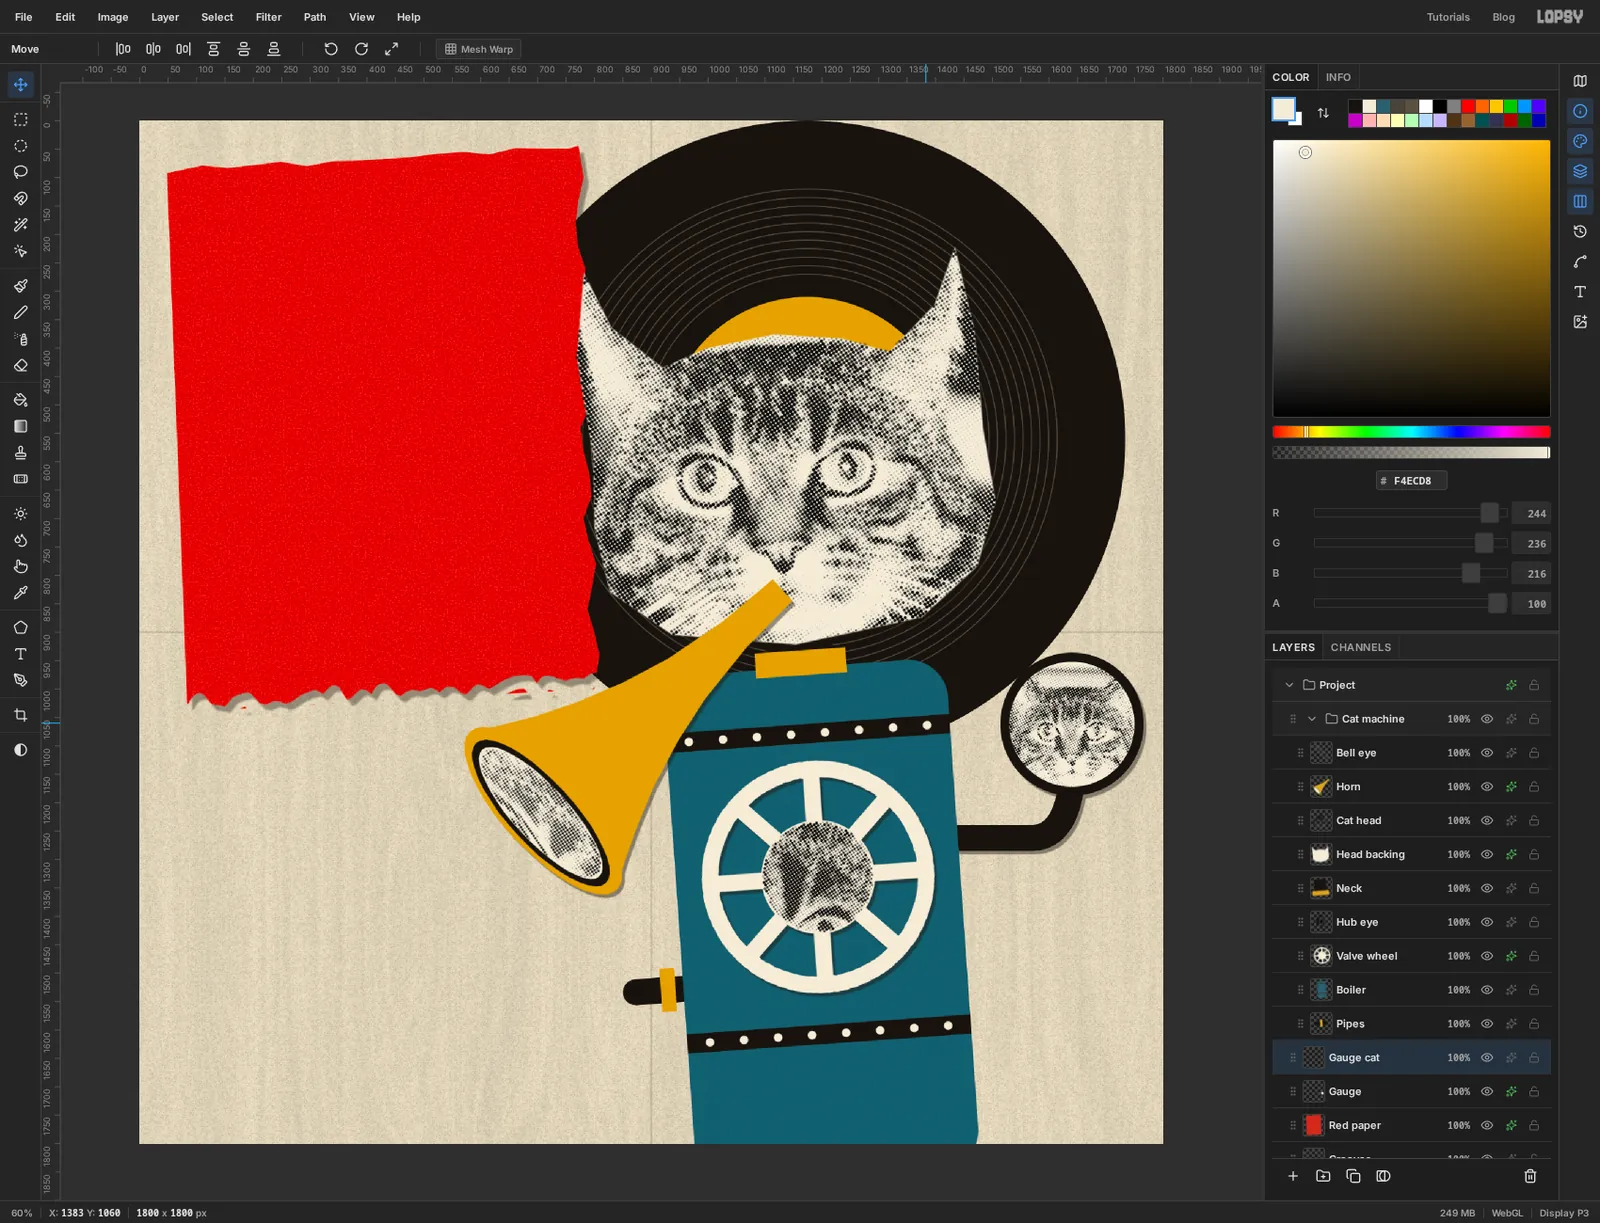
With the Move tool, hold Cmd and drag a corner handle inward until the disc is about 220 px across. Press Cmd+D and drag it onto the cream circle of the gauge.
Give it the same treatment as the big head: Filter → Desaturate, Brightness/Contrast with Brightness 5 and Contrast 50, then Halftone with Dot Size 4. The smaller dot keeps a small face readable.
The same cat now appears twice at very different sizes, which is exactly the kind of thing Höch did.
-
Make a swatch of printer's dots
Click the
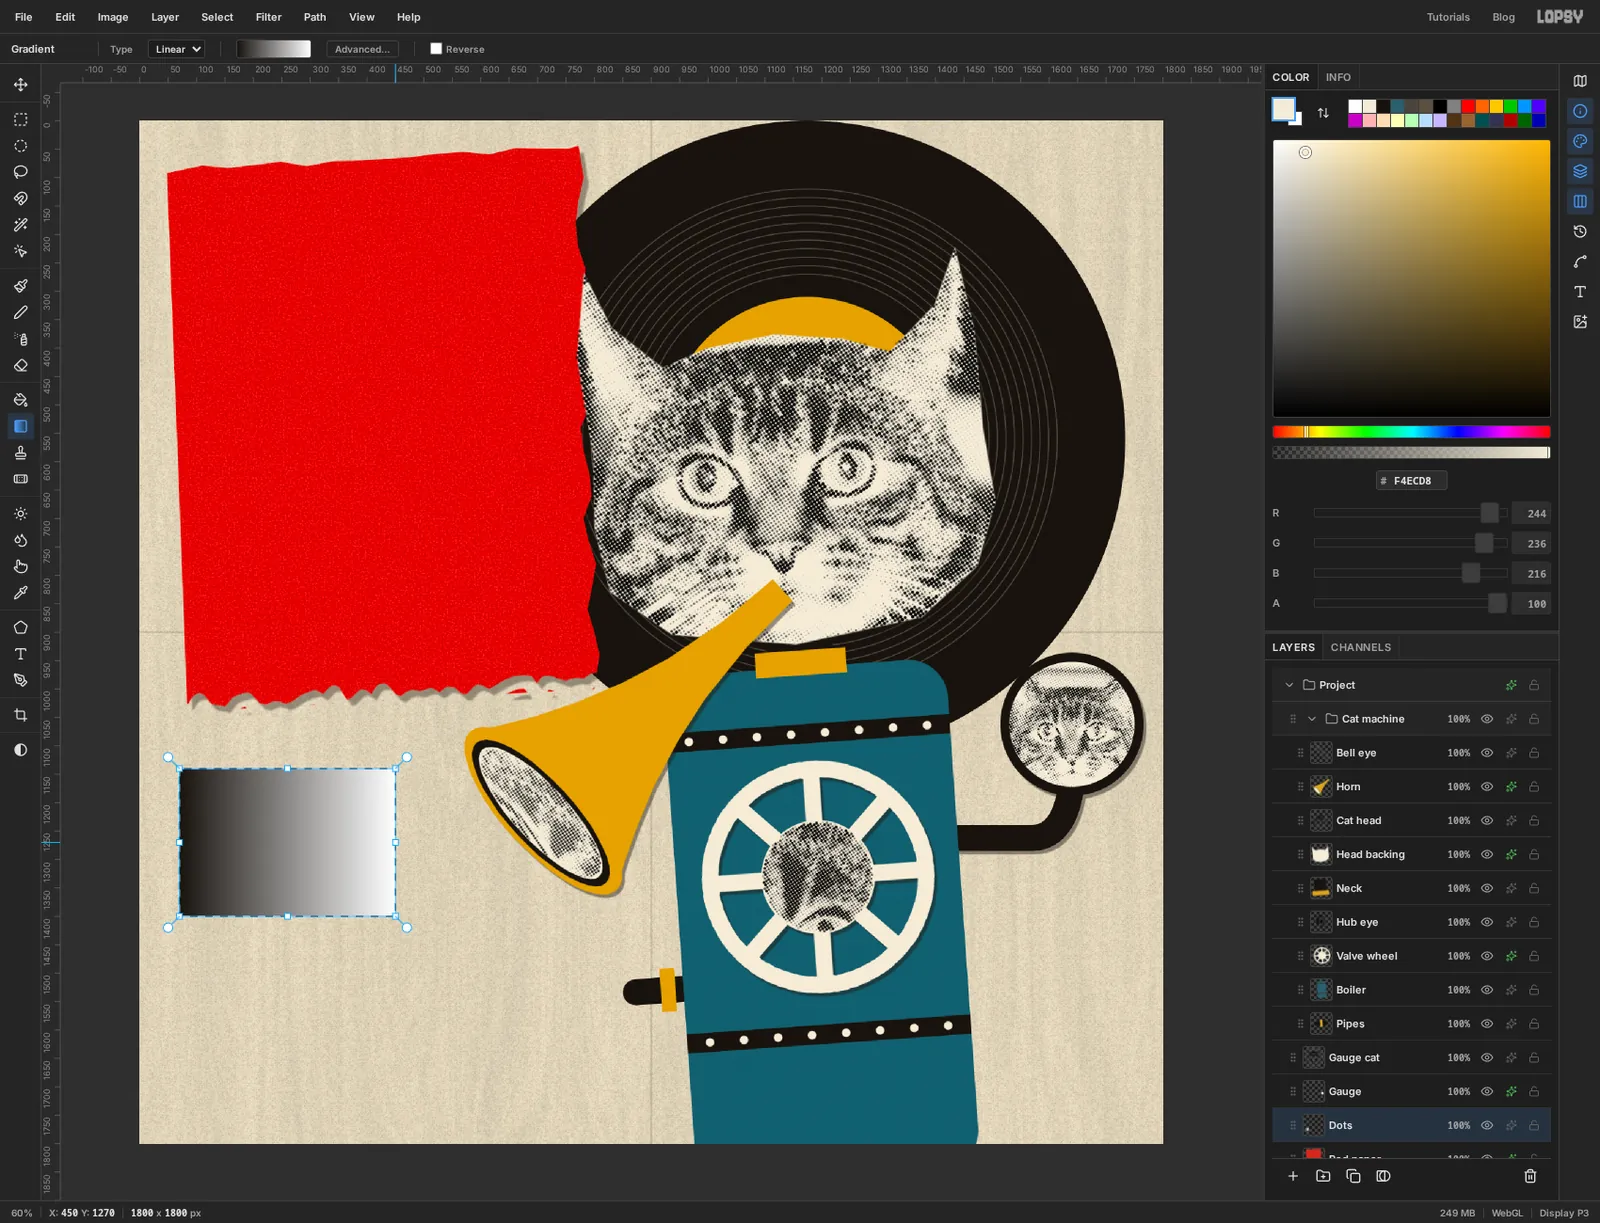
Red paperlayer again and add a layer calledDots. With the Rectangular Marquee, drag a box in the empty space under the red paper, from about 70, 1140 to 450, 1400.Pick the Gradient tool and click Advanced…. Set the left stop to ink and the right stop to white, and click Done. Drag from the left edge of the box to its right edge.
-
Halftone it and cut it crooked
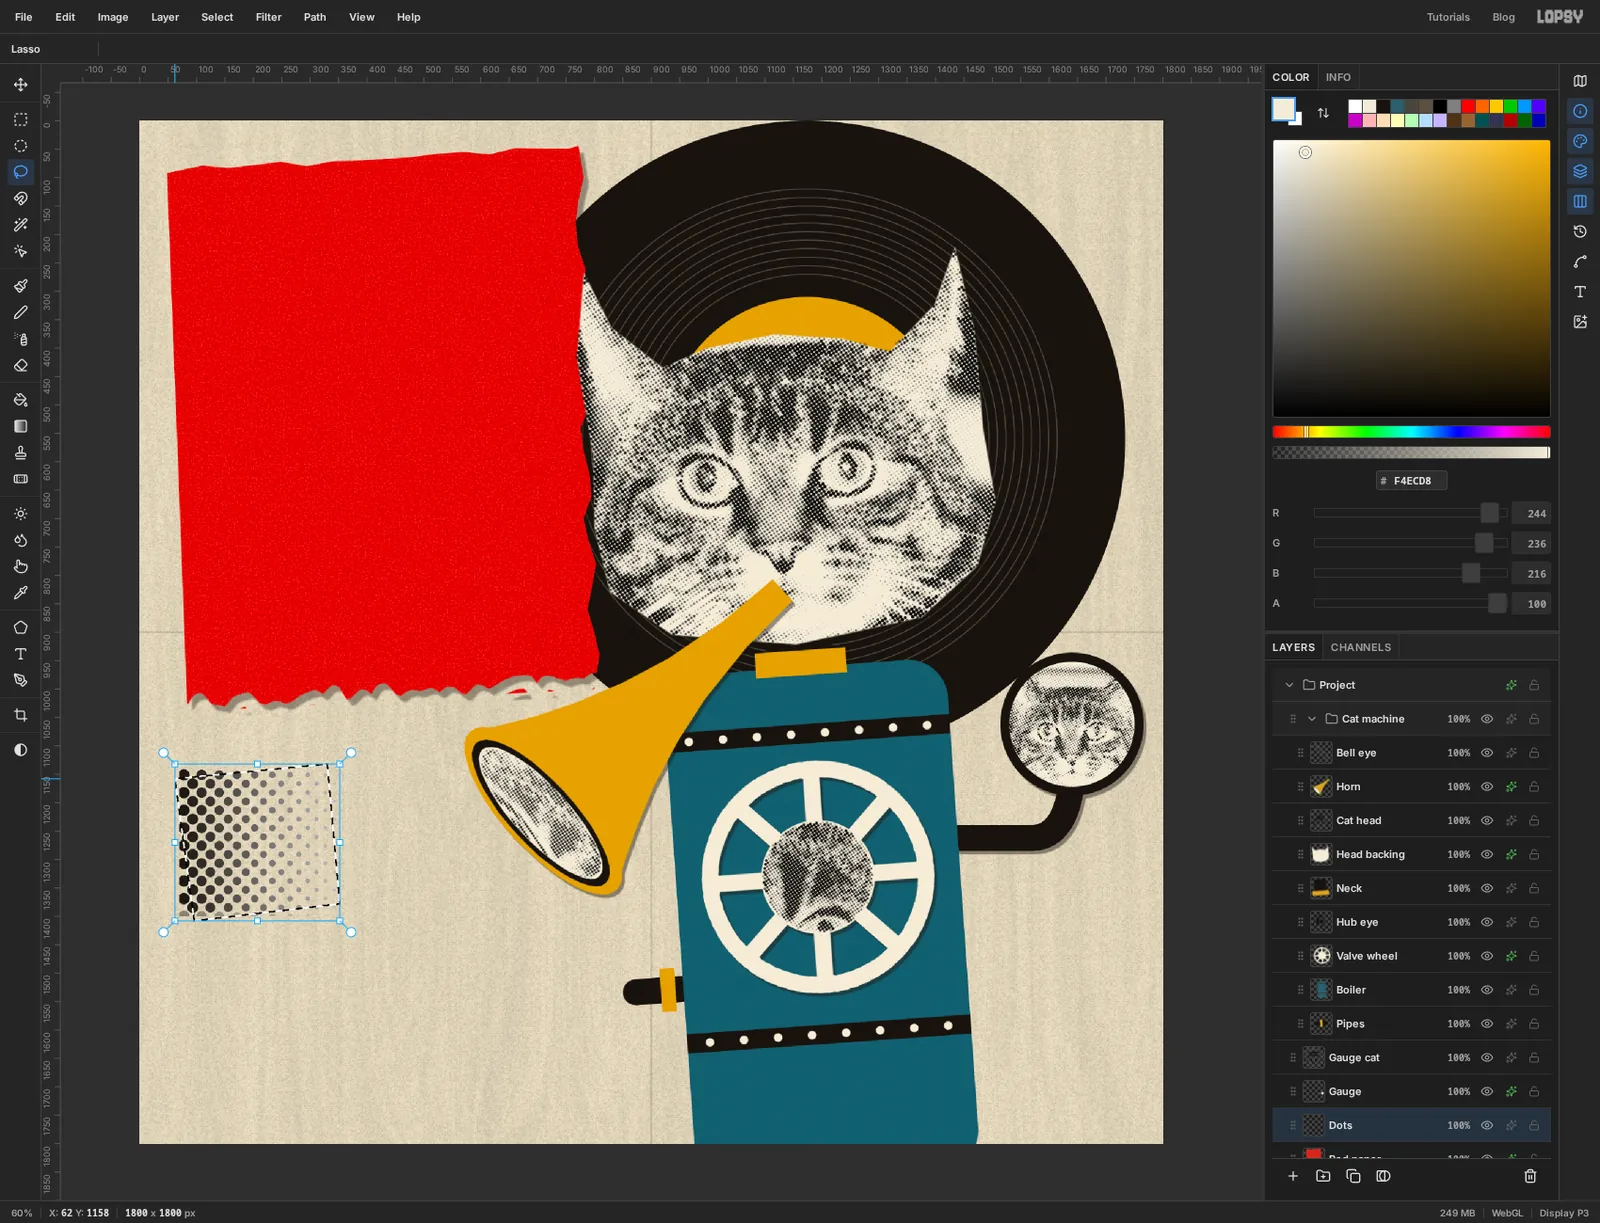
With the box still selected, choose Filter → Halftone and set Dot Size to 22, Angle to 45 and Softness to 0.5. The gradient becomes dots that shrink away to nothing. Press Cmd+D.
A neat rectangle of dots looks computer-made. With the Lasso, draw a crooked four-sided shape over the left two-thirds of the dots. Press Cmd+Shift+I, Delete and Cmd+D. Now it's a scrap someone cut from a printer's proof.
-
Draw the yowl
Add a layer called
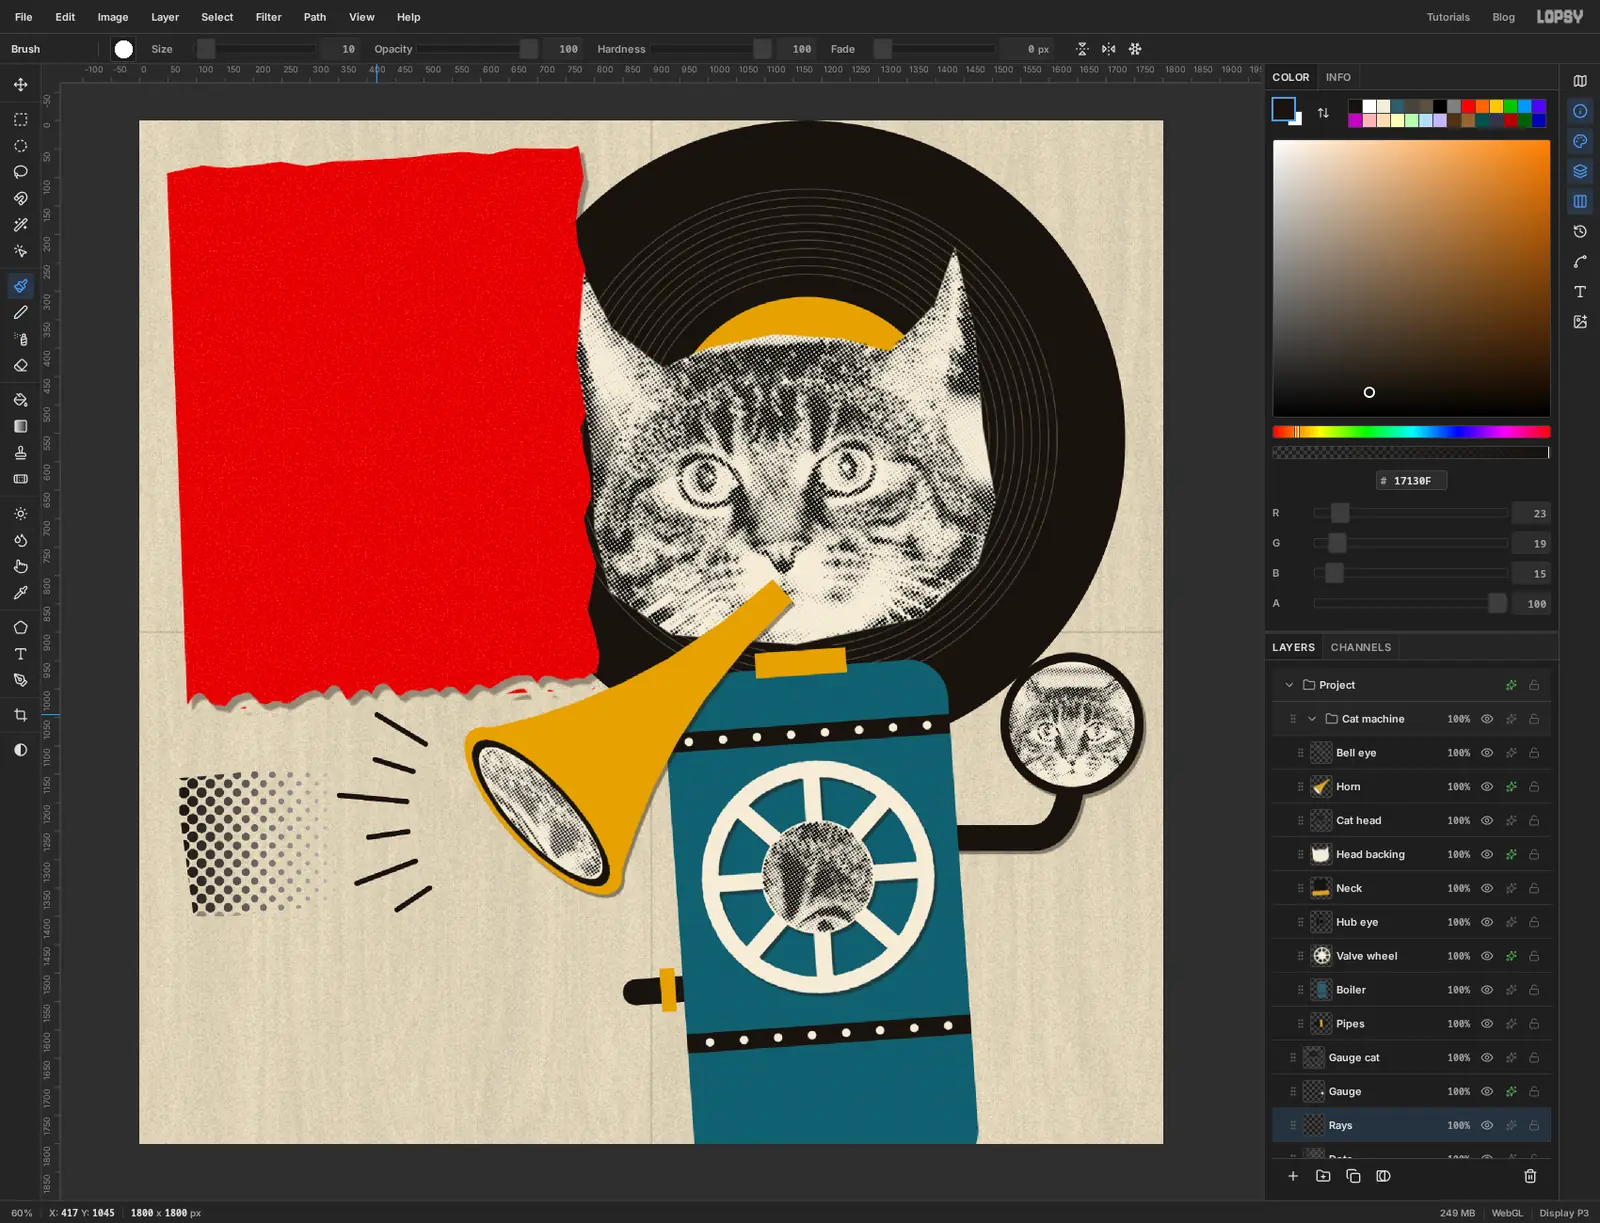
Rays. Pick the Brush, set Size to 10 with full hardness, and choose ink.Draw six short lines fanning out to the left of the horn's bell. For each one, click a little way out from the bell, hold Shift and click 70 to 120 px further out. Alternate long and short. Keep them clear of the red paper above and of the space at the bottom, where the title goes.
-
Set the first letter
The title is four letters from four different type cases. Each one is its own layer.
Click the
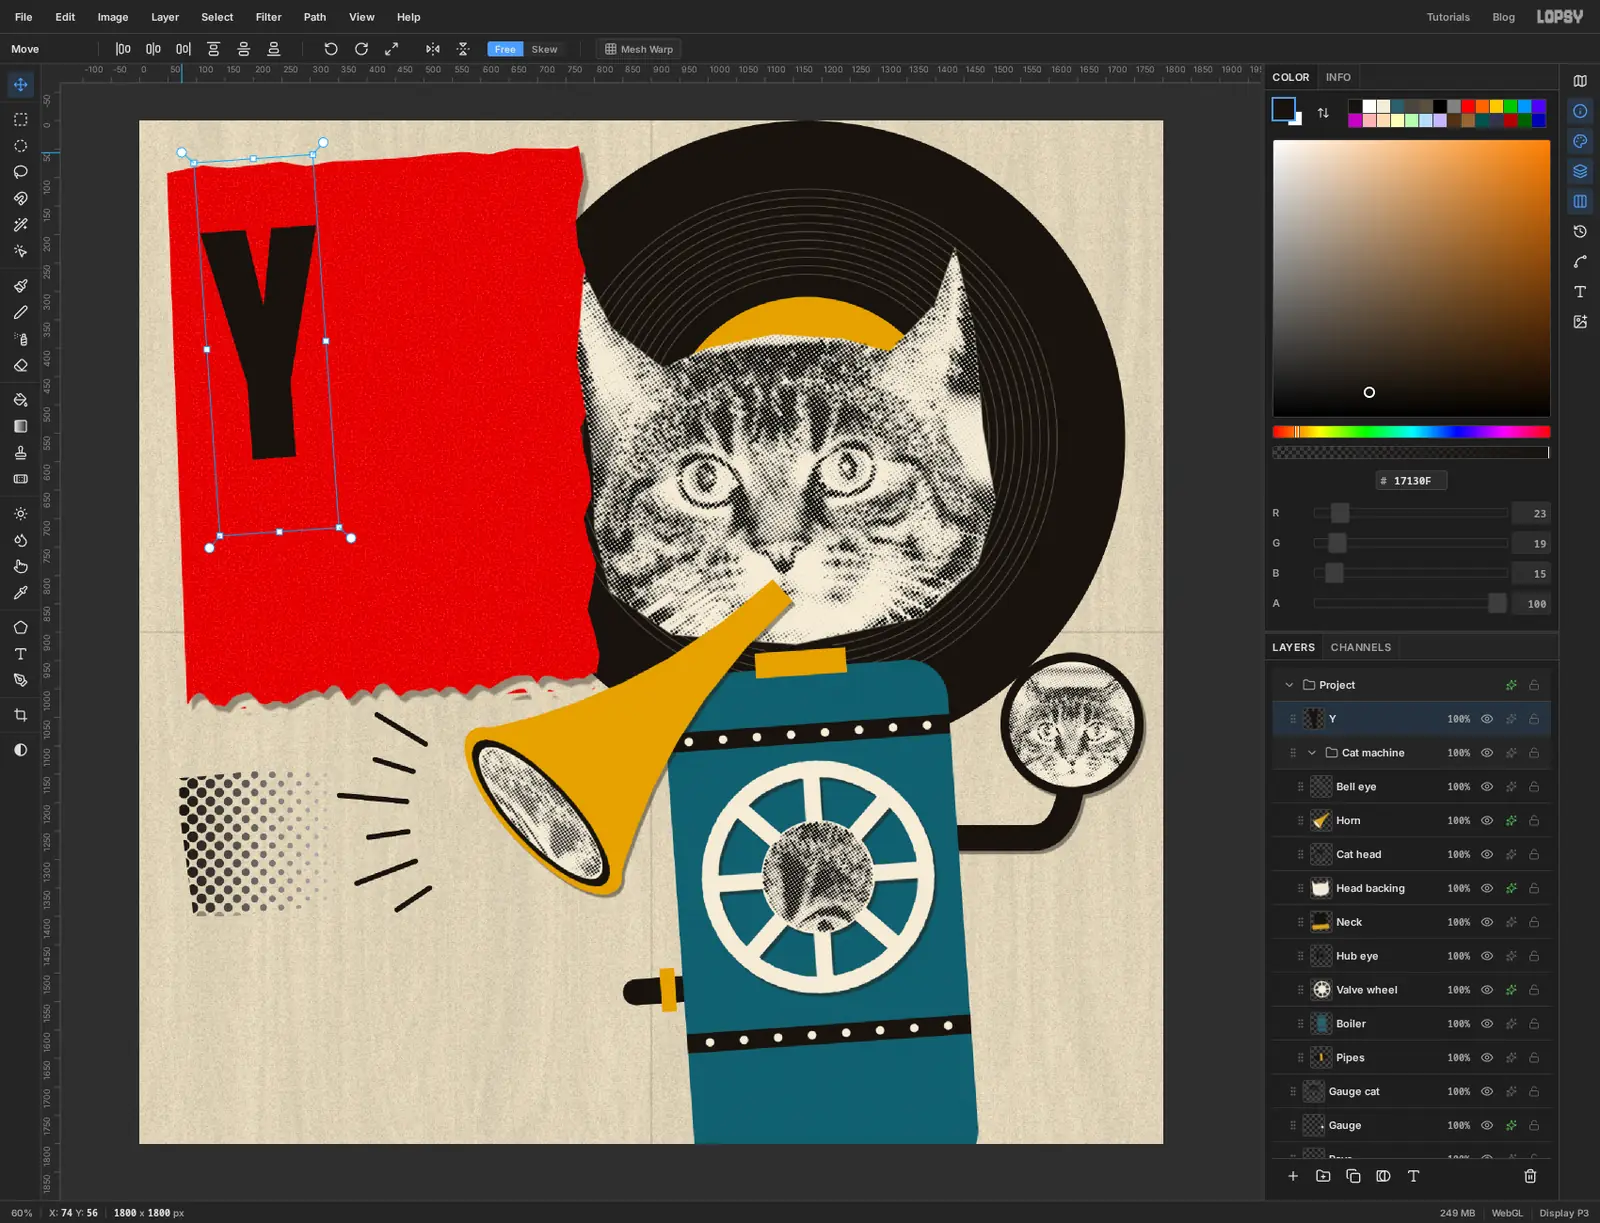
Cat machinegroup. Set the colour to ink, pick the Text tool and click in an empty area of paper. In the options bar set Size to 470 and open the font menu, search for Anton and pick it. TypeYand press Tab to commit.The new layer lands inside the group, because the group was active. Drag its row by the grip on the left, up above
Cat machineand a little to the left, and let go when the line appears above the group. It's now on top of the stack and out of the group.With the Move tool, drag the Y onto the red paper near the top left, with its top at about y 190. Then drag a rotation handle to tip it about 4° anticlockwise. A text layer keeps its handles without a selection, and stays editable after it's been turned.
-
Finish the word
Make the other three letters the same way. Each time: set the colour, click in empty paper, set the size and font, type the letter, press Tab, drag it into place and tilt it.
Oin Abril Fatface, 470, cream, to the right of the Y and a little lower, tipped 5° clockwiseWin Alfa Slab One, 320, cream, under the Y with about 40 px of red to its left, tipped 3° anticlockwiseLin Playfair Display, weight Black, 400, ink, to the right of the W, tipped 6° clockwise
Leave about the same amount of red above the Y as below the W, and keep the L's foot clear of the W's serif.
Then add one more piece of type the same way:
No. 391in Anton at 76, in ink, on the paper just under the red sheet, above the dots. 391 was the name of Francis Picabia's Dada magazine.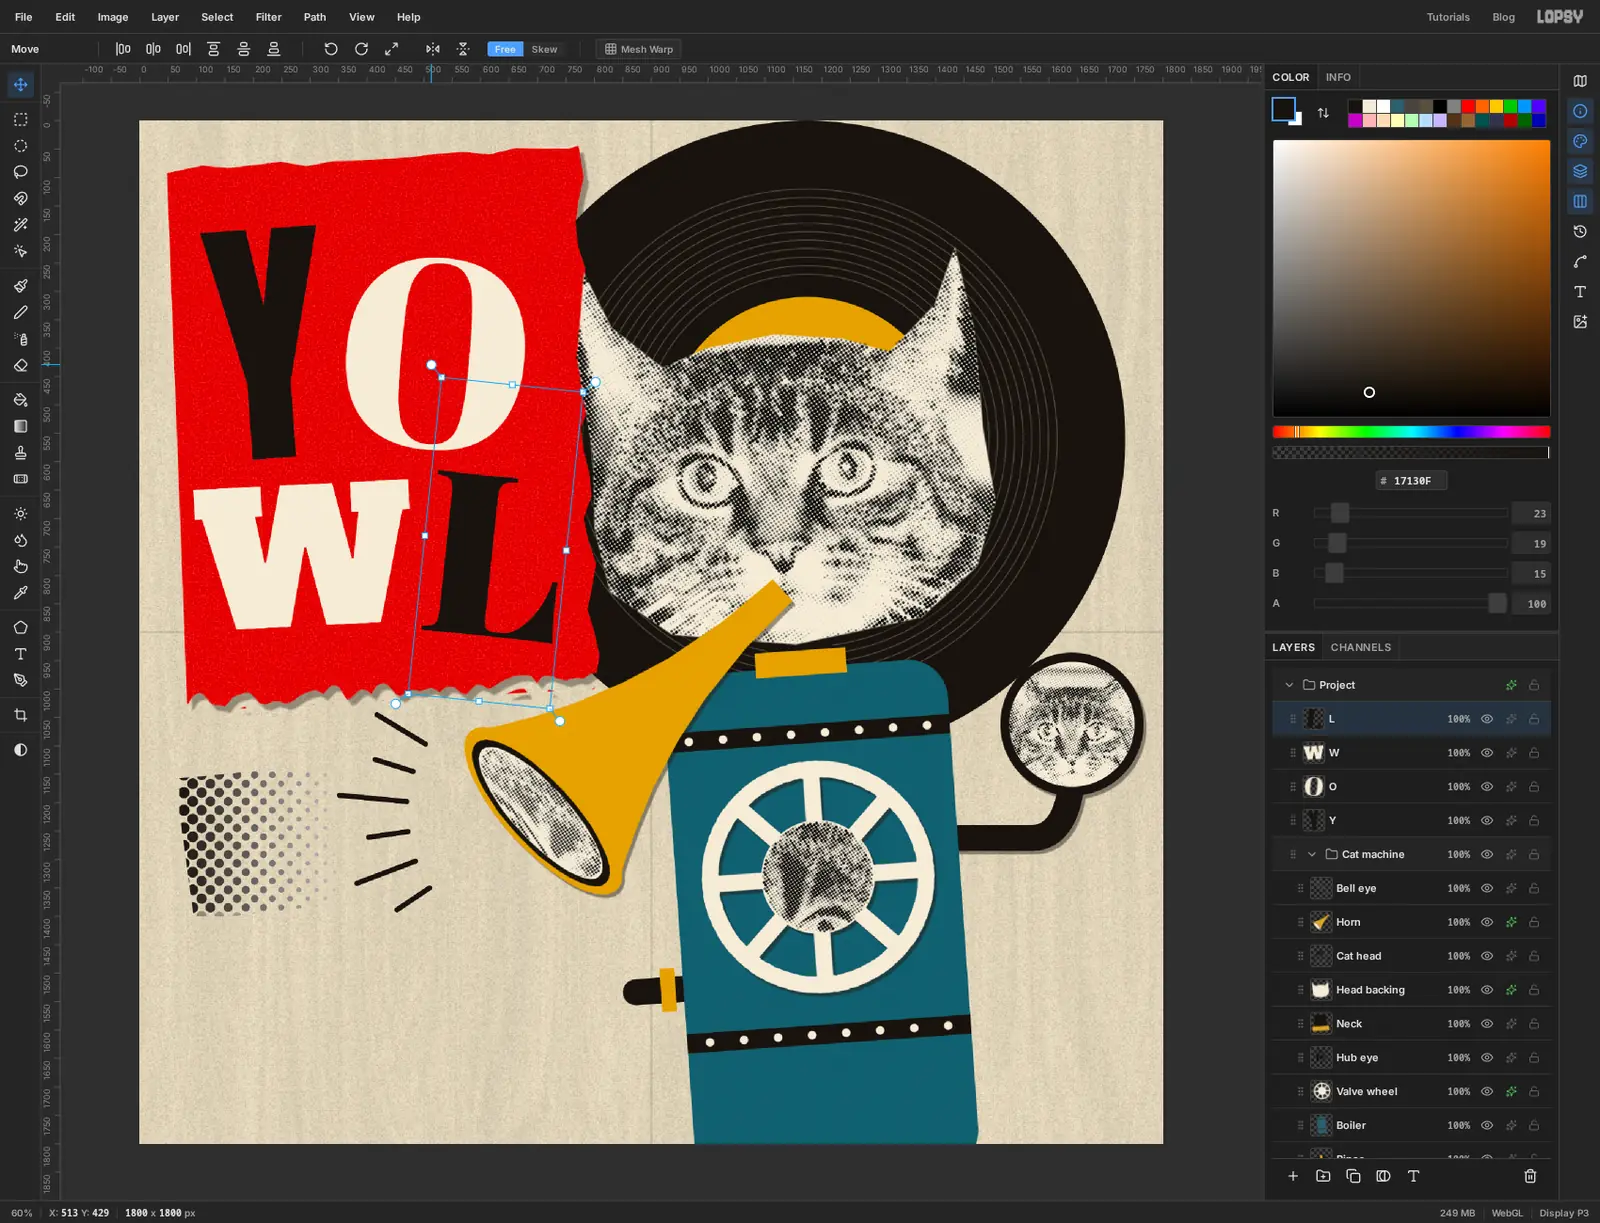
-
Cut a bar for the second word
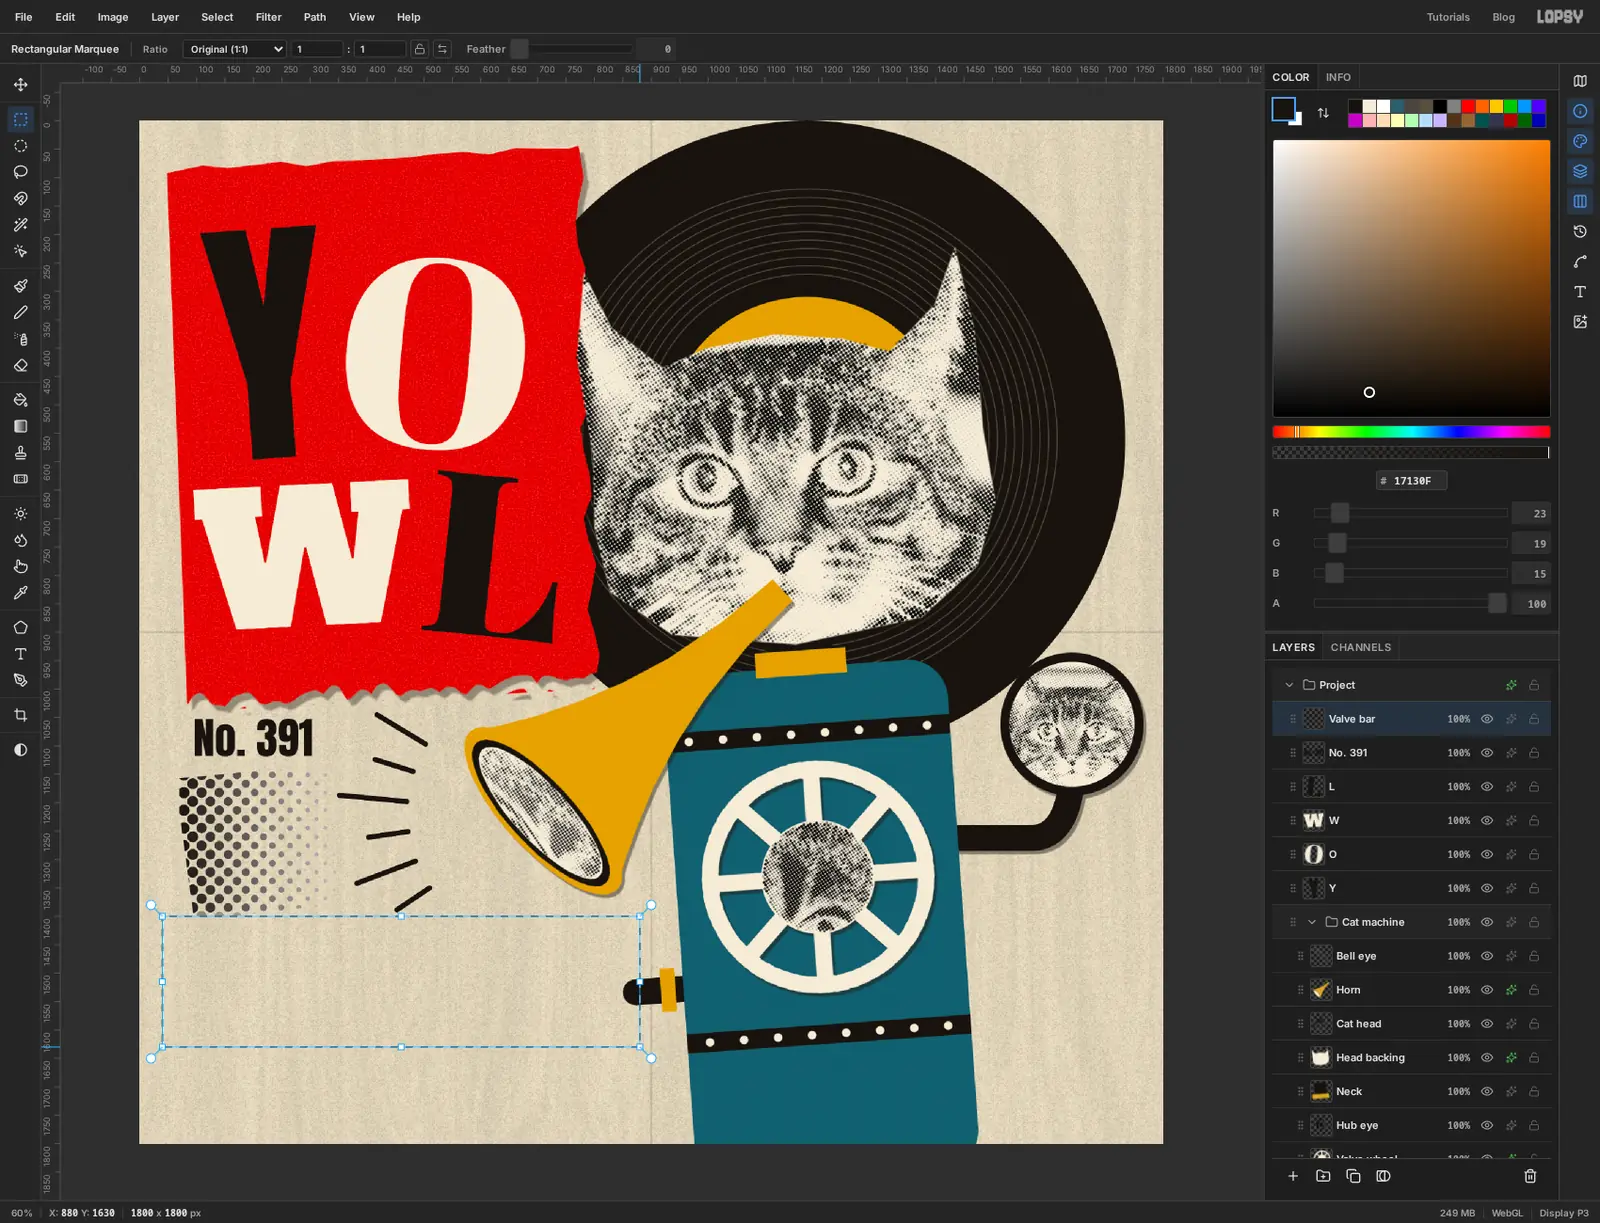
Add a layer called
Valve bar. With the Rectangular Marquee, drag a bar from 40, 1400 to 880, 1630. Fill it with ink, deselect, and add the small Drop Shadow.Set the colour to cream. With the Text tool, click in empty paper, choose Abril Fatface at 215 and type
VALVE. Press Tab.The word is narrower than the bar. Open the Text panel from the strip of panel buttons on the right edge of the window and set Letter spacing to 26. Then drag the word into the bar with the Move tool. Seat it carefully: the same gap above the capitals as below them, and the same gap at both ends.
-
Make the V red
Pick the Text tool and click on the word to edit it. Press Home to jump to the start, then hold Shift and press the right arrow once to select the V.
Click the Text color swatch in the options bar, type
D4281Cand press Enter. Only the selected letter changes. Press Esc to close the picker and Tab to commit.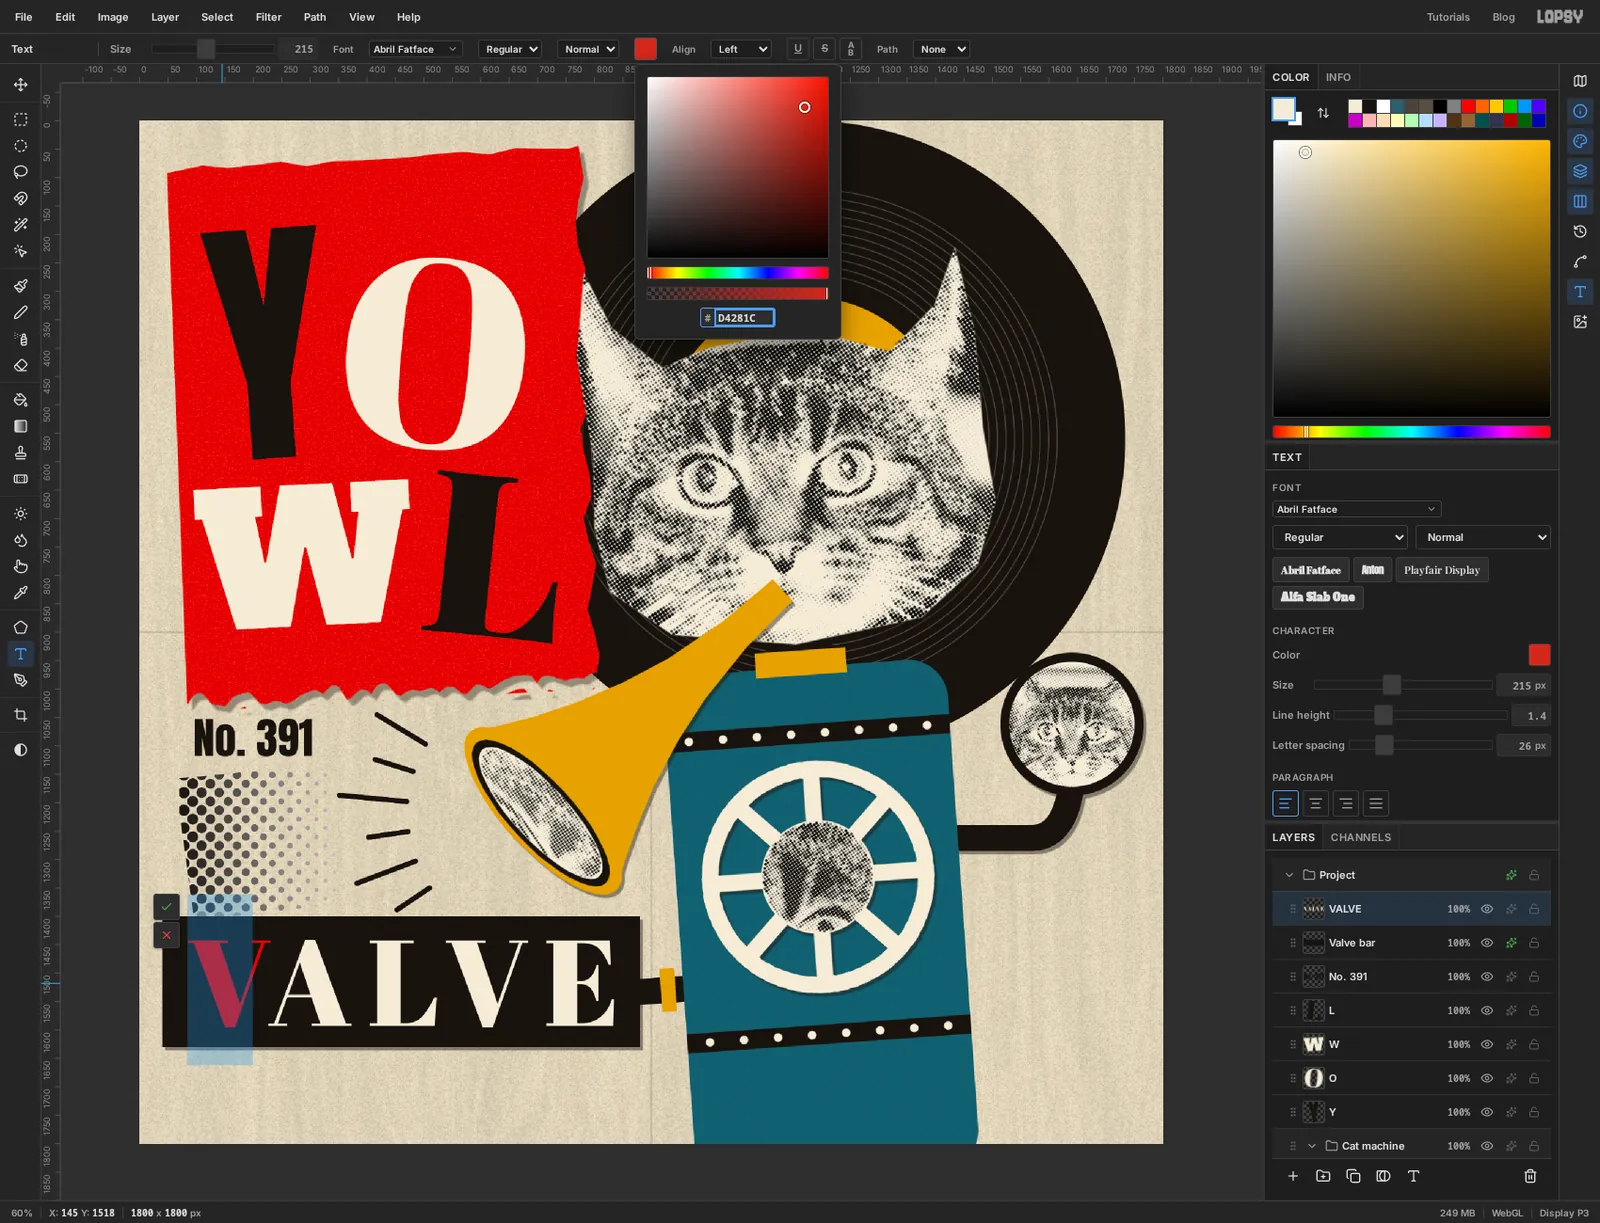
-
Tilt the bar and the word together
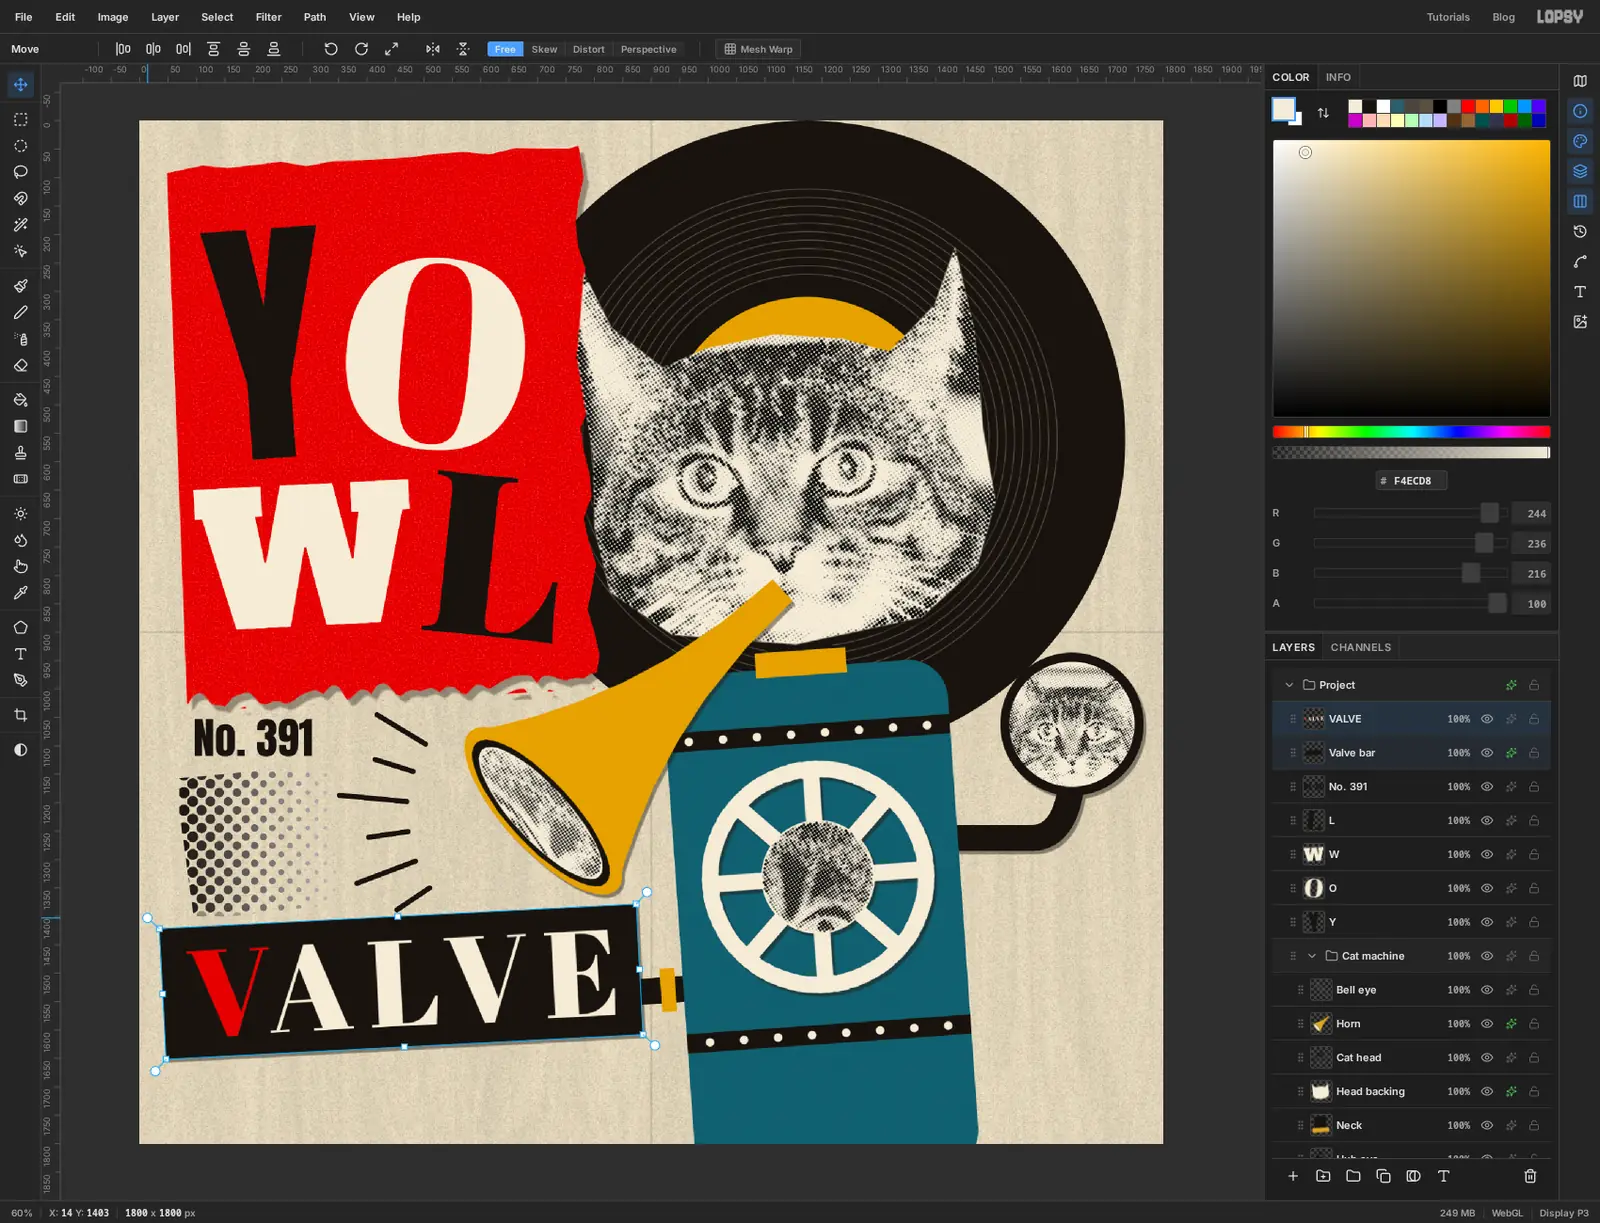
Click the
VALVElayer, hold Shift and clickValve bar. With both selected and the Move tool active, one set of handles frames the pair. Drag a rotation handle about 3° anticlockwise, and press Cmd+D.Rotating them together is what keeps the word seated in the bar. If you turn them one at a time, you'll be nudging letters for ten minutes.
-
Credit the band
Add a layer called
Strip. Drag a long, low marquee along the bottom, from 36, 1672 to 1110, 1752, and fill it with mustard. It runs straight across the bottom of the boiler. That's deliberate: pieces in a montage cover each other. Add the small Drop Shadow.The Text panel still remembers the 26 px of letter spacing from
VALVE, and it picks the value up again every time that layer is selected. WithStripactive, set Letter spacing back to 0 before you type anything new.Set the colour to ink and create new text in Special Elite at 60:
THE YESTERDAY VENTRILOQUISTS. Drag it into the strip and centre it by eye, with equal space at both ends and the capitals centred between the top and bottom edges.Select the text layer and
Striptogether and rotate them about 2° anticlockwise, the same way as the bar.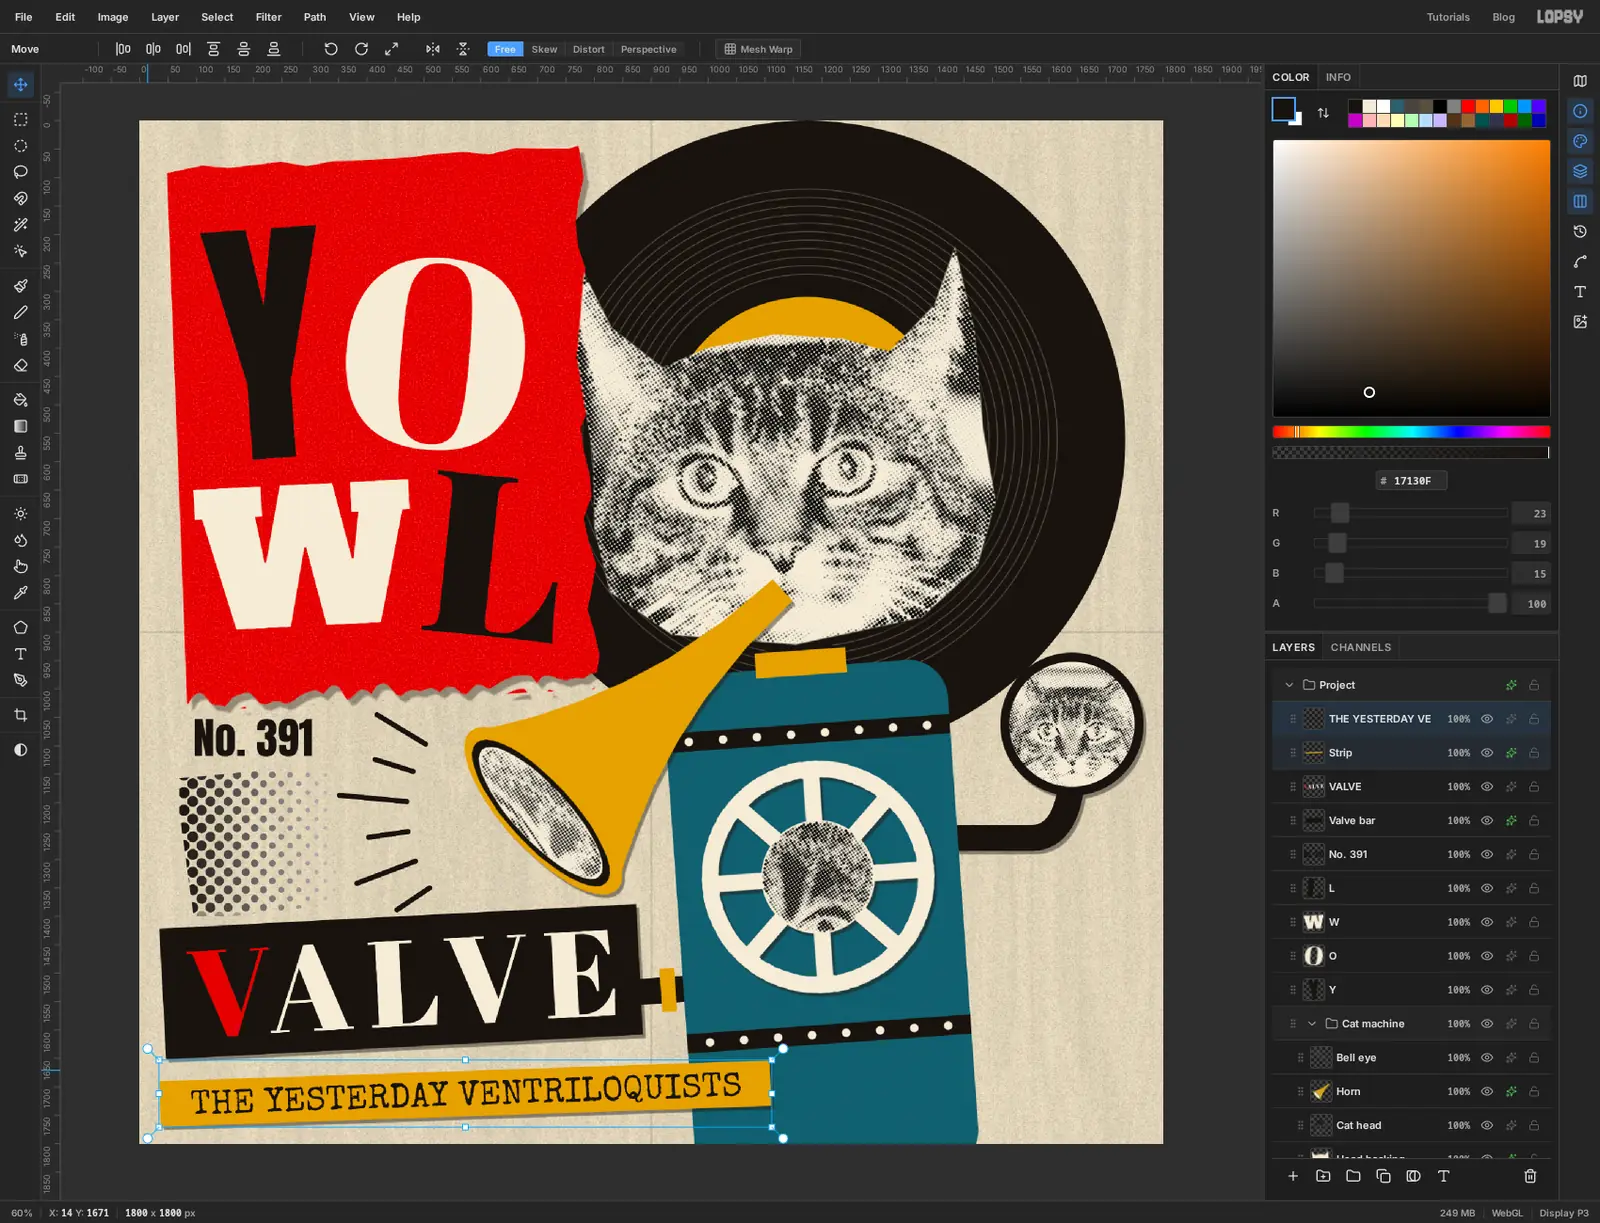
-
Stick on a speed label
Add a layer called
Sticker. With the Elliptical Marquee and Cmd held, drag a circle about 210 px across in the top right corner, centred near 1655, 152, so it just overlaps the edge of the record. Fill it with red and add the small Drop Shadow.Set the colour to cream and add two pieces of text:
33⅓in Abril Fatface at 74. The ⅓ isn't on most keyboards, so copy it from here and paste it while you're typing.R.P.M.in Bebas Neue at 32
Place the number slightly above the middle of the sticker and the letters under it. Leave a clear gap between the two lines and at least 30 px of red on either side of the number.
Click the
R.P.M.layer, Shift-clickStickerto select all three, and rotate them about 10° clockwise.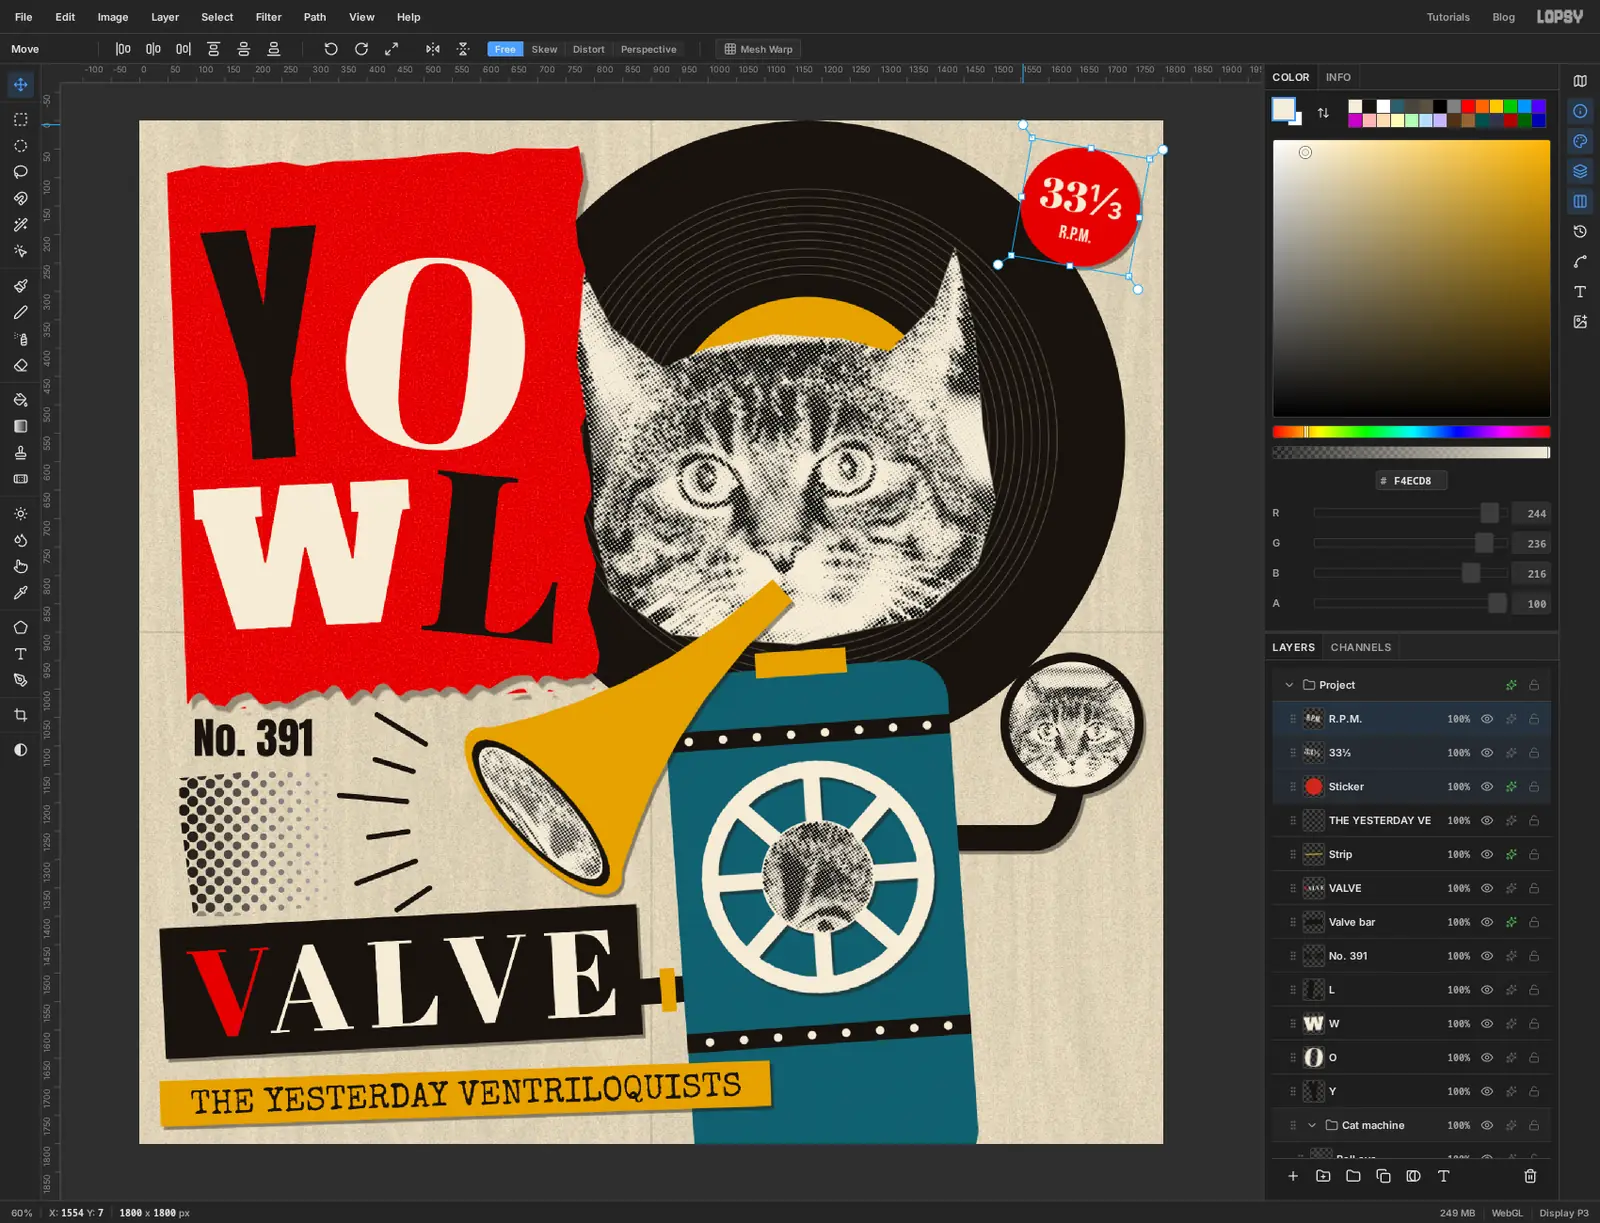
-
Draw a path around the record
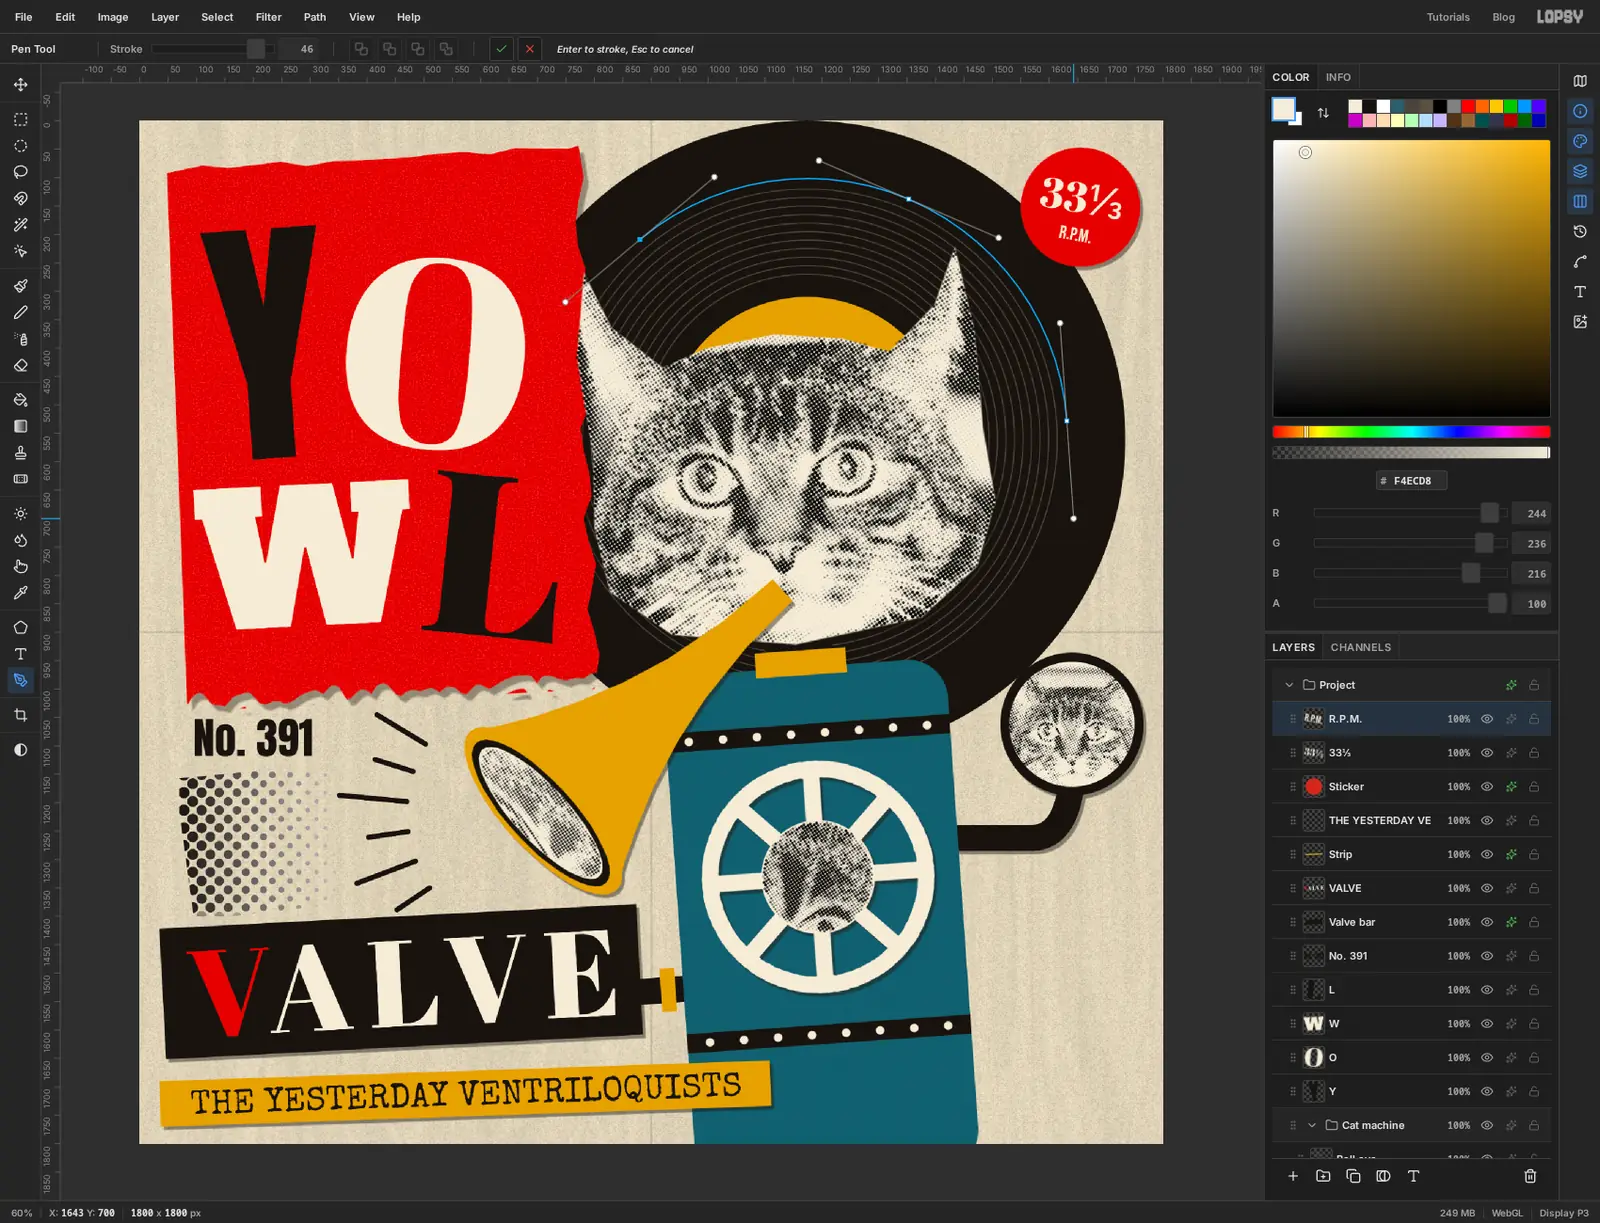
The empty band on the record is for a line of type that follows the curve. Pick the Pen tool.
You need three anchors on a circle about 100 px inside the record's edge. For each one, press at the point and drag about 170 px in the direction the curve is travelling, clockwise around the record:
- Press at about 880, 209 and drag up and to the right
- Press at about 1353, 138, near the top of the record, and drag right and slightly down
- Press at about 1631, 528, on the right side, and drag almost straight down
Click the Commit path ✓ in the options bar. This saves the path without stroking it.
-
Bind the text to the path
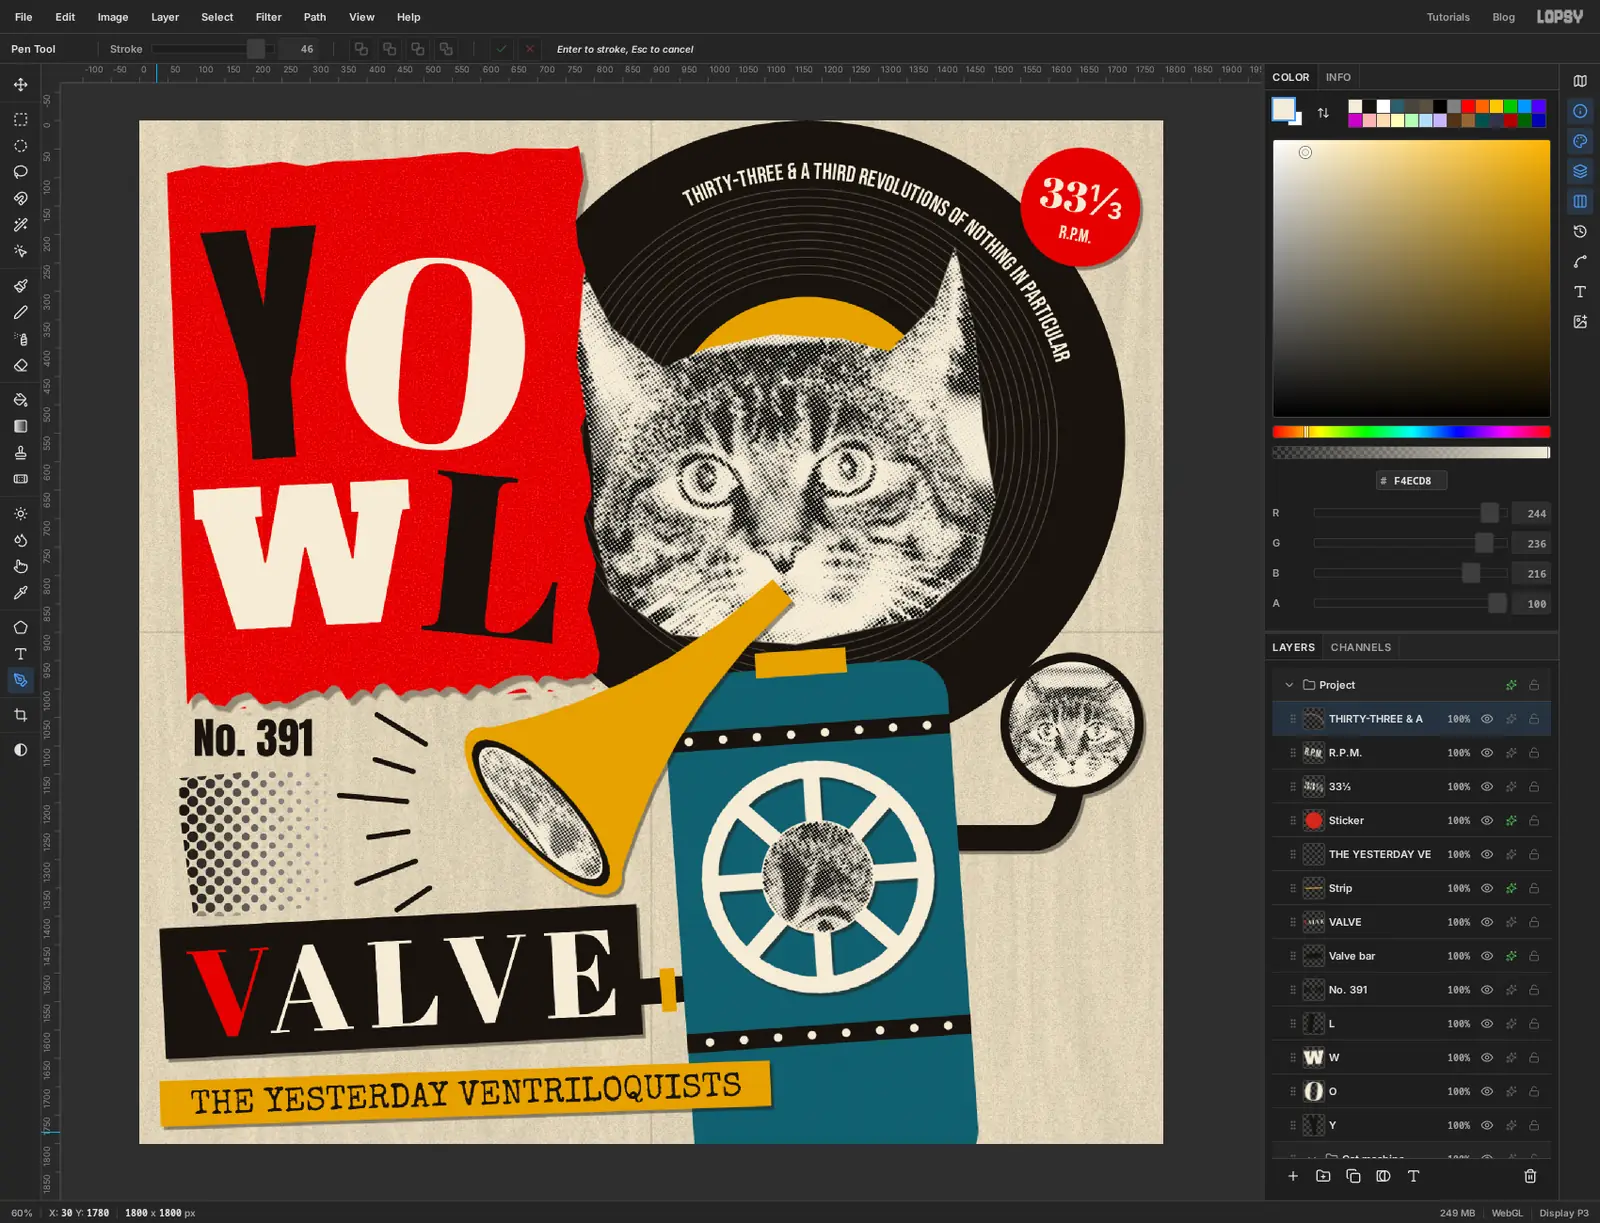
Set the colour to cream. With the Text tool, click in empty paper, choose Bebas Neue at 40 and type
THIRTY-THREE & A THIRD REVOLUTIONS OF NOTHING IN PARTICULAR.Before committing, open the Path menu at the right of the options bar and pick the last path in the list,
Path 3. The line jumps onto the curve. Set Align to Center so it sits in the middle of the arc, then press Tab. The type settles into its final size and position once it's committed.If the text runs off the end of the path, lower the Size by a point or two. Clear the path's outline the usual way: Pen tool, click on empty canvas, Cancel path. Set Align back to Left for the next piece of text.
-
Paste in a track list
Add a layer called
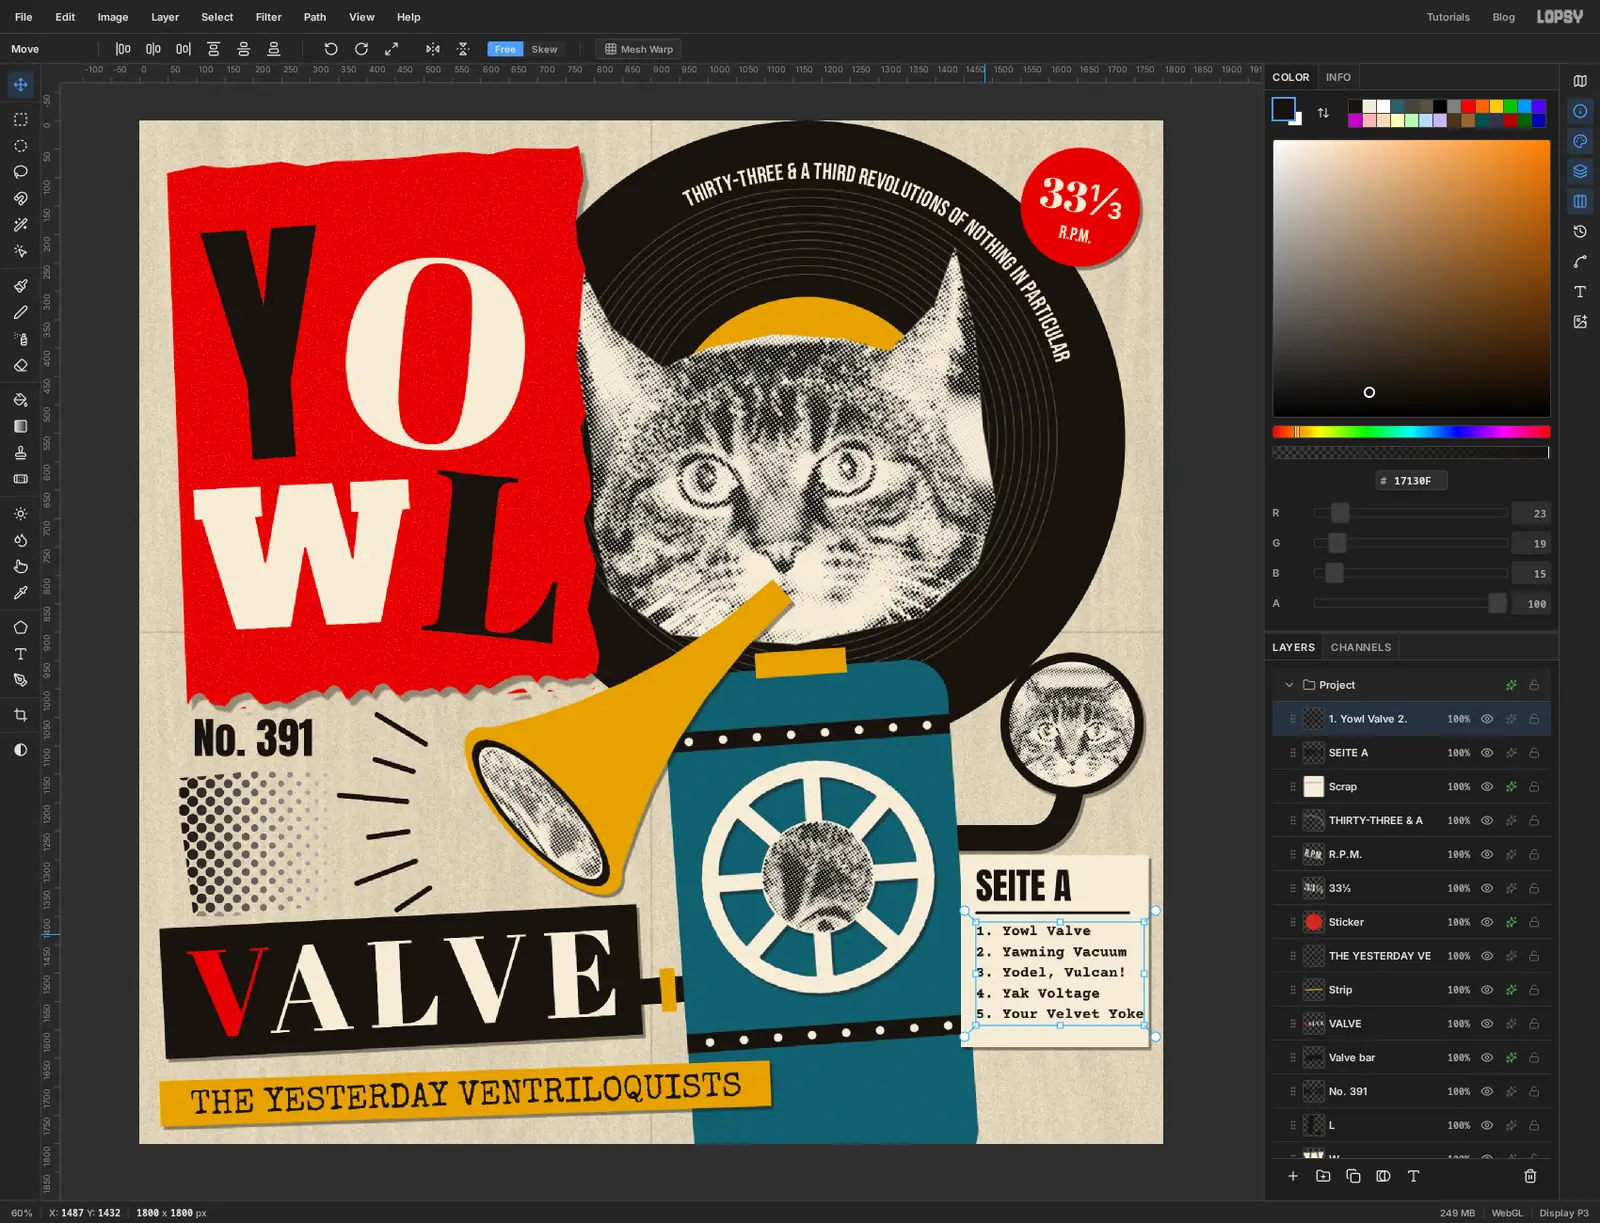
Scrap. Drag a marquee on the right-hand side from 1445, 1292 to 1775, 1630, so it covers the edge of the boiler, and fill it with cream. Add the small Drop Shadow. With the Brush at Size 6, in ink, click and Shift-click a rule across the scrap about 100 px from its top.Add two pieces of text in ink:
SEITE Ain Anton at 64, above the rule. It's German for "Side A".- The track list in Courier Prime, weight Bold, at 26, pressing Enter between lines: 1. Yowl Valve, 2. Yawning Vacuum, 3. Yodel, Vulcan!, 4. Yak Voltage and 5. Your Velvet Yoke
Line both up about 27 px in from the scrap's left edge. At 26 the longest track runs almost to the right edge of the scrap, which is too tight. With the track list layer active and the Text tool selected, lower Size to 23 so there's a clear margin on the right.
-
Tilt the scrap and stamp the label
Click the track list layer, hold Shift and click
Scrap. The heading between them is selected too. Rotate all three about 3° clockwise with the Move tool and press Cmd+D.Under the scrap, make a record-label stamp the same way you made the
VALVEbar. Add a layer calledLabel block, drag a marquee from 1500, 1668 to 1770, 1754 and fill it with ink. Set the colour to cream, create the textDADAPHONin Anton at 50 in empty paper, and drag it into the block with an even margin all round. Then select the text layer andLabel blocktogether and rotate the pair about 5° anticlockwise.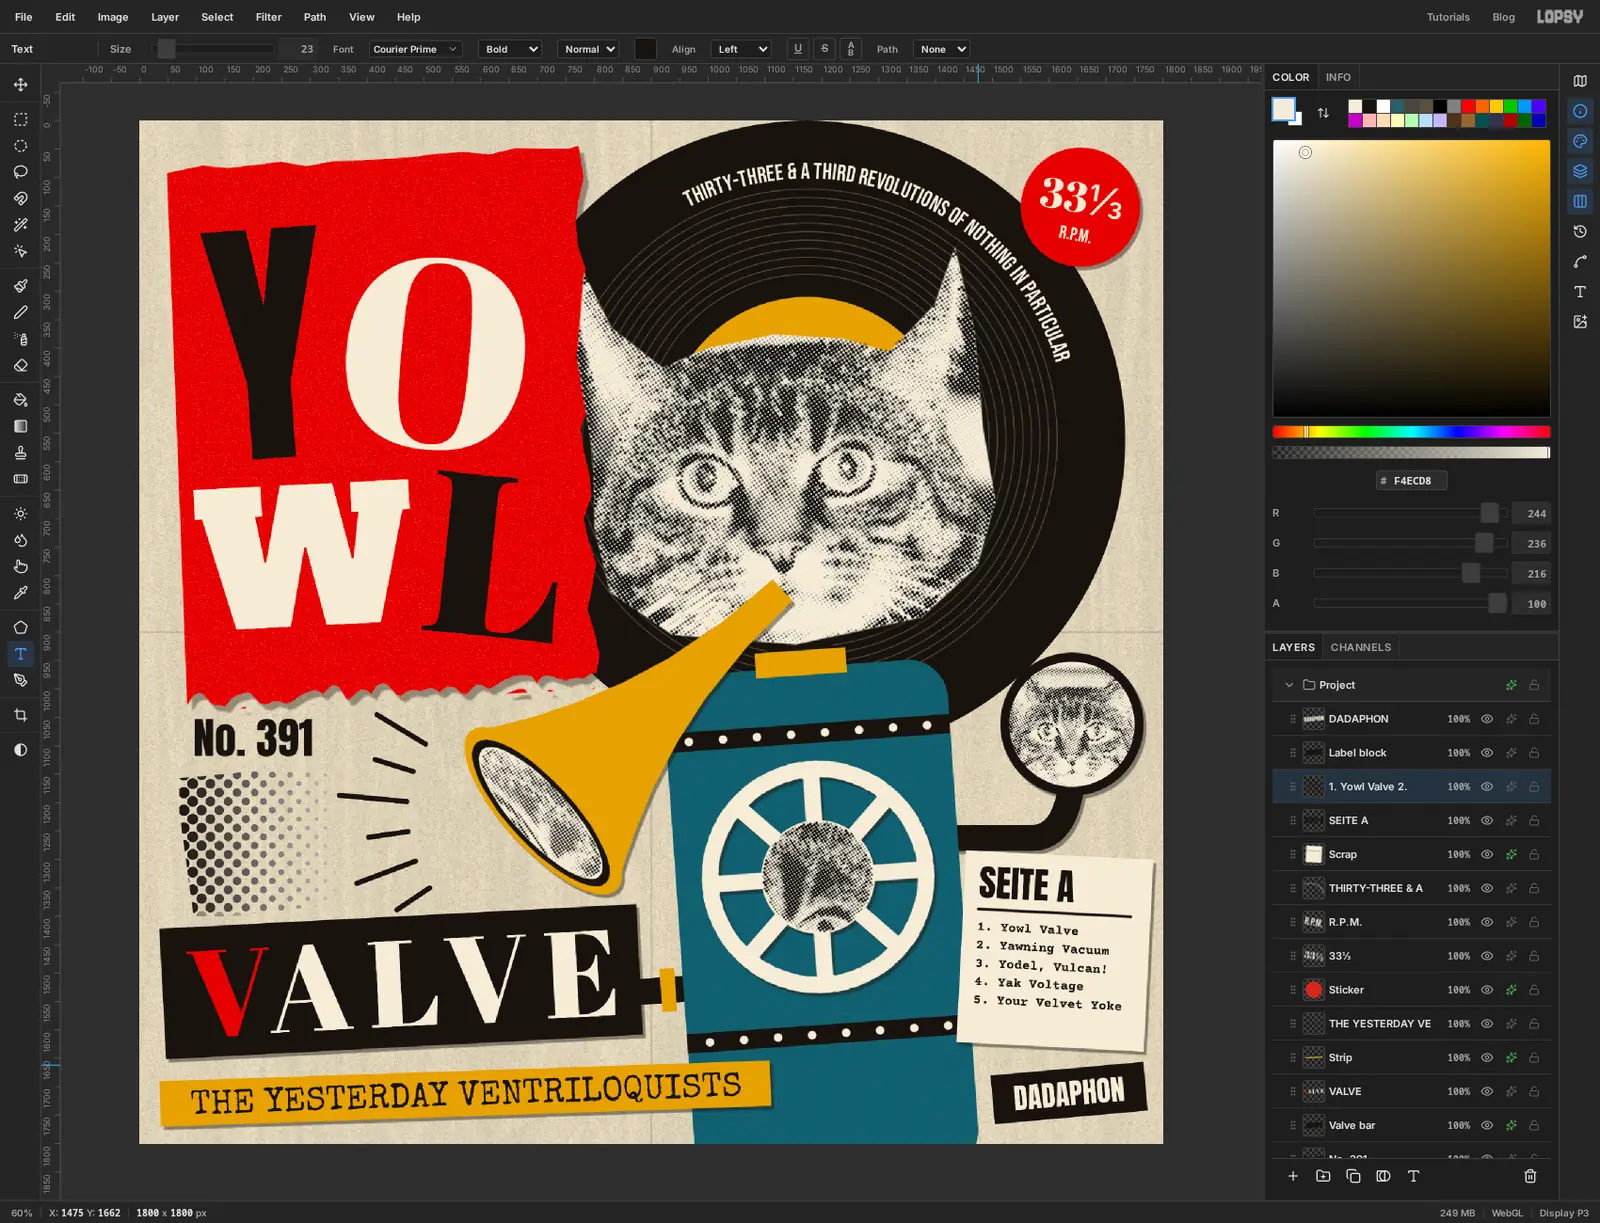
-
Group the type
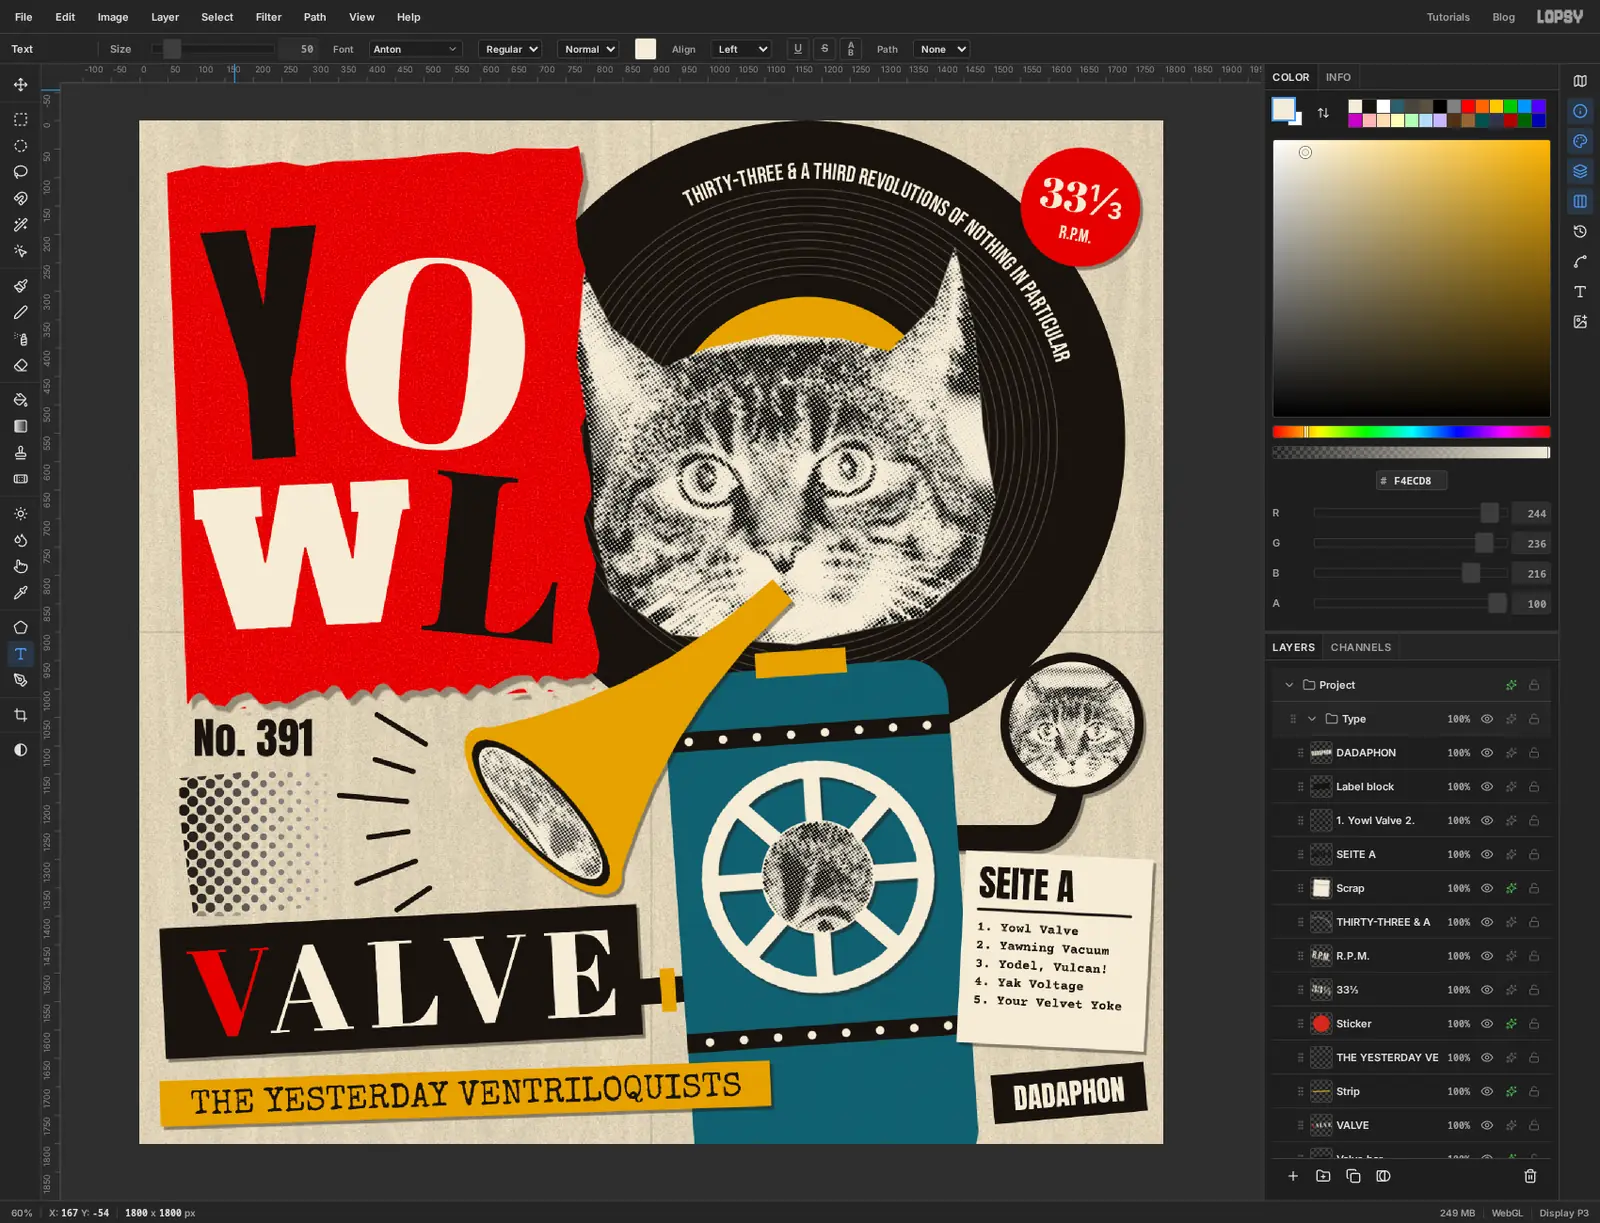
Click the top layer, scroll down and Shift-click the
Ylayer, then choose Layer → Group Layers and name the groupType.With the group selected, the Move tool now shifts every piece of type at once, the curved line included, if you want to adjust how the type sits against the figure.
-
Add grain
Click Add Layer and name it
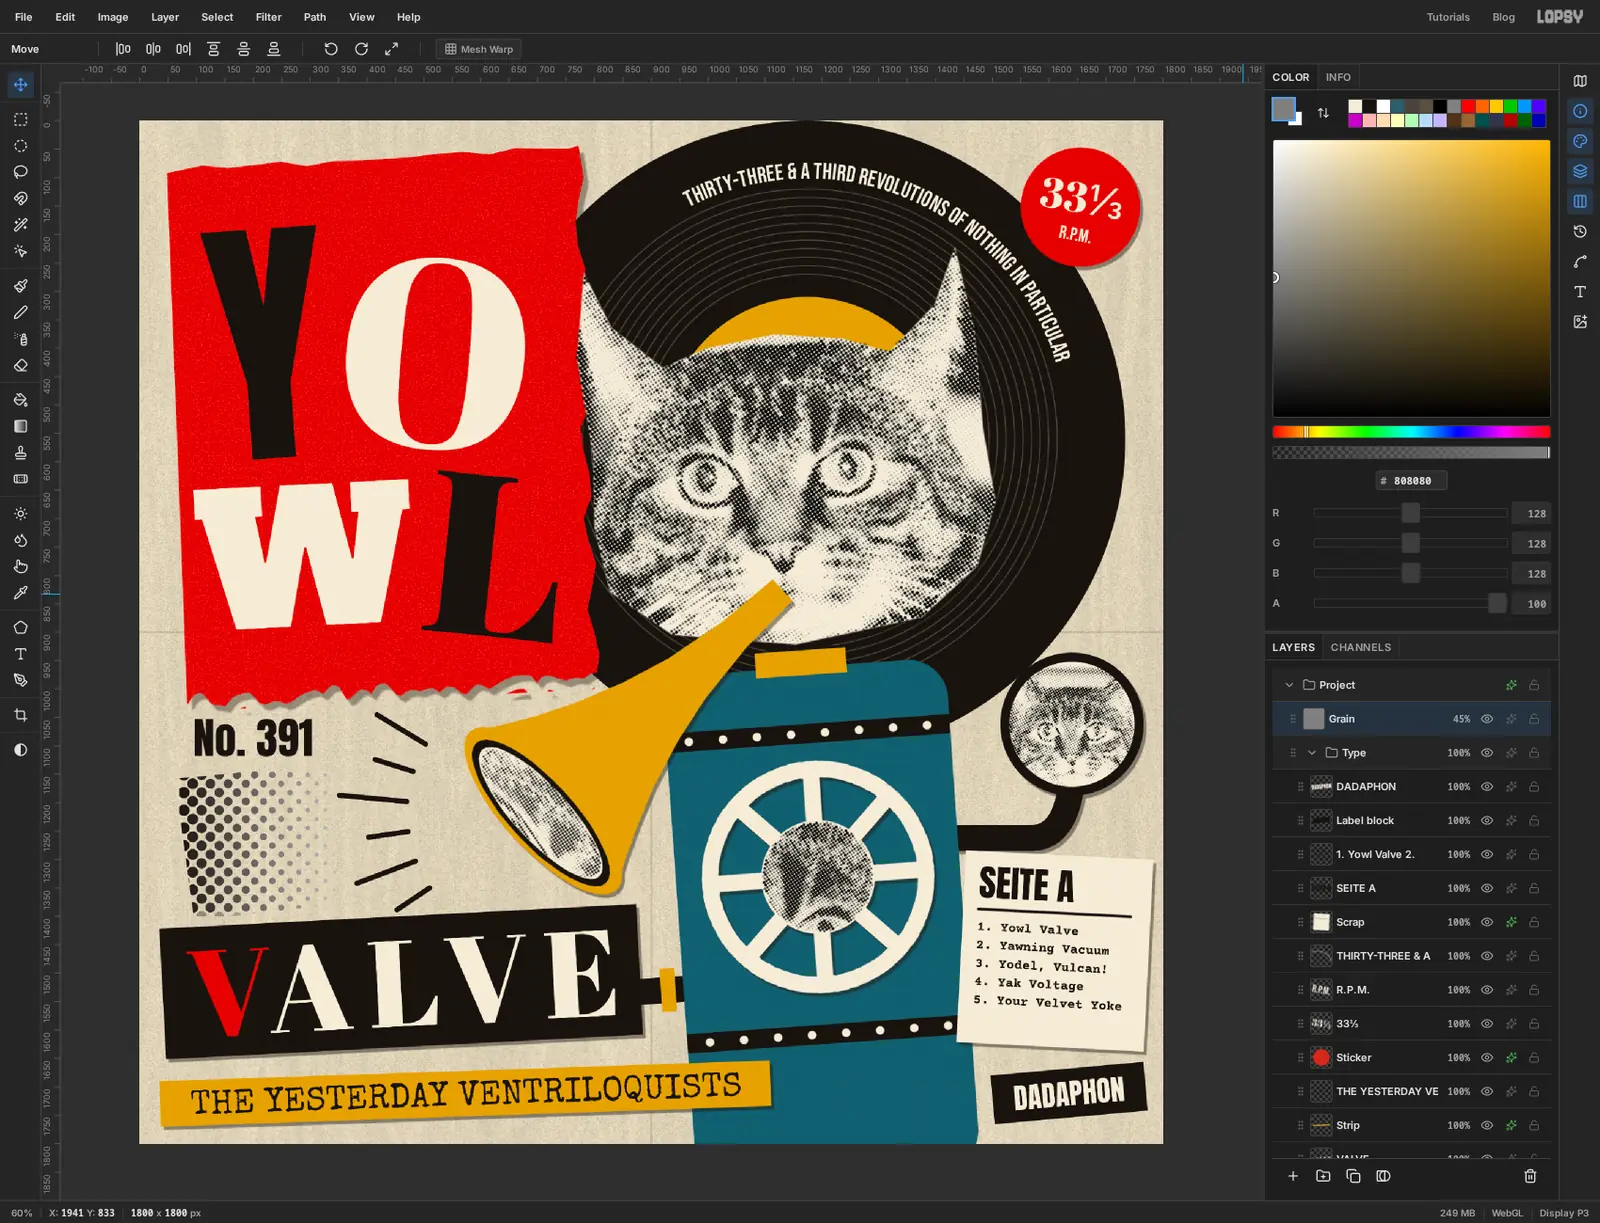
Grain. It lands inside the Type group, so drag its row up and to the left until it sits above the group.Set the colour to mid-grey , press Cmd+A, choose Edit → Fill and press Cmd+D. Choose Filter → Add Noise, set Amount to 28, and pick Mono and Gaussian.
Open the layer's effects drawer and set the blend mode to Overlay, then lower its opacity to about 45%. Grey does nothing in Overlay, so only the speckle shows. It runs across every piece of paper and ties them together.
-
Warm it up
Old paper yellows. Choose Layer → Adjustment Layer…. The first time, a note explains that adjustments in Lopsy live on groups. Click Got it. The drawer that opens belongs to the
Projectgroup, which holds the whole document. It already lists Levels, Curves, Exposure, Hue / Saturation and Color Grading, all at neutral settings. Leave those alone.Click Add Adjustment and choose Photo Filter. It starts with a warm orange. Lower Density to 14 so the whites turn the colour of an old paperback without the red going brown. Close the drawer.
Choose File → Quick Export PNG for the cover and File → Save Project to keep the layers.
From here you can swap in your own cat, your own band and your own five tracks. The method stays the same: cut it rough, print it in dots, paste it crooked.