Make a Memphis Photo-Collage Album Cover
Cut a zebra photo into a sticker-edged bust, set it on a patterned Memphis plinth, and build an 80s album cover with shapes, confetti and outlined type.
Memphis was a group of Milan designers led by Ettore Sottsass, who launched their first collection in 1981. Their furniture looked like toys built by architects: flat slabs of colour, stripes, dots, squiggly "Bacterio" patterns, black outlines and objects perched on pedestals. Through the 1980s that look spread to record sleeves, TV idents and shop windows.
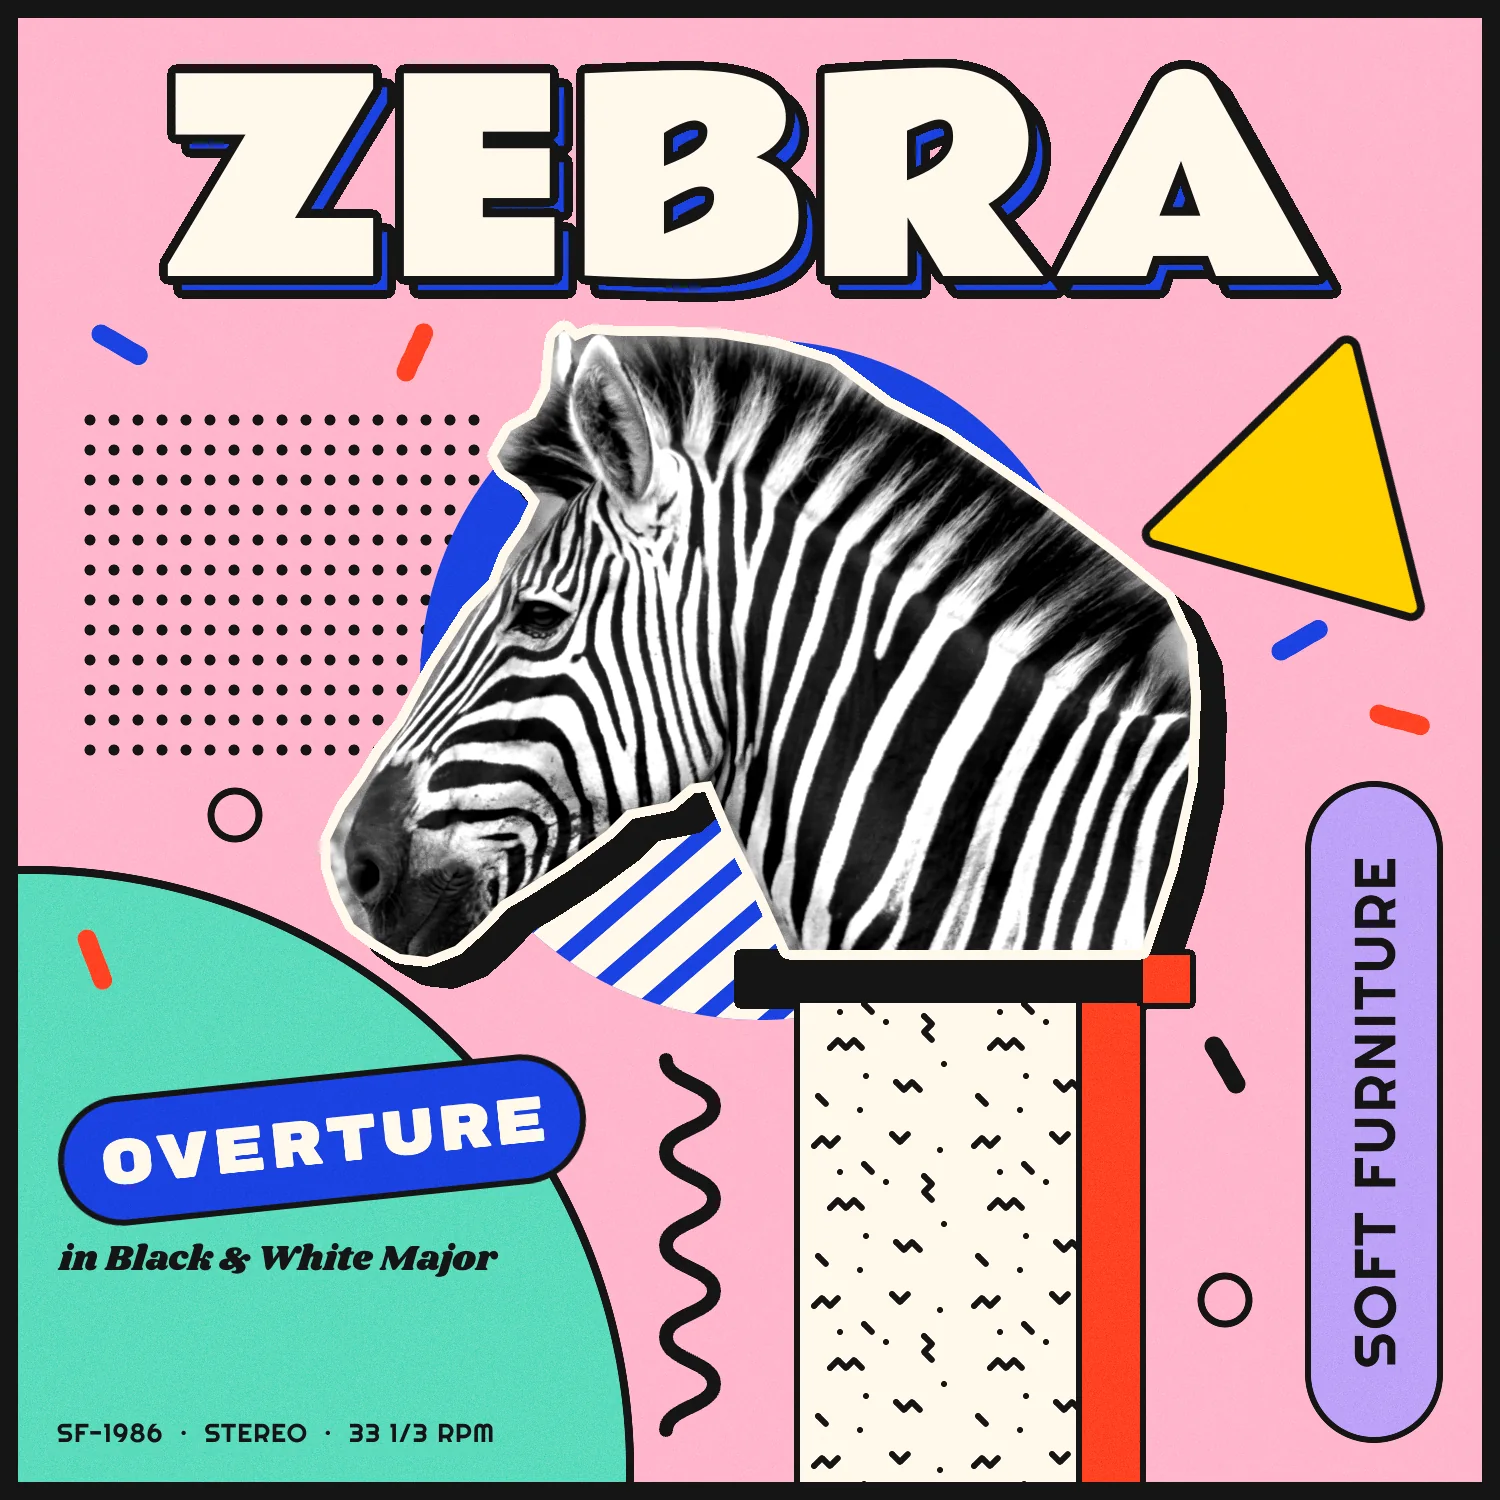
In this tutorial you'll make a 1500 × 1500 px sleeve for Zebra Overture, an imaginary album by an imaginary band called Soft Furniture. The idea is a joke about classical music: the zebra gets the composer-bust treatment and sits on a Memphis plinth. It has:
- a photo of a zebra cut into a bust with the Lasso, with a cream sticker edge and a hard black shadow
- a plinth with a squiggle-pattern column, built from a tile you draw yourself
- flat Memphis shapes: a striped cobalt disc, a dot grid, a mint quarter-circle, a yellow triangle and a lilac pill
- confetti: a Pen-drawn squiggle, brush dashes and copied rings
- outlined title type with a block shadow, a tilted label and vertical band name
- print grain and an ink border
The tools you'll use:
- the Elliptical and Rectangular Marquee (including Shift+Option intersect), the Lasso, Select → Inverse and the Brush with Shift-click straight lines
- Desaturate, Brightness/Contrast and Add Noise
- the Stroke and Color Overlay layer effects, Duplicate Layer and the Overlay blend mode
- Define Pattern and Fill with Pattern
- the Shape tool's ellipses, rounded rectangles and triangles, and the Pen tool
- Copy, Paste, Merge Down and Group Layers
- the Move tool's scale and rotation handles, on a photo, a shape, live text and a group
- the Text tool and Image → Border
You need one photo: Zebra head.jpg) by flowcomm on Wikimedia Commons (CC BY 2.0). Download the largest size. It's a side-on head with a soft green background, which makes it easy to trace.
The fonts are all free Google Fonts in Lopsy's font picker: Rammetto One for the title, Rubik Mono One for OVERTURE, Shrikhand for the subtitle and Righteous for the band name and credits.
The palette:
-
Pink ground
-
cream
-
ink
-
Cobalt
-
tomato
-
yellow
-
Mint
-
lilac
-
grain grey
-
Set up a pink square with guides
- Open Lopsy. In the New Document dialog set Width and Height to
1500, then click Create. - Click the
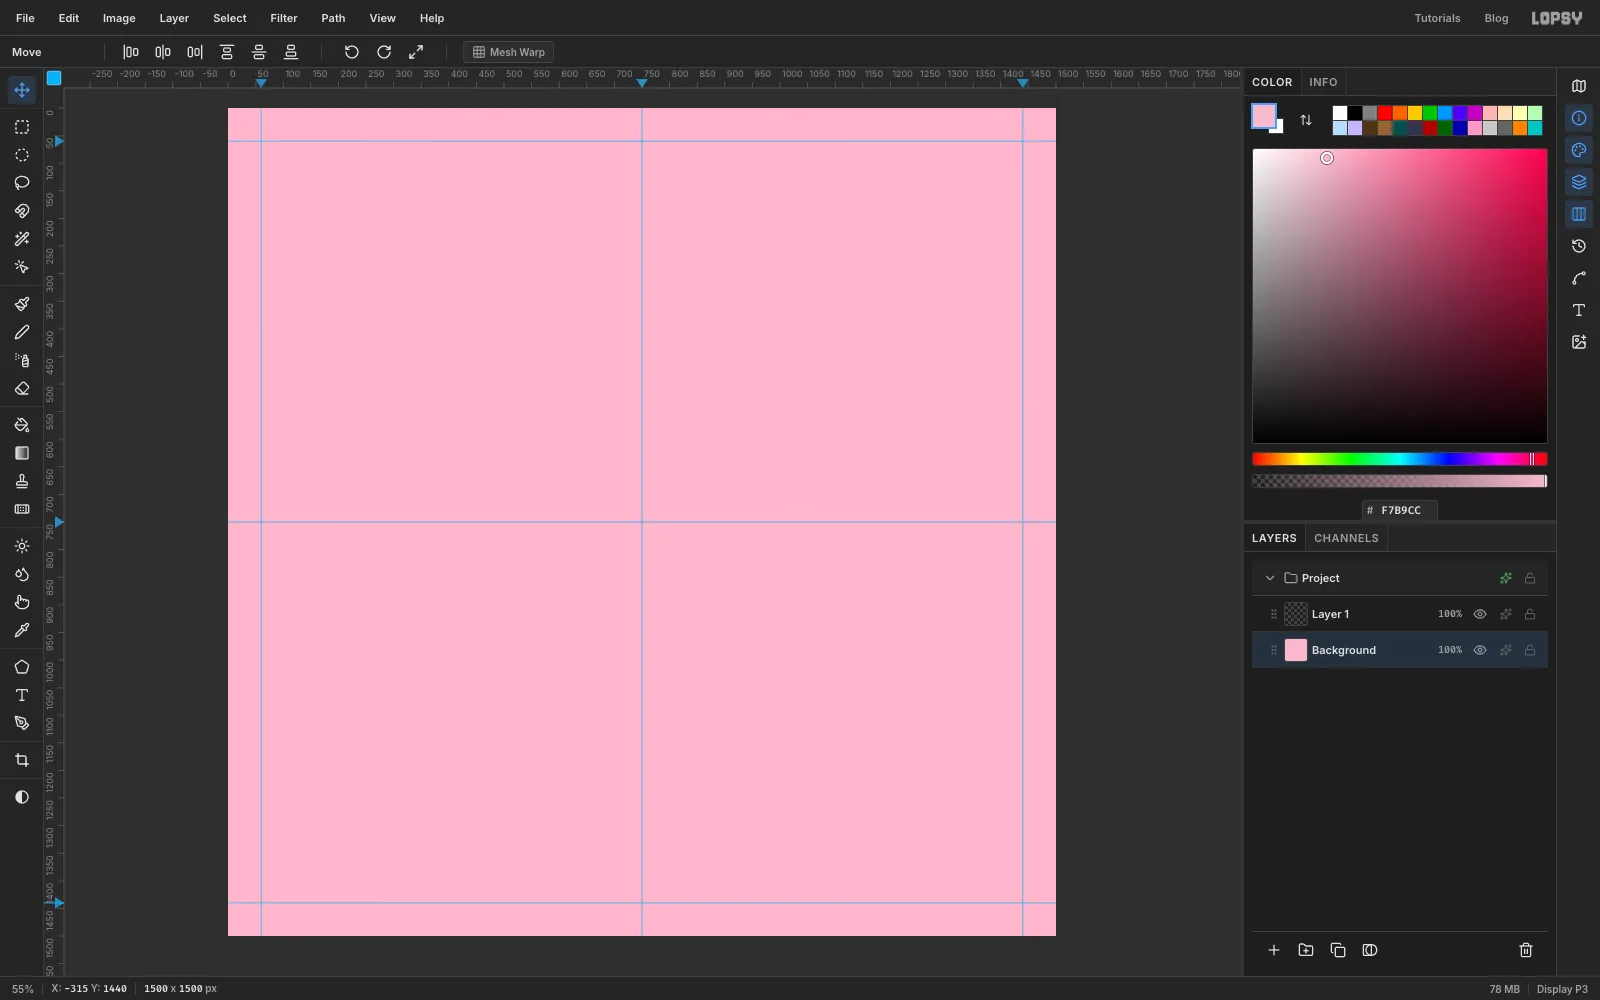
Backgroundlayer. TypeF7B9CCin the Color panel's hex field and choose Edit → Fill. - Click the top ruler at 60, 750 and 1440 to drop vertical guides, then click the left ruler at the same three numbers for horizontal guides. The outer guides are your margins. The middle ones mark the centre.
- Open Lopsy. In the New Document dialog set Width and Height to
-
Draw the cobalt disc
The disc will sit behind the zebra's head like a halo.
- Double-click
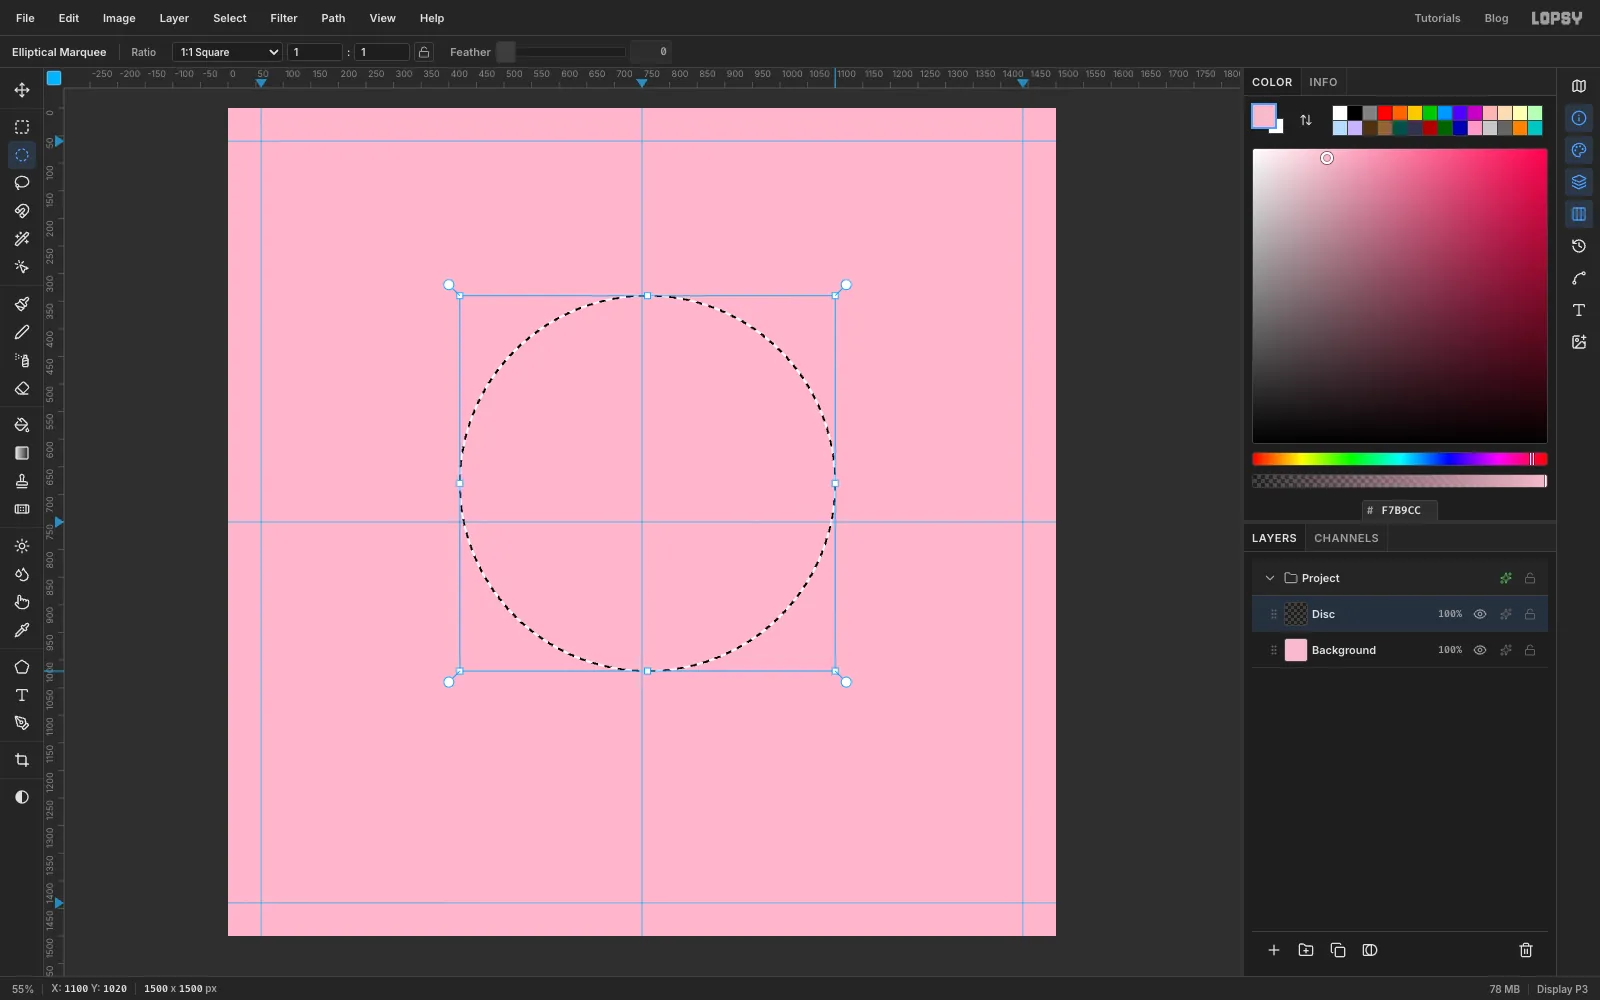
Layer 1and rename itDisc. - Pick the Elliptical Marquee. Click once on the canvas without dragging and enter
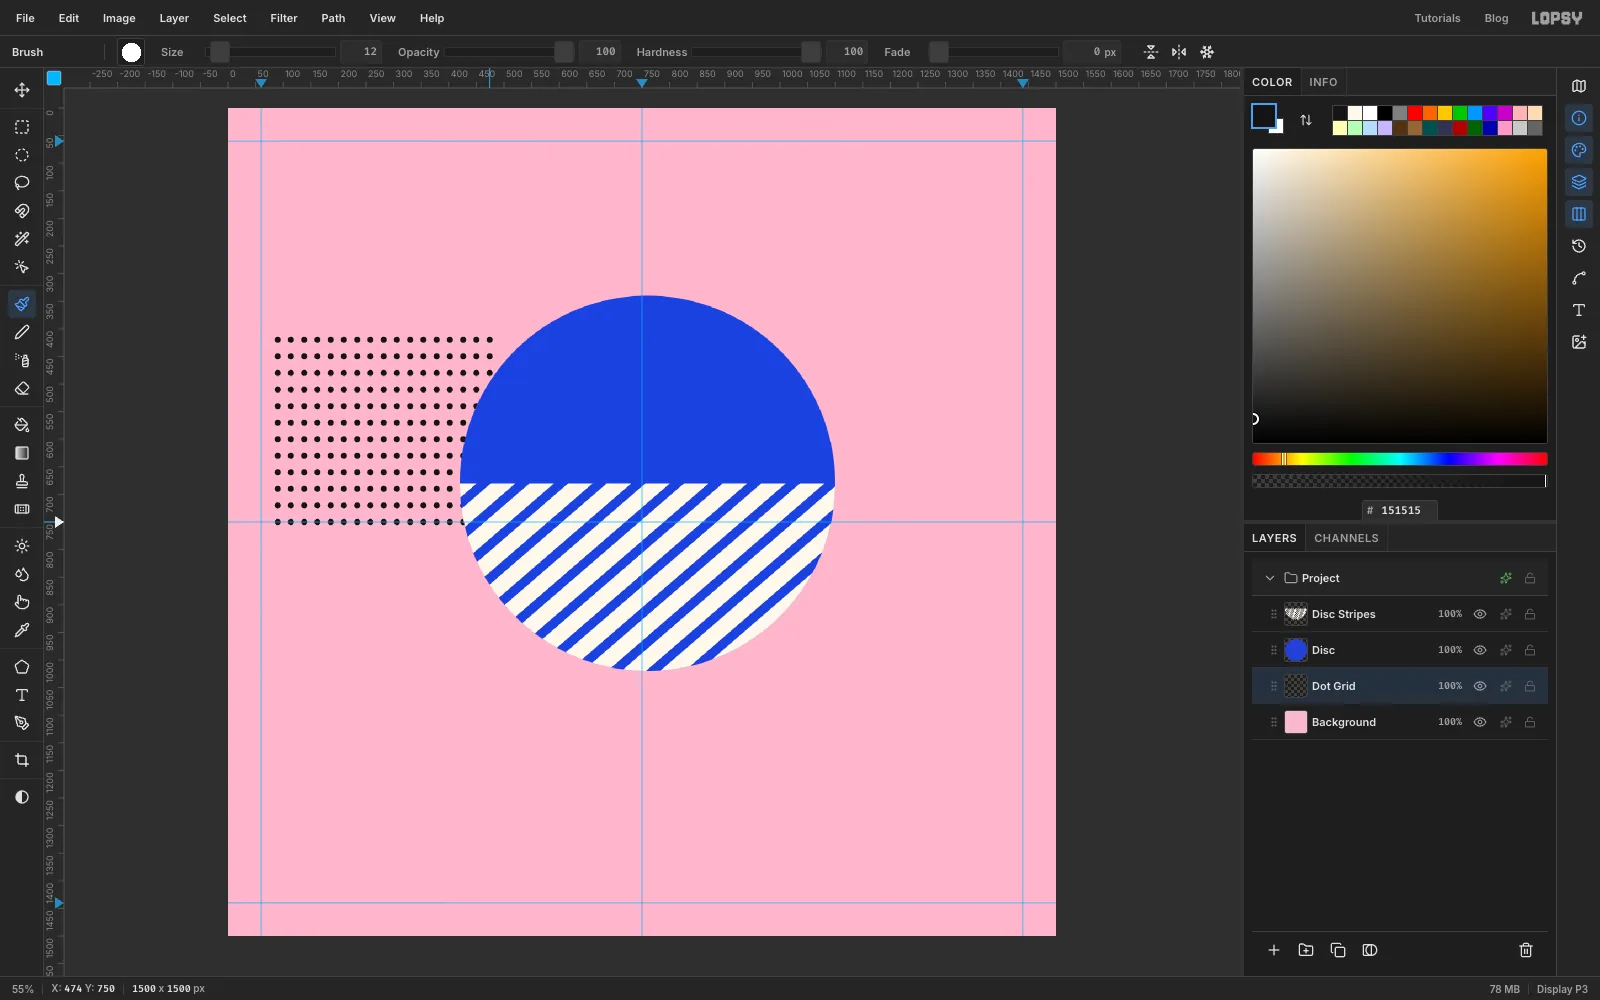
420, 340to1100, 1020. That's a circle 680 px across, centred at760, 680. - Set the colour to and choose Edit → Fill. Leave the selection active for the next step.
- Double-click
-
Keep only the bottom half of the circle selected
You'll paint stripes in the lower half of the disc only. The quickest way to get that shape is to intersect the circle with a rectangle.
- Click the
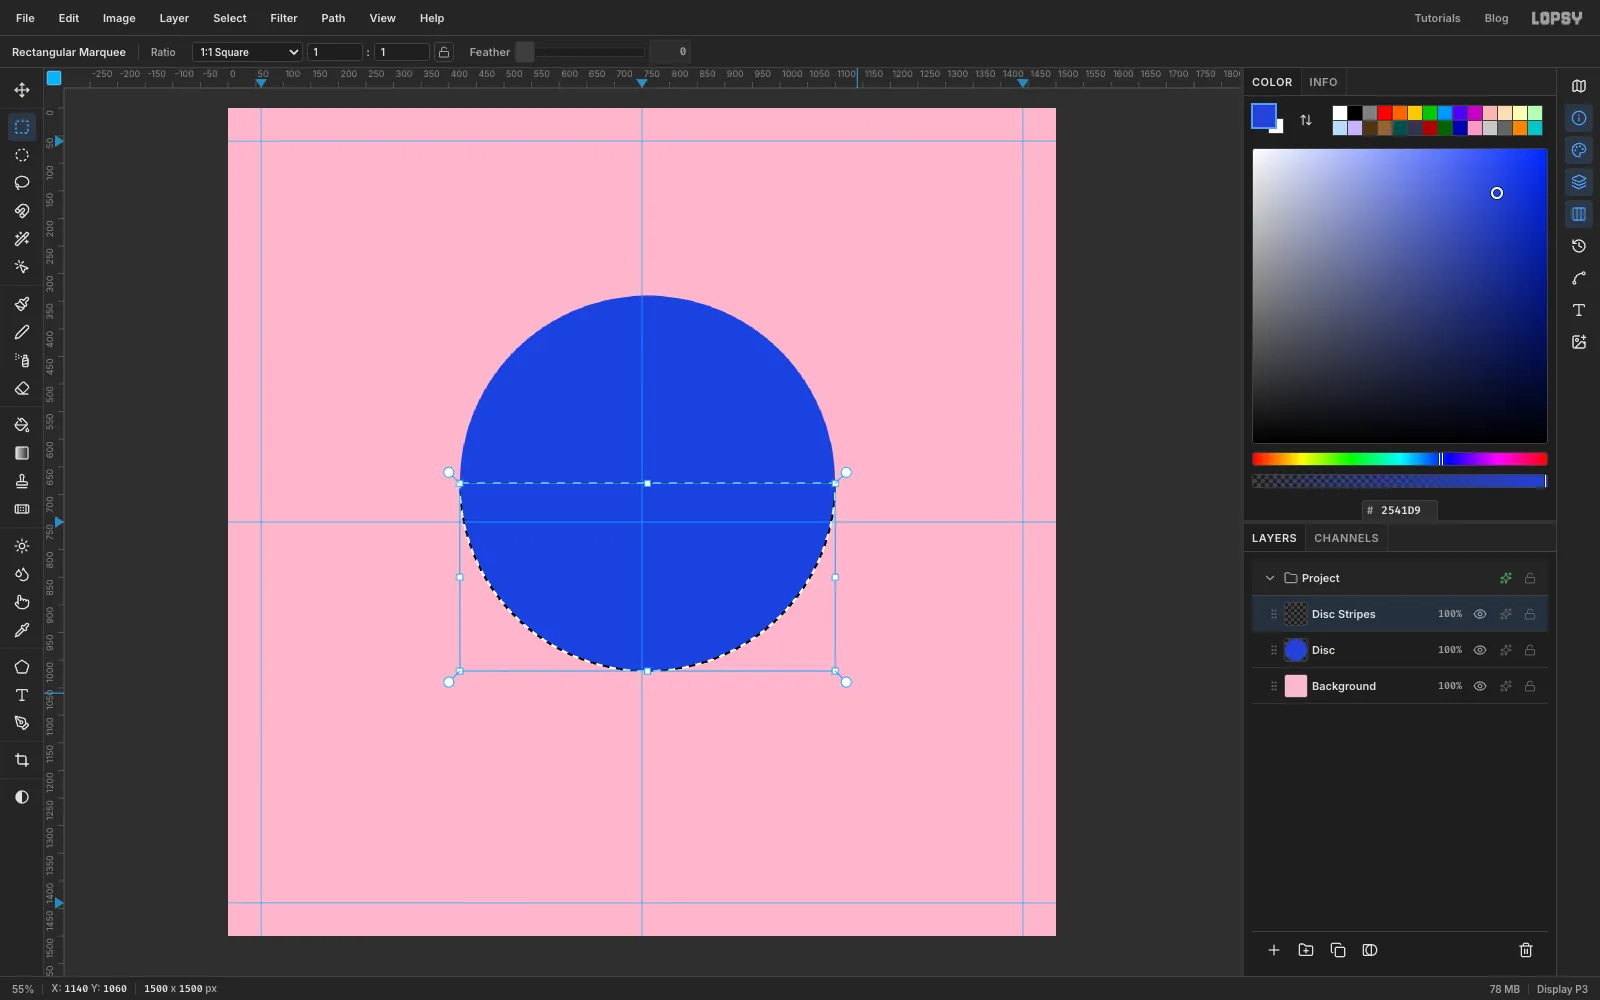
Disclayer, then Add Layer (the + button at the bottom of the Layers panel). Name the new layerDisc Stripes. - The circle selection is still there. Switch to the Rectangular Marquee (M). Hold Shift+Option and drag a rectangle from just left of the disc at the level of its centre (
380, 680) down past its bottom-right (1140, 1060).
When you let go, only the bottom half of the circle stays selected.
- Click the
-
Brush the cream stripes
The Brush only paints inside a selection, so you can draw long lines and let the selection trim them.
- Pick the Brush (B). In the options bar set Size to
30, Hardness to100and Opacity to100. Click the brush-tip thumbnail at the left of the options bar, and on the Shape tab set Spacing to1. Close the Brushes window. - Set the colour to .
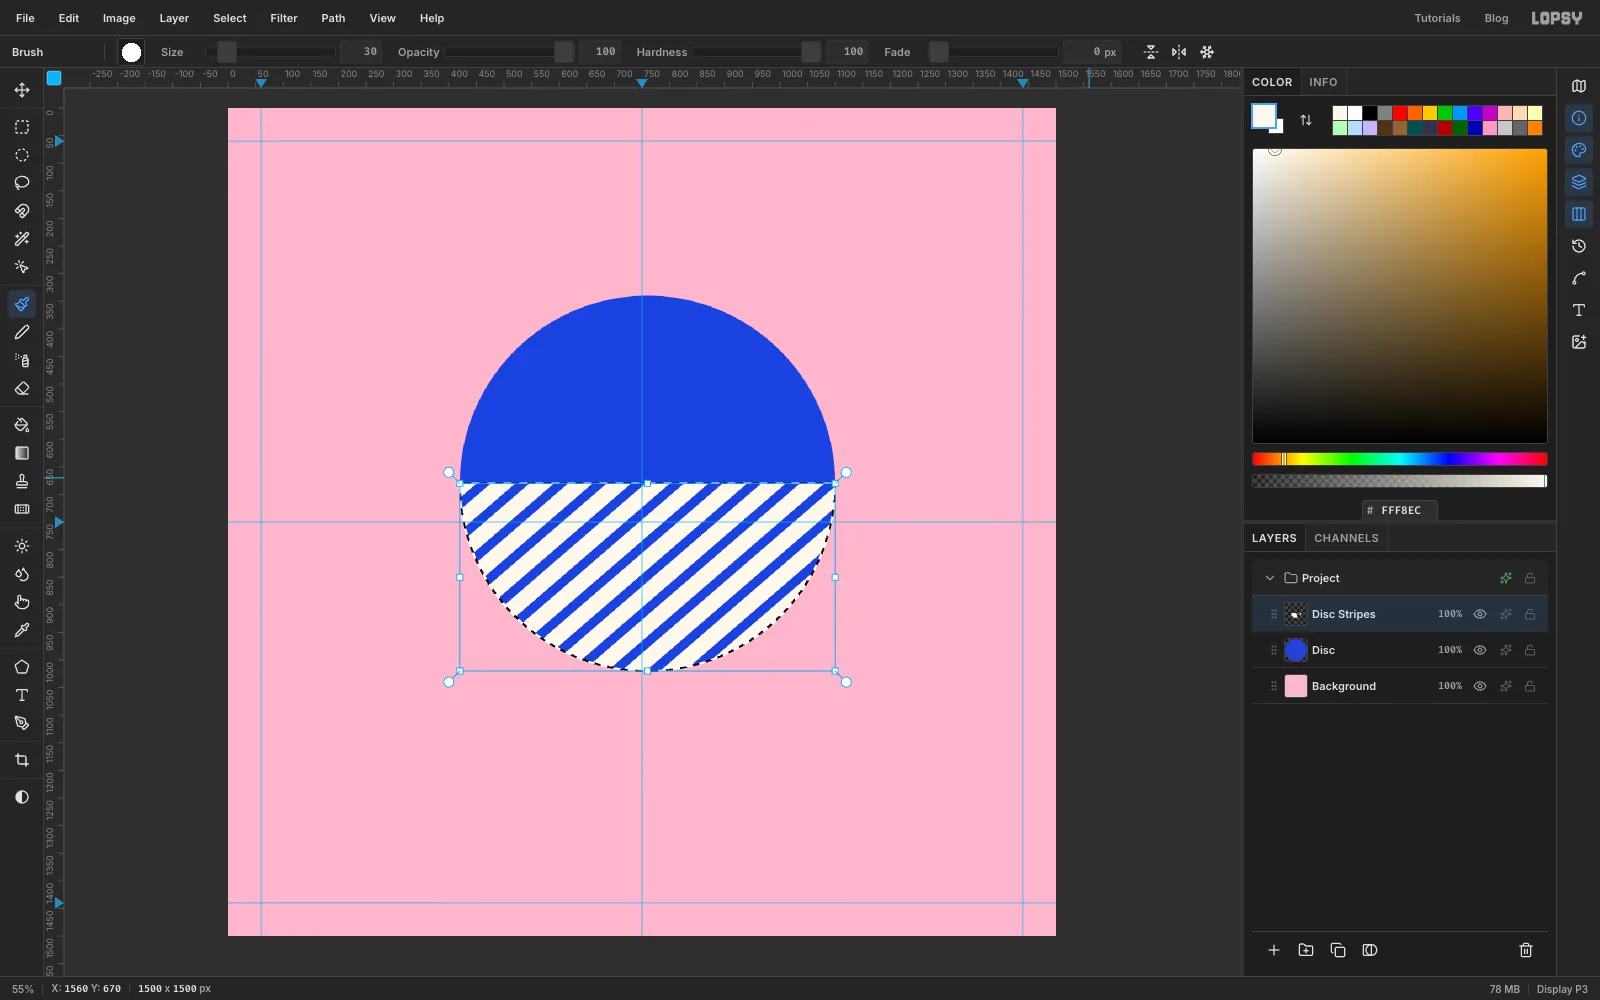
- Draw a diagonal line: click below and left of the disc, then Shift-click about 440 px to the right and 380 px higher. Lopsy joins the two clicks with a straight stroke. Start the first line at
0, 1050and finish it at440, 670. - Repeat every 70 px along the bottom (the next one runs from
70, 1050to510, 670) until the stripes cover the whole half-disc. You need about 17 lines. - Press Cmd+D to deselect.
- Pick the Brush (B). In the options bar set Size to
-
Dot a grid behind the disc
A grid of dots is the most Memphis texture there is. A brush with very wide spacing paints a dotted line in one Shift-click.
- Click the
Backgroundlayer, then Add Layer. Name itDot Grid. New layers go directly above the active one, so this one sits under the disc. - Keep the Brush. Set Size to
12, then open the brush-tip window again and set Spacing to200. Each dot is now 24 px from the next. - Set the colour to .
- Click at
90, 420and Shift-click at474, 420. That gives a row of dots. - Repeat every 30 px down the page (
90, 450to474, 450, and so on) until the last row aty = 750. That's 12 rows. - Set Spacing back to
1so the next brush strokes are solid.
- Click the
-
Place and scale the zebra photo
- Click the
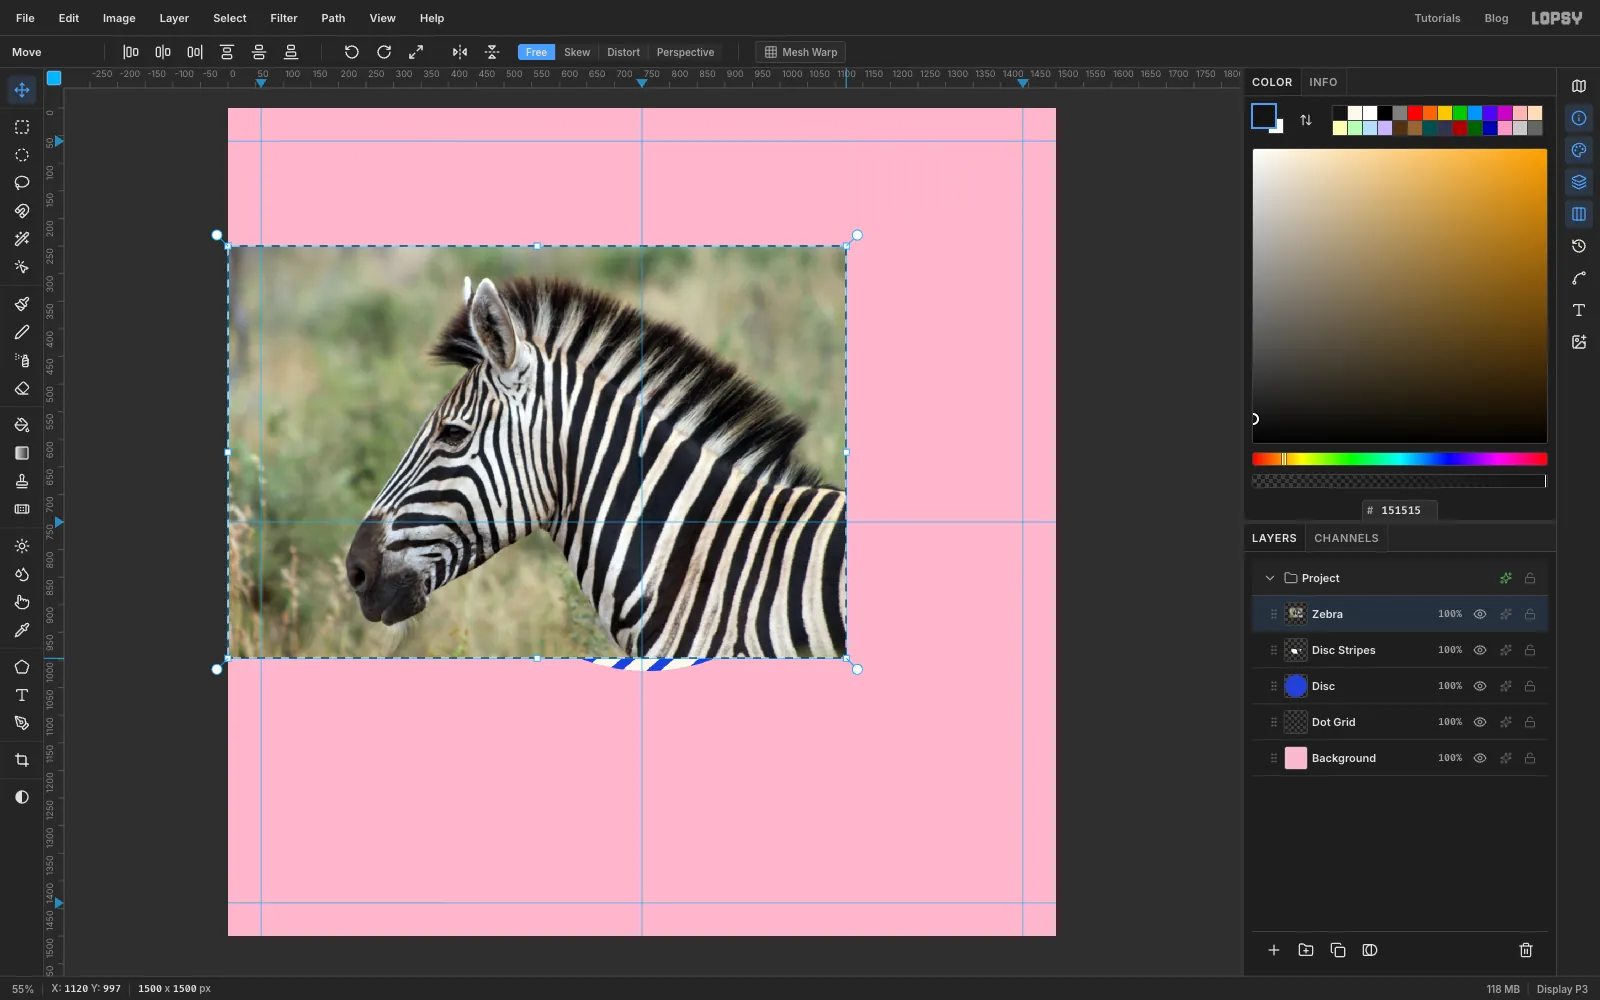
Disc Stripeslayer so the photo lands on top of it. - Drag the downloaded zebra photo from your desktop onto the canvas. Lopsy adds it as a new layer, fitted to the canvas width, and shows its transform handles. Rename the layer
Zebra. - Hold Cmd and drag the bottom-right corner handle up and to the left until the photo is about 1120 px wide. Cmd keeps the proportions. Press Enter to apply, then Cmd+D.
- With the Move tool (V), drag the photo so its top-left corner is at about
130, 277. The zebra's nose should now be just right of the dot grid, and its ear tips just above the disc.
- Click the
-
Trace the bust with the Lasso
A classical bust ends in a flat cut, so you'll trace the head and mane carefully and cut the neck off straight.
- Zoom in (Cmd+=) if it helps. Pick the Lasso (L).
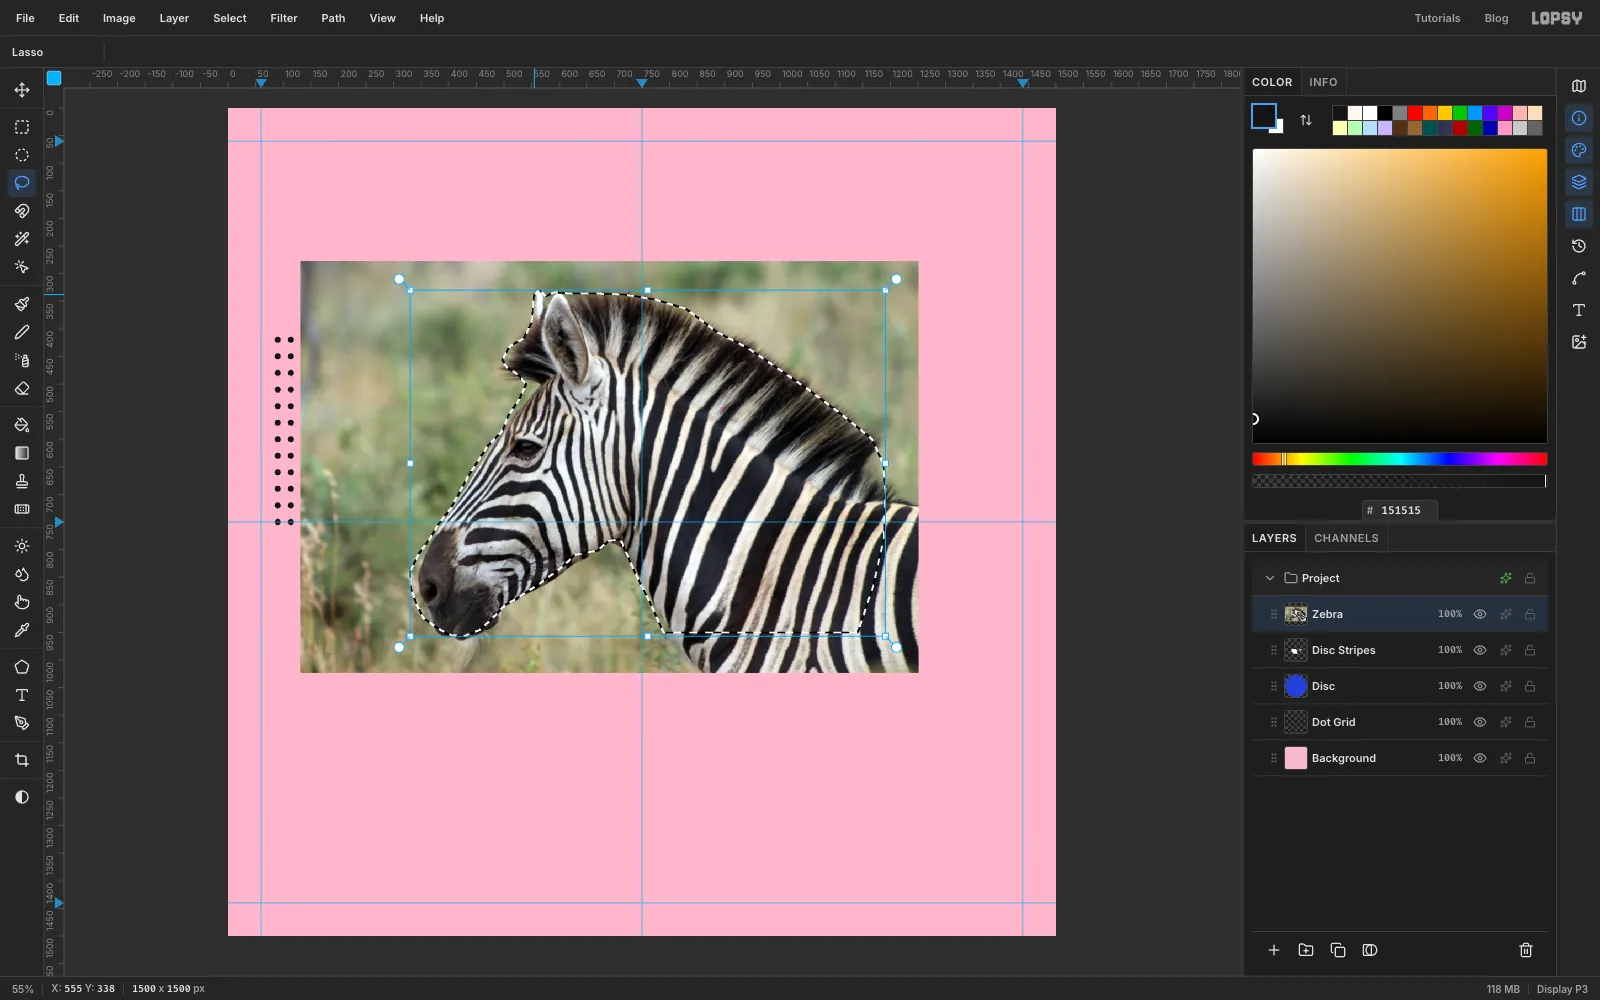
- Start at the tip of the back ear and drag around the outline: over the front ear, along the top of the mane, down the back of the neck, and around the nose and chin. Stay a pixel or two inside the hair, so no green background gets in.
- Cut the bust off with two clean lines: down the back of the neck near
x = 1180, then across aty = 950, back to the throat. The Lasso is freehand, so drag slowly and steadily here. The sticker edge you add later hides small wobbles. Close the loop at the ear tip.
-
Cut out and desaturate the bust
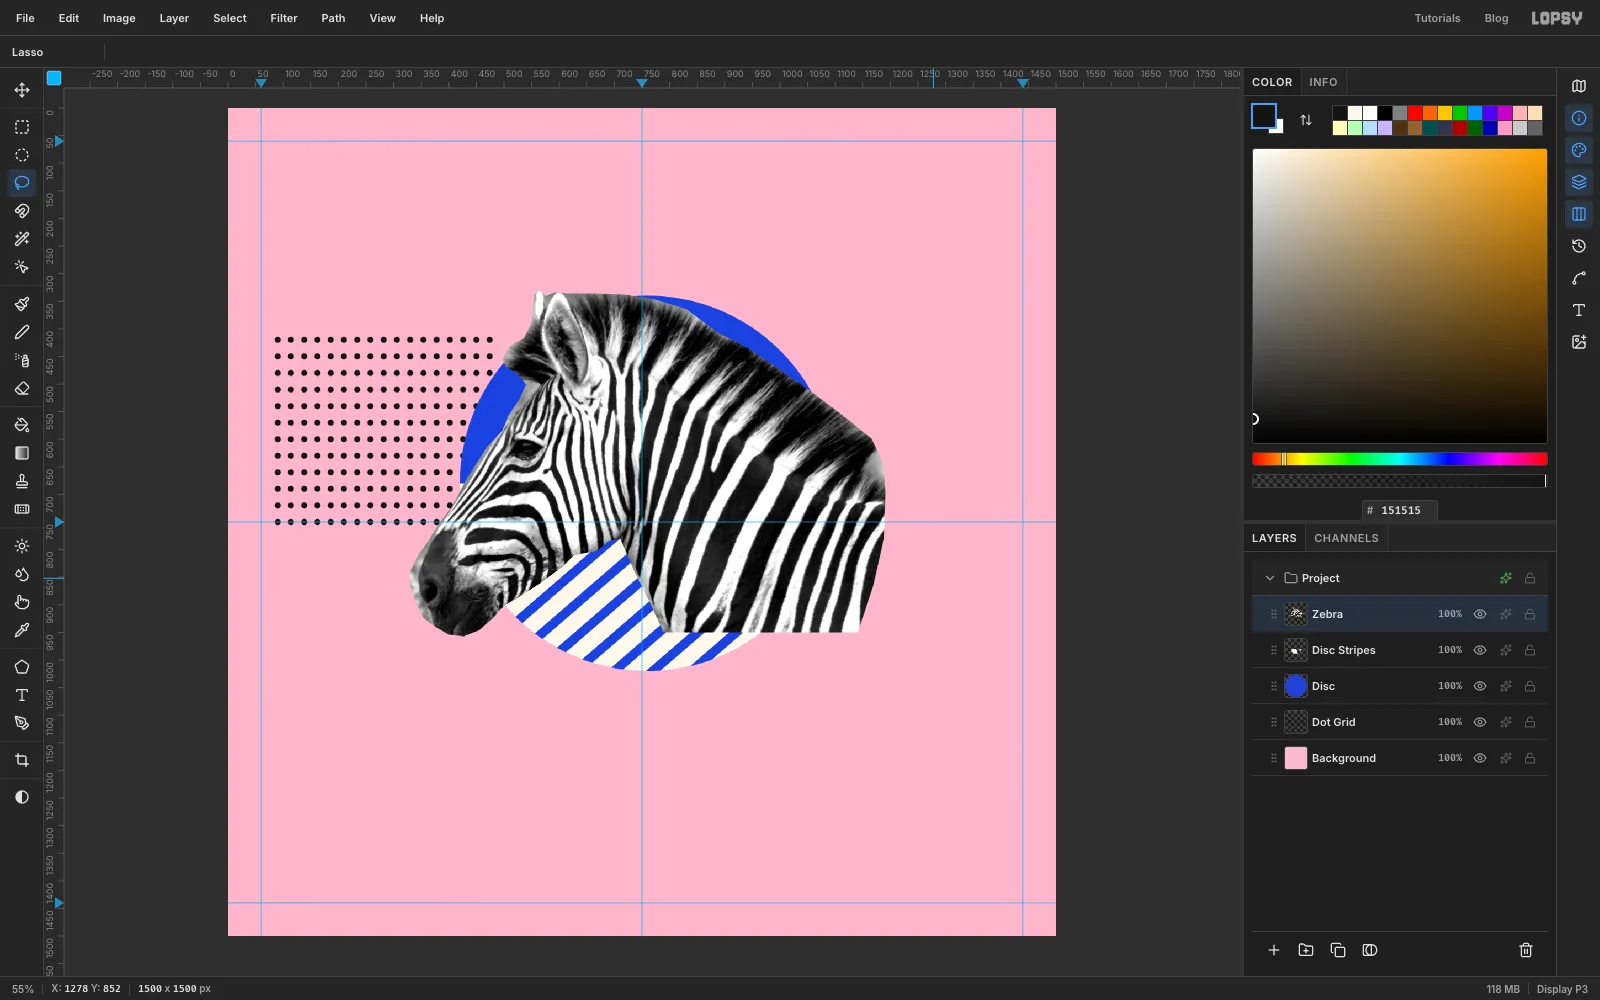
- Choose Select → Inverse, then press Delete. Everything outside the bust is gone. Press Cmd+D.
- Choose Filter → Desaturate to turn the photo grey. That suits a black-and-white animal, and it stops the leftover green fringe from clashing with the pink.
- Choose Filter → Brightness/Contrast…. Set Brightness to
8and Contrast to35, then click Apply. The white stripes now glow like paper.
-
Give the bust a sticker edge
A cream outline makes the photo look scissored out of a magazine, and it hides any small fringe the Lasso left.
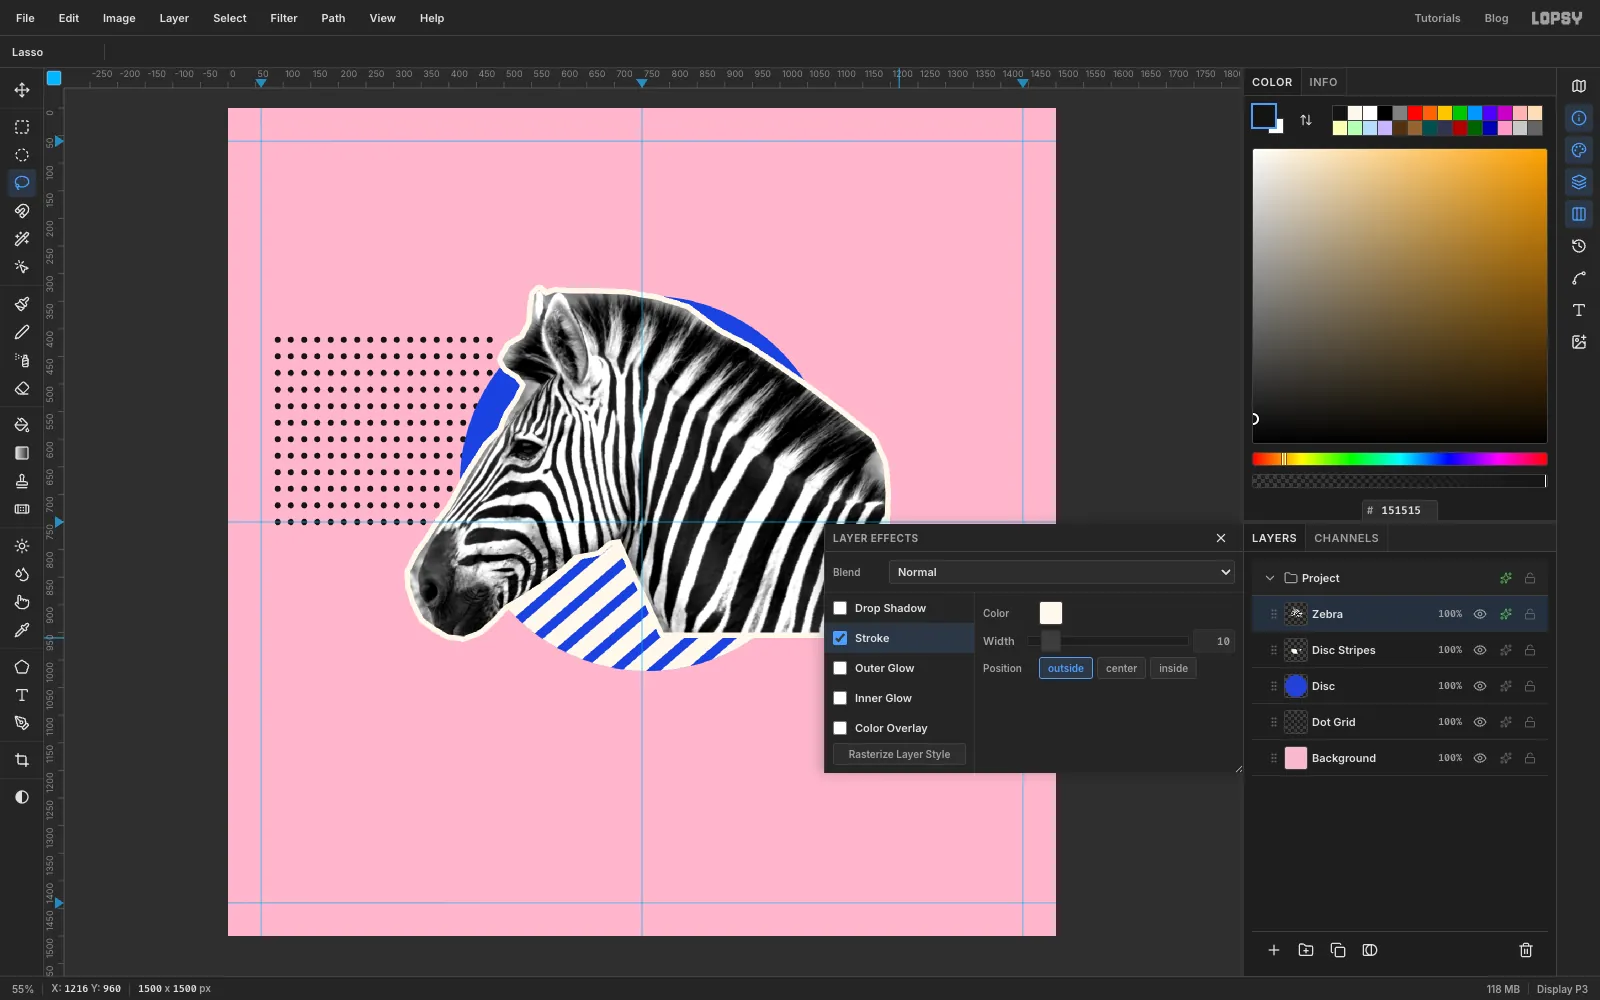
- Click the ✦ (layer effects) button on the
Zebrarow. - Tick Stroke. Set Width to
10and the colour to . Leave the position on Outside. - Close the effects drawer.
- Click the ✦ (layer effects) button on the
-
Add a hard black shadow
Memphis shadows are solid shapes, not soft blurs. The easiest way to get one is to duplicate the layer and turn the copy underneath into a silhouette.
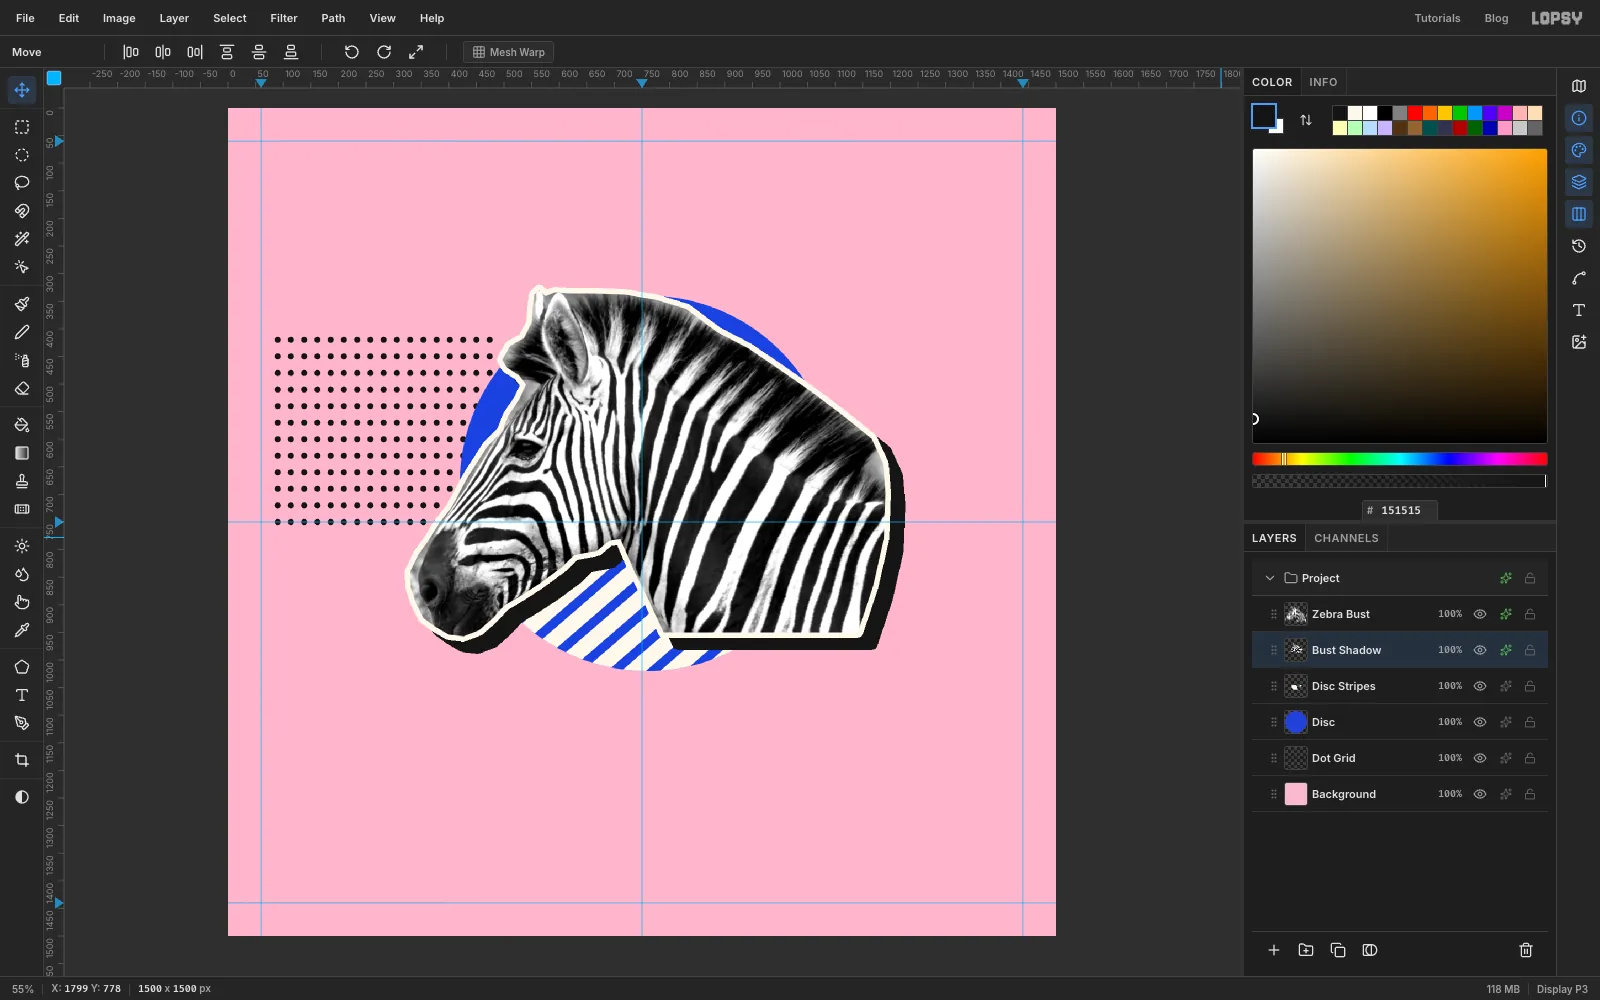
- Click Duplicate Layer at the bottom of the Layers panel. The copy appears above the original. Rename the copy
Zebra Bust. - Duplicate Layer sometimes offsets the copy by 10 px. If yours has moved, nudge it back with the arrow keys so it lines up exactly with the original.
- Click the original
Zebralayer and rename itBust Shadow. In its effects drawer, tick Color Overlay and set it to . Change the Stroke colour to too, so the shadow includes the sticker edge. - With the Move tool, nudge the shadow 26 px right and 22 px down. Shift+→ moves 10 px and → moves 1 px.
- Click Duplicate Layer at the bottom of the Layers panel. The copy appears above the original. Rename the copy
-
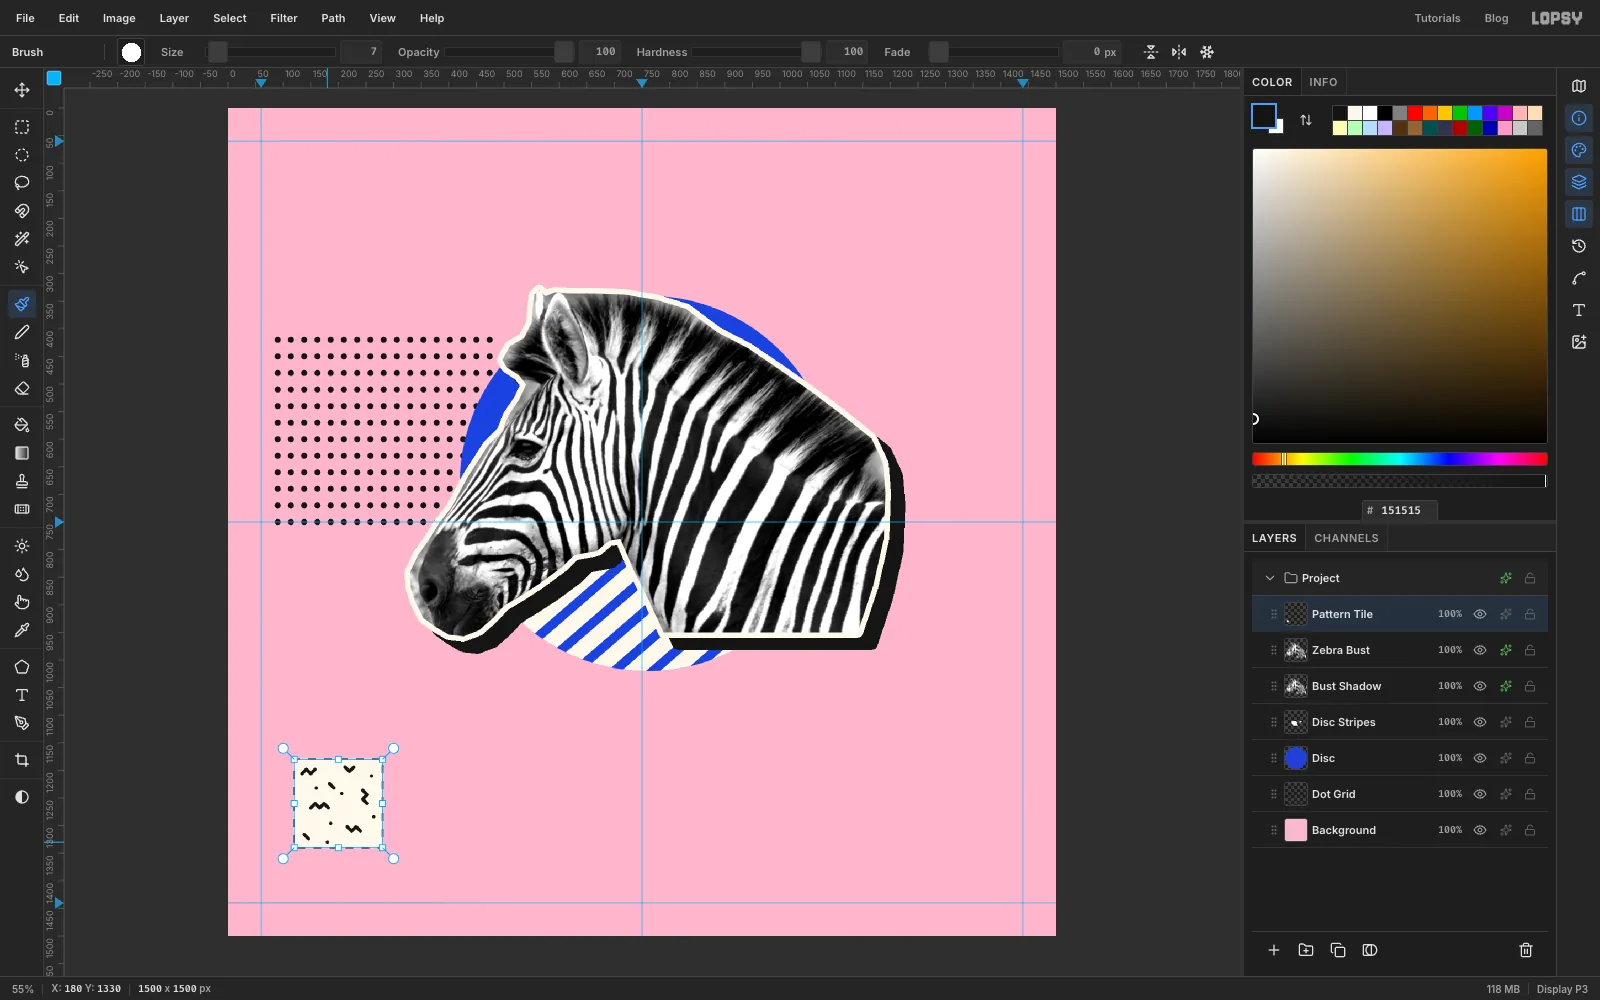
Draw a squiggle tile
The plinth's column gets a Bacterio-style squiggle pattern. You'll draw one 160 px tile in an empty corner and let Lopsy repeat it.
- Click
Zebra Bust, then Add Layer. Name itPattern Tile. - With the Rectangular Marquee, click once and enter
120, 1180to280, 1340. Fill it with . - Pick the Brush, set Size to
7and the colour to . Draw six or seven short zigzags across the tile. Each one is a click followed by two or three Shift-clicks about 8 px apart, going up and down. Vary their directions, and keep them a few pixels inside the edges. - Click once in five or six empty spots to add single dots.
- Choose Edit → Define Pattern. Press Cmd+D, then delete the
Pattern Tilelayer with the bin button. The pattern is saved, so you don't need the layer any more.
- Click
-
Fill the column with the pattern
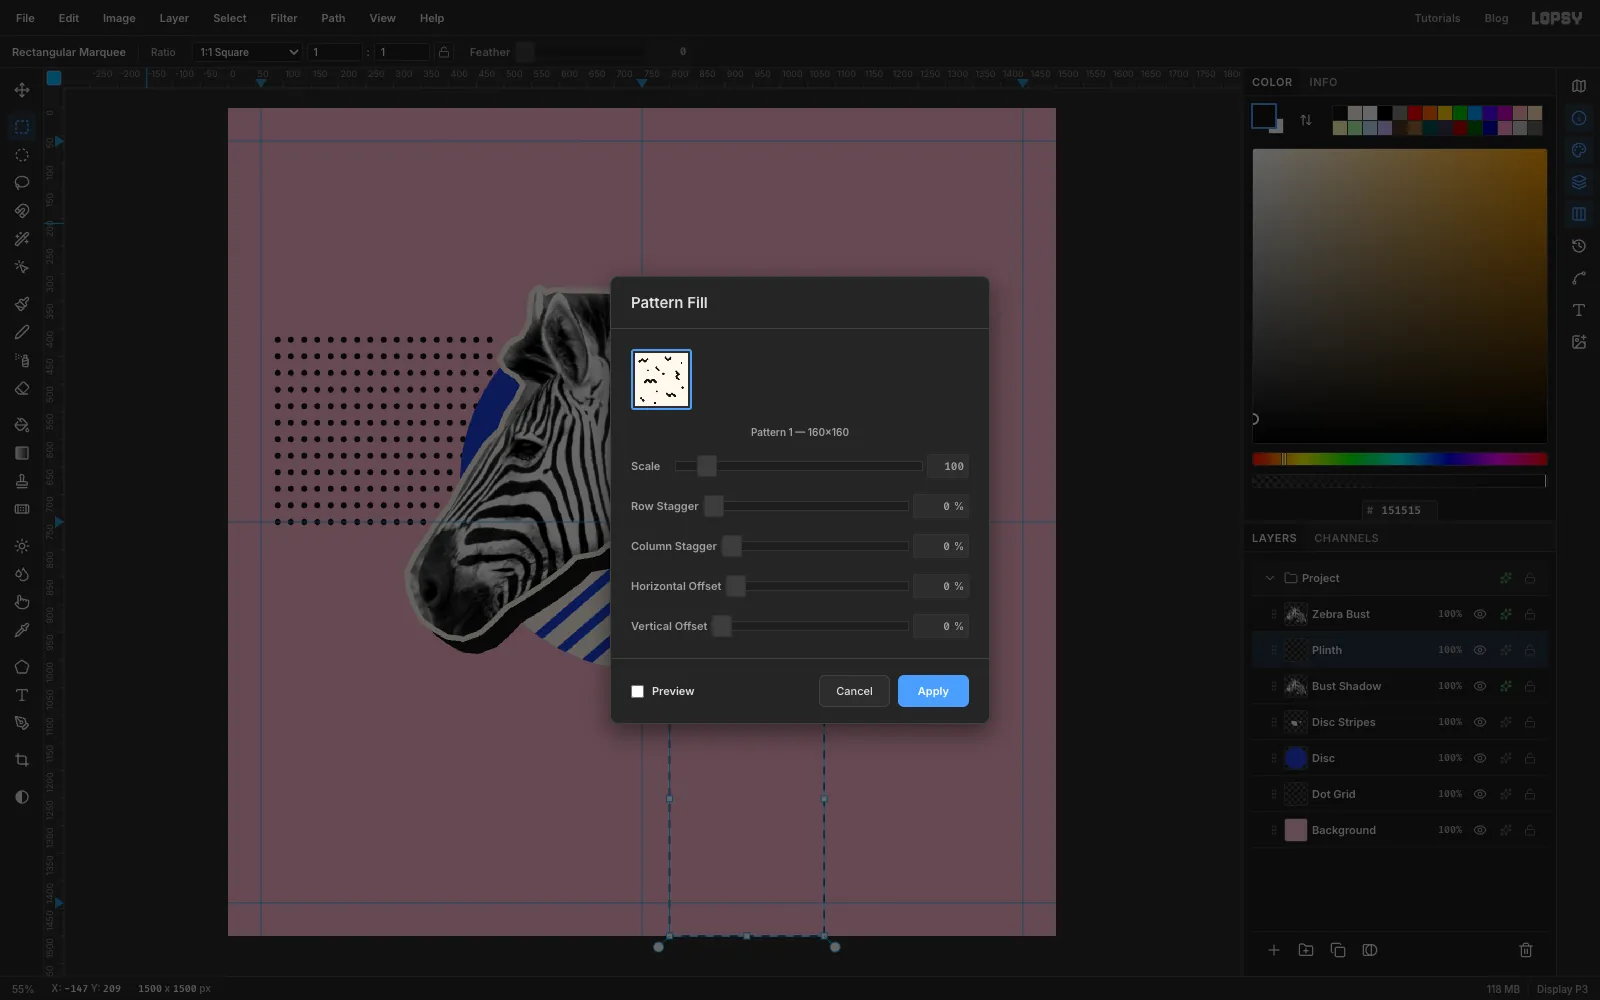
- Click the
Bust Shadowlayer, then Add Layer. Name itPlinth. It sits between the shadow and the bust, so the plinth's cap will hide the bottom of the shadow. - With the Rectangular Marquee, click once and enter
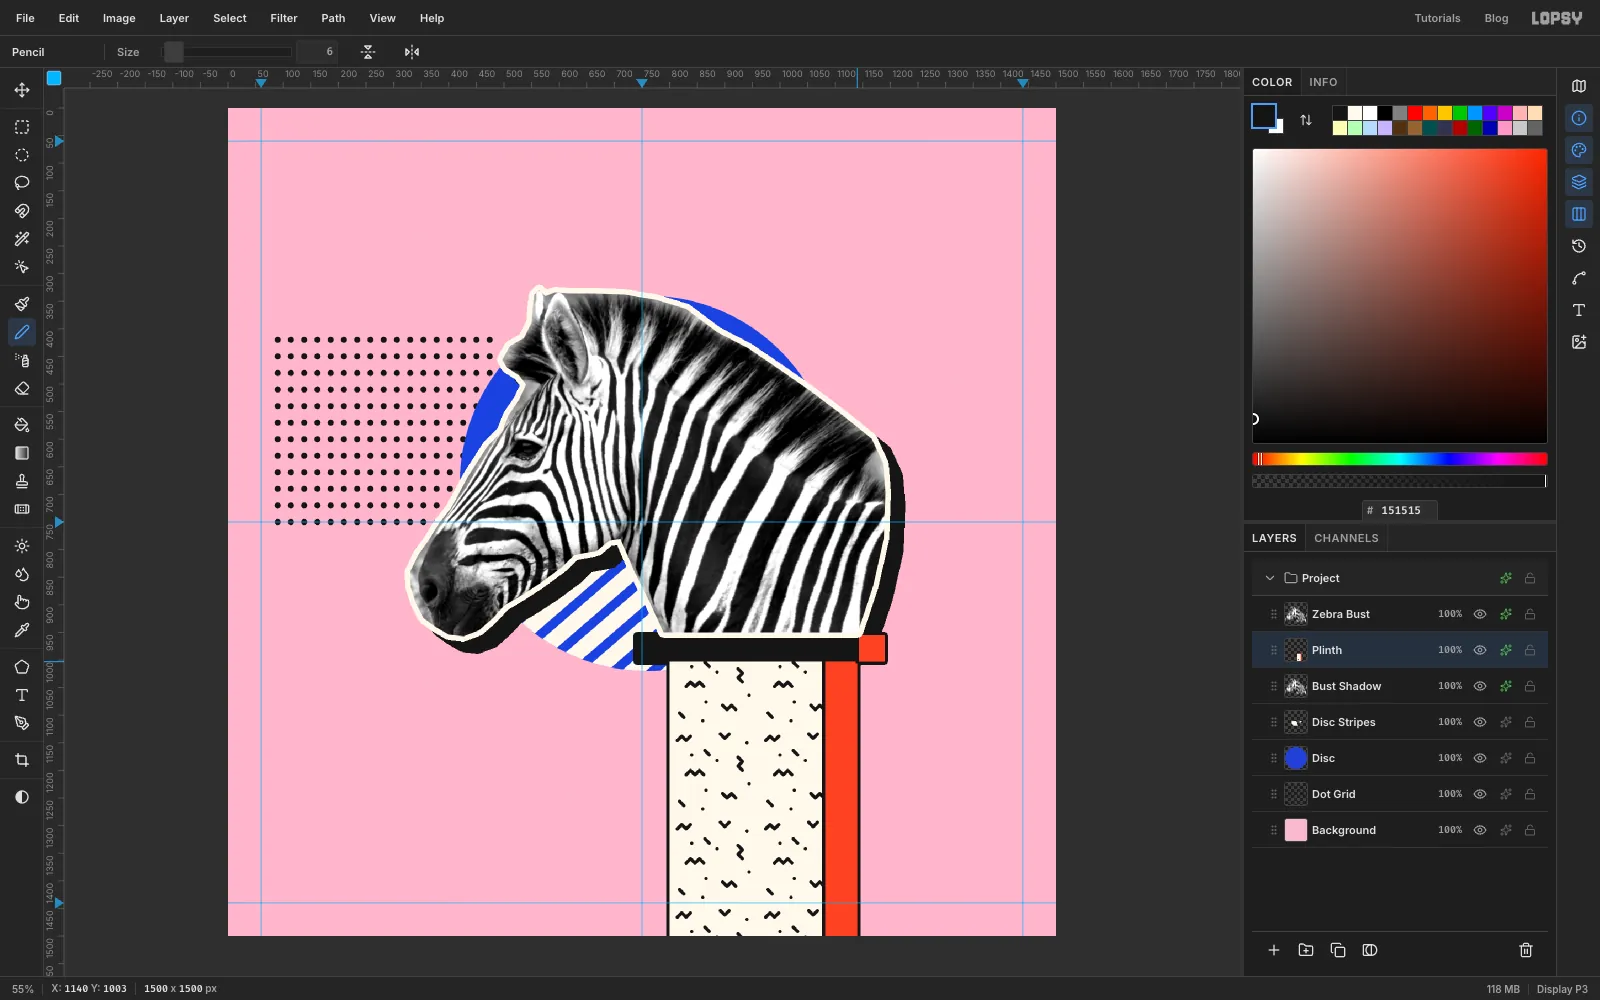
800, 1003to1080, 1500. That's the front of the column, running off the bottom of the cover. - Choose Edit → Fill with Pattern…, click your squiggle tile (the last swatch) and click Apply.
- Click the
-
Build the rest of the plinth
Every right-hand face of the plinth is tomato red. That one rule makes the flat rectangles read as blocks.
- Press Cmd+D, then select
1080, 1003to1140, 1500and fill it with . This is the column's side. - Deselect, then select
740, 955to1140, 1003and fill it with . This is the cap, and the bust sits on its top edge. - Deselect, then select
1140, 955to1190, 1003and fill it with . This is the side of the cap. Press Cmd+D. - Open the effects drawer for
Plinth, tick Stroke, and set Width to6and the colour to . - Pick the Pencil (N), set Size to
6and the colour to , and draw the two seams where front meets side. Click at1080, 1003and Shift-click at1080, 1499. Then click at1140, 955and Shift-click at1140, 1003.
- Press Cmd+D, then select
-
Add a mint quarter-circle with the Shape tool
- Click
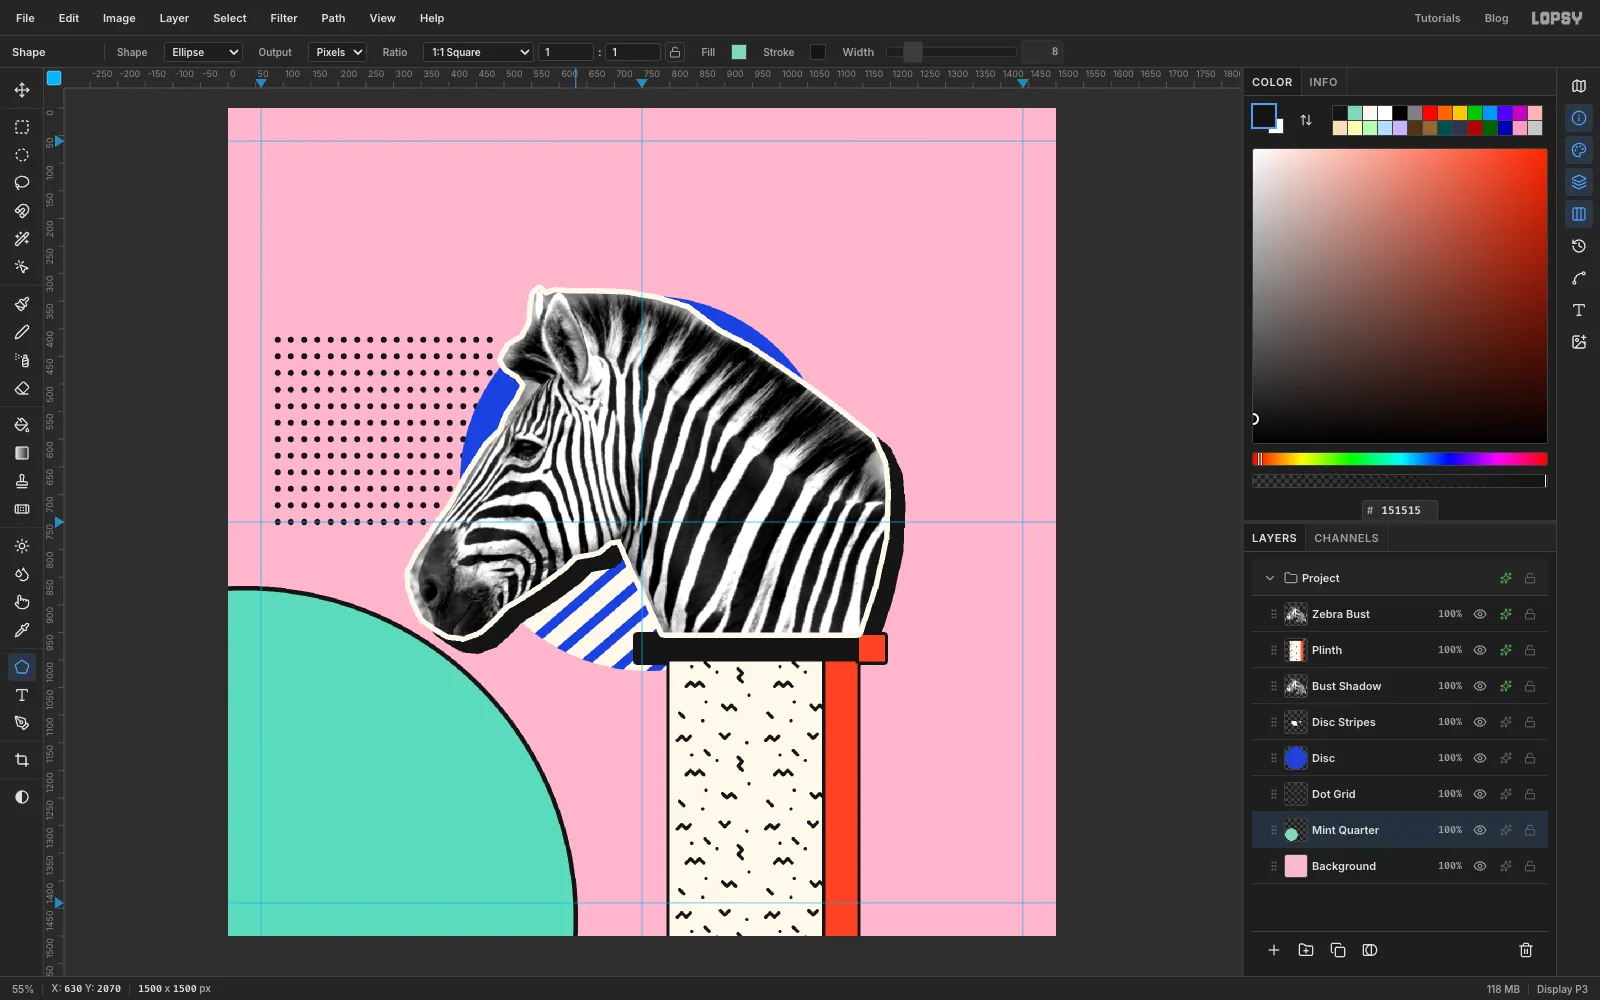
Background, then Add Layer. Name itMint Quarter. - Pick the Shape tool (U). In the options bar set Shape to Ellipse and Output to Pixels. Click the Fill swatch and enter
7FD8BE. Click the Stroke swatch and enter151515, then set Width to8. - The Shape tool grows shapes out from where you press. Zoom out (Cmd+-) so there's room below the canvas. Press near the bottom-left corner (
30, 1470) and drag down and to the right, past the edge of the canvas, until the circle's top edge reaches abouty = 870. That's a radius of 600 px. Only the quarter inside the canvas shows.
- Click
-
Draw and tilt the yellow triangle
- Click
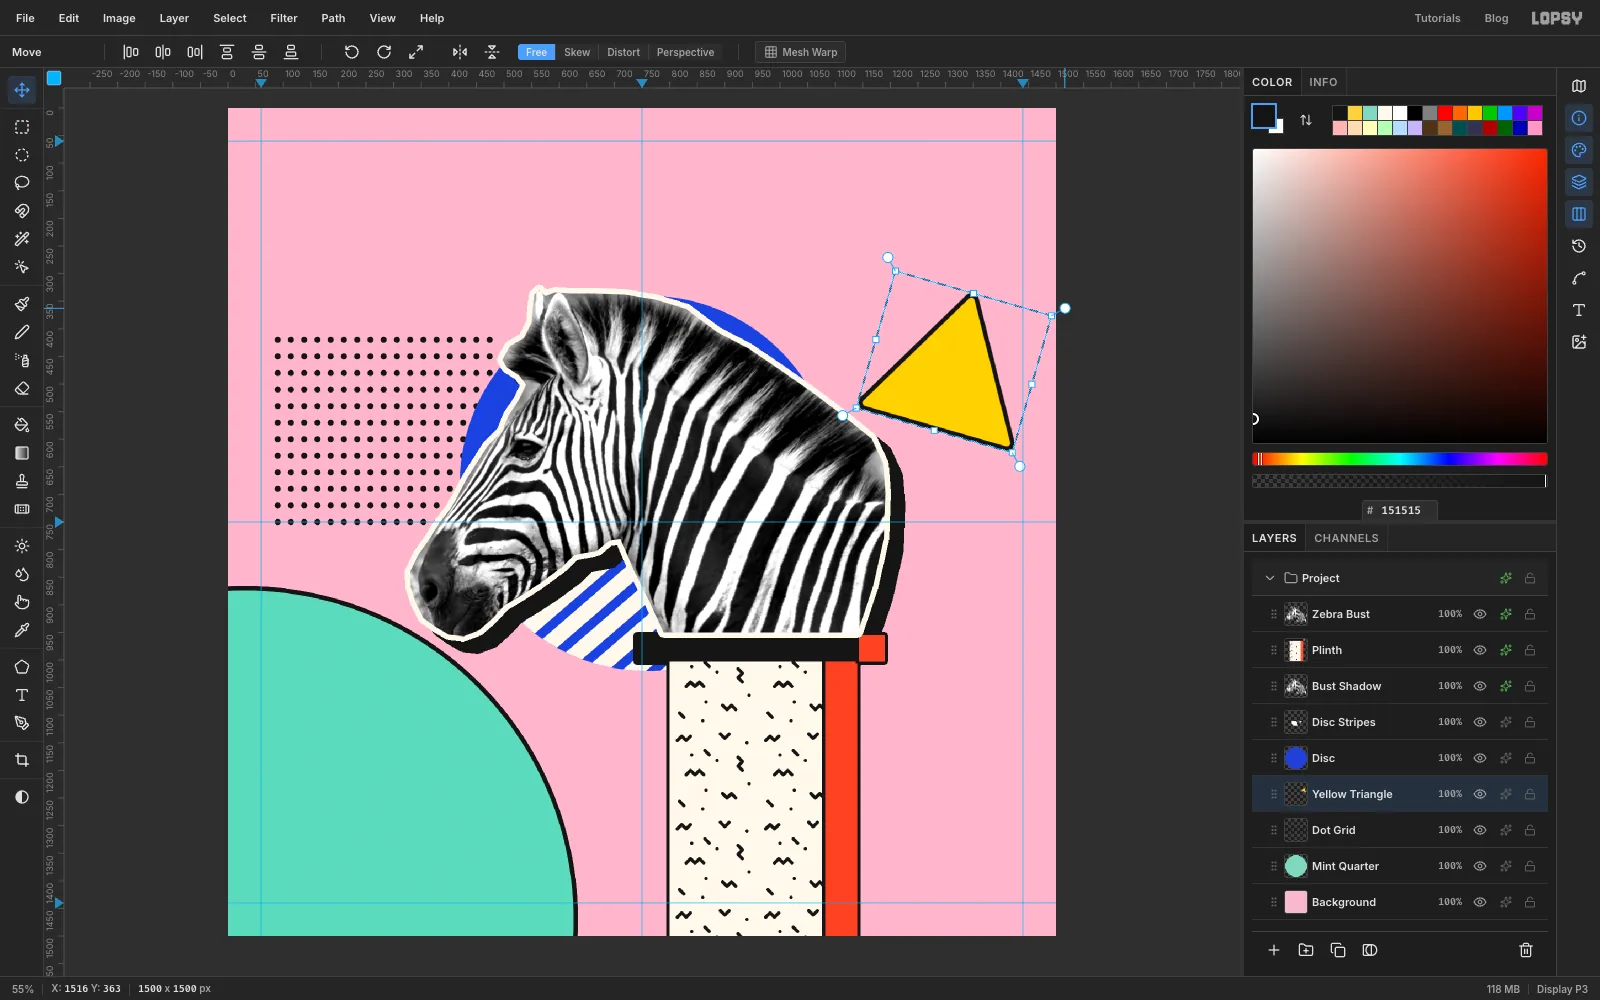
Dot Grid, then Add Layer. Name itYellow Triangle. It sits under the disc and bust. - With the Shape tool, set Shape to Polygon, Sides to
3and Corner Radius to10. Set the fill toFFD33Dand keep the black 8 px stroke. - Press at the triangle's centre,
1315, 455, and drag out to the corner of its box, 150 px down and right at1465, 605. - Draw a Rectangular Marquee around the triangle and switch to the Move tool. Grab the round rotation handle just outside the top-right corner and drag it clockwise by about 16°. Press Enter, then Cmd+D.
- Click
-
Draw the lilac pill for the band name
- Click
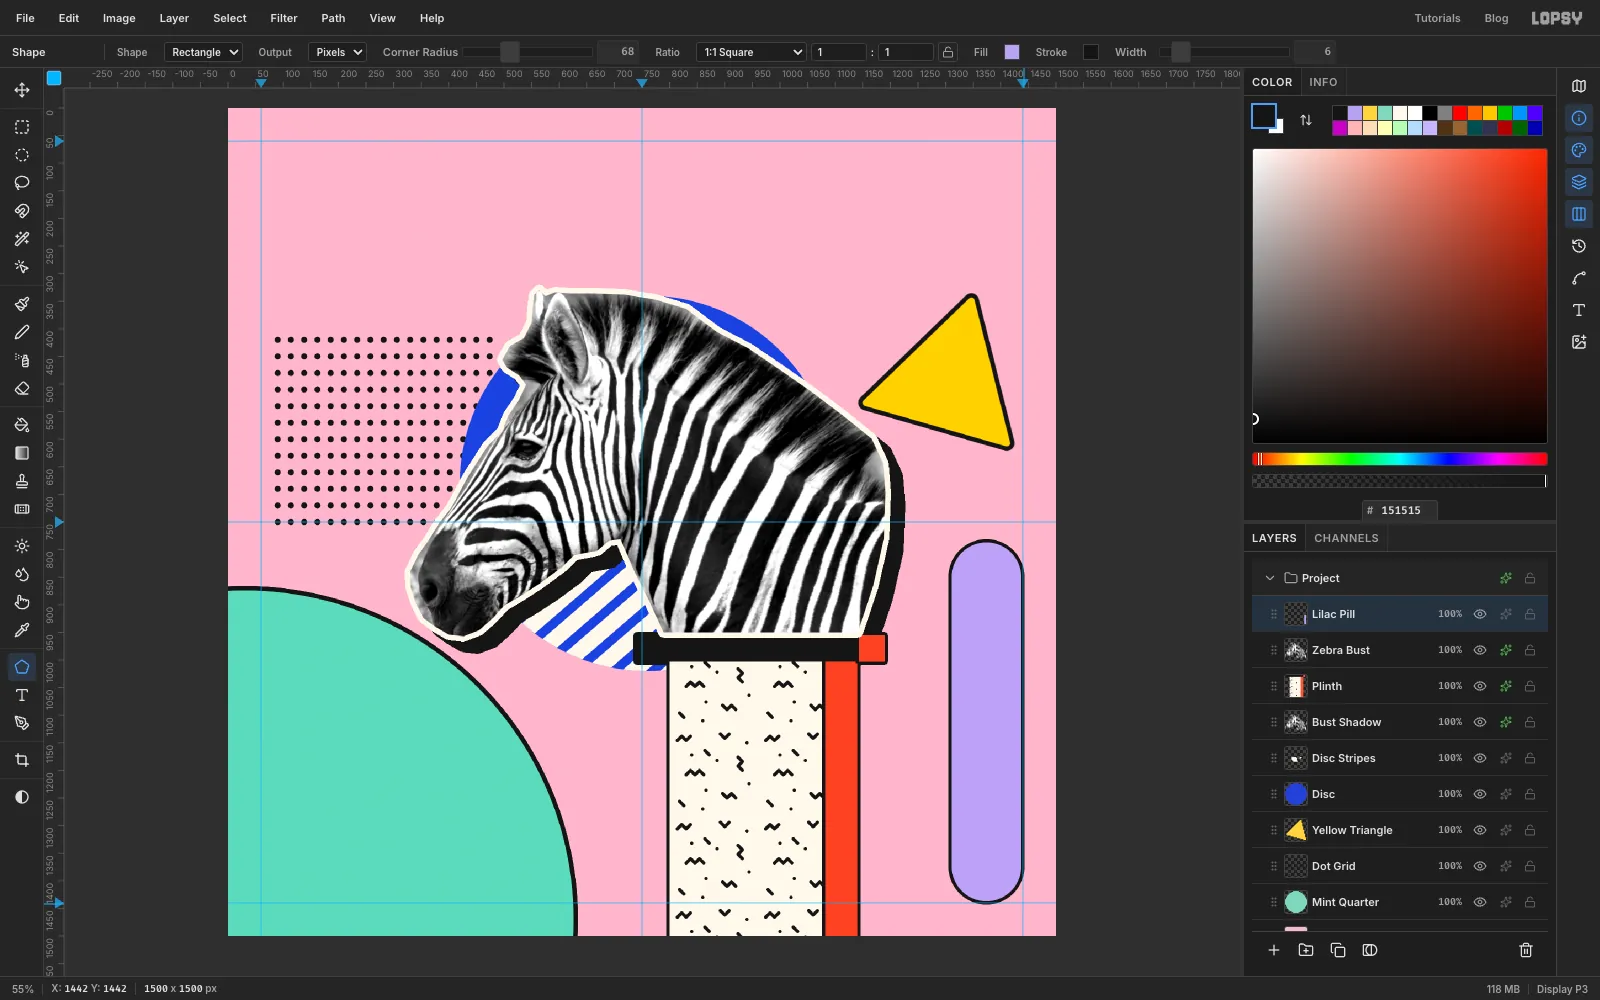
Zebra Bust, then Add Layer. Name itLilac Pill. - With the Shape tool, set Shape to Rectangle and Corner Radius to
68. Set the fill toB9A2F2, the stroke to151515and Width to6. - Press at the pill's centre,
1374, 1112, and drag out to its bottom-right corner at1442, 1442. The pill ends 58 px from the right and bottom edges. You'll use that 58 px margin all round the cover.
- Click
-
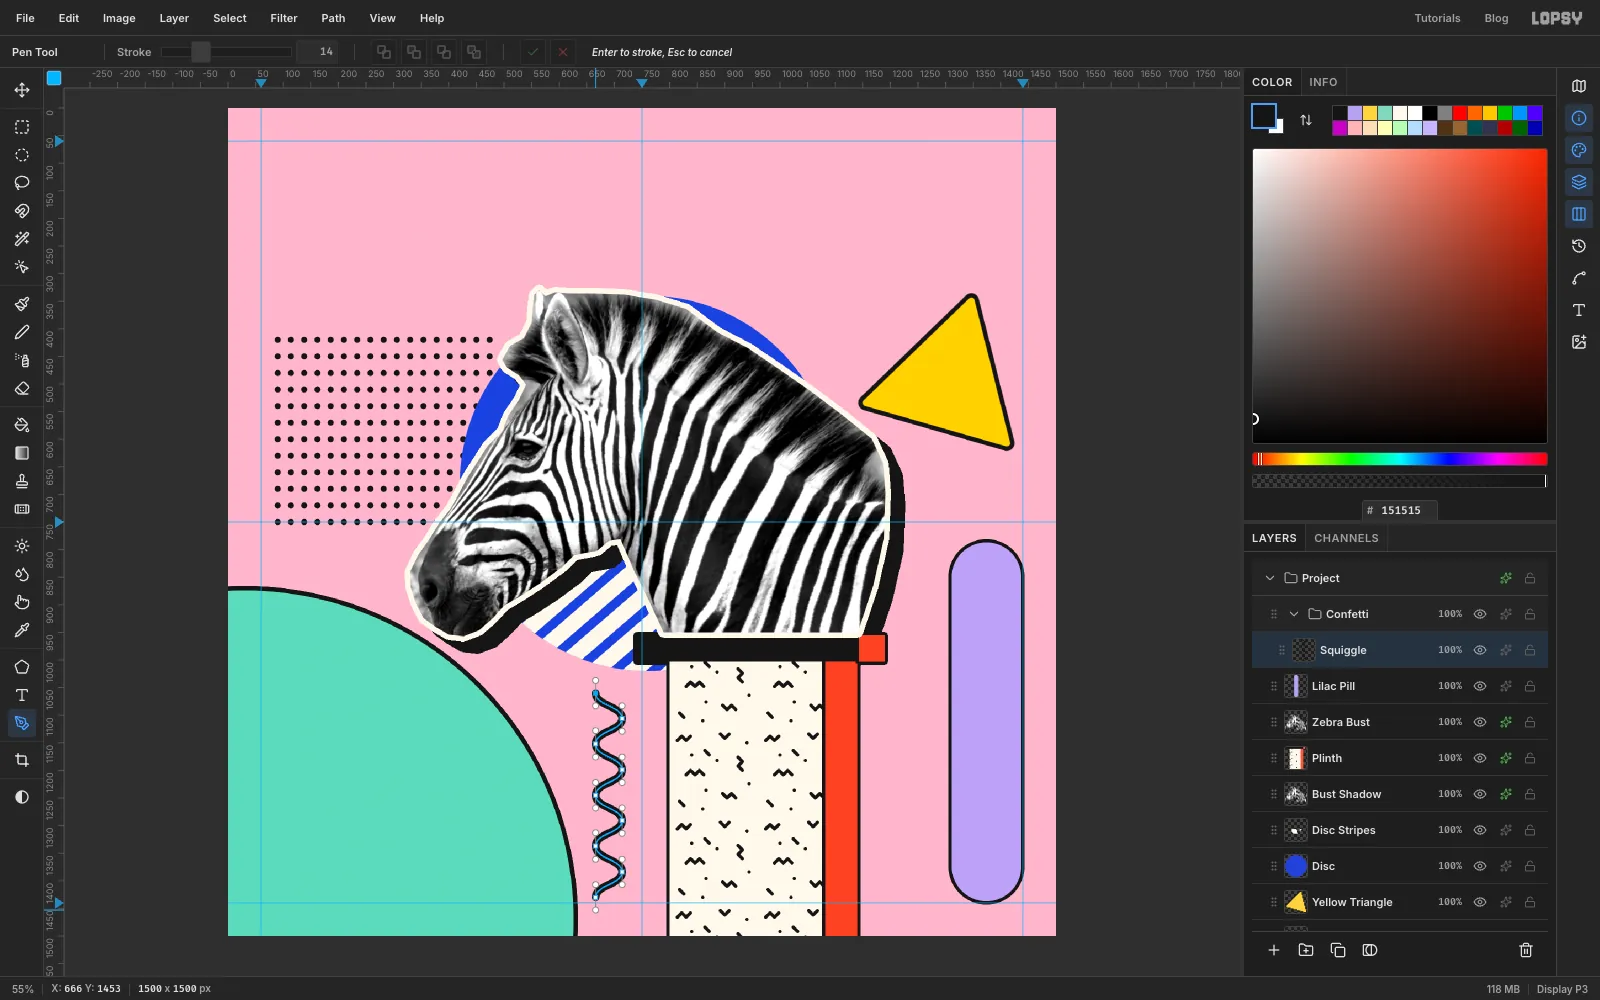
Draw a squiggle with the Pen
- With
Lilac Pillactive, click New Group (the folder button) and name the groupConfetti. Click Add Layer and name the new layerSquiggle. It goes inside the group. - Set the colour to . Pick the Pen tool (P) and set Stroke in the options bar to
14. - Make nine anchors down a vertical line near
x = 690, fromy = 1060toy = 1430, about 46 px apart. Put them alternately 24 px left and right of the line (x = 666, then714, and so on). At each anchor, press and drag straight down about 23 px. That pulls out the handles that make the curve smooth. - Press Enter to stroke the path with the colour. Then open the Paths panel (the curve icon in the right-hand strip) and delete the path, so its outline doesn't get in the way.
- With
-
Brush the confetti dashes
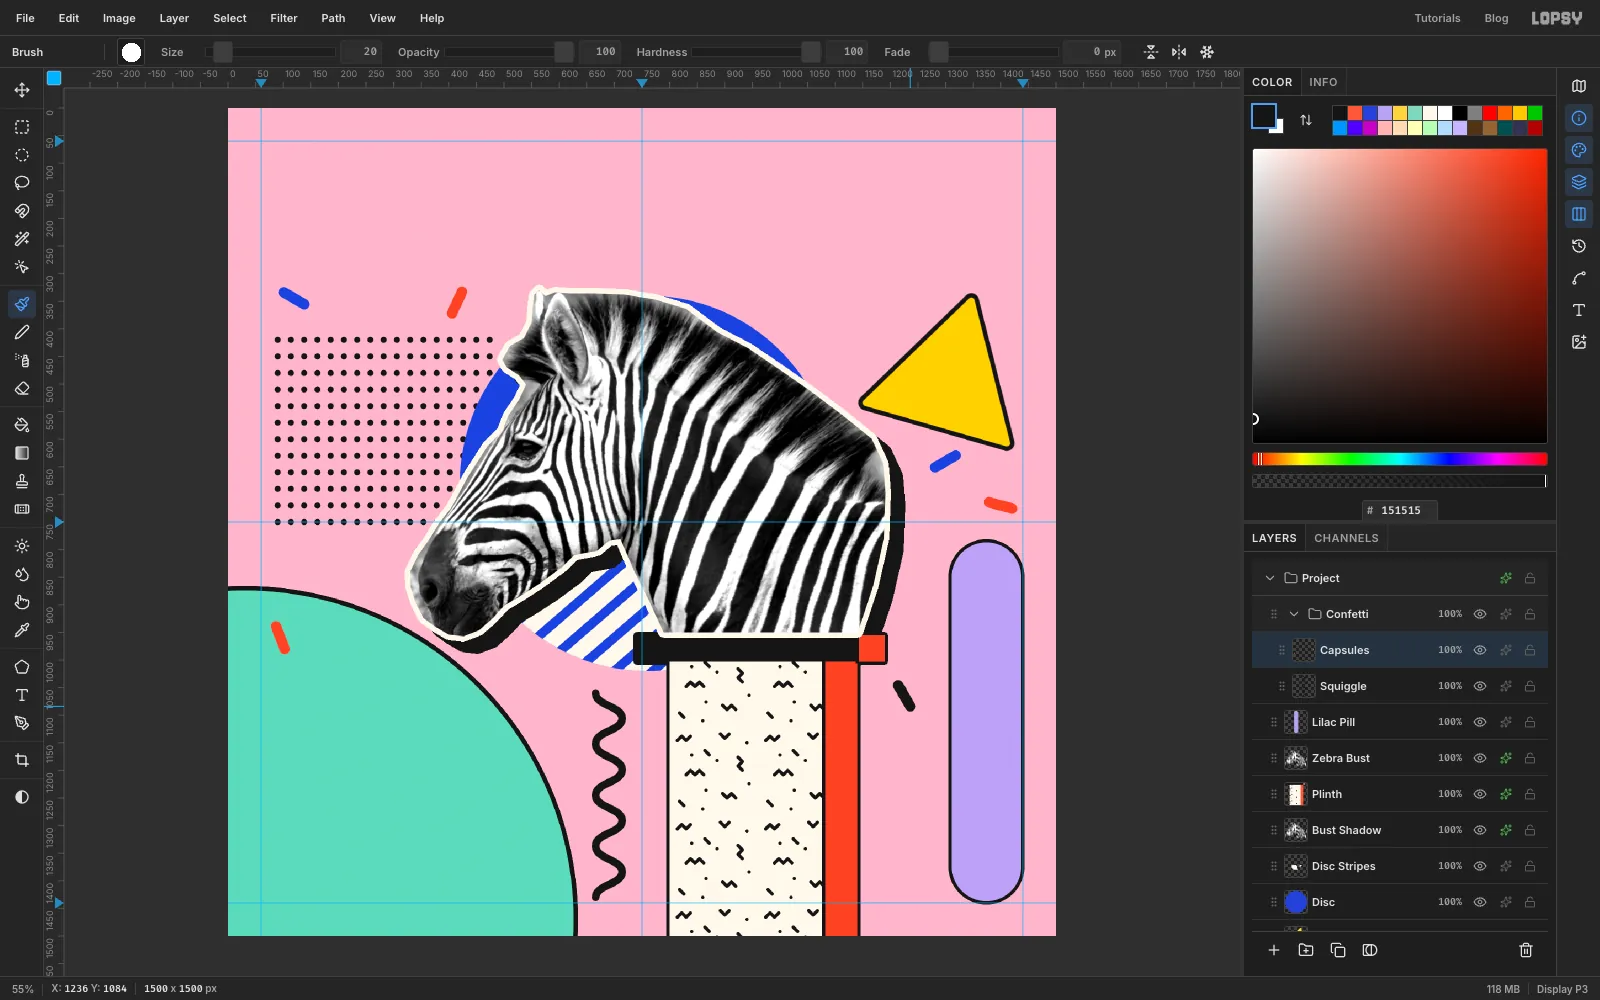
- Click Add Layer and name it
Capsules. - Pick the Brush, with Size
20and Hardness100. Each dash is a short drag, about 44 px long. A round brush gives it rounded ends. - Scatter six dashes in the empty pink areas, at different angles:
- cobalt at the top left (
120, 345) and under the triangle (1300, 640) - tomato just left of the ears (
415, 352), on the mint (95, 960) and above the lilac pill (1400, 720) - ink between the plinth and the pill (
1225, 1065)
Keep every dash at least 25 px away from other shapes. A dash that almost touches something looks like a mistake.
- Click Add Layer and name it
-
Copy a ring with Copy and Paste
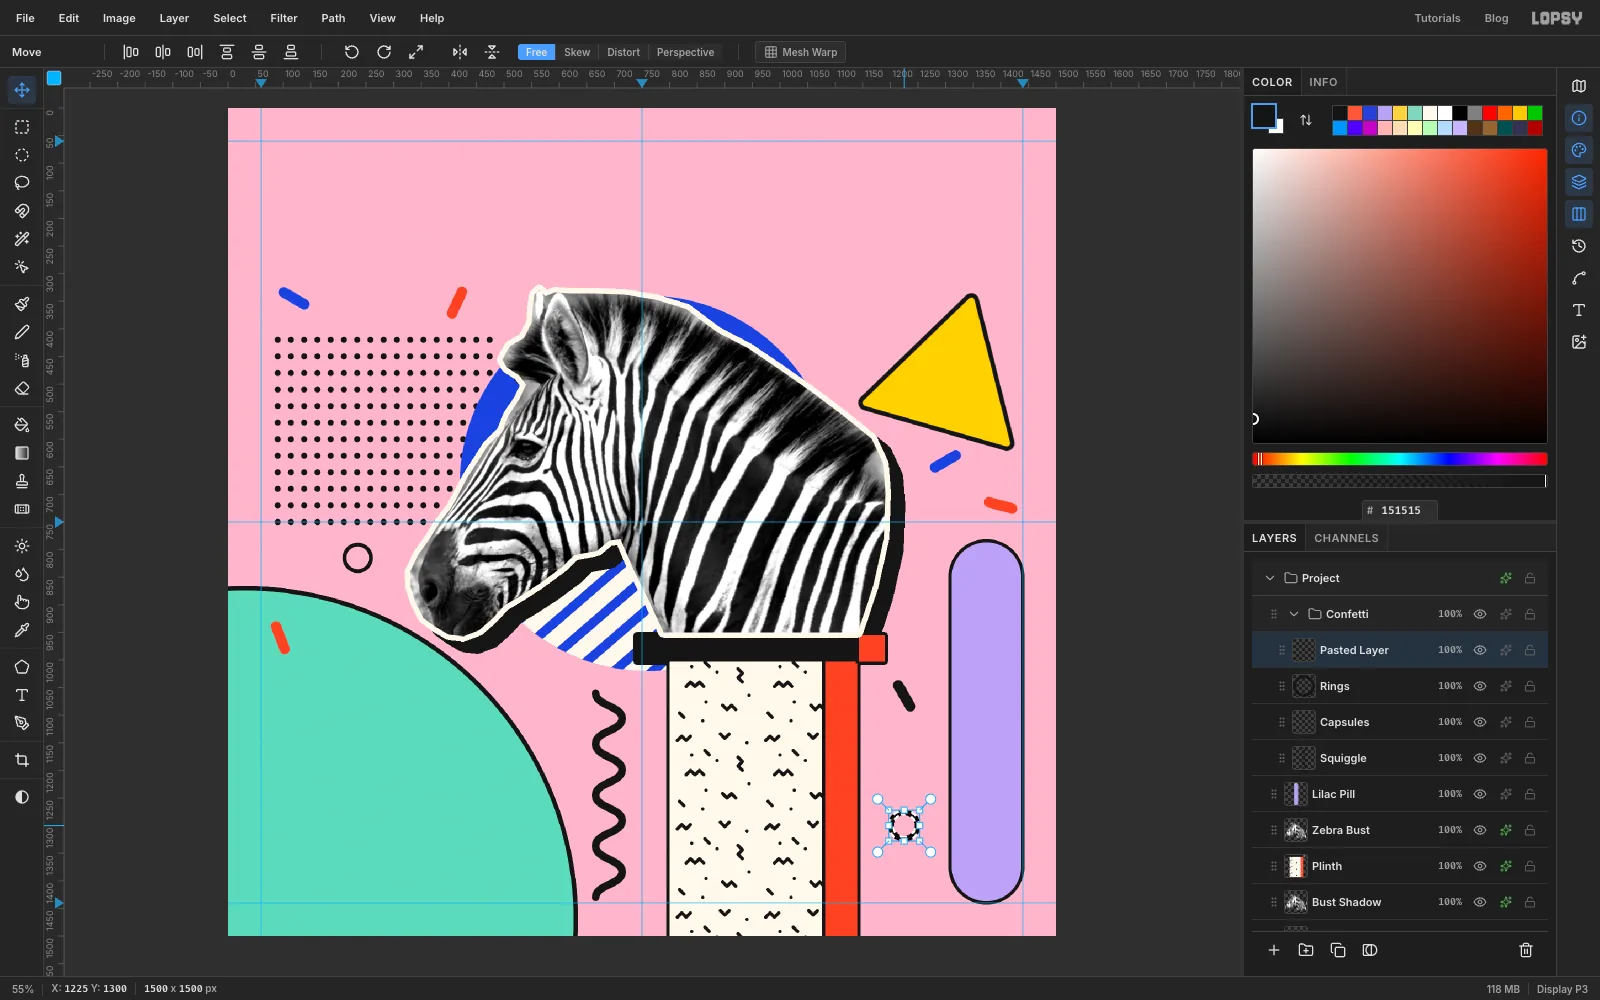
- Click Add Layer and name it
Rings. - With the Shape tool, set Shape to Ellipse. Click the Fill swatch and click Remove fill. Set the stroke to
151515and Width to7. - Press at the ring's centre,
235, 815, just under the dot grid, and drag 24 px down and right. That makes a ring 48 px across. - Draw a Rectangular Marquee around the ring and press Cmd+C, then Cmd+V. The paste lands on its own layer, in place.
- With the Move tool, drag the copy from its middle to
1225, 1300, between the plinth and the pill. Press Enter. Don't grab it near the edge of its box: the edges are scale handles.
- Click Add Layer and name it
-
Merge the copy back into the Rings layer
Press Cmd+D, then choose Layer → Merge Down. The pasted ring joins the
Ringslayer, so the Confetti group holds just three layers.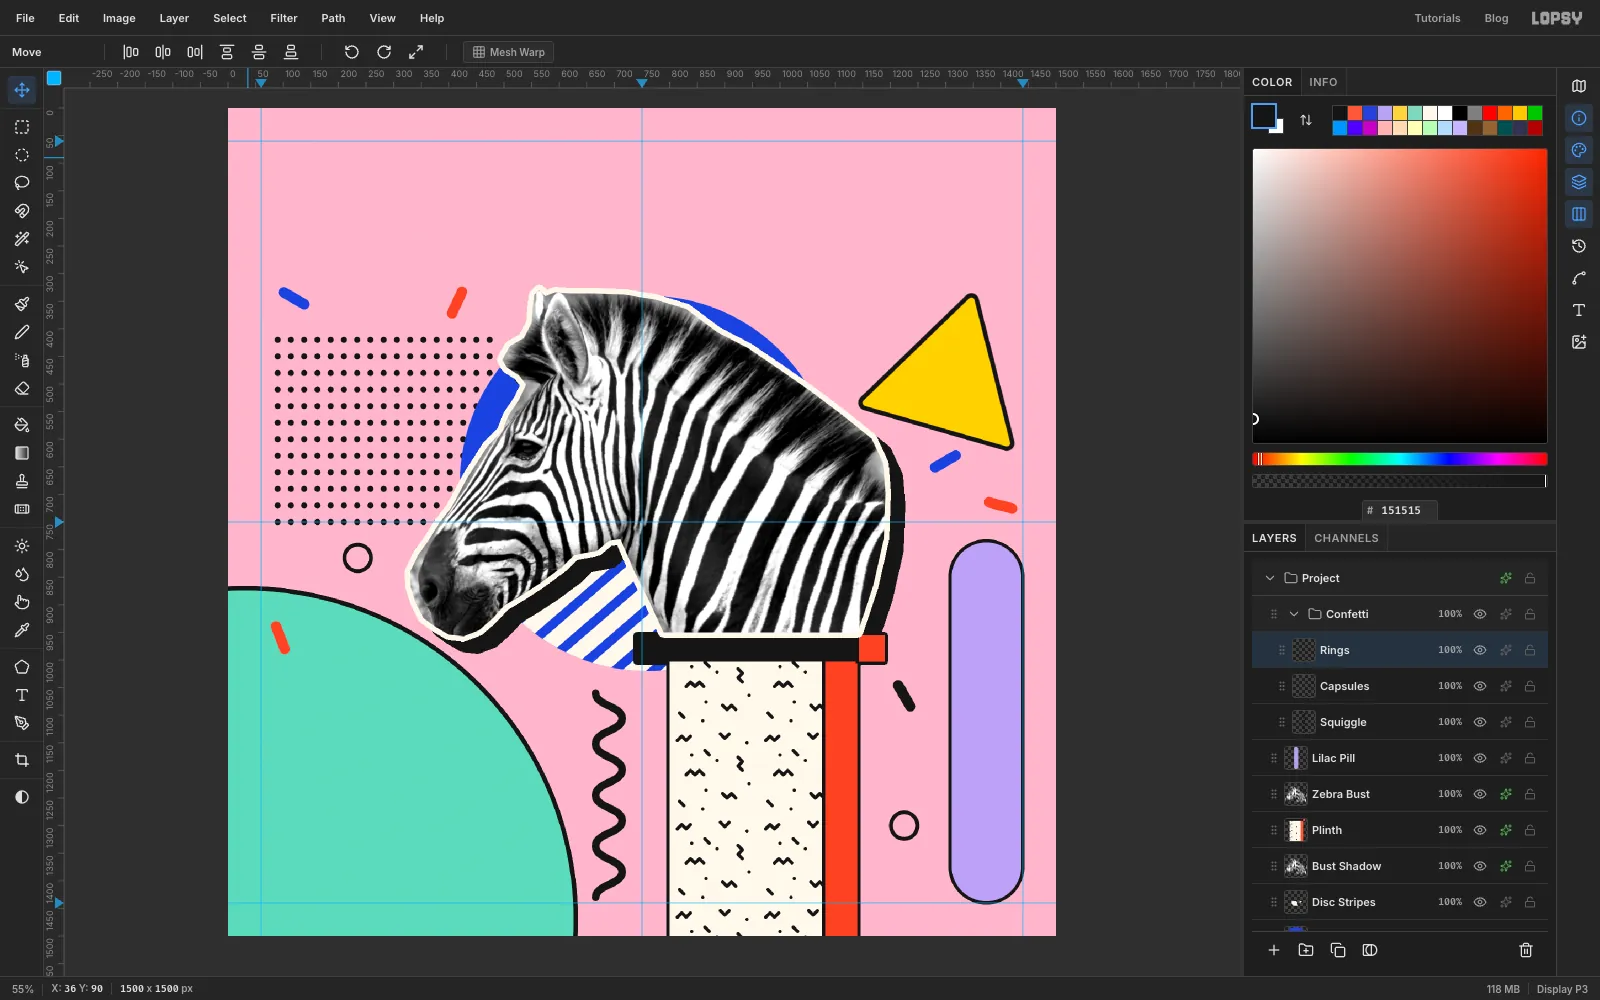
-
Set the OVERTURE label and the small type
All the type goes in its own group on top of the artwork.
- Click the collapse arrow on the
Confettigroup, then click the group row. Click Add Layer and name itType Anchor. Because the group was collapsed, this layer lands above the group, not inside it. - Click New Group and name it
Type. Click Add Layer and name itOverture Pill. - With the Shape tool, draw a Rectangle with Corner Radius
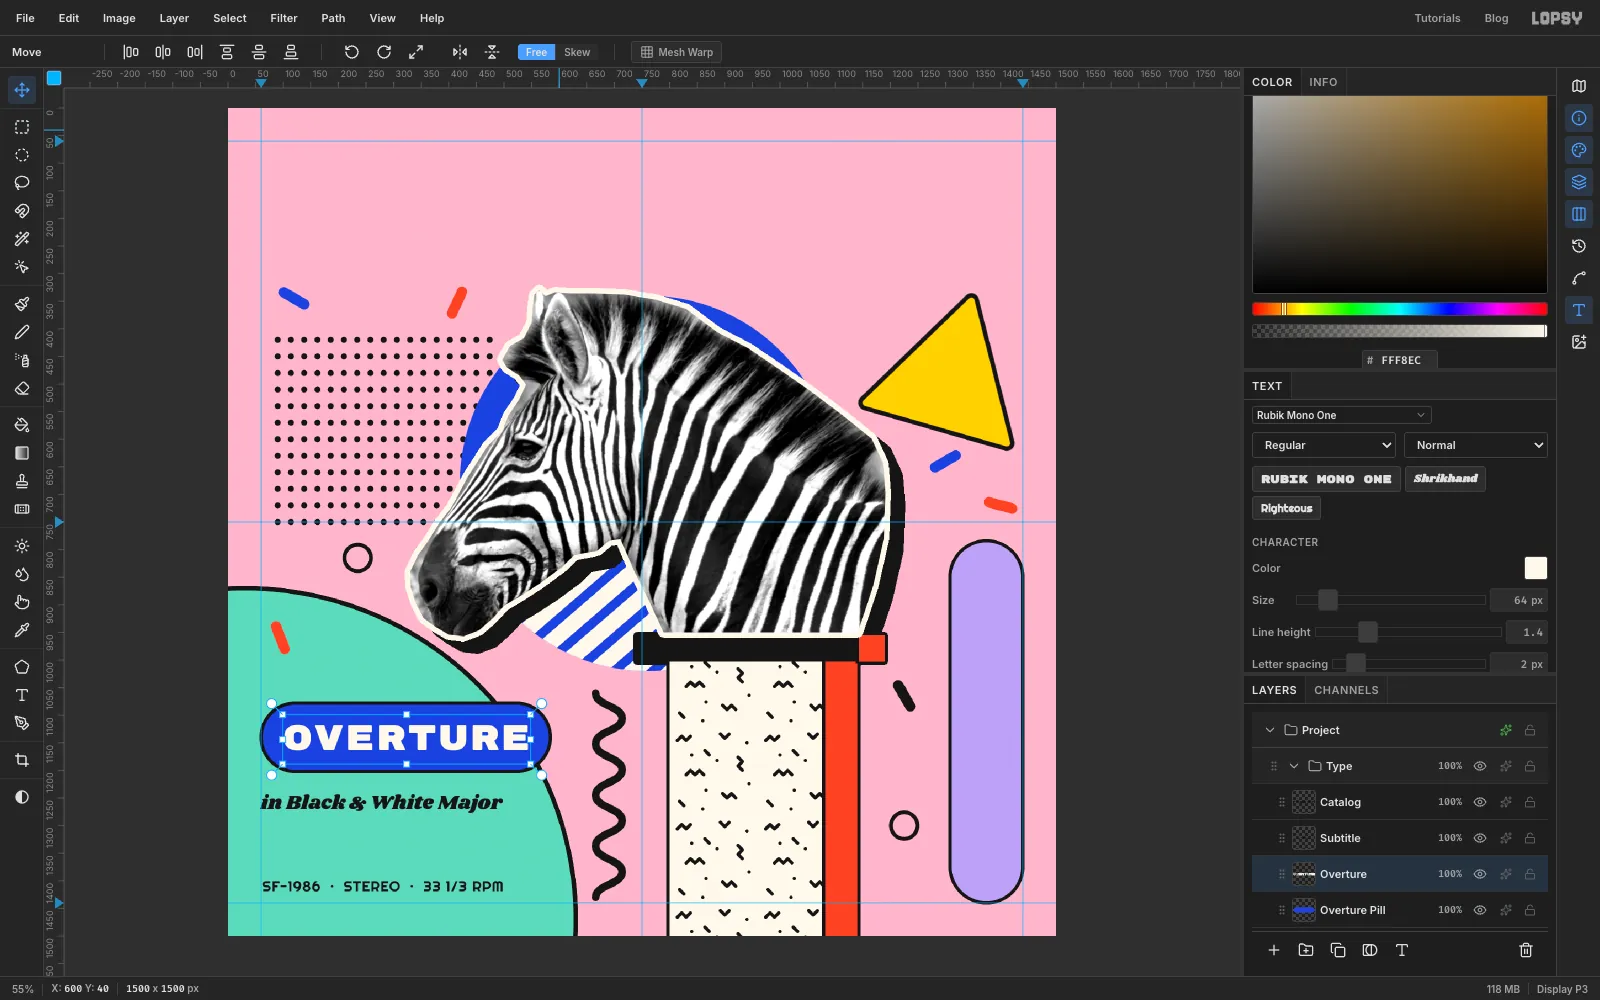
62, fill2541D9, stroke151515and Width6. Press at the pill's centre,322, 1140, and drag out to584, 1202. That makes a pill 524 × 124 px. - Make the credits line. Pick the Text tool (T), choose Righteous at size
26with Align on Left, and set the colour to . Click near the bottom left, at62, 1392. TypeSF-1986 · STEREO · 33 1/3 RPM, press Tab to finish, and rename the layerCatalog. In the Text panel set Letter spacing to1. Then nudge it with the Move tool so its left edge is atx = 58. - Make the subtitle. Click
Overture Pillfirst. Choose Shrikhand at36, in , aligned Left. Click at62, 1235, typein Black & White Major, press Tab and rename itSubtitle. Set Letter spacing to0and nudge its left edge tox = 58. - Make OVERTURE. Click
Overture Pillfirst. Choose Rubik Mono One at64and set the colour to . Click in empty space near the top of the canvas, typeOVERTURE, press Tab and rename itOverture. Set Letter spacing to2. With the Move tool, drag it from the middle of its box down onto the pill, then nudge it with the arrow keys until it sits in the middle, with the same gap above and below the letters.
- Click the collapse arrow on the
-
Rotate the band name upright
- Click
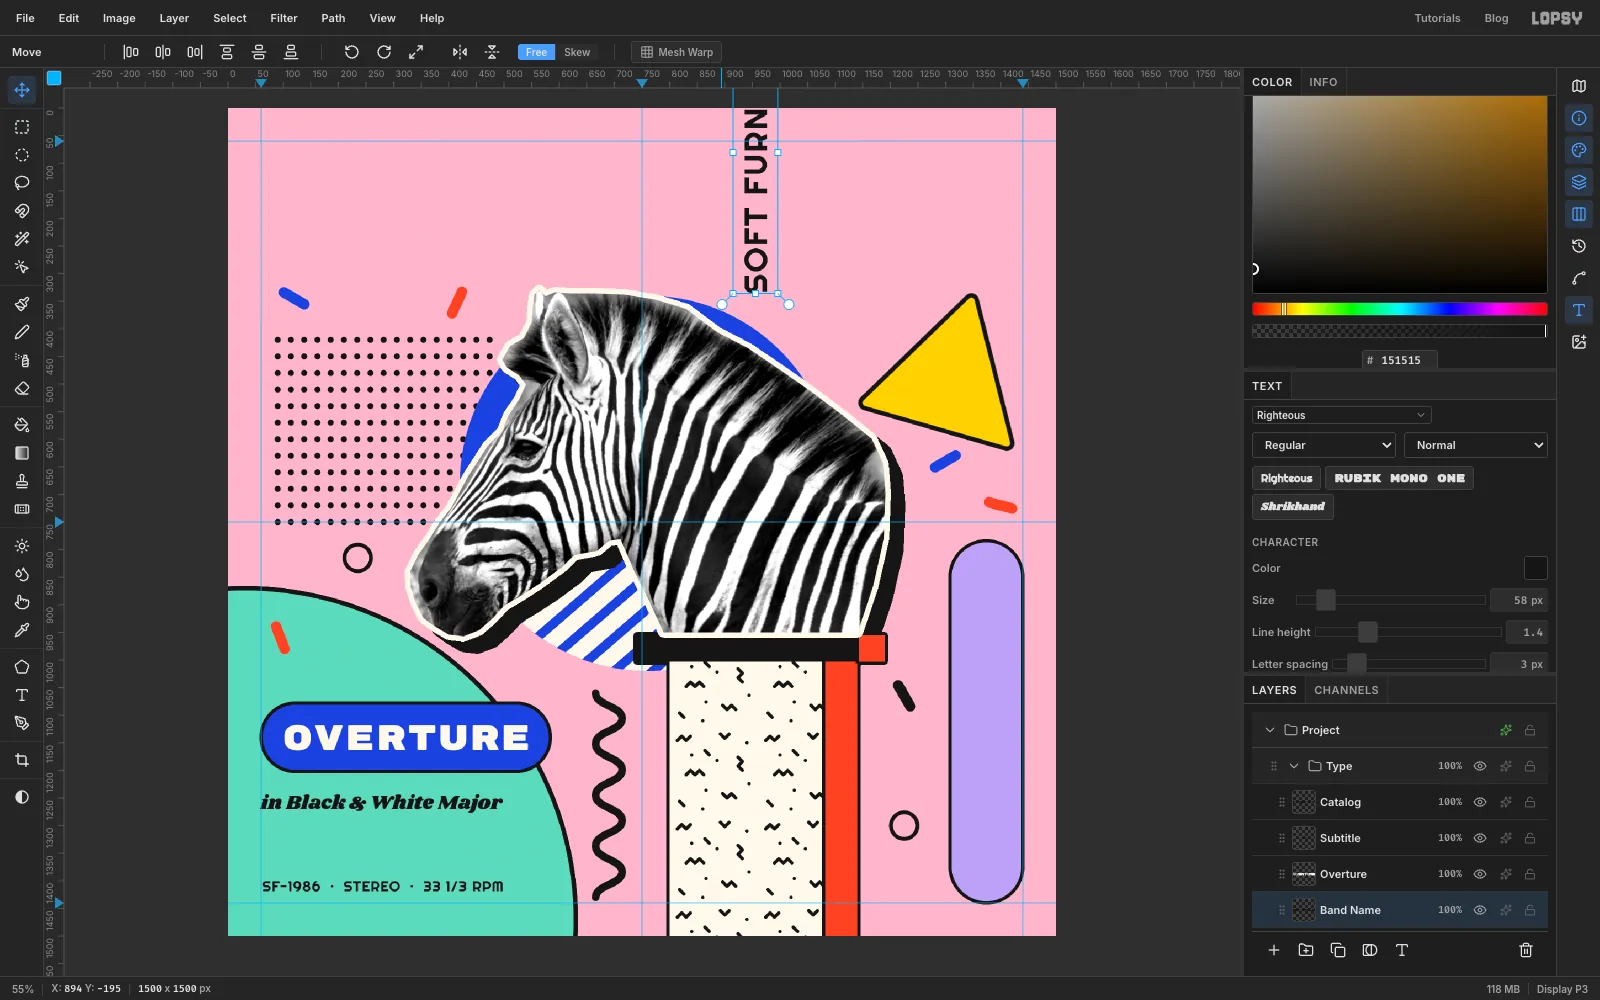
Overture Pillfirst. With the Text tool, choose Righteous at58in . Click in empty space at the top of the canvas and typeSOFT FURNITURE. Press Tab, rename itBand Name, and set Letter spacing to3. - Switch to the Move tool. Hold Cmd and drag the rotation handle at the top-right corner counter-clockwise. Cmd snaps the angle to 15° steps, so you can land exactly on −90°. Press Enter. The text reads bottom to top, like the spine of a record.
- Drag the text from the middle of its box onto the lilac pill, then nudge it with the arrow keys until it sits in the middle, with equal space at both ends and both sides.
- Click
-
Type the title
- First, tidy the credits. Click
Catalogand nudge it down with the Move tool until its bottom sits level with the bottom of the lilac pill (y = 1442). - Click
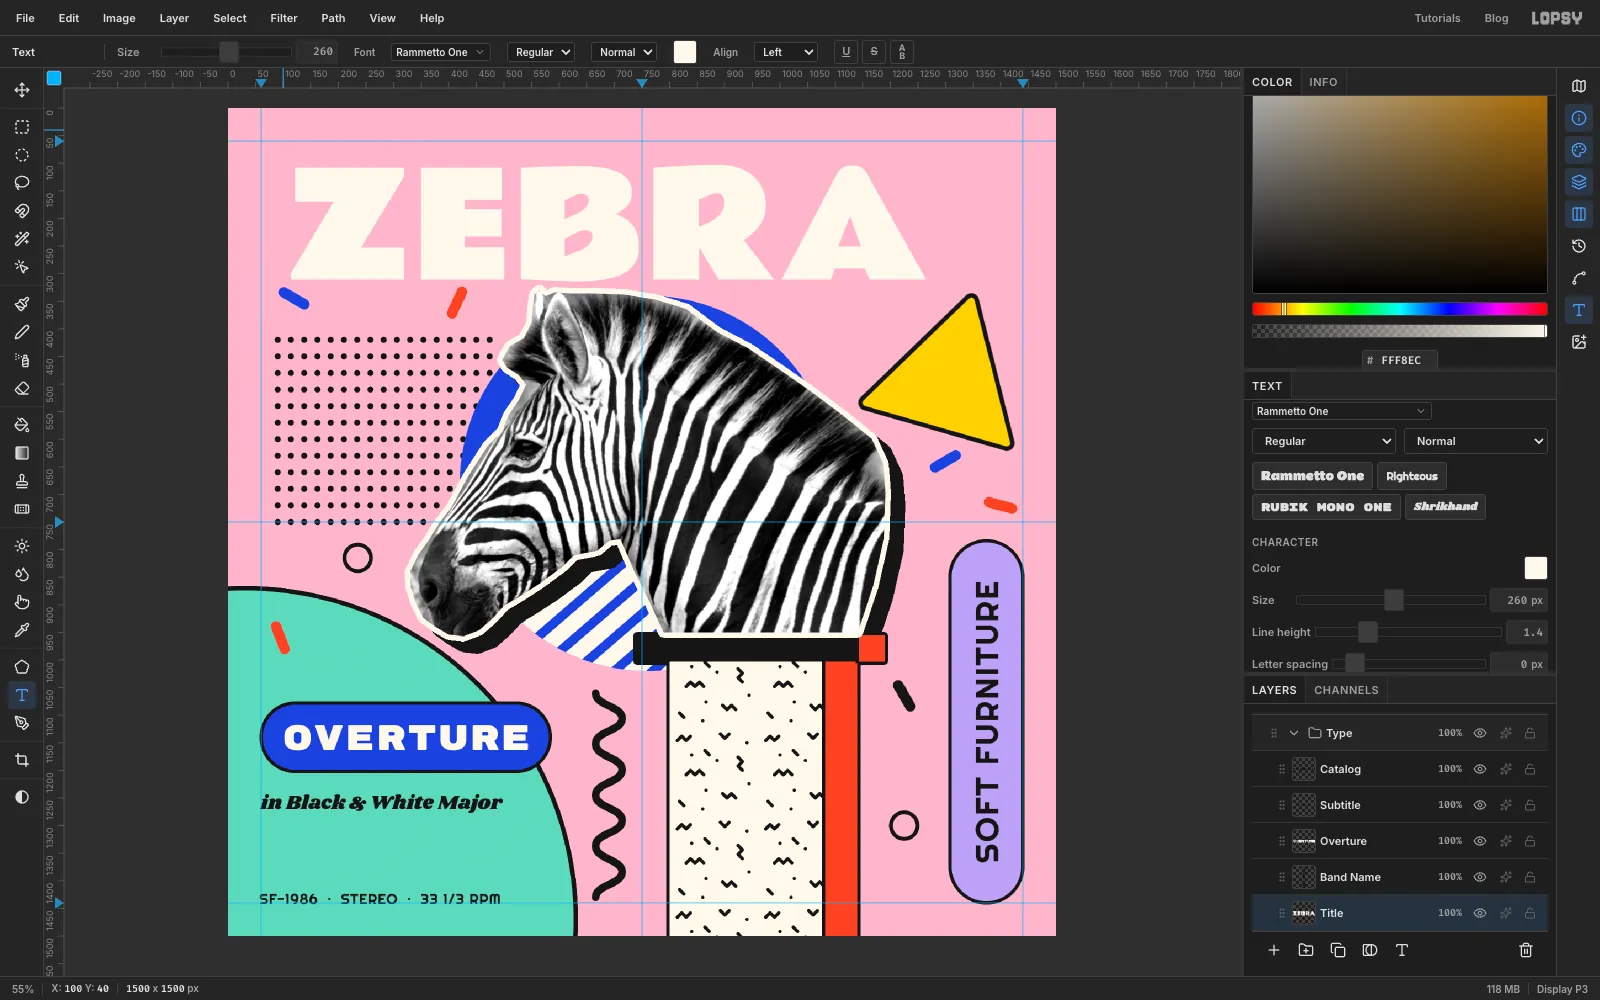
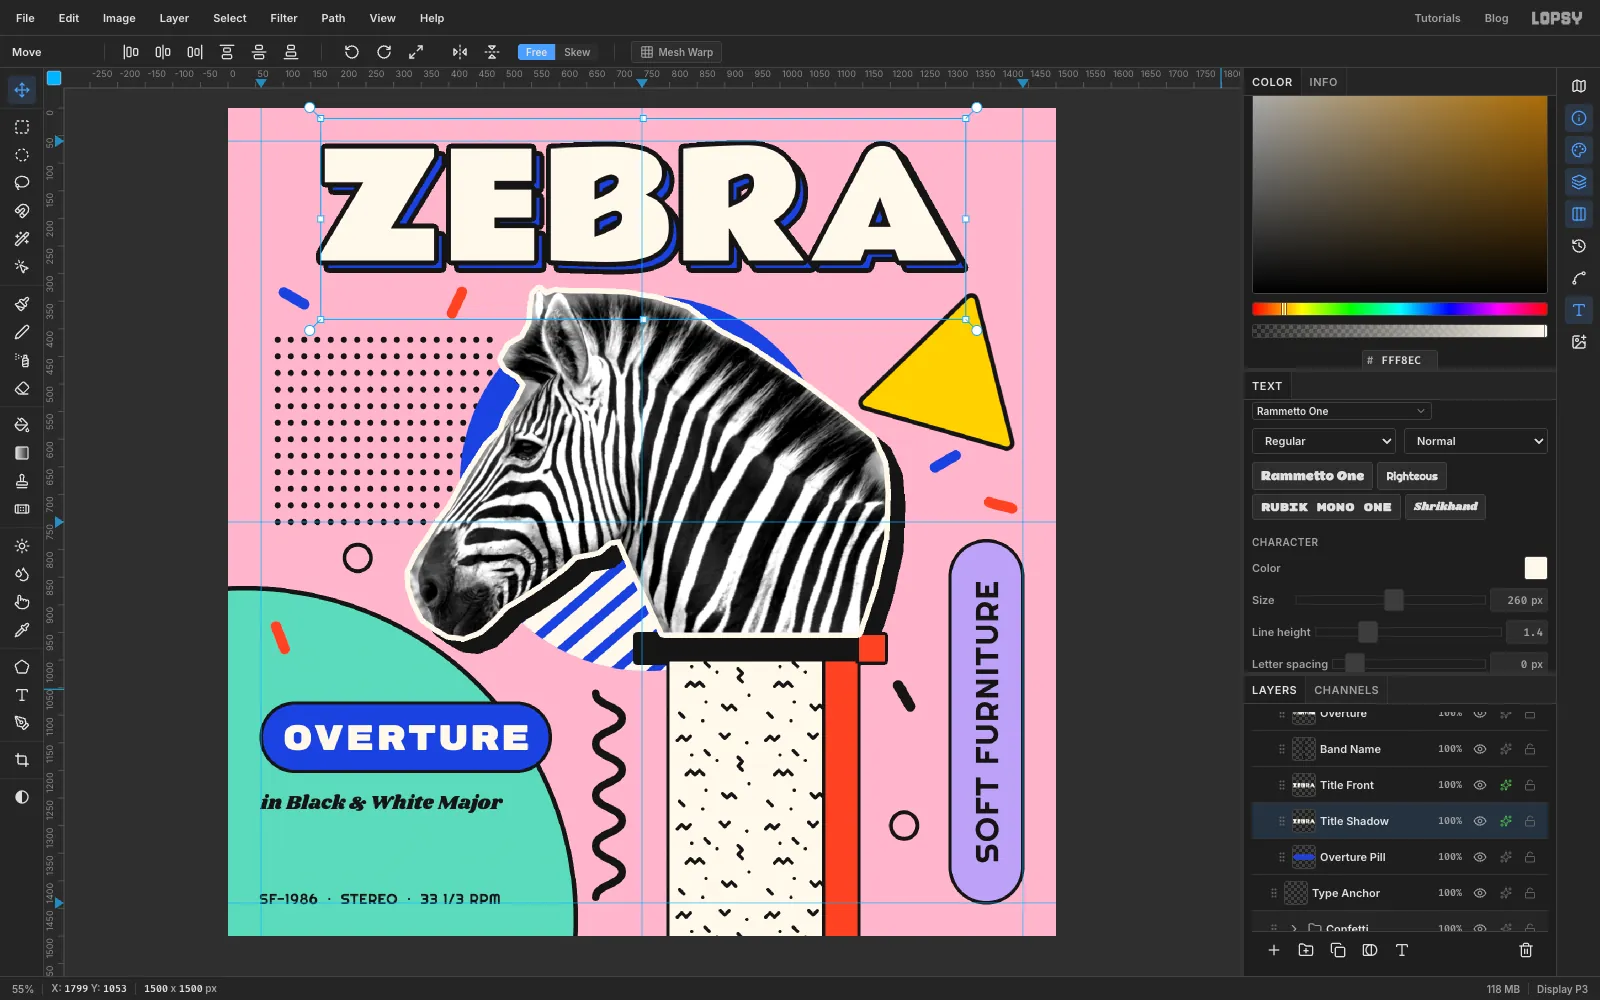
Overture Pill. With the Text tool, choose Rammetto One at260in , with Letter spacing0. Click near the top left and typeZEBRA. Press Tab and rename itTitle. - With the Move tool, nudge the title so it sits just under the top margin guide, a few pixels left of the centre guide. Its shadow (next step) will push it 14 px to the right, and you want the whole block centred.
Cream on pink is hard to read. The next two steps fix that.
- First, tidy the credits. Click
-
Outline the title
Open the effects drawer for the title, tick Stroke, and set Width to
9and the colour to . The letters still stay editable text.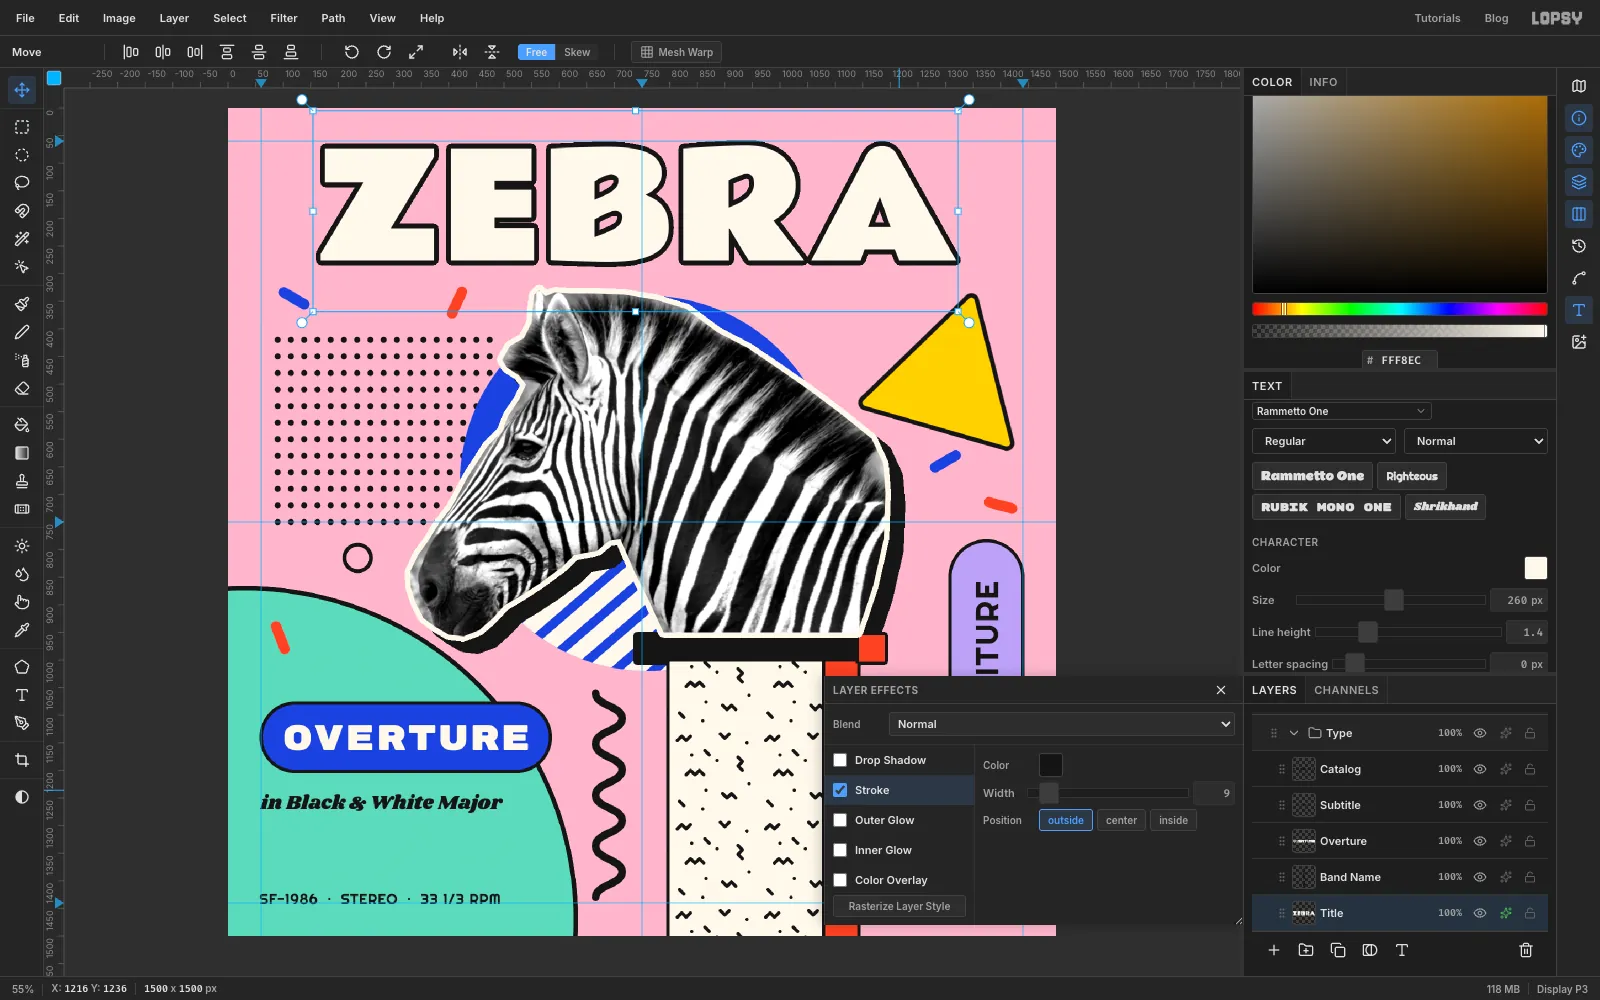
-
Give the title a cobalt block shadow
You'll use the same trick as the bust's shadow.
- Click Duplicate Layer and rename the copy
Title Front. As with the bust, line it up with the original if the copy was offset. - Click the original
Titlelayer and rename itTitle Shadow. Tick Color Overlay and set it to . The black outline stays, so the shadow looks like the side of a block. - Nudge the shadow 14 px right and 14 px down.
- Click Duplicate Layer and rename the copy
-
Group the label and tilt it
Memphis layouts are a little off-kilter. Tilting the label is enough to make the whole bottom-left corner feel looser.
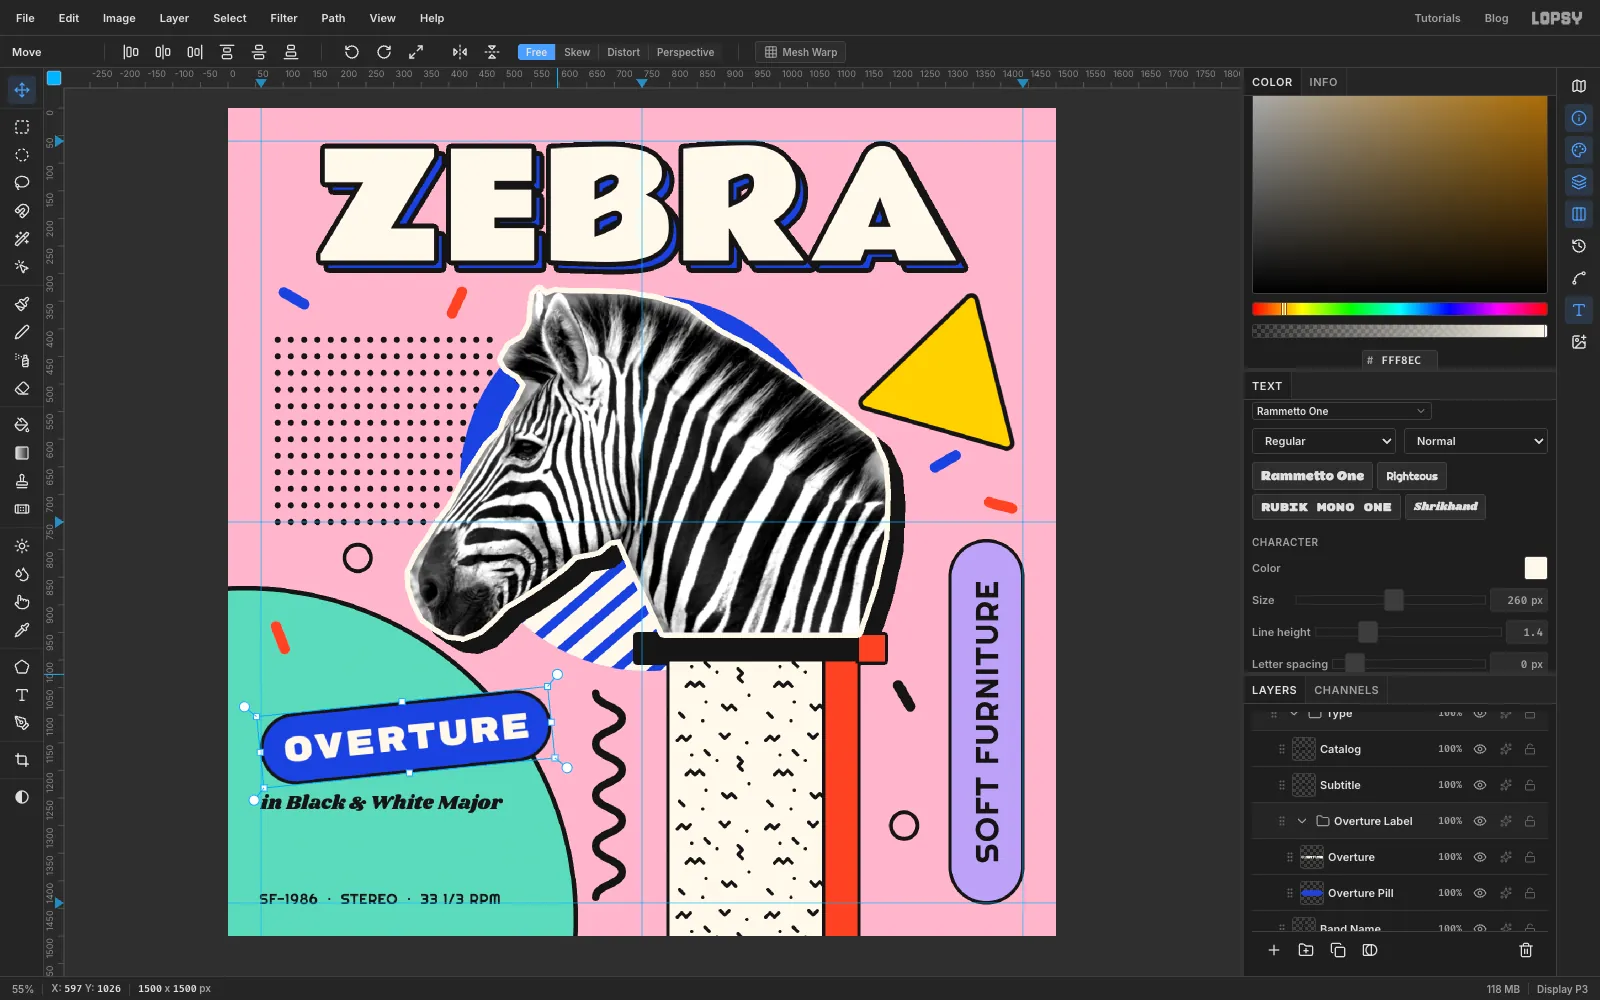
- Click
Overture Pill, then Cmd-clickOvertureso both are selected. - Choose Layer → Group Layers and rename the group
Overture Label. - With the group active, use the Move tool's top-right rotation handle to turn it about 6° counter-clockwise. Press Enter. The pill and its text turn together, and the text stays editable.
- Click
-
Add print grain
- Collapse the
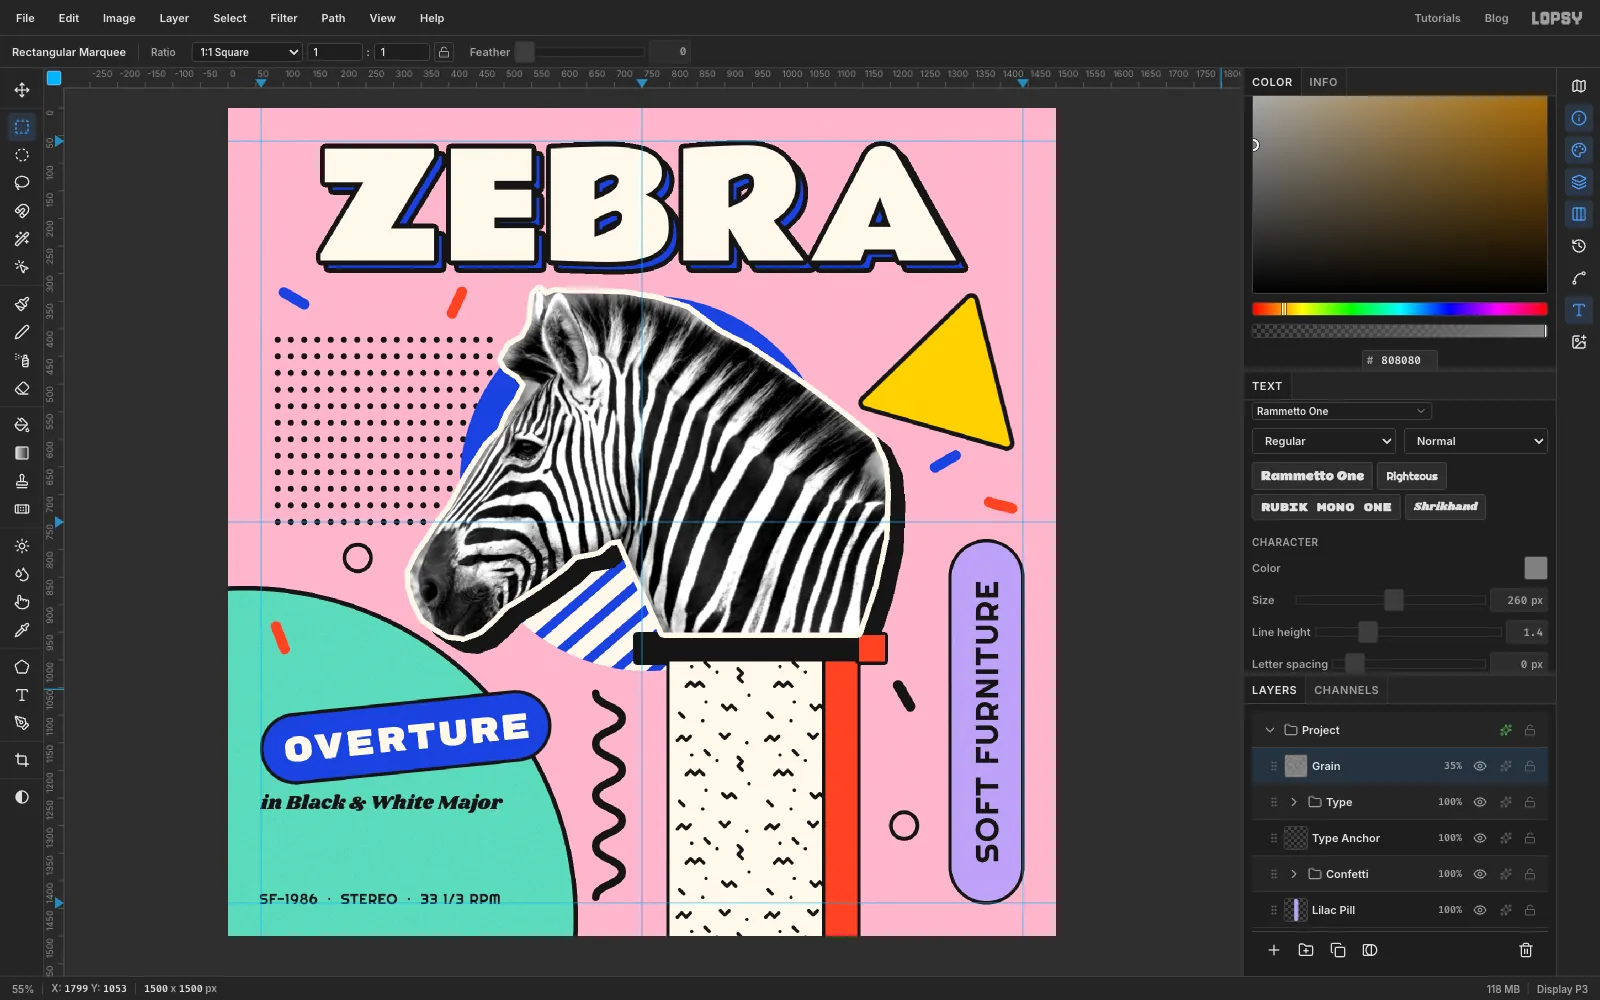
Overture LabelandTypegroups, then click theTypegroup. Click Add Layer and name itGrain. It lands above everything. - Choose Select → All, fill with , and press Cmd+D.
- Choose Filter → Add Noise…. Set Amount to
100, click Mono and Gaussian, then click Apply. - In the effects drawer, set the blend mode to Overlay. Mid-grey disappears in Overlay, so only the speckles show. Set the layer's opacity to
35%.
- Collapse the
-
Frame it with a border
- Click
Type Anchorand delete it. It has done its job. - Set the colour to .
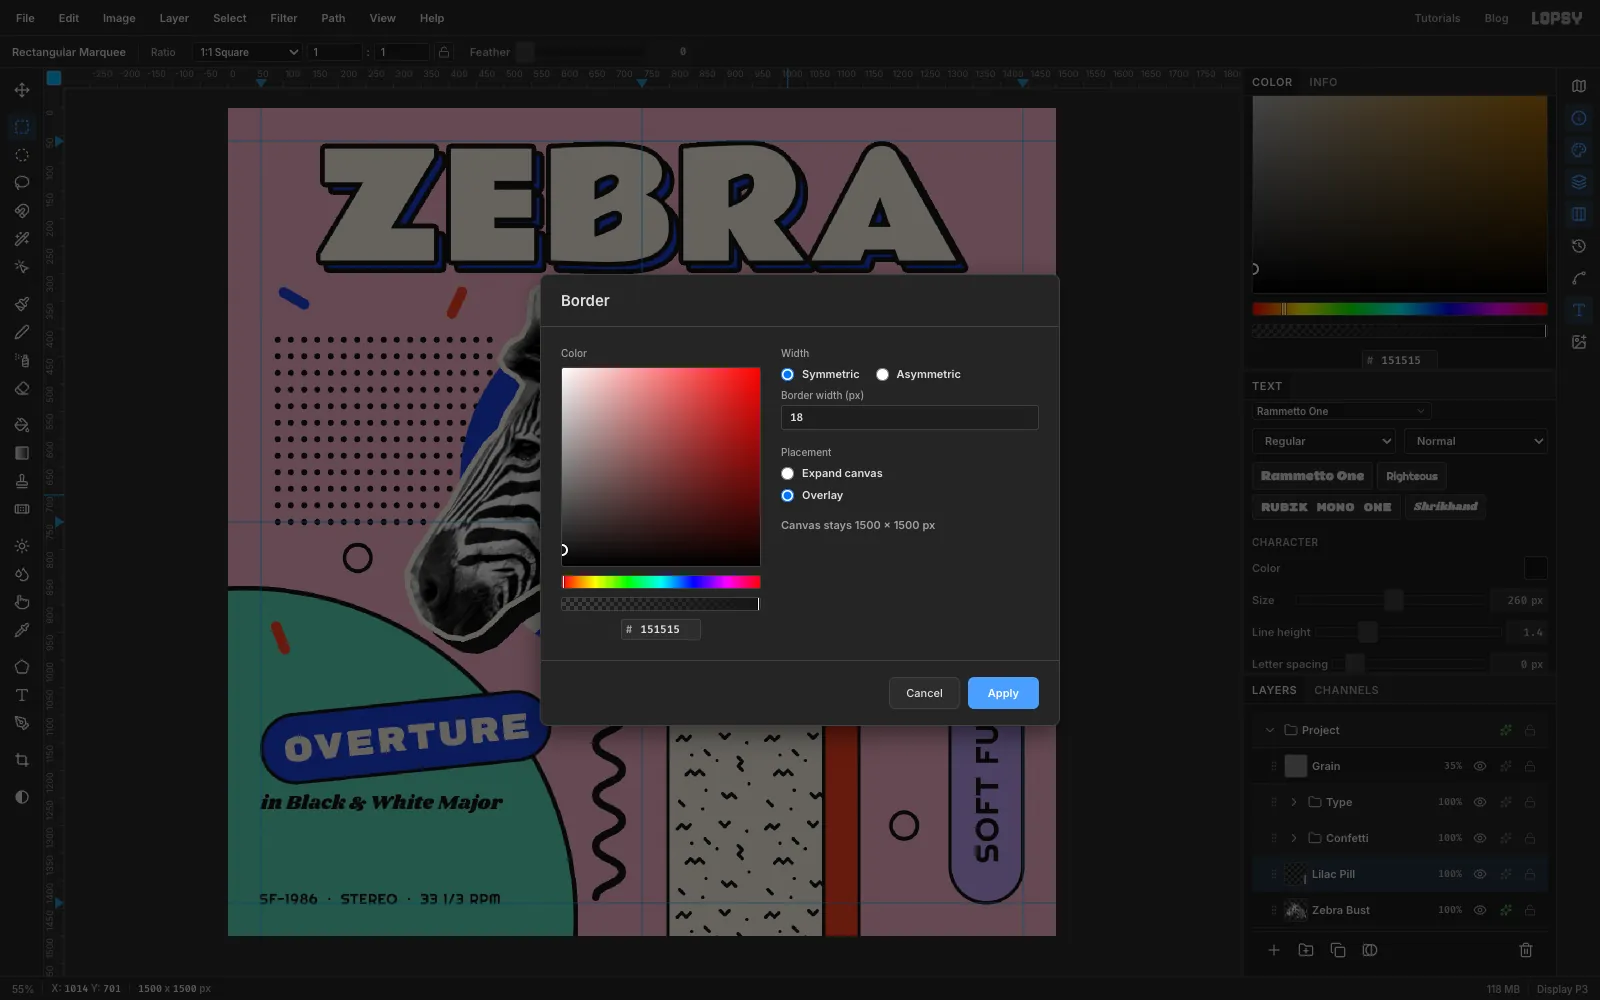
- Choose Image → Border…. Pick Symmetric, enter
18for Border width (px), and pick Overlay. Overlay keeps the canvas at 1500 × 1500 and adds a black frame layer on top. Expand canvas would add the border outside the artwork instead. - Click Apply.
Save the project with File → Save Project, and export it with File → Quick Export PNG.
- Click