Design a 1950s Exotica Tropical Album Cover
Make a mid-century exotica LP cover in Lopsy with a posterized sunset, perspective wave patterns, palm silhouettes, script type and print texture.
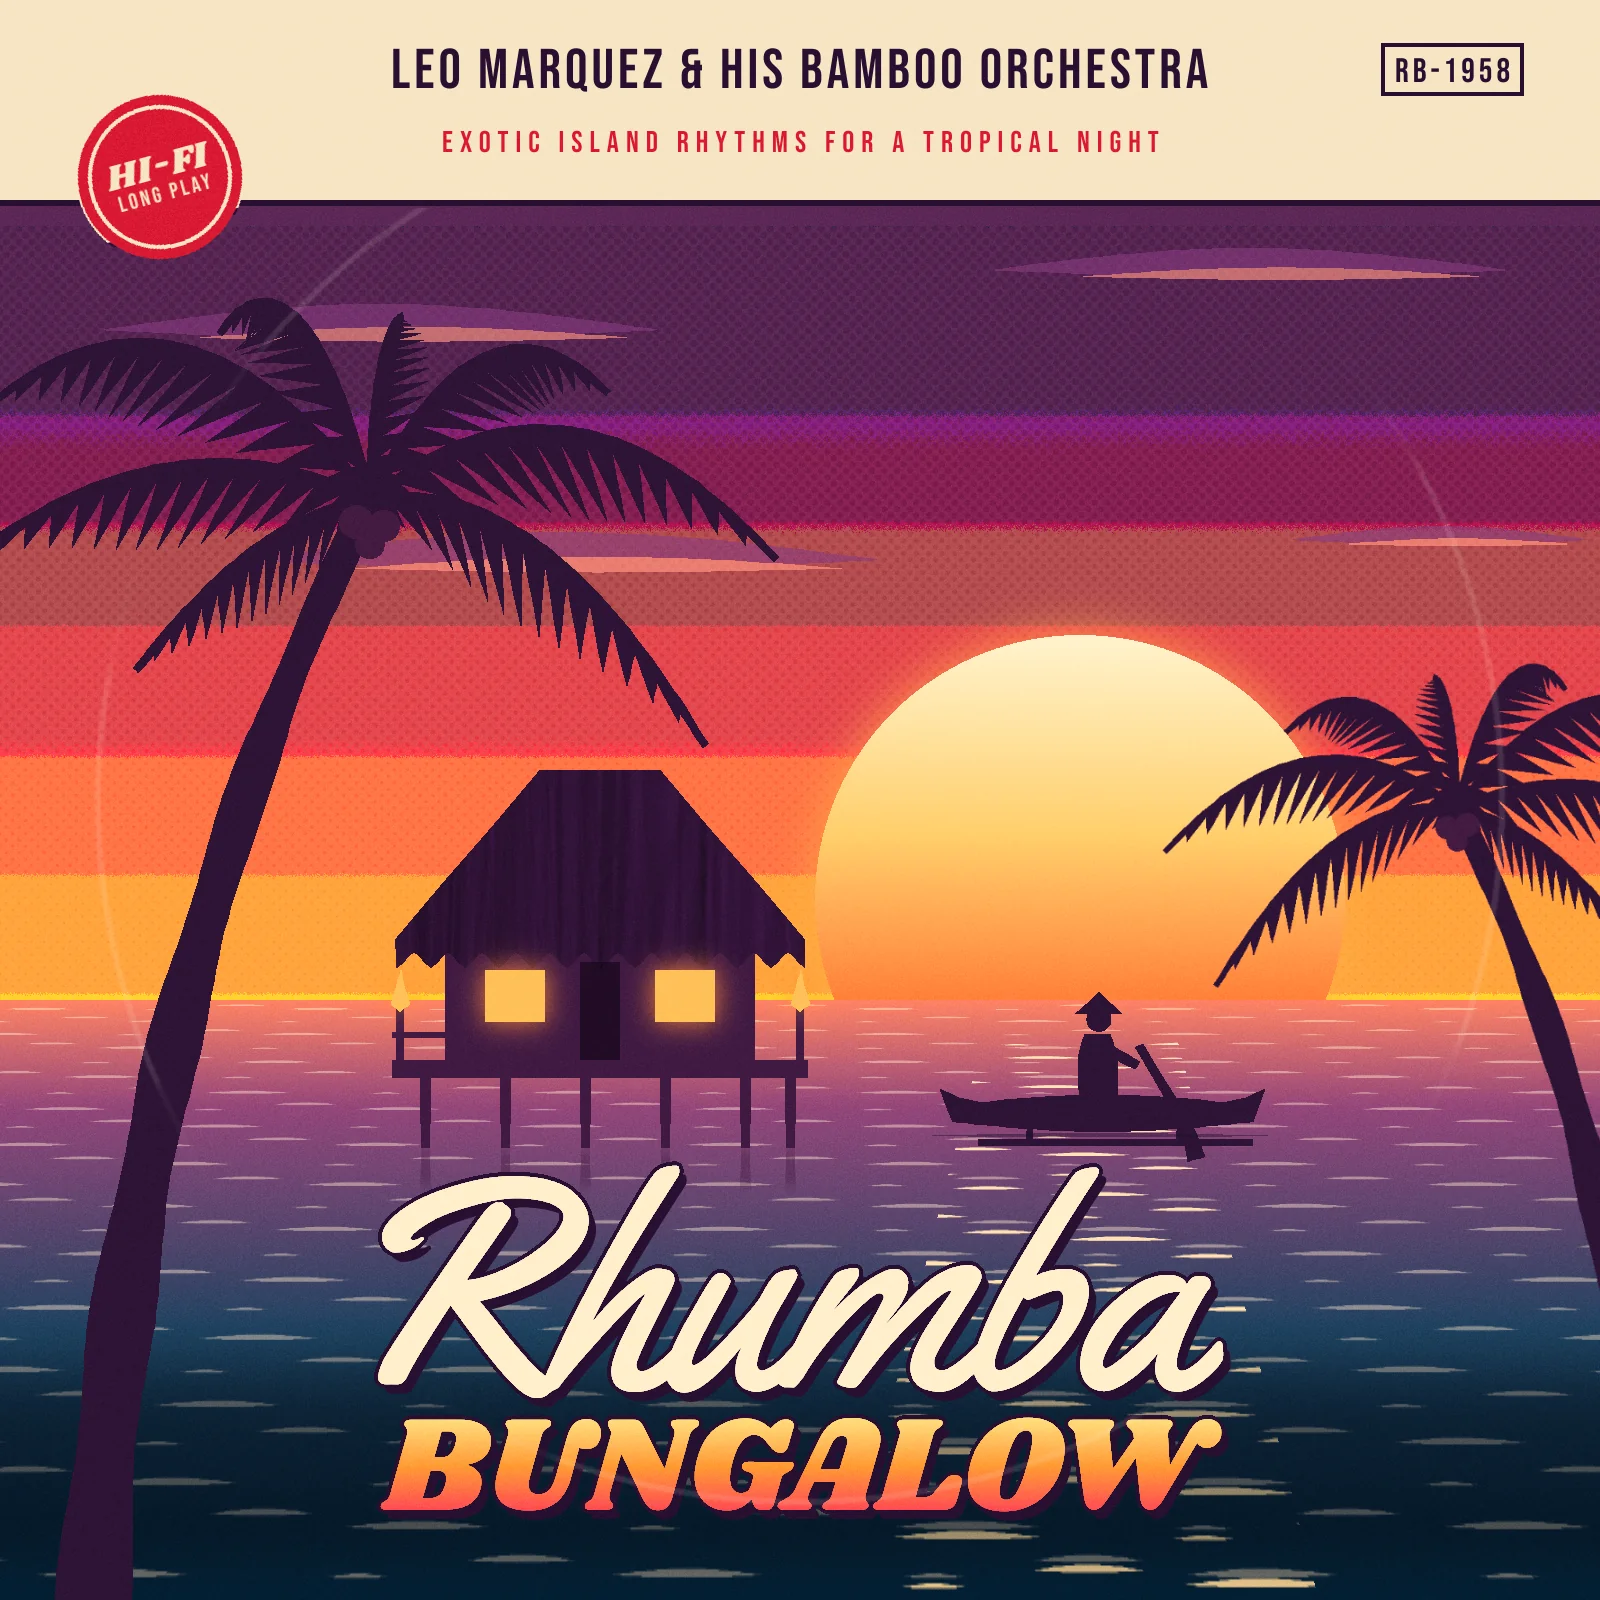
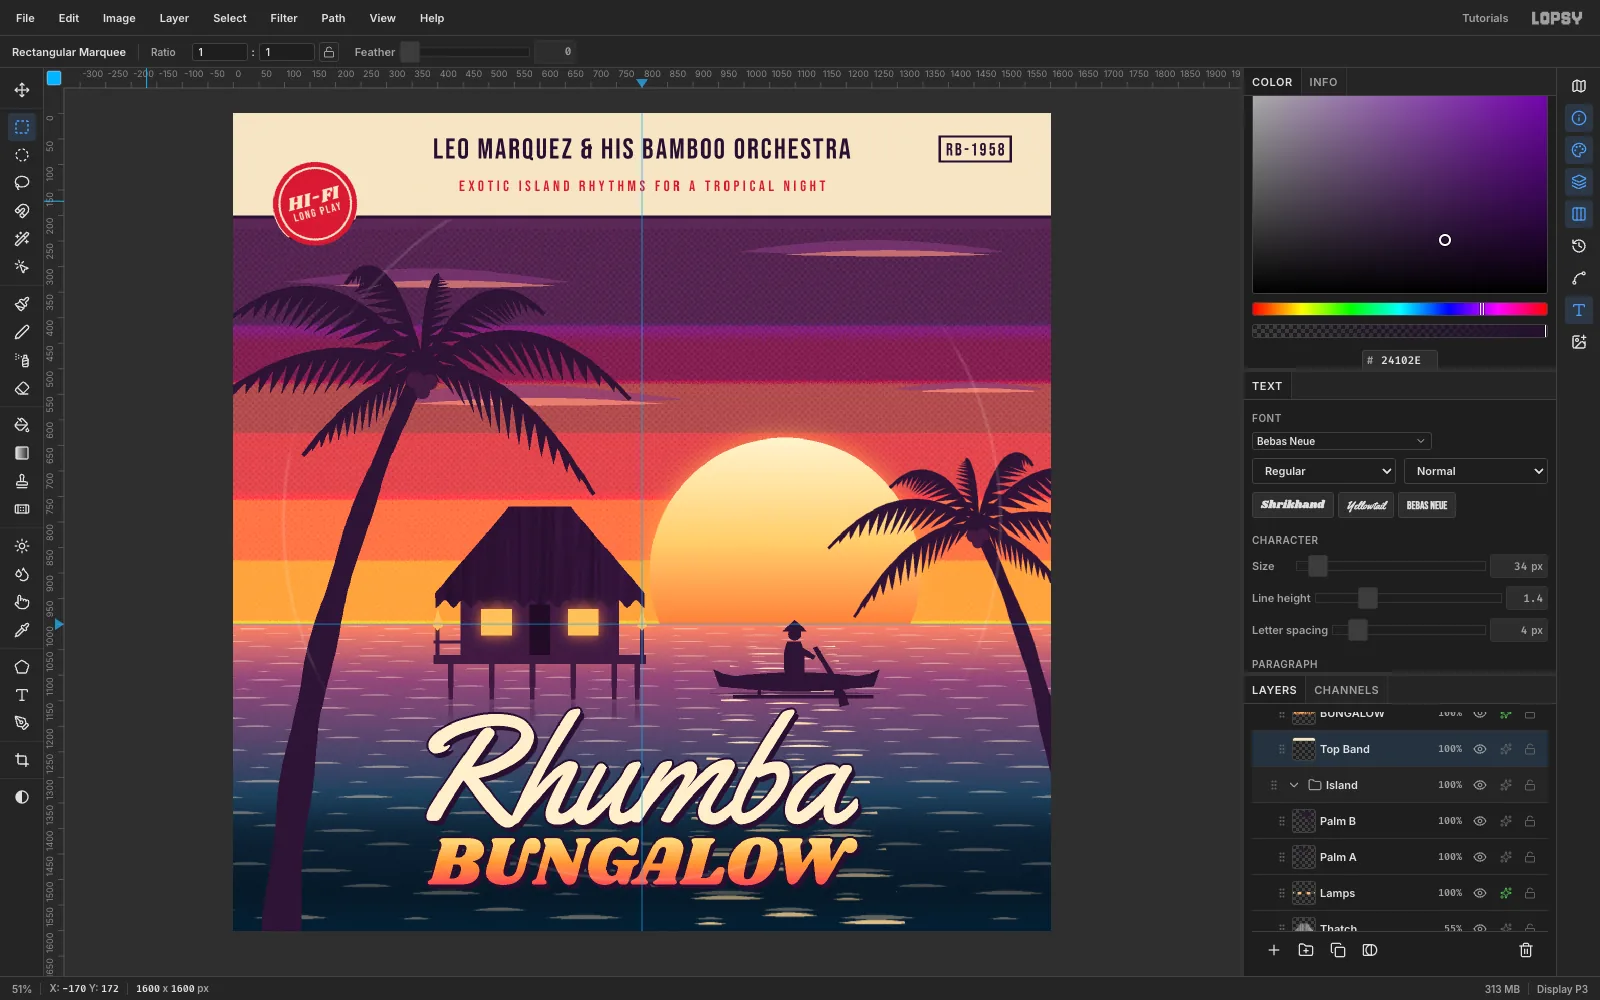
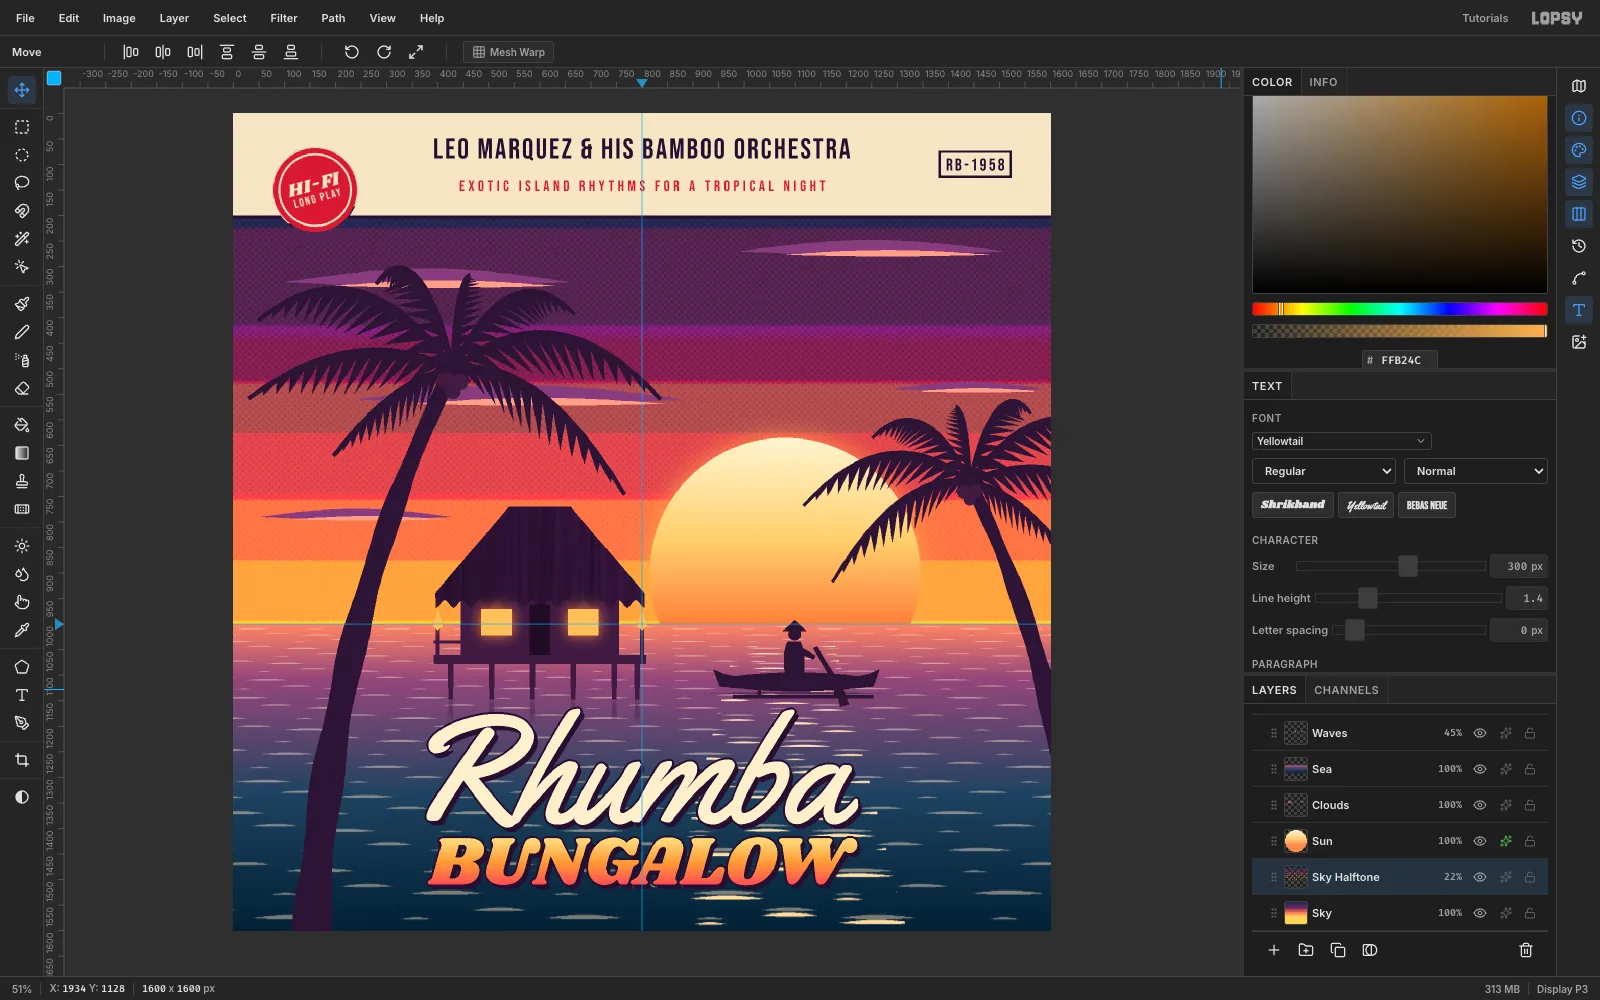
Exotica records from the late 1950s sold a fantasy island. The covers were a flat travel-poster sunset, black palm silhouettes, a hut with a lit window, and a title in a loose script. On top sat the label's trade dress: a band with the orchestra's name, a HI-FI badge and a catalog number.
In this tutorial you'll make Rhumba Bungalow, a 1600 × 1600 px LP cover for a fictional record by Leo Marquez & His Bamboo Orchestra. Almost every shape is a Lasso polygon. The period look comes from a few moves:
- Posterize turns the sky gradient into flat ink bands.
- A tiny Define Pattern tile, Fill with Pattern and the Perspective transform make the sea.
- Halftone, grain and a worn ring age the finished sleeve.
The palette:
- Sky:
#0E2446→#6B2F6A→#E8605A→#FFC75E - Sea:
#F08A6A→#8A4A78→#27405E→#0A1F33 - Silhouettes: plum
#2A1433, hut#3B1B40, lamp gold#FFC46B - Trade dress: cream
#F4E6C8, ink#24102E, red#C8323A
-
Set up the canvas and paint the sky
Choose File → New, set the unit to Pixels, and create a 1600 × 1600 document. Rename Layer 1 to Sky.
- Click the top ruler at 800 for a centre guide, and the left ruler at 1000 for the horizon.
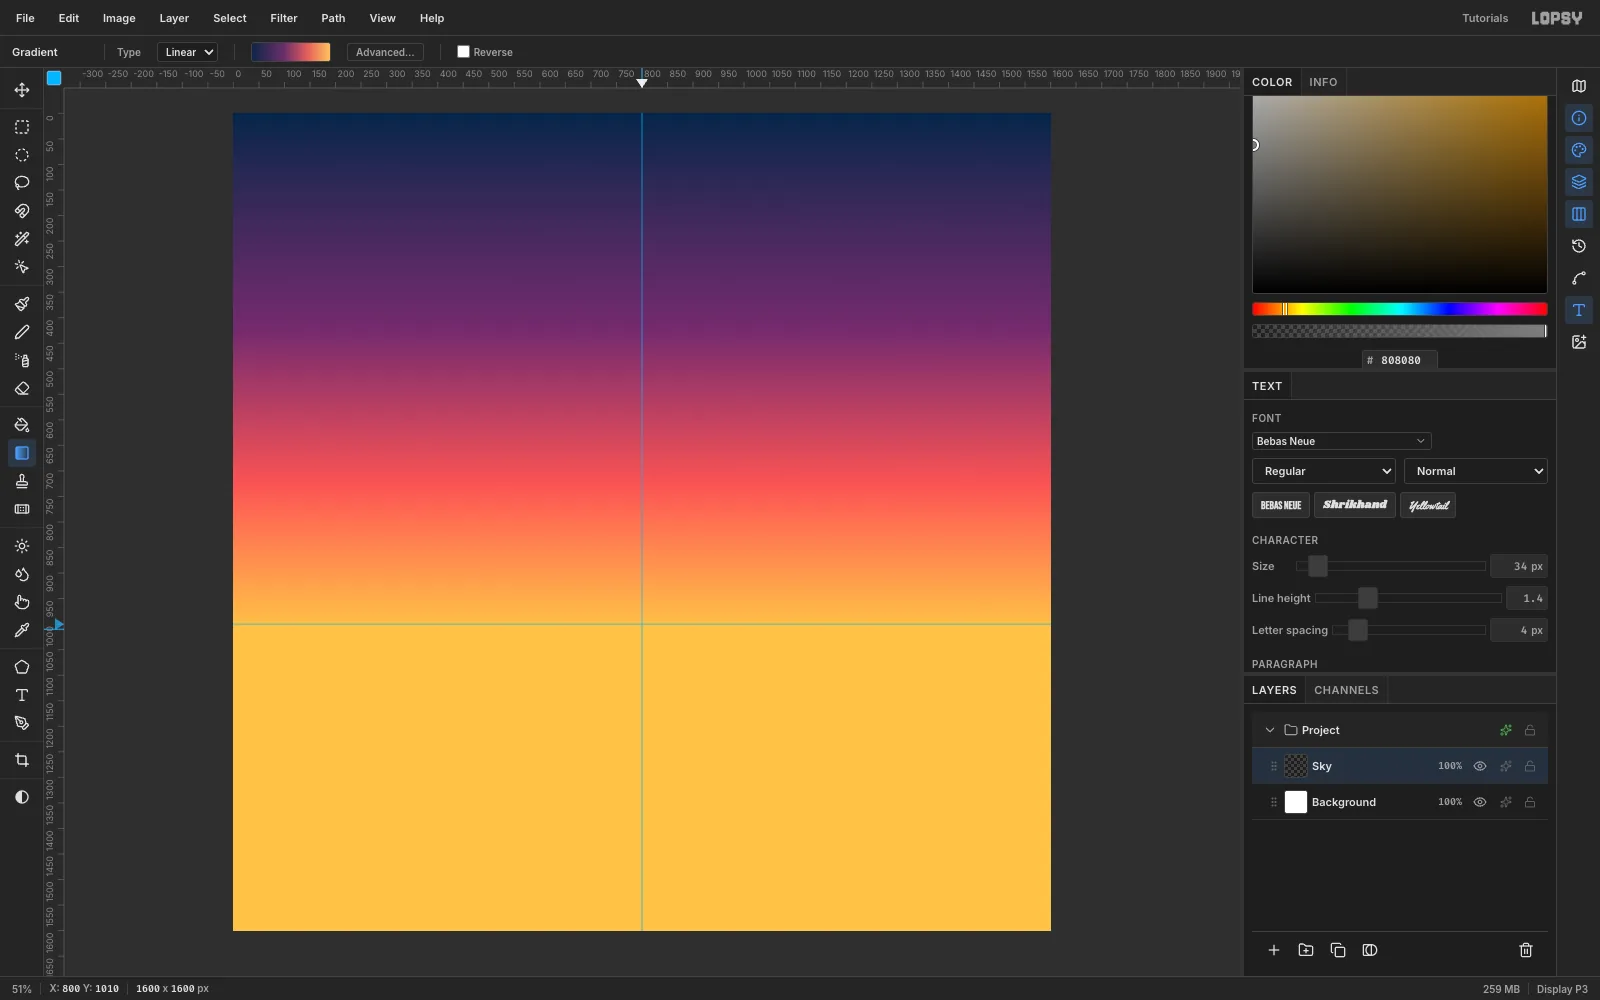
- Pick the Gradient tool, set Type to Linear, and open Advanced…. Make four stops:
#0E2446at 0,#6B2F6Aat 42%,#E8605Aat 72% and#FFC75Eat 100%. - Drag from the top edge straight down to the horizon guide (y 1000).
-
Posterize the sky into ink bands
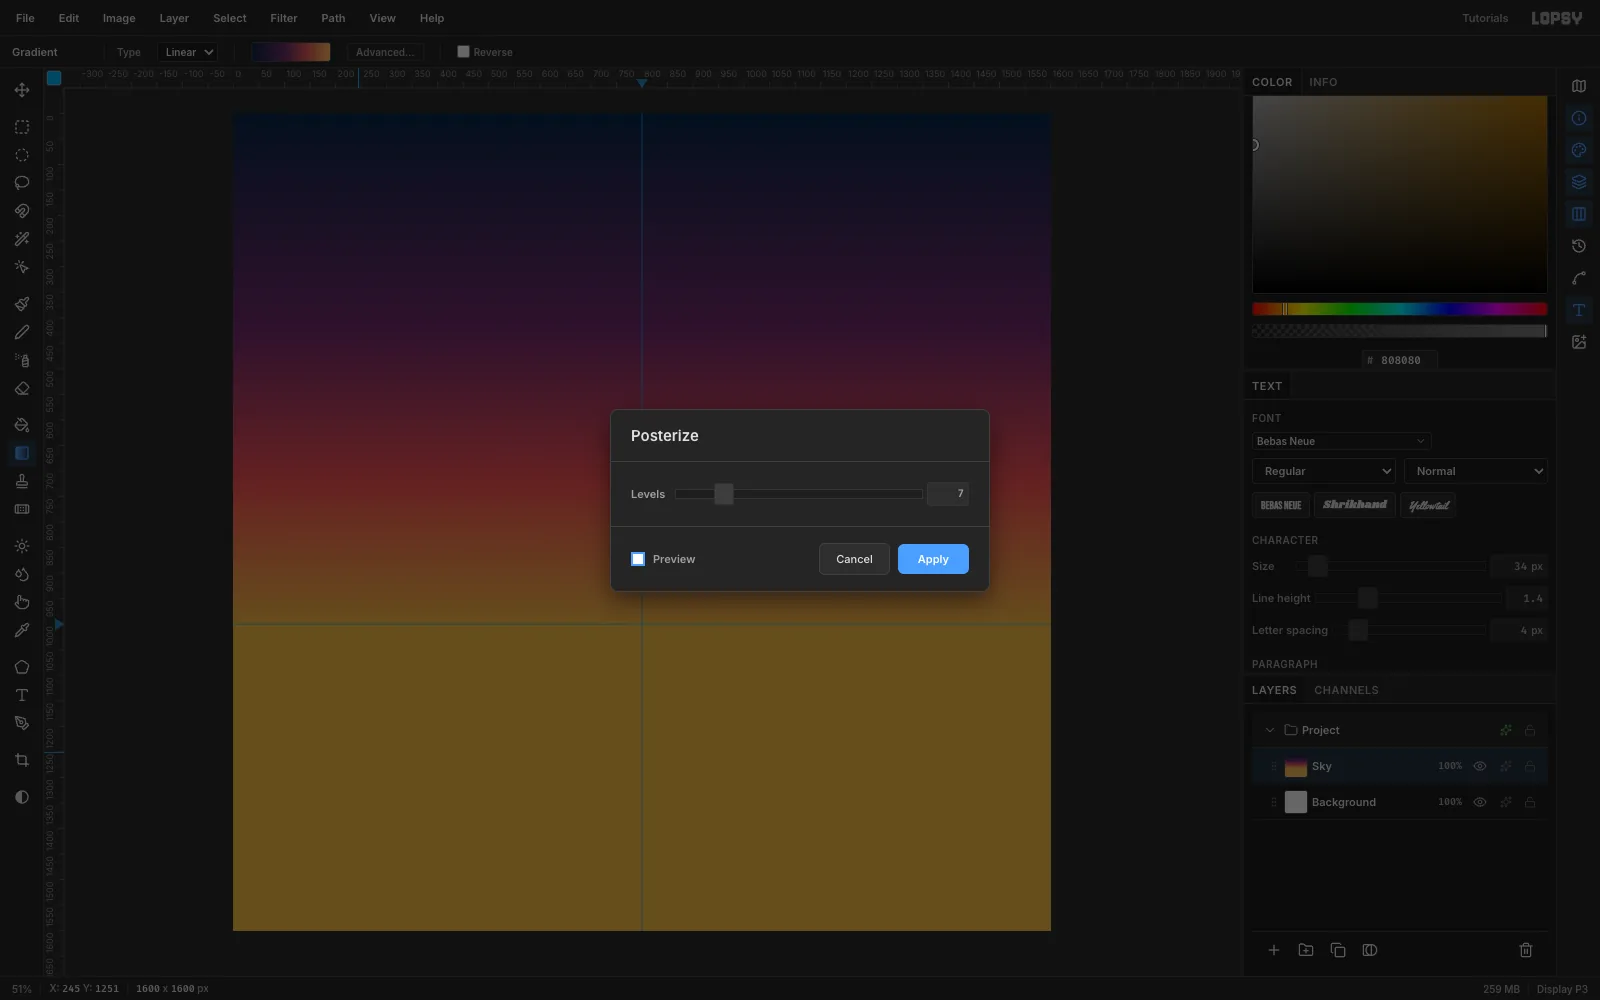
A smooth airbrushed gradient reads as modern. Old covers were printed in a few flat inks.
Choose Filter → Posterize…, set Levels to 7, and click Apply. The band edges come out slightly ragged, like ink on uncoated card.
-
Add the setting sun
Add a layer called Sun.
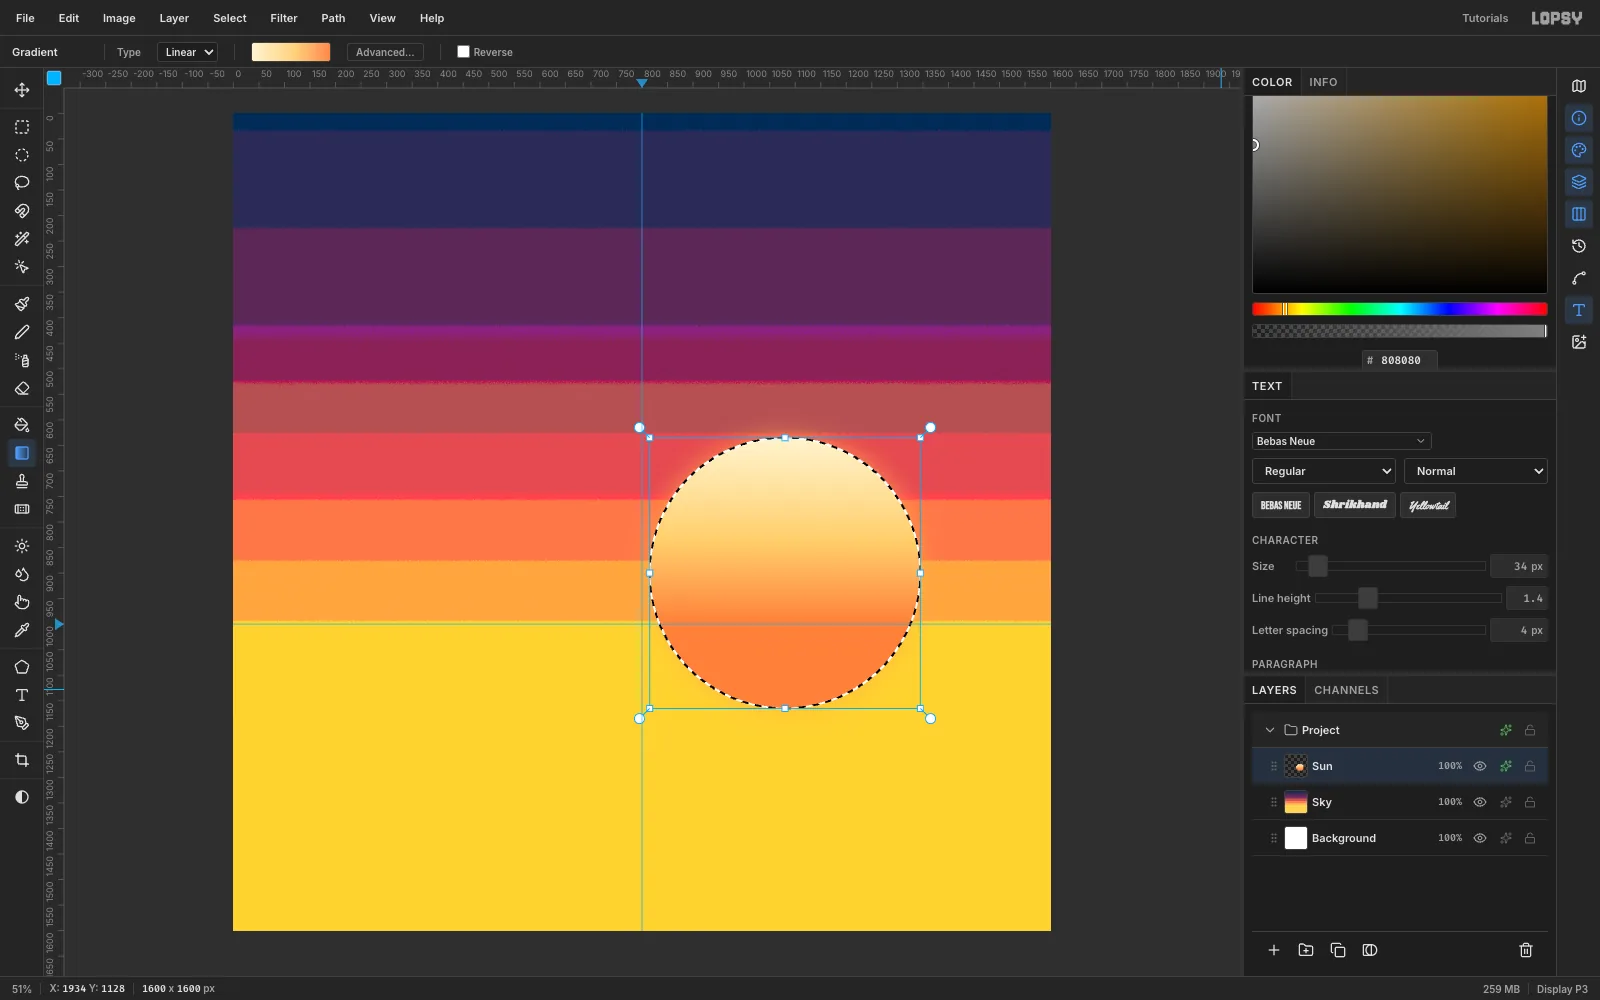
- With the Elliptical Marquee, drag a circle of radius 265 centred at (1080, 900), so its lower third sits below the horizon.
- In the Gradient editor, set the stops to
#FFF4D2,#FFD37Aat 55% and#FF8A4C. Drag from the top of the circle down to y 1000. - Open the layer's effects and turn on Outer Glow: colour
#FFB45A, Size 63, Spread 10, Opacity 70.
The sun sits right of centre so the bungalow can have a clean sky behind it later.
-
Draw streak clouds
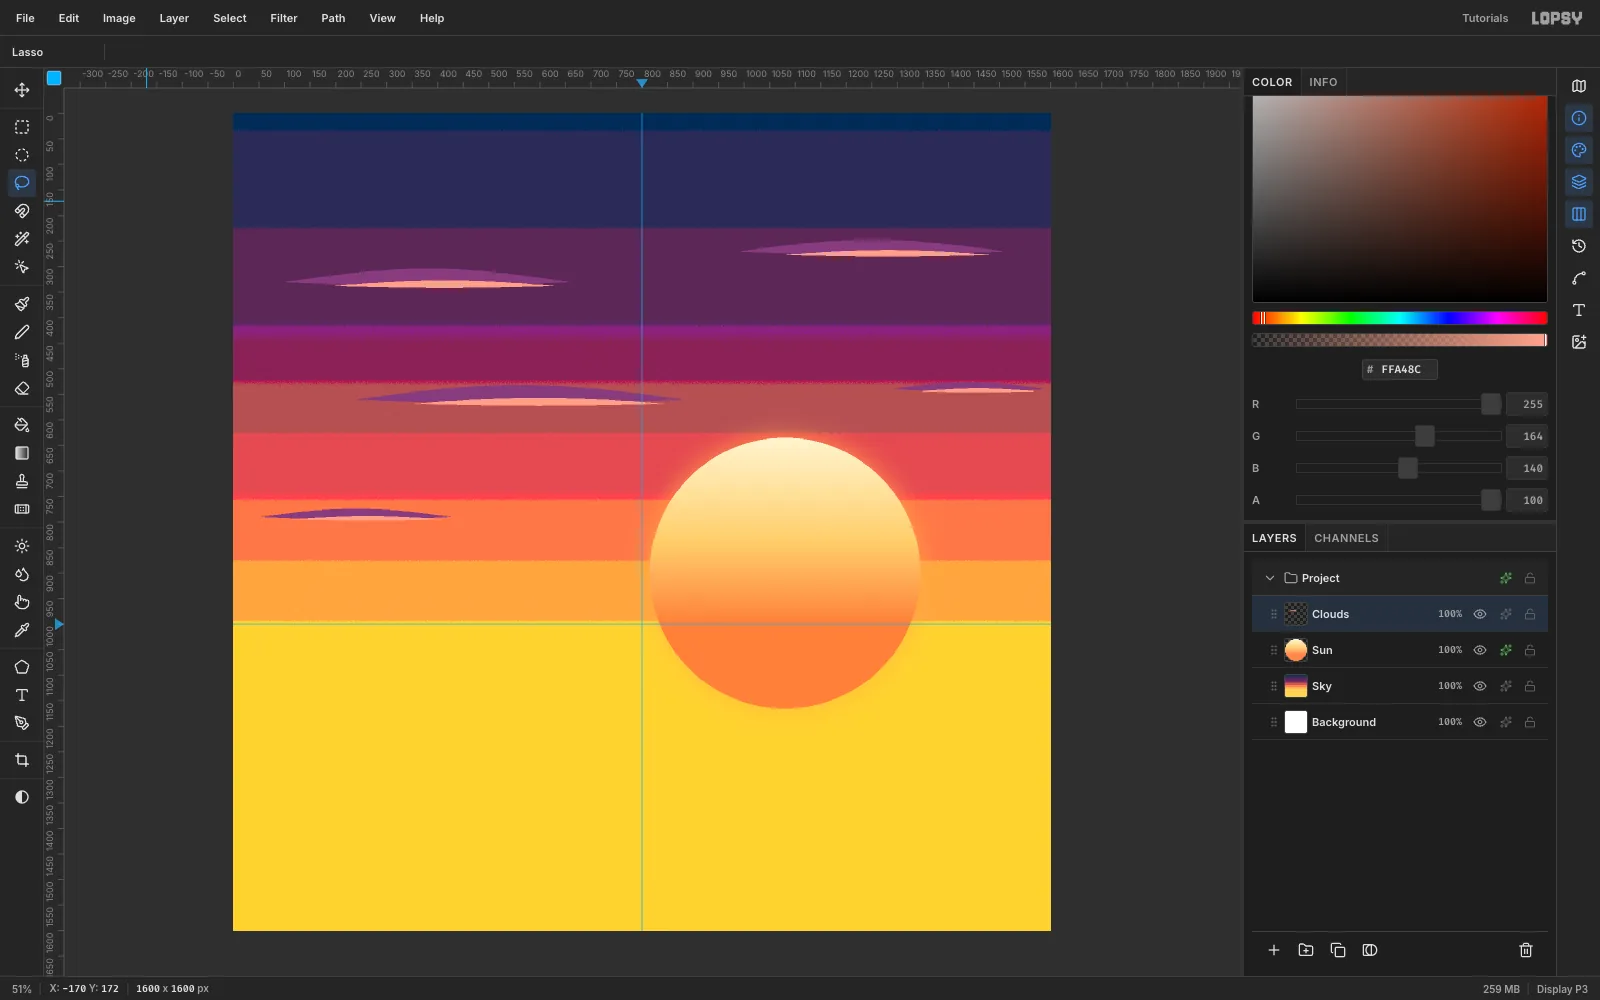
Add a Clouds layer. Travel-poster clouds are long, thin lenses: a curved top and a flatter bottom.
- With the Lasso, trace a 400–650 px lens and Edit → Fill it with
#7E3F7C. Make five of them, and keep them away from the sun. - Inside each one, fill a shorter, thinner lens with
#FFA48Calong its lower edge. This is the sunlit underside.
- With the Lasso, trace a 400–650 px lens and Edit → Fill it with
-
Lay in the sea
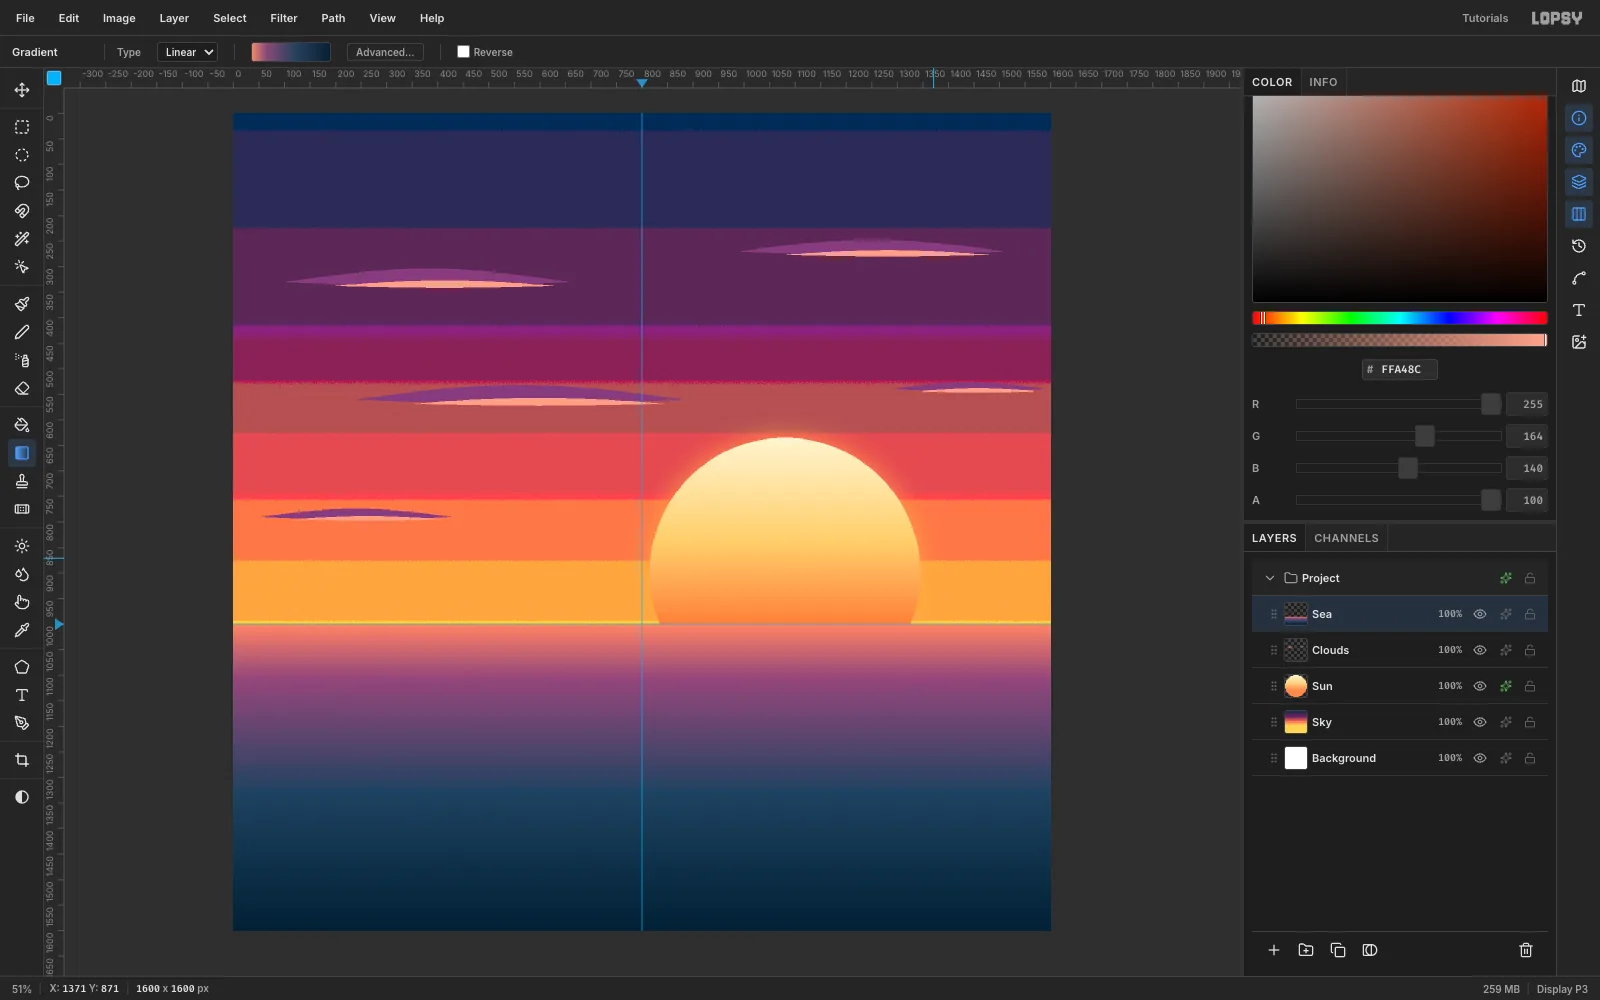
Add a Sea layer and marquee everything below the horizon (y 1000 to the bottom edge). Fill it with a linear gradient from
#F08A6Athrough#8A4A78(18%) and#27405E(55%) to#0A1F33.Leave the sea smooth. Posterize works per channel, and on these hues it throws in grey and green bands.
-
Draw one tile of wave dashes
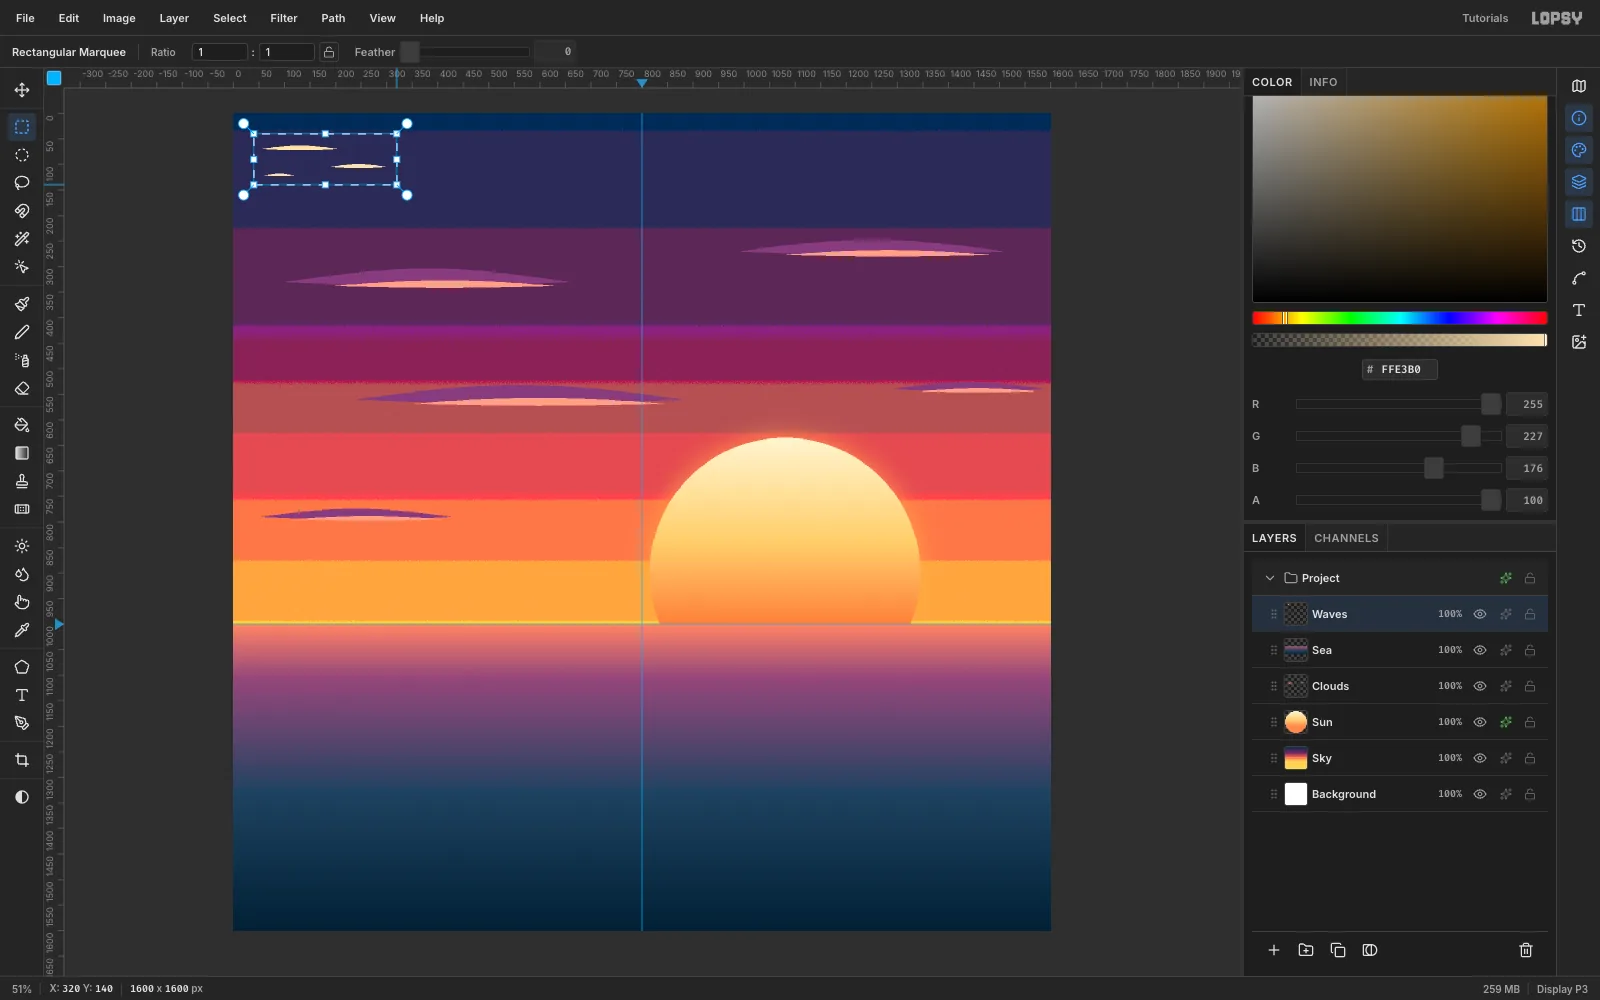
Add a Waves layer. Near the top-left corner, lasso and fill three small lens-shaped dashes in
#FFE3B0, about 150, 110 and 60 px long.- Draw a rectangular marquee from (40, 40) to (320, 140) around them.
- Choose Edit → Define Pattern.
- Press Delete to clear the tile. The pattern stays in the library.
-
Tile the pattern across the sea
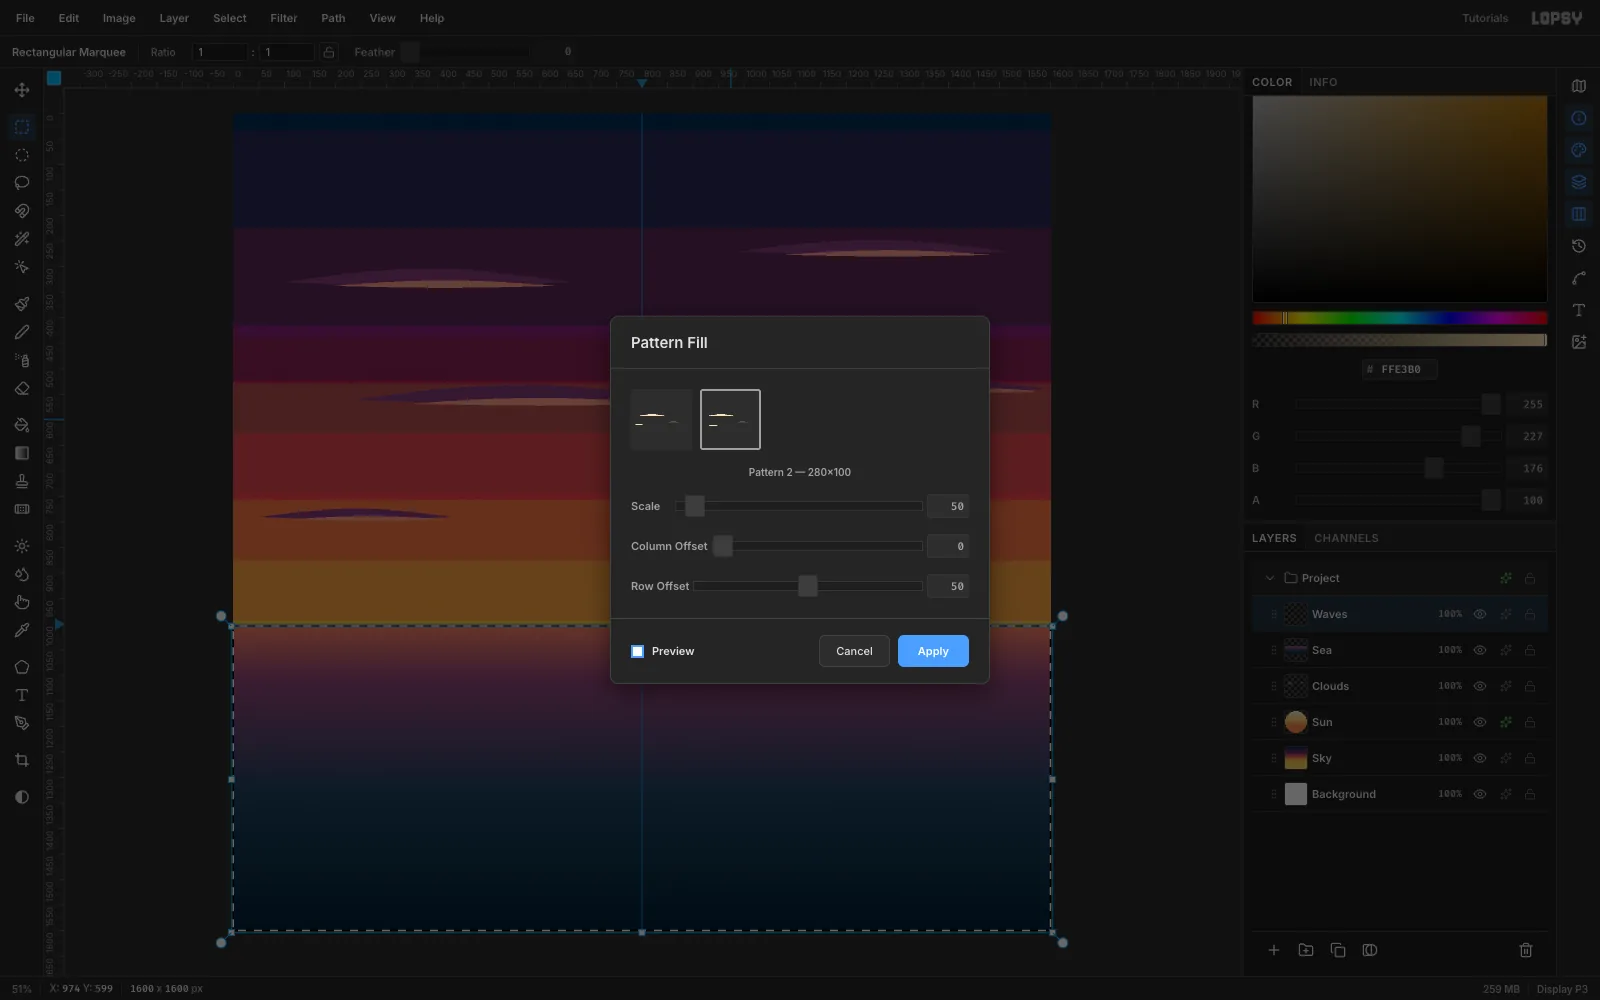
Marquee the sea again, from y 1004 to the bottom. Choose Edit → Fill with Pattern…, pick the newest tile, and set:
- Scale 50
- Row Offset 50, which staggers the columns so the dashes don't line up
Click Apply. The dashes are evenly sized, so the sea still looks like wallpaper. The next step fixes that.
-
Foreshorten the waves with Perspective
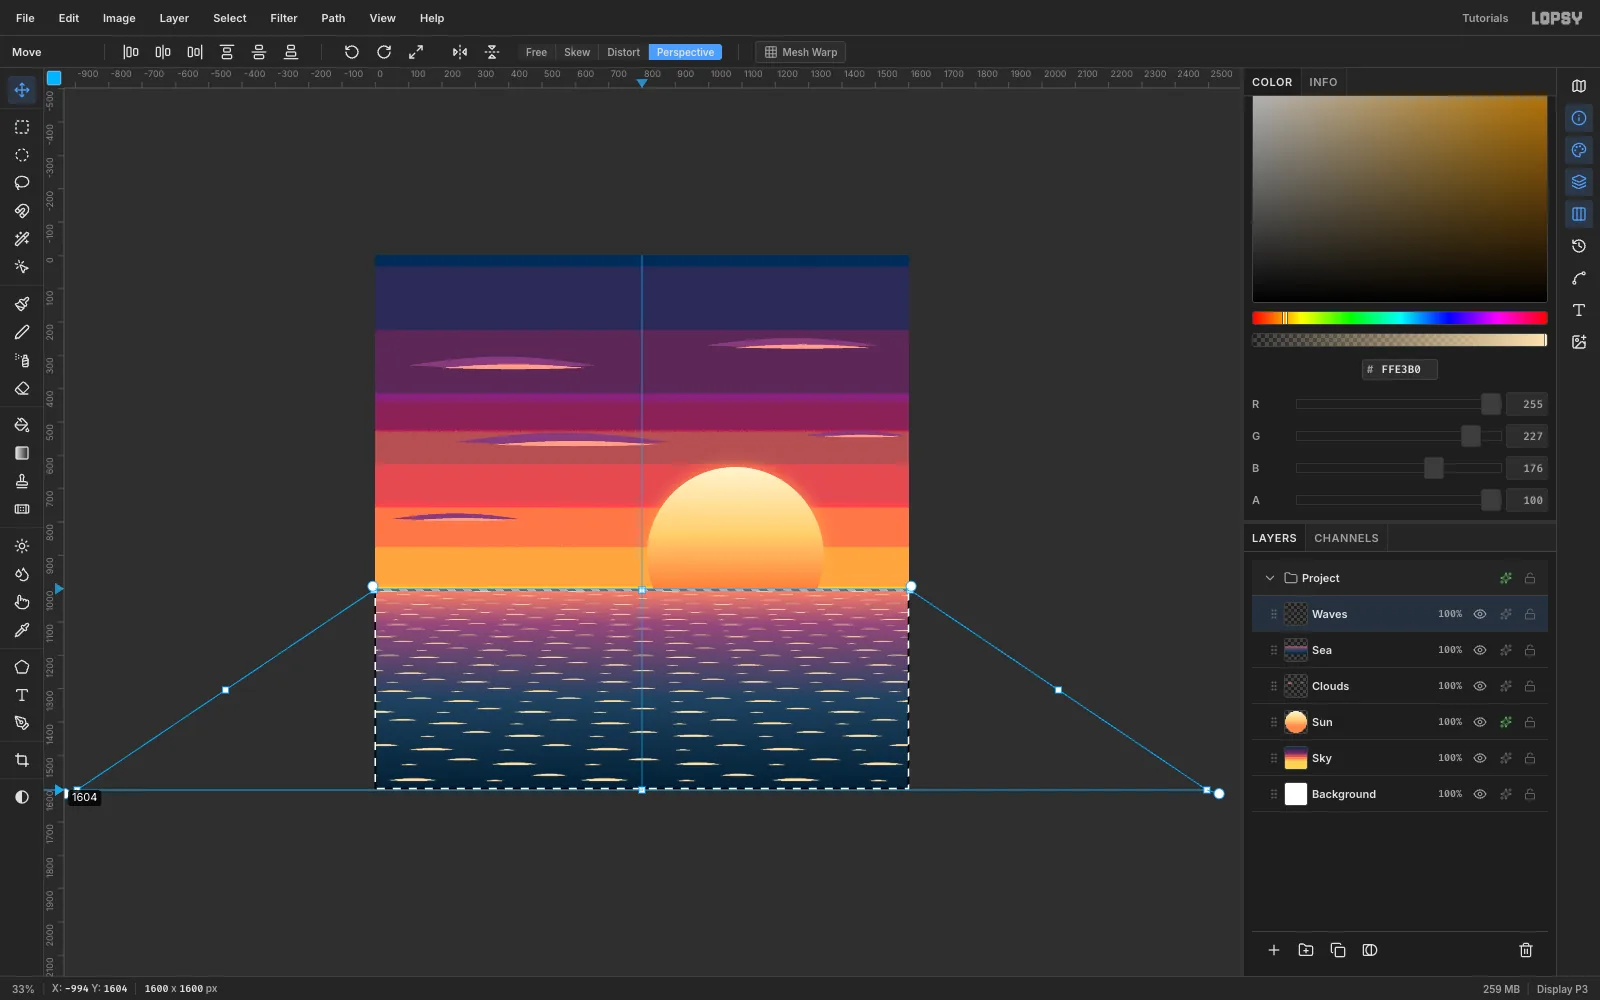
Keep the marquee and switch to the Move tool. Press Cmd+- twice so you can reach past the canvas edge, then choose Perspective in the options bar.
- Drag the bottom-left corner handle a long way left, about 1000 document pixels. The bottom-right corner mirrors it.
- Press Cmd+D to commit, then Cmd+0 to fit the canvas again.
Perspective is a true projective transform. The dashes near the horizon shrink and crowd together, and the ones in the foreground grow. Set the Waves layer to Screen at 45%.
-
Make a glitter path under the sun
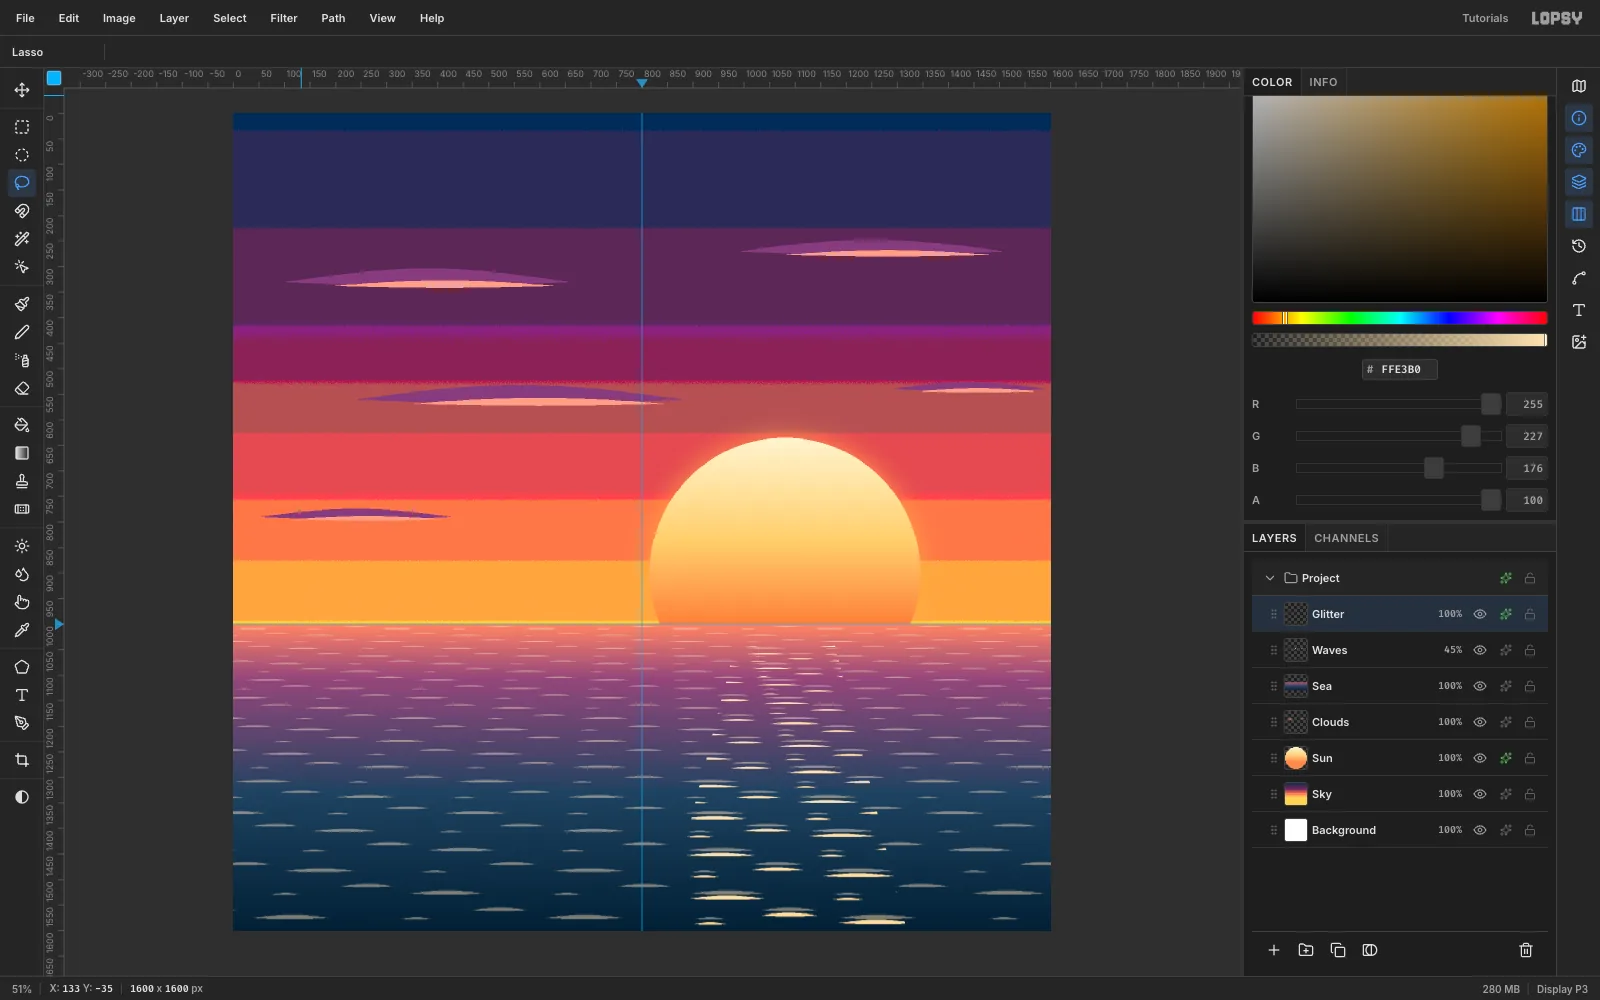
With Waves selected, choose Layer → Duplicate Layer. Rename the copy Glitter, set it to 100% opacity, and add a Color Overlay of
#FFD98A.- Lasso a trapezoid from (945, 996)–(1215, 996) at the horizon down to (790, 1610)–(1370, 1610).
- Choose Select → Feather… with a Radius of 45, then Select → Inverse.
- Press Delete.
Only a soft-edged path of gold dashes remains, widening toward the viewer.
-
Draw the first palm
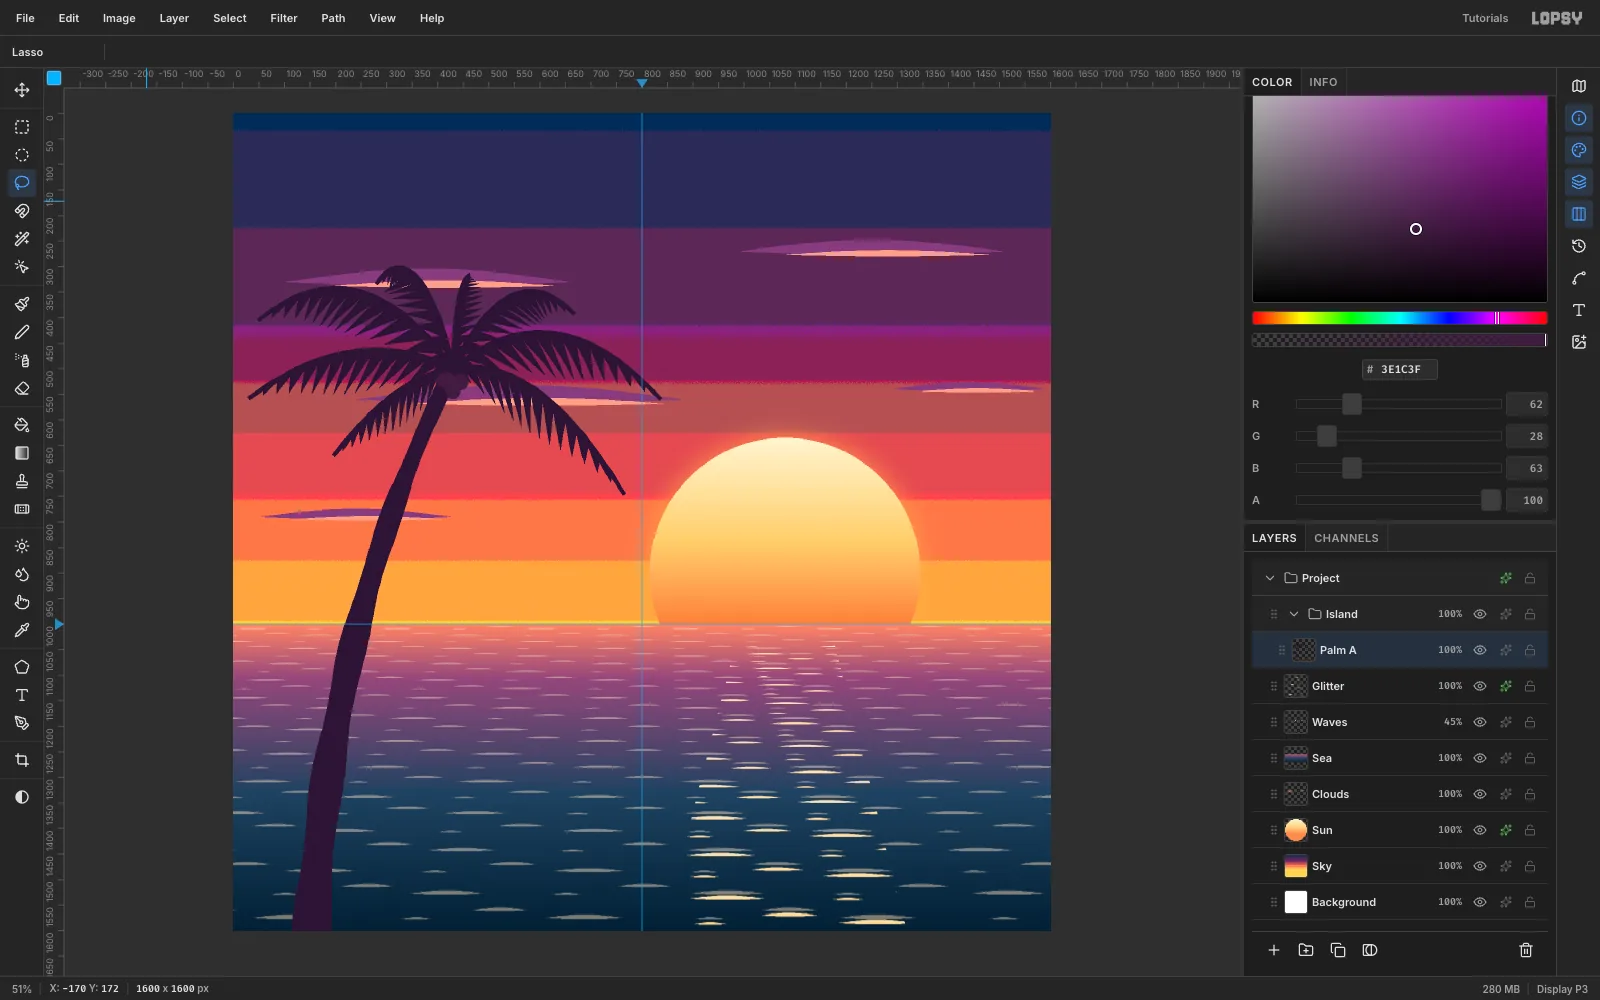
Select Glitter and click New Group. Name the group Island, then add a layer inside it called Palm A. Use plum
#2A1433for everything.- Trunk: lasso a long, gently curved taper from off the bottom-left edge (about 70 px wide) up to a crown at about (430, 500), where it's about 26 px wide.
- Fronds: lasso eight arched crescents radiating from the crown. Each one has a smooth top edge and a saw-toothed lower edge of leaflets that hang down and sweep toward the tip. Make them 240–440 px long, and let the side fronds droop further than the top ones.
- Coconuts: fill three small overlapping circles under the crown in
#3E1C3F.
Hanging leaflets on arched stems are what make it read as a coconut palm. If the leaflets stick out straight on both sides, it looks like a pine branch.
-
Copy, flip and scale the second palm
There's no need to draw the second palm from scratch.
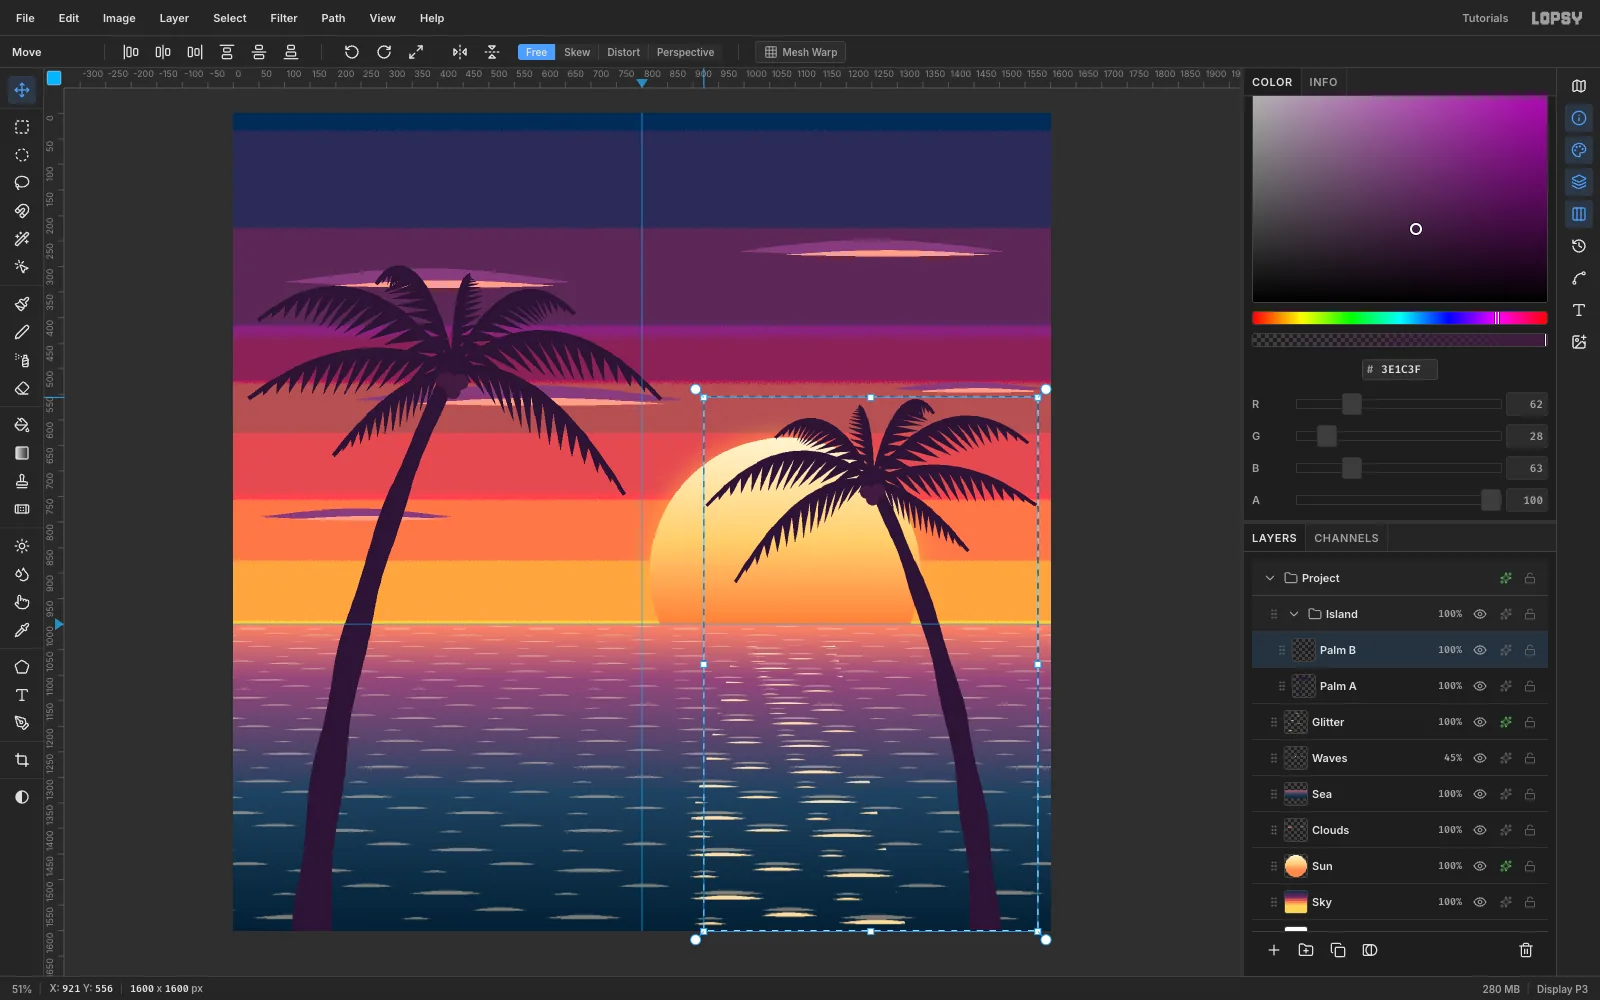
- Marquee the whole canvas, then Cmd+C and Cmd+V. Rename the pasted layer Palm B.
- Marquee the canvas again and, with the Move tool, click Flip Horizontal. Press Cmd+D.
- Marquee the new palm. Hold Cmd and drag its top-left corner handle toward the opposite corner, to about 80% (Cmd keeps the scale uniform). Press Cmd+D.
- Marquee it once more and drag it about 190 px right, so the crown sits over the right side of the sun and the trunk leaves the canvas at the right edge.
-
Build the stilt bungalow
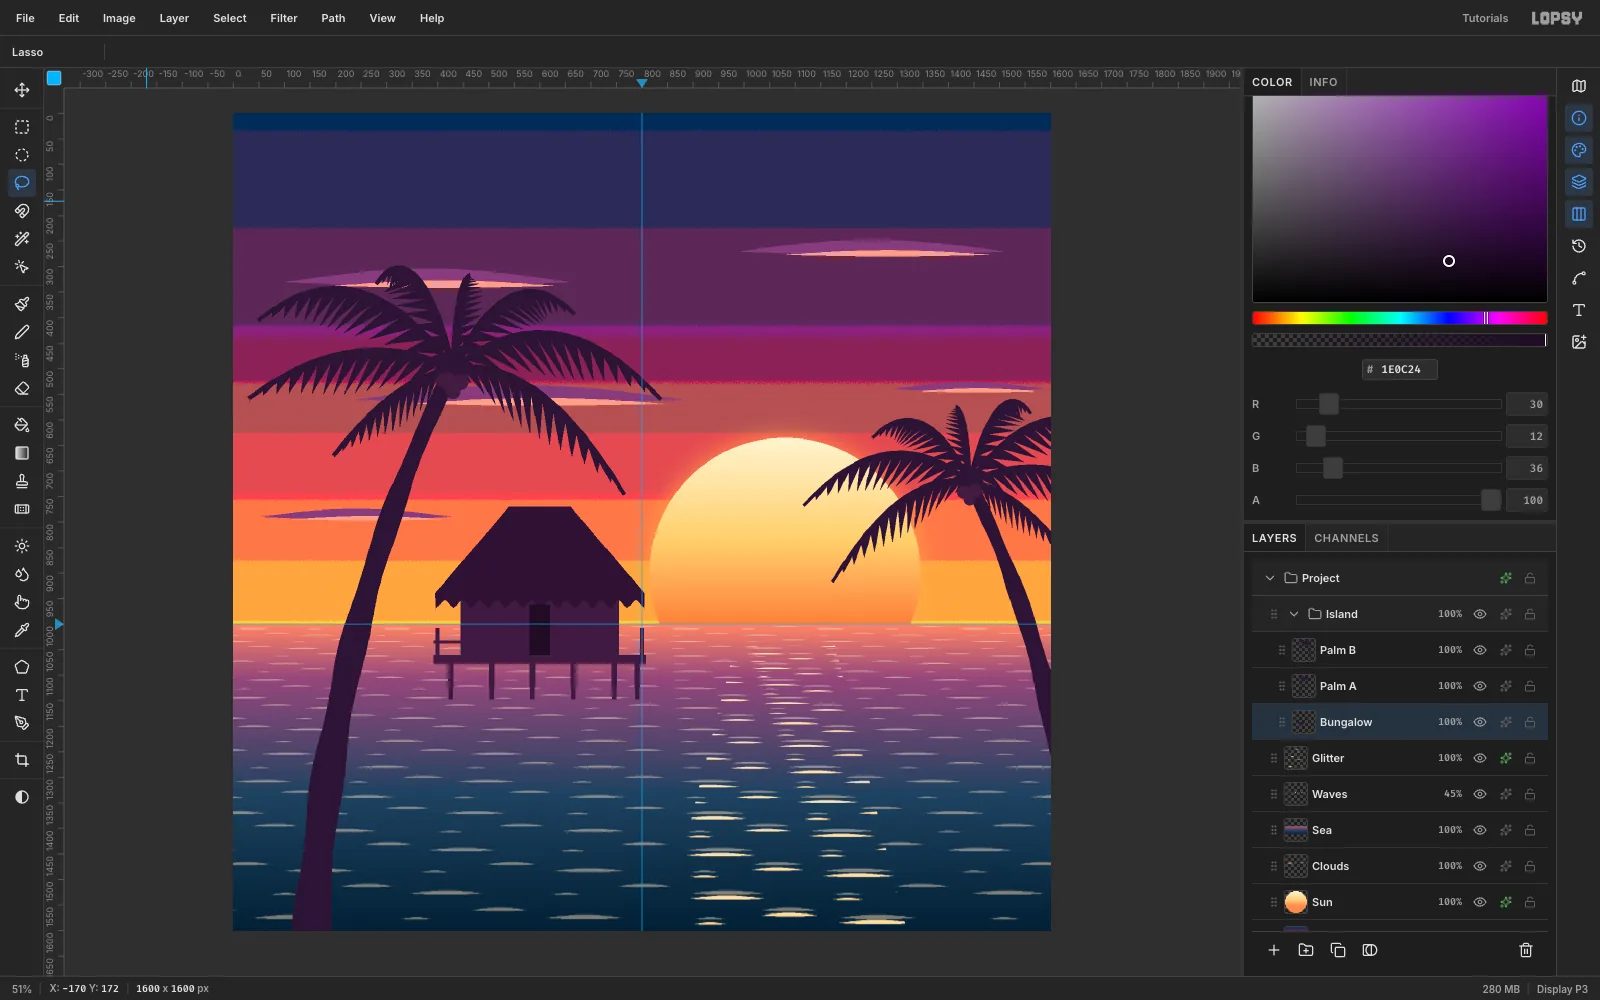
With Palm A selected, add a Bungalow layer and fill lasso shapes:
- Walls, deck, rail, six stilts and two torch posts:
#3B1B40. The walls span x 445–755 and y 935–1062. The deck is at y 1060–1078. The stilts run down to y 1148. - Roof:
#2B1333, a hip roof from a 120 px ridge at y 770 out to eaves at x 395 and 805. Its lower edge zig-zags in 17 px steps for the thatch fringe. - Door:
#1E0C24.
Drag the Bungalow row below Palm A by its grip, so the palm trunk passes in front of the hut.
- Walls, deck, rail, six stilts and two torch posts:
-
Add thatch texture with Fibers
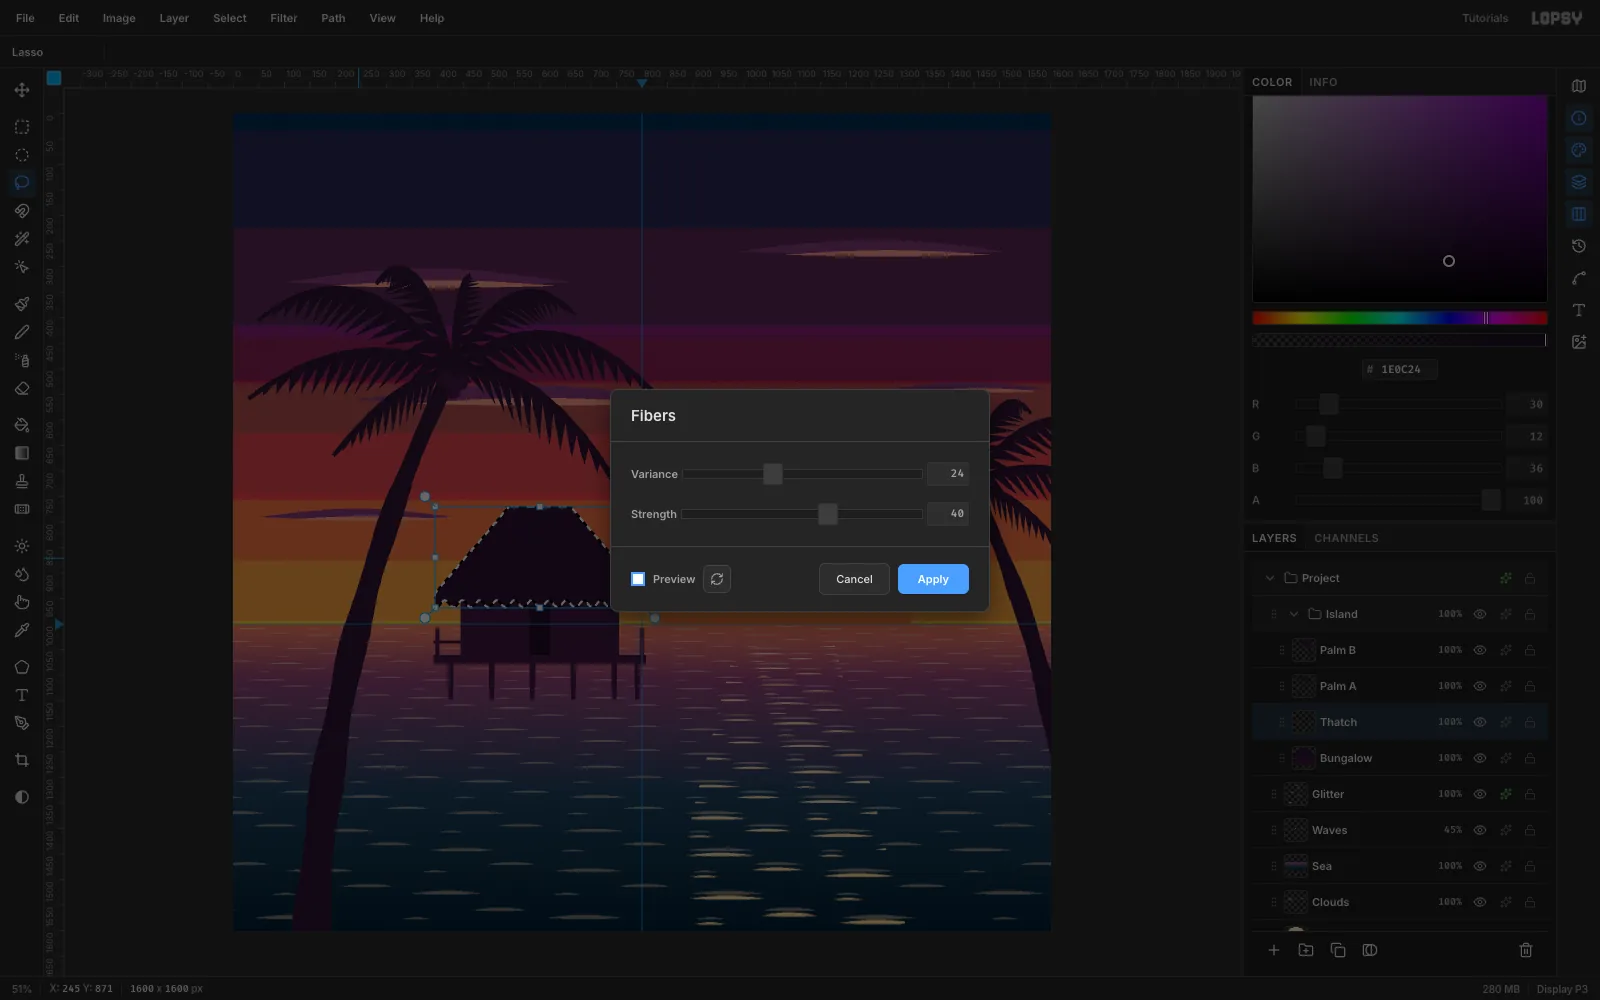
Add a Thatch layer above Bungalow and lasso the roof shape again. Choose Filter → Fibers… and set Variance 24 and Strength 40. The filter only fills the selection.
Deselect, set the layer to Overlay, and set it to 55%. The strands now read as straw on the dark roof.
-
Light the windows and torches
Add a Lamps layer above Thatch and fill two window rectangles and two small flame shapes on top of the torch posts, all in
#FFC46B.Turn on Outer Glow: colour
#FF9A48, Size 40, Spread 5, Opacity 85. These warm points are the second focal point after the sun.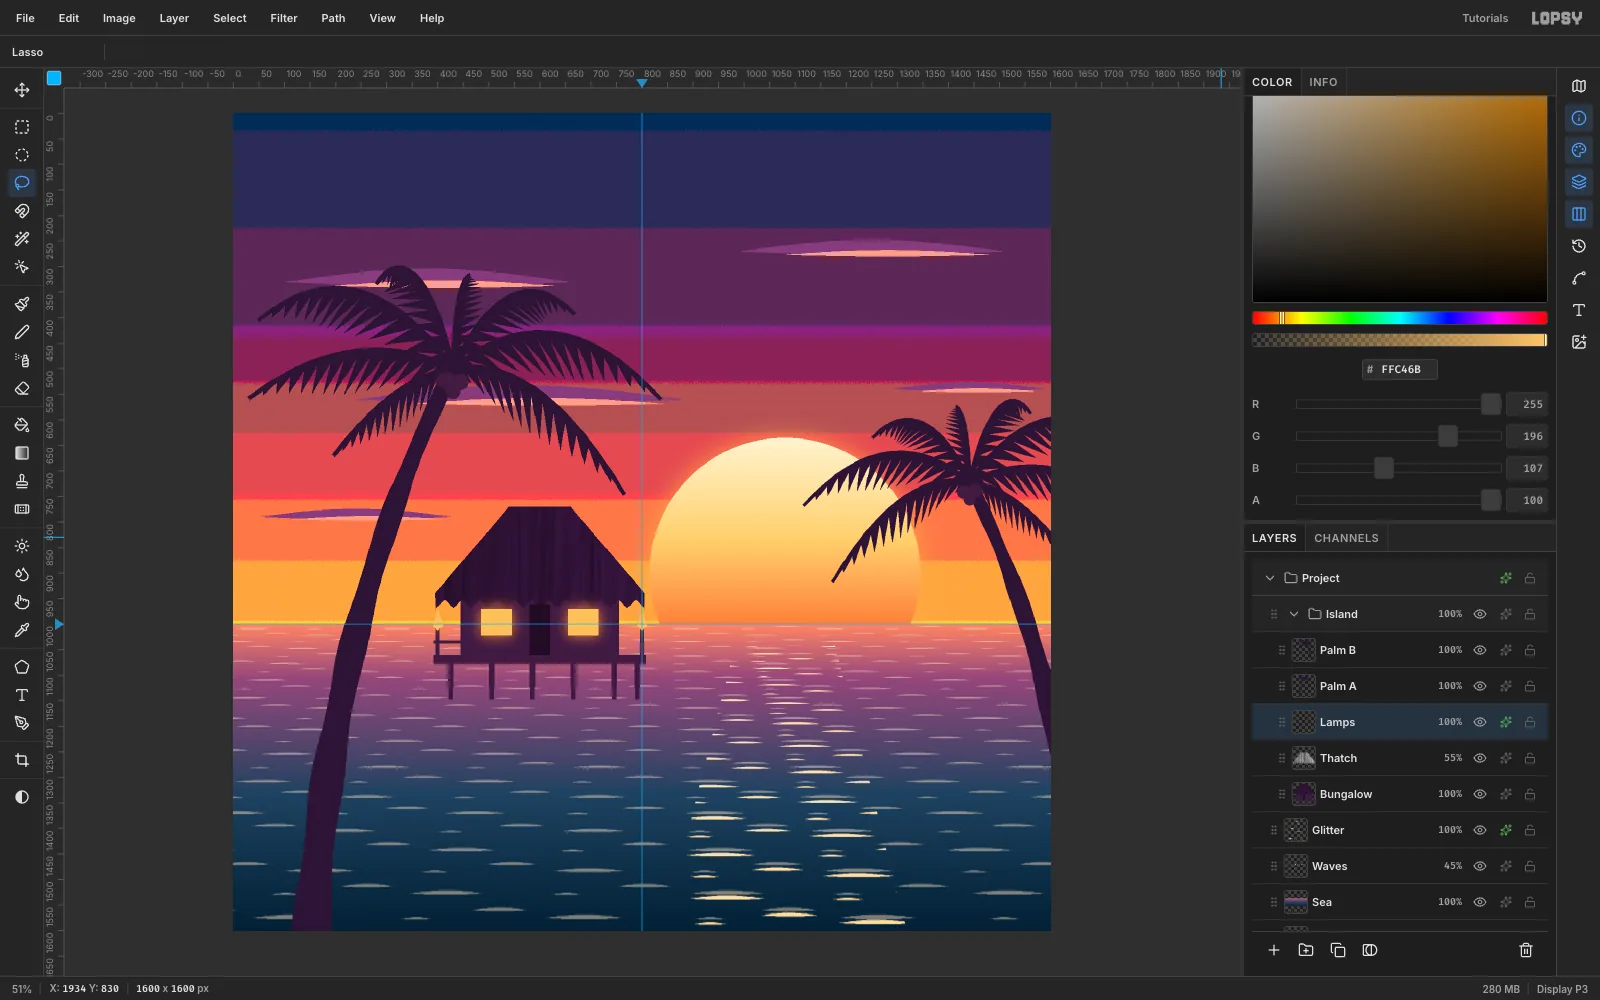
-
Reflect the stilts in the water
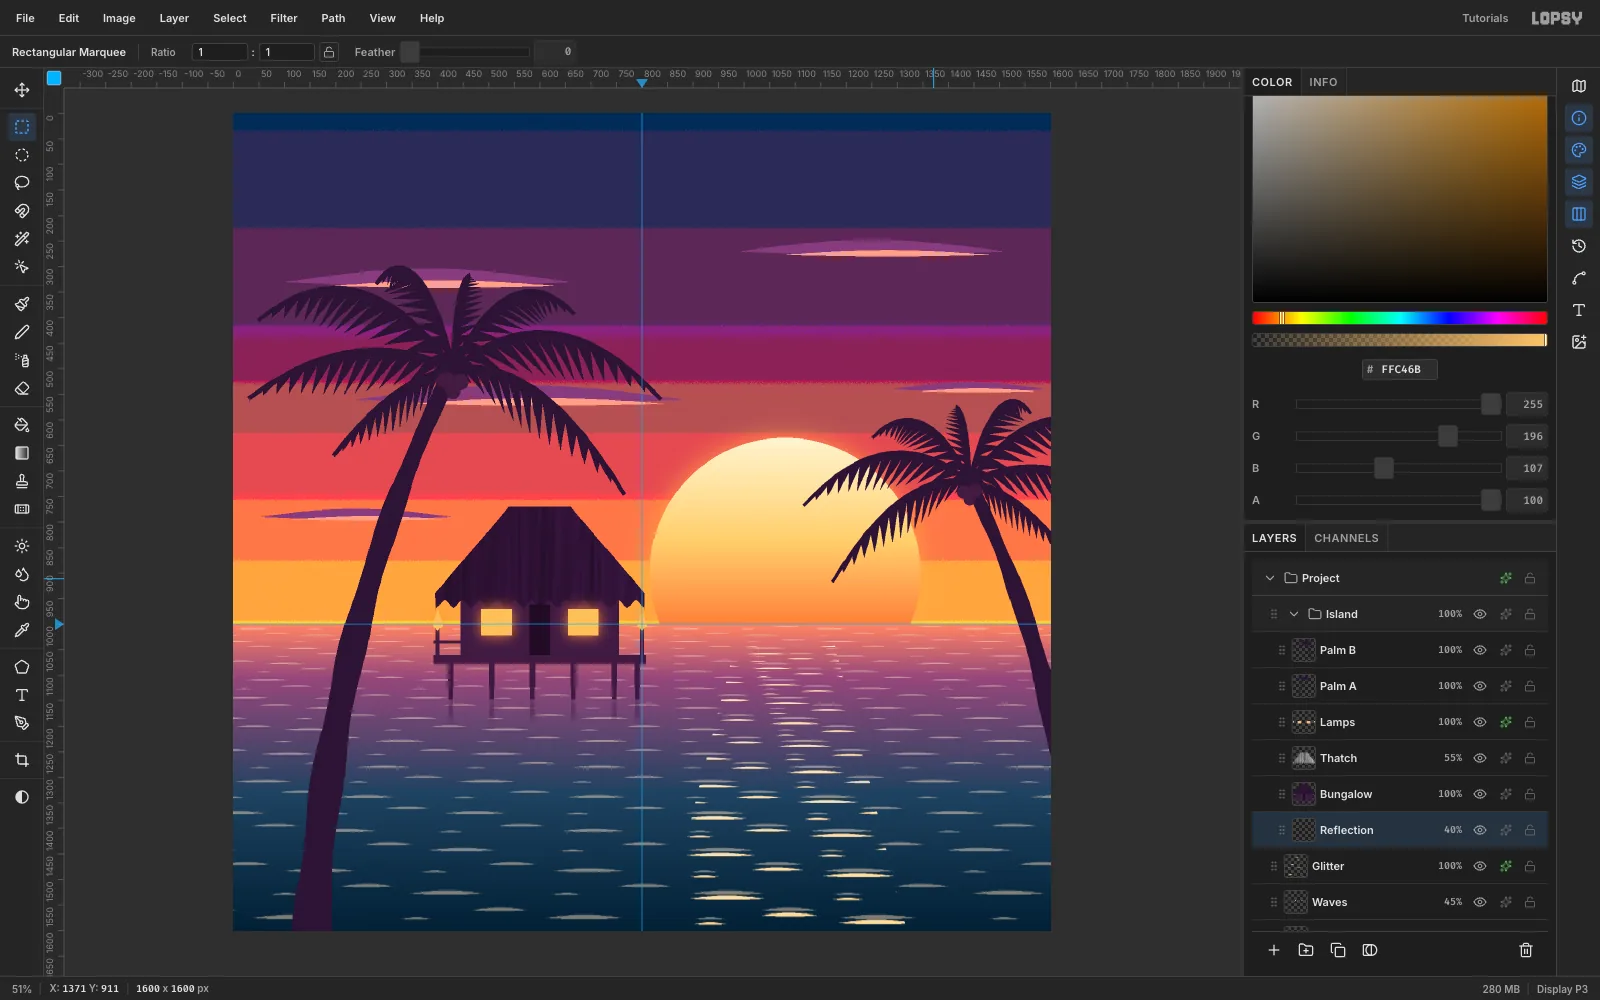
- Duplicate the Bungalow layer and rename the copy Reflection.
- Marquee around the hut and click Flip Vertical in the Move options. Press Cmd+D.
- Use the arrow keys (Shift moves 10 px) to nudge the flipped copy until its top meets the stilt bottoms at y 1149.
- Marquee everything below y 1225, Feather it by 40, and press Delete. Only the stilt reflections are left, and they fade out before the title area.
- Run Filter → Motion Blur… with an Angle of 90 and a Distance of 18. Set the layer to 40% and drag it below Bungalow.
-
Paddle out a canoe
Add a Canoe layer and lasso these shapes in
#2A1433:- An upturned hull about 320 px long, with its waterline at y 1112
- A seated figure with a conical hat and one arm reaching to the paddle
- An angled paddle and a thin outrigger float
Below it, on a Canoe Wake layer at 45%, fill a very thin 380 px lens in
#1B0F2A. Placing the canoe on the glitter path makes it read as a silhouette.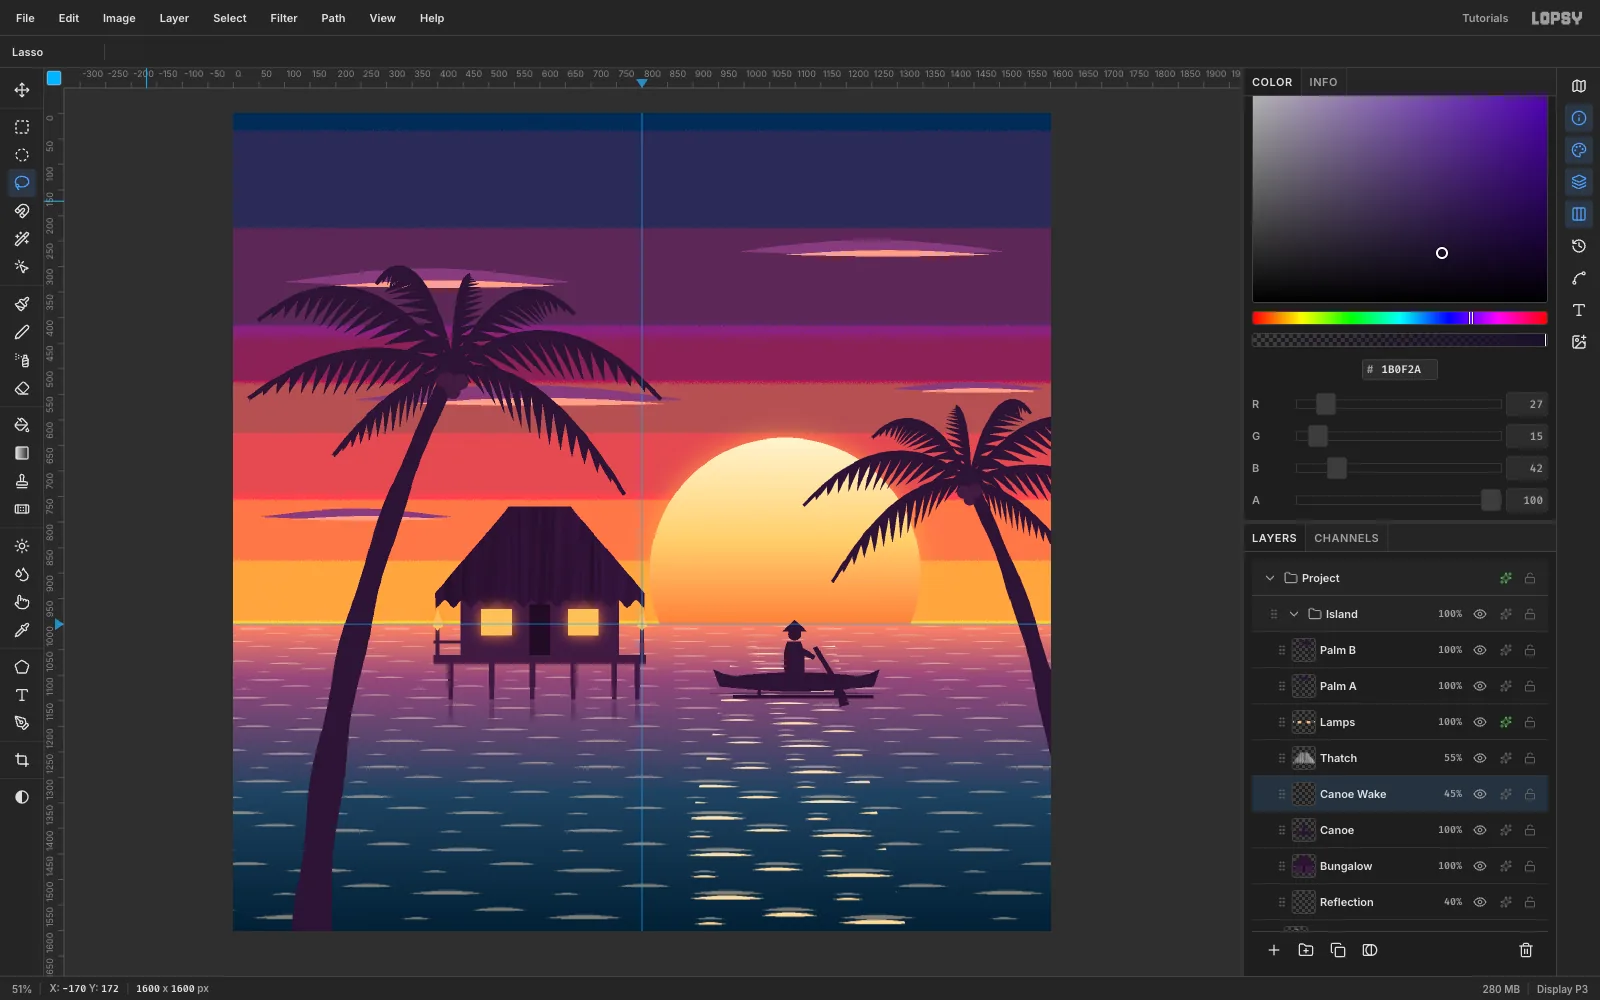
-
Start the trade-dress band
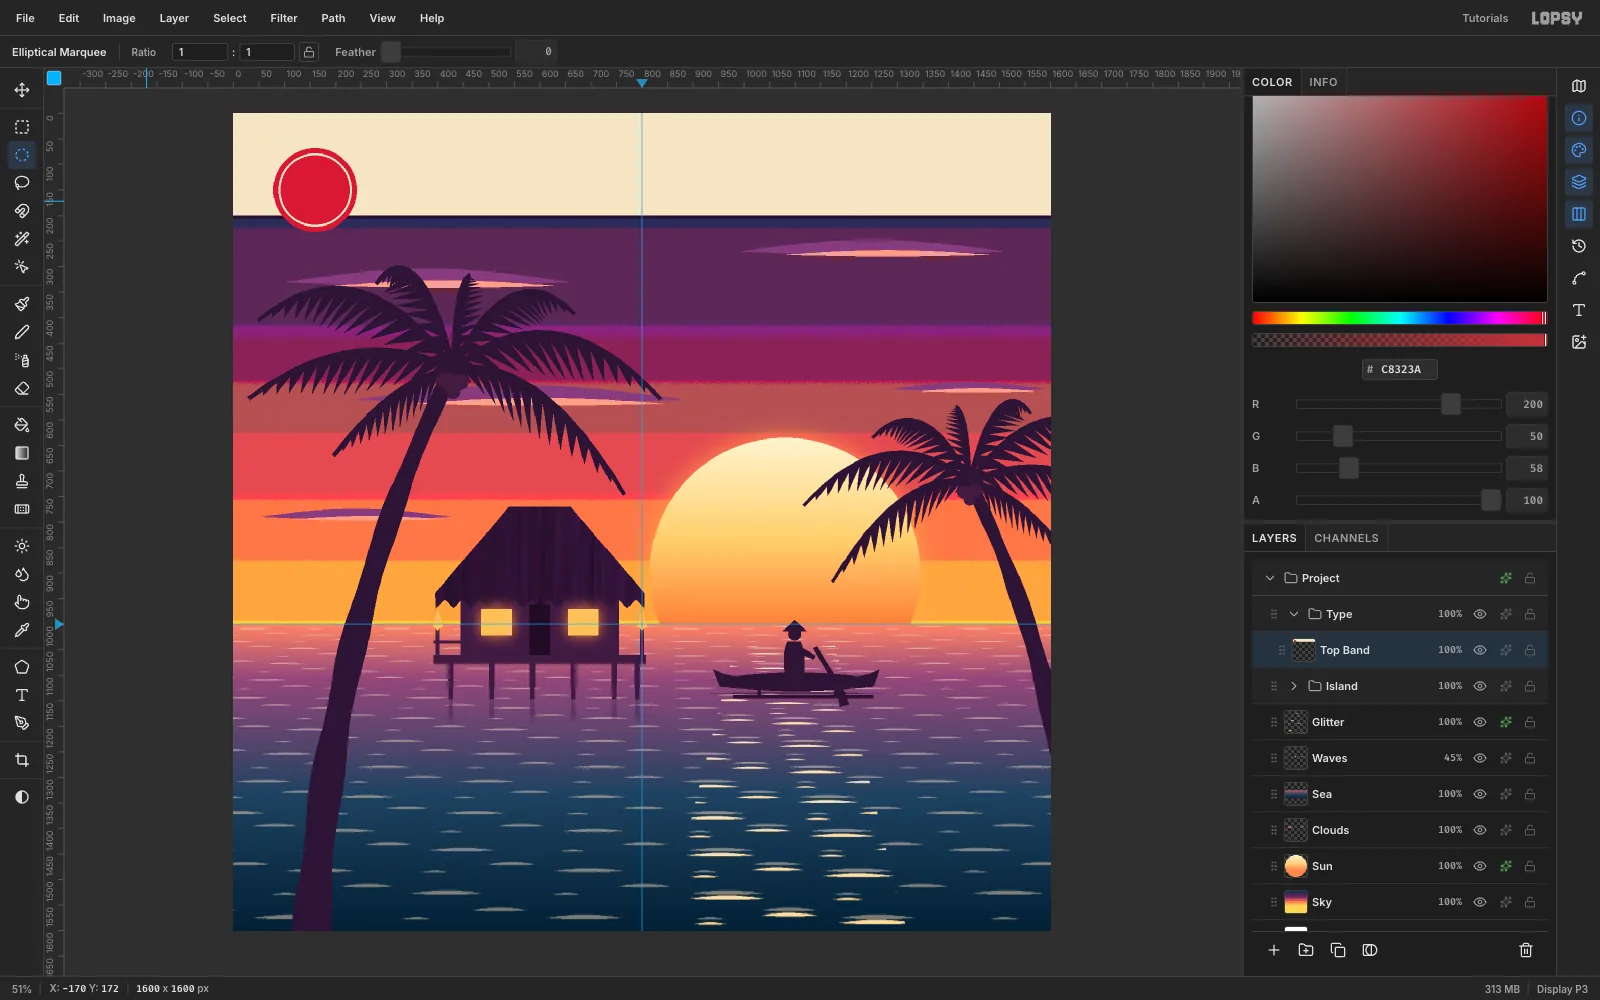
Collapse Island. Select Glitter, click New Group, name it Type, and drag its row above Island. Inside Type, add a layer called Top Band.
- Fill a rectangle from the top edge down to y 200 with
#F4E6C8, then a rule from y 200 to 206 with#24102E. - Build the badge from three stacked Elliptical Marquee fills centred at (160, 150): red
#C8323Aat radius 82, cream at 72, and red again at 68. The result is a red disc with a thin cream ring.
- Fill a rectangle from the top edge down to y 200 with
-
Cut the badge onto its own layer
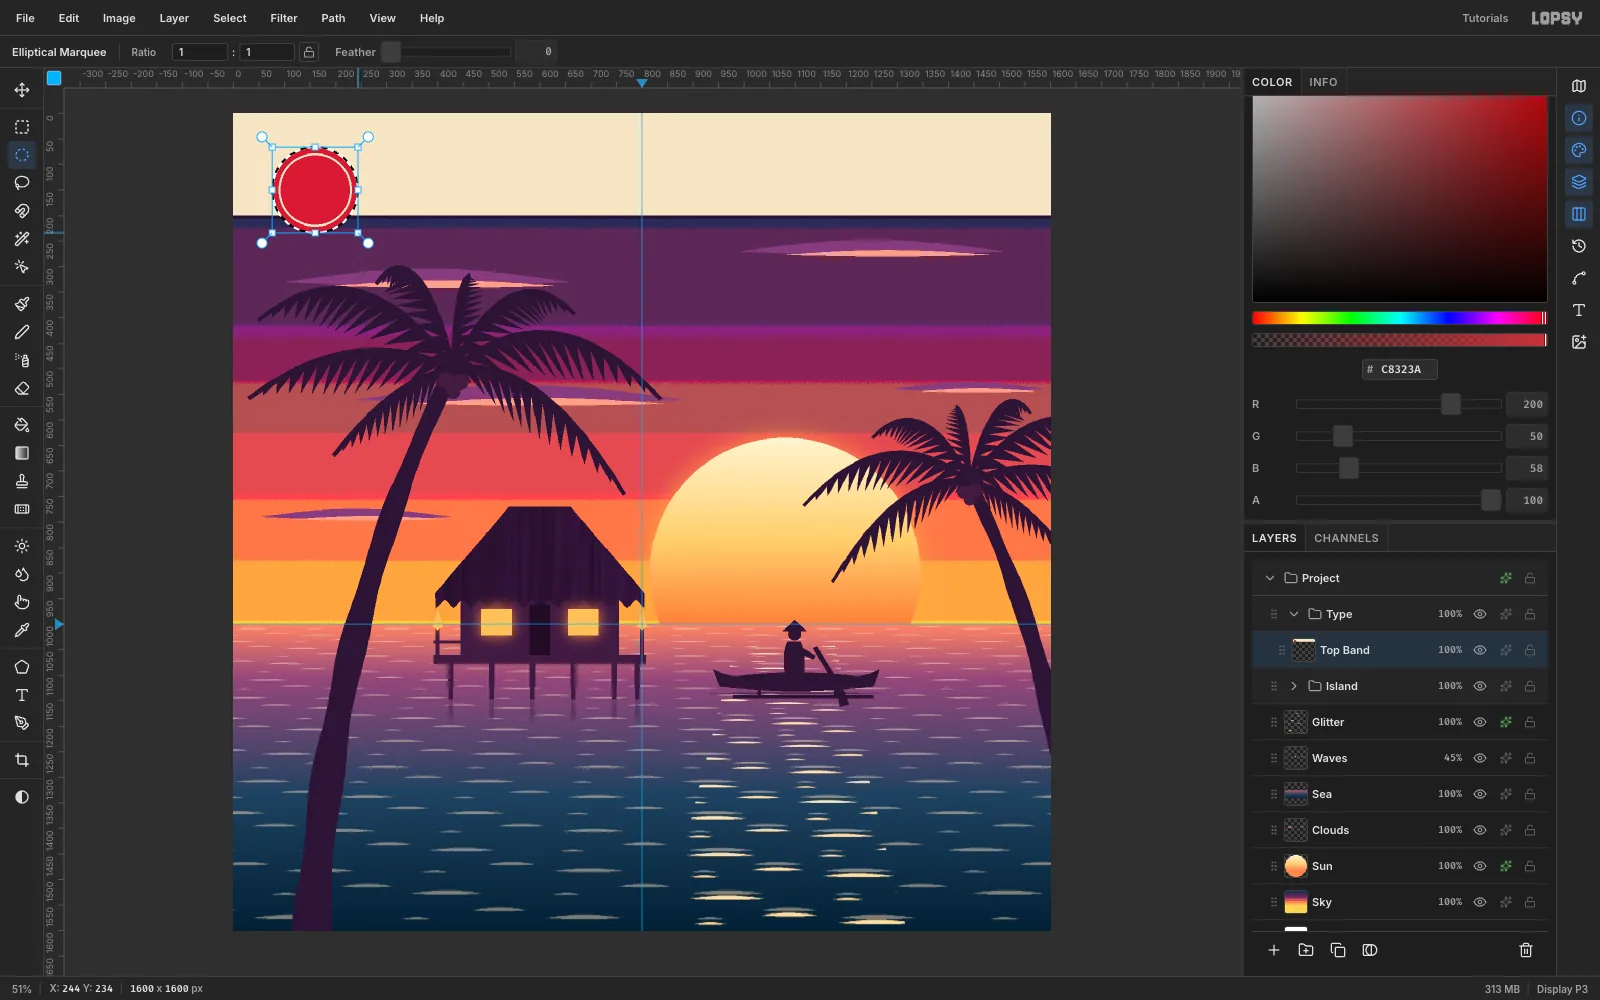
The badge needs to rotate on its own, so move it off the band. Marquee a circle of radius 84 around it and press Cmd+X. Wait a moment, then press Cmd+V. The badge pastes back in place on a new layer. Rename it Badge.
-
Letter and tilt the badge
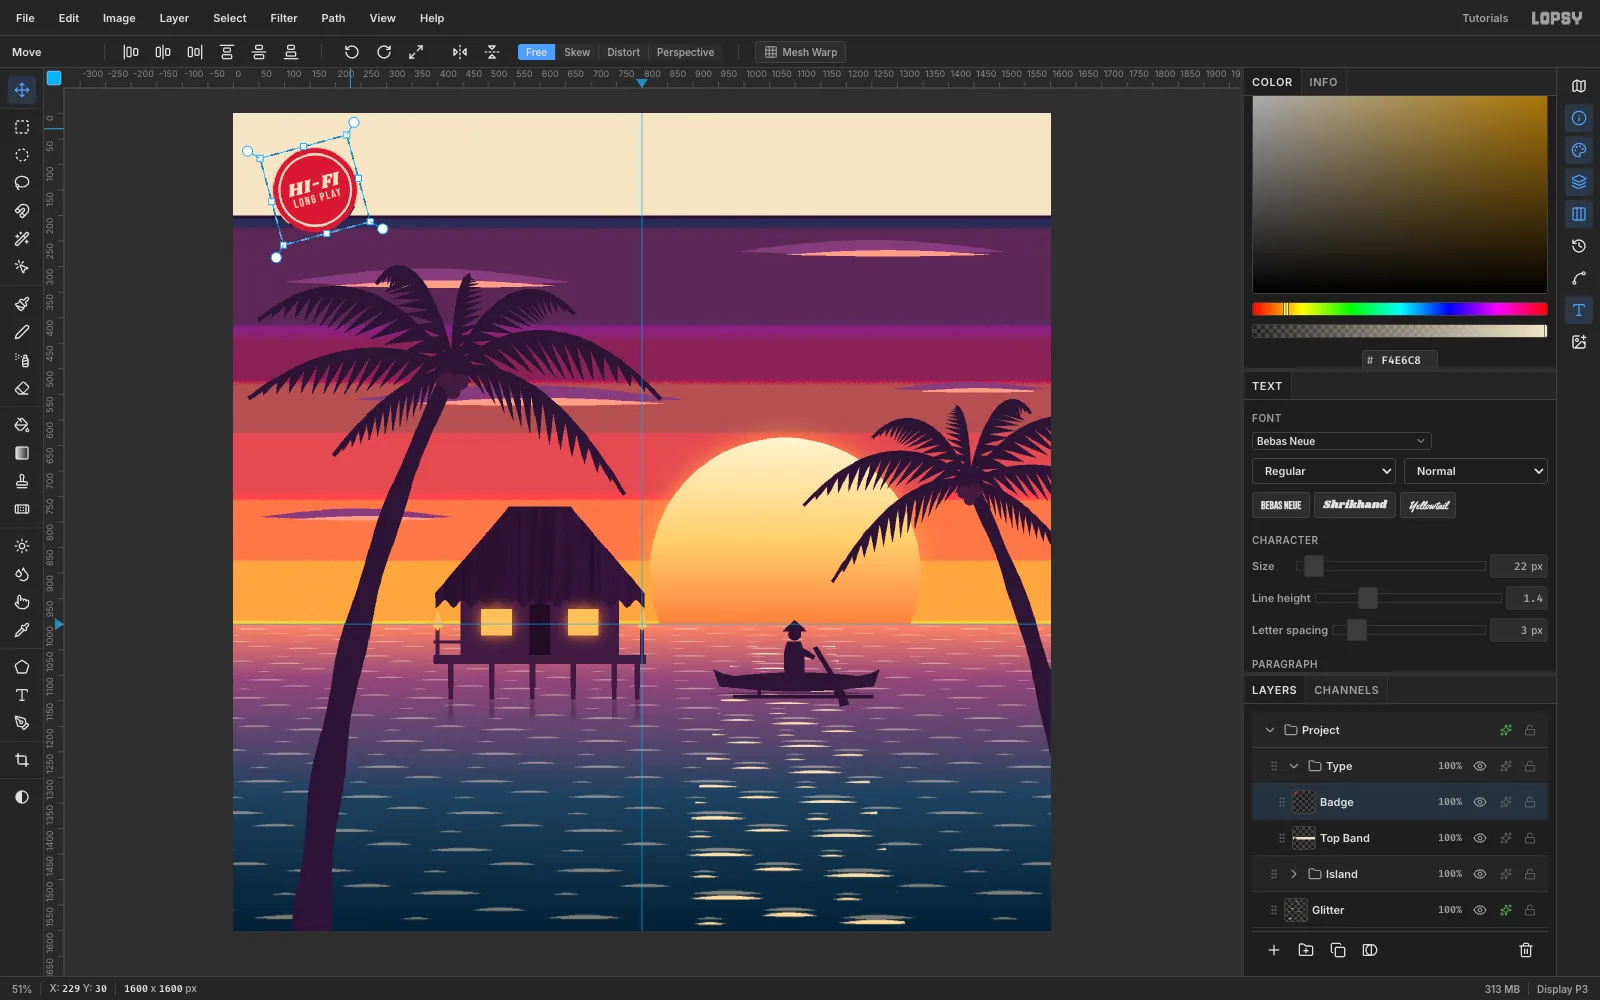
Set HI-FI in Shrikhand at 36 px and LONG PLAY in Bebas Neue at 22 px with 3 px letter spacing, both in
#F4E6C8. Create each one in empty canvas, then nudge them so the pair is centred on (160, 150).- Select each text layer and click Rasterize Layer, then use Layer → Merge Down twice so both land on Badge.
- Marquee the badge. With the Move tool, drag a corner rotation handle about −15°. Press Cmd+D.
-
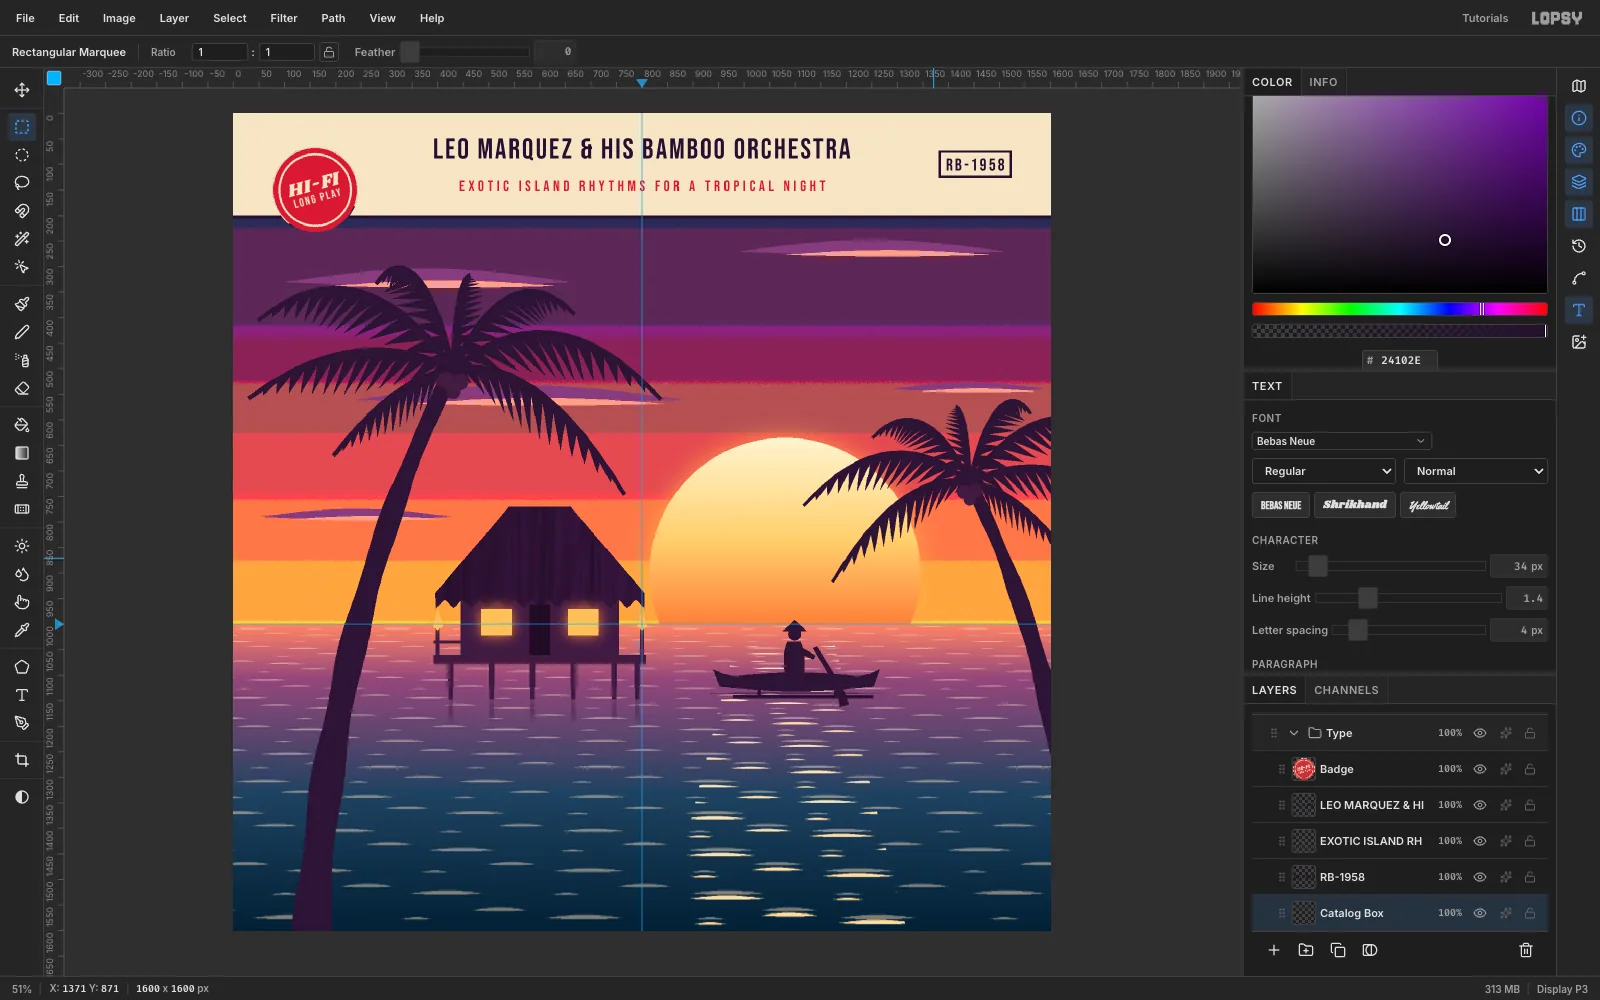
Set the credit line and catalog number
With Top Band selected (so the new text lands above it):
- LEO MARQUEZ & HIS BAMBOO ORCHESTRA: Bebas Neue 56 px,
#24102E, letter spacing 4, top at y 48. - EXOTIC ISLAND RHYTHMS FOR A TROPICAL NIGHT: Bebas Neue 30 px,
#C8323A, letter spacing 7, top at y 130. - RB-1958: Bebas Neue 34 px,
#24102E, letter spacing 4, with its right edge about 90 px in from the canvas edge.
Centre both headline lines on x 800. On a Catalog Box layer, fill a rectangle that leaves about 15 px of padding around RB-1958. Then use Select → Shrink… by 3 and press Delete to leave a thin frame.
- LEO MARQUEZ & HIS BAMBOO ORCHESTRA: Bebas Neue 56 px,
-
Stack the title over the sea
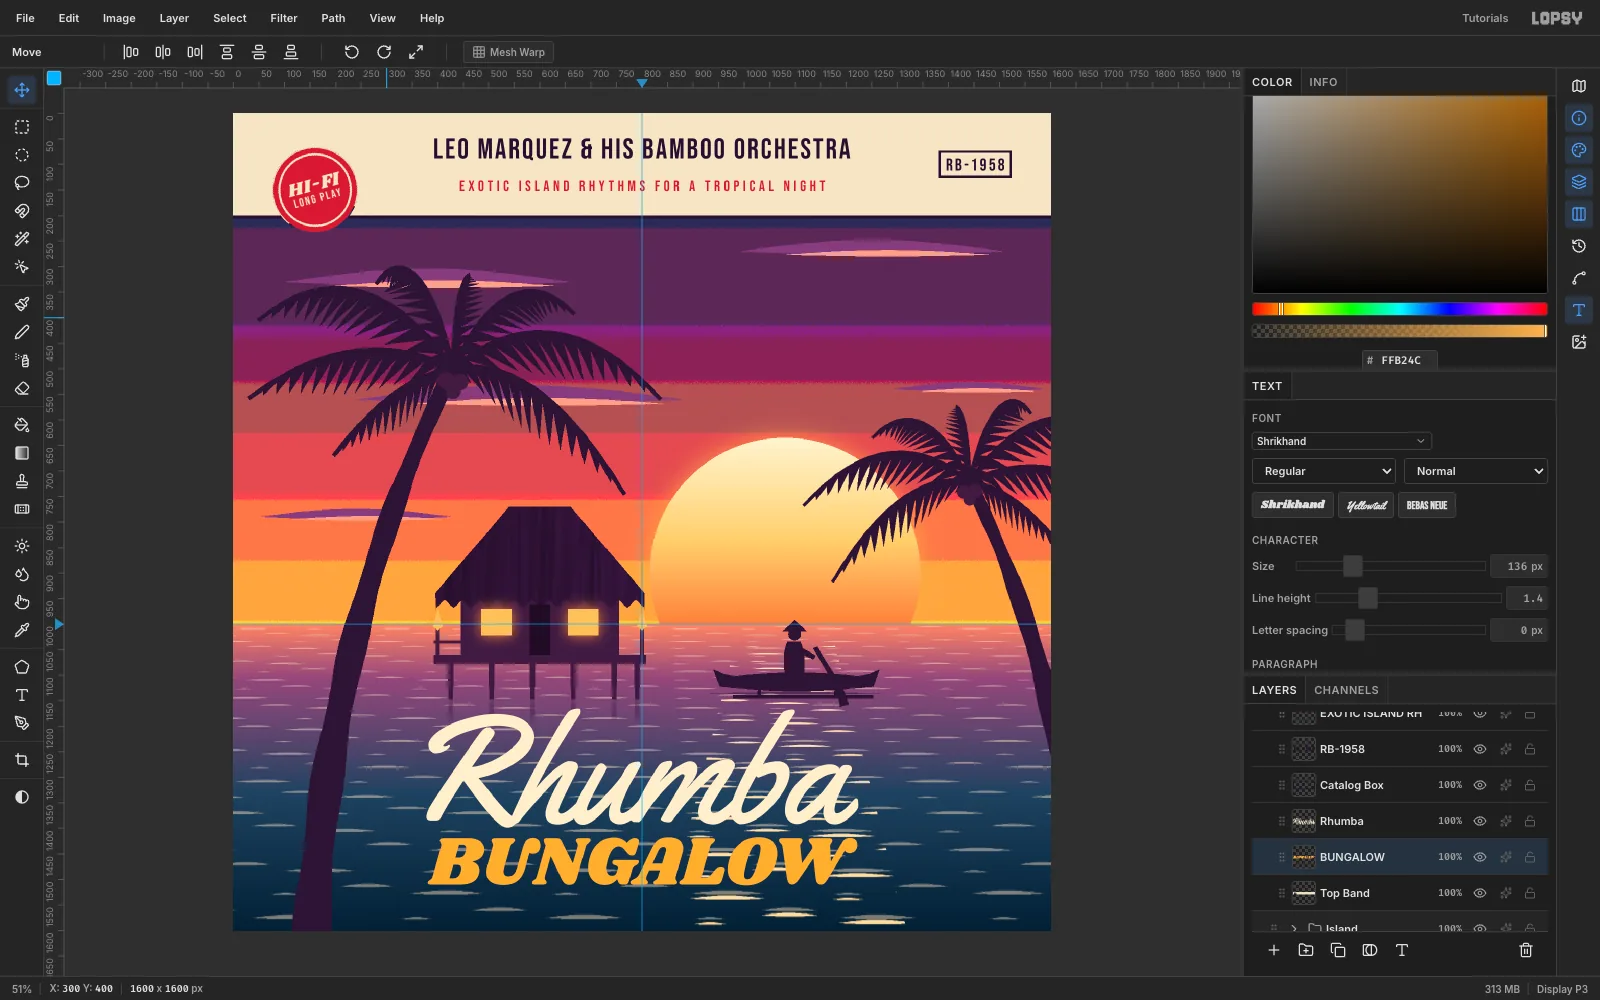
Create each word in empty canvas, then position it:
- Rhumba: Yellowtail 300 px,
#FFF0CF. Place its top-left at (377, 1165). - BUNGALOW: Shrikhand 136 px, any orange for now. Place its top-left at (380, 1417).
At these sizes both words are about 845 px wide, so they stack as a lockup. The script's baseline sits just above the slab, and the bottom margin is about 90 px.
- Rhumba: Yellowtail 300 px,
-
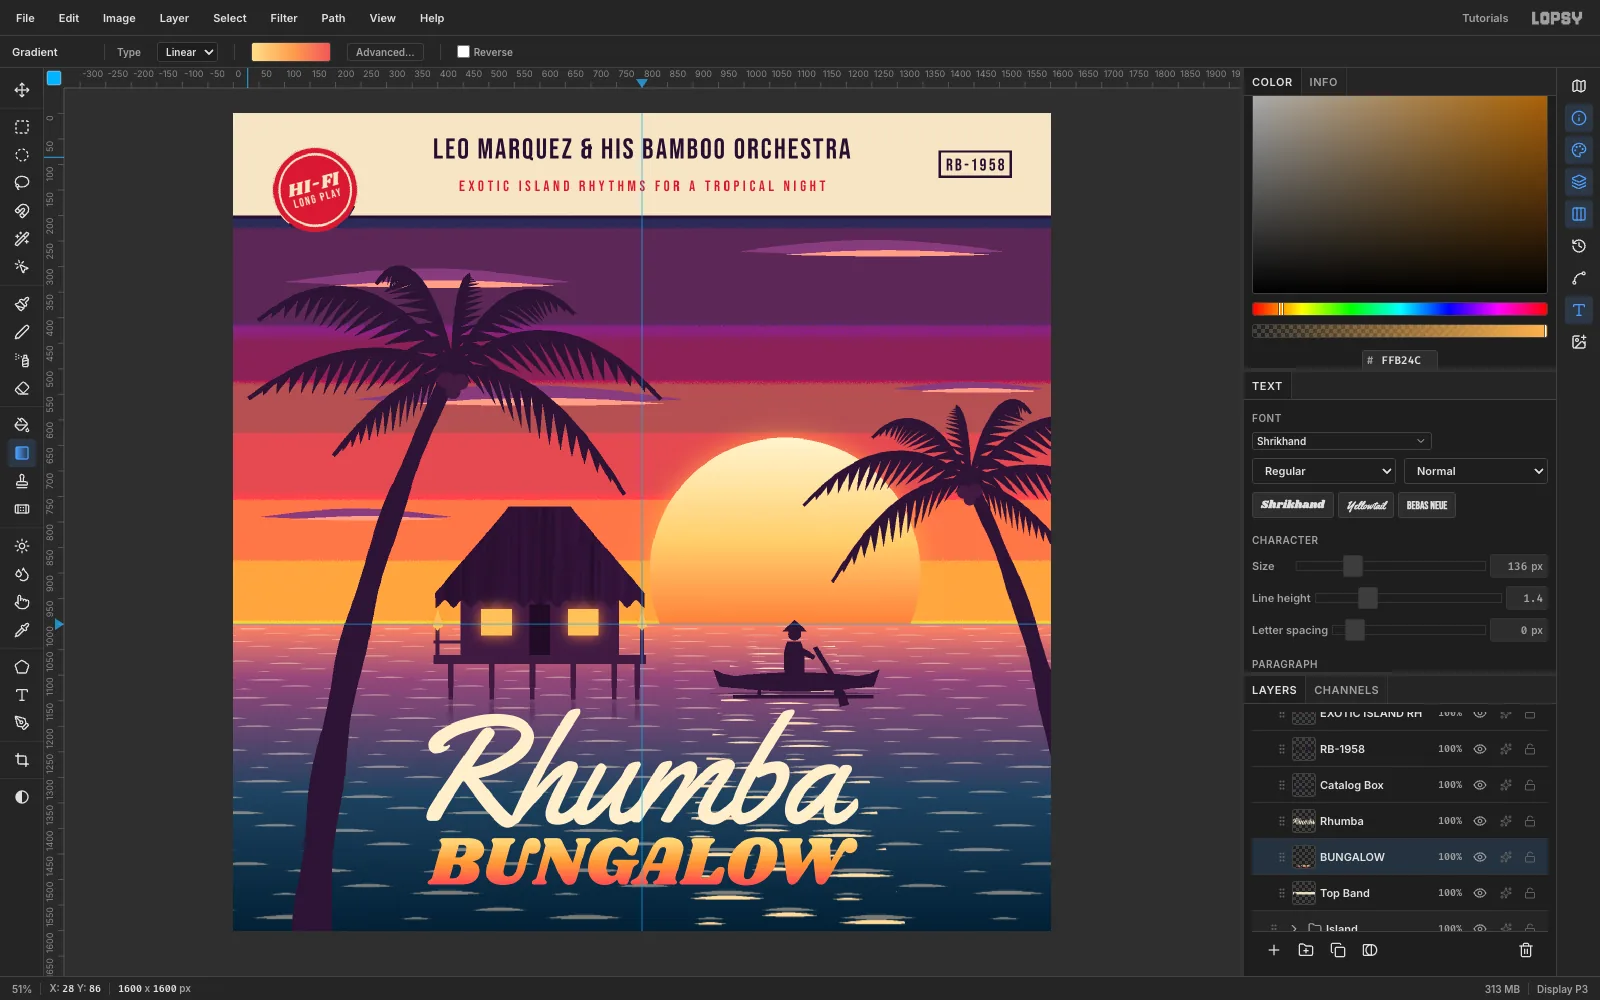
Fill BUNGALOW with a sunset gradient
- Select BUNGALOW and click Rasterize Layer.
- Cmd-click its thumbnail to select just the letters.
- Click Add Layer, then drag a linear gradient through the letter height from
#FFE08Athrough#FFA24Cto#F2555A. - Deselect and use Merge Down to bake the gradient into the letters.
-
Give the type one hard shadow
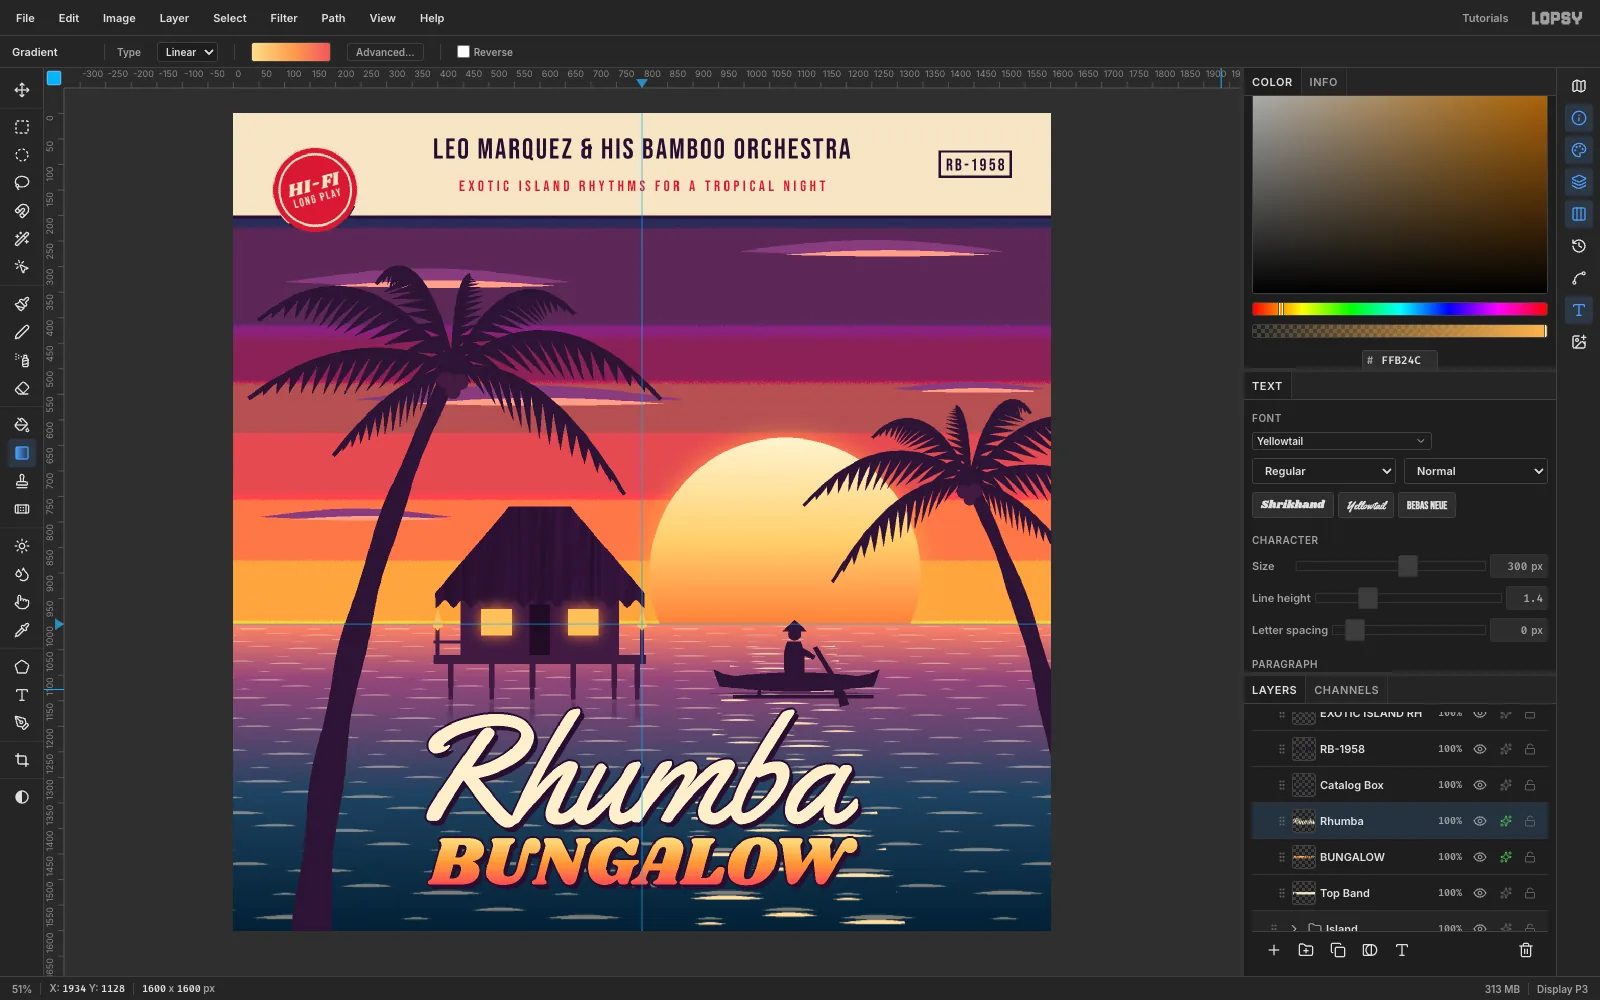
Give both Rhumba and BUNGALOW the same effects:
- Drop Shadow:
#24102E, Offset X 7, Offset Y 9, Blur 0, Spread 0, Opacity 100 - Stroke:
#24102E, Width 4
Use one depth treatment for all the display type. The title then reads as a single printed plate instead of two unrelated effects.
- Drop Shadow:
-
Screen-print the sky with Halftone
Duplicate the Sky layer and rename the copy Sky Halftone. Run Filter → Halftone… with Dot Size 9, Angle 45 and Softness 1. Set the layer to Multiply at 22%.
The dots only show up close, but they give the sky a printed texture.
-
Age the sleeve with ring wear and grain
Old sleeves wear a pale circle where the record inside rubs through.
- Add a Ring Wear layer at the root and drag it above the Type group.
- Fill a circle of radius 705 centred on the canvas with
#FFF3DC. Use Select → Shrink… by 5, then Delete to leave a thin ring. - Run Gaussian Blur with a Radius of 3 and set the layer to Screen.
- With a soft Eraser (Size 260, Opacity 70), drag along four stretches of the ring to break it up.
For grain, add a Grain layer, Edit → Fill it with
#808080, and run Filter → Add Noise… at an Amount of 60 with Mono. Set it to Soft Light at 40%.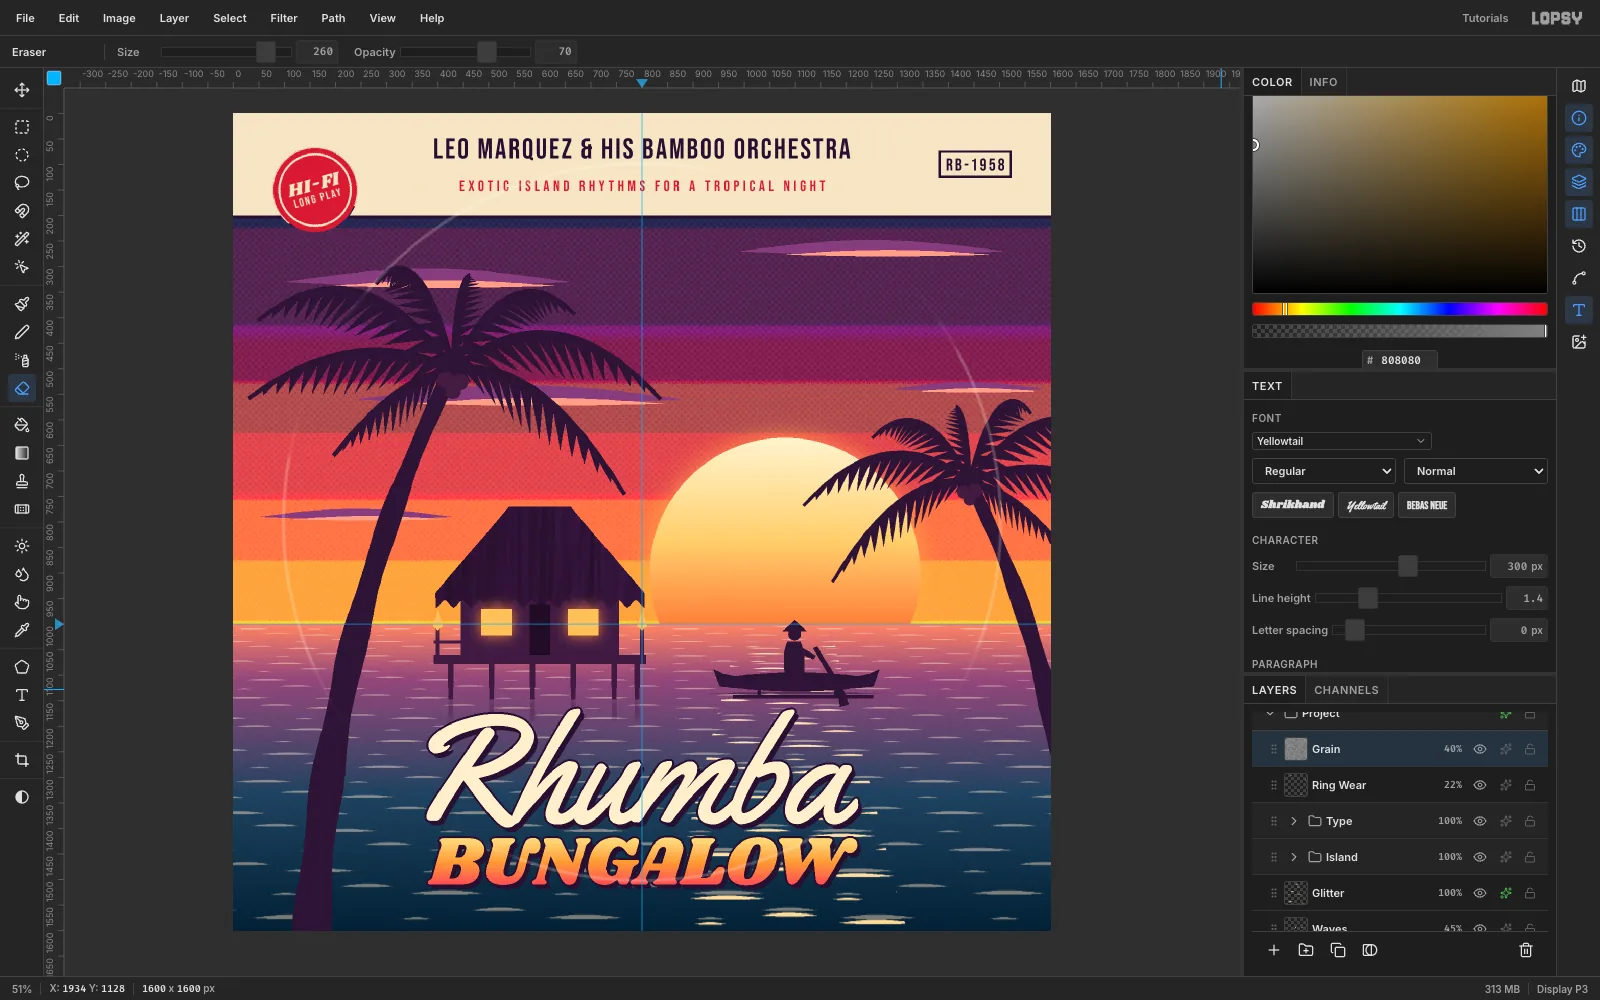
-
Refine the layout
Step back and fix what competes:
- Ring Wear: marquee the band area (y < 208), press Delete, and drop the layer to 12%. The worn ring should never cross the cream band.
- Clouds: set the layer to 60% and delete the low-left streak that crowded the hut roof.
- Band edge: fill the thin navy posterize strip under the rule (y 195–226) on Sky with the next band's colour,
#552A55. - Catalog box: nudge the box and RB-1958 up 30 px so they're centred on the credit line.
- Badge: nudge it down 27 px, so it stamps further into the sky. Fill the band's hole behind its old position with cream and redraw the rule there.
- Title Shade: on a new Title Shade layer under Island, fill a feathered-60 band from y 1370 to 1570 with
#07182A. Set it to Multiply at 45% so the slab lettering reads clearly against the water. - Palms: move Palm A 60 px left so its trunk clears the R, and scale Palm B to 90% toward the right edge.
Save the project, then choose File → Quick Export PNG.