Design a Film Noir Detective Agency Billboard in Lopsy
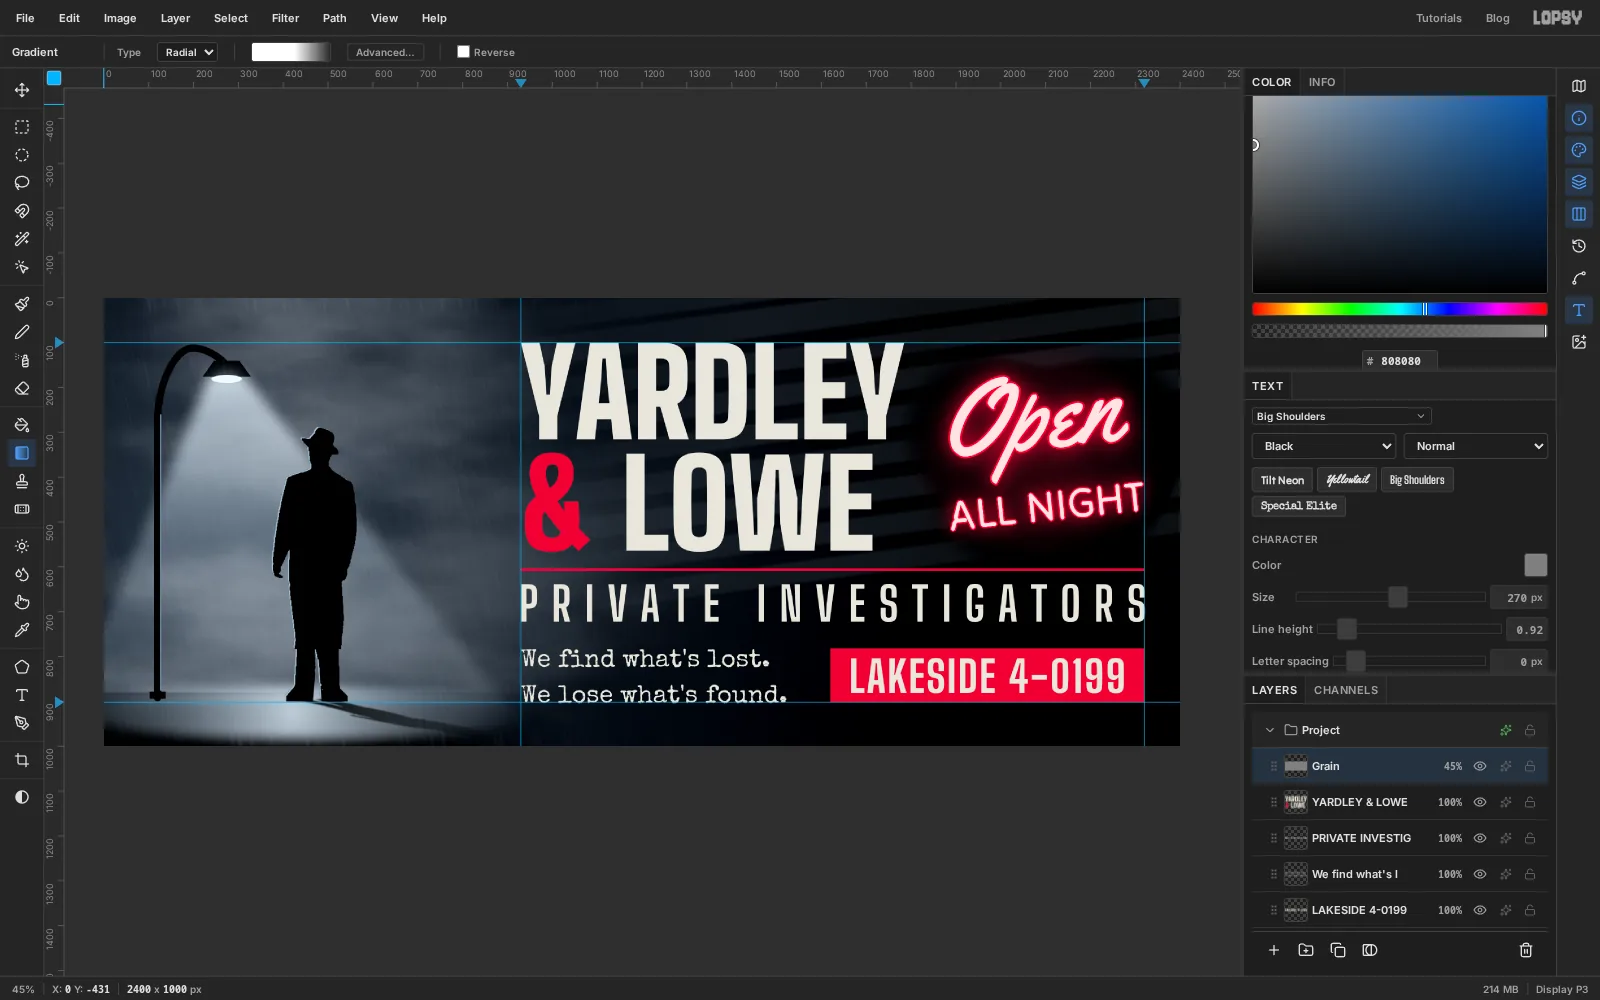
Build a film noir billboard in Lopsy. Cut a silhouette from a public-domain film still, light it with a foggy street lamp, and add neon type and blind shadows.
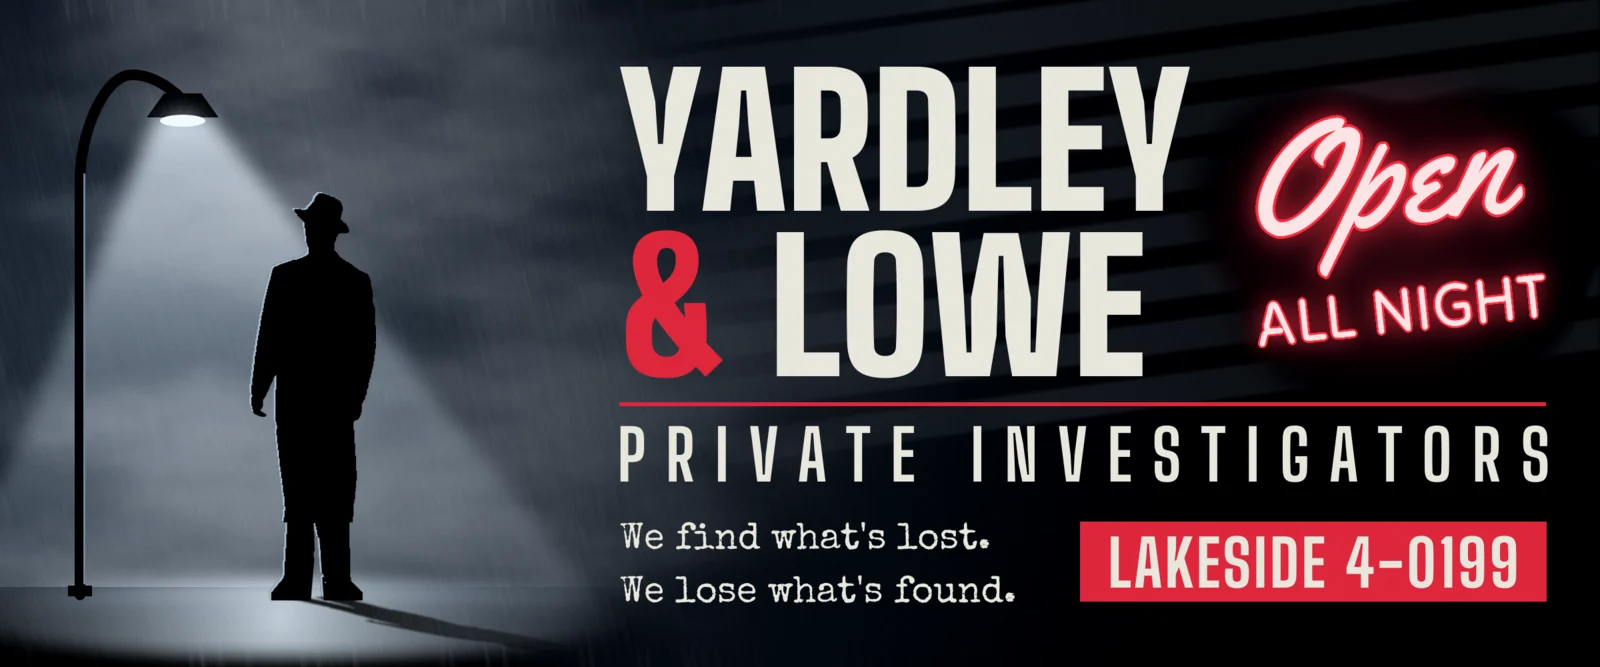
Film noir is mostly a lighting style. A few habits do the work:
- one hard light in a lot of dark, so shapes read as silhouettes
- weather you can see the light in: fog, rain, wet pavement
- shadows of things that aren't in the picture, like the bars of a window blind
- black and white with one colour, used sparingly
You'll use all four on a 2400 × 1000 px billboard for a made-up detective agency, Yardley & Lowe. The detective isn't drawn. He's cut out of a frame from The Big Combo (1955), a noir that is in the public domain. Download the frame from Wikimedia Commons before you start: BigComboTrailer.jpg.
The tools you'll use:
- the Gradient tool, on layers and on layer masks
- the Clouds, Gaussian Blur, Threshold, Add Noise and Motion Blur filters
- the Lasso, Elliptical Marquee and Magic Wand, with Feather and Shift to add
- the Pen for the lamp post and the Pencil with Shift-click for straight lines
- the Move tool's handles: scale, Flip Vertical, Distort, Skew and rotating a group
- the Text tool with four Google fonts, one of them recoloured a single character at a time
- ruler guides and the grid
- Stroke and Outer Glow layer effects, the Screen and Overlay blend modes, and group adjustments
The palette is blue-black and fog grey with one red:
-
Night
-
Pavement
-
Lamp light
-
fog light
-
pool
-
Silhouette
-
lamp post
-
rim light
-
post highlight
-
Bulb
-
bulb glow
-
pool edge
-
cold filter
-
Bone
name, subtitle, tagline, phone number
-
Red
-
neon edge
-
neon core
-
Blind light
The type is Big Shoulders for the name and the phone number, Special Elite for the tagline, and Yellowtail and Tilt Neon for the sign. All four are in the Text tool's font list, so there's nothing to install.
-
Paint the night
Choose File → New and make a document 2400 × 1000 pixels. Rename Layer 1 to Night.
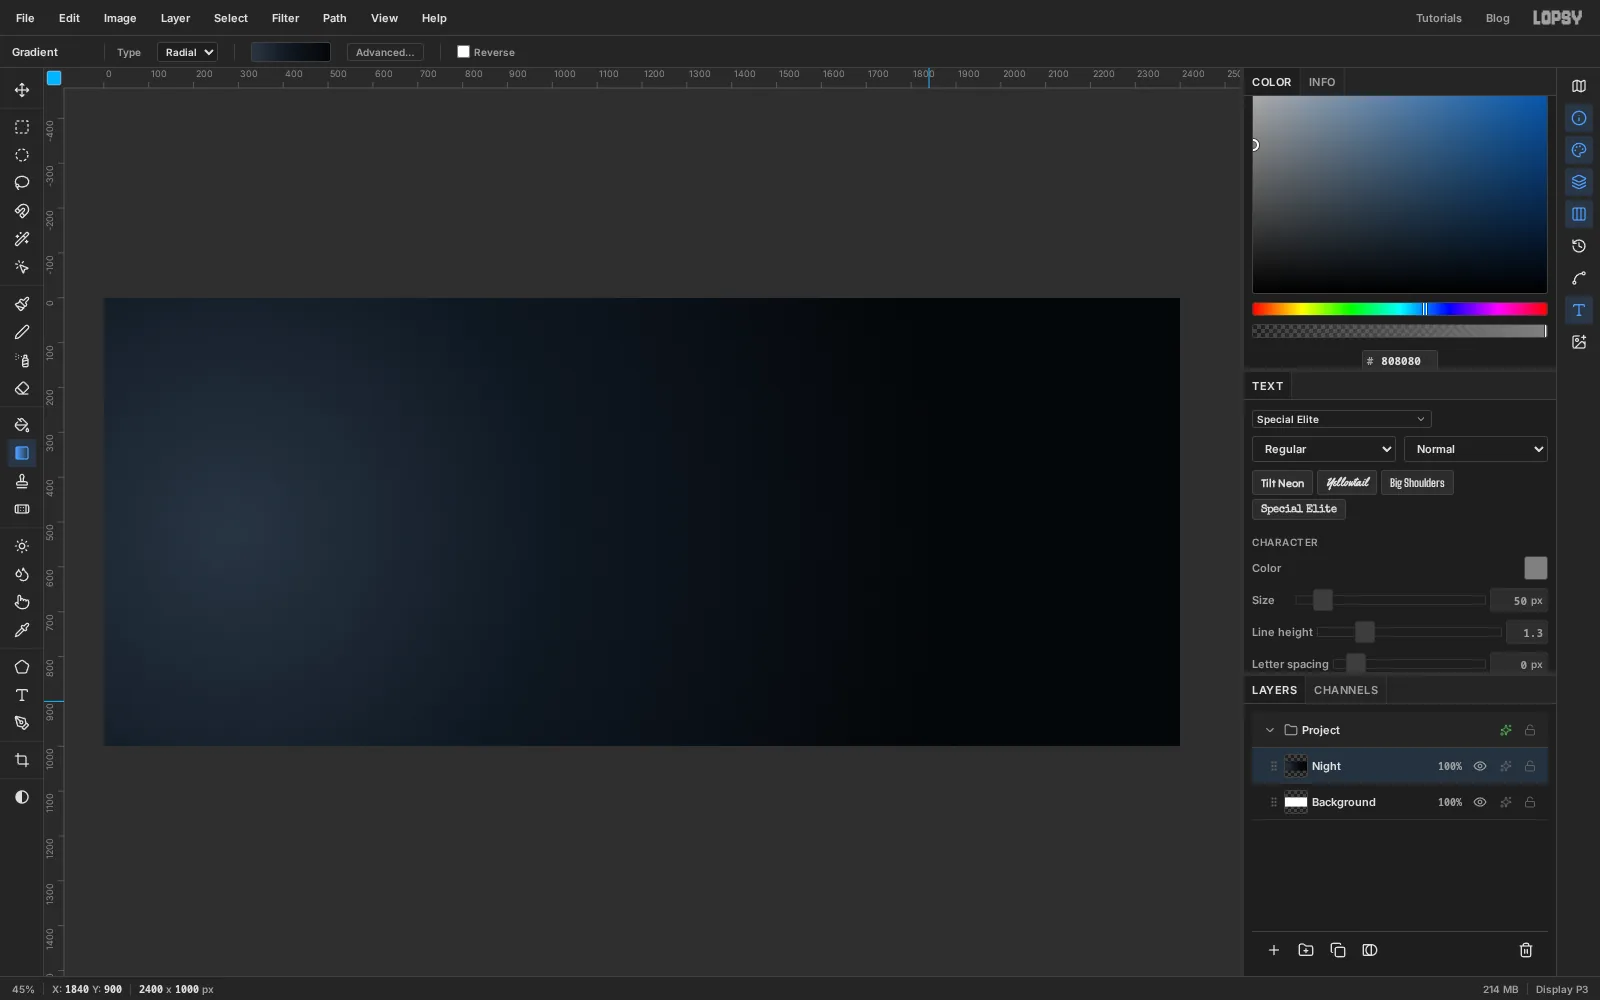
Pick the Gradient tool, set Type to Radial and click Advanced…. Give it three stops: at the start, a little before the middle and at the end. Click Done.
Drag from the left side of the canvas, about halfway down, to the bottom right. The light part of the gradient is where the street lamp will go, so the scene already has a bright side and a dark side.
-
Make fog with Clouds
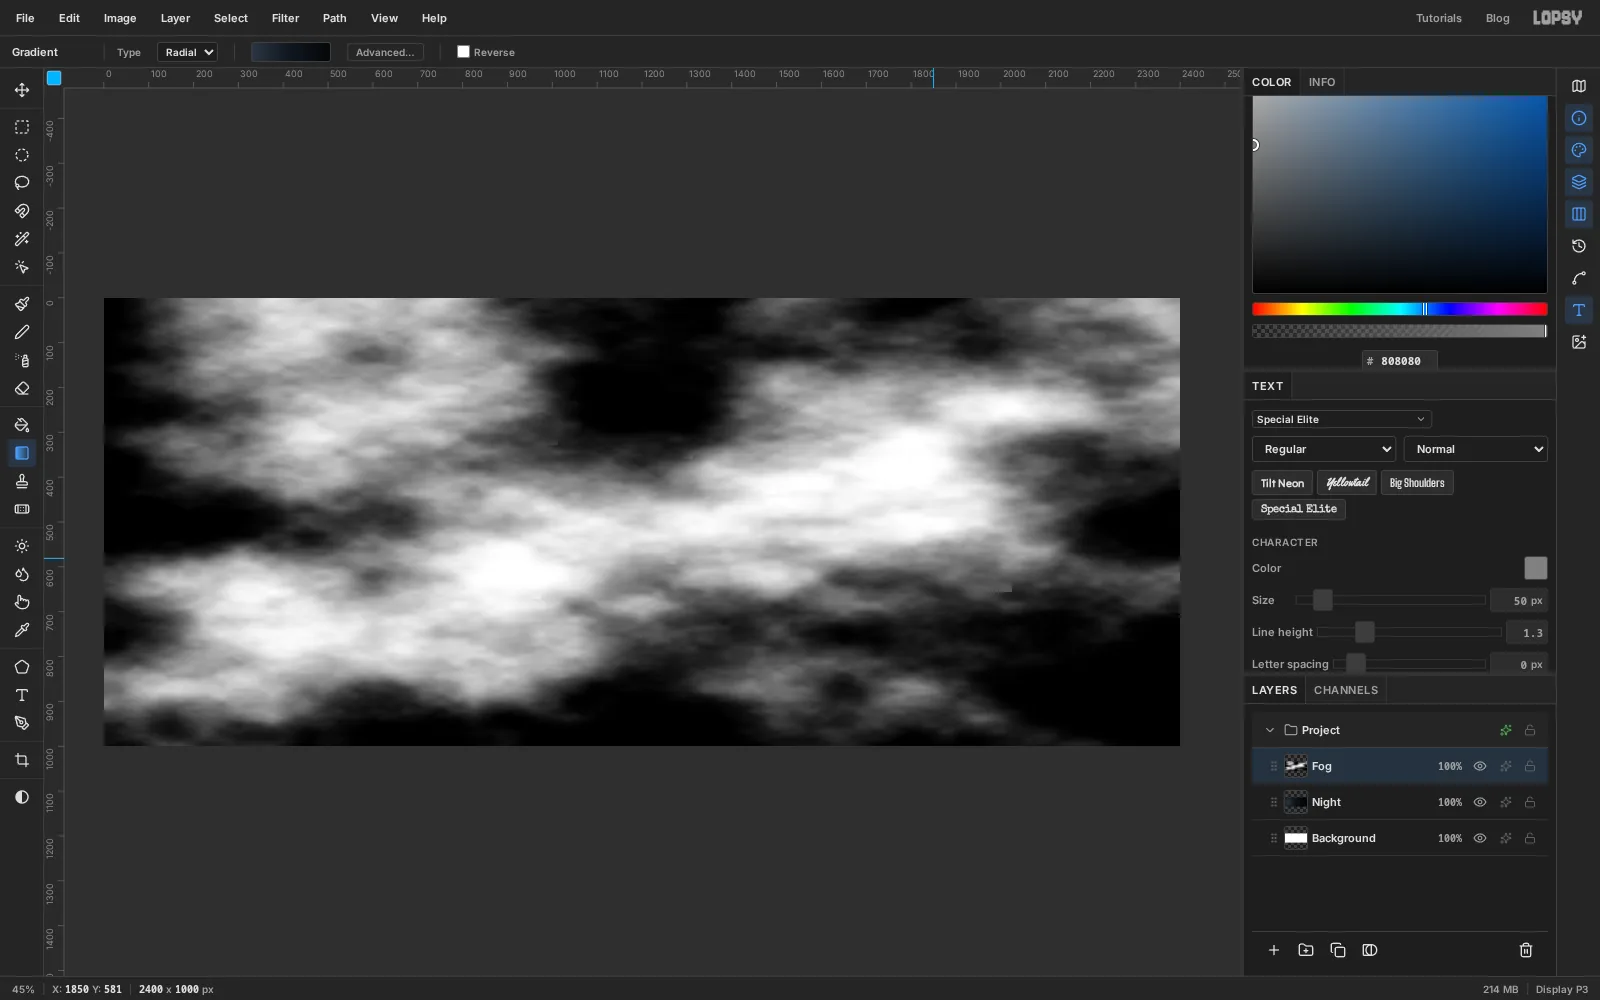
Add a layer and call it Fog. Choose Filter → Clouds…, set Scale to 4 and click Apply.
The pattern is random, so yours will look different from this one. If you get a pattern you don't like, press Cmd+Z and apply the filter again.
Now soften it. Choose Filter → Gaussian Blur… with Radius 10. Open the layer's effects (the sparkle icon on its row), set Blend to Screen and close the drawer. Click the layer's 100% and drag the slider down to 30%. Screen only lets the light parts of the layer through, so the black disappears and the white becomes mist.
-
Keep the fog on the left
The right side of the billboard is for type, and it should stay dark.
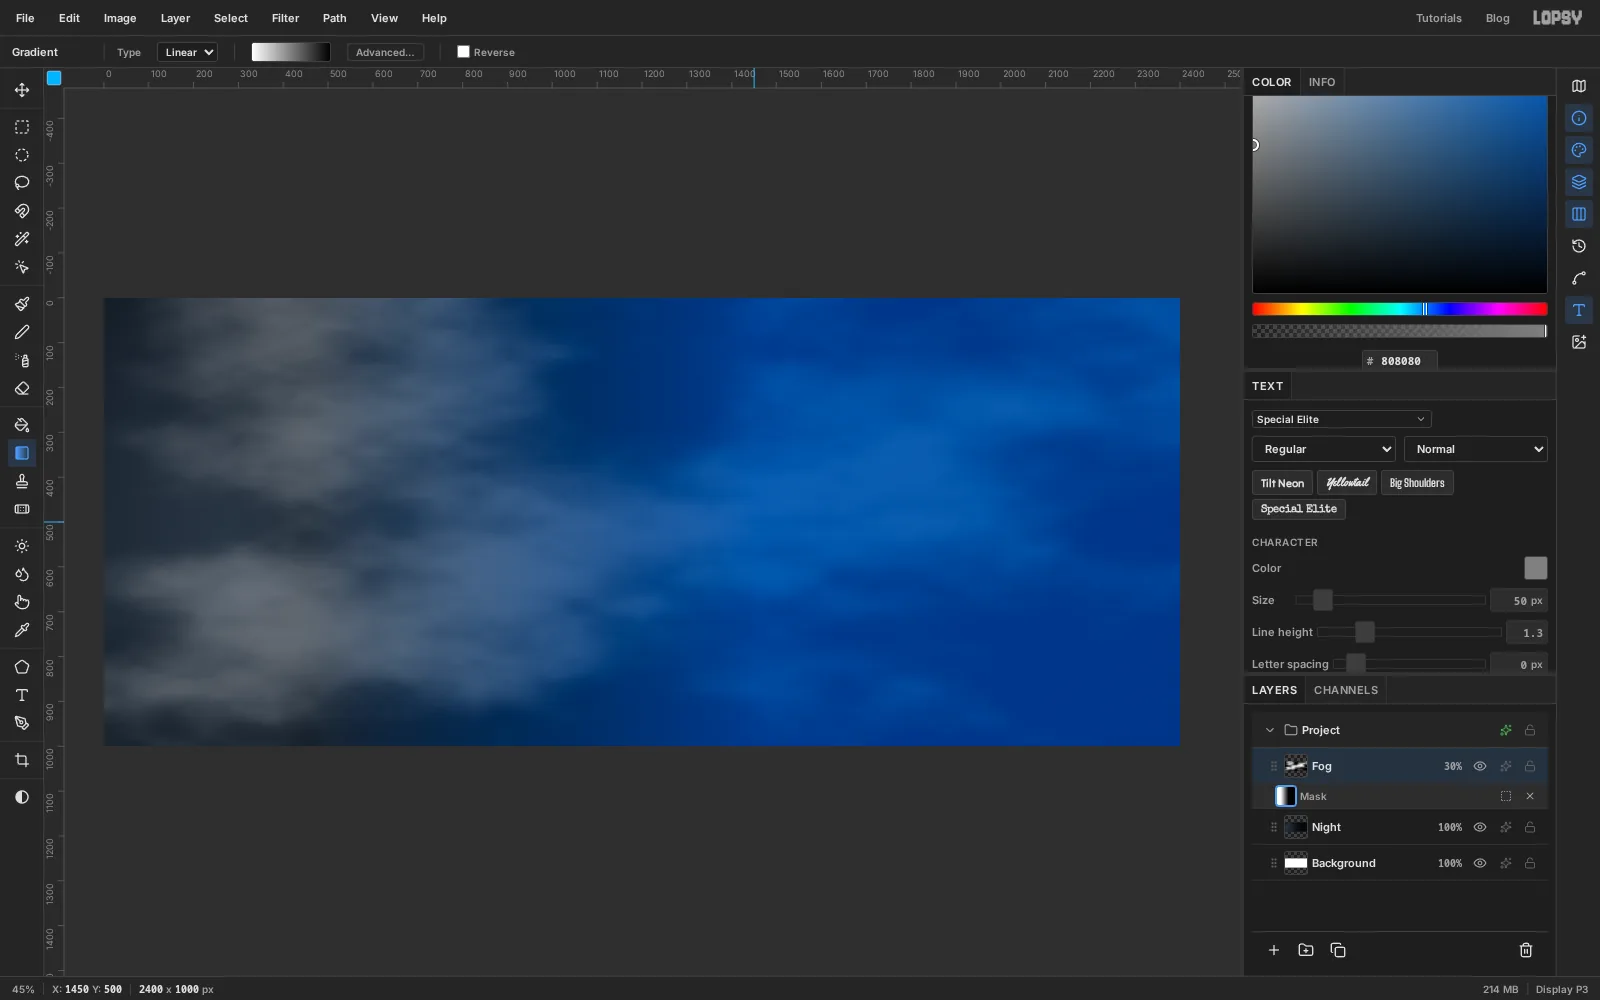
With Fog active, click Add Mask at the bottom of the Layers panel. You're now painting on the mask instead of the layer. Take the Gradient tool, set Type to Linear and open Advanced…. Click the middle stop and delete it, then make the first stop white and the last one black. Drag from about a fifth of the way across the canvas to a little past the middle.
The blue tint shows what the mask hides. Click the Fog row to leave the mask, and the tint goes away.
-
Lay the pavement
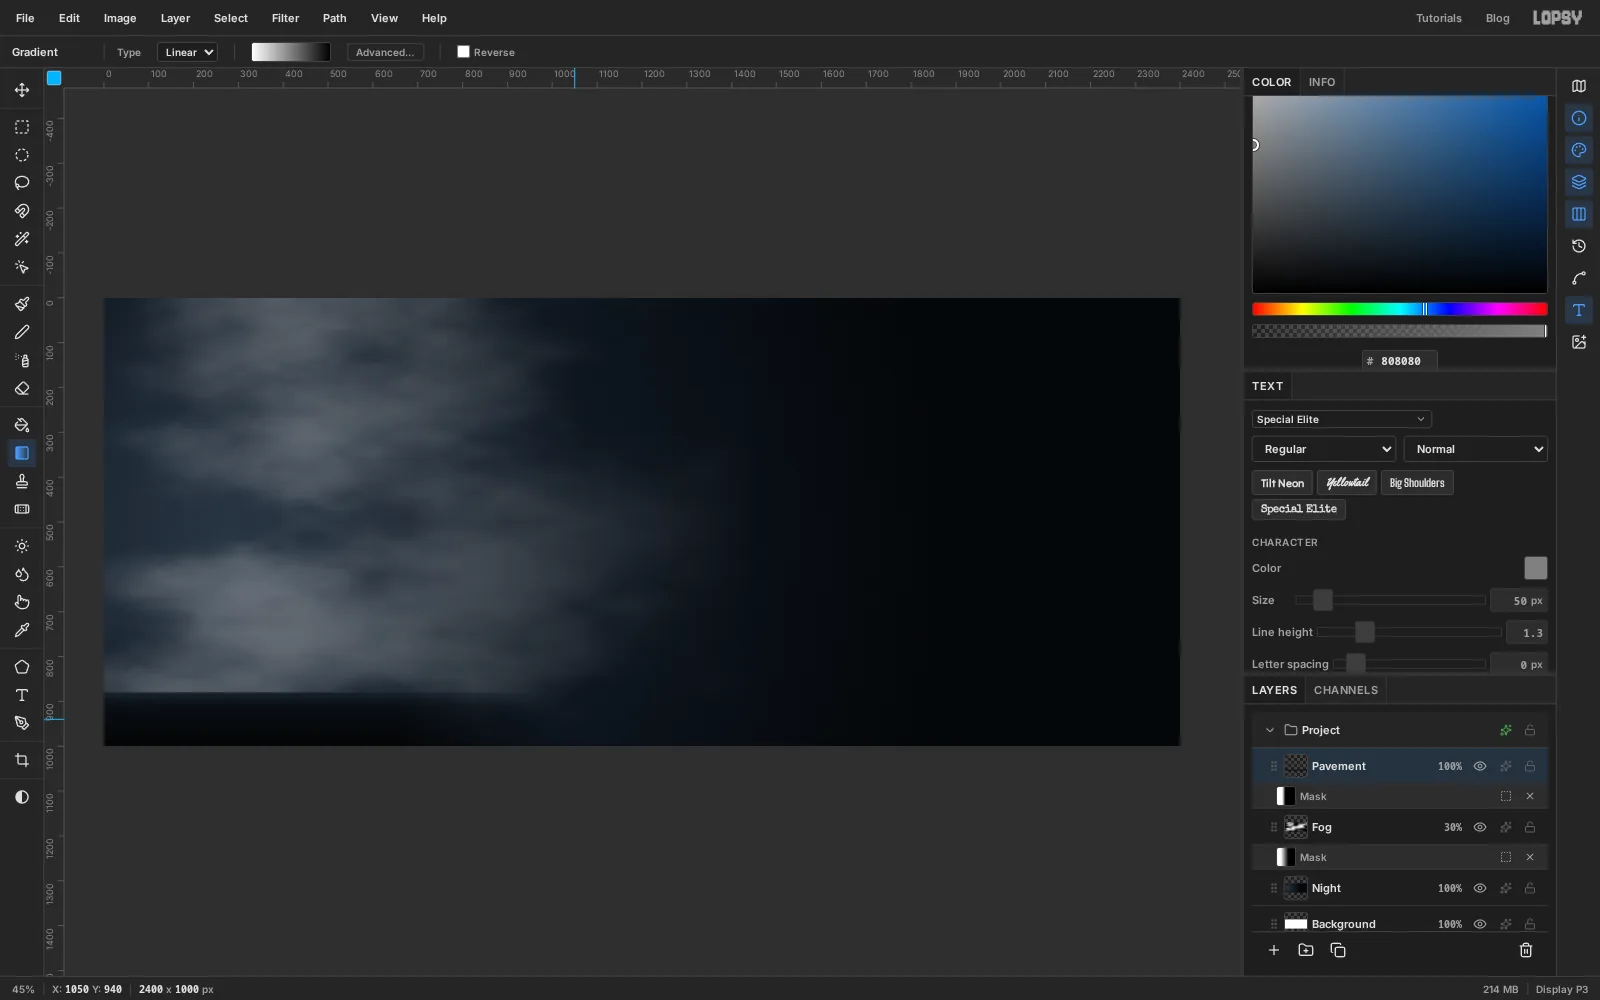
Add a layer called Pavement. With the Rectangular Marquee, select a strip across the bottom of the canvas about 120 px tall.
Open the gradient editor and set three stops: at the start, about a quarter of the way along (click the bar to add a stop), and at the end. Drag from the top of the strip to the bottom, then press Cmd+D to deselect.
A hard horizon line running the full width would cut through the type later. So add a mask to this layer too. Set the gradient back to two stops, white → black, as you did for the fog, and drag from under where the lamp will be to just past the middle of the canvas. Click the Pavement row when you're done.
-
Draw the cone of light
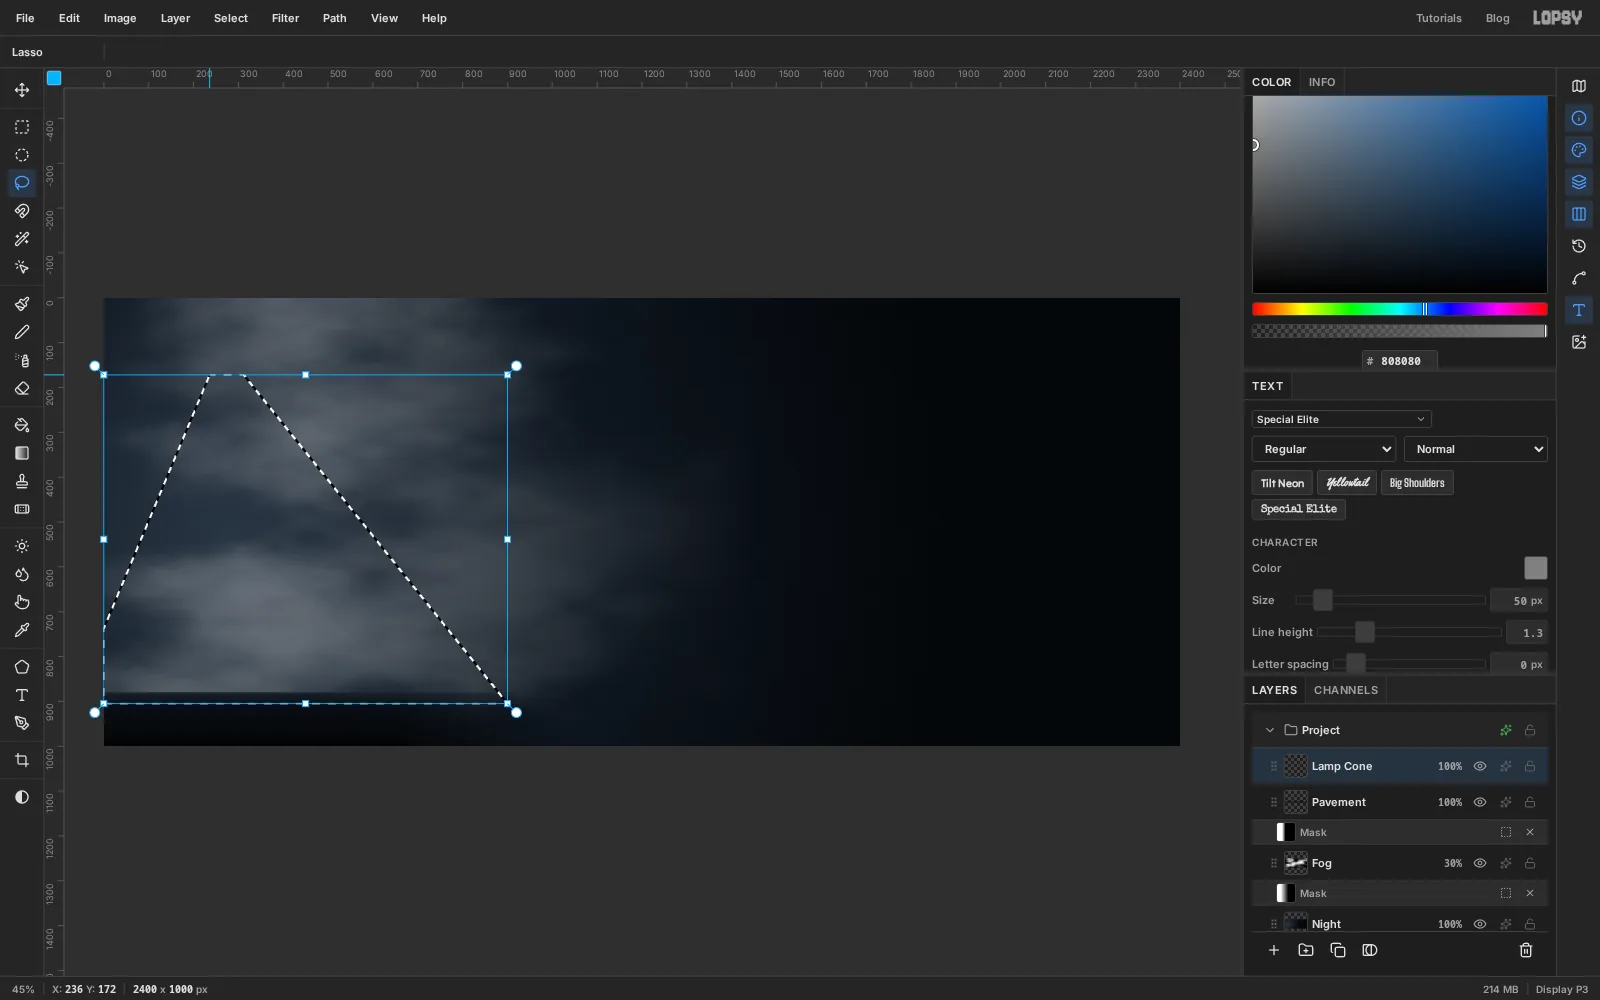
Add a layer called Lamp Cone. With the Lasso, draw a tall shape that is narrow at the top, about 80 px wide, and spreads out to the ground. Take the bottom-left corner all the way to the left edge of the canvas. It doesn't need to be neat, because the next step blurs the edge.
Choose Select → Feather…, enter 28 and click Apply. Feathering blurs the edge of the selection, so whatever you put in it will have soft sides.
-
Fill the cone with a fading gradient
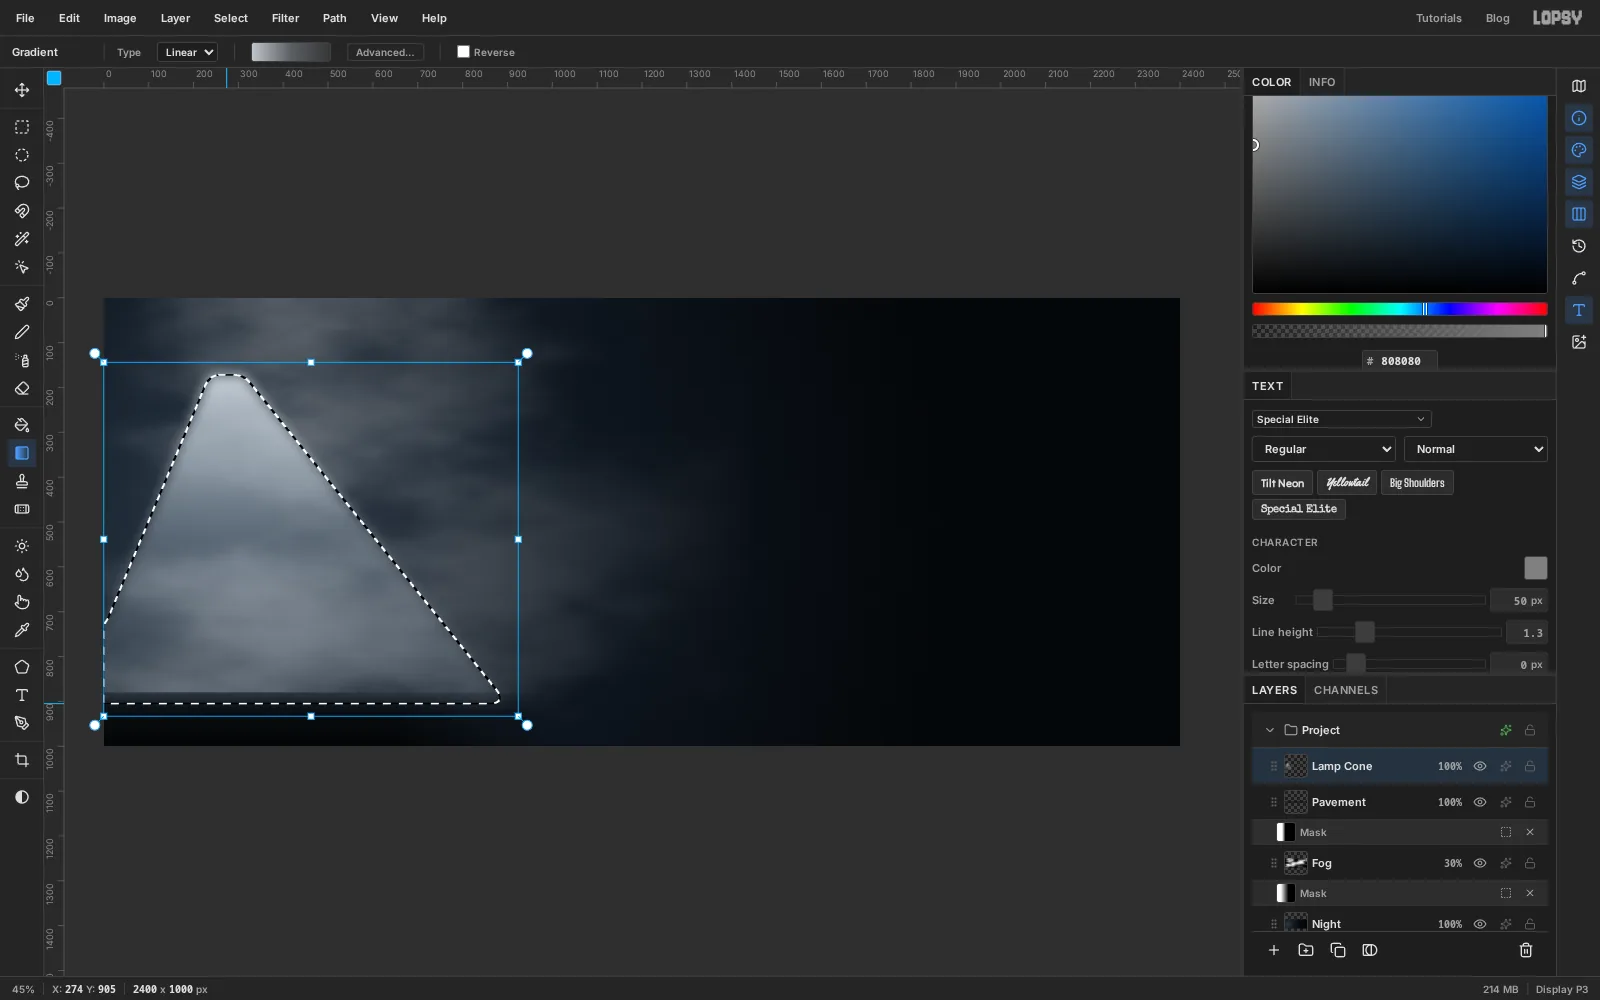
Open the gradient editor again. Set the first stop to and drag its opacity down to about 80%. Add a middle stop of at about 32% opacity, and make the last stop at 10%.
Drag straight down from the top of the selection to the bottom. Deselect, then set the layer's blend mode to Screen. The fog shows through the light now, which is what makes it look like a beam and not a grey triangle.
-
Add a pool of light on the ground
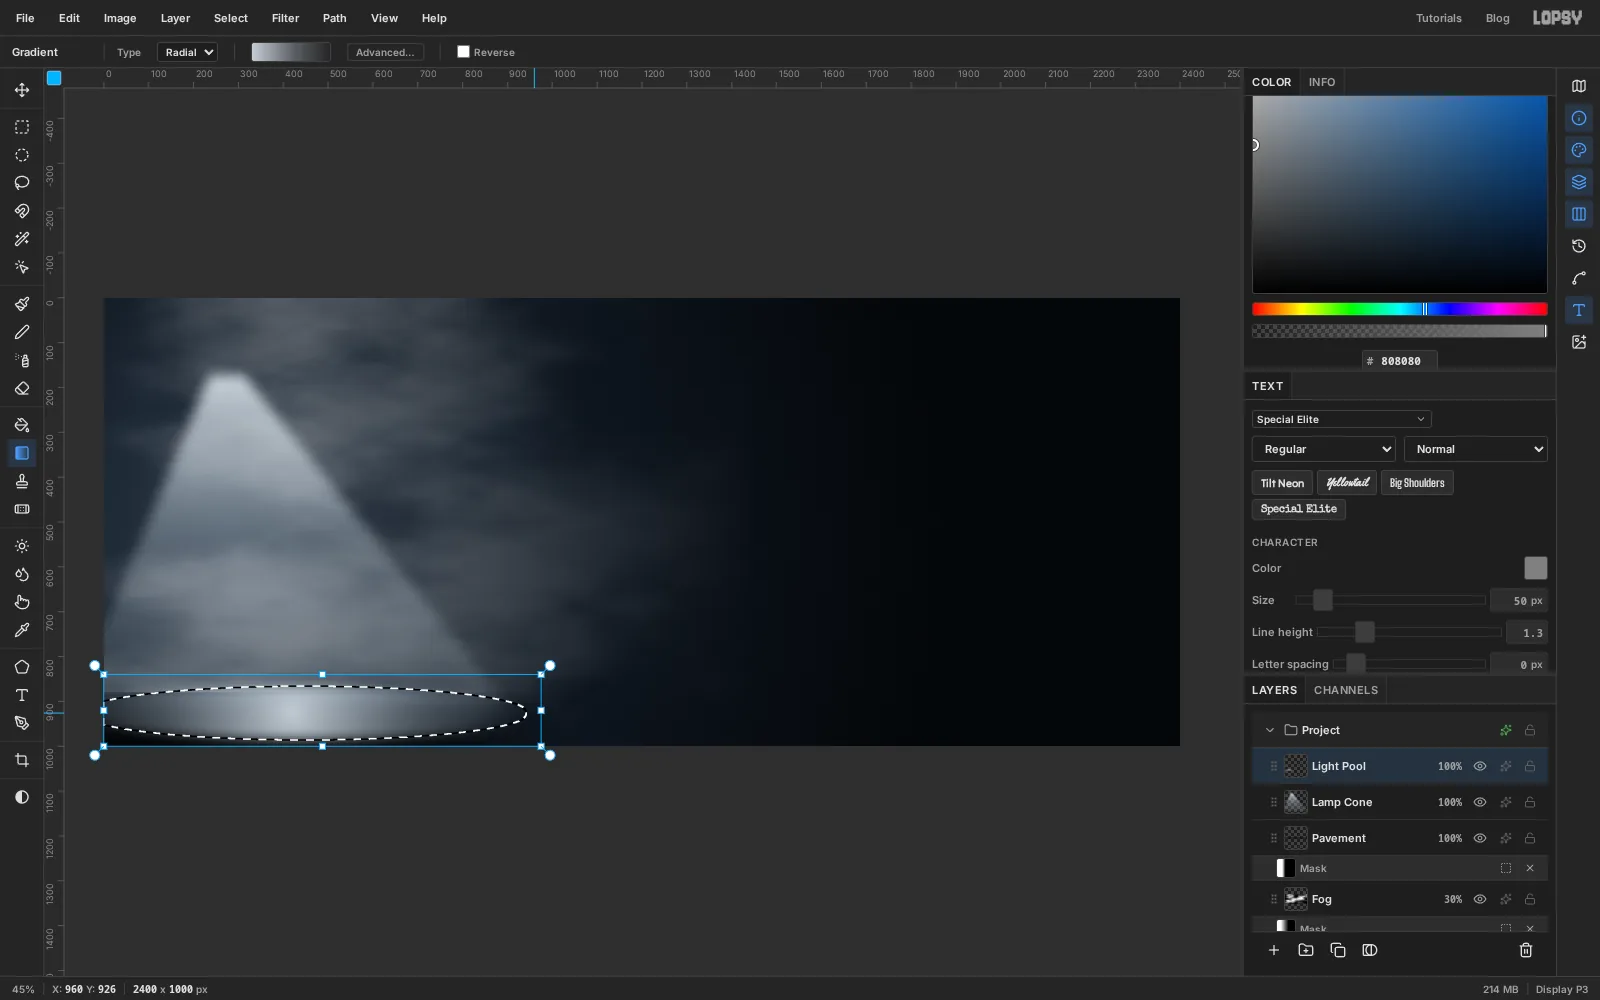
Add a layer called Light Pool. With the Elliptical Marquee, drag a wide, flat ellipse across the pavement under the cone. Feather it by 26.
Switch the gradient to Radial with stops of at 85%, at 35% just past the middle, and at 0%. Drag from the centre of the ellipse out to its right edge. Deselect and set the layer to Screen.
-
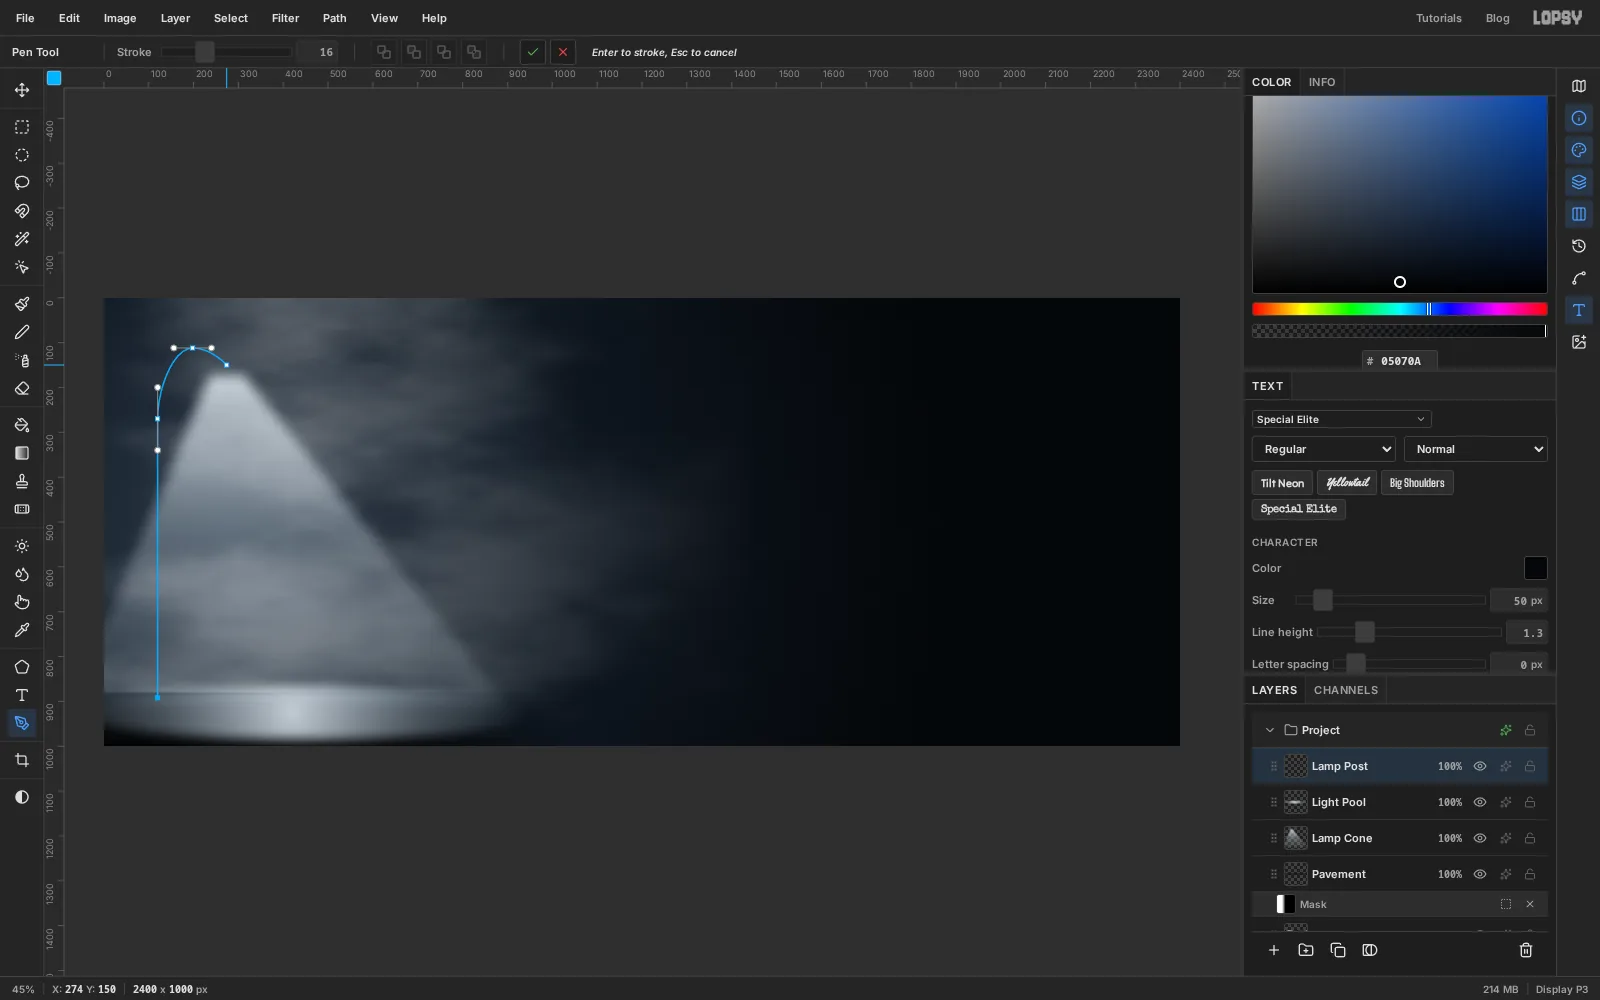
Draw the lamp post with the Pen
Add a layer called Lamp Post and set the foreground colour to . Pick the Pen tool and set Stroke to 16.
The post takes four anchors:
- Click on the pavement, well to the left of the cone.
- Straight above it, about a quarter of the way down the canvas, click and drag upward a short way. Dragging pulls out handles, which turns the corner into a curve.
- Up and to the right, click and drag to the right. This is the top of the arc.
- Click once at the narrow top of the cone.
Press Enter. The path is stroked onto the layer in the foreground colour.
-
Finish the lamp
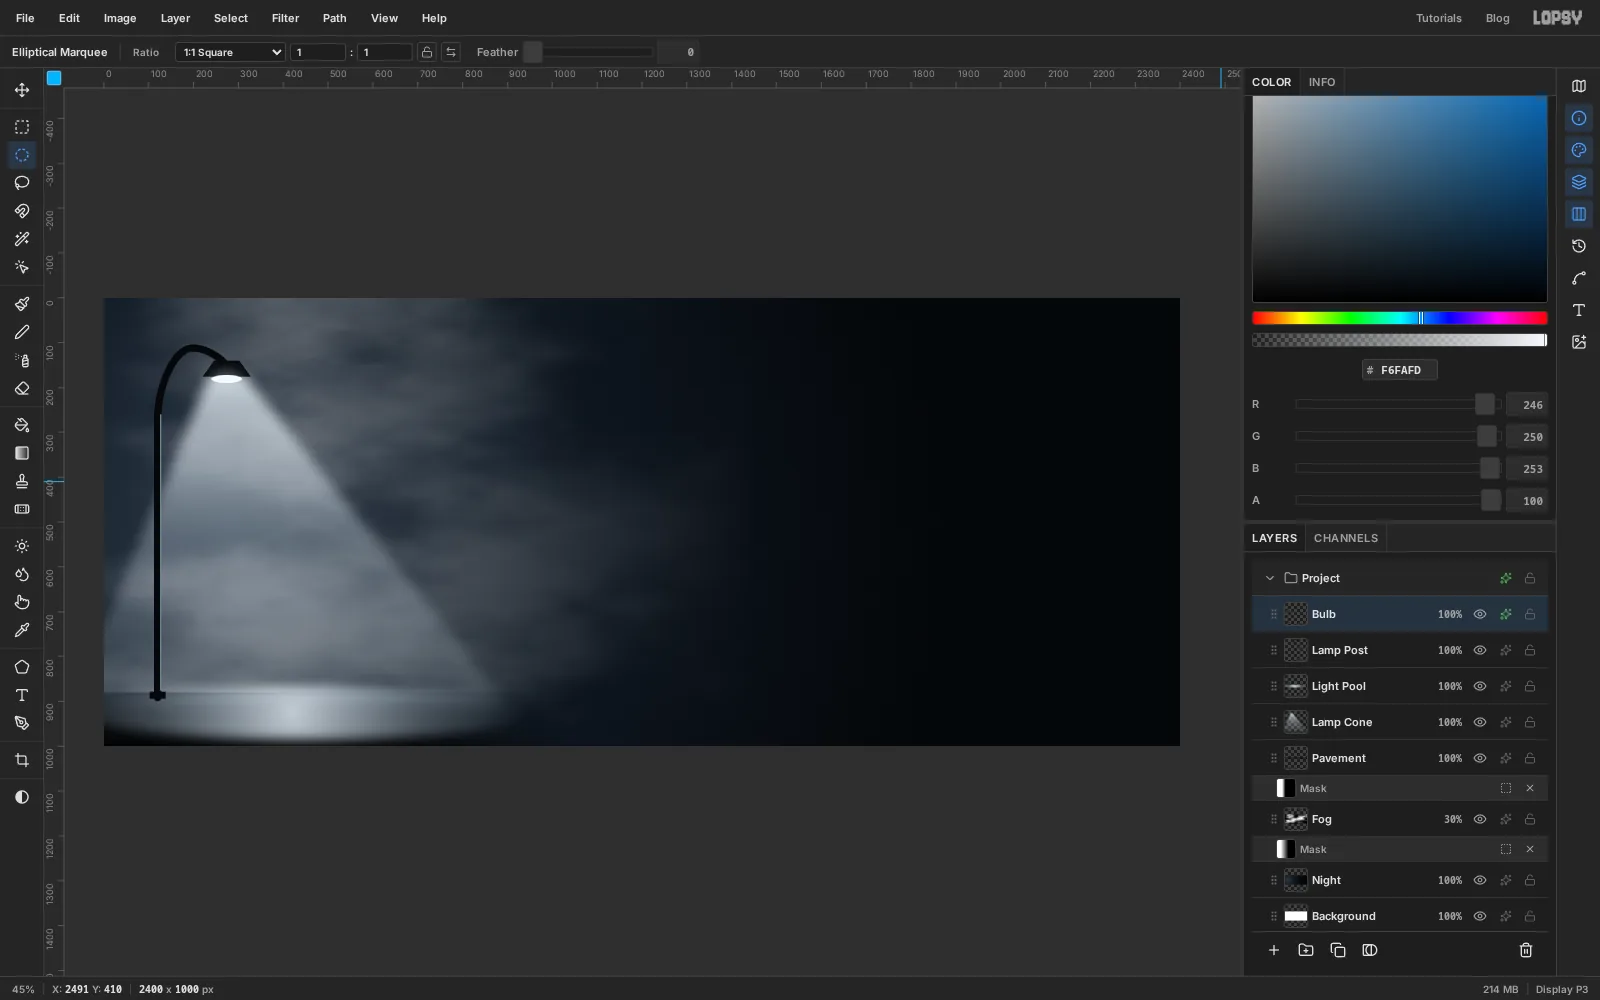
Still on Lamp Post, use the Lasso to draw a small shade over the end of the arm, wider at the bottom than the top. Choose Edit → Fill. Marquee a small foot at the base of the post and fill that too, then press Cmd+D.
The post is lit from the right, so give it a highlight. Set the foreground colour to , pick the Pencil and set Size to 3. Click just inside the right edge of the post near the ground, then Shift-click near the top of the straight part. Shift-click draws a straight line from the last point.
For the bulb, add a layer called Bulb. Set the foreground colour to , select a small flat ellipse under the shade with the Elliptical Marquee, choose Edit → Fill and deselect. Open the layer's effects, turn on Outer Glow, and set Size 46, Opacity 85 and the colour .
-
Bring in the film still
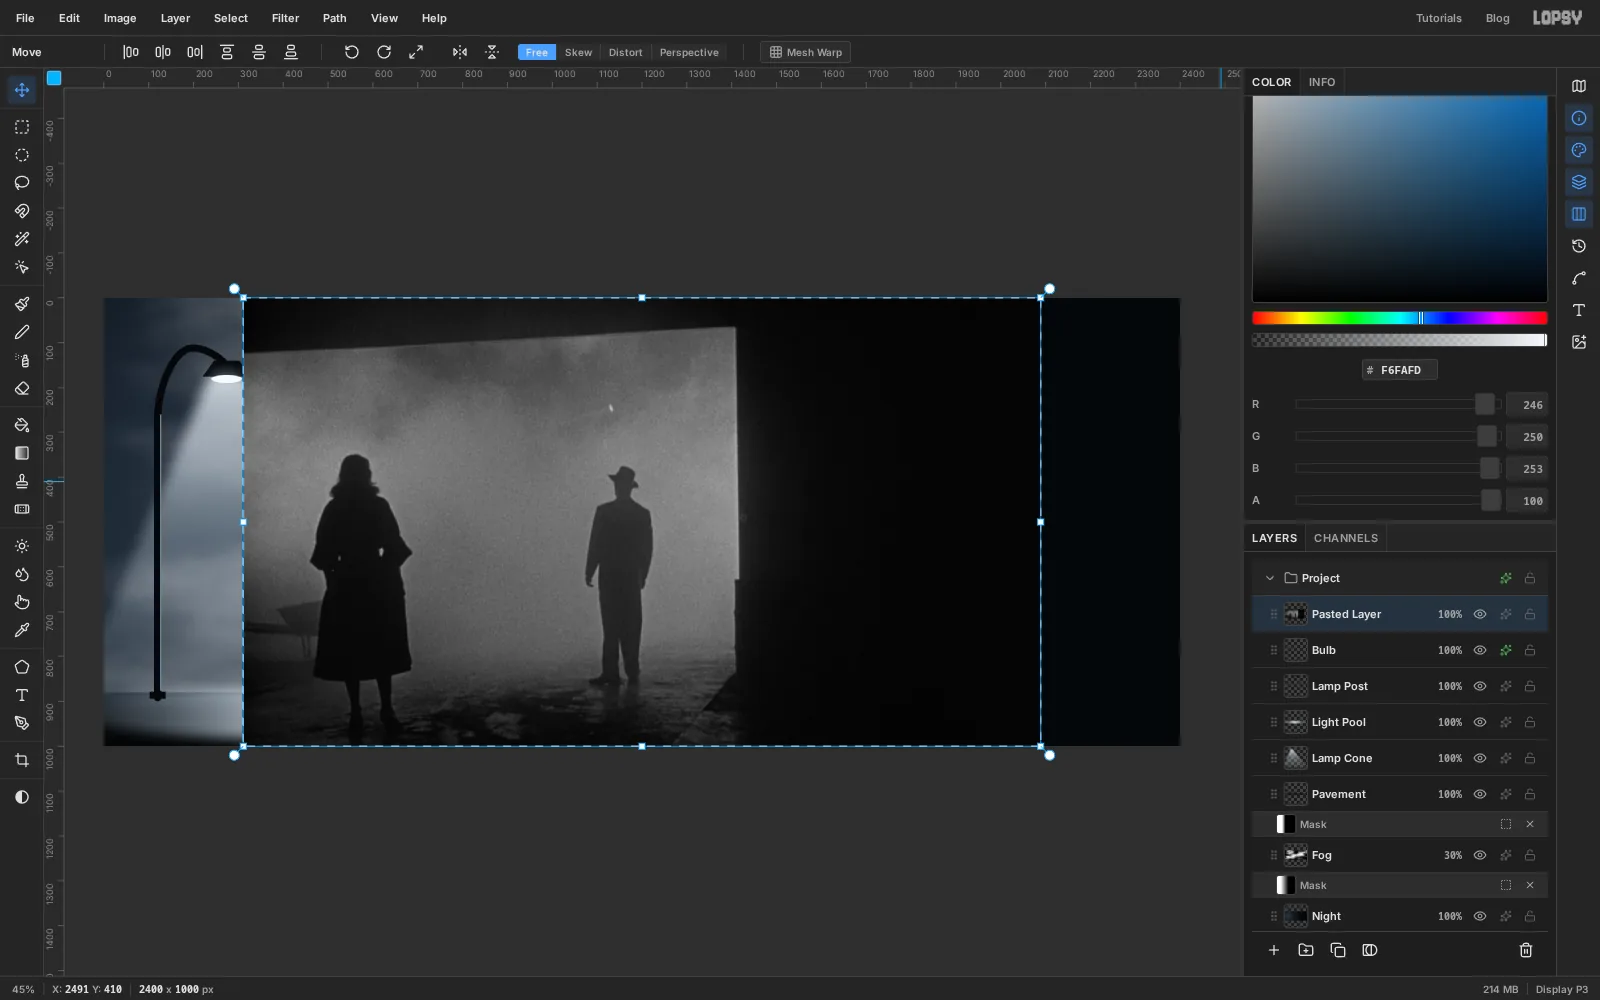
Drag BigComboTrailer.jpg from your computer onto the canvas. It arrives as a new layer, scaled down to fit the canvas and already selected. Press Cmd+D and rename the layer Detective.
You want the man on the right. He's standing with his back to the camera, which is ideal: there's no face to get wrong.
-
Cut out the man
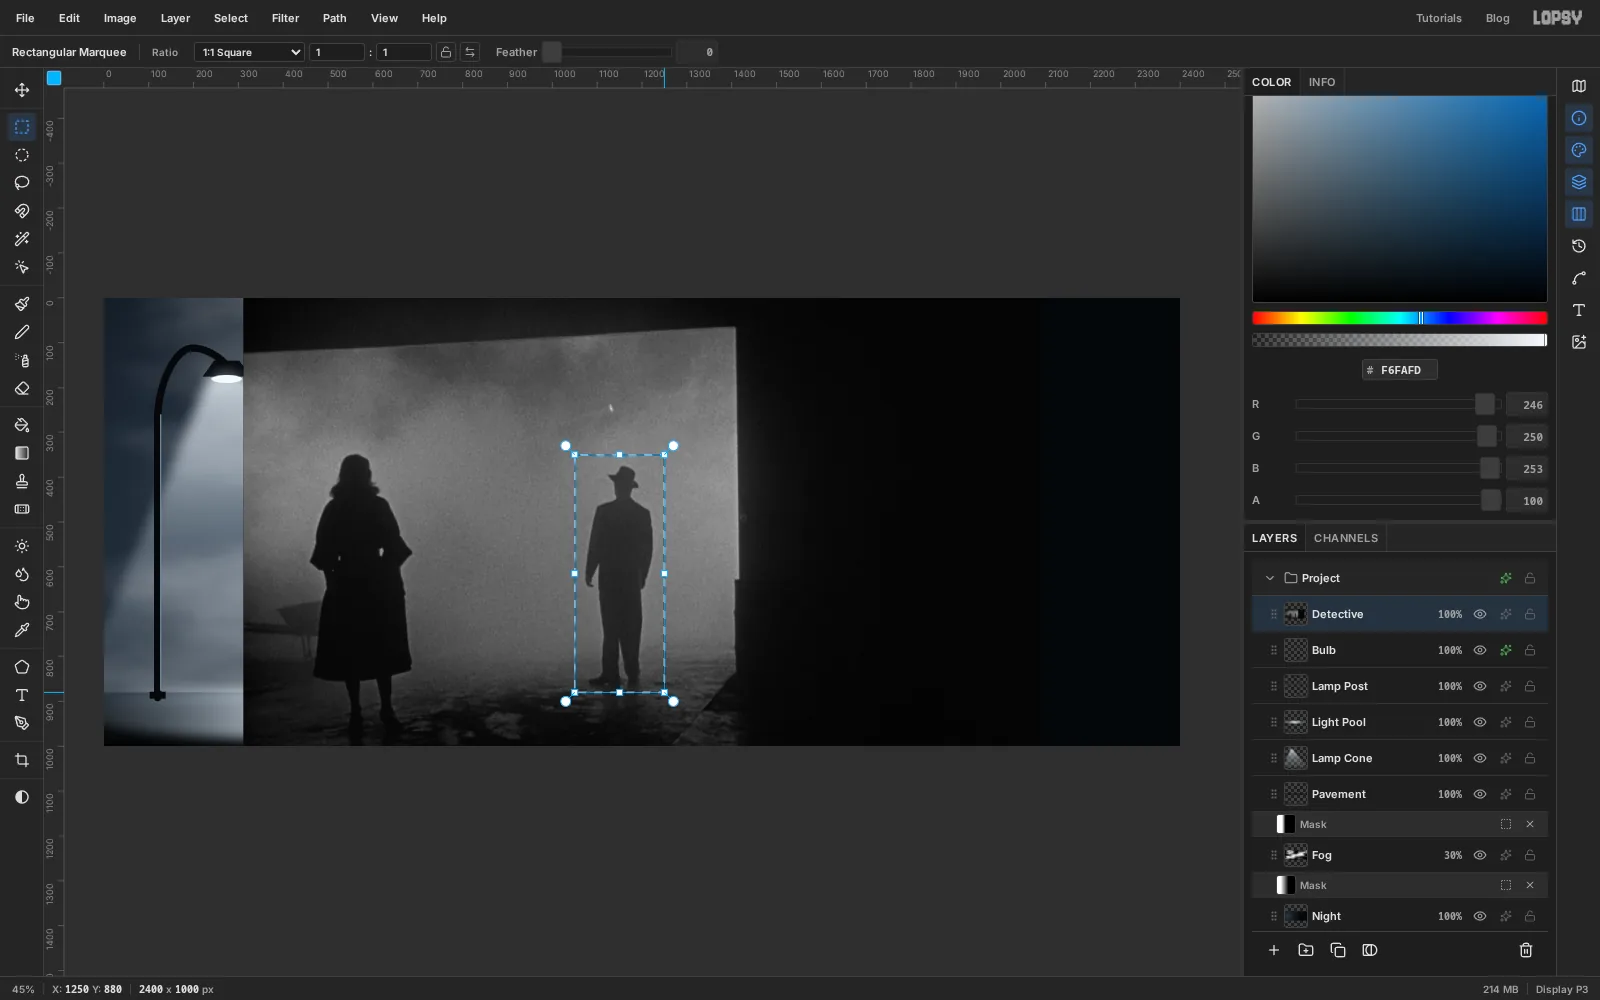
With the Rectangular Marquee, drag a box around the man. Leave some fog on every side, and take it a little below his shoes.
Choose Select → Inverse and press Delete. Everything but the box is gone. Deselect.
-
Turn him into a silhouette with Threshold
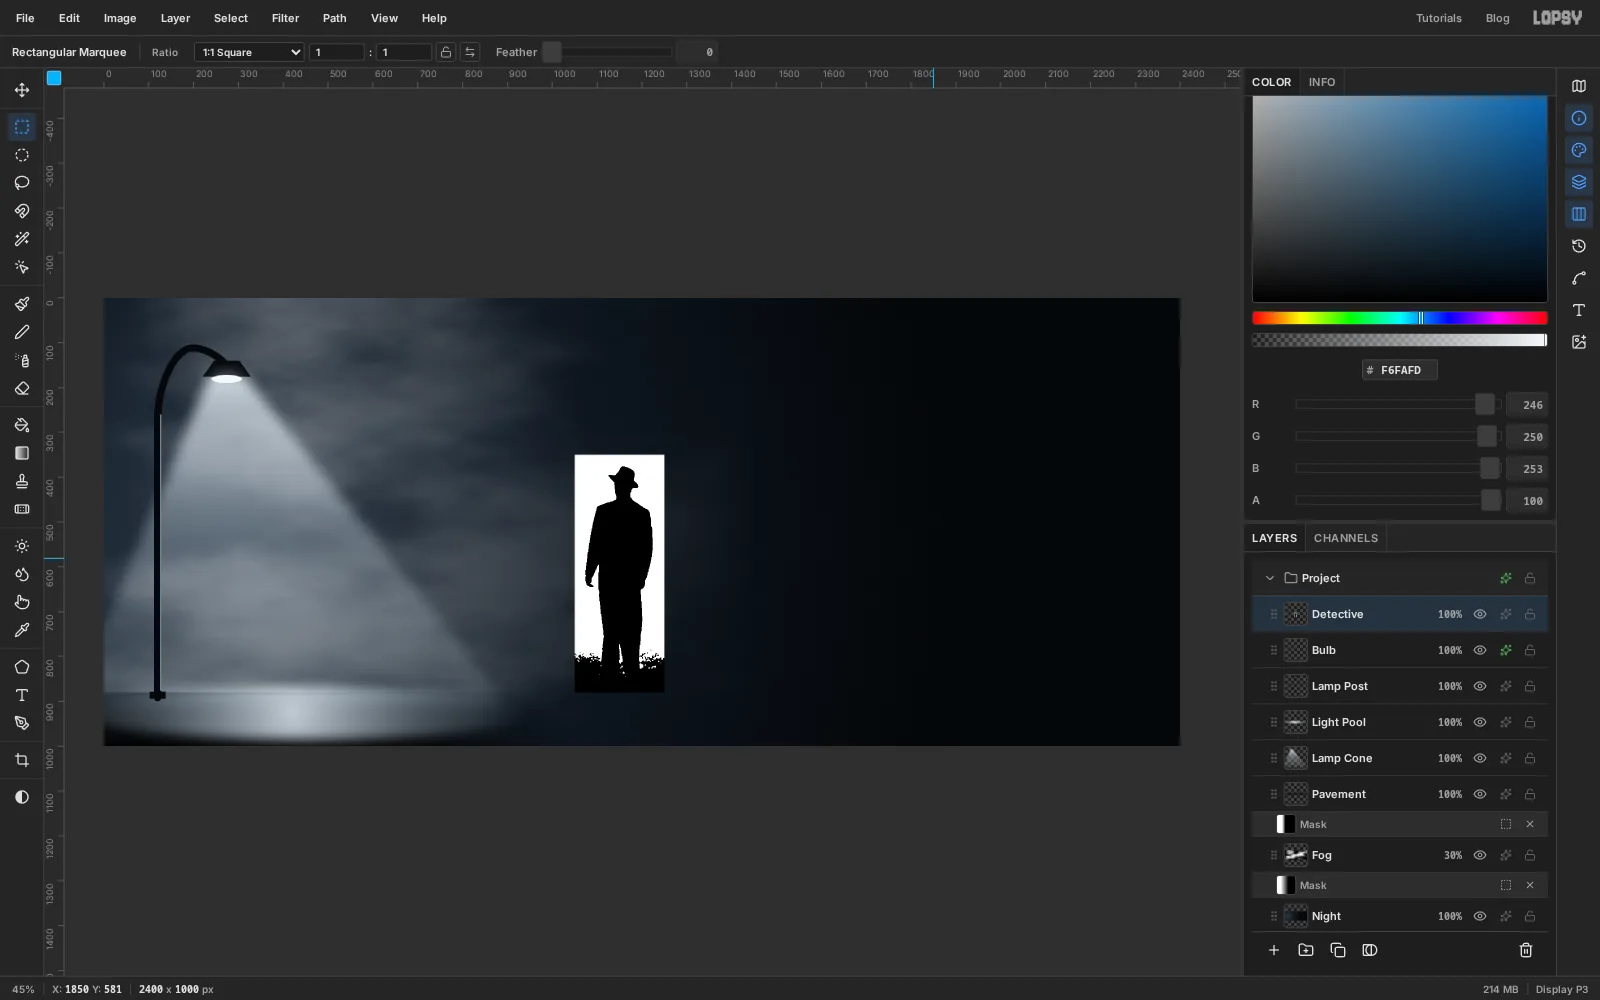
Film grain makes a ragged edge, so blur it away first: Filter → Gaussian Blur… with Radius 2.
Then choose Filter → Threshold…. Threshold turns every pixel black or white, depending on which side of the level it falls. Turn on Preview and set Level to about 84, moving the slider until the man is solid black and the fog is solid white. If his shoulders start to break up, the level is too low.
-
Delete the white with the Magic Wand
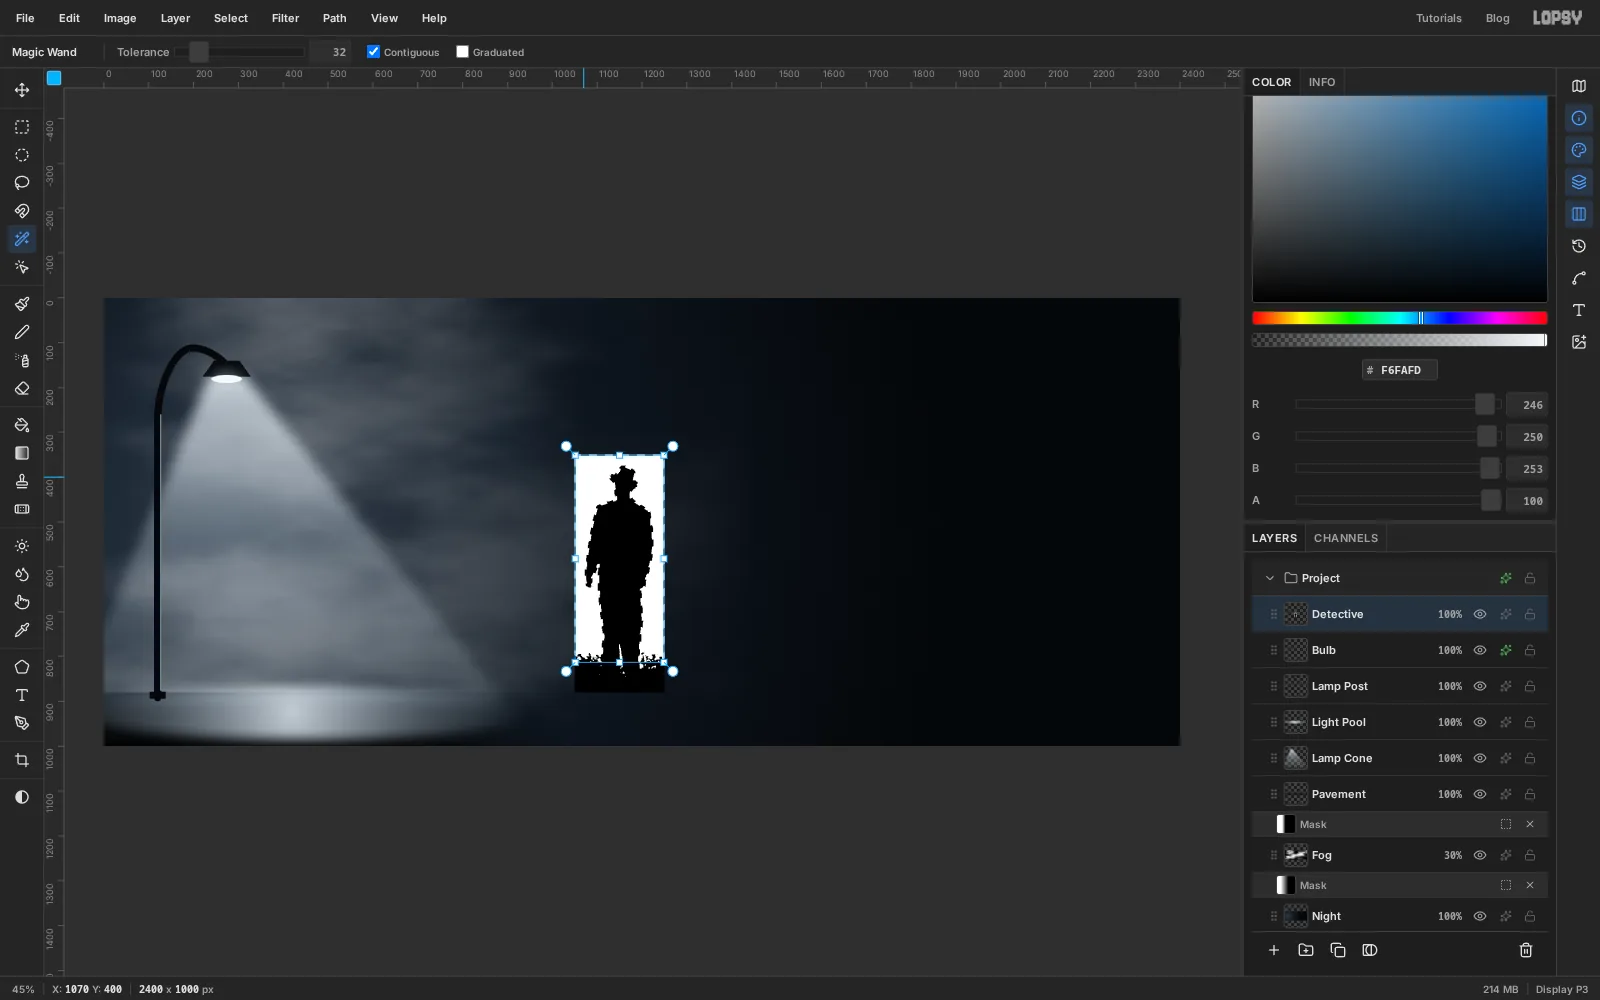
Pick the Magic Wand and click anywhere in the white. Press Delete, then deselect. The man now stands on the fog you painted earlier.
-
Trim the floor
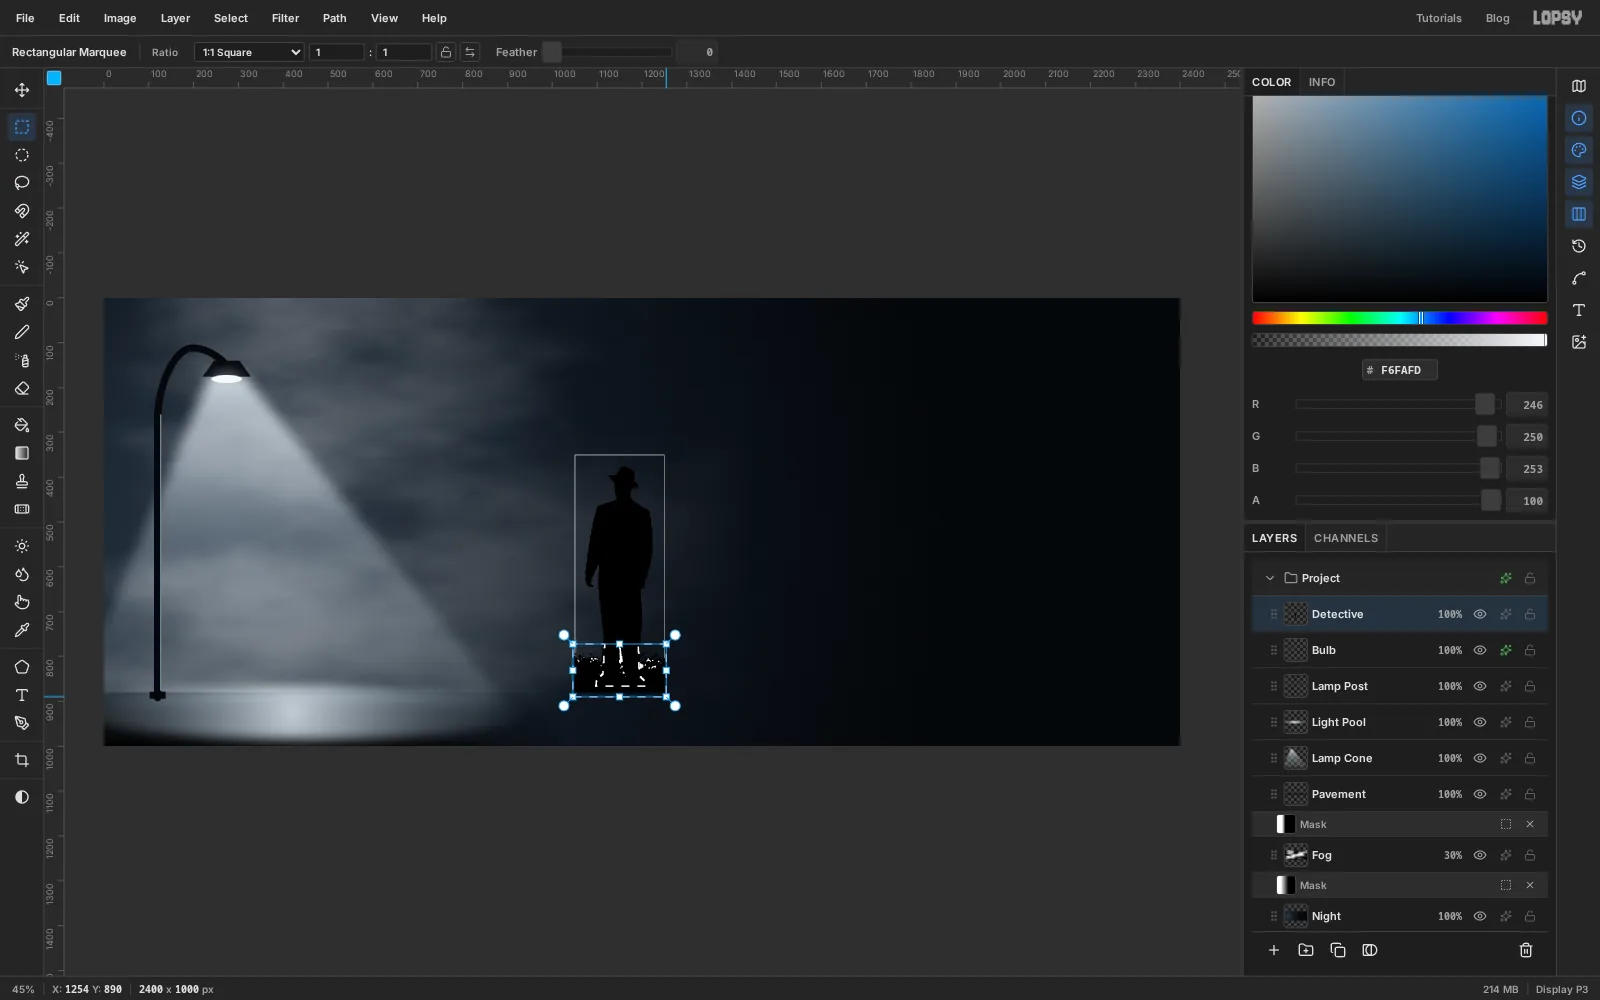
The dark floor in the photo came through Threshold as a black slab around his shoes.
With the Lasso, draw around the floor to the left of his legs, following the outside of the trouser leg and the shoe. Hold Shift and do the same on the right. Holding Shift adds to the selection. Switch to the Rectangular Marquee, hold Shift again and add a strip under his soles. Press Delete and deselect.
There's one more leftover: a faint line around where the box used to be, from the blur. Click the man's body with the Magic Wand, choose Select → Inverse, press Delete and deselect.
-
Fill him solid
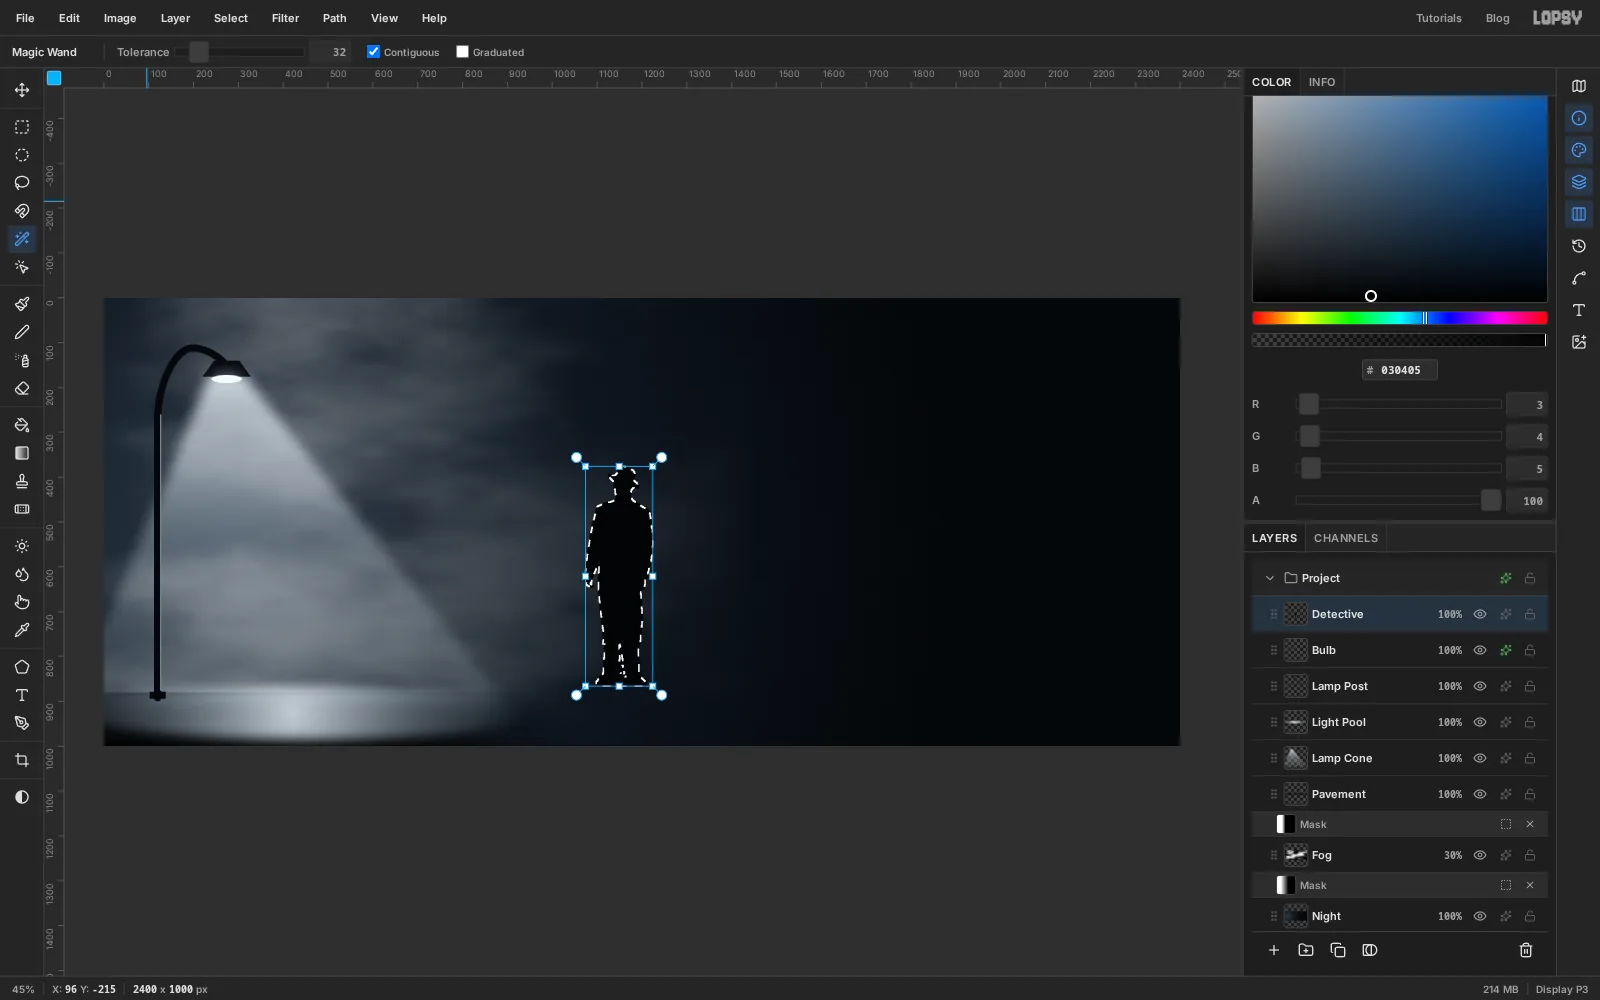
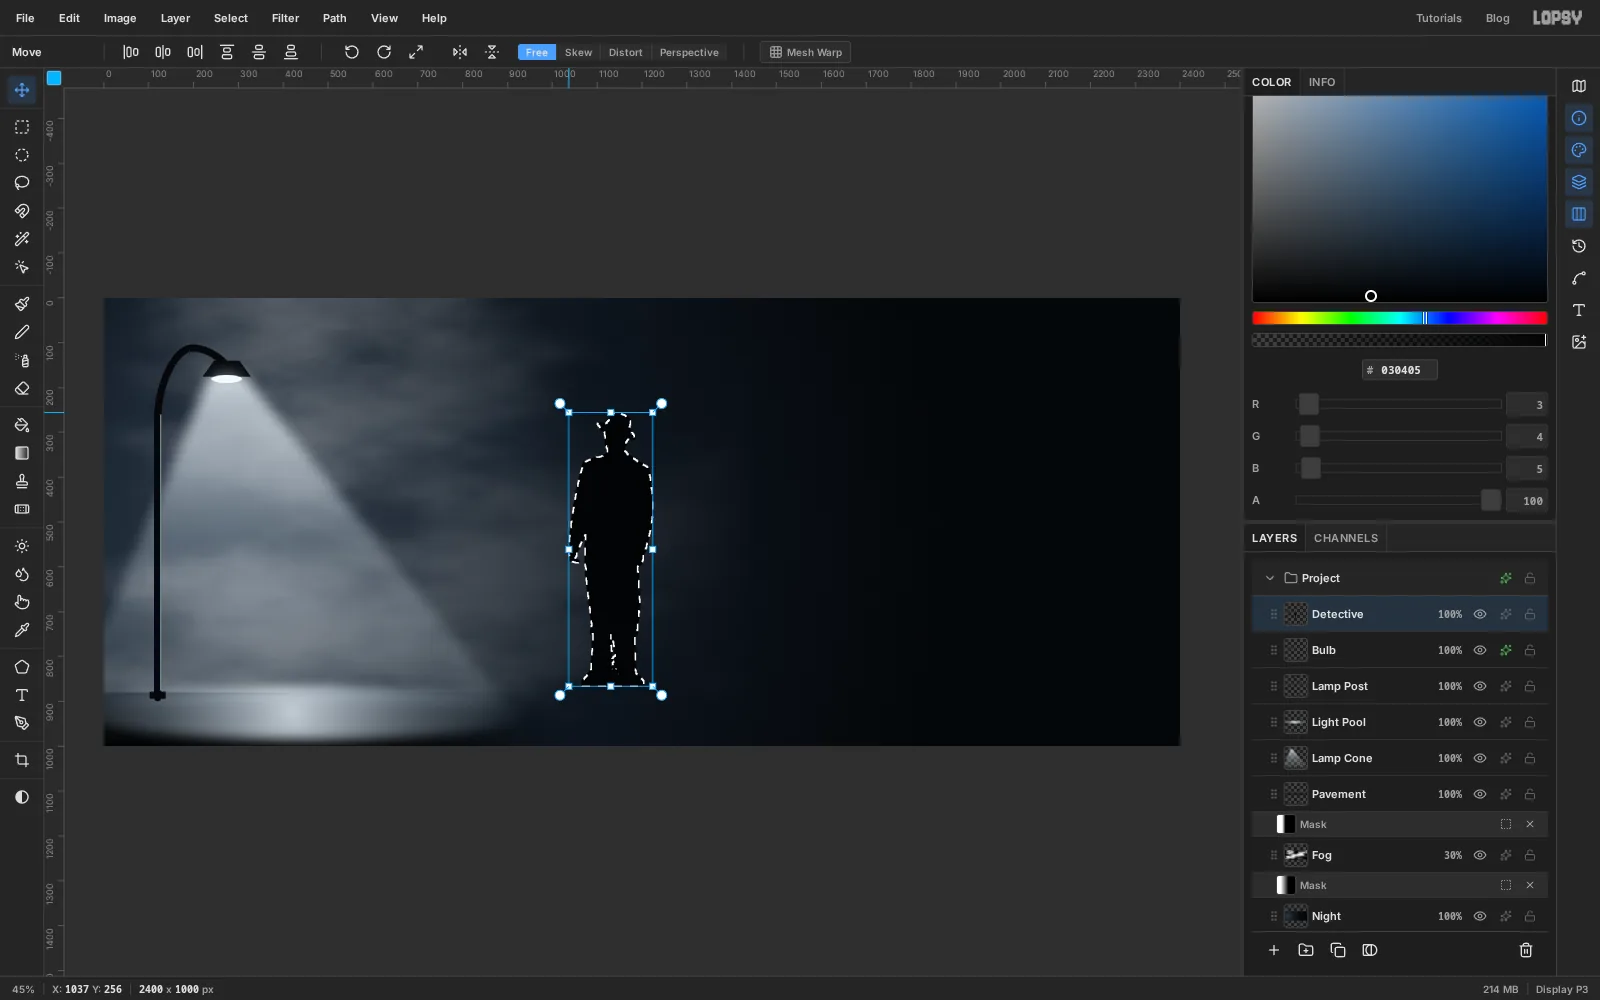
Hold Cmd and click the Detective layer's thumbnail. This selects everything on the layer that isn't transparent. Set the foreground colour to and choose Edit → Fill. Any white specks inside the figure are covered.
Keep the selection for the next step.
-
Scale him up
Pick the Move tool. Handles appear around the selection. Hold Cmd, which keeps the proportions, and drag the top-left corner handle up and to the left until he's about a quarter taller. Press Cmd+D to commit.
Scaling a black and white cut-out leaves a stepped edge, so run Filter → Gaussian Blur… at Radius 1 to smooth it.
-
Stand him under the lamp
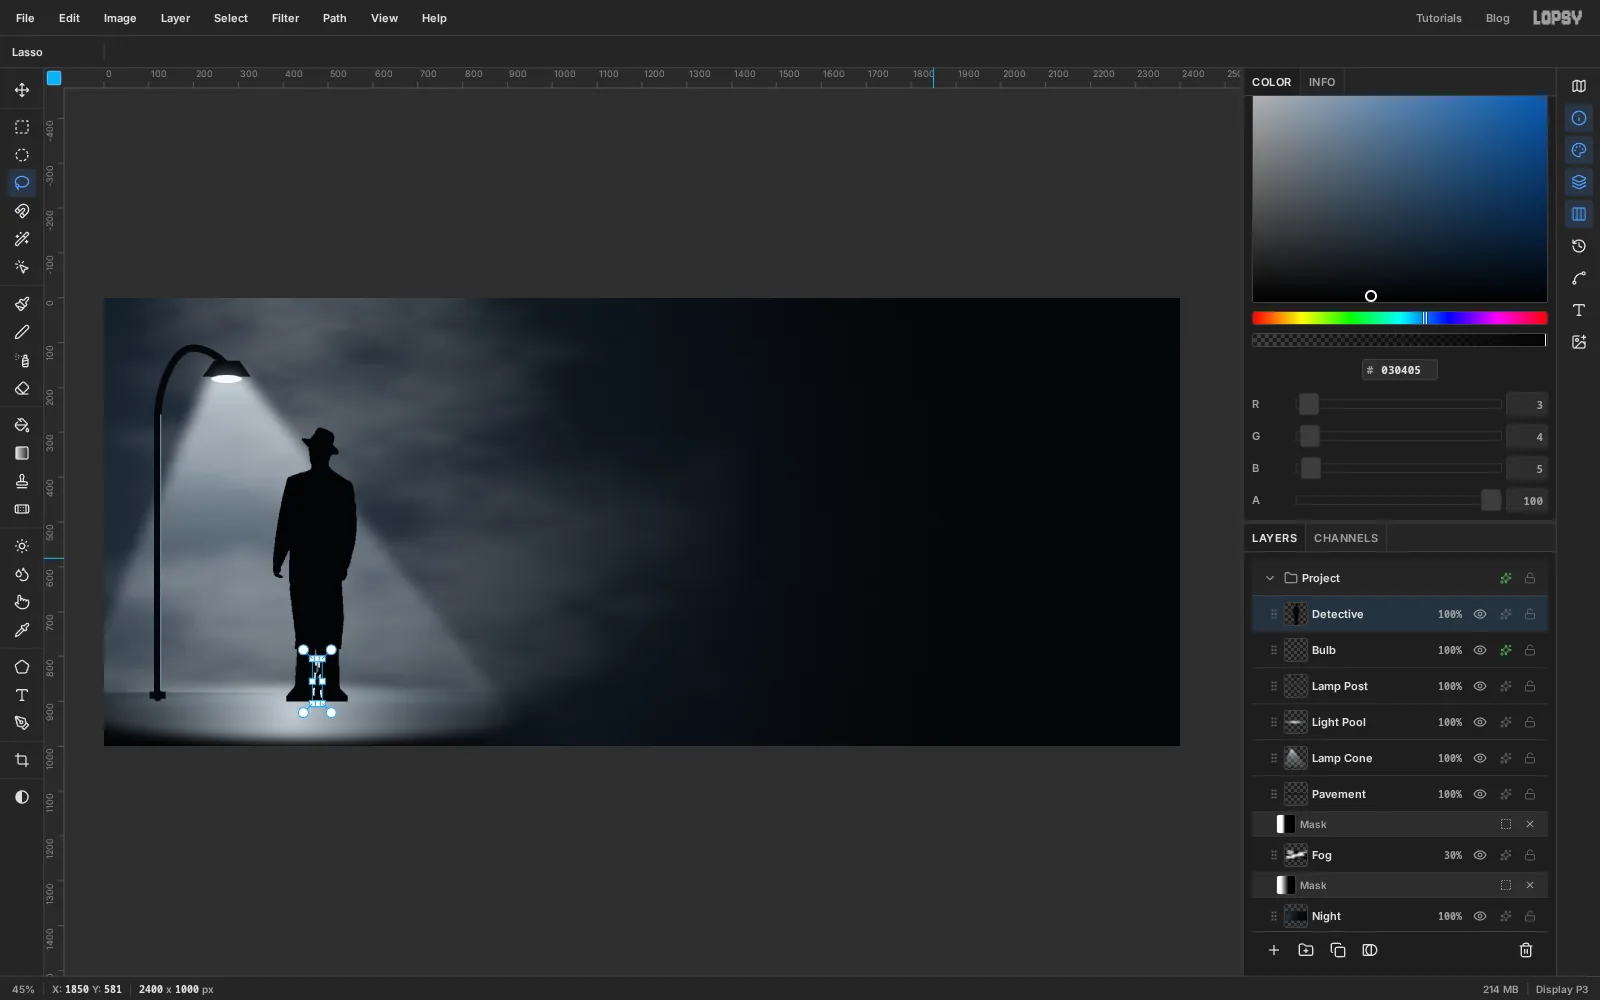
With the Move tool, drag him into the cone, a little to the right of its centre, with his soles on the top edge of the light pool.
His legs are still one block. With the Lasso, draw a thin wedge from the ground up between his shoes to about knee height. Feather it by 1, press Delete and deselect. He has two legs now.
-
Add a rim of light
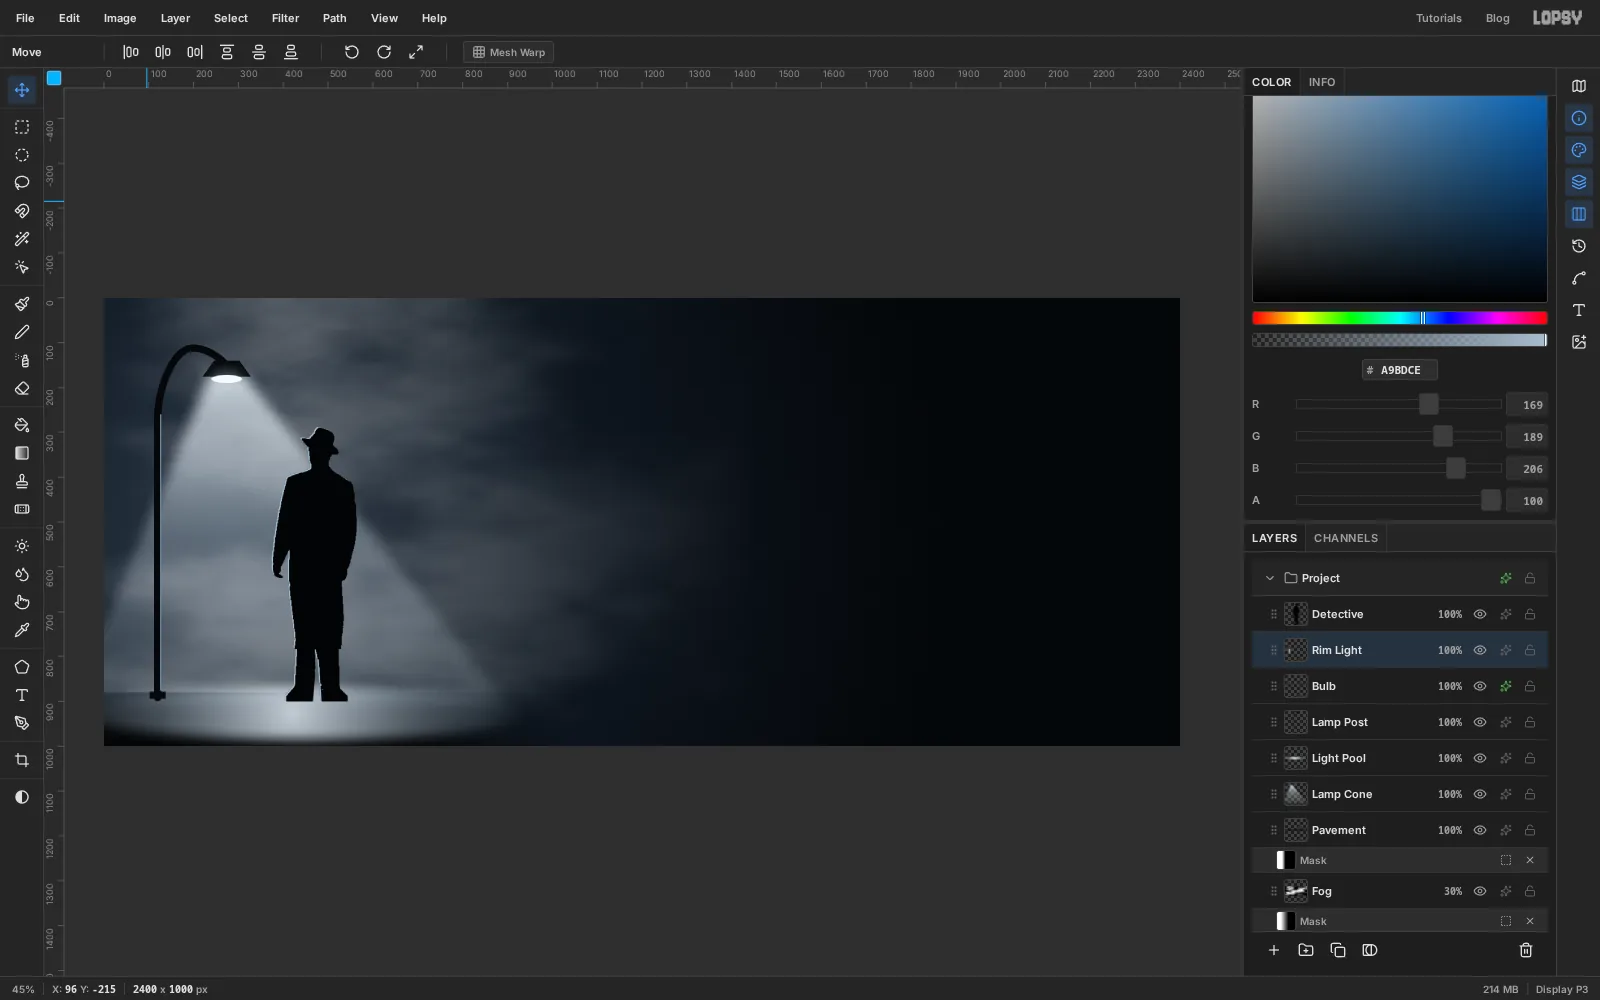
A black shape with no edge light looks pasted on. The lamp is up and to the left, so the left side of his hat, shoulder and arm should catch it.
Choose Layer → Duplicate Layer. The copy lands on top, named Detective copy. Rename the original underneath it to Rim Light, and rename Detective copy to Detective.
Click Rim Light, Cmd-click its thumbnail, set the foreground colour to , choose Edit → Fill and deselect. Pick the Move tool and press ← three times and ↑ twice. The pale copy now peeks out from behind the black one on the side that faces the lamp.
-
Flip a copy for the shadow
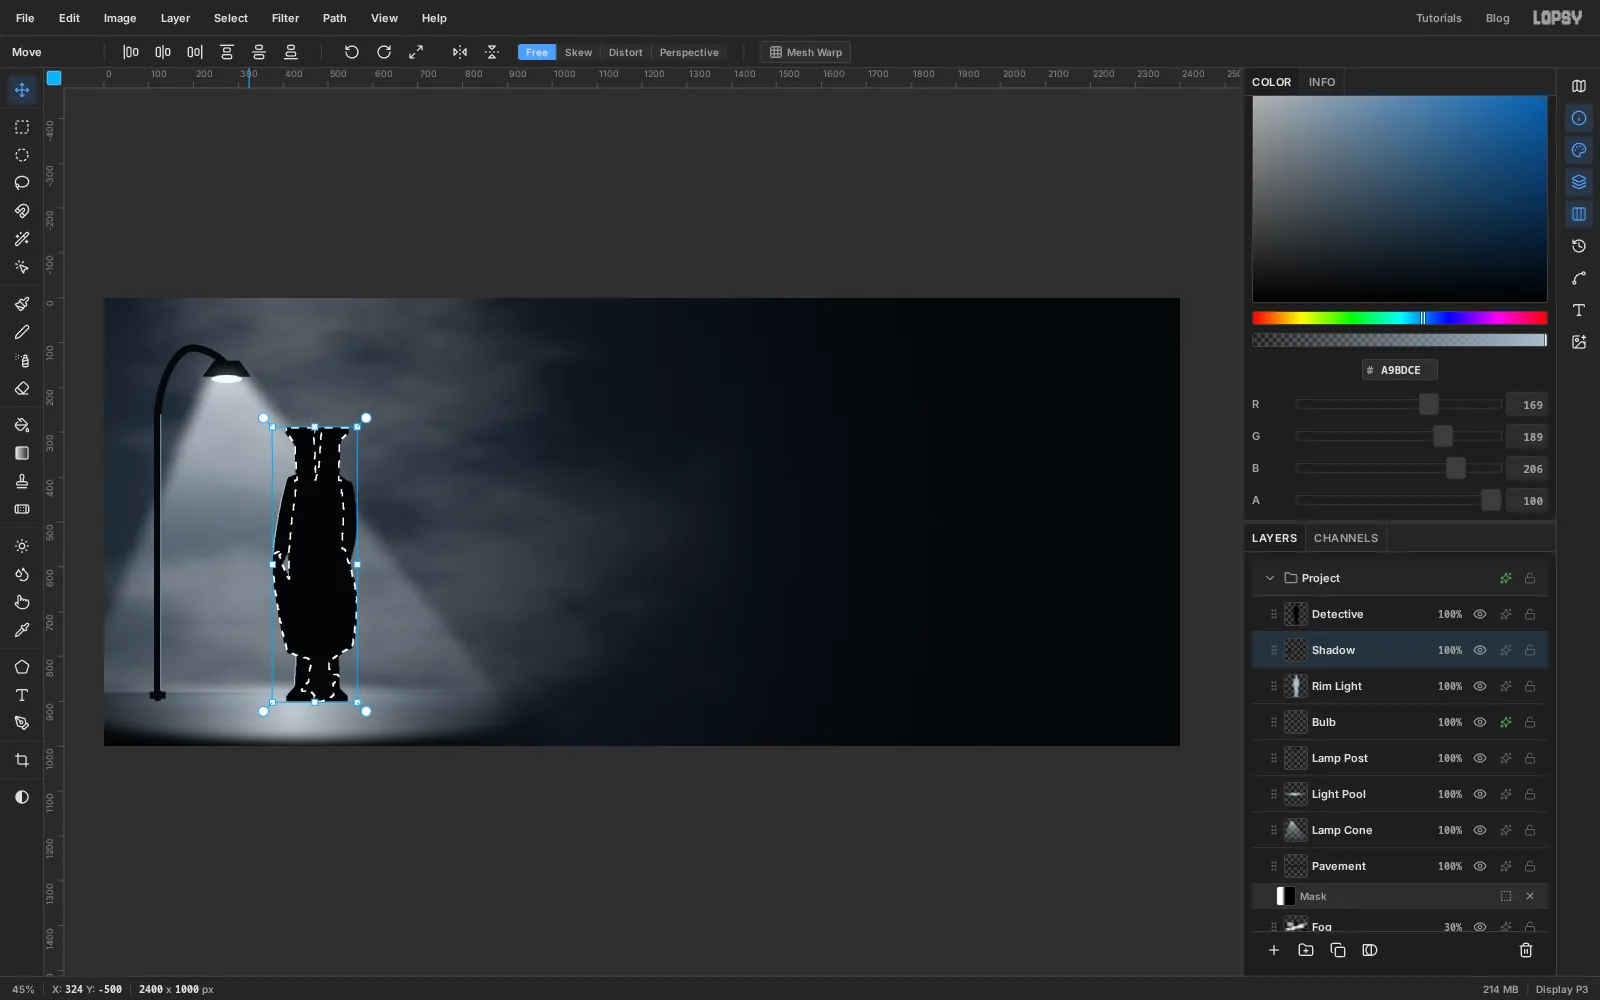
Click Detective and duplicate it again. As before, rename the original underneath to Shadow and the copy on top to Detective.
On Shadow, Cmd-click the thumbnail and pick the Move tool. Click Flip Vertical in the options bar. The copy is now standing on its head.
-
Lay the shadow on the ground with Distort
In the options bar, switch the transform mode from Free to Distort. In Distort, each corner handle moves on its own.
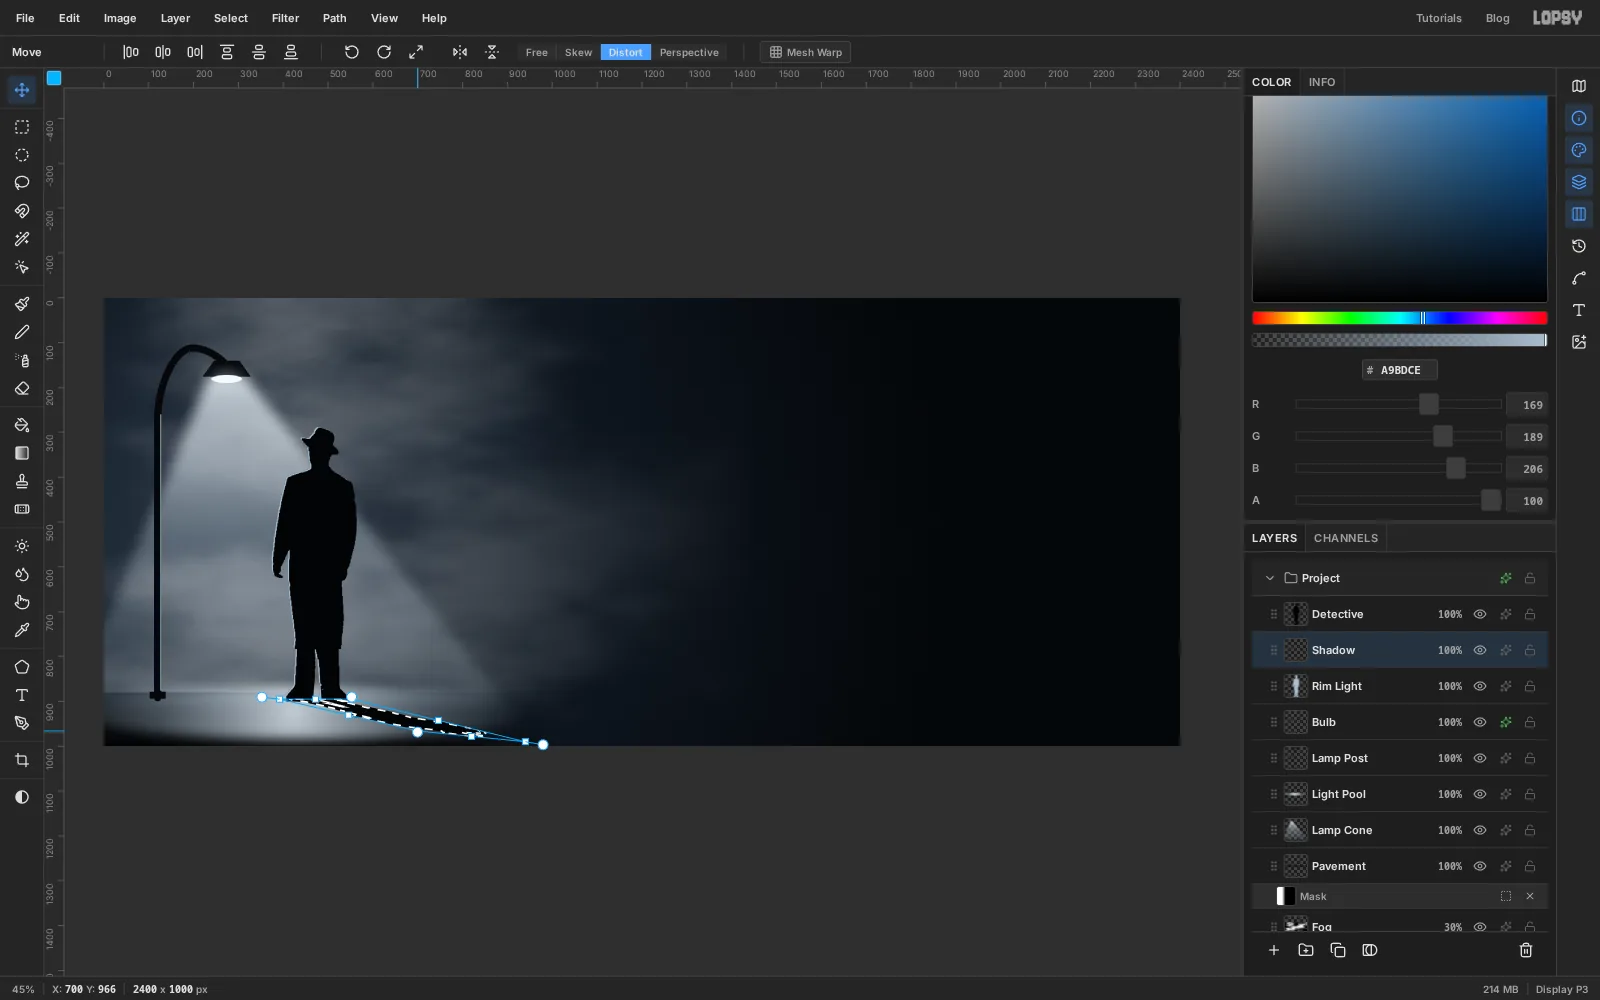
- After the flip, the top of the box is his feet. Drag the two top corners straight down to his shoes, one to the outside of each shoe.
- Drag the bottom-right corner down and far out to the right, stopping just inside the bottom edge of the canvas.
- Drag the bottom-left corner out to the right as well, but not as far and not as low.
The shadow should start at both feet and run away from the lamp. Switch the mode back to Free and press Cmd+D.
Then finish it:
- Run Gaussian Blur at Radius 4.
- Click Add Mask. Set the gradient to Linear with two stops, white and dark grey (), both at full opacity.
- Drag from his feet to the tip of the shadow, so it fades as it gets further from him.
- Click the Shadow row and lower its opacity to 88%.
-
Group the scene
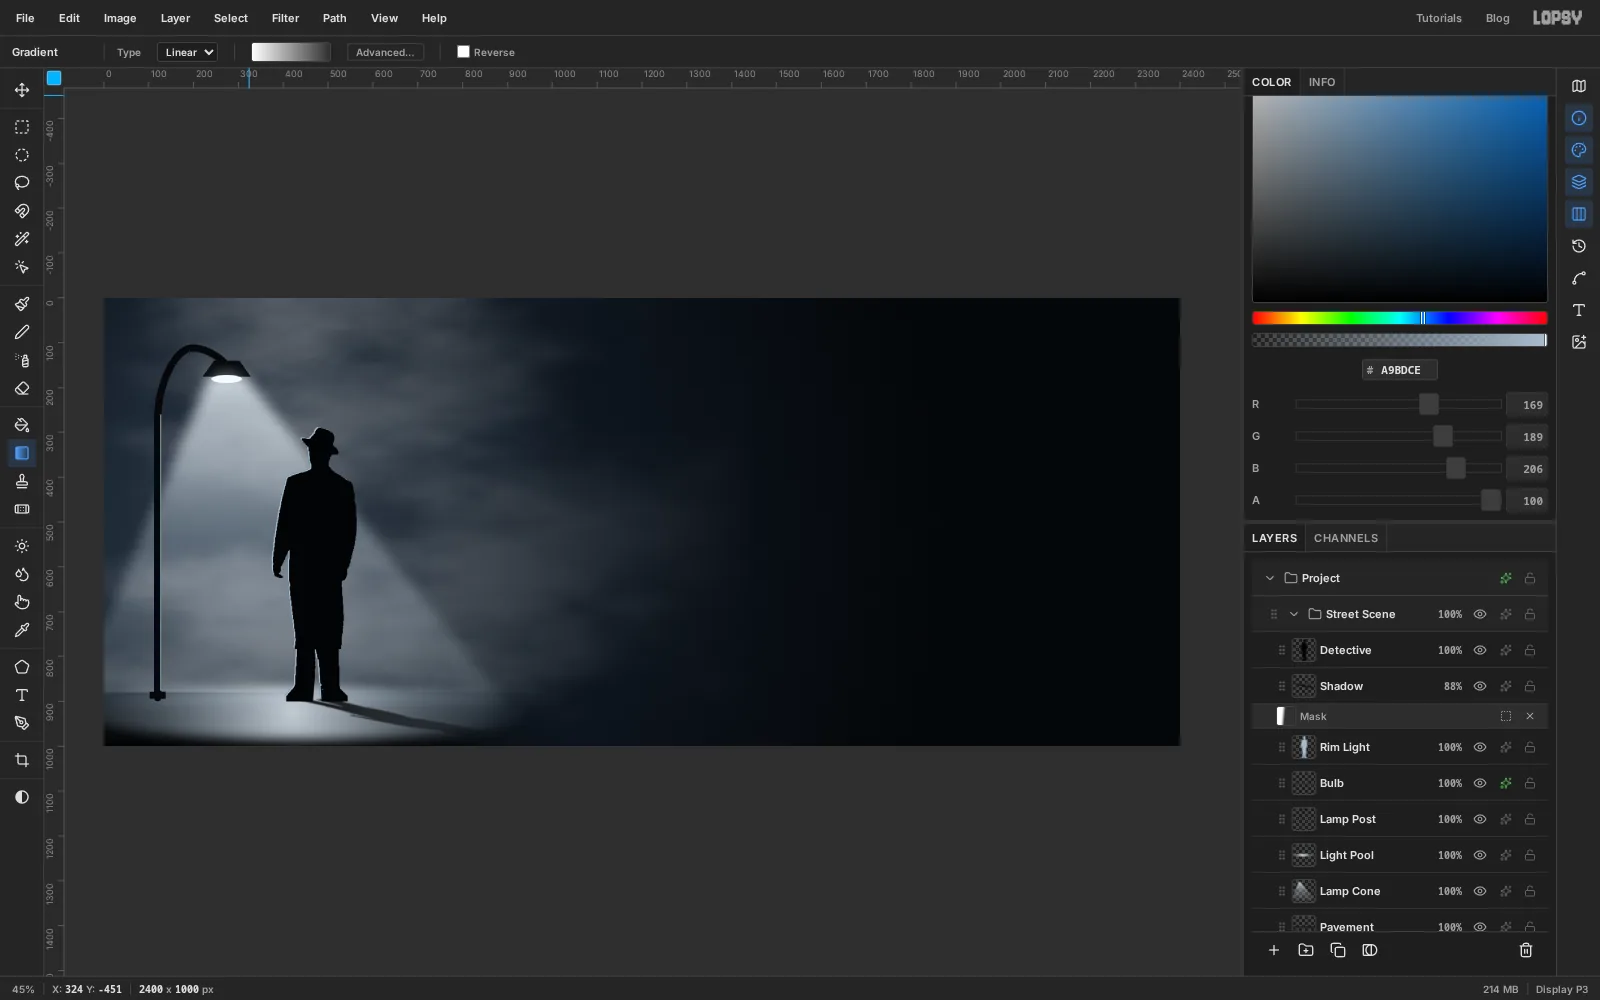
Click Detective in the Layers panel, then Shift-click Pavement to select every layer between them. Choose Layer → Group Layers and rename the group Street Scene.
Grouping keeps the Layers panel short, and it lets you hide or move the whole scene at once.
-
Set the first line of the name
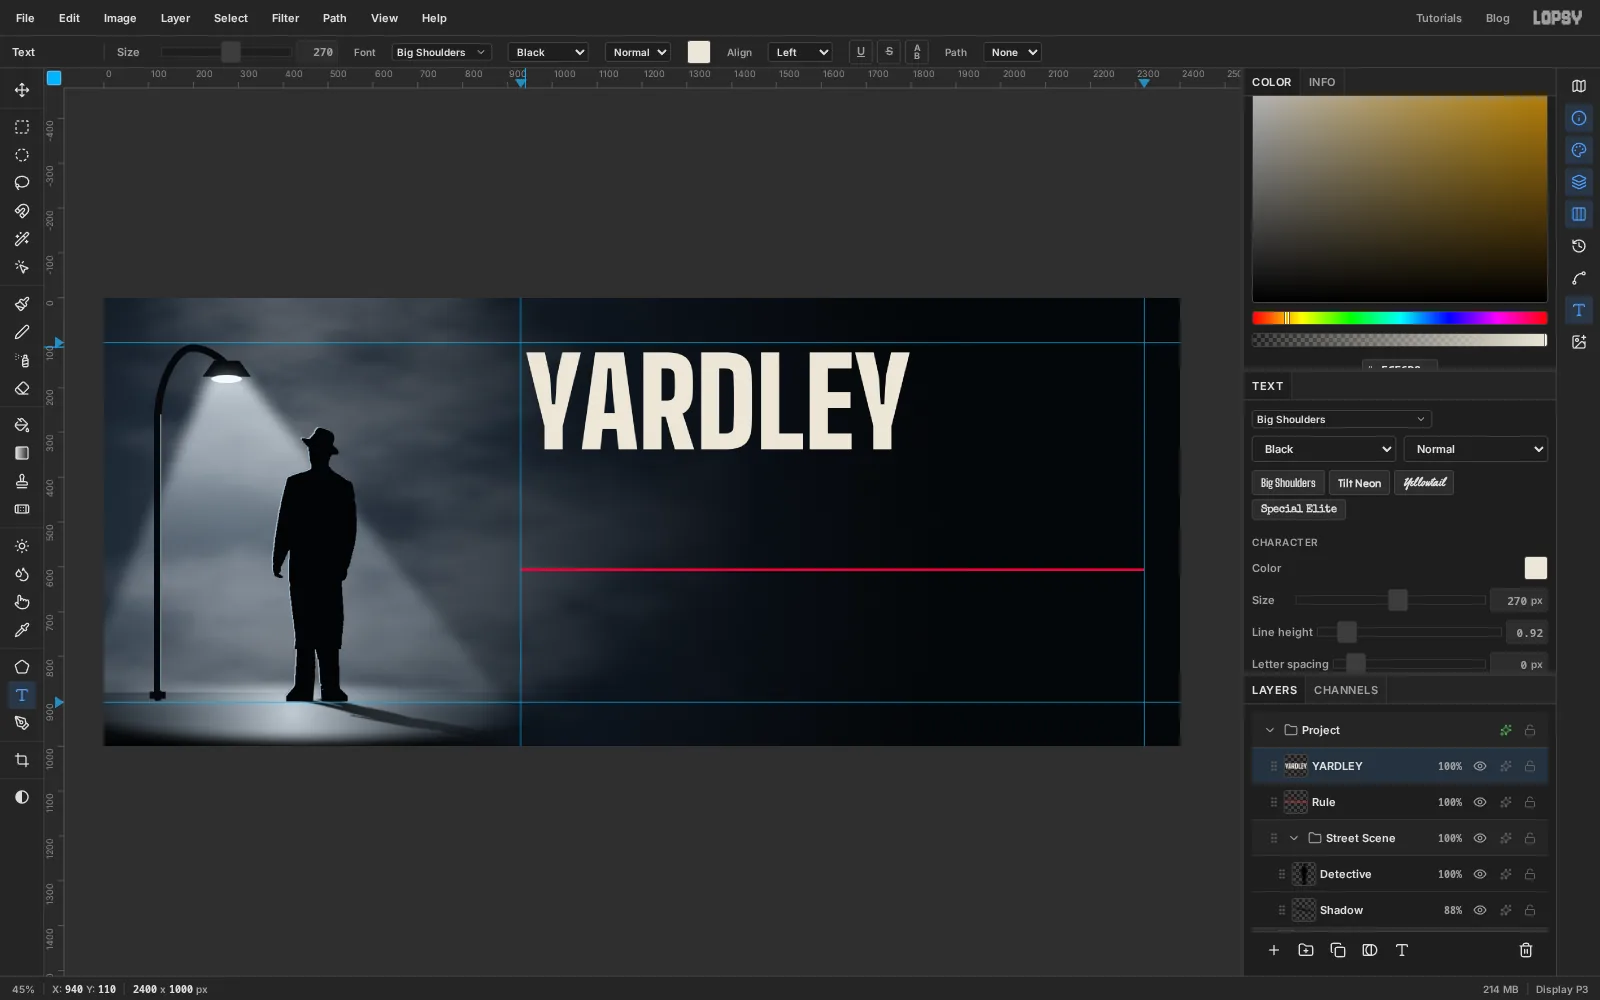
First set up guides. Click once in the top ruler at 930 and again at 2320: those are the left and right edges of the type. Click in the left ruler at 100 and 902 for the top and bottom. The bottom guide lines up with the detective's feet.
Then draw the red rule, because everything else hangs off it. Click the Street Scene group and add a layer called Rule. A new layer lands inside the group, so drag its row up above Street Scene.
Set the foreground colour to , pick the Pencil at Size 6, click on the left guide about 600 px down and Shift-click on the right guide at the same height.
Now the name. Set the foreground colour to and pick the Text tool. In the options bar set Size to 270, choose Big Shoulders from the font list and set the weight to Black. Click in the empty space near the top and type YARDLEY. In the Text panel, set Line height to 0.92 so the second line will sit close under the first.
-
Add the second line and colour the ampersand
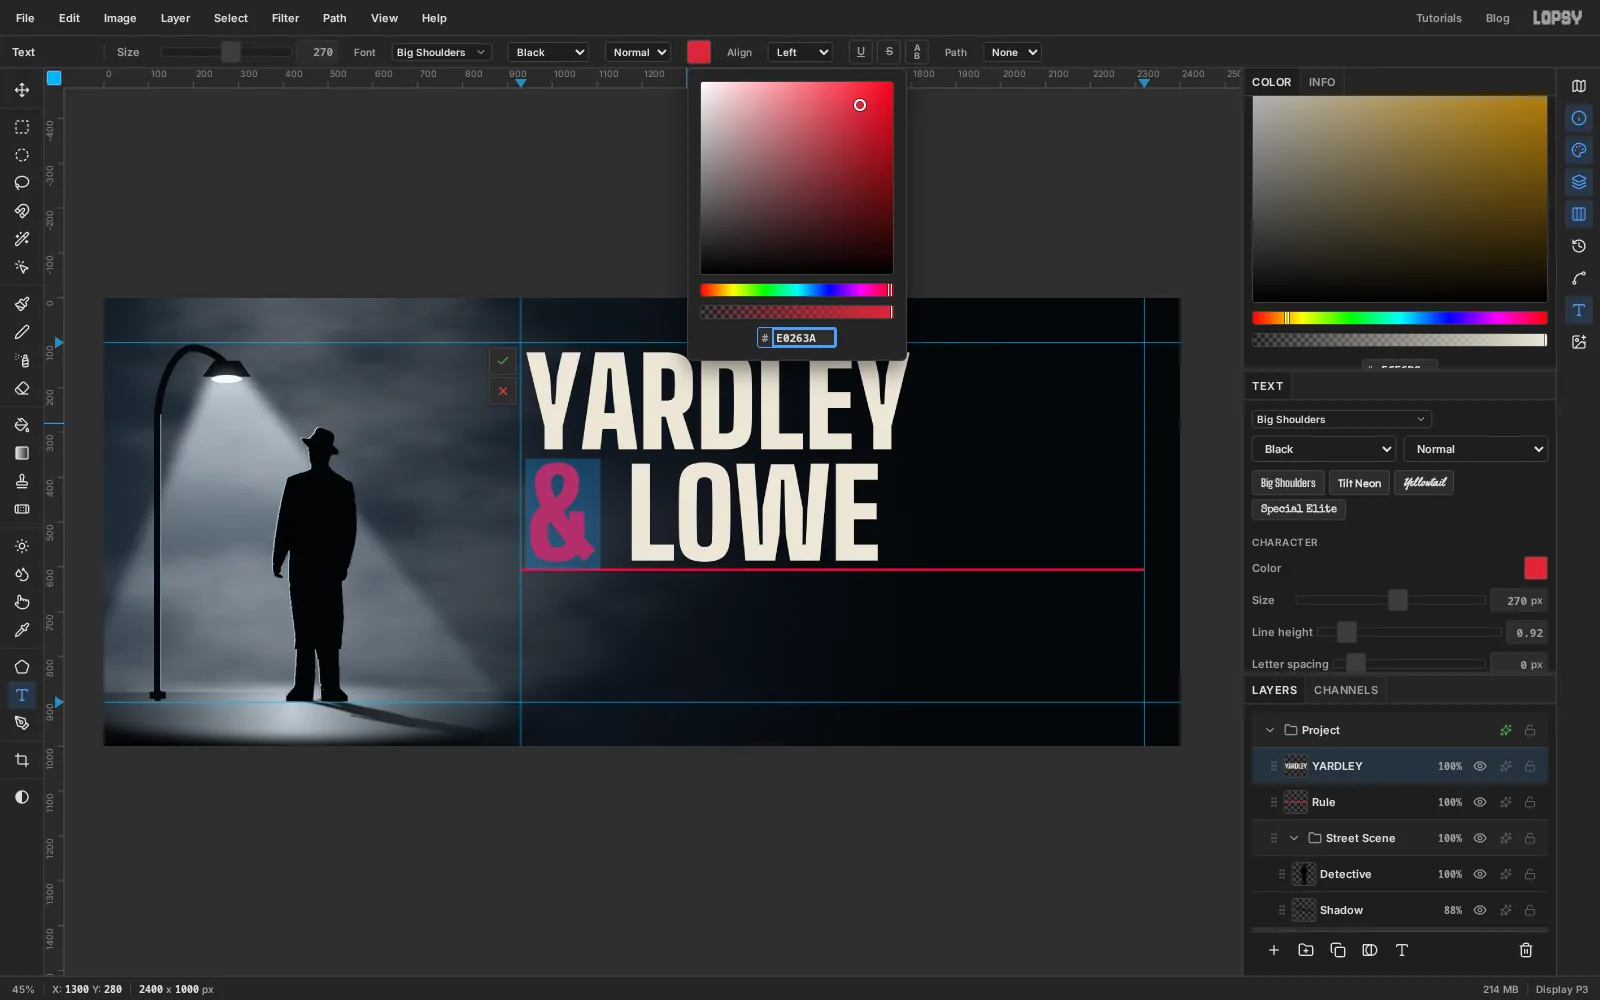
Still typing, press Enter and type & LOWE.
Press Home to jump to the start of the line, then Shift+→ to select only the ampersand. Click the Text color swatch in the options bar, type
E0263Ainto the hex field and press Enter. Only the selected character changes. Press Esc to close the picker and Tab to commit the text.Pick the Move tool and use the arrow keys to seat the block: the left edge of the Y on the left guide and the tops of the letters on the top guide. Hold Shift to move 10 px at a time.
-
Add the subtitle
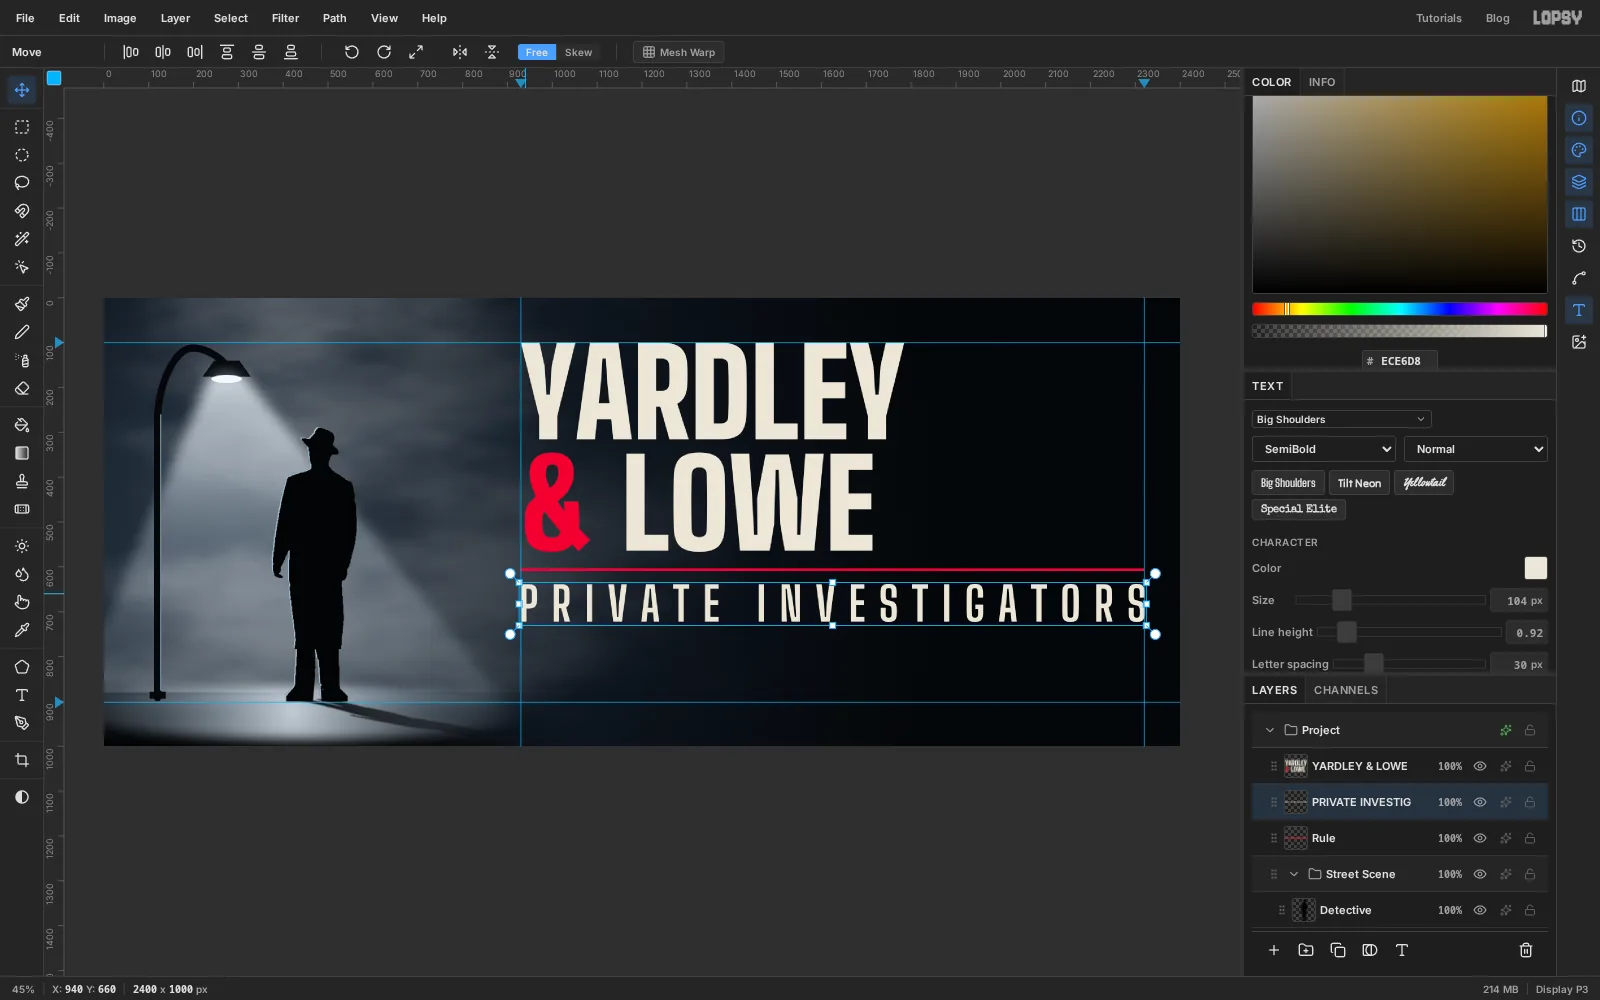
Click the Rule layer first, so you don't restyle the name. With the Text tool, keep Big Shoulders, set Size to 104 and the weight to SemiBold, then click in empty space below the rule and type PRIVATE INVESTIGATORS. Press Tab.
In the Text panel, raise Letter spacing until the line is as wide as the rule. Here that's 30. Nudge it with the Move tool so the P sits on the left guide and the line hangs about 30 px under the rule.
-
Type the tagline
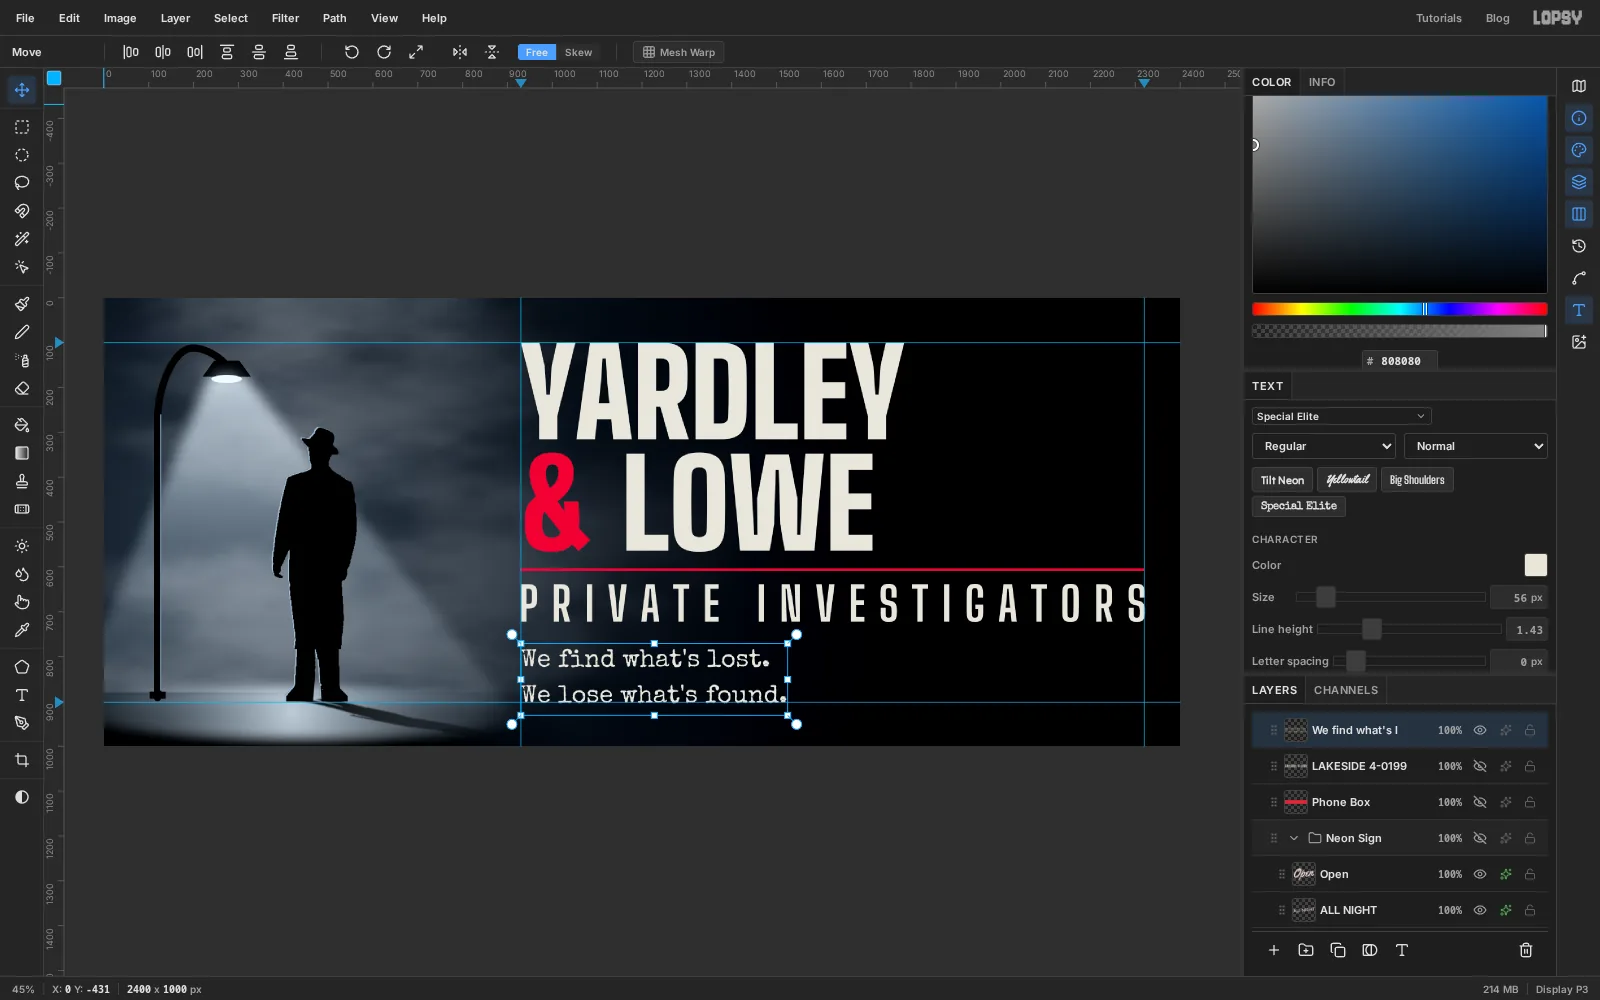
Click Rule again. With the Text tool, choose Special Elite, weight Regular, at Size 56. In the Text panel set Letter spacing back to 0 and Line height to 1.43.
Click below the subtitle and type We find what's lost., press Enter, and type We lose what's found. Press Tab.
Move it so the W sits on the left guide and the bottom of the second line rests on the bottom guide. The wide line height is what lets the two lines fill the same height as the phone panel you'll draw next.
-
Draw the phone panel
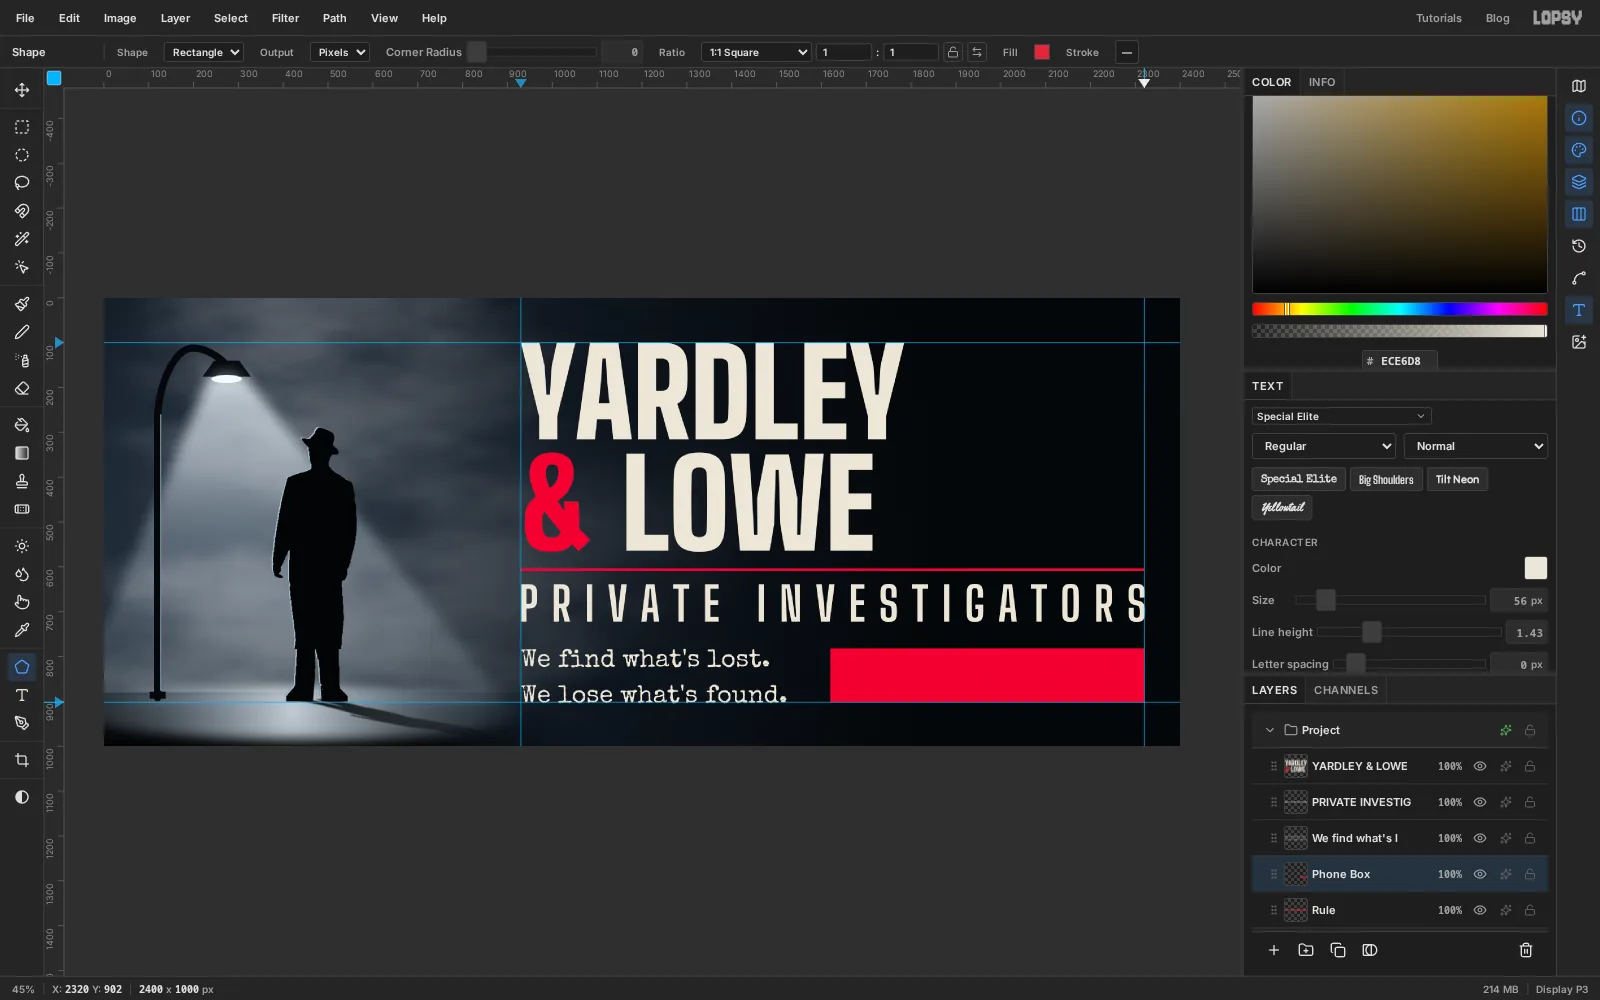
Click Rule and add a layer called Phone Box. Pick the Shape tool and set Shape to Rectangle. Click the Fill swatch and enter . If the shape has a stroke, click its swatch and choose Remove stroke.
The Shape tool draws from the centre outward. Start the drag where the middle of the panel should be and pull out to the corner where the right guide and the bottom guide cross. The corner snaps to the guides. Aim for a panel about 700 px wide and as tall as the two lines of tagline.
-
Seat the phone number
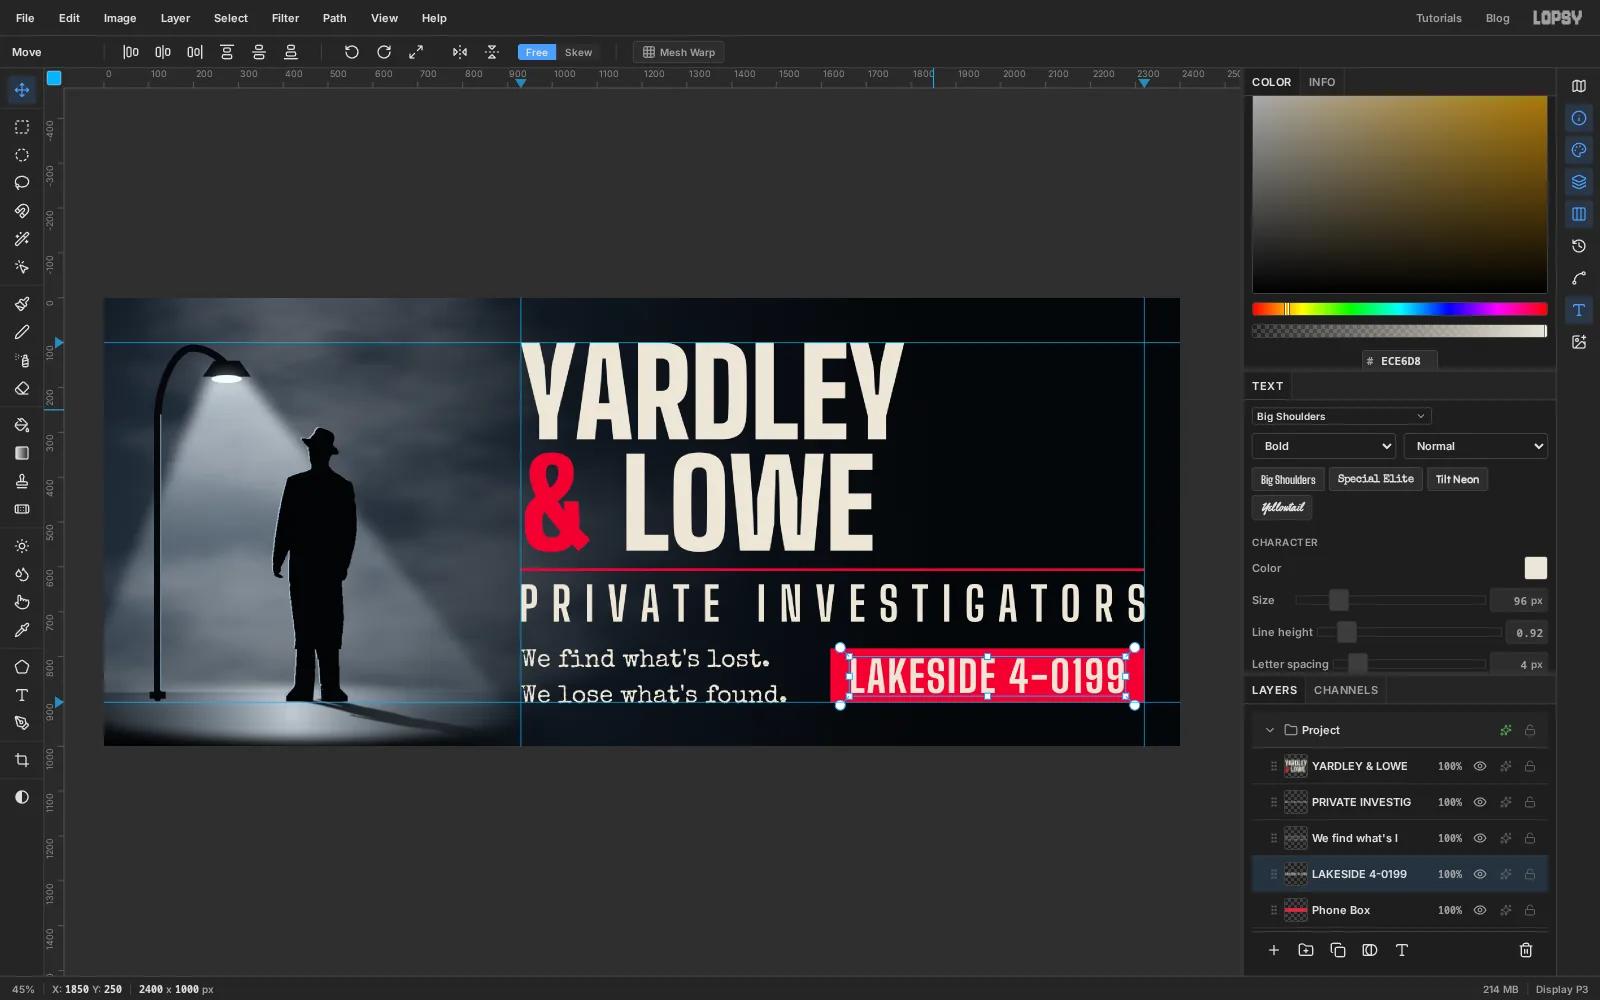
Click Phone Box, then pick the Text tool. Set Big Shoulders, Bold, Size 96, and in the Text panel Letter spacing 4 and Line height 0.92. Click in the empty space in the top right, well away from the other text, and type LAKESIDE 4-0199. Press Tab.
A click on existing text edits it, which is why you type somewhere empty and move it afterwards.
Drag the number into the panel with the Move tool and finish with the arrow keys. Check all four sides: the gap to the left of the L should match the gap to the right of the last 9, and the gap above the letters should match the gap below. There are no letters that drop below the line here, so the capitals can sit exactly in the middle.
-
Paint the neon's spill on the wall
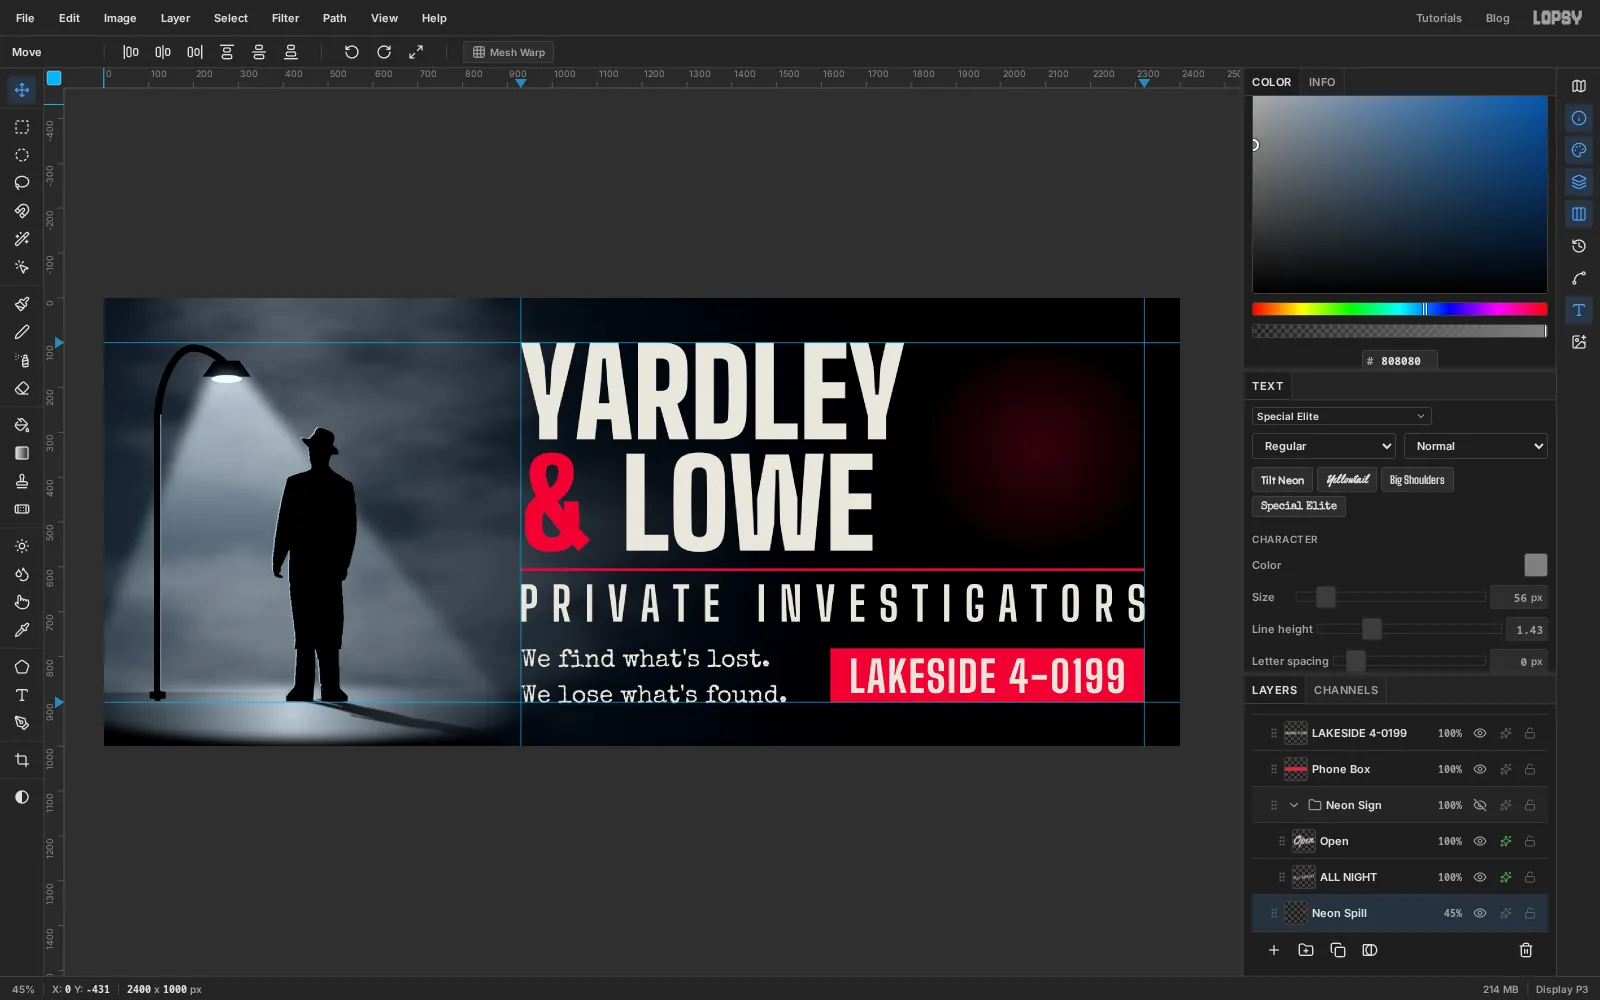
Neon lights up the wall behind it, so paint that first. Click Rule and add a layer called Neon Spill. With the Elliptical Marquee, drag an ellipse over the empty space to the right of the name and feather it by 60. Set the gradient to Radial with two stops, at 55% opacity and at 0%, and drag from the centre of the ellipse to its edge. Deselect, set the layer to Screen and lower it to 45%.
-
Set the sign's two words
Set the foreground colour to .
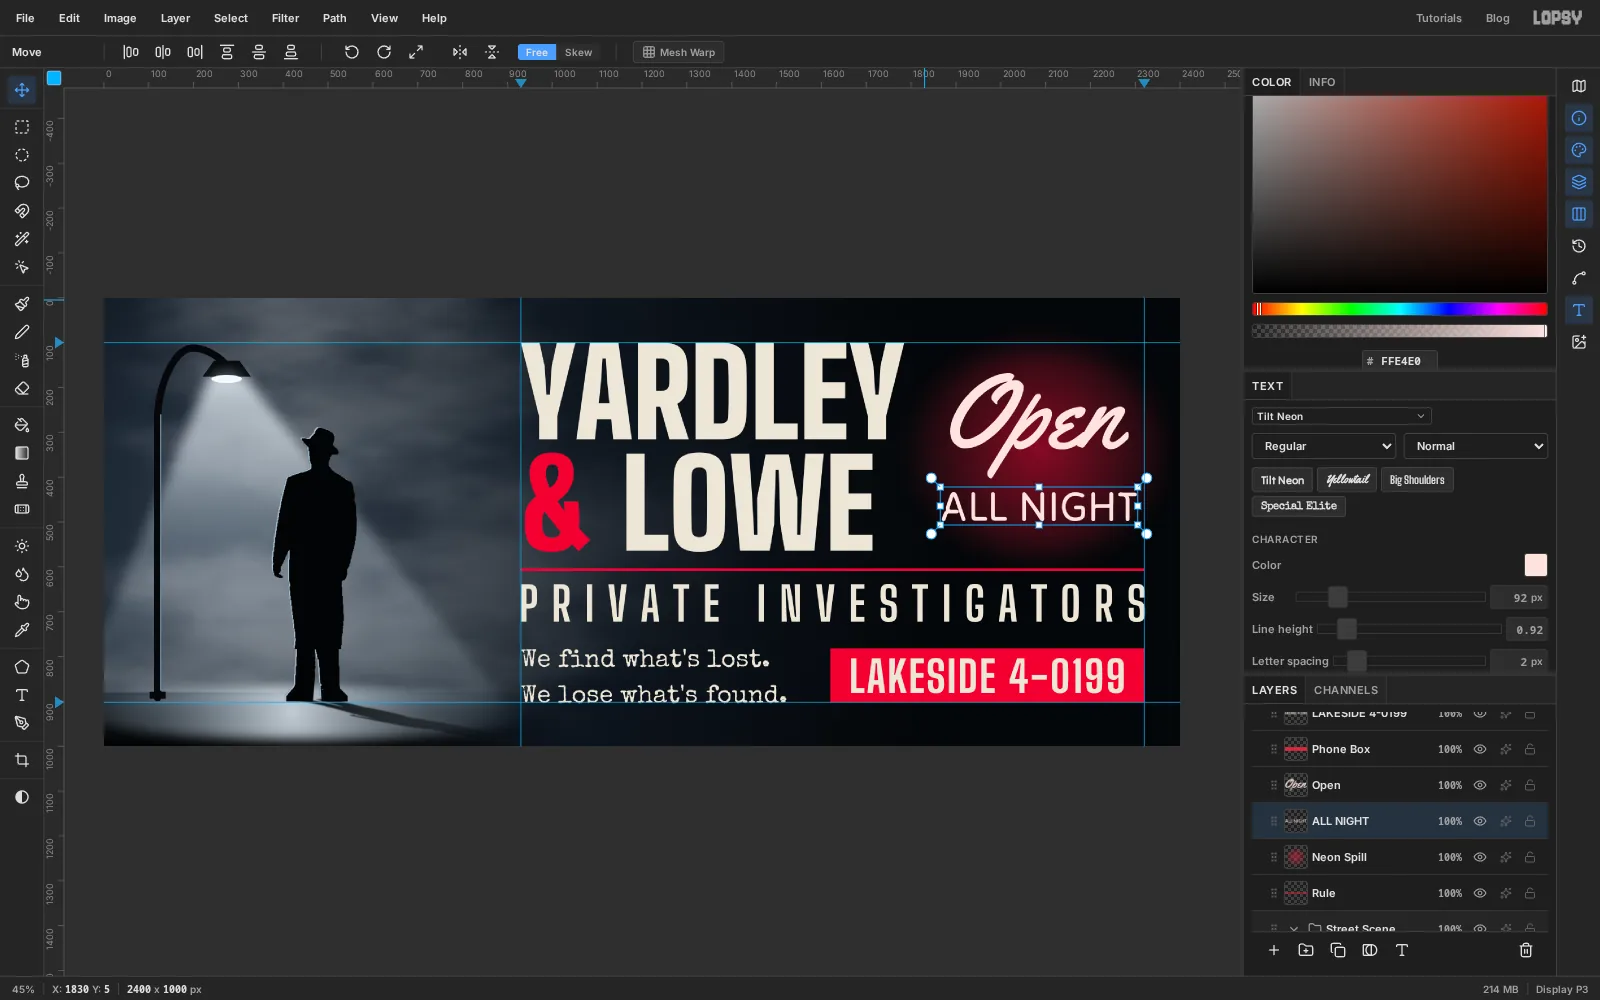
- Click Neon Spill. With the Text tool choose Yellowtail, Regular, Size 230, and set Letter spacing to 0. Click in empty space, type Open and press Tab.
- Click Neon Spill again. Choose Tilt Neon at Size 92 with Letter spacing 2. Click in empty space, type ALL NIGHT and press Tab.
Stack them with the Move tool: Open above, ALL NIGHT about 30 px below it and centred under it.
-
Rotate the sign as a group
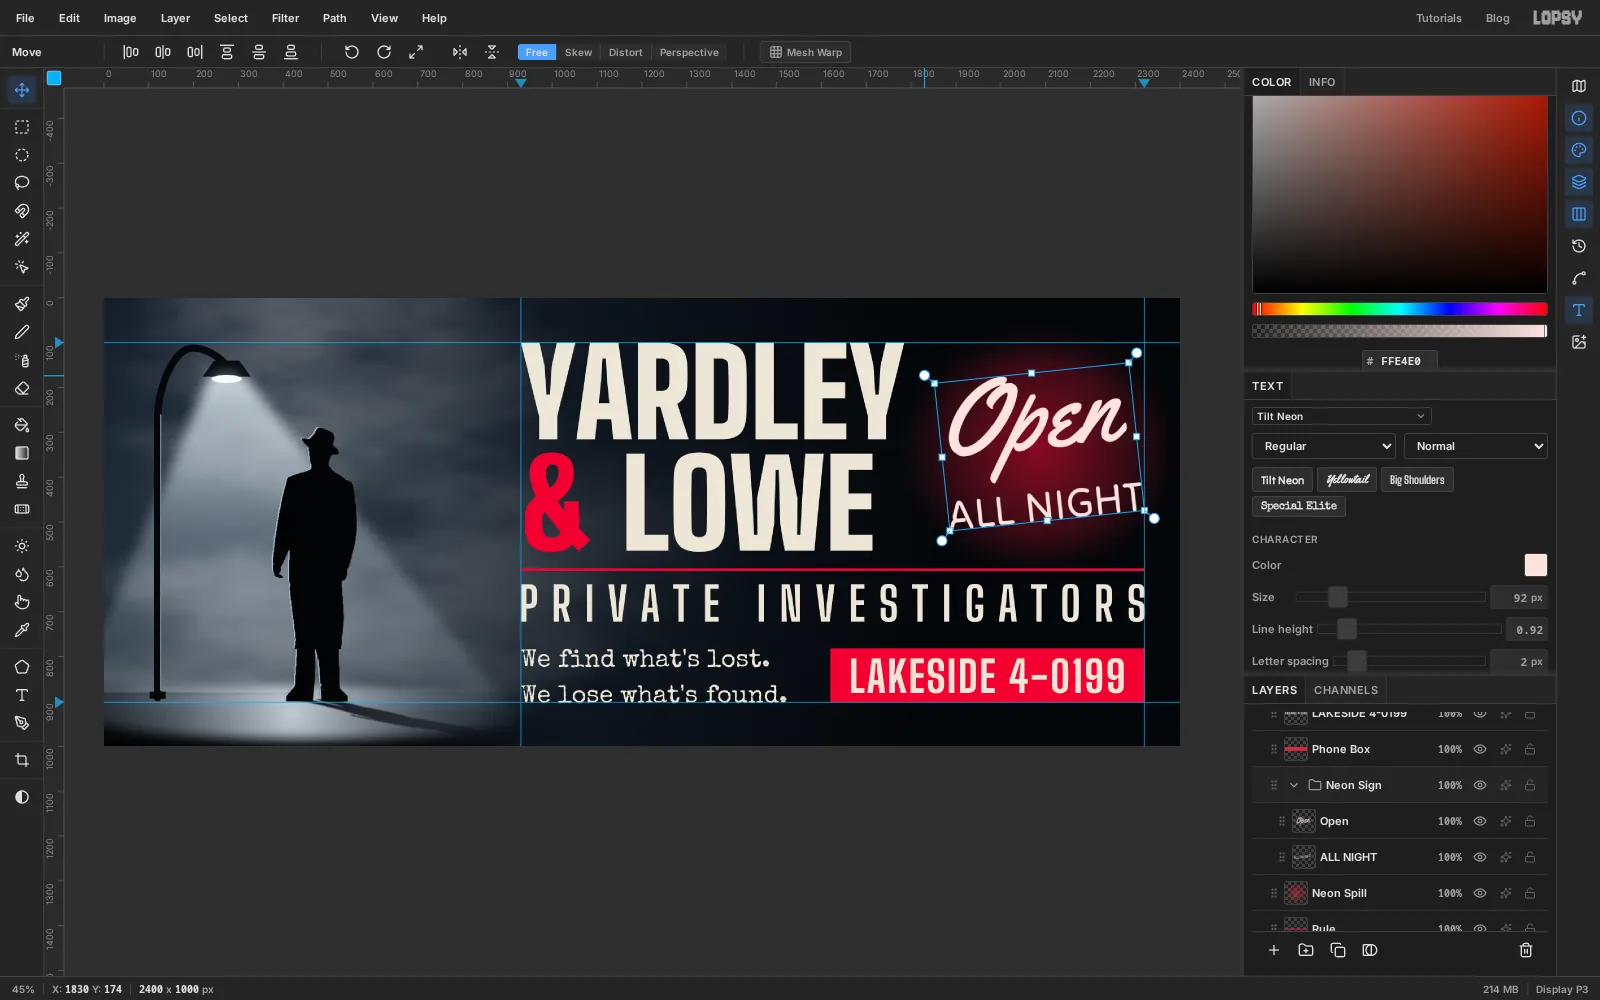
Click ALL NIGHT and Shift-click Open, choose Layer → Group Layers and name the group Neon Sign.
With the group selected and the Move tool active, one set of handles frames both words. Move the pointer just outside a corner until you can grab the round rotation handle, and drag it anticlockwise by about 6°. Both layers turn together around their shared centre, and both stay editable as text. Press Cmd+D.
-
Light the neon
A real neon tube is almost white in the middle and coloured at the edge. Two effects on each word give you that.
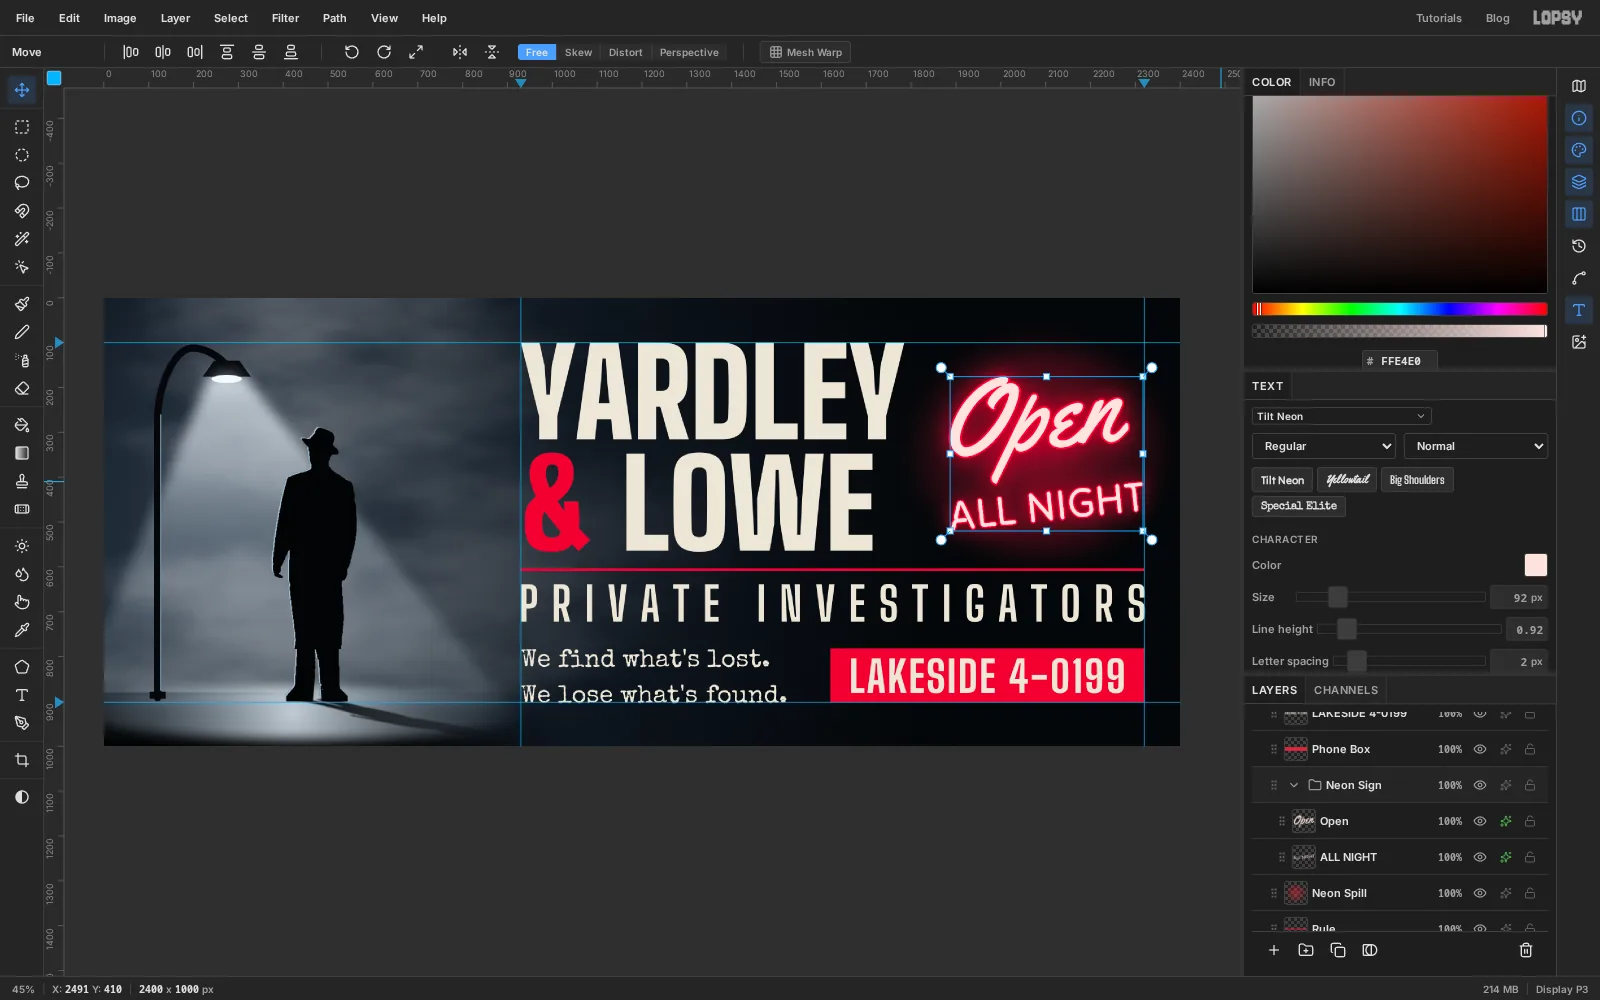
Open the effects for Open. Turn on Stroke with the colour and Width 4. Turn on Outer Glow with the colour , Size 70 and Opacity 95. Do the same for ALL NIGHT with Width 3 and Size 55.
Select the Neon Sign group and nudge it with the arrow keys until the T of NIGHT touches the right guide.
-
Mark out the blind with the grid
The last piece of light is the shadow of a window blind falling across the wall.
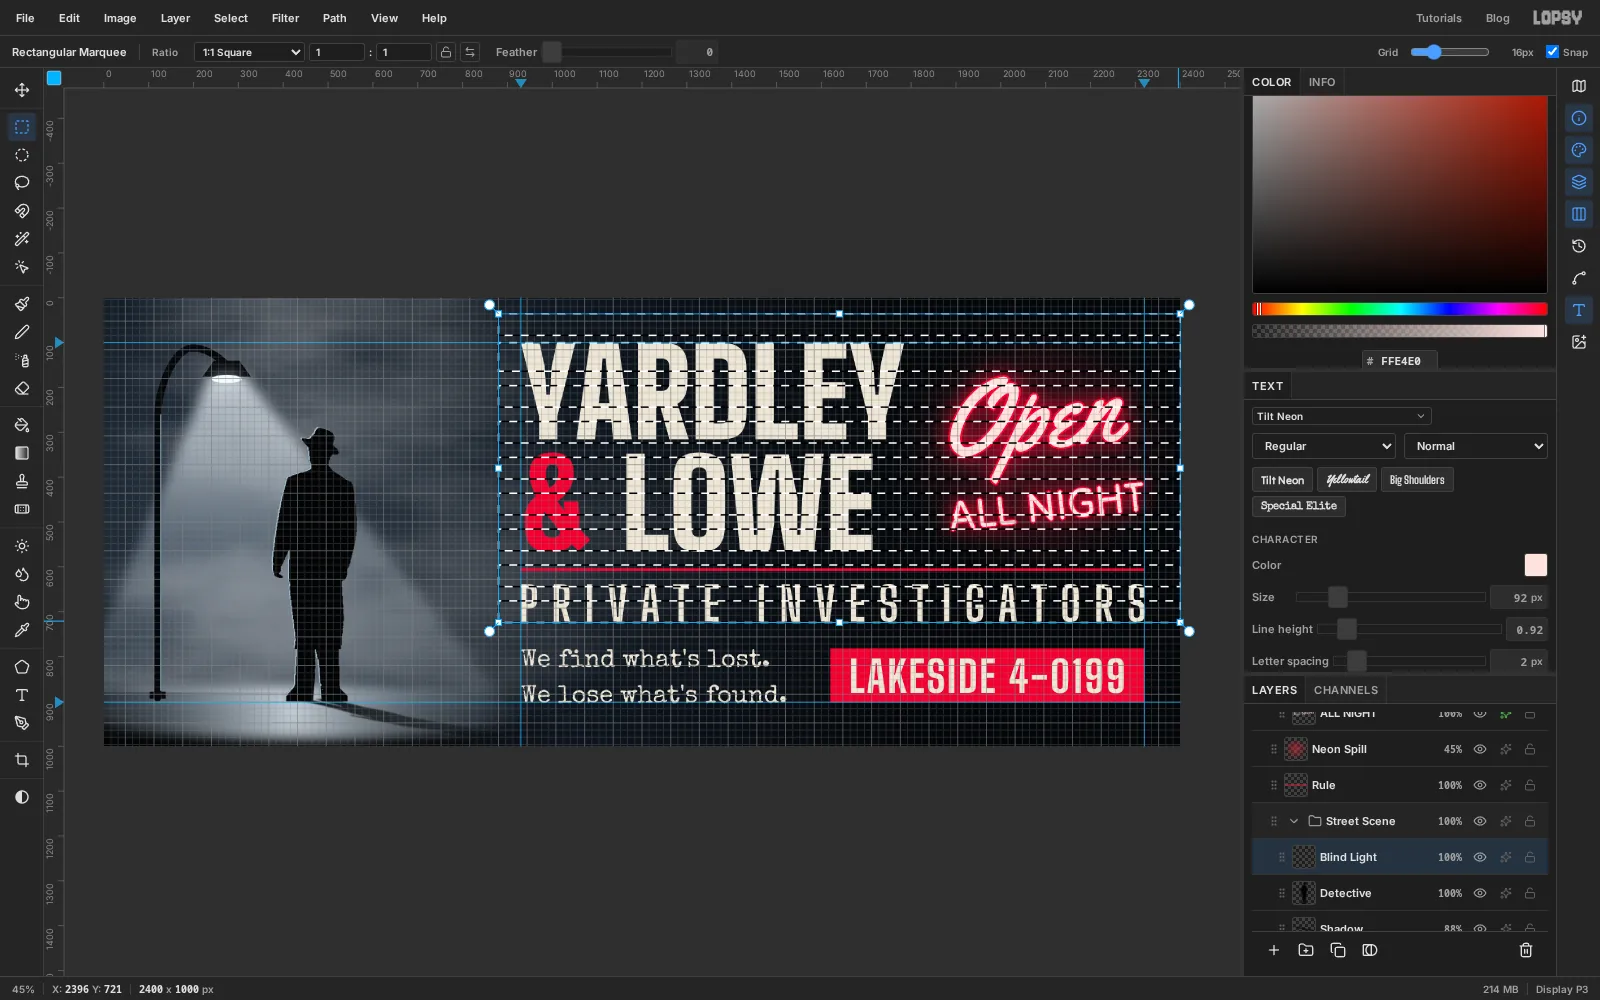
Click the Street Scene group and add a layer called Blind Light. Choose View → Show Grid. Pick the Rectangular Marquee and make sure Snap is ticked at the right of the options bar. Marquees now snap to the grid, which makes evenly spaced bars easy.
Drag a bar three grid squares tall from just left of the name to the right edge of the canvas. Hold Shift and drag another the same height, two squares below it. Keep going until you have nine. If you forget Shift, the new bar replaces all the others: press Cmd+Z and carry on.
Set the foreground colour to and choose Edit → Fill, then choose View → Show Grid again to hide the grid.
-
Slant the bars with Skew
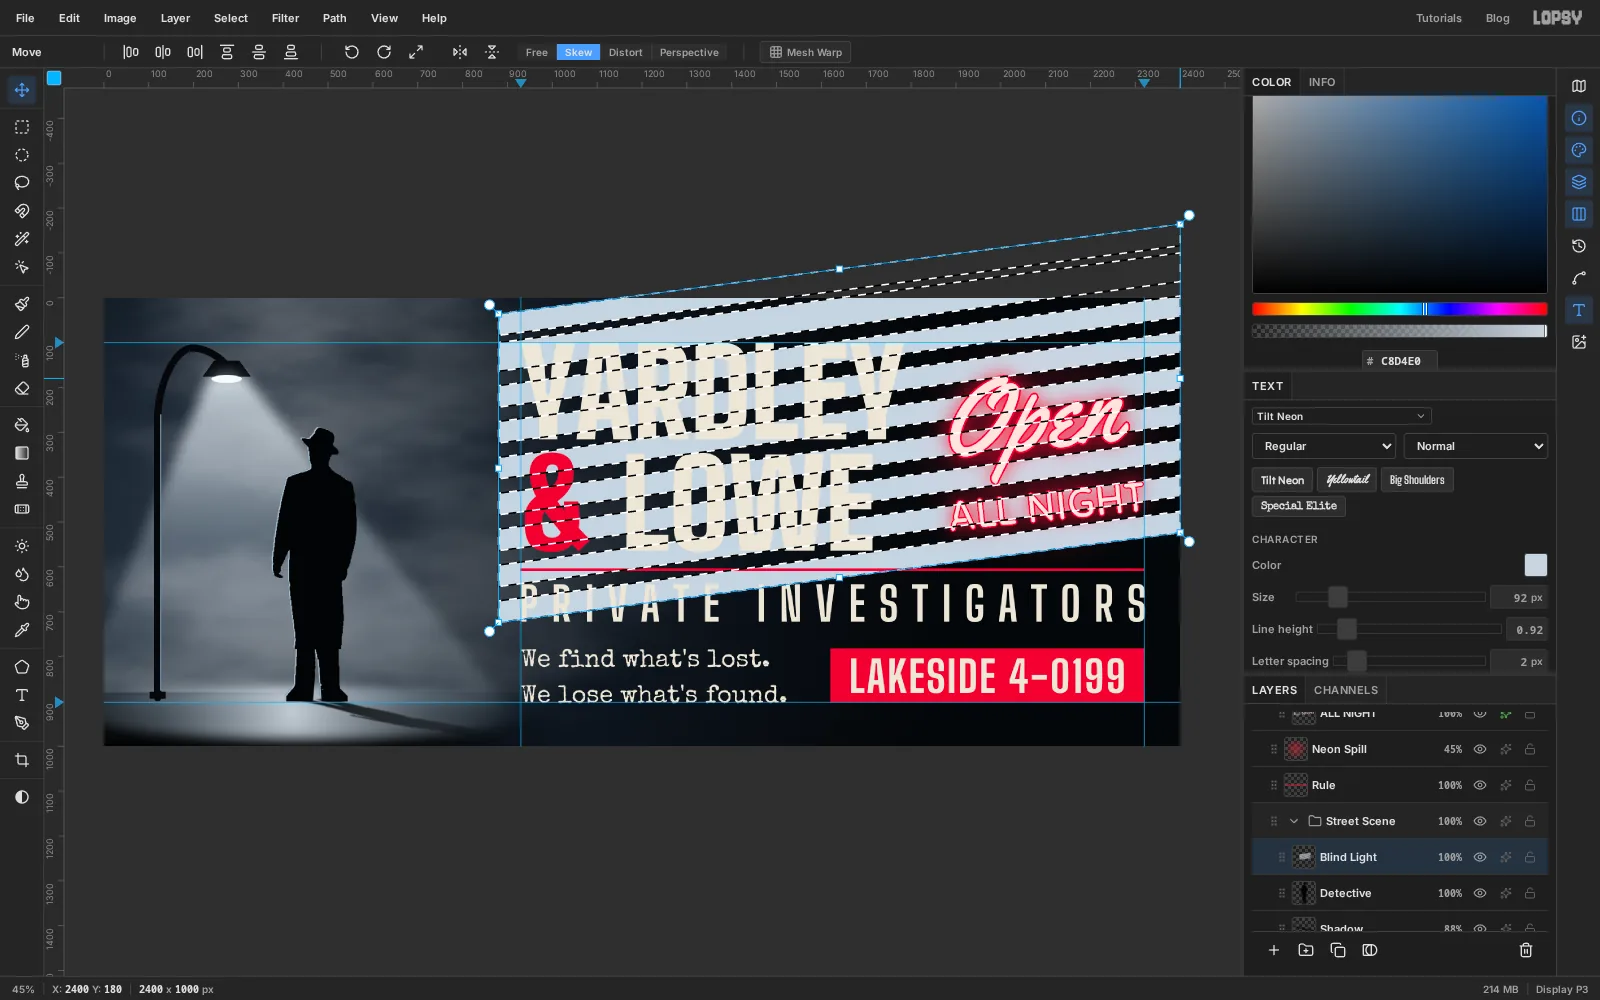
Keep the selection. Pick the Move tool and switch the transform mode to Skew. Drag the handle in the middle of the right side upward by about 200 px. The right ends of the bars rise and the left ends stay put.
Switch back to Free and press Cmd+D.
-
Fade the bars and clear the sign
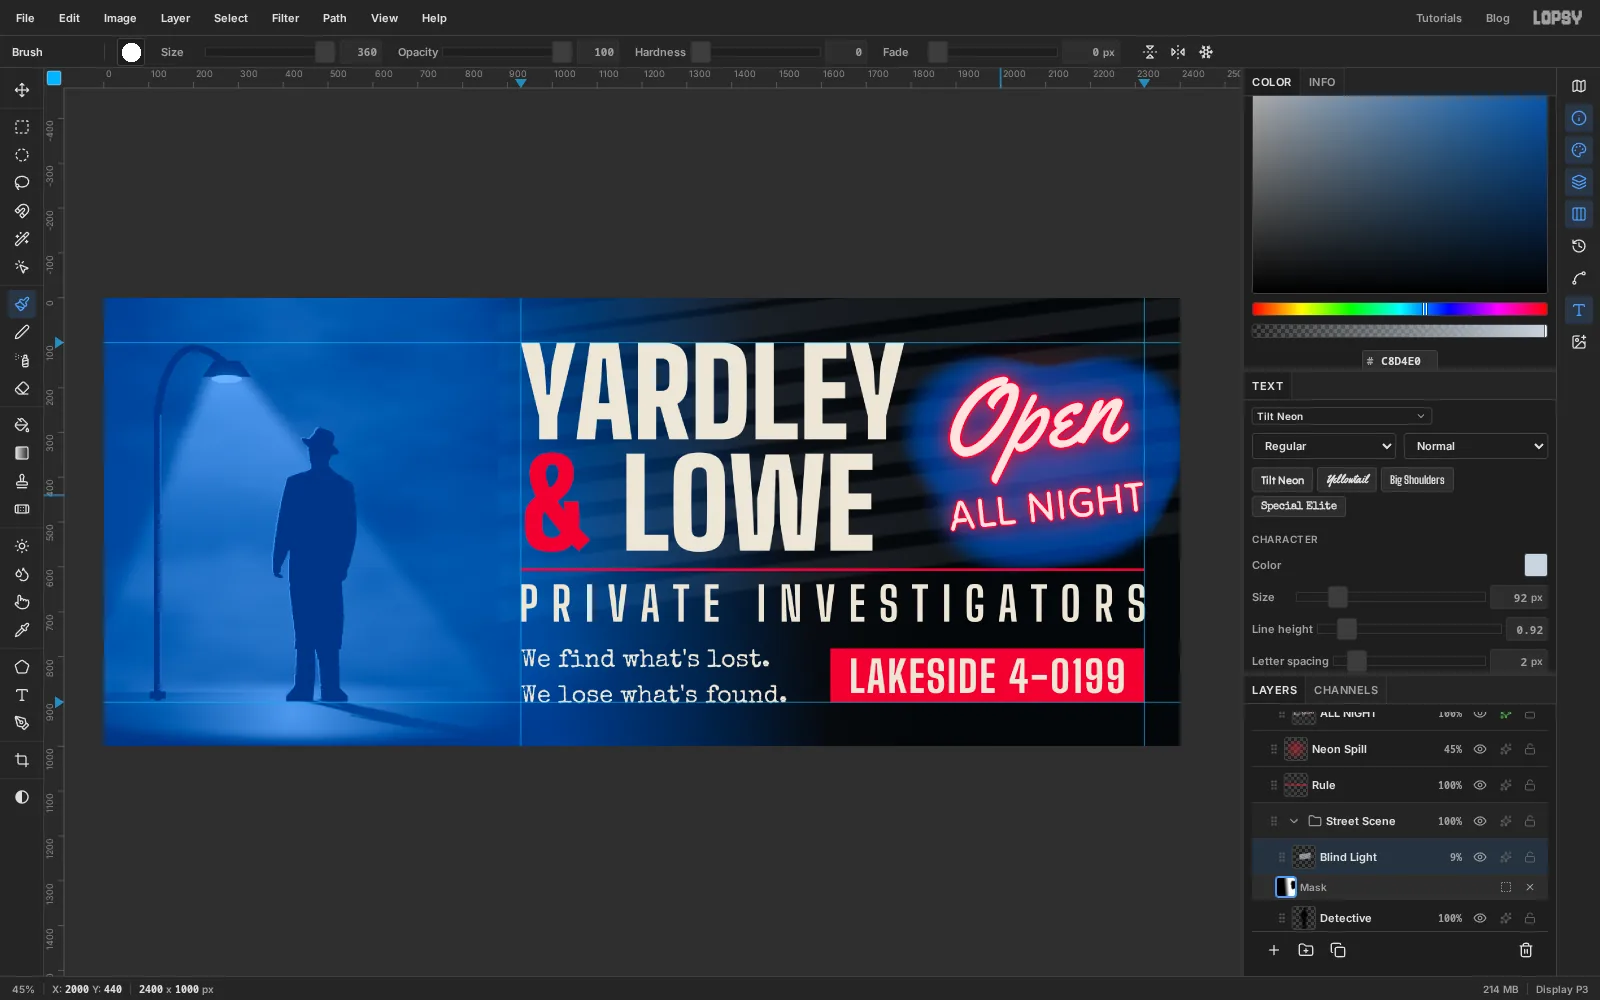
Blur the bars with Gaussian Blur at Radius 7 and drop the layer to 9%. They should be just visible.
Add a mask. Set the gradient to Linear with two stops, black then white, both at full opacity, and drag from the left ends of the bars to about a third of the way along them, so they fade in from the left.
The bars also cut through the neon. While you're still on the mask, pick the Brush, set Size to 360 and Hardness to 0, and paint over the sign. On a mask the Brush always hides. Click the Blind Light row to finish.
-
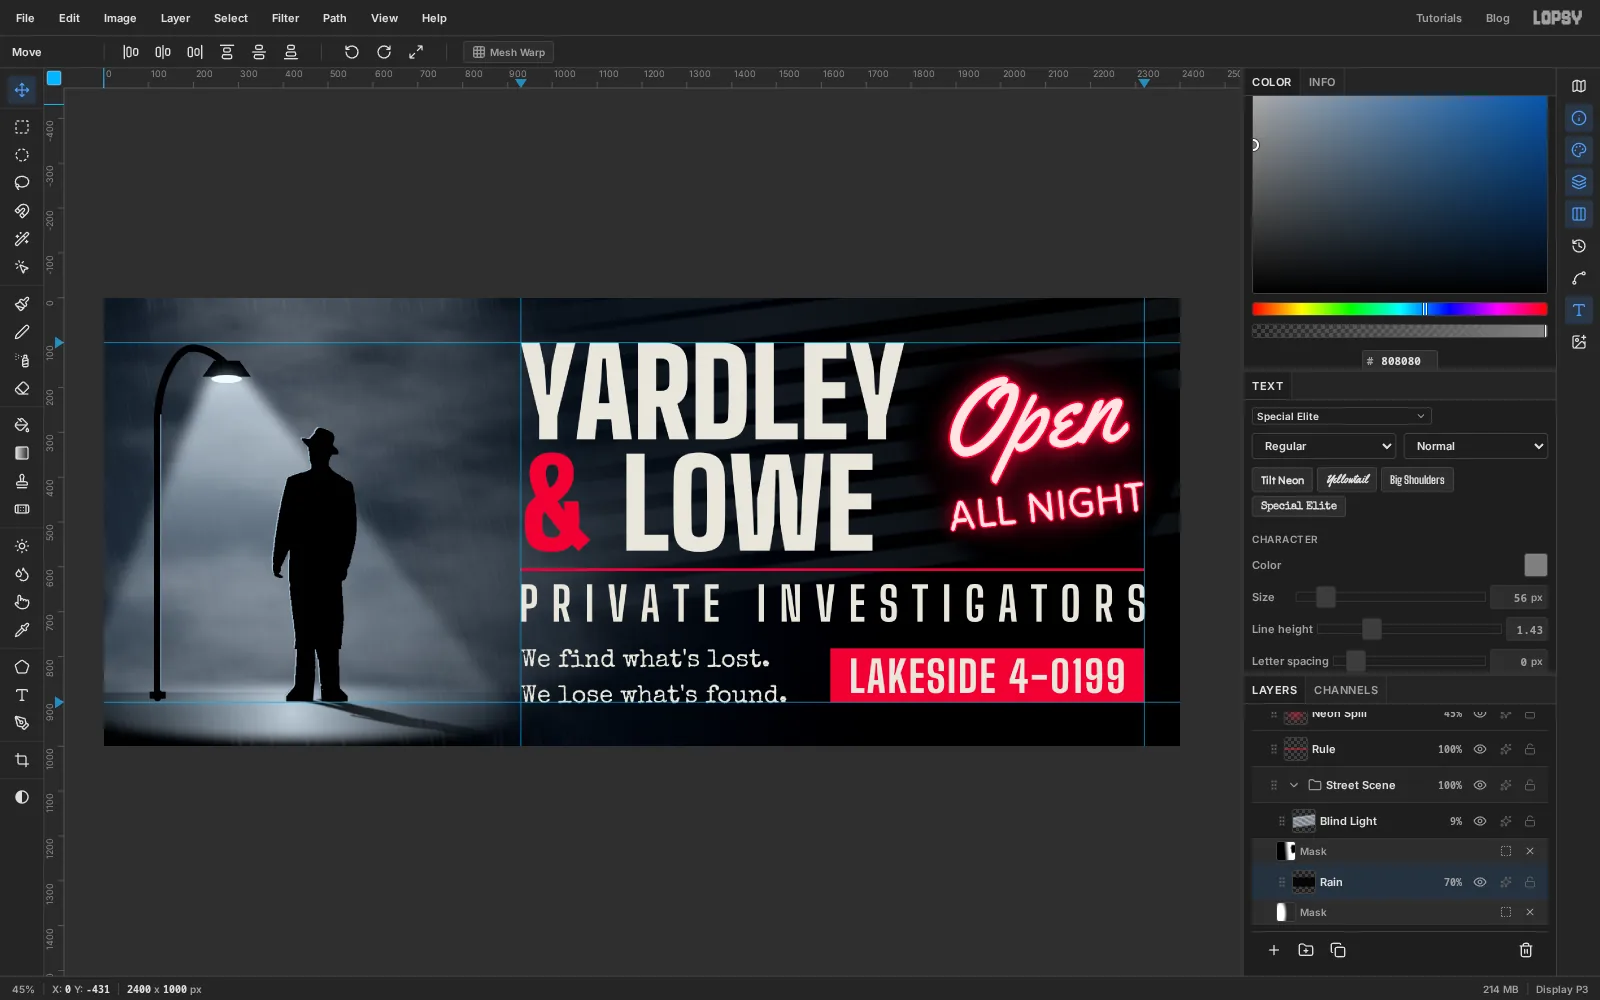
Start the rain as noise
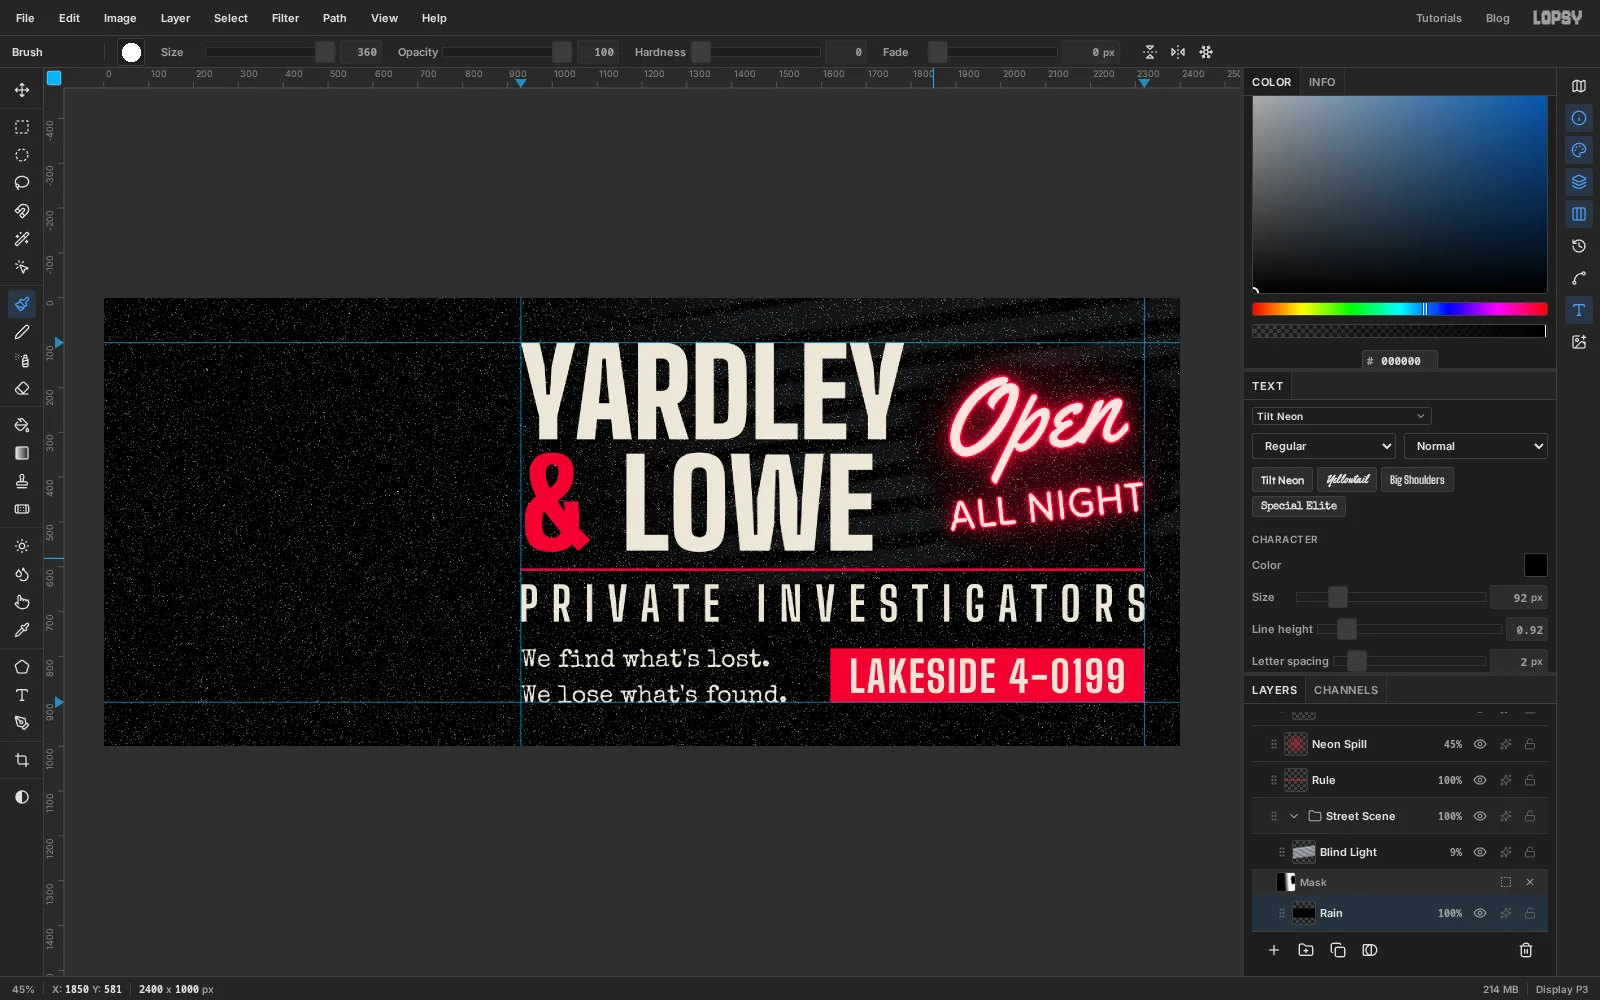
Click Detective and add a layer called Rain. Press Cmd+A, fill it with black and deselect.
Choose Filter → Add Noise…, set Amount to 100 and choose Mono. Then Filter → Threshold… with Level 48. Most of the noise turns black and about one pixel in fifty turns white. If you get all black, lower the level by one or two. If the layer goes mostly white, raise it.
-
Blur the noise into rain
Choose Filter → Motion Blur… with Angle 76 and Distance 80. Each dot is smeared into a slanted streak.
Set the layer to Screen and lower it to 70%. Rain only shows where light hits it, so add a mask. Set the gradient to Radial with three stops, all at full opacity: white at the start, white again in the middle, and dark grey () at the end. Drag from the middle of the cone out past the left edge of the name, then click the Rain row.
-
Add film grain
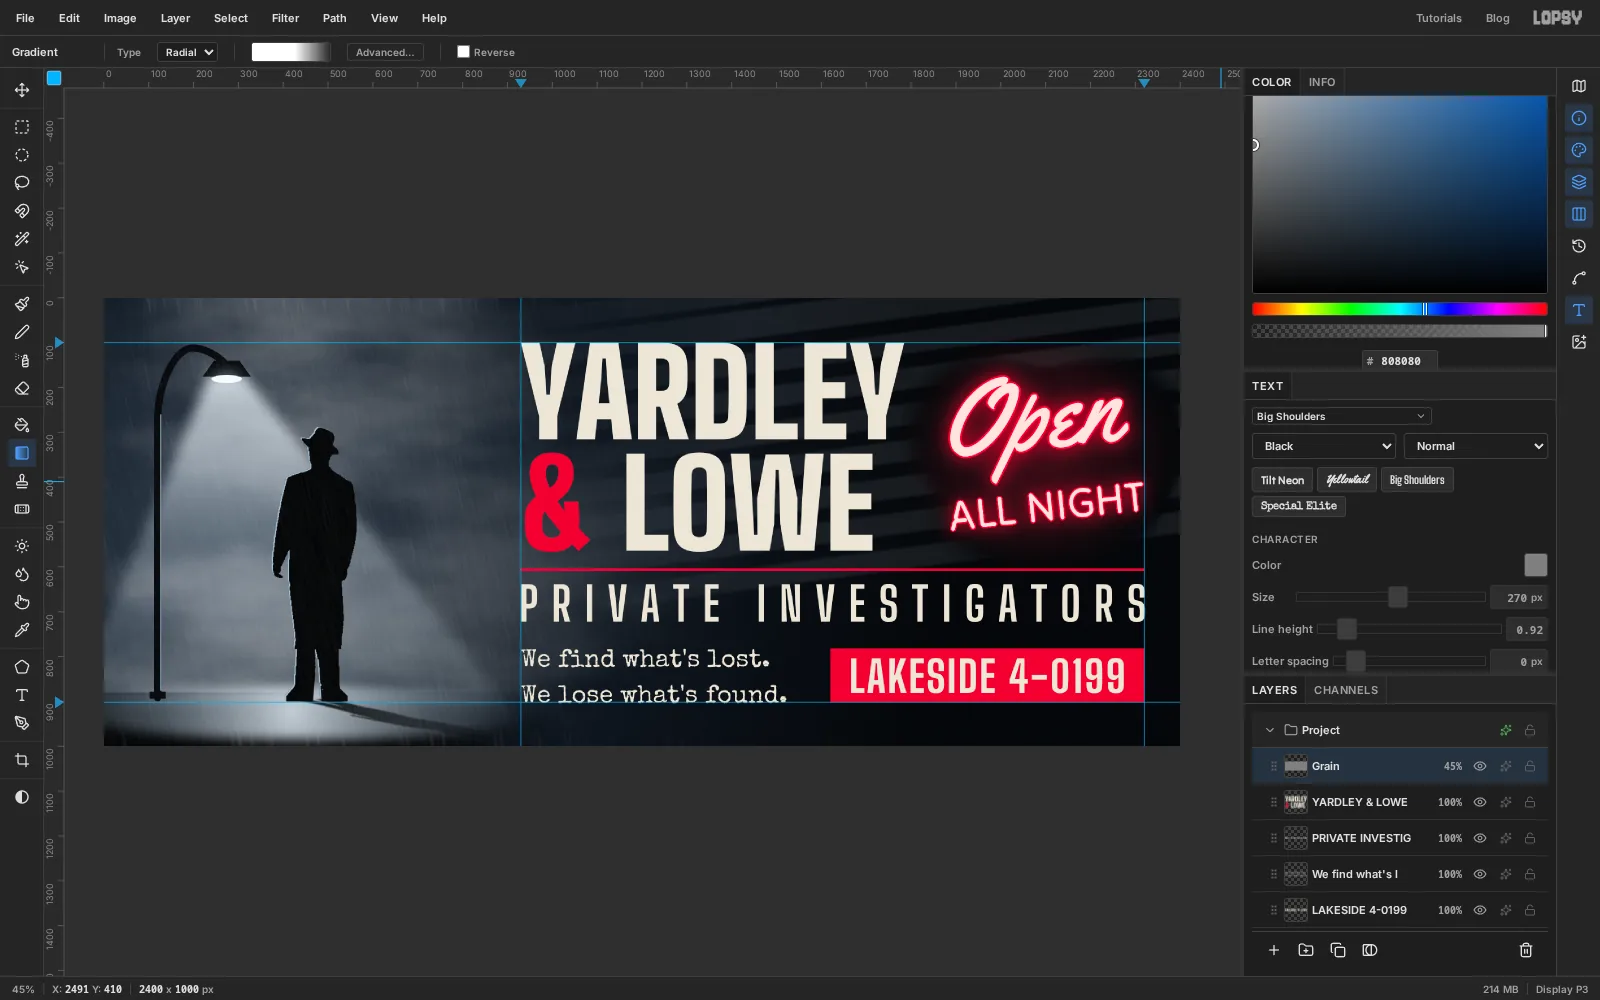
Click the top layer and add one called Grain. Press Cmd+A, fill it with and deselect. Choose Filter → Add Noise… with Amount 30, Mono and Gaussian. Set the layer to Overlay at 45%.
Mid-grey disappears in Overlay, so only the speckle is left. It ties the photo-based figure and the clean type together.
-
Cool the picture down
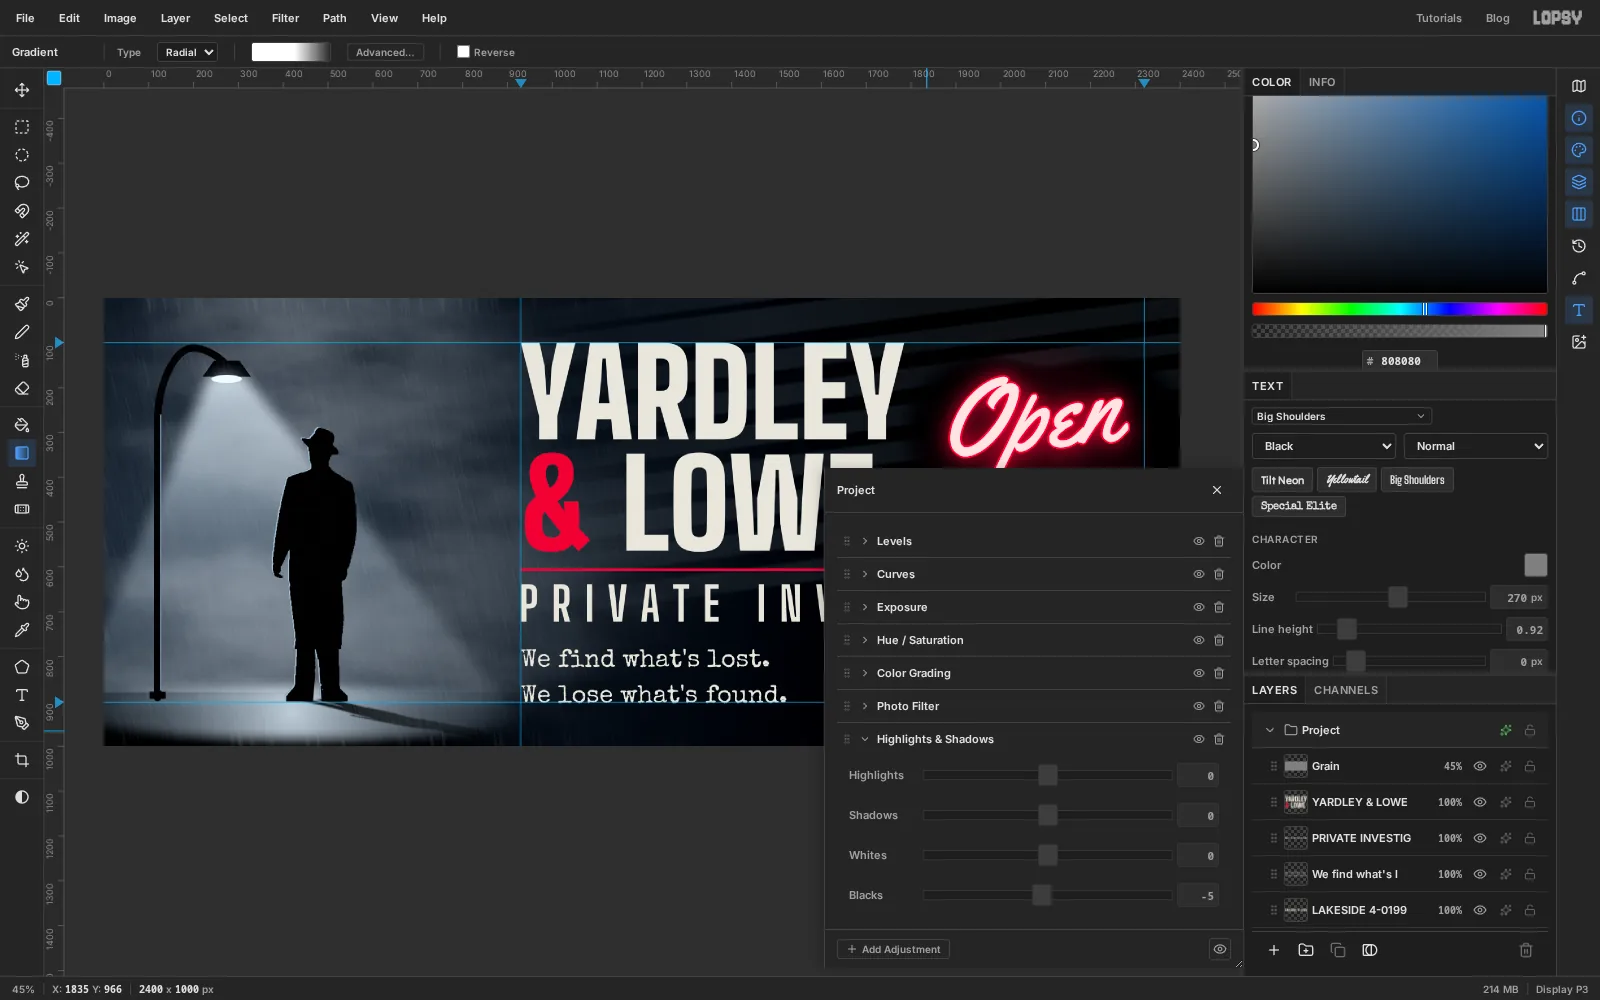
Click the sparkle icon on the Project group at the top of the Layers panel. Adjustments here apply to everything in the document without changing any pixels. The drawer already lists a few neutral adjustments. Leave them alone.
Click Add Adjustment and choose Photo Filter. Set the Filter color to and Density to 9 for a slight cold cast. Add Highlights & Shadows and set Blacks to -5 to deepen the darkest tones a touch. Go easy here: at -15 or lower the neon glow and the blind bars sink into black.
-
Export the billboard
Close the drawer and look at the whole board. Read it the way a driver would, in two seconds: lamp, man, name, red.
Choose File → Quick Export PNG.
To make it your own, change the name and the tagline first, and keep the red to three or four places. If you swap the figure, pick a photo where the person is already a dark shape against something light. Threshold needs that contrast to work.