Design a Futurist WIND MACHINE Flier
Build an Italian Futurism event flier in Lopsy with sunburst force lines, a motion-echo fan, cobalt halftone, rotated live type and a layer group.
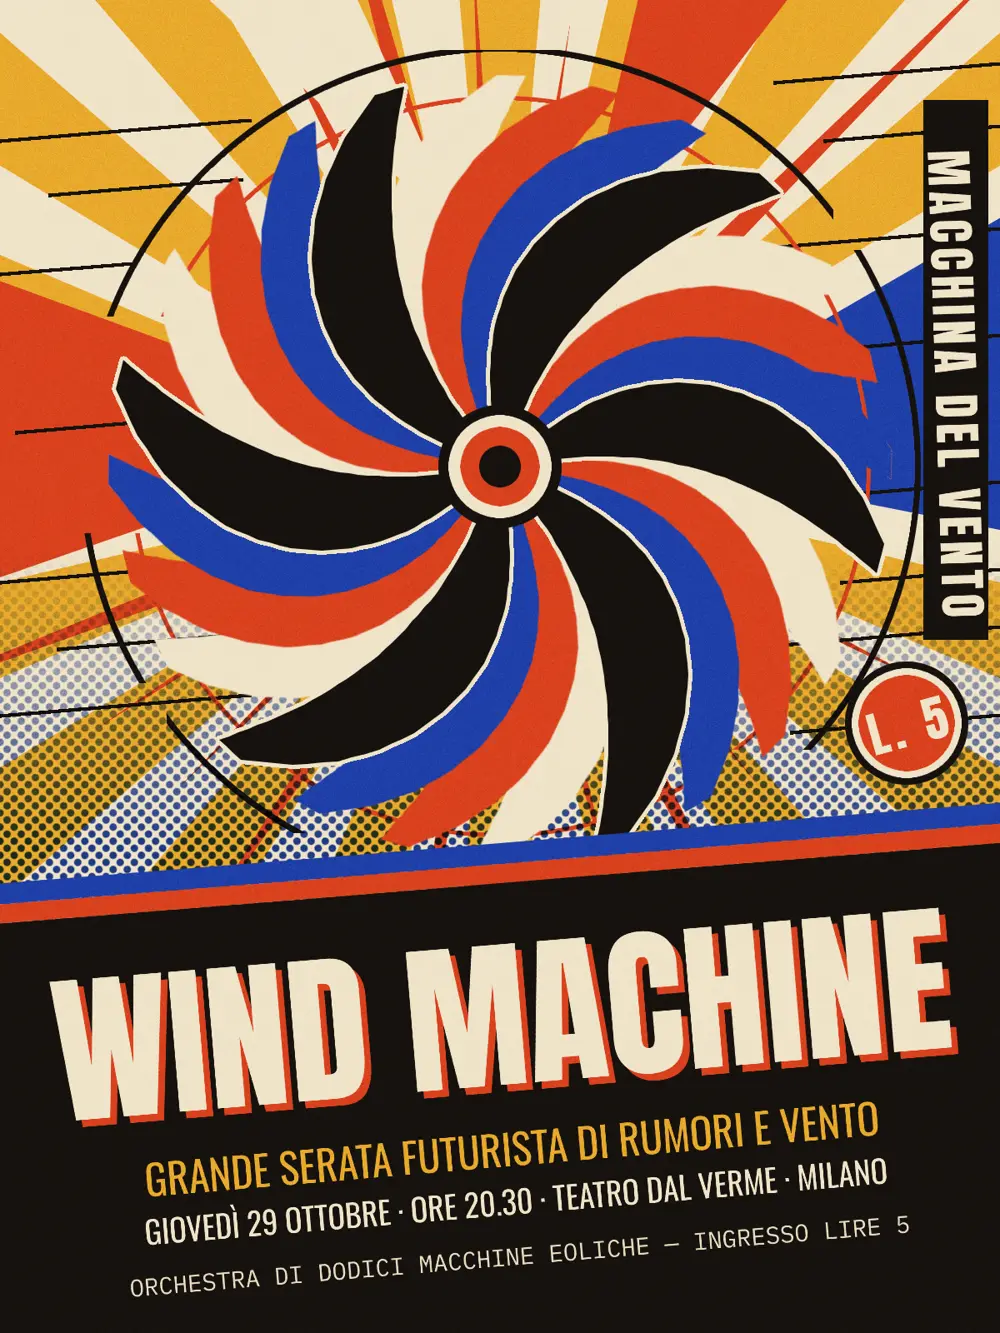
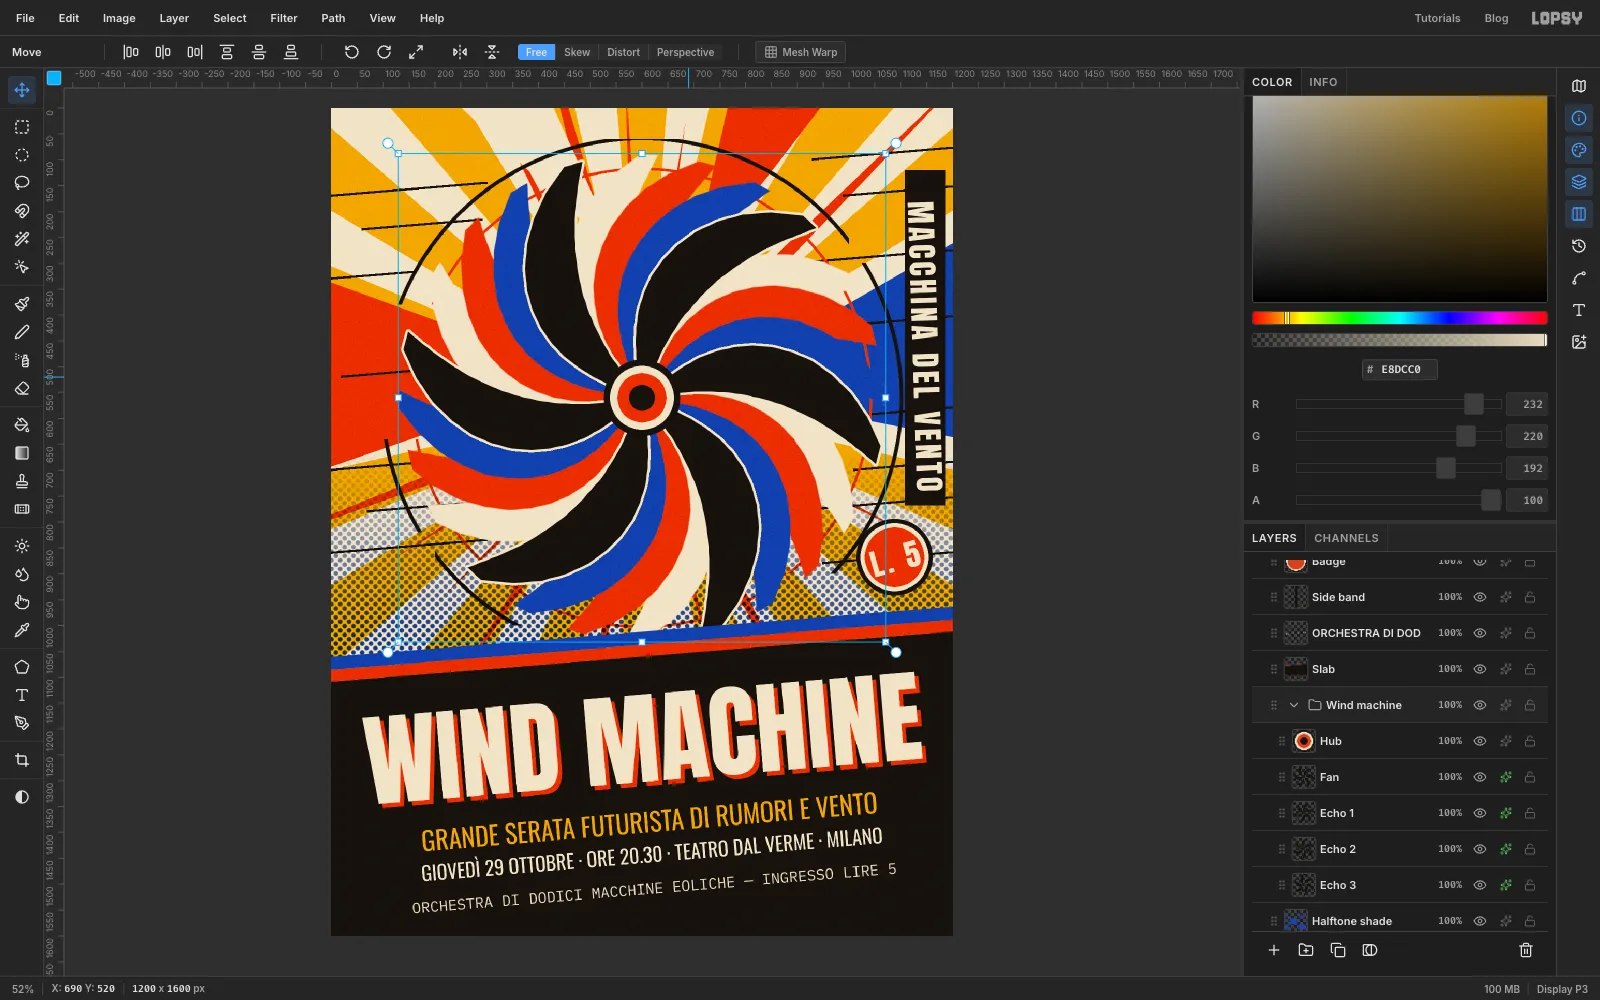
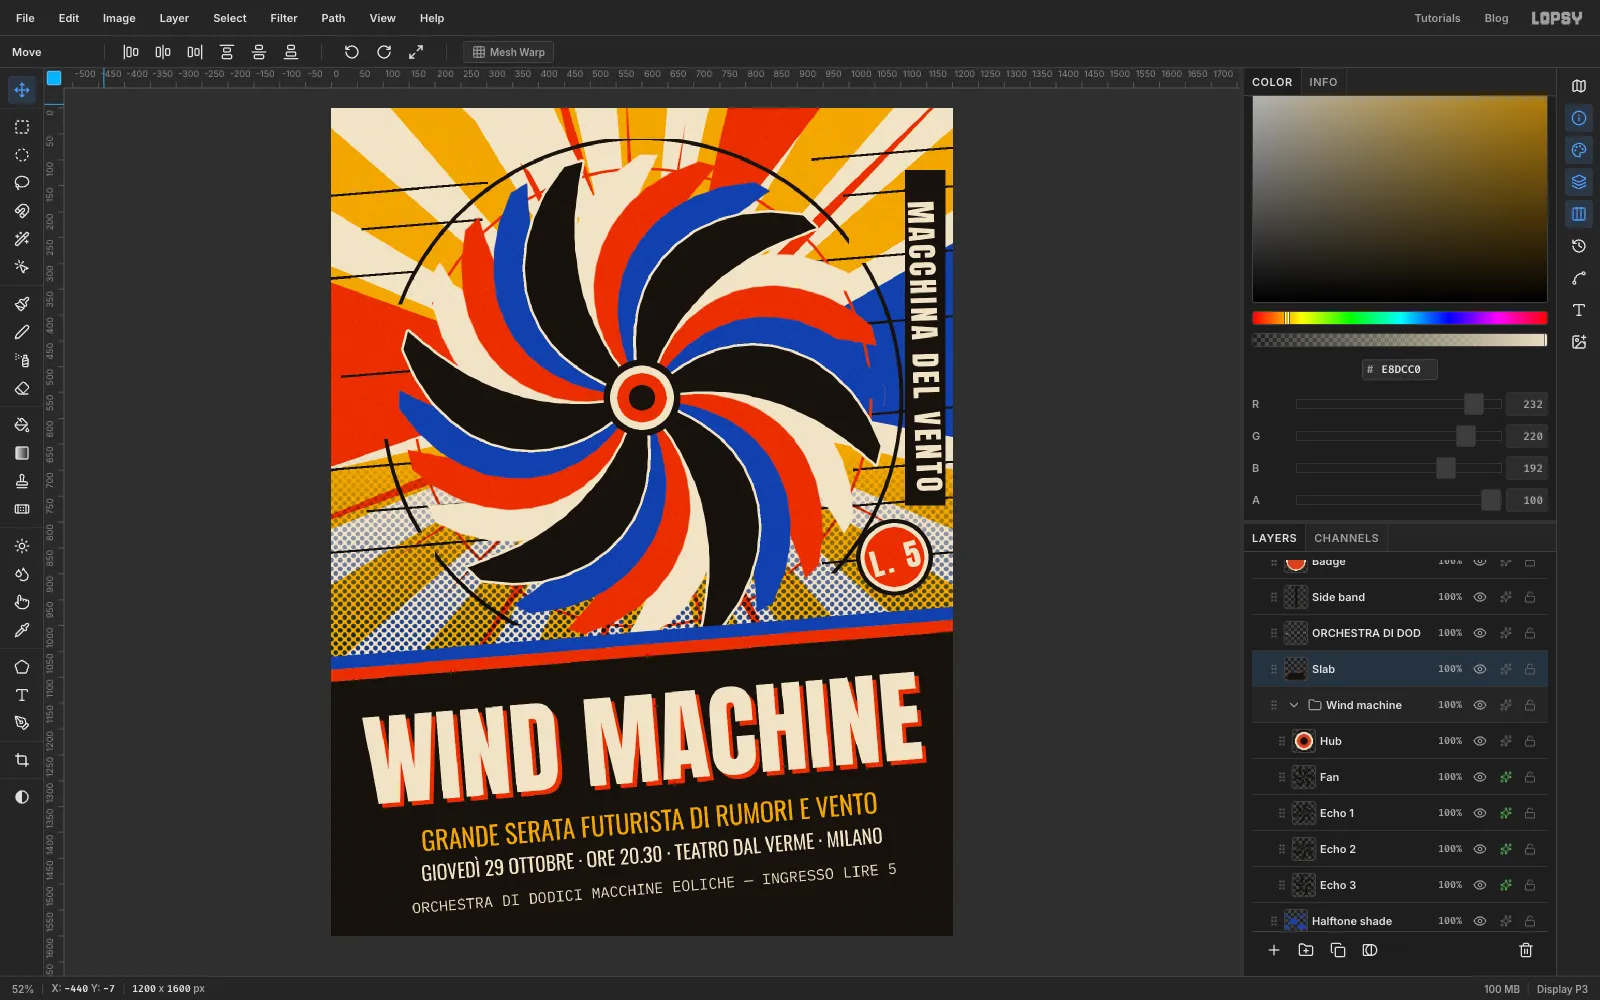
Italian Futurists loved speed, noise and machines. Their posters threw lines of force across the page, repeated a moving shape to show motion, and set type on a slant in loud primary colours. This tutorial builds a 1200 × 1600 px flier for an imaginary concert of wind machines, using those same ideas: a burst of rays behind a spinning fan, three coloured echoes of the blades, and a heavy tilted slab for the lettering.
Nearly everything is a flat fill, so the work is mostly Lasso and Elliptical Marquee shapes, a few Pencil lines and some live text. The motion trail comes from duplicating one layer and turning it with the Move tool's rotate handle.
The tools you'll meet along the way:
- Filter → Sunburst for two layers of rays
- the Lasso and Elliptical Marquee, plus Select → Shrink
- the Pencil with Shift-click straight lines
- the Gradient tool and Filter → Halftone
- Duplicate Layer and the Move tool's rotate handle
- layer effects: Color Overlay, Stroke and Drop Shadow
- Anton, Oswald and IBM Plex Mono text, rotated while it is still live text
- a layer group, and undo / redo
The palette is cream paper, a dimmer cream for small print, and four inks:
-
Paper cream
-
dim cream
-
Mustard
-
Vermilion
-
Cobalt
-
Ink black
-
Start with the paper
Choose File → New, set the units to Pixels, type 1200 and 1600, and click Create. Click the foreground colour box, type
EFE3C8in the hex field, then choose Edit → Fill to paint the page cream, then double-click the layer's name and rename it Paper. Everything else goes above it.
-
Lay down the mustard rays
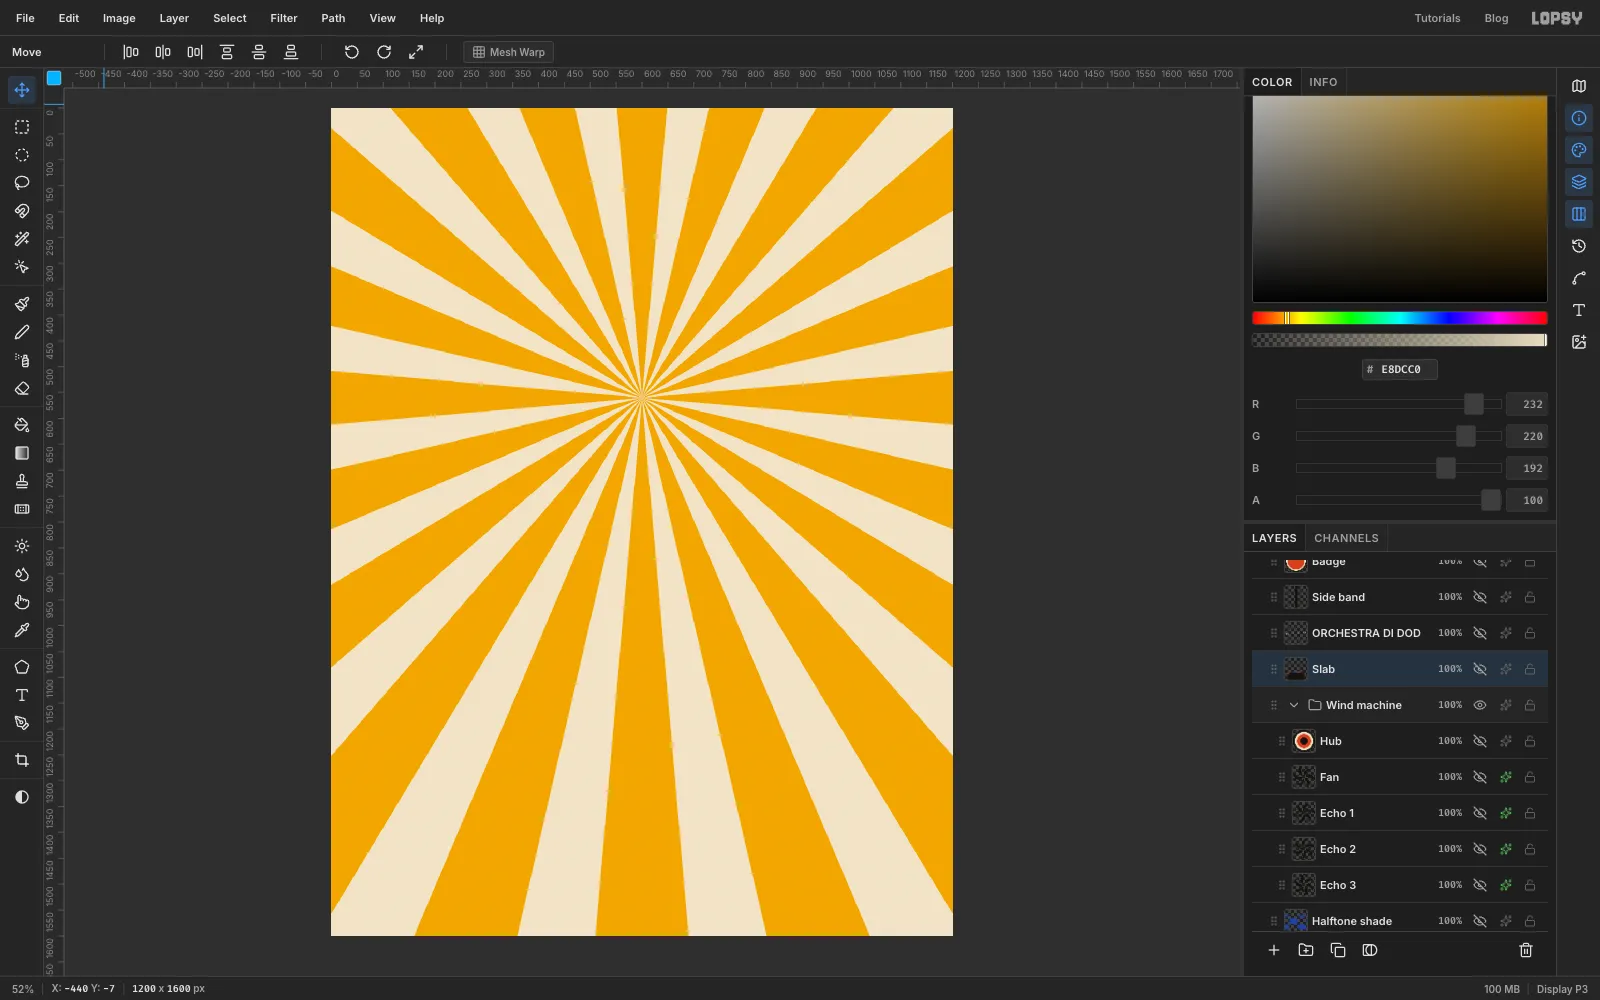
Add a layer and name it Mustard rays. Set the foreground to mustard and choose Filter → Sunburst. Set Rays to 20, Length to 150, Width to 55, Taper to 0 and Fade to 0. Move Center X to 50 and Center Y to 35, so the rays start a little above the middle of the page, which is where the fan will sit. Click Apply.
-
Add the vermilion spikes
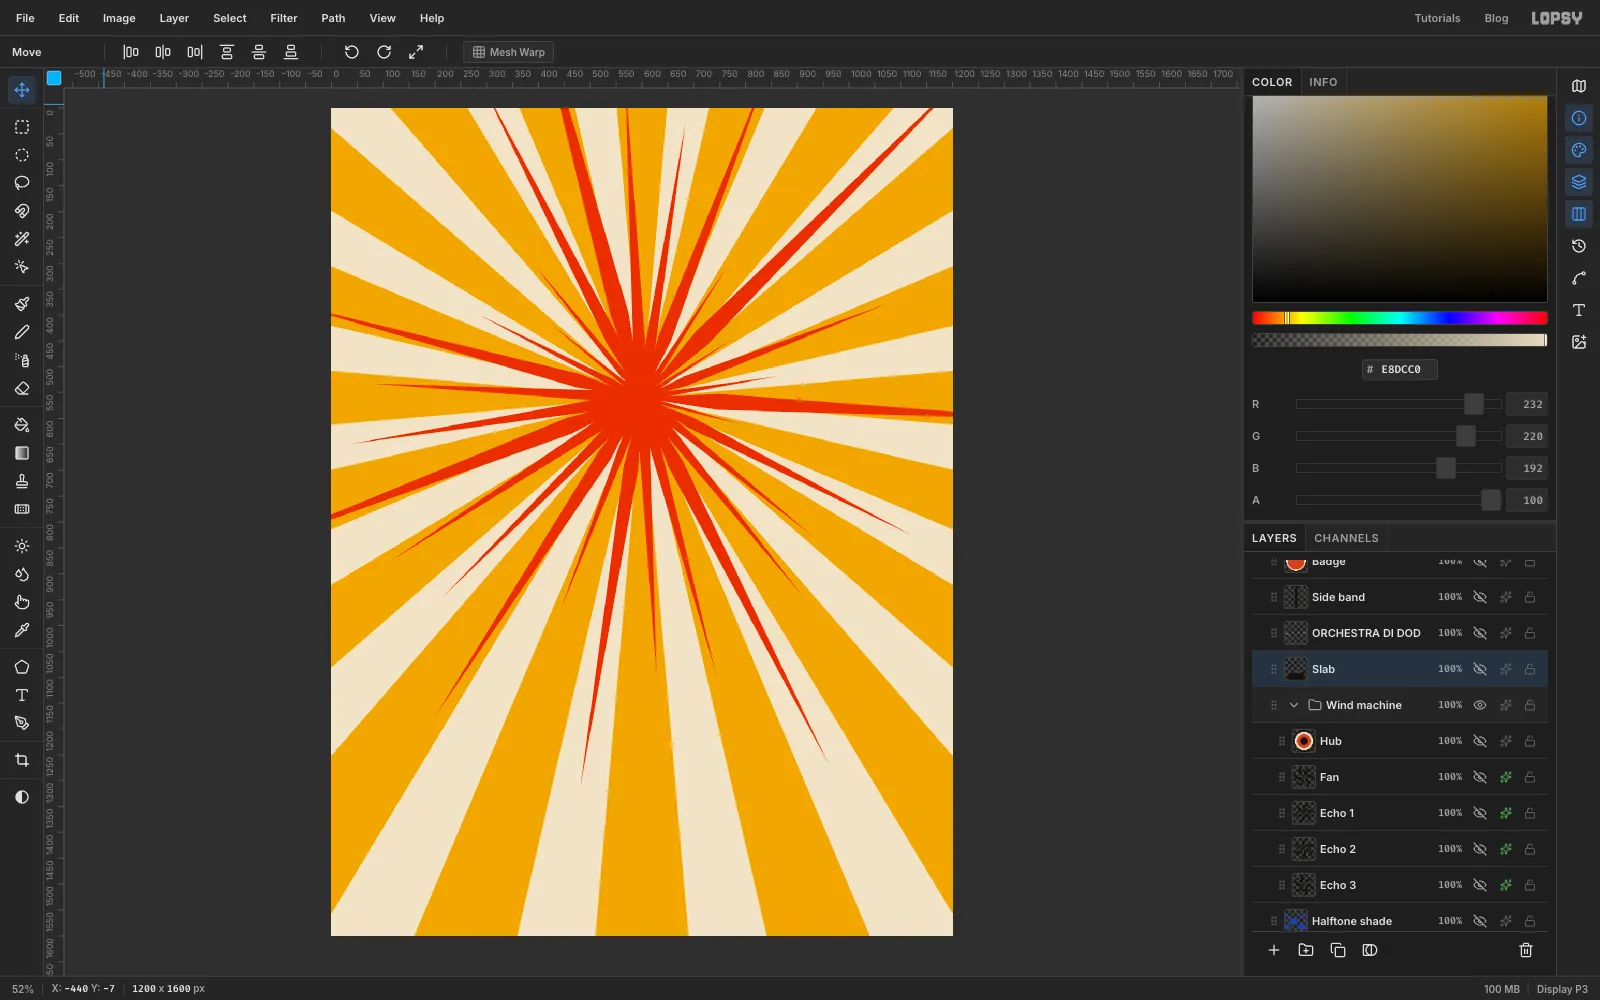
Add another layer, Vermilion spikes, and set the foreground to vermilion . Run Filter → Sunburst again with Rays 30, Length 80, Width 22, Taper 100, Jitter 80, Seed 31 and Rotation 3. Keep Center X at 50 and Center Y at 35. High taper turns each ray into a needle, and the jitter makes them uneven, like a hand-cut shape.
-
Cut the flat colour planes
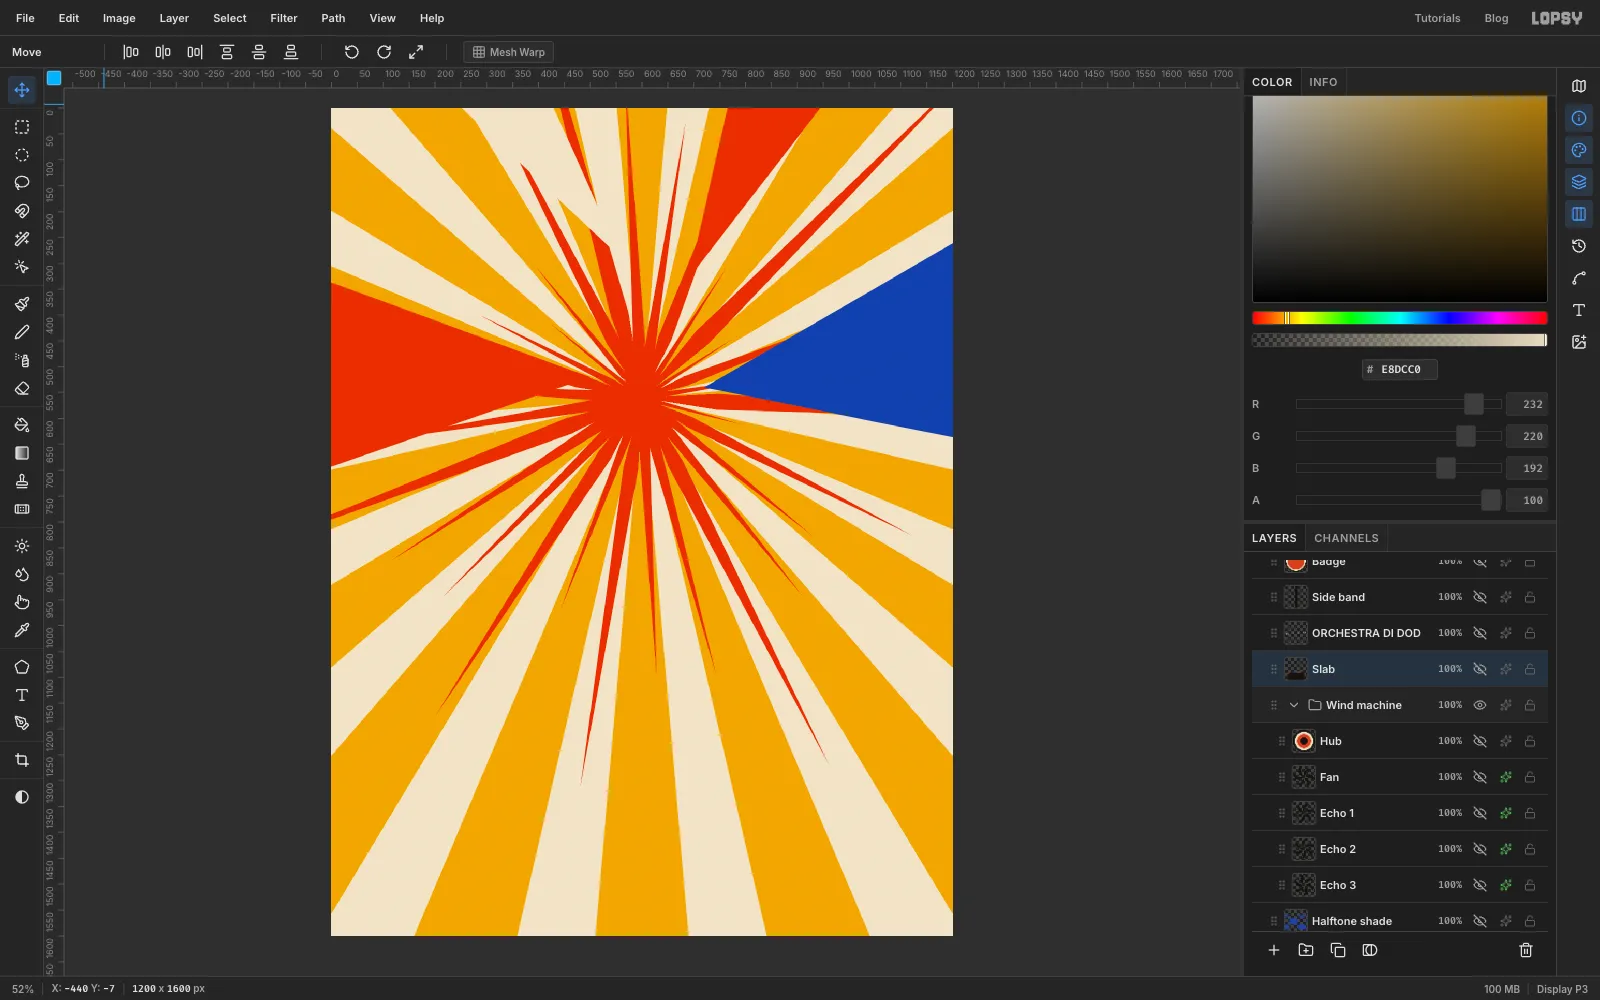
Add a layer called Planes and pick the Lasso. Futurist posters stack big flat wedges that all point at the action, so draw four triangles that start off the canvas and aim at the centre. Click three corners for each, then finish by clicking the first point and choose Edit → Fill:
- a long vermilion wedge from the left edge, a third of the way down
- a cream wedge from the top edge, left of centre
- a cobalt wedge from the right edge, a third of the way down
- a second vermilion wedge from the top edge, right of centre
The cream wedge is subtle against the cream rays. That's fine: it only breaks up the pattern a little.
-
Draw the speed lines
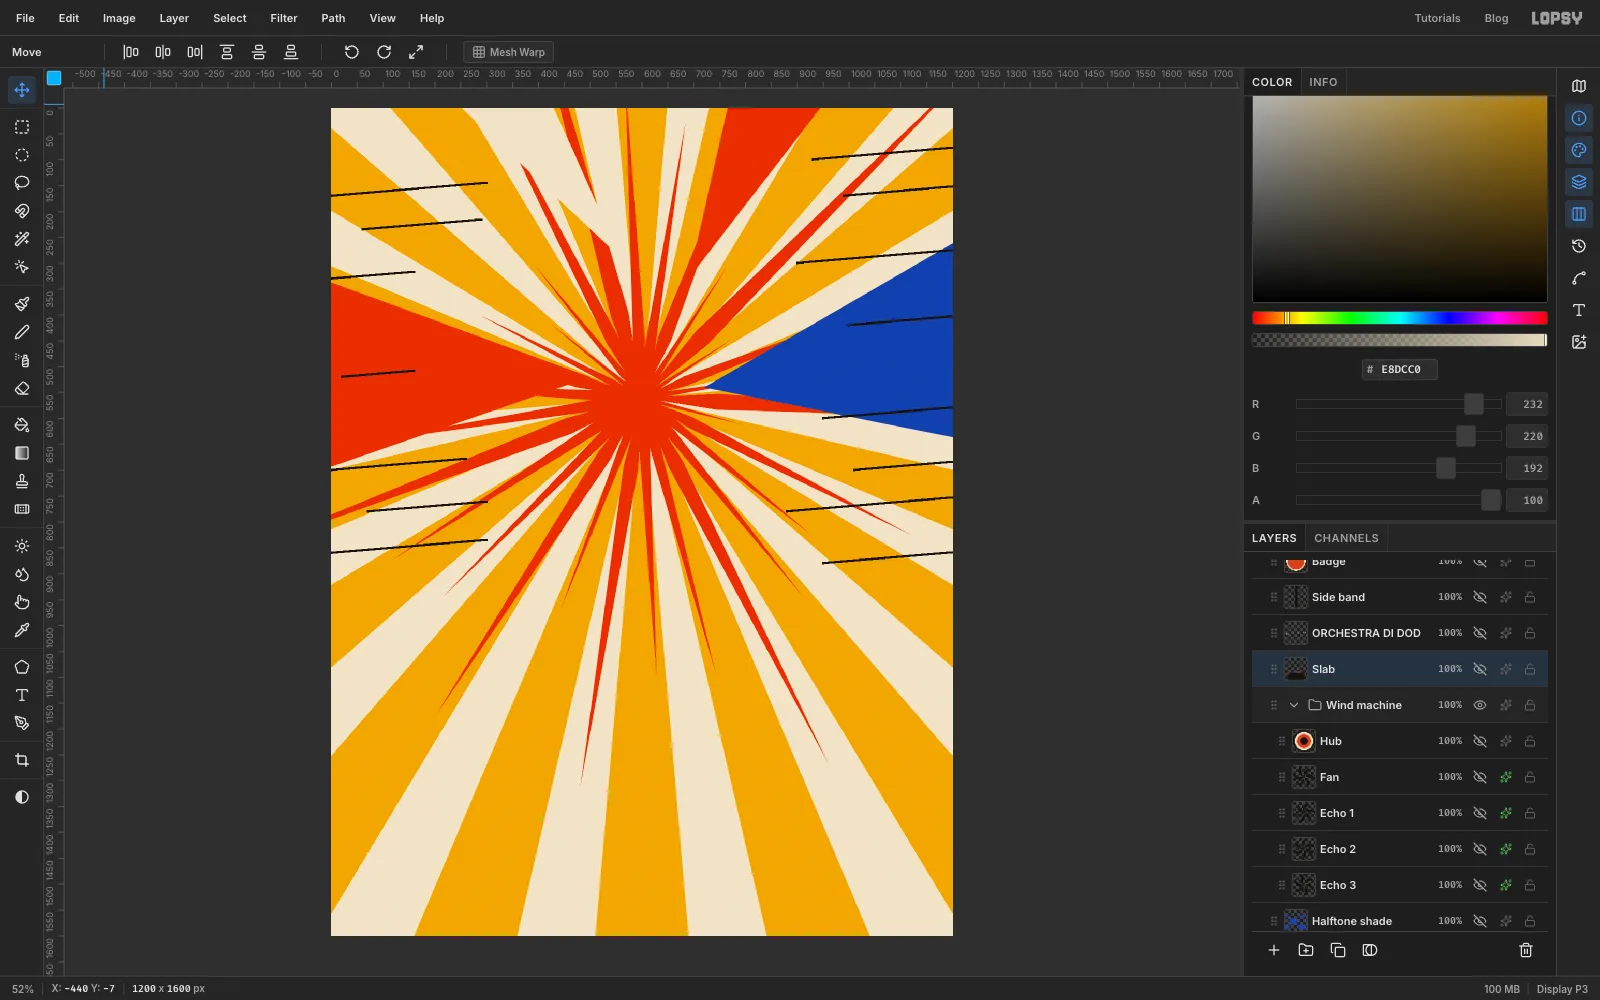
Add a layer called Speed lines and set the foreground to ink black . Pick the Pencil and set Size to 4. Click where a line should start, then hold Shift and click where it should end. Make about a dozen lines of different lengths, some touching the page edge and some floating, on both sides of the fan area. Tilt every one by the same small amount, rising slightly to the right, so they all run parallel to the slab you'll add later (a gentle slope, about 1 px up for every 12 px across).
-
Draw the broken rings
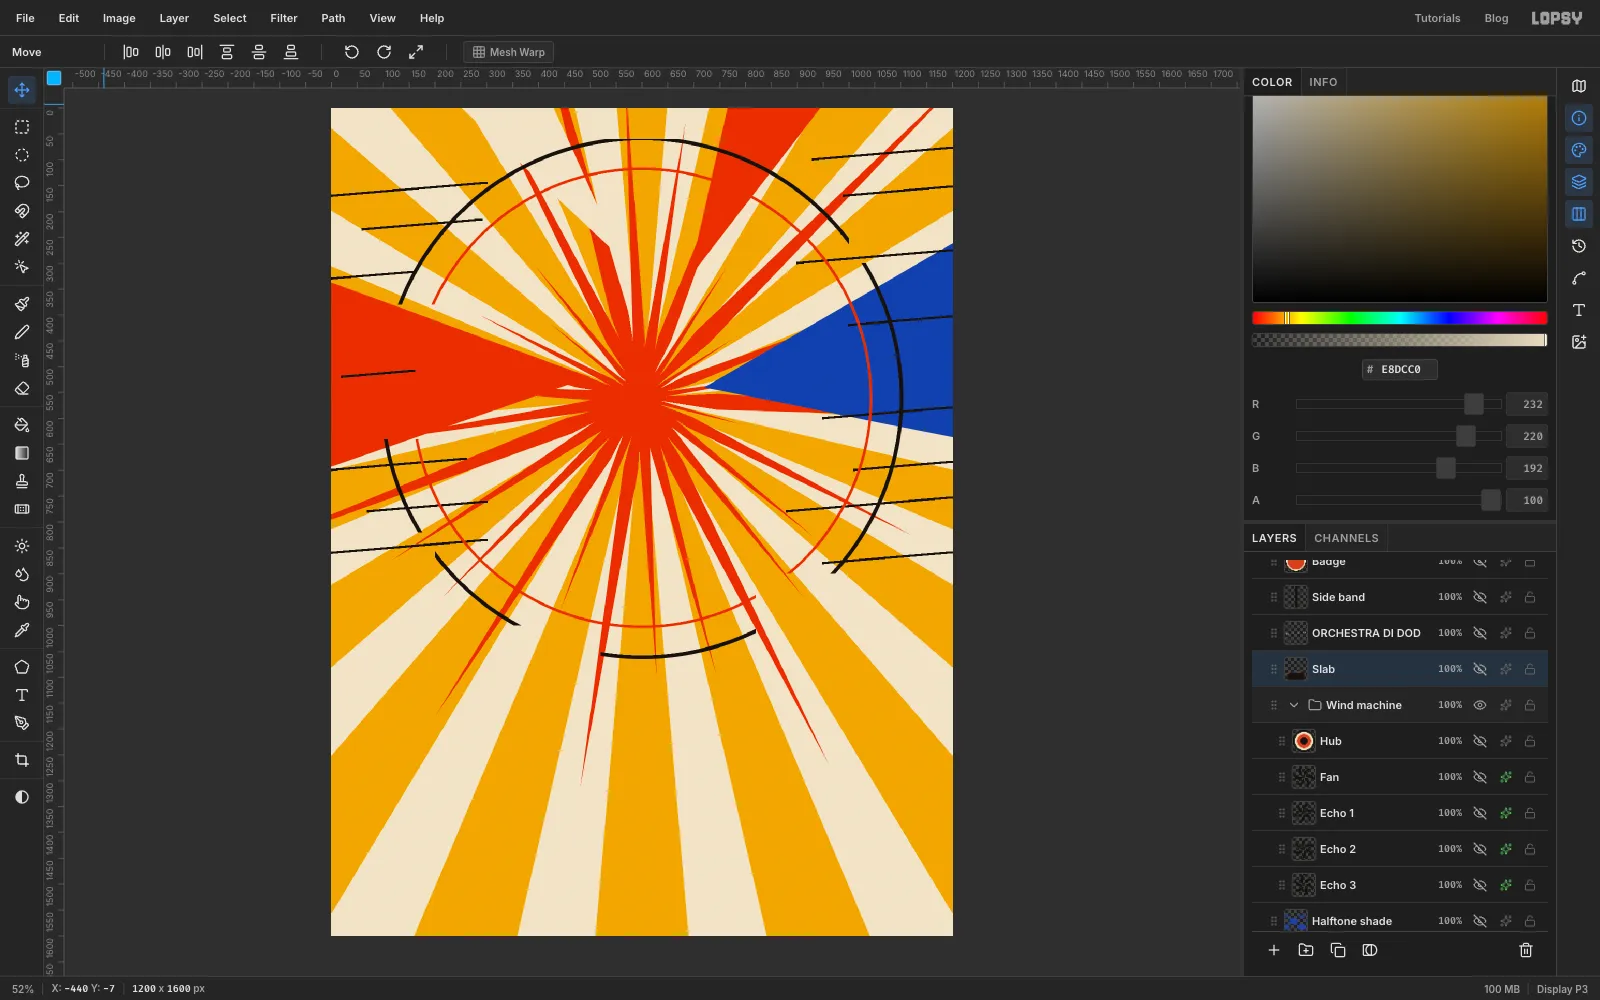
Add a layer called Rings. Pick the Elliptical Marquee, hold Shift, and drag a big circle centred on the burst that nearly touches the left and right edges of the page, about 1010 px across (the status bar shows the size as you drag). Fill it with ink black, then choose Select → Shrink, enter 7, click Apply and press Delete. A thin black ring is left. Repeat with a slightly smaller circle, about 890 px across and centred on the same point, filled with vermilion and shrunk by 5 before deleting.
The rings feel mechanical when they are broken. Switch to the Rectangular Marquee, drag small boxes over the sides and press Delete each time to cut gaps into both rings, leaving a few separate arcs.
-
Print a halftone shadow
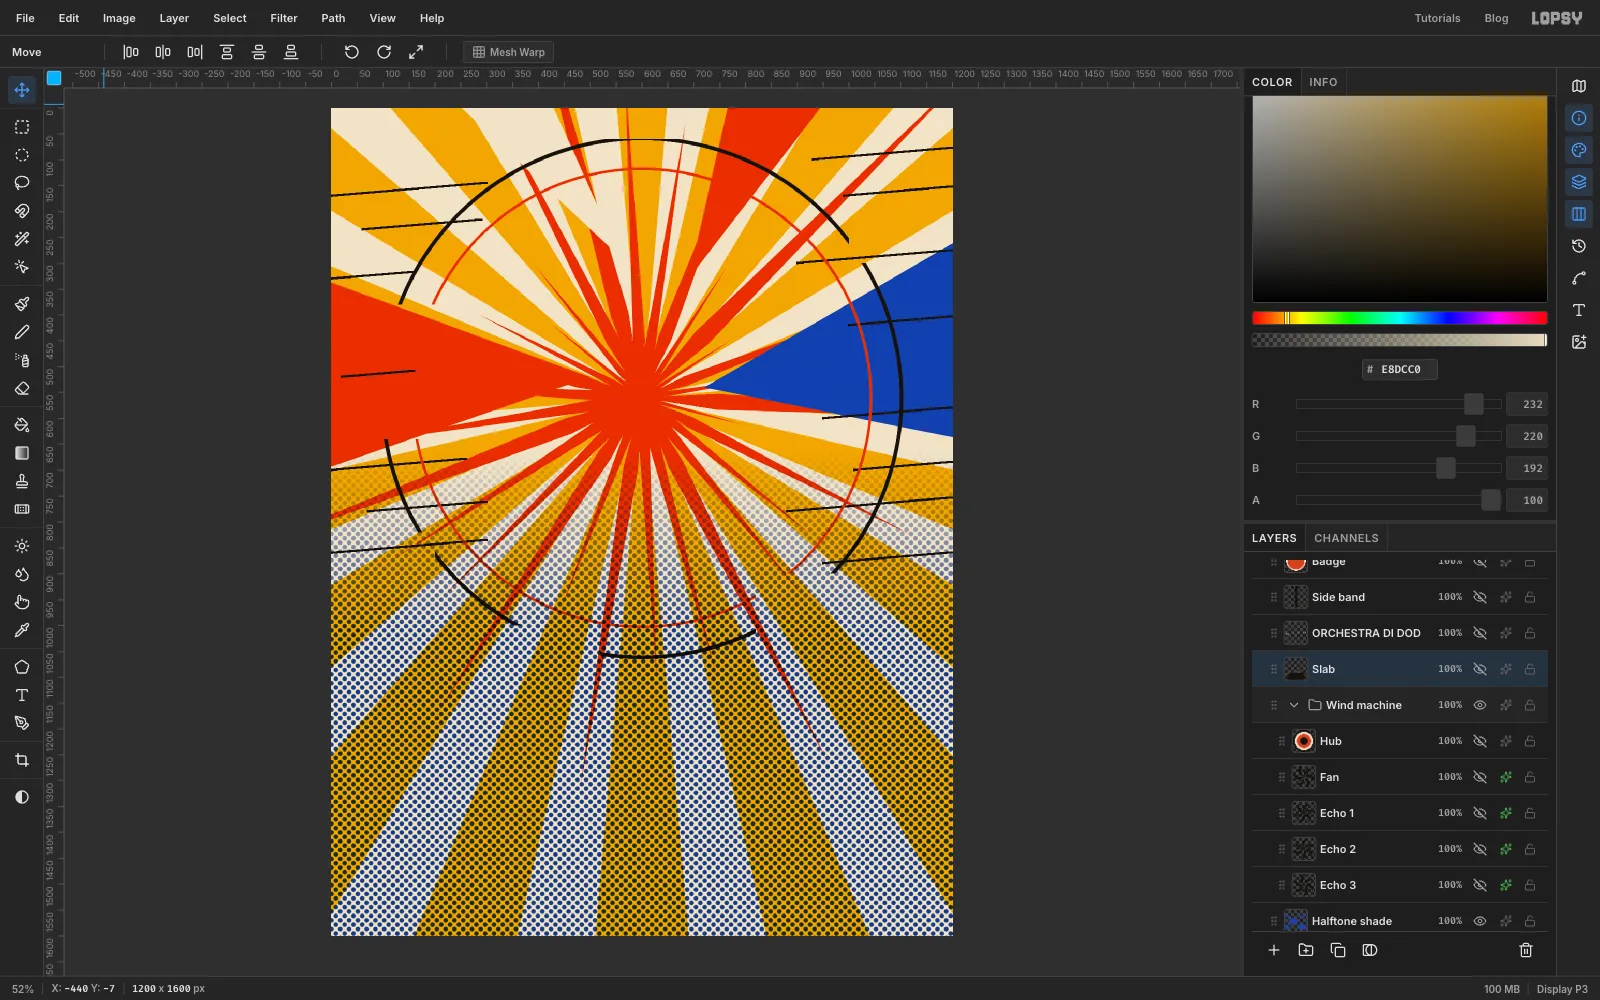
Add a layer called Halftone shade. Choose the Gradient tool, set the type to Linear and open Advanced to give it two stops: cobalt at the start and the same cobalt at the end with Opacity set to 0. Drag from near the bottom of the page straight up to about two-fifths of the way up. Then choose Filter → Halftone and set Dot Size to 12. The smooth fade becomes a screen of dots.
Open the layer's effects drawer and set its Blend to Multiply, so the dots print into the rays. You'll cover the bottom of the page with a slab later, so only the upper part of the dots remains visible.
-
Cut the fan blades
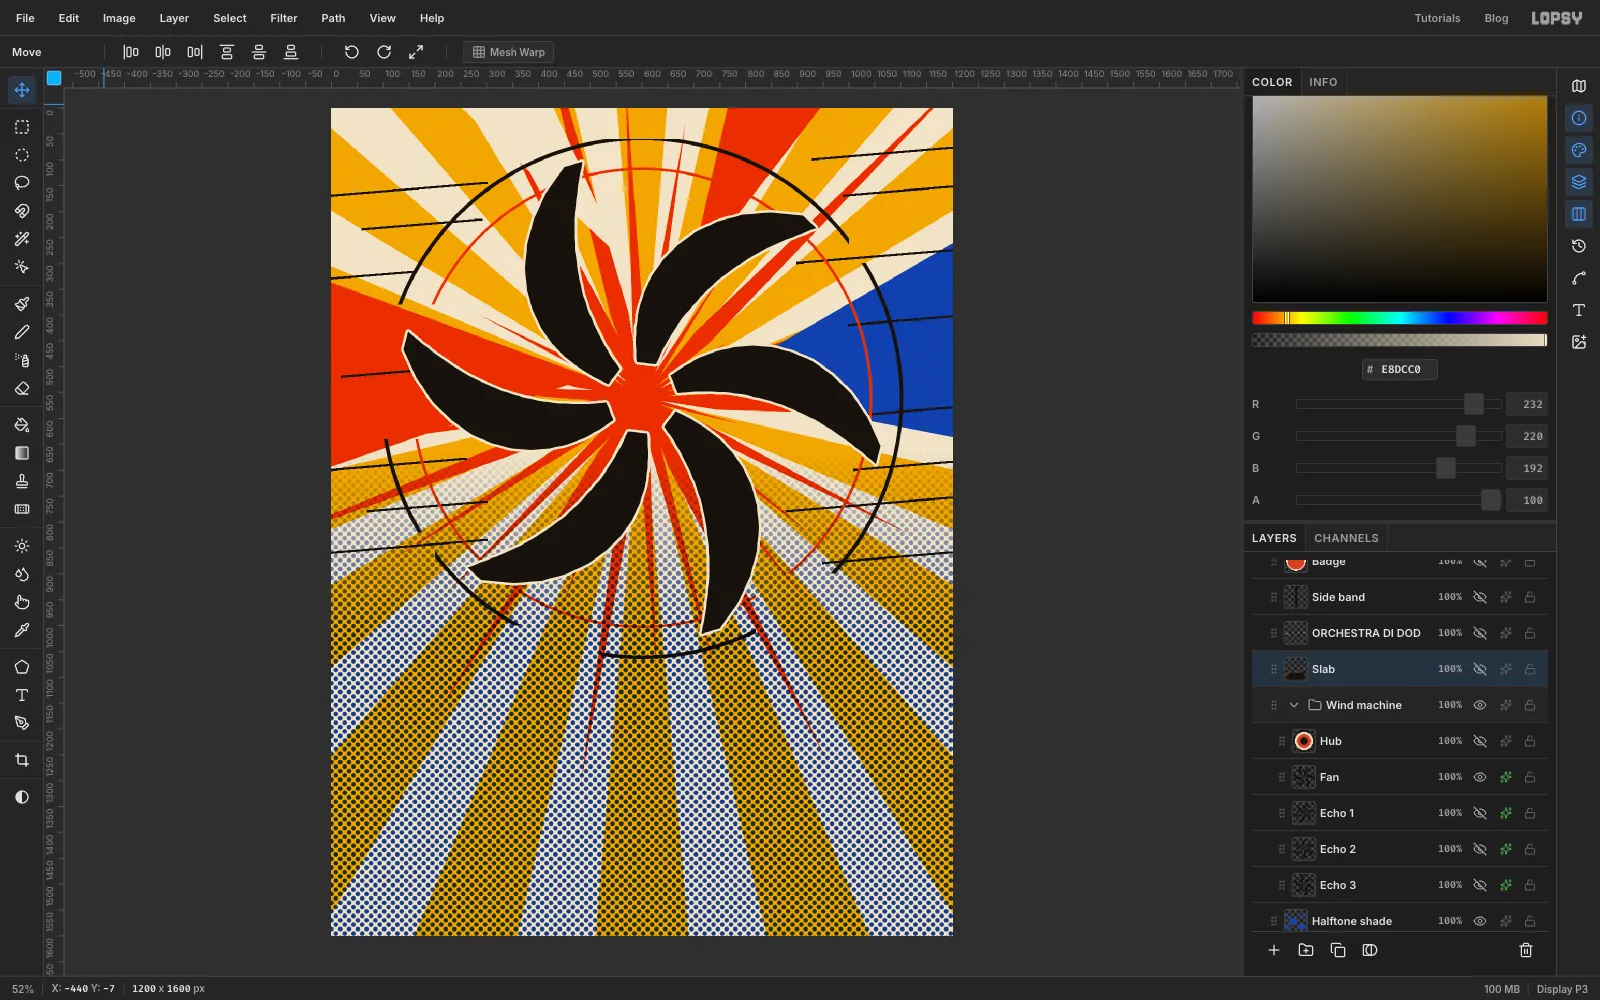
Add a layer called Fan and set the foreground to ink black. With the Lasso, draw one blade as a thin curved crescent: start at the centre of the burst, curve outward in a long arc about 470 px long, widest in the middle and tapering to a point, then return along a second curve to close it. Click many small steps for a smooth curve, then choose Edit → Fill.
Repeat the shape five more times at roughly 60° intervals around the centre, so the blades all sweep the same way like a pinwheel. They don't need to match exactly; slight differences look hand-cut. (For identical blades, fill one, duplicate the layer, turn the copy 60° as in the next step, and merge it down.) Keep the whole fan roughly centred on the burst, because the next step turns it around that point.
-
Rotate a copy for the motion trail
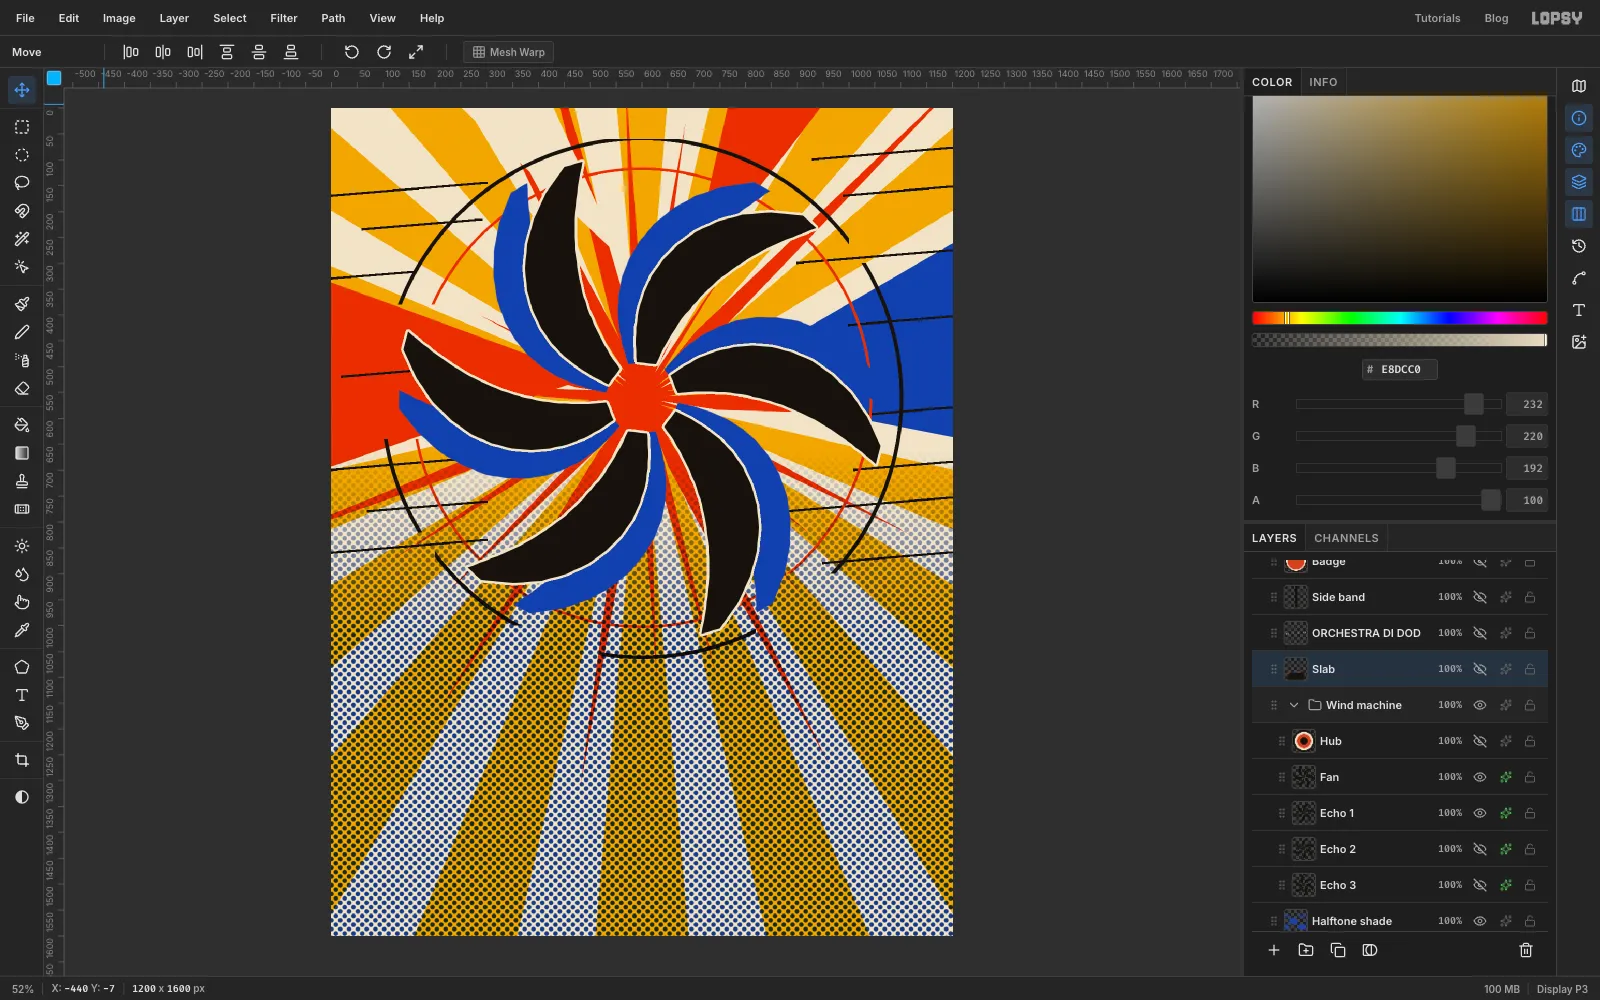
Choose Layer → Duplicate Layer, click the new Fan copy row, and rename it Echo 1. Pick the Rectangular Marquee and drag a box that just contains the whole fan, with the same margin on all sides so its centre is the centre of the burst. With a selection active, the copy rotates around the centre of the box, which is the hub, instead of around the middle of the whole layer. Switch to the Move tool and drag the round rotate handle outside a corner about 14° anticlockwise. Press Cmd/Ctrl+D to commit and deselect.
Open the layer's effects drawer, switch on Color Overlay and set the colour to cobalt . Drag the Echo 1 row below Fan.
-
Repeat for two more echoes
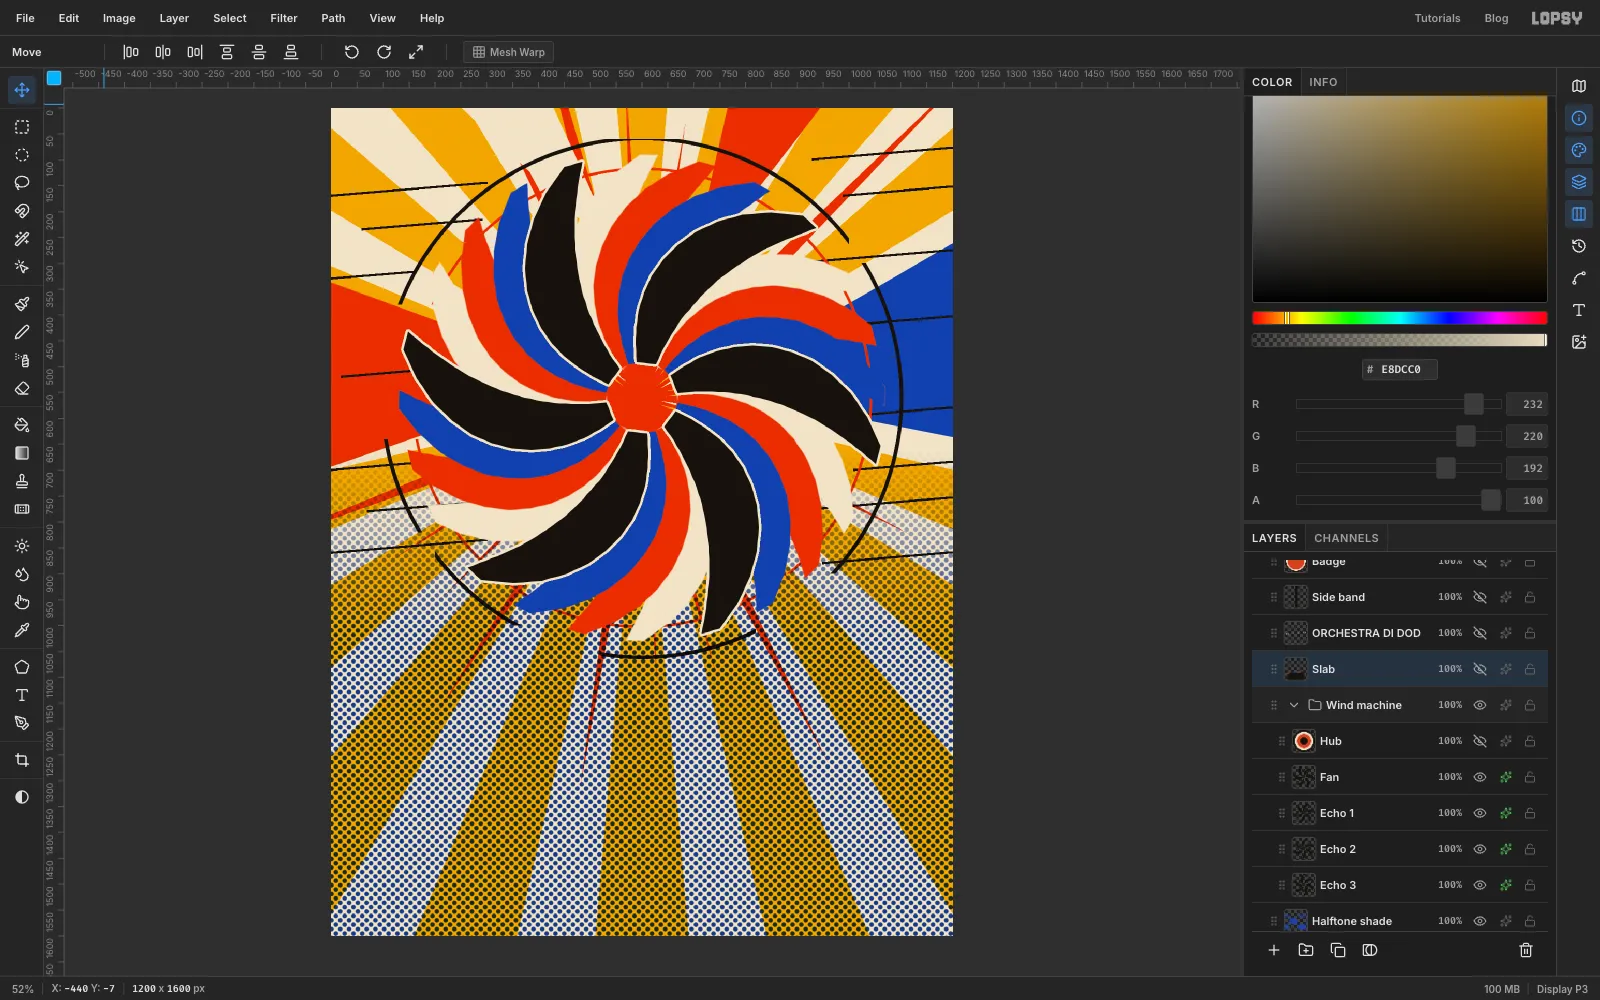
Duplicate Echo 1, click the copy, rotate it another 14° anticlockwise the same way, rename it Echo 2 and drag it below Echo 1. Change its Color Overlay to vermilion . Make Echo 3 from Echo 2 in the same way, dragging each new echo below the previous one so the stack reads Fan, Echo 1, Echo 2, Echo 3 from the top, with a cream overlay. Together they read as one blade moving through three stages, the same trick Giacomo Balla used for a dog on a leash.
Select Fan and switch on Stroke in the effects drawer: cream, width 5. The thin pale outline keeps the black blades from merging with the black arcs and lines.
-
Add the hub
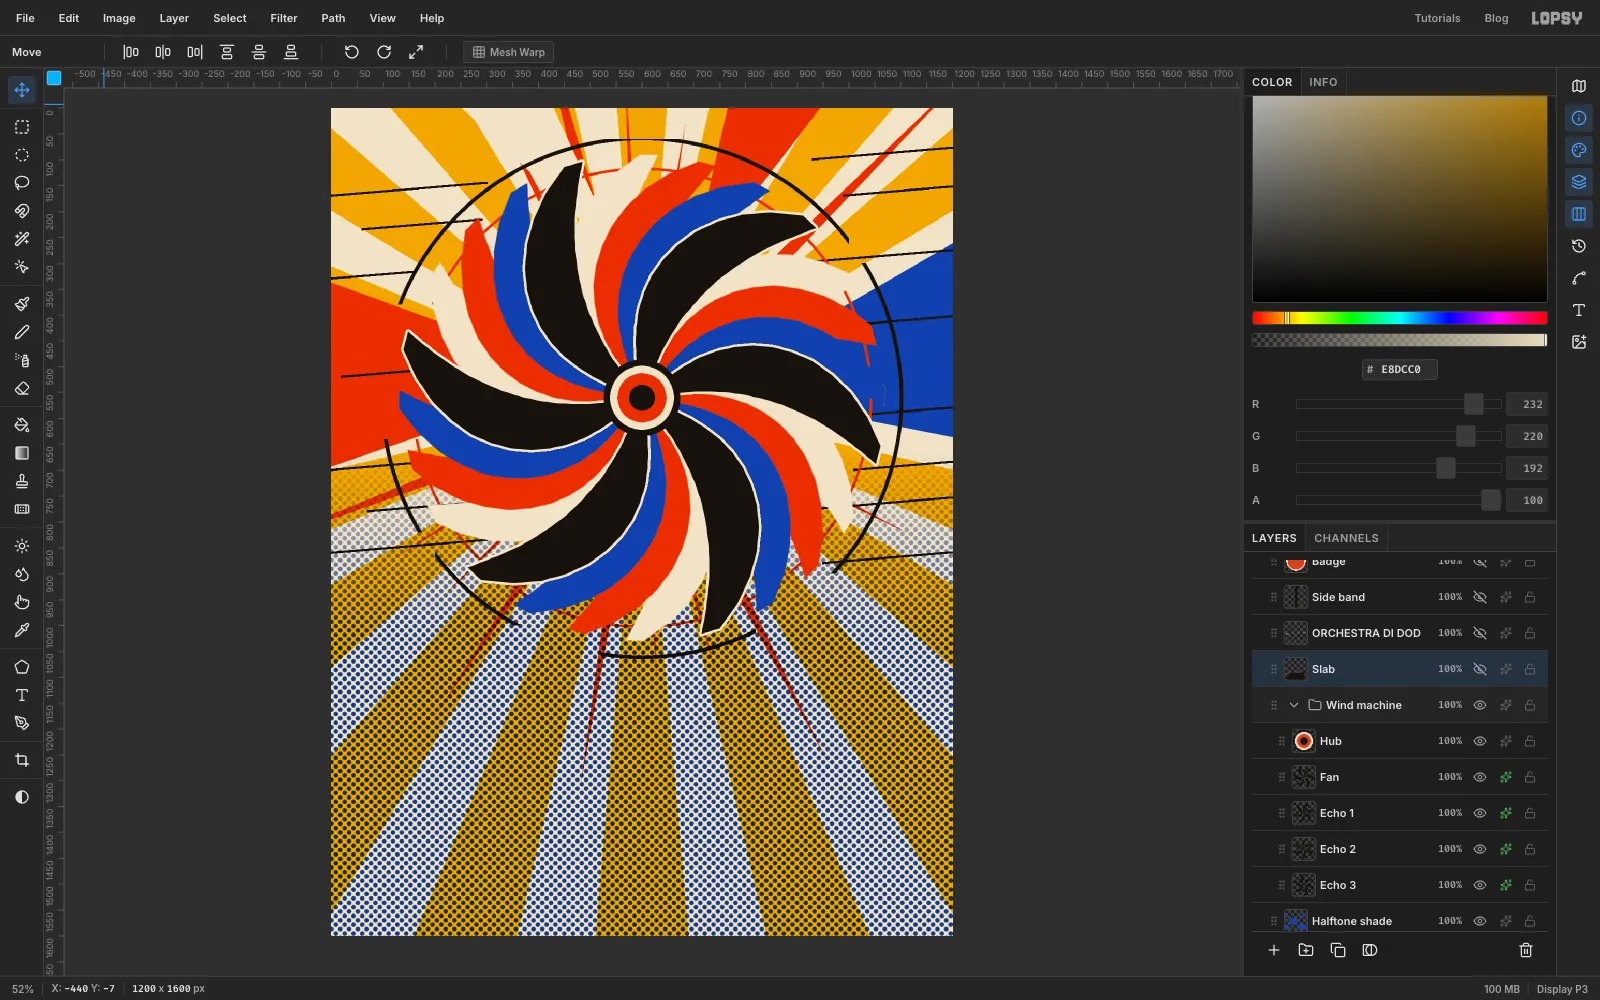
Add a layer called Hub above Fan. With the Elliptical Marquee, hold Shift and drag a circle about 150 px across centred on the fan and fill it with ink black. Choose Select → Shrink by 12 and fill with cream, then shrink the new selection again by 14 and fill with vermilion, then once more by 22 and fill with ink black.
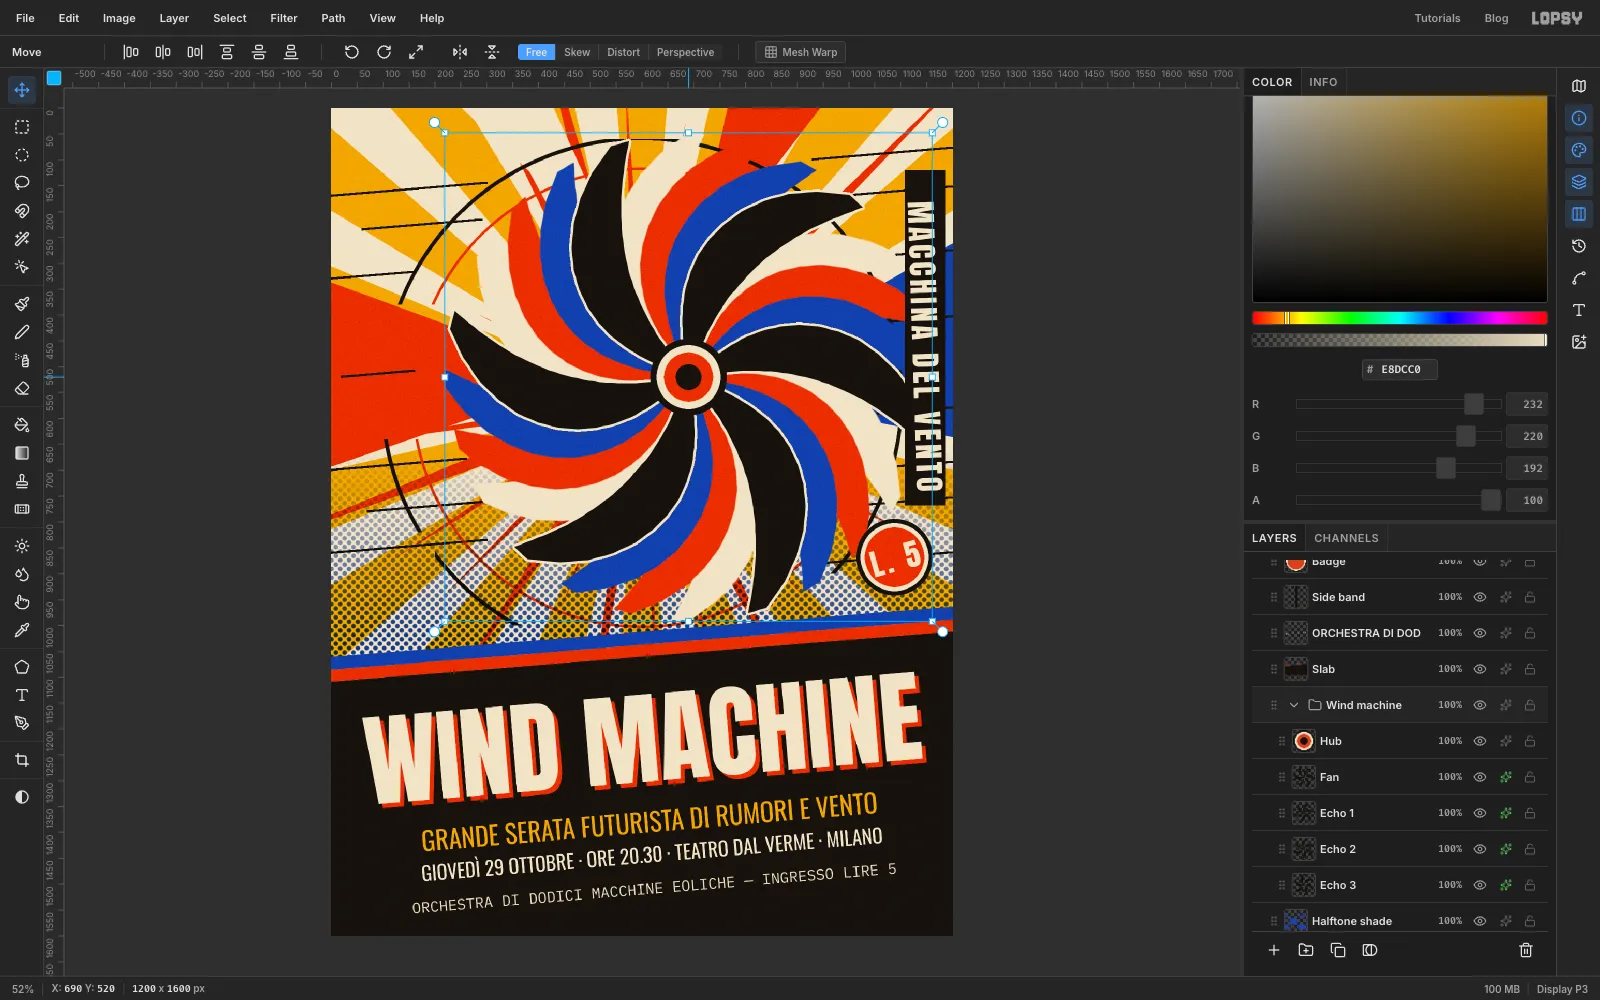
Now group the machine. Click the Hub row, hold Shift and click the Echo 3 row so all five layers are selected, then choose Layer → Group Layers. Rename the group Wind machine. You can now move or scale the whole fan as one thing.
-
Build the slab
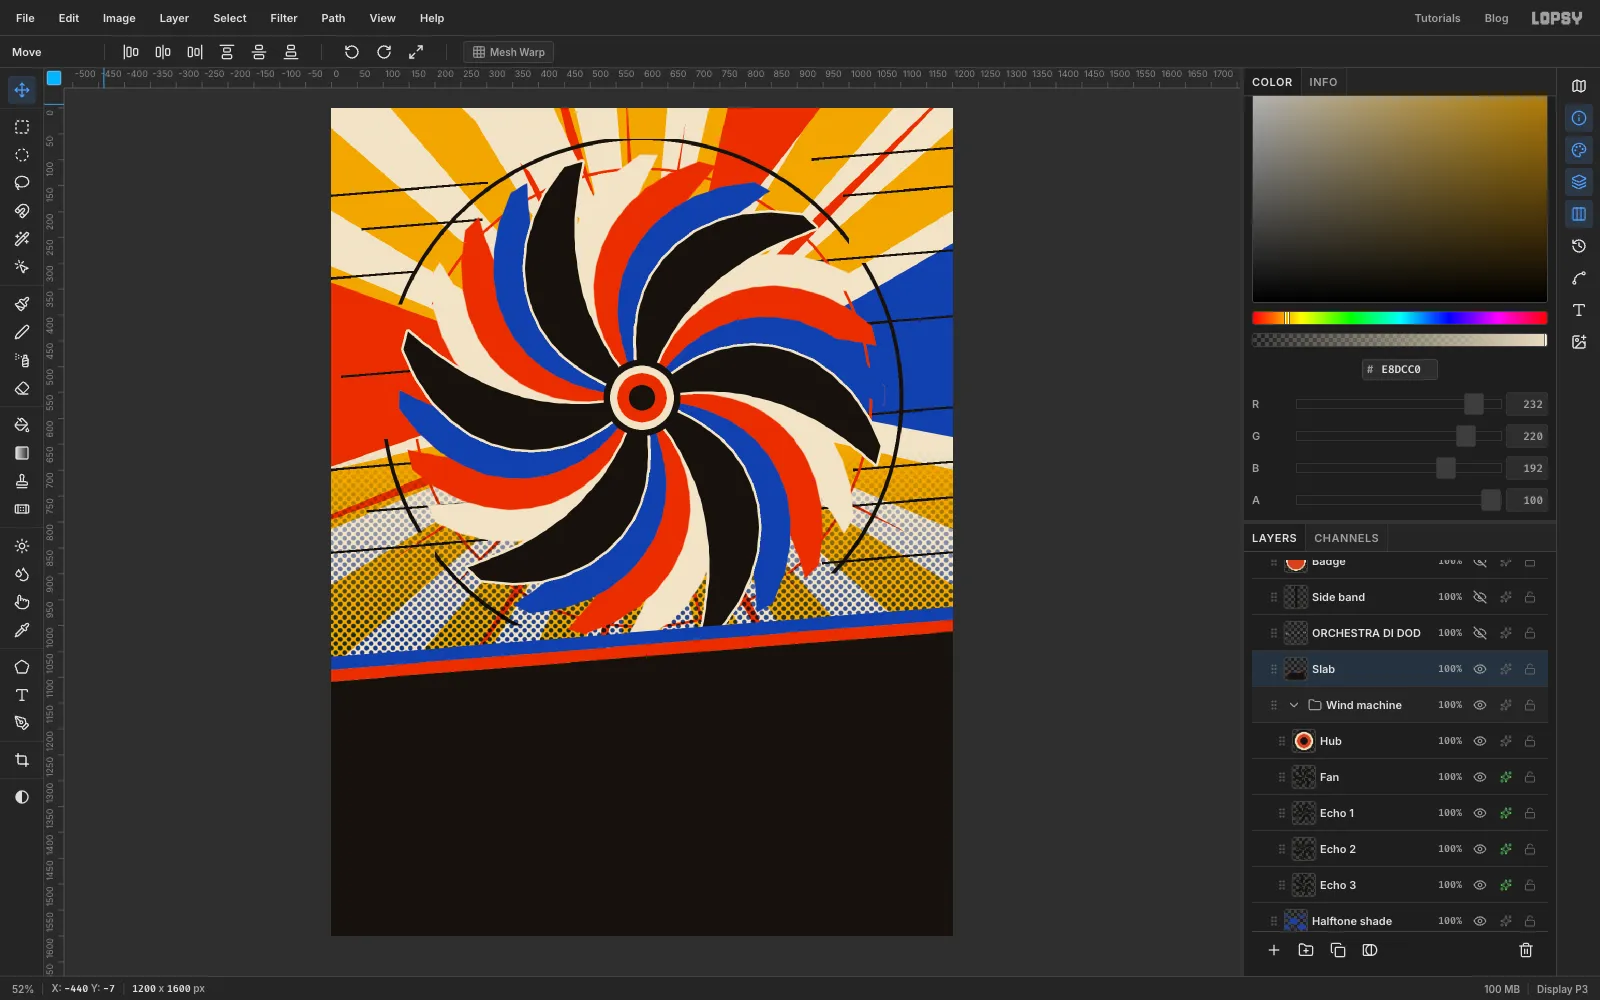
Add a layer called Slab above everything by clicking the top group in the Layers panel first. With the Lasso, click a corner off the left edge about two-thirds of the way down the page, then a corner off the right edge about 100 px higher, then the bottom right and bottom left corners, and close the shape. Fill it with ink black.
On the same layer, draw two thin parallel bands right above its top edge in the same way: first vermilion, then cobalt above it, each about 25 px tall and running at exactly the same angle. The slab's slope sets the angle for all the type.
-
Set the title
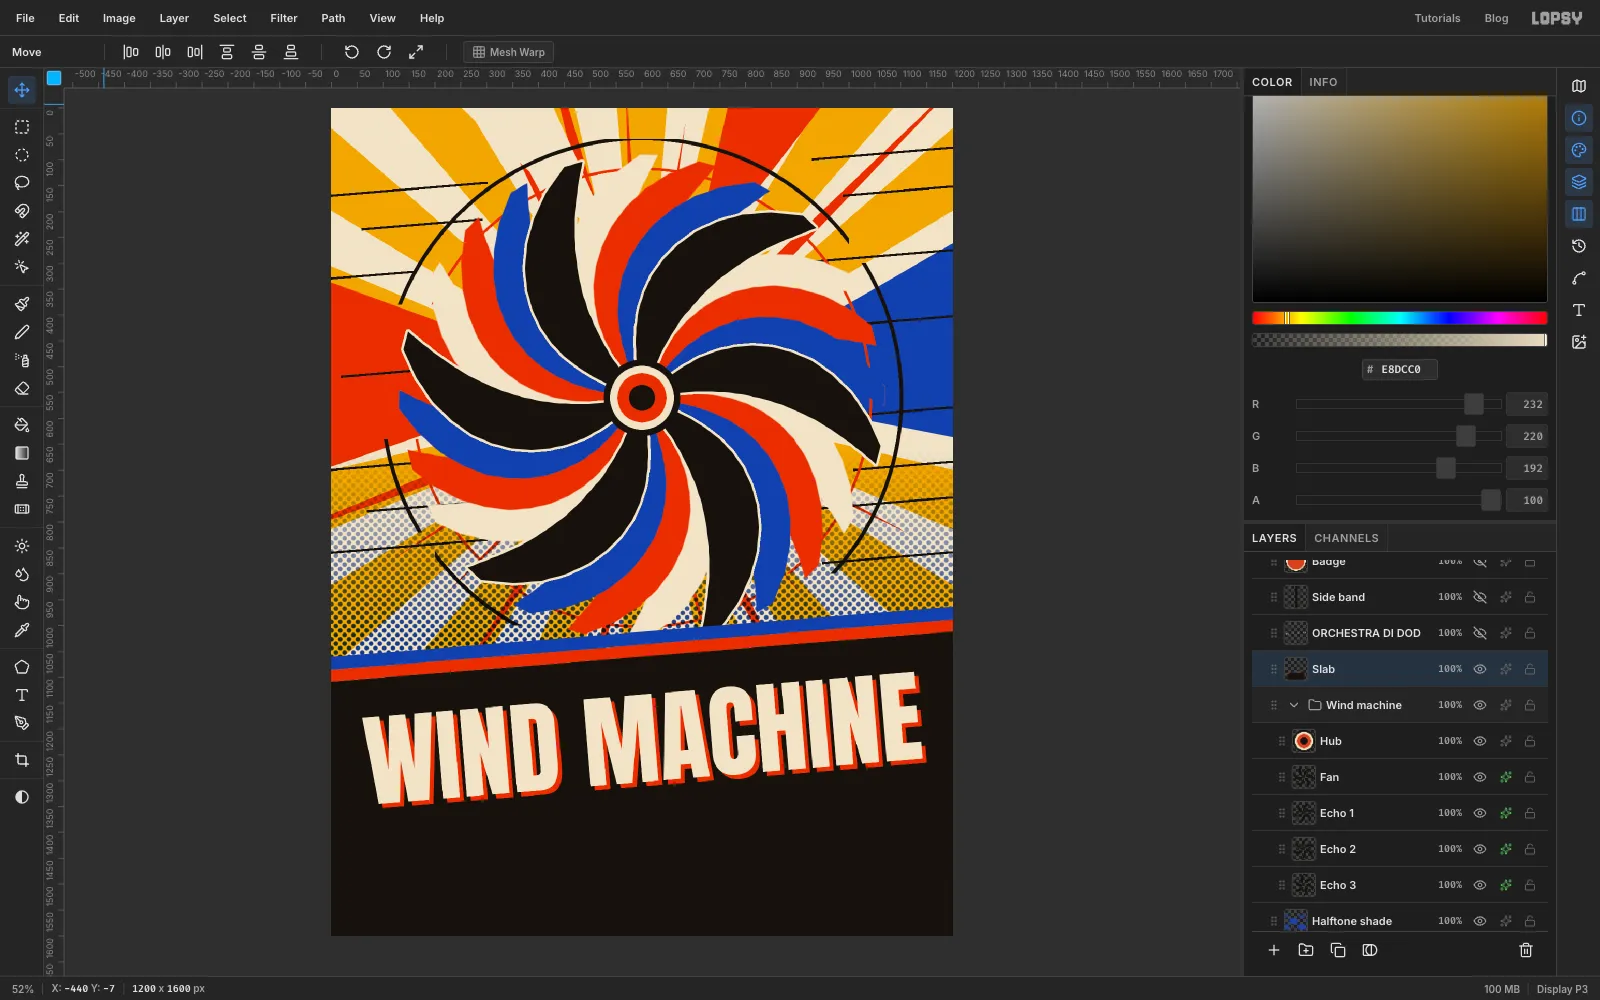
Click the Slab row so a raster layer is active, pick the Text tool, choose Anton, set the size to 196 and the colour to cream , then click on the slab and type
WIND MACHINE. Press Tab to commit the text.With the Move tool, the text layer shows a box with rotate handles at its corners. Drag the top-right handle upward until the baseline is parallel to the slab edge, about 5°. Then drag the title so it is centred left to right, with a margin of roughly 60 px on each side and a clear gap below the stripes.
Open the effects drawer, switch on Drop Shadow, set the colour to vermilion , Offset X and Offset Y to 8, Blur to 0 and Opacity to 100. The hard offset looks like a printing misregistration.
-
Add the subtitle and details
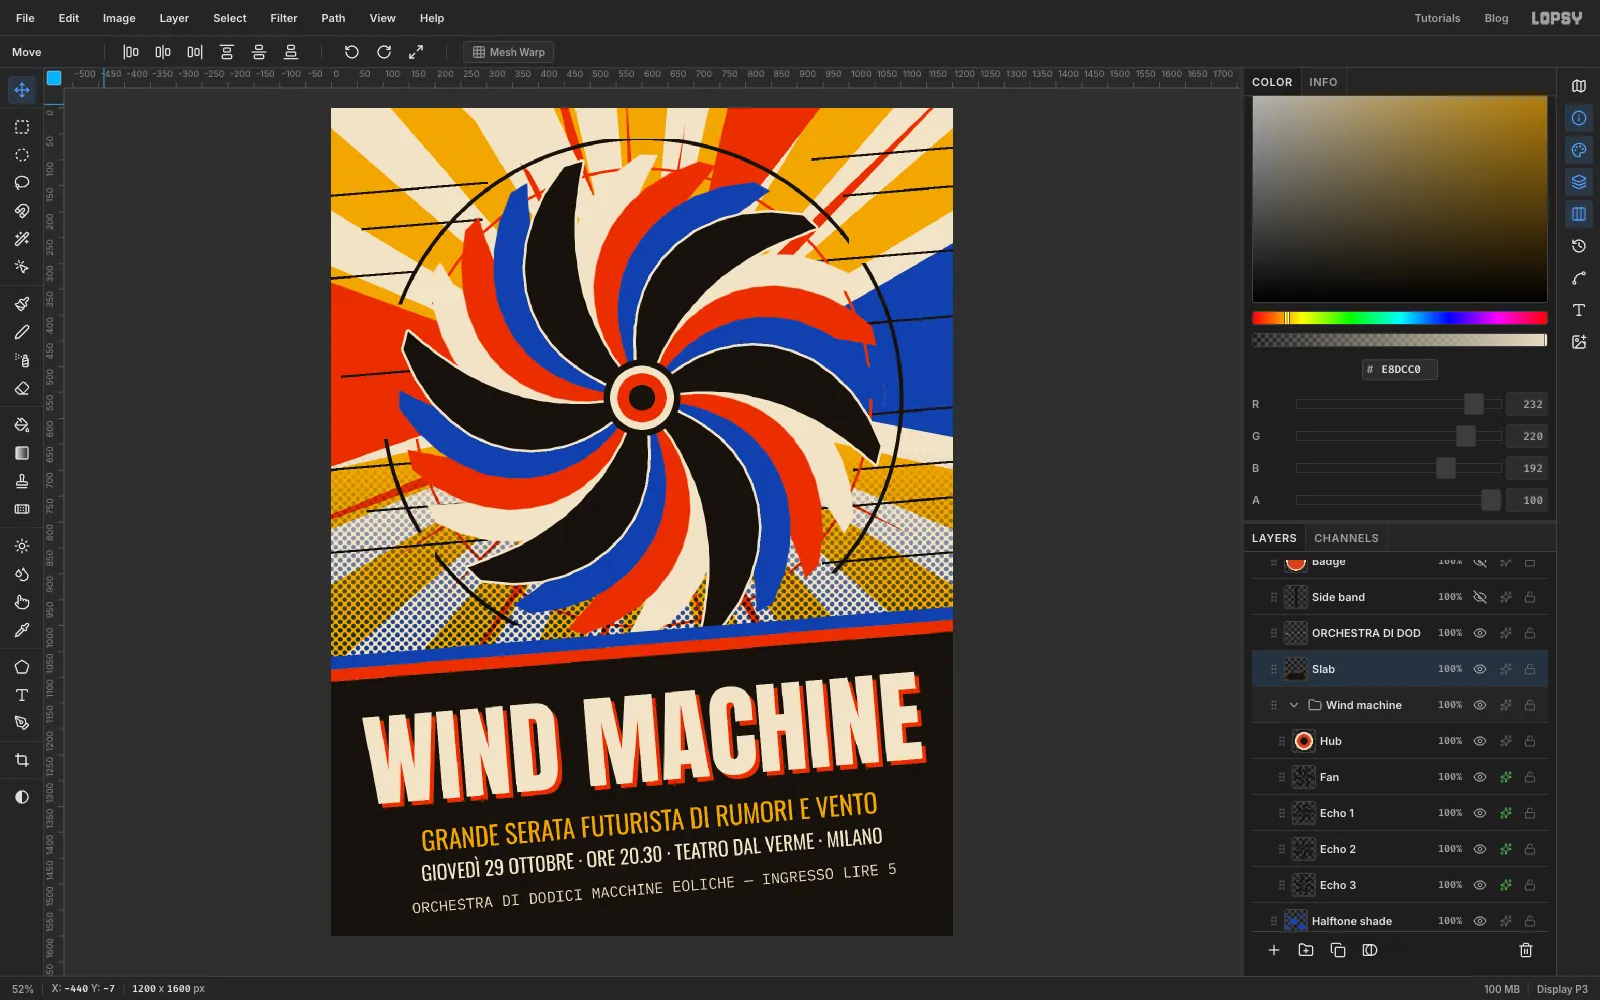
Make three more text layers, clicking the Slab row each time. First Oswald at 50, mustard :
GRANDE SERATA FUTURISTA DI RUMORI E VENTO. Then Oswald at 38, cream:GIOVEDÌ 29 OTTOBRE · ORE 20.30 · TEATRO DAL VERME · MILANO. Finally IBM Plex Mono at 29, :ORCHESTRA DI DODICI MACCHINE EOLICHE — INGRESSO LIRE 5.Rotate each one to match the slope of the title (matching by eye along the slab's edge is fine), and centre each line under the one above it. Leave about 35 px between lines and a margin of at least 40 px above the bottom edge so nothing crowds the border.
-
Add the side band and the price badge
Add a layer called Side band above the slab. With the Rectangular Marquee, drag a tall narrow box near the right edge, from about an eighth of the way down to about half the page, and fill it with ink black. Create text in Anton at 58 with Letter spacing 6, type
MACCHINA DEL VENTO, then rotate it 90° clockwise with the Move tool's handle and drop it into the band, leaving even padding at both ends.For the badge, add a layer called Badge, drag an Elliptical Marquee about 150 px across, and fill it ink black. Shrink by 8 and fill with cream, shrink by 8 again and fill with vermilion. Set Anton at 58 in cream, with letter spacing at 0, type
L. 5, turn it 14° anticlockwise and centre it in the disc. Place it just below the side band so it doesn't touch the lettering, with the end of the black ring passing close by.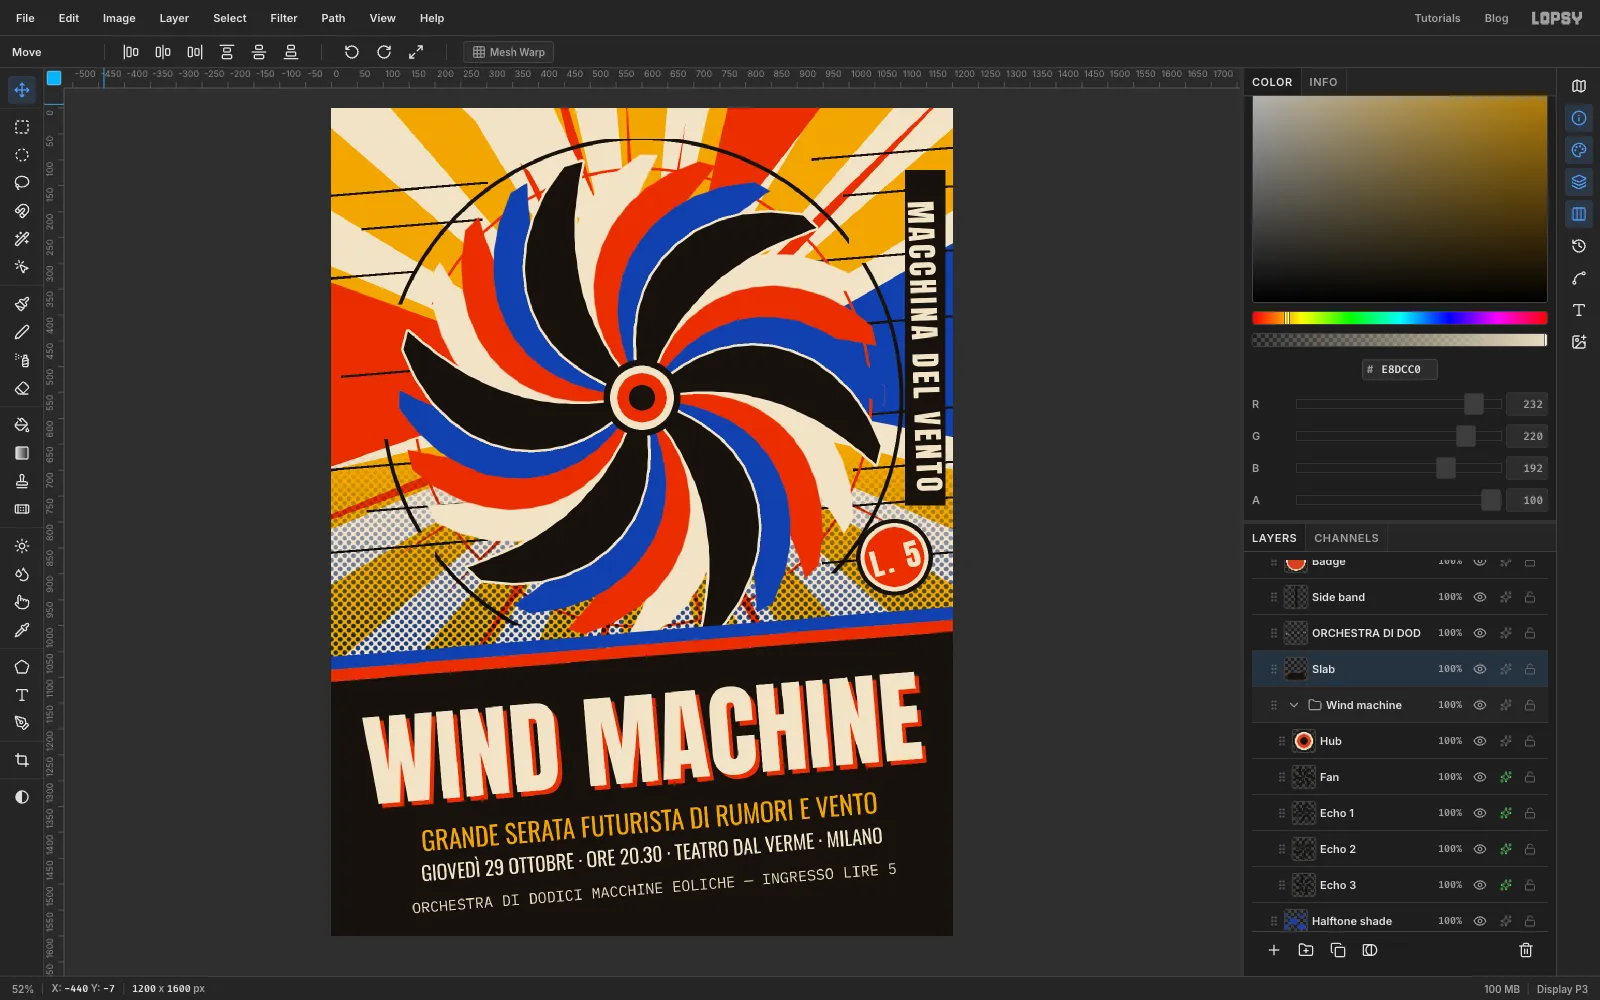
-
Finish with paper grain
Add a layer called Grain above everything. Set the foreground to mid grey and fill the layer with Edit → Fill. Choose Filter → Add Noise, switch to Mono, set Amount to 60 and apply. Then open the effects drawer, set the layer's Blend to Overlay and drop its opacity to 55%.
-
Try moving the machine as one piece
This part is optional. Click the Wind machine group row, pick the Move tool and drag on the canvas. The fan, echoes and hub move together while the slab, type and rays stay put.
-
Undo and export
Press Cmd/Ctrl+Z and the group snaps back exactly where it was. Cmd/Ctrl+Shift+Z redoes the move, and undo once more if you want it back in place. Export the flier with File → Quick Export PNG, or save the project to keep every layer for later tweaks.