Make a Gothic Holiday Card with a Kissing Bough
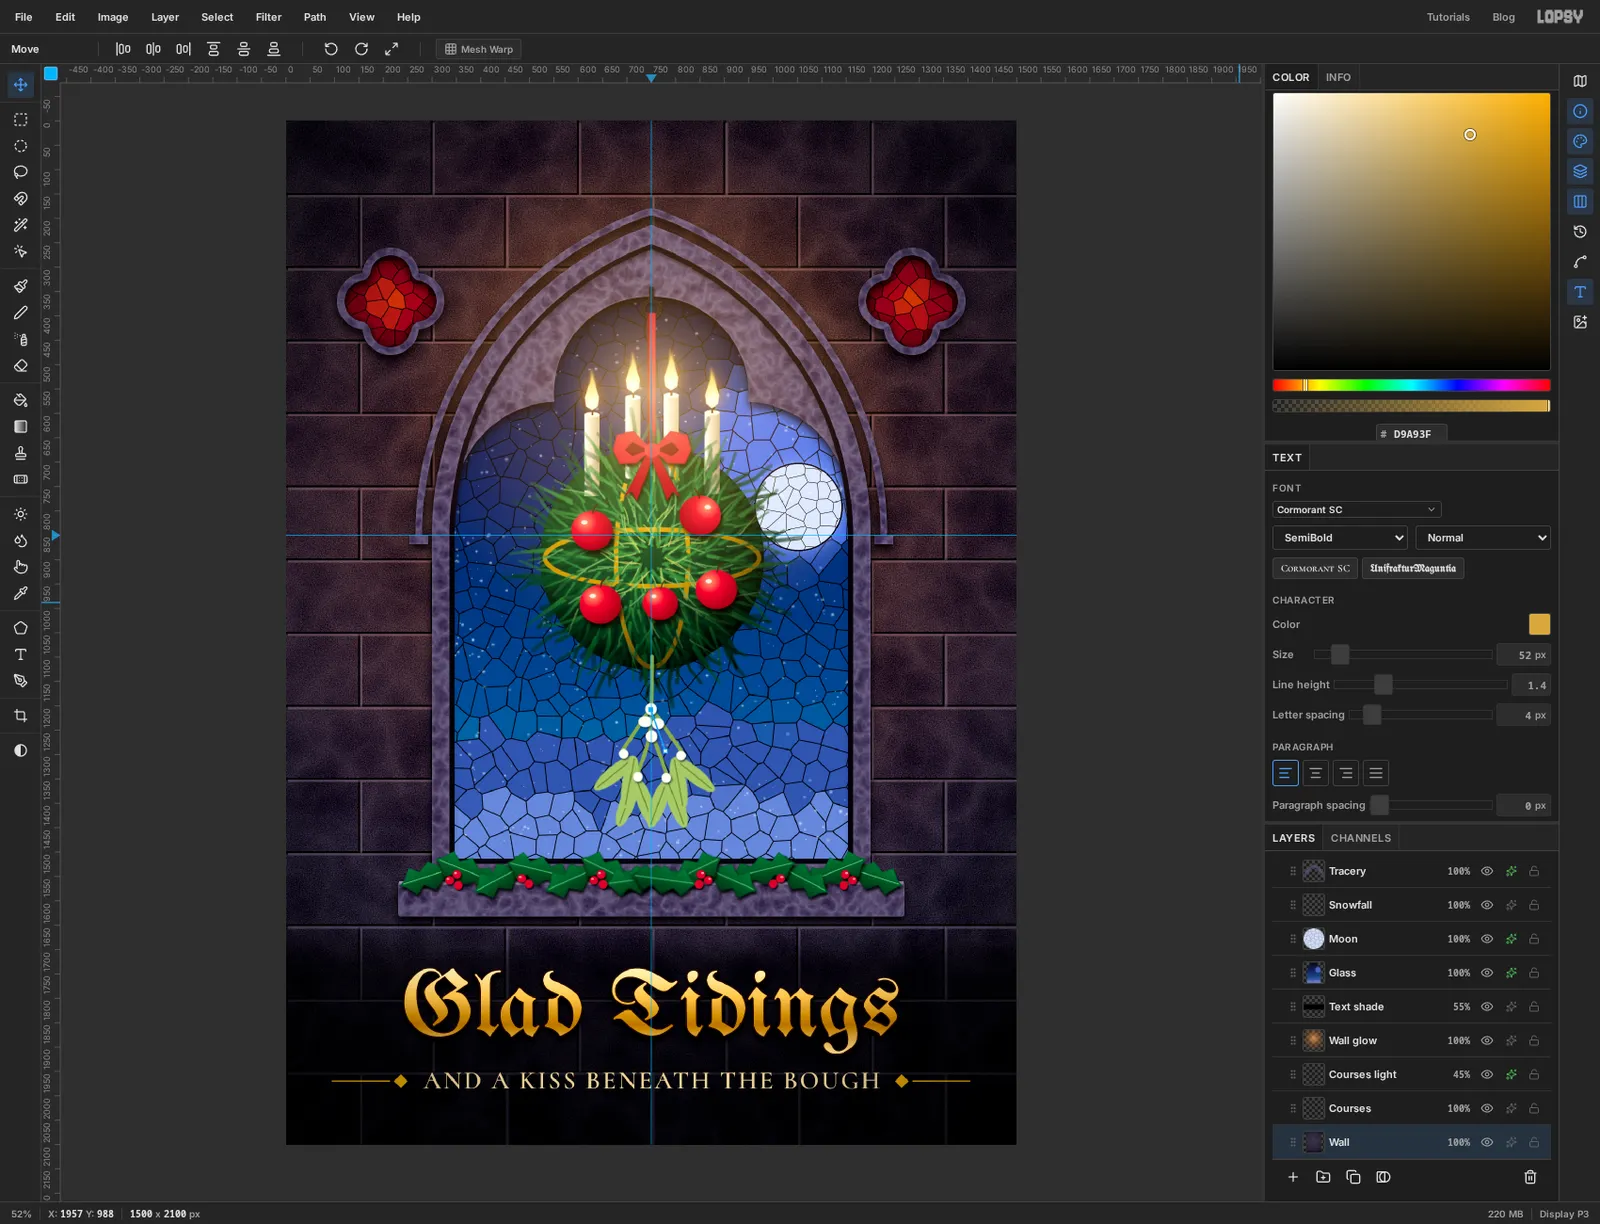
Build a gothic Christmas card in Lopsy with a trefoil stained-glass window, a candlelit kissing bough painted with radial symmetry, holly and gold blackletter.
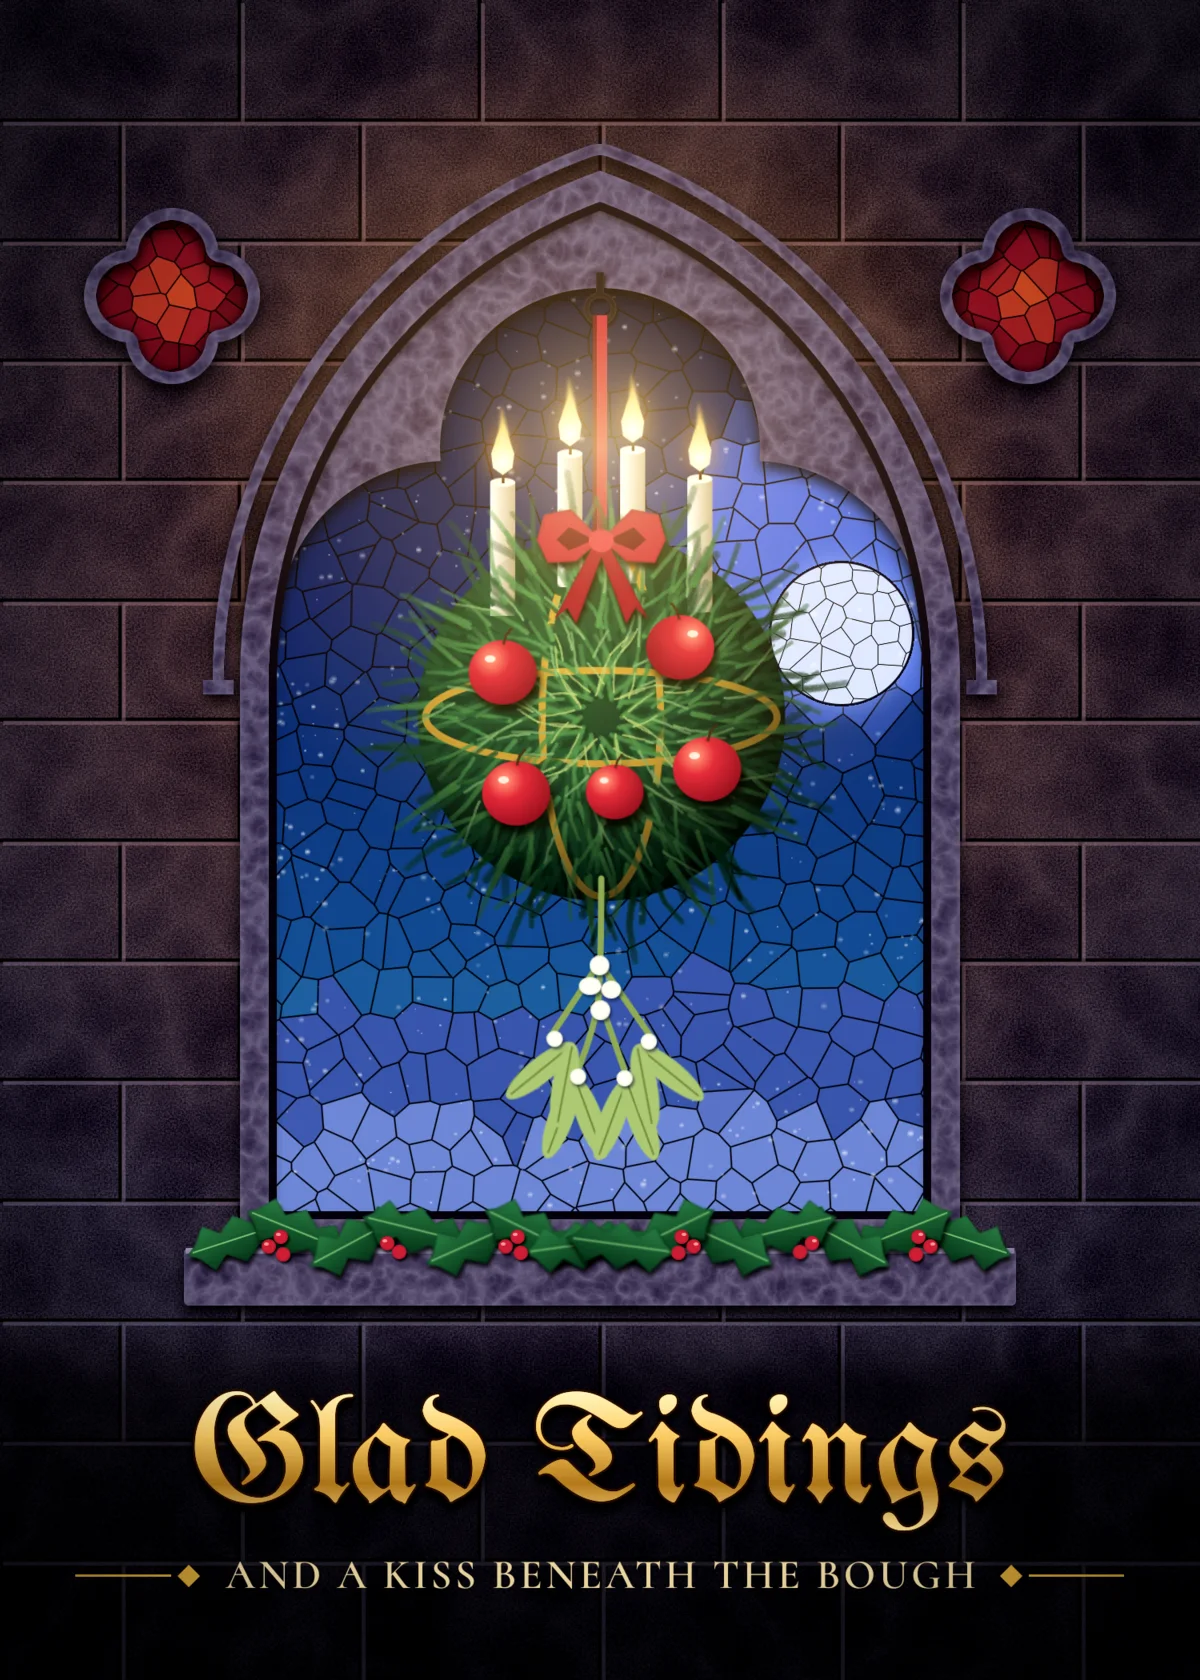
Before the Christmas tree reached England, the centrepiece of the house was the kissing bough: a ball of evergreens on a frame of hoops, hung from the ceiling with candles, apples and a bunch of mistletoe underneath. It's a good subject for a gothic card because it already hangs in the middle of things, the way a lamp hangs in a chapel.
This tutorial puts one in front of a stained-glass window on a 1500 × 2100 px card. The gothic part comes from four habits:
- a pointed arch, built from two overlapping circles the way a mason would set it out
- tracery, the stonework that divides the head of the window into lobes
- cold glass against warm candlelight, with everything else kept dark
- blackletter for the greeting
The tools you'll use:
- the Gradient tool, Texture and the Pencil with Shift-click lines for the wall
- the Voronoi filter for stained glass
- the two Marquee tools with Shift to add, Alt to subtract and Shift+Alt to intersect
- Select → Grow, Shrink, Feather and Inverse
- the Brush with Radial Symmetry, then a layer mask
- the Shape tool, the Pen, Spray, Smudge and the Lasso
- the Move tool for rotating, scaling, flipping and nudging layers and whole groups
- layer effects, the Overlay, Multiply and Screen blend modes, and group adjustments
- two Google fonts and a gradient run through the letters
The palette is cold stone and blue glass with a few warm things in front of it:
-
Stone
-
Dressed stone
-
stone highlight
-
mortar
-
Night glass
-
Snow hills
-
moon
-
Ruby glass
-
Fir
-
Ribbon
-
berry
-
wine
-
Candle
-
flame
-
Gold
-
title gold
-
subtitle
The type is UnifrakturMaguntia for the greeting and Cormorant SC SemiBold for the line under it.
-
Lay down the stone
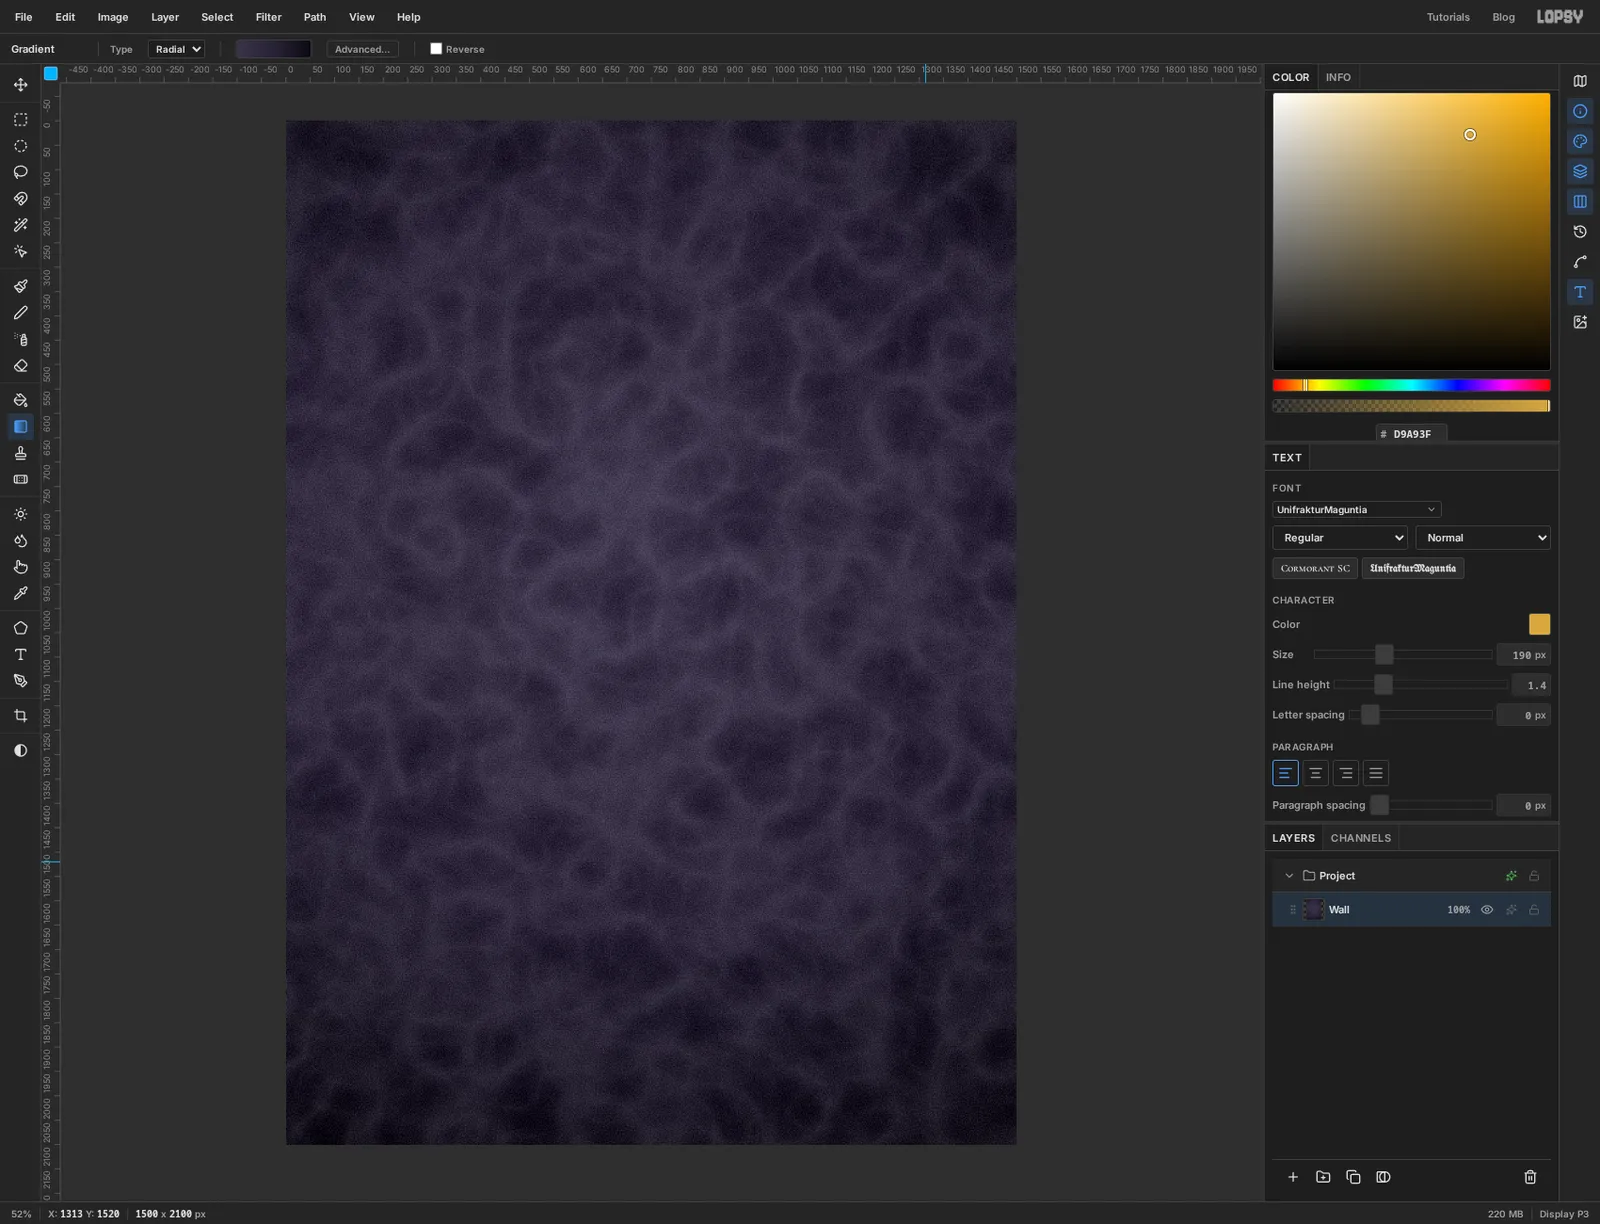
Choose File → New and make a document 1500 wide and 2100 high with a Transparent background. Rename the layer Wall.
Pick the Gradient tool, set Type to Radial and click Advanced… to open the Gradient Editor. Give it three stops: at the left, just past the middle and at the right. Click Done, then drag from a little above the centre of the canvas straight down, well past the bottom edge.
Choose Filter → Texture…. Click Rough, set Amount to 10, Size to 150 and Detail to 55, and apply. That gives the big, slow veins. Run Texture… again with Grain, Amount 13, Size 2.5 and Detail 30 for the fine tooth.
-
Rule the masonry with the Pencil
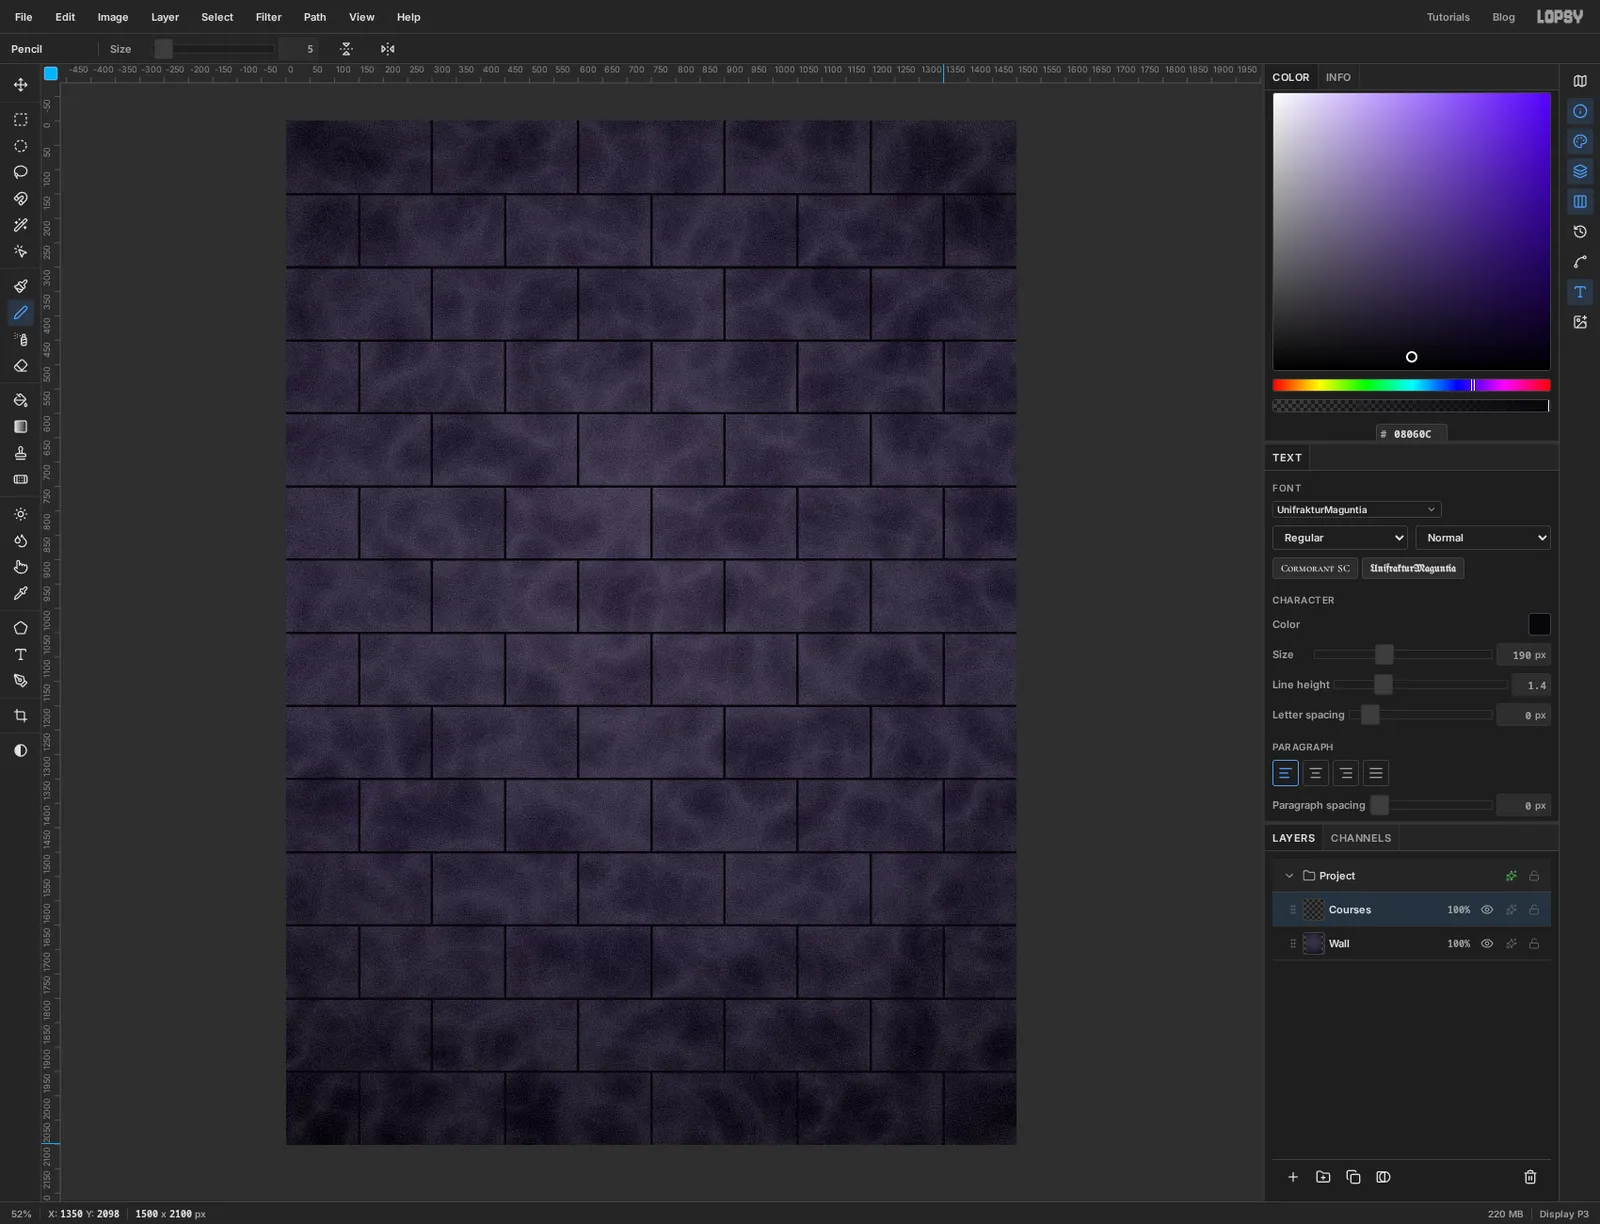
Add a layer called Courses. Take the Pencil, set Size to 5 and the foreground to .
Click just outside the left edge of the canvas, then Shift-click just outside the right edge at the same height. That draws one straight joint. Do it thirteen times, every 150 px down the canvas, using the left ruler to space them.
Then add the upright joints the same way, with a click at the top of a course and a Shift-click at the bottom. Put one every 300 px, and shift every second row sideways by half a block so no two joints line up. That's four or five short lines in each of fourteen courses, so allow ten minutes for it.
-
Bevel the joints and drop two guides
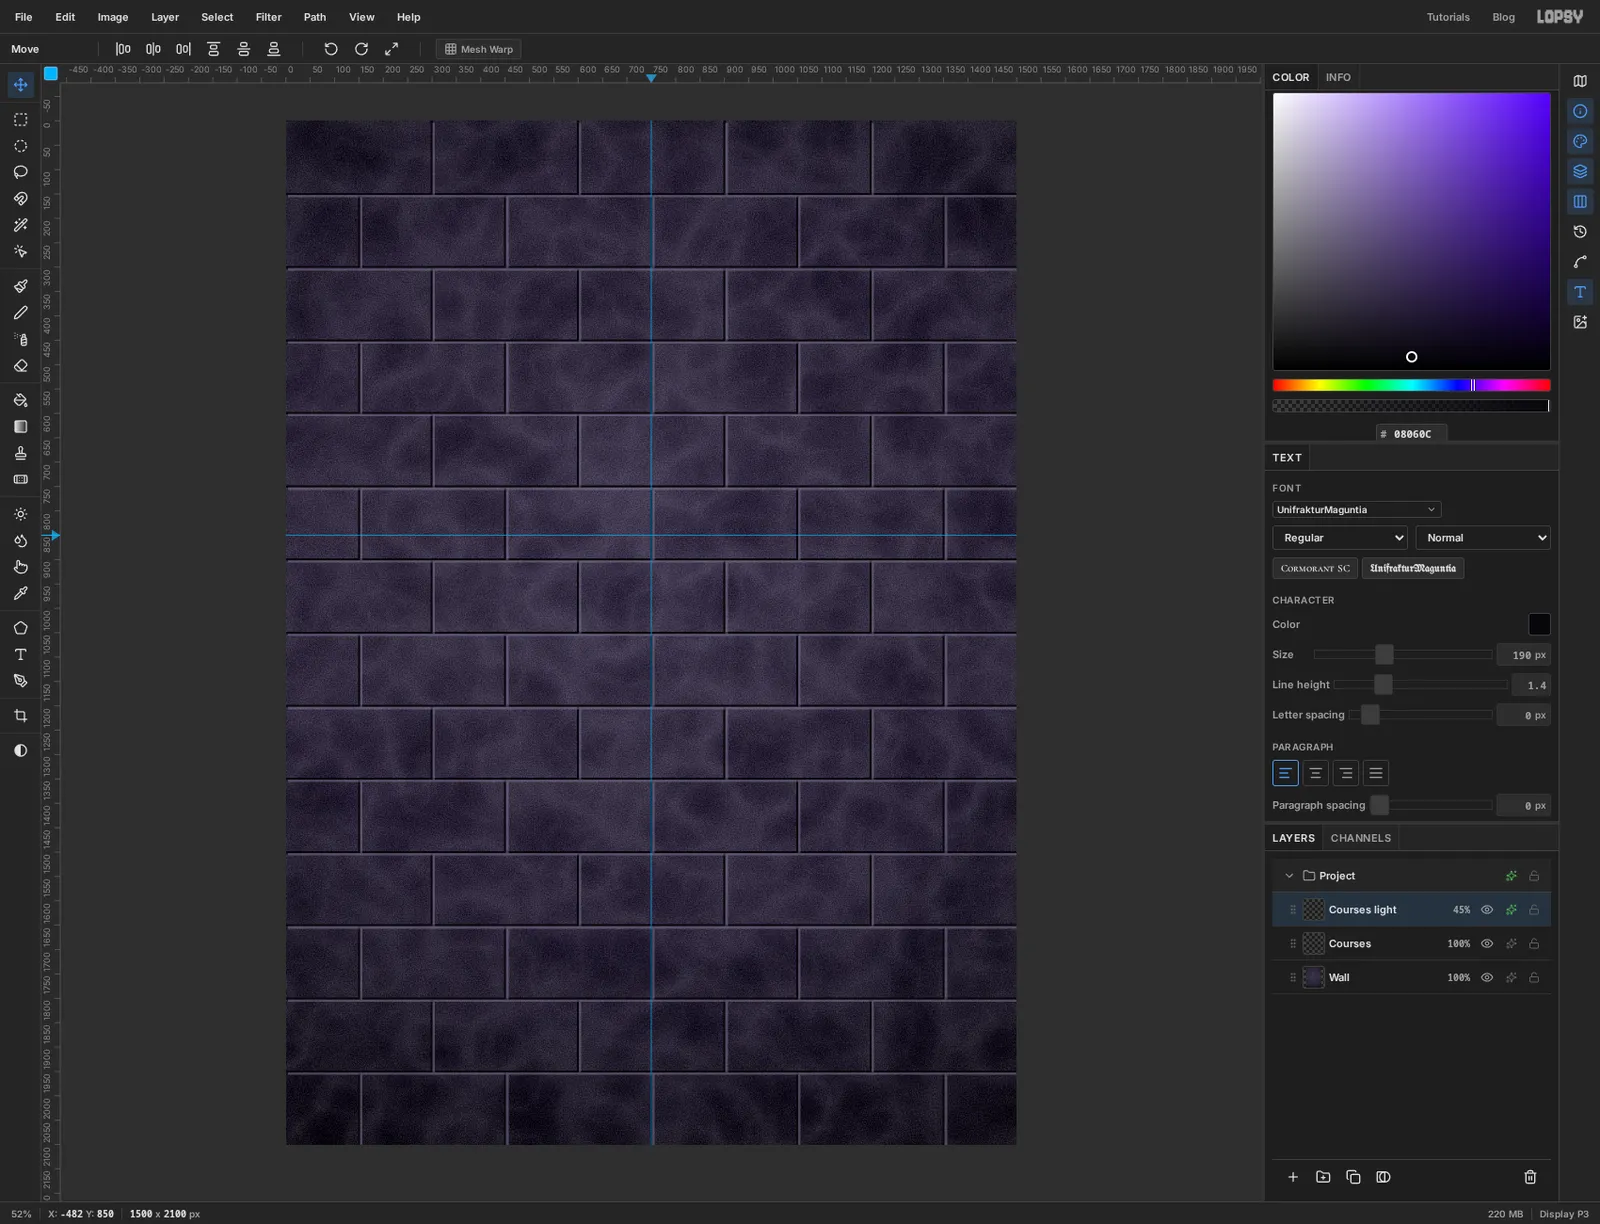
Choose Layer → Duplicate Layer and rename the copy Courses light. With the Move tool active, press the ↓ and → arrow keys four times each. Open the layer's effects with the sparkle button on its row, tick Color Overlay and set its colour to . Close the drawer and lower the layer to 45%. The pale copy sits just down and to the right of each dark joint, like light catching the edge of the block below.
Now the guides. Hold Cmd and click the top ruler near the middle: the guide snaps to the exact centre. Then click the left ruler at 850. That horizontal line is the springing line, the height where the window's straight sides end and its arch begins.
-
Paint the night behind the glass
Add a layer called Glass. It gets cut to shape later, so paint across the whole canvas for now.
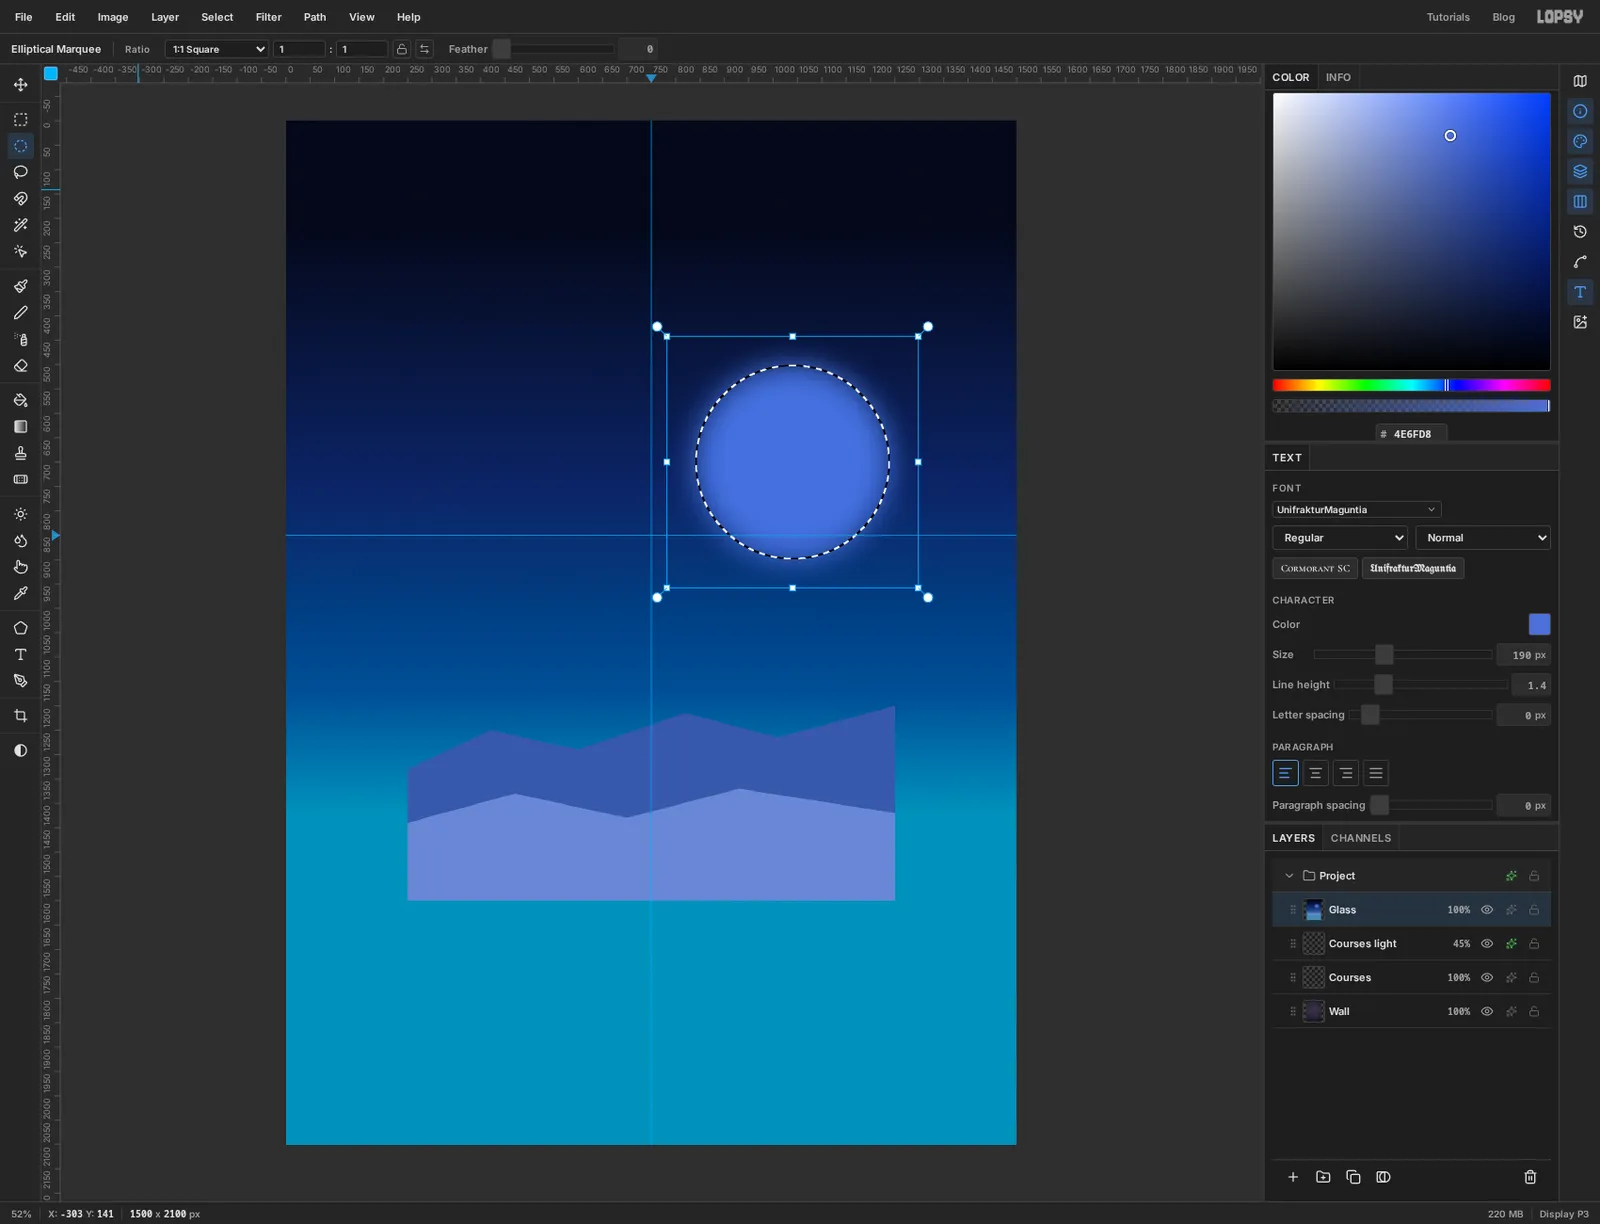
Open the Gradient Editor again, switch Type to Linear and set four stops: , at about 45%, at about 80% and . Drag from near the top of the canvas to about two-thirds of the way down.
Take the Lasso and draw a low range of hills across the lower third, closing the shape along the bottom. Fill it with using Edit → Fill. Draw a second, nearer range a little lower and fill it with . Keep both fairly dark. The mistletoe will hang in front of them and needs something to stand out against.
For the moon's halo, drag an Elliptical Marquee about 400 px across, to the right of centre and just above the horizontal guide. Choose Select → Feather…, enter 60, and fill with . Press Cmd+D.
-
Break it into stained glass
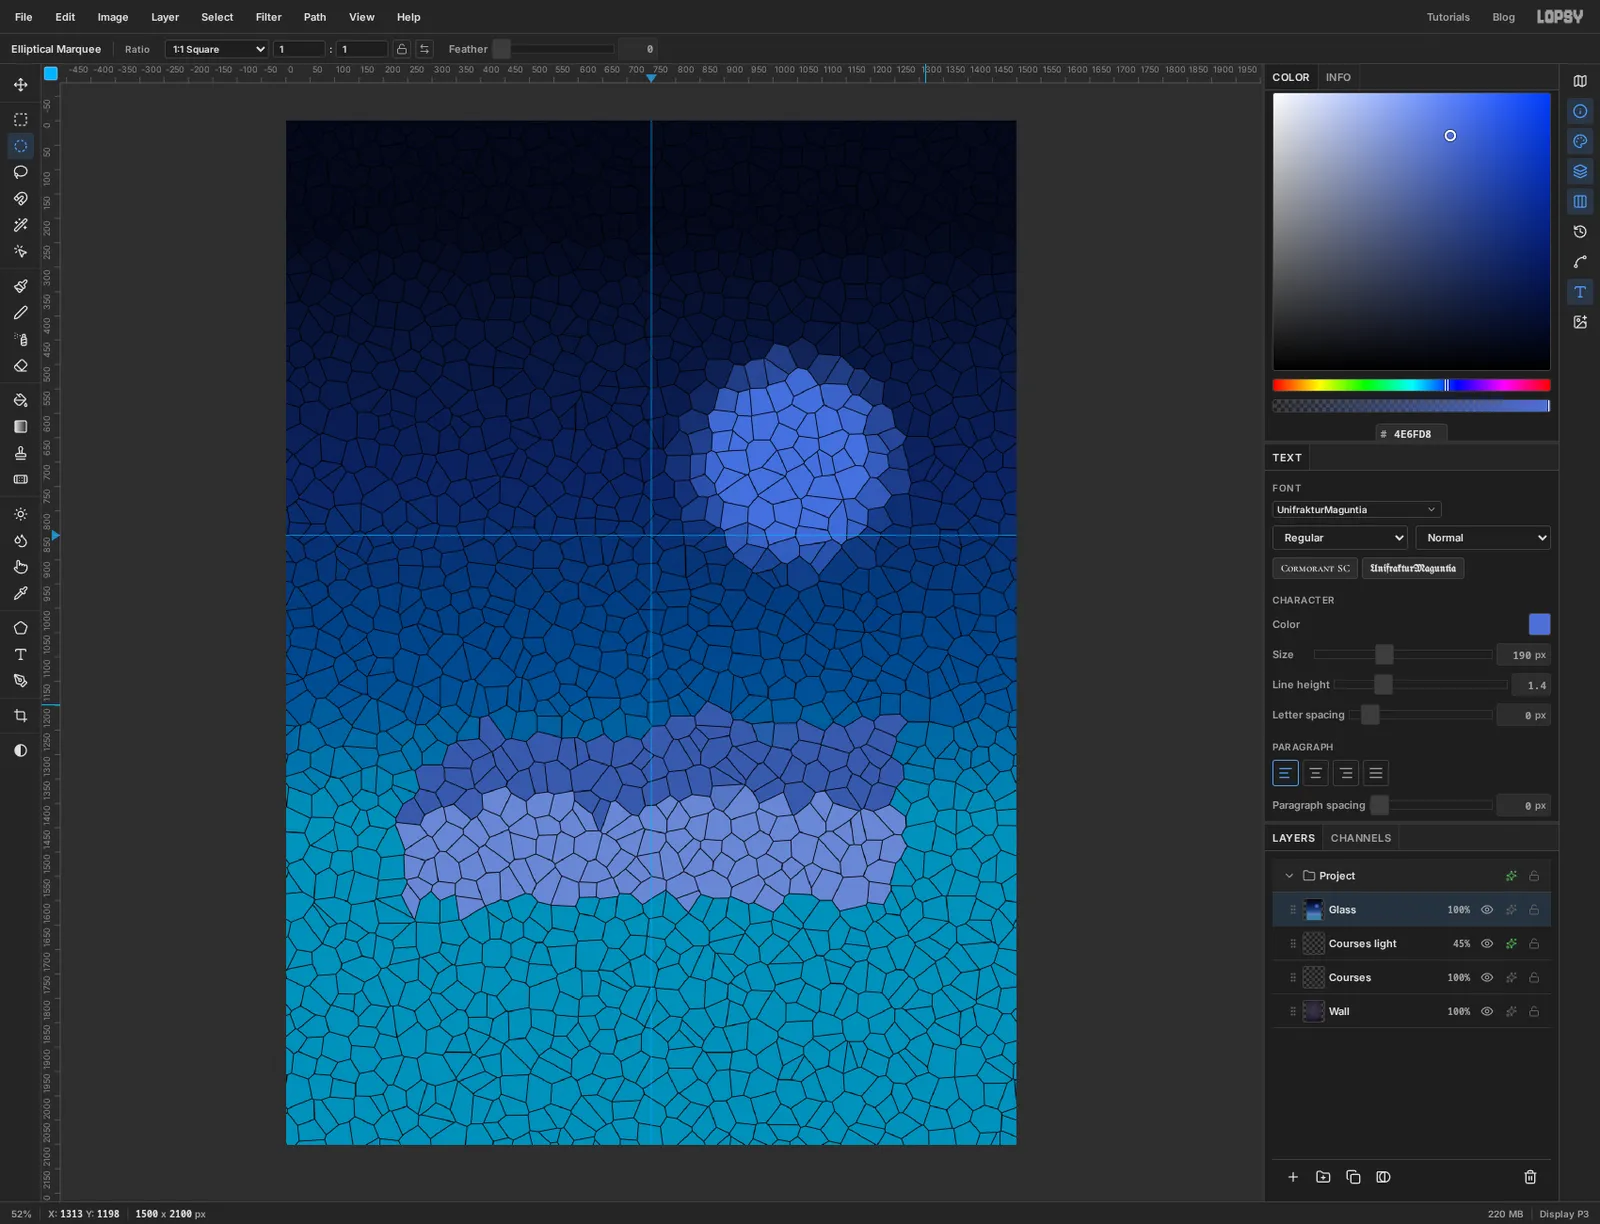
Choose Filter → Voronoi…. Set Cells to 46, Edge Width to 3.5 and Seed to 7, and apply. Every cell takes the colour under its middle, and the dark edges become the leading.
Voronoi is why the halo was feathered. A soft blob breaks into rings of cells that step down in brightness, which looks like a glazier chose them.
-
Cut a clean moon
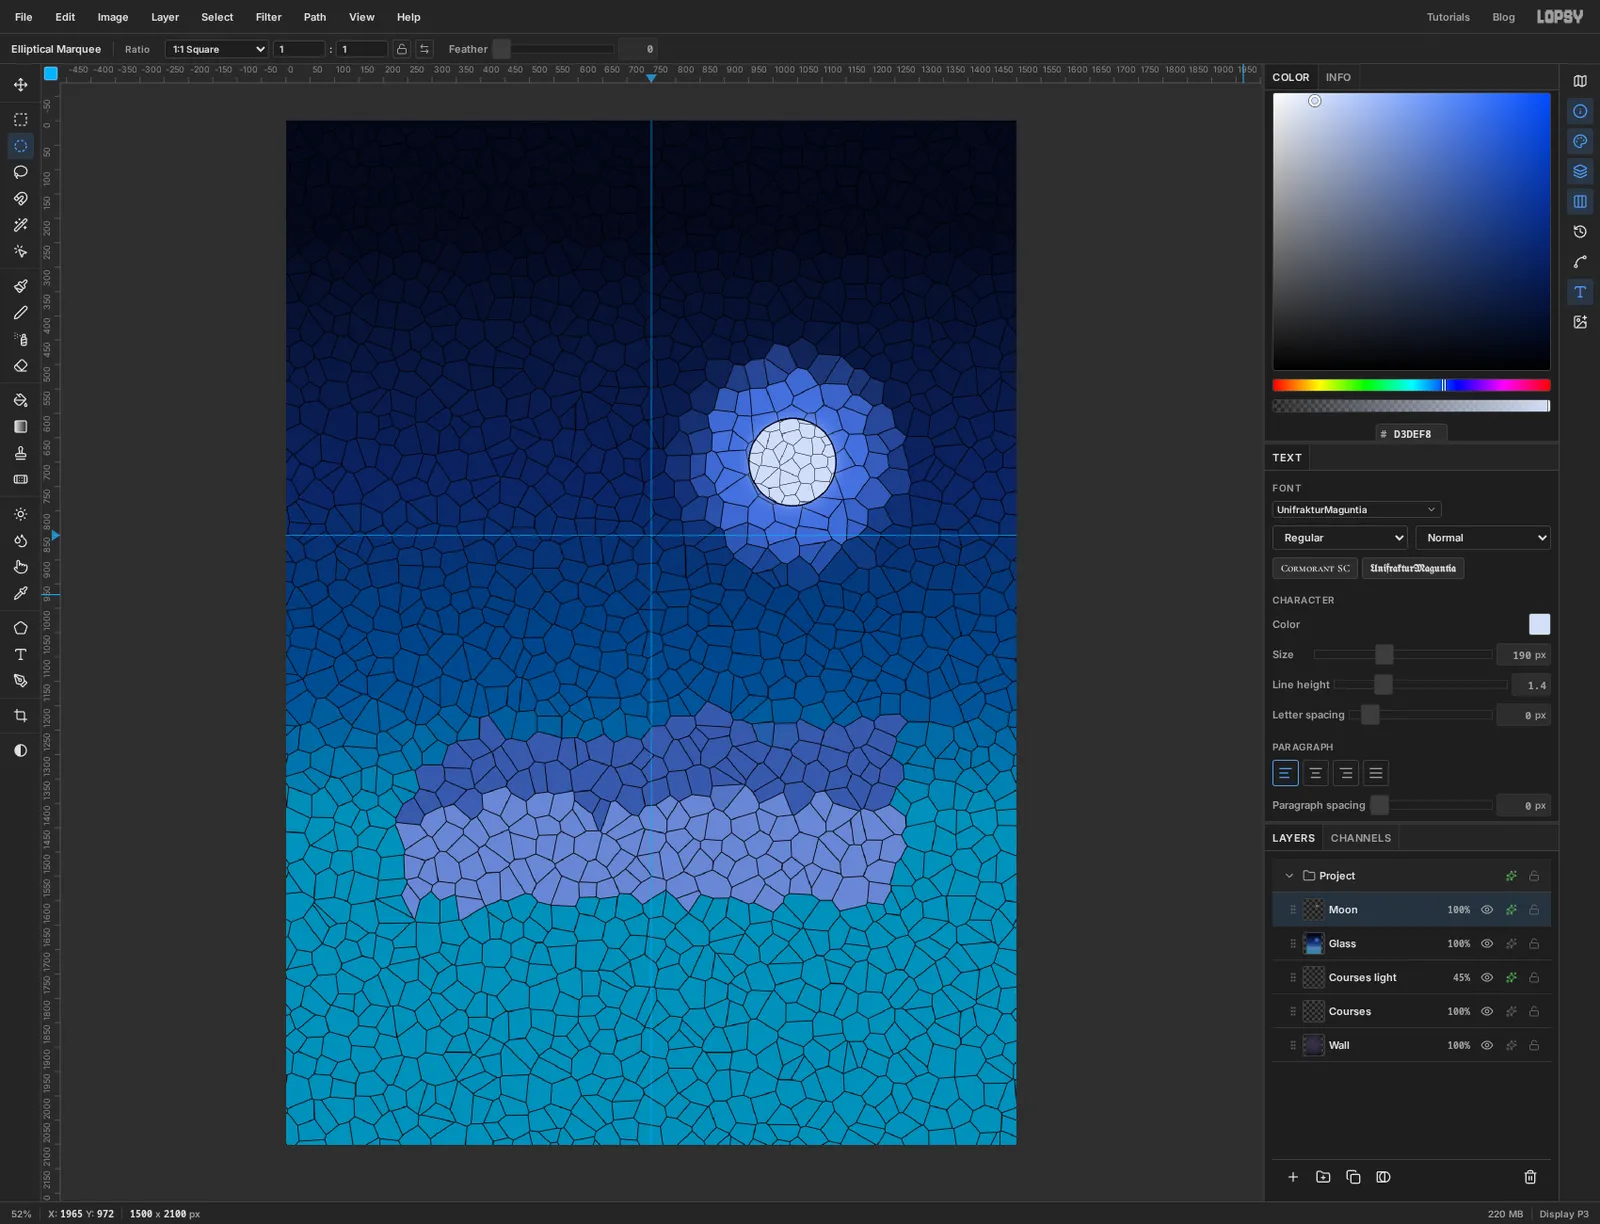
A moon put through that filter comes out with a ragged edge, so it gets its own layer. Add one called Moon. Drag a Rectangular Marquee a bit bigger than the moon you want, in the middle of the halo, and fill it with . Deselect and run Voronoi… with Cells 70, Edge Width 2 and Seed 3.
Now drag an Elliptical Marquee inside the crackled square, about 175 px across. Hold Cmd while you drag to keep it a circle. Choose Select → Inverse, press Delete and deselect. The cells stay but the outline is a true circle.
In the layer's effects, tick Outer Glow (, Size 46, Opacity 70) and Stroke (, Width 3).
-
Start the arch with two circles
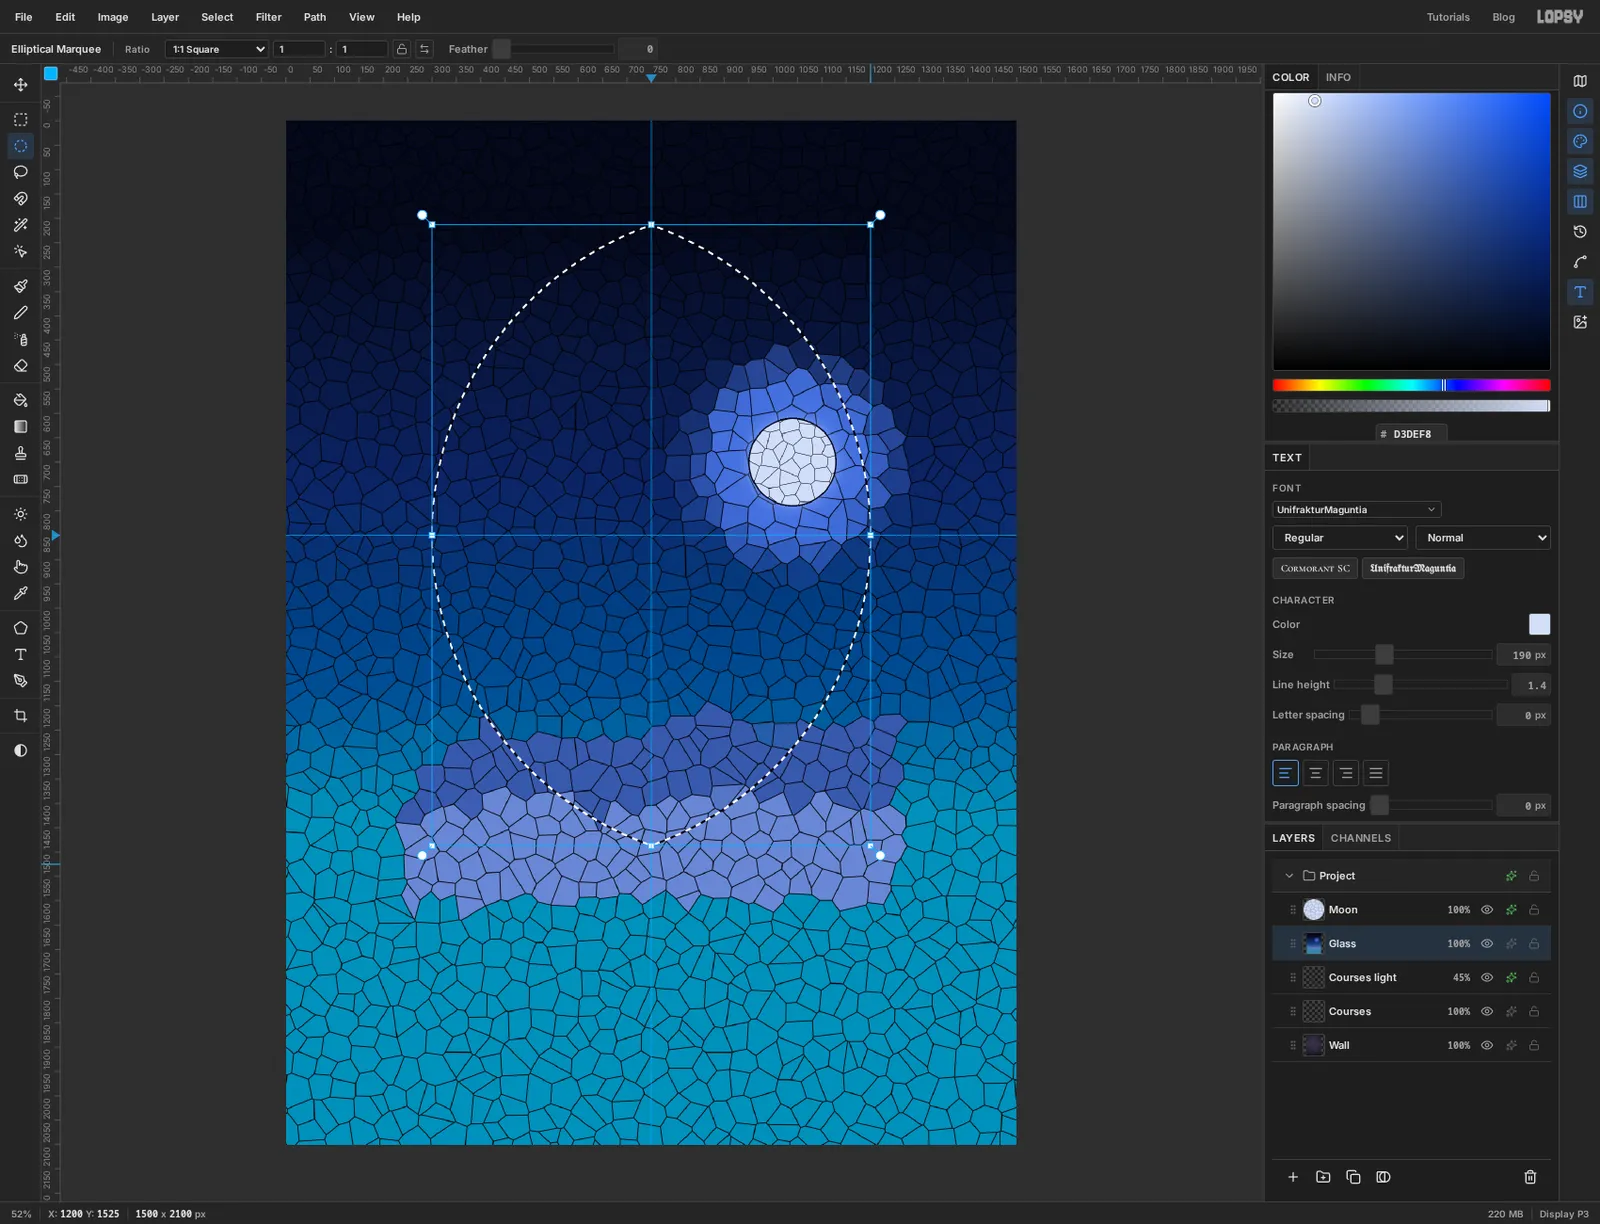
A pointed arch is the overlap of two circles whose centres sit on the springing line. Click the Glass layer first.
Take the Elliptical Marquee. The status bar shows where the pointer is, which makes this easy to place. Put the pointer at 300 across and 175 down, hold Cmd to keep the shape a circle, and drag down and to the right until the pointer reaches 1525 on the left ruler. The circle is 1350 px across, its centre is on the horizontal guide, and it runs off the right side of the canvas, which is fine.
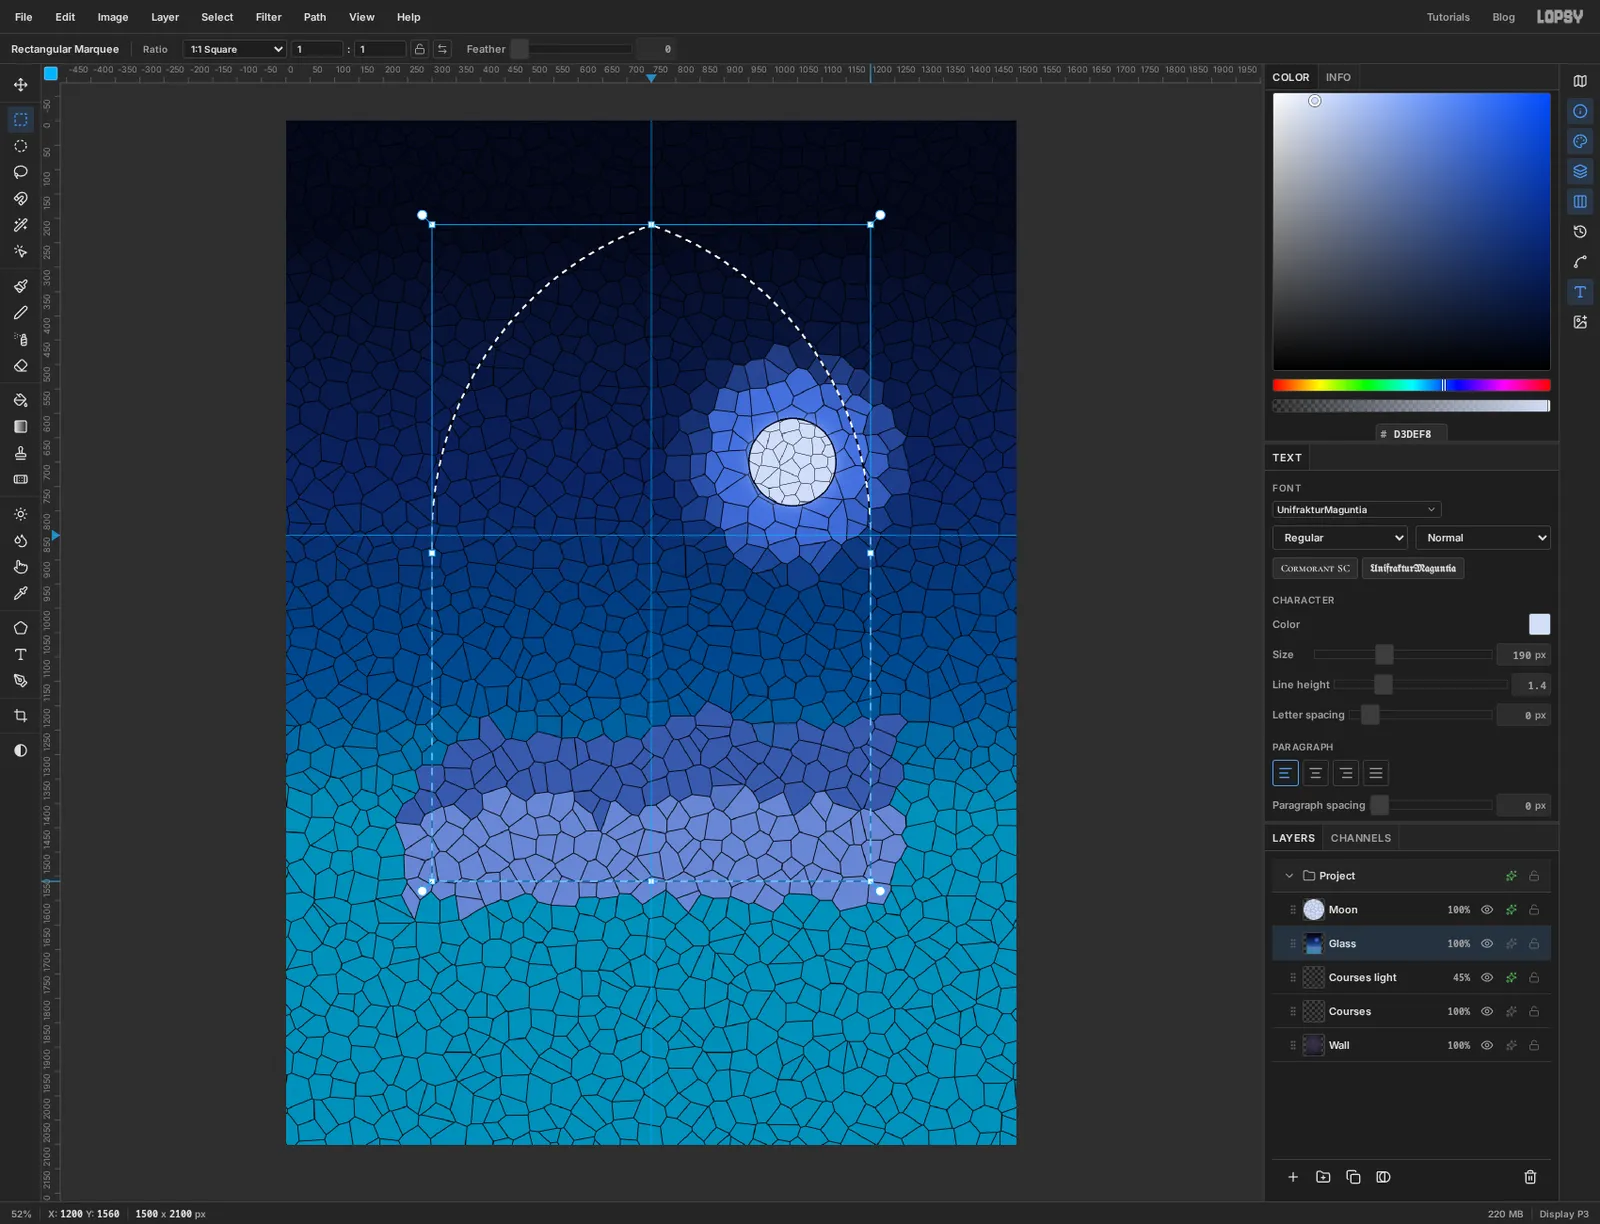
For the second circle, start at 1200 across and 175 down, hold Shift+Alt and Cmd, and drag down and to the left to 1525 again. Shift+Alt keeps only the overlap, so you're left with a pointed almond 900 px wide, from 300 to 1200.
-
Finish the window opening
Switch to the Rectangular Marquee. Hold Shift+Alt and drag a box that starts above the tip of the almond and ends on the horizontal guide, wider than the almond on both sides. The bottom edge snaps to the guide, and only the top half of the almond survives.
Now hold Shift on its own and drag a rectangle from the guide down to 1560 on the left ruler, running from 300 to 1200 on the top ruler so it's exactly as wide as the arch. Shift adds, and you have a lancet window.
Choose Select → Inverse and press Delete to cut the glass to shape. Click the Moon layer and press Delete there too, in case any of it pokes outside. Then choose Select → Inverse again so the arch is selected once more.
-
Add a hood mould
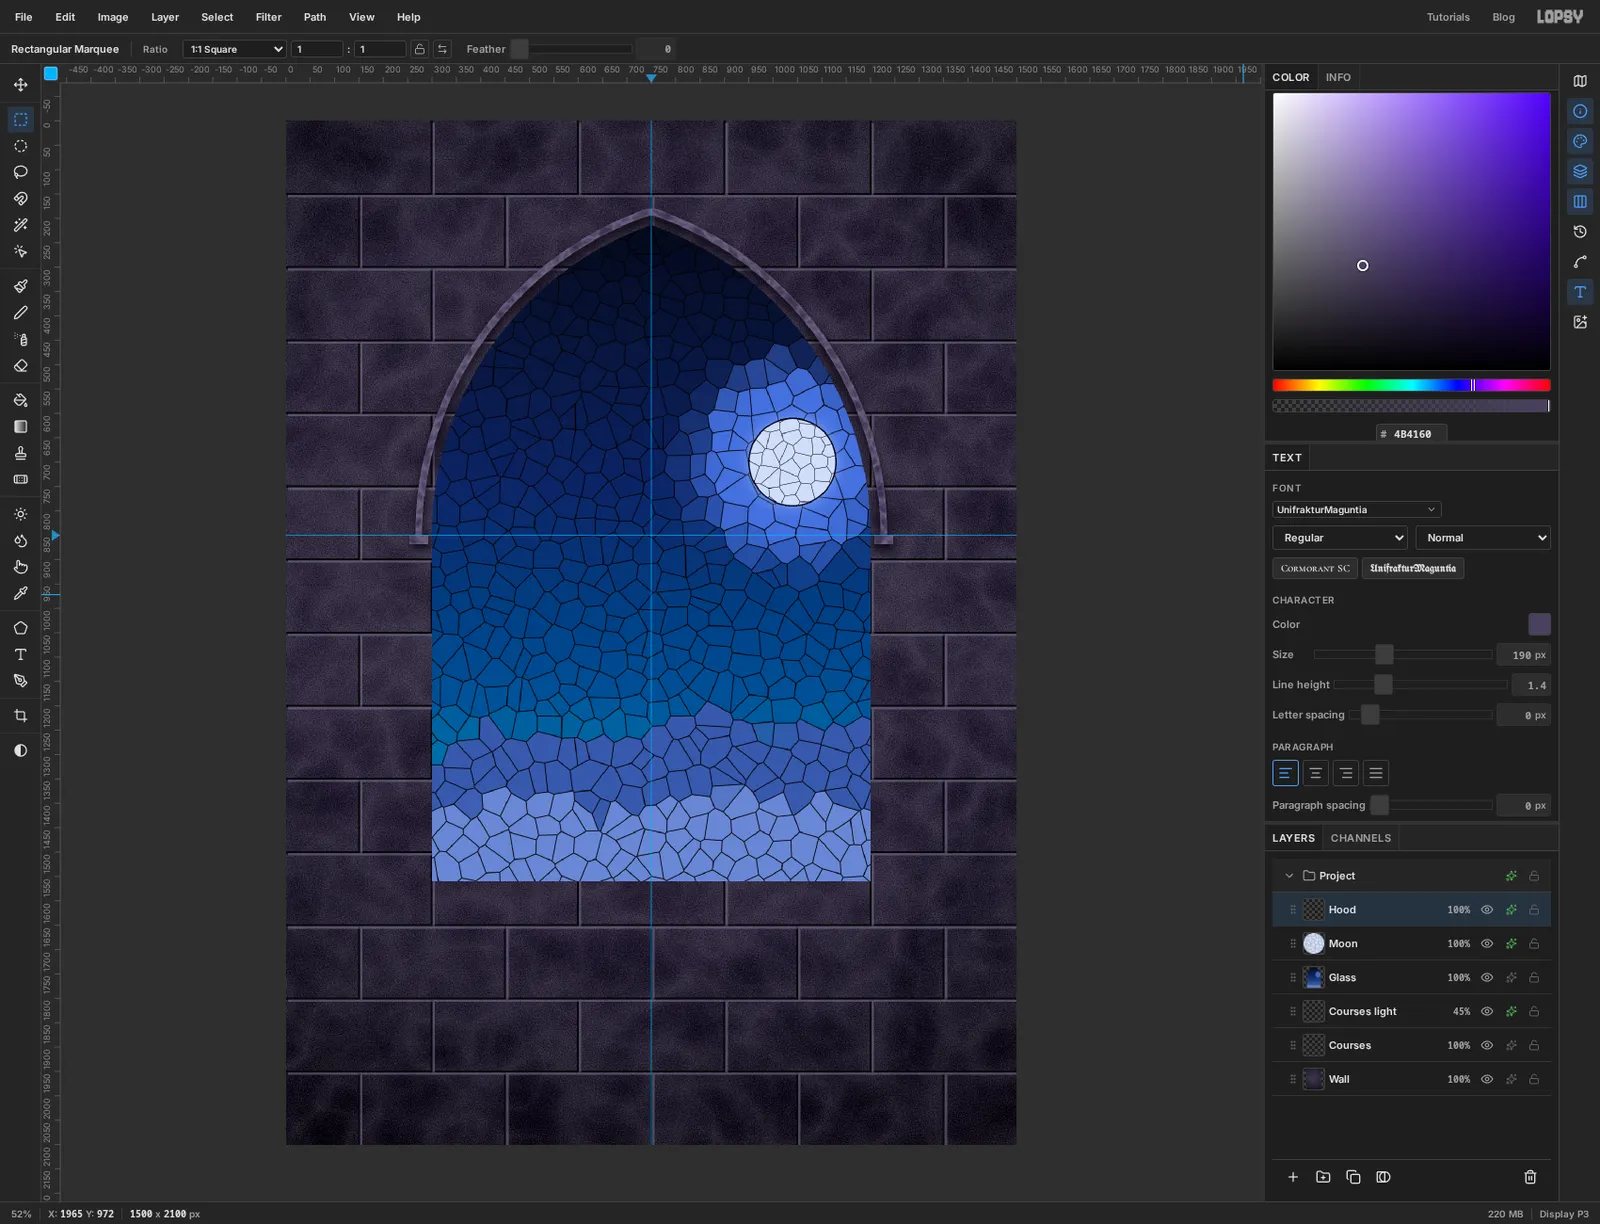
A hood mould is the thin outer rib that throws rain clear of a window. Add a layer called Hood. Choose Select → Grow… and enter 34. Fill with , then choose Select → Shrink…, enter 14 and press Delete. That leaves a ring 14 px thick, standing a little way off the opening.
It should only cover the arch. Drag a Rectangular Marquee over everything below the horizontal guide and press Delete. Then marquee a block about 40 px wide and 30 px tall at each cut end, sitting on the guide, and fill both with the same stone. Deselect and give the layer the stone finish from the tip at the top of the page.
-
Build the frame
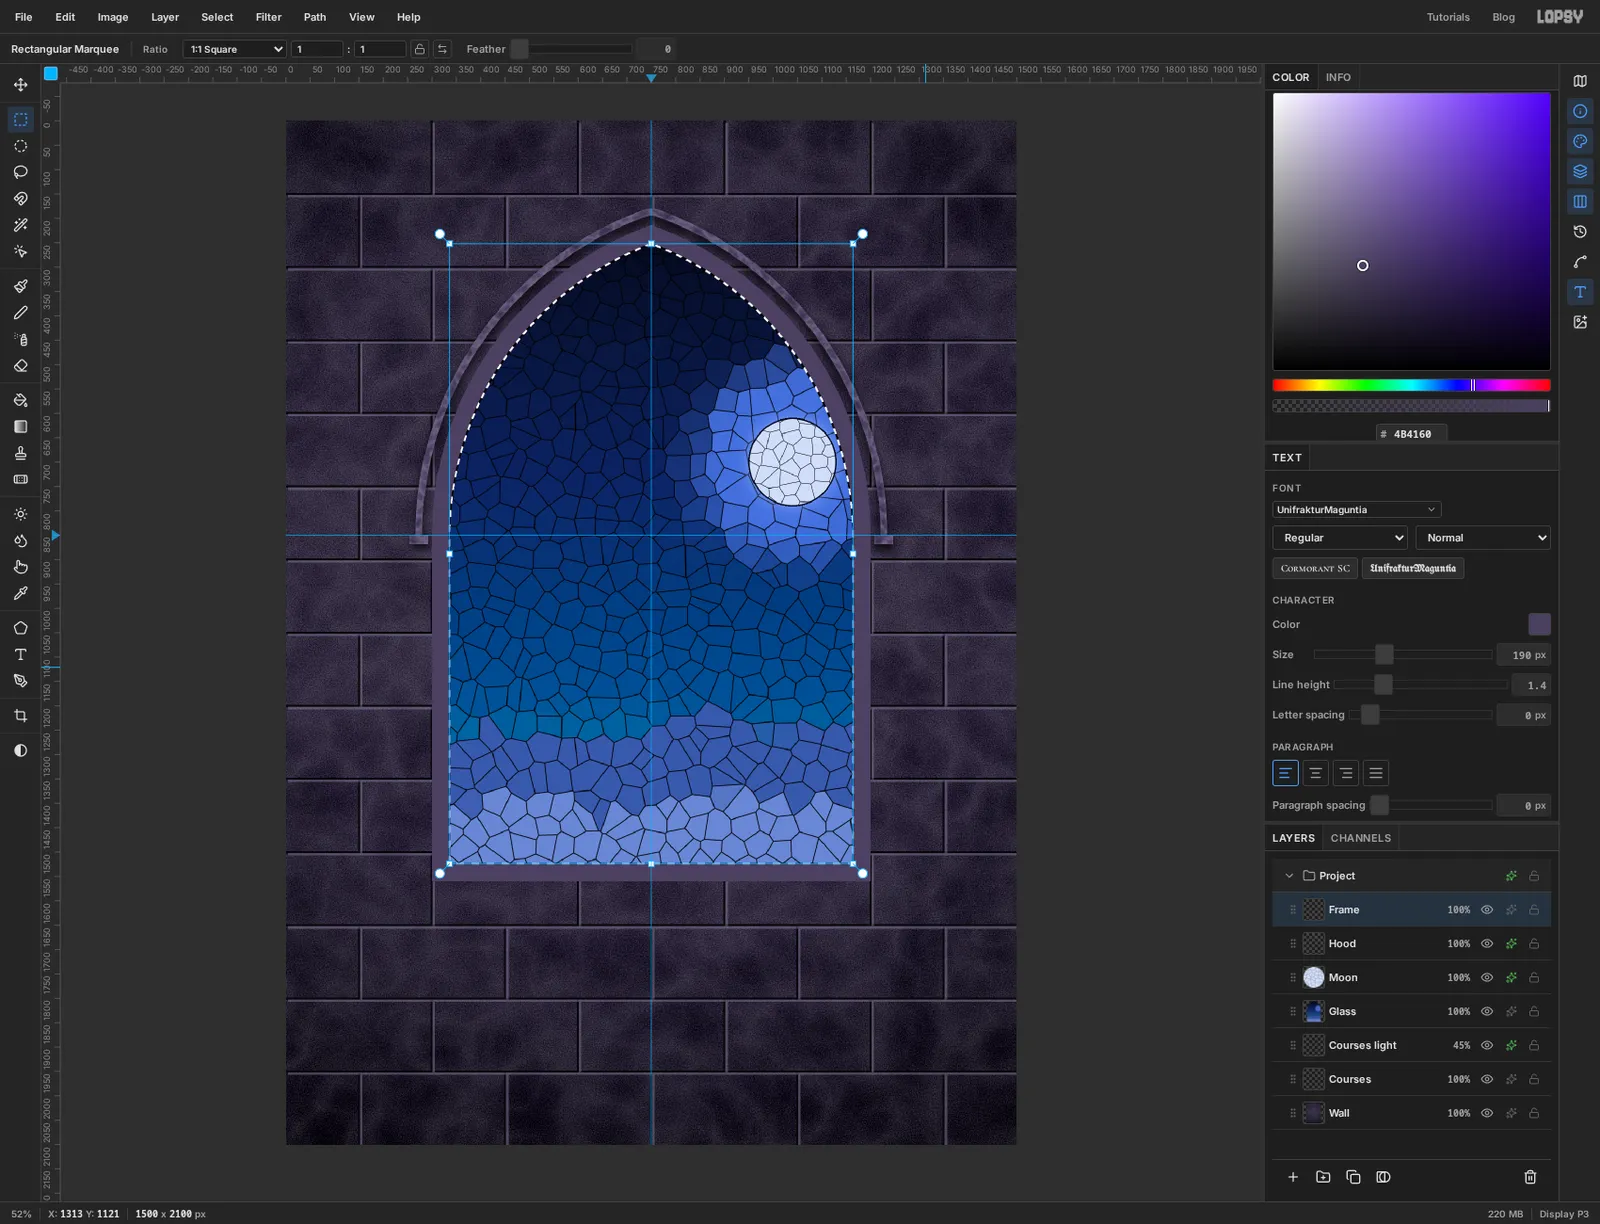
Hold Cmd and click the Glass layer's thumbnail to load the arch as a selection again. Add a layer called Frame, fill with , choose Select → Shrink… with 36 and press Delete.
Don't deselect. Add a layer called Rebate, fill the shrunken selection with , shrink by 10 and delete again. That leaves a thin dark step between stone and glass. Now press Cmd+D.
Click Frame and give it the stone finish. Then open the Glass layer's effects and tick Inner Glow with , Size 60 and Opacity 70, so the glass darkens toward its edges and sits back in the wall.
-
Carve the trefoil out of a selection
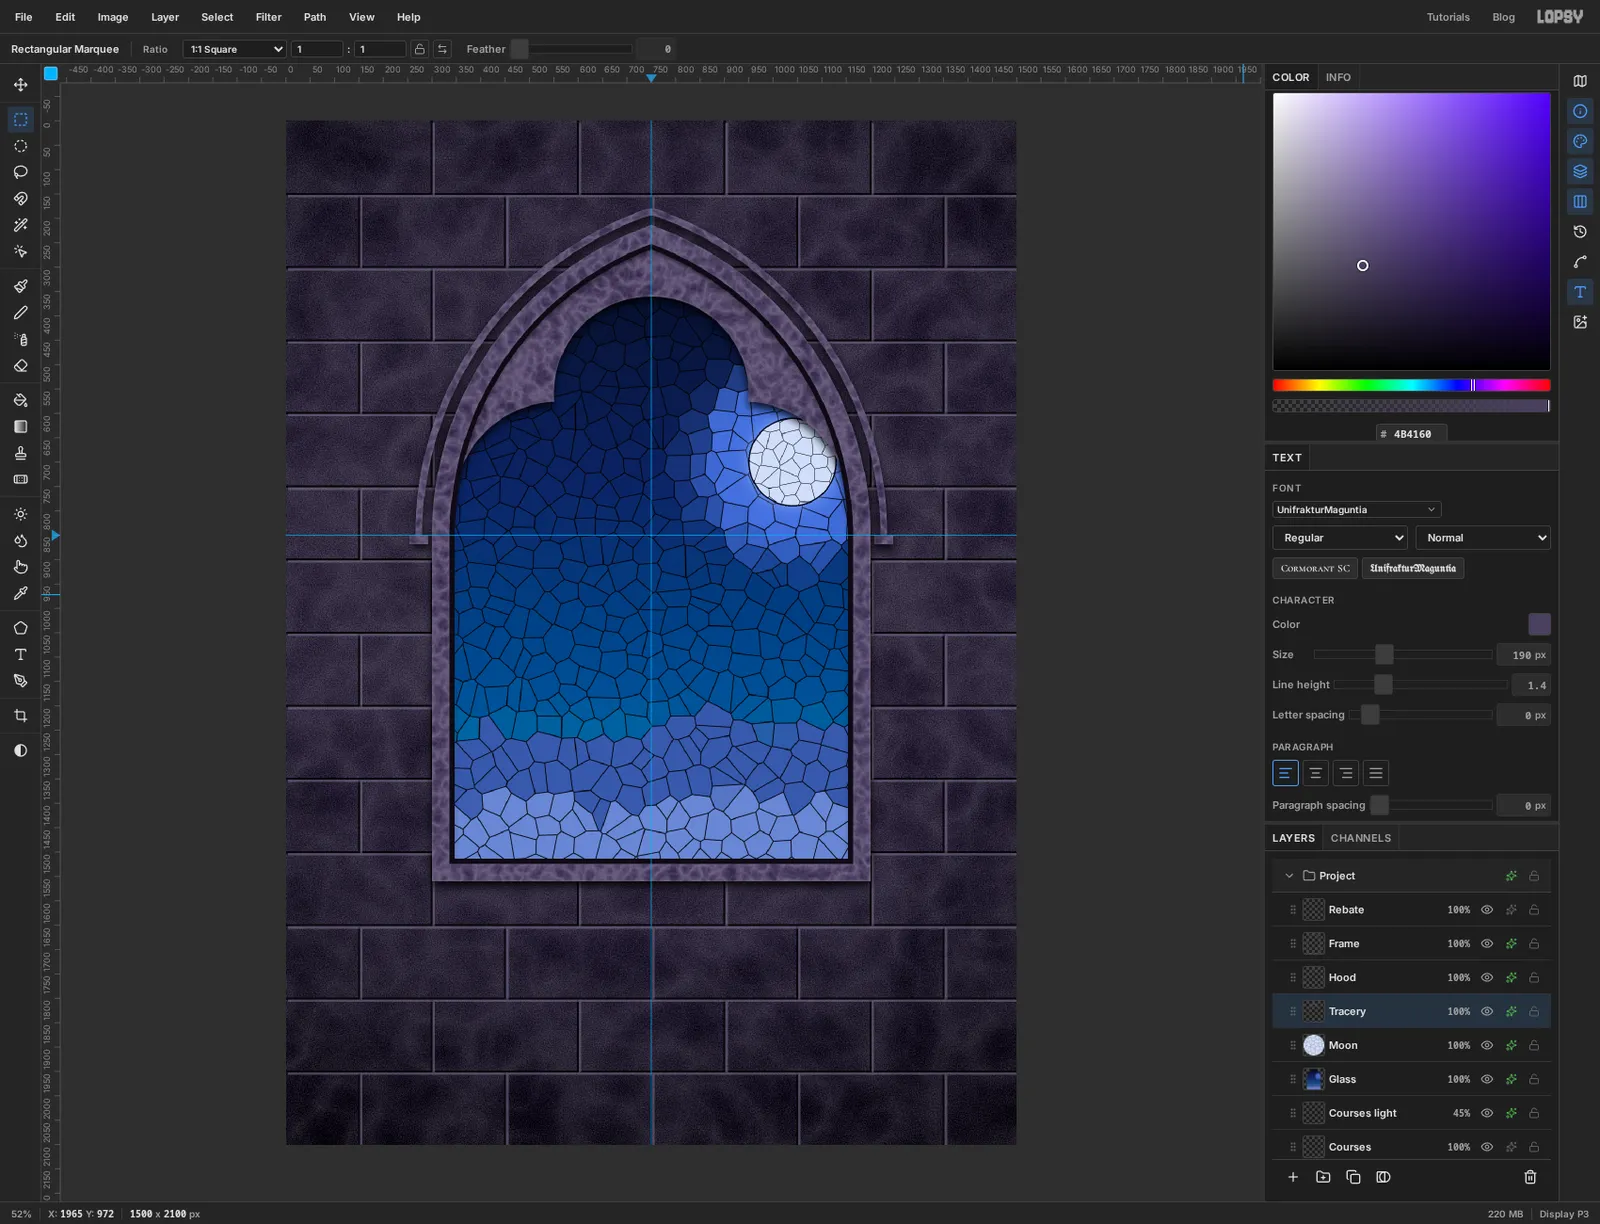
Click Moon and add a layer called Tracery above it. It lands under the frame.
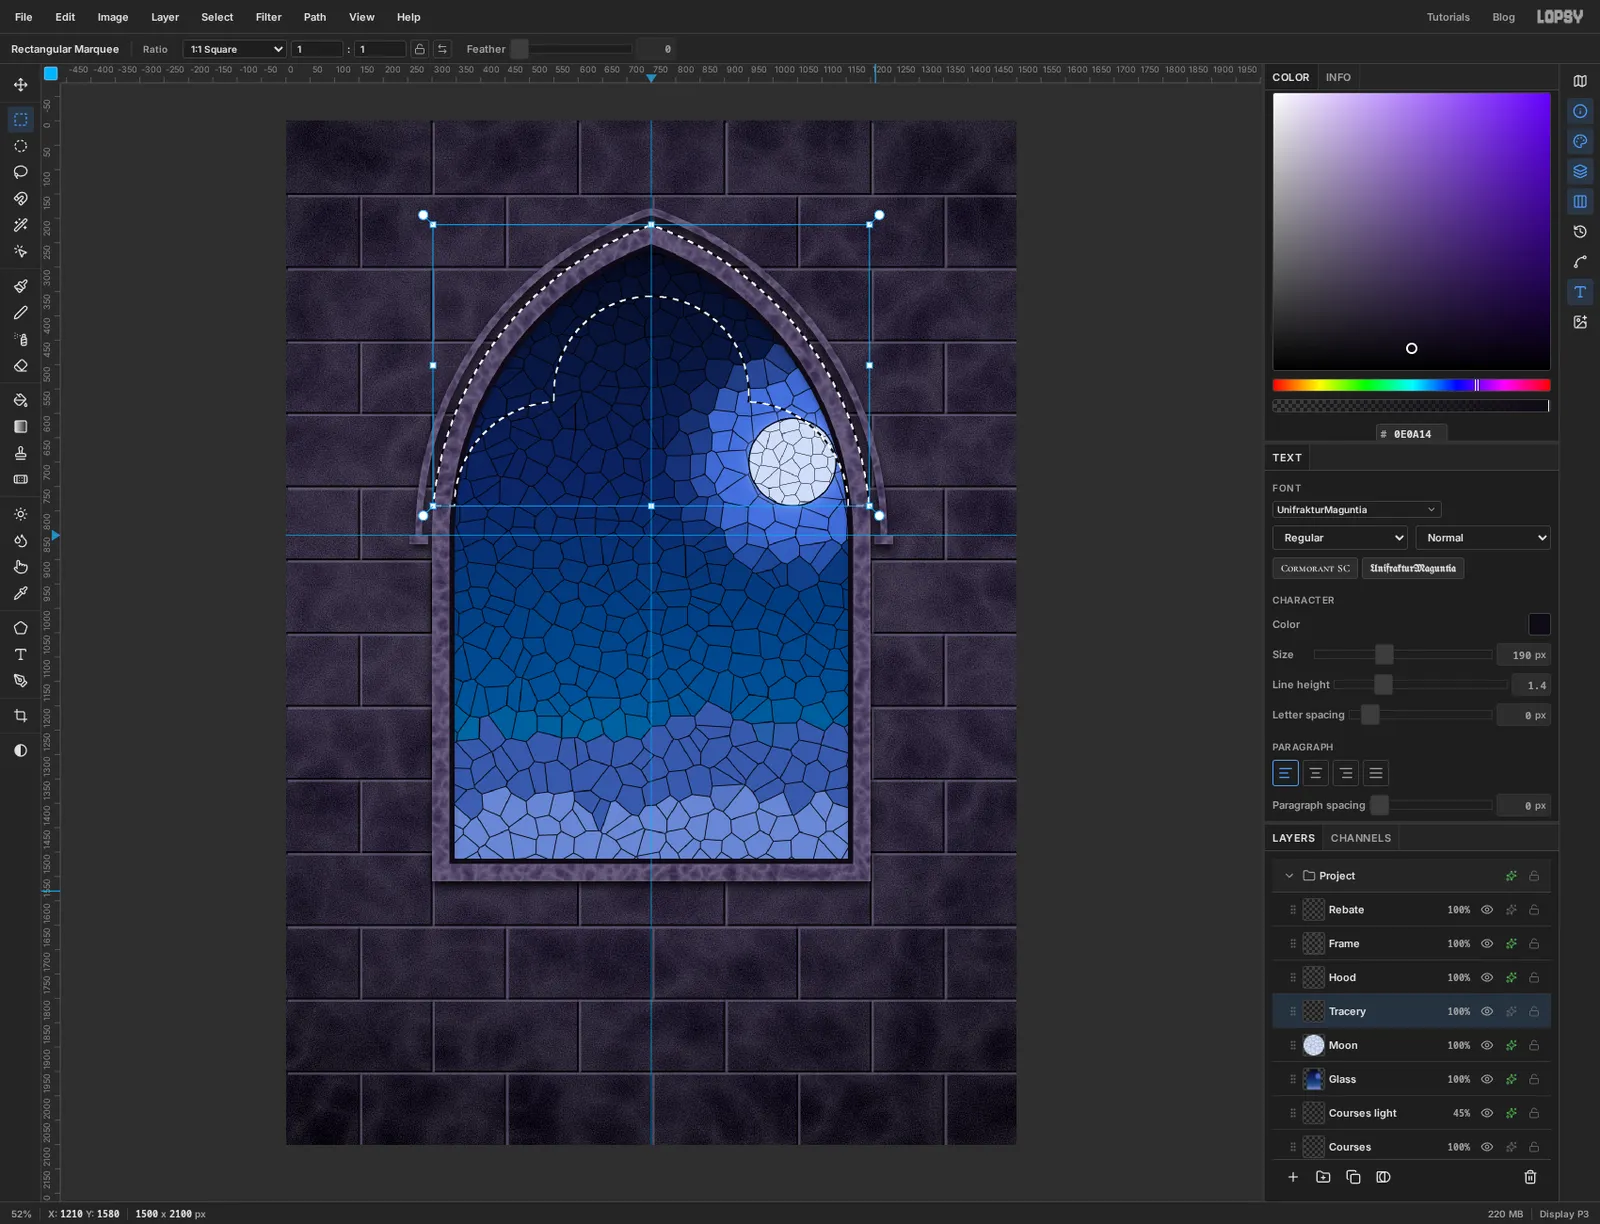
Cmd-click the Glass thumbnail to select the whole opening. The plan is to subtract the part that stays open and fill what's left.
Take the Elliptical Marquee, hold Alt and drag a circle about 400 px across, centred on the vertical guide, in the upper part of the arch. Then Alt-drag two more, each about 430 px across, side by side below it. Their outer edges should touch the sides of the glass and their centres should sit a little above the horizontal guide. All three need to overlap.
Switch to the Rectangular Marquee and Alt-drag a box from the widest part of the two lower circles down past the bottom of the window. What's left is a stone shoulder on each side, where the lobes meet, and the stone above the top lobe.
-
Fill the tracery
Fill the selection with , deselect and apply the stone finish. The drop shadow falls onto the glass, which is what makes the cusps look carved.
-
Spray snow behind the stone
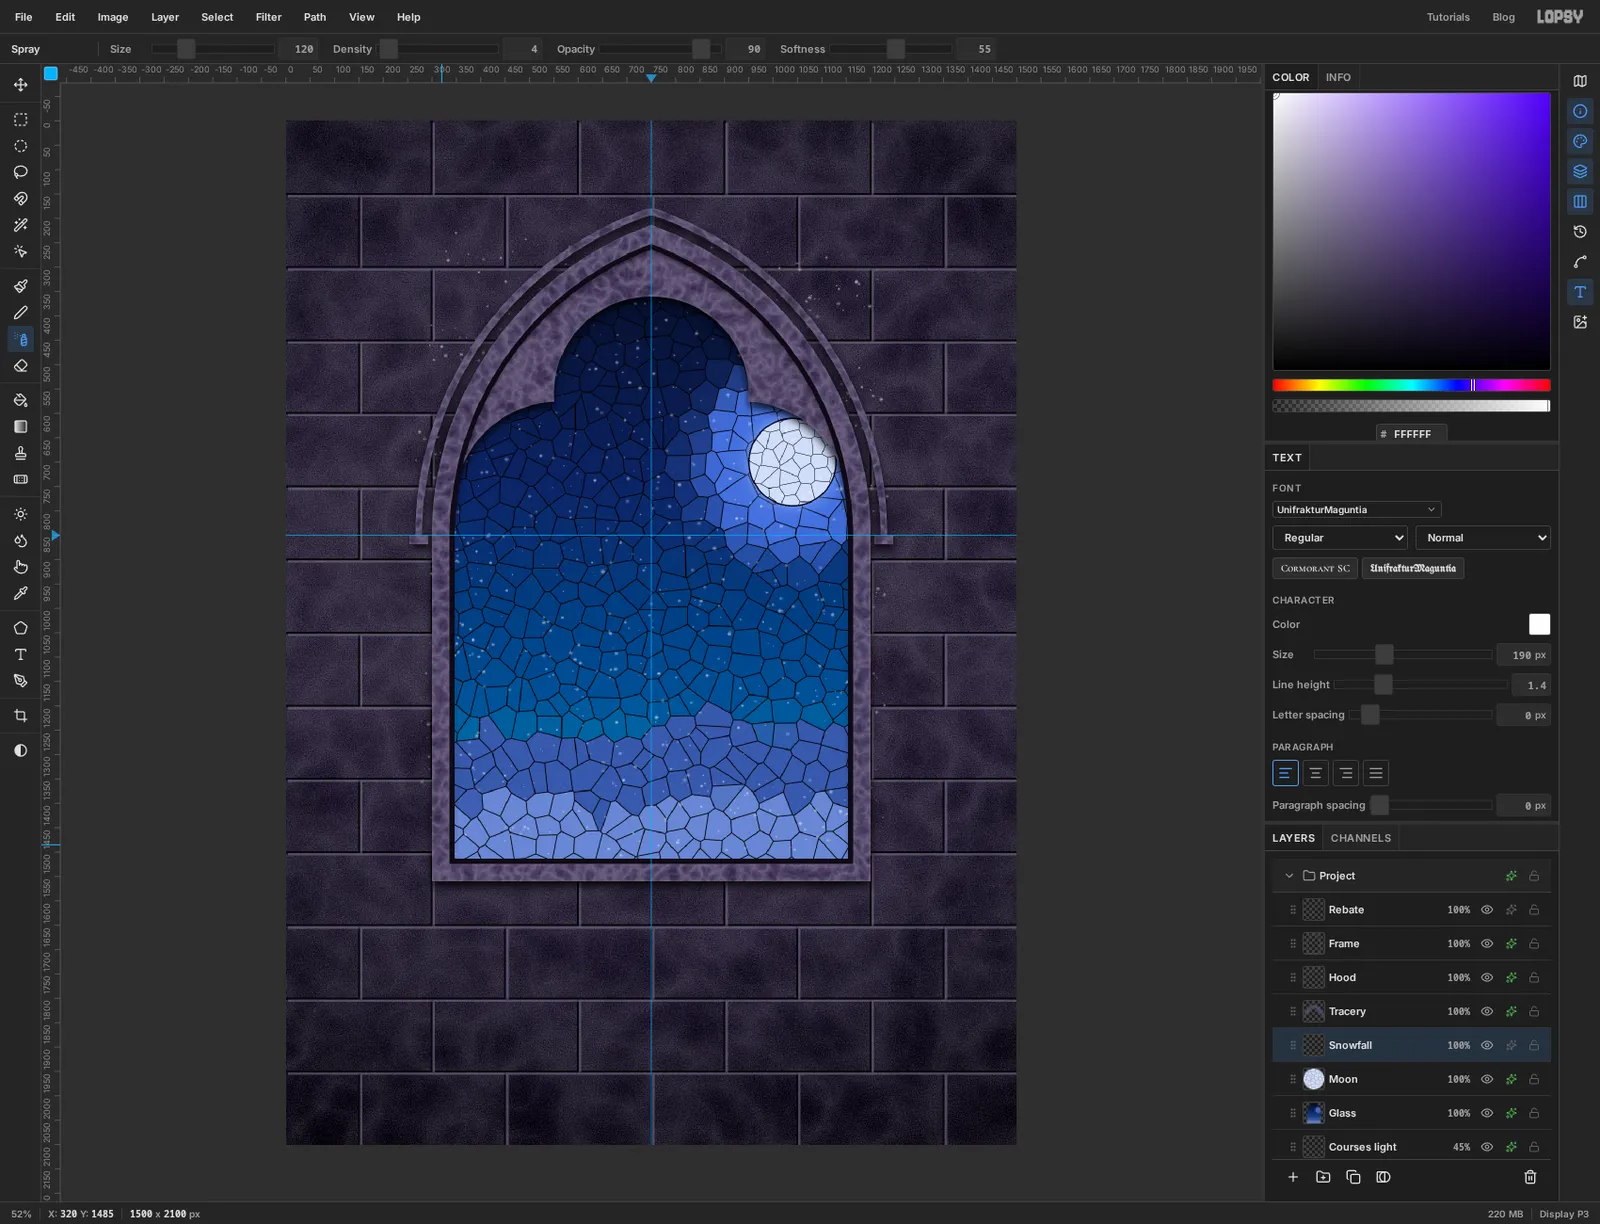
Click Moon and add a layer called Snowfall. Take the Spray tool and set Size to 120, Density to 4, Opacity to 90 and Softness to 55. With white as the foreground, drag a slow zigzag from the top of the window to the bottom in one stroke.
Some flakes land on the wall. Cmd-click the Glass thumbnail, choose Select → Inverse, press Delete and deselect. Lower the layer to 70% for now.
-
Set a sill under the window
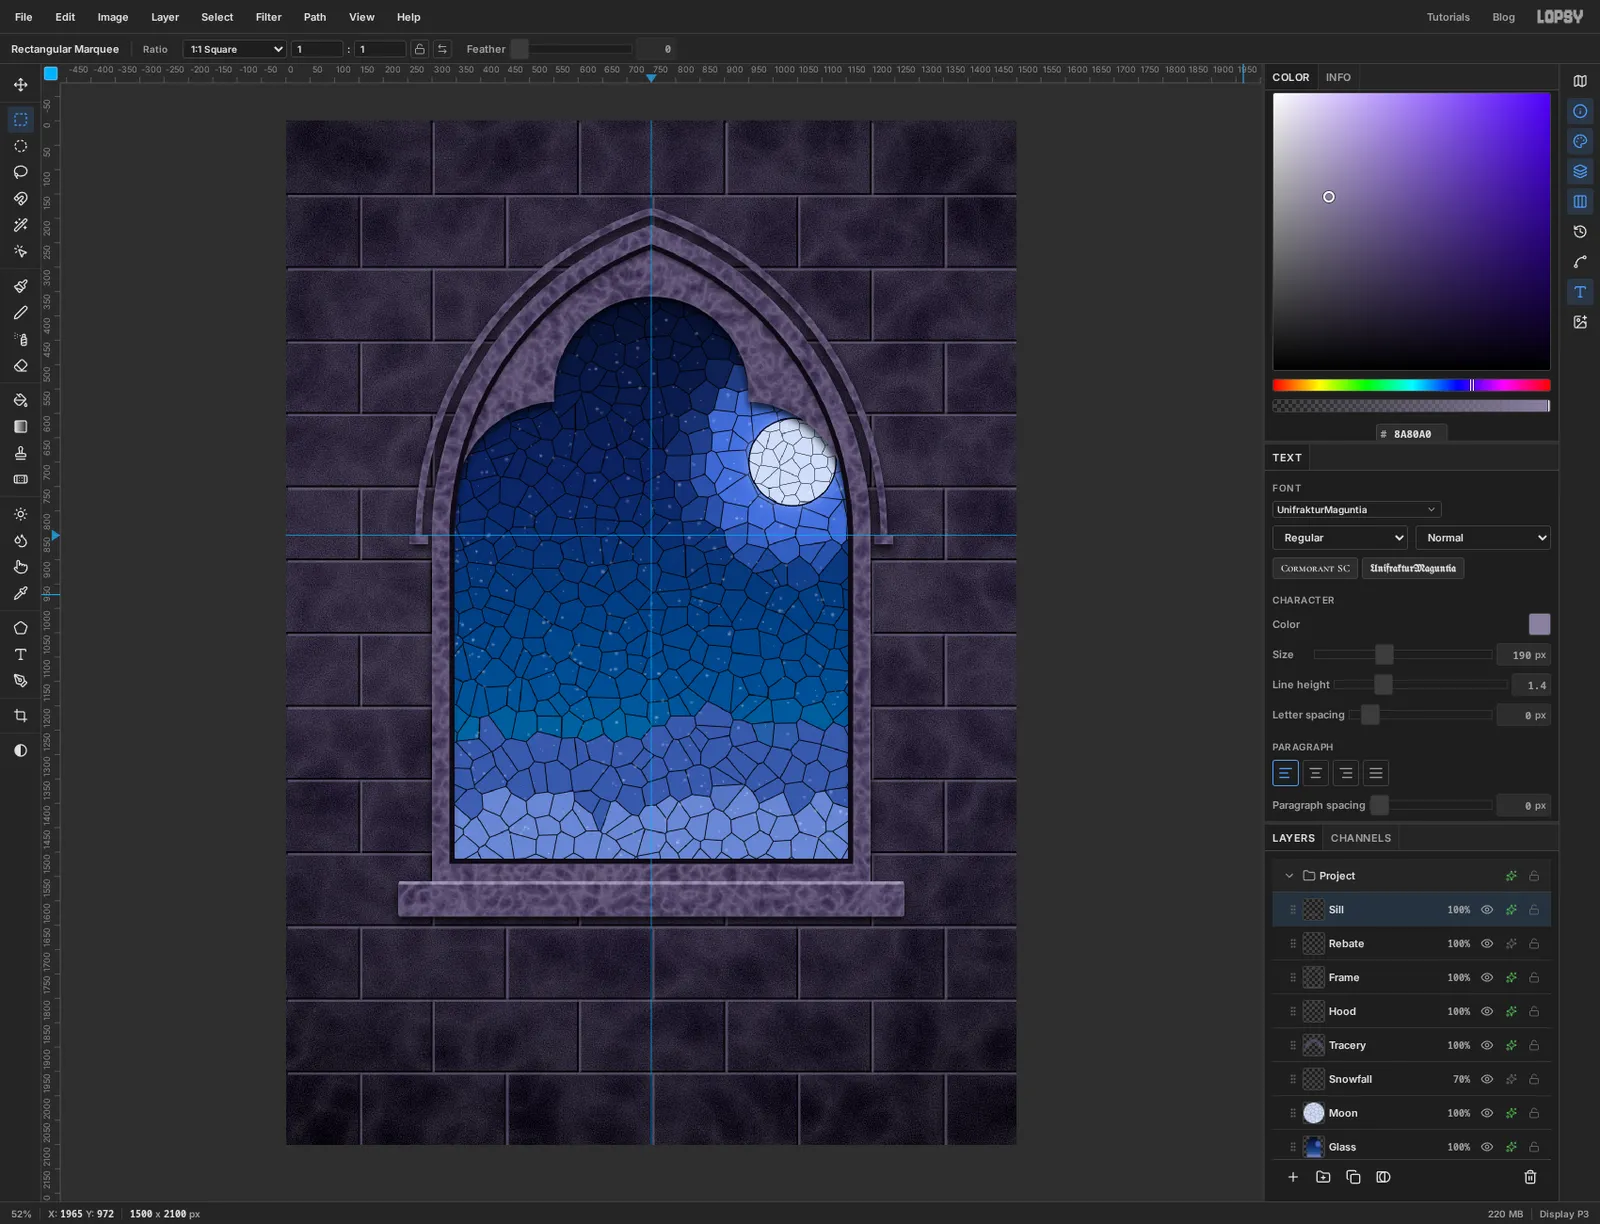
Click Rebate and add a layer called Sill. Take the Shape tool and set Shape to Rectangle. Click the fill swatch and enter , leave the stroke off and set Corner Radius to 6.
A shape grows outward from where you press. Press on the vertical guide about 35 px below the frame, since that point becomes the middle of the ledge, and drag out and down until the ledge is about 70 px tall and overhangs the frame by 70 px on each side.
Drag a thin Rectangular Marquee, about 7 px tall, along the top edge of the ledge and fill it with . Deselect and apply the stone finish.
-
Make two patches of ruby glass
The upper corners get small quatrefoil windows. The glass comes first and the stone cuts it to shape afterwards.
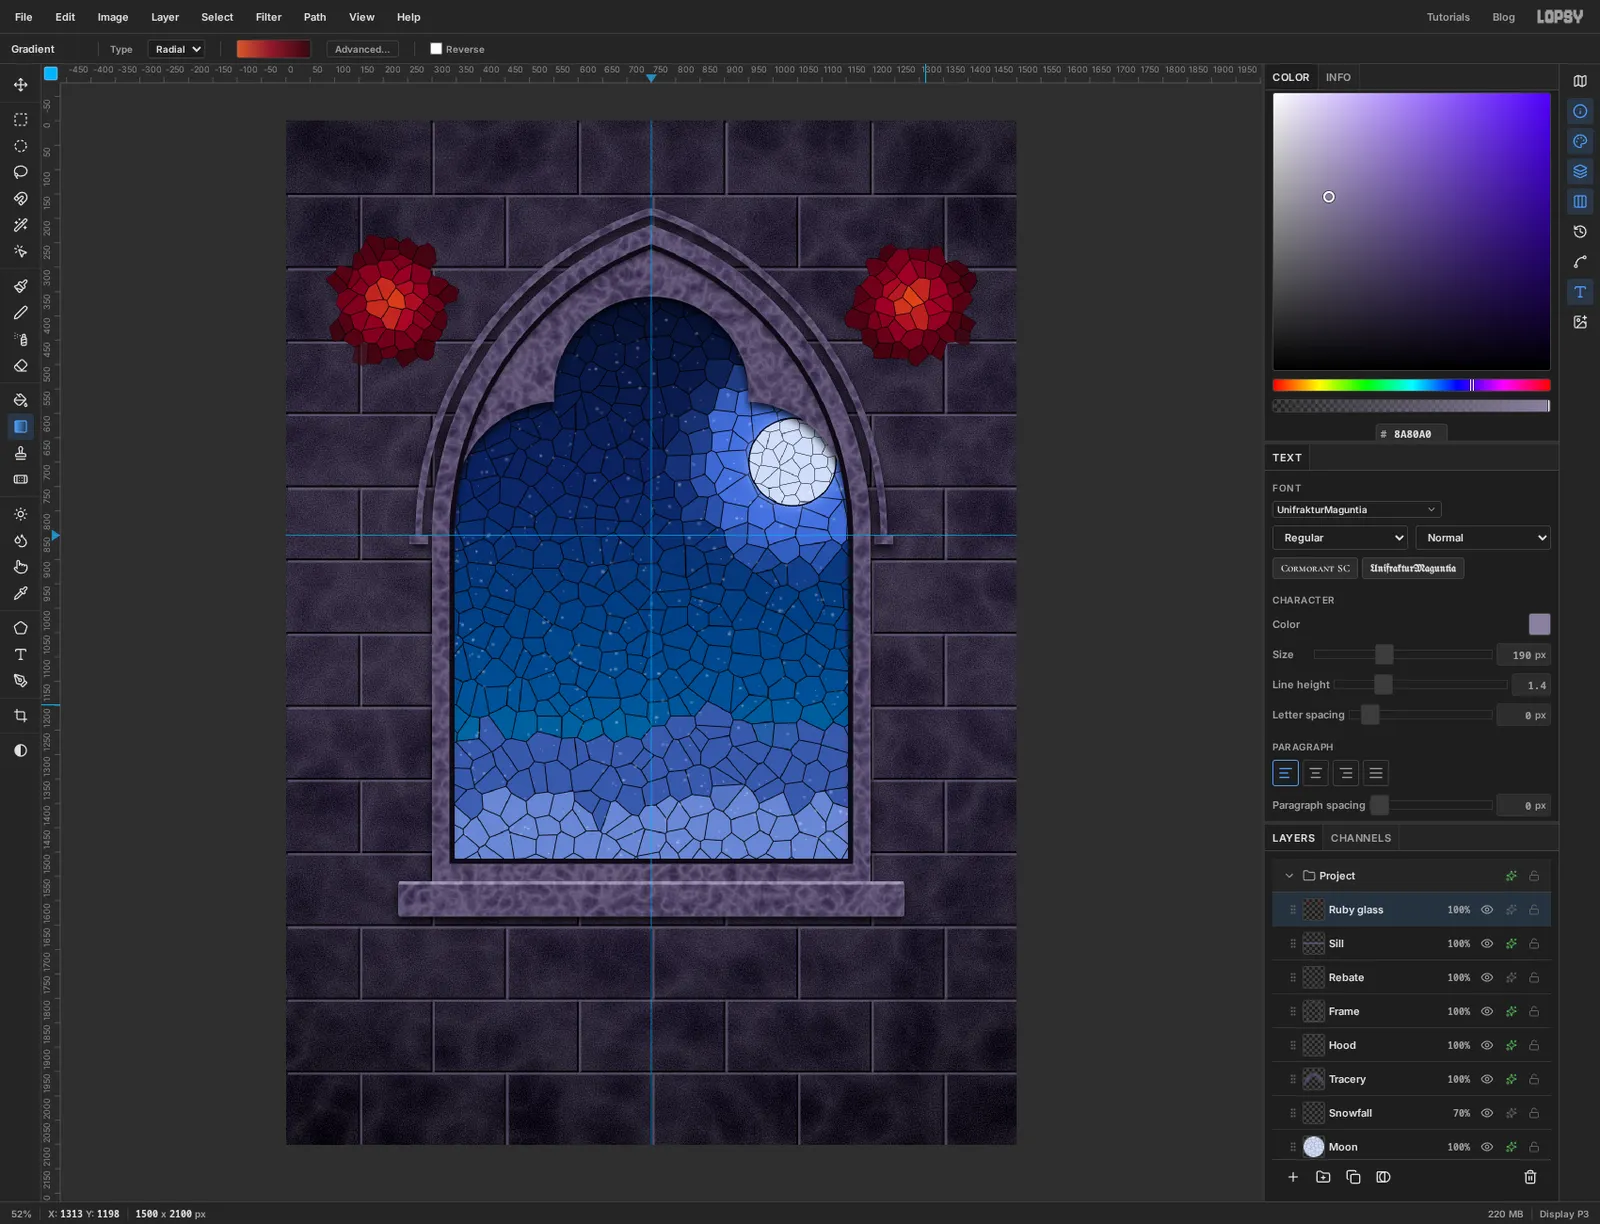
Add a layer called Ruby glass. Drag a square marquee about 250 px across in the upper left of the wall, level with the shoulder of the arch. In the Gradient Editor set Type to Radial and make four stops: at the left, at about 45%, at about 97%, and again at the far right with its opacity pulled down to 0. Drag from the middle of the square to its edge.
Do the same in the upper right. The transparent last stop matters here: a radial gradient paints its end colour over everything beyond the drag, and with an opaque end it would flood the first patch.
Deselect and run Voronoi… with Cells 64, Edge Width 3 and Seed 21.
-
Draw the quatrefoils
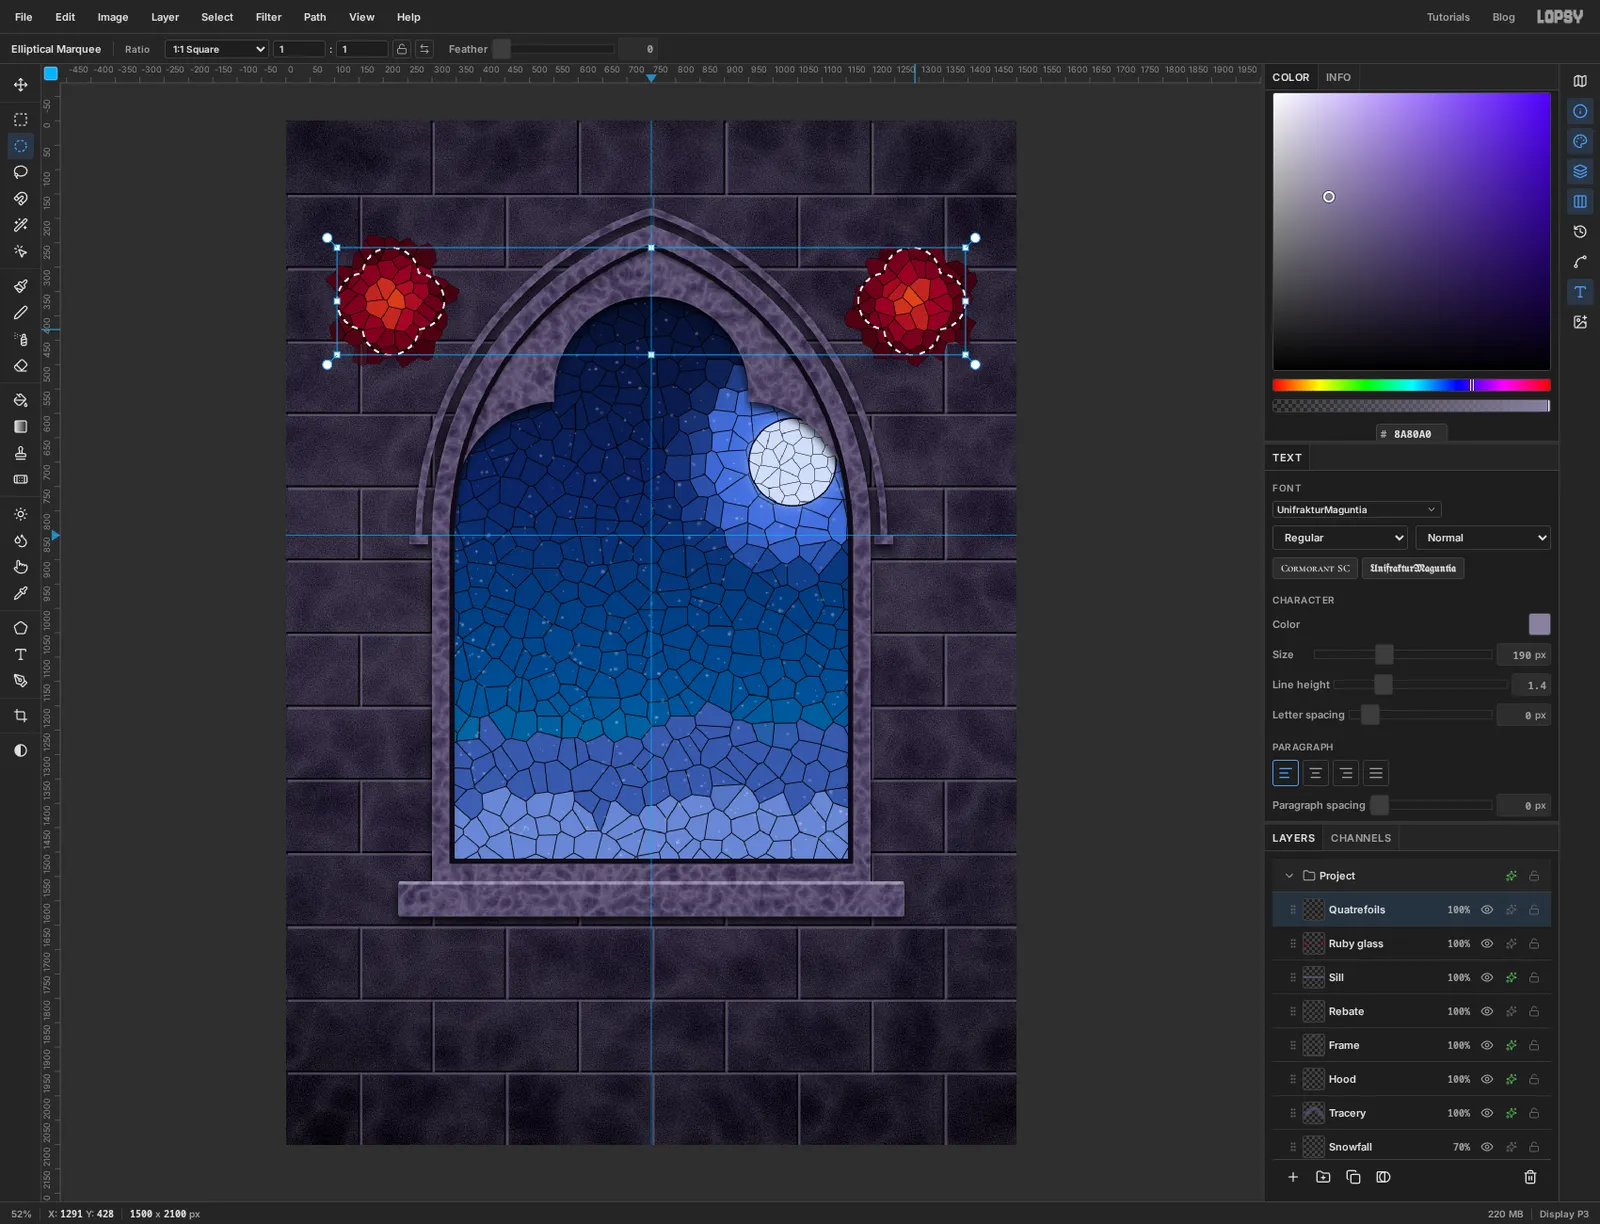
Add a layer called Quatrefoils. With the Elliptical Marquee, drag a circle about 115 px across over the top of the left patch. Hold Shift and add three more the same size, to the right, below and left, so the four overlap in the middle like a clover. Keep holding Shift and build the same clover over the right patch.
-
Cut the ruby glass to fit
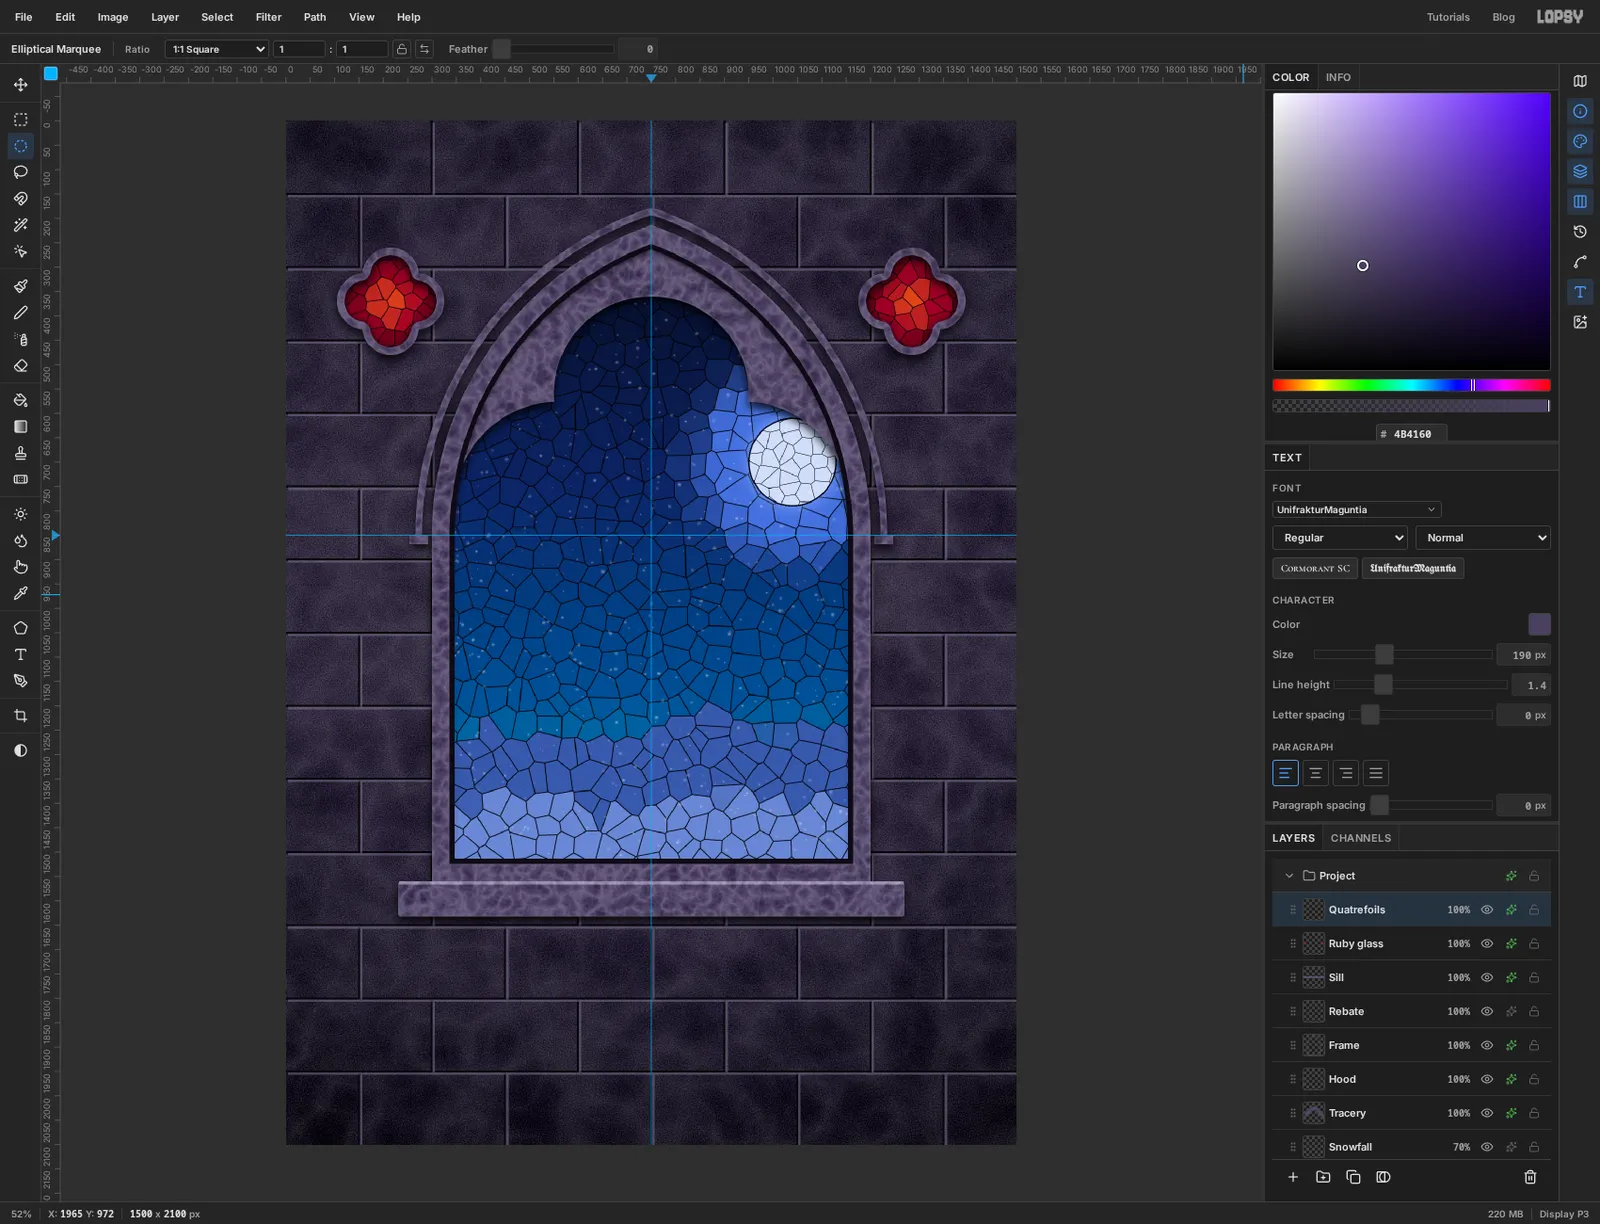
Fill the selection with . Choose Select → Shrink… with 15 and press Delete, which leaves a stone ring.
The selection is now the opening. Click the Ruby glass layer, choose Select → Inverse, press Delete and deselect.
Give Ruby glass an Inner Glow of , Size 20, Opacity 80. Give Quatrefoils the stone finish.
-
Hang a hook and a ribbon
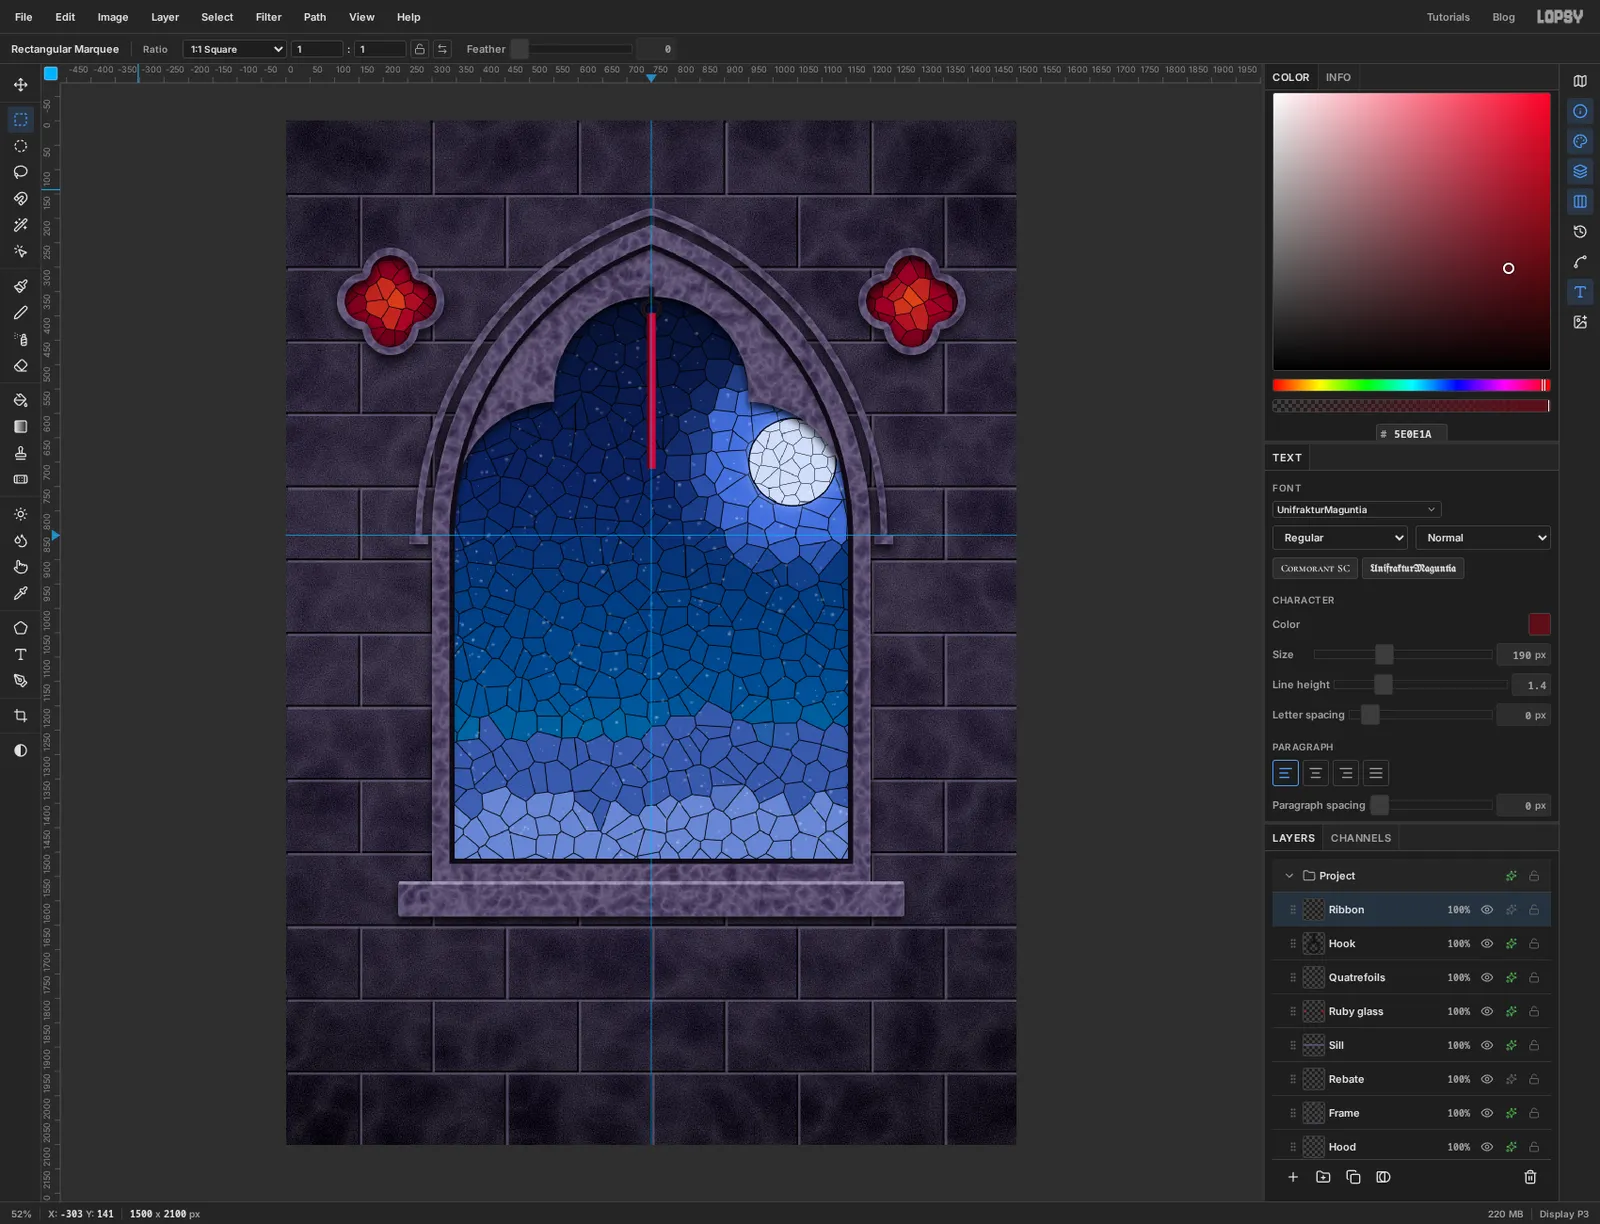
Add a layer called Hook. On the vertical guide, where the stone meets the top lobe, drag a marquee about 10 px wide and 30 px tall and fill it with .
Take the Shape tool and switch Shape to Ellipse. Open the fill swatch and click Remove fill, then add a stroke of with Width 7. Drag a ring about 34 px across so it hangs from the stub. Add an Inner Glow (, Size 3, Opacity 60) and a Drop Shadow (Offset X 2, Y 4, Blur 6, Opacity 80).
Add a layer called Ribbon. Drag a marquee 18 px wide from the ring straight down to about 710 on the left ruler, well short of the horizontal guide, and fill it with . Select the left 5 px of it and fill that with for a fold.
-
Paint the needles with radial symmetry
With Ribbon active, click New Group under the Layers panel and name the group Bough. Everything that hangs from the ribbon goes inside it.
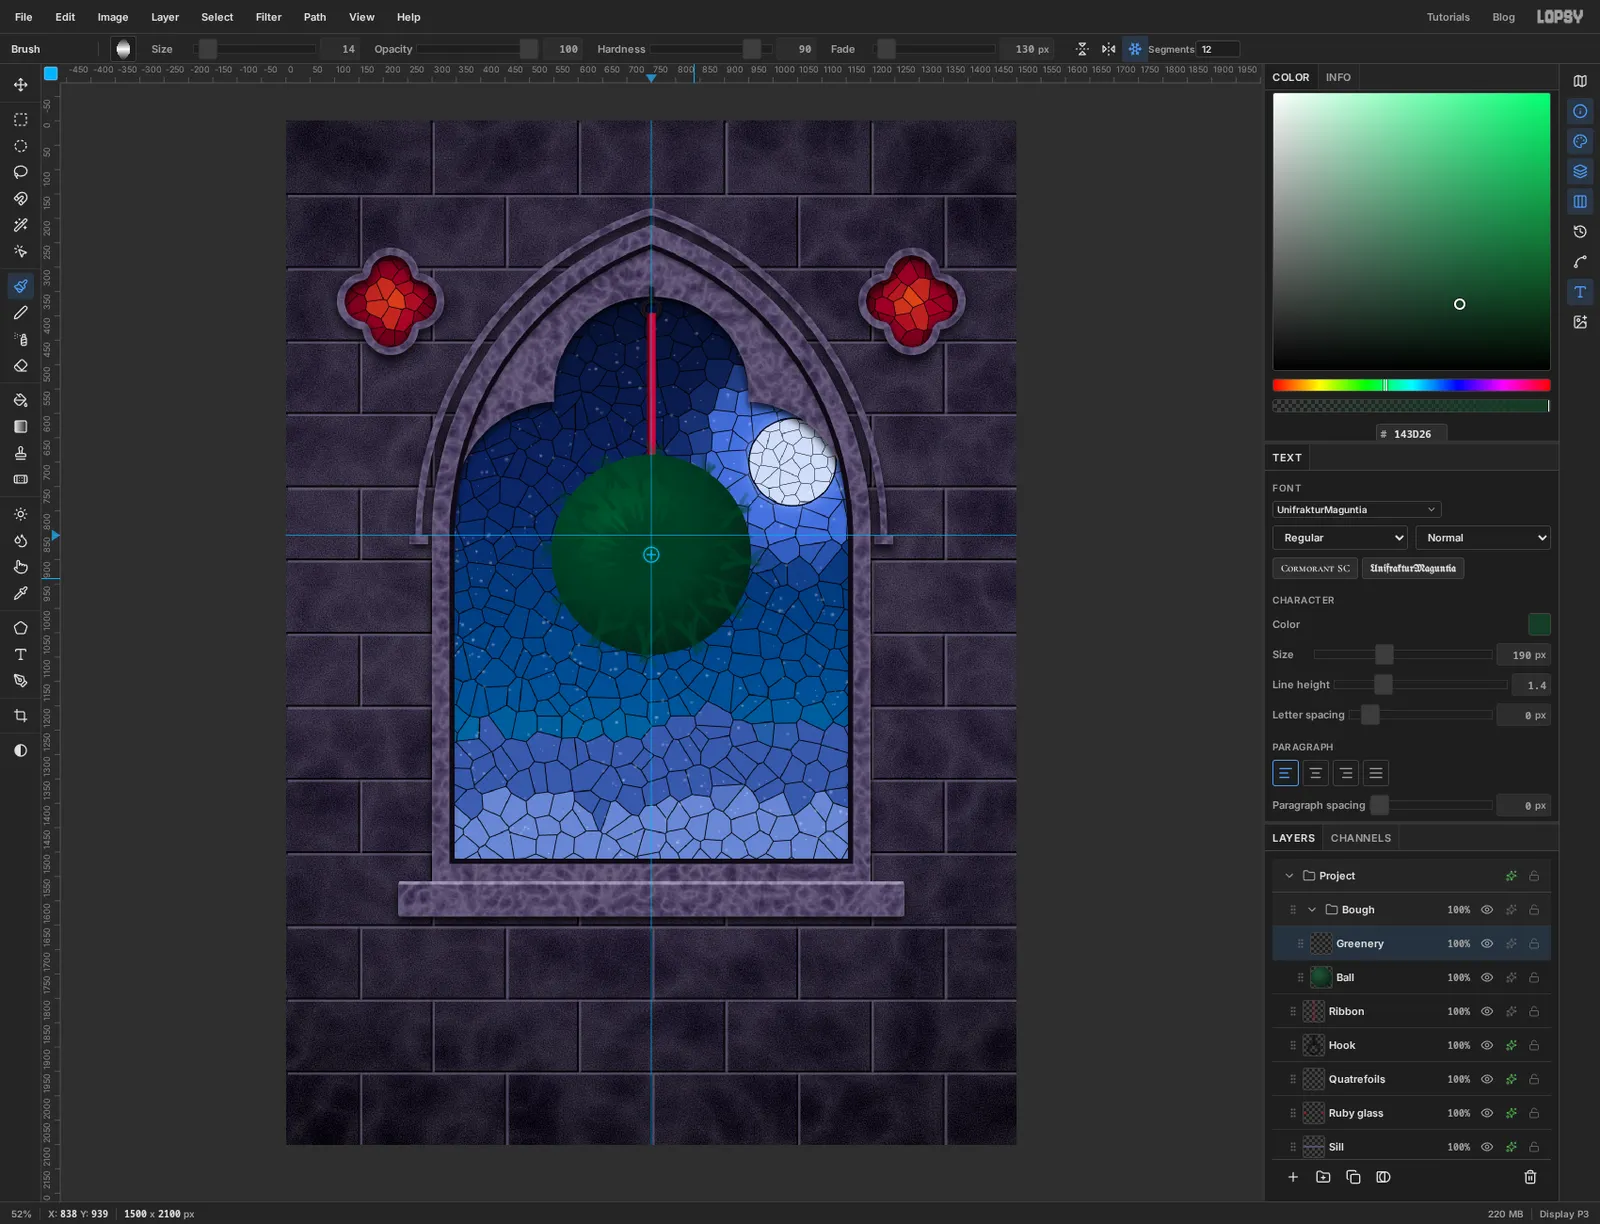
Add a layer called Ball. Drag an Elliptical Marquee about 410 px across, centred on the vertical guide, with its top just covering the end of the ribbon. Make a Radial gradient of , at 70% and , and drag from the upper left of the circle to past its lower right edge. Deselect.
Add a layer called Greenery and take the Brush. In the options bar click Radial Symmetry and set Segments to 12. Hold Cmd and click the centre of the ball to put the symmetry centre there. Set Hardness to 90 and Fade to 130.
With and Size 14, make about a dozen short, slightly curved strokes, each 60 to 100 px long. Start them anywhere inside the ball, including right at the centre, and point them every which way. Each stroke is repeated twelve times around the centre, and Fade lets it die away to nothing, which reads as the tip of a needle.
Go round again with at Size 12, then with at Size 9. Let some strokes run past the edge of the ball so the outline turns bristly.
-
Bind it with gold hoops
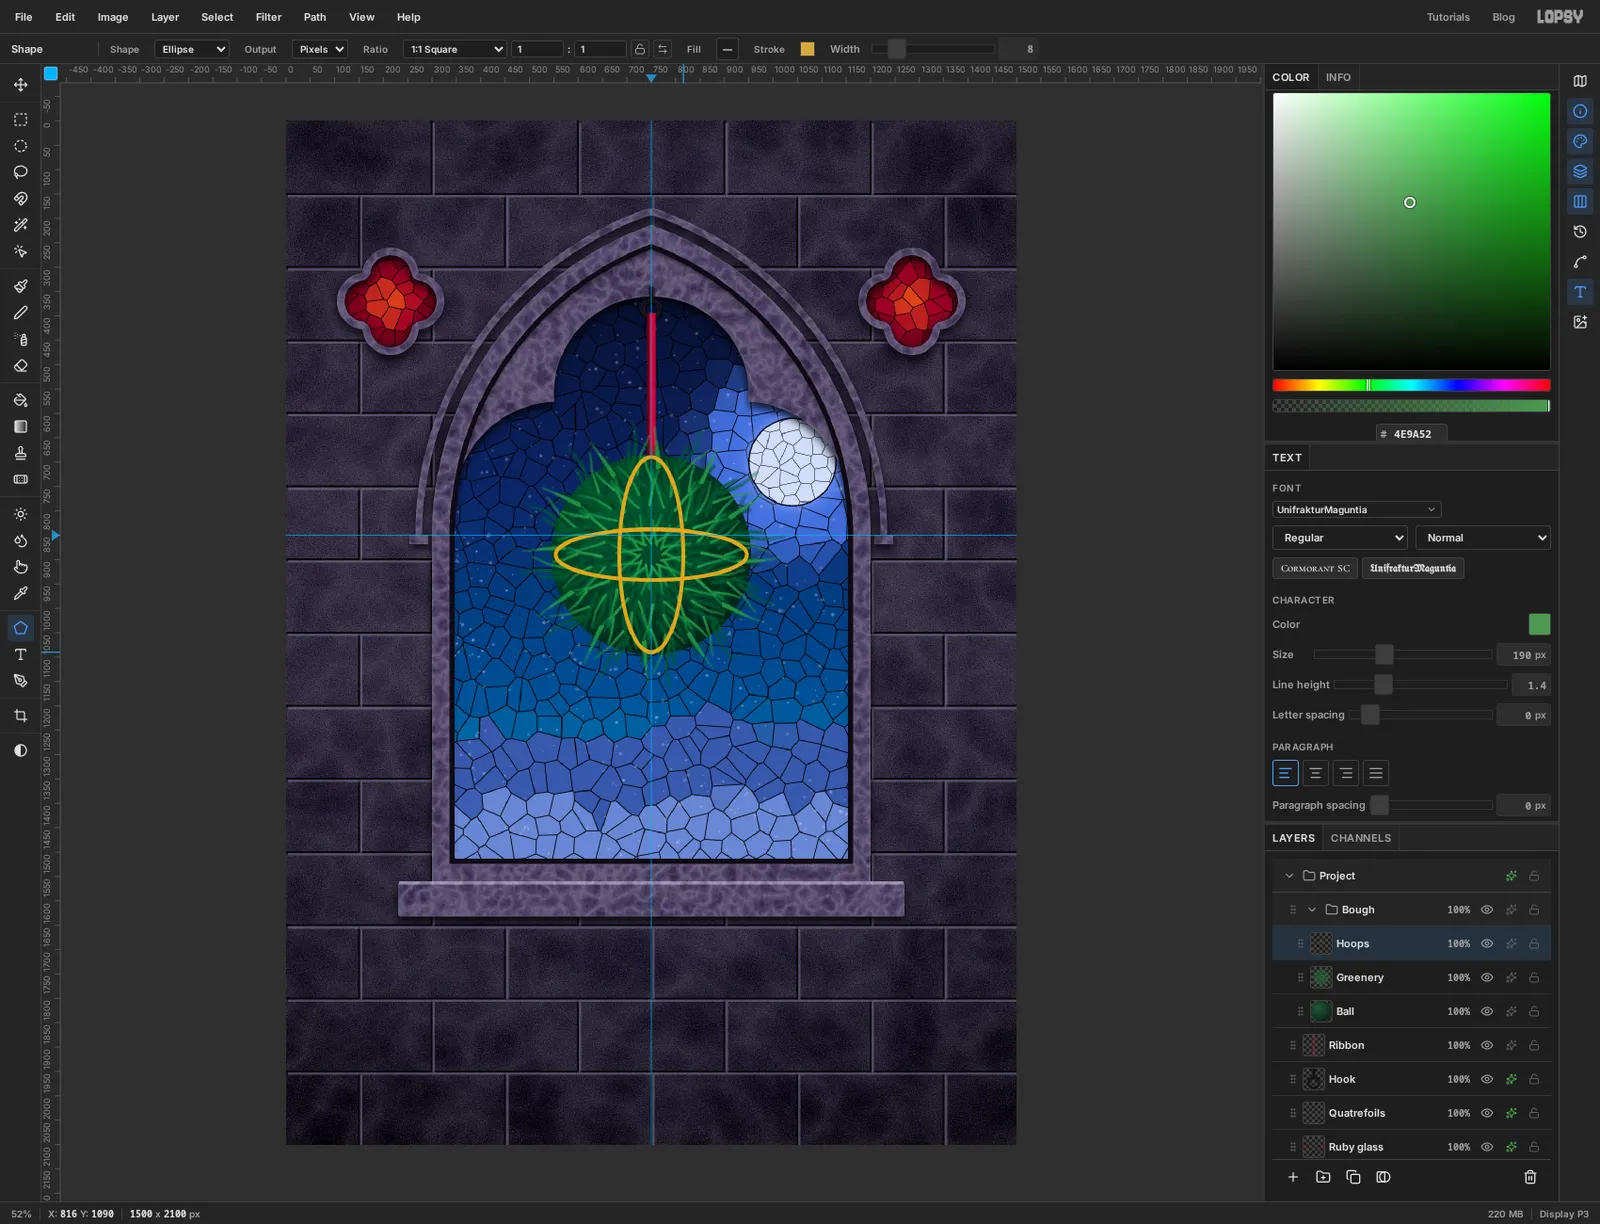
A real bough is built on crossed hoops. Add a layer called Hoops. Take the Shape tool, still on Ellipse with no fill, and change the stroke to with Width 8.
Press on the centre of the ball and drag out a wide, flat ellipse that stops just inside the ball's edge. Then, from the same centre, drag a tall narrow one. Keep both inside the green, or the wide one ends up looking like the rings of Saturn.
-
Weave the hoops with a layer mask
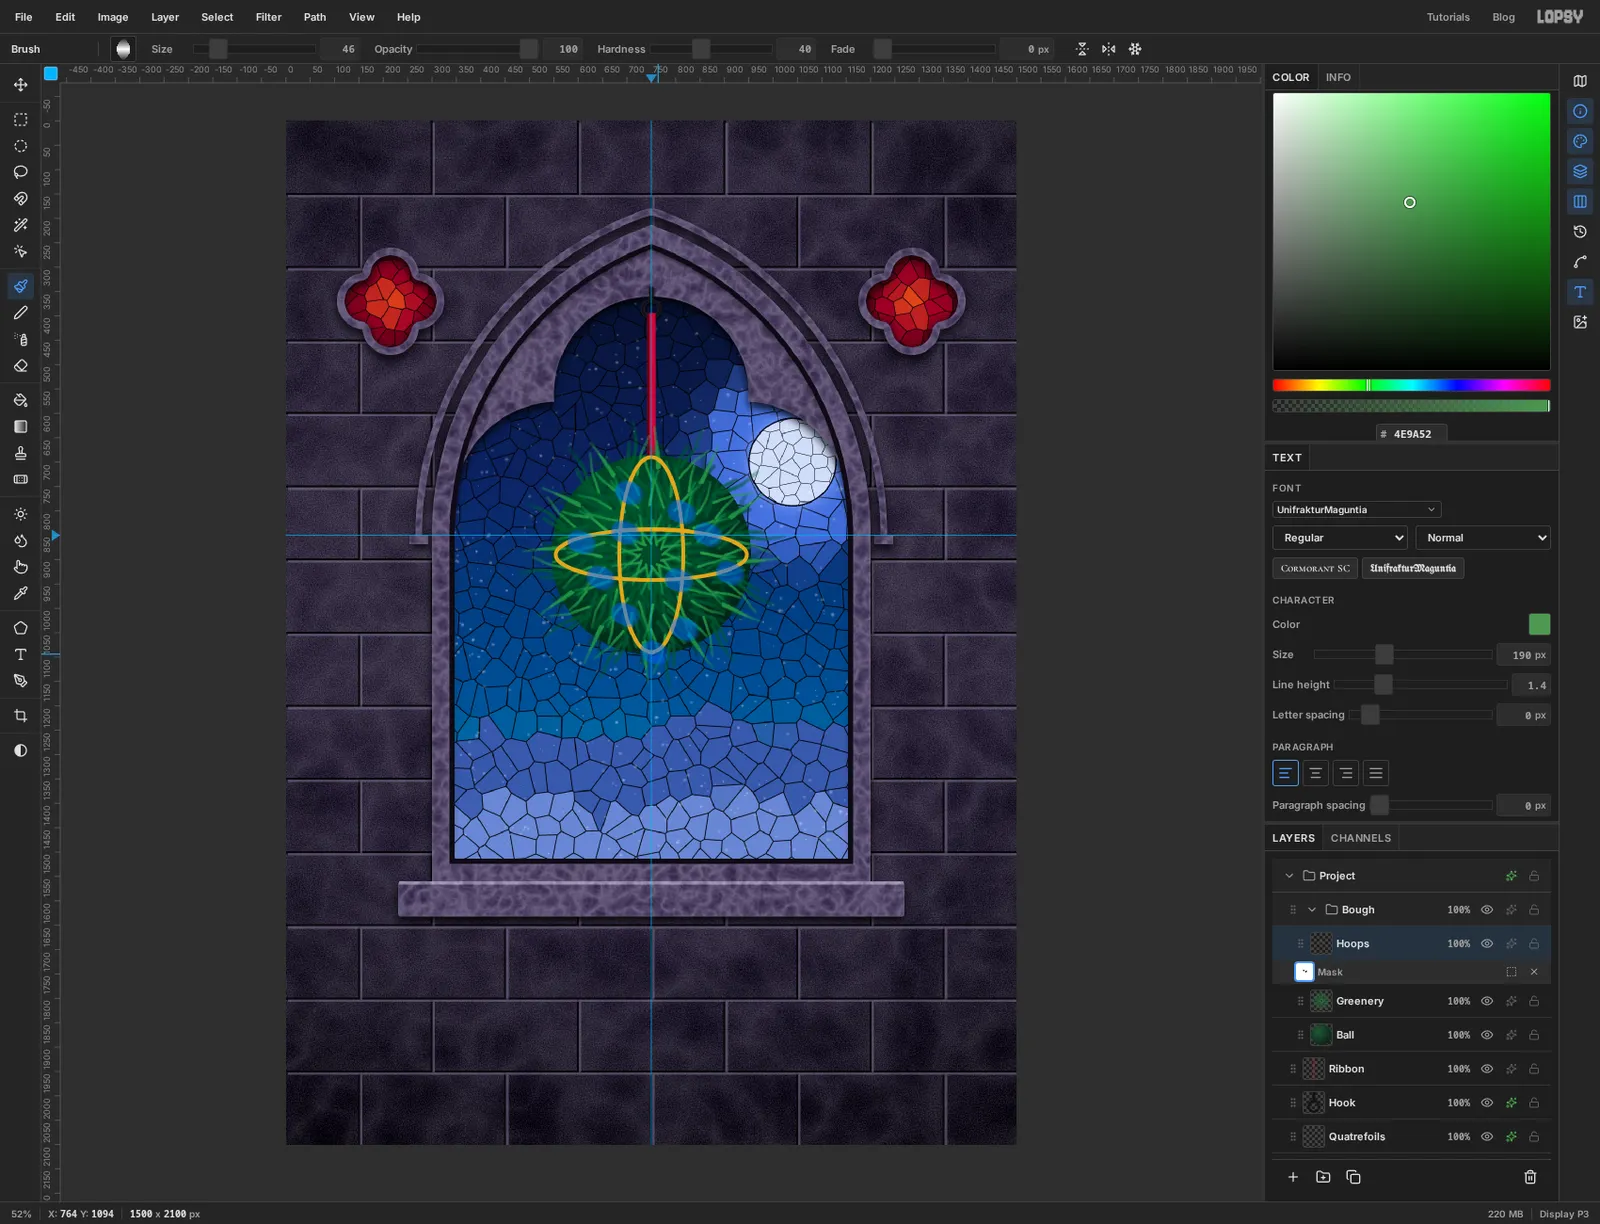
With Hoops active, click Add Mask under the Layers panel. You're now painting on the mask. Take the Brush, click Radial Symmetry again to turn it off, and set Fade back to 0, Size to 46 and Hardness to 40.
Dab a short stroke over the hoops in ten or so places. The canvas tints each hidden patch blue while you're in the mask. Skip the crossings and hide the stretches between them, so the gold seems to dip under the needles and come back up.
Click the Hoops row to leave the mask.
-
Add lighter sprigs on top
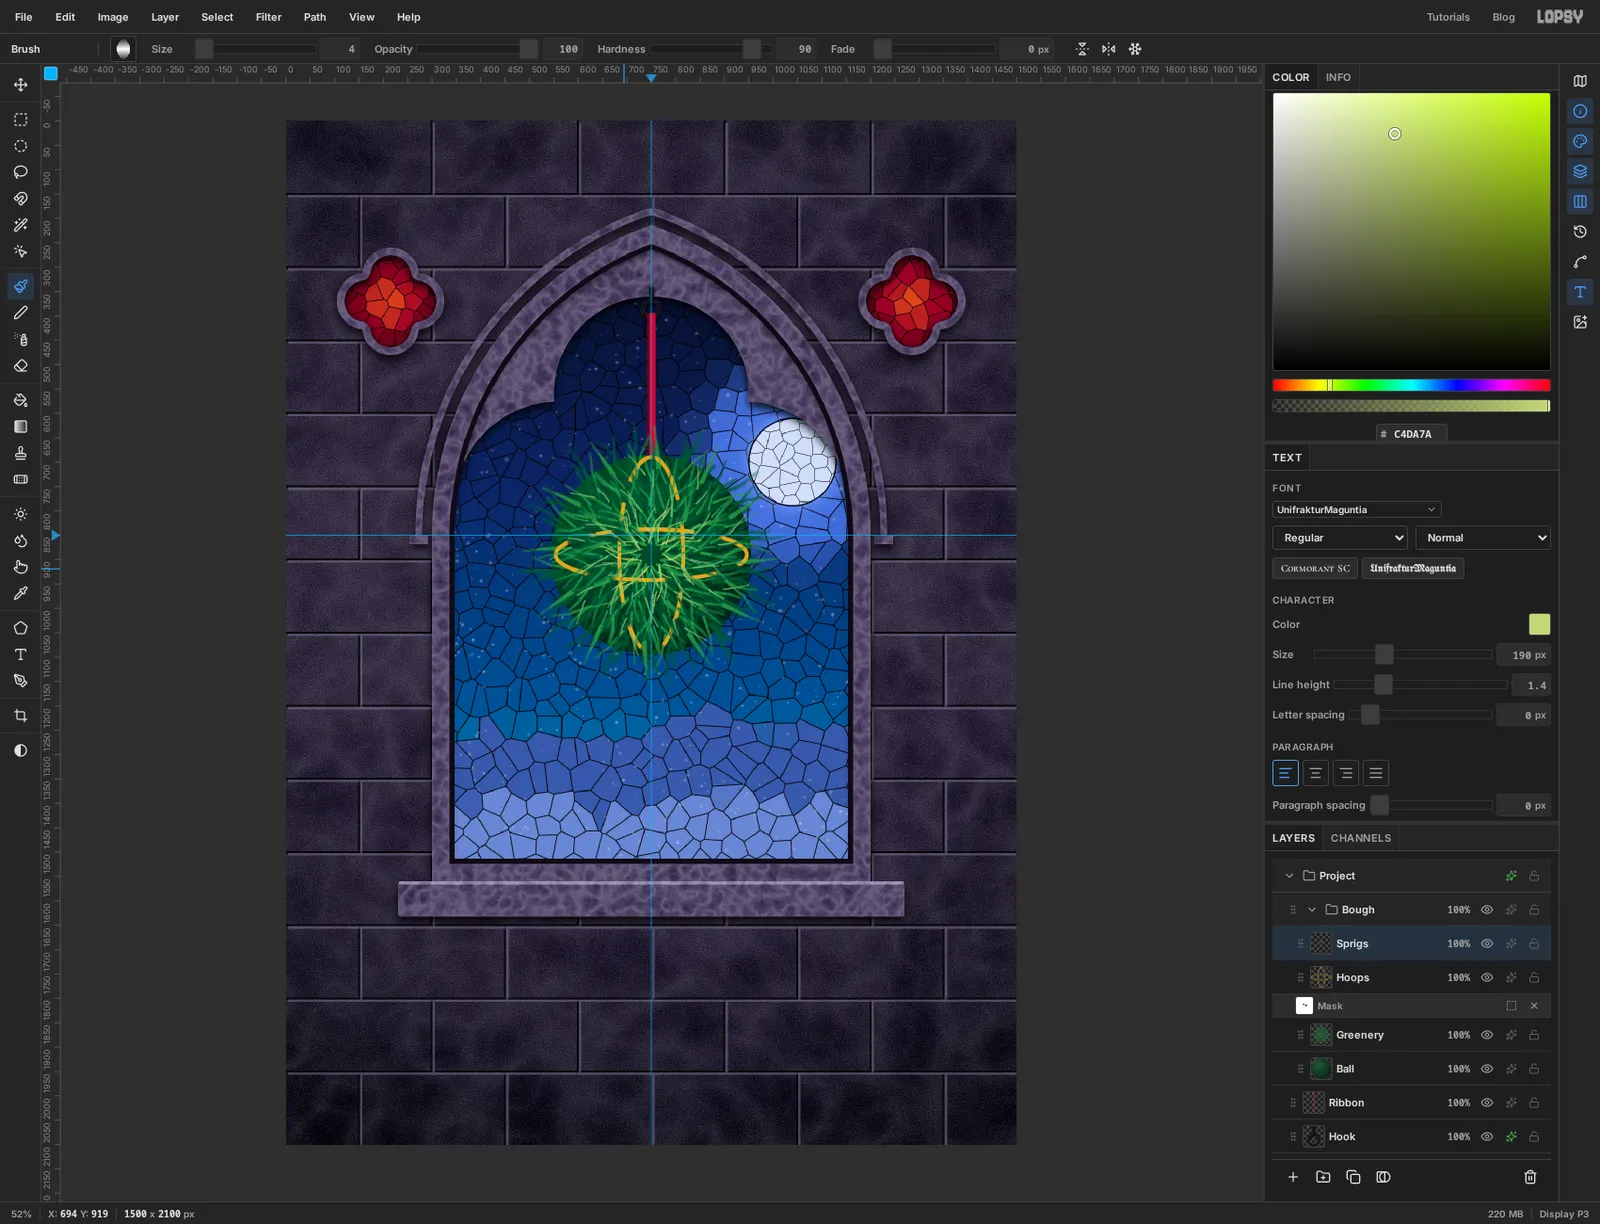
Add a layer called Sprigs, above Hoops. Turn Radial Symmetry back on and set Segments to 9. An odd number that doesn't divide into twelve stops the two layers of needles from lining up. Set Hardness to 90 and Fade to 120.
Paint nine or so strokes each of at Size 9, at Size 7 and at Size 5, shorter than before. Then change Segments to 7 and add a few fine strokes of at Size 4 near the middle, where the candlelight will fall.
Turn Radial Symmetry off and set Fade to 0 before you move on. Both settings stick, and they also apply to the Pencil and Eraser.
-
Shade the ball
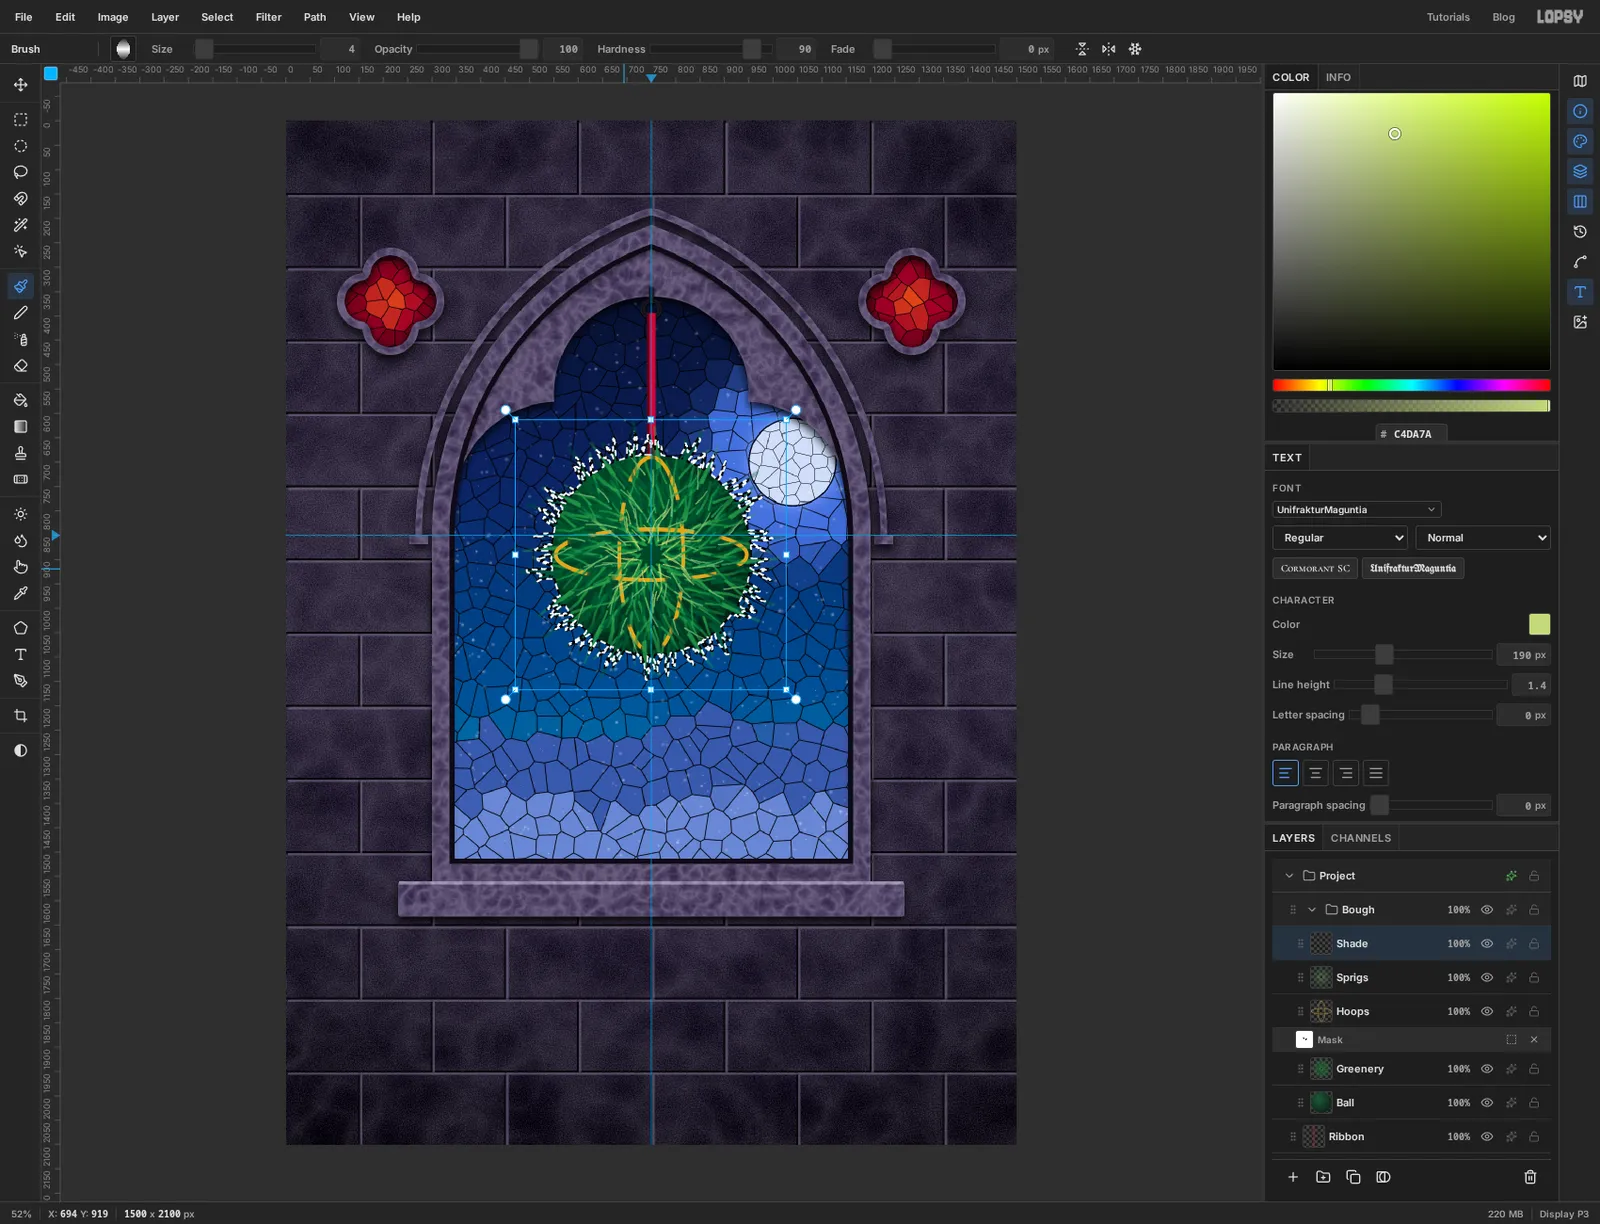
Add a layer called Shade. Hold Cmd and click the Ball thumbnail, then hold Cmd+Shift and click the Greenery and Sprigs thumbnails to add their shapes. The selection follows every needle.
Make a Radial gradient with three stops: black at 0% opacity, black at 10% opacity near the middle, and at 80% opacity. Drag from the upper left of the ball to its lower right edge, then deselect. In the layer's effects set the blend mode to Multiply, and the flat disc of needles turns into a ball lit from the upper left.
-
Hang the apples
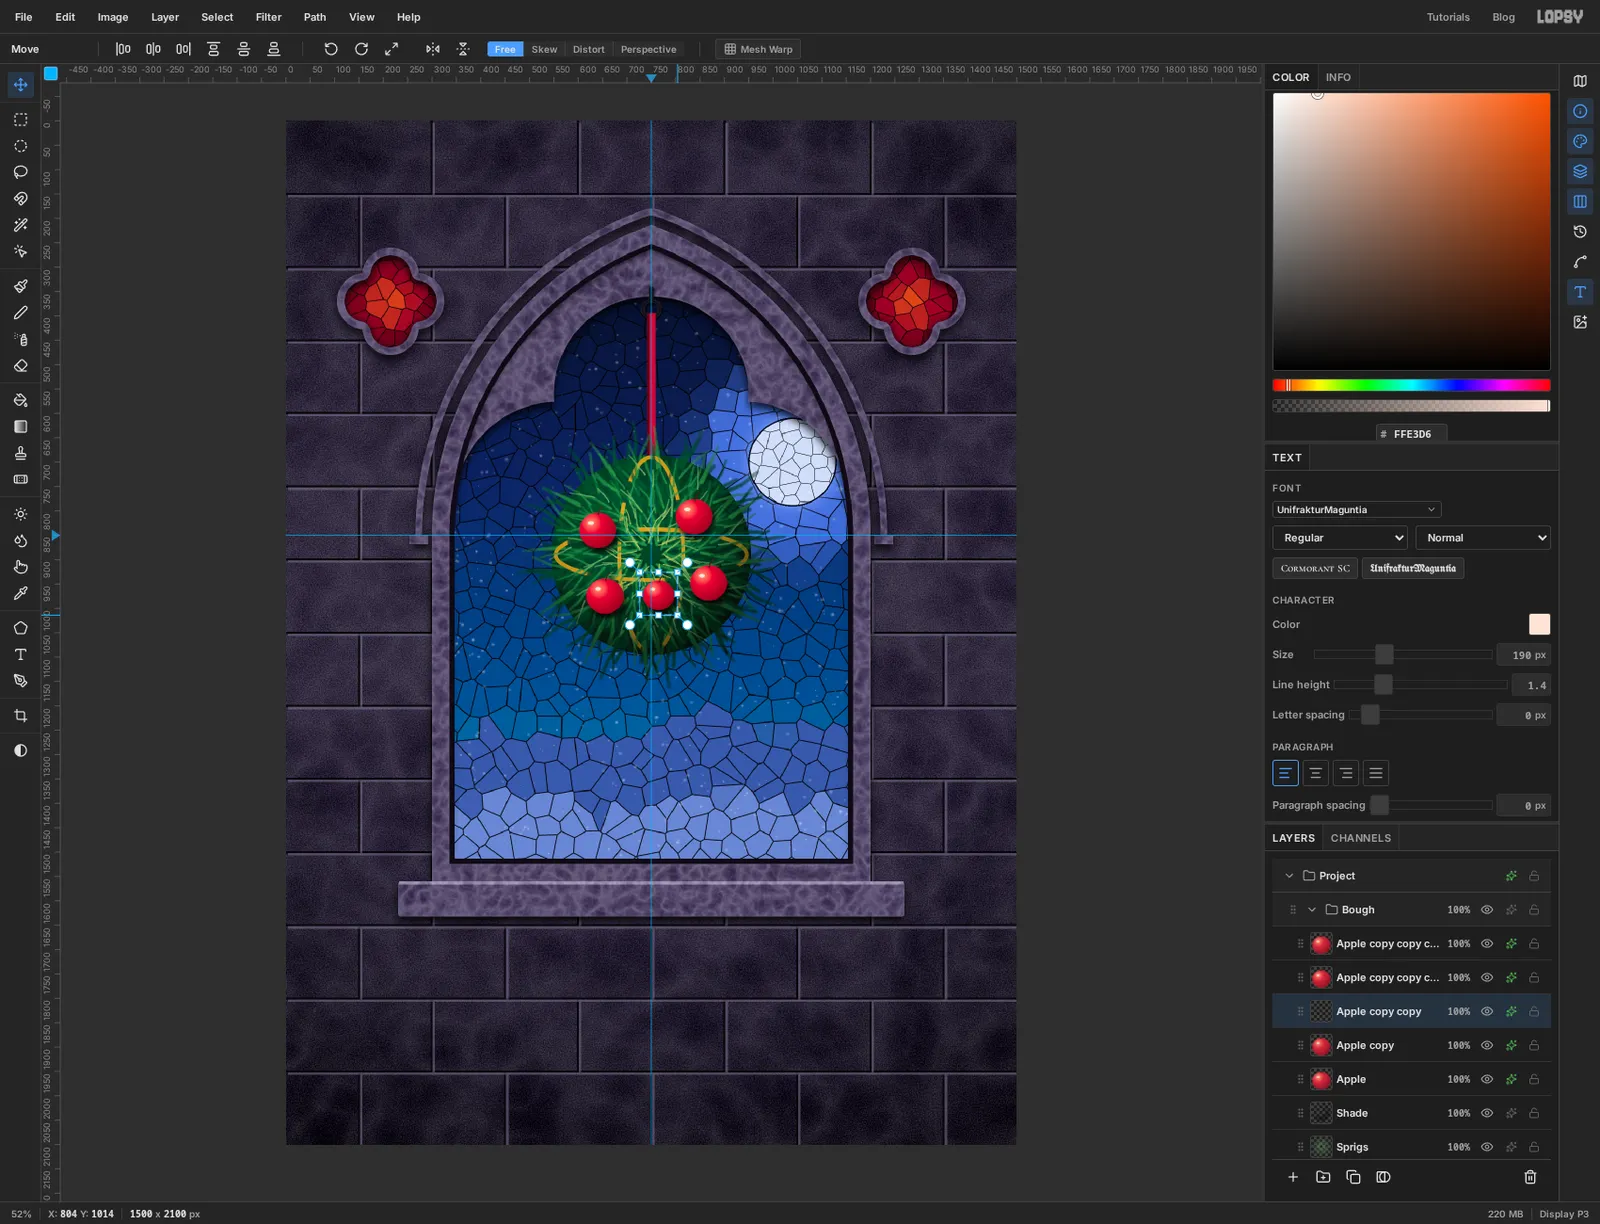
Add a layer called Apple. Drag an Elliptical Marquee about 76 px wide and a touch less tall on the upper left of the ball. Fill it with a Radial gradient of , at 30%, at 80% and , dragged from the upper left of the apple to its lower right edge. Deselect.
With the Brush at Size 5 and Hardness 100, flick a short stalk in out of the top. Add a tiny ellipse of as a highlight. Then give the layer a Drop Shadow with Offset X 5, Y 10, Blur 14 and Opacity 80.
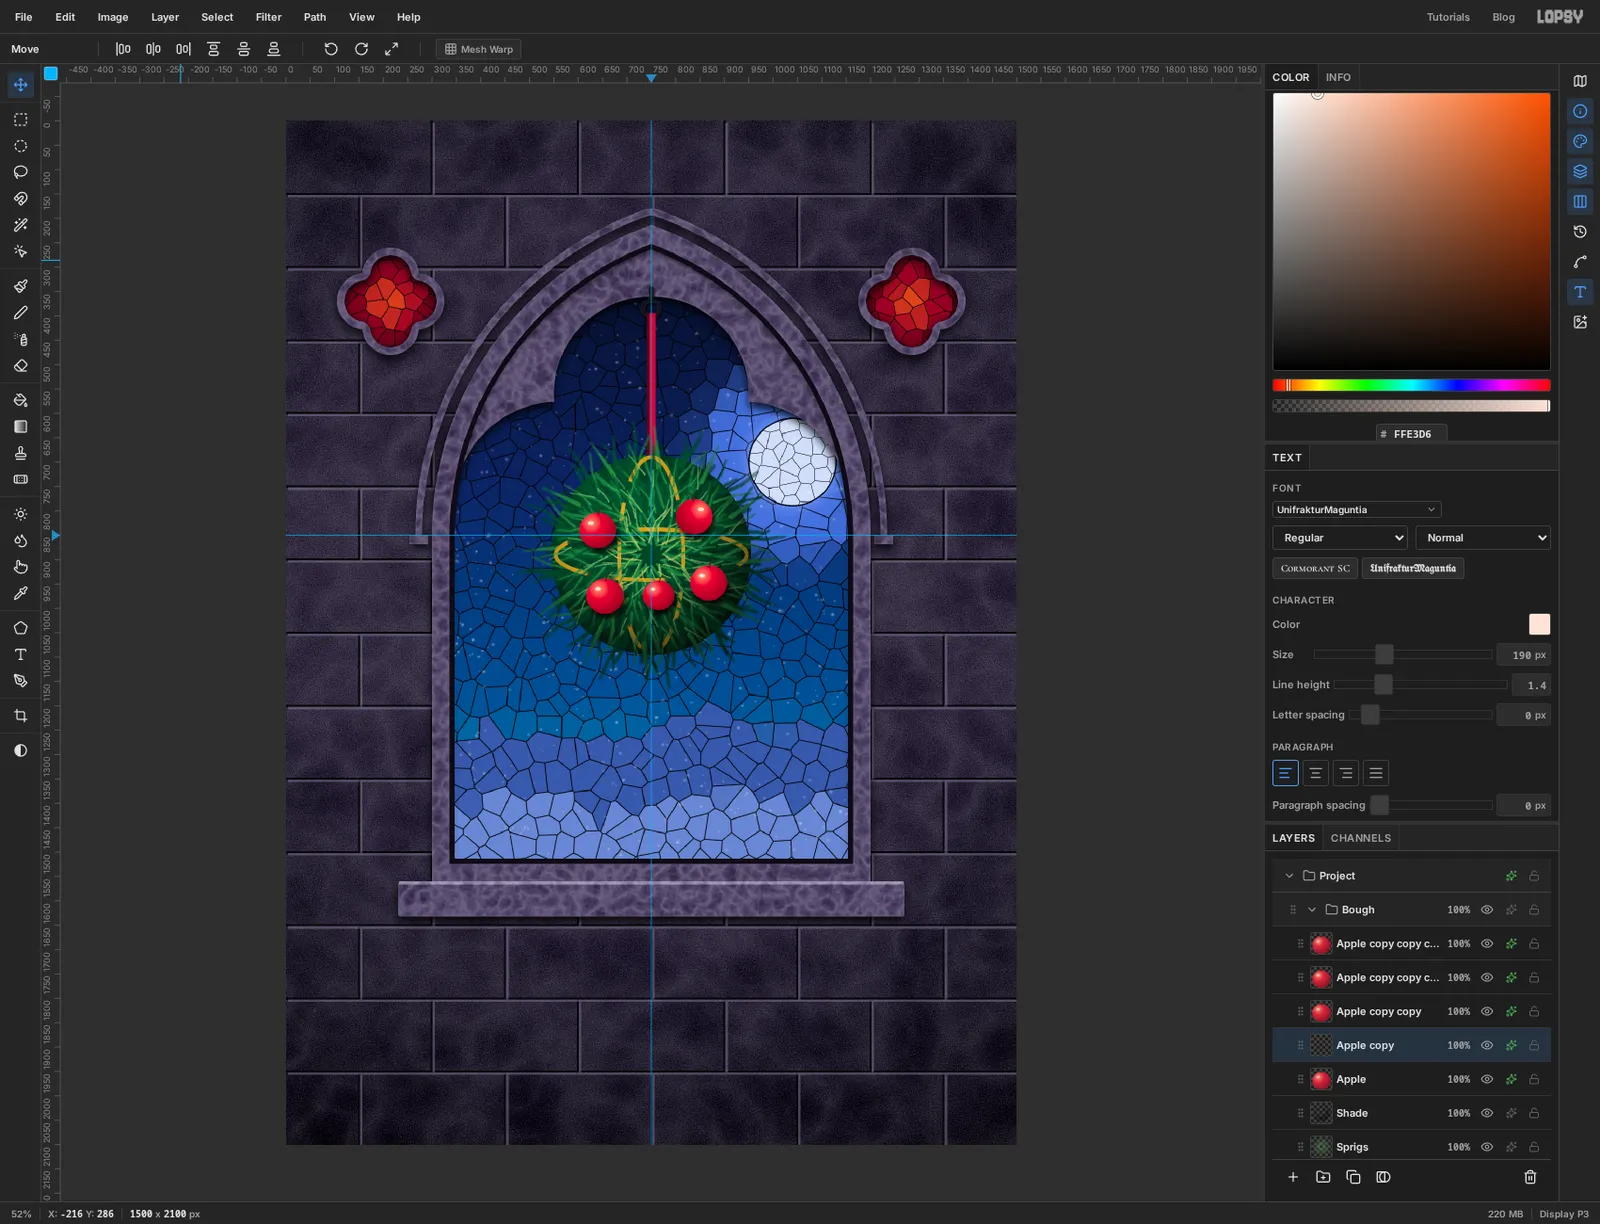
Choose Layer → Duplicate Layer and drag the copy somewhere else on the ball with the Move tool. Do that four times, for five apples.
Identical apples give the trick away. Click one of the copies, drag a Rectangular Marquee round it, and with the Move tool hold Cmd and drag a corner handle inward to shrink it by about a sixth. Press Cmd+D.
-
Flip one for variety
Click another copy and choose Image → Flip Horizontal. Its highlight swaps sides, which is enough to stop the eye pairing them up.
-
Make a candle flame
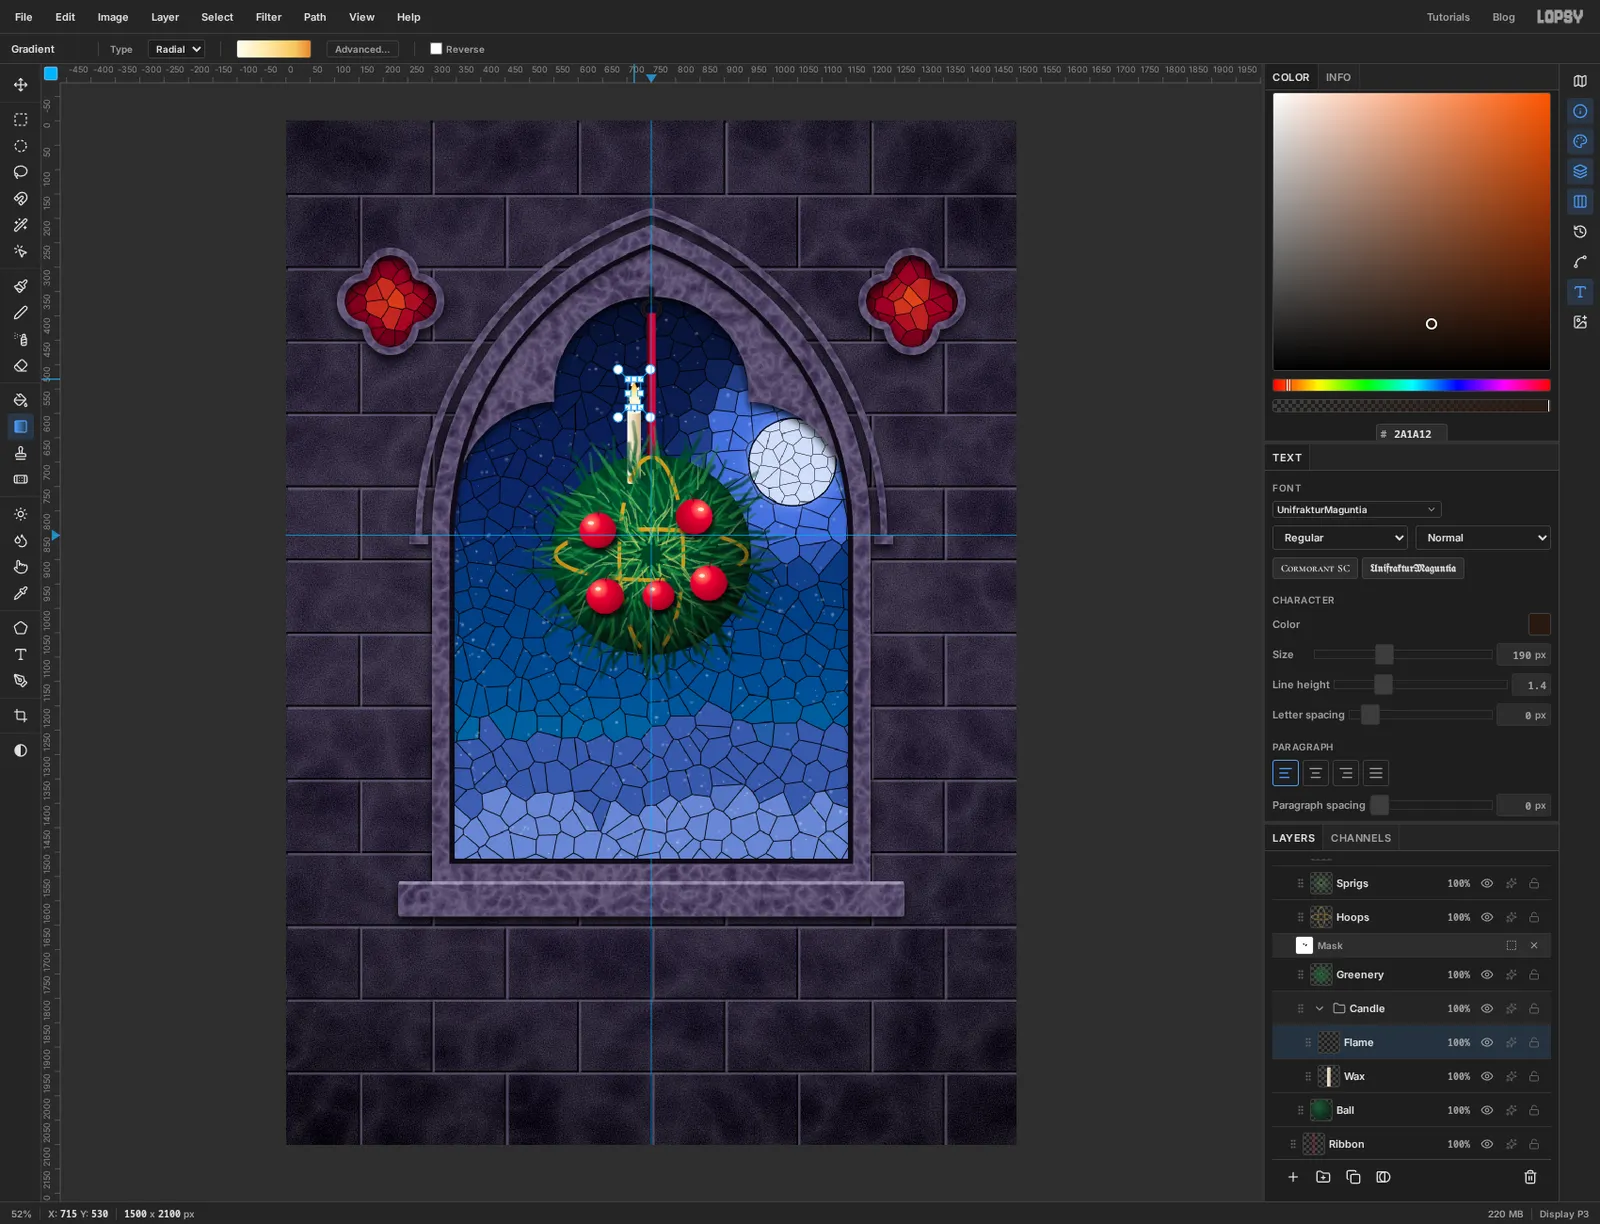
Click Ball, then click New Group and name it Candle. The group lands just above Ball and under the needles, so the candle's foot is buried in the greenery.
Add a layer called Wax. Drag a marquee about 28 px wide and 150 px tall, standing on top of the ball to the left of the ribbon. Fill it with a Linear gradient from to , dragged left to right across it. Deselect, add a flat ellipse of across the top for the melted rim, and use the Pencil at Size 3 with to draw a 15 px wick with a click and a Shift-click.
Add a layer called Flame. With the Lasso, draw a teardrop about 26 px wide and 60 px tall above the wick. Fill it with a Radial gradient of , at 40%, at 80% and , dragged from the base of the flame up to its tip. Deselect.
Take the Smudge tool with Size 22 and Strength 60 and drag once from the middle of the flame up through the tip. The point stretches into a wisp. Add an Outer Glow of , Size 44, Opacity 90.
-
Copy the candle group three times
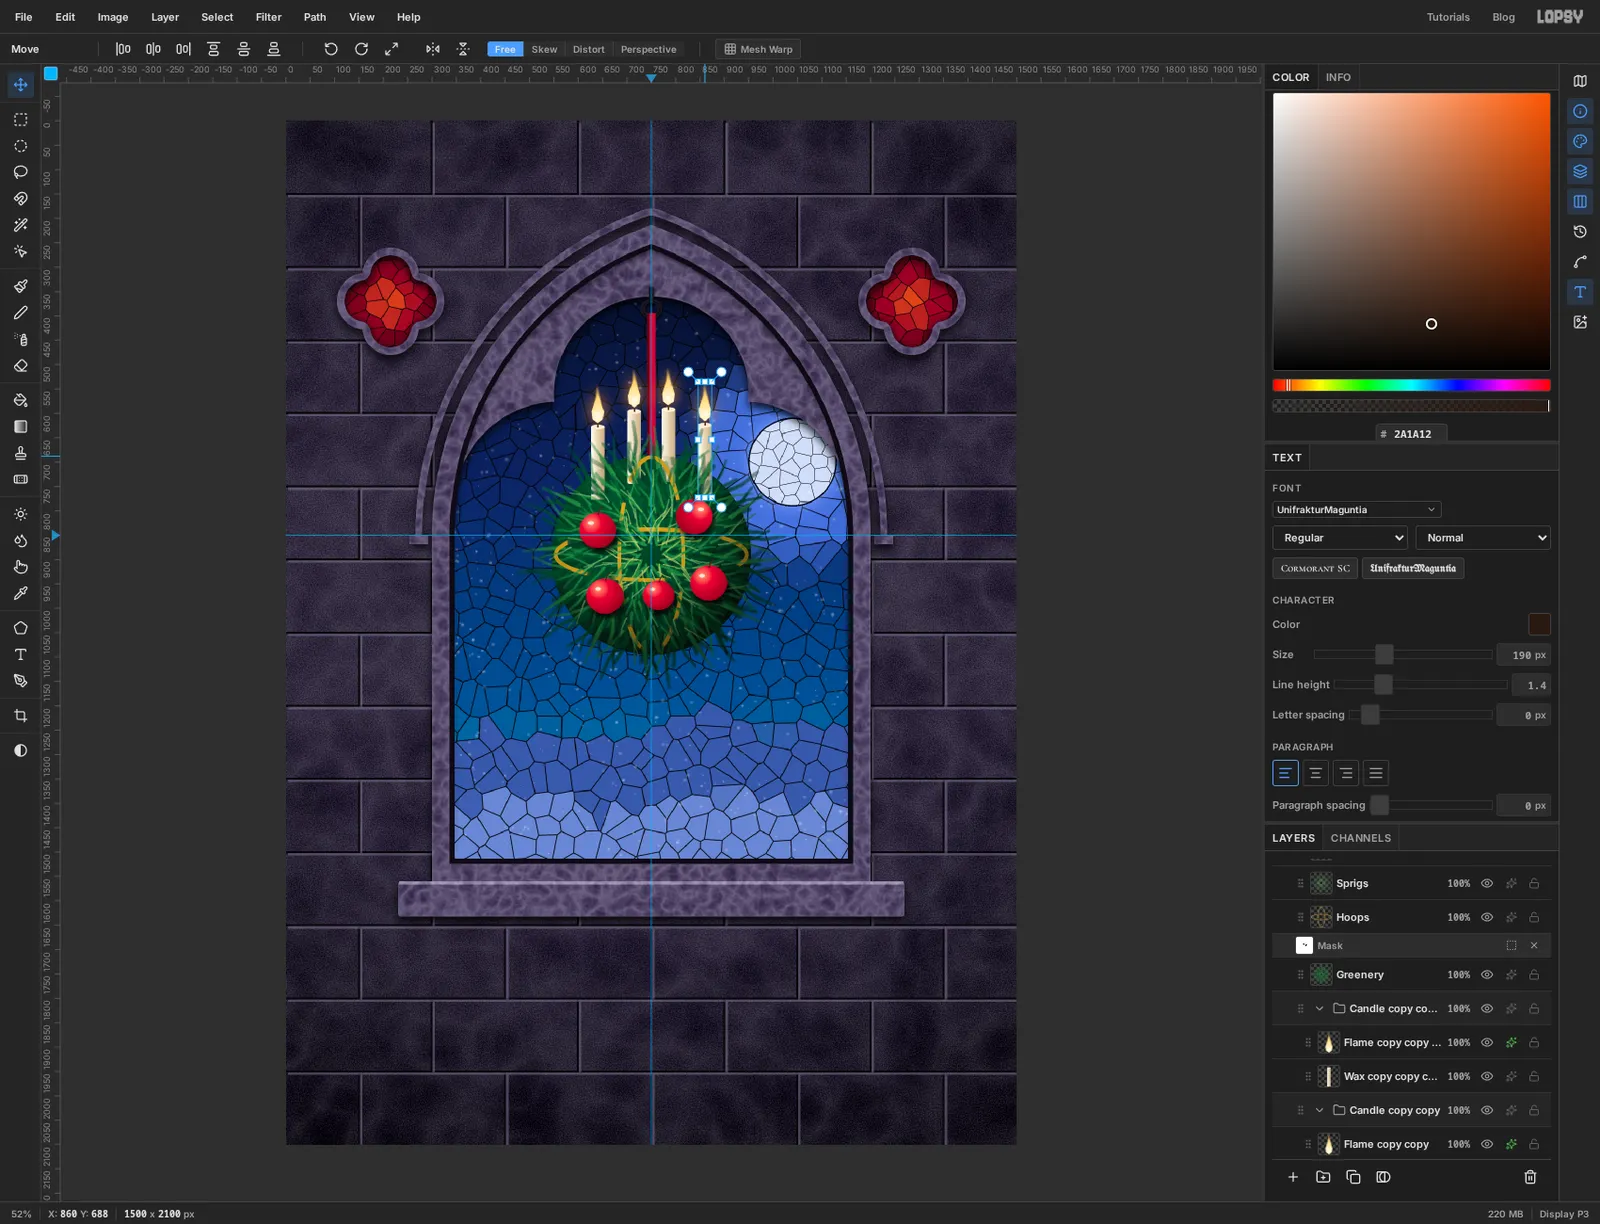
Click the Candle group's row and choose Layer → Duplicate Layer. The whole group is copied, wax and flame together. With the Move tool, drag the copy to the far left of the ball and a little lower.
Duplicate twice more, putting one candle just right of the ribbon and one at the far right, level with the first copy.
-
Draw mistletoe stems with the Pen
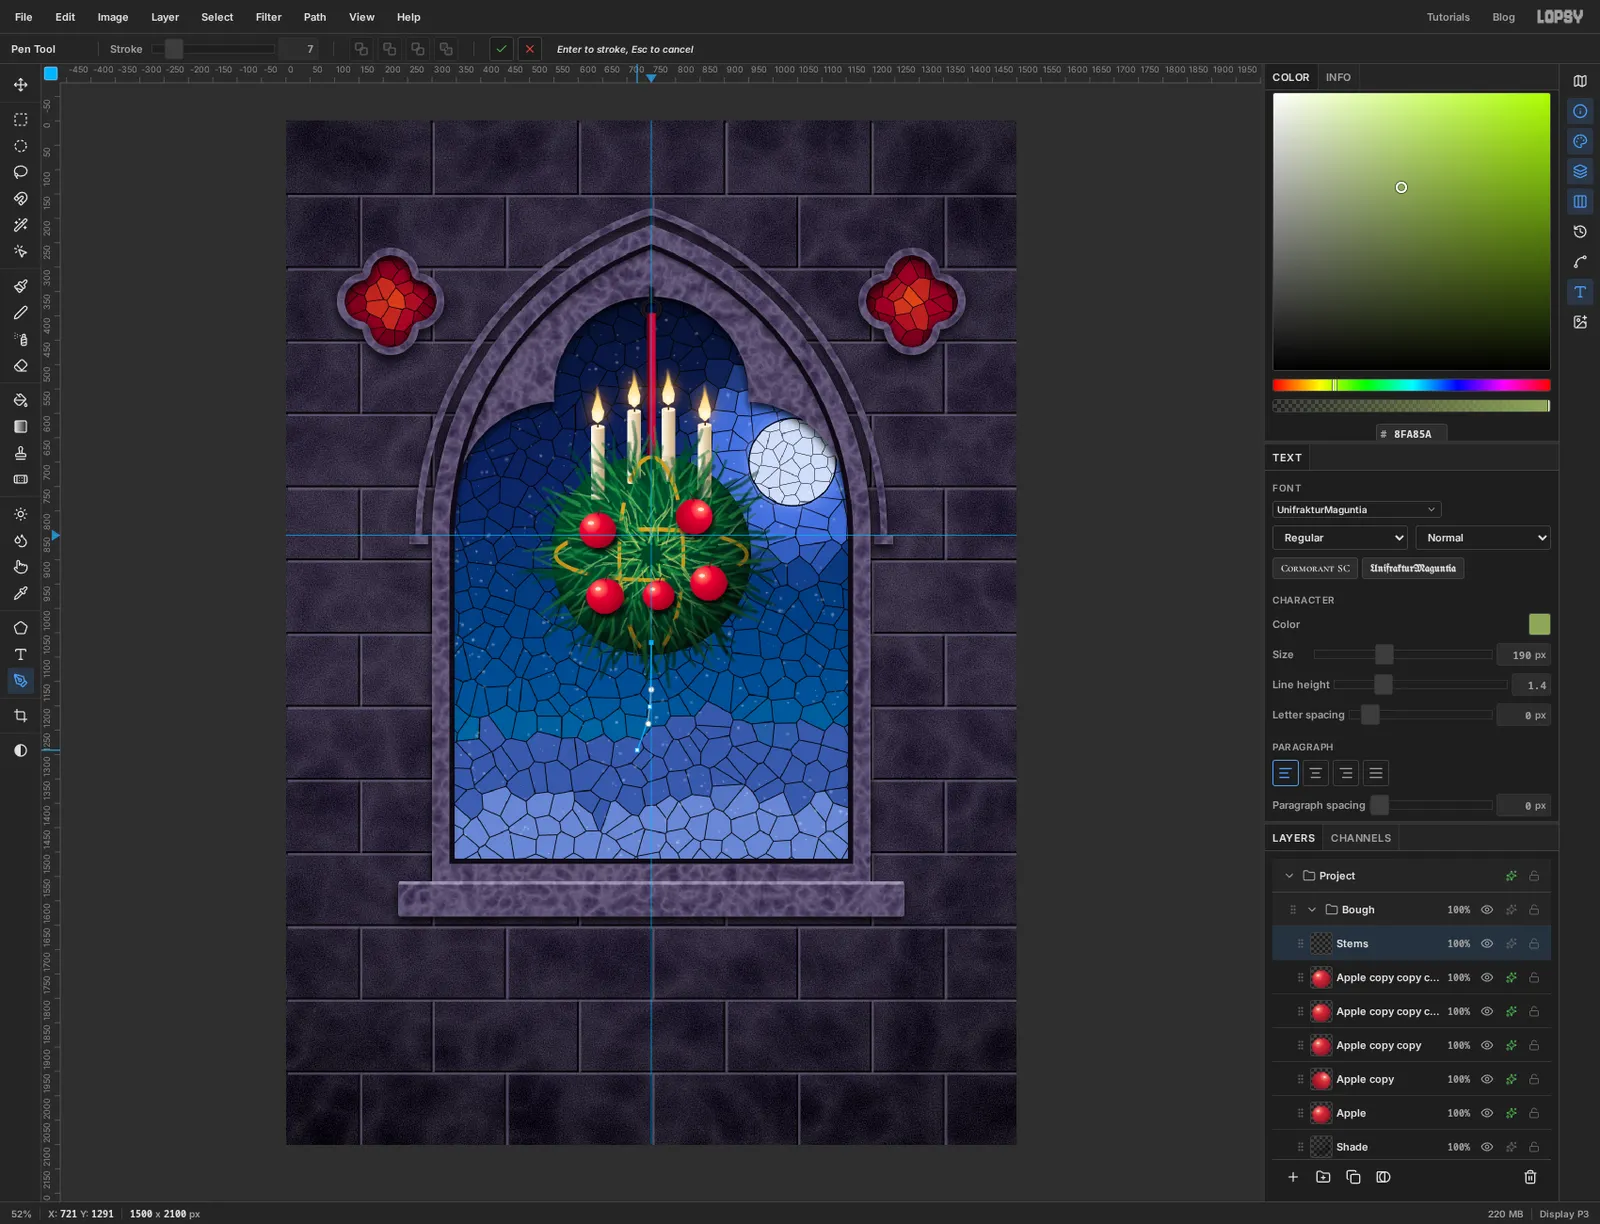
Click the topmost Apple layer and add a layer called Stems above it. Take the Pen, set Stroke to 7 and the foreground to .
Click at the bottom of the ball on the vertical guide. About 130 px lower, press and drag down a short way before letting go, which bends the stem. Click once more, lower and to the left. Press Enter and the path is stroked onto the layer.
Draw a wide upside-down V with three clicks, its point on the stem and its arms reaching down to either side, and press Enter. Then a short branch from the stem down to the right, and Enter again. You should have four tips to hang leaves from.
-
Rotate a leaf
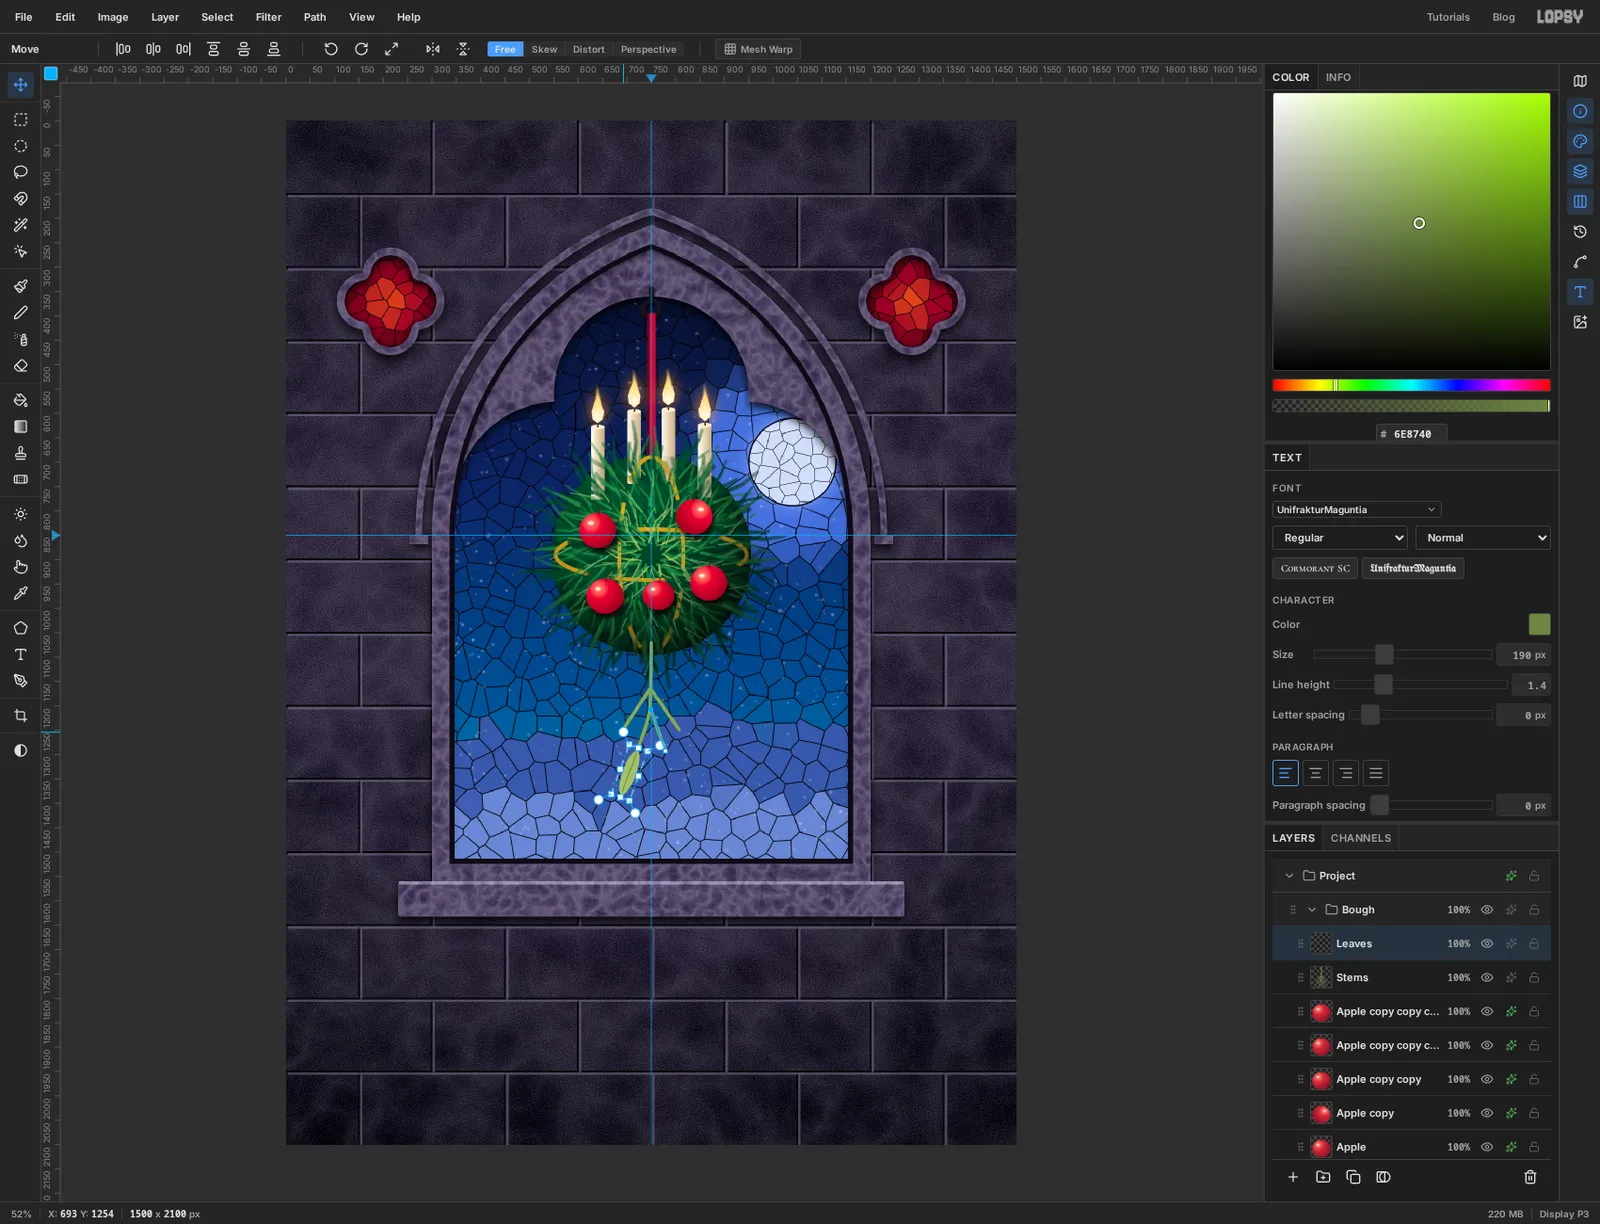
Add a layer called Leaves. Drag an Elliptical Marquee about 28 px wide and 96 px tall below the lower left tip and fill it with . Deselect, and draw a midrib down it with the Pencil at Size 2 in .
Drag a Rectangular Marquee round the leaf with room to spare. Switch to the Move tool, press just outside a corner of the box and drag in an arc to turn the leaf about 20° clockwise, so it hangs down and to the left. Press Cmd+D.
Now make its partner. Choose Layer → Duplicate Layer, then Image → Flip Horizontal, and tap → until the two leaves meet at the top in an upside-down V. Shift+→ moves 10 px at a time. Press Cmd+E to merge the copy back down into Leaves.
-
Put a pair on every tip
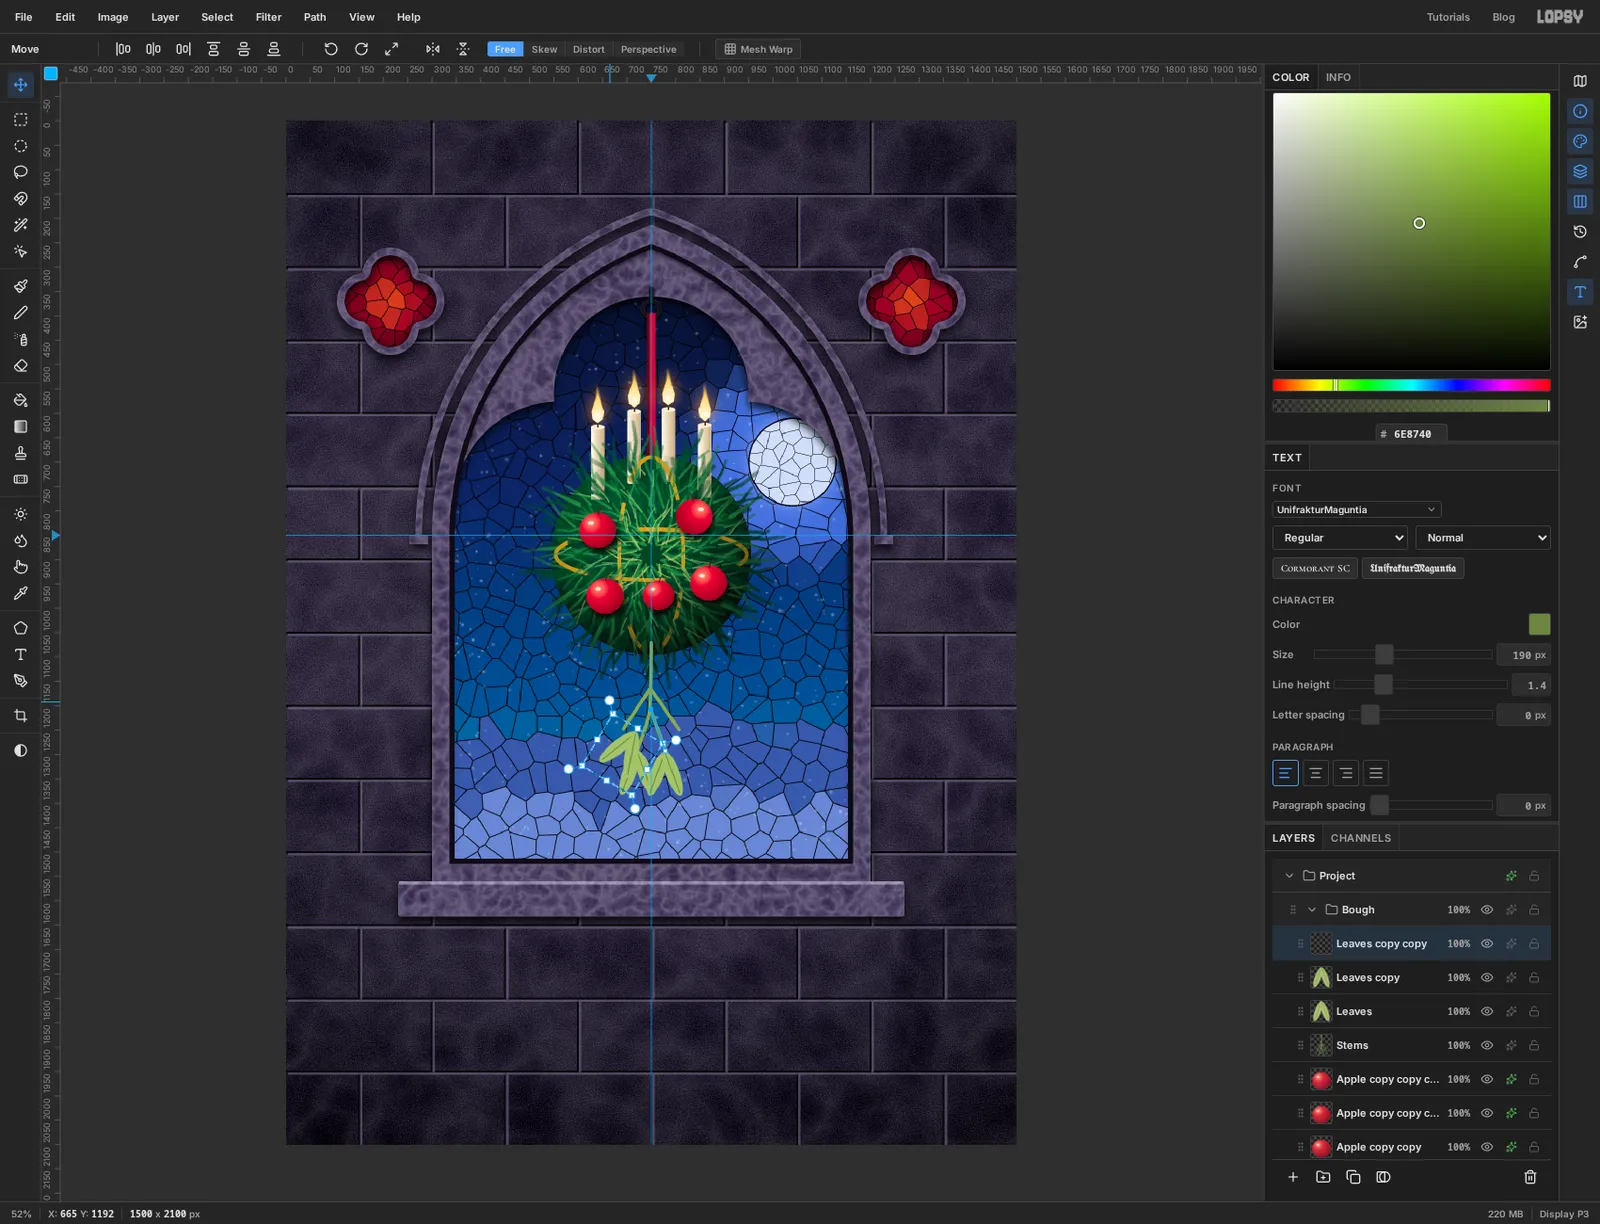
Duplicate Leaves and drag the copy across to the lower right tip.
Duplicate again and drag that copy up to the end of the left arm of the upside-down V. Marquee it, rotate it about 30° clockwise so it swings outward, and press Cmd+D. Duplicate once more, choose Image → Flip Horizontal, and drag the mirrored pair to the right arm.
-
Add the berries
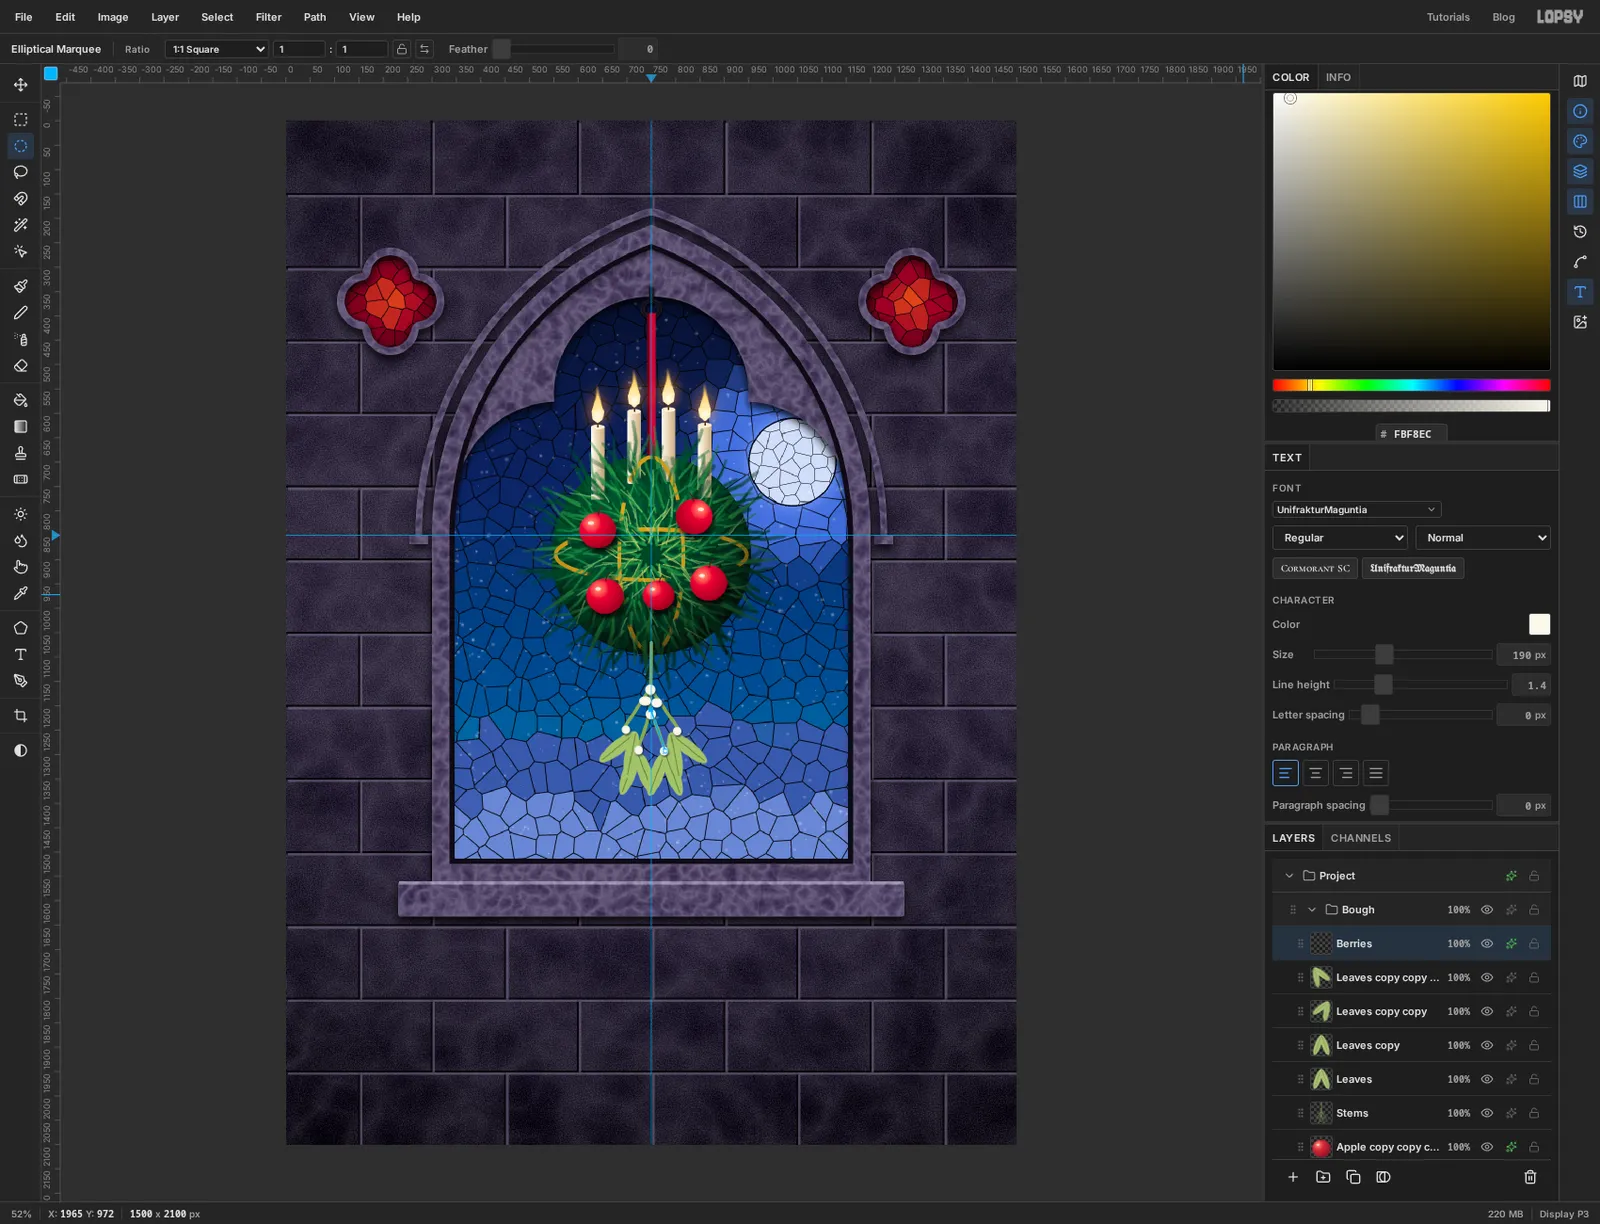
Add a layer called Berries. With the Elliptical Marquee, drag eight small circles, 18 to 22 px across, where the stems fork and where each pair of leaves joins on. Hold Shift from the second one onward so they all join one selection, then fill once with and deselect. Add an Inner Glow (, Size 6, Opacity 55) and a Drop Shadow (, Offset X 2, Y 3, Blur 5, Opacity 60), and they turn into pearls.
-
Tie a bow
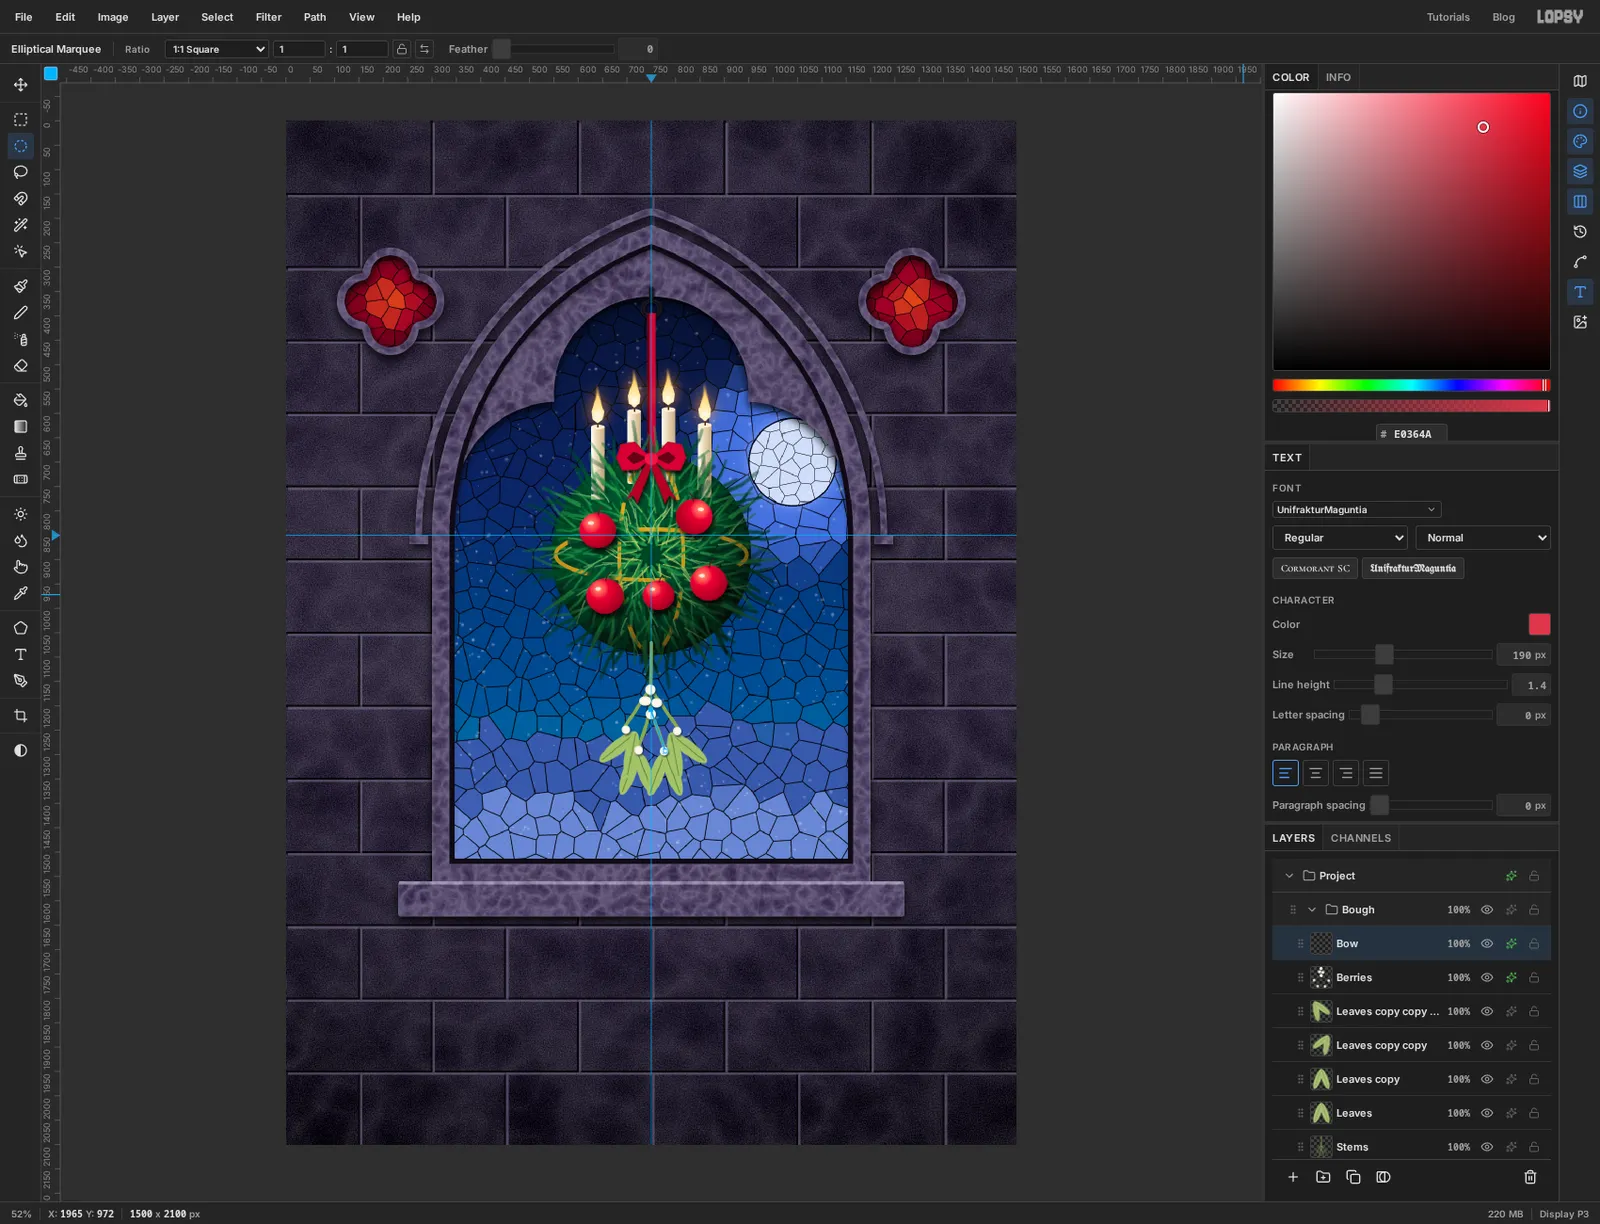
Add a layer called Bow. With the Lasso, draw one loop to the left of the ribbon at the top of the ball, a fat leaf shape about 70 px long, and fill it with . Draw its twin on the right.
Inside each loop draw a smaller diamond and fill it with for the shadowed inside. Draw two tails hanging from the middle, each with a notch cut in its end, in . Finish with a small oval knot of where they meet.
Add an Inner Glow (, Size 7, Opacity 60) and a Drop Shadow (Offset X 2, Y 7, Blur 10, Opacity 75).
-
Scale the whole bough at once
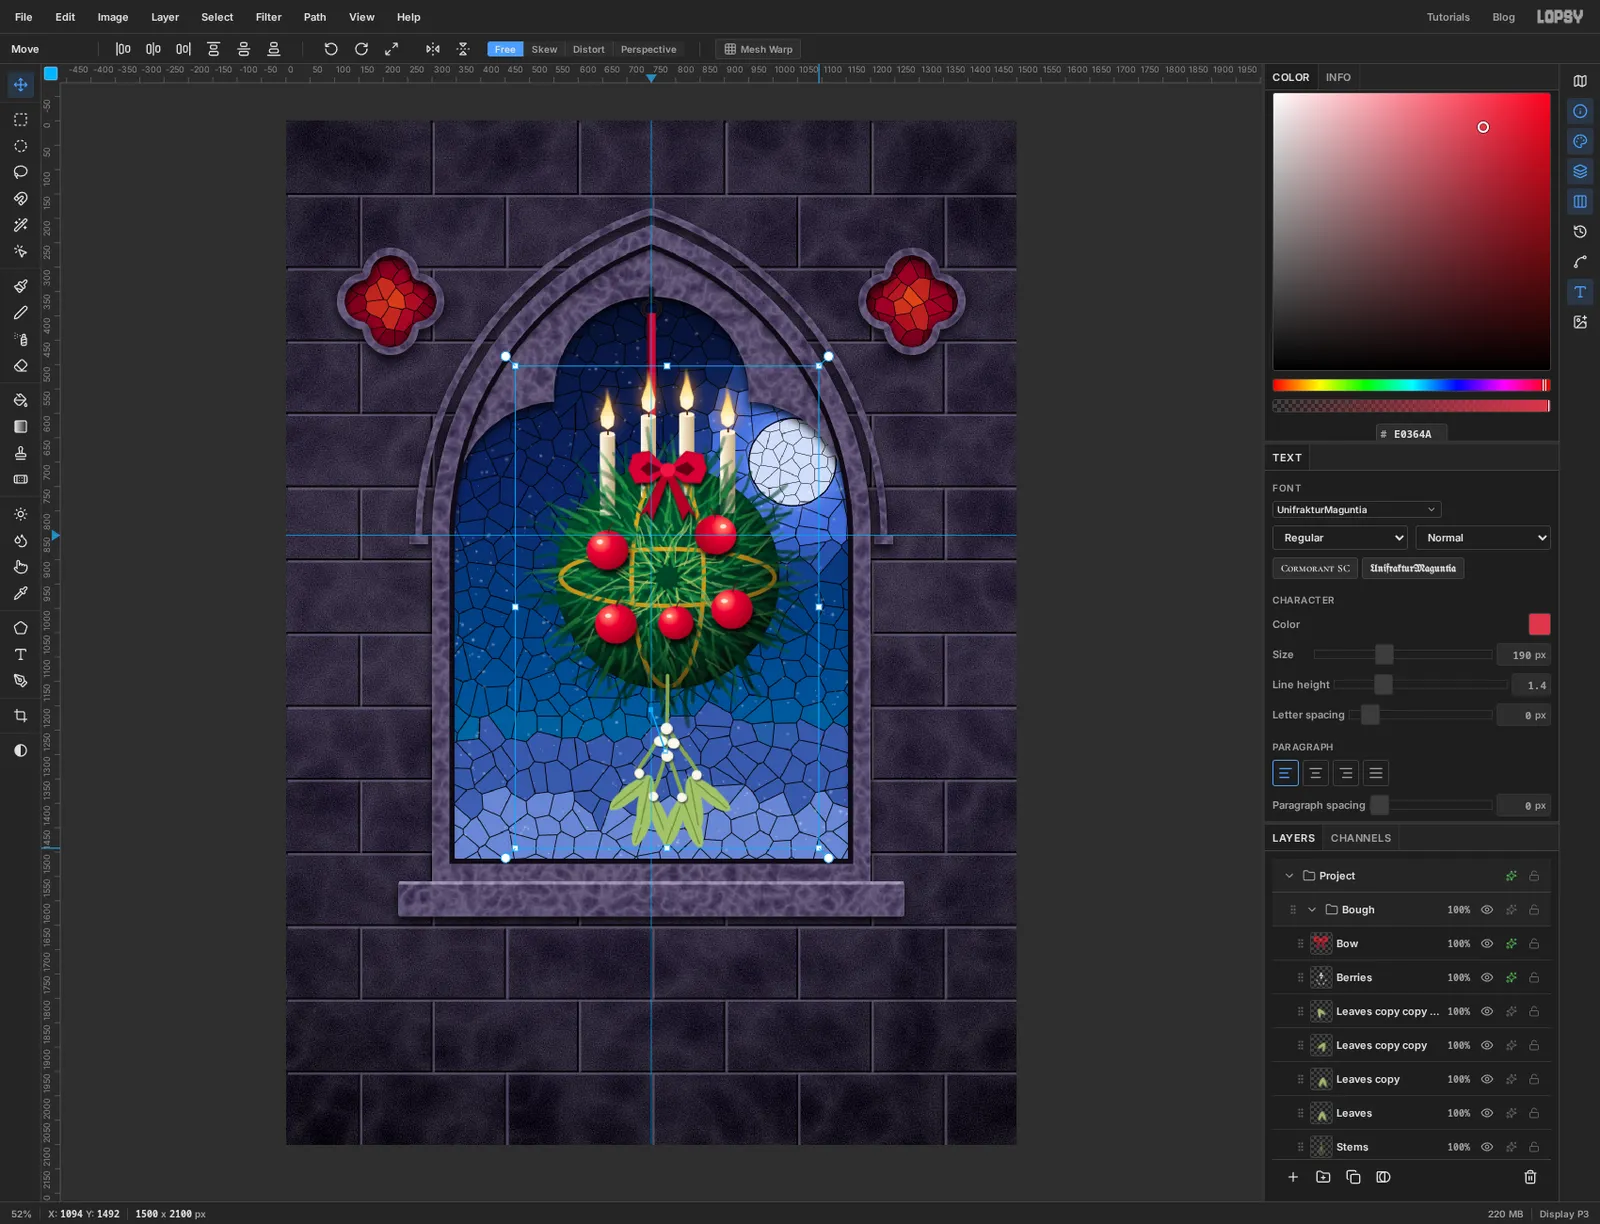
The bough is a little small for its window, and this is where the group pays off. Press Cmd+D to make sure nothing is selected and click the Bough group's row. With the Move tool, one set of handles surrounds everything in the group: candles, apples, mistletoe and all.
Hold Cmd and drag the bottom right handle outward until the box is about an eighth bigger. Press Cmd+D to commit. The nested candle groups and every layer's effects come along.
-
Centre it and nudge it up
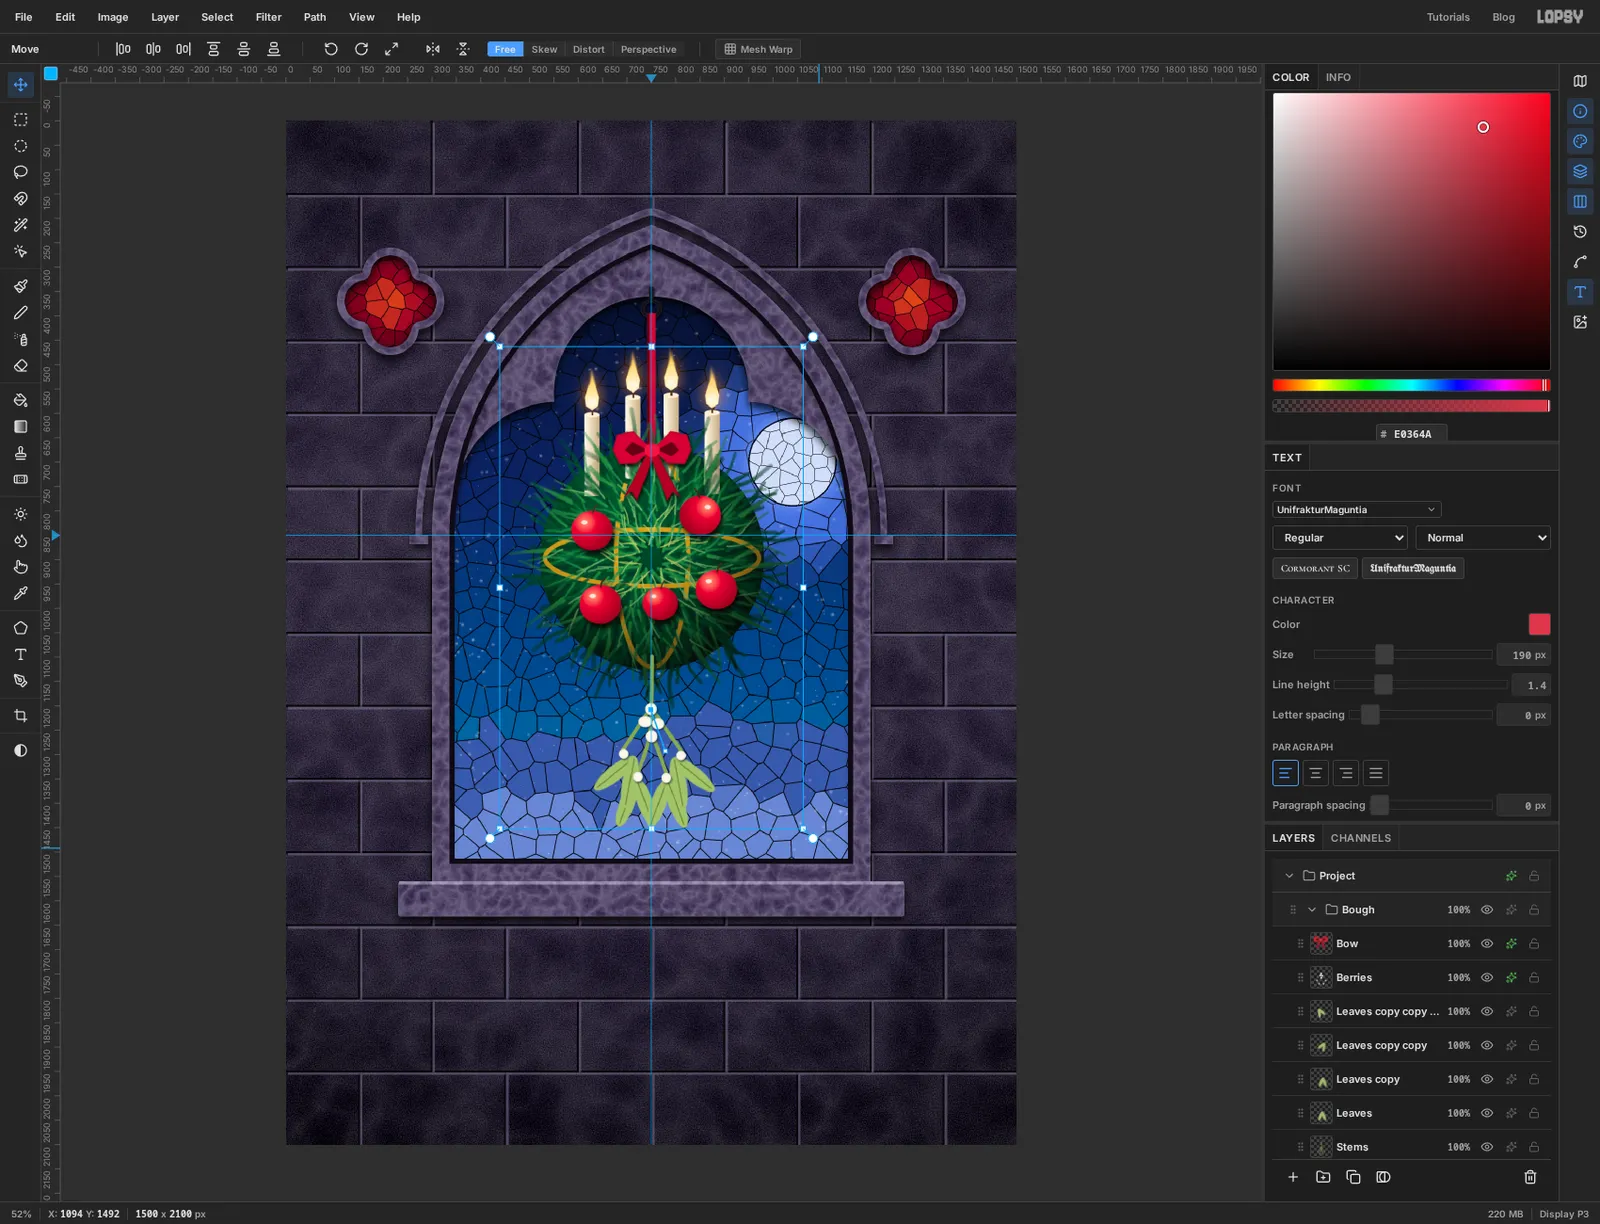
Scaling from a corner pushes the bough off to the right. With the group still active, click Align center horizontally in the Move tool's options bar. Then press Shift+↑ four times, until the ball's top meets the ribbon again and the mistletoe hangs well clear of the bottom of the glass.
-
Move the moon out from behind the candles
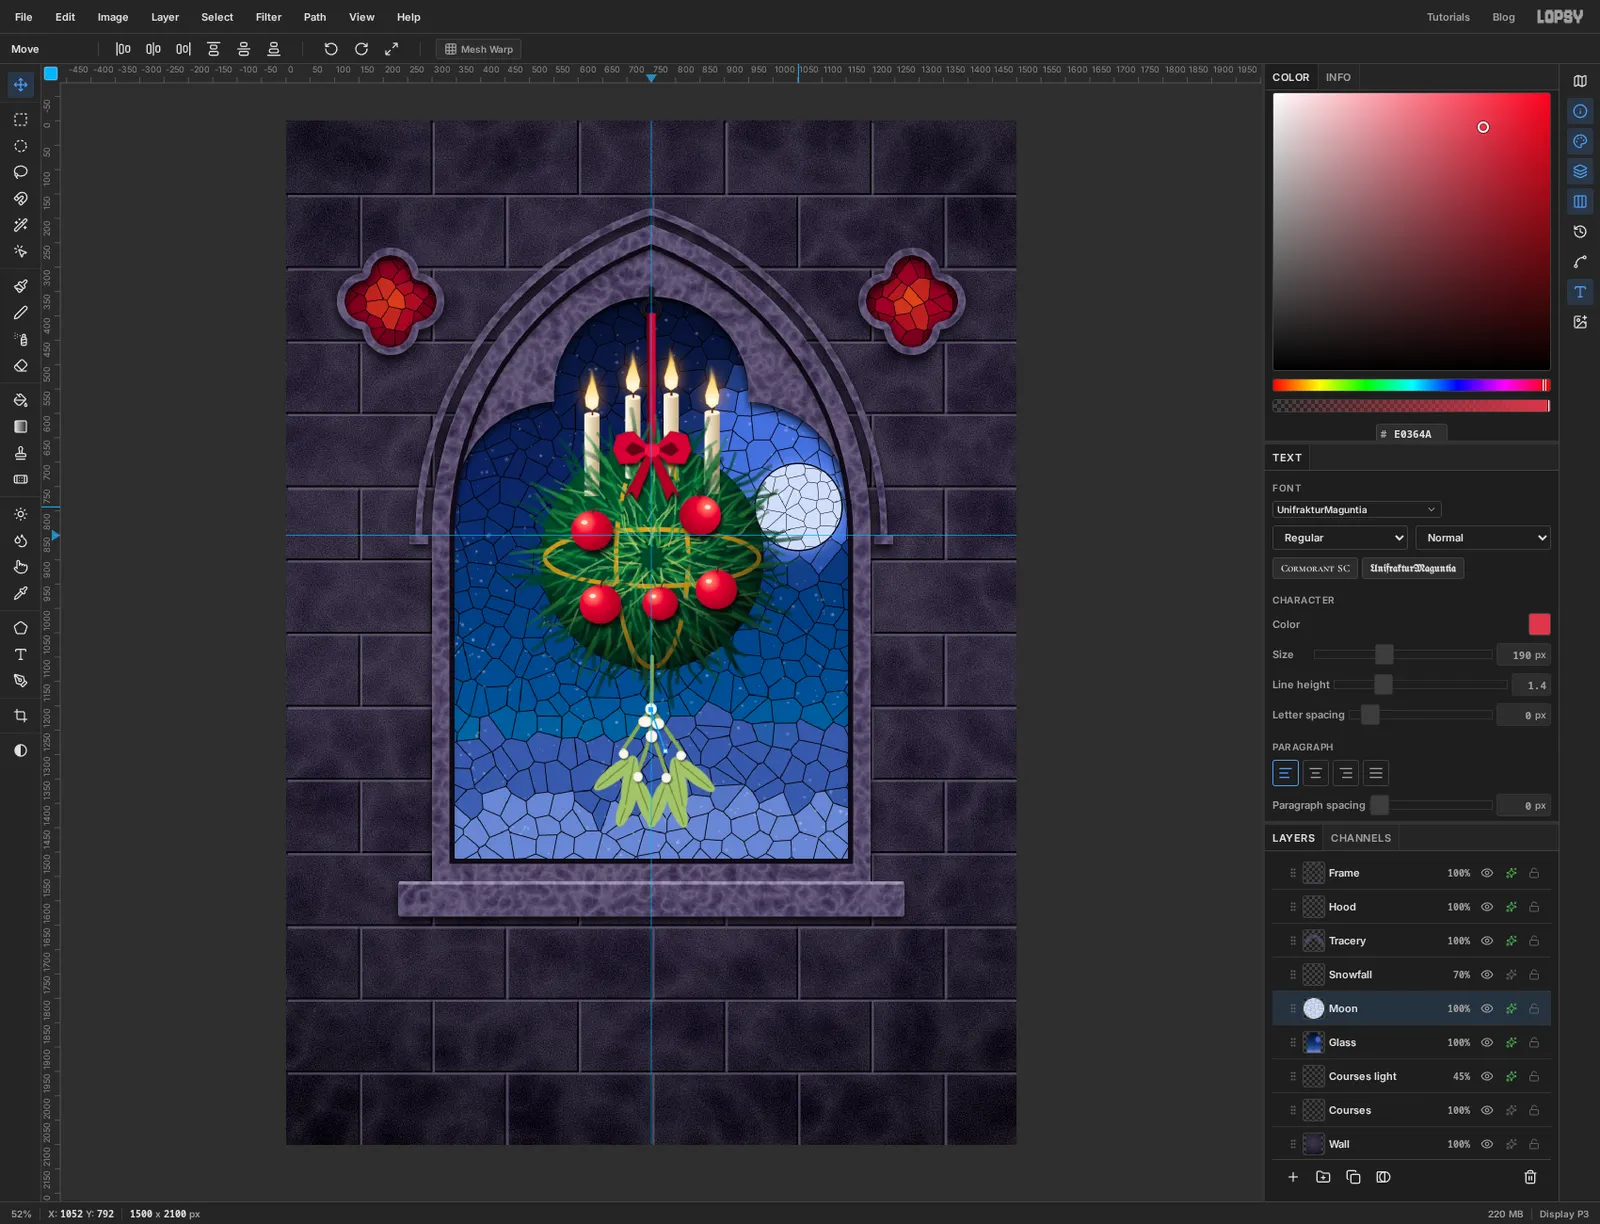
The bigger bough has run into the moon. Click the Moon layer and drag it down with the Move tool until it clears the right-hand candle and tucks in beside the ball. It moves off its halo, and that's fine: the brightest glass now sits above the moon like thin cloud.
-
Draw one holly leaf
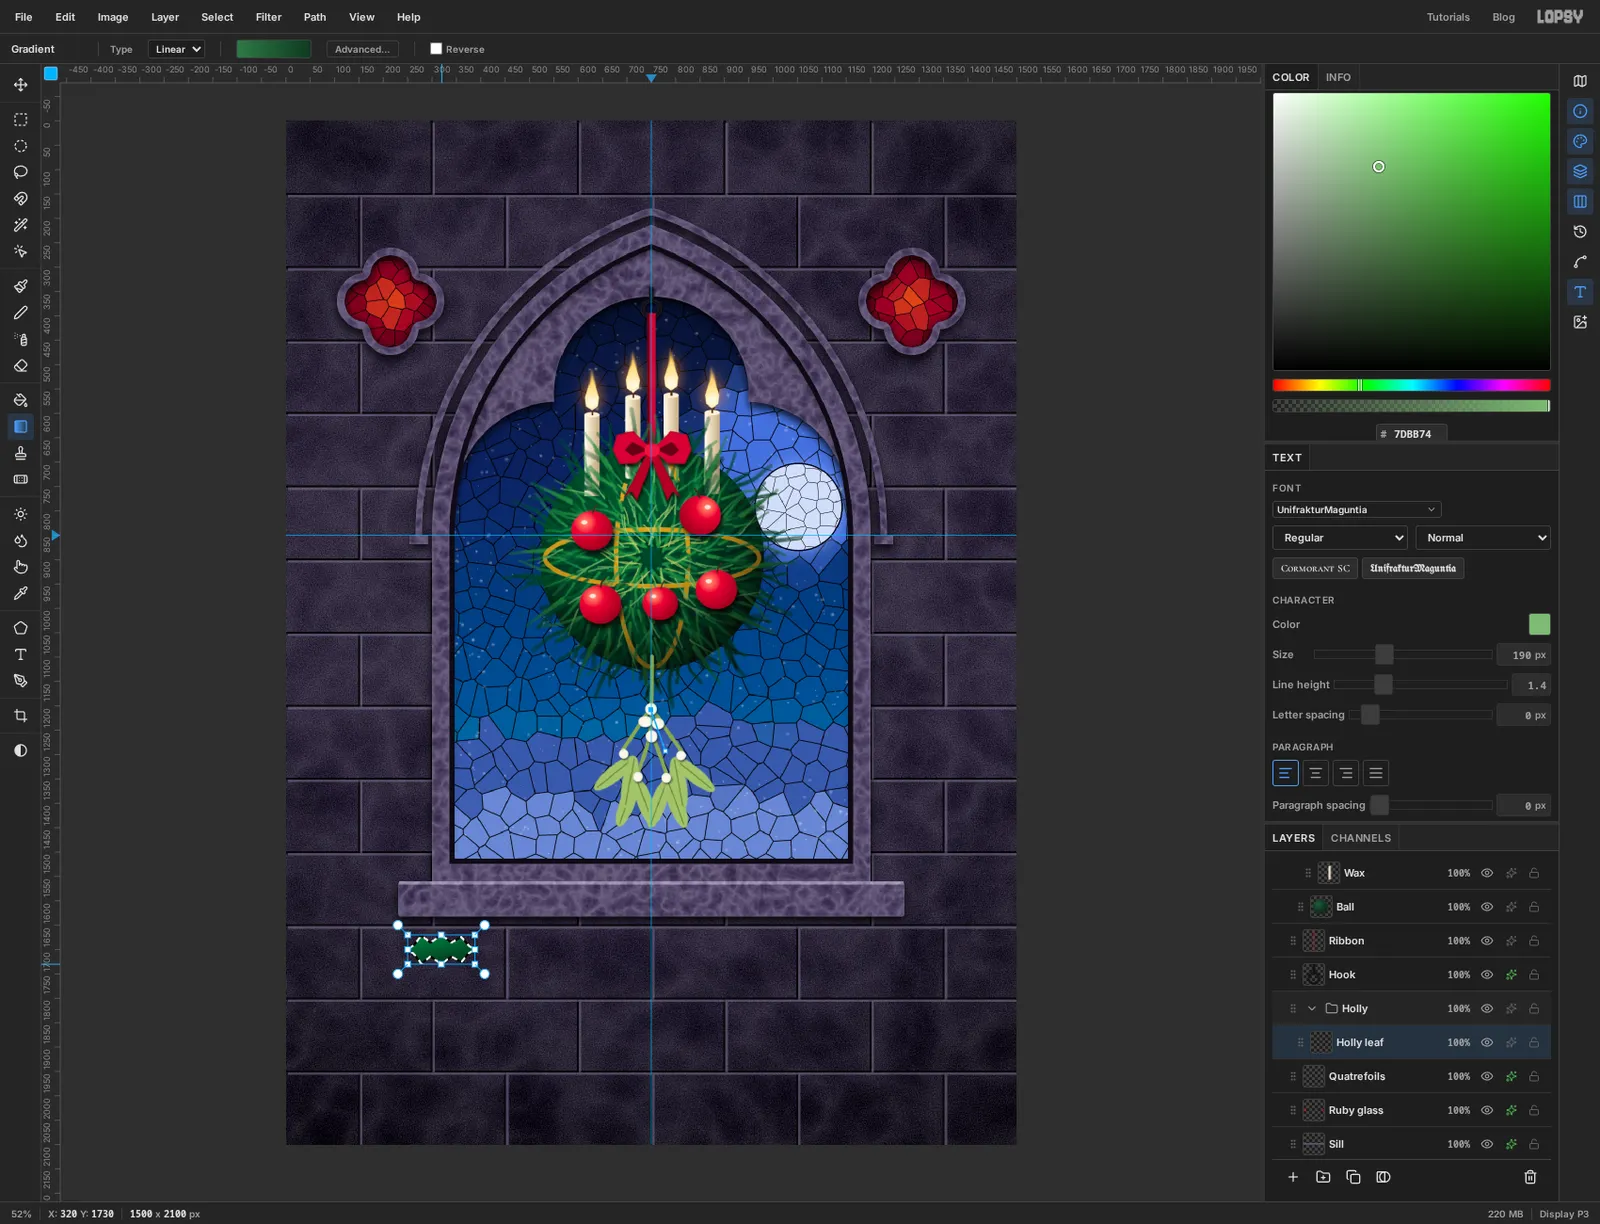
Click Quatrefoils, click New Group and name it Holly. Add a layer inside called Holly leaf.
Draw the leaf somewhere roomy, like the bare wall under the sill. With the Lasso, trace a lying-down leaf about 140 px long: a point at each end and three spikes along each side with shallow scoops between them. Straight, slightly clumsy edges suit holly.
Fill it with a Linear gradient from to , dragged from the top of the leaf to the bottom. Deselect, and rule a midrib with the Pencil at Size 2 in . Add a Drop Shadow (Offset X 2, Y 6, Blur 8, Opacity 80) and an Inner Glow (, Size 5, Opacity 55).
-
Lay leaves along the sill
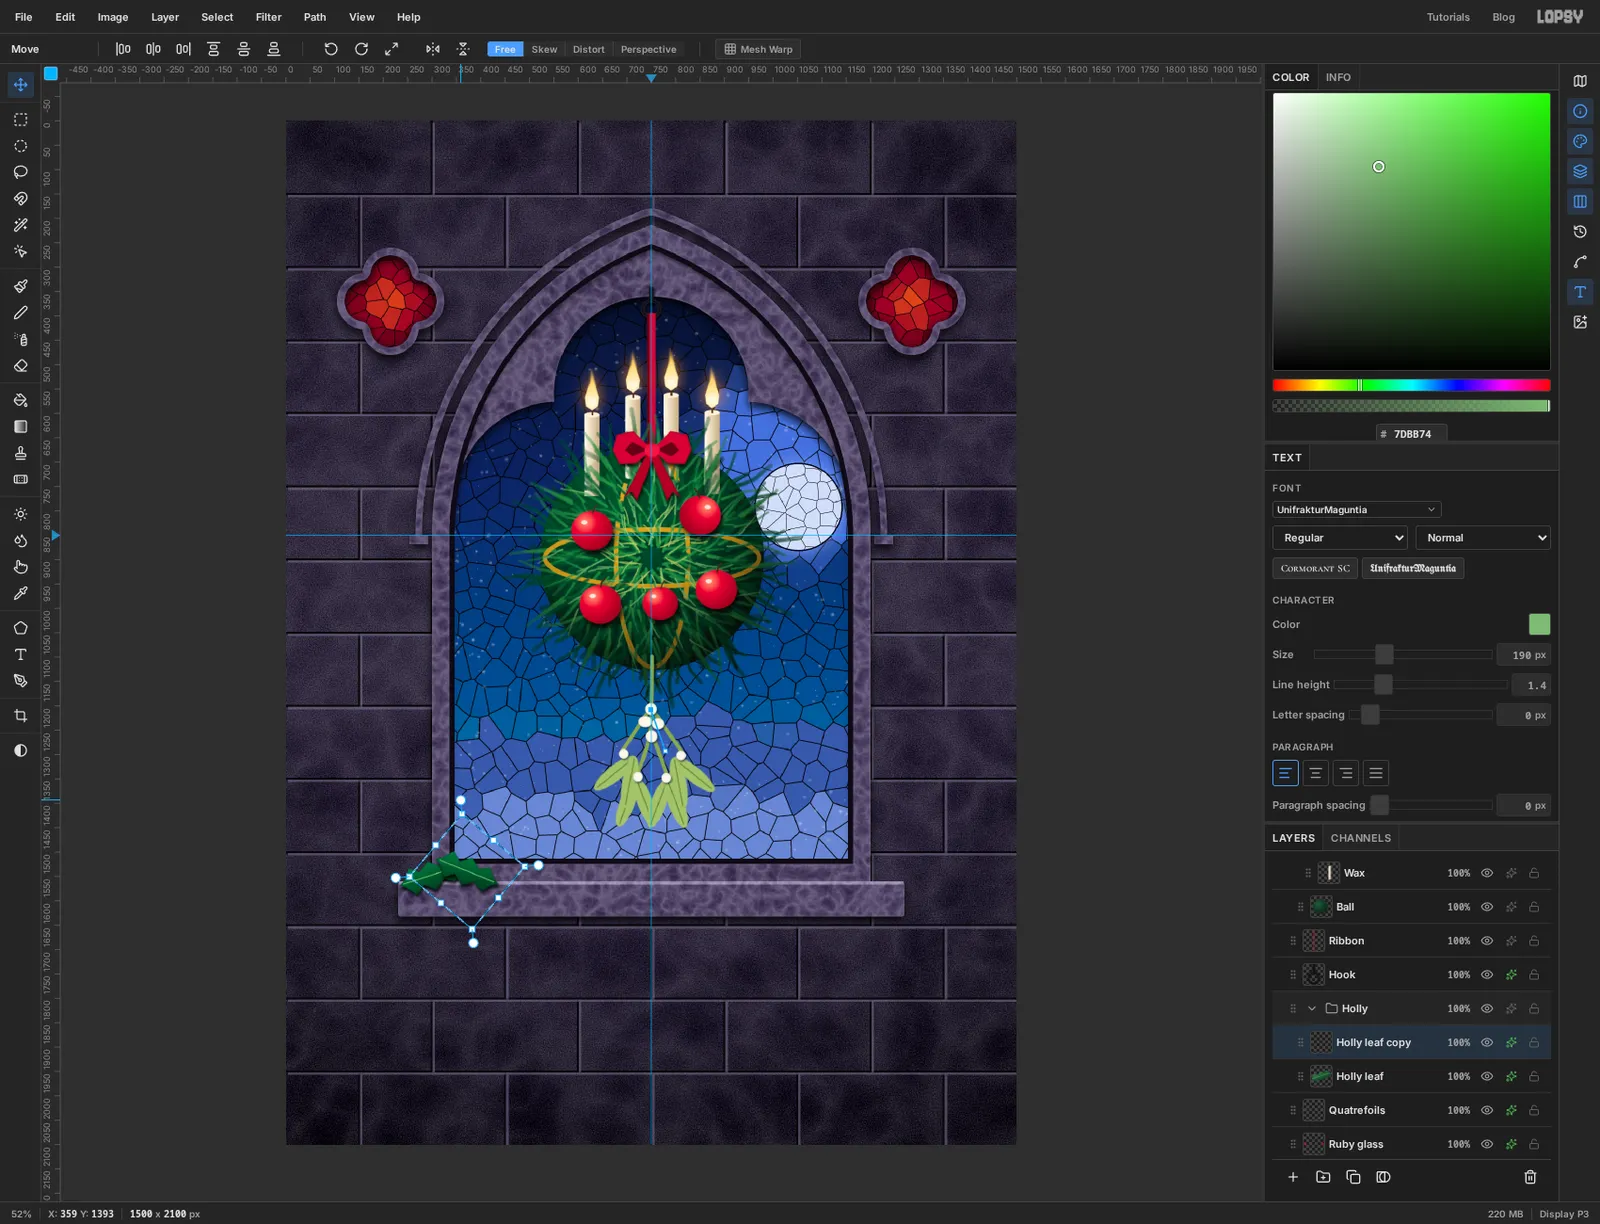
Drag the leaf up onto the left end of the sill with the Move tool. Draw a marquee round it that's generous on every side, turn it a little anticlockwise and press Cmd+D.
Duplicate the layer, drag the copy about 70 px to the right, marquee it and turn it the other way so it leans against the first. Carry on like that, one leaf at a time, alternating the lean and nudging each one a few pixels up or down, until the seventh leaf reaches the vertical guide.
-
Add holly berries
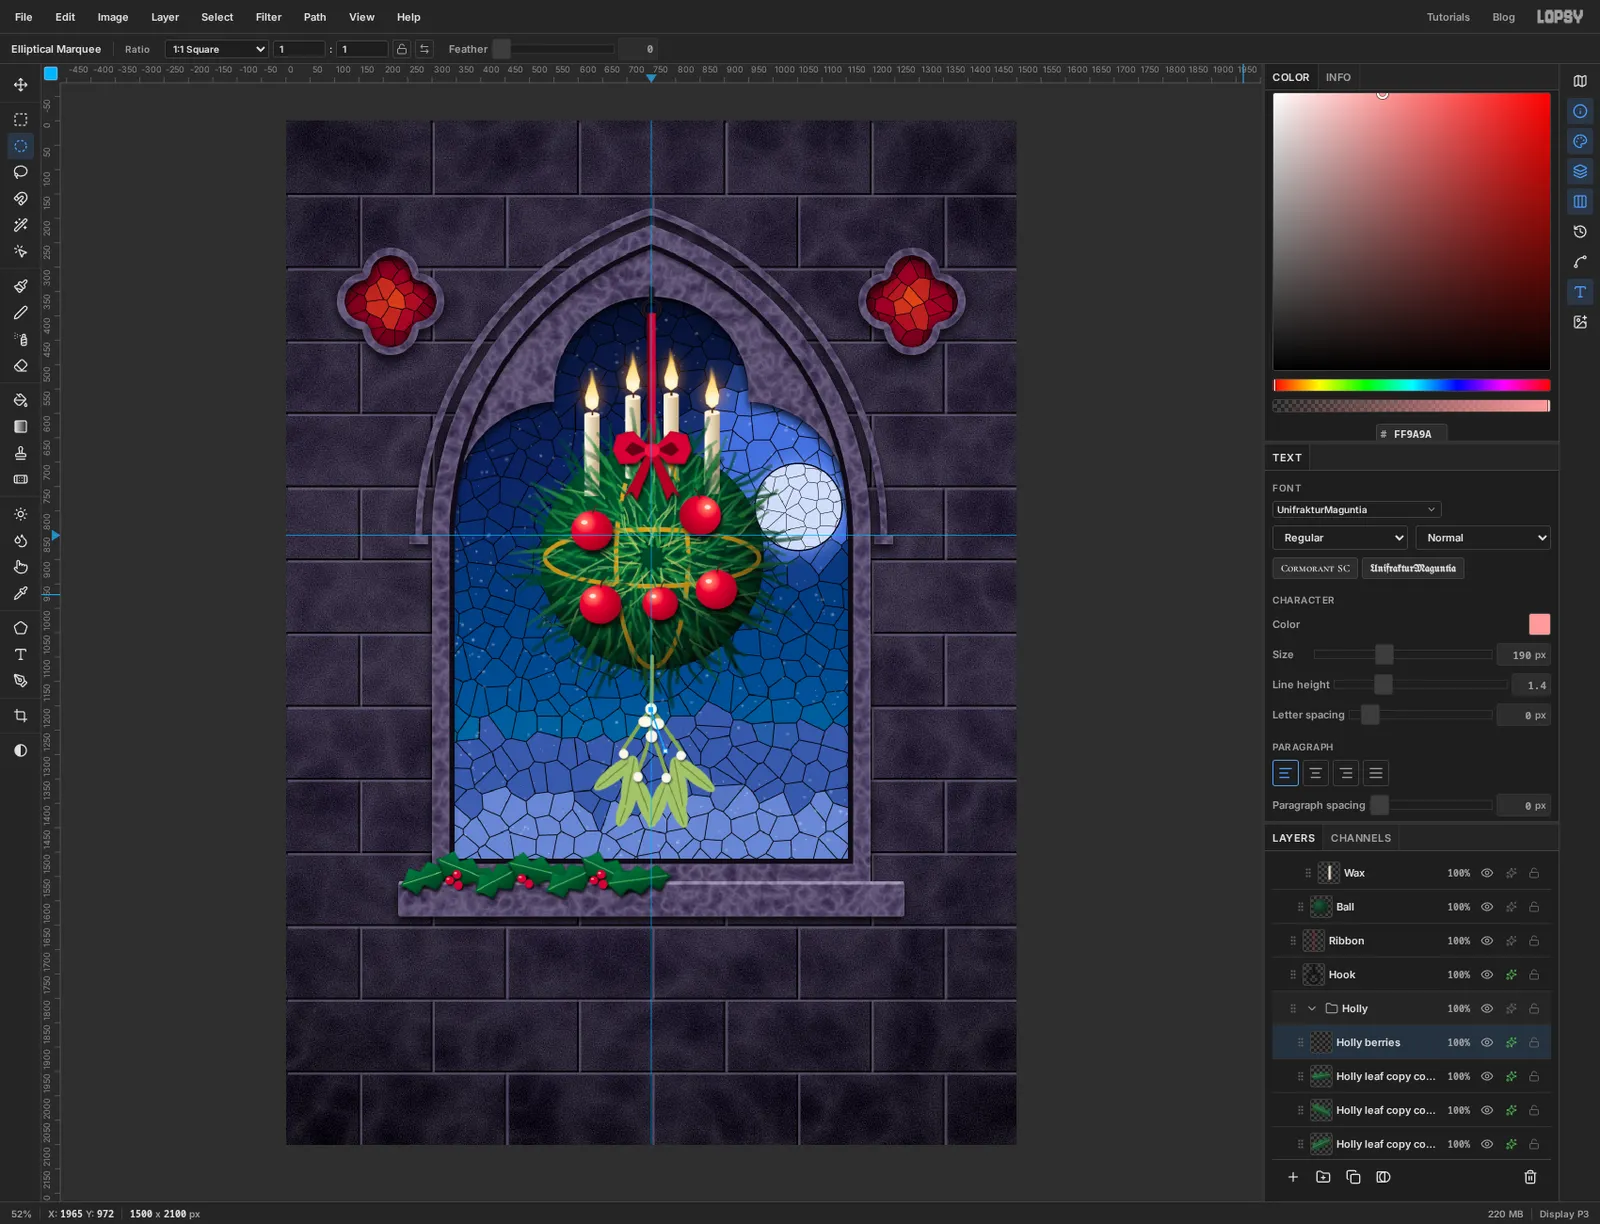
Add a layer called Holly berries inside the group. Put three clusters of two or three red circles, about 18 px across, where leaves overlap. As with the mistletoe, Shift-drag them into one selection and fill once, with . Give each berry a speck of at its upper left. Add an Inner Glow (, Size 5, Opacity 60) and a Drop Shadow (Offset X 2, Y 3, Blur 4, Opacity 75).
-
Mirror the garland
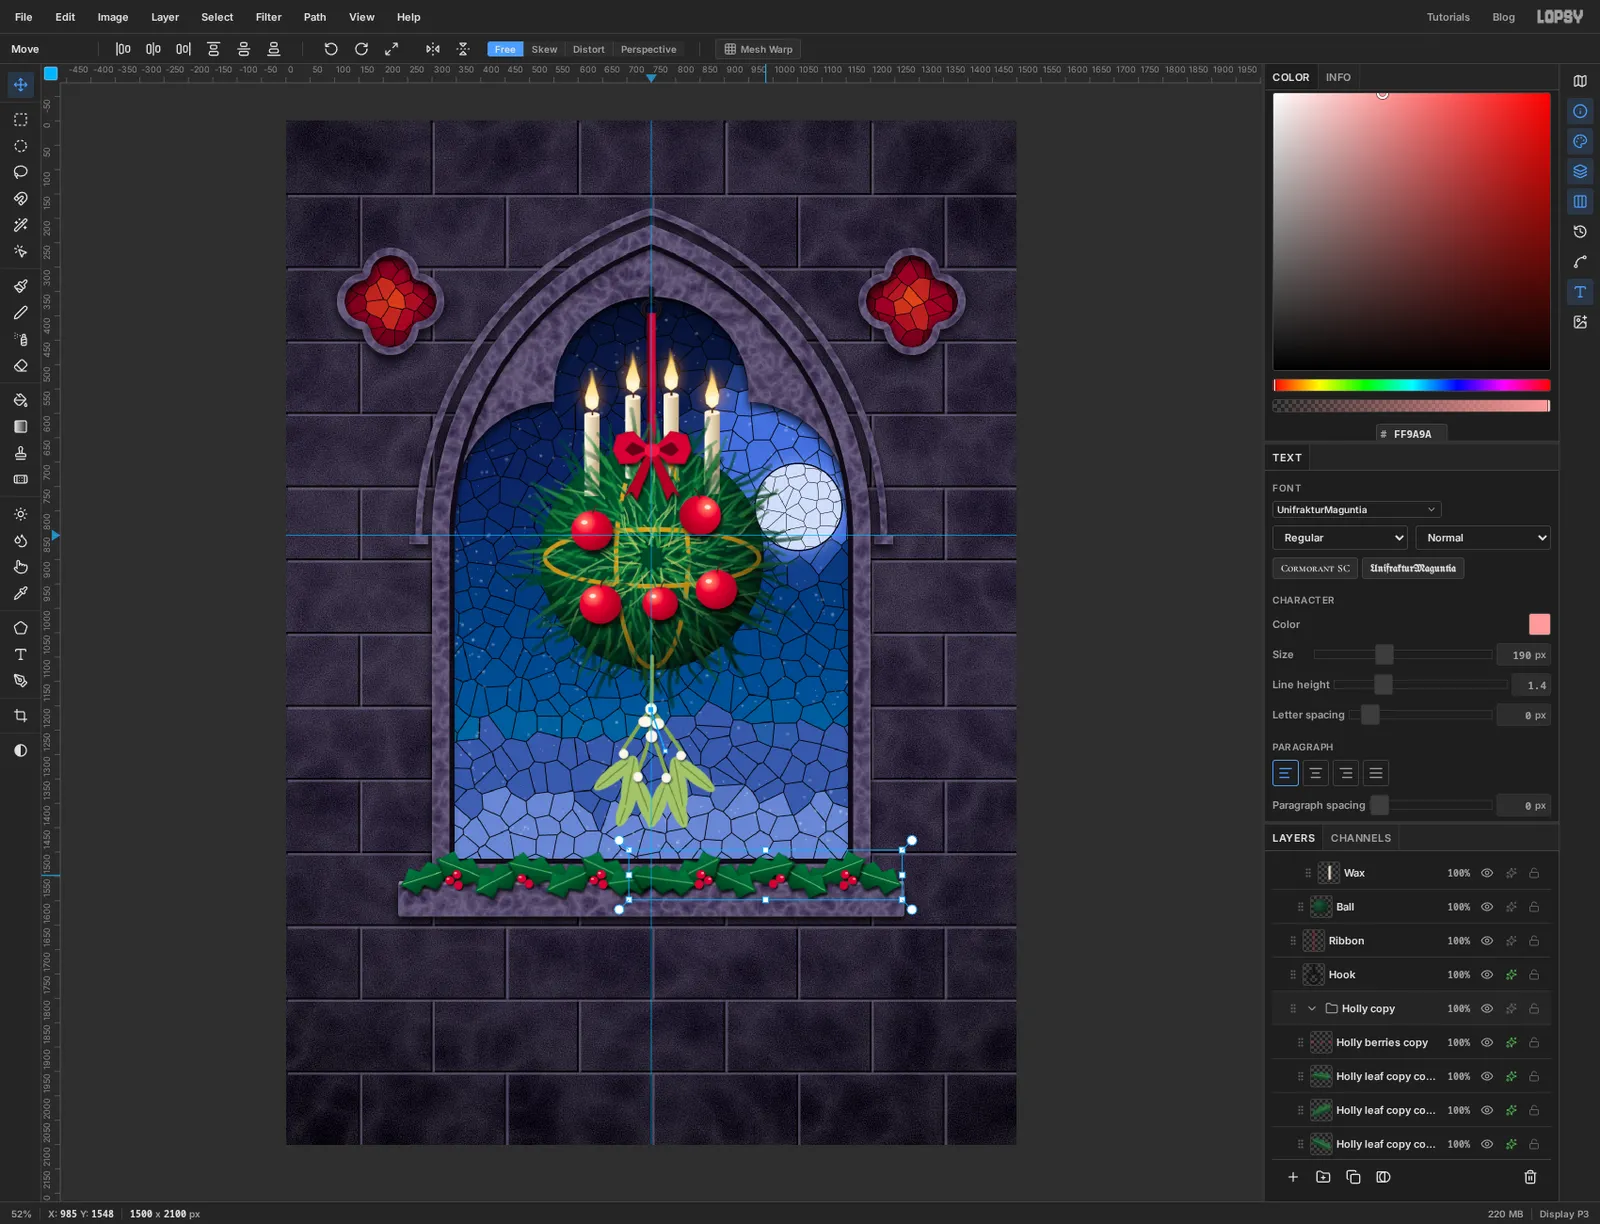
Click the Holly group's row and choose Layer → Duplicate Layer, then Image → Flip Horizontal. The copy flips in place, on top of the original. With the Move tool, drag it to the right until its last leaf reaches the right end of the sill and the two halves overlap at the guide.
-
Warm the wall
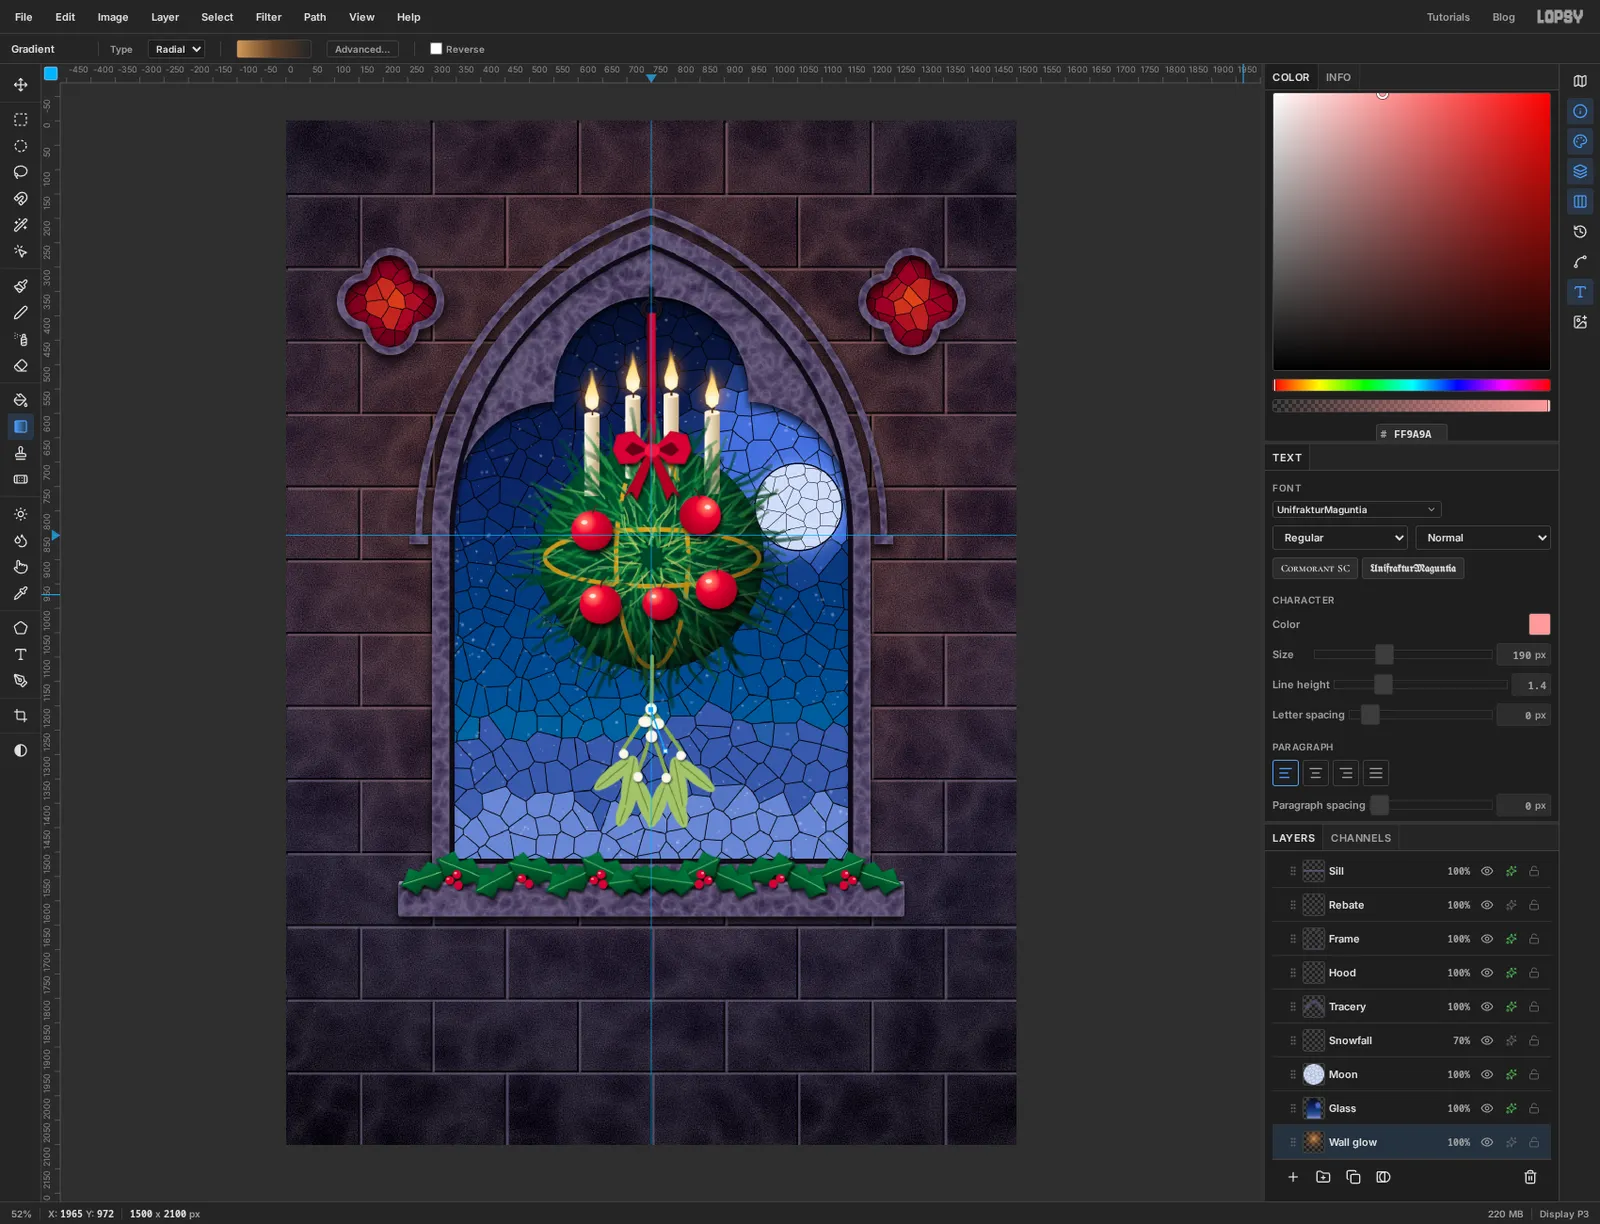
Click Courses light and add a layer called Wall glow, so it sits on the masonry and under the window. Make a Radial gradient of at 80% opacity, at 32% opacity in the middle, and at 0%. Drag from the middle of the window, near the flames, down to a little below the sill. Set the layer's blend mode to Overlay. The stone nearest the candles picks up their colour and the corners stay cold.
-
Add the candlelight and a shadow for the type
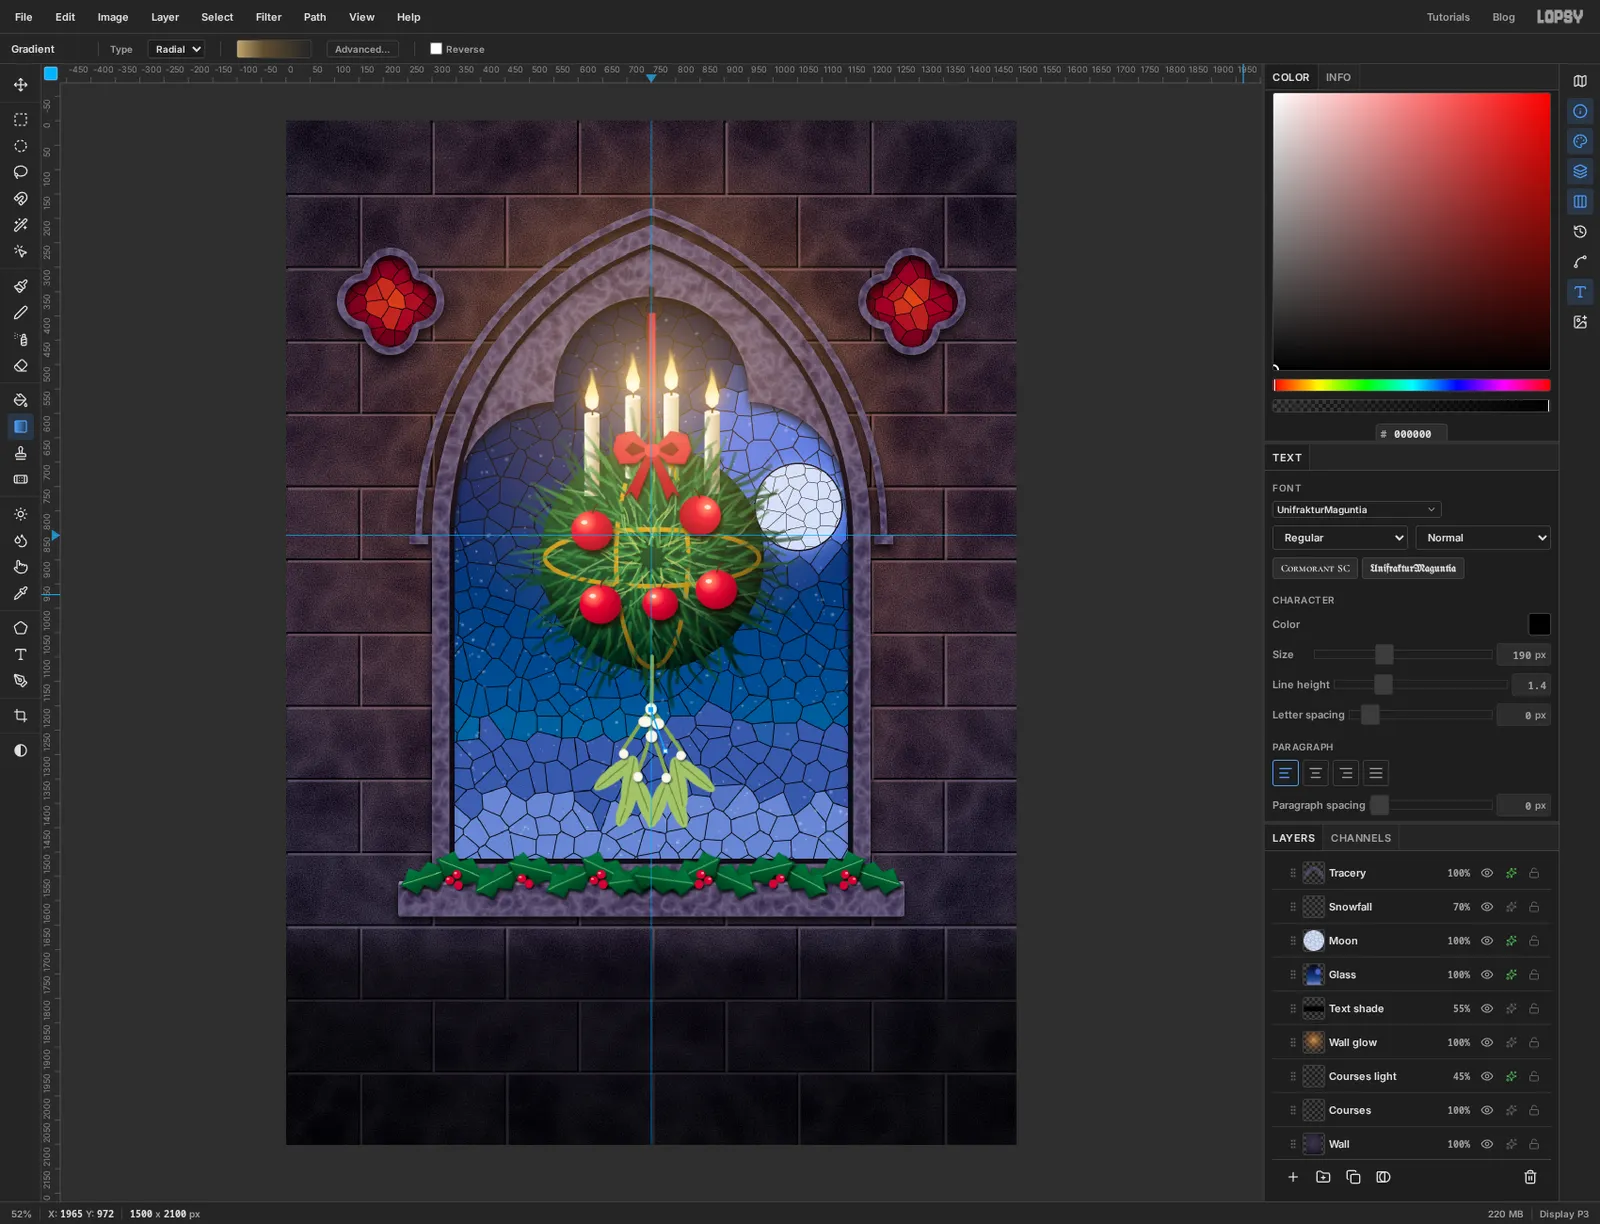
Add another layer above Wall glow called Text shade. Drag a marquee across the whole width of the canvas from just below the sill to the bottom edge. Choose Select → Feather… with 60, fill with black, deselect and lower the layer to 55%. Gold letters need a quiet, dark ground, and this also fades the mortar lines that would run behind them.
Now click the Project group at the top of the Layers panel and add a layer. With the root group active, a new layer lands above everything else. Call it Candlelight. Make a Radial gradient of at 72% opacity, at 28% about a third of the way along, and at 0%. Drag from between the two middle flames down to the bottom of the ball, and set the blend mode to Screen.
-
Set the greeting
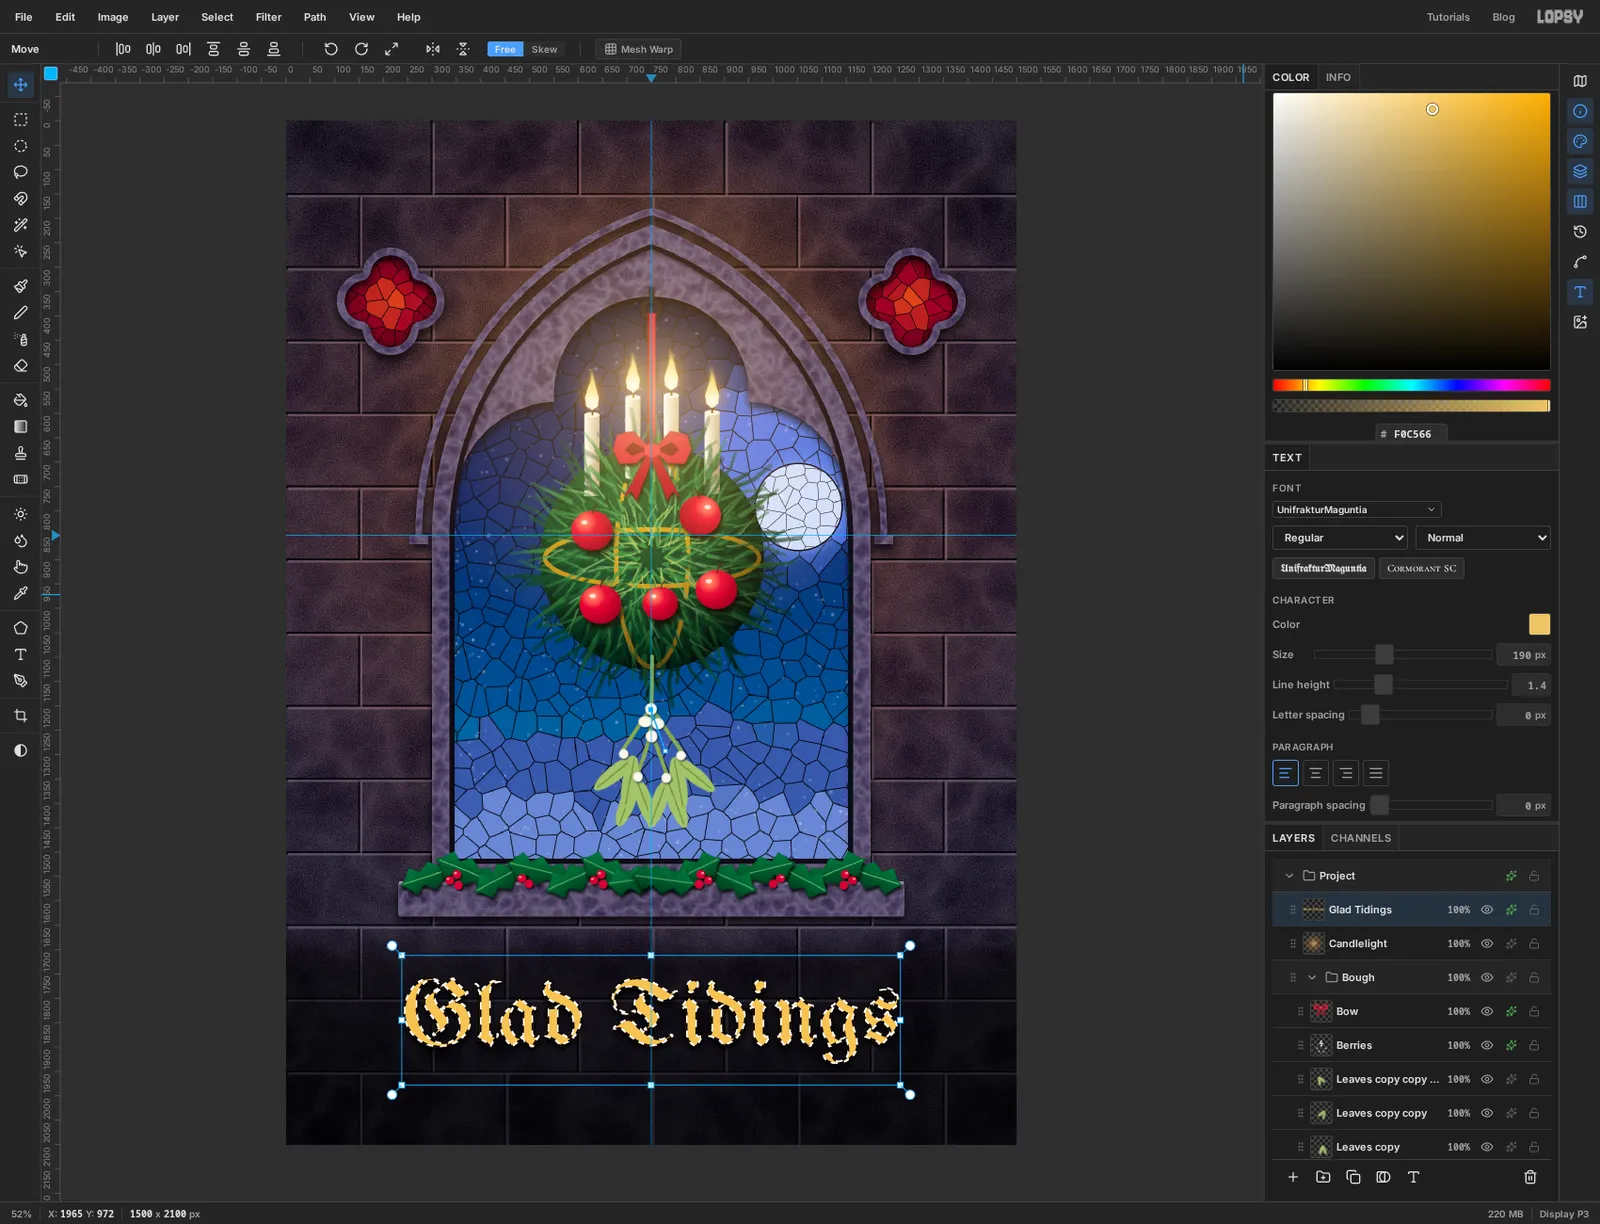
Click Project again so the text lands at the top of the stack. Take the Text tool, set Size to 190, choose UnifrakturMaguntia from the font list and set the foreground to . Click on the left of the wall under the sill, type
Glad Tidingsand press Tab.Switch to the Move tool and click Align center horizontally. In the layer's effects add a Stroke (, Width 3) and a Drop Shadow (Offset Y 8, Blur 14, Opacity 90).
Then hold Cmd and click the text layer's thumbnail. The letters load as a selection.
-
Run gold foil through the letters
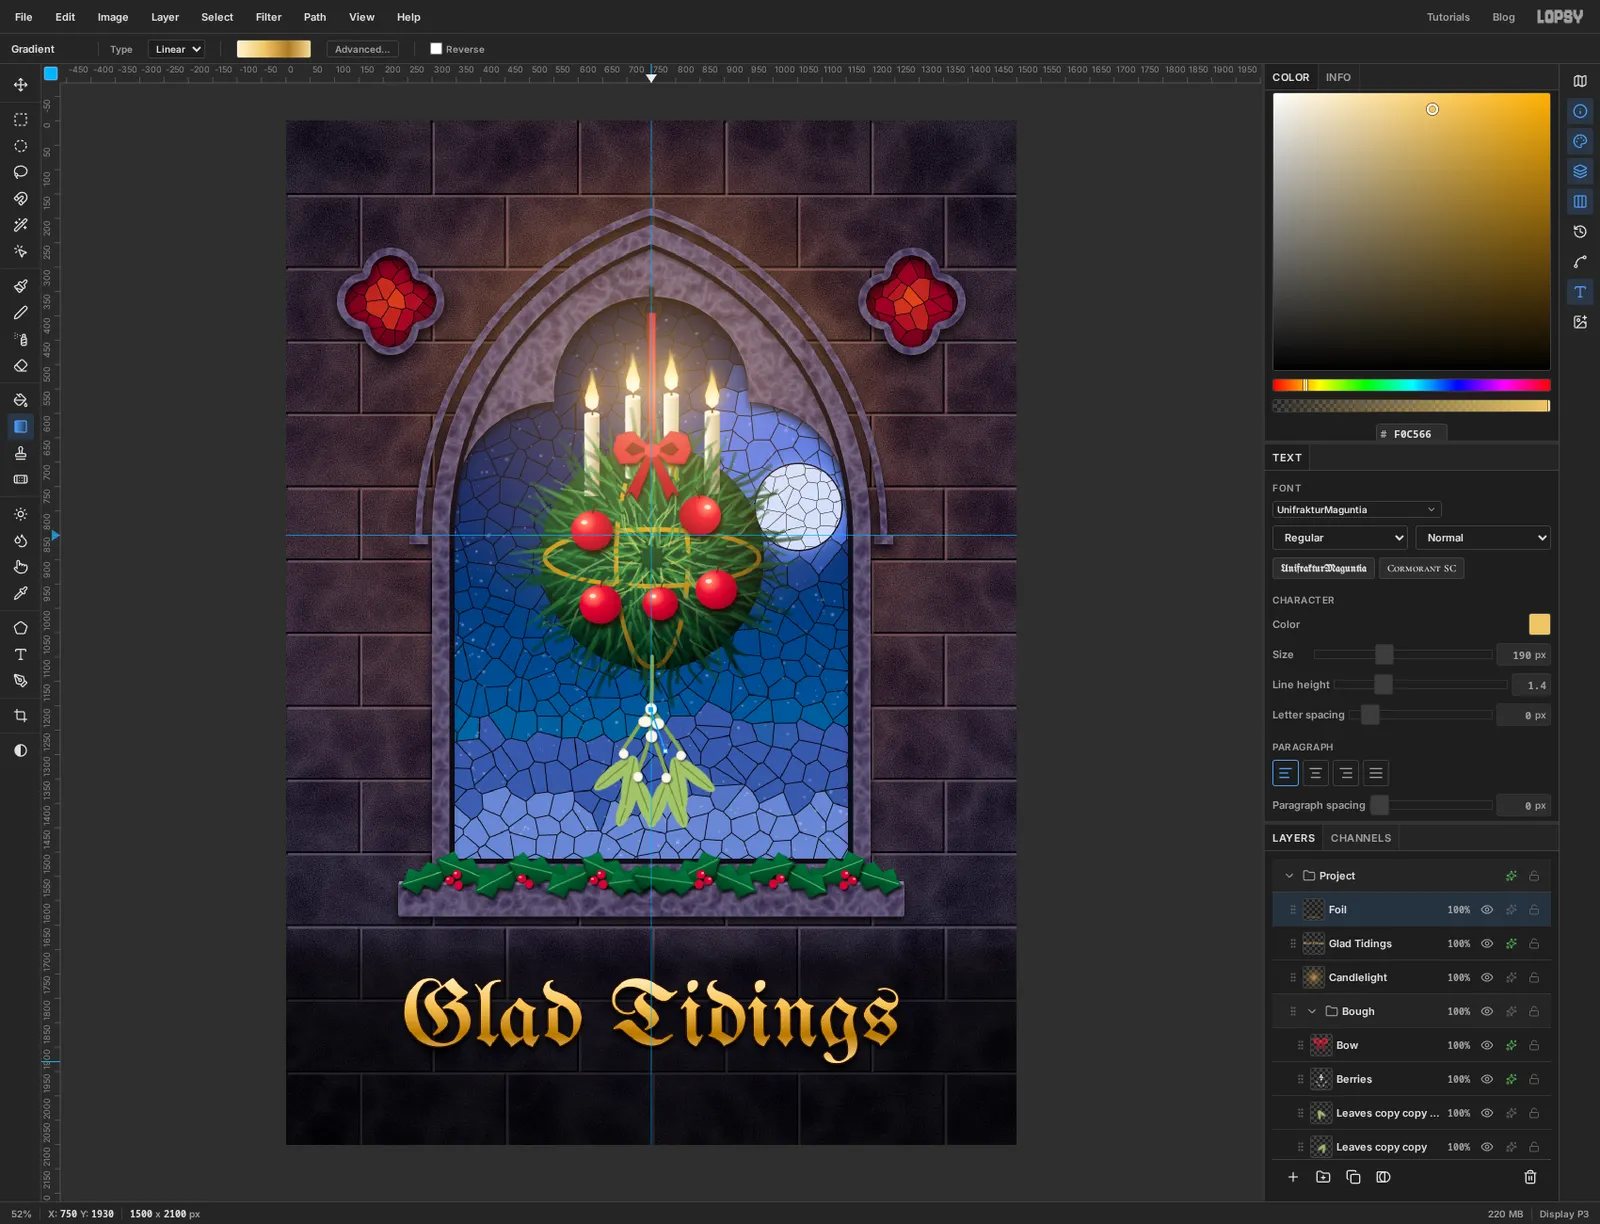
Add a layer called Foil. Make a Linear gradient of , at 38%, at 70% and . Drag from the top of the capital G to the bottom of the letters, then press Cmd+D. The text underneath stays editable and keeps supplying the outline and shadow.
-
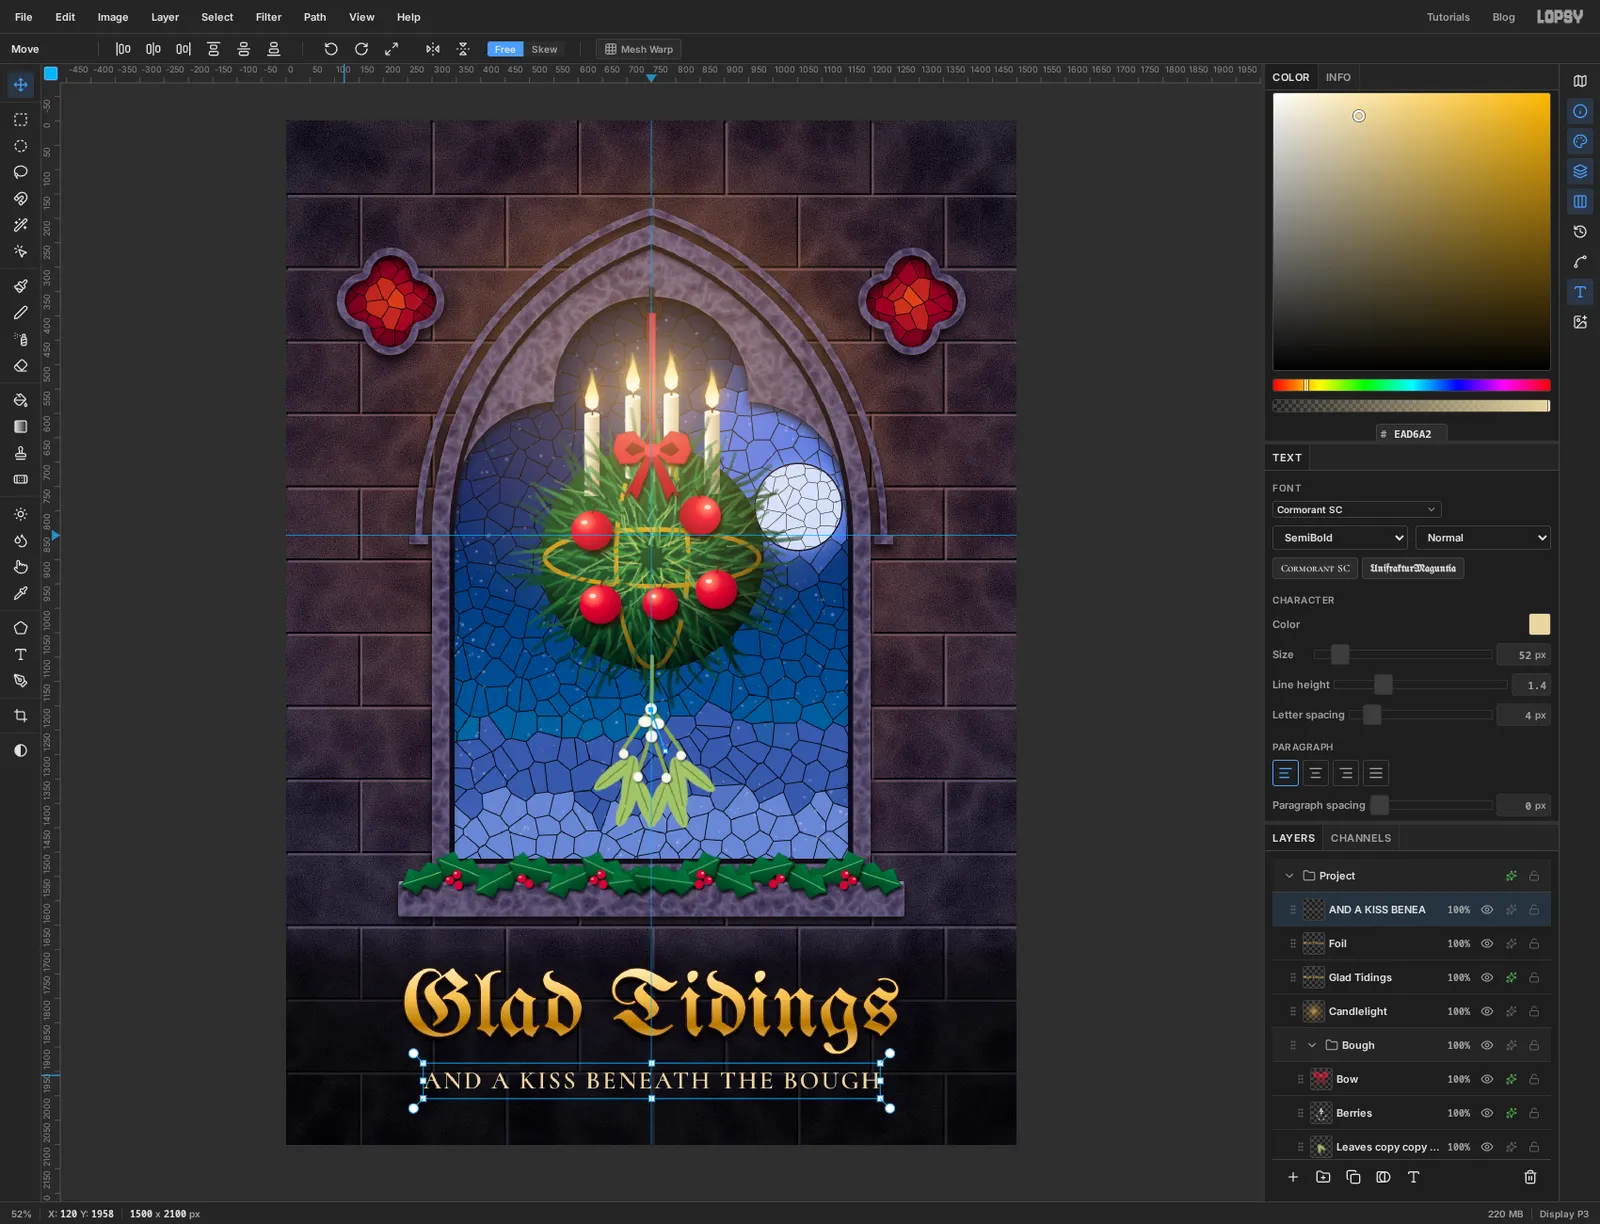
Add the second line
Click Project first, so the new line lands on top. It matters for another reason too: while a text layer is active, changing the font or size restyles that layer.
Set the foreground to . With the Text tool, set Size to 52, choose Cormorant SC and set the weight to SemiBold. Click below the greeting, type
AND A KISS BENEATH THE BOUGHand press Tab. Open the Text panel from the icons at the far right and set Letter spacing to 4. Then switch to the Move tool and click Align center horizontally.Now settle the spacing. Click the title, Shift-click Foil so both are selected, and tap Shift+↑ or Shift+↓ until the greeting sits comfortably below the sill without crowding it. Then nudge the second line until the tail of the g hangs clear of its capitals and there's about 100 px of wall left under it.
-
Finish the line with gold diamonds
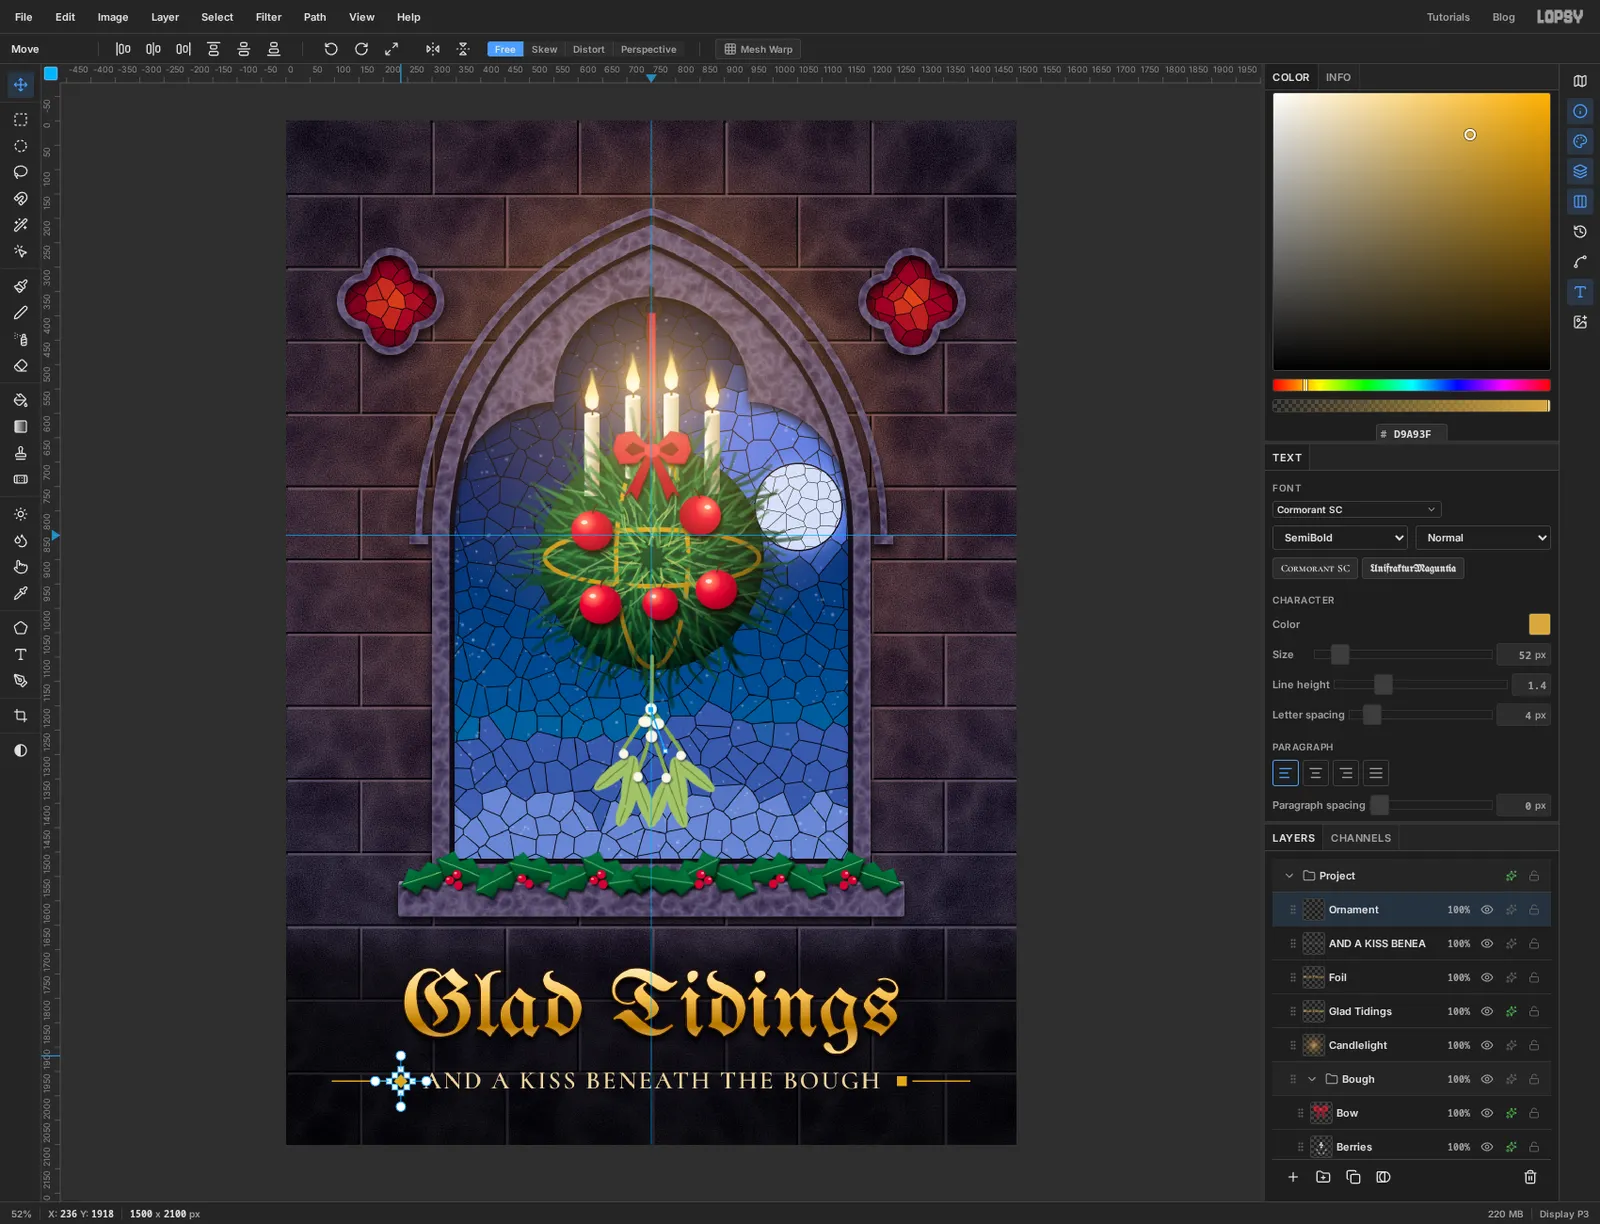
Add a layer called Ornament. With the Shape tool set to Polygon, Sides 4, Corner Radius 0, a fill of and no stroke, drag out a square about 20 px across just beyond each end of the second line, level with the middle of the capitals. A shape grows from its centre, so that's a drag of only 10 px.
Take the Pencil at Size 3 in the same gold. Click a little outside the left square and Shift-click about 115 px further left for a rule. Do the same on the right, keeping the two rules the same length.
Marquee each square in turn and turn it 45° with the Move tool, holding Cmd so the rotation snaps in 15° steps, and press Cmd+D after each.
-
Close in the corners
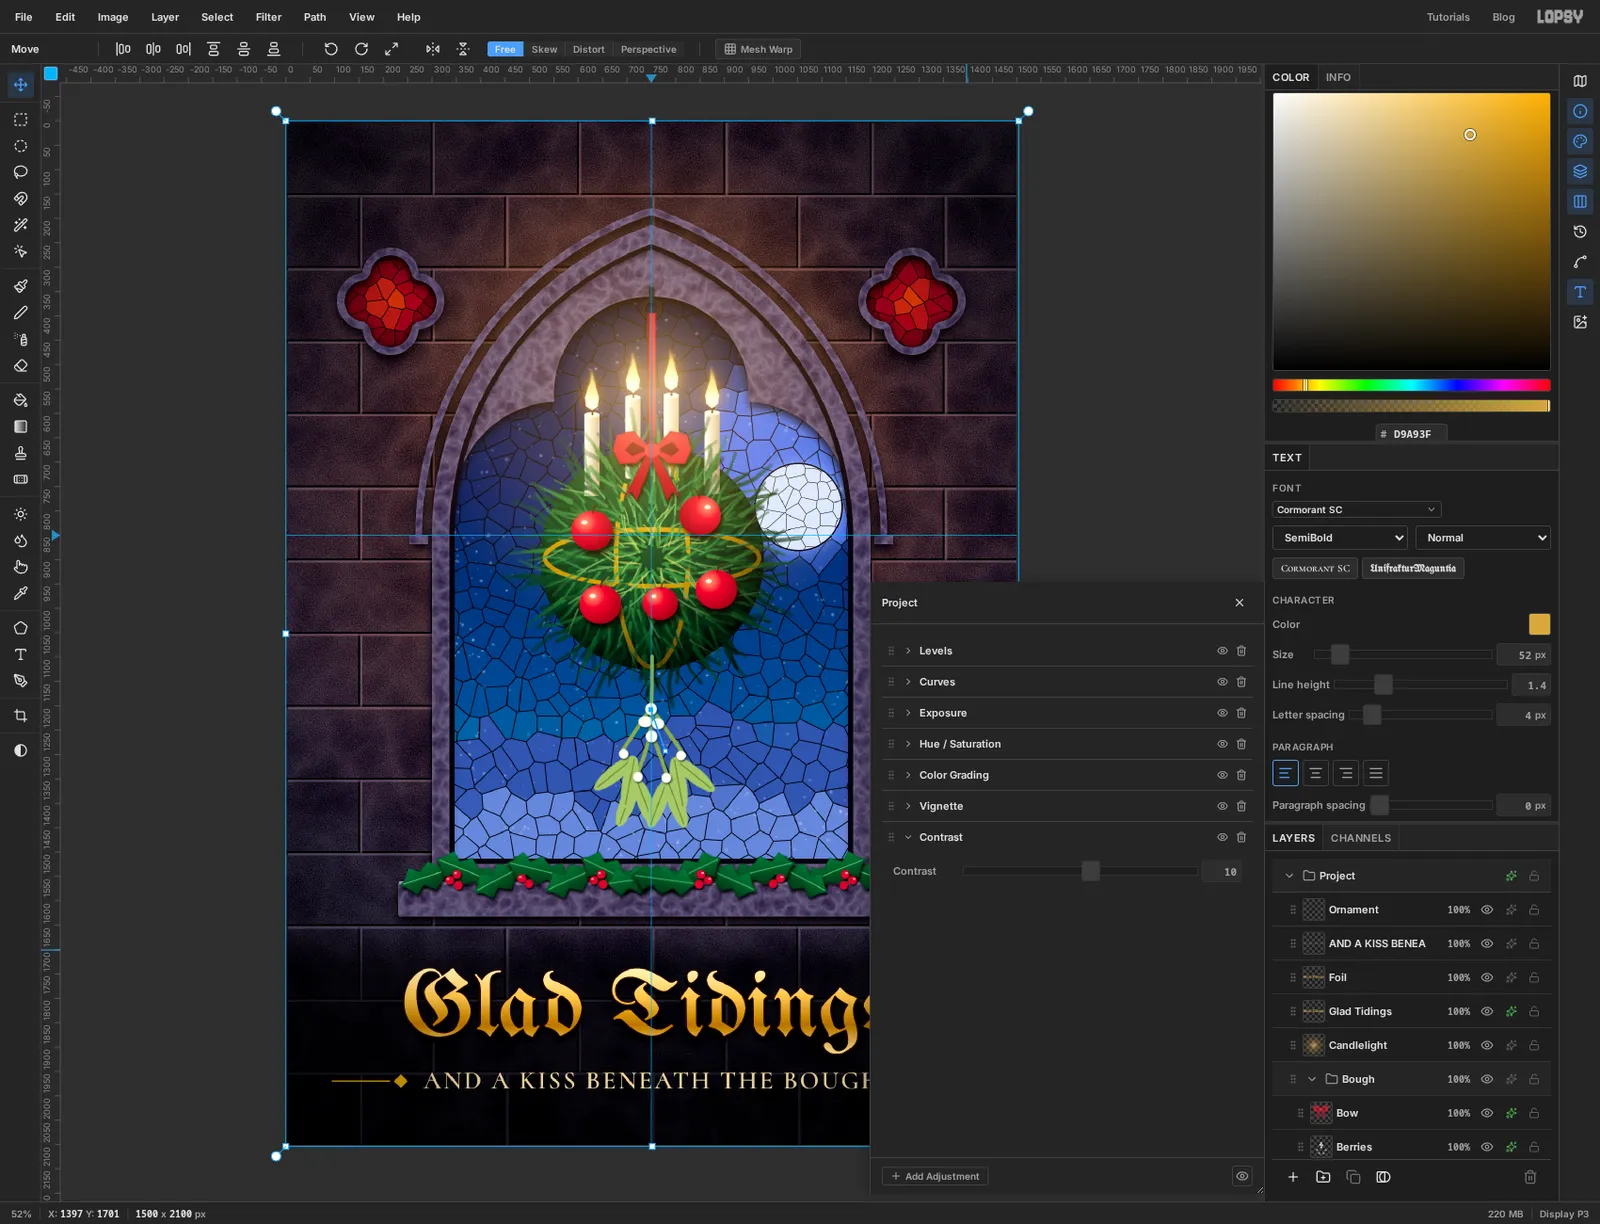
Choose Layer → Adjustment Layer…. Lopsy keeps adjustments on a group, and this opens the drawer for the whole document, with a short note explaining that the first time. Dismiss the note, click Add Adjustment, choose Vignette and set it to 55. Add Contrast and set it to 10. Close the drawer.
The vignette sinks the corners into the dark and leaves the window lit.
-
Export the card
Look the whole card over at View → Fit to Screen. If the snow looks thin now that the bough is in front of it, put Snowfall back up to 100%, as the finished card has it. The two guides are still showing, but guides never export, so go straight to File → Quick Export PNG.
To make the card your own, start with the words. The second line is live text. To change the greeting, delete Foil, edit the title, then repeat the Cmd-click and the gradient. For a different mood, change the four stops of the night sky. A deep green and gold window with the same bough reads as a much older, warmer card.