Design a Gothic Restaurant Menu with a Stained-Glass Window
Make a gothic chophouse menu in Lopsy with a Voronoi stained-glass window, a raven silhouette, candlelit stone, blackletter type and a wax seal.
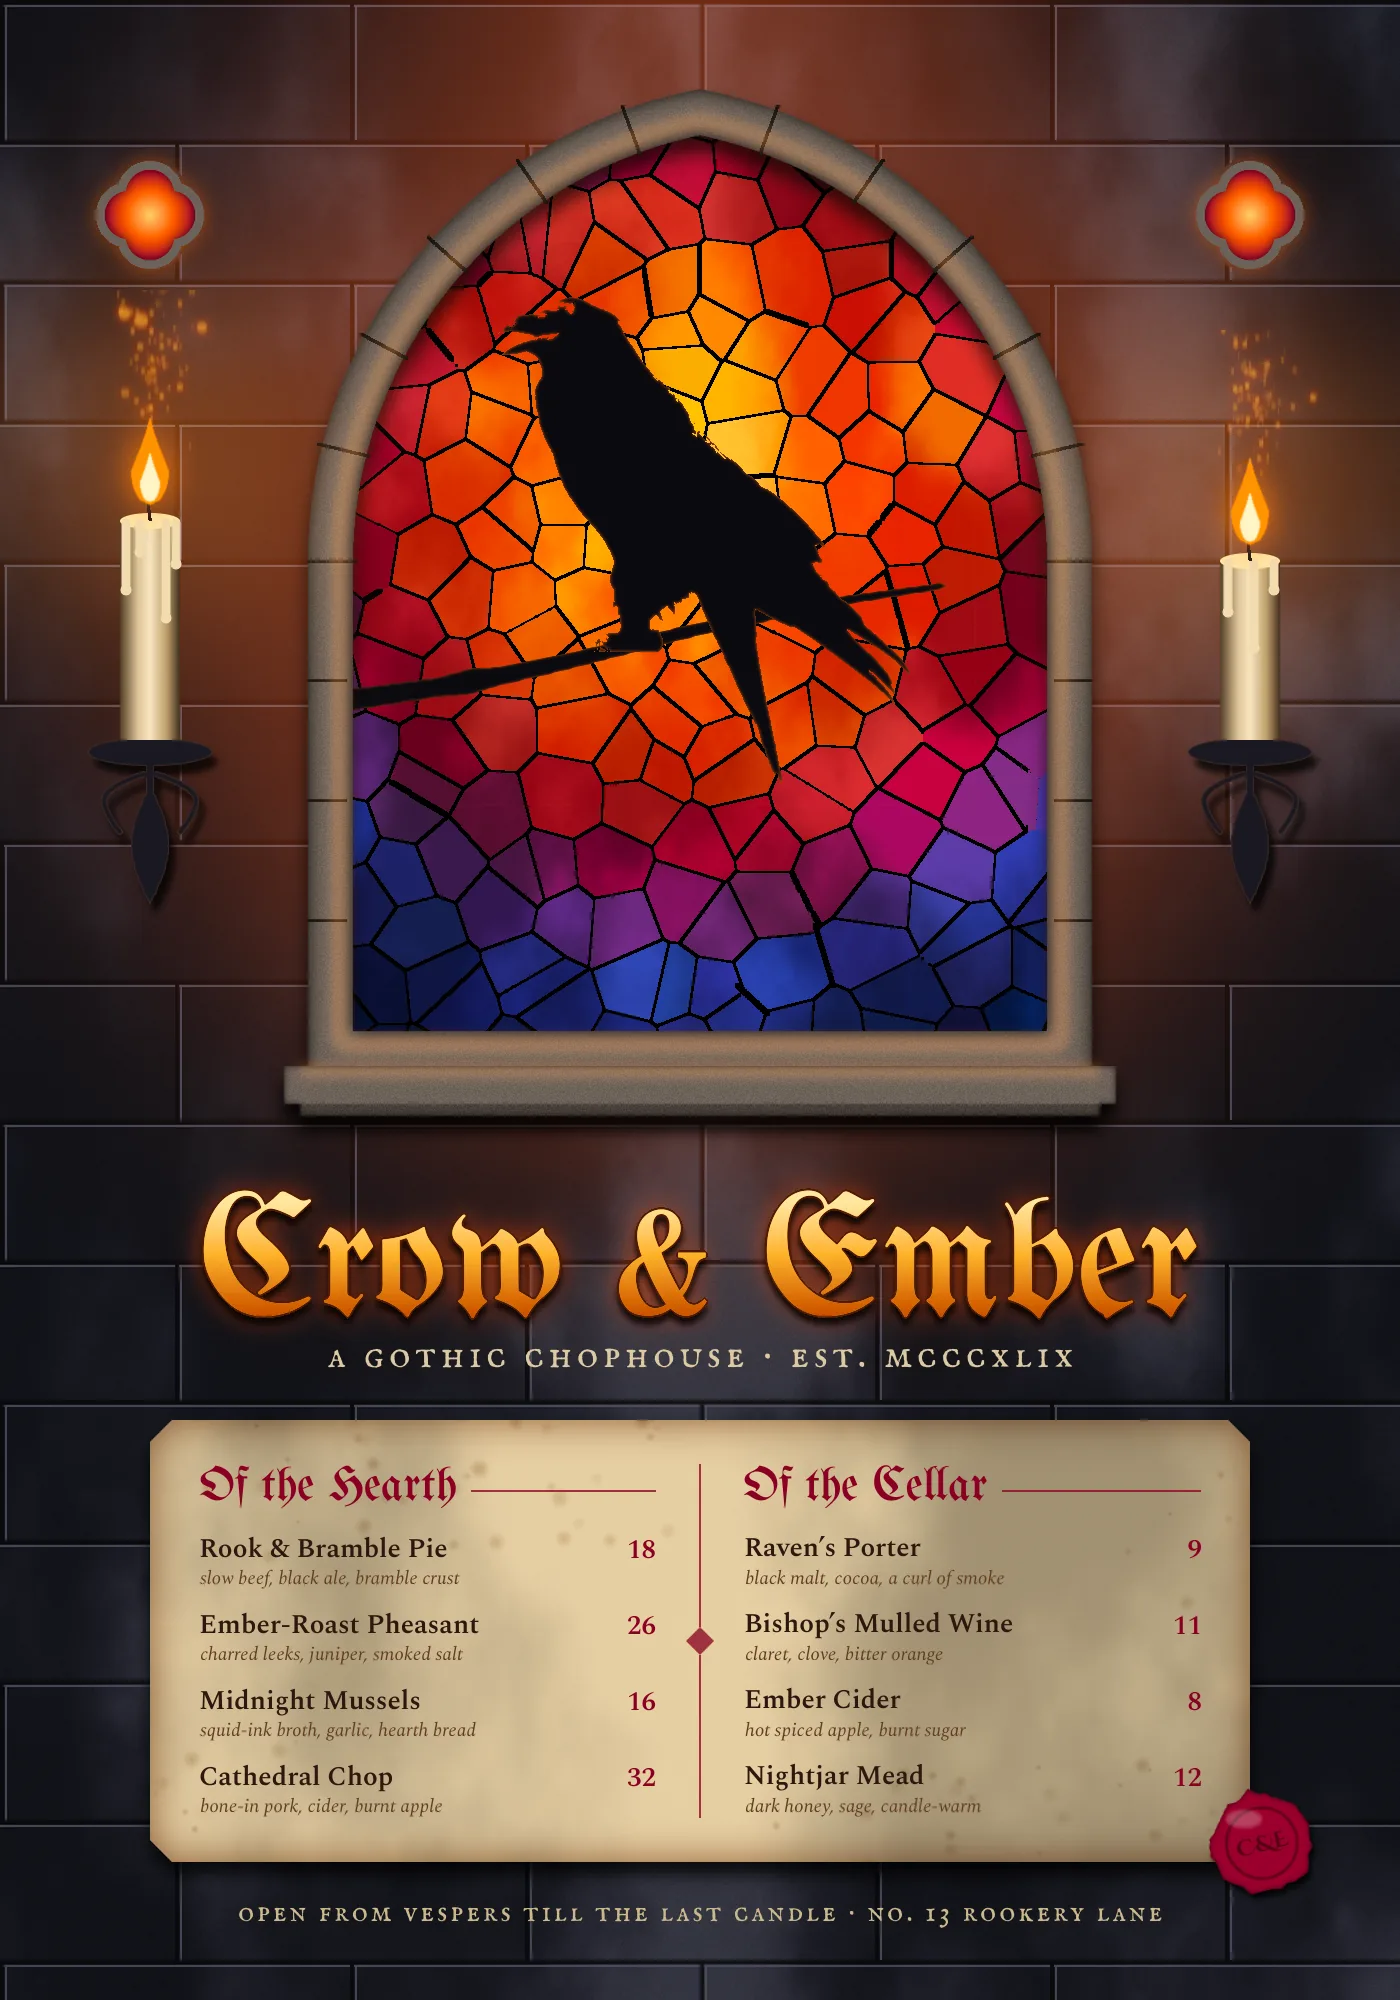
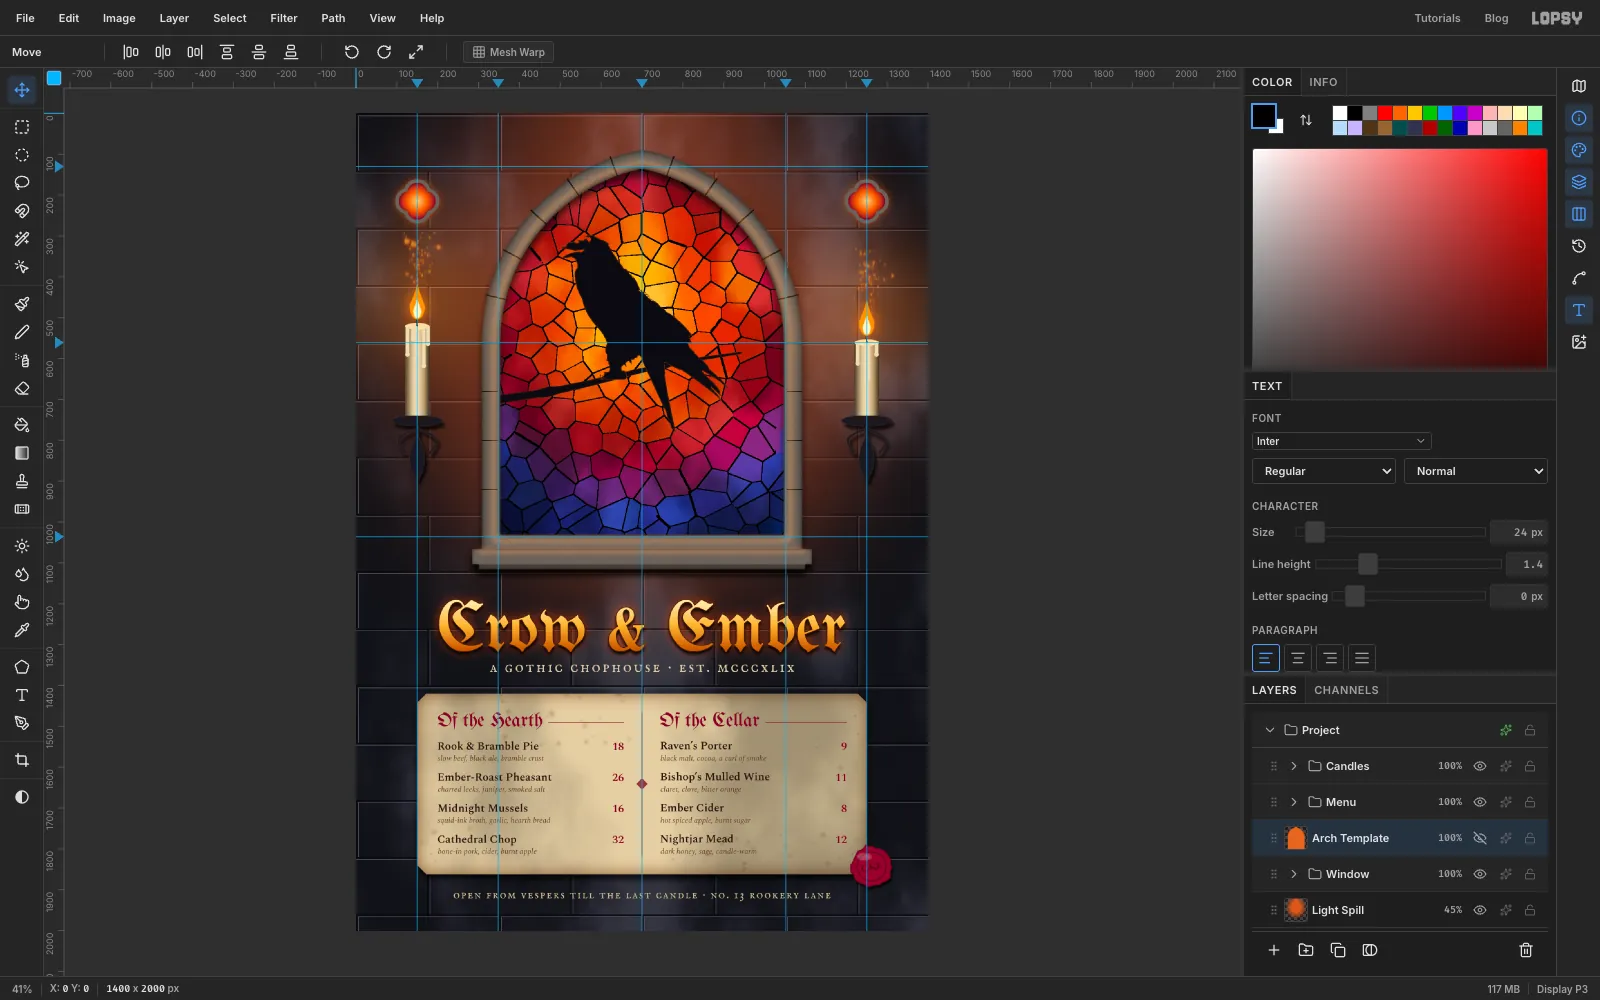
Gothic design runs on contrast: cold stone and hot coloured light, black lead against glowing glass, a heavy blackletter title against a quiet, readable menu. In this tutorial you'll make a 1400 × 2000 px menu for Crow & Ember, an imaginary candlelit chophouse.
The page has:
- an ashlar stone wall tiled with Pattern Fill
- a pointed window drawn the way medieval masons did it, from two overlapping circles
- stained glass made with the Voronoi filter, and lead lines built from a second Voronoi pass with Find Edges and Threshold
- a raven silhouette made from a photo with Threshold and the Magic Wand
- a stone frame with voussoir joints, a sill and warm light bouncing off the glass
- two candles in wrought-iron sconces, with sparks made with the Spray tool
- a gold blackletter title, a two-column parchment menu and a rotated wax seal
The fonts are free Google Fonts:
- UnifrakturMaguntia for the title and the section headings
- IM Fell English SC for the subtitle and the footer
- Spectral (SemiBold and Italic) for the dishes, notes and prices
- Cinzel Decorative Bold for the seal's monogram
The palette:
-
Stone
-
warm frame stone
-
iron
-
Glass
-
Ember light
-
spill
-
Gold title
-
Parchment
-
ink
-
notes
-
Ruby
-
wax
The raven is a public-domain photo from Wikimedia Commons, Raven perched on a snag by Yellowstone National Park. Any photo of a dark bird against a pale sky will work.
Each part of the page gets its own group (Window, Candles and Menu). New layers appear above whichever layer is selected, so select a layer inside a group before you add to it. A few screenshots were re-taken from the finished file, so the Layers panel sometimes lists a group you haven't made yet.
-
Lay a dark stone wall
Create a 1400 × 2000 document. Select
Background, set the foreground to and choose Edit → Fill. Run Filter → Add Noise… at 6, Mono, for a little grit.Rename
Layer 1toStone Mottle. Set the foreground to white and the background to black, then run Filter → Clouds… at Scale 6. Set the layer's blend mode to Soft Light and its opacity to 45%. The wall now has the uneven light and dark patches of real stone.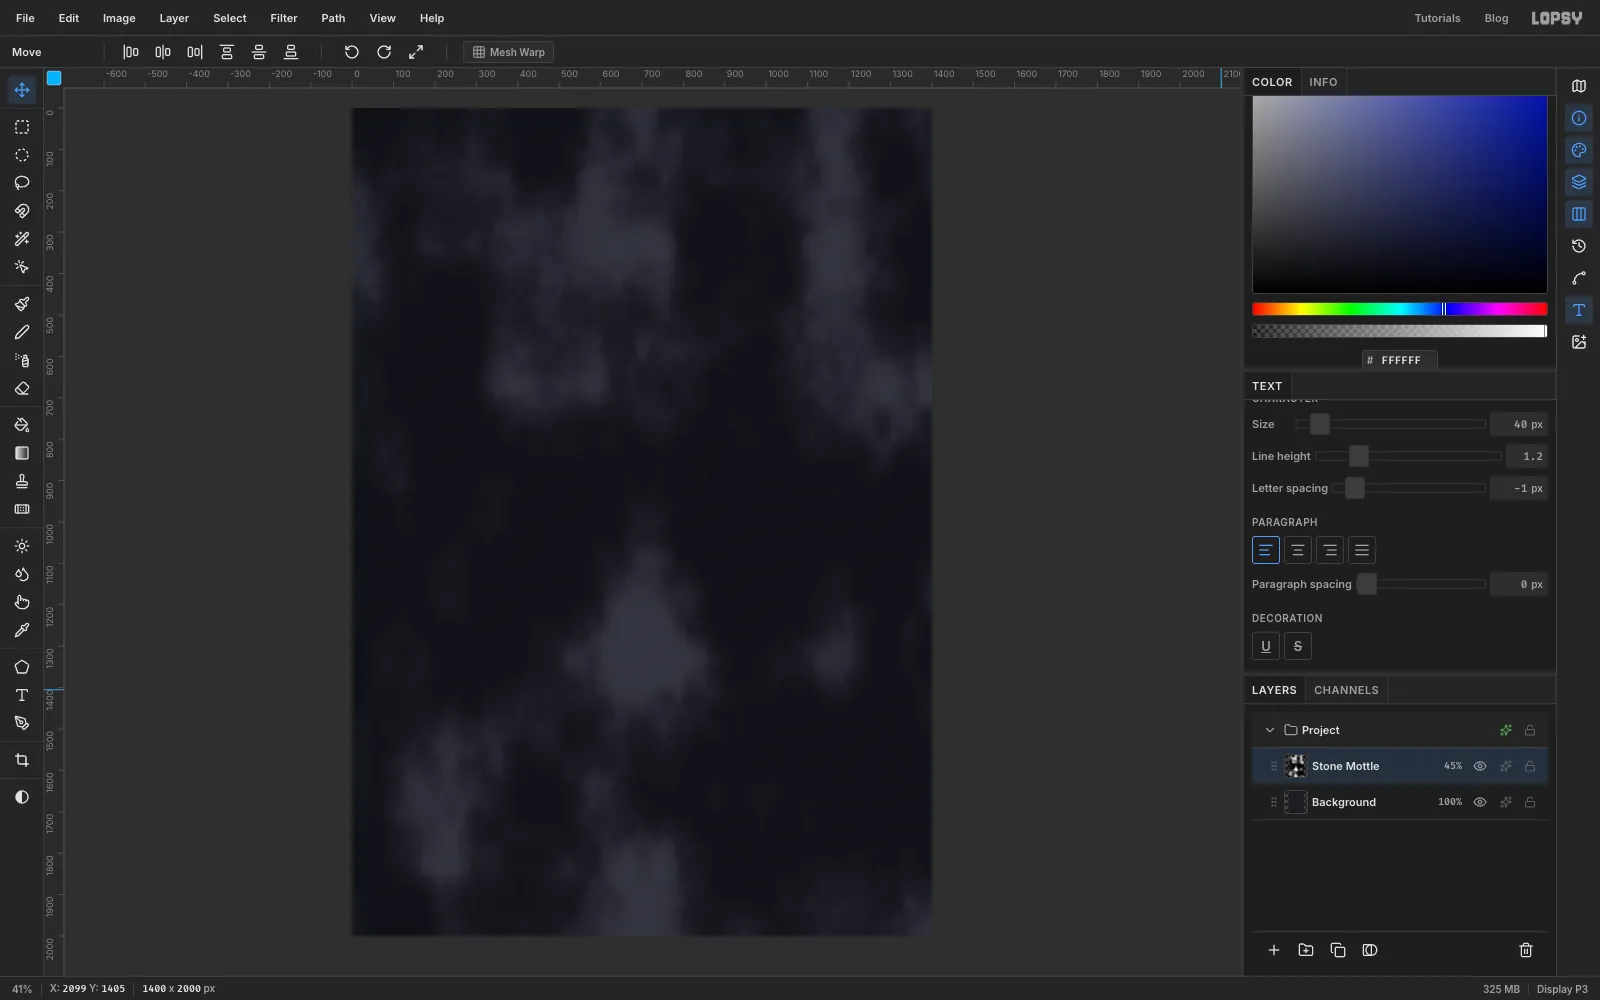
-
Draw one stone block
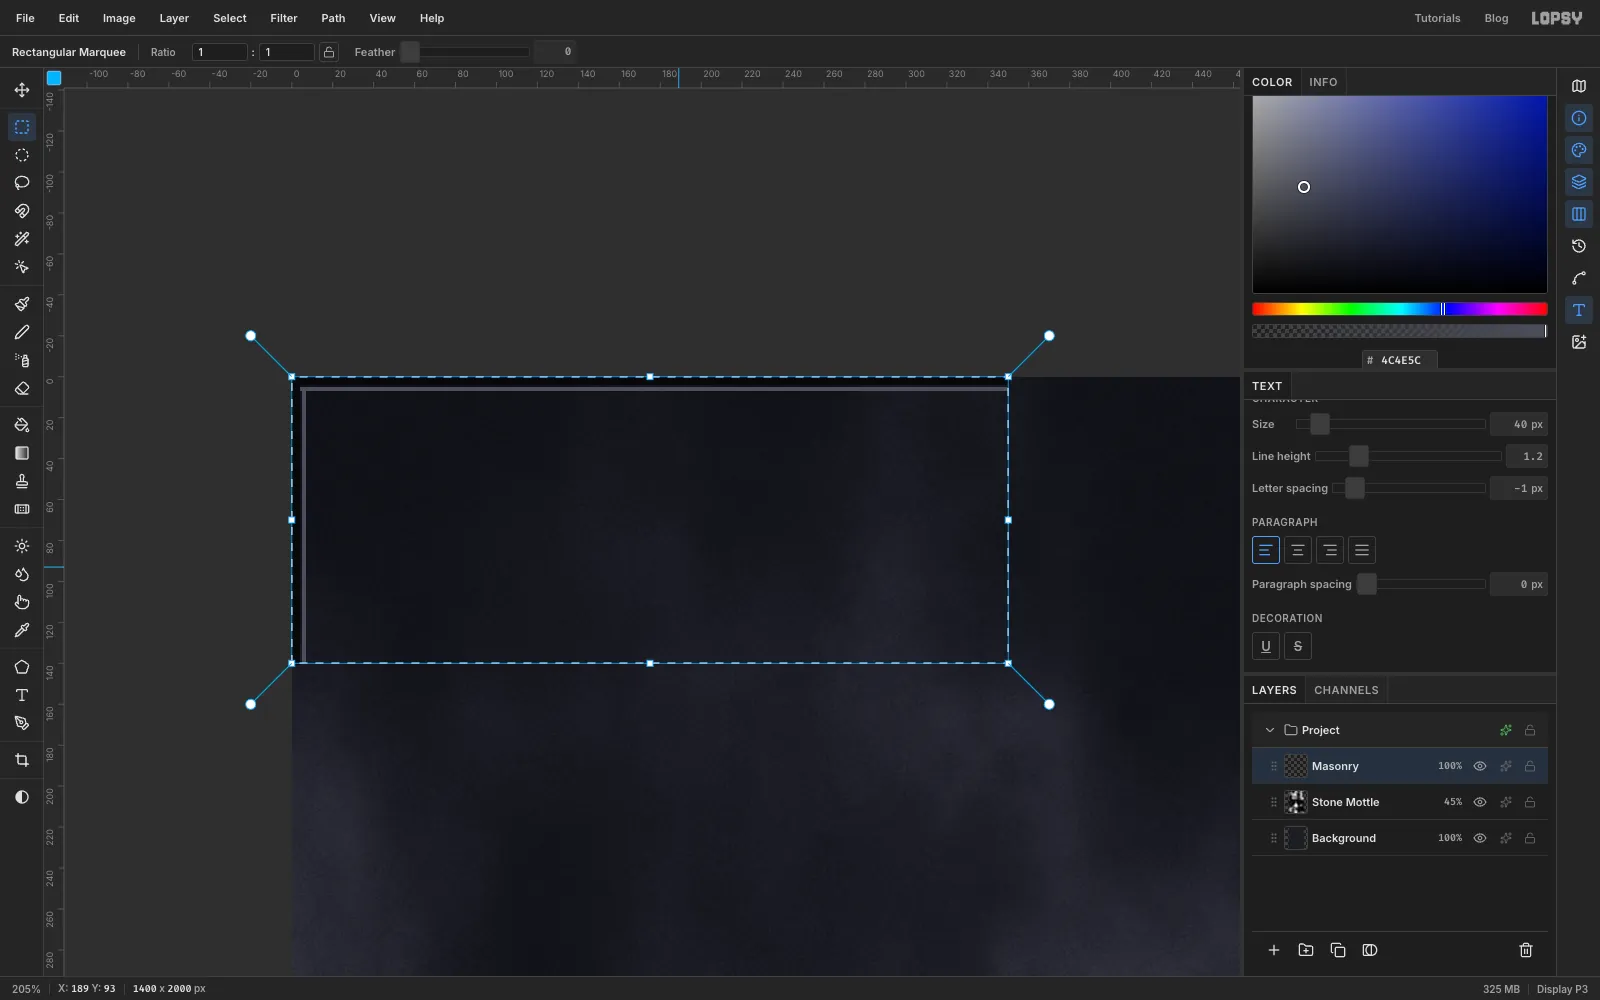
Add a layer called
Masonry. You'll draw a single block's joints and repeat it across the wall.- Choose the Pencil at Size 4 with a near-black . Click at the top-left corner of the canvas, then Shift-click about 350 px to the right. Draw a second line from the same corner straight down about 140 px.
- Switch the Pencil to Size 2 and a lighter grey . Draw the same two lines again, about 4 px inside the dark ones. This thin highlight is what makes the joint look cut into the stone.
- With the Rectangular Marquee, select the block from the corner to 350 × 140. Click once on the canvas without dragging if you want to type the corners exactly.
Choose Edit → Define Pattern.
-
Tile the wall with Pattern Fill
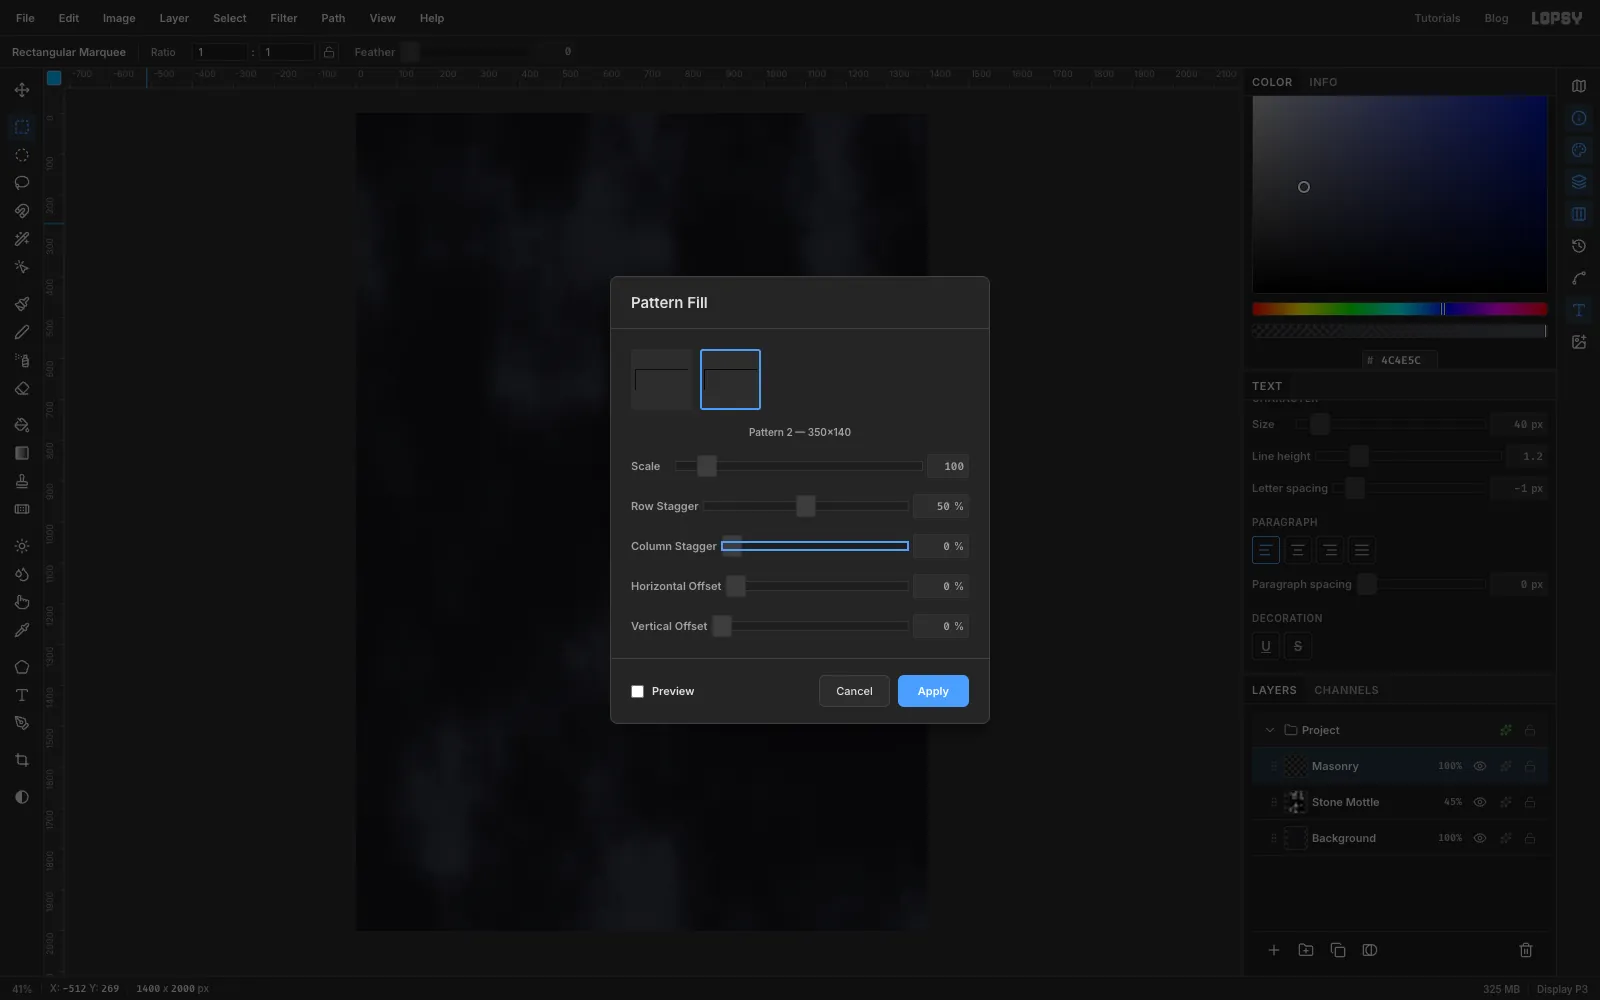
Select all, press Delete to clear the block you drew, and choose Edit → Fill with Pattern…. Pick the new pattern and set Row Stagger to 50%. Each course of blocks now sits half a block over from the one below, like real ashlar masonry. Click Apply and set the layer to 85% opacity.
-
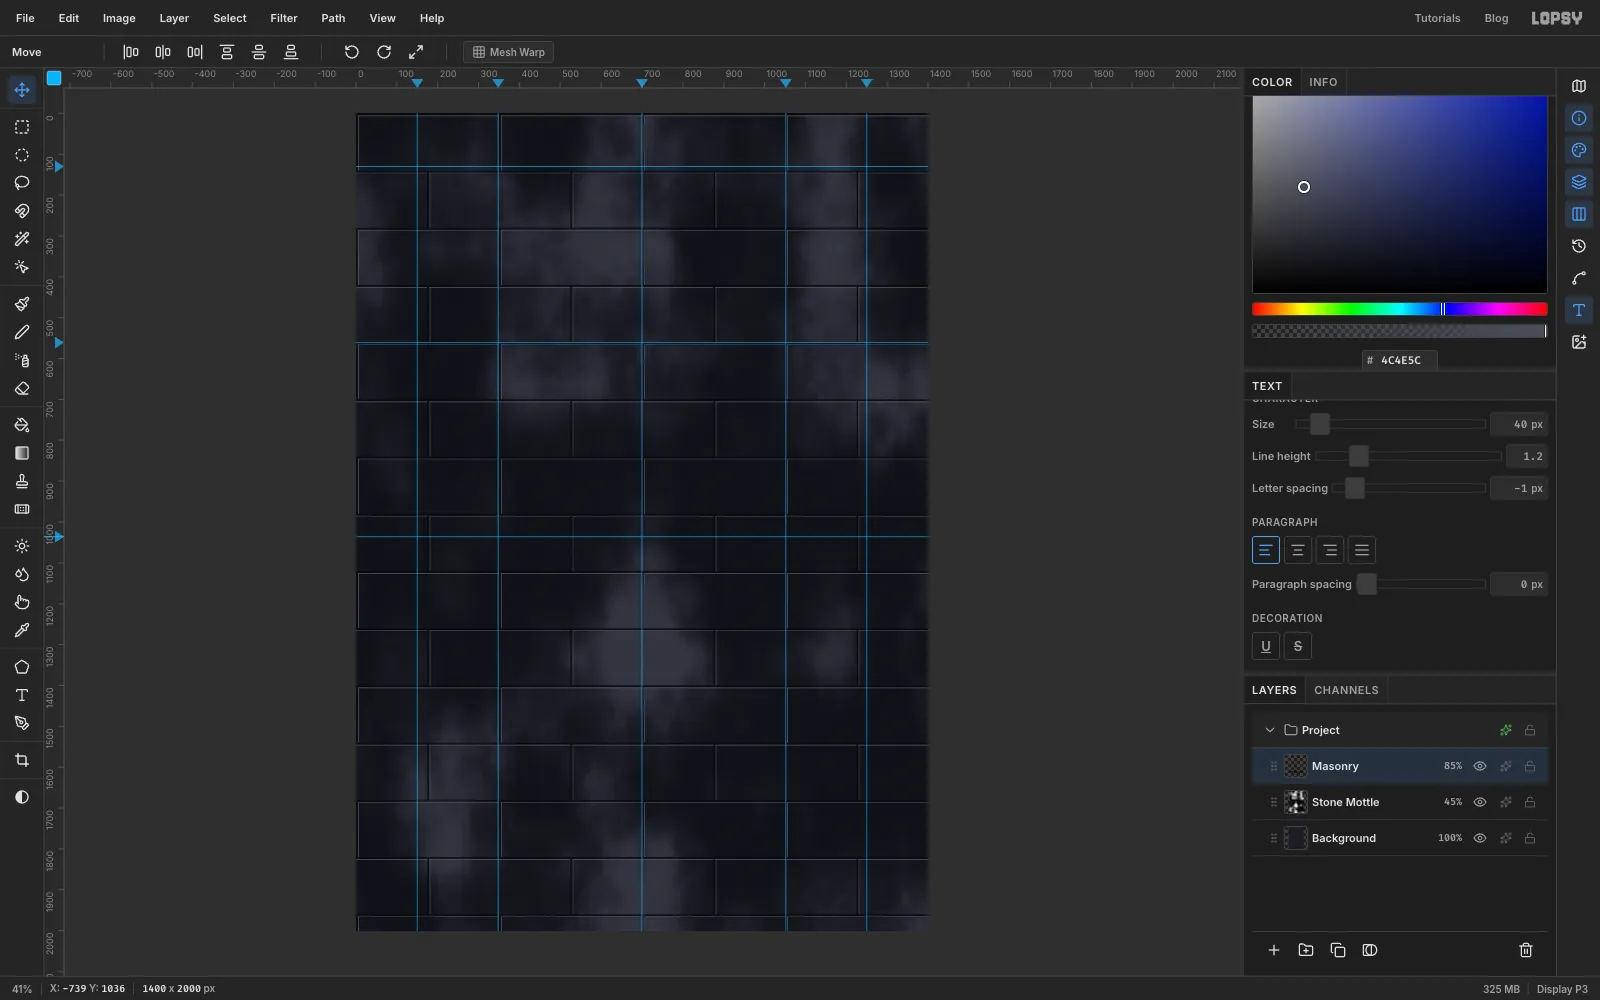
Add guides
Click the top ruler at 150, 348, 700, 1052 and 1250 to make vertical guides, and the left ruler at 130, 561 and 1036 for horizontal ones. The outer pair mark where the candles go. The inner pair are the sides of the window, 700 is the centre line, and the horizontal guides are the window's point, the top of its straight sides, and its bottom.
Turn off View → Snap to Guides for the next few steps. The circles you're about to draw have edges close to the guides, and you don't want them pulled out of shape.
-
Draw a pointed arch from two circles
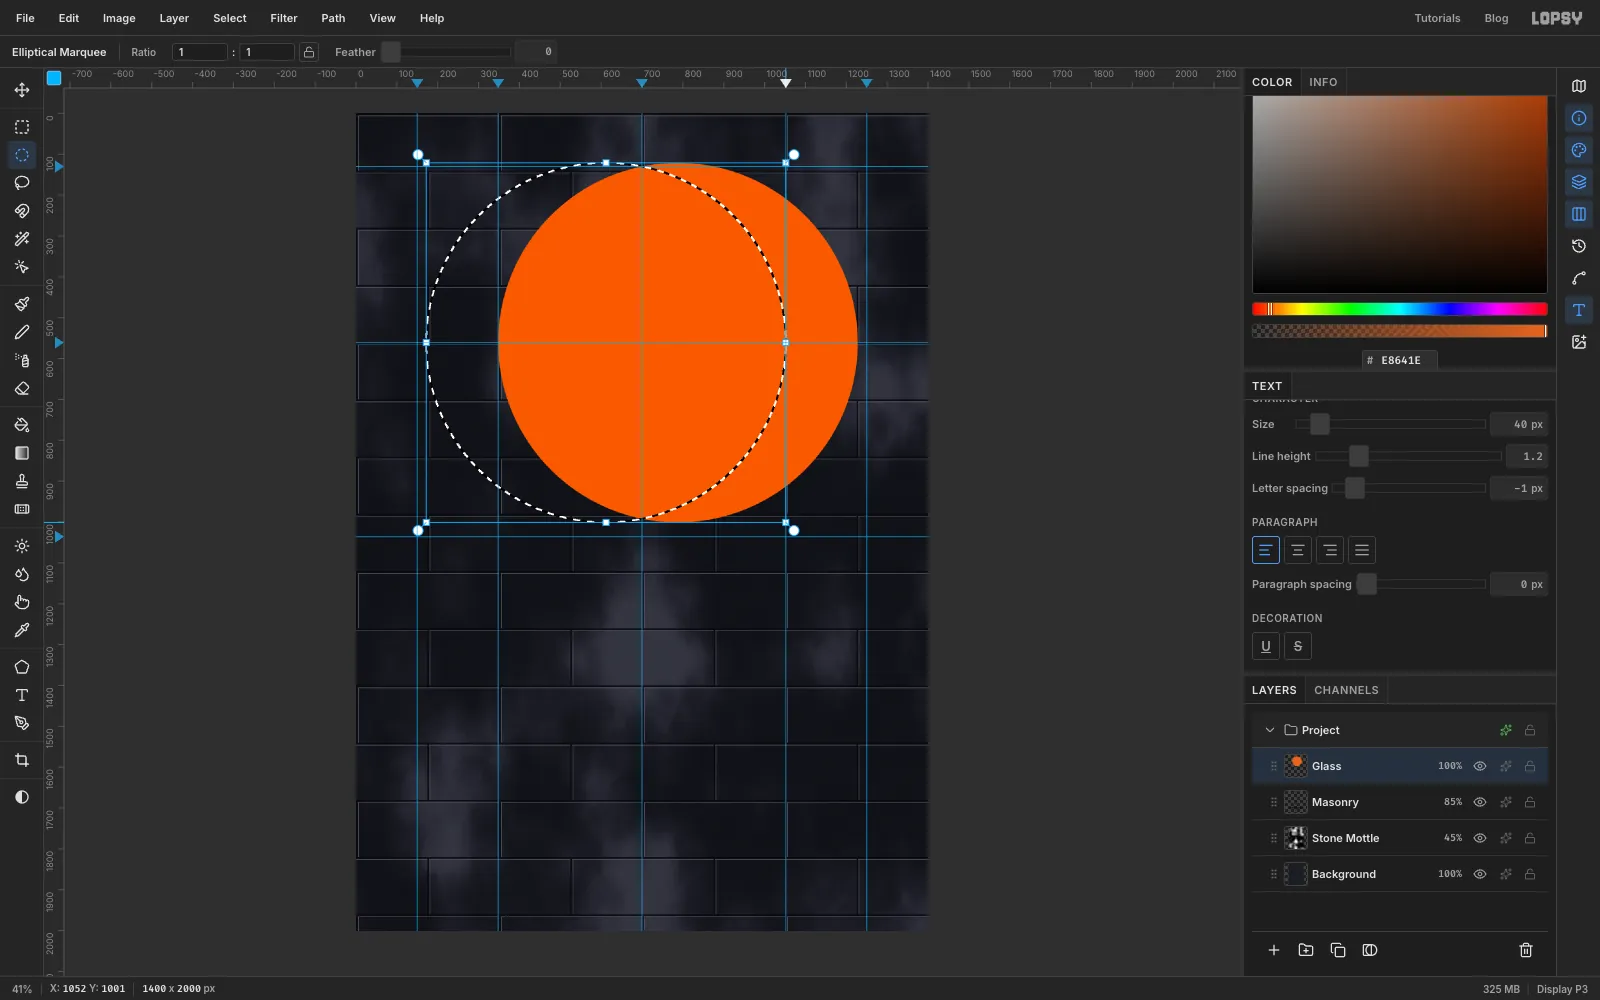
A gothic arch is two circular arcs that meet at a point. Masons drew it with a compass, and you can do the same with two circles.
Add a layer called
Glassand set the foreground to orange .- Choose the Elliptical Marquee and, with nothing selected, click once on the canvas without dragging. That opens a dialog where you type the corners exactly. Enter From 348, 121 to 1228, 1001: an 880 px circle centred at 788, 561, whose left edge touches the guide at 348. Choose Edit → Fill, then deselect.
- Click again and enter 172, 121 to 1052, 1001 for a second circle of the same size, centred at 612, 561, whose right edge touches the guide at 1052.
- Choose Select → Inverse and press Delete. Only the lens where the two circles overlap is left.
-
Finish the window shape
Marquee everything below the 561 guide and press Delete to cut off the bottom of the lens. Then marquee from the guides at 348, 561 to 1052, 1036 and fill it. The point of the arch lands exactly on the 130 guide.
Choose Layer → Duplicate Layer, rename the copy
Arch Templateand hide it. You'll Cmd-click its thumbnail many times to get the window's outline back as a selection.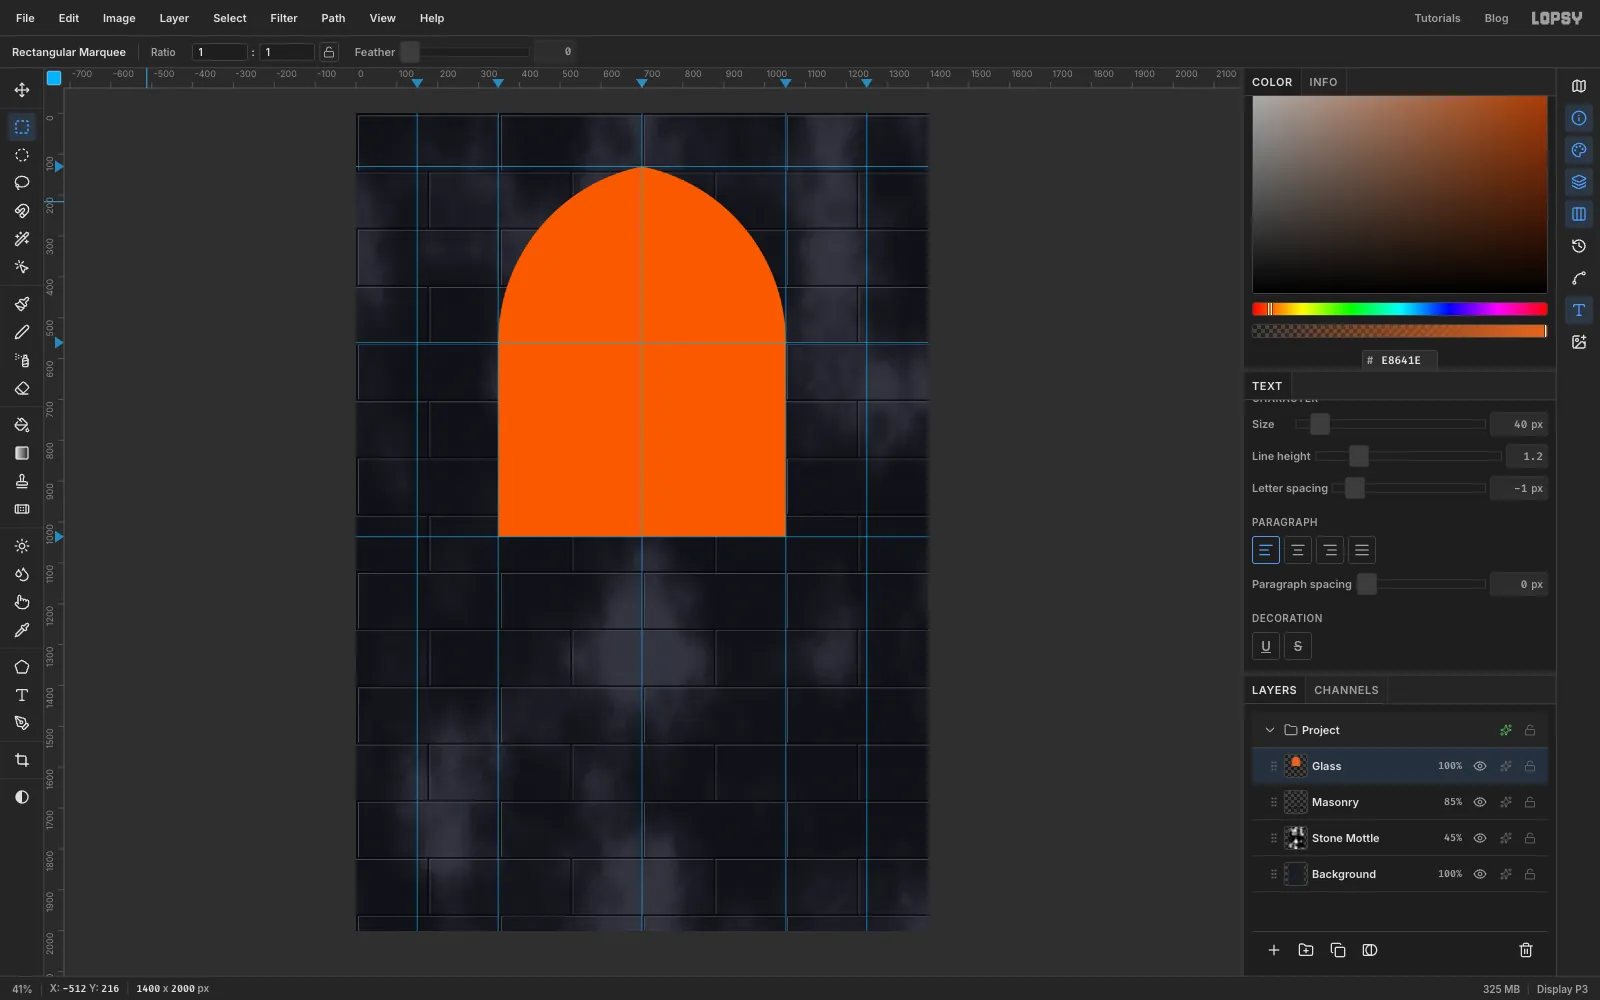
-
Fill the glass with a radial gradient
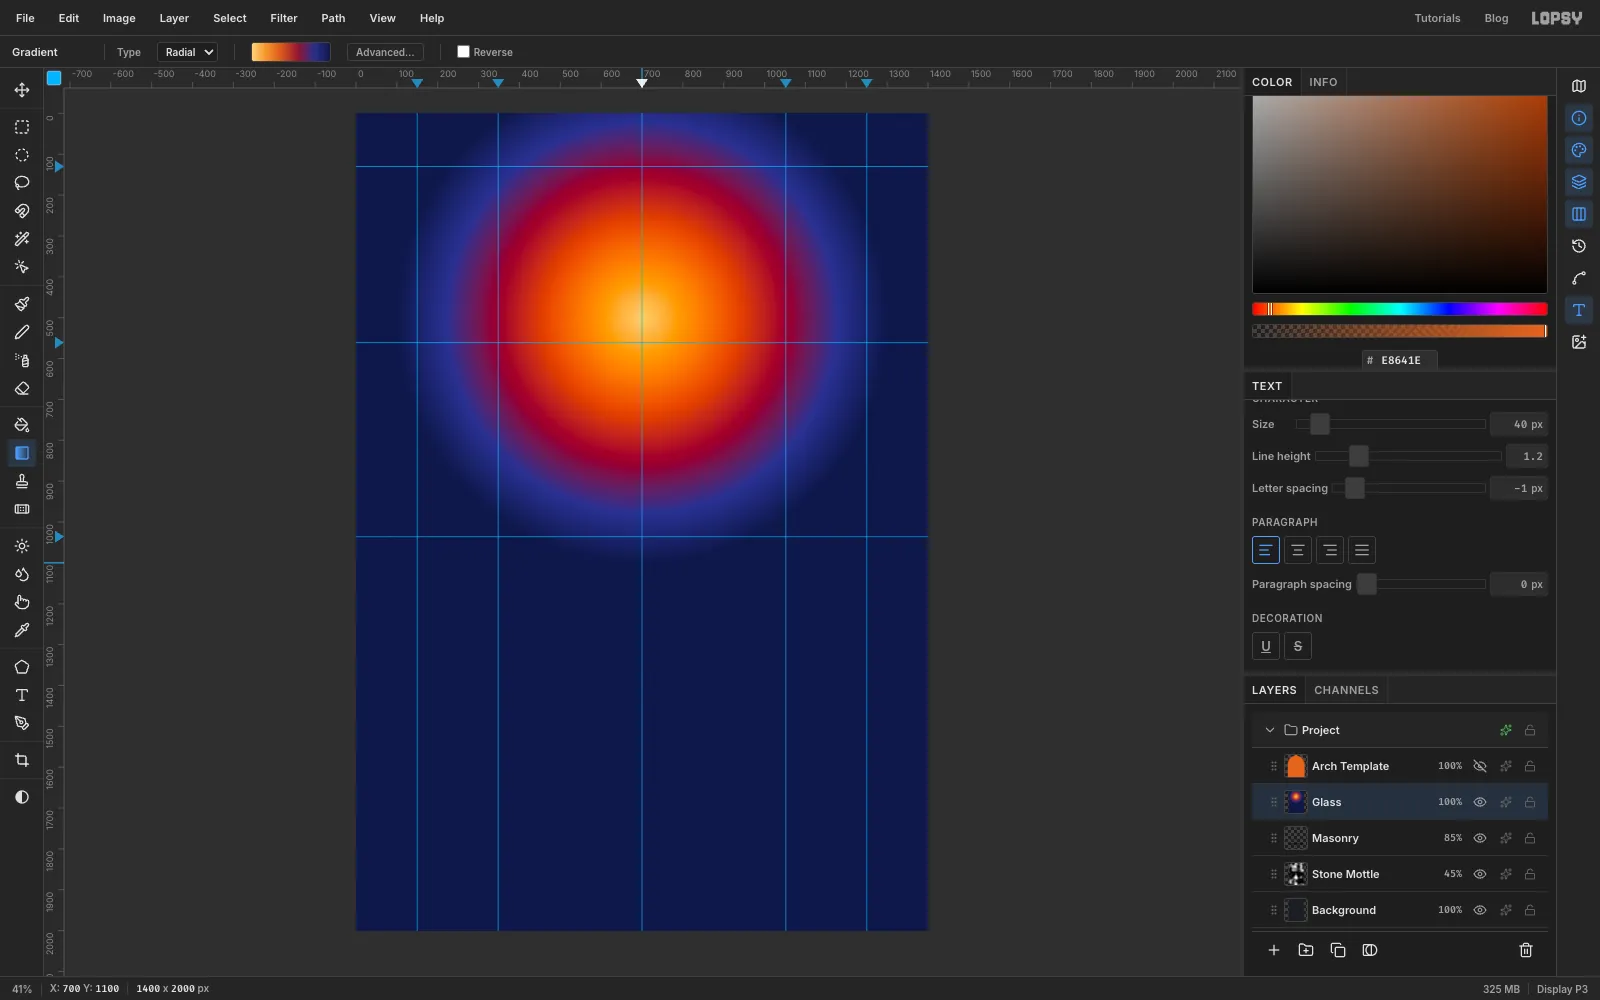
Deselect, then choose the Gradient tool, set Type to Radial and click Advanced…. Make six stops: , , , , and , at about 0, 18, 38, 60, 80 and 100%.
Drag from about 700, 500 straight down to about 700, 1100, a little below the window. Fill the whole layer, not just the arch. The next filter breaks the image into cells, and cells along the arch's edge need colour on both sides to come out whole.
-
Break the gradient into glass
Run Filter → Add Noise… at 16 with Color and Uniform. On its own this just looks grainy. Its job is to give every piece of glass a slightly different tint.
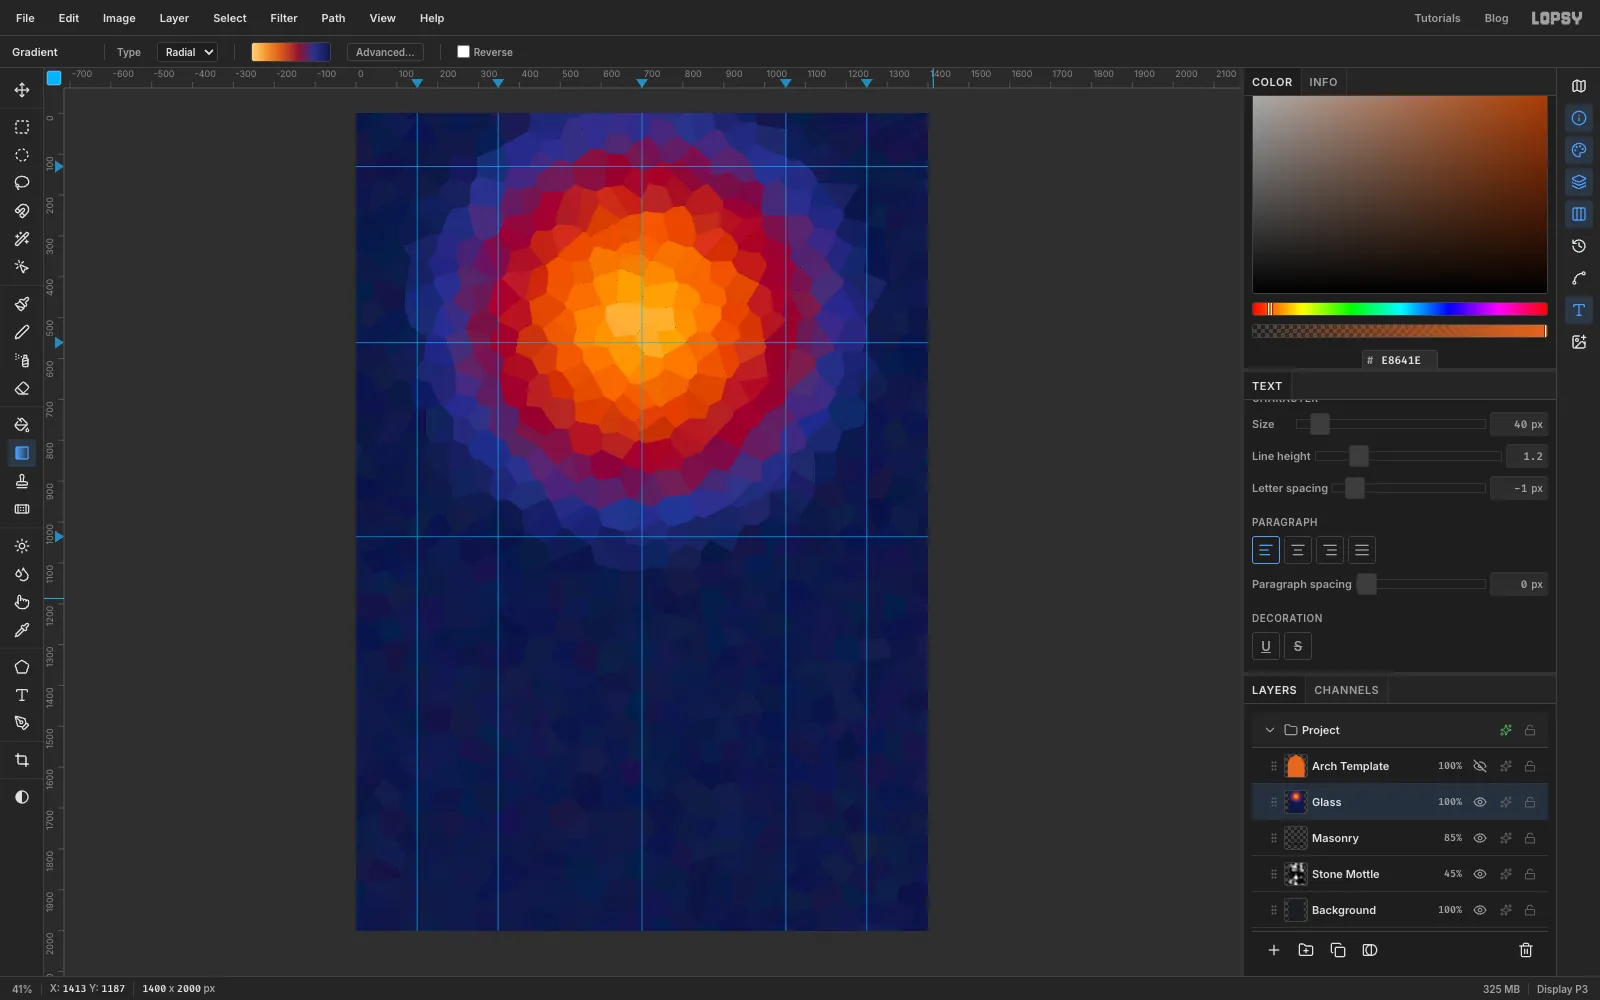
Now run Filter → Voronoi… with Cells 34, Edge Width 0 and Seed 128. Each cell takes the colour at its centre, so the noise turns into hand-picked glass: no two neighbouring pieces quite match.
-
Make a matching cell map for the lead
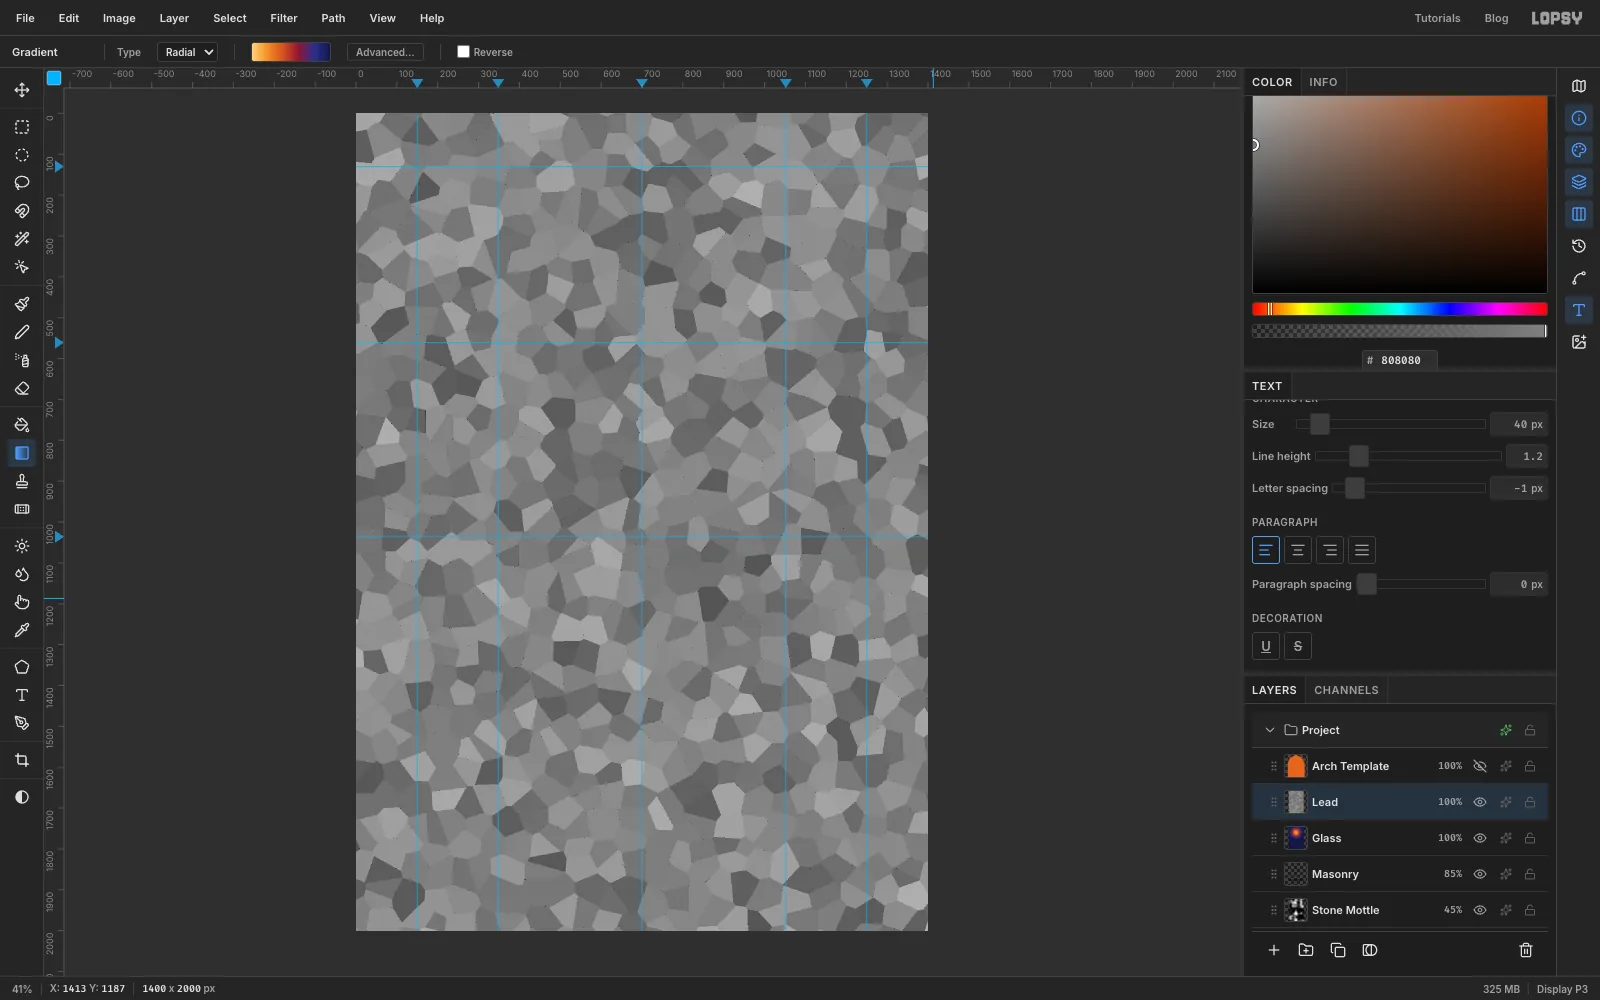
The Voronoi Seed is repeatable: run it again with the same settings on a layer of the same size, and you get exactly the same cells. You'll use that to draw lead lines along every edge.
- Add a layer called
LeadaboveGlass. - Fill it with mid grey .
- Run Add Noise at 100, Mono, Uniform.
- Run Voronoi again with Cells 34, Edge Width 0, Seed 128.
The cells match the glass exactly, but neighbouring cells now have very different greys, which makes their edges easy to find.
- Add a layer called
-
Trace the cell edges
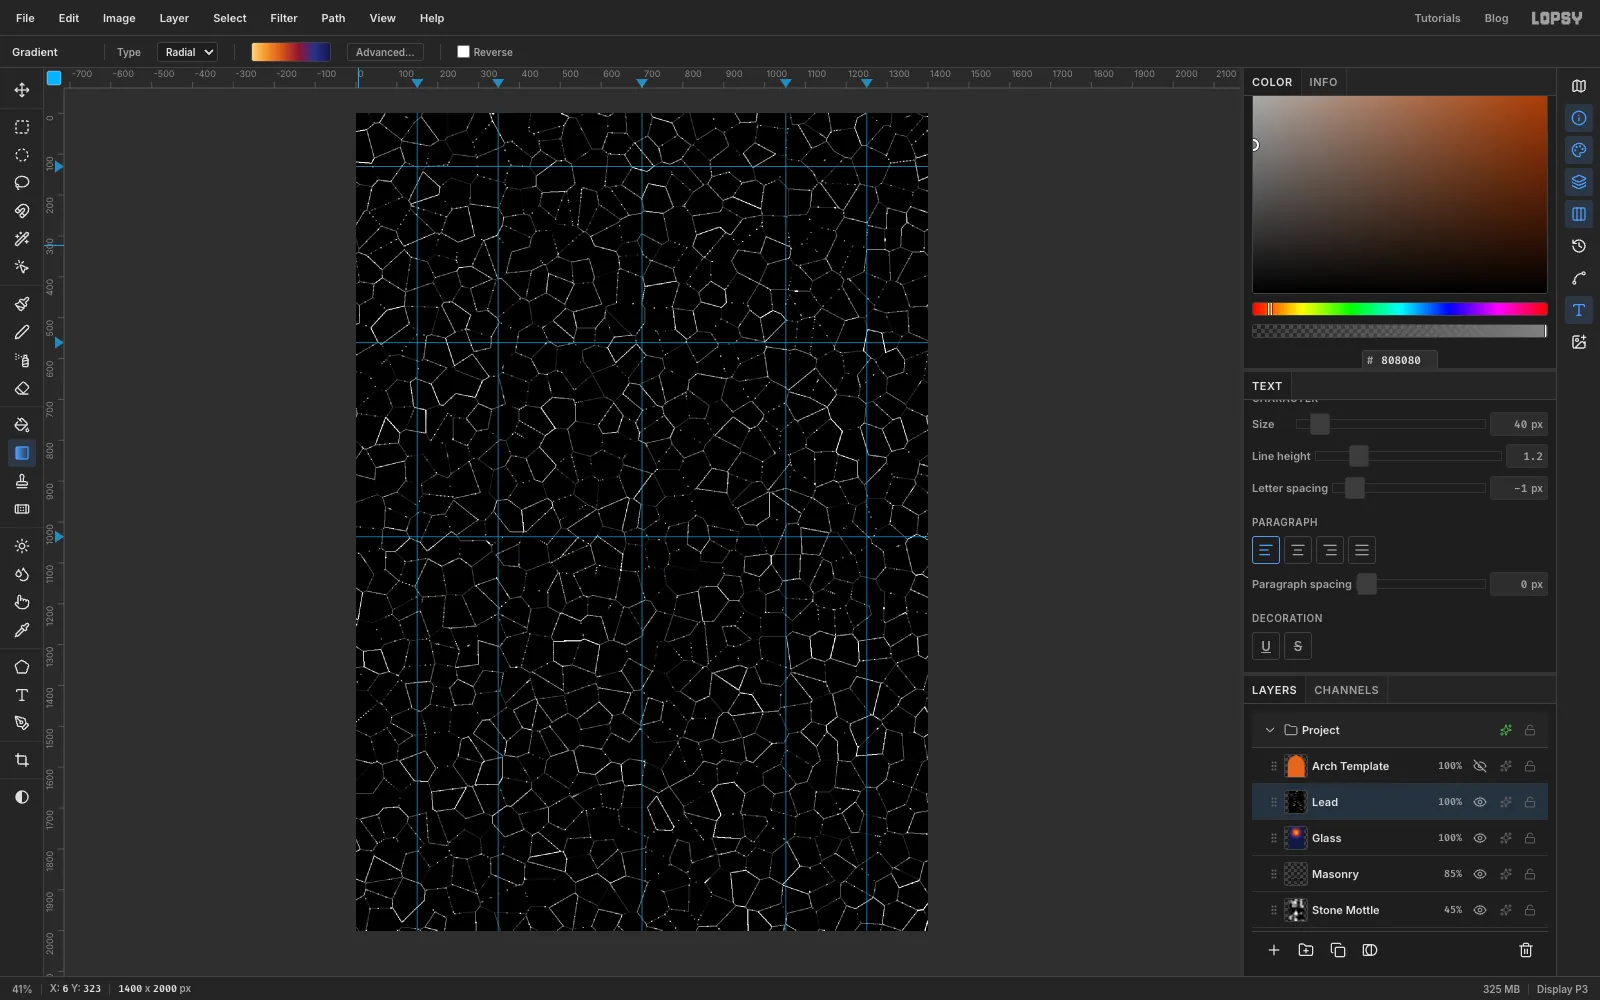
Run Filter → Find Edges. Every boundary between two cells becomes a thin bright line on black.
-
Turn the edges into lead
Now thicken those lines and make them black:
- Threshold at 8, so every edge becomes pure white.
- Gaussian Blur at 2.
- Threshold again at 60. The blur spreads each line, and the second threshold cuts it back to a solid line about 5 px wide.
- Filter → Invert, so you have black lines on white.
- Set the layer to Multiply. The white disappears and only the lead shows.
To trim both layers to the window, Cmd-click the
Arch Templatethumbnail, choose Select → Inverse, and press Delete onLeadand then onGlass.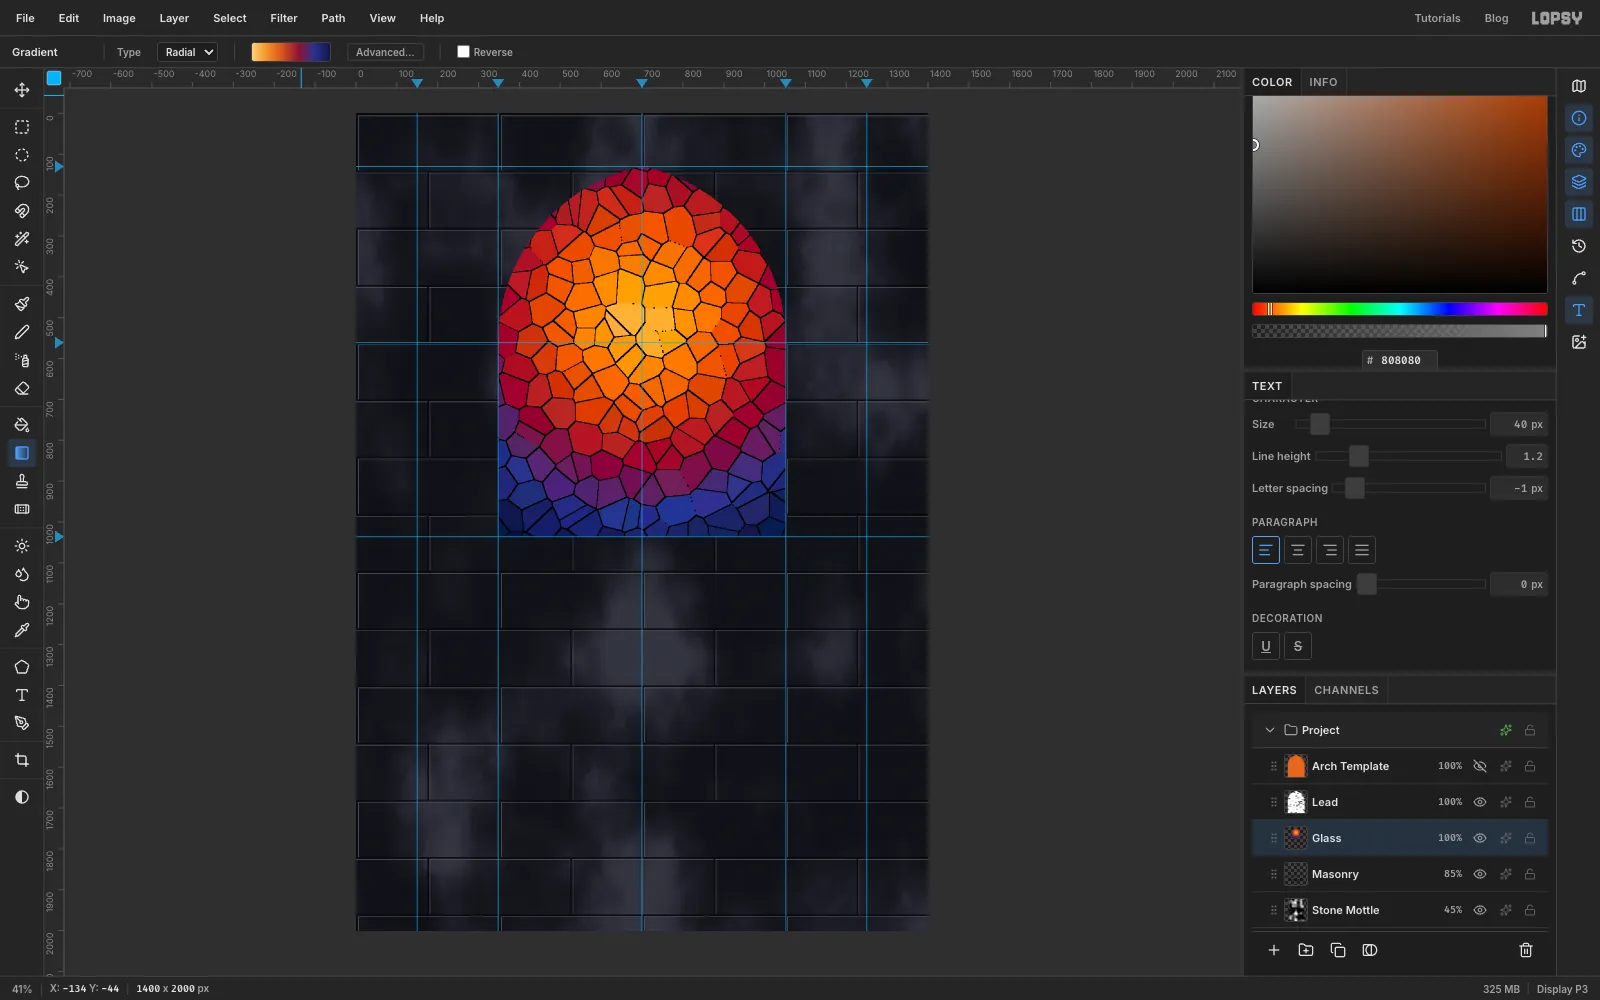
-
Touch up missing leads
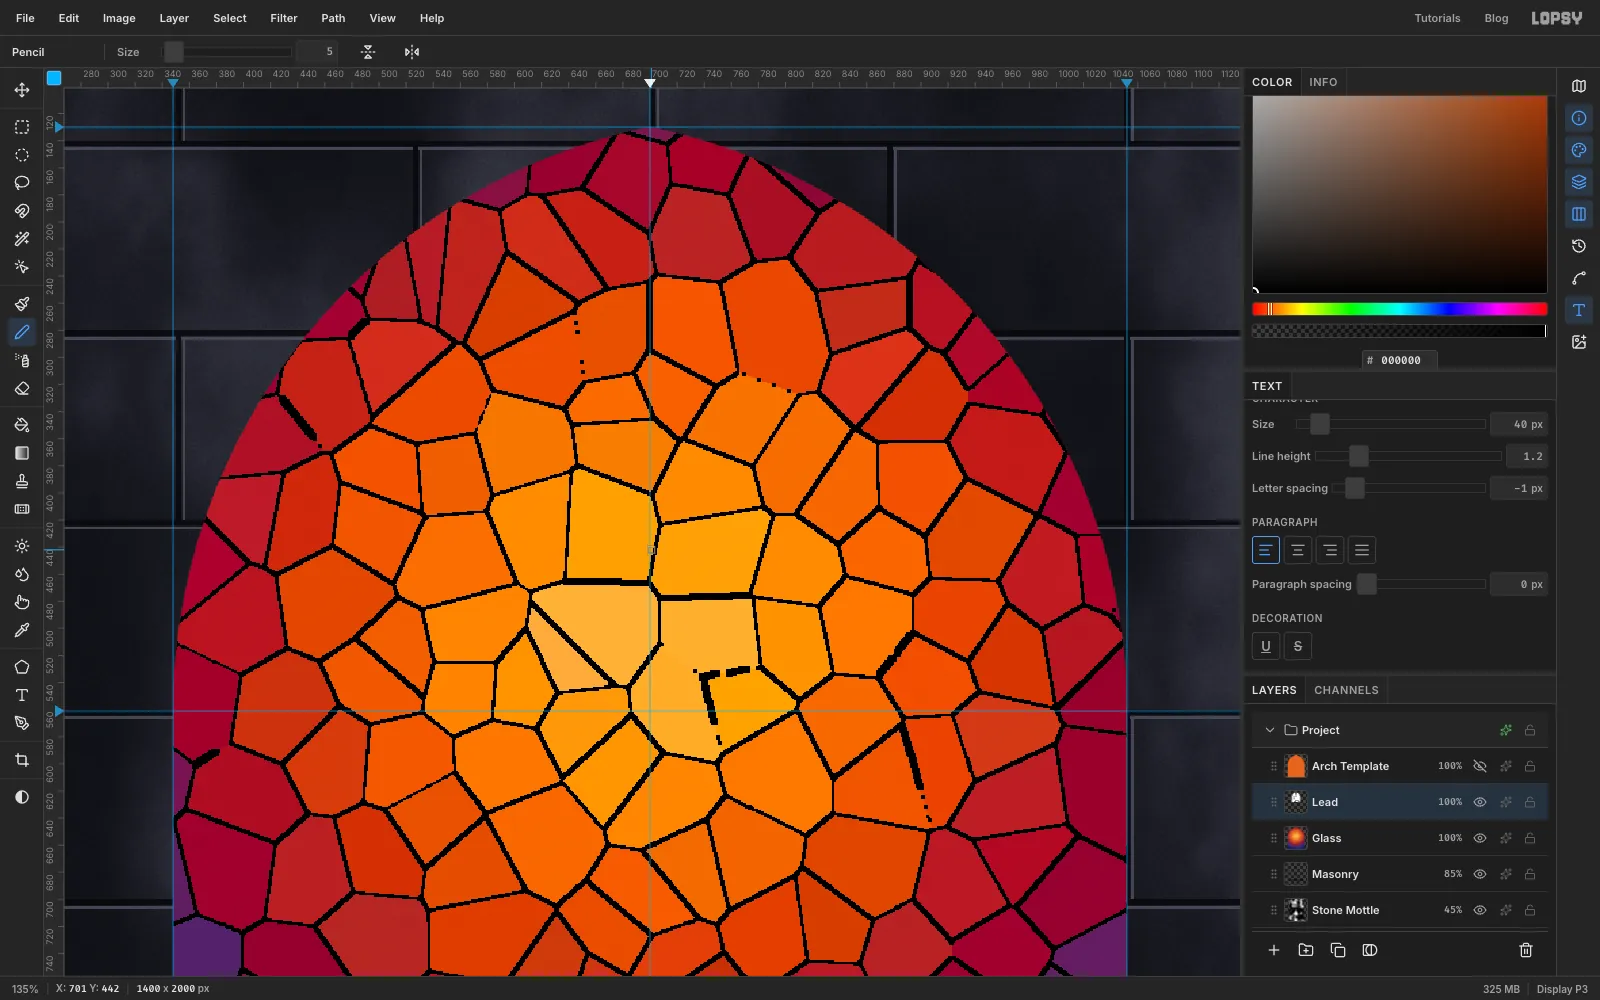
Zoom in and look over the window. Here and there two cells will have had nearly the same grey, so Find Edges skipped their boundary and left a gap or a dotted line. Fix those by hand on the
Leadlayer: Pencil, Size 5, black, click one end of the missing edge and Shift-click the other.Also look for short stubs of lead that don't join anything, especially along the edge of the arch. Lasso them and press Delete.
-
Give the glass some depth
Real glass isn't evenly coloured. Add a layer called
Glass ShadingbetweenGlassandLead. Cmd-click theArch Templatethumbnail, run Clouds at Scale 10 with white and black, and deselect. Set it to Overlay at 35%.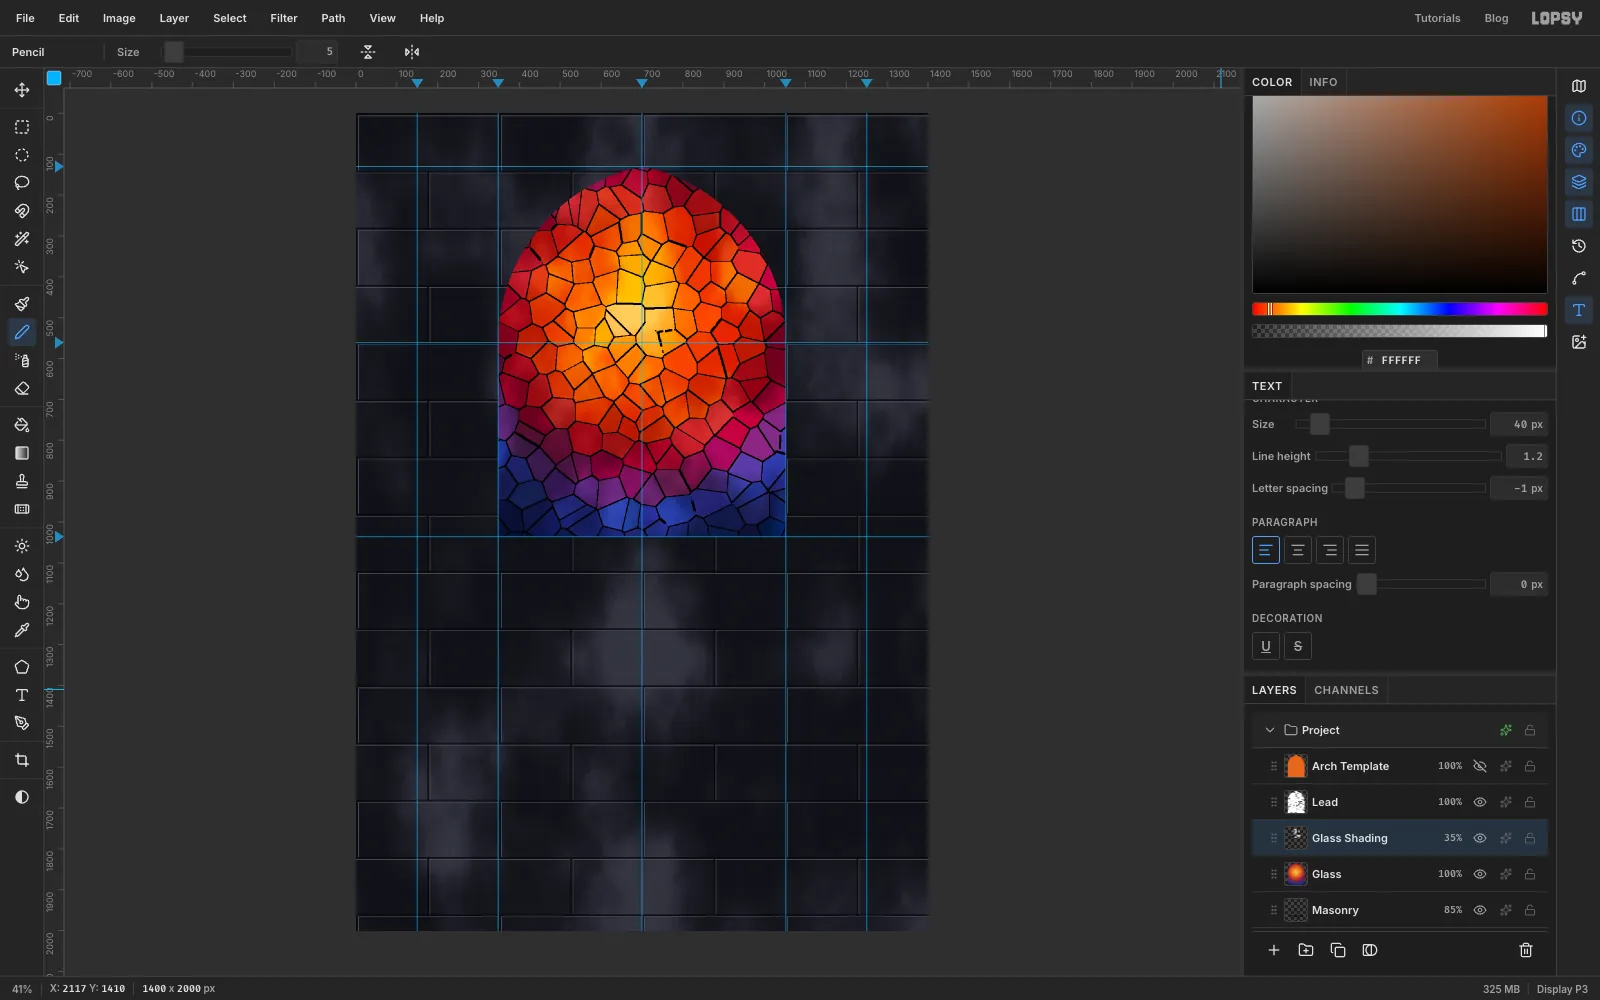
-
Build the stone frame
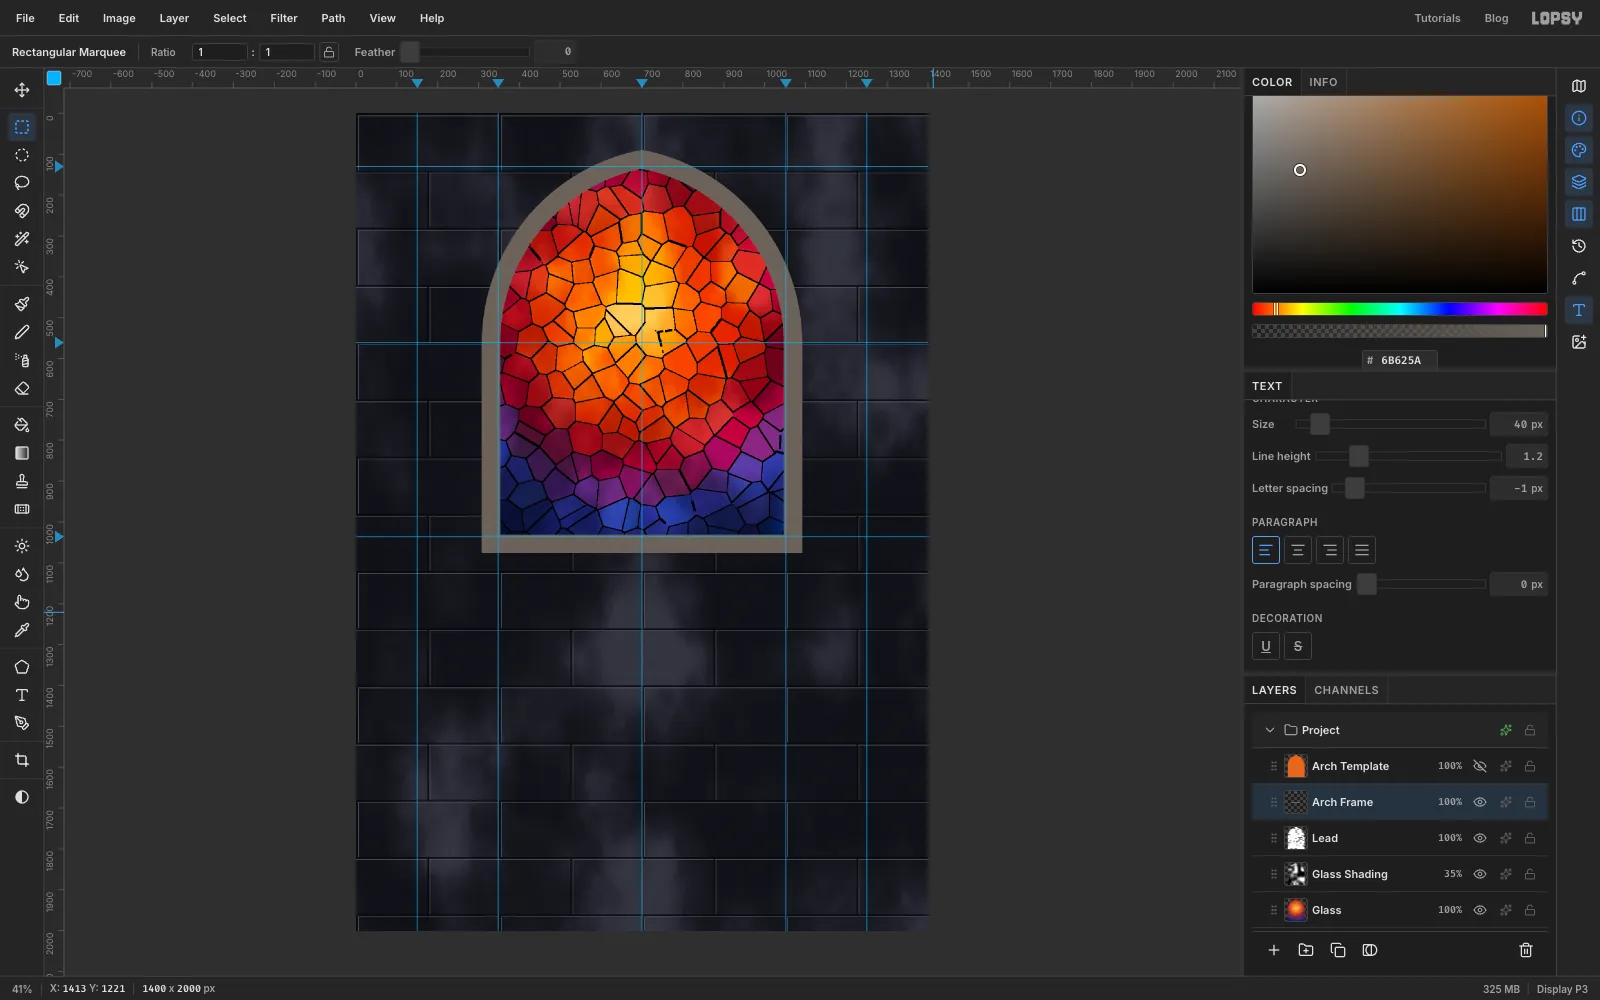
The frame is a bigger version of the same arch. Add a layer called
Arch FrameaboveLeadand set the foreground to warm stone .- Use the exact-corners dialog again for two 960 px circles on the same centres as before: 308, 81 to 1268, 1041, and 132, 81 to 1092, 1041. Fill the first, deselect, then select the second, Inverse it and delete, exactly as you did for the window.
- Delete everything below 561, then fill a rectangle from 308, 561 to 1092, 1076 for the sides.
- Cmd-click
Arch Template, choose Select → Shrink… by 5, and press Delete onArch Frame. That opens the window up and leaves the frame overlapping the glass by a few pixels, like a real rebate.
Cmd-click the frame's thumbnail and run Add Noise at 16, Mono, so it reads as stone instead of plastic.
-
Cut the voussoir joints
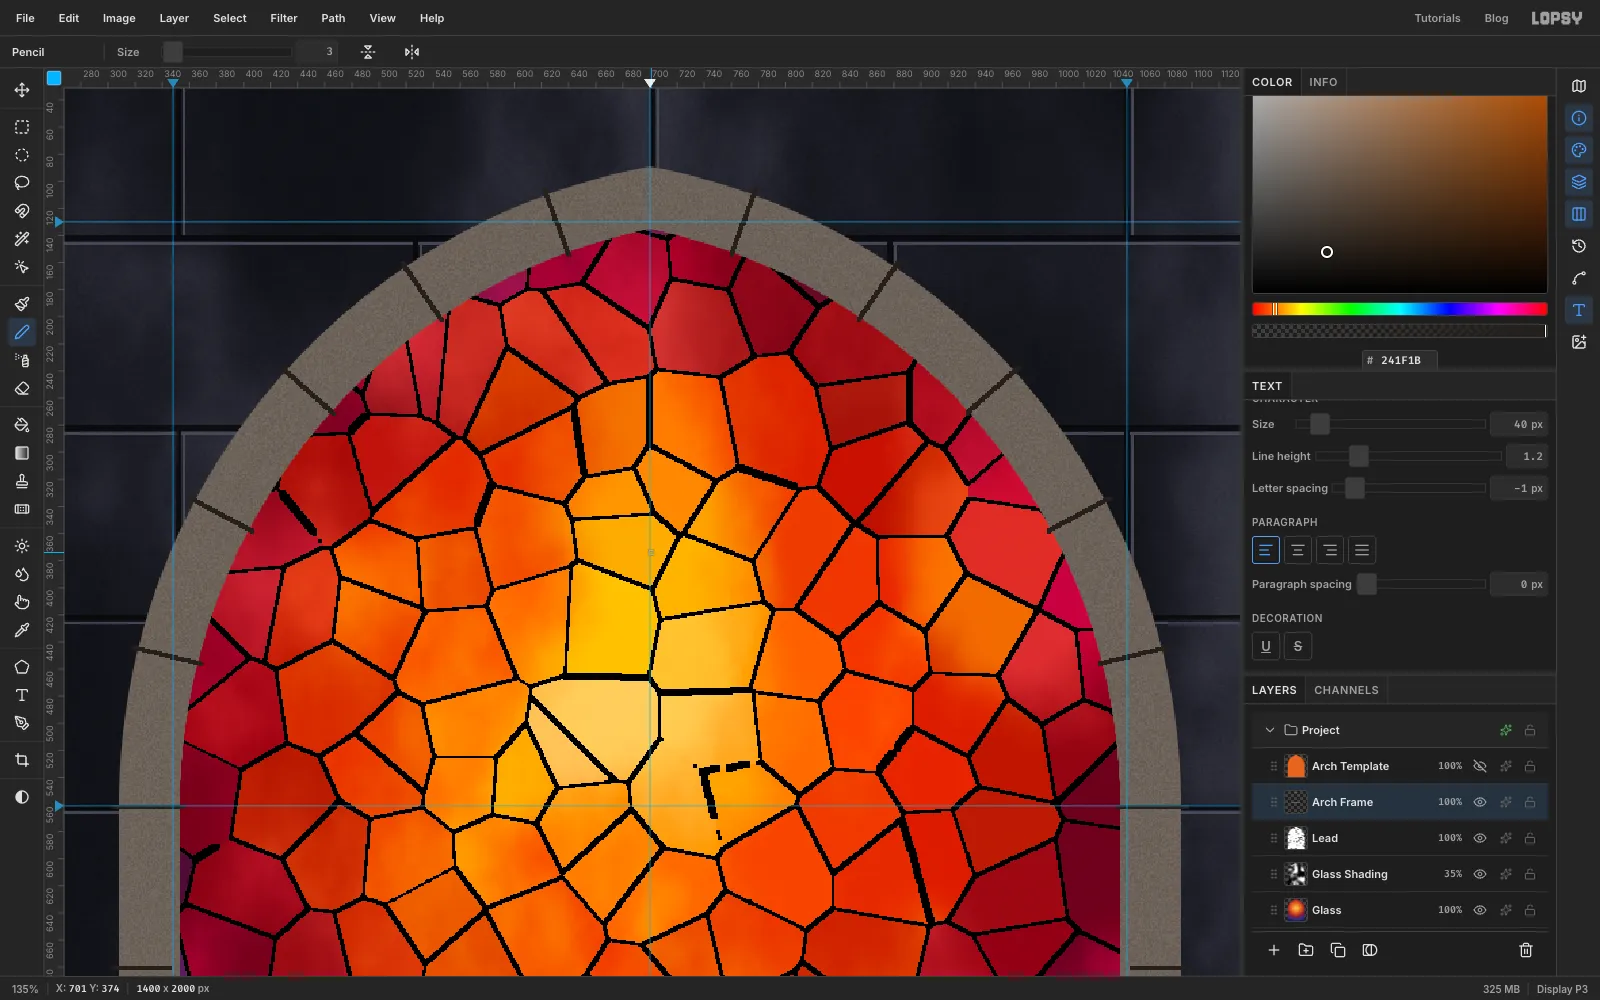
A stone arch is built from wedge-shaped blocks called voussoirs. Pick the Pencil at Size 3 in dark . Across the left arc, draw short lines that point back towards the right circle's centre. Space them evenly, about six on each side. Click the inner edge of the frame, then Shift-click the outer edge. Do the same on the right arc, pointing back towards the left circle's centre. Add three level joints across each straight side.
Then open the layer's effects and add:
- Inner Glow: near-black , Size 24, Opacity 90%, so the frame's inner and outer edges curve away
- Drop Shadow: black, offset 0, 14, Blur 28, Opacity 75%
-
Add the sill and the glow
Add a layer called
Sill. Fill a slab a little wider than the frame (284, 1066 to 1116, 1104) with , and a slightly narrower, darker lip under it in . Give it the same noise, an Inner Glow of Size 10, and a Drop Shadow of 0, 16, Blur 22.Light from the glass should warm the stone next to it. Add a layer called
Reveal Light. Cmd-clickArch Template, Grow… by 18 and fill with . Cmd-clickArch Templateagain and press Delete, leaving a thin orange ring. Marquee a strip along the top of the sill and fill that too. Run Gaussian Blur at 16 and set the layer to Screen at about 32%. Keep it faint: you want warm stone, not a glowing tube.Finally, select
Masonryand add a layer calledLight Spill. Fill an ellipse about 1100 × 1300 px centred on the window with , run Gaussian Blur at 140, and set it to Screen at 45%. The wall now looks lit by the window.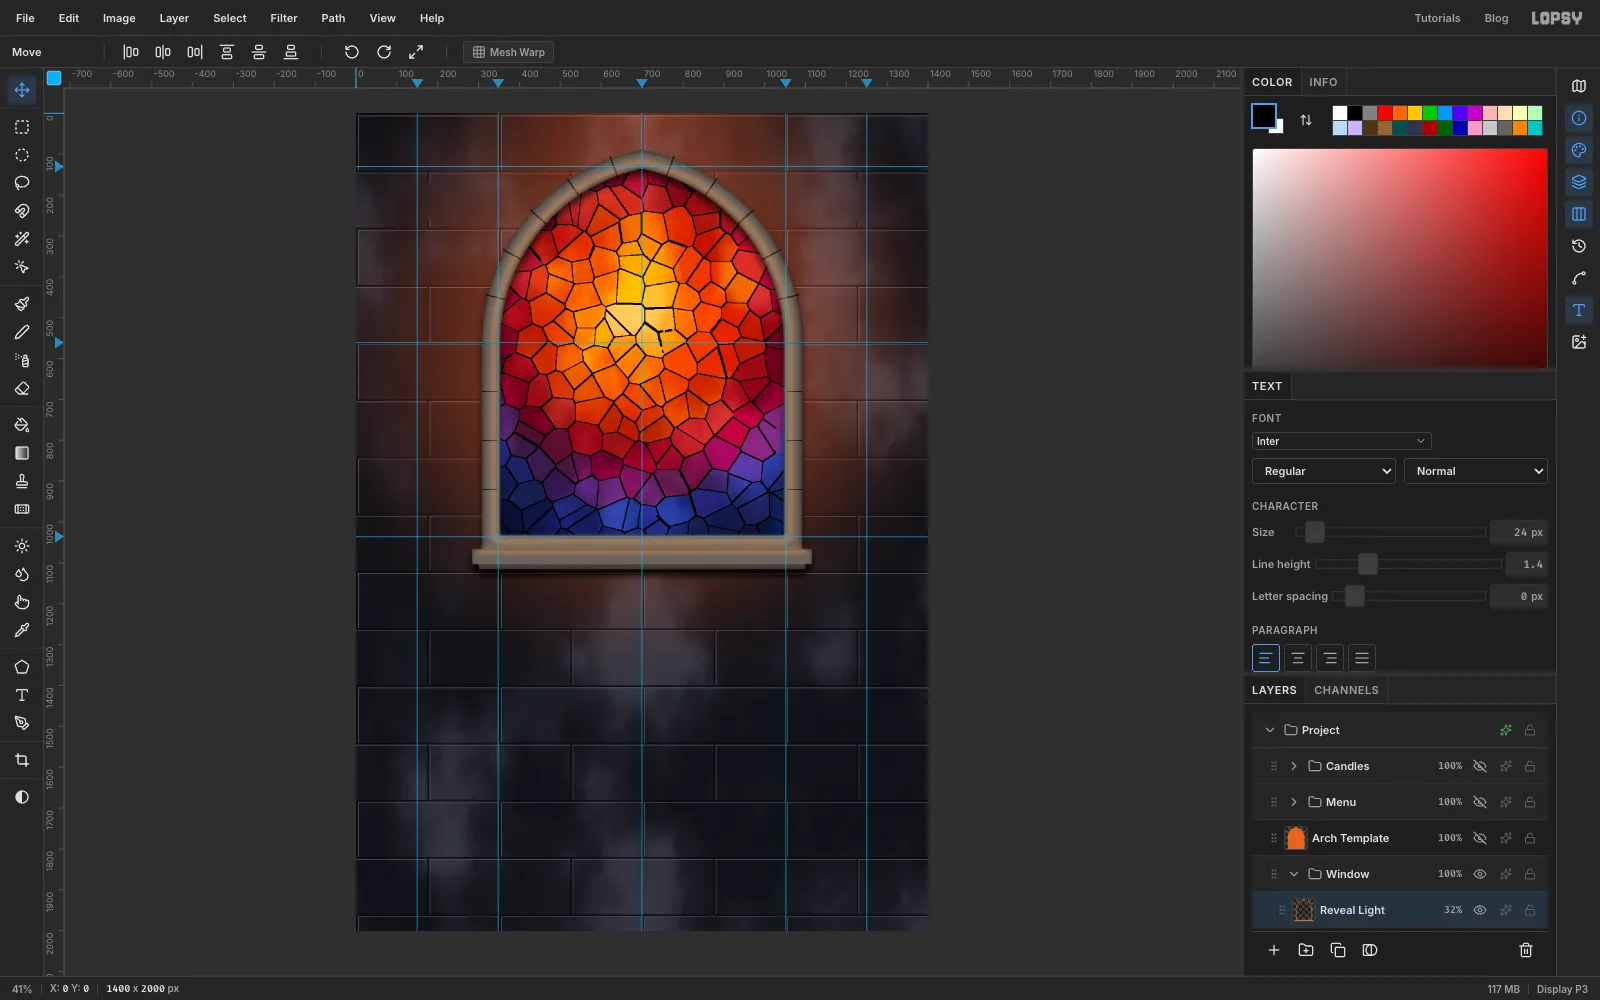
-
Bring in the raven
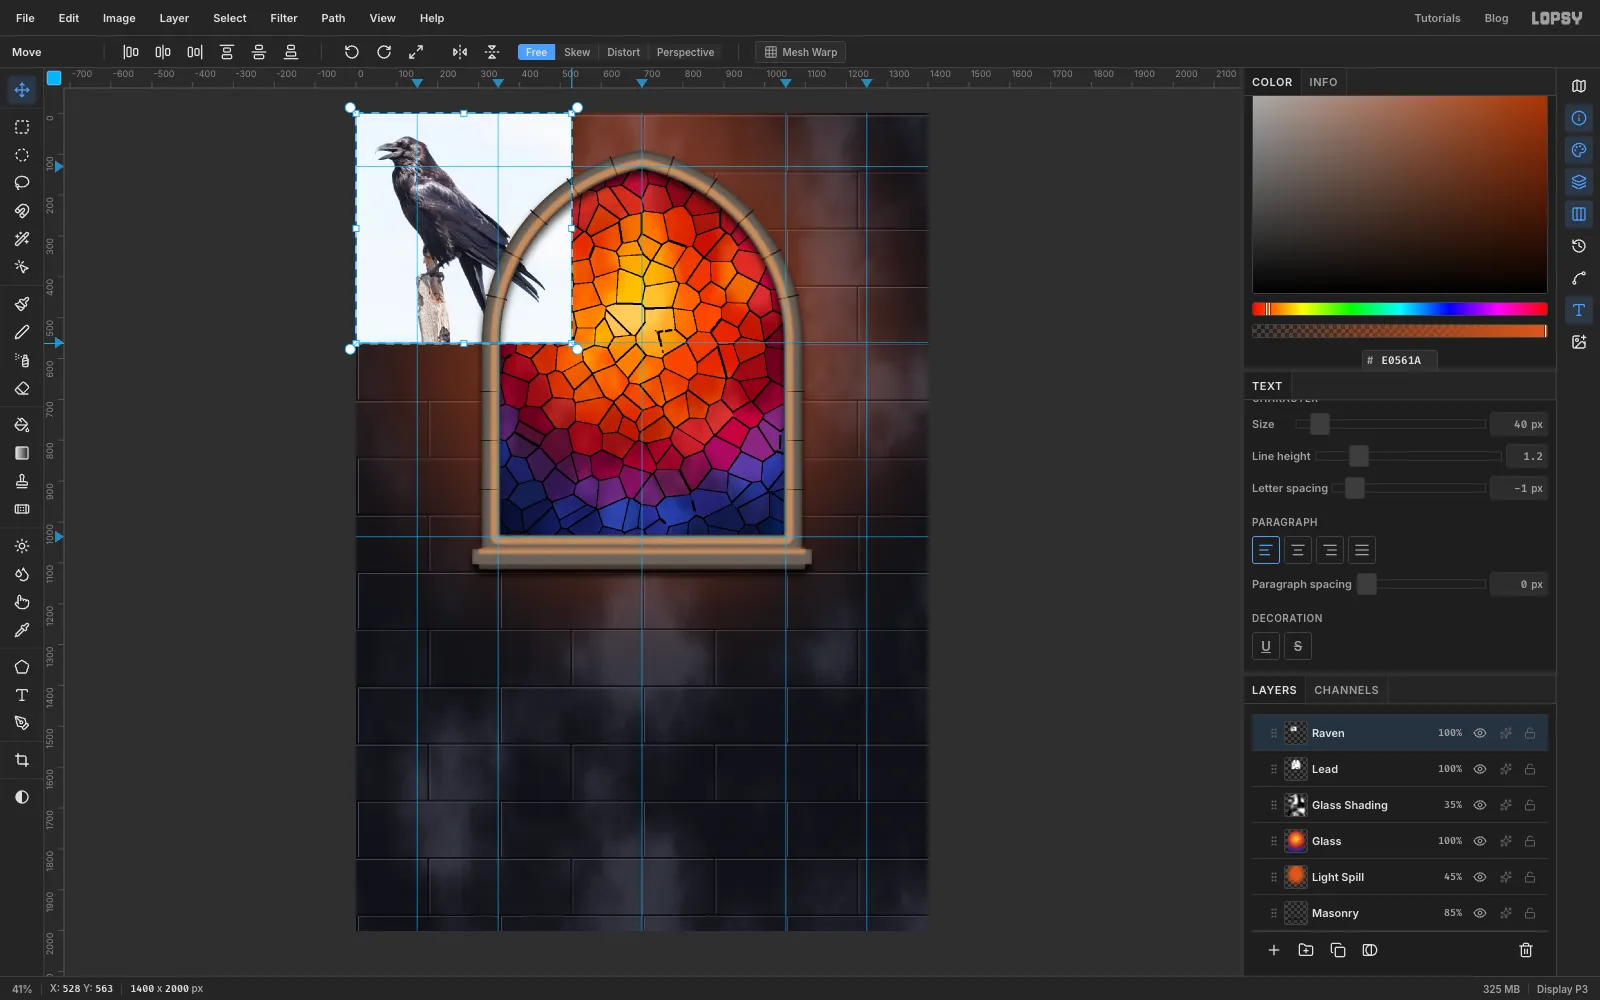
Copy your raven photo and paste it with Cmd+V while
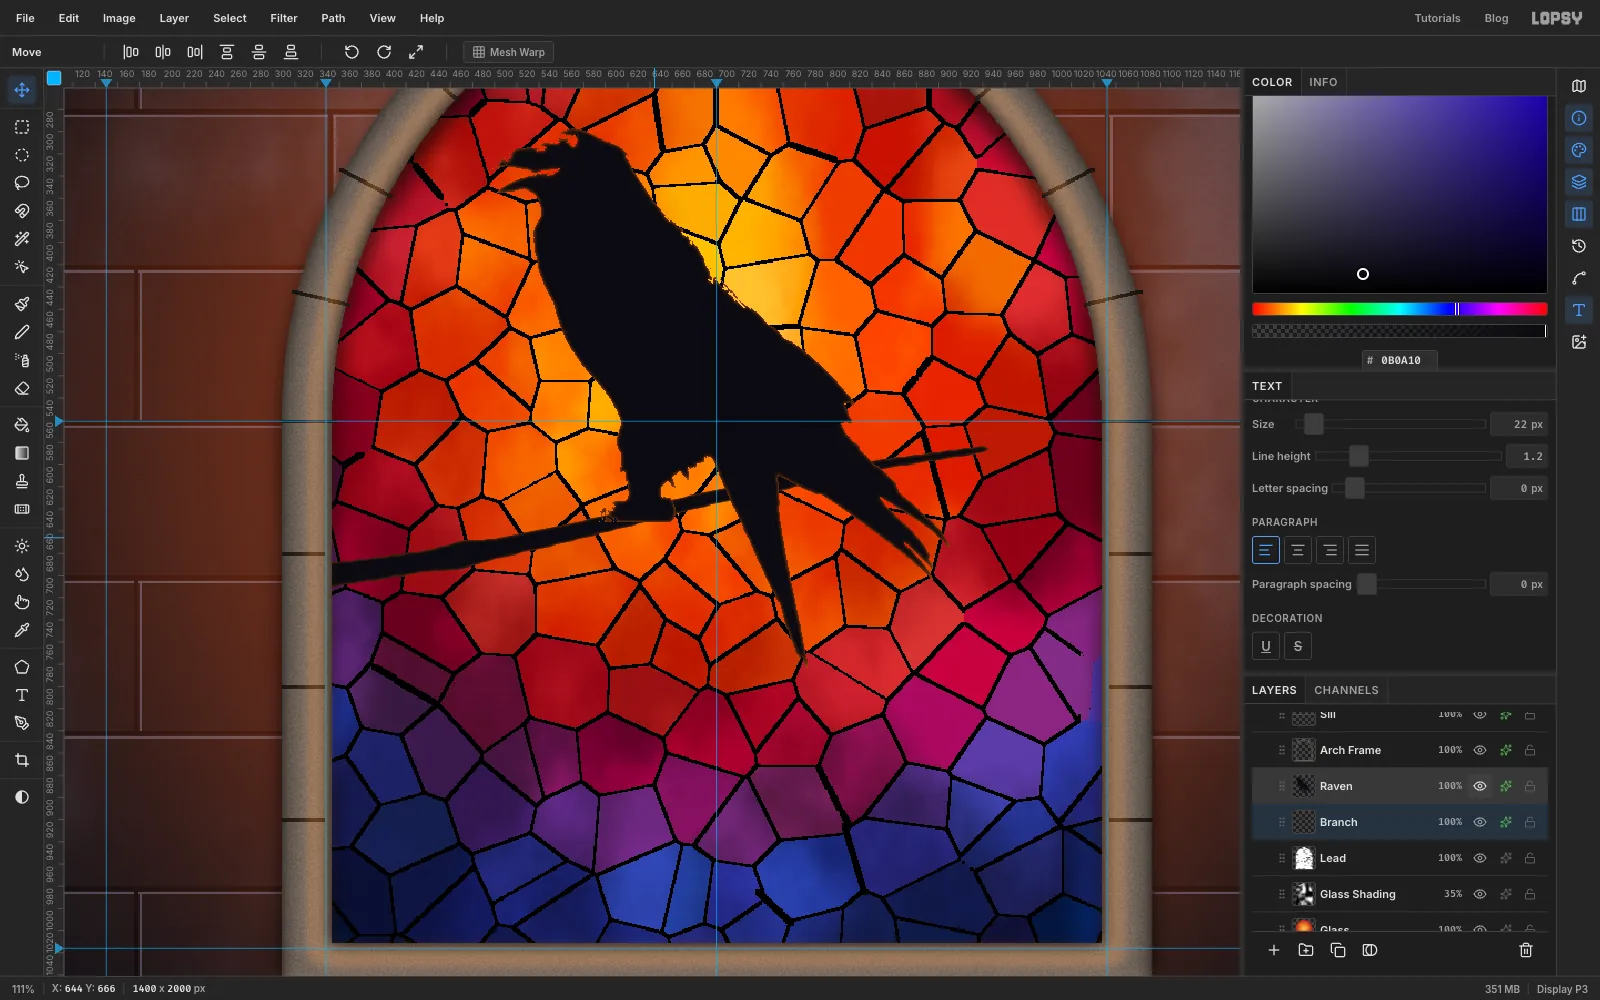
Leadis selected, so it lands just above the glass. Rename the layerRaven.The paste comes in selected, with handles. Hold Cmd and drag a corner handle inwards to scale it evenly, until the bird is about 450 px from the top of its head to the tip of its tail. Then drag from inside the box to move the bird so its head is near the top of the window, its chest is over the brightest part of the glass, and its tail hangs towards the lower right. Press Enter to commit.
-
Turn the photo into a silhouette
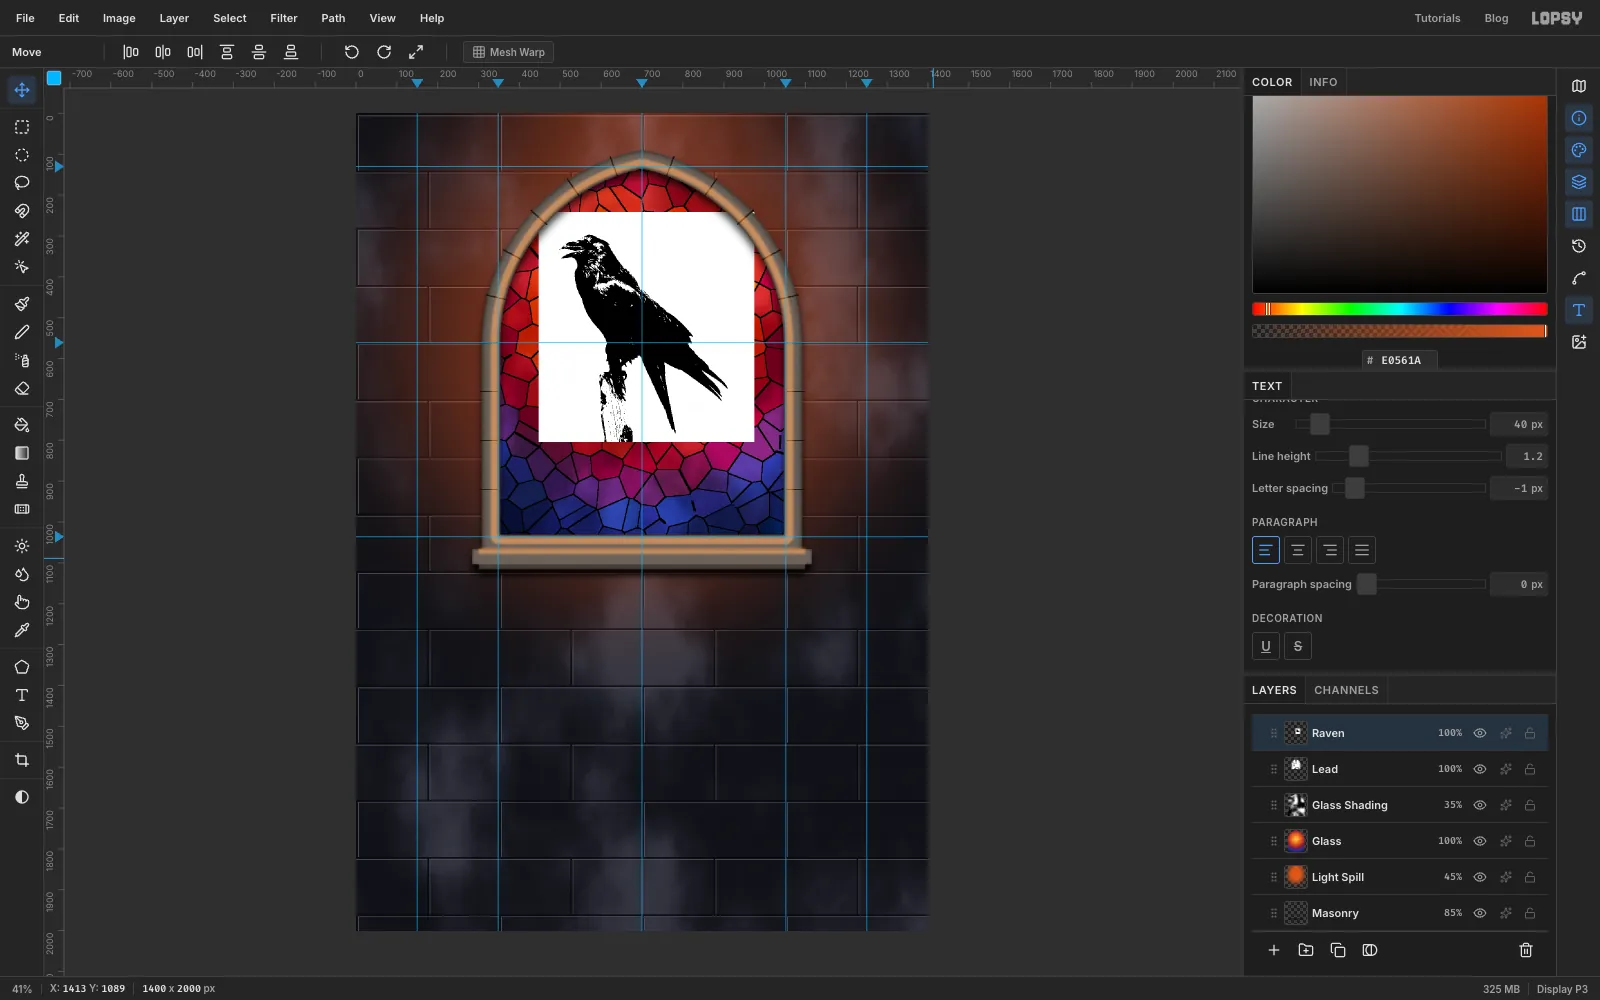
Run Filter → Threshold… at 150. The sky goes white and the bird goes black.
The edge of a thresholded photo is jagged. To smooth it, run Gaussian Blur at 1.5 and then Threshold again at 128.
If the bird is standing on a post or perch in the photo, lasso the part below its feet and press Delete.
-
Cut it out and add a rim light
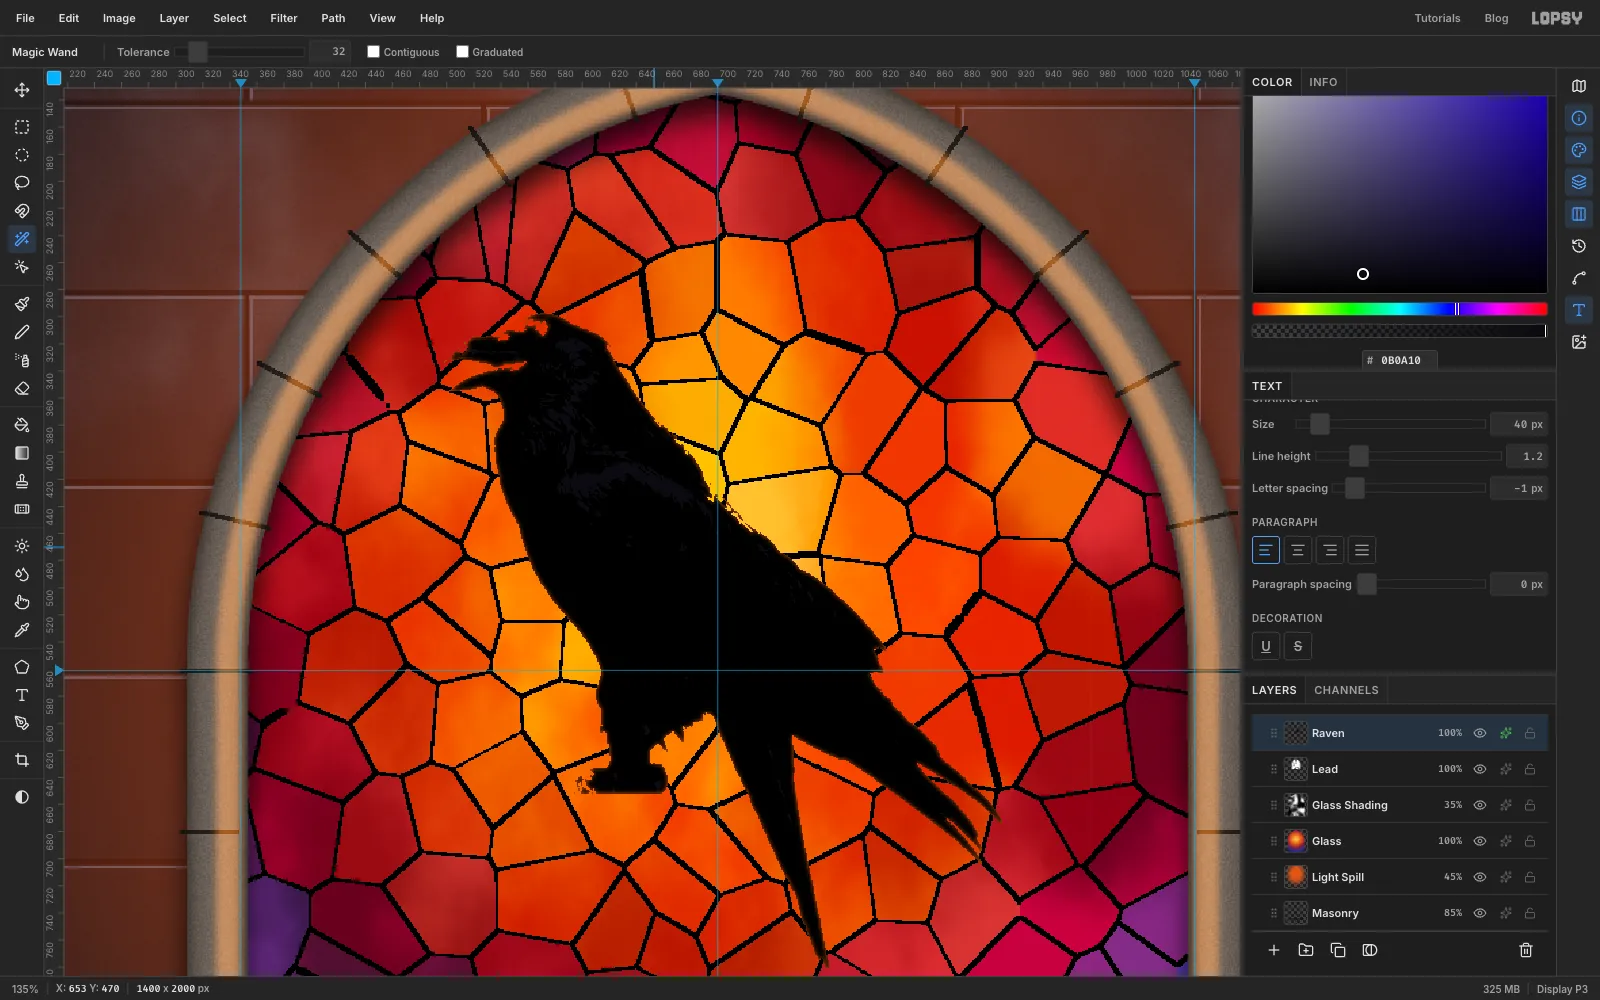
Choose the Magic Wand with Contiguous on and click the white sky. Press Delete, then deselect.
There are still white feather highlights inside the bird. Turn Contiguous off, click one of them, and fill the selection with near-black . Then Cmd-click the
Raventhumbnail and fill once more, which flattens any grey sheen left from the photo. Now the raven is one solid silhouette, like a piece of black glass.Give the layer an Inner Glow in , Size 5, Opacity 75%. It catches the edges as if the bird were backlit by the window.
-
Add a branch for it to perch on
Add a layer called
BranchbetweenLeadandRaven, so the bird's feet sit on top of it. With the Lasso, draw the branch's outline:- start under the frame on the left at about the height of the window's middle
- rise gently to the right, passing just under the raven's feet
- end in a point about 100 px before the right side of the window
- make it about 20 px thick on the left and 6 px at the tip, with a bump for a knot
Fill it with and add the same orange Inner Glow at Size 4. Keep it to one clean branch: extra twigs crossing the glass get confused with the lead lines.
-
Group the window
Click
Glassin the Layers panel, Shift-clickReveal Light, and choose Layer → Group Layers. Name the groupWindow. Now you can hide or move the whole window as one piece.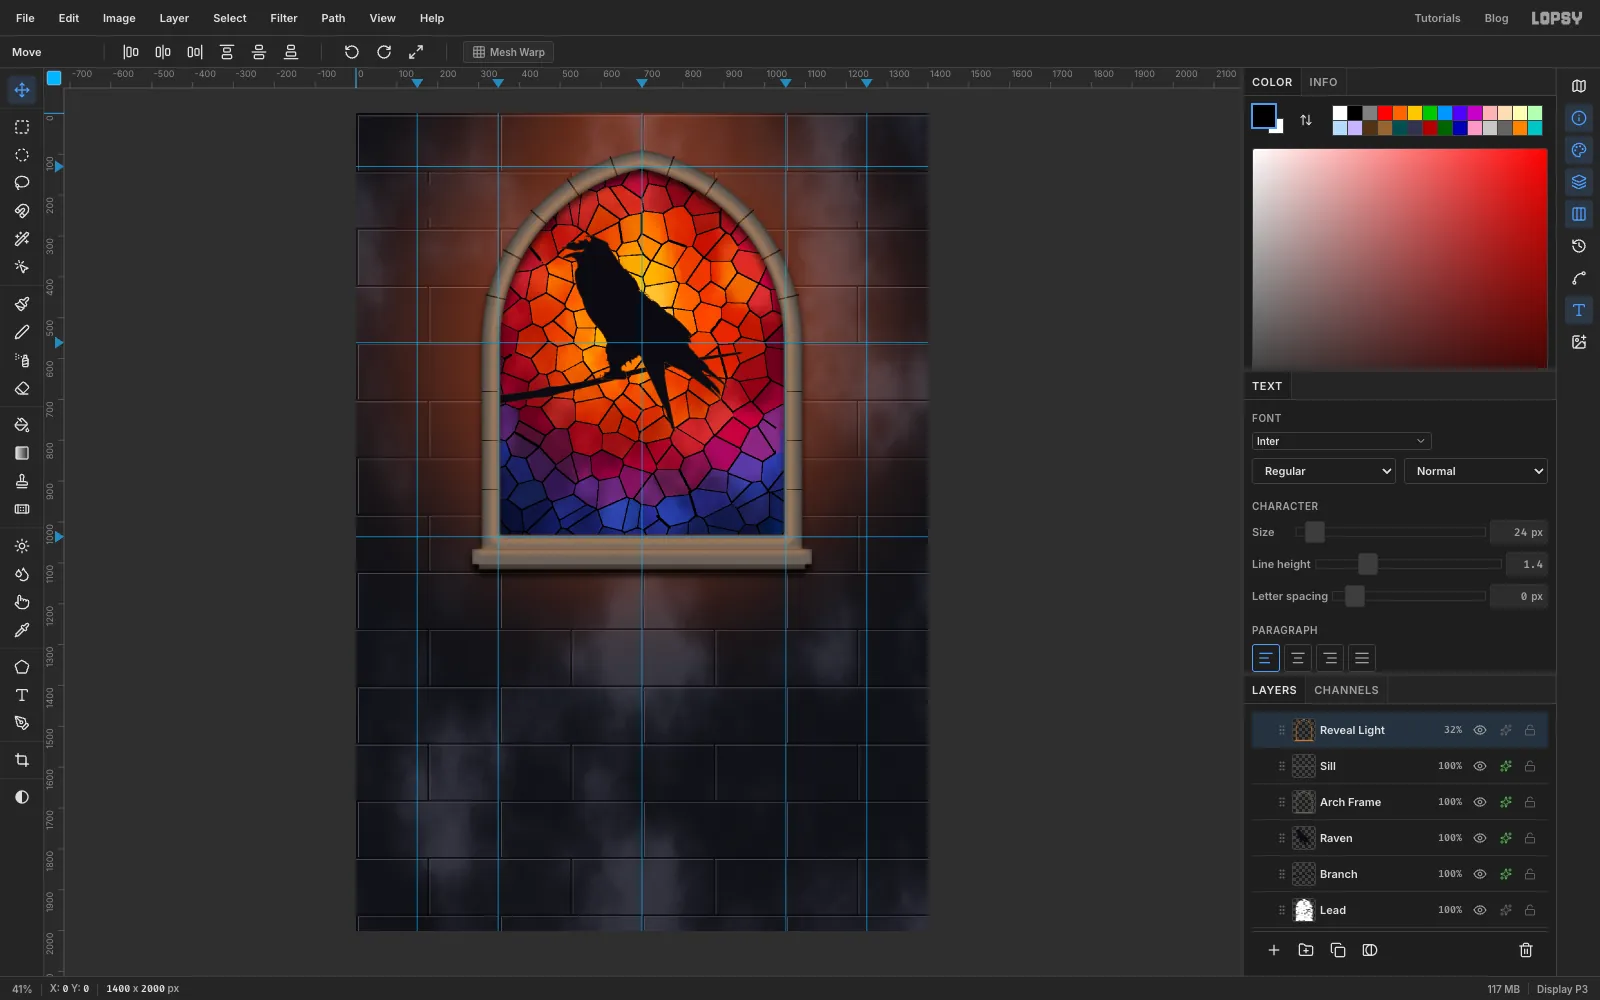
-
Light the left candle
Select
Arch Templateand click New Group. Name itCandles. Build the left candle on the 150 guide, one layer at a time:- Candle Glow L: a soft ellipse of where the flame will be, blurred at 60 and set to Screen at 50%.
- Quatrefoil L: with the Elliptical Marquee, draw a circle about 48 px across, then Shift-drag three more around it so they overlap in a four-leafed shape about 90 px wide, centred on the 150 guide at about y 215. Fill it with any colour, Cmd-click the thumbnail and drag a Radial gradient from the centre outwards, from through to . Add an outside Stroke of 9 in frame stone , a dark Inner Glow and a soft orange Outer Glow.
- Sconce L: in iron , lasso a pointed backplate about 40 px wide hanging from y 785 to about y 905. Fill a short stem above it, a small cup, and a flat ellipse about 125 × 28 px at y 752 for the drip pan. Use the Pen at Stroke 6 for two curling arms from the stem to the plate; press Enter after each one to stroke it. Add a thin warm Inner Glow (, Size 3) to catch the candlelight, and a Drop Shadow.
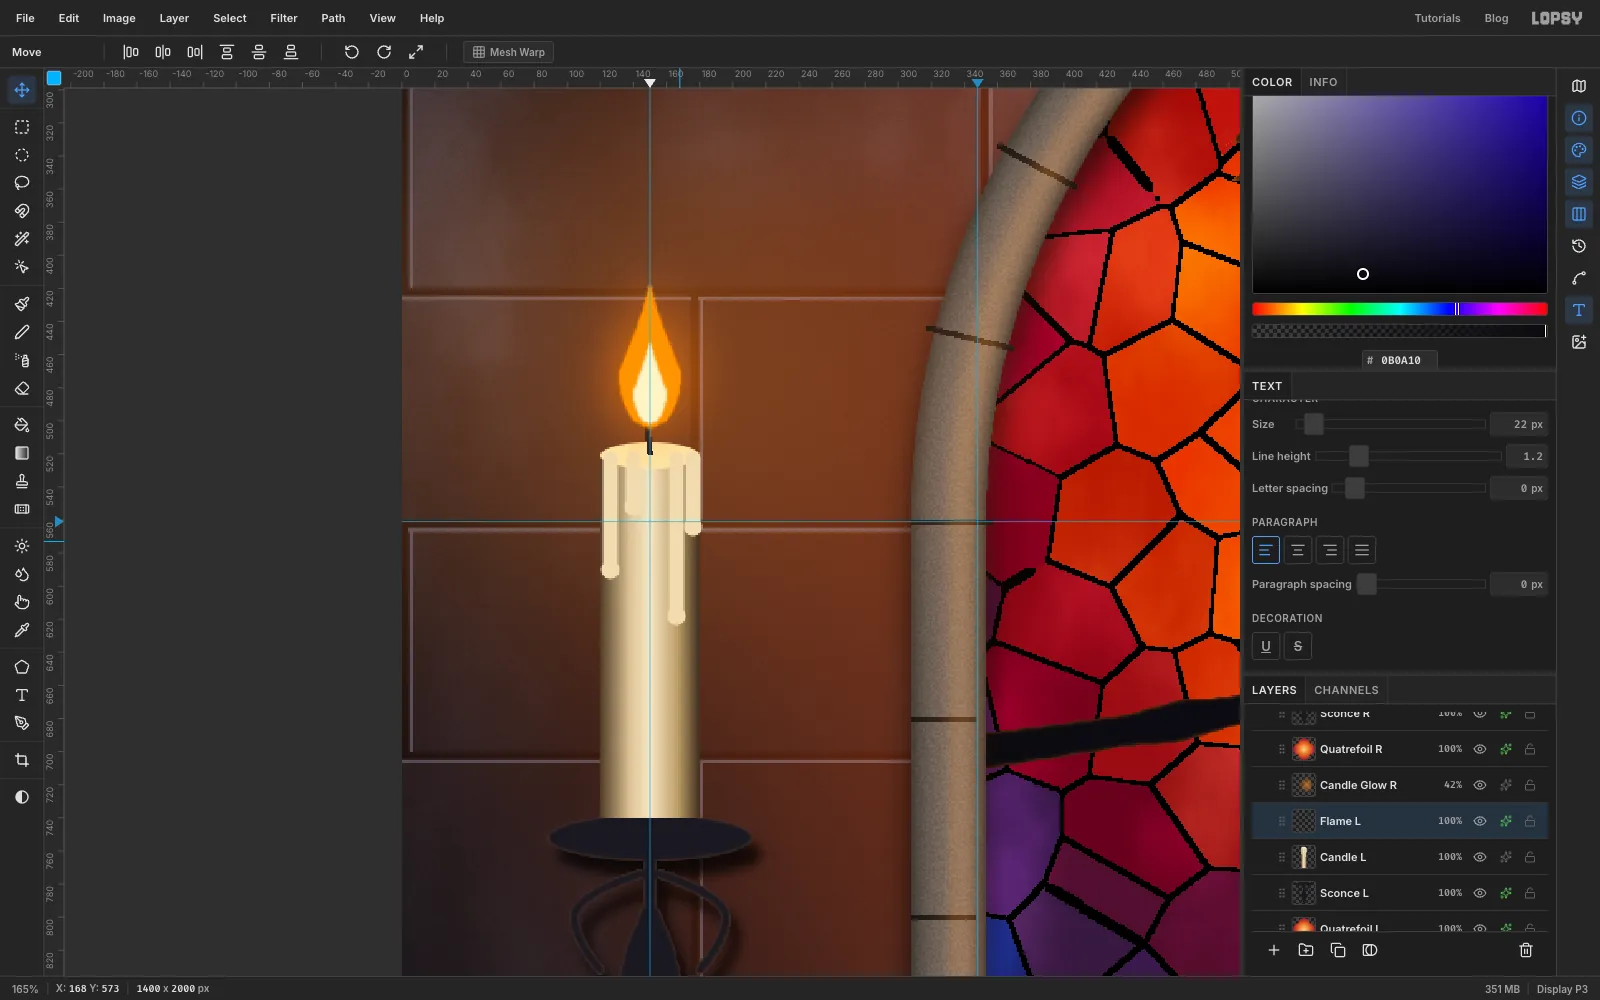
- Candle L: marquee the candle body, about 60 px wide from y 520 down to the drip pan, and drag a horizontal Linear gradient across it from dark tan to cream and back to dark. That makes it look round. Fill a pale ellipse on top for the melted pool. Paint drips straight down with a Brush at Size 10, and click a slightly bigger dot at the end of each. Pencil a short black wick.
- Flame L: lasso a teardrop and fill it orange . Lasso a smaller teardrop lower down and fill it pale . Run Gaussian Blur at 2 and add an Outer Glow of at Size 50.
-
Light the right candle
Make the right-hand set the same way on the 1250 guide, but make that candle a little shorter and give it different drips, so the two sides aren't mirror copies.
To set the quatrefoils into the wall, Cmd-click each quatrefoil's thumbnail, Grow… by 12, select
Masonryand press Delete. The joints stop at the stone surround instead of running behind it.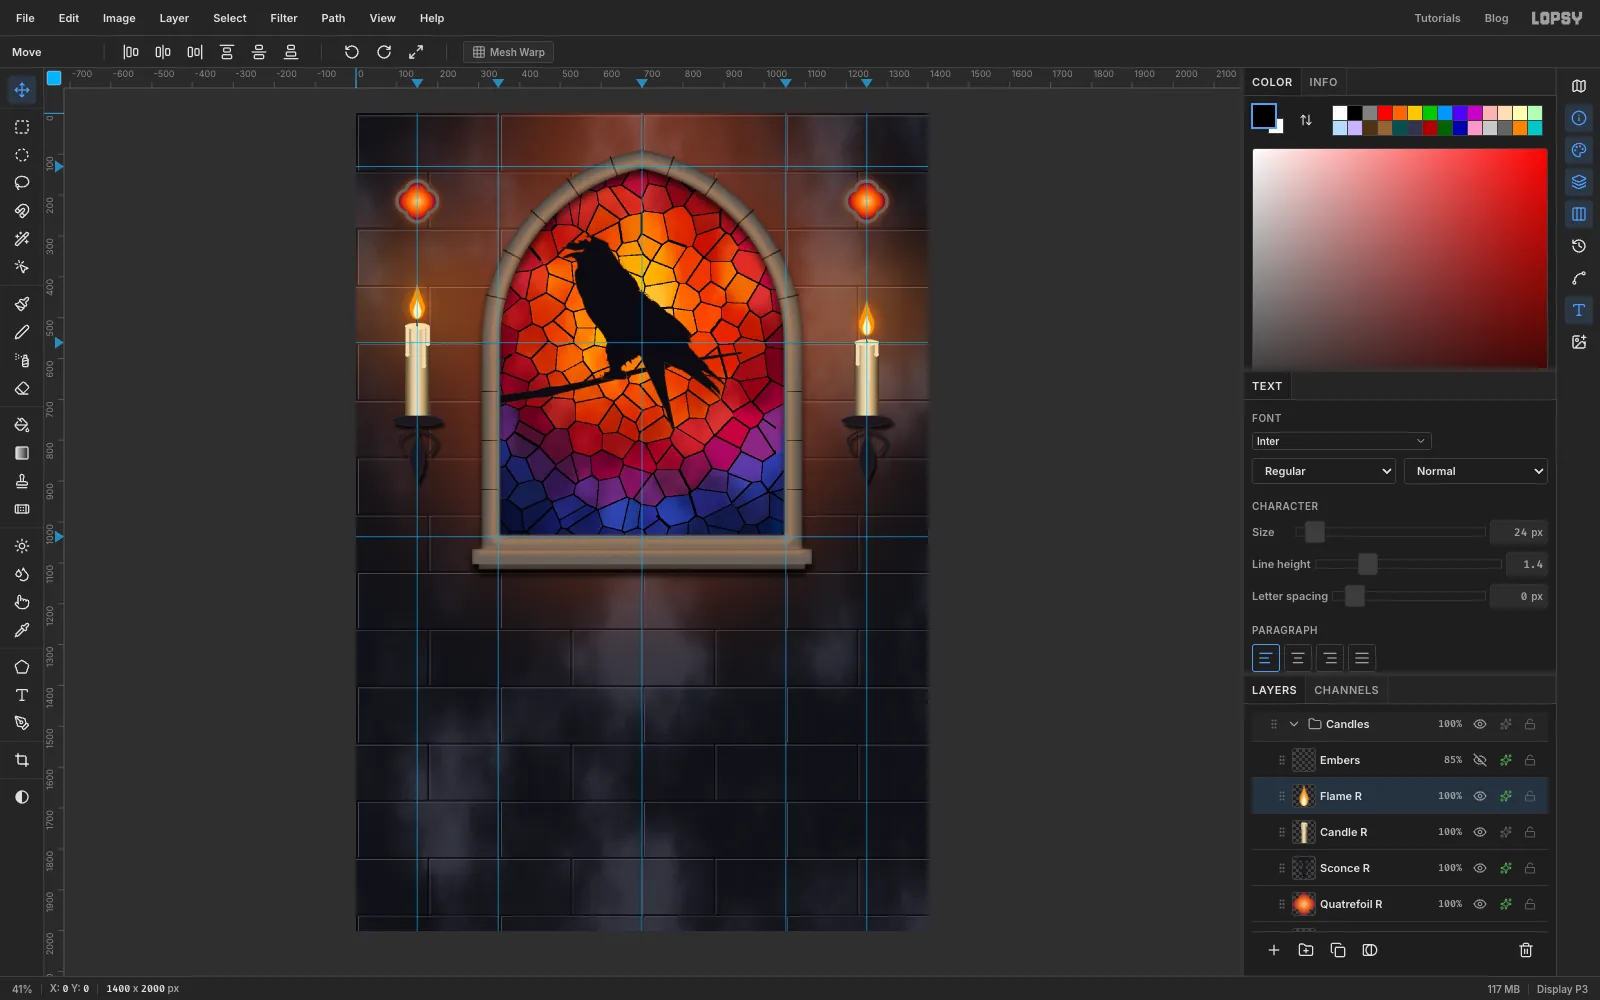
-
Set the title
Select
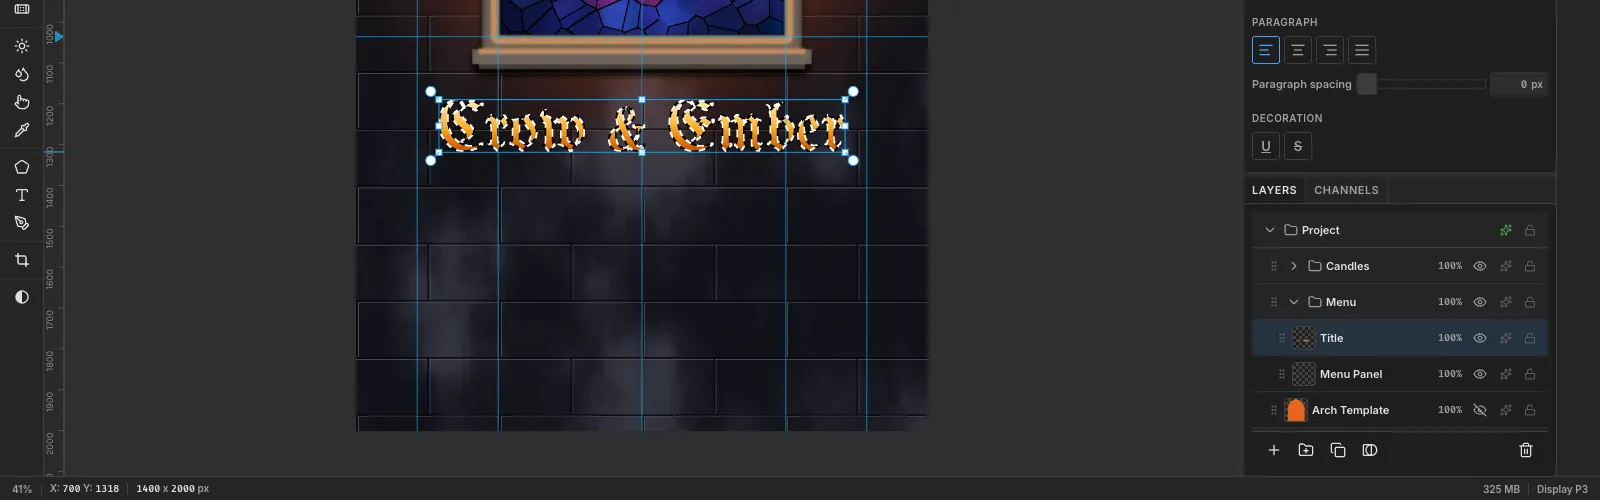
Arch Templateand click New Group. Name itMenu, and add an empty layer in it calledMenu Panel.Choose the Text tool, set the font to UnifrakturMaguntia at 170 px and click on empty canvas. Type
Crow & Emberand press Tab. Move it so its top is about 75 px below the sill, then click Align center horizontally in the Move options.Rename the layer
Titleand click Rasterize Layer in the Layers panel footer. Cmd-click the title's thumbnail and drag a Linear gradient from the top of the letters to the bottom: , , . Deselect and add:- Stroke: outside, 2, dark brown
- Outer Glow: , Size 40, Opacity 55%
- Drop Shadow: 0, 7, Blur 10, Opacity 85%
-
Add the subtitle
With
Menu Panelselected, set the Text tool to IM Fell English SC at 40 px in , and typea gothic chophouse · est. mcccxlixin lowercase; this font turns it into small capitals. Name the layerSubtitle. In the Text panel, set Letter spacing to 5. Place it about 30 px below the title and centre it.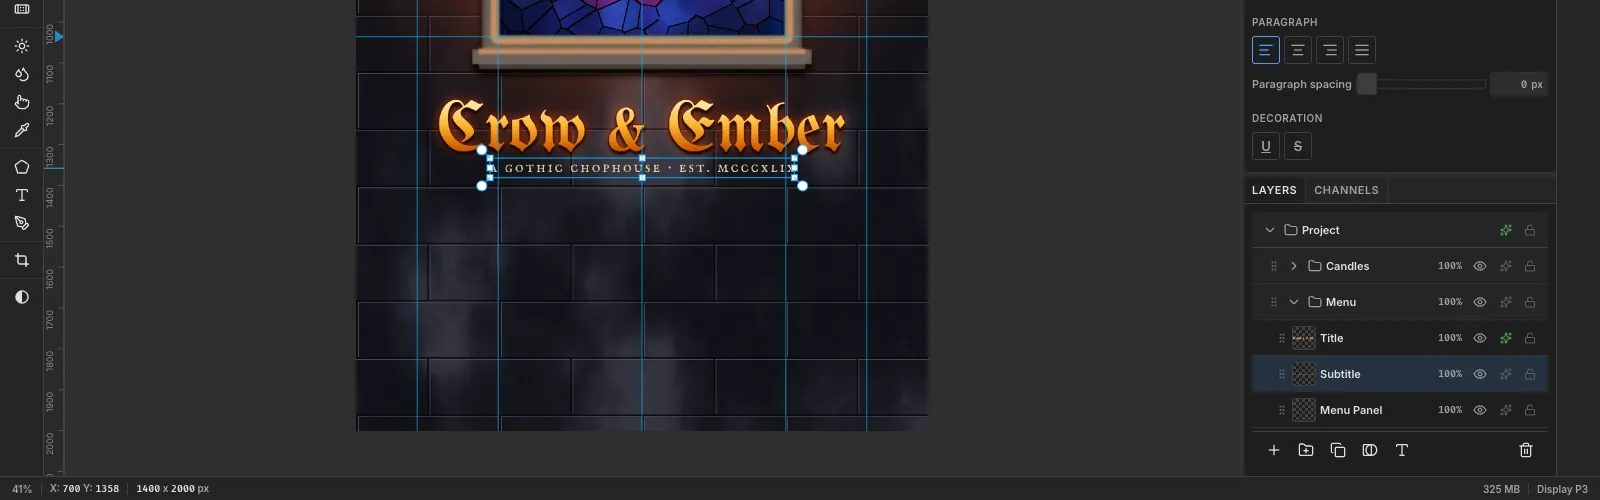
-
Make the parchment panel
Select
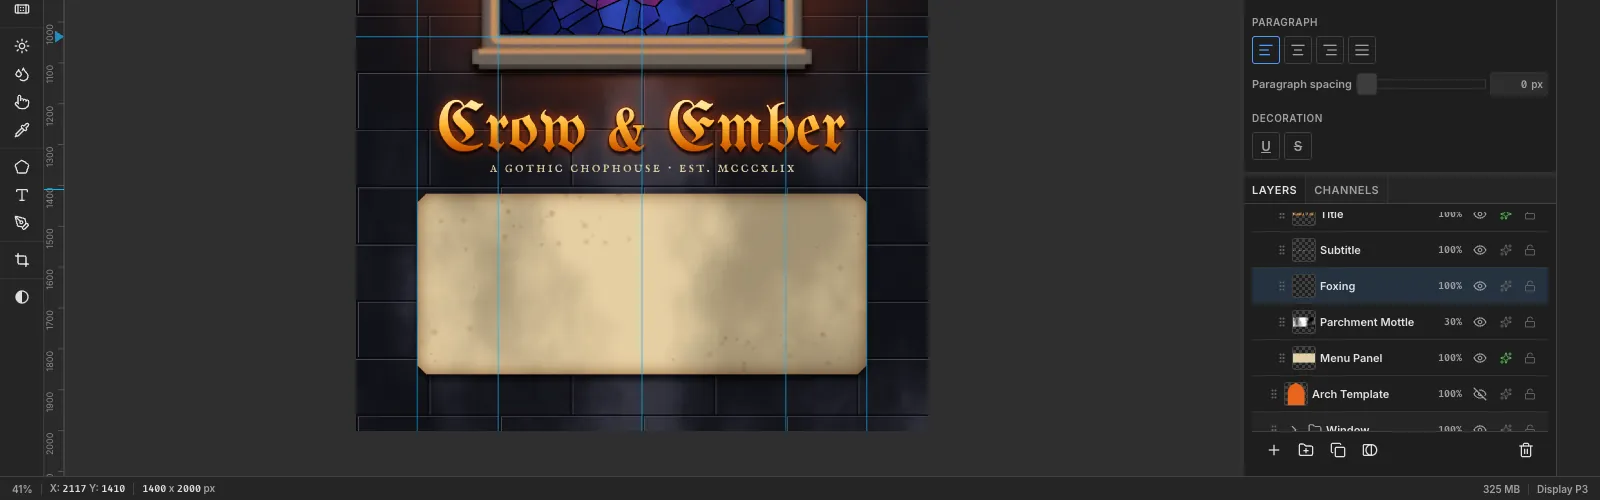
Menu Panel. With the Rectangular Marquee, select from 150 to 1250 across, starting about 55 px below the subtitle and about 440 px tall, and fill it with . To clip the corners, drag the Lasso around a small triangle about 22 px deep on each corner and press Delete. Select the panel again by Cmd-clicking its thumbnail and run Add Noise at 6, Mono, Gaussian. Add an Inner Glow of , Size 60, Opacity 80% to darken the edges, and a Drop Shadow.Two more layers age it:
- Parchment Mottle: Cmd-click the panel, run Clouds at Scale 4 with white and a brown , and set it to Multiply at 30%.
- Foxing: Cmd-click the panel again and use the Spray tool (Size 220, Density 3, Opacity 30, Softness 100) in along the edges and corners. Set the layer to Multiply.
-
Set the left column
Each column is four text layers. Keep 50 px of padding inside the panel, and create every text layer on empty canvas before you move it into place. Name the layers as you go (
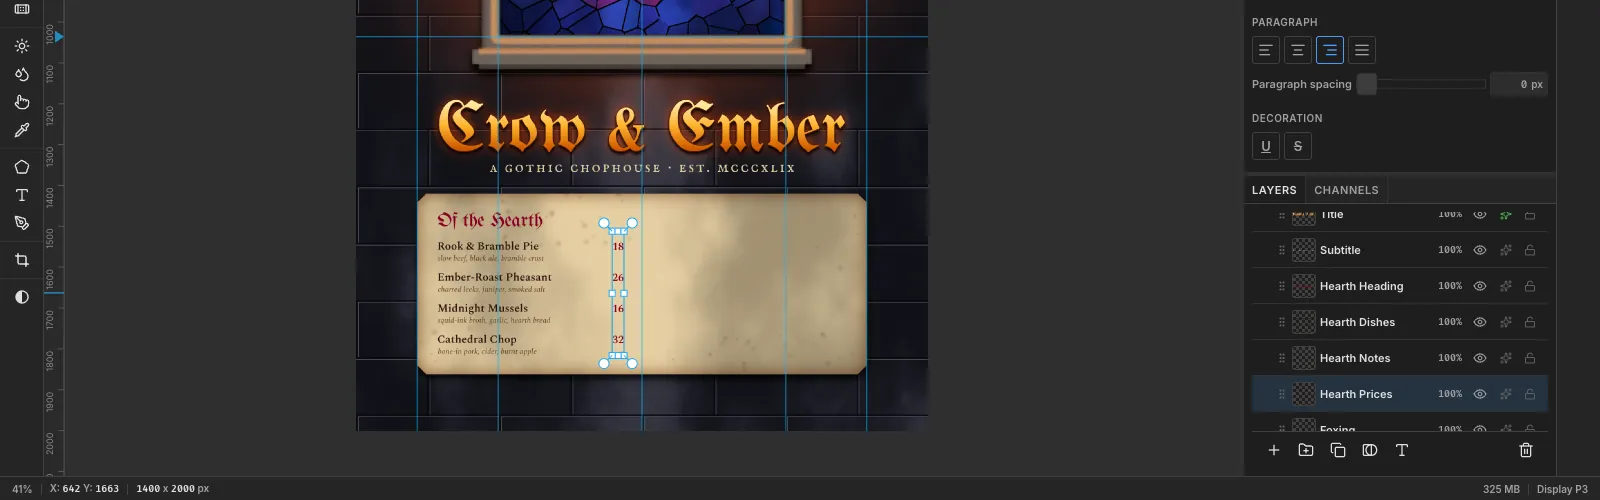
Hearth Heading,Hearth Dishes,Hearth Notes,Hearth Prices), so the panel stays easy to work in.- Heading:
Of the Hearthin UnifrakturMaguntia, 48 px, ruby , about 45 px below the panel's top edge. - Dishes: Rook & Bramble Pie, Ember-Roast Pheasant, Midnight Mussels and Cathedral Chop on separate lines, in Spectral SemiBold, 27 px, ink . Set Line height to 2.815, which gives a row every 76 px.
- Notes: slow beef, black ale, bramble crust, charred leeks, juniper, smoked salt, squid-ink broth, garlic, hearth bread and bone-in pork, cider, burnt apple, in Spectral Italic, 19 px, , with Line height 4 (also 76 px). Move it so each note sits just under its dish.
- Prices:
18,26,16and32on separate lines in Spectral SemiBold, 27 px, ruby, with Line height 2.815 and Align right. Line up its right edge 45 px left of the centre line, and its baselines with the dish names.
- Heading:
-
Set the right column
Repeat for the drinks, starting 45 px right of the centre line:
Of the Cellar, then Raven’s Porter, Bishop’s Mulled Wine, Ember Cider and Nightjar Mead, with the notes black malt, cocoa, a curl of smoke, claret, clove, bitter orange, hot spiced apple, burnt sugar and dark honey, sage, candle-warm, and prices9,11,8and12right-aligned 50 px in from the panel's right edge. Use a real apostrophe (’) rather than a straight one.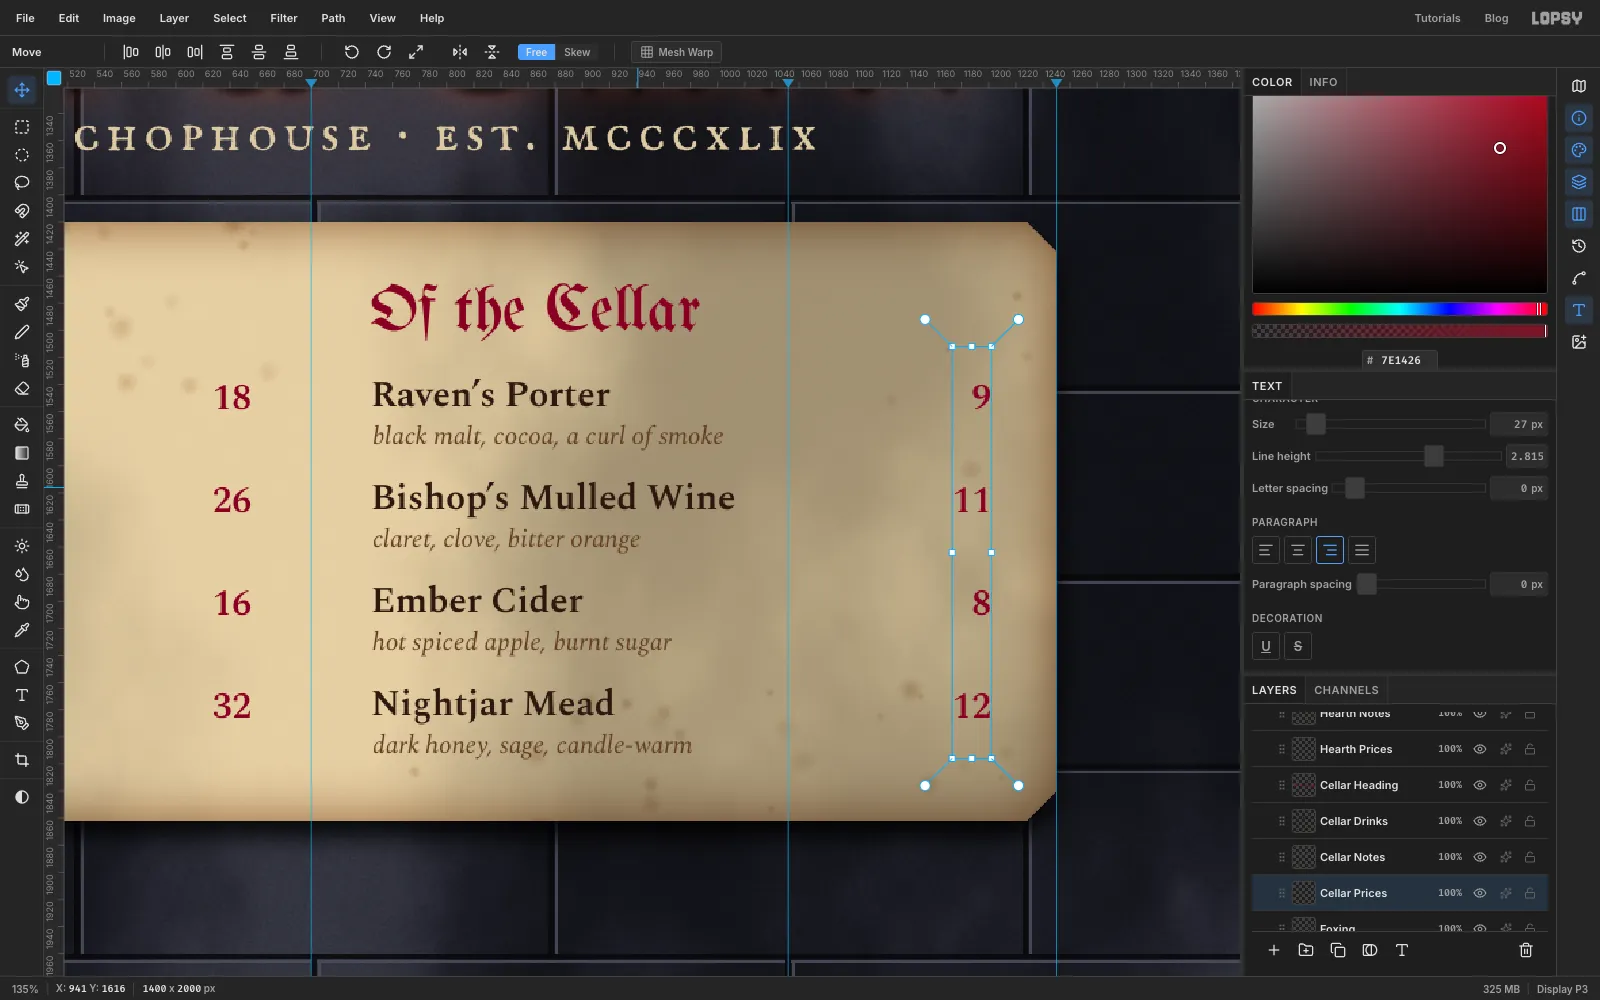
-
Add rules, a divider and the footer
Add a layer called
Menu Rules. With the Pencil at Size 2 in ruby:- Shift-click a line from just after each heading to the column's right edge, level with the middle of the heading.
- Draw a vertical line down the centre, starting and ending 45 px inside the panel. Leave a short gap in the middle, and lasso a small diamond there and fill it.
Set the layer to 80%.
For the footer, type
open from vespers till the last candle · no. 13 rookery lanein IM Fell English SC at 30 px, , letter spacing 3. Centre it about 45 px below the panel.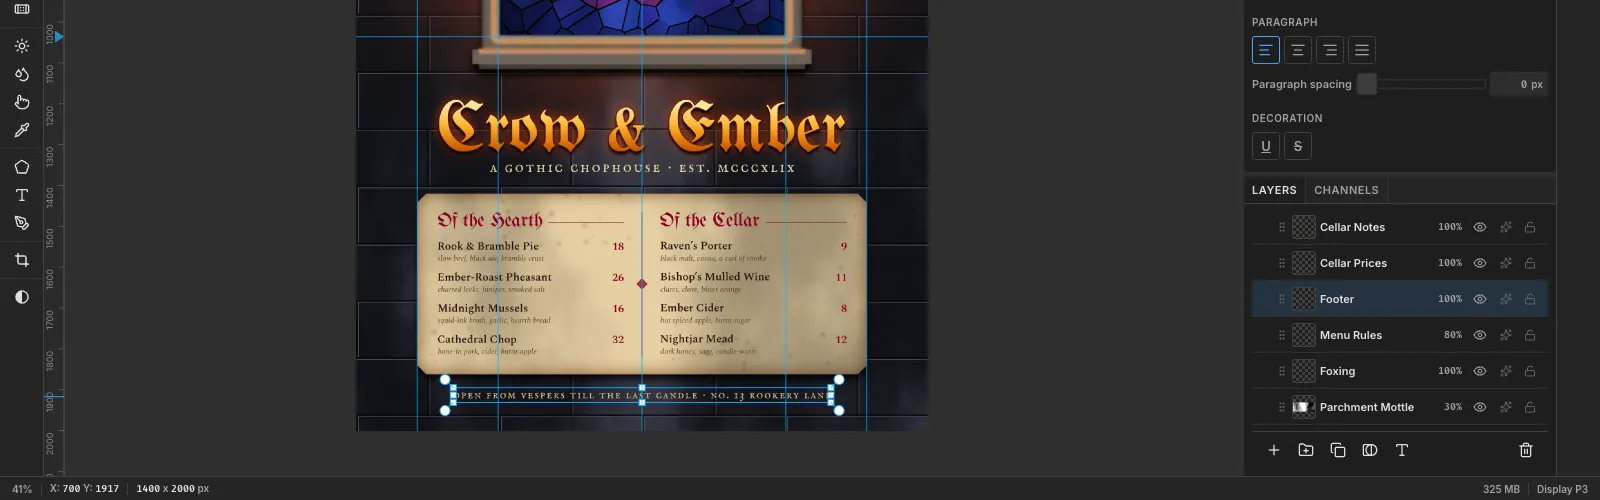
-
Press a wax seal
Add a layer called
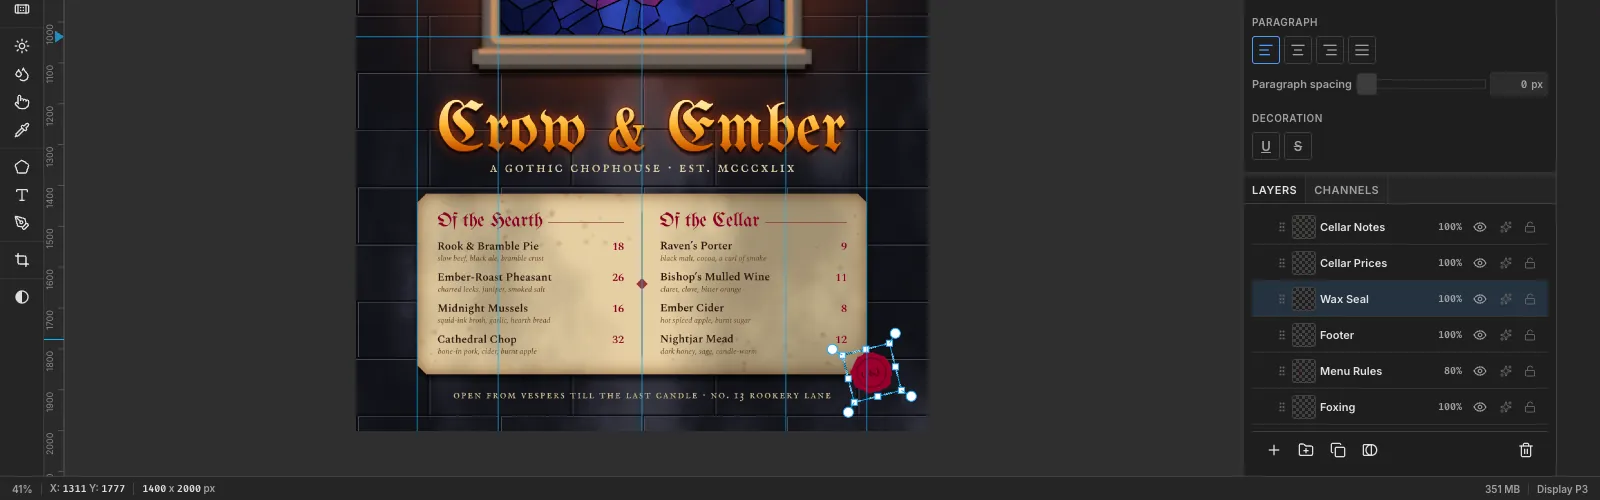
Wax Seal. Lasso a wobbly circle about 100 px across over the panel's bottom-right corner, at least 50 px from the last price and clear of the footer line, and fill it with . Fill a circle about 74 px across in darker on the same centre. Shrink it by 3 and fill it with the wax colour again, leaving a thin pressed ring.Type
C&Ein Cinzel Decorative Bold at 22 px in and centre it on the seal. Rasterize it and choose Layer → Merge Down.Marquee the seal, switch to the Move tool and drag the rotation handle to turn it about 14° anticlockwise. Press Enter.
-
Finish the seal
Give the seal an Inner Glow of at Size 9 and a Drop Shadow of 3, 6, Blur 8. For the shine, add a layer called
Seal Shine, fill a small white ellipse on the upper left of the seal, blur it at 6 and set it to about 22%. Any brighter and the wax looks like plastic.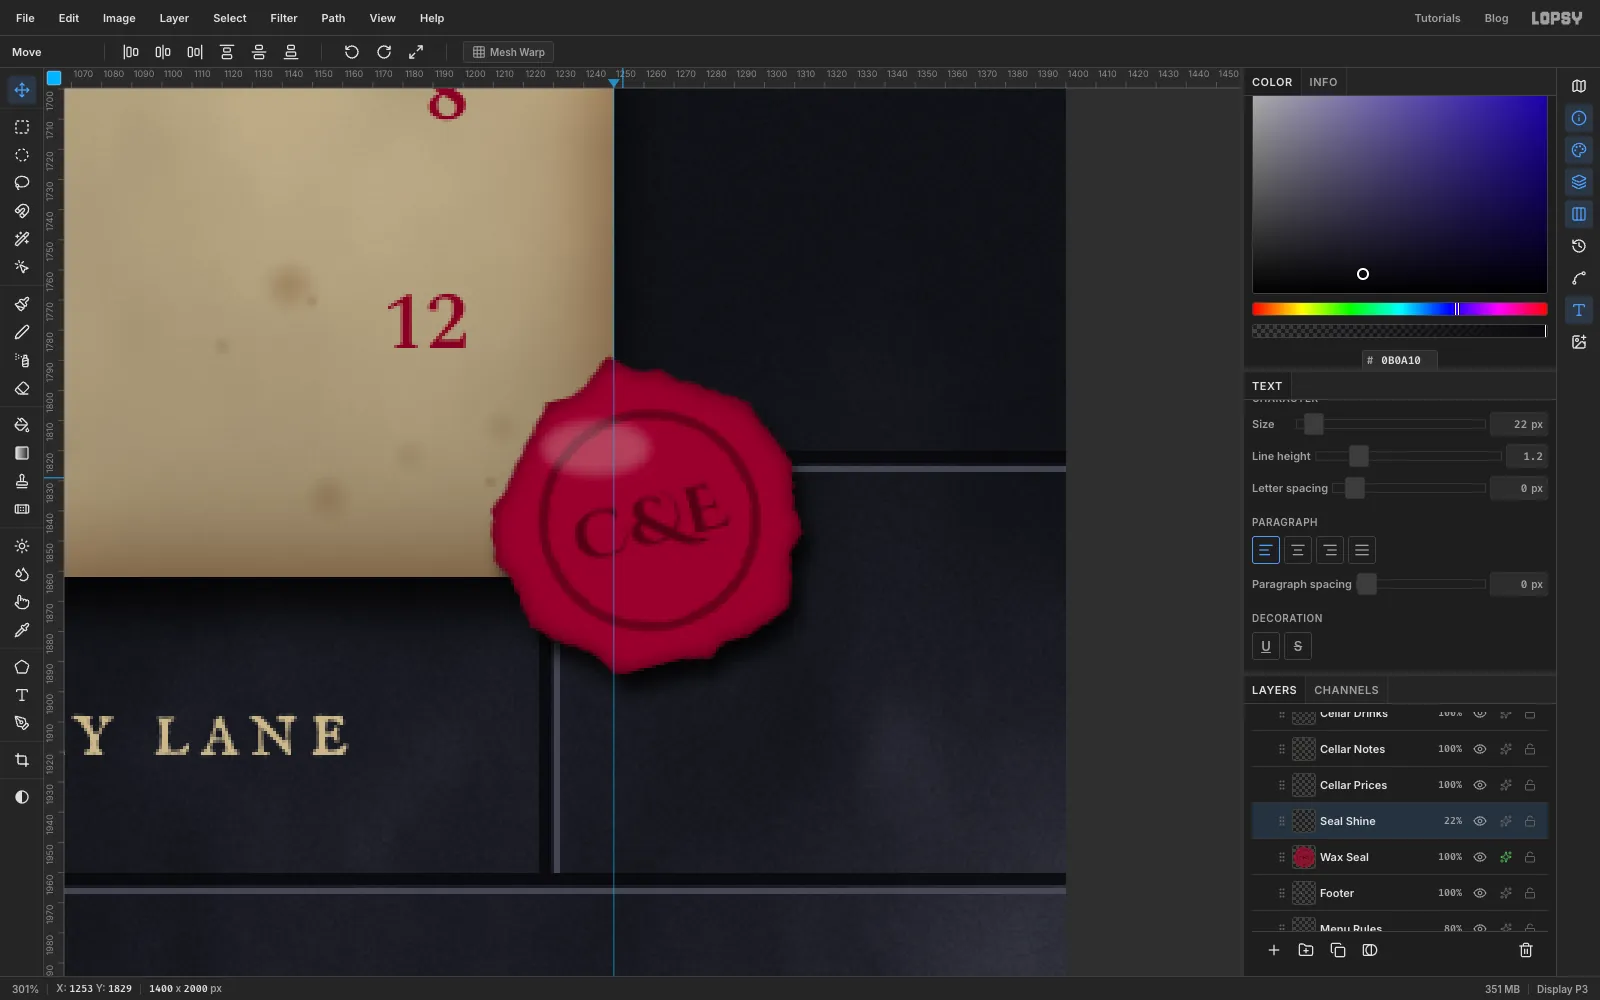
-
Send sparks up from the flames
Open the
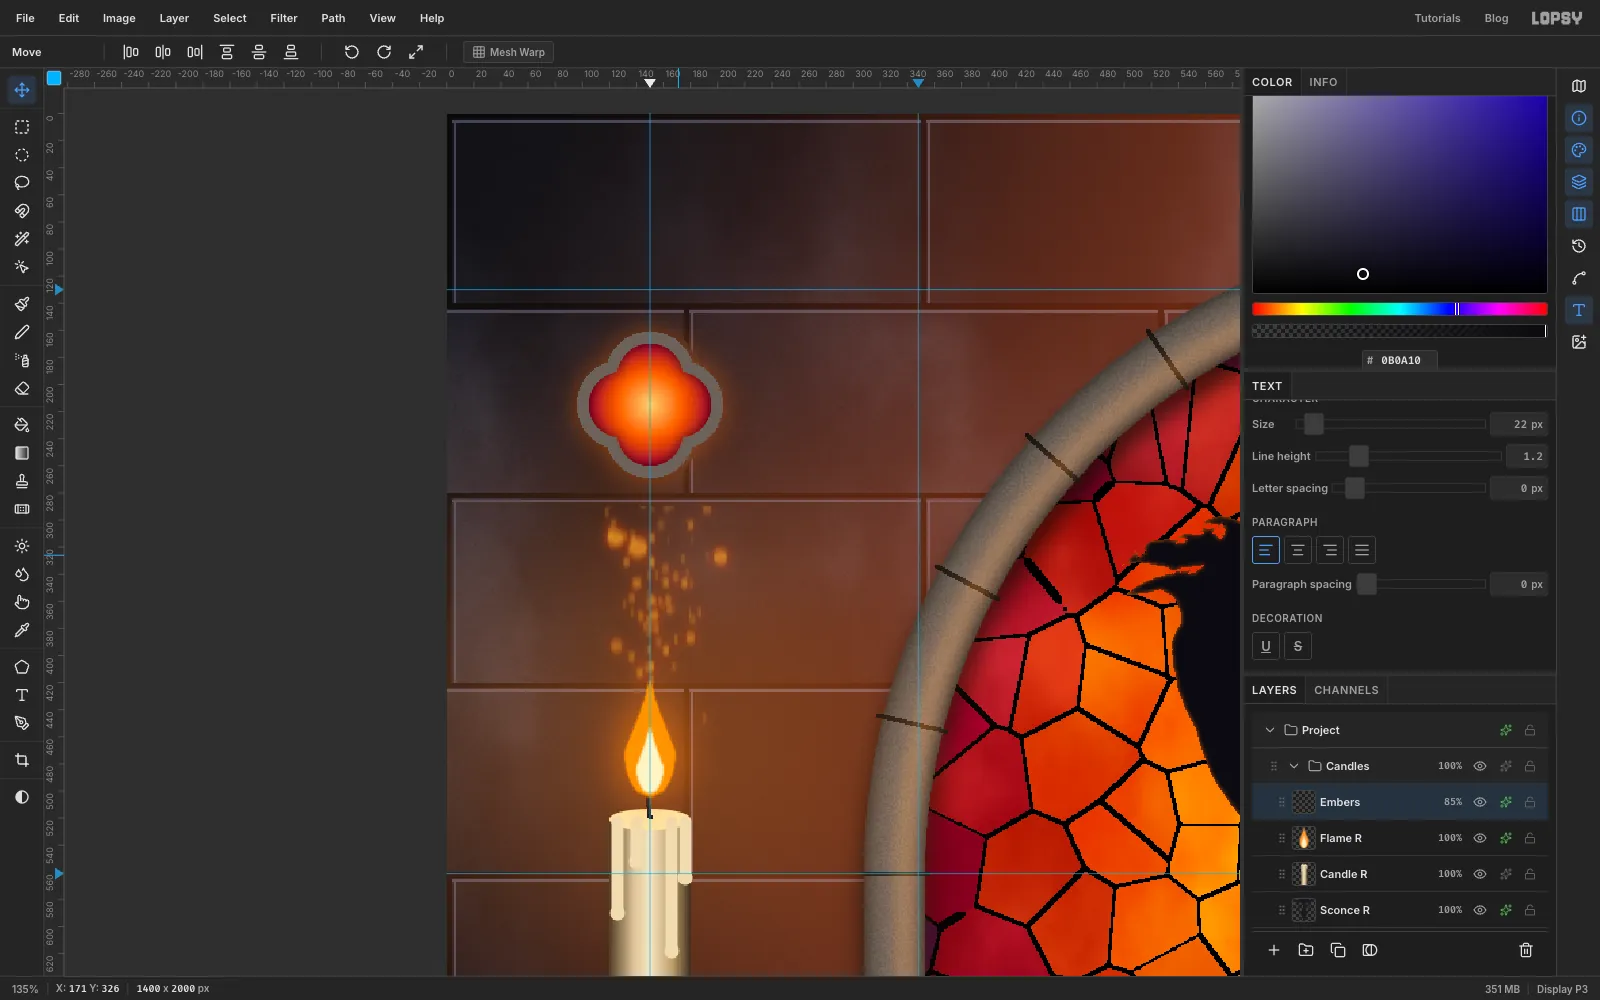
Candlesgroup, select the top layer and add a layer calledEmbers. Choose the Spray tool at Size 60, Density 3, Opacity 100, Softness 30, in .Make one short drag just above each flame, then one long, wavering drag upwards from the flame. The sparks pile up near the flame and thin out as they rise. Switch to Size 140, Density 1 and make one more pass for a few bigger embers.
Sparks that drift right up to the quatrefoils look like they're pouring out of them. Marquee from the top of the canvas down to about 60 px below each quatrefoil and press Delete, then set the layer to 85%.
Run Motion Blur at 90°, 7 px, so each spark gets a short upward streak, and add an Outer Glow of at Size 12.
-
Soften the candle glows
Last of all, look at the candle glows on the wall. If you can still see where each one ends, select
Candle Glow LandCandle Glow Rin turn, run Gaussian Blur again at 90 and lower it to about 42%. They should fade into the warm light from the window.Save with File → Save Project, then File → Quick Export PNG.