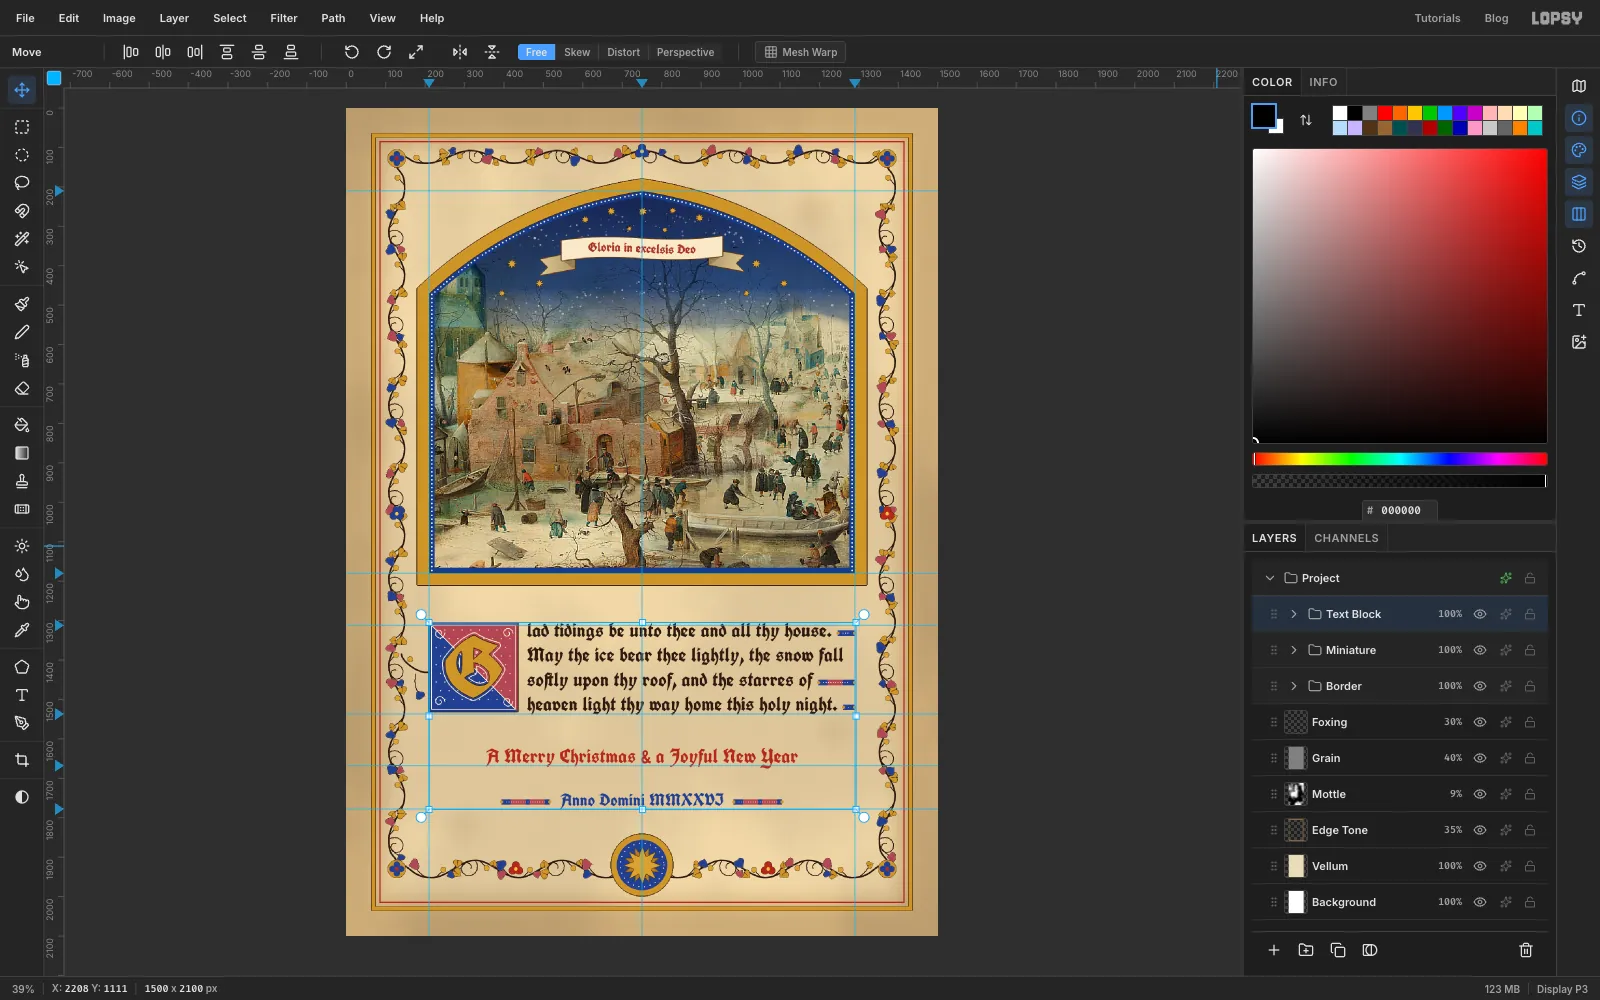
Make an Illuminated Manuscript Holiday Card
Design a Book of Hours style Christmas card in Lopsy with a gilded pointed arch, a champie initial, blackletter on a scroll and an ivy-leaf border.
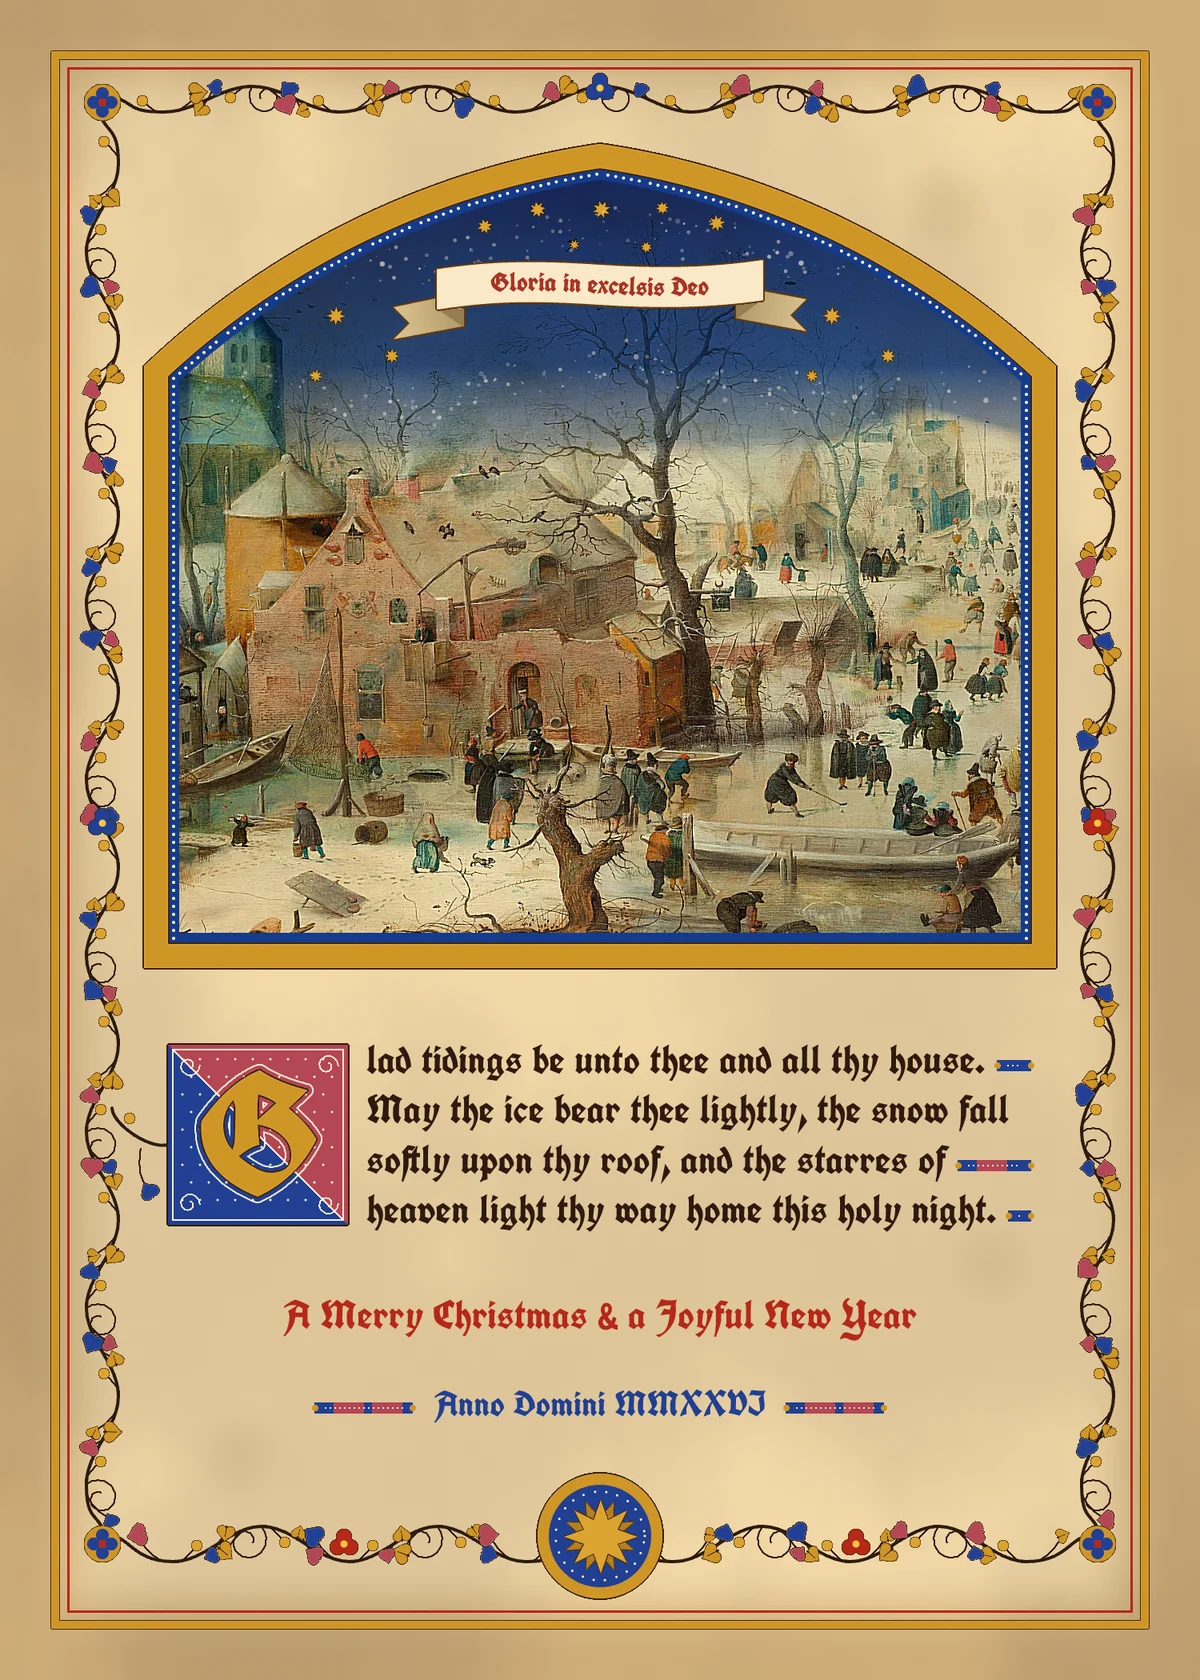
Medieval Books of Hours are prayer books made for wealthy owners in the fourteenth and fifteenth centuries. Their pages share a recognisable toolkit:
- a painted miniature framed in burnished gold
- skies of ground lapis lazuli, often scattered with gold stars
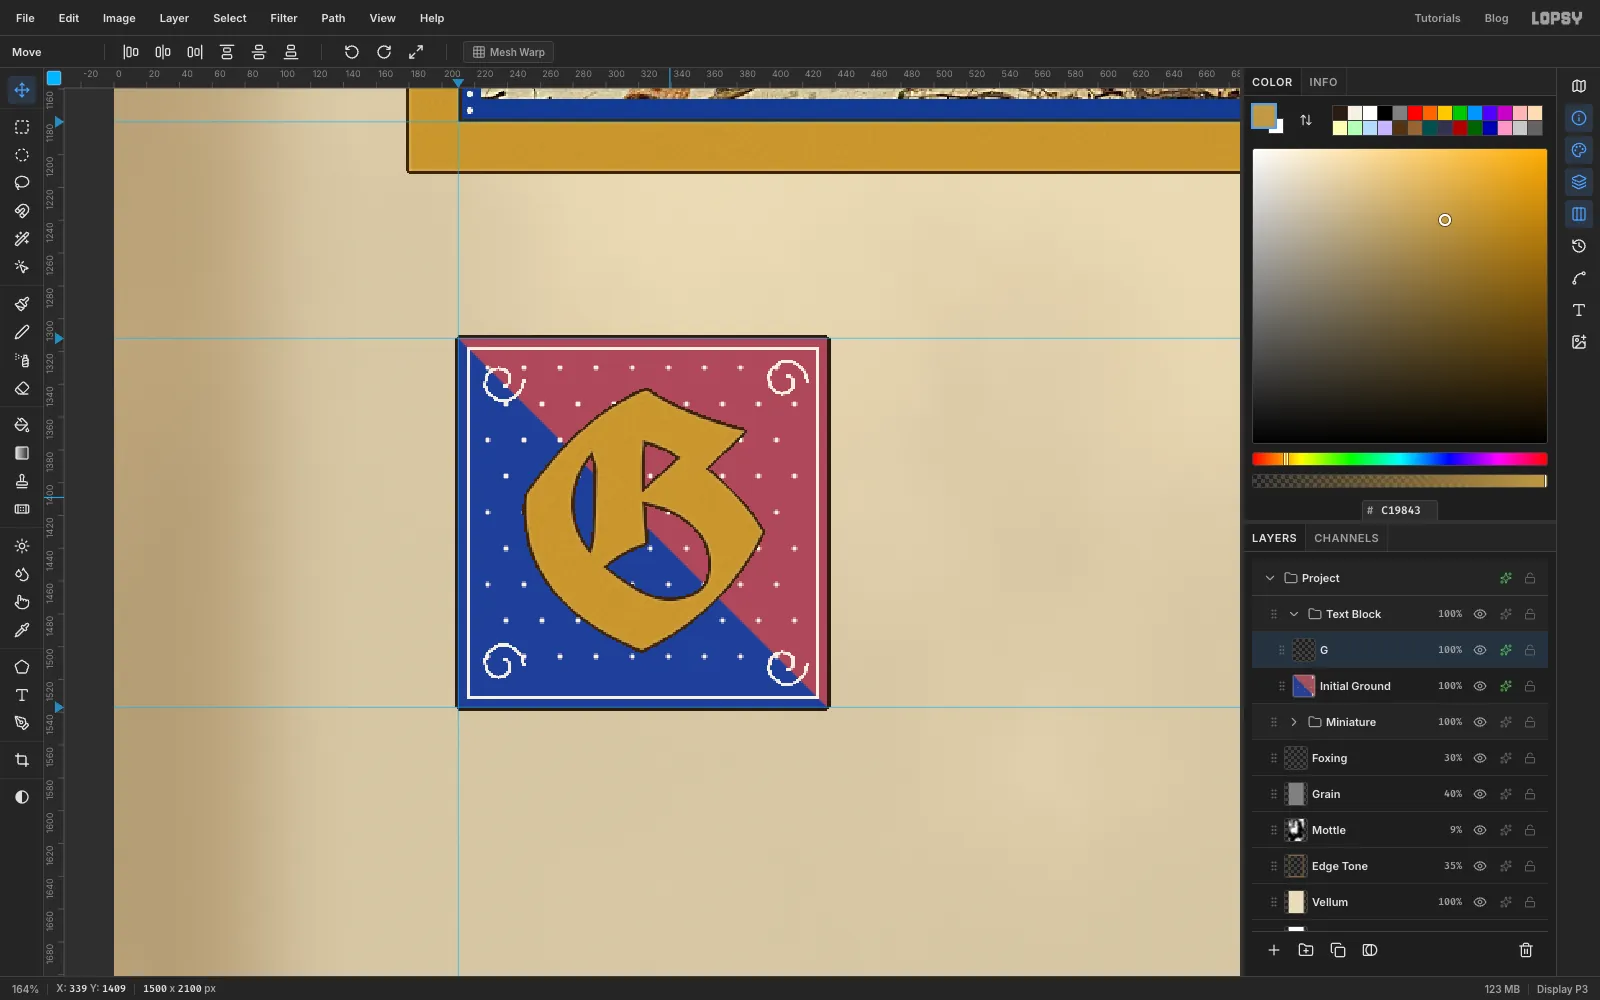
- a champie initial: a gold letter on a ground split into blue and rose, dotted with white penwork
- black textura script, with rubrics (headings) in red
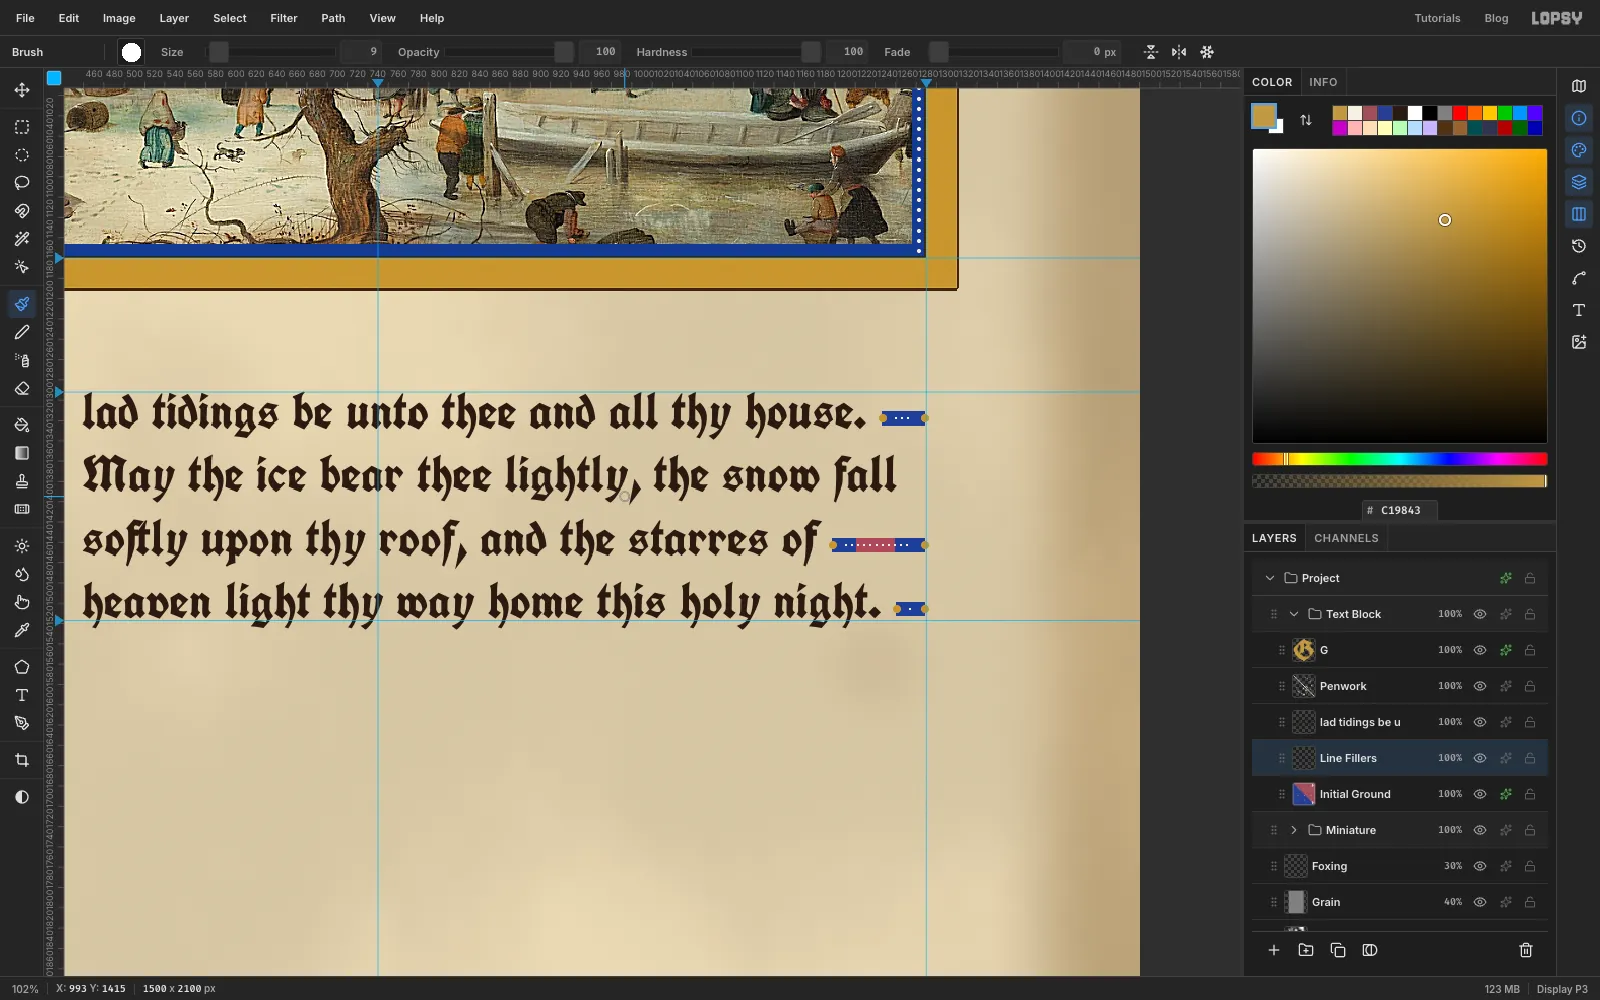
- line-fillers: painted bars that close the gap at the end of a short line
- borders of hairline ink vines carrying gold ivy leaves and gold dots called bezants
In this tutorial you'll use all of them on a Christmas card called Ice Skaters. The miniature is a real painting: a detail of Hendrick Avercamp's Winter Landscape with Ice Skaters (about 1608, Rijksmuseum, public domain). You'll set it in a pointed gilt arch and give it a lapis sky. Everything else is drawn in Lopsy. The card is 1500 × 2100 px, a 5 × 7 inch card at 300 ppi.
Along the way you'll use:
- Paste from the clipboard, a uniform corner scale and a layer mask
- the exact-corners marquee dialog, Inverse and Cmd-clicking a thumbnail to cut and reload a pointed arch
- Grow, Shrink and Feather
- the Gradient tool with transparent stops, and Multiply blending
- Clouds, Add Noise, Hue/Saturation and Unsharp Mask
- the Spray, Eraser, Pencil and Brush tools, including the Square brush preset
- the Pen tool for outlines, Path to Selection, stroked paths and text on a path
- Define Color Brush with Angle Jitter
- Copy, Paste, Merge Down, Duplicate Layer and a rotation handle
- the Stroke, Inner Glow and Color Overlay layer effects
- a Photo Filter adjustment on a group, and group nudging
- UnifrakturCook, one blackletter family for all the text
The palette:
-
Vellum
-
edge umber
-
stains
-
Lapis
-
band
-
Sky
-
Gold
-
highlight
-
star gold
-
dark gold
-
Vermilion
-
Rose
-
Ink
-
gold outline
-
Scroll
-
scroll outline
-
tails
-
fold
-
White lead
-
snow
New layers always appear above whichever layer is selected, so each section tells you which row to click first.
-
Create the vellum and darken its edges
Choose File → New, enter 1500 × 2100, pick a White background and click Create. Double-click Layer 1's name and rename it Vellum. Set the foreground to , press Cmd+A and choose Edit → Fill.
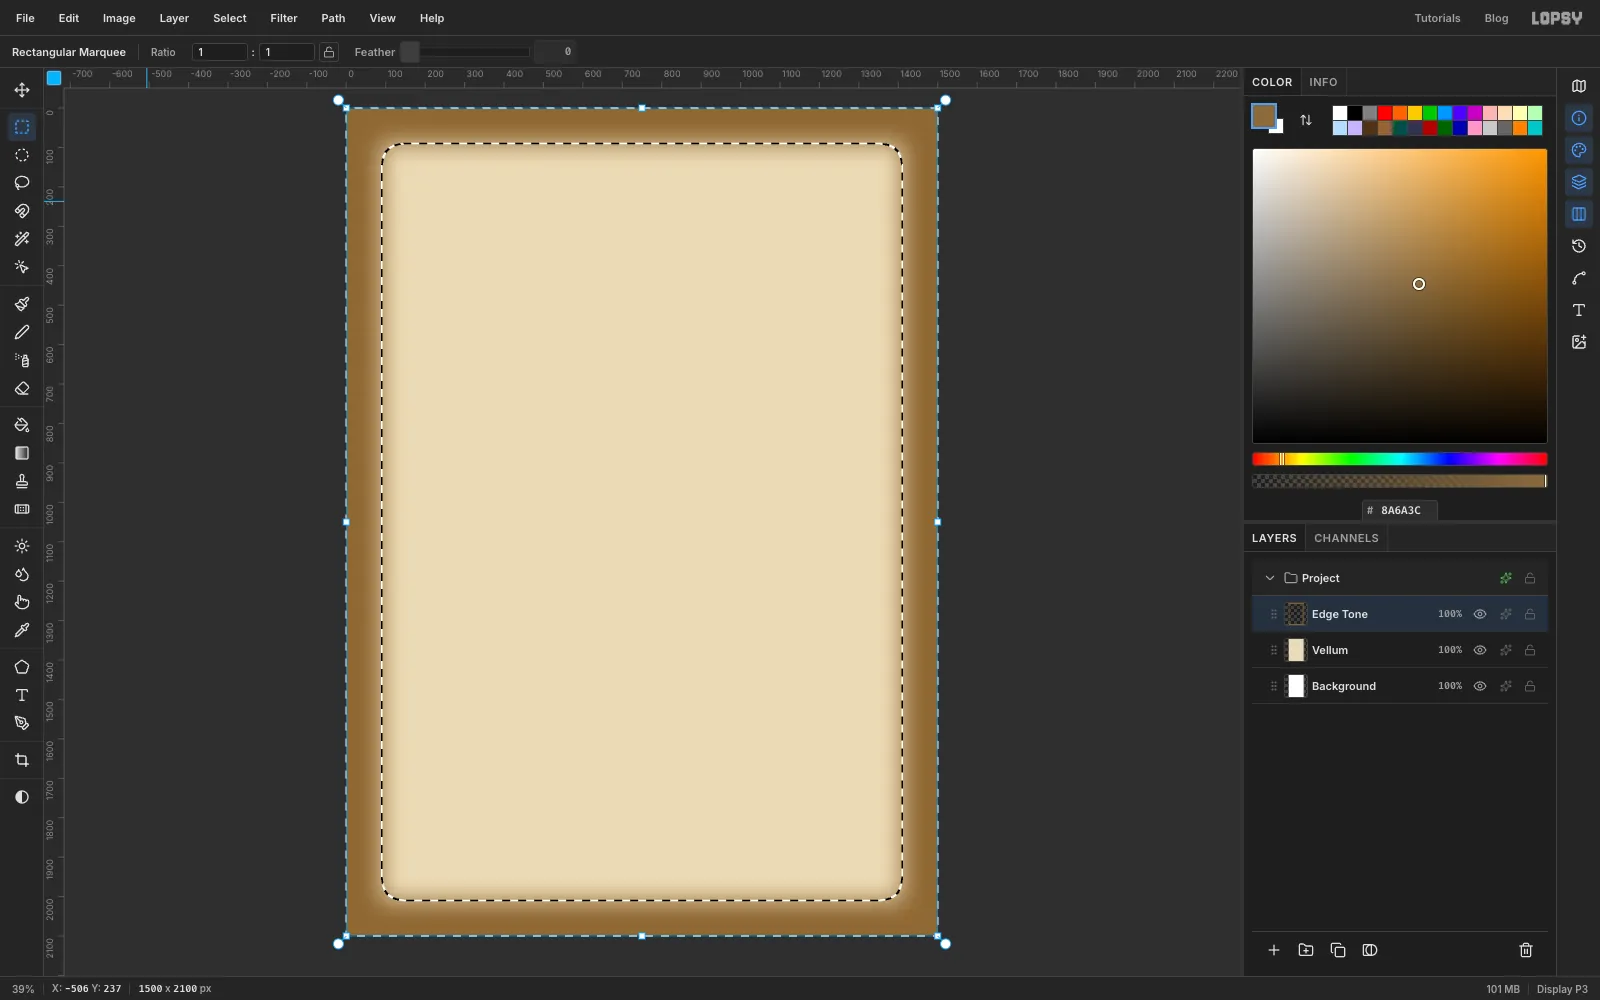
Real vellum darkens where hands have held it. Click Add Layer and name the new layer Edge Tone. With the exact-corners dialog, select from 90, 90 to 1410, 2010 and press Cmd+Shift+I to invert. That leaves a 90 px band around the edge. Choose Select → Feather…, enter 60 (the largest feather Lopsy applies) and click Apply. Fill the band with , deselect with Cmd+D, and set the layer to Multiply at 35%.
-
Add skin texture, grain and stains
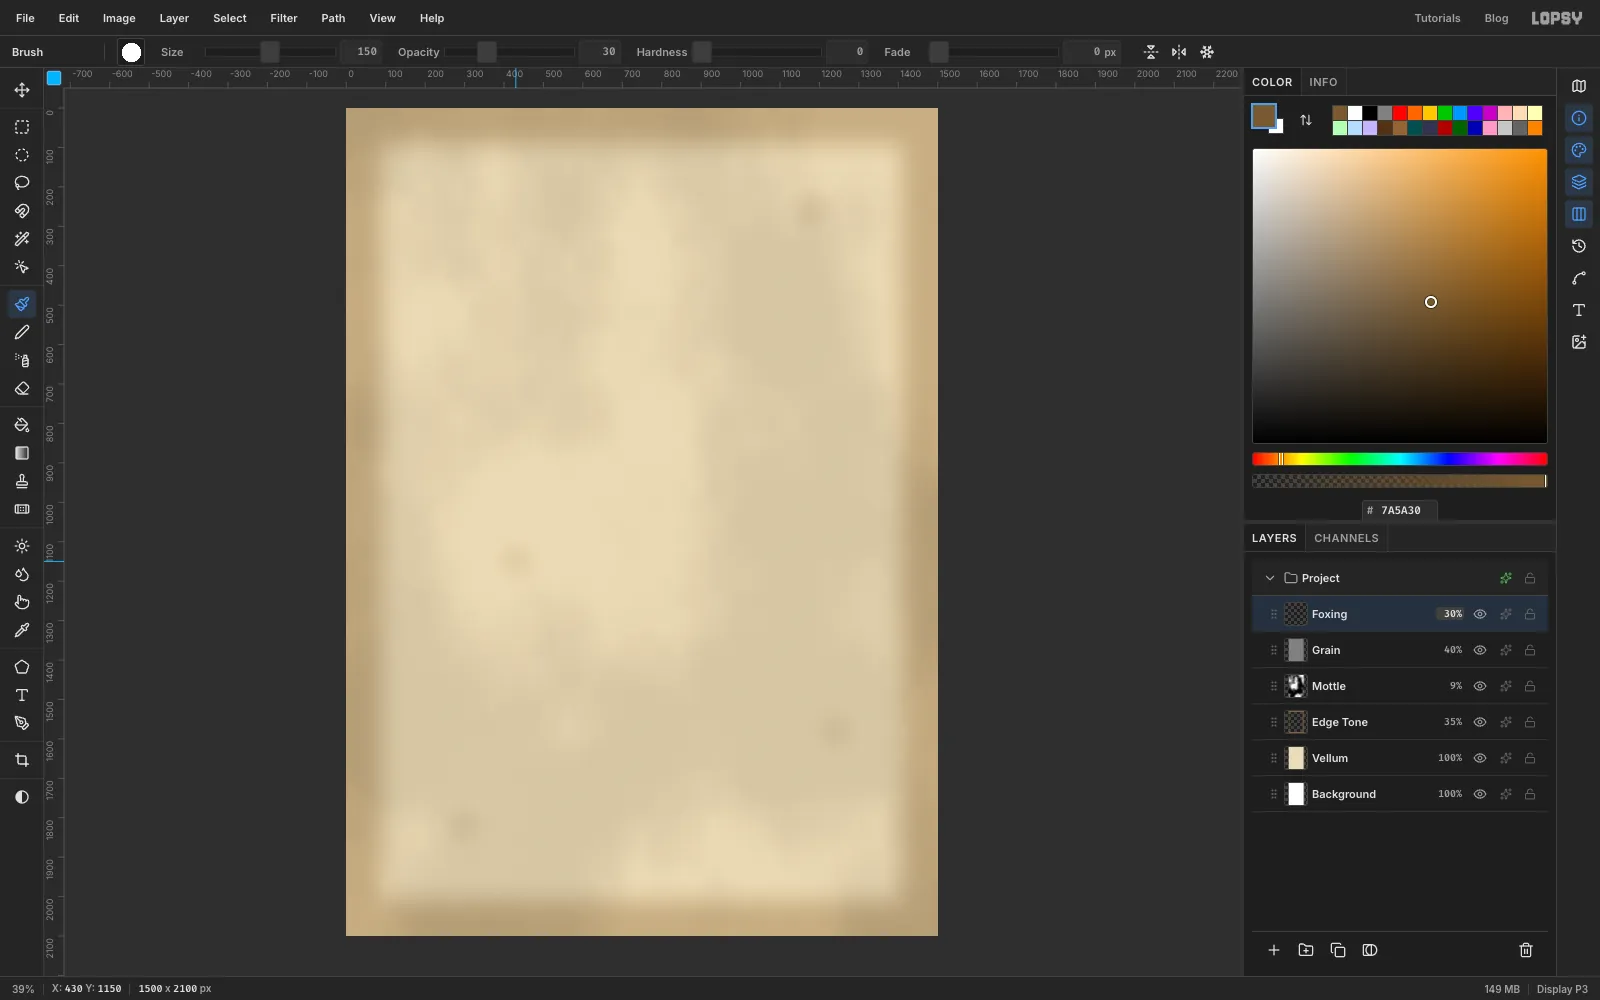
Add a layer called Mottle and run Filter → Clouds… with Scale 4. Set it to Multiply at 9%. The clouds give the page soft, uneven patches with no direction, like animal skin.
Add a layer called Grain. Fill it with and run Filter → Add Noise… with Amount 14, Mono and Gaussian. Set it to Overlay at 40%.
Add a layer called Foxing. Pick the Brush and, in the options bar, set Size 150, Hardness 0 and Opacity 30. With , click four or five times in different places, away from the centre: these are old stains. Set the layer's opacity to 30%.
-
Mark the margins with guides
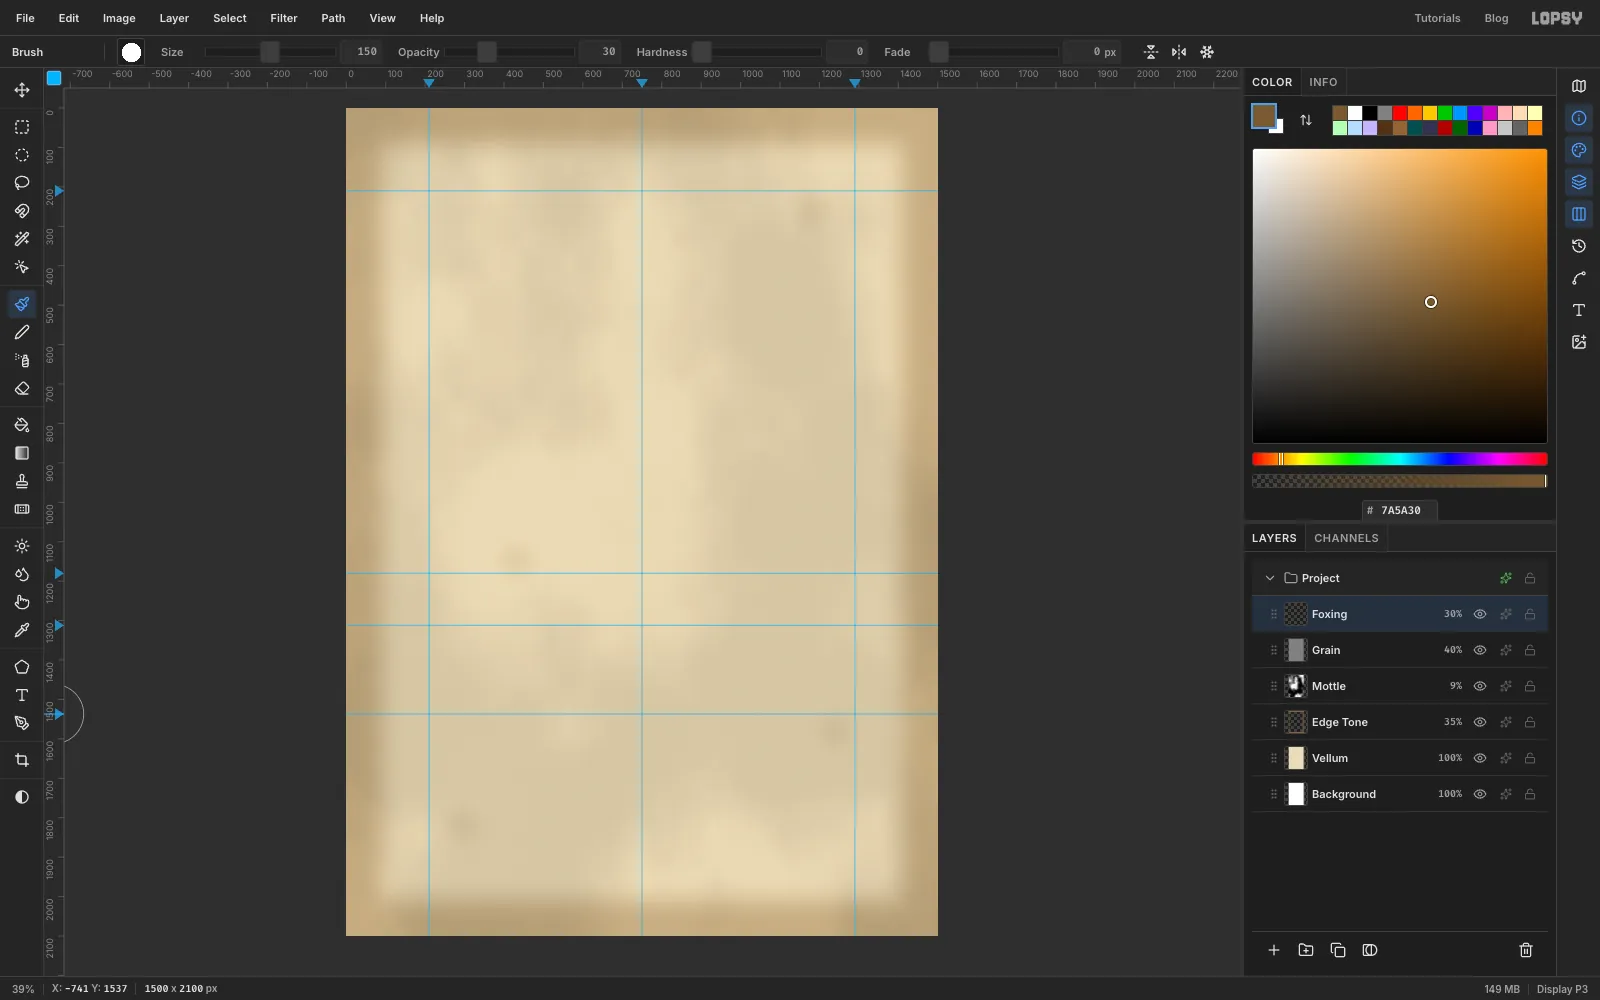
If the rulers aren't showing, choose View → Show Rulers. Click the top ruler at 210, 750 and 1290 to drop three vertical guides: the left edge of the picture, the centre line and the right edge. Click the left ruler at 210 and 1180 (top and bottom of the picture), and at 1312 and 1537 (top and bottom of the initial letter).
Watch the coordinate readout in the status bar before you click. To remove a guide that landed in the wrong place, click it on the ruler again.
-
Paste the painting
Download Avercamp's painting from Wikimedia Commons (Hendrick Avercamp – Winterlandschap met ijsvermaak, public domain). In any image viewer, crop the left part of the scene: the church tower, the brick house, the big bare tree and the skaters to its right. Make the crop about 1.1 times as wide as it is tall. Scale it to 1300 px wide, a little bigger than you need, so you can fit it by eye in Lopsy. Copy it.
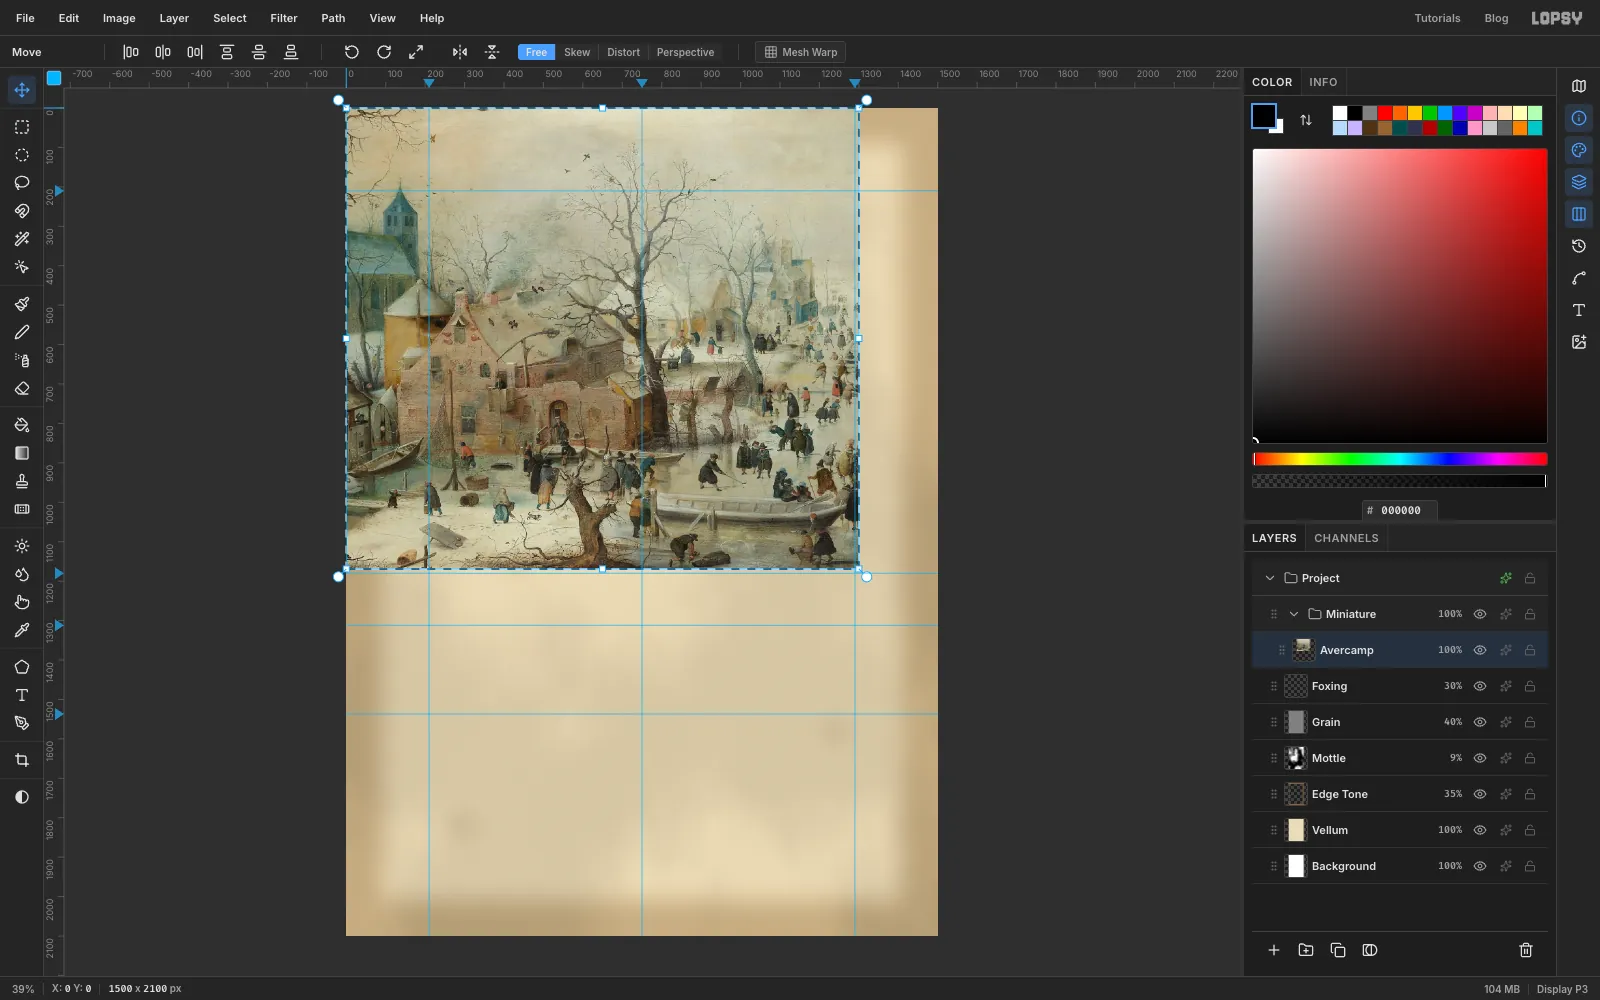
In Lopsy, click Foxing, click New Group and name the group Miniature. Press Cmd+V. The painting lands at the top-left corner of the page as a new layer, already selected, with the Move tool active. Rename the layer Avercamp.
-
Scale the painting into place
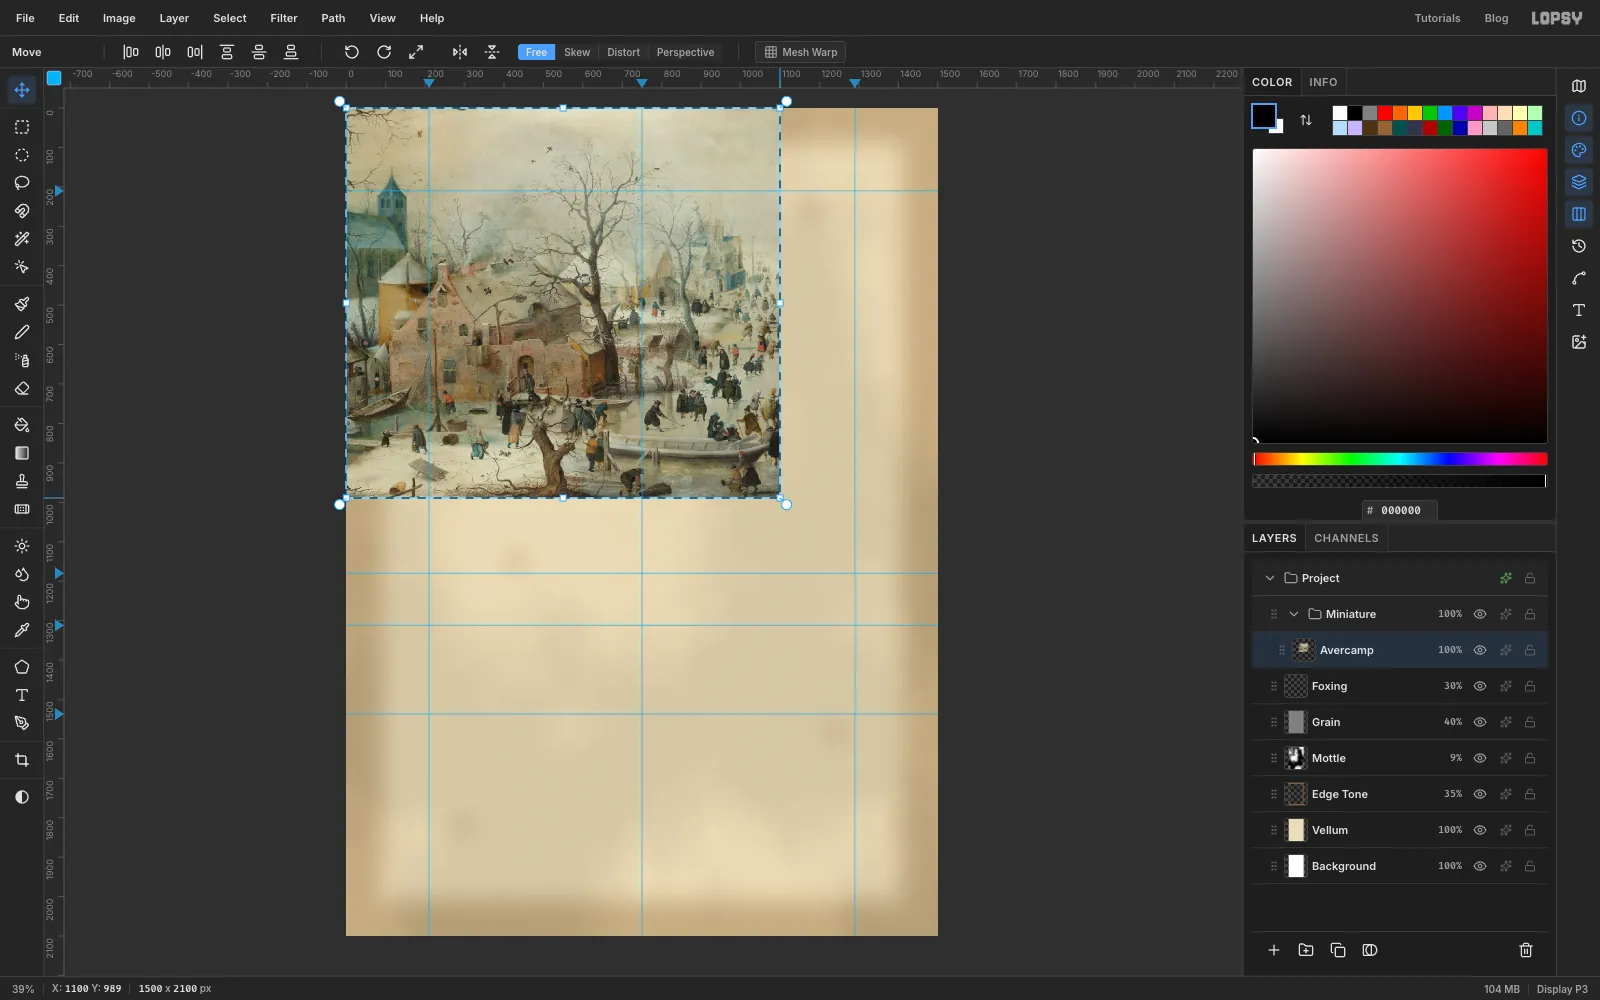
Hold Cmd and drag the bottom-right corner handle up and to the left until the painting is about 1100 px wide. Cmd keeps the proportions. Then drag from the middle of the painting to move it, so its top-left corner sits at about 200, 200. It should overlap all four picture guides by about 10 px. Press Cmd+D to commit.
-
Cut a pointed arch on its own layer
A Gothic two-centred arch is where two big overlapping circles meet. Each side of the arch is part of a circle centred low on the opposite side of the page. You'll need this shape several times, so build it once on its own layer and reload it whenever you need it.
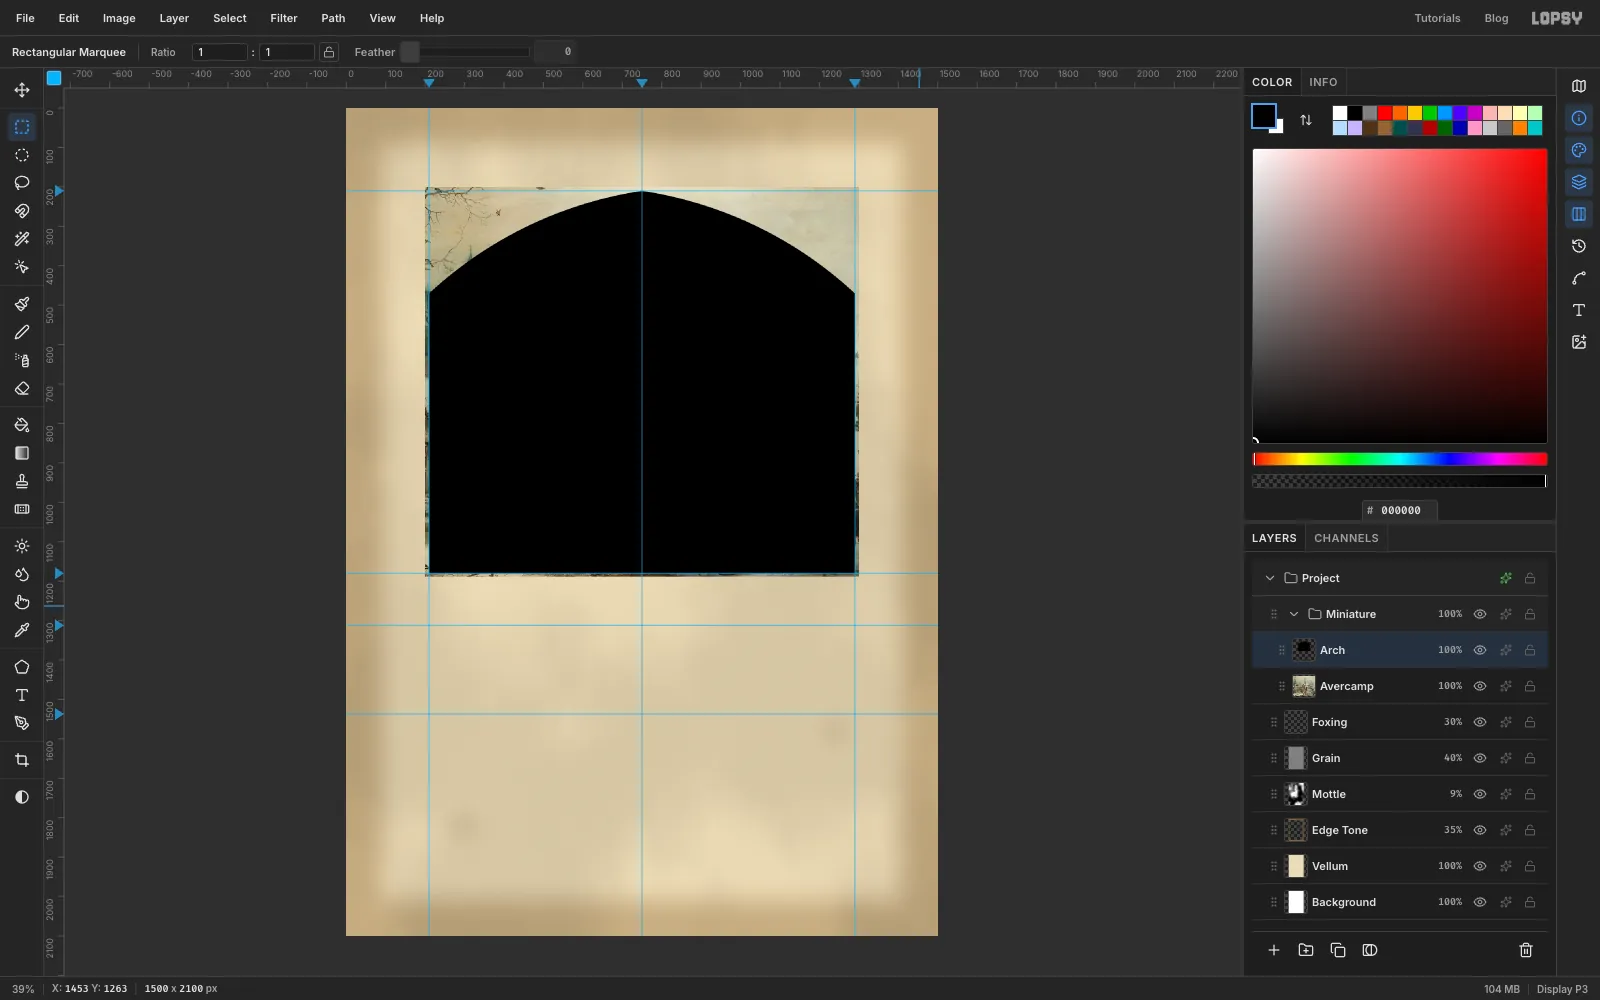
- Add a layer called Arch. Pick the Elliptical Marquee, click once and enter From −113, 199 and To 1913, 2225. That is a circle 2026 px across, centred at 900, 1212. Most of it hangs off the page, which is fine. Fill it with black.
- Deselect, click again and enter the mirror-image circle: −413, 199 to 1613, 2225. Press Cmd+Shift+I and then Delete. Only the lens where the two circles overlap is left.
- Deselect. With the Rectangular Marquee, click once and enter 210, 210 to 1290, 1180, the picture guides. Invert and press Delete. The lens is now a pointed arch with straight sides.
- Deselect and click the eye on the Arch row to hide it.
From now on, "load the arch" means: deselect, then Cmd-click the Arch thumbnail. That loads its shape as a selection even while the layer is hidden.
-
Mask the painting to the arch
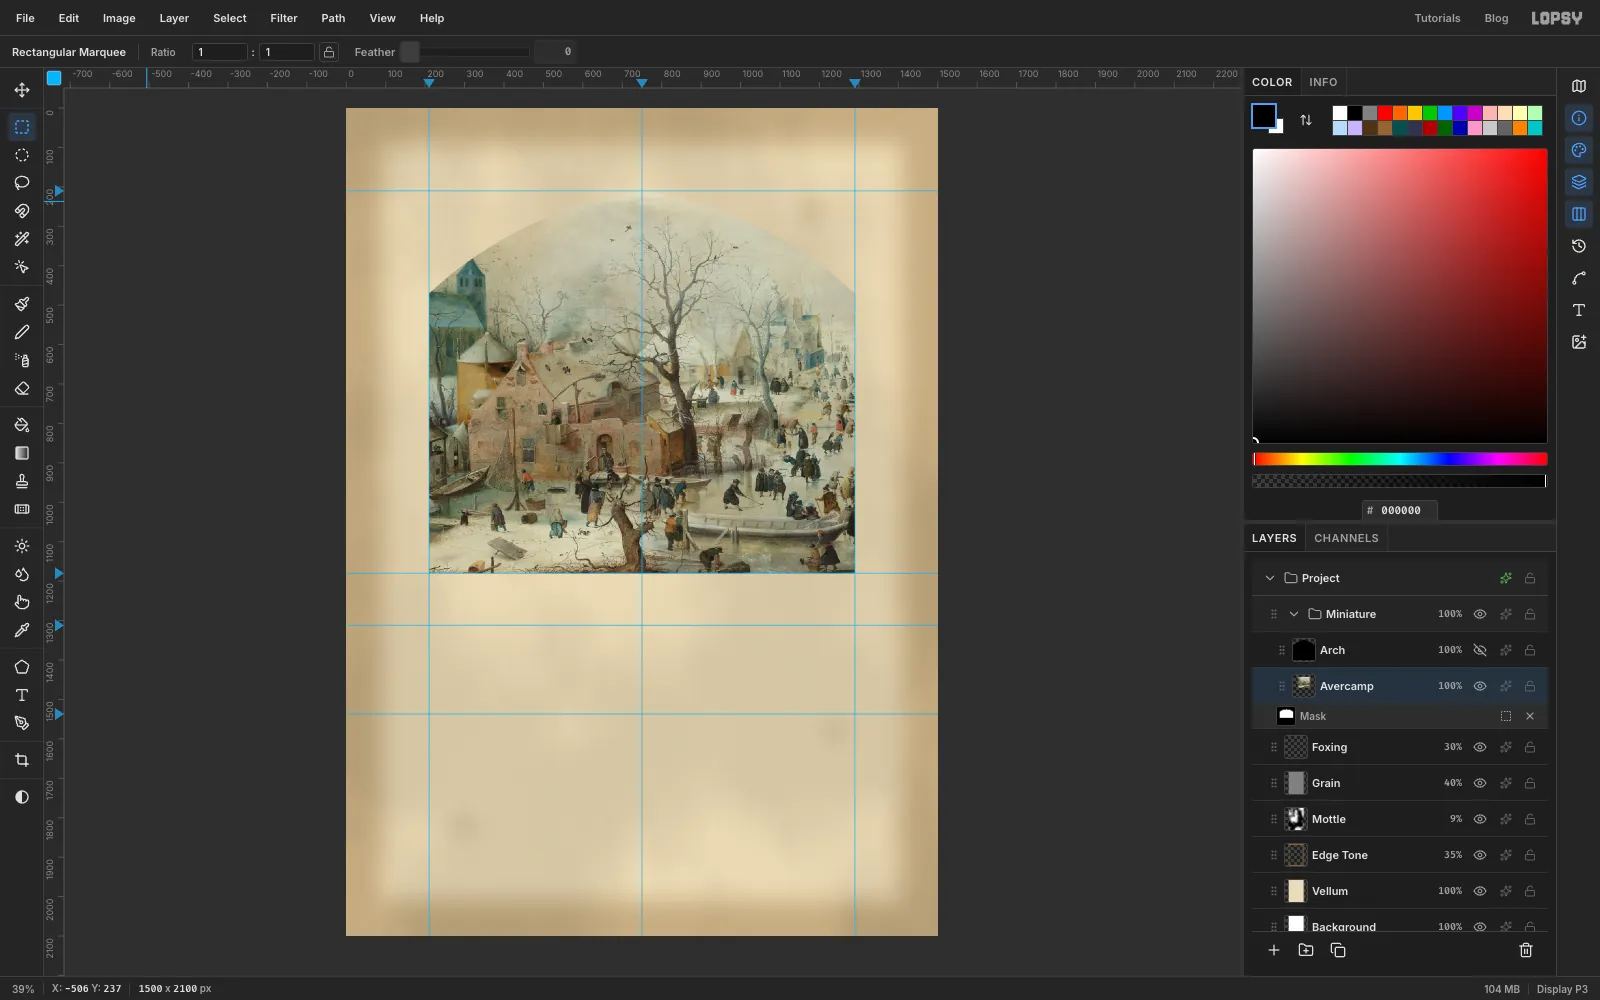
Click Avercamp and click Add Mask at the bottom of the Layers panel. Load the arch, then click the mask thumbnail (Edit mask for Avercamp) so you paint on the mask instead of the picture. Press Cmd+Shift+I, set the foreground to black and choose Edit → Fill. Deselect, then click the Avercamp row to stop editing the mask.
Run Filter → Hue/Saturation… with Hue −4 and Saturation +22, then Filter → Unsharp Mask… with Radius 2, Amount 0.8 and Threshold 0. The old varnish becomes a little richer and crisper.
-
Paint a lapis sky
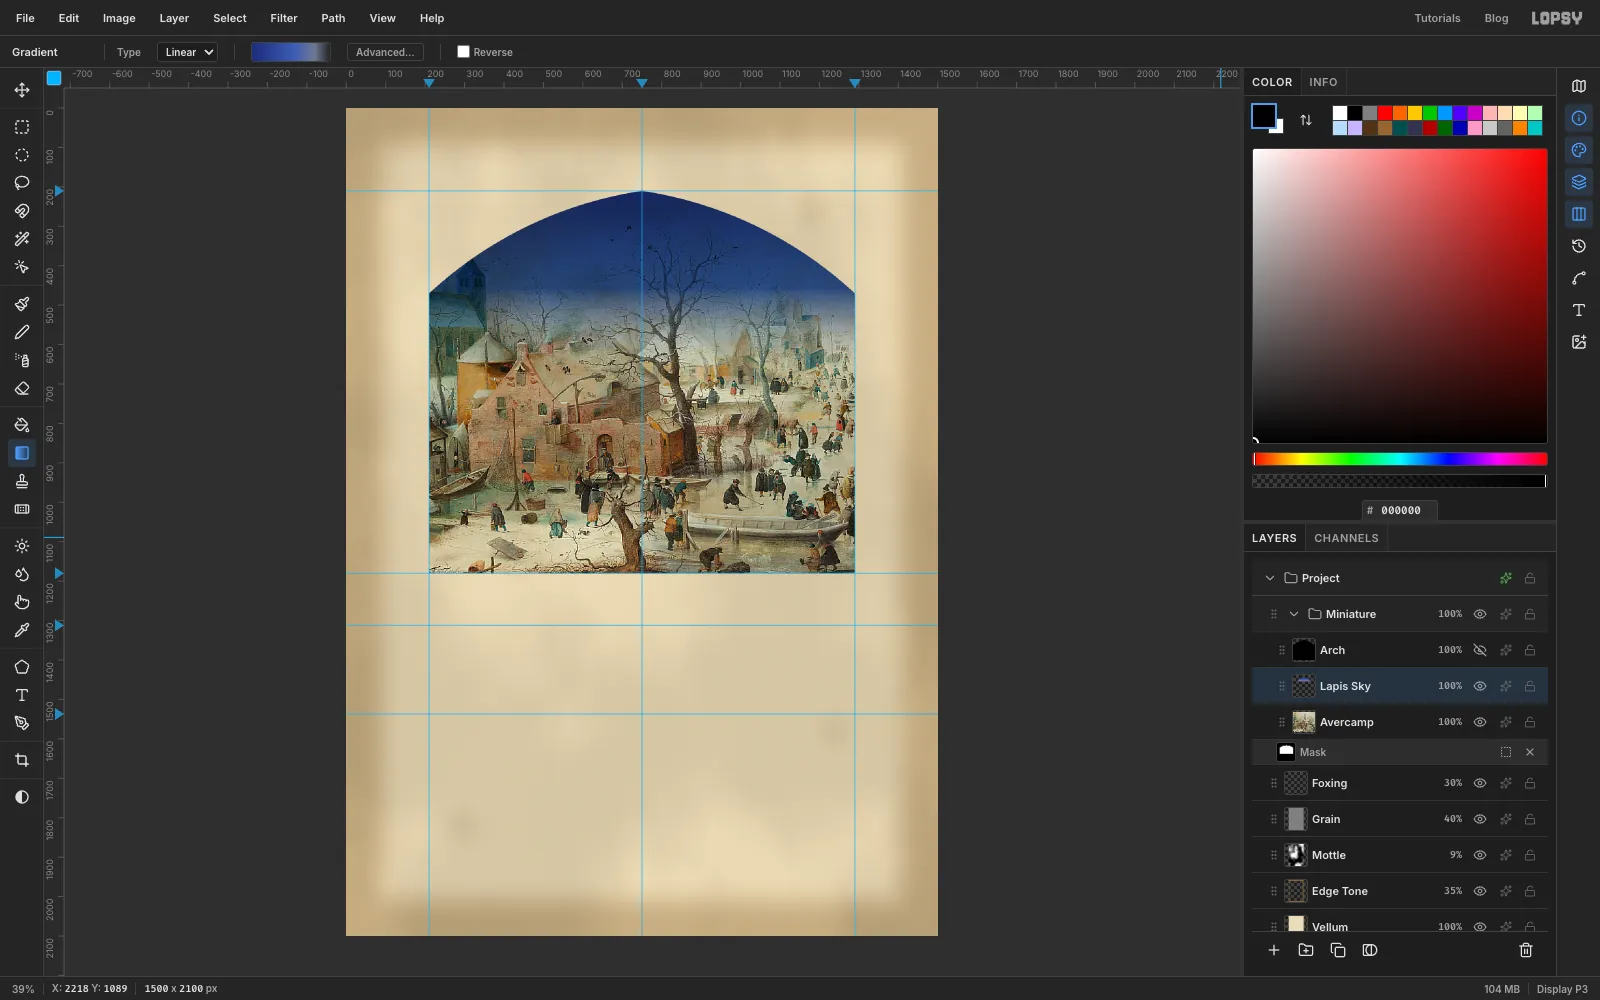
Add a layer called Lapis Sky and load the arch. Pick the Gradient tool, set it to Linear, click Advanced… and build four stops:
- 0%
- 55%
- 80% at 60% opacity
- 100% at 0% opacity
Drag from the top of the arch (750, 210) straight down to 750, 660, just below the rooftops. Deselect and set the layer to Multiply. Multiply keeps every dark branch and bird, so the painted trees stand out against the blue like silhouettes.
-
Give the town its warm colour back
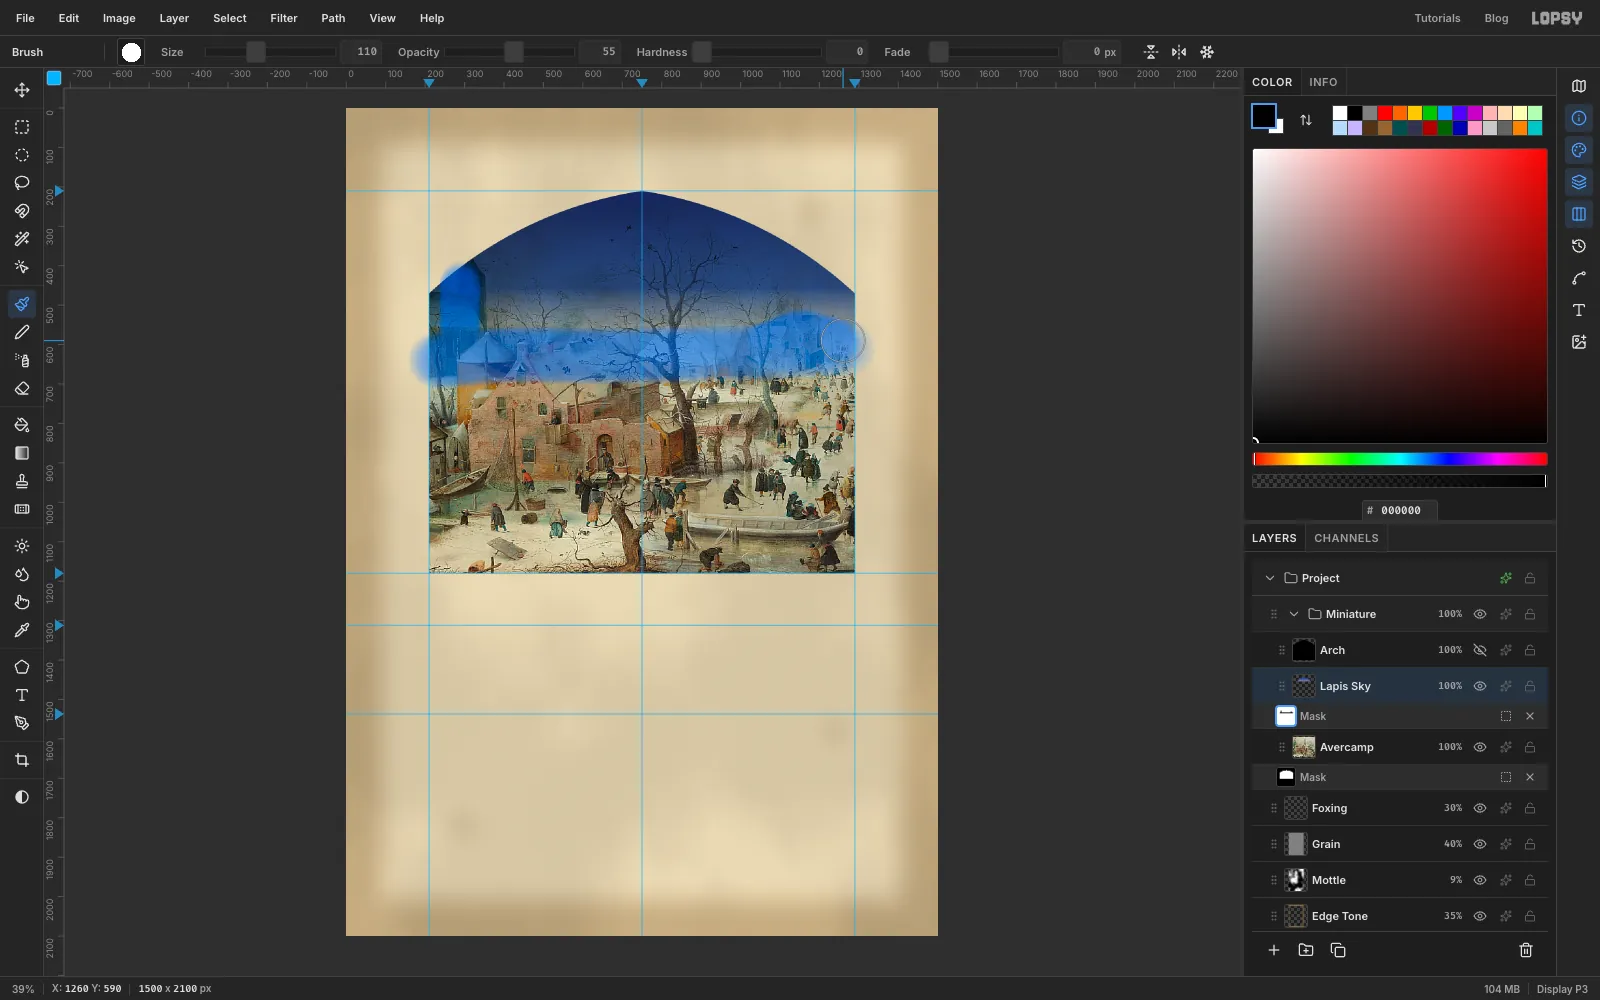
The blue also tints the rooftops and church. Click Add Mask on Lapis Sky and click Edit mask for Lapis Sky. Pick the Brush with Size 150, Hardness 0, Opacity 55 and black. Paint one stroke from left to right along the rooftops, at about y 620.
Lower the size to 110. Paint up the church tower on the left, from about 288, 570 to 288, 440, and across the distant town on the right at about y 580. Click the Lapis Sky row when you're done.
-
Gild the frame
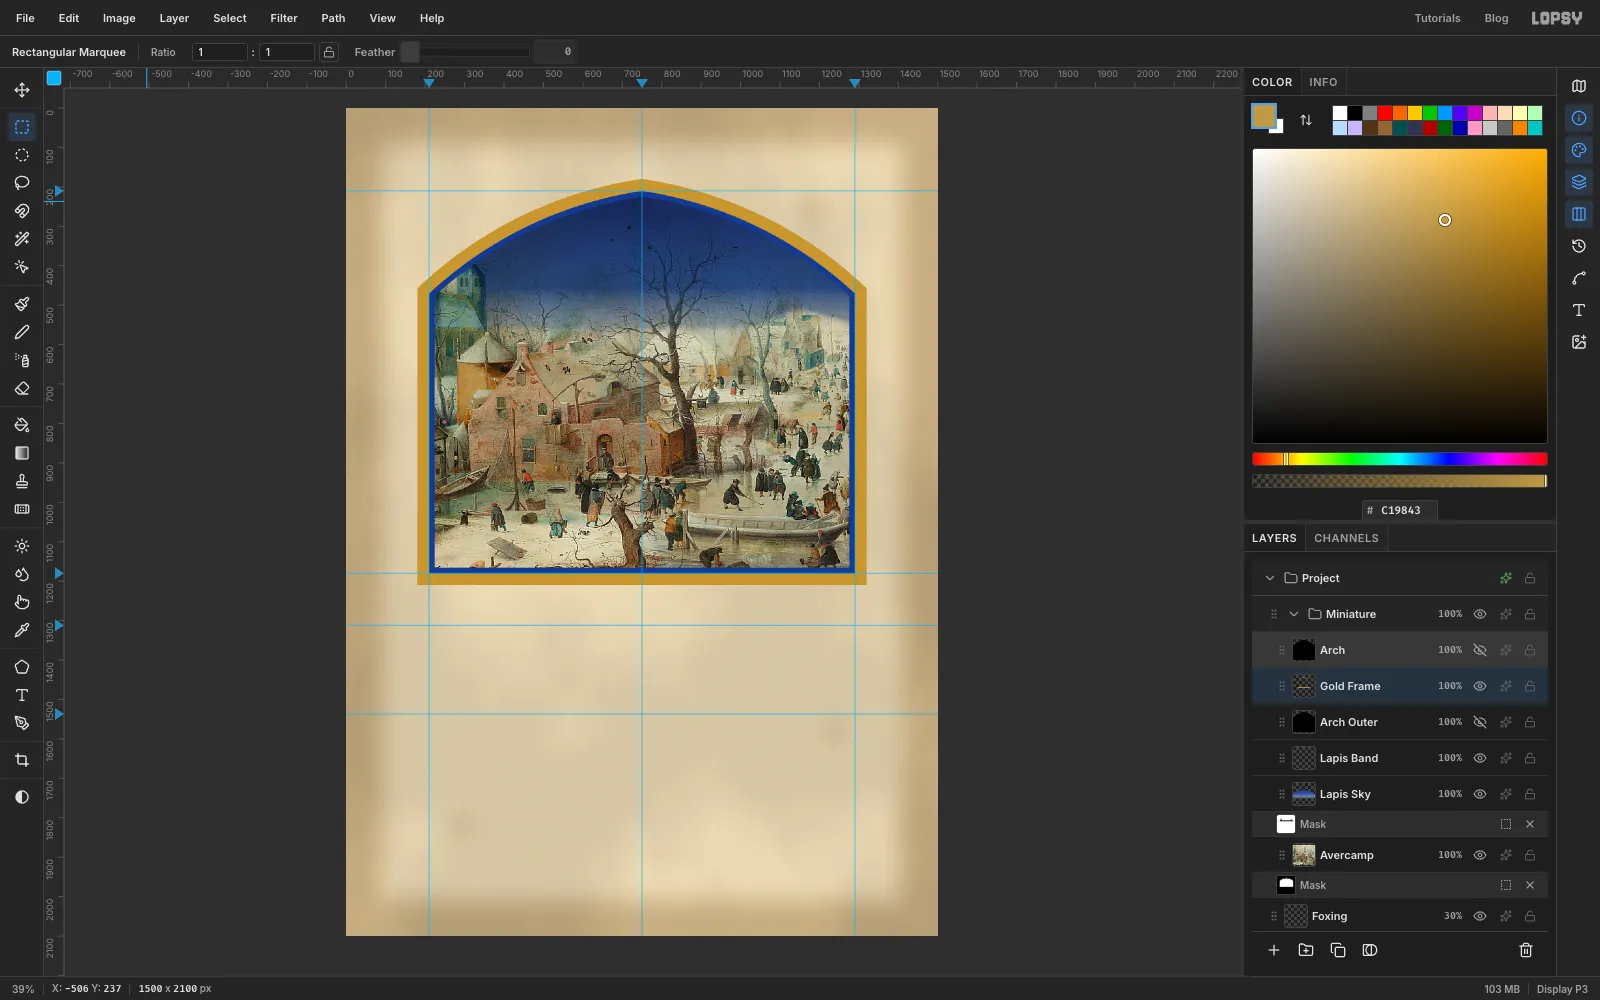
Click Lapis Sky, add a layer called Lapis Band and load the arch. Fill it with , choose Select → Shrink… with 14, and press Delete. That leaves a 14 px blue rim around the window. Deselect.
The frame needs a second arch, 30 px bigger all round. Build it exactly like Arch on a new layer called Arch Outer: circles from −143, 169 to 1943, 2255 and from −443, 169 to 1643, 2255, then a rectangle from 180, 180 to 1320, 1210. Hide it.
Add a layer called Gold Frame. Cmd-click the Arch Outer thumbnail and fill with gold . Load the normal arch and press Delete to cut the window back out.
-
Burnish the gold
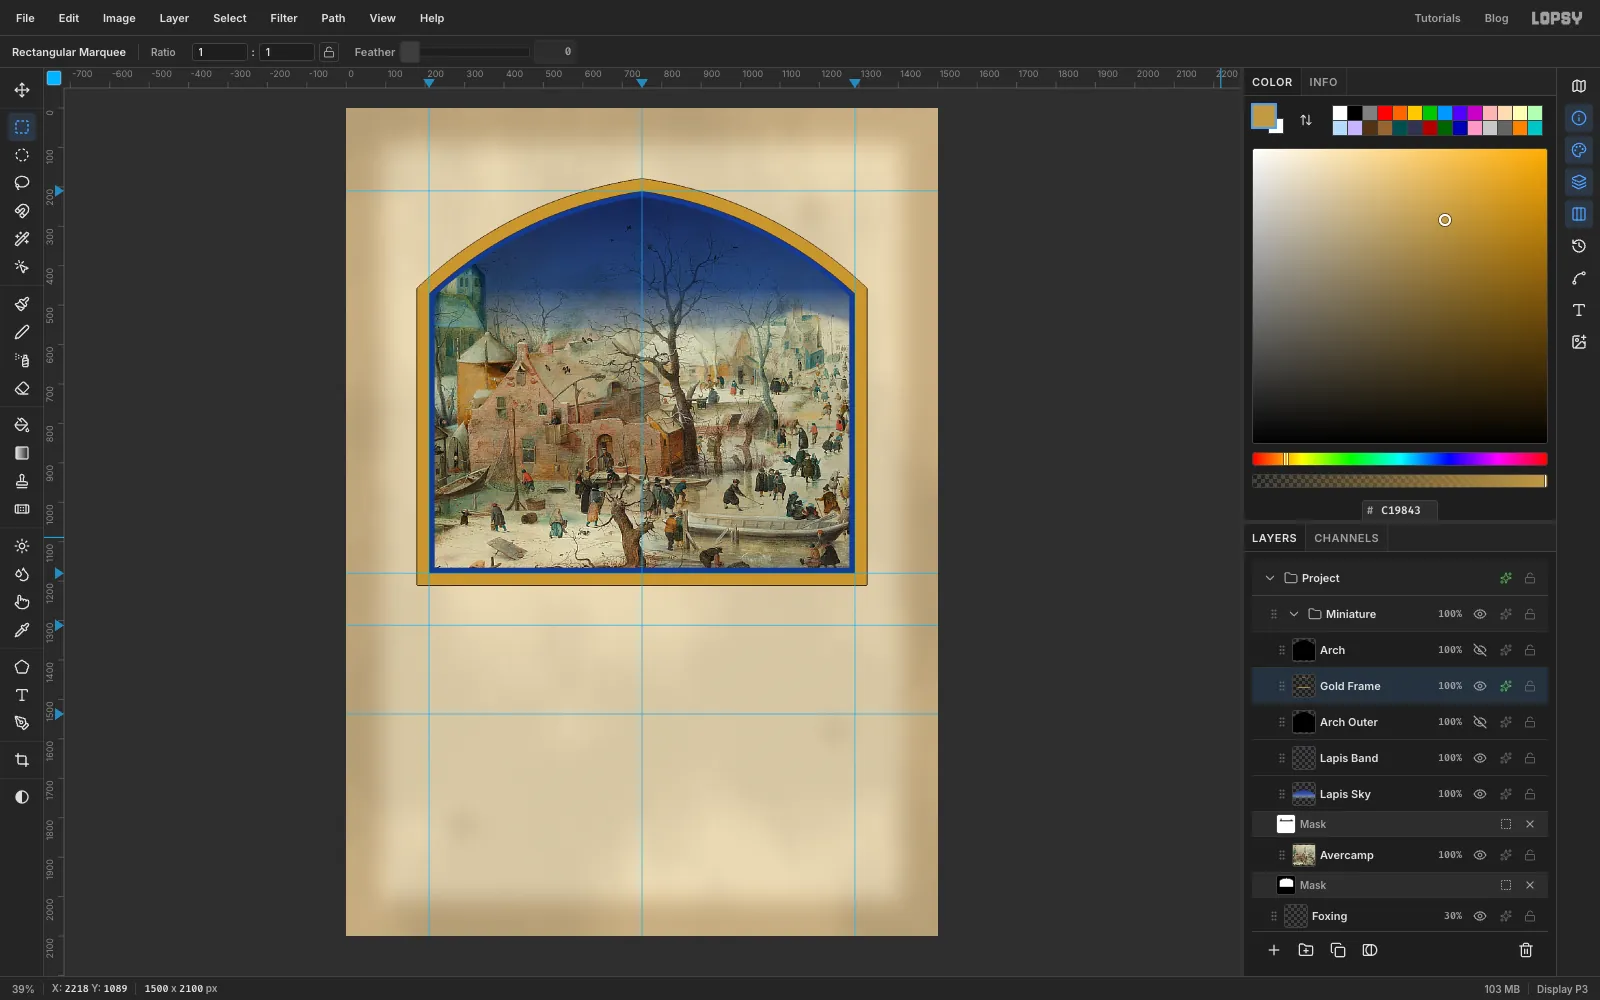
Deselect and run Filter → Add Noise… with Amount 5 and Mono. Open the layer's effects (the ✦ button on its row) and add:
- Stroke, Width 2, in gold outline
- Inner Glow, Size 3, Opacity 85, in highlight
The glow puts a thin light line along each edge, the way burnished gold catches light on the rim of its raised base.
-
Add white pearling
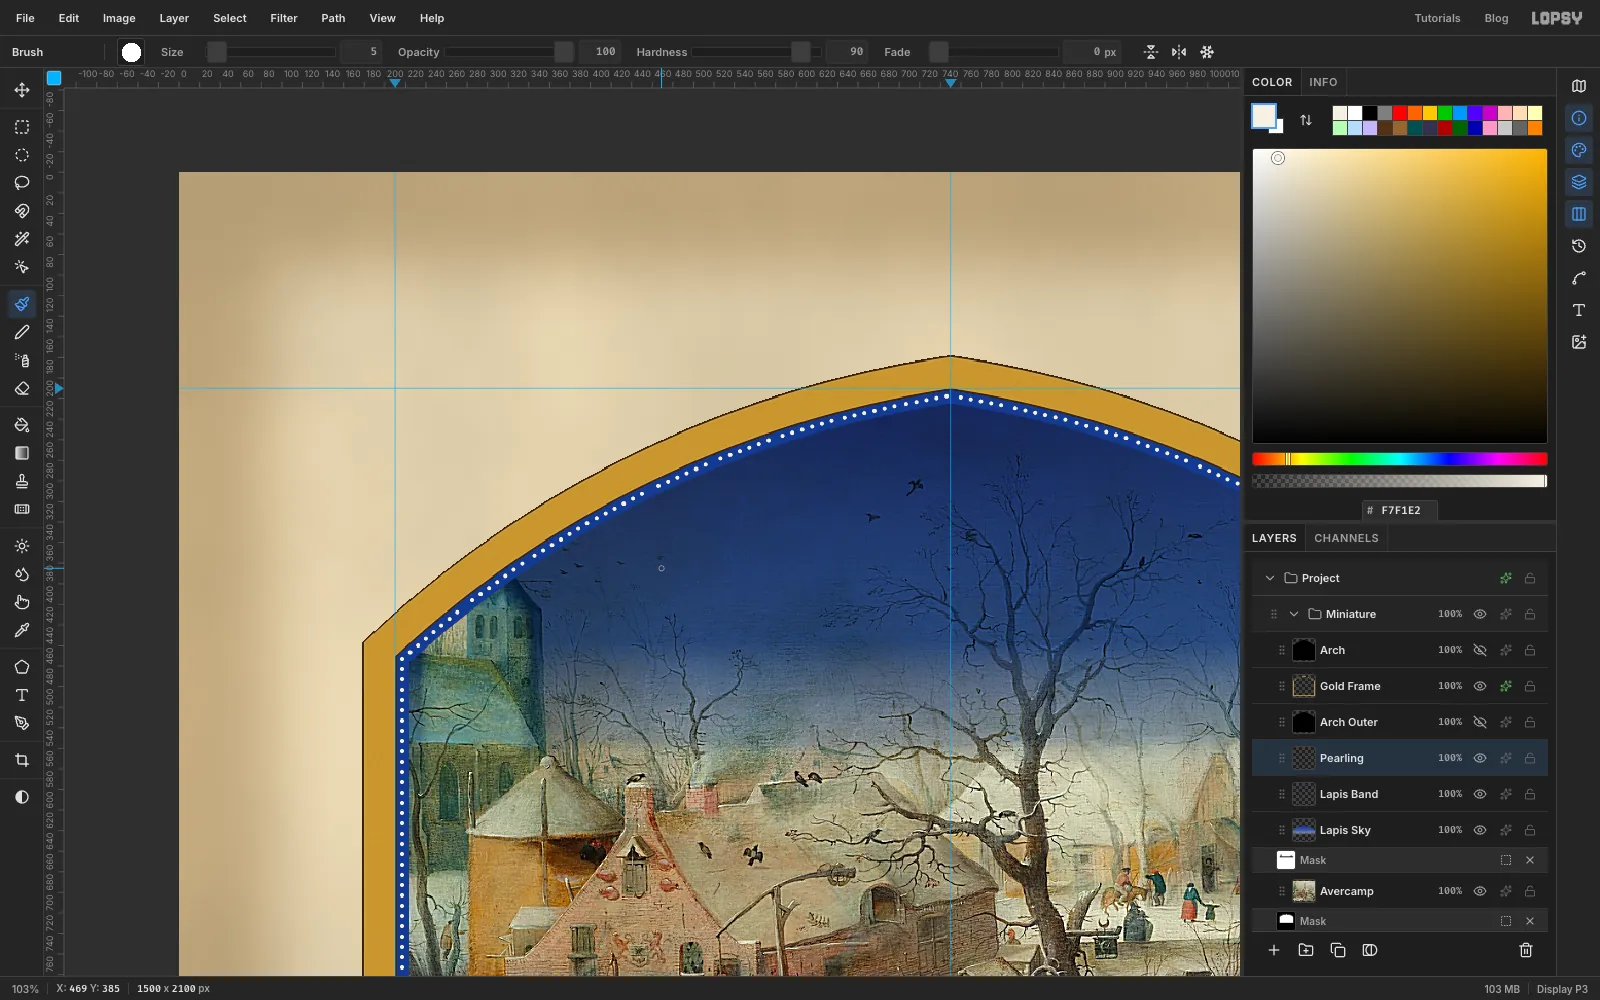
Click Lapis Band and add a layer called Pearling. Pick the Brush and set Size 5, Hardness 90 and Opacity 100 in the options bar. Then click the brush-tip thumbnail at the left of the options bar to open the Brushes panel, and on its Shape tab set Spacing 200. At 200% spacing the brush leaves separate dots instead of a line.
Set the foreground to white lead . Work along the middle of the blue band, about 7 px inside the window's edge. Click at the bottom of the left side, then Shift-click at the shoulder: one click does the whole straight side. Round the curve, Shift-click every 60 px or so, with one click exactly on the point, then come down the right side the same way. Each short straight piece comes out as an even row of dots.
-
Draw a star with the Pen
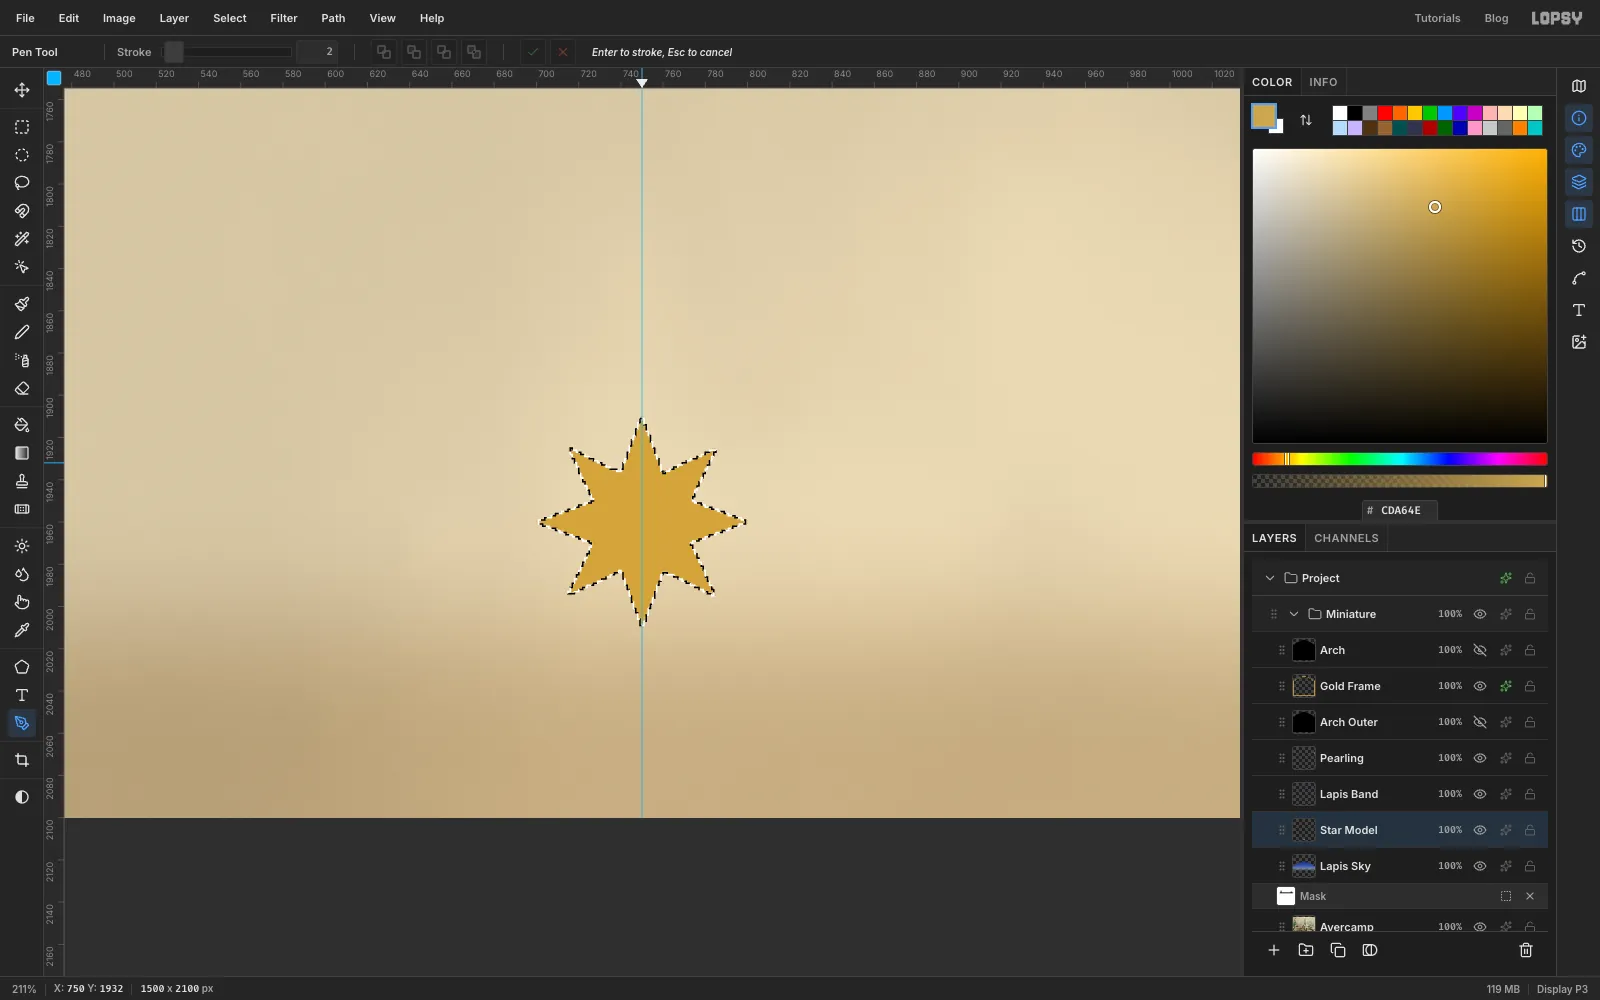
You'll stamp all the stars from one star drawn carefully. Add a layer called Star Model and zoom in on an empty spot near the bottom of the page. Pick the Pen and click the 16 corners of an eight-point star about 100 px across, going round in order: a tip, then a notch, then the next tip. Put the notches half as far from the centre as the tips. Click the first point again to close the path.
Open the Paths panel, click Path to Selection and then Delete Path. Fill the selection with star gold .
Select a square just around the star and choose Edit → Define Color Brush…. Name it Gold Star. The star becomes the brush tip, colour and all. Deselect and delete the Star Model layer.
-
Stamp the gold stars
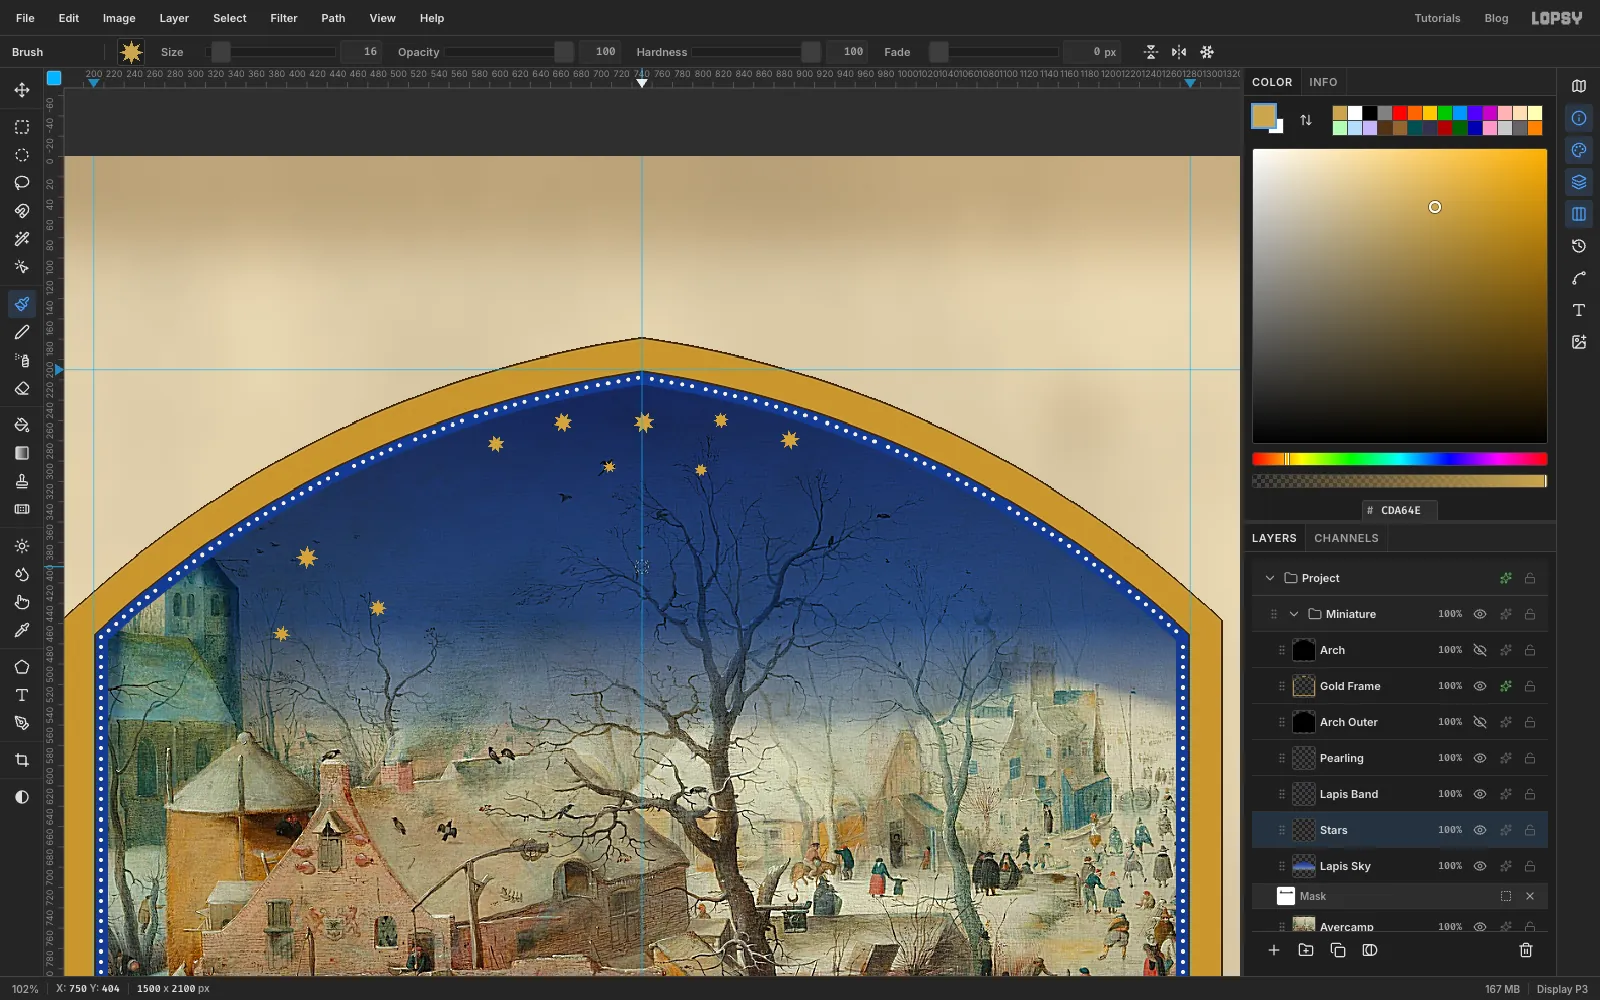
Click Lapis Sky and add a layer called Stars. With the Brush (now using Gold Star), open the Brushes panel and on the Dynamics tab set Angle Jitter to 10, so the stars sit at slightly different angles. Click once for each star, changing Size between 12 and 22 as you go:
- seven in a loose, uneven group under the arch's point, between y 240 and 310, where the scroll will sit below them
- three on the left, between the church tower and the big tree, at about 420, 395, 490, 445 and 395, 470
Keep them irregular: a neat row looks mechanical.
-
Copy the stars to the other side
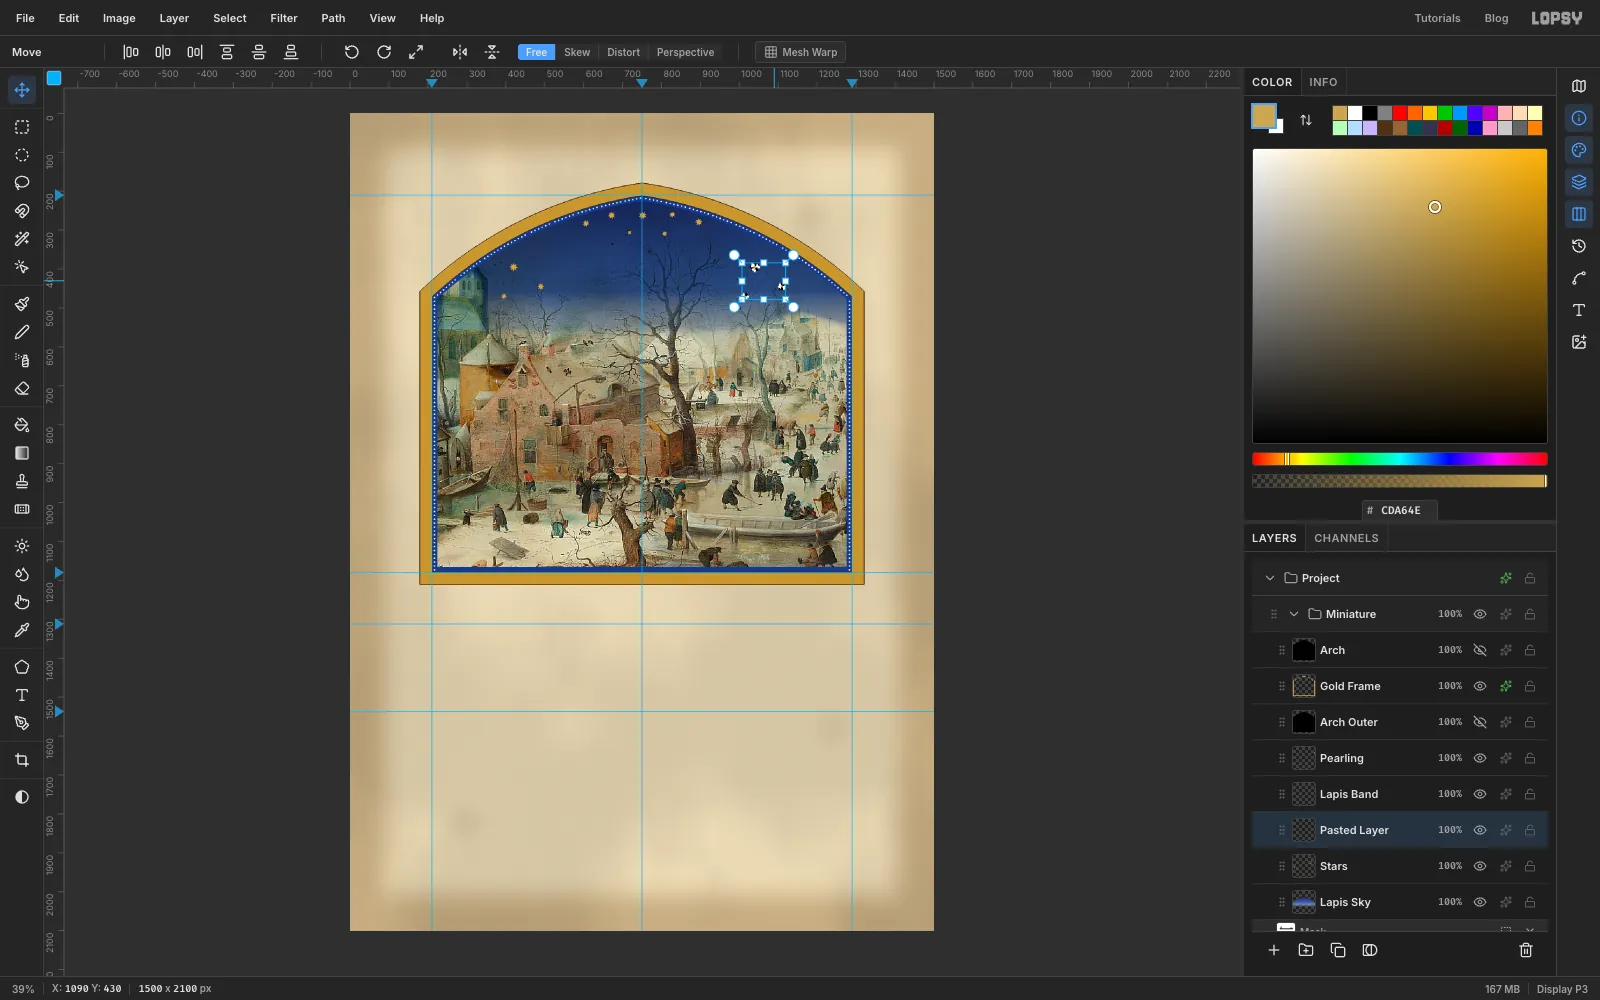
Draw a rectangle around the three left-hand stars, from about 380, 380 to 570, 485. Press Cmd+C then Cmd+V. The copy is pasted in place as a new layer, with the Move tool ready. Drag it 620 px to the right, into the sky right of the tree.
Deselect, choose Layer → Merge Down to merge the copy into Stars, and give Stars a Stroke of Width 1 in gold outline . Manuscript stars are solid gold with a fine outline, not glowing sparkles.
-
Let it snow
The Spray tool borrows the Brush's tip, so put the round tip back first. Pick the Brush, open the Brushes panel, set Angle Jitter back to 0, and on the Presets tab choose Hard Round.
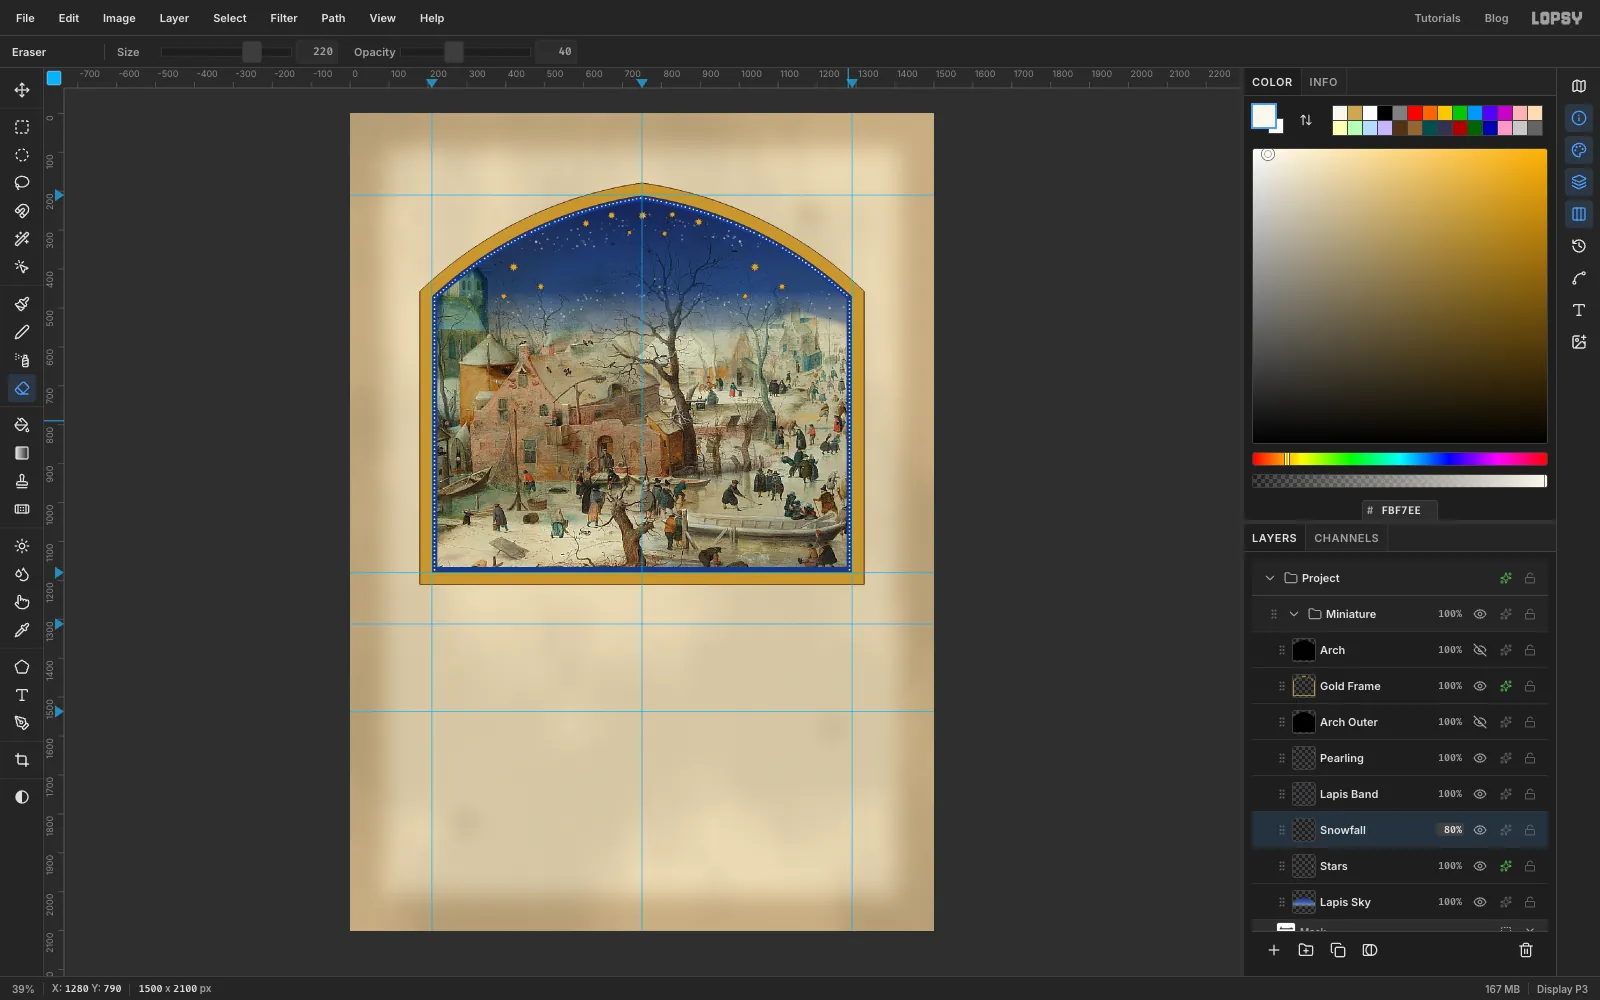
Add a layer called Snowfall and load the arch. Pick the Spray tool with Size 60, Density 3, Softness 35 and Opacity 85. Set the colour to snow . Make five slow, slightly wavy passes from left to right, at about y 300, 470, 640, 820 and 1000. The flakes come out 2–7 px across. Deselect.
Snow should be thickest in the sky. Pick the Eraser with Size 220 and Opacity 55 and drag across the bottom of the picture at about y 1080 and 930. Lower Opacity to 40 and drag across y 790 and 650. Set the layer to 80%.
-
Cut the scroll's tails
A banderole is a painted scroll carrying words. Its ends turn under, so draw the tails first, on a layer underneath the scroll. Add a layer called Ribbon Tails.
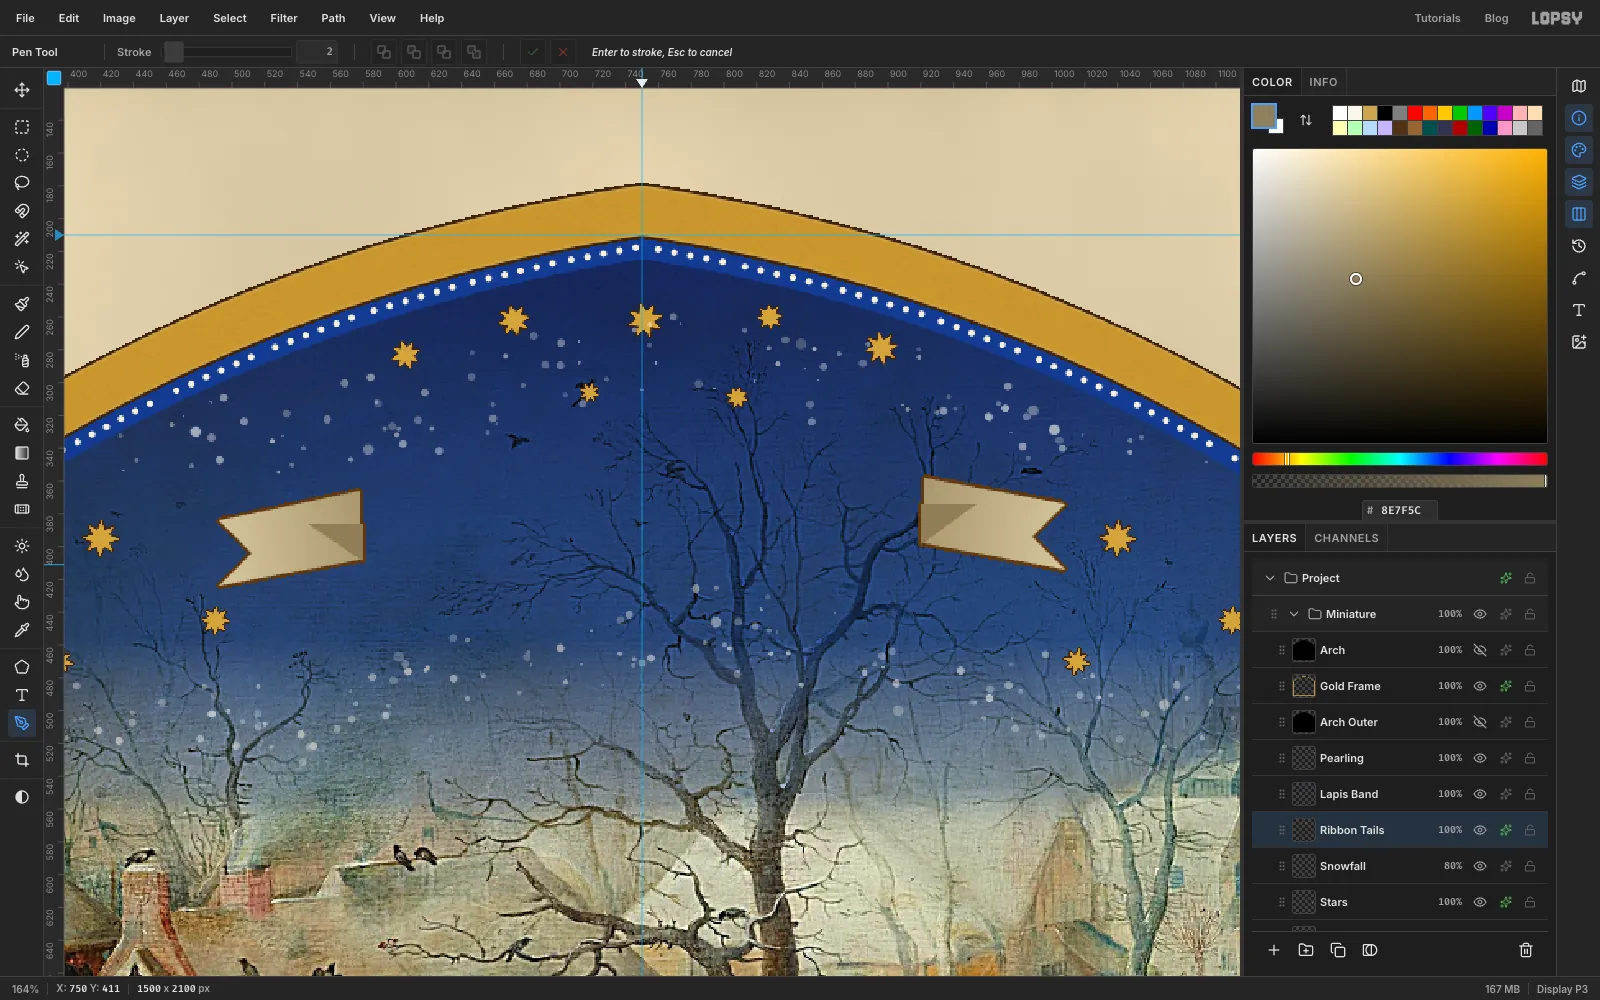
With the Pen, draw the left tail. It's a ribbon end about 85 px long and 40 px tall, sloping slightly down and outward, with a V-notch about 20 px deep in its outer end. Click 578, 366, 492, 384, 512, 404, 492, 424 and 578, 408, then click the first point again to close it. Click Path to Selection, then Delete Path.
Pick the Gradient tool and click Advanced…. Delete the two middle stops and set the ends to and , both at full opacity. Drag from the scroll end outward, from 578, 390 to 492, 404.
Draw the right tail as its mirror image, about 10 px higher because the scroll rises to the right: 922, 358, 1008, 374, 988, 394, 1008, 414 and 922, 398. Shade it the same way, from 922, 378 to 1008, 394.
Then draw a small triangle with the Pen where each tail disappears under the scroll, and fill it with fold . The left one is 546, 386, 580, 386 and 580, 409; the right one is 954, 374, 920, 374 and 920, 399. That dark fold makes the tail read as the back of the ribbon. Deselect and add a Stroke of Width 2 in scroll outline .
-
Draw the scroll's path
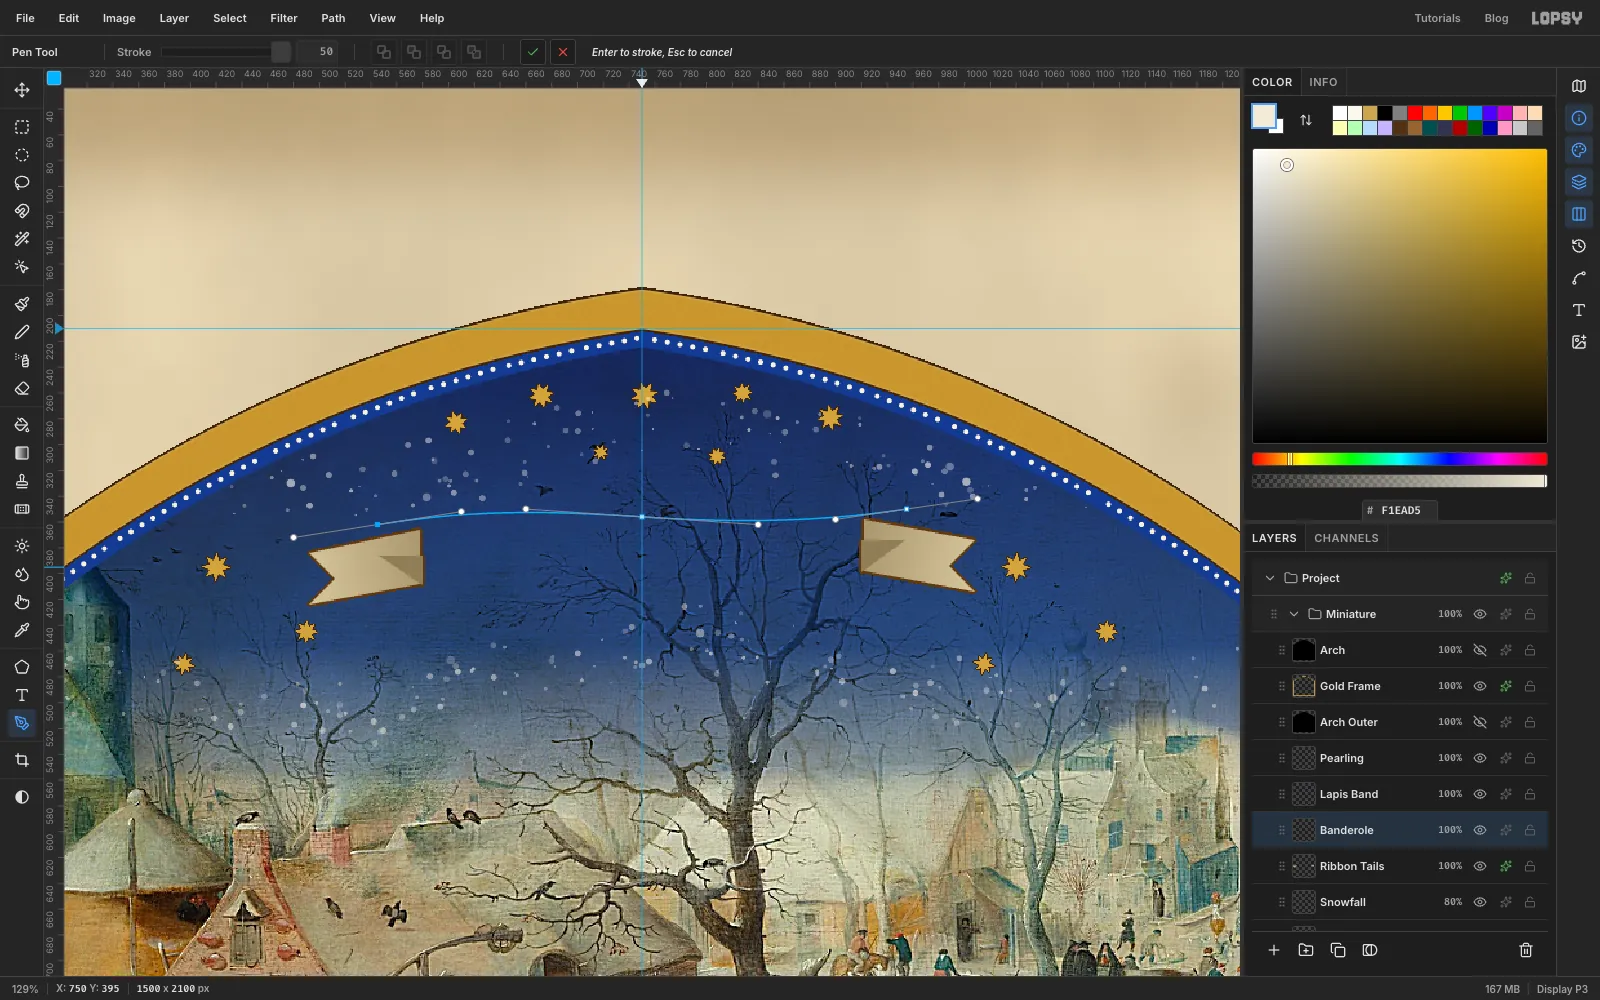
Add a layer called Banderole and set the foreground to scroll cream . Pick the Pen. Press and drag at each of three points to make a smooth anchor:
- press at 545, 362 and drag to 610, 352
- press at 750, 356 and drag to 840, 362
- press at 955, 350 and drag to 1010, 342
The curve rises slightly from left to right with a gentle wave. Set the Pen's Stroke option to 50.
-
Stroke the scroll
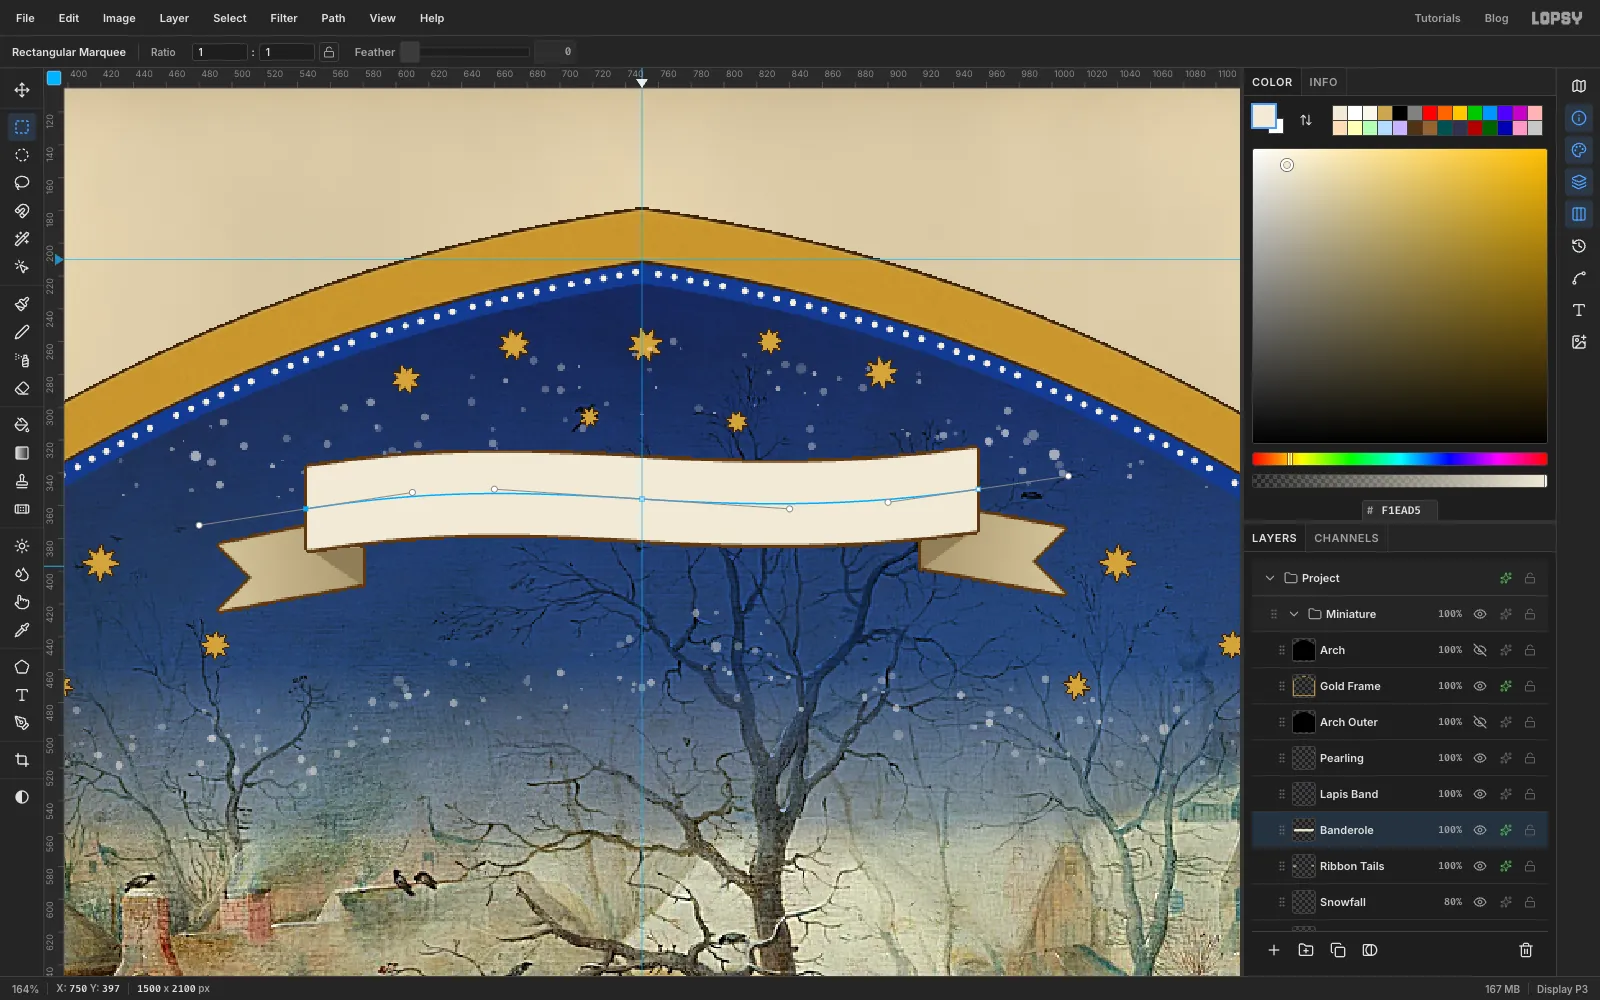
Press Enter. The path is stroked 50 px wide in cream. The round ends need squaring off: select from 480, 300 to 546, 420 with the exact-corners dialog and press Delete, then do the same from 954, 280 to 1024, 400. Deselect and add a Stroke of Width 2 in scroll outline .
-
Letter the scroll on a path
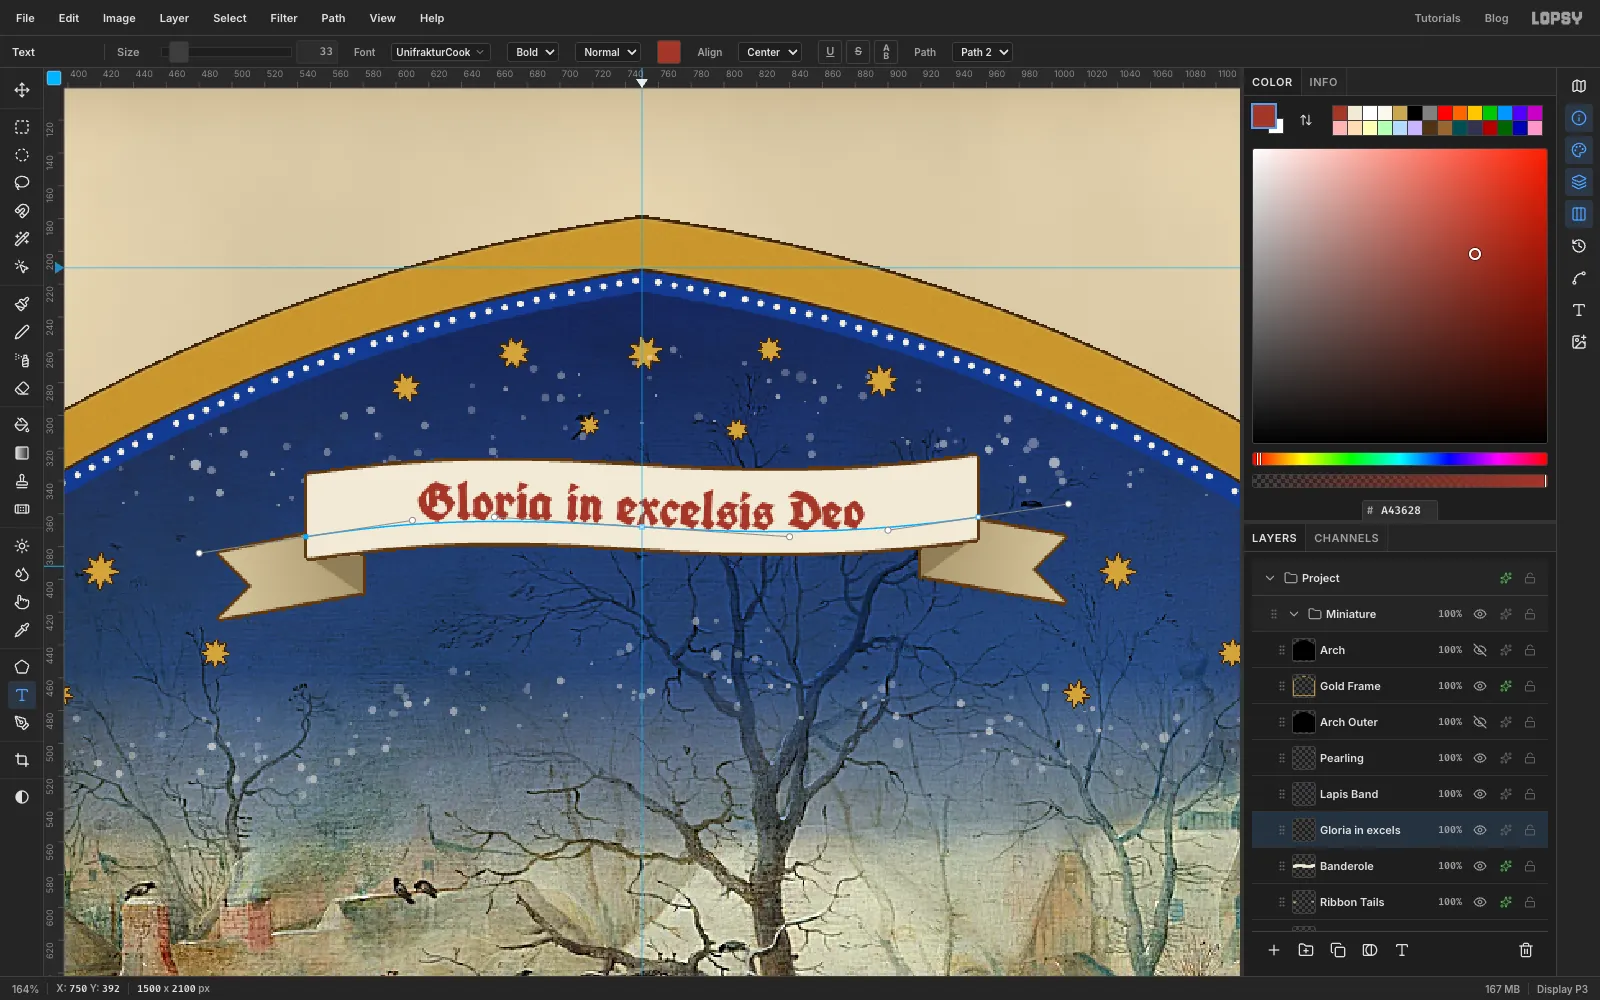
Text on a path sits on the path, so the lettering needs its own path a little below the scroll's centre. Open the Paths panel and click the selected path to deselect it; otherwise the Pen would edit it. Draw the same three anchors 12 px lower: 545, 374 dragged to 610, 364; 750, 368 dragged to 840, 374; and 955, 362 dragged to 1010, 354. Click the ✓ (Commit path) button in the options bar, which saves the path without stroking it.
Set the foreground to vermilion . Pick the Text tool and choose UnifrakturCook, Size 33, Align Center. Click an empty spot low on the page and type Gloria in excelsis Deo. While you're still typing, choose the new path in the options bar's Path menu, then click ✓. The words flow along the curve with about 12 px of cream above and below.
-
Lay the champie ground
Collapse the Miniature group, click its row, click New Group and name the group Text Block. Add a layer called Initial Ground.
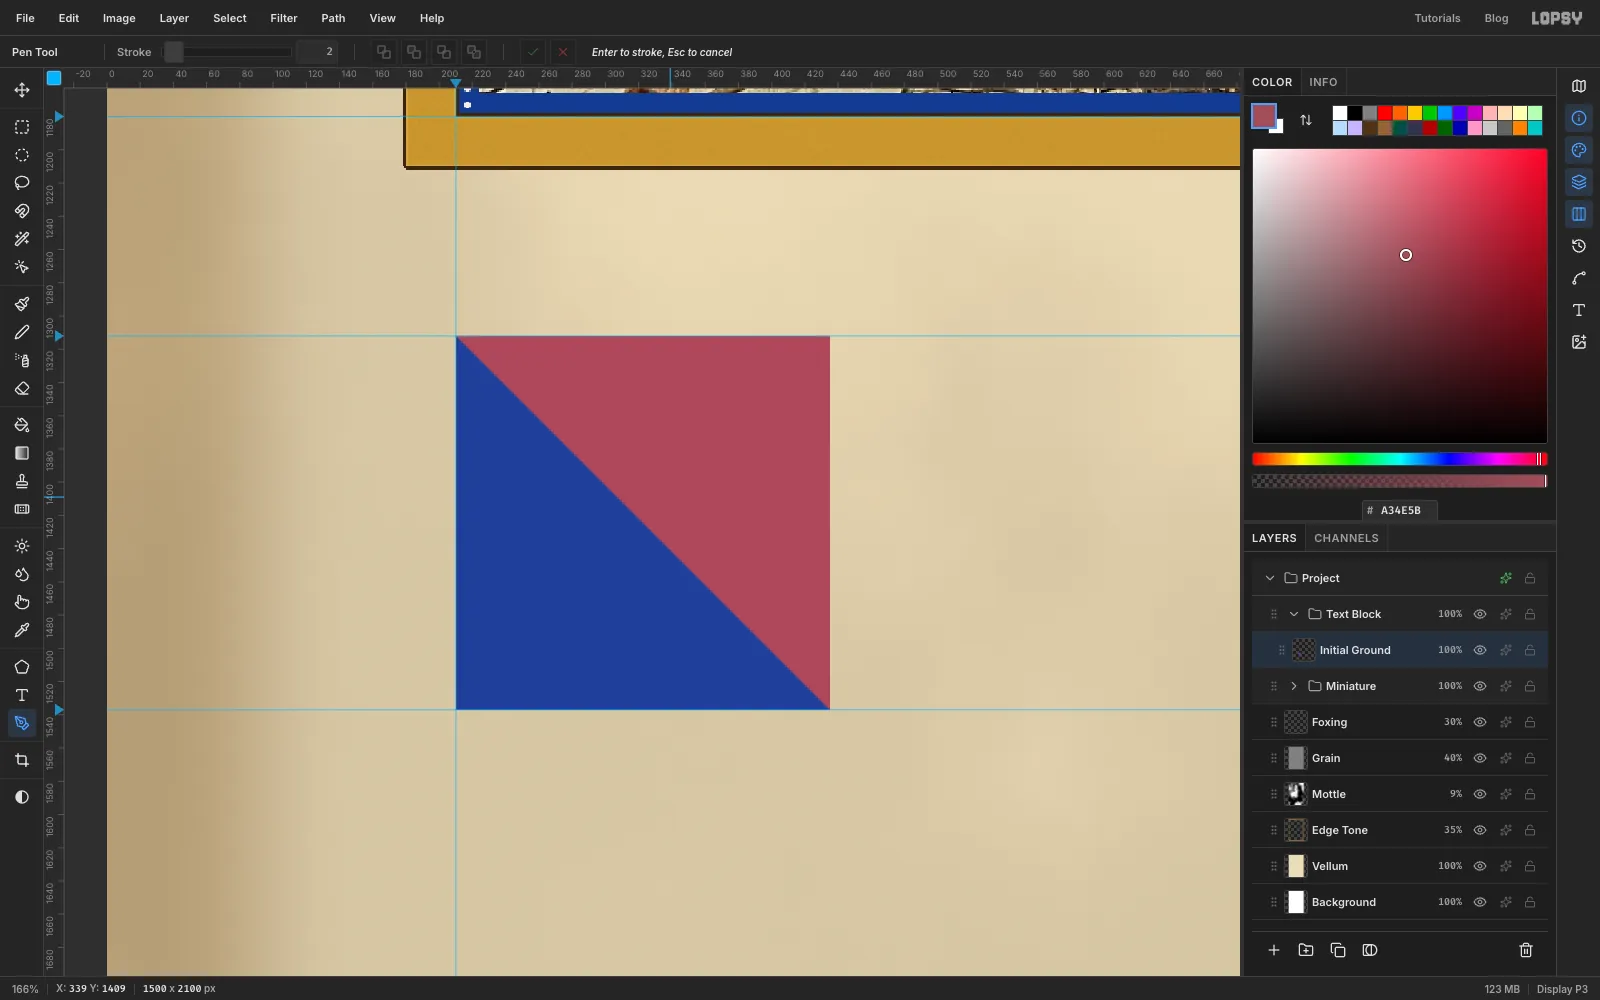
Select a square from 210, 1312 to 435, 1537, which matches the guides, and fill it with lapis . Deselect. With the Pen, click the square's top-left, top-right and bottom-right corners, then the first corner again to close the triangle. Click Path to Selection and Delete Path, and fill the triangle with rose . Deselect.
-
Add white filigree
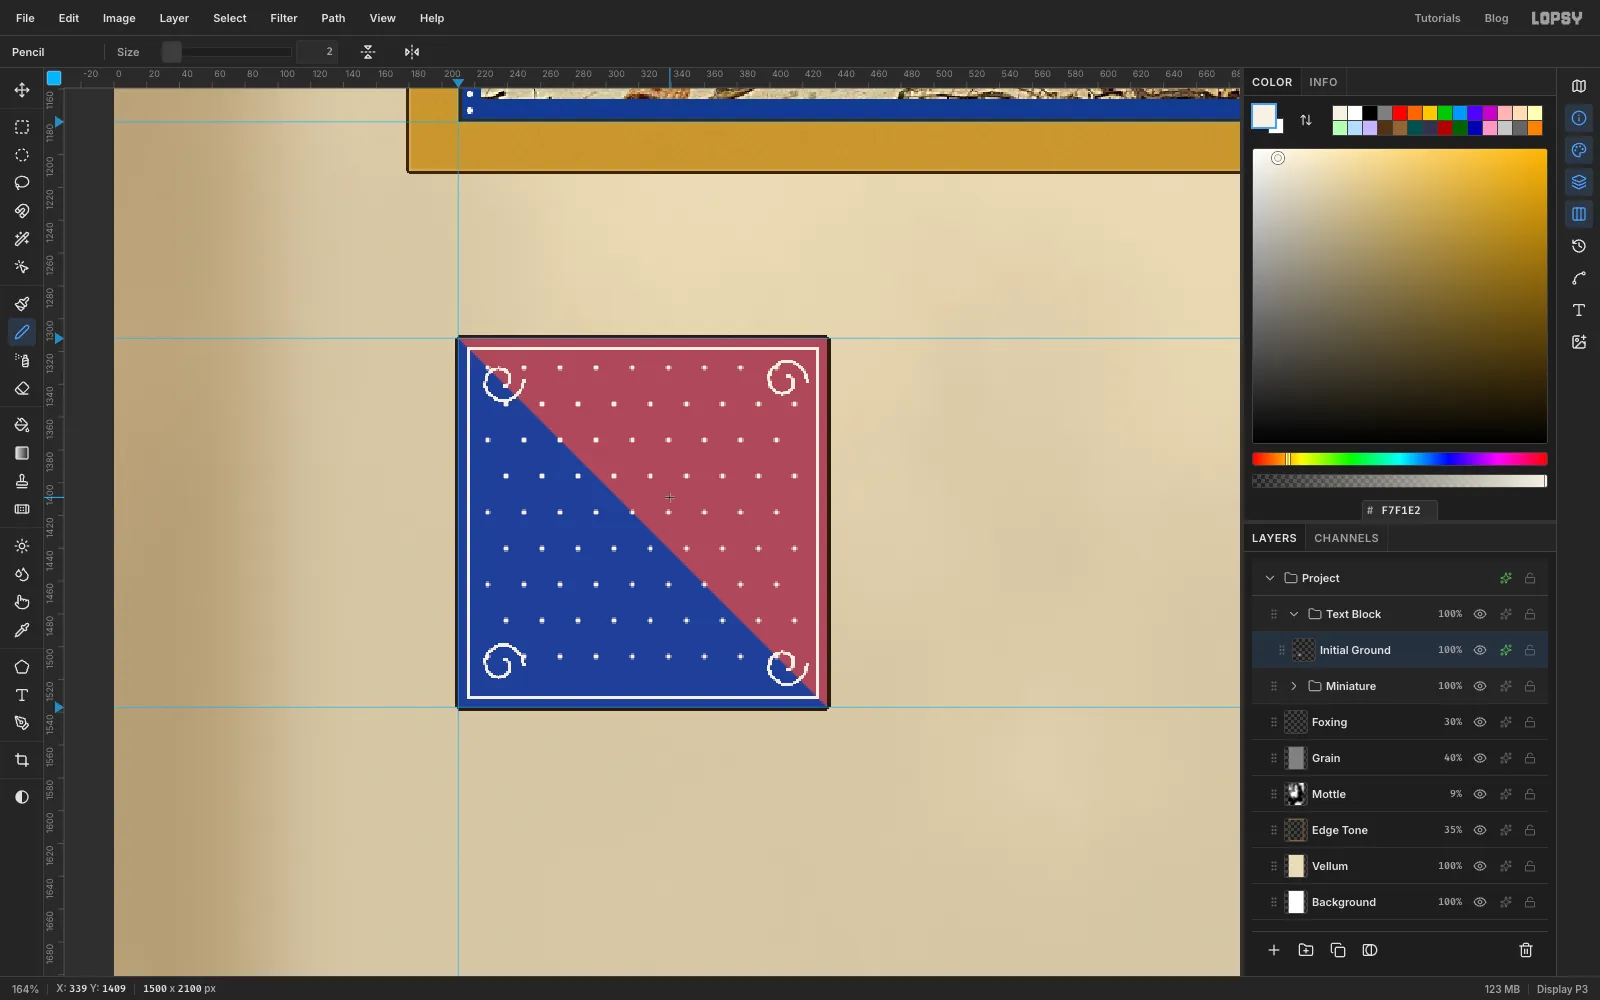
Champie grounds are decorated with fine white penwork. Pick the Brush and set Size 4, Spacing 10 and white lead . Click a staggered grid of dots about 22 px apart across the square.
Lower the size to 2 and draw a tiny spiral, about 28 px across, in each corner. Then pick the Pencil at Size 2. Click 6 px inside the square's top-left corner and Shift-click each of the other corners in turn, then back to the start, to draw a white hairline frame. Give the layer a Stroke of Width 2 in ink .
-
Set the G and select it
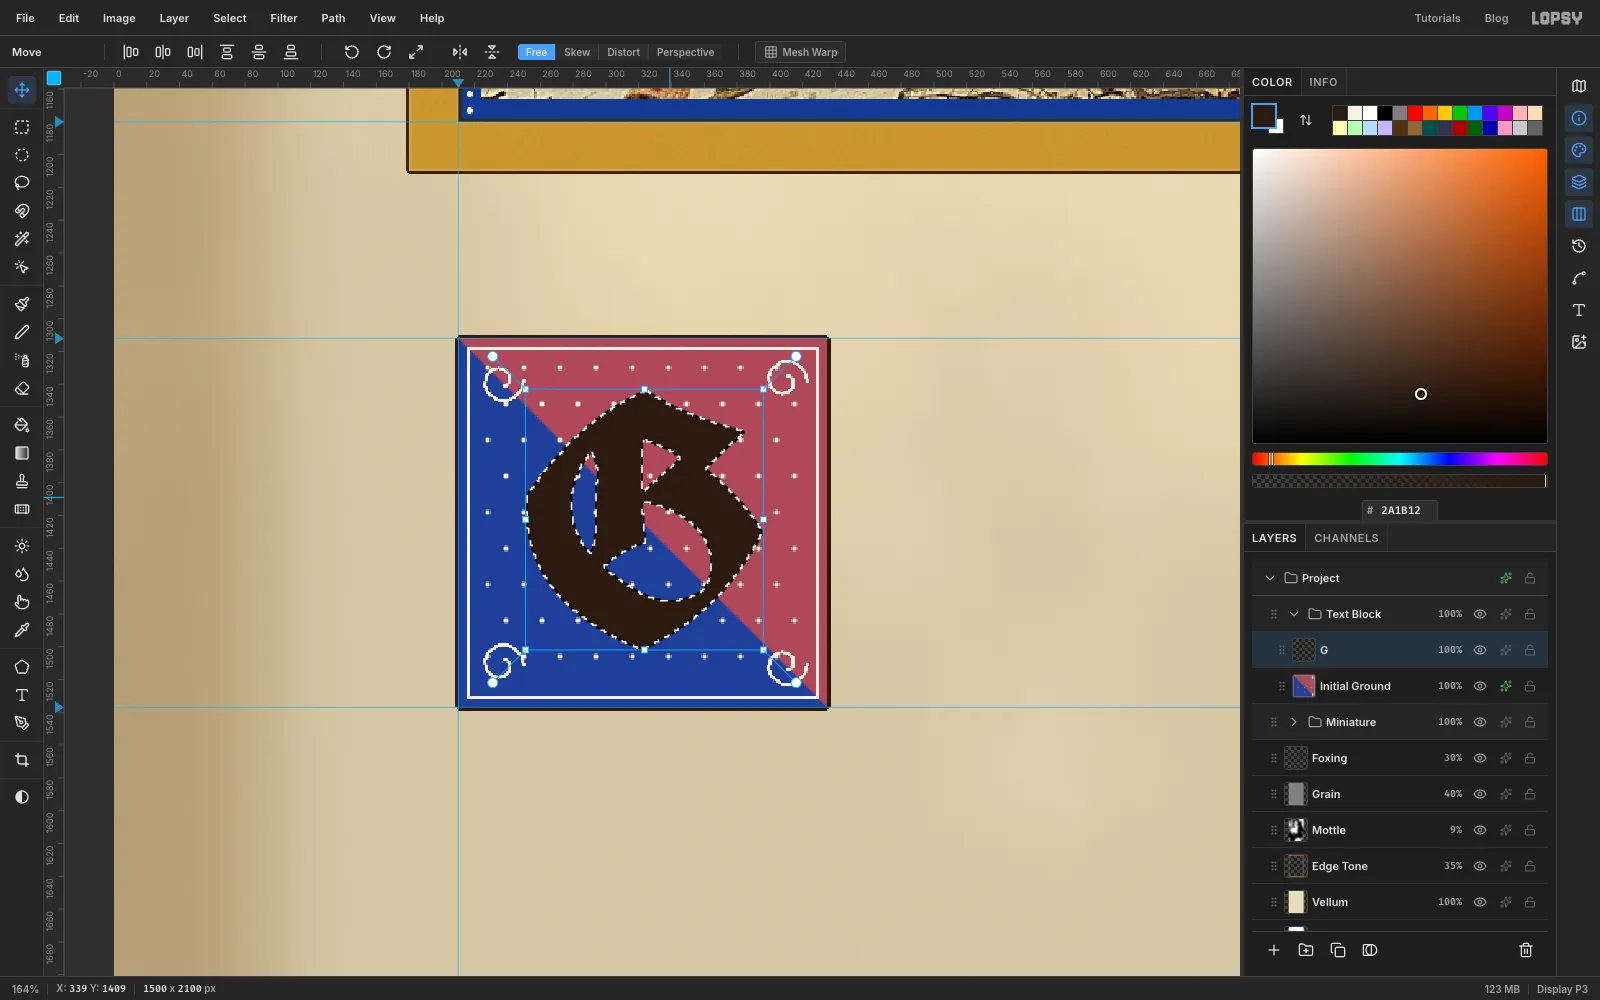
Set the foreground to ink . Pick the Text tool with UnifrakturCook, Size 215 and Align Center. Click in the middle of the square and type a capital G, then click ✓. With the Move tool, use the arrow keys to centre the letter on the square, then nudge it up 2 px. A letter looks better centred optically, slightly high.
Click Rasterize Layer at the bottom of the Layers panel, then Cmd-click the G's thumbnail. That loads the letter's shape as a selection.
-
Gild the G
Set the foreground to gold and choose Edit → Fill. Run Filter → Add Noise… with Amount 5 and Mono, then deselect. Add the same effects as the frame:
- Stroke, Width 2, in gold outline
- Inner Glow, Size 3, Opacity 85, in highlight
-
Trace white penwork around the letter
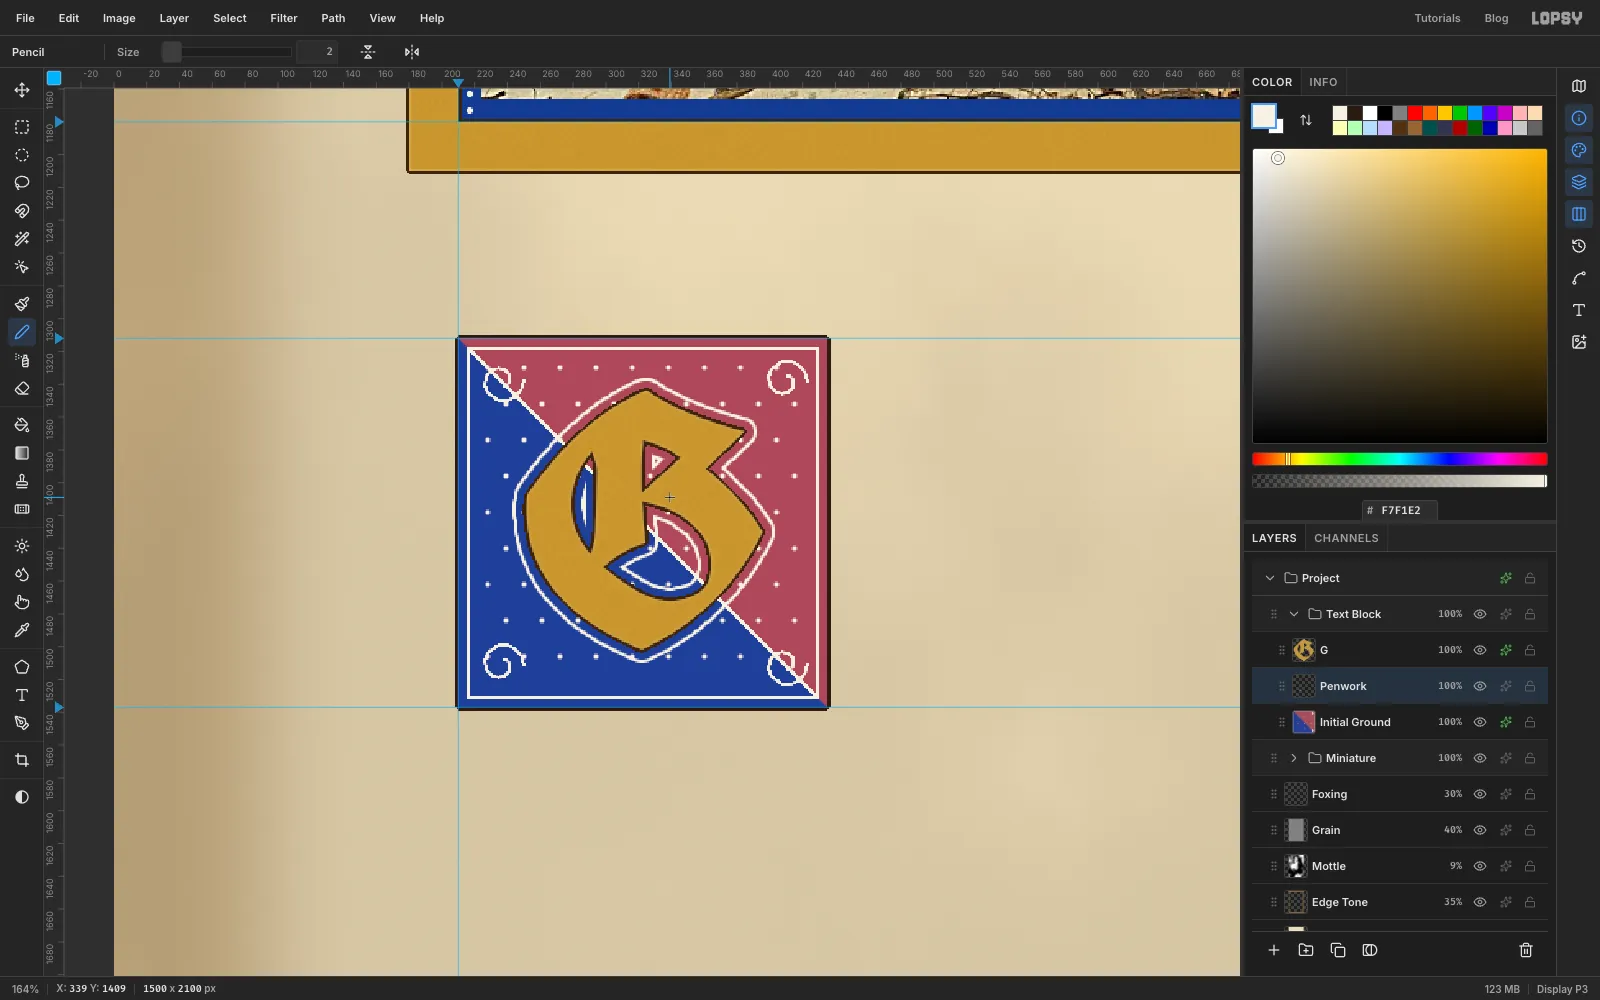
Click Initial Ground and add a layer called Penwork, which sits below the G. Cmd-click the G's thumbnail, choose Select → Grow… with 8 and fill with white. Cmd-click the G's thumbnail again, grow it by 6 and press Delete. A 2 px white line now traces the letter. Deselect.
With the Pencil at Size 2, click 8 px inside the square's top-left corner and Shift-click 8 px inside the bottom-right corner. The white diagonal disappears behind the G.
-
Write the text
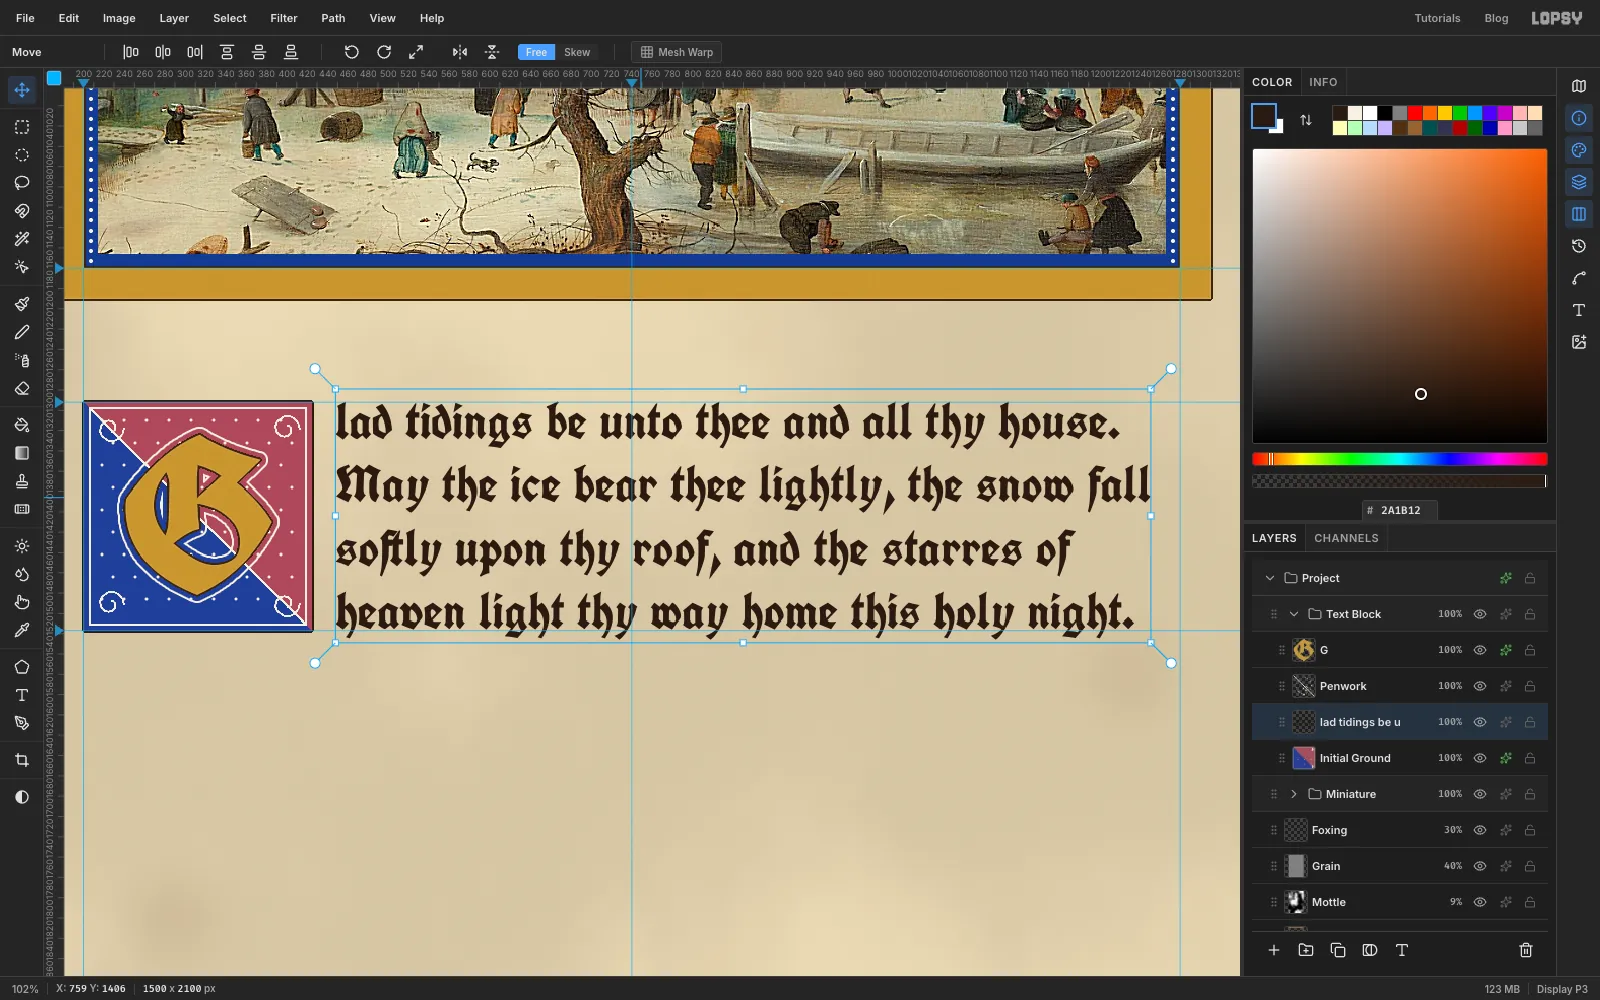
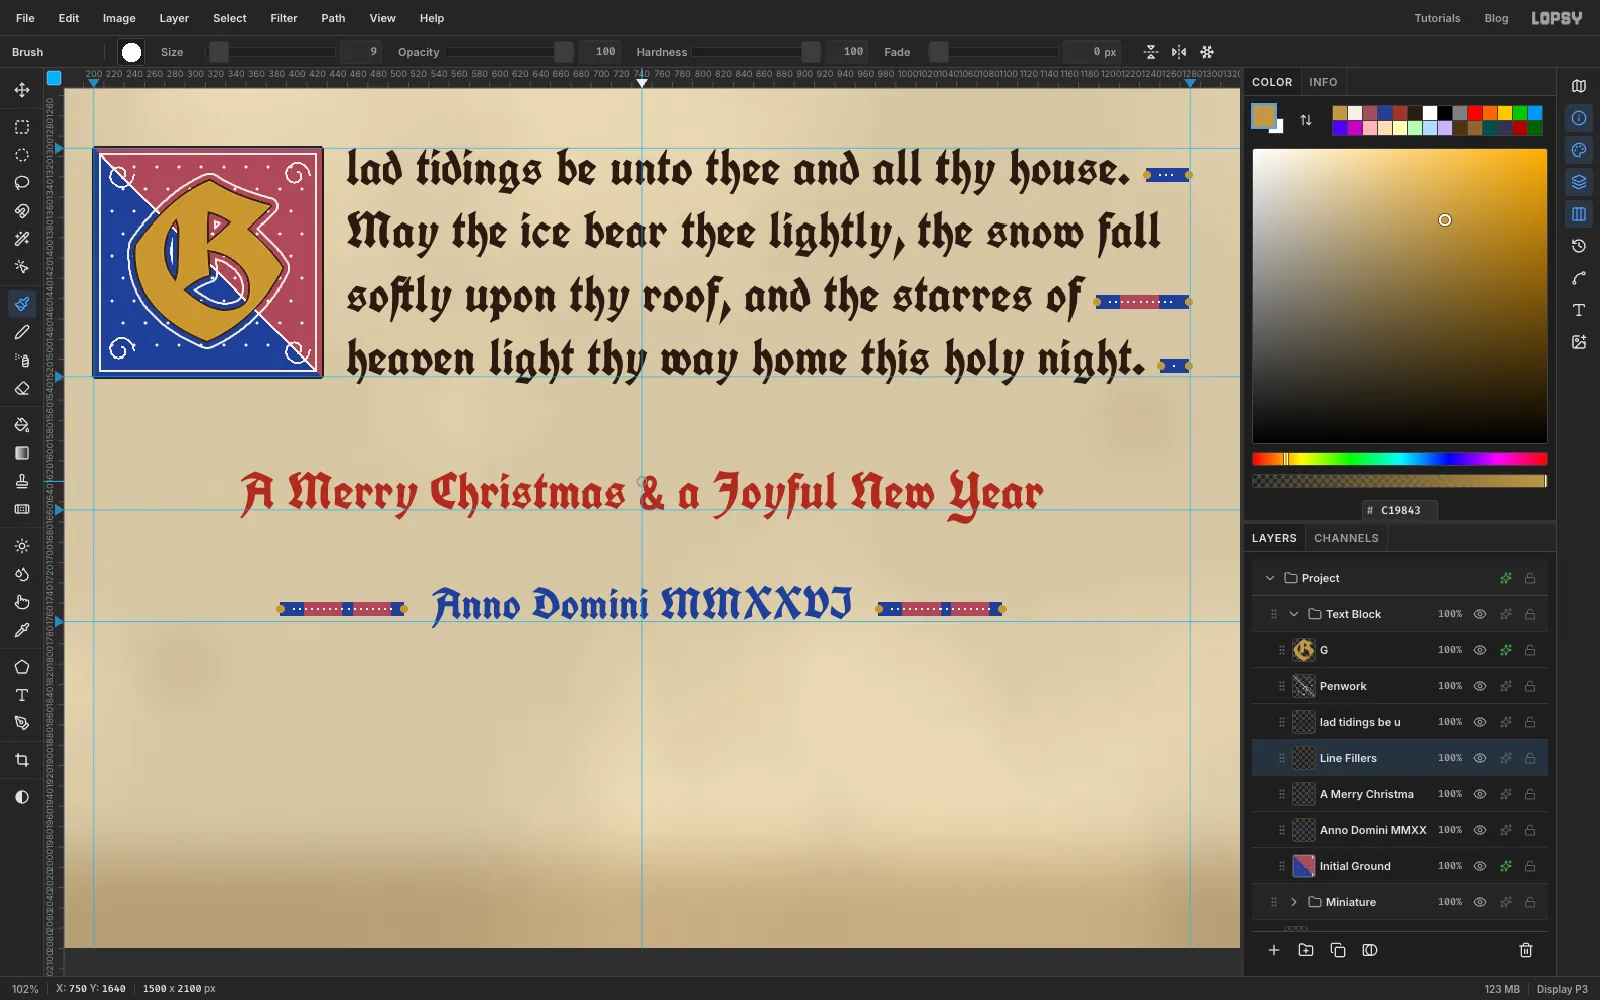
Click Initial Ground, so the text layer sits under the initial's penwork and G. Set the foreground to ink, pick the Text tool and choose UnifrakturCook at Size 50. In the Text panel set Line height to 1.25 and Letter spacing to 0, and choose Align Left.
Drag a text box from 457, 1300 to the right guide at 1290, 1550. That leaves a 22 px gap after the initial. Leave off the G, because the gilded initial supplies it, and type:
lad tidings be unto thee and all thy house. May the ice bear thee lightly, the snow fall softly upon thy roof, and the starres of heaven light thy way home this holy night.
Click ✓. The text wraps into four lines. Use the Move tool's arrow keys to raise or lower it until the top of the first l touches the 1312 guide. The last line's baseline then sits on the 1537 guide, level with the bottom of the square. Leave the right edge ragged: justifying four short lines opens wide gaps between the words.
-
Close the short lines with line-fillers
Scribes filled the space at the end of a short line with a painted bar. Click Initial Ground and add a layer called Line Fillers. Pick the Brush, open the Brushes panel, choose the Square preset and set Size 14 and Spacing 10. The square tip gives the bars square ends.
Work on each line that ends more than about 34 px short of the right guide. Here that's the first, third and fourth. Keep the bars about 12 px above the baseline, centred on the small letters:
- In lapis , click 23 px after the last letter and Shift-click 7 px short of the 1290 guide. The 14 px tip adds 7 px at each end, so the bar runs from 16 px after the text to the guide.
- In rose , starting about 30 px in, click and Shift-click 24 px apart. With the tip that makes each rose bar about 38 px long. Start a new one every 48 px.
- Switch to the Hard Round preset at Size 3 and Spacing 200, and Shift-click a row of white dots along the middle.
- At Size 9, click a gold dot on each end.
-
Add the rubric and date
Click the left ruler at 1668 and 1778 to drop two baseline guides, 130 px and 240 px below the paragraph's last line.
Click Initial Ground first: changing Text options while a text layer is selected restyles that layer. Set the foreground to vermilion, choose UnifrakturCook at Size 50 with Align Center, click on the centre line well below the text, and type A Merry Christmas & a Joyful New Year. Click ✓ and nudge the line until its baseline sits on the 1668 guide. At the same size as the text, the red does the work and the line doesn't compete with the initial.
Click Initial Ground again. In lapis at Size 44, type Anno Domini MMXXVI on the centre line and nudge its baseline onto the 1778 guide. Click Line Fillers and paint two fillers, as in the last step, each about 124 px long. Centre them on the date's small letters, 26 px from its first and last letters.
-
Rule the gold keyline and red rule
Collapse Text Block and Miniature, click Foxing, click New Group and name it Border. The group sits under the picture and text.
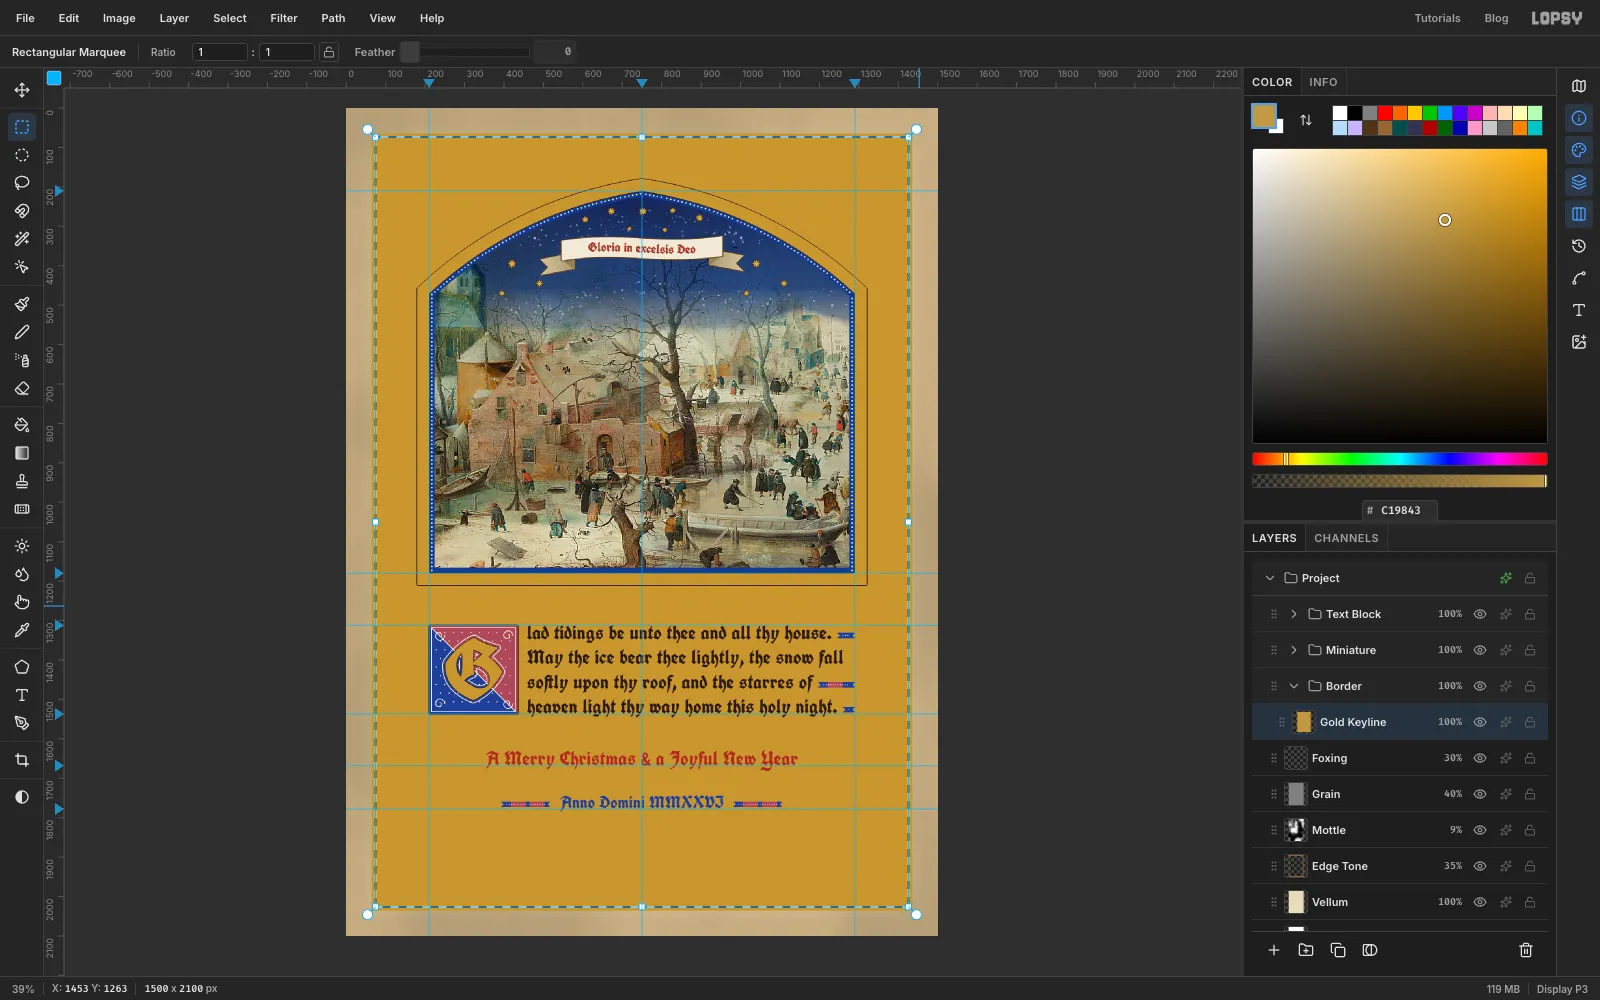
Add a layer called Gold Keyline. Select from 64, 64 to 1436, 2036 and fill it with gold. Deselect, select from 74, 74 to 1426, 2026 and press Delete, leaving a 10 px frame. Deselect and run Filter → Add Noise… with Amount 5 and Mono. Add a Stroke (Width 1, gold outline ) and an Inner Glow (Size 2, Opacity 80, highlight ).
Add a layer called Red Rule and do the same with a 3 px line: fill 84, 84 to 1416, 2016 with vermilion, then delete 87, 87 to 1413, 2013.
-
Draw the vine stems with the Pen
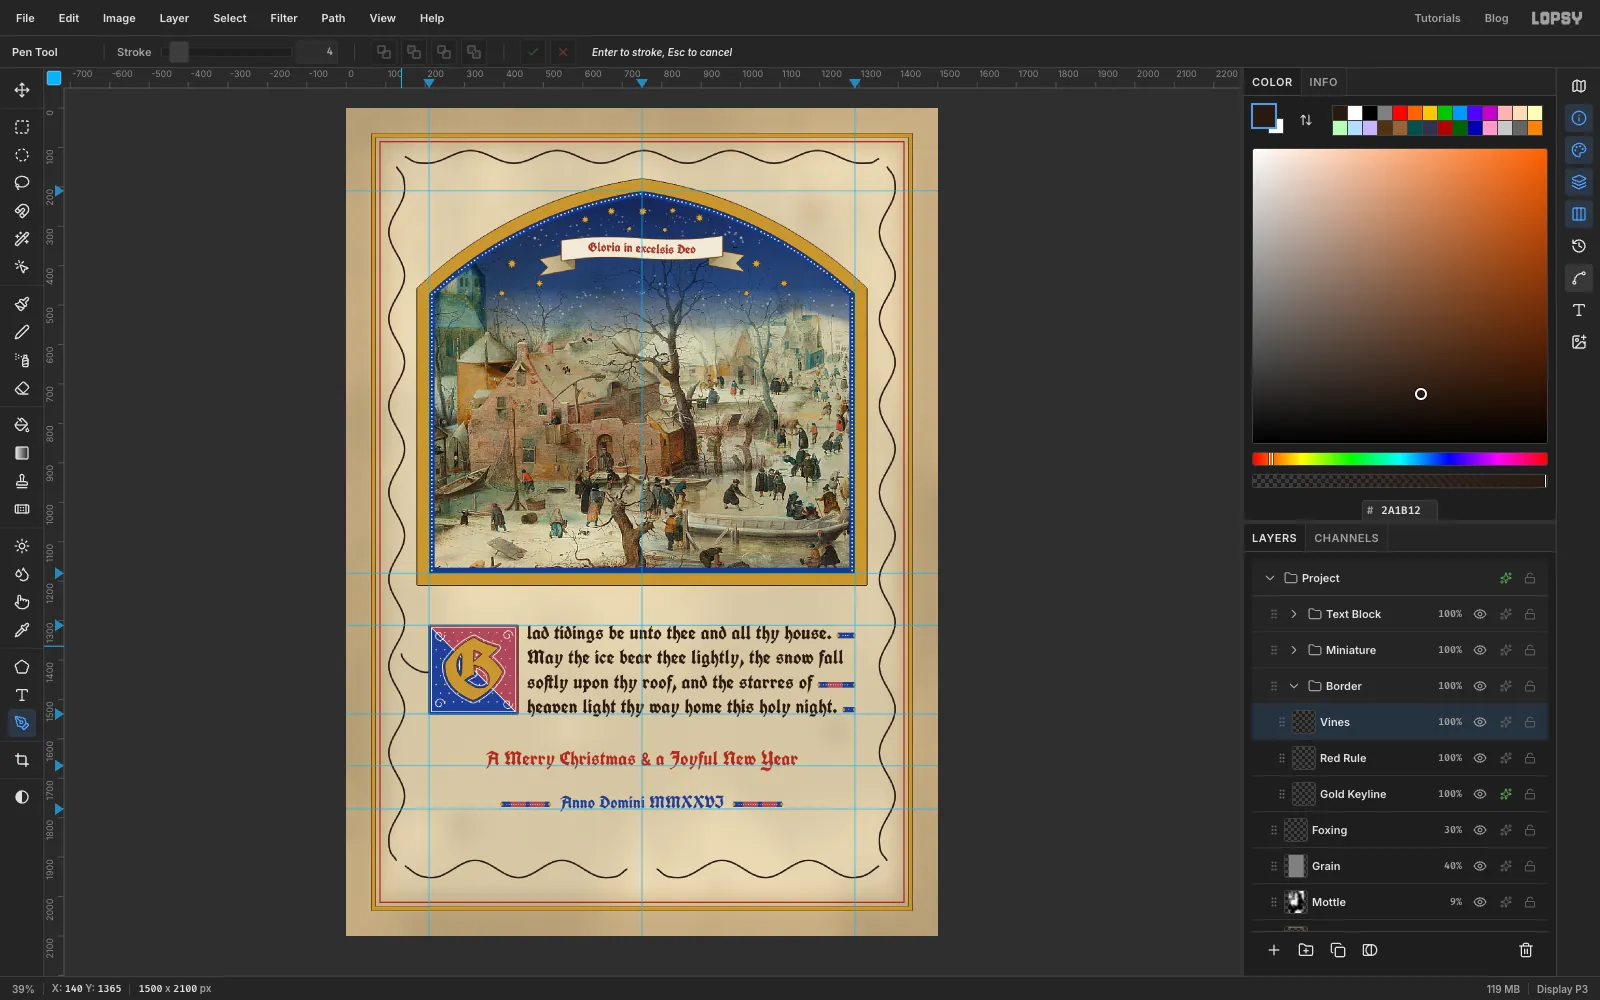
Add a layer called Vines and set the foreground to ink . Freehand waves 1,700 px long never come out even, so draw them with the Pen and set its Stroke to 4. Every wave crest is one anchor. Press on the crest and drag about 40 px along the direction of the stem to make a smooth anchor:
- Left margin: start at 128, 150. Then put a crest every 110 px down the page from y 205, alternating between x 148 and x 108. Finish at 128, 1908 and press Enter to stroke it.
- Right margin: the same, centred on x 1372.
- Top: start at 150, 124 and put a crest every 110 px from x 205, alternating between y 140 and y 108. Finish at 1350, 124.
- Bottom: two stems centred on y 1930, swinging 22 px either side. Each runs from a corner to just short of the centre (x 712 and x 788); the roundel will hide their ends.
- From the initial: a short stem from the initial's left edge at 213, 1430, curving down and back up into the left vine at about 140, 1385.
After each Enter, deselect the path in the Paths panel before you start the next one.
-
Add hairline tendrils
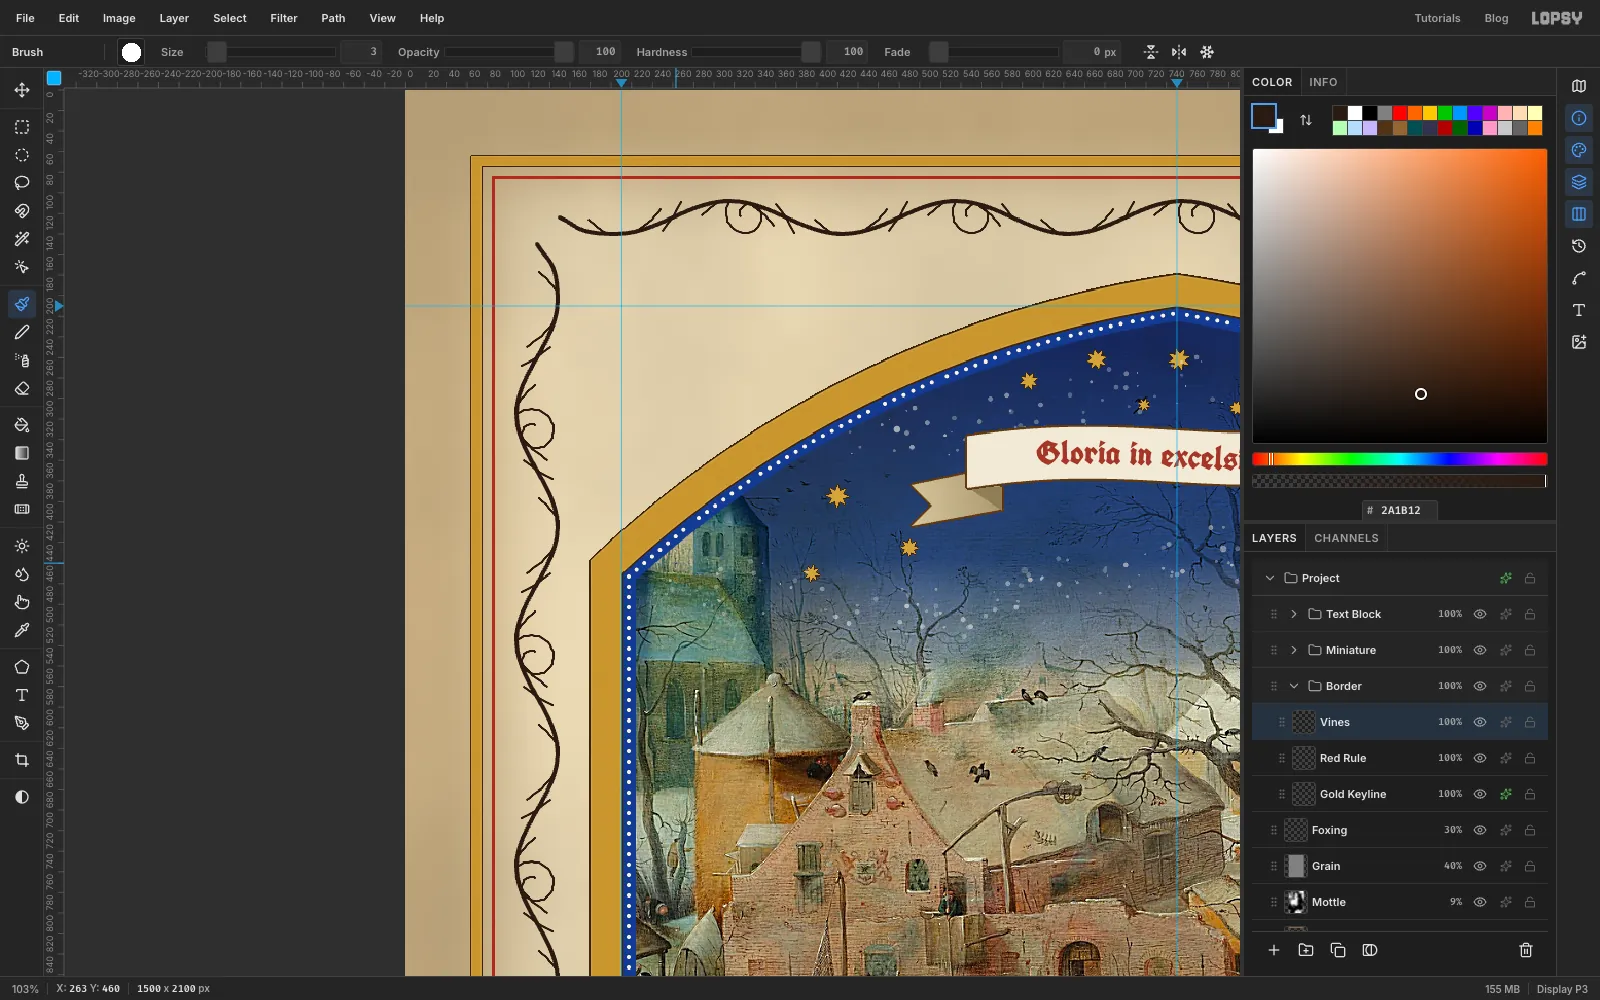
Medieval penwork repeats the same few strokes on every wave, so get one wave right, then work along each stem. Pick the Brush (Hard Round, Size 3) and zoom to 100% or more on the top-left corner. A crest is each outward bulge of a stem, on either side. At every crest:
- Starting on the stem at the crest, flick one curved hairline about 40 px long. It crosses back over the stem and ends over the next hollow. A leaf will sit on its tip.
- Flick a shorter one, about 25 px, backwards along the crest's own side. A gold dot will sit on its tip.
- On every second crest, add a small spiral curl about 30 px across in the hollow beside it.
Where a stem crosses its centre line, add two tiny stalks about 15 px long, one on each side. They'll carry leaves too. Quick, short strokes make cleaner hairlines than slow ones; undo any that wobble. It's slow work, so compare your corner with the screenshot before you go round the page.
-
Make an ivy-leaf brush
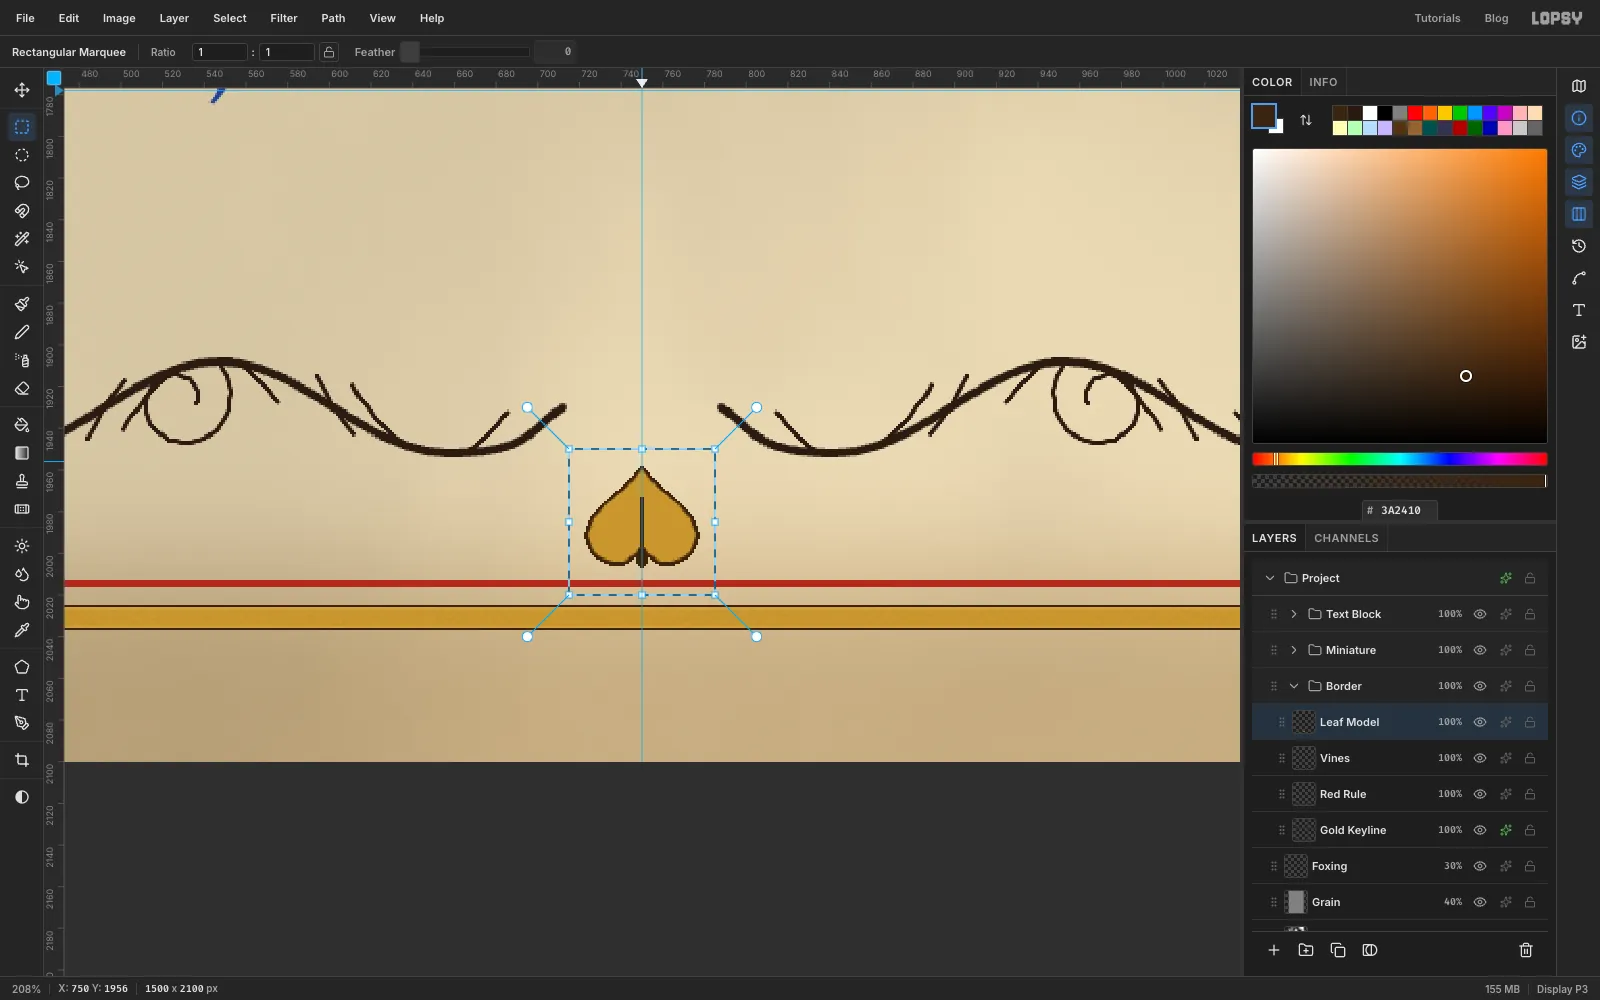
Add a layer called Leaf Model and zoom in on an empty spot near the bottom margin. Drag the Lasso round a heart-shaped leaf about 50 px wide, with its point up, and fill it with gold . With the brush at Size 2 in gold outline , click at the notch and Shift-click near the point to draw a midrib. Add a Stroke of Width 2 in , then click Rasterize Layer Style in the effects drawer.
Draw a square selection just around the leaf and choose Edit → Define Color Brush…. Name it Ivy Leaf. Deselect and delete the Leaf Model layer.
-
Stamp the gold leaves
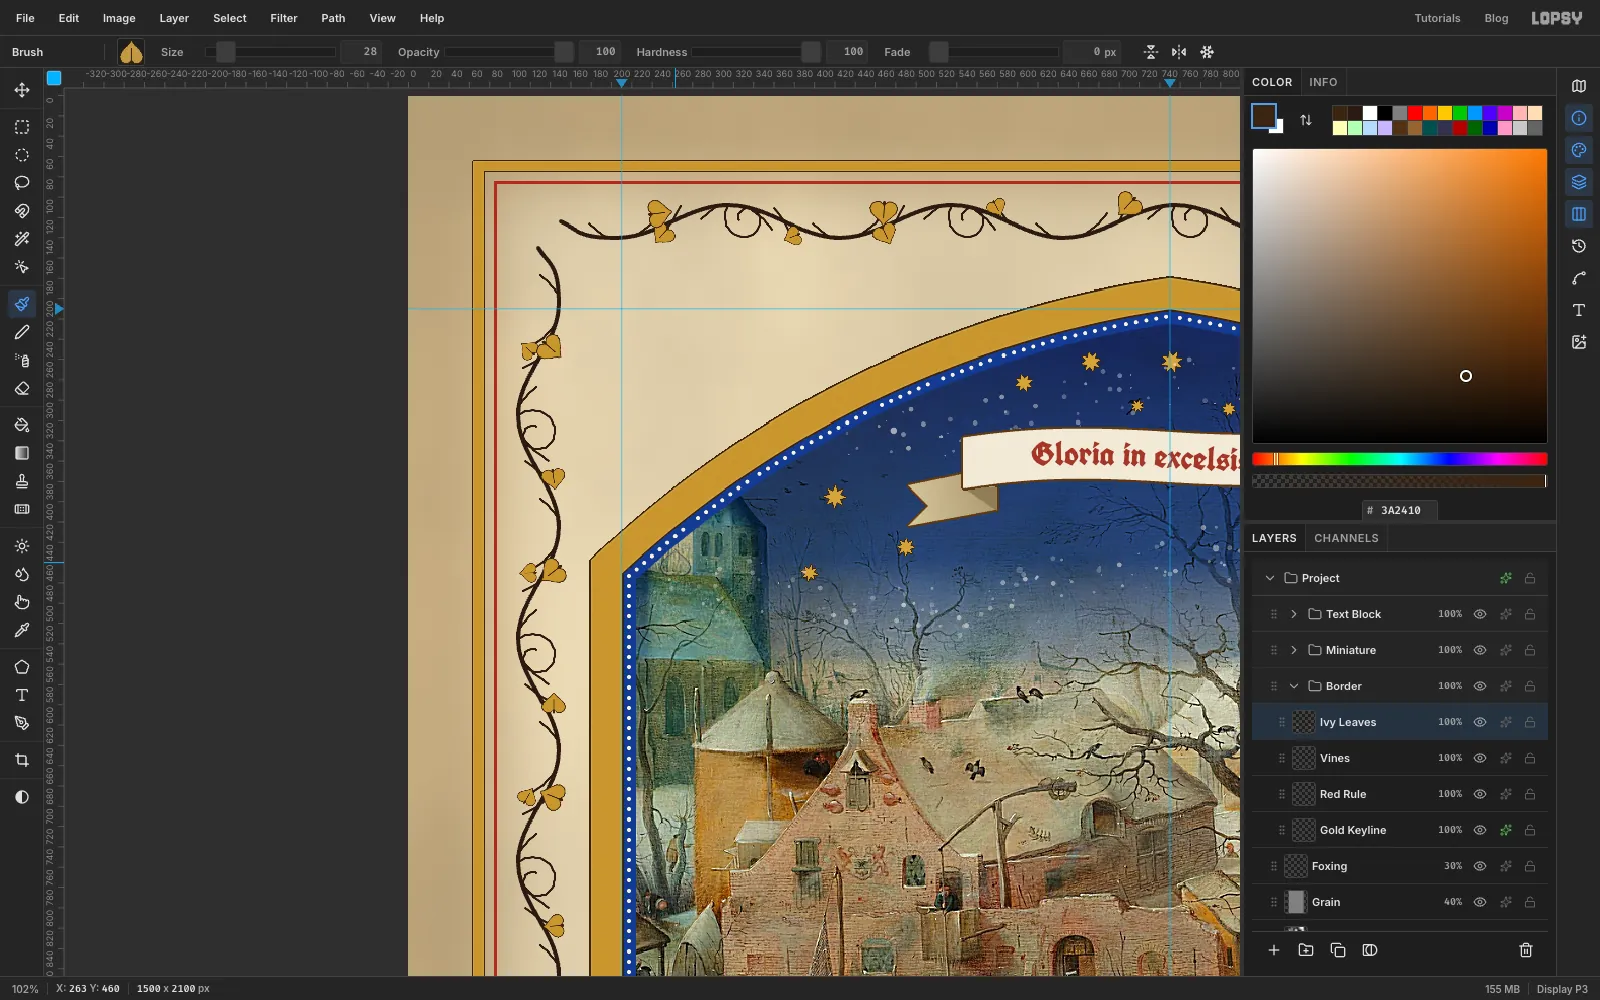
Click Vines and add a layer called Ivy Leaves. In the Brushes panel's Dynamics tab, set Angle Jitter to 100, so every leaf lands at a different angle. Switch between Size 20, 24 and 28 as you go, and click once at the tip of each leaf hairline and each tiny stalk. Leave every second leaf position empty for the next step.
-
Paint some leaves blue and rose
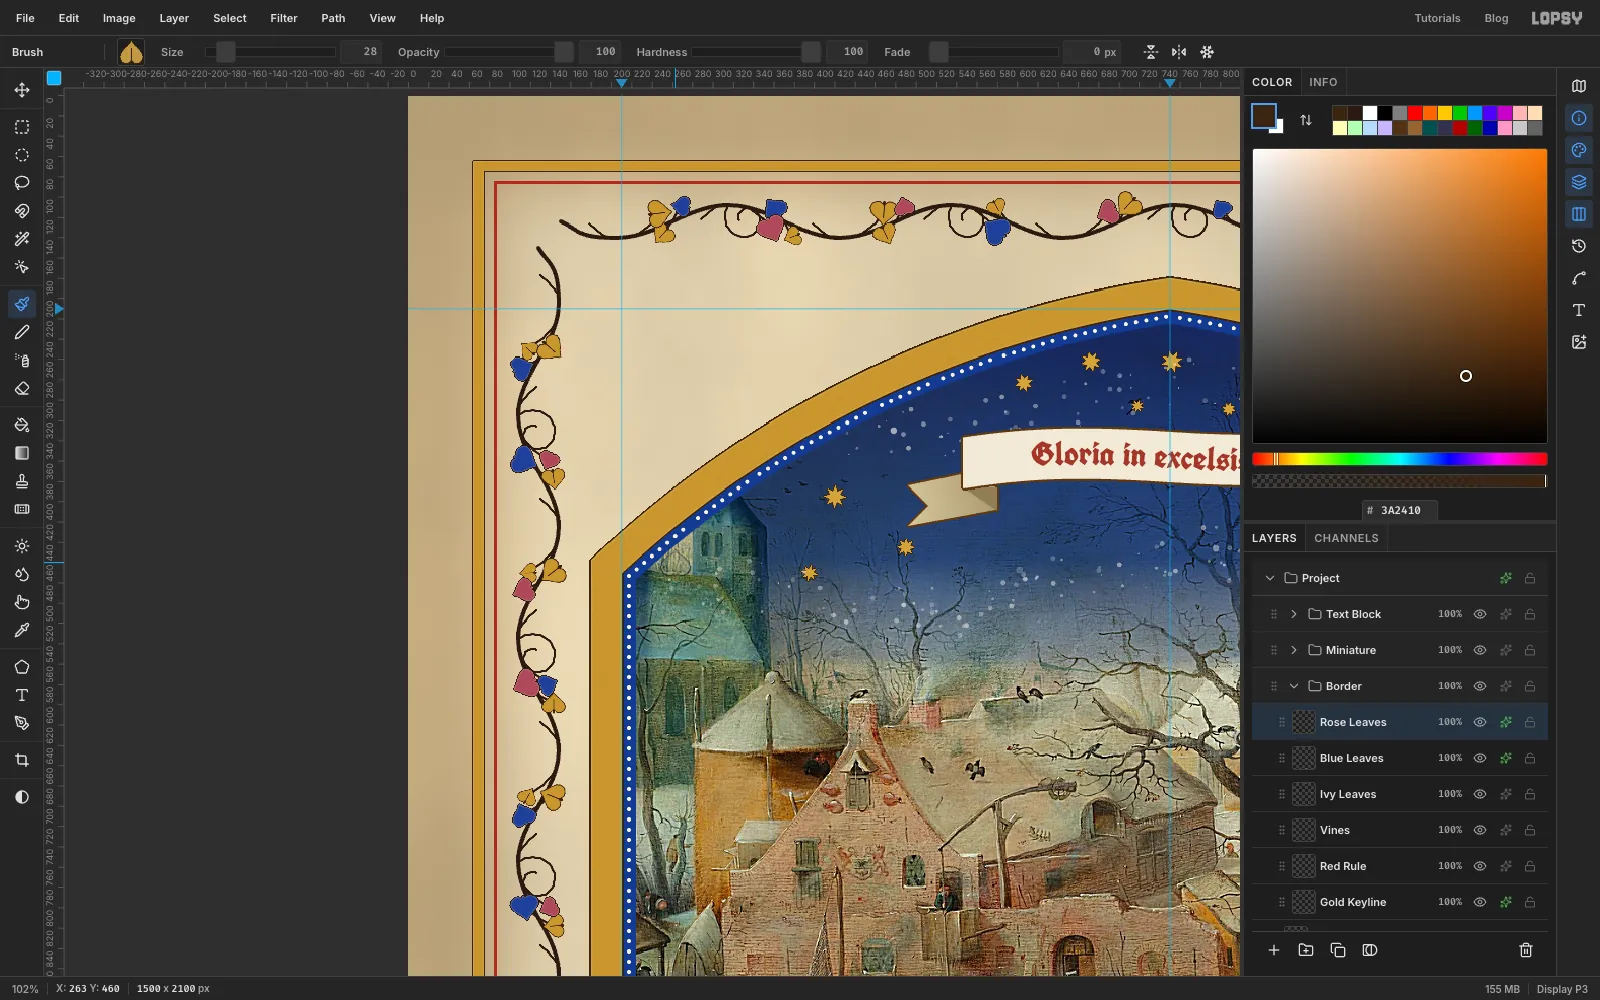
Gothic ivy borders mix gold leaves with painted ones. Add a layer called Blue Leaves and stamp half of the empty positions with the same brush. Give the layer:
- Color Overlay in lapis
- Inner Glow, Size 2, Opacity 70, in white lead
- Stroke, Width 1, in ink
Add a layer called Rose Leaves, stamp the remaining positions, and give it the same three effects with a rose overlay.
-
Add bezants, rosettes and trefoils
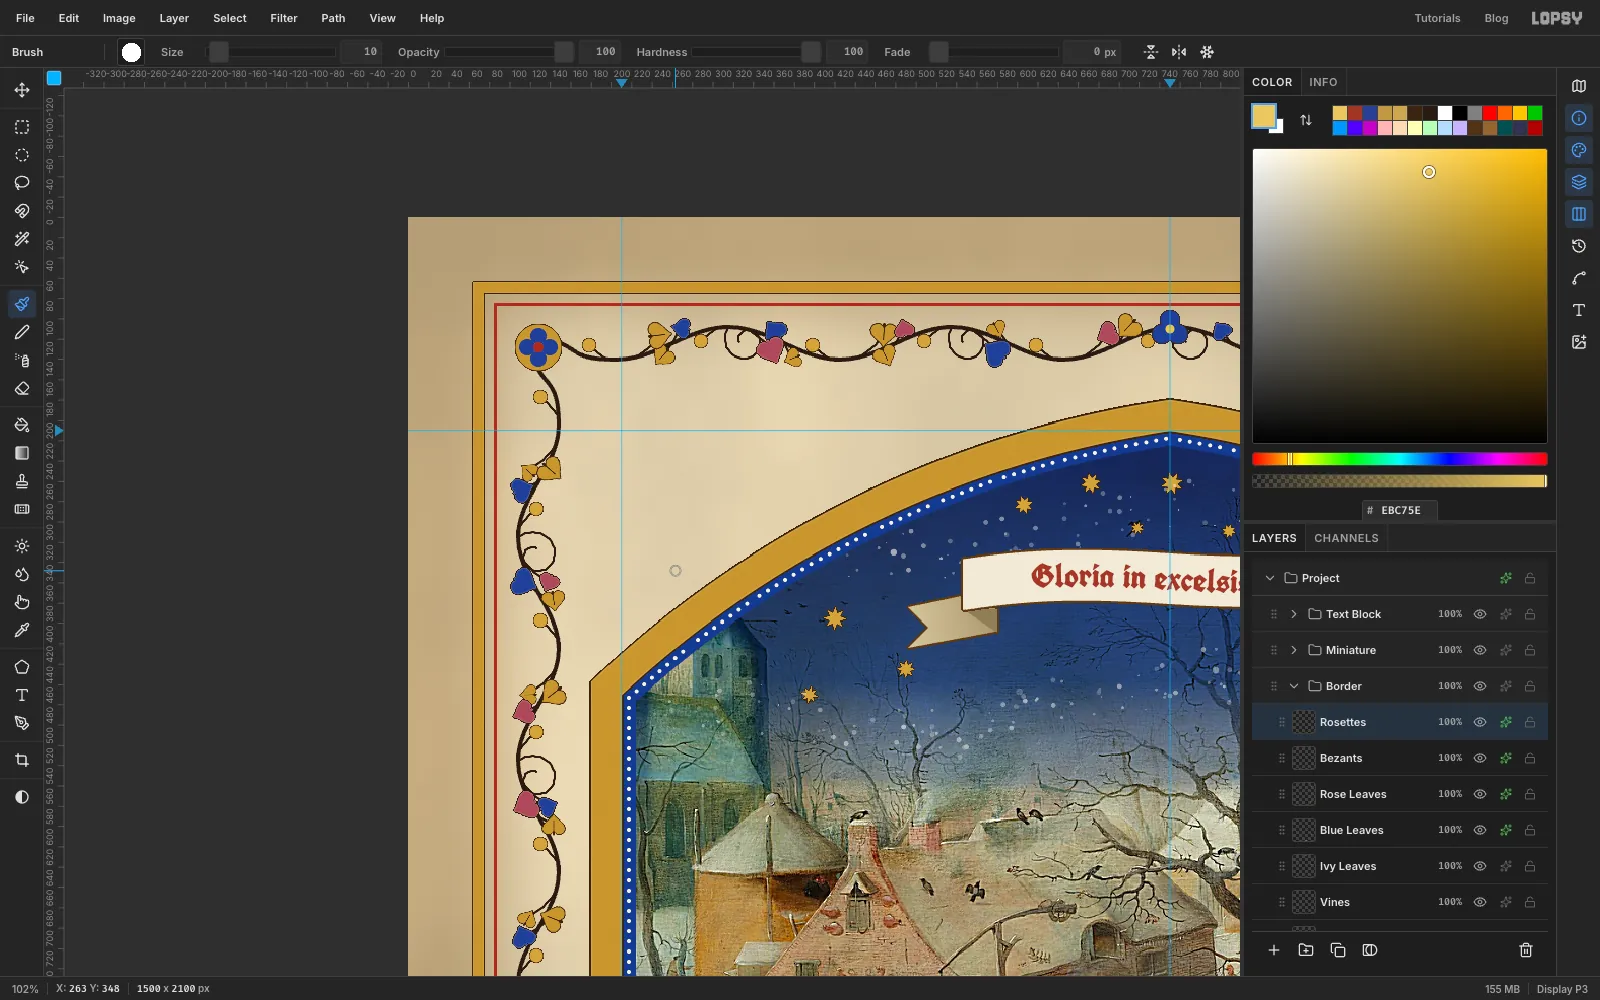
Add a layer called Bezants. In the Brushes panel, set Angle Jitter back to 0, choose the Hard Round preset and set Size 14. In star gold , click the tip of each short backward hairline. Add a Stroke of Width 1 in gold outline .
Add a layer called Rosettes. At each corner where the vines meet (128, 128, 1372, 128, 128, 1930 and 1372, 1930):
- click a gold dab at Size 46
- click four lapis dabs at Size 17, 11 px above, right, below and left of the centre
- click a vermilion dab at Size 11 in the middle
On the same layer, make trefoils from three Size 20 dabs around a point, with a Size 10 gold dab in the middle. Put blue ones on the left vine at 128, 1029 and on the top vine at 750, 110, and red ones at 1372, 1029, 430, 1930 and 1070, 1930. Add a Stroke of Width 1 in gold outline .
-
Turn a second star in the roundel
Add a layer called Roundel. Select a circle from 672, 1842 to 828, 1998 (radius 78 around 750, 1920) and fill it with gold. Deselect, select a smaller circle from 686, 1856 to 814, 1984 and fill it with lapis. Add a Stroke (Width 2, gold outline ) and an Inner Glow (Size 2, Opacity 80, highlight ).
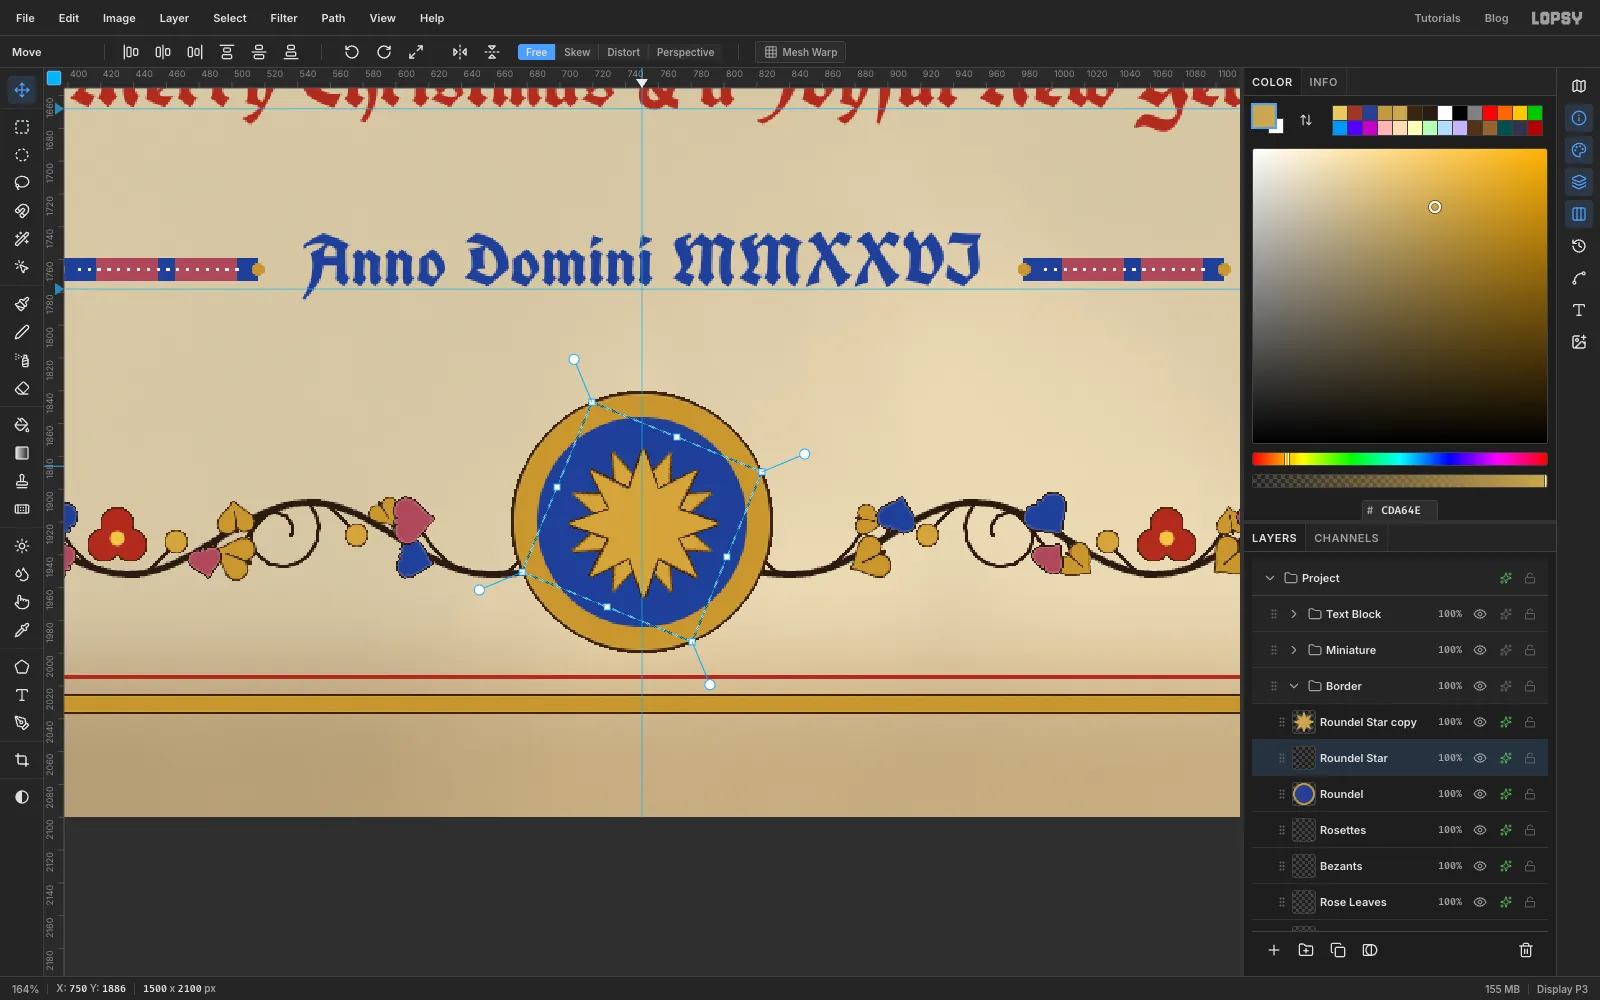
Add a layer called Roundel Star. With the Pen, draw an eight-point star centred on the roundel, as you did for the model star: tips 46 px from the centre and notches 23 px. Use Path to Selection and Delete Path, fill it with star gold, and give it a Stroke of Width 1 in . Click Duplicate Layer. The copy sits exactly on top.
Click the original Roundel Star row and select a square from 694, 1864 to 806, 1976. Pick the Move tool and drag a corner's rotation handle until each point of this star sits exactly halfway between two points of the copy: a sixteenth of a turn. There's no angle readout, so zoom in and judge it by eye. Press Cmd+D to commit, then give the original a Color Overlay of dark gold . The two stars together make a sixteen-point star.
-
Pearl the roundel
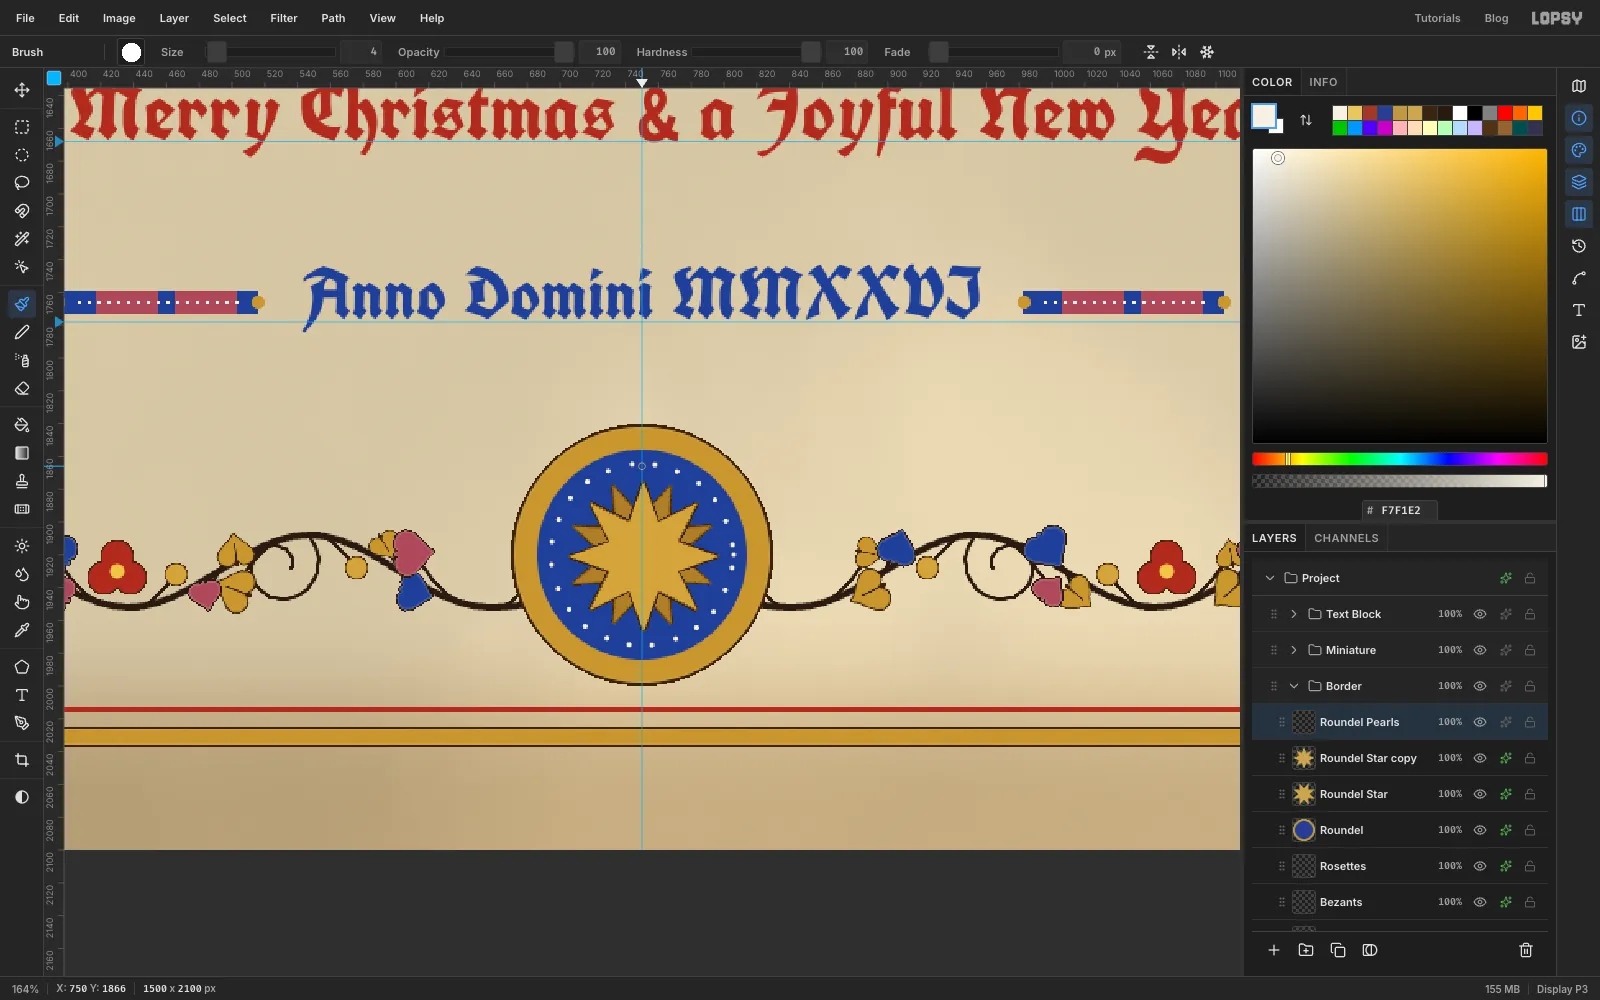
Click Roundel Star copy and add a layer called Roundel Pearls. Pick the brush at Size 4 with Spacing 200, in white lead. Pearl a circle with a radius of 56 px around the star: click once on the circle, then Shift-click about every 15 px round it, back to the start.
The bottom vines run in behind the roundel from both sides, so the border reads as one unbroken plant.
-
Warm the whole page
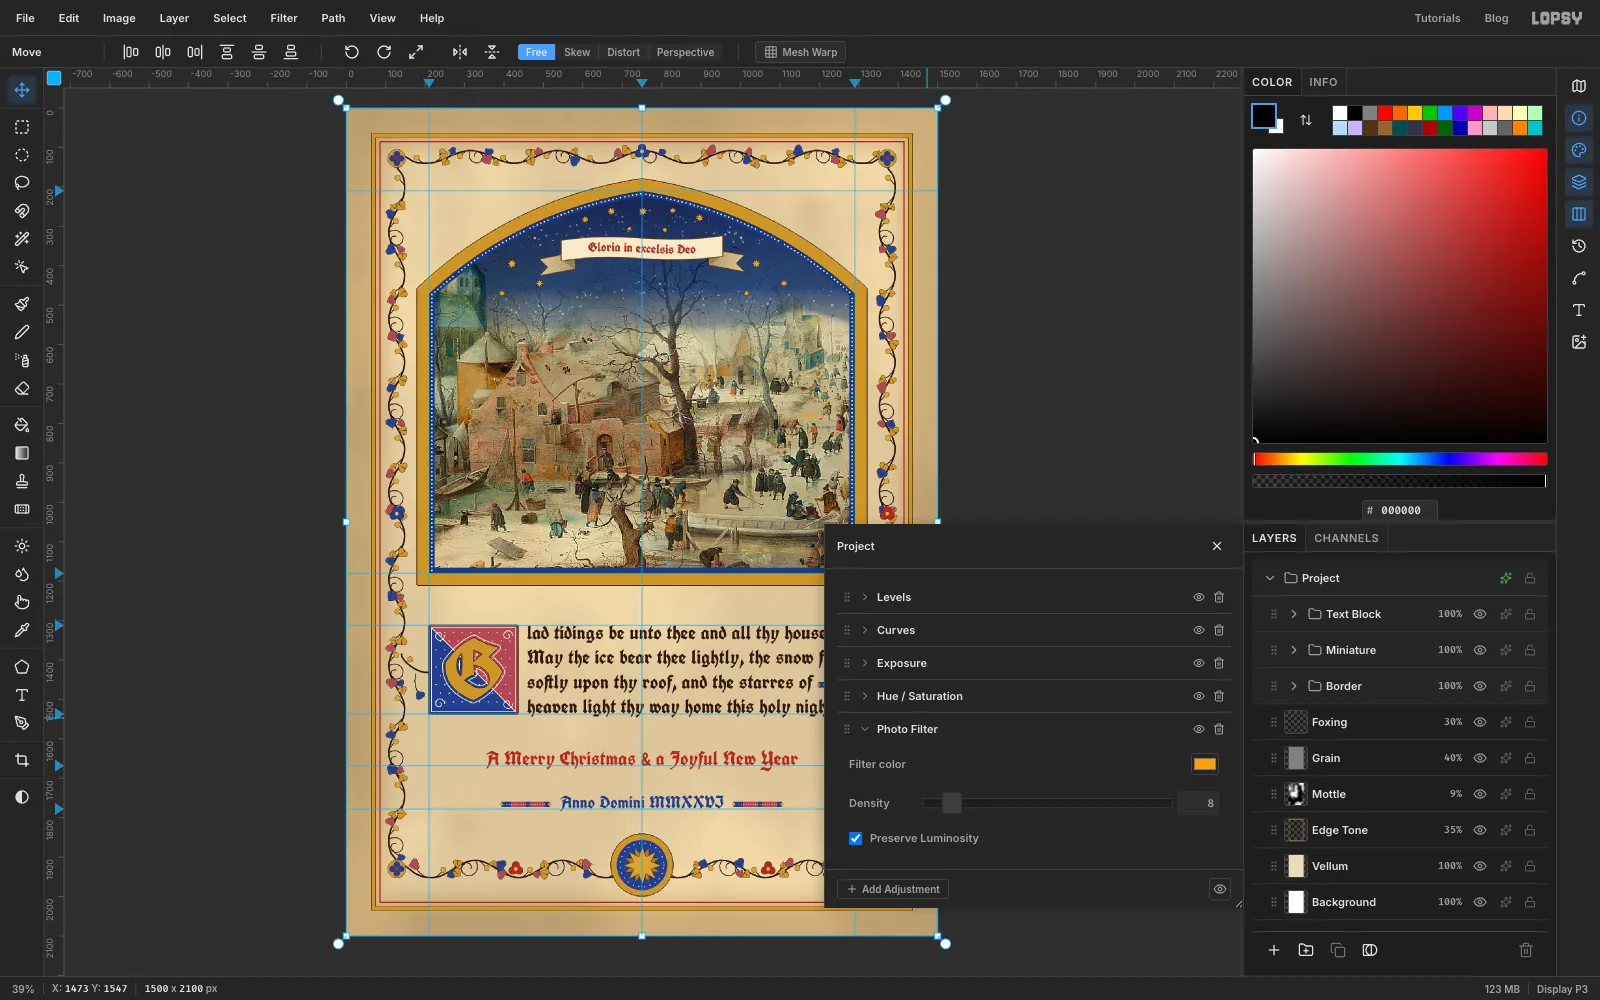
Collapse the three groups. Click the ✦ button on the Project group's row, click Add Adjustment and choose Photo Filter. Set Density to 8. The adjustment is non-destructive and covers every layer evenly, like a coat of old varnish, so all the gold stays the same colour.
-
Nudge the text block into balance
Step back and compare the gaps between the picture, the text and the roundel. If the text block looks low, as it did here, click the Text Block group's row, pick the Move tool and nudge it up with Up. This card took six presses. The initial, text, fillers, rubric and date all move together.
Save with File → Save Project, then choose File → Quick Export PNG.