Design a Graffiti Hot Chicken Restaurant Menu
Paint a street-art menu in Lopsy with a pattern-filled brick wall, a 3D graffiti title with drips, a photo turned into a spray stencil and sticker heat levels.
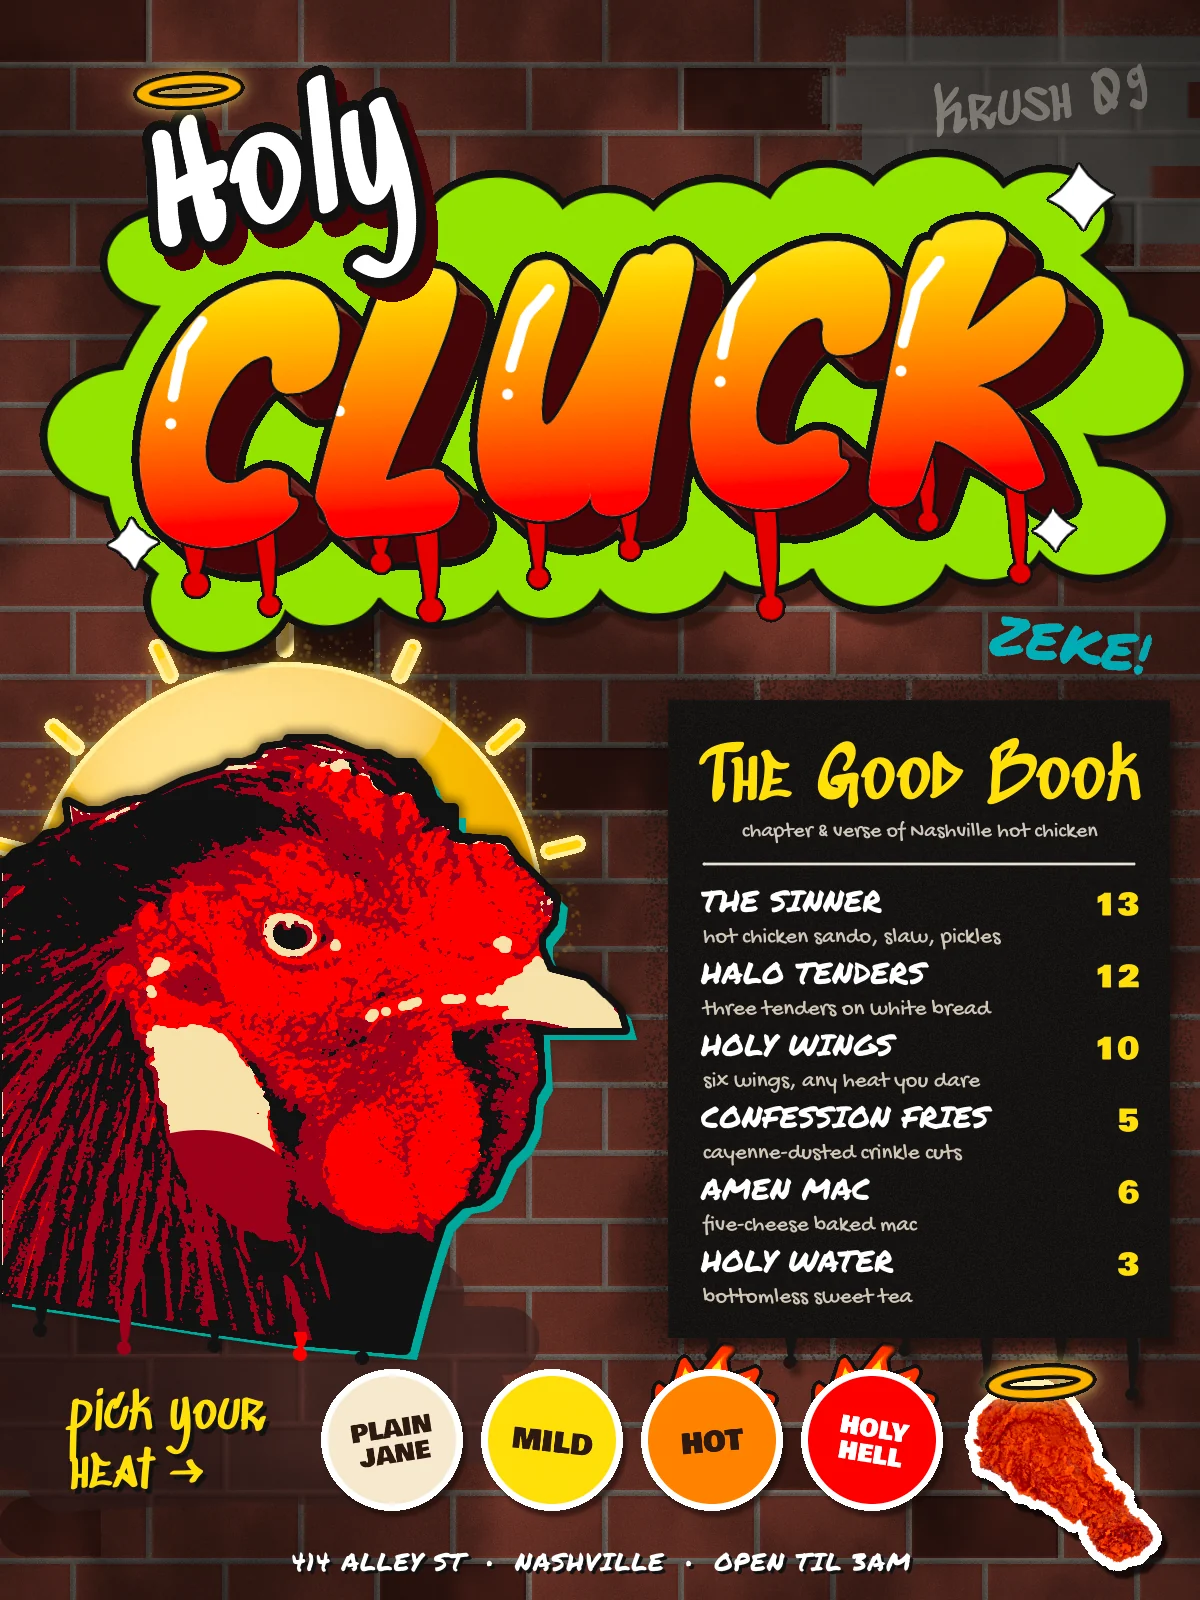
A graffiti piece (short for masterpiece) is built in layers, the way a writer paints it on a wall. First comes the fill, often a fade from one colour to another. Then a 3D block that makes the letters look thick, a hard outline, white shines and a cloud or backdrop that holds it all together. Stencil artists work the opposite way. They cut a photo into two or three flat tones and spray one stencil plate over another, slightly out of register.
This tutorial puts both on the same alley wall. The result is a menu for Holy Cluck, an imaginary Nashville hot chicken joint: a graffiti title, a stencilled rooster with a halo, a painted menu board and a row of heat-level stickers. The canvas is 1200 × 1600 px. You'll need two photos: a close-up of a rooster's head and a fried drumstick on a white background. Both photos used here are public domain from Wikimedia Commons ("Rooster in Filipino.JPG" and "Fried-Chicken-Leg.jpg").
Along the way you'll use:
- Define Pattern and Fill with Pattern (with Row Stagger) for the bricks
- Add Noise, Clouds, Emboss and Smoke for a worn wall
- Quick Mask and Shift-added marquees for painted-over "buff" patches
- text in Knewave, Sedgwick Ave Display, Permanent Marker, Gochi Hand and Bowlby One
- Rasterize Layer, a gradient through a selection, and Duplicate Layer + Merge Down for a 3D block
- Select → Grow / Shrink / Feather, Lasso drips and sparkles, and the rotation handles
- the Pen tool with Path to Selection, Desaturate, Gaussian Blur and Threshold for stencil plates
- the Magic Wand, with and without Contiguous, and intersecting a selection with a layer thumbnail
- guides, Show Grid and snapping for the menu board and stickers
- Stroke, Drop Shadow and Outer Glow effects, plus Overlay and Multiply blend modes
- group adjustments (Vignette, Hue / Saturation), Clone Stamp, Sponge, Dodge and Smudge
The palette:
-
Mortar
-
brick
-
dark brick
-
Buff paint
-
Title fade
-
Title block
-
outline
-
drips
-
Cloud lime
-
halo gold
-
Stencil cream
-
red
-
crimson
-
black
-
Under-plate teal
-
Halo disc
-
rays
-
Board
-
notes
-
rule
-
Sticker cream
-
yellow
-
orange
-
red
-
ink
-
Flames
-
tag cyan
-
shadow brown
-
grain grey
-
Fill the mortar
Choose File → New, enter 1200 × 1600 and click Create. Click the Background row, set the foreground to mortar and choose Edit → Fill.
Real mortar is gritty, so choose Filter → Add Noise…, set Amount to
18, click Mono and Gaussian, and click Apply.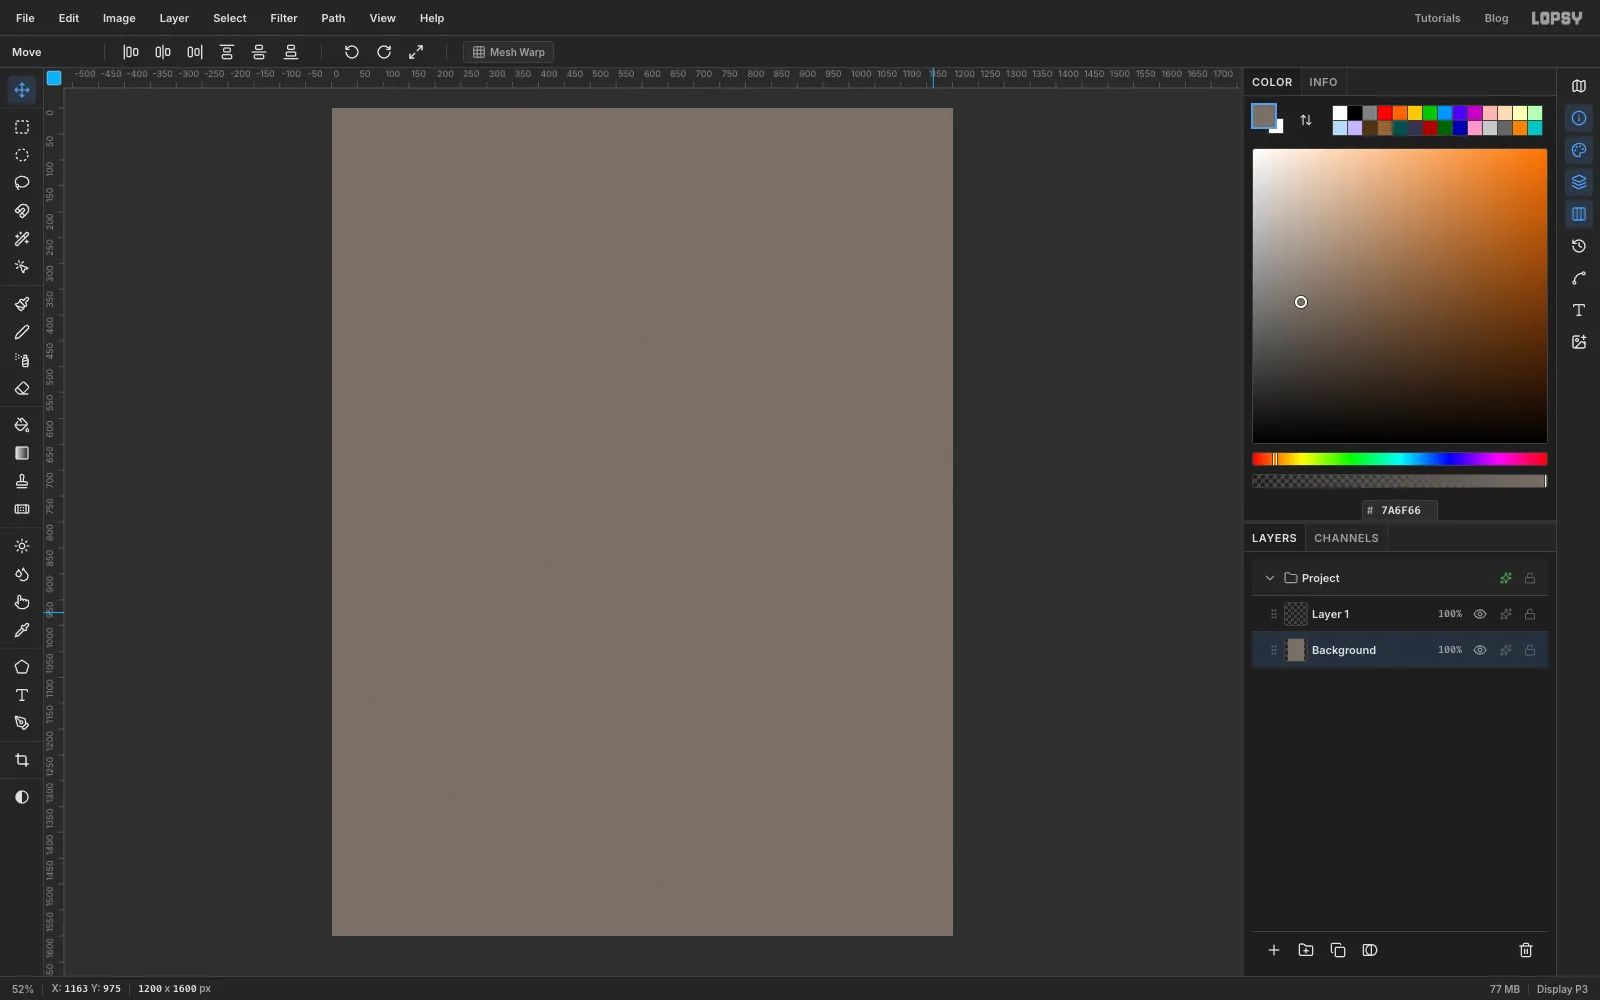
-
Draw one brick and define it as a pattern
Click Layer 1 and rename it Bricks (double-click the name). The pattern will tile from the top-left corner of the document, so draw the tile there.
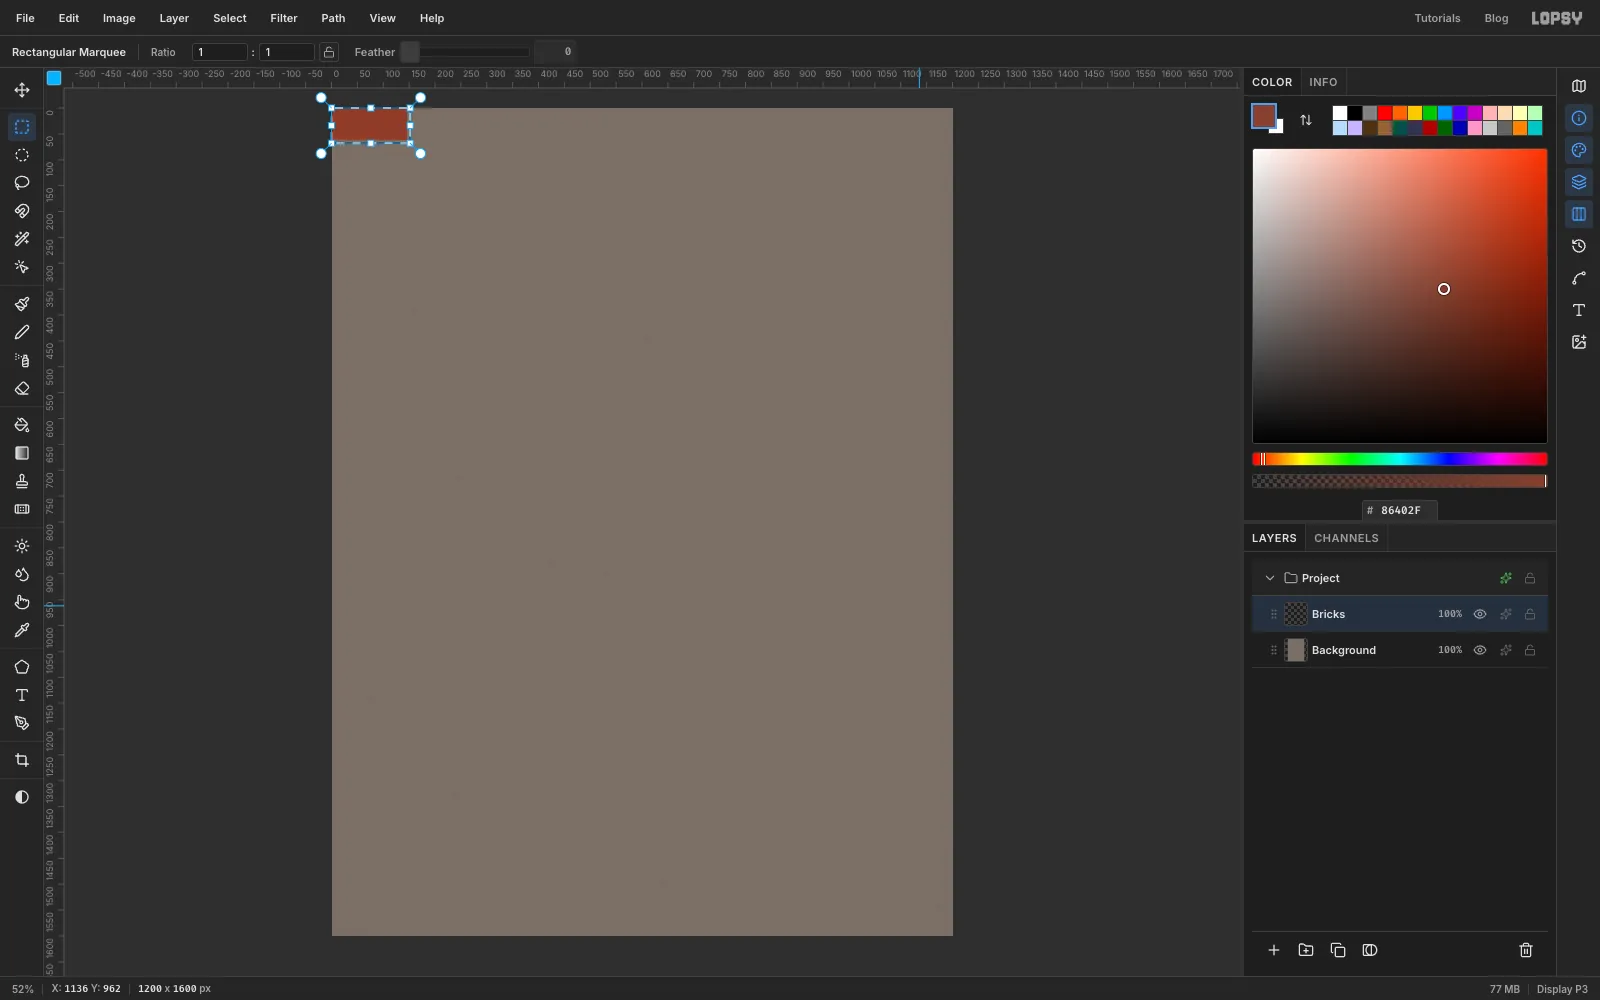
Set the foreground to brick . With the Rectangular Marquee, click once on the canvas and enter From
0, 0To146, 62, then Edit → Fill. Now select a slightly larger box, From0, 0To152, 68, which takes in the brick plus a 6 px gap on its right and bottom. That gap becomes the mortar line.Choose Edit → Define Pattern. Press Delete to clear the tile, then Cmd+D.
-
Fill the wall with staggered bricks
With Bricks still selected, choose Edit → Fill with Pattern…. Set Row Stagger to
50and click Apply. Each row shifts half a brick sideways, like a real stretcher-bond wall.Choose Filter → Add Noise… again, this time Amount
22with Color and Gaussian. That gives every brick a slightly speckled, fired-clay surface.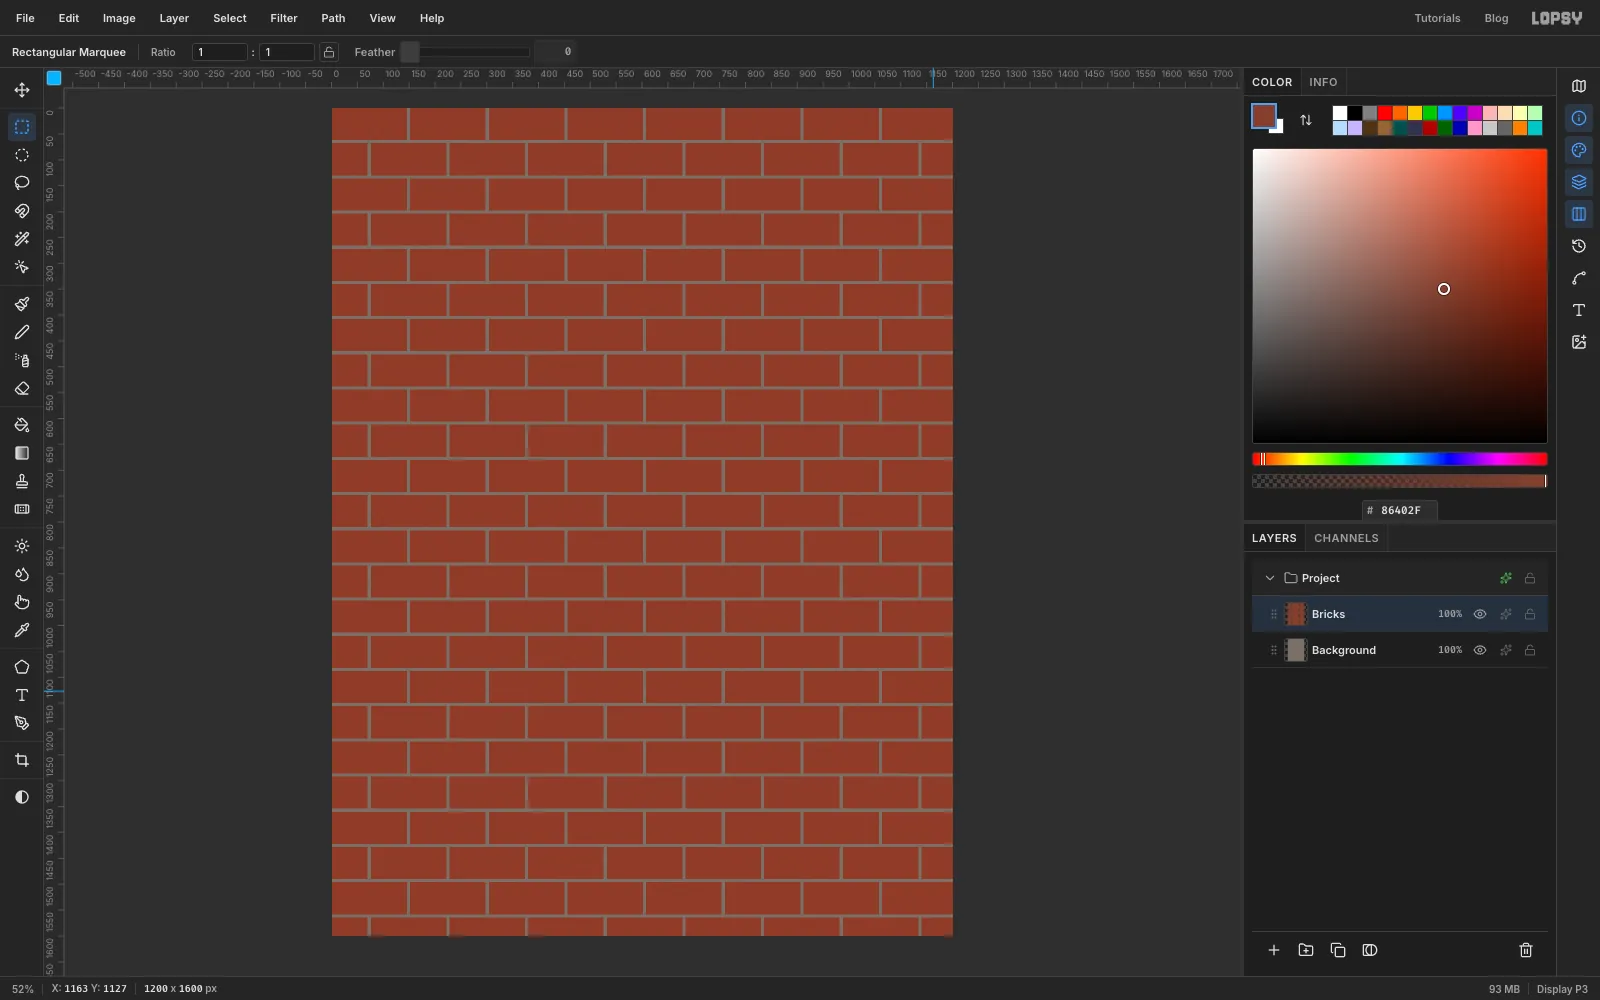
-
Pick out some darker bricks with the Magic Wand
Click Add Layer and name the new layer Brick Shade. Then click the Bricks row again, because the wand reads the layer you have selected.
Pick the Magic Wand, set Tolerance to
40and tick Contiguous. Click the middle of one brick. Hold Shift and click about fifteen more, scattered across the wall so no two are neighbours. Click right in the middle of each brick: a click on a mortar line selects the whole mortar network.Click the Brick Shade row, set the foreground to dark brick and fill. Deselect, then click the opacity number on the row and set it to
70%.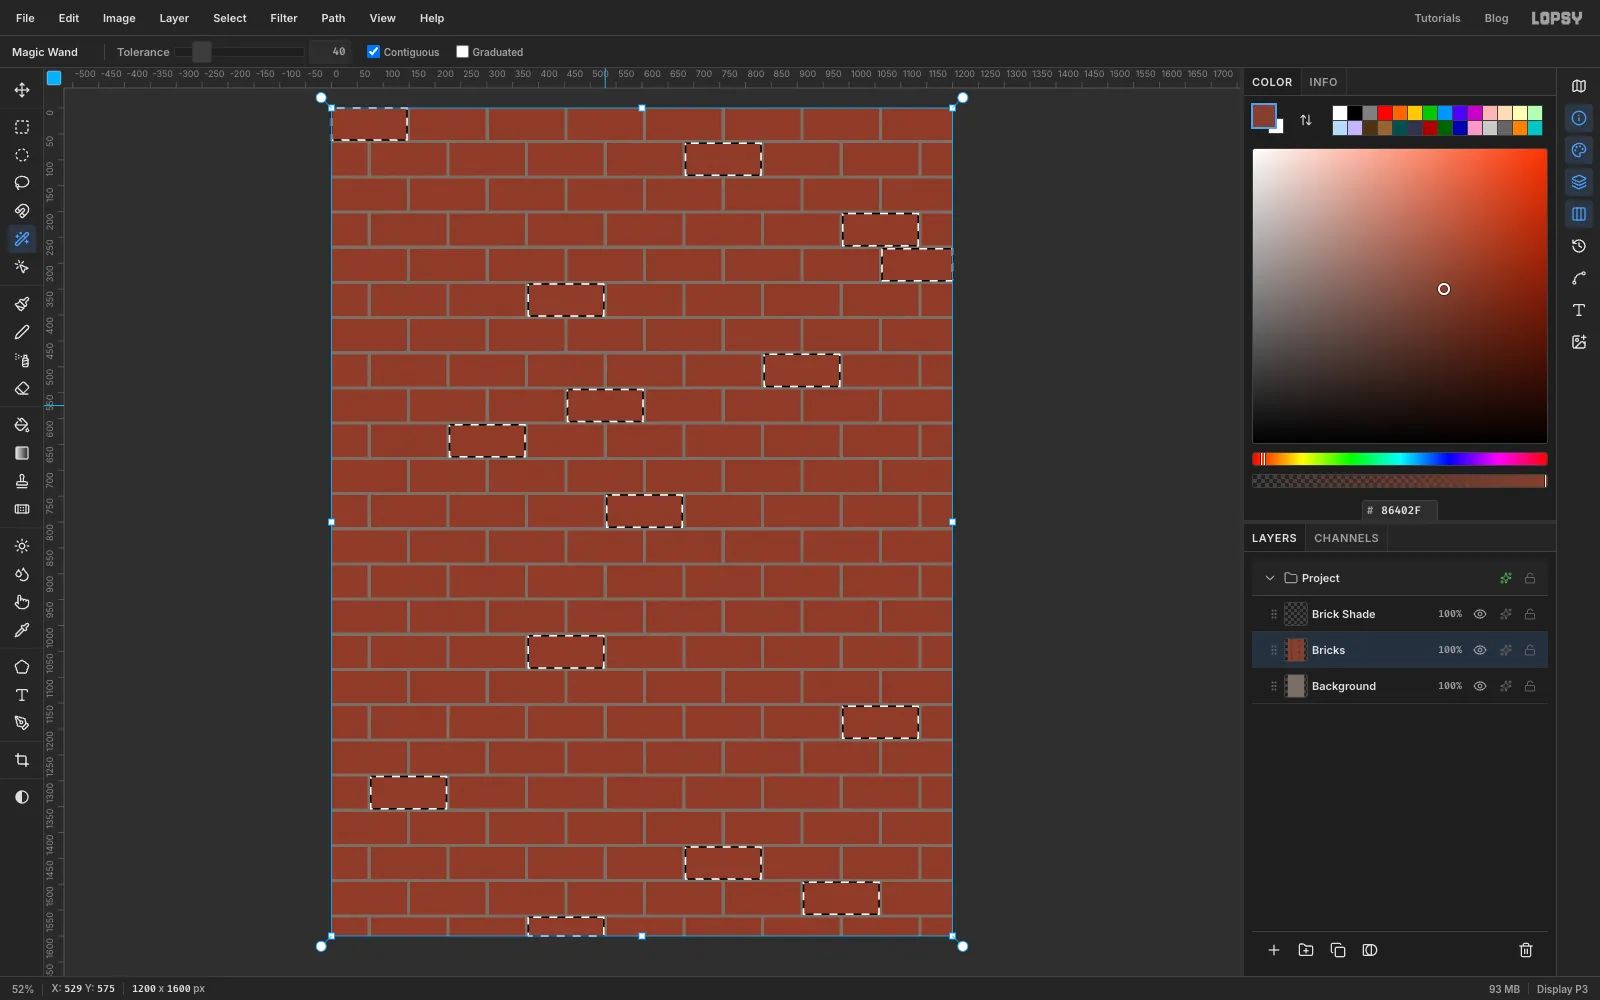
-
Mottle the wall with Clouds
Add a layer called Mottle. Choose Filter → Clouds…, set Scale to
9and click Apply. You get a soft black-and-white cloud texture.Open the layer's effects drawer, set Blend to Overlay and close the drawer. Set the layer opacity to
14%, so the clouds only nudge the bricks lighter and darker.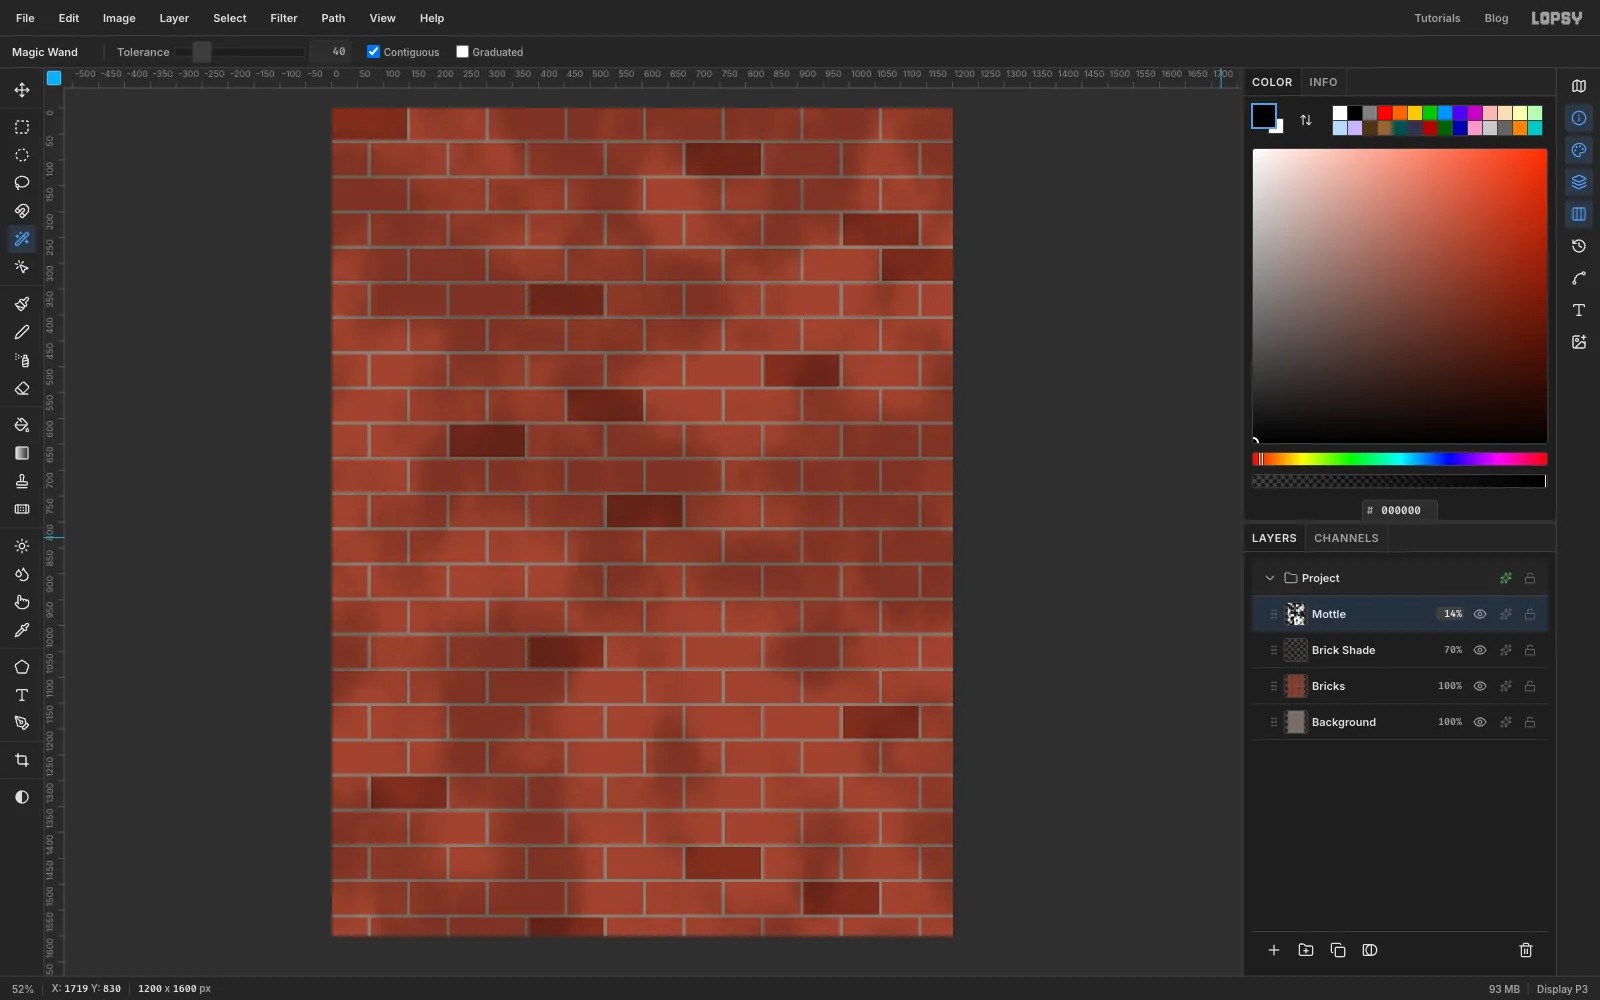
-
Emboss the brick edges
Brick edges catch the light, and the mortar sits back in shadow. To fake that, press Cmd+A, choose Edit → Copy Merged and then Edit → Paste. Deselect and rename the pasted layer Relief.
Choose Filter → Desaturate. Then choose Filter → Emboss…, set Angle to
135and Strength to35, and keep the type on Emboss. Click Apply. Set the layer's Blend to Overlay and its opacity to55%.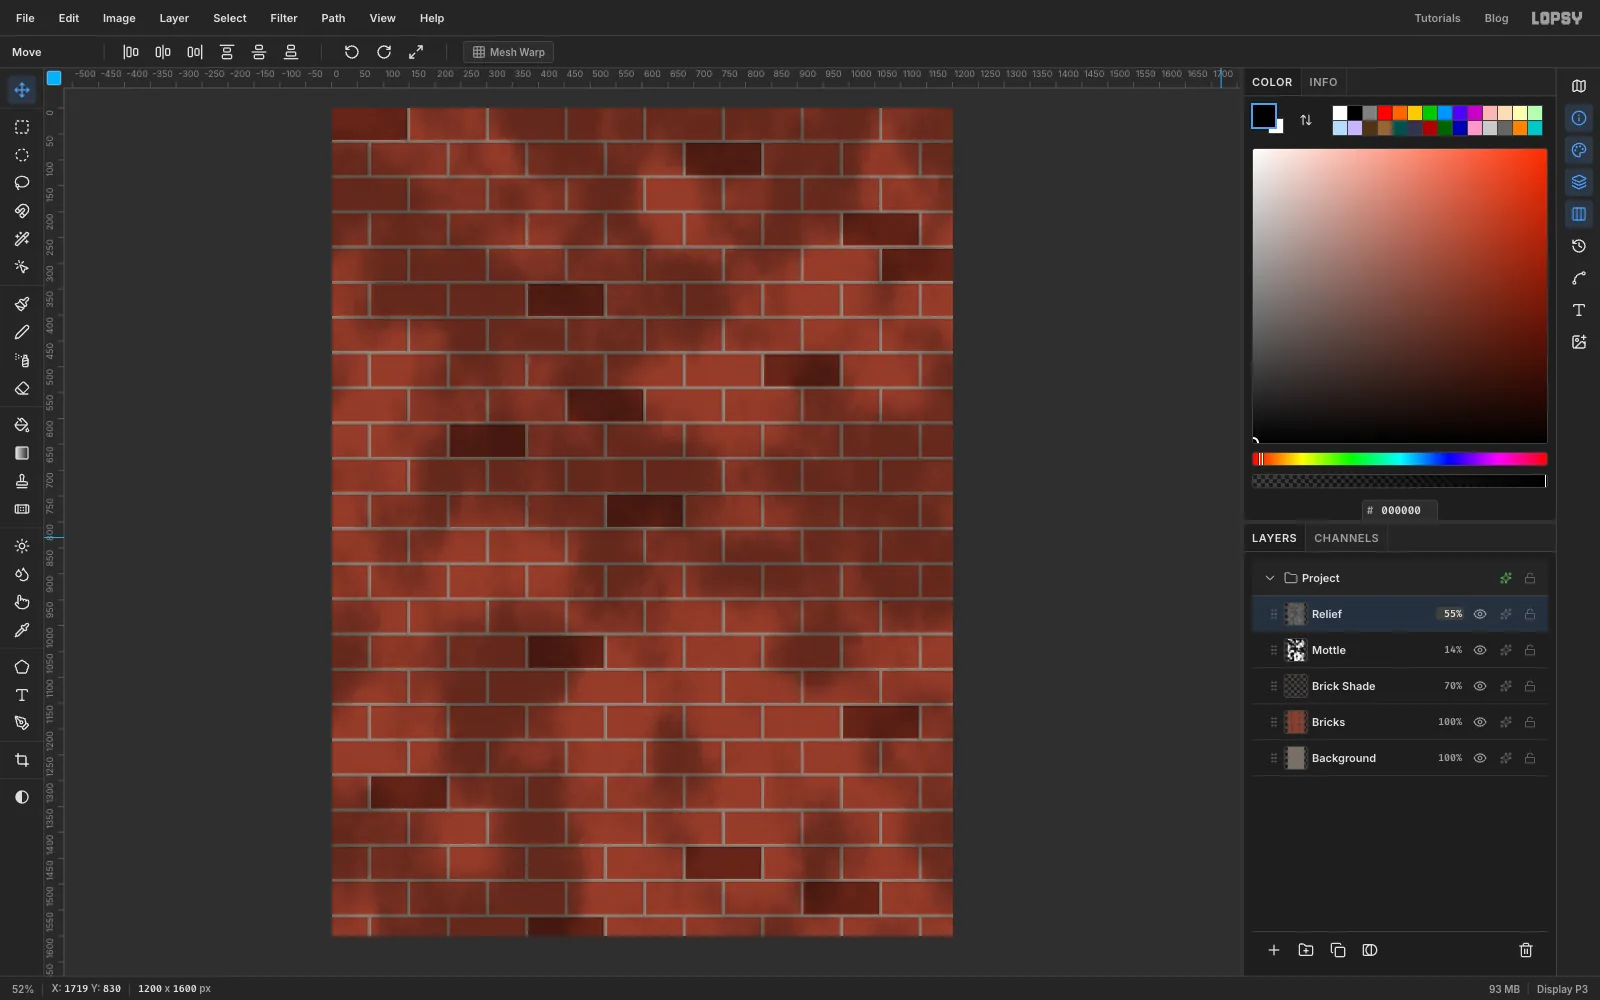
-
Paint a buffed-out patch with Quick Mask
Cities paint over graffiti with whatever paint is to hand, leaving mismatched patches. Click the Mottle row and add a layer called Buff, so the relief still shows through the paint.
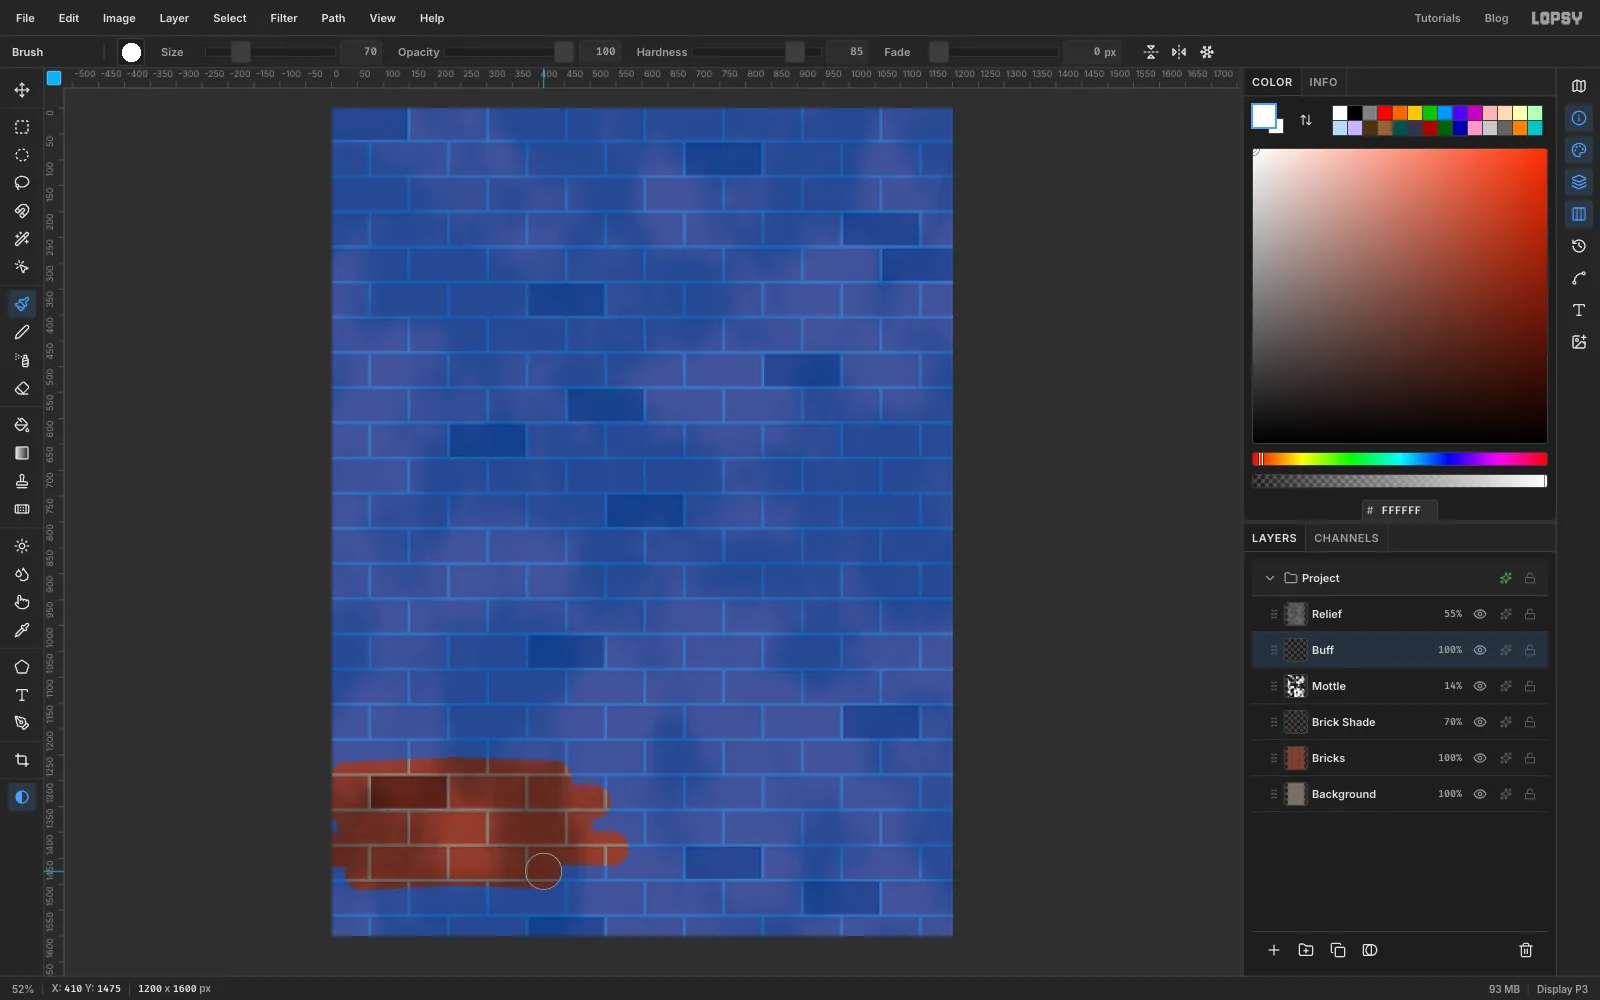
Press Q to enter Quick Mask. Everything turns blue except what you paint. Pick the Brush: Size
70, Hardness85, Opacity100, with white as the foreground colour. Paint five overlapping horizontal passes in the lower left, from aboutx 10–60across tox 410–540, betweeny 1290and1470. Make each pass a different length so the end is ragged, like a roller.Press Q again to turn the painted area into a selection. Fill it with and deselect.
-
Roll a grey patch from marquee strips
The second patch was rolled in grey. Stay on Buff, pick the Rectangular Marquee and drag a strip about 45 px tall from
846, 36to the right edge. Then hold Shift and drag four more strips below it. Overlap them a little and start each one at a different x, between820and885. Stop the lowest strip aroundy 244.Fill with and deselect. To dry out the roller ends, pick Spray (Size
34, Density45, Opacity85) with the same grey. Spray once down the ragged left ends, then once along the top edge and once along the bottom.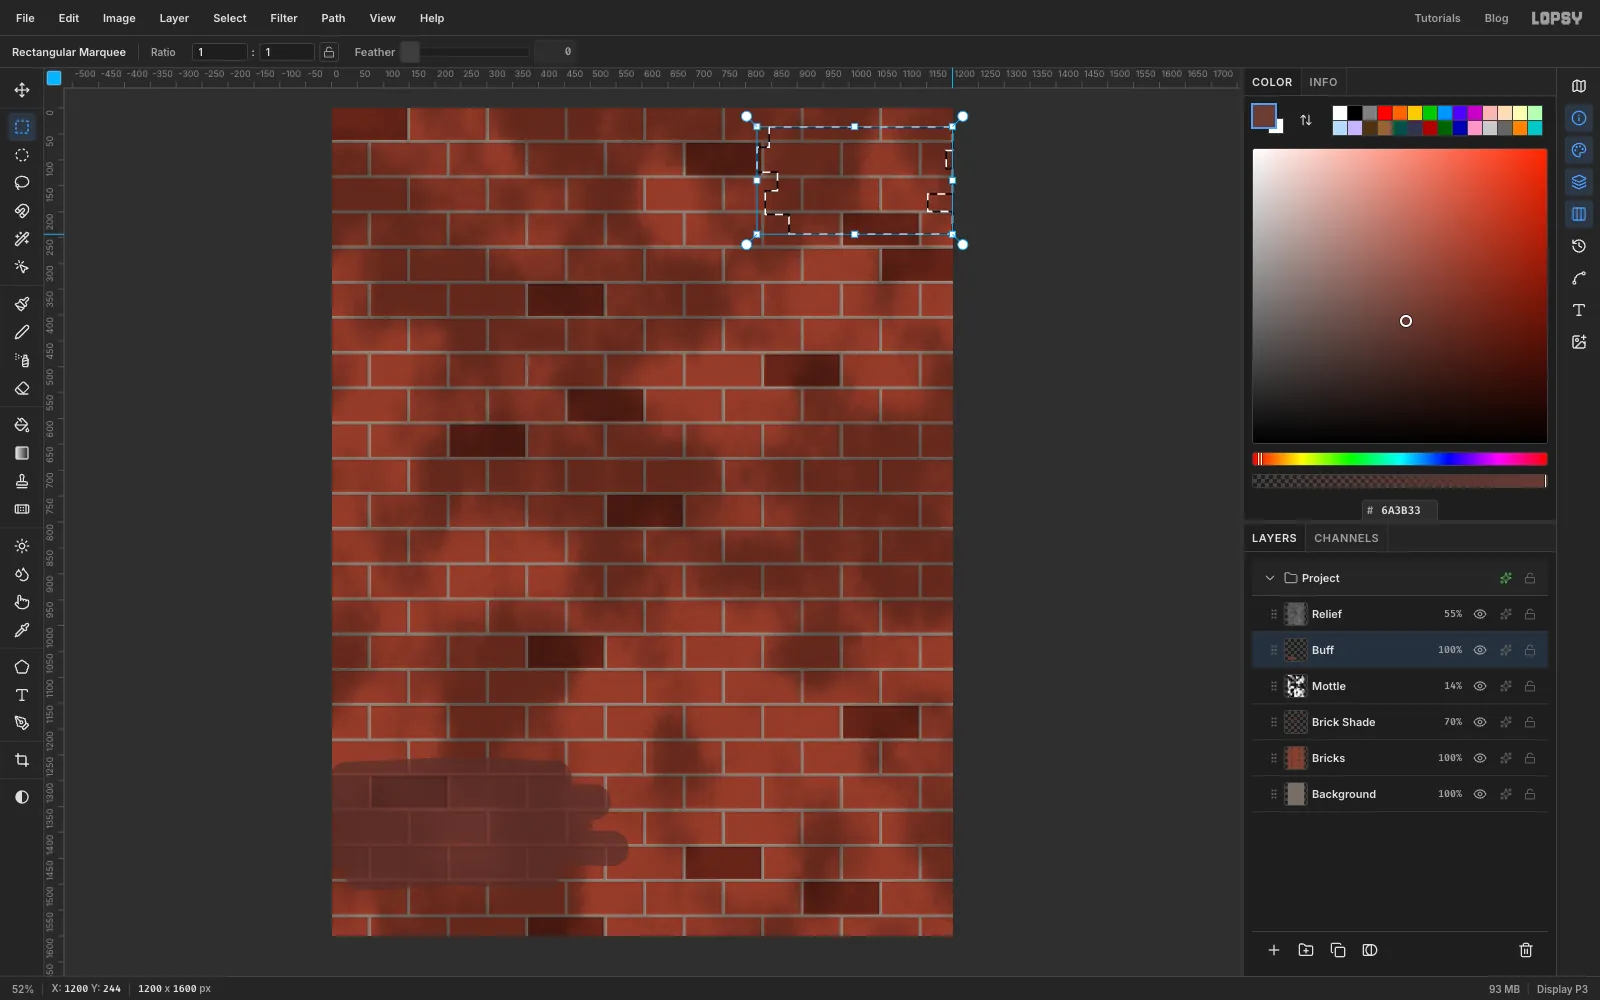
-
Add street grime with Smoke
Click Relief and add a layer called Grime. Choose Filter → Smoke…, set Scale to
5and Turbulence to55, and click Apply. Set the blend to Multiply and the opacity to22%. The wall is finished.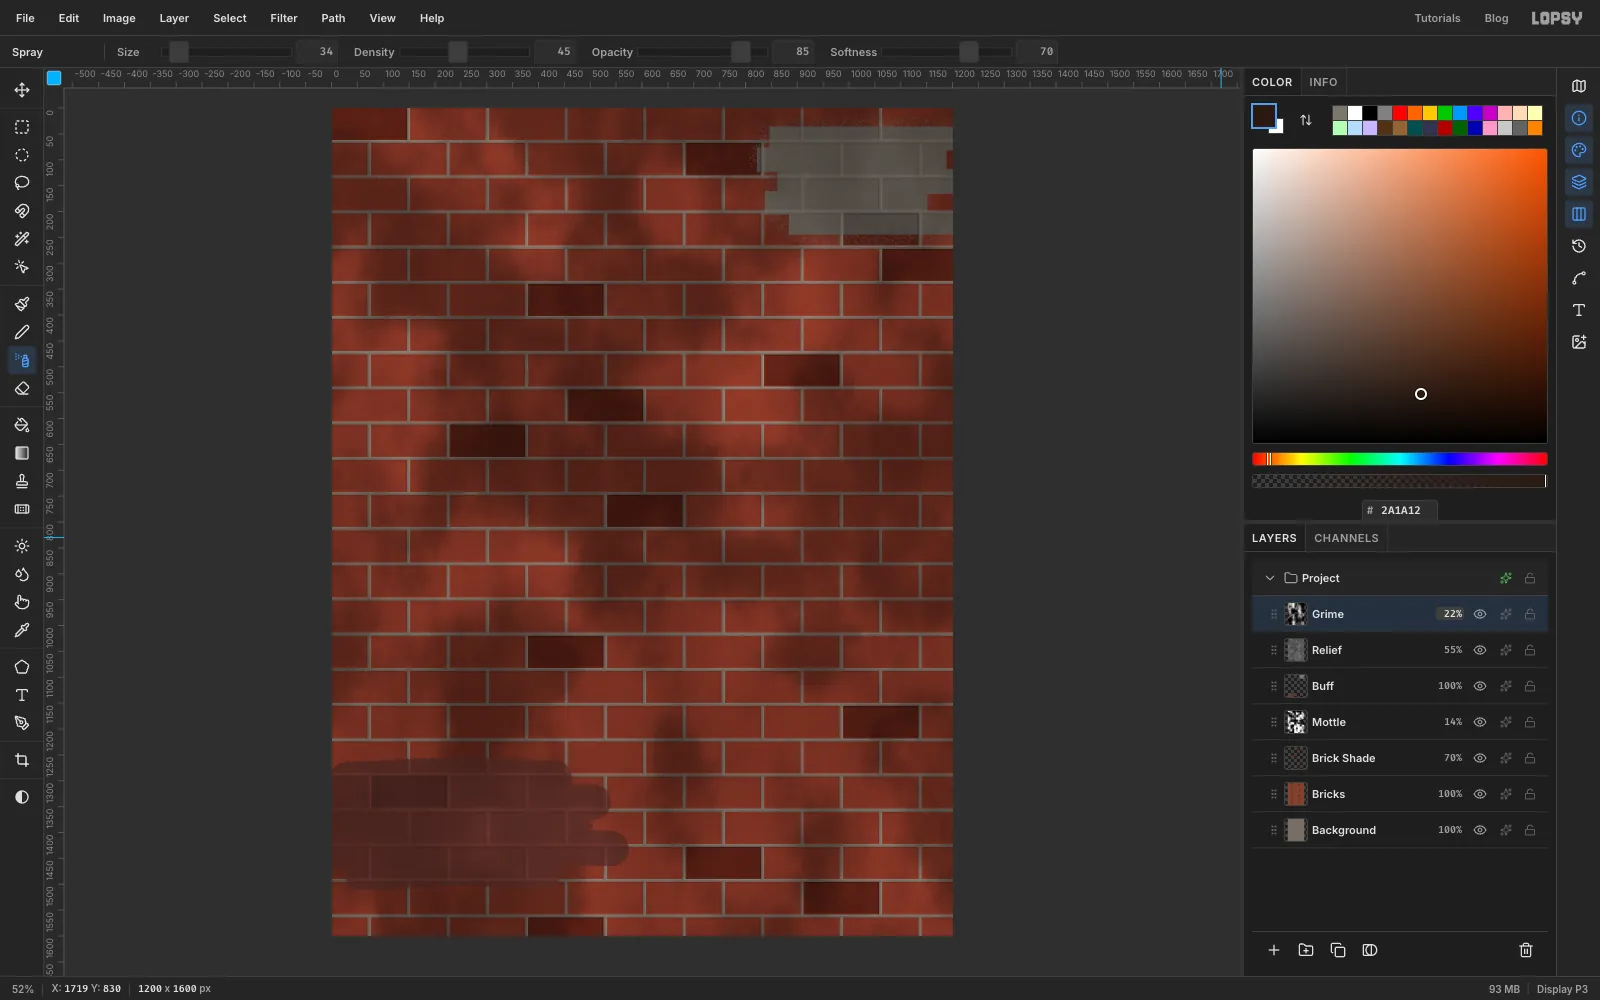
-
Type the title in Knewave
With Grime selected, pick the Text tool. Choose the font Knewave, Size
320and white. In the Text panel, check that Letter spacing is0. Click near128, 112, typeCLUCKand press Tab to commit.The letters should run from about
x 132tox 1066. Click the Rasterize Layer button at the bottom of the Layers panel to turn the text into pixels, then rename the layer Cluck Face.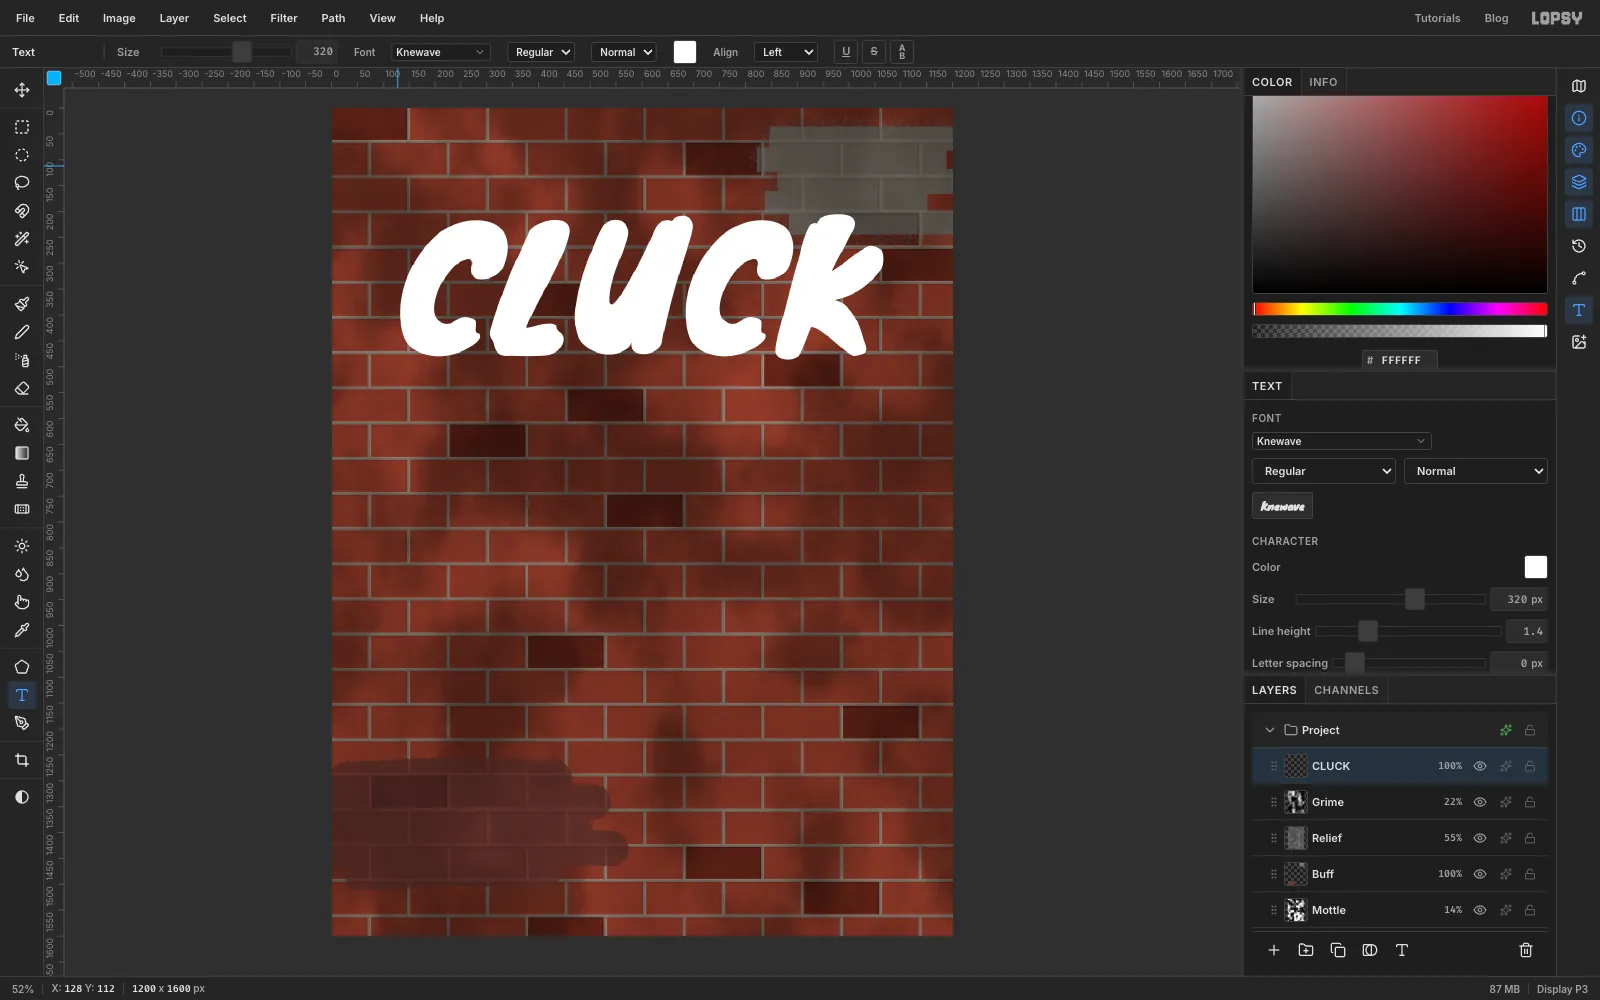
-
Fade the fill from yellow to red
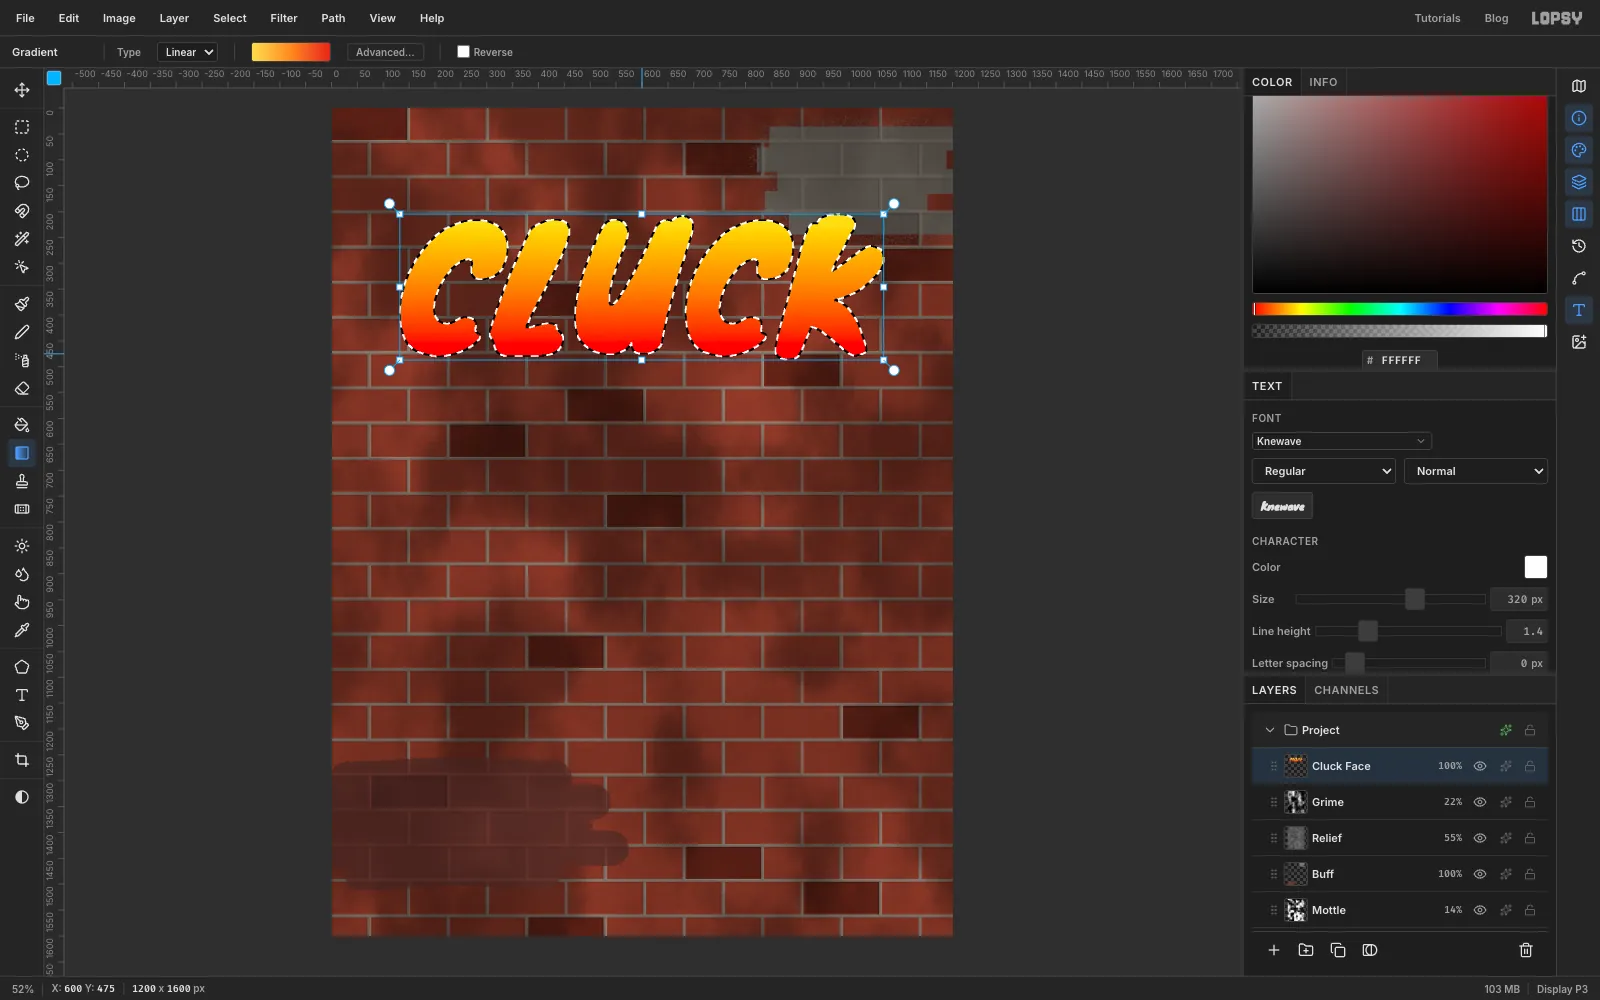
Cmd-click the Cluck Face thumbnail to load the letters as a selection. Pick the Gradient tool, set it to Linear and click Advanced…. Make three stops: at the left, in the middle and at the right. Click Done.
Drag straight down from just inside the top of the letters to just above their bottom. The gradient stays inside the selection. Deselect.
-
Build the 3D block
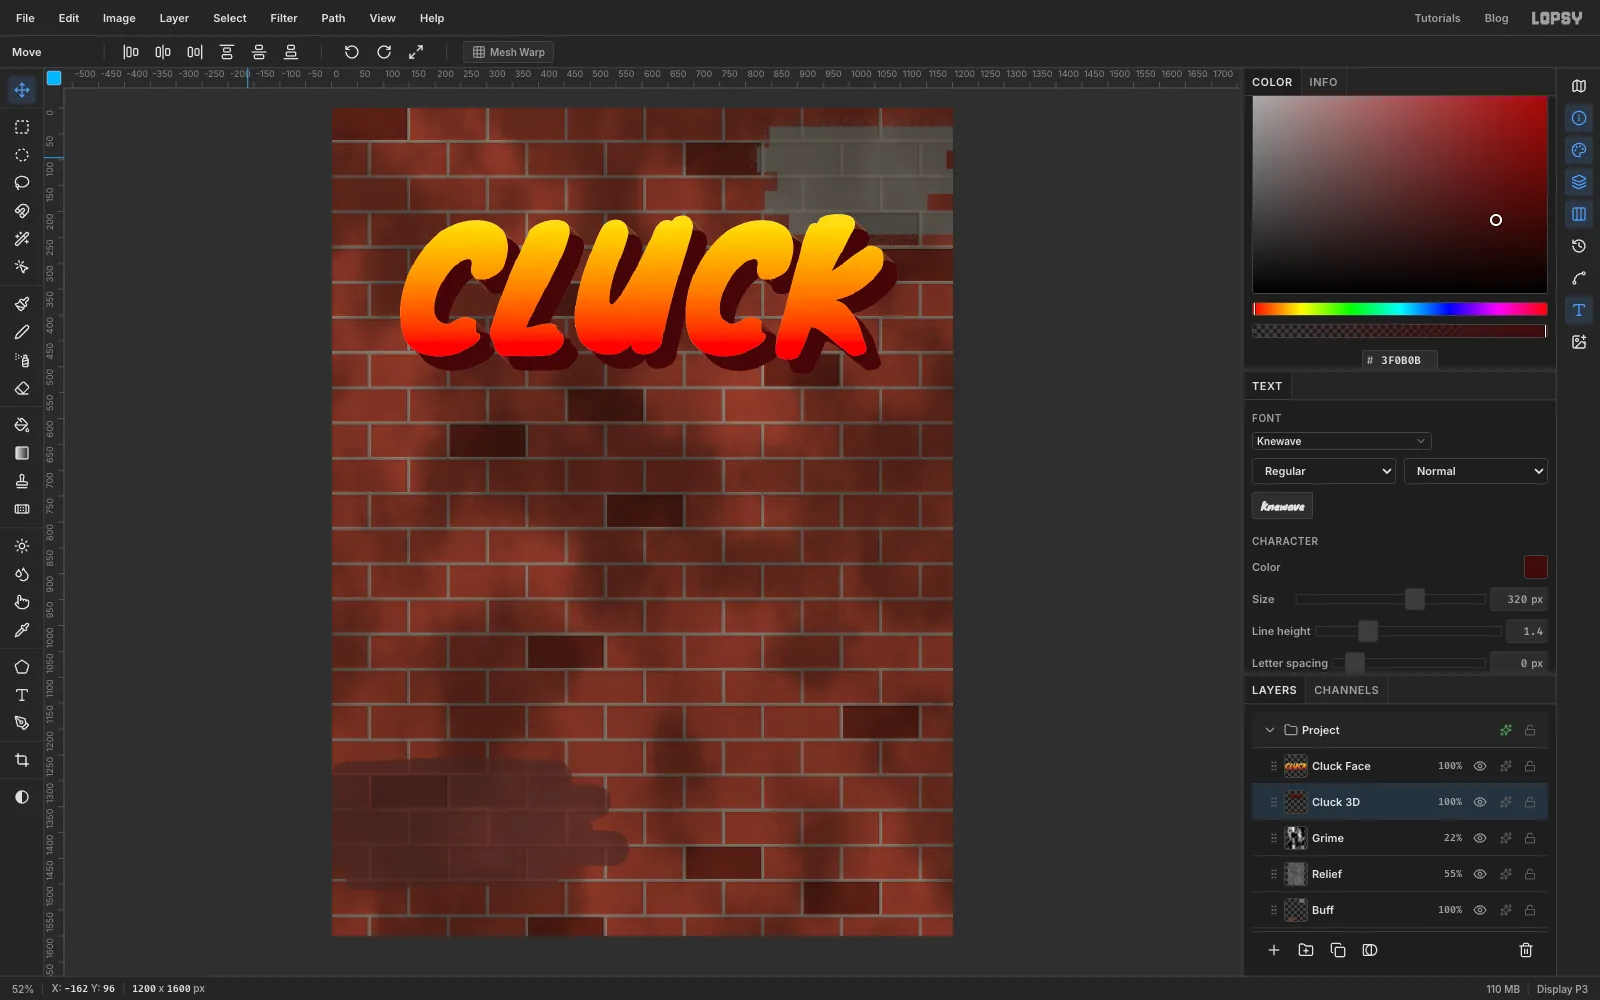
Choose Layer → Duplicate Layer. The copy lands on top and is selected. Click the original underneath and rename it Cluck 3D. Cmd-click its thumbnail, fill with maroon and deselect. Rename the copy on top back to Cluck Face.
Now make the block deep. With Cluck 3D selected:
- Choose Layer → Duplicate Layer.
- Pick the Move tool and press → and ↓ once each, to nudge the copy 1 px right and down.
- Choose Layer → Merge Down.
Repeat with nudges of 2, 4, 8, 8 and 5 px. Each round adds its nudge to the depth, so the six rounds give a solid 1 + 2 + 4 + 8 + 8 + 5 = 28 px block.
-
Outline the letters
On Cluck 3D, open the effects drawer and turn on Stroke: Width
8, colour . On Cluck Face, add a Stroke of Width3in the same black. The thin line separates the face from the block, and the thick one wraps the whole word.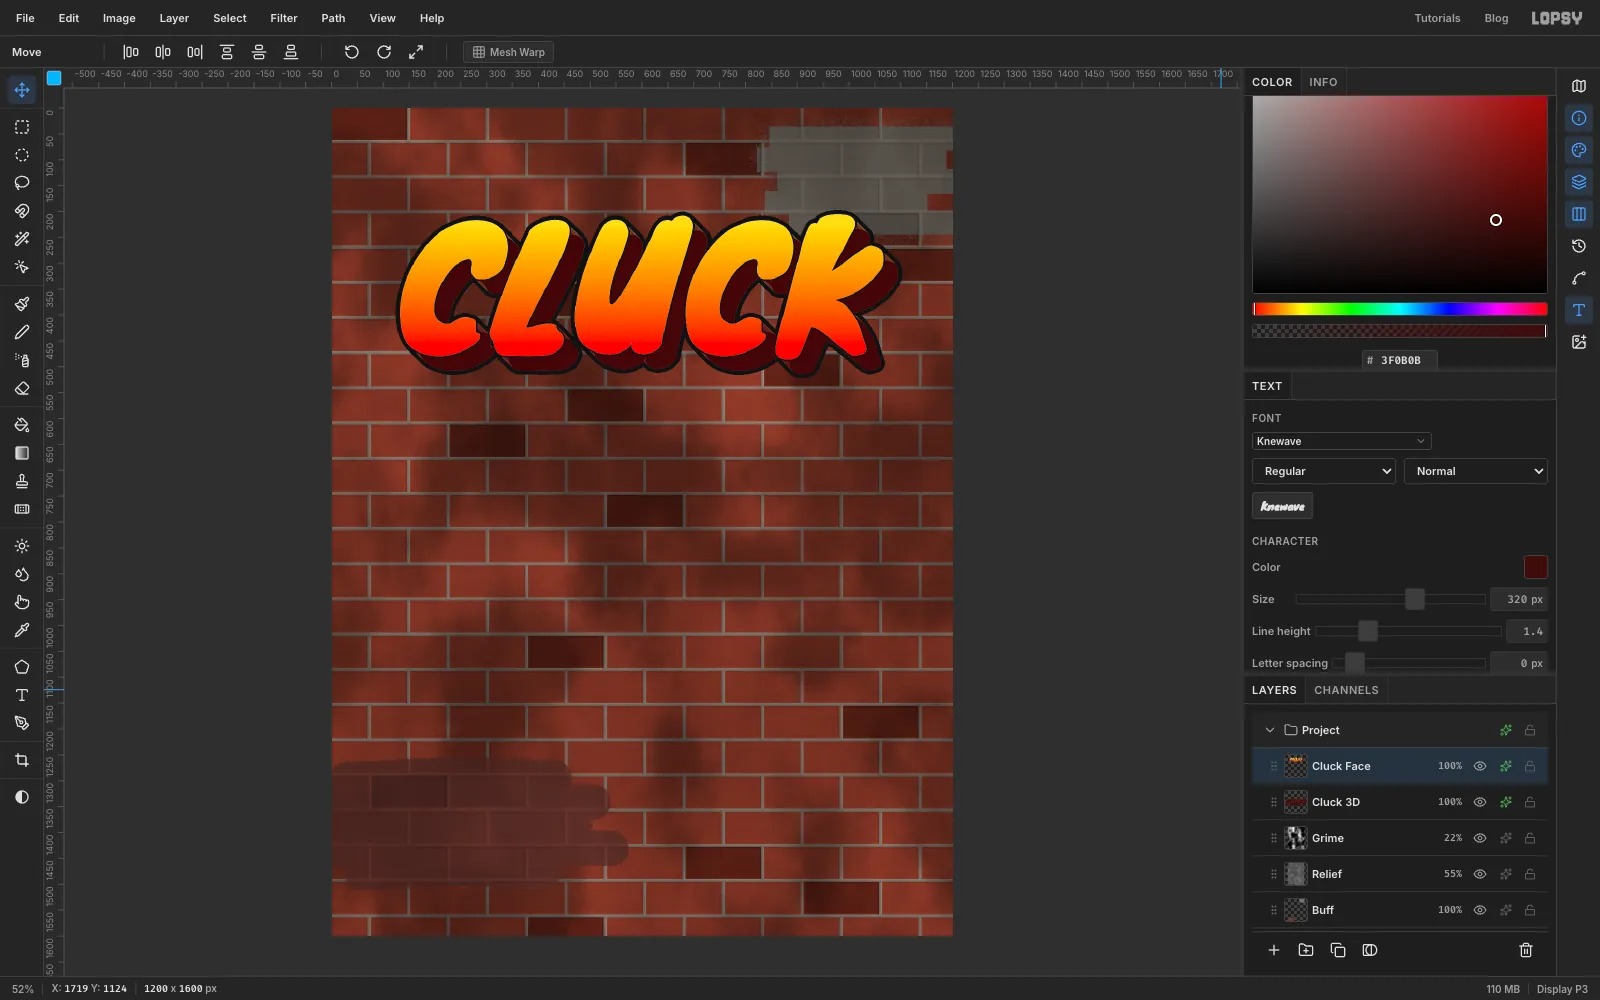
-
Grow a cloud selection
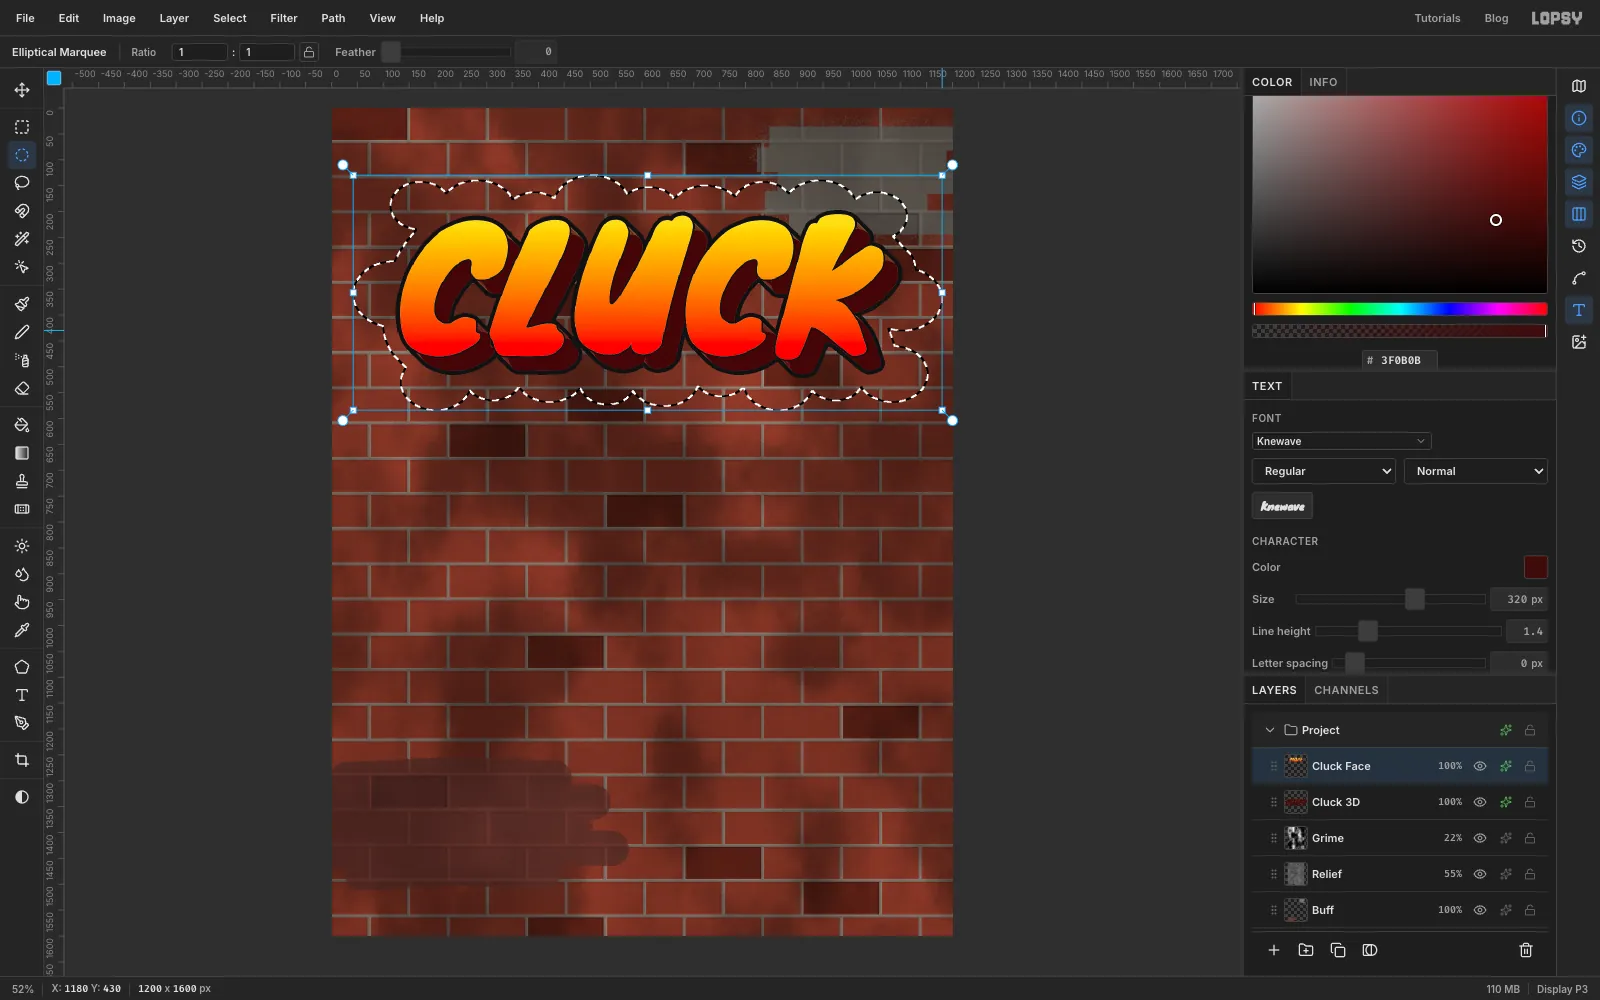
Cmd-click the Cluck 3D thumbnail, then choose Select → Grow… and grow by
34. That gives a smooth outline around the word.Graffiti clouds are lumpy, so pick the Elliptical Marquee, hold Shift and drag ellipses about 110–150 px wide along the top and bottom edges. Let each overlap the outline by about half. Add one big ellipse at each end of the word.
-
Fill the lime cloud
Click Grime so the new layer sits under the lettering, and add a layer called Cloud. Fill with lime and deselect.
Give Cloud a Stroke of Width
8in . Then add a Drop Shadow: Offset X10, Offset Y12, Blur6, Opacity55, colour . The shadow lifts the piece off the bricks.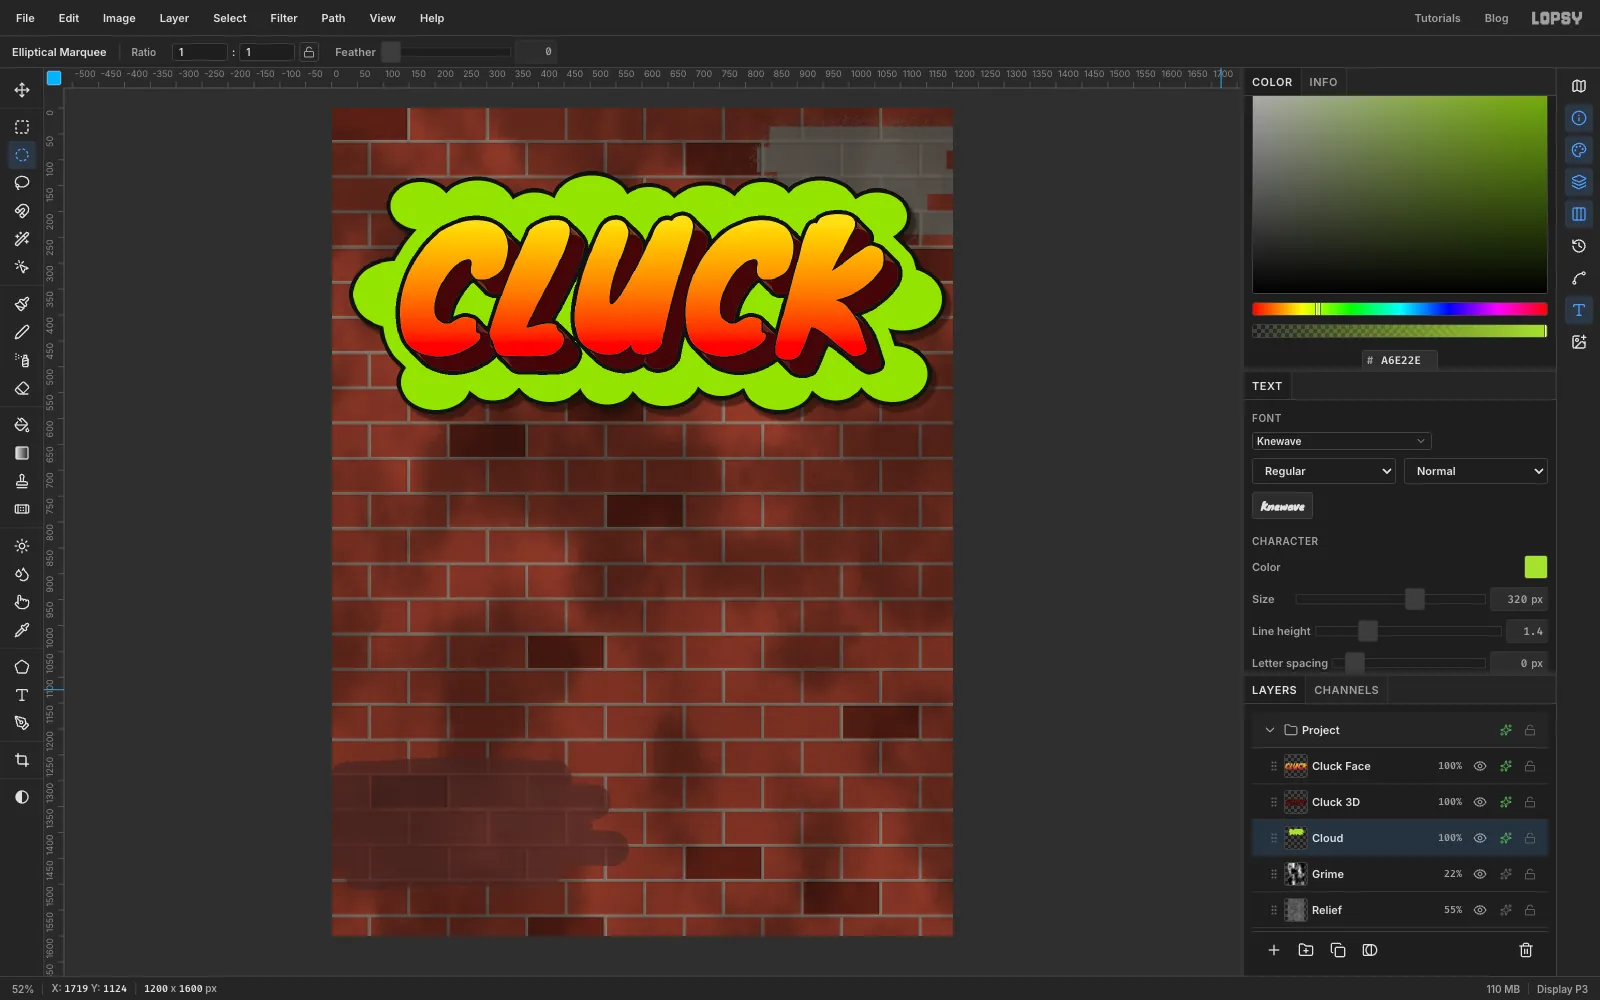
-
Paint the shines
Click Cluck Face and add a layer called Shine. Cmd-click the Cluck Face thumbnail so the strokes can't leave the letters.
Pick the Brush: Size
12, Hardness100, white. In each letter, paint a short curved stroke near the top left, following the letter's curve. Then click once just below it for a dot. Deselect.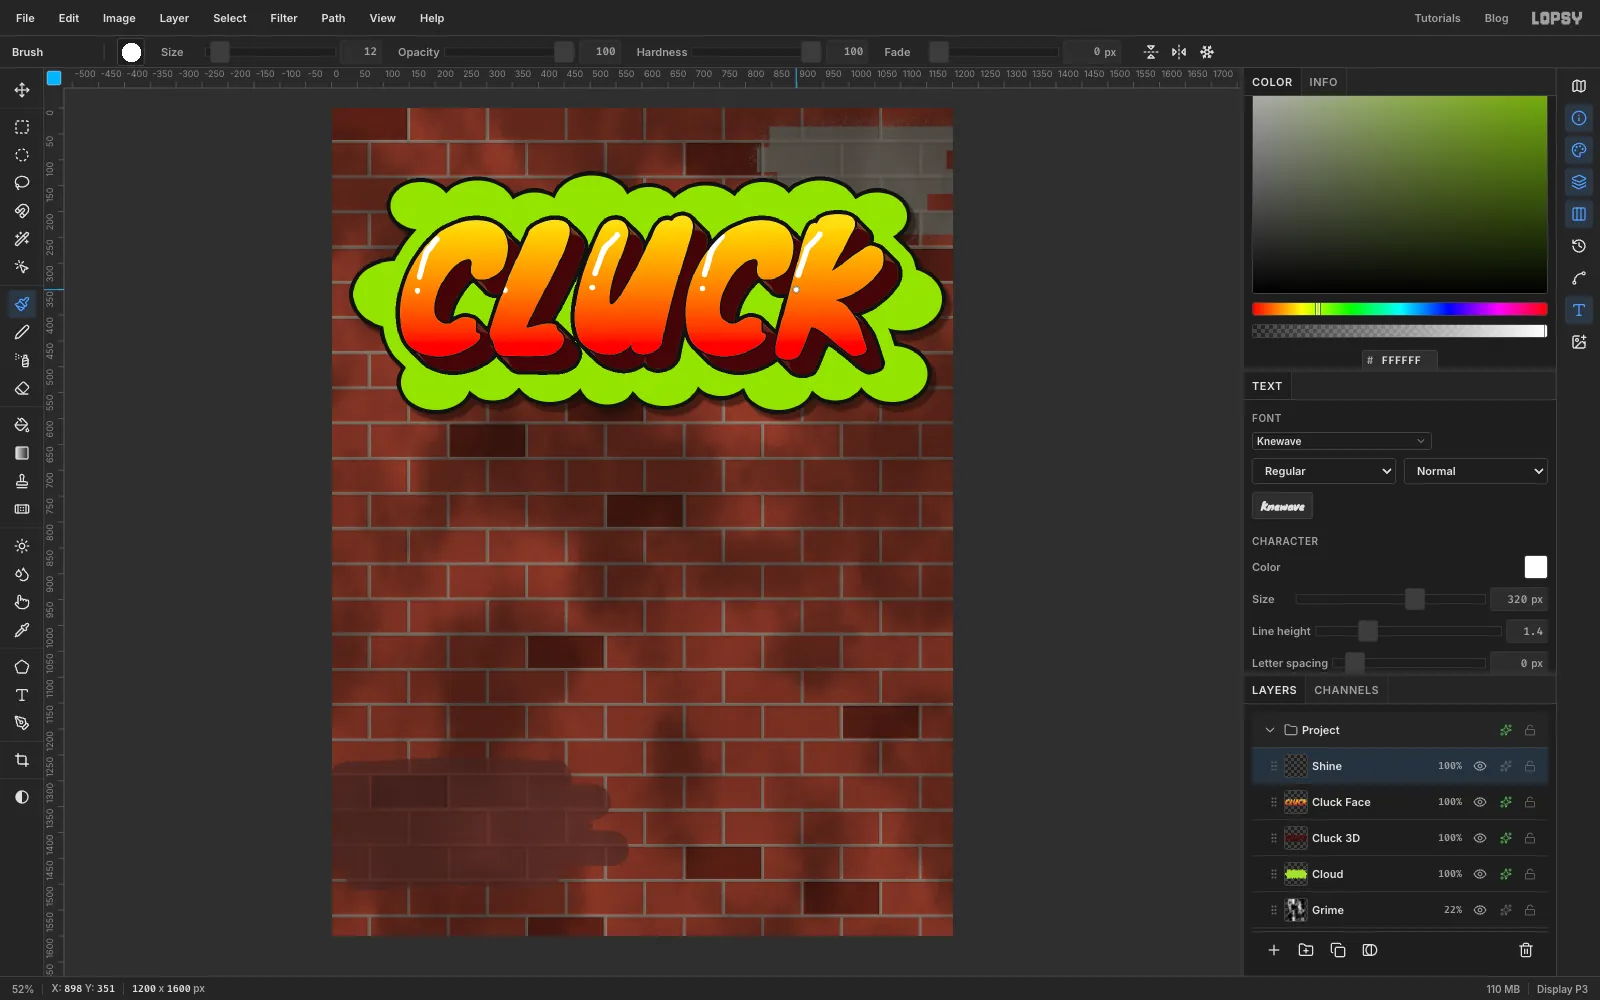
-
Add paint drips
Click Cluck 3D and add a layer called Drips, so the runs sit over the block but under the faces. Set the foreground to .
Each drip is one shape traced with the Lasso. Start about 20 px wide at the bottom of a letter. Narrow to about 40% of that width as you go down, then loop round a bead slightly wider than the start, and come back up the other side. Fill each one, then deselect.
Make nine drips of different lengths, between about 40 and 110 px. Keep the ones under the first C, the L and the U shorter (under 90 px), because the rooster's halo goes right below them. Finish with a Stroke of Width
3in .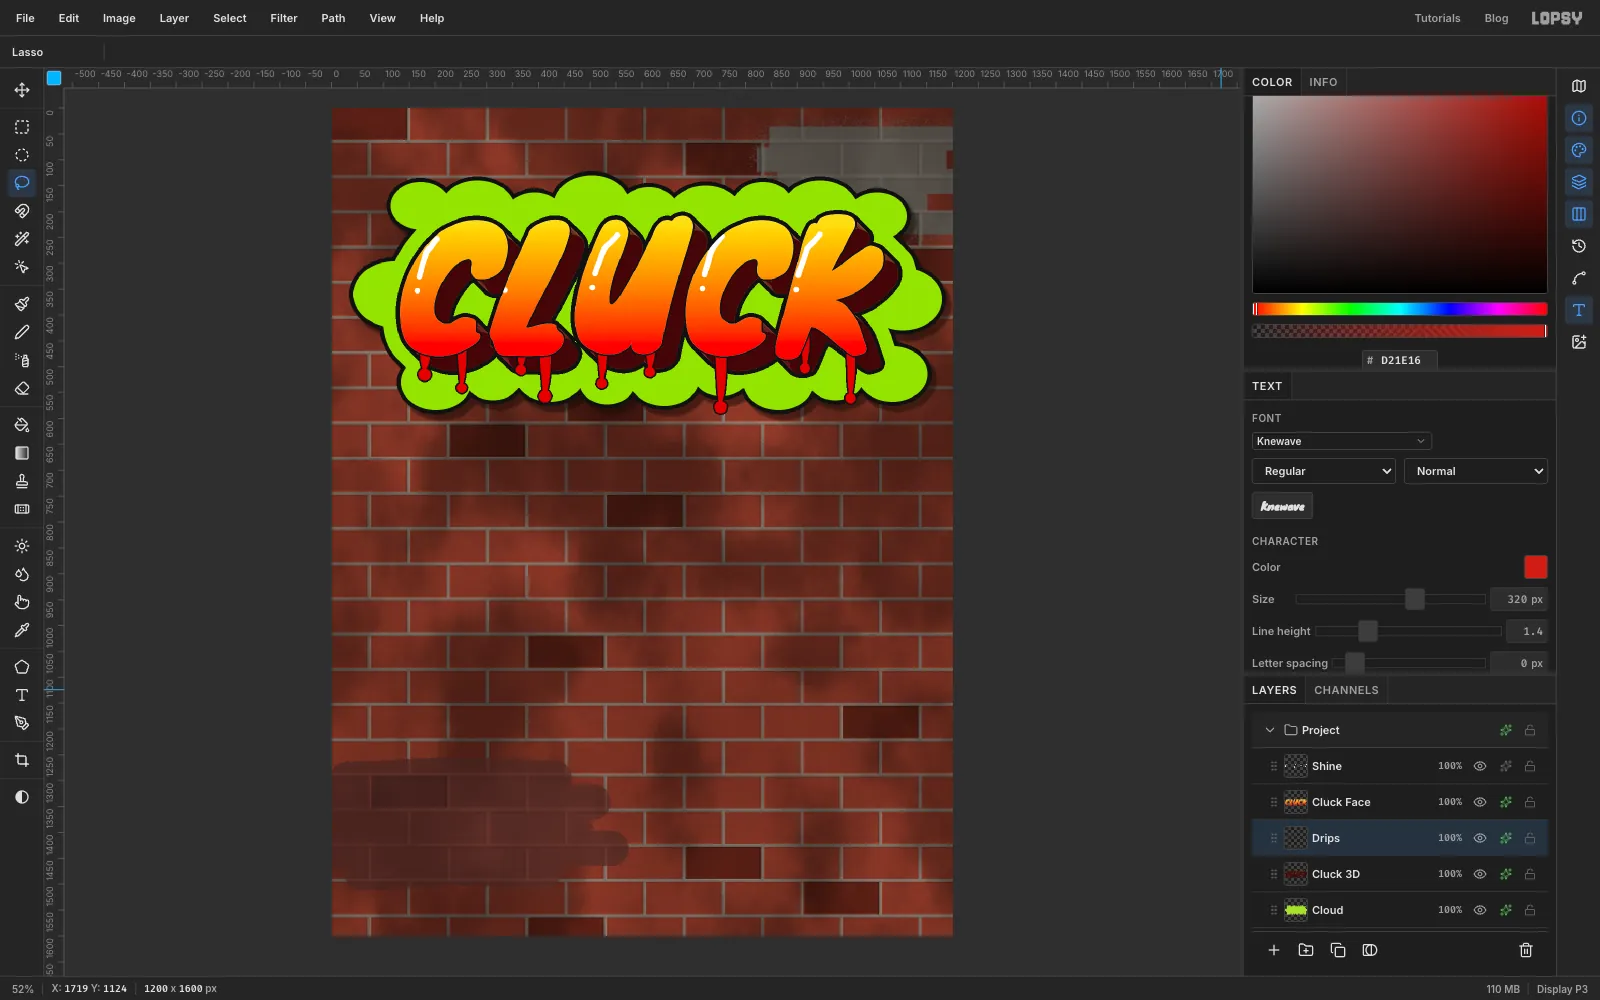
-
Tag "Holy" and tilt it
Click Shine first: if a text layer is selected, the Text tool's options restyle that layer instead. Pick the Text tool with Sedgwick Ave Display, Size
160, white. Click in an empty spot of wall, typeHolyand press Tab.With the Move tool, drag it over the top left of CLUCK, centred around
290, 128, so its last letter dips into the cloud. Then drag the round rotation handle just outside a corner of its box anticlockwise, about 9°, until the y rises by about 40 px compared with the H. Press Cmd+D.Rename the layer Holy if it isn't already. Give it a Stroke of Width
10in and a hard Drop Shadow: Offset X12, Offset Y14, Blur0, Opacity100, colour .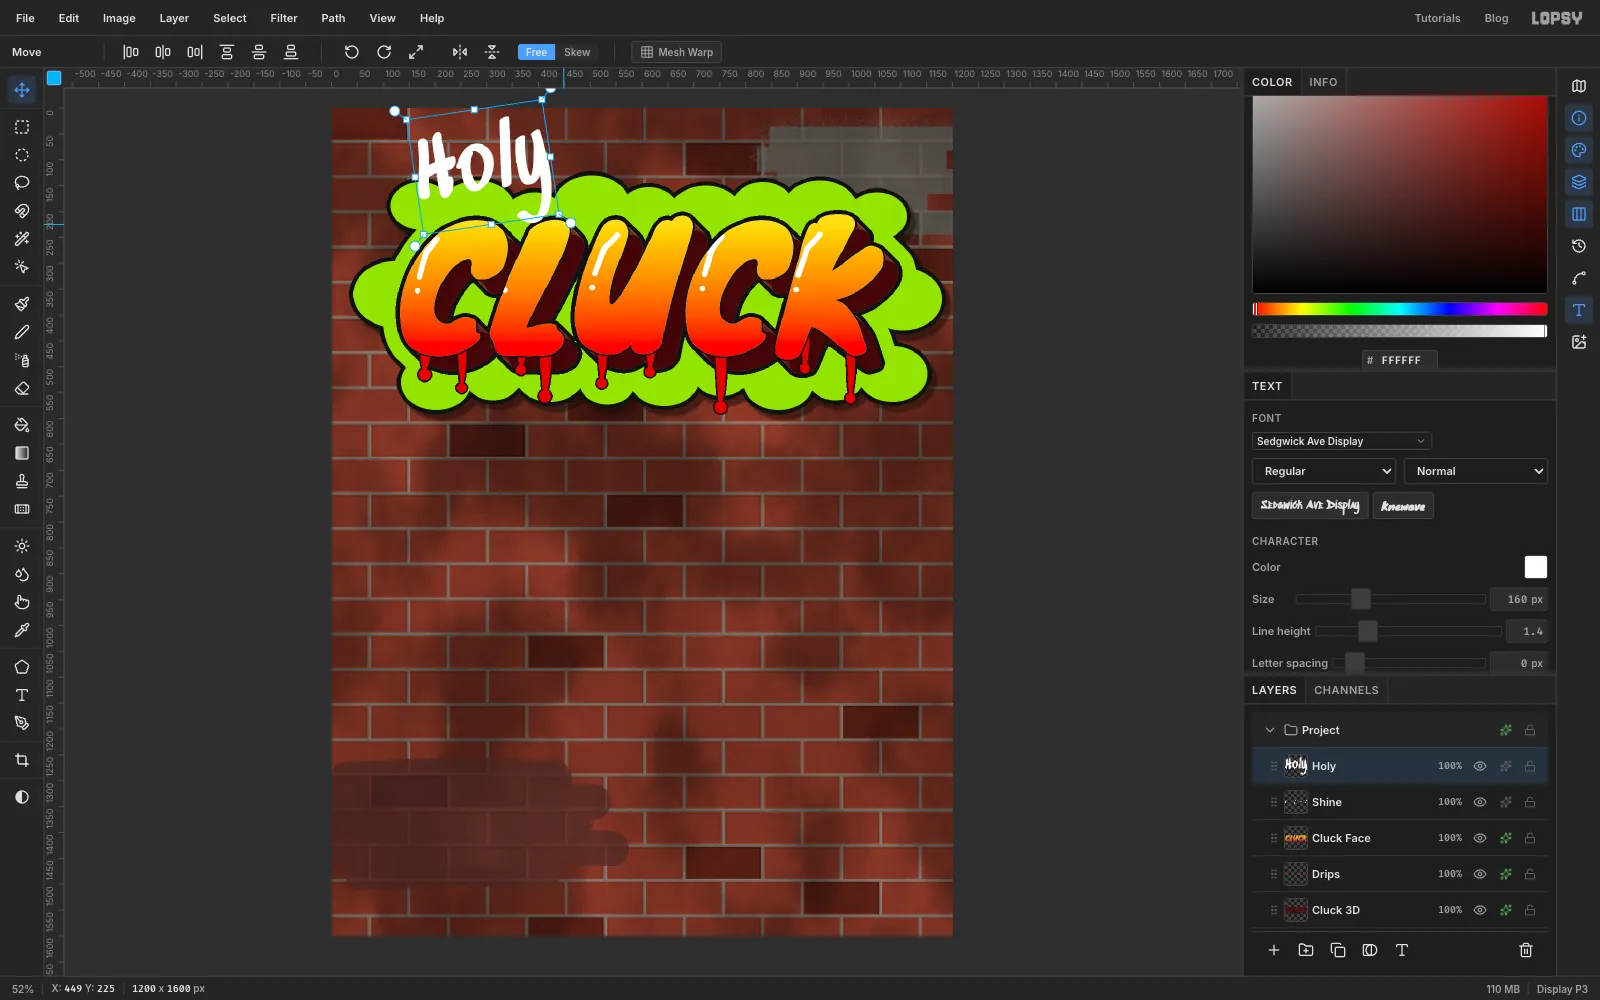
-
Float a halo over the H
Add a layer called Halo and zoom in on the H. With the Elliptical Marquee, drag a flat ellipse about 104 × 30 px just above the H. Hold Alt and drag a smaller ellipse, about 80 × 14, in its middle to subtract it, which leaves a ring.
Fill with gold and deselect. Add a Stroke of Width
4in and an Outer Glow with Size22, Opacity80and colour .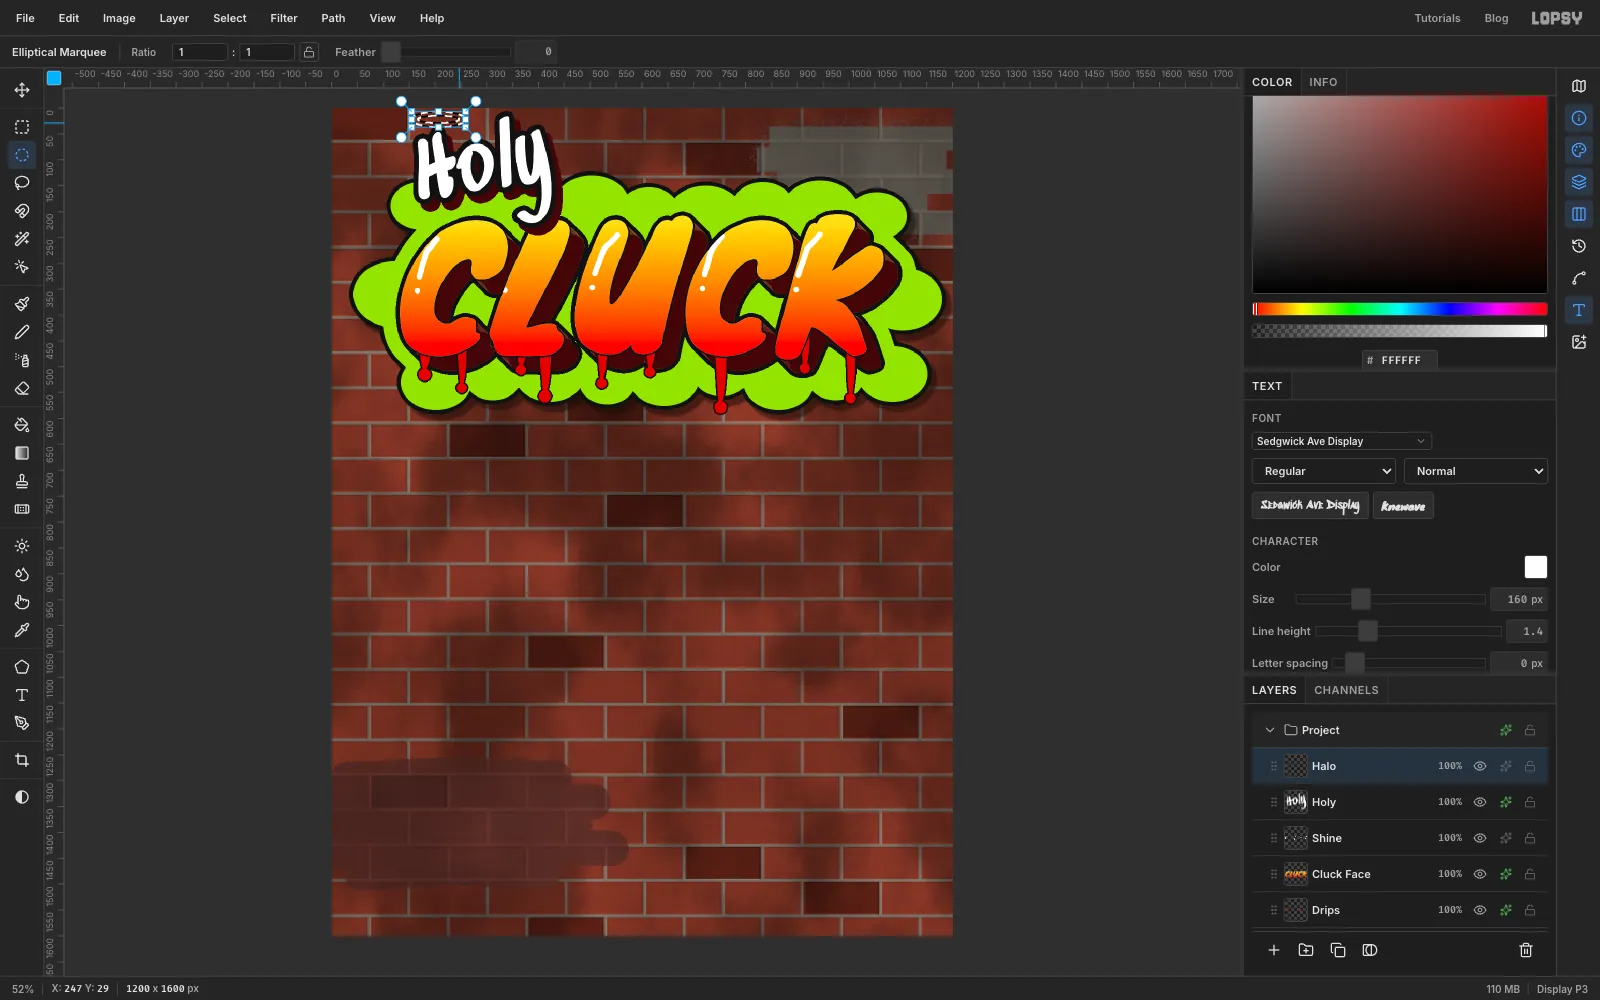
-
Add sparkles
Add a layer called Sparkles. With the Lasso, trace a four-point star whose sides curve inwards. Fill it white. Make one large sparkle, about 70 px tall, at the top right of the cloud, and two smaller ones, about 50 px tall, at the left and right ends of the word. Add a Stroke of Width
3in .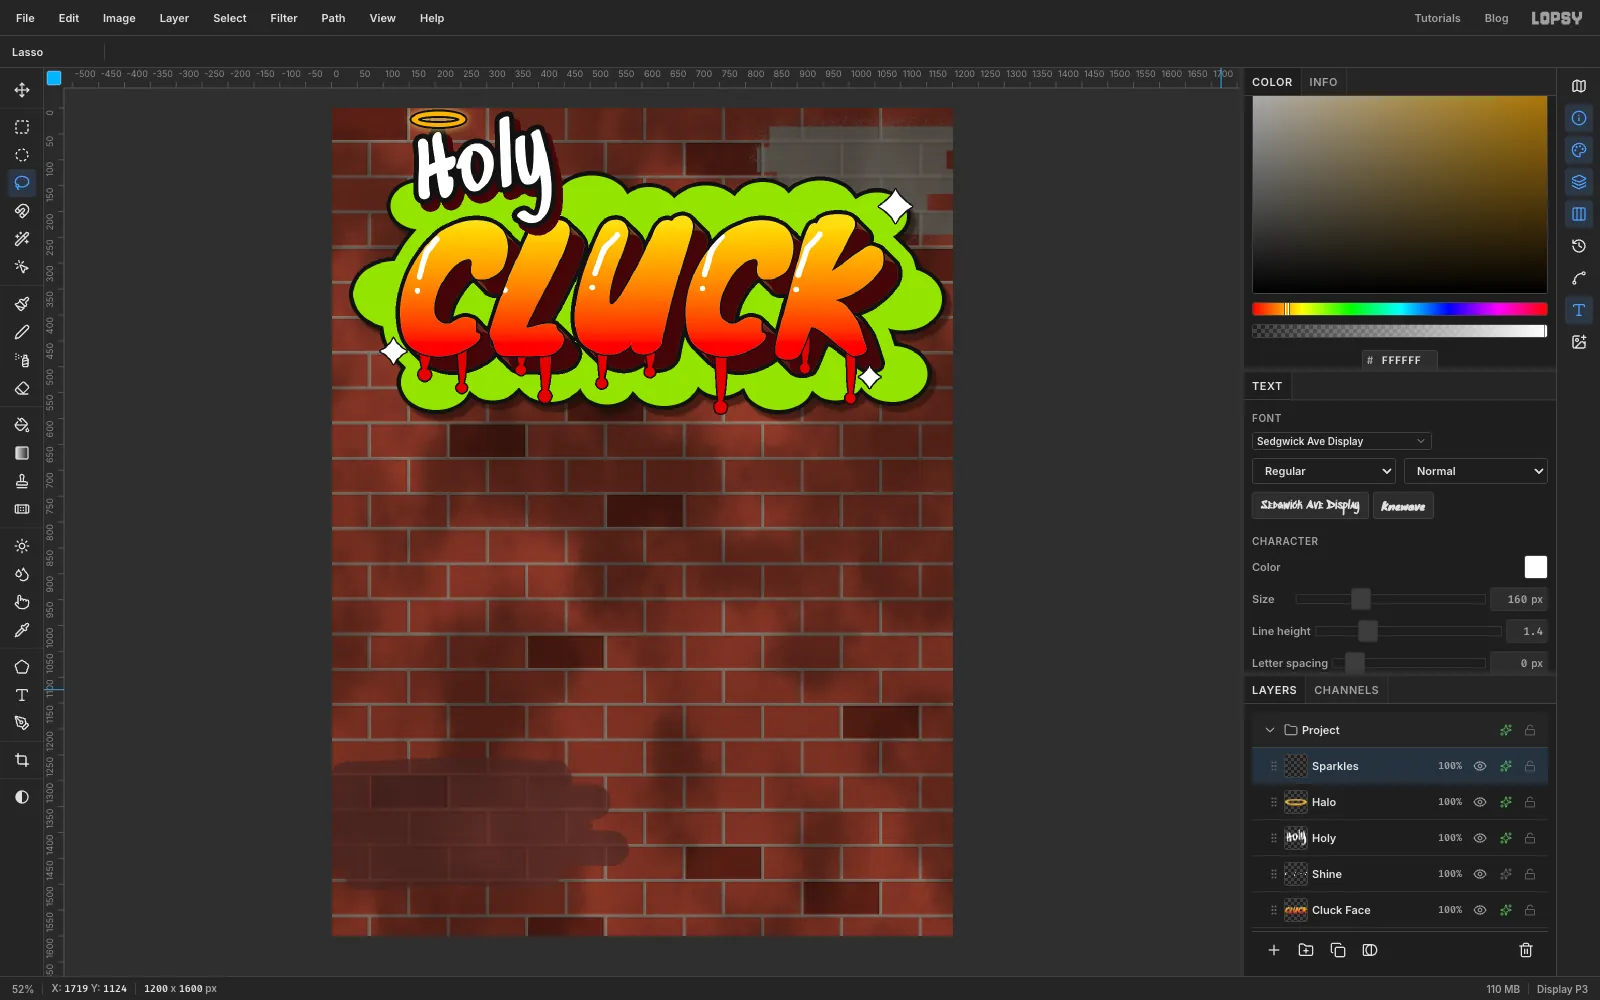
-
Group the piece, move it and tilt it
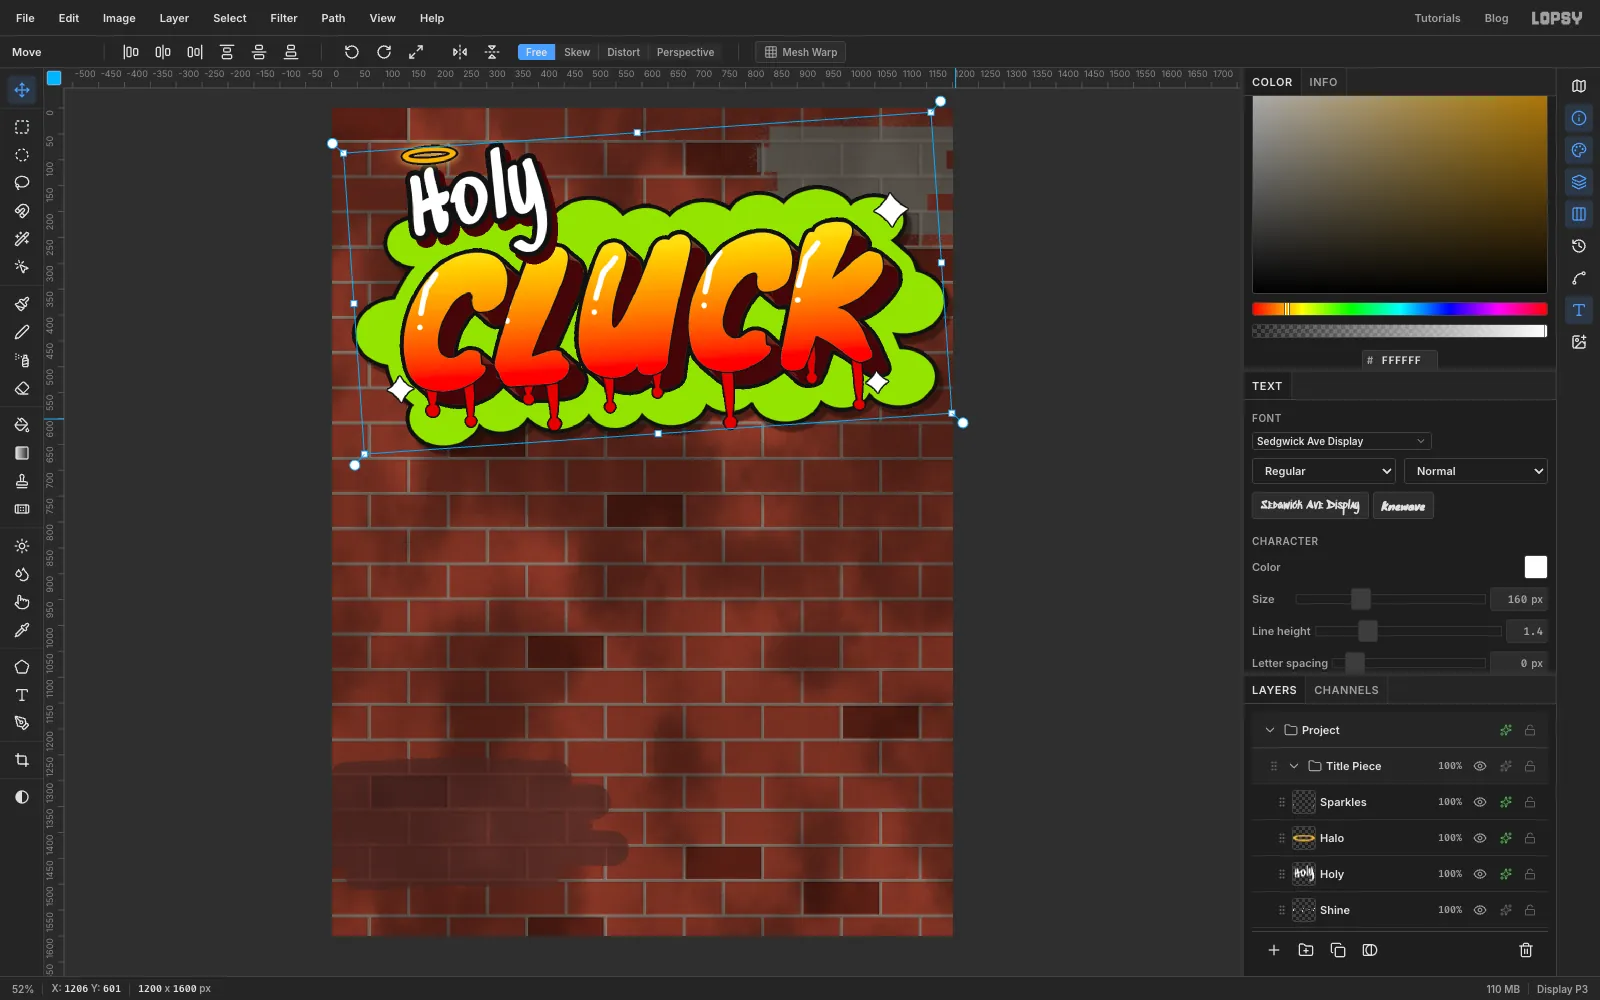
Click the Cloud row, then Shift-click Sparkles to select everything in between. Choose Layer → Group Layers and rename the group Title Piece.
With the group row selected, pick the Move tool and drag the piece down about 40 px to give Holy some headroom. Then drag the rotation handle at a corner of the group's box anticlockwise, about 4°, until the right end of the cloud sits about 40 px higher than the left. Press Cmd+D to commit.
-
Drop in the rooster photo, flip it and scale it
Click Grime again so the photo lands under the title group. Drag the rooster close-up from your desktop onto the canvas. It is scaled to the canvas width and arrives with a marquee around it. Rename it Rooster Photo.
The head should look towards the menu on the right. Pick the Move tool and click Flip Horizontal in the options bar. Then hold Cmd, which keeps the proportions, and drag the bottom-right corner handle in until the photo is about 960 px wide (80% of the canvas width). Press Cmd+D.
Drag the photo down and left until its top edge is at about
y 718and its left edge is about 200 px off the canvas. The beak now points into the gap left of the future menu, at aboutx 640.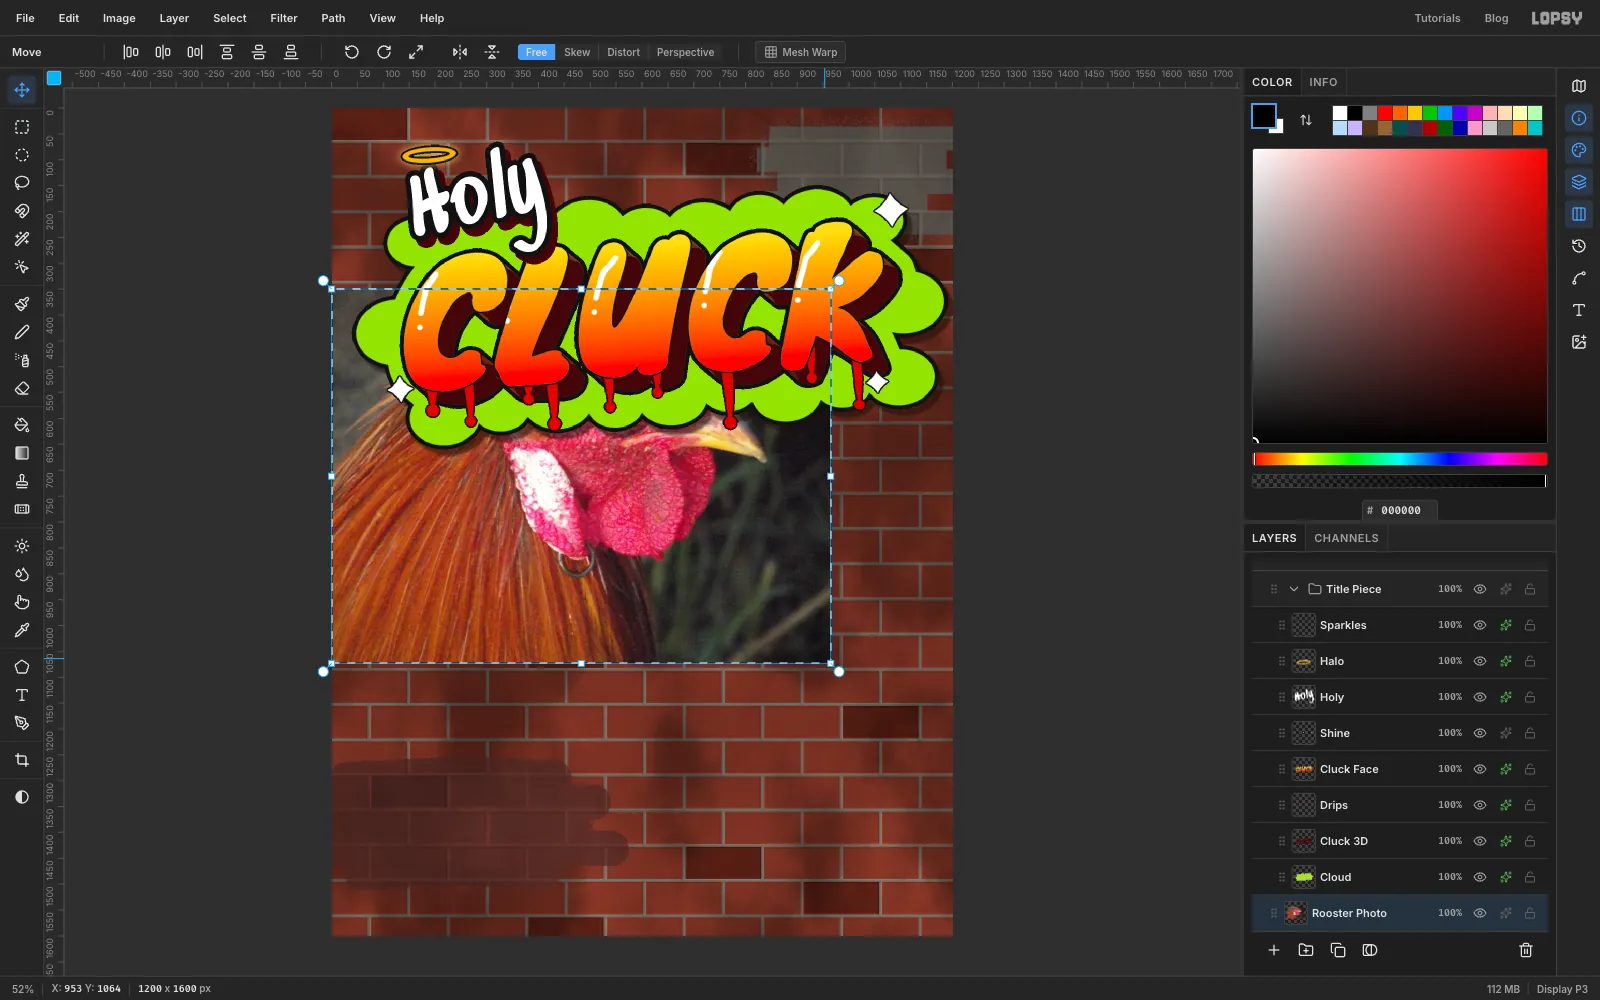
-
Trace the head with the Pen
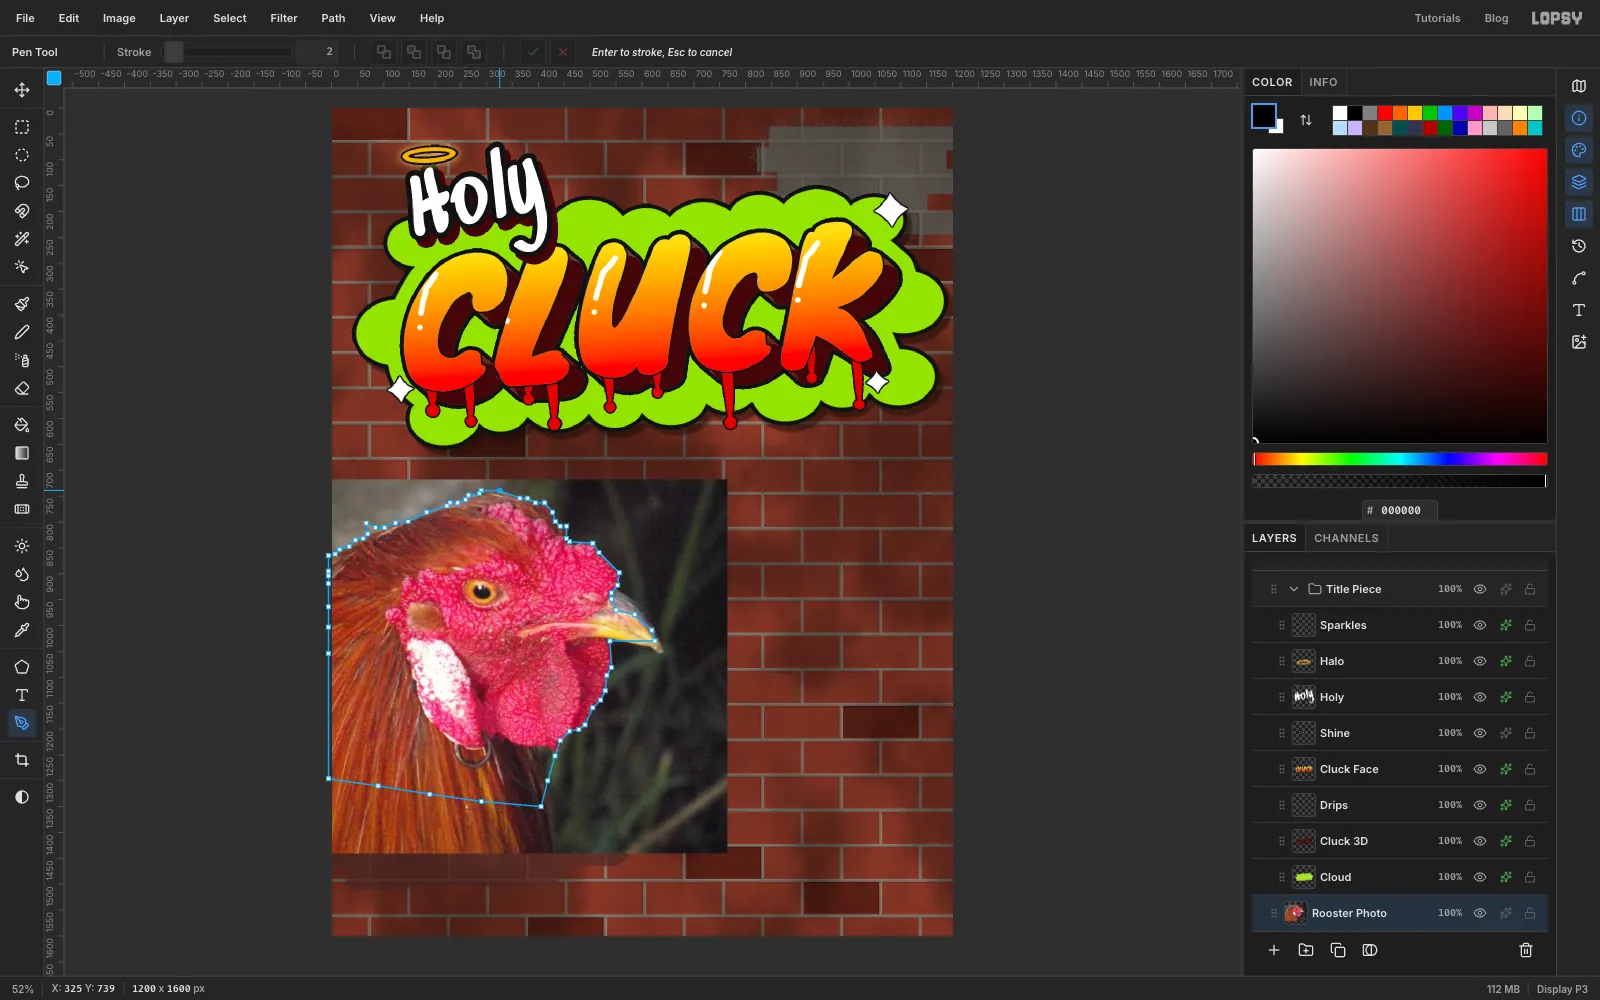
Pick the Pen tool. Start just off the left edge of the canvas behind the comb, at about
y 860. Click your way around the head with short straight segments: over the bumps of the comb, out to the beak tip, under the beak, round the wattles and down the front of the neck. About 60 clicks is plenty.Leave the bottom as a bust cut: a shallow line that rises from about
y 1350under the neck to abouty 1296at the left edge of the canvas. Click slightly off the left edge so the shape reaches the border. Then click the first point to close the path. Don't press Return, which would stroke the path.Open the Paths panel (the curve icon in the right-hand strip) and click Path to Selection, then Delete Path.
-
Fill the base plate
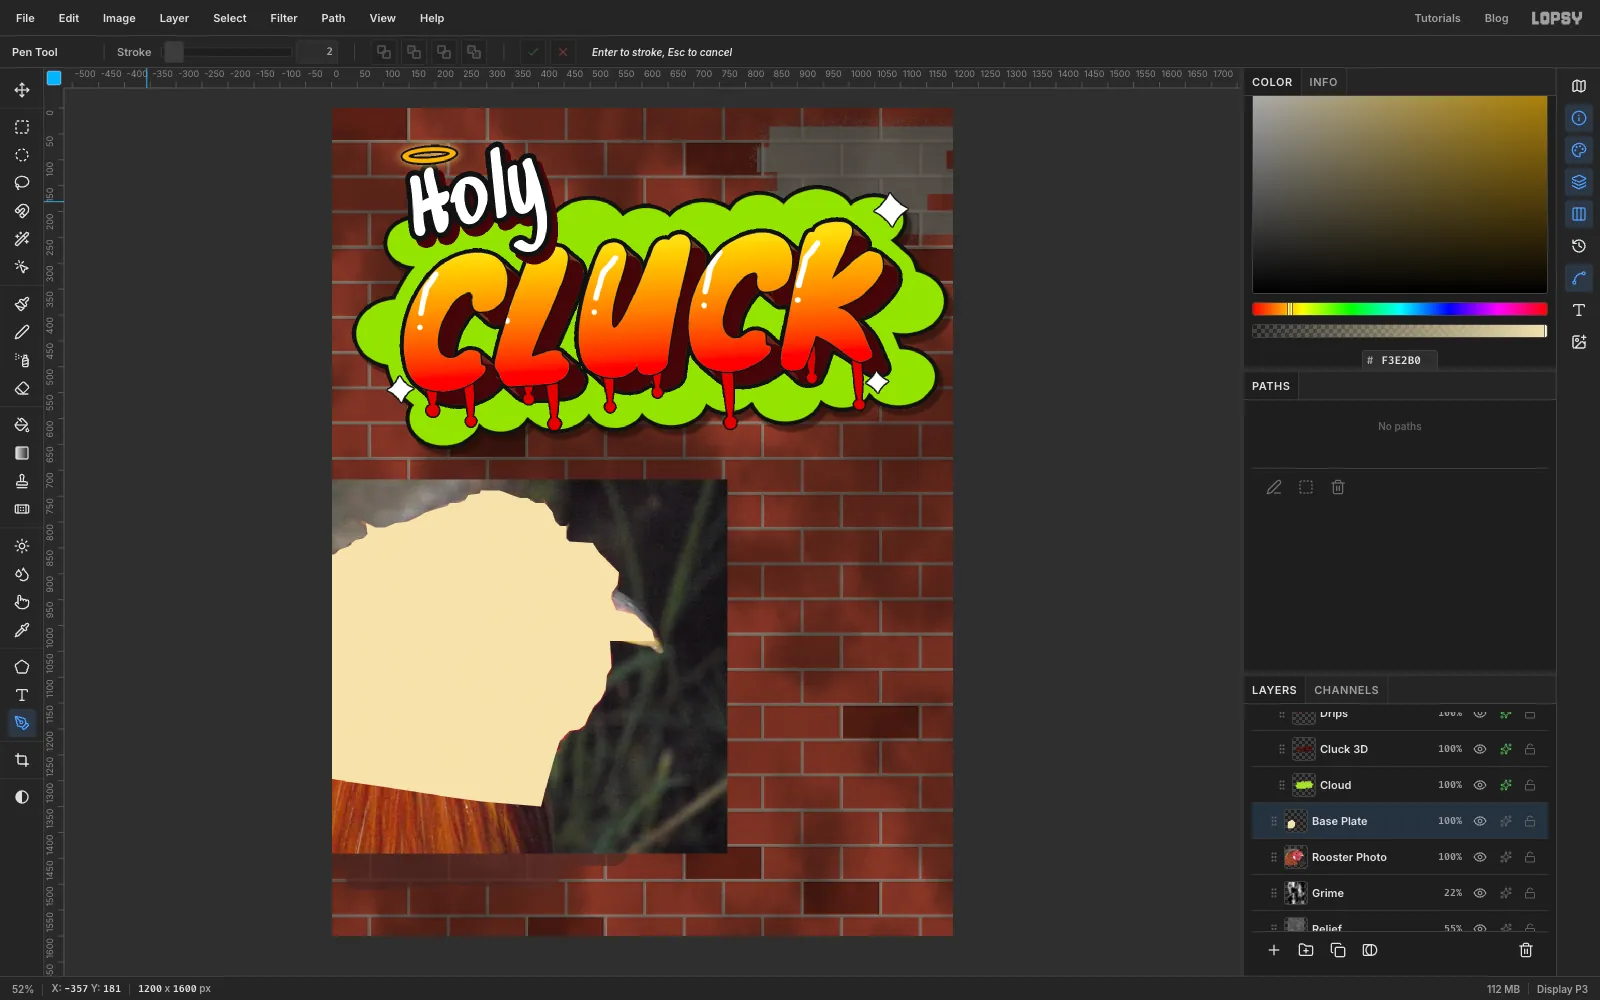
Click Rooster Photo and add a layer called Base Plate. Fill it with cream and deselect. This is the lightest stencil plate. It shows through wherever the darker plates leave gaps: the beak, the earlobe and the eye.
-
Make a two-level tone study
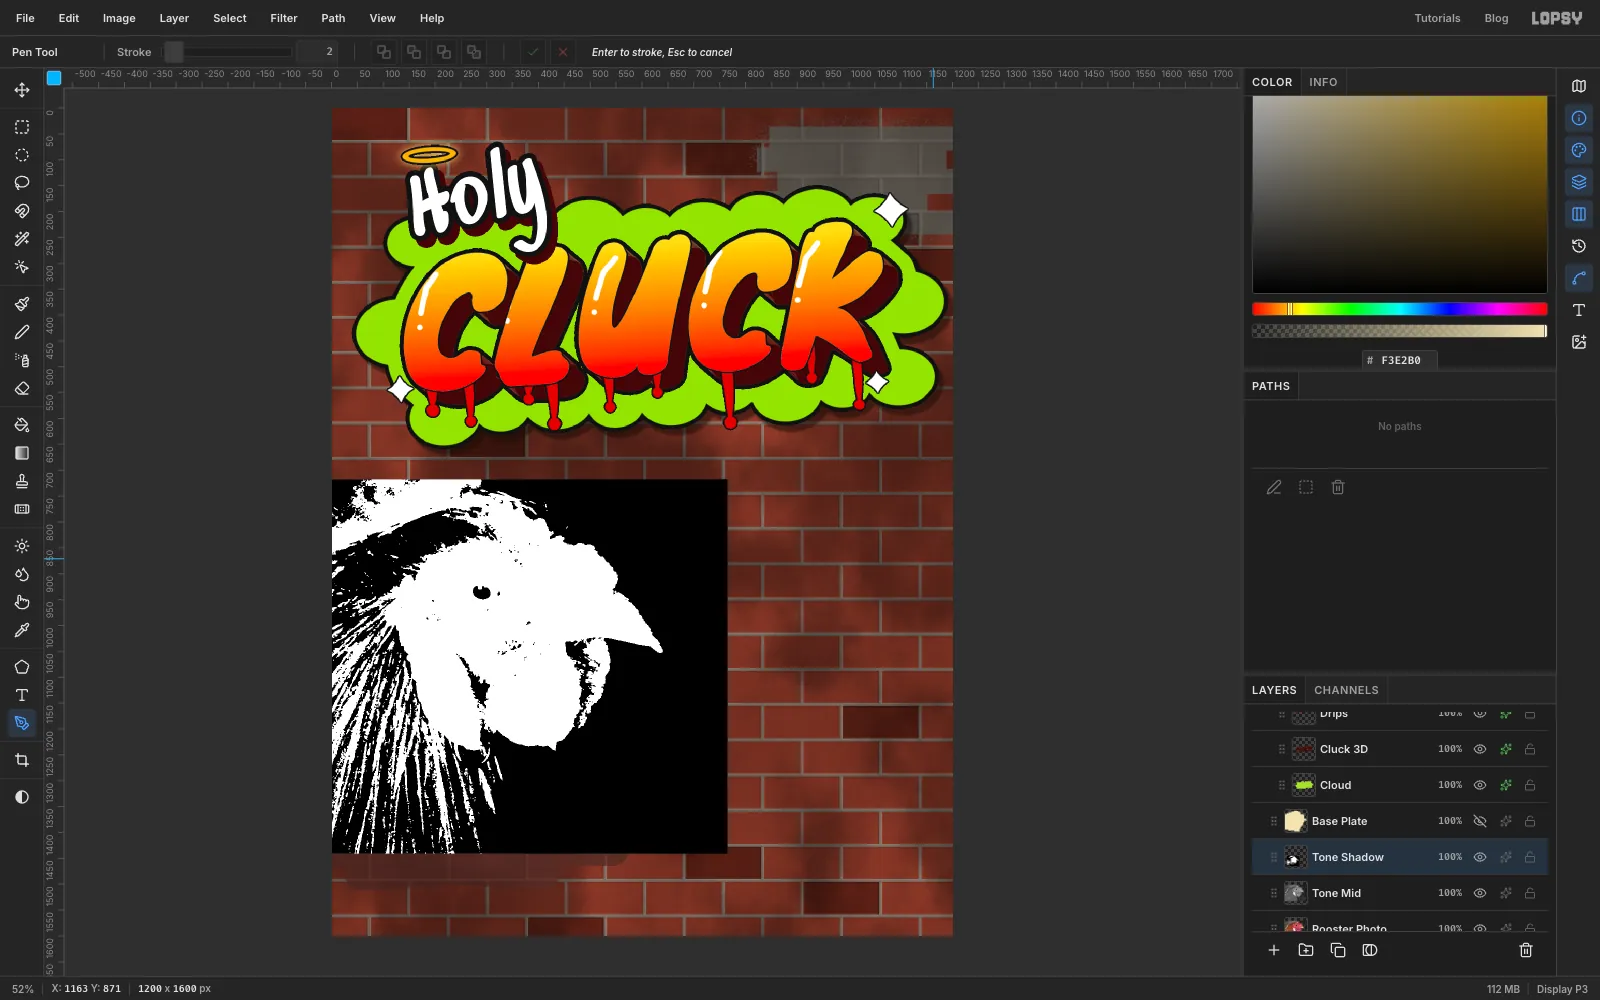
Hide Base Plate (the eye icon) so you can see the photo while you work. Click Rooster Photo and choose Layer → Duplicate Layer. Rename the copy Tone Mid.
Choose Filter → Desaturate and then Filter → Gaussian Blur… with Radius
2. The blur rounds off speckles, so the plates get smooth, cuttable shapes.Duplicate Tone Mid and name the copy Tone Shadow. Apply Filter → Threshold… with Level
100. Then select Tone Mid and apply Threshold with Level131. Aim for roughly a third of the head black in Tone Shadow and two thirds in Tone Mid. If your photo is lighter or darker, adjust the levels until you get there.Show Base Plate again.
-
Wand the comb and wattles
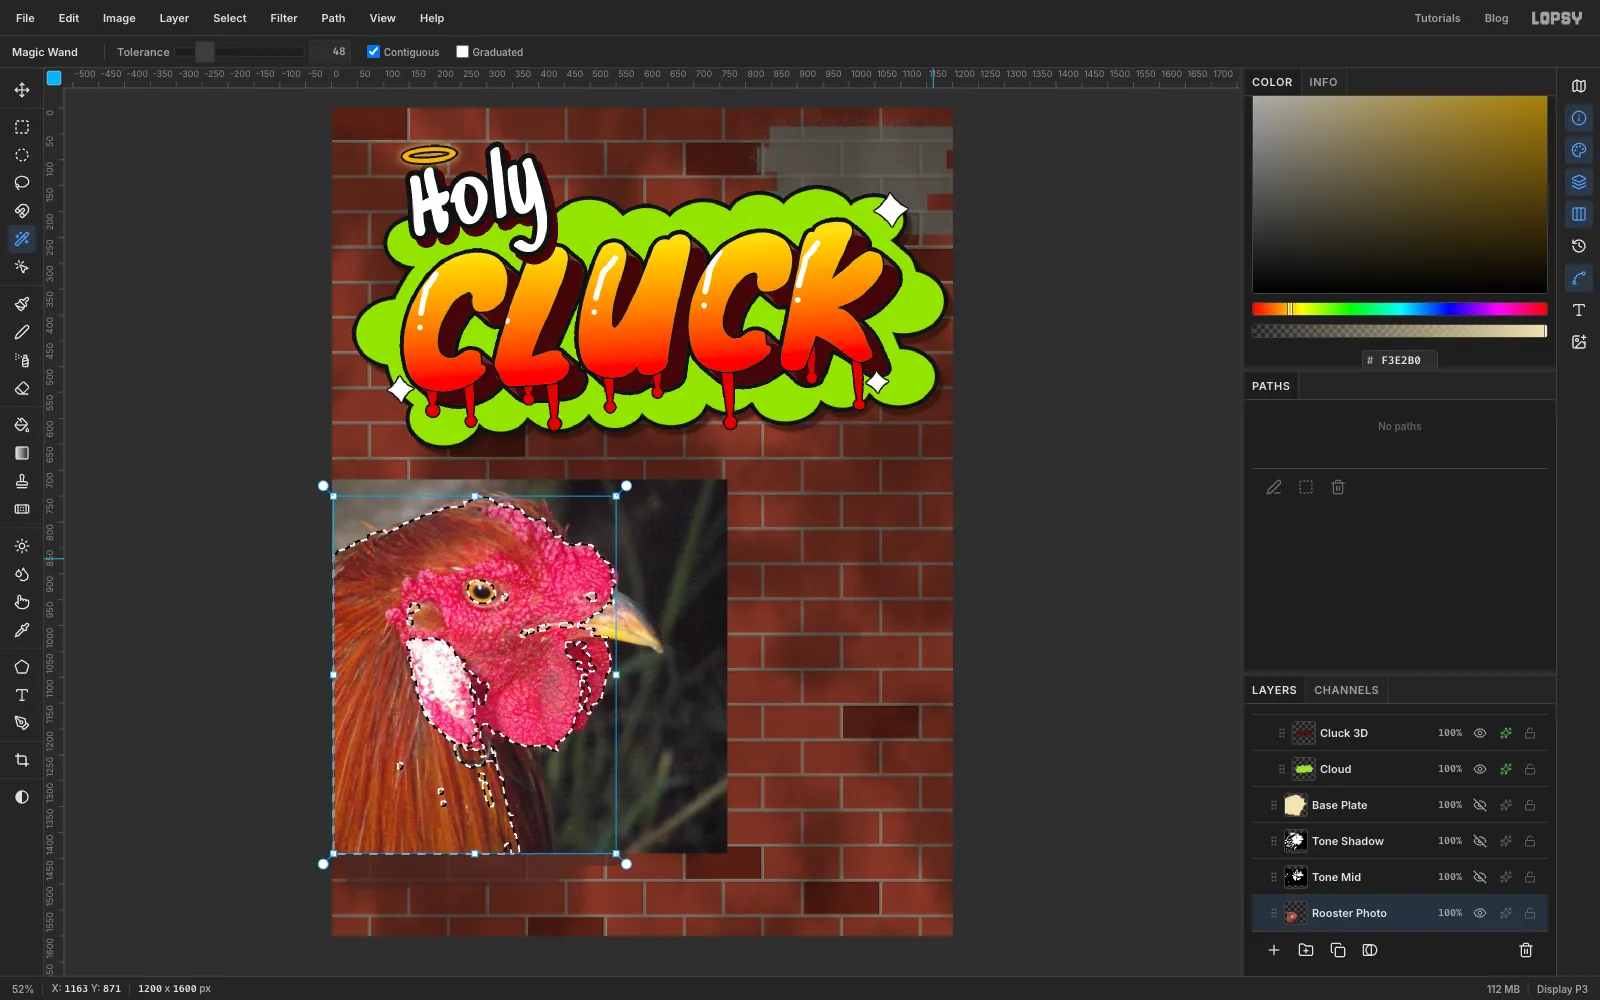
Hide Base Plate, Tone Mid and Tone Shadow so the photo shows, and click Rooster Photo. Pick the Magic Wand with Tolerance
48and Contiguous on. Click the comb. Shift-click the wattles, the bare skin around the eye and the back of the comb.Smooth the speckled edge with Select → Grow…
4and then Select → Shrink…4. Show Base Plate again, then Cmd+Shift+Alt-click its thumbnail to keep only the part inside the silhouette.Click Base Plate, add a layer called Comb Plate and fill it with red .
-
Cut the crimson and black plates
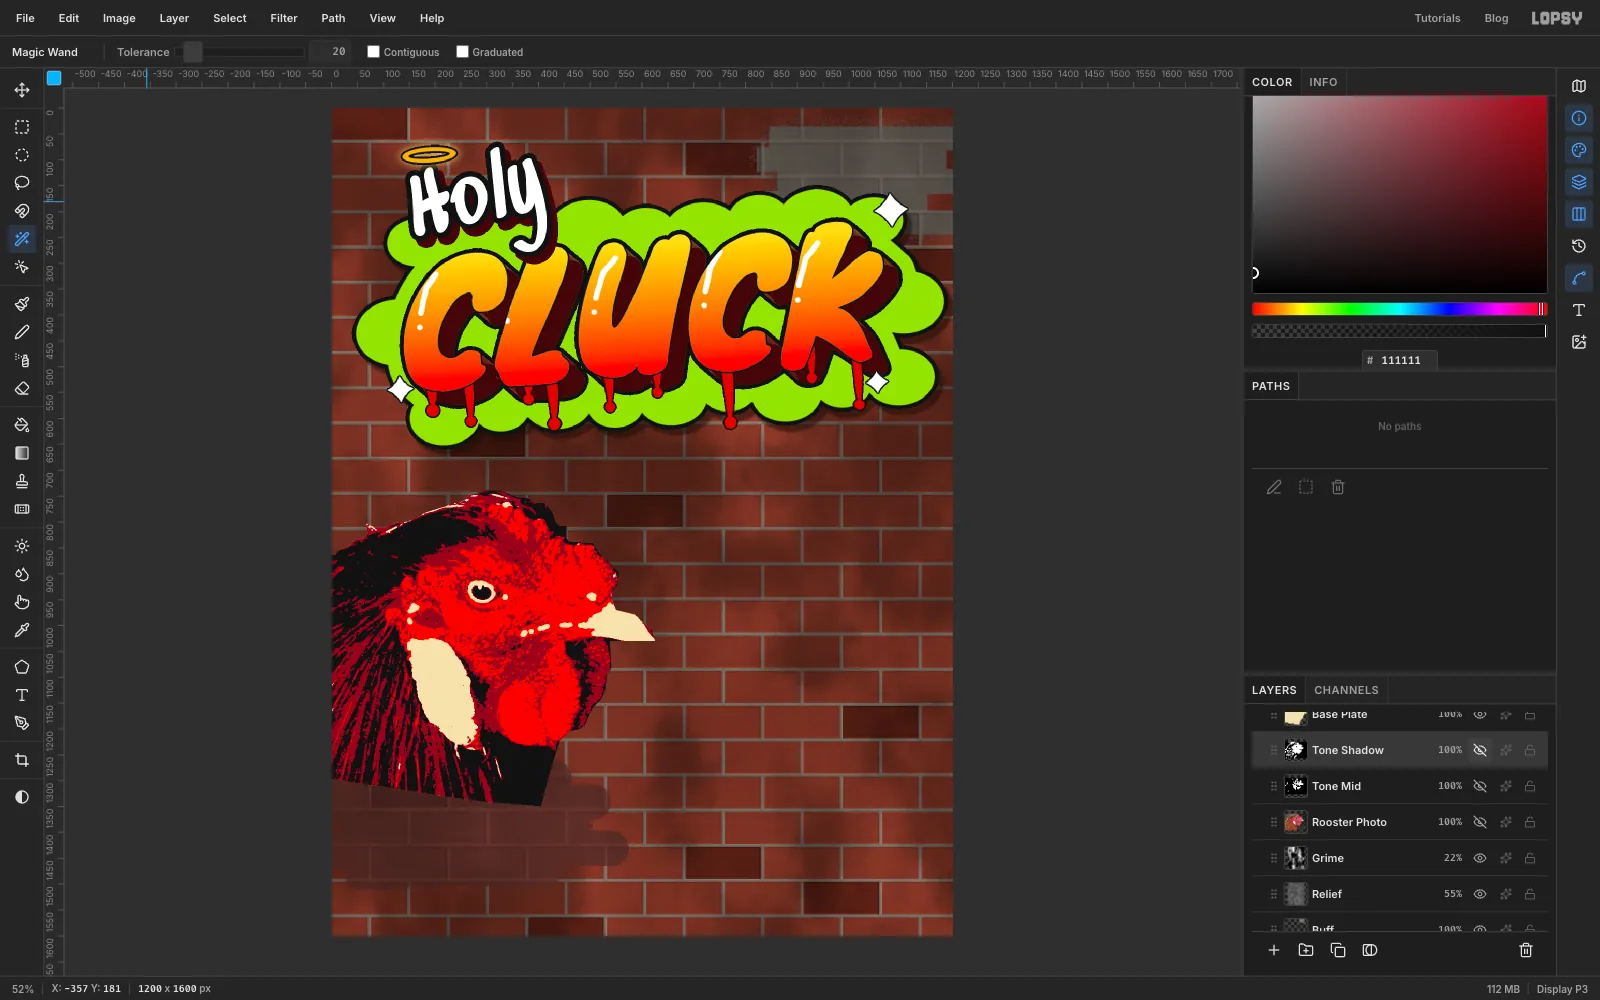
Show Tone Mid and Tone Shadow again and click Tone Mid. Pick the Magic Wand, set Tolerance to
20and untick Contiguous. Click any black pixel, such as the background beside the head. Every black pixel in the layer is selected. Cmd+Shift+Alt-click the Base Plate thumbnail to intersect.Click Comb Plate, add a layer called Mid Plate and fill it with crimson .
Do the same with Tone Shadow: wand the black, intersect with Base Plate, then click Mid Plate and add a layer called Shadow Plate. Fill it with . Hide Rooster Photo, Tone Mid and Tone Shadow.
-
Paint a gold halo behind the head
Click Tone Shadow and add a layer called Halo Disc, so it sits under the plates. With the Elliptical Marquee, click once and enter From
30, 667To540, 1177.Pick the Gradient tool, set it to Radial and make two stops, and . Drag from up and left of the centre to the lower right edge, then deselect.
For rays, pick the Brush (Size
9, Hardness100, ). Click about 18 px outside the rim and Shift-click about 30 px further out. Repeat every 25° or so round the top half.Spray a little gold haze round the rim with Spray (Size
70, Density40, Opacity35). Finally, add a Stroke of Width5in pale yellow and an Outer Glow with Size25, Opacity50and colour .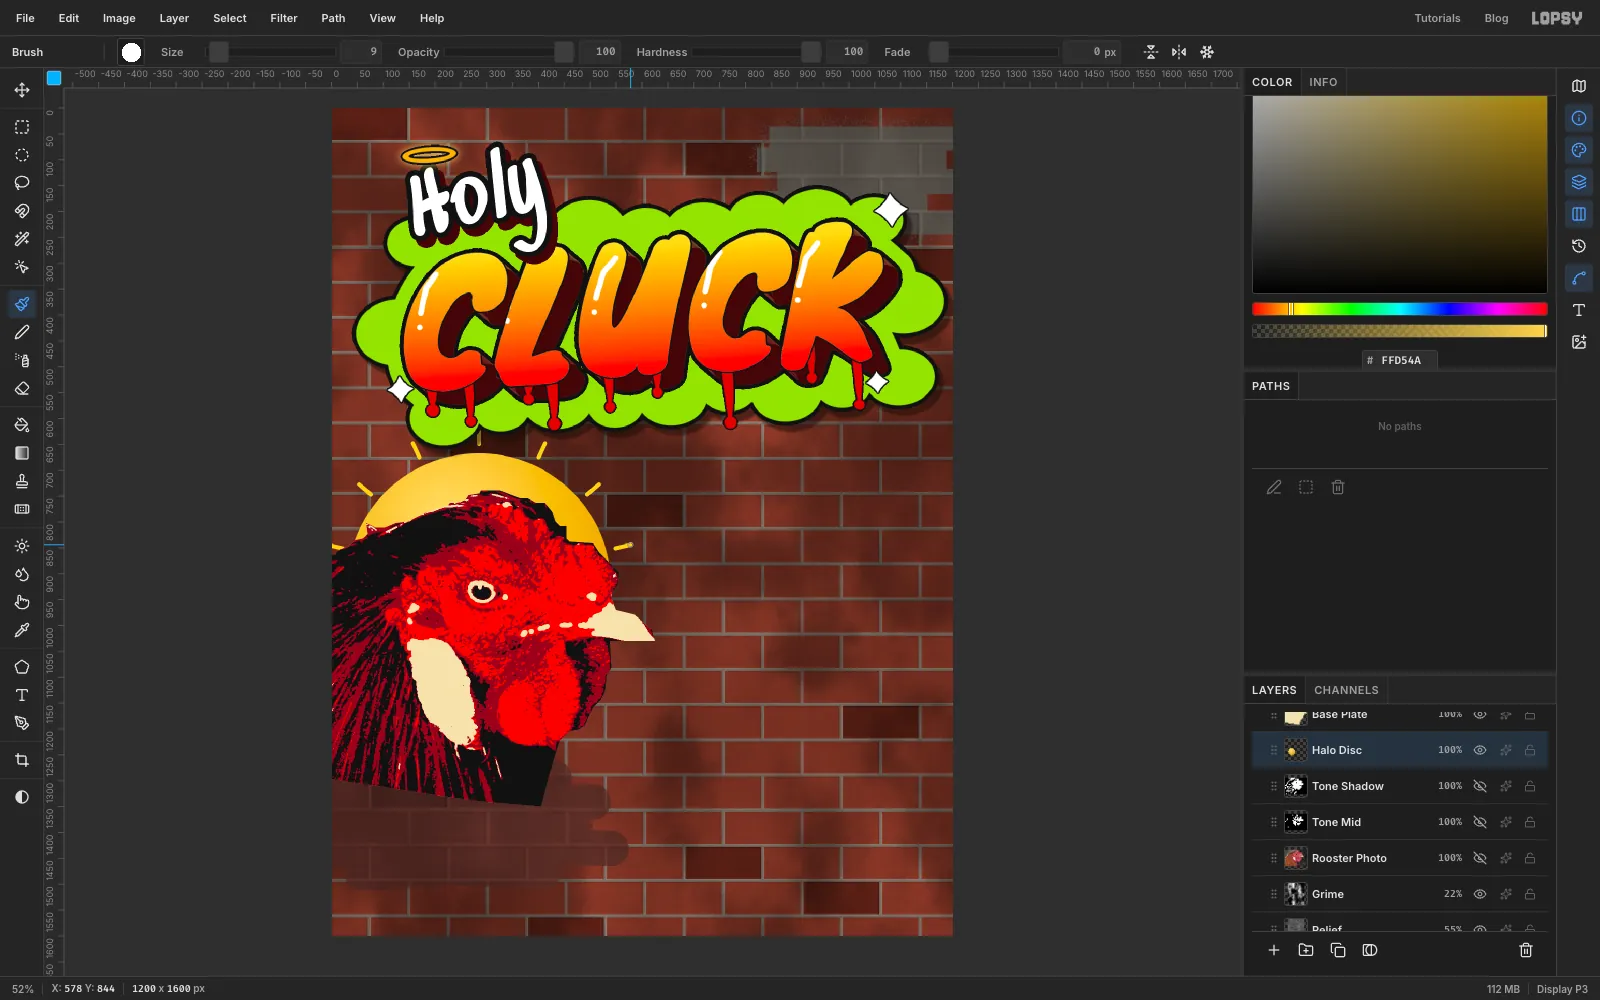
-
Spray a soft shadow and a teal under-plate
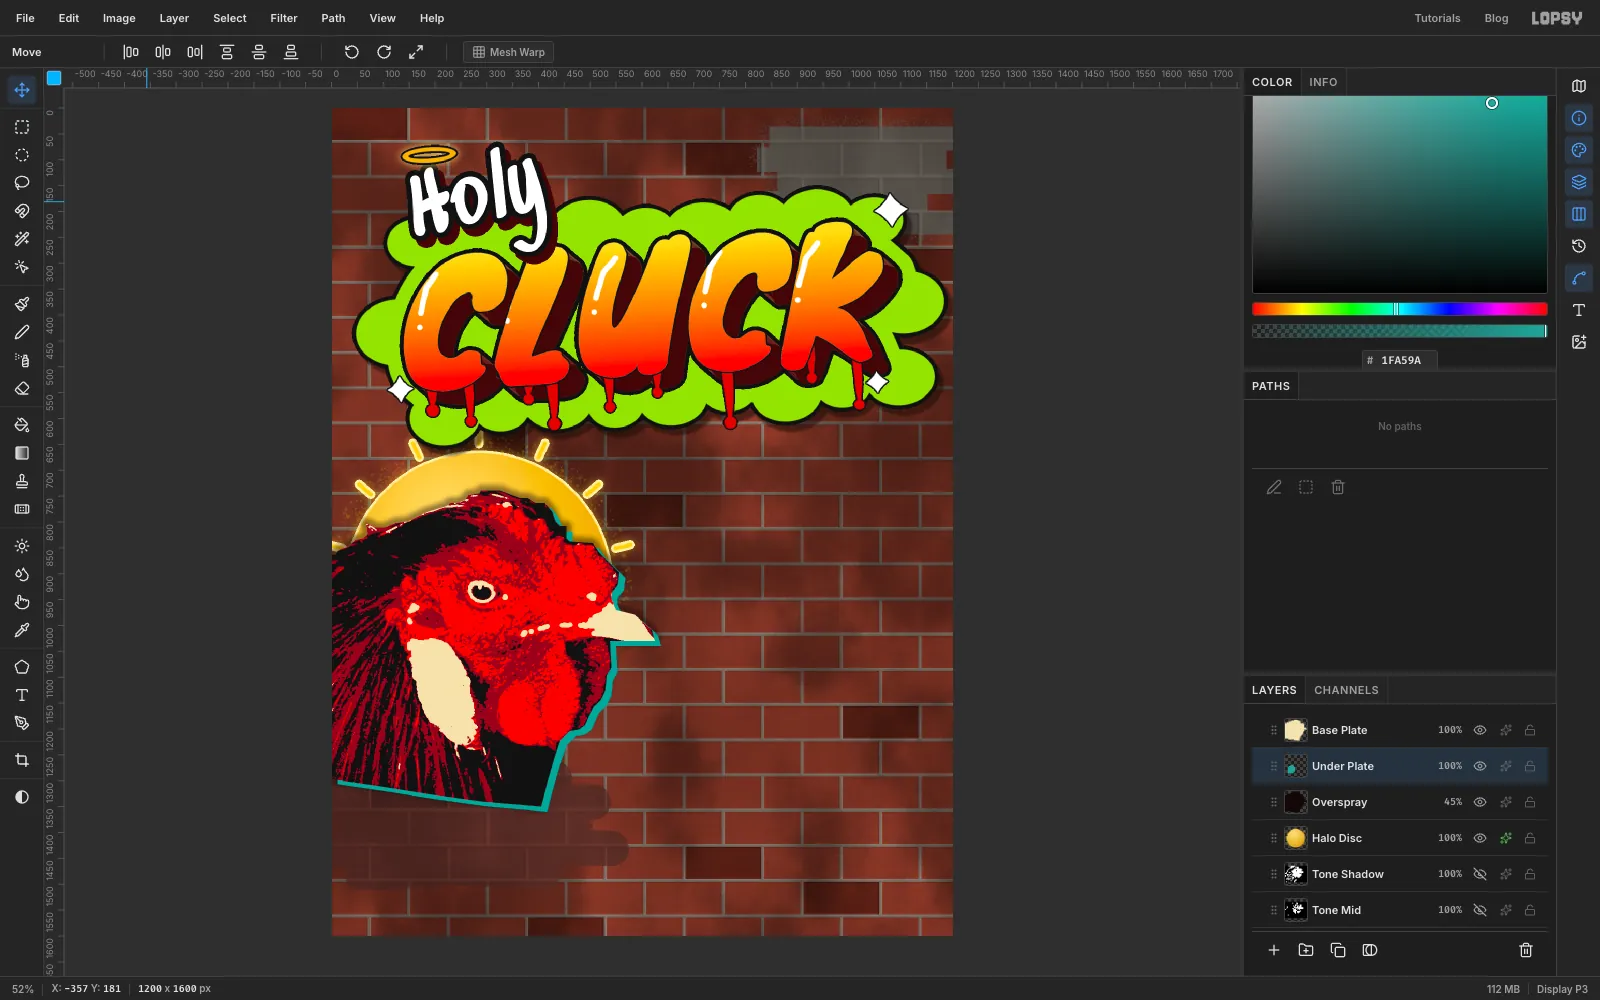
Click Halo Disc and add a layer called Overspray. Cmd-click the Base Plate thumbnail, then use Select → Grow…
10and Select → Feather…9. Fill with , deselect and set the layer opacity to45%.Click Overspray and add a layer called Under Plate. Cmd-click the Base Plate thumbnail again, fill with teal and deselect. Pick the Move tool and nudge the layer 12 px right and 10 px down with the arrow keys (Shift+arrow moves 10 px). The cool edge lifts the red head off the brick wall.
Hand-cut stencils never line up exactly, so click Mid Plate and nudge it 3 px right and 2 px up as well.
-
Cut back the cheek
The cream earlobe reads as one big flat patch, so shrink it. Stay on Mid Plate. With the Elliptical Marquee, drag from
60, 1130to340, 1410. Then Cmd+Shift+Alt-click the Base Plate thumbnail to keep only the part inside the head. Fill with crimson and deselect.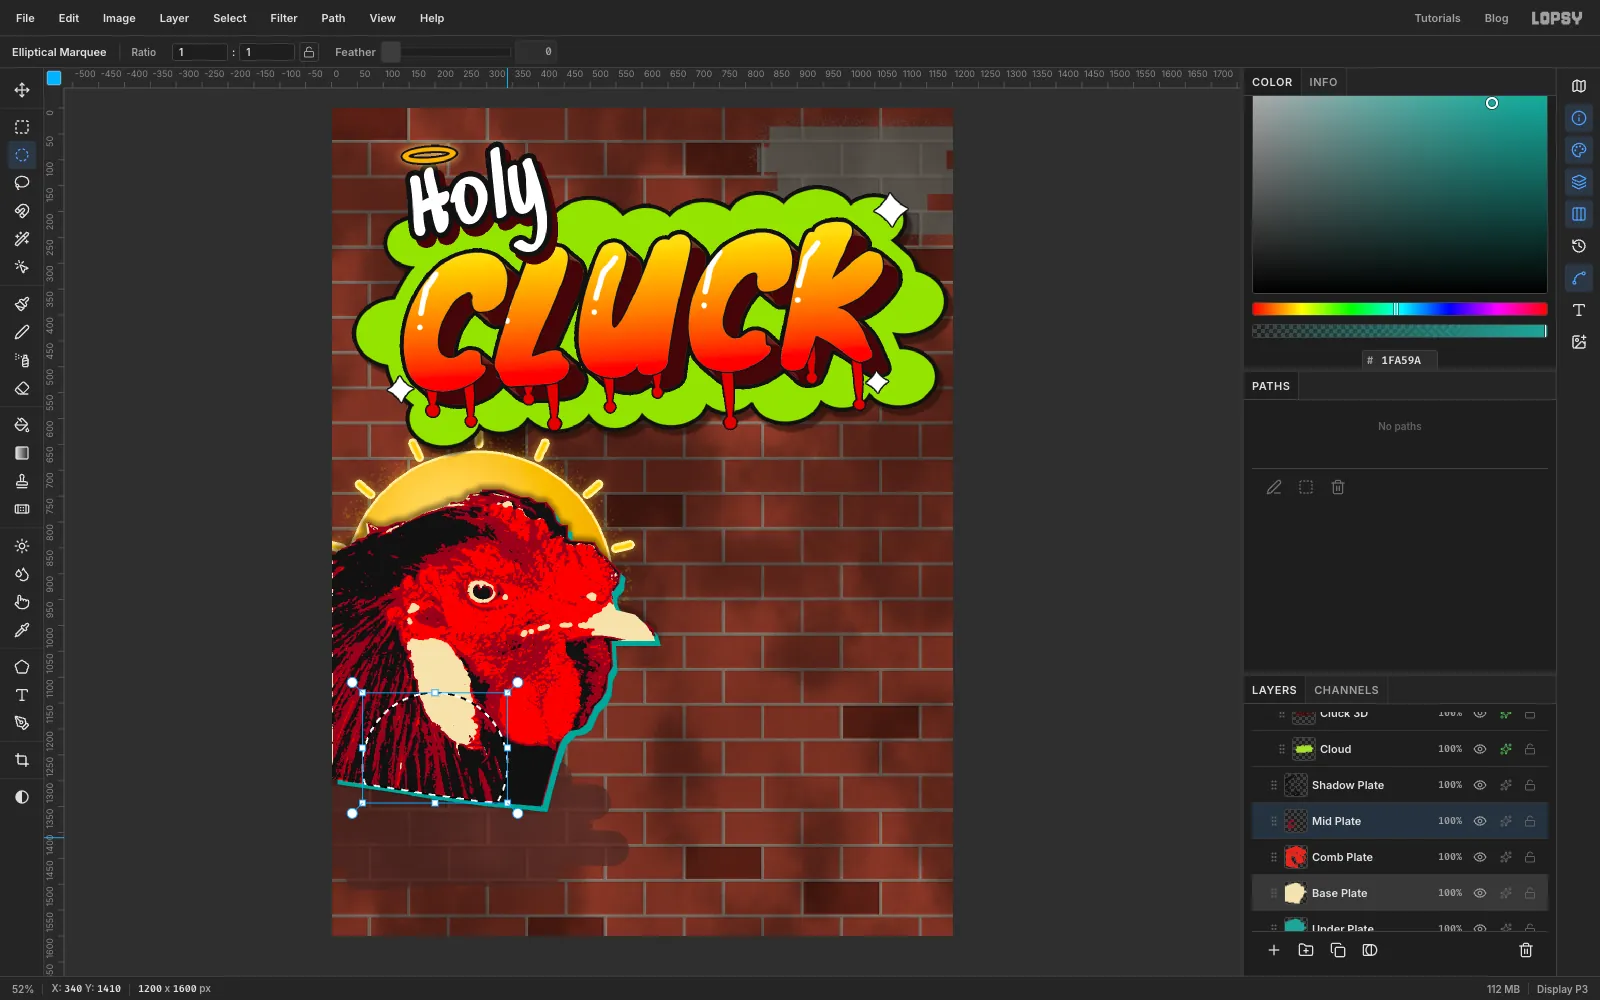
-
Outline the stencil
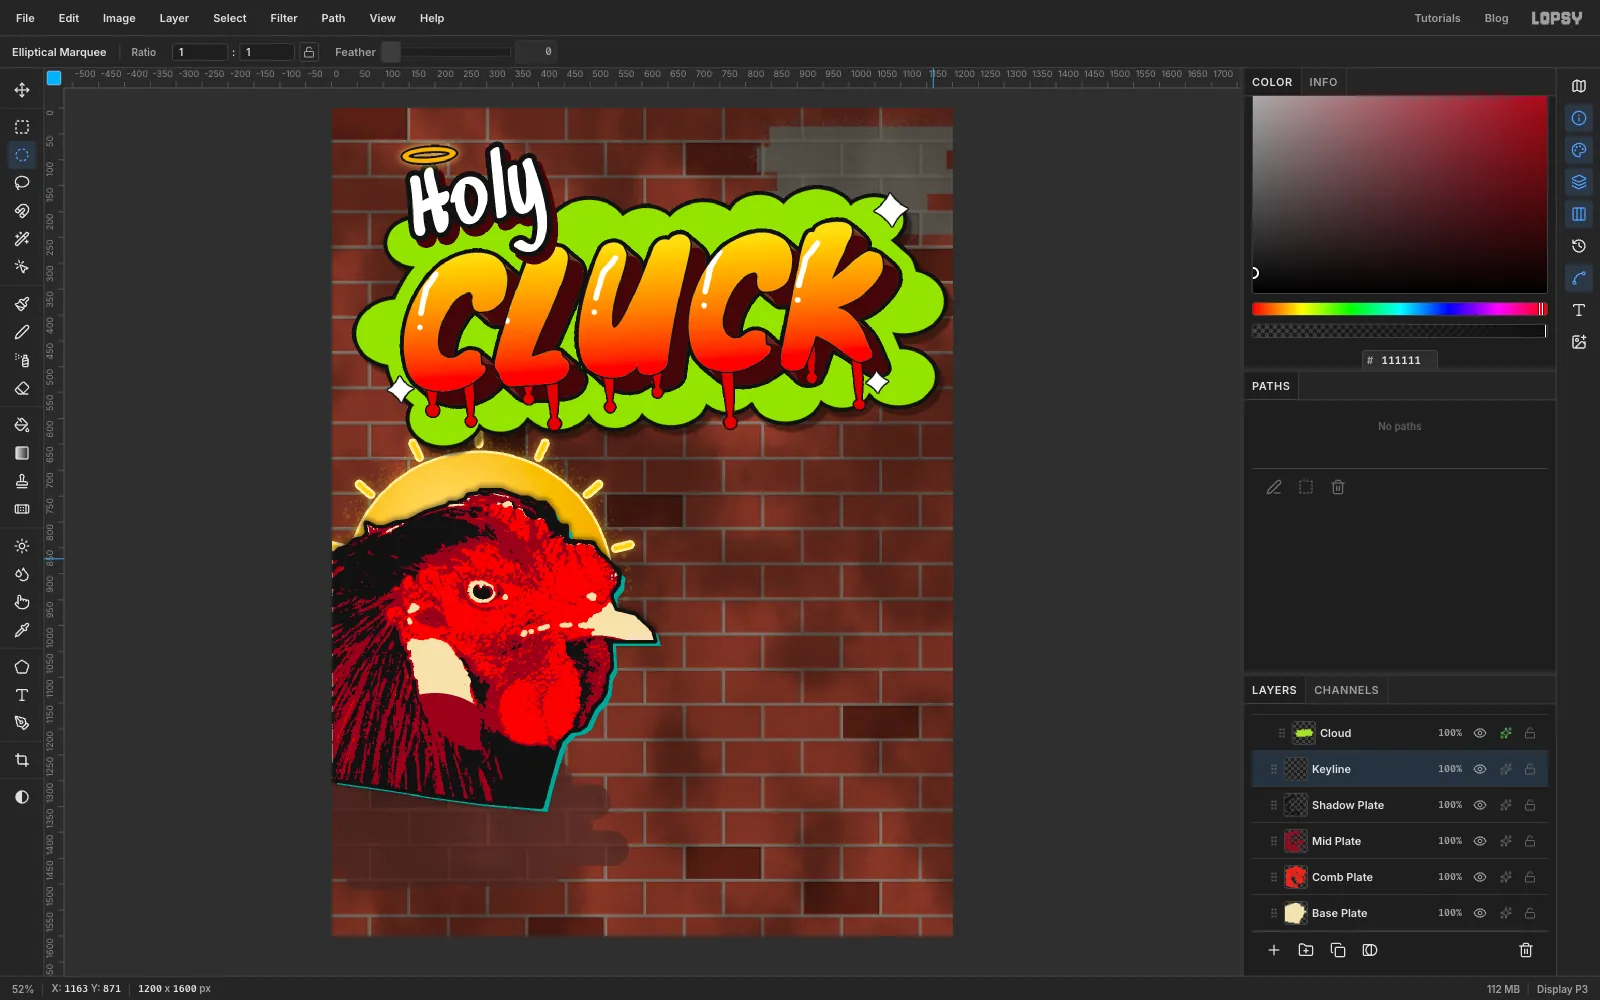
Click Shadow Plate and add a layer called Keyline.
- Cmd-click the Base Plate thumbnail.
- Choose Select → Grow…
5and fill with . - Cmd-click the Base Plate thumbnail again.
- Choose Select → Shrink…
2and press Delete.
What's left is a ring from 2 px inside the edge to 5 px outside it. It sits above all the plates, so it also hides the faint, half-transparent pixels where the plates' edges overlap.
-
Add stencil drips and group the rooster
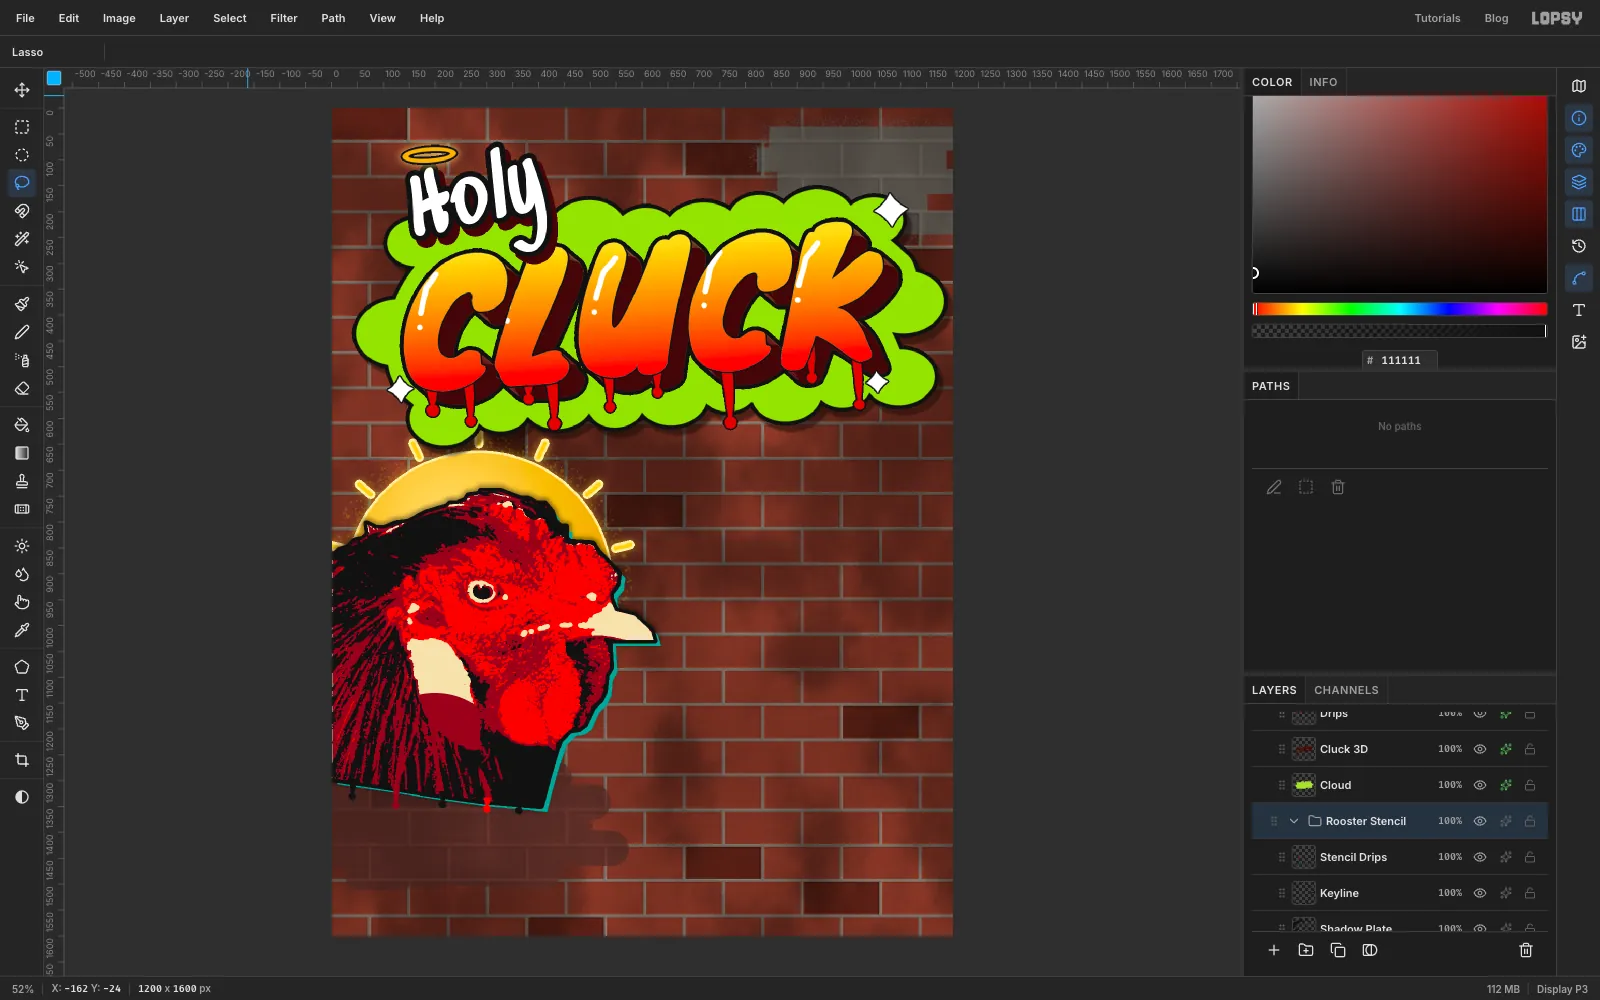
Add a layer called Stencil Drips. Trace five short runs along the bust edge with the Lasso, the same way as the title drips but about 13 px wide and 18–42 px long. Fill them in black, crimson and red.
Click Halo Disc, Shift-click Stencil Drips, choose Layer → Group Layers and name the group Rooster Stencil. Click the group's arrow to collapse it.
-
Set guides for the menu board
Click the top ruler at
668,700,1138and1170to drop four vertical guides: the board's sides and its text margins. Click the left ruler at700and1338for its top and bottom.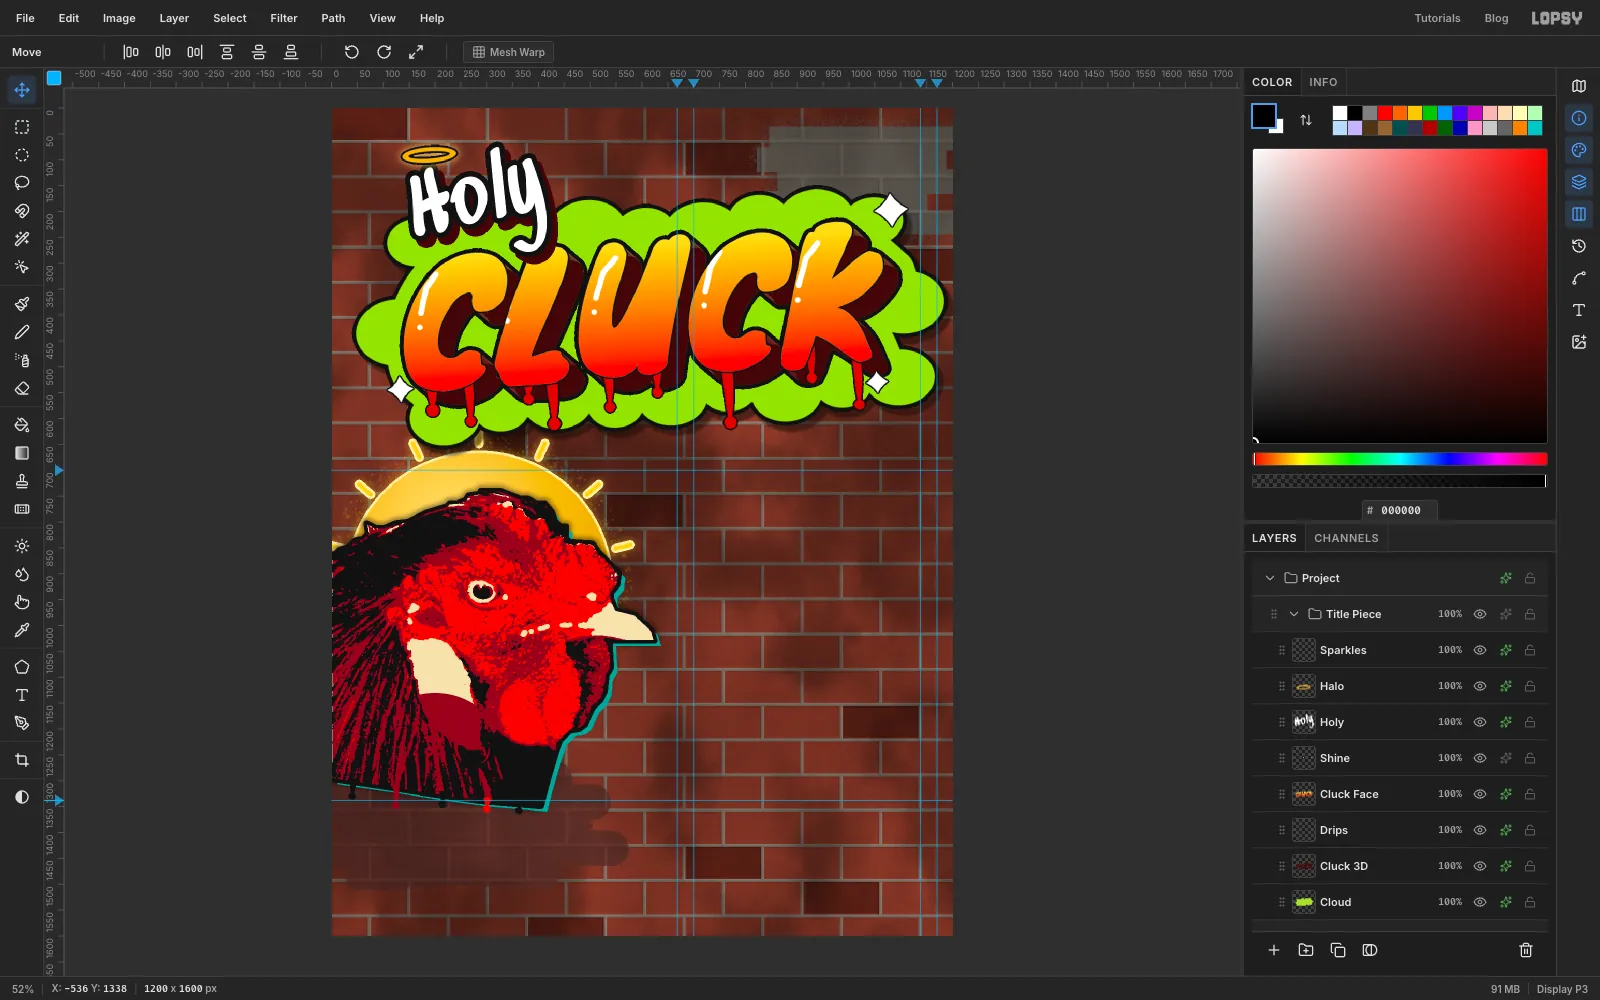
-
Paint the board
Click the collapsed Rooster Stencil group and add a layer called Menu Board. With the Rectangular Marquee, drag from near where the
668guide meets the700guide to near where1170meets1338. Both corners snap onto the guides.Fill with . Apply Add Noise Amount
10with Mono and Uniform for a rolled-paint texture, then deselect.Pick Spray (Size
40, Density60, Opacity80) and spray once along each edge, just outside it, to rough it up. Then trace a few short Lasso drips (about 12 px wide, 18–62 px long) off the bottom edge and fill them. Add a Drop Shadow: Offset X6, Offset Y8, Blur10, Opacity45, black.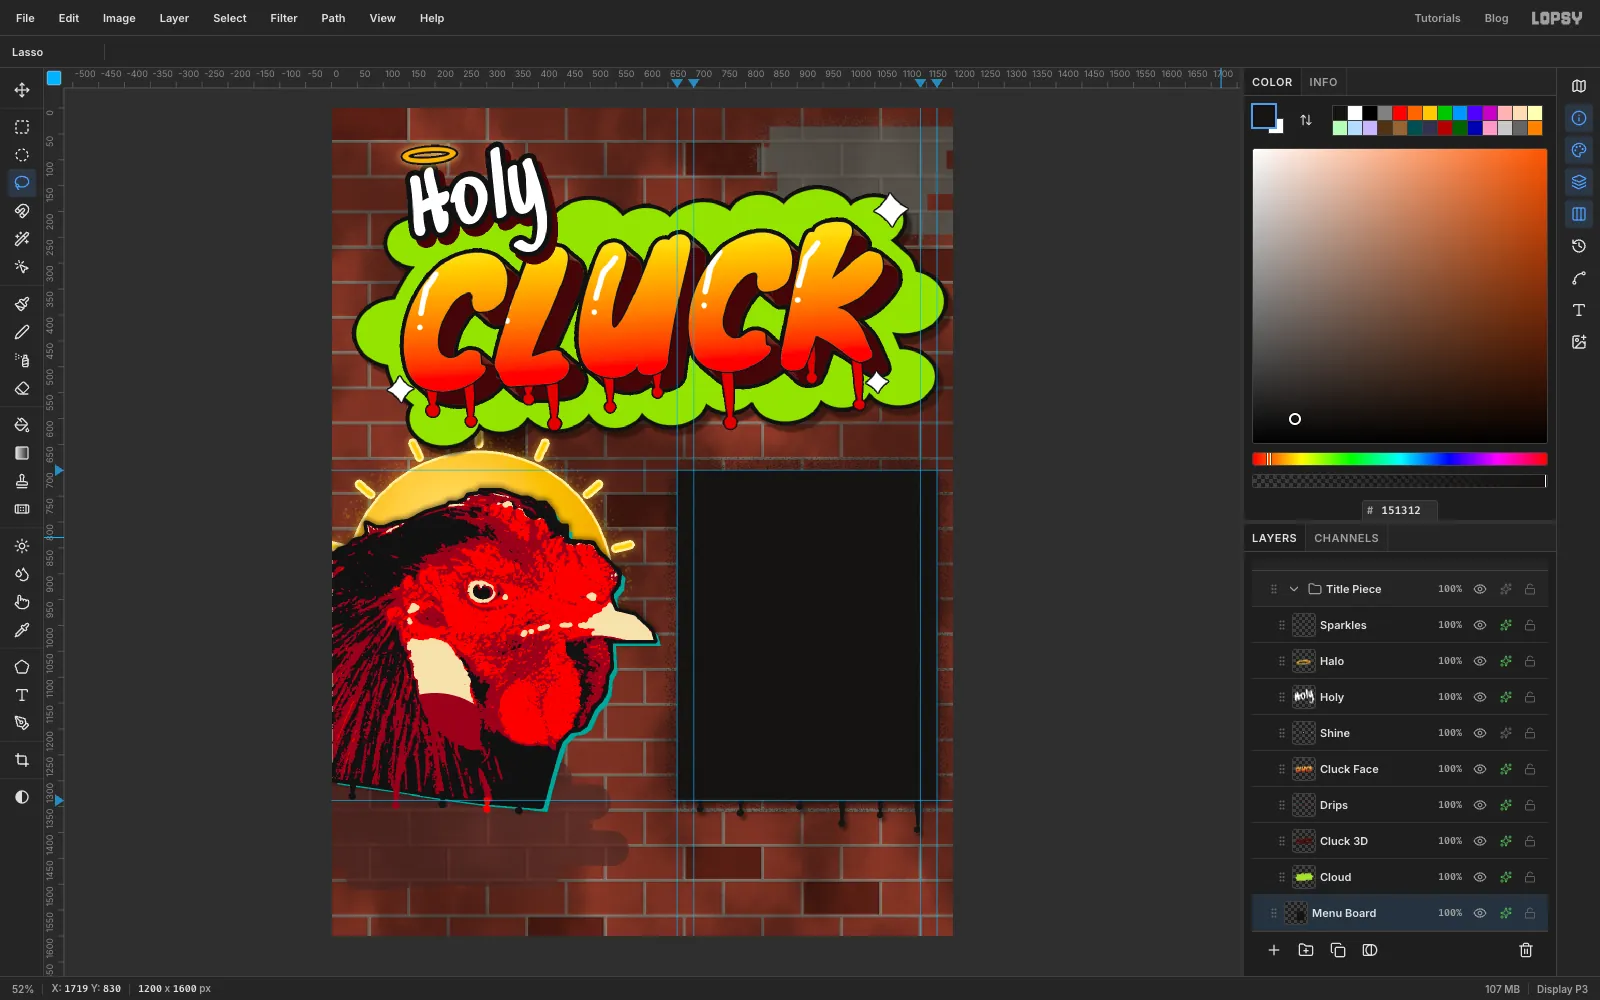
-
Letter the board's header
With Menu Board selected, set up the Text tool: Sedgwick Ave Display, Size
74, . Click on empty wall, typeThe Good Bookand press Tab. Rename the layer Good Book and move it so it's centred on the board with its top at abouty 738.Click Menu Board again and add the subtitle the same way: Gochi Hand at
22in , readingchapter & verse of Nashville hot chicken. Name it Good Book Sub and centre it about 14 px under the heading.Add a layer called Board Rules. Pick the Brush at Size
4with . Click on the700guide about 22 px below the subtitle and Shift-click on the1138guide at the same height.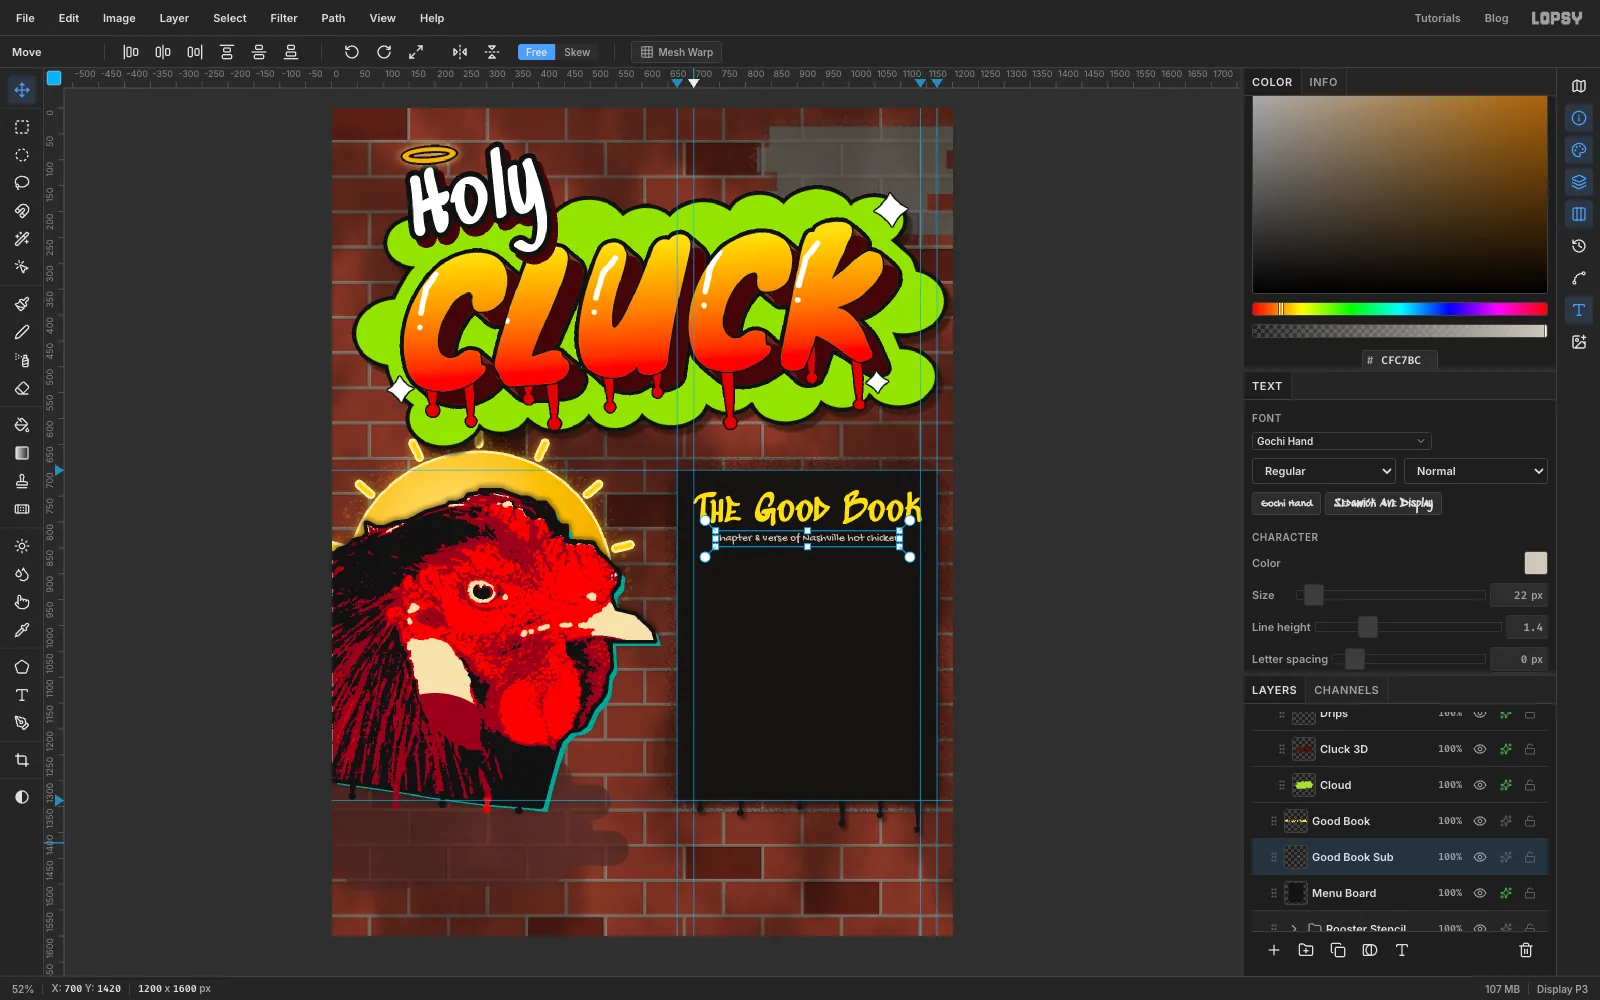
-
Set the menu in three columns
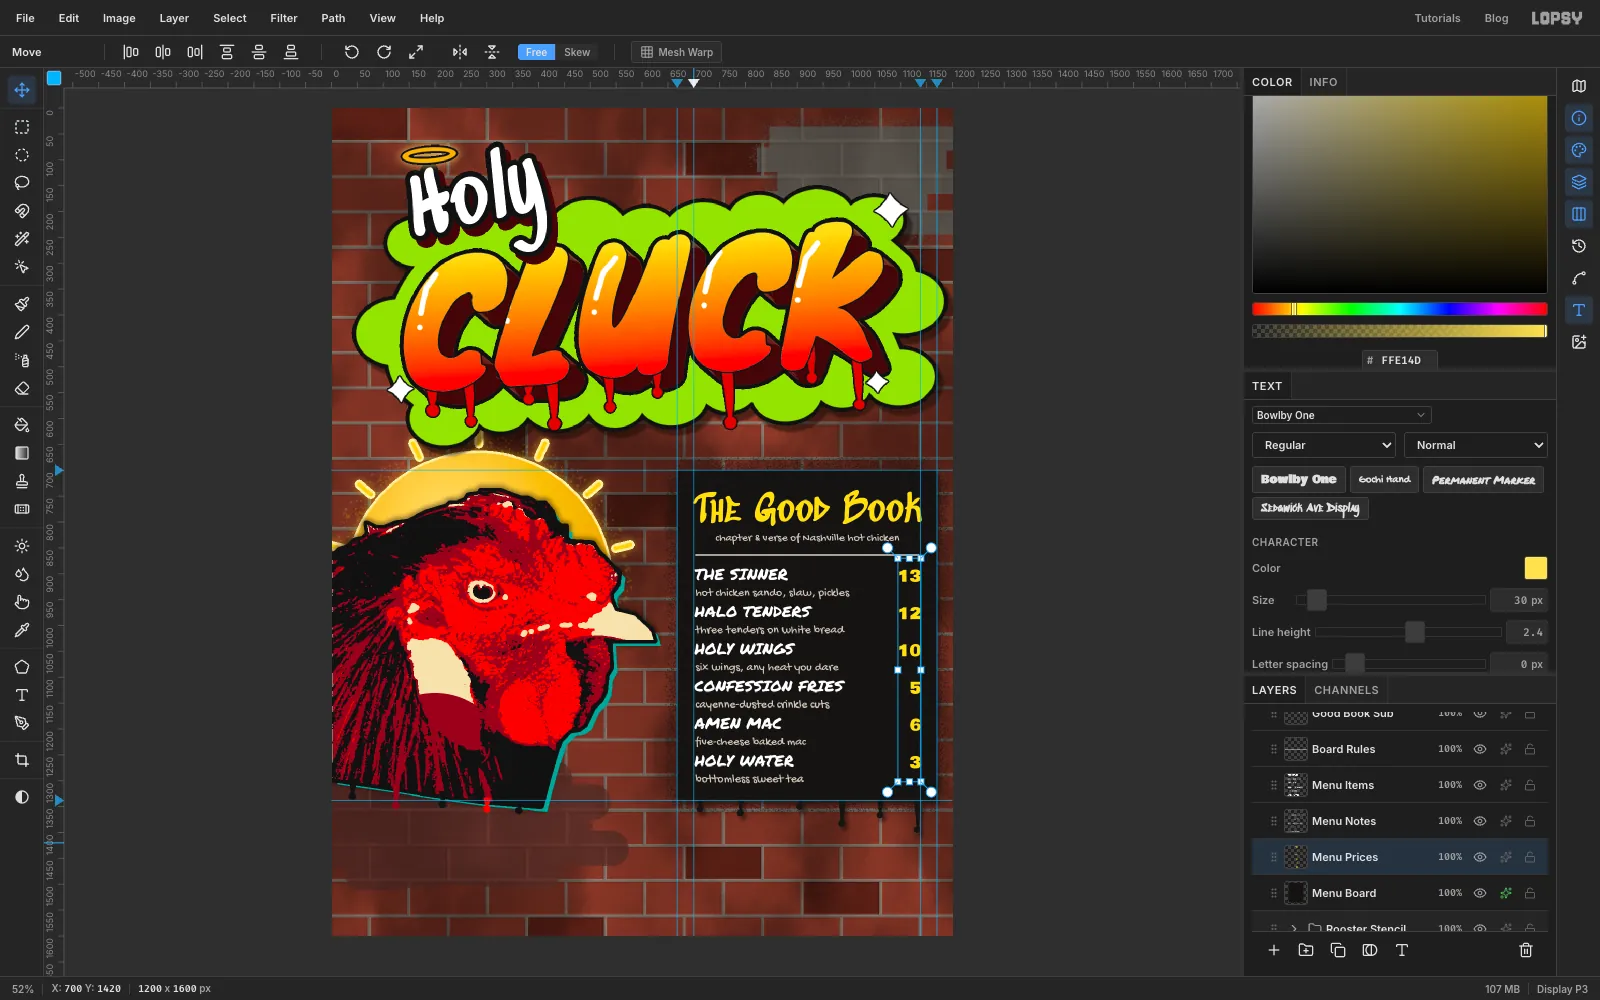
All three columns use the same 72 px line pitch, so the rows line up. In the Text panel, Line height is a multiple of the font size, so each column gets its own value. Click Menu Board again before each block.
- Names: Permanent Marker at
30, white, Line height2.4. TypeTHE SINNER,HALO TENDERS,HOLY WINGS,CONFESSION FRIES,AMEN MACandHOLY WATER, pressing Return between them. Name the layer Menu Items and move it so its left edge sits on the700guide, about 48 px under the rule. - Notes: Gochi Hand at
23, , Line height3.13, one note per line: hot chicken sando, slaw, picklesthree tenders on white breadsix wings, any heat you darecayenne-dusted crinkle cutsfive-cheese baked macbottomless sweet tea
Name it Menu Notes and place it 2 px right of the names and 38 px lower, so each note sits under its dish.
- Prices: Bowlby One at
30, , Line height2.4, and Align set to Right. Type13,12,10,5,6and3. Name it Menu Prices and move it so its right edge sits on the1138guide and its first line lines up with THE SINNER.
- Names: Permanent Marker at
-
Snap the sticker discs to the grid
Click Menu Prices and add a layer called Heat Stickers. Choose Edit → Clear Guides so the guides don't pull your marquees, then View → Show Grid. The grid is 16 px and centred on the page, and showing it also turns on snapping.
The discs are 128 px circles in a row, 160 px apart. For each one:
- With the Elliptical Marquee, drag from the grid intersection at the top-left corner of the disc to the one at its bottom-right. The first runs from
328, 1376to456, 1504, and each next one starts 160 px further right. - Set the foreground and fill: cream , then yellow , orange and red .
- Deselect before the next disc.
Turn Show Grid off. Give the layer a white Stroke of Width
7for a die-cut edge, and a Drop Shadow with Offset X4, Offset Y6, Blur6, Opacity55and colour .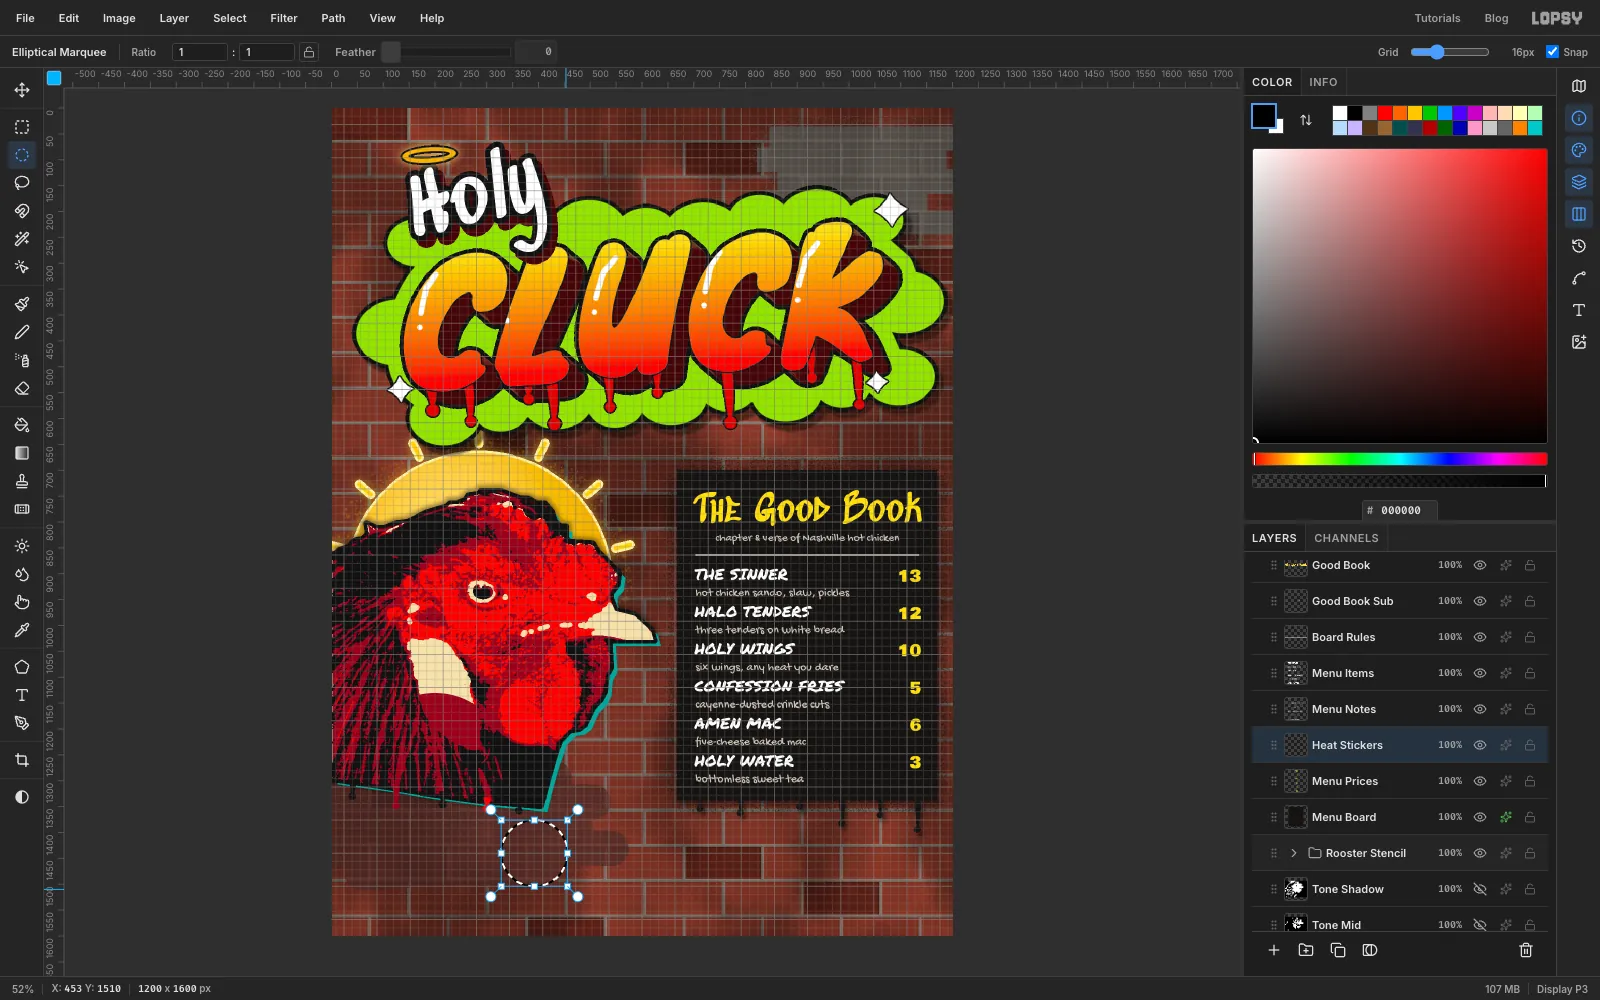
- With the Elliptical Marquee, drag from the grid intersection at the top-left corner of the disc to the one at its bottom-right. The first runs from
-
Light some flames
Click Menu Prices again and add a layer called Flames, so it sits just under the stickers. Zoom in on the HOT and HOLY HELL discs. With the Lasso, trace a crown of seven flame tongues round the top half of each disc, starting and ending inside the disc so the sticker hides the base. Make the middle tongue the tallest, about 30 px above the rim, and the outer ones 10–15 px. No tip may go higher than
y 1345, just under the board's bottom edge.Fill with . Cmd-click the Flames thumbnail, Shrink the selection by
6and fill with yellow for the hot core. Deselect and add a Stroke of Width4in .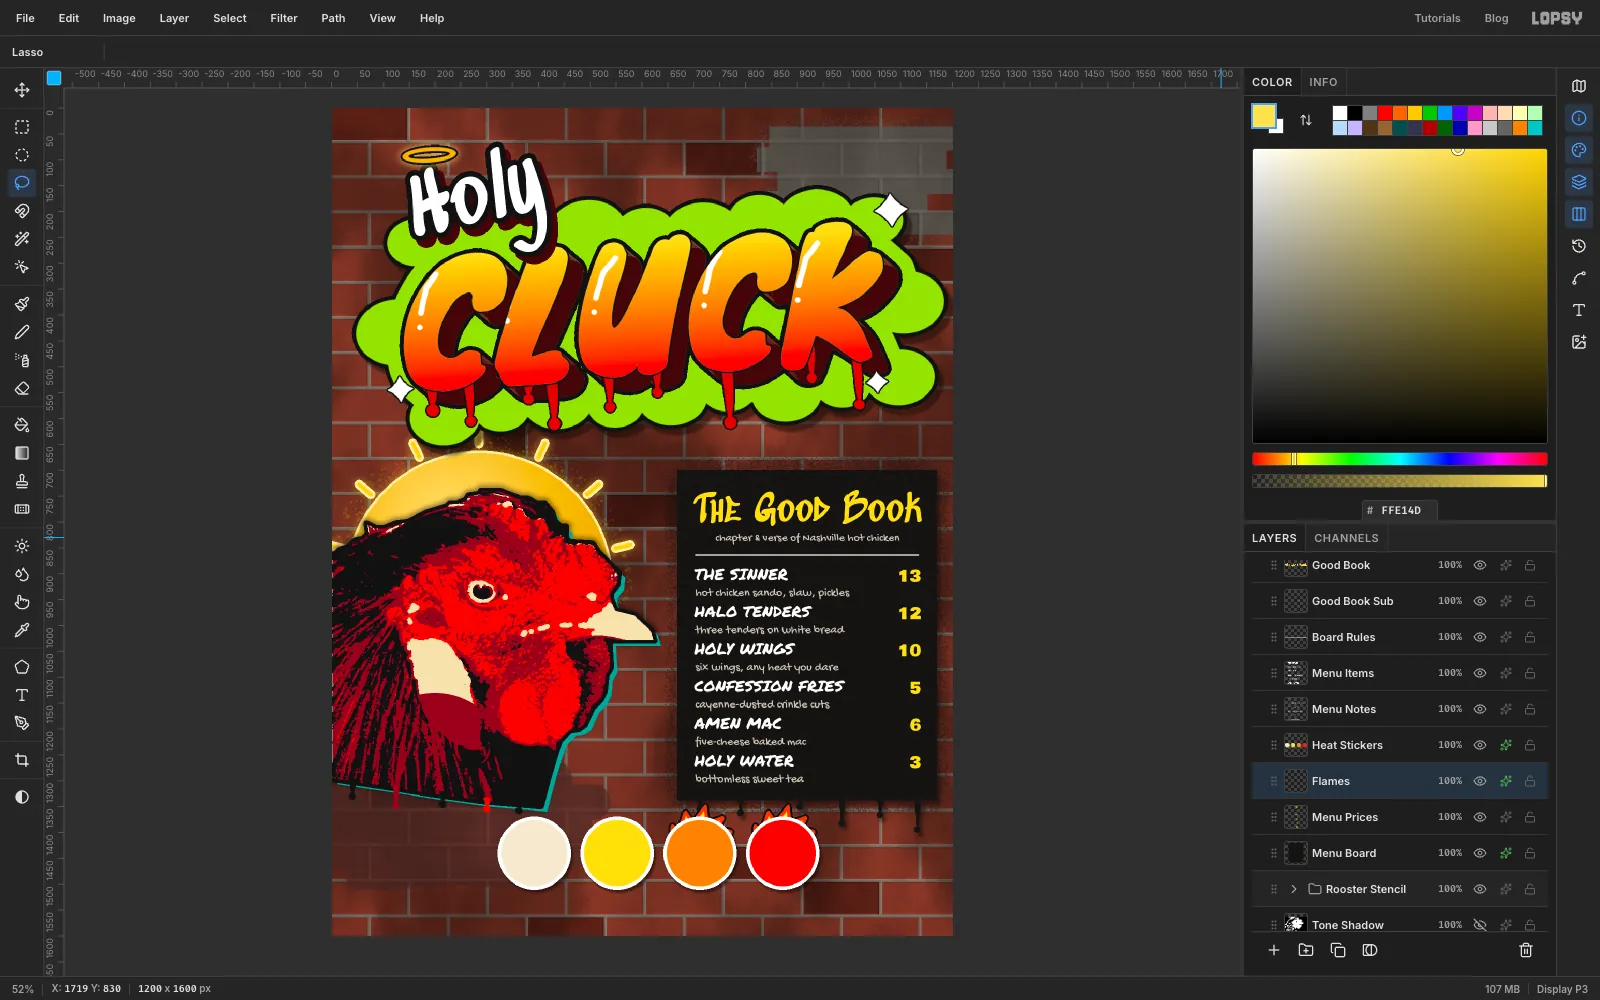
-
Label the stickers
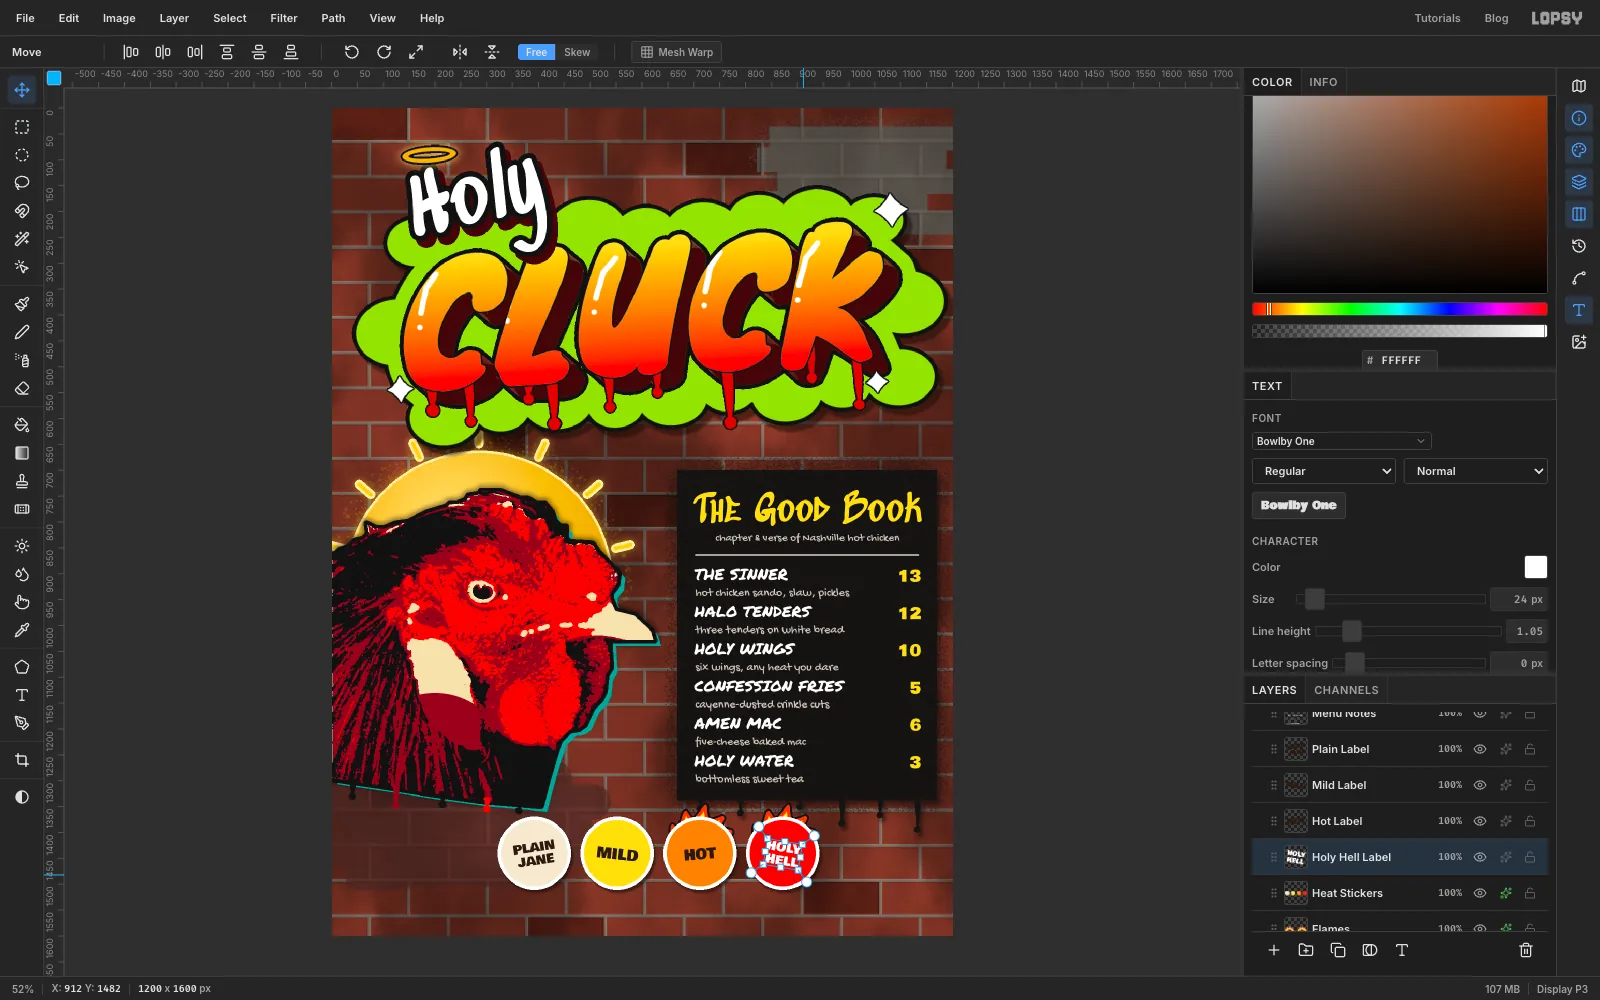
Make one label per sticker. Before each one, click Heat Stickers, then set the Text tool to Bowlby One with Align Center and Line height
1.05. Use dark text, but white for HOLY HELL:- one-line labels at size
28:MILDandHOT - two-line labels at size
24:PLAIN/JANEandHOLY/HELL
Name them Plain Label, Mild Label, Hot Label and Holy Hell Label. Centre each one on its disc, then tilt it with its rotation handle, by about −8°, 6°, −5° and 9°, and press Cmd+D after each.
- one-line labels at size
-
Cut out the drumstick
Click Holy Hell Label and drag the drumstick photo onto the canvas. Rename it Drumstick and deselect.
Pick the Magic Wand with Tolerance
24and Contiguous on, and click the white backdrop near a corner. Grow the selection by1to catch the soft edge, press Delete and deselect.Nashville hot chicken is cayenne red, not golden brown. Choose Filter → Hue/Saturation… and set Hue
-16, Saturation30and Lightness-6.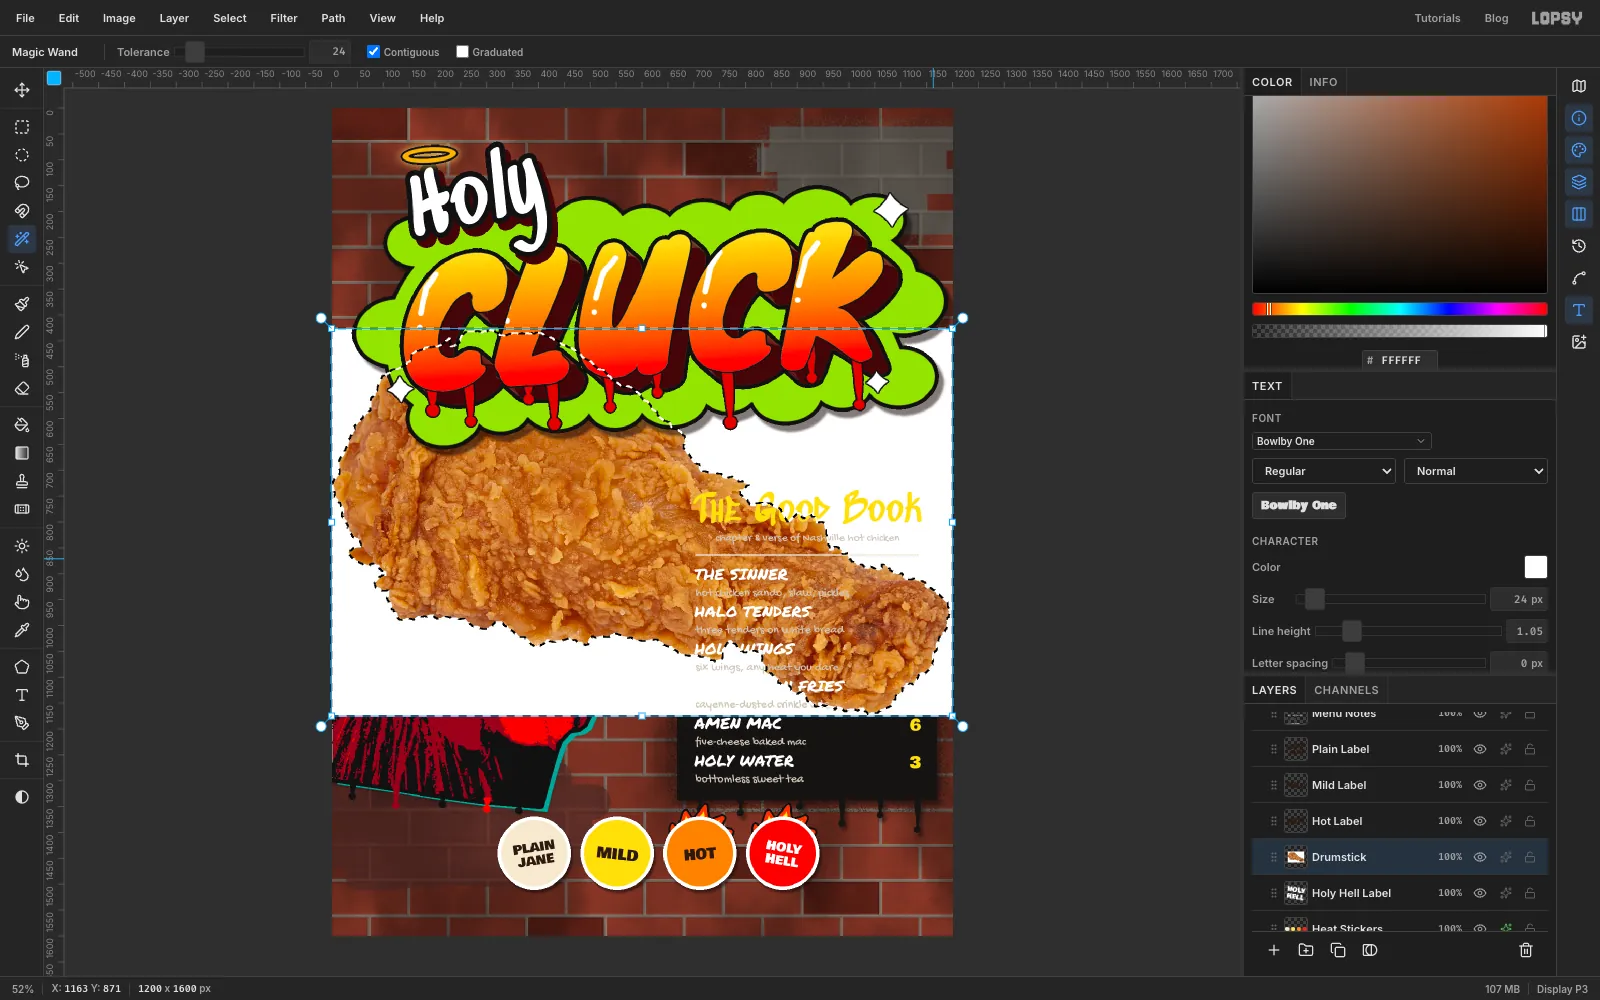
-
Shrink and tilt the drumstick
Cmd-click the Drumstick thumbnail so the transform box hugs the drumstick. With the Move tool, hold Cmd and drag a corner handle in until the drumstick is about 190 px wide, then press Cmd+D.
Drag it to the right of the HOLY HELL sticker, centred around
1068, 1470. Cmd-click the thumbnail again. Drag the rotation handle about 24° clockwise so the bone points down to the right, then press Cmd+D.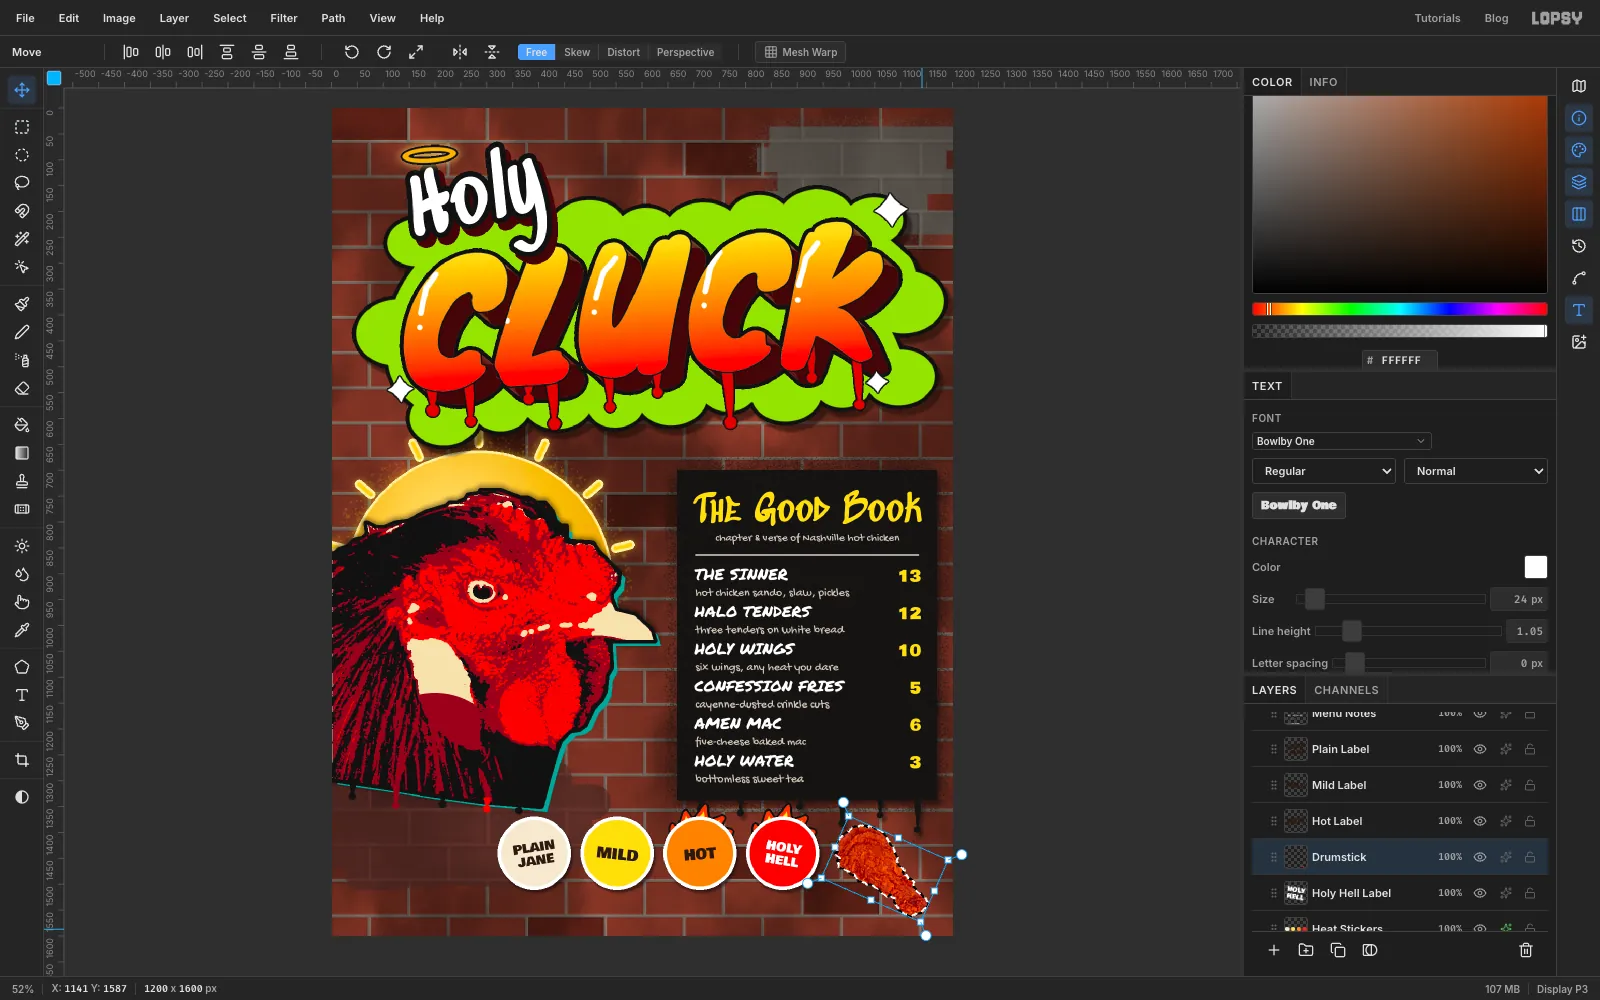
-
Make it a sticker and give it a halo
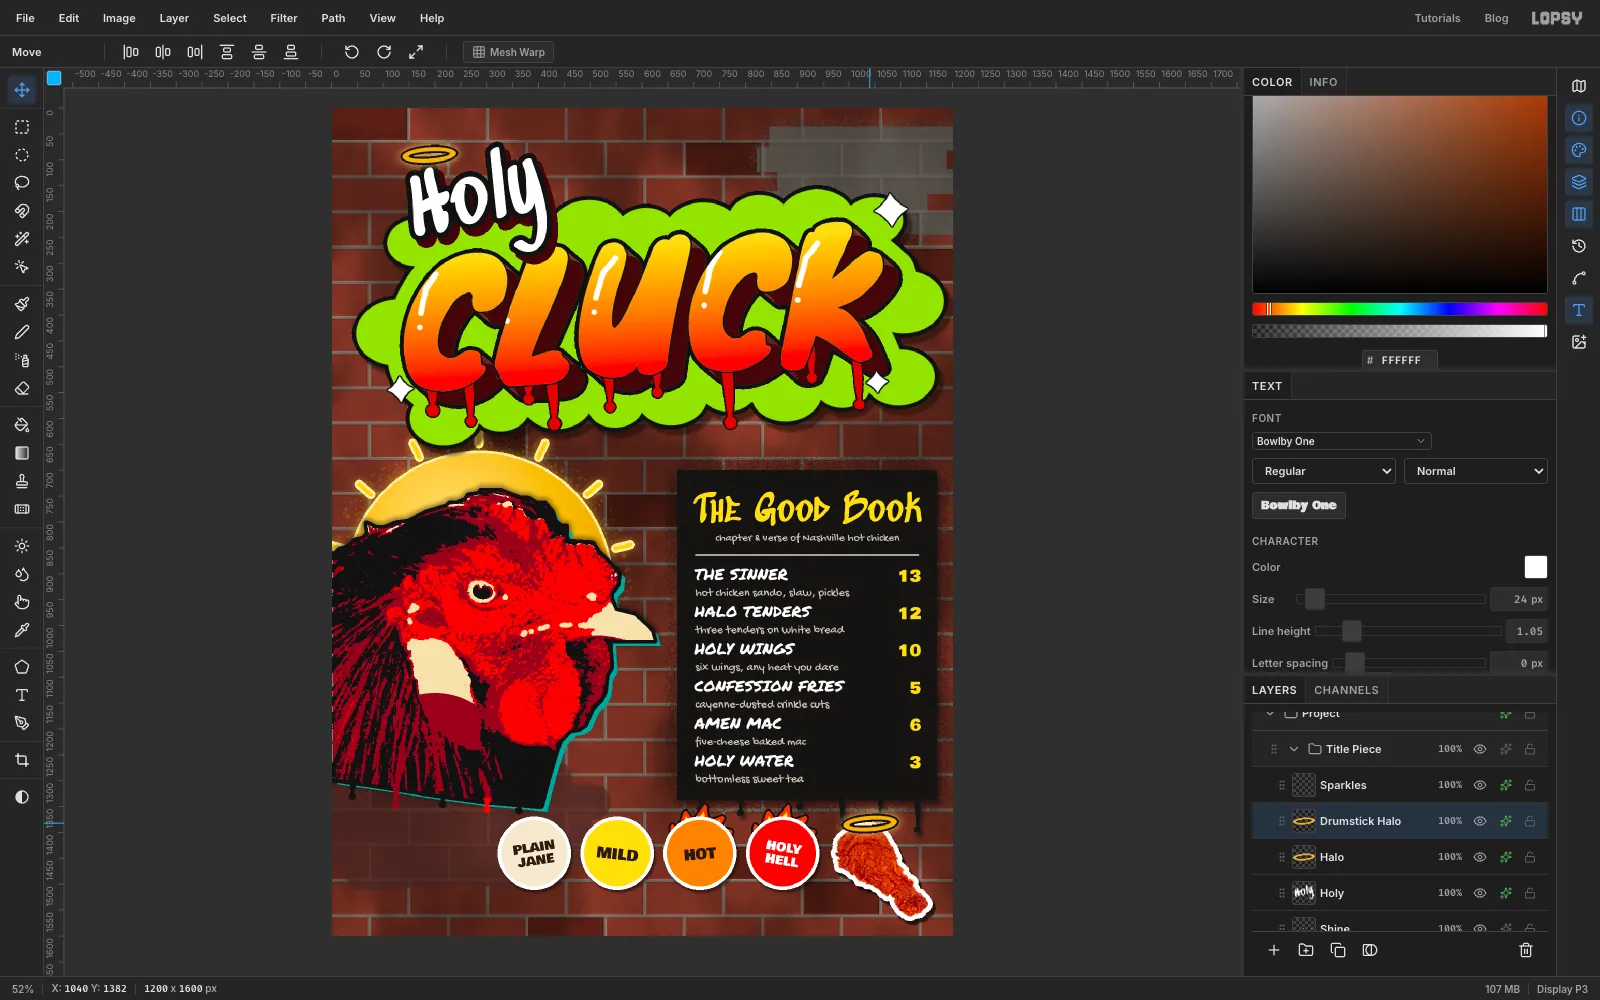
Give Drumstick a white Stroke of Width
9. Add a Drop Shadow with Offset X6, Offset Y8, Blur4, Opacity70, black.Saints need halos. Expand the Title Piece group, click its Halo layer and choose Layer → Duplicate Layer. Rename the copy Drumstick Halo and drag it just above the top of the drumstick.
-
Add the label and the footer
Click Heat Stickers. With Sedgwick Ave Display at
52, Line height1.1and , typepick your, press Return and typeheat →. On a Mac, the arrow is in the Character Viewer (Ctrl+Cmd+Space); you can also paste it. Name the layer Pick Your Heat and place it with its left edge atx 66, level with the stickers. Give it a hard Drop Shadow: Offset X4, Offset Y5, Blur0, Opacity100, .Click Heat Stickers again. For the footer, use Permanent Marker at
25, white, Letter spacing1. Type414 ALLEY ST • NASHVILLE • OPEN TIL 3AM, with two spaces either side of each bullet (Alt+8 types • on a Mac). Name it Footer, centre it onx 600with its top at abouty 1552, and add a Drop Shadow with Offset X3, Offset Y3, Blur0, Opacity100.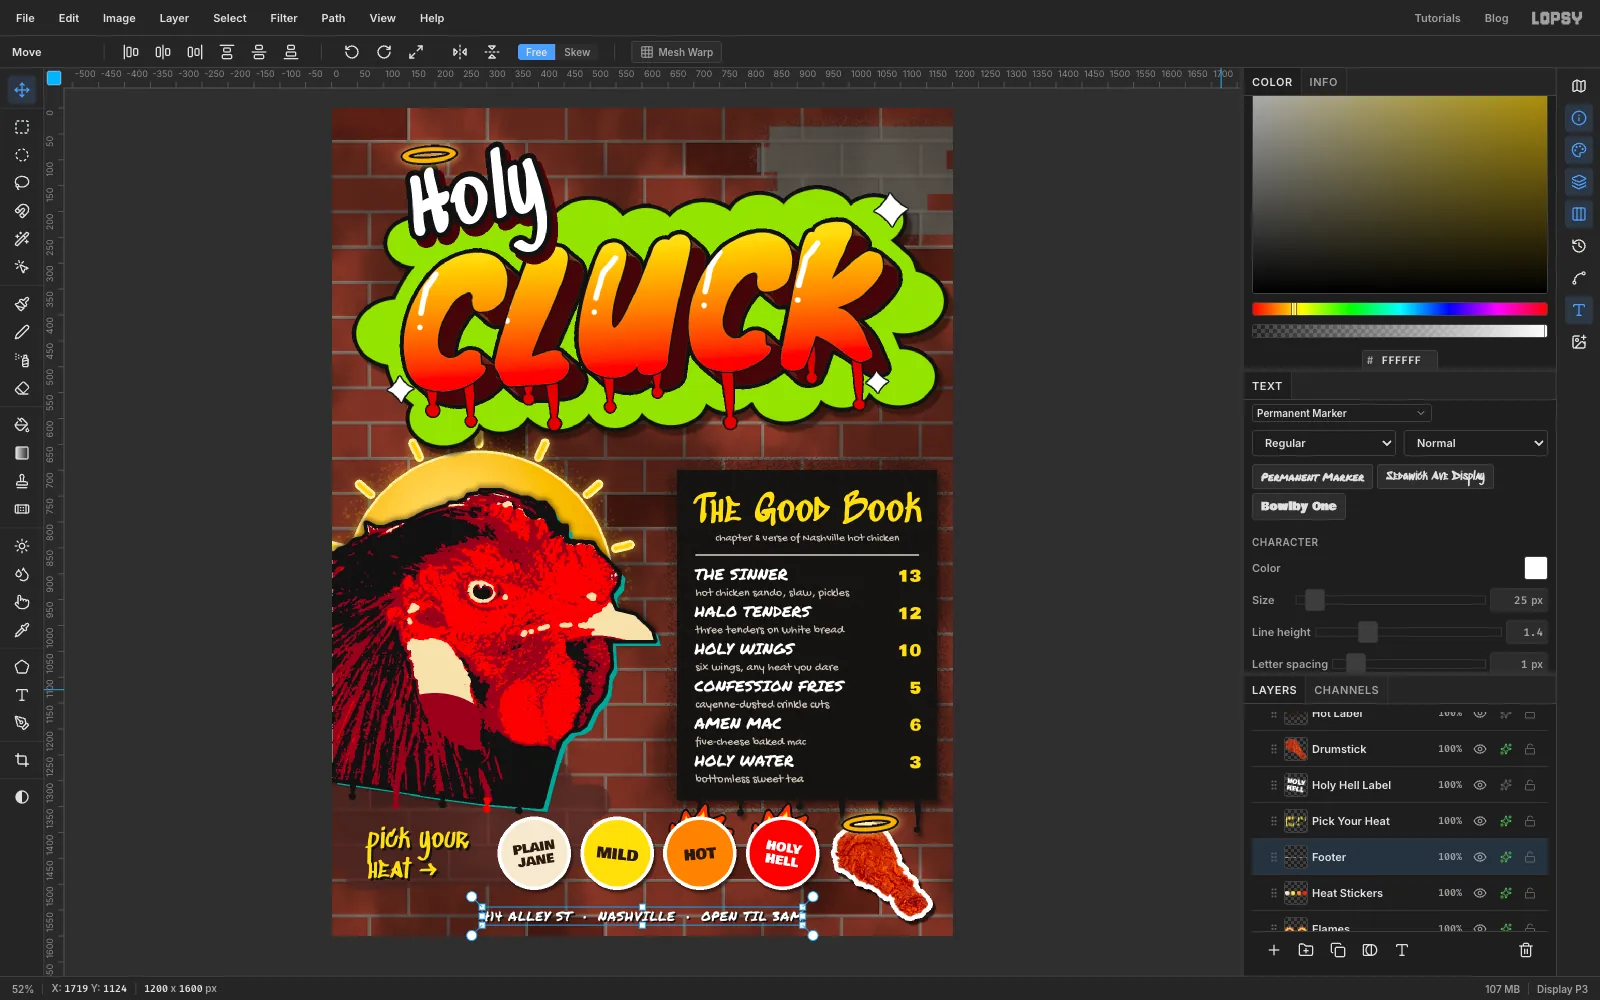
-
Knock the wall back with group adjustments
Click the Background row and Shift-click Grime, choose Layer → Group Layers and name the group Wall. Open the group's effects drawer and click Add Adjustment.
Choose Vignette and set its Vignette slider to
38. Then add Hue / Saturation with Saturation-18and Lightness-5. The darker, duller wall pushes the bright title, rooster and stickers forward.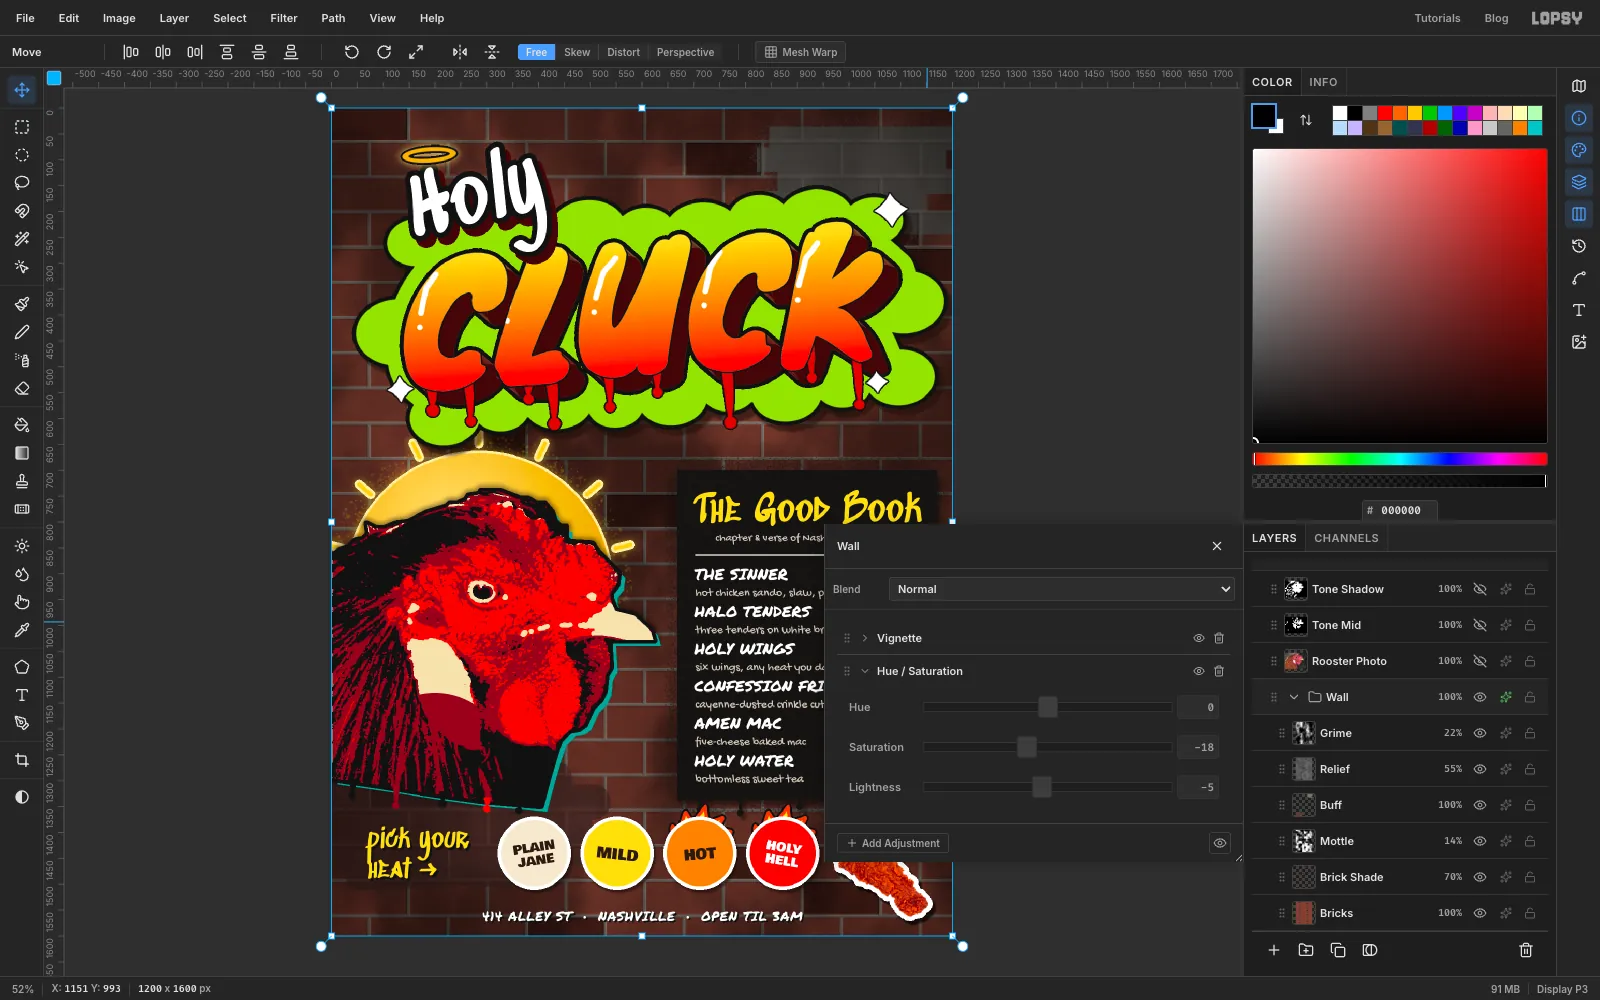
-
Leave some older tags on the wall
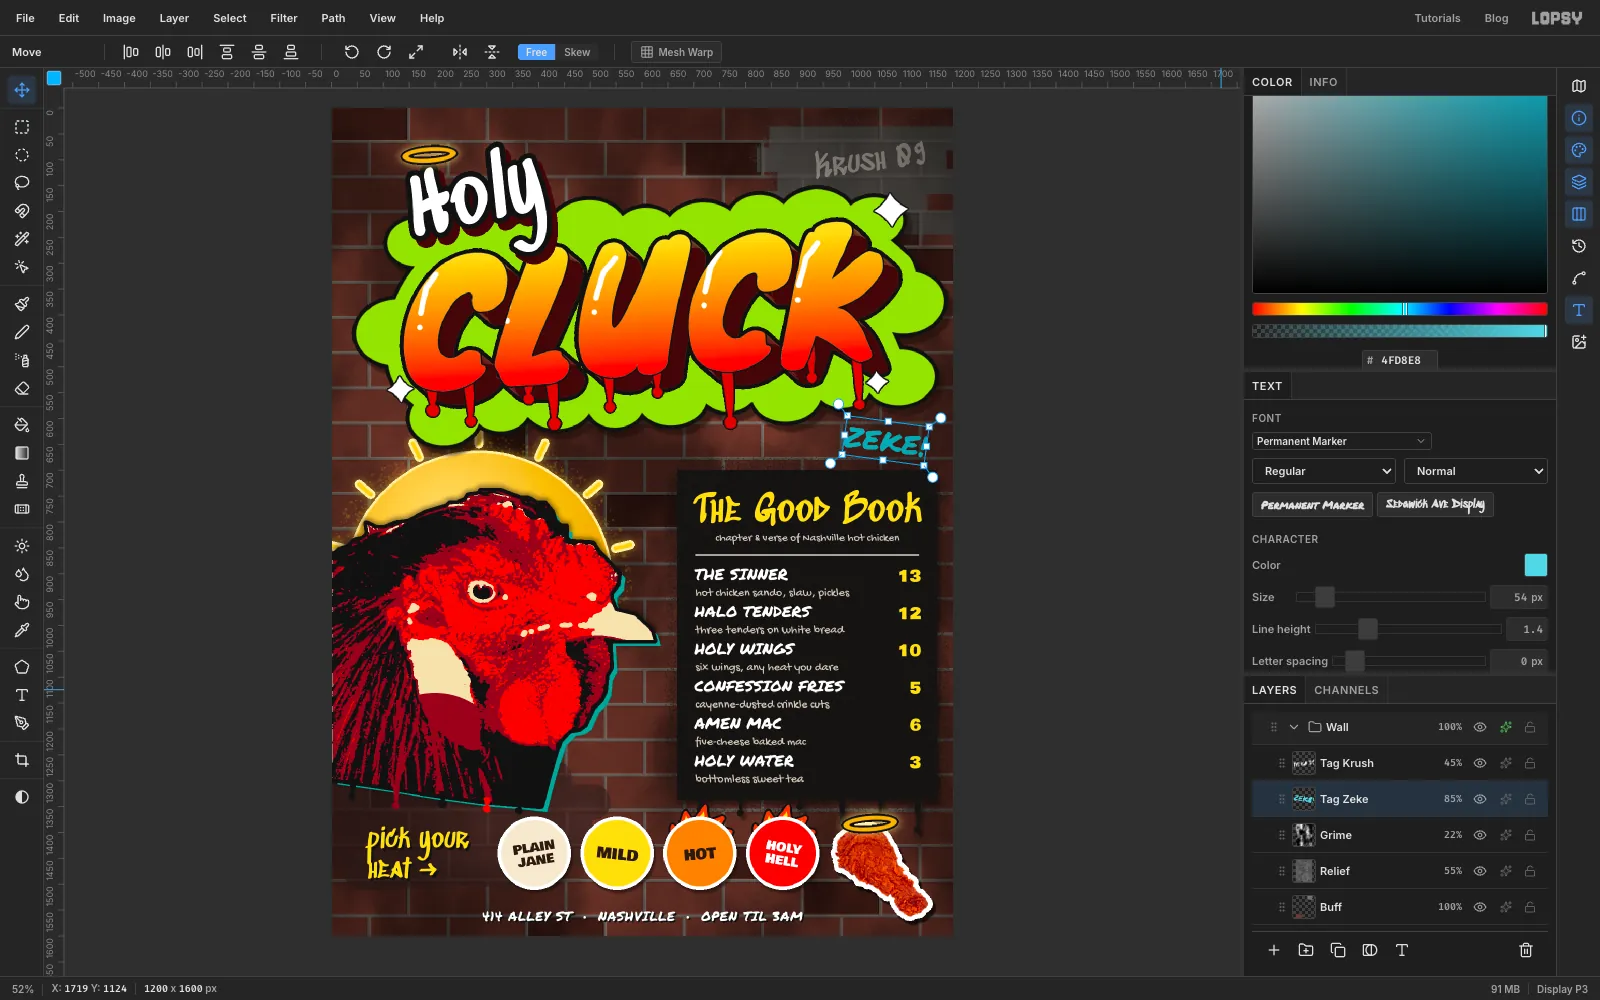
Make two tags inside the Wall group, so they're toned down along with the wall. Click Grime before each one:
- Sedgwick Ave Display
58in : typeKrush 09and name it Tag Krush. Centre it on the grey buff patch at about1040, 92, rotate it about −7° and set its opacity to45%. - Permanent Marker
54in cyan : typeZEKE!and name it Tag Zeke. Place it right of the cloud at about1070, 646, rotate it about 8° and set its opacity to85%.
- Sedgwick Ave Display
-
Clone a dark brick
The bottom-left corner has no dark bricks. Click Brick Shade and pick the Clone Stamp at Size
60. Alt-click the middle of the dark brick at about301, 643. Then paint one short stroke across the plain brick at73, 1527, under the label, to stamp a copy there.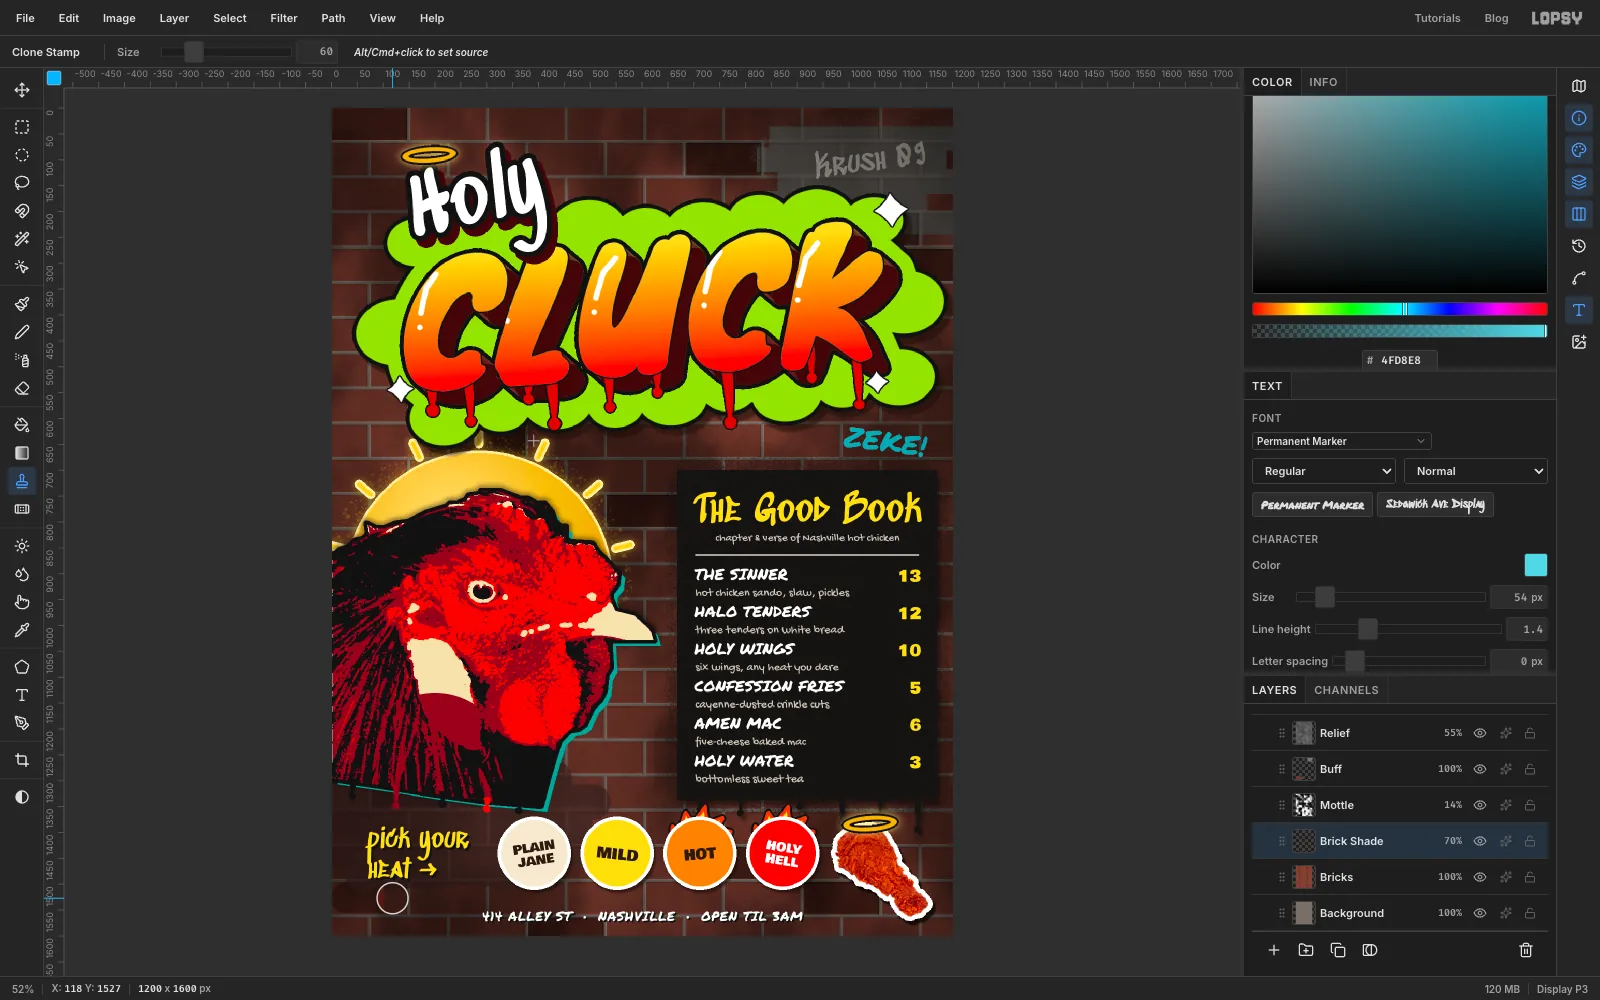
-
Saturate the crust and dodge the halo
Click Drumstick, pick the Sponge, set Mode to Saturate, Size
120and Strength35, and drag once along the drumstick.Expand Rooster Stencil and click Halo Disc. Pick Dodge with Size
140and Exposure35, and drag across the upper left of the disc to brighten it where the light hits.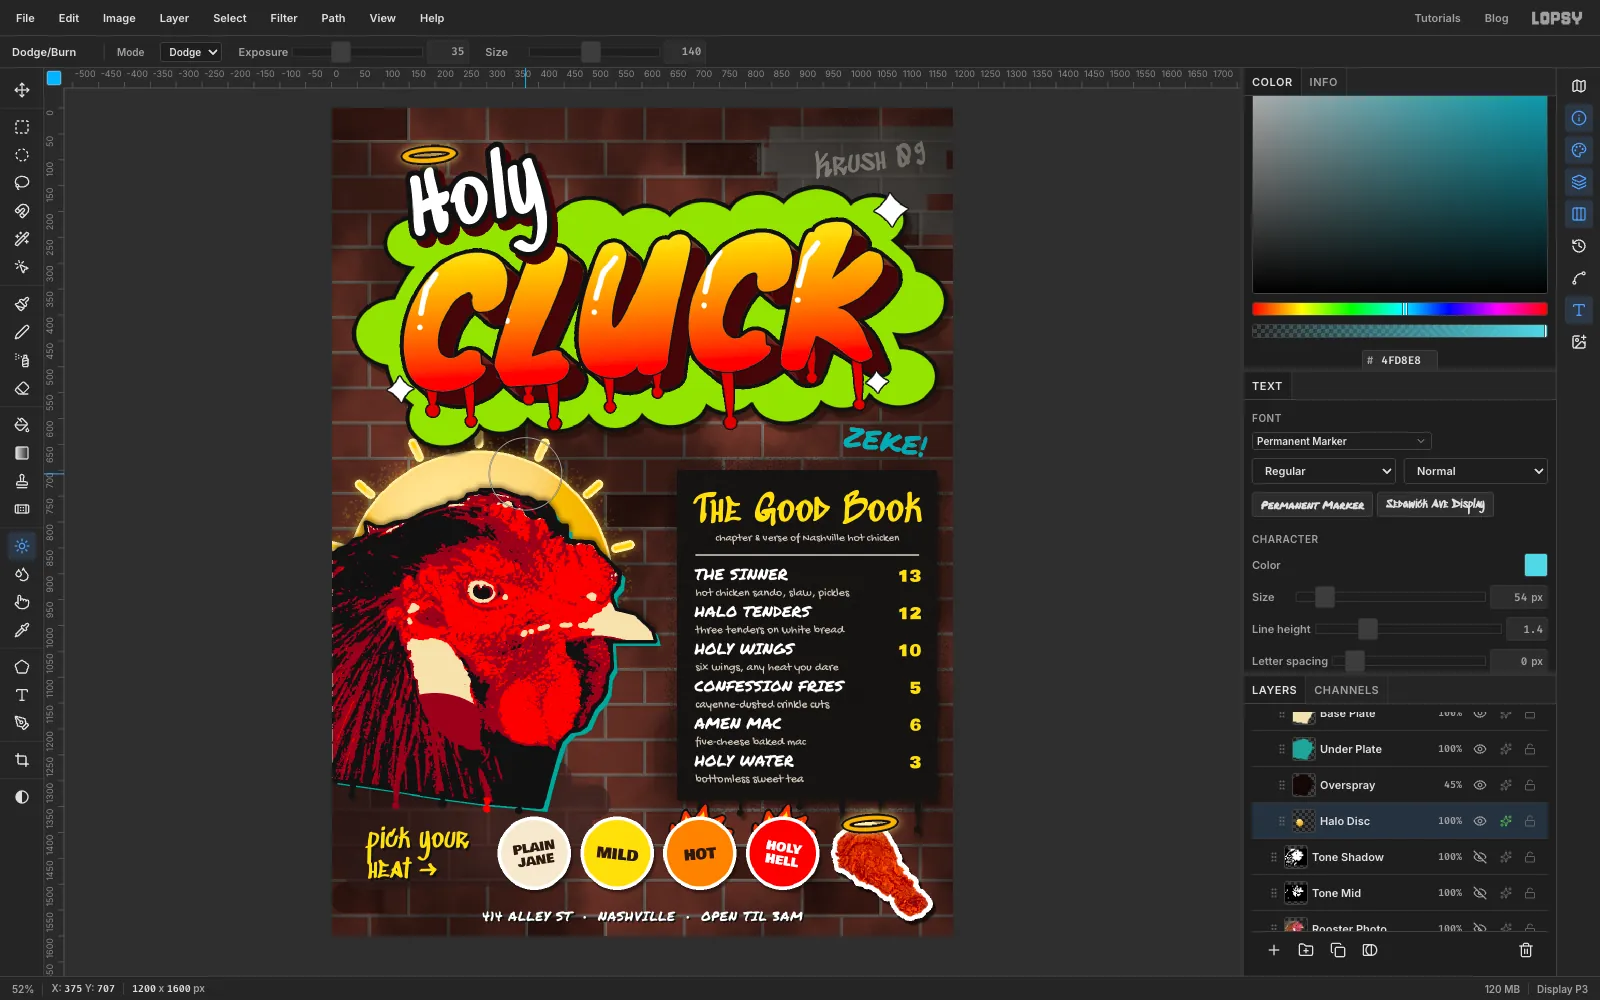
-
Curl the flame tips
Click Flames and zoom in. Pick the Smudge tool: Size
18, Strength60. On each sticker, start just inside the tallest flame tongue and drag a short way up and to the right. The tip bends over like a real flame.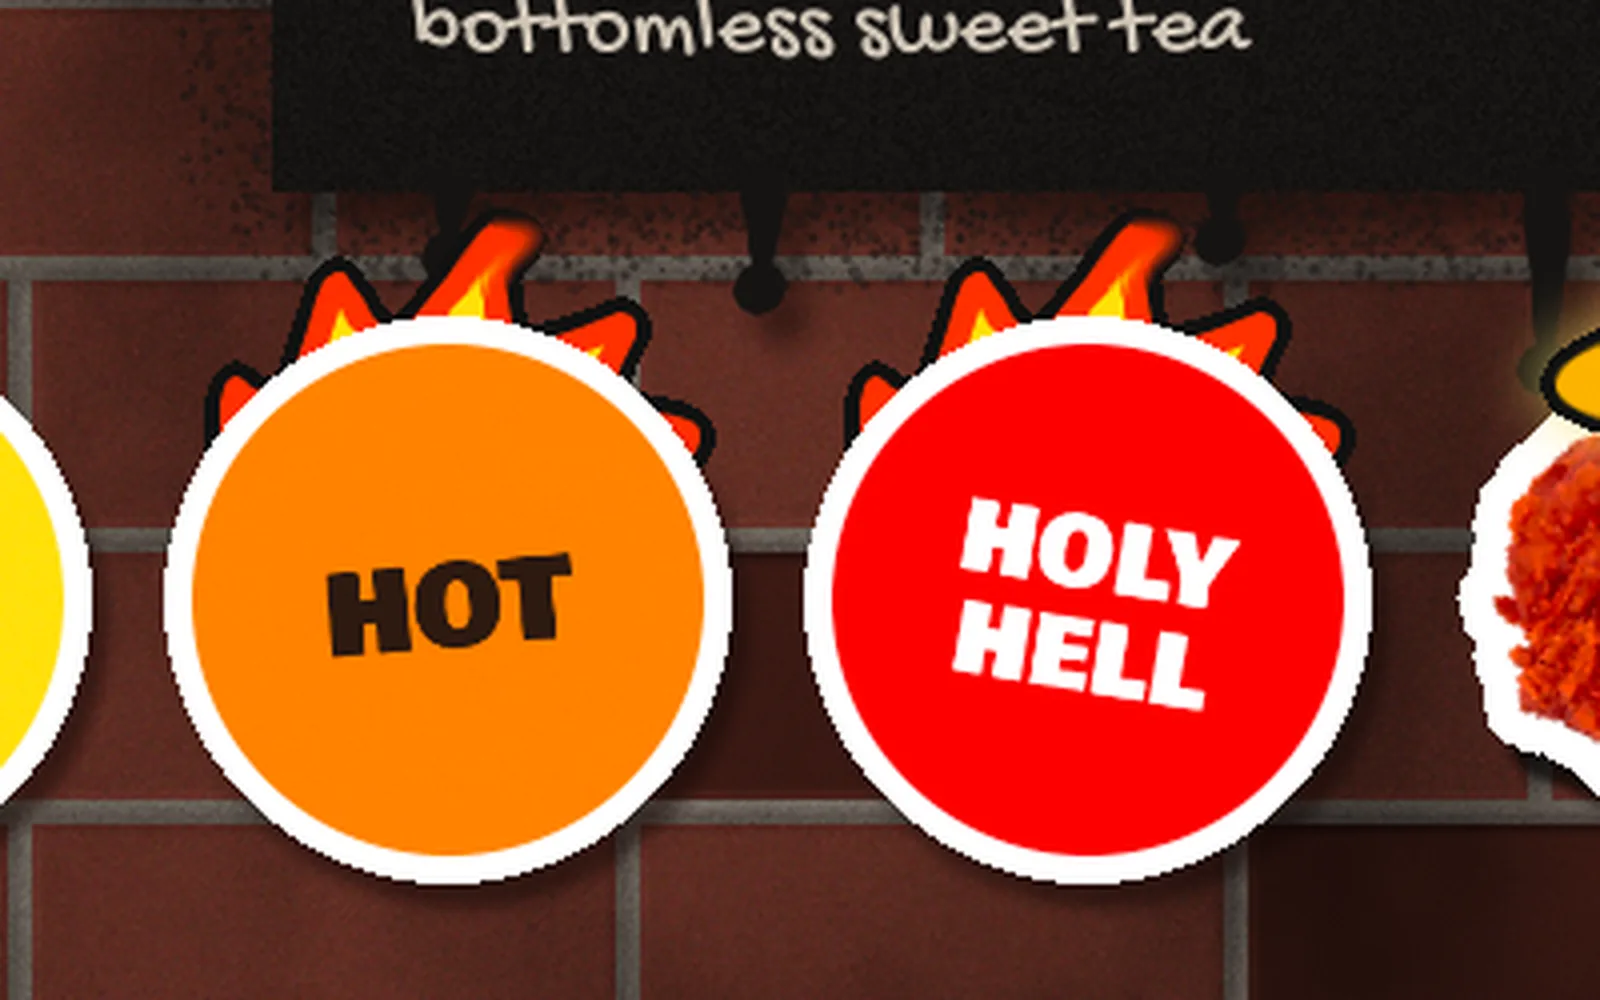
-
Finish with grain
Collapse the Title Piece group and click it, so the new layer goes above it rather than inside. Add a layer called Grain, fill it with and apply Add Noise with Amount
35, Mono and Gaussian. Set the blend to Overlay and the opacity to22%. Grey is neutral in Overlay, so only the noise shows, as a fine speckle over the flat paint.Export with File → Quick Export PNG, and save the project with File → Save Project.