Turn a Photo into a Three-Layer Stencil Poster
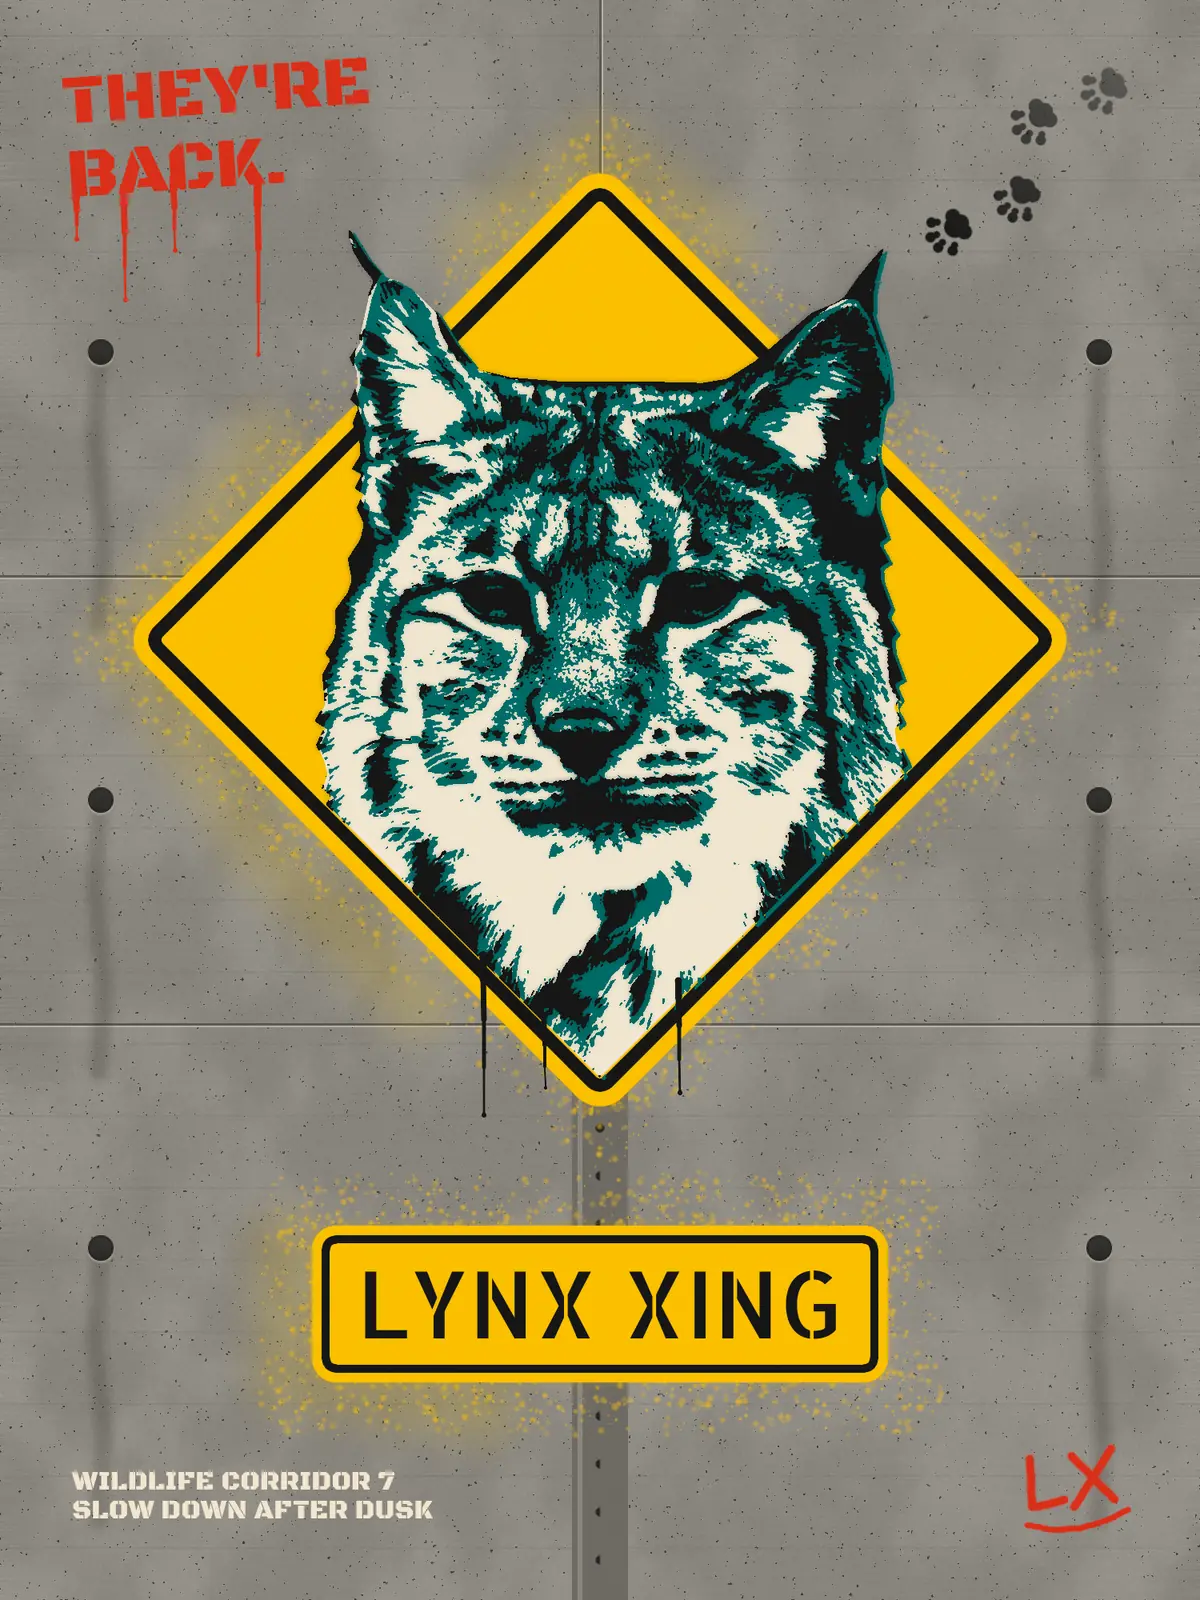
Cut a lynx photo into cream, teal and black spray-stencil plates in Lopsy, then spray it over a road sign on a concrete wall with drips and overspray.
Multi-layer stencils are how street artists like Shepard Fairey turn a photograph into a few flat colours they can spray fast. Each colour is its own cut-out sheet, called a plate. You spray the lightest plate first and the darkest last, and the slightly-off alignment between them is part of the charm.
This poster does the same in Lopsy. A photo of a lynx is split into three plates with Threshold and the Magic Wand, then sprayed over a yellow wildlife-crossing sign on a concrete wall. The lynx is Portrait of a Carpathian Lynx by Wilfredor on Wikimedia Commons, which is public domain (CC0). To follow along, open its Commons page and download the 1,920 px wide version. Or use any portrait of an animal facing the camera against a darker background.
Along the way you'll use:
- Add Noise, Motion Blur, Clouds, Gaussian Blur and Threshold to build a concrete texture
- the grid with snapping, ruler guides, and the Pencil for straight lines
- Define Pattern and Fill with Pattern for board joints and the holes in a sign post
- the Shape tool's click-to-size dialog, rotating with Cmd for 15° steps, and Select → Shrink to cut borders
- pasting a photo, scaling it with the Move tool, Desaturate and Surface Blur
- the Lasso, an intersecting selection, and the Magic Wand (with Contiguous off) to turn threshold layers into stencil plates
- Spray, soft Brush strokes and Outer Glow for overspray, plus hand-made paint drips
- live text in Allerta Stencil and Black Ops One, the Text panel's line height, and rotating text
- transforming two layers at once, copy and paste, Merge Down, and a layer mask with a gradient
The palette is concrete greys with safety yellow, a teal and black lynx, and one red accent:
-
Concrete
-
seams
-
joints
-
Tie holes
-
hole lip
-
stains
-
Safety yellow
-
yellow haze
-
sign black
-
Post
-
post highlight
-
post holes
-
Cream plate
-
teal plate
-
black plate
-
Tag red
-
footer cream
-
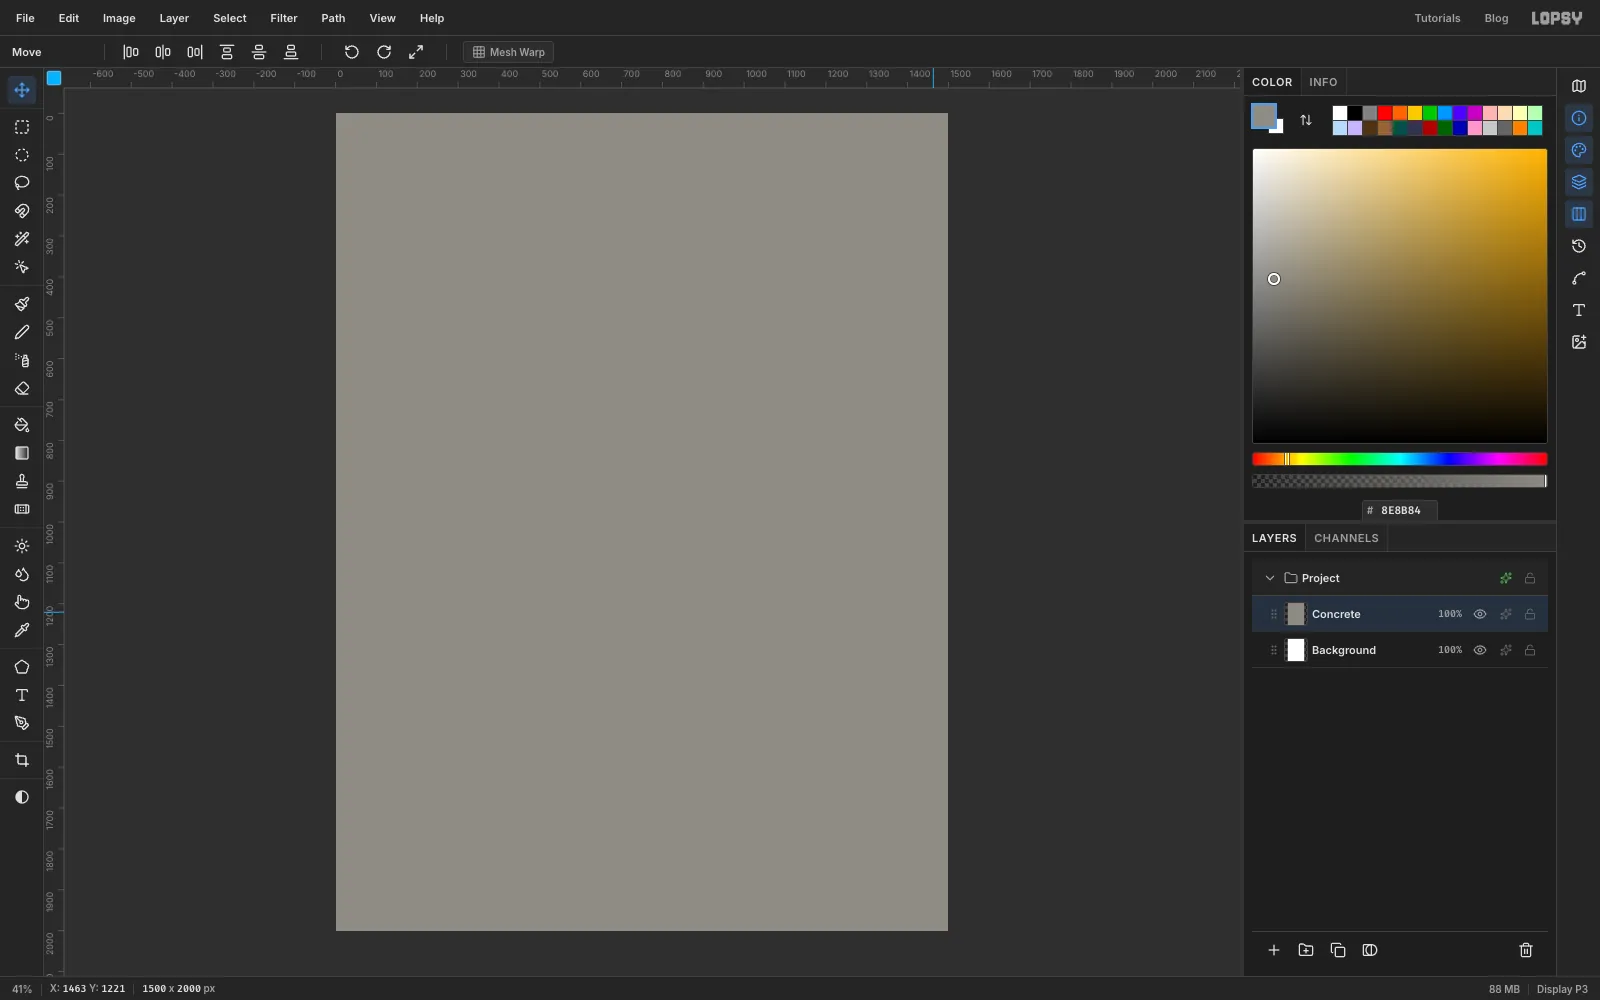
Start the concrete wall
- Open Lopsy. In the New Document dialog set Width to
1500and Height to2000, leave the background white and click Create. That's an 18 × 24 poster shape. - Double-click Layer 1 in the Layers panel and rename it
Concrete. - Set the foreground colour to and choose Edit → Fill.
- Choose Filter → Add Noise…, set Amount to
14, choose Mono and Gaussian, and click Apply.
- Open Lopsy. In the New Document dialog set Width to
-
Add board-formed grain
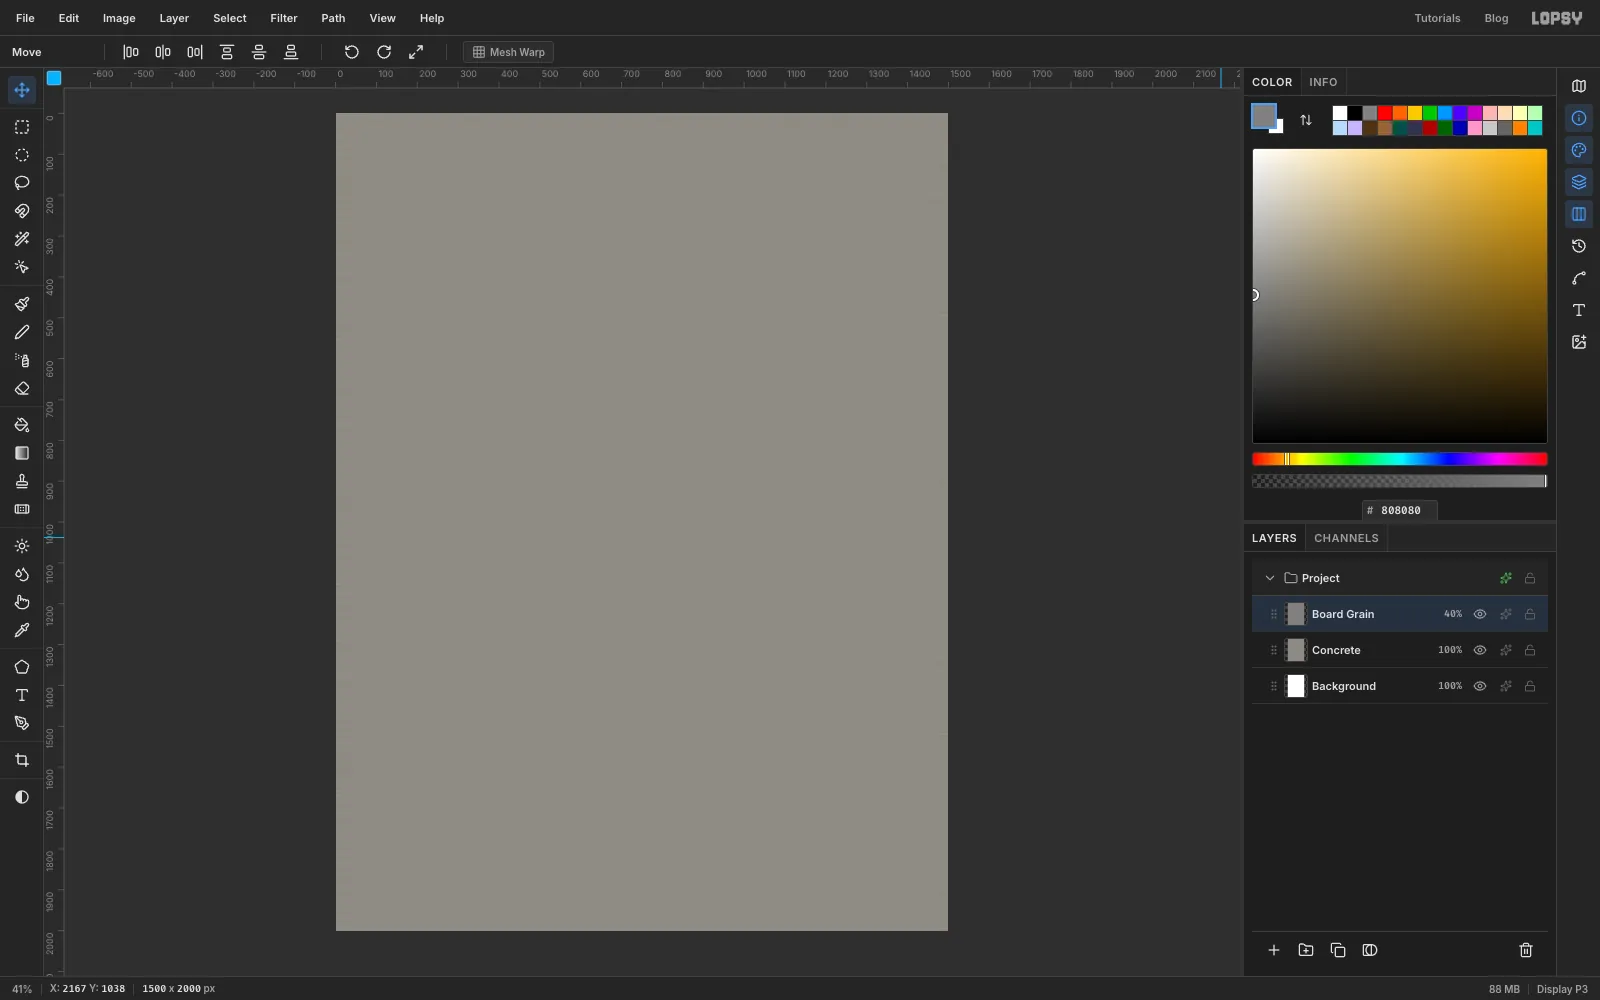
Concrete poured against wooden boards picks up the grain of the wood in long horizontal streaks.
- Click Add Layer and name the layer
Board Grain. - Fill it with mid grey .
- Run Filter → Add Noise… with Amount
60, Mono and Uniform. - Run Filter → Motion Blur… with Angle
0and Distance90. The speckles smear into horizontal streaks. - Set the layer's blend mode to Overlay and its opacity to
40%.
Overlay ignores mid grey, so only the light and dark streaks show.
- Click Add Layer and name the layer
-
Pit the surface with bugholes
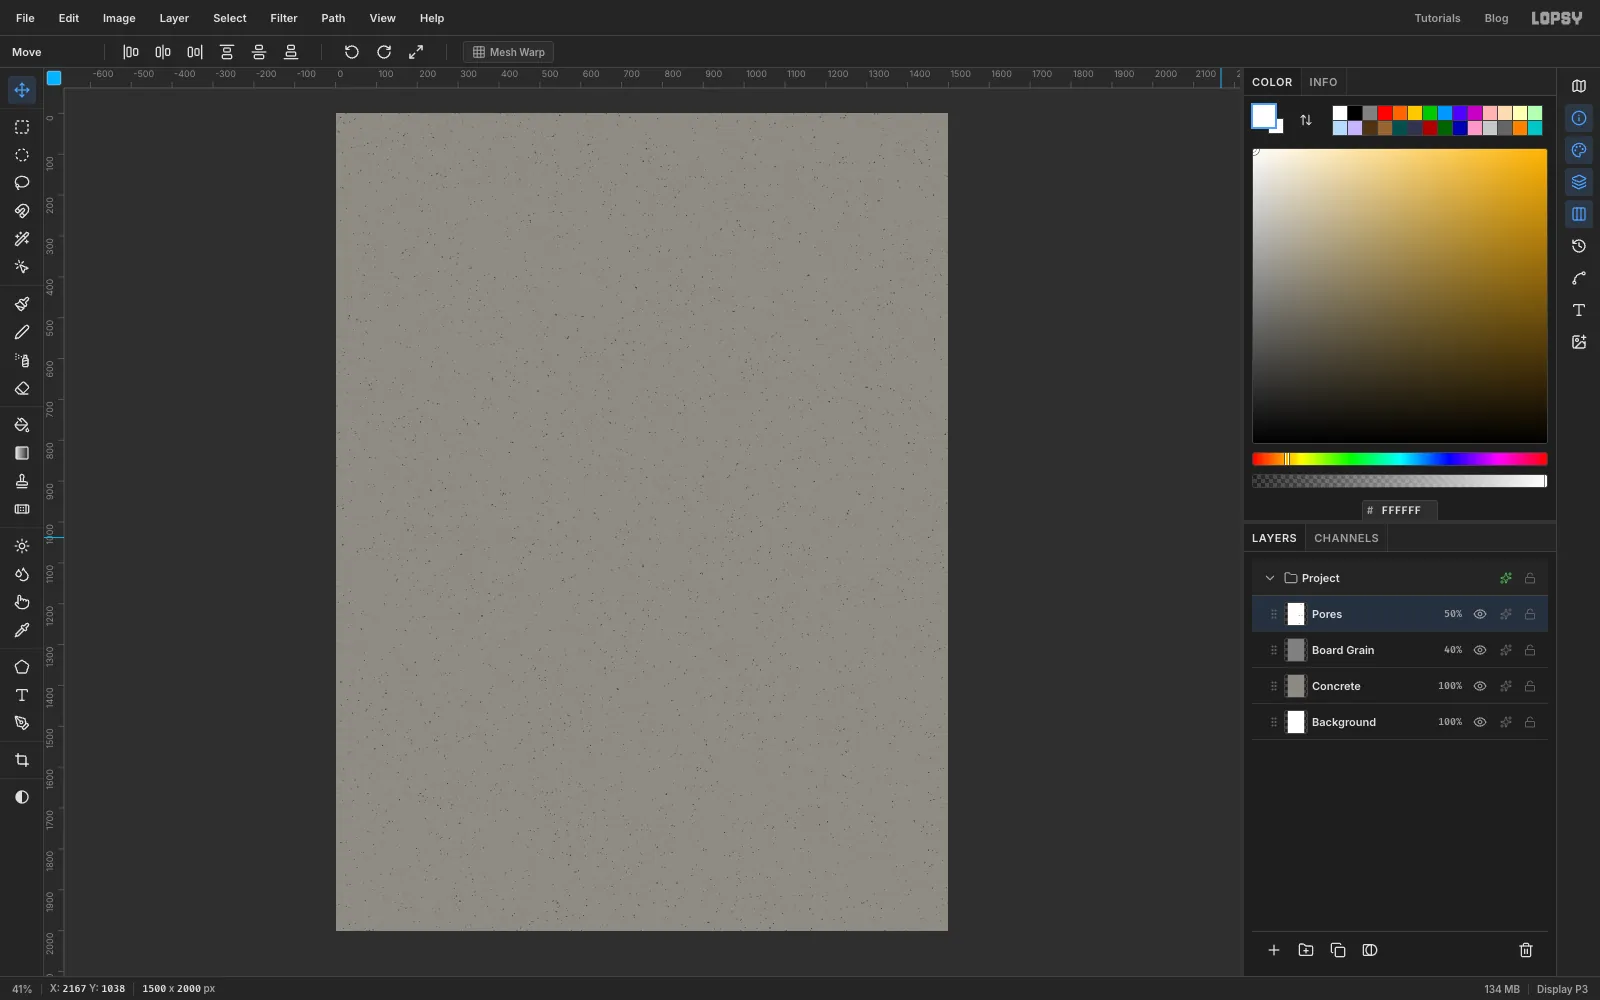
Real concrete has little air bubbles, called bugholes, trapped in its surface.
- Add a layer called
Poresand fill it with white. - Run Add Noise at Amount
100with Mono and Uniform, then Filter → Gaussian Blur… with a Radius of3. The blur clumps the noise into soft blotches. - Run Filter → Threshold…. Turn on Preview and drag Level down until only sparse dark specks are left, mostly a few pixels across. That was around
230here. - Set the layer to Multiply at
50%.
- Add a layer called
-
Mottle the wall with clouds
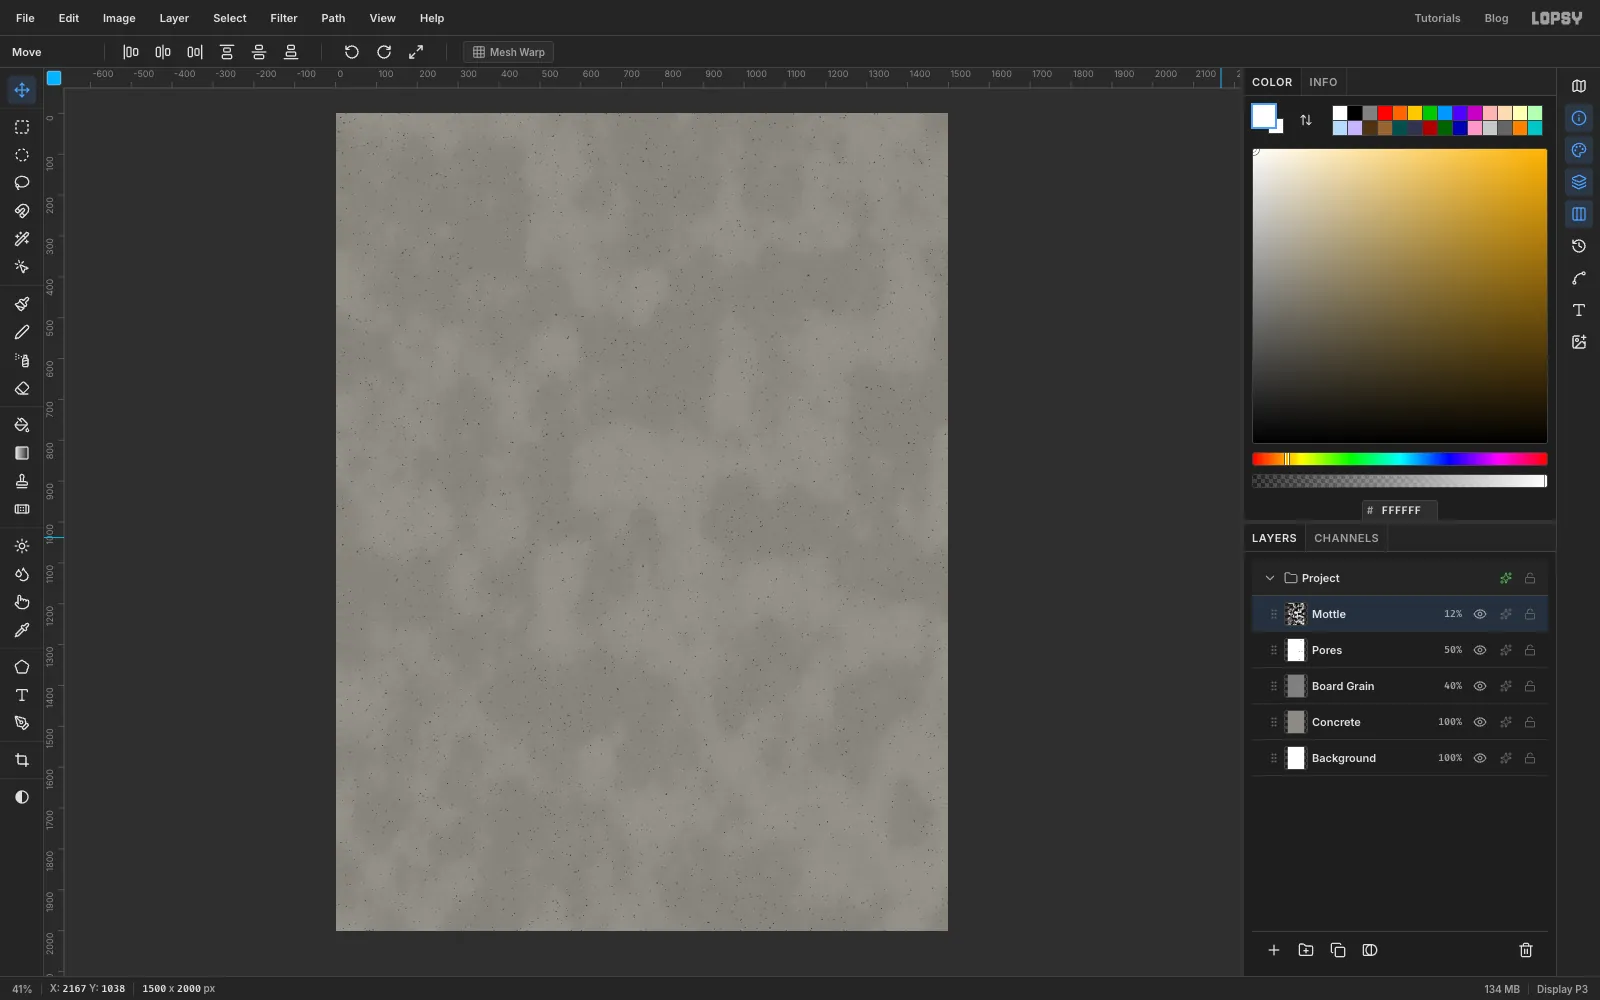
- Add a layer called
Mottle. - Run Filter → Clouds… with Scale
14. - Set it to Soft Light at
12%.
Keep this faint. At higher opacity the clouds look like fog or camouflage instead of concrete.
- Add a layer called
-
Draw the formwork seams
Board-formed walls show a joint wherever two boards met, and a stronger seam at each panel edge.
- Add a layer called
Seamsand pick the Pencil. - Set Size to
3and the colour to . Click once on the left edge of the canvas aty 720, then hold Shift and click on the right edge at the same height. Shift-click draws a straight line from the last click. Do the same aty 1280, and draw one vertical seam down the middle atx 750. - Set Size to
2and the colour to , and draw the same three lines again 3 px lower (or 3 px to the right for the vertical one). The pale line under each dark one reads as a lit edge. - Zoom in and watch the Y readout in the status bar while you do that, because 3 px is only about one screen pixel at fit-to-screen zoom.
- Add a layer called
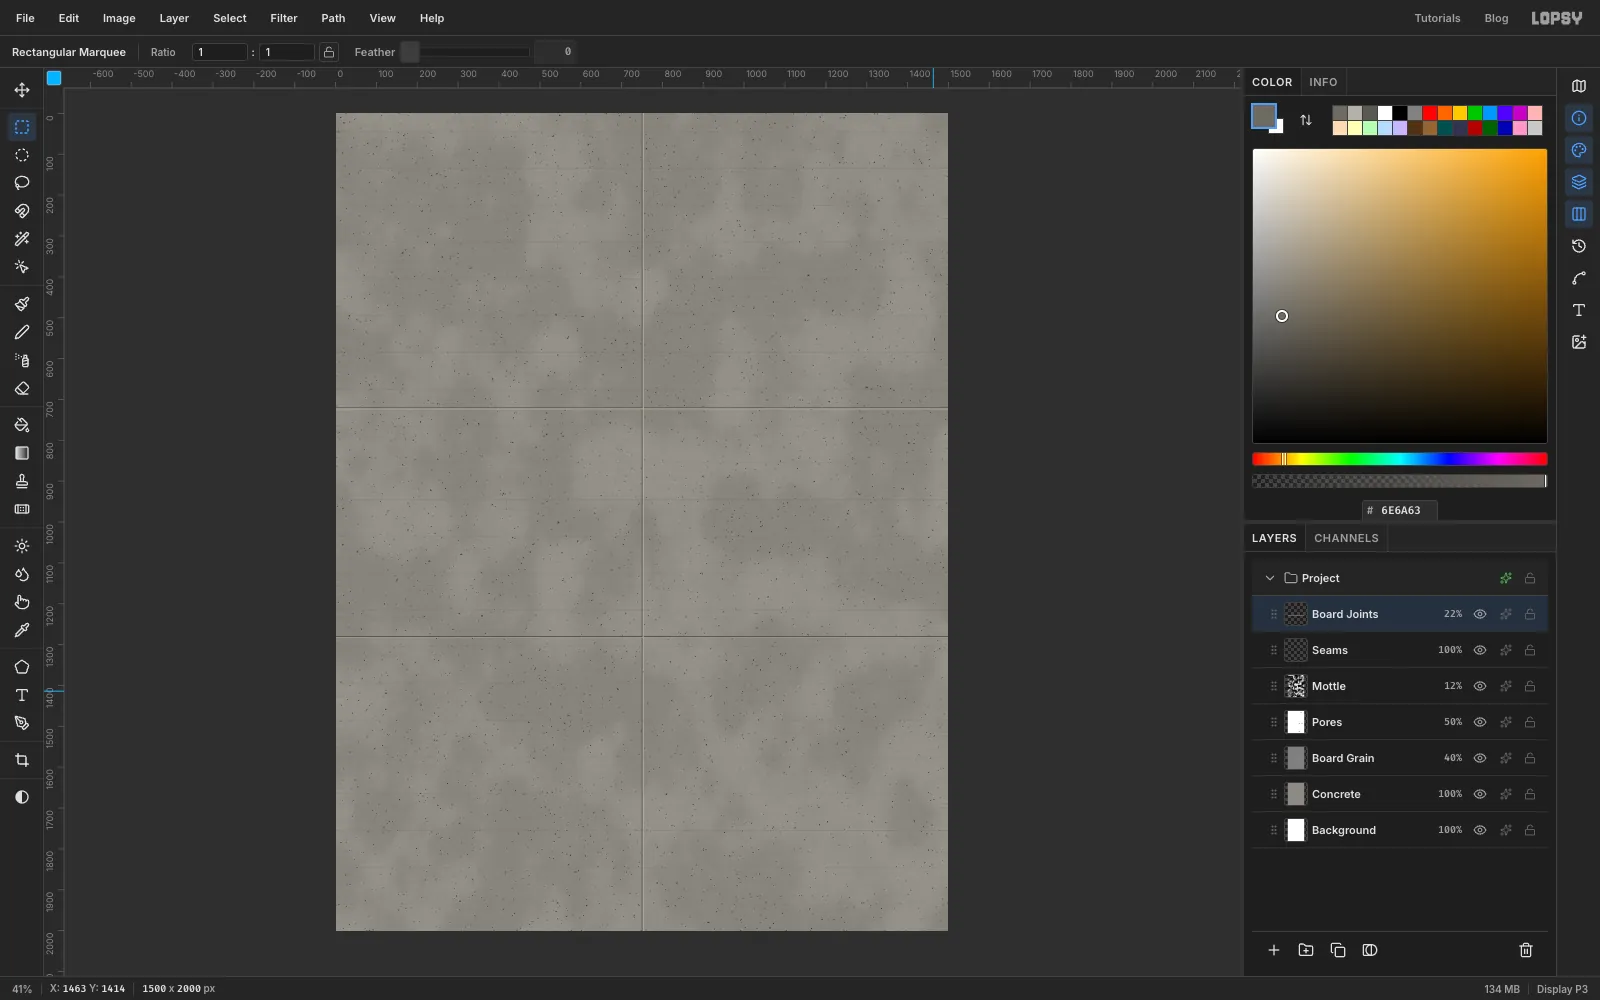
Board Joints. With the Pencil at size2in , draw one line across the wall aty 45. - Turn that line into a repeating tile. With the Rectangular Marquee, select a 90 × 90 px square from the top-left corner of the canvas, so the line runs through its middle. Choose Edit → Define Pattern.
- Press Cmd+A to select the whole canvas, choose Edit → Fill with Pattern… and click Apply. The line repeats every 90 px down the wall. Deselect and set the layer to
22%.
- Add a layer called
-
Lay out the tie holes on the grid
The steel ties that hold the formwork together leave neat round holes in rows.
- Add a layer called
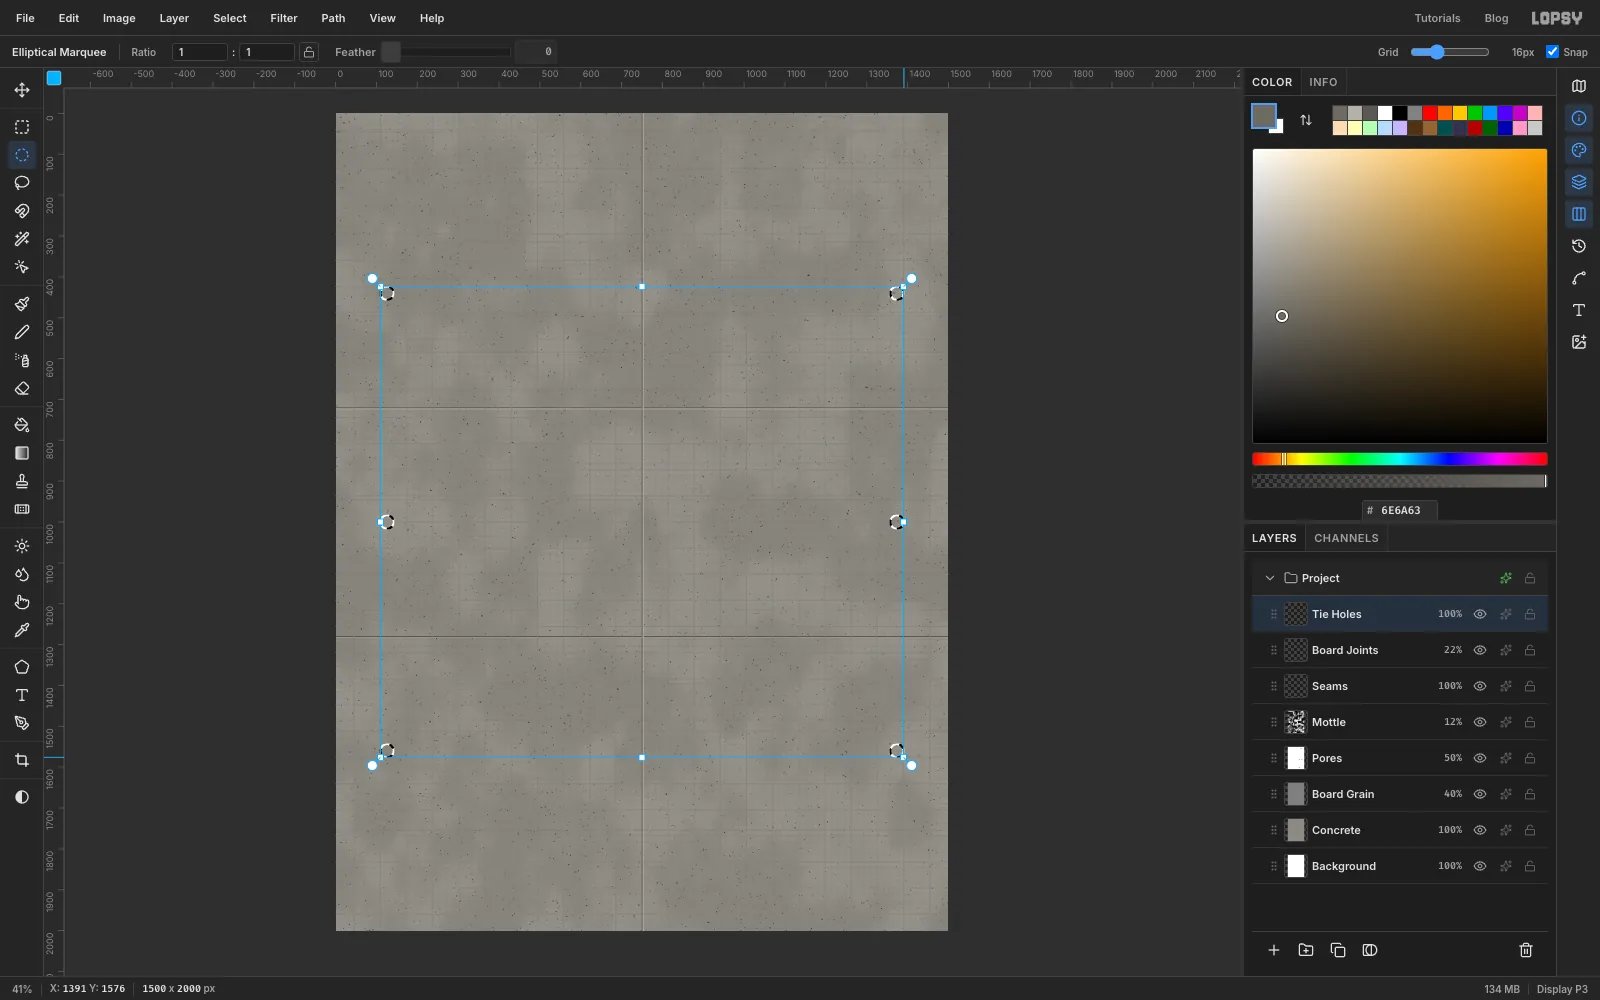
Tie Holes. - Choose View → Show Grid. Make sure Snap is ticked in the options bar, so the selection corners land on the 16 px grid lines and every hole comes out the same size.
- Pick the Elliptical Marquee and drag a small circle about 32 px across (two grid squares), centred about
125px in from the left edge aty 440. - Hold Shift and drag five more circles: one at the same height
125px in from the right edge, then a pair aty 1000and a pair aty 1560. Shift adds each one to the selection. The big box around them is the selection's transform box. Leave it alone.
- Add a layer called
-
Give the holes depth
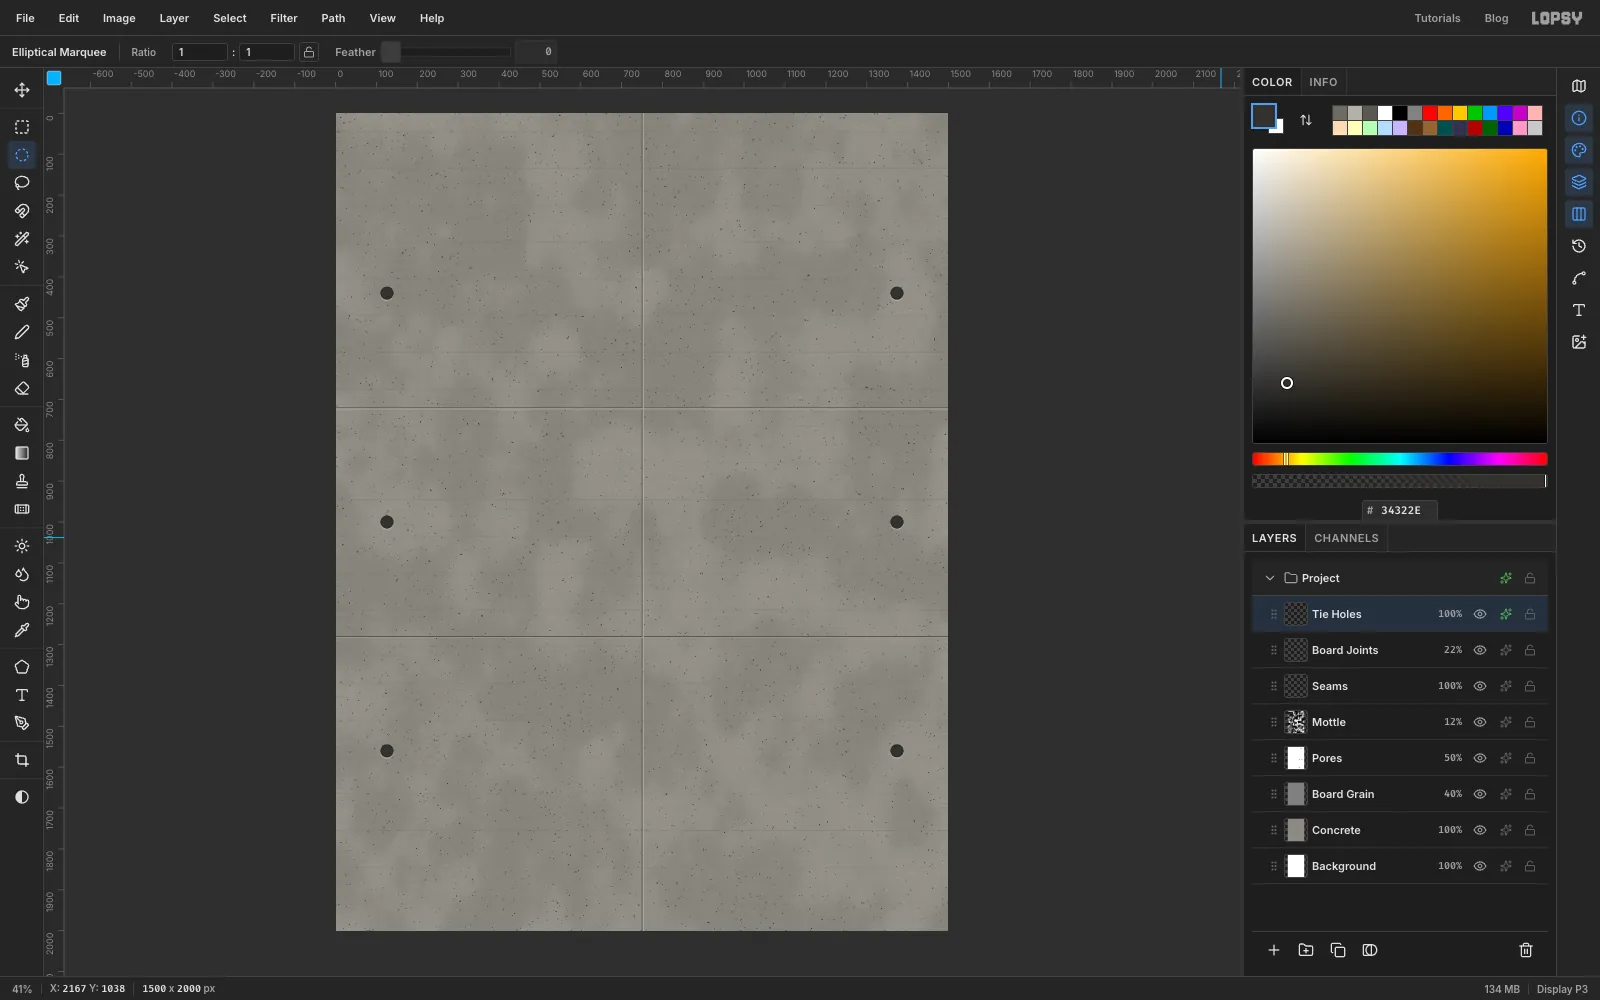
- Fill the selection with and deselect.
- Choose View → Show Grid again to hide the grid.
- Open the effects drawer for
Tie Holes:
- Tick Drop Shadow and set Offset X
0, Offset Y3, Blur2, Opacity55and the colour . A pale "shadow" below the hole reads as light catching its lower lip. - Tick Inner Glow and set Size
7, Opacity75and the colour , which darkens the inside rim.
-
Run water stains down from the ties
Rain carries rust and grime out of the ties and down the wall.
- Add a layer called
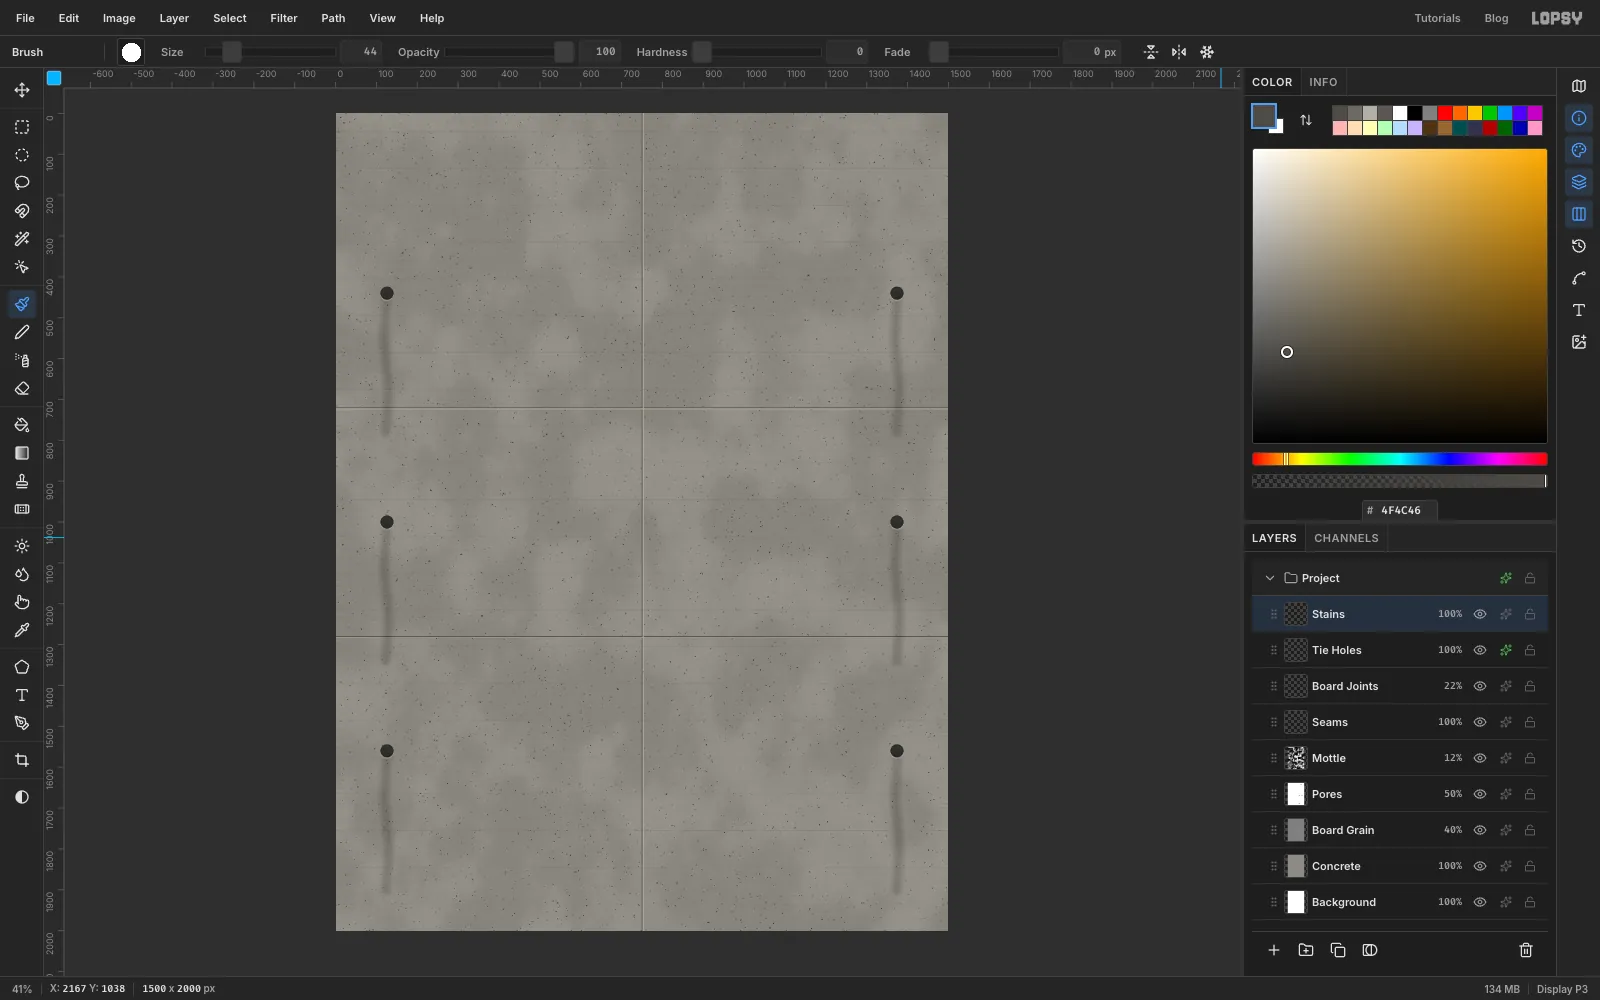
Stains. - Pick the Brush and set Size
44, Hardness0and Opacity22. Set the colour to . - From just under each tie hole, drag down about 340 px with a little wobble.
- Set the layer to Multiply, and put the brush Opacity back to
100.
- Add a layer called
-
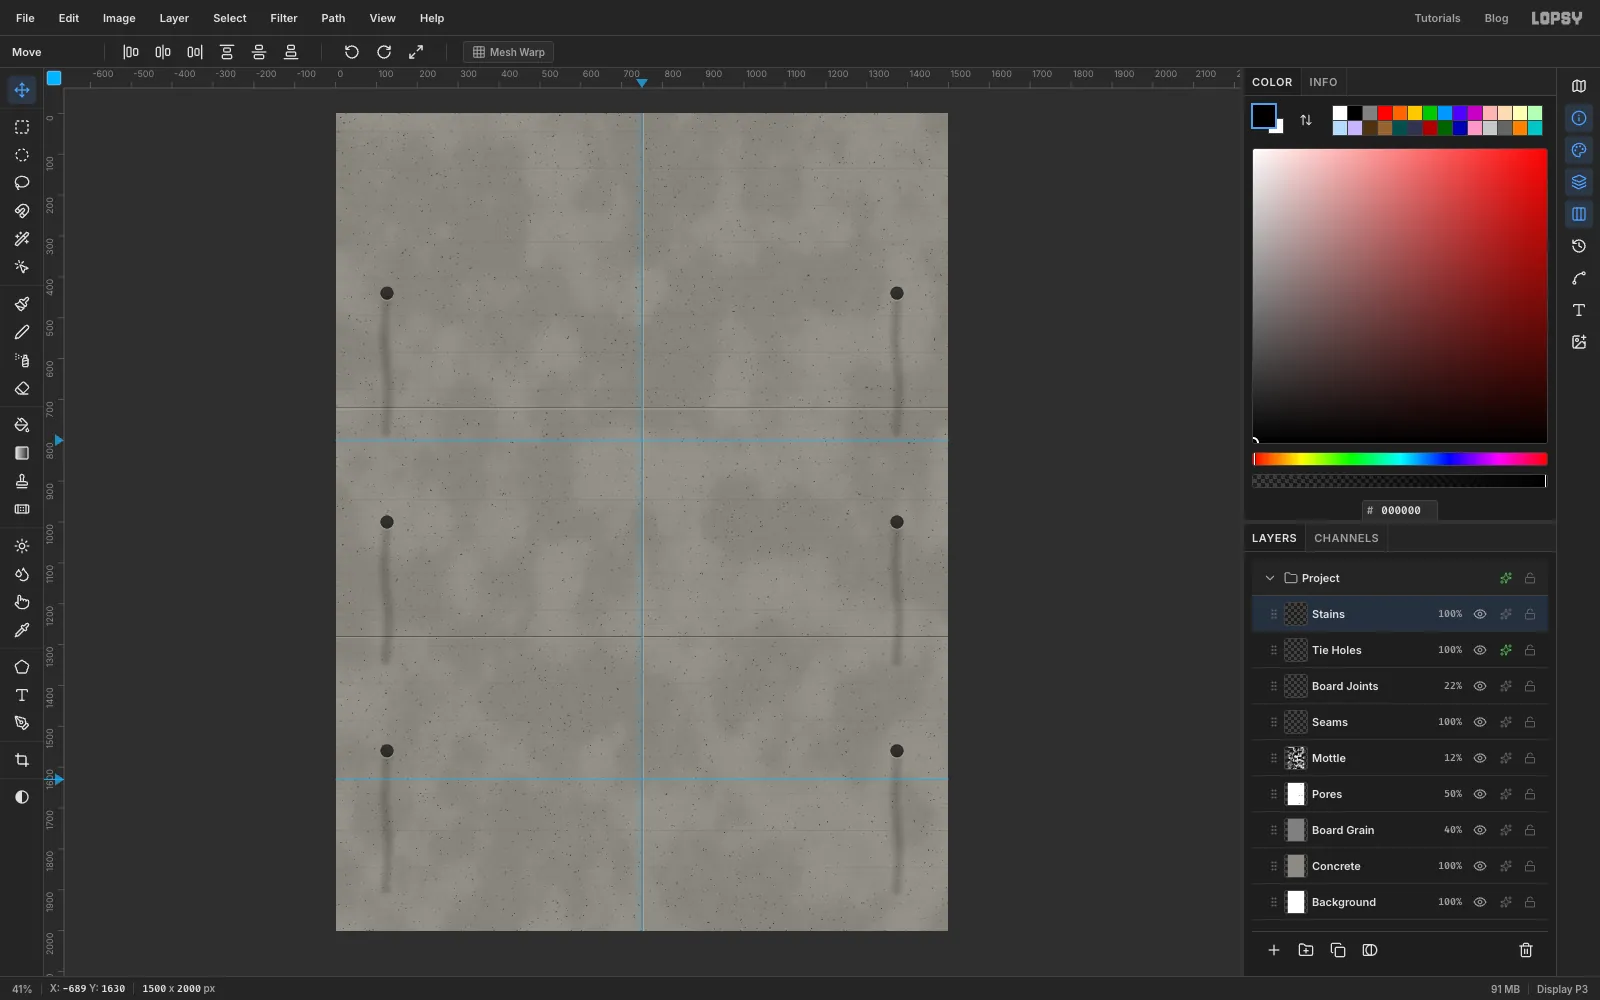
Add guides for the sign
- Click
Stainsin the Layers panel. Click the top ruler at750to drop a vertical guide down the centre of the poster. - Click the left ruler at
800(the middle of the diamond sign) and at1630(the middle of the plaque under it).
- Click
-
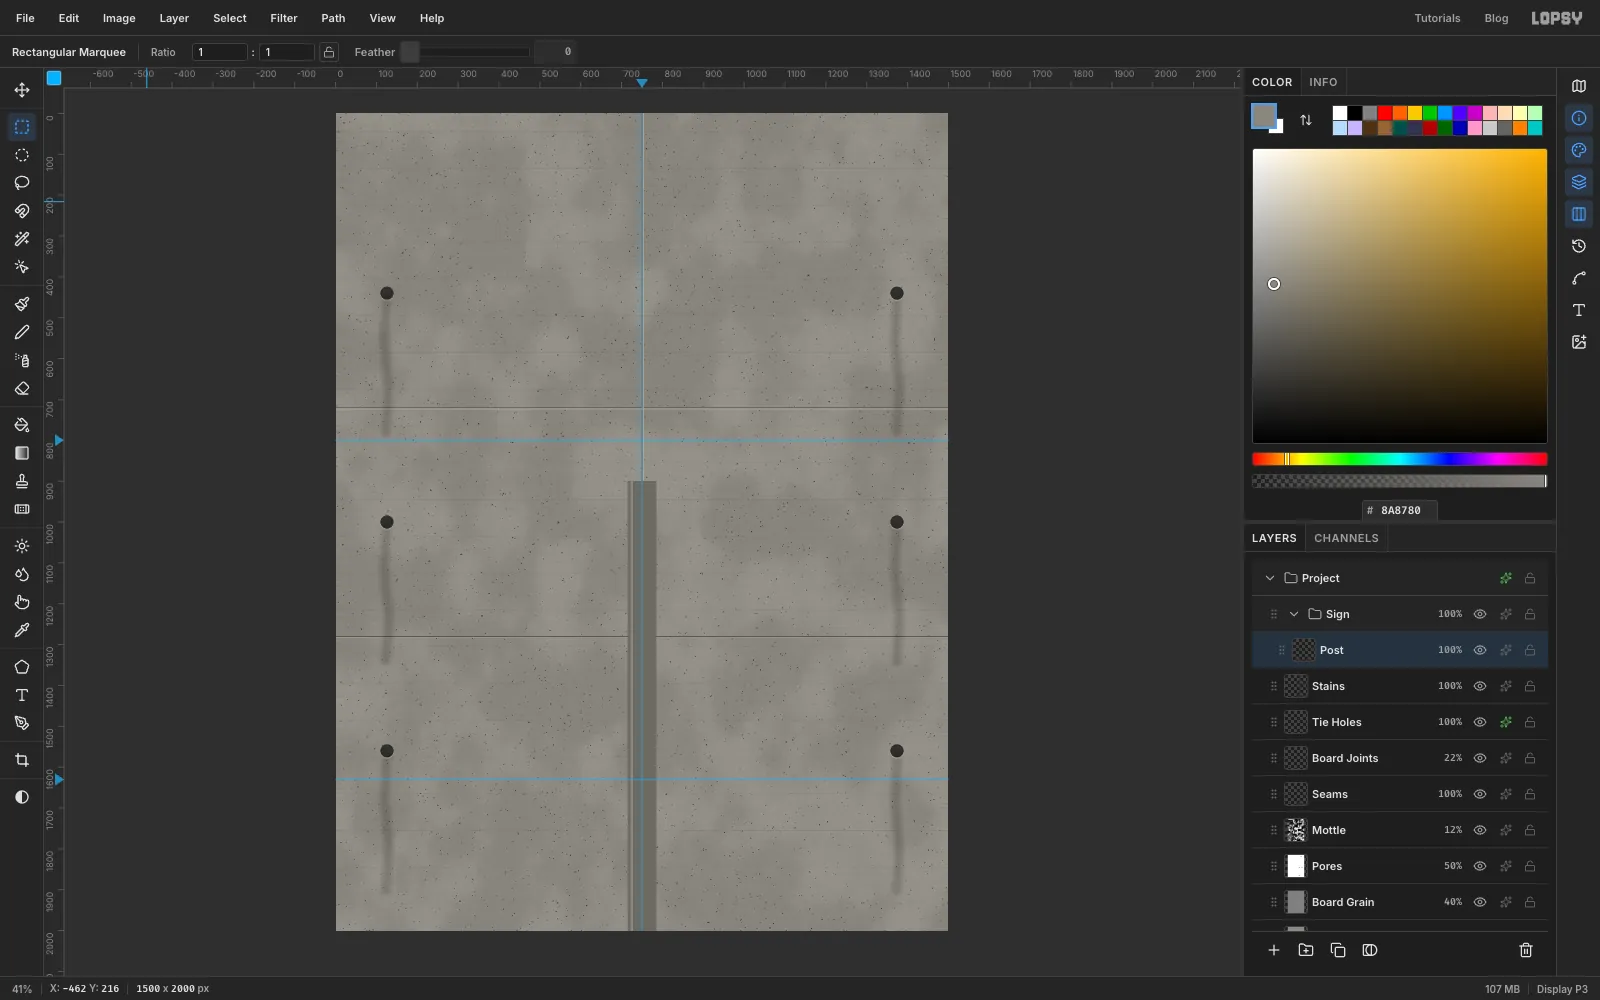
Paint the sign post
- With
Stainsstill selected, click New Group in the Layers panel and name the groupSign. Then click Add Layer and name the layerPost. - With the Rectangular Marquee, select a 70 px-wide strip centred on the vertical guide, from
y 900down to the bottom edge. Fill it with . - Select a 6 px strip just inside the post's left edge and fill it with as a highlight. Deselect.
- With
-
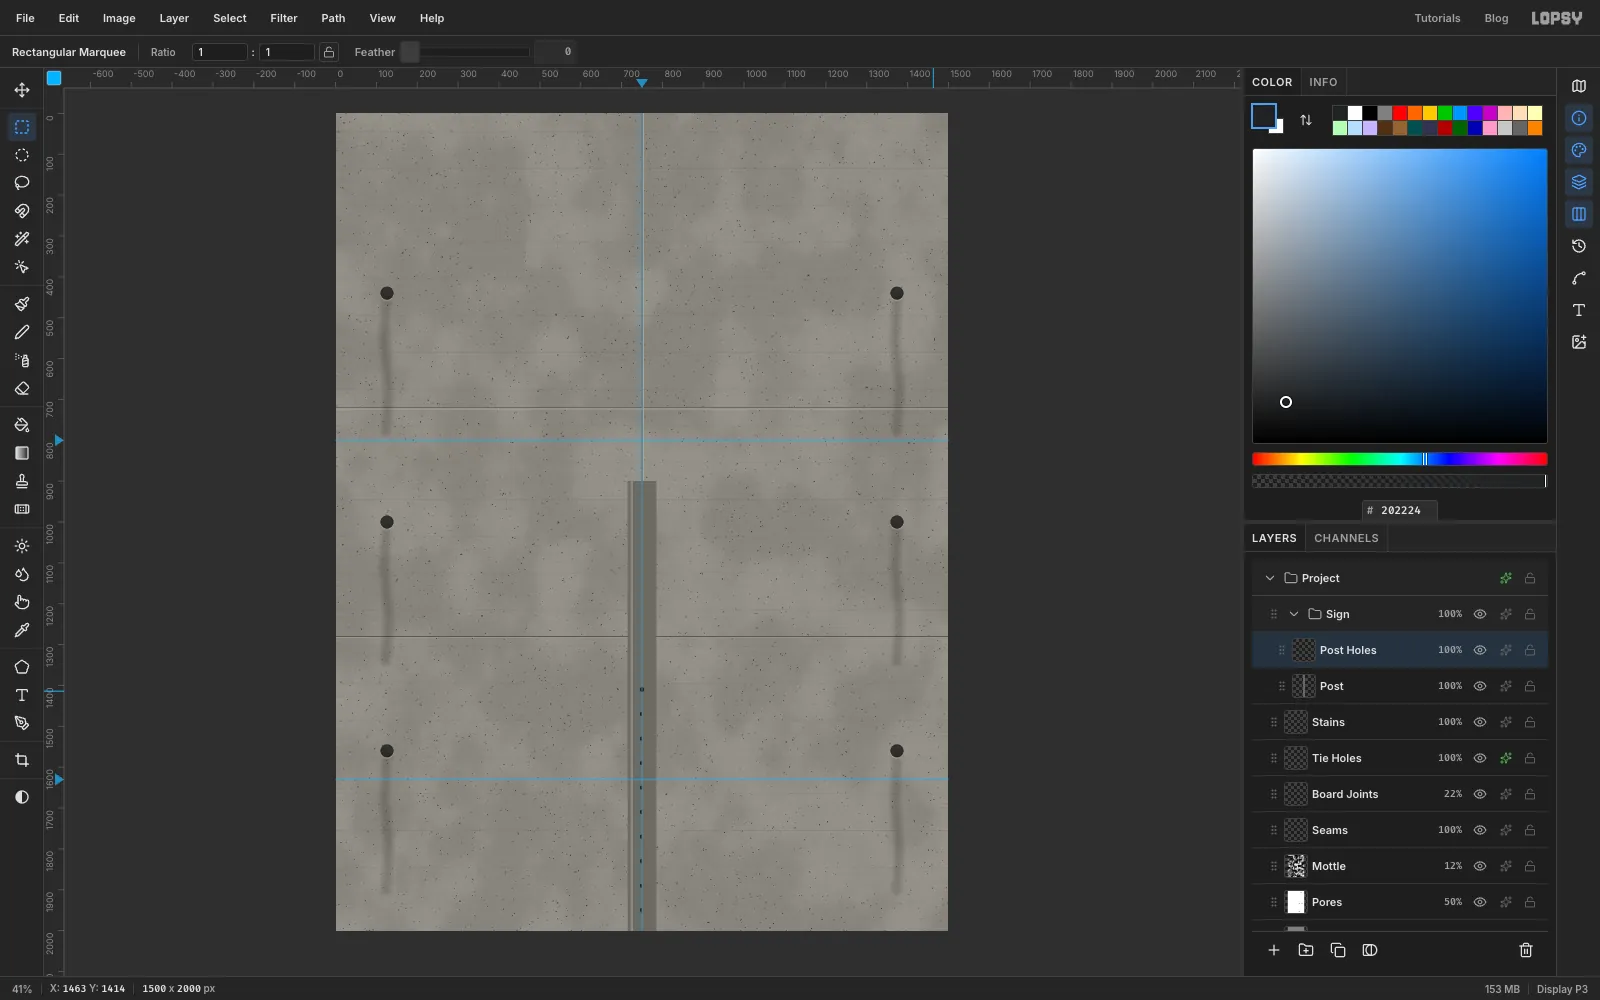
Punch holes in the post with a pattern
Sign posts are perforated all the way down. Make one hole, turn it into a pattern, then tile it.
- Add a layer called
Post Holes. With the Brush at Hardness100and Size12, click once on the centre guide at750, 1410in . - With the Rectangular Marquee, select a 40 × 60 px box from
720, 1380to760, 1440, with the hole inside it. Choose Edit → Define Pattern. - Select a 40 px-wide column over the post from
720, 1380down to the bottom edge. Choose Edit → Fill with Pattern…, pick the new hole pattern and click Apply. Deselect.
The pattern tiles from the canvas's top-left corner. The tile you defined starts on a multiple of 40 and of 60, so the copies land exactly in line with the first hole, one every 60 px.
- Add a layer called
-
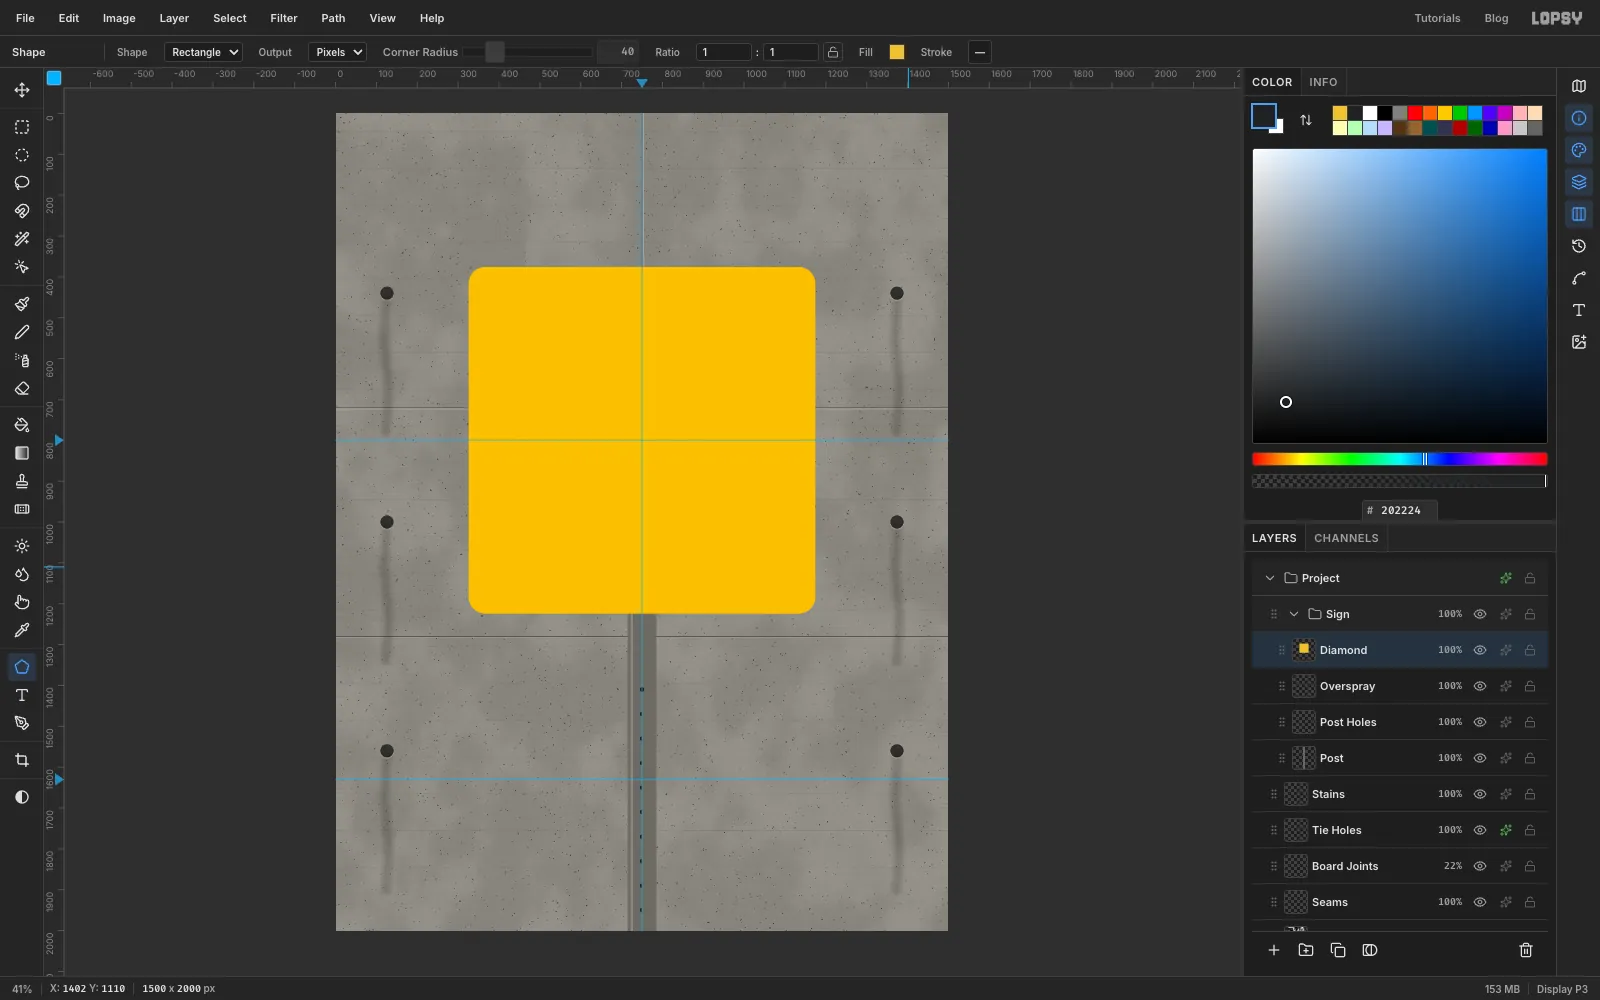
Make a rounded square with the Shape tool
- Add a layer called
Oversprayand leave it empty for now. Then add a layer calledDiamond. - Pick the Shape tool. Set Shape to Rectangle, Output to Pixels and Corner Radius to
40. Click the Fill swatch and typeF2C230. If Stroke shows a colour, click it and choose Remove stroke. - Click once where the guides cross at
750, 800without dragging. The Shape Size dialog opens. Enter848for both Width and Height and click Create.
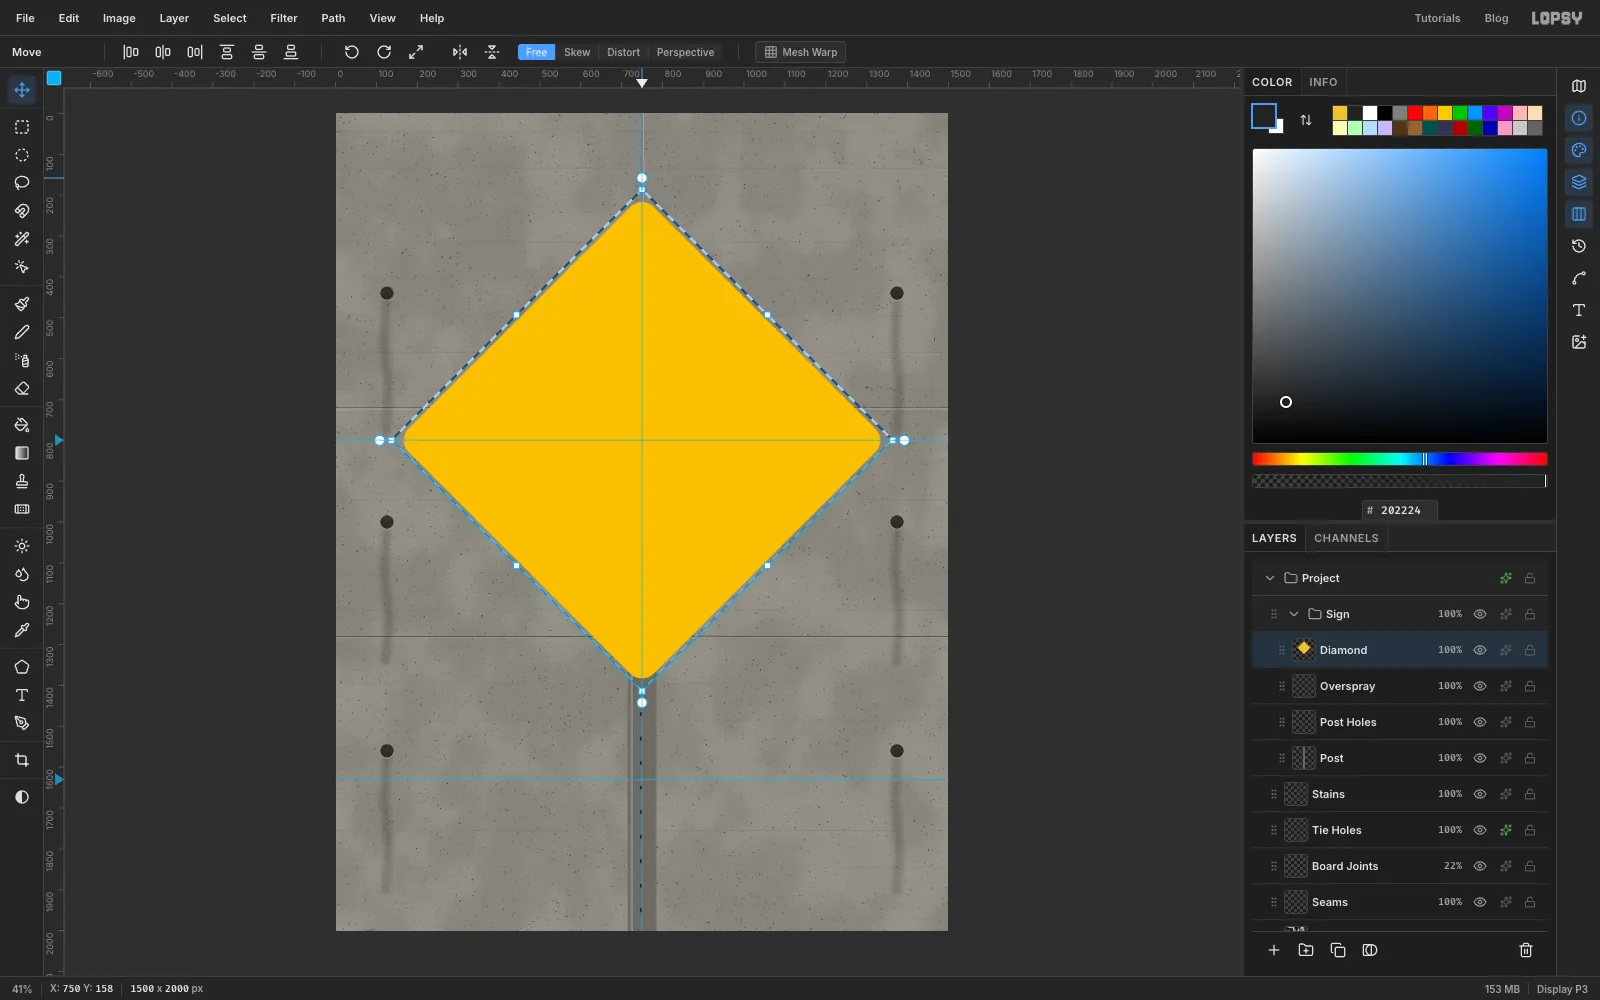
The shape is centred on the click. 848 px is chosen so that once it's turned 45° the diamond is 1200 px from point to point.
- Add a layer called
-
Turn it into a diamond
- With the Rectangular Marquee, drag a box just around the square.
- Pick the Move tool. Rotation handles are the round dots just outside each corner of the box.
- Hold Cmd and drag the top-left rotation handle clockwise. Cmd snaps the angle to 15° steps, so stop when it clicks to 45°.
- Press Cmd+D to commit.
-
Cut the black border ring
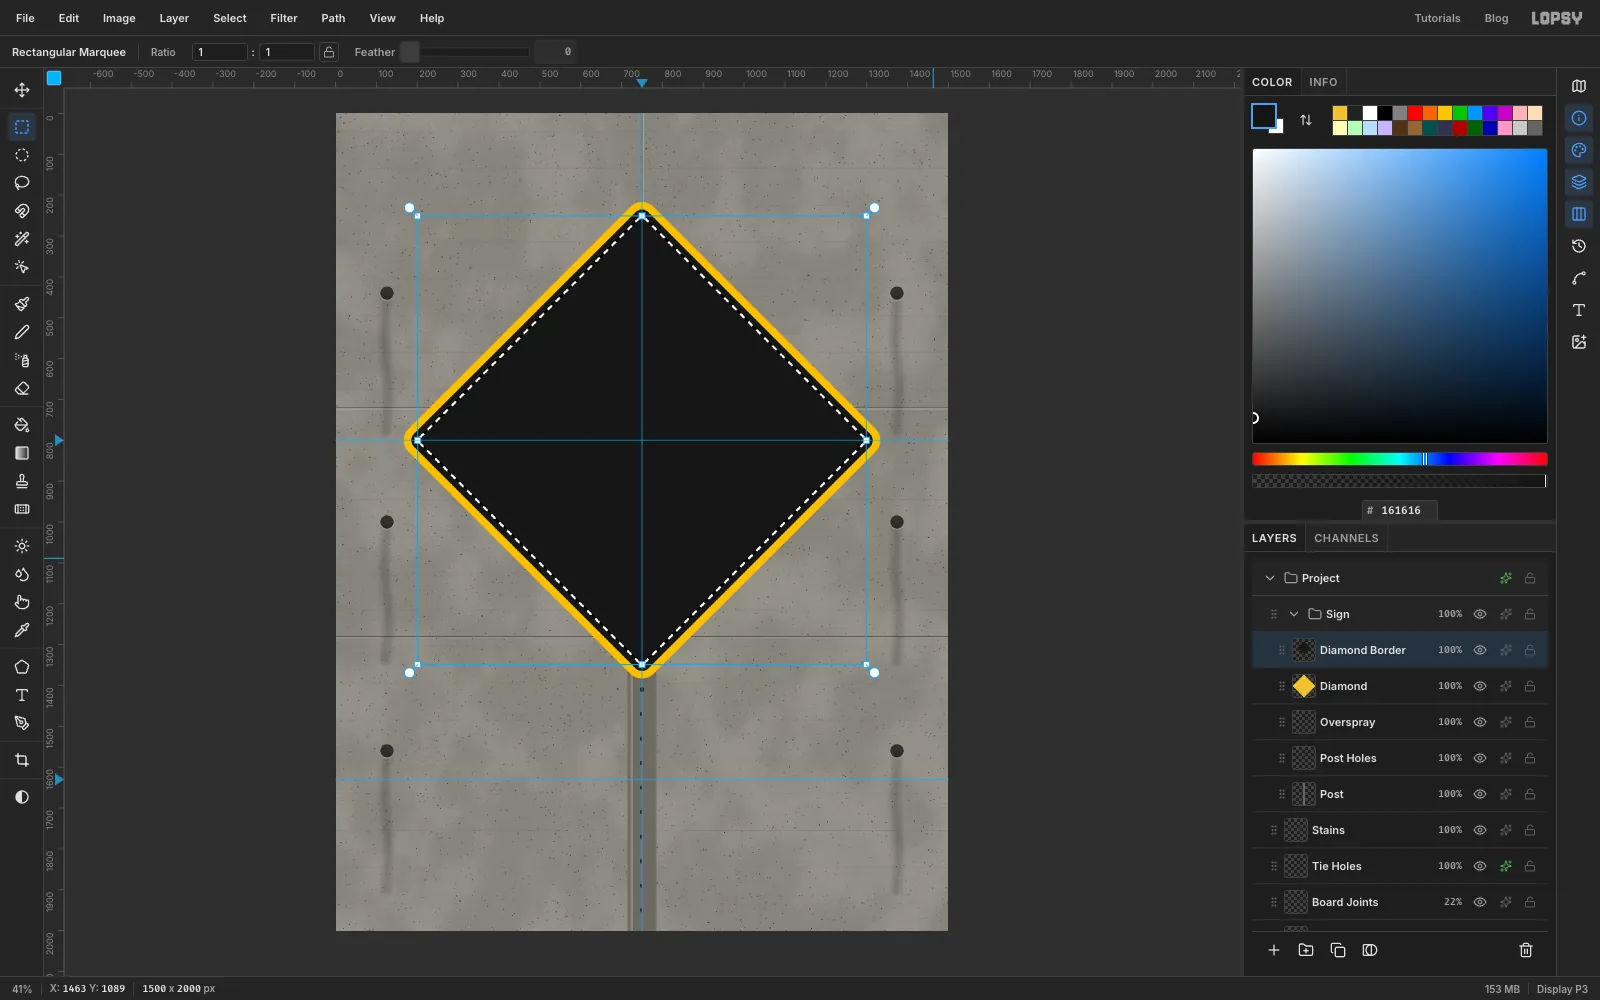
A warning sign has a thin black border set in from its edge.
- Switch to the Rectangular Marquee so the Move tool's handles go away. Hold Cmd and click the
Diamondthumbnail to select its shape. - Choose Select → Shrink…, enter
18and apply. - Add a layer called
Diamond Borderand fill it with . - Shrink the selection again by
16. Now the whole shrunken diamond is black with marching ants inset in it. Press Delete to clear the middle, and deselect.
That leaves a 16 px black ring with an 18 px yellow rim outside it.
- Switch to the Rectangular Marquee so the Move tool's handles go away. Hold Cmd and click the
-
Add the plaque
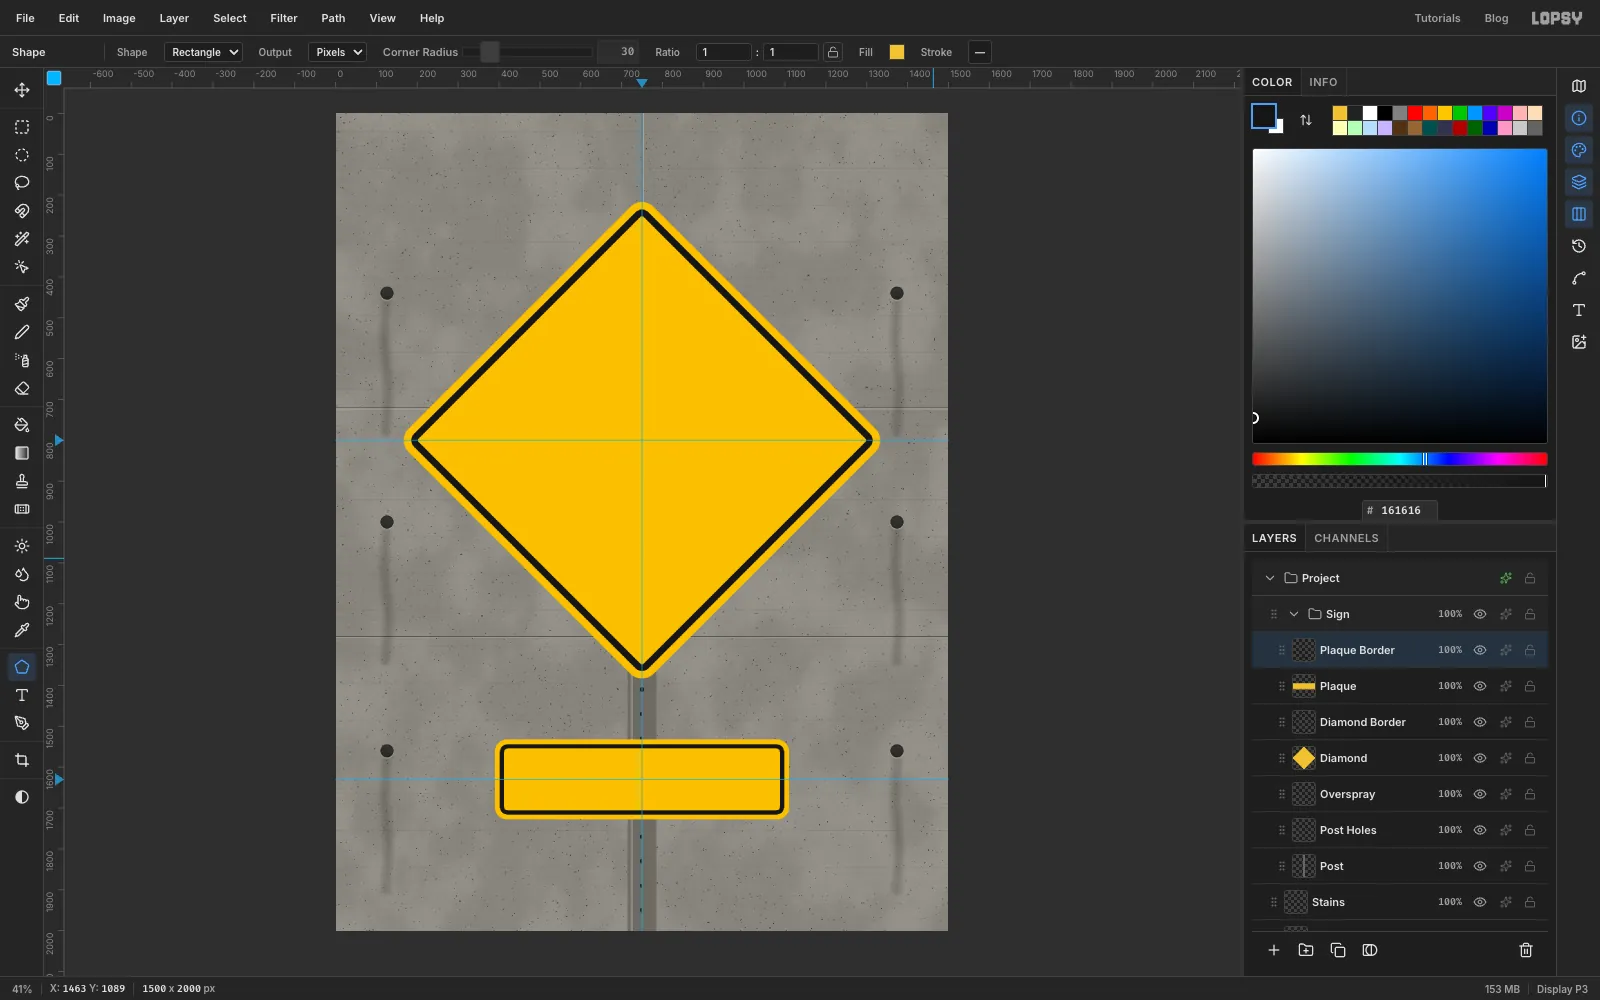
- Add a layer called
Plaque. Pick the Shape tool, set Corner Radius to30, and click on the centre guide at750, 1630. Make it720wide and196tall. - Cmd-click the
Plaquethumbnail and shrink the selection by12. Add a layer calledPlaque Border, fill it with , shrink by10, press Delete and deselect.
- Add a layer called
-
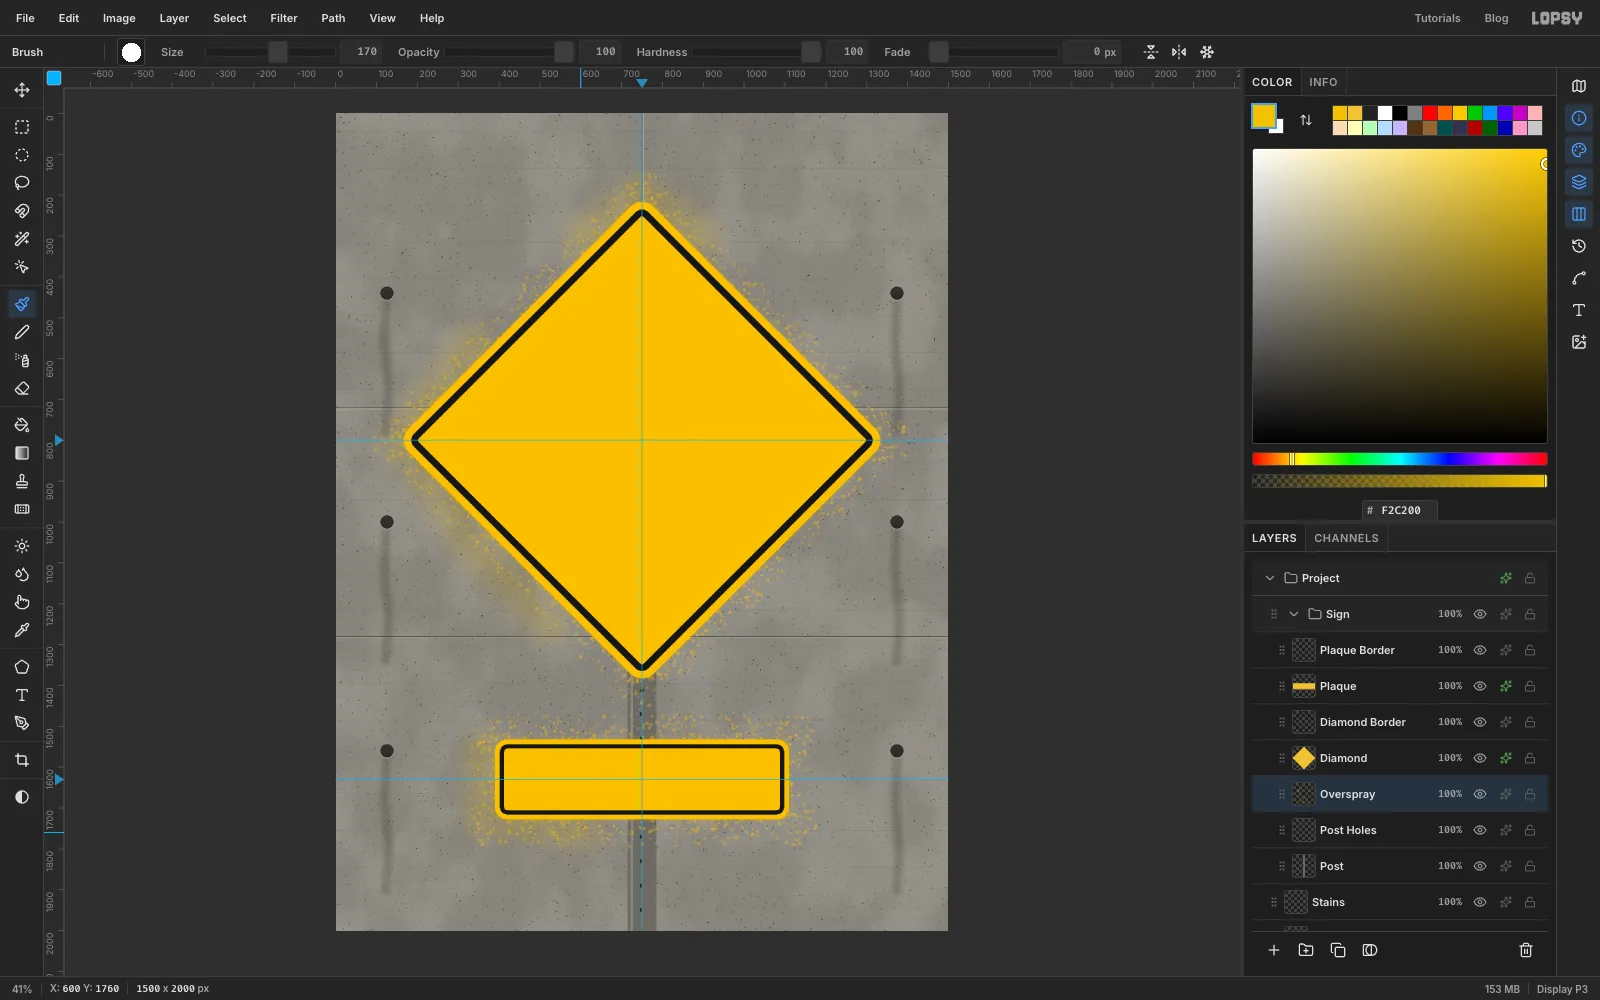
Spray the overspray
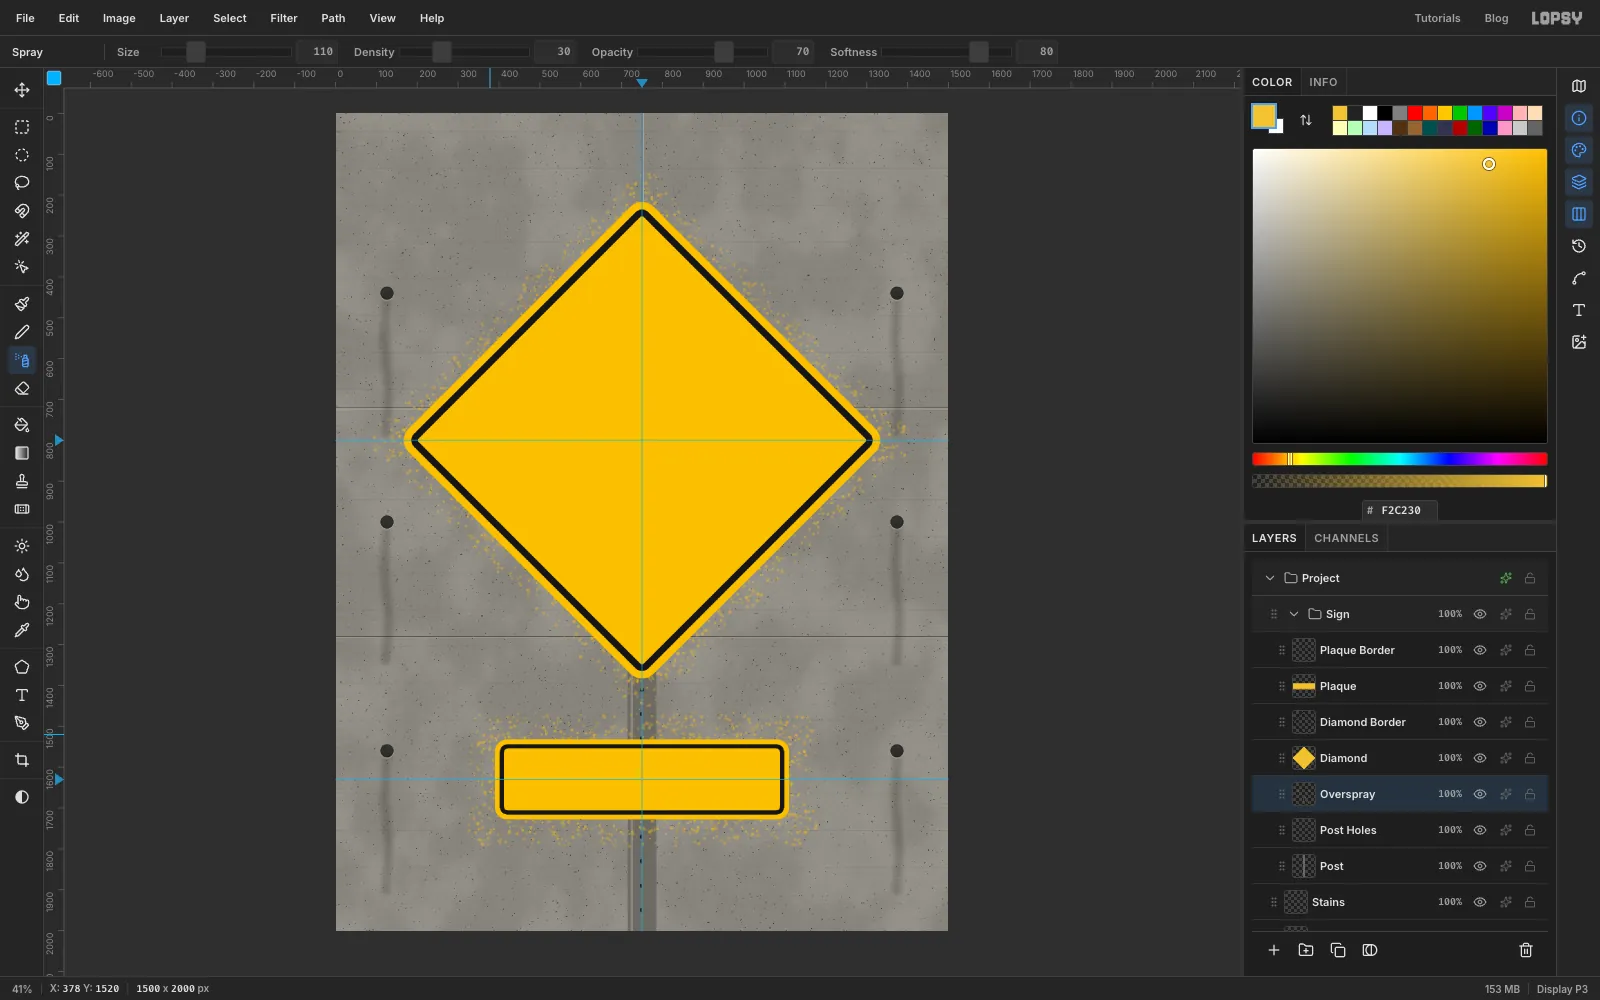
When you spray through a stencil, some paint always drifts under the edge.
- Click the
Overspraylayer, which sits under the diamond. - Pick the Spray tool. Set Size
110, Density30, Opacity70and Softness80, and the colour to . - Drag slowly around the outside of the diamond, keeping the cursor just beyond its edge, then do the same around the plaque.
- Click the
-
Soften the edges and add haze
Perfectly crisp edges look like vector art, not paint.
- Select
Diamondand run Add Noise at Amount7with Mono and Uniform. Do the same onPlaque. - Run Gaussian Blur with Radius
1on each ofPost,Post Holes,Diamond,Diamond Border,PlaqueandPlaque Border. - Give
DiamondandPlaquean Outer Glow with Size18, Opacity30and colour . - Click
Oversprayagain. Pick the Brush at Size170, Hardness0and Opacity14in . Sweep a few soft strokes along the left side of the diamond, over its top tip and along the left end of the plaque. Uneven haze looks hand-sprayed. - Put the brush back to Opacity
100and Hardness100.
- Select
-
Paste in the lynx photo
- Click the arrow on the
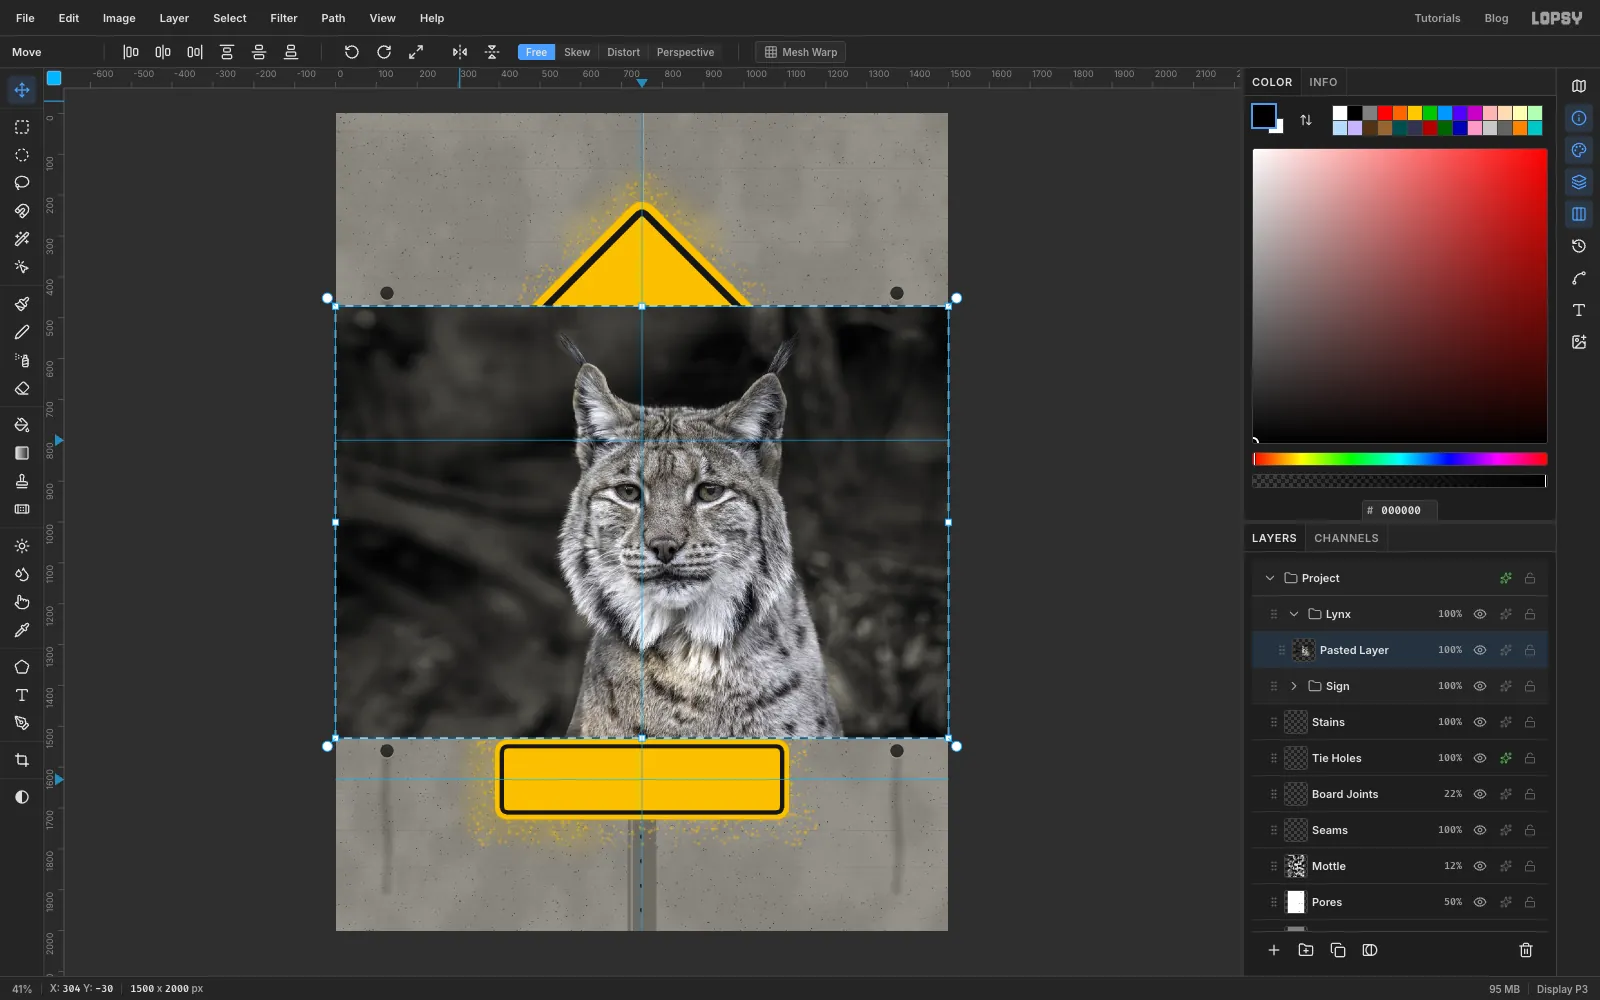
Signgroup row to collapse it, then click theSignrow. Click New Group and name itLynx. With the group collapsed, the new group lands next toSigninstead of inside it. - Open the lynx photo in another tab, copy the image, and press Cmd+V in Lopsy.
- A photo larger than the canvas is shrunk to fit, so it lands across the full width. Rename the new layer
Photo.
- Click the arrow on the
-
Scale the photo back up
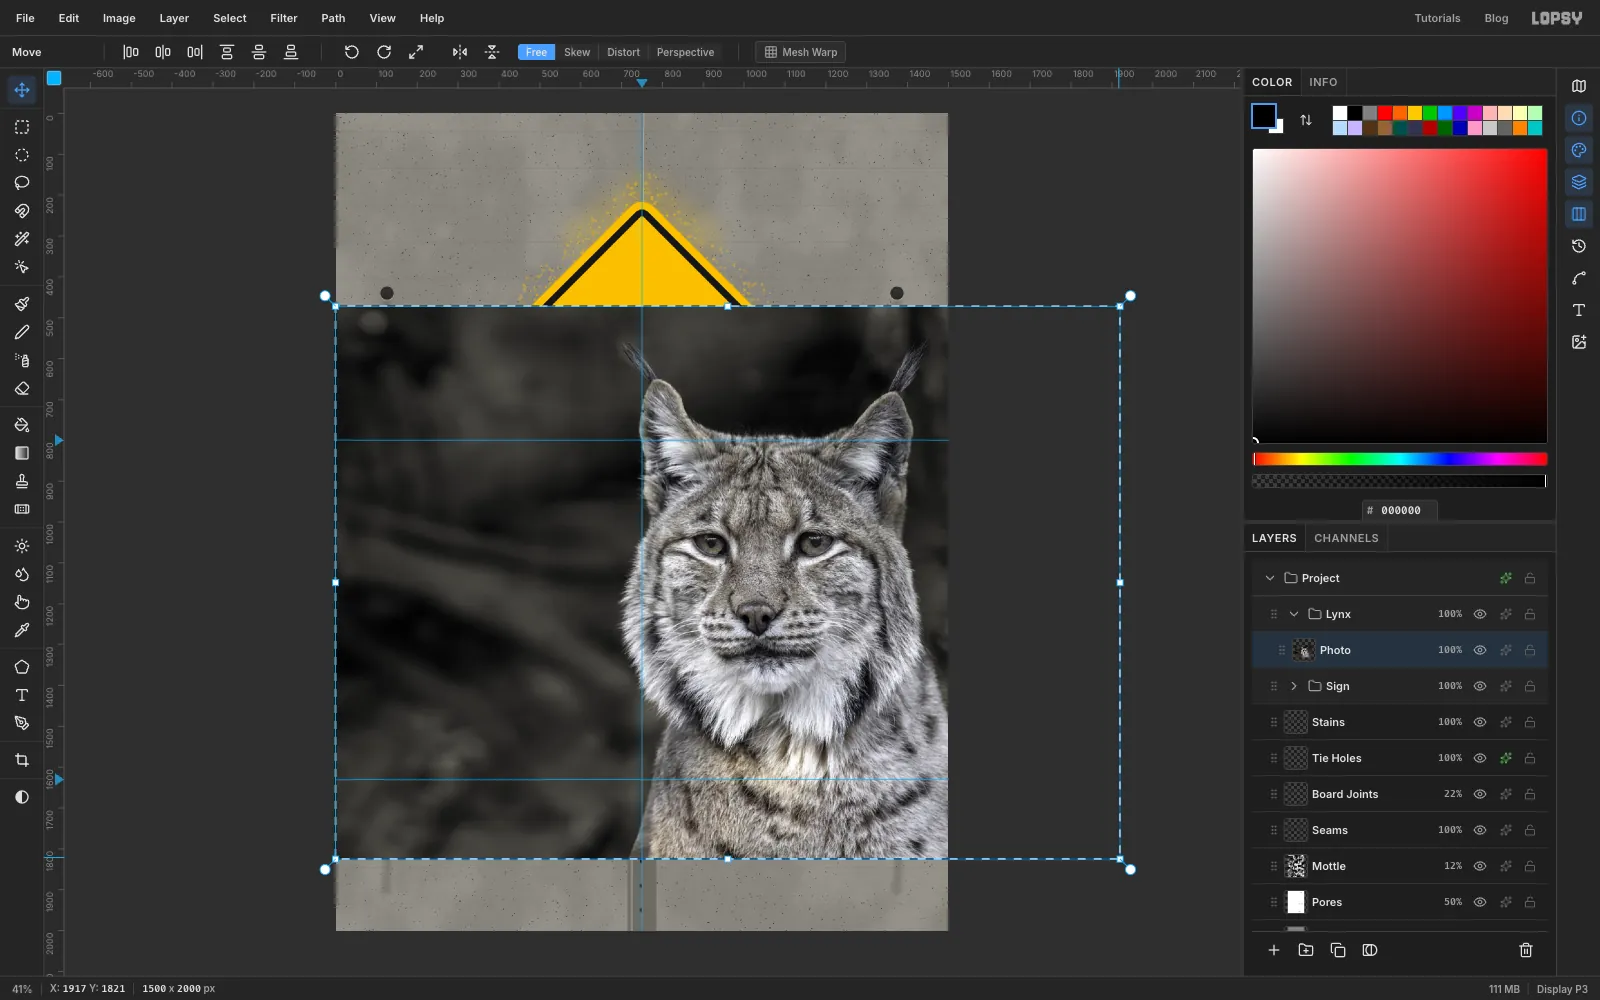
The fitted photo is too small. The lynx's head should nearly fill the diamond.
- The paste is already selected and the Move tool is active. Hold Cmd and drag the bottom-right corner handle down and to the right until the box's right edge reaches
1920on the top ruler. That's the photo's original size. Cmd keeps the proportions. - Press Cmd+D to commit.
Part of the photo now hangs off the canvas. That's fine, because Lopsy keeps those pixels.
- The paste is already selected and the Move tool is active. Hold Cmd and drag the bottom-right corner handle down and to the right until the box's right edge reaches
-
Line the lynx up with the sign
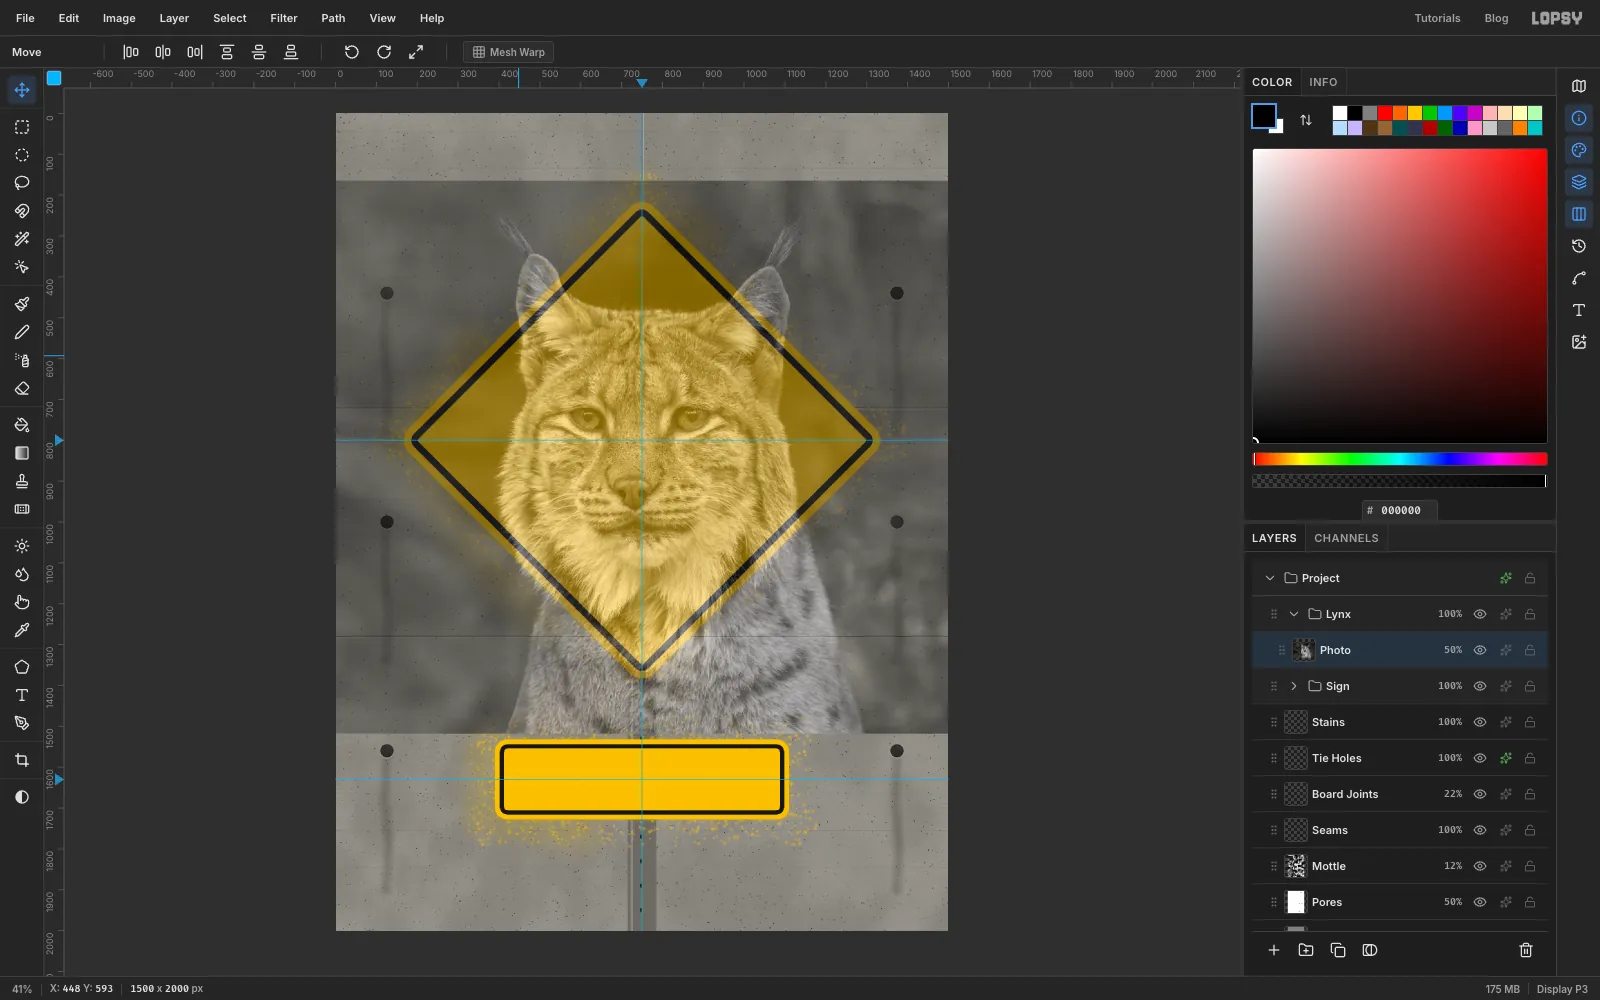
The photo now covers the sign, so make it see-through while you place it.
- Set the
Photolayer's opacity to50%. - Drag the photo with the Move tool until the lynx's nose is just left of the centre guide, at about
728, 930. Its ruff is fuller on the right, so setting the nose a little left centres the head in the diamond. The ear tufts should poke out past the diamond's top edges. - Set the opacity back to
100%.
- Set the
-
Simplify the photo
A stencil can't hold every hair. Flatten the colour first, then smooth the detail.
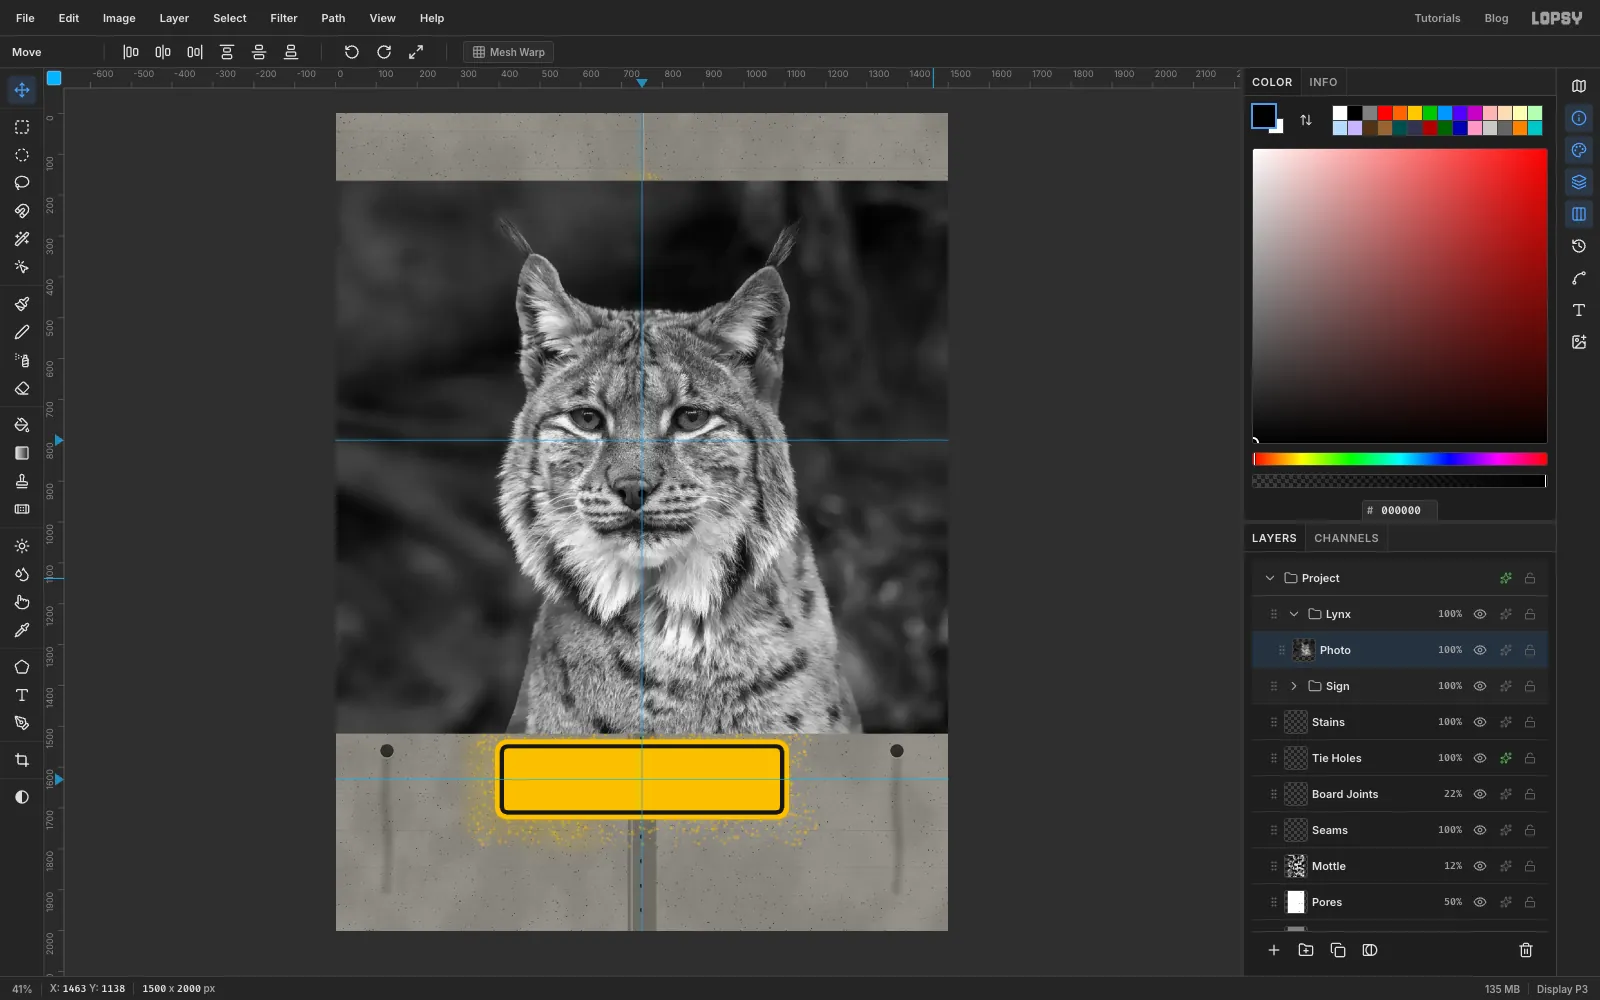
- Choose Filter → Desaturate. This lynx is nearly grey already, but with a colour photo this step matters.
- Run Filter → Surface Blur… with Radius
14and Threshold34. Surface Blur smooths soft areas but keeps strong edges. At this zoom the change is subtle, but it's what keeps the plates from breaking into specks later.
-
Lasso the lynx out of its background
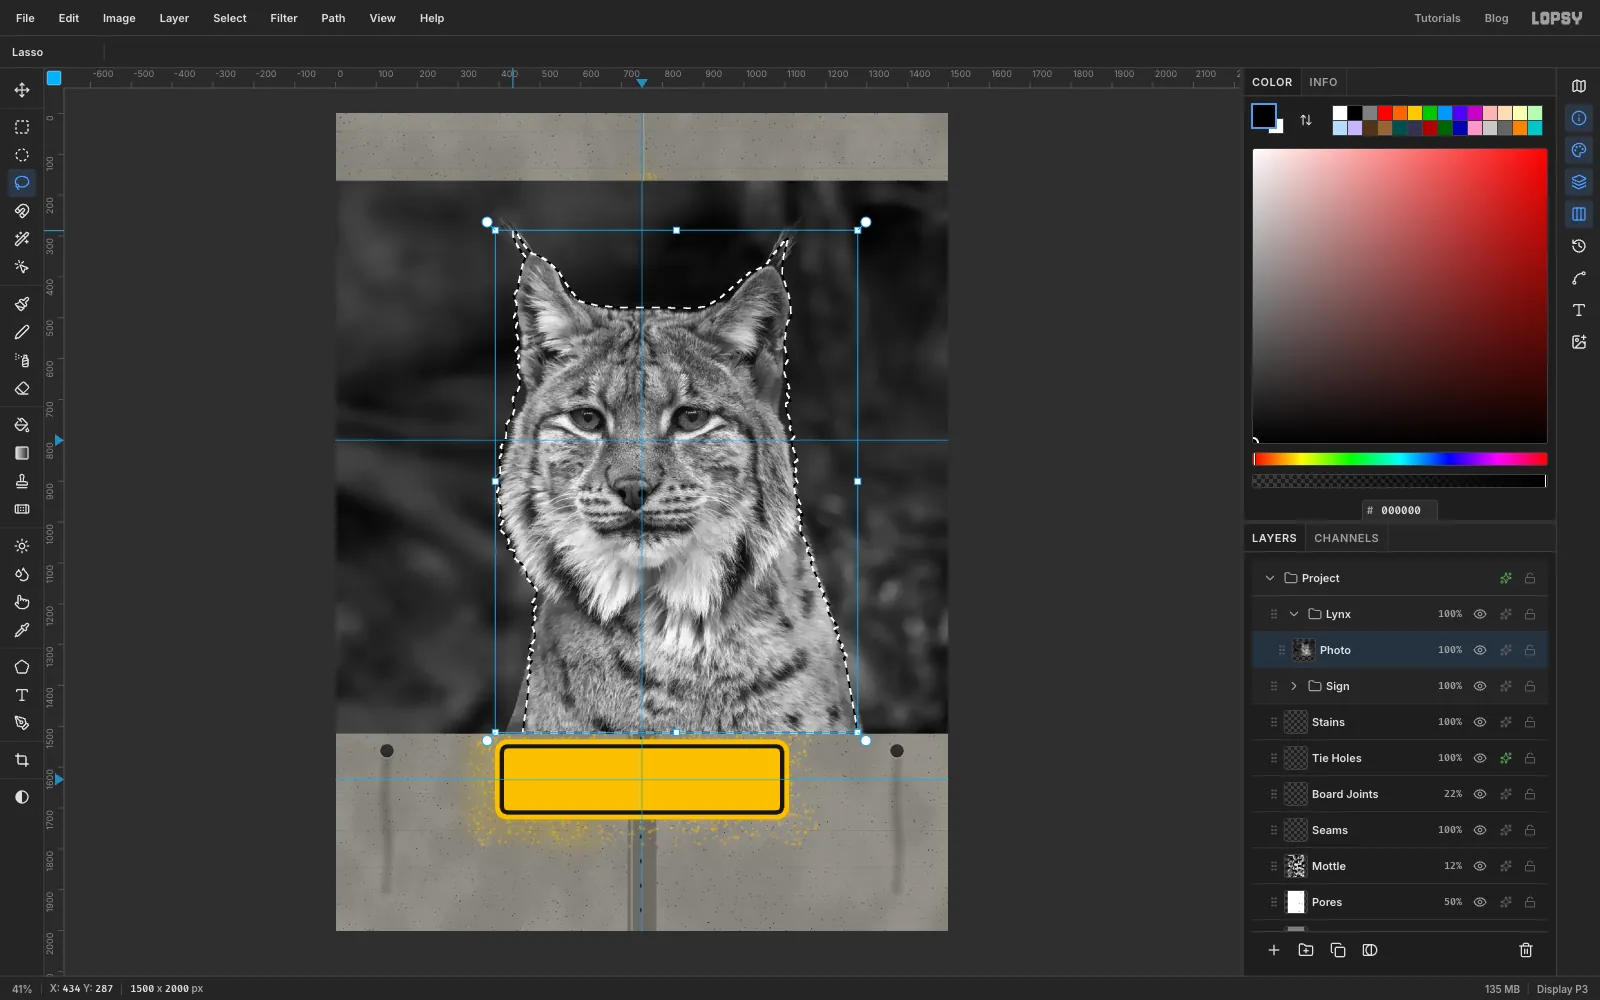
- Pick the Lasso. Start at the tip of the left ear tuft and hold the mouse button down for the whole loop.
- Go over the left ear, across the top of the head and over the right ear and its tuft.
- Go down the right cheek to the bottom edge of the photo, along the bottom, and back up the left cheek to where you started, then release.
- Along the cheeks and ruff, zigzag outwards every 20 px or so to follow the tufts of fur. A smooth line here looks like a cut-out. Zoom in for this part if you need to.
- Choose Select → Inverse, press Delete and deselect.
-
Trim the chest inside the sign
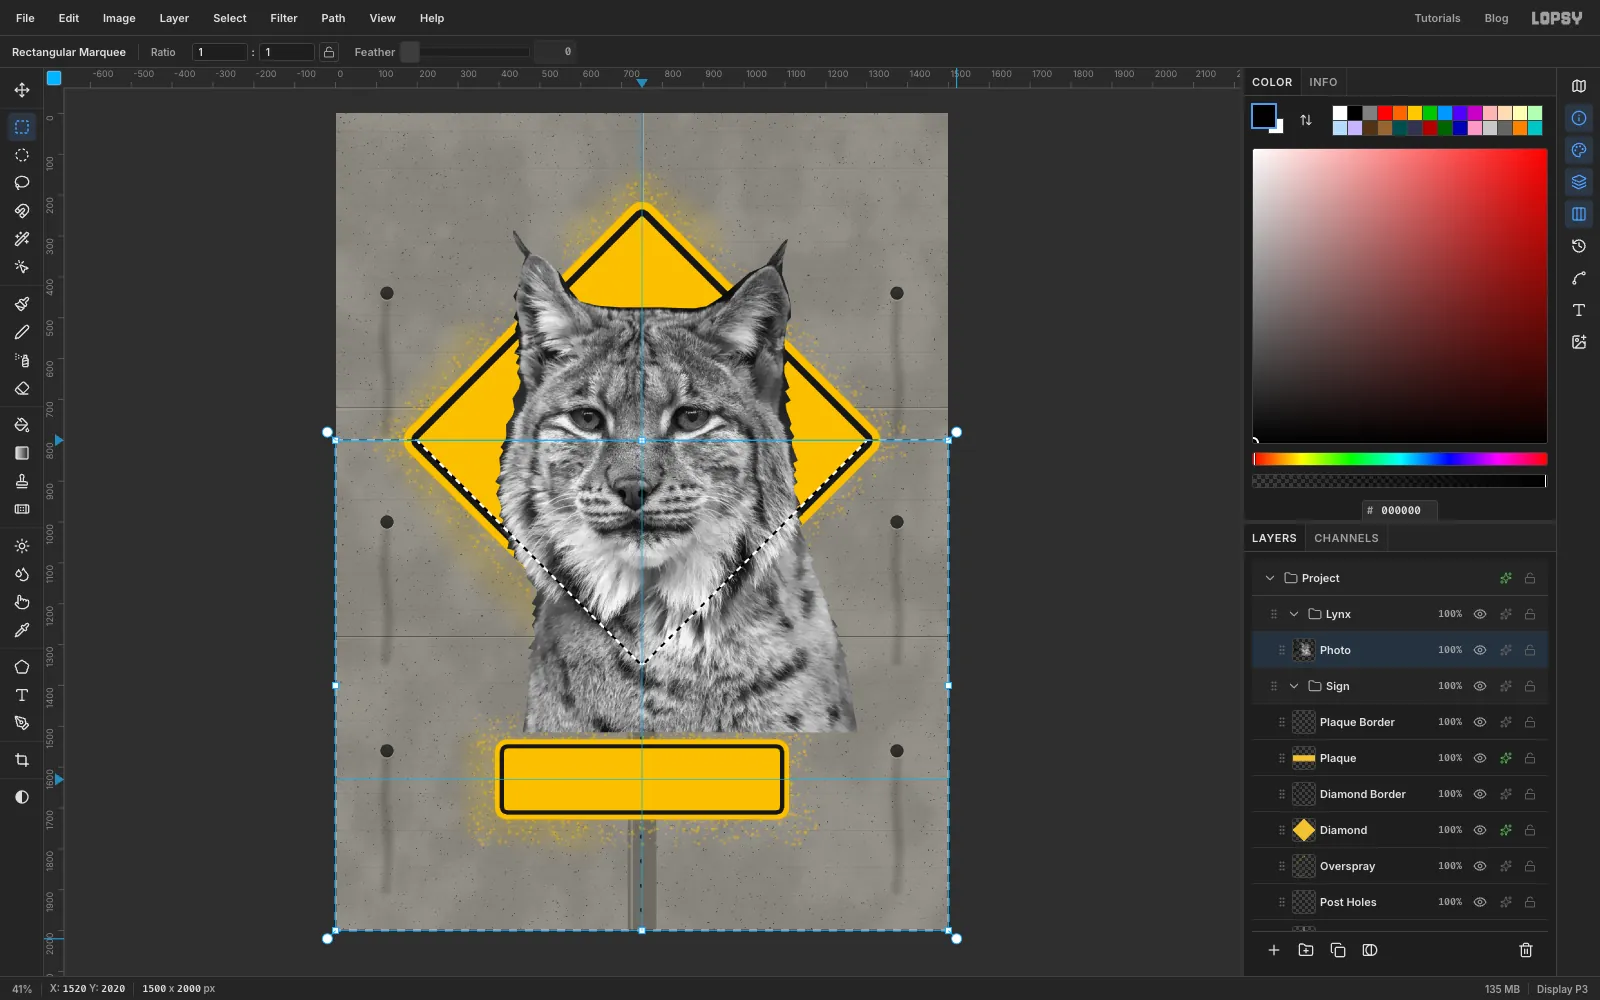
The ears should break out of the top of the sign, but the chest should stay inside the border. Build that shape from the diamond itself.
- Expand the
Signgroup. Pick the Rectangular Marquee, then Cmd-click theDiamondthumbnail. - Choose Select → Shrink… and enter
34. That's 18 + 16, so the selection now runs along the inside edge of the black ring. - Choose Select → Inverse to select everything outside the ring.
- Hold Shift and Alt and drag a marquee from the left edge on the
y 800guide to past the bottom-right corner of the canvas. Shift+Alt keeps only the overlap, so you're left with the area outside the ring below its widest point. - Collapse
Sign, clickPhoto, press Delete and deselect.
- Expand the
-
Spray the cream base plate
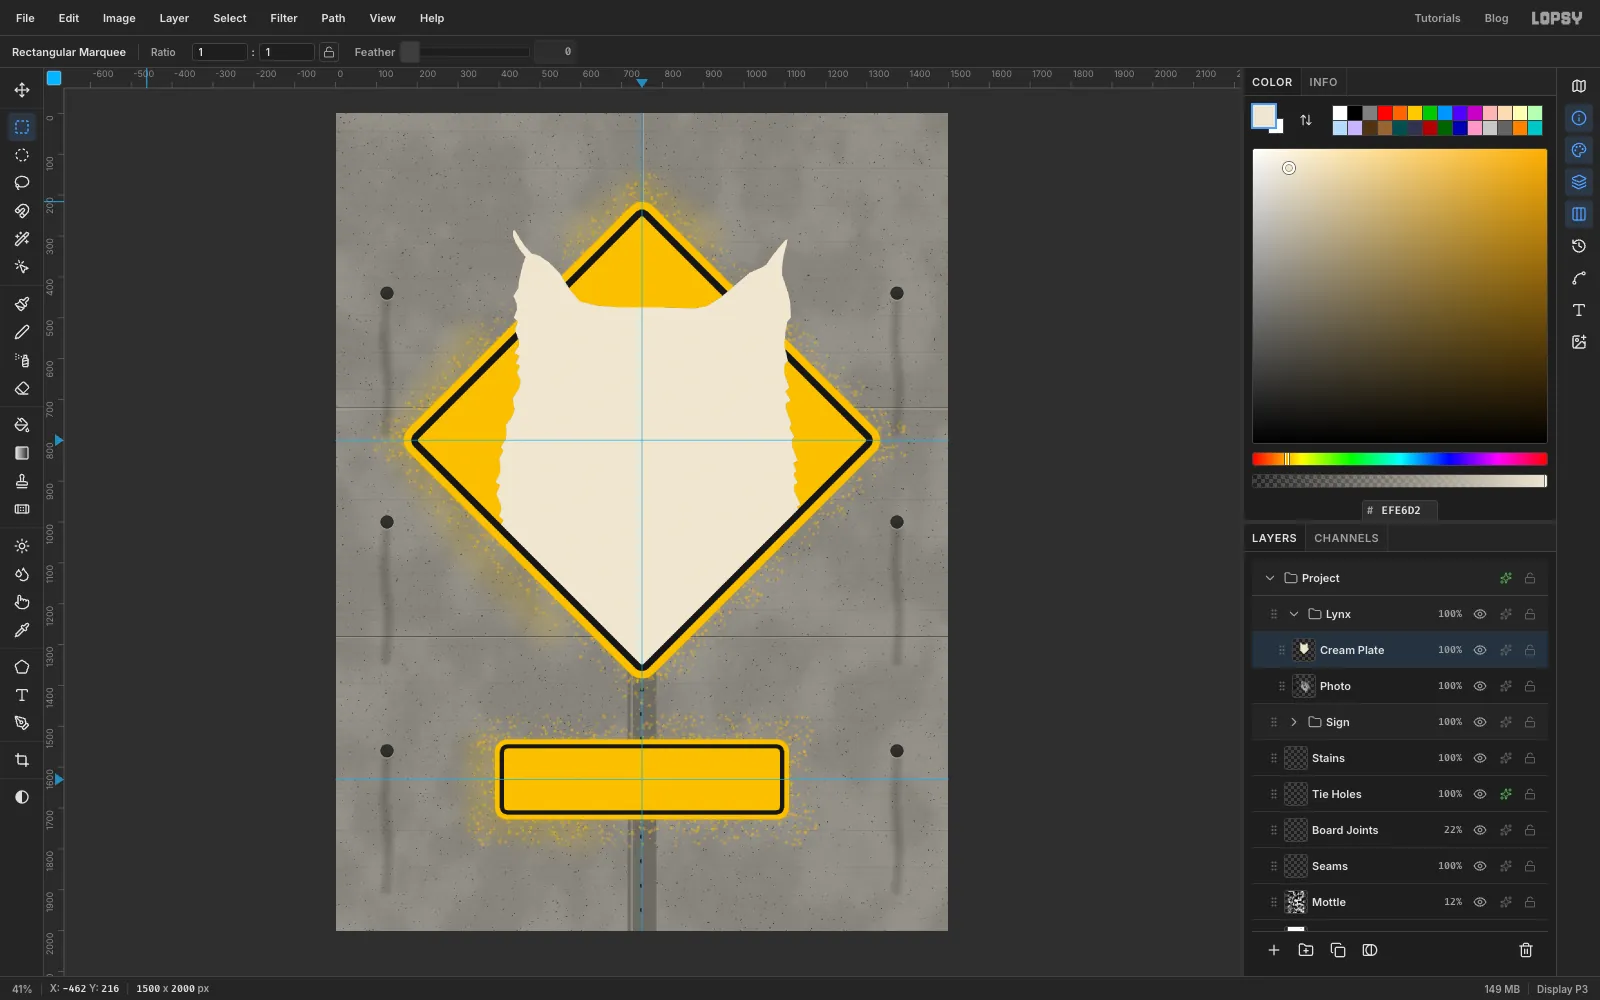
The lightest plate is the whole silhouette.
- Cmd-click the
Photothumbnail to select the lynx's shape. - Click Add Layer, name it
Cream Plate, fill it with and deselect.
- Cmd-click the
-
Threshold the mid-tones
- Click the eye on
Cream Plateto hide it for now. - Select
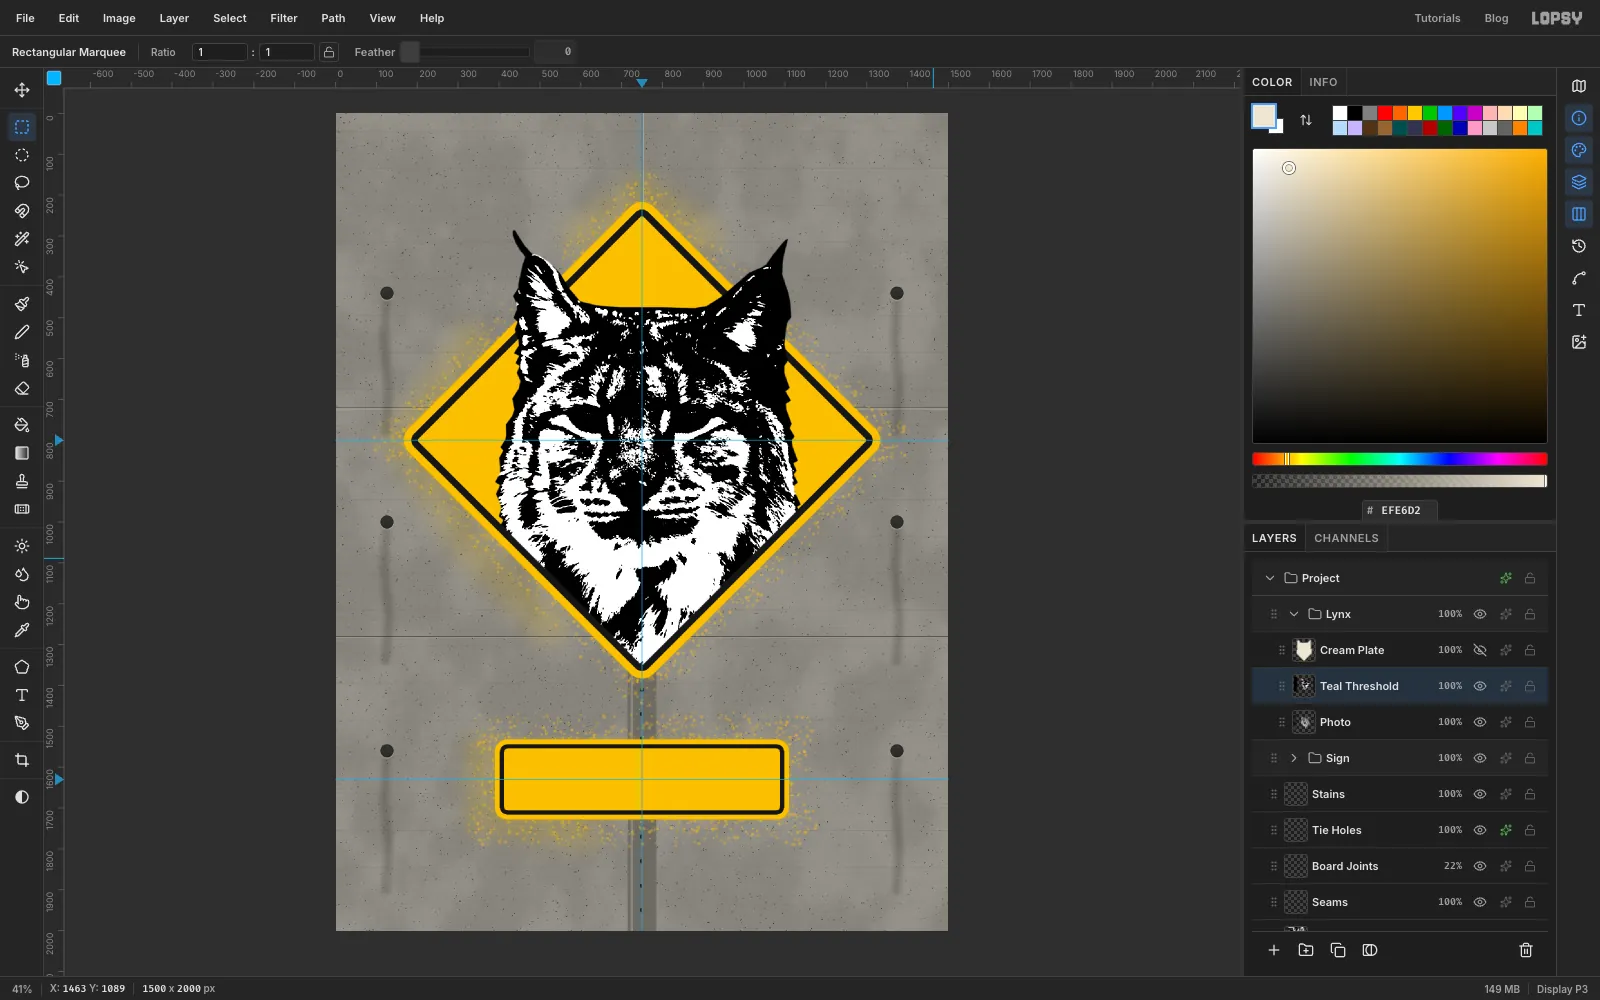
Photoand choose Layer → Duplicate Layer. Rename the copyTeal Threshold. - Run Filter → Threshold… with Level
144. Everything darker than that turns black. - Run Gaussian Blur at Radius
3, then Threshold again at Level128. Blurring and re-thresholding rounds the jagged edges into shapes you could actually cut with a knife.
- Click the eye on
-
Select the black with the Magic Wand
- Pick the Magic Wand. Set Tolerance to
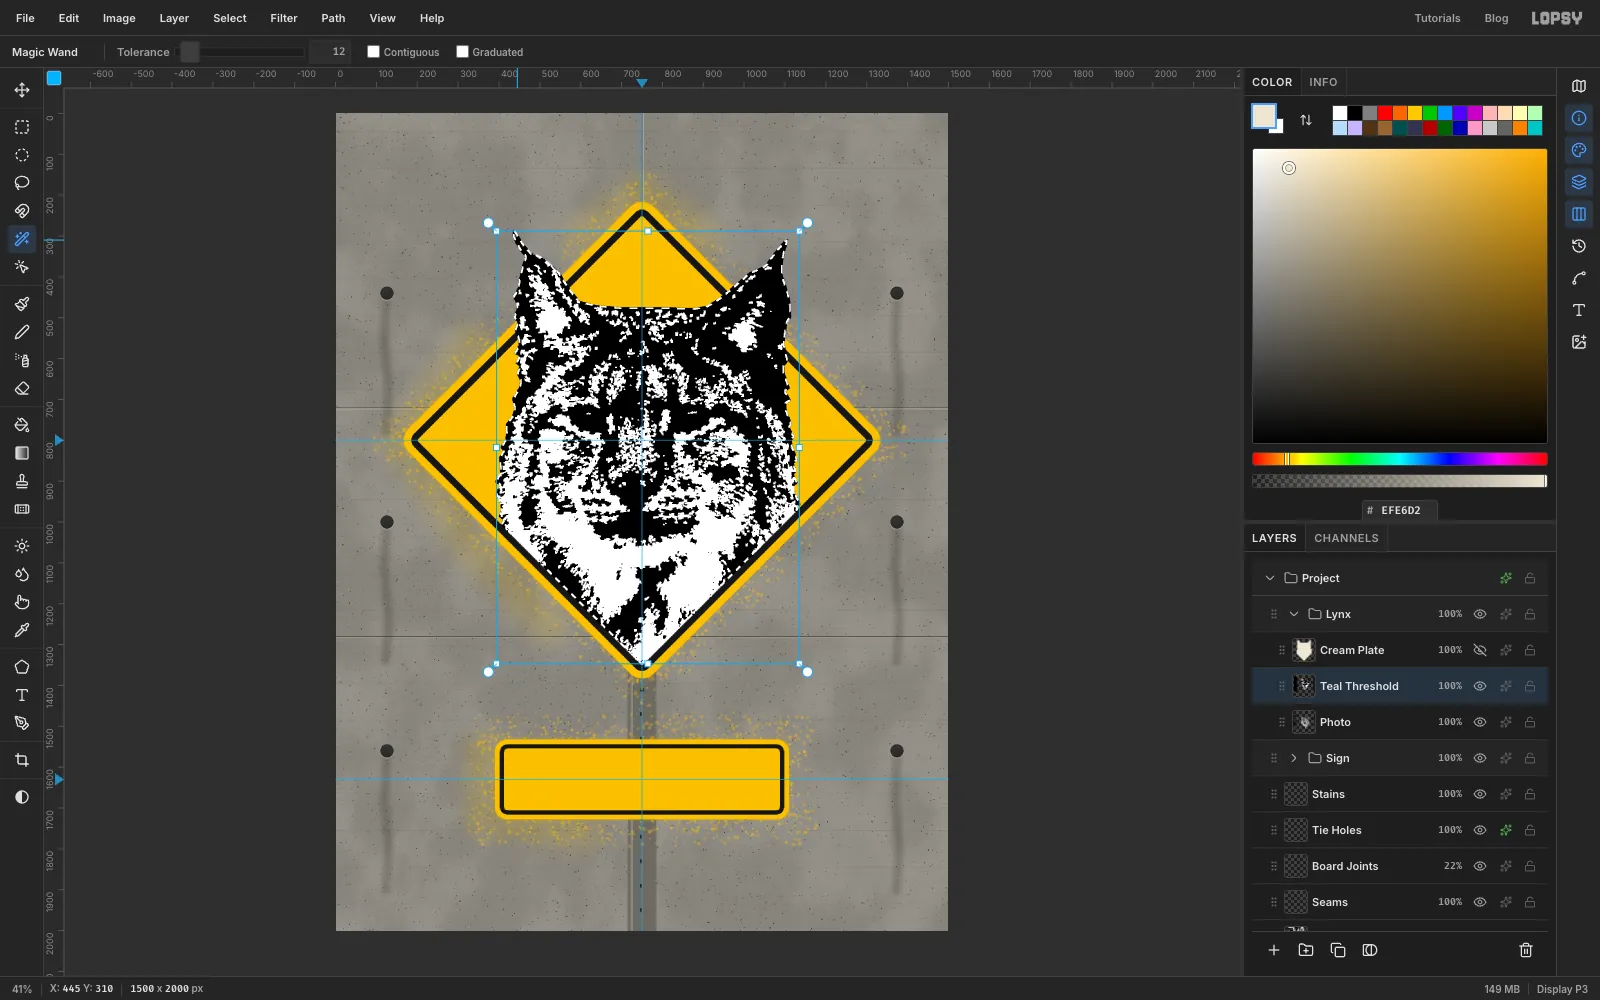
12and untick Contiguous, so one click selects every matching pixel on the layer. - Click any solid black area of the lynx.
- Show
Cream Plateagain and click its row. Add a layer calledTeal Plate, fill it with and deselect. - Delete the
Teal Thresholdlayer with the bin icon at the bottom of the Layers panel.
- Pick the Magic Wand. Set Tolerance to
-
Make the black plate
Repeat the last two steps for the shadows.
- Hide
Cream PlateandTeal Plate. - Click
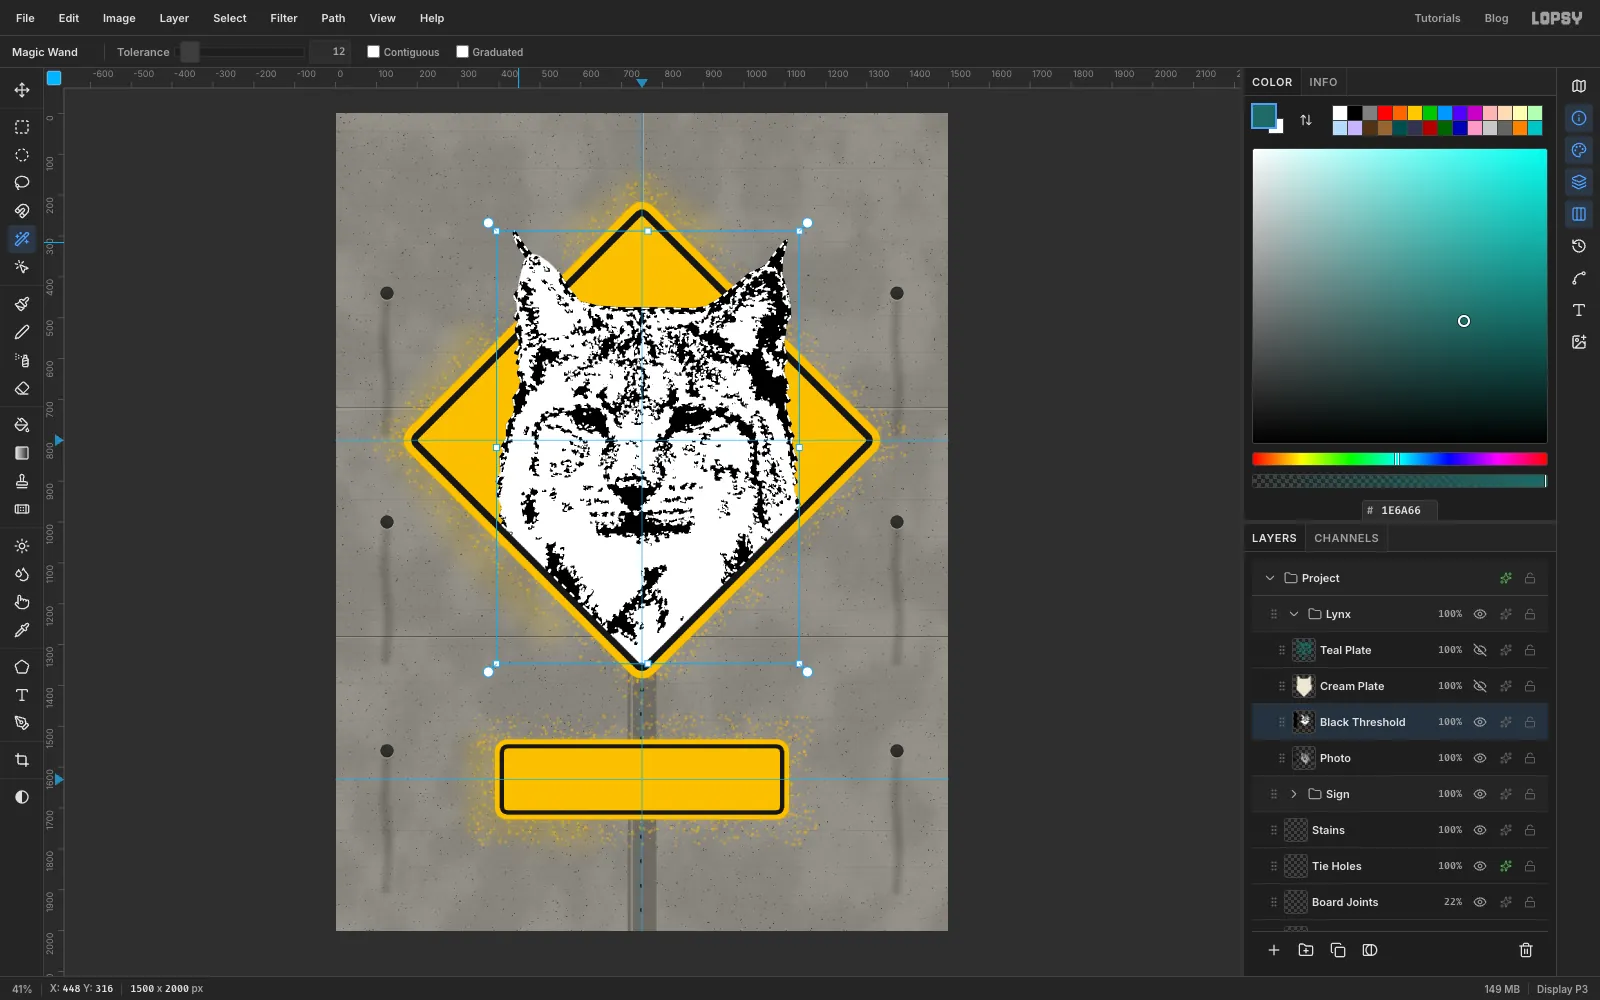
Photo, choose Layer → Duplicate Layer, and name the copyBlack Threshold. - Run Threshold at Level
99, Gaussian Blur at3, then Threshold at128. - Click a black area with the Magic Wand.
- Show both plates again. Click
Teal Plateand add a layer calledBlack Plateabove it. Fill it with , deselect, and deleteBlack Threshold.
- Hide
-
Tidy the cream plate
- Hide the
Photolayer. - Where the darker plates reach the edge of the silhouette, the threshold blur stops them a pixel or two short, which leaves a thin cream rim outlining the head. Trim it:
- Cmd-click the
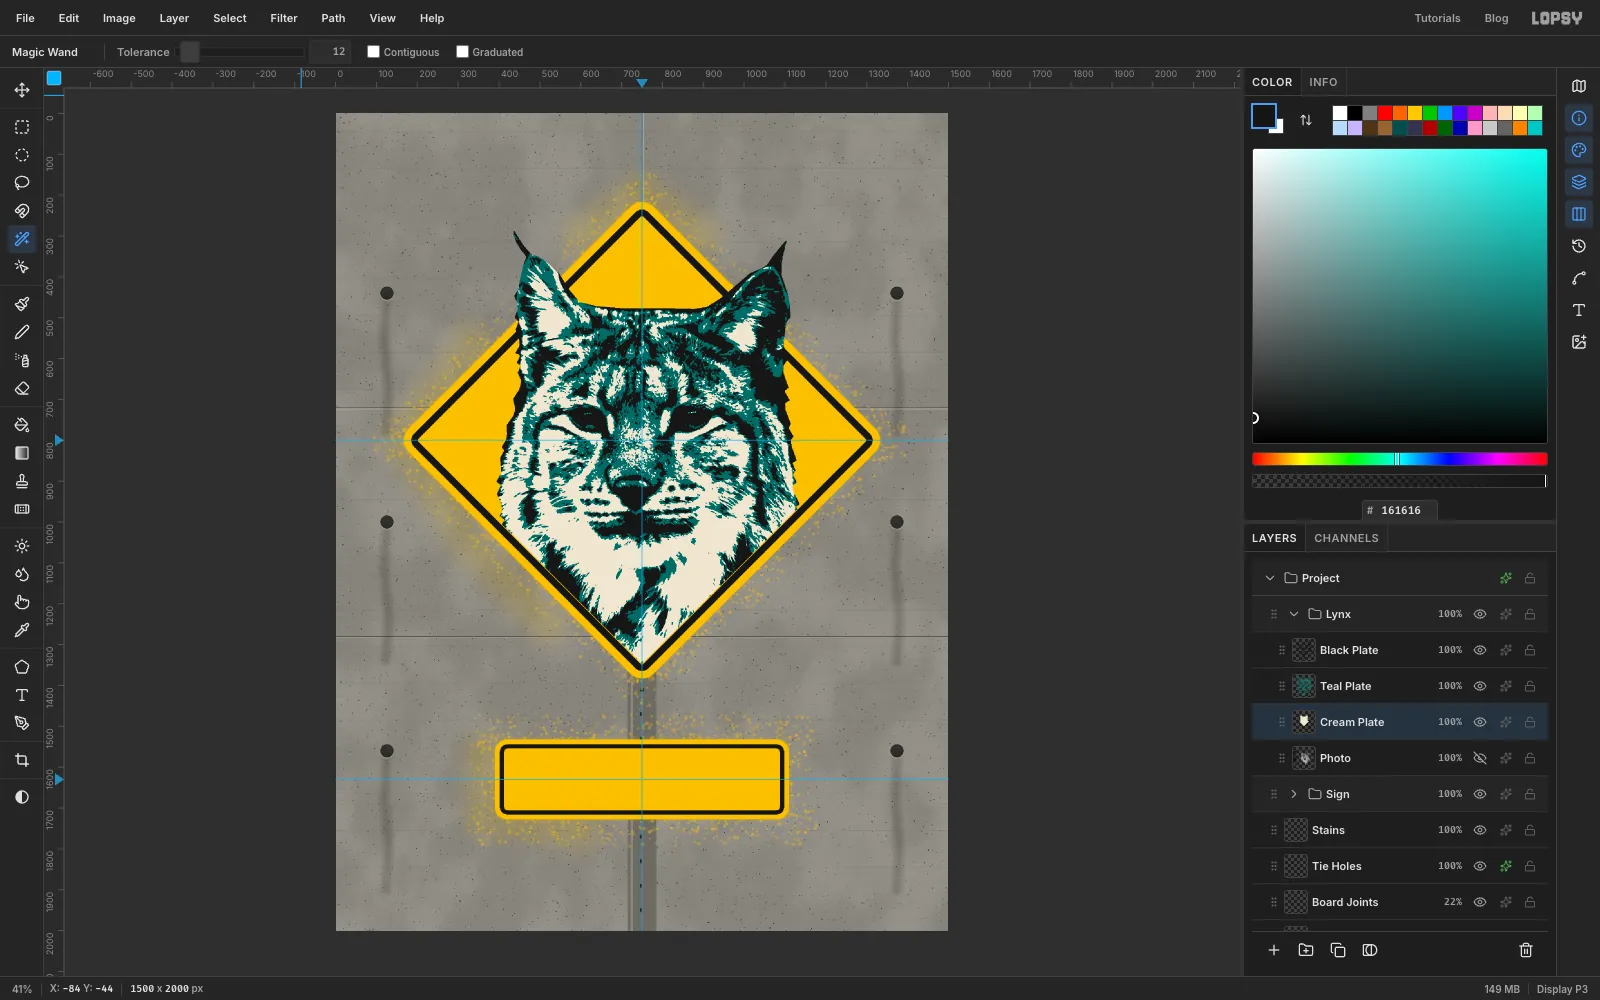
Cream Platethumbnail and Shrink the selection by3. - Choose Select → Inverse, click
Cream Plateand press Delete. - Deselect.
The plates are now stacked lightest at the bottom and darkest on top, the same order you'd spray real ones.
- Hide the
-
Knock the teal plate off register
Hand-held stencils never line up perfectly. Click
Teal Plate, pick the Move tool, and press Right five times and Down three times. Each arrow press moves the layer by 1 px.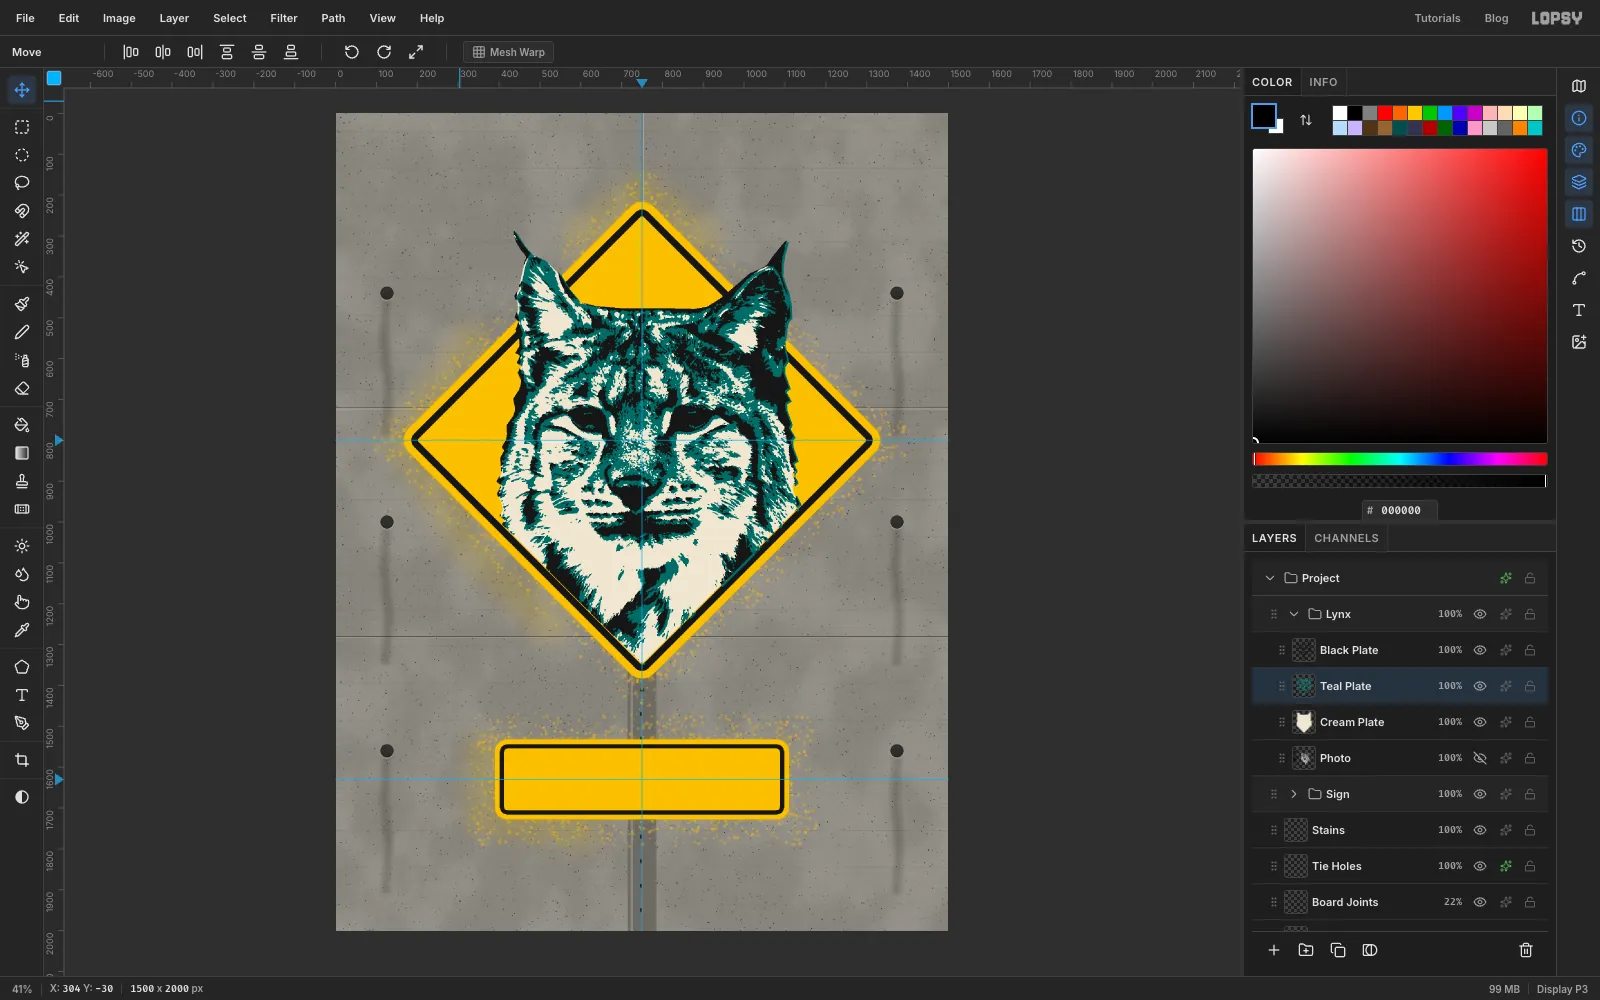
-
Letter the plaque
- Collapse
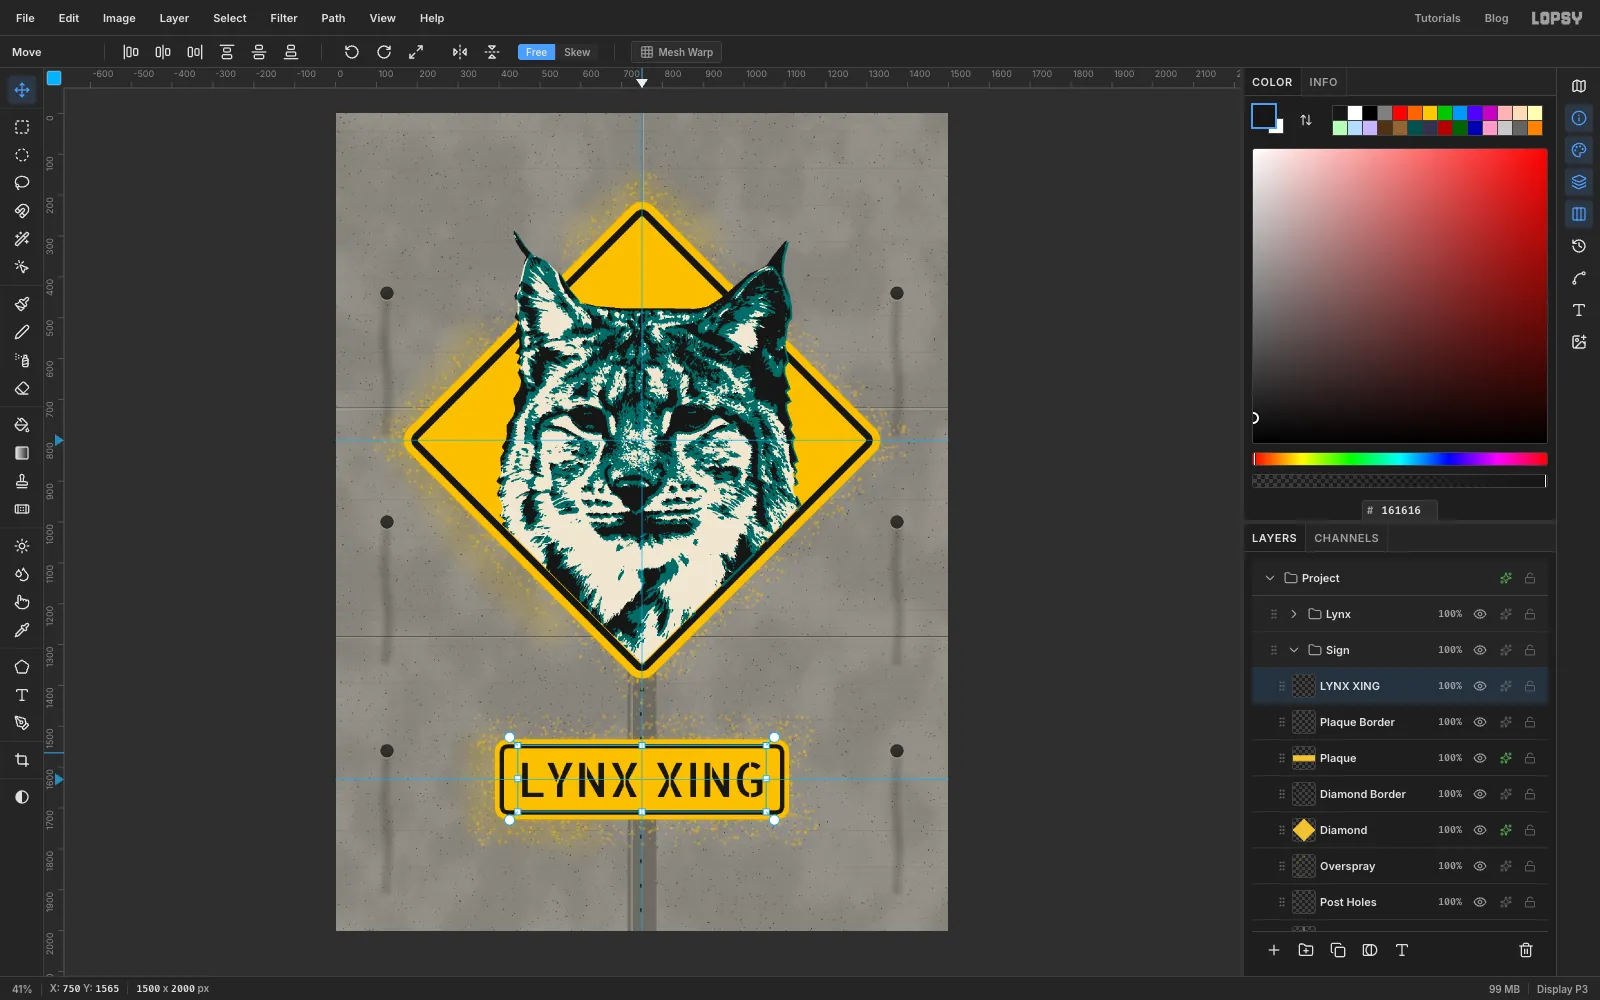
Lynxand expandSign, then clickPlaque Border. The text layer will be created right above it, inside the group. - Set the foreground colour to . Pick the Text tool, then choose Allerta Stencil as the font, set Size to
116and Align to Center. - Click on the centre guide just above the middle of the plaque, type
LYNX XINGand press Tab to commit. - With the Move tool, use the arrow keys to nudge the text until it sits on the
y 1630guide. The gaps above and below the letters should match. At the sides you should have about 45 px between the letters and the black border. If the side gaps are much smaller, lower the Size.
- Collapse
-
Stencil the tagline
- Collapse
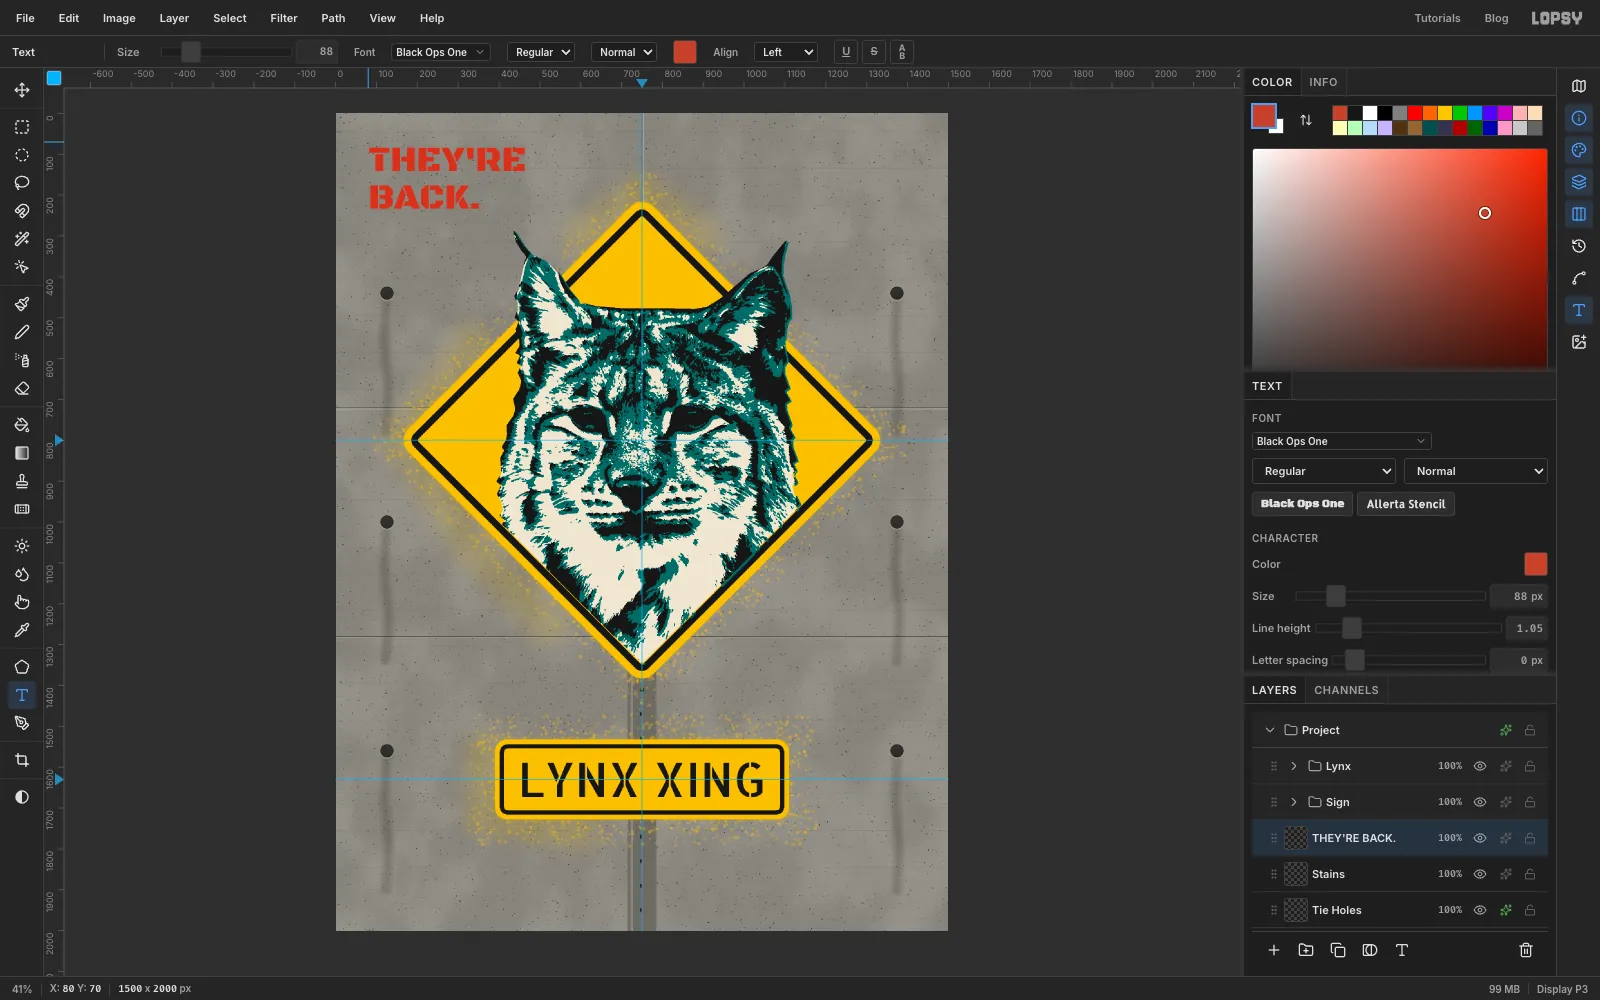
Signand clickStains, so the tagline sits on the wall under the sign. - Set the foreground colour to . Pick the Text tool, choose Black Ops One, set Size to
88and Align to Left. - Click in the top-left corner, near
80, 70. TypeTHEY'RE, press Enter, typeBACK.and press Tab. - Open the Text panel from the right-hand rail and set Line height to
1.05to pull the two lines together.
- Collapse
-
Tilt the tagline
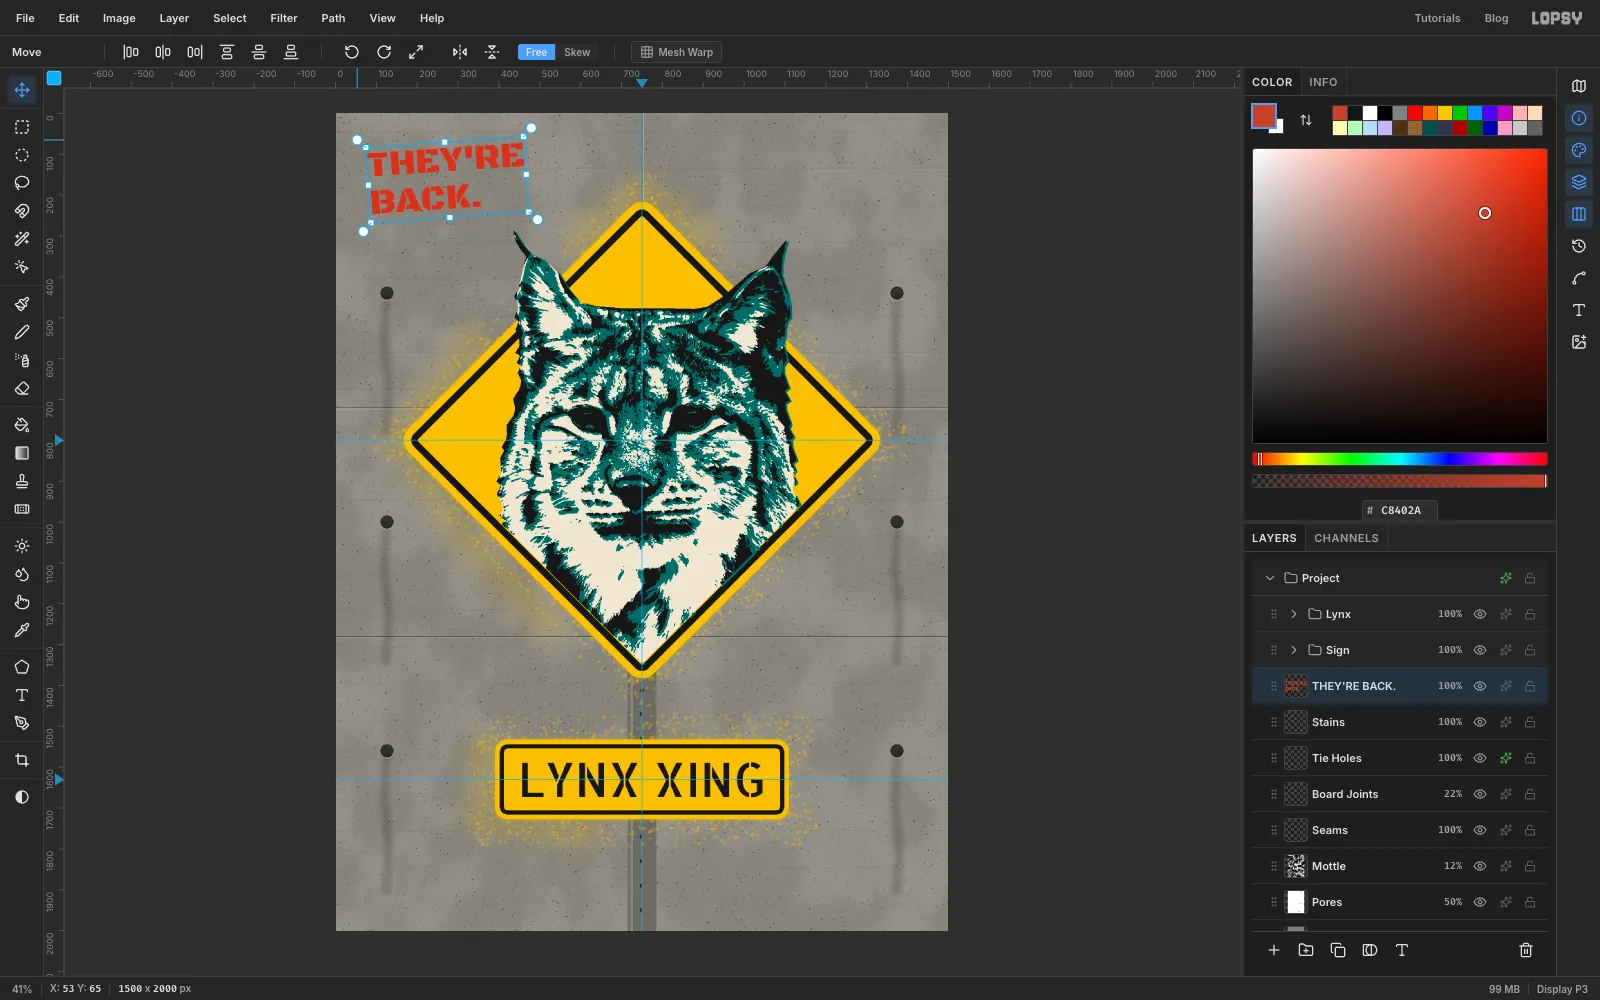
- Pick the Move tool. Handles appear around the text's box.
- Drag the rotation handle outside its top-left corner a little anticlockwise (towards the lower left), about 4°. The text stays live and editable.
- Press Cmd+D to commit.
-
Set the footer
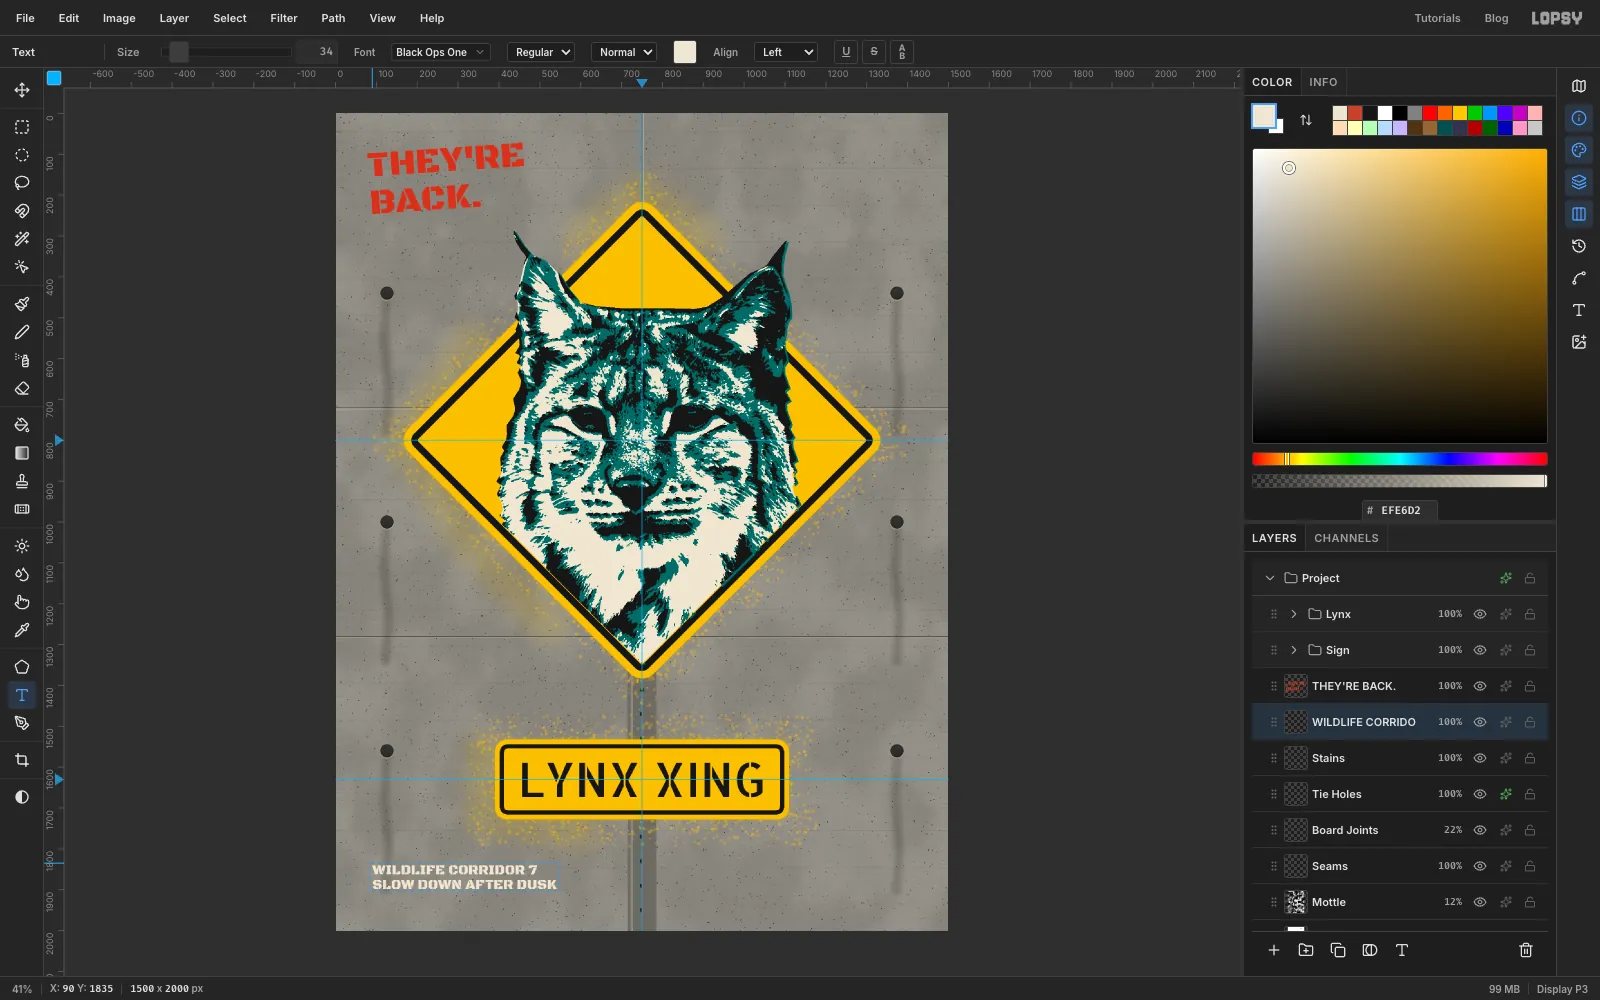
- Click
Stainsfirst. With a text layer selected, changing the font or size restyles that layer, so this keeps the tagline safe. It also puts the footer on the wall, under the tagline. - Set the foreground colour to . With the Text tool, choose Black Ops One at Size
34. - Click at
90, 1835and typeWILDLIFE CORRIDOR 7. Press Enter, typeSLOW DOWN AFTER DUSKand press Tab.
Its left edge sits about 90 px in from the edge of the canvas, roughly in line with the tagline above.
- Click
-
Sign it with a tag
Street artists sign with a quick freehand tag, not a font.
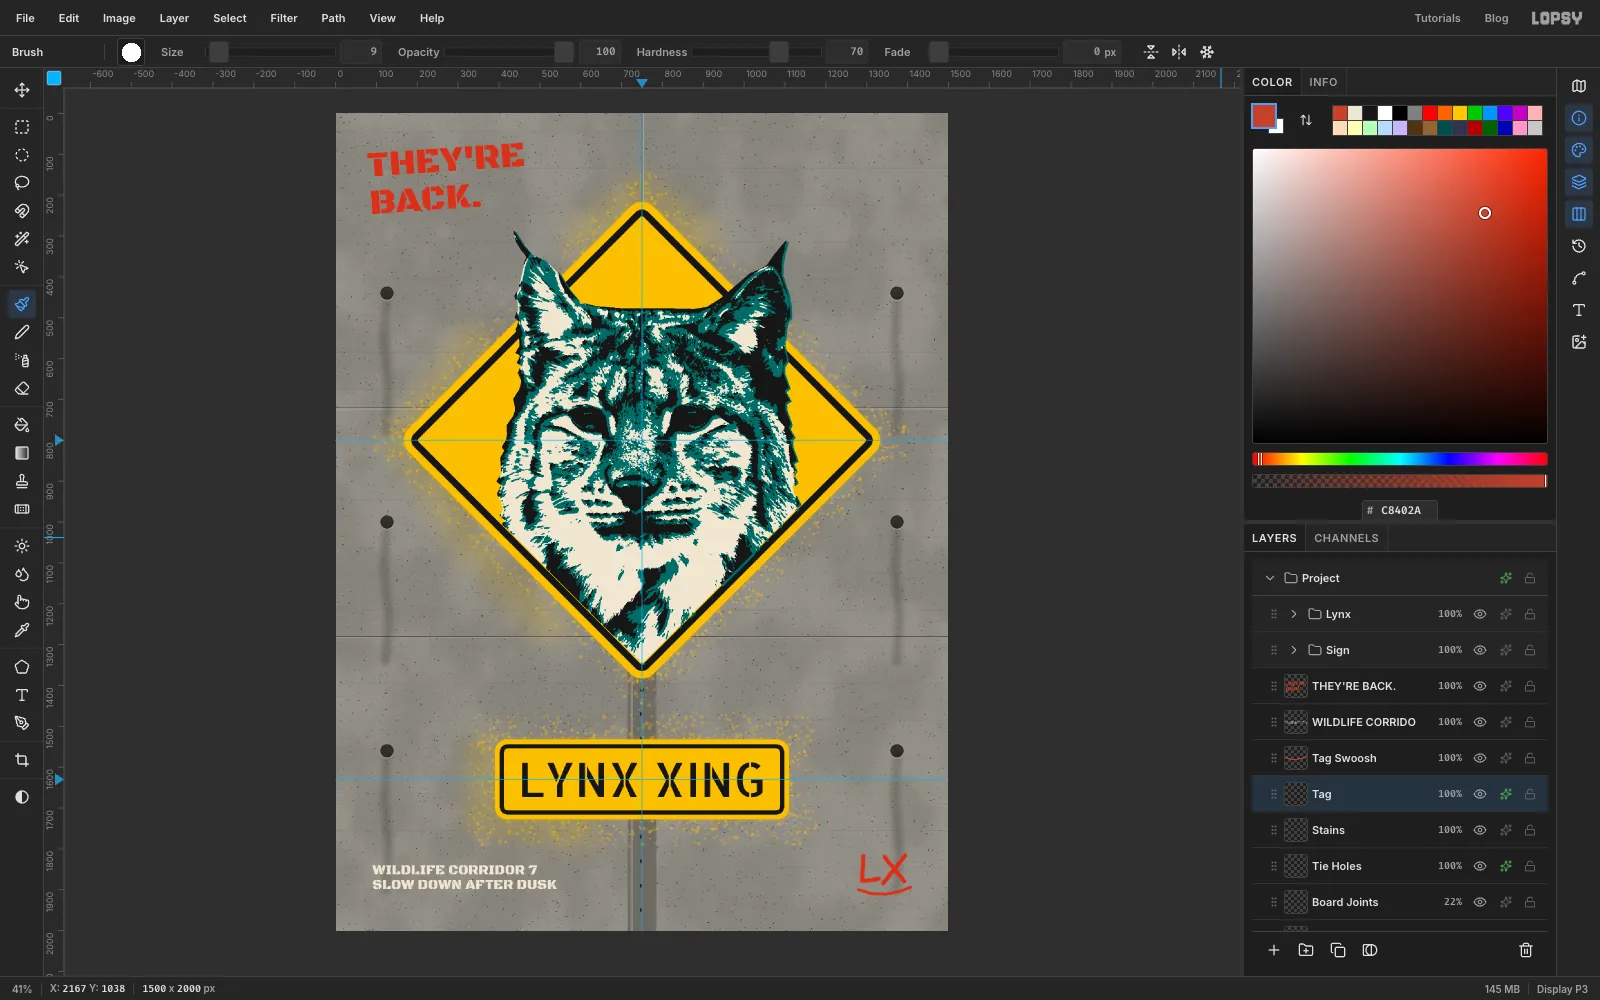
- Click
Stainsand add a layer calledTag. Pick the Brush, set Hardness70and Size12, and use . - In the bottom-right corner, write an
Lin one stroke and anXin two. Keep the right side about 90 px from the canvas edge, so it mirrors the footer's margin. - Add a layer called
Tag Swoosh, drop the brush to size9, and drag a slightly curved underline under the letters. Keeping it on its own layer means you can redraw the swoosh without touching the letters. - Give
Tagan Outer Glow with Size6, Opacity30and colour for a hint of overspray.
- Click
-
Tilt both tag layers together
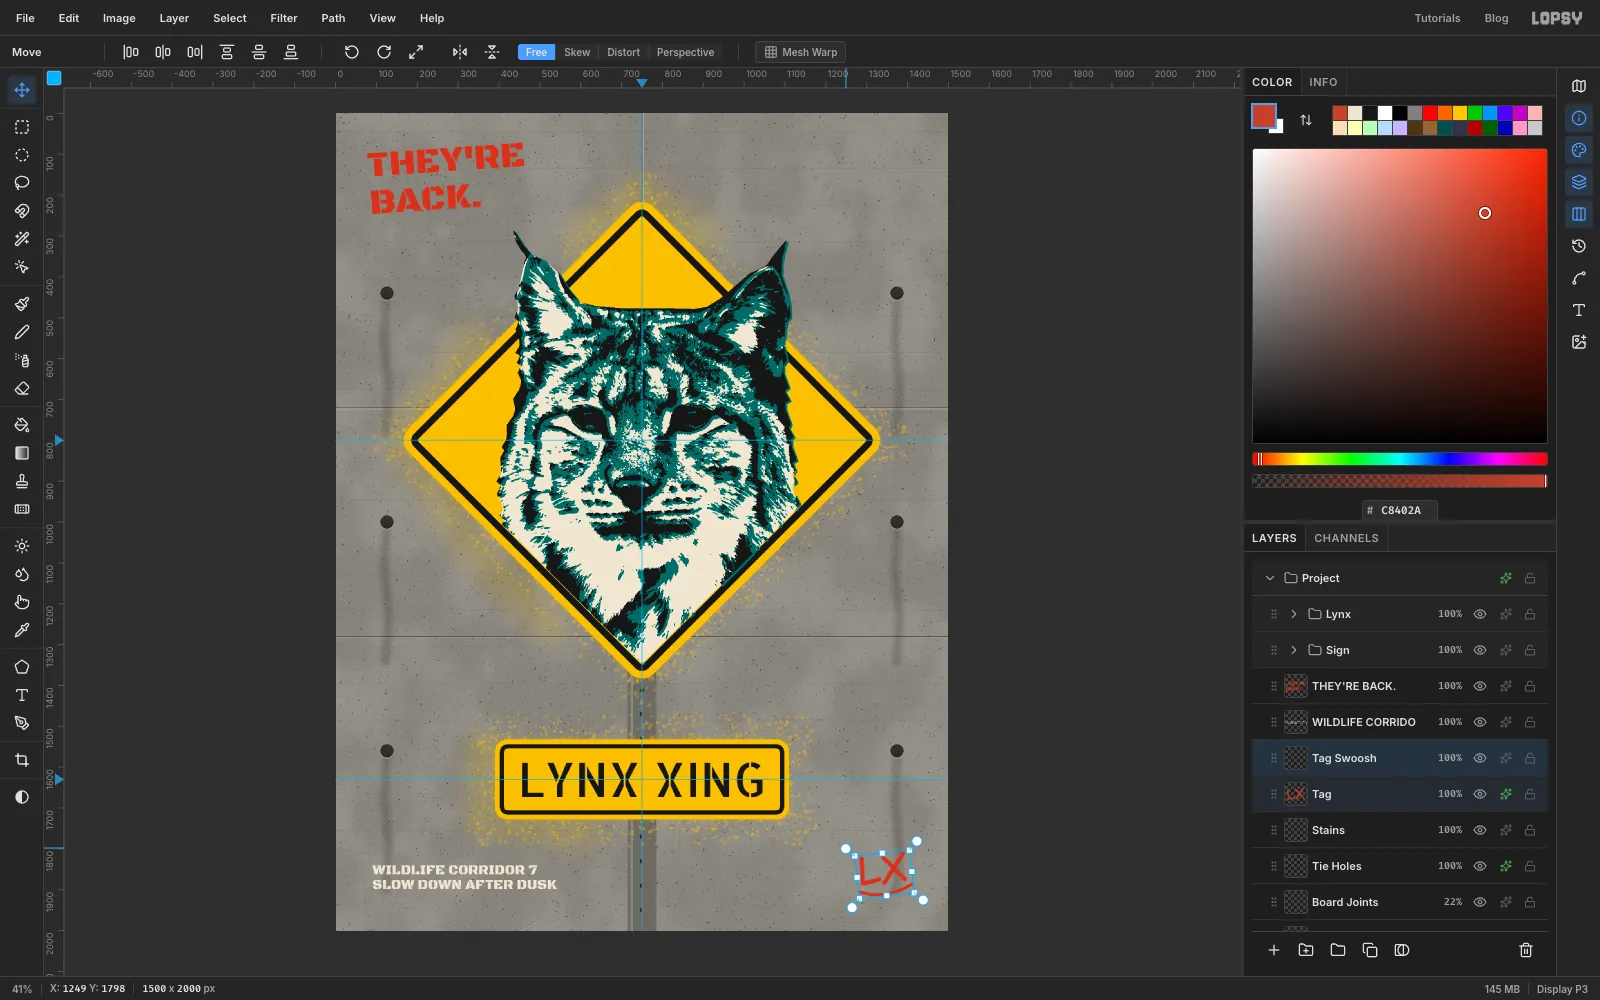
- Click
Tag Swoosh, then Shift-clickTagso both rows are highlighted. - Pick the Move tool. One box now frames both layers.
- Drag a rotation handle about 6° anticlockwise, then press Cmd+D.
- Click
-
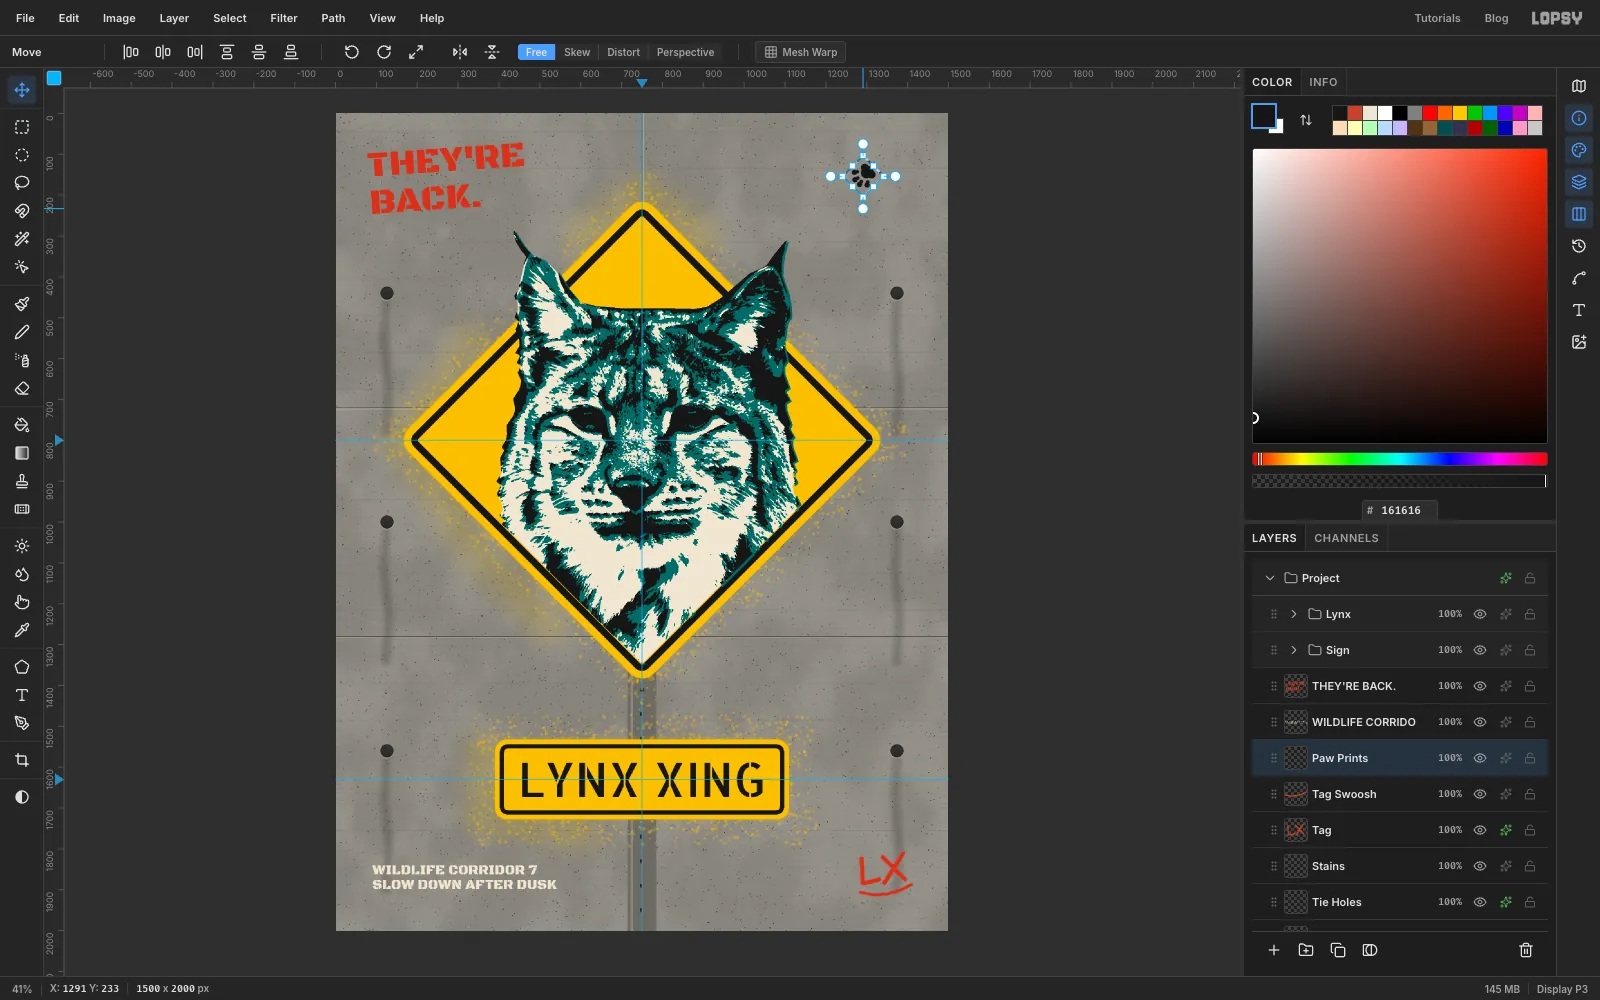
Draw one paw print
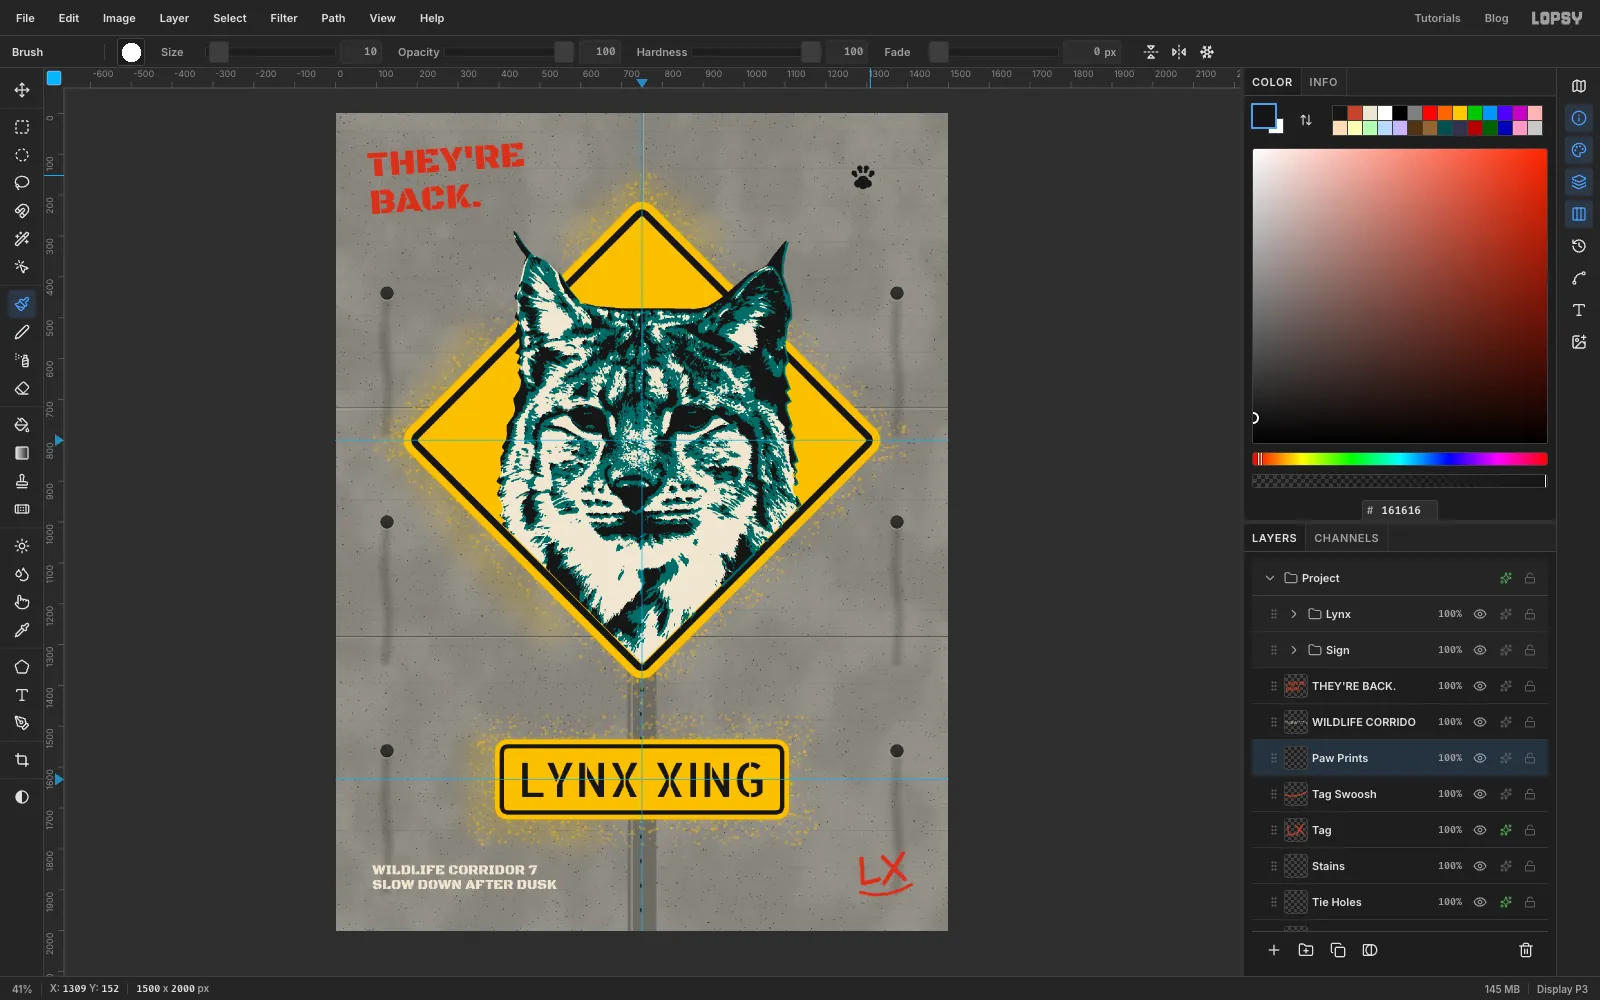
- Click
Tag Swooshand add a layer calledPaw Prints. - Pick the Brush at Hardness
100in . Work near1290, 155in the top-right corner. - Heel pad: click once at size
28. Then click at size20just below it on each side, and once at size22at the bottom middle. That makes the three lobes of a cat's heel pad. - Toes: above the pad, click four times at size
14in a gentle arc. Then click once at size10just below each toe, towards the pad, to make it a teardrop.
The whole print is about 60 px tall.
- Click
-
Turn the paw toward the lynx
The trail should walk down the wall towards the lynx's right ear.
- With the Rectangular Marquee, drag a square around the print.
- Pick the Move tool. Hold Cmd and drag a rotation handle anticlockwise until the toes point down and to the left. Cmd snaps to 15° steps, so stop at 135°.
- Press Cmd+D.
-
Walk a trail and fade it with a mask
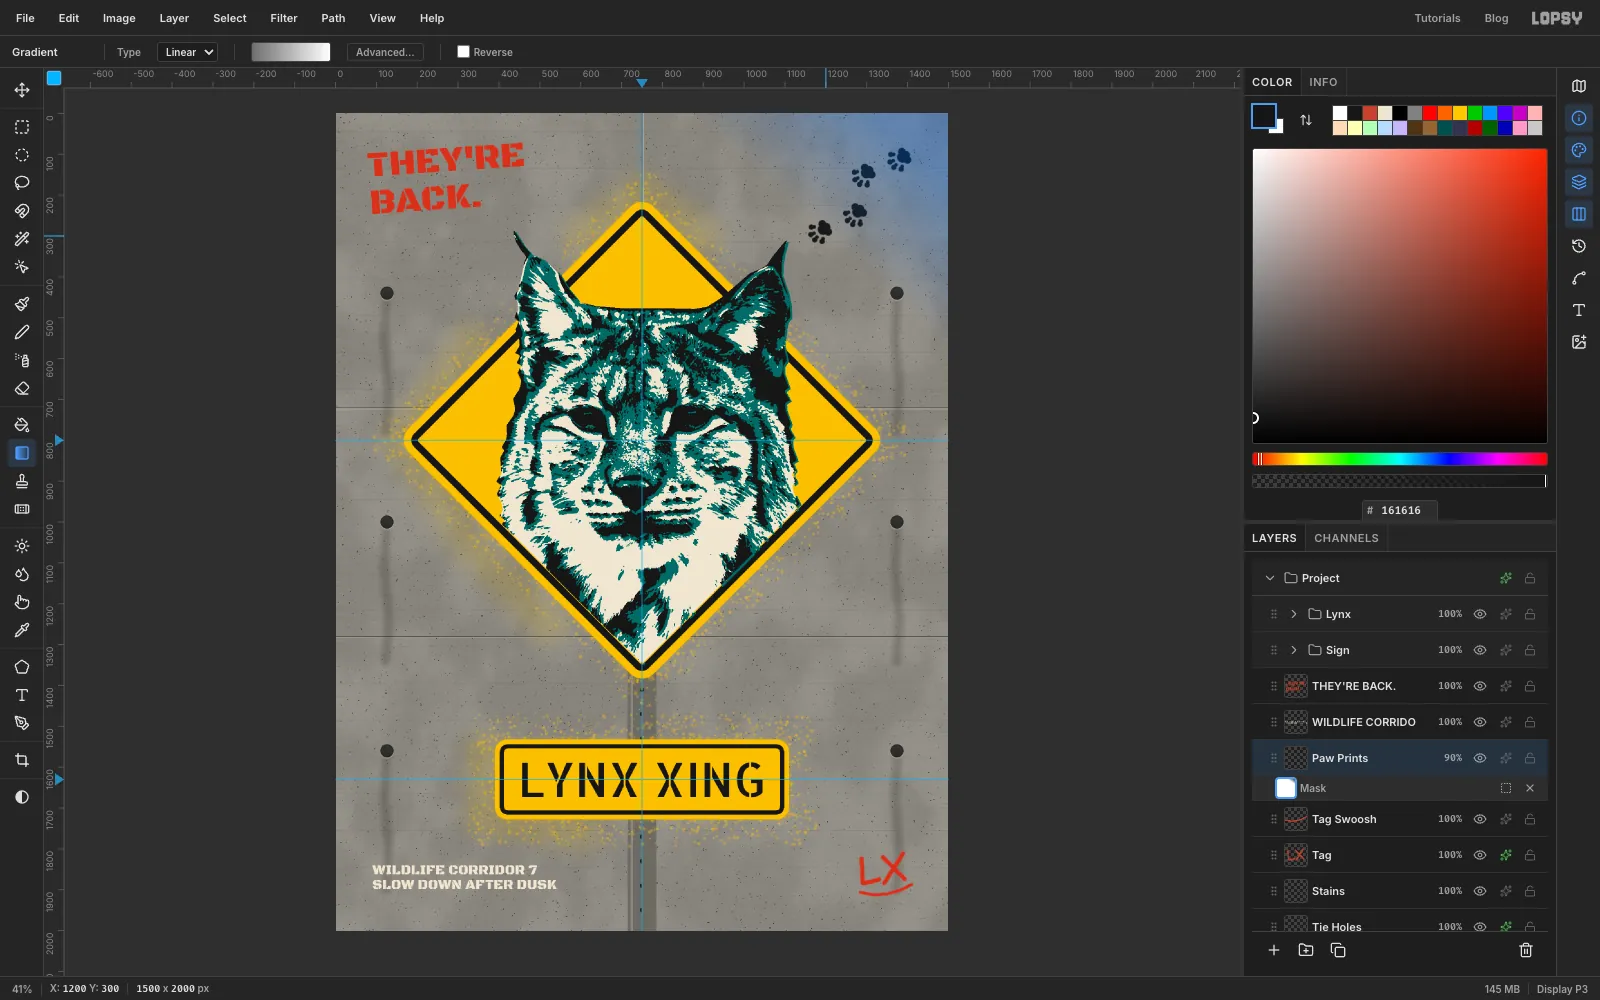
You want four prints in all: the one you drew, one above and to the right of it near the top-right corner, and two below it heading for the lynx's right ear. Alternate them left and right of the line, like real footsteps.
- Marquee around the print, press Cmd+C and then Cmd+V. The copy lands in place on a new layer.
- Drag the copy with the Move tool to its spot. Marquee around it and turn it about 10° either way, so the prints don't look stamped. Press Cmd+D, then Cmd+E to merge it down into
Paw Prints. - Repeat for the other two copies. Keep the top print about 90 px from the right edge.
- Run Gaussian Blur at
1, then setPaw Printsto Multiply at90%. - Click Add Mask, then click the mask thumbnail on the new Mask row to edit it.
- Pick the Gradient tool, set the type to Linear and click Advanced…. Click the left stop under the gradient bar and type
6E6E6Ein the hex field, then click the right stop and typeFFFFFF. Click Done, then drag from the top-right corner down to the print nearest the ear. - Click the
Paw Printsname to stop editing the mask.
The oldest prints fade out, as if the lynx has been walking towards you.
-
Let the black plate drip
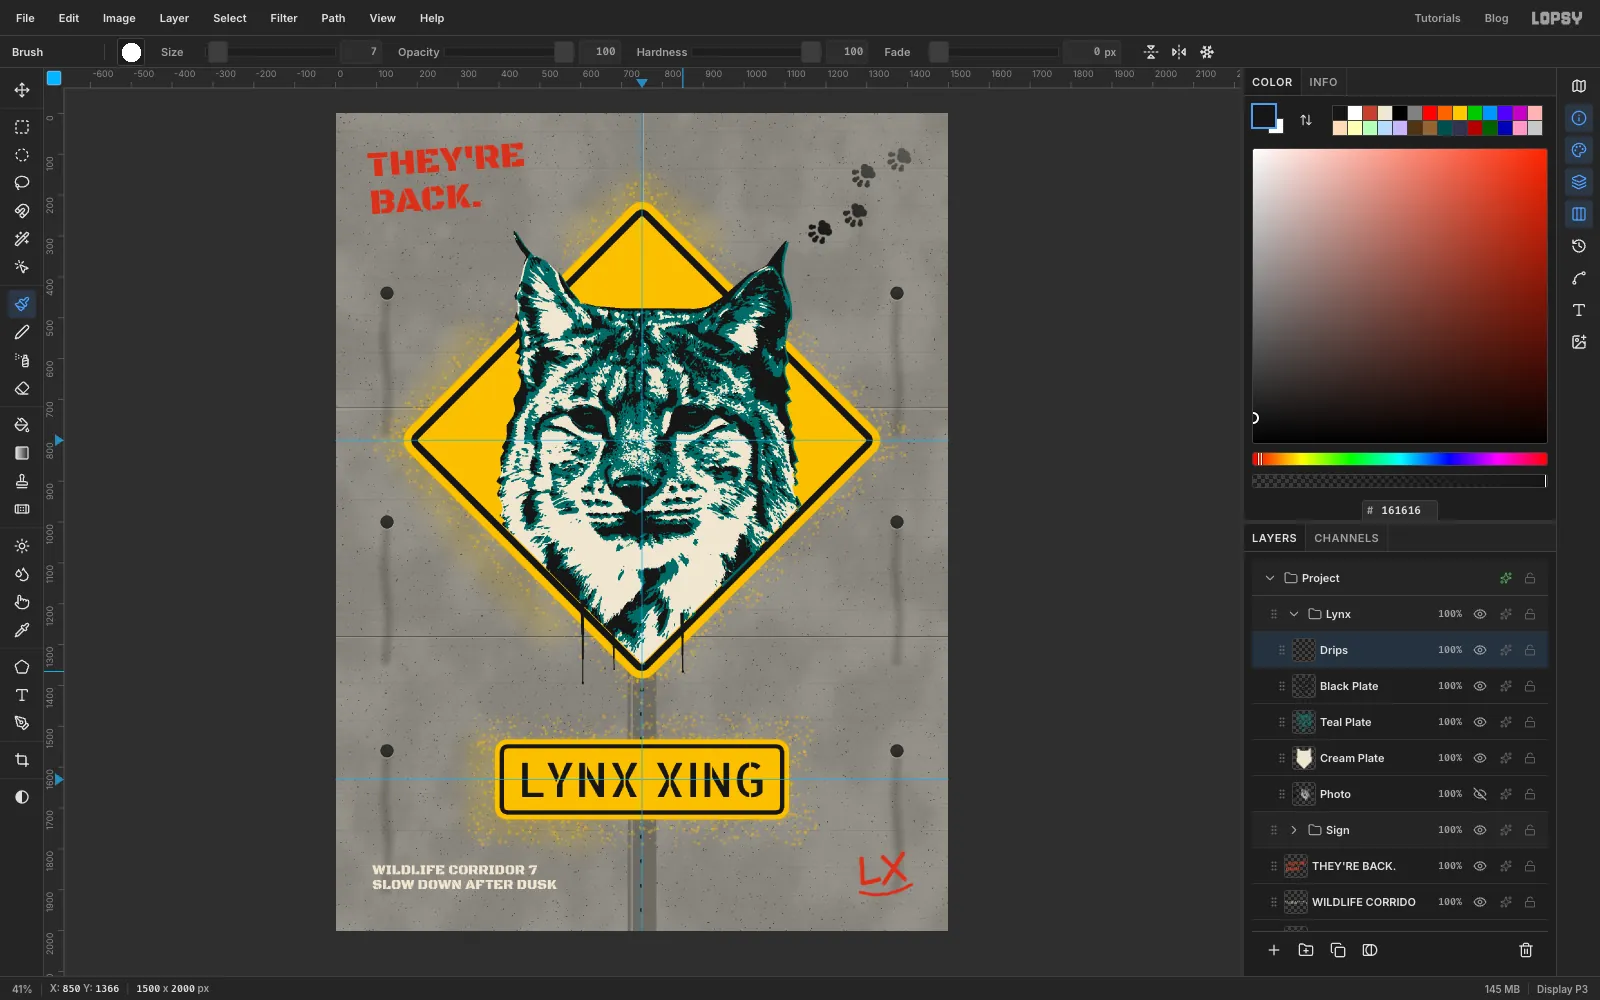
Too much paint on a stencil runs. You'll make three drips, about 200, 90 and 140 px long. Each one starts wide, narrows as it runs, and ends in a bulb.
- Expand
Lynx, clickBlack Plate, and add a layer calledDrips. Use the Brush at Hardness100in . - Find a spot where the black plate touches the bottom of the cut-out, just inside the border. Click there at Size
11. - Make four evenly spaced Shift-clicks straight down to the drip's full length. Step the brush size down before each one:
9,7,5,4. - At the end, click once at size
5and once at size7just below it for the bulb. - Repeat for the other two drips.
- Expand
-
Add overspray to the plates
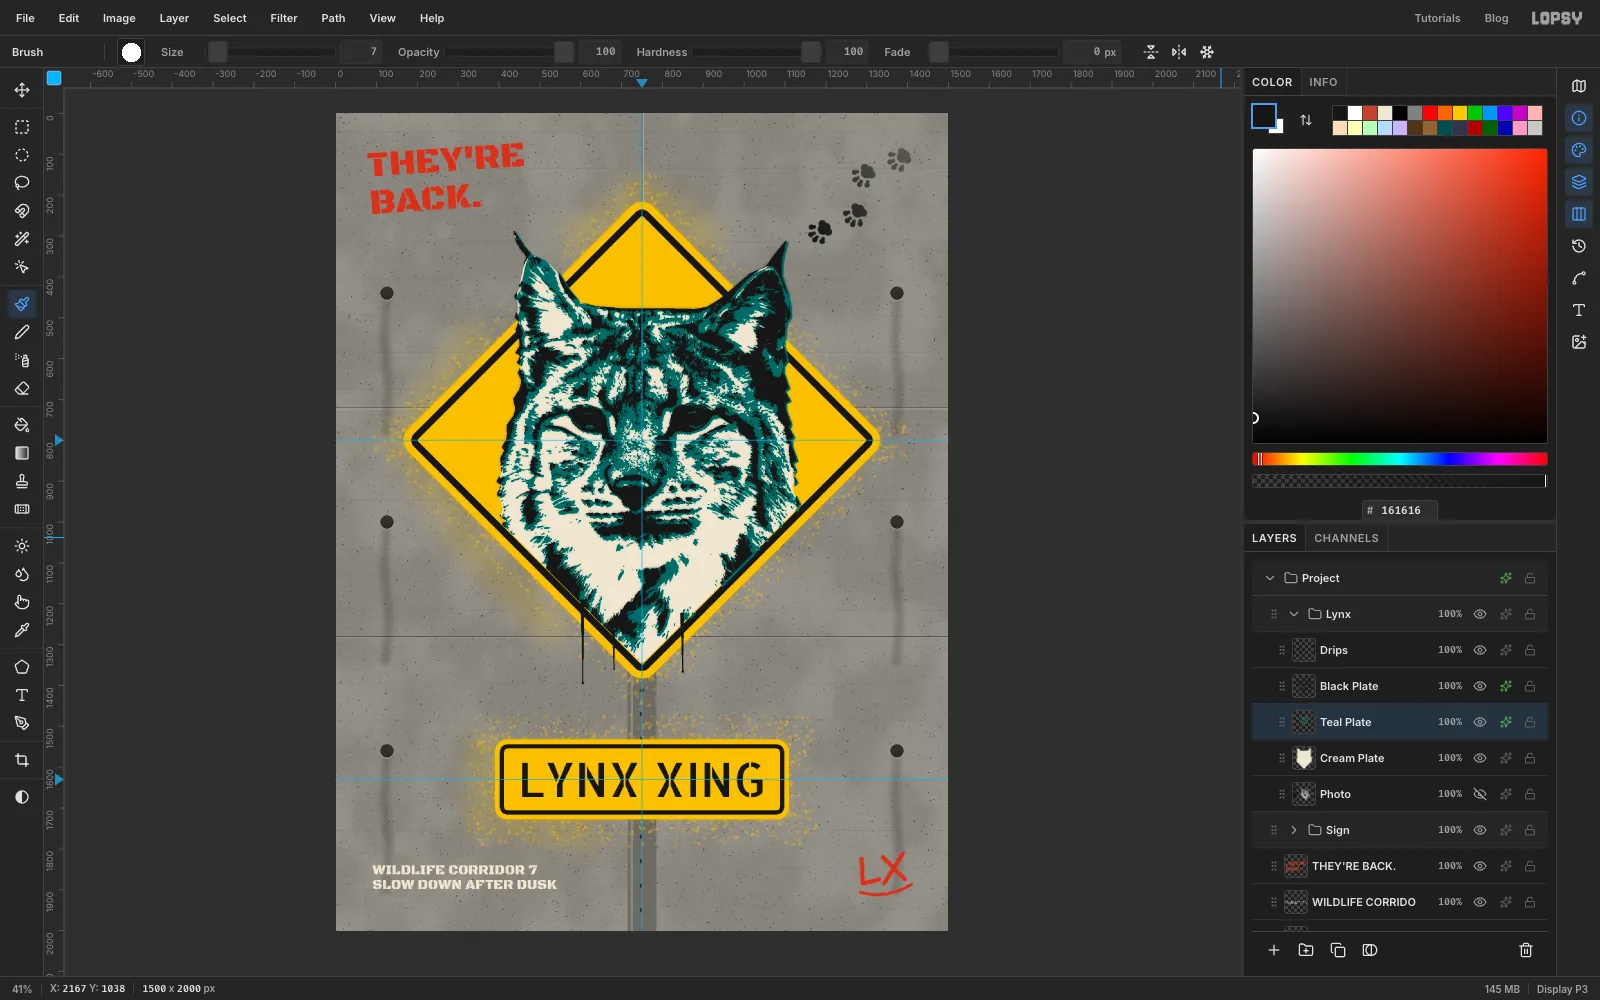
- Give
Black Platean Outer Glow with Size10, Opacity35and colour . - Give
Teal Platean Outer Glow with Size8, Opacity25and colour .
- Give
-
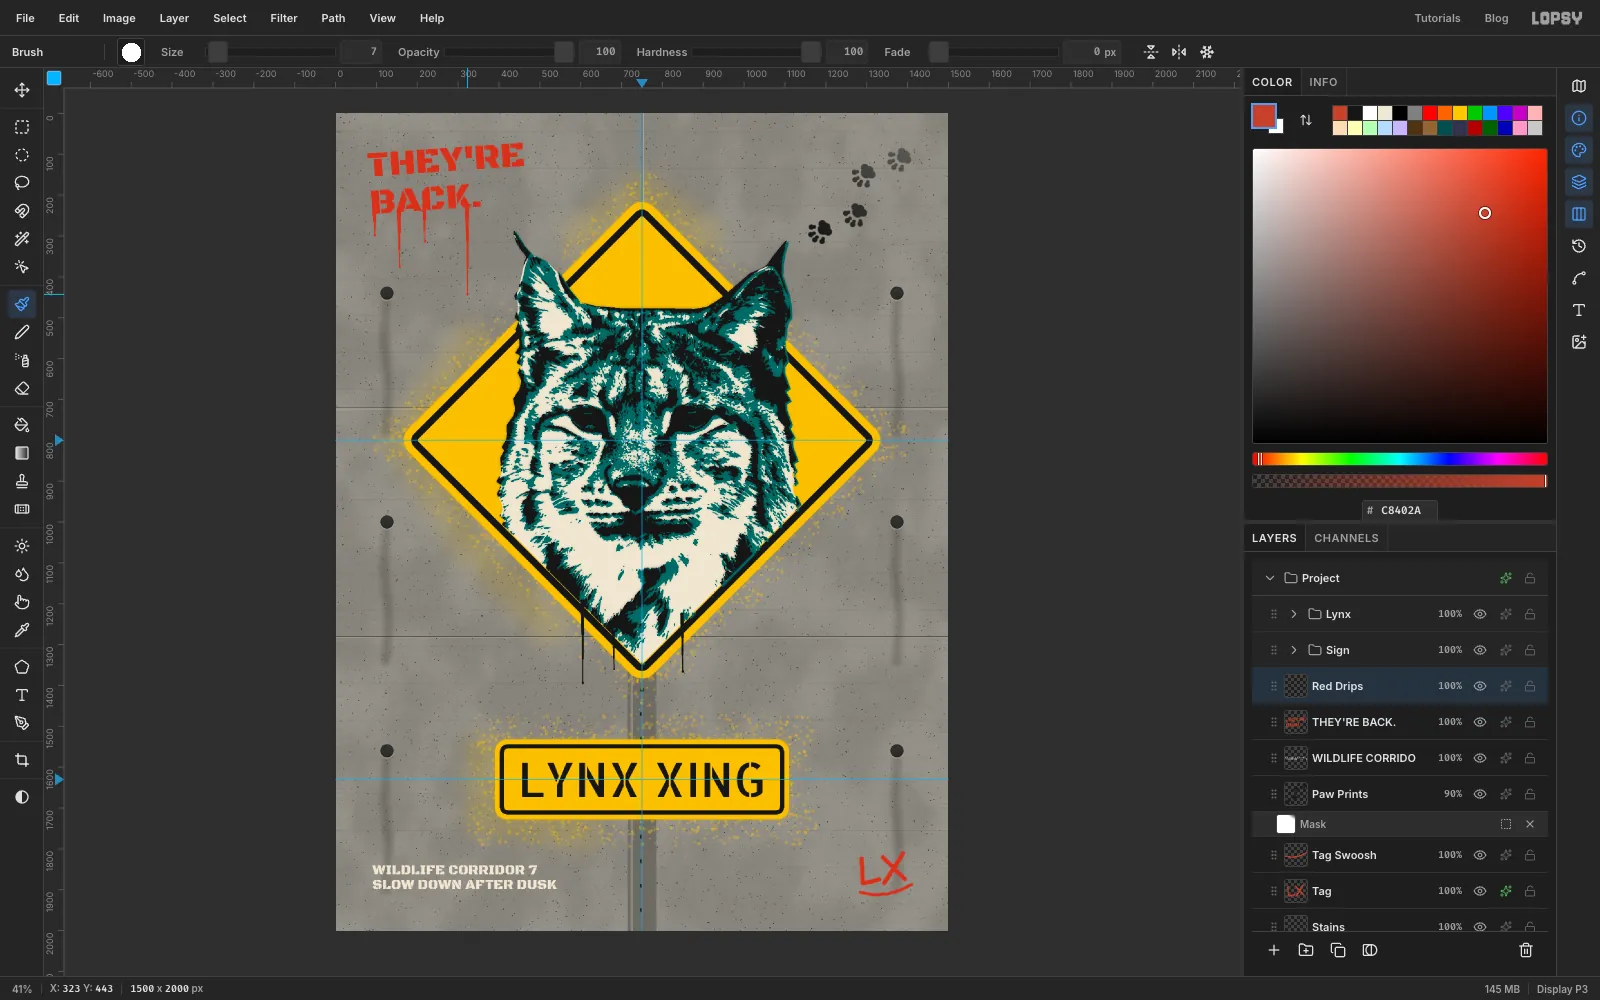
Drip the red letters
- Collapse
Lynx, click theTHEY'RE BACK.layer and add a layer calledRed Dripsabove it. - In , make four drips from the bottoms of the letters in
BACK.(the B, the A, the C and the K), using the same stepped technique. Start at size12where the drip leaves the letter and finish at4. - Vary the lengths: about 60, 140, 90 and 220 px.
- Collapse
-
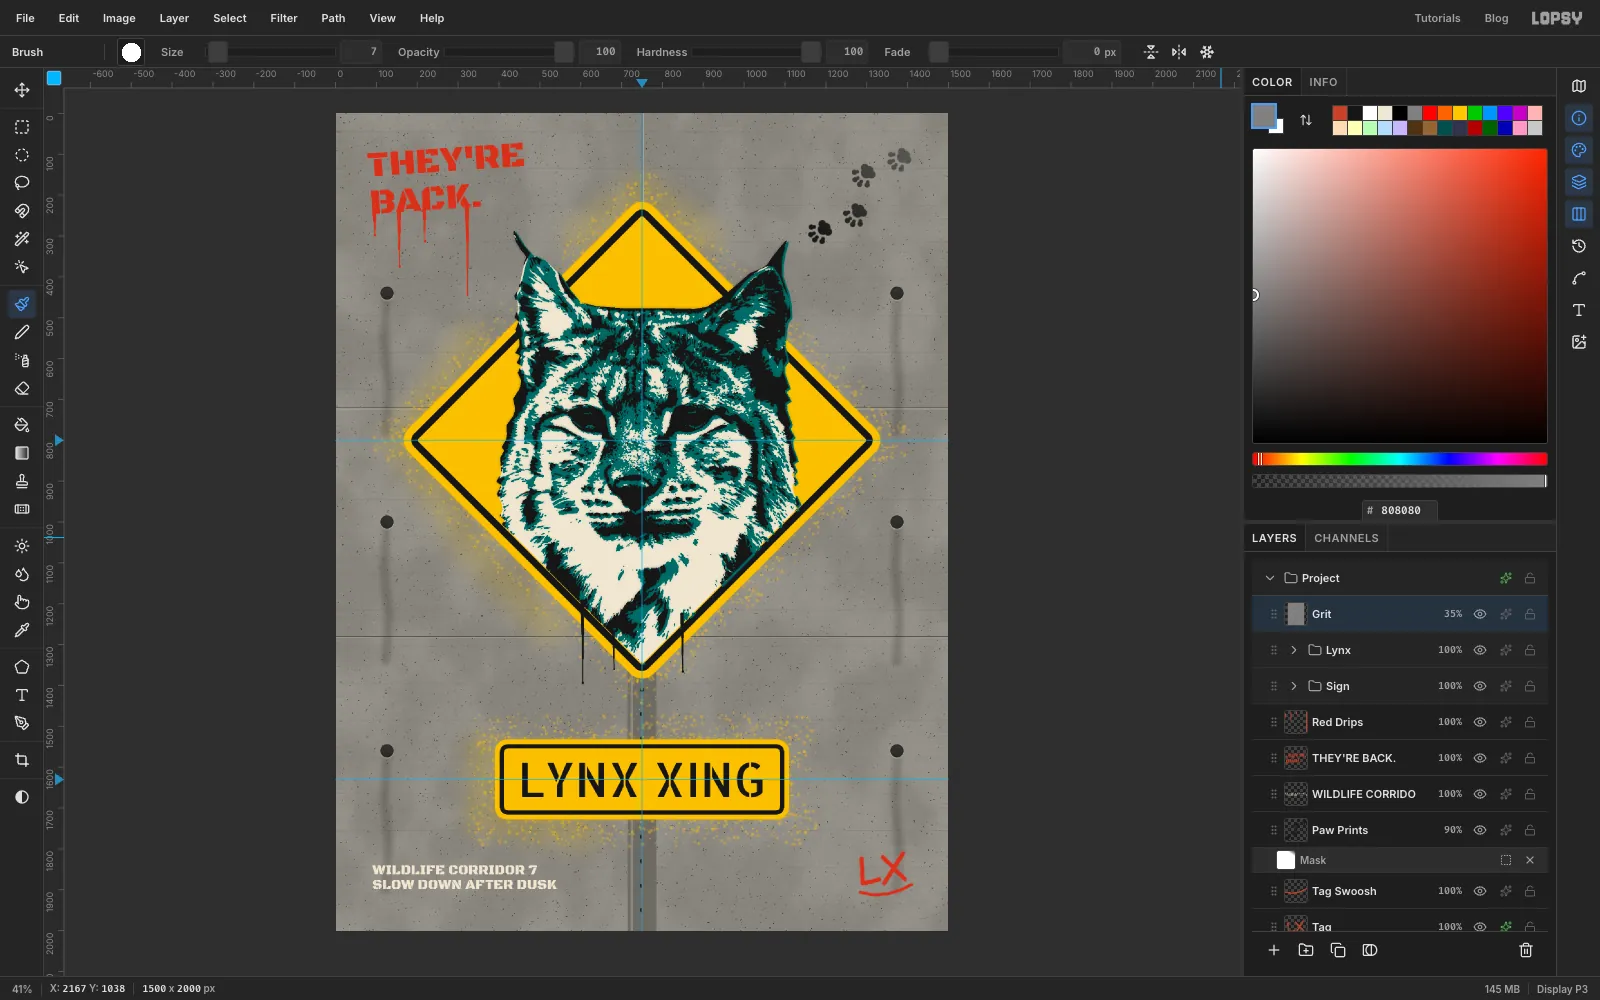
Finish with grit
- With
Lynxstill collapsed, click its row and add a layer calledGrit. It lands above both groups. - Fill it with and run Add Noise at Amount
45with Mono and Gaussian. - Set it to Overlay at
35%.
The fine noise sits over everything, so the paint, the sign and the wall share the same grain.
Save your work with File → Save Project, and use File → Quick Export PNG to get the finished poster.
- With