Design a Grunge Guitar Practice App Mockup
Build a 90s photocopy-style app mockup in Lopsy with a thresholded guitar photo, a torn poster, three phone screens, gaffer tape and a rubber stamp.
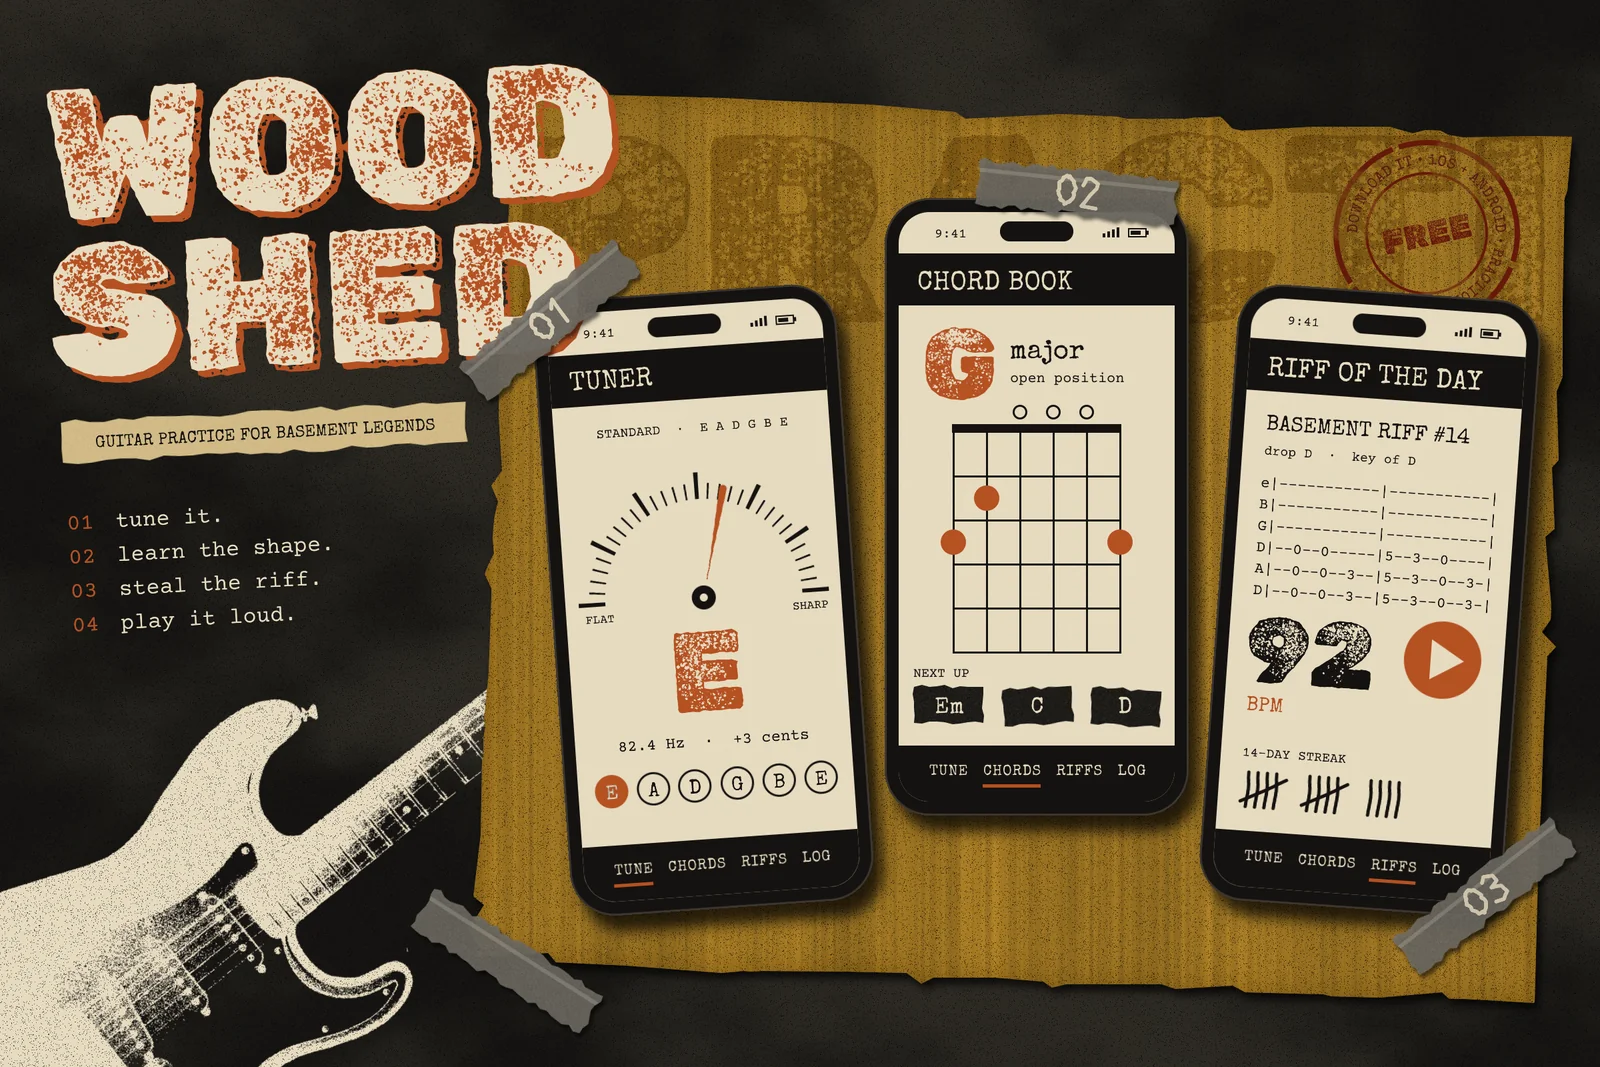
Grunge design came out of 90s music magazines and gig flyers. Pages were photocopied until the type broke up, pictures were crushed to one ink, and layouts were held together with tape. It's a good fit for anything rock-and-roll, including an app.
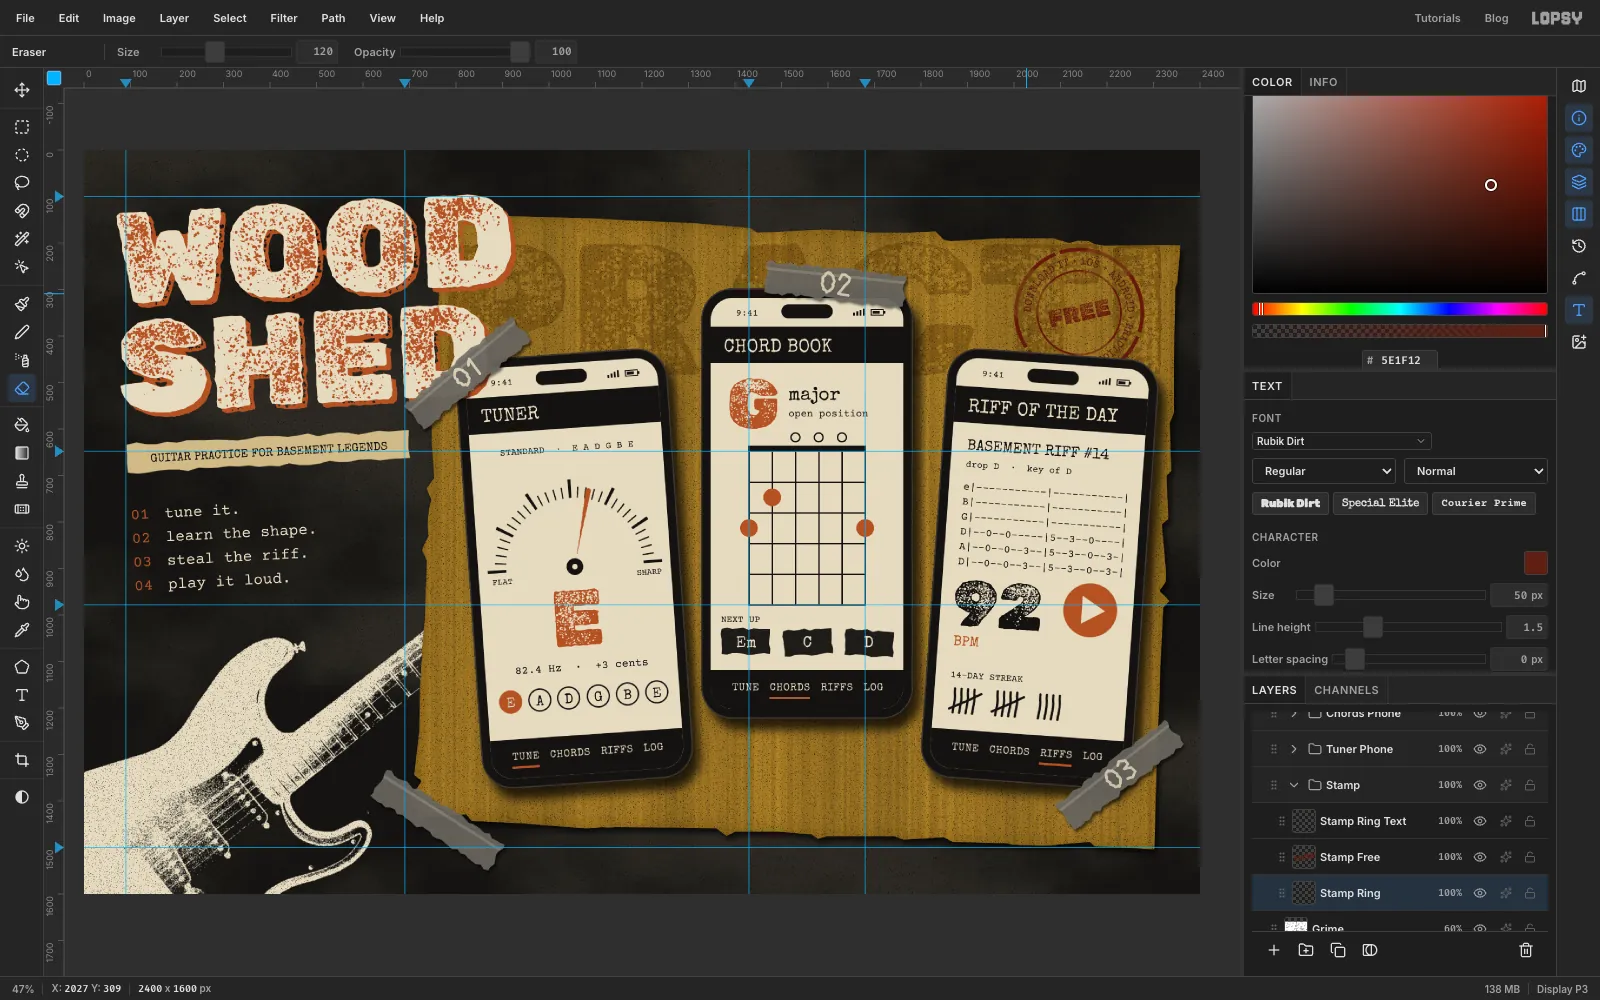
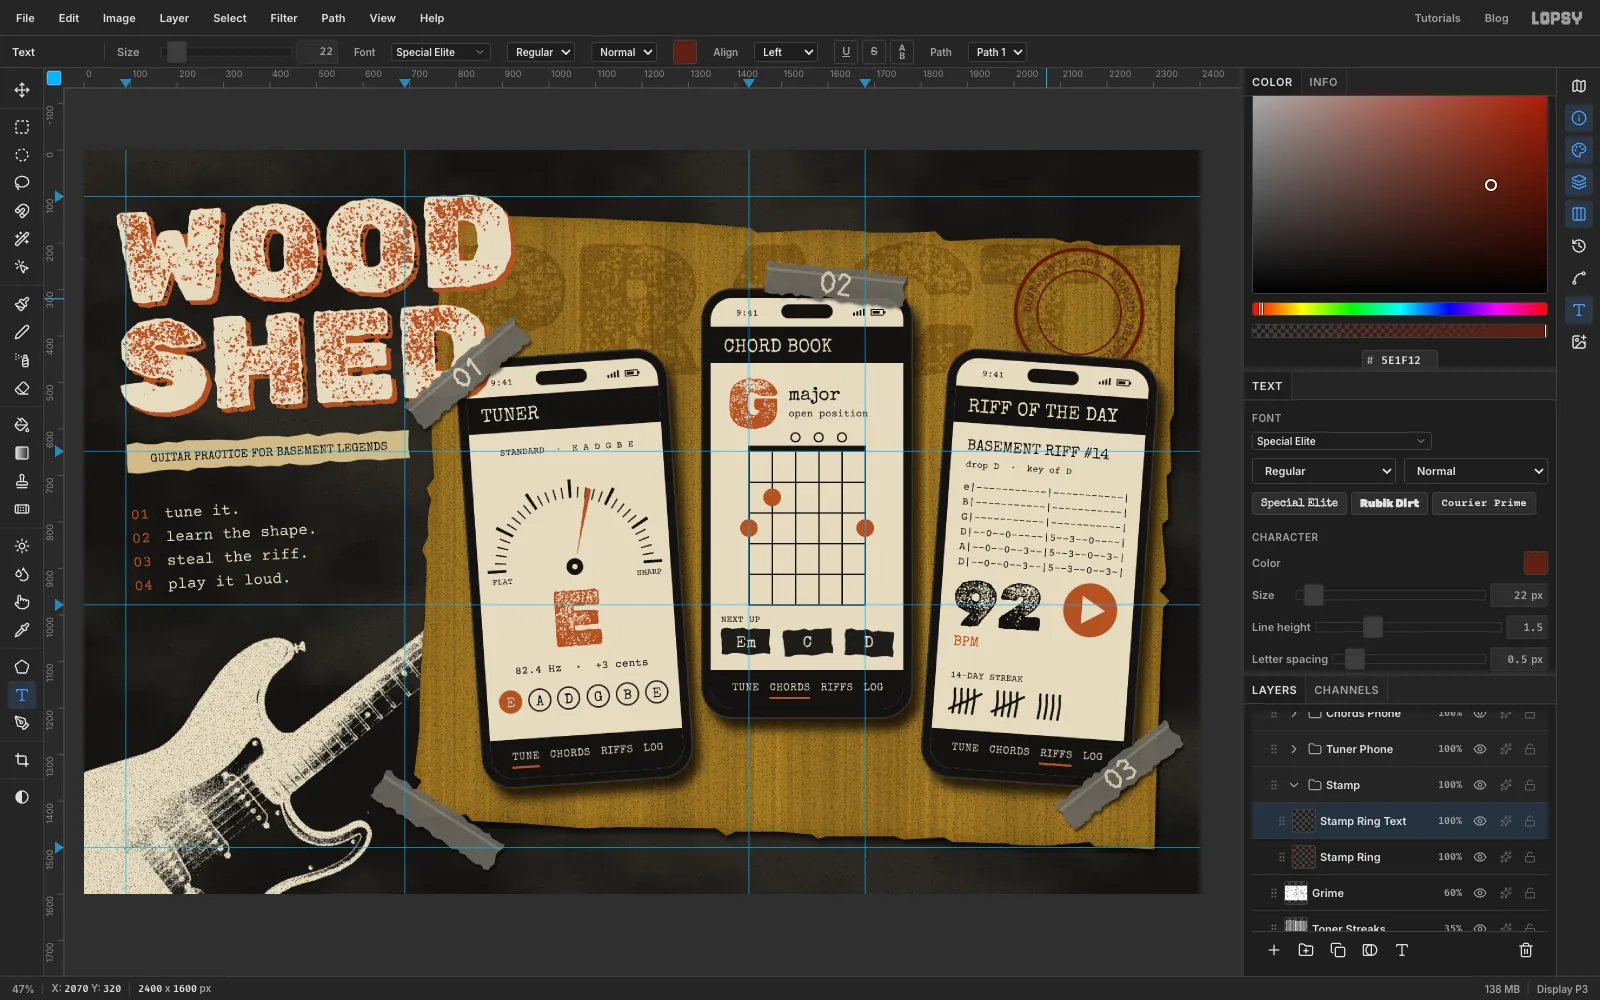
In this tutorial you'll build a presentation board for Woodshed, an imaginary guitar-practice app ("woodshedding" is musician slang for practising alone until you get it right). Three phone mockups, a tuner, a chord book and a riff of the day, are taped onto a torn mustard photocopy poster. Next to them sit a photocopied Stratocaster, a distressed headline and a rubber stamp.
You'll crush a guitar photo to a single ink with Threshold, tear paper with the Lasso, and build rounded phone shells with Shrink and Grow. You'll draw gauge ticks with Sunburst, copy and paste UI between screens, and set stamp text on a circular path. You'll also tilt whole groups with the Move tool's rotate handle.
The canvas is 2400 × 1600. The guitar is Fender Stratocaster 004-2.jpg, a public-domain photo on Wikimedia Commons. Any guitar shot on a plain light background will do. You'll make about 90 layers in five groups, so name each layer as you go. Fonts are Rubik Dirt, Special Elite and Courier Prime, all in the font browser.
The palette:
-
Wall
-
grime grey
-
Bone
-
ink
-
Rust
-
stamp oxblood
-
Poster mustard
-
poster print
-
Gaffer tape
-
tape chips
-
Masking tape
-
phone edge
-
Toner base white
-
Set up the wall and guides
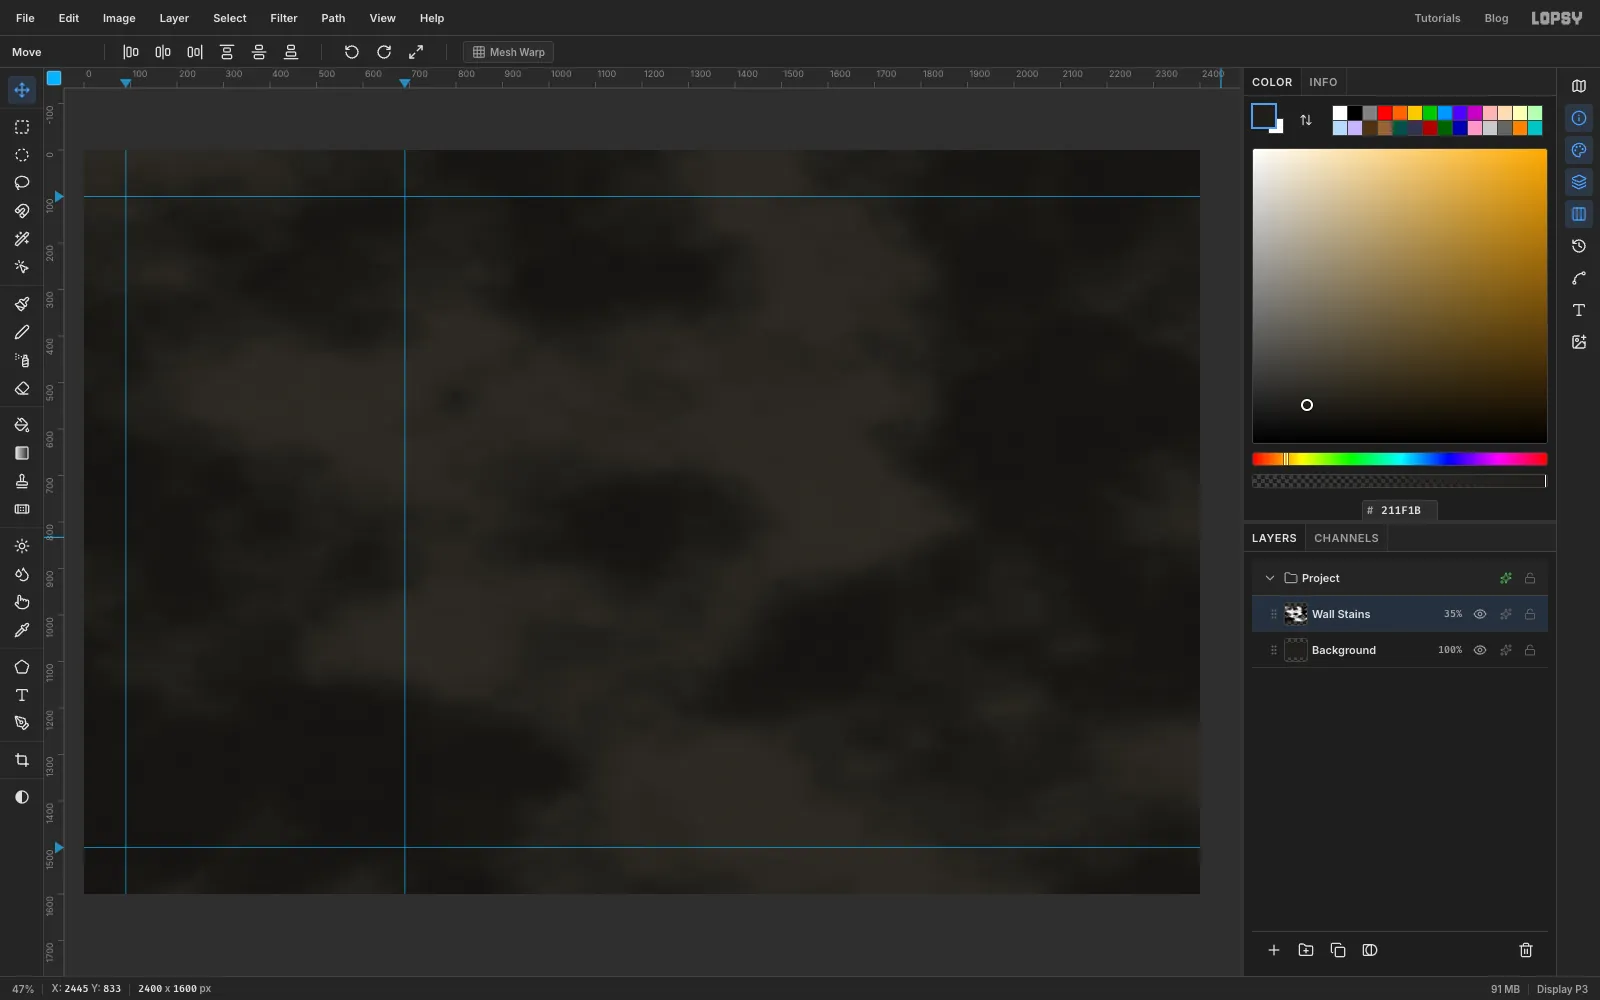
Choose File → New, make a 2400 × 1600 document and click Create.
Click the top ruler at 90 and 690 to drop two vertical guides. They mark the left column, where the headline will go. Click the left ruler at 100 and 1500 for top and bottom margins.
Click Background, set the foreground colour to and choose Edit → Fill. Click Layer 1 and rename it Wall Stains. Run Filter → Clouds… with Scale 6. Clouds is greyscale whatever your colours are. In the layer's effects drawer, set the blend mode to Overlay, then click the percentage on the layer's row and set it to 35%. The wall now has soft damp patches.
-
Drop in the guitar photo
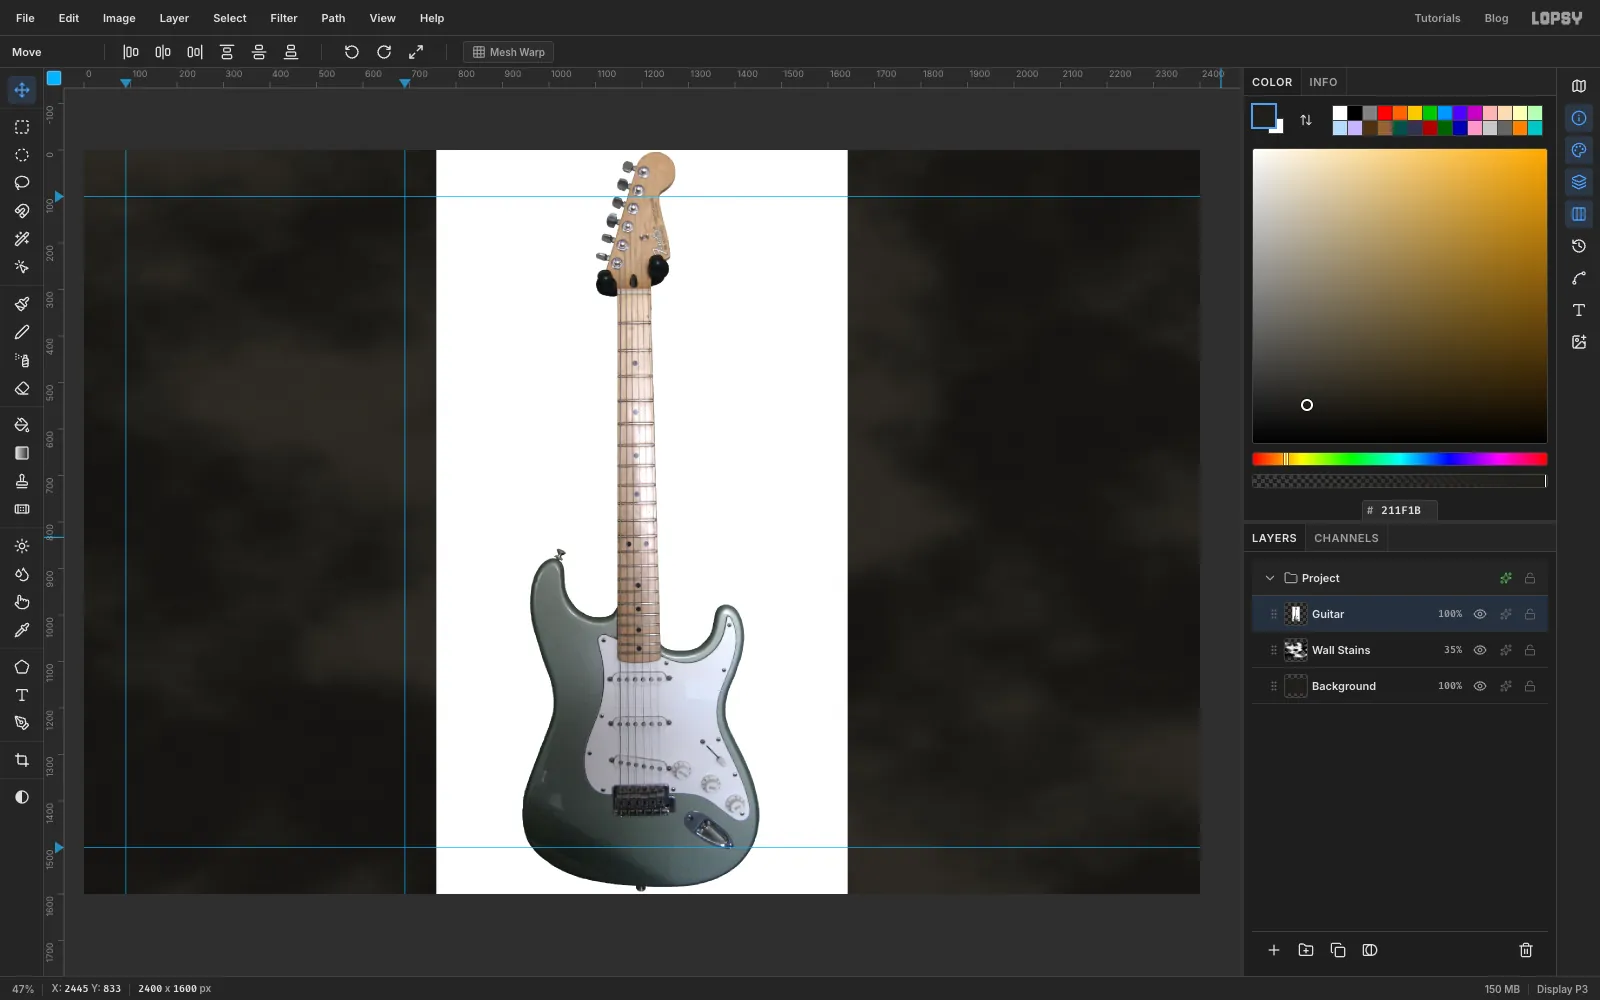
Drag the guitar photo from your computer onto the canvas. It lands as a new layer, sized to fit the canvas height. Press Cmd+D to drop the selection, then rename the layer Guitar.
-
Select the white backdrop
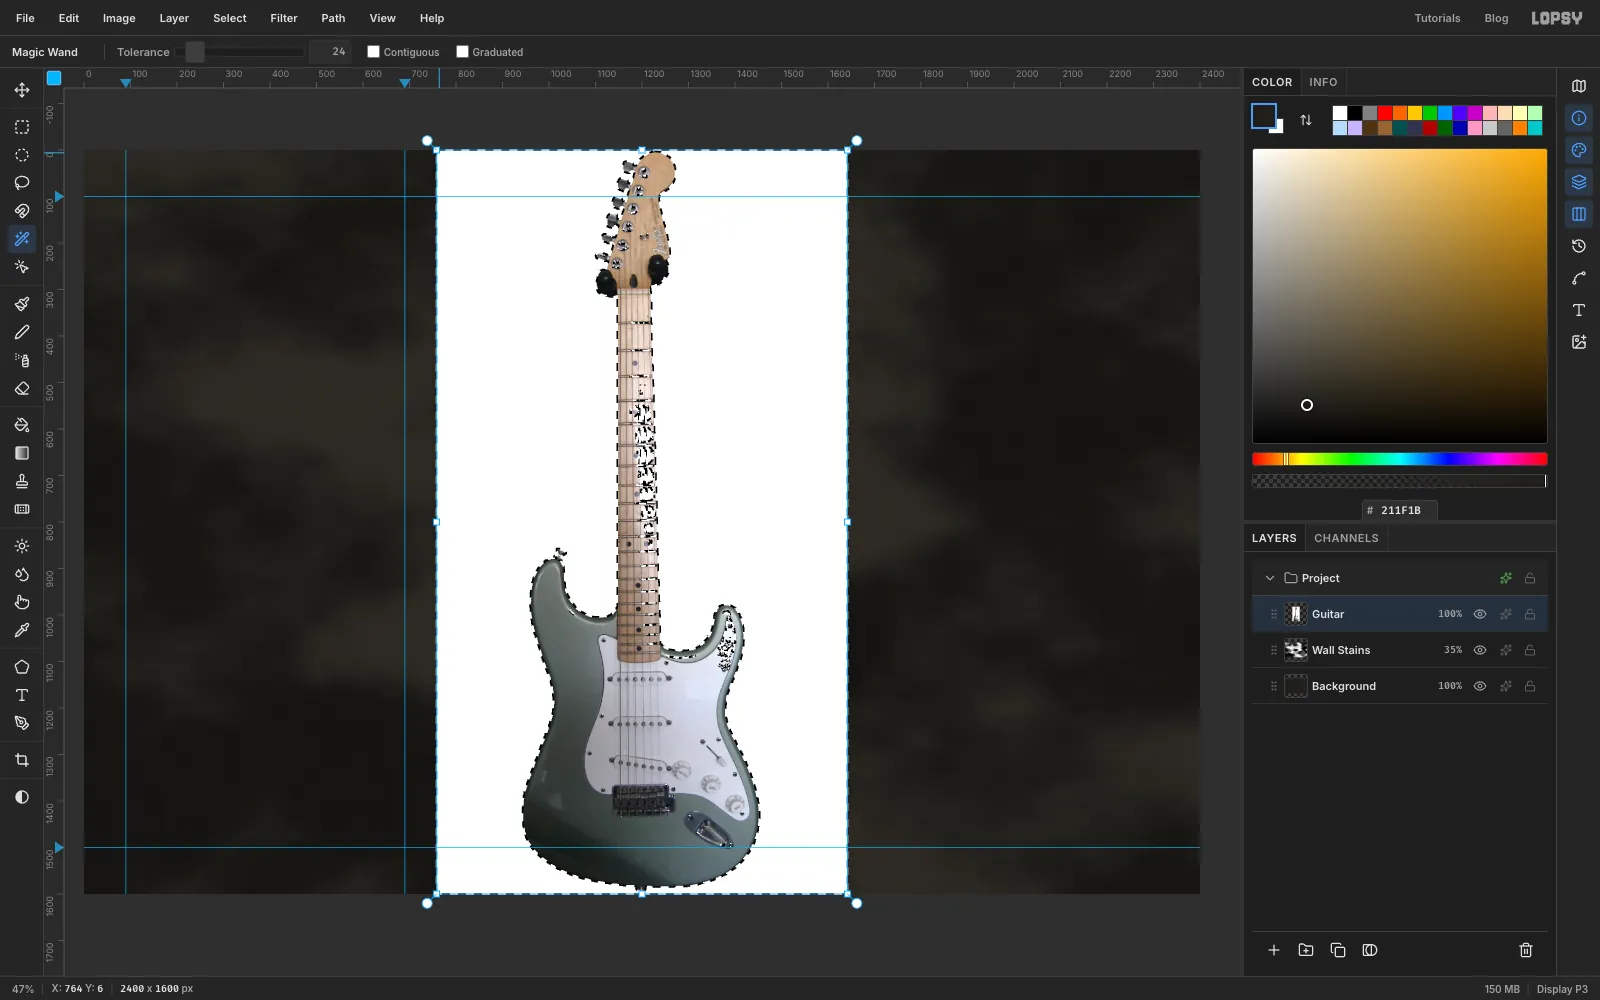
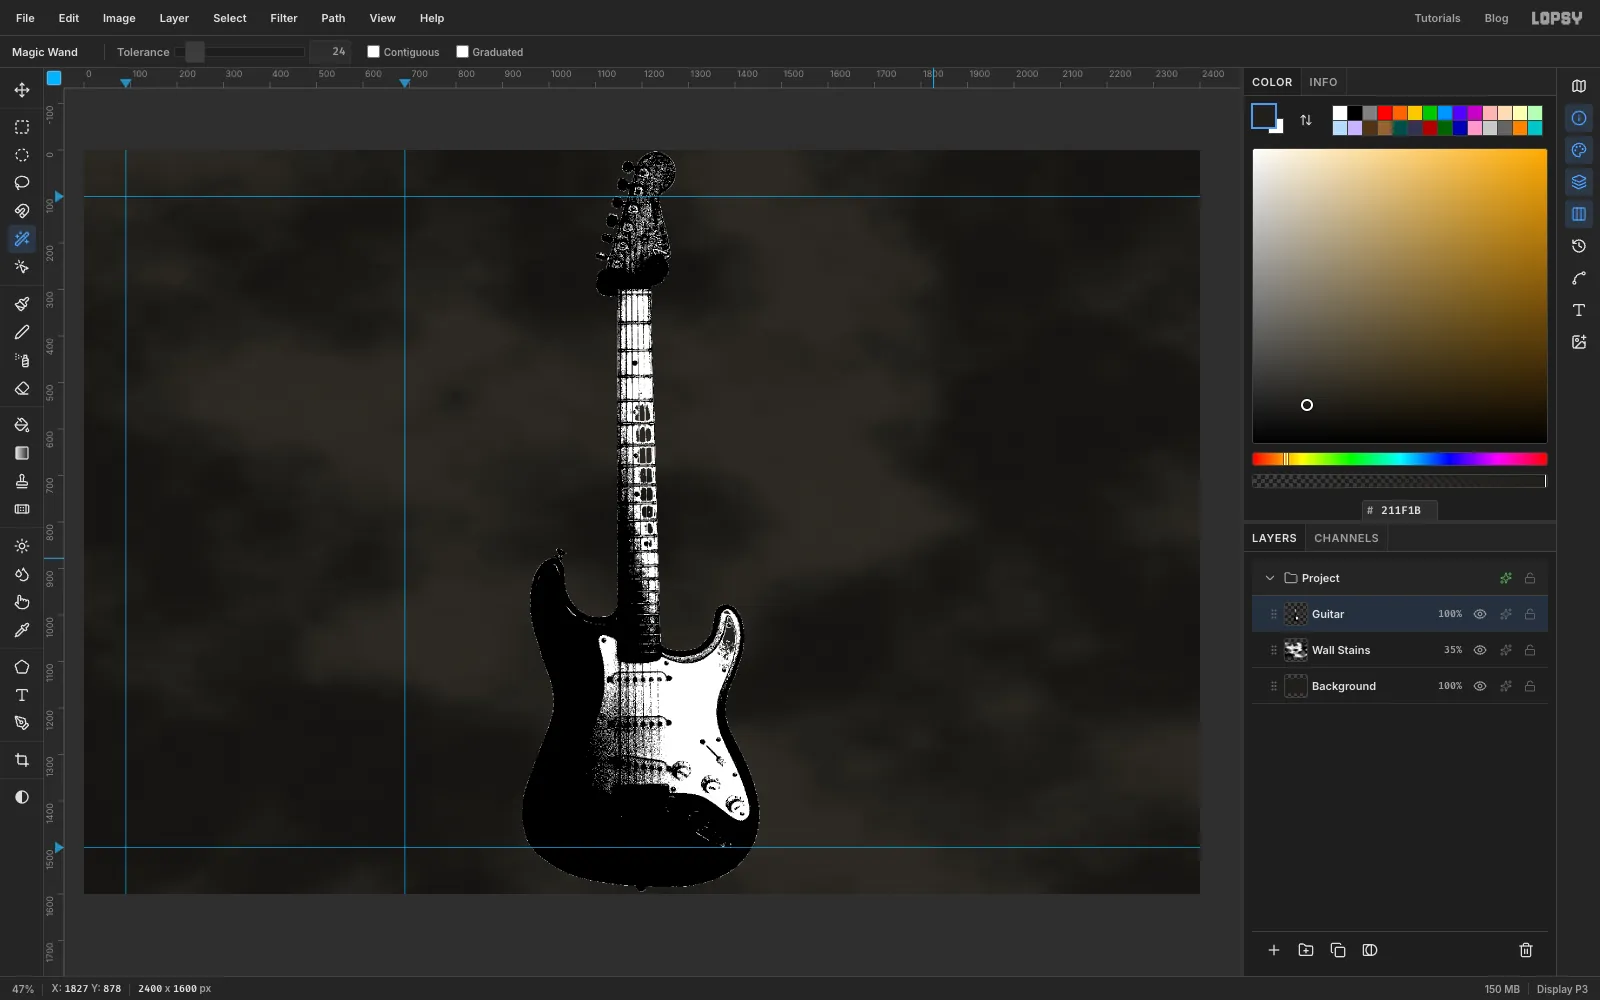
Pick the Magic Wand. Set Tolerance to 24 and untick Contiguous, so every white area is caught in one click. Click the white backdrop near a corner of the photo. Press Delete to clear it, then Cmd+D. The pickguard is off-white, so at this tolerance it survives. If your photo's pickguard is pure white, lower the Tolerance until it stays.
-
Photocopy it to one ink
Now make it look photocopied. Choose Filter → Desaturate. Run Filter → Add Noise… with Amount 40 and Mono, which roughens the edges the way a copier does. Finish with Filter → Threshold… at Level 175. Everything is now pure black or pure white.
-
Turn the ink bone-coloured
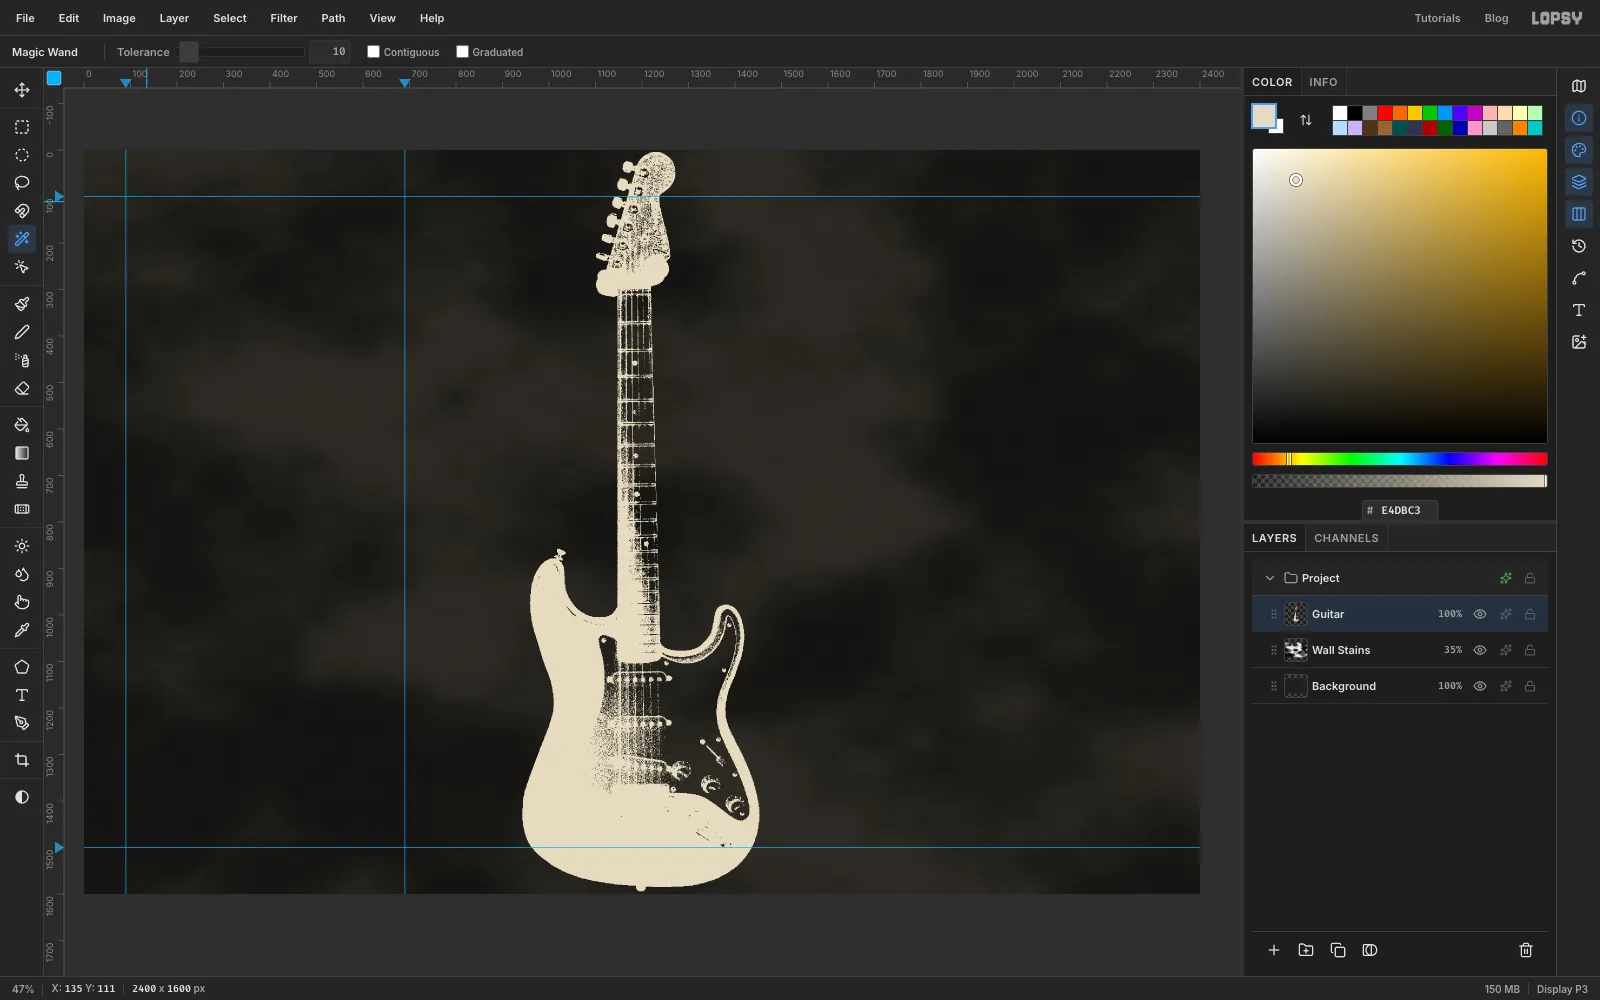
On a dark wall the guitar should print in pale ink, so keep the black and lose the white. With the Magic Wand still at Contiguous off, set Tolerance 10 and click the white pickguard. Press Delete, then Cmd+D.
Cmd-click the Guitar layer's thumbnail to select what's left. Set the foreground to bone , choose Edit → Fill and press Cmd+D.
-
Rotate the guitar
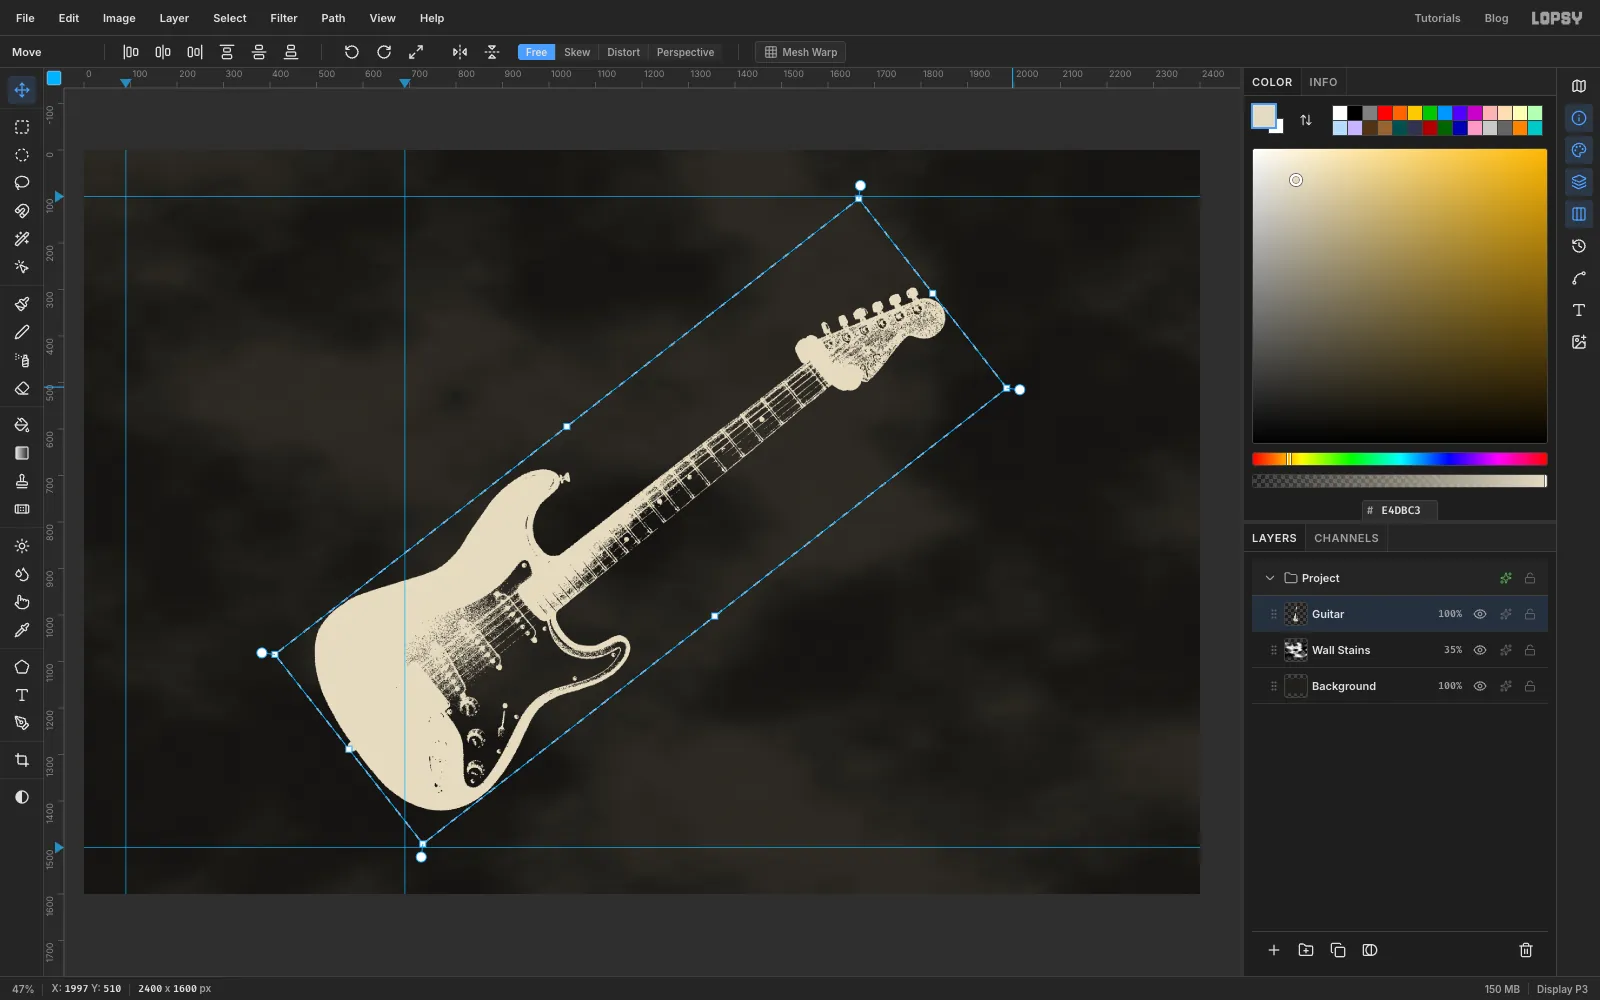
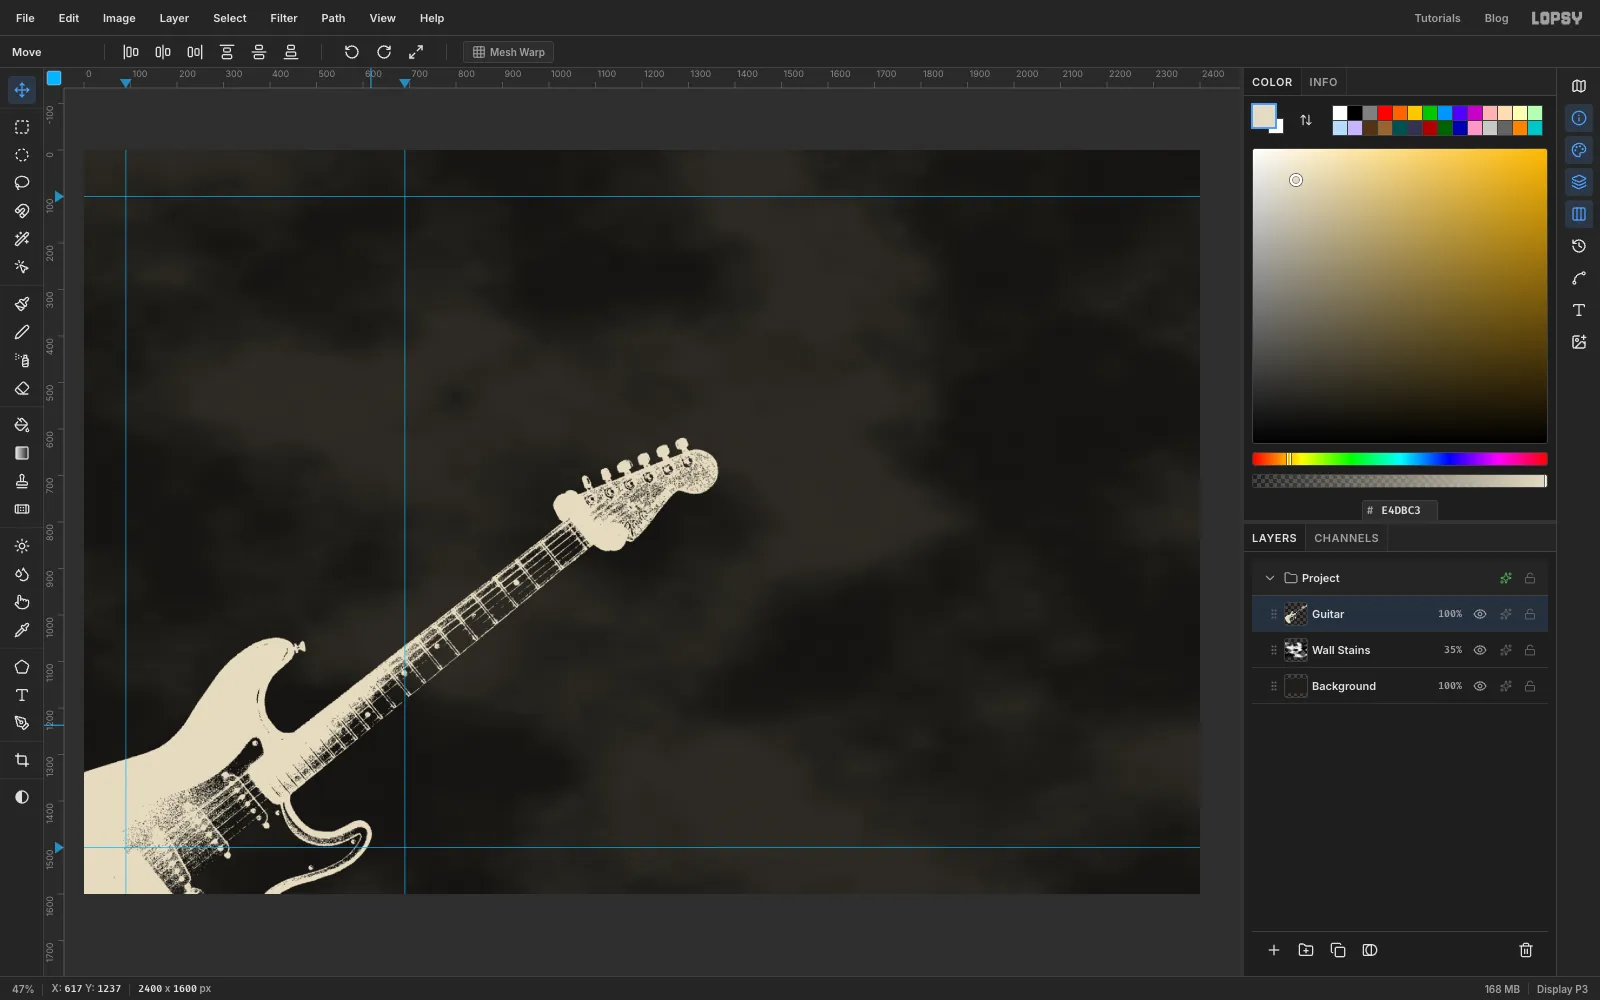
Draw a Rectangular Marquee just around the guitar. Pick the Move tool and drag the round rotate handle beyond the top-right corner clockwise, until the headstock points up and to the right (about 52°). Press Cmd+D to commit.
-
Scale it up a little
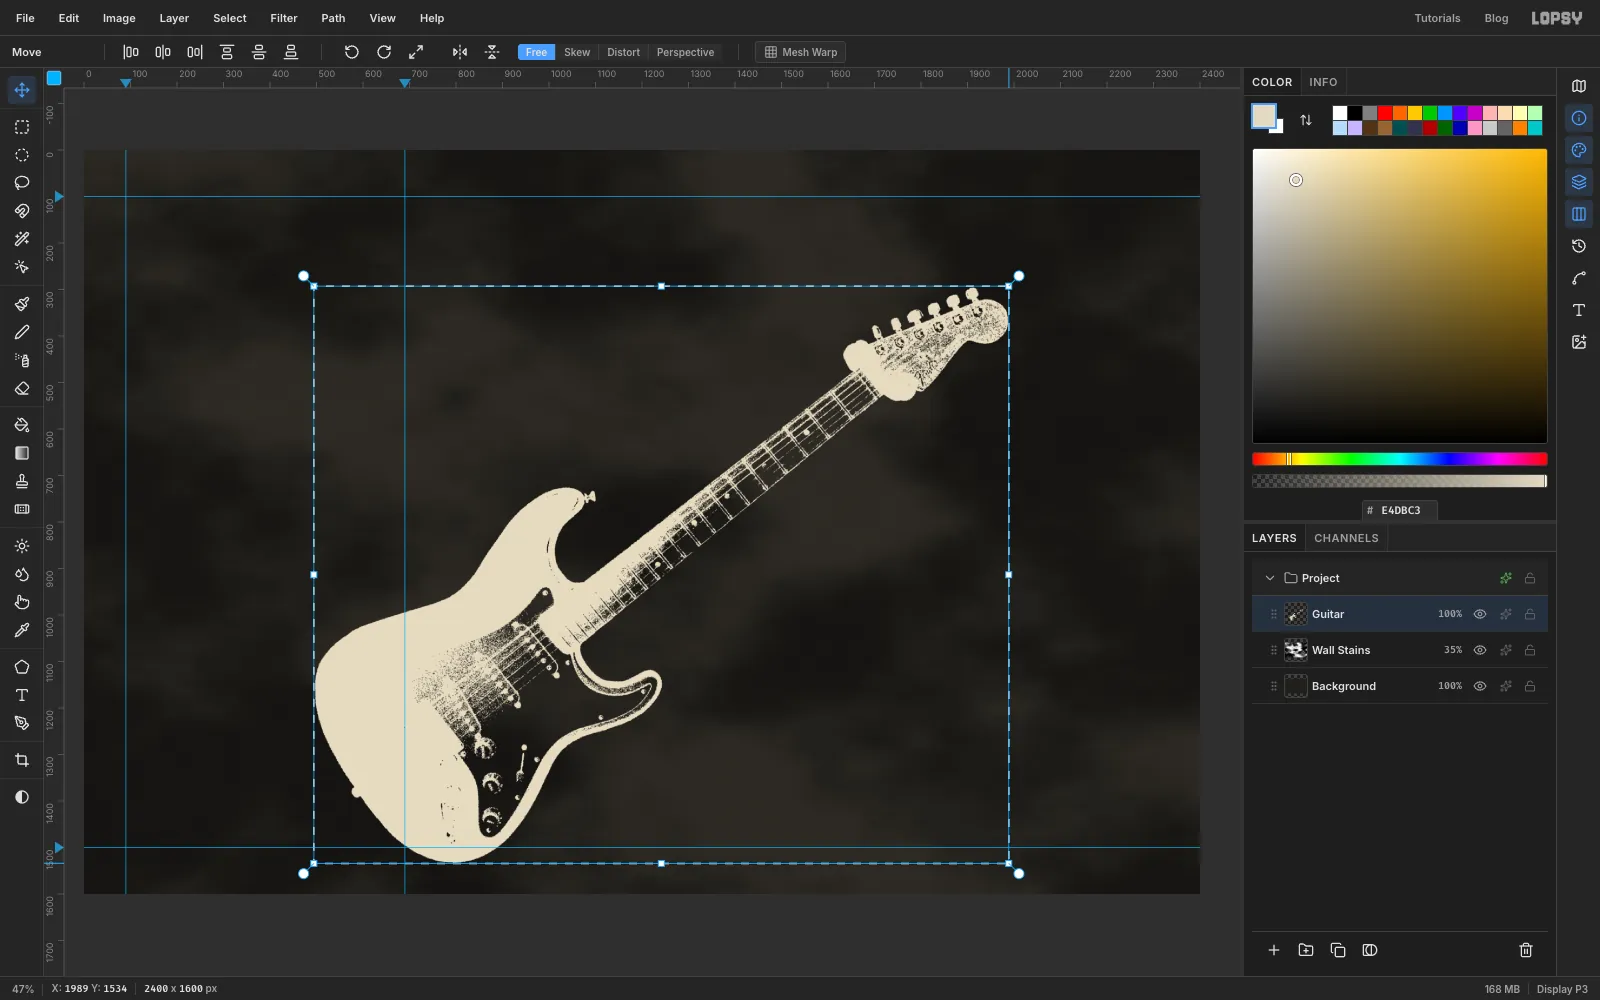
Draw a new marquee around the tilted guitar. Hold Cmd and drag the bottom-right corner handle out about 10%. Cmd keeps the proportions. Press Cmd+D again.
-
Slide it into the corner
With the Move tool, drag the guitar down and left until the body hangs off the bottom-left corner and the headstock sits near the middle of the canvas. The poster will cover most of the neck, so only the body and the start of the neck stay visible.
-
Tear the poster
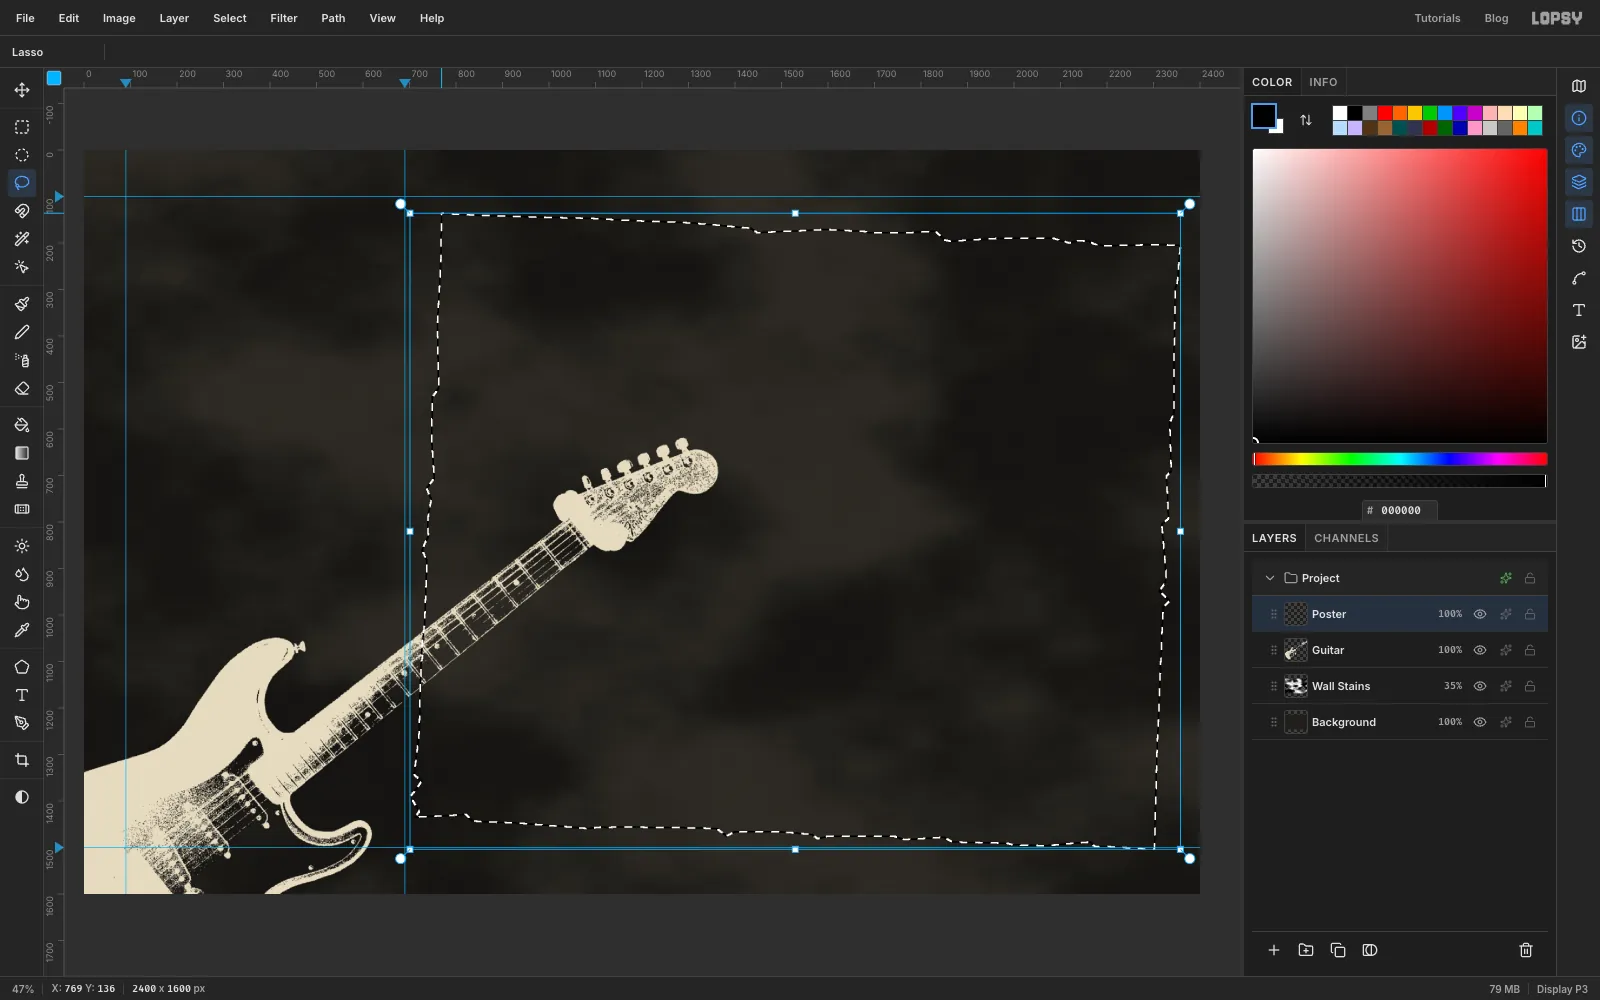
Click Add Layer and name it Poster. It sits above the guitar. With the Lasso, trace a big, slightly tilted sheet from about 740 across to 2330, and from the top margin down to the bottom one.
To make the edge look torn, mix long calm stretches with short jagged bursts. An even zigzag all the way round looks fake.
-
Age the paper
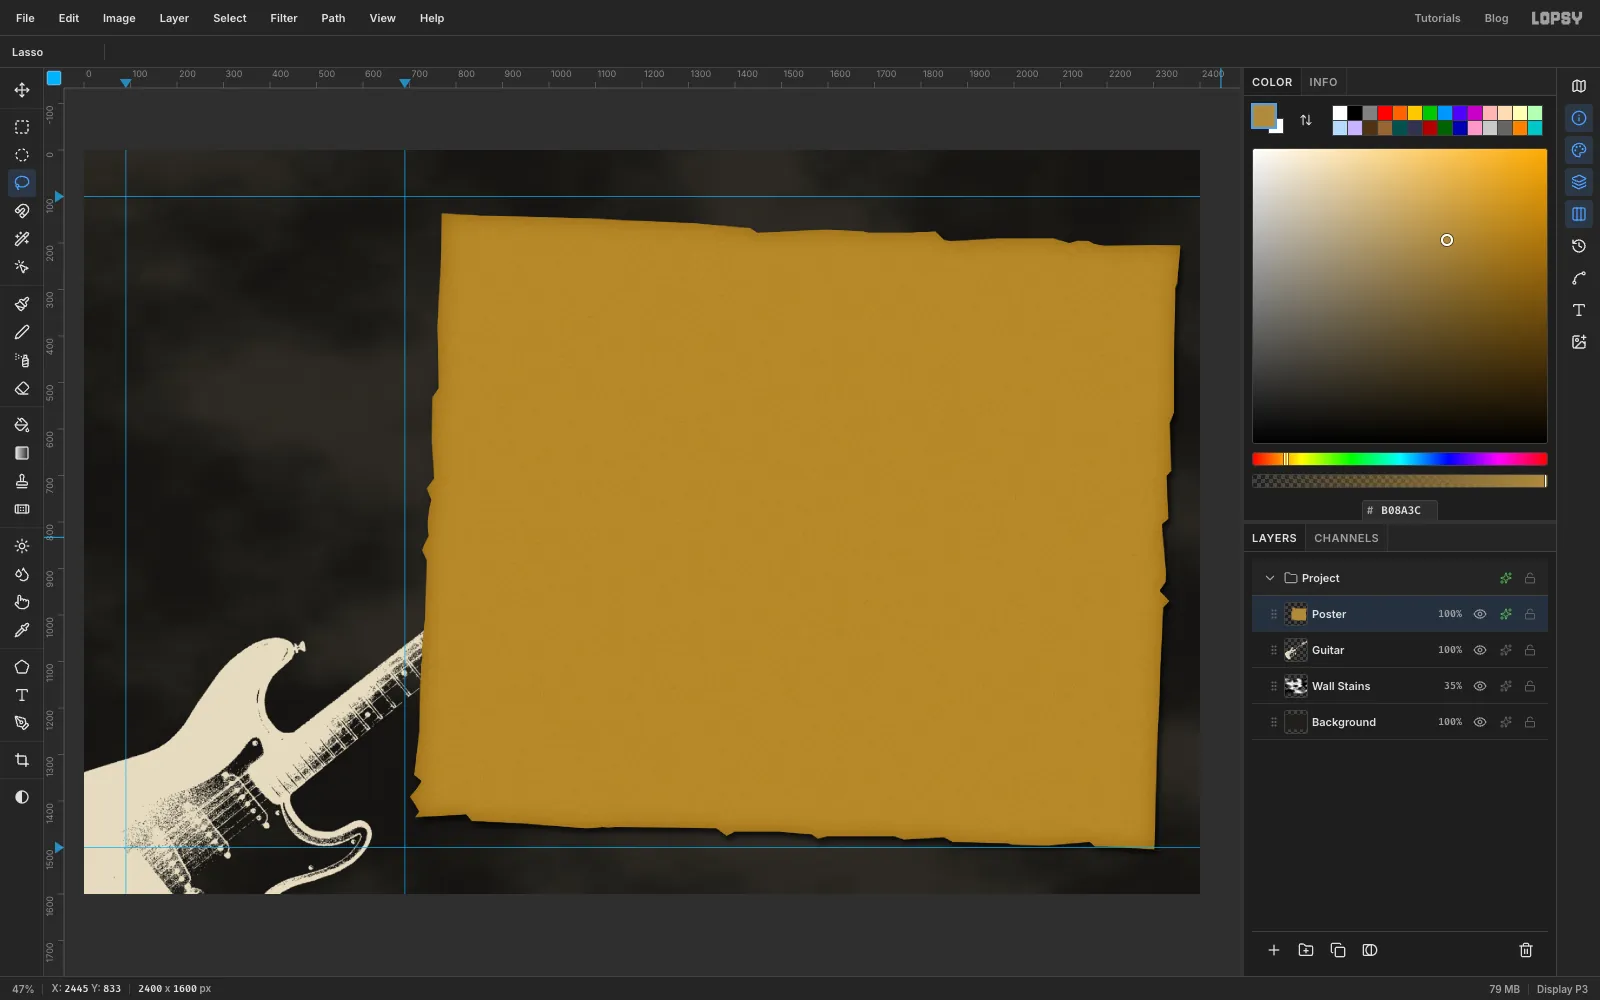
Set the foreground to mustard and choose Edit → Fill. While the selection is live, run Add Noise at 16, Mono. Press Cmd+D.
Open the Poster's effects drawer:
- Inner Glow: colour , Size 70, Opacity 55. This browns the edges like old paper.
- Drop Shadow: Offset X 6, Offset Y 10, Blur 18, Opacity 70. This lifts the sheet off the wall.
-
Add a ghost print and toner streaks
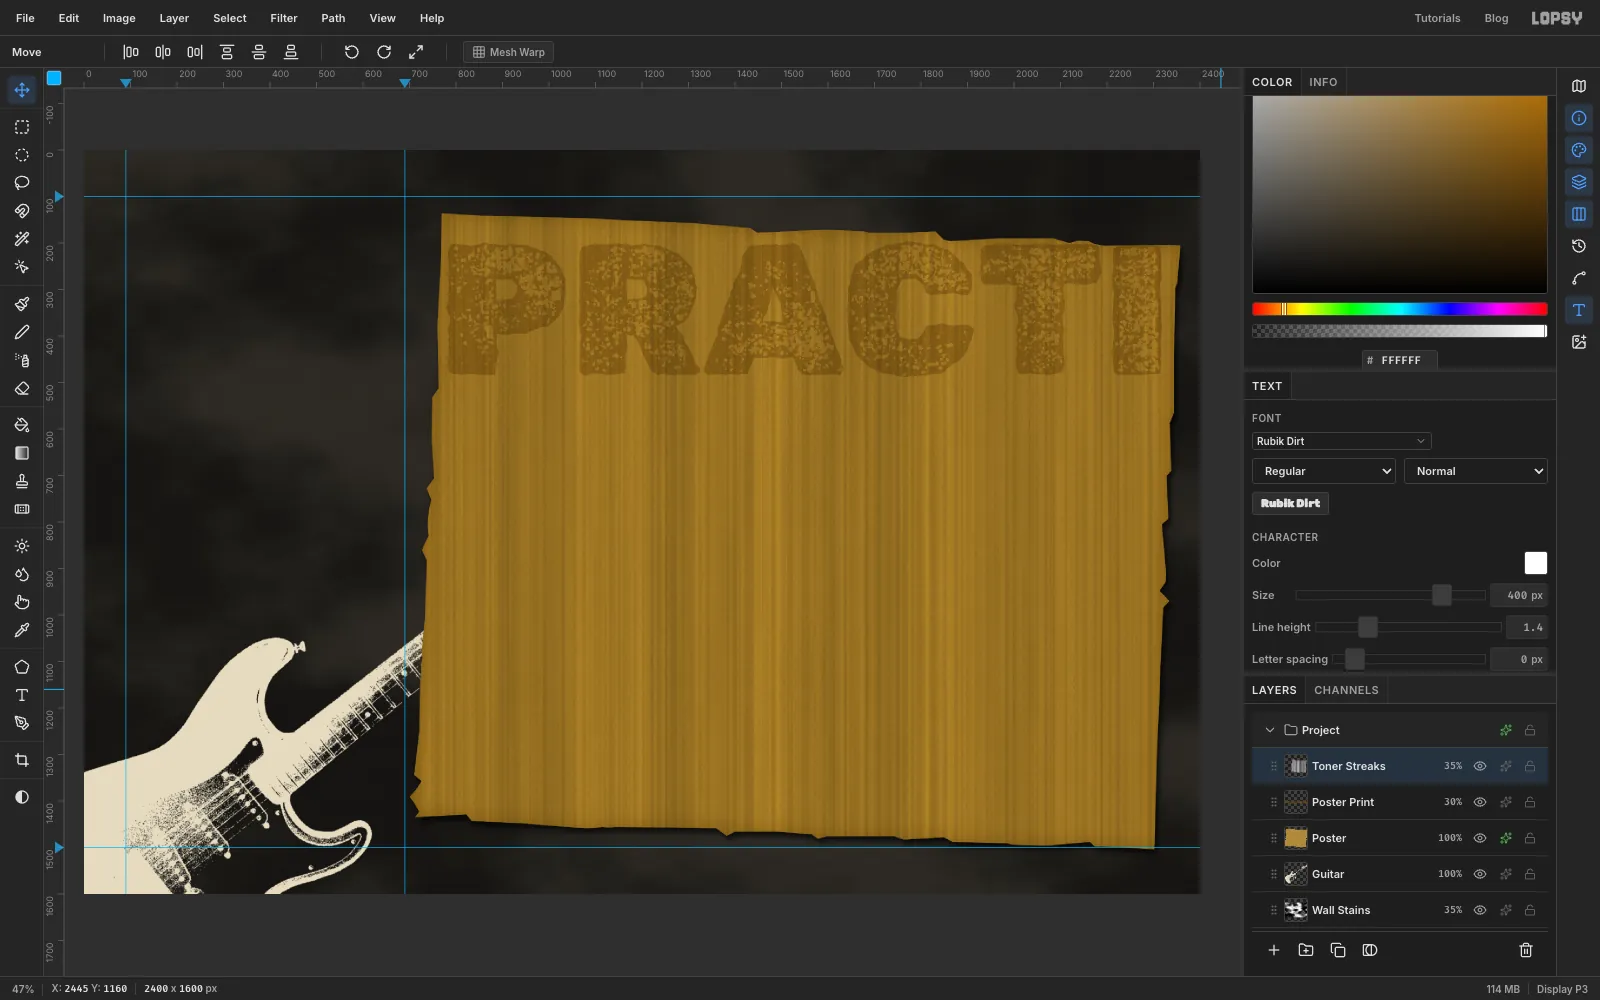
Copied posters always show something that was printed before. With Poster selected, pick the Text tool. Set Rubik Dirt at 400 px in , click near the top-left of the poster and type
PRACTICE. Press Tab. Move it so it starts just inside the poster's left edge, near the top.Click Rasterize Layer in the Layers footer, then rename the layer Poster Print. Cmd-click the Poster thumbnail, choose Select → Inverse, click Poster Print again and press Delete. The word is now cut to the paper. Press Cmd+D, set the layer to Multiply and its opacity to 30%.
For copier streaks, add a layer called Toner Streaks. Cmd-click the Poster thumbnail, fill the selection with white and run Filter → Fibers… with Variance 40 and Strength 64. Higher Strength gives straighter strands. Press Cmd+D, then set the layer to Multiply at 35%.
-
Speckle the wall and poster
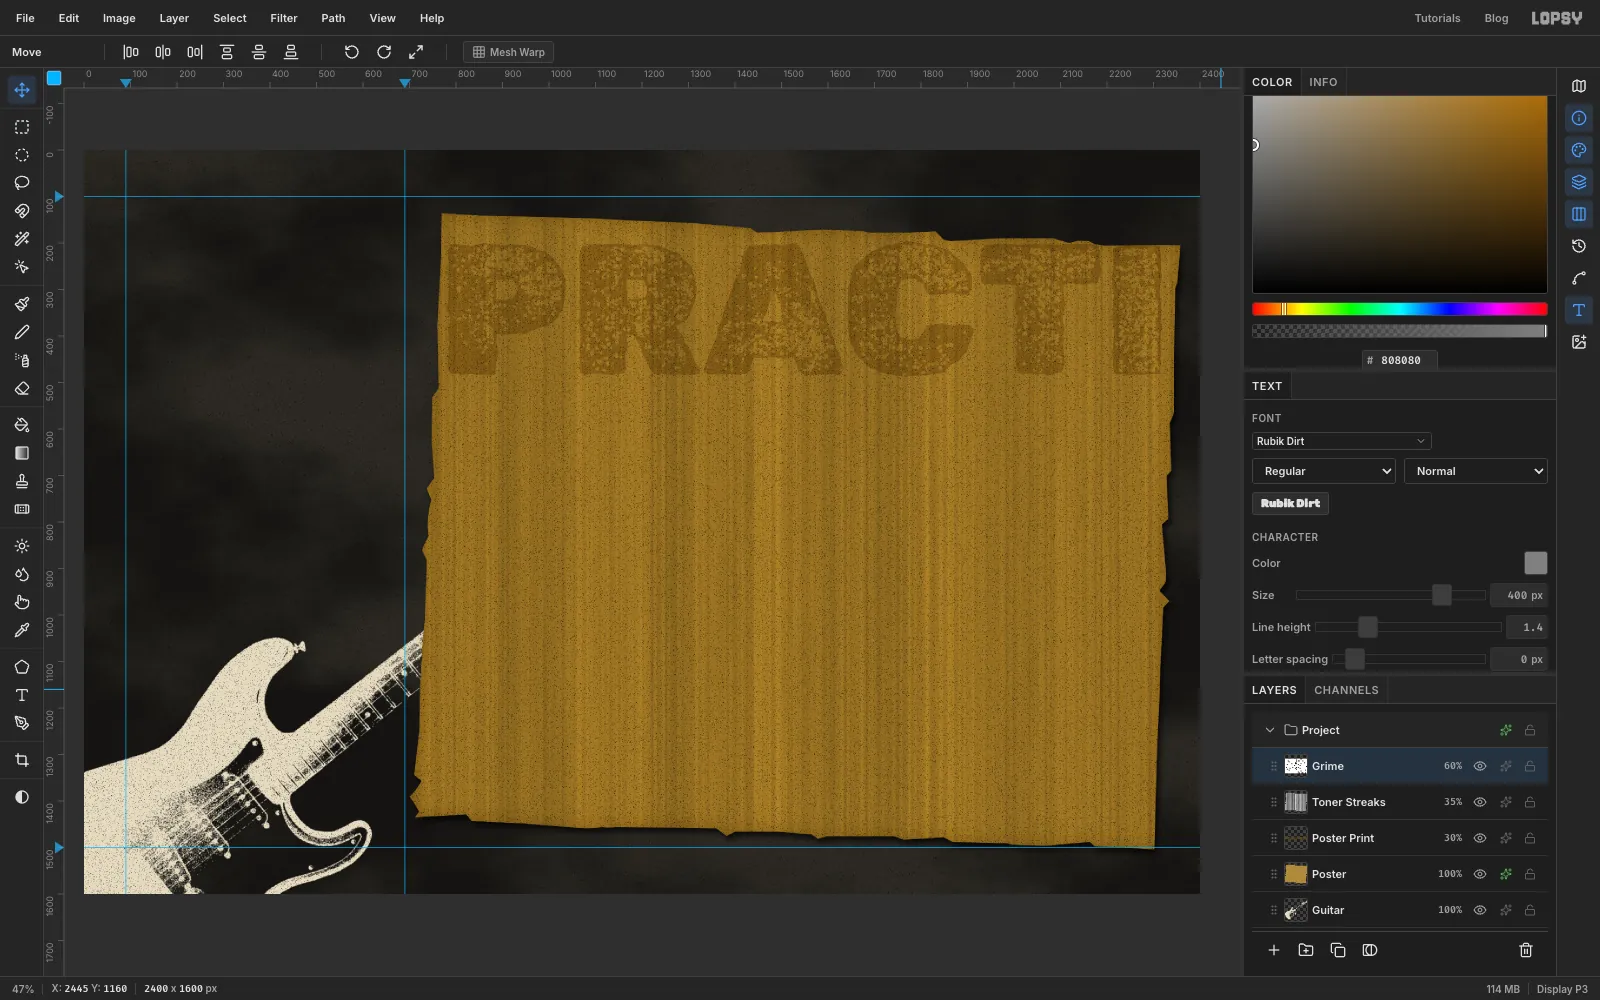
Add a layer called Grime. Fill it with mid-grey , run Add Noise at 100 Mono, then Threshold at 84. Add Noise moves pixels about 50 levels either side of grey. Only the darkest few percent fall below 84, so you get scattered black specks on white.
Set Grime to Multiply at 60%. The white disappears and the specks stay. The phones go above this layer, so their screens stay clean.
-
Build the first phone body
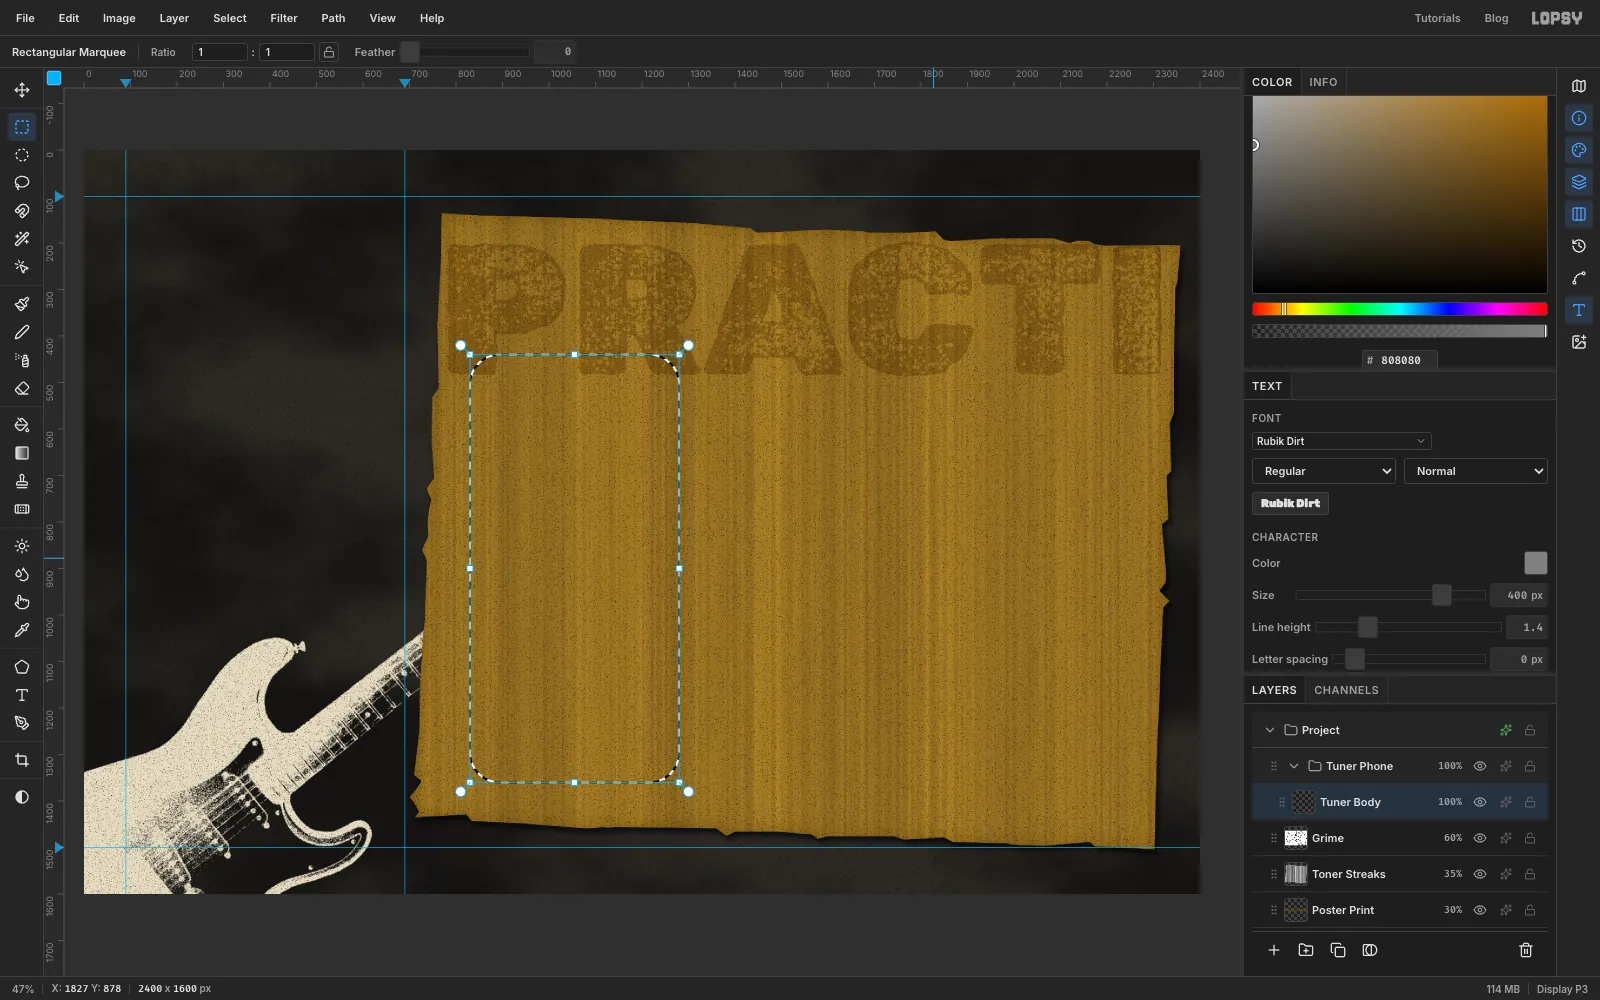
Click New Group and name it Tuner Phone, then add a layer inside it called Tuner Body.
With the Rectangular Marquee, click once on the canvas without dragging. That opens the exact-corners dialog. Enter From 830, 440 and To 1280, 1360, then press Enter. To round the corners, choose Select → Shrink… 64, then Select → Grow… 64. Growing back rounds the corners off.
Fill with ink and press Cmd+D. In the effects drawer, add a Drop Shadow (Offset X 16, Offset Y 24, Blur 30, Opacity 75) and a Stroke (Width 3, colour ). The stroke catches a little light on the bezel.
-
Add the screen, notch and status bar
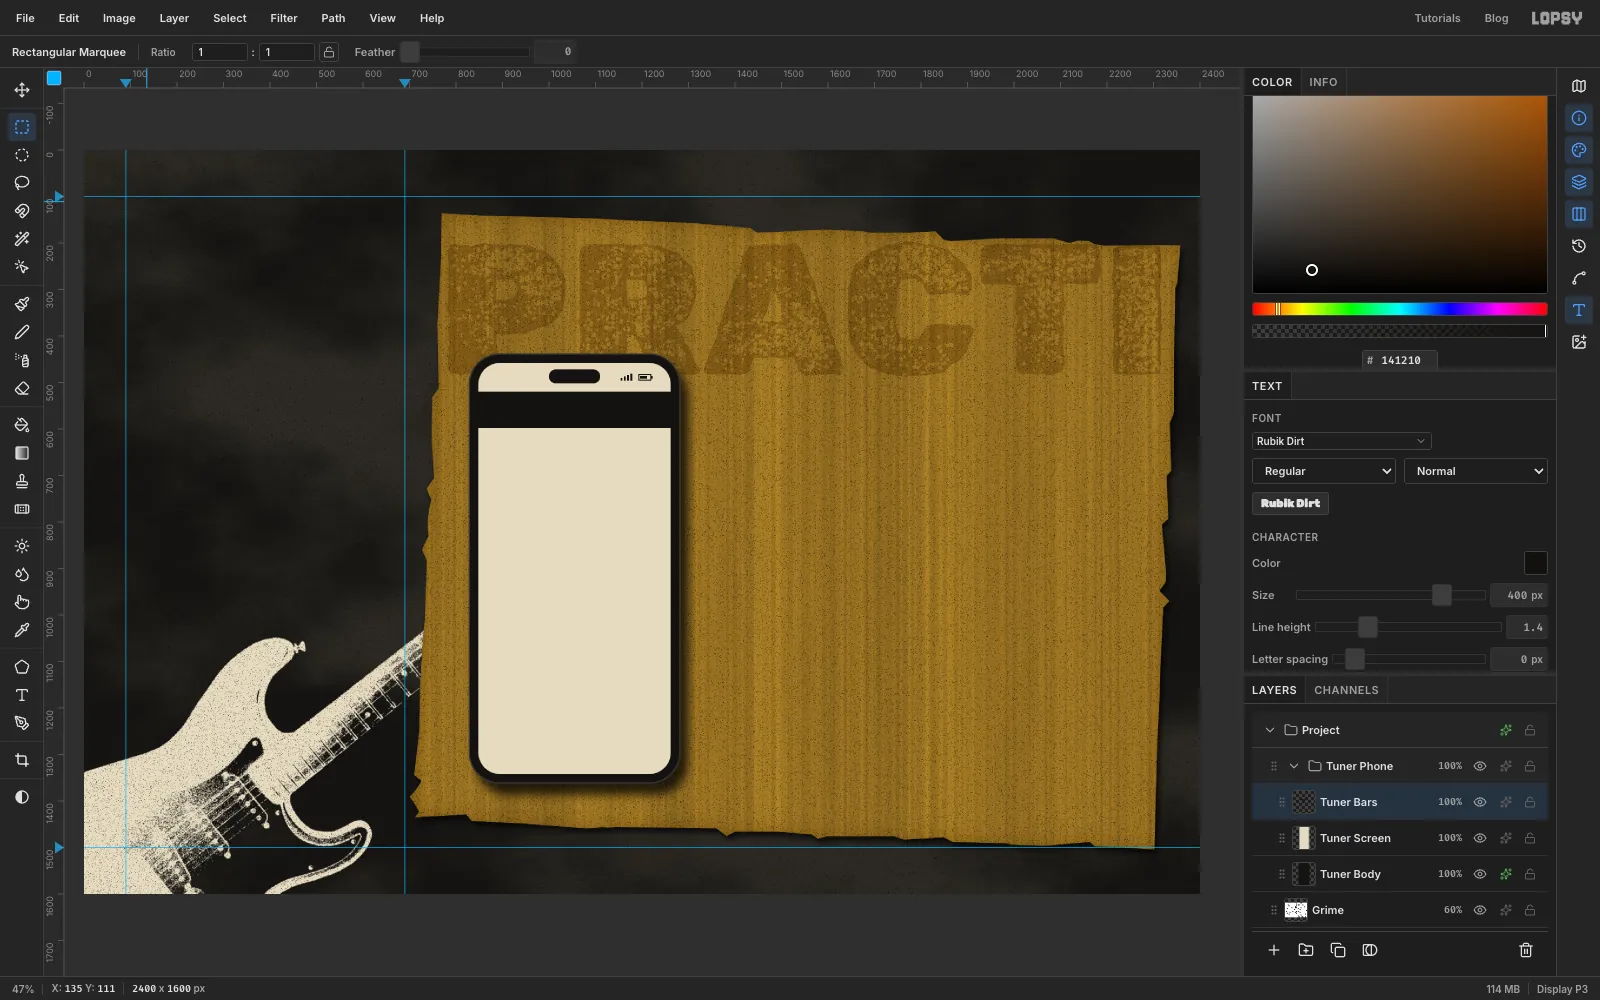
Add a layer called Tuner Screen. Use the exact-corners dialog again for 848, 458 → 1262, 1342. That is 18 px inside the body on every side. Then Shrink 46, Grow 46, fill with bone and run Add Noise at just 4 Mono. Screens should look like glass, so keep their texture light. Press Cmd+D.
Add a layer called Tuner Bars and fill these shapes in ink, entering each one's corners in the exact-corners dialog:
- Notch: 1000, 472 → 1110, 502, rounded with Shrink 14 and Grow 14.
- App bar: 848, 520 → 1262, 598, the full width of the screen.
- Signal: four bars 4 px wide, starting at x 1154, 1161, 1168 and 1175. All end at y 496, and they are 6, 9, 12 and 15 px tall.
- Battery: fill 1192, 482 → 1220, 496, then delete 1194, 484 → 1218, 494 to leave an outline. Fill a charge level at 1196, 486 → 1211, 492 and a nub at 1220, 486 → 1223, 492.
-
Repeat for the other two phones
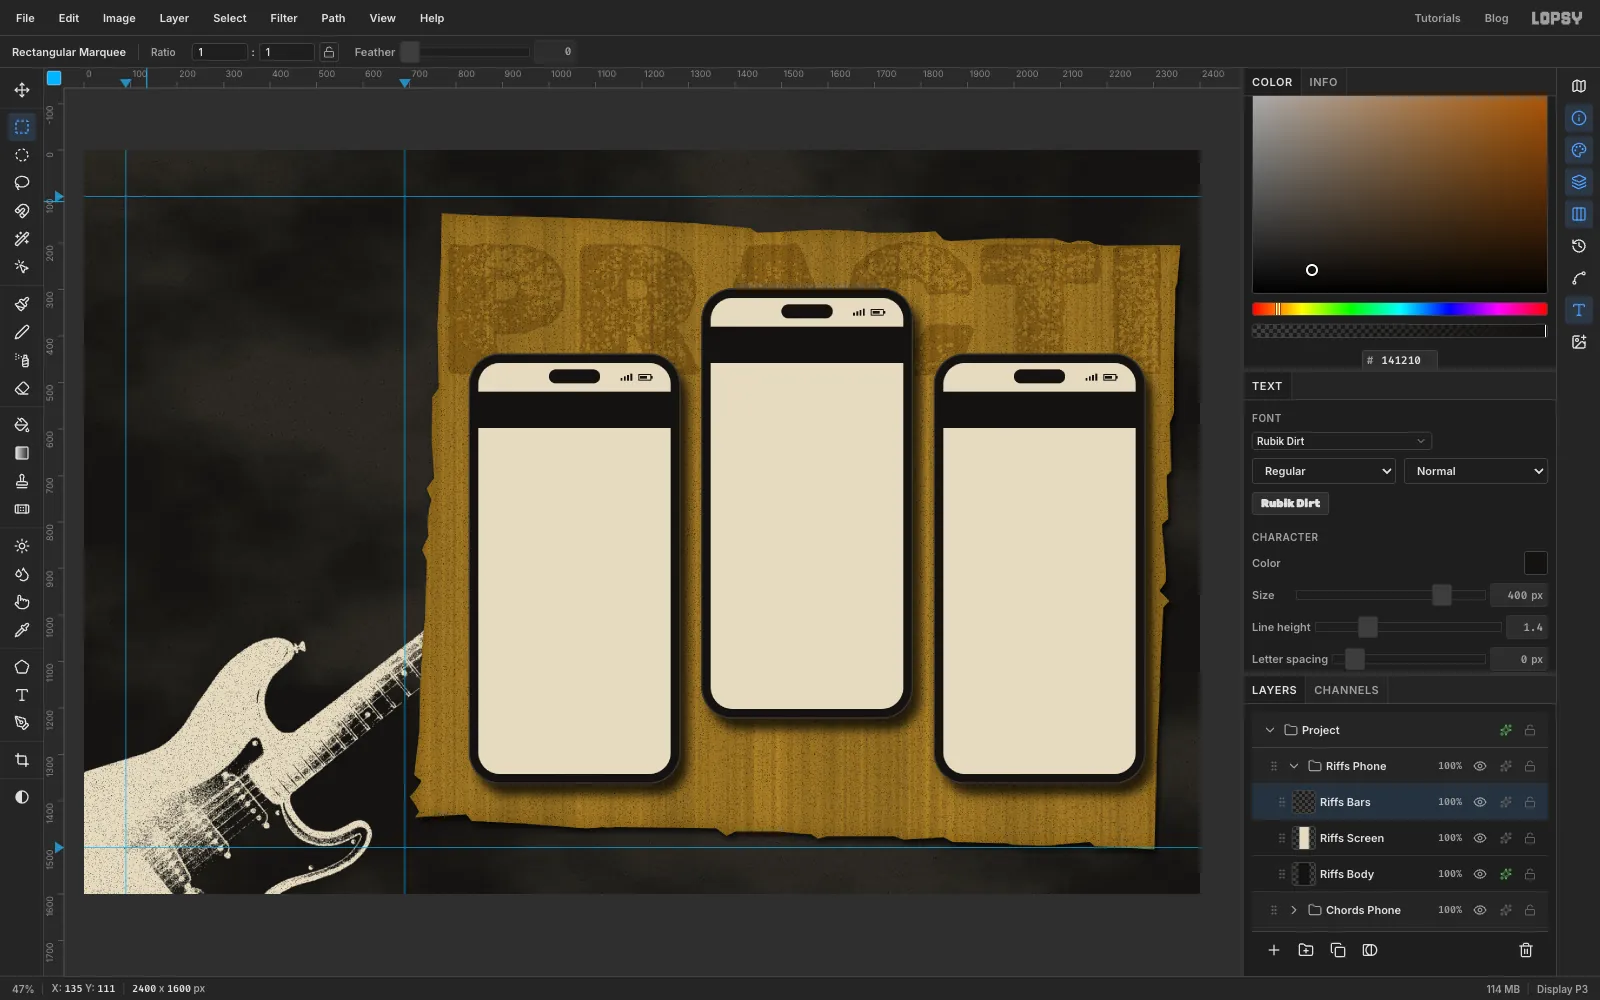
Collapse Tuner Phone and click its row, so the next group lands beside it, not inside it. Click New Group, name it Chords Phone, and repeat the last two steps with layers named Chords Body, Chords Screen and Chords Bars. Add 500 to every x and subtract 140 from every y. For example, the body is 1330, 300 → 1780, 1220 and the screen is 1348, 318 → 1762, 1202.
Collapse Chords Phone, click its row and do it once more for Riffs Phone (Riffs Body, Riffs Screen, Riffs Bars). This time add 1000 to every x and keep the y values, so the body is 1830, 440 → 2280, 1360. Raising the middle phone 140 px makes a gentle triangle.
-
Lay down the tab bar
Expand Tuner Phone, click Tuner Bars and add a layer called Tuner Tabs. Cmd-click the Tuner Screen thumbnail. Then hold Shift+Alt and drag a rectangle over the bottom 84 px of the screen. Shift+Alt intersects, so only the bottom of the rounded screen stays selected. Fill it with ink and press Cmd+D.
With the Text tool, set Special Elite at 22 px in bone and type
TUNE CHORDS RIFFS LOG(three spaces between words). In the Text panel, set Letter spacing to 1. Centre the labels in the bar, then choose Layer → Merge Down to bake them into Tuner Tabs.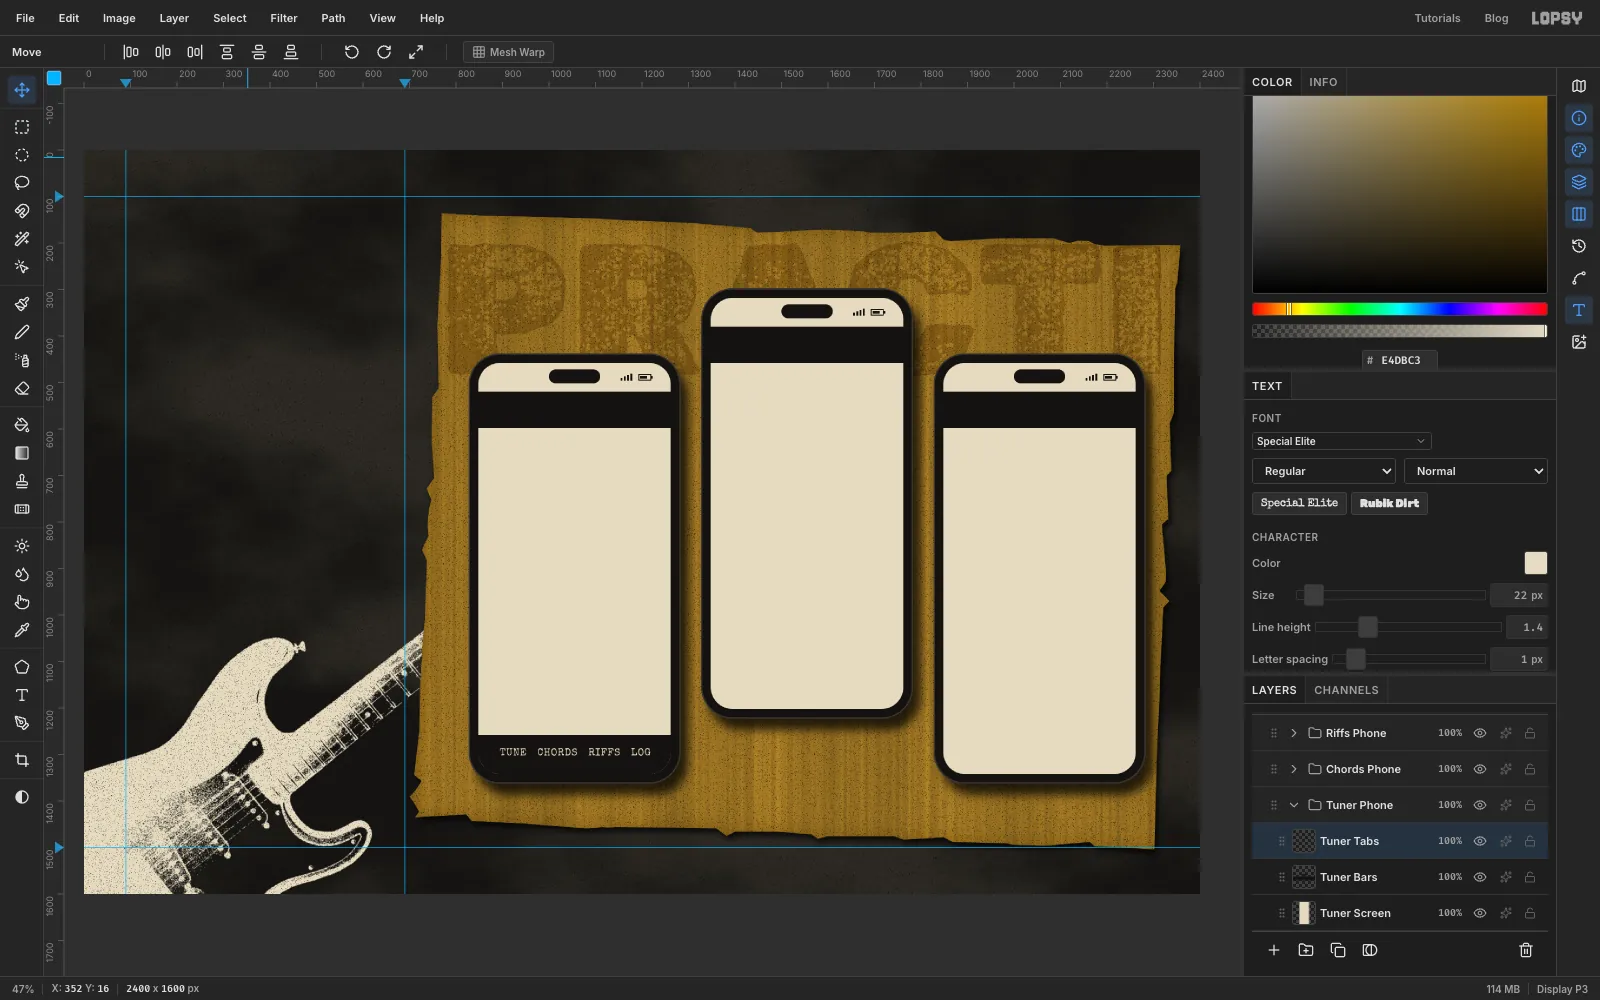
-
Draw gauge ticks with Sunburst
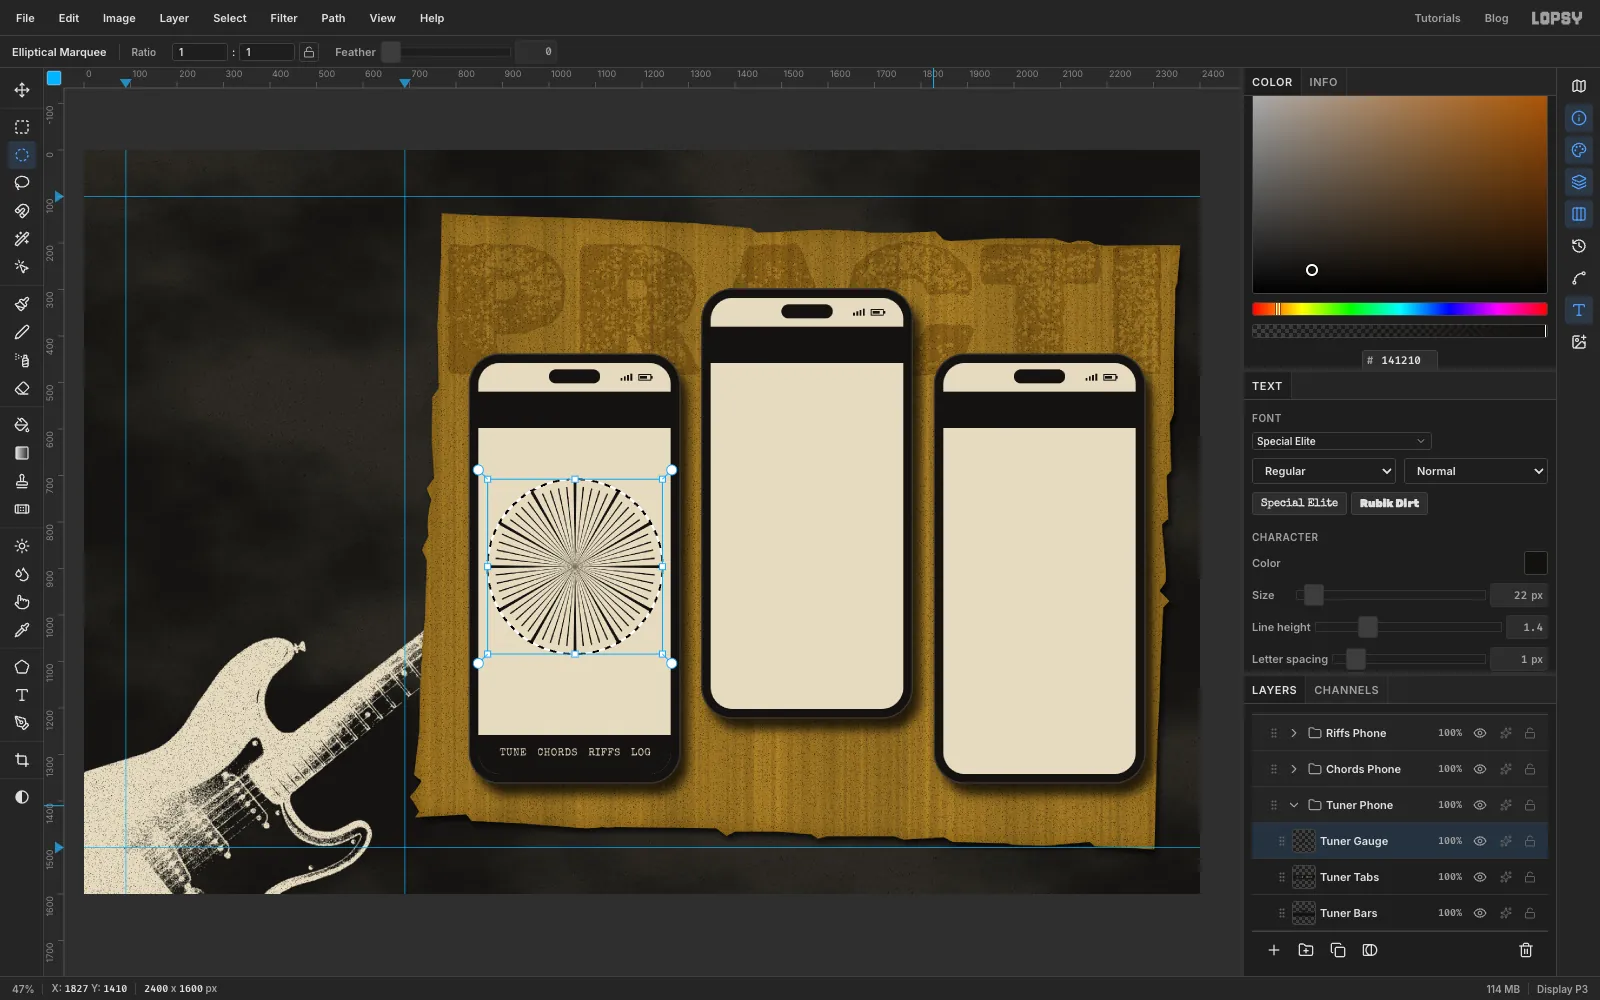
Add a layer called Tuner Gauge and set the foreground to ink. The gauge's centre is at 1056, 896. That's exactly 44% across and 56% down the canvas, which matters because Sunburst's centre moves in 1% steps.
Make an Elliptical Marquee circle with the exact-corners dialog: 884, 724 → 1228, 1068 (radius 172). Run Filter → Sunburst… with Rays 60, Width 16, Taper 0, Center X 44 and Center Y 56. The selection keeps the rays inside the circle.
For bolder major ticks, make a slightly bigger circle (radius 188: 868, 708 → 1244, 1084). Run Sunburst again with Rays 12 and Width 7.
-
Knock the rays back to a ring
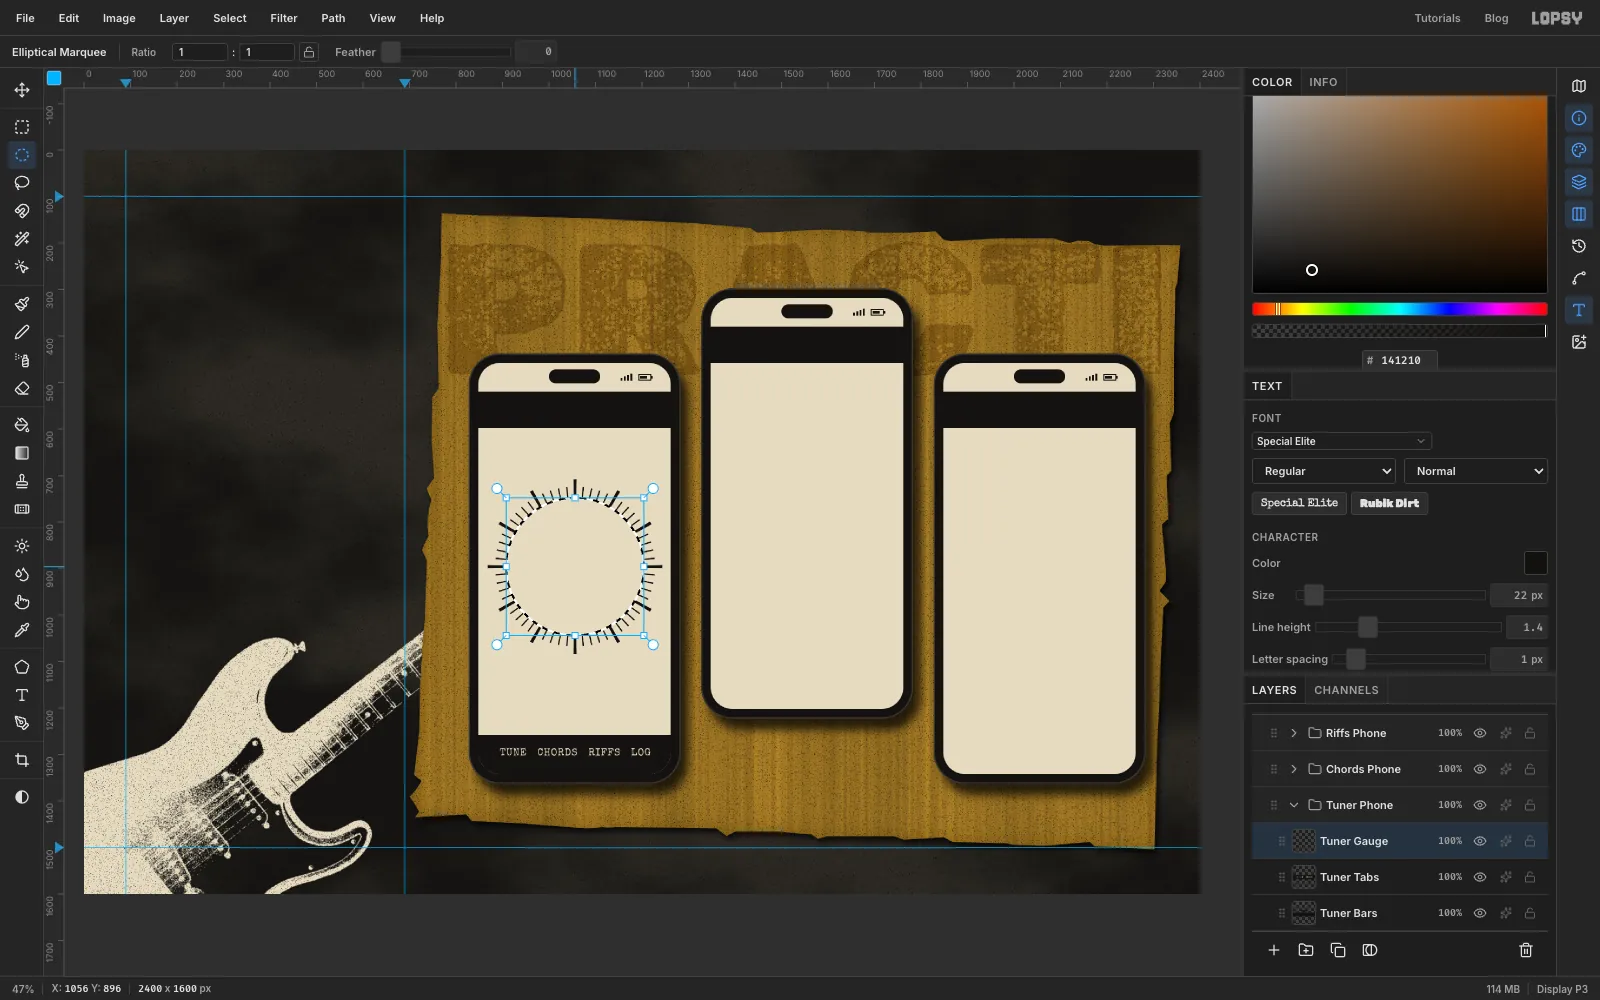
Select a circle of radius 148 on the same centre (908, 748 → 1204, 1044) and press Delete. Only the tips of the rays are left, as tick marks.
Then marquee everything below the centre line, from just under y 899 down past the ring, and press Delete. Press Cmd+D. You now have a classic half-moon tuner scale.
-
Add the needle
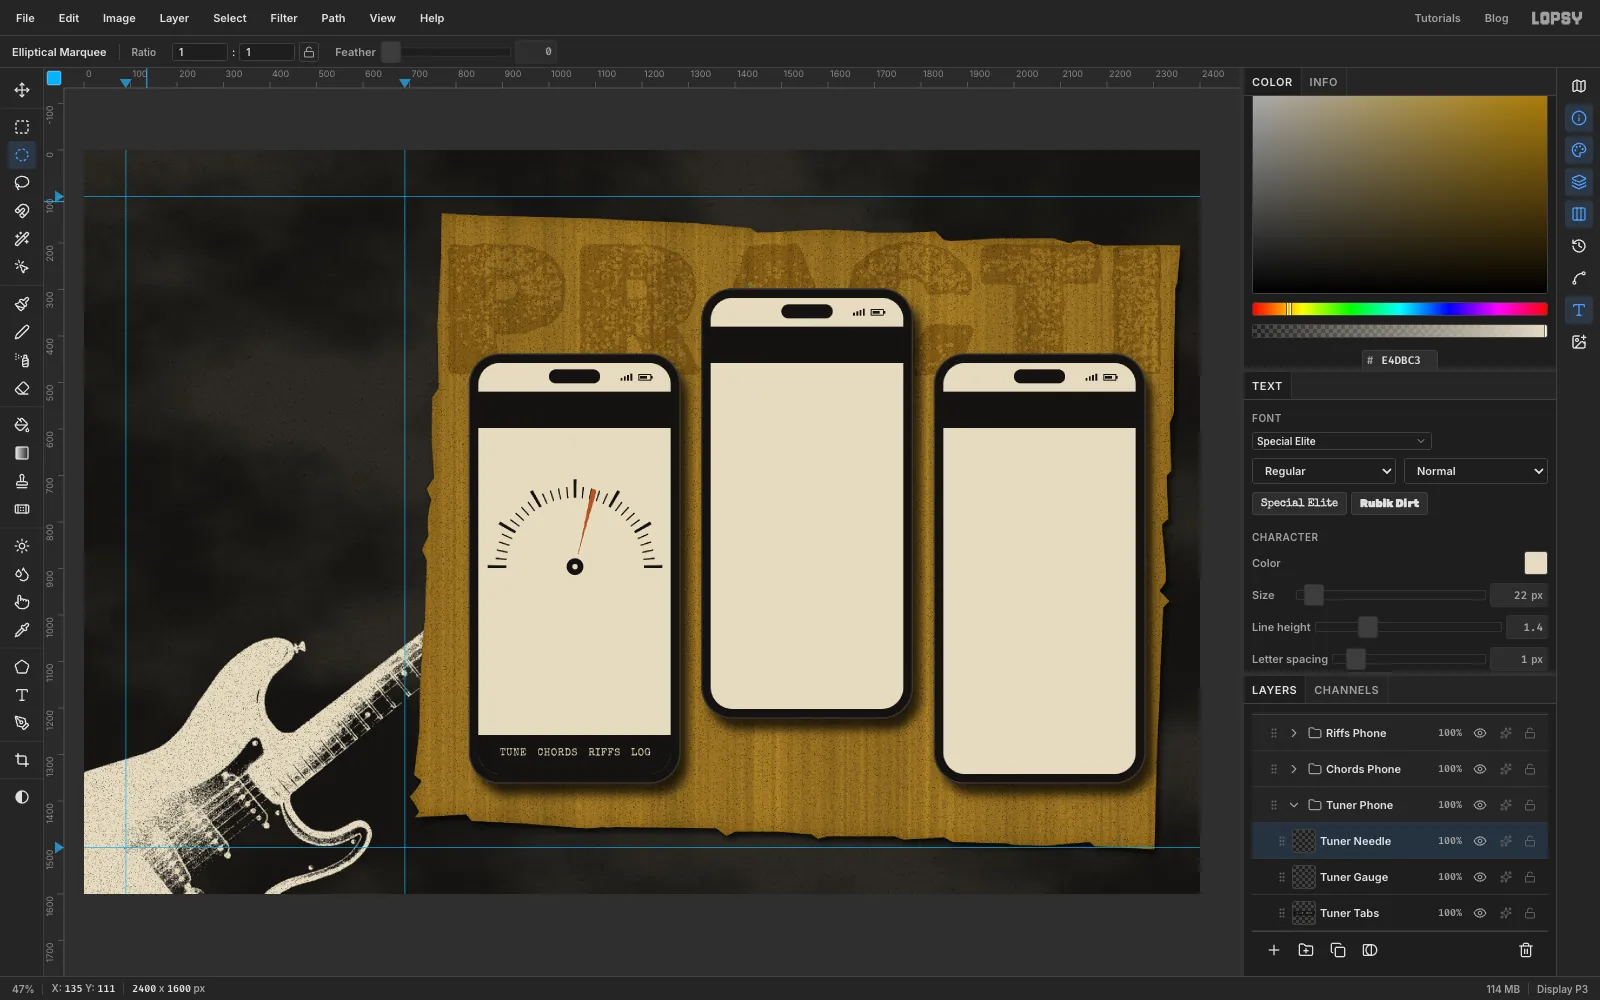
Add a layer called Tuner Needle. Set the foreground to rust . Pick the Brush, open the Brushes panel and set Size 12, Hardness 100, Spacing 2 and Taper 140. Taper shrinks the start of a stroke, so draw from the tip back to the centre. Press at the tip, about 1096, 735 (watch the X/Y readout in the status bar), and drag in one steady straight line to the centre at 1056, 896. That leans the needle 14° right, slightly sharp. Shift-click lines put a full-size dab at the start, so drag this one.
Set Taper back to 0. For the pivot, fill an ink circle of radius 18 and a bone circle of radius 6 on the centre.
-
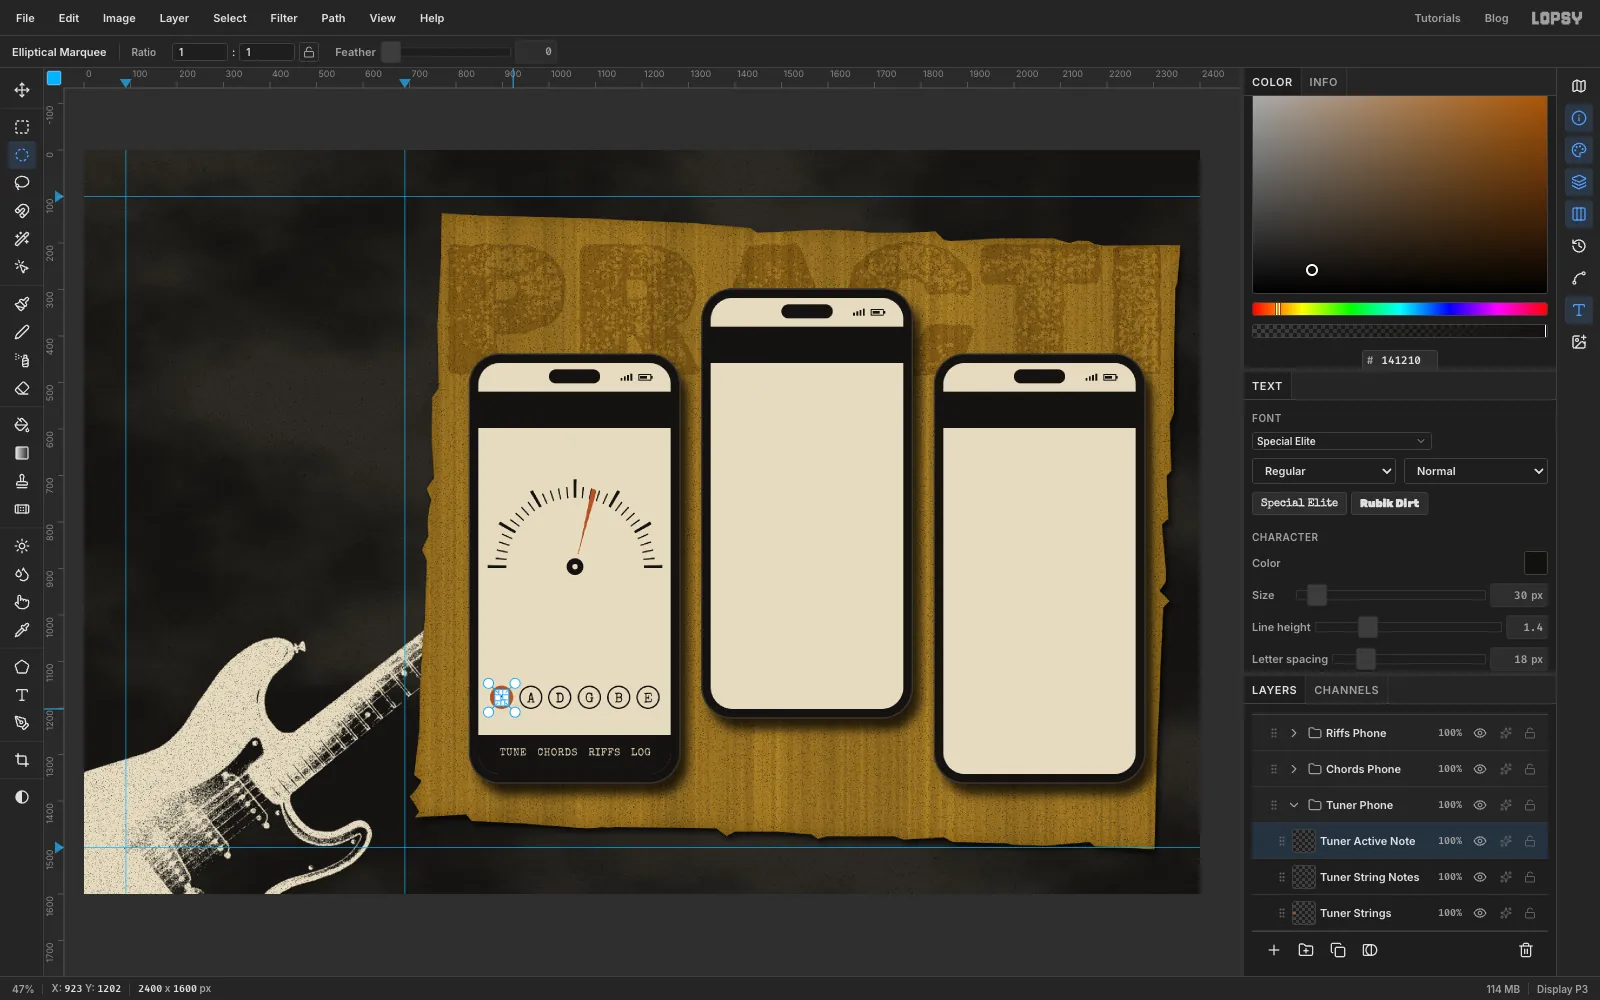
Make the string selector
Add a layer called Tuner Strings. With the Text tool, set Special Elite at 30 px in ink, type
E A D G B E, and set Letter spacing 18, and rename the layer Tuner String Notes. Centre it across the screen, about 80 px above the tab bar.Click Tuner Strings and draw a ring around each letter. The letters sit about 62 px apart, centred at x 898, 960, 1023, 1085, 1148 and 1210, all on y 1177. For each one, fill a circle 25 px either side of its centre (the first is 873, 1152 → 923, 1202). Then delete a circle 22 px either side. For the first E (the active low string), fill a solid rust disc instead.
The black letter now disappears into the rust disc. Click the Tuner String Notes row and add a layer called Tuner Active Note. Cmd-click the text layer's thumbnail. Then Shift+Alt-drag an ellipse over the rust disc, so only that one letter stays selected. Fill with bone and press Cmd+D.
-
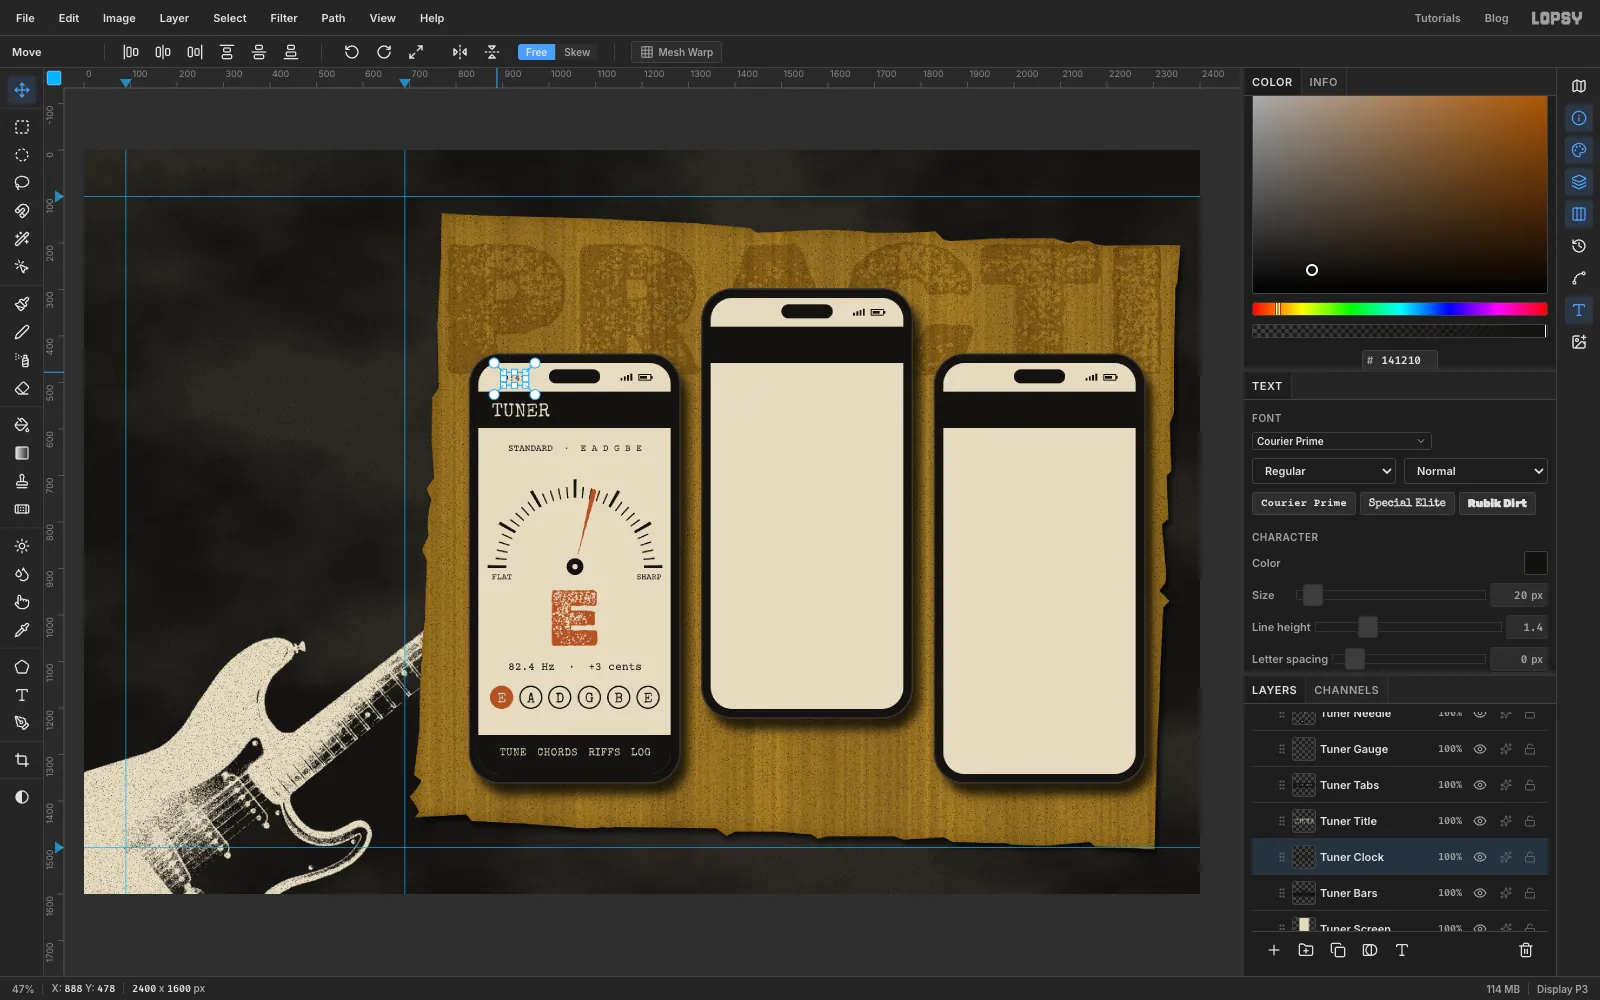
Type the tuner screen
Add the rest of the type. Create each piece from the bottom of the screen upward. A Text-tool click near an existing text layer edits that layer, so you never want to click just below one.
Before each new text, click a raster row such as Tuner Strings. That way the font and size you set don't restyle the text you just made. Also set Letter spacing back to 0 in the Text panel: it keeps the last value you typed (18 from the string letters).
82.4 Hz · +3 cents: Courier Prime 24, ink, centred above the string buttons.E: Rubik Dirt 170, rust, centred under the gauge.FLATandSHARP: Courier Prime 18, under the two ends of the scale.STANDARD · E A D G B E: Courier Prime 20, under the app bar.TUNER: Special Elite 40, bone, in the app bar.9:41: Courier Prime 20, ink, at the top left of the screen.
-
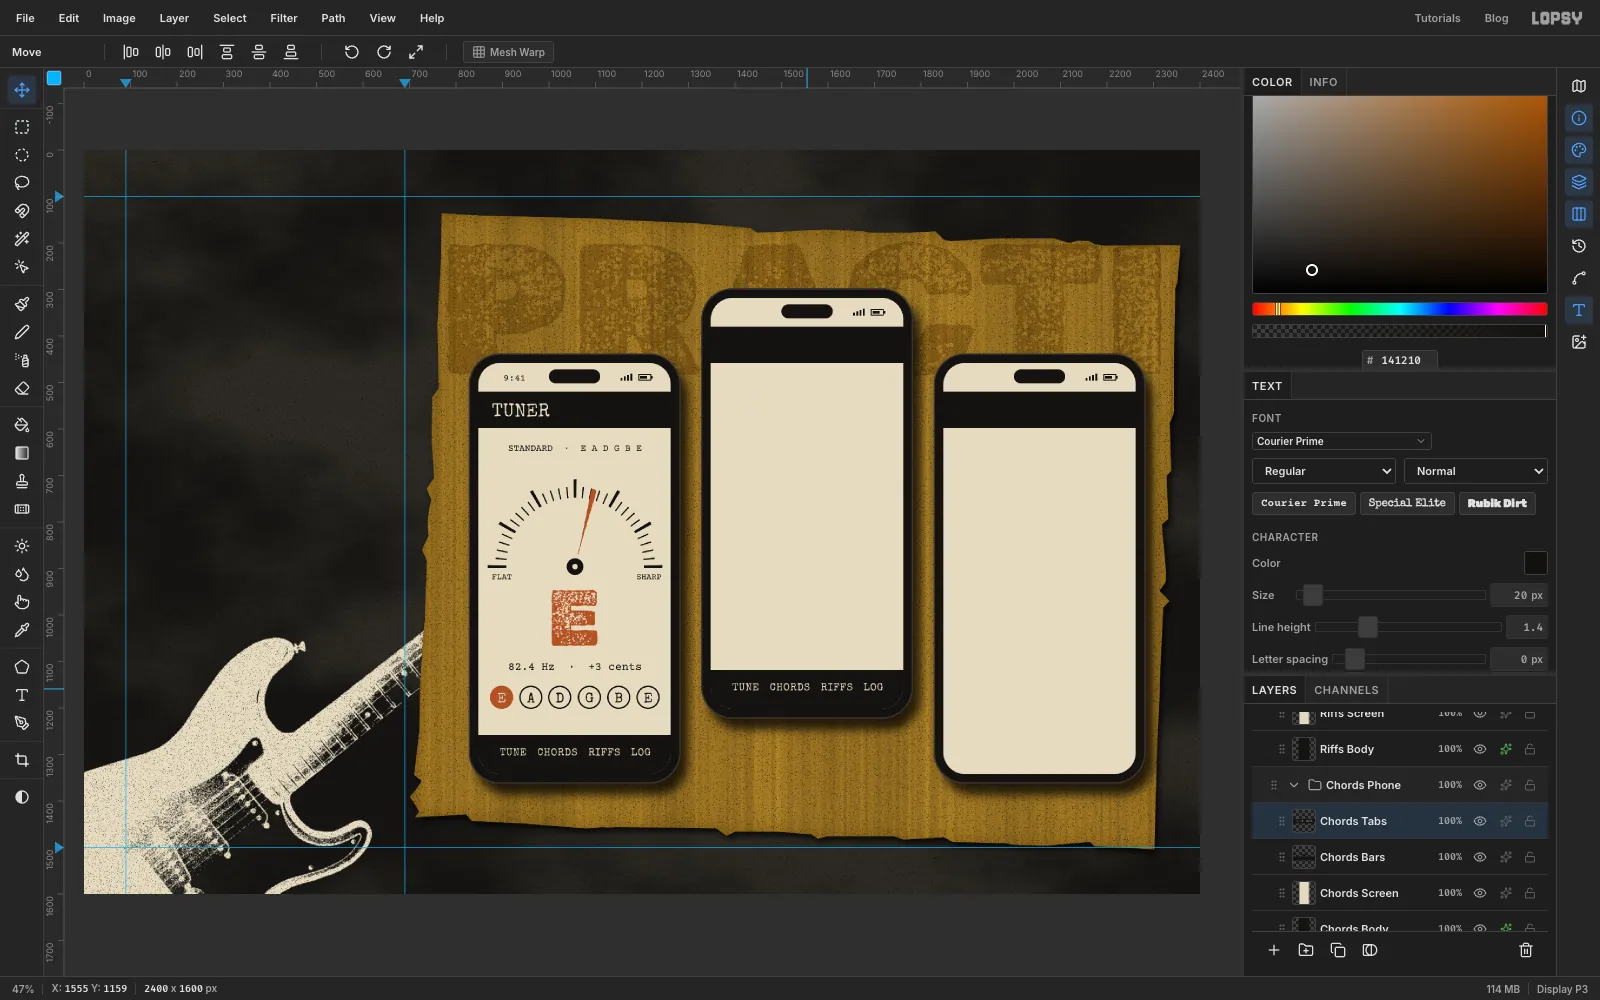
Copy the tab bar to the other phones
There's no need to build the tab bar twice. Click Tuner Tabs, marquee the bar and press Cmd+C. Expand Chords Phone, click Chords Bars and press Cmd+V. The copy pastes in place as a new layer above Chords Bars. Rename it Chords Tabs and press Cmd+D.
With the Move tool, drag it onto the bottom of the chord book's screen. Line it up exactly with the arrow keys (Shift moves 10 px). Do the same for Riffs Tabs on the right phone.
-
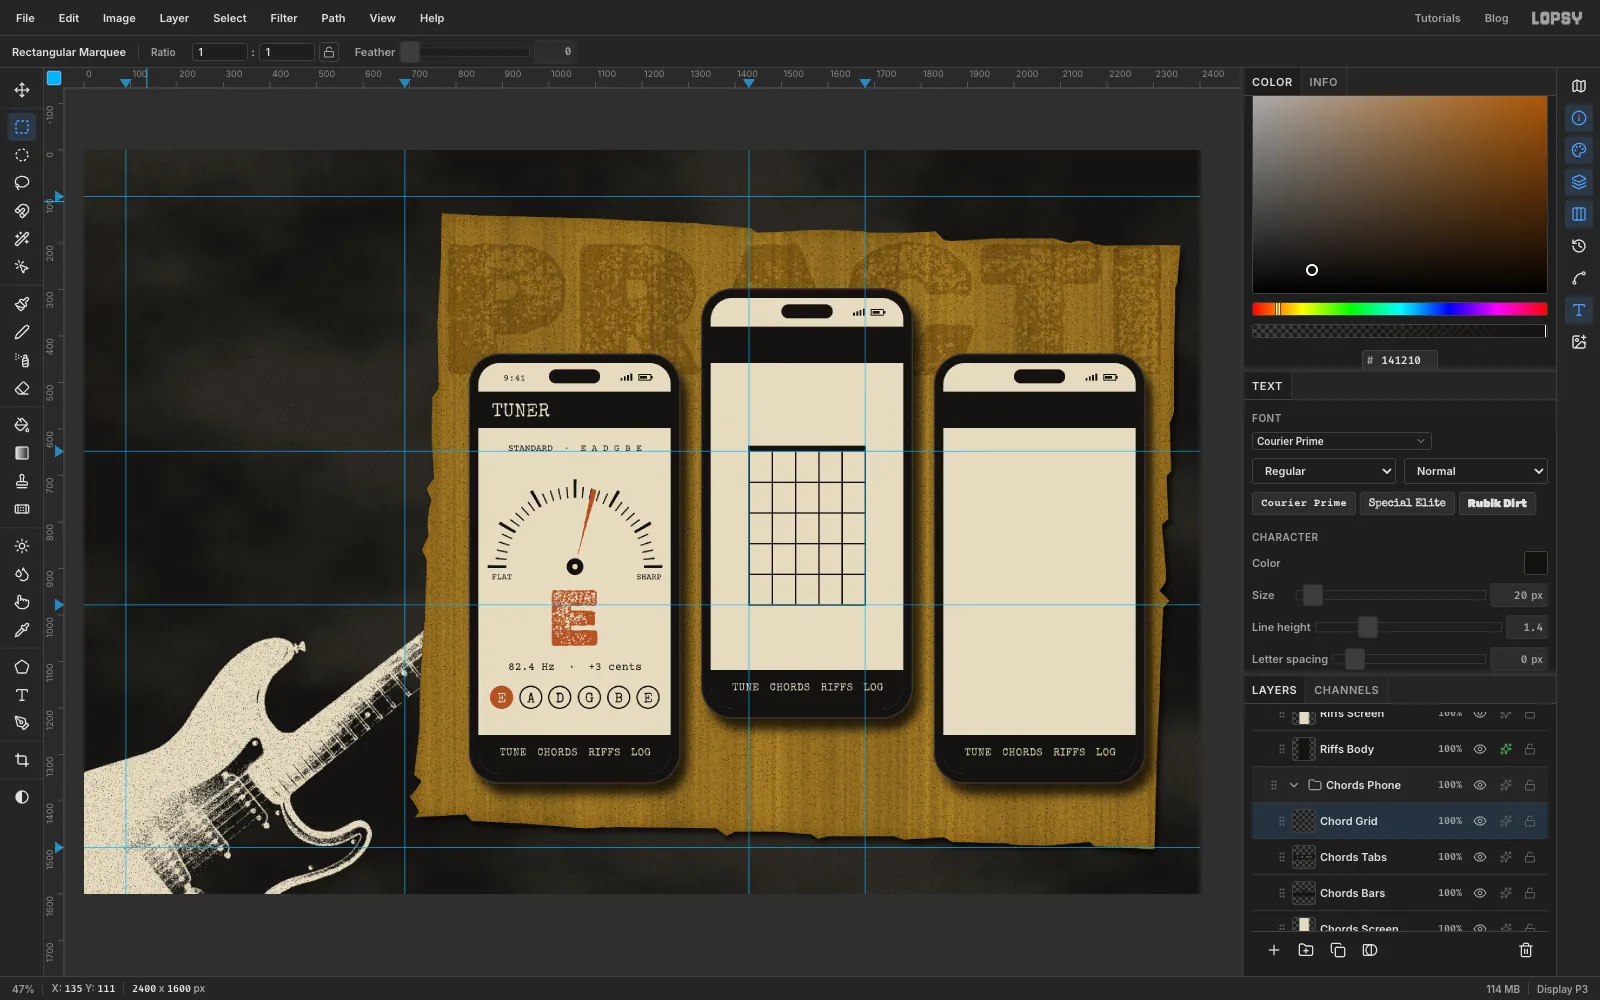
Rule the chord grid with the Pencil
Click the top ruler at 1430 and 1680, and the left ruler at 648 and 978, to frame the diagram with guides.
Add a layer called Chord Grid. Pick the Pencil at Size 3 in ink. To draw each line, click its start, then Shift-click its end:
- Strings: six vertical lines, 50 px apart, from the top guide to the bottom one.
- Frets: five horizontal lines, 66 px apart, below the top guide, from the left guide to the right one. The last one lands on the bottom guide.
For the nut, marquee a 12 px strip along the top guide (1428, 636 → 1682, 649) and fill it.
-
Place the finger dots
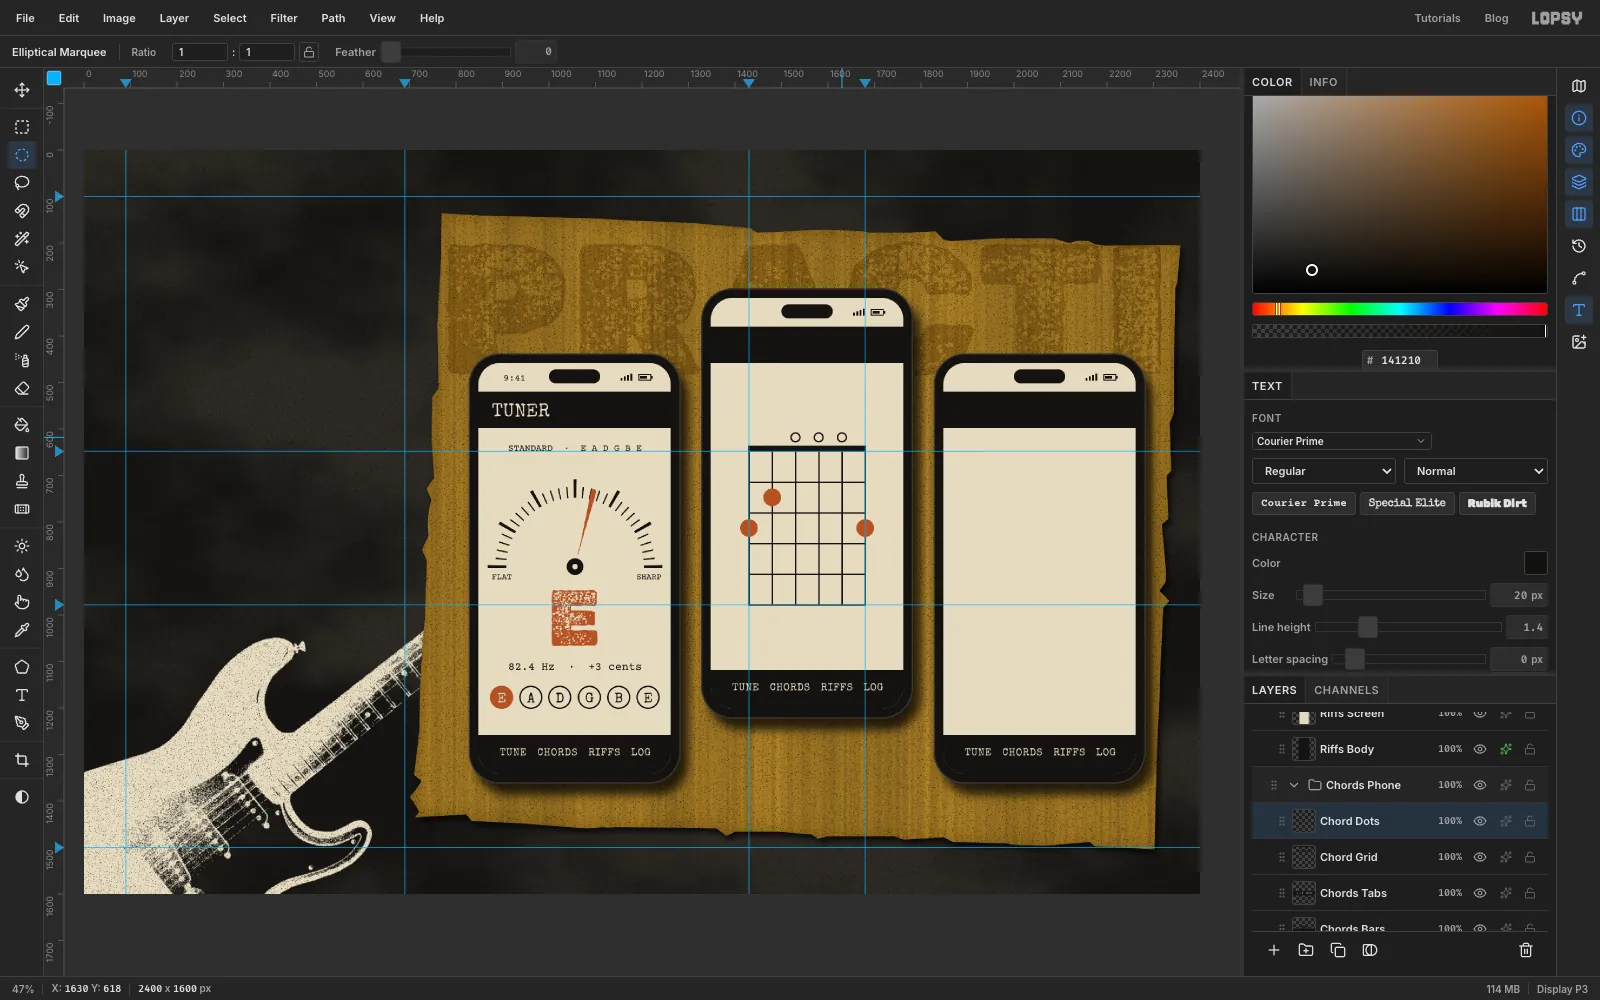
Add a layer called Chord Dots. This is G major in open position (3-2-0-0-0-3). Fill rust circles (radius 19) halfway between frets:
- low E string (left), 3rd fret: 1411, 794 → 1449, 832
- A string, 2nd fret: 1461, 728 → 1499, 766
- high E string (right), 3rd fret: 1661, 794 → 1699, 832
The D, G and B strings ring open. Draw a small ink ring above the nut on each of them, centred at x 1530, 1580 and 1630, y 618. Fill a circle 11 px either side of the centre, then delete one 8 px either side.
-
Cut tape chips and paste copies
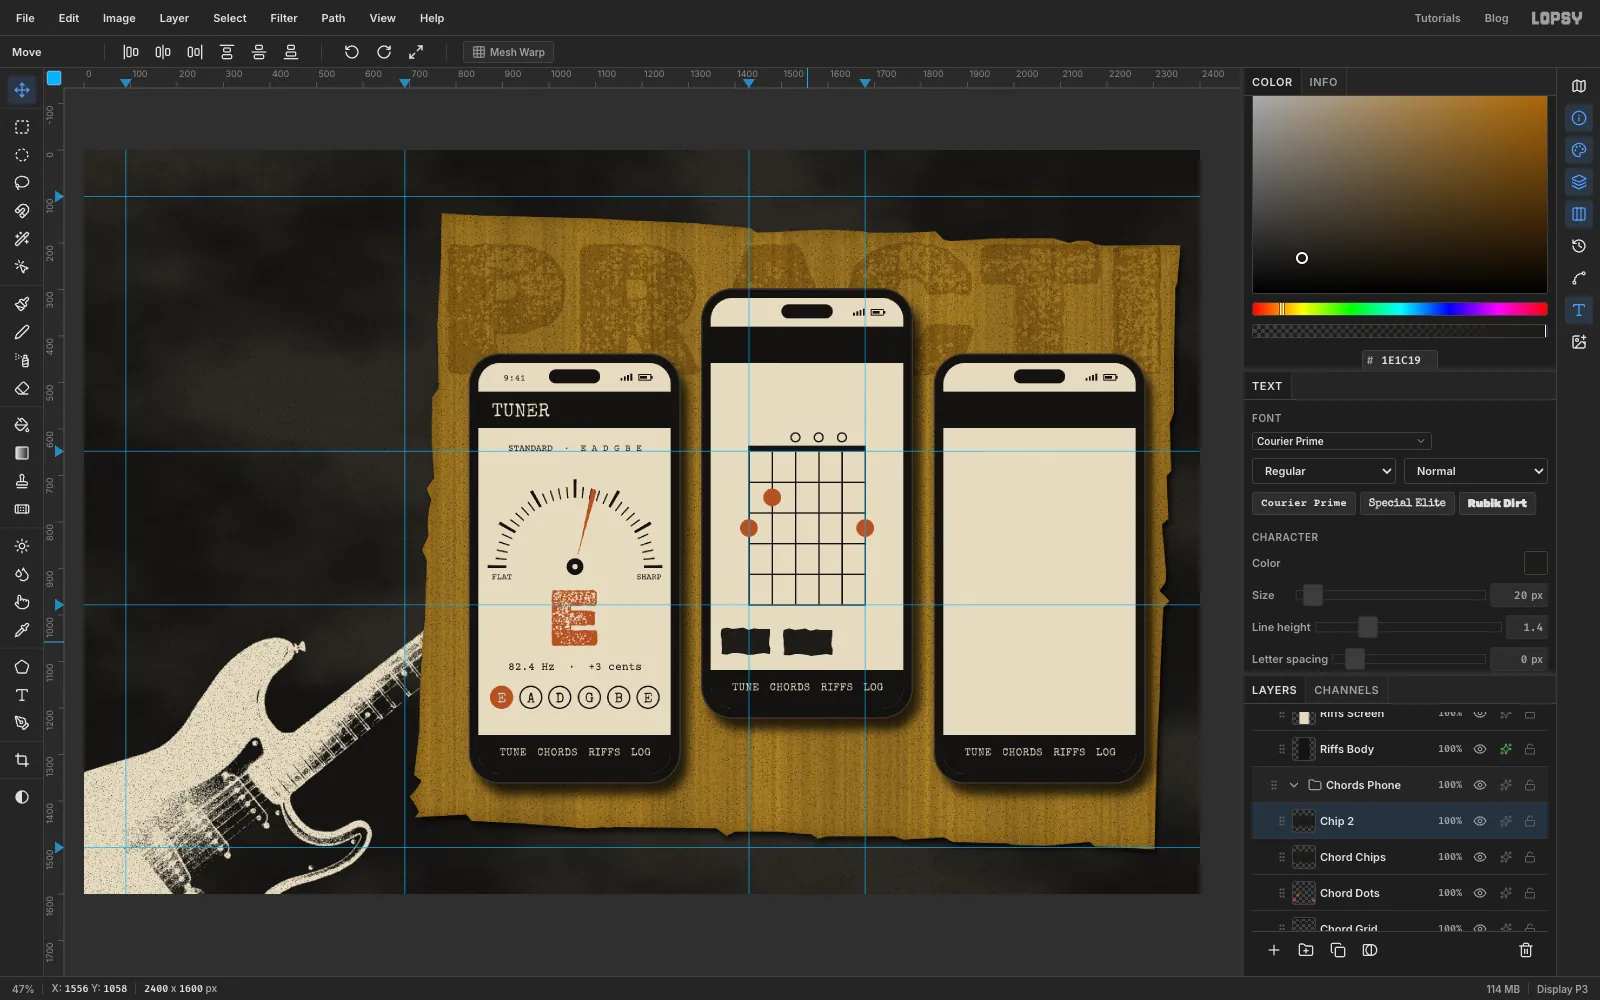
Add a layer called Chord Chips. With the Lasso, trace a small torn chip about 104 × 54 px near the bottom left of the screen, above the tab bar. Fill it with and run Add Noise at 22 Mono.
Keep the selection, then press Cmd+C and Cmd+V. Rename the new layer Chip 2 and press Cmd+D. With the Move tool, nudge it 132 px to the right: press Shift+Right 13 times and Right twice. Paste a third copy from Chord Chips, call it Chip 3 and nudge it 264 px from the first. That leaves an even 28 px gap between chips.
-
Tilt the chips
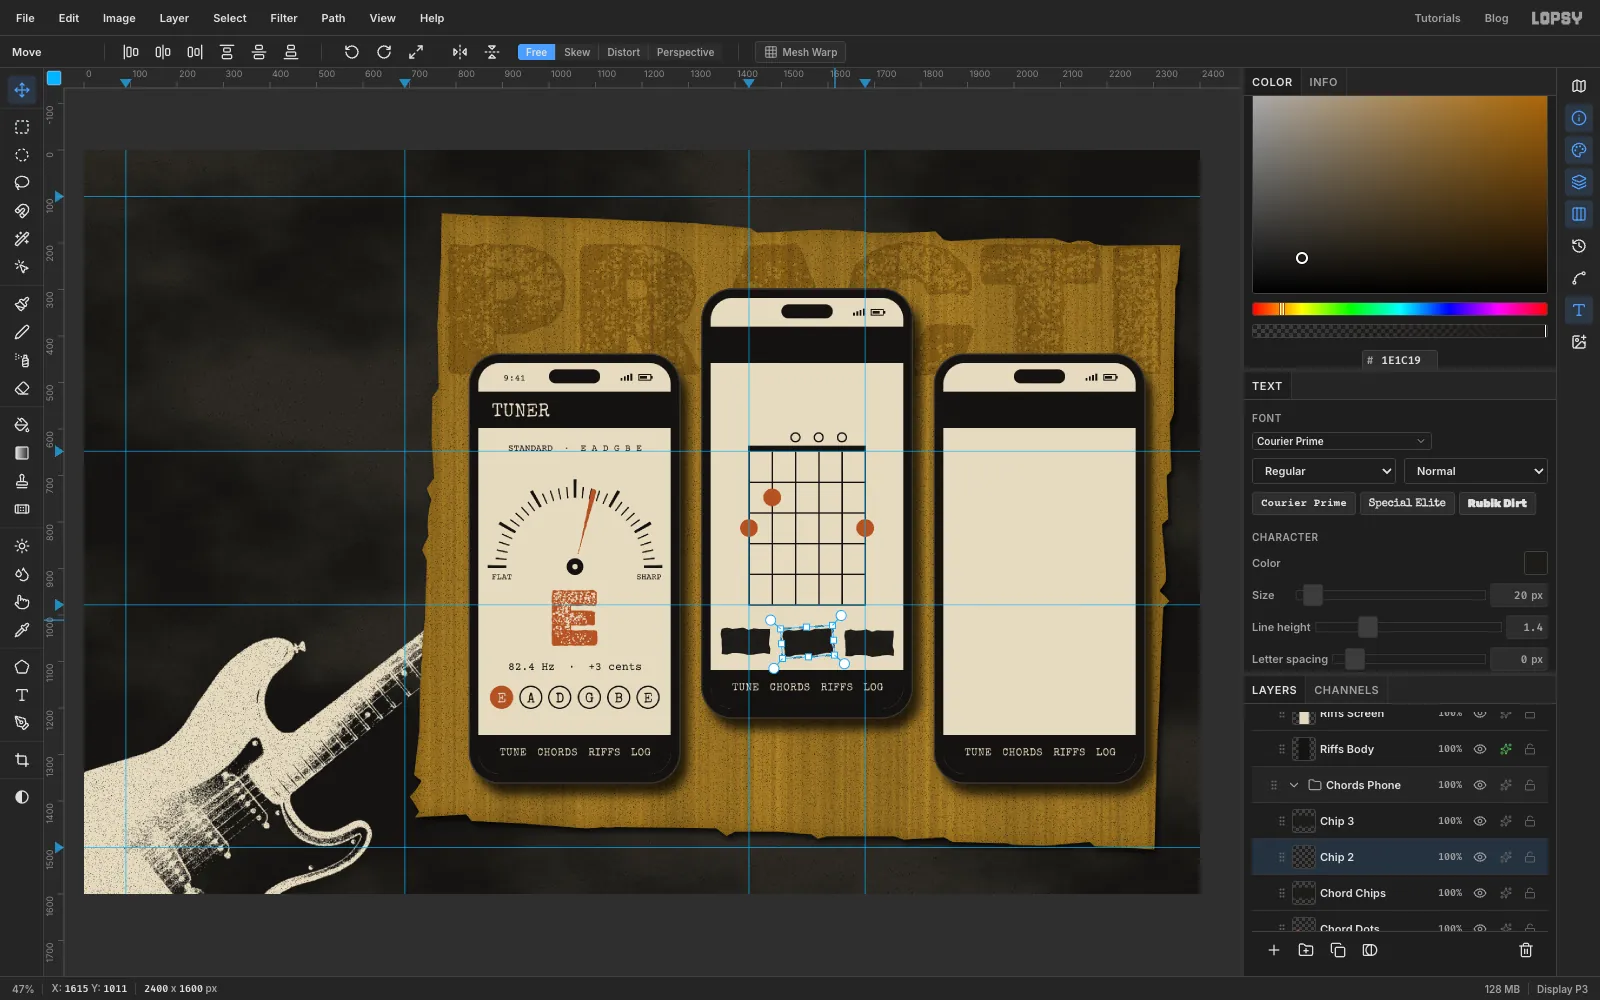
Taped chips never sit perfectly straight. On Chip 2, draw a marquee just around the chip and drag the rotate handle about 4° counter-clockwise. Press Cmd+D. Tilt Chip 3 about 3° the other way.
Then click Chip 3 and choose Layer → Merge Down twice, so all three chips end up on Chord Chips.
-
Type the chord book
Working from the bottom up again:
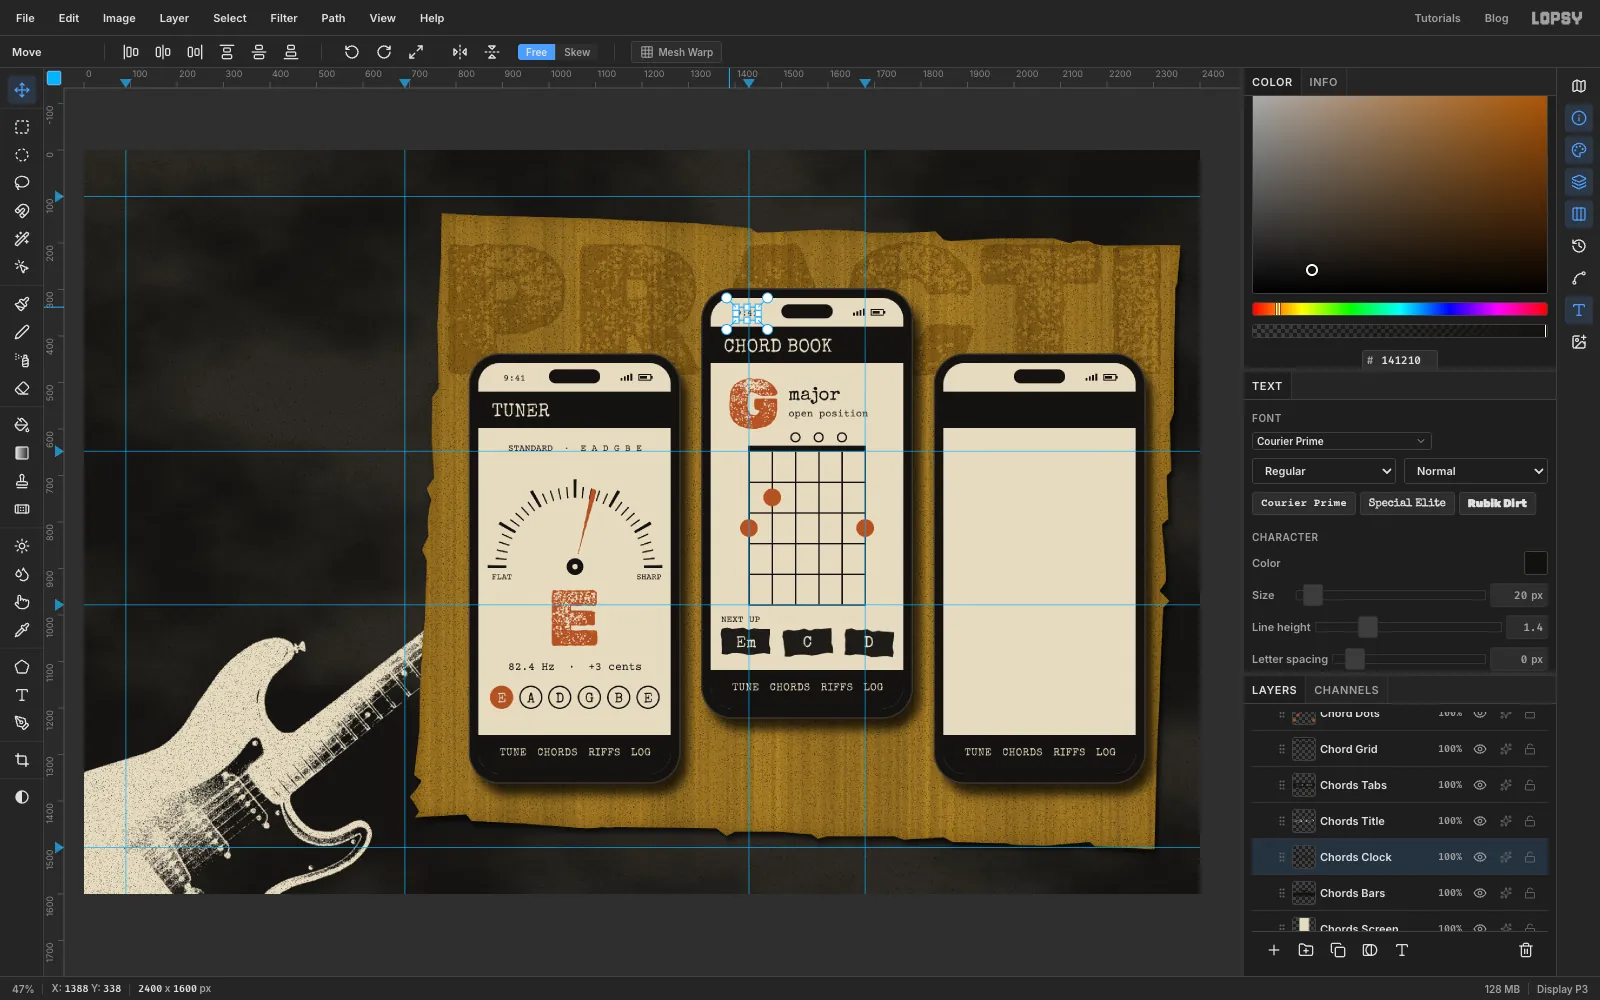
Em,C,D: Special Elite 34, bone, each centred on its chip.NEXT UP: Courier Prime 20, ink, just above the chips.open position: Courier Prime 22, ink, and above itmajorin Special Elite 40, ink. Both sit right of the G's position.G: Rubik Dirt 150, rust, top left of the screen.CHORD BOOK: Special Elite 40, bone, in the app bar.9:41: Courier Prime 20, ink.
-
Add the active-tab markers, play button and tally
Mark the active tab on each phone with a short rust bar, about 5 px tall, just under its label. Draw it on that phone's Tabs layer: under TUNE on the tuner, CHORDS on the chord book and RIFFS on the right phone.
On the right phone, add a layer called Riffs Play:
- Fill a rust circle at 2112, 924 → 2228, 1040.
- Lasso a right-pointing triangle inside it, roughly 2152, 952 / 2202, 982 / 2152, 1012, and fill it with bone.
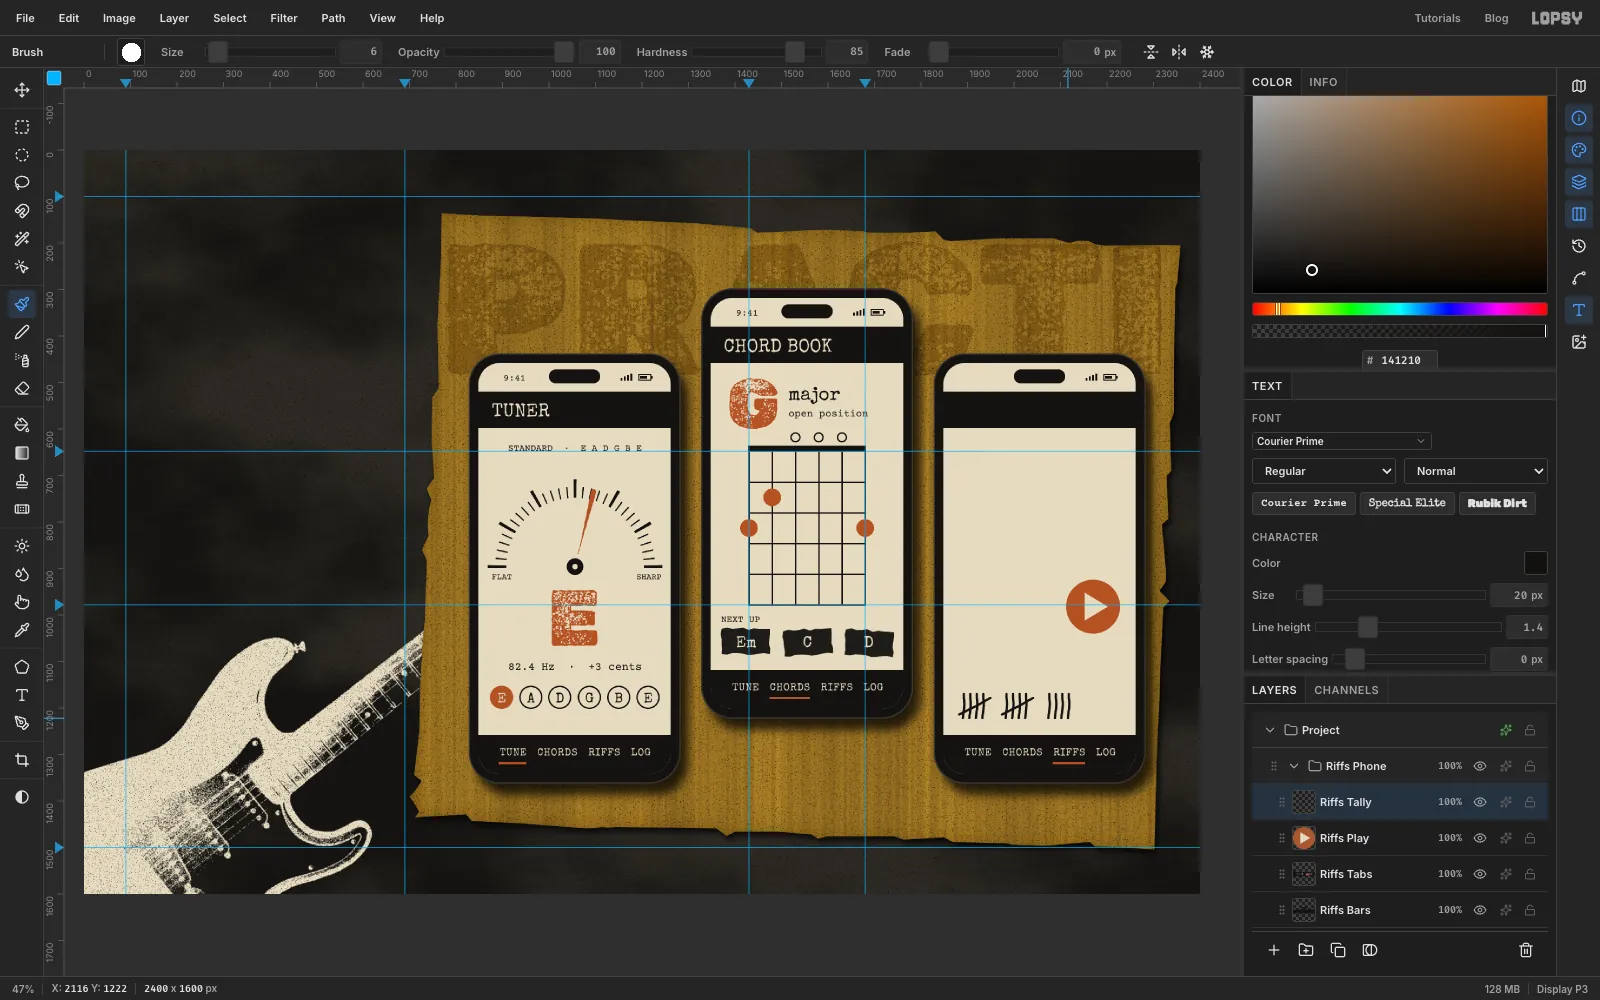
Add a layer called Riffs Tally. Pick the Brush at Size 6, Hardness 85, in ink. Draw fourteen days of streak by hand as two gates of five and one group of four. A gate of five is four short downstrokes plus one diagonal across them.
-
Type the riff screen
Bottom up:
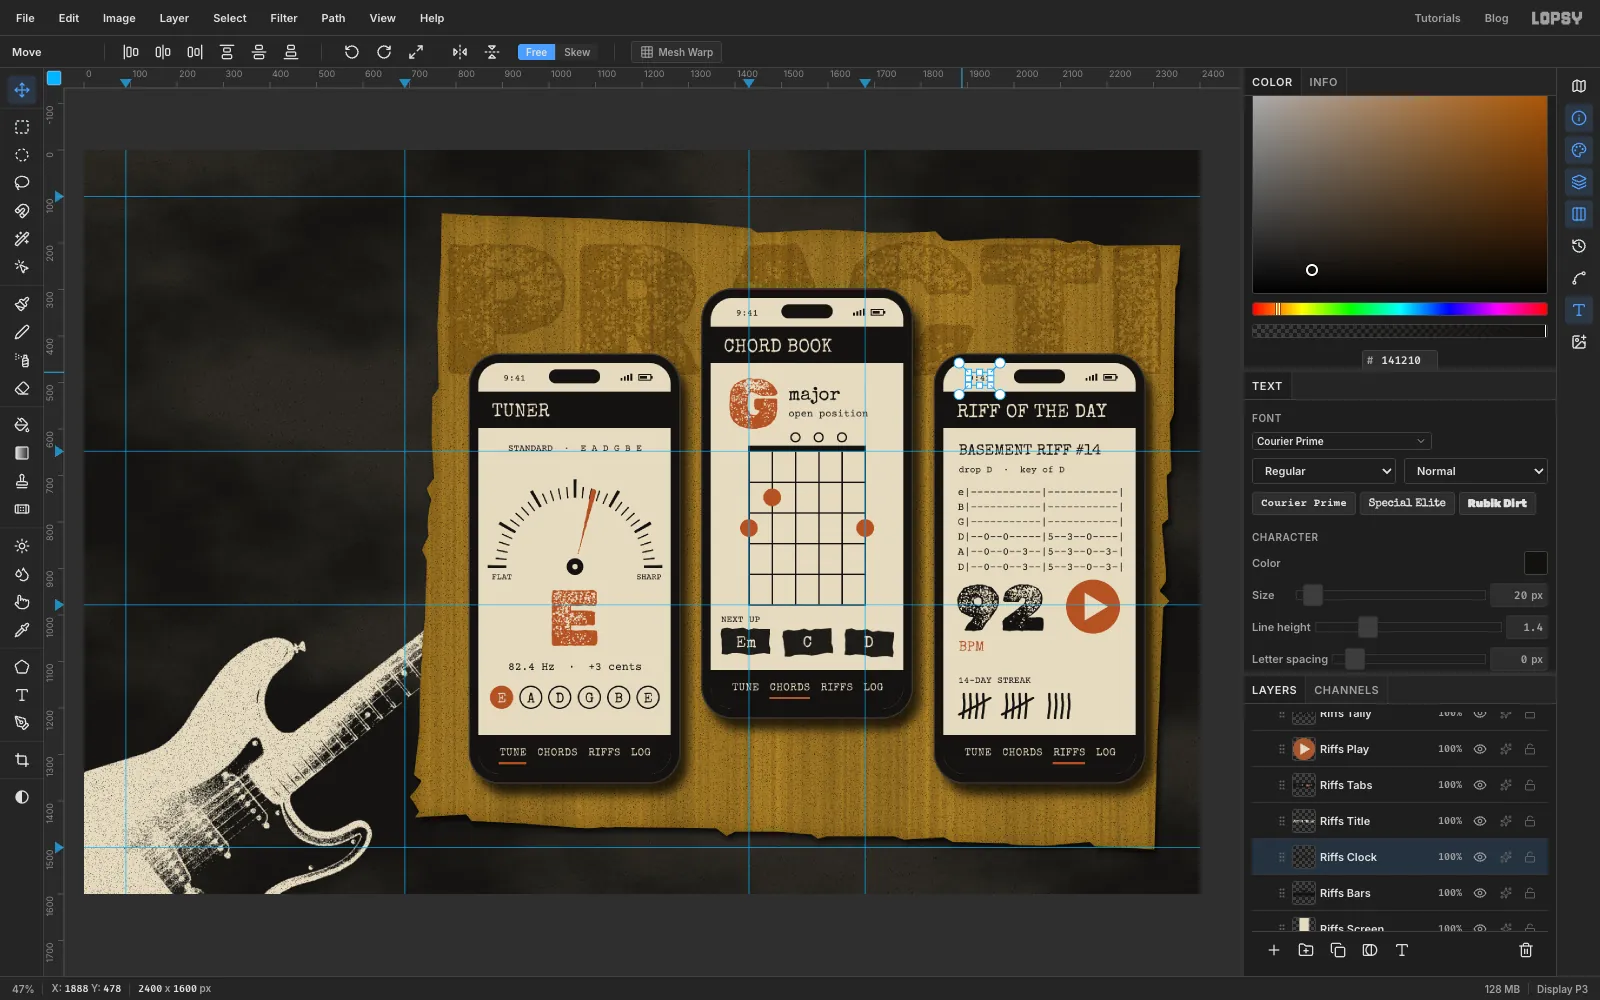
14-DAY STREAK: Courier Prime 20, above the tally.BPM: Special Elite 30, rust, under where the 92 will go.92: Rubik Dirt 140, ink, left of the play button.- The tab: Courier Prime 23. It's monospaced, so the dashes line up. Paste it as one six-line text:
``
e|-----------|-----------| B|-----------|-----------| G|-----------|-----------| D|--0--0-----|5--3--0----| A|--0--0--3--|5--3--0--3-| D|--0--0--3--|5--3--0--3-|``drop D · key of D: Courier Prime 20, ink.BASEMENT RIFF #14: Special Elite 32, ink.RIFF OF THE DAY: Special Elite 40, bone, in the app bar, and the9:41clock in Courier Prime 20.
-
Set the headline
Collapse all three phones, click Riffs Phone and click New Group. Name the group Headline.
Add a layer called Tagline Tape. Lasso a torn strip from the left guide to just past the right guide, roughly 60 px tall, starting at y 612. Fill it with masking-tape and run Add Noise at 14 Mono.
The feature list is two text layers, a column of rust numbers and a column of bone lines. Make the right column first: a multi-line text layer has a wide click area, and a click inside it would edit it.
- Click at x 160, y 740 (watch the X/Y readout in the status bar) and type in Courier Prime 34, bone, one item per line:
tune it.,learn the shape.,steal the riff.,play it loud. - In the Text panel, set Line height 1.5.
- At x 90, same baseline, type
01to04, one per line, in rust, also at line height 1.5.
Set
GUITAR PRACTICE FOR BASEMENT LEGENDSin Special Elite 25, ink, centred on the tape.Then set
SHEDandWOODin Rubik Dirt 280, bone, as two separate layers, SHED first. Align WOOD's left edge with the left guide, with SHED just under it. At this size both words run well onto the poster. Make that overlap obvious; a near-miss looks like a mistake.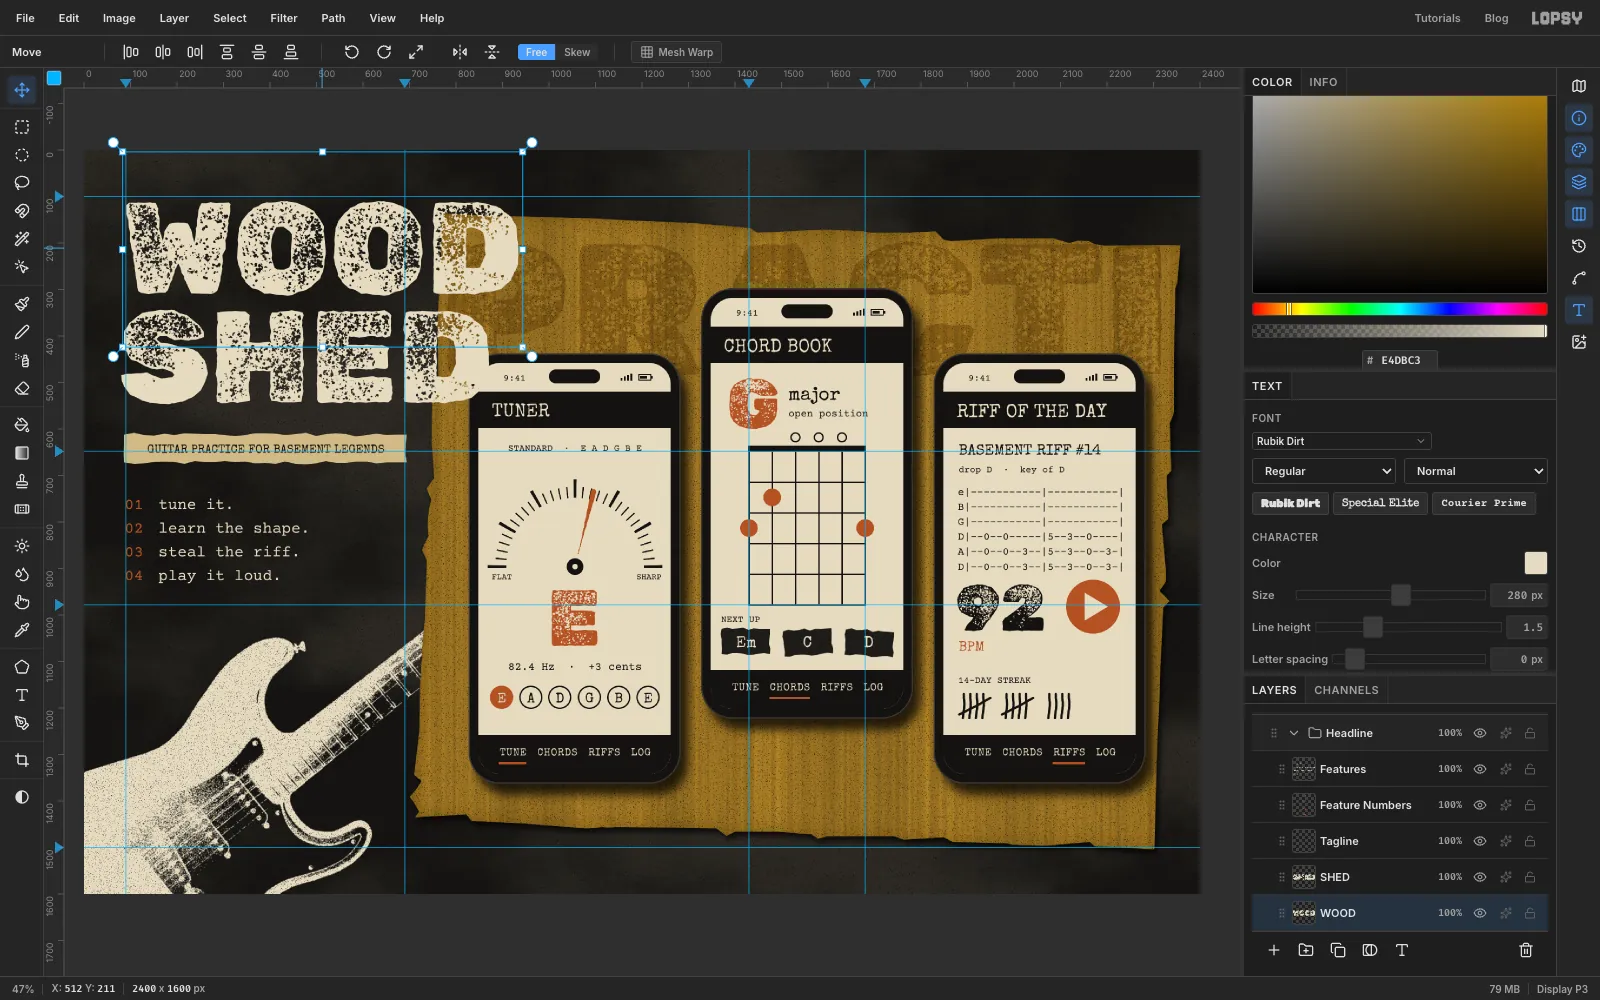
- Click at x 160, y 740 (watch the X/Y readout in the status bar) and type in Courier Prime 34, bone, one item per line:
-
Misregister a rust echo
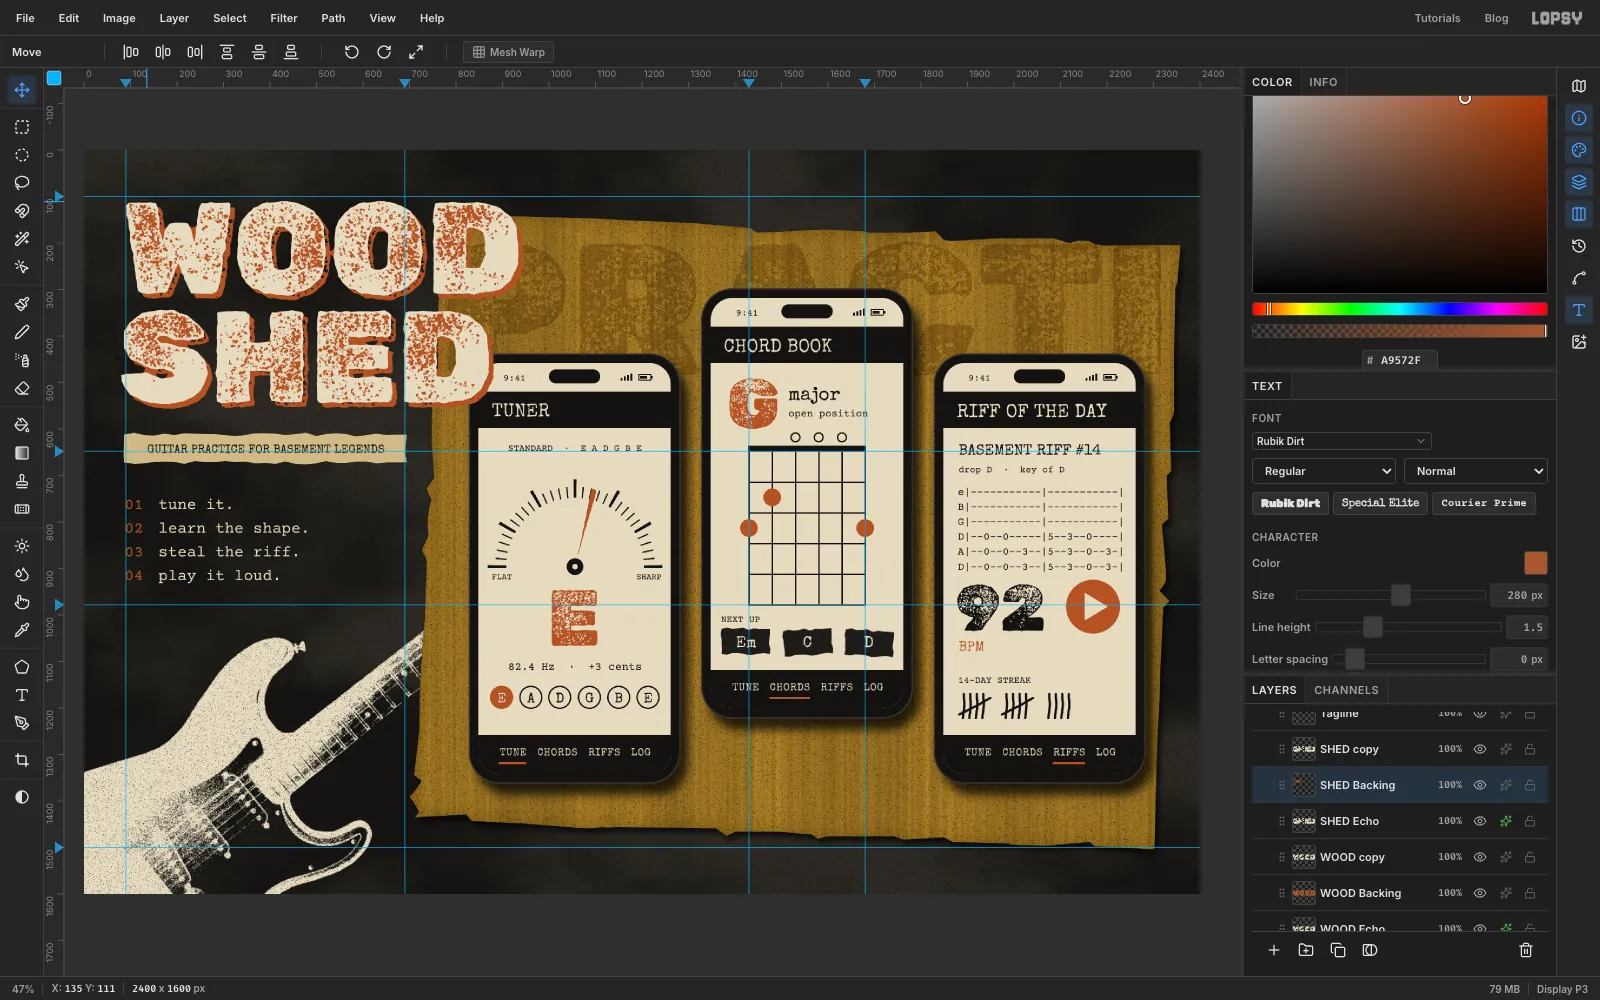
Two-colour copies never line up. Click WOOD and click Duplicate Layer. The copy lands on top. Click the original (the lower row) and rename it WOOD Echo. Give it a Color Overlay in rust .
With the Move tool, press Shift+Right and Shift+Down to push it 10 px each way. Do the same for SHED.
-
Close up the speckle
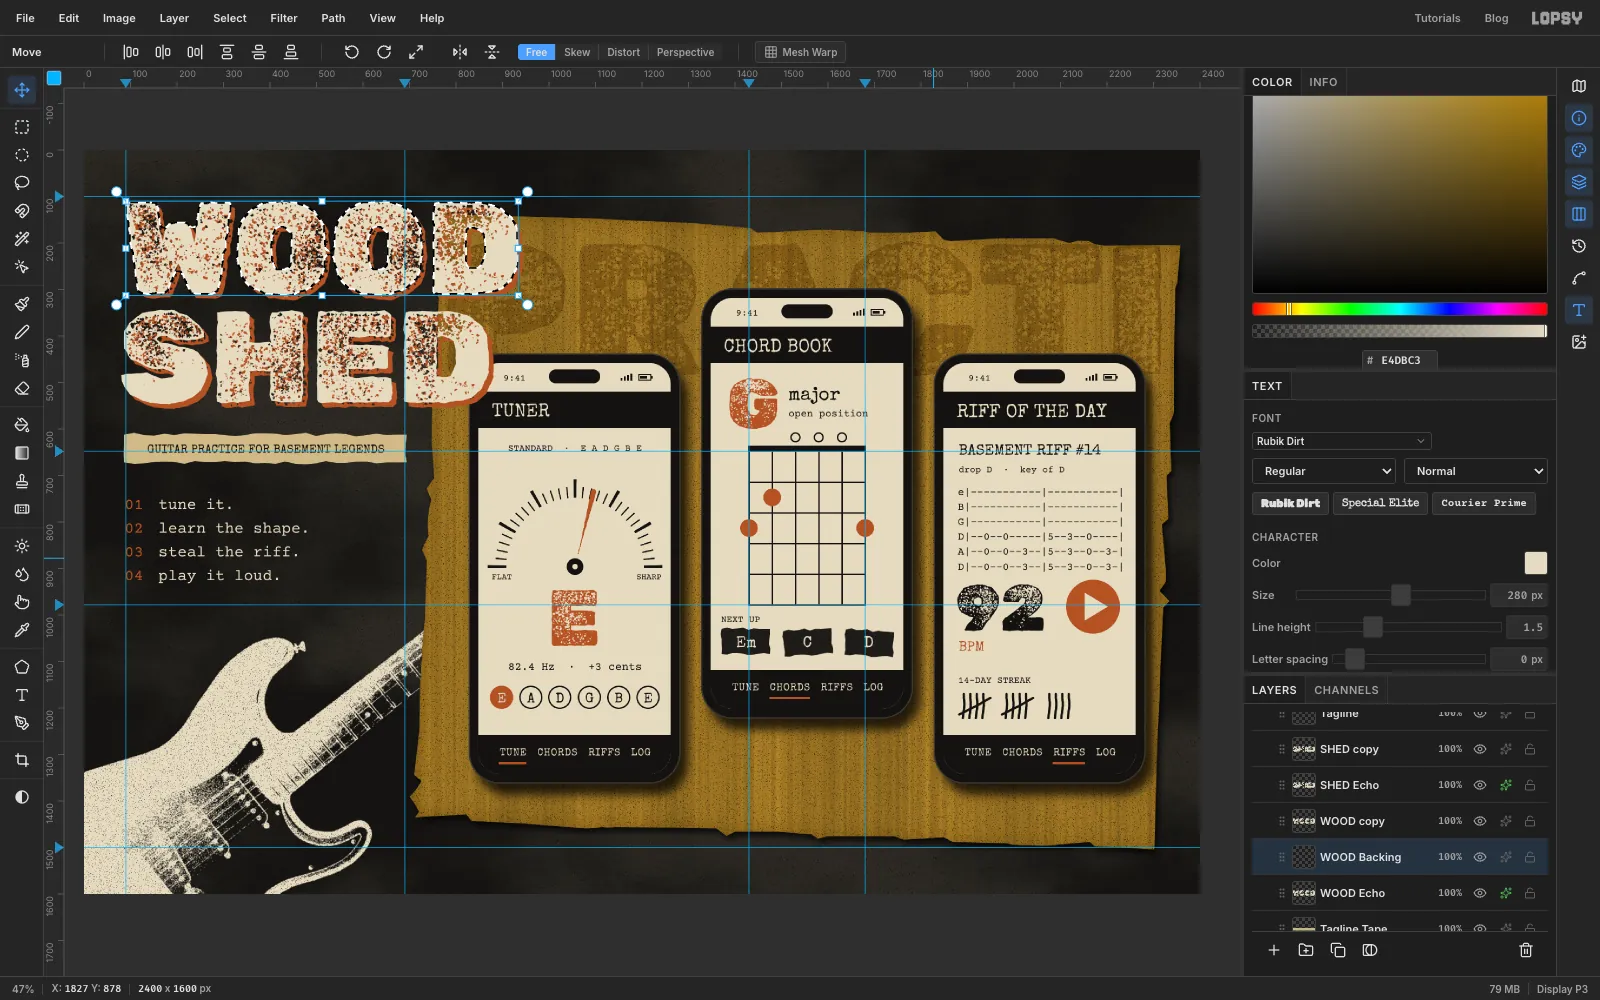
Rubik Dirt is heavily speckled. At this size the holes show the dark wall and read as dirt. Fill them with rust, so they read as a second ink.
- Click WOOD Echo and add a layer called WOOD Backing. It sits between the echo and the cream word.
- Cmd-click the cream WOOD copy thumbnail.
- Choose Select → Grow… 9, then Select → Shrink… 9. Growing closes the small holes, and shrinking brings the outline back, so the letter shapes stay the same.
- Fill with rust and press Cmd+D.
Repeat for SHED.
-
Tilt the whole headline
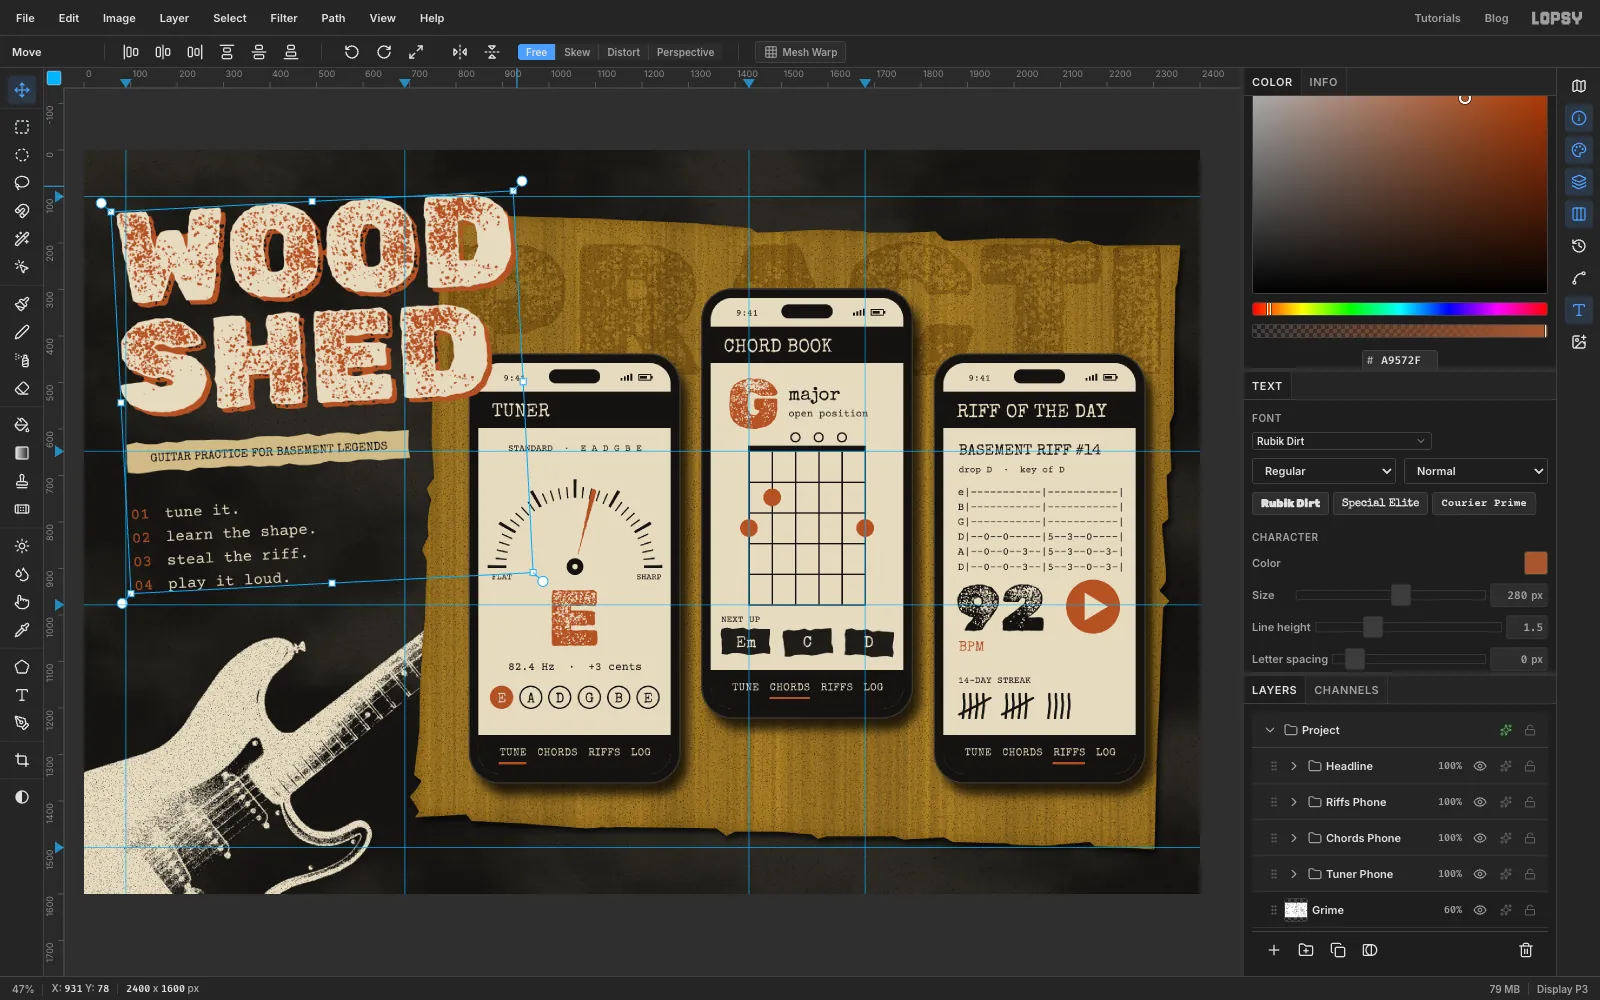
Collapse Headline and click its row. Press Cmd+D so there's no selection. With the Move tool, a box appears around everything in the group. Drag its rotate handle about 3° counter-clockwise and press Escape to commit.
Rotating a group or a whole text layer commits with Escape. Rotating pixels inside a marquee, as you did with the guitar, commits with Cmd+D.
The text layers stay live: they're rotated, not rasterized, so you can still edit them.
-
Tilt the outer phones
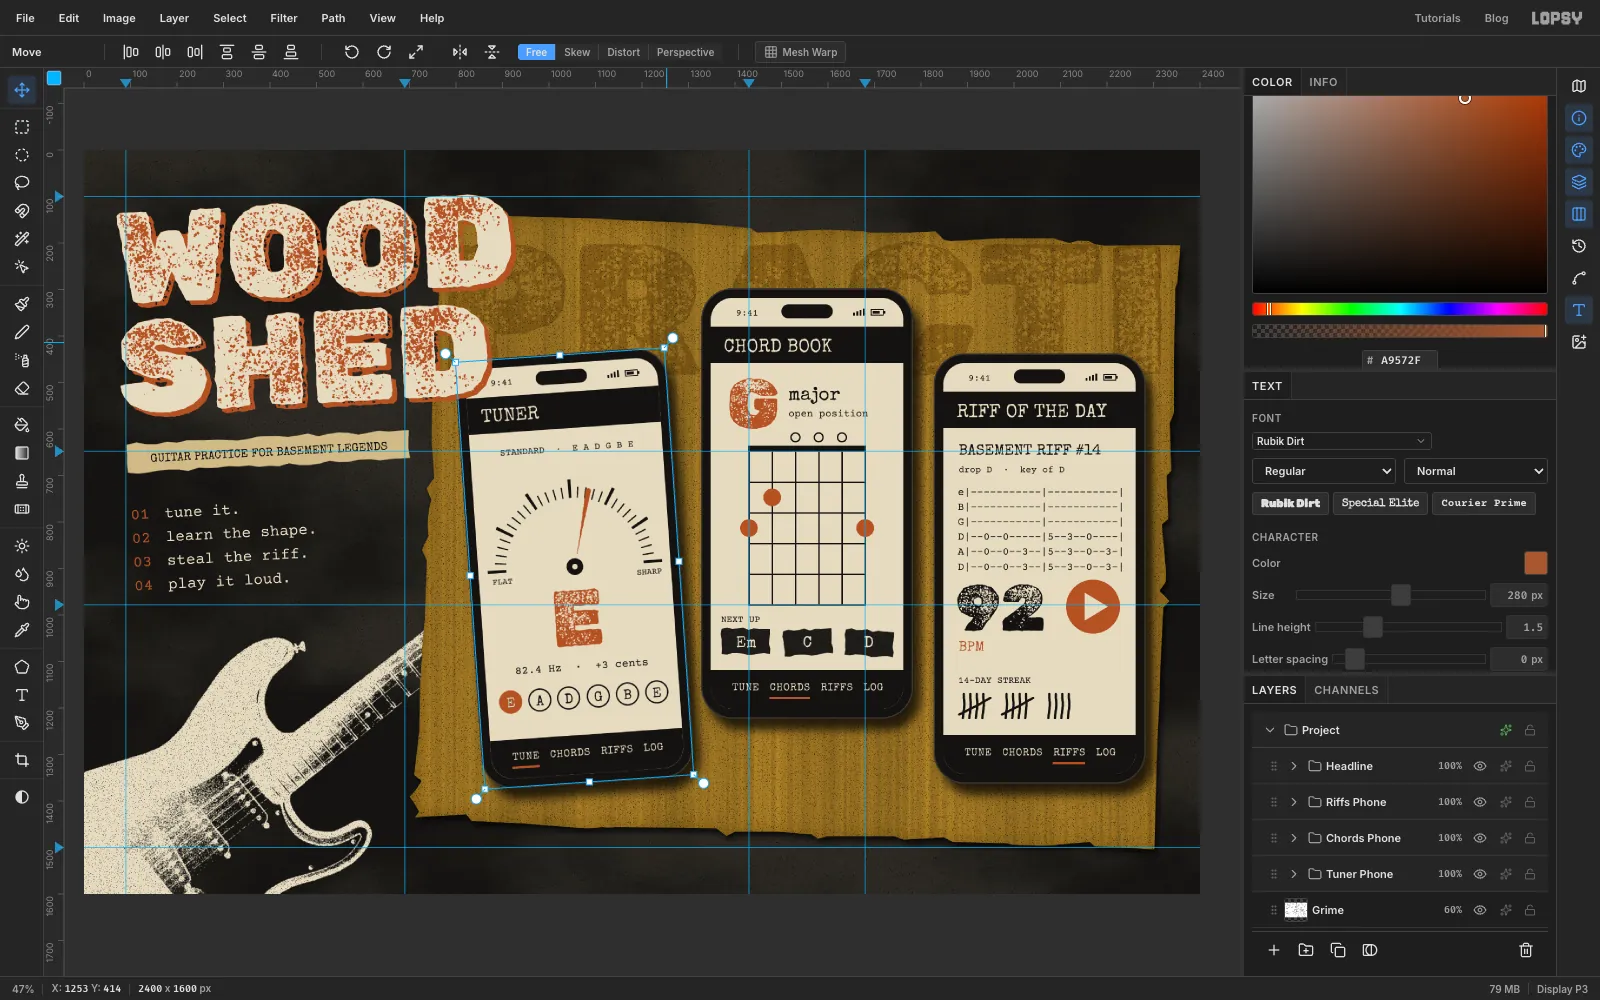
Click the Tuner Phone group row, press Cmd+D and rotate it about 4° counter-clockwise with the Move tool's handle, then press Escape. The whole phone, live text included, turns as one piece.
Tilt Riffs Phone 4° clockwise. The straight middle phone holds the three together.
-
Cut a strip of gaffer tape
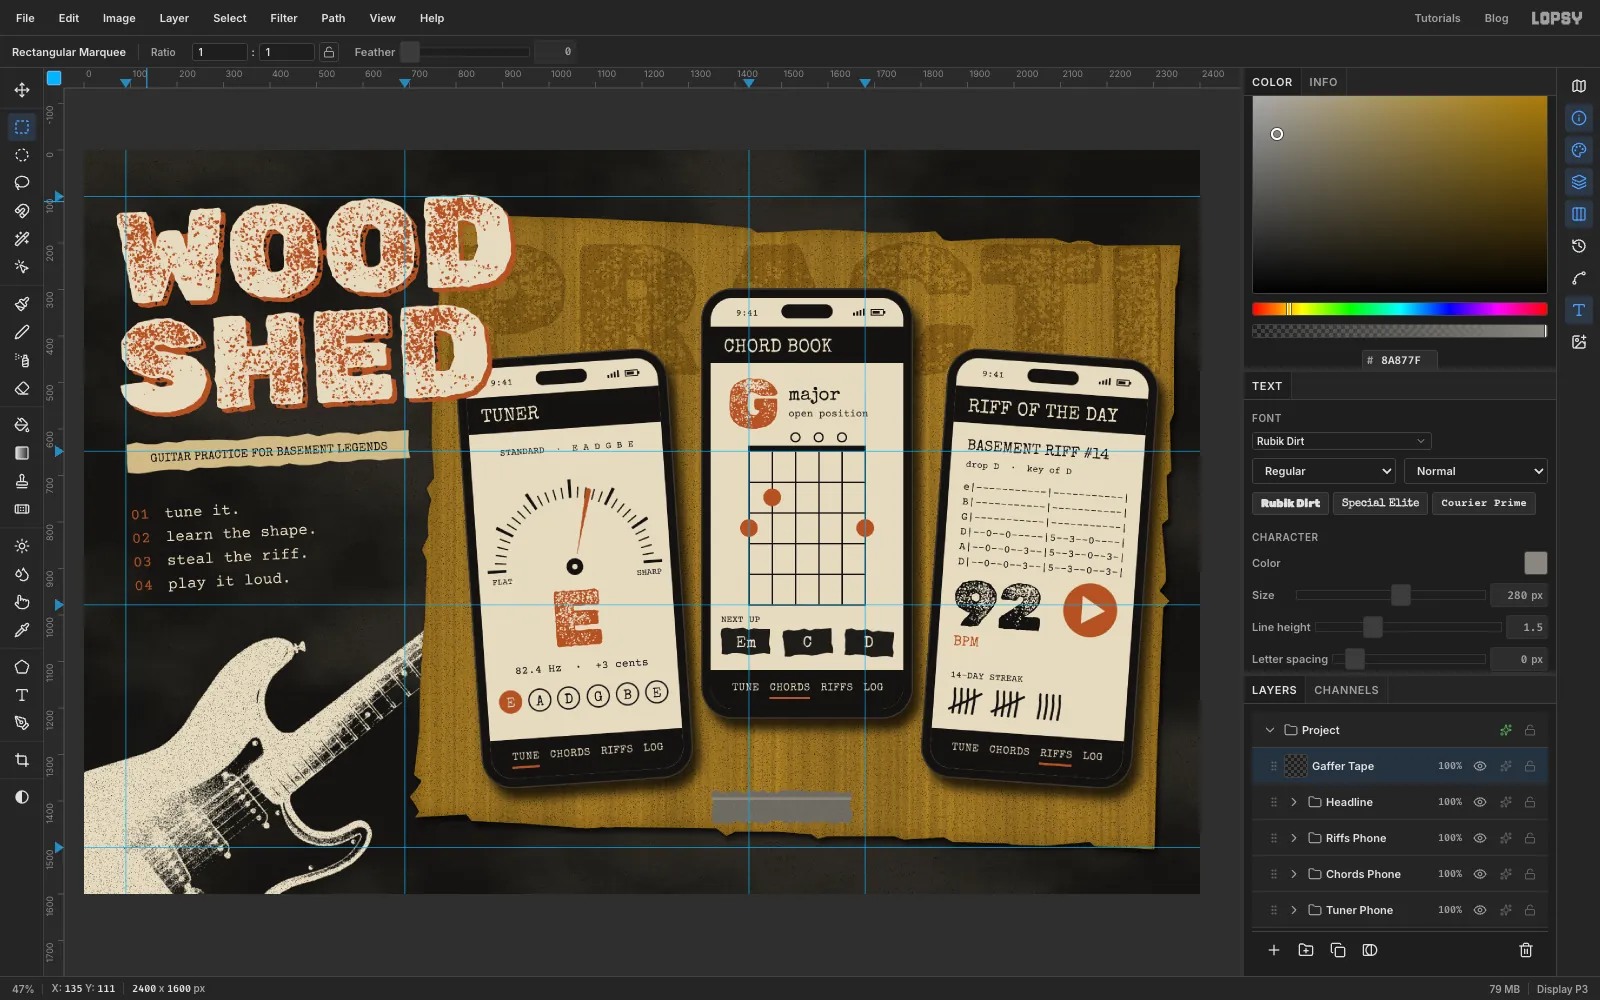
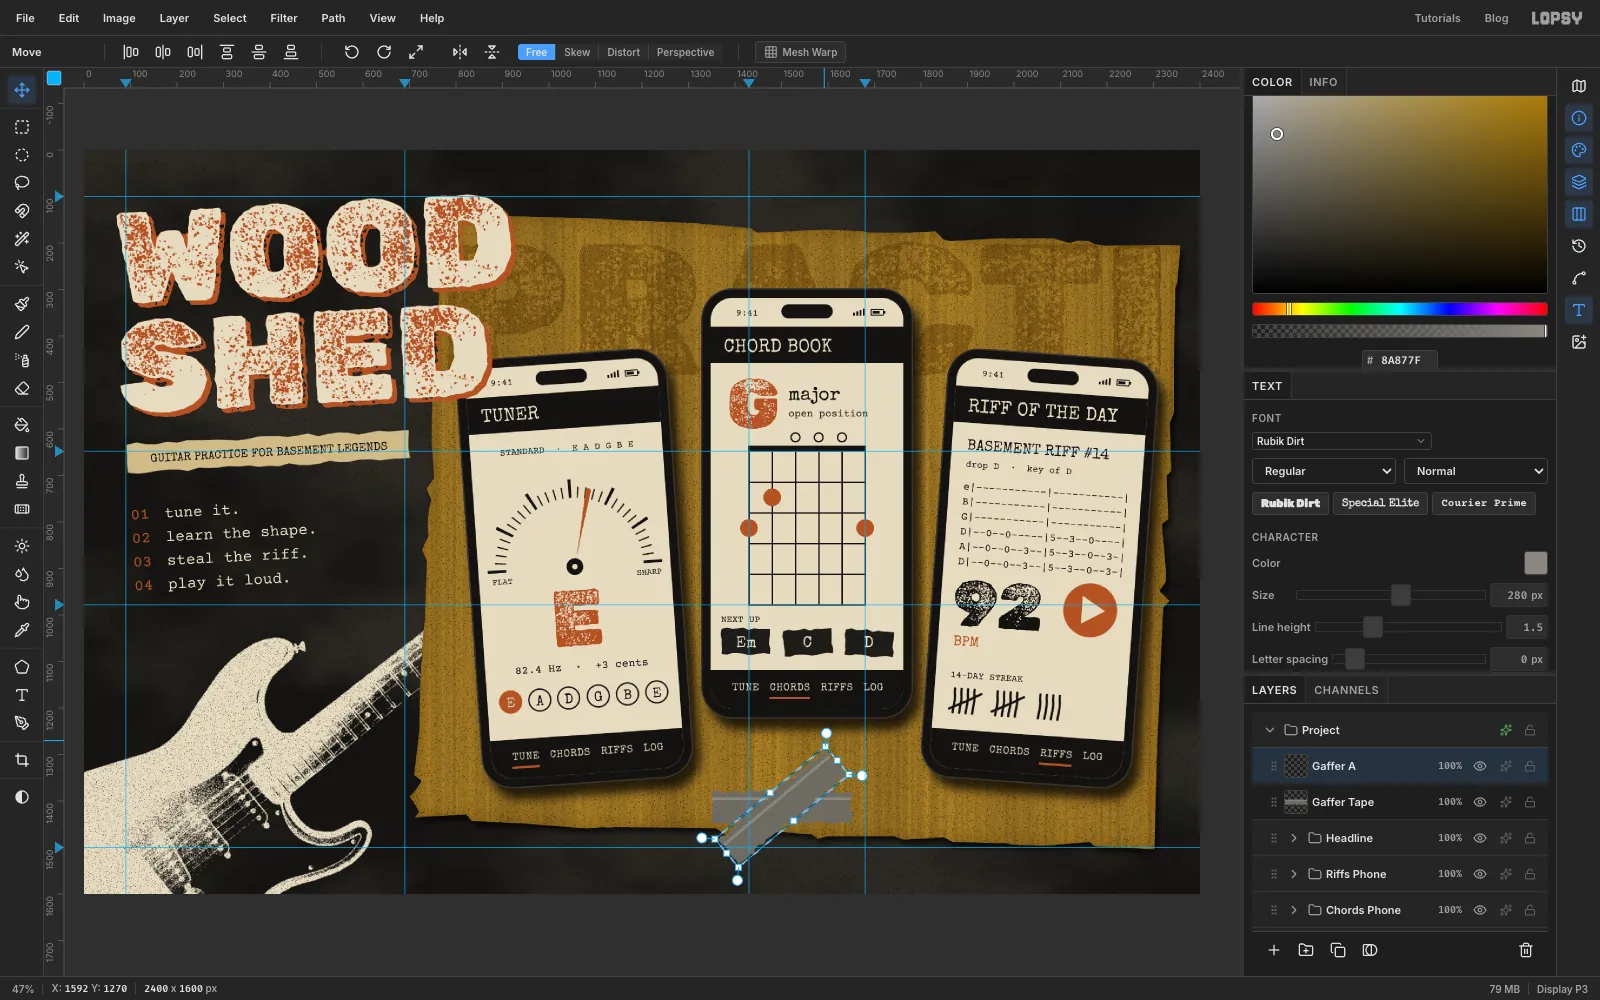
Click the Headline group and add a layer called Gaffer Tape so it sits on top of everything. Lasso a torn strip about 300 × 66 px in empty space at the bottom of the poster. Fill it with and run Add Noise at 20 Mono.
Marquee a thin 6 px band along its top third, keeping it just inside the torn ends, and fill it with . That's the sheen on real gaffer tape. Press Cmd+D.
-
Copy, rotate and place the tape
Lasso the strip, press Cmd+C and Cmd+V, and rename the copy Gaffer A. Marquee it and rotate it about 40° counter-clockwise. Press Cmd+D, then drag it across the tuner's top-left corner.
Paste two more copies:
- Gaffer B, tilted 6° clockwise, along the top edge of the chord book. Keep it on the bezel so the status icons stay visible.
- Gaffer C, about 38° counter-clockwise, across the riff phone's bottom-right corner.
Finally, rotate the original strip about 32° clockwise and drag it over the poster's bottom-left corner. Merge the three copies down into Gaffer Tape.
-
Number the tape by hand
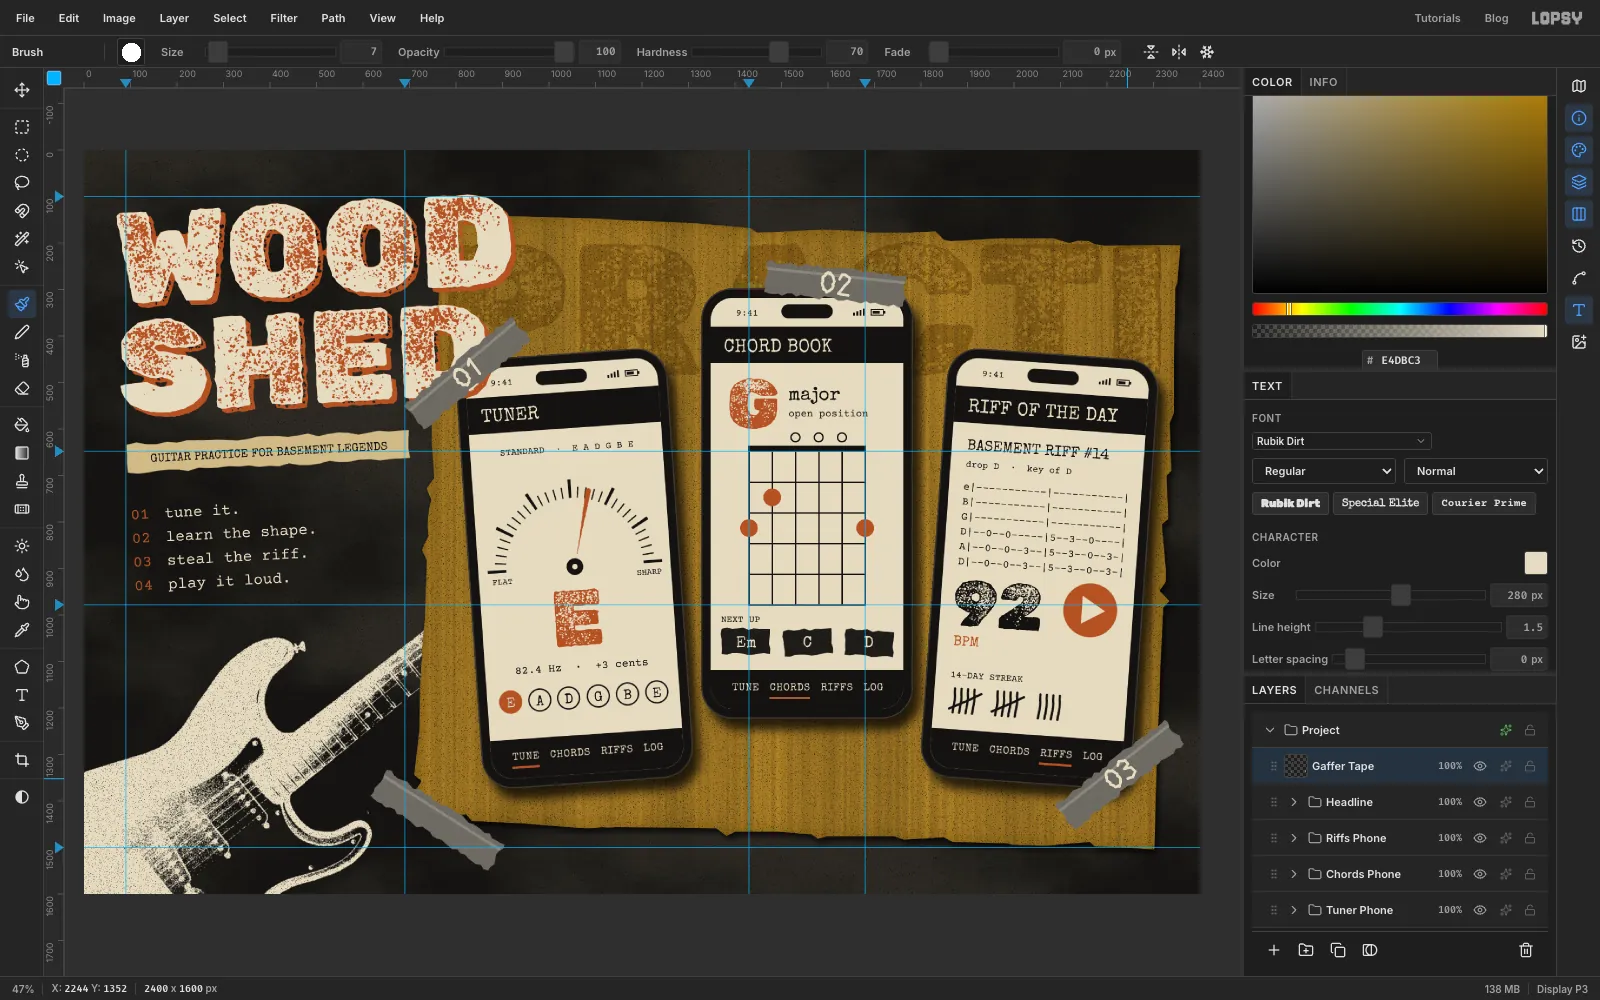
Stay on Gaffer Tape and write a step number on each phone's tape. Use the Brush at Size 7, Hardness 70, in bone. Draw
01,02and03as quick strokes along each strip's angle; a little wobble helps.Then give Gaffer Tape a Drop Shadow (4, 6, Blur 8, Opacity 55) and set the layer to 88% opacity, so a hint of the poster shows through.
-
Draw the stamp rings
The stamp is printed on the poster, so it belongs under the phones. Collapse the groups, click Grime and click New Group. Name the group Stamp.
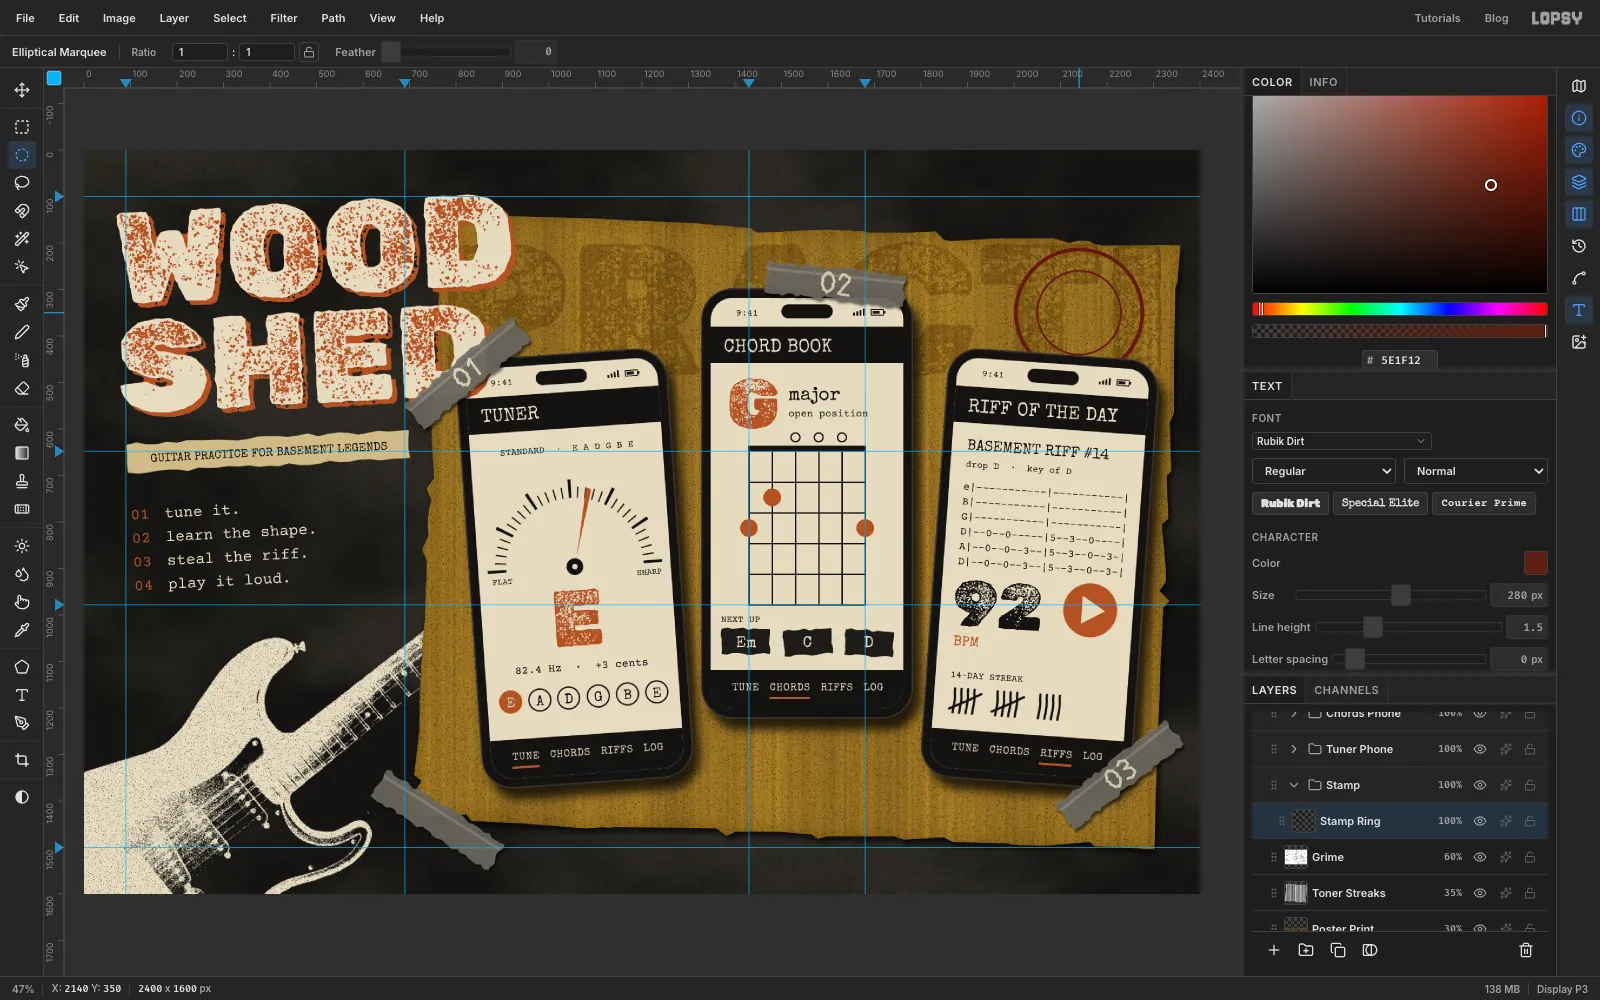
Add a layer called Stamp Ring and set the foreground to oxblood . Use the exact-corners dialog with the Elliptical Marquee, around the centre 2140, 350:
- Fill 2000, 210 → 2280, 490 (radius 140), then delete 2008, 218 → 2272, 482.
- Fill 2048, 258 → 2232, 442 (radius 92), then delete 2052, 262 → 2228, 438.
That gives a thick outer ring and a thin inner one.
-
Draw a circle path for the ring text
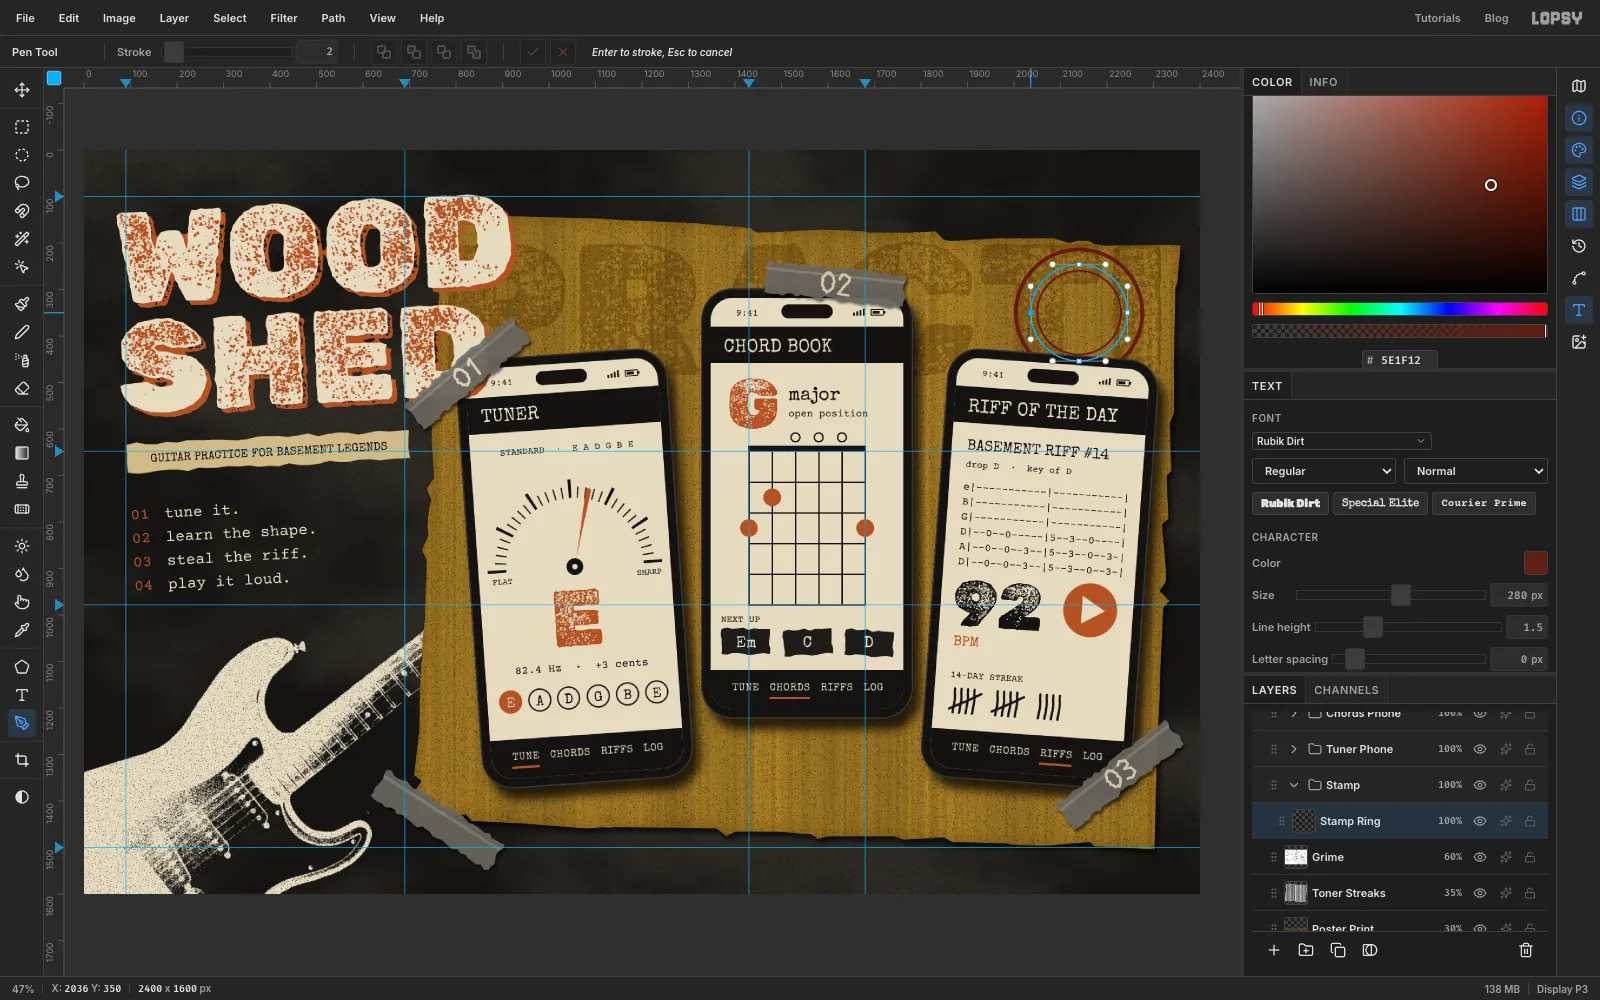
Pick the Pen tool. The ring text runs on a circle of radius 104 around the same centre. Its four anchors are left 2036, 350, top 2140, 246, right 2244, 350 and bottom 2140, 454.
Press at the left anchor and drag straight up about 57 px to pull out a handle. Then press at the top anchor and drag right 57 px, at the right anchor drag down, and at the bottom anchor drag left. Each handle points clockwise along the circle.
Click the first anchor again to close the circle. Those 57 px handles (0.55 × the radius) make a near-perfect circle.
-
Set the text on the path
Click Stamp Ring. Pick the Text tool and set Special Elite 22 in oxblood. Click inside the inner ring and type
DOWNLOAD IT • iOS + ANDROID • PRACTICE LOUD •, then press Tab. Rename the layer Stamp Ring Text and set Letter spacing to 0.5. The words run about three-quarters of the way round, and the riff phone covers the end.With the Text tool still active, choose Path 1 from the options bar's Path dropdown. The letters now follow the circle.
In the Paths panel, click the path's row to deselect it and hide the outline.
-
Stamp FREE and wear the ink
Click Stamp Ring first, so the Text tool doesn't pick up the ring text. Then click in the middle of the ring and set
FREEin Rubik Dirt 50, oxblood, and name the layer Stamp Free. Centre it, then rotate it about 12° counter-clockwise with the Move tool's handle, and press Escape.Real rubber stamps never print evenly:
- On Stamp Ring, lasso three narrow wedges across the outer ring and press Delete to leave small gaps.
- Pick the Eraser at Size 120 and Opacity 40, and click once on three spots around the ring to fade the ink unevenly.
- Set the Eraser's opacity back to 100.
Choose View → Show Guides to hide the guides. Save the project and export your PNG.