Make a Hand-Coloured Etching Christmas Card of a Hedgehog
Turn a hedgehog photo into a hand-coloured etching Christmas card in Lopsy, with an aquatint night sky, a plate mark, holly, washes and pencil signing.
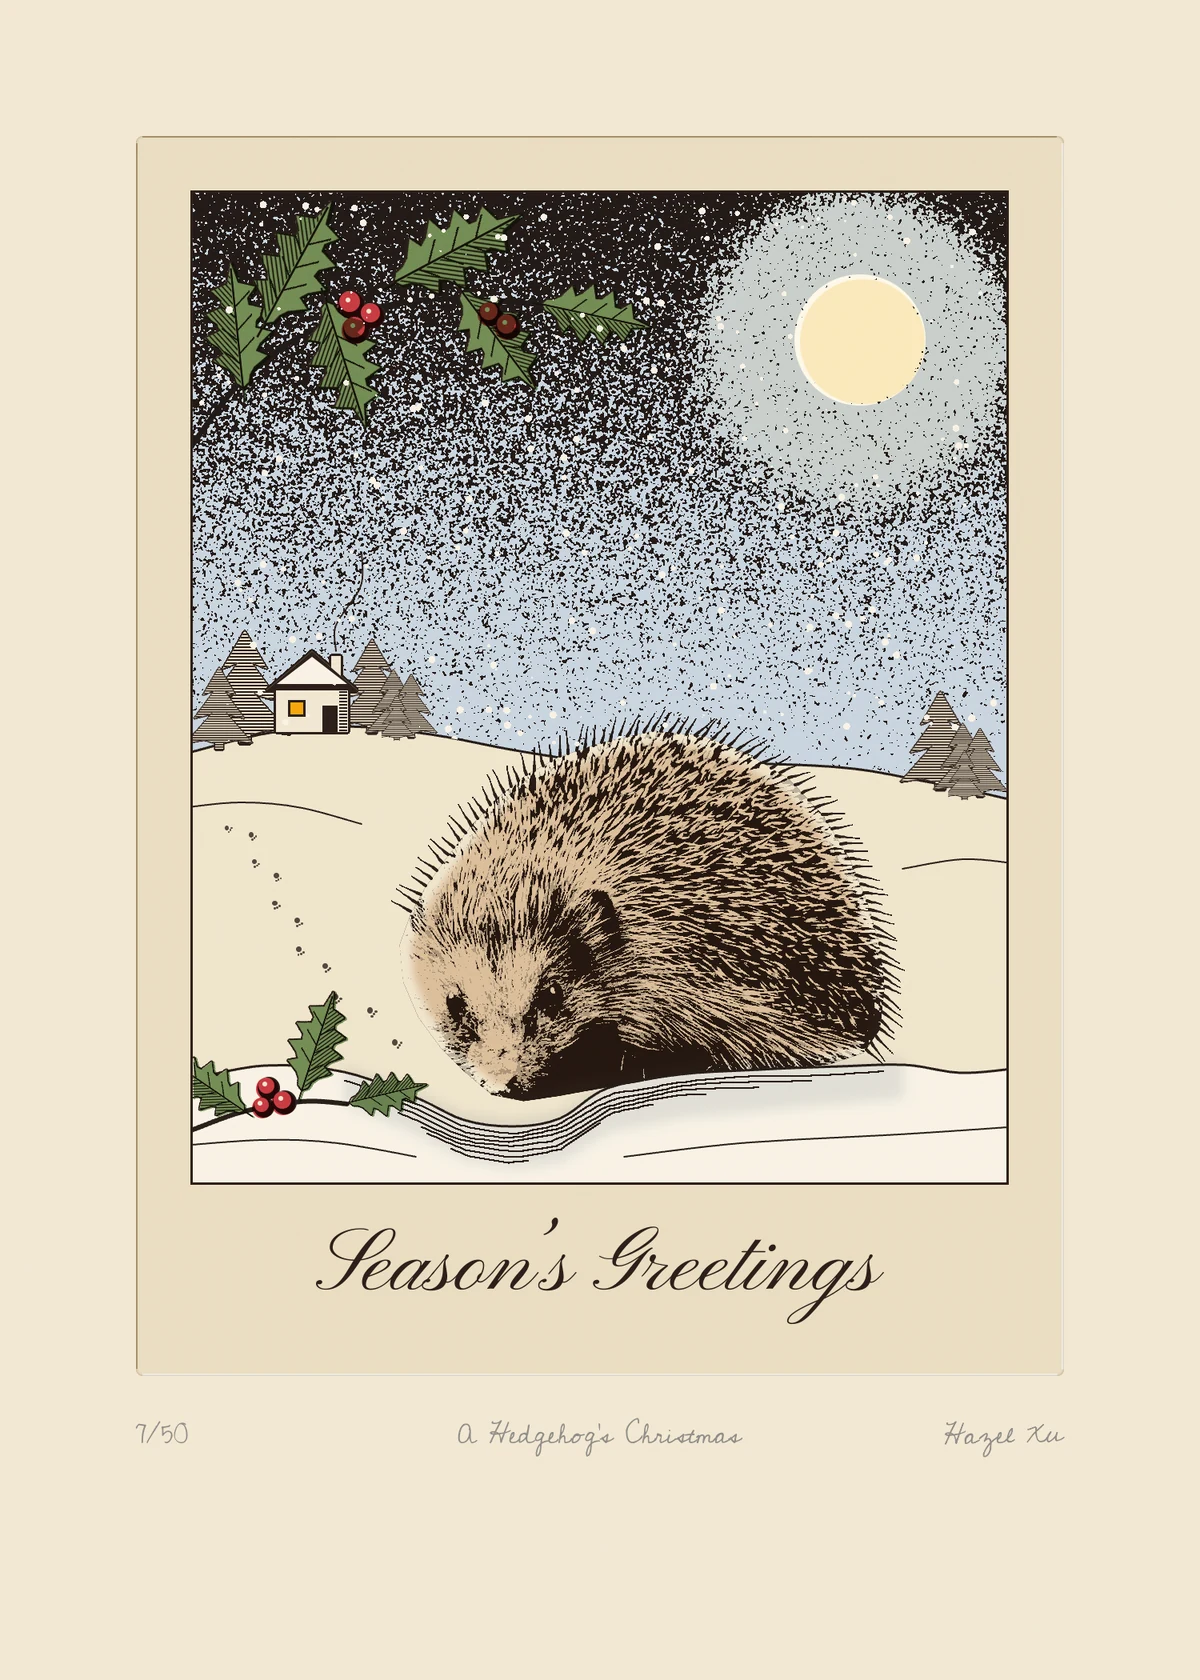
Some of the earliest Christmas cards were hand-coloured prints, and printmakers have long sent small etchings as cards. The artist scratches a picture through a waxy ground on a copper plate and lets acid bite the lines into the metal. Large areas of tone come from aquatint: a dusting of rosin melted onto the plate, so the acid bites around each grain and leaves a speckled tone. After printing, each copy can be coloured by hand with thin watercolour washes, then numbered and signed in pencil under the plate mark, the dent the plate leaves when it's pressed into damp paper.
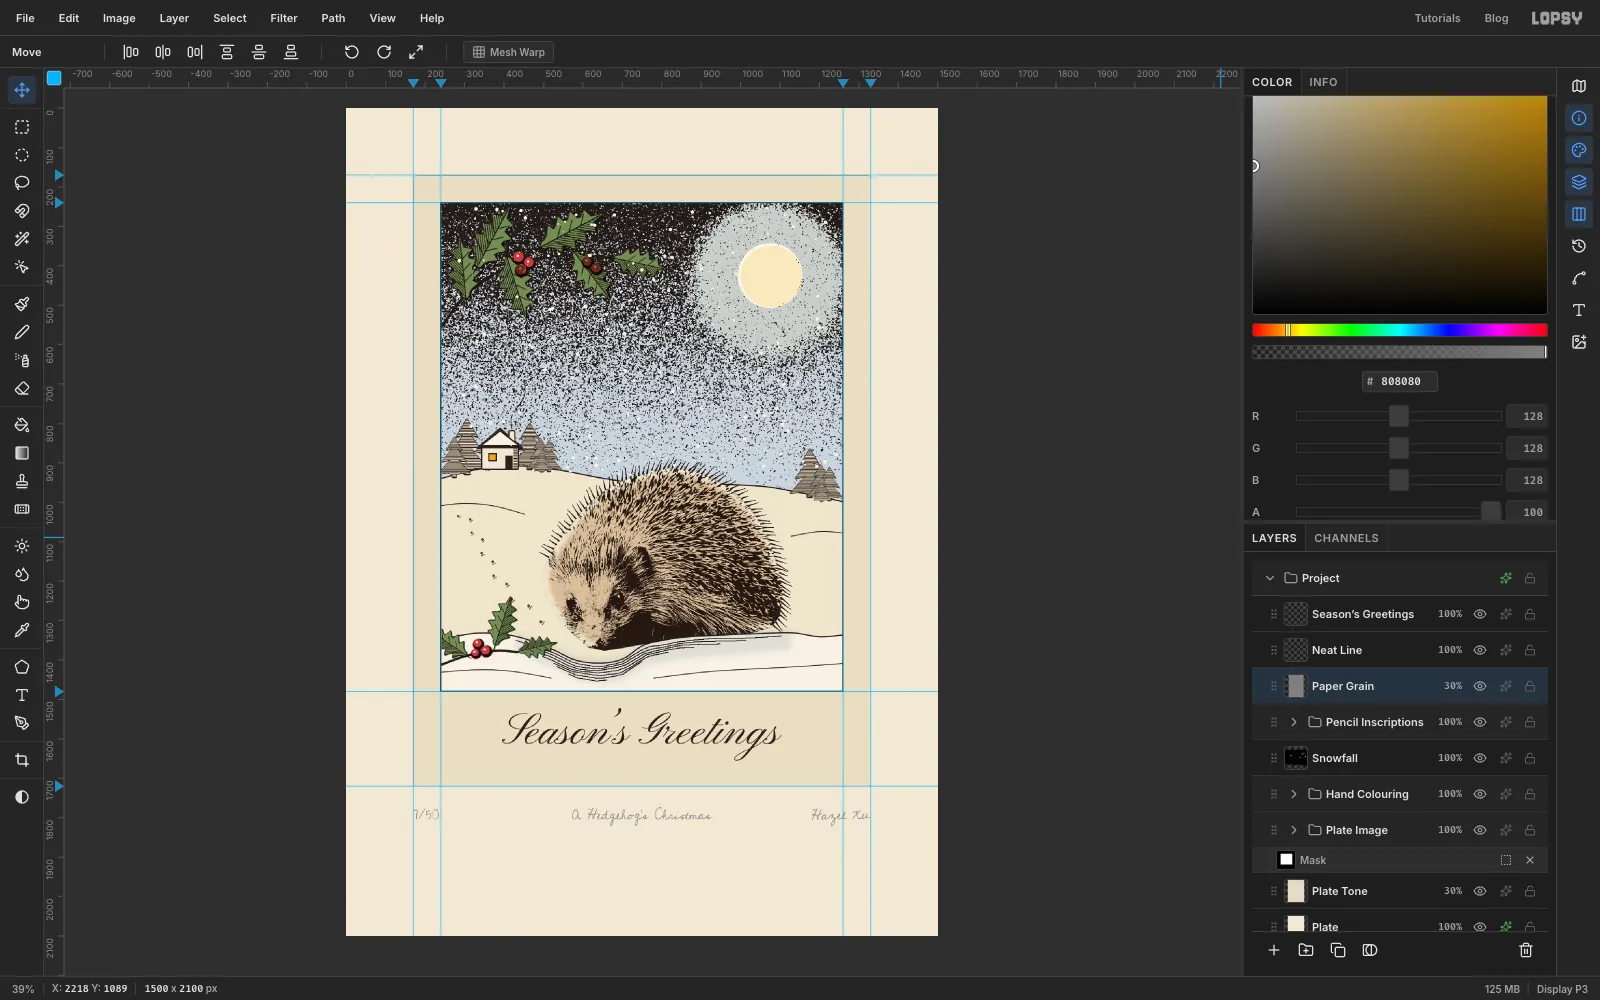
In this tutorial you'll make that kind of card digitally: A Hedgehog's Christmas, a 1500 × 2100 px card (5 × 7 in at 300 dpi). A big etched hedgehog sits in the snow under a grainy aquatint sky with a full moon. Behind it are a far-off cottage and a few firs, and holly frames the picture. Everything is printed in warm brown-black ink, washed with transparent colour, and signed under the plate.
You'll work from a real photo, Adi kirpi.jpg, a CC0 picture of a European hedgehog on a lawn by Oldiefan on Wikimedia Commons. Download the full-size file (960 × 720 px).
The tools you'll use:
- guides, the Rectangular and Elliptical Marquee, the Lasso, and Select → Shrink / Grow / Feather / Inverse
- the Gradient tool, Add Noise, Gaussian Blur, Threshold, Desaturate and Brightness/Contrast
- the Lighten, Darken, Multiply and Overlay blend modes, and Merge Down
- the Pen tool, Pencil, Brush with Taper, Dodge and Spray
- Define Pattern and Fill with Pattern, and the Inner Glow and Stroke layer effects
- Copy, Paste, Flip Horizontal and the scale and rotation handles
- Group Layers, a group mask, and live text in Pinyon Script and Cedarville Cursive
The palette:
-
Paper
-
plate tone
-
hill cream
-
snow
-
Etching ink
-
pencil
-
Sky wash
-
moon
-
Holly
-
berries
-
Hedgehog wash
-
lamplight
-
snow shadow
-
Set up the card and guides
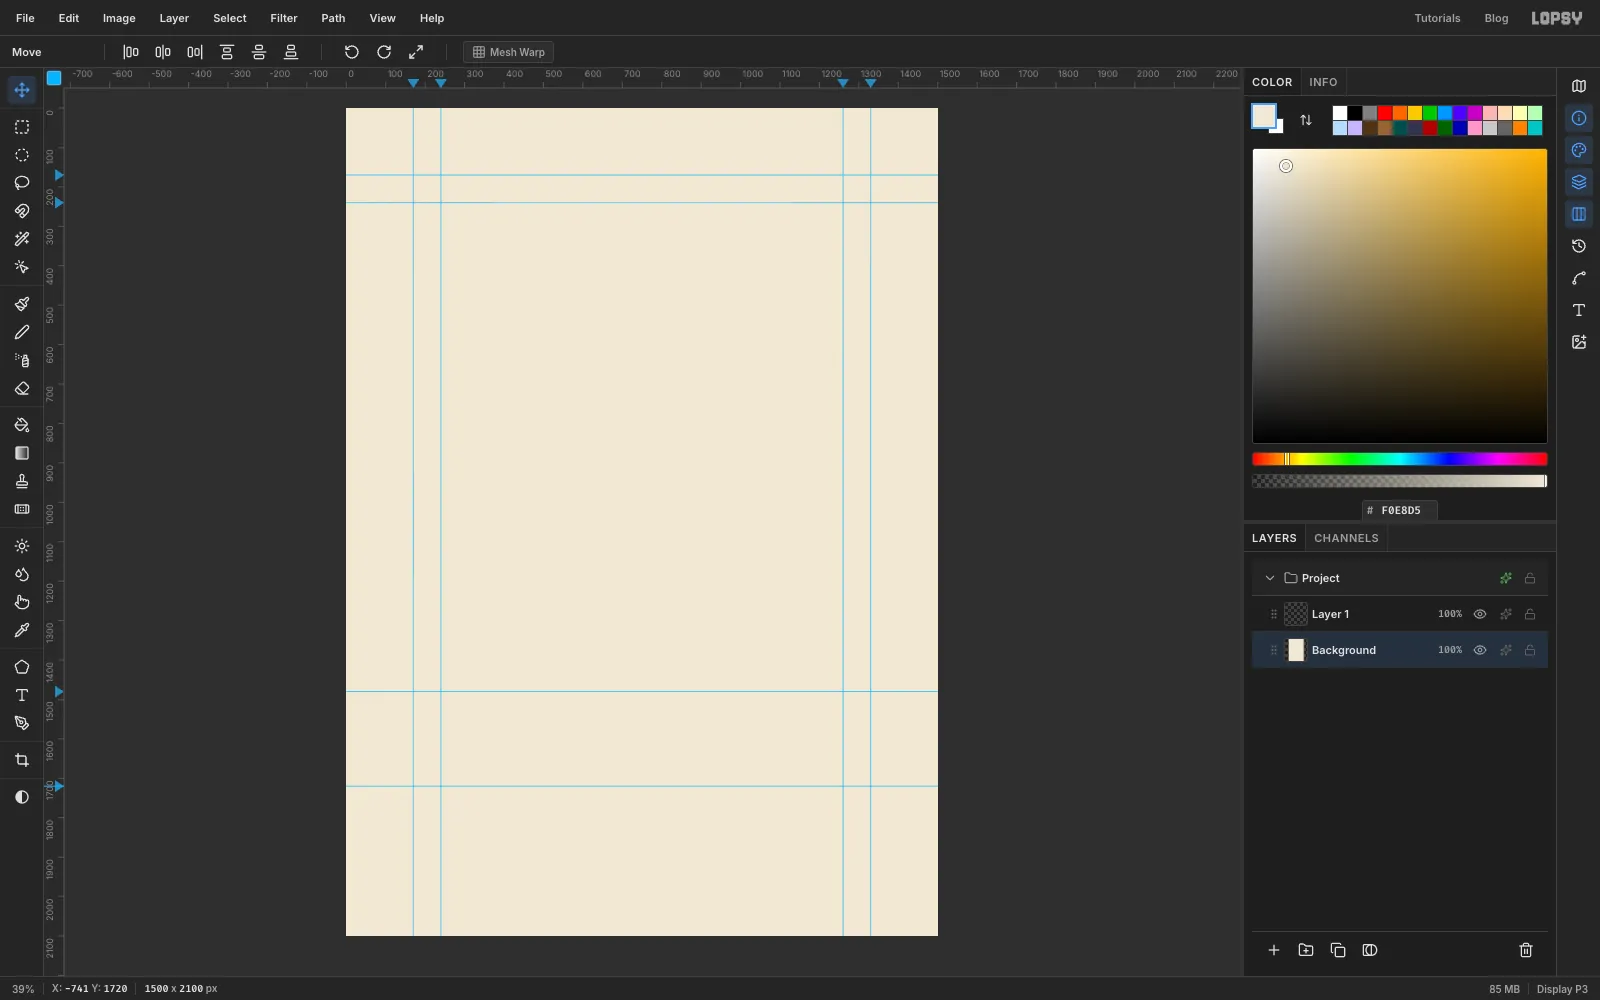
Choose File → New, keep the units on Pixels, and make the document 1500 wide and 2100 high. Click Background, set the foreground colour to paper and choose Edit → Fill.
Now add guides. The plate will leave a 170 px margin at the top and sides and a deeper margin at the bottom for the signing. Inside the plate, the picture sits 70 px further in at the top and sides, which leaves a deep band at the bottom of the plate for the lettering. Click the top ruler at 170, 240, 1260 and 1330, and the left ruler at 170, 240, 1480 and 1720.
-
Draw the copper plate
A new document comes with an empty Layer 1. Double-click its name and rename it Plate.
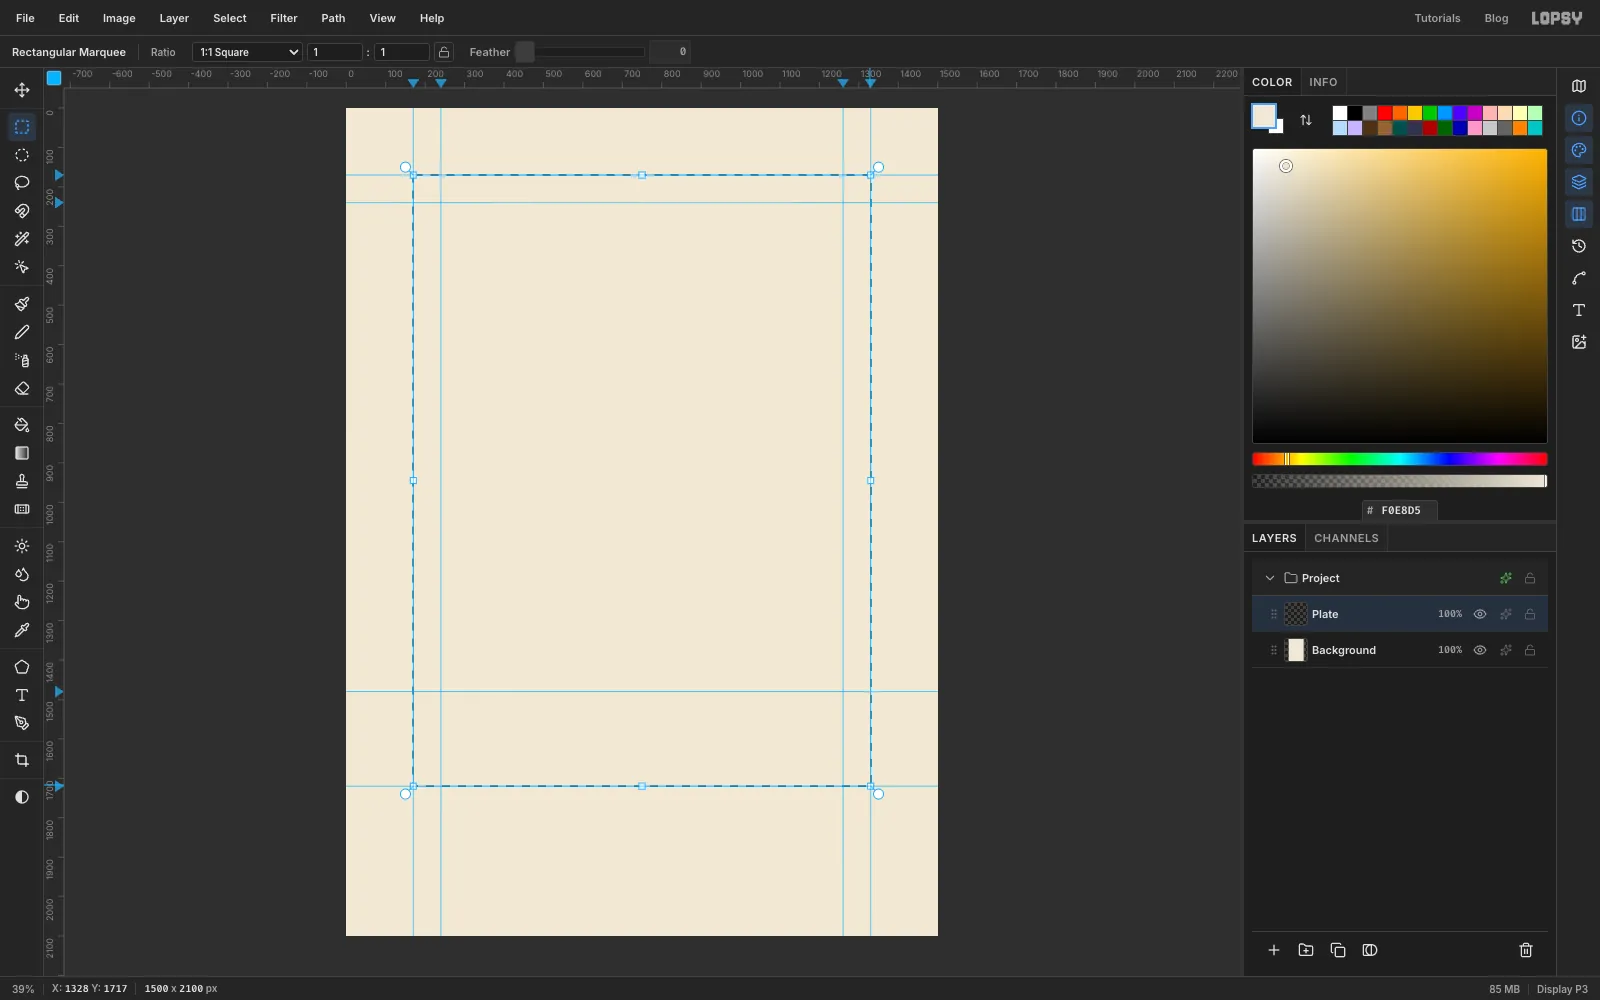
Pick the Rectangular Marquee (M) and drag from where the outer guides cross at the top left to where they cross at the bottom right. The marquee snaps to the guides.
Real plates have softly rounded corners. Choose Select → Shrink… with 8 px, then Select → Grow… with 8 px. Growing back rounds the corners. Fill the selection with the paper colour (Edit → Fill) and press Cmd+D.
-
Press in the plate mark and add plate tone
The plate is pressed into the paper, so its edge needs to look sunken.
- Open the layer effects for Plate (the effects button on its row). Turn on Inner Glow with colour , Size 5 and Opacity 55. This puts a soft dark rim just inside the edge.
- Zoom in to 200% or more on each edge as you work, because these lines sit right at the plate's edge. Pick the Pencil (N) at Size 2 with colour . Click near the bottom of the plate's left edge, 2 px inside it, then Shift-click near the top. That's a straight line. Do the same along the top edge. Stop each line about 10 px short of the corners so the rounding stays clean.
- Switch the colour to white and the size to 3, and draw the same kind of line down the right edge and along the bottom. With light from the top left, the bevel is dark on the top and left and light on the bottom and right.
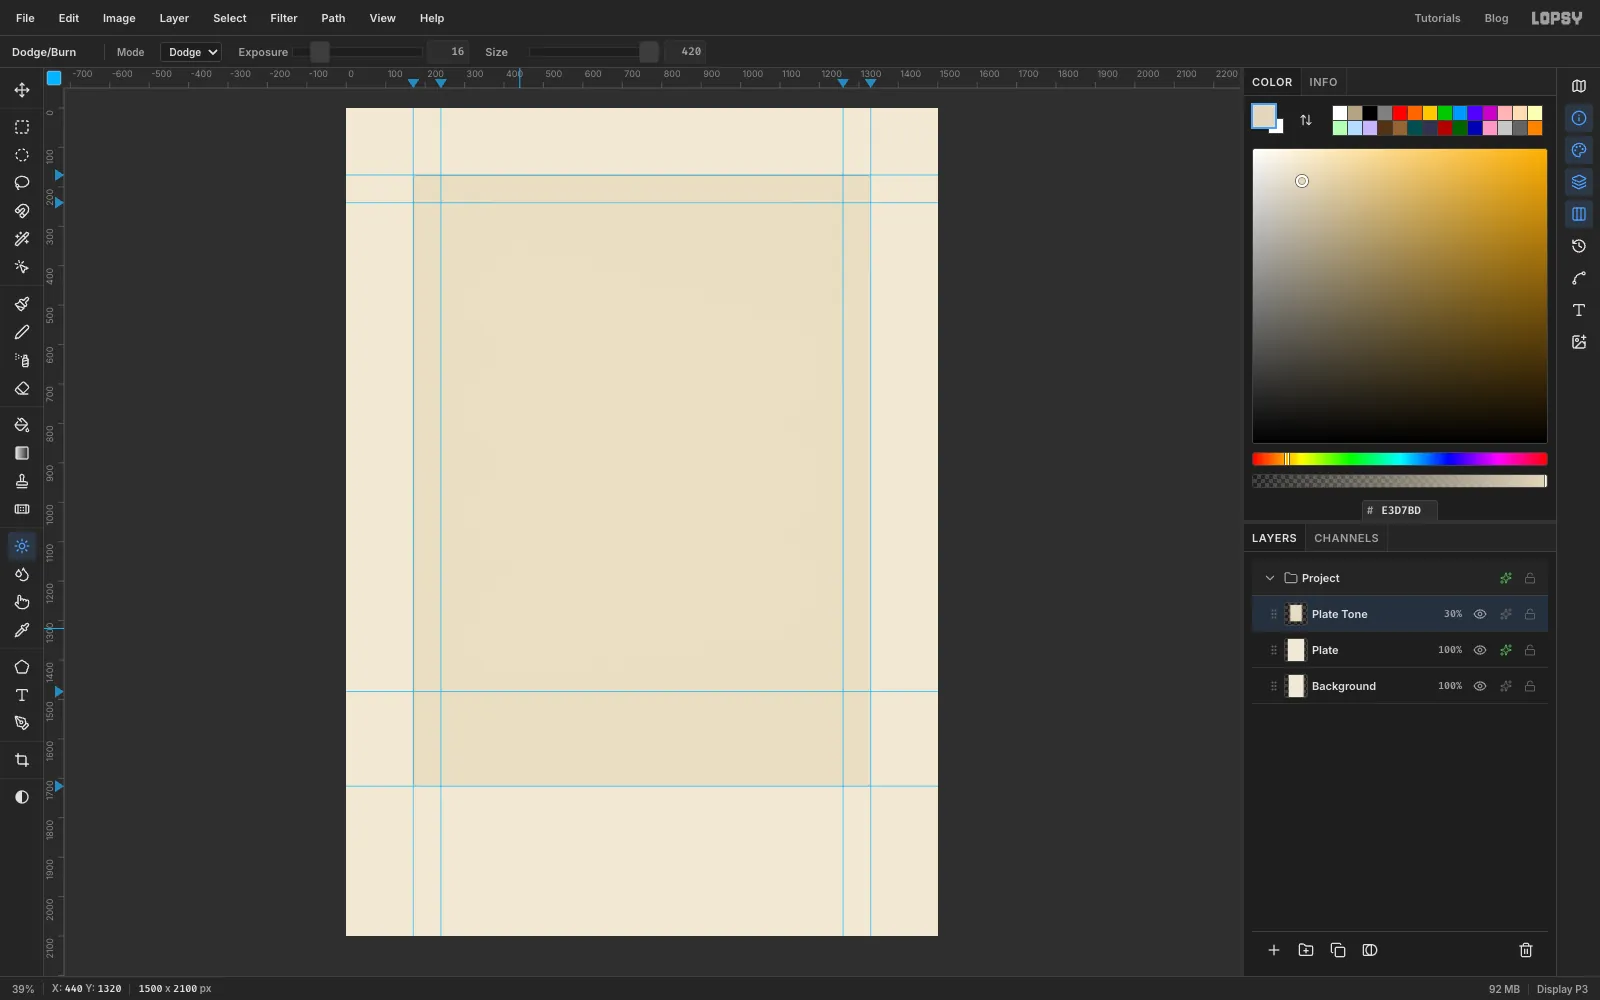
Plate tone is the thin film of ink left on the plate after wiping. Click Add Layer, name it Plate Tone, then Cmd-click the Plate thumbnail to select its shape. Fill with plate tone and press Cmd+D. In the effects drawer set the Blend to Multiply, then set the layer's opacity to 30%.
Printers wipe the middle of the plate cleaner than the edges. Pick Dodge (O) with Size 420 and Exposure 16, and in one stroke zig-zag from side to side down through the middle of the plate.
-
Lay a grey tone for the aquatint
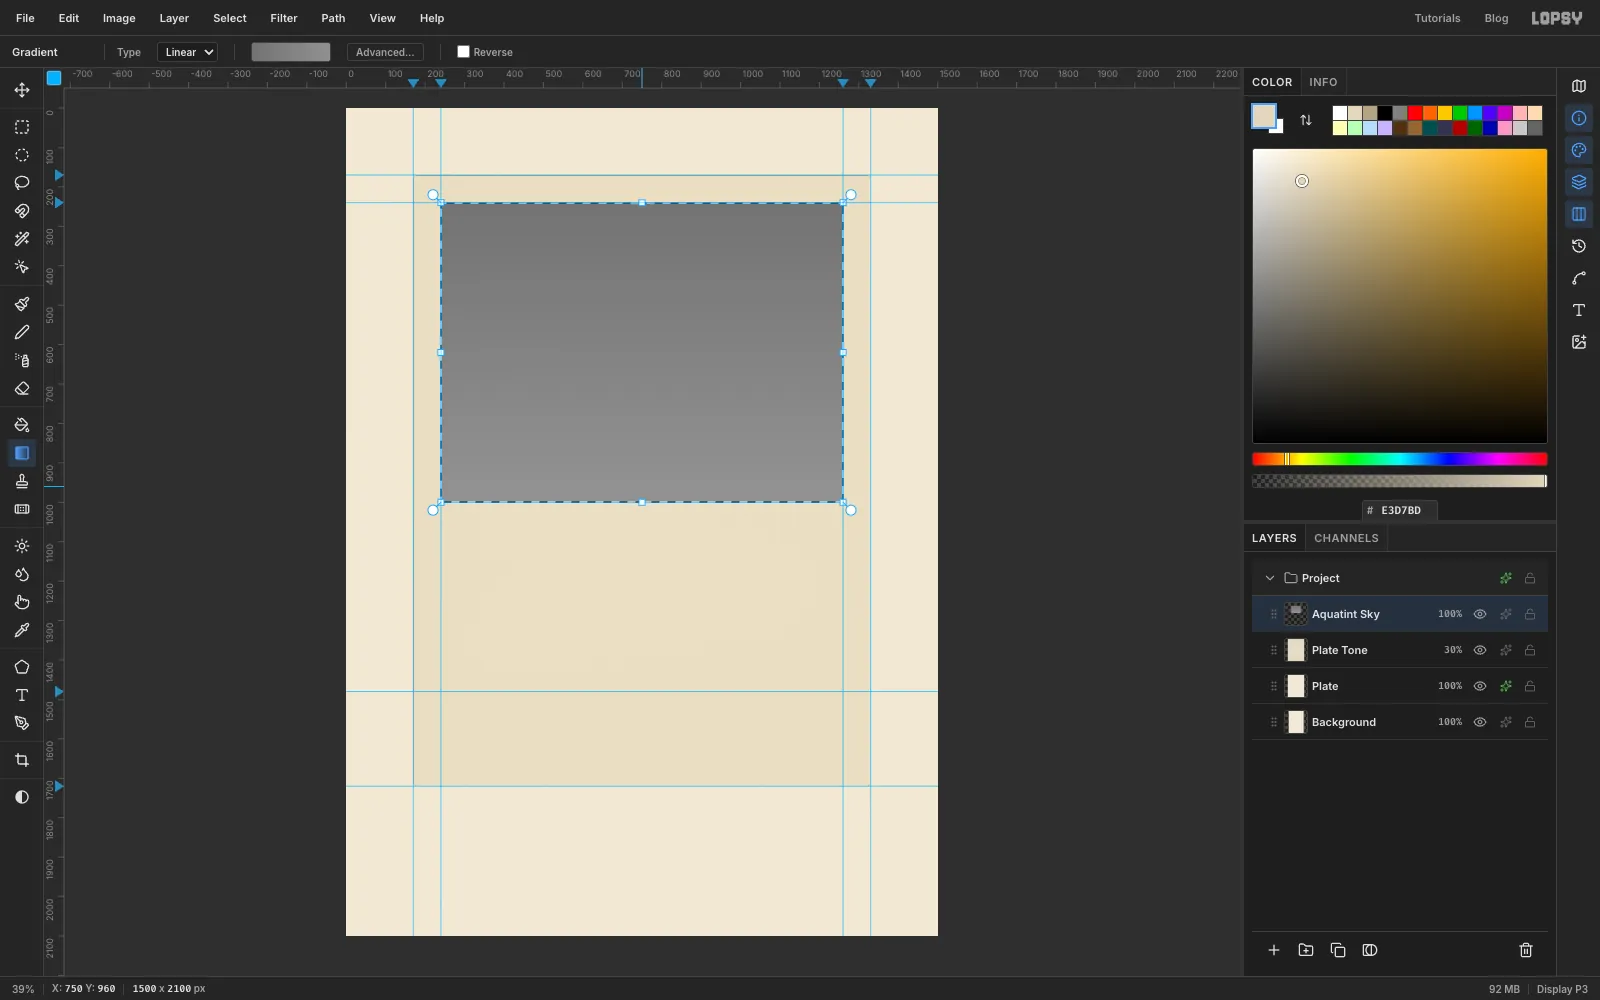
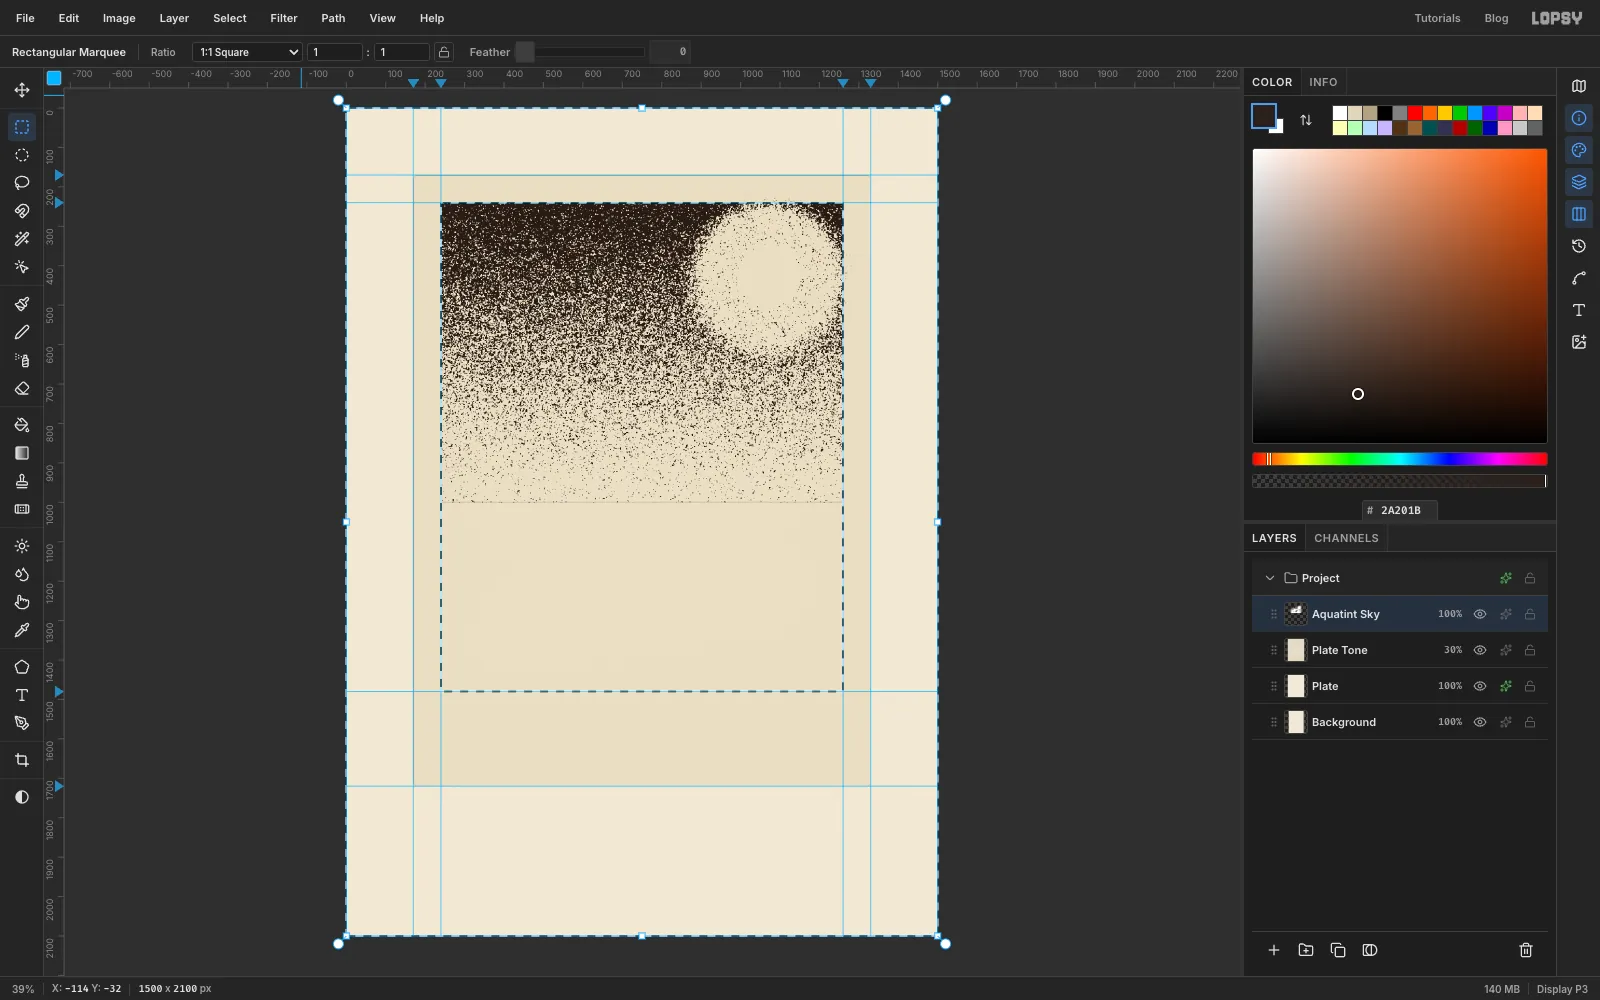
Click Add Layer and name it Aquatint Sky. With the Rectangular Marquee, select the picture area from the inner top-left guide across to the inner right guide, and down to about y 1000, a little below where the horizon will be.
Pick the Gradient tool, set it to Linear and open Advanced…. Make a two-stop gradient from to . Then drag straight down from the top of the selection to about y 960.
These two greys are close together on purpose. In a moment you'll turn this grey into grain, and the grey decides how dense the grain is. Keep the range narrow and the grain fades evenly from top to bottom.
-
Lighten a halo where the moon will be
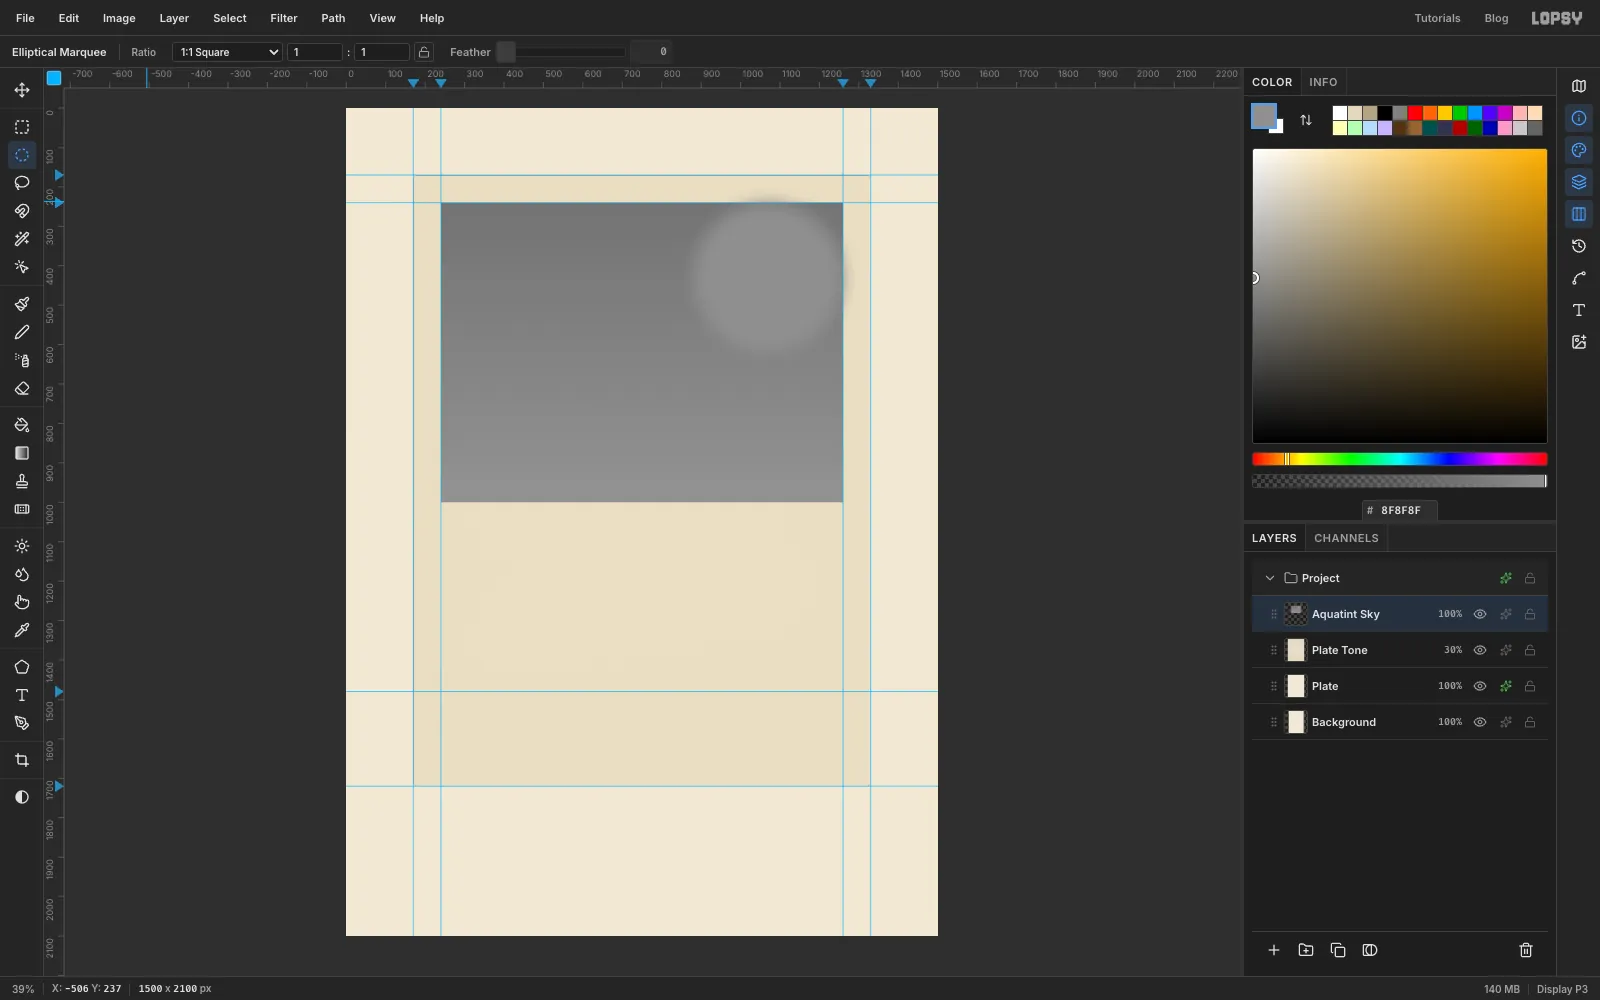
The moon will sit in the upper right, about 190 px in from the picture's right edge and 185 px down from its top. Pick the Elliptical Marquee, hold Cmd to keep it round, and use the status bar readout to drag from about x 880, y 230 to x 1270, y 620, a circle about 390 px across. Choose Select → Feather… with 40 and fill it with , a shade lighter than the sky. Press Cmd+D.
It barely shows now, but this lighter patch will bite into a clearing of sparse grain around the moon.
-
Bite the aquatint grain
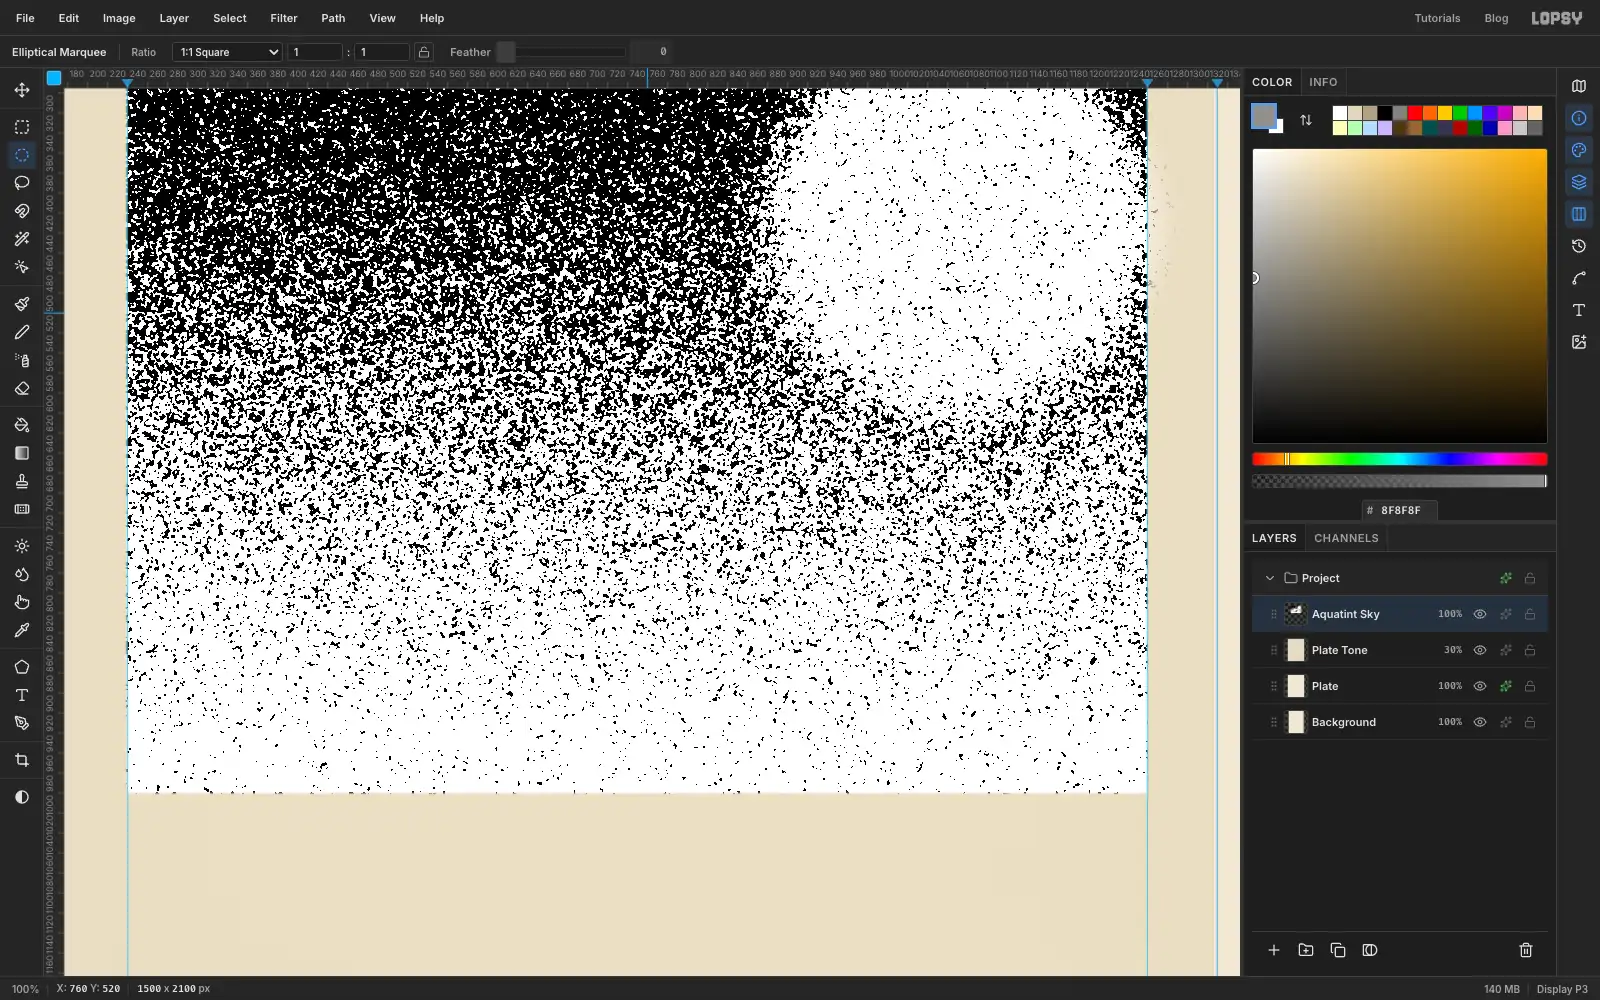
With the selection cleared, run three filters on Aquatint Sky:
- Filter → Add Noise… with Amount 100 and Mono selected.
- Filter → Gaussian Blur… with Radius 3. This merges the single-pixel noise into blobs a few pixels across, like melted rosin.
- Filter → Threshold… with Level 128.
Each blob now becomes solid black or white. Where the tone was darker, more blobs fall below 128, so the top of the sky is dense and the grain thins out toward the horizon.
-
Stop out the moon
Etchers protect parts of the plate from the acid with varnish called stop-out. Here that just means painting white.
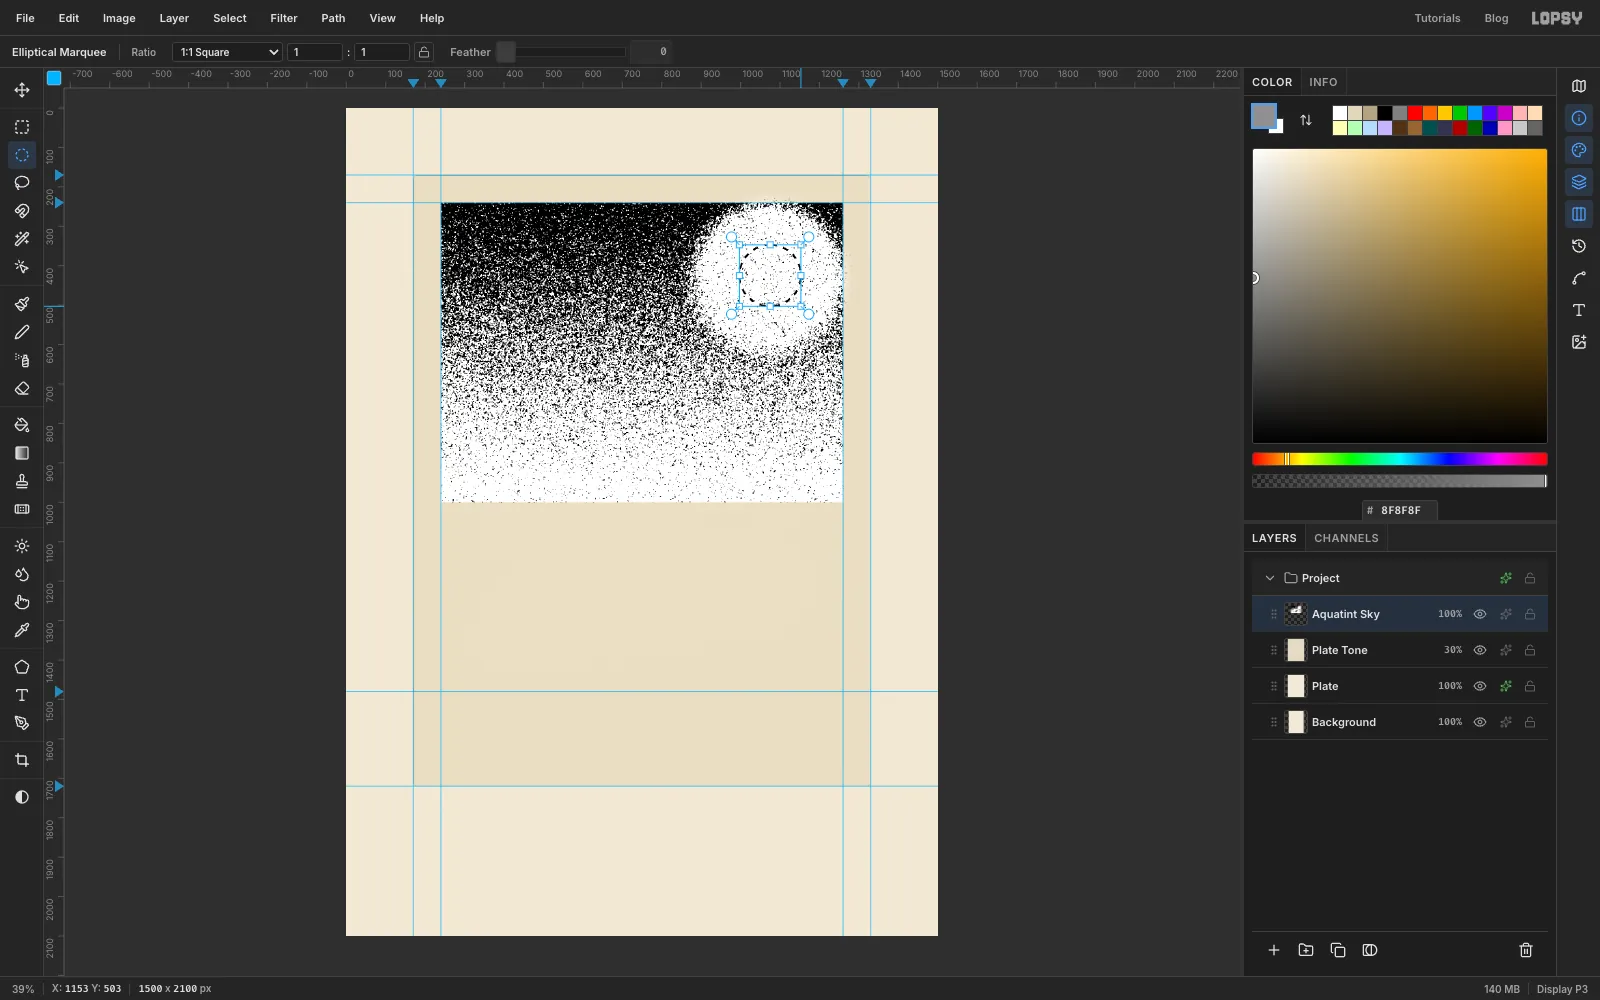
With the Elliptical Marquee, hold Cmd and drag from about x 997, y 347 to x 1153, y 503: a circle 156 px across in the middle of the halo. Fill it with white and press Cmd+D. You now have a clean disc for the moon.
-
Ink the grain and trim it to the picture
The grain is pure black, but etching ink is a warm brown-black. To change the black without touching the white:
- Add Layer (name it Ink Colour), select the same sky area as before, and fill it with etching ink . Press Cmd+D.
- Set the layer's Blend to Lighten. Lighten keeps the lighter of the two colours, so the white grain stays white and the black turns brown.
- Choose Layer → Merge Down.
Click Aquatint Sky and set its Blend to Multiply so its white paper lets the plate show through.
The halo spilled a little past the picture's edge. Select the picture area (inner guides, top left to bottom right), choose Select → Inverse, press Delete and then Cmd+D.
-
Draw the snowy hill and its crest line
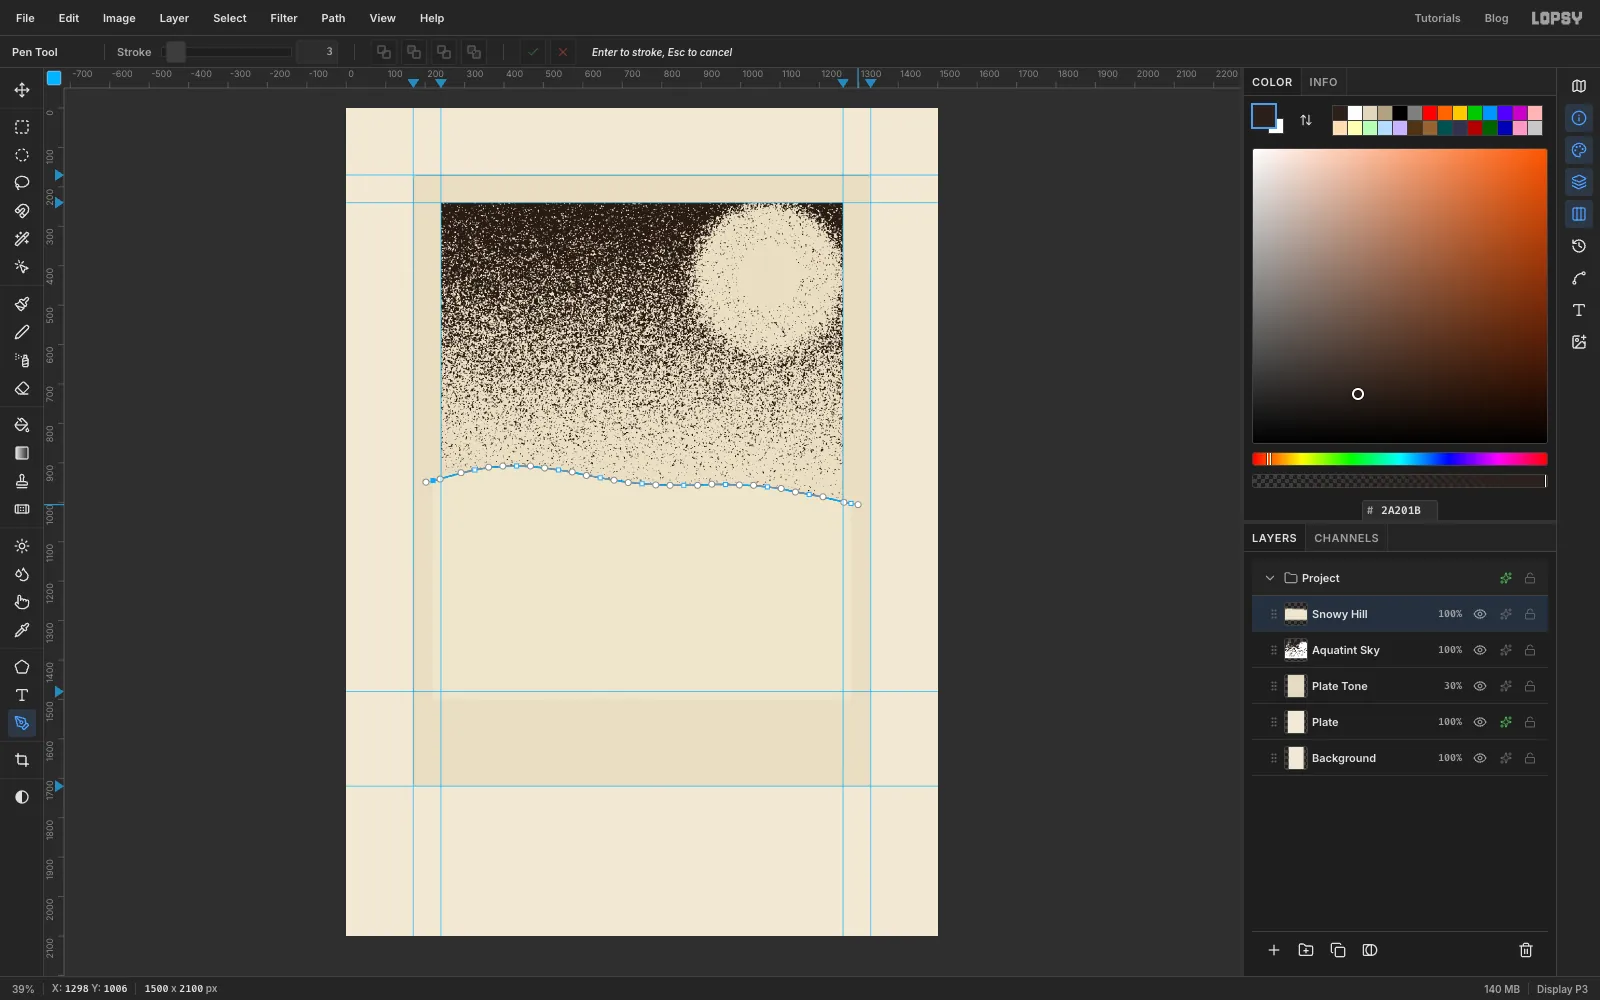
Add Layer and name it Snowy Hill. With the Lasso (L), draw a long gentle crest across the picture from left to right. Start a little outside the left edge at about y 930, rise and fall gently across the width, and finish a little outside the right edge at about y 960. Then go down and round the whole bottom of the picture to close the shape. Fill it with , a snowy cream, and press Cmd+D.
For the etched line along the crest, pick the Pen tool (P) and set Stroke to 3 in the options bar. With ink as the foreground colour, place points along the crest, dragging a little at each one to keep the curve smooth. Press Enter to stroke the path. Then open the Paths panel and click Delete Path so the next Pen path starts fresh.
-
Etch one fir tree
The firs are etched in lines, not filled solid, so you need a line pattern first:
- Add Layer and name it Hatch Tile.
- With the Rectangular Marquee, click once without dragging. A dialog asks for the corners. Type From 20, 20 To 36, 22 and fill it with ink.
- Press Cmd+D and click again. Enter From 20, 20 To 36, 24 and choose Edit → Define Pattern. That's a 2 px line every 4 px.
- Press Cmd+D and delete the Hatch Tile layer with the bin button.
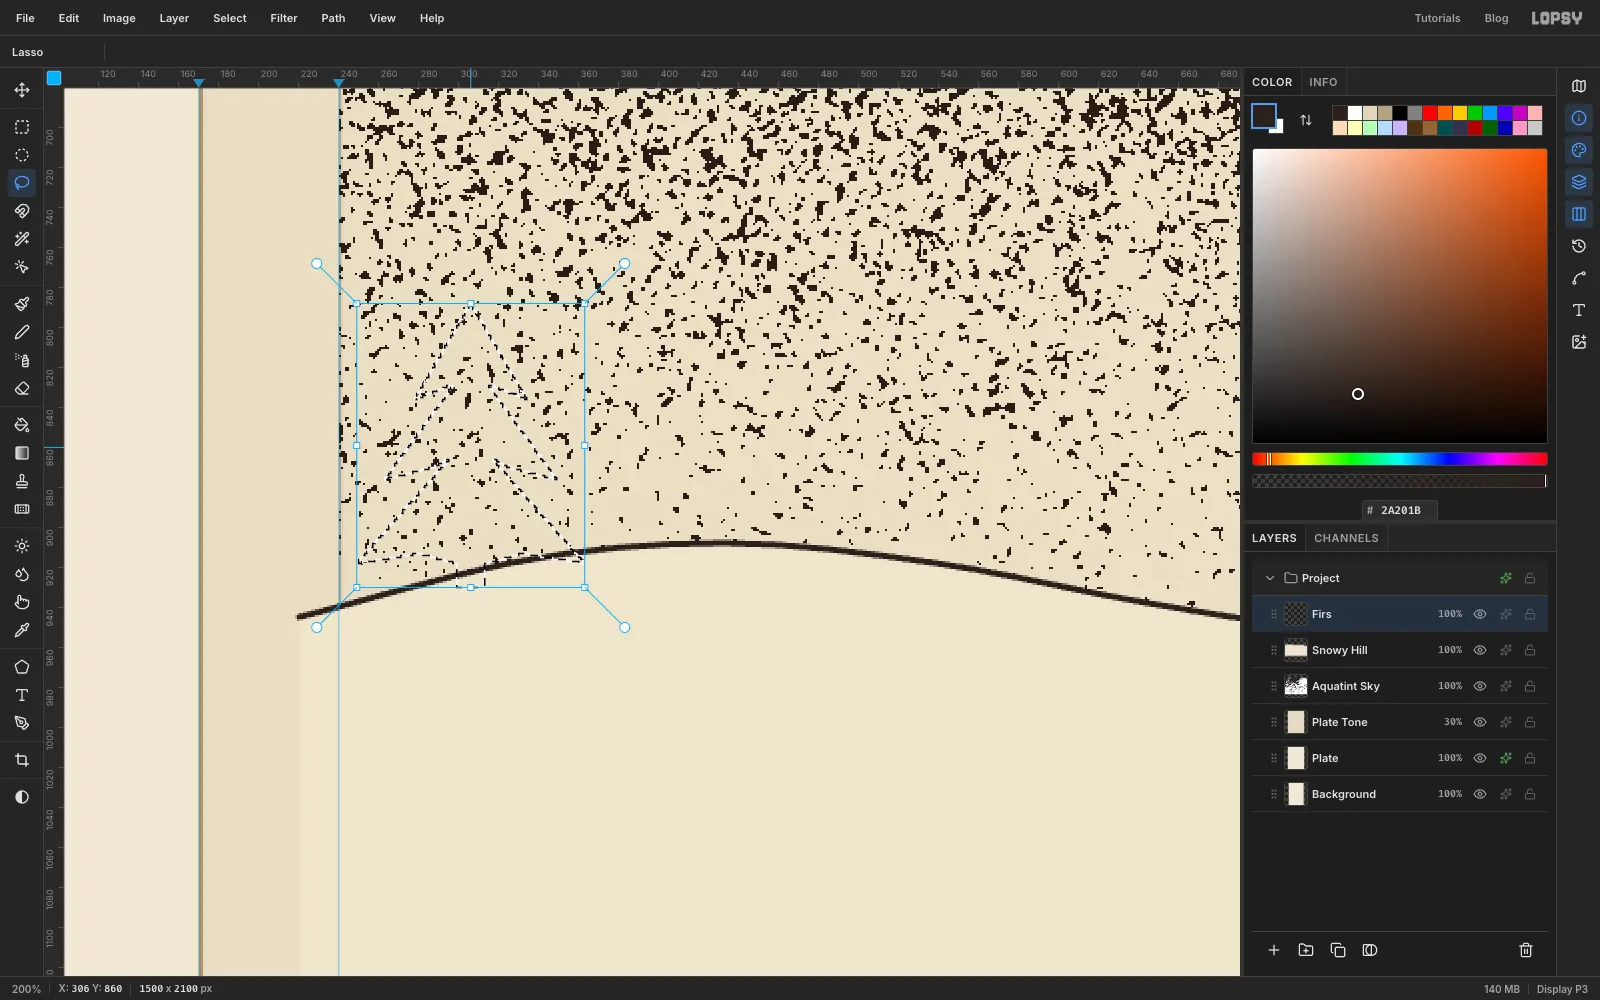
Click Snowy Hill, Add Layer, and name it Firs. With the Lasso, draw one fir about 140 px tall standing on the crest, about 70 px in from the picture's left edge. Draw three stacked, jagged tiers, each wider than the one above, on a short trunk.
Fill the selection with hill cream , then choose Edit → Fill with Pattern…, pick the line tile and click Apply. Press Cmd+D. Give the layer a Stroke effect, Width 2 in ink, and click Rasterize Layer Style so the outline becomes pixels.
-
Copy the fir into a little wood
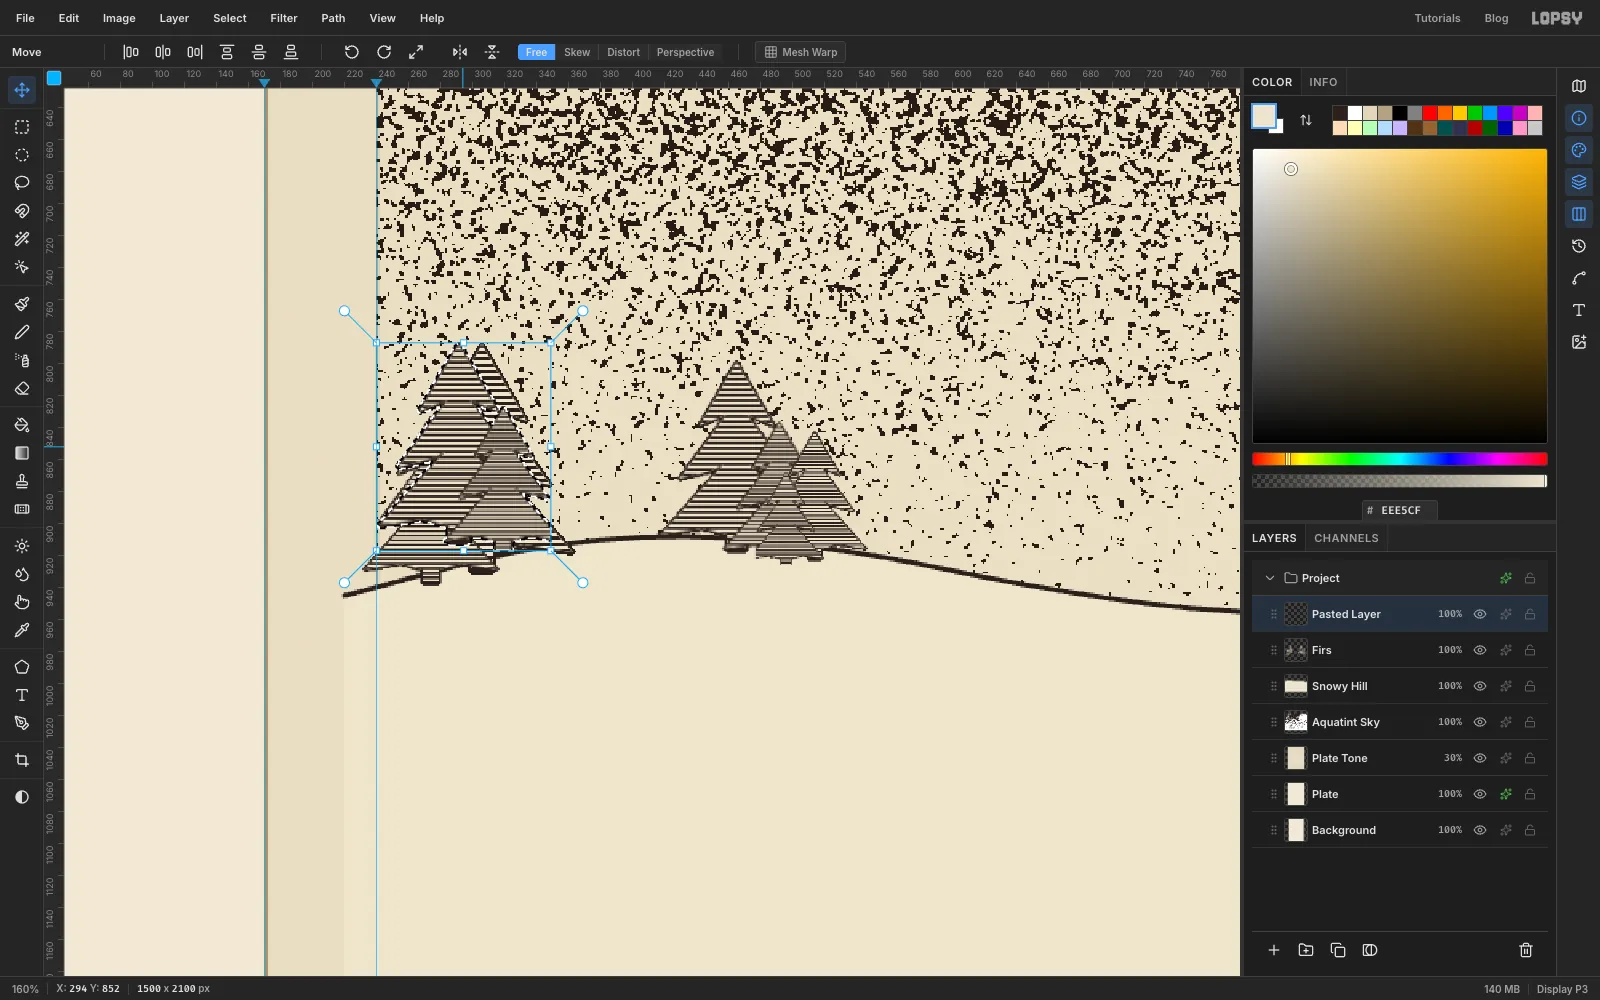
Drag a rectangular marquee just around the fir and press Cmd+C, then Cmd+V. The copy is pasted exactly on top of the original as a new layer, with the Move tool active.
Hold Cmd and drag its bottom-right corner handle in to make it smaller. For every second copy, click Flip Horizontal in the options bar first, so the trees don't look stamped. Press Enter, press Cmd+D, then drag the copy along the crest and set its foot on the hill. Choose Layer → Merge Down to fold it back into Firs.
Repeat until you have a cluster of four firs at the left, around where the cottage will go, and two more at the far right, from about 75 px to 140 px tall. The far-right pair will peek out behind the hedgehog later.
-
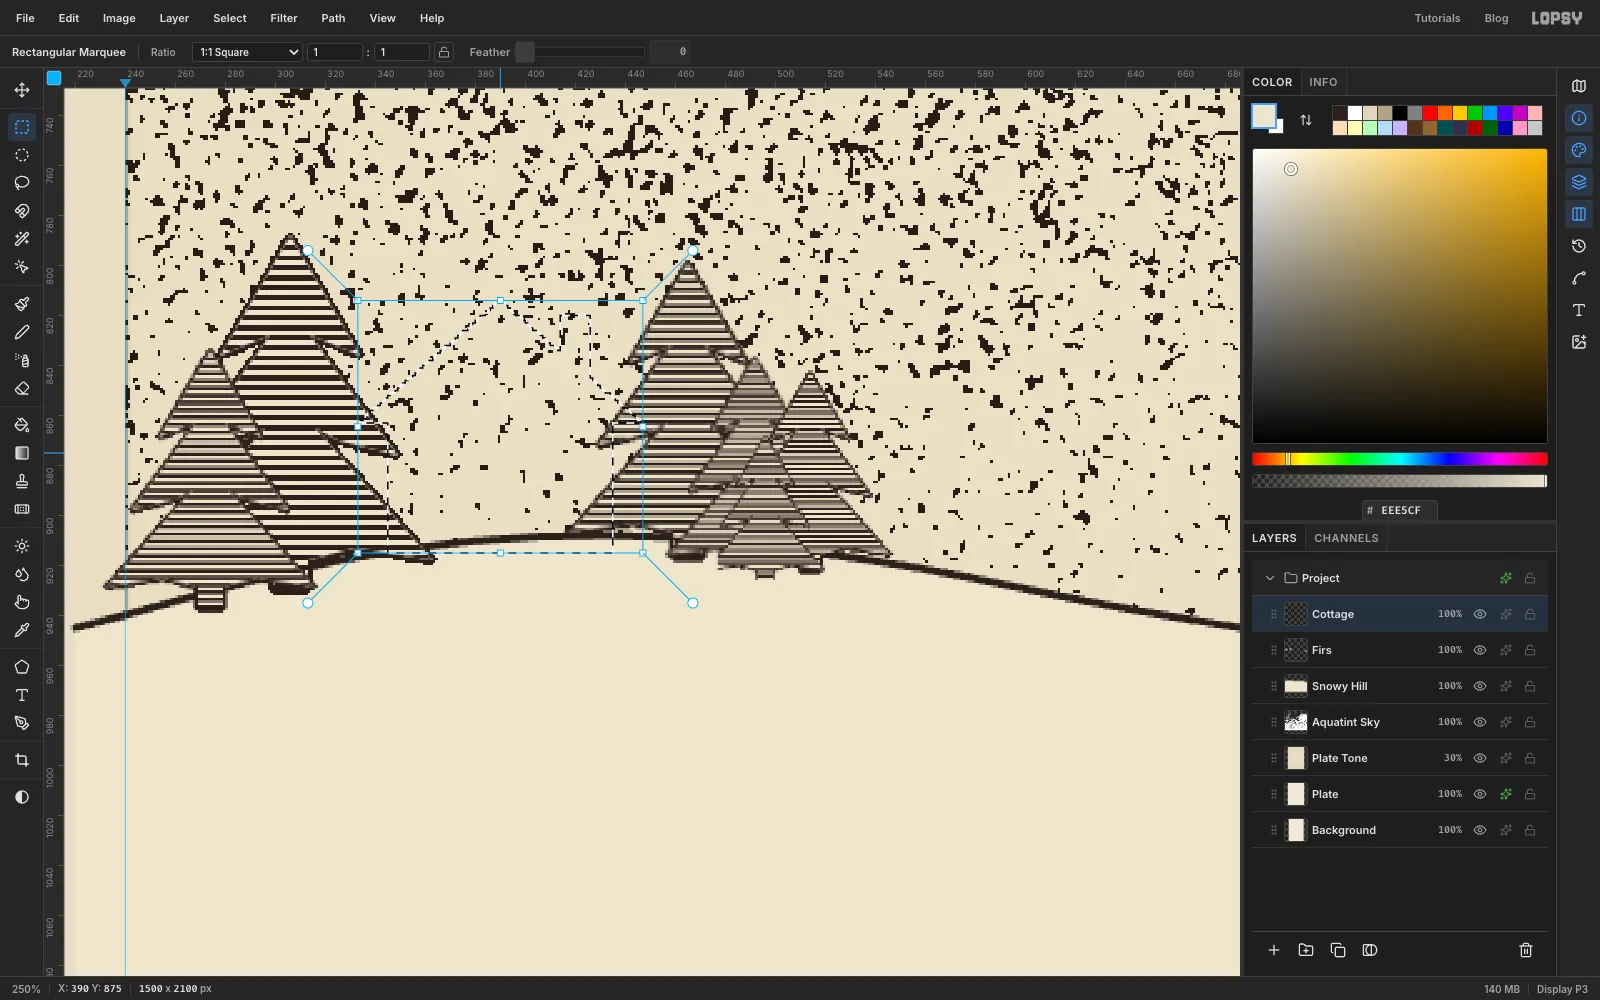
Block in the cottage
Add Layer and name it Cottage. The cottage sits on the crest in the gap between the firs on the left:
- Drag a rectangular marquee for the walls, 90 px wide and 55 px tall, with its bottom on the crest.
- Hold Shift and lasso a triangle on top for the gable roof, a little wider than the walls.
- Hold Shift again and drag a thin rectangle for the chimney on the right-hand slope.
Fill the selection with and press Cmd+D. Add a Stroke effect, Width 3 in ink, and click Rasterize Layer Style.
-
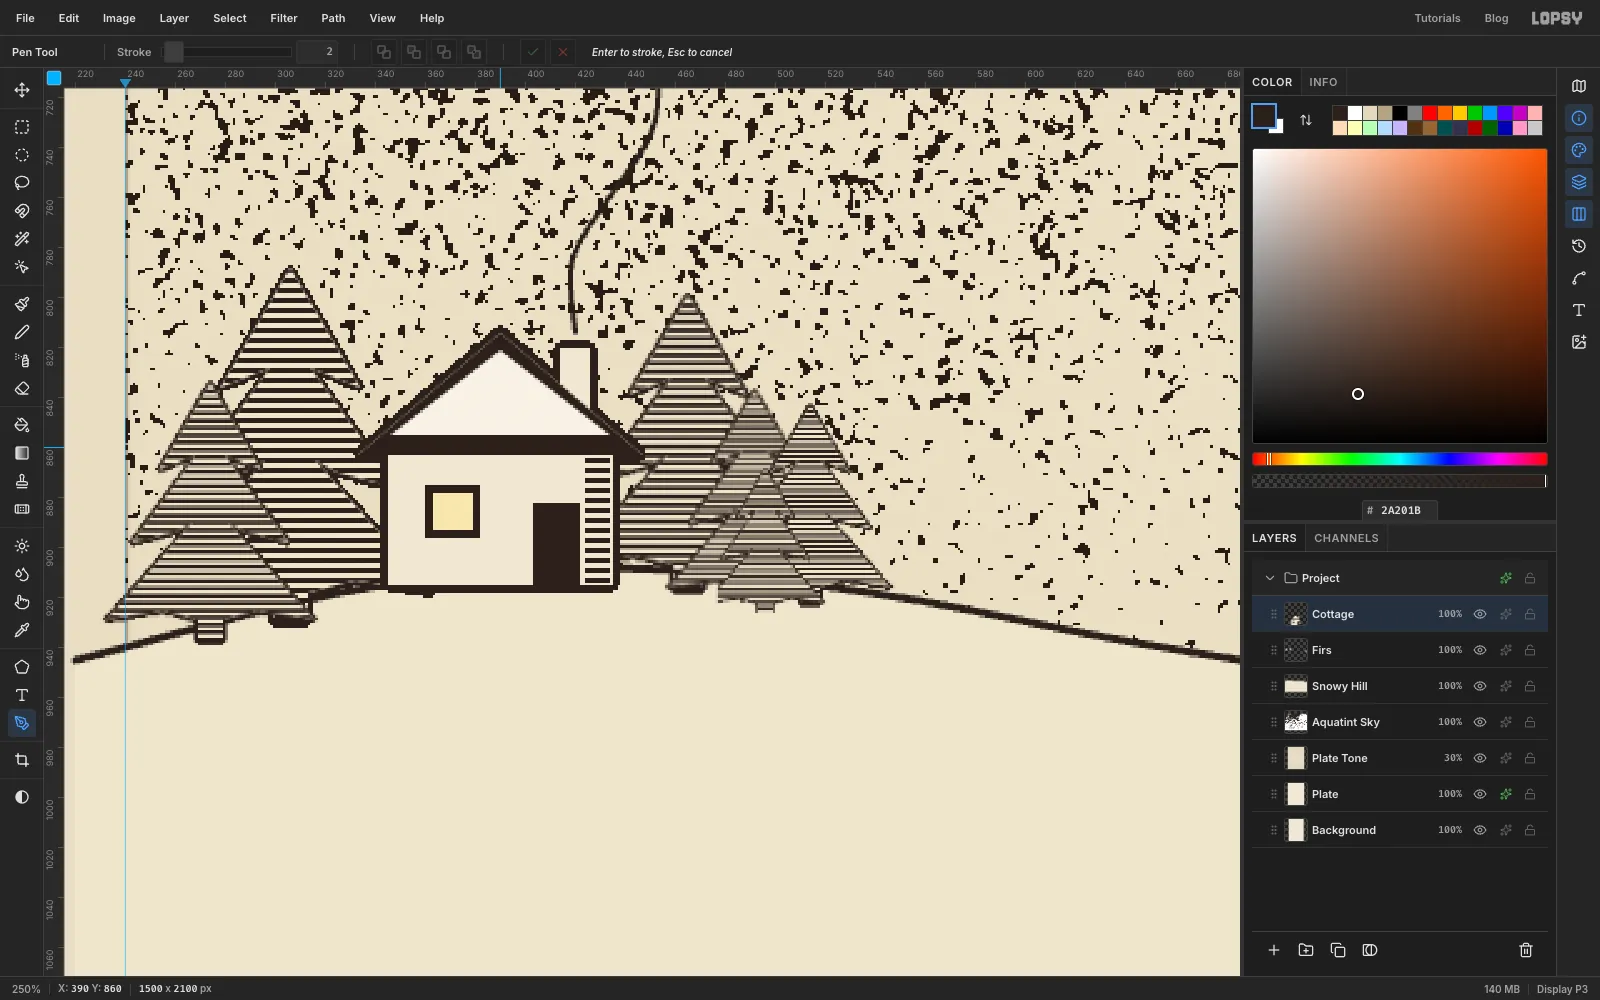
Add the roof, window, door and smoke
Work on the Cottage layer:
- Roof. Lasso the roof triangle again and fill it with ink. Then lasso a slightly smaller triangle inside it and fill that with snow . You're left with a snowy roof with dark eaves.
- Window. Drag a small square on the left of the wall and fill it with ink. Choose Select → Shrink… with 3 and fill it with .
- Door. Drag a tall rectangle on the right, from about a third of the way down the wall to the ground, and fill it with ink.
- Shading. Select the strip of wall to the right of the door and choose Edit → Fill with Pattern… with the line tile.
- Smoke. Press Cmd+D. With the Pen at Stroke 2, draw an open curl rising from the chimney, then press Enter and delete the path.
Click Snowy Hill, Shift-click Cottage and choose Layer → Group Layers. Name the group Village and collapse it.
-
Drop in the hedgehog photo and scale it
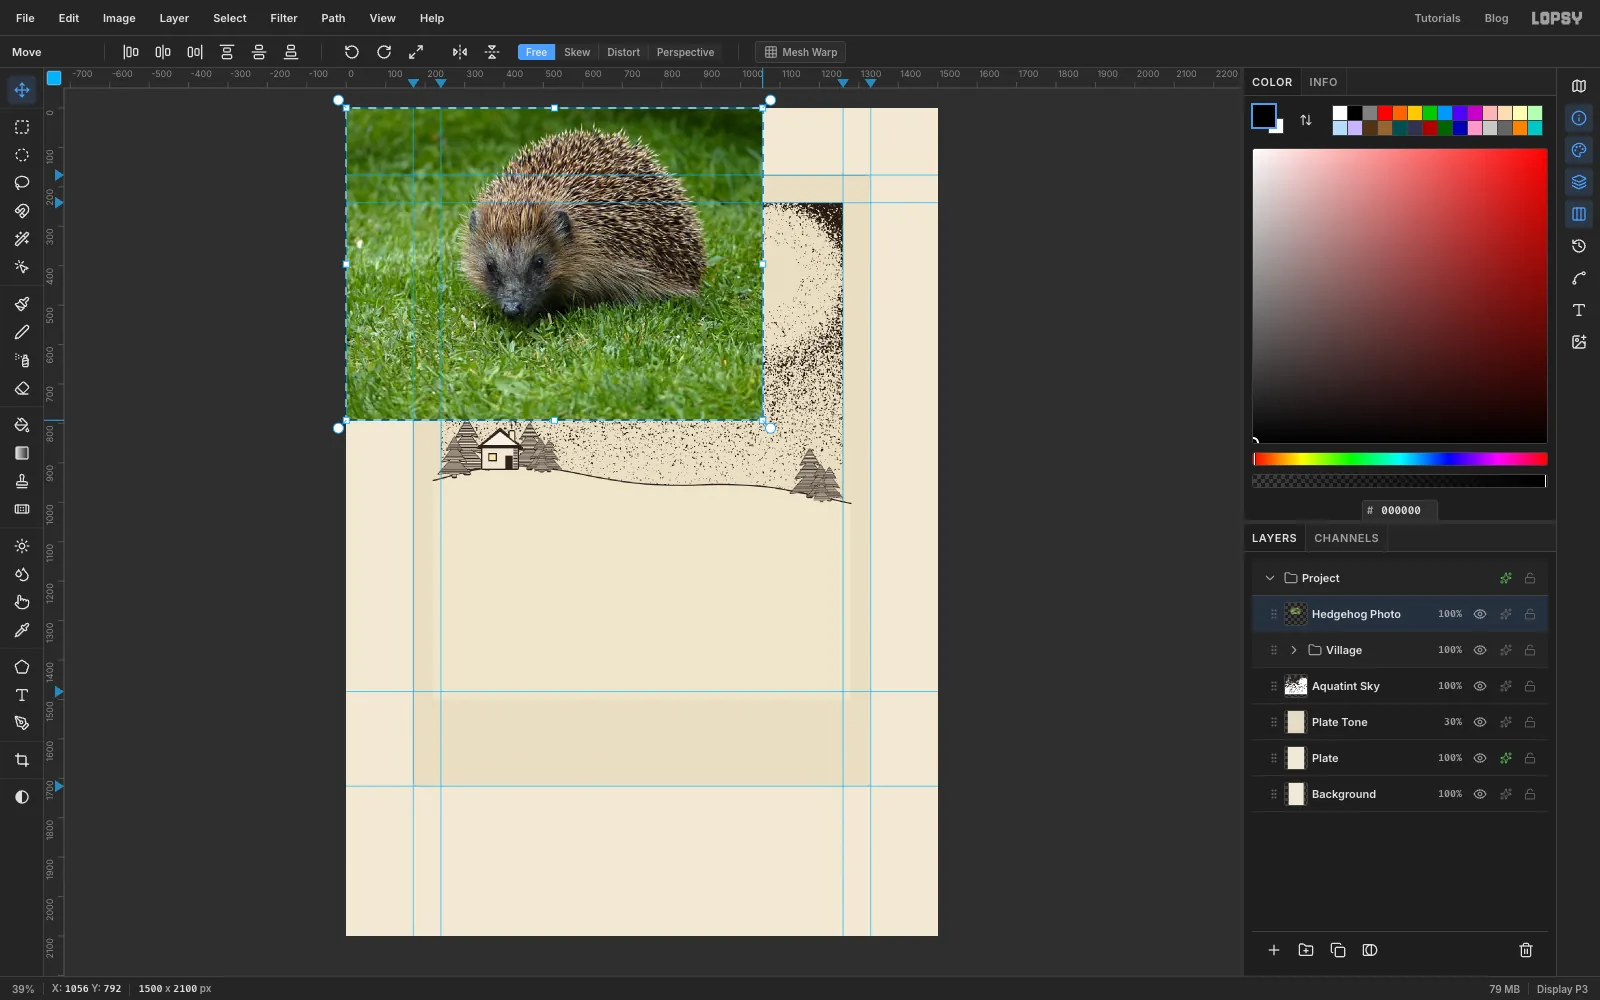
Click the Village group (collapsed, so new layers land above it). Drag the photo file onto the canvas. It lands at the top left at its own size, already selected, with the Move tool active. Rename the layer Hedgehog Photo.
Hold Cmd and drag the bottom-right corner handle outward to make the photo 10% bigger, about 1056 × 792 px. Press Enter and then Cmd+D.
-
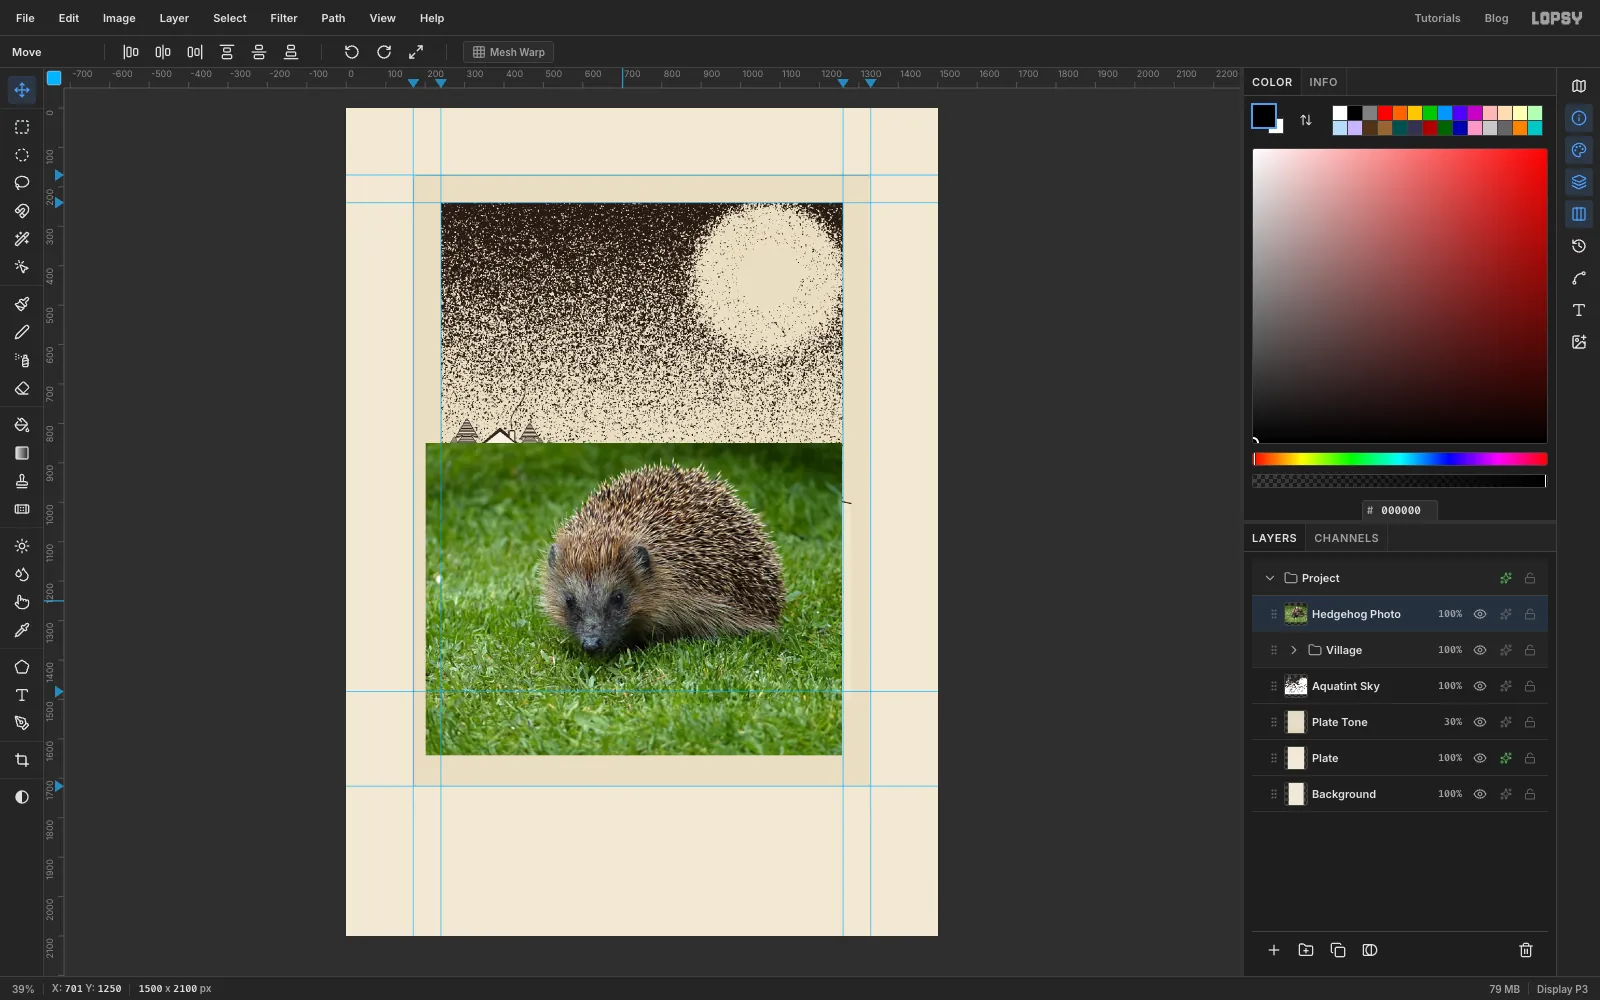
Move the photo into place
Drag the photo down and to the right until its left edge sits just left of the picture's left edge and the hedgehog's back overlaps the hill's crest. Its nose should end up a little left of centre, about 100 px above the bottom of the picture.
-
Cut the hedgehog out
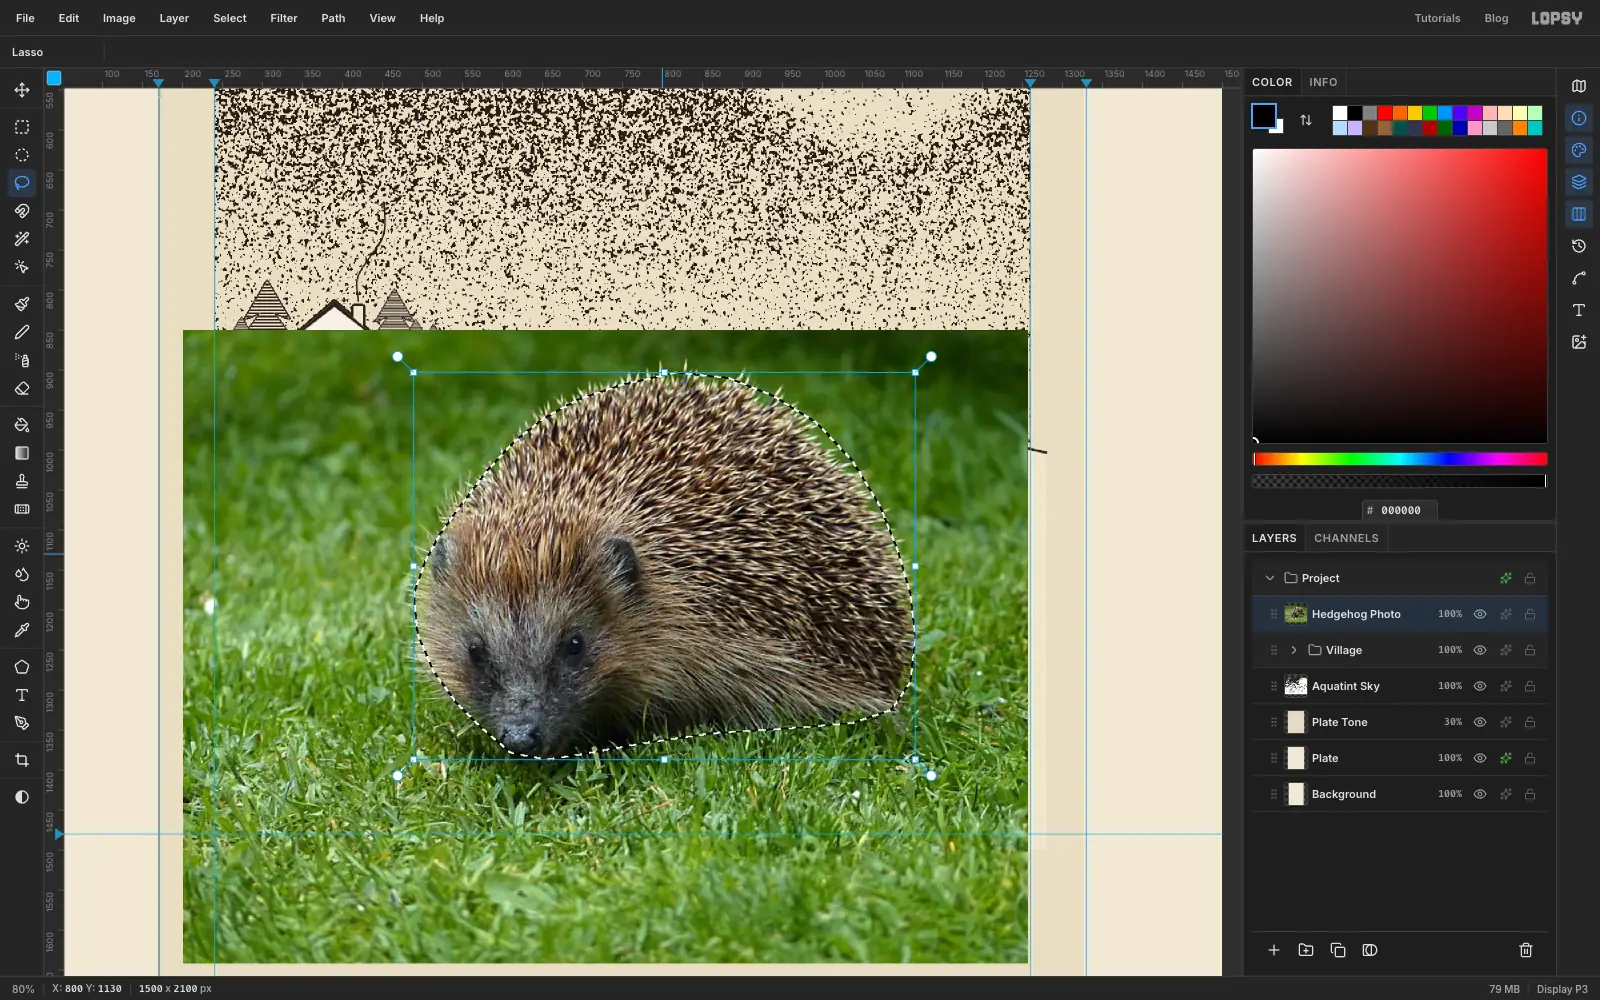
Pick the Lasso and trace round the hedgehog. Go just outside the tips of its spines across its back, and along the top of the grass under its chin and belly. A smooth line is fine. The real spiny edge comes later.
Choose Select → Shrink… with 10. This pulls the cut inside any green fringe, so no grass survives. Then choose Select → Inverse, press Delete and press Cmd+D.
-
Desaturate and lift the face
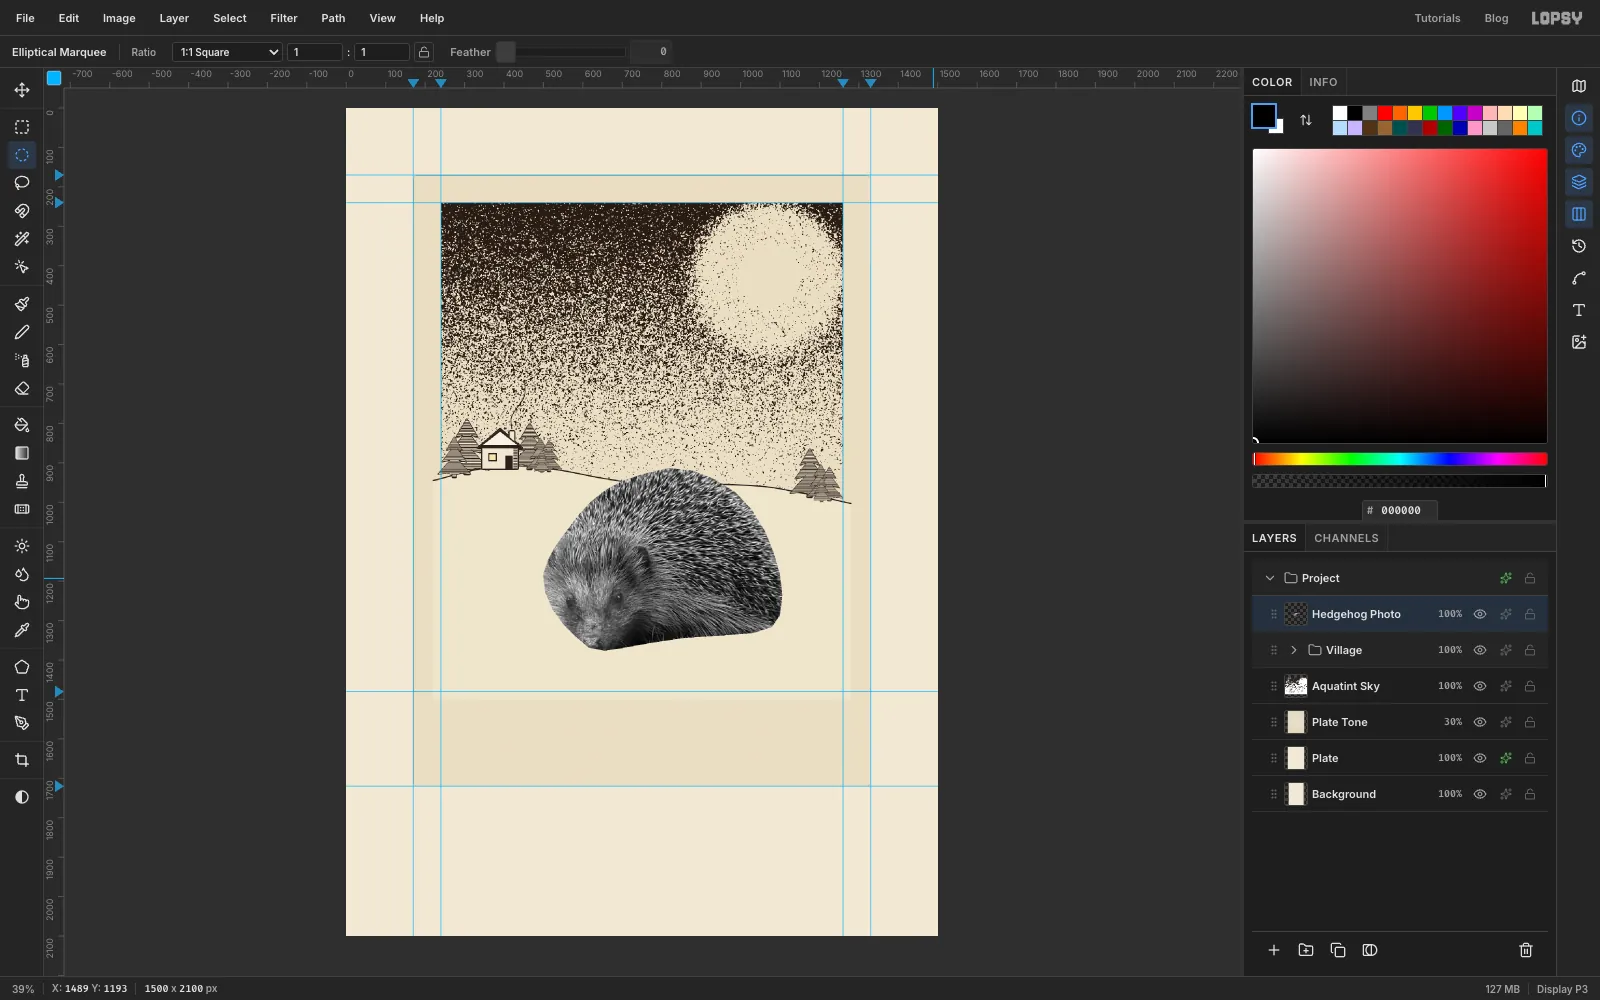
Choose Filter → Desaturate.
The face is very dark in the photo, and it would turn into a black blob when you threshold it in the next step. With the Elliptical Marquee, drag an oval about 240 × 190 px over the face, centred on the snout. Choose Select → Feather… with 45, then Filter → Brightness/Contrast… with Brightness 12. Press Cmd+D.
-
Bite the hedgehog in two passes
First give the hedgehog a solid backing, so the hill line doesn't show through its gaps:
- Click Village, Add Layer and name it Hedgehog Ground.
- Cmd-click the Hedgehog Photo thumbnail and fill the selection with , the hill colour. Press Cmd+D.
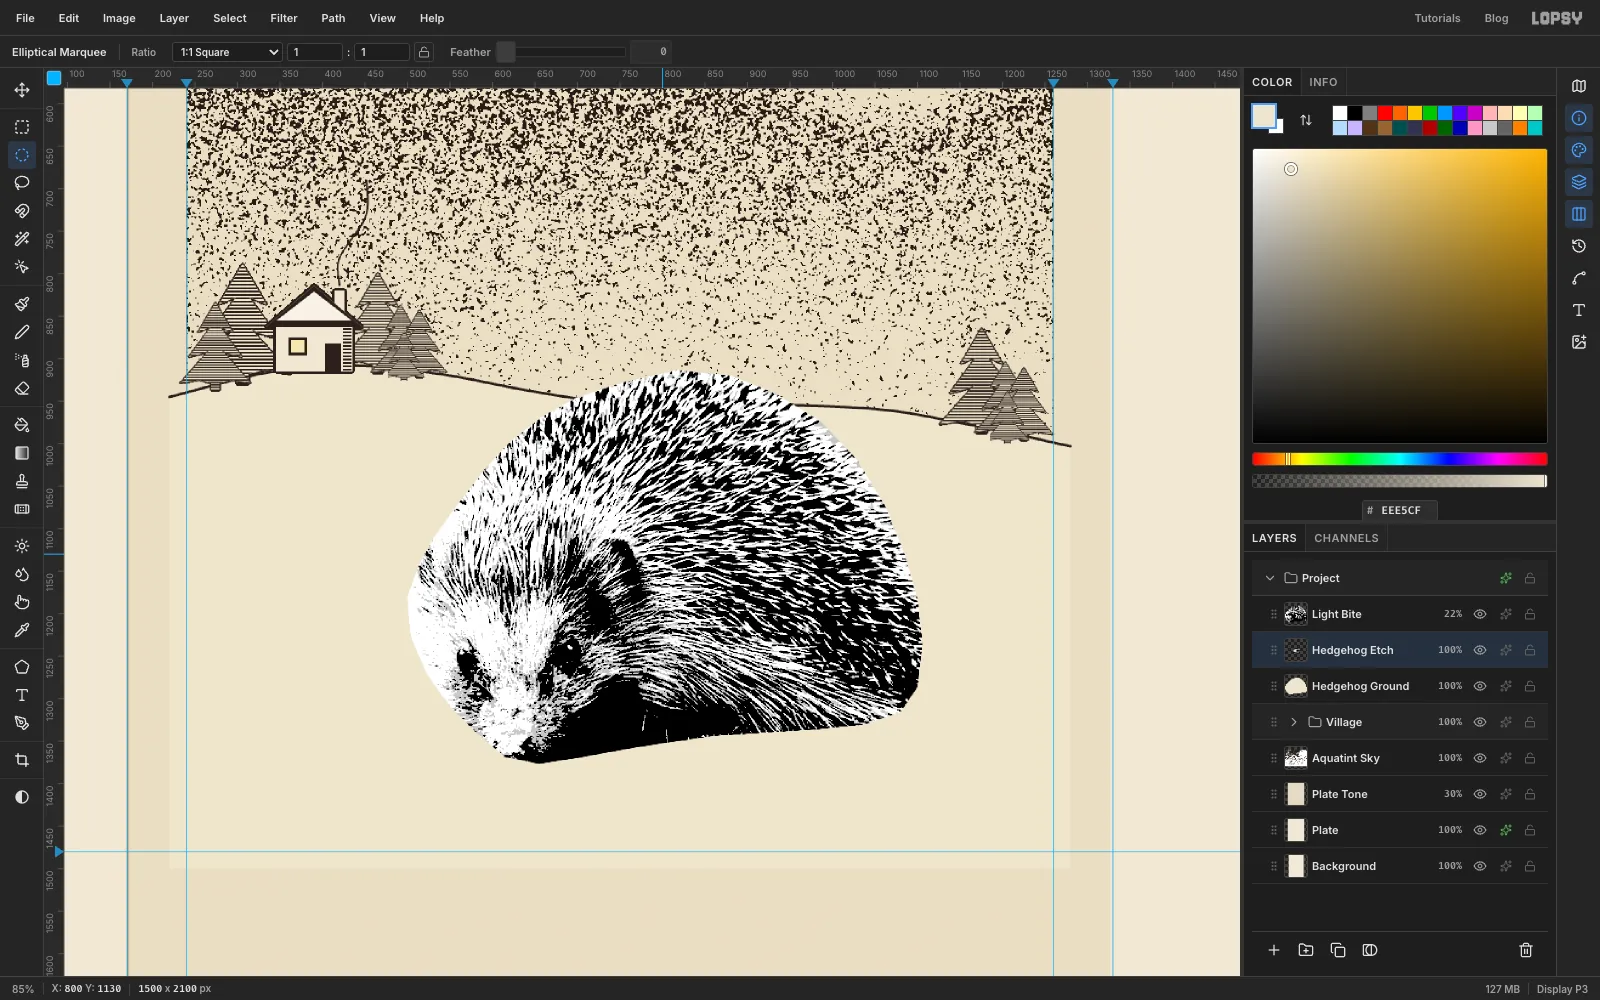
Now bite the photo twice, the way an etcher bites a plate lightly for the mid-tones and deeply for the darks:
- Click Hedgehog Photo and rename it Hedgehog Etch. Click Duplicate Layer and name the copy Light Bite.
- On Light Bite, choose Filter → Threshold… with Level 110. Set its Blend to Multiply and its opacity to 22%.
- Click Hedgehog Etch and run Threshold with Level 82. That's the deep bite: only the darkest spine shadows stay black.
-
Turn the bites into warm ink
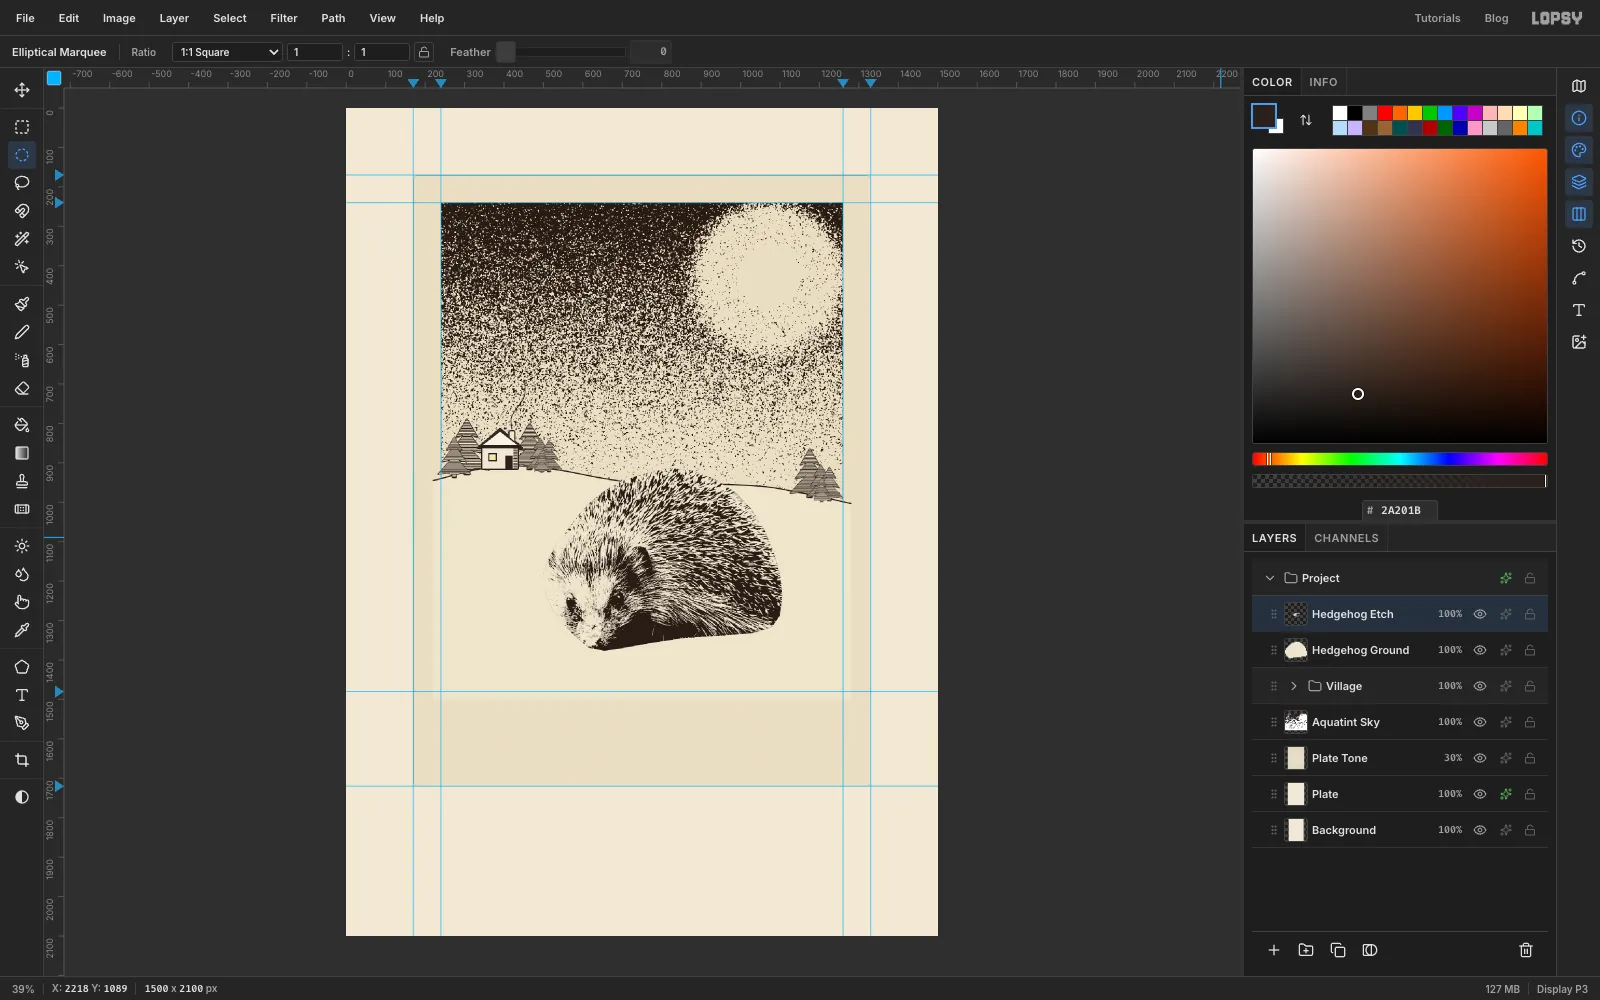
Click Light Bite and choose Layer → Merge Down. The two bites become one layer, with soft grey marks between the black ones.
Use the same Lighten trick as for the sky:
- Add Layer (Ink), Cmd-click the Hedgehog Etch thumbnail and fill with ink .
- Press Cmd+D, set the Blend to Lighten and choose Layer → Merge Down.
- Set Hedgehog Etch to Multiply.
-
Flick the spines past the outline
The cut edge is too smooth for a hedgehog. Draw the spines past it by hand, the way an etcher would scratch them:
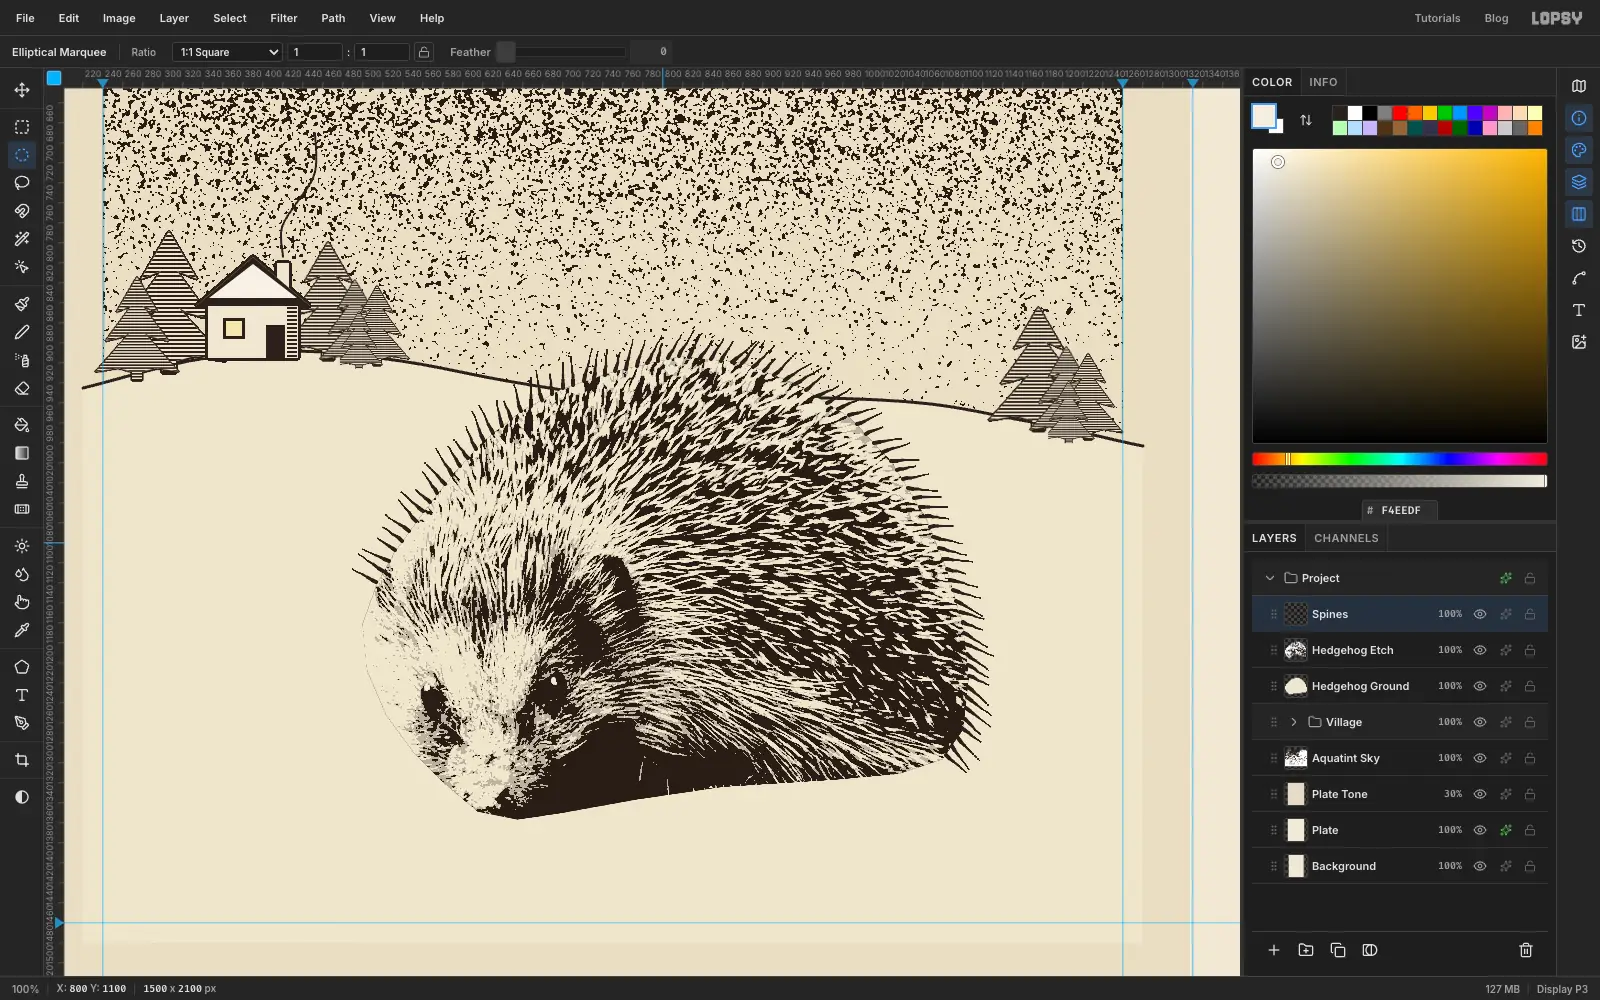
- Add Layer and name it Spines.
- Pick the Brush (B) in ink and open the brush settings. On the Shape tab set Size 5, Hardness 100 and Taper 30. Taper thins every stroke from where it starts, so each stroke begins at the root and ends in a point.
- Starting about 10 px inside the outline, flick short strokes outward all the way from the cheek, over the back, to the rump. Make them roughly 15–30 px long and about 12 px apart. Lean each one back toward the tail, the way the spines lie. That's about seventy little strokes.
Last, give the face some life. Set the foreground to . Zoom in on the eyes. With the Elliptical Marquee, drag a 5 px dot over the tiny highlight in each eye and fill it. Press Cmd+D.
-
Pile a snow drift in front
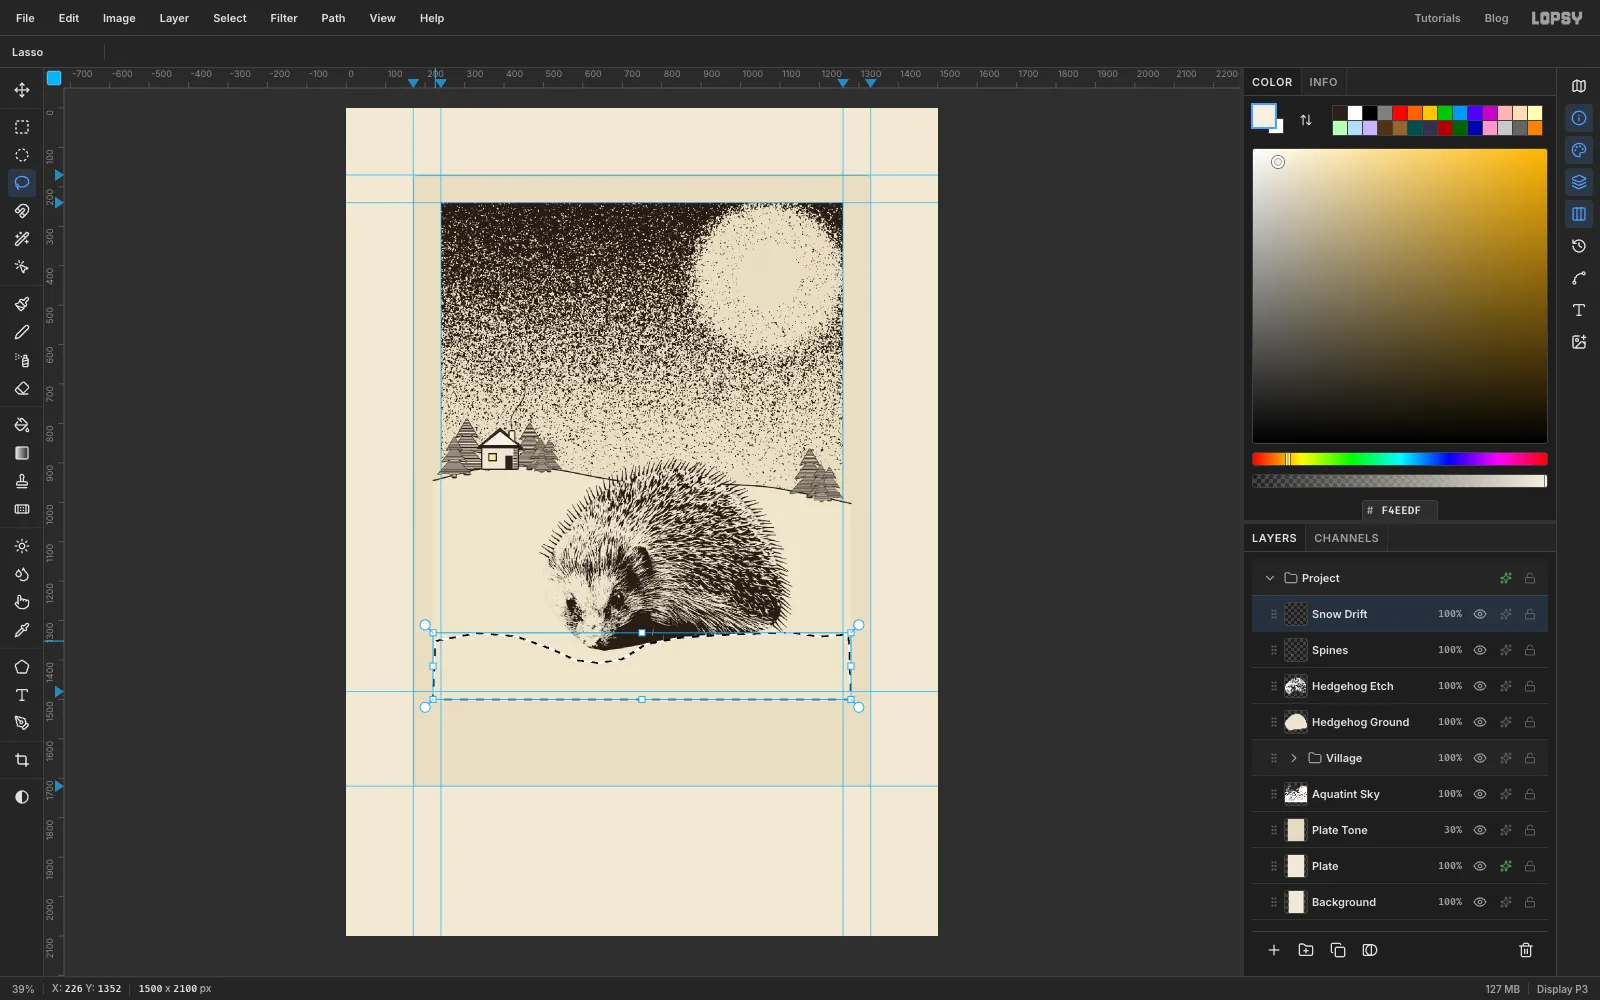
Add Layer and name it Snow Drift. With the Lasso, draw the top of a drift across the picture:
- start at the left edge at about y 1350
- dip down under the hedgehog's nose to about y 1400, so the snout is clear of the drift
- rise to hide its belly and the bottom of its spines
- run fairly level to the right edge
Then go round the bottom of the picture to close it. Fill it with snow and press Cmd+D.
-
Draw the snow contours
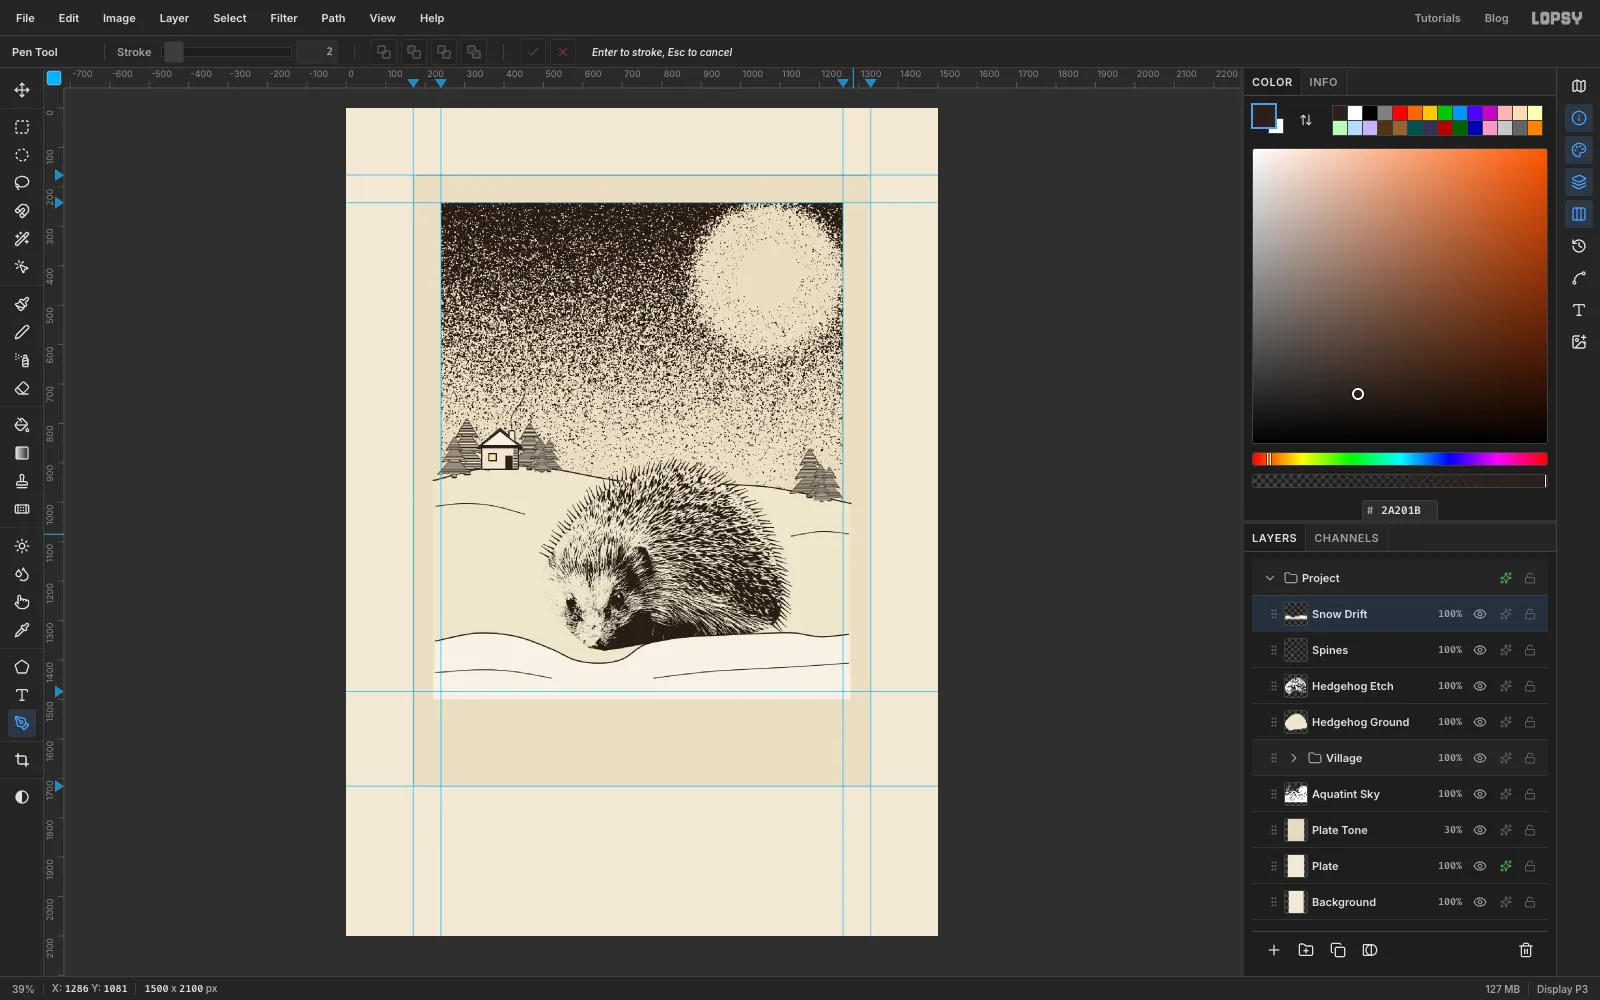
Set the foreground back to ink . With the Pen at Stroke 3, trace along the top of the drift and press Enter, then delete the path.
At Stroke 2, add four gentle open curves to model the snow, deleting each path after you stroke it:
- one low in the drift on the right
- one low in the drift on the left
- one across the left of the hill, just below the crest
- a short one on the right of the hill
-
Rule the hedgehog's shadow by hand
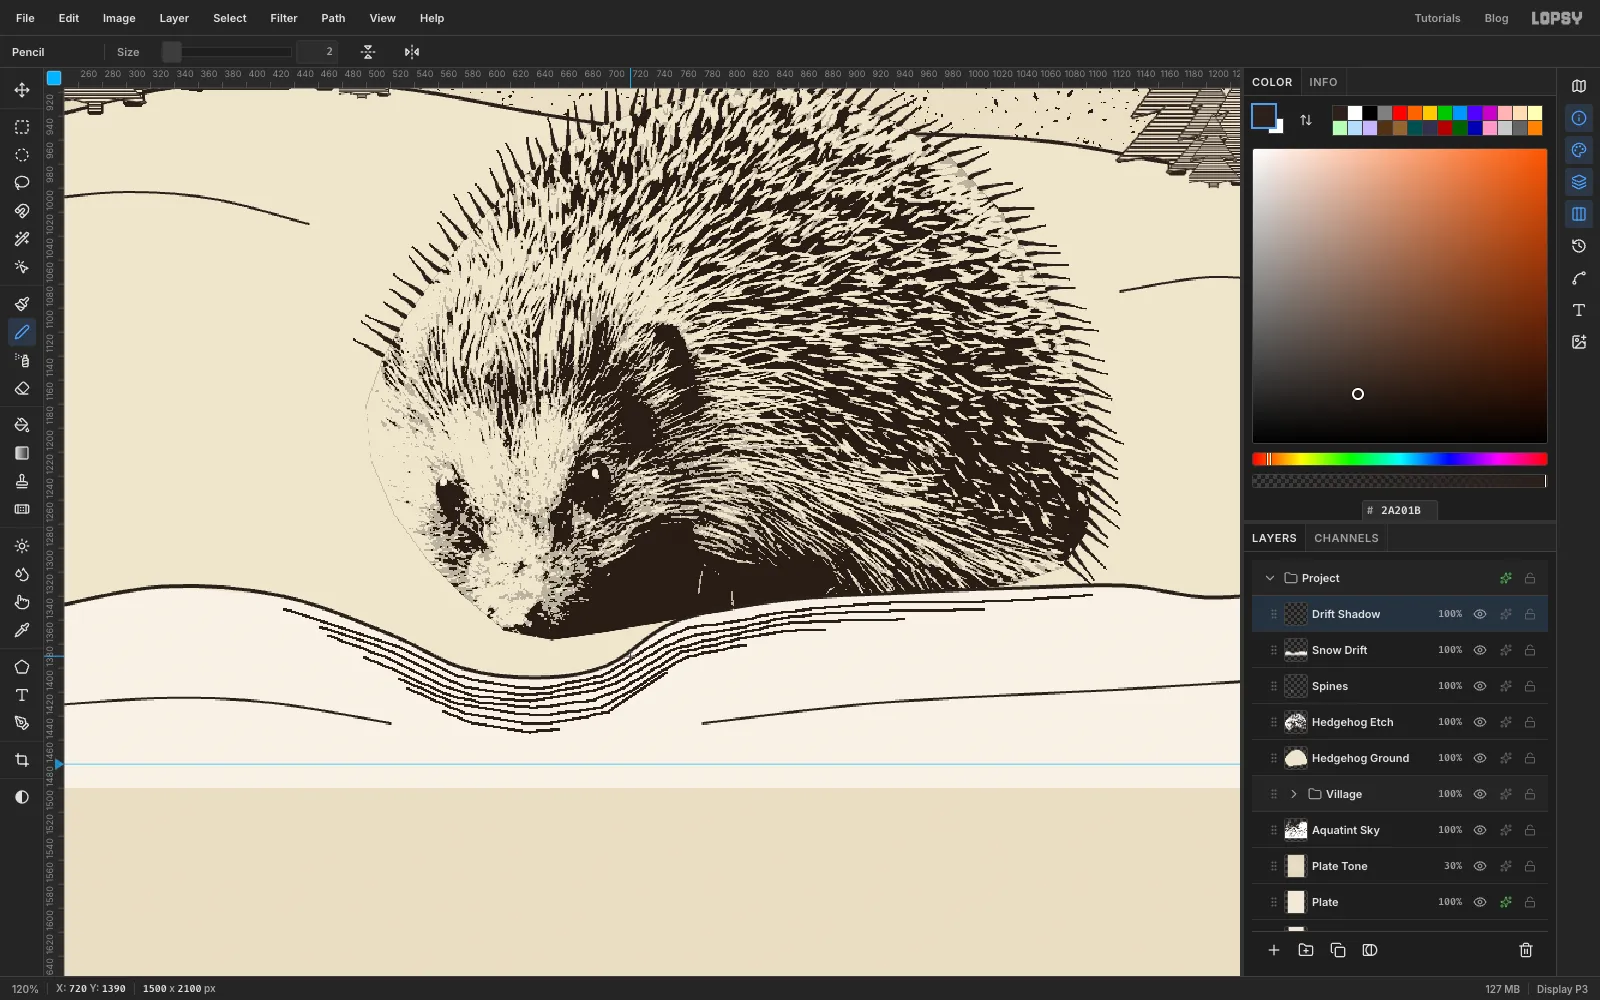
The moon is up to the right, so the hedgehog throws a shadow across the drift. Add Layer, name it Drift Shadow, and pick the Pencil at Size 2, still in ink.
Draw seven lines under the drift's top edge, each one about 6 px below the last. Start each line a little further right than the one above, and end it a little sooner, so the band tapers. Drag them by hand rather than Shift-clicking. A slight wobble is what makes them look etched rather than ruled.
-
Leave a trail of footprints
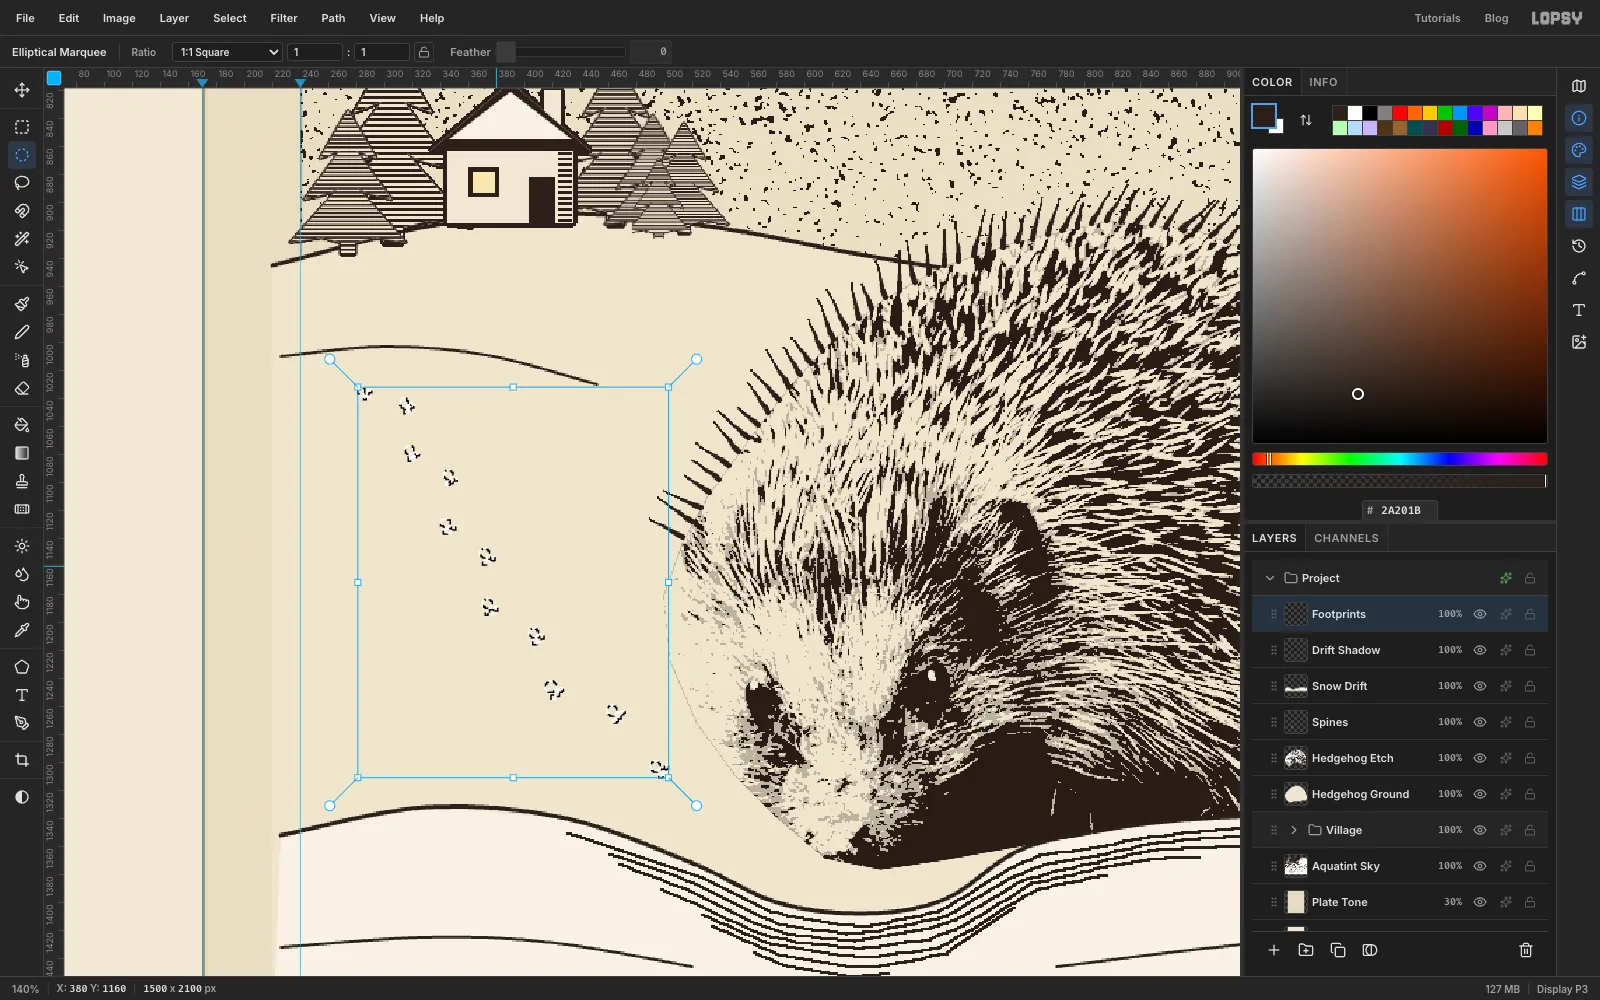
The empty snow on the left needs a story. Add Layer and name it Footprints. Hedgehogs leave little prints with a pad and short toes.
With the Elliptical Marquee, hold Shift to add each new shape to the selection. Each print is a small round pad, about 7 px across, with three tiny toe dots just in front of it. Place about ten prints along a wandering path:
- start up near the left of the hill
- curve down toward the hedgehog's nose
- step from side to side as you go
- make the prints a little bigger as they come closer
Fill with ink, press Cmd+D and set the layer's opacity to 80%.
-
Draw the holly stems
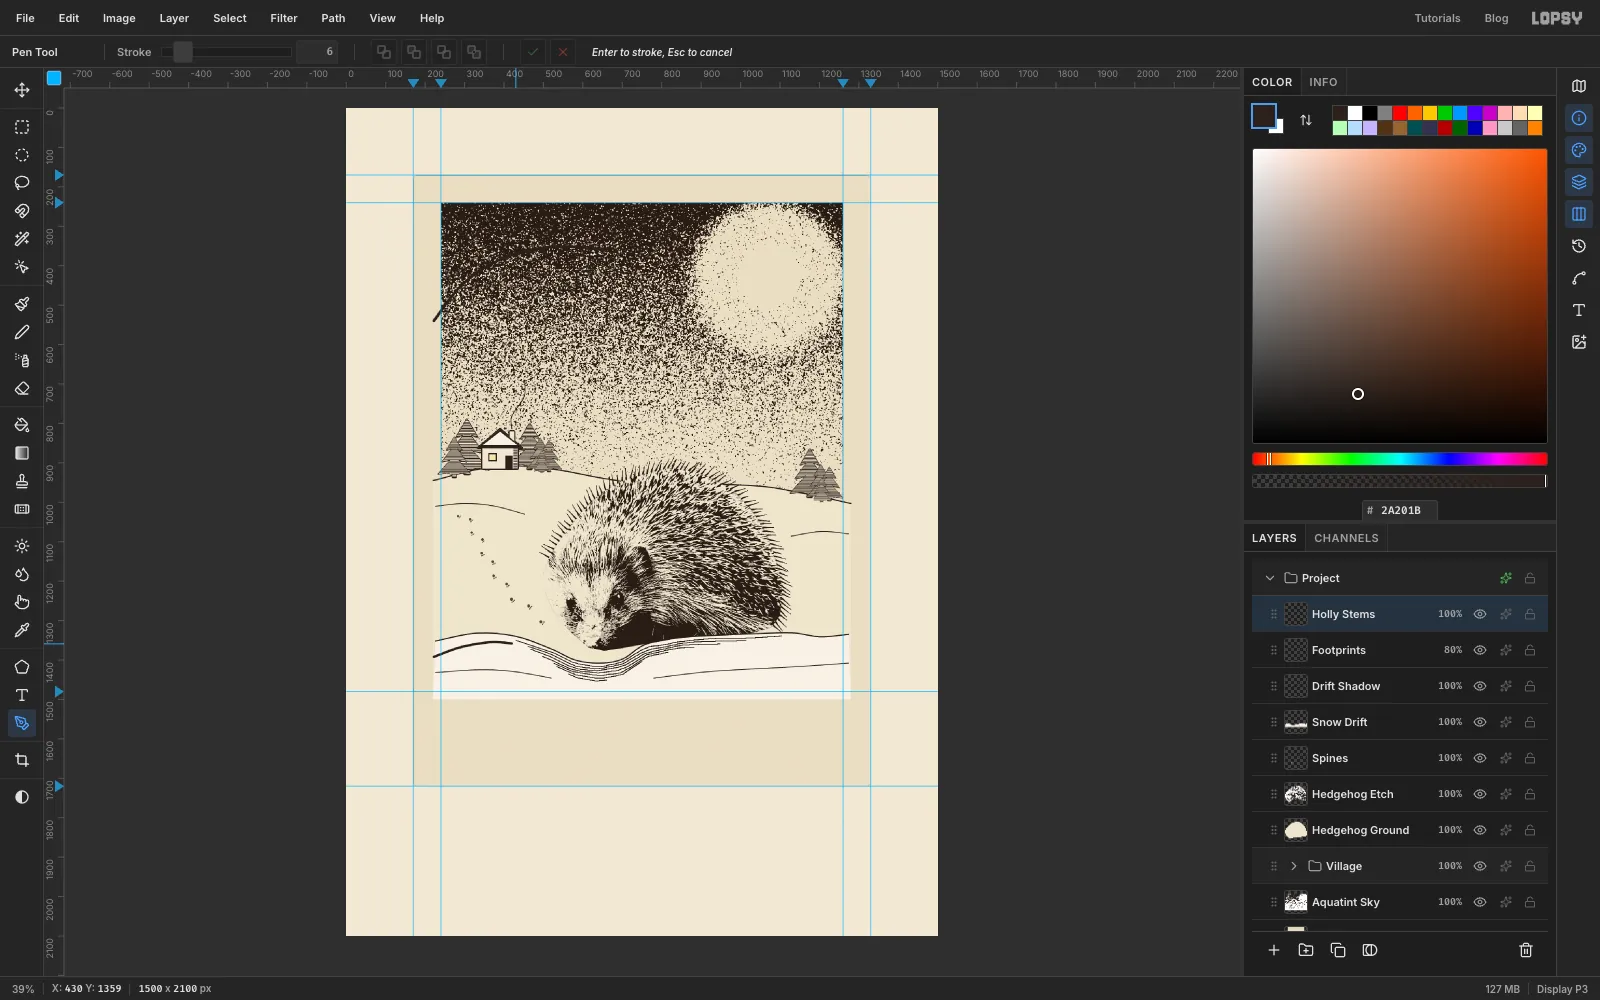
Click Footprints, Add Layer and name it Holly Stems. With the Pen at Stroke 7 in ink, draw a curved stem that comes in from the left edge about a quarter of the way down, arches up, and runs right to the middle of the top. Press Enter and delete the path.
At Stroke 6, draw a shorter stem lying along the snow at the bottom left, ending well short of the hedgehog's nose.
-
Draw one holly leaf with the Pen
You'll draw one big holly leaf and copy it. First make a second line tile the same way as before: From 20, 20 To 36, 22 filled with ink, then define From 20, 20 To 36, 26 as the pattern. That's a 2 px line every 6 px.
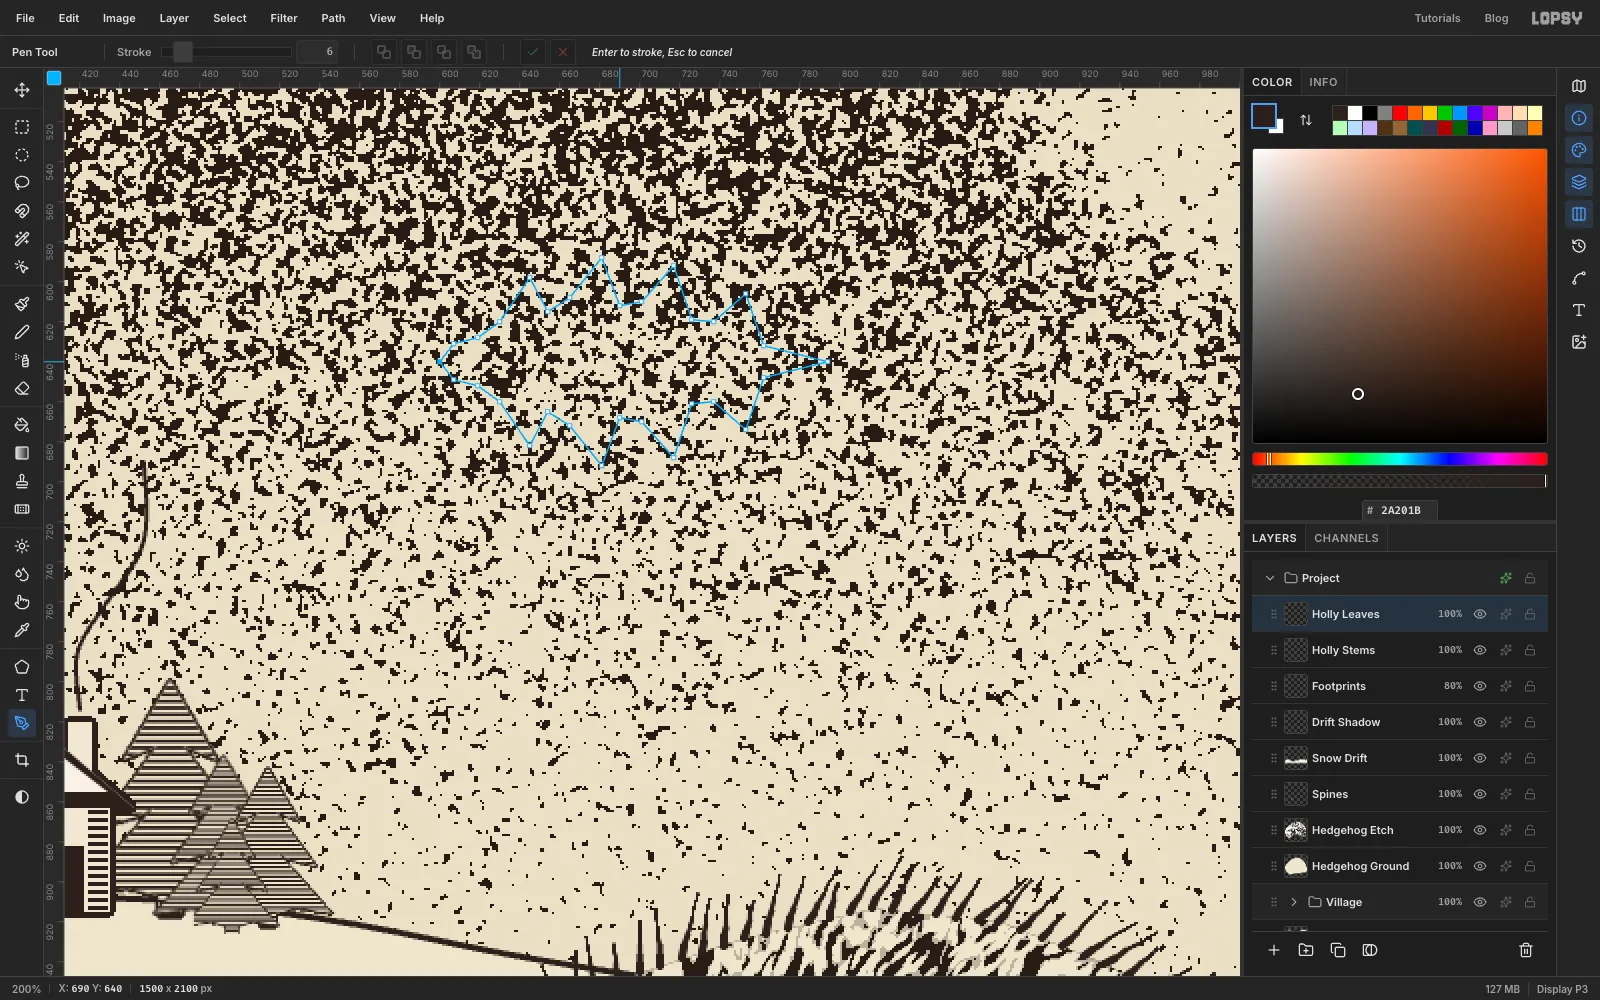
Add Layer and name it Holly Leaves. In an empty patch of sky, draw the leaf with the Pen, clicking corner points only. Start at the stalk end on the left: the Pen puts small ✓ and ✕ buttons just left of your first point, and starting at the left keeps them clear of the leaf. The leaf is about 180 px long and lies flat, tip to the right. Each side has four spines that point forward and out, with a shallow scooped curve between each spine and the next. Finish with a point at the tip. Click the first point to close the path.
In the Paths panel, click Path to Selection and then Delete Path. Fill the selection with and press Cmd+D.
-
Hatch the leaf along its veins
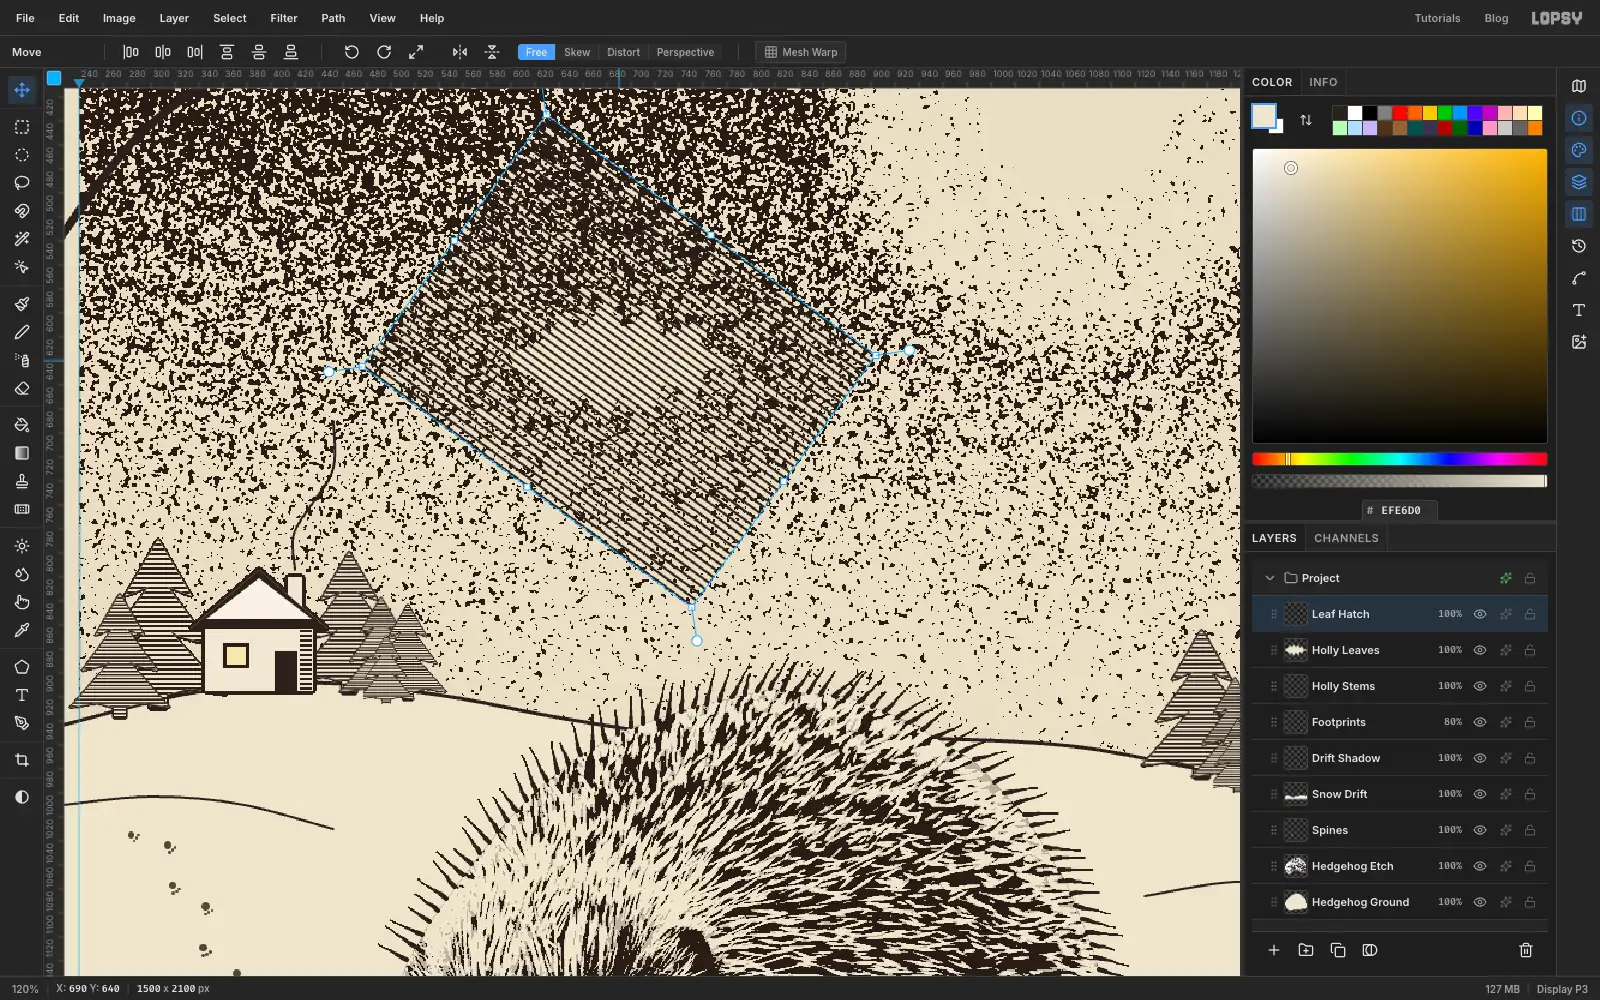
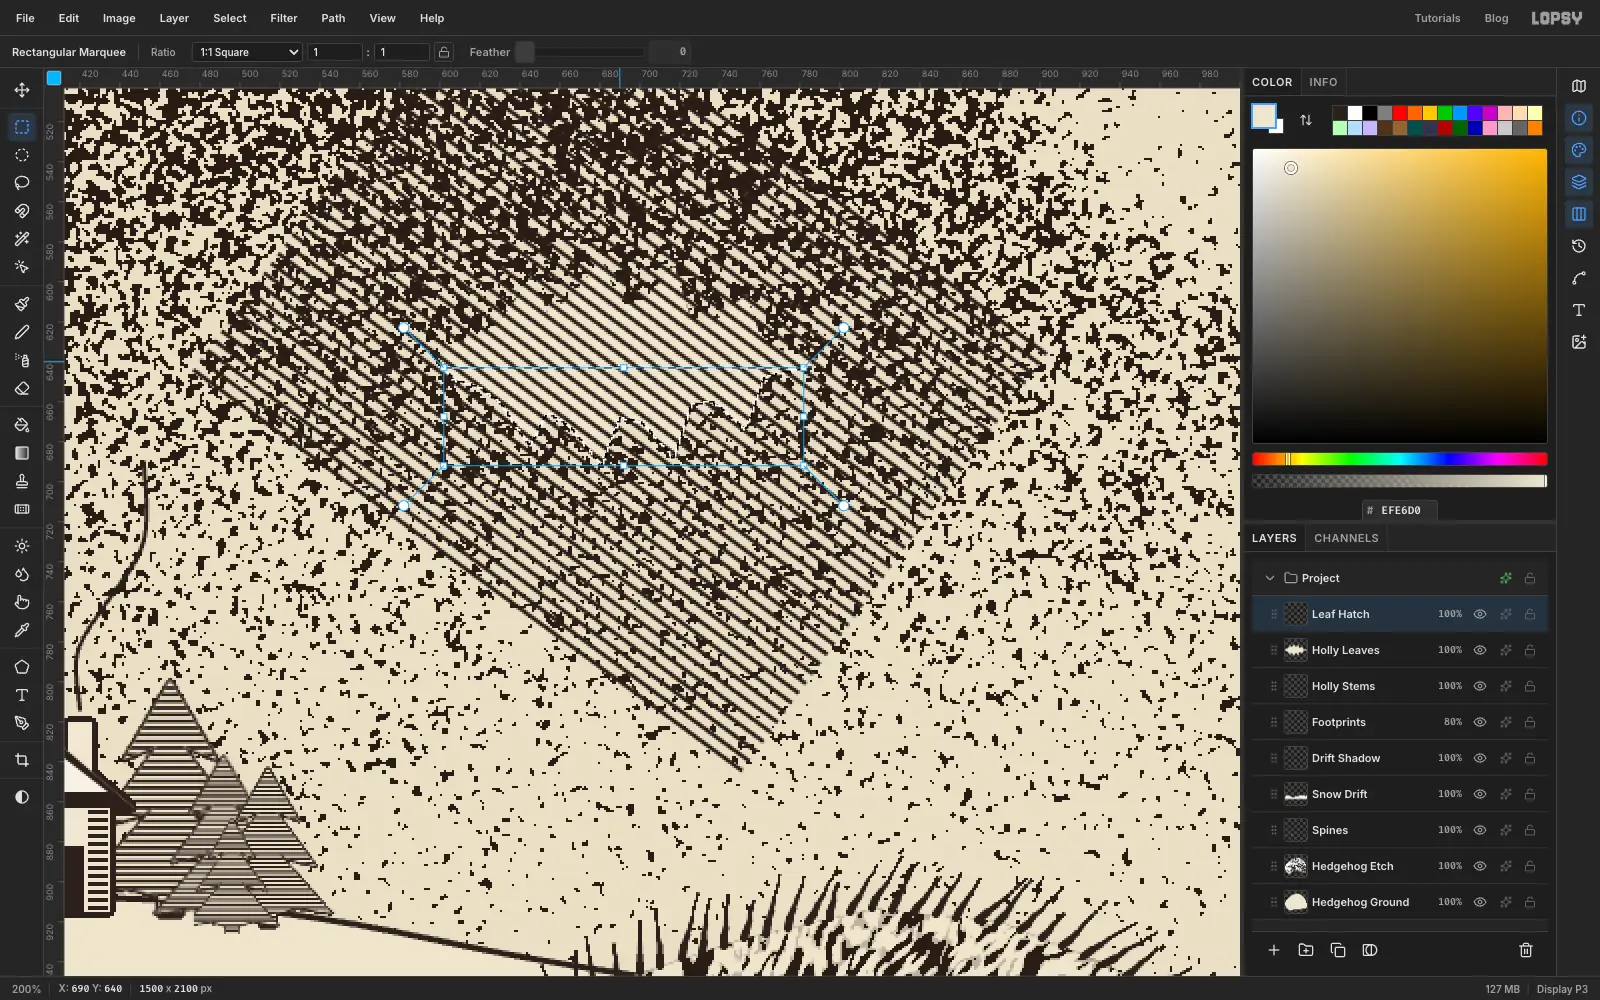
Add Layer and name it Leaf Hatch. With the Rectangular Marquee, drag a box well beyond the leaf on all sides and choose Edit → Fill with Pattern… with the new tile.
Holly veins run out from the midrib at an angle, so turn the lines to match. Switch to the Move tool, grab the rotation handle just outside a corner of the box, and turn it about 36° clockwise. Press Enter, then Cmd+D.
-
Keep the hatching on the lower half
The light comes from above, so only the lower half of each leaf is shaded.
Cmd-click the Holly Leaves thumbnail to select the leaf. Then pick the Rectangular Marquee, hold Shift and Option, and drag a box from just below the midrib down past the bottom of the leaf. Holding both keys keeps only where the two shapes overlap: the lower half of the leaf.
Choose Select → Inverse, press Delete to clear the hatching everywhere else, then Cmd+D. Choose Layer → Merge Down to put the hatching into Holly Leaves.
-
Outline the leaf and add the veins
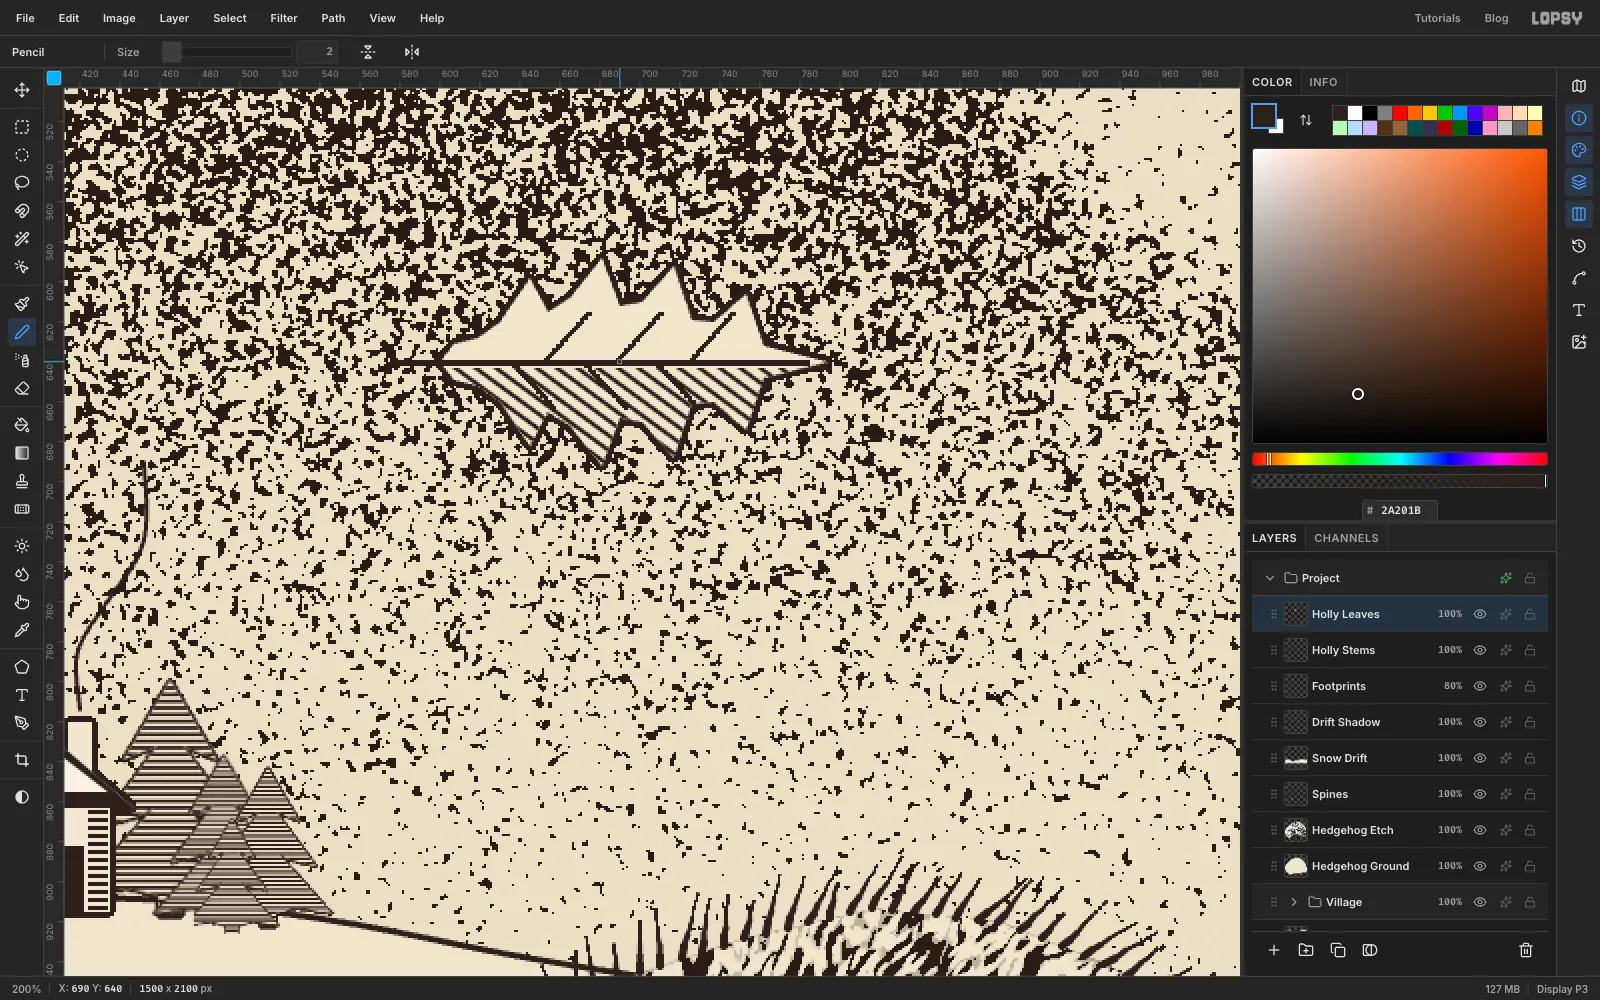
Give Holly Leaves a Stroke effect, Width 3 in ink, and click Rasterize Layer Style.
Set the foreground to ink and pick the Pencil at Size 3. Click a little left of the leaf's base and Shift-click at the tip for the midrib and stalk. At Size 2, add three short veins on each side, from the midrib out toward the spines. Shift-click again for each one.
-
Copy, scale and rotate the leaf
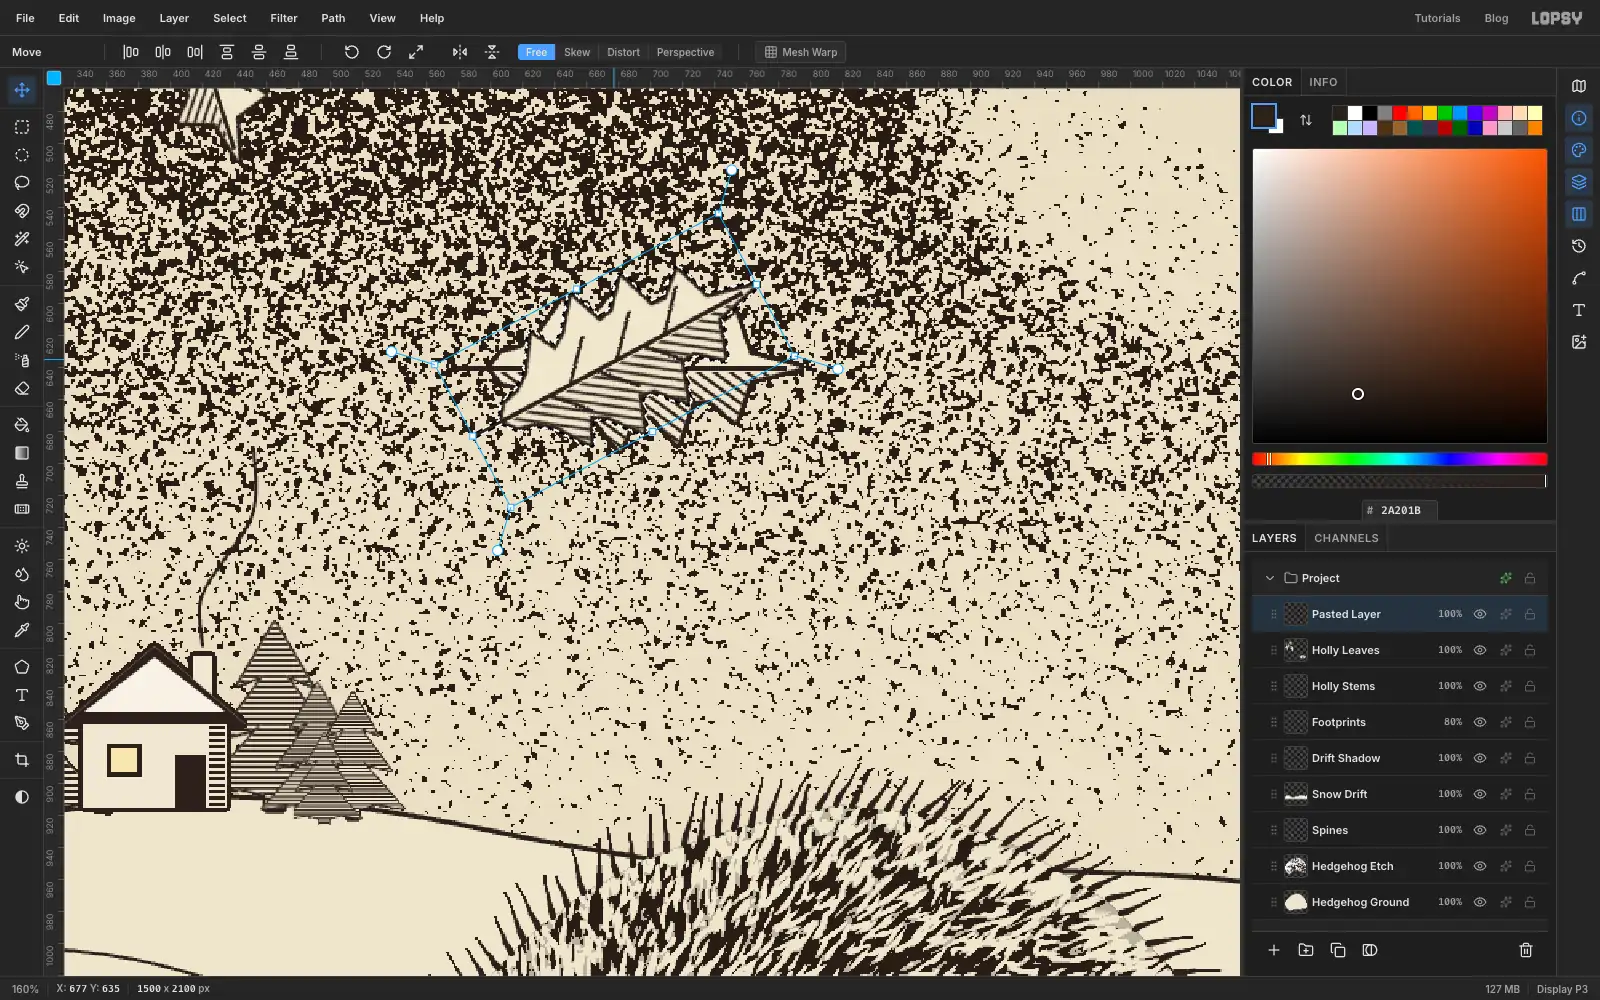
Each leaf on the sprigs is this one leaf, copied and turned. For each leaf:
- Click Holly Leaves. With the Rectangular Marquee, drag a box just around the master leaf and press Cmd+C, then Cmd+V.
- For about half the leaves, click Flip Horizontal in the options bar.
- Hold Cmd and drag the bottom-right corner handle to make the copy 55–90% of the master's size.
- Turn it with a rotation handle so its stalk points back to the stem.
- Press Enter, press Cmd+D, and drag it so its stalk touches the stem.
- Choose Layer → Merge Down.
-
Finish the sprigs
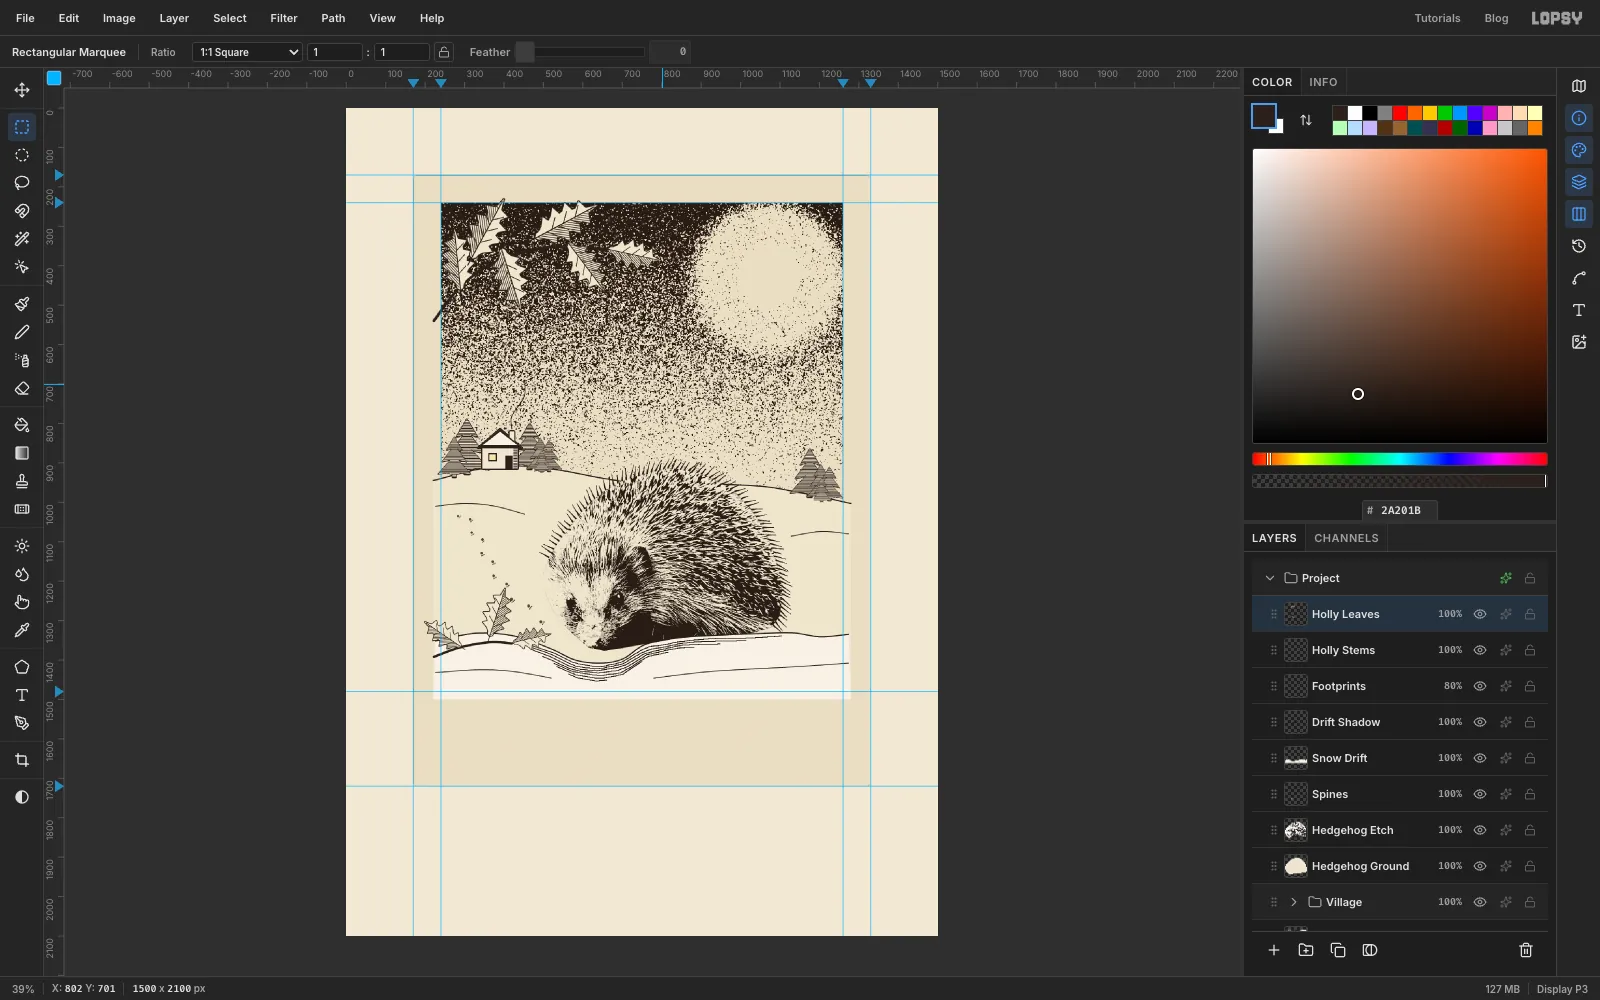
Place six leaves along the top stem, alternating sides and pointing in different directions. Put three on the bottom stem. Keep the left-most leaves just inside the picture's left edge.
When they're all placed, drag a rectangular marquee around the master leaf in the sky and press Delete.
-
Add the berries
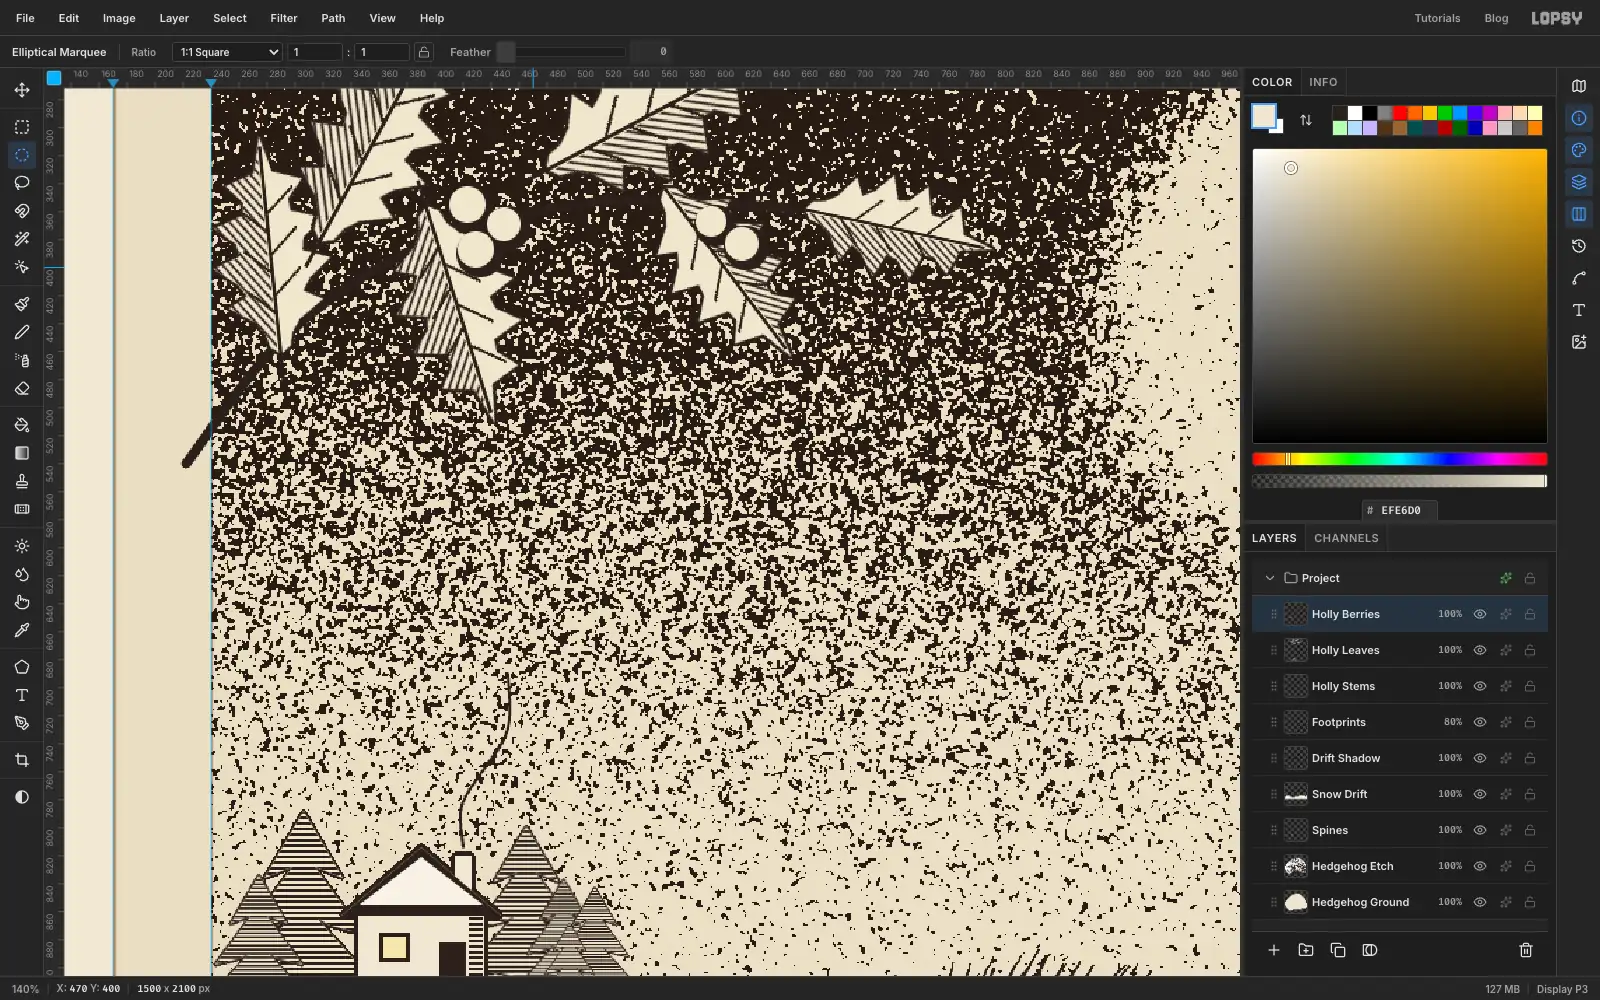
Add Layer and name it Holly Berries. With the Elliptical Marquee, hold Shift and draw berries about 30 px across. Put a cluster of three where the top stem forks, a pair further along it, and three on the bottom stem. Fill with ink and press Cmd+D.
For the round, shaded look, draw a slightly smaller circle on each berry, shifted 3 px up and to the left, again holding Shift for each one. Fill with . Each berry keeps a dark crescent on its lower right.
-
Group the holly and nudge it into place
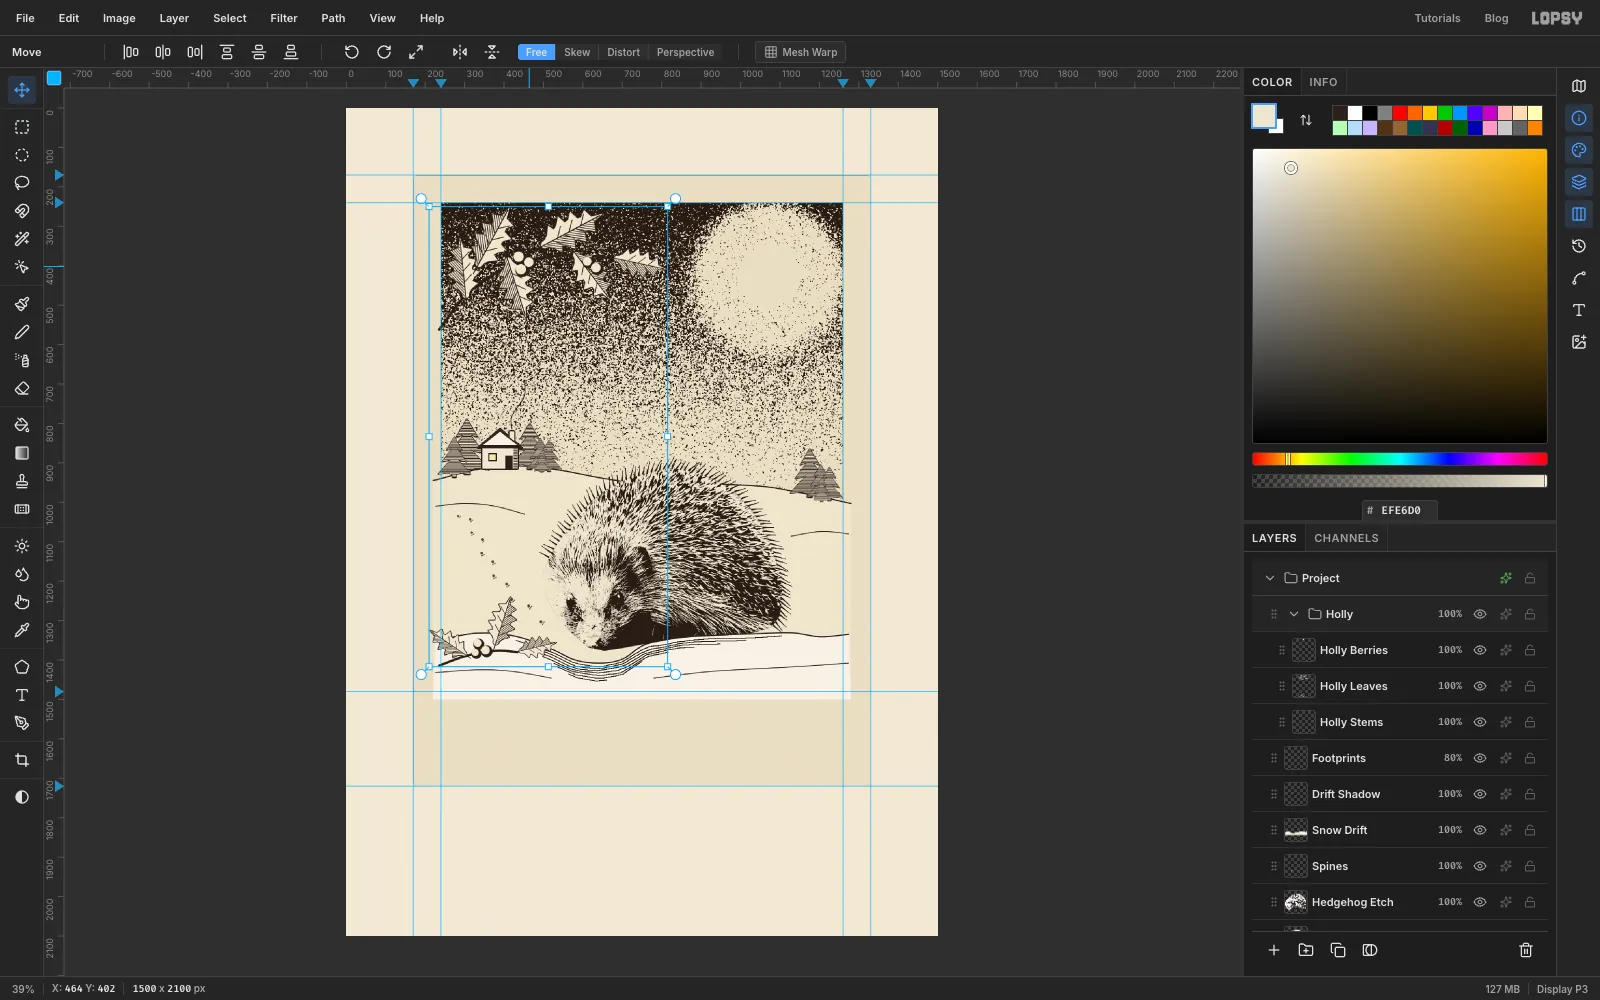
Click Holly Stems, Shift-click Holly Berries and choose Layer → Group Layers. Name the group Holly.
If the sprigs crowd the corner, click the group and use the Move tool to drag it a little down and to the right, so the top leaves clear the picture's top edge. Stems, leaves and berries move together. Collapse the group.
-
Clip the picture to the neat line
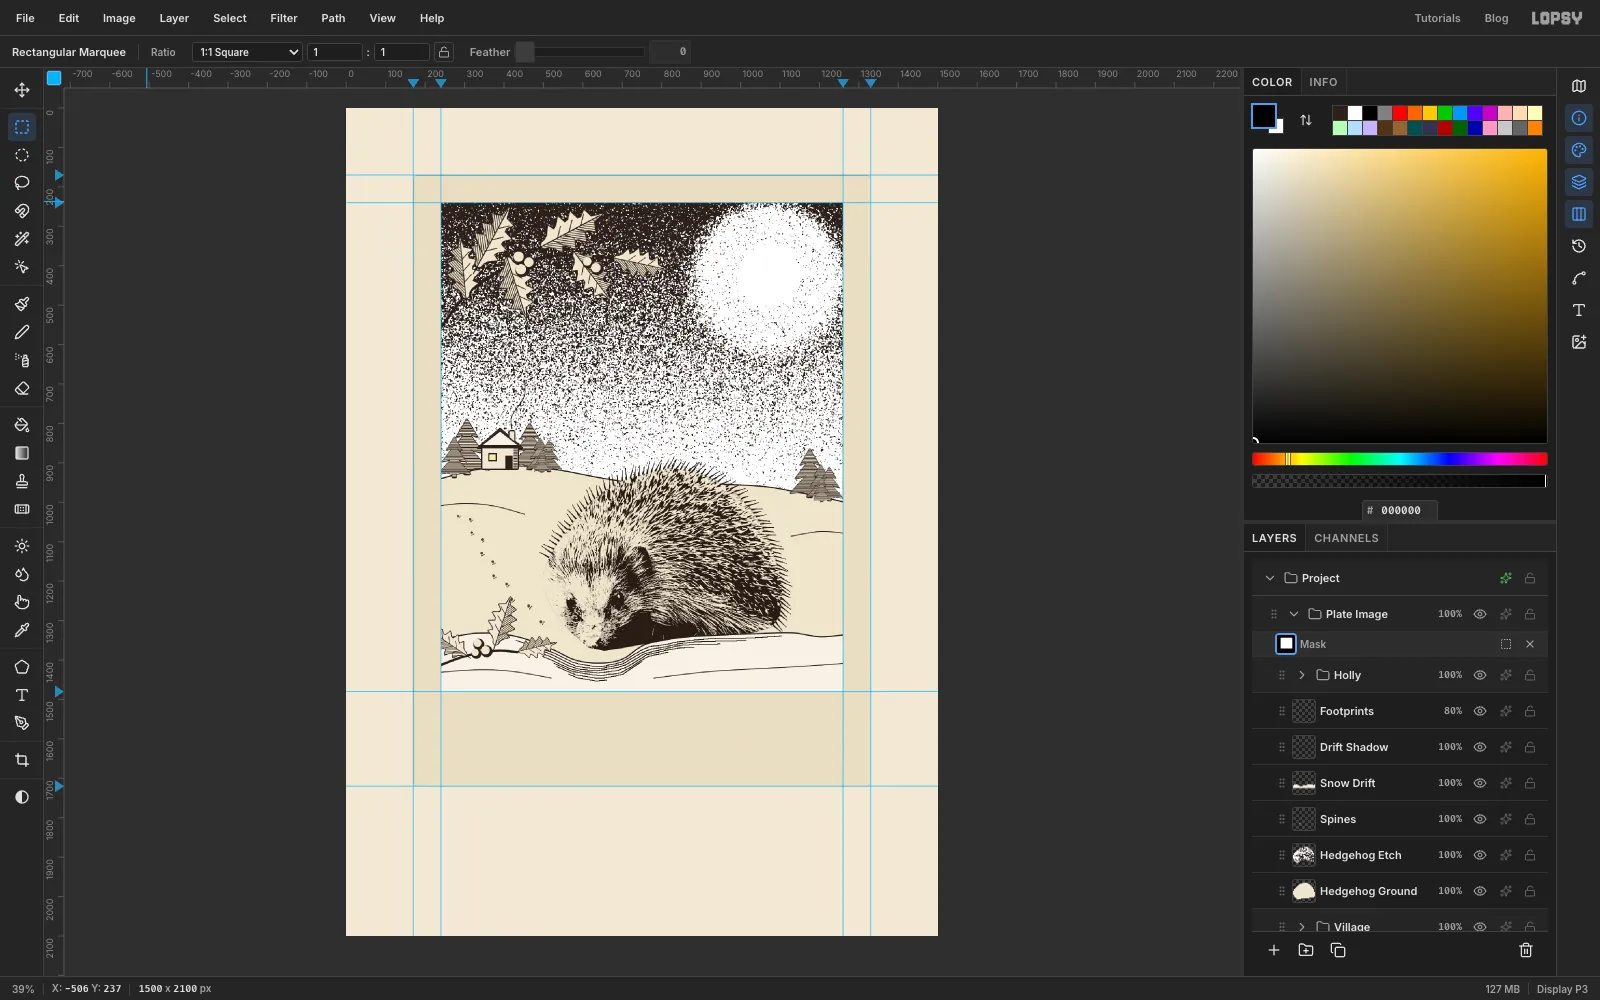
Several layers spill a little past the picture's edge. Click Aquatint Sky, Shift-click Holly and choose Layer → Group Layers. Name the group Plate Image.
With the group selected:
- Click Add Mask at the bottom of the Layers panel. A Mask row appears under Plate Image. Click its thumbnail to edit the mask.
- Select the picture area with the inner guides, choose Select → Inverse, set the foreground to black and choose Edit → Fill.
- Press Cmd+D, then click the group's name to stop editing the mask, and collapse the group.
A masked group is composited on its own before it's blended onto the plate. So the sky's clear grain now shows as bright, well-wiped paper rather than plate tone, which suits a moonlit sky.
-
Rule the neat line
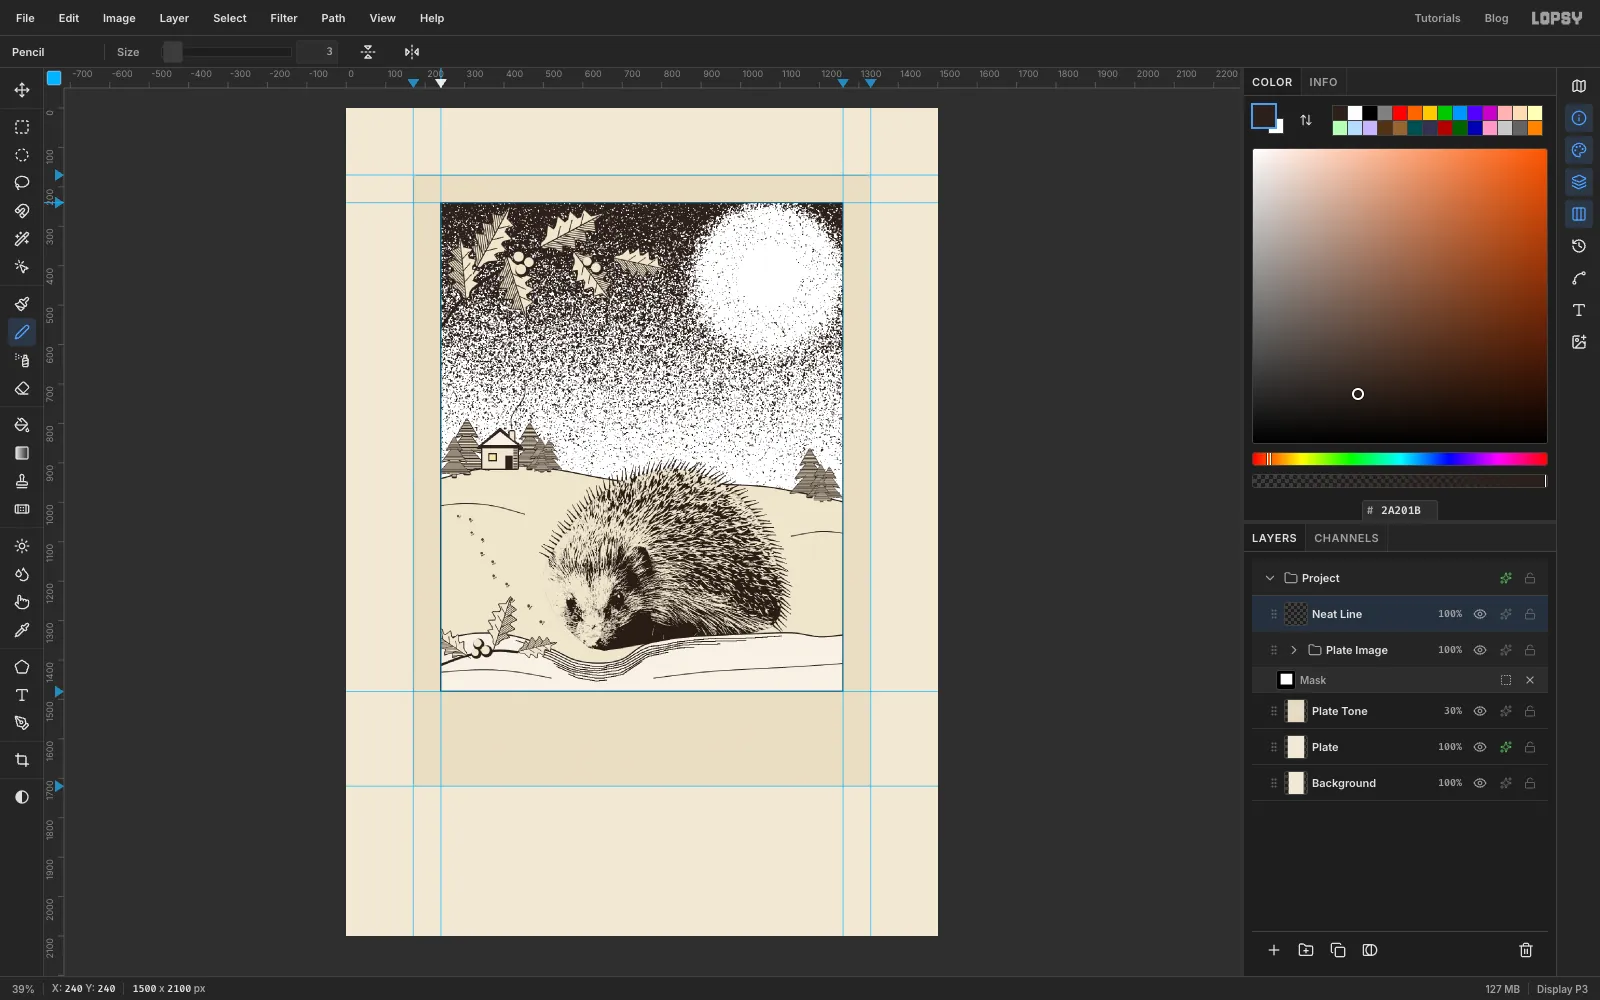
With Plate Image selected, Add Layer and name it Neat Line. Pick the Pencil at Size 3 in ink. Click on the top-left inner guide crossing, then Shift-click each of the other three corners in turn, and finally the first corner again.
-
Engrave Season’s Greetings
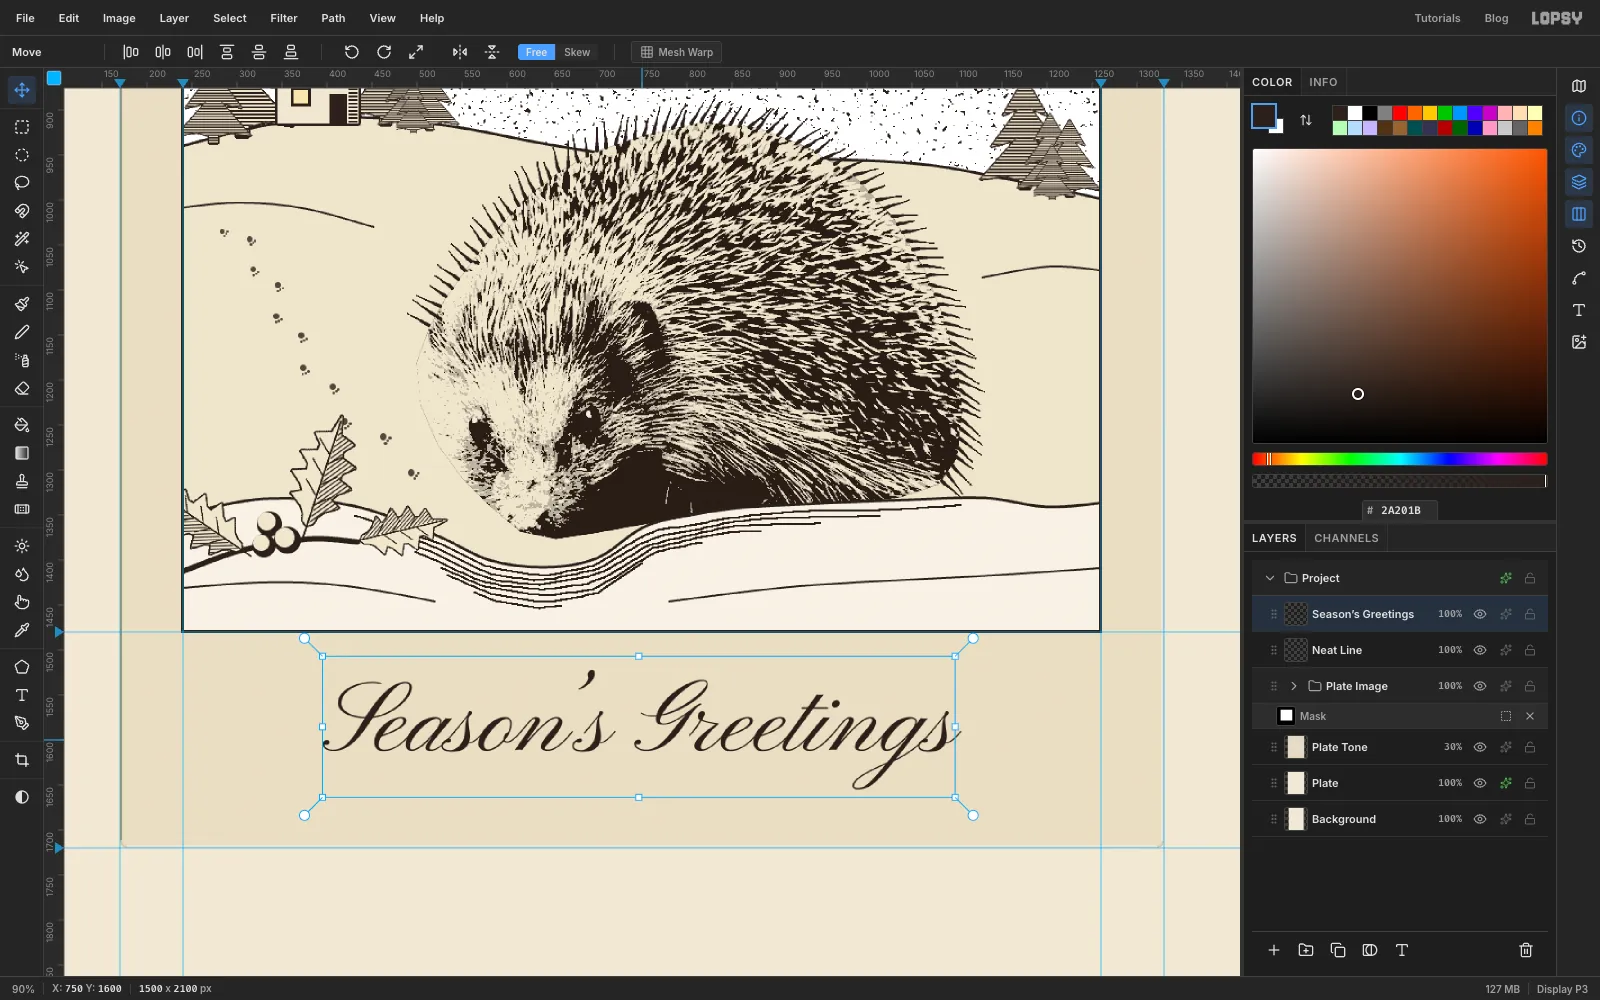
Pick the Text tool (T), choose Pinyon Script at 112 in ink, and click in the empty plate margin below the picture. Type Season’s Greetings with a curly apostrophe (’), which sits better in a script than a straight one. Press Tab to finish. Rename the layer Season’s Greetings.
Switch to the Move tool and click Align center horizontally in the options bar. Then nudge it up or down with the arrow keys until the words, including the tails of the *g*s, sit centred between the picture's bottom edge and the plate's bottom edge, a few pixels above the exact middle.
-
Select the sky for the first wash
Now the hand colouring. Every wash goes on its own layer set to Multiply, so it tints the ink and paper without covering them.
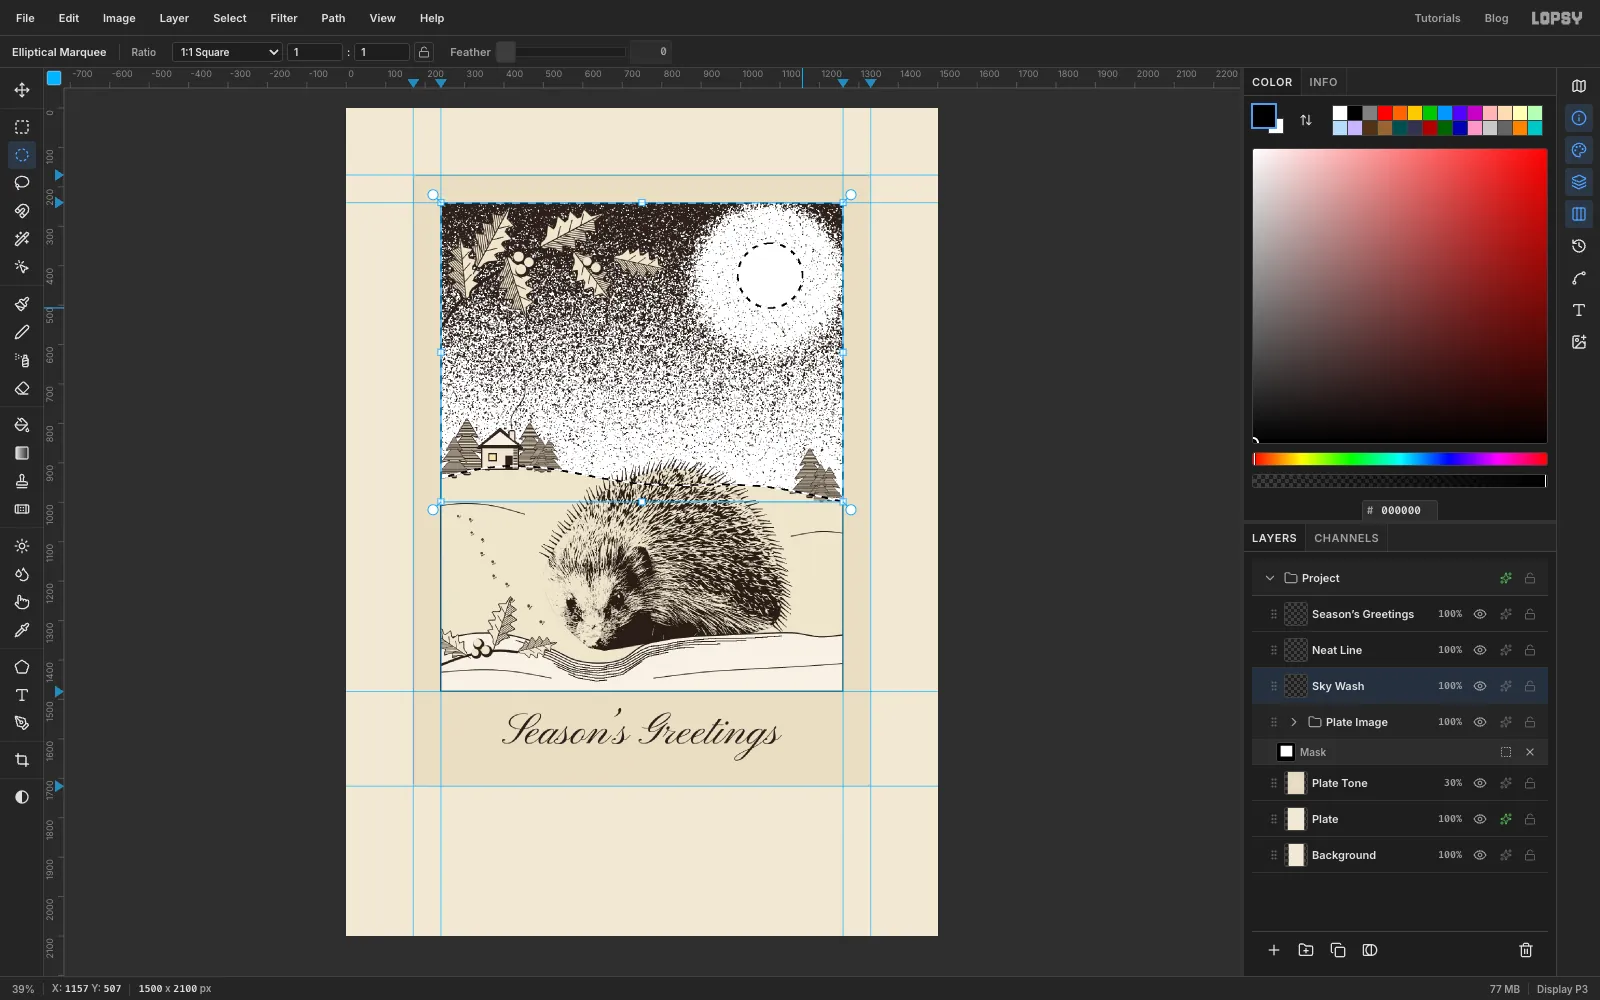
Click Plate Image, Add Layer and name it Sky Wash. With the Lasso, select the sky: along the top of the picture, down the right edge to the hill, back along the crest and up the left edge. Then:
- Pick the Rectangular Marquee, hold Shift and Option, and drag over the whole picture area. This trims anything you lassoed outside it.
- Pick the Elliptical Marquee, hold Option, and drag a circle over the moon to take it out of the selection.
-
Wash in the sky
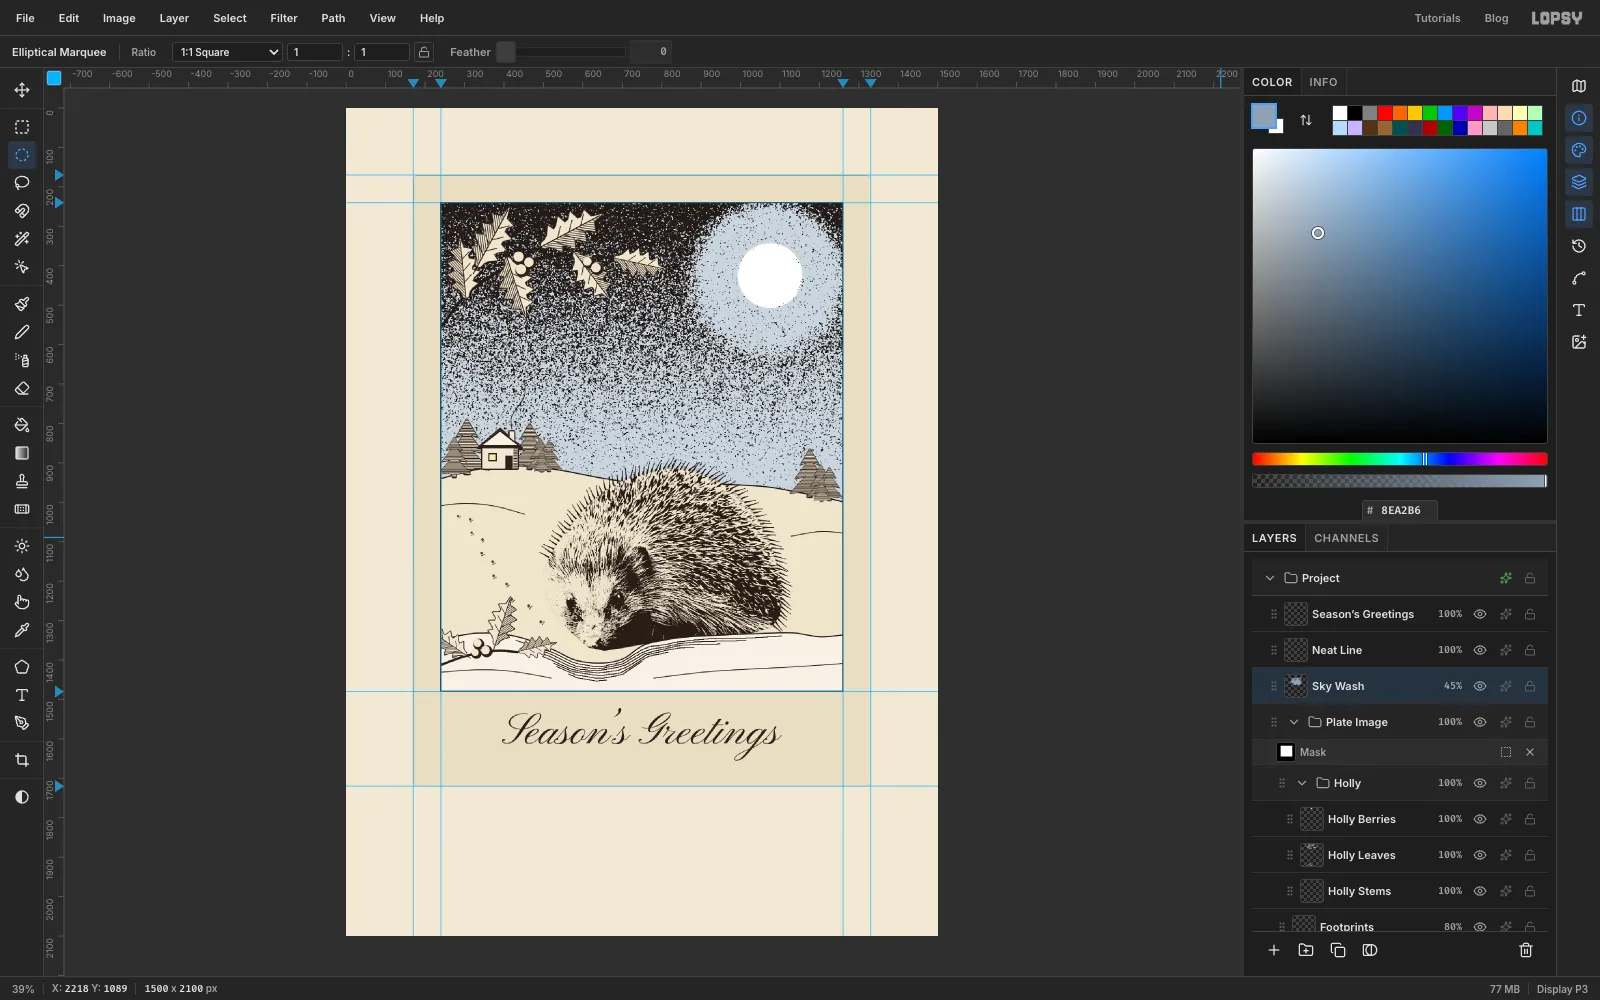
Fill the selection with sky wash .
The hedgehog's back, the holly and the cottage stand against the sky, and they shouldn't turn blue. Expand the groups so you can see those layers. Cmd-click the thumbnail of each of Hedgehog Ground, Holly Leaves, Holly Berries, Cottage and Firs in turn, and press Delete each time. Press Cmd+D, set the layer to Multiply and its opacity to 45%.
-
Tint the moon, holly and berries
Make each of these as a new layer set to Multiply. A hand colourist never hits the lines exactly, so each wash gets nudged a couple of pixels off with the arrow keys:
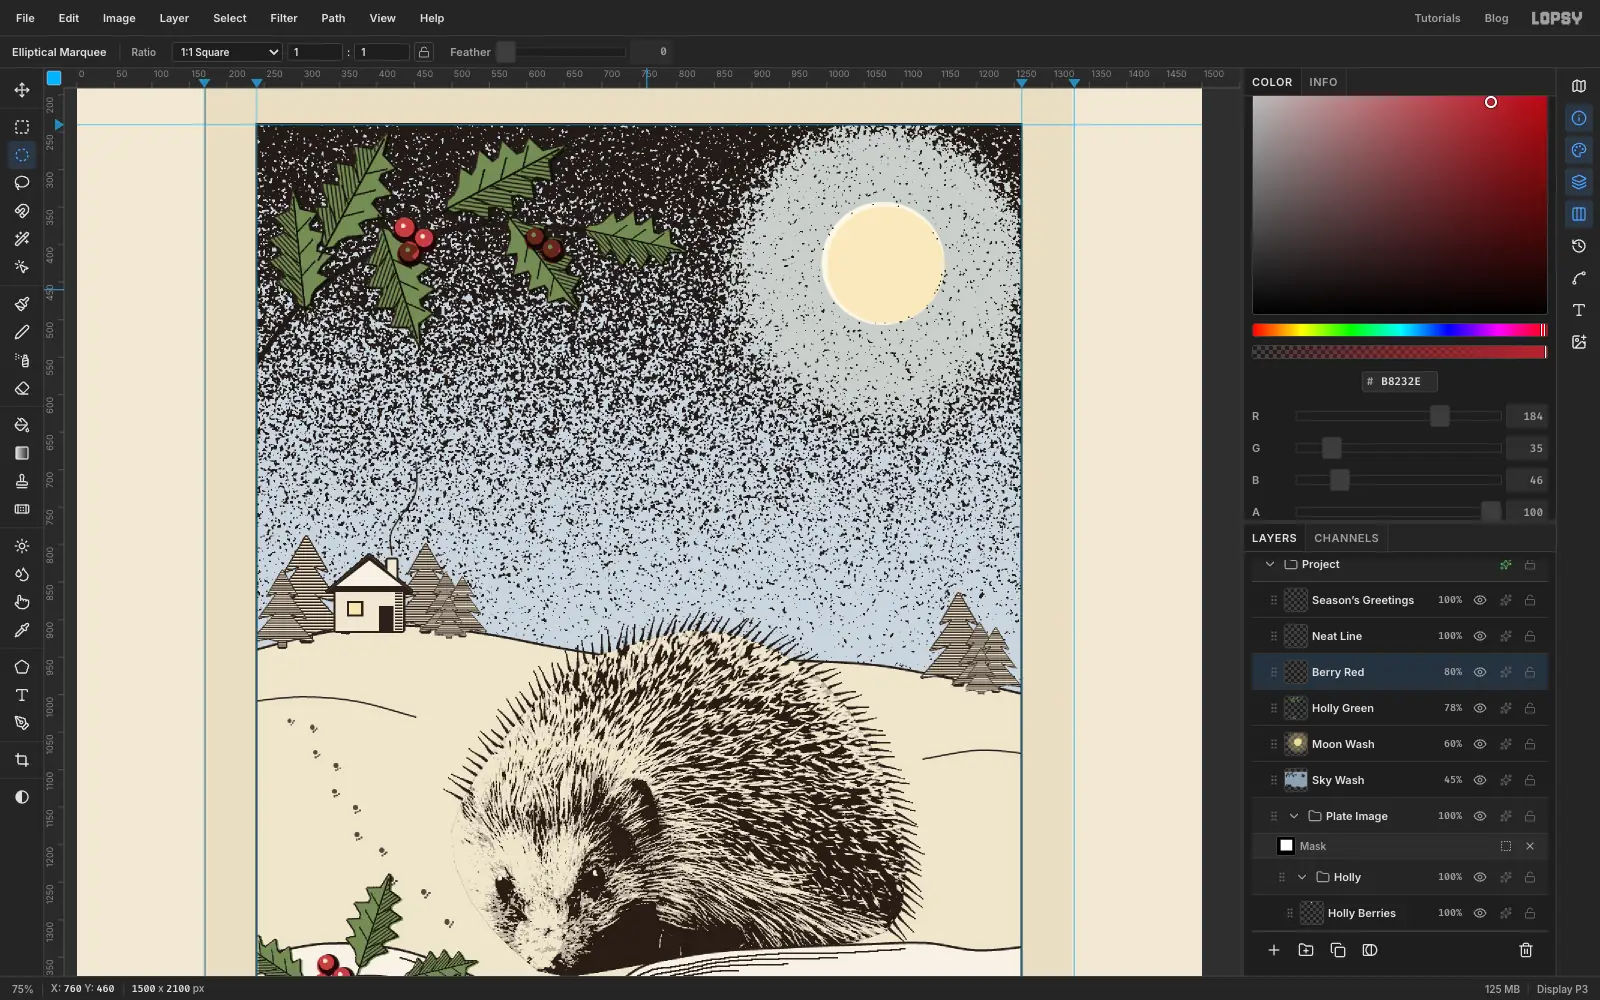
- Moon Wash. With the Elliptical Marquee, drag a circle about 420 px across around the moon and choose Select → Feather… with 60. Trim it to the picture with a Shift+Option rectangular marquee as before. Set the foreground to moon , lower the A value in the Color panel to 35, and fill. Then put A back to 100, select the 156 px moon disc again and fill. Set the layer to 60% and nudge it 3 px right and 2 px down.
- Holly Green. Cmd-click the Holly Leaves thumbnail (expand the groups to see it), trim to the picture, fill with , set 78%, and nudge it 2 px right and 1 px down.
- Berry Red. Cmd-click Holly Berries, trim to the picture, fill with , set 80%, and nudge it 2 px left and 1 px down. Then, with the Elliptical Marquee and Shift held, draw a dot about 7 px across on the upper left of each berry and press Delete, so a speck of paper shines through.
-
Tint the hedgehog and shade the snow
Two more Multiply washes:
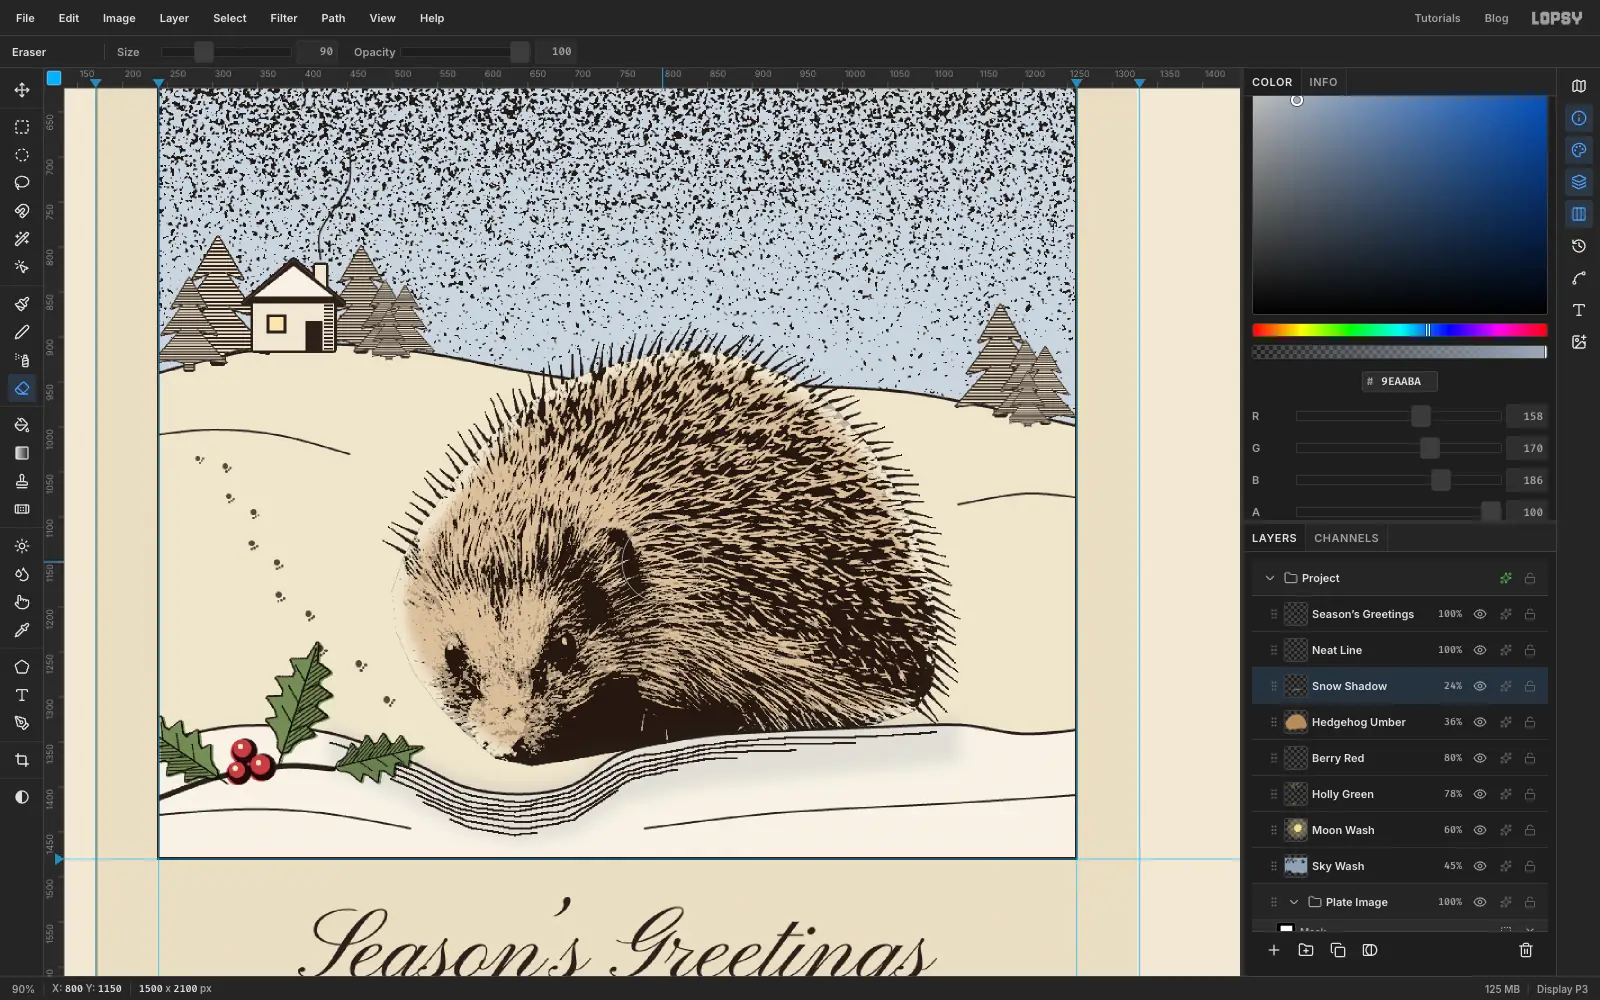
- Hedgehog Umber. Cmd-click Hedgehog Ground, choose Select → Shrink… with 14 and Select → Feather… with 10, fill with and set 36%. Shrinking the selection keeps the wash off the pale fur round the edge of the face, so the cheek and muzzle stay light.
- Snow Shadow. With the Lasso, select a band under the drift's edge, from left of the nose to the right of the hedgehog, about 50 px deep. Feather it 16, fill with and set 24%.
-
Light the window and group the washes
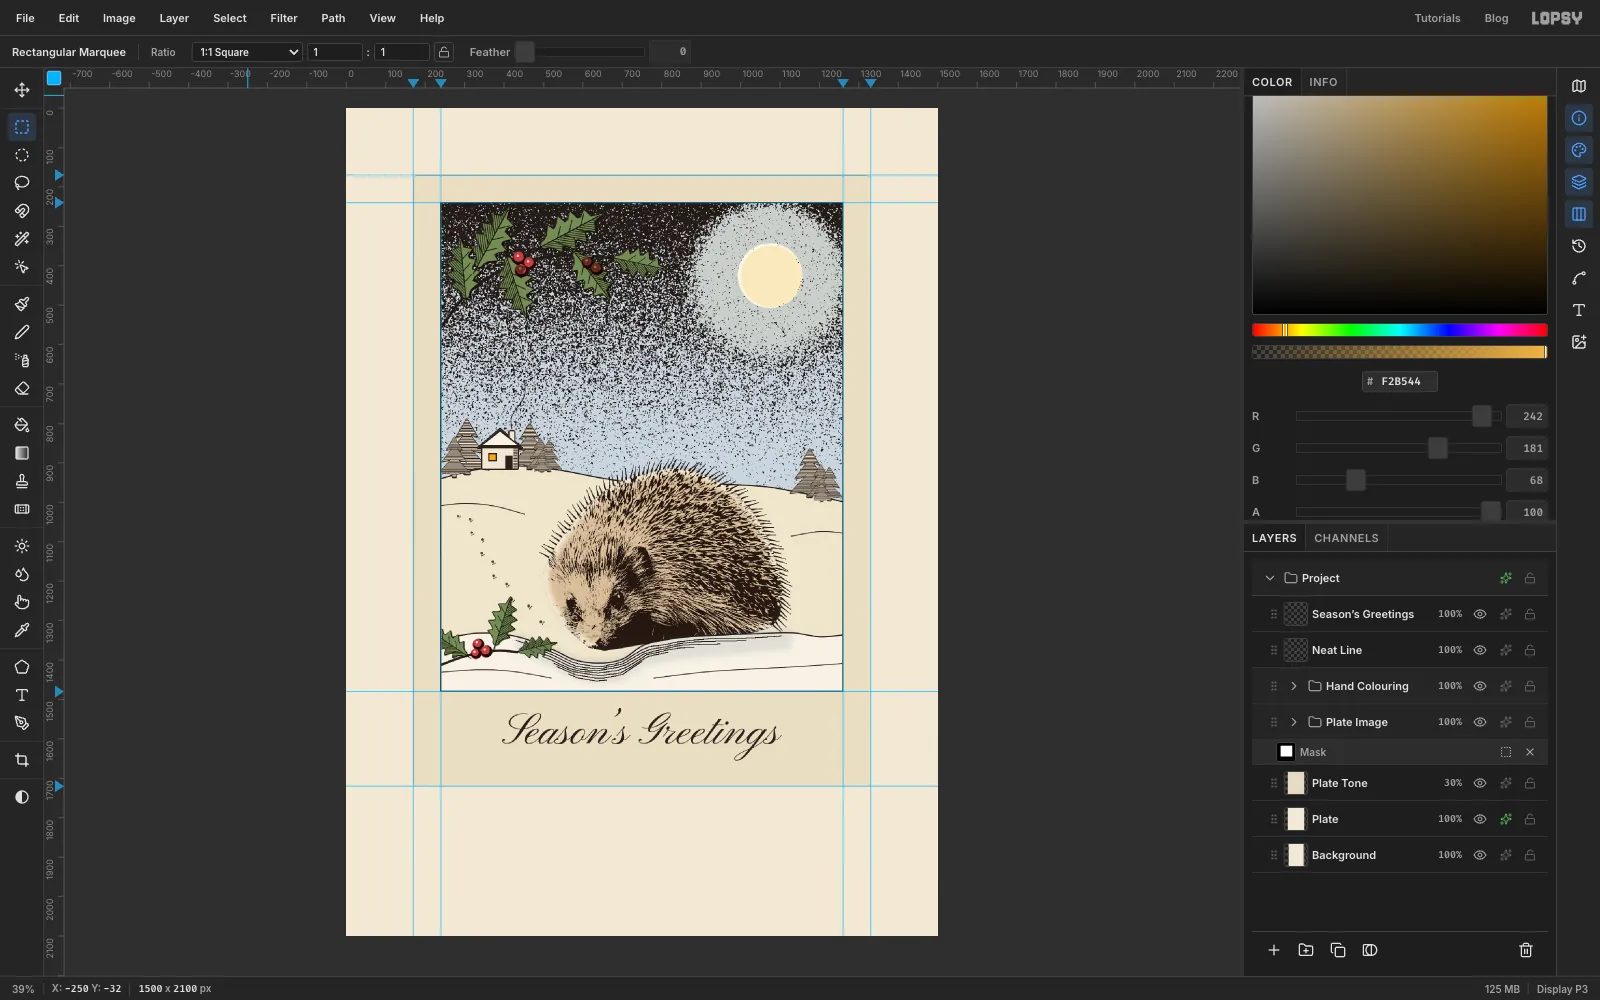
Add Layer, name it Lamplight and set it to Multiply. With the Rectangular Marquee, drag over the pale square of the window and fill it with .
Click Sky Wash, Shift-click Lamplight and choose Layer → Group Layers. Name the group Hand Colouring.
-
Spray snowflakes onto black
On a real plate the flakes would be stopped out before the aquatint bite, so they print as crisp paper-coloured dots, not soft blobs. Make them on black first:
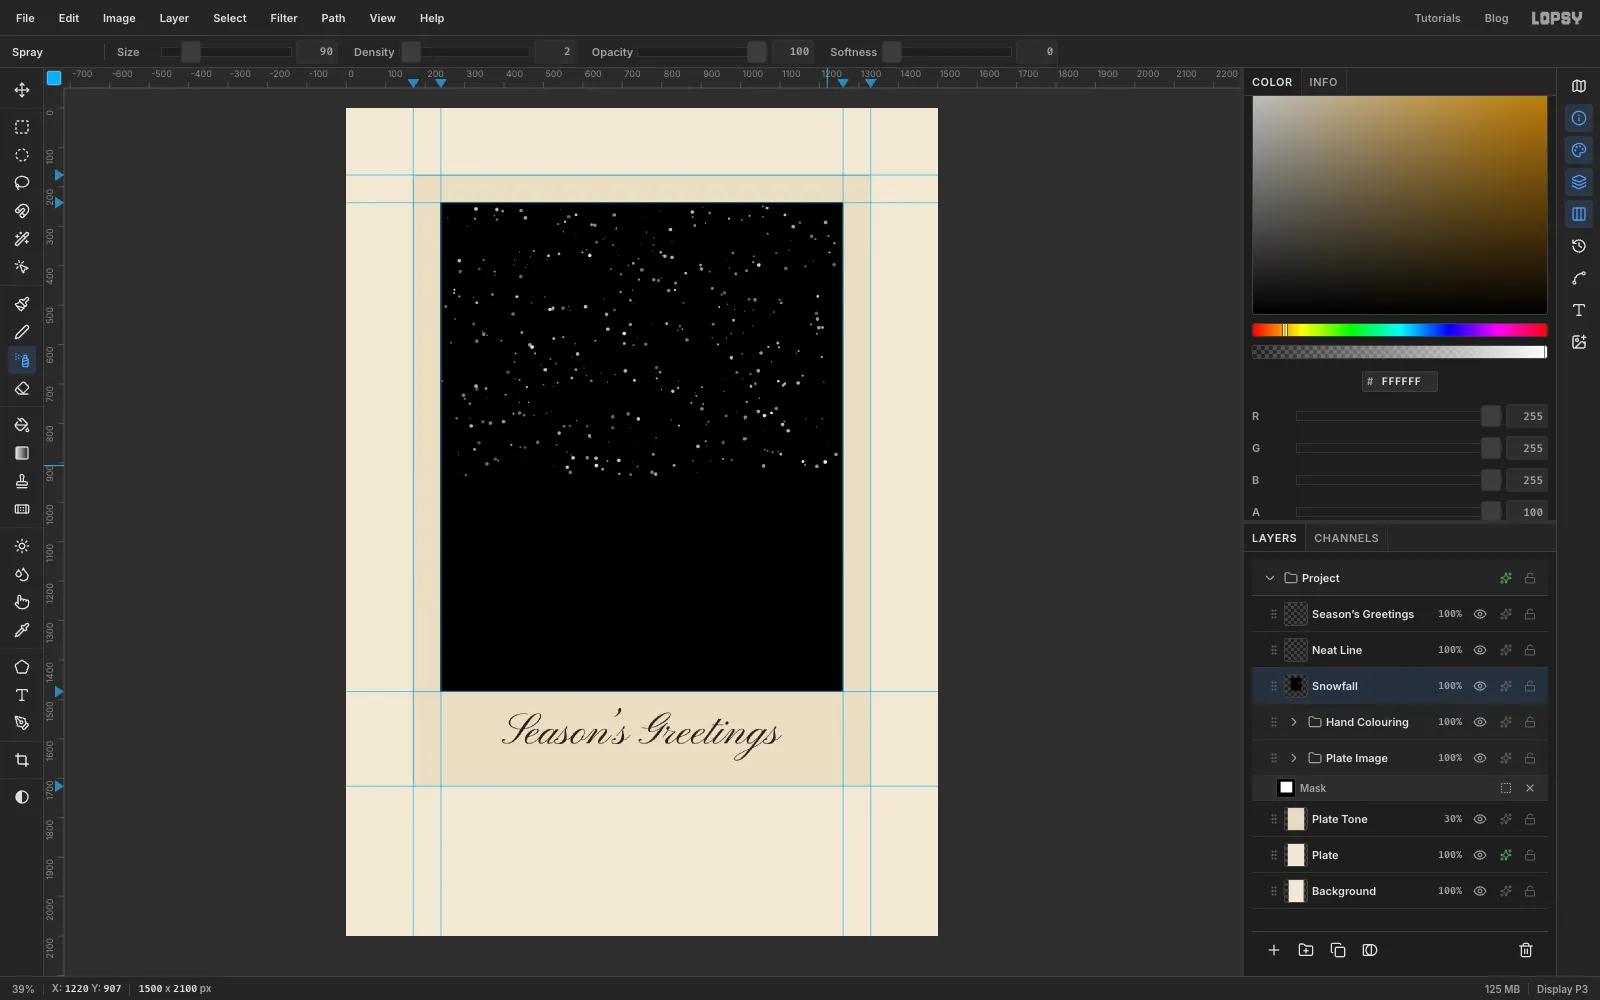
- Click Hand Colouring, Add Layer and name it Snowfall.
- Select the picture area and fill it with black. Leave the selection active so the spray stays inside it.
- Pick the Spray tool (J) in white with Size 90, Density 2, Opacity 100 and Softness 0.
- Drag it across the sky in seven loose wavy passes, working down from the top to just above the hill.
- Press Cmd+D and choose Filter → Threshold… at 110. Every faint dot snaps to pure white or vanishes.
-
Turn them into paper-white flakes
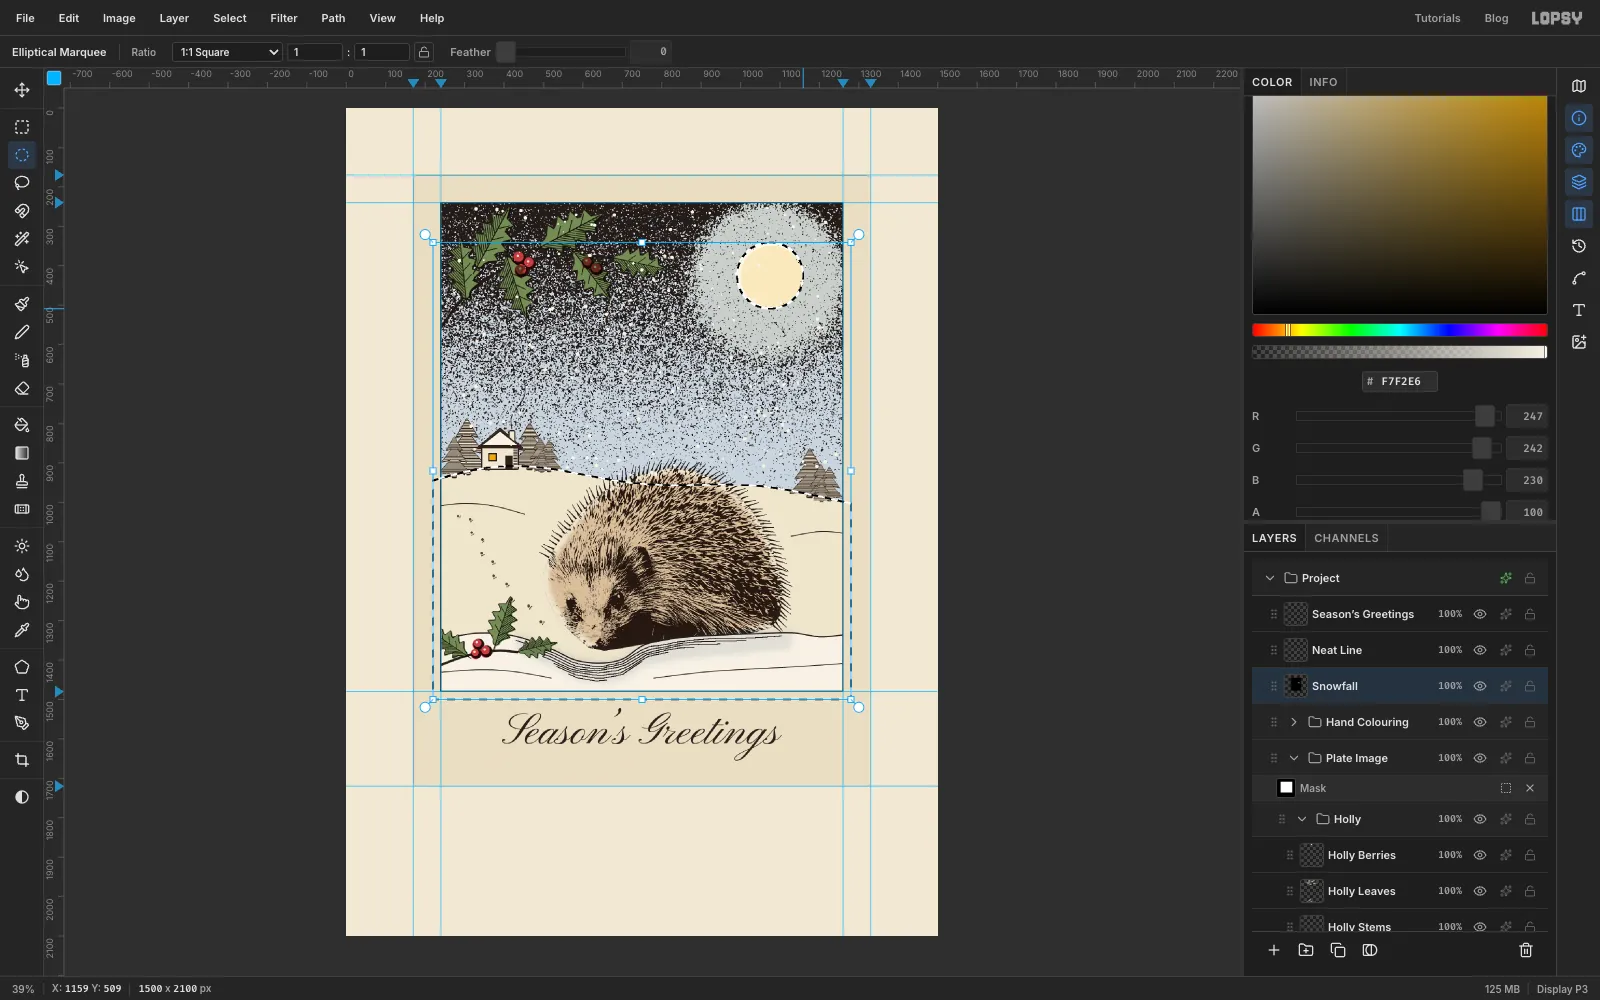
- Add Layer, select the picture area, fill it with snow and press Cmd+D.
- Set this layer to Darken and choose Layer → Merge Down. Darken keeps the darker colour, so the white flakes become snow-coloured and the black stays black.
- Set Snowfall to Lighten. The black now disappears, and only the flakes show.
Snow only falls in the sky. Expand Plate Image and Cmd-click the Snowy Hill thumbnail to select the hill and everything below it. With the Elliptical Marquee, hold Shift and add a circle over the moon. Click Snowfall and press Delete. Then Cmd-click Hedgehog Ground, click Snowfall and press Delete again, so no flakes sit on the hedgehog. Press Cmd+D and collapse the group.
-
Number, title and sign the print in pencil
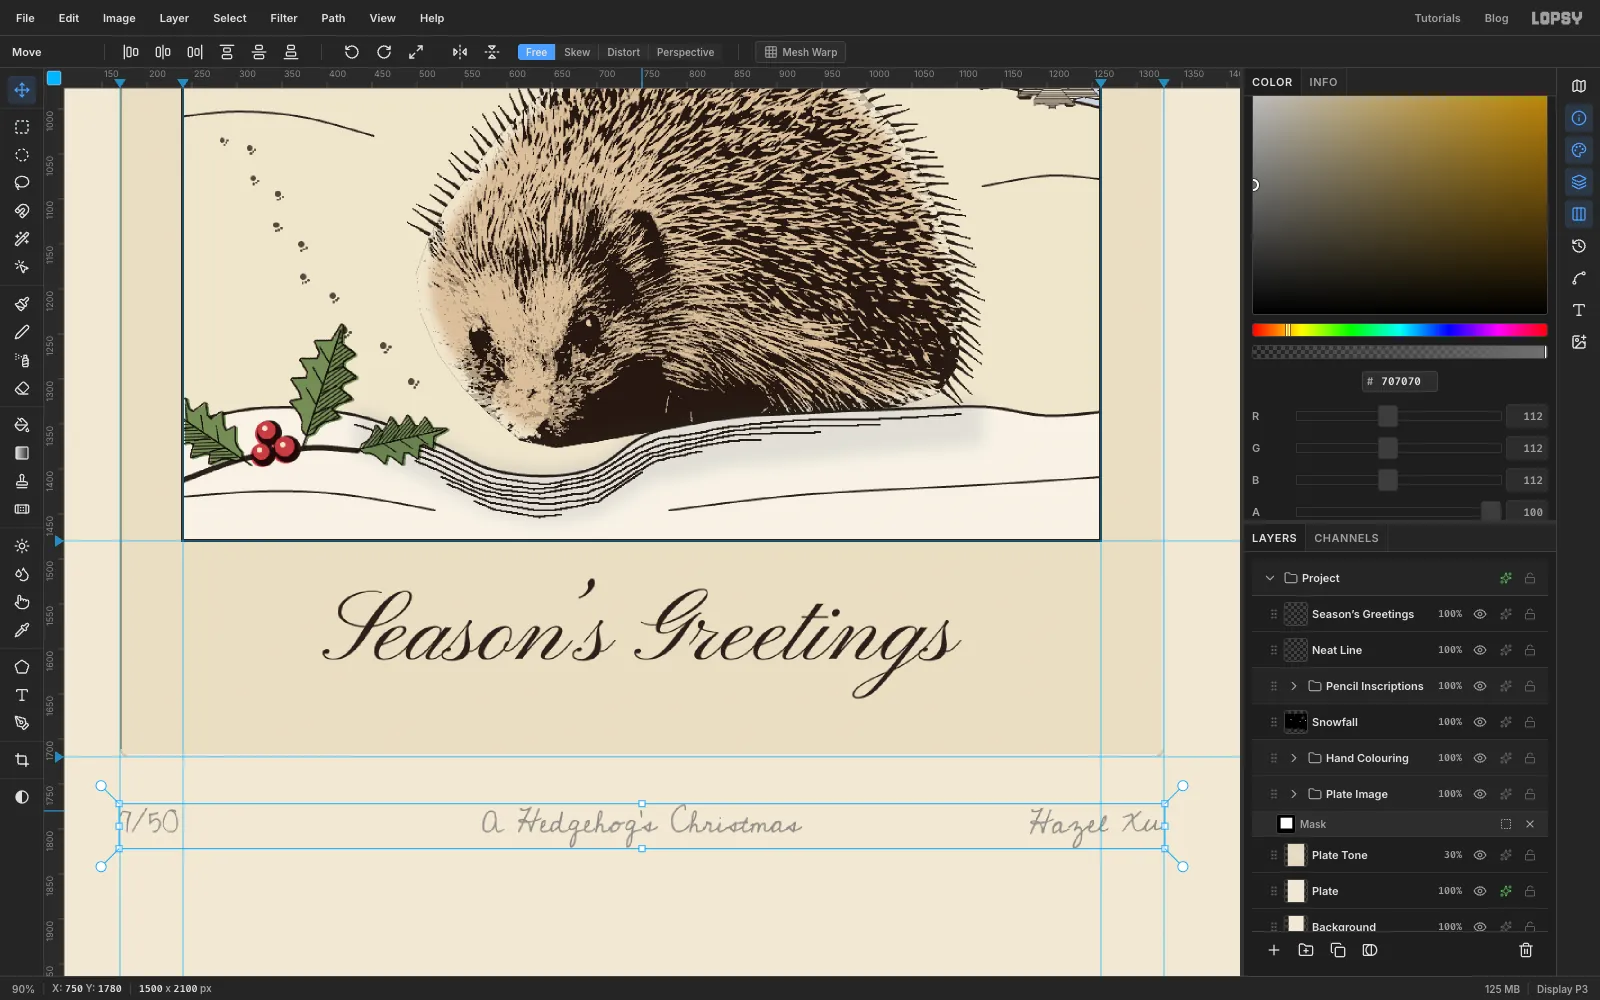
Printmakers sign below the plate mark in pencil: the edition number at the left, the title in the middle and the signature at the right. All three share one baseline.
With Snowfall selected, pick the Text tool with Cedarville Cursive at 34 in . Make three text layers about 50 px below the plate, clicking at the same height each time and clicking Snowfall again before each one:
- Type 7/50, press Tab and rename the layer Edition. With the Move tool, nudge it with the arrow keys until its left edge lines up with the plate's left edge.
- Type A Hedgehog’s Christmas, press Tab and rename it Title. Click Align center horizontally.
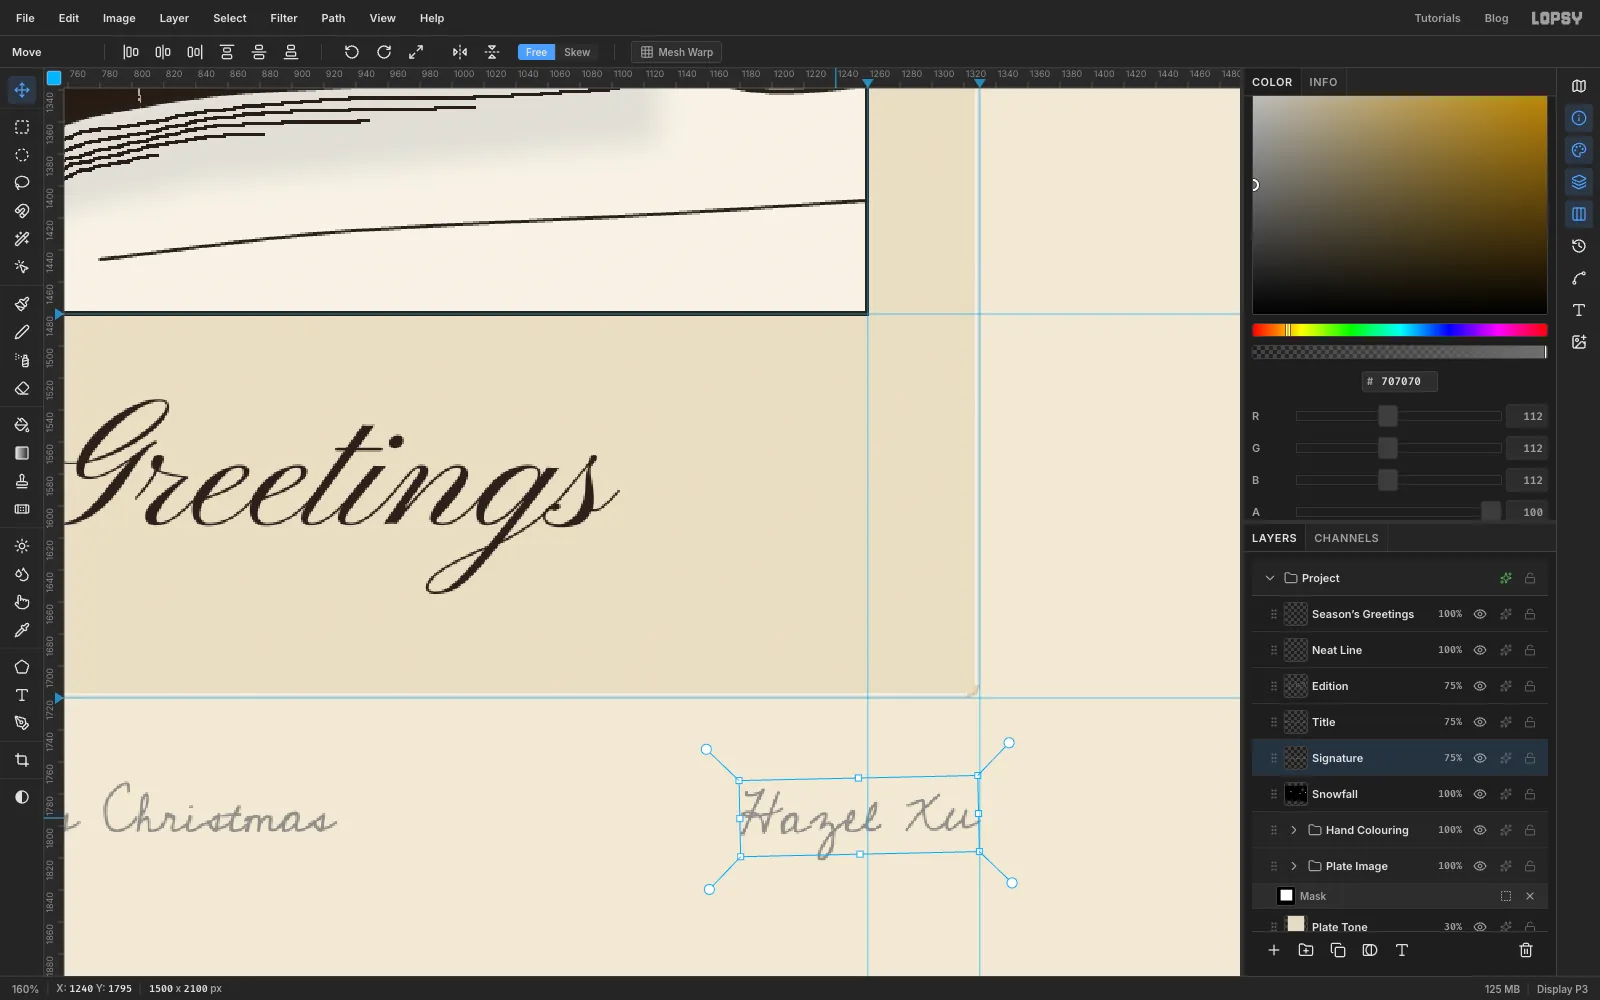
- Type Hazel Xu, press Tab and rename it Signature. Nudge it until its right edge lines up with the plate's right edge. Then tilt it about 1.5° anticlockwise with a corner rotation handle, as a hand would, and press Enter.
Set each layer's opacity to 75% so it reads as graphite rather than ink.
-
Group the inscriptions
Click Edition, Shift-click Signature and choose Layer → Group Layers. Name the group Pencil Inscriptions. The three lines stay live text, so you can still change the edition number later, and if you want them a little higher or lower you can move the whole group at once.
-
Add a paper grain and save
Collapse Pencil Inscriptions and click it, so the new layer goes on top of everything. Add Layer, name it Paper Grain and fill it with mid grey . Then:
- Choose Filter → Add Noise… with Amount 30 and Mono.
- Choose Filter → Gaussian Blur… with Radius 1.
- Set the layer to Overlay at 30%.
Overlay leaves mid grey invisible, so only the faint texture shows, over the paper, the ink and the washes alike.
Choose File → Save Project to keep every layer, then File → Export… for a PNG to print or send.