Make a Holographic Foil Restaurant Menu with a Layer Mask
Design a foil-stamped menu in Lopsy. Build one holographic sheet with Sunburst and a Gradient Map, then reveal type and a photo bun through a mask.
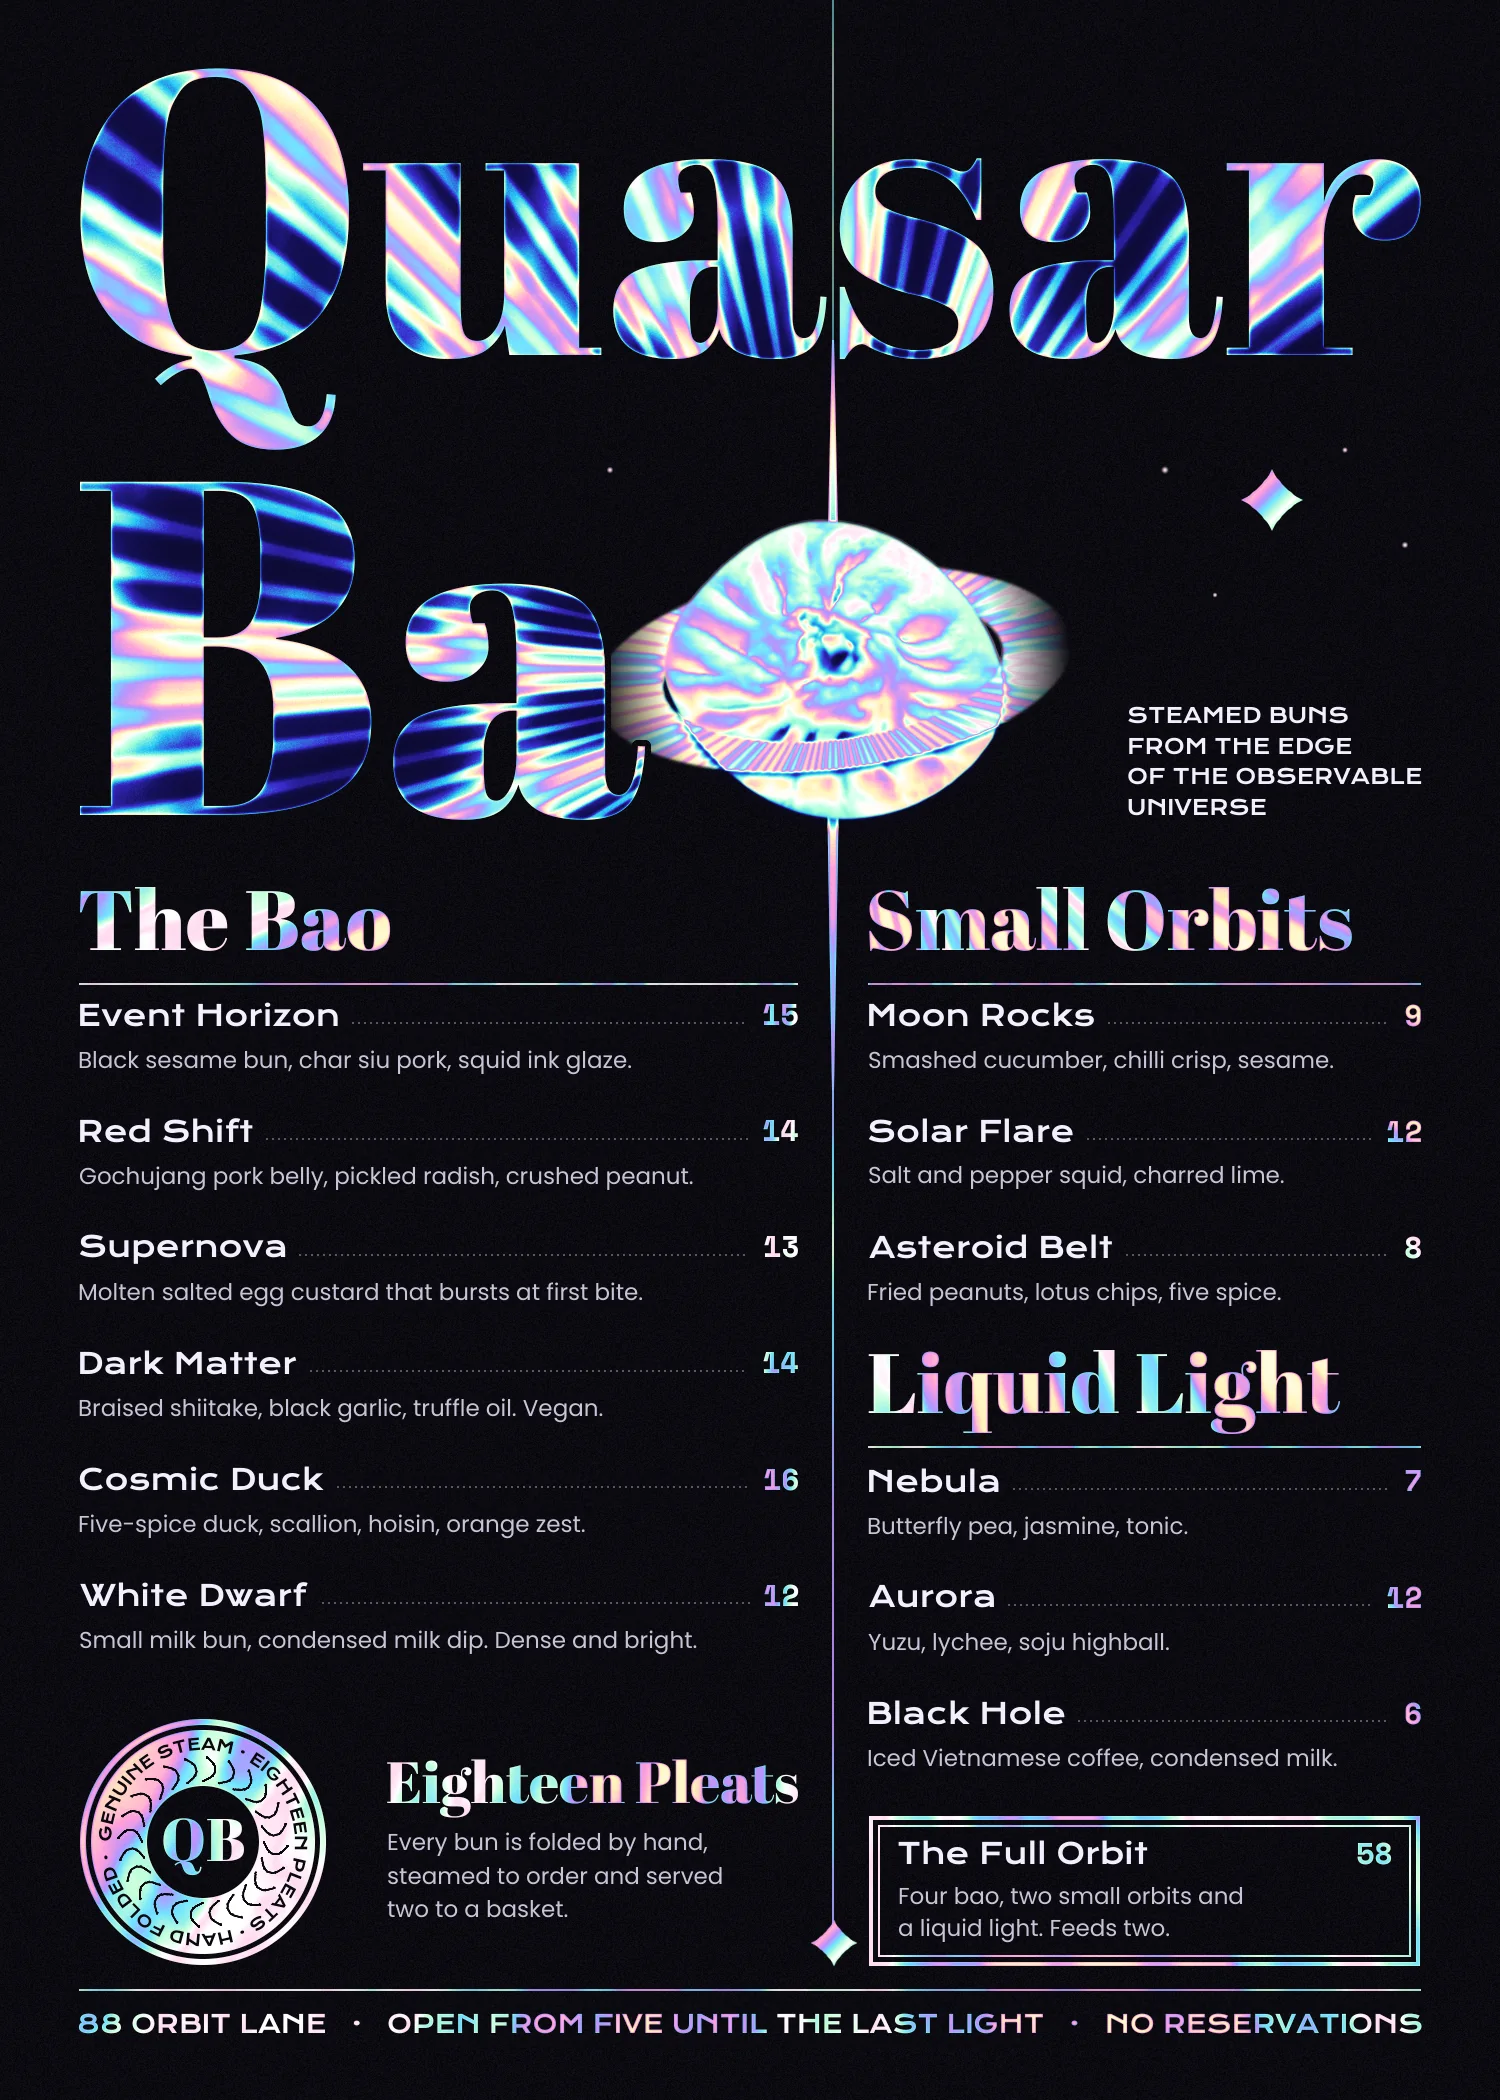
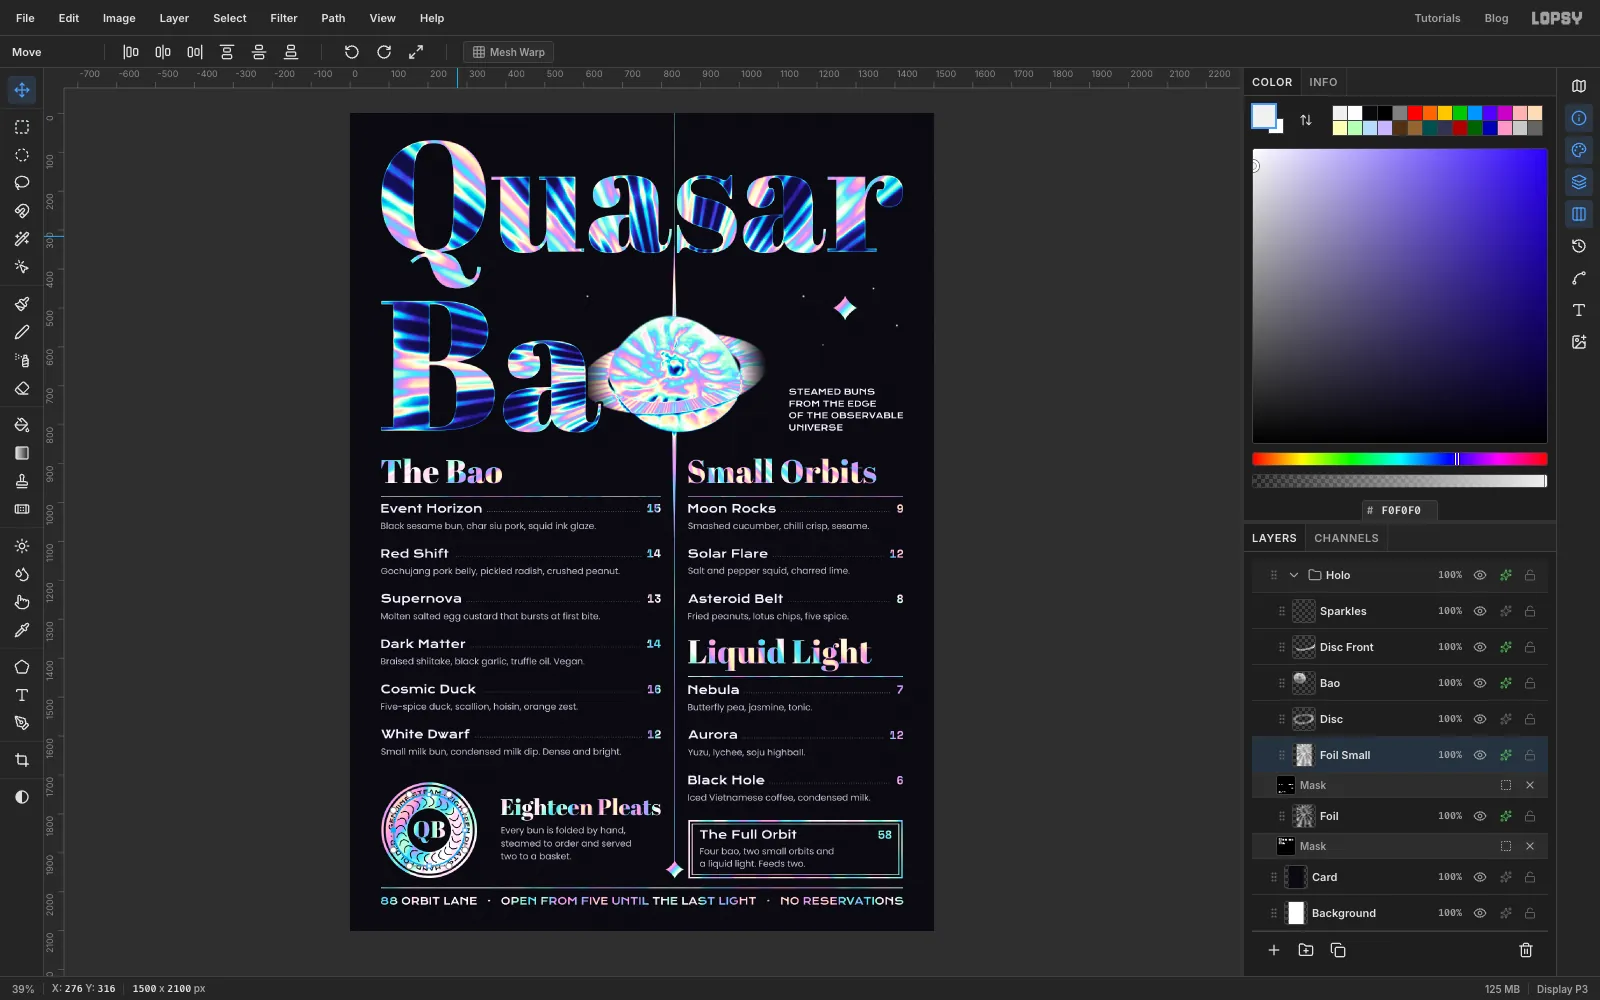
Print shops make holographic menus by stamping one sheet of foil through a plate, so every foil element is cut from the same shimmer. This tutorial works the same way. You'll make Quasar Bao, a 1500 × 2100 menu for a made-up steamed bun restaurant, where the bun is the "o" in "Bao" and also a quasar, with a disc around it and a jet of light that divides the two columns.
You build one grey sheet, turn it into foil with a Gradient Map on its group, and hide all of it behind a layer mask. The mask is your printing plate: wherever it's white, foil shows. The bun is a real photo that goes through the same Gradient Map, so it looks stamped from the same material.
The bun comes from a public domain (CC0) photo on Wikimedia Commons, Baozi as a fast food by Cartonfox. Save it and crop it to about 850 px wide around the front bun, without scaling it, or use any photo of a pleated bun seen from slightly above.
The fonts are free Google Fonts:
- Abril Fatface for the title and section headings
- Krona One for dish names, the tagline, the footer and the seal
- Poppins for descriptions
- Space Mono Bold for prices
The palette:
-
Card
-
Dish names
-
descriptions
-
leaders
-
Foil darks
-
Foil colours
-
Foil highlights
A few habits will save you trouble:
- Check the tool before you drag. Transform handles only move pixels with the Move tool, so press V first. With a marquee tool the same handles resize just the selection outline.
- Use the status bar for positions. It shows the cursor's X and Y at the bottom left, so glance at it whenever a step gives a position.
- Close the effects drawer when you're done. It sits over part of the canvas and catches clicks.
- Click a raster layer before you make new text. If a text layer is active, changing the font or size restyles that layer. New text also picks up the last font, weight and spacing, so set them each time.
- Set the foreground before you fill. Most steps below say which colour to use, because it changes often.
-
Set up the black card
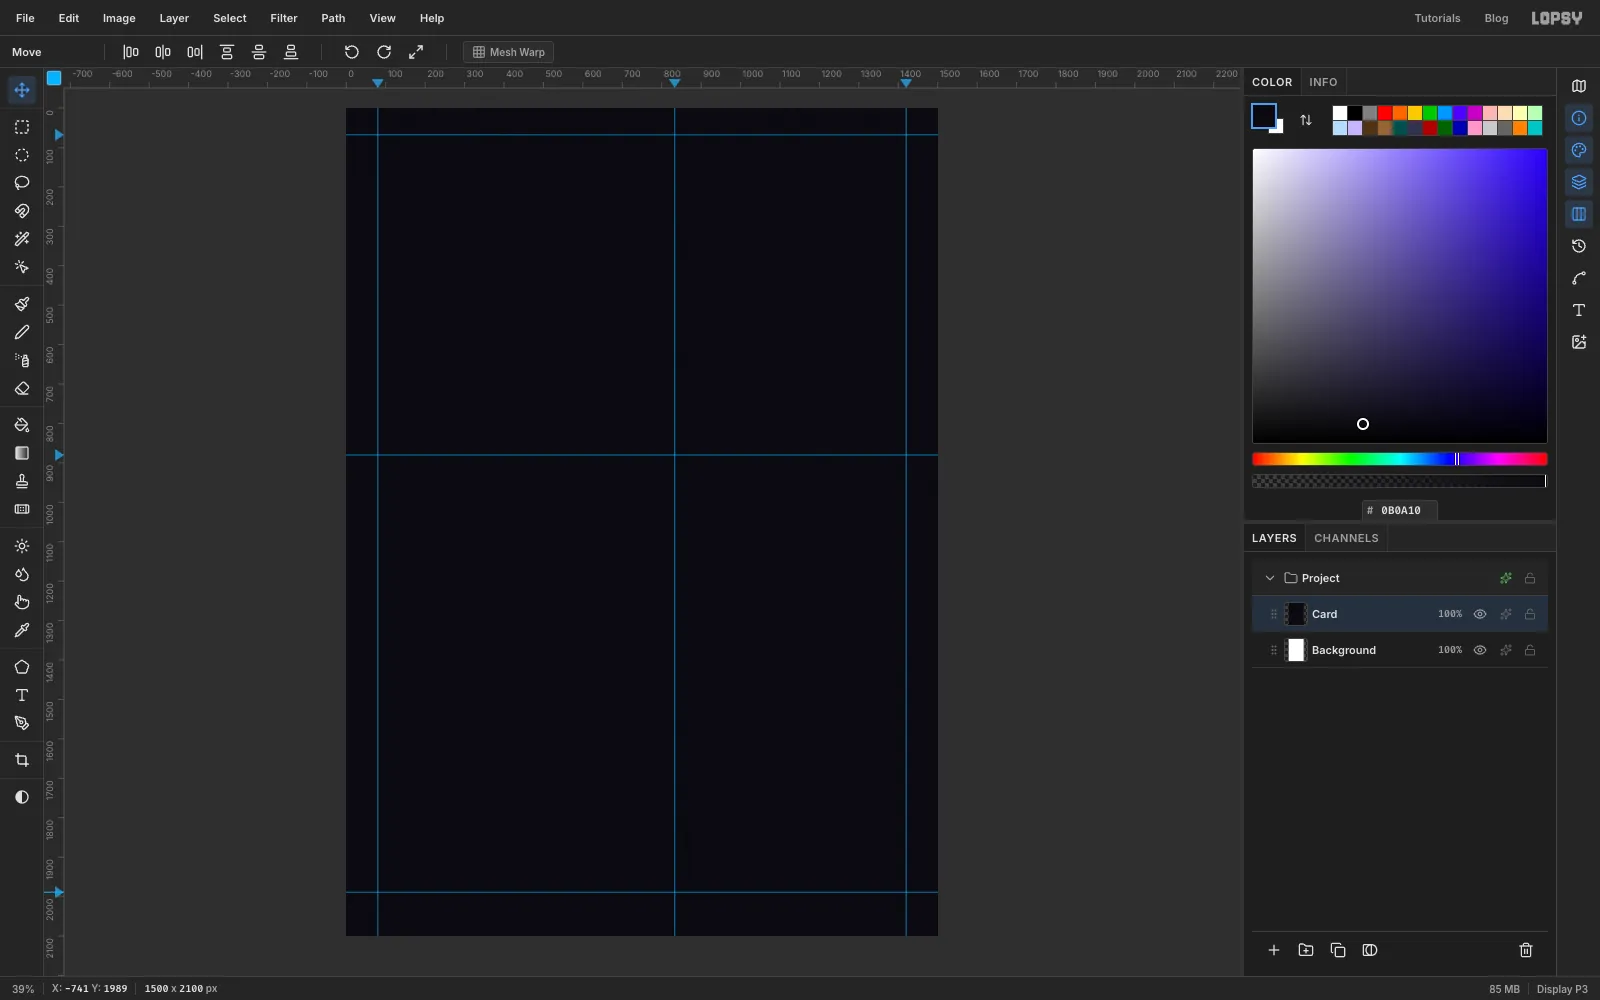
Choose File → New, enter 1500 × 2100 pixels and click Create. The document starts with a white Background and an empty layer above it. Double-click the empty layer's name and rename it Card.
Type into the Color panel's hex field and choose Edit → Fill. Then run Filter → Add Noise with Amount 11 and Mono selected. You can barely see the noise, but it gives the black the tooth of real card stock.
Click the top ruler to drop vertical guides at x = 80, 833 and 1420, and click the left ruler for horizontal guides at y = 68, 880 and 1989. The outer vertical guides are your margins. The one at 833 is where the bun and the jets will sit.
-
Build the layers and render clouds
Next you'll stack three groups. New Group lands directly above the active layer, so build them from the top down, always starting from Card:
- Click Card, click New Group and name it Menu. Click Add Layer and name the new layer Menu base.
- Click Card again, click New Group and name it Plate. Add a layer inside it called Plate base.
- Click Card again, click New Group and name it Holo.
From top to bottom you now have Menu, Plate, Holo, Card and Background. Menu holds normal type. Plate holds white artwork for the mask. Holo holds the foil.
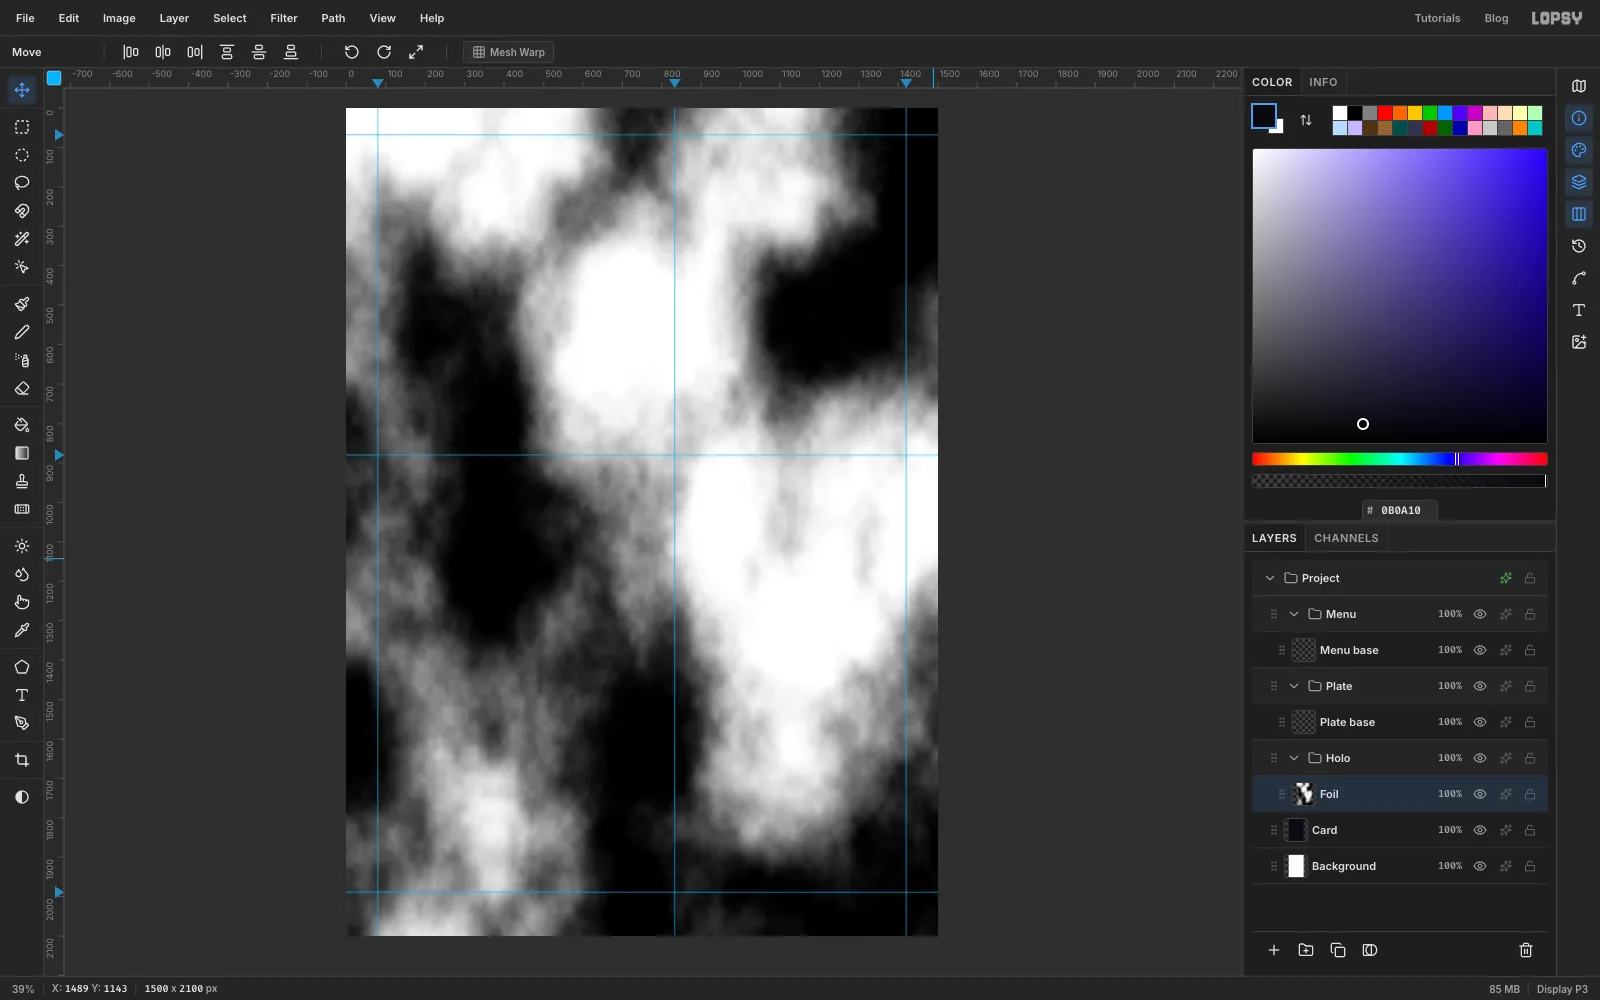
With Holo active, click Add Layer and name it Foil. Run Filter → Clouds with Scale 4.
-
Solarize the clouds into ripples
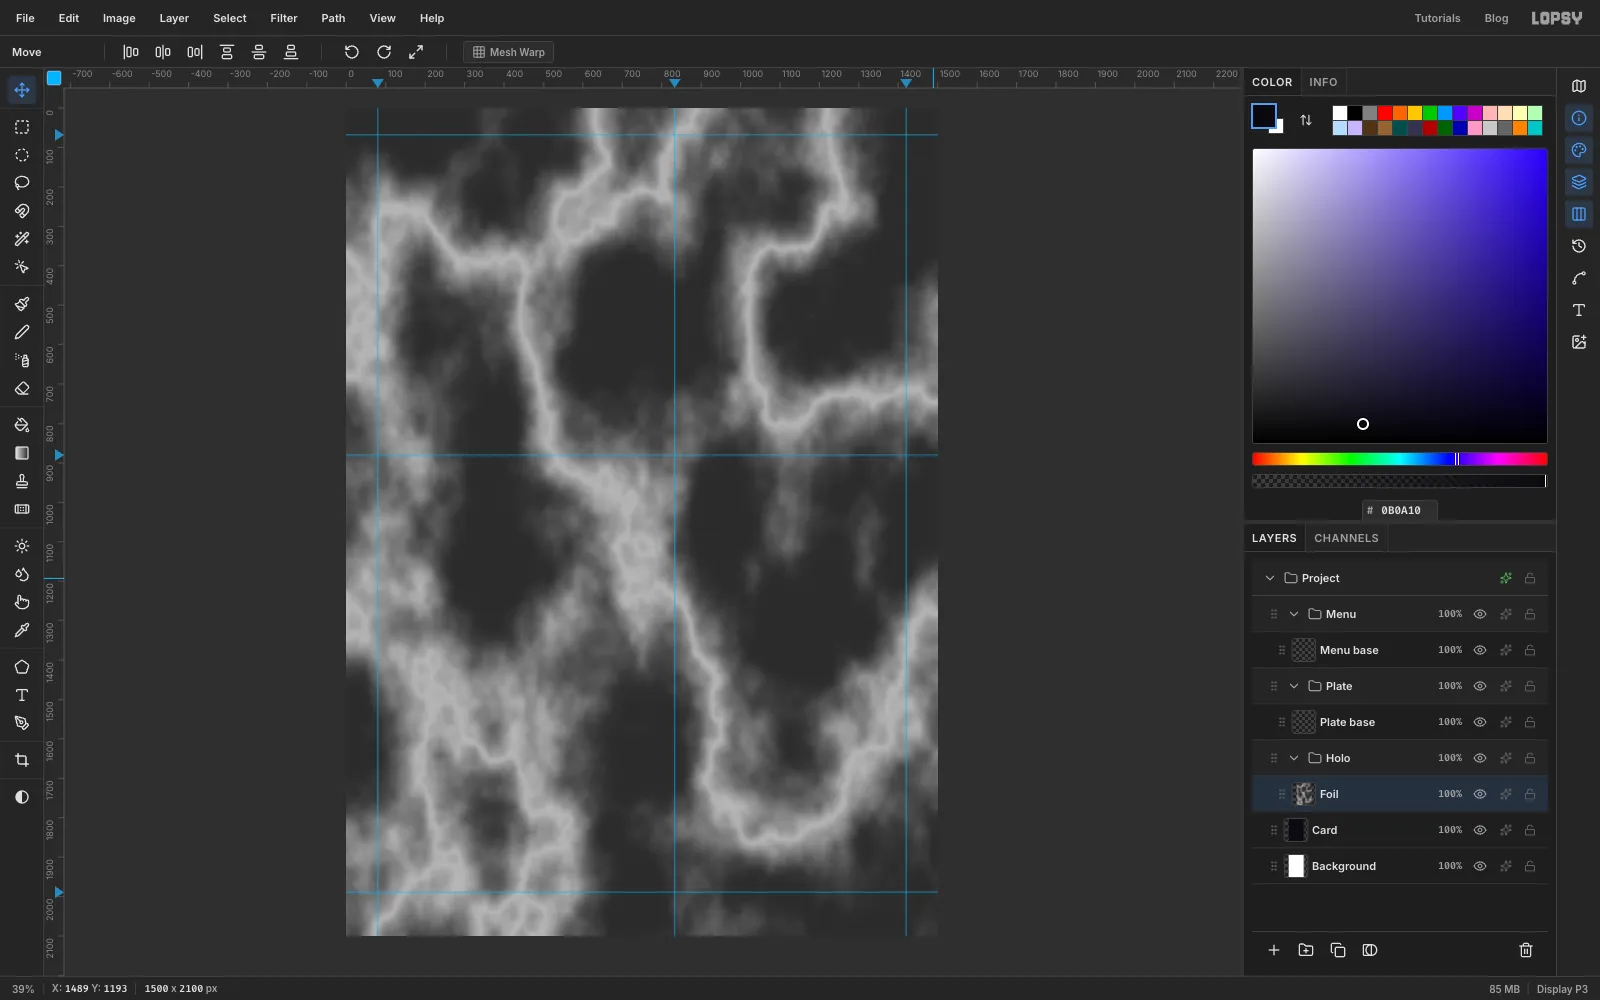
Real foil has thin bright ridges more than it has soft clouds. Run Filter → Solarize with Threshold 128 to fold the tones back on themselves. Then run Filter → Gaussian Blur with Radius 10 to soften the creases, and Filter → Brightness/Contrast with Brightness 22 and Contrast 10.
-
Radiate rays from the bun
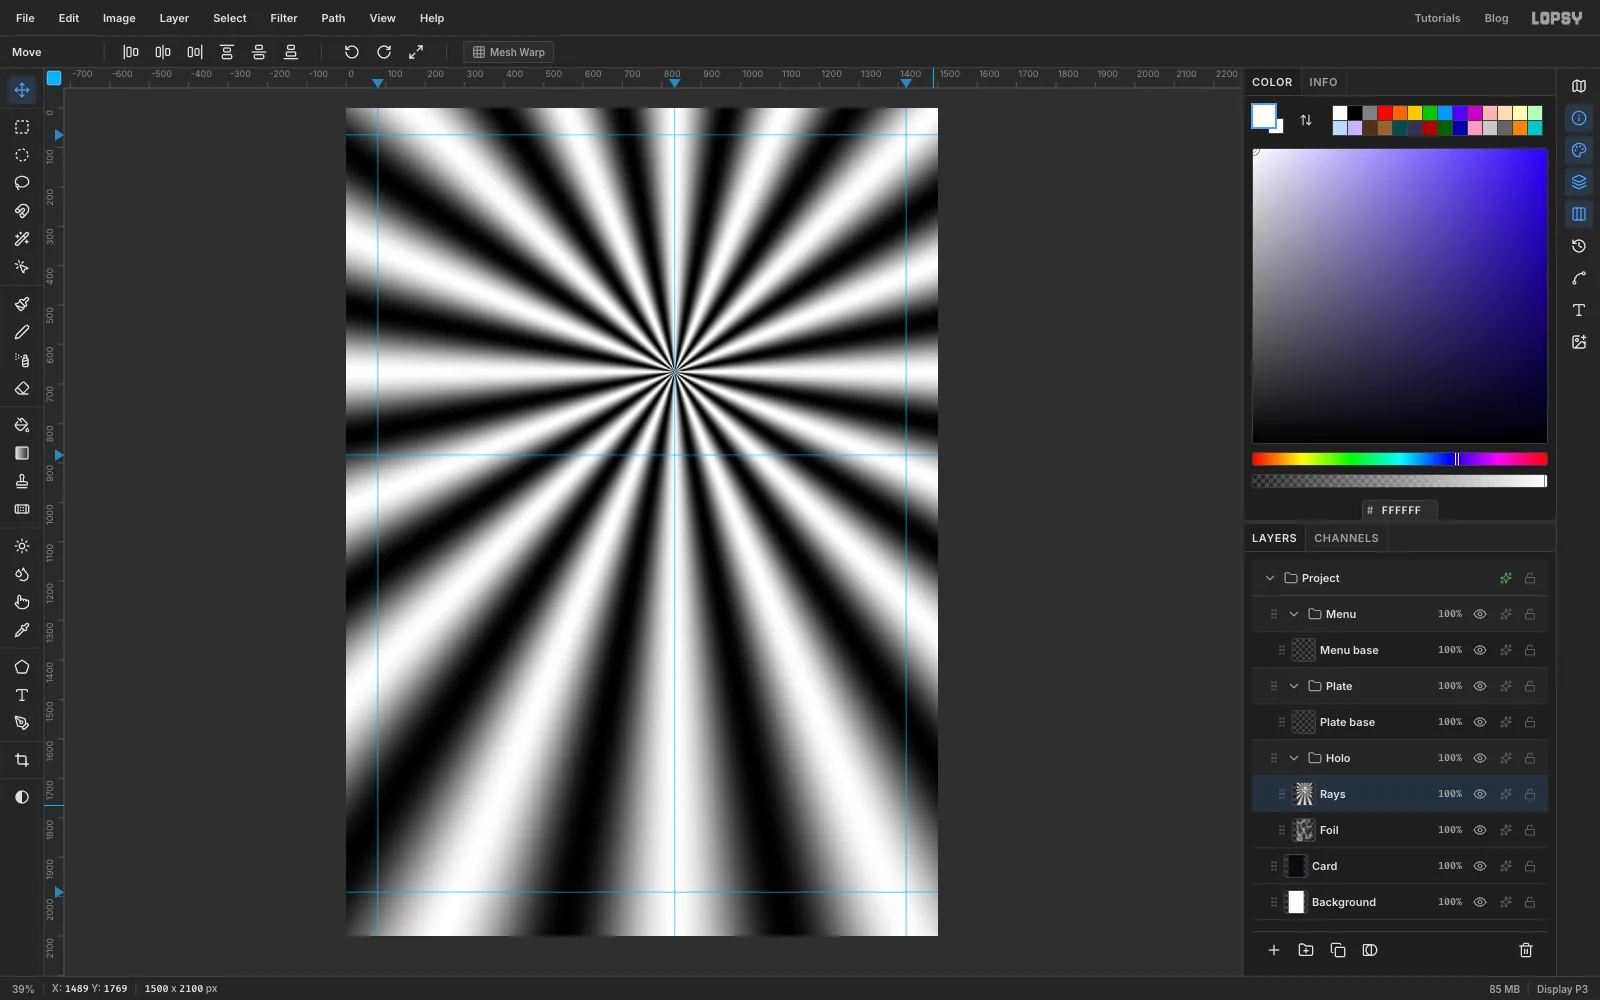
The foil should look lit by the quasar, so the rays start where the bun will be. Click Add Layer and name it Rays. Set the foreground to black, choose Edit → Fill, then set the foreground to white.
Run Filter → Sunburst with these settings:
- Rays 16, Length 150, Width 50, Softness 100
- Center X 55.5, Center Y 31.9, which is the point on your 833 guide about a third of the way down the page
-
Merge the rays into a grey sheet
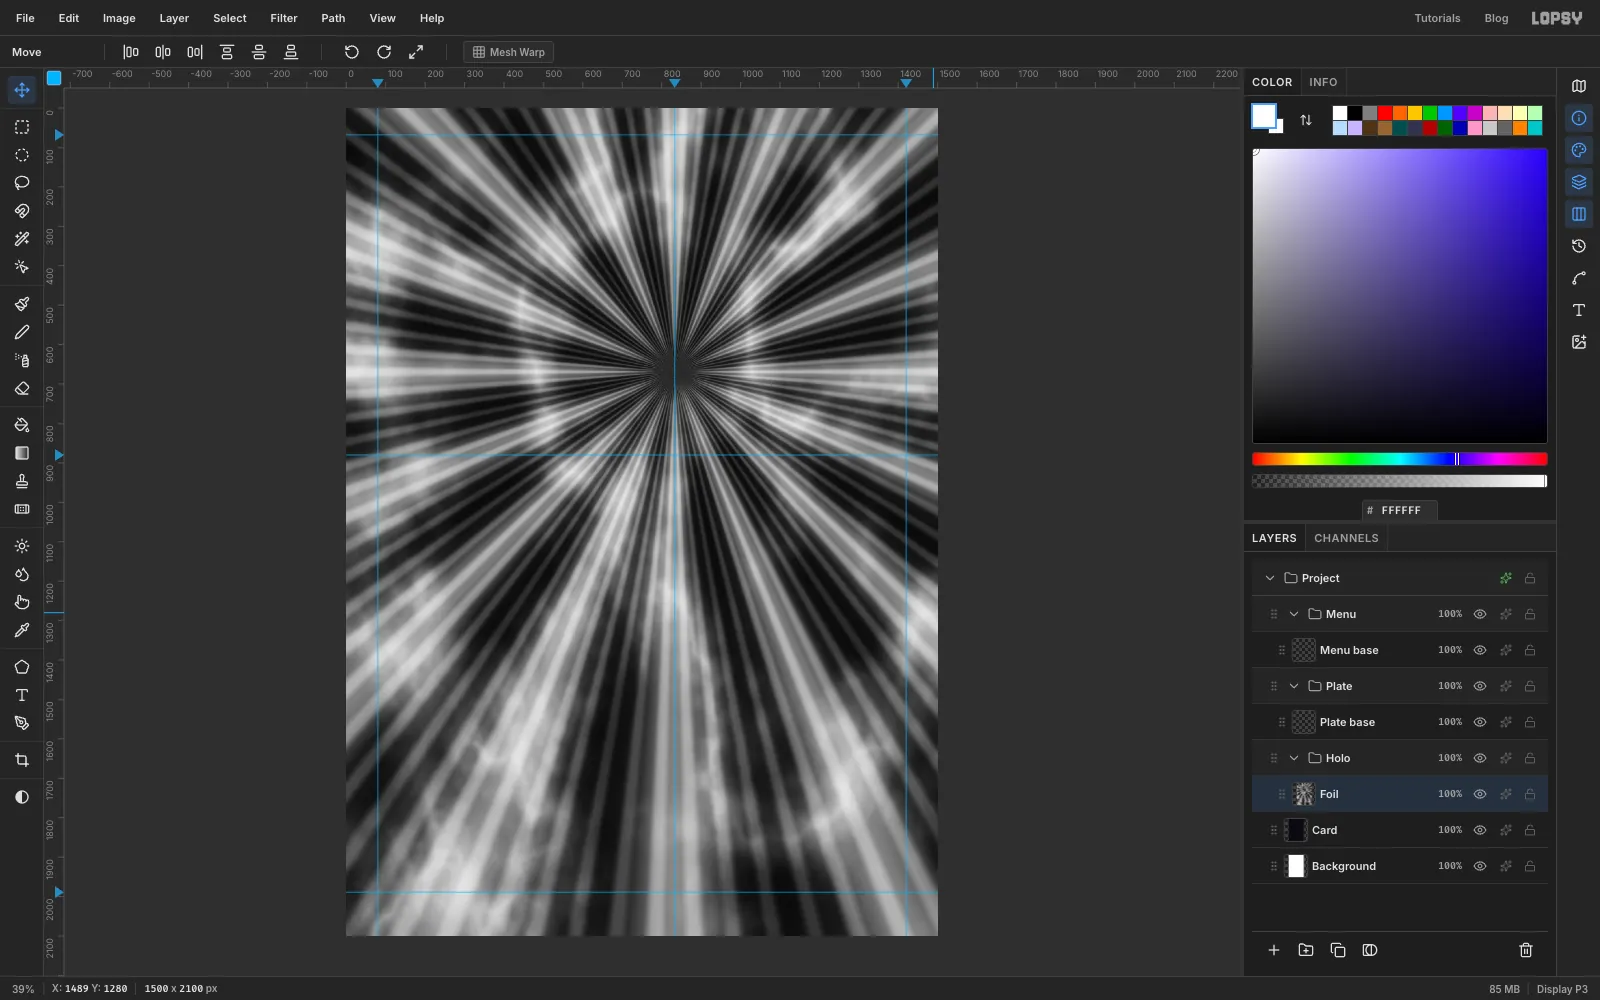
Run Gaussian Blur on the rays with Radius 24. Click the layer's effects button (the sparkle icon on its row), set Blend to Hard Light and close the drawer. Click the percentage on the row and set the opacity to 55%. Choose Layer → Merge Down.
Now add finer lines the same way. Add a layer, fill it black, set the foreground to white and run Sunburst with Rays 90, Length 150, Width 40, Softness 70 and the same centre. Set this layer to Soft Light at 50% and merge it down.
Finish the sheet with Add Noise, Amount 5, Mono. The grain turns into fine sparkle in the next step.
-
Turn the grey into foil with a Gradient Map
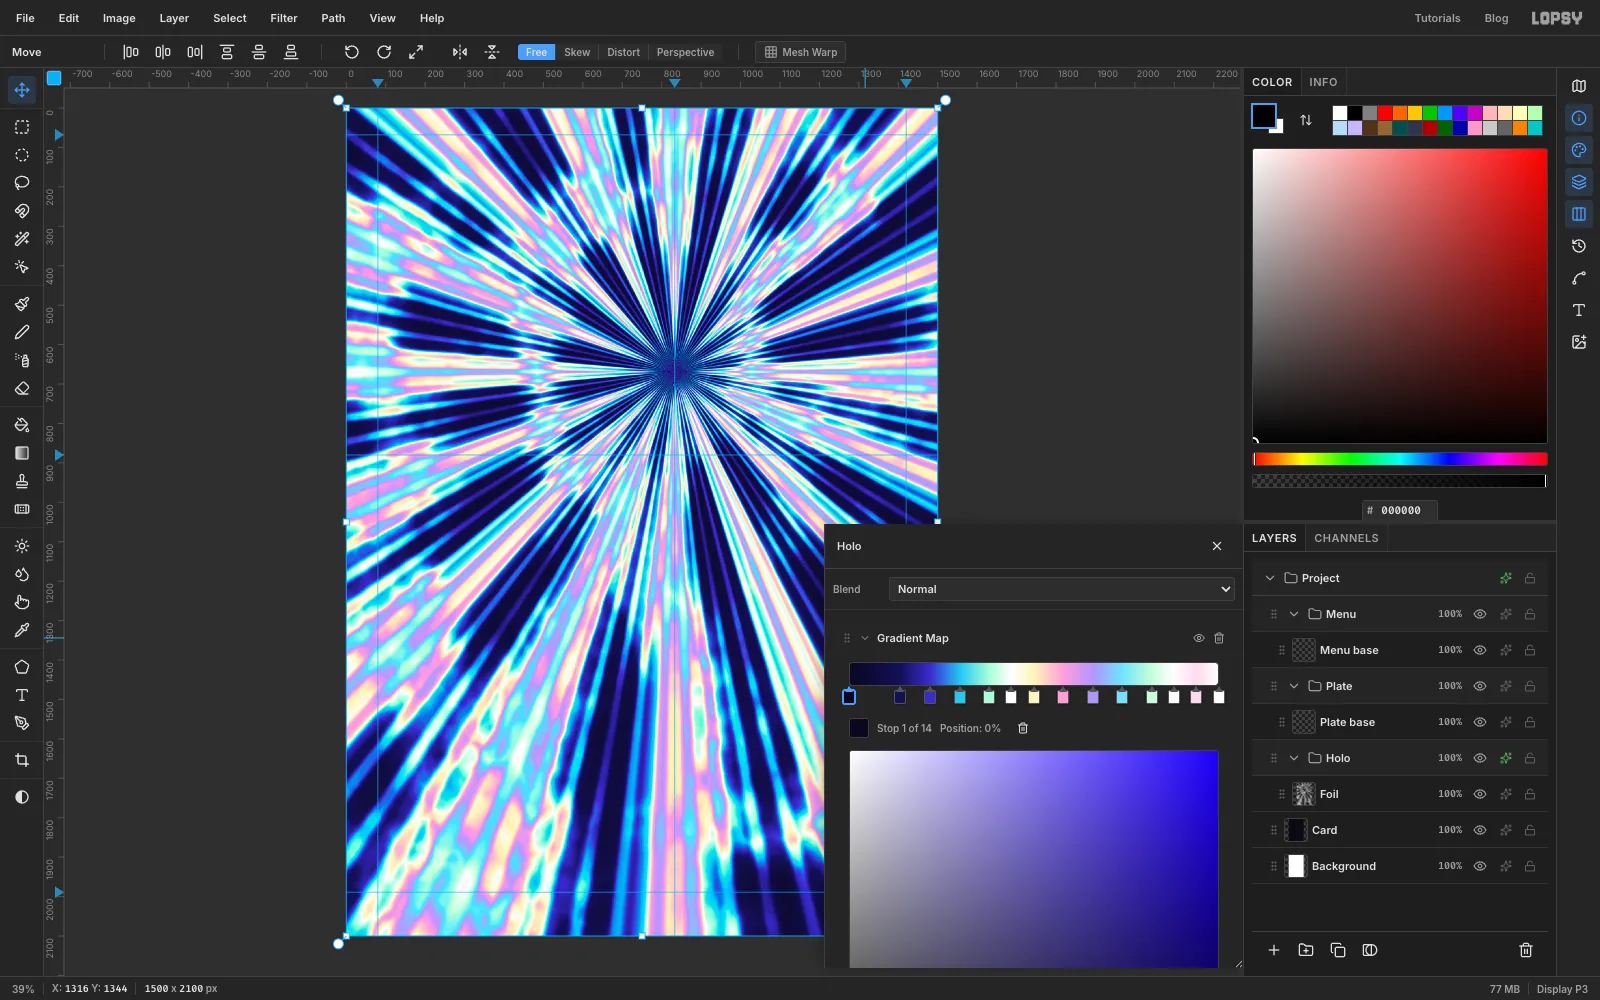
Click the Holo group's effects button, click Add Adjustment and choose Gradient Map. Every grey in the group now gets a colour from this ramp.
Click along the ramp to add stops, then select each stop and type its hex. Drag a stop until the readout under the ramp shows its percentage. Set these positions and colours:
- 0% , 14% , 22% , 30%
- 38% , 44% , 50% , 58%
- 66% , 74% , 82% , 88%
- 94% , 100%
The two narrow white stops are the hot streaks, and the near-black end gives you dark reflections. Without both, foil looks like a pastel gradient fill.
Close the drawer.
-
Make a brighter copy for small type
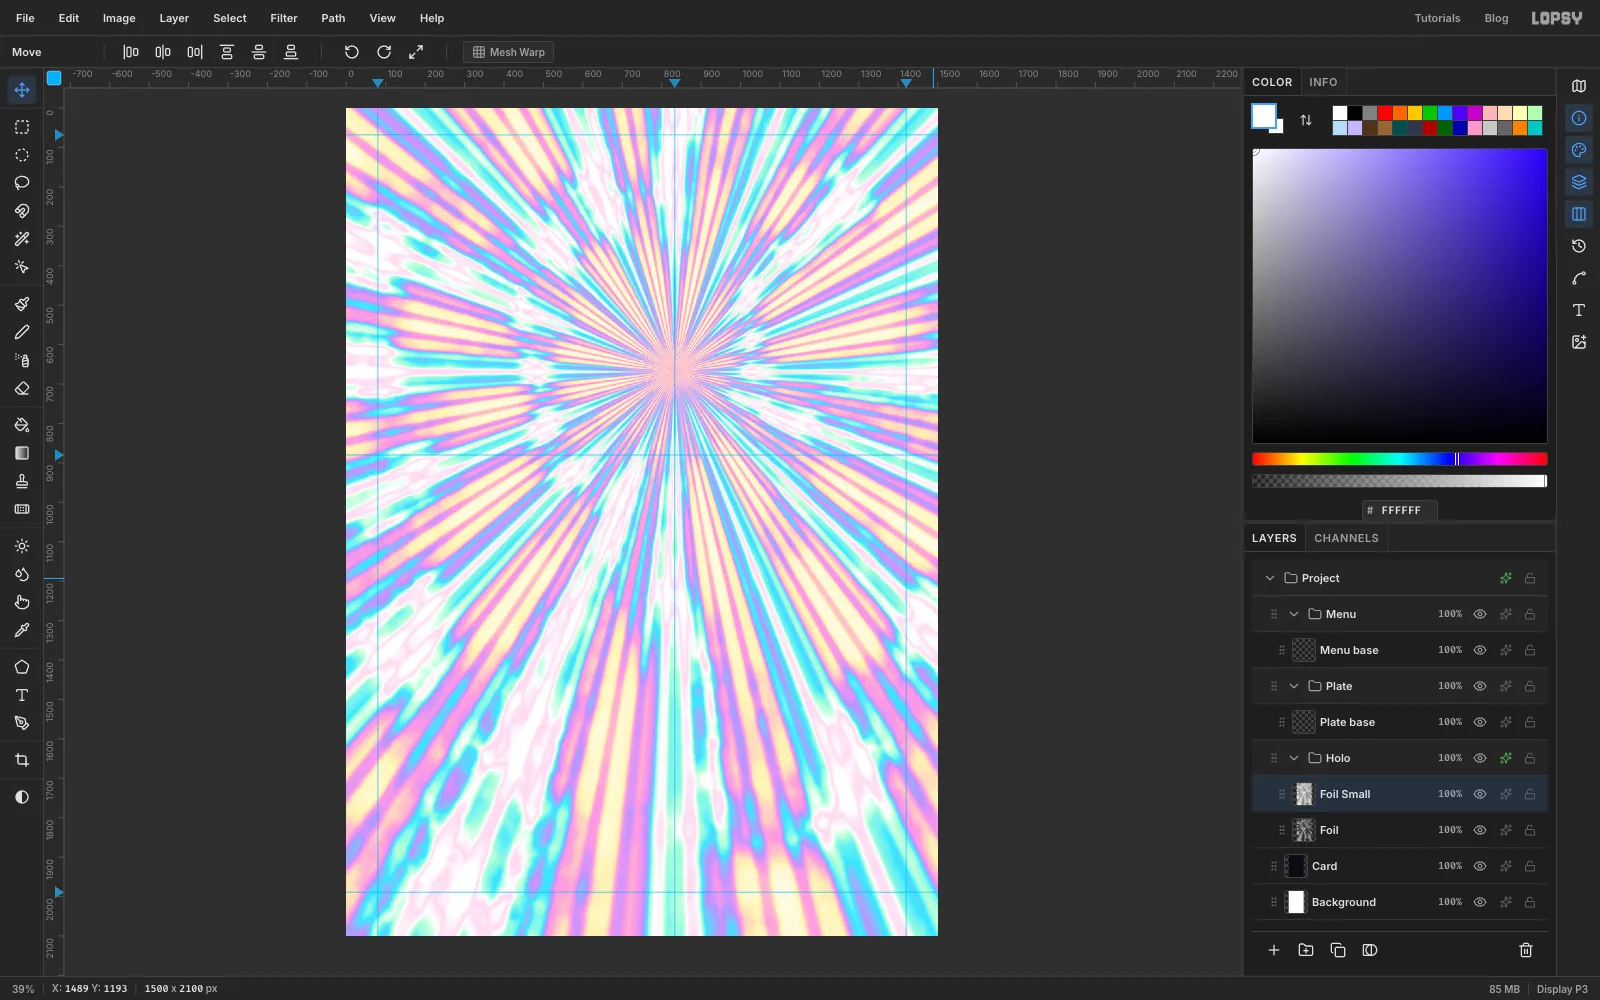
The dark reflections look great in huge letters, but they would swallow a price. So small type gets its own brighter copy of the same sheet.
Press V for the Move tool, click Foil and click Duplicate Layer. Name the copy Foil Small. Then run Brightness/Contrast with Brightness 28 and Contrast -30. The rays stay in the same place, but the darks are gone.
-
Set the title on the plate
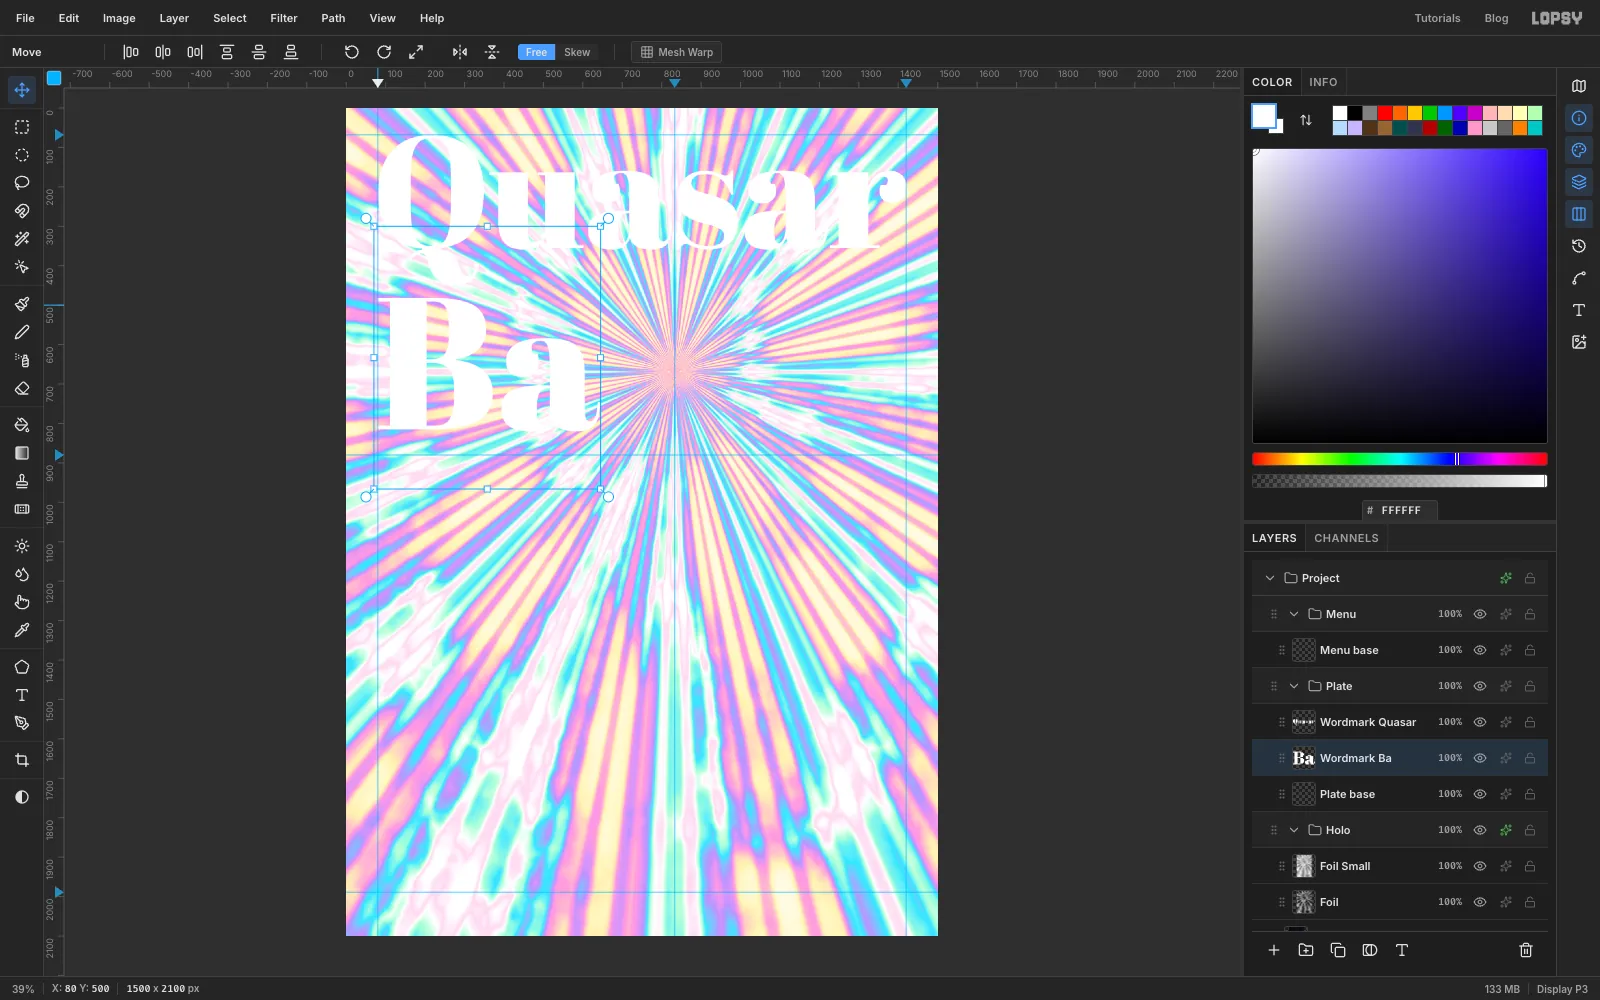
Click Plate base and press T for the Text tool. In the options bar set Size 403 and choose Abril Fatface. Set the foreground to white, click near the top left of the page, type Quasar and press Tab to commit. Press V and use the arrow keys (Shift moves 10 px) until the word runs from guide to guide with its top on the 68 guide.
Click Plate base again and make a second text layer reading Ba at Size 476. Put it on the left guide, about 30 px below the tail of the Q.
Rename the layers Wordmark Quasar and Wordmark Ba. They're plain white for now because they're only the artwork for the plate.
-
Hide the foil behind a mask
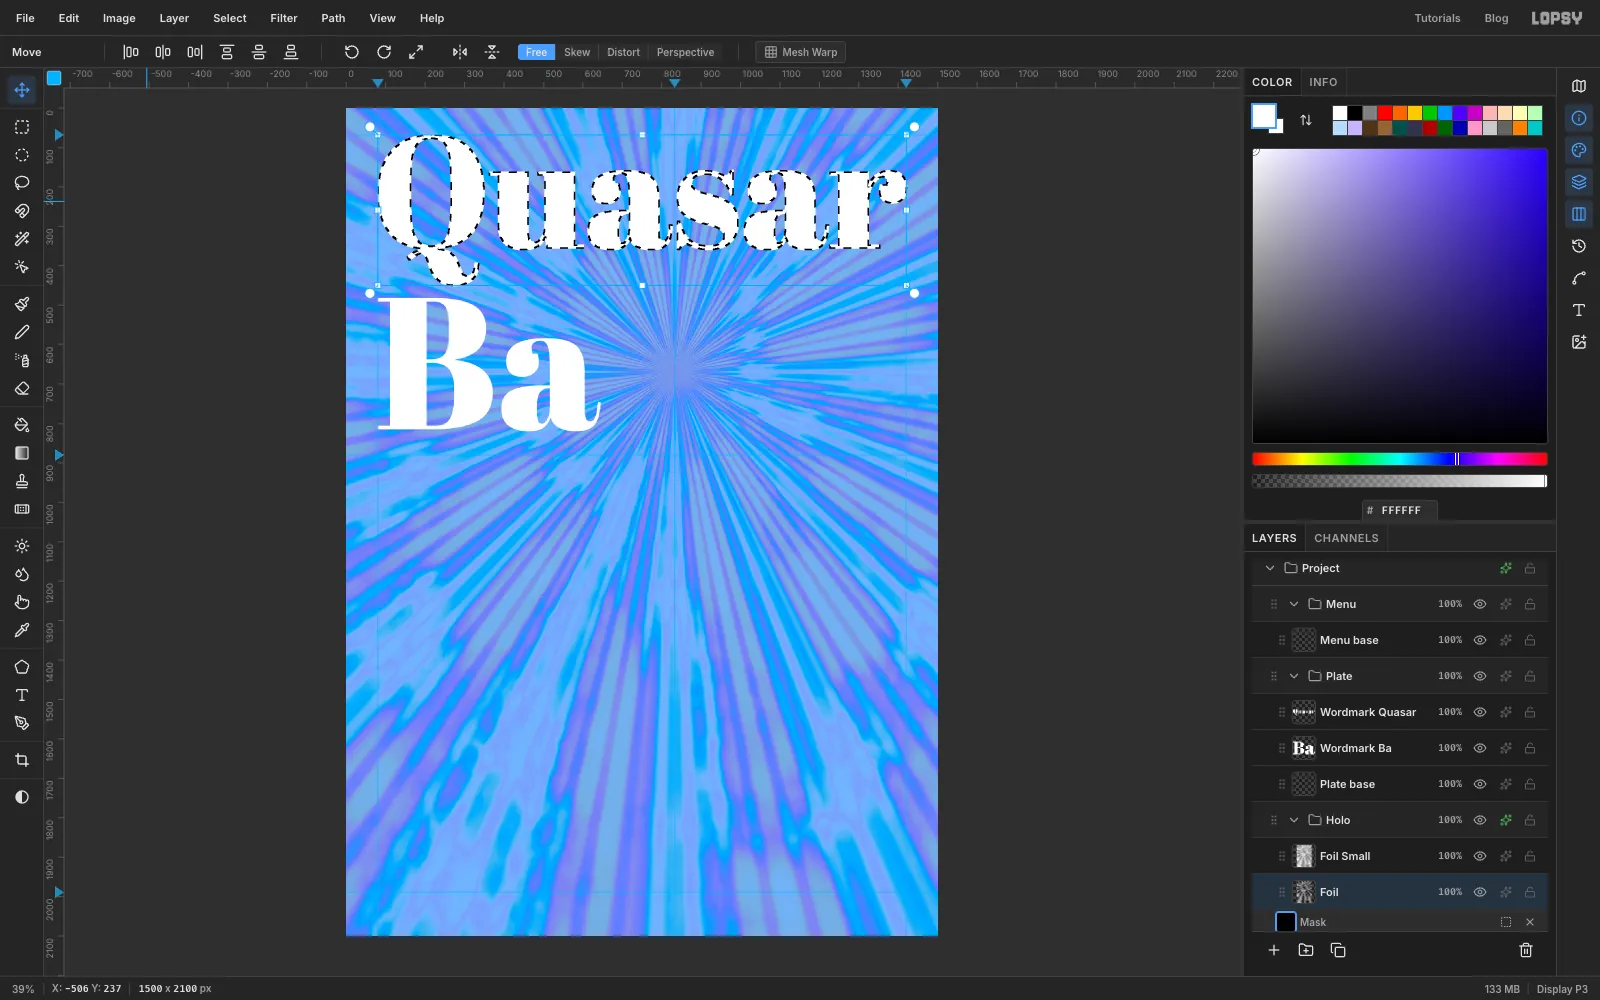
Click Foil and click Add Mask in the Layers panel footer. Click the Mask row under the layer to edit the mask. The canvas gets a translucent blue tint while you're in this mode.
Set the foreground to black and choose Edit → Fill. The sheet is now hidden, though you won't see that yet, because Foil Small still sits on top until it gets its own mask below. In mask mode, Edit → Fill writes the foreground colour into the mask, so black hides and white reveals.
Set the foreground to white. Hold Cmd and click the Wordmark Quasar thumbnail to load its letters as a selection, then choose Edit → Fill. Do the same for Wordmark Ba, and press Cmd+D to deselect.
Click the Foil row to leave mask mode. Then do the first part again for Foil Small: Add Mask, click its Mask row, fill it black and click its row to leave.
-
Check the foil through the title
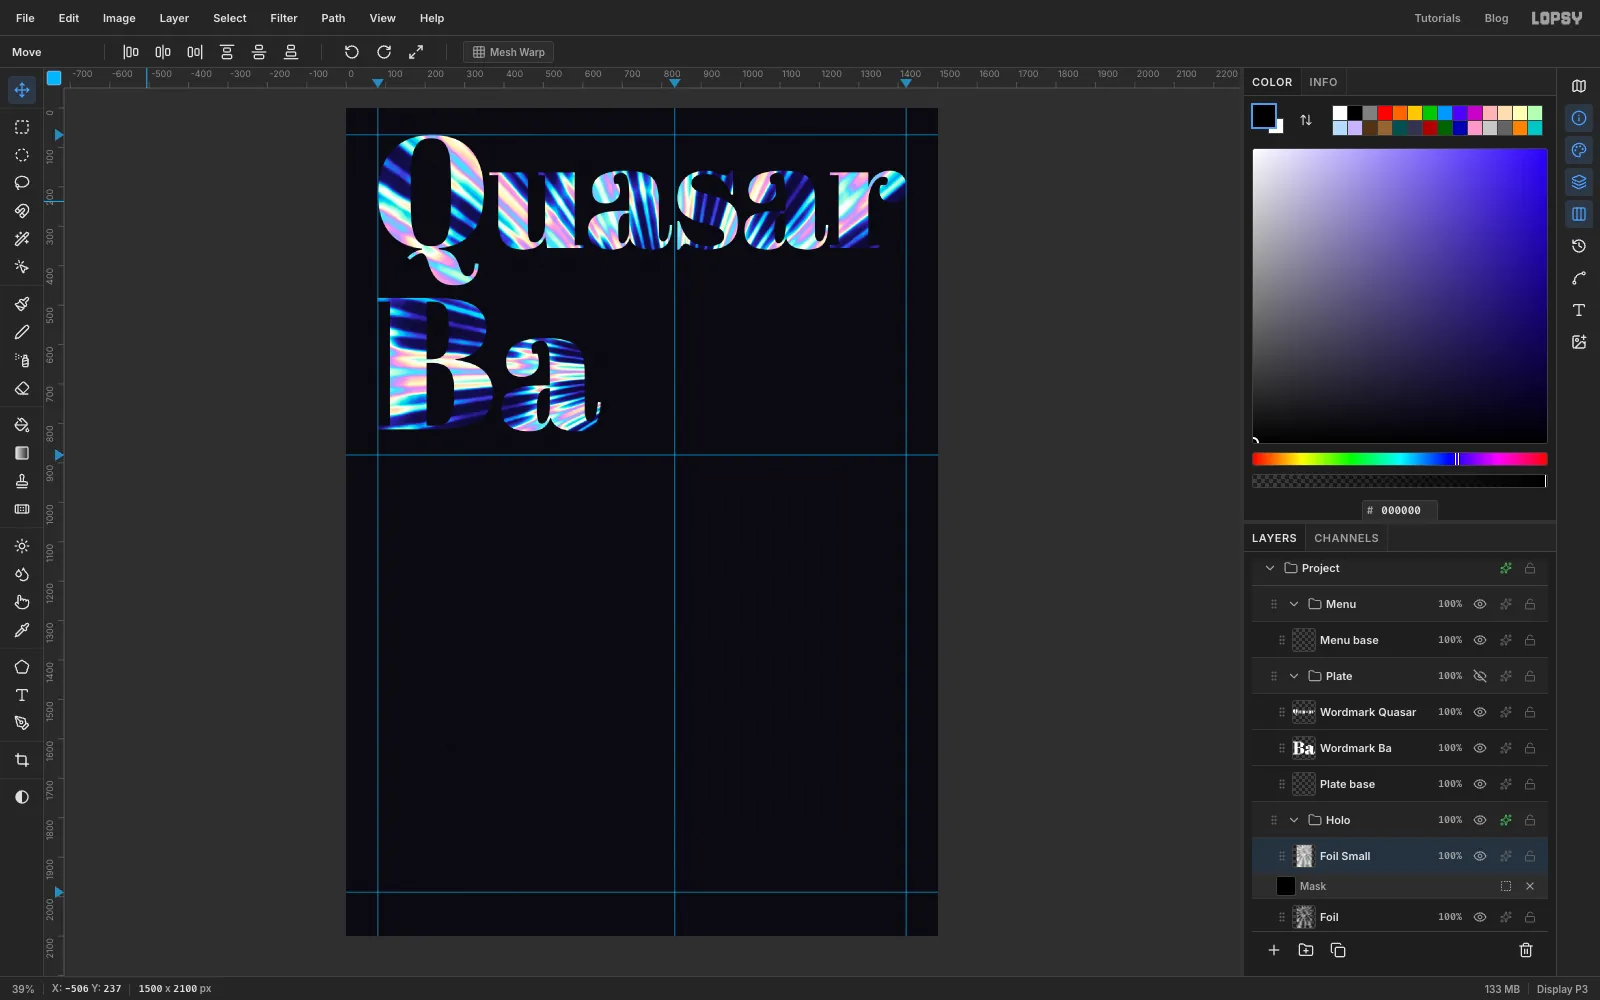
Click the eye on the Plate group to hide the white artwork. The Plate group sits above the foil, so you'll need to hide it whenever you want a true view. There's your stamped title on black card. Turn Plate back on when you need its layers.
-
Bring in the bun and heal it
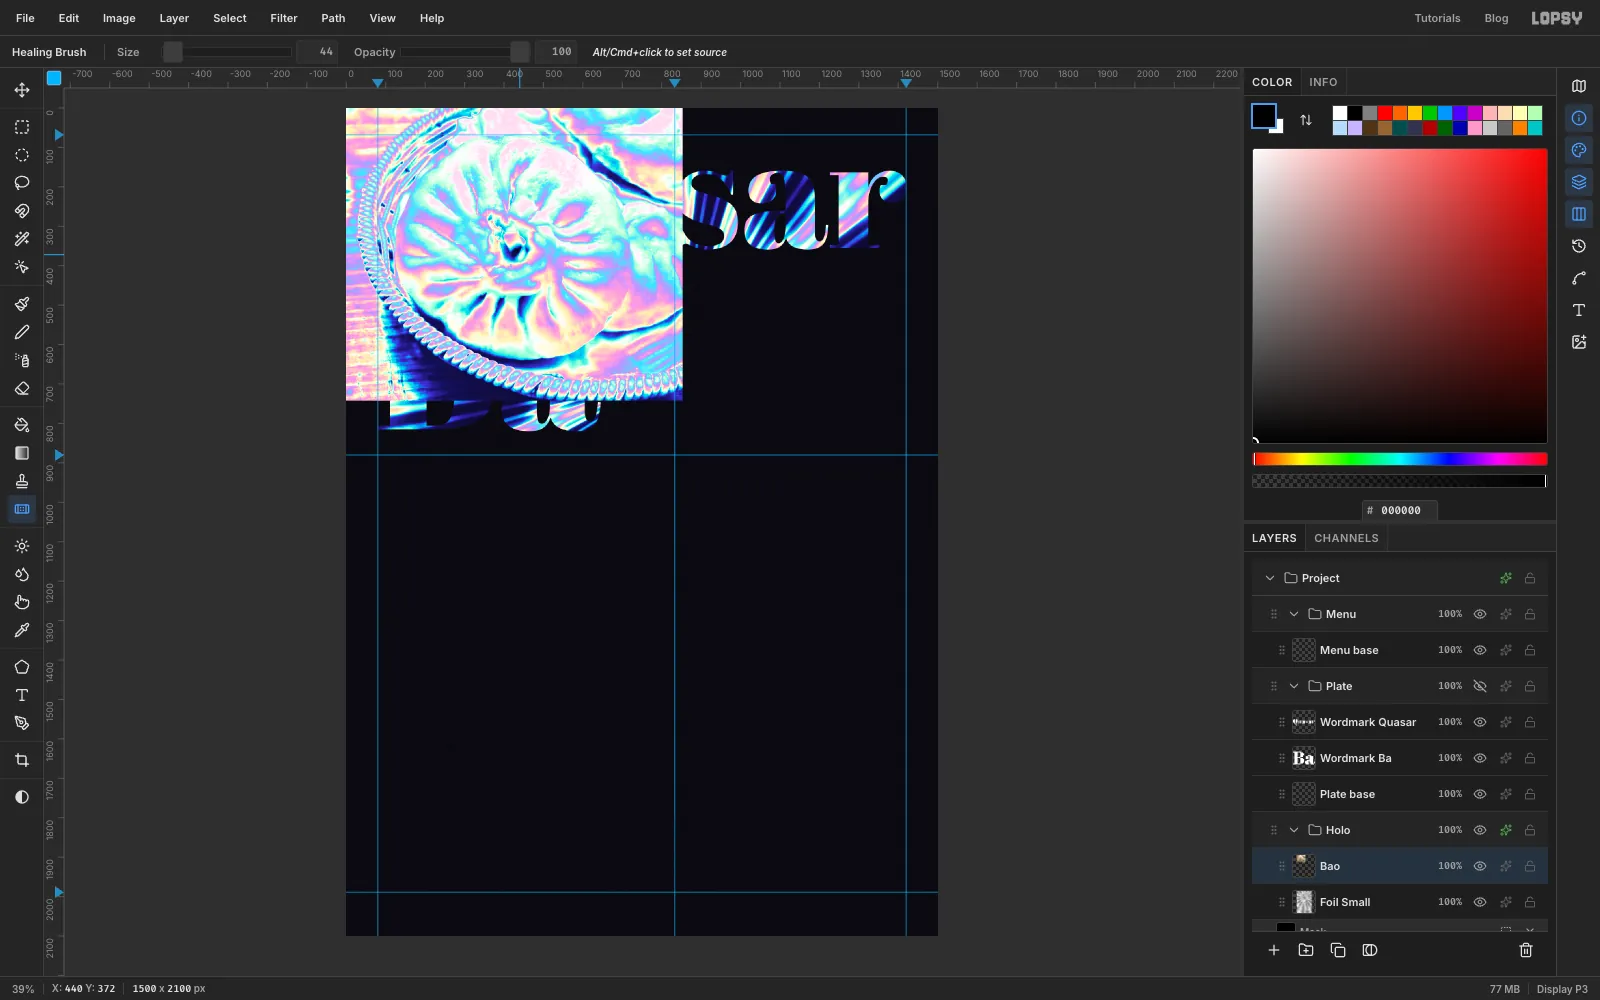
Click Foil Small and hide Plate while you work on the photo, because its white letters would cover it. Then drag your cropped photo onto the canvas. It lands in the top left corner as a new layer inside Holo, and the Gradient Map colours it straight away. Press Cmd+D, and rename the layer Bao.
My bun has a bright yellow seed in its centre, which would turn into a hot spot later. Choose the Healing Brush and set Size to about 44. Hold Alt and click clean dough nearby, then paint over the seed. Skip this if your bun has nothing to remove.
-
Cut out the bun
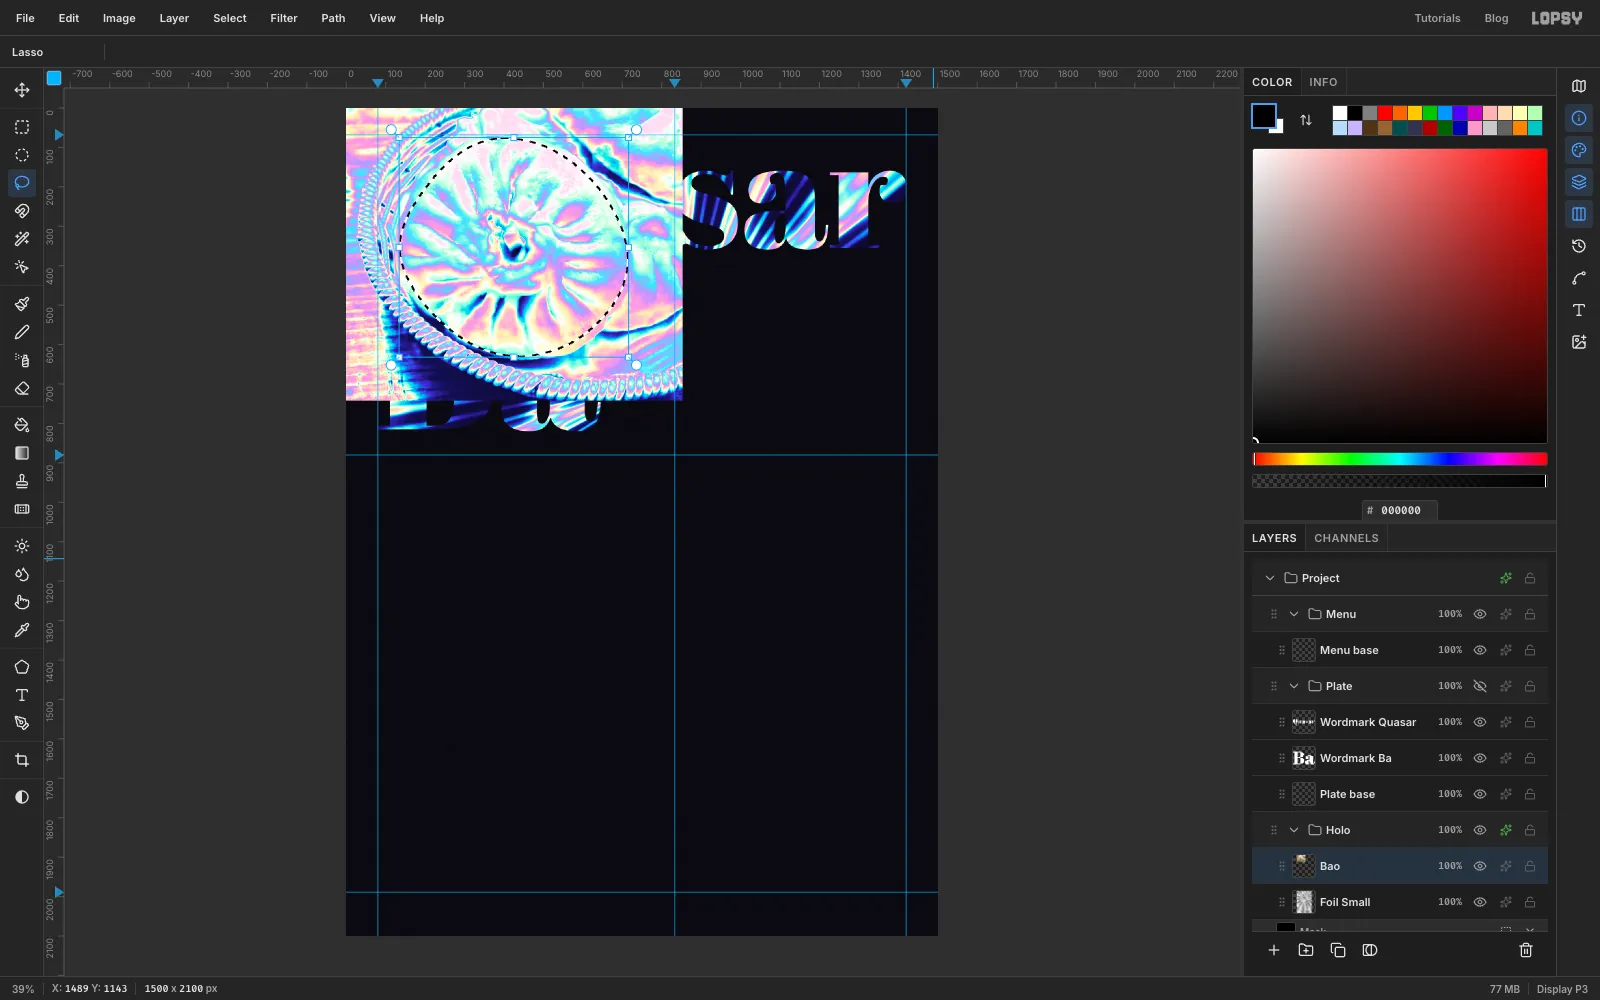
Press L for the Lasso. Trace the outline of the front bun in one slow, smooth drag, staying just inside the edge so that none of the basket comes along. Quick Selection is tempting here, but pale dough on a pale background leaks.
Choose Select → Feather with a value of 2. Then choose Select → Inverse, press Delete and press Cmd+D.
-
Remove the colour and smooth the dough
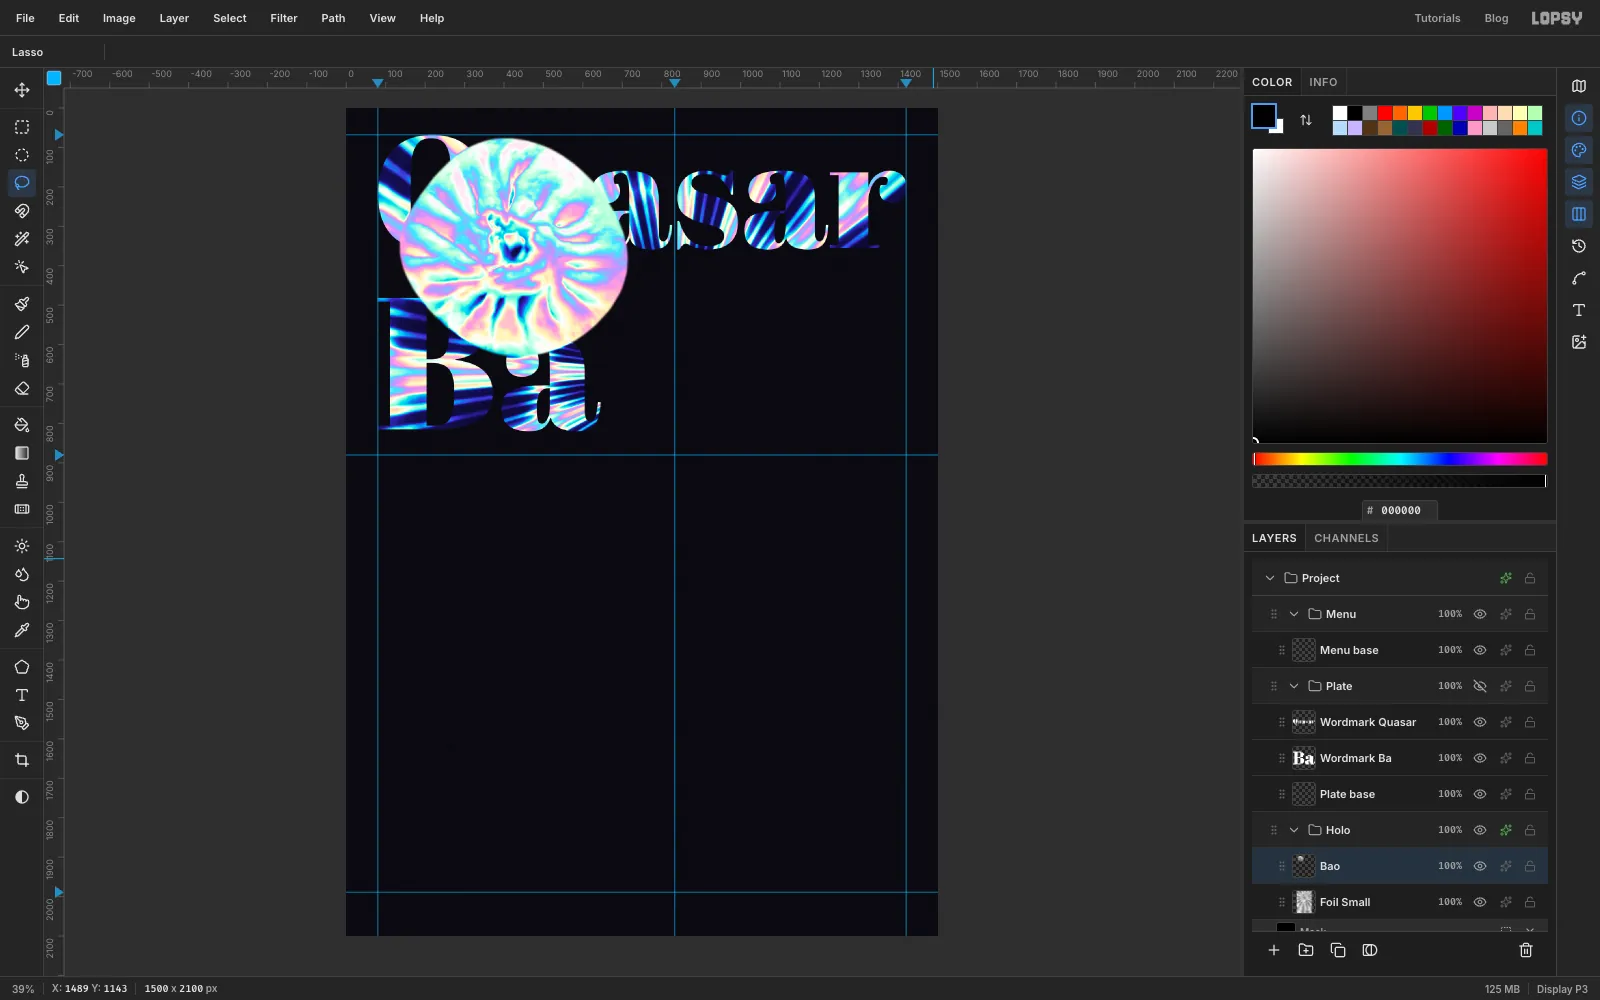
Choose Filter → Desaturate, then run Gaussian Blur with Radius 5. The blur looks heavy, but the bun is about to shrink. Without it, the map turns every small crease into jagged contour lines.
-
Scale the bun and squash it into a dome
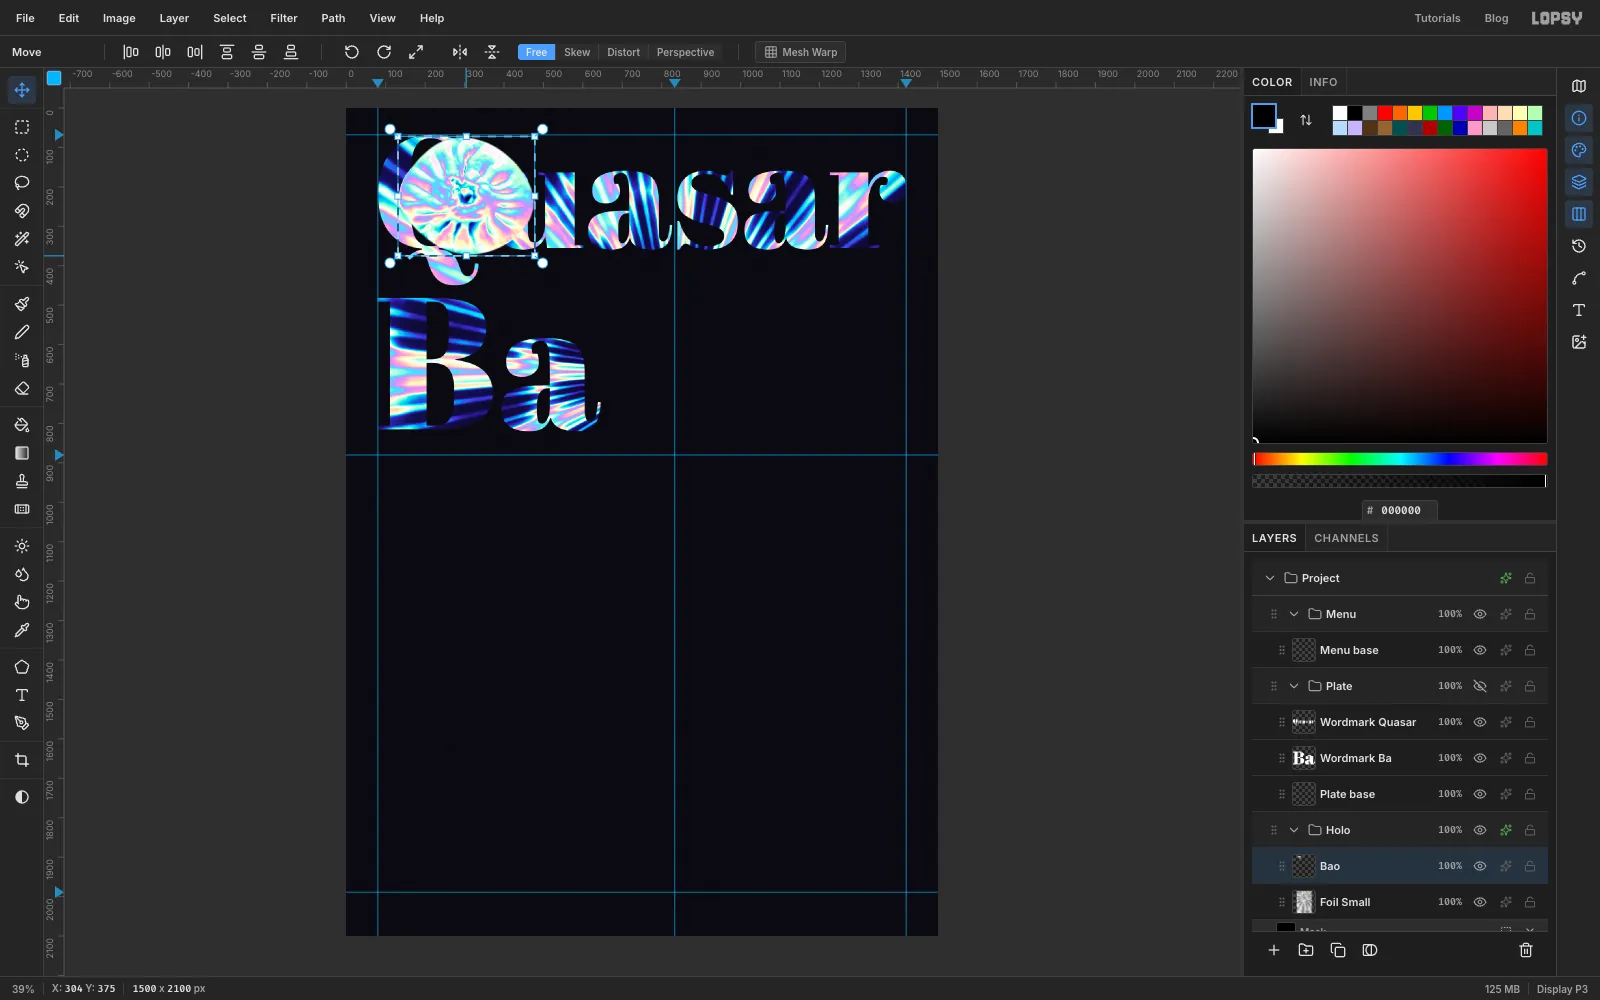
Press M and draw a marquee around the bun, a little bigger than it. Press V, hold Cmd and drag the bottom right corner handle inward until the bun is about 345 px wide. Cmd keeps the proportions. Press Cmd+D.
Press M, draw a new marquee around the smaller bun, press V and drag the middle handle on the bottom edge up until it's about 300 px tall. The disc will be seen from an angle, and this slight squash makes the bun agree with it. Press Cmd+D.
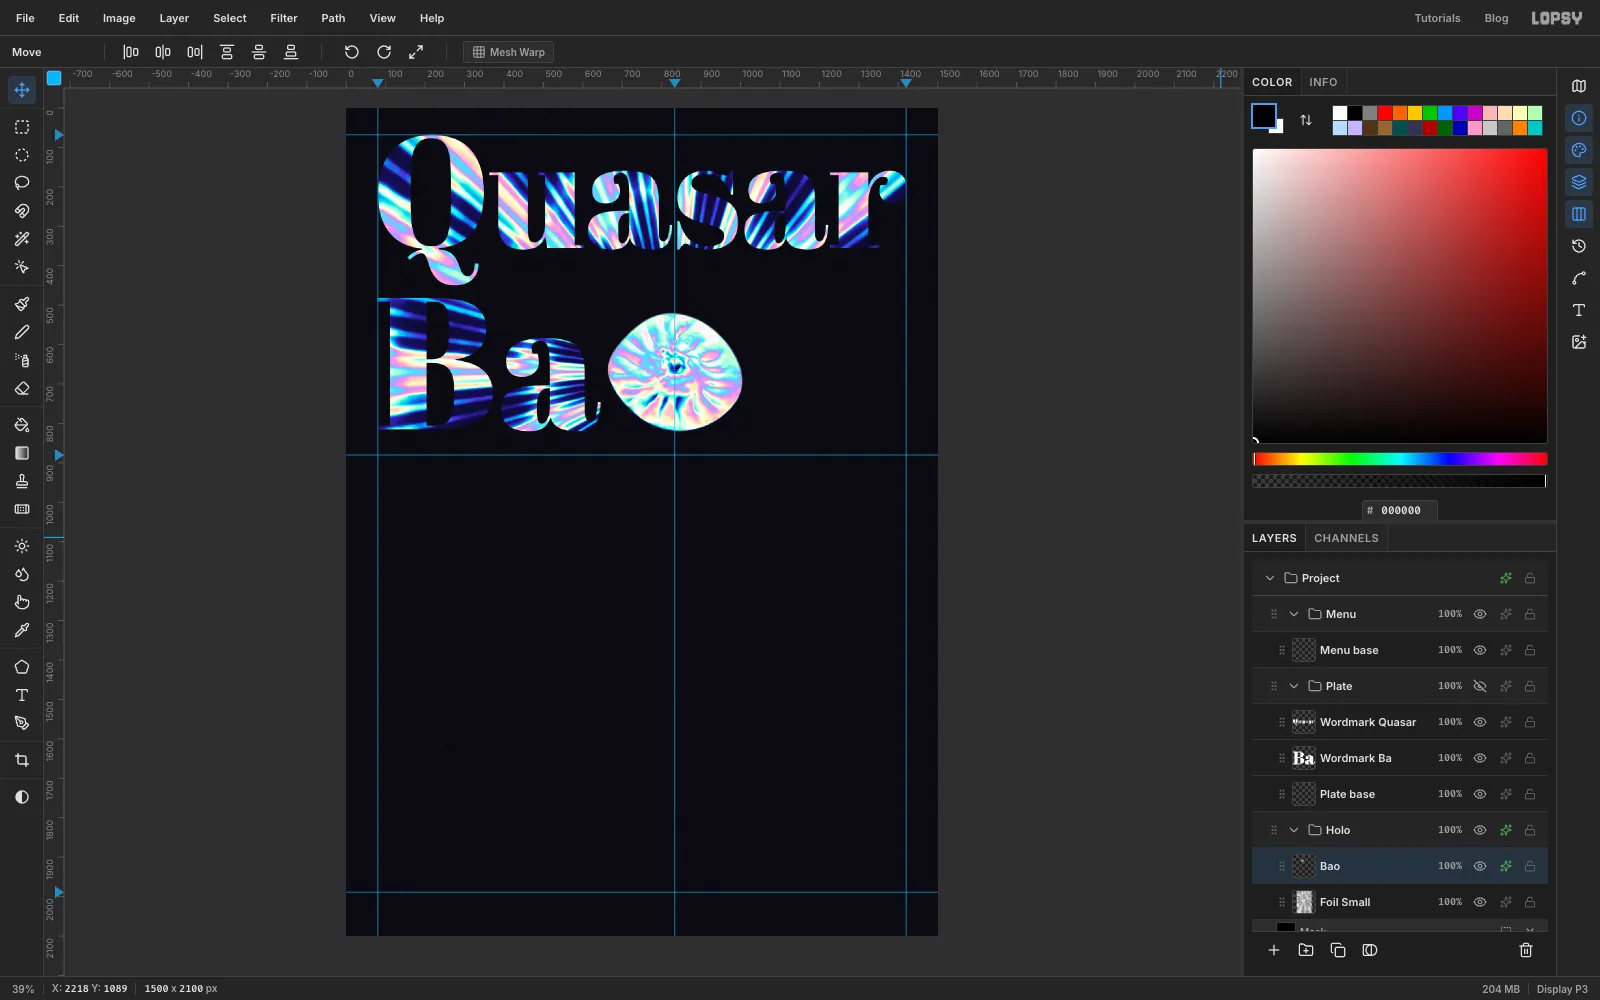
Drag the bun so it's centred on the 833 guide with its base about 5 px below the bottom of the Ba letters. It should sit about 20 px from the tail of the "a". Now it reads as the third letter of the word.
-
Lift the knot with Liquify
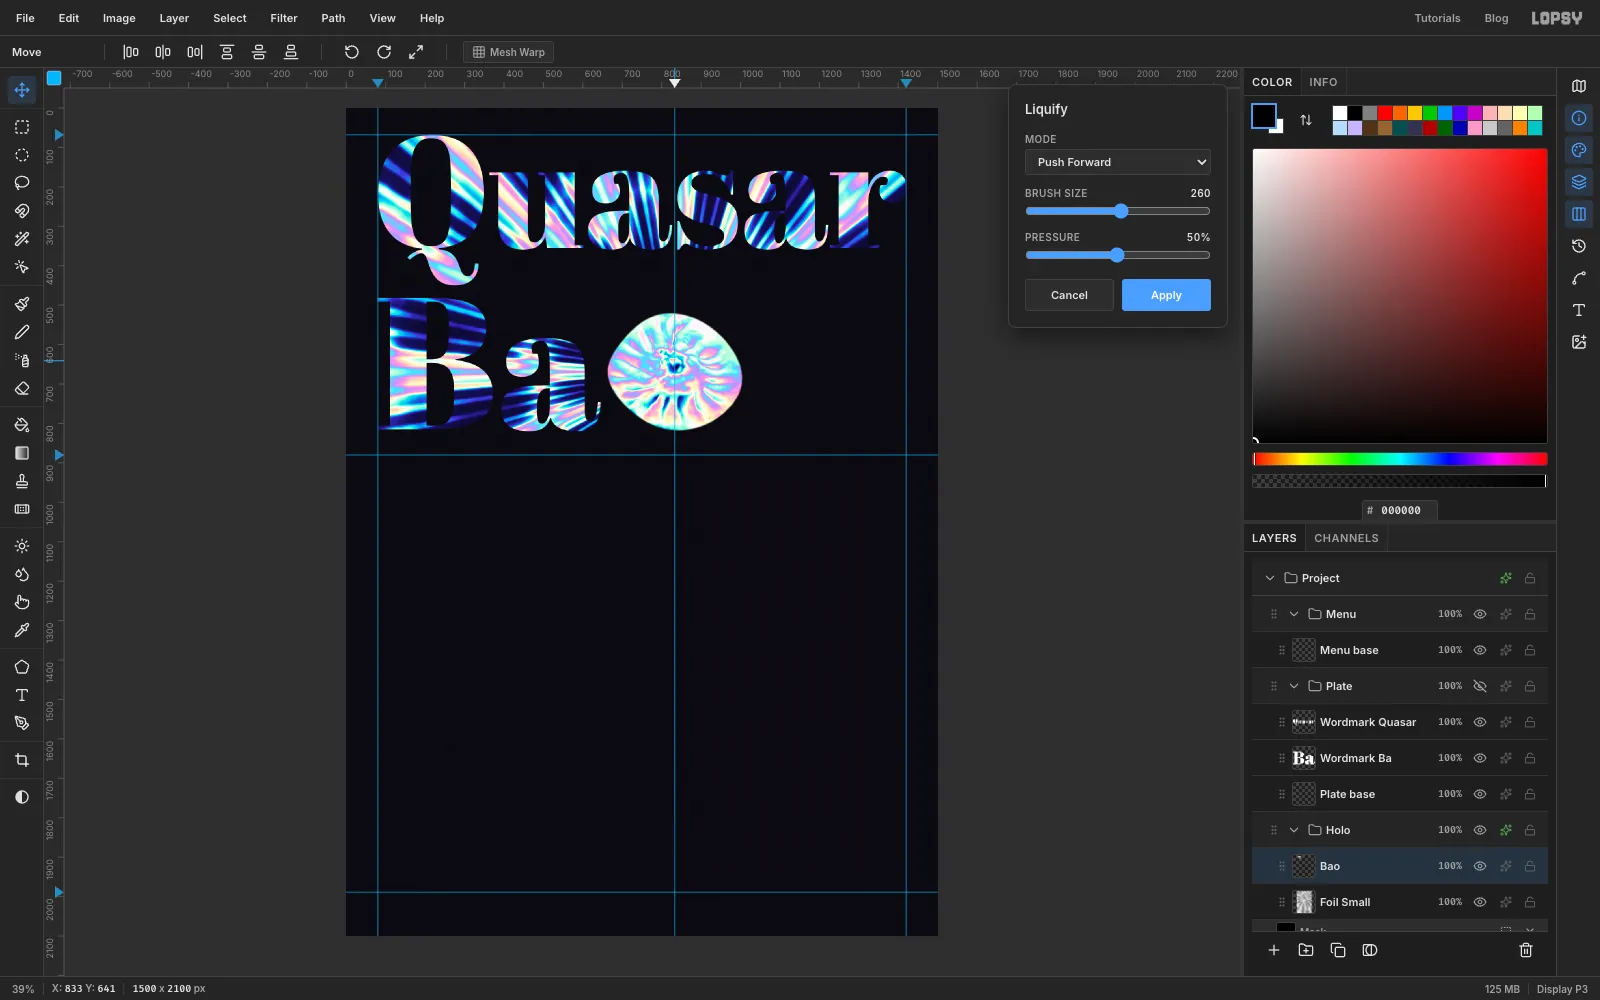
The pleated knot sits dead centre, as if you were looking straight down on the bun. Choose Filter → Liquify with Push Forward and a Brush Size of 260. Make one short drag straight up from the middle of the bun, about 35 px. A second pass quickly makes it look like a jellyfish, so stop at one. Click Apply.
-
Straighten the bun and add a shadow
The bun leans a little to the left. Press M, draw a marquee around it, press V and drag the round rotation handle at a corner about 4° clockwise. Press Cmd+D. If the turn moved it off the guide, drag it back into place.
Open its effects, tick Drop Shadow and set Offset X 0, Offset Y 6, Blur 18 and Opacity 60. Close the drawer. The shadow will separate the bun from the disc behind it.
-
Draw the disc on the plate
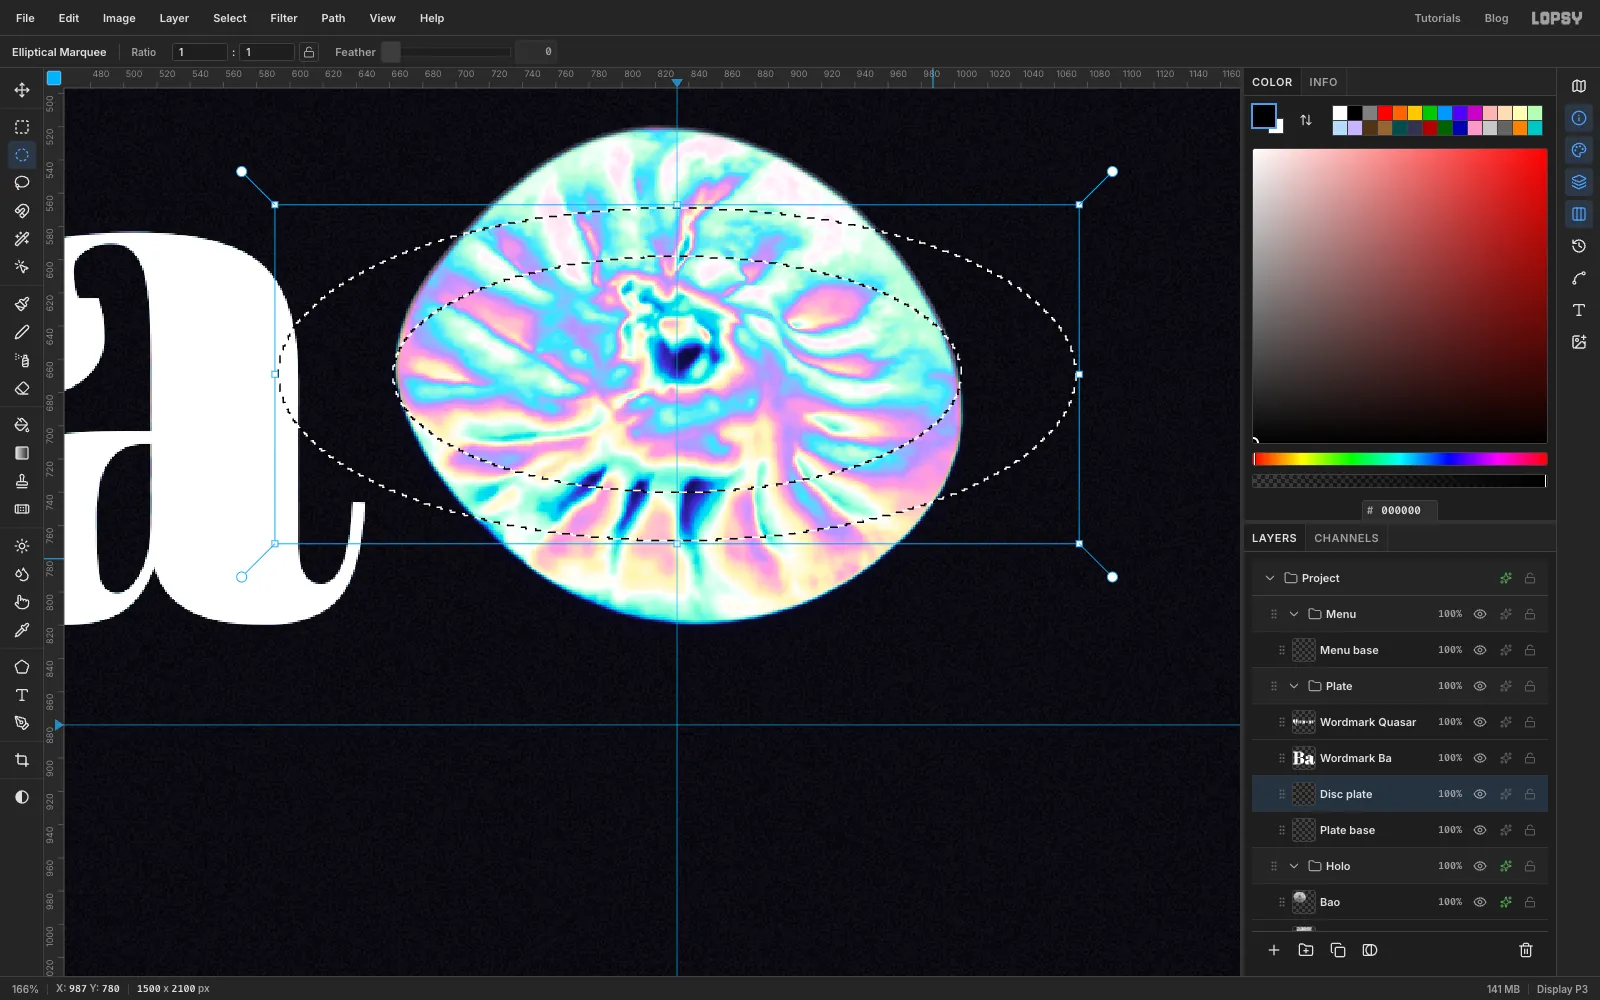
Show Plate again. Click Plate base, click Add Layer and name it Disc plate. Zoom in on the bun with Cmd and the scroll wheel.
Choose the Elliptical Marquee and draw an ellipse centred on the bun, about 480 × 200 px. Hold Alt and drag, corner to corner, a second ellipse that shares the same centre, about 342 × 142 px, to subtract the middle. Its left and right ends should just touch the sides of the bun. Choose Select → Feather with a value of 2.
-
Fade the tips and tilt the disc
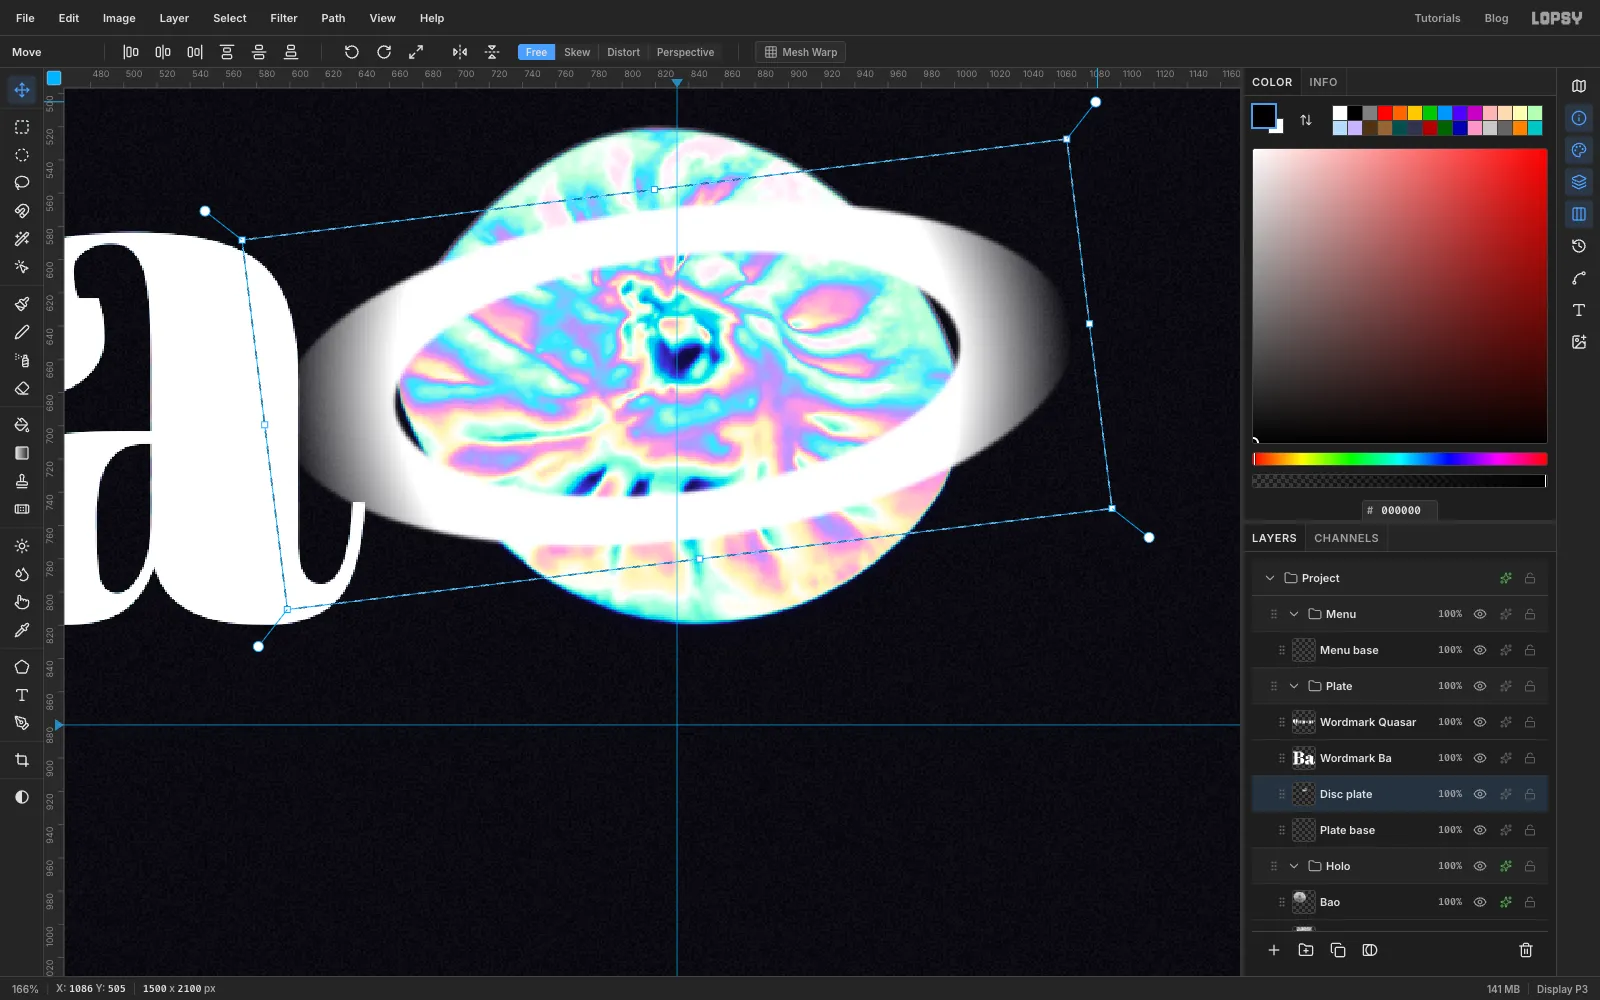
Choose the Gradient tool with the type set to Radial, and click Advanced…. Set three white stops at 0%, 72% and 100%. Select the last stop and drag the Opacity bar to 0. The first two stay at full opacity. Click Done.
Drag from the centre of the bun to the right tip of the ring, then press Cmd+D. The disc now fades away at both ends, so it won't look like Saturn's hard-edged rings.
Press M, draw a marquee around the whole disc, press V and drag a rotation handle about 7° counter-clockwise. Press Cmd+D and press Cmd+0 to fit the page again.
-
Copy the foil through the disc
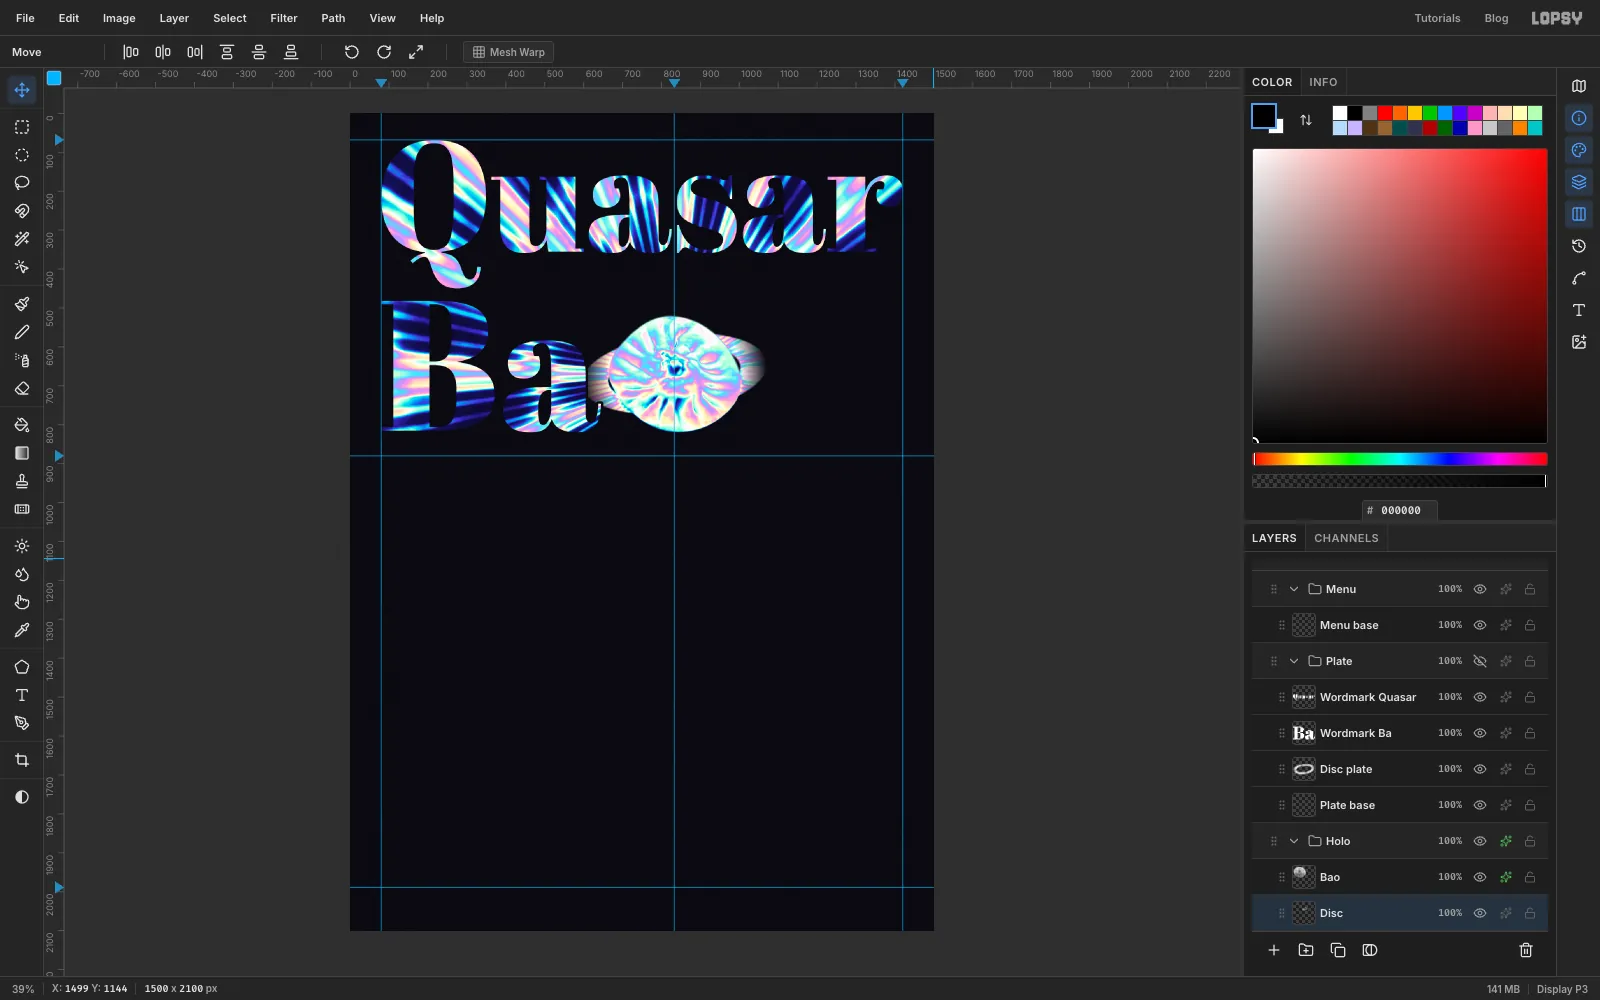
The disc should be cut from the same sheet as everything else. Hold Cmd and click the Disc plate thumbnail. Click the Foil Small row and press Cmd+C. Copy reads the layer's own pixels, not its mask, so you get the foil in the shape of the disc. Press Cmd+V. The copy lands in place, above Foil Small and under the bun. Rename it Disc and press Cmd+D.
Run Gaussian Blur with Radius 2 to calm the fine rays.
The left end of the disc runs into the "a", so let the letter win. Hold Cmd and click the Wordmark Ba thumbnail, choose Select → Grow with a value of 6, click the Disc row and press Delete. Press Cmd+D.
Hide Plate to check it.
-
Select the front of the disc
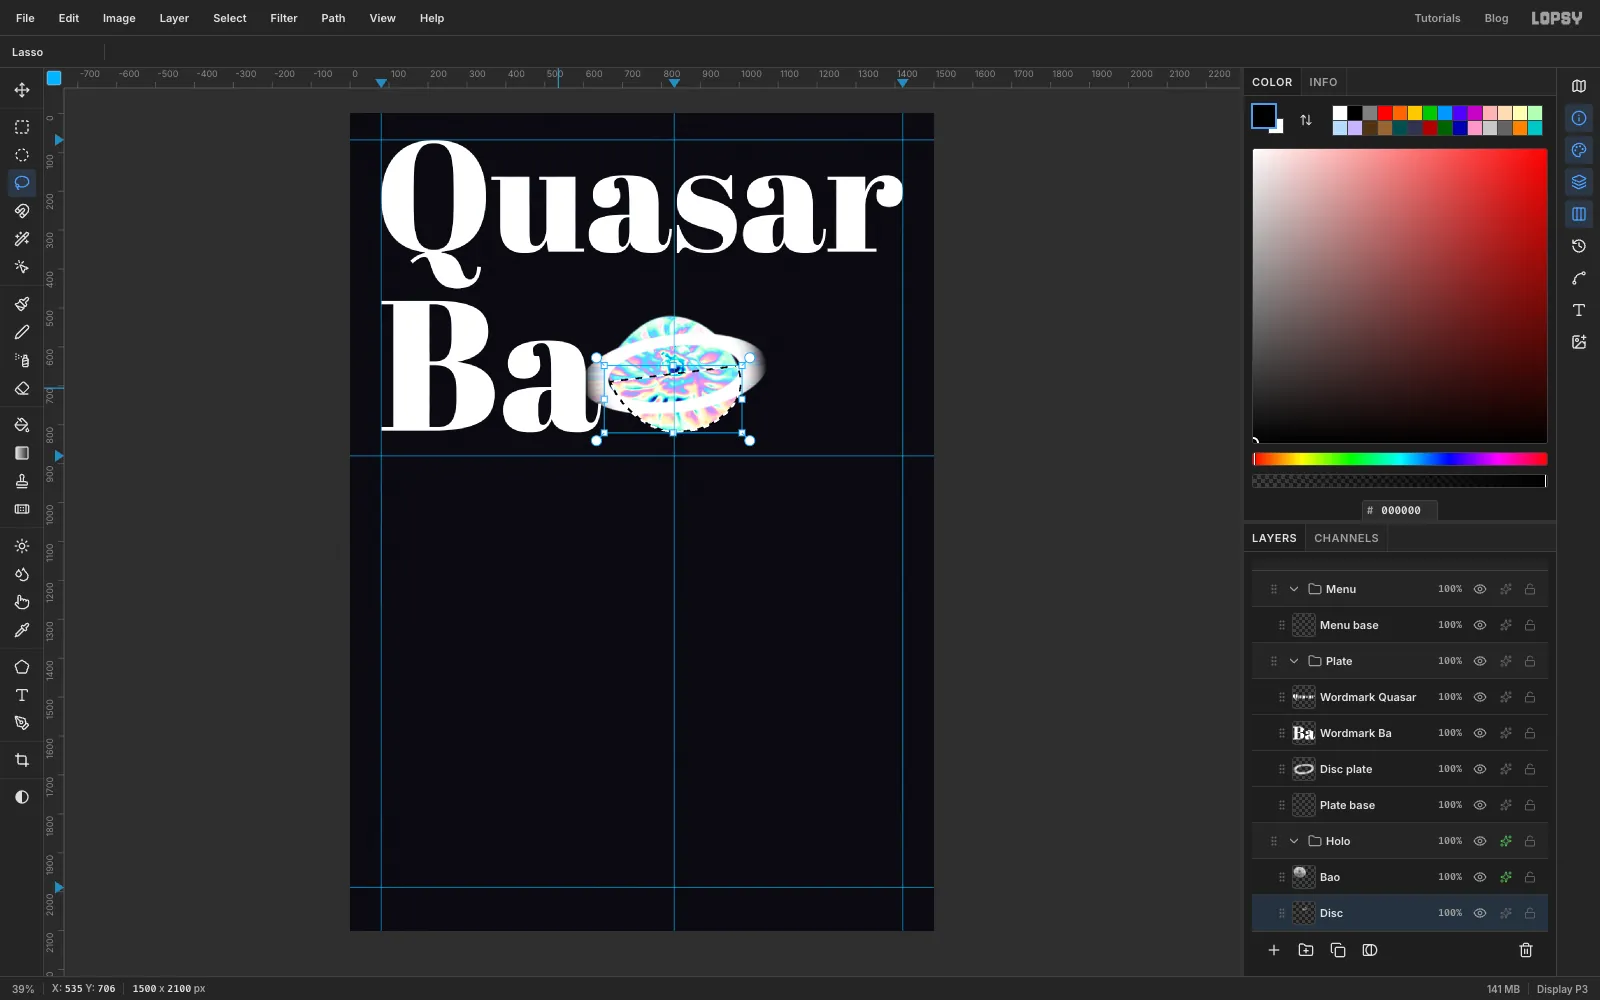
Now the near side of the disc has to cross in front of the bun, but only where it overlaps. With Plate showing, hold Cmd and click the Bao thumbnail to select the bun.
Press L, hold Shift and Alt together, and draw around the lower half of the bun, following the tilt of the disc along the top. Holding both keys keeps only the overlap, so you end up with the bun's lower part.
-
Lay the front of the disc over the bun
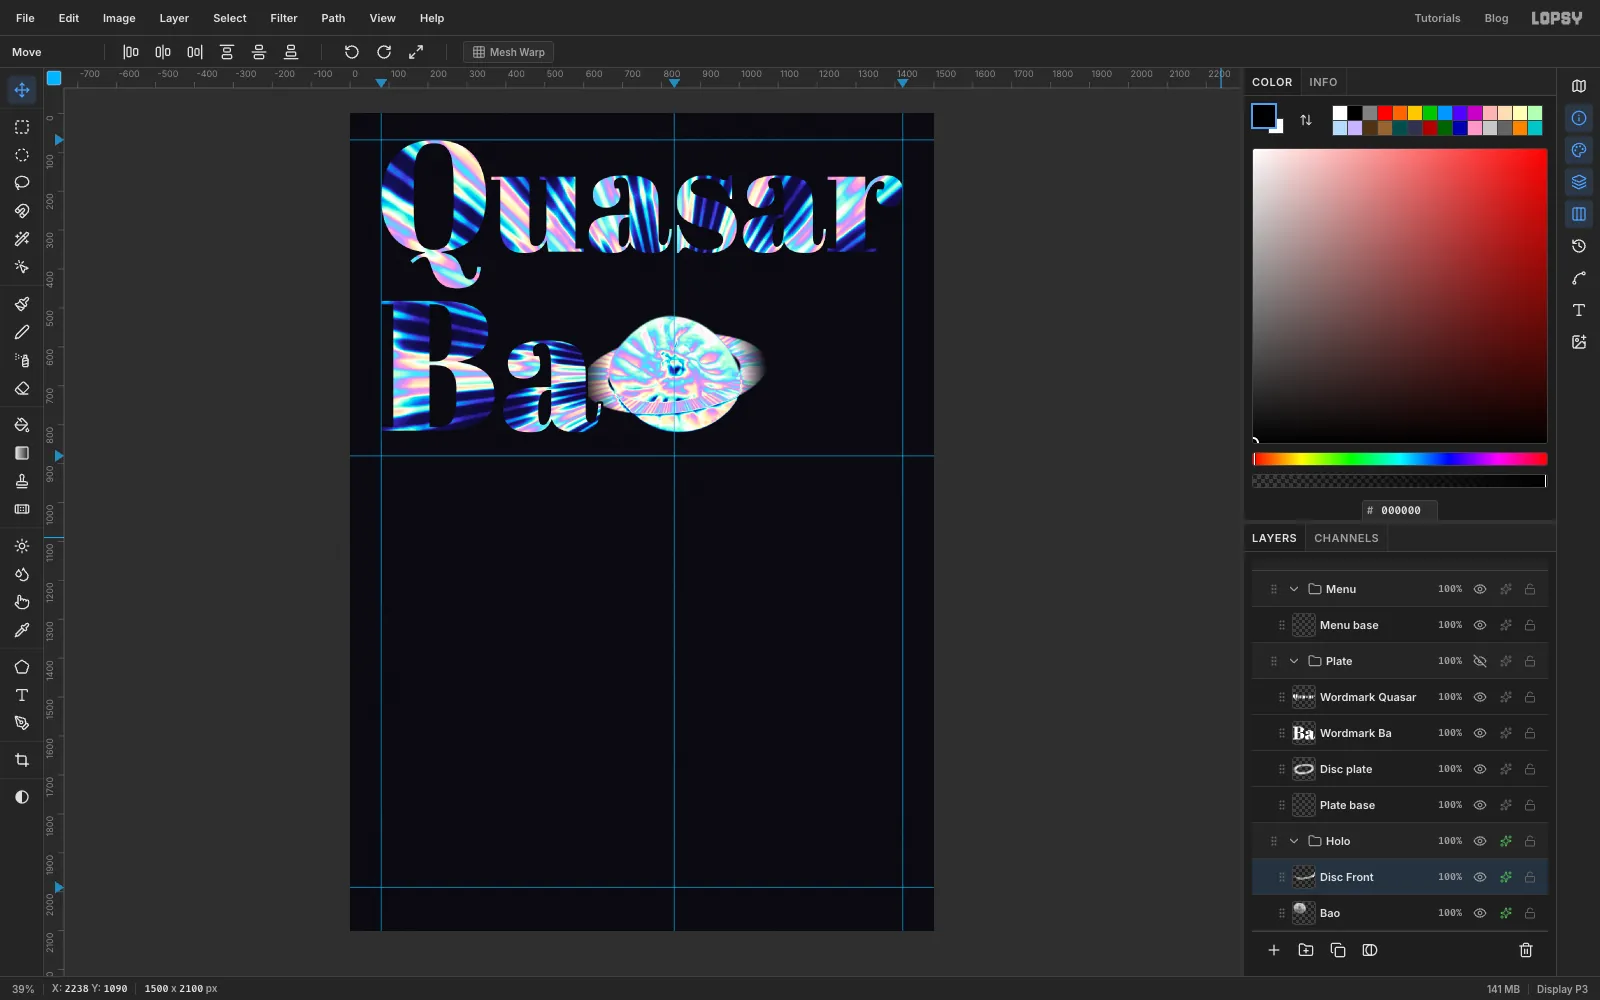
Click the Disc row and press Cmd+C. Only the disc pixels inside your selection get copied. Click the Bao row and press Cmd+V, which places the copy above the bun. Rename it Disc Front and press Cmd+D.
Open its effects, tick Drop Shadow and set Offset X 0, Offset Y 4, Blur 8 and Opacity 70. Close the drawer. The band now wraps around the bun, with no seam, because the full disc is still there behind it. Hide Plate to check the wrap, then show it again.
-
Draw the jets into the mask
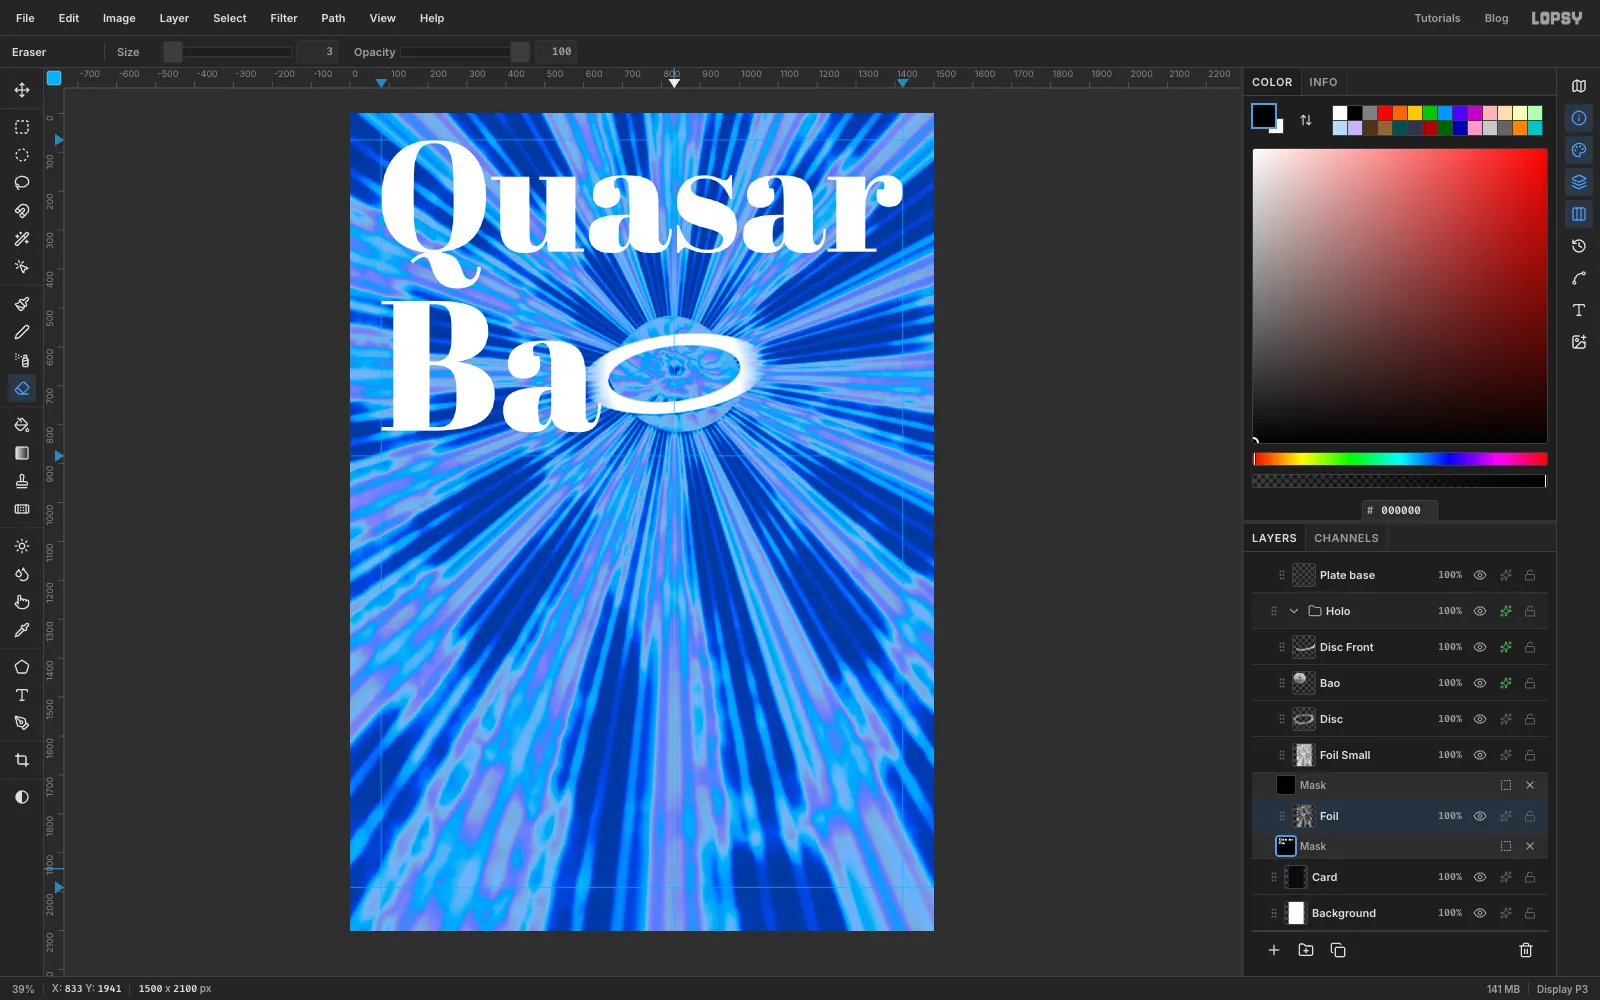
Click the Foil row and then its Mask row. In a mask the Brush and Pencil always hide, whatever the foreground colour, and the Eraser always reveals. So press E for the Eraser and set Size 3.
Set Opacity to 55. Click on the 833 guide at the very top of the page, then hold Shift and click on the guide just under the title's baseline. The jet stays dim across the word so that it doesn't read as a letter.
Set Opacity back to 100. Click on the guide just below the bun, hold Shift and click on the guide about 160 px above the bottom of the page. The lines are hard to see in this mode, so don't worry if they blend into the guide.
-
Taper the jets
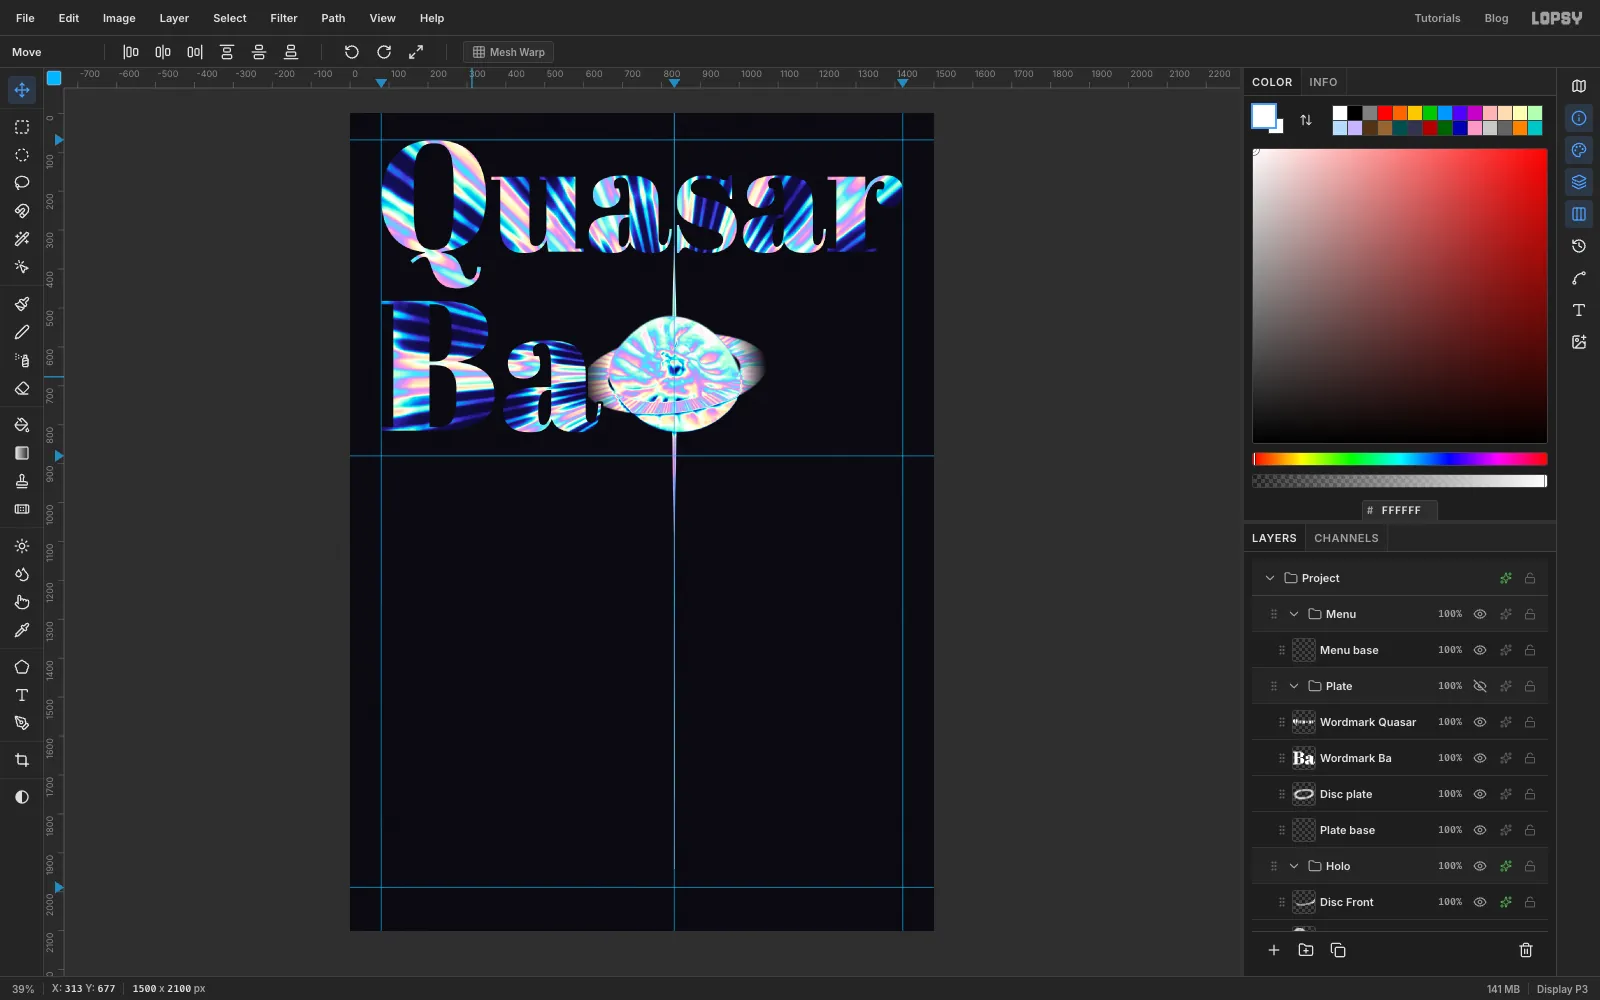
Thin lines don't look like energy, so give each jet a wedge at its base. Zoom in above the bun. Set the foreground to white, and with the mask still active press L and draw a long narrow wedge: about 16 px wide behind the bun, narrowing to a point just inside the bottom of the title. Choose Edit → Fill.
Do the same below the bun, ending the wedge about 270 px under it. Press Cmd+D, press Cmd+0 and click the Foil row to leave mask mode. Hide Plate to see the result.
-
Set the left column
The columns run from the left guide to x = 797, and from x = 869 to the right guide, which leaves the jet its gutter. Add guides at 797 and 869 if you'd like them. Show Plate if it's hidden.
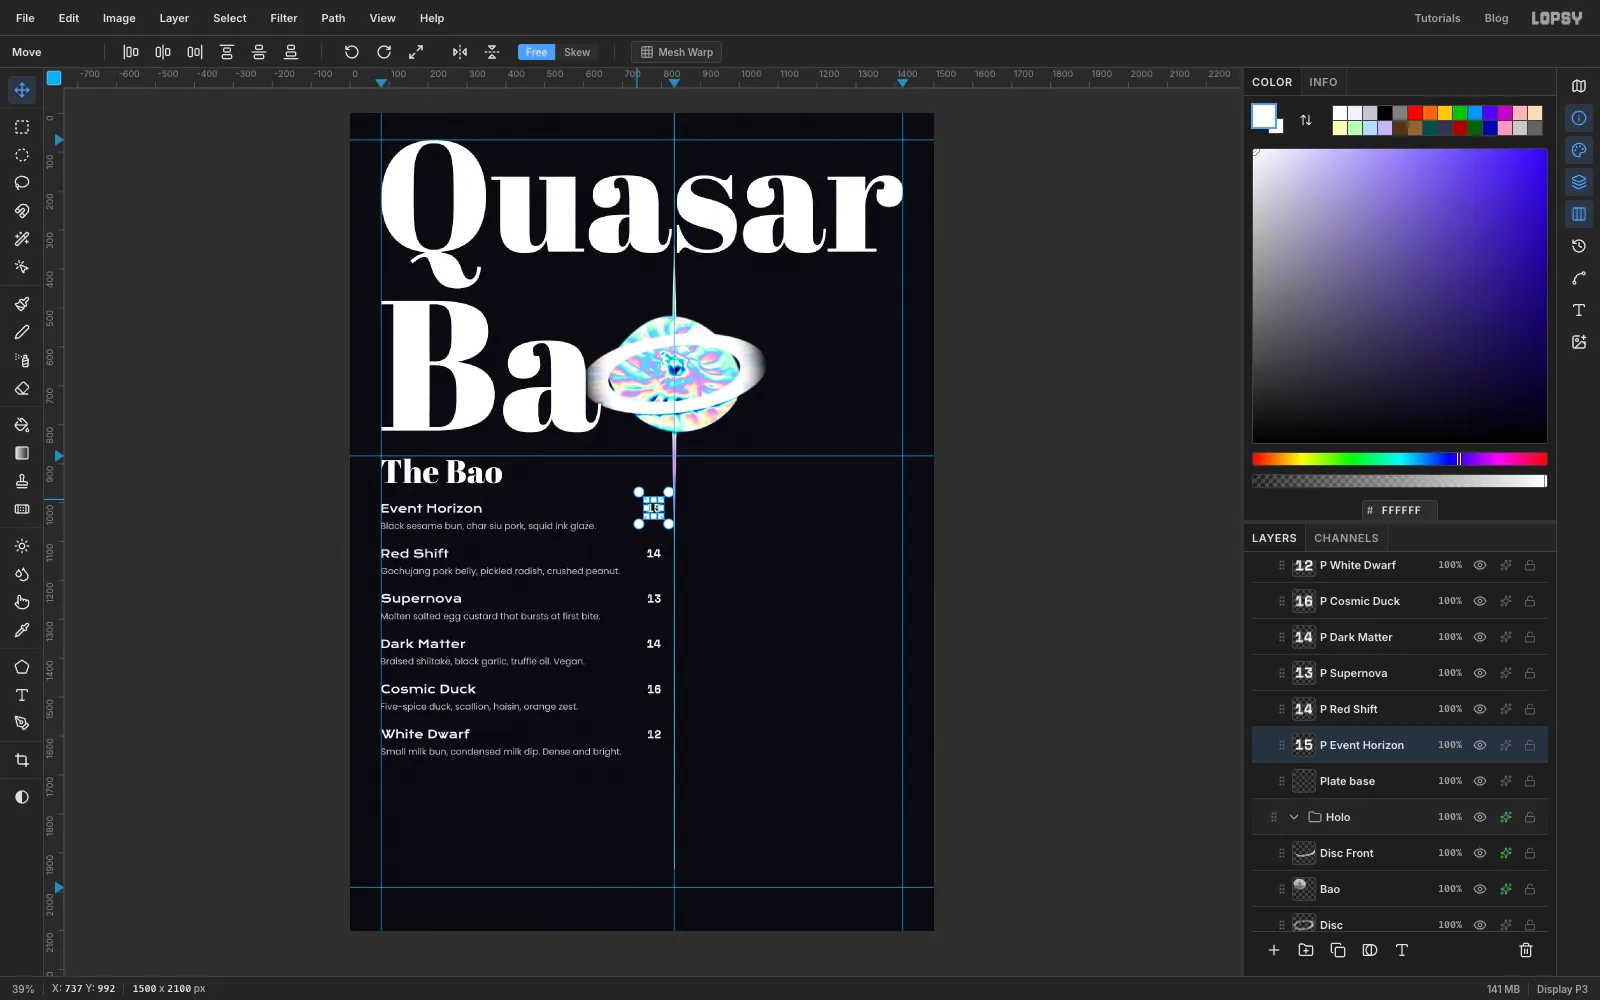
Headings and prices go on the plate in white. Click Plate base before each one. Dish names and descriptions are normal type, so click Menu base before each of those. Use these styles:
- Heading: Abril Fatface, Size 84, white, on the plate. Its top sits just below the 880 guide.
- Dish name: Krona One, Size 29, .
- Description: Poppins Regular, Size 23, , about 25 px under the name.
- Price: Space Mono Bold, Size 30, white, on the plate, with its right edge on the column edge and its baseline level with the name.
Start the first dish name about 1005 px down, and start each dish 116 px below the last. Type this into the left column under the heading The Bao:
- Event Horizon, 15. Black sesame bun, char siu pork, squid ink glaze.
- Red Shift, 14. Gochujang pork belly, pickled radish, crushed peanut.
- Supernova, 13. Molten salted egg custard that bursts at first bite.
- Dark Matter, 14. Braised shiitake, black garlic, truffle oil. Vegan.
- Cosmic Duck, 16. Five-spice duck, scallion, hoisin, orange zest.
- White Dwarf, 12. Small milk bun, condensed milk dip. Dense and bright.
Rename each price layer as you go, because you'll click through them shortly. Krona One and Abril Fatface have one weight, so switching to them drops Bold back to Regular, and you'll need to set Bold again for every price. If you go straight from a price to a Poppins line, Bold stays on, so set it back to Regular.
-
Set the right column
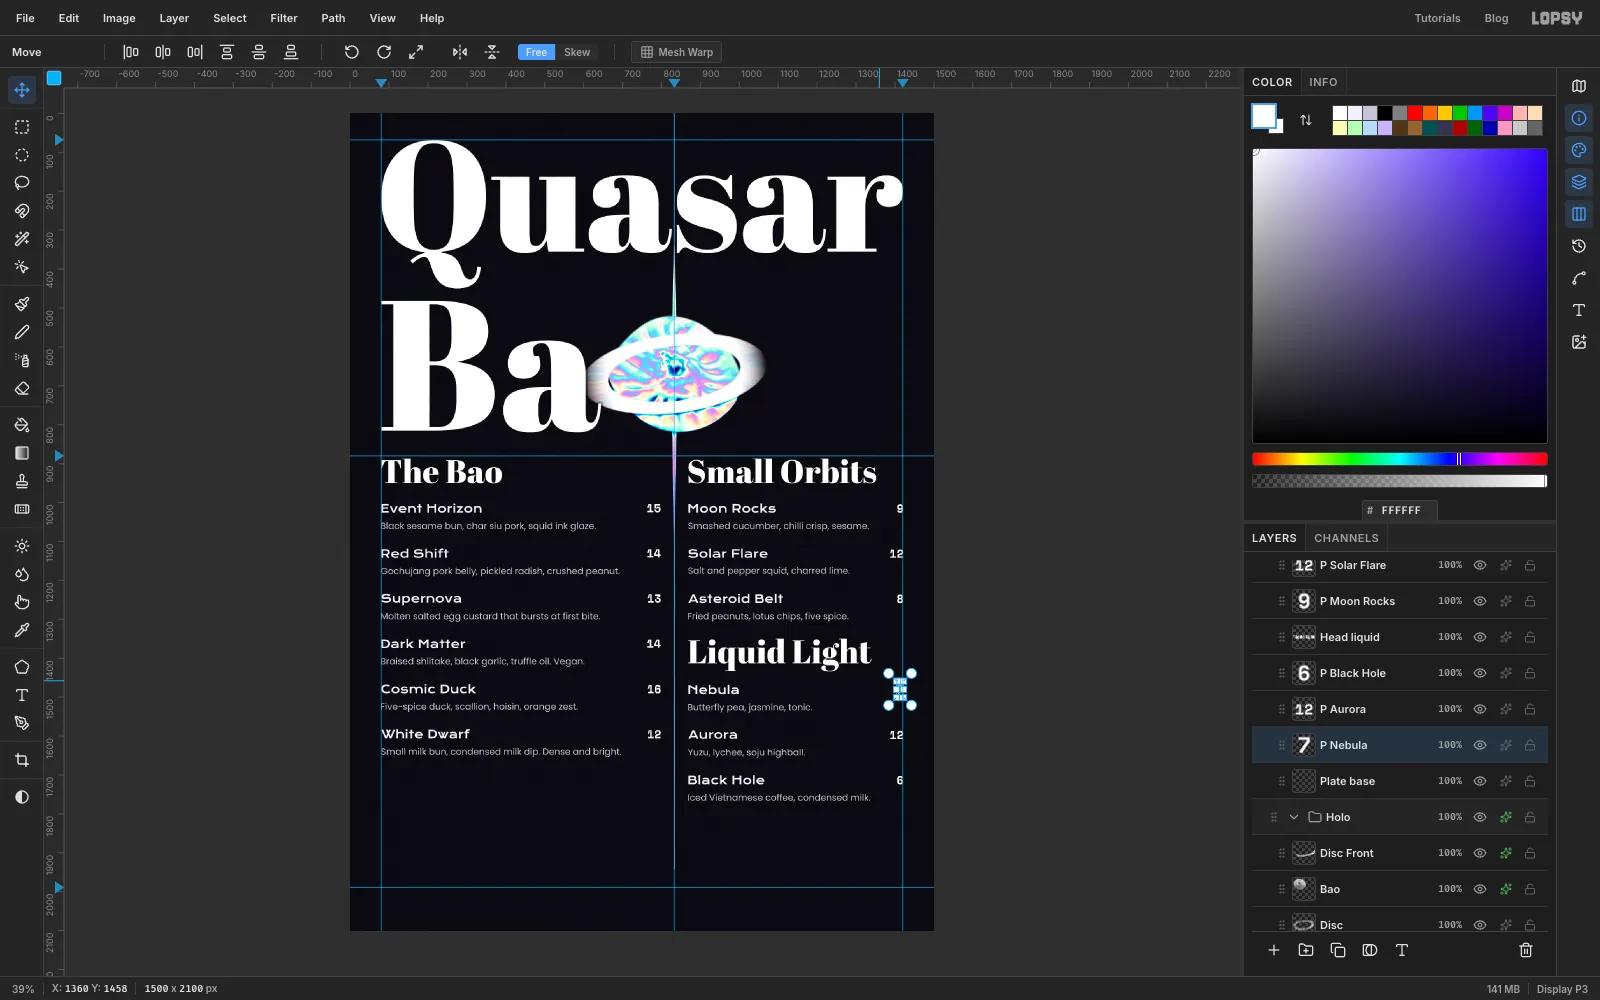
Use the same styles from x = 869. Under Small Orbits, level with The Bao, add three dishes on the same 116 px rows as the left column:
- Moon Rocks, 9. Smashed cucumber, chilli crisp, sesame.
- Solar Flare, 12. Salt and pepper squid, charred lime.
- Asteroid Belt, 8. Fried peanuts, lotus chips, five spice.
Put the heading Liquid Light with its top at about 1350. Start its first dish level with Cosmic Duck in the left column, and continue at 116 px:
- Nebula, 7. Butterfly pea, jasmine, tonic.
- Aurora, 12. Yuzu, lychee, soju highball.
- Black Hole, 6. Iced Vietnamese coffee, condensed milk.
-
Stamp the headings and prices
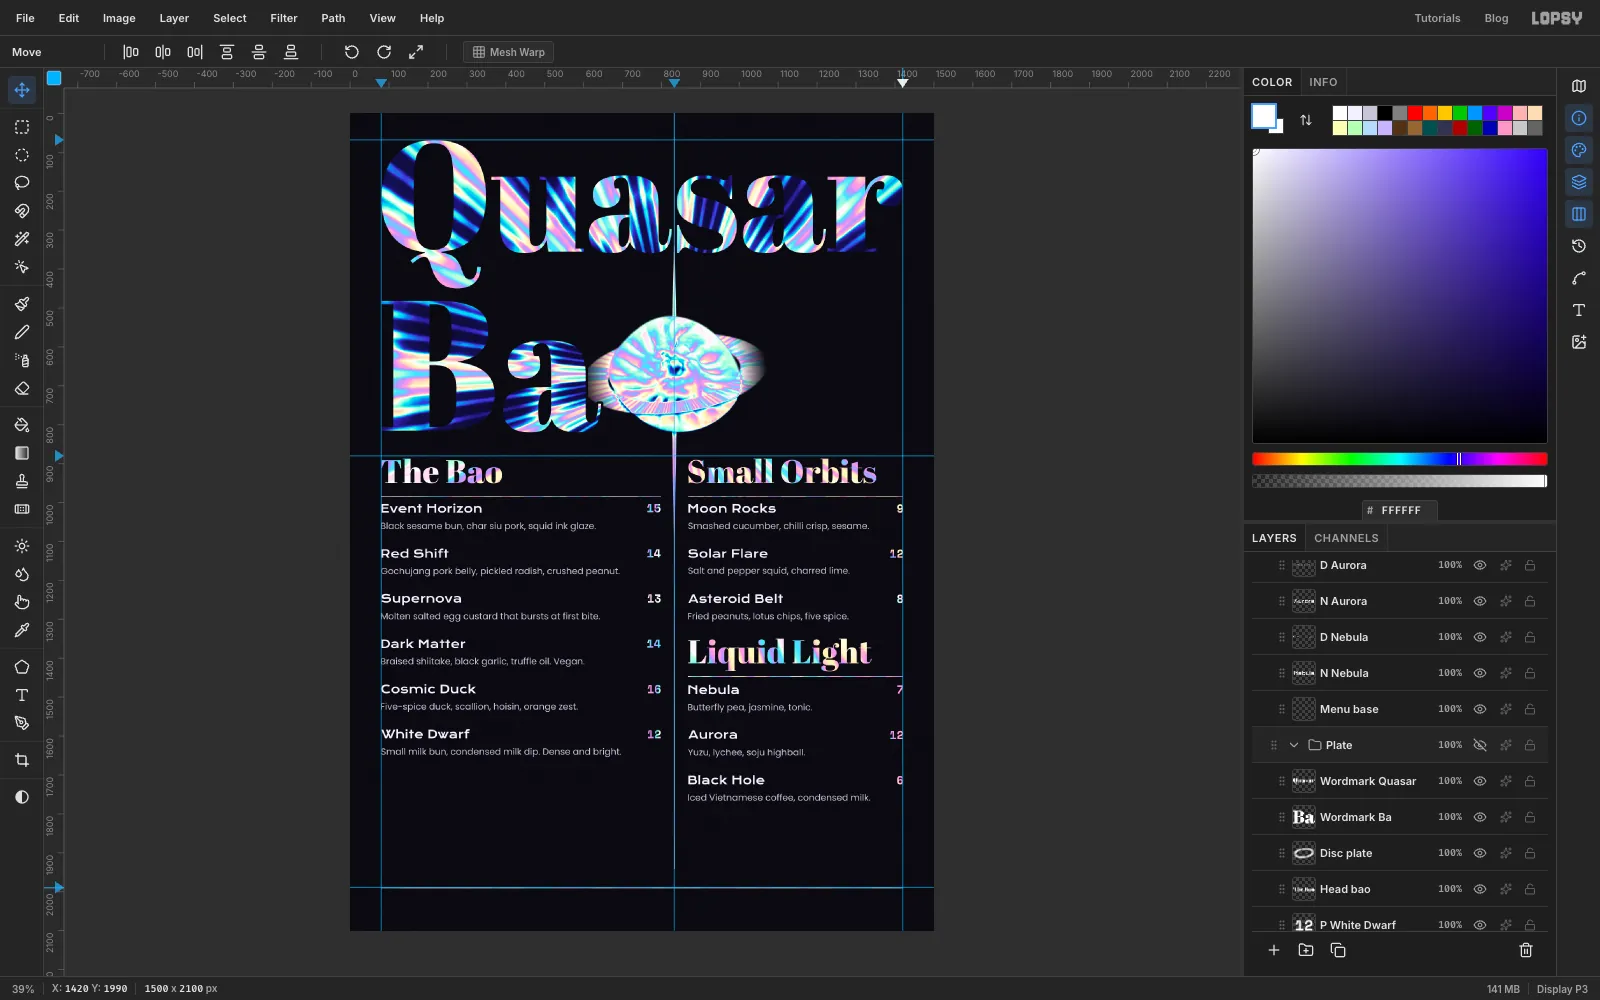
Click the Foil Small row and then its Mask row. Set the foreground to white. For each heading and price, hold Cmd and click its thumbnail, then choose Edit → Fill. It's repetitive, with fifteen layers to get through: Cmd-click, Edit → Fill, next. Press Cmd+D when you're done.
While you're in this mask, add the rules. Press E for the Eraser with Size 3 and Opacity 100. Click at one end of a rule, hold Shift and click the other end. Draw one under each heading, about 20 px above the first dish, and one across the page between the margins at about y = 1990 for the footer.
Click the Foil Small row to leave the mask, then hide Plate.
-
Add dotted leaders
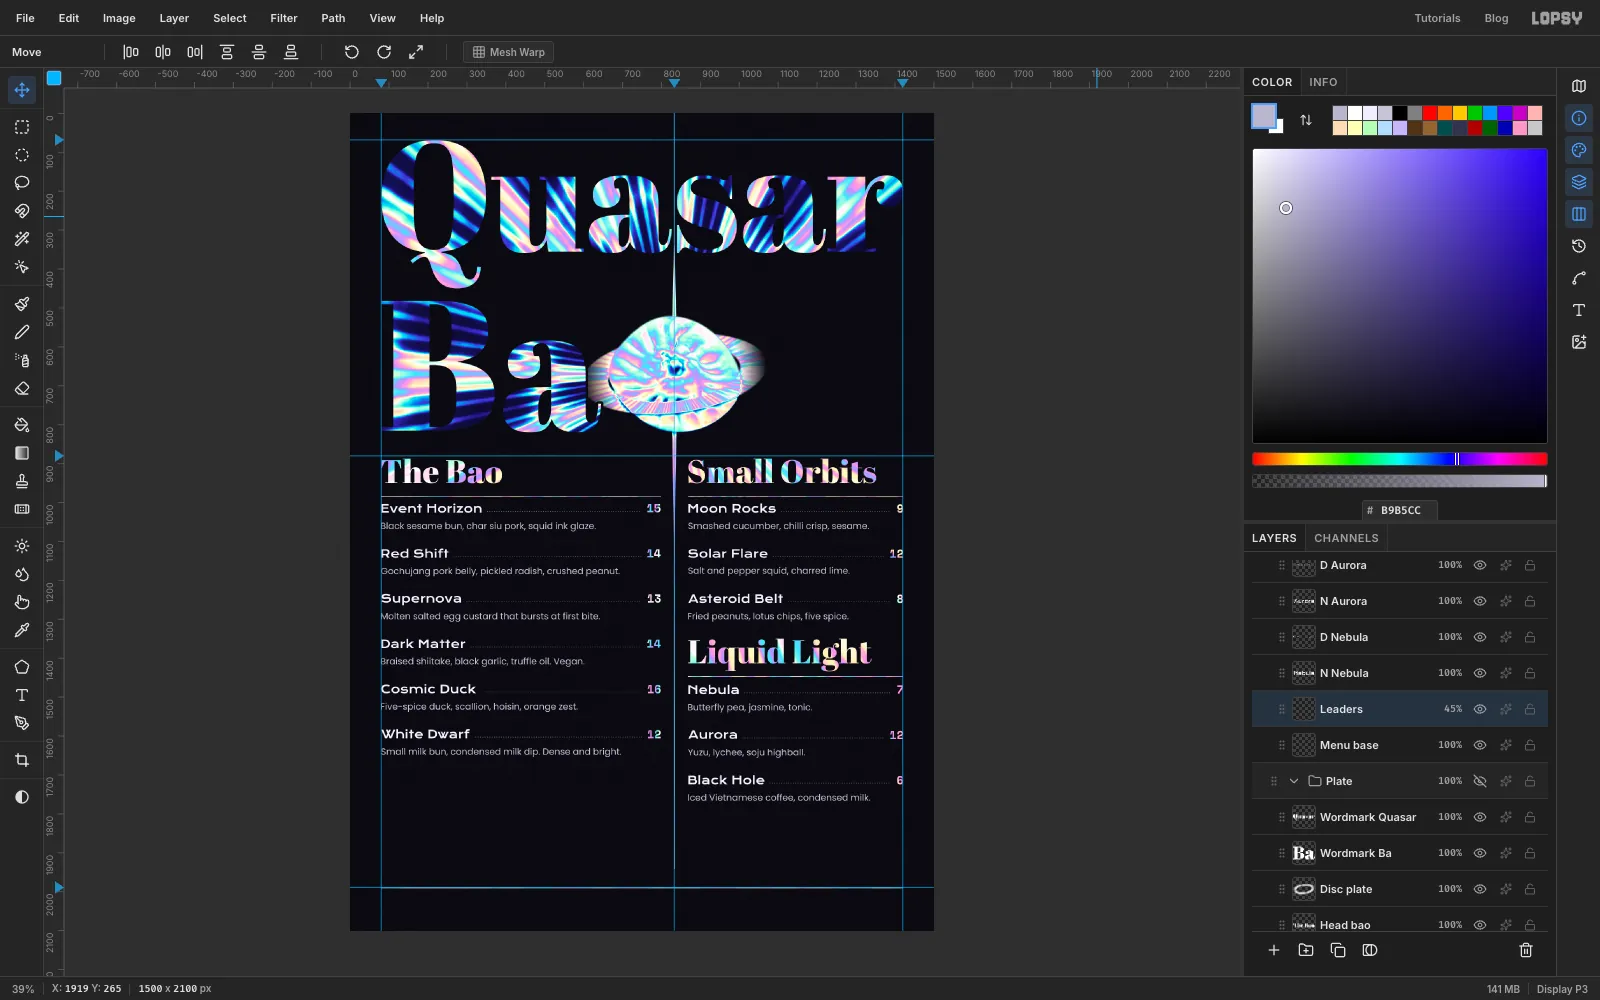
Left-column prices sit a long way from their names, and the eye needs a path. Click Menu base, click Add Layer and name it Leaders. Set the foreground to . Press B for the Brush with Size 3. Click the round brush preview at the left of the options bar, set Spacing to 200, then close the panel.
On each row, click just right of the dish name, about 2 px above the baseline, then hold Shift and click just left of the price. Spacing stretches the line into dots. When you've done every row, set Spacing down to 10 so it doesn't catch you out later, and set this layer's opacity to 45%.
-
Rule the Full Orbit panel
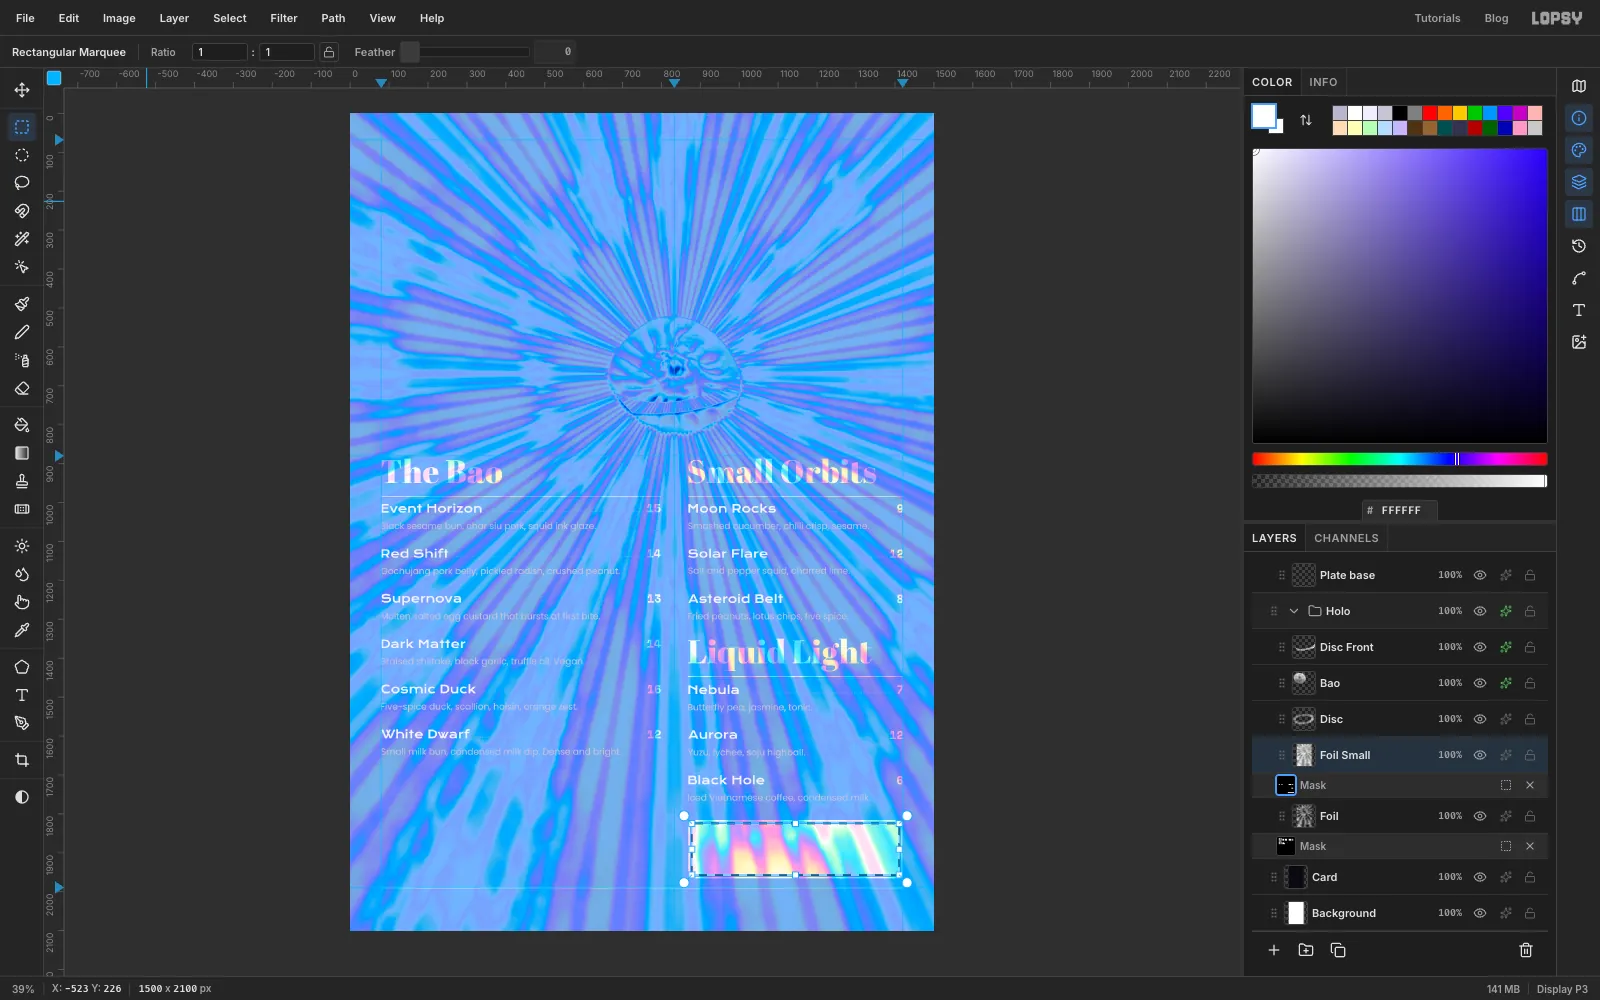
The set menu deserves its own frame. It runs along the right column, from about y = 1816 to y = 1966. Click the Foil Small row and then its Mask row. You'll make a double rule by stacking four rectangles, each one inset from the last. Press M. For each rectangle, press Cmd+D, click once on the canvas and type its corners into the dialog. Don't drag these, because the edges snap to the guides.
- From 869, 1816 to 1420, 1966: fill with white.
- From 873, 1820 to 1416, 1962: fill with black.
- From 878, 1825 to 1411, 1957: fill with white.
- From 880, 1827 to 1409, 1955: fill with black.
Change the foreground before each Edit → Fill. Press Cmd+D and click the Foil Small row to leave.
-
Finish the small type
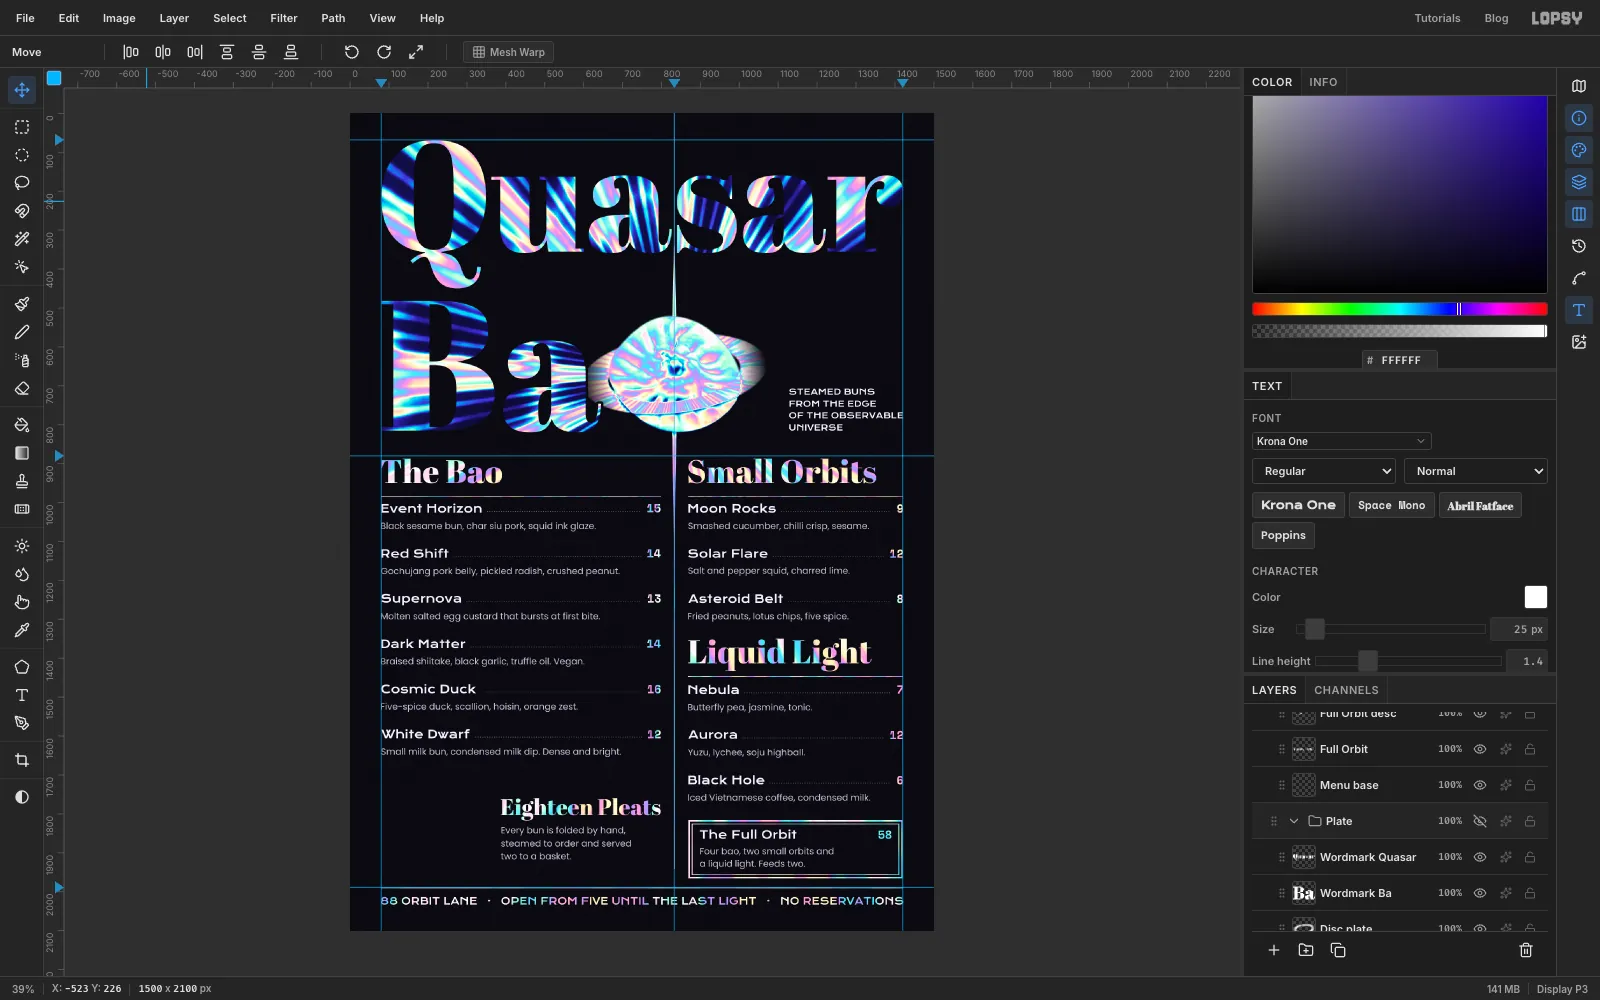
Show Plate. Add the remaining text the same way as the menu. Line height lives in the Text panel (the T icon on the right edge), so set it after you press Tab, with the text layer still active.
- On Menu base, the panel text: The Full Orbit in Krona One 29 and , and two lines of Poppins 23 in reading Four bao, two small orbits and a liquid light. Feeds two. Leave about 25 px of space around the text inside the rule.
- On Plate base, the price 58 in Space Mono Bold 30, white, 30 px inside the panel's right edge, with its baseline level with The Full Orbit.
- On Menu base, the tagline in Krona One Size 21, , with Line height 1.45: STEAMED BUNS / FROM THE EDGE / OF THE OBSERVABLE / UNIVERSE on four lines. Put its right edge on the right guide and its last baseline level with the bottom of Ba.
- On Plate base, the heading Eighteen Pleats in Abril Fatface Size 58, white, starting at x = 387 and about 1760 px down.
- On Menu base, under that heading, three lines of Poppins 23 in at Line height 1.45: Every bun is folded by hand, / steamed to order and served / two to a basket.
- On Plate base, the footer in Krona One Size 25, white: 88 ORBIT LANE · OPEN FROM FIVE UNTIL THE LAST LIGHT · NO RESERVATIONS, with three spaces either side of each dot. It should run from margin to margin just under the footer rule.
Stamp 58, Eighteen Pleats and the footer into the Foil Small mask the same way as the prices. Hide Plate.
-
Cut the rings of the seal
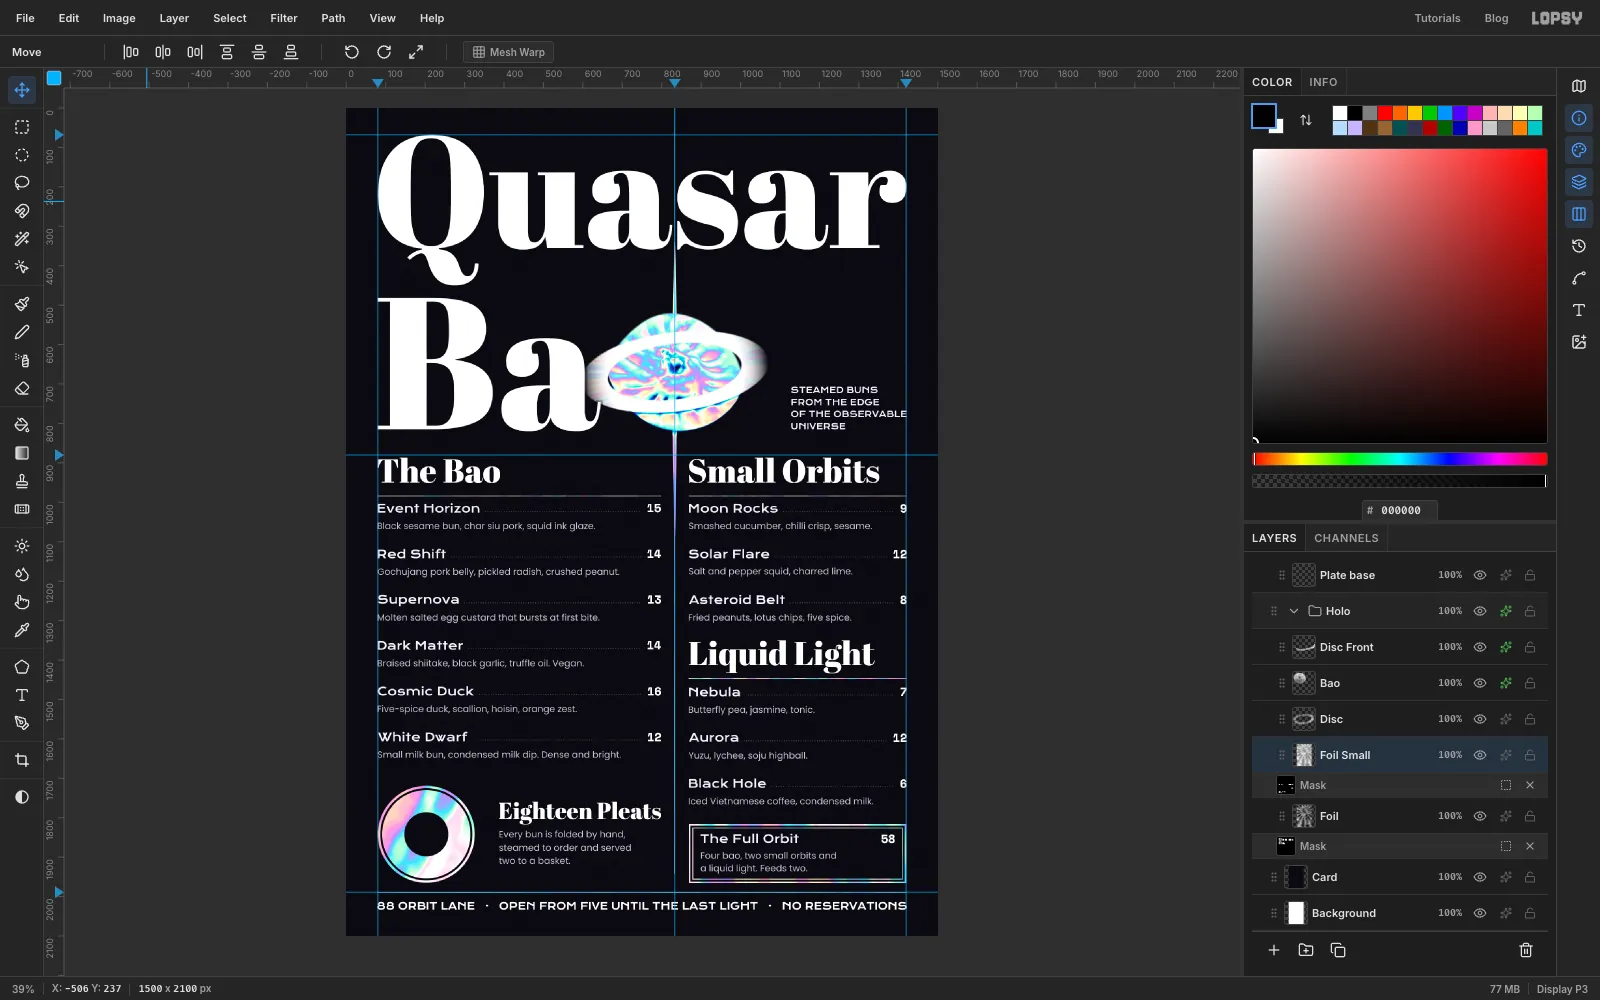
The empty corner at the bottom left is the place for a hologram seal, centred around x = 203, y = 1842. It's made of nested circles in the Foil Small mask. Show Plate, click Foil Small's Mask row and choose the Elliptical Marquee. For each circle, press Cmd+D, click once on the canvas and type the corners into the dialog, so the circles stay on one centre and don't snap to the left guide:
- From 80, 1719 to 326, 1965: fill with white.
- From 86, 1725 to 320, 1959: fill with black.
- From 91, 1730 to 315, 1954: fill with white.
- From 147, 1786 to 259, 1898: fill with black.
That gives you a thin outer ring, a wide foil band and a black plate in the middle. Press Cmd+D and click Foil Small to leave the mask.
-
Stamp the monogram
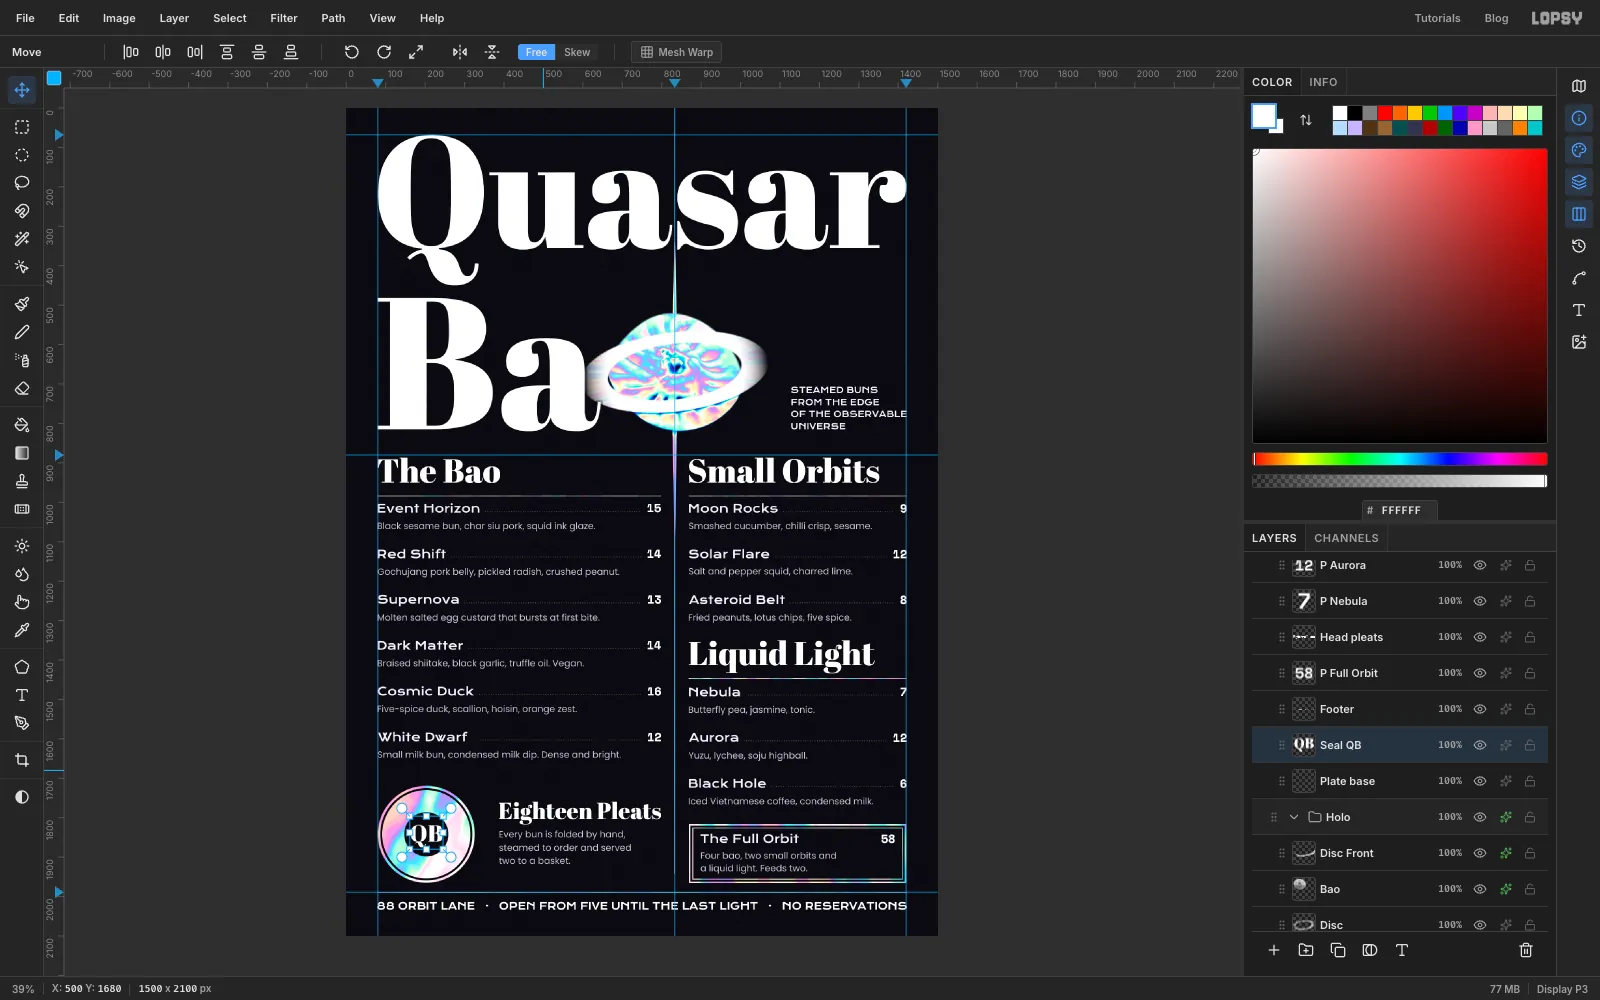
Click Plate base. Make a text layer reading QB in Abril Fatface Size 60, in white, somewhere empty. Press V and move it to the middle of the black plate. Centre the two capitals by eye, since the tail of the Q hangs below them.
Click the Foil Small Mask row, hold Cmd and click the QB thumbnail, and choose Edit → Fill with the foreground still white. Press Cmd+D and click the Foil Small row to leave the mask.
-
Ink the pleats around the seal
Now print on top of the foil, the way a seal is overprinted in black ink. Click Menu base, add a layer called Seal Ink and set the foreground to . Press B for the Brush with Size 3.
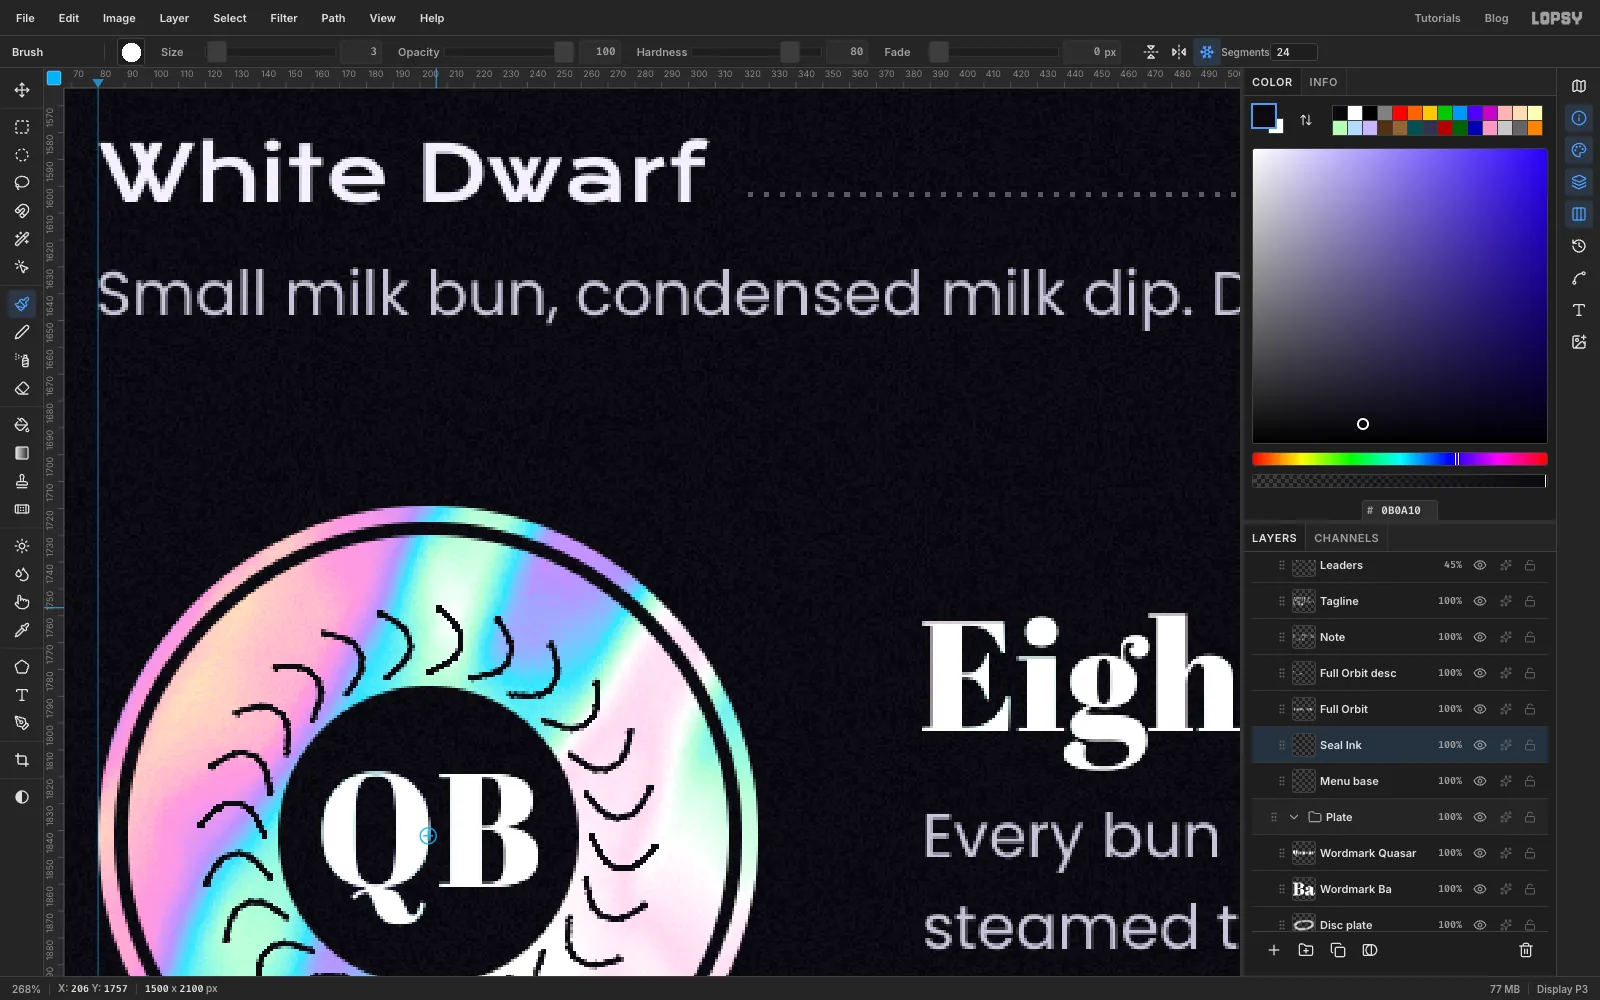
In the options bar, click Radial Symmetry and set Segments to 24. Hold Cmd and click the centre of the seal to set the symmetry centre. Zoom in, then draw one small curved stroke like a crescent in the foil band, leaving room outside it for the rim text. It repeats around the circle. Twenty-four reads better than eighteen at this size, and no one's counting.
Click Radial Symmetry again to turn it off, since it hijacks every Cmd-click while it's on. Stay zoomed in for the next step.
-
Run the text around the rim
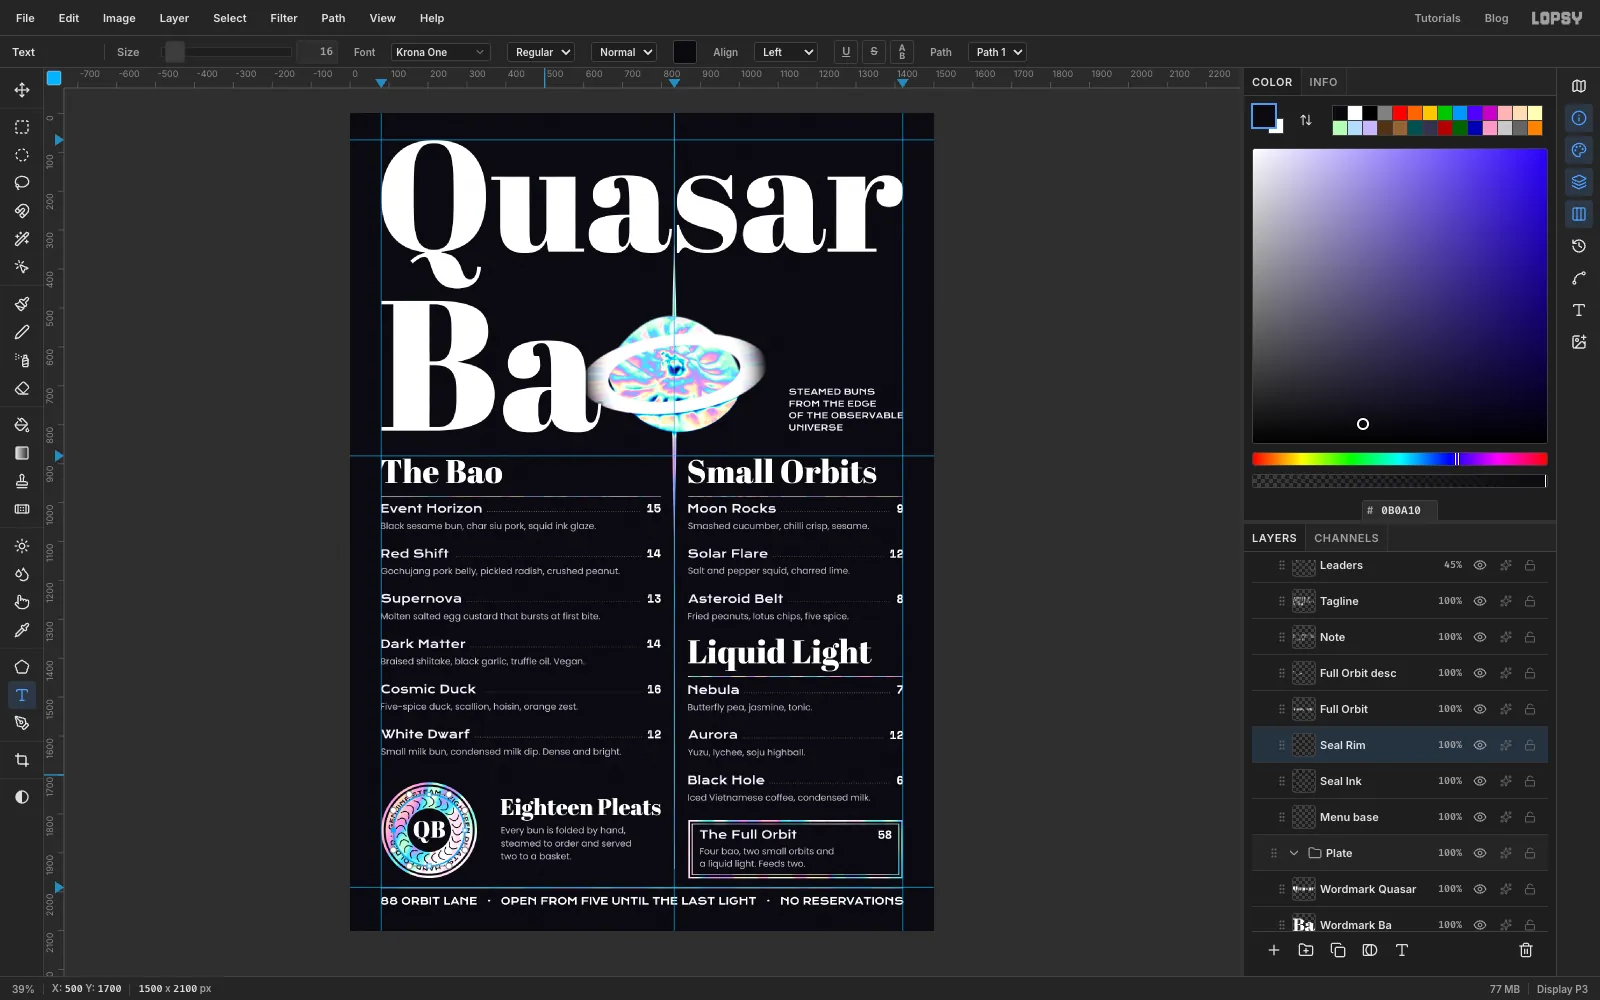
Press P for the Pen tool. Draw a circle in the band, outside the crescents, with a radius of about 92 px. Press at the left point and drag straight up. Press at the top and drag right, at the right and drag down, and at the bottom and drag left. Drag each handle about 50 px, a little over half the radius. Then click the first point to close it, and press Cmd+0.
Click Seal Ink, press T and set Krona One Size 16 in . Click in an empty area and type GENUINE STEAM · EIGHTEEN PLEATS · HAND FOLDED · with one space at the end, then press Tab. You won't see the text, because the ink matches the card. With the Text tool still active, choose your circle in the Path dropdown in the options bar, and it appears on the foil, wrapped around the ring and almost closing it. Change the size by a pixel if yours leaves a bigger gap. Hide Plate when you're done.
-
Add a sparkle and copy it down the jet
Click Disc Front, press V and click Add Layer. Name it Sparkles, so it stays in the Holo group and gets the foil colours.
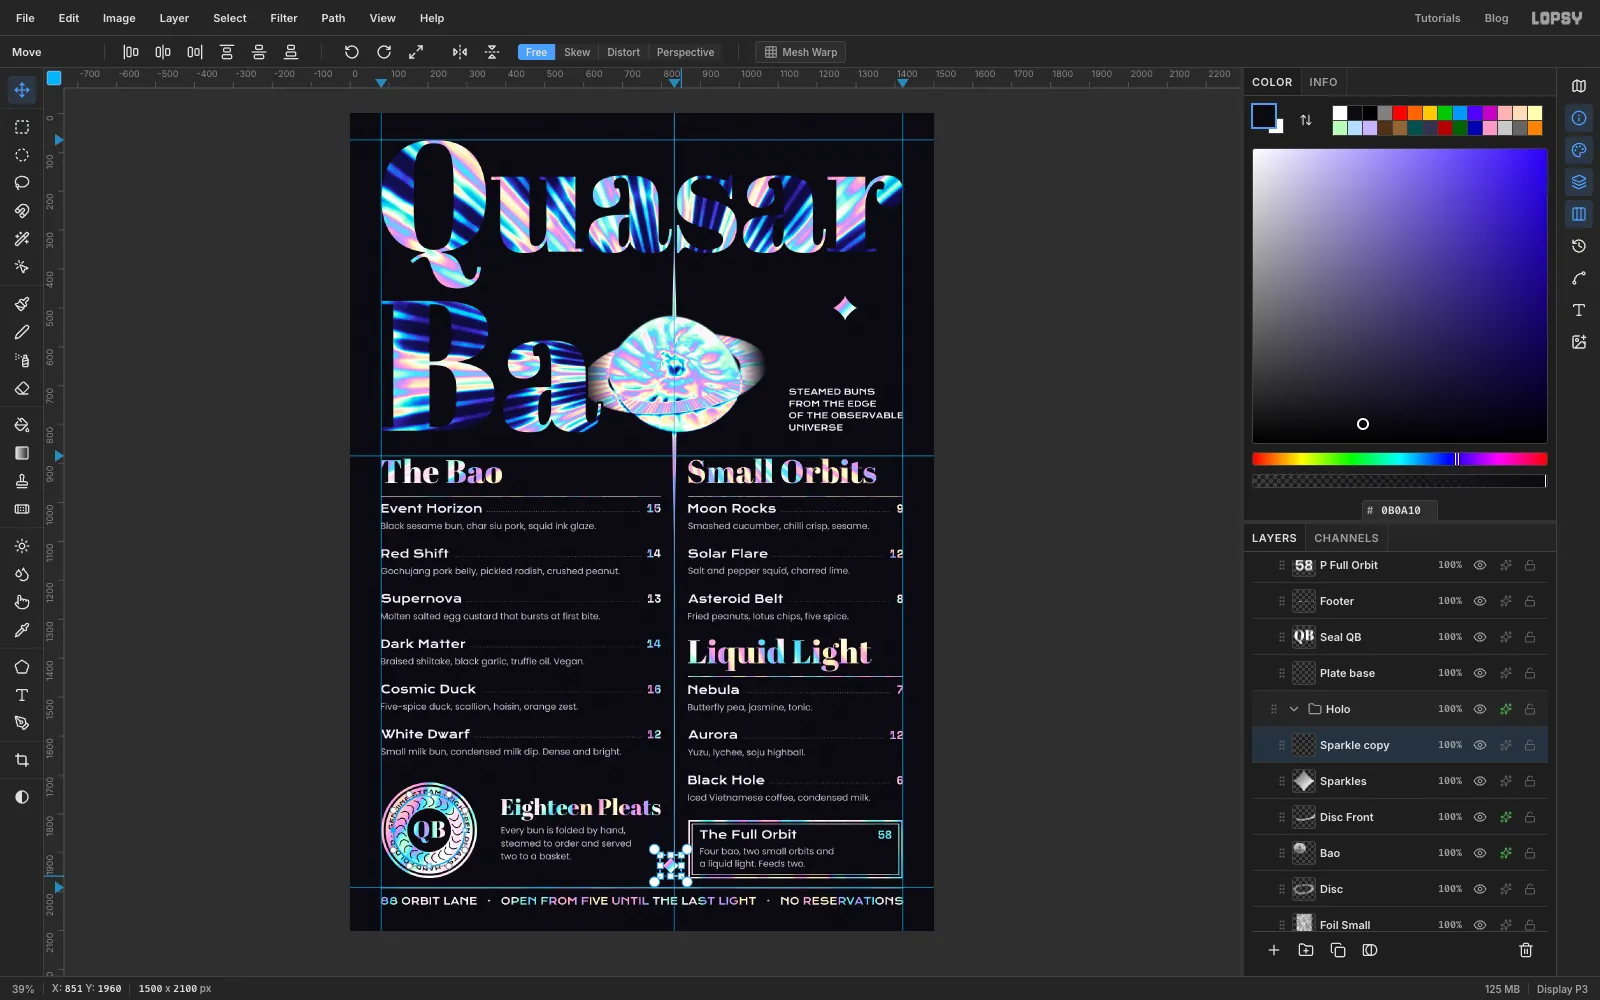
Zoom in and lasso a four-point star about 64 px across in the empty space right of the bun, with concave sides. Choose the Gradient tool in Linear mode and click Advanced…. Set four grey stops: , , and . The opacity from the disc's gradient carries over, so set every stop's opacity back to 100%. Click Done, drag across the star from corner to corner and press Cmd+D, then Cmd+0.
Press M, draw a marquee around the star, press Cmd+C and Cmd+V, then drag the copy to the end of the lower jet. Press Cmd+D, press M, draw a marquee around it, press V and hold Cmd while you drag a corner handle to scale it down to about 48 px. Press Cmd+D, nudge it so the jet ends inside it, then choose Layer → Merge Down.
Add a few soft stars around the bun. Set the foreground to , then press B for the Brush at Hardness 0 and Size between 6 and 9, and click five or so times. Keep them sparse.
-
Give the foil an edge and export
Foil stamped into card has a bright edge where it catches the light. That edge also holds the shape of each letter where the foil goes dark.
Click Foil, open its effects and tick Inner Glow with Size 5 and Opacity 55. Click Foil Small and tick Inner Glow with Size 3 and Opacity 55. Layer effects follow the mask, so every letter gets its own rim. Close the drawer.
Make sure the Plate group is hidden, and press Cmd+; to hide the guides if you want a clean look. Choose File → Save Project to keep the layers, then File → Quick Export PNG for the finished menu.
To try other colours, open the Holo group's Gradient Map and move a stop. The title, bun, disc, seal and footer all change together, because they all pass through one Gradient Map.