Illuminated Manuscript T-Shirt Design for a Monastery Mead
Build a Gothic illuminated-manuscript T-shirt in Lopsy with a lancet arch, gold leaf, a diaper ground, a straw skep, photo-traced bees and Lombardic capitals.
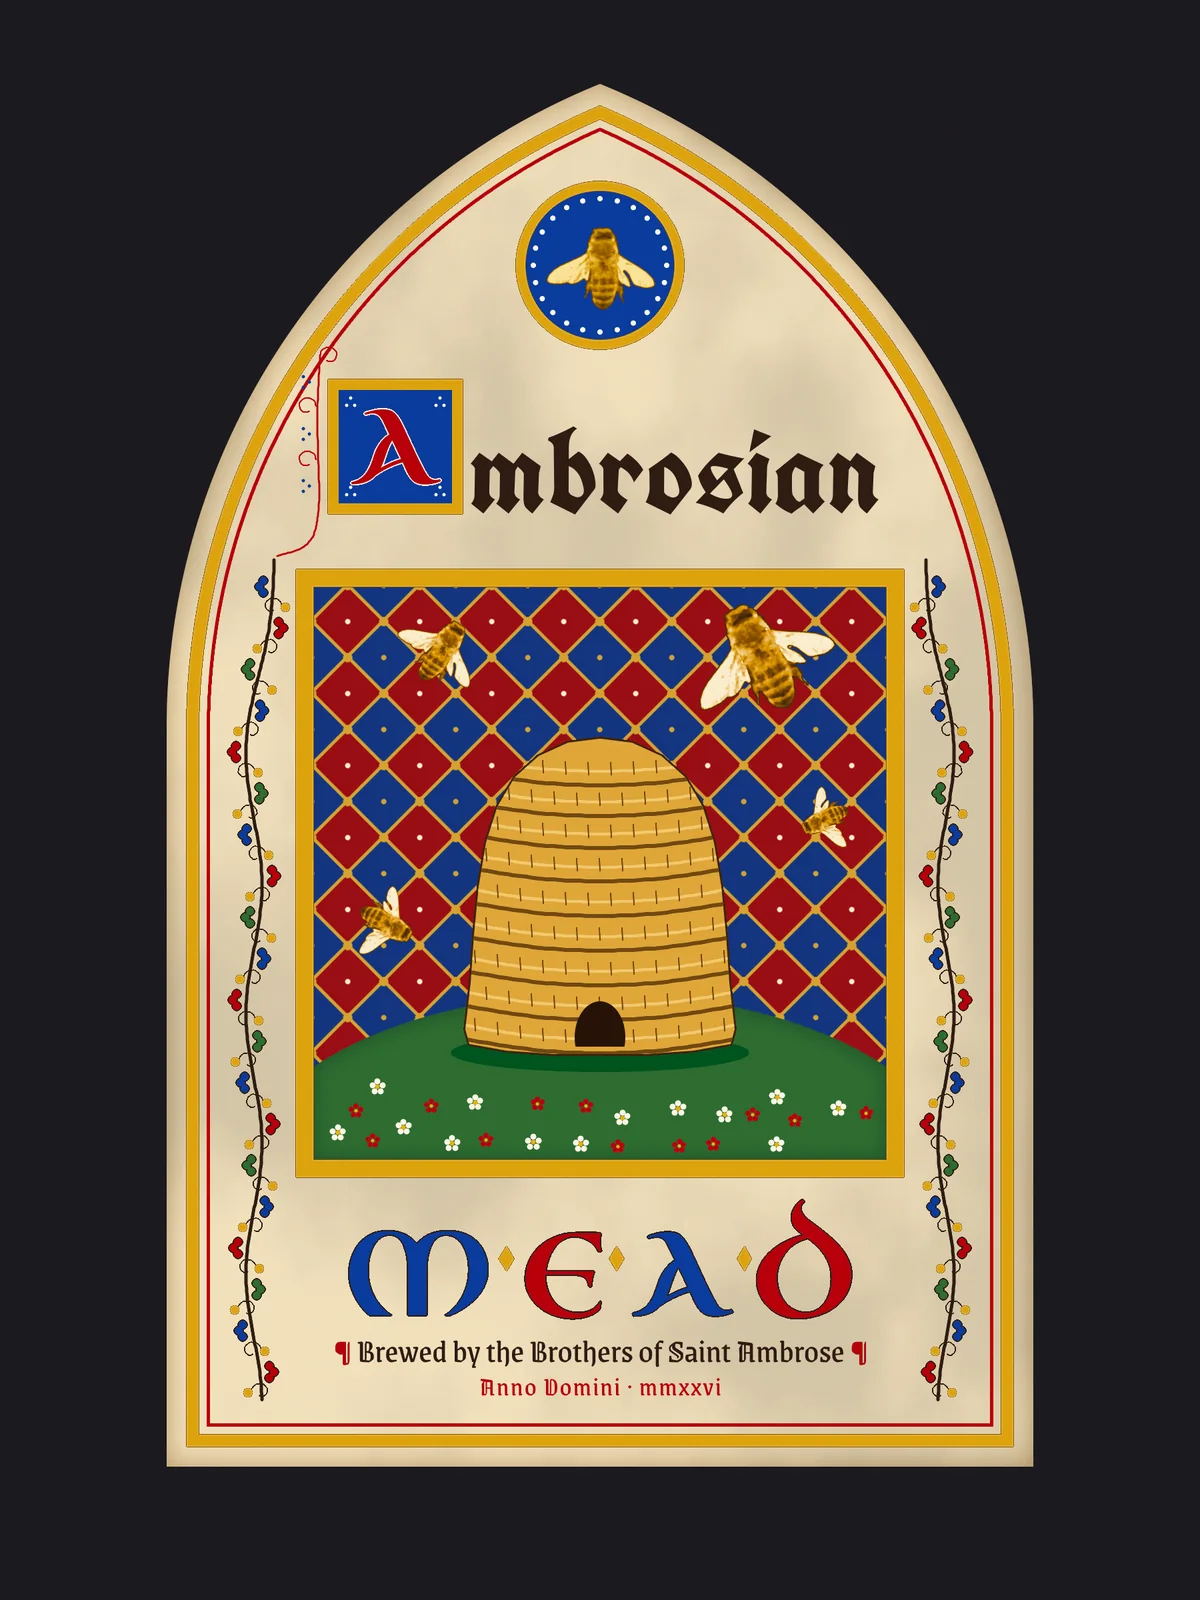
Gothic manuscripts were painted in a small, fixed kit of materials: gold leaf, lapis blue, vermilion, a green, ink and the cream of the vellum. The pages are full of standard pieces. There are pointed arches, gold-framed miniatures set on a chequered diaper ground, ivy-leaf borders studded with gold dots called bezants, and big Lombardic capitals that alternate red and blue.
In this tutorial you'll put that kit together as a T-shirt print for an imaginary monastery brewery, Ambrosian Mead. Saint Ambrose is the patron saint of beekeepers, so the picture is a straw skep (a woven beehive) with bees flying round it. The design is 1800 × 2400 px on a charcoal tee.
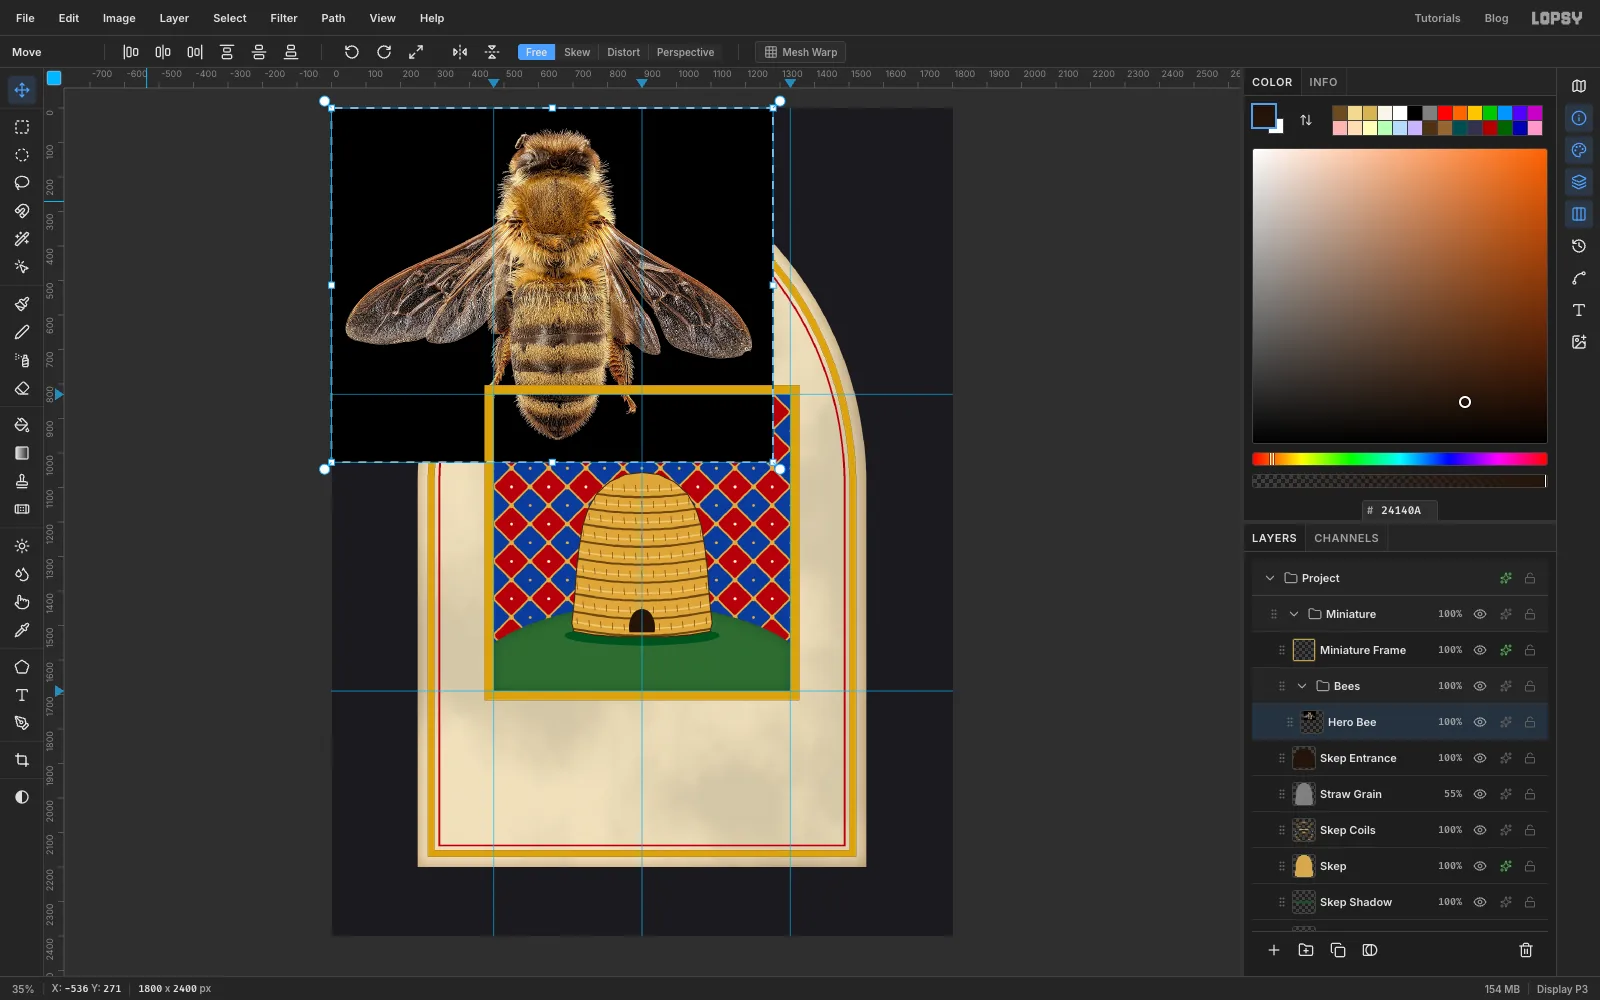
The bees start as a real photograph, then get repainted to match the flat style. Download this public-domain honeybee from Wikimedia Commons. It was taken by the USGS Bee Inventory and Monitoring Lab, and the bee is on a black background:
- Apis mellifera, dark body, back, beltsville, md.jpg) (use the 1,280 × 1,027 download)
You'll use:
- the Elliptical and Rectangular Marquee with Shift (add), Alt (subtract) and Shift+Alt (intersect), and Select → Shrink and Feather
- the Lasso to trace a hive and a photo
- Edit → Define Pattern and Fill with Pattern
- the Brush with mirror and Radial Symmetry, and the Pencil
- Add Noise, Clouds, Gaussian Blur, Motion Blur, Oil Paint, Invert, Desaturate, Brightness/Contrast and Hue/Saturation
- Inner Glow and Stroke effects, and a group Gradient Map
- Move-tool scale, rotate and flip, Copy and Paste, and groups
- the Text tool, Rasterize Layer, and select-and-fill to colour single letters
The type is three free Google Fonts from Lopsy's font picker:
- Uncial Antiqua for the Lombardic capitals
- UnifrakturCook for the blackletter title
- Grenze Gotisch for the small lines
The palette is the illuminator's kit:
-
Shirt
the tee, not an ink
-
Vellum
-
aged edge
-
ink
-
Gold leaf
-
glint
-
keyline
-
Lapis
-
vermilion
-
leaf green
-
dark green
-
Straw
-
straw shadow
-
Bee map
-
Emblem map
-
Pearl white
-
lattice gold
-
flower gold
-
Straw ridge
-
hive outline
-
door
-
shadow green
-
Set up the shirt and guides
Open Lopsy. In the New Document dialog set Width to
1800and Height to2400, and click Create.- Click Background, set the colour to
1C1A1Fand choose Edit → Fill. Rename the layerShirt(double-click the name). - Add a layer named
Heather. Fill it with808080. Choose Filter → Add Noise… with Amount40, Mono and Gaussian, then Filter → Gaussian Blur… with Radius0.5. - Open the layer's fx drawer, set the blend mode to Overlay, and set the layer's opacity to
22%. The grey disappears, leaving a faint flecked heather. - Click the top ruler at 470, 900 and 1330, and the left ruler at 830 and 1690. The square between them is where the picture goes.
The empty
Layer 1that Lopsy adds to a new document stays in the stack. You'll use it later as a place to start a group.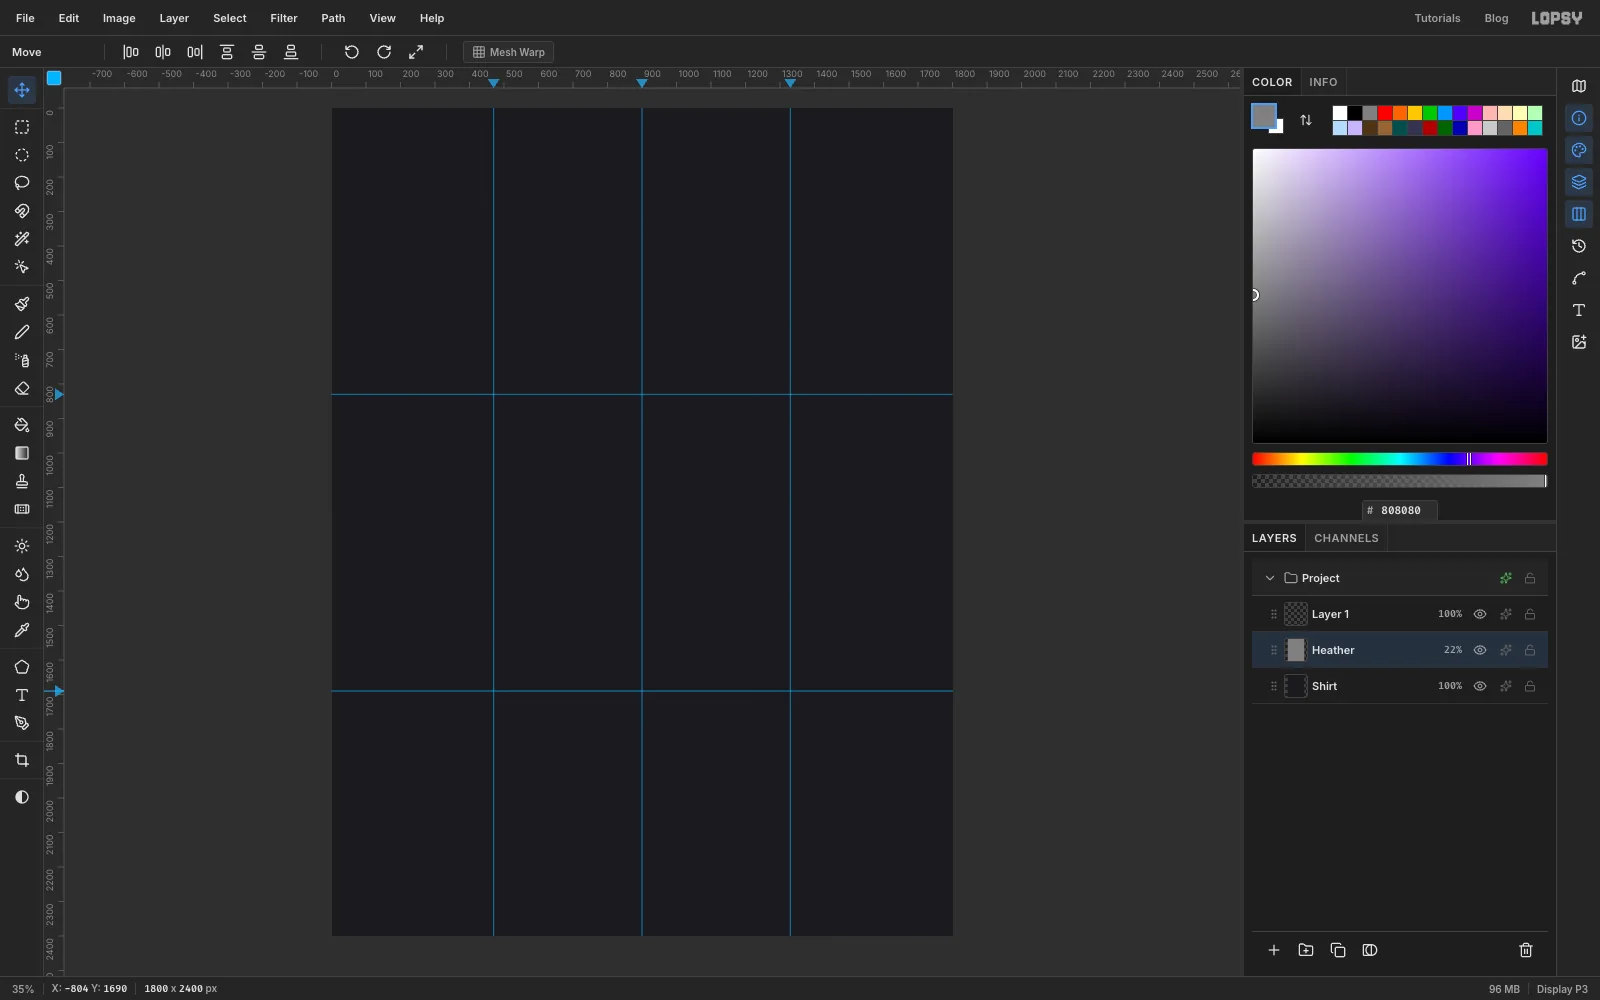
- Click Background, set the colour to
-
Draw a Gothic lancet arch
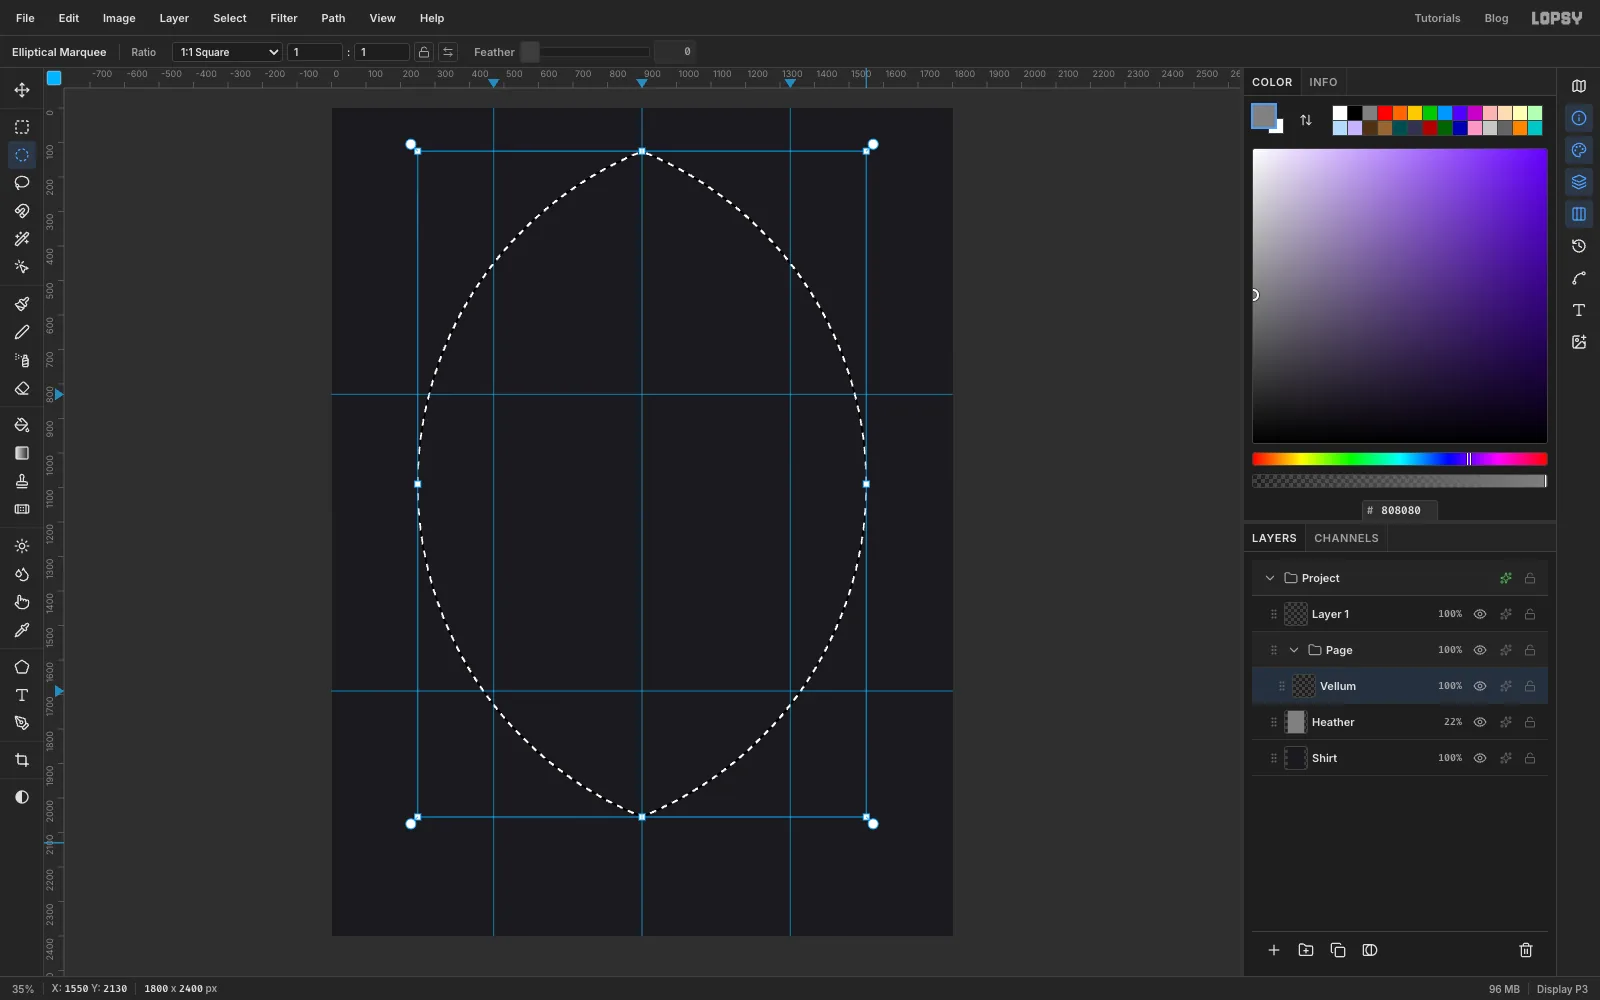
A pointed Gothic arch is where two circles overlap. Each side of the arch is an arc drawn from a centre on the opposite side.
- Click
Heather, then click New Group at the bottom of the Layers panel and name itPage. Add a layer namedVelluminside it. - With the Elliptical Marquee, hold Cmd and drag a circle from
250, 50to2330, 2130. It runs off the right of the canvas, so keep dragging onto the grey pasteboard. Cmd keeps it round. - Hold Shift+Alt+Cmd and drag a second circle from
-530, 50to1550, 2130, starting on the pasteboard to the left. Shift+Alt keeps only the overlap, a tall pointed lens, and Cmd keeps this circle round too. - Switch to the Rectangular Marquee, hold Shift, and drag from
250, 1090to1550, 2200. The rectangle adds the straight sides and the foot of the page.
The bigger the circles, the sharper the point. Circles only a little wider than the arch give an almost round top.
- Click
-
Fill the vellum and age its edges
- Set the colour to
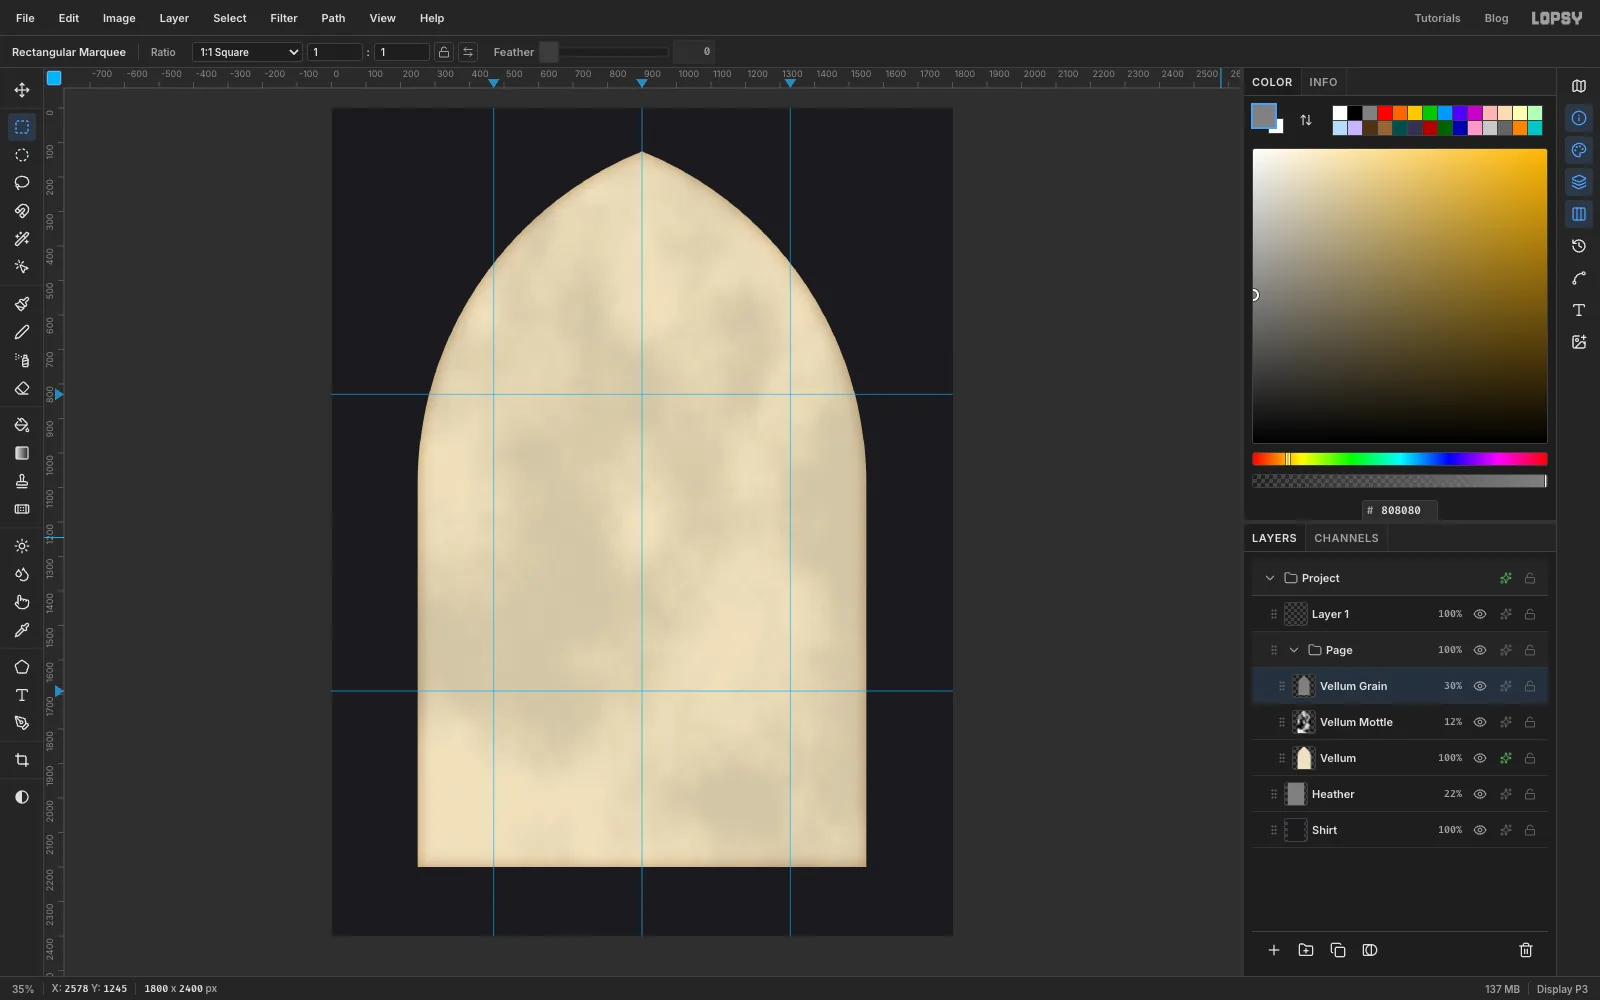
EEE1C0, choose Edit → Fill, and press Cmd+D. - In the fx drawer tick Inner Glow: Size
70, Spread0, Opacity70, colour9C7A45. Old vellum darkens towards its edges. - Add a layer named
Vellum Mottle. Cmd-click theVellumthumbnail to select the page, then choose Filter → Clouds… with Scale6. Set it to Multiply at12%. - Add a layer named
Vellum Grain. Cmd-click theVellumthumbnail again and fill with808080. Run Add Noise… at30(Mono, Gaussian) and Gaussian Blur… at1, deselect, and set it to Overlay at30%.
Leave the page without a drop shadow. On a shirt, a shadow prints as a muddy grey band.
- Set the colour to
-
Grow the gold frame in from the edge
Select → Shrink follows any shape, so the frame comes straight off the page outline.
- Click
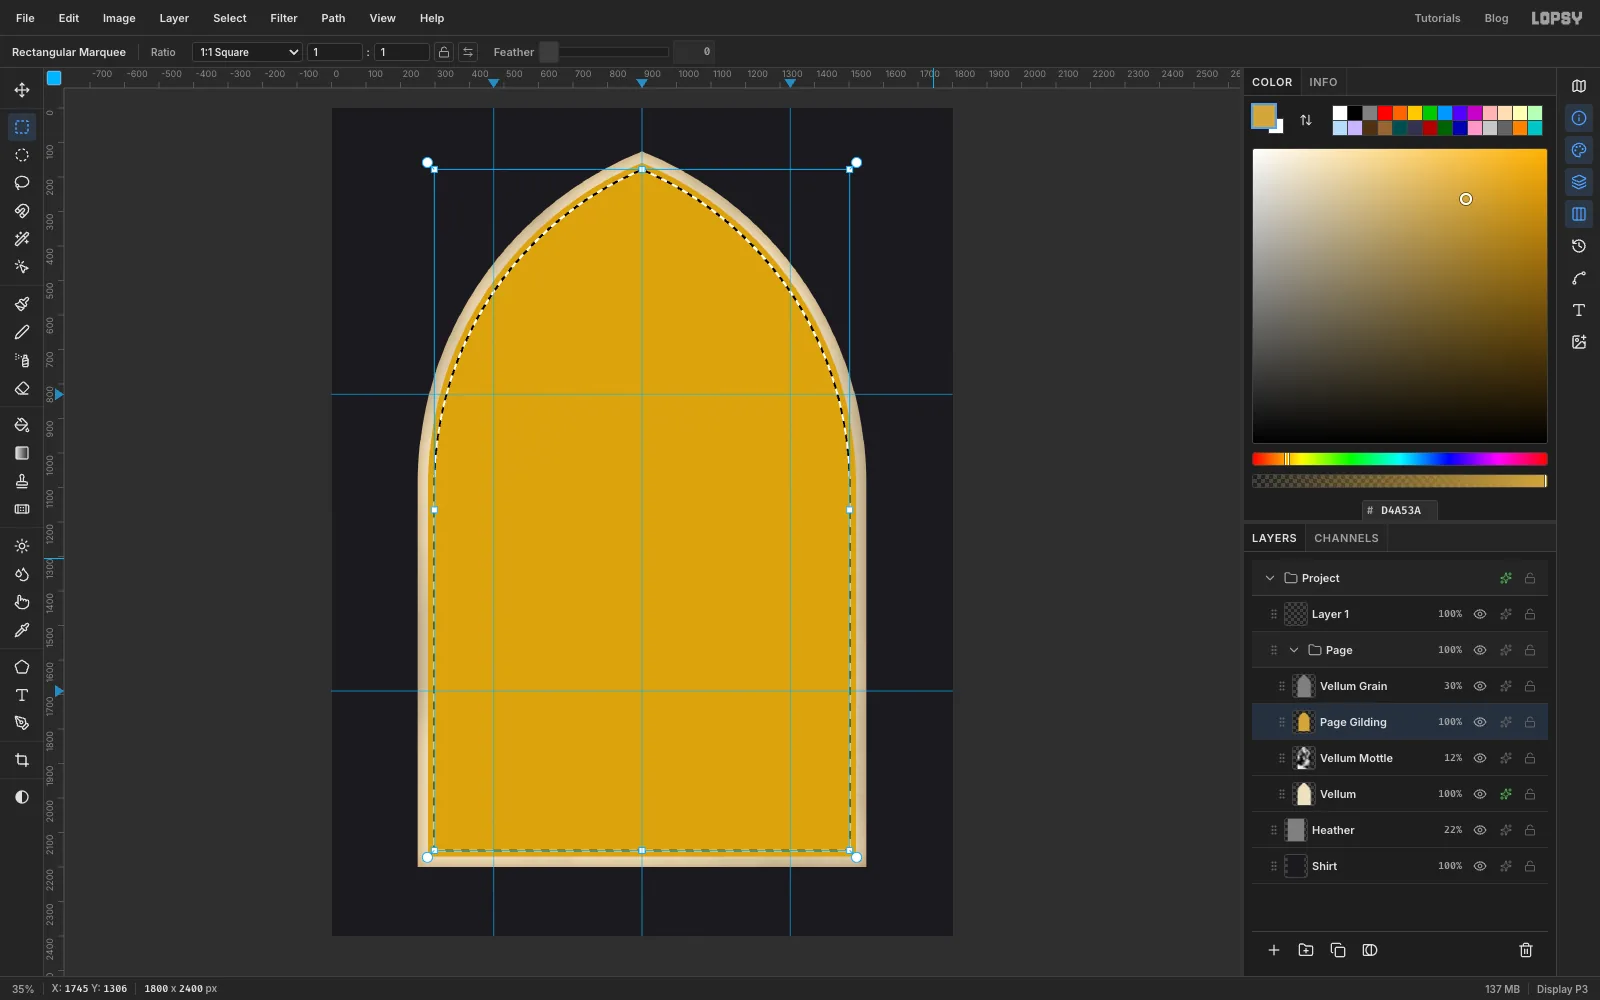
Vellum Mottleand add a layer namedPage Gilding. - Cmd-click the
Vellumthumbnail, choose Select → Shrink… and enter30. - Fill with
D4A53A. - Choose Select → Shrink… again with
18and press Delete. That leaves an 18 px gold band. Press Cmd+D.
- Click
-
Gild it and rule the margin
Painted gold leaf is flat in colour. What makes it read as metal is a bright edge and a crisp outline, not a 3D bevel.
- Cmd-click the
Page Gildingthumbnail and run Add Noise… at6, Mono, for a hammered surface. Deselect. - In the fx drawer tick Inner Glow: Size
3, Opacity90, colourFFF1B0. Tick Stroke: Width1, colour7A5410. - Add a layer named
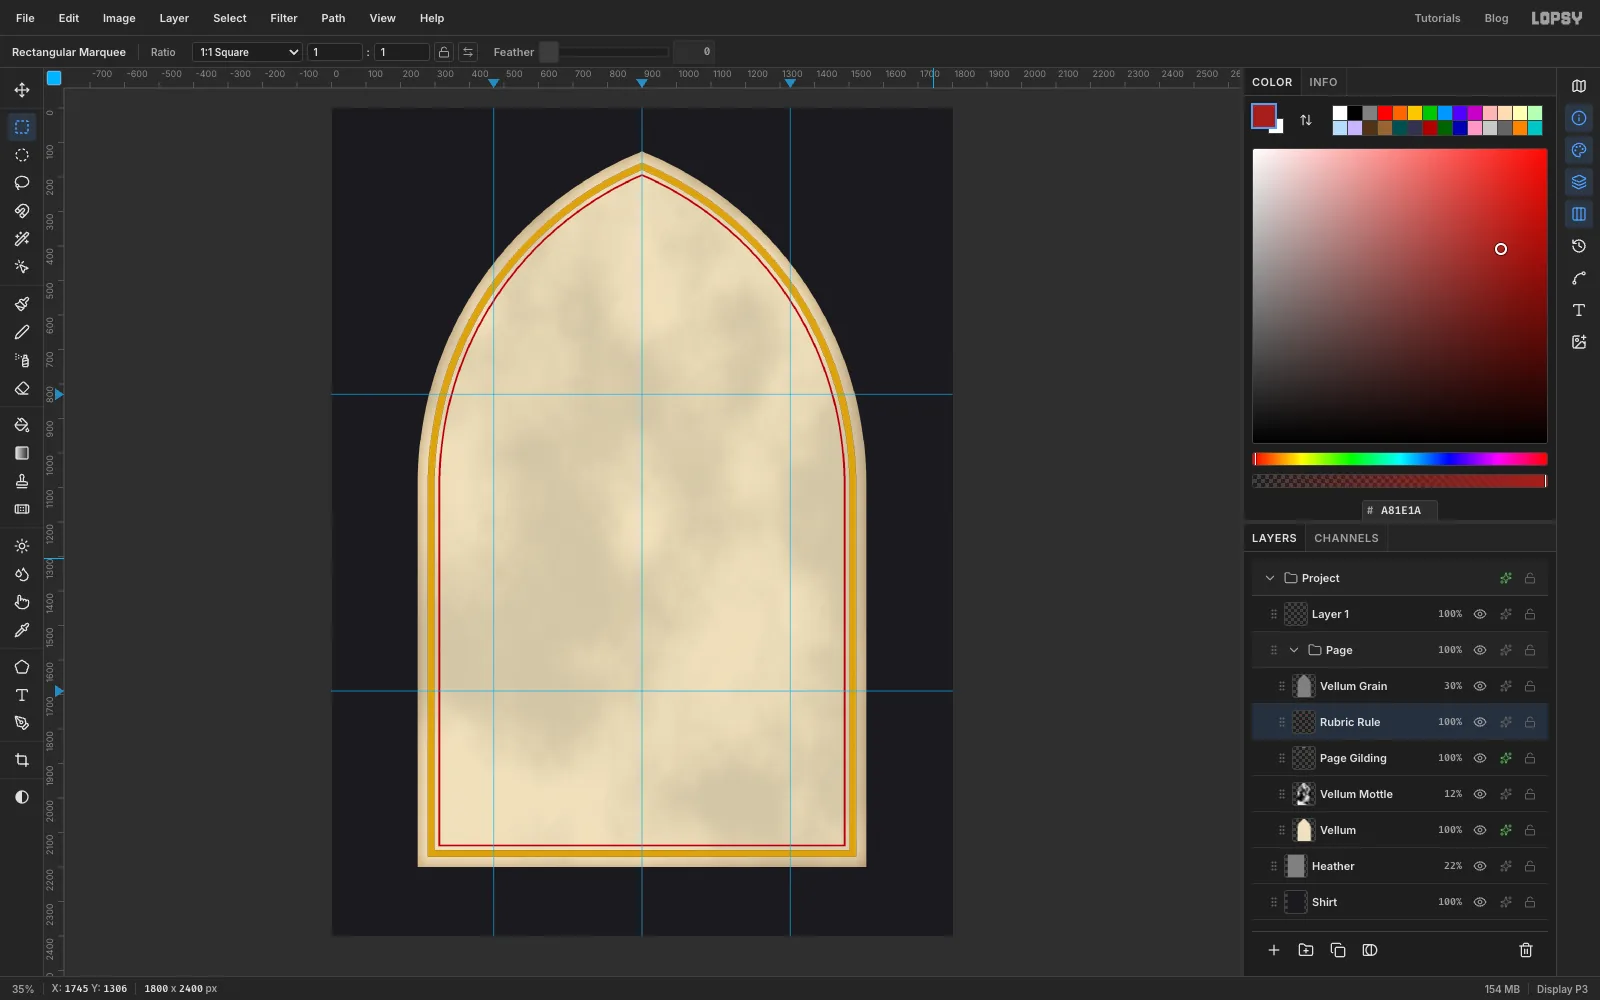
Rubric Rule. Cmd-clickVellum, shrink by60, fill withA81E1A, shrink by5more and press Delete, then Cmd+D. You now have a 5 px red rule just inside the gold.
You'll gild every gold shape in this design the same way: noise, a pale inner glow and a thin dark stroke.
- Cmd-click the
-
Paint a diaper tile
A diaper is the chequered ground behind a medieval miniature. Here it's red and blue lozenges in a gold lattice. You only paint one square, and Lopsy tiles it.
- Click
Layer 1, click New Group and name the groupMiniature. Add a layer namedDiaper Tile. - Click once with the Rectangular Marquee and enter From
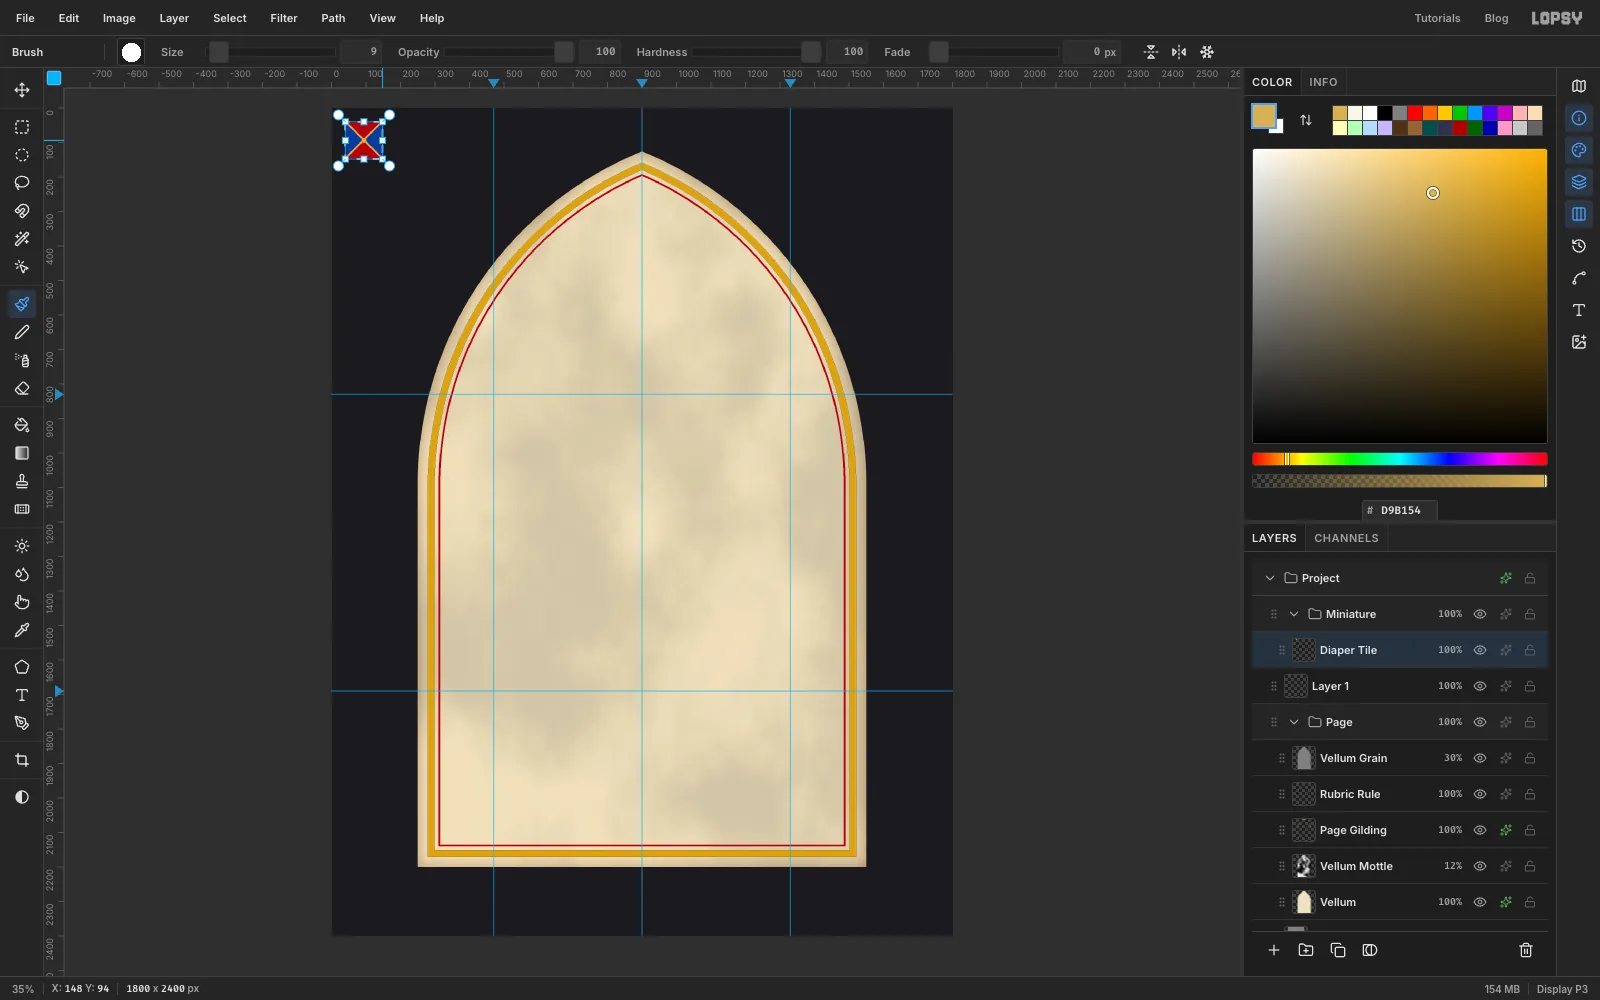
40, 40To148, 148. Fill with1A3A96. - With the Lasso, drag a triangle from just outside the top-left corner, to just outside the top-right corner, to the centre at
94, 94and back. Hold Shift and drag the same triangle along the bottom edge. - Switch to the Rectangular Marquee, hold Shift+Alt and drag around the square to trim the triangles to it. Fill with
A81E1Aand deselect. - Click once again for the
40, 40to148, 148square. Pick the Pencil, Size4, colourD9B154. Click just outside one corner and Shift-click just outside the opposite corner, then do the other diagonal. The selection keeps the lines inside the tile. - With the Brush at Size
15, Hardness100, click a gold dot on each corner and on the centre. Switch to Size9and click white (FBF6E8) dots at the middle of the top and bottom edges, then gold ones at the middle of the left and right edges. - With the square still selected, choose Edit → Define Pattern and press Cmd+D. Then delete the
Diaper Tilelayer.
Half dots on the edges are deliberate. When the tiles meet, the halves join into whole dots.
- Click
-
Tile the diaper into the miniature
- Click the
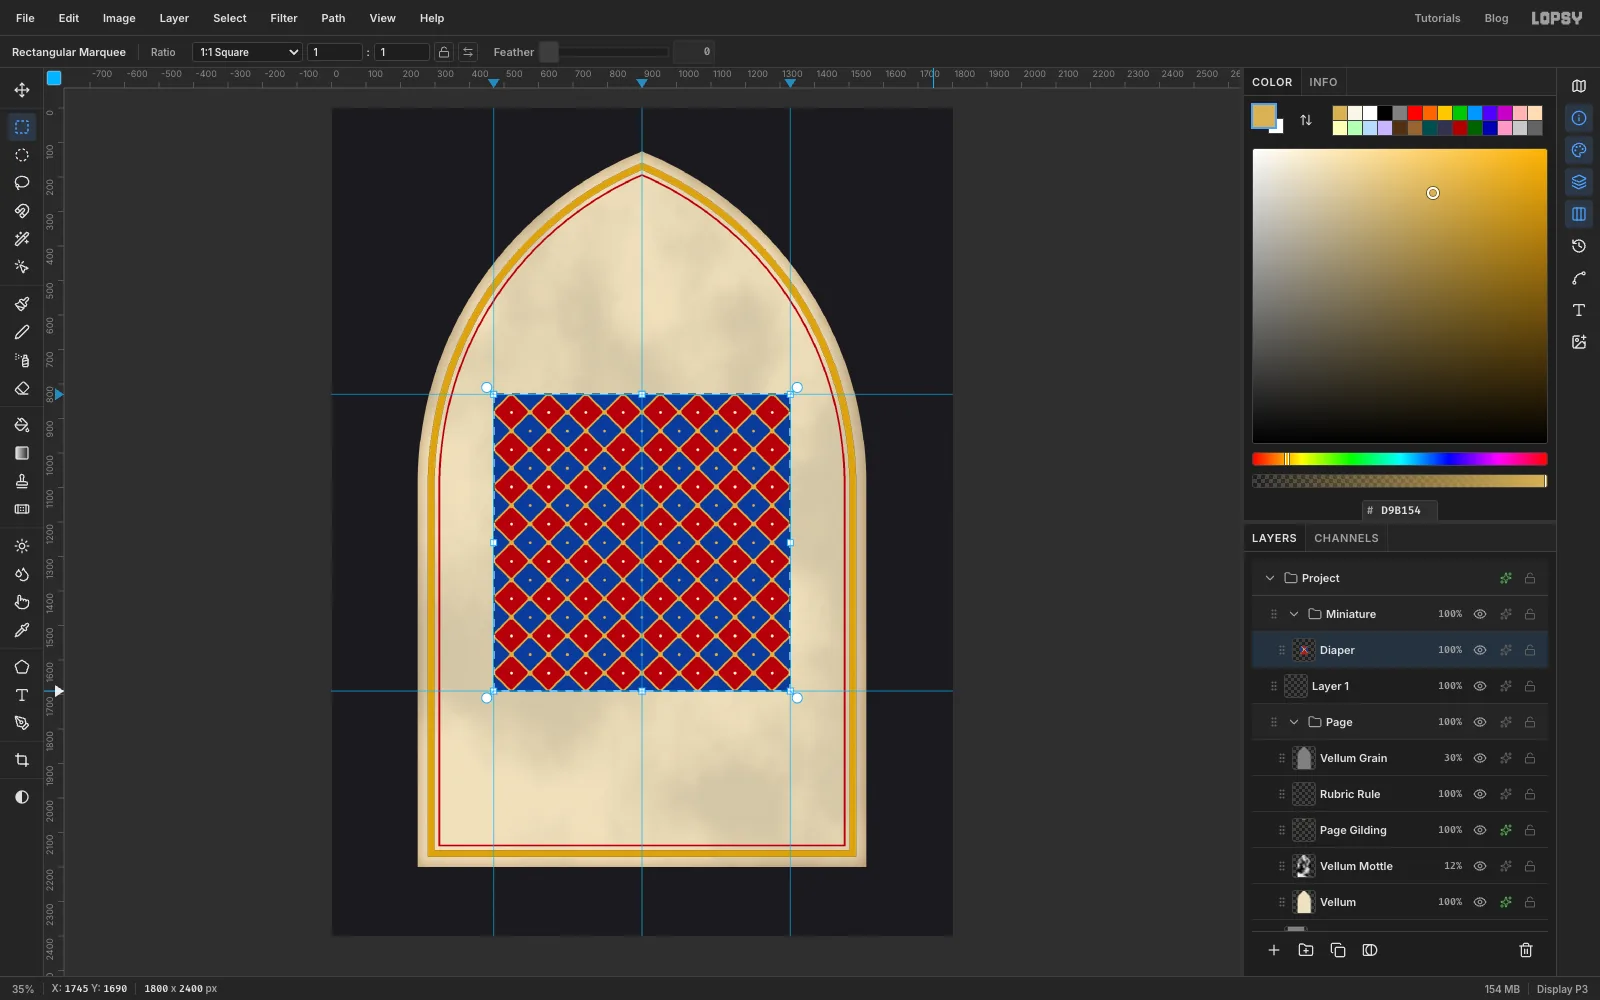
Miniaturegroup row and add a layer namedDiaper; it goes inside the group. Click once with the Rectangular Marquee and enter470, 830to1330, 1690, the square between your guides. - Choose Edit → Fill with Pattern… and pick your tile.
- Set Horizontal Offset to
33and Vertical Offset to17. The first centres a lozenge left to right, so the pattern is cut evenly at the left and right edges, and the second does the same top to bottom. Click Apply and deselect.
- Click the
-
Frame the miniature in gold
- Add a layer named
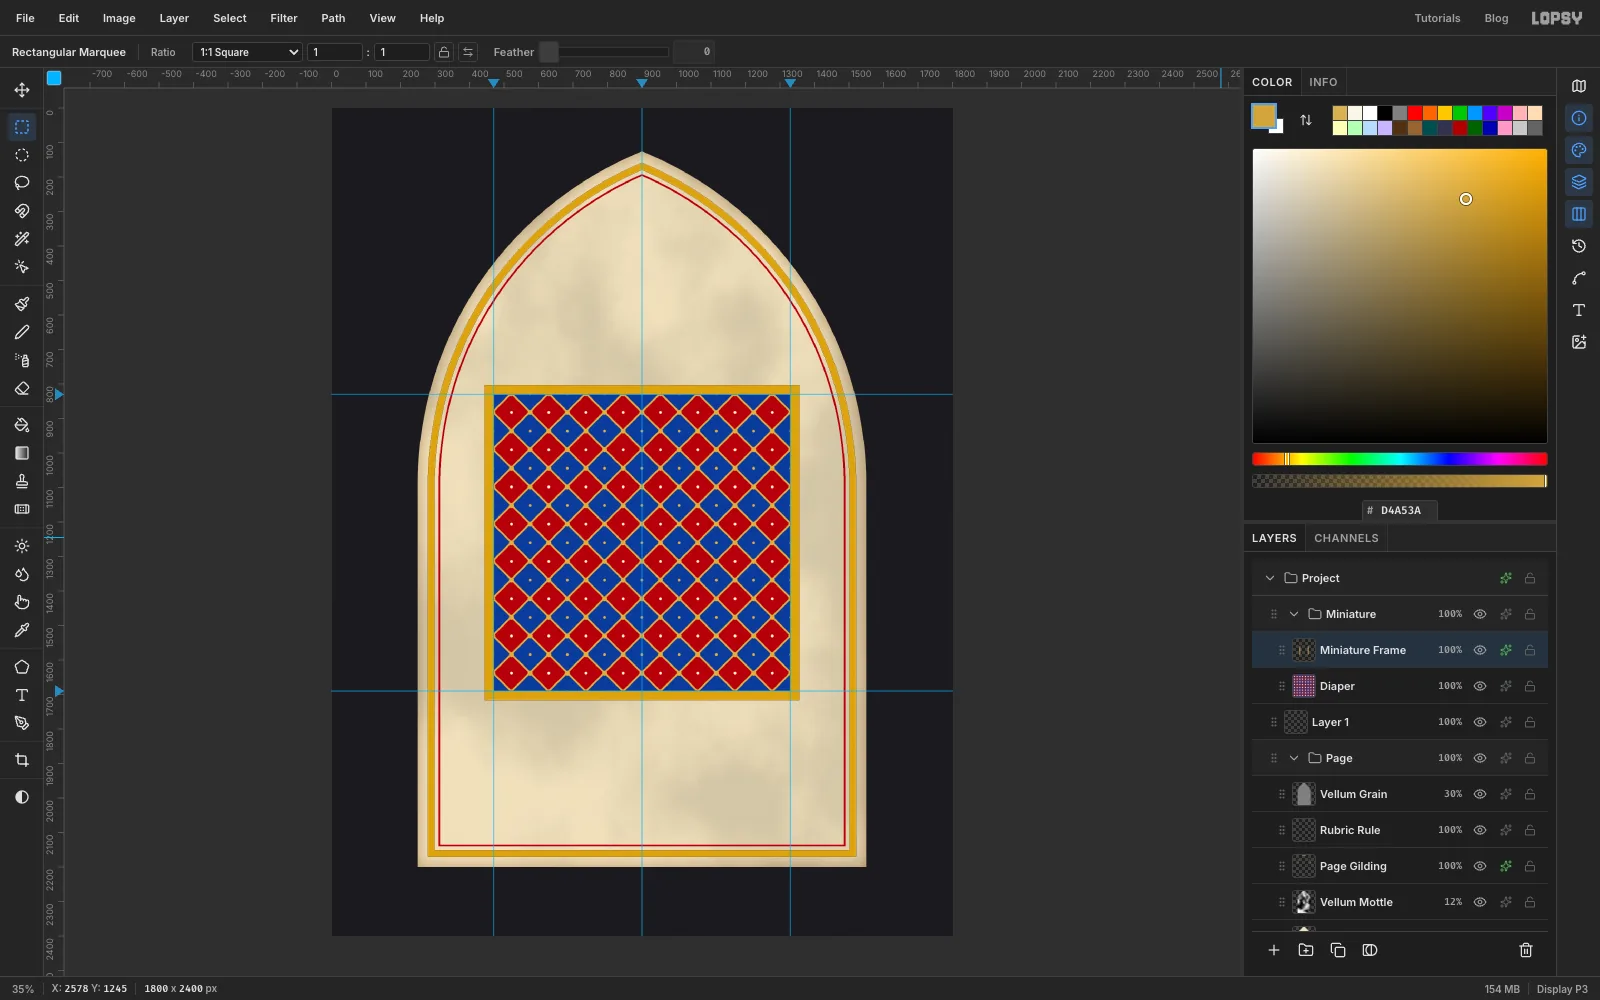
Miniature Frame. Click once with the Rectangular Marquee and enter444, 804to1356, 1716. Fill withD4A53Aand press Cmd+D. - Click once more and enter exactly the diaper's square,
470, 830to1330, 1690, then press Delete and Cmd+D. That leaves a 26 px band that butts right up against the pattern. A hole any bigger leaves a cream hairline of vellum showing between the gold and the diaper. - Gild it as in the "Gild it and rule the margin" step: noise
6, Inner Glow and Stroke.
If you want to check that everything lines up, View → Show Grid puts a grid over the canvas. Turn it off again before you draw, because it also snaps.
- Add a layer named
-
Lay the green mound
- Click
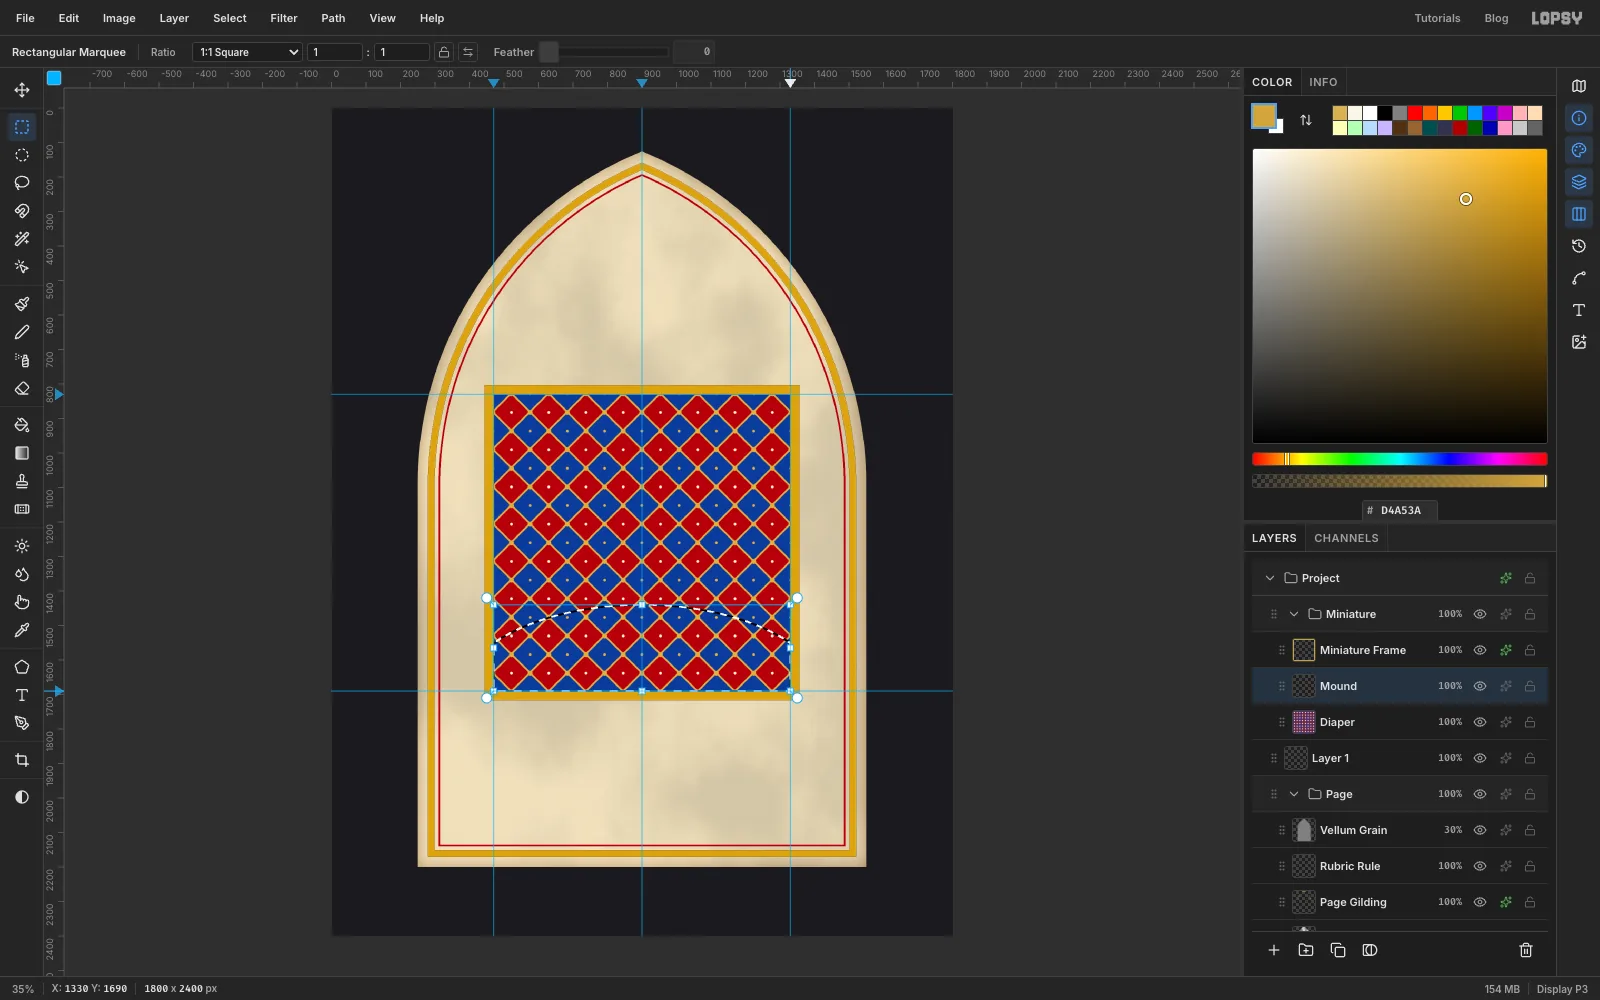
Diaperand add a layer namedMound. - With the Elliptical Marquee, drag from
360, 1440to1440, 2000. Then hold Shift+Alt with the Rectangular Marquee and drag around the miniature square to cut the ellipse off at the frame. - Fill with
3E6B37, deselect, and add an Inner Glow: Size40, Opacity80, colour24432A. - Add a layer named
Skep Shadow. Drag an ellipse from676, 1500to1124, 1558and fill it with1E5225. A hard-edged pool of shadow looks painted. A blurred one looks like a photo.
- Click
-
Trace the skep
- Add a layer named
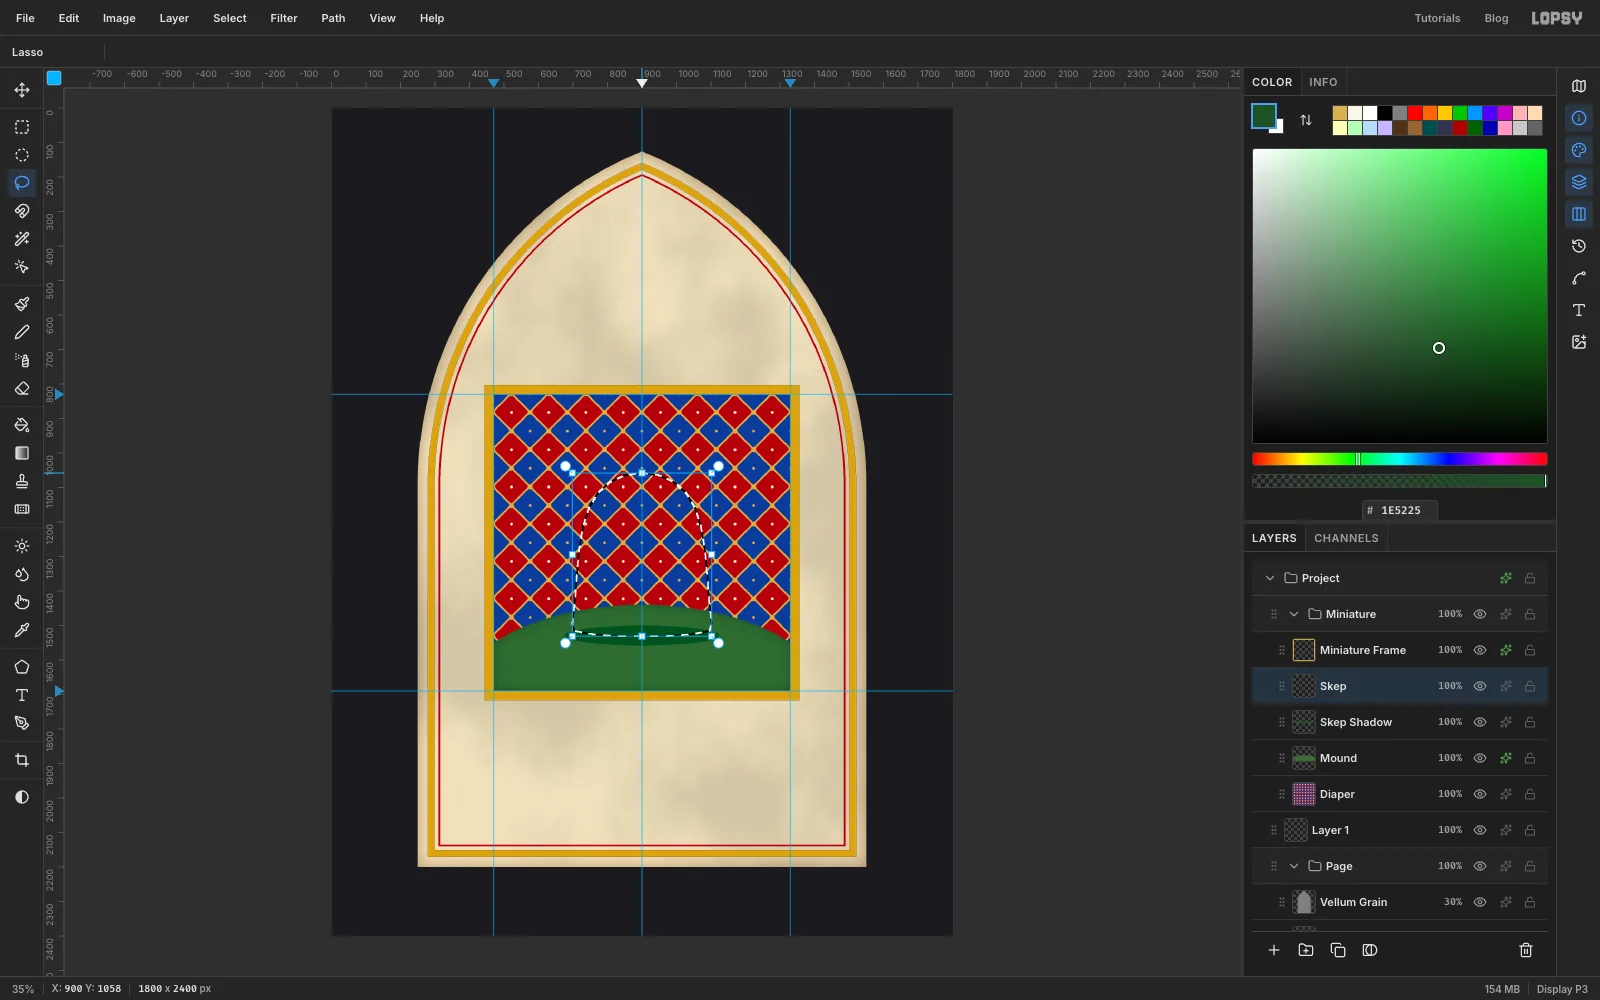
Skep. - With the Lasso, drag round a bell shape. Start at the top at about
900, 1058. Go down the left side, bulging out to720, 1280and to the widest point at698, 1494. Round the corner and run along a slightly curved base that dips to about900, 1530, then come back up the right side through1102, 1494. Make the sides nearly straight towards the bottom. - Fill with
D6A84E, deselect, and add a Stroke of3in3A2410.
- Add a layer named
-
Coil the straw and stitch it
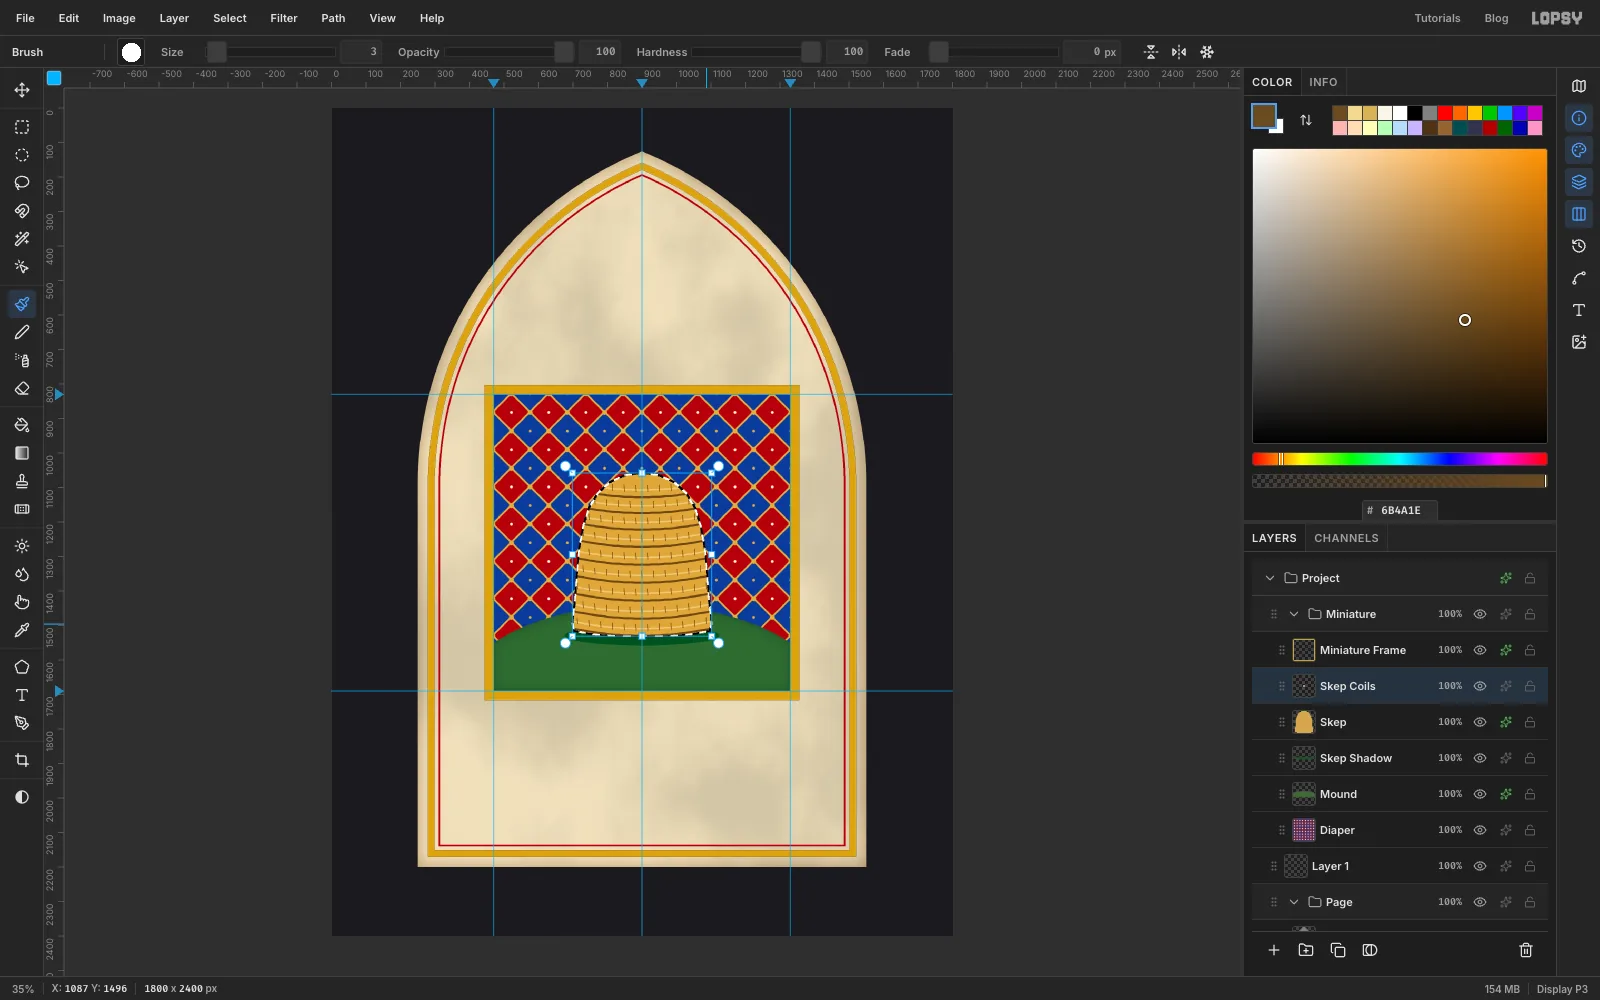
A skep is a rope of straw coiled round and round, bound with split bramble. Each coil is a dark groove, a pale ridge and a row of stitches.
- Add a layer named
Skep Coilsand Cmd-click theSkepthumbnail. The brush will now stay inside the hive. - Brush, Size
7, Hardness100, colour6B4A1E. Drag nine strokes across the hive, evenly spaced from just under the top down to just above the base, about 50 px apart. Let each one sag in the middle by about half the gap between coils, so the coils look round. - Set Size
6, Hardness60, Opacity70, colourF4D88E, and drag the same arcs again 20 px higher for the ridges. - Set Size
3, Opacity100, colour6B4A1E. Drag a short vertical stitch across every coil, then more along the coil, each a little shorter than the coil is tall and spaced about twice that apart. Shift each row half a step so the stitches stagger like brickwork.
- Add a layer named
-
Add straw grain and the door
- Keep the selection and add a layer named
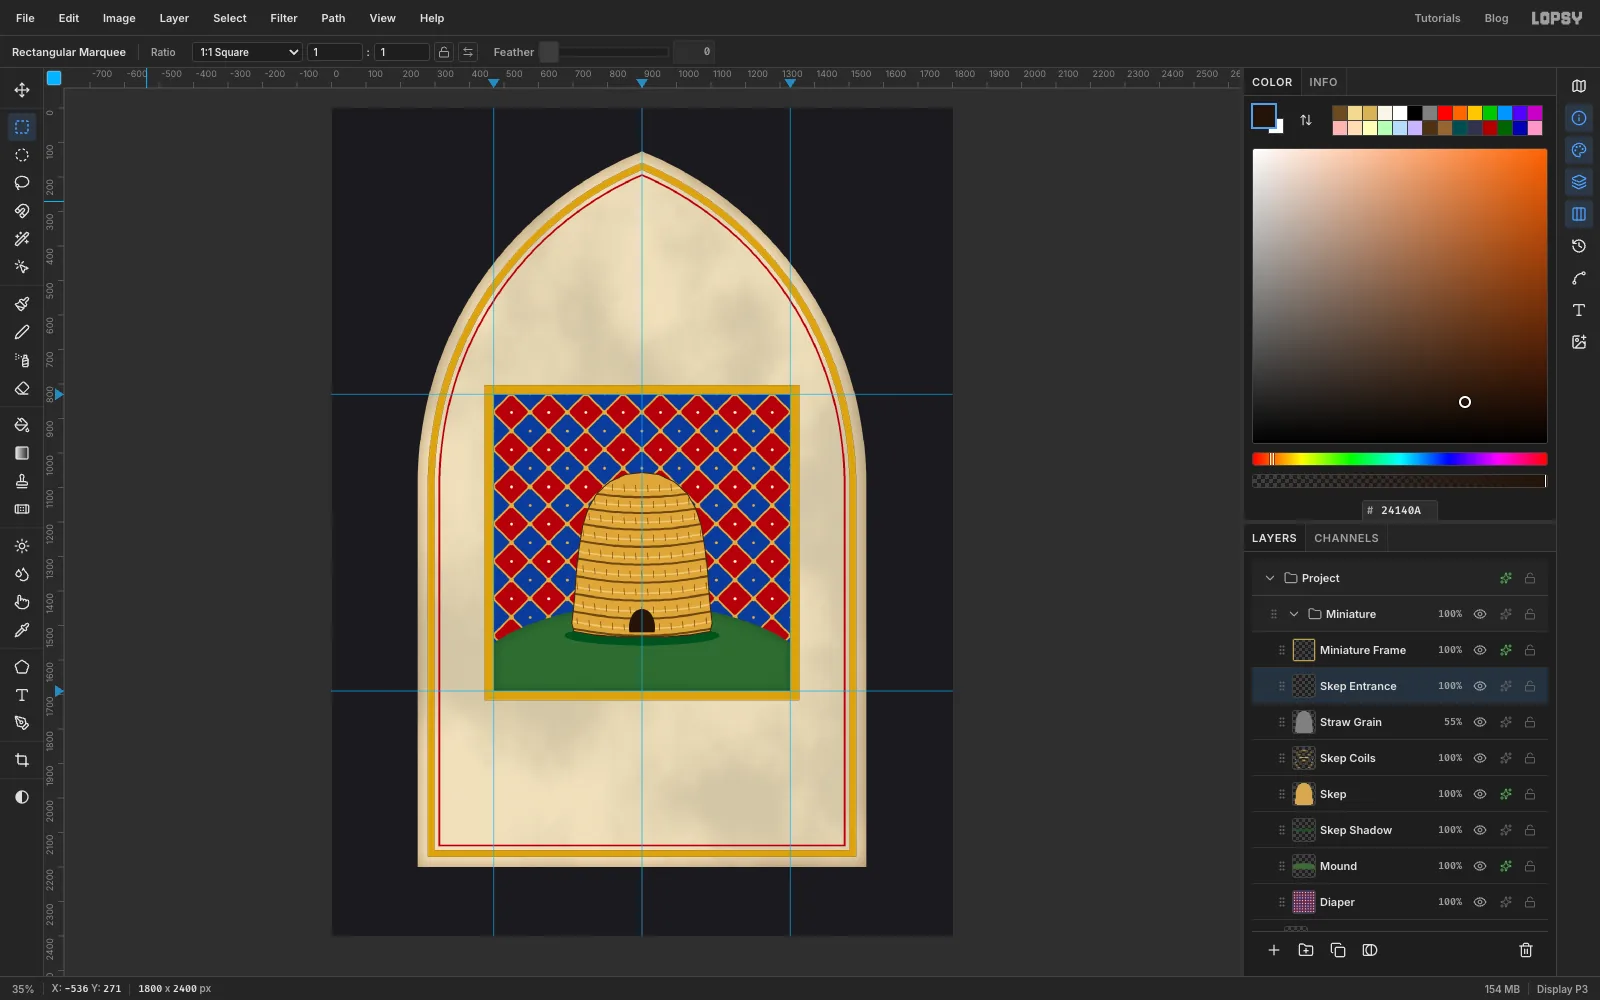
Straw Grain. Fill it with808080, then run Add Noise… at70(Mono) and Filter → Motion Blur… with Angle0and Distance28. Deselect and set it to Overlay at55%. The noise smears into straw running round the coils. - Add a layer named
Skep Entrance. Drag an ellipse from862, 1452to938, 1560. Switch to the Rectangular Marquee, hold Alt and drag from840, 1520to960, 1580to cut off the bottom. Fill with24140A.
Keep the hive flat: no gradient across it. In an illumination, the outline and the coils show its shape.
- Keep the selection and add a layer named
-
Drop in the bee photo
- With
Skep Entranceselected, click New Group and name itBees. It goes insideMiniature, above the hive. - Drag the downloaded bee photo onto the canvas. It lands in the top-left corner on its black background. Rename the layer
Hero Bee.
- With
-
Trace the bee with the Lasso
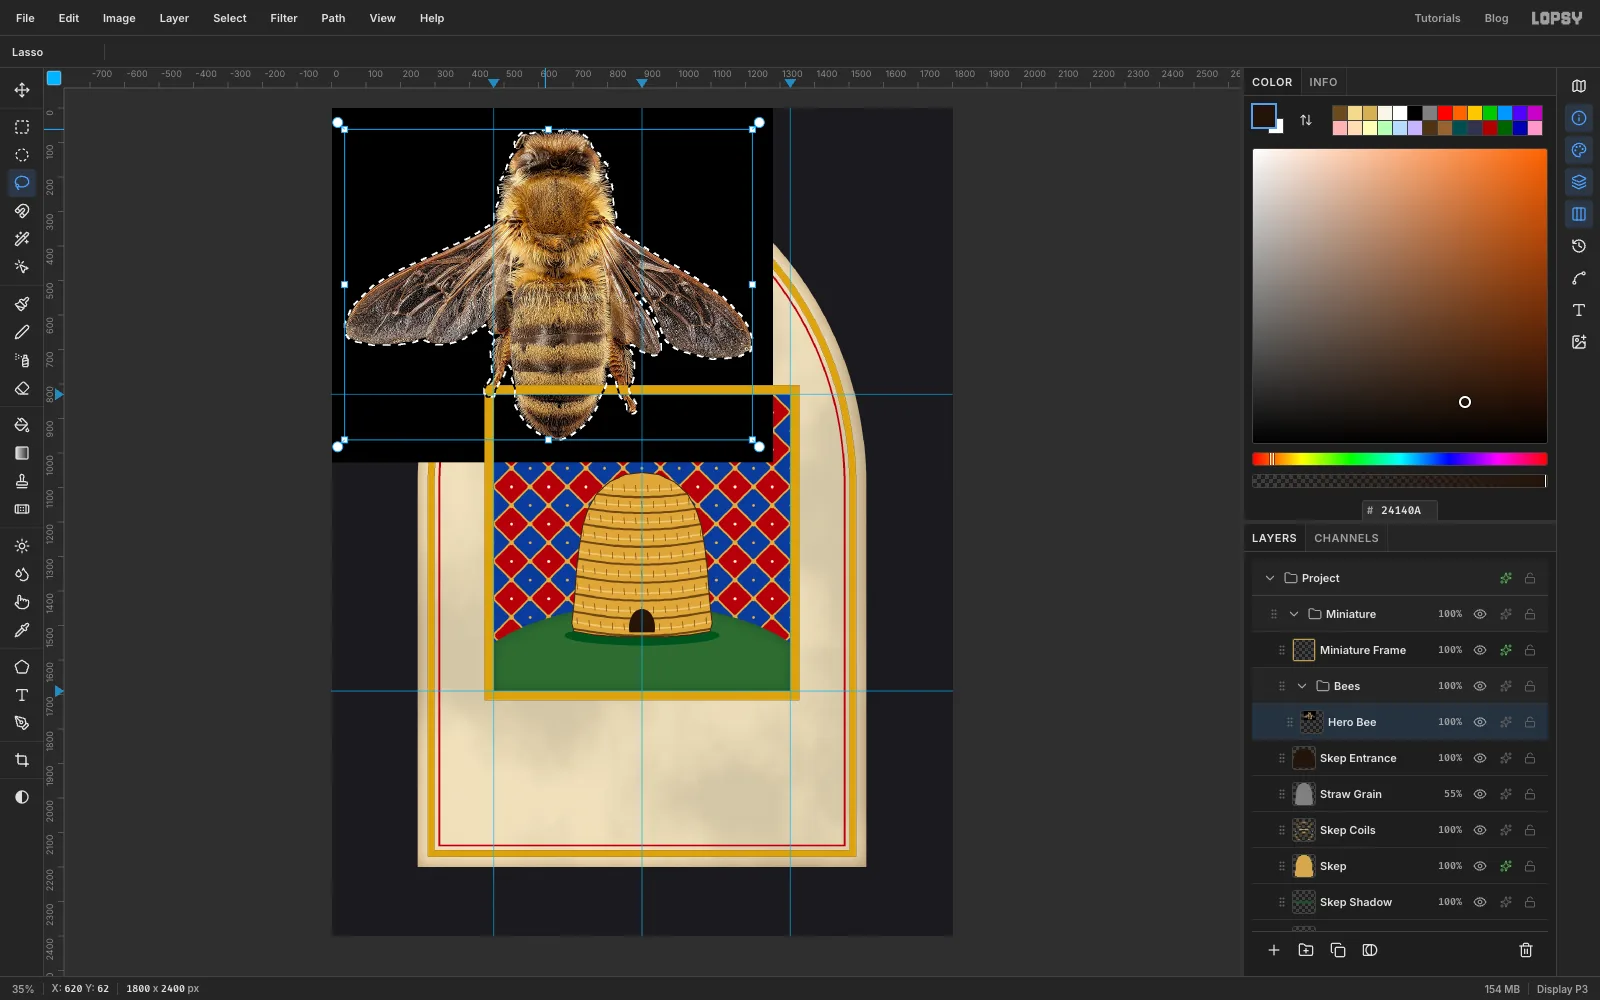
The wings are see-through, so the Magic Wand would leak into them through the black. Trace the bee by hand instead.
- With the Lasso, drag slowly round the outside of the bee: over the head, out along the top edge of each wing to its tip, back under the wings, and down round the legs and abdomen. Stay just outside the hairs.
- Choose Select → Inverse and press Delete, then deselect.
-
Scale the bee down
- Drag a Rectangular Marquee round the bee.
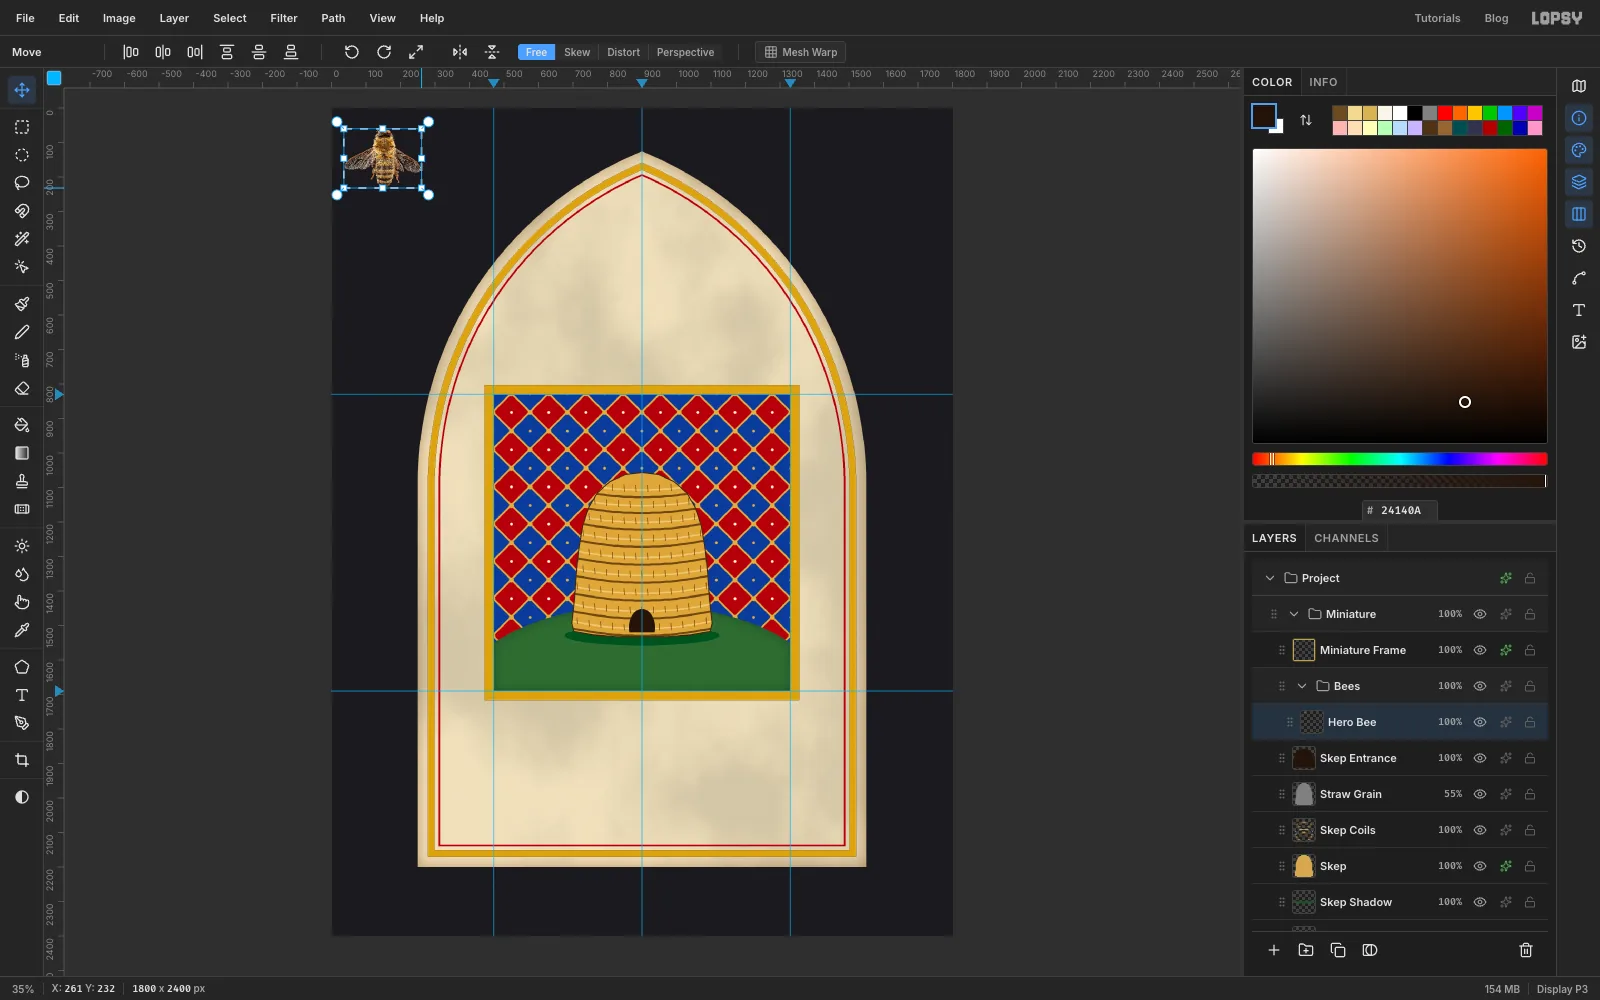
- Pick the Move tool, hold Cmd and drag the bottom-right handle in until the bee is about 220 px wide. Press Enter and deselect.
- The photo leaves a dark fringe. Cmd-click the layer thumbnail, then choose Select → Shrink… at
2and Select → Feather… at1. Choose Select → Inverse, press Delete to trim it off, then press Cmd+D.
-
Paint the bee flat
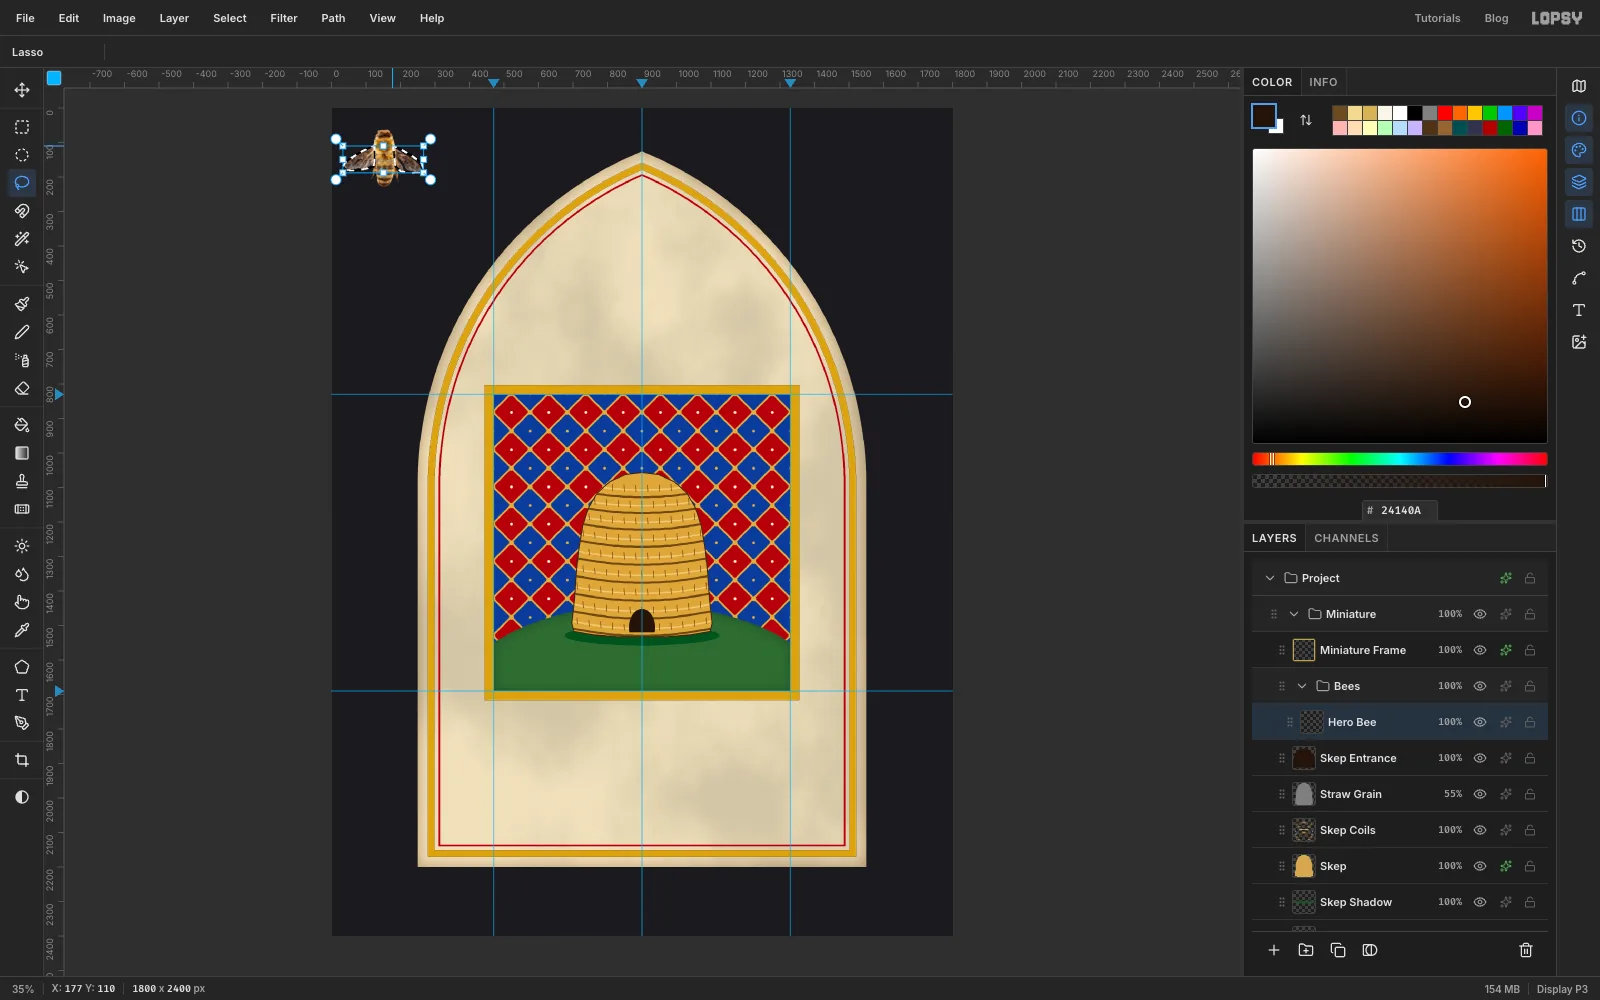
- Run Filter → Oil Paint… with Radius
2and Sharpness1.5. The fur becomes painted patches. Then run Hue/Saturation… with Saturation20and Lightness4. - With the Lasso, draw round the left wing, then hold Shift and draw round the right one.
- Choose Filter → Invert. The dark membrane turns pale and the veins turn dark, like ink lines. Then Filter → Desaturate, and Brightness/Contrast… with Brightness
40and Contrast25. Deselect. - Add a Stroke of
2in2A1A10, then click Rasterize Layer Style in the drawer. The outline becomes part of the pixels, so every copy you paste will have one.
- Run Filter → Oil Paint… with Radius
-
Turn the hero bee and set it in place
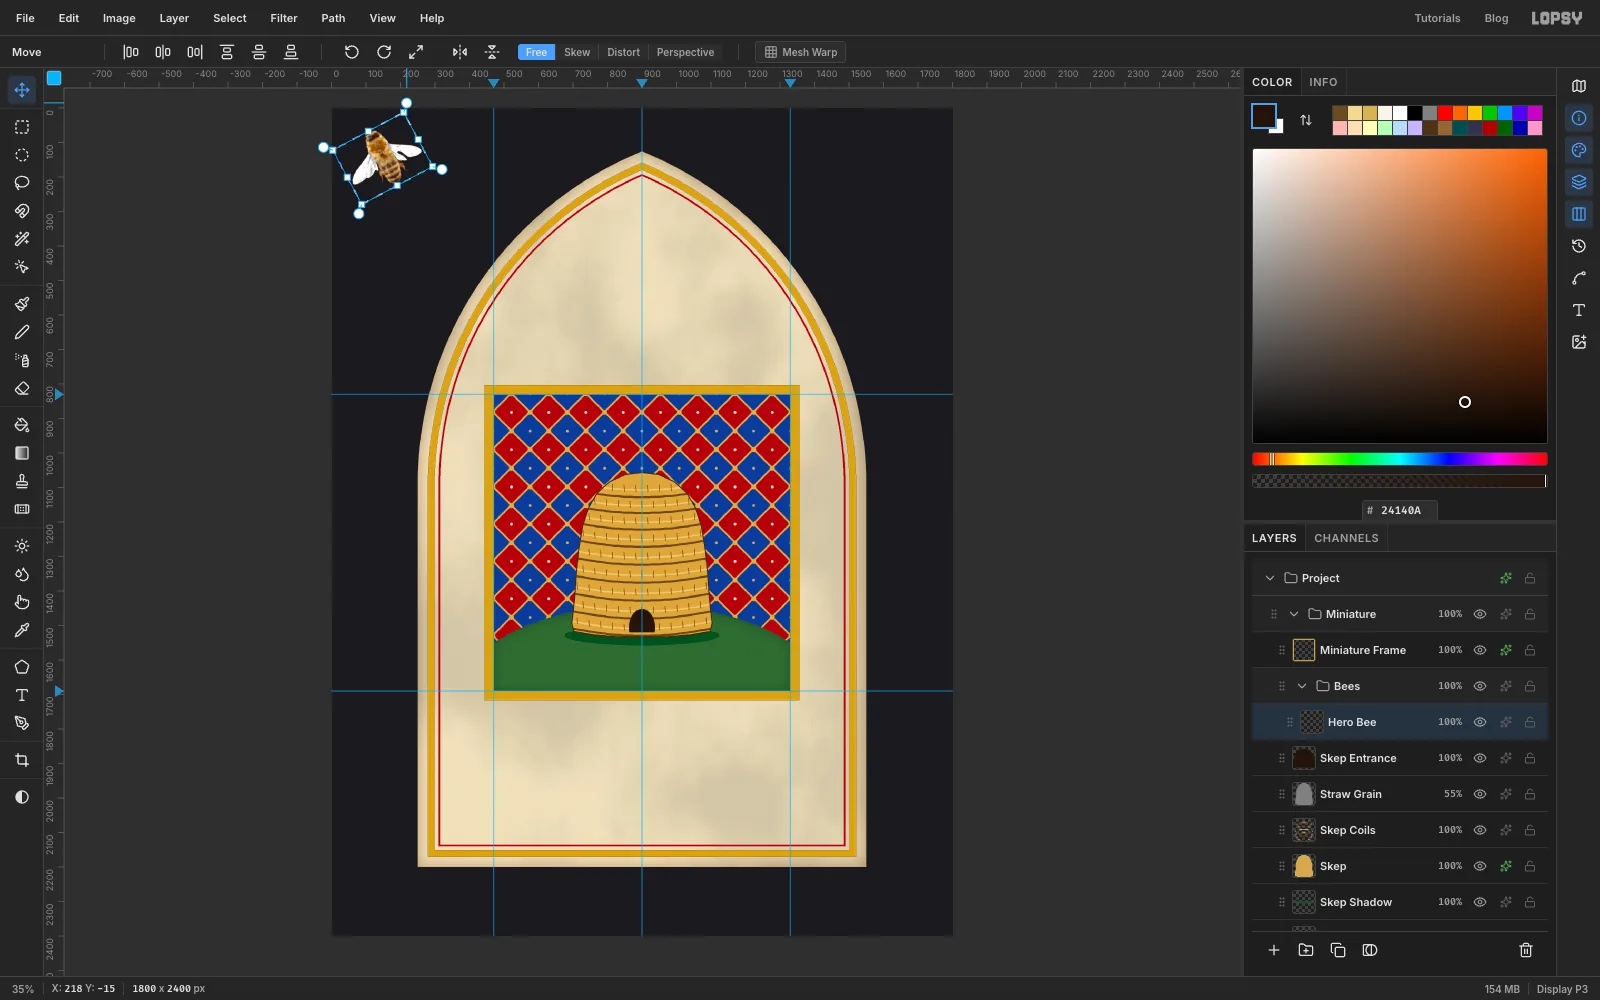
- Drag a marquee round the bee. With the Move tool, drag from just outside a corner to turn it about 28° counter-clockwise, so it flies up and to the left. Press Enter and deselect.
- Drag the bee into the top right of the miniature, centred near
1150, 935. Keep at least 25 px of diaper between it and the top of the hive.
-
Copy and paste the smaller bees
- Drag a marquee round
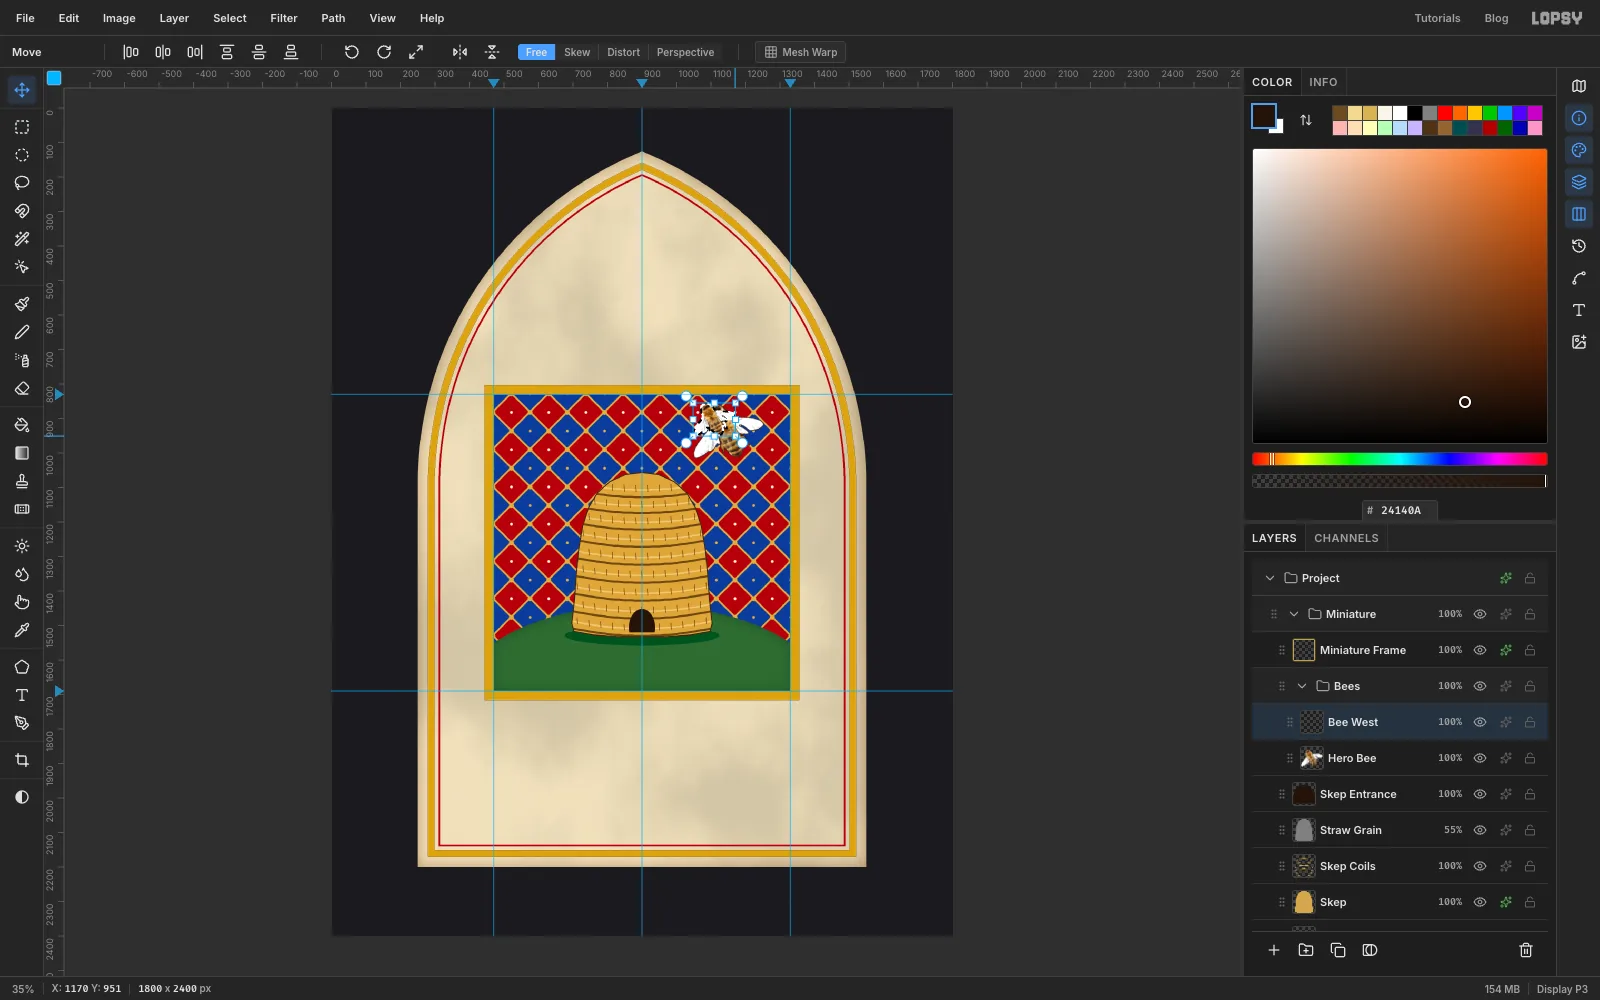
Hero Bee, press Cmd+C, then Cmd+V. The copy arrives on a new layer as a live transform. Rename itBee West. - Cmd-drag a corner handle in until it's about 130 px wide and press Enter.
- Paste two more:
Bee Low Westat about 110 px andBee Low Eastat about 95 px. Before scalingBee Low West, click Flip Horizontal in the Move options bar so it isn't an exact copy.
Different sizes make the bees look like a swarm at different distances instead of four stamps.
- Drag a marquee round
-
Turn each bee towards the hive
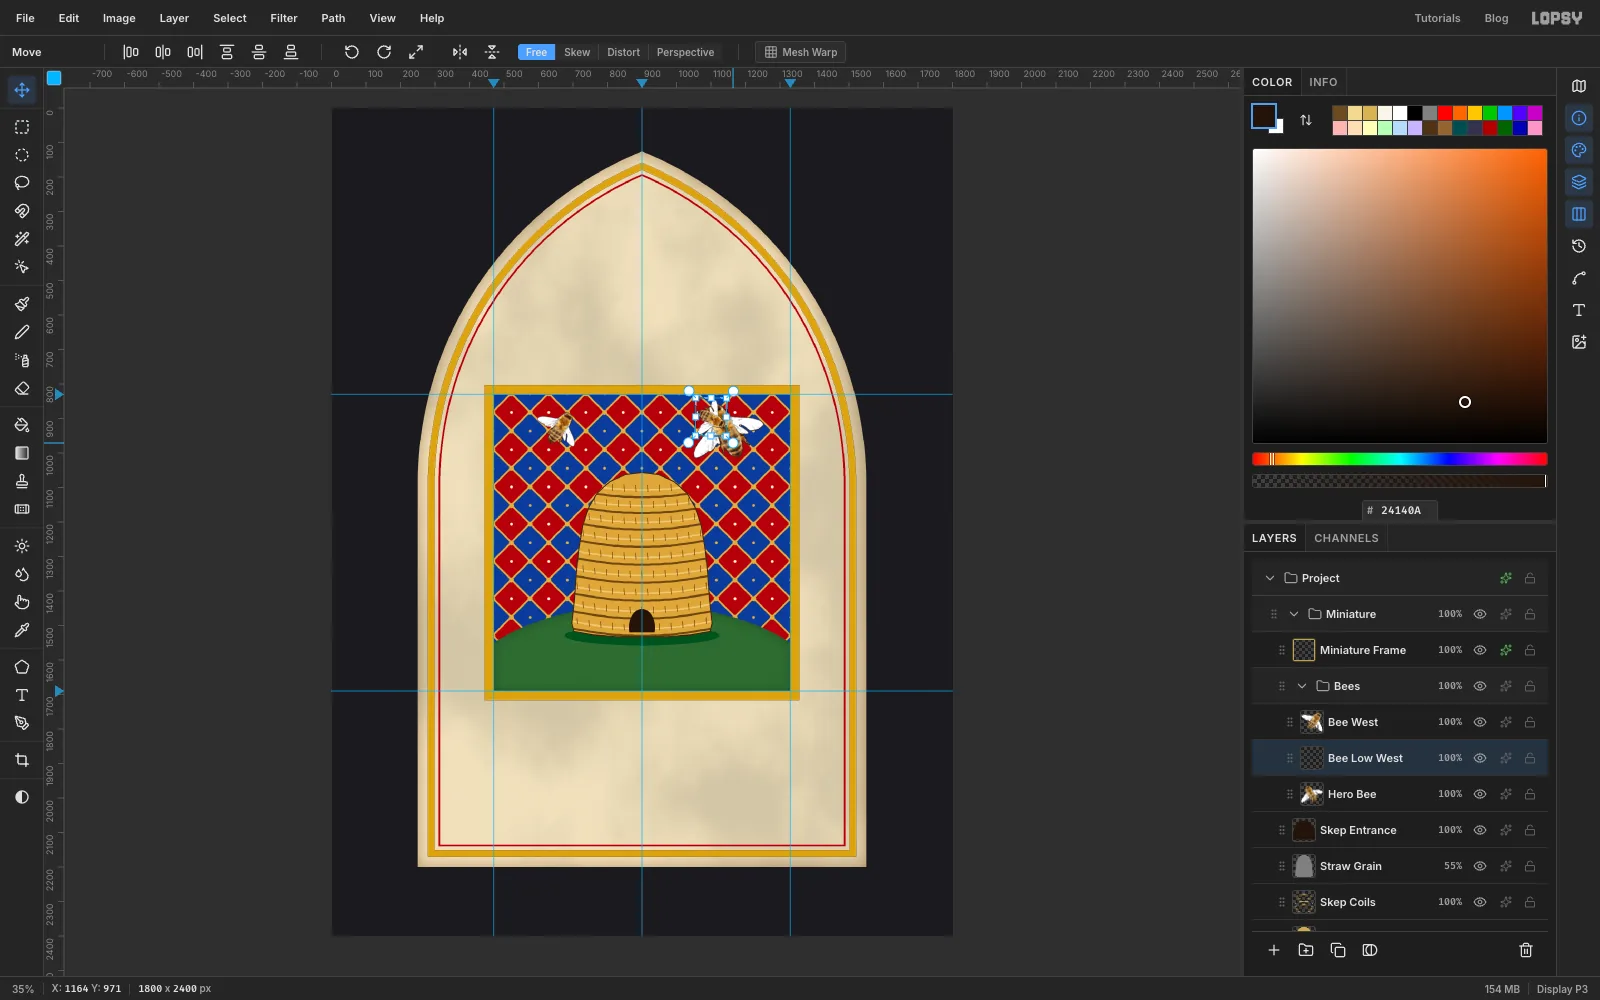
Rotate each small bee the same way you turned the hero, then move it into place:
Bee Westheads up and to the right, near650, 930.Bee Low Westheads down towards the door, near578, 1330.Bee Low Eastheads in towards the hive at a different height, near1236, 1175.
Keep them off a grid: four bees at matching heights look like decoration, not flight.
-
Recolour every bee at once
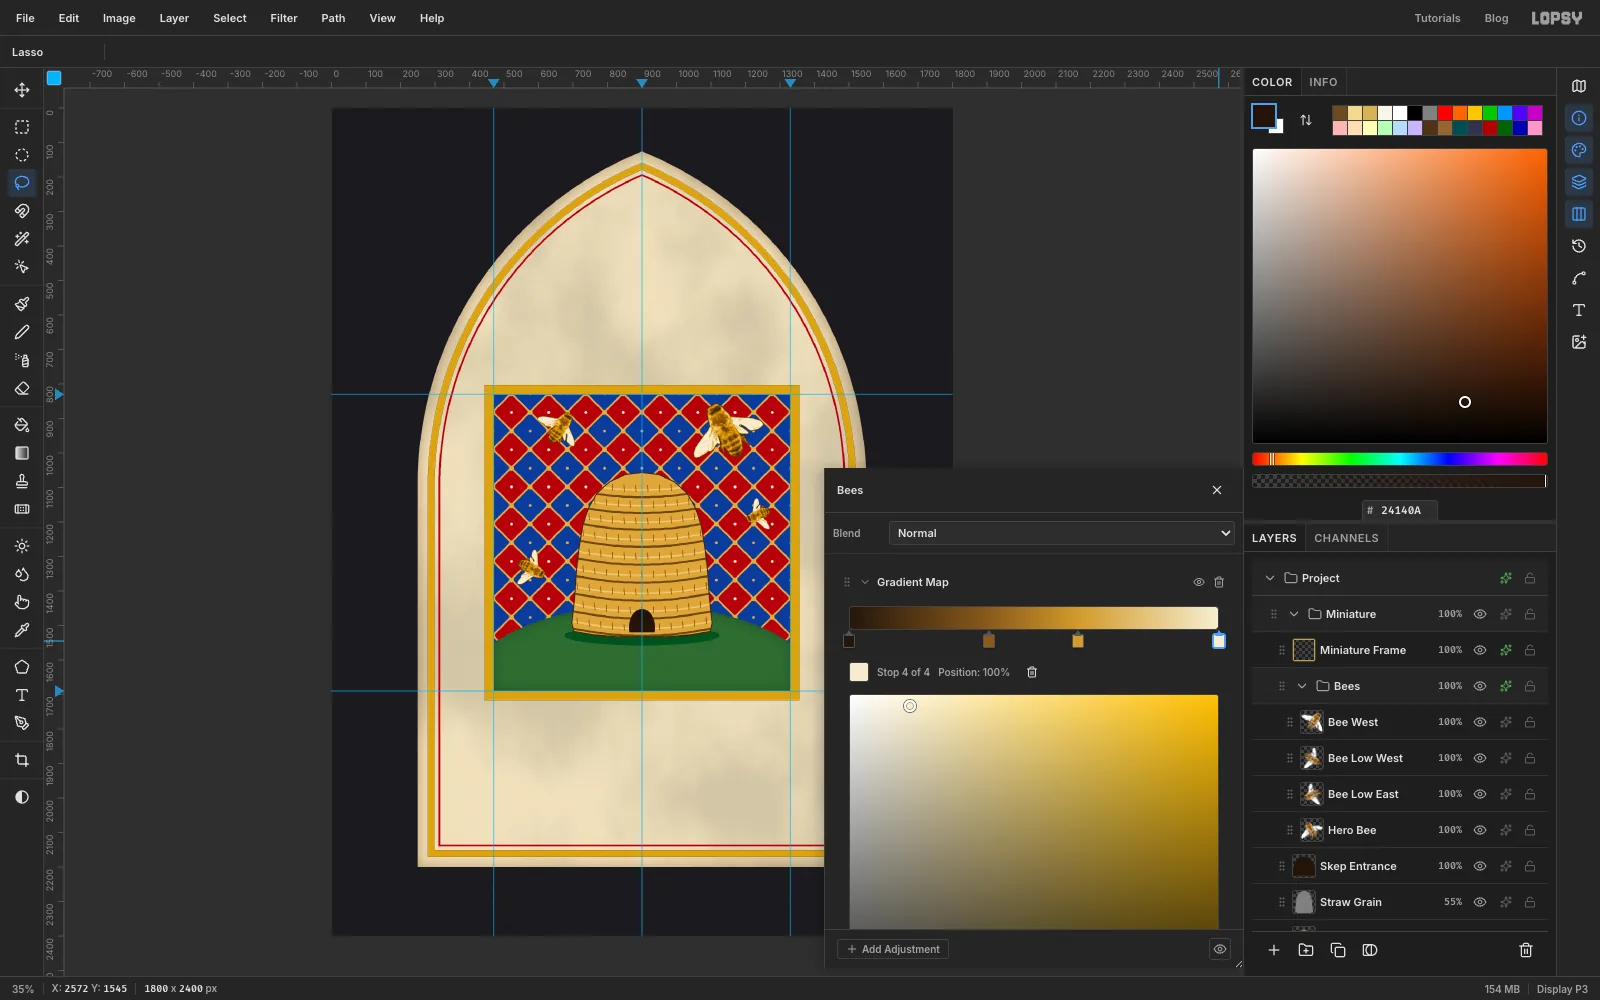
The photo colours still look like a photo. A Gradient Map on the group repaints all four bees by brightness.
- Click the
Beesgroup row and open its fx drawer. Click Add Adjustment → Gradient Map. - Click the gradient bar twice to add two stops near
38%and62%. Click each stop and type its colour:24160C,8A5A1C,D29A2A,F7EDCF.
The dark stripes become sepia, the fur ochre, and the wings cream. That's the illuminator's flat colouring, and it's the same on all four bees.
- Click the
-
Scatter the millefleurs
- Click
Moundand add a layer namedMillefleurs. - Brush, Size
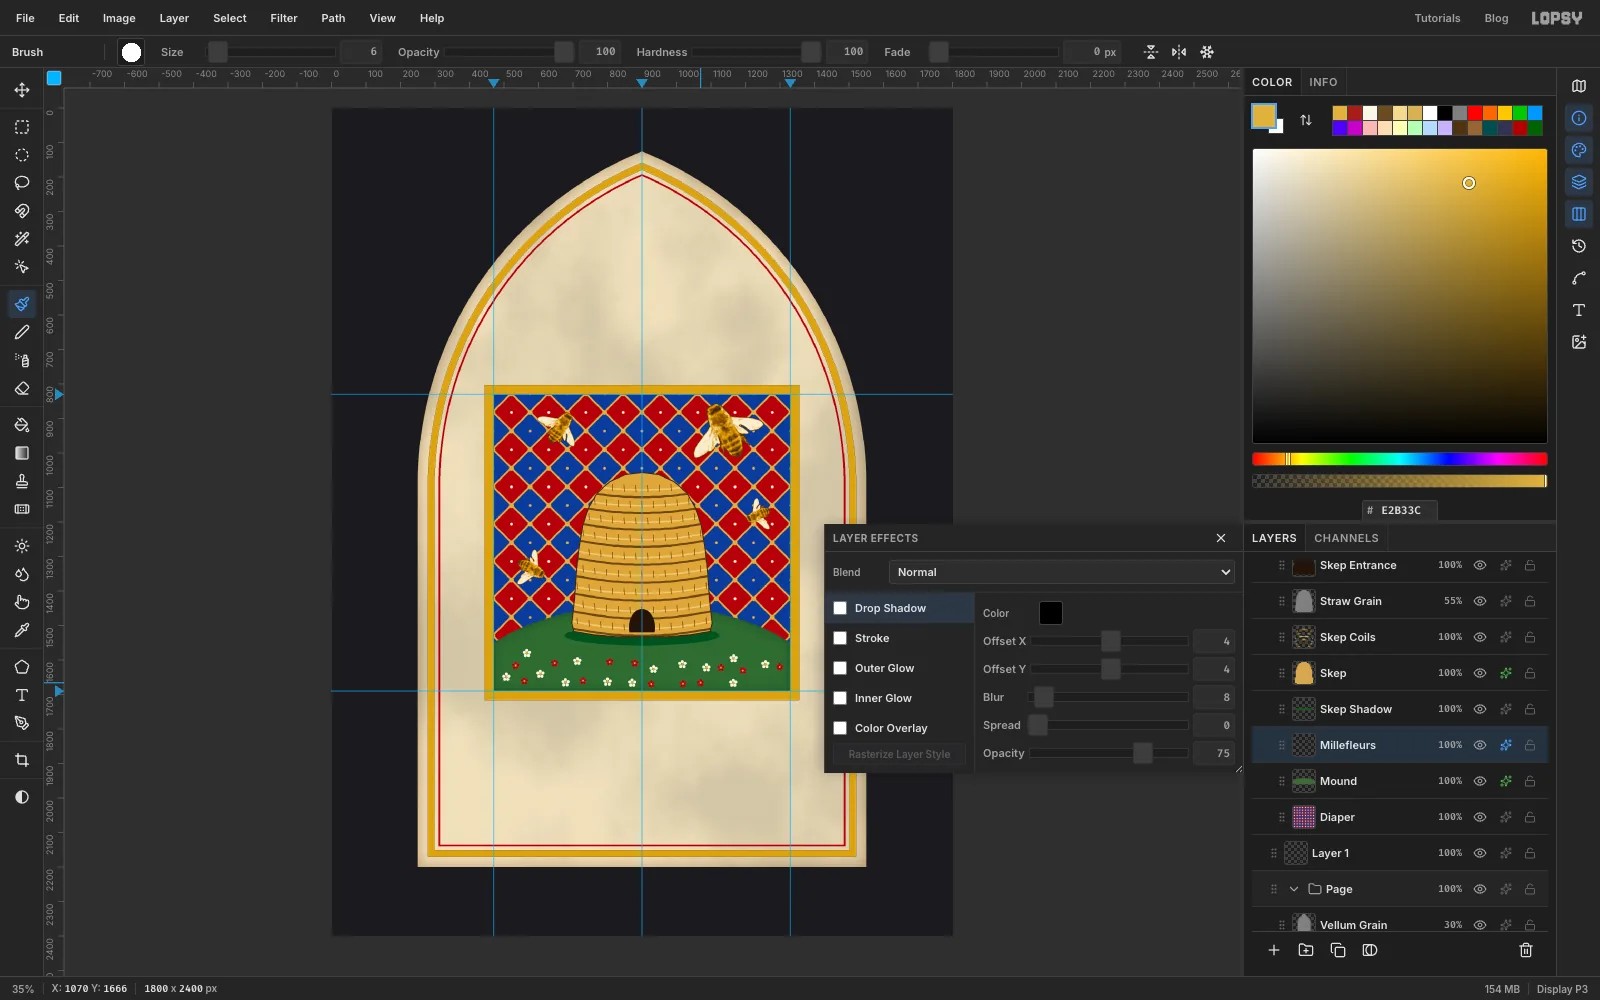
10, Hardness100, colourFBF6E8. Make a flower by clicking five dots in a small ring. Make about sixteen across the grass, keeping clear of the hive. - Make about a dozen more in
A81E1Aat Size9, in the gaps. - Give every flower a centre: click a single dot in
E2B33Cat Size8for the white ones and6for the red ones.
- Click
-
Mirror an ivy vine down both margins
- Collapse the
Miniaturegroup, click its row, then click New Group and name itBorder. Add a layer namedVine. - Pick the Brush, Size
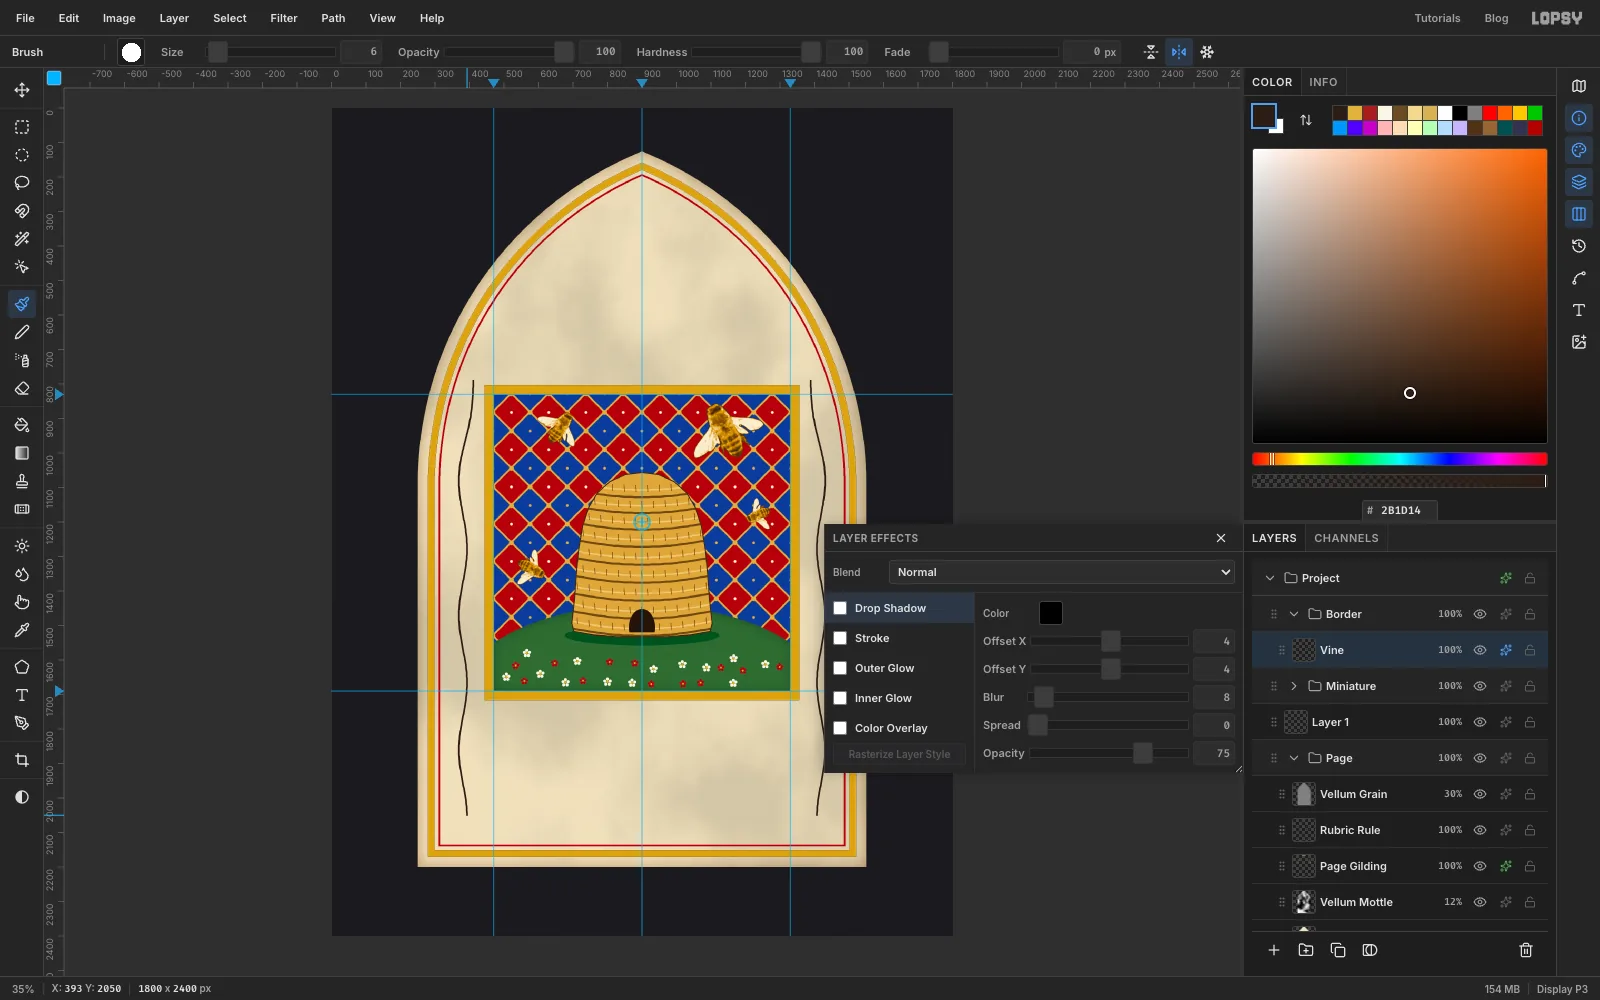
6, colour2B1D14, and click Symmetry Vertical in the options bar (the mirror icon). Everything you paint on the left is copied on the right. - Drag a gently waving stem down the left margin, from about
410, 790to about380, 2060. Let it swing a little to each side, a full wave roughly every 120 px. Near the top, keep it about 65 px inside the red rule, because the arch curves in there. - At Size
2, add a small curling tendril at every swing of the stem.
- Collapse the
-
Leaf the vine and stud it with bezants
- Add a layer named
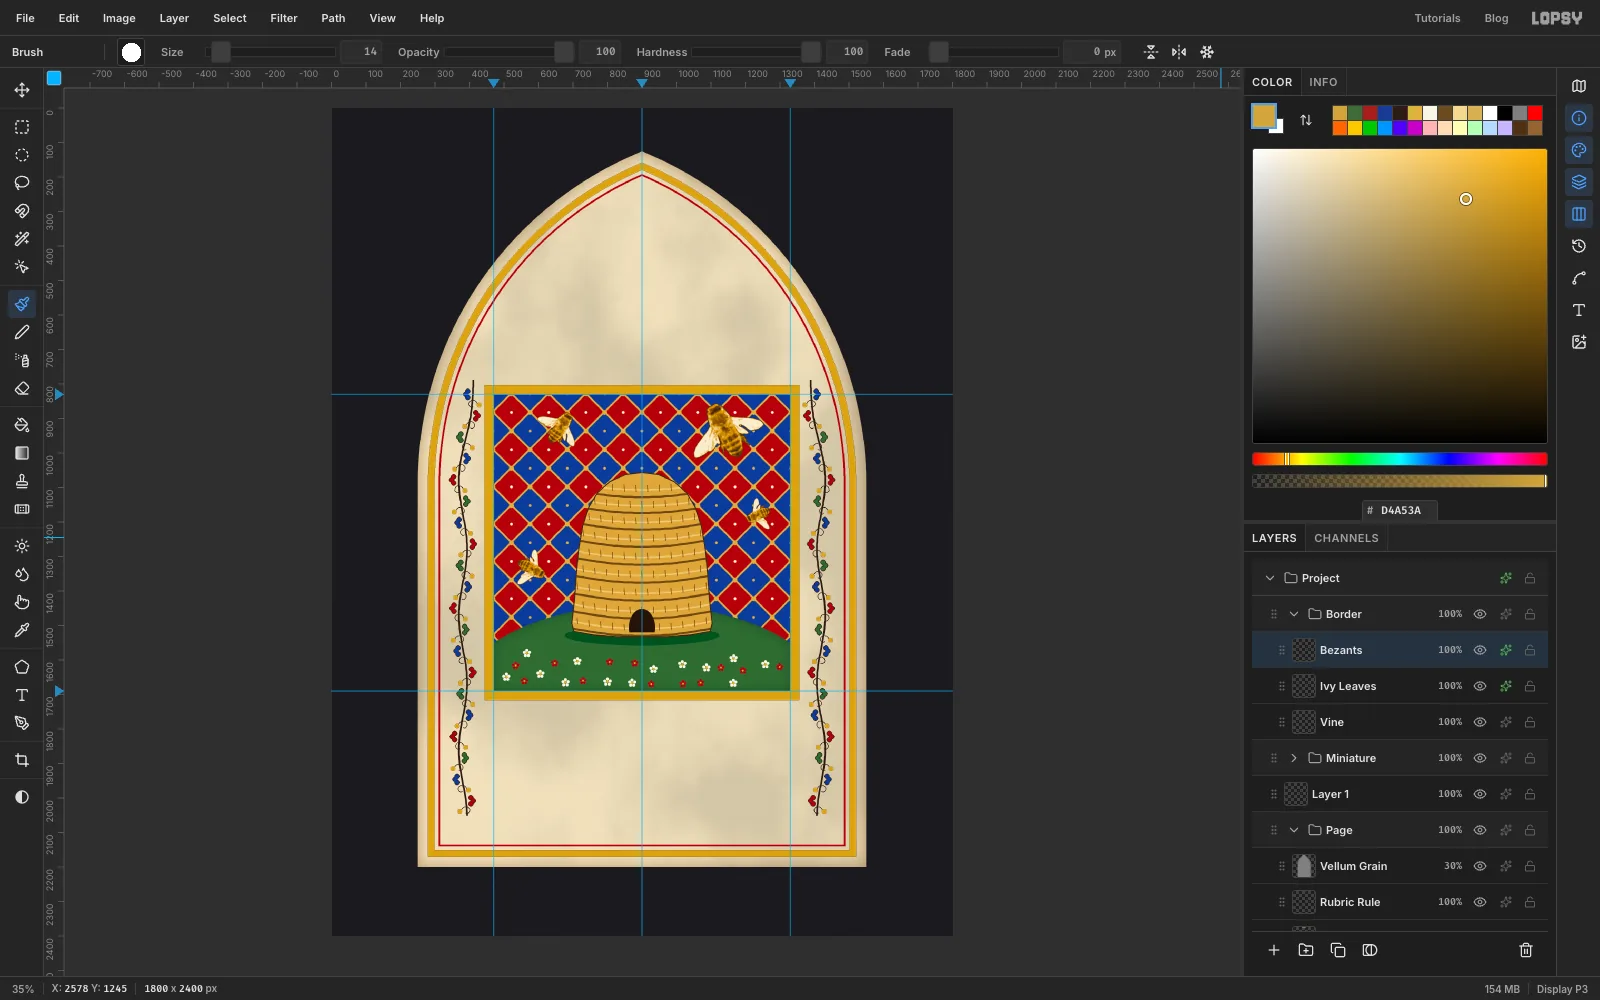
Ivy Leaves. With the Brush at Size13, make each leaf from three dabs in a fan, one straight out from the stem and one each side. Put a leaf at every swing, alternating sides of the stem. Cycle the leaves through1A3A96,A81E1Aand3E6B37in turn. - Add a Stroke of
2in2B1D14. - Add a layer named
Bezants. At Size14inD4A53A, click a gold dot on the opposite side of the stem from each leaf. Gild the layer as before. - Click Symmetry Vertical again to turn the mirror off.
Keep at least 25 px between the leaves and both the frame and the red rule.
- Add a layer named
-
Set a roundel in the point of the arch
- Collapse
Border, click its row, click New Group and name itLettering. Add a layer namedRoundel Ground. - Click once with the Elliptical Marquee and enter
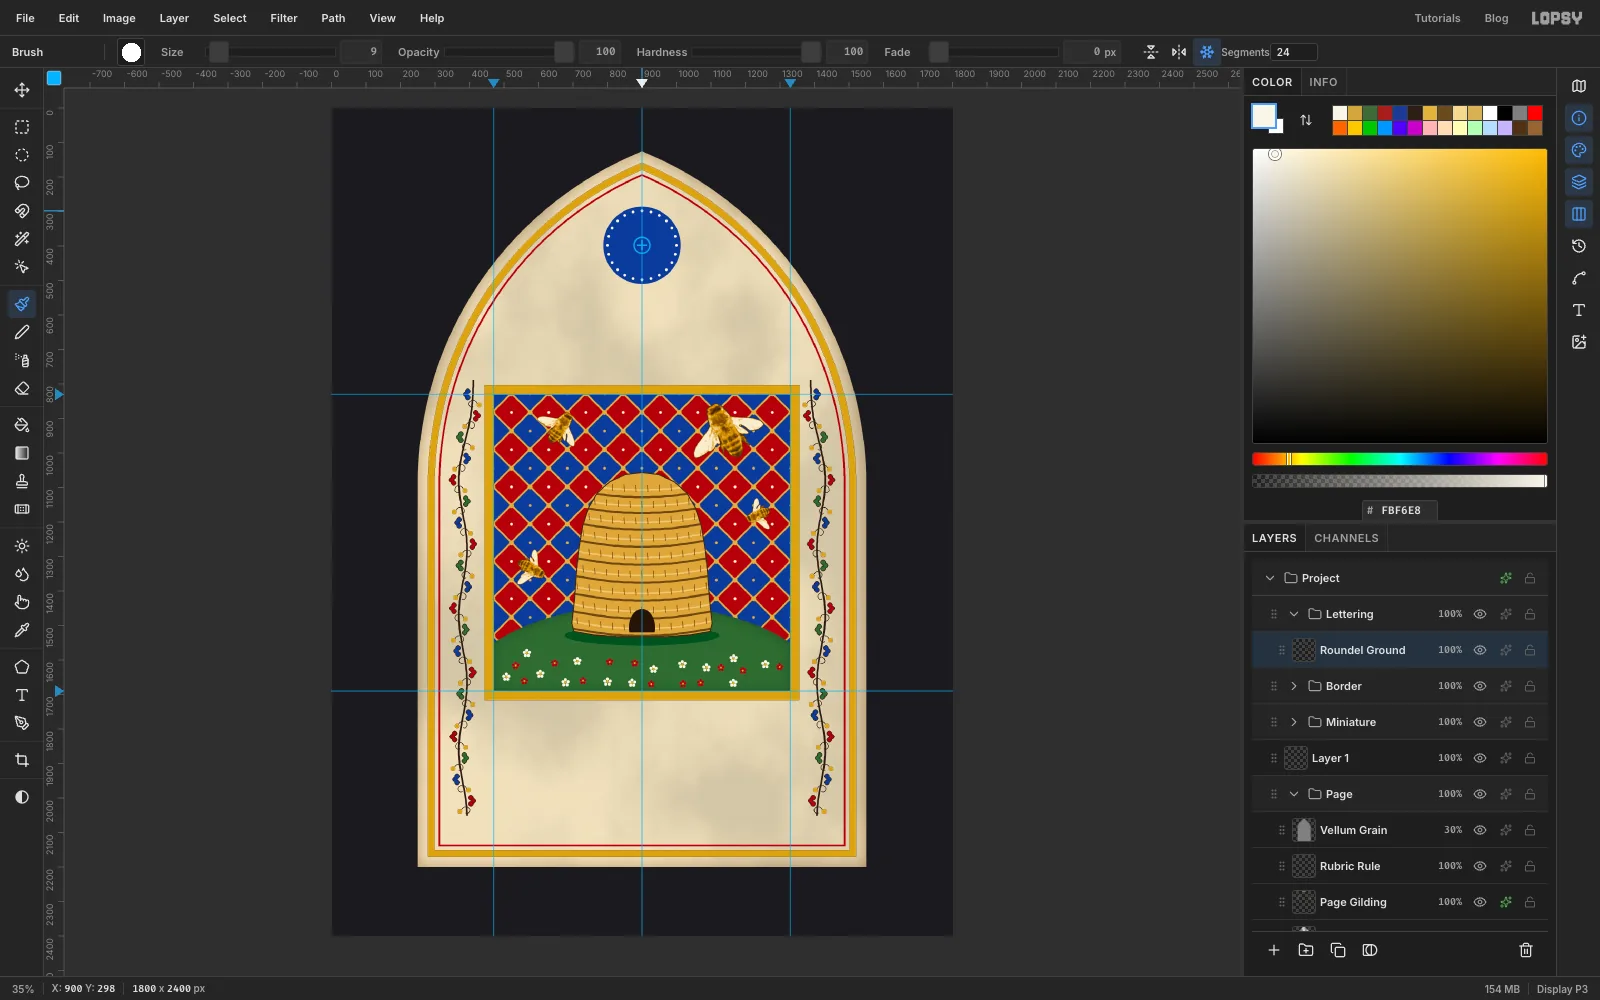
788, 286to1012, 510. Fill with1A3A96and deselect. - Pick the Brush at Size
9, colourFBF6E8. Click Radial Symmetry and set Segments to24. Cmd-click the centre of the disc (900, 398) to put the symmetry centre there. - Click once just inside the top of the disc. You get twenty-four evenly spaced pearls. Turn Radial Symmetry off.
- Add a layer named
Roundel Gilding. Click once with the Elliptical Marquee for774, 272to1026, 524, fill withD4A53Aand press Cmd+D. Click once more for the inner circle788, 286to1012, 510, press Delete and Cmd+D. Gild the ring.
- Collapse
-
Gild an emblem bee
- Expand
MiniatureandBees, clickHero Bee, drag a marquee round it and press Cmd+C. Press Cmd+D and collapse the groups again. - Click
Roundel Gilding, click New Group and name itEmblem, then press Cmd+V. Rename the pasted layerEmblem Bee. Cmd-drag a corner handle until it's about 160 px wide, press Enter, then turn it 28° clockwise so it stands upright, press Enter and deselect. Centre it in the disc. - Give
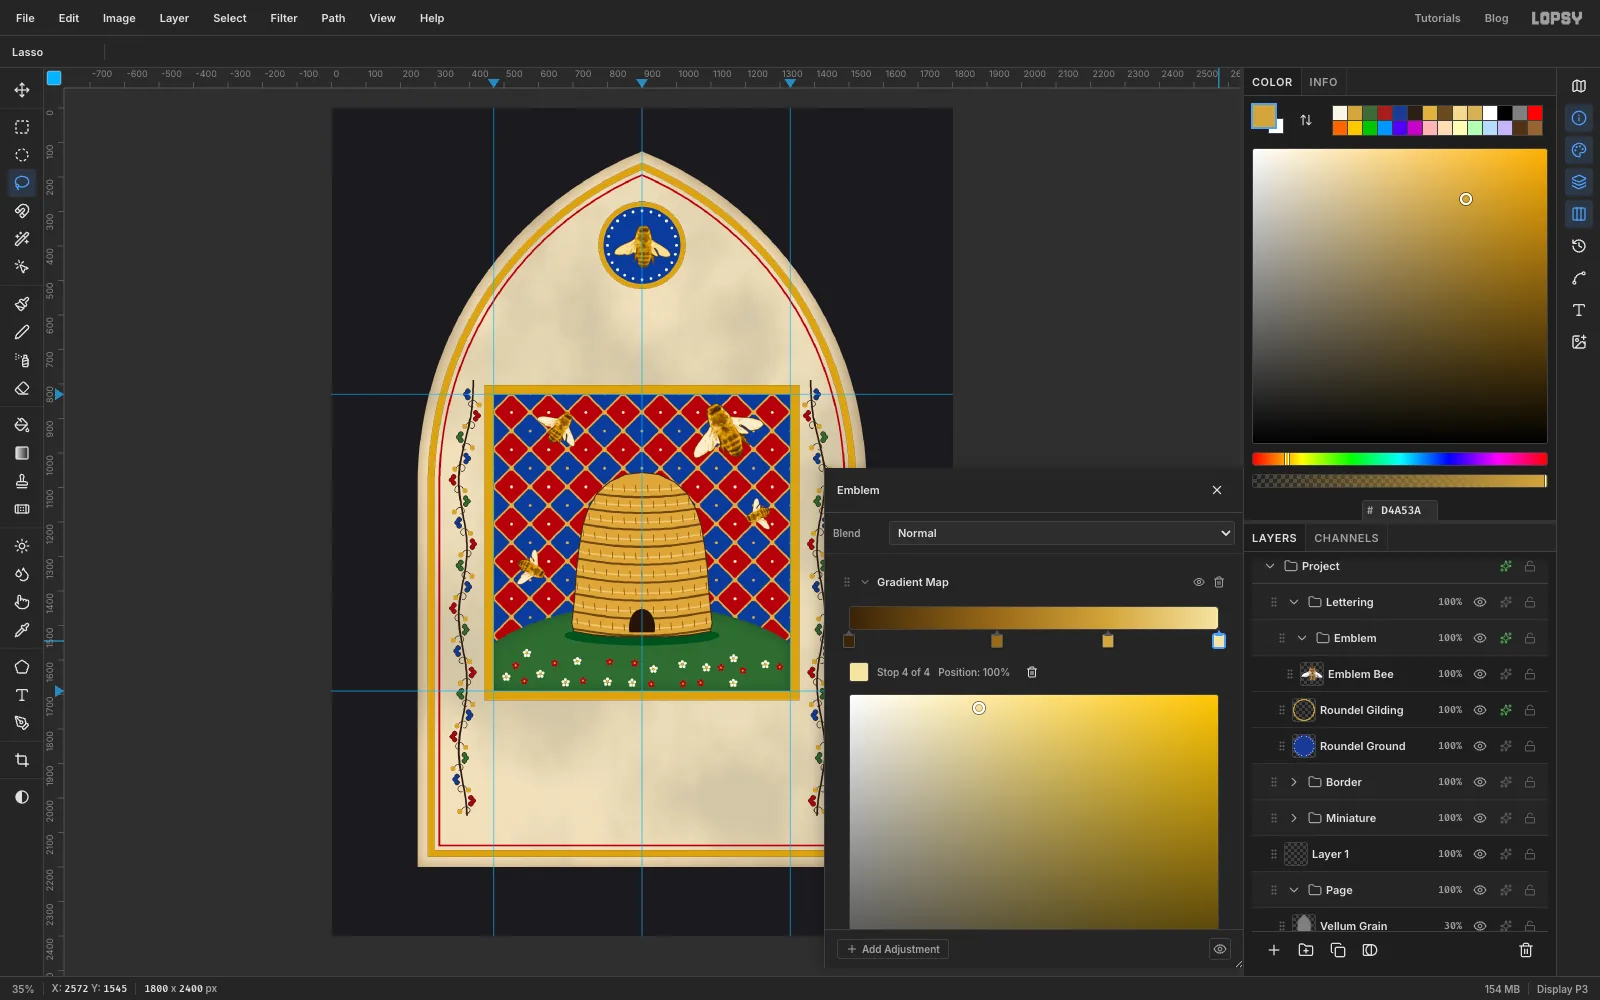
Emblemits own Gradient Map:3A2408,9A6A18at40%,D4A53Aat70%, andF6E3A0.
An upright gold bee on blue is a heraldic charge, the kind of badge an abbey would paint over its door.
- Expand
-
Make room for the title
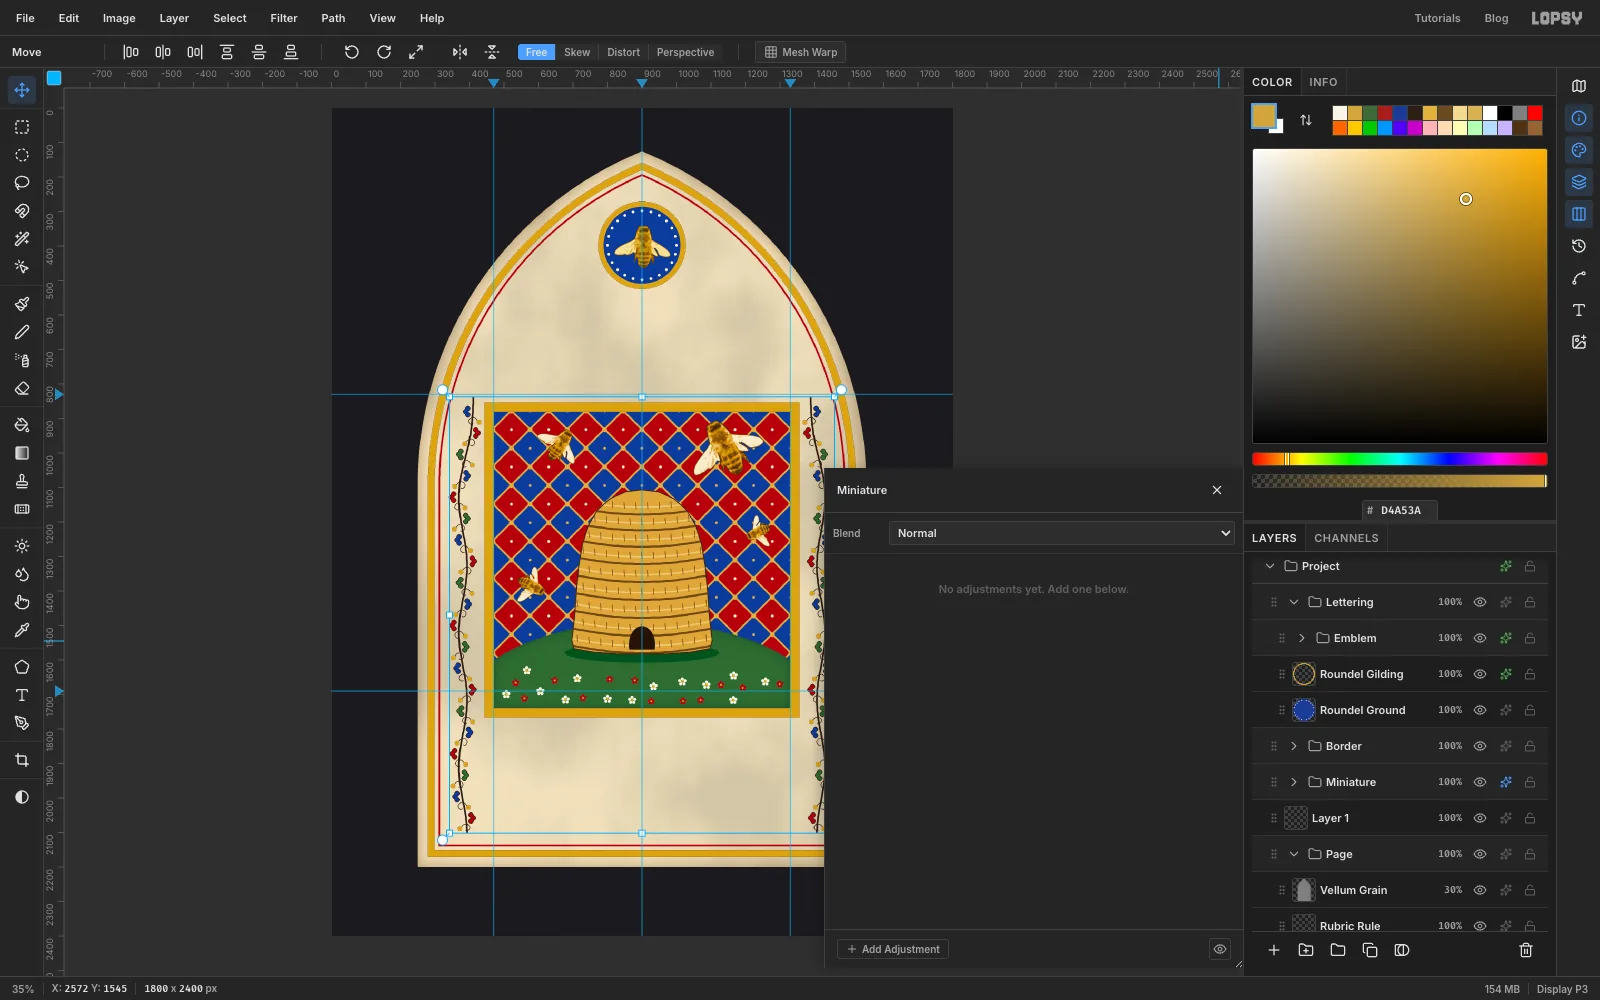
With the roundel in, the gap above the picture is too tight for the title.
- Click the
Miniaturerow and Shift-click theBorderrow. - Pick the Move tool and press Shift+Down five times. Both groups move 50 px down together.
- Click the
-
Build the illuminated initial
- Click
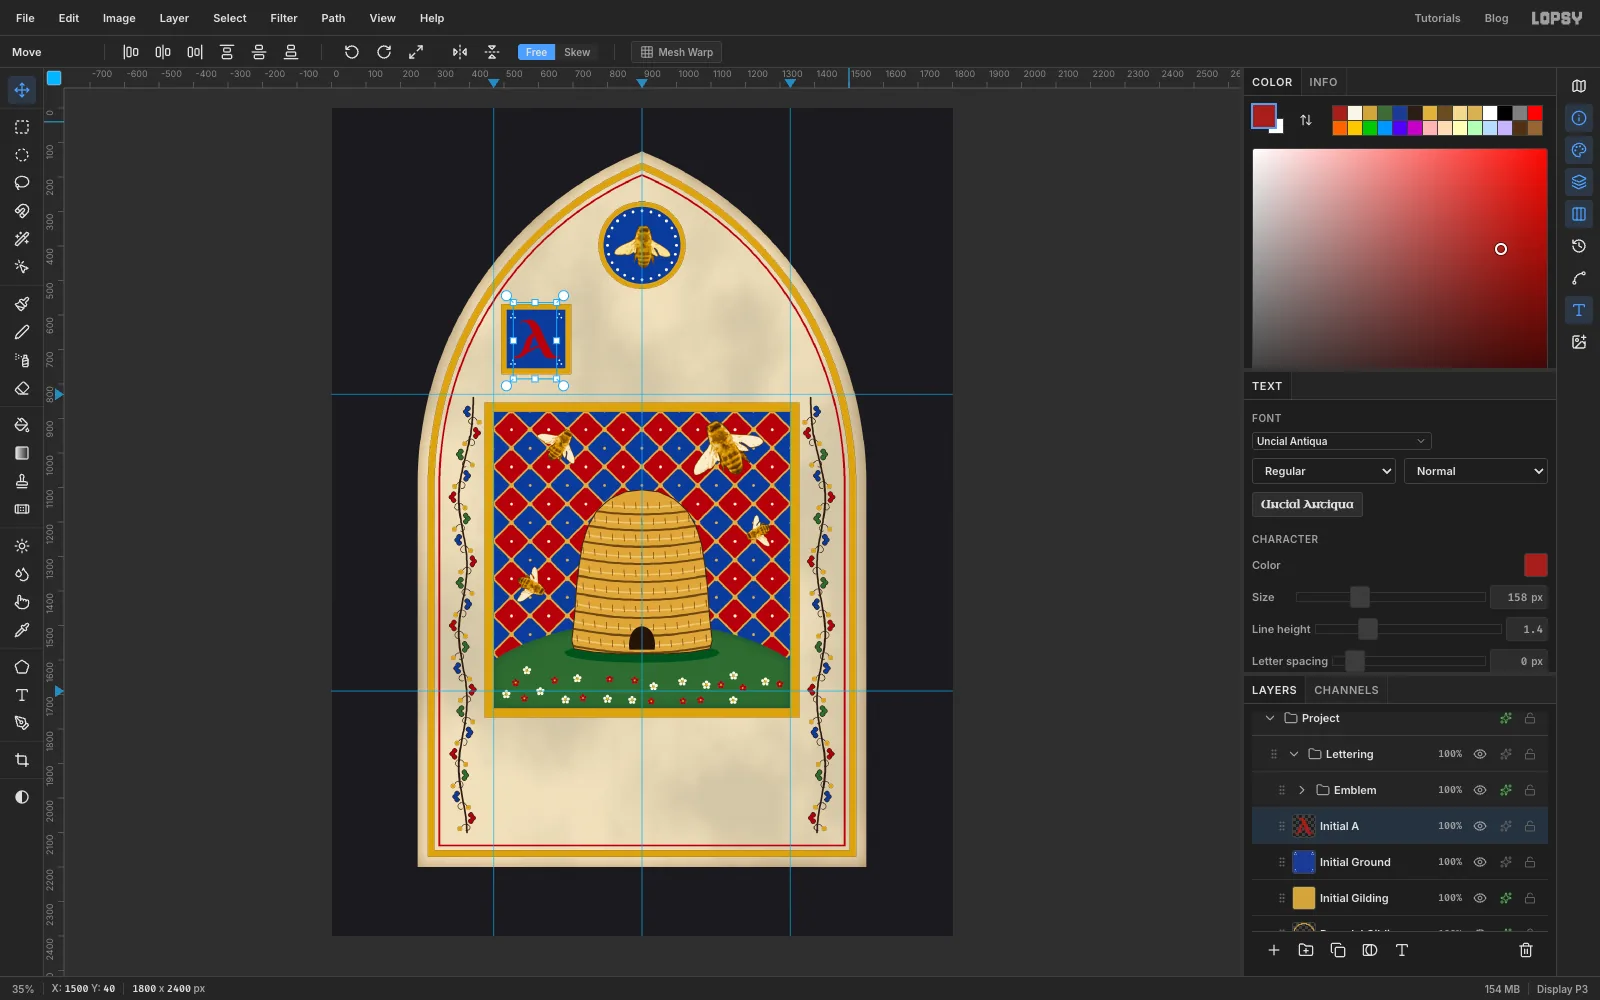
Roundel Gildingand add a layer namedInitial Gilding. Fill the square492, 569to694, 771withD4A53A, press Cmd+D and gild it. - Add a layer named
Initial Ground. Fill508, 585to678, 755with1A3A96. With a white Size6brush, click a three-dot cluster into each corner. - Pick the Text tool. Set Uncial Antiqua, Size
158, colourA81E1A. Click an empty part of the canvas, typeA, press Tab and rename the layerInitial A. Move it to the middle of the blue square, with about 12 px of blue on each side. - Add a Stroke of
2in white. The A stands off the blue the way a white-lined capital does.
Uncial Antiqua's A has a pointed top and a crossbar, so it can't be read as a U. Blackletter capitals can.
- Click
-
Set the title and its penwork
- Click
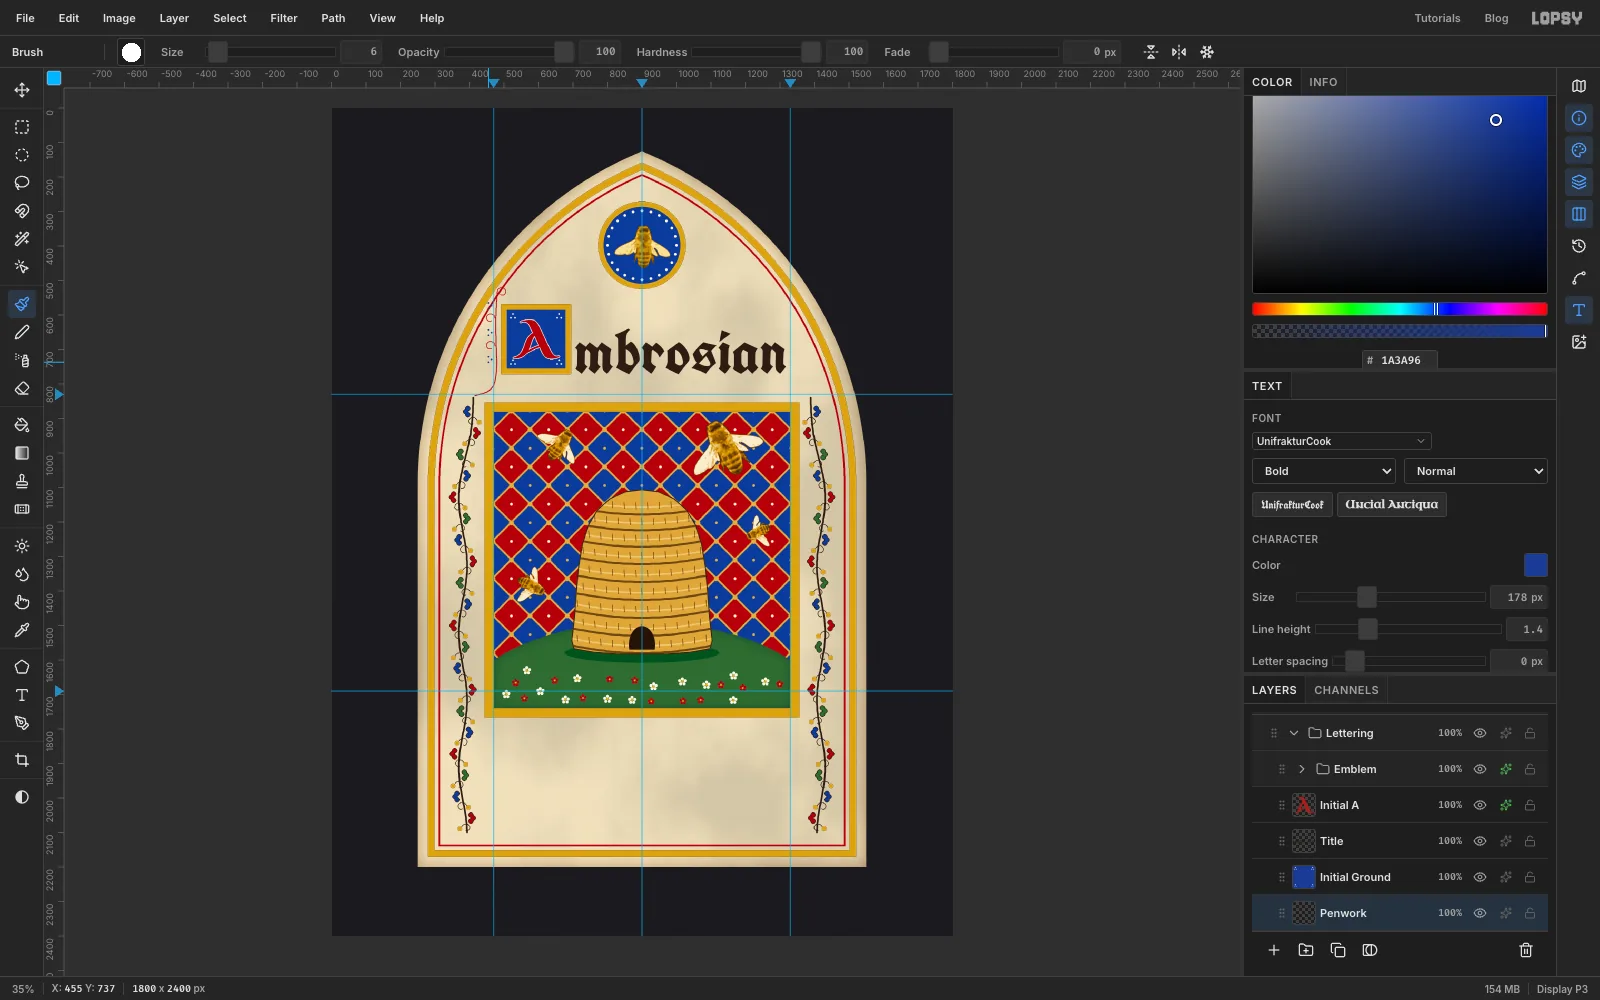
Initial Ground(a raster layer, so the new type doesn't restyle the A). Typembrosianin UnifrakturCook, Size178, colour2B1D14, and rename the layerTitle. - Move it so its left edge is about 12 px right of the gold box and the bottom of its letters sits exactly on the box's bottom edge (
771). The box should read as the first letter of the word. - Click
Initial Gildingand add a layer namedPenwork. With a Size4brush inA81E1A, draw a stem from just above the box down its left side, curving out to join the top of the left-hand vine. - At Size
3, add a curl at its top and two small curls off its left side. Click a few three-dot sprays in1A3A96at Size6beside it.
- Click
-
Type MEAD in Lombardic capitals
- Click
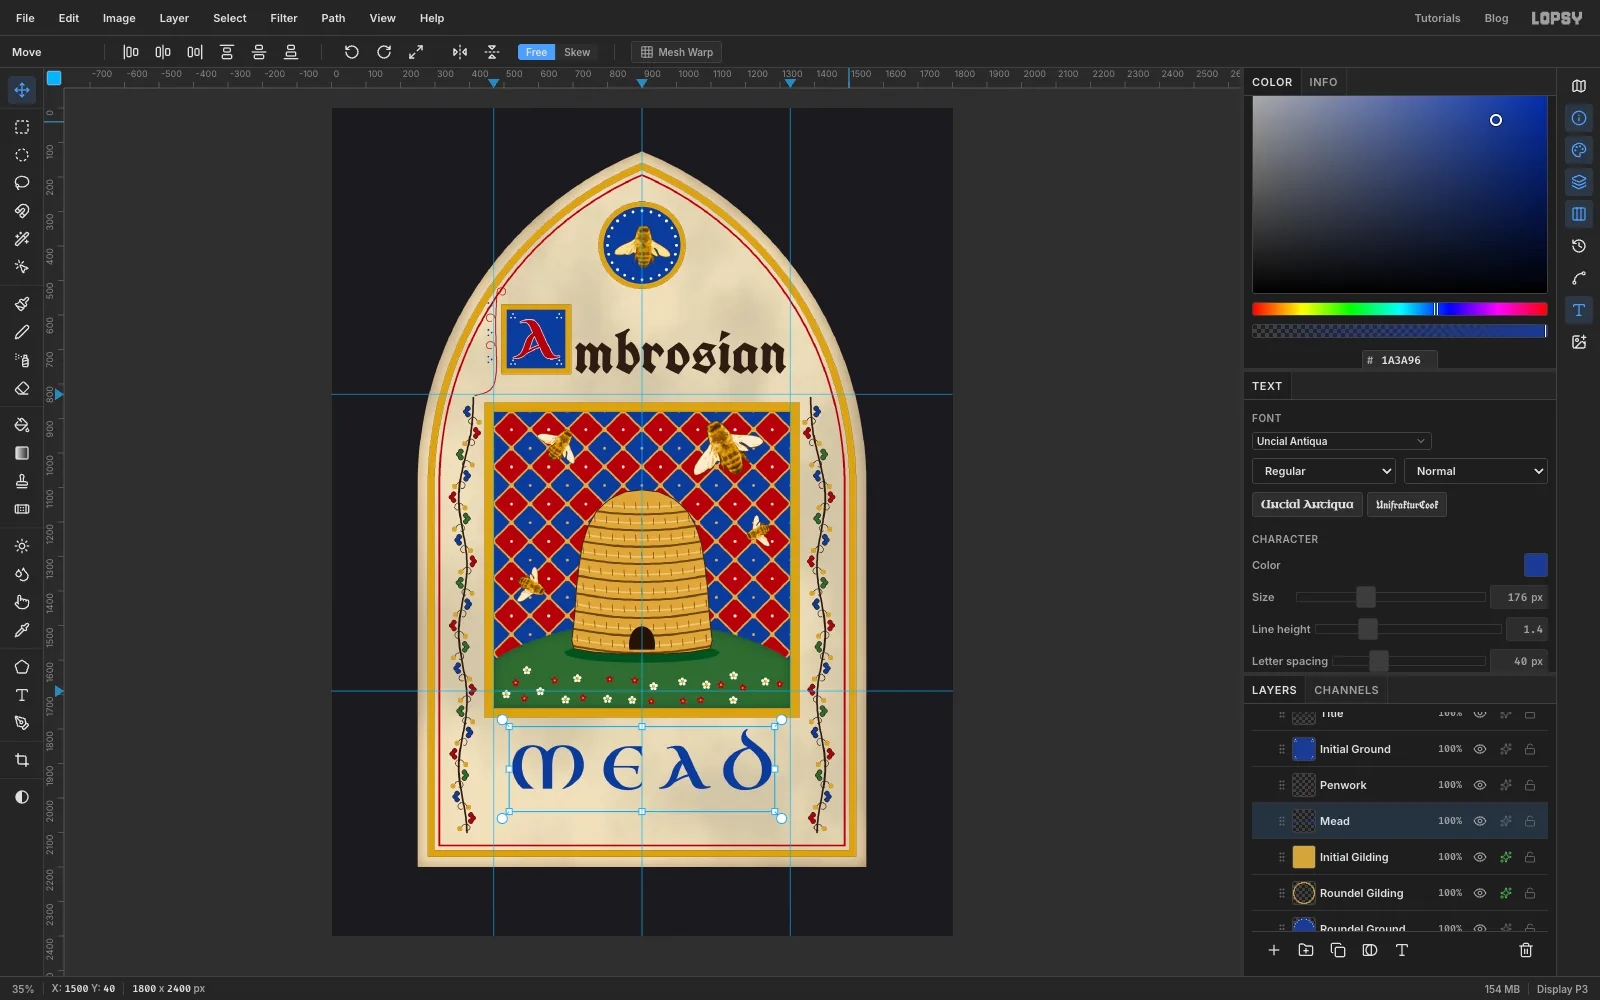
Initial Gildingagain. TypeMEADin Uncial Antiqua, Size176, colour1A3A96, and rename the layerMead. In the Text panel set Letter spacing to40. - Centre it on the middle guide with the top of the tall D at
1800. That leaves about 30 px clear under the gold frame. - Click Rasterize Layer at the bottom of the Layers panel.
- Click
-
Rubricate the E and D
Lombardic capitals alternate blue and red. You'll recolour two letters by selecting them, not by retyping.
- Cmd-click the
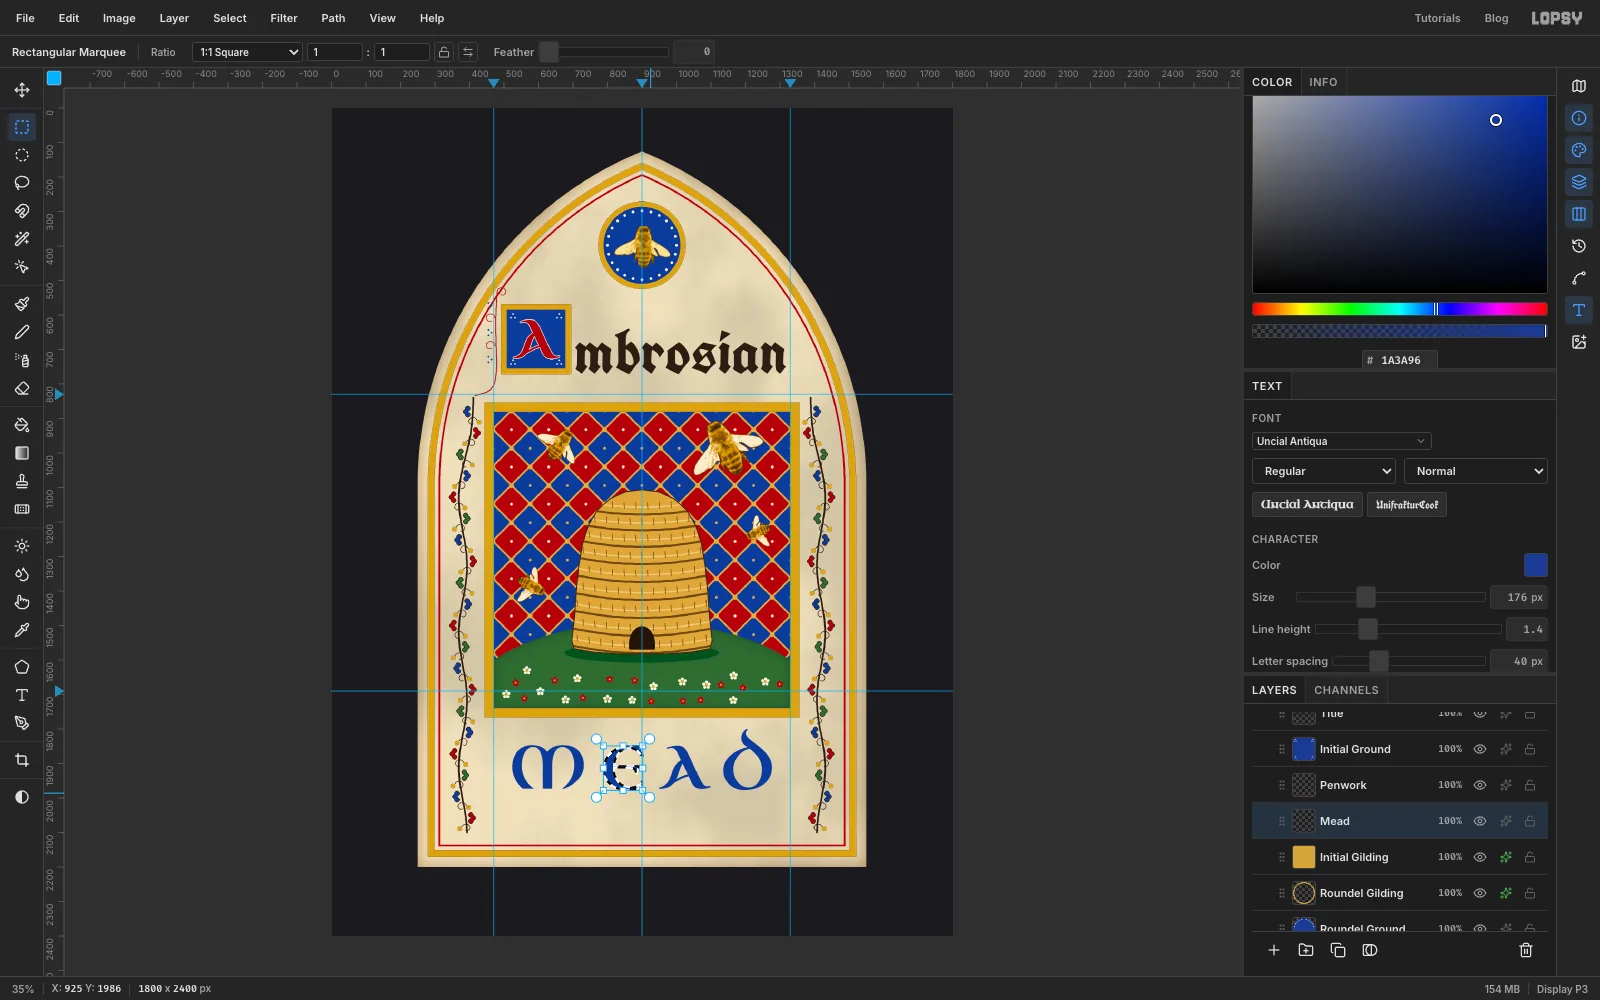
Meadthumbnail to select the letters. - With the Rectangular Marquee, hold Shift+Alt and drag a box round the E. Start and finish halfway into the gaps on either side, so you catch the tips of its serifs. Only the E stays selected.
- Fill with
A81E1A. Repeat for the D, then deselect. - Add a Stroke of
2in2B1D14. - Add a layer named
Lozenges. With the Lasso, draw a small diamond (about 22 × 38 px) in each gap, centred on the letters' middle height. Hold Shift for the second and third so they add to the selection. Fill withD4A53A, deselect, and gild them.
- Cmd-click the
-
Add the tagline and the date
- Click
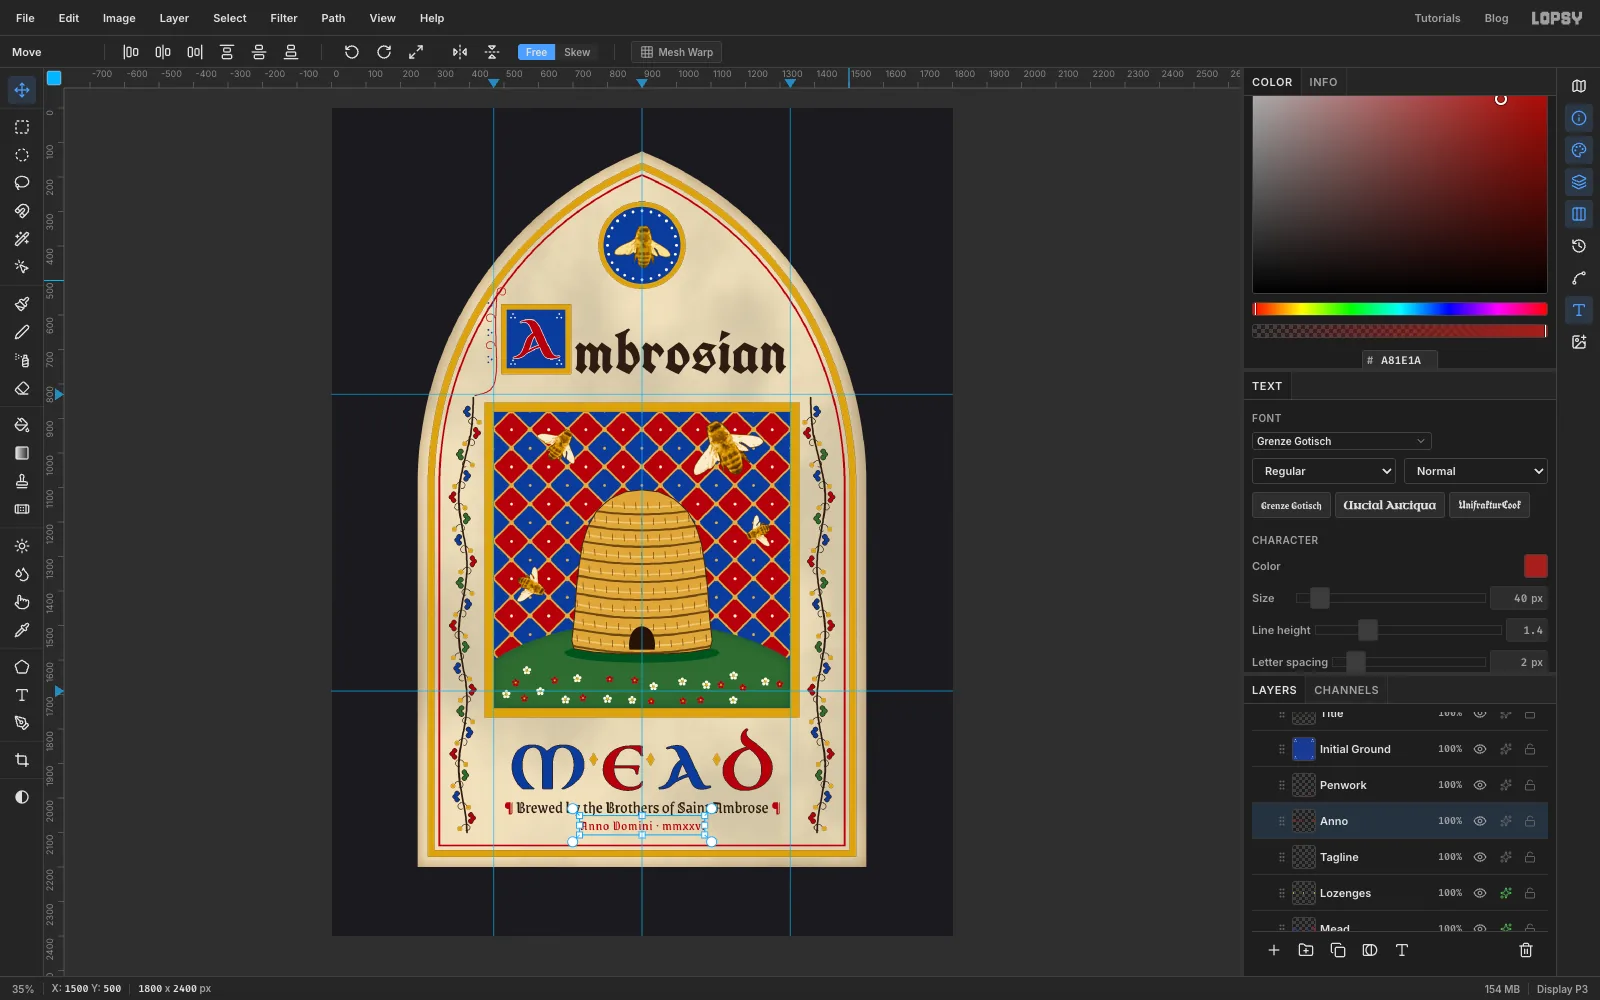
Lozenges. Type¶ Brewed by the Brothers of Saint Ambrose ¶(on a Mac, ¶ is Option+7 and · is Option+Shift+9) in Grenze Gotisch, Size50, colour2B1D14. Rename itTaglineand centre it about 34 px below MEAD. It should be narrower than MEAD and well clear of the vines. - Rasterize it. Cmd-click its thumbnail, Shift+Alt-drag a box round the first ¶, and fill with
A81E1A. Do the same for the last ¶, then deselect. - Type
Anno Domini · mmxxviin Grenze Gotisch, Size40, colourA81E1A, Letter spacing2. Rename itAnnoand centre it 16 px below the tagline. Scribes often wrote numerals in lowercase, and a run of Grenze's blackletter capital Ms is hard to read, so only the two words keep their capitals.
Check the bottom margin: there should be at least 30 px between the date and the red rule.
- Click
-
Finish and export
- Expand
Miniature, clickDiaperand run Hue/Saturation… with Saturation-10and Lightness-5. The pattern stays in the same red and blue as the lettering, just a step quieter, so the bees and hive lead. - Untick View → Show Guides to hide the guides.
- Choose File → Save Project, then File → Quick Export PNG.
For a print-ready file, hide
ShirtandHeatherbefore exporting so the page sits on transparency. Look at it at thumbnail size: "Ambrosian" and "MEAD" should read at a glance, and the bee and hive should still be the first thing you see.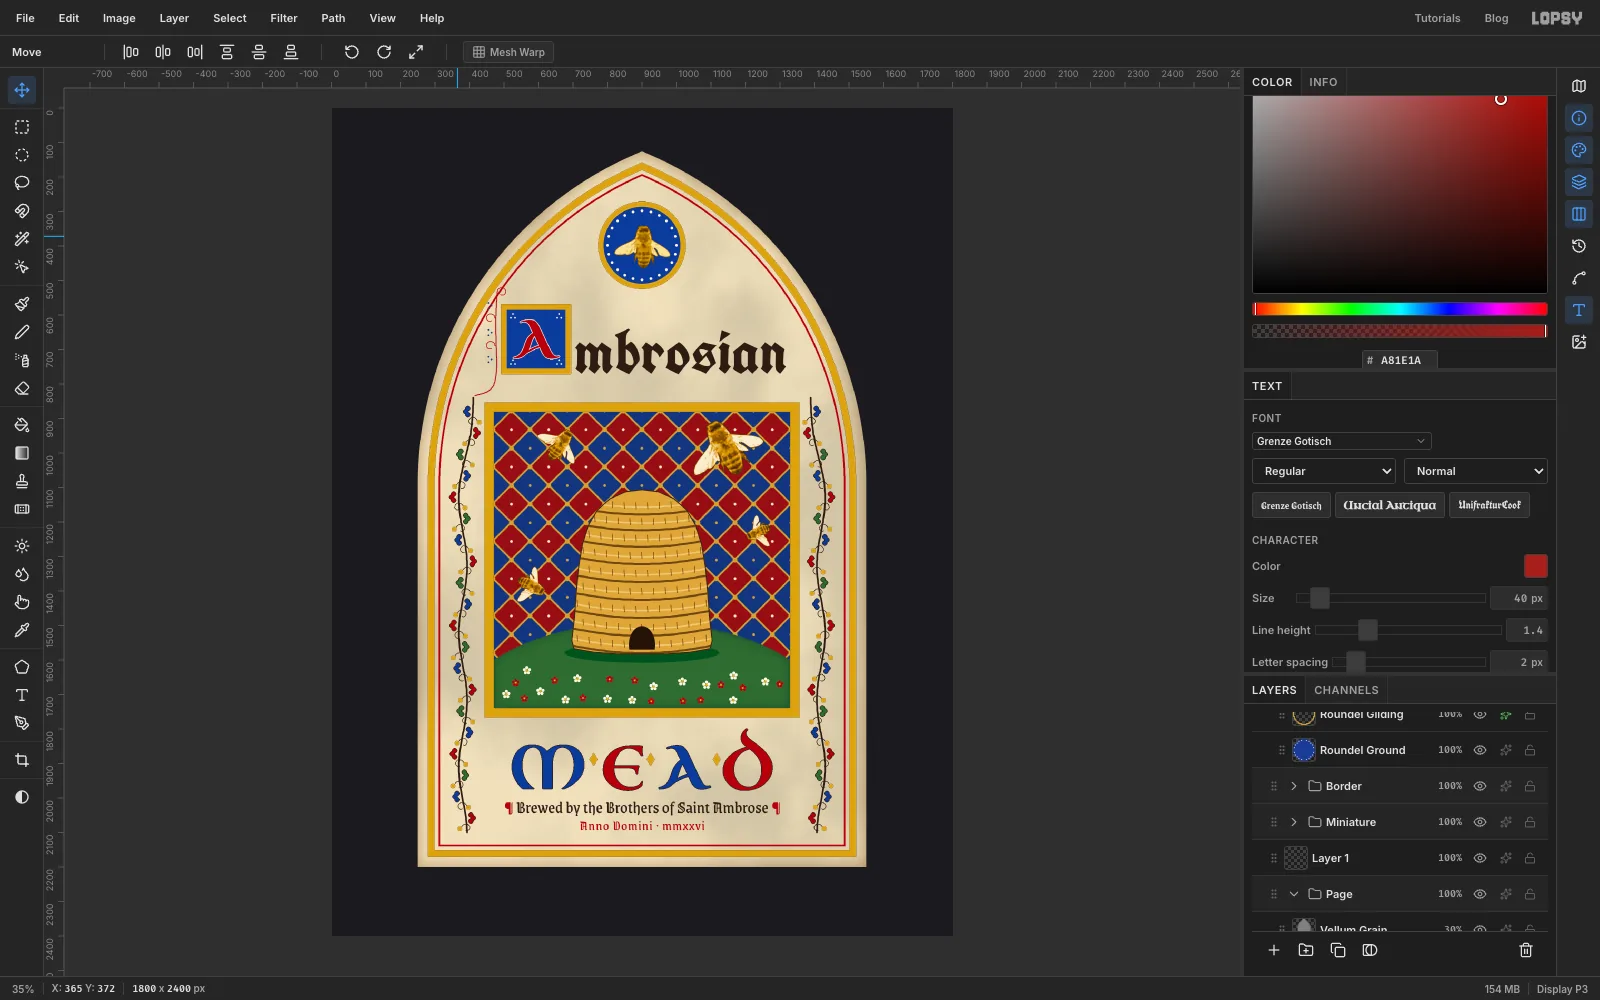
- Expand