Design an Iridescent Nautilus Logo for a Dive School
Marble a mother-of-pearl gradient with Liquify, cut a nautilus from Pen curves, set type on a circle and build a logo sheet with icons and a palette.
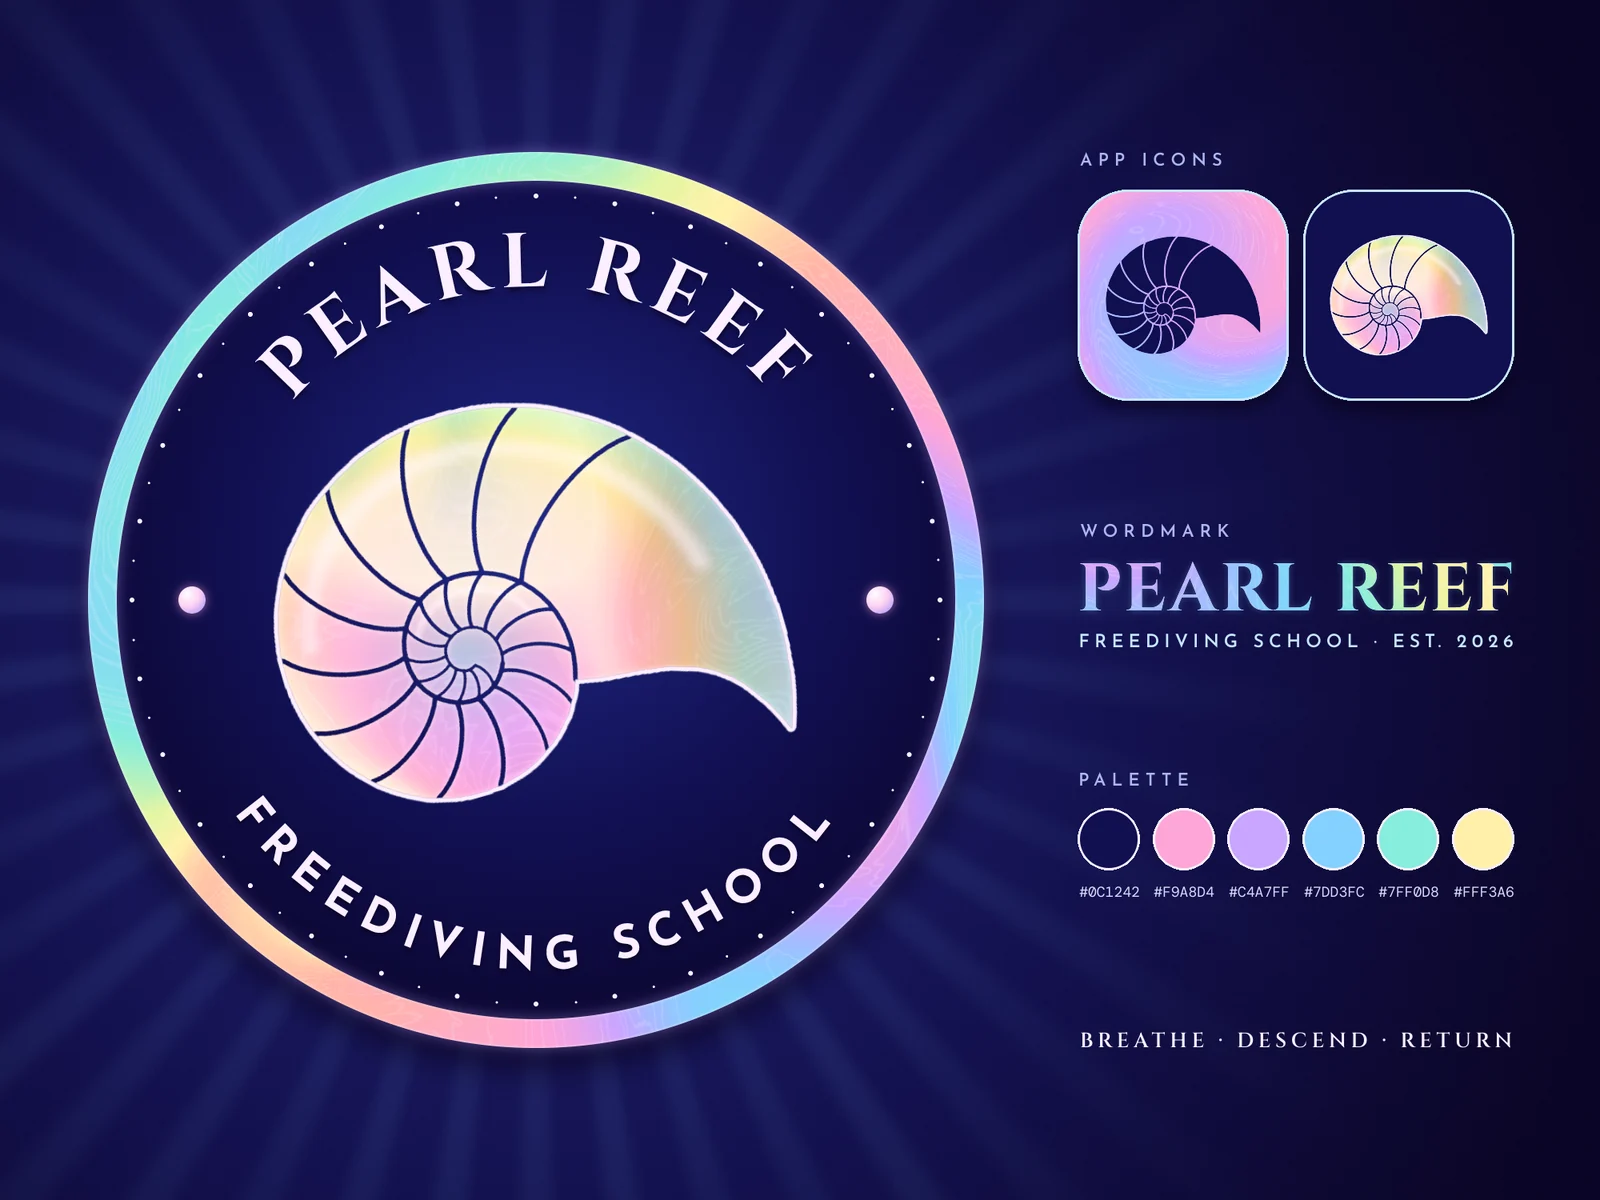
Iridescence is colour that changes with the angle you look from: the inside of a shell, a soap film, a patch of oil on water. A screen can't change with your viewing angle, so designers fake it with a pastel rainbow that keeps shifting hue across a surface, bent into soft swirls so it never reads as plain stripes.
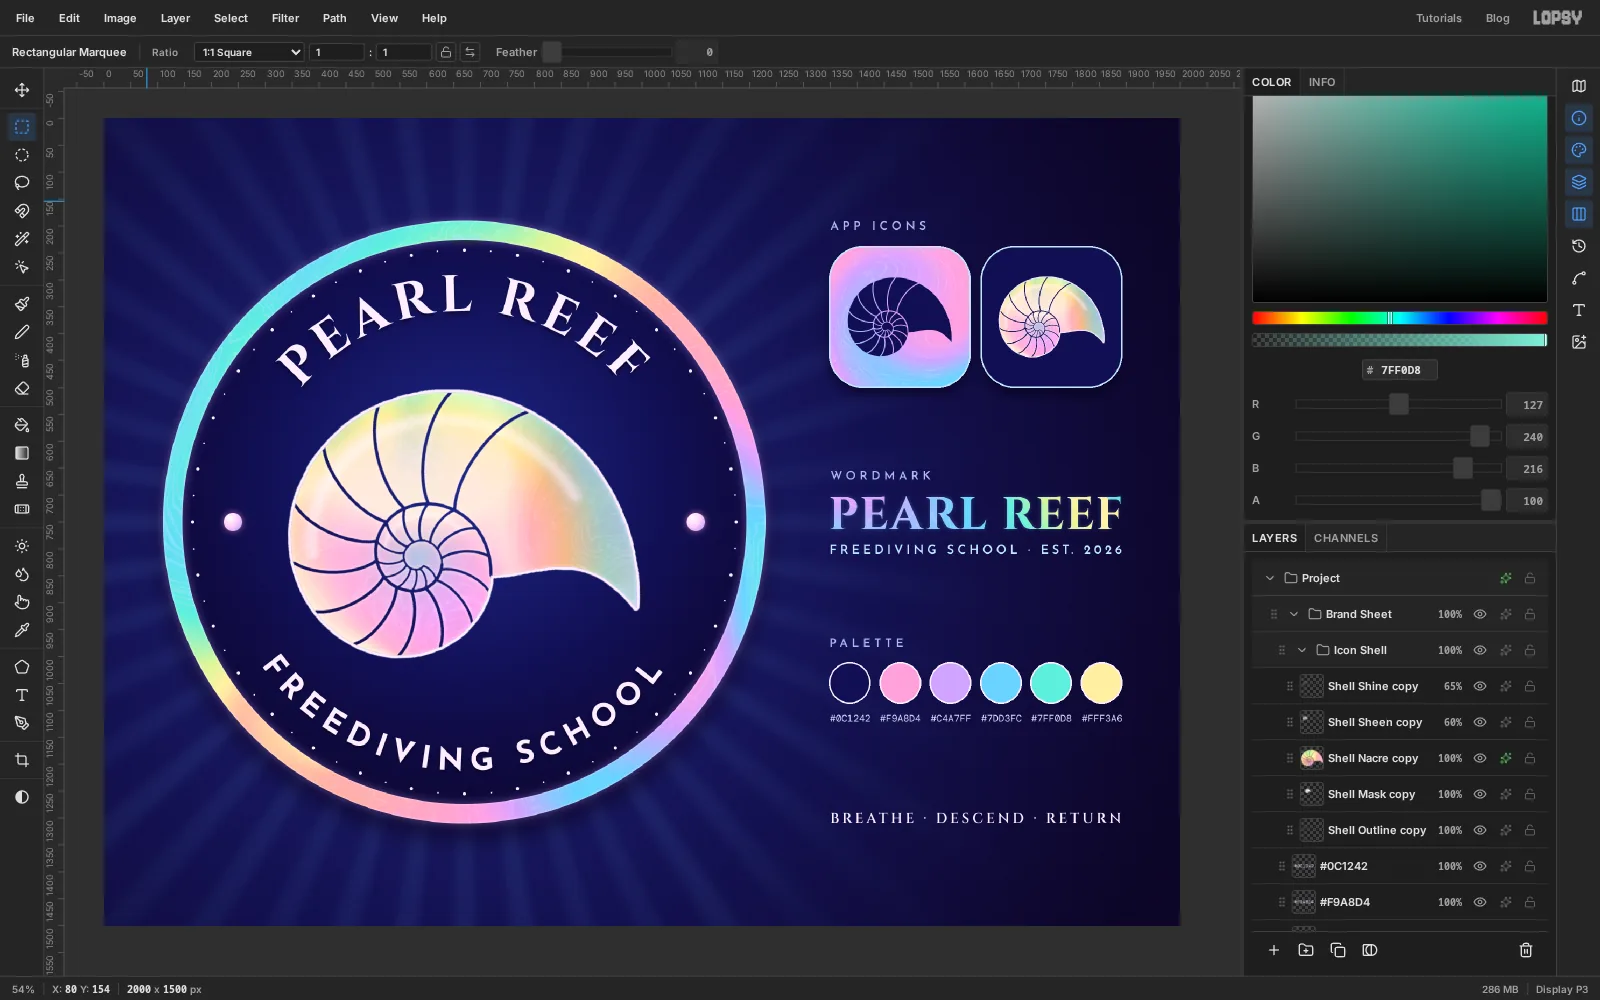
This tutorial builds a logo sheet for Pearl Reef, an invented freediving school. You'll make one sheet of marbled "nacre" (mother-of-pearl) and reuse it everywhere: the rim of the emblem, the nautilus shell, an app icon and the wordmark. The type stays plain so it's easy to read.
Along the way you'll use:
- a 15-stop Gradient, Clouds, Posterize and Find Edges for the veins, and Liquify to marble them
- the Lasso, Select → Grow and the Pen tool to draw the shell
- copy and paste through a selection to cut nacre into any shape
- Group Layers with the Move tool's rotate and scale handles
- text bound to a path, plus letter spacing in the Text panel
- Radial Symmetry for a ring of dots
- guides, the Shape tool, layer effects, a layer mask and a Color Grading adjustment
The palette is deep navy and a seven-colour pastel ramp:
-
Abyss
-
Disc
-
Nacre
-
Pearl white
-
ice blue
-
caption blue
-
Paint the deep-water background
Open Lopsy. In the New Document dialog set Width to
2000and Height to1500and click Create.- Double-click Layer 1 in the Layers panel and rename it
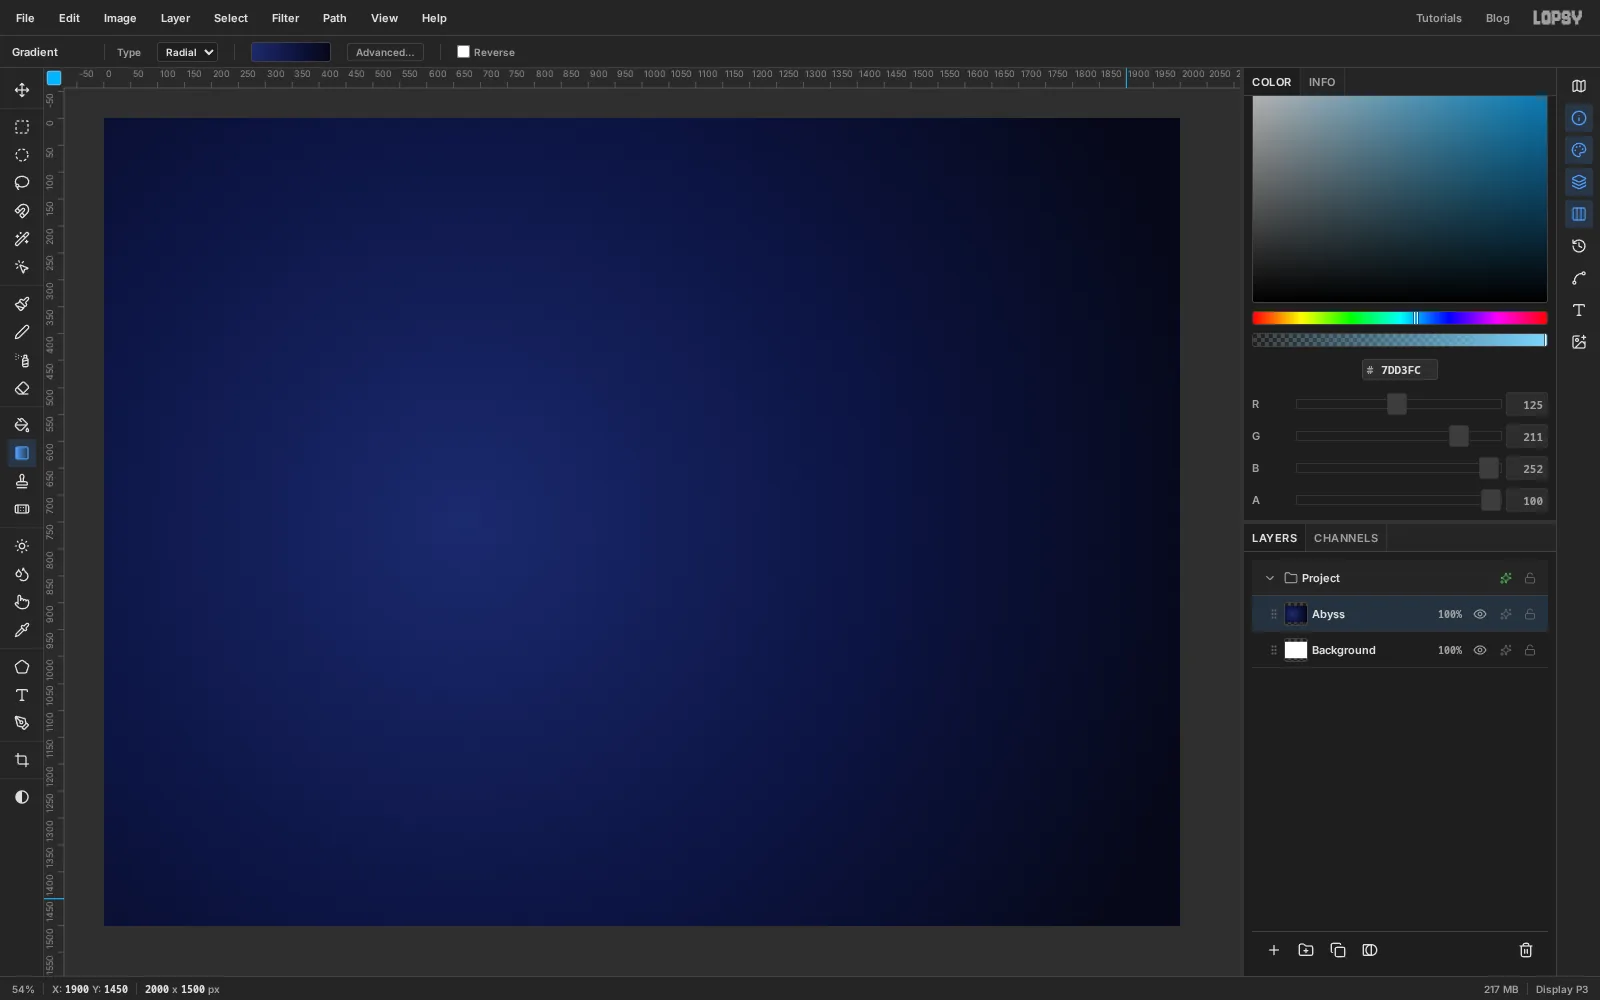
Abyss. - Pick the Gradient tool and set Type to Radial. Click Advanced… and give the gradient three stops: at the start, a little past halfway and at the end. Click Done.
- Drag from (670, 750), where the emblem will sit, out to the bottom-right corner.
The brightest water ends up behind the emblem, and the right side falls off to near black.
- Double-click Layer 1 in the Layers panel and rename it
-
Build a pastel rainbow gradient
- Click Add Layer and name the layer
Nacre. - With the Gradient tool, set Type to Linear and open Advanced… again.
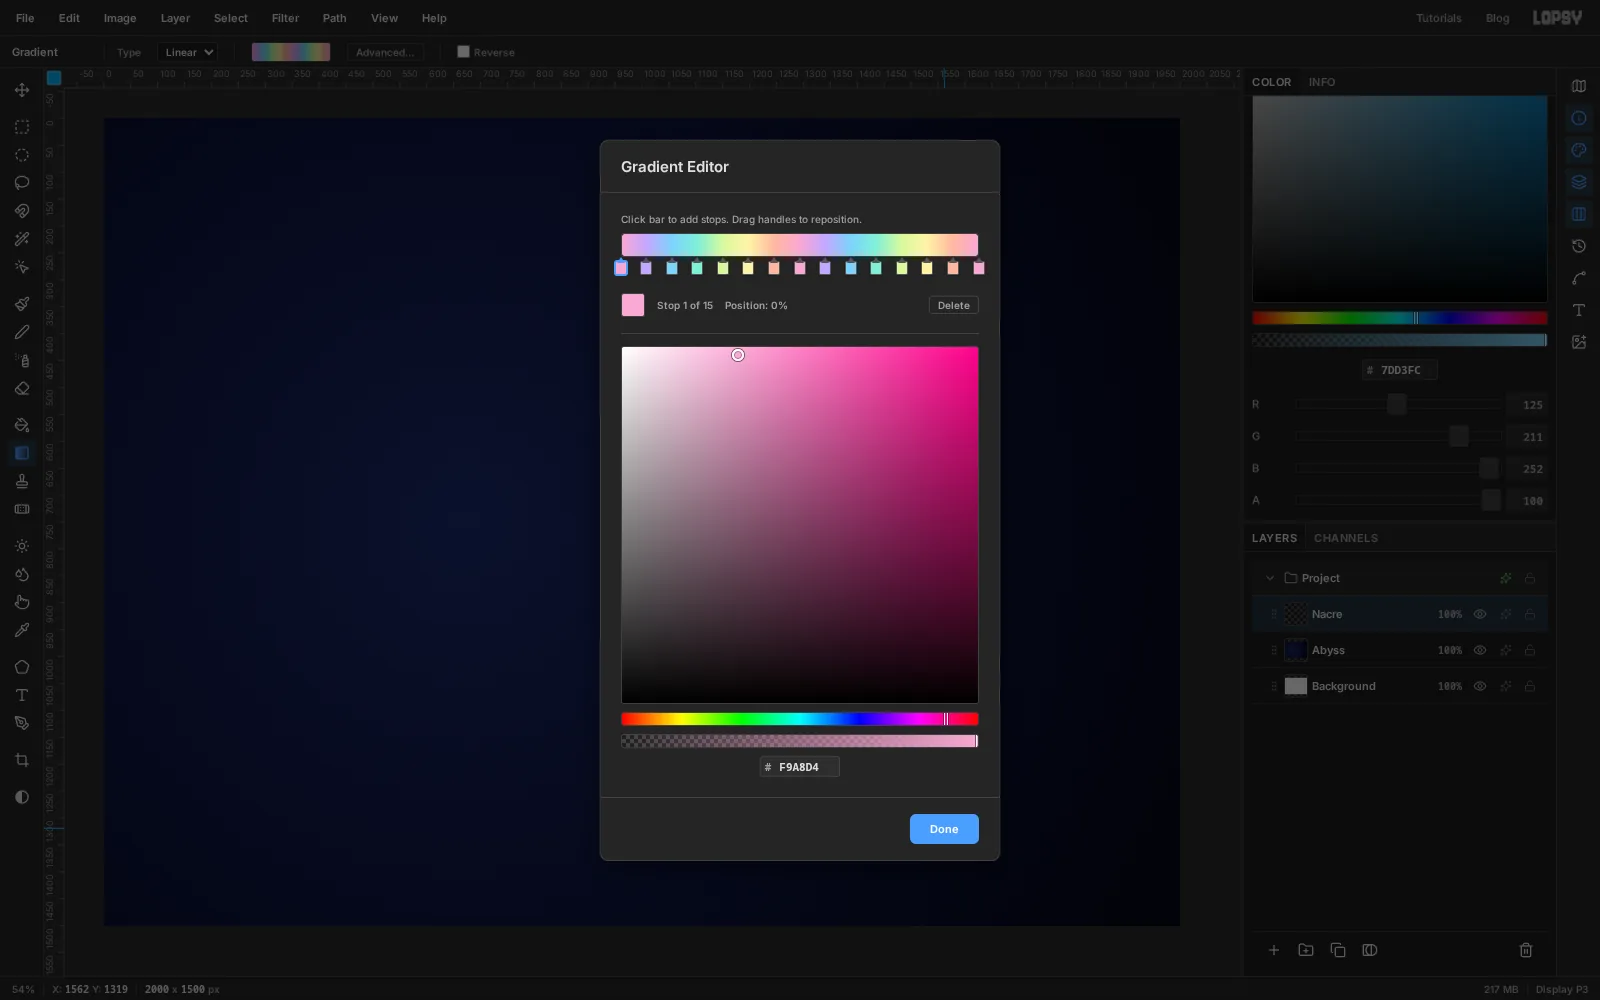
- Make 15 evenly spaced stops by clicking along the bar. Colour them in this order, then start the order again: , , , , , , . The last stop ends up pink again.
- Click Done and drag from the top-left corner to the bottom-right corner.
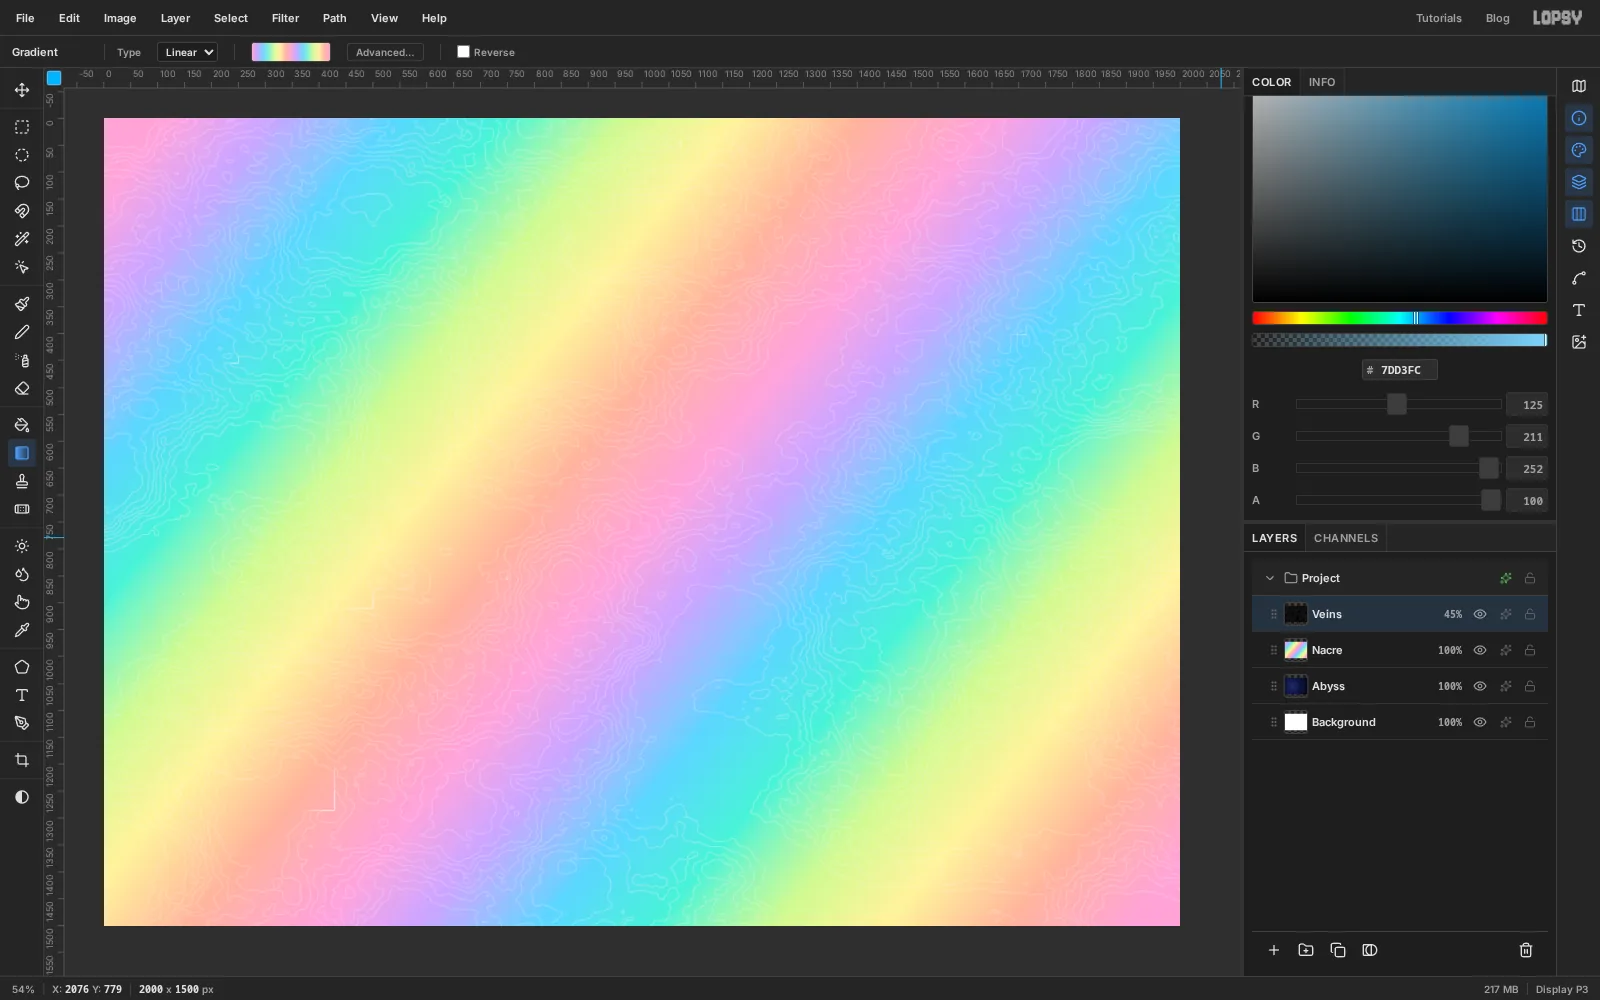
You now have about two full pastel rainbows running diagonally across the canvas.
- Click Add Layer and name the layer
-
Draw vein lines with Clouds and Find Edges
Real nacre has fine growth lines. You can get them from a contour map of random clouds.
- Add a layer named
Veins. - Choose Filter → Clouds, set Scale to
7and click Apply. - Choose Filter → Posterize with Levels
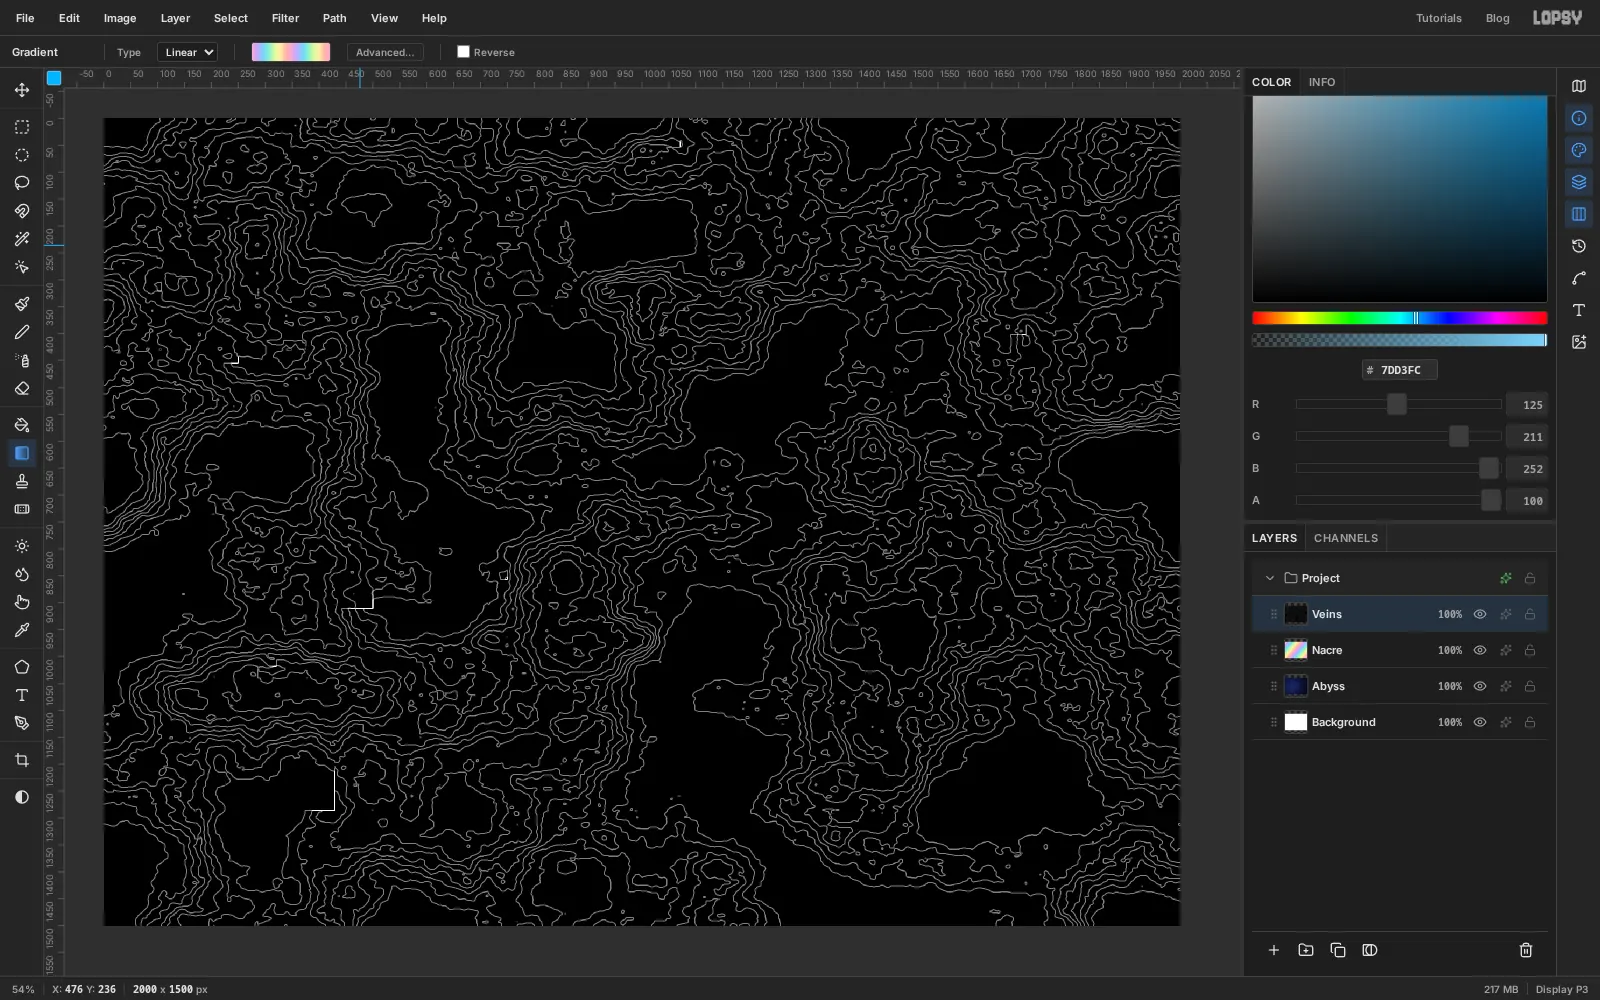
9. The soft clouds become nine flat grey bands. - Choose Filter → Find Edges. Only the borders between the bands are left, as thin white lines on black.
Clouds is random, so your lines won't match the screenshot. Any set will do.
- Add a layer named
-
Screen the veins over the gradient
- Choose Filter → Gaussian Blur with Radius
2to soften the lines. - Click the effects button on the
Veinsrow and set the blend mode to Screen. Screen drops the black and keeps the white. - Click the layer's opacity button and set it to 45%.
- Press Cmd+E (Layer → Merge Down) to fold the veins into the gradient. The merged layer keeps the name
Nacre.
Merge now, before the next step, so the veins get swirled along with the colour.
- Choose Filter → Gaussian Blur with Radius
-
Marble it with Liquify
- Choose Filter → Liquify. Set Brush Size to
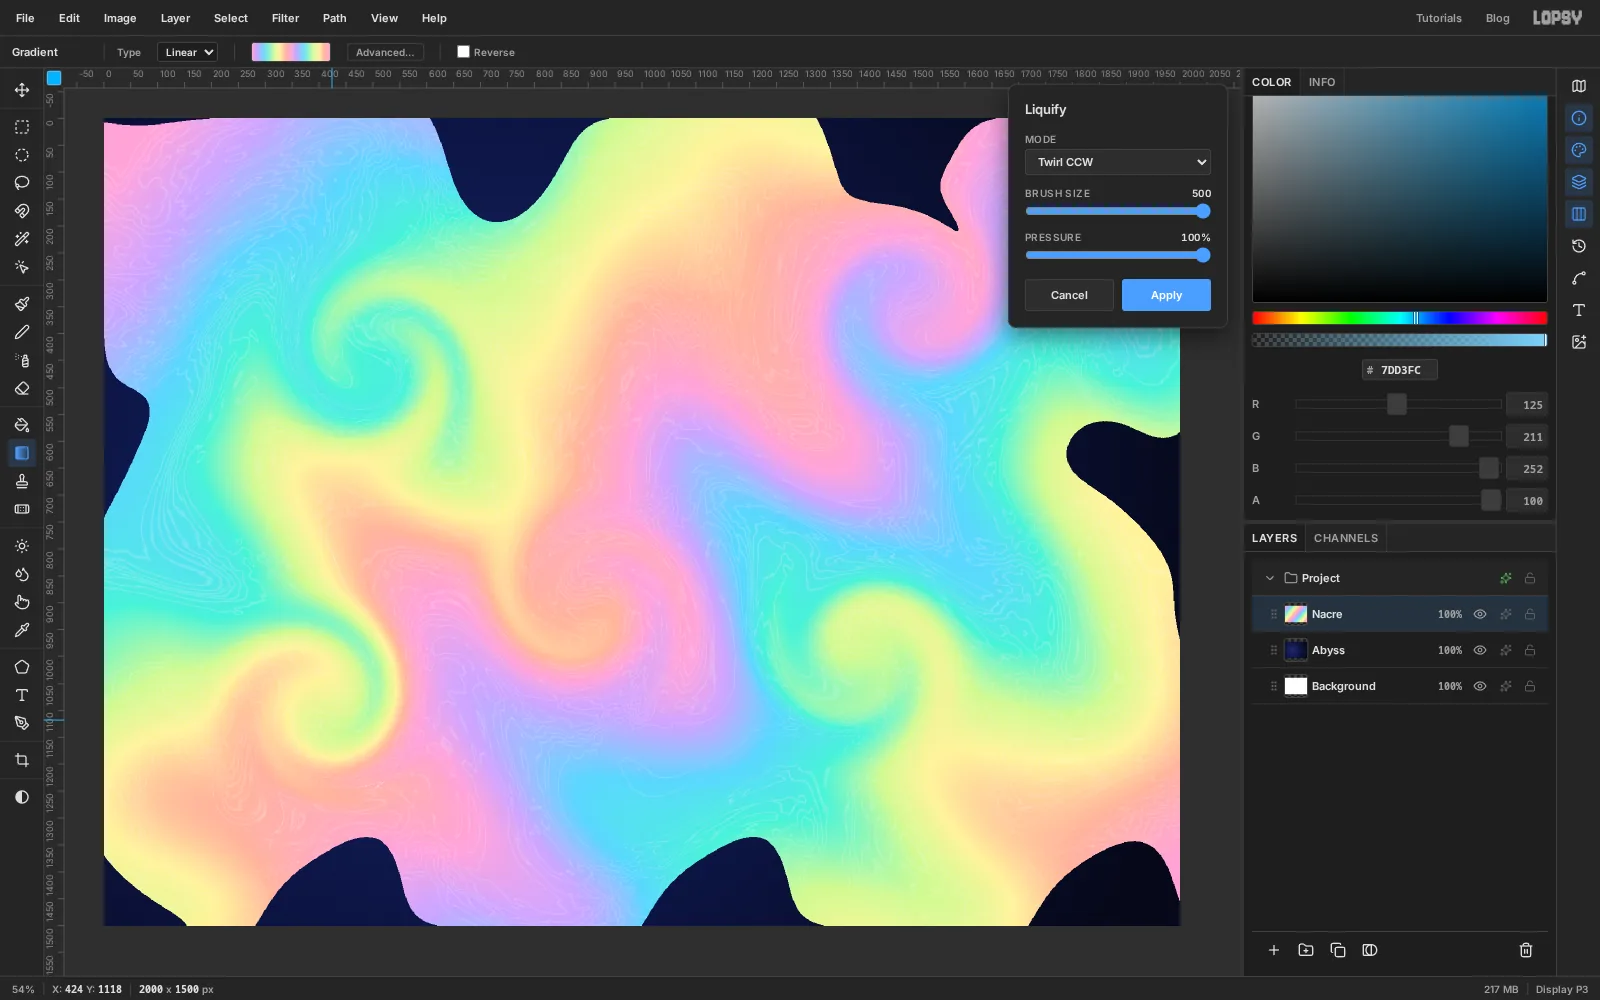
500and Pressure to100%. - In Push Forward mode, drag seven long wavy strokes across the canvas, one under the other, alternating left-to-right and right-to-left. Let each stroke rise and fall by about 150 px. The straight stripes bend into ribbons.
- Switch Mode to Twirl CW. Hold the pointer down and make small circles for a few seconds near (500, 450), (1400, 1000) and (900, 900).
- Switch to Twirl CCW and do the same near (1500, 350) and (400, 1100).
- Click Apply.
Gaps open at the edges of the canvas where pixels were pushed inward. The next step fills them.
- Choose Filter → Liquify. Set Brush Size to
-
Back the sheet so it has no holes
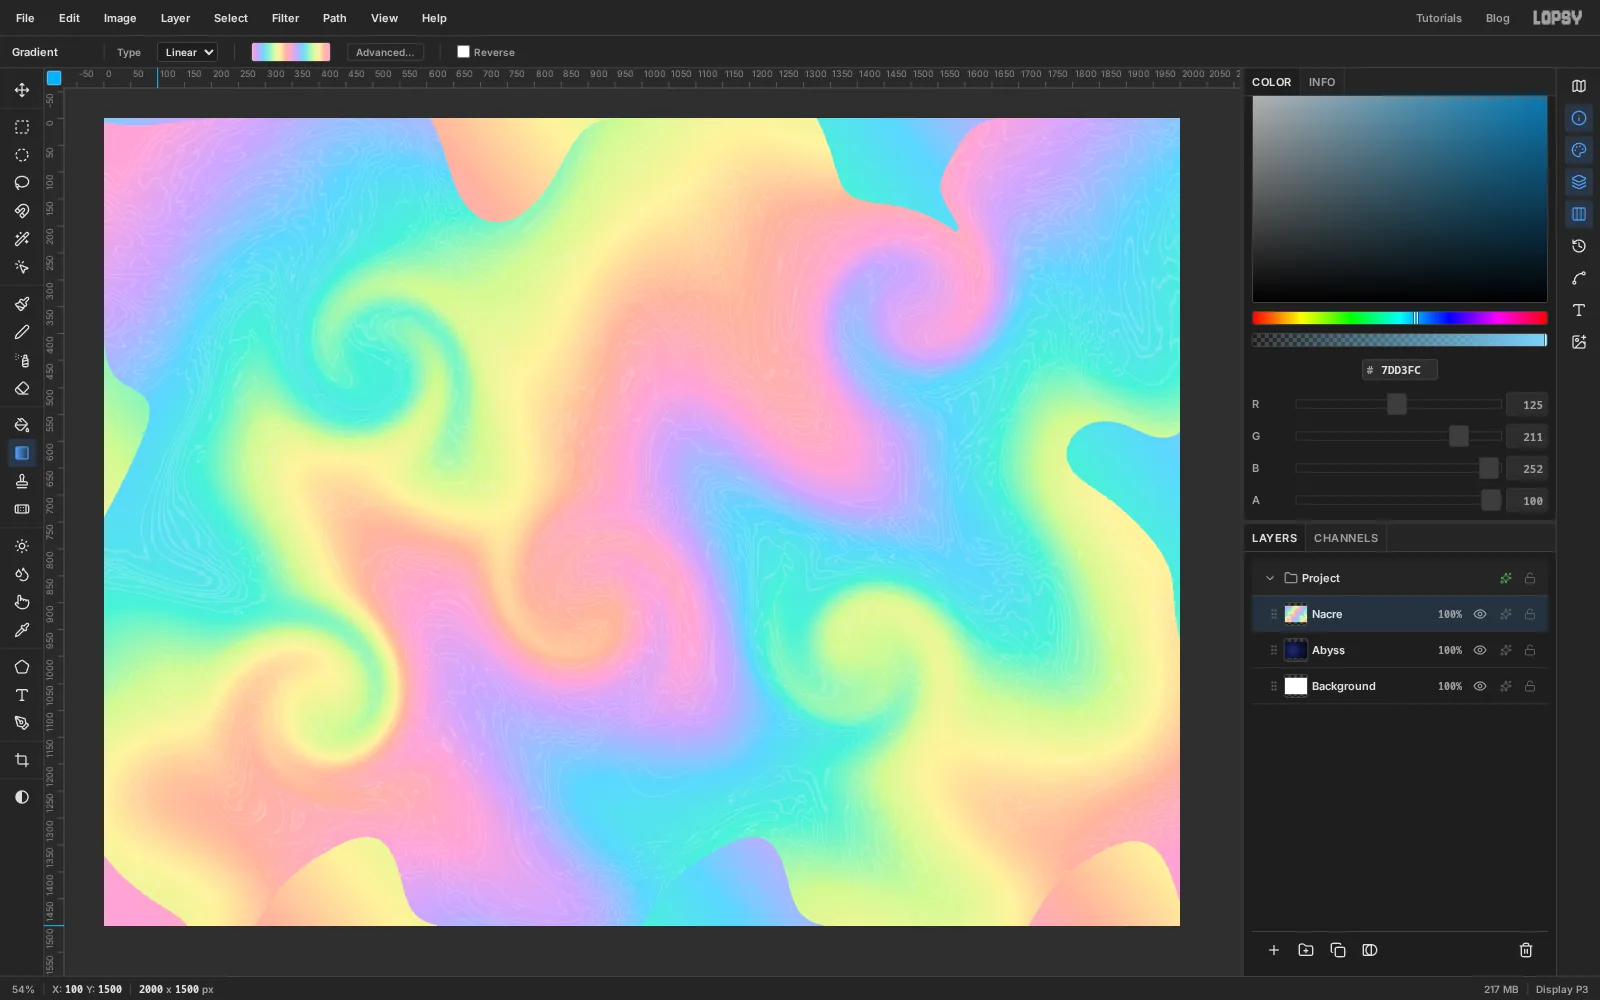
Pushing pixels around drags transparent gaps in from the edges of the canvas. A plain copy of the gradient underneath fills them.
- Select
Abyssand add a layer namedNacre Base. It appears just underNacre. - The Gradient tool still holds the pastel stops. Drag from the top-right corner to the bottom-left corner, so these stripes cross the others.
- Select
Nacreand press Cmd+E. The merged layer takes the lower layer's name, so rename it back toNacre. - Click the eye on
Nacreto hide it. From here on it's a sheet of material you copy pieces from.
- Select
-
Fill the emblem disc
- Add a layer named
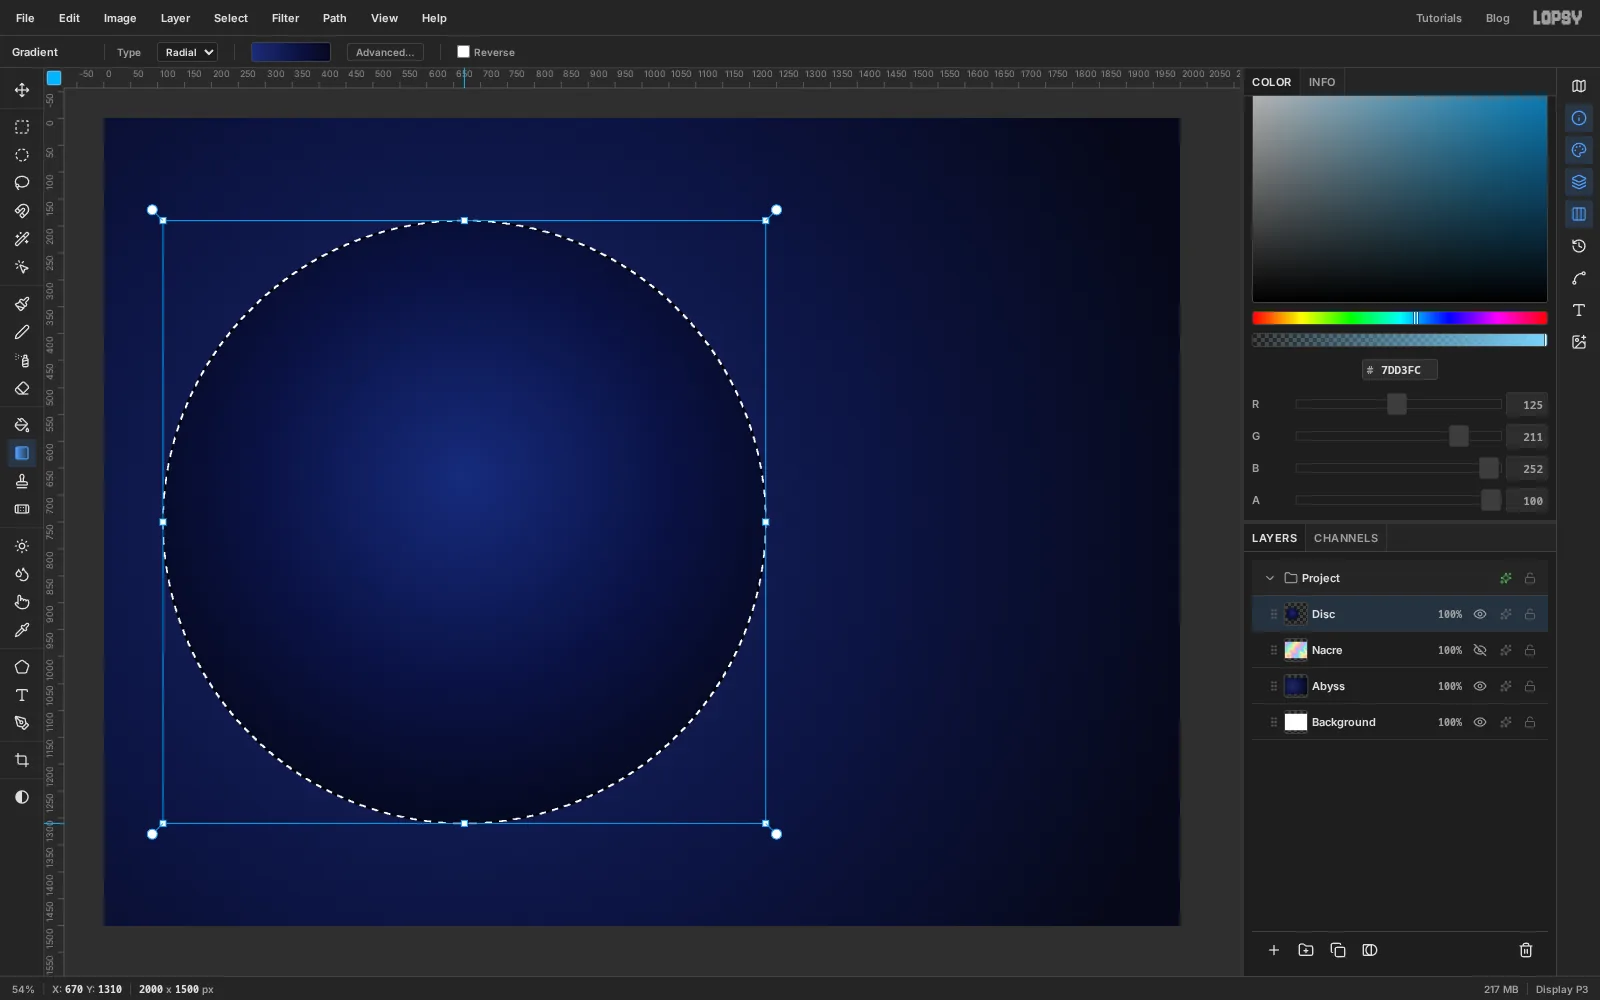
Disc. - Pick the Elliptical Marquee and drag from (110, 190) to (1230, 1310). That's a circle 1120 px across.
- Switch to the Gradient tool, Radial, with the stops , (at about 60%) and . Drag from just above the middle of the circle straight down to its bottom edge. A gradient only fills the selection.
- Press Cmd+D to deselect.
- Add a layer named
-
Cut the iridescent rim from the sheet
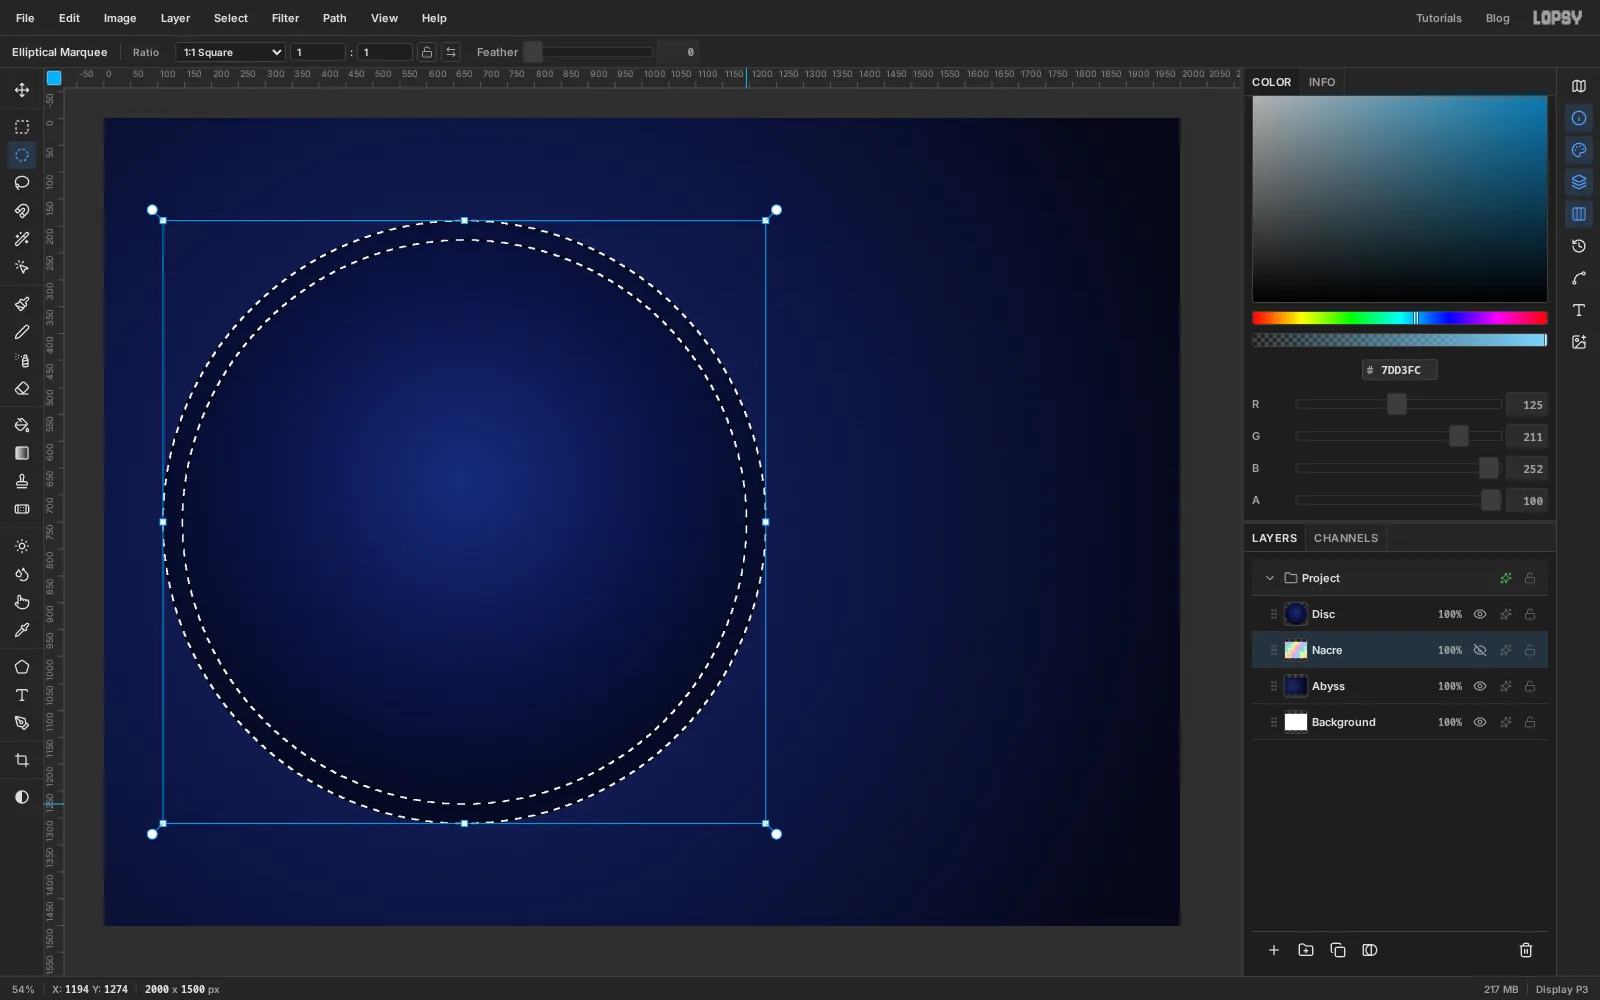
- With the Elliptical Marquee, drag the same circle again, from (110, 190) to (1230, 1310).
- Hold Alt and drag a second circle from (146, 226) to (1194, 1274). Alt subtracts, so what's left is a ring 36 px wide.
- Select the hidden
Nacrelayer and press Cmd+C. - Select
Discand press Cmd+V. The ring of nacre lands on a new layer in the same place. Name itRimand deselect.
Copying from a hidden layer works, and this select, copy, paste routine is how every iridescent piece on the sheet is made.
-
Lasso the shell's outline
A nautilus is a spiral that gets three times wider with every full turn. Draw it upright for now. You'll tilt it later.
- Add a layer named
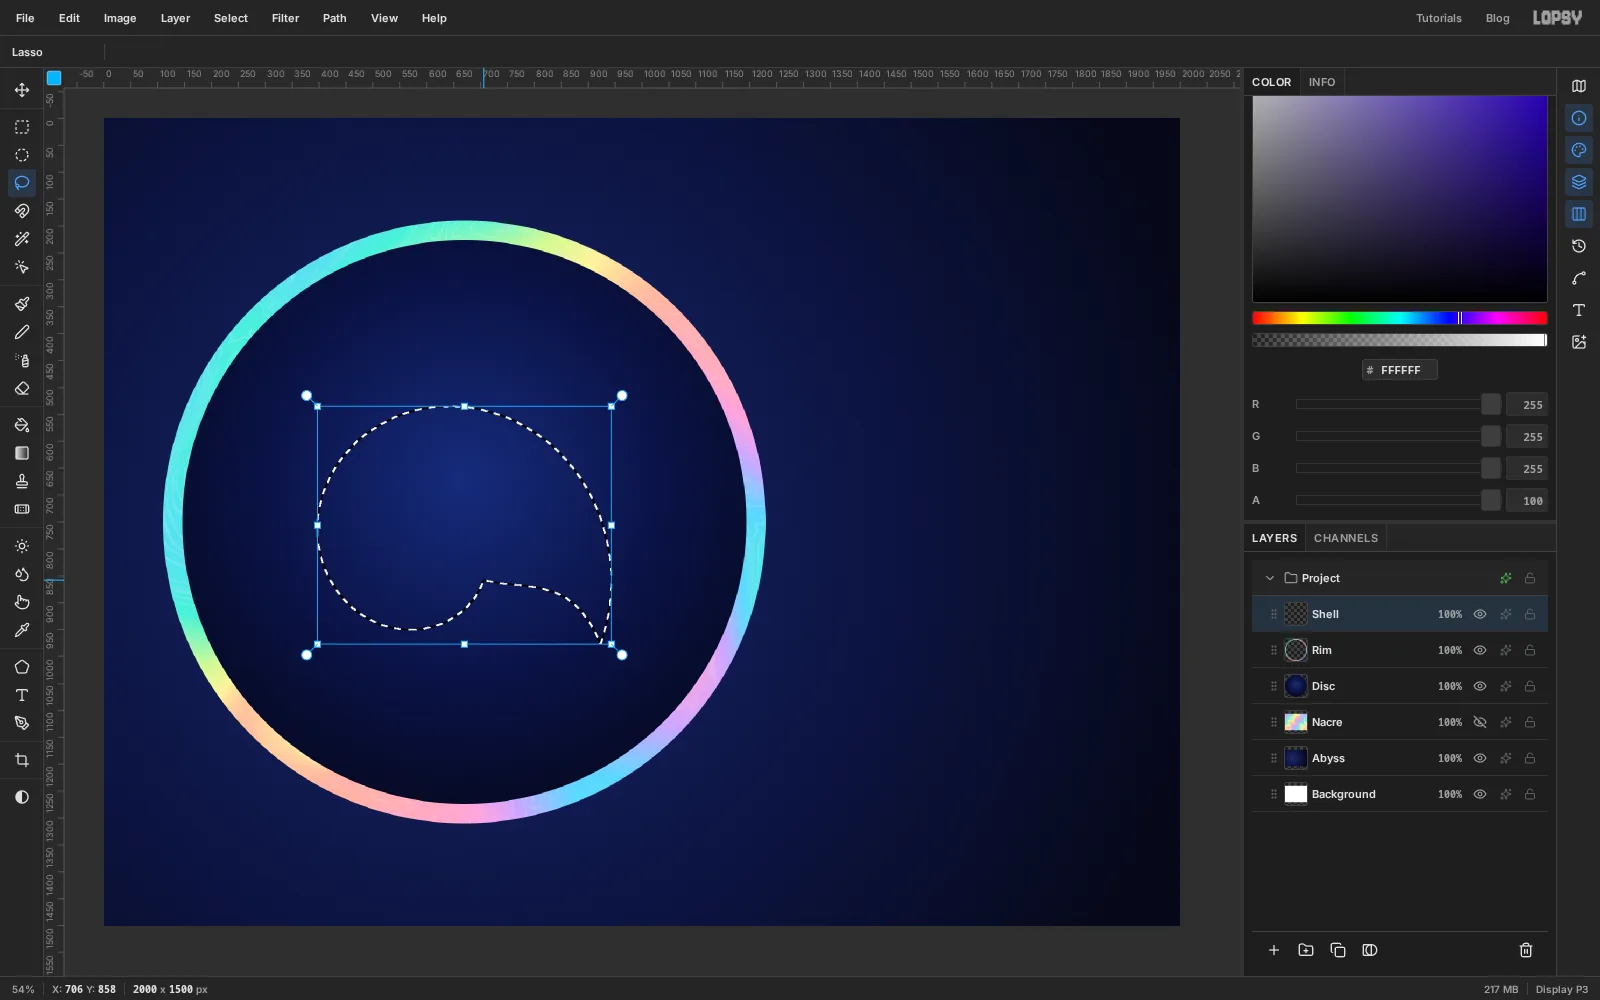
ShellaboveRim. - Pick the Lasso and trace the outer turn clockwise through these points: (706, 858), (637, 935), (519, 942), (417, 851), (408, 695), (528, 562), (732, 550), (908, 707) and (923, 977). The curve keeps moving away from the spiral's centre at (597, 798) as it goes round.
- From (923, 977) come back along the mouth of the shell with a shallow inward curve through (885, 913), (831, 879) and (770, 867), and finish where you started at (706, 858).
- Set the foreground colour to white and choose Edit → Fill. Deselect.
It doesn't have to be perfect. A slightly wobbly edge reads as hand-drawn, and the outline in the next step tidies it.
- Add a layer named
-
Give the shell a crisp outline
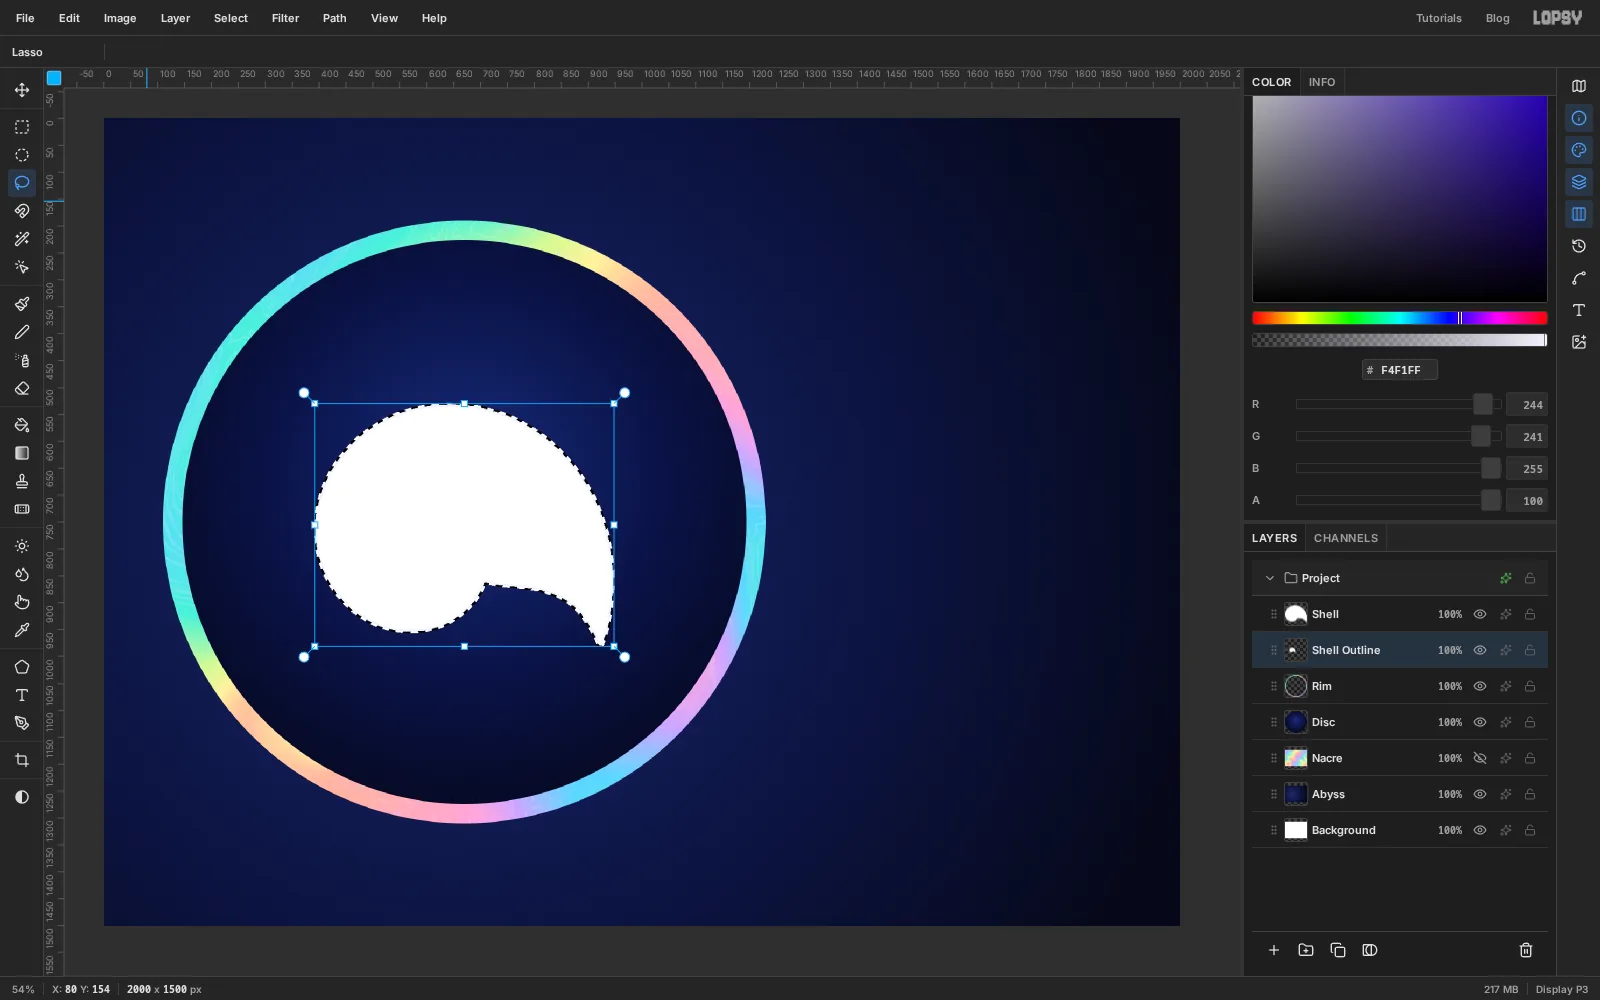
- Hold Cmd and click the
Shellthumbnail to load the shell as a selection. - Choose Select → Grow, enter
5px and click Apply. - Select
Rimand add a layer namedShell Outline, so it sits under the shell. Fill it with pearl white . - Cmd-click the
Shellthumbnail again, make sureShell Outlineis still the selected layer, and press Delete. That removes the middle and leaves a 5 px ring. - Deselect.
The outline has to be a ring and not a solid shape, because the next steps cut gaps into the shell and the disc should show through them.
- Hold Cmd and click the
-
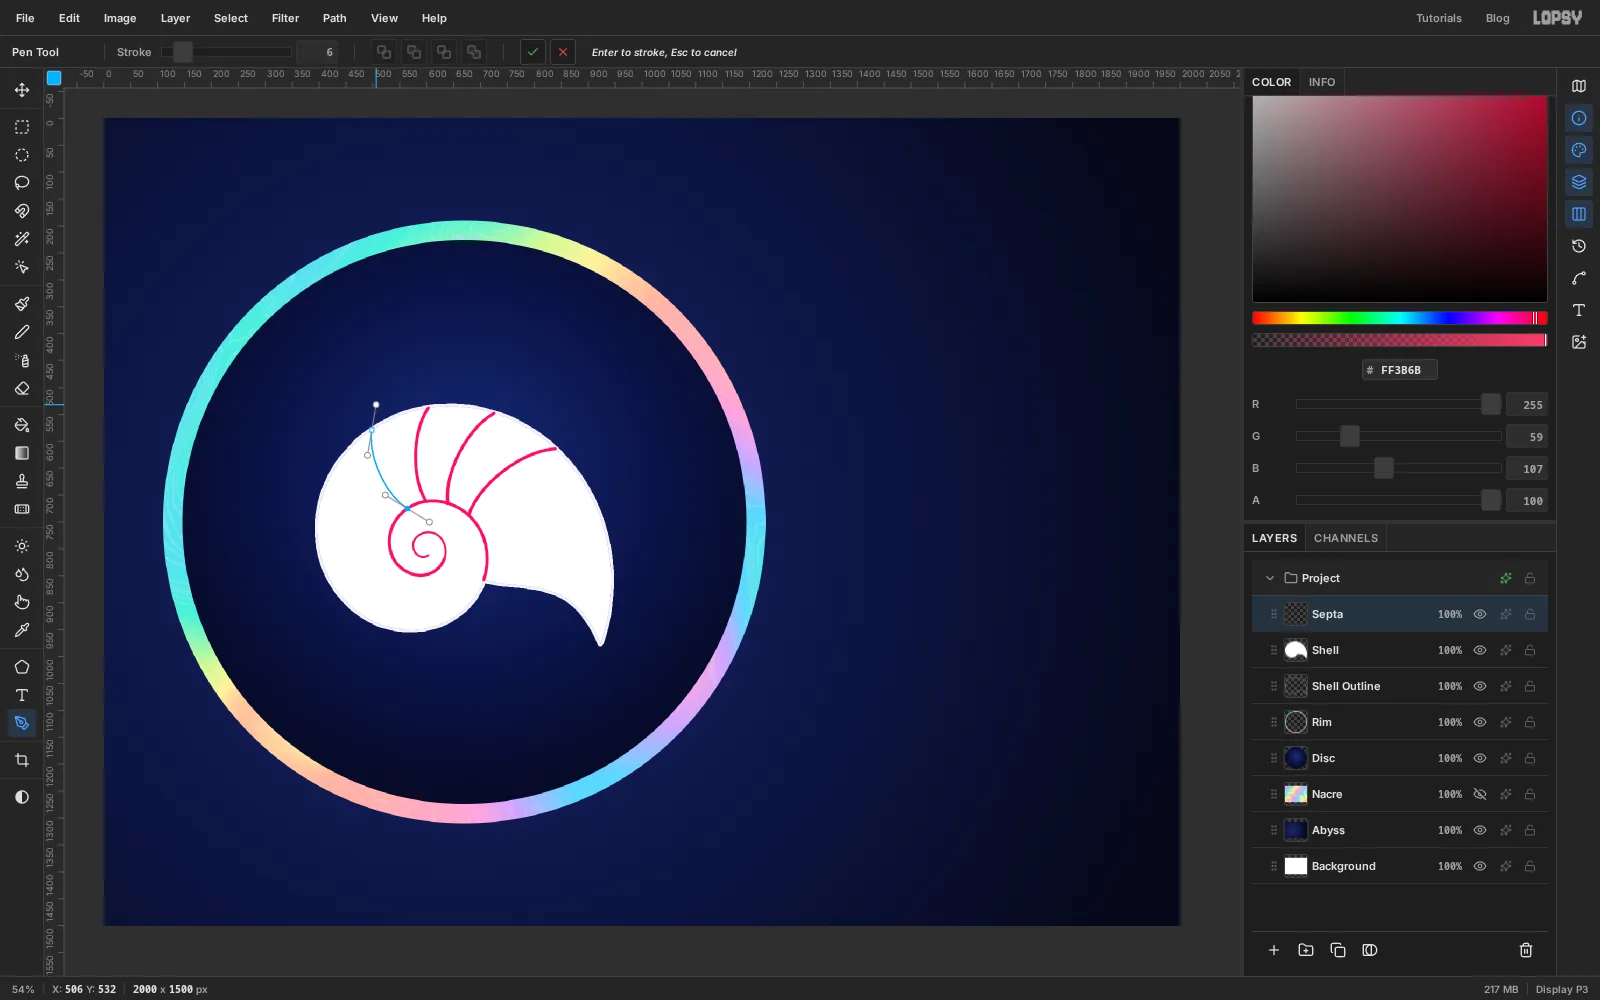
Draw the inner wall with the Pen
The chamber walls are smooth curves, which is the Pen's job. Draw them on their own layer first.
- Add a layer named
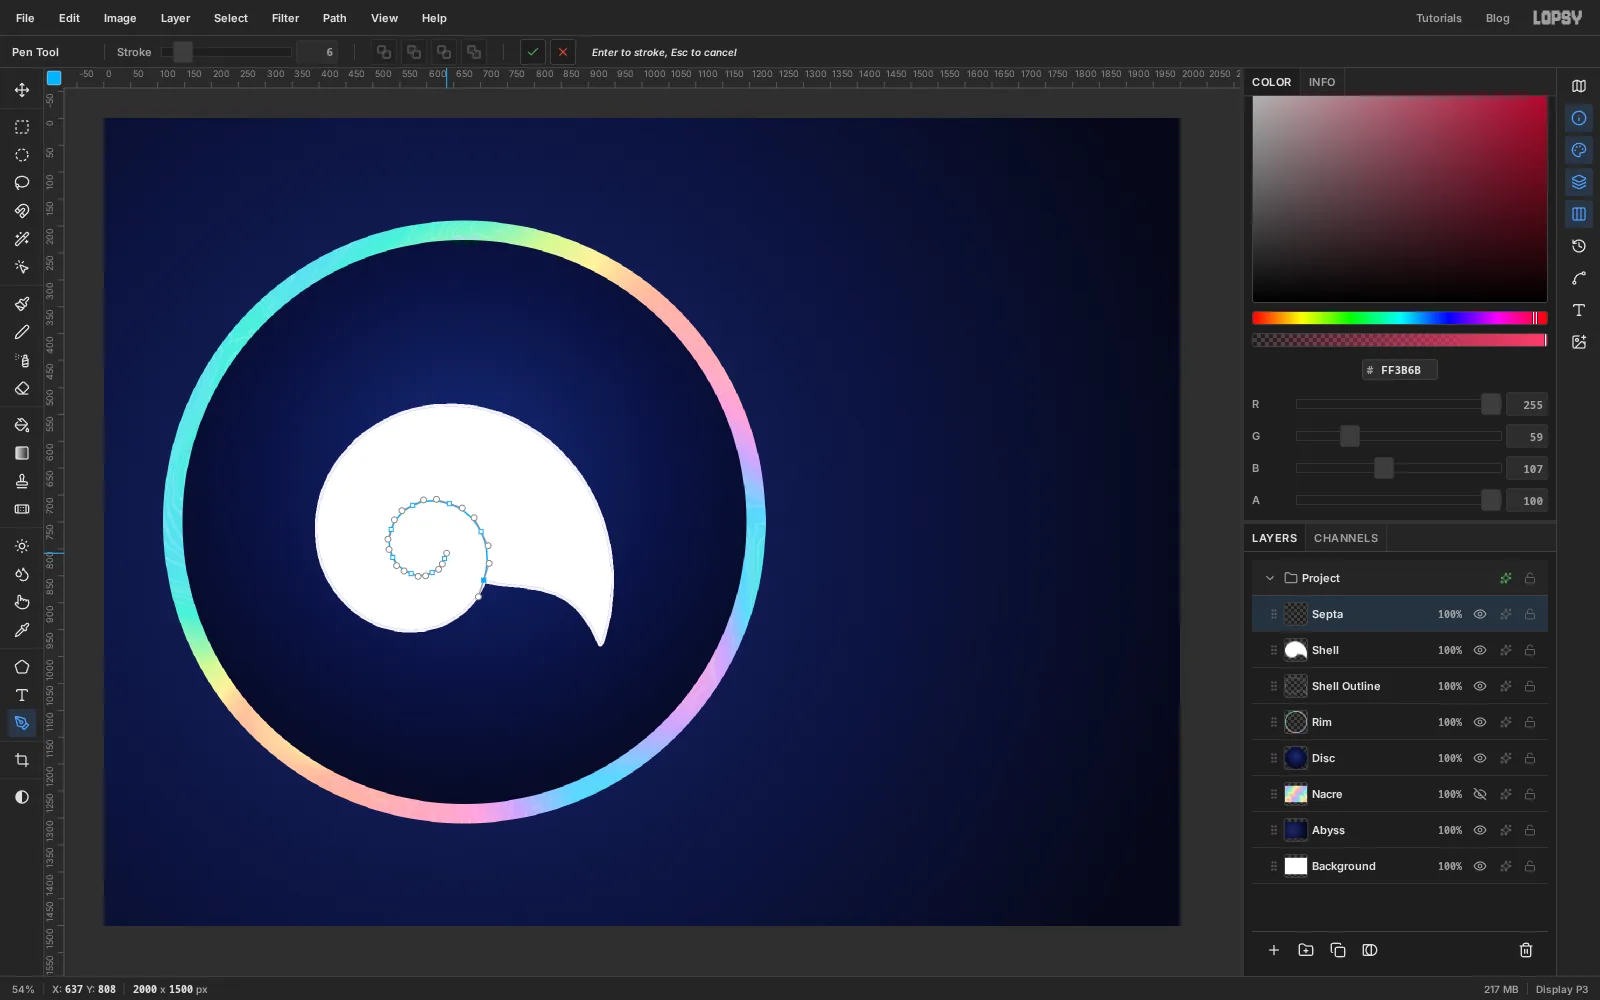
SeptaaboveShelland set the foreground colour to any bright colour, such as . - Pick the Pen tool and set Stroke to
6. - Draw the inner spiral by pressing on each of these points and dragging a short way along the direction the curve is travelling before you let go: (706, 858), (701, 768), (642, 716), (574, 719), (534, 764), (537, 816), (571, 846), (610, 844) and (633, 818). Dragging pulls out handles, which is what makes each anchor smooth. A drag of about a quarter of the distance to the next point works well.
- Press Enter. The path is stroked onto the layer in your foreground colour.
- Set Stroke to
4and carry on inward from (633, 818) the same way, through (631, 788), (612, 771), (589, 772), (576, 787), (577, 804), (588, 814) and (601, 813). The drags are tiny here, 5 to 10 px. Press Enter again.
- Add a layer named
-
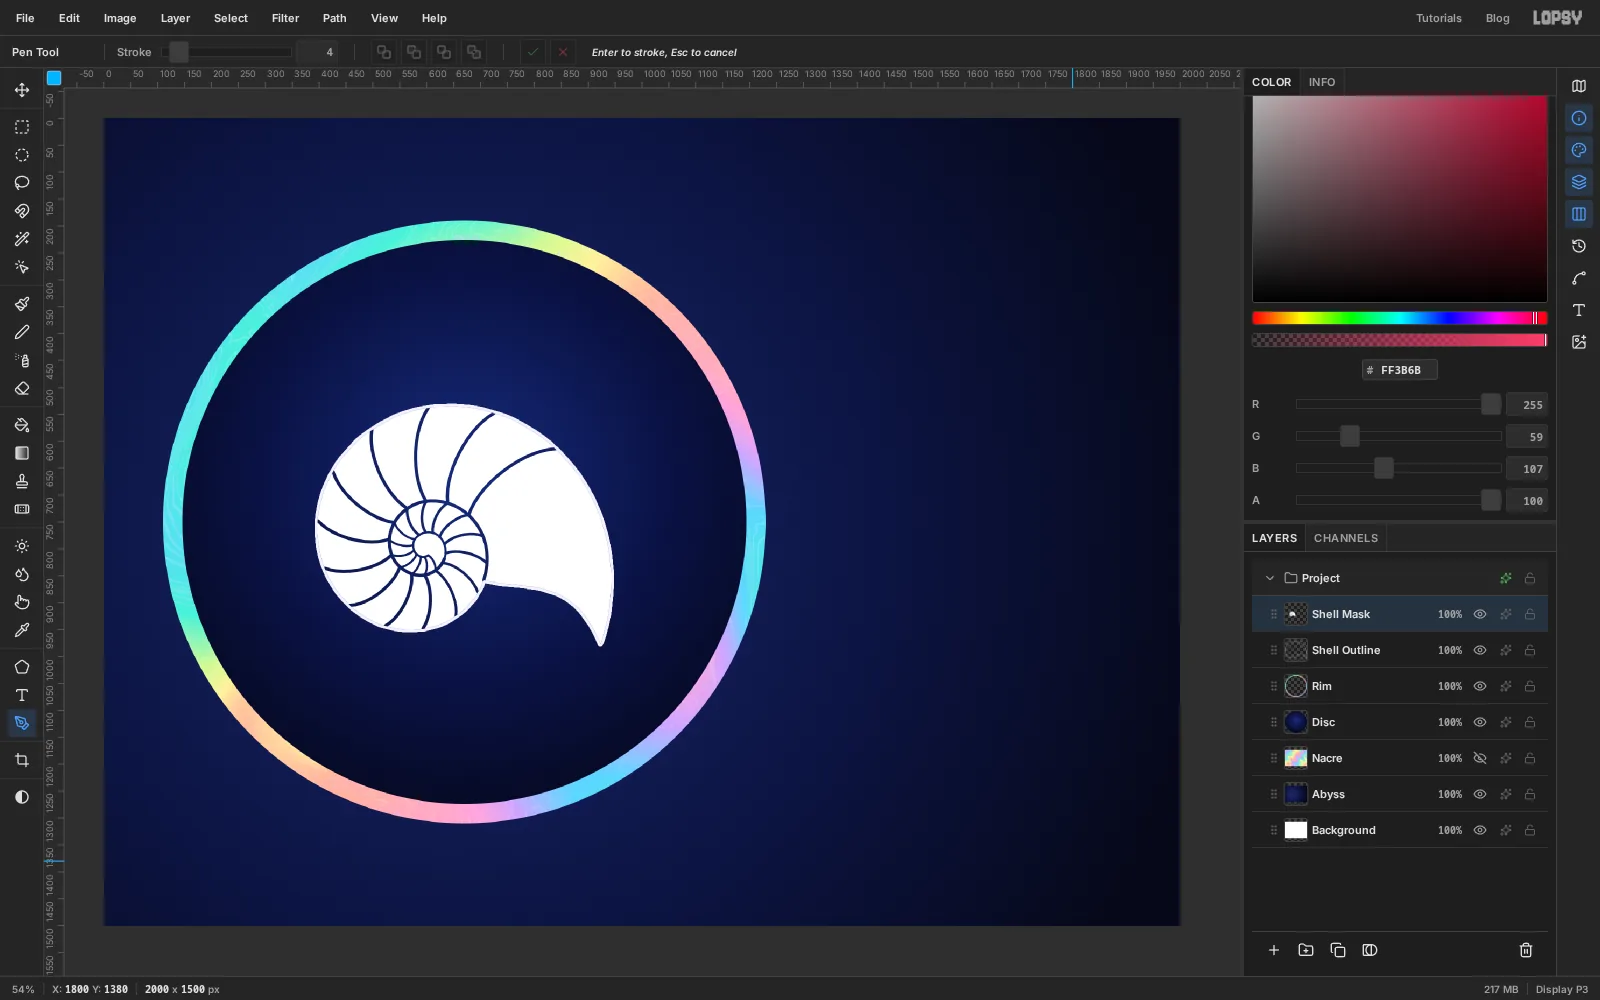
Add the chamber walls
Each wall (a septum) is a two-anchor curve from the inner spiral out to the shell's edge. Every one is drawn the same way:
- Press on the inner spiral and drag outward, leaning anticlockwise, toward where the next wall will go.
- Press on the outer edge straight out from where you started and drag leaning clockwise, back toward the wall before.
- Make each drag about a fifth of the wall's distance from the spiral's centre, then press Enter to stroke it.
That gives a line that bows back toward the centre of the spiral.
- Start the first wall at (678, 737). Drag about 60 px almost straight up. Press at (839, 614) on the outer edge and drag about 60 px to the right. Press Enter.
- Work round the shell anticlockwise, adding a wall roughly every 26°, which is 14 per turn. These five are evenly spread around the outer turn, with two more walls between each pair:
- (564, 725) out to (498, 579)
- (535, 811) out to (411, 836)
- (596, 848) out to (593, 948)
- (635, 808) out to (712, 827)
- (624, 778) out to (678, 737), which is where the first wall began
- As the walls get shorter, drop Stroke to
5once they're under about 150 px from the centre and to4under 80 px. - Keep going round the inner turn, where the walls run from the smallest spiral out to the first one: (578, 782) to (540, 751), (589, 814) to (572, 847) and (603, 812) to (616, 840), again with two more between each pair.
- Leave the stretch between the first wall and the mouth empty. That's the living chamber, where the animal sits.
I drew 25 walls. The exact count doesn't matter as long as the spacing looks even and each wall is a little shorter than the last.
-
Knock the walls out of the shell
- Cmd-click the
Septathumbnail to load every stroke as a selection. - Select
Shelland press Delete, then deselect. - Select
Septaand click Delete Layer. It has done its job. - Rename
ShelltoShell Mask. From now on it's the stencil the coloured layers are cut with, and the name frees upShellfor the group you'll make later.
The walls are now gaps in the shell, so whatever colour you put in the shell, the lines stay the colour of the disc behind it.
- Cmd-click the
-
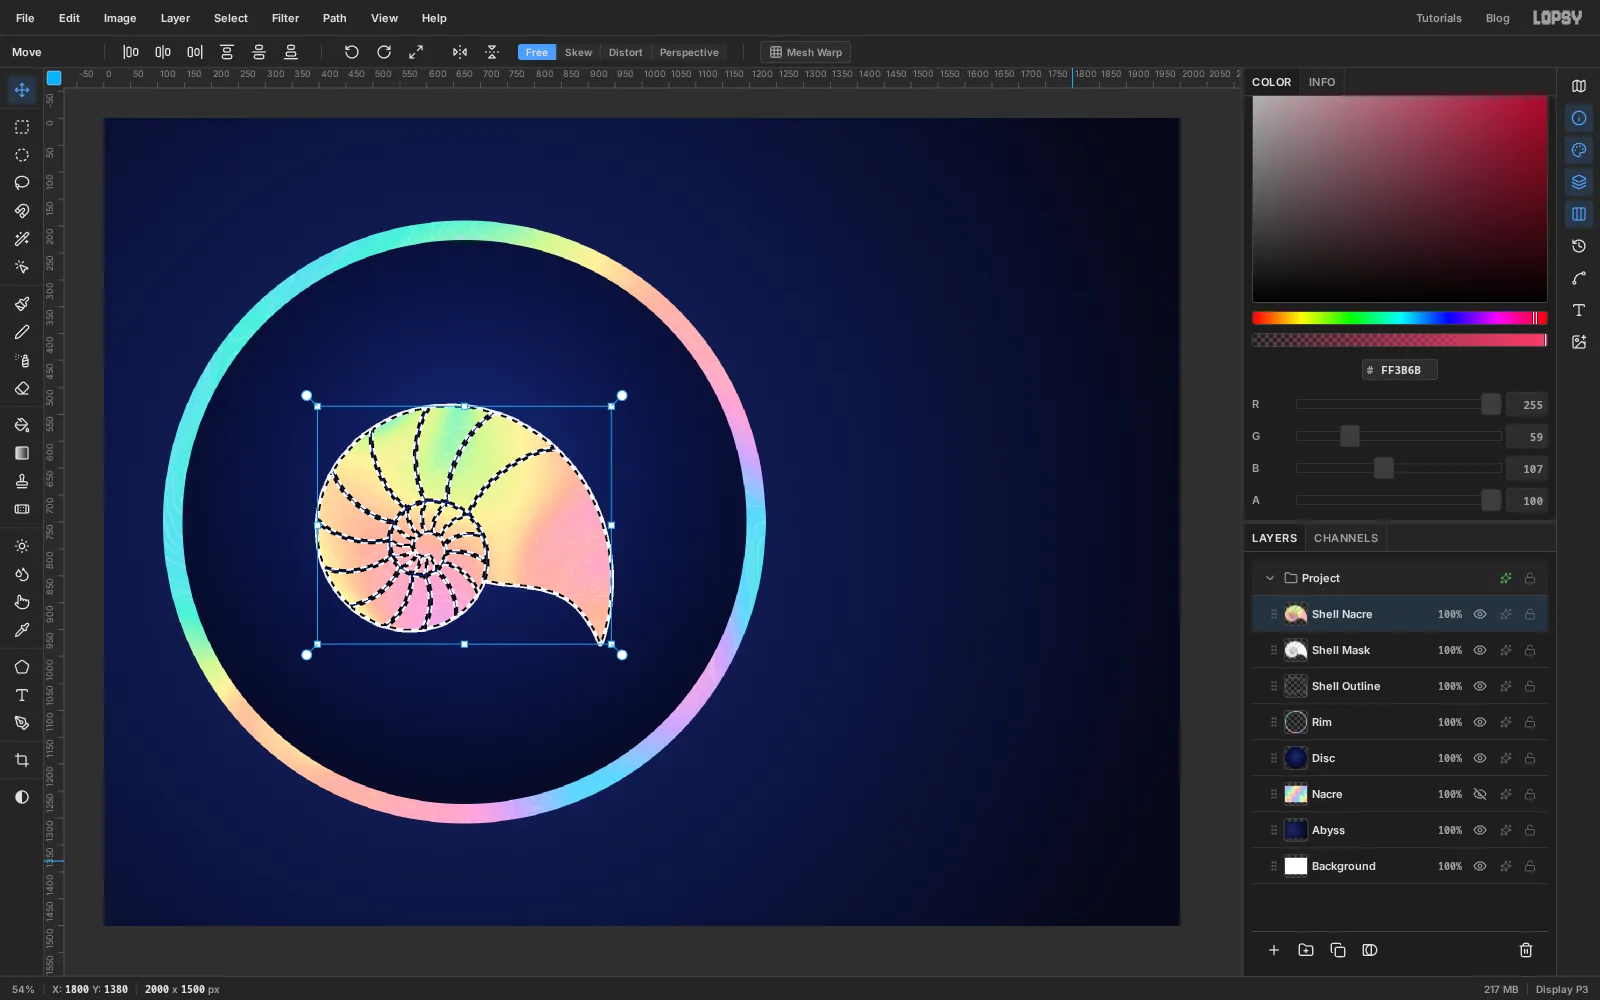
Fill the shell with nacre
- Cmd-click the
Shell Maskthumbnail. - Select
Nacreand press Cmd+C. - Select
Shell Maskand press Cmd+V. Name the new layerShell Nacre.
- Cmd-click the
-
Shift the hues with a radial sheen
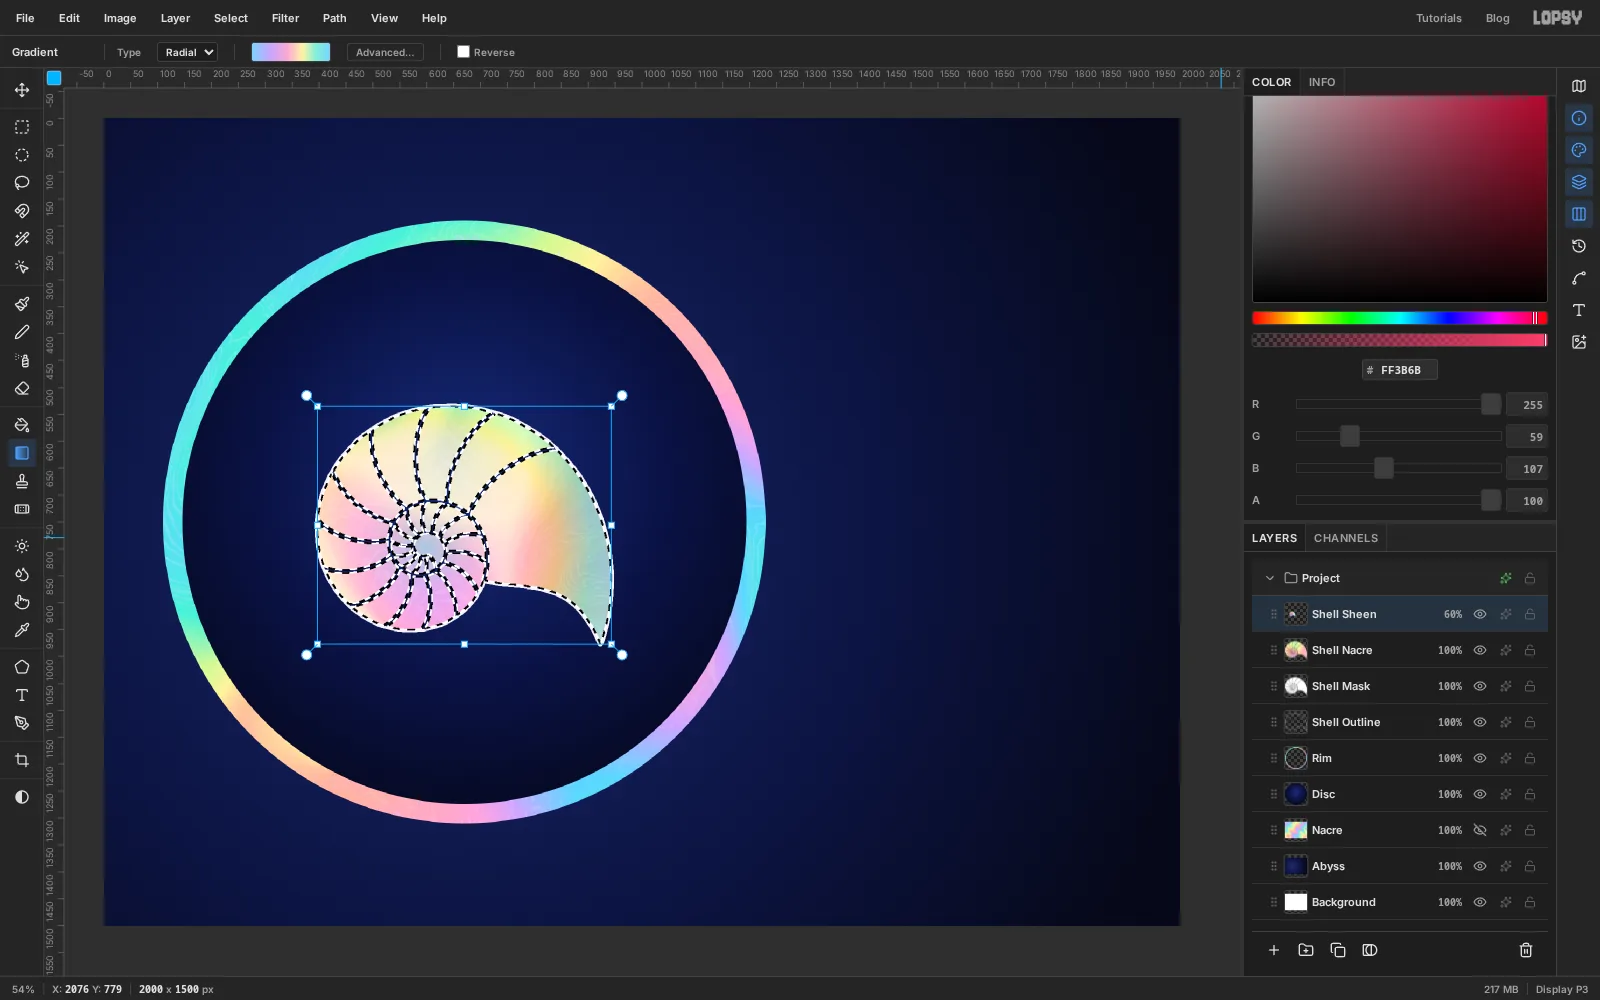
The piece of sheet under the shell might be mostly one colour. A radial rainbow in Color blend mode fixes that without flattening the marbling.
- Cmd-click
Shell Maskagain and add a layer namedShell SheenaboveShell Nacre. - With the Gradient tool on Radial, set six stops: , , , , and back to .
- Drag from the centre of the spiral at (597, 798) to the far edge of the shell near (957, 678).
- Set the layer's blend mode to Color and its opacity to 60%.
Color mode takes hue and saturation from the gradient and keeps the light and dark of the nacre below, veins included.
- Cmd-click
-
Paint a soft highlight
- With the shell still selected, add a layer named
Shell Shine. - Pick the Brush, white, Size
38, Hardness0and Opacity70. - Paint one stroke that follows the outer edge, a little inside it, from the lower left up over the top and partway down the right side. The selection keeps the paint inside the shell.
- Drop Size to
16and add a short stroke along the top of the inner turn. - Deselect and set the layer to 65% opacity.
- Open the effects for
Shell Nacre, tick Inner Glow and set the colour to white, Size12and Opacity60. That brightens the edge of each chamber.
Set the Brush back to Hardness
100and Opacity100when you're done.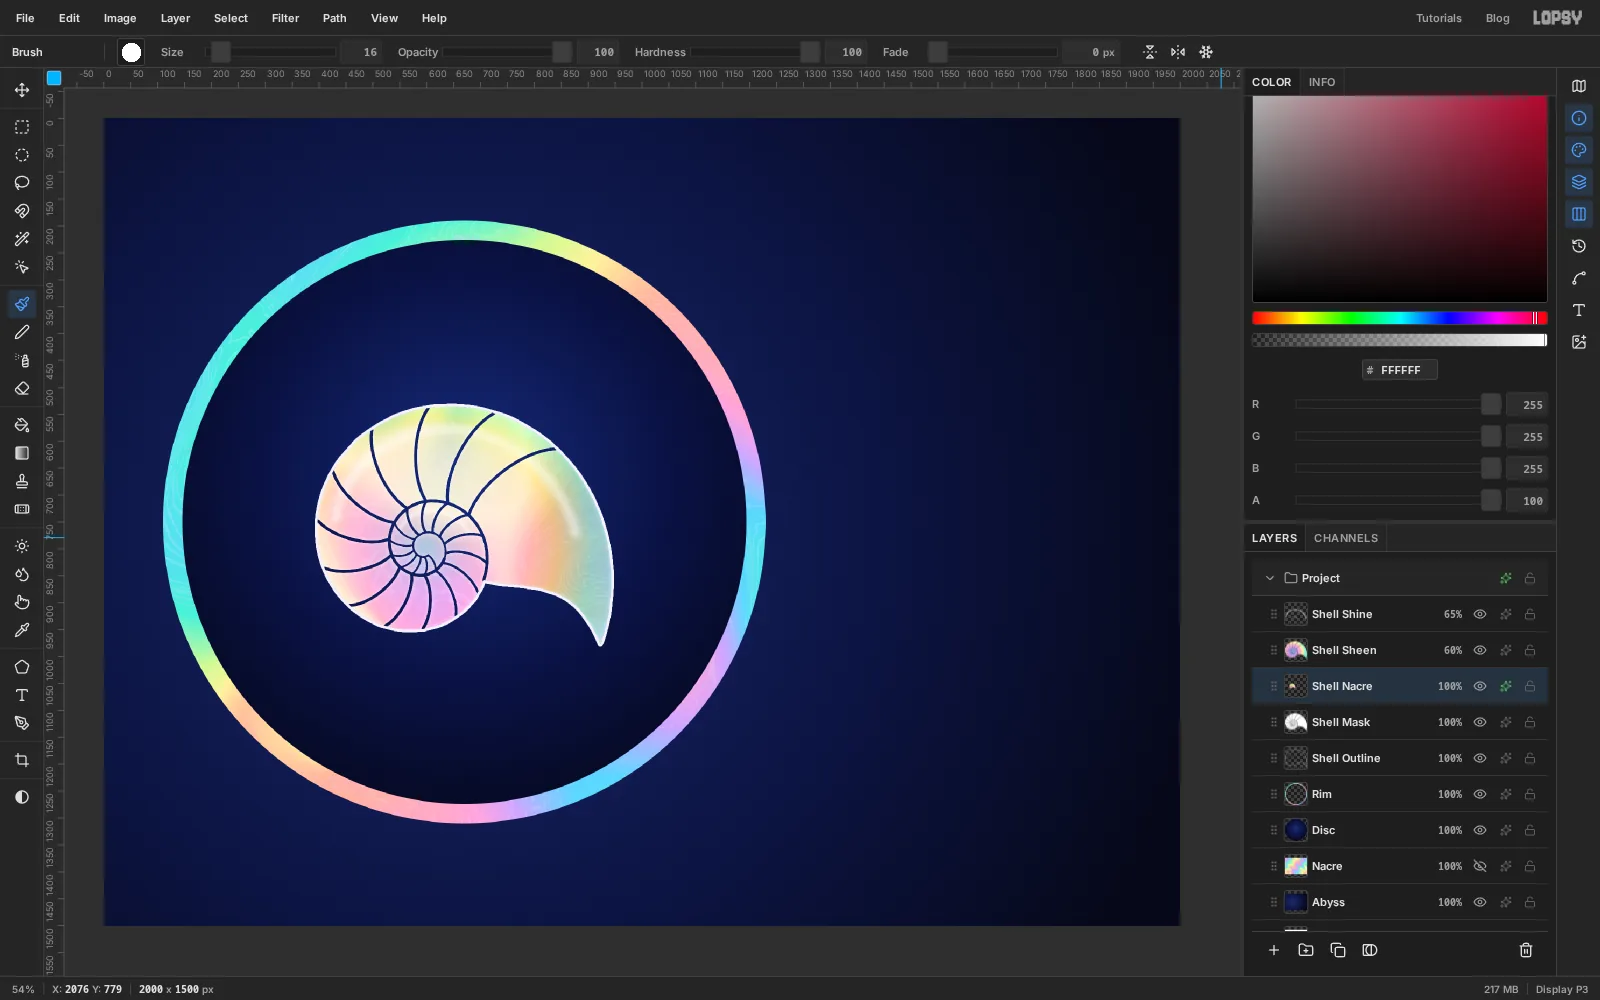
- With the shell still selected, add a layer named
-
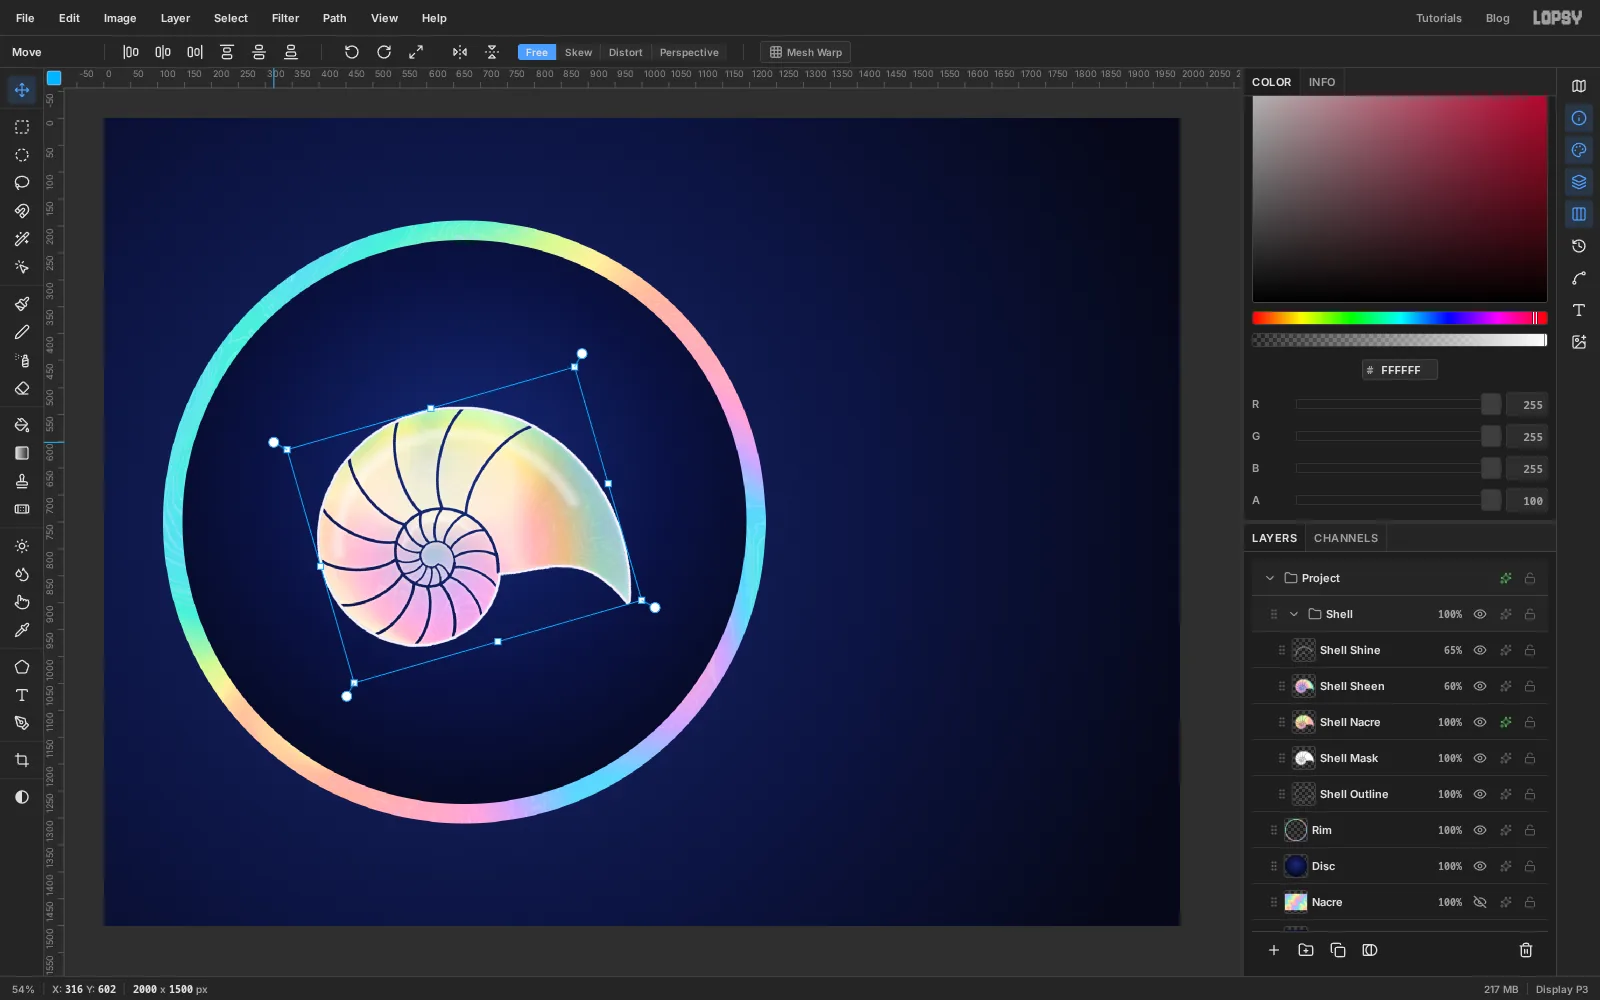
Group the shell and rotate it
- Click
Shell Shinein the Layers panel, then Shift-clickShell Outline. All five shell layers are selected. - Choose Layer → Group Layers and name the group
Shell. - With the group selected, pick the Move tool. Handles appear around everything in the group.
- Drag the round rotation handle just outside the top-left corner and turn the shell about 16° anticlockwise, so the mouth opens toward the right.
- Press Cmd+D to commit.
- Click
-
Scale it up and centre it
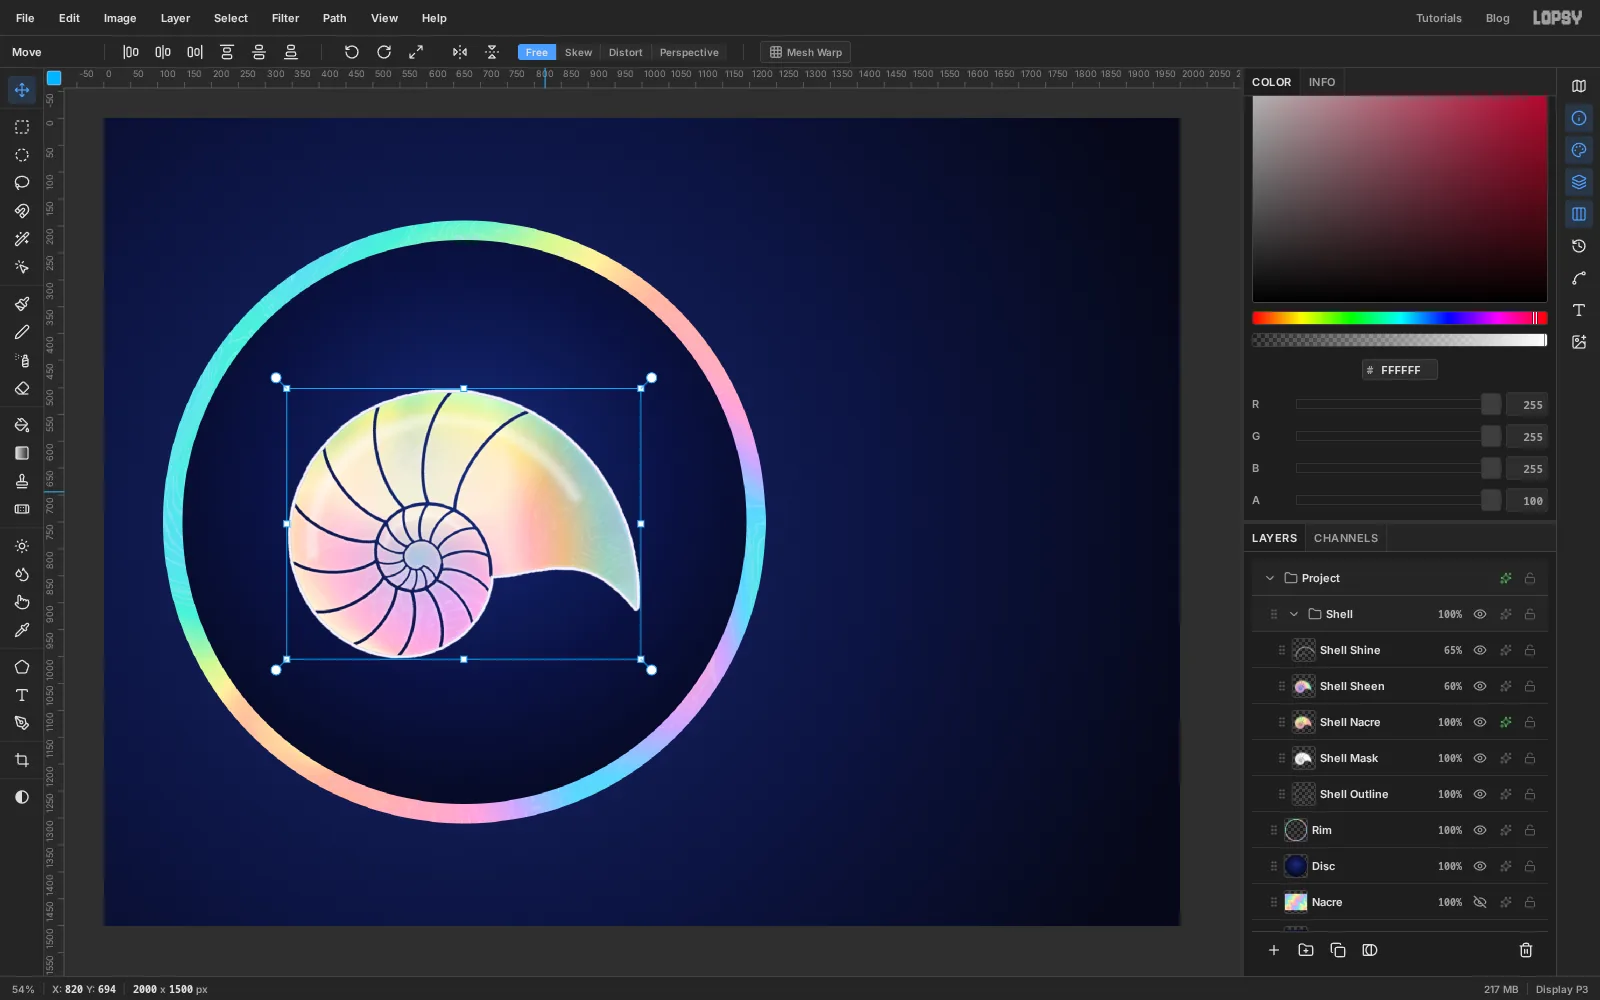
- Hold Cmd and drag the bottom-right corner handle outward until the shell is about 12% bigger, roughly 655 px wide. Cmd keeps the proportions. Commit with Cmd+D.
- Drag the shell so it sits in the middle of the disc, with the centre of its handles box at about (670, 754).
The shell reaches about 300 px above the centre and 325 px below it. Keep those numbers in mind: the type has to clear them.
-
Draw two arcs for the type
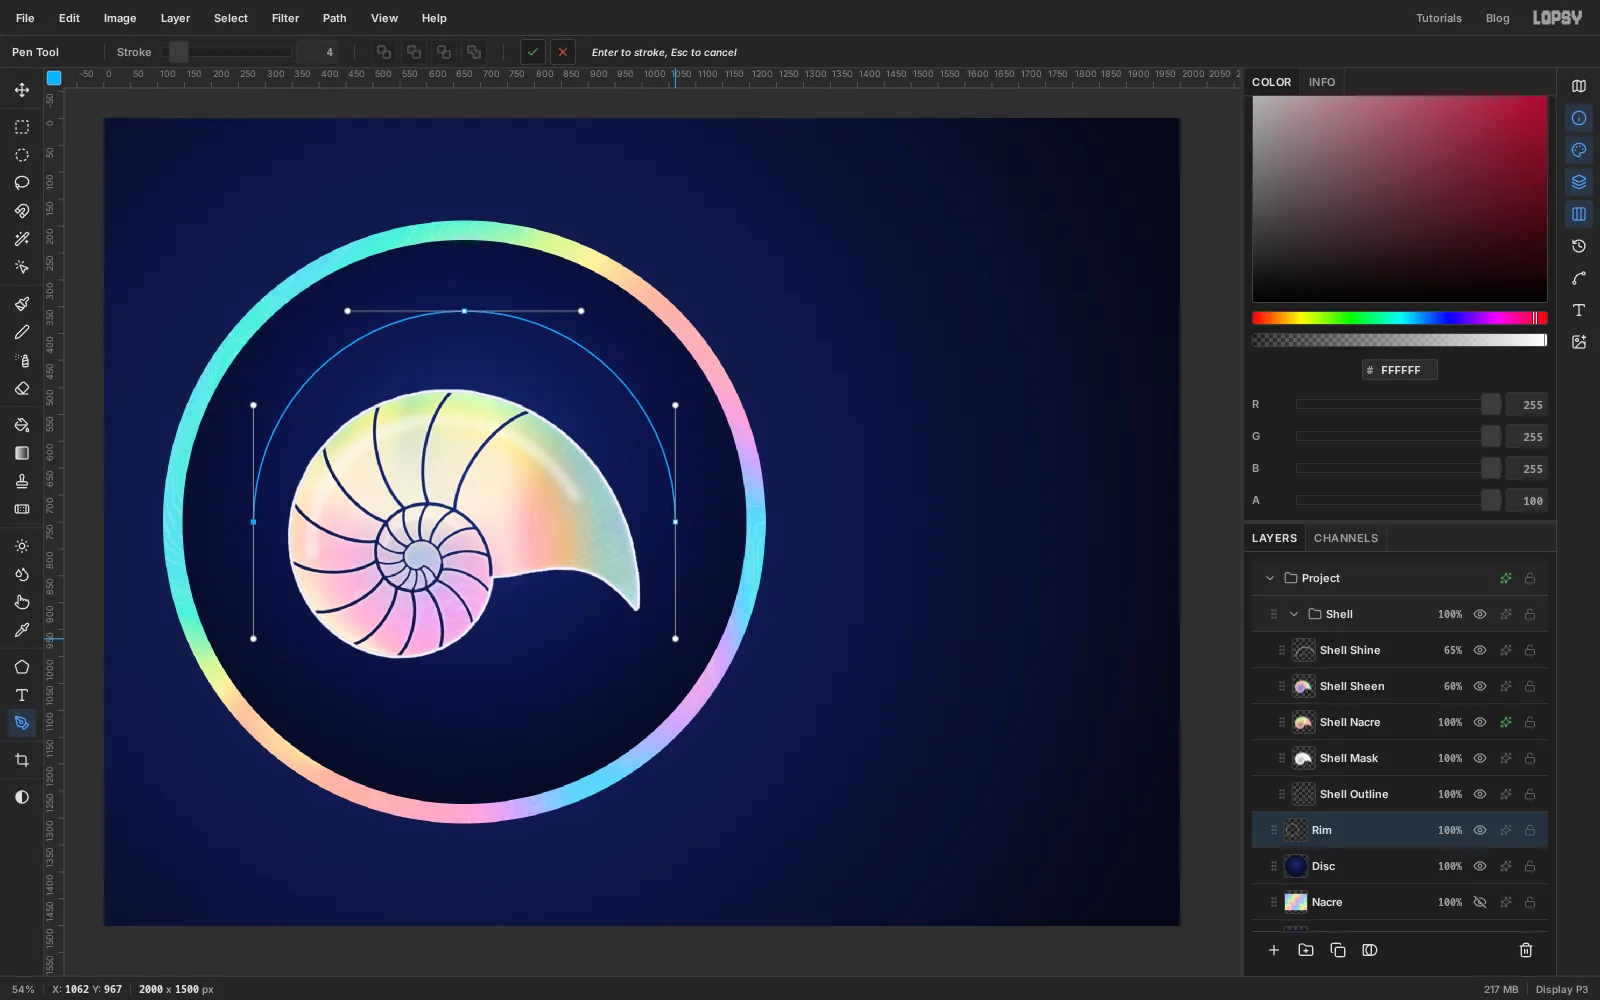
Text on a circle needs a path to sit on. Each arc is three smooth anchors.
- Select
Rim, pick the Pen and click empty canvas followed by Esc to drop any selected path. - For the top arc, press at (278, 750) and drag straight up about 215 px. Press at (670, 358) and drag right 215 px. Press at (1062, 750) and drag down 215 px. That's a half circle with a 392 px radius, drawn left to right over the top.
- Click the ✓ Commit path button in the options bar. It saves the path without stroking it.
- For the bottom arc, press at (208, 750) and drag down about 255 px, press at (670, 1212) and drag right 255 px, then press at (1132, 750) and drag up 255 px. Commit that one too.
The direction matters. Text reads along the path in the order you drew it and stands on its left side, so the bottom arc, drawn left to right, puts the letters inside the curve and the right way up.
- Select
-
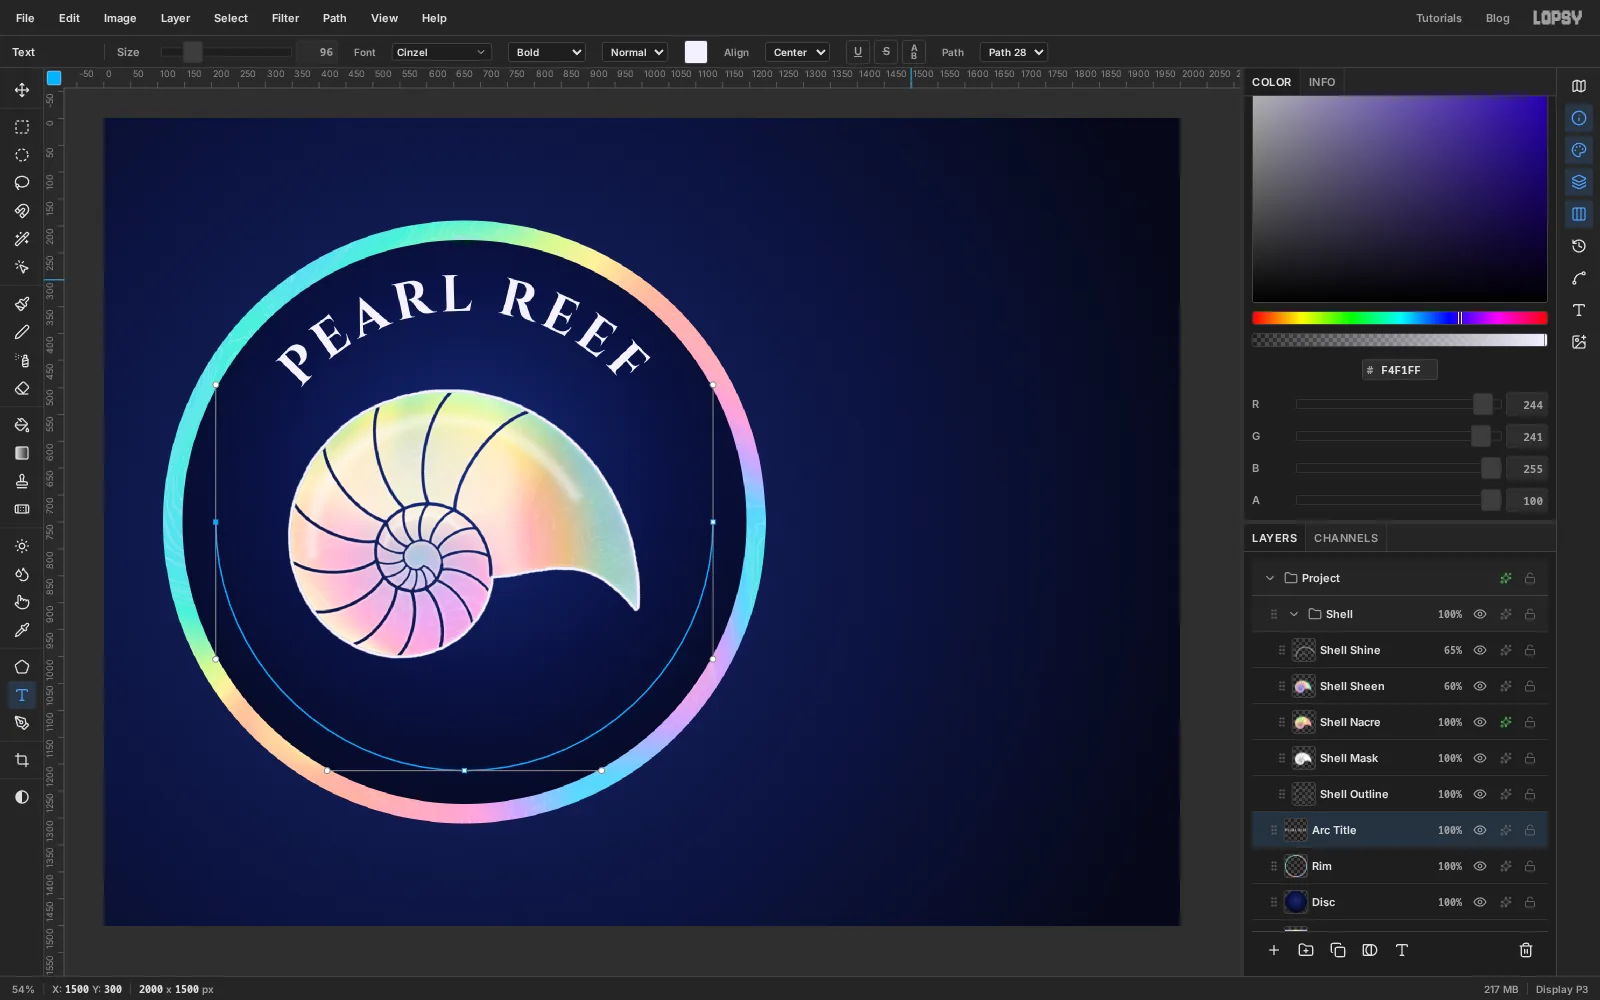
Set the name on the top arc
- Select
Rimagain so no text layer is active, and set the foreground colour to . - Pick the Text tool. Set Size to
96, choose Cinzel in the font list, Bold, and Align Center. - Click on empty canvas to the right of the emblem, type
PEARL REEFand press Tab to commit. - Open the Text panel and set Letter spacing to
10. - In the options bar's Path dropdown choose the top arc. The dropdown lists every path in the document, including all the chamber walls, so the top arc is the second-to-last entry (
Path 28for me) and the bottom arc is the last.
Center alignment puts the middle of the words at the top of the arc. The capitals stand about 68 px tall on a 392 px radius, which leaves a gap of about 45 px to the dotted ring you'll add shortly and more than that to the shell.
- Select
-
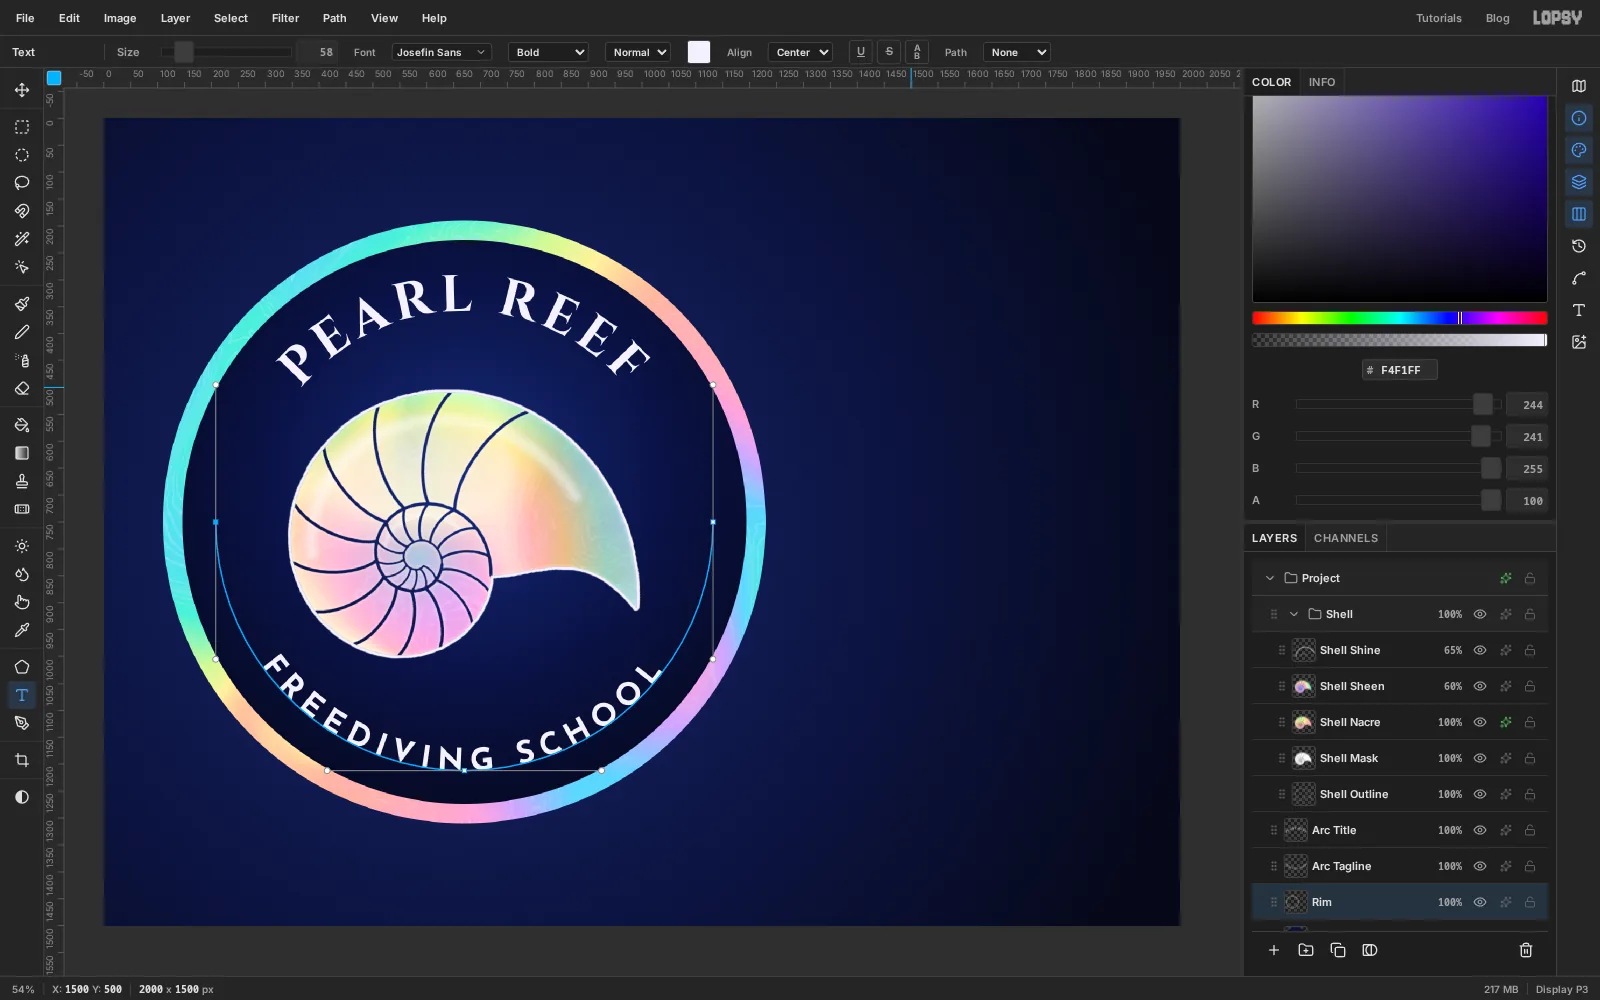
Set the tagline on the bottom arc
- Select
Rimagain, then set the Text tool to Josefin Sans, Bold, Size58, still centred. - Click empty canvas, type
FREEDIVING SCHOOLand press Tab. - Set Letter spacing to
14and bind the layer to the bottom arc, the last entry in the Path dropdown. - Rename the two text layers
Arc TitleandArc Tagline.
Both lines use the same pearl white and a bold weight, so they read as one lockup even though the faces differ.
- Select
-
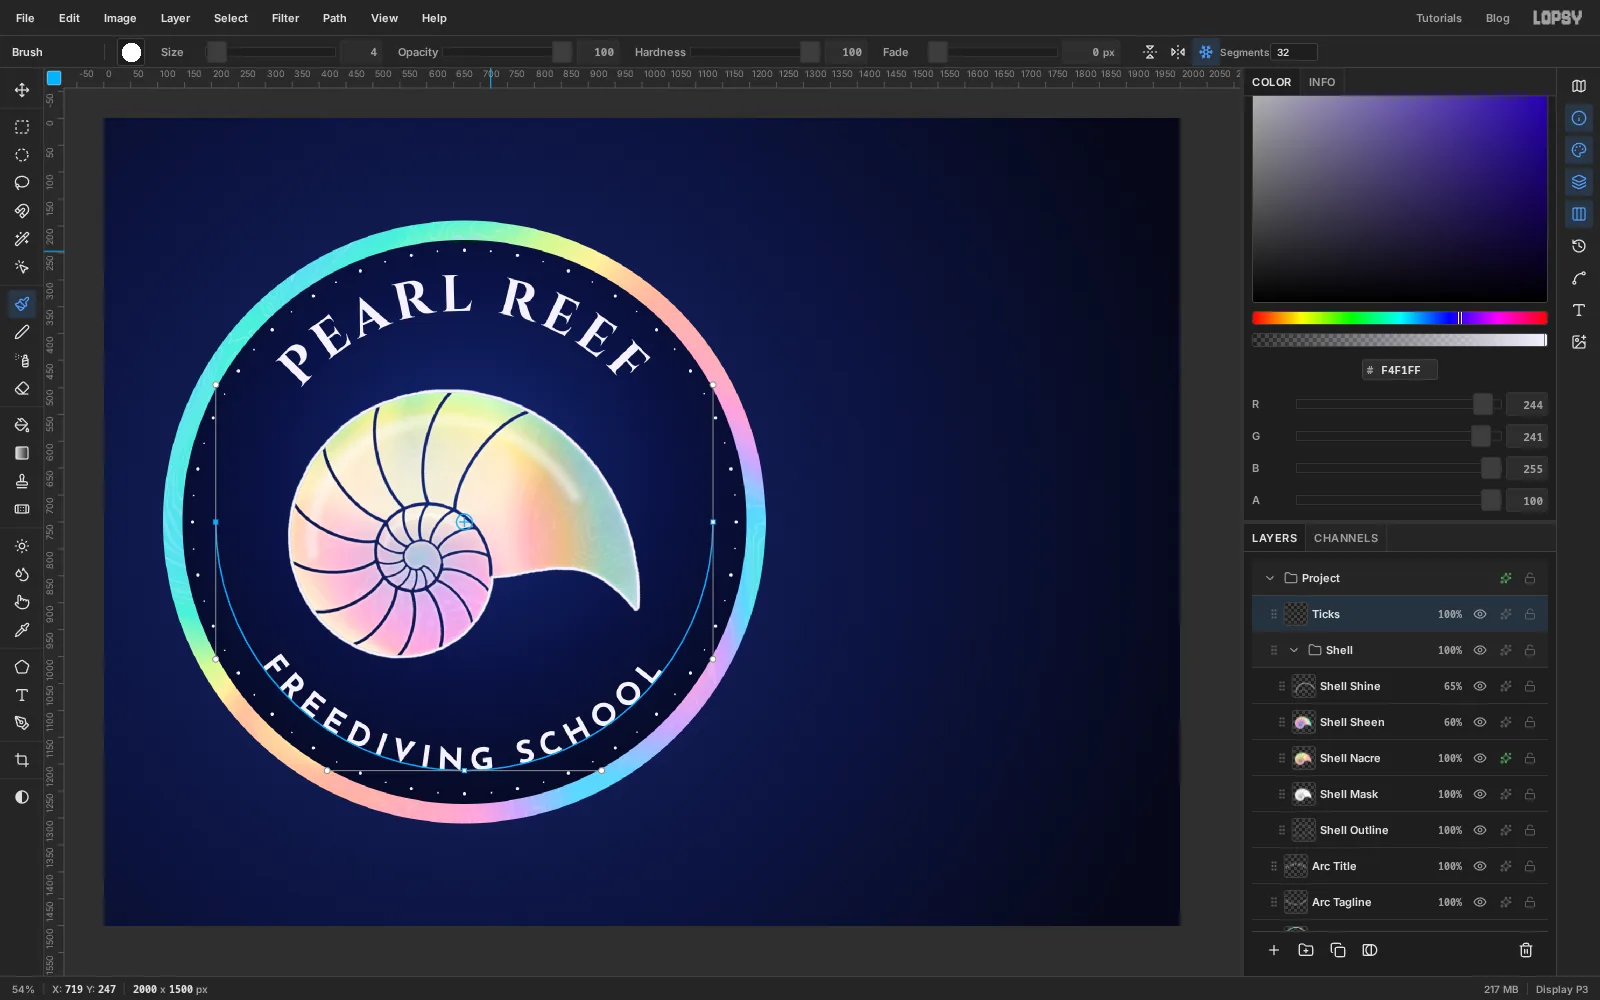
Stamp a ring of dots with Radial Symmetry
- Select the
Shellgroup and add a layer namedTicks. A new layer lands inside the selected group, so drag its grip up until it sits above the group. - Pick the Brush: , Size
7, Hardness100. - Click Radial Symmetry in the options bar and type
32into Segments. - Hold Cmd and click the centre of the emblem at (670, 750). That moves the symmetry centre there without painting.
- Click once at the top of the disc, at (670, 245). Thirty-two dots appear, evenly spaced.
- Set Size to
4and click once more a few degrees round, near (719, 247). A second ring of smaller dots fills the gaps. - Click Radial Symmetry again to turn it off.
- Select the
-
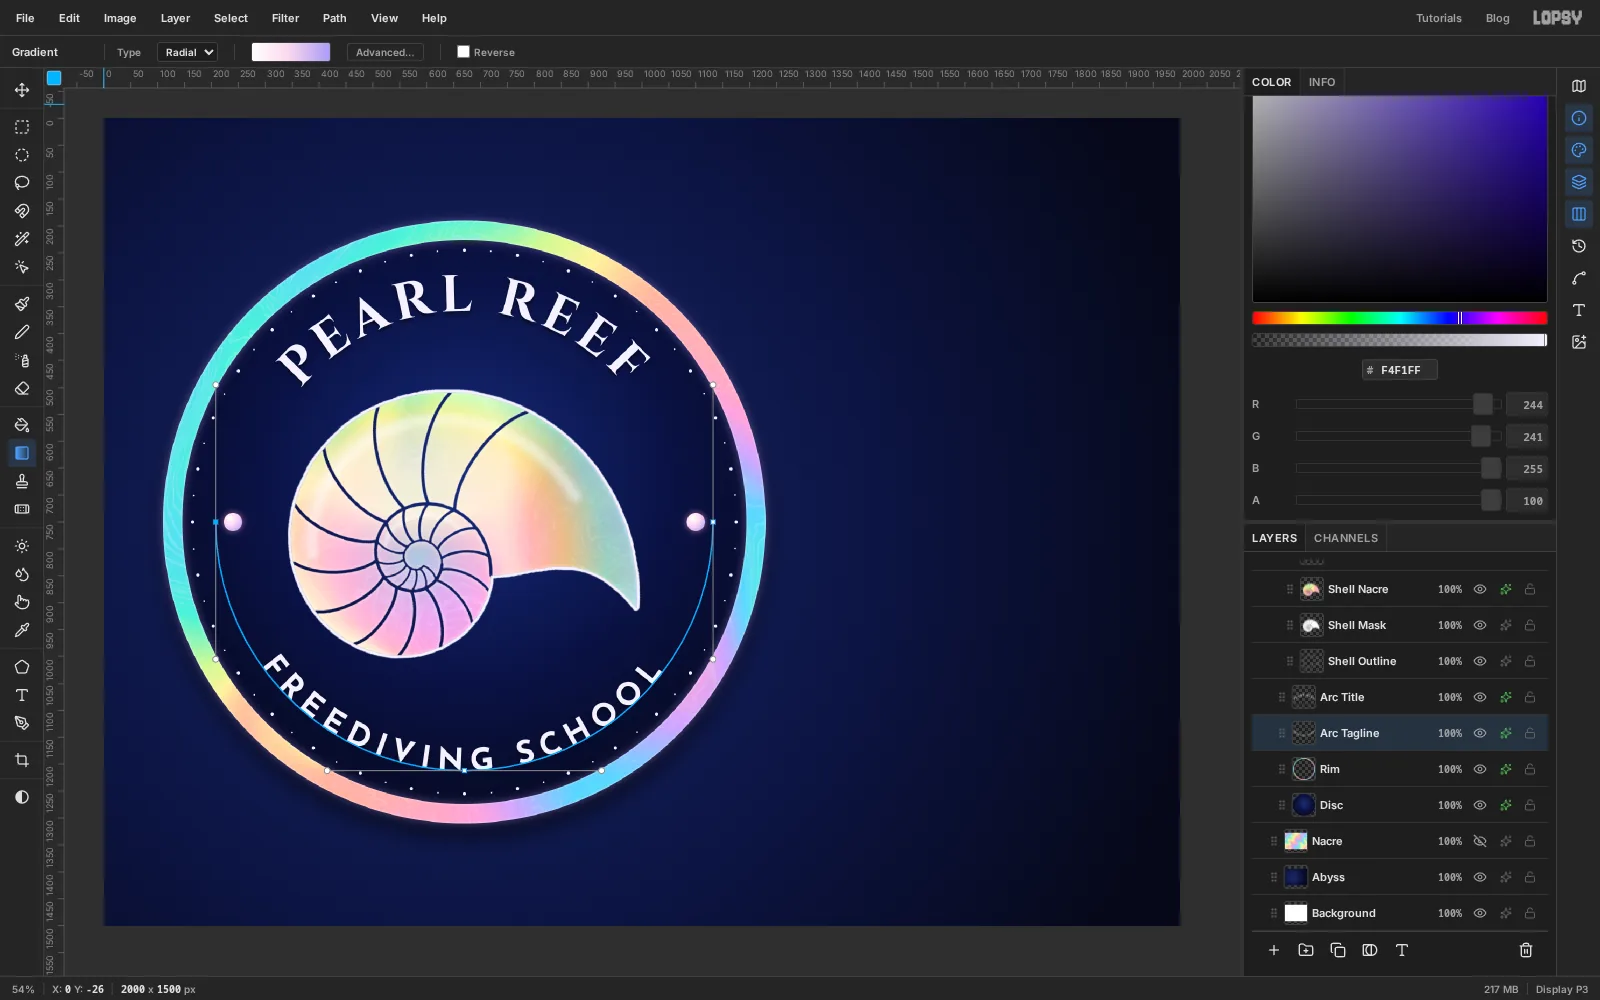
Add pearls, group the emblem and give it depth
- Add a layer named
Pearls. With the Elliptical Marquee, drag from (223, 733) to (257, 767) for a 34 px circle on the left of the emblem, level with its centre. - Fill it with a Radial gradient of , and , dragging from just up and left of the circle's centre to its lower-right edge. The off-centre start makes it look lit from above.
- Do the same for a second pearl on the right, from (1083, 733) to (1117, 767), then deselect.
- Tick Outer Glow on
Pearls: colour , Size18, Opacity60. - Click
Pearls, Shift-clickDiscand choose Layer → Group Layers. Name the groupEmblem. - Add the depth effects:
Disc: Drop Shadow, colour , Offset Y26, Blur60, Opacity70.Rim: Outer Glow , Size26, Opacity40, and Inner Glow white, Size6, Opacity70.Arc TitleandArc Tagline: a small Drop Shadow, Offset Y5, Blur10.
- Add a layer named
-
Lay out the column with guides and two tiles
The right-hand column is 540 px wide, with the same 110 px margin to the canvas edge that the emblem has on the left.
- Make sure View → Snap to Guides is ticked. Click the top ruler at
1350,1620and1890, and the left ruler at190,240and1310. - Add a layer named
Tile A Maskand drag it above theEmblemgroup. - Pick the Shape tool. Set Shape to Rectangle, Corner Radius to
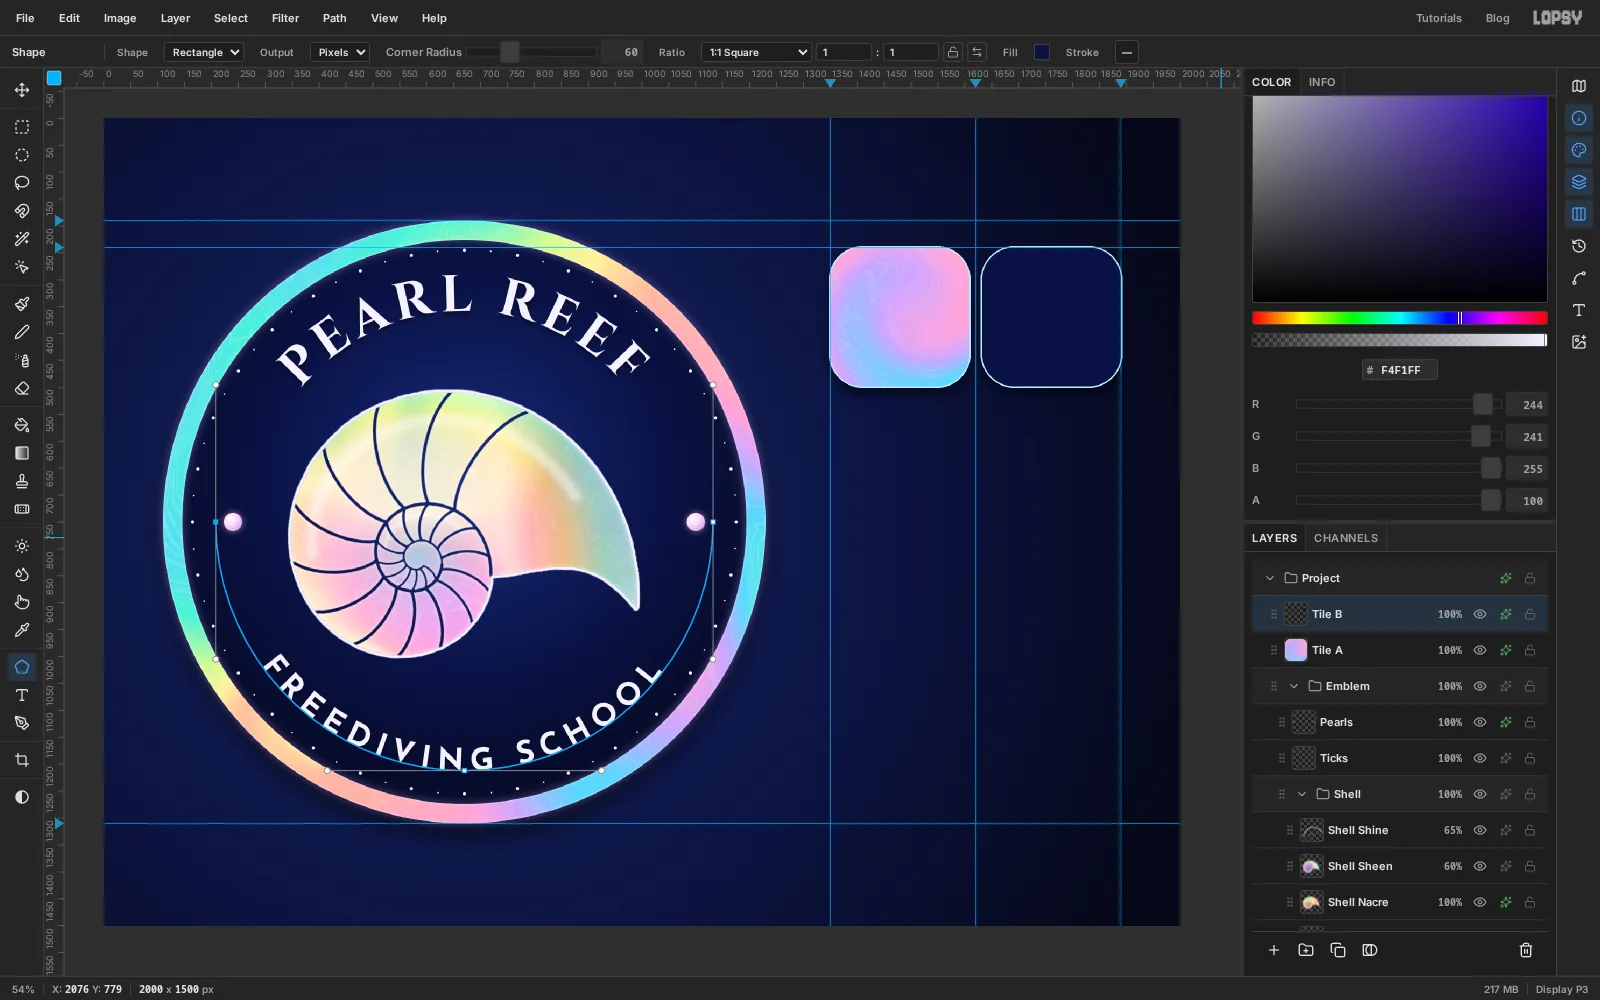
60, the fill to white and no stroke. - A shape grows from its centre. Press at (1479, 369) and drag up and left toward the corner where the 1350 and 240 guides cross. Hold Cmd as you drag if you want to be sure it stays square. The corner snaps onto both guides and you get a 258 px rounded square.
- Fill the tile with nacre the same way as the rim:
- Cmd-click the
Tile A Maskthumbnail to select its shape. - Select
Nacreand press Cmd+C. - Select
Tile A Maskand press Cmd+V, then deselect. - Name the pasted layer
Tile Aand deleteTile A Mask.
- Add a layer named
Tile B, change the Shape fill to , press at (1761, 369) and drag to the corner where the 1890 and 240 guides cross. - Give both tiles the same effects: Stroke, colour , Width
3, and Drop Shadow, Offset Y14, Blur28, Opacity60.
- Make sure View → Snap to Guides is ticked. Click the top ruler at
-
Make a small one-colour shell
- Select
Shell Maskinside theShellgroup and choose Layer → Duplicate Layer. - Drag the copy out of the groups to the top of the panel and name it
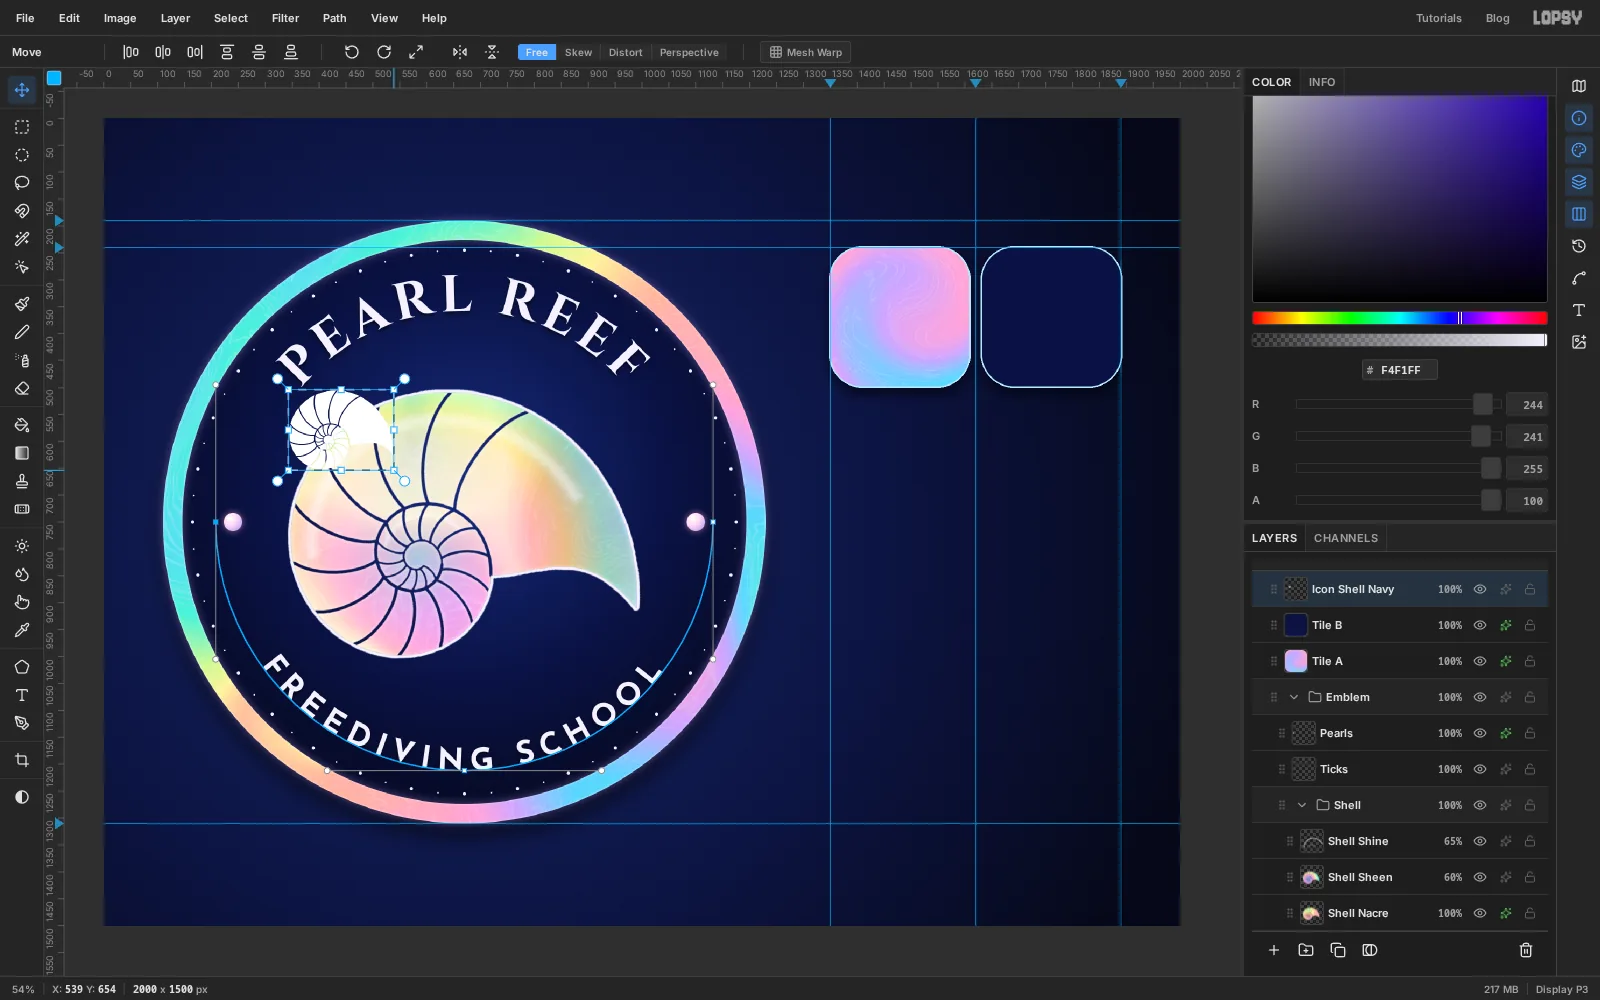
Icon Shell Navy. - A single pixel layer has no handles of its own, so draw a Rectangular Marquee around the copy.
- With the Move tool, hold Cmd and drag the bottom-right handle up and to the left until the shell is about 30% of its size, around 195 px wide. Press Cmd+D.
- Drag the small shell onto the middle of
Tile A. - Open its effects, tick Color Overlay and set the colour to .
- Select
-
Add the full-colour icon
- Select the
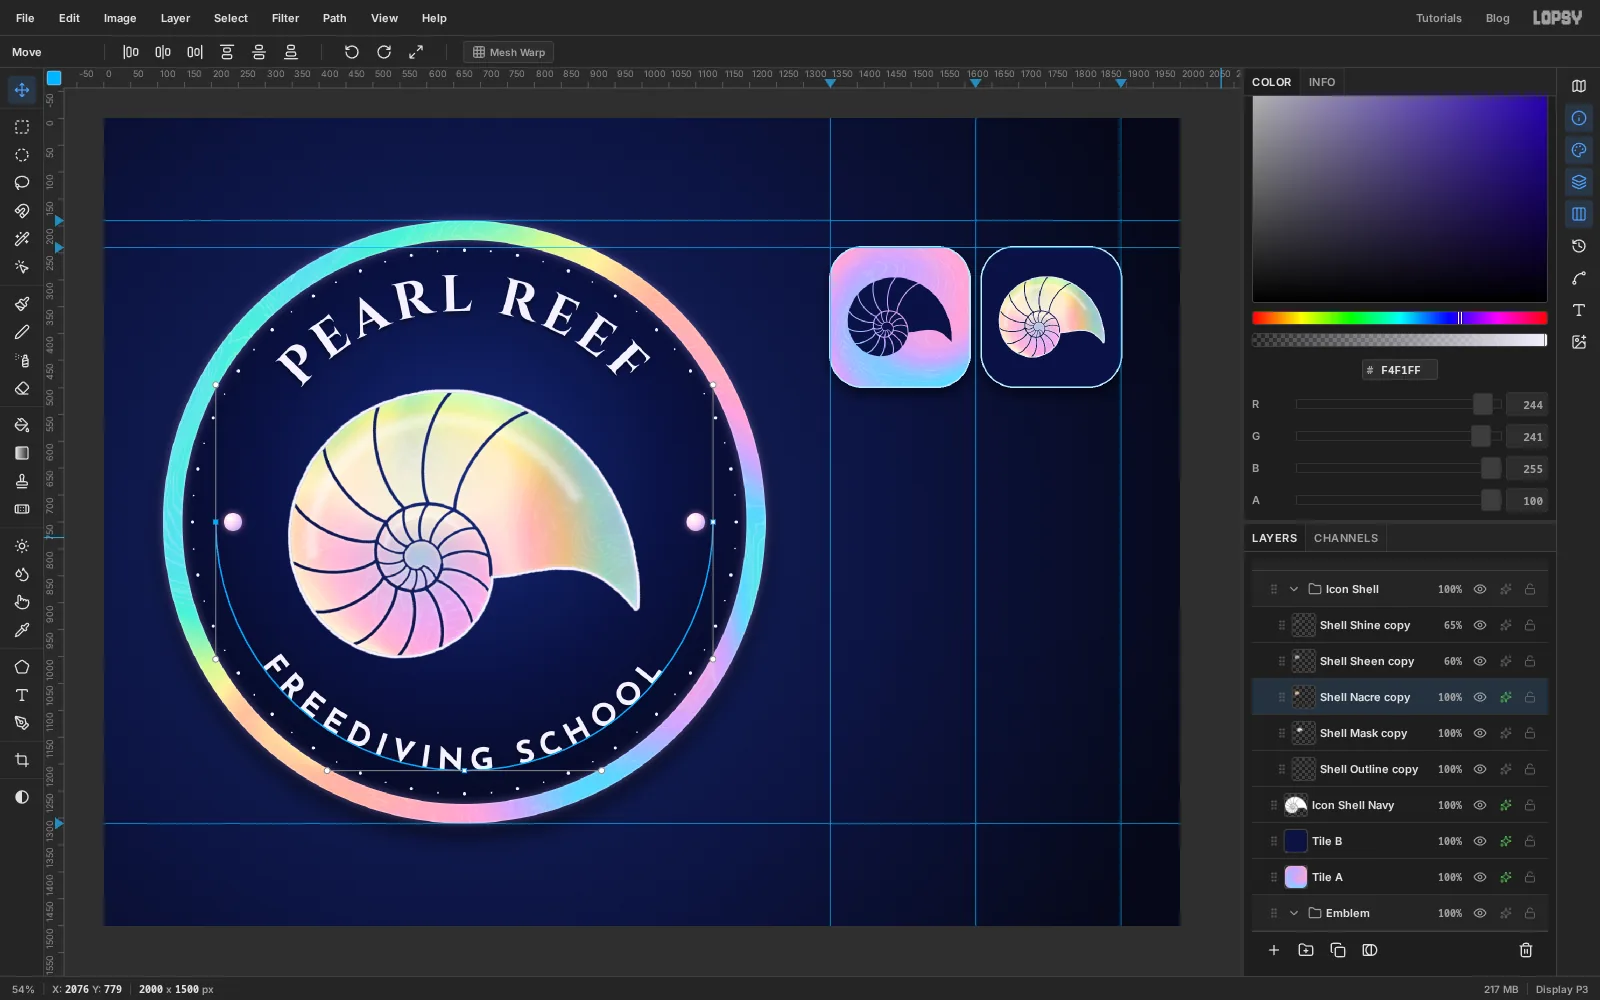
Shellgroup and choose Layer → Duplicate Layer. The whole group is copied. - Drag
Shell copyto the top of the panel and name itIcon Shell. - A group does get handles. With the Move tool, Cmd-drag the bottom-right handle to shrink it to the same 30%, commit, and drag it onto
Tile B. - Layer effects don't shrink with the pixels. Open the effects for
Shell Nacre copyand lower Inner Glow Size to4.
- Select the
-
Set the wordmark, captions and motto
Six lines of type go in the column. Select
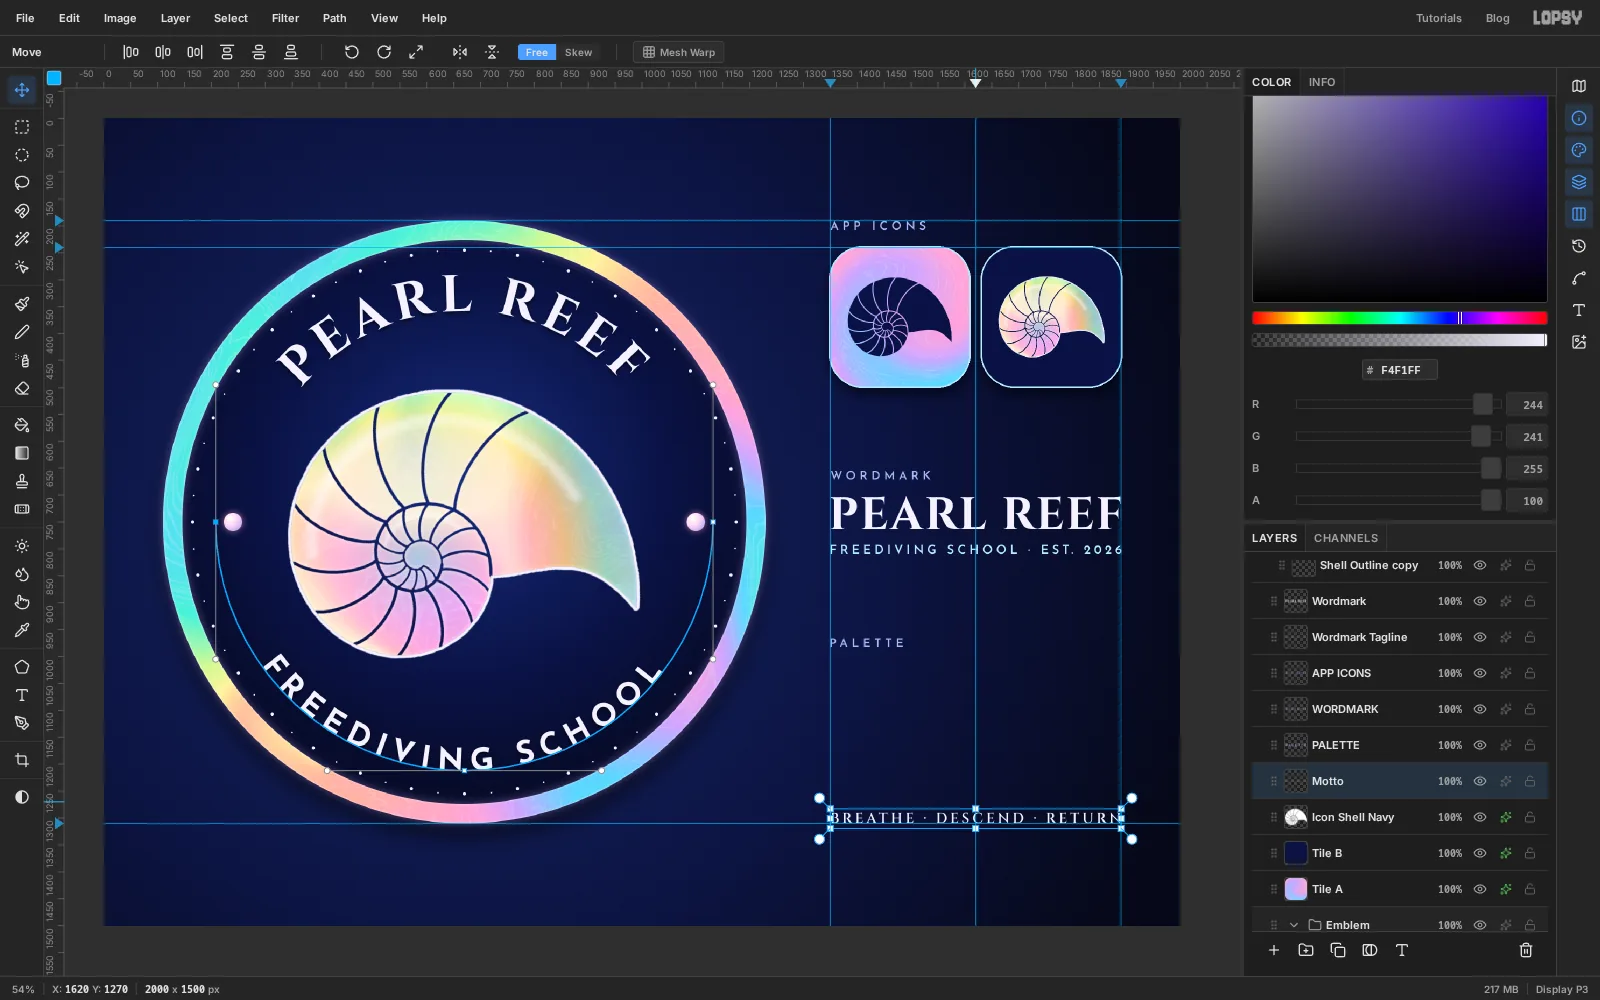
Icon Shell Navybefore you make each one. It's a pixel layer, so nothing gets restyled, and every new layer lands just above it. Click roughly where the line belongs, type, press Tab, then fine-tune: select the layer, pick the Move tool and use the arrow keys. Shift with an arrow moves 10 px.The wordmark and its tagline:
- Cinzel Bold, Size
84, colour , Align Center. Click near (1620, 690) and typePEARL REEF. Rename the layerWordmark, because the next step loads it by name. - In the Text panel, adjust Letter spacing until the word runs exactly from the 1350 guide to the 1890 guide. For me that was
3.4. Nudge it until the tops of the letters are at y702. - Josefin Sans SemiBold, Size
23, colour , centred:FREEDIVING SCHOOL · EST. 2026with Letter spacing6, which also fills the column. Put the tops of its letters at y791, about 28 px under the wordmark. Name itWordmark Tagline.
The three captions. Set all three in Josefin Sans SemiBold, Size
22, colour , Align Left, Letter spacing7, with the left edge on the 1350 guide:APP ICONS, with the tops of its letters on the 190 guide, level with the top of the emblemWORDMARK, tops at y654PALETTE, tops at y965
The motto:
- Cinzel SemiBold, Size
26, colour , centred:BREATHE · DESCEND · RETURNwith Letter spacing5.6, so it too spans the column. Sit the bottoms of its letters on the 1310 guide, level with the bottom of the emblem. Name itMotto.
Those positions leave the same gap of about 155 px between the tiles, the wordmark block and the palette block.
- Cinzel Bold, Size
-
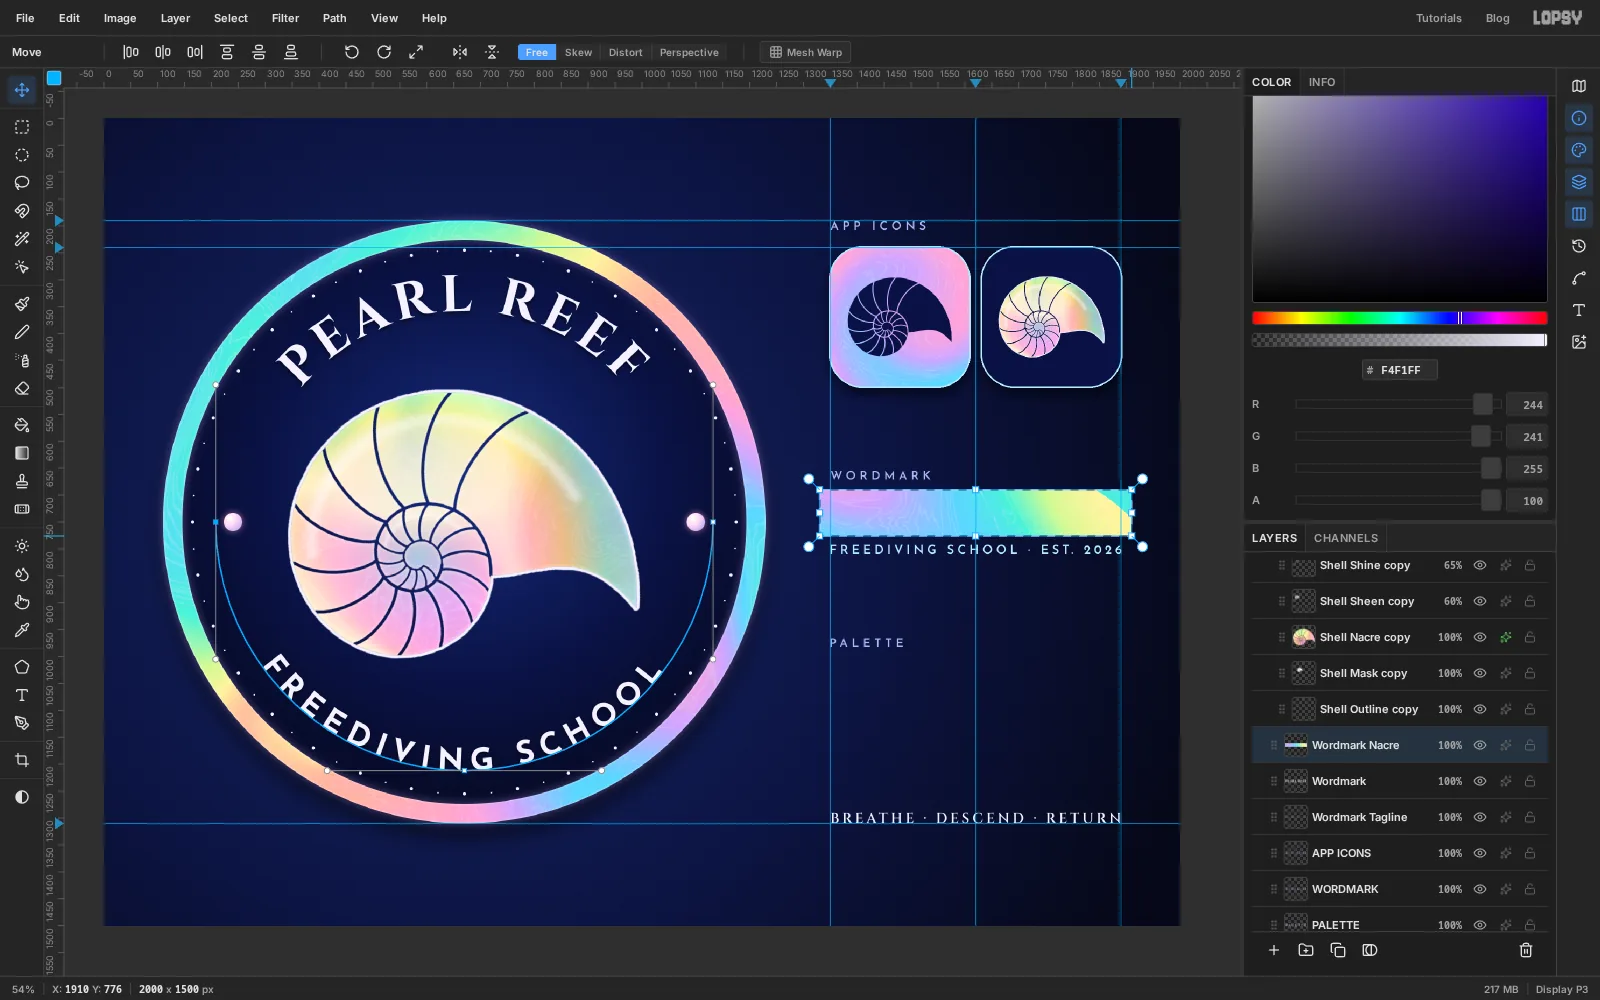
Fill the wordmark with nacre
- Untick View → Snap to Guides so selections stop jumping to the guides.
- Select
Nacreand drag a Rectangular Marquee that covers the wordmark with a little room to spare. Press Cmd+C. - Select
Wordmarkand press Cmd+V. Name the stripWordmark Nacre. - Cmd-click the
Wordmarkthumbnail to load the letters, choose Select → Inverse and press Delete. Only the letter shapes are left. - Deselect, and add an Outer Glow to
Wordmark Nacre: , Size12, Opacity30.
The white text layer stays underneath, still editable. If the name changes, retype it and cut a new strip.
-
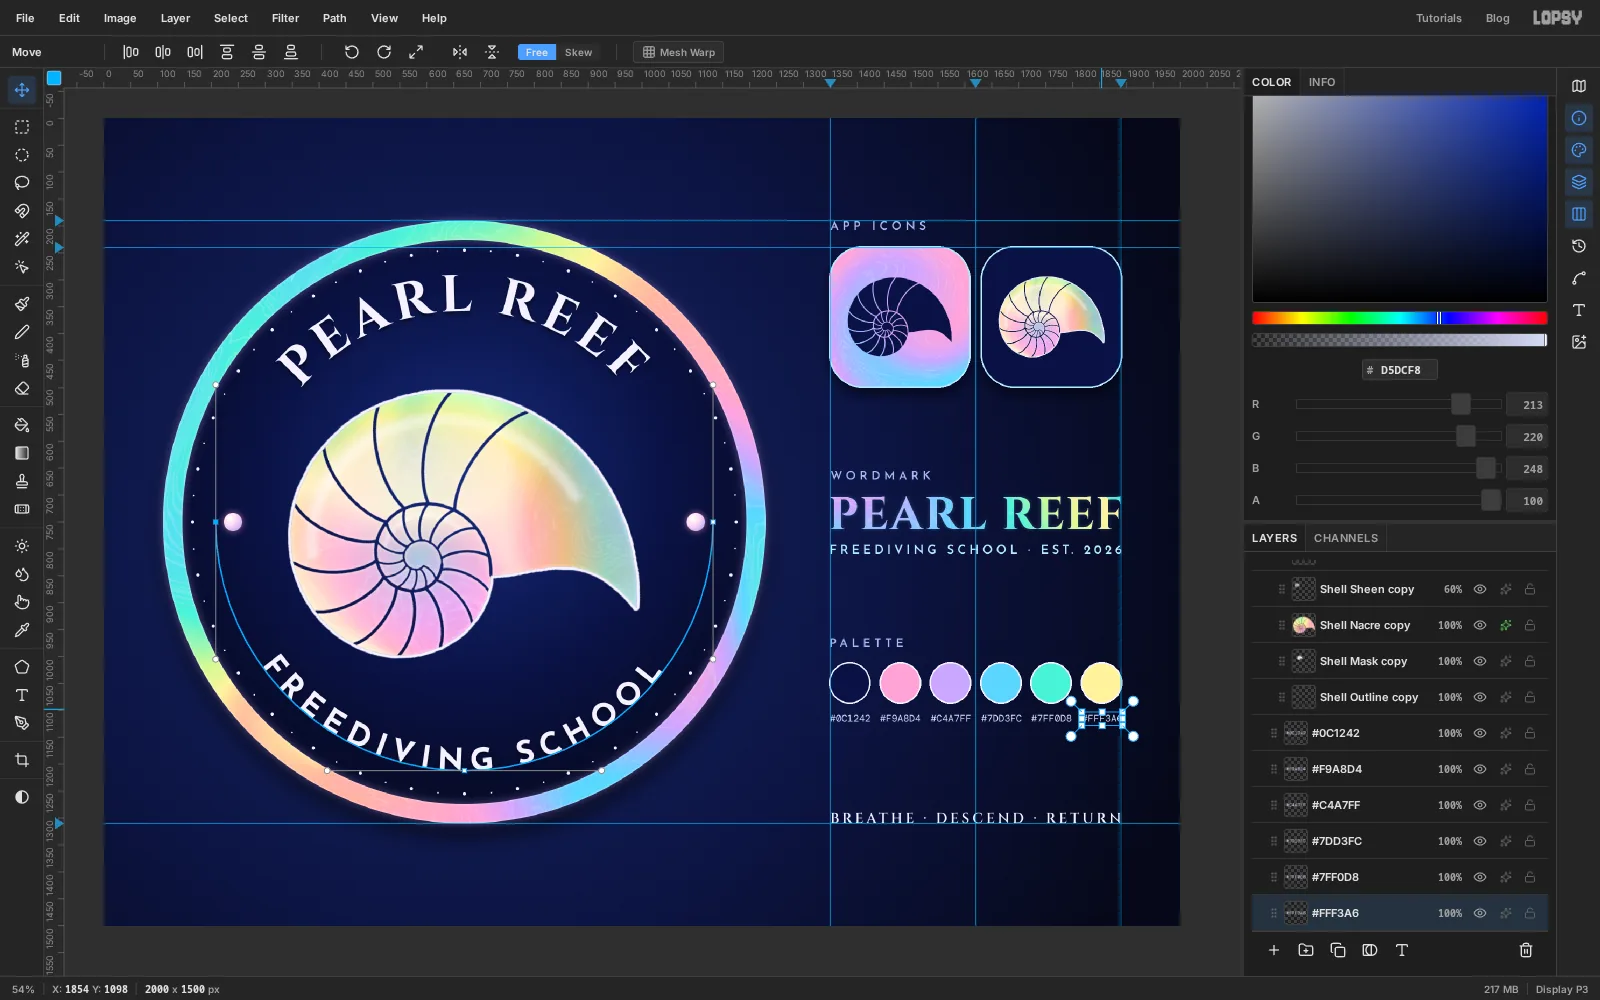
Add the palette swatches
- Add a layer named
Chips. - With the Elliptical Marquee, drag from (1350, 1013) to (1422, 1085) for a 72 px circle, and fill it with (Edit → Fill).
- Make five more circles the same size along the row, each one about 94 px further right, and fill them with , , , and . Their centres are at x
1480,1573,1667,1761and1854, so the last circle's right edge touches the 1890 guide. - Tick Stroke on the layer: , Width
3. The ring is what makes the navy swatch visible on a navy background. - Label each swatch with its hex code. Select
Chipsfirst each time, then set DM Mono, Size18, colour , Align Center and Letter spacing0. Click under the middle of a swatch, type the code ( and so on), press Tab, and nudge it so the tops of the characters are at y1108. - Click
Icon Shellin the Layers panel, Shift-clickTile Aand choose Layer → Group Layers. Name the groupBrand Sheet.
- Add a layer named
-
Send light rays out from behind the emblem
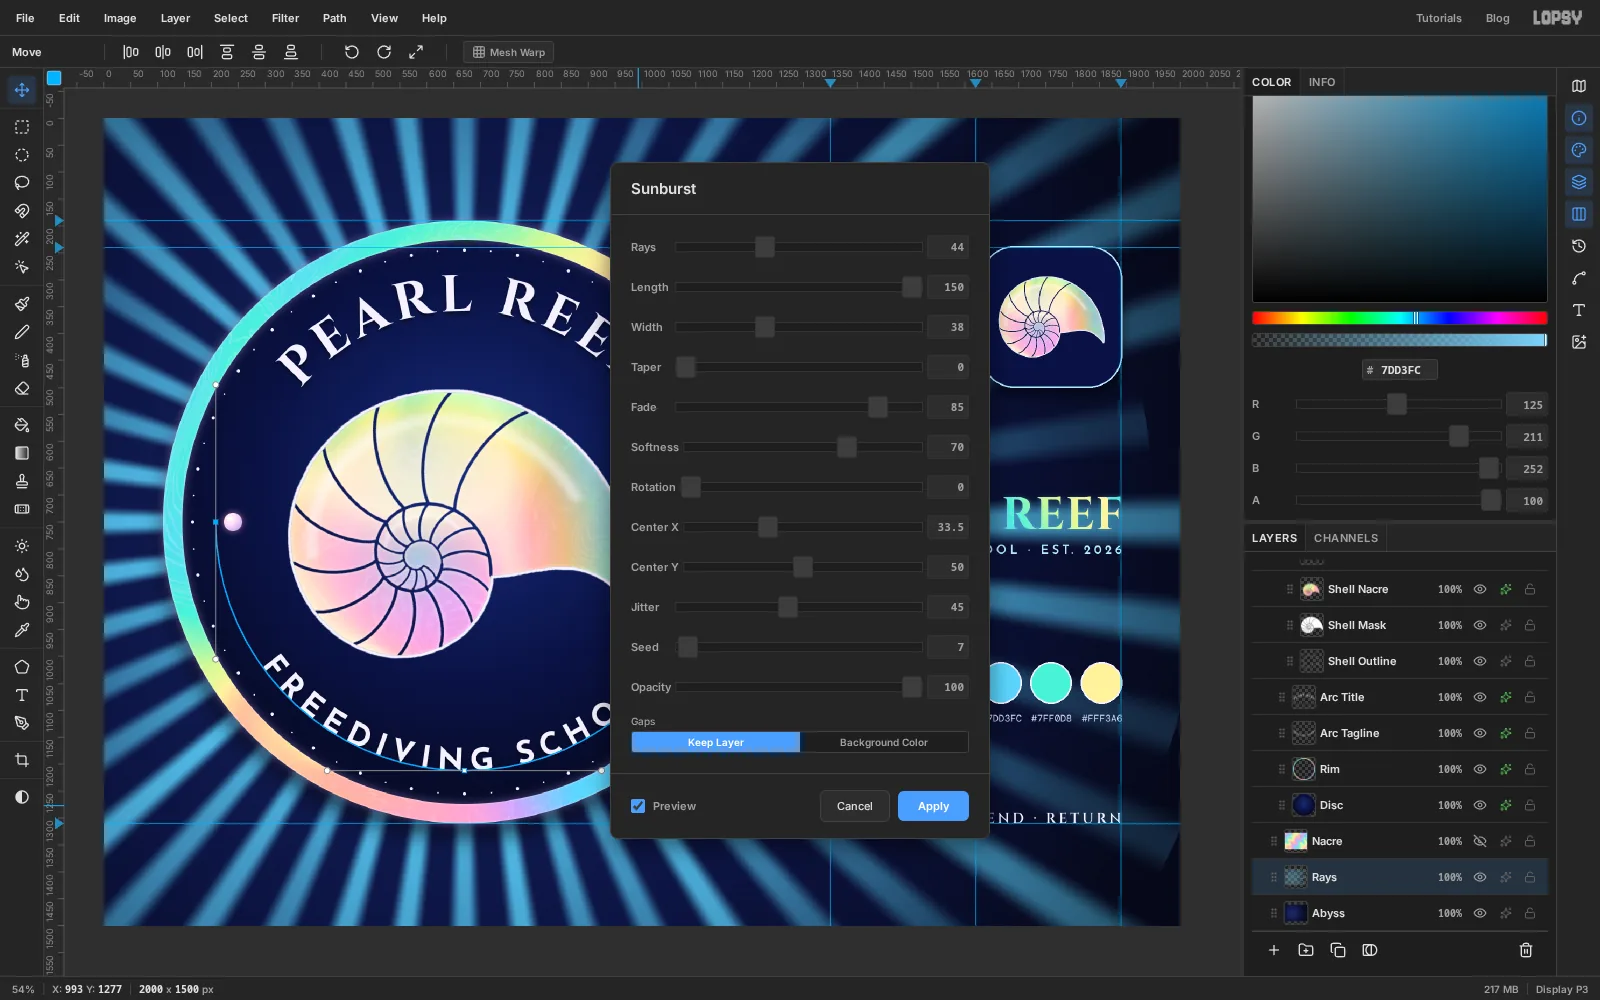
- Select
Abyssand choose Filter → Add Noise with Amount6, Mono and Gaussian, for a little grain in the water. - Add a layer named
RaysaboveAbyssand set the foreground colour to . - Choose Filter → Sunburst and set Rays
44, Length150, Width38, Fade85, Softness70, Center X33.5, Center Y50, Jitter45and Seed7. Center X is a percentage of the canvas width, and 33.5% of 2000 is the emblem's centre. Click Apply. - Soften the rays with Gaussian Blur, Radius
5. - Set the layer's blend mode to Screen and its opacity to 8%. They should be a hint, not a pattern.
- Select
-
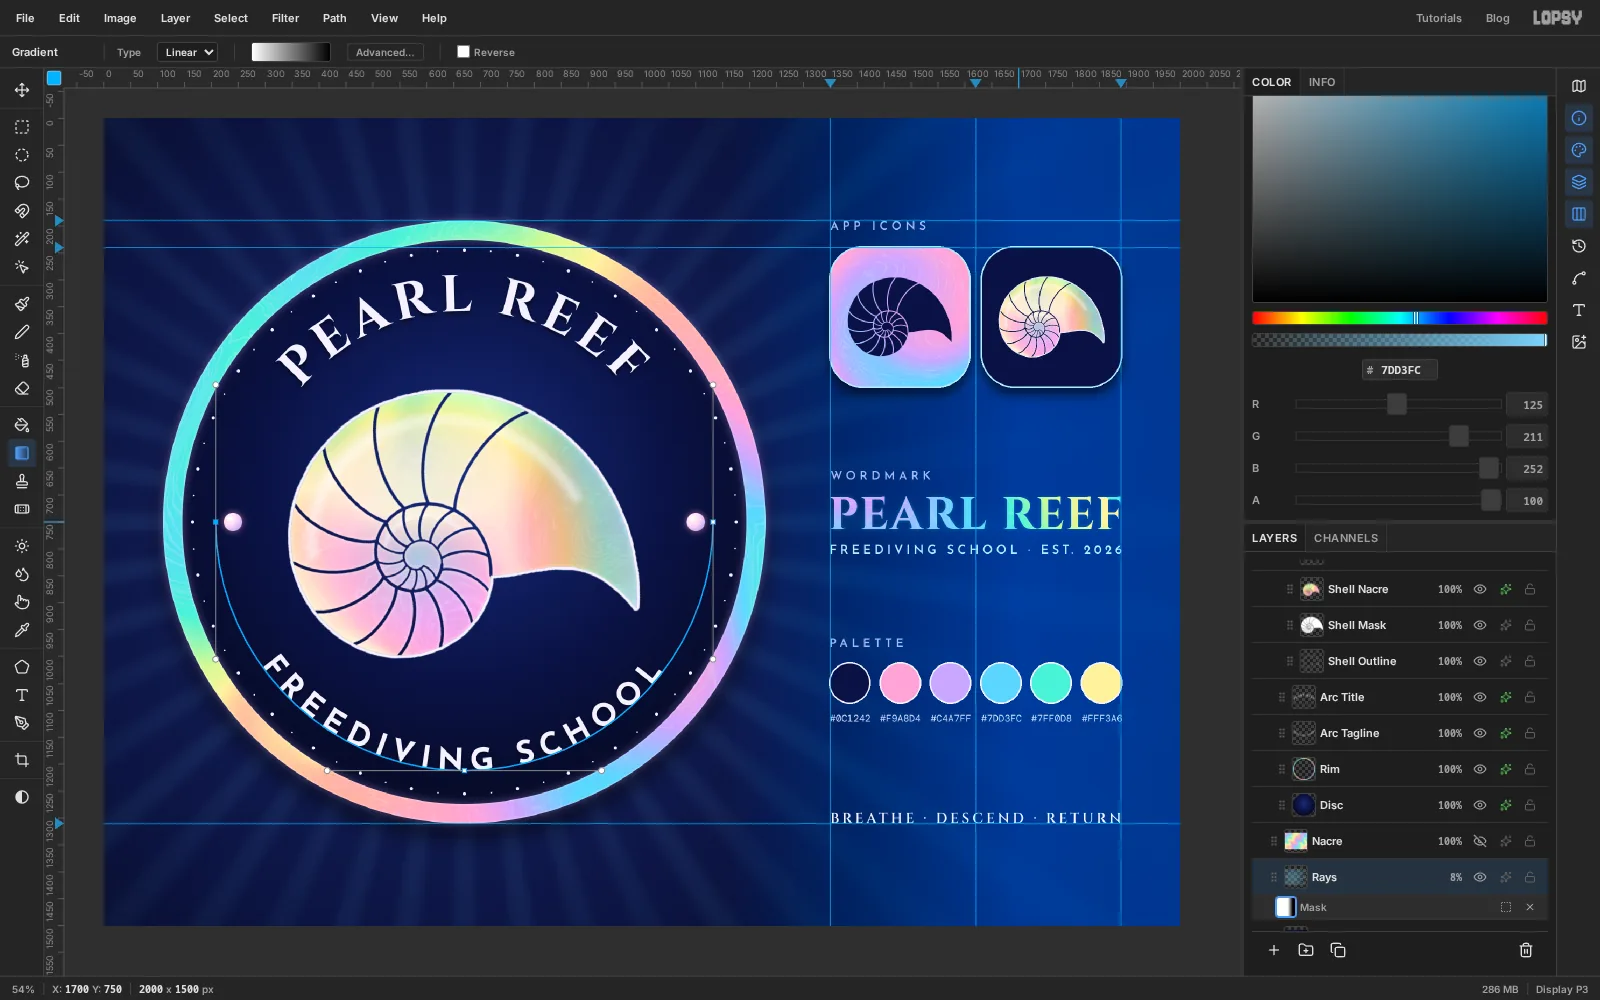
Fade the rays out of the column with a mask
Rays behind small type make it harder to read.
- With
Raysselected, click Add Mask. The layer enters mask edit mode. - Pick the Gradient tool, Linear, with two stops: white, then black.
- Drag from (1150, 750), just inside the emblem's right edge, across to (1700, 750). White keeps the rays and black hides them. The blue overlay shows the hidden part.
- Click the
Rayslayer row to leave mask edit mode.
- With
-
Tint the shadows with Color Grading
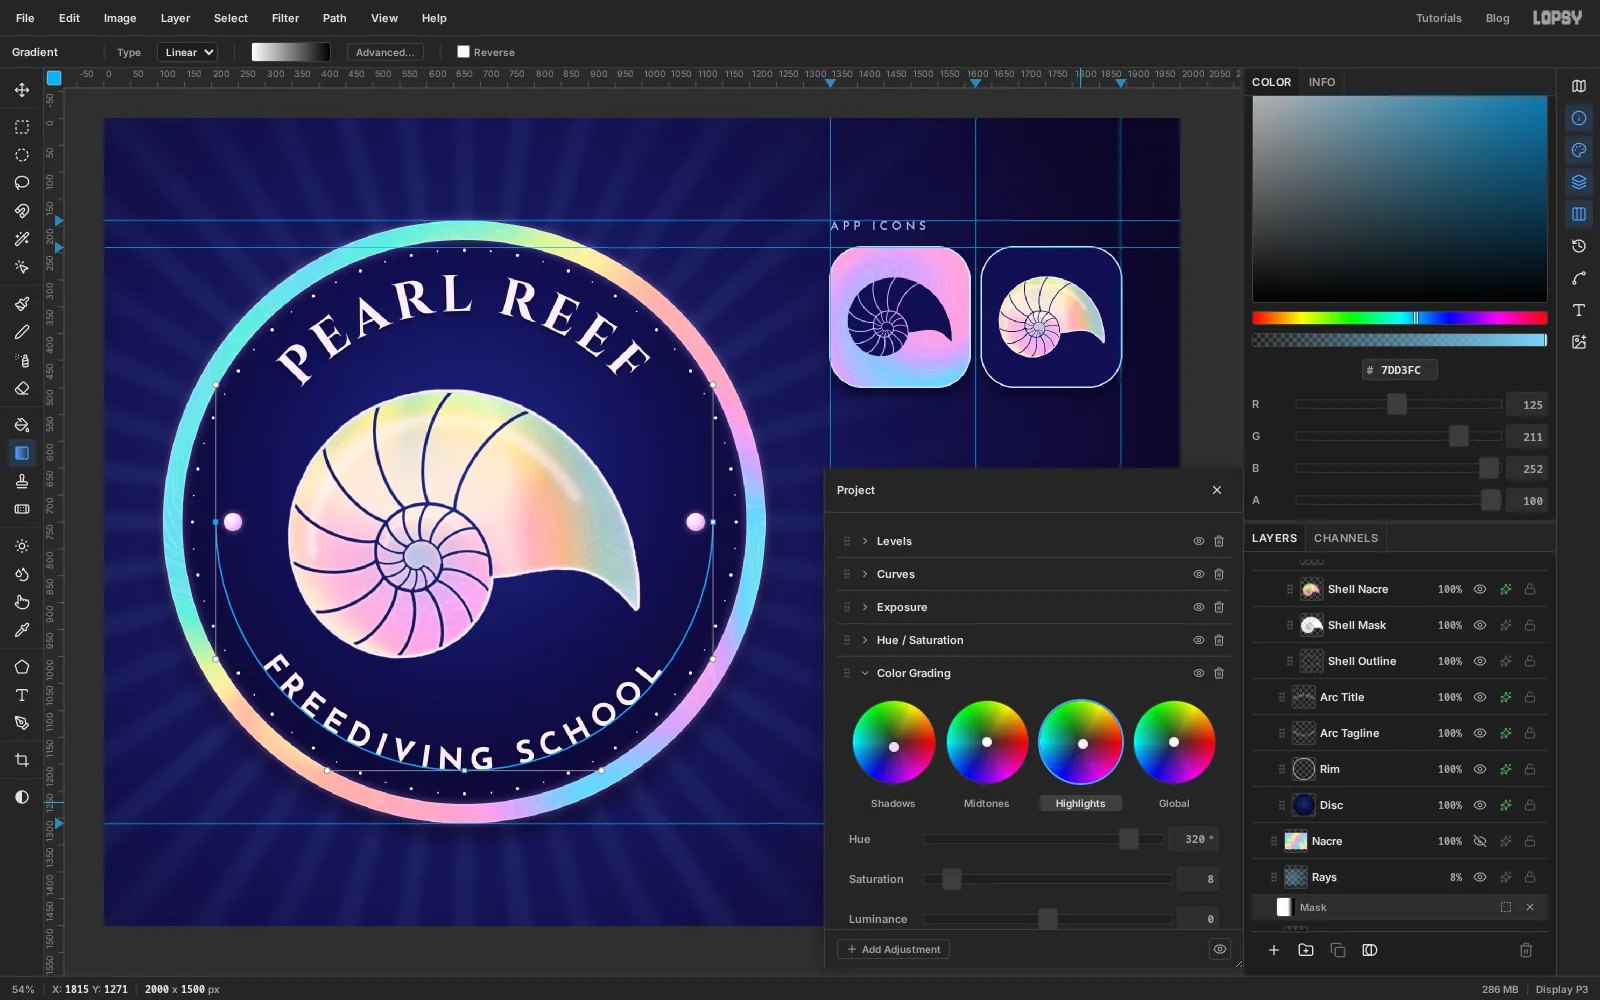
- Choose Layer → Adjustment Layer…. A note explains that adjustments live on groups. Click Got it, and the adjustments drawer is open for the whole document.
- Expand Color Grading. Click Shadows under the colour wheels and set Hue
268and Saturation14. - Click Highlights and set Hue
320and Saturation8. - Close the drawer.
The navy takes on a little violet and the pale colours a little pink, which ties the background to the nacre. Keep the numbers low. The swatches should still look like their hex codes.
-
Export the sheet and save the project
- Choose View → Show Guides to hide the guides and check the sheet. The emblem and the column should share a top edge at 190 and a bottom edge at 1310.
- Choose File → Quick Export PNG for the sheet.
- Choose File → Save Project to keep every layer, path and text line editable.
Because every iridescent piece was cut from the same hidden
Nacrelayer, you can restyle the whole identity by repainting that one sheet and repeating the copy and paste steps.