Design an Isometric Logo for an Architecture Studio
Build an isometric UU monogram from lassoed faces, wrap windows on with Distort, and lay out an identity sheet with a wordmark, variants and palette in Lopsy.

An isometric logo draws a small 3D object with no vanishing point. Every edge runs along one of three axes, so the whole mark is built from flat, evenly shaded faces. It looks precise and architectural, which suits a studio that designs buildings.
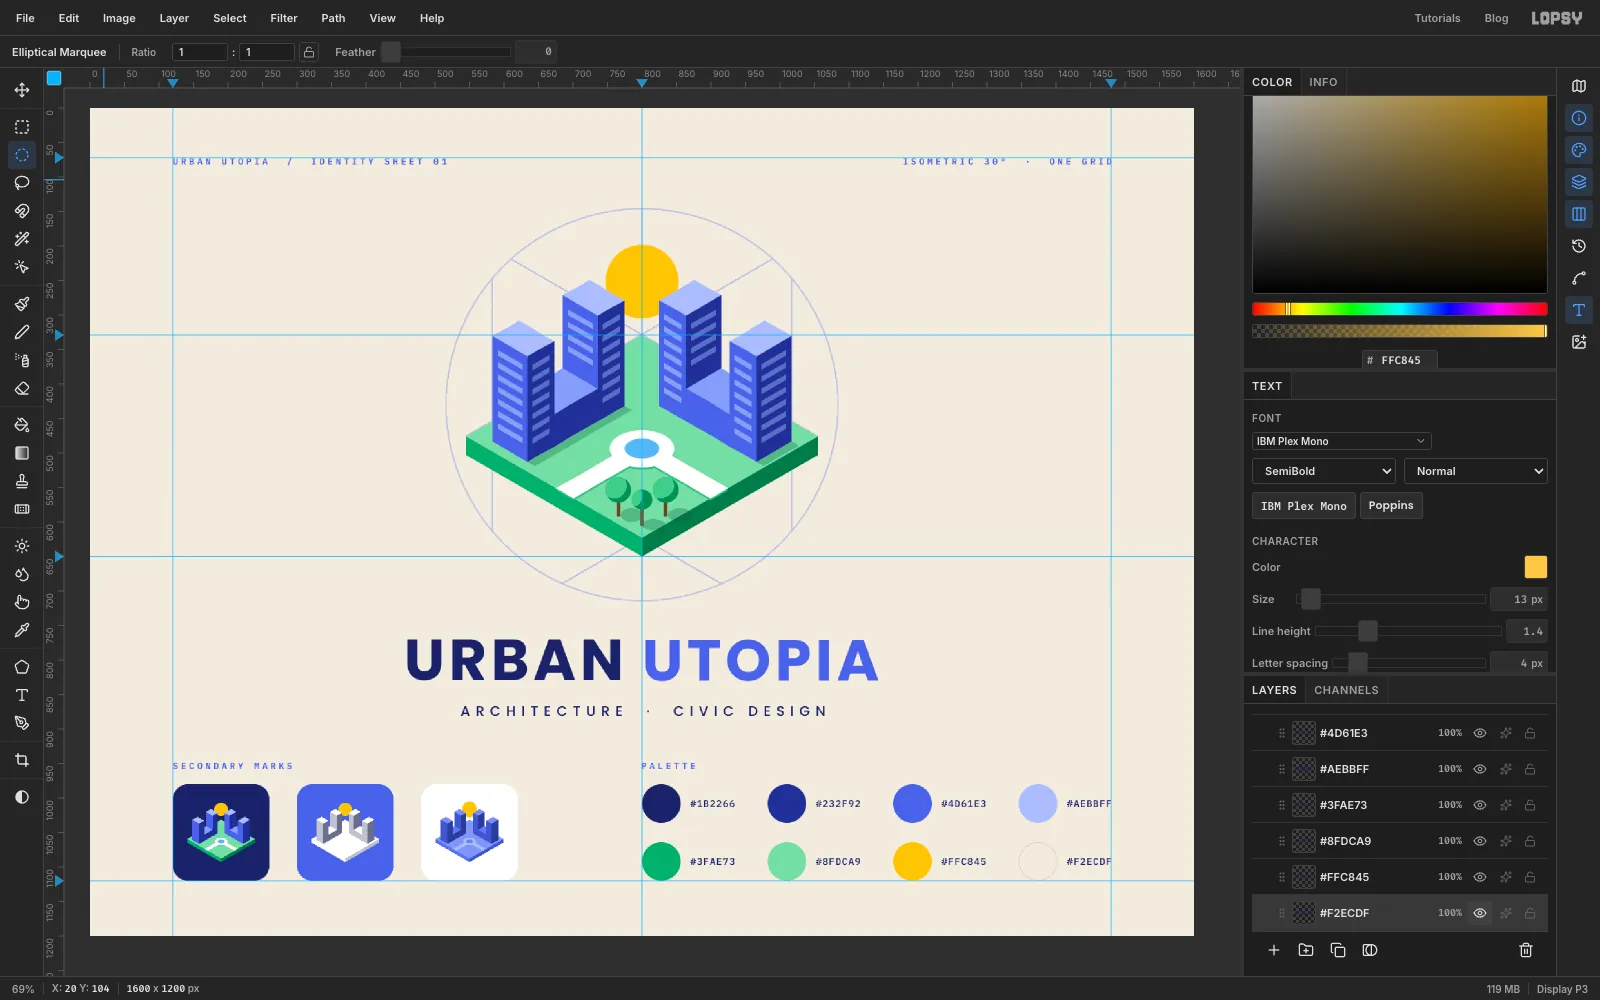
This tutorial makes an identity sheet for Urban Utopia, an invented architecture and civic-design studio. The mark is a park block with two U-shaped buildings on it. One is two towers joined by a low podium, the other its mirror image. Together they spell UU, with the sun rising in the gap. Around the mark you'll lay out the pieces a real brand sheet shows:
- faint construction lines
- a wordmark and tagline
- three small versions of the mark
- the colour palette
Along the way you'll use:
- the Lasso for every face, plus add and intersect selections
- Move → Distort to wrap flat window bands onto the towers
- Copy Merged, paste and scale
- Group Layers with a Gradient Map adjustment
- the Shape tool for rounded tiles
- text with letter spacing, and Add Noise for paper grain
The palette is cool blues and park greens on cream paper, with one yellow accent:
-
Paper
-
Ink navy
-
shade face
-
Ultramarine
-
Roofs
-
podium roofs
-
Lawn
-
slab sides
-
Sun
-
Fountain
-
Set up the paper and guides
Open Lopsy. In the New Document dialog set Width to
1600and Height to1200, leave Background on White and click Create.- Select the Background layer and set the foreground colour to in the Color panel's hex field. With nothing selected, Edit → Fill floods the whole layer.
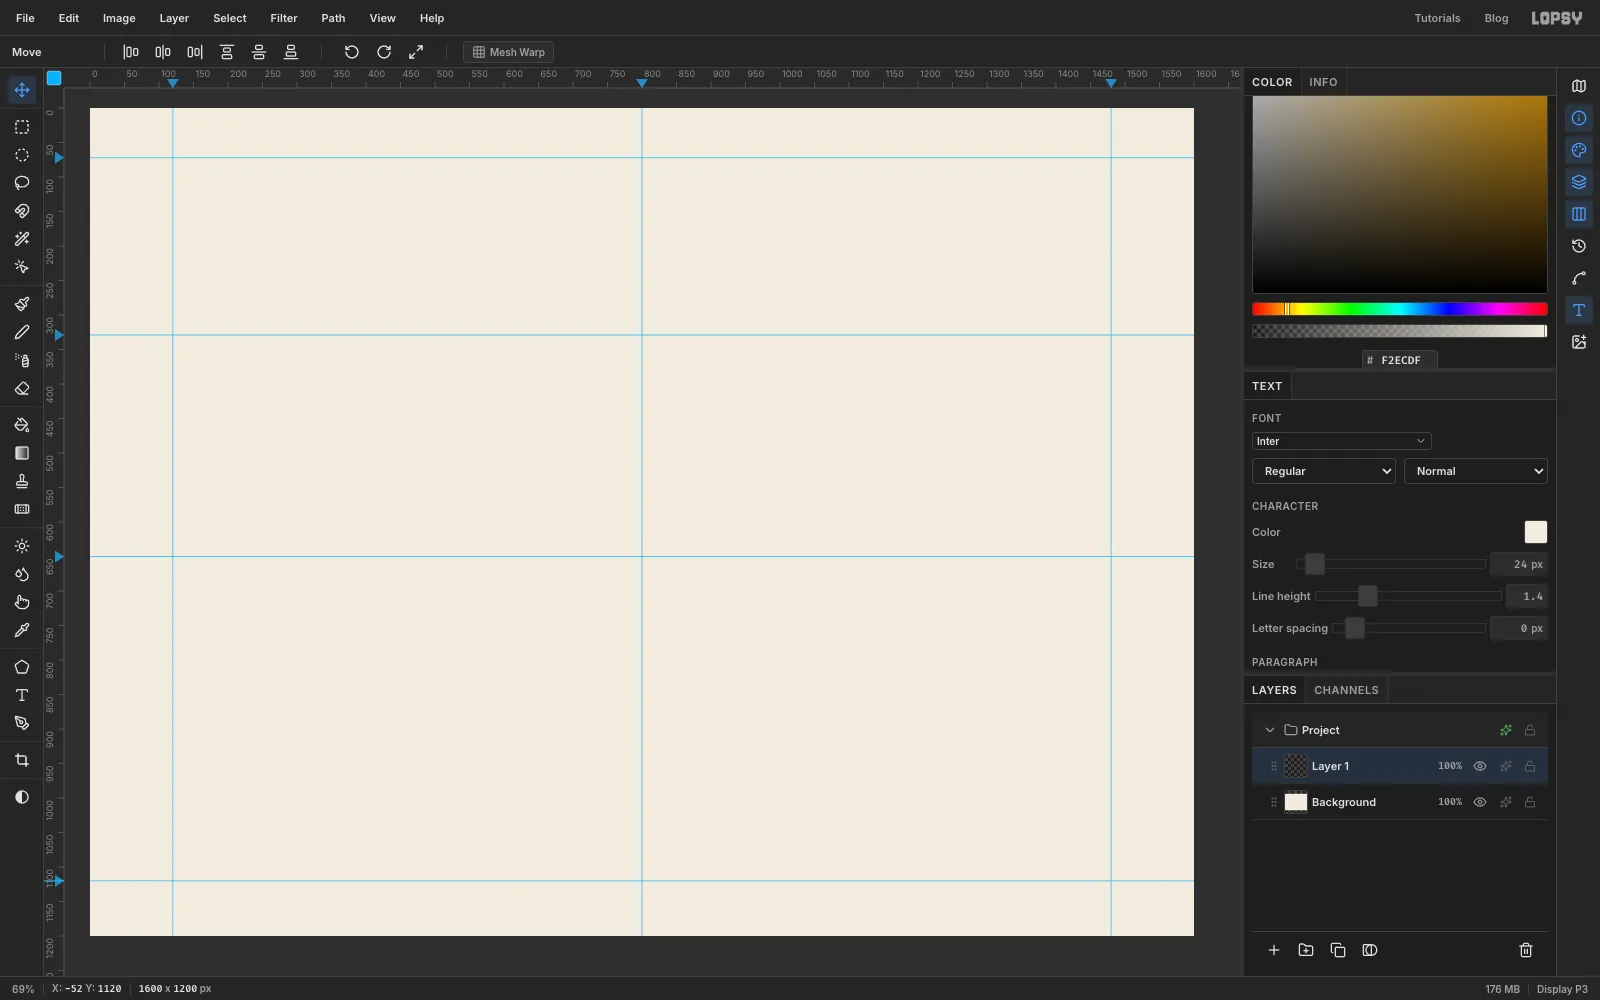
- Click the top ruler at
120,800and1480to make vertical guides for the side margins and the centre line. - Click the left ruler at
72,329,650and1120. Those mark the top margin, the back corner of the park slab, its front-bottom corner and the bottom margin.
-
Draw the construction rays
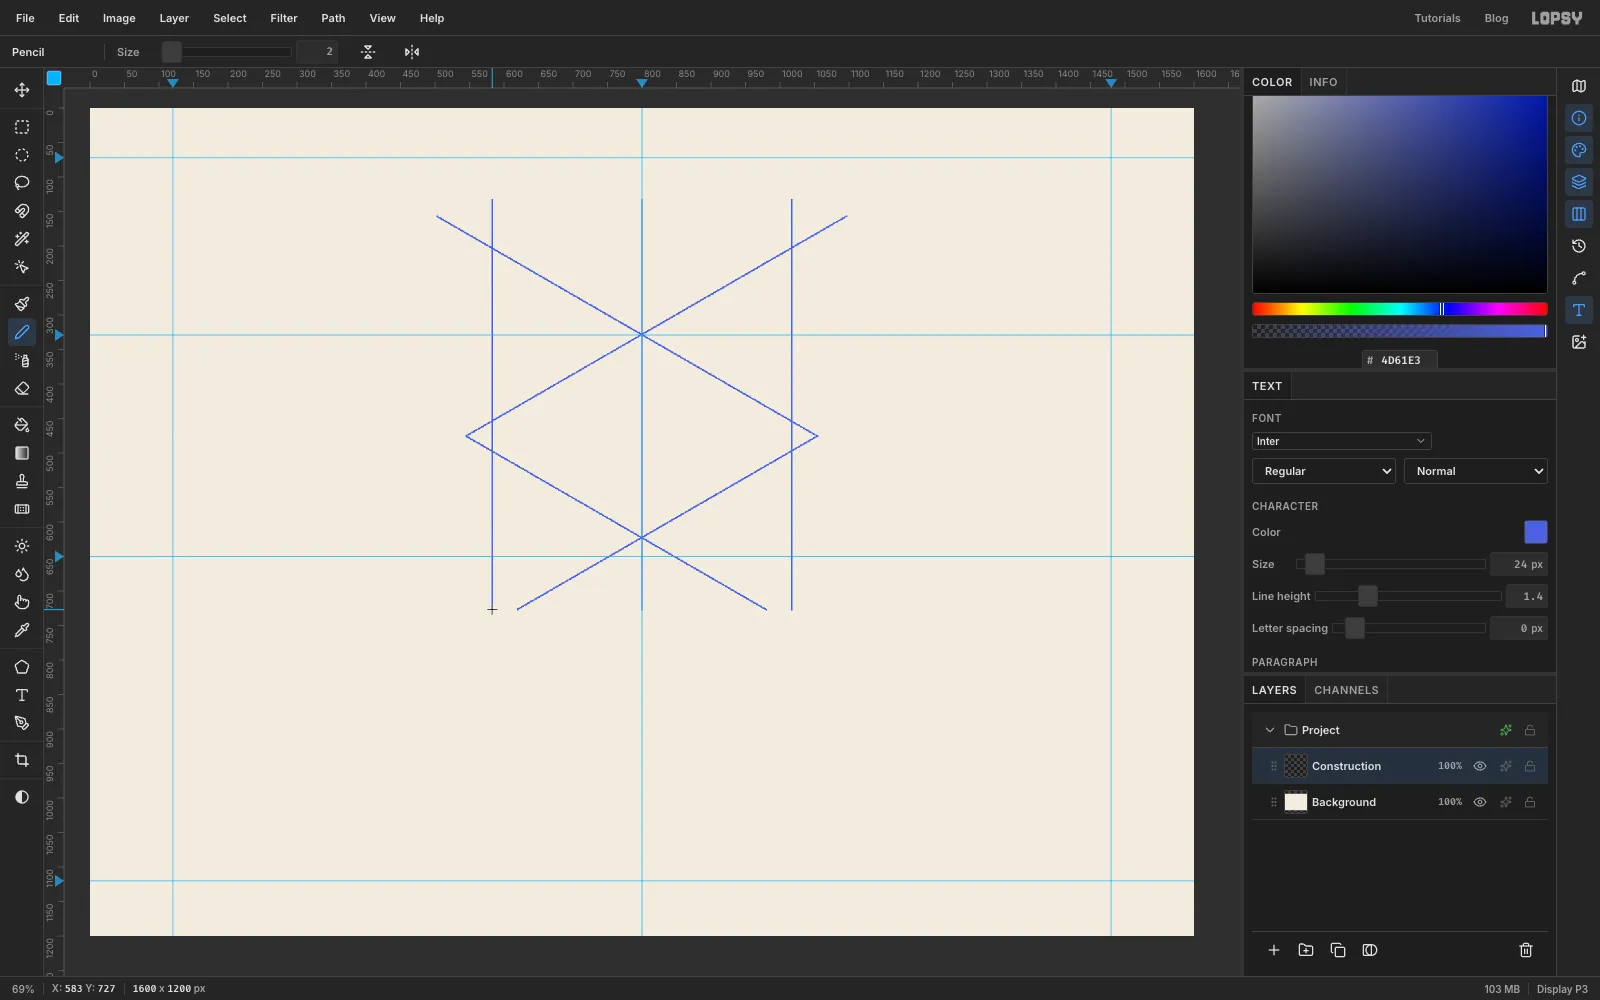
Logo sheets often show the geometry the mark was built on. Here that's four 30° rays that meet at the slab's corners.
- Double-click Layer 1 and rename it
Construction. - Pick the Pencil, set Size to
2and use . - To draw each line, click its start and then Shift-click its end.
- Draw the four rays:
- from (503, 157) to (1055, 476), which passes through the slab's back corner at (800, 329)
- from (1097, 157) to (545, 476)
- from (620, 727) up to (1055, 476)
- from (980, 727) up to (545, 476)
- Add three verticals from y
133to y727, at x800,583and1017. The outer two line up with the outside edges of the outer towers.
Every ray stops exactly on the slab's left or right corner, so no stray ends stick out past it.
- Double-click Layer 1 and rename it
-
Trim the lines to a circle
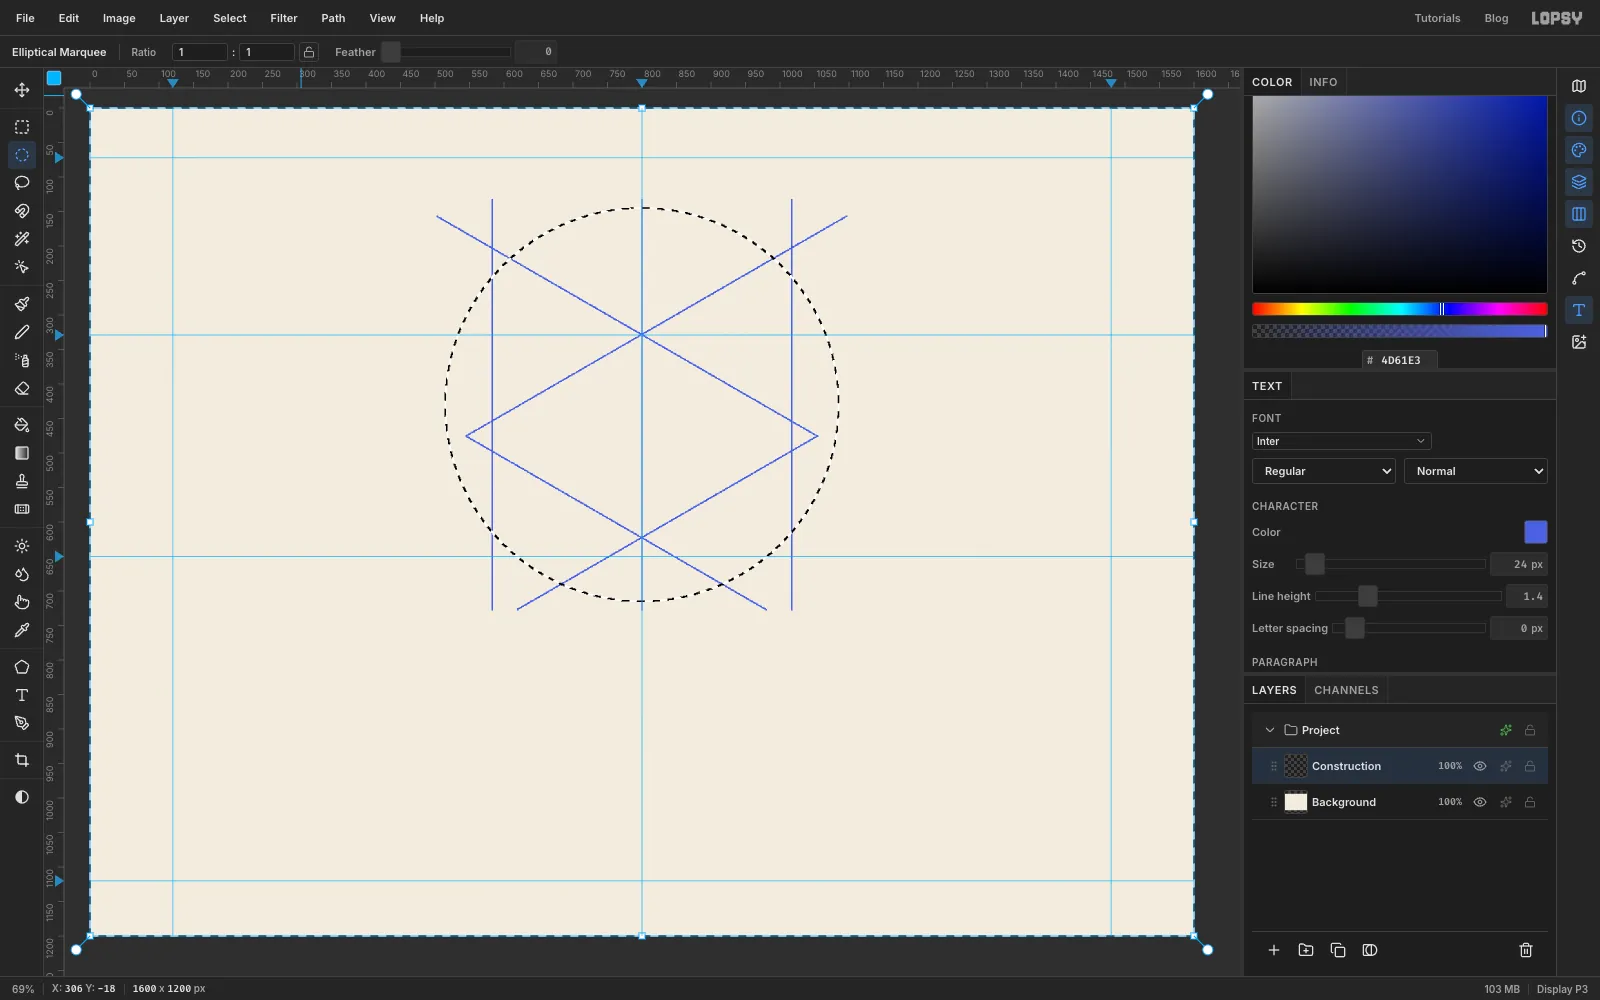
- Pick the Elliptical Marquee and drag from (515, 145) to (1085, 715). That's a circle 570 px across, centred on (800, 430).
- Choose Select → Inverse and press Delete. Every line now ends on the circle.
- Press Cmd+D to deselect.
-
Add the construction ring
- Click Add Layer and name it
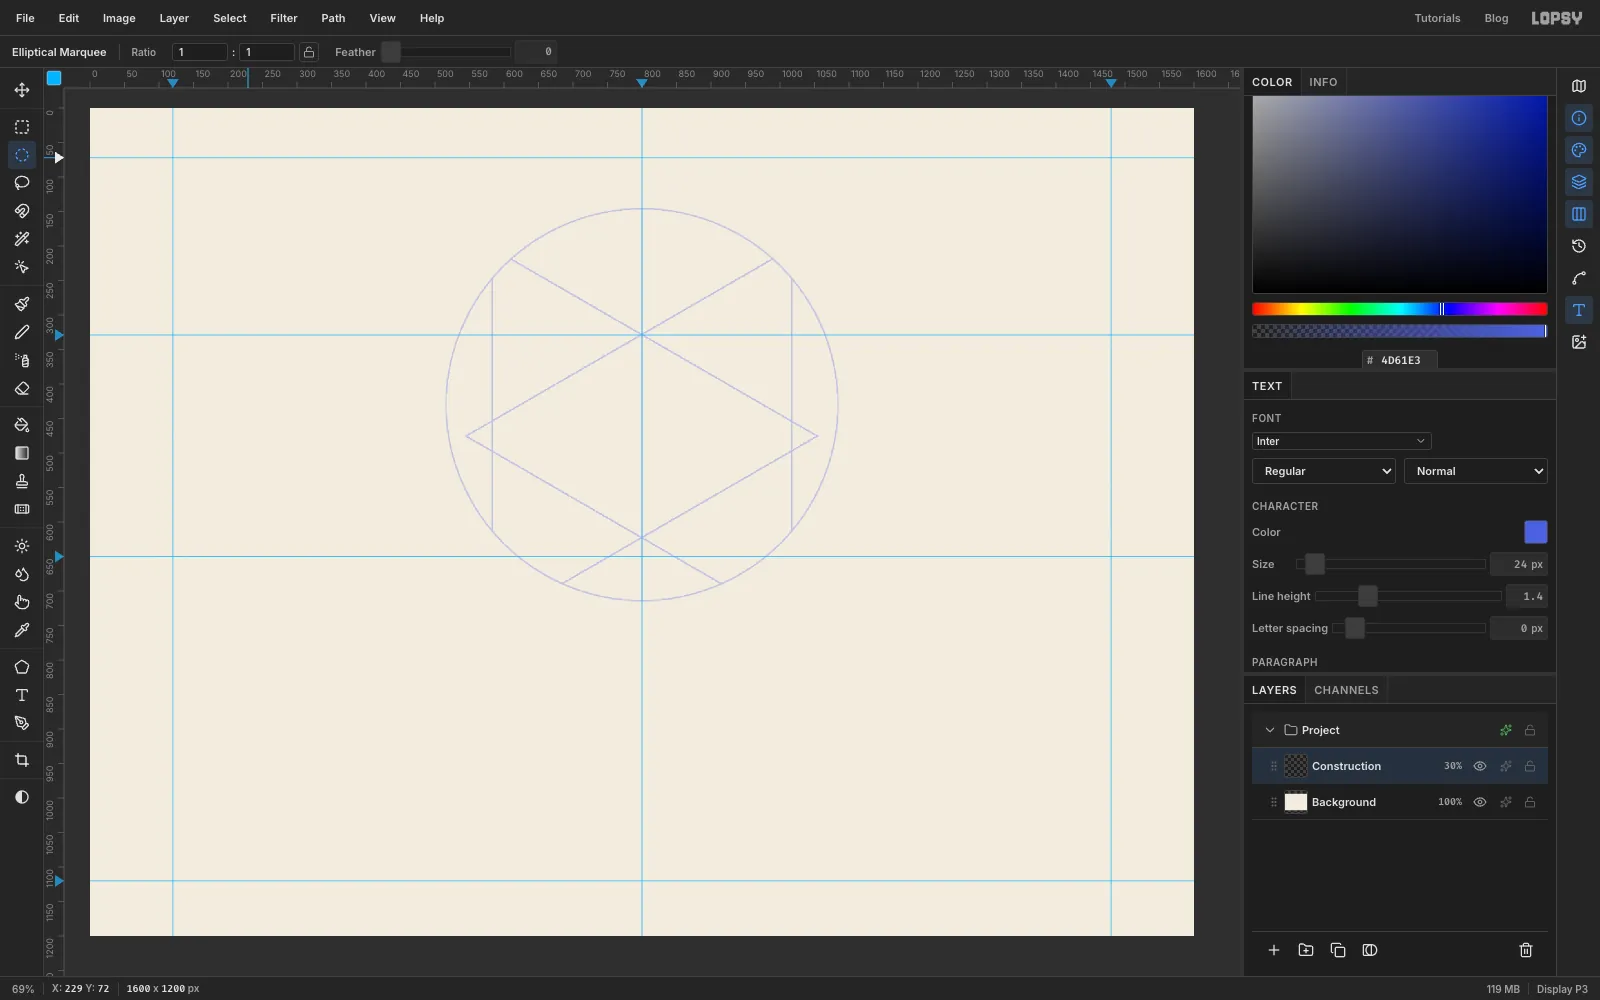
Ring. - Draw the same circle, from (515, 145) to (1085, 715), and fill it with (Edit → Fill).
- Choose Select → Shrink, enter
2px, and press Delete. That leaves a 2 px outline. - Deselect and choose Layer → Merge Down to fold the ring into
Construction. - Set
Constructionto 30% opacity with the opacity button on its row. The lines should whisper, not shout.
- Click Add Layer and name it
-
Lasso the park slab
- Add a layer named
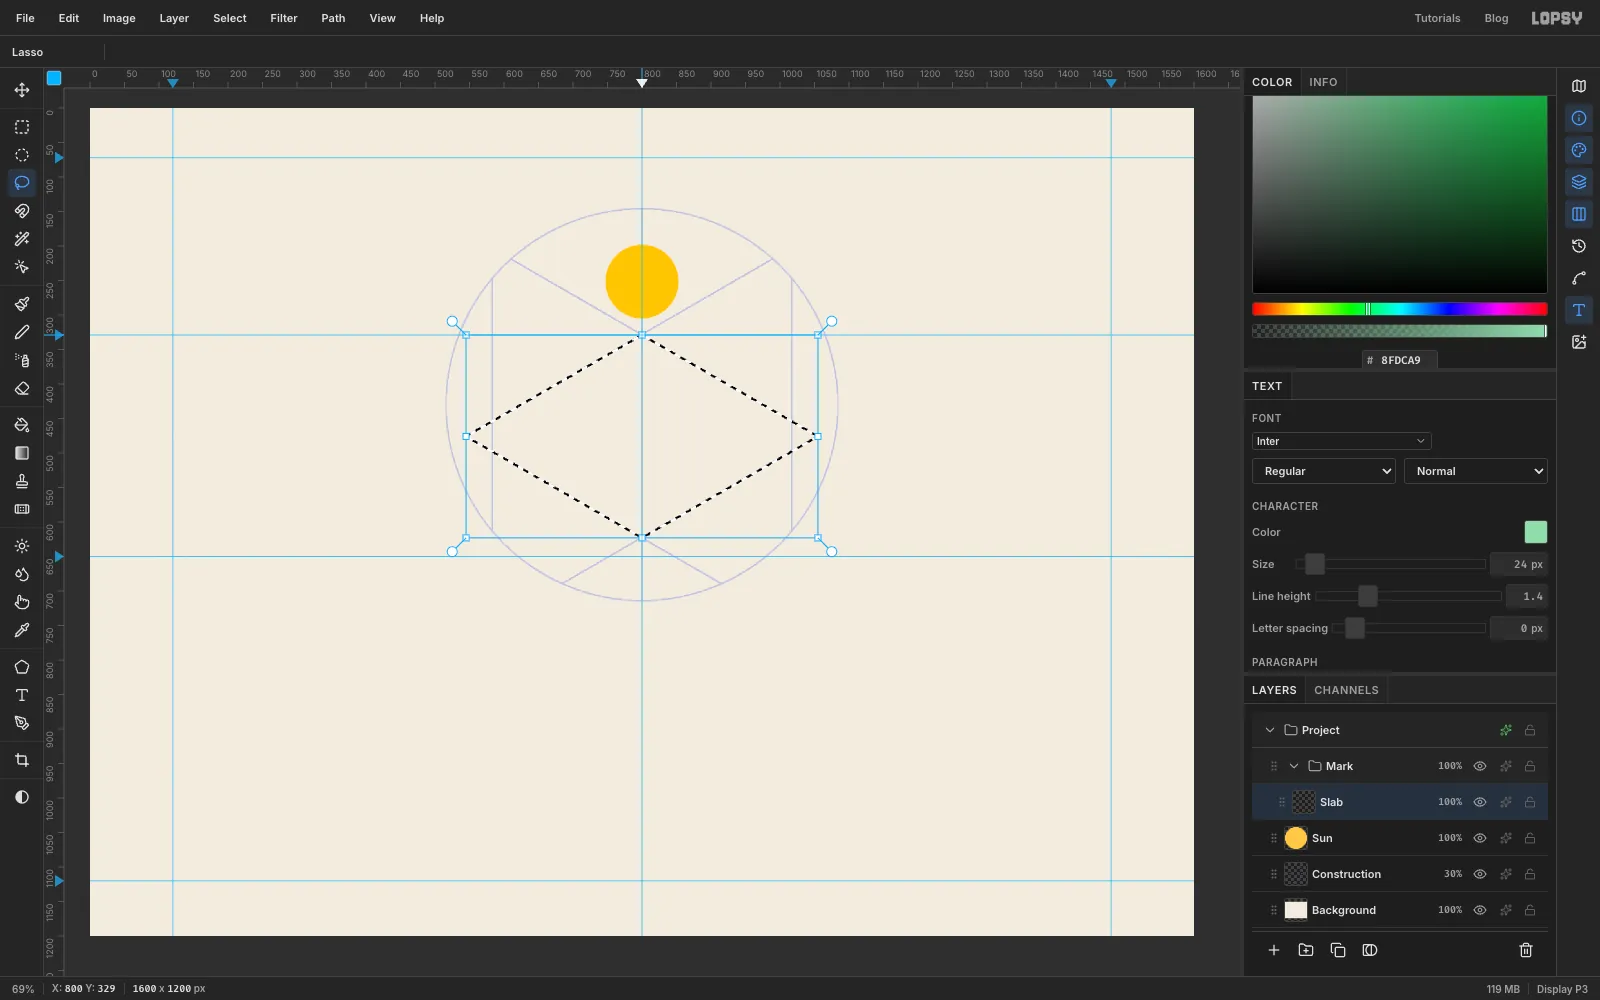
Sun. Drag an elliptical marquee from (747, 198) to (853, 304) and fill it with . - With
Sunselected, click New Group in the Layers panel and name itMark. Then add a layer namedSlabinside it. - Pick the Lasso and drag straight from corner to corner around the diamond: (800, 329), (1055, 476), (800, 623) and (545, 476). The construction rays run along its edges, so you can trace them. Fill it with .
- The slab is 26 px thick:
- Lasso the left side, from (545, 476) down to (800, 623), then down to (800, 650) and back up to (545, 502). Fill it with .
- Lasso the right side, (800, 623), (1055, 476), (1055, 502), (800, 650), and fill it with the darker .
The light comes from the upper left, so left-facing sides are mid-tone and right-facing sides are darkest.
- Add a layer named
-
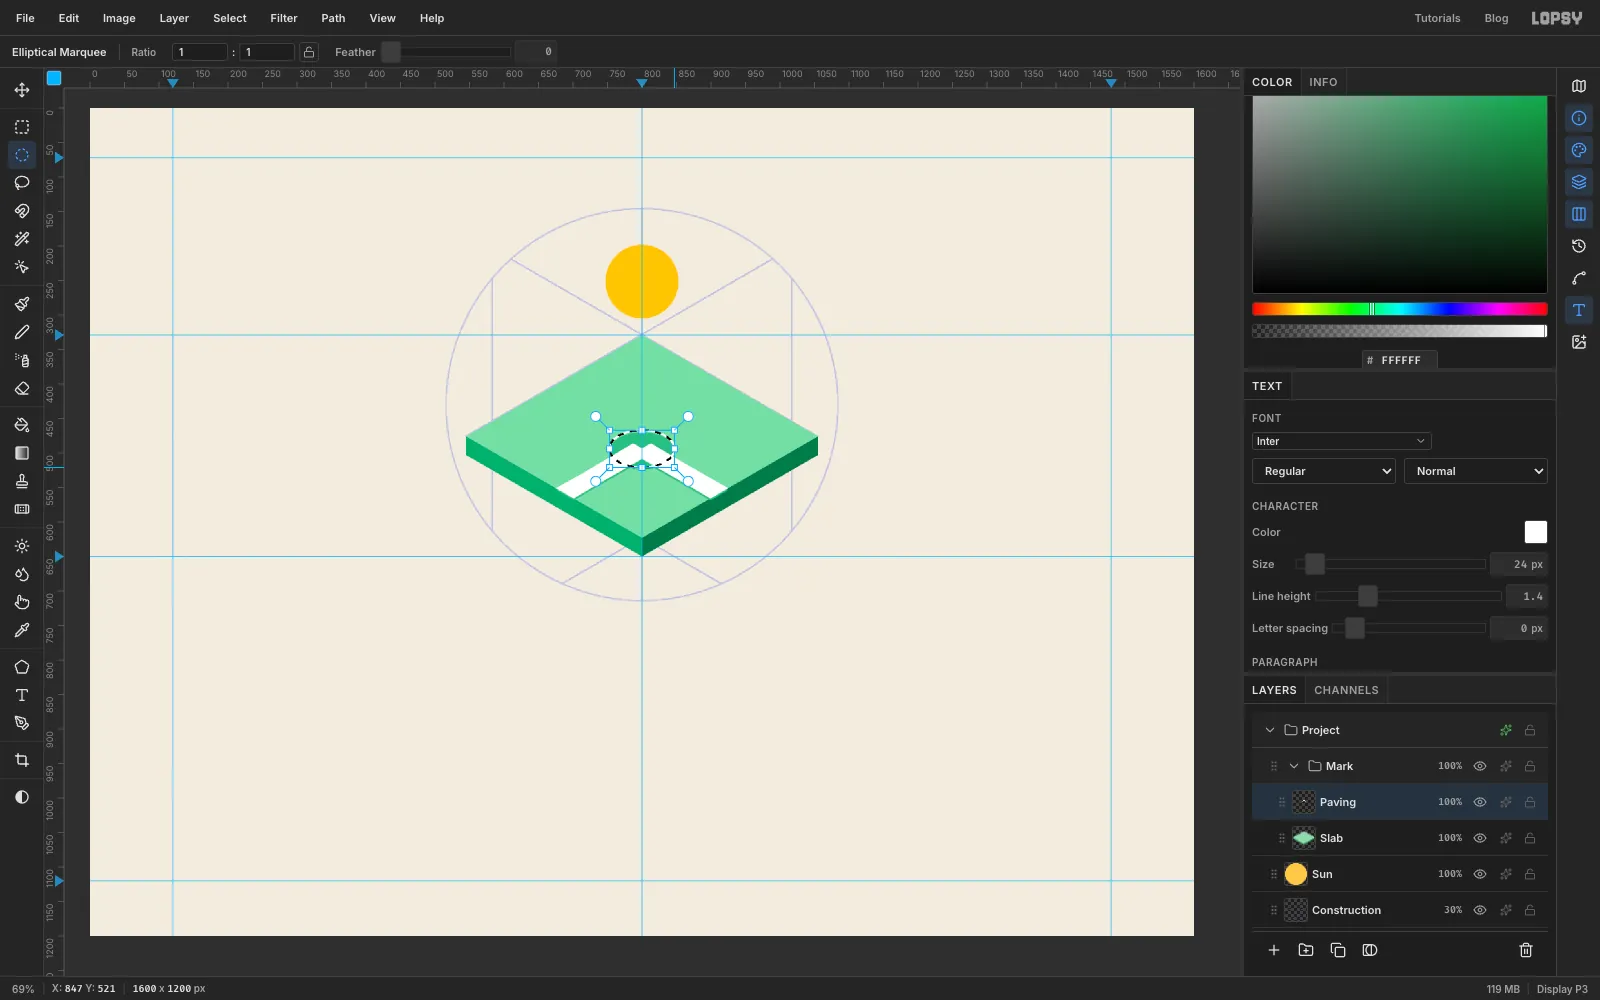
Lay the paving and fountain
Add a
Pavinglayer. Draw the curb first and the paving on top of it, so a sliver of curb shows under each path.- Curb. Set the colour to .
- Lasso the right path 3 px lower than its final spot: (813, 489), (925, 554), (899, 569), (787, 504). Fill it.
- Do the same for the left path at (787, 489), (813, 504), (701, 569), (675, 554).
- Draw an ellipse from (753, 470) to (847, 524) and fill it too.
- Paving. Switch to white .
- Lasso the paths again at their true positions: (813, 486), (925, 551), (899, 566), (787, 501), and (787, 486), (813, 501), (701, 566), (675, 551). Fill each.
- Draw the plaza ellipse from (753, 467) to (847, 521) and fill it.
- Fountain. Draw an ellipse from (775, 479) to (825, 509) and fill it with .
An isometric circle is an ellipse 1.73 times as wide as it is tall. That's why the plaza is 94 × 54.
-
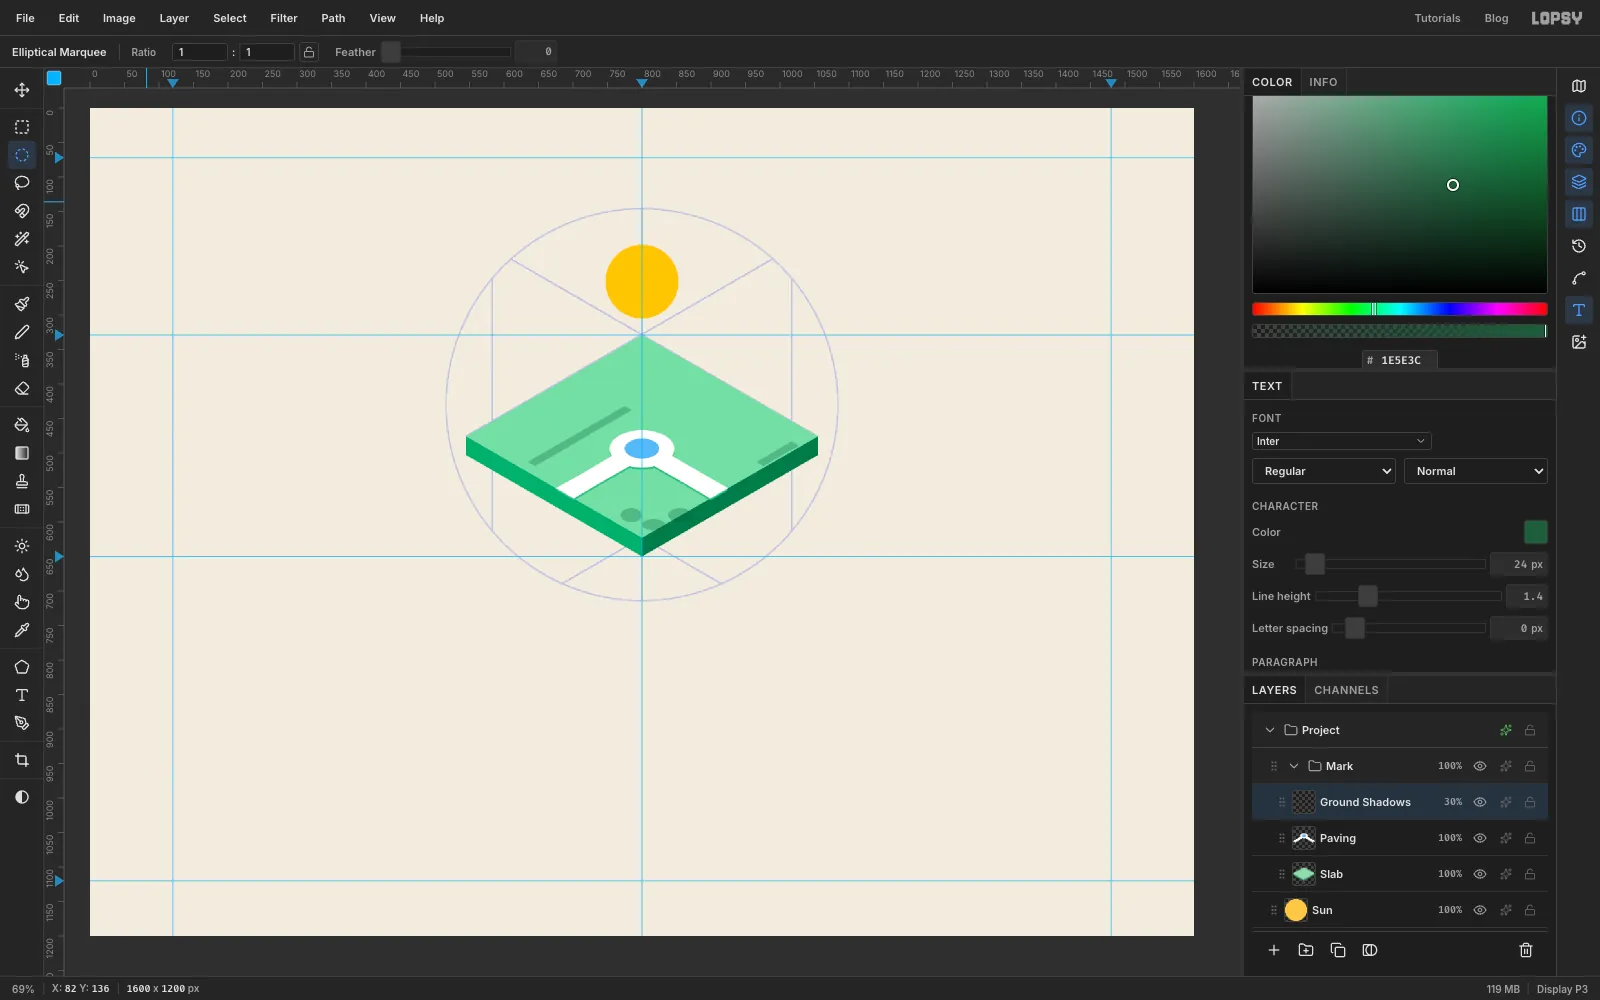
Add the ground shadows
Shadows go only on the shade side, away from the light.
- Add a layer named
Ground Shadowsand set the colour to . - Lasso and fill two thin strips:
- (774, 432), (785, 438), (645, 519), (634, 513), along the base of the left building's shaded facade
- (1017, 483), (1027, 490), (976, 519), (966, 513), at the end of the right building
- Fill three small ellipses for the tree shadows, offset to the right of where the trees will stand. Drag them from (769, 580) to (803, 600), (838, 580) to (872, 600), and (807, 596) to (834, 612).
- Set the layer to 30% opacity.
- Add a layer named
-
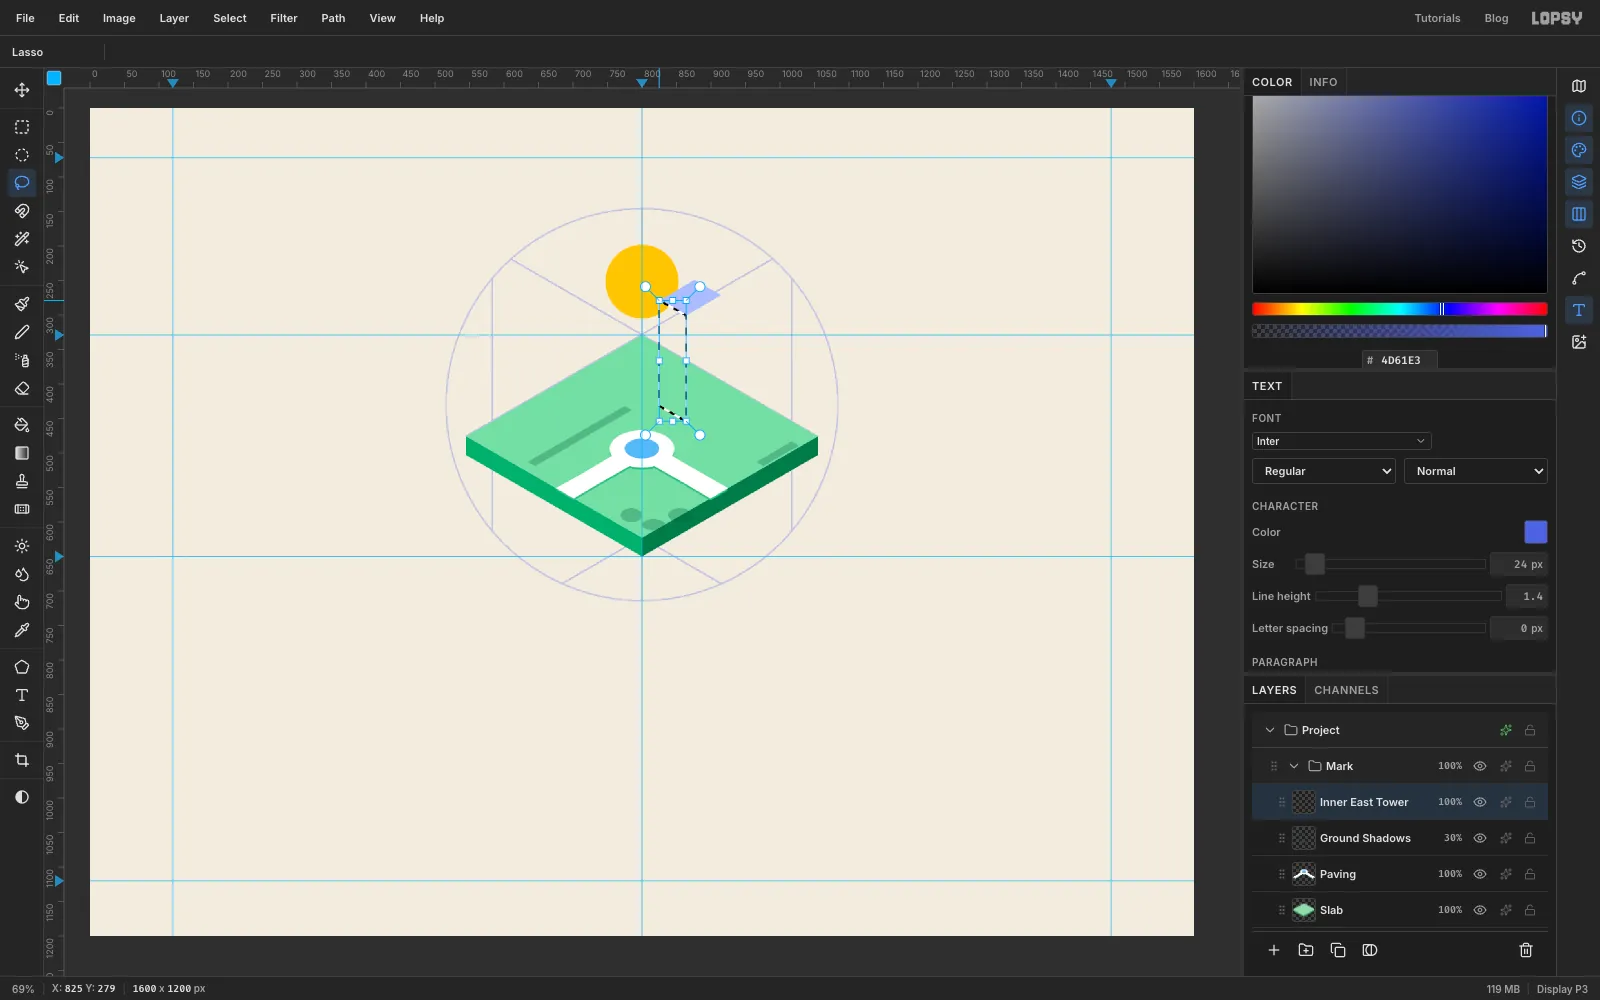
Start with a tower
Each block gets its own layer, filled face by face with three colours:
- Top: for towers, for podiums
- Left face:
- Right face:
Top-face corners are listed back, right, front, left. The side faces drop straight down from the top's edges: 153 px for towers and 47 px for podiums.
Add a layer named
Inner East Tower.- Lasso the top at (876, 249), (915, 271), (864, 301), (826, 279) and fill it.
- Lasso the left face from the left corner (826, 279) to the front corner (864, 301), then down 153 px to (864, 454) and (826, 432). Fill it.
- Lasso the right face from (864, 301) to (915, 271), then down to (915, 424) and (864, 454). Fill it.
-
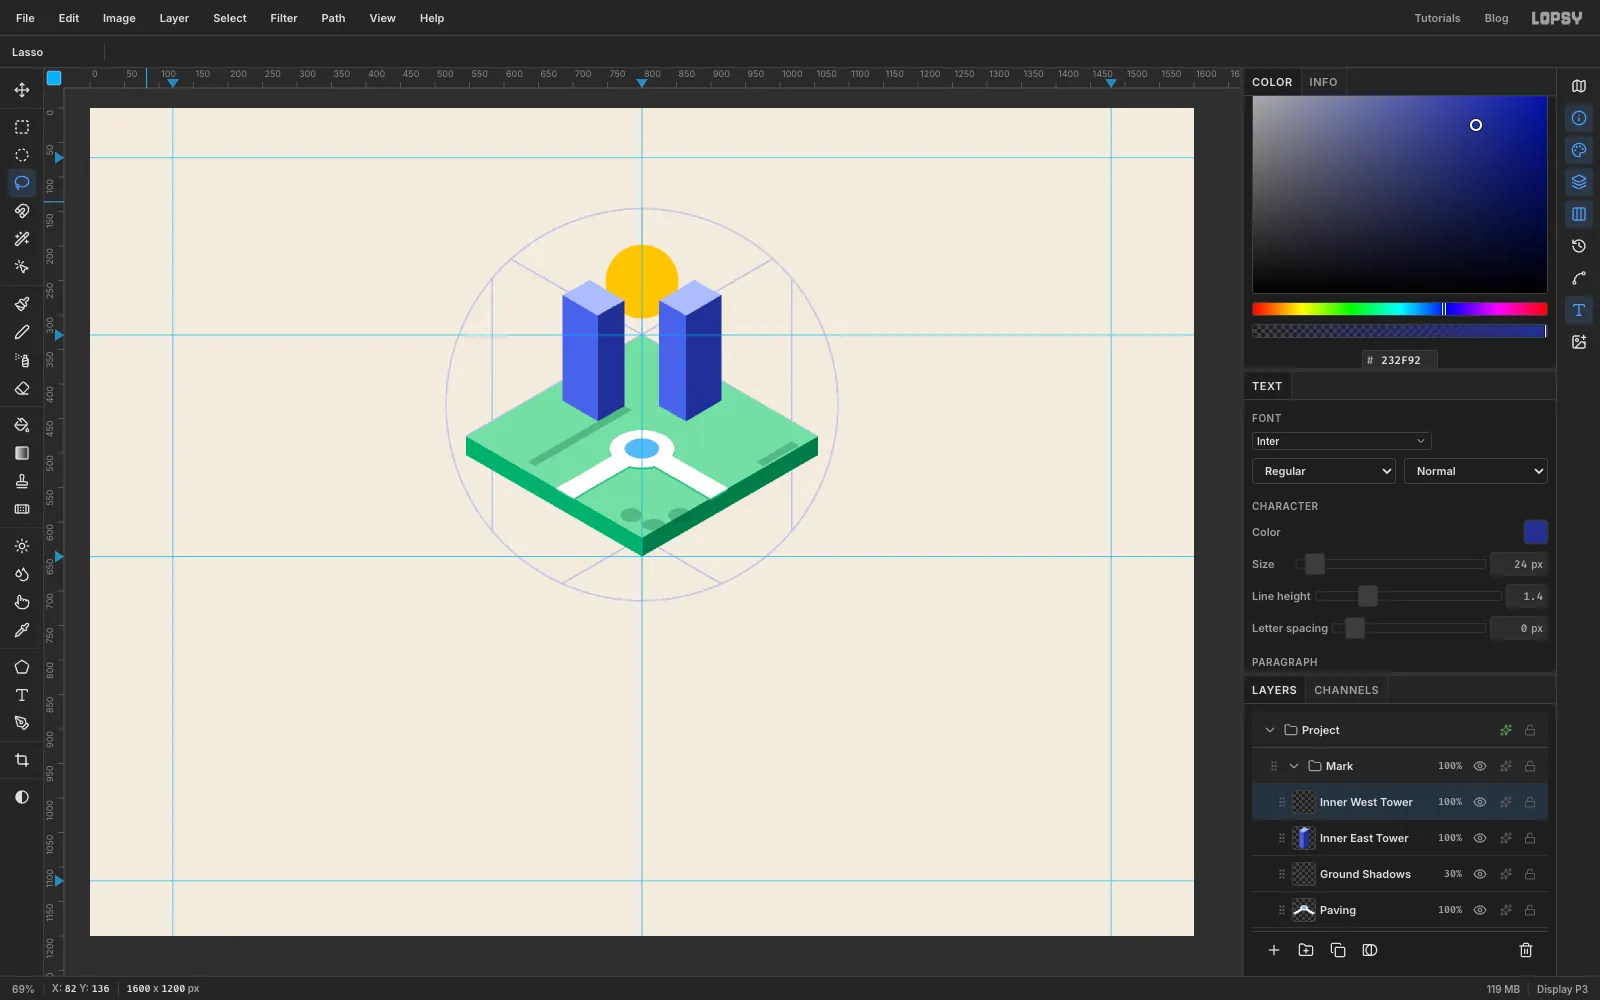
Add the inner towers
Add a layer named
Inner West Towerand build it the same way. Its top is (724, 249), (774, 279), (736, 301), (685, 271).The sun now peeks through the gap between the two towers. That gap is the heart of the logo.
-
Add the podiums
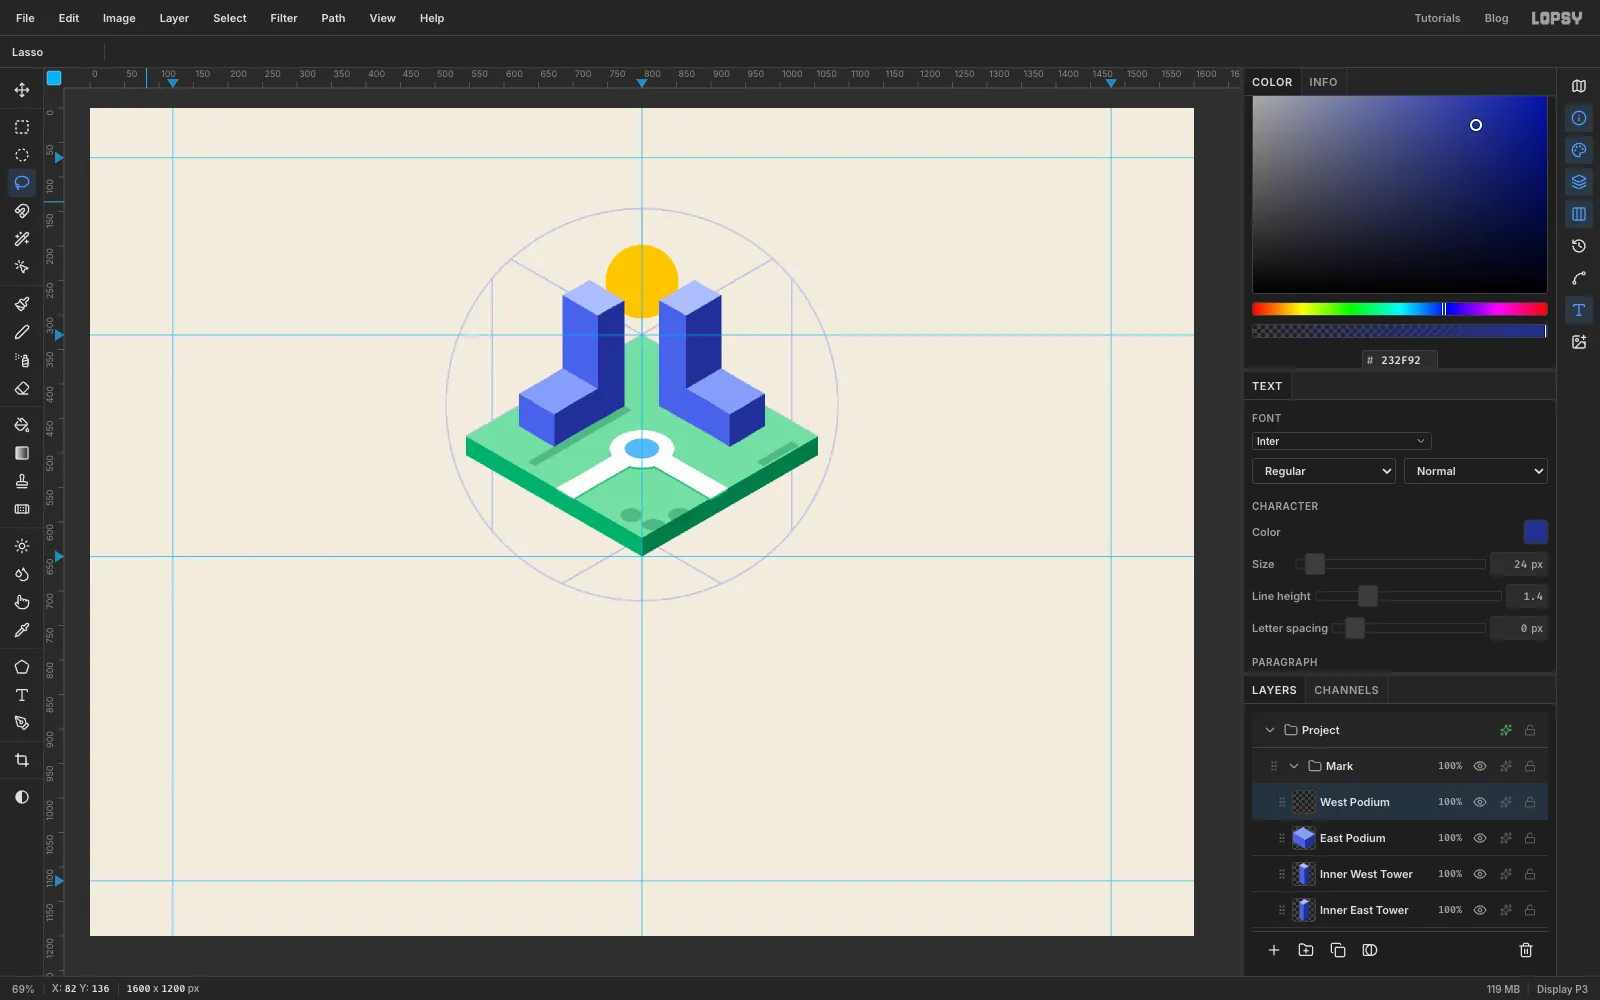
Podiums are 47 px high, and their roofs use the slightly darker so they don't merge with the tower tops.
East Podiumtop: (915, 377), (978, 414), (928, 444), (864, 407).West Podiumtop: (685, 377), (736, 407), (672, 444), (622, 414).
Build the podiums after the inner towers. Each podium is nearer to you, so it should cover the bottom of its tower.
-
Close the two U's
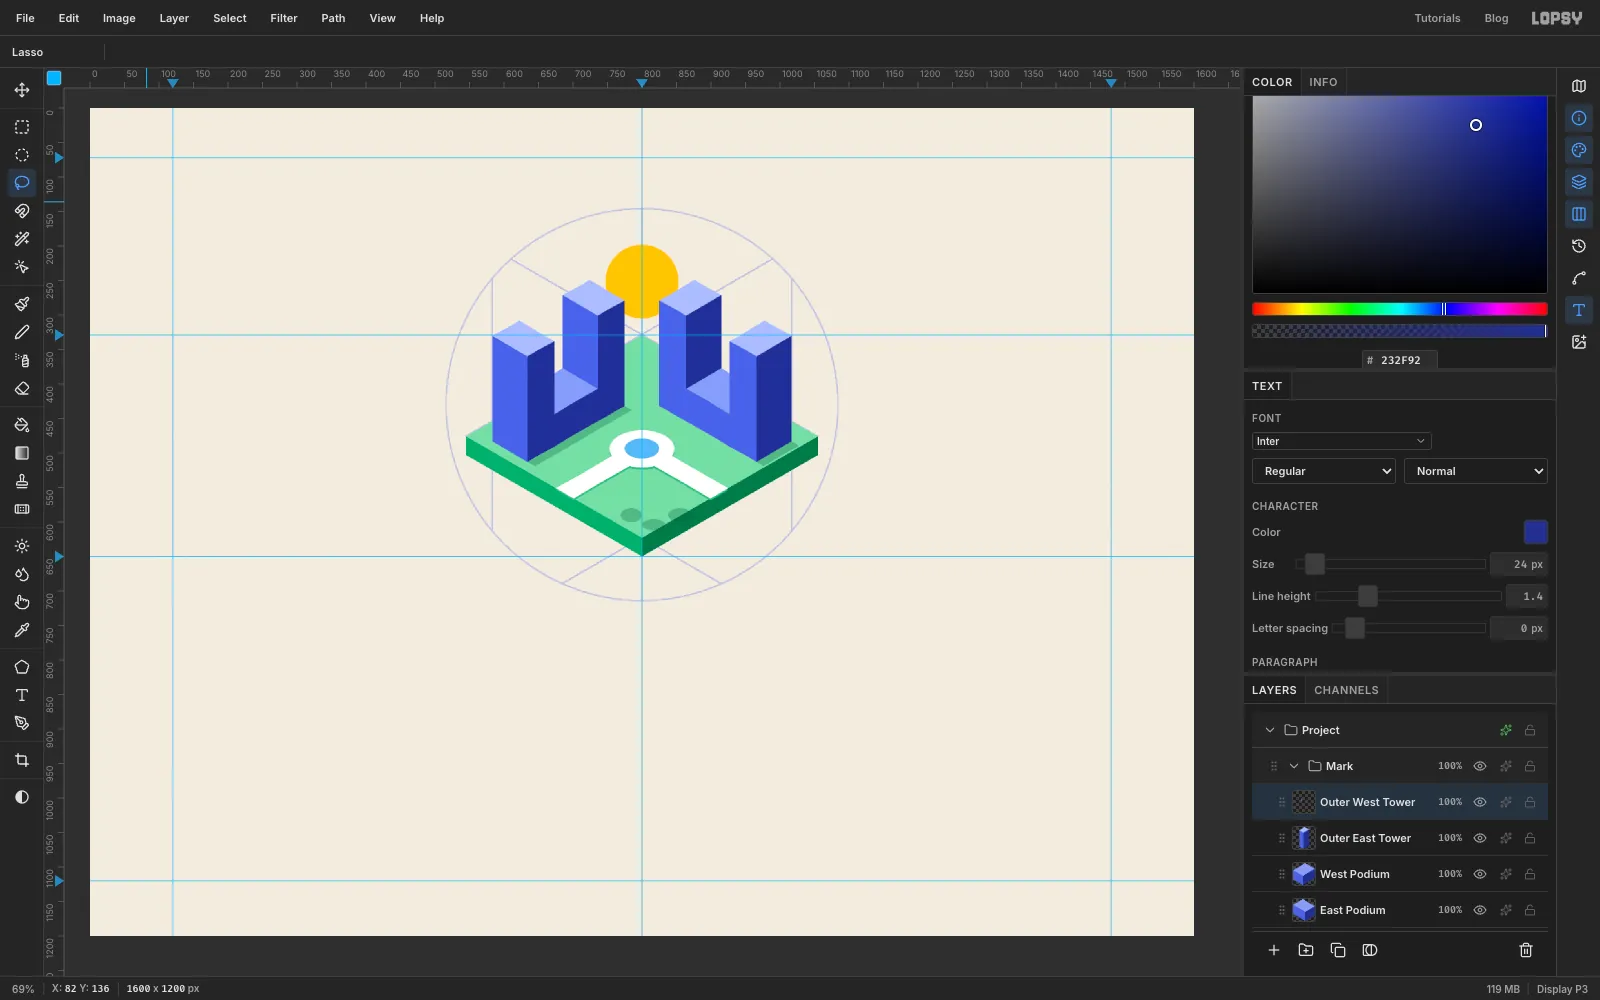
Add the outer towers last, because they're the nearest:
Outer East Towertop: (978, 308), (1017, 330), (966, 360), (928, 338).Outer West Towertop: (622, 308), (672, 338), (634, 360), (583, 330).
Now each wing reads as a letter U: two equal towers with a low base and an open counter. The left U faces you in shadow; the right one catches the light.
-
Draw flat window bands
Windows are much easier to draw flat and then wrap onto a face.
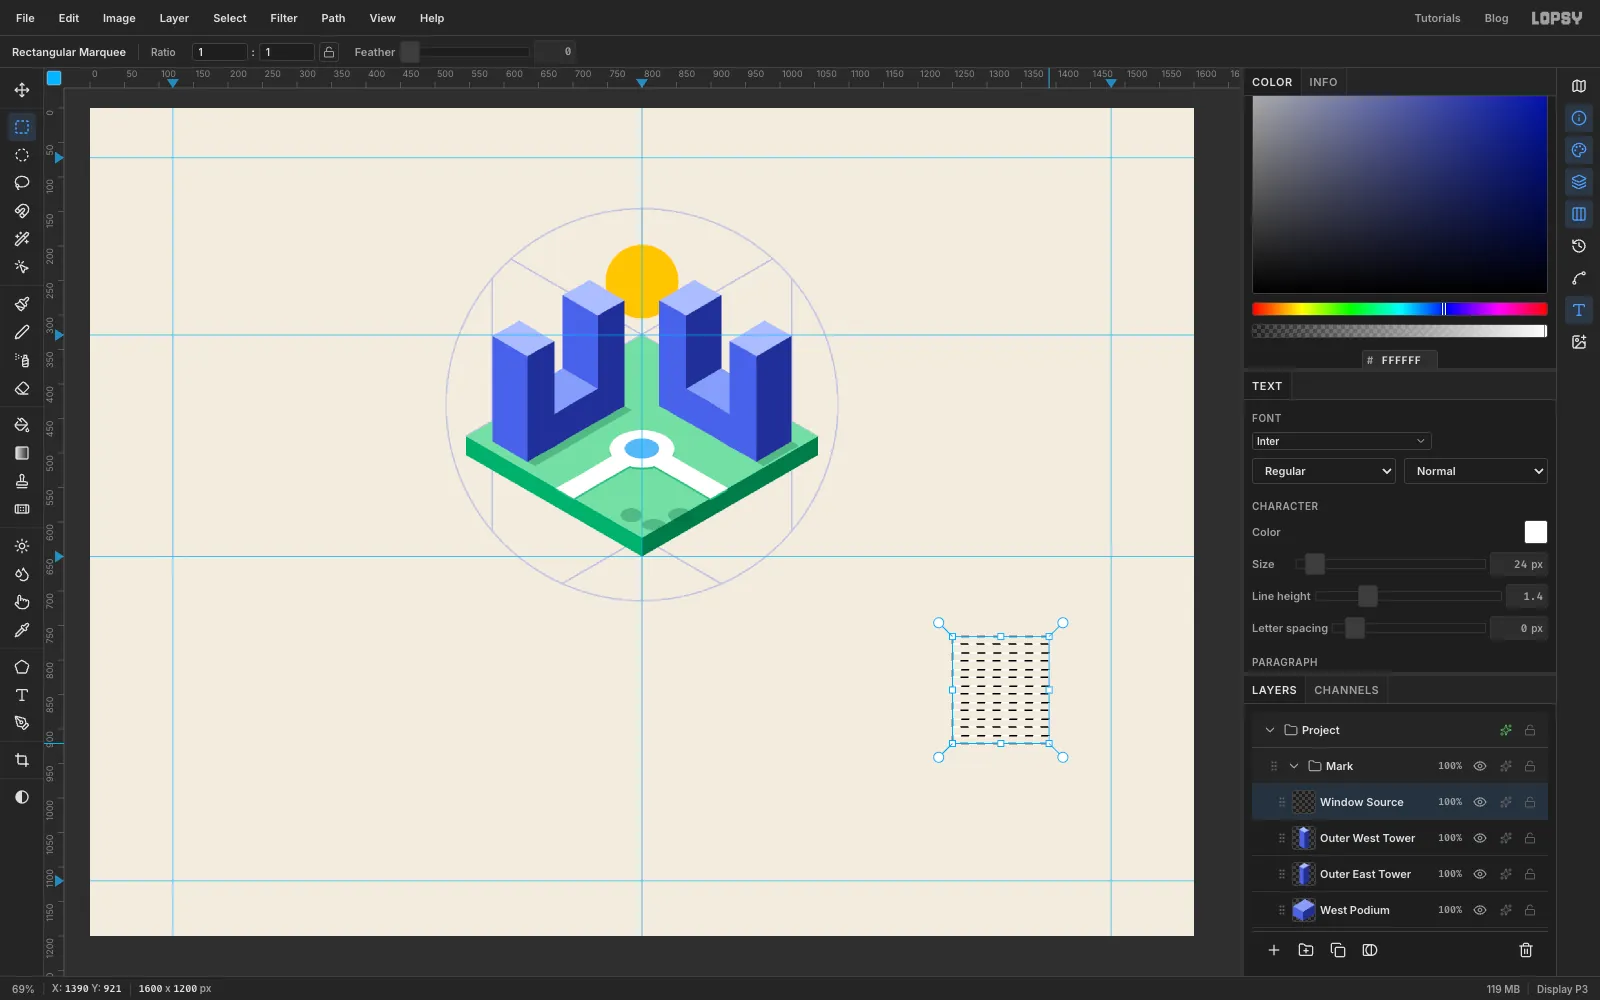
- Add a layer named
Window Source. - With the Rectangular Marquee, drag a bar 140 px wide and 11 px tall in an empty spot, starting at (1250, 766).
- Hold Shift and drag six more bars below it, one every 24 px.
- Fill them all at once with white.
- Add a layer named
-
Wrap the windows with Distort
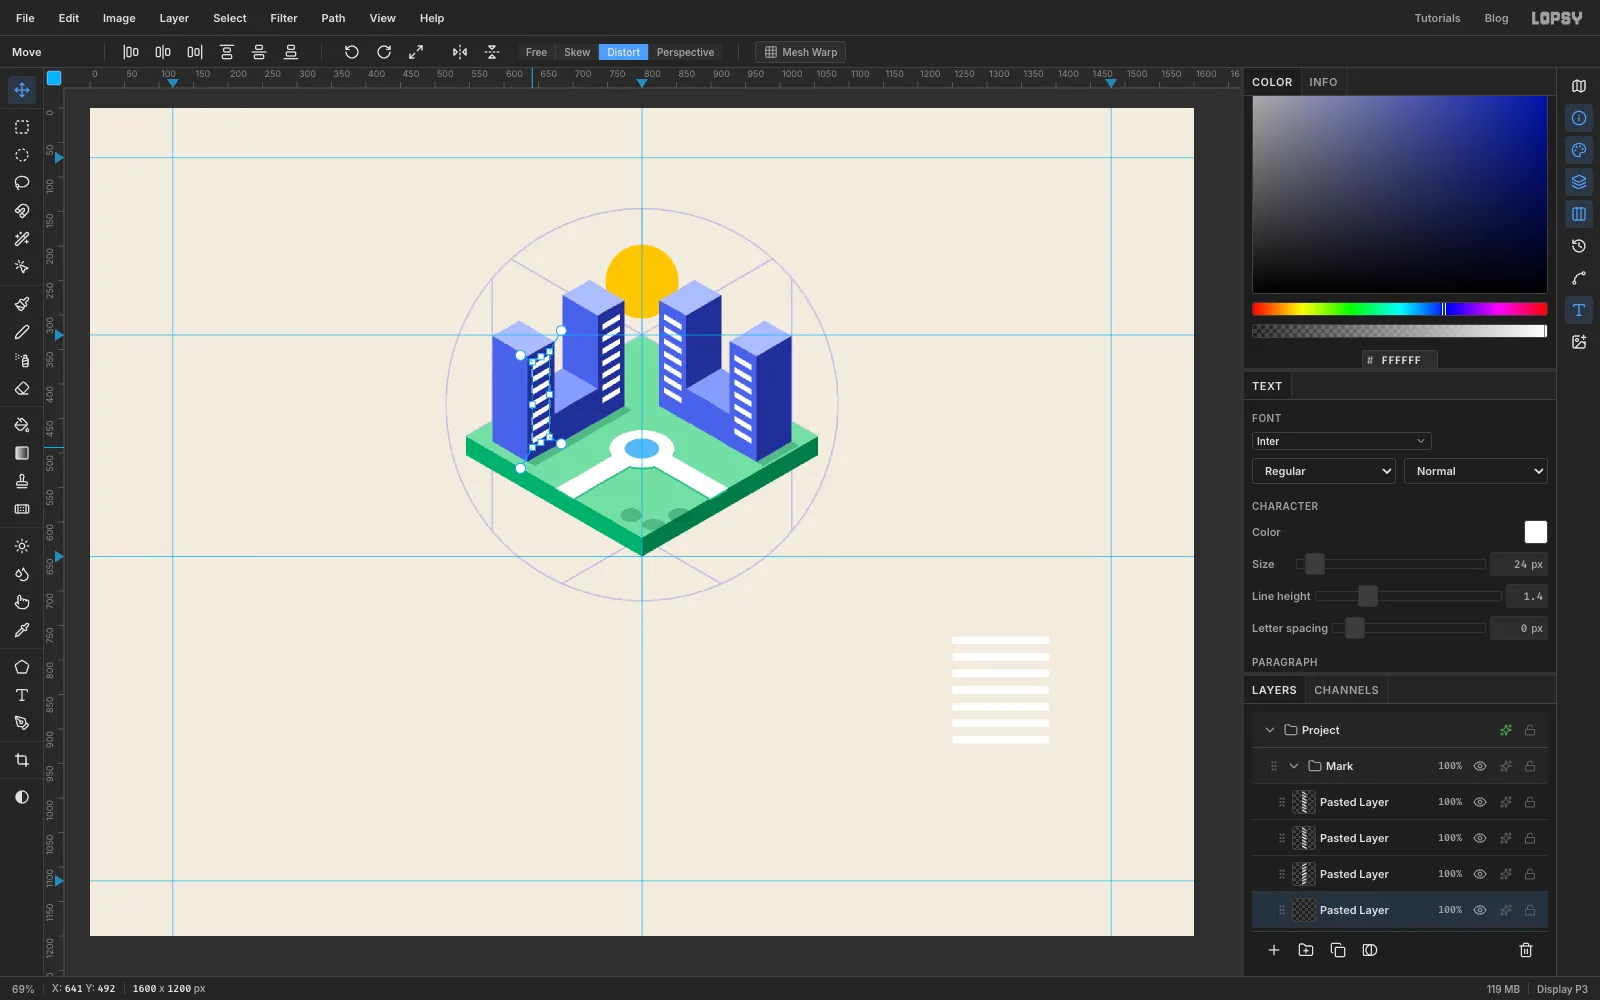
For each face:
- On
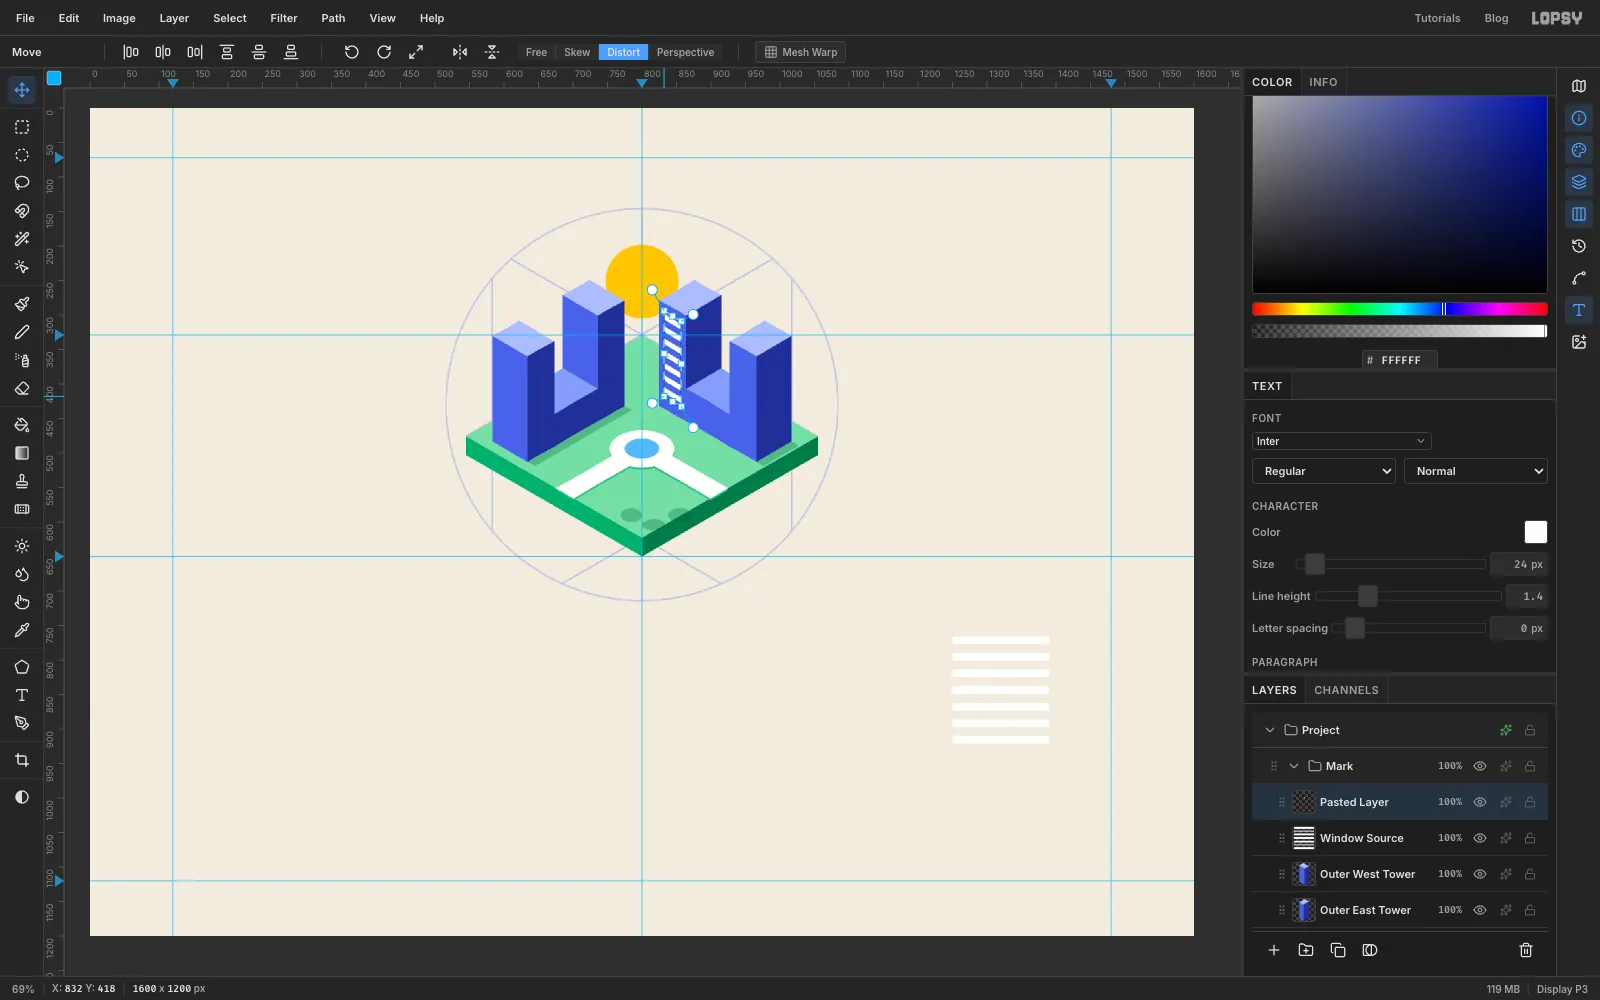
Window Source, marquee the bars you need, from (1248, 760) down to (1392, 928) for all seven. Press Cmd+C then Cmd+V. The paste lands in place on a new layer. - Re-draw the marquee around the pasted bars, from (1250, 760) to (1390, 928) (or to y
856when you copied four bars), and pick the Move tool. - Click Distort in the options bar.
- Drag each corner handle onto the matching corner of the face's window area.
- Press Cmd+D to commit.
For the inner east tower's lit face, the corners are:
- top-left (832, 294)
- top-right (857, 309)
- bottom-right (857, 433)
- bottom-left (832, 418)
Distort maps the rectangle with a true perspective transform. On an isometric face that keeps the bands evenly spaced and parallel to the roofline.
- On
-
Window every tower face
Repeat for the other faces, using seven bars for full-height faces. The window areas (top-left, top-right, bottom-right, bottom-left) are:
- Outer east tower, lit face: (934, 353), (959, 368), (959, 492), (934, 477).
- Inner west tower, dark face: (743, 309), (768, 294), (768, 418), (743, 433).
- Outer west tower, dark face: (641, 368), (666, 353), (666, 477), (641, 492).
- Outer east tower, end face: (973, 367), (1009, 346), (1009, 470), (973, 491).
- Outer west tower, end face: (591, 346), (627, 367), (627, 491), (591, 470).
The two inner towers also show a face above their podiums. Only four floors are visible there, so copy just the top four bars (down to y
856). Map them to:- Inner east tower: (871, 308), (907, 288), (907, 358), (871, 379).
- Inner west tower: (693, 288), (729, 308), (729, 379), (693, 358).
-
Blend the windows into the faces
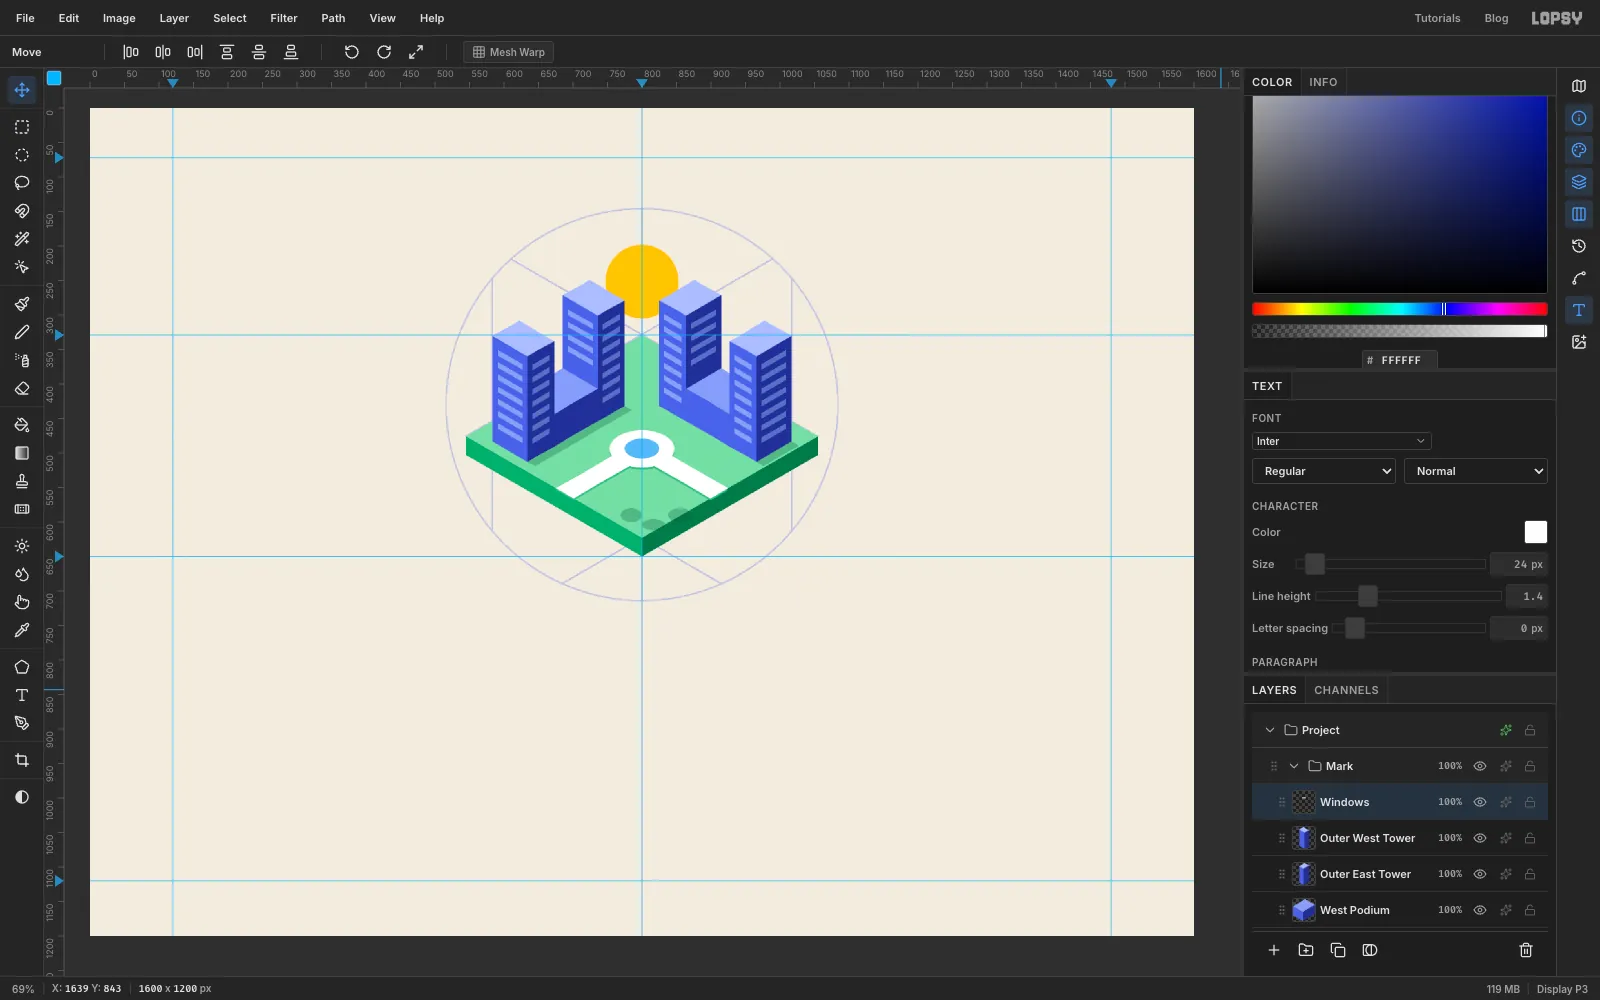
- Select the top pasted layer and choose Layer → Merge Down seven times, stopping before it merges into
Window Source. Name the resultWindows. - Delete
Window Source. - Open the layer's effects drawer and set Blend to Soft Light.
Soft Light lightens each face by an amount that suits its tone. The same white bars read as pale glass on the lit faces and as subtle reflections on the dark ones.
- Select the top pasted layer and choose Layer → Merge Down seven times, stopping before it merges into
-
Plant a small grove
Add a layer named
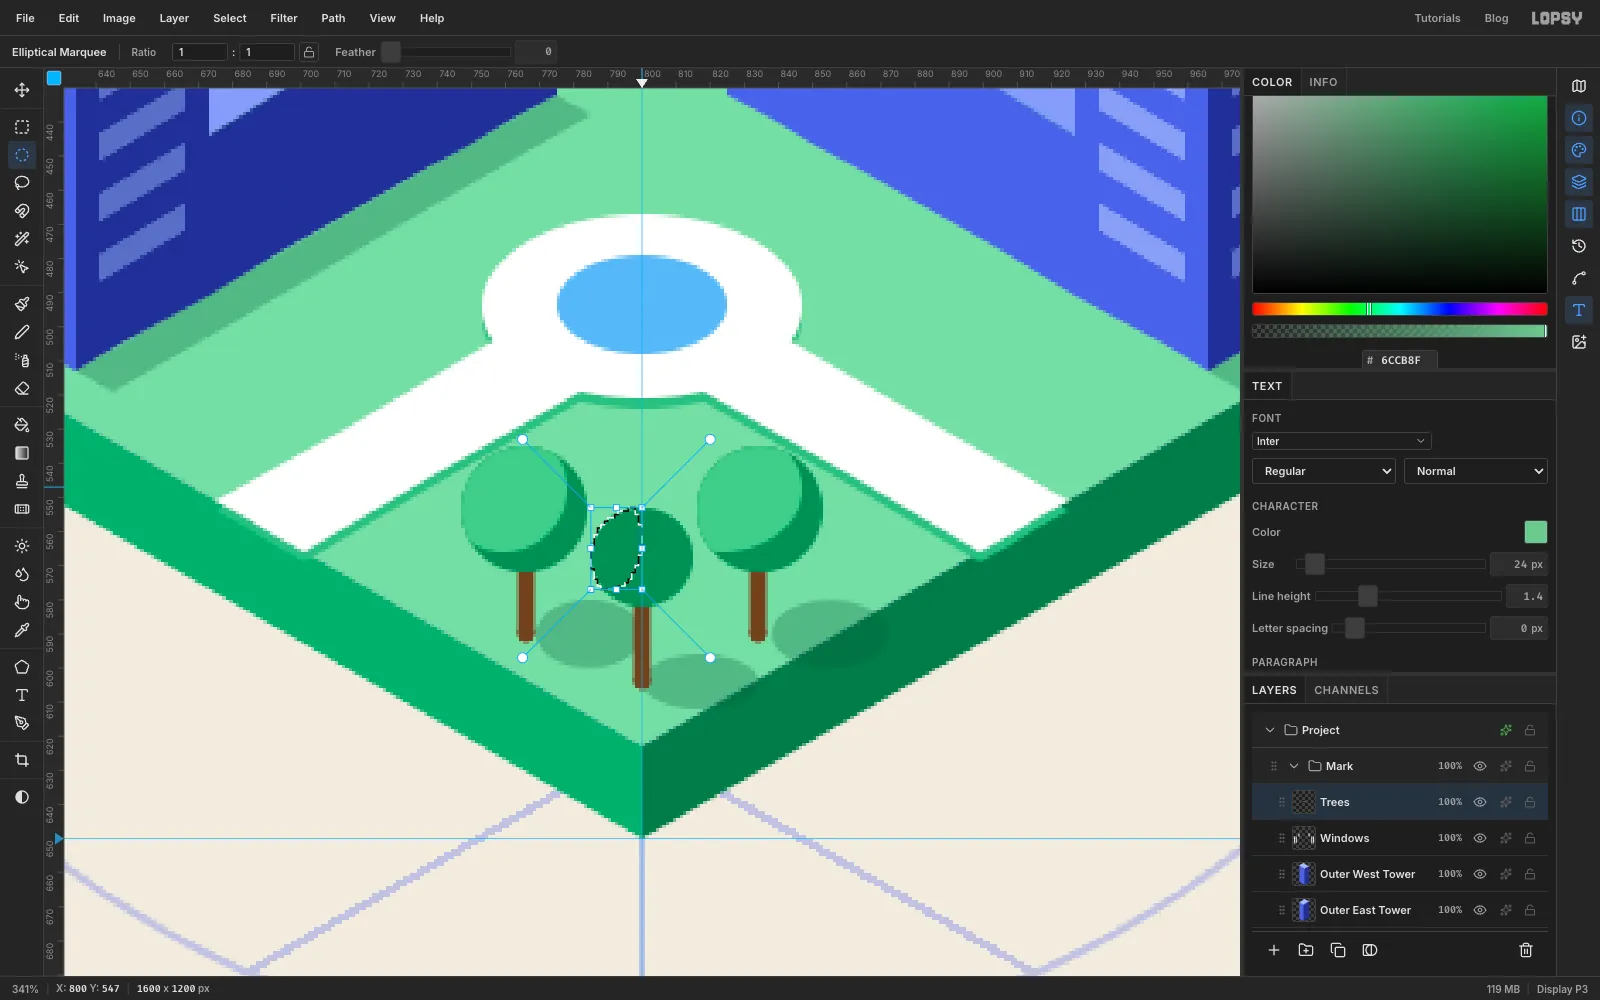
Trees. Pick the Brush at Size 6, Hardness 100. Then finish each tree in turn, left, right and front:- Trunk. In , click the base and Shift-click 26 px straight up: (766, 590) to (766, 564) for the left tree, (834, 590) to (834, 564) for the right one, and (800, 604) to (800, 578) for the front one.
- Canopy. Drag an elliptical marquee for the crown and fill it with : (748, 535) to (784, 571) on the left, (816, 535) to (852, 571) on the right, and a smaller (785, 552) to (815, 582) in front.
- Highlight. Keep the crown selected, hold Shift+Alt and drag the same-size circle again, 6 px up and to the left (5 px for the small tree). That keeps only the overlap. Fill it with .
The crescent left in the dark green is the shade side, so the light matches the buildings.
-
Set the wordmark
- Select
Sun, click New Group and name itWordmark. - Add an empty layer called
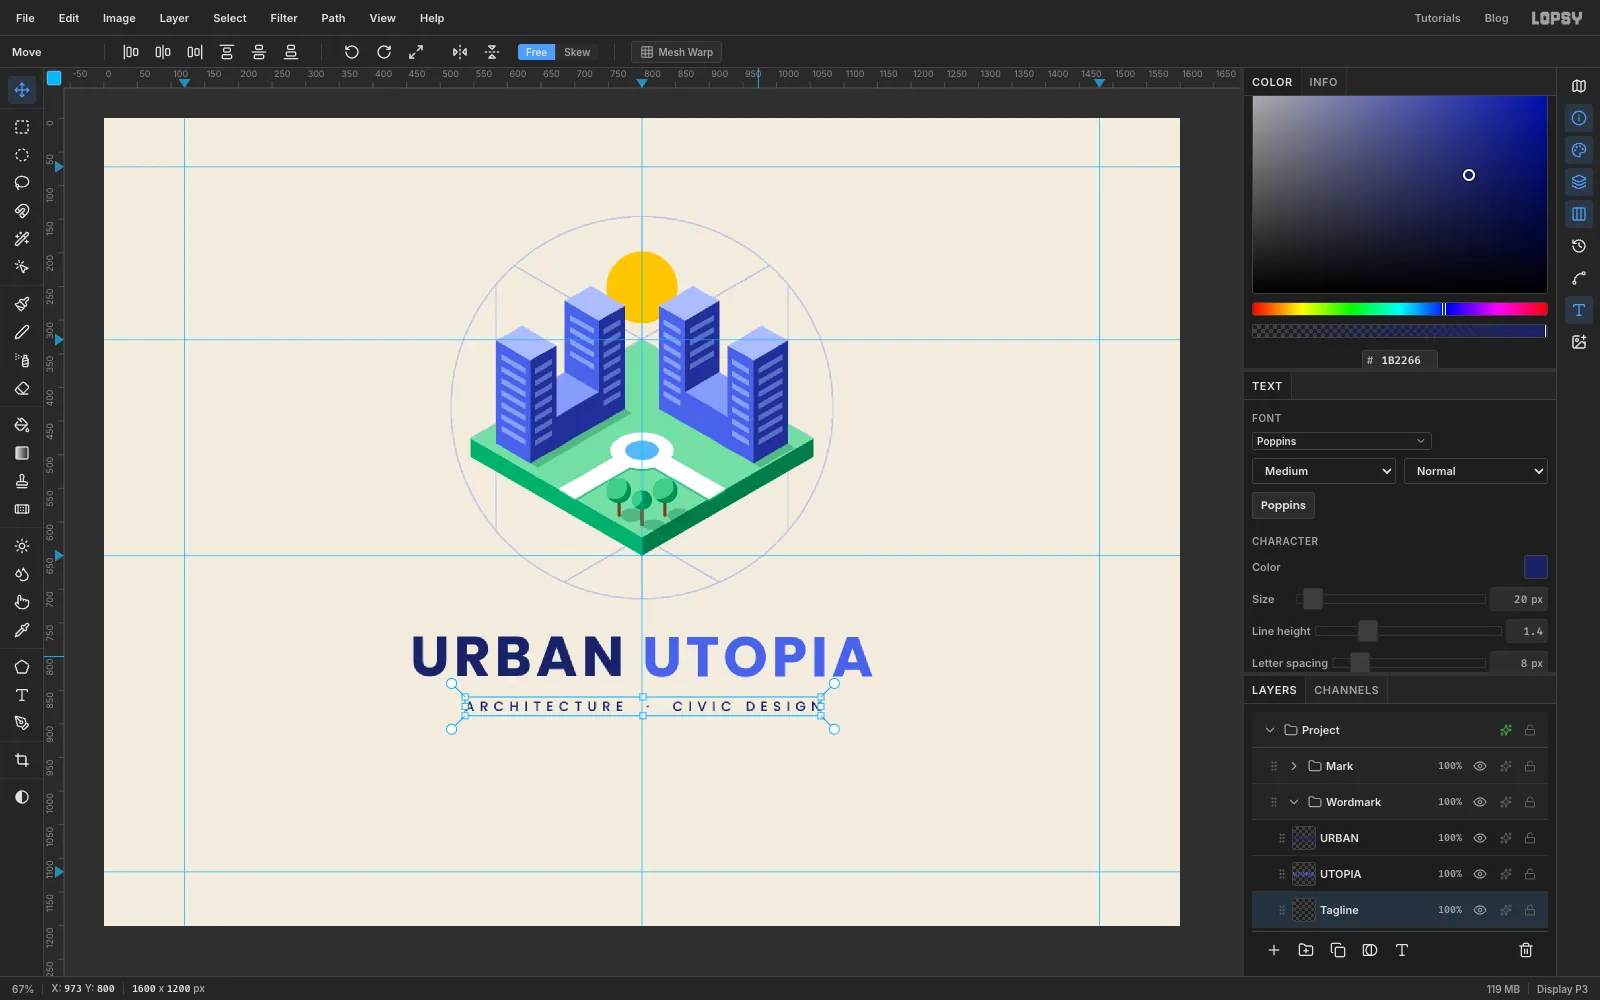
Type Anchor. Select it before you create each piece of text. That way a font change can't restyle the type you already set. - Pick the Text tool and choose Poppins, Bold, size
84, colour . Click in empty space, typeURBANand press Tab to commit. - Open the Text panel and set Letter spacing to
6. - Make
UTOPIAthe same way in . - Make the tagline
ARCHITECTURE · CIVIC DESIGNin Poppins Medium, size20, letter spacing8. There are two spaces each side of the dot. - Move the words with the Move tool:
- URBAN's first letter starts at x
459and UTOPIA's at x804, both with their cap tops on y770. That leaves a 36 px word gap and centres the pair on the page. - The tagline's first letter starts at x
537with its cap tops on y866, which centres it under the wordmark.
- Select
-
Add the sheet labels
Make a
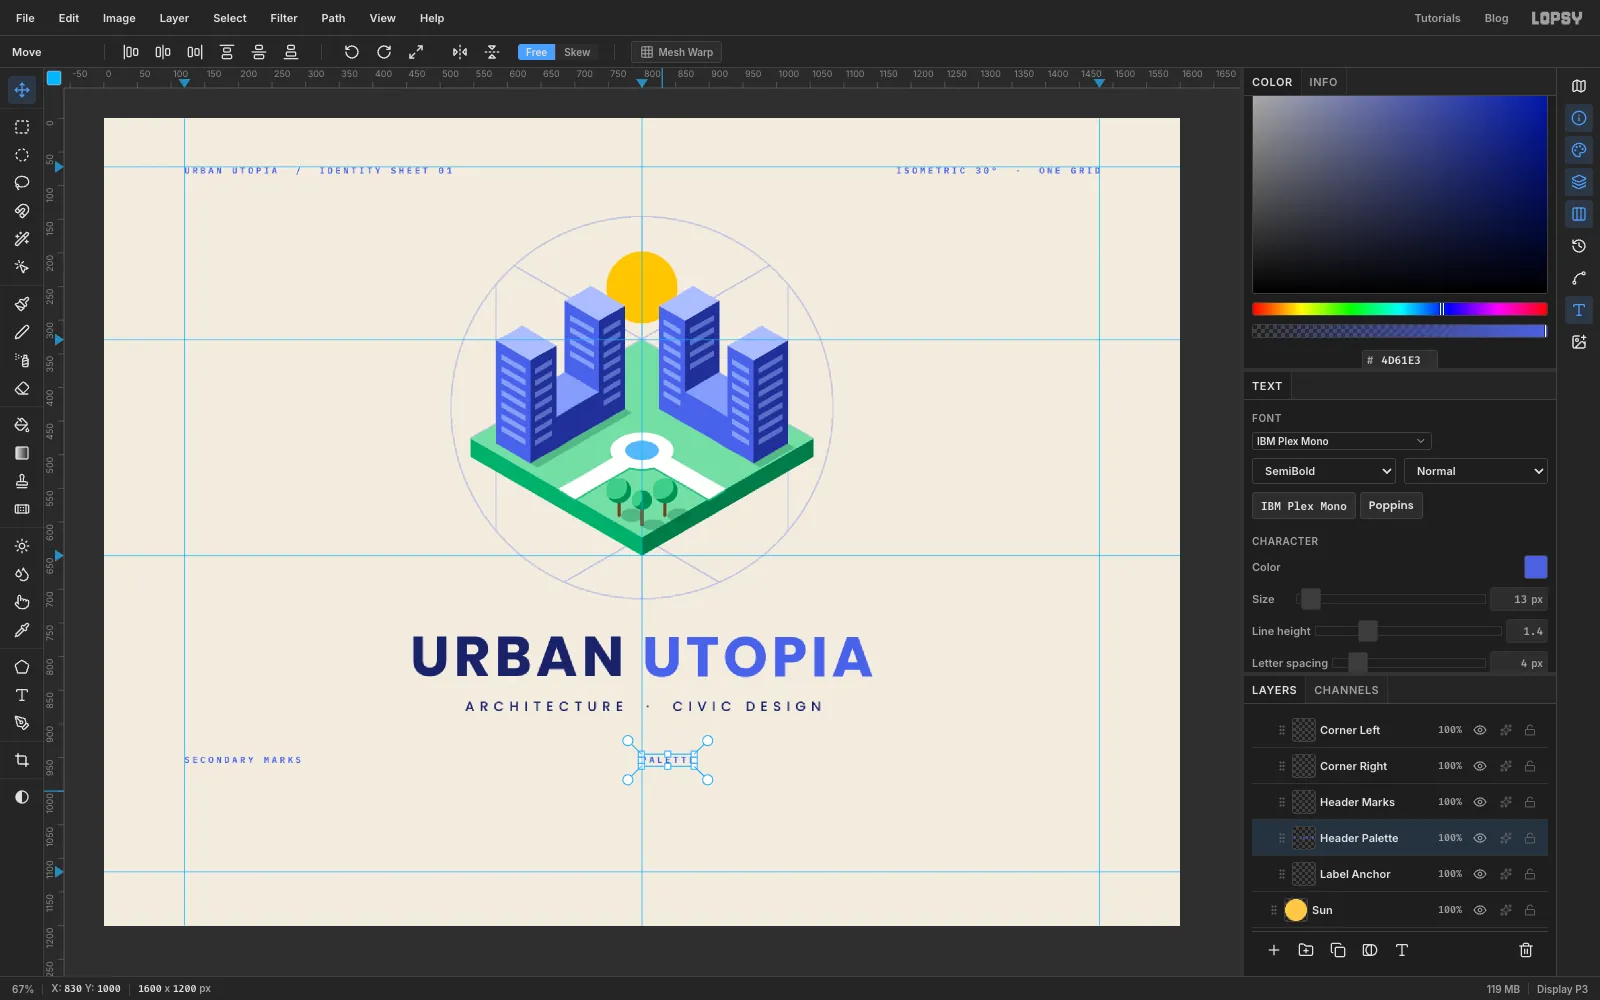
Labelsgroup the same way, with its own anchor layer. Set four labels in IBM Plex Mono SemiBold, size13, letter spacing4, colour :URBAN UTOPIA / IDENTITY SHEET 01, top left at (120, 72).ISOMETRIC 30° · ONE GRID, top right, its last letter on the 1480 guide.SECONDARY MARKSat (120, 948).PALETTEat (800, 948).
-
Make the tiles
- Select
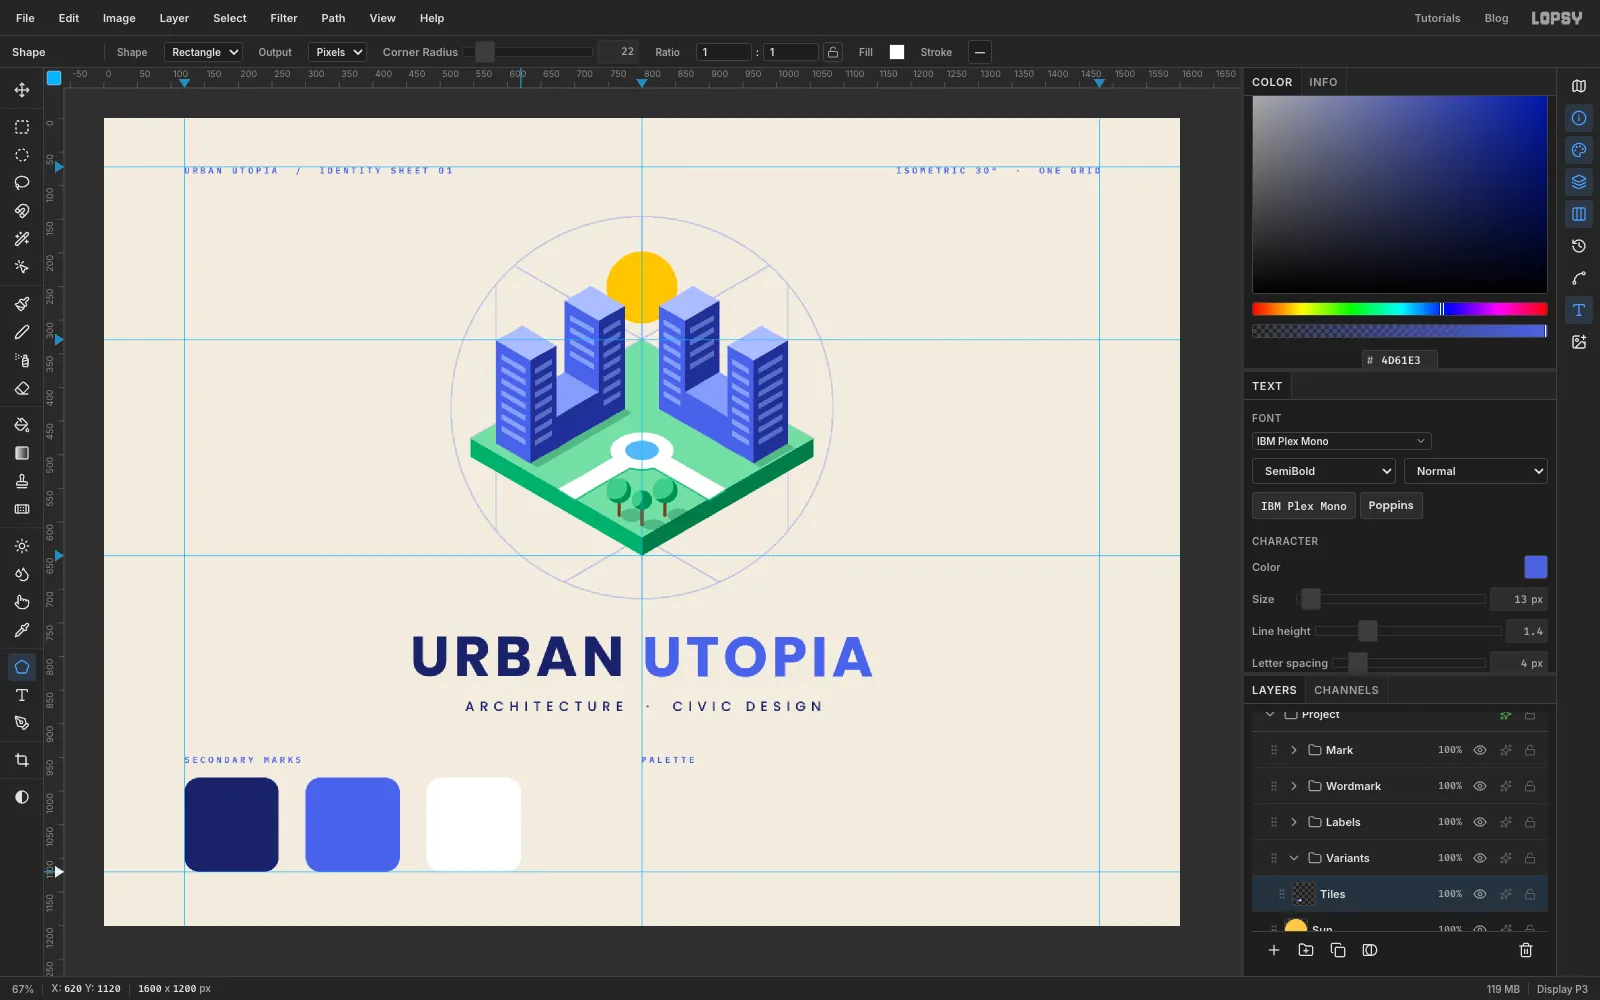
Sunagain and make aVariantsgroup with aTileslayer. - Pick the Shape tool and set Shape to Rectangle, Output to Pixels and Corner Radius to
22. - Shapes grow from where you press. Set the options bar's Fill swatch to and drag from (190, 1050) to (260, 1120) for a 140 px tile.
- Repeat from (370, 1050) with the Fill set to , and from (550, 1050) in white.
- Add an empty layer called
Tile SunsaboveTiles. You'll use it shortly.
- Select
-
Copy a simplified mark
Small versions of a logo need less detail.
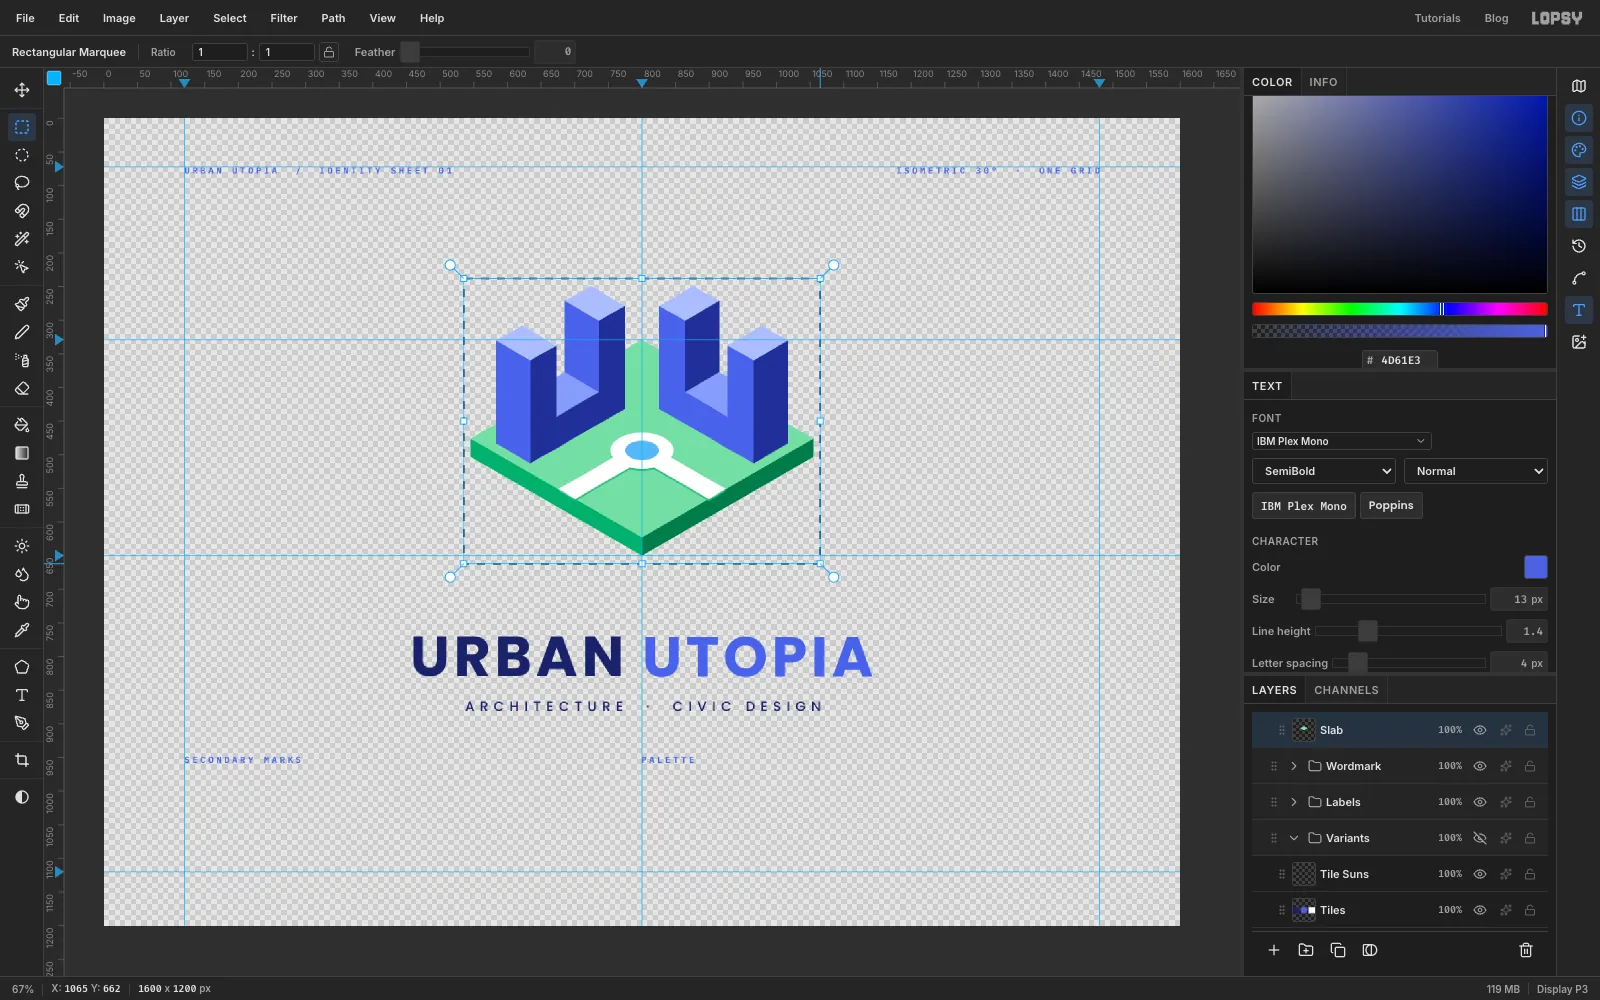
- Hide
Background,Construction,Sun,Windows,Trees,Ground Shadowsand theVariantsgroup. - Marquee around the buildings and slab, from (535, 238) to (1065, 662), and choose Edit → Copy Merged.
- Show everything again.
- Select
Tile Sunsand paste. Name the new layerMark Full Colour.
- Hide
-
Scale it into the tile
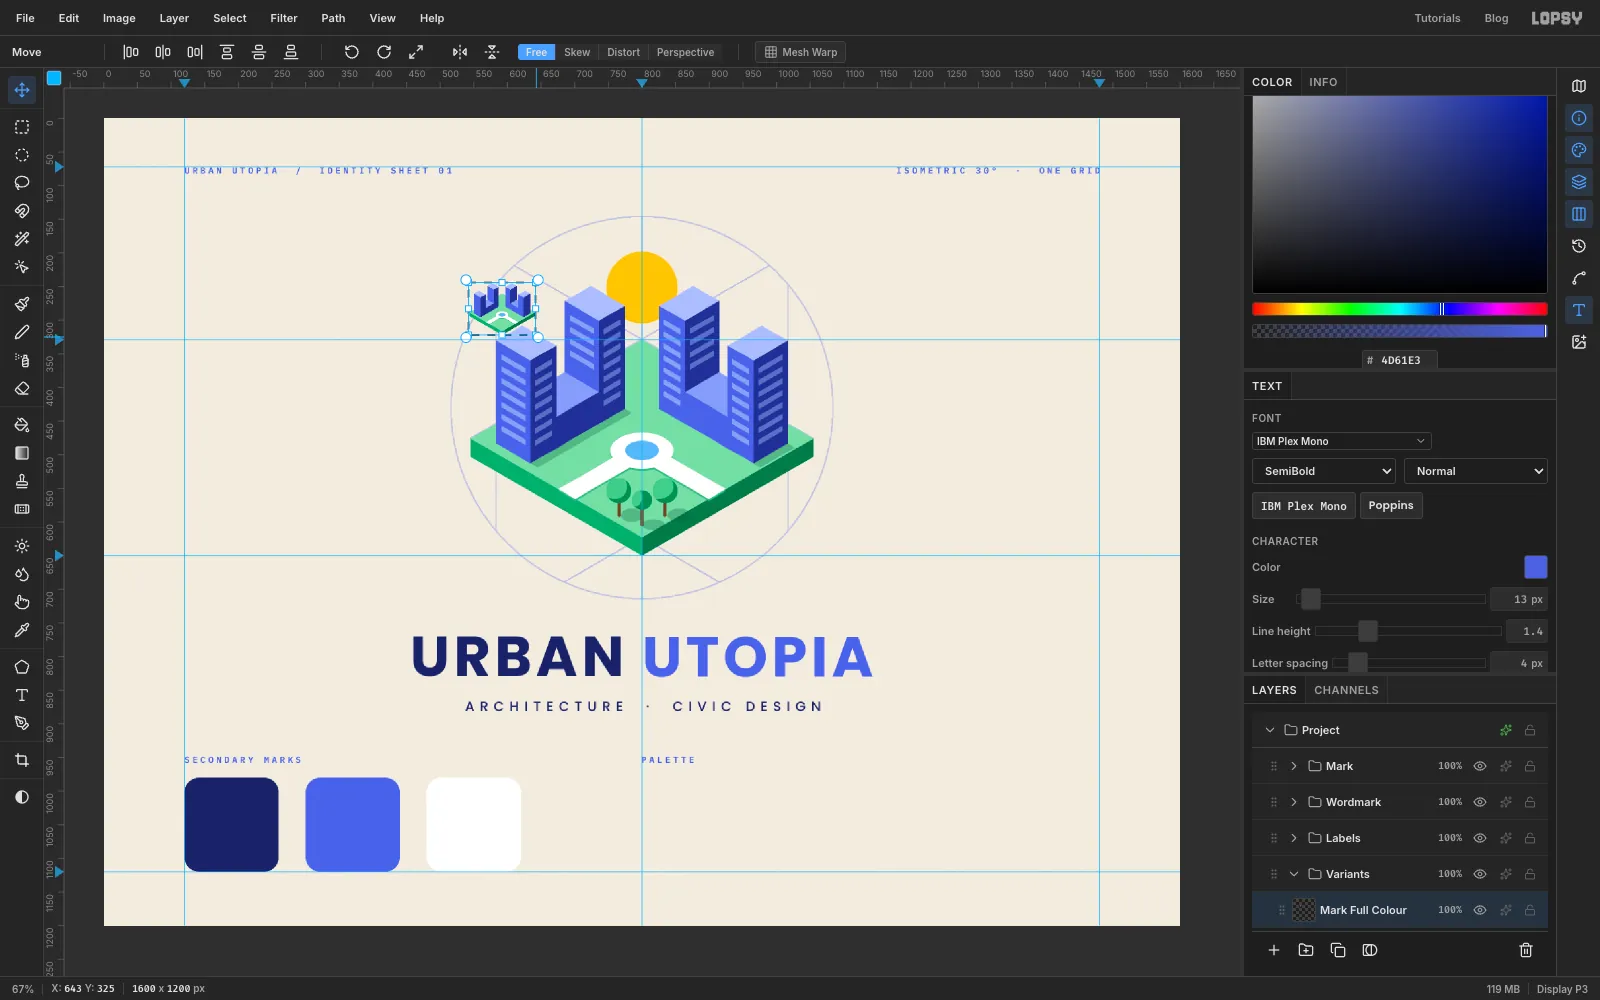
- With the Move tool, hold Cmd (to keep the proportions) and drag the bottom-right corner handle in until the mark is about 98 px wide, roughly 19%. Press Cmd+D.
- Move it into the first tile, with its top-left at (141, 1016).
- Select it with a marquee, copy, paste, and move the copy into the second tile at (321, 1016). Name it
Mark Reversed. - Repeat for
Mark Monoat (501, 1016).
-
Reverse the mark with a Gradient Map
- Select
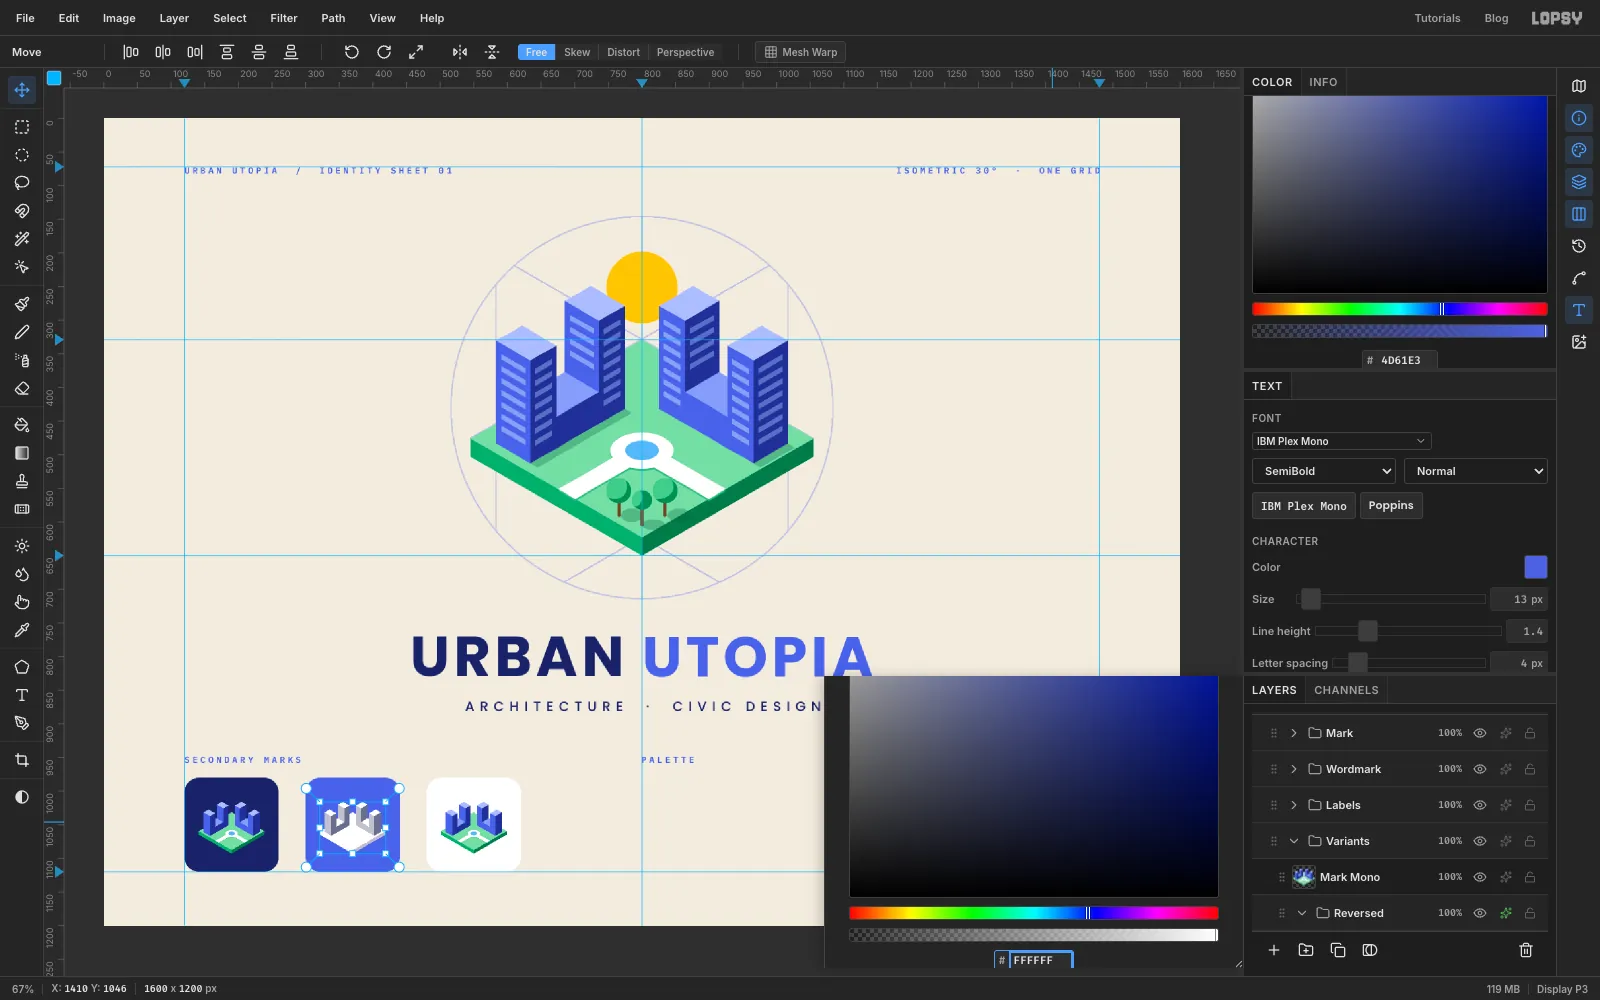
Mark Reversedand choose Layer → Group Layers. Name the groupReversed. - With the group selected, open its effects drawer and choose Add Adjustment → Gradient Map.
- Set stop 1 to and stop 2 to white with the hex field.
- Click the gradient bar at about 55% to add a third stop, and make it white as well.
Everything above about 55% brightness turns white, so the mark reads as a white building on the blue tile.
- Select
-
Make a tonal mono version
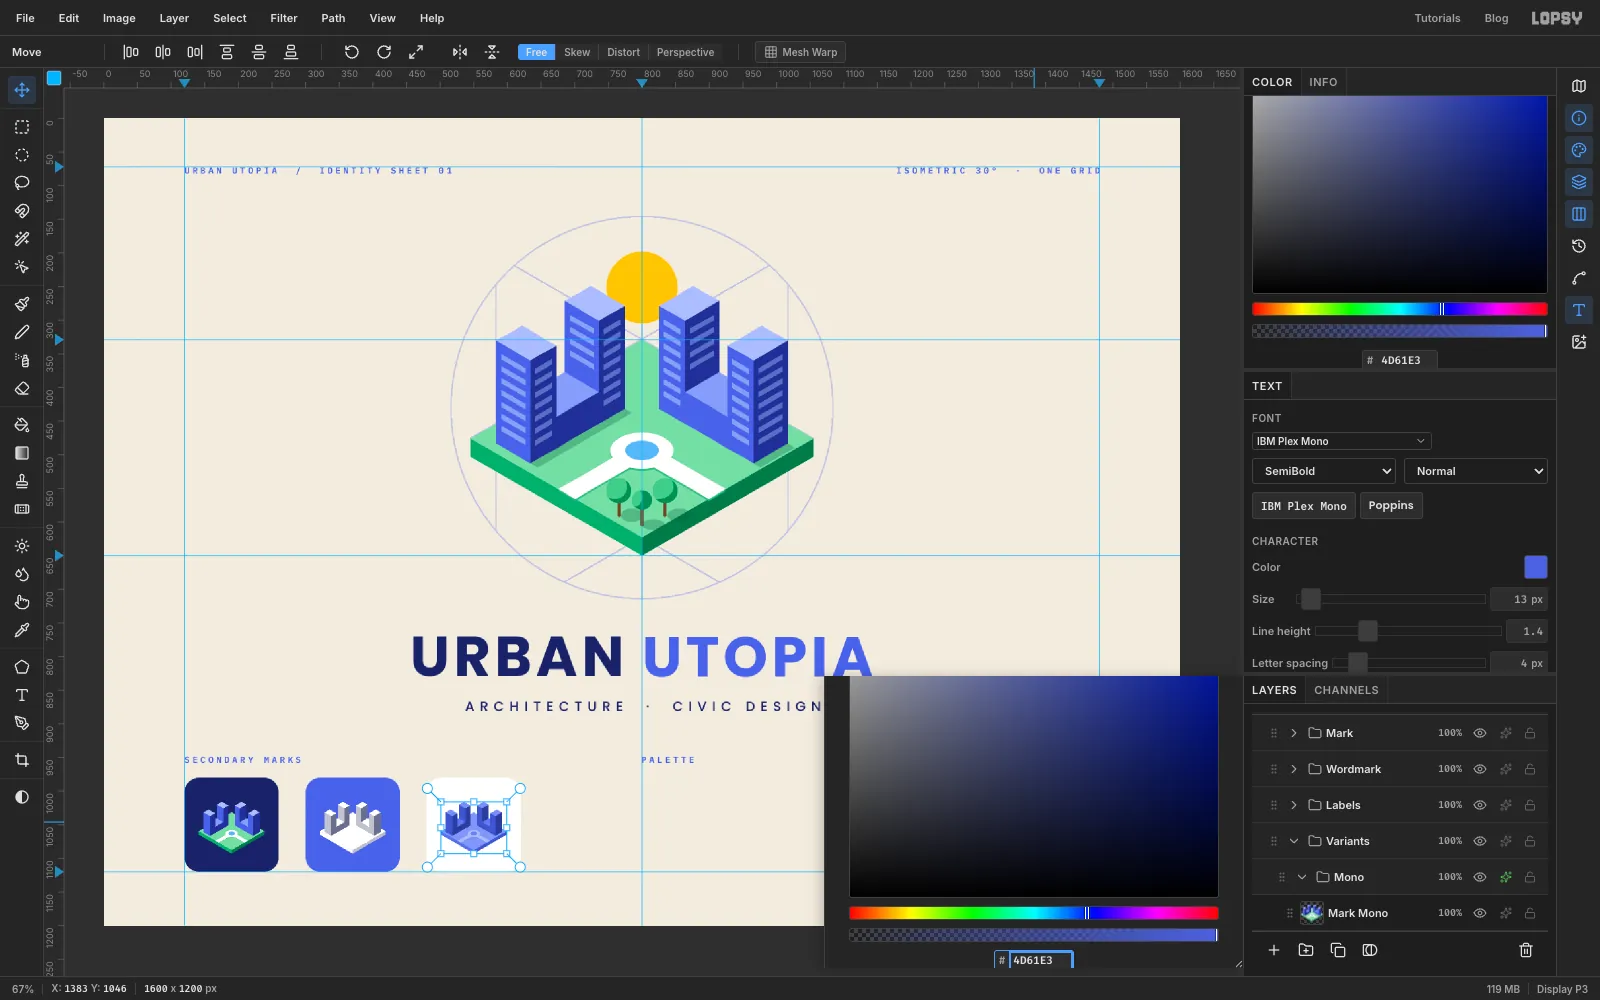
Group
Mark Monothe same way, name the groupMono, and add a Gradient Map with three stops:- on the left
- at 50%
- on the right
The faces keep their light and shade but use only the brand blues. That makes a one-colour version you could foil-stamp or embroider.
-
Keep the suns yellow
The Gradient Maps would turn a sun grey, so the suns live on
Tile Suns, outside the mapped groups and underneath the marks. On that layer, fill a 20 px circle in behind each mark, centred on (190, 1017), (370, 1017) and (550, 1017), just inside the gap between its inner towers.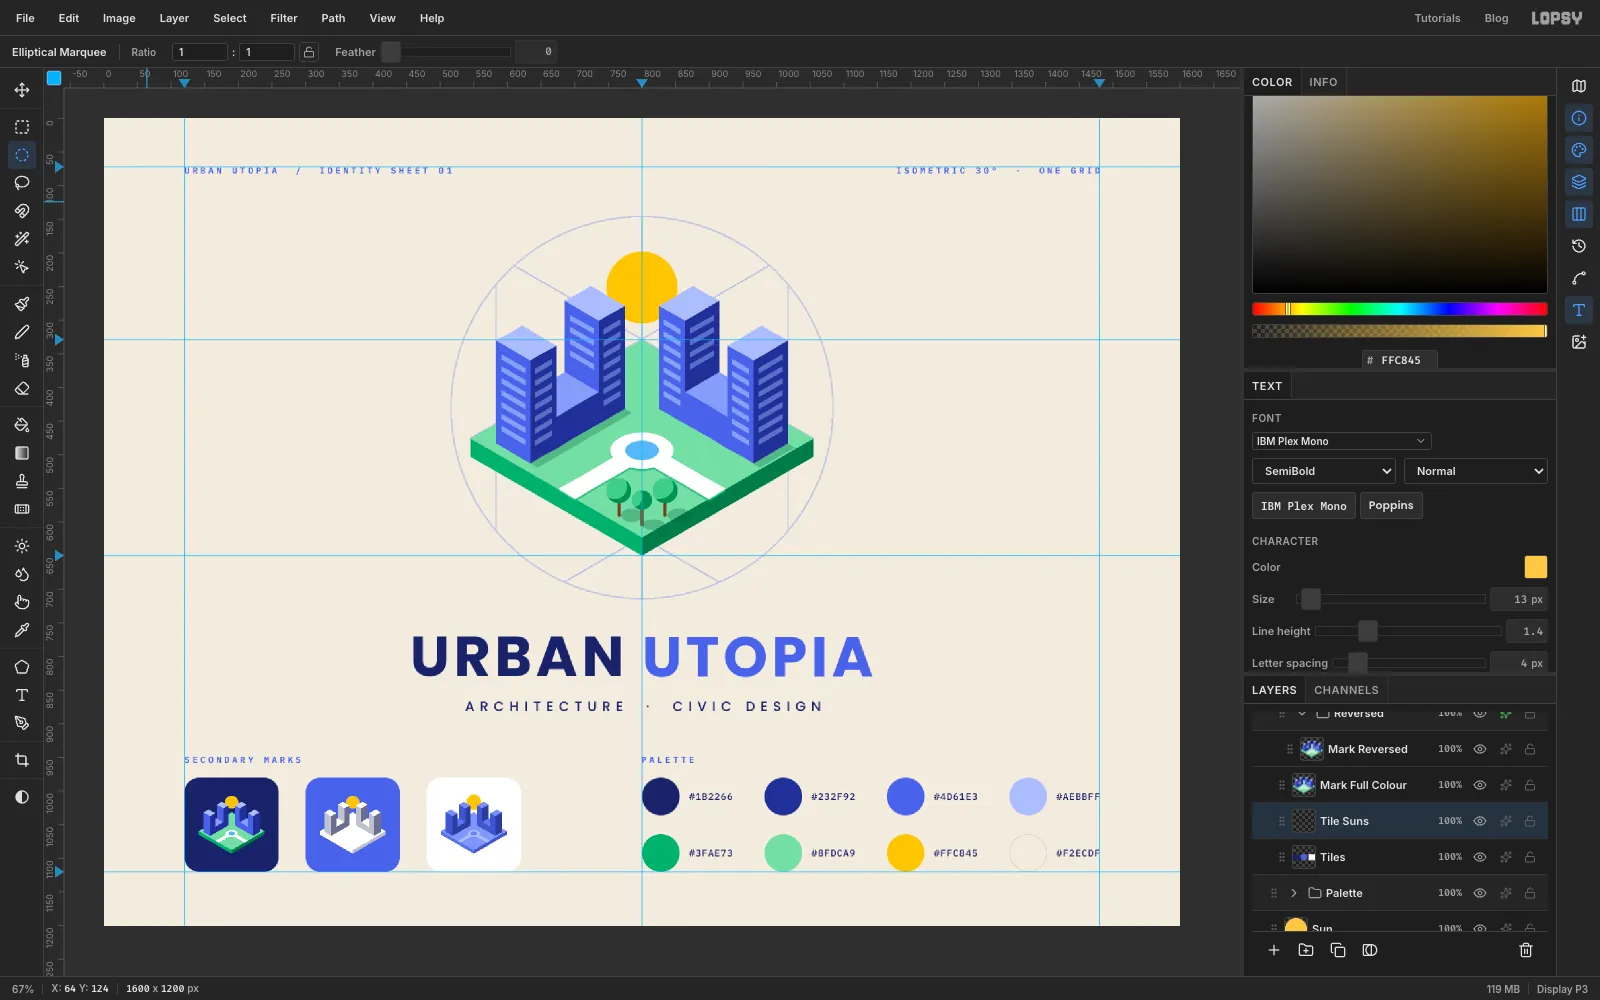
-
Lay out the palette
- Select
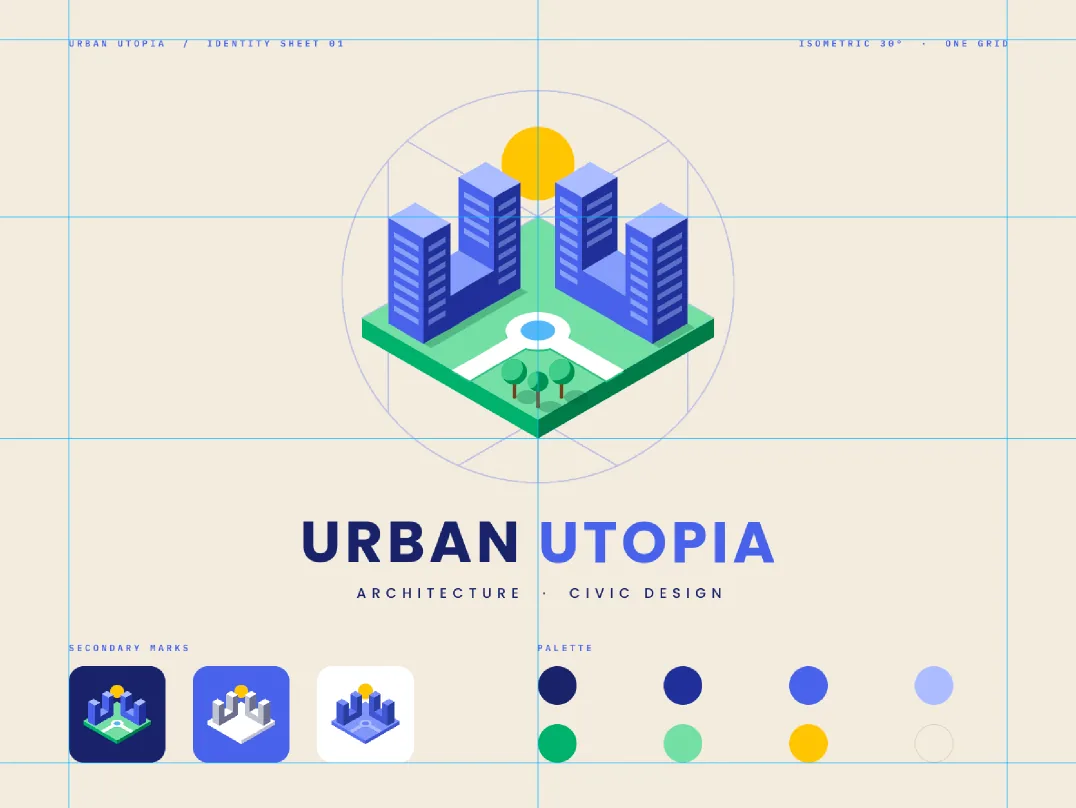
Sun, make aPalettegroup, and add aSwatcheslayer. - Fill eight 56 px circles in two rows of four. The left edges sit at x
800,982,1164and1346, and the rows are centred on y1008and1092.
- Top row: , , , .
- Bottom row: , , , .
- The cream swatch would vanish on cream paper, so outline it:
- Fill its circle with first.
- Choose Select → Shrink by
1px and fill with .
The swatch block sits level with the tiles, from 980 to 1120.
- Select
-
Label the swatches
- Select
Swatchesbefore you create each label. It's a plain pixel layer, so it works as the anchor here and no label gets restyled. Set each hex code in IBM Plex Mono Medium, size14, letter spacing1, colour . - Place each label 14 px right of its swatch, centred on it vertically. The last column's labels end on the 1480 guide.
- If a row of labels needs to move, click the first label in the Layers panel and Shift-click the last. The arrow keys then nudge all of them together.
- Select
-
Add a paper grain
- Select
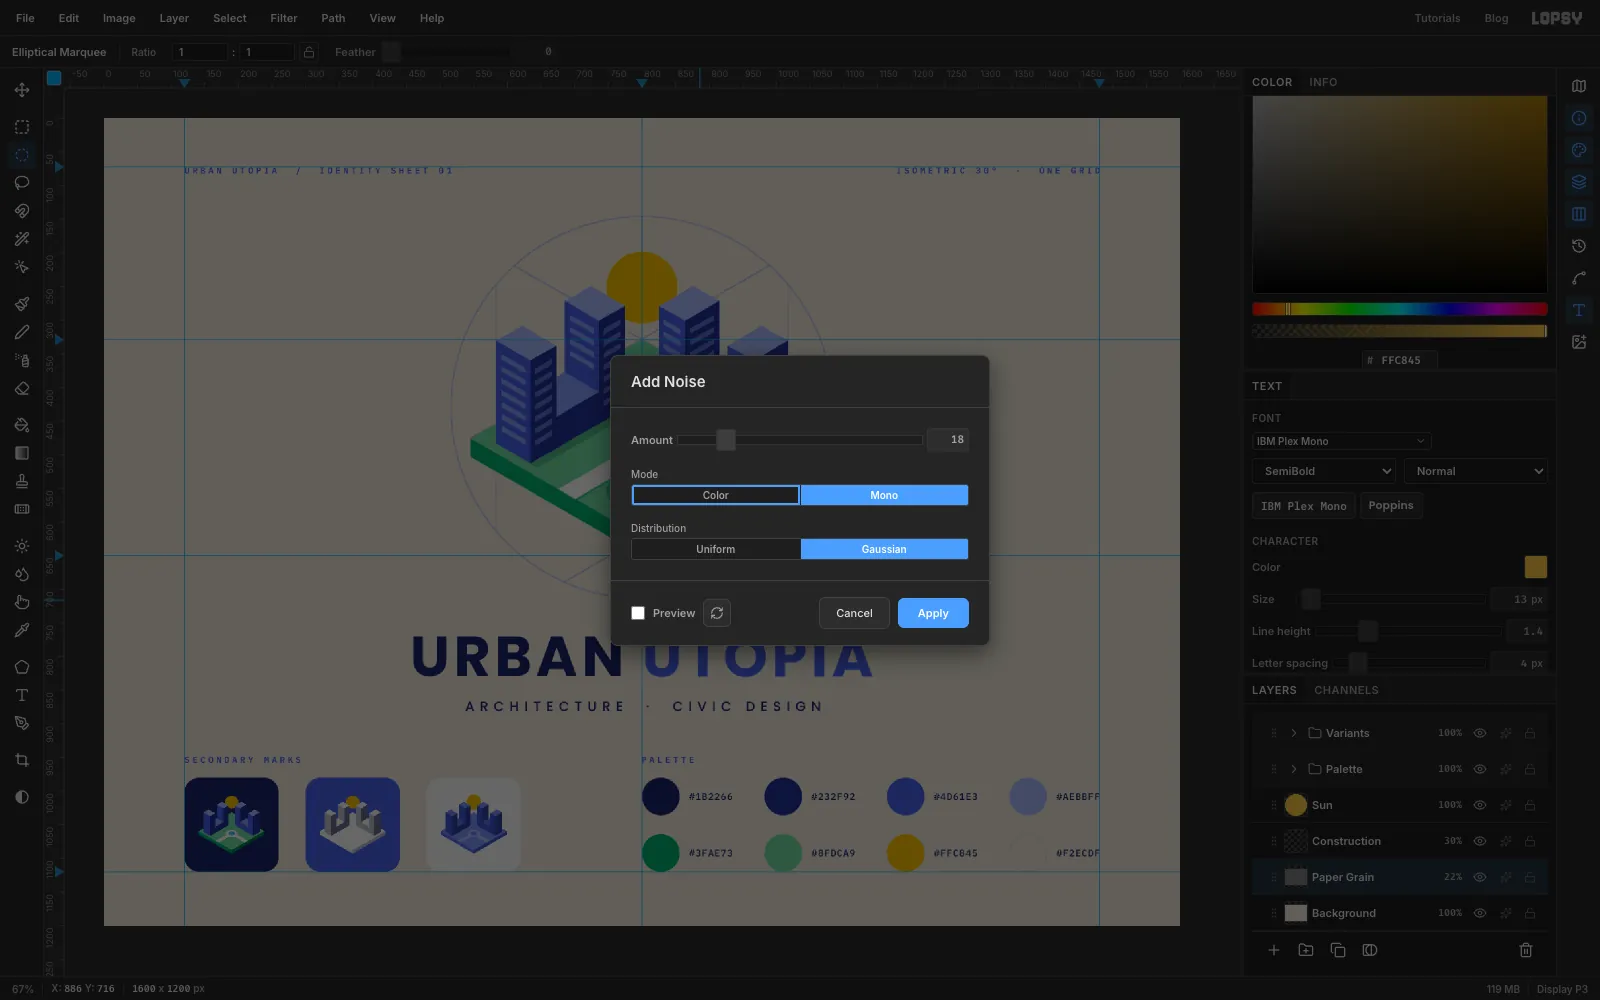
Backgroundand add a layer namedPaper Grain. Fill it with mid-grey . - Choose Filter → Add Noise with Amount
18, Mono and Gaussian, and click Apply. - Set the layer's blend mode to Overlay and its opacity to 22%.
Overlay hides the grey and keeps only the speckle. The flat colours get a faint printed-paper feel without looking dirty.
Finally, choose File → Quick Export PNG for the sheet and File → Save Project to keep every layer editable.
- Select