Paint an Iridescent Rainbow Trout Rising Toward the Light
Turn a trout photo into an iridescent digital painting in Lopsy, with thin-film sheen, a pattern of scales, painted light and spectral sunbeams.
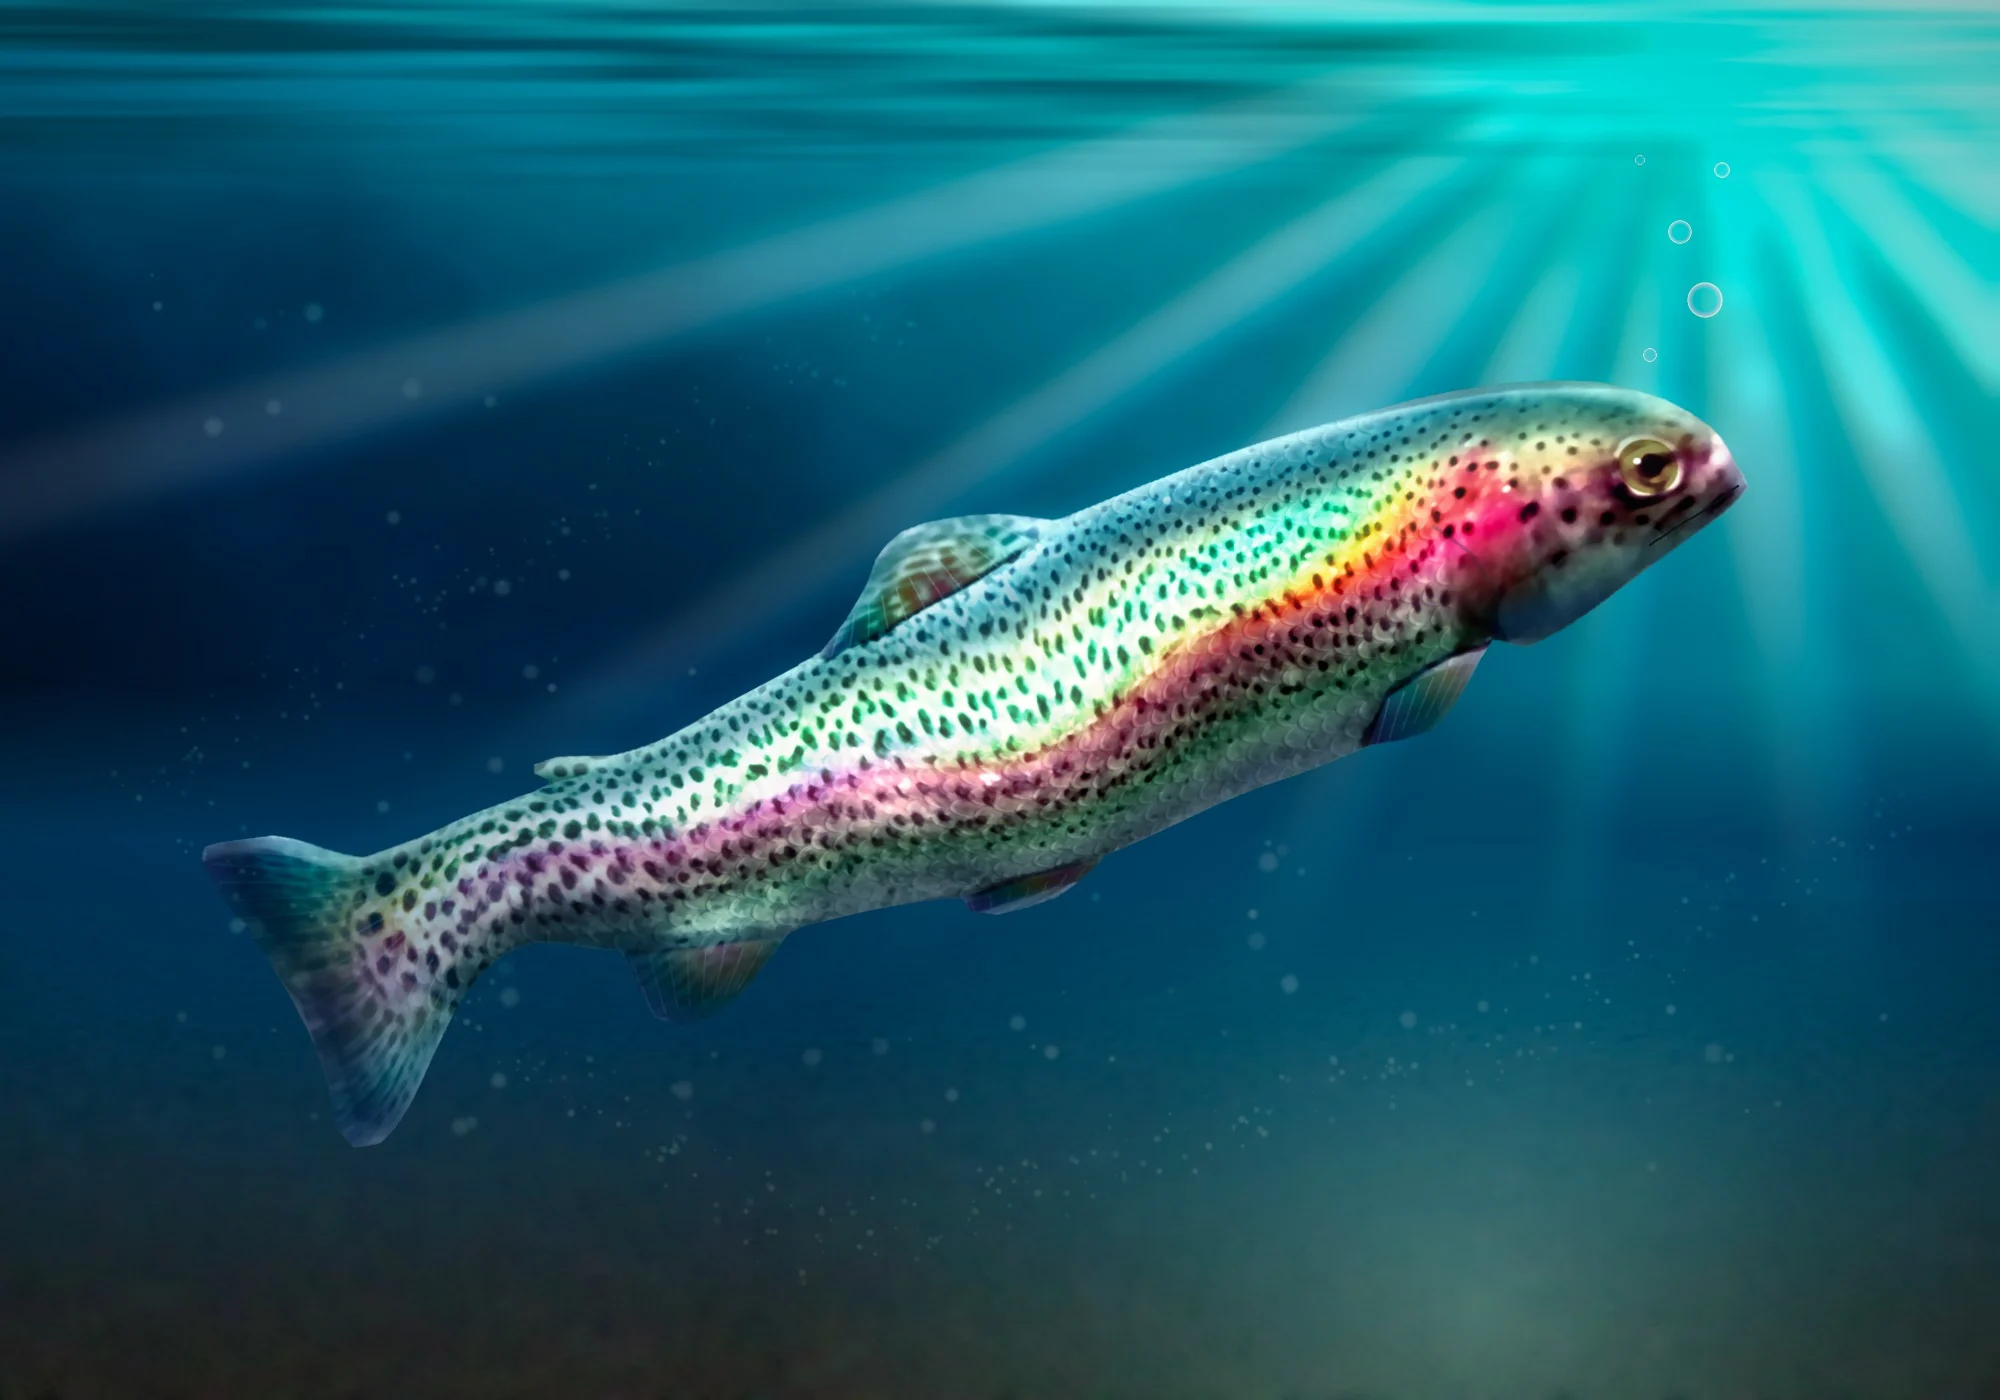
Iridescence is colour that shifts as the angle of the light shifts. It comes from thin layers bouncing light back at slightly different wavelengths, like the rainbow in a film of oil. A rainbow trout's flank does this. Its pink stripe is real pigment, but the gold, green and violet that slide across the scales change as the fish turns.
The trap, and I fell into it on my first attempt here, is painting that as a rainbow. Stripes of saturated colour running the full length of the fish look like a neon sticker. What works is a calm silver-olive fish with a narrow strip of colour across the part of the flank that catches the light.
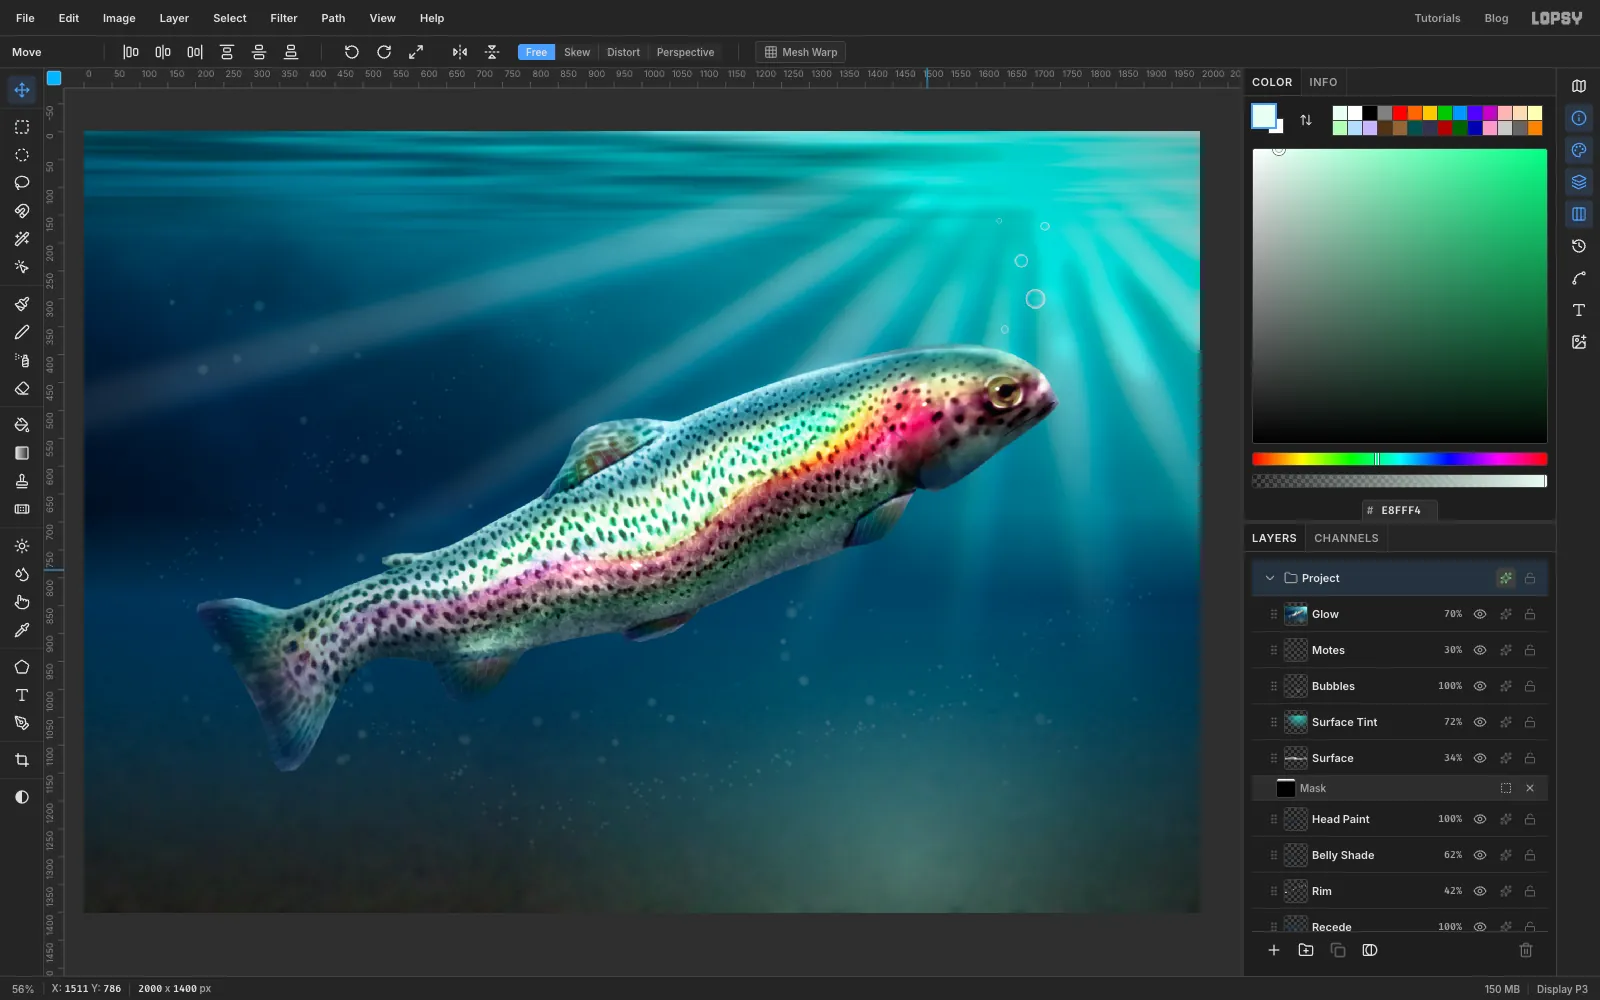
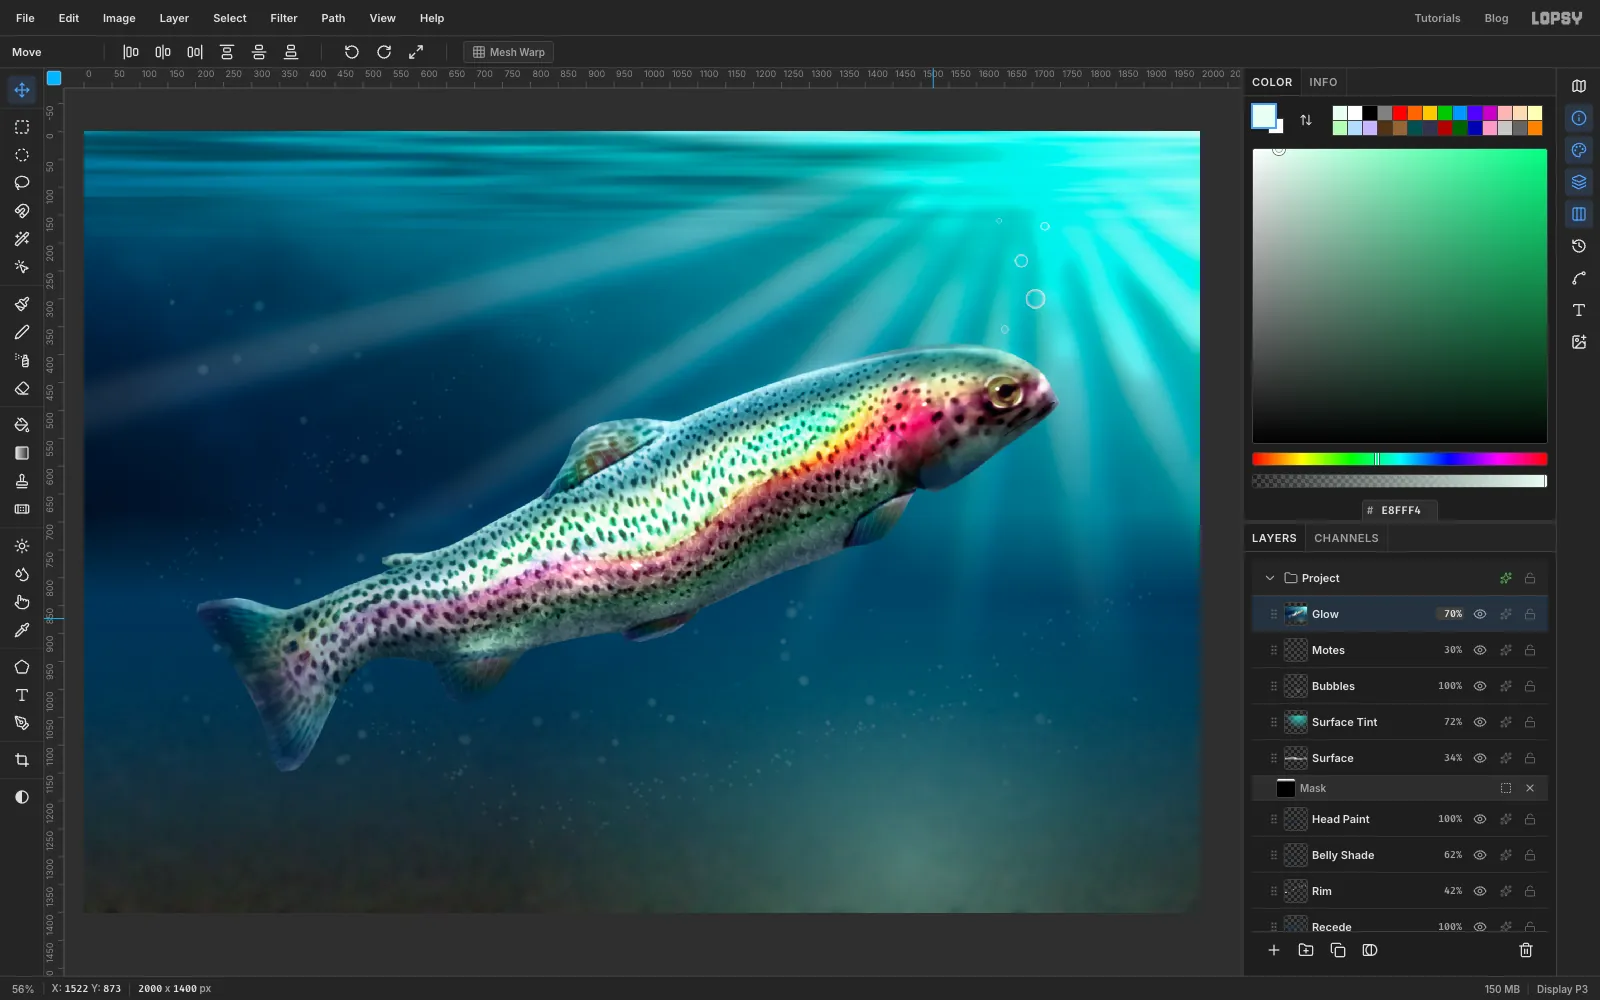
In this tutorial you'll paint Rainbow Trout, a 2000 × 1400 px picture of a trout rising toward the surface of a river. You'll build the water first, cut a real trout out of a photo and paint over it, add a thin-film sheen and a scale pattern, then bake the fish into one layer so you can bend it and light it as a single object.
Along the way you'll use:
- the Gradient tool with transparent stops, Clouds, Add Noise, Voronoi, Oil Paint, Emboss, Solarize and Sunburst
- Tilt-Shift Blur, Motion Blur, Surface Blur, Chromatic Aberration and Bloom
- the Pen tool, Path to Selection, Feather, Shrink and Inverse
- a group with a Gradient Map adjustment, Define Pattern and Fill with Pattern with column stagger
- layer masks, Copy Merged, Liquify and the Move tool's scale and rotate handles
- the Soft Light, Overlay, Color, Screen and Multiply blend modes, plus a Vignette adjustment
You'll need a side-on photo of a trout. I used this public domain photograph by Eric Engbretson, U.S. Fish and Wildlife Service, and the steps assume it. Open it at full size and copy it, or save it and copy it from your image viewer.
The palette:
-
Water
-
Deep water
-
floor glow
-
Trout back
-
flank
-
Rose stripe
-
belly
-
Thin film
-
Rim light
-
shade
-
Fill the canvas with deep water
Choose File → New, set the size to 2000 × 1400 and choose a White background. Rename the Background layer Water by double-clicking its name.
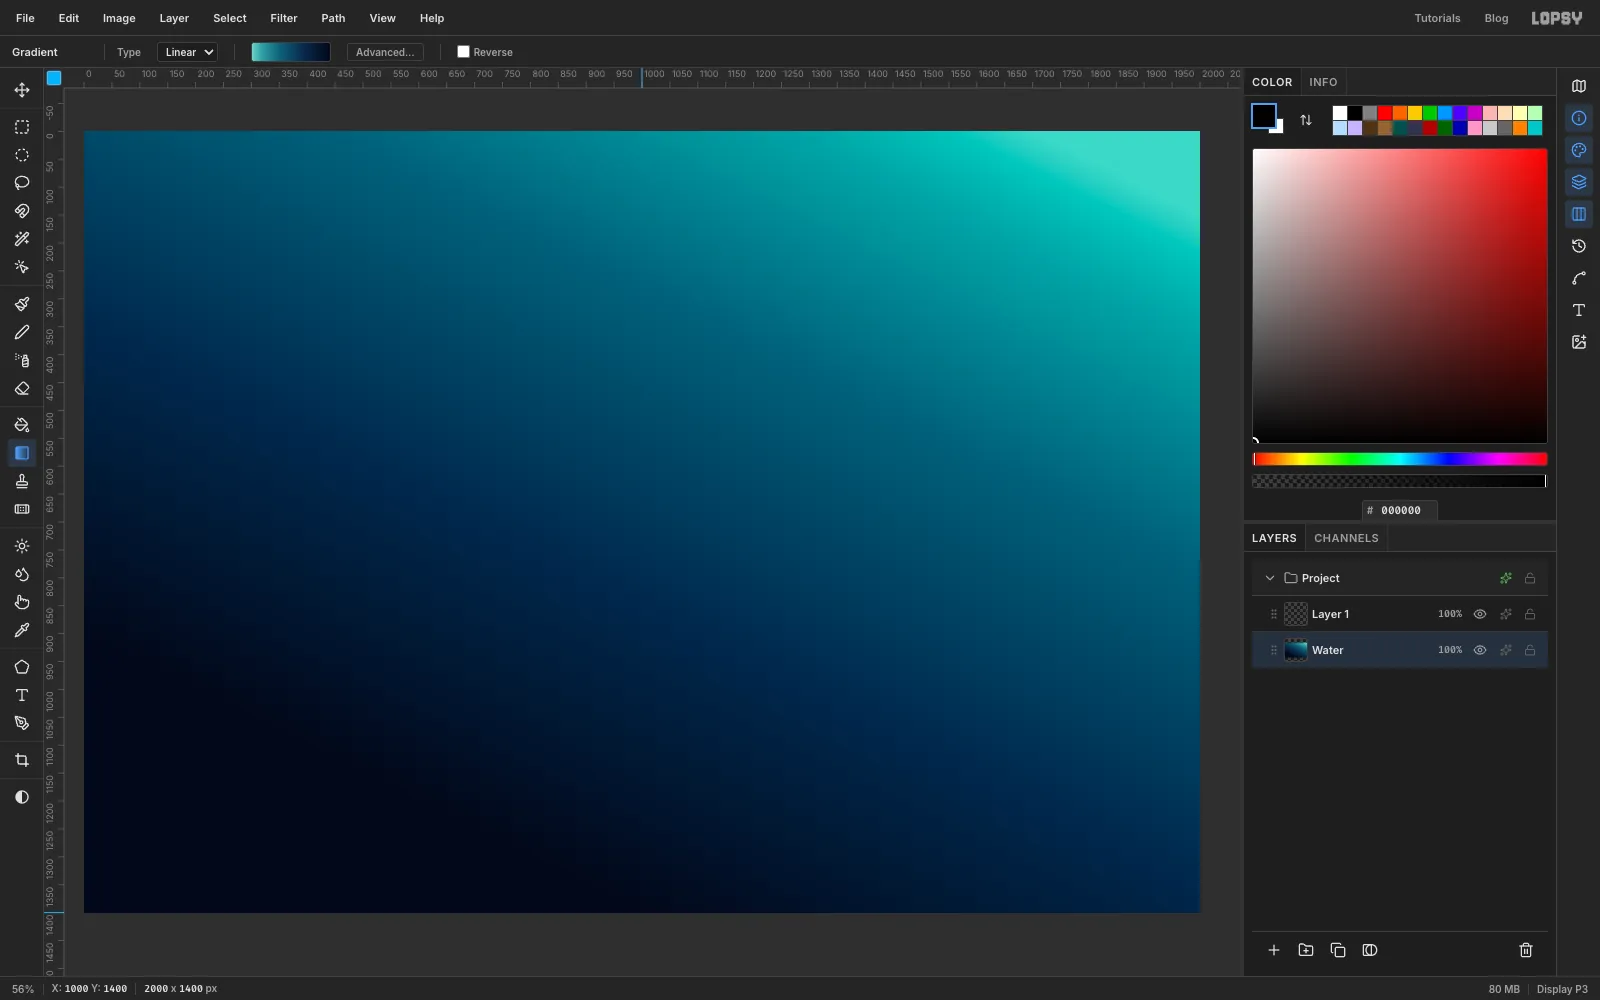
Pick the Gradient tool, set the type to Linear and click Advanced…. Give it five stops, clicking the handle row to add each new one and typing its colour in the Hex field:
- at the far left
- at about 12%
- at about 36%
- at about 68%
- at the far right
Click Done. Later steps need fewer stops than this: to remove one, select it in Advanced… and click Delete. Drag from the top edge, about five sixths of the way across, down to the bottom edge, about halfway across. The brightest corner at the top right is where the light will come from, so the rest of the painting will refer back to it.
-
Add some murk
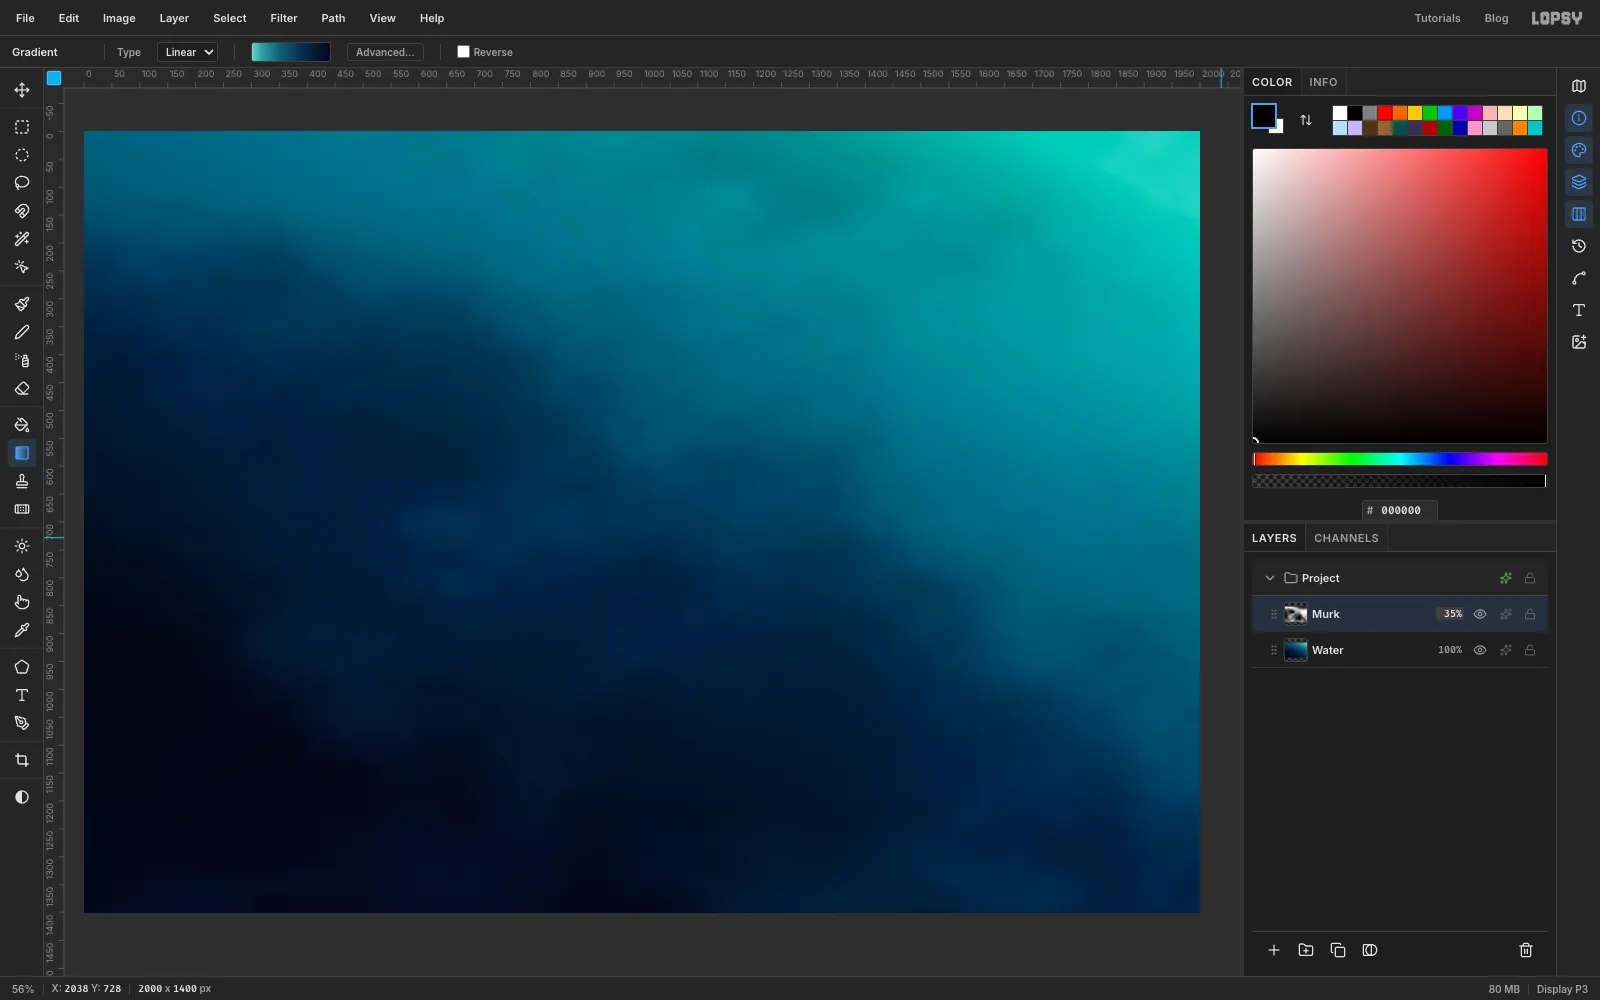
Click the empty Layer 1 and rename it Murk. Run Filter → Clouds… with Scale 3. Set the layer's blend mode to Soft Light and its opacity to 35%.
Real river water is never a clean gradient, and this gives it uneven depth without adding any detail you'd notice.
-
Make pebbles with Voronoi
Add a layer above Murk and name it Bed. Set the foreground colour to and choose Edit → Fill.
Now run these filters, one after another:
- Add Noise… with Amount 100 and Color mode
- Gaussian Blur… with Radius 10, which turns the noise into blotches of colour
- Hue/Saturation… with Saturation 80
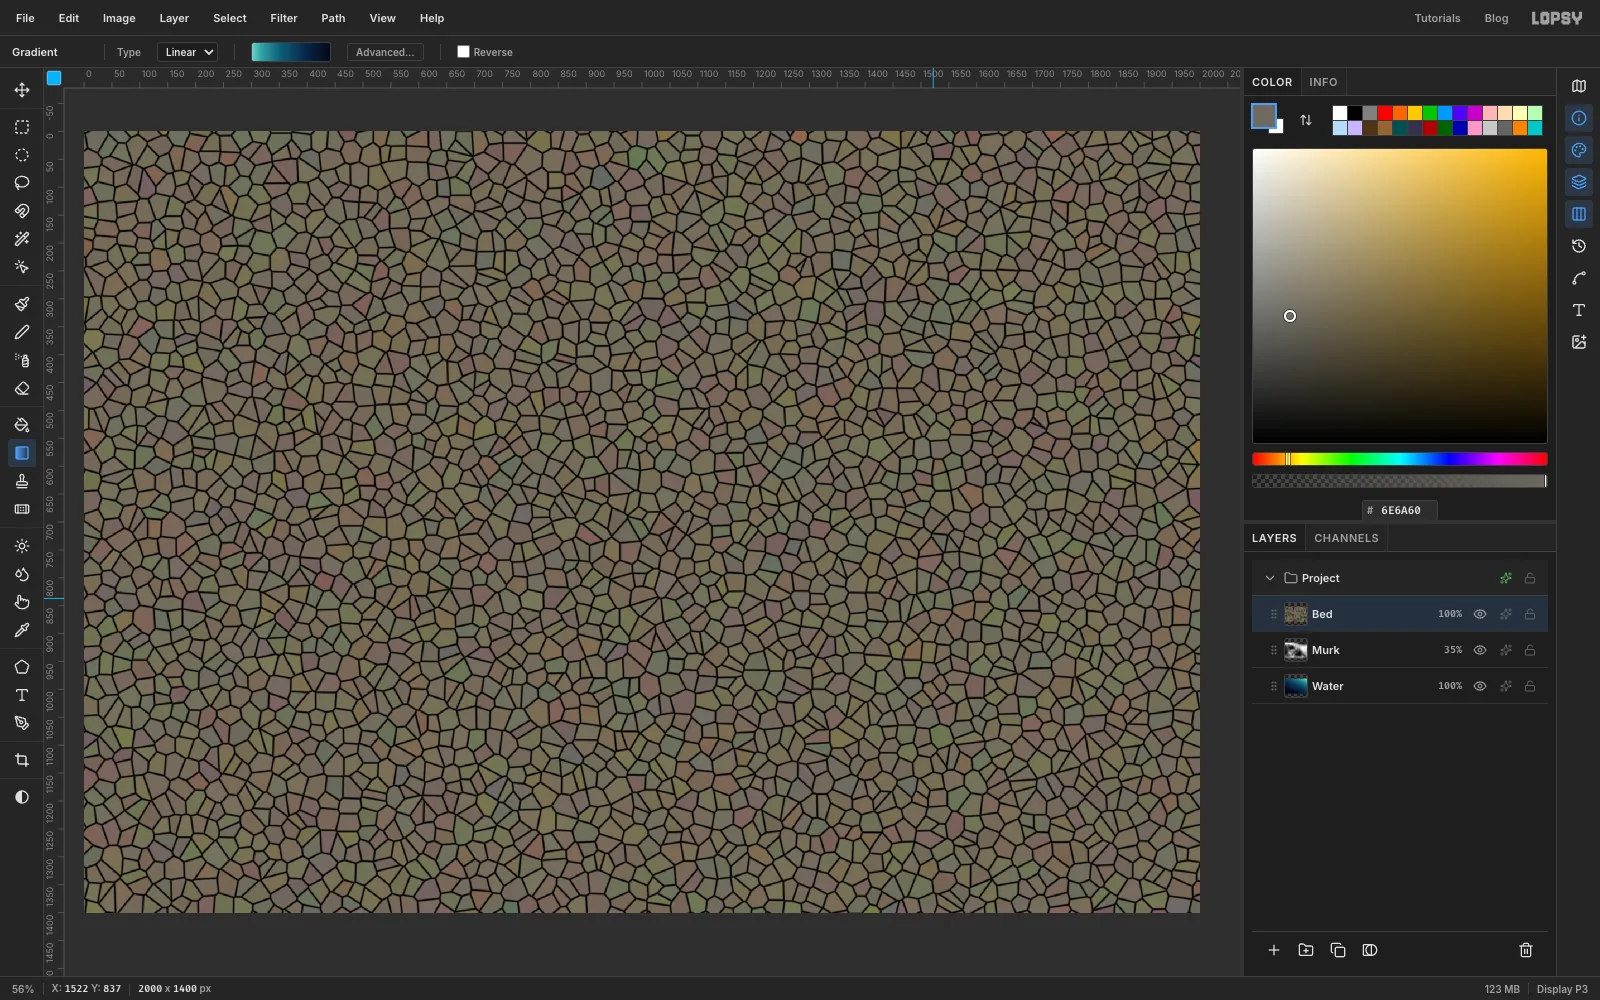
- Voronoi… with Cells 46, Edge Width 6 and Seed 41
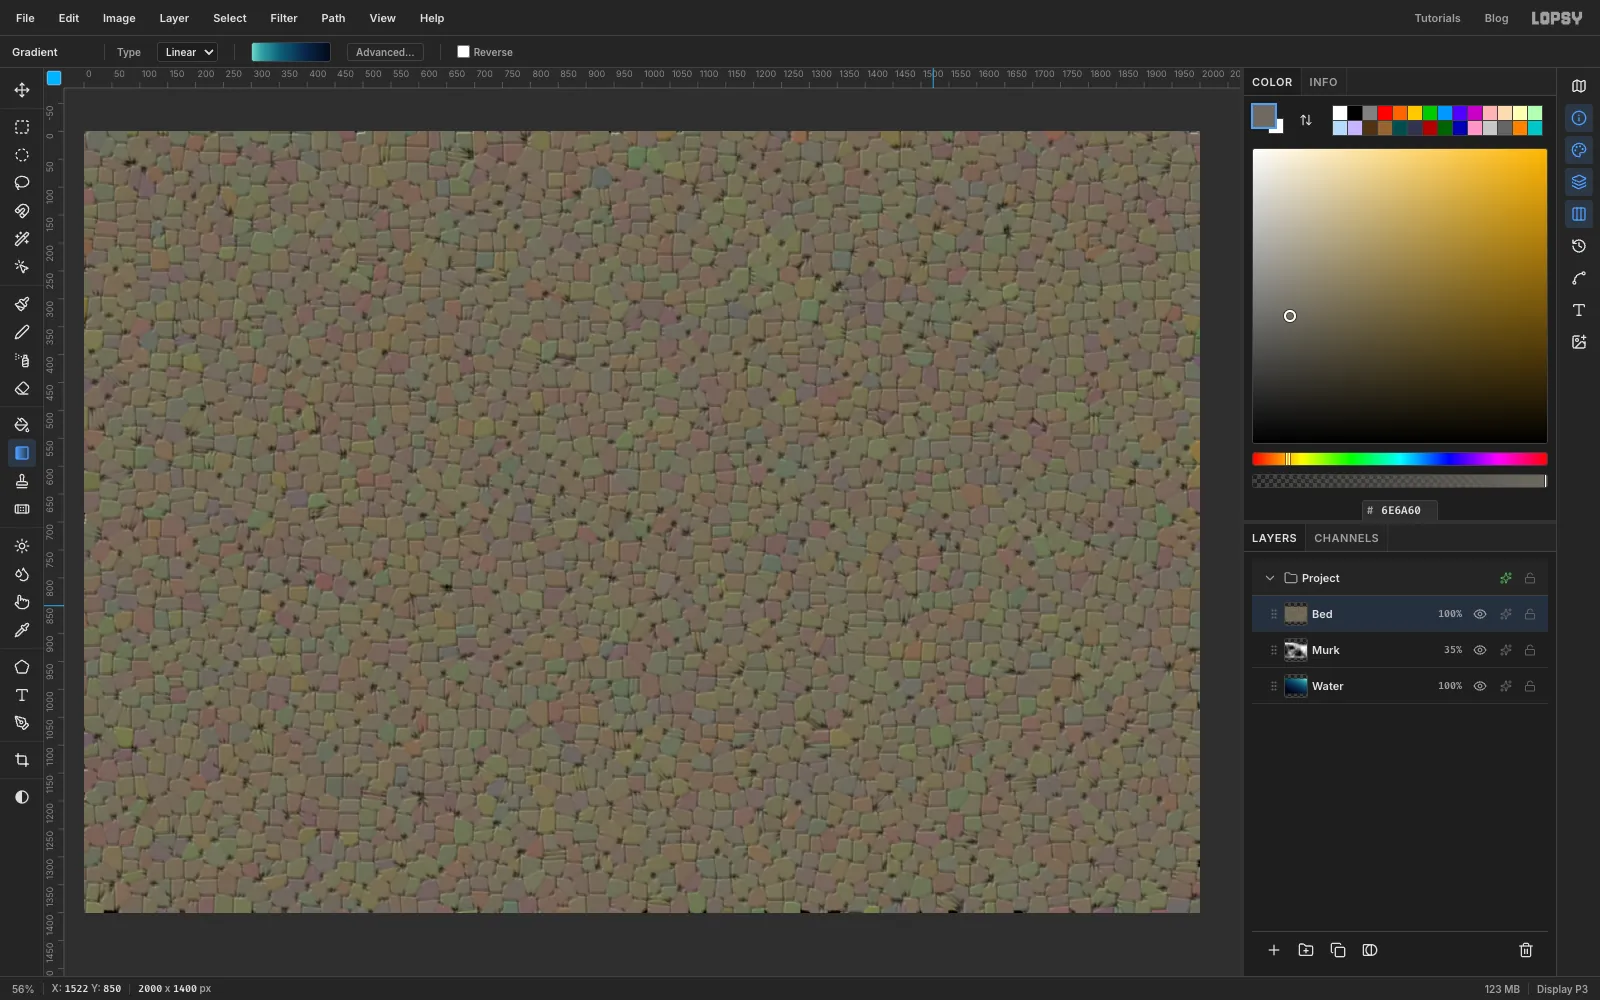
Each cell takes one colour from the blotches underneath, so you get a field of stones in different colours.
-
Round off the stones
Polygon cells look like crazy paving, so soften them. Run Oil Paint… with Radius 8 and Sharpness 3, then Gaussian Blur… with Radius 2. Finish with Emboss…, Angle 60 and Strength 35, which lifts the stones and gives them a lit side.
-
Lay the riverbed flat
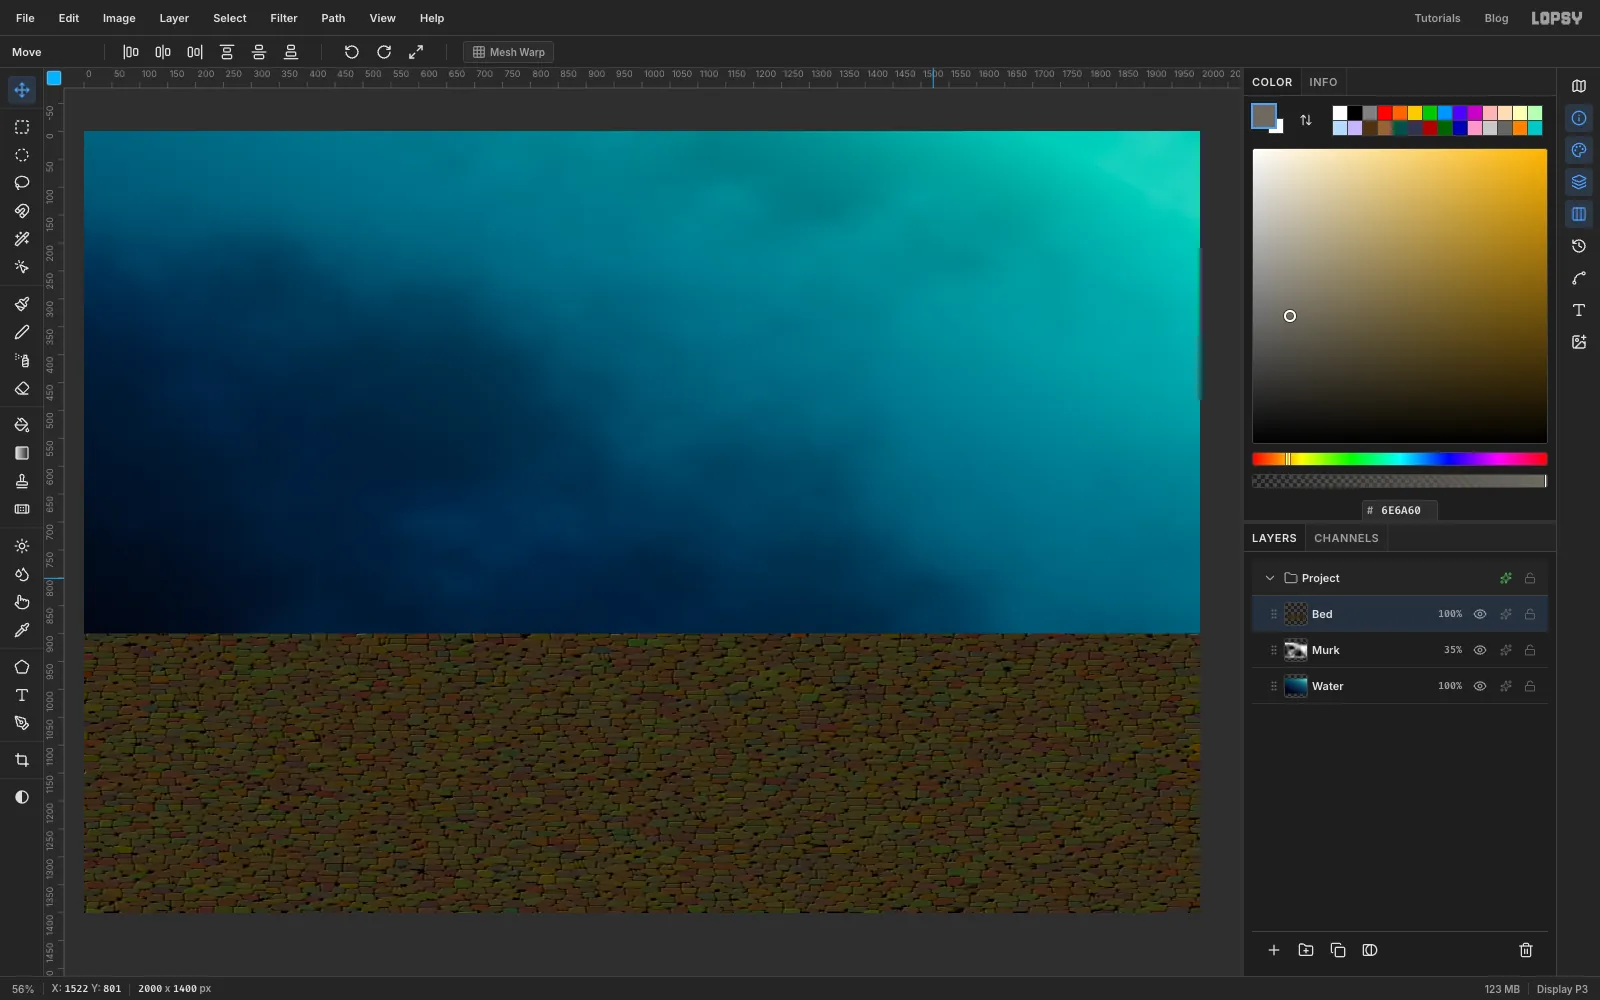
Pick the Rectangular Marquee and drag around the entire canvas. Switch to the Move tool and drag the square handle at the middle of the top edge straight down, until it's about 900 on the left ruler. The stones squash into wide ovals, which is how a floor looks from a low angle.
Press Cmd+D to deselect and commit the transform. Then darken the bed with Brightness/Contrast…, Brightness -22 and Contrast 18.
-
Build a caustic net
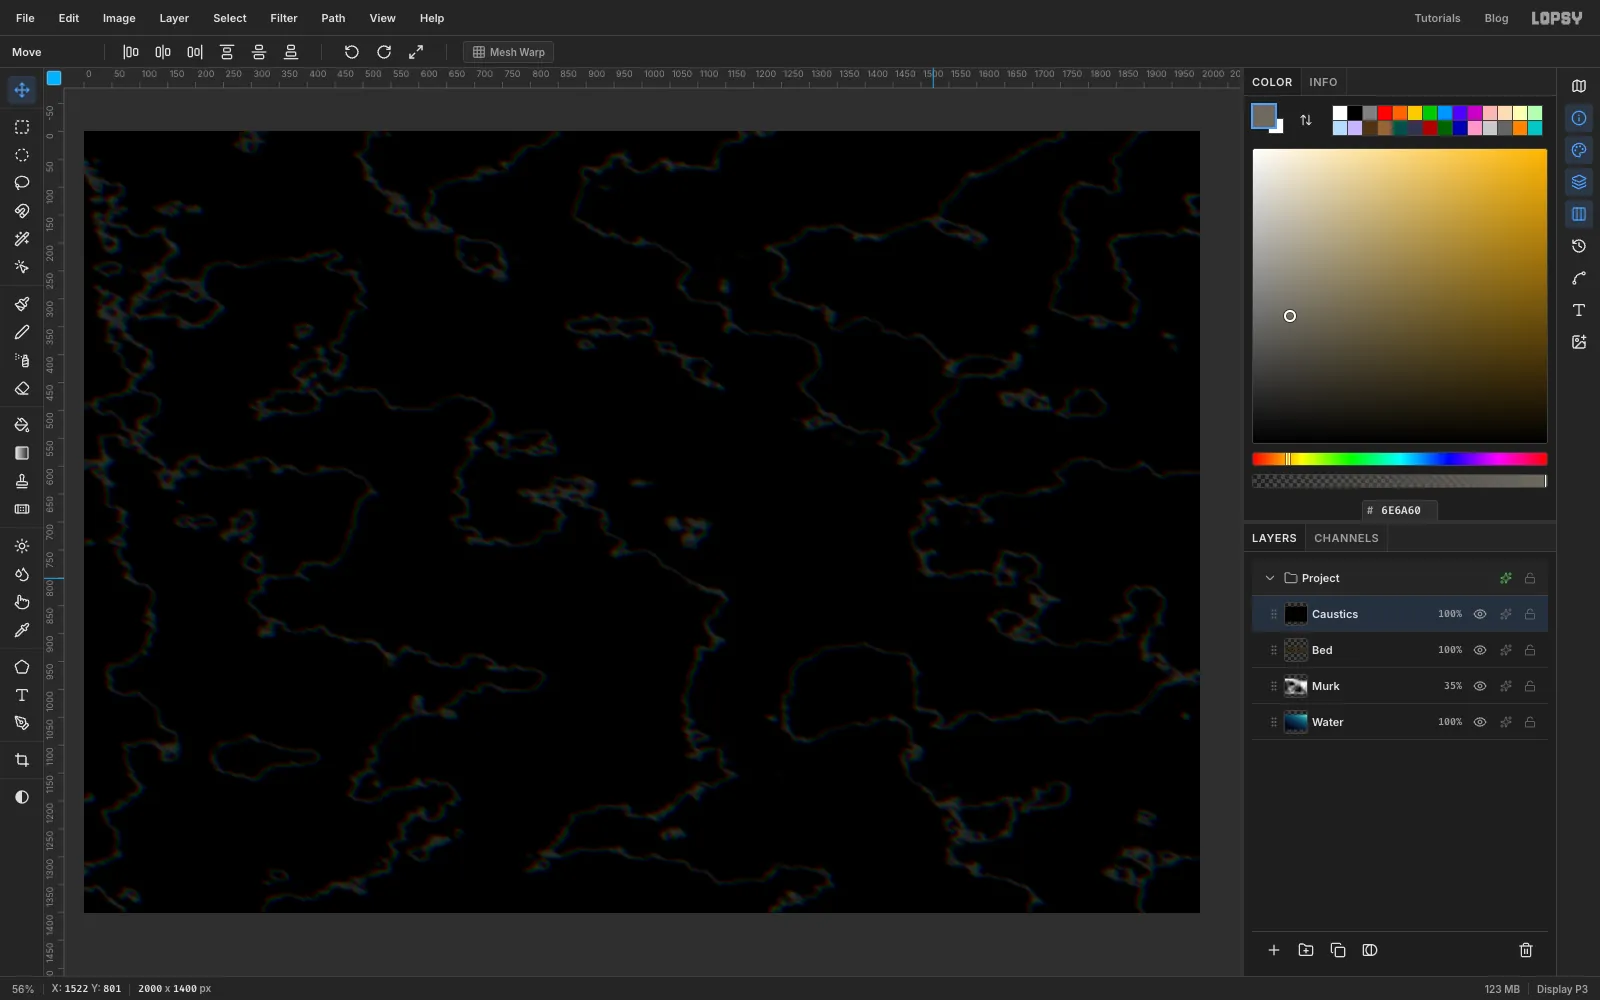
Caustics are the wobbling lines of light that the surface throws onto the bottom of a river. Solarize gives them to you almost for free.
Add a layer named Caustics. Run:
- Clouds… with Scale 10
- Solarize… with Threshold 128
- Brightness/Contrast… with Brightness 0 and Contrast 100
- Brightness/Contrast… again with Brightness -30 and Contrast 100
- Gaussian Blur… with Radius 5
- Chromatic Aberration… with Amount 6 and Direction 30
Solarize folds the tones over, so a bright crease appears wherever the clouds crossed mid-grey. The two contrast passes burn away everything except those creases, and the aberration splits each line into red, green and blue.
-
Lay the light on the stones
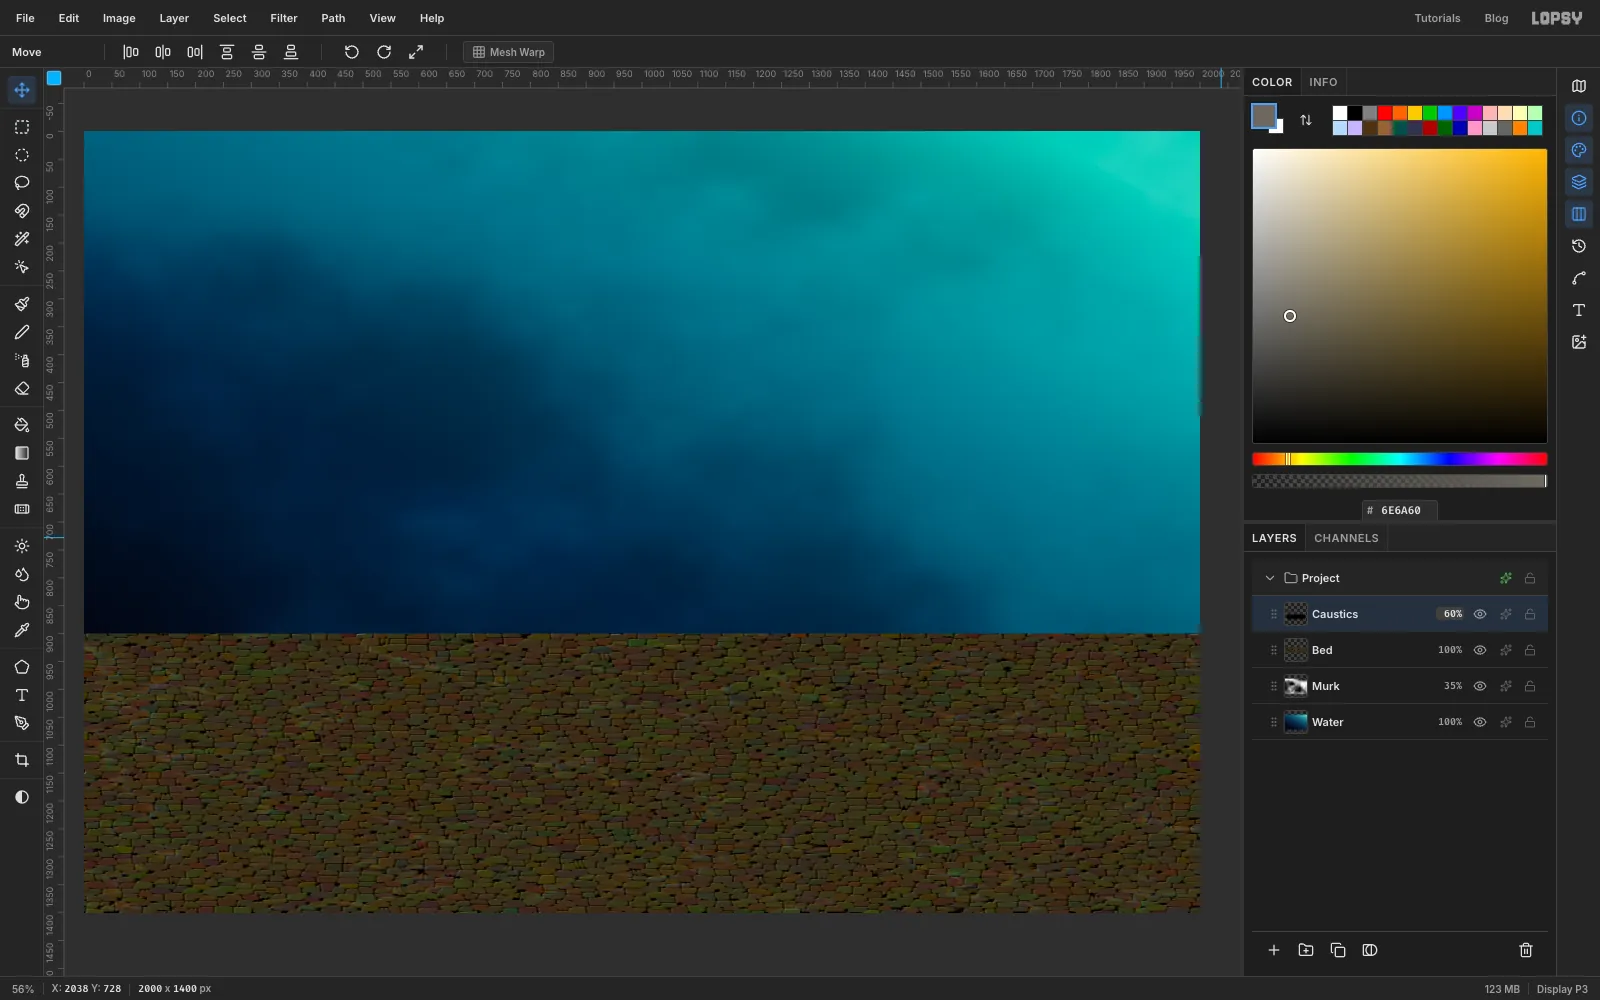
Squash the Caustics layer the same way you squashed the bed: marquee the whole canvas, drag the top middle handle down to about 900 with the Move tool, and press Cmd+D.
Set the layer to Screen at 60%.
-
Put the foreground out of focus
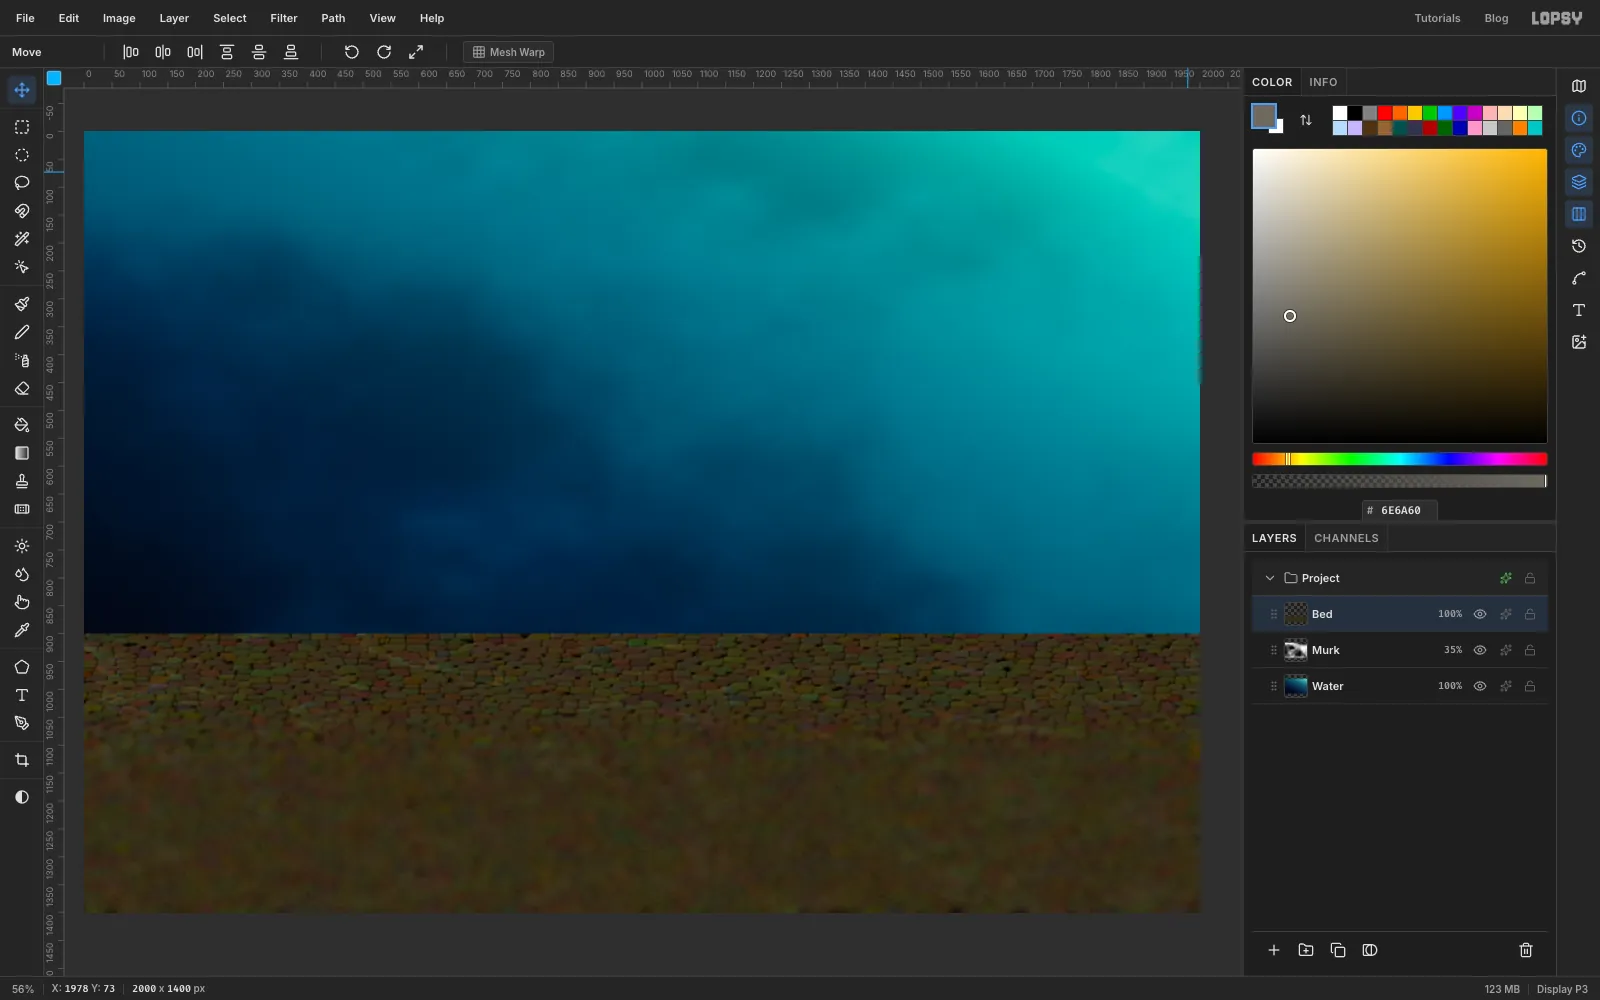
With Caustics still active, choose Layer → Merge Down so the lines and stones become one Bed layer. Run Gaussian Blur… with Radius 4.
Then choose Filter → Tilt-Shift Blur…. It starts straight away with a sharp band across the middle of the canvas. Set Blur Radius to 14 in the small panel and click Apply. Since the bed is in the lower part of the picture, this mostly softens its near edge, as a lens focused on the fish would.
-
Sink the bed into the water
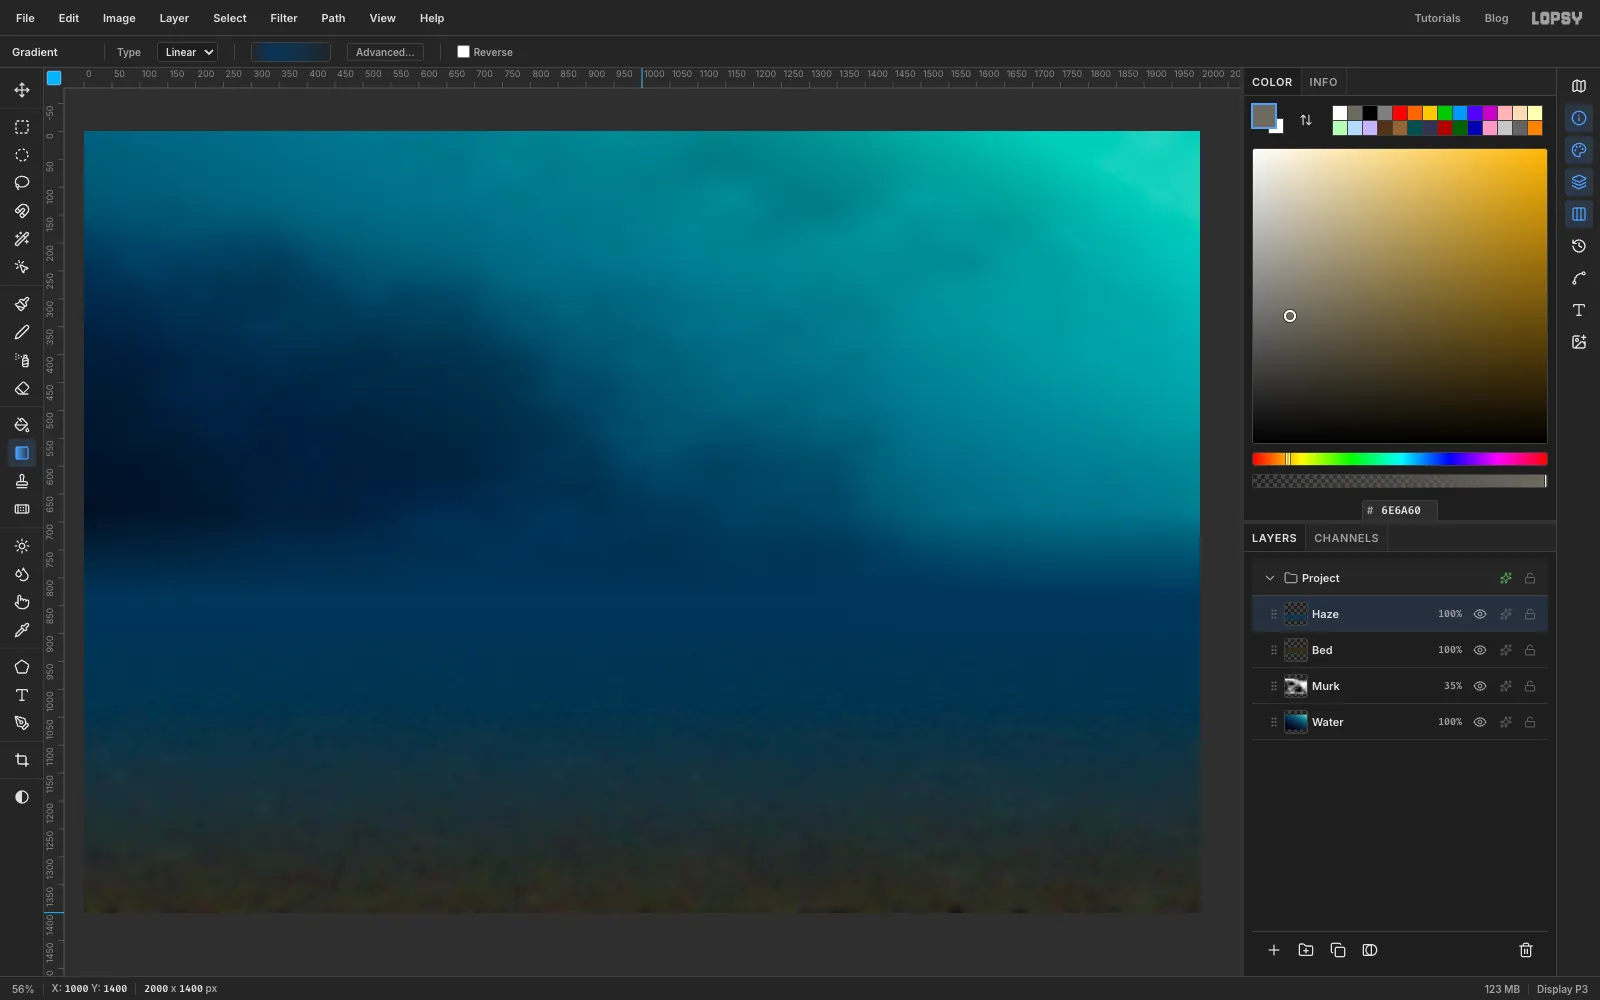
The bed still has a hard top edge, and distant things under water should disappear into blue.
Add a layer named Haze. Set up a linear gradient with these stops. Click each stop and set its opacity with the checkered strip under the colour picker:
- at the far left, fully transparent
- at about 22%, fully opaque
- at about 46%, 85% opaque
- at about 72%, 50% opaque
- at the far right, 18% opaque
Drag straight down from a little below the middle of the canvas to the bottom edge. The transparent stop keeps the upper water clear, and the opaque band hides the bed's edge.
-
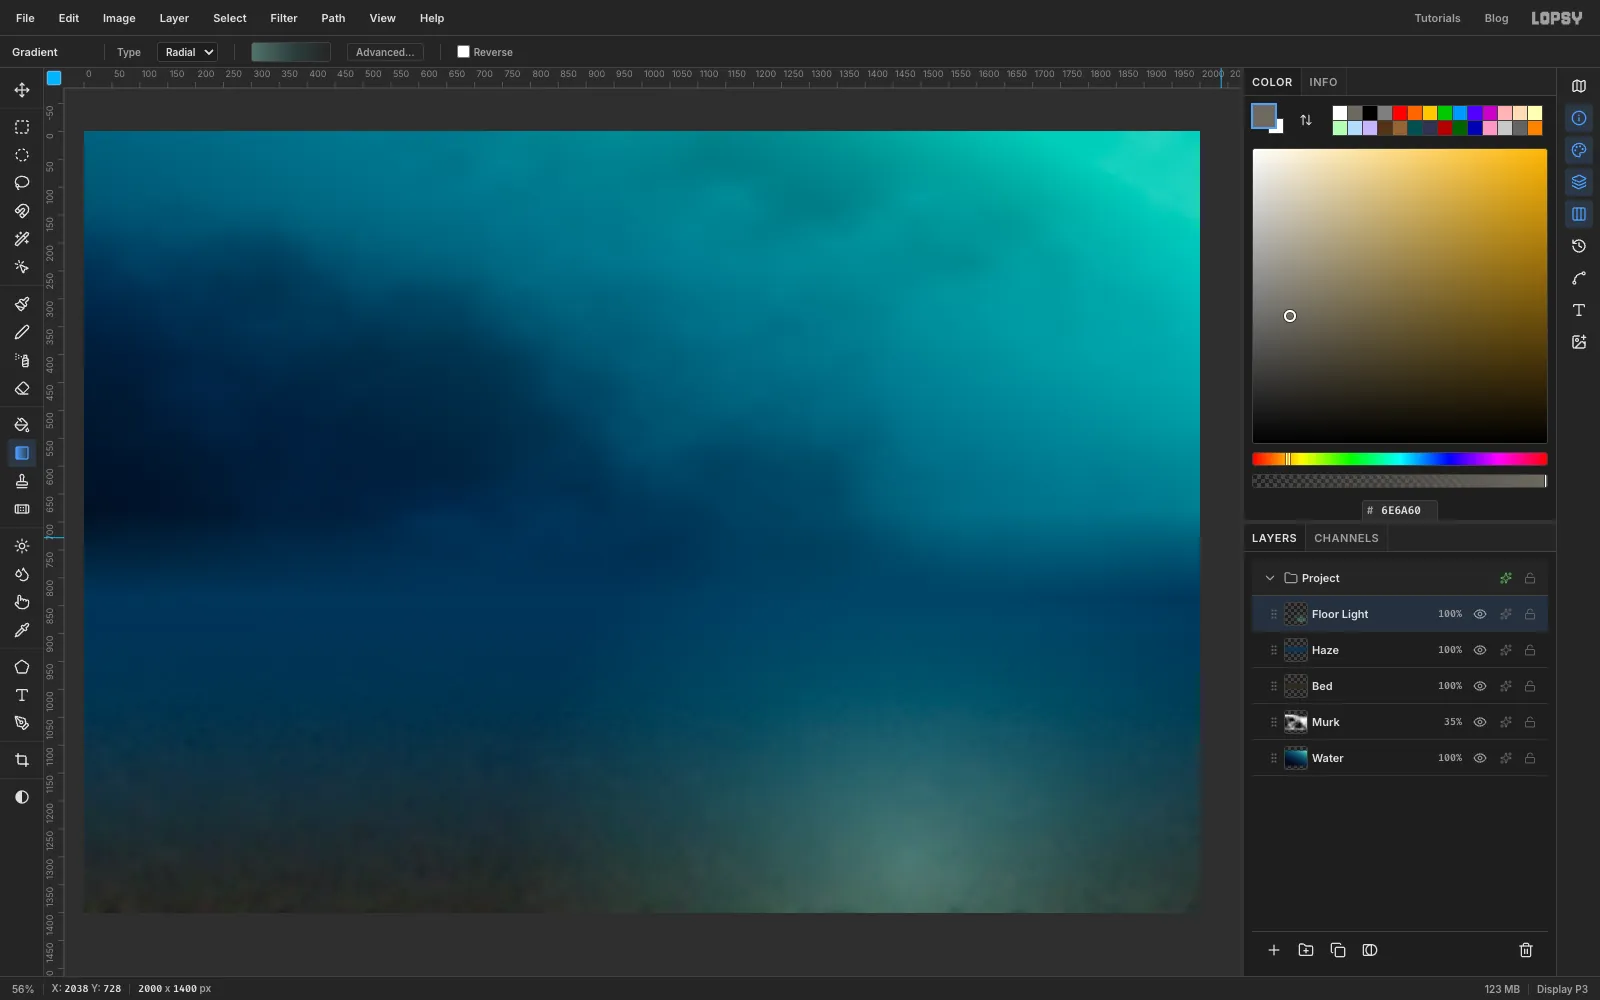
Pool some light on the floor
Click the Bed layer and run Hue/Saturation… with Saturation -35. The stones are now duller, as they would be under this much water.
Click Haze and add a layer above it named Floor Light. Set the gradient type to Radial with three stops:
- at the far left, 42% opaque
- at about 55%, 16% opaque
- at the far right, fully transparent
Drag from the floor at about three quarters of the way across the canvas, out past the right edge. Set the layer to Screen.
-
Bring down the sunbeams
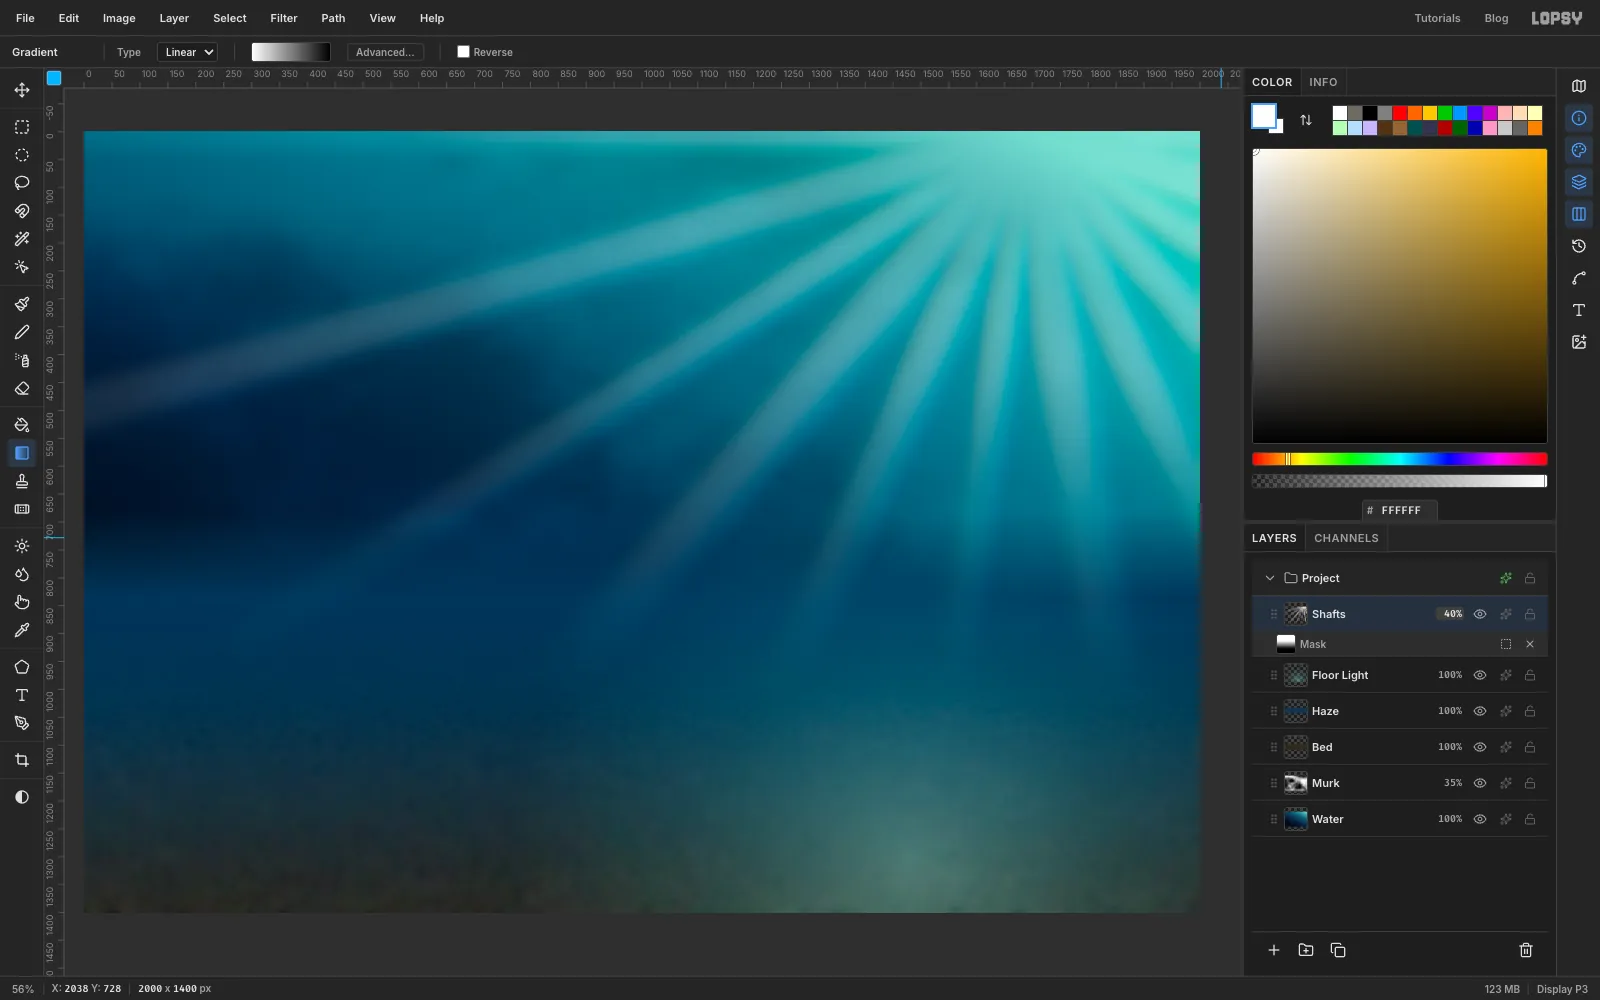
Set the foreground to white and add a layer named Shafts. Choose Filter → Sunburst… with these values:
- Rays 22, Length 110, Width 26
- Taper 50, Fade 75, Softness 70
- Center X 85, Center Y 0
- Jitter 45, Seed 5, Opacity 80
Run Gaussian Blur… with Radius 22, then Chromatic Aberration… with Amount 9 and Direction 0. That gives each ray a faint spectral edge.
The rays shouldn't reach the floor at full strength. Click Add Mask at the bottom of the Layers panel, then click the new mask thumbnail to edit it. Set a linear gradient from white to black, and make both stops fully opaque, because they keep the opacity you gave the last gradient. Drag straight down from about 30% of the way down the canvas to about 70%.
Click the layer row to leave mask editing. Set the layer to Screen at 40%.
-
Paste in the trout
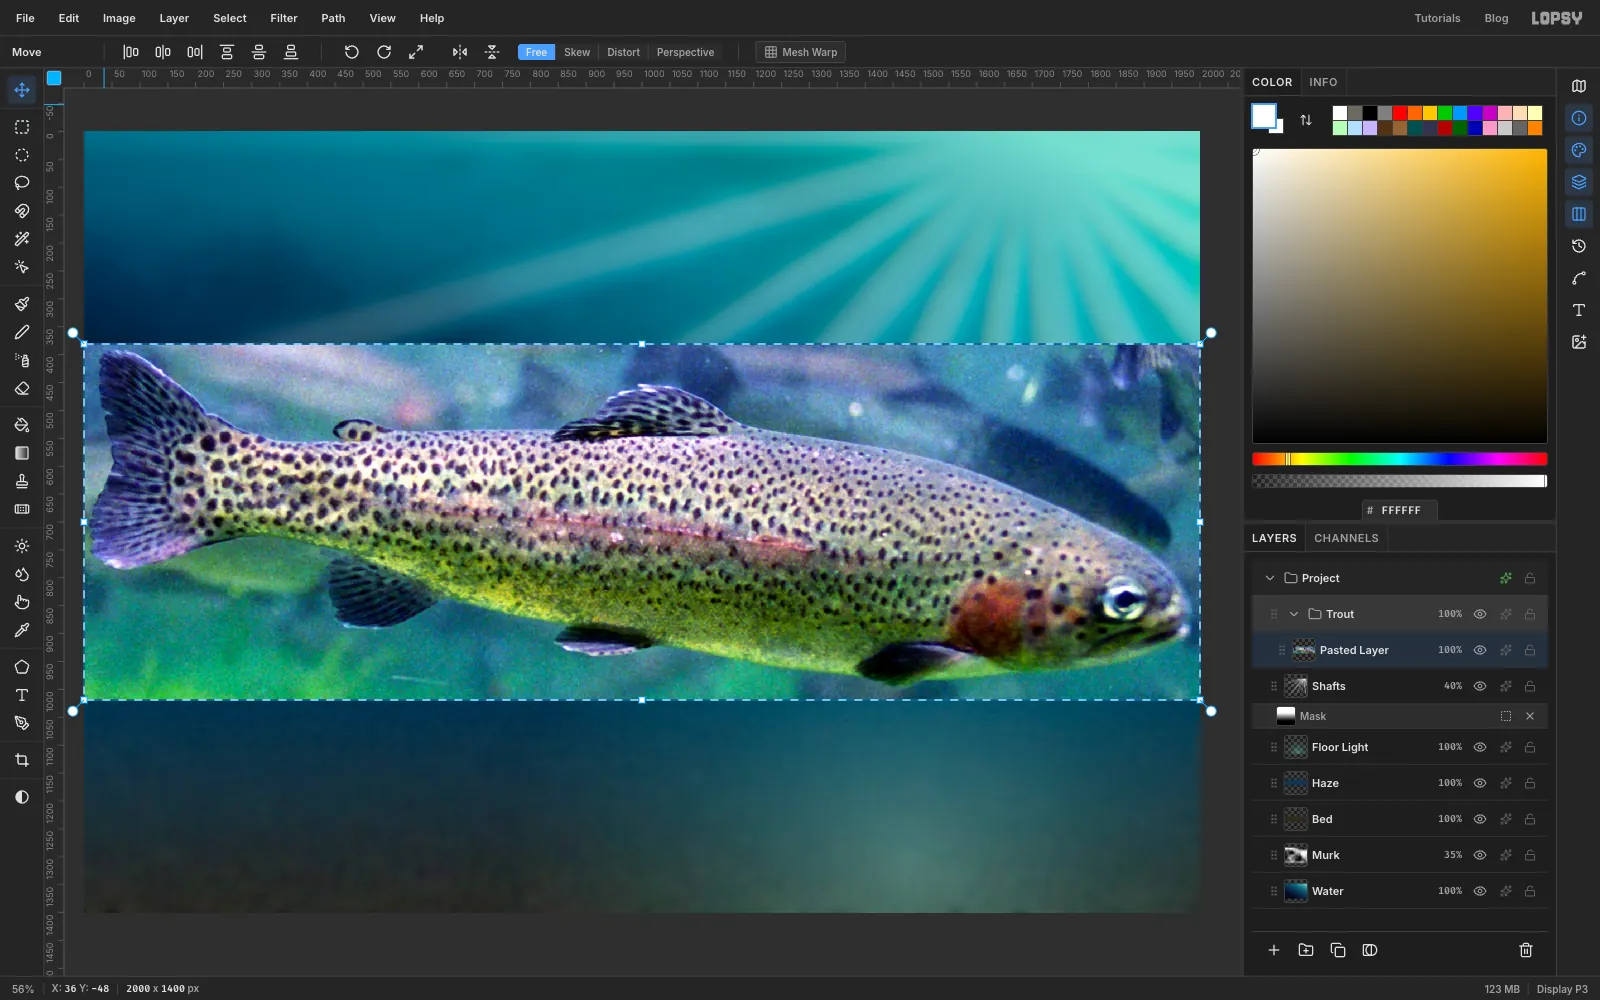
Everything so far has been background. With Shafts active, click New Group and name the group Trout. With the group selected, press Cmd+V to paste your photo.
Lopsy fits an oversized paste to the canvas, so the photo lands across the full width, in a new layer inside the group. Rename the layer Photo and press Cmd+D.
-
Turn the photo into paint
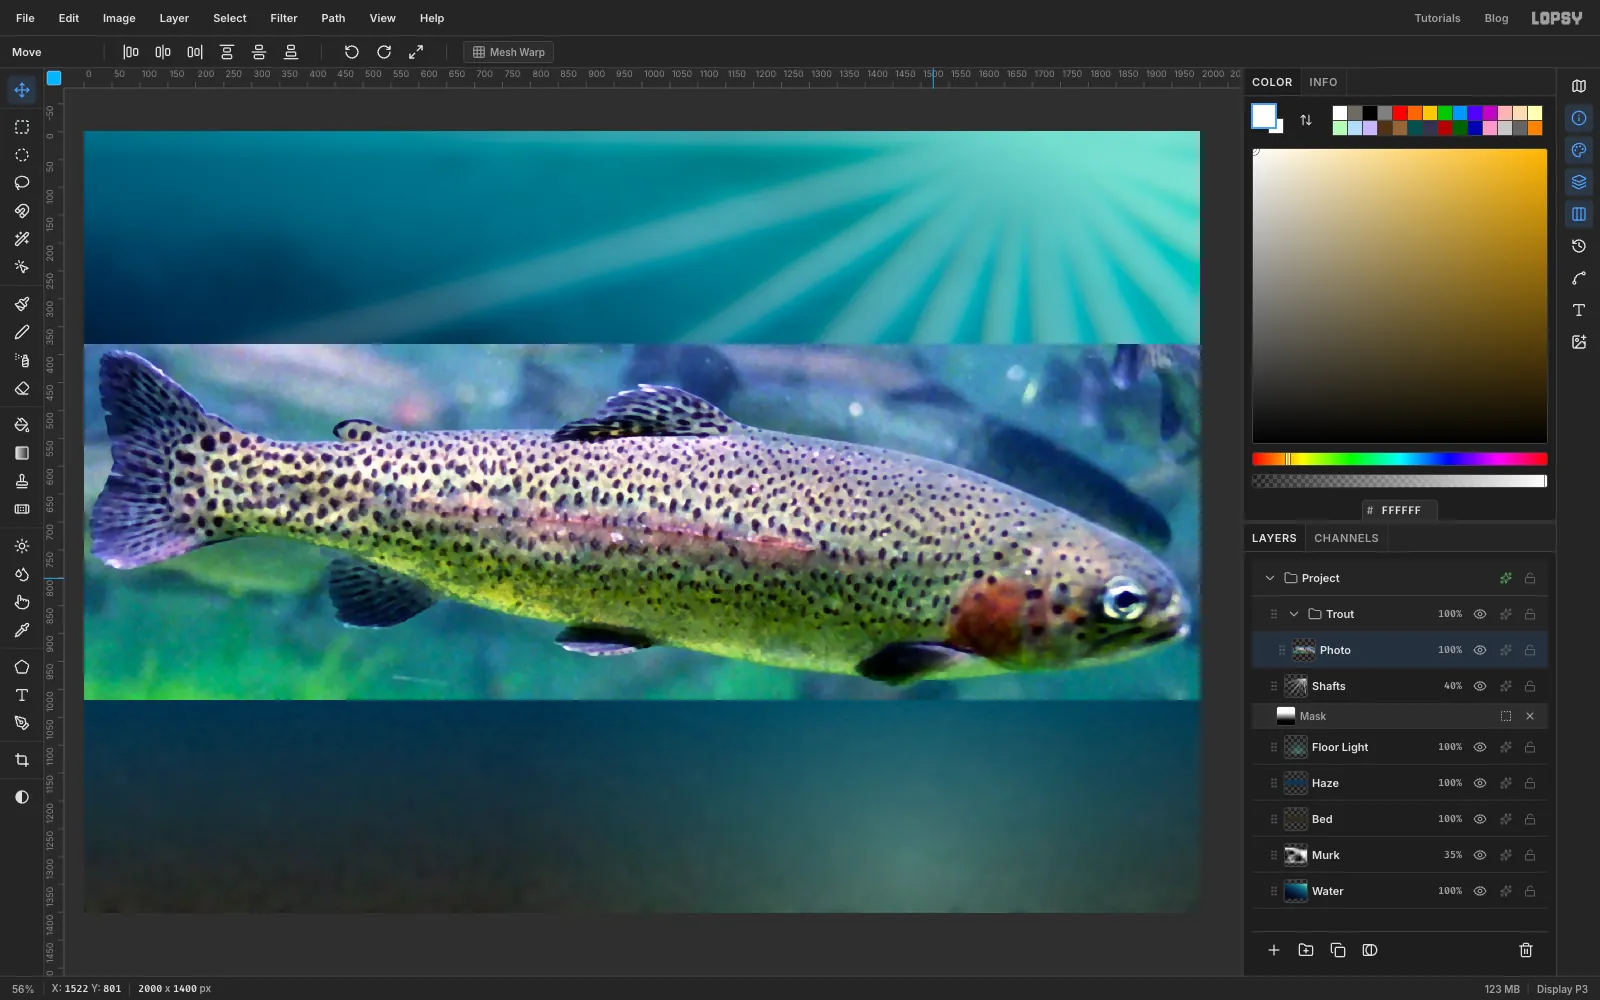
Run Surface Blur… with Radius 5 and Threshold 28, which removes the grain and keeps the spots crisp. Then run Oil Paint… with Radius 2 and Sharpness 1.2.
Do this before cutting the fish out. If you run Oil Paint on a cut-out, its edge grows little whiskers all along the outline.
-
Trace the fish with the Pen
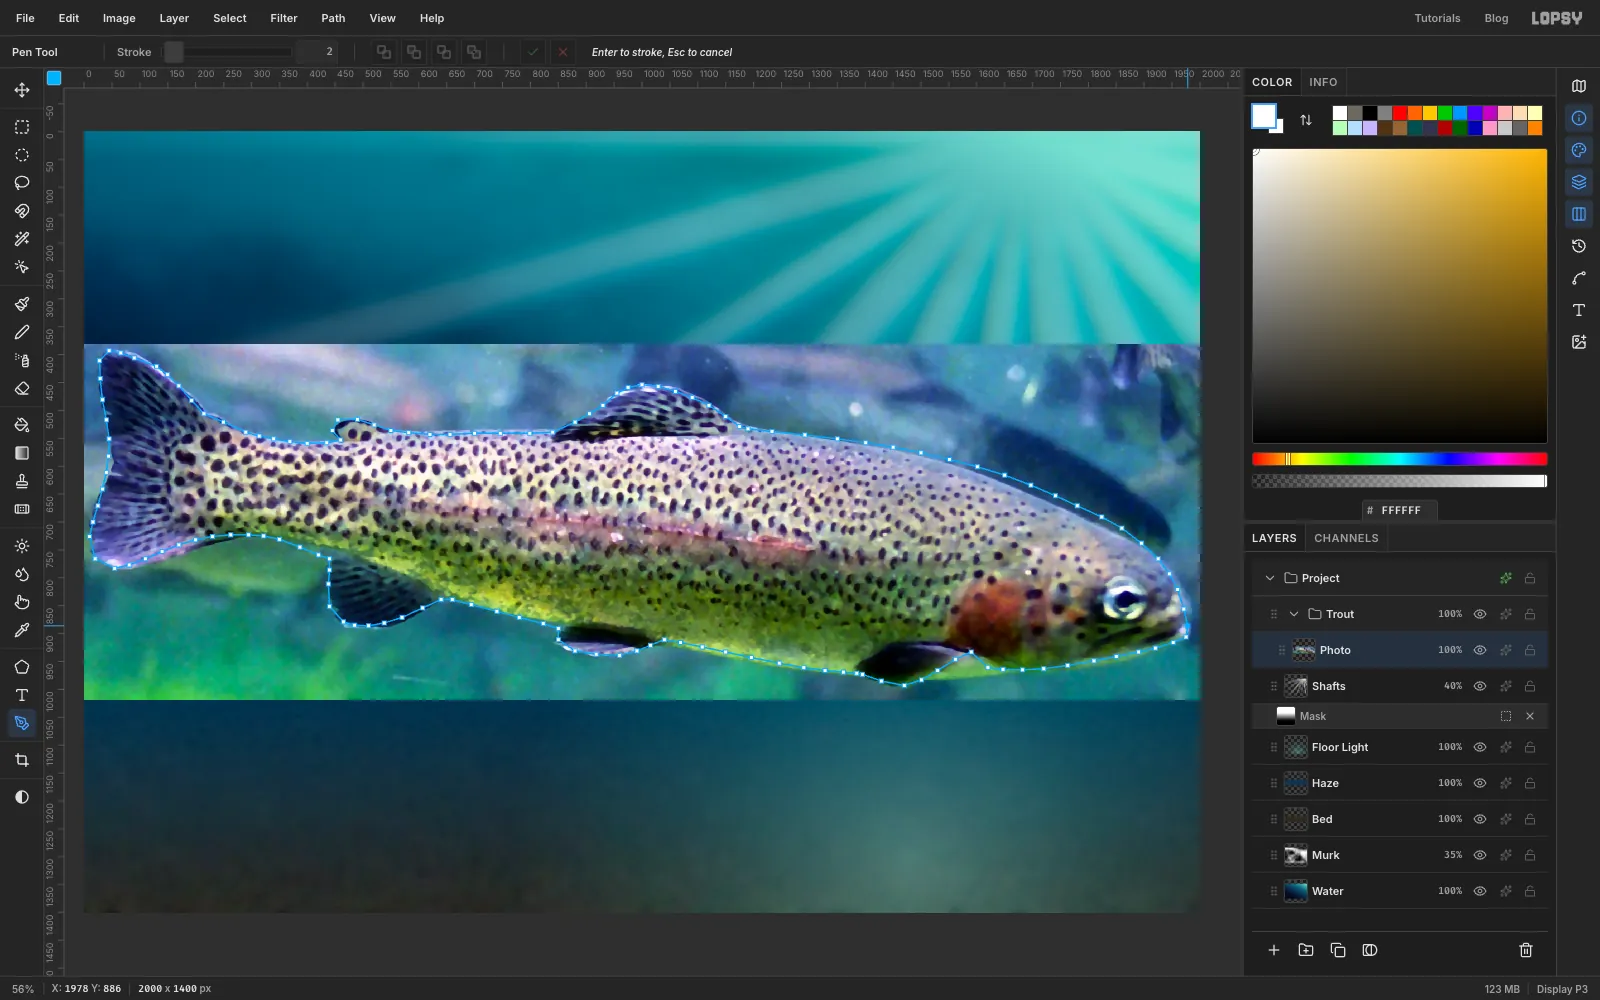
Pick the Pen tool and click your way around the fish, placing an anchor about every half centimetre on screen and closer together around the fins. Start at the nose, go along the back, around the dorsal fin and the small adipose fin, around the tail, then back along the belly and the three lower fins.
Click on the first anchor to close the path. The outline in the picture has about 130 anchors, so allow a few minutes. Stay very slightly inside the fish, because any background you include will show as a halo against the dark water.
-
Cut it out
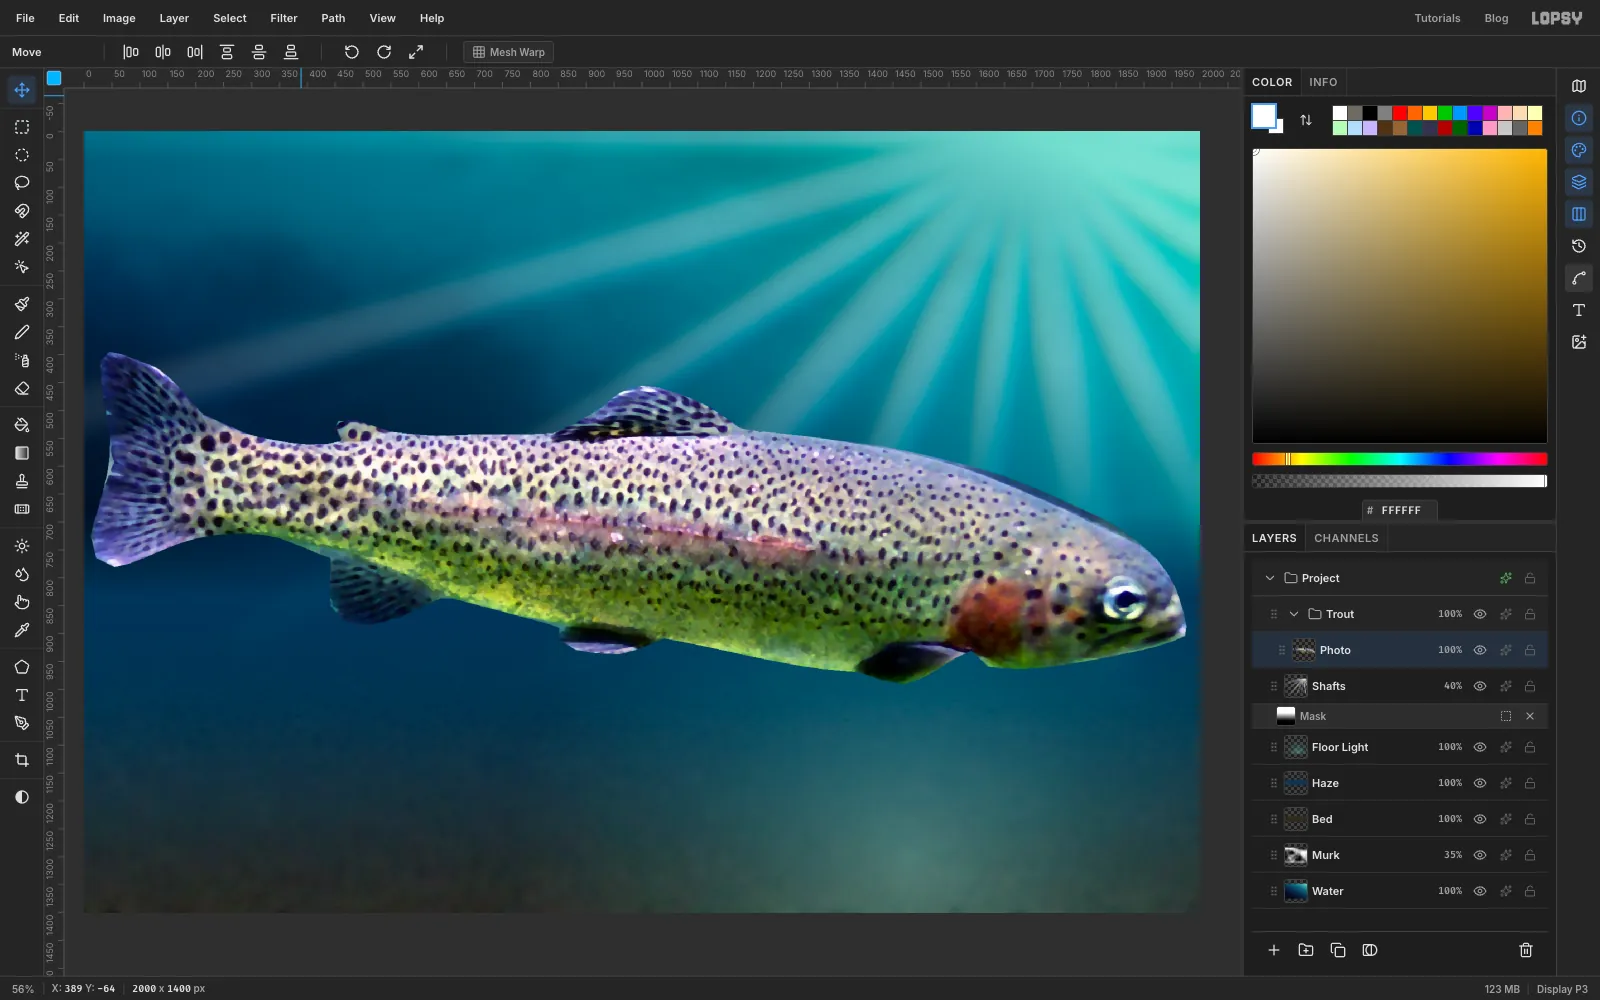
Open the Paths panel from the panel toolbar, select your path, and click Path to Selection. Then:
- Select → Shrink… by 2
- Select → Feather… by 1
- Select → Inverse
- Press Delete
- Press Cmd+D
Back in the Paths panel, click Delete Path. You're finished with this path, and leaving it selected would mean your next Pen click could split it instead of starting a new one.
-
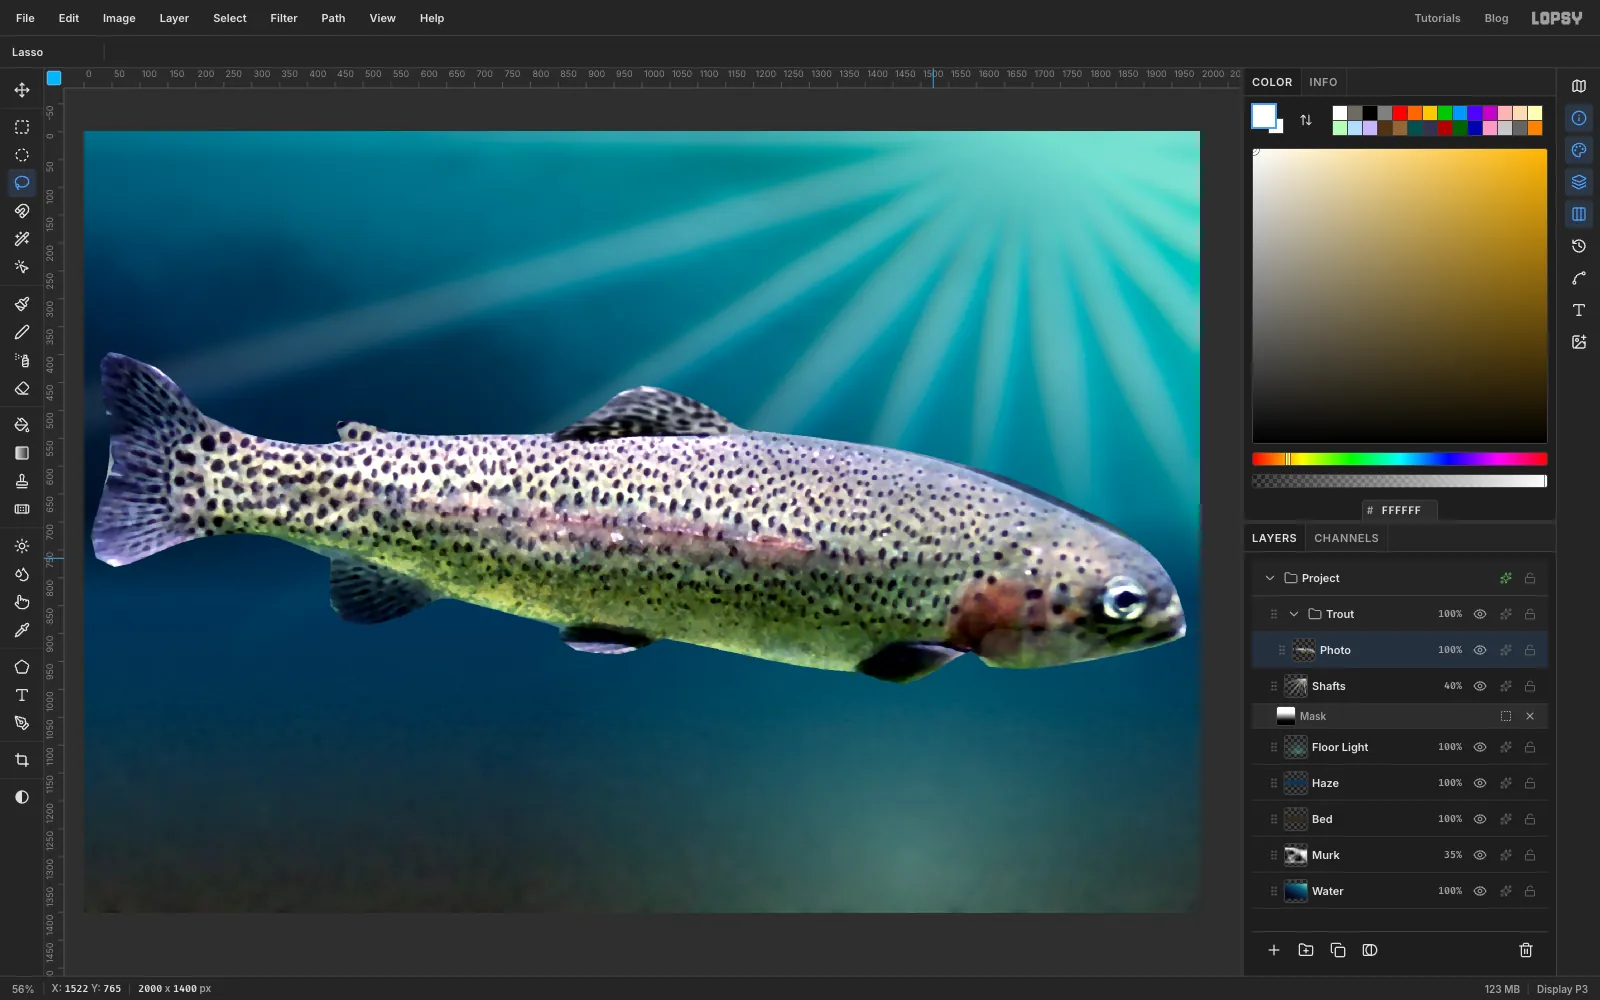
Calm the photo down
The colour you add later needs a quiet base to sit on. With Photo active, run Hue/Saturation… with Saturation -35 and Brightness/Contrast… with Brightness 2 and Contrast 14.
Pick the Dodge/Burn tool, leave it on Dodge, and set Exposure to 16 and Size to 70. Make one stroke along the lower jaw, from behind the head toward the chin, so the head doesn't turn into a dark blob.
The dorsal fin's busy spots will fight with everything else, so lasso around that fin with the Lasso. Choose Select → Feather… by 3, then run Hue/Saturation… with Saturation -50 and Gaussian Blur… with Radius 4. Press Cmd+D.
-
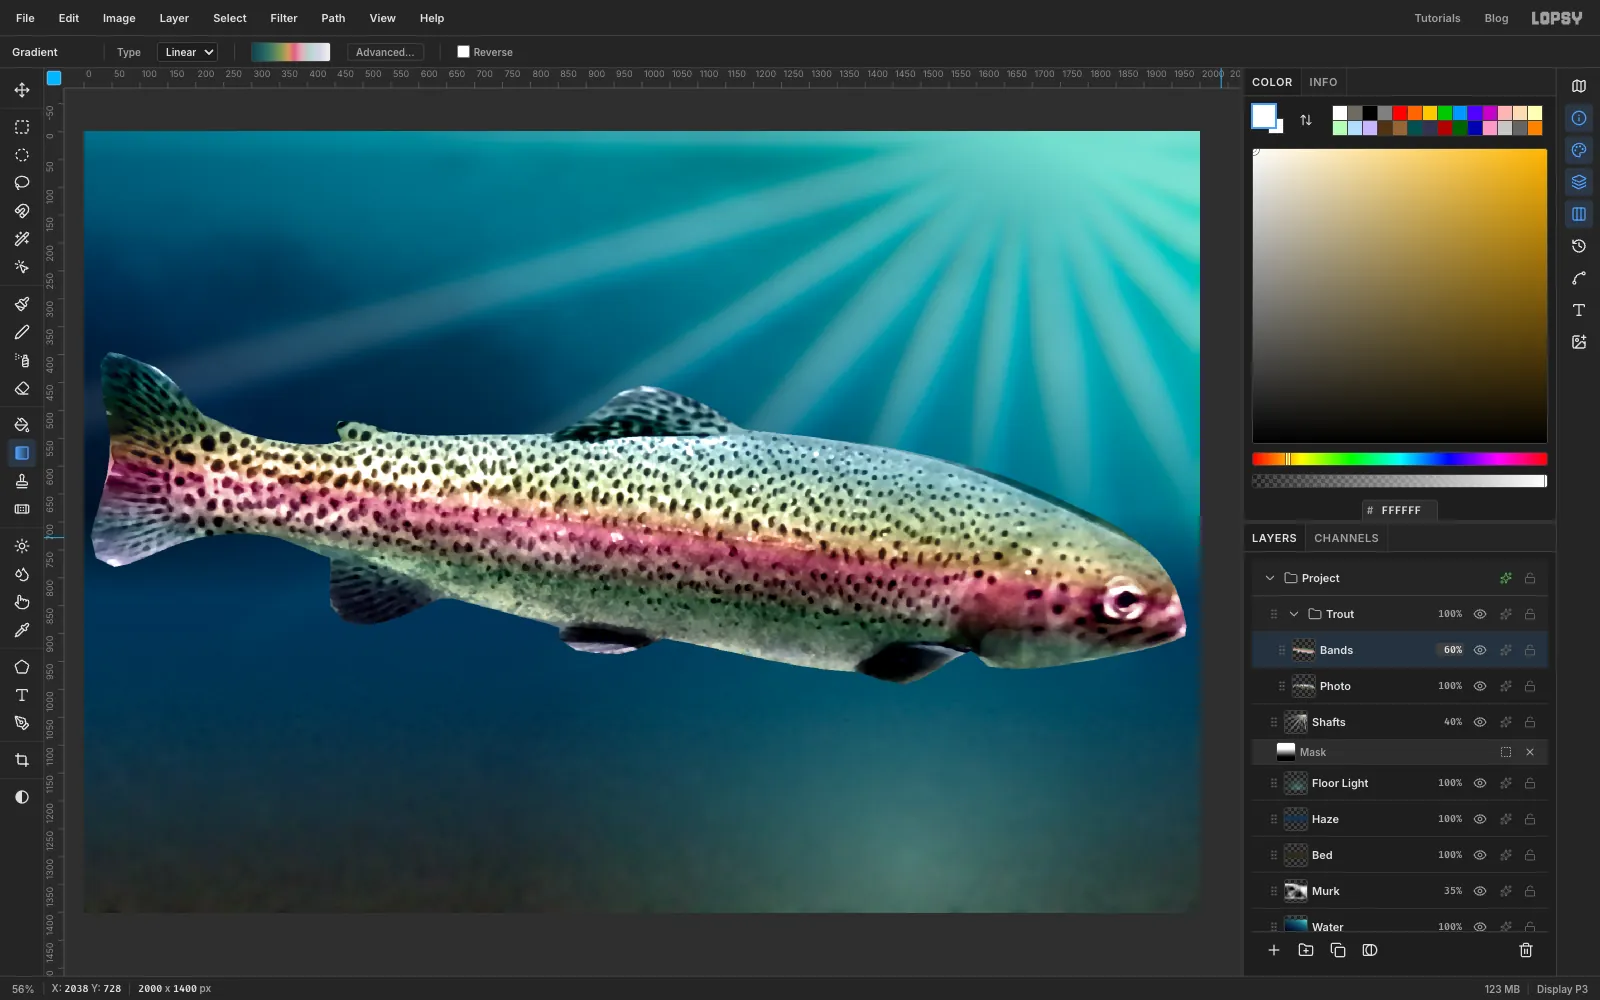
Lay down the body colours
Add a layer above Photo named Bands. Hold Cmd and click the Photo thumbnail to select the fish's shape. The active layer stays on Bands.
Set a linear gradient, all stops fully opaque:
- at the far left
- at 20%
- at 38%
- at 47%
- at 54%
- at 62%
- at 74%
- at 88%
- at the far right
Start just above the back, halfway along the fish. Drag down to just below the belly, tilting the drag very slightly so it's square to the body. Press Cmd+D. Set the layer to Color at 60%, so the spots and shading all stay where the photo put them.
-
Start the thin film
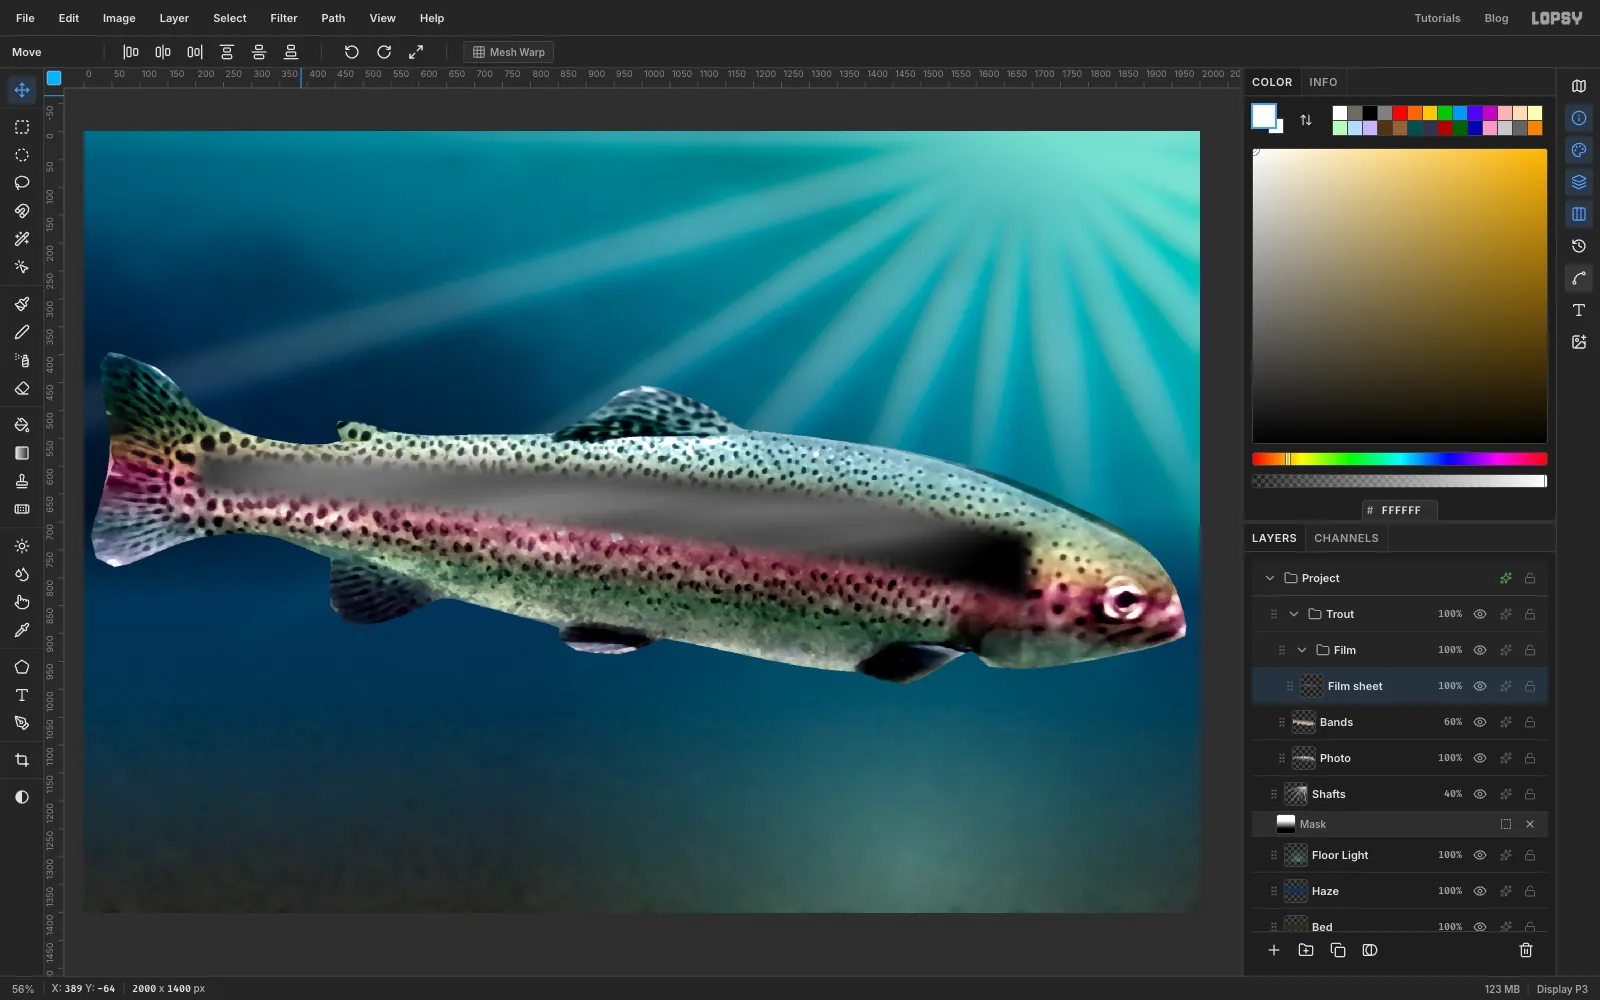
Here's the iridescence. With Bands active, click New Group and name it Film. Click Add Layer and name the new layer Film sheet. It goes inside the group.
Run:
- Clouds… with Scale 3
- Solarize… with Threshold 128
- Motion Blur… with Angle 172 and Distance 300
- Motion Blur… again with the same values
- Brightness/Contrast… with Brightness 8 and Contrast 45
The blur stretches the clouds along the length of the fish. Trim the sheet to the fish: Cmd-click the Photo thumbnail, choose Select → Inverse, press Delete and press Cmd+D.
Now keep only a strip of it. With the Pen, click a long, narrow shape along the upper flank, from just ahead of the tail to behind the head, about a third of the body deep. Close it by clicking the first anchor. In the Paths panel click Path to Selection, then Select → Feather… by 30, Select → Inverse, Delete and Cmd+D. Delete the path.
-
Map the greys to a spectrum
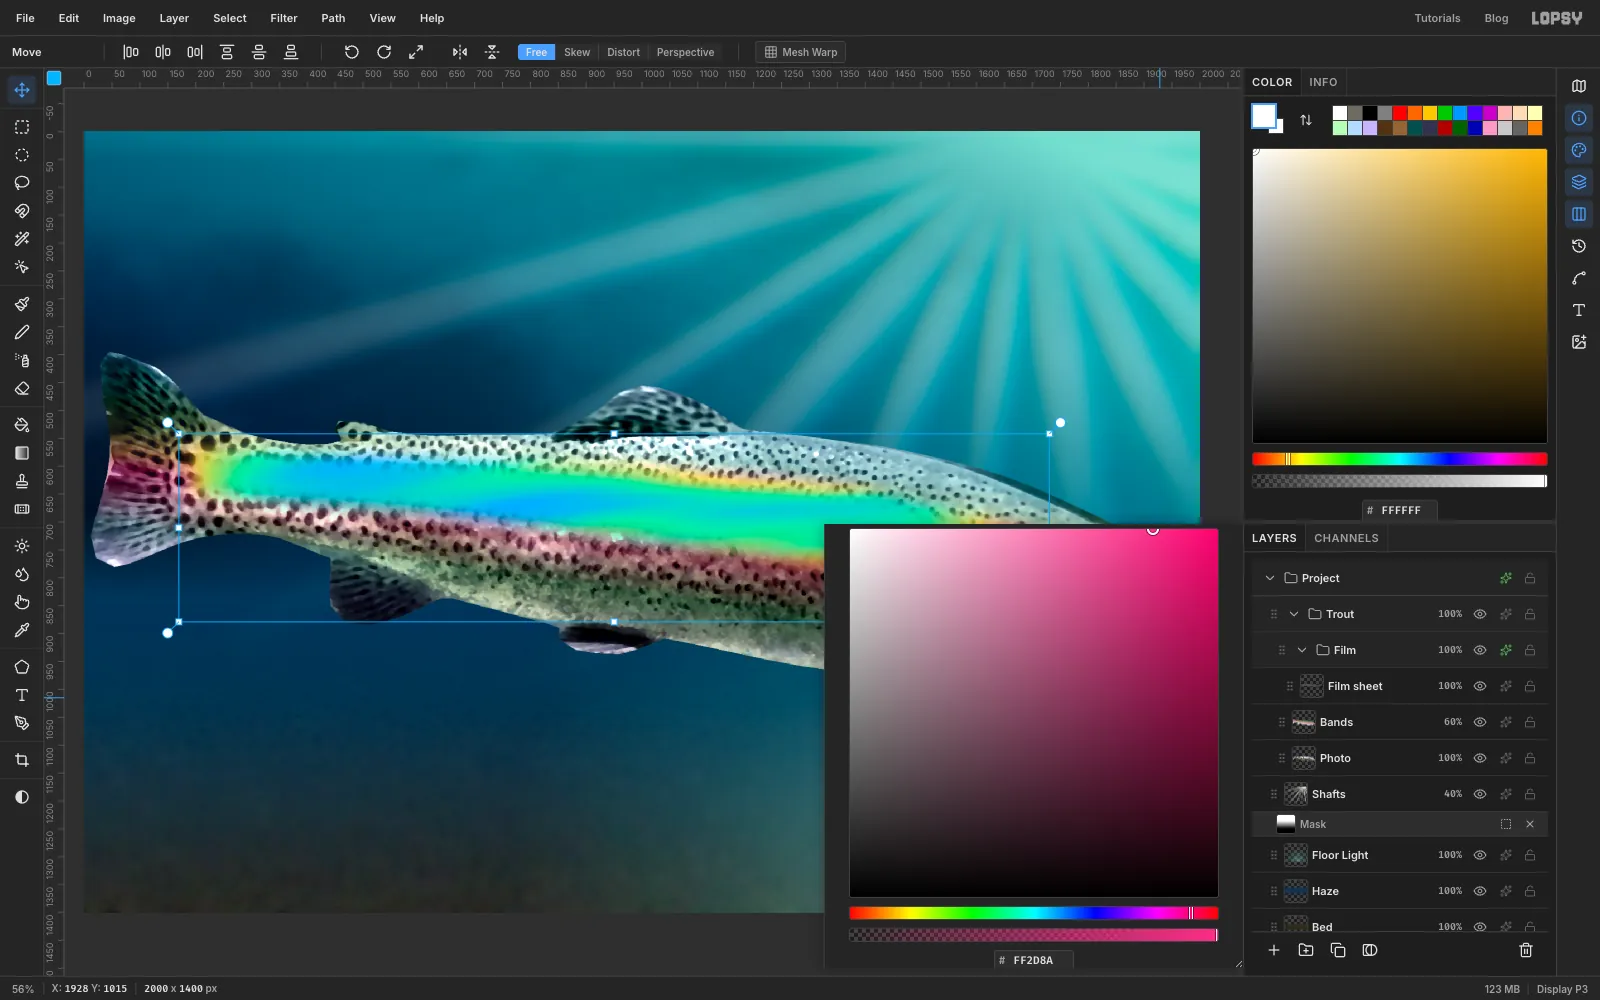
Click the Film group row and open its effects drawer with the ✦ button. Click Add Adjustment and choose Gradient Map. Click the handle row to add stops, typing each colour in the Hex field:
- at the far left
- at 17%
- at 34%
- at 50%
- at 67%
- at 84%
- at the far right
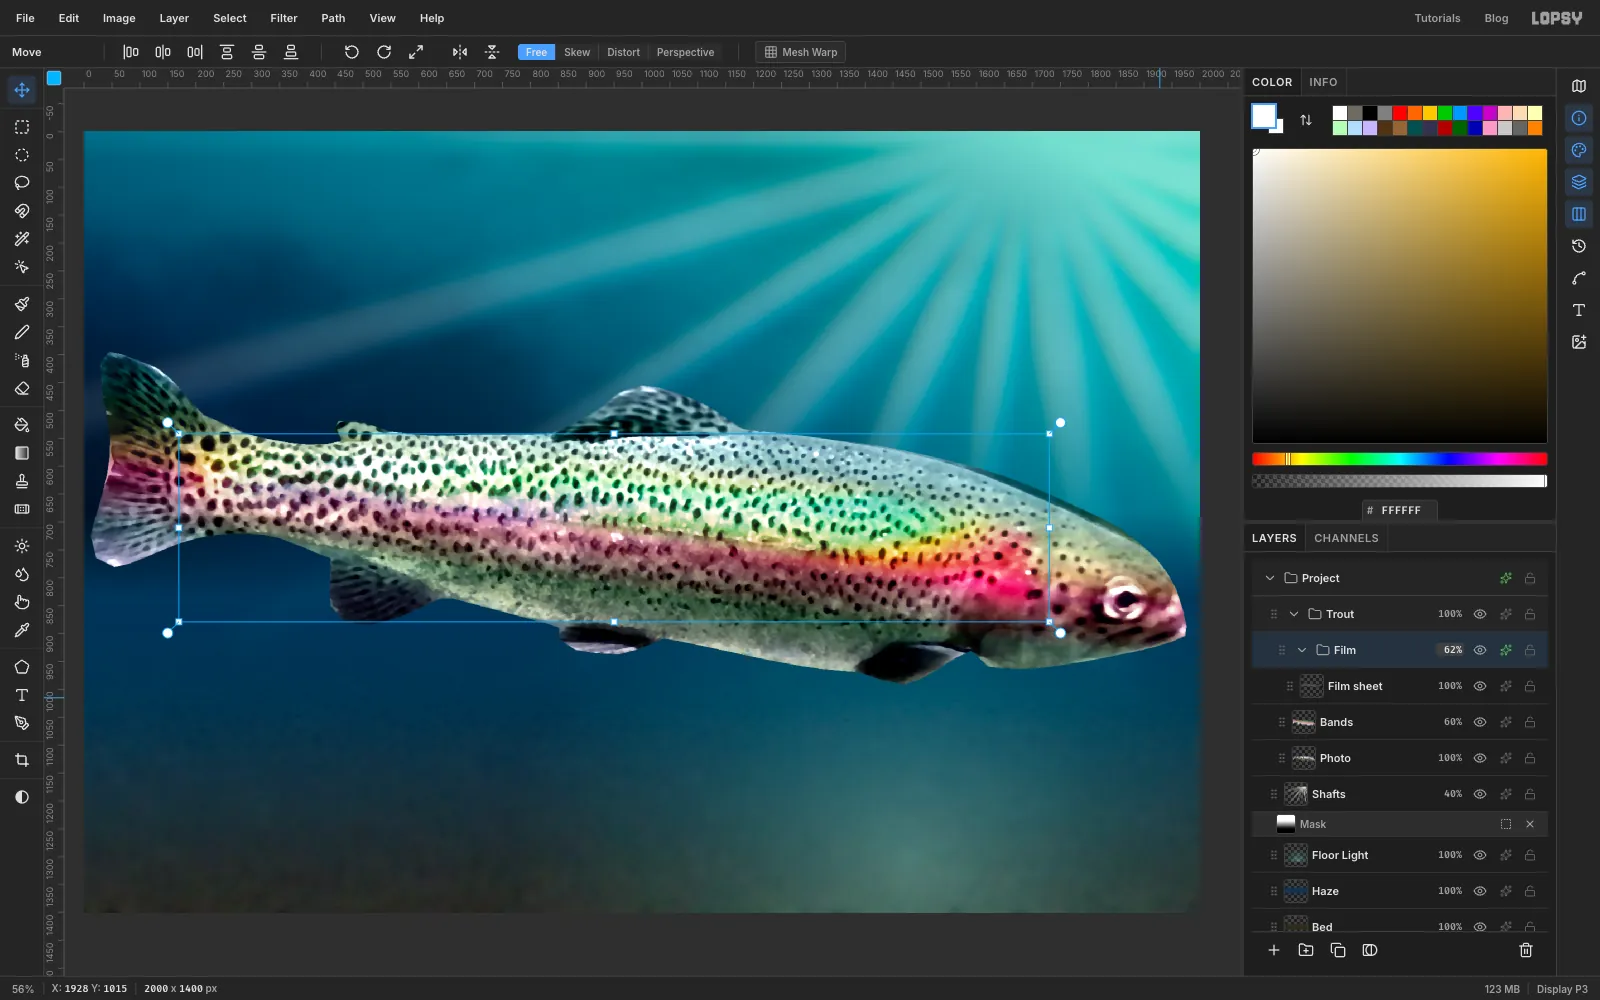
Each grey value now picks a hue, so the streaks turn into bands of colour that shift along the body. It looks awful at this stage, but the next step fixes that.
-
Sink the sheen into the fish
With the drawer still open, set the Film group's blend mode to Overlay. Close the drawer and set the group's opacity to 62%.
Overlay keeps the fish's own light and dark, so the spots stay crisp and the colour only appears on the mid-tones.
-
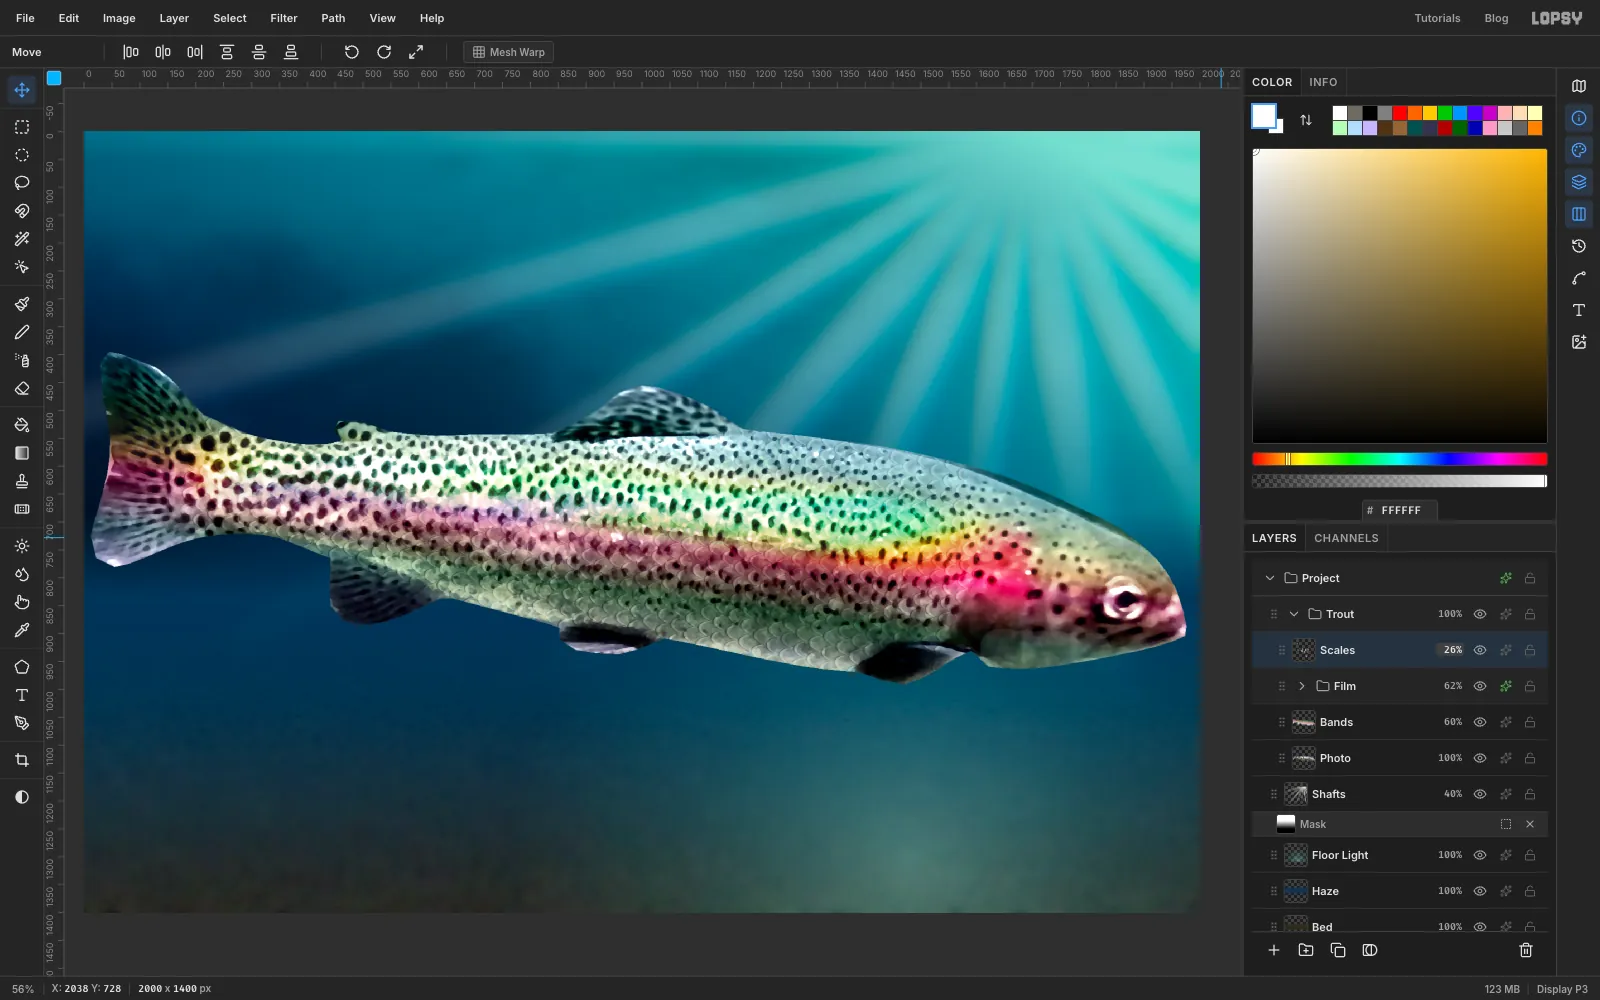
Draw one scale
Click the arrow on the Film row to collapse it, then click the row and click Add Layer, so the new layer lands beside the group and not inside it. Name the layer Scales.
You're about to draw in the empty water at the top of the canvas, and it'll be cleaned up afterwards. Pick the Elliptical Marquee and draw an ellipse about 190 wide and 110 tall. Set the foreground to black and choose Edit → Fill.
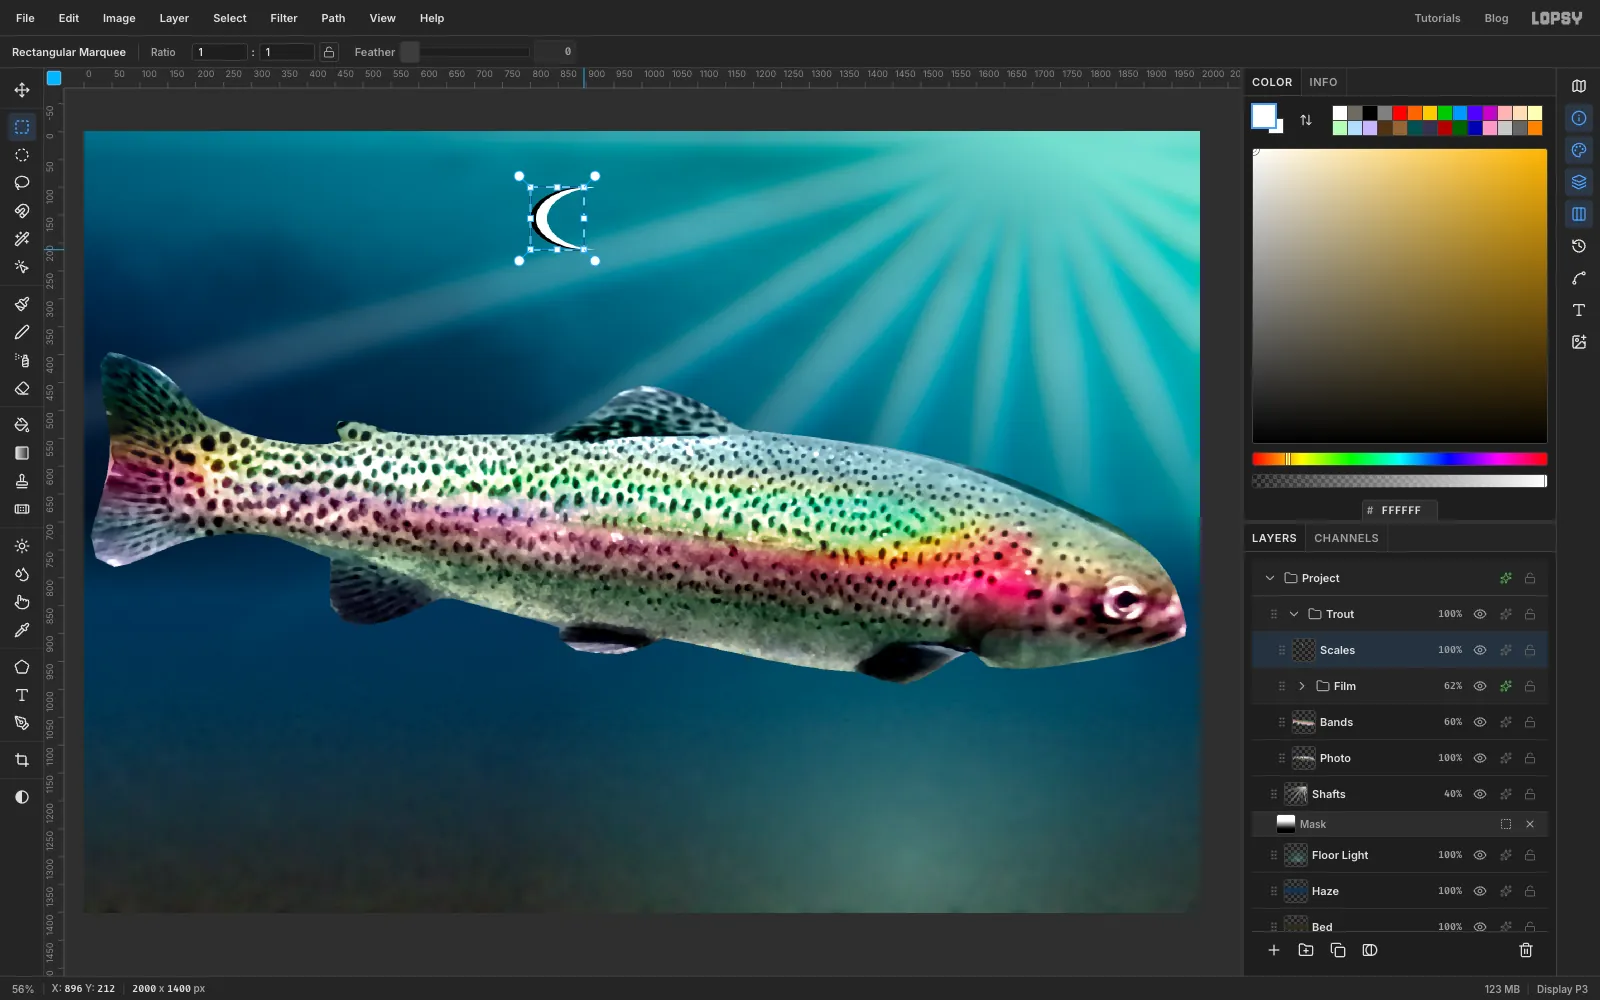
Press Shift+Right once to move the outline 10 px to the right without moving any pixels. Set the foreground to white and fill again. Press Shift+Right twice more, then press Delete. You're left with a thin crescent, black on its outer edge and white just inside, like a scale's edge catching the light.
Press Cmd+D, then use the Rectangular Marquee to select exactly the left half of the shape, from the top to the bottom of the crescent, ending at its tips. Choose Edit → Define Pattern.
-
Tile it across the canvas
Marquee around the crescent, press Delete, and press Cmd+D.
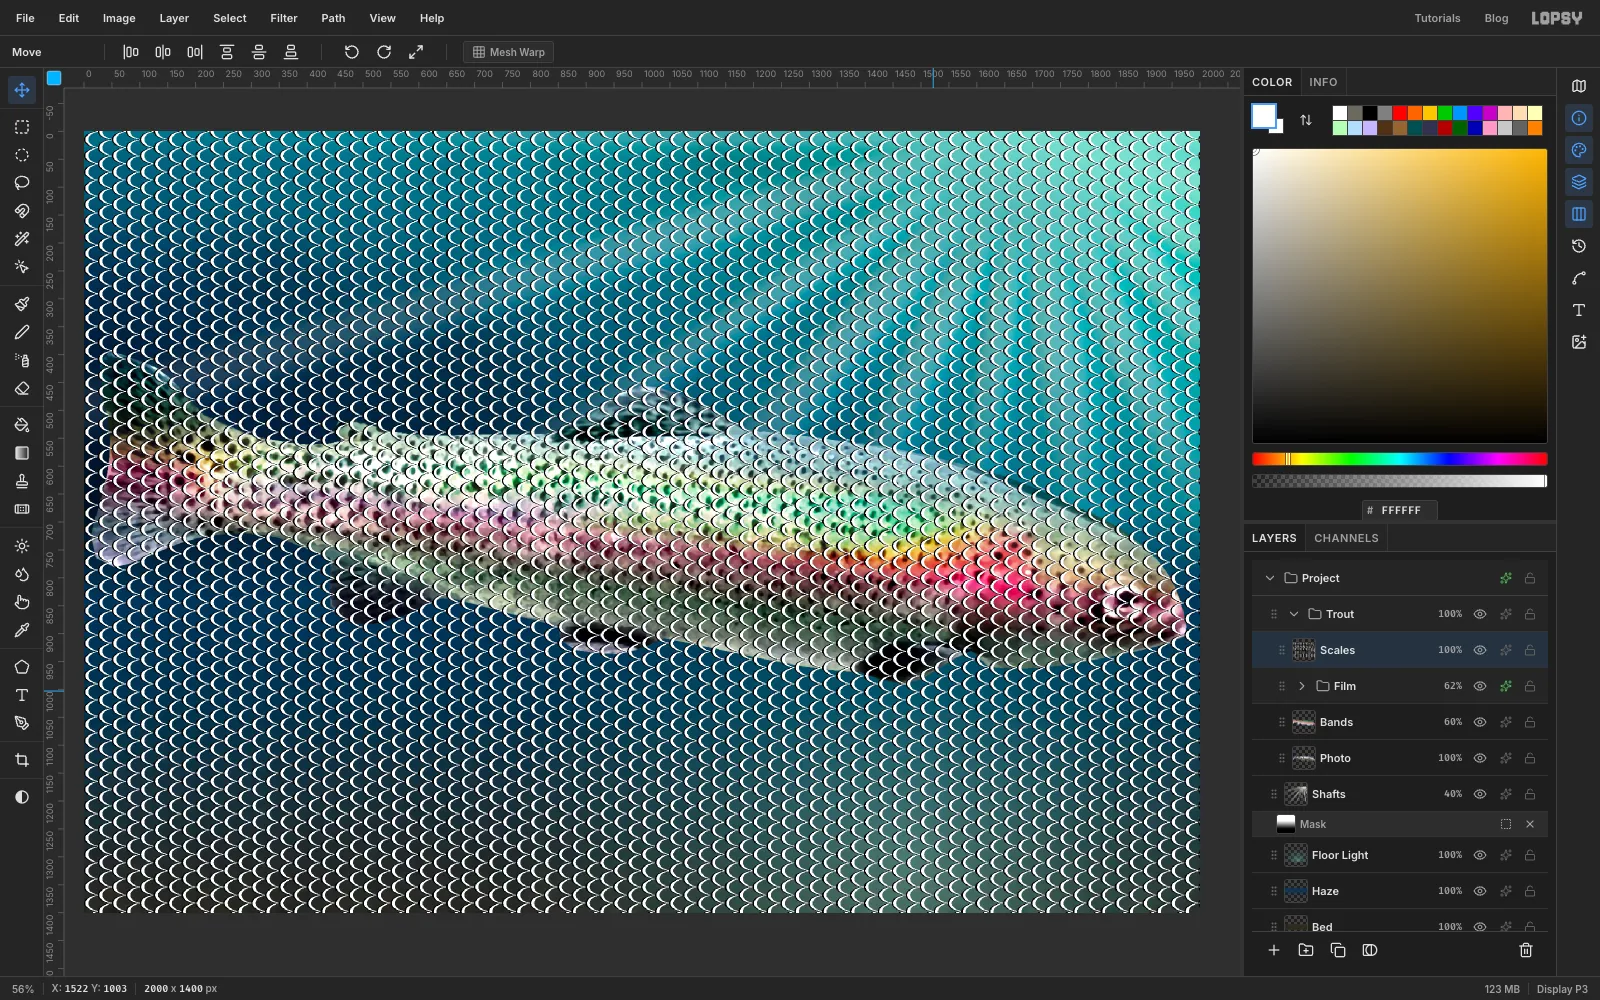
Choose Edit → Fill with Pattern…. Set Scale to 26 and Column Stagger to 50, then click Apply. Stagger shifts every other column by half a tile, so the crescents overlap the way real scales do.
The photo's fish tilts down to the right, so the sheet should too. Marquee the whole canvas, switch to the Move tool, and drag the round rotate handle just outside a corner clockwise by about 8 degrees. Press Cmd+D.
-
Trace the body
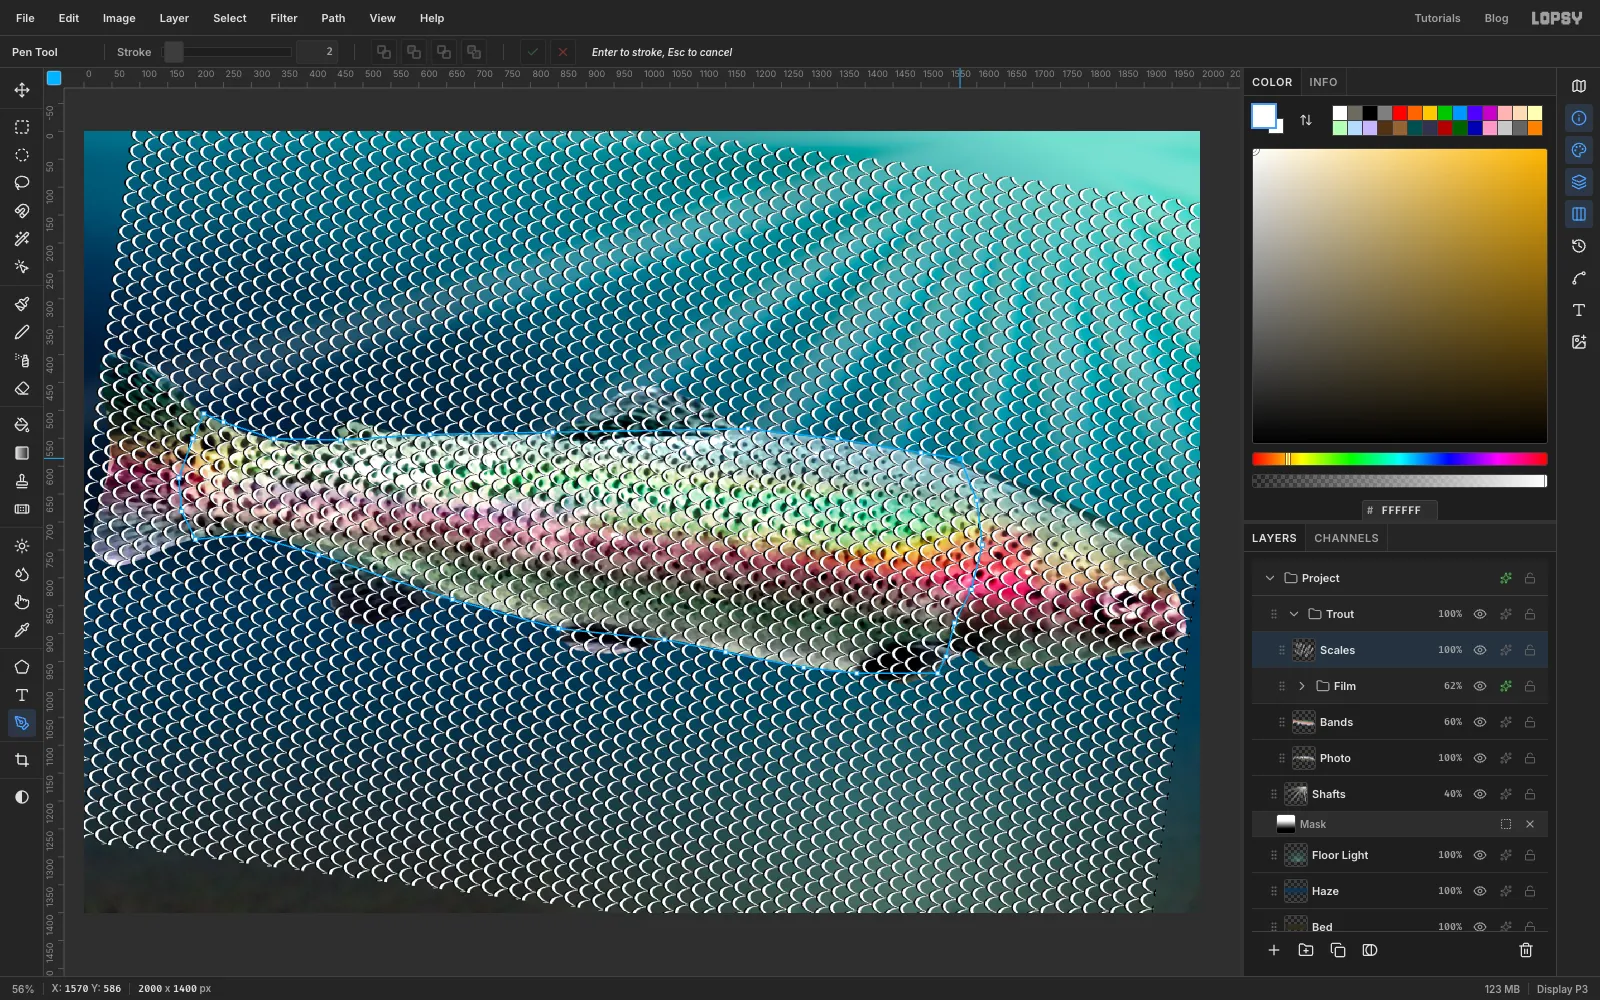
A trout's fins and head have no scales. Use the Pen to click a rough outline around just the body, from behind the gill back to where the tail begins, keeping out the fins. Close it by clicking the first anchor.
-
Clip the scales to the fish
Click Path to Selection, then Select → Feather… by 8, Select → Inverse, Delete and Cmd+D. Delete the path.
The outline you just drew runs slightly past the fish here and there, so trim to the real shape. Cmd-click the Photo thumbnail, choose Select → Inverse, press Delete and press Cmd+D.
Set the layer to Overlay at 26%.
-
Paint the stripe and the belly
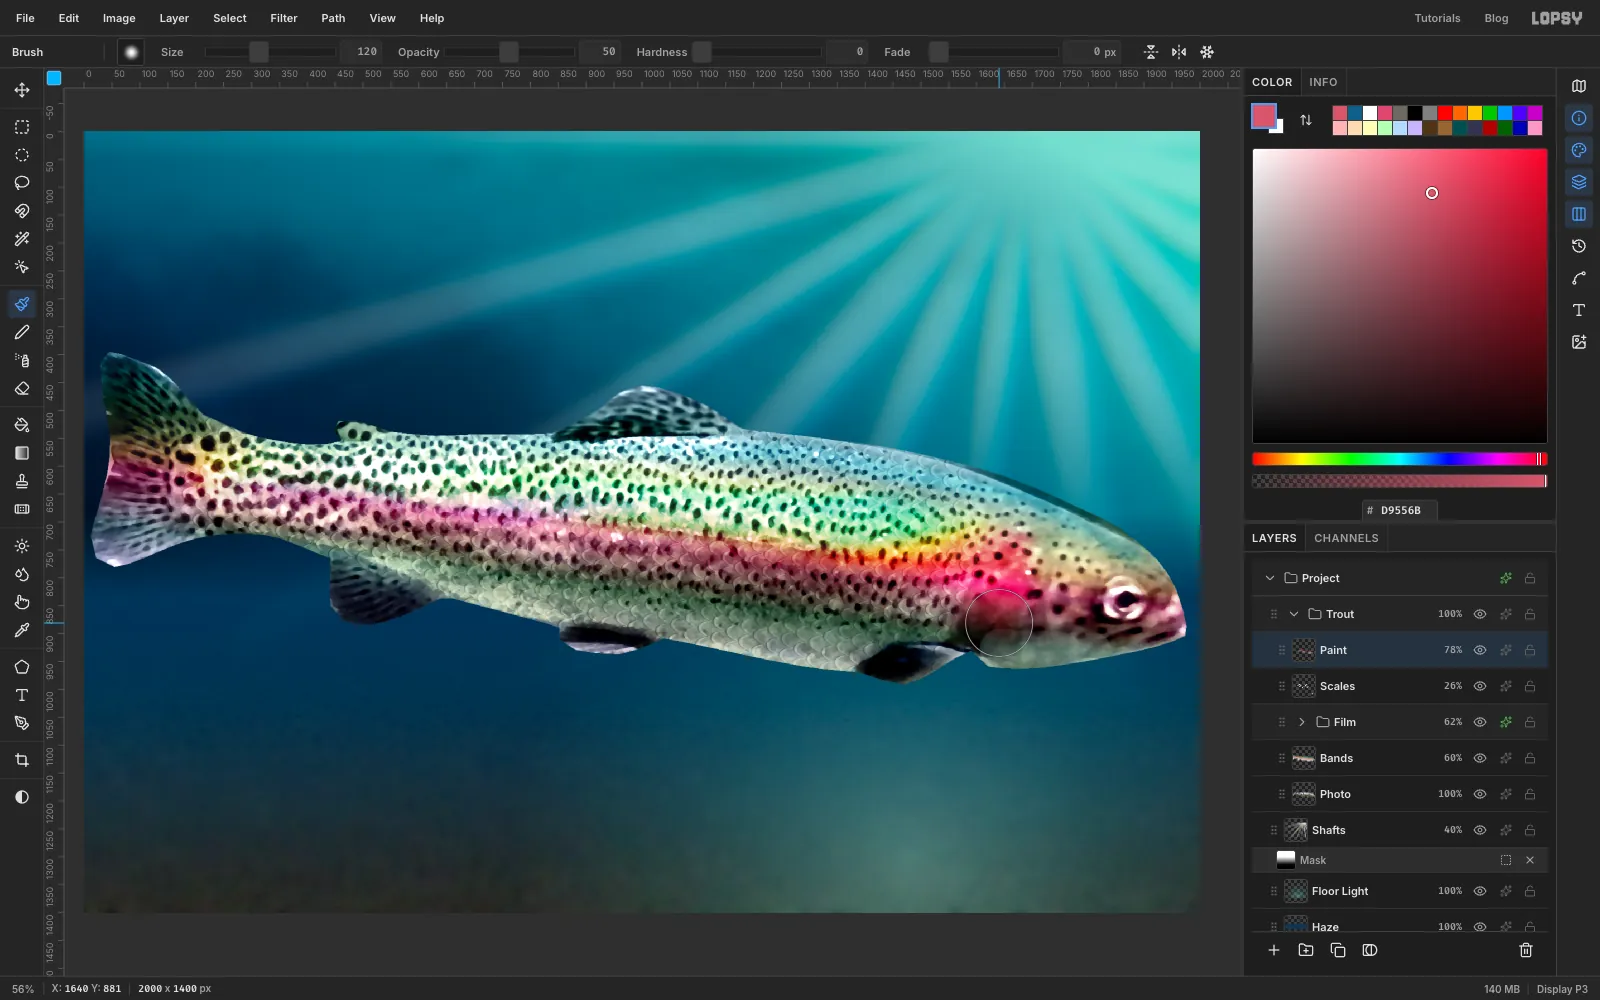
Add a layer named Paint, set it to Soft Light at 78%, and Cmd-click the Photo thumbnail so your strokes stay on the fish.
Pick the Brush. Open the Brushes modal from the tip thumbnail at the left of the options bar, click the Soft Round preset and close the modal with its ✕. Set Size and Opacity in the options bar, changing them for each of these strokes:
- , Size 60, Opacity 85: along the middle of the fish, from near the tail to just behind the gill
- White, Size 110, Opacity 60: along the lower flank, from below the back of the fish to behind the pectoral fin
- White, Size 80, Opacity 70: along the underside of the head to the chin
- , Size 60, Opacity 80: along the top of the back, from the tail to the head
- , Size 120, Opacity 50: one short stroke on the gill plate
Press Cmd+D.
-
Darken the back
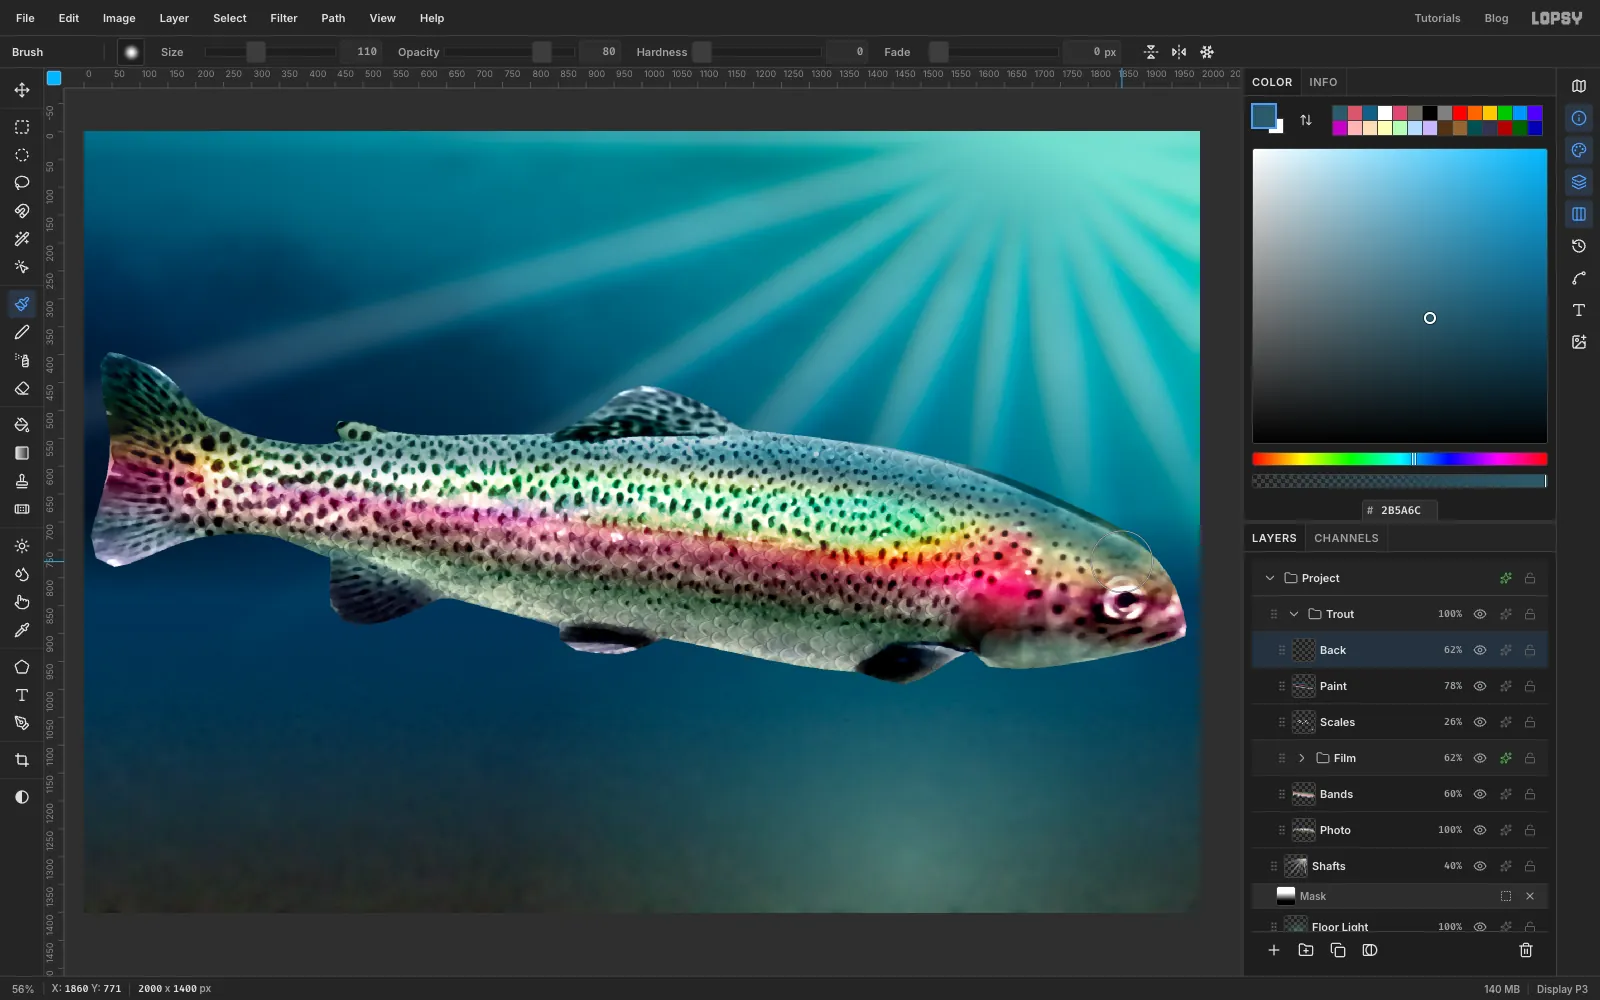
Add a layer named Back, set it to Multiply at 62%, and Cmd-click the Photo thumbnail. Open the Brushes modal and pick Soft Round if it isn't active. With Size 110, Opacity 80 and the colour , paint one long stroke along the back from the tail to the top of the head. Press Cmd+D.
A dark top makes the flank look brighter, and the sheen needs that contrast.
-
Finish the eye and the gill
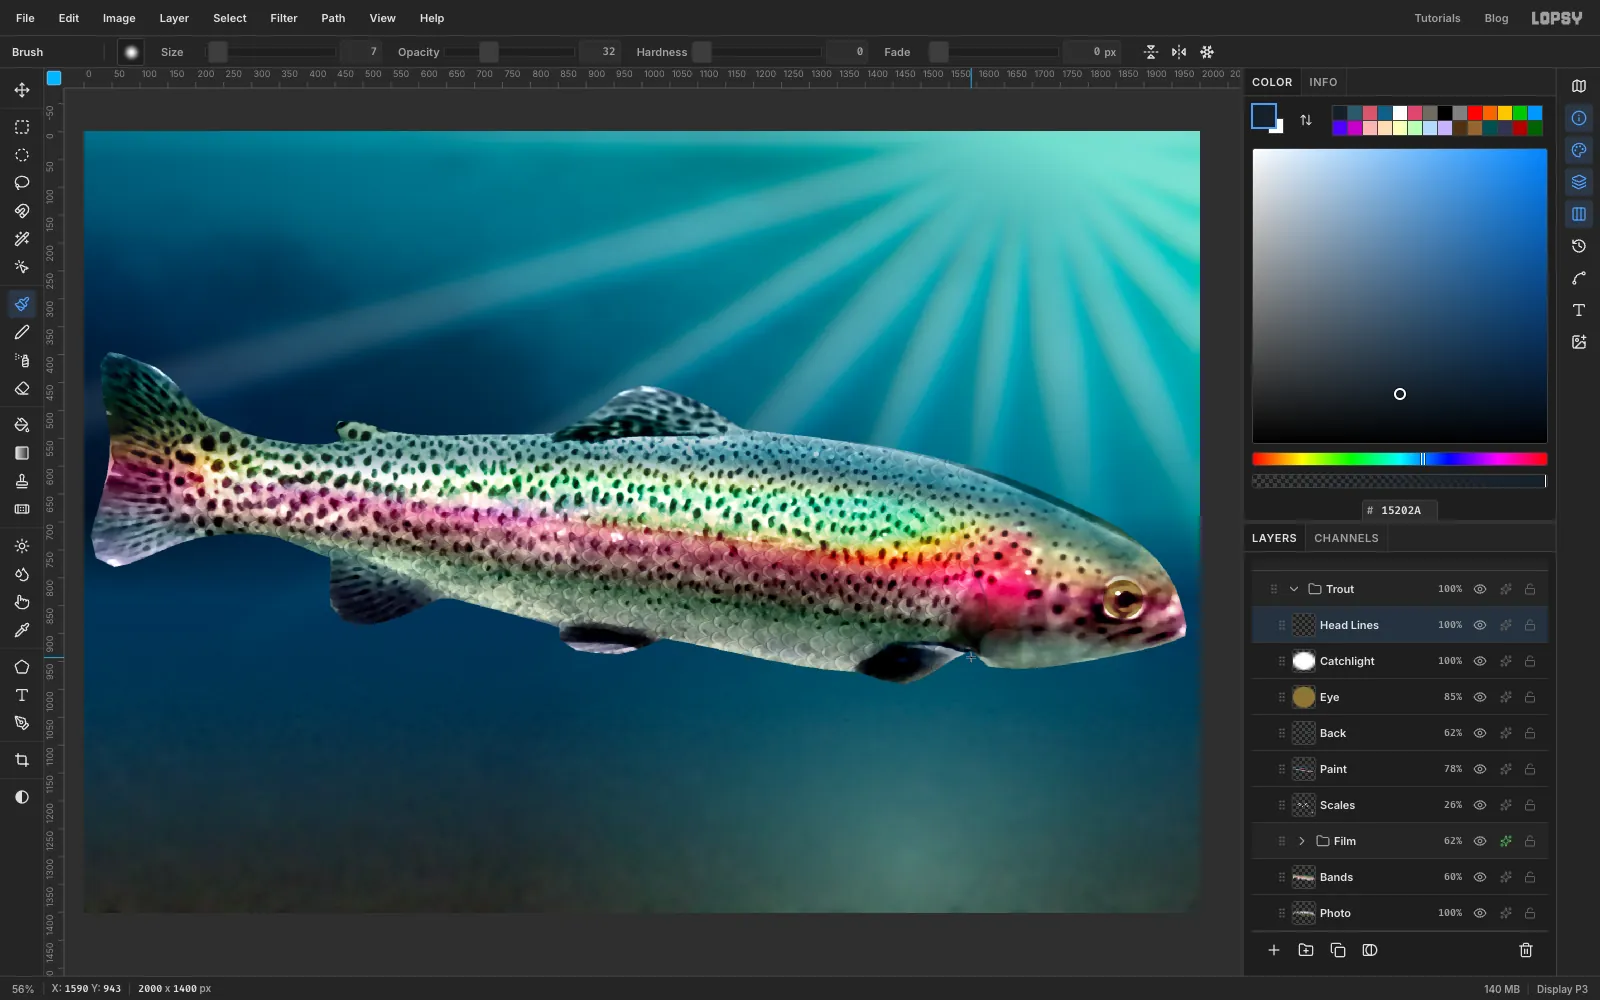
Add a layer named Eye. With the Elliptical Marquee, select a circle just covering the eye, about 70 px across. Fill it with , press Cmd+D, and set the layer to Multiply at 85%. This turns the photo's silver ring to old gold without losing its structure.
Add a layer named Catchlight. Select a tiny ellipse, about 10 px across, at the upper left of the pupil. Fill it with white and press Cmd+D.
Add a layer named Head Lines and Cmd-click the Photo thumbnail. Keep the Soft Round preset, set Size 7 and Opacity 32, and with the colour paint one curved line down the back edge of the gill plate. Press Cmd+D.
-
Colour the fins
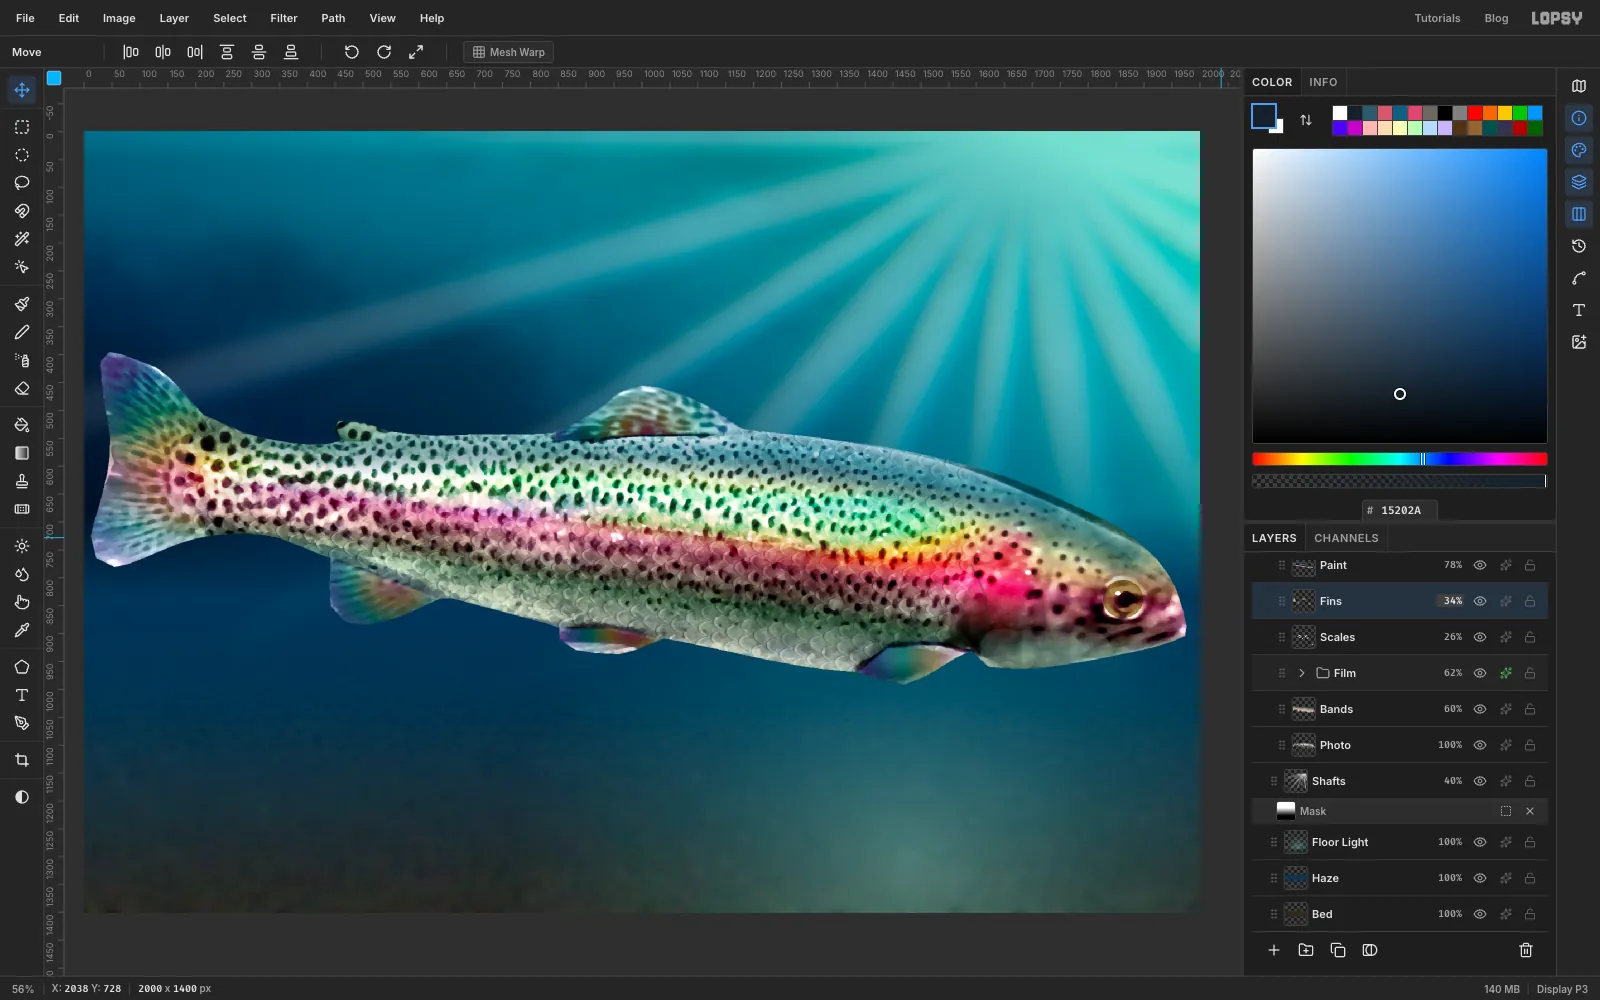
Click the Scales layer and add a layer above it named Fins. Set a radial gradient, all stops fully opaque: at the far left, at 30%, at 55%, at 80% and at the far right.
For each fin in turn, tail, dorsal, anal, pelvic and pectoral:
- Draw around it with the Lasso
- Select → Feather… by 3
- Drag the Gradient from where the fin joins the body out to its tip
- Press Cmd+D
Your lasso will have strayed past the fish in places, so trim it: Cmd-click the Photo thumbnail, Select → Inverse, Delete, Cmd+D. Set the layer to Screen at 34%.
-
Paint the fin rays
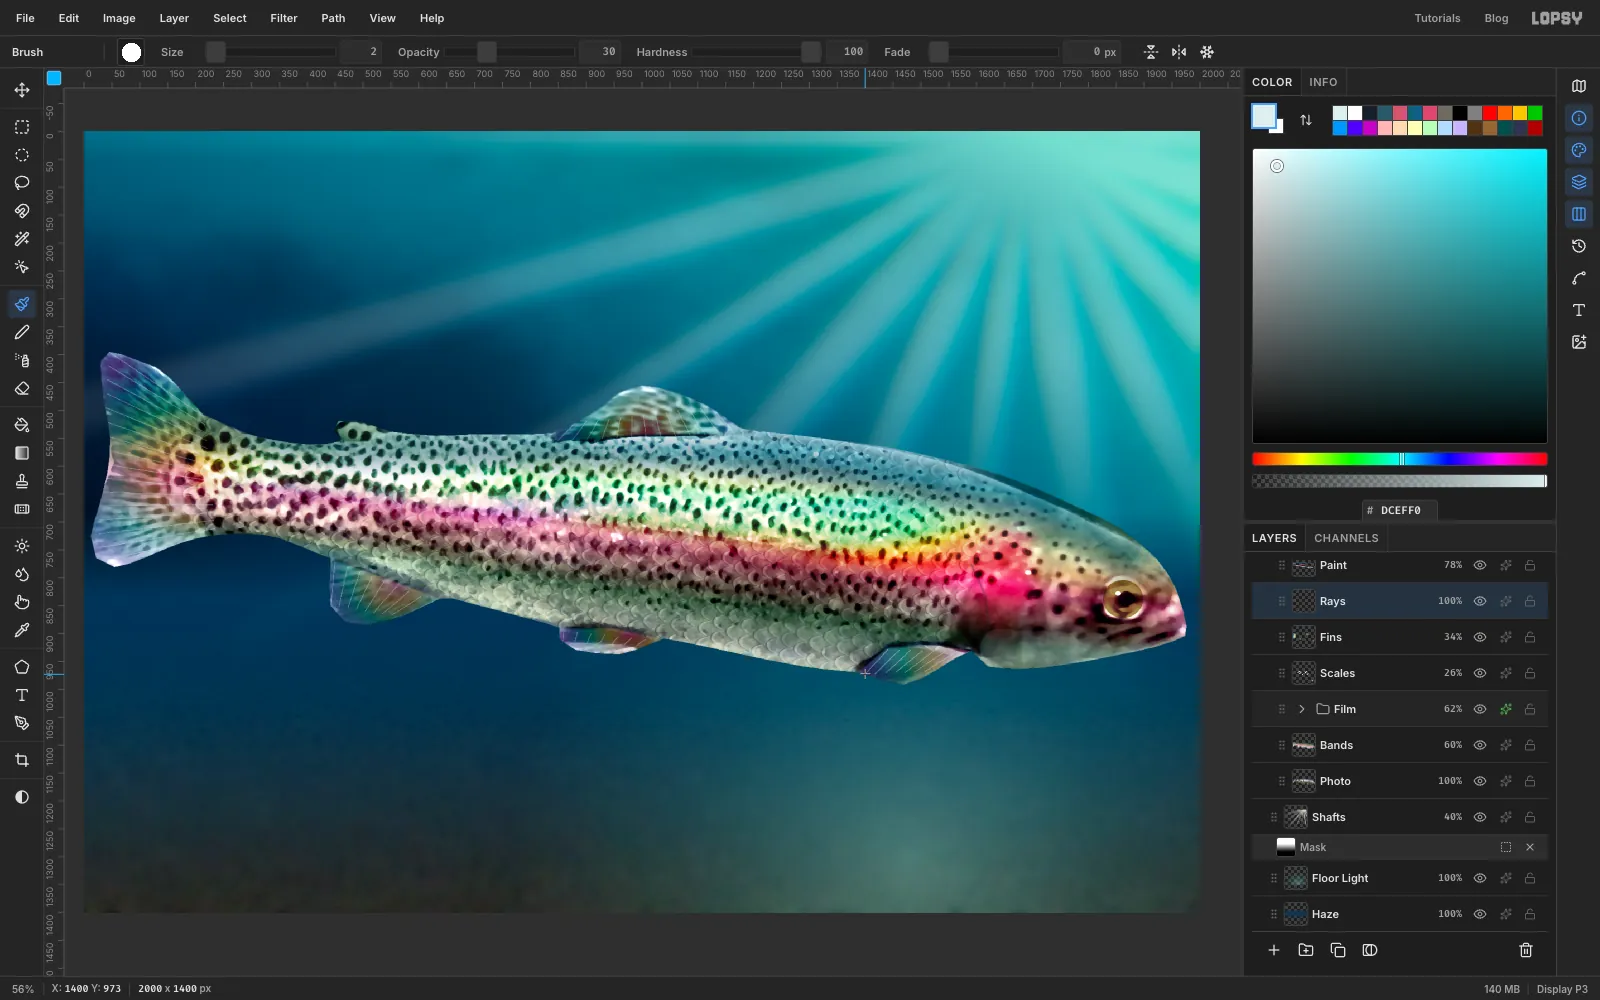
Add a layer named Rays and Cmd-click the Photo thumbnail. Open the Brushes modal, click the Hard Round preset and close the modal. Set Size to 2 and Opacity to 30 in the options bar. Set the colour to .
Paint thin lines from the base of each fin out to its edge, fanning them slightly: about 15 on the tail, 12 on the dorsal and 8 on each of the others. Press Cmd+D. This takes a while, but it's what makes a fin look like a fin and not a smudge.
-
Copy the whole fish
From here on you'll bend and light the fish as one object, so flatten a copy of it.
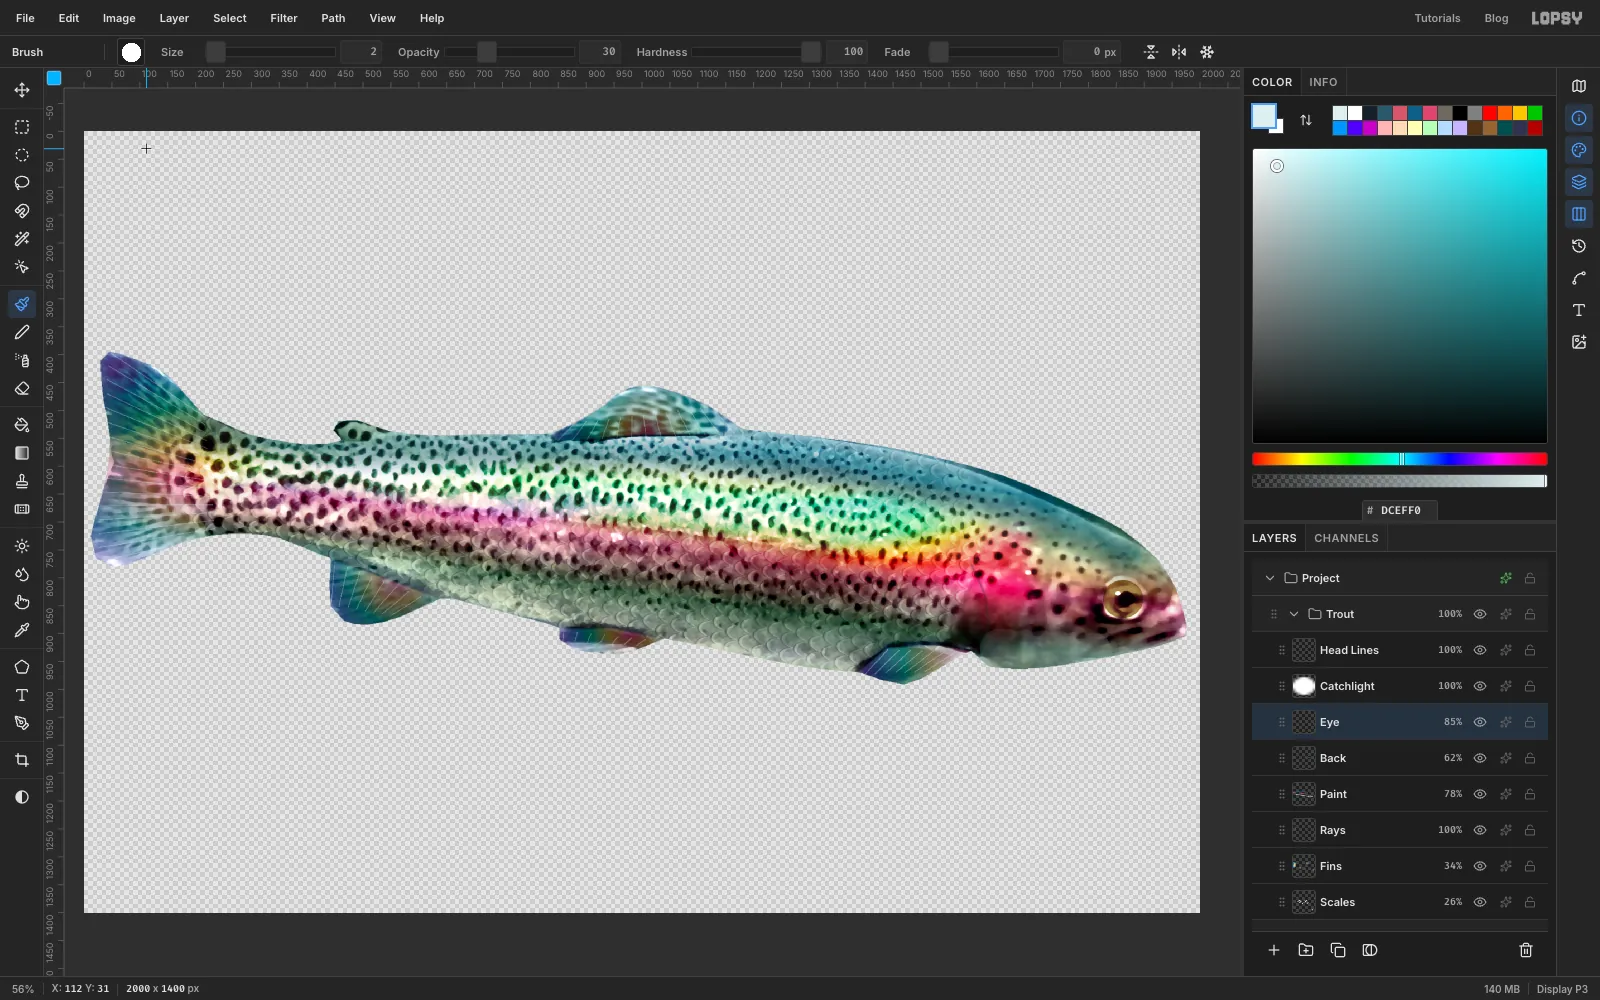
Hide Water, Murk, Bed, Haze, Floor Light and Shafts with their eye icons, so only the Trout group is visible. Make sure nothing is selected, then choose Edit → Copy Merged.
-
Paste it as one layer
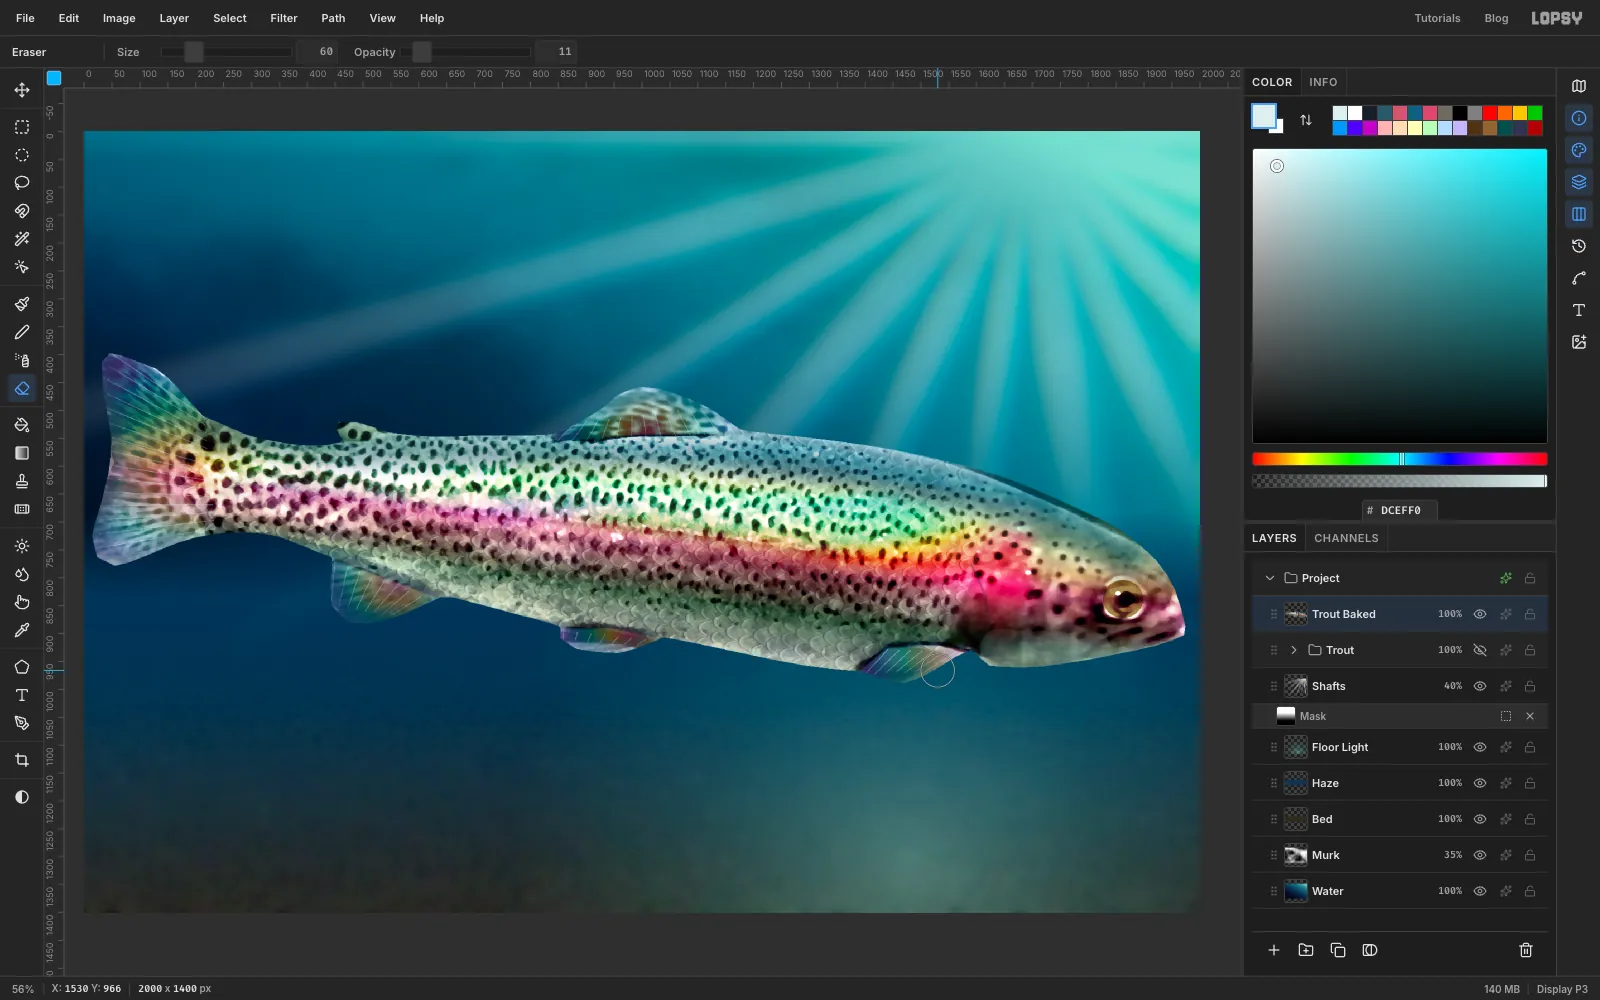
Show those six layers again. Hide the Trout group, collapse it with its arrow and click its row. Press Cmd+V, and rename the new layer Trout Baked. The hidden group stays as your editable original.
Press Cmd+D, then tidy the edge: Cmd-click the Trout Baked thumbnail, Select → Shrink… by 2, Select → Feather… by 1, Select → Inverse, Delete, Cmd+D.
Now make the fins fade into the water. Pick the Eraser, set Size to 60 and Opacity to 11, and make one light pass along the outer edge of each fin.
-
Scale the fish down
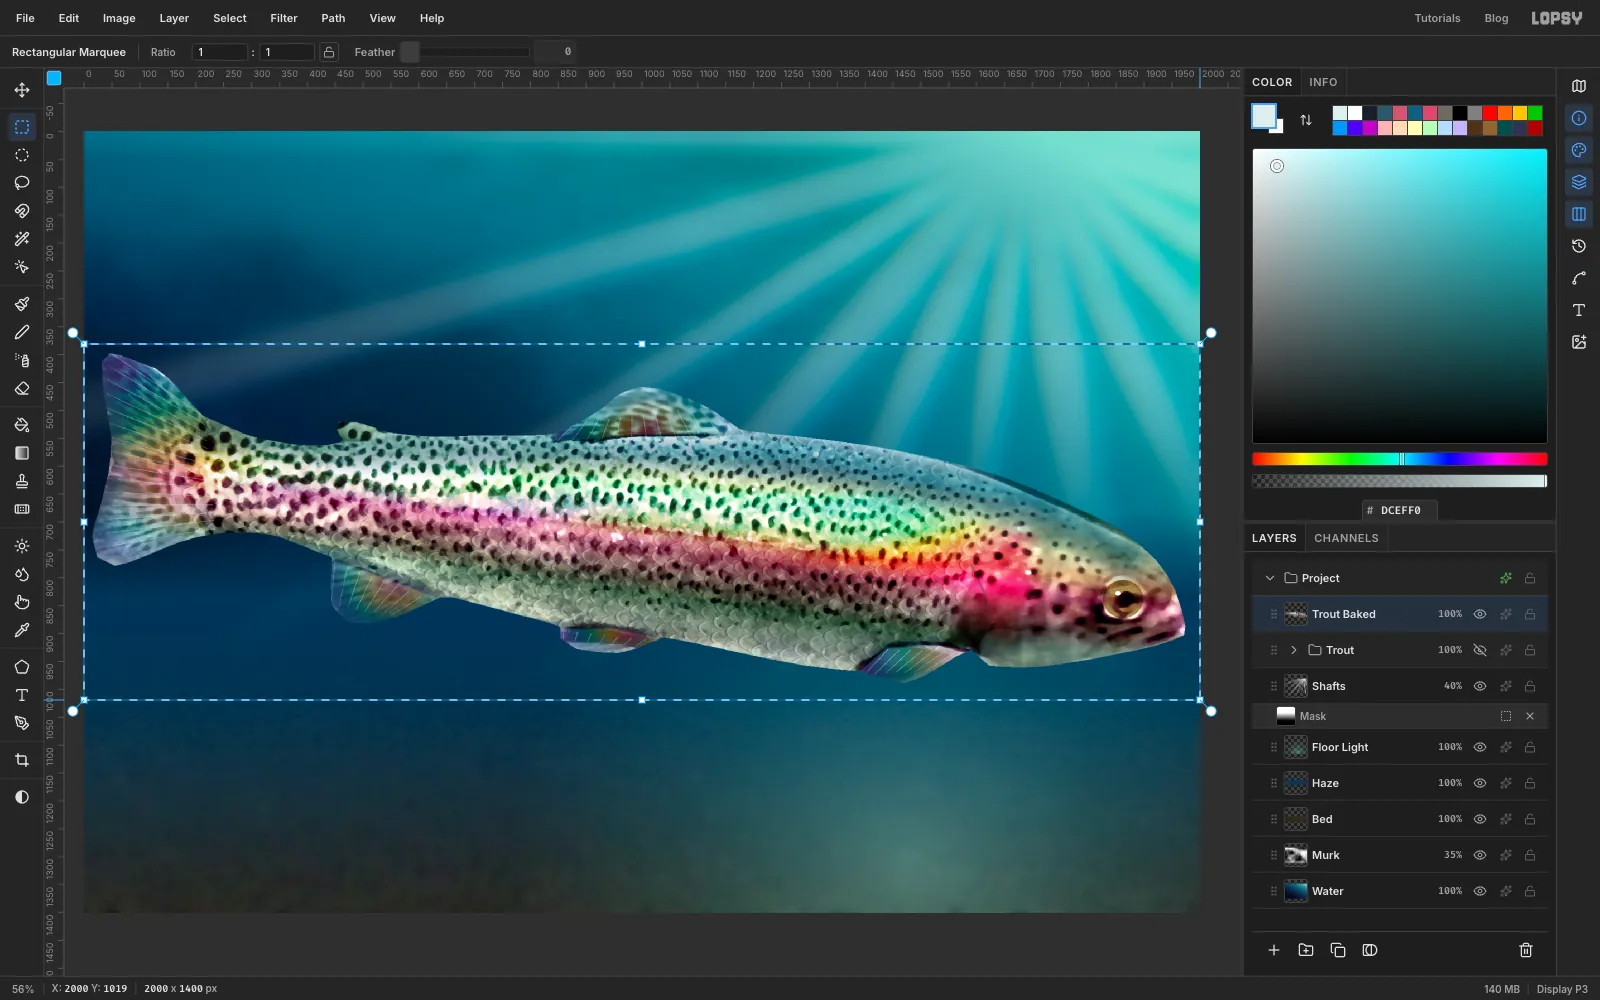
With the Rectangular Marquee, select the band of the canvas holding the fish, edge to edge. Switch to the Move tool, hold Cmd and drag the bottom-right corner handle up and to the left until the box is about 1600 px wide. Cmd keeps the proportions. Press Cmd+D.
-
Point it at the light
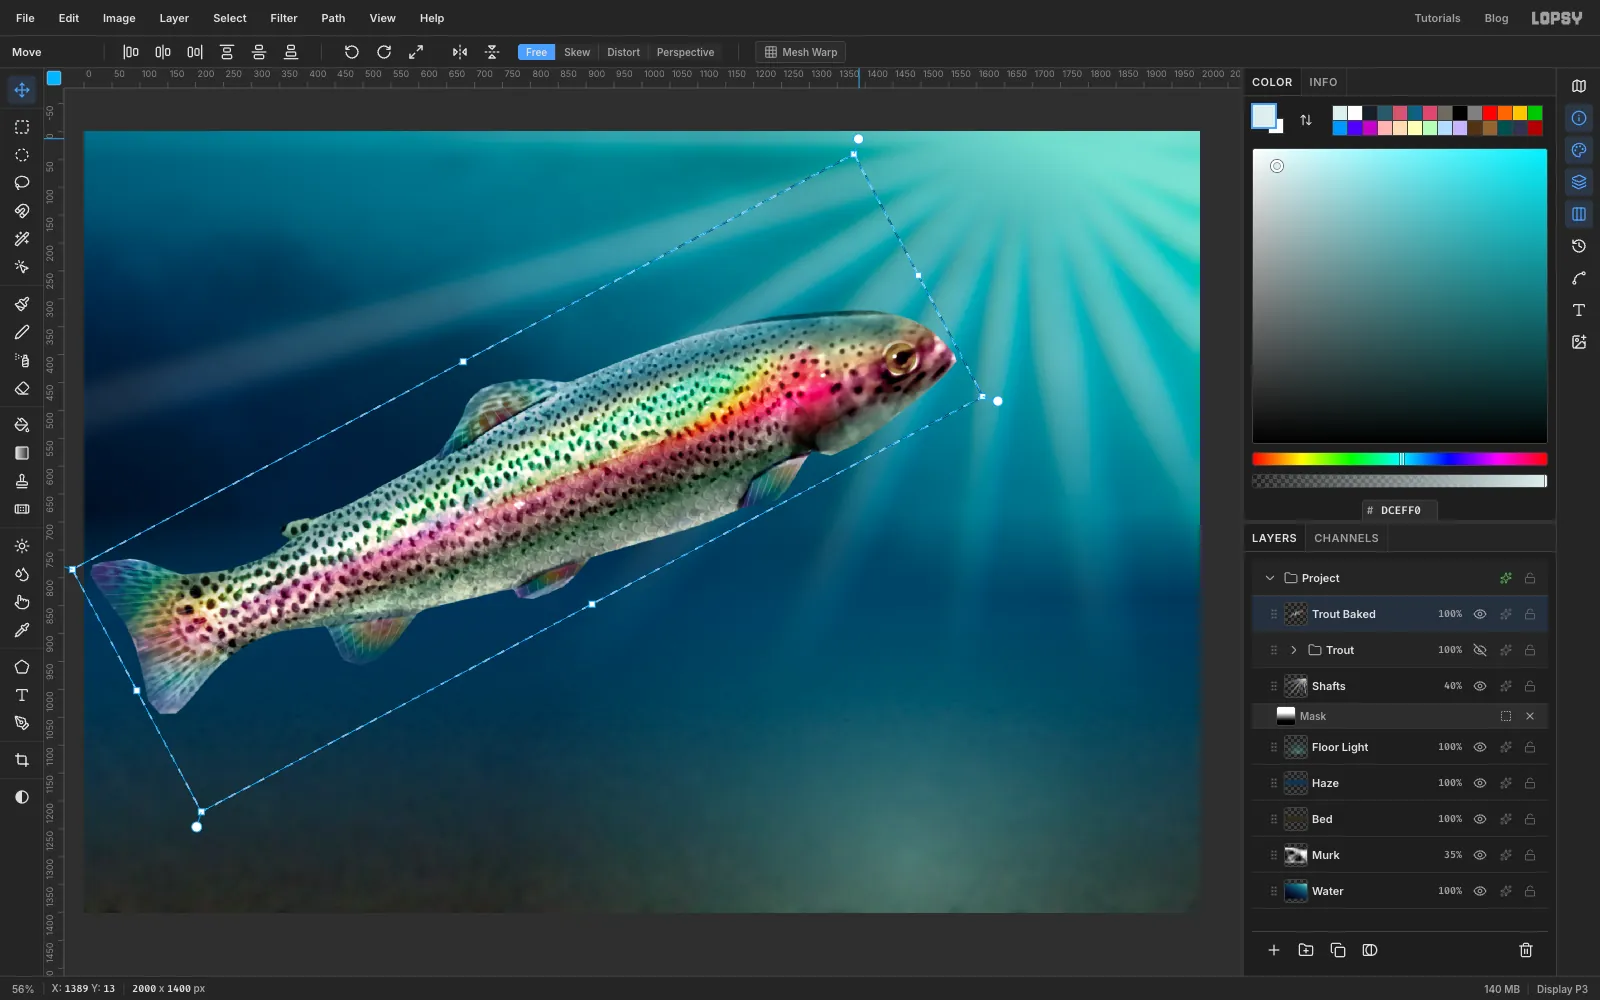
Marquee tightly around the smaller fish. With the Move tool, hover just outside the top-right corner until the rotate handle appears, and drag it counter-clockwise by about 28 degrees. Press Cmd+D.
-
Move it into place
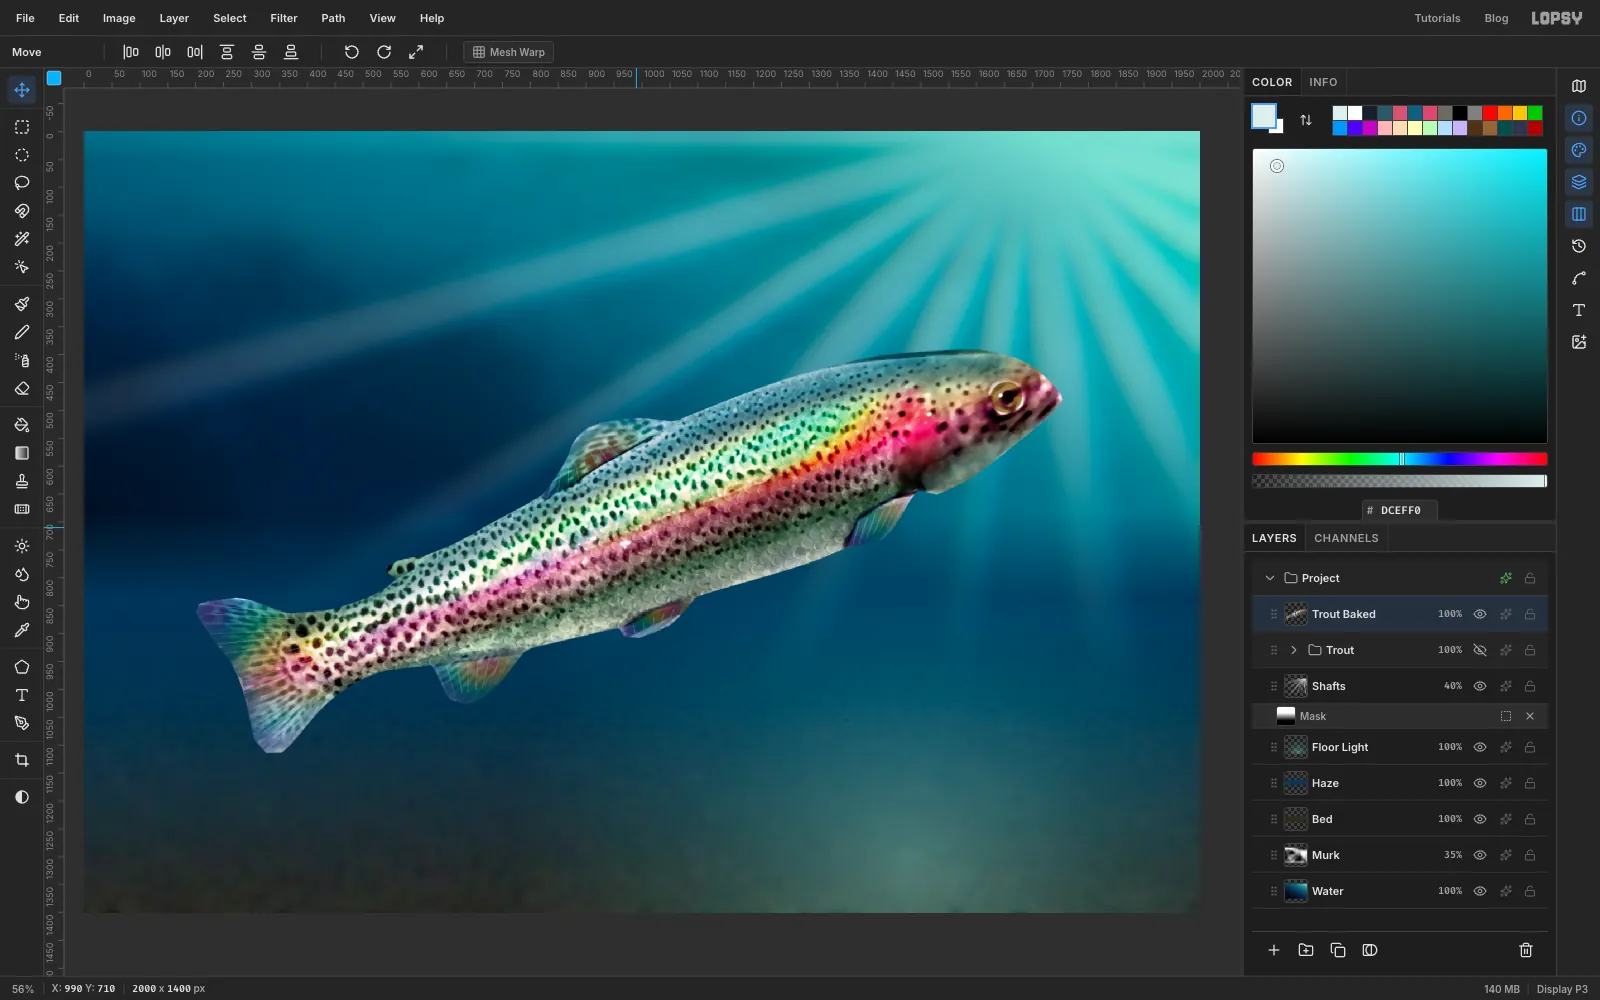
With nothing selected, drag the fish with the Move tool, about 190 px right and 70 px down. Its nose should sit almost directly under the point where the rays meet, which is what makes it look like it's rising toward the light.
-
Bend the body with Liquify
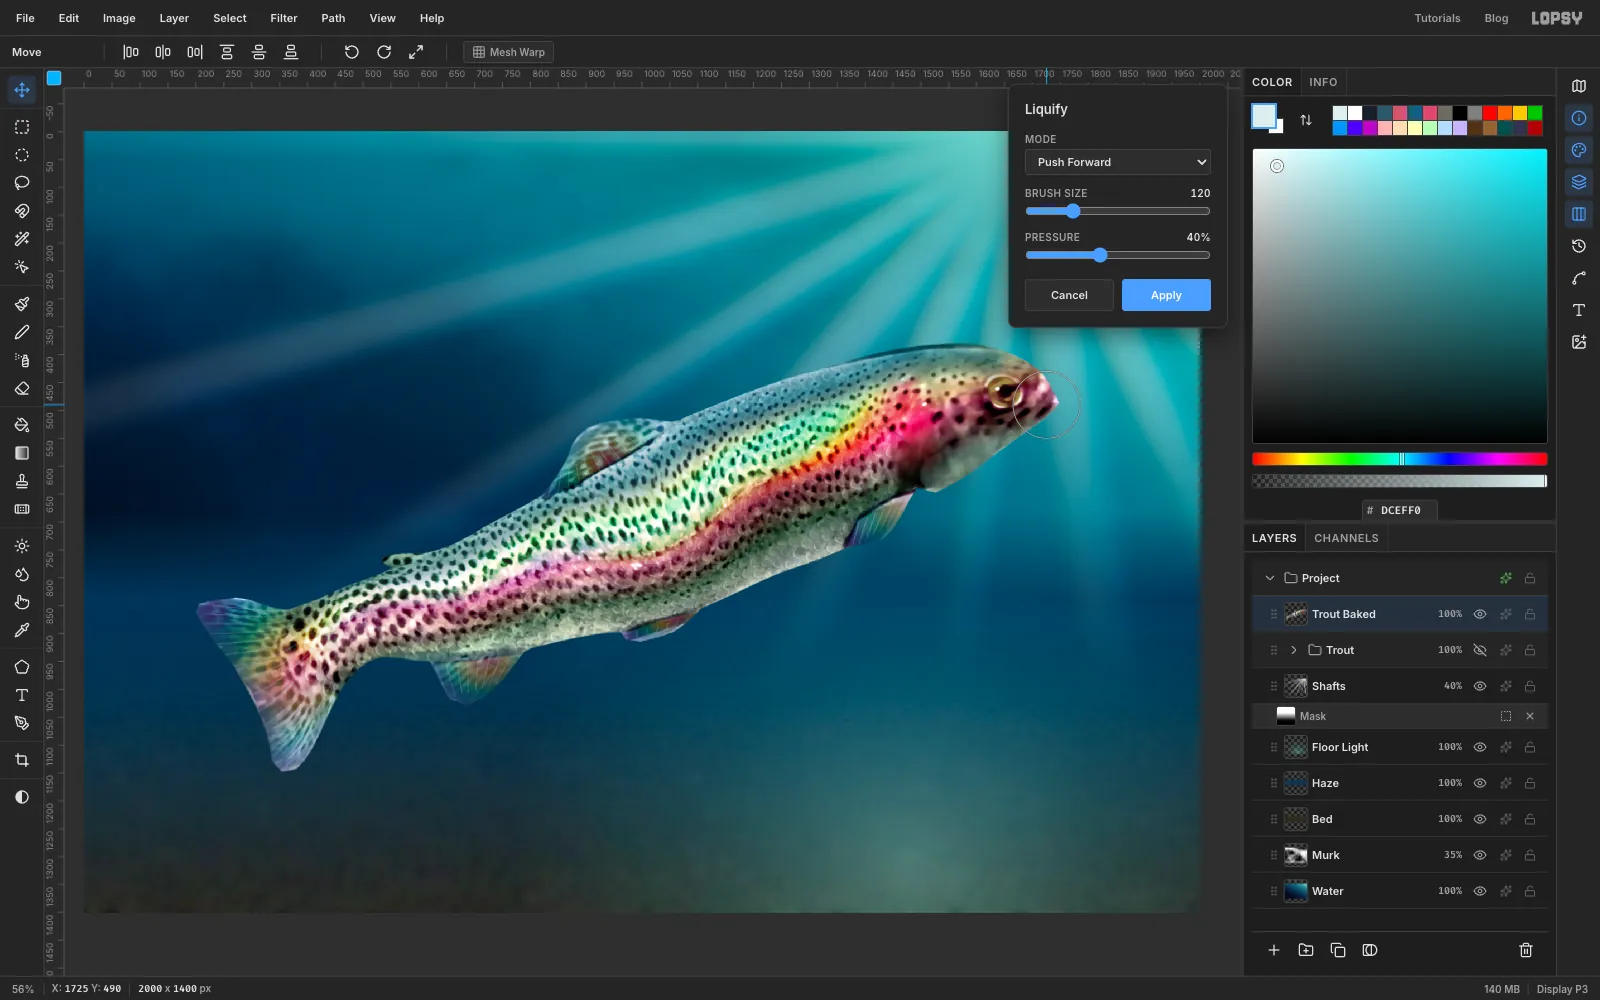
A photo of a fish is always a bit stiff, so give it some movement. Choose Filter → Liquify…. The mode starts on Push Forward. Make these short drags, setting Brush Size and Pressure first:
- Size 500, Pressure 70: in the middle of the body, push down and to the right by about 80 px
- Size 500, Pressure 36: on the head, push up and to the left by about 60 px
- Size 420, Pressure 70: just ahead of the tail, push up and to the left by about 60 px
- Size 420, Pressure 70: on the tail, push down and to the right by about 80 px
- Size 120, Pressure 40: on the tip of the snout, push down and to the left by about 30 px, to blunt it
Click Apply.
-
Put the fish in the water
At this point the fish looks pasted on, because everything else is seen through water and it isn't.
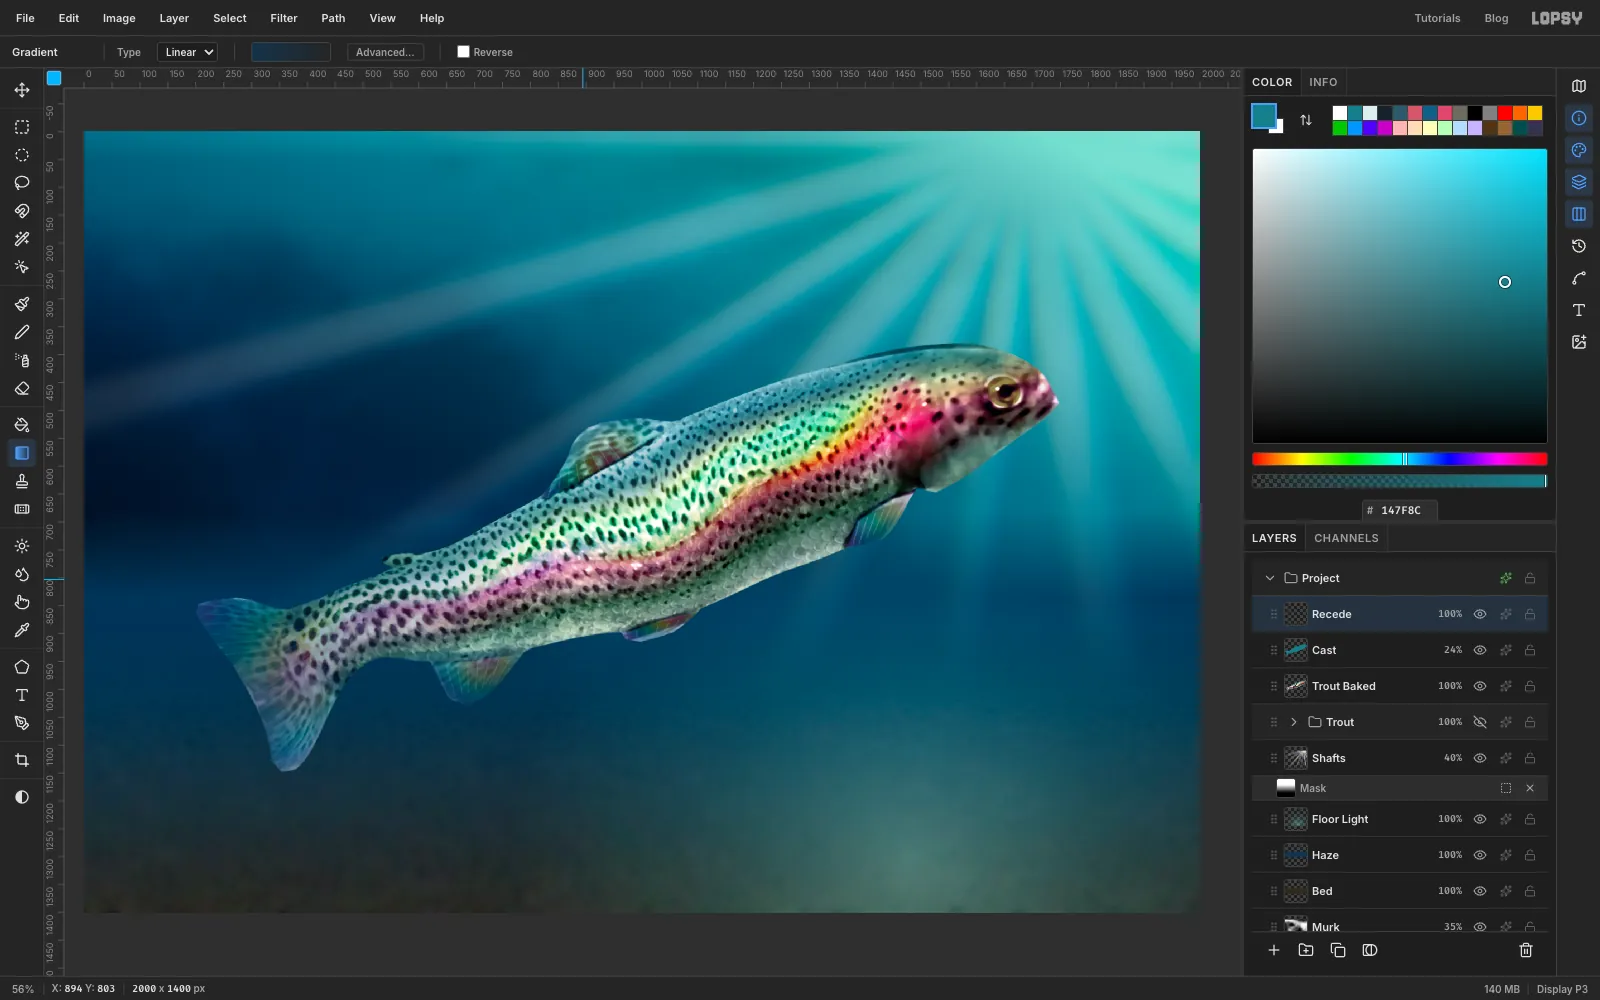
Add a layer above Trout Baked named Cast. Cmd-click the Trout Baked thumbnail, fill with and press Cmd+D. Set the layer to Soft Light at 24%.
Add a layer named Recede and Cmd-click the thumbnail again. Set a linear gradient with two stops, both : the left one 62% opaque and the right one fully transparent. Drag from the tail to the middle of the fish. Press Cmd+D. The tail is further from the light, so now it drops back into the blue.
-
Light the back edge
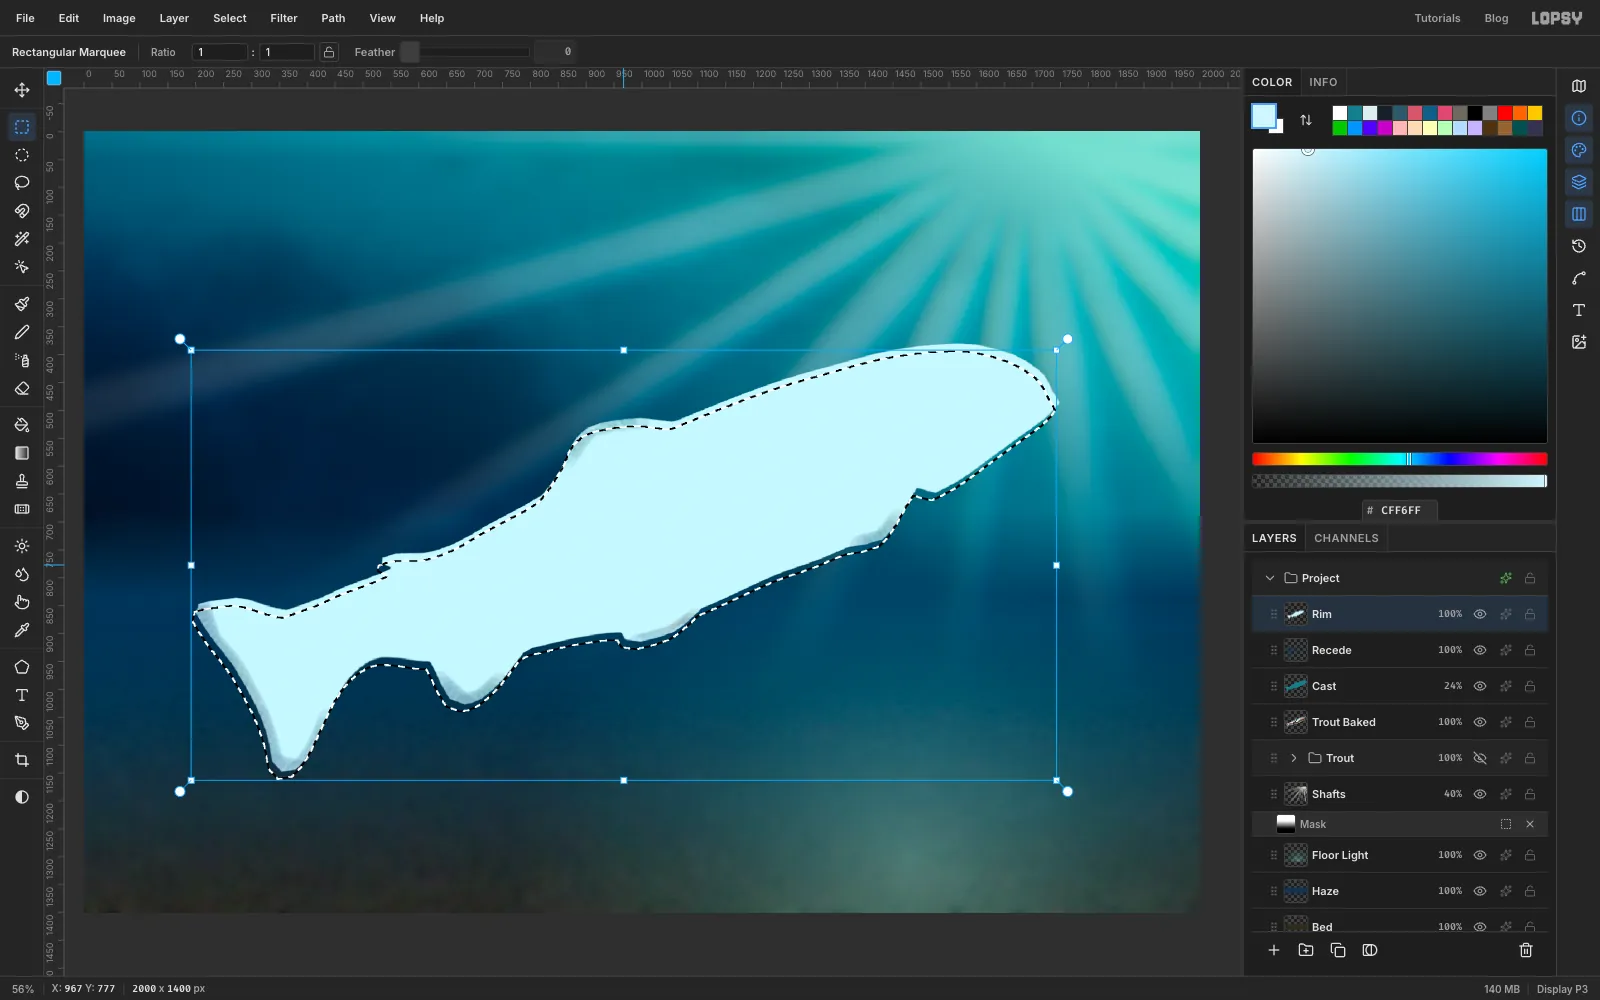
Add a layer named Rim, Cmd-click the Trout Baked thumbnail, and fill with . The fish turns into a pale silhouette for a moment.
Pick the Rectangular Marquee. Press Left 7 times and Down 14 times, which moves just the outline and leaves the pixels alone. Then choose Select → Feather… by 7, press Delete and press Cmd+D.
Only a thin crescent of pale colour survives along the edges facing the light. Set the layer to Screen at 42%.
-
Shade the belly
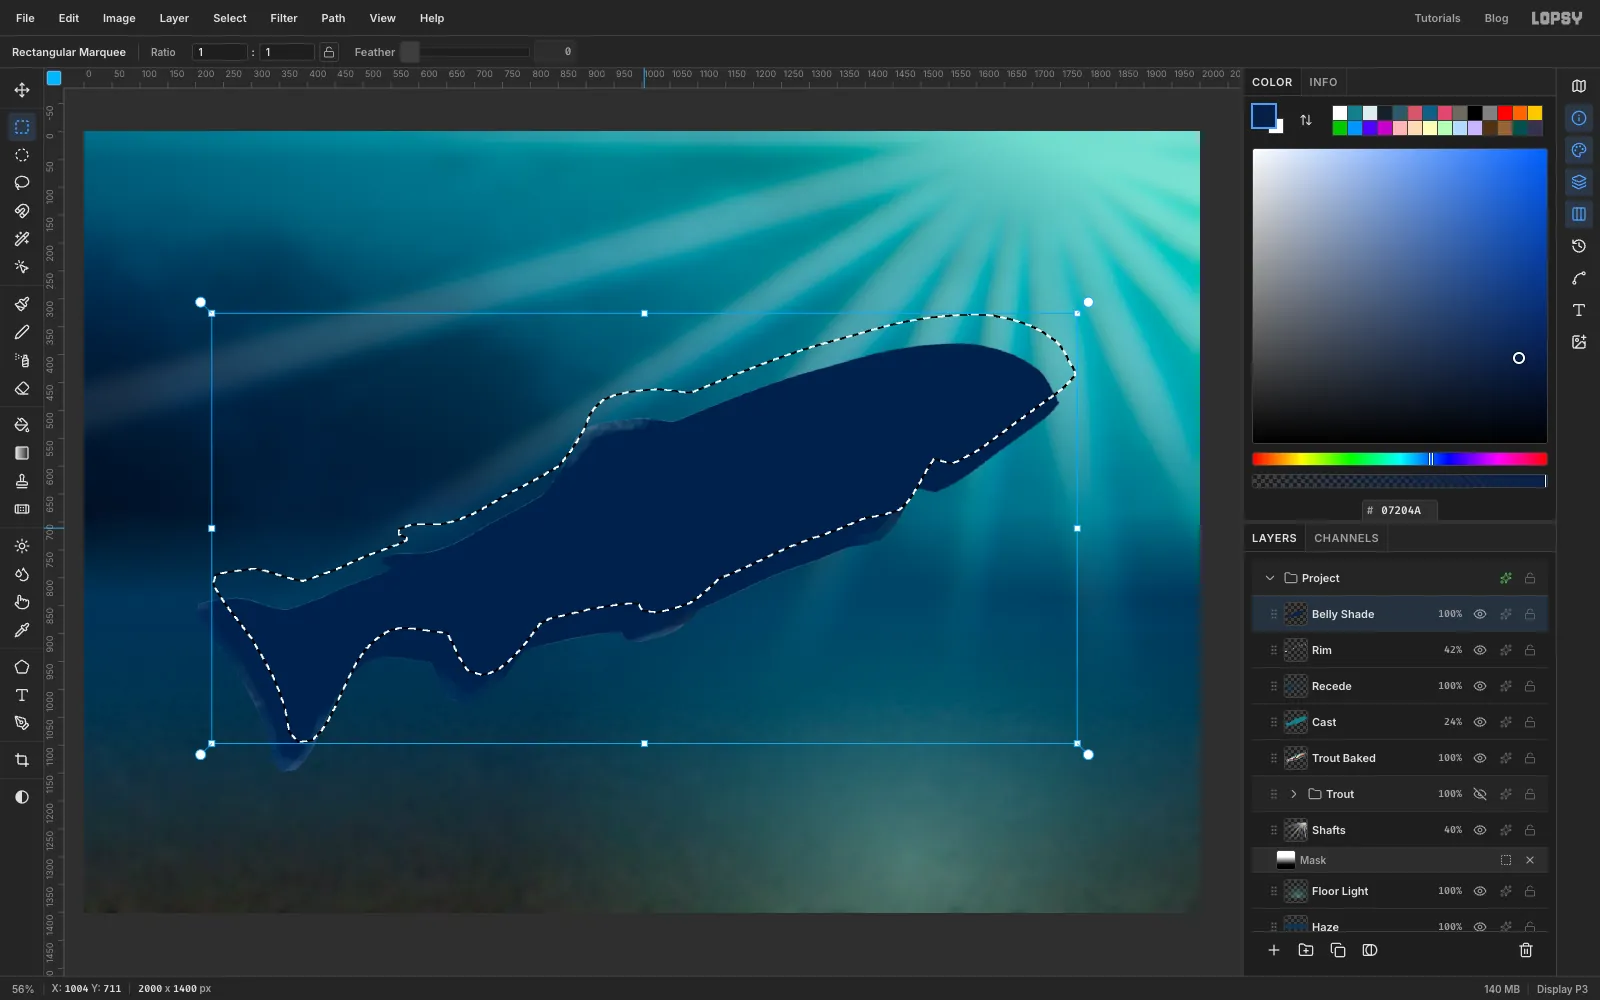
Do the same thing on the opposite side. Add a layer named Belly Shade, Cmd-click the Trout Baked thumbnail, and fill with .
With the Rectangular Marquee, drag the outline about 30 px right and 52 px up. Choose Select → Feather… by 30, press Delete and press Cmd+D. Set the layer to Multiply at 62%.
-
Add the mouth
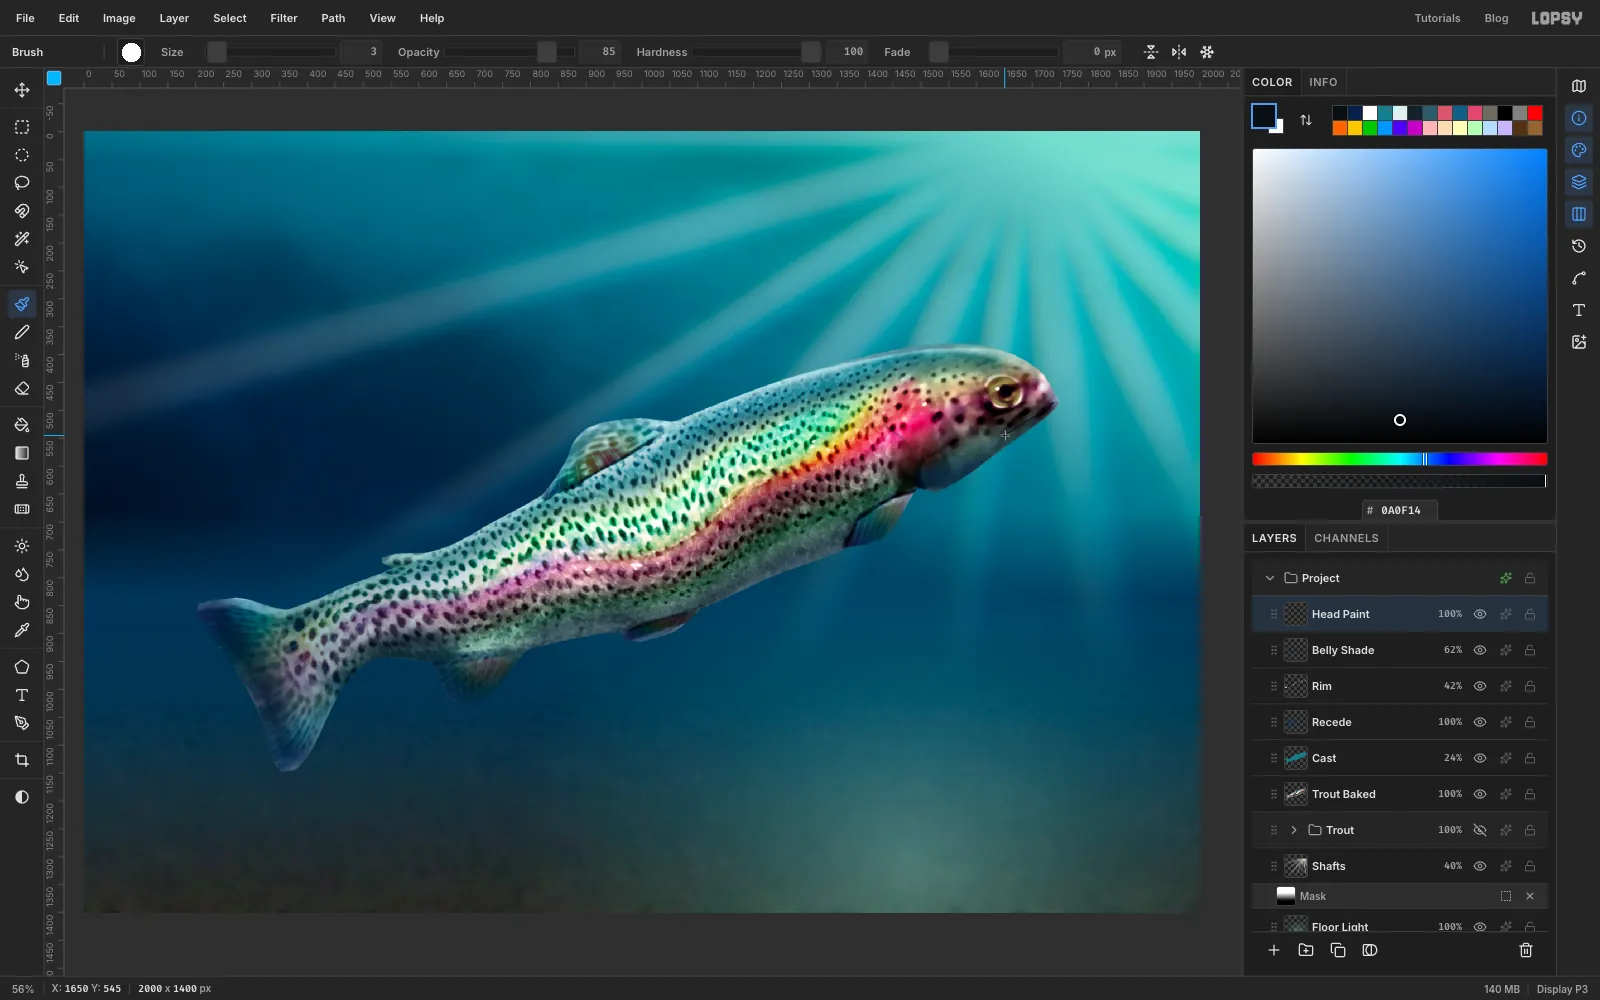
Add a layer named Head Paint and Cmd-click the Trout Baked thumbnail.
Pick the Soft Round preset, then set Size 70 and Opacity 45 in the options bar. With the colour , make one short stroke across the throat to bring it back into shadow.
Switch to the Hard Round preset, then set Size 3 and Opacity 85 in the options bar, with the colour , and paint the mouth as one thin line from the tip of the snout back along the lower jaw. Press Cmd+D.
Click the eye icons on Cast, Rim and Belly Shade off and on to see what each one is doing.
-
Add the surface
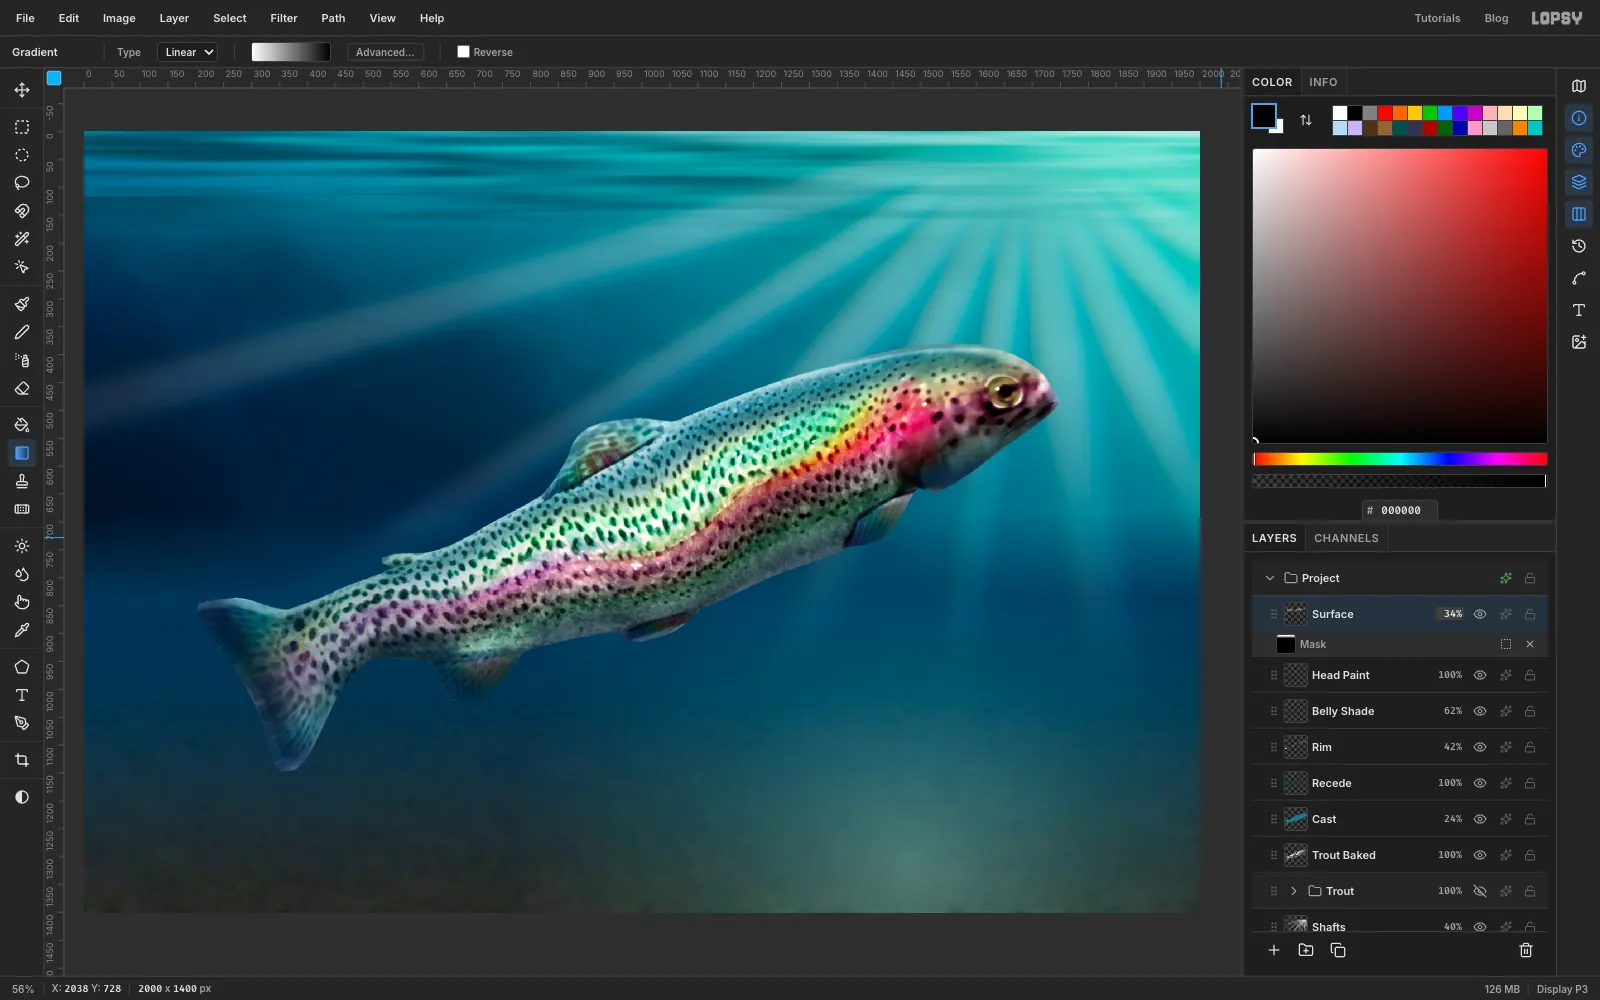
Click Head Paint and add a layer above it named Surface. Run:
- Clouds… with Scale 14
- Motion Blur… with Angle 0 and Distance 300
- Brightness/Contrast… with Brightness 2 and Contrast 30
- Gaussian Blur… with Radius 9
Marquee the whole canvas. With the Move tool, drag the bottom middle handle up until the layer fills only the top 15% of the canvas. Press Cmd+D.
Click Add Mask and click the mask thumbnail. With a linear white-to-black gradient, both stops fully opaque, drag from near the top of the canvas down to the bottom of the streaks, so they don't end in a hard line. Click the layer row, and set the layer to Overlay at 34%.
-
Colour the highlight
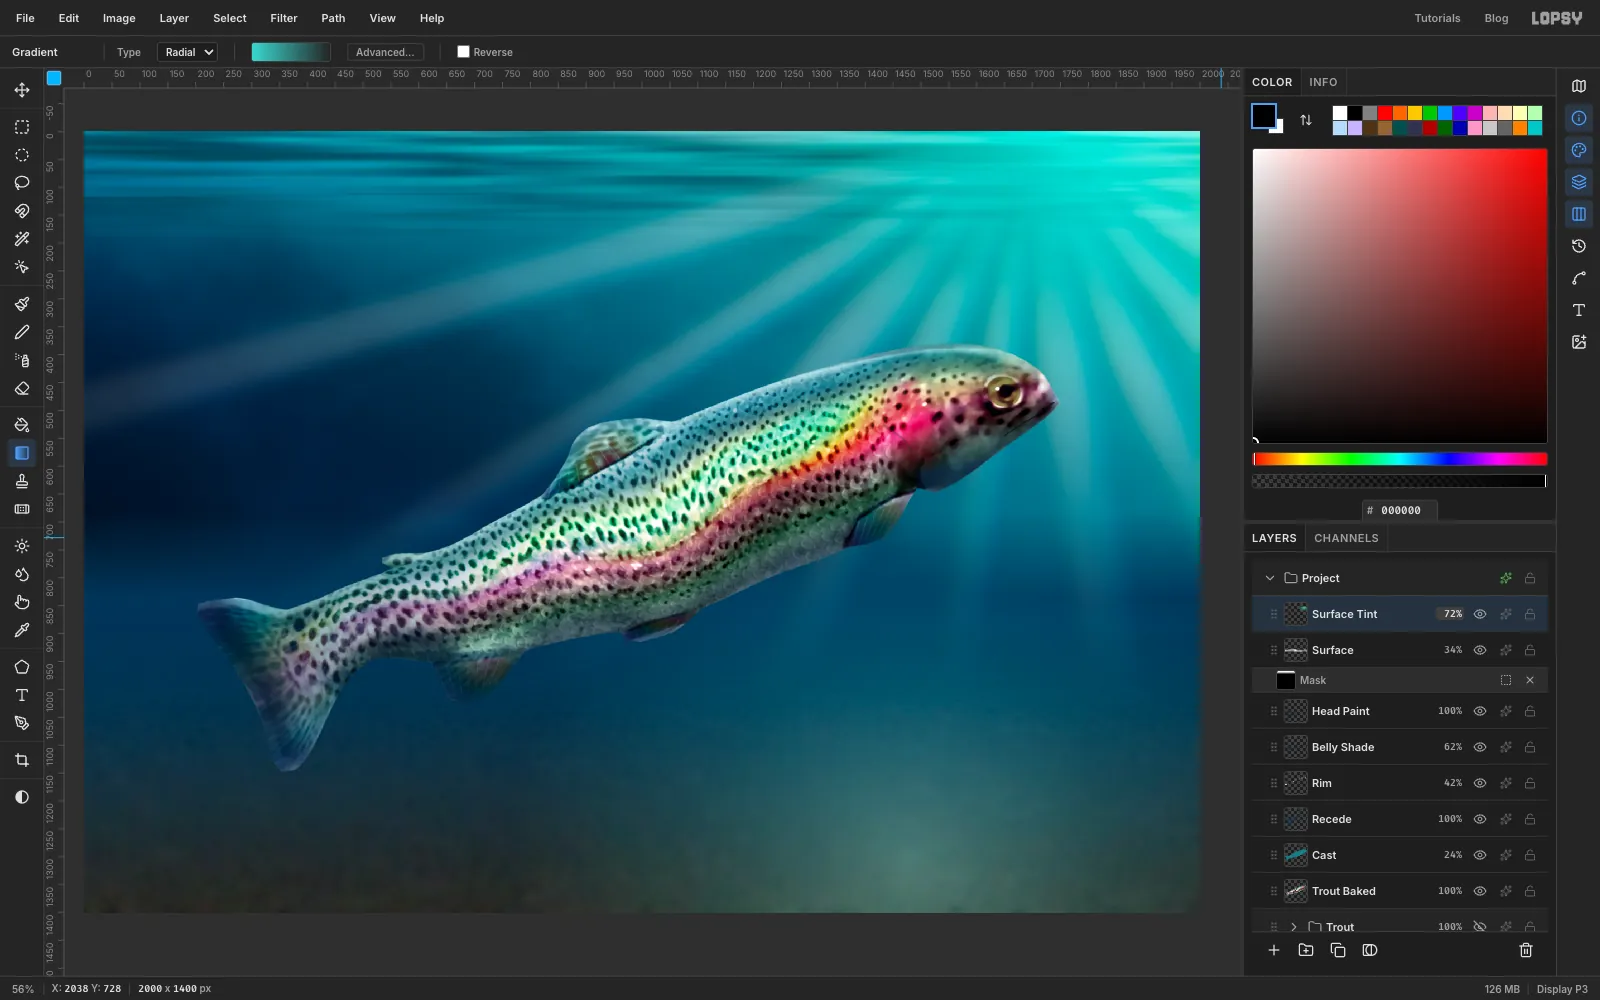
Where all those screens stack up, the corner bleaches toward a dull, slightly peach white. Add a layer named Surface Tint. Set a radial gradient with two stops, both : the left one fully opaque, the right one fully transparent. Drag from the top of the canvas where the rays meet out past the right edge.
Set the layer to Color at 72%. The brightness doesn't change, but the highlight turns a clean teal.
-
Blow a few bubbles
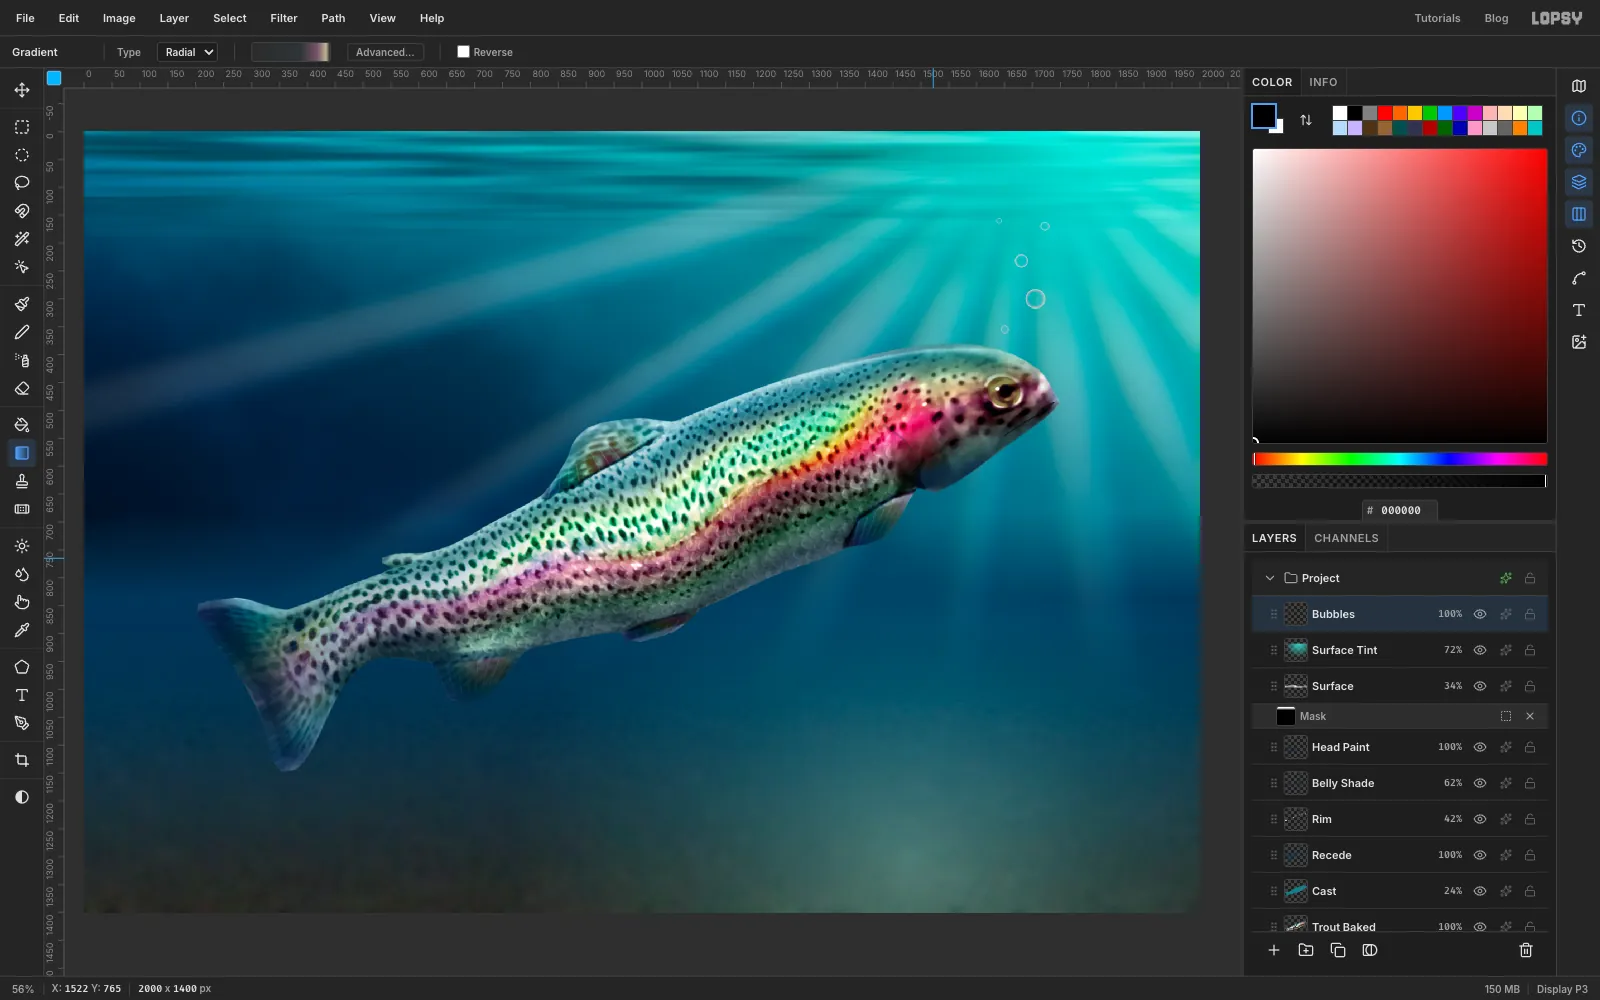
Add a layer named Bubbles. Set a radial gradient with these stops:
- White at the far left, 3% opaque
- at 62%, 8% opaque
- at 84%, 38% opaque
- at 95%, 70% opaque
- White at the far right, fully transparent
With the Elliptical Marquee, select a small circle above the fish's head. Drag the Gradient from its centre to its edge, then press Cmd+D. Repeat for five bubbles of different sizes, from about 35 px across down to 10 px, in a loose wandering column.
Then run Gaussian Blur… with Radius 1 so they sit in the water.
-
Scatter drifting specks
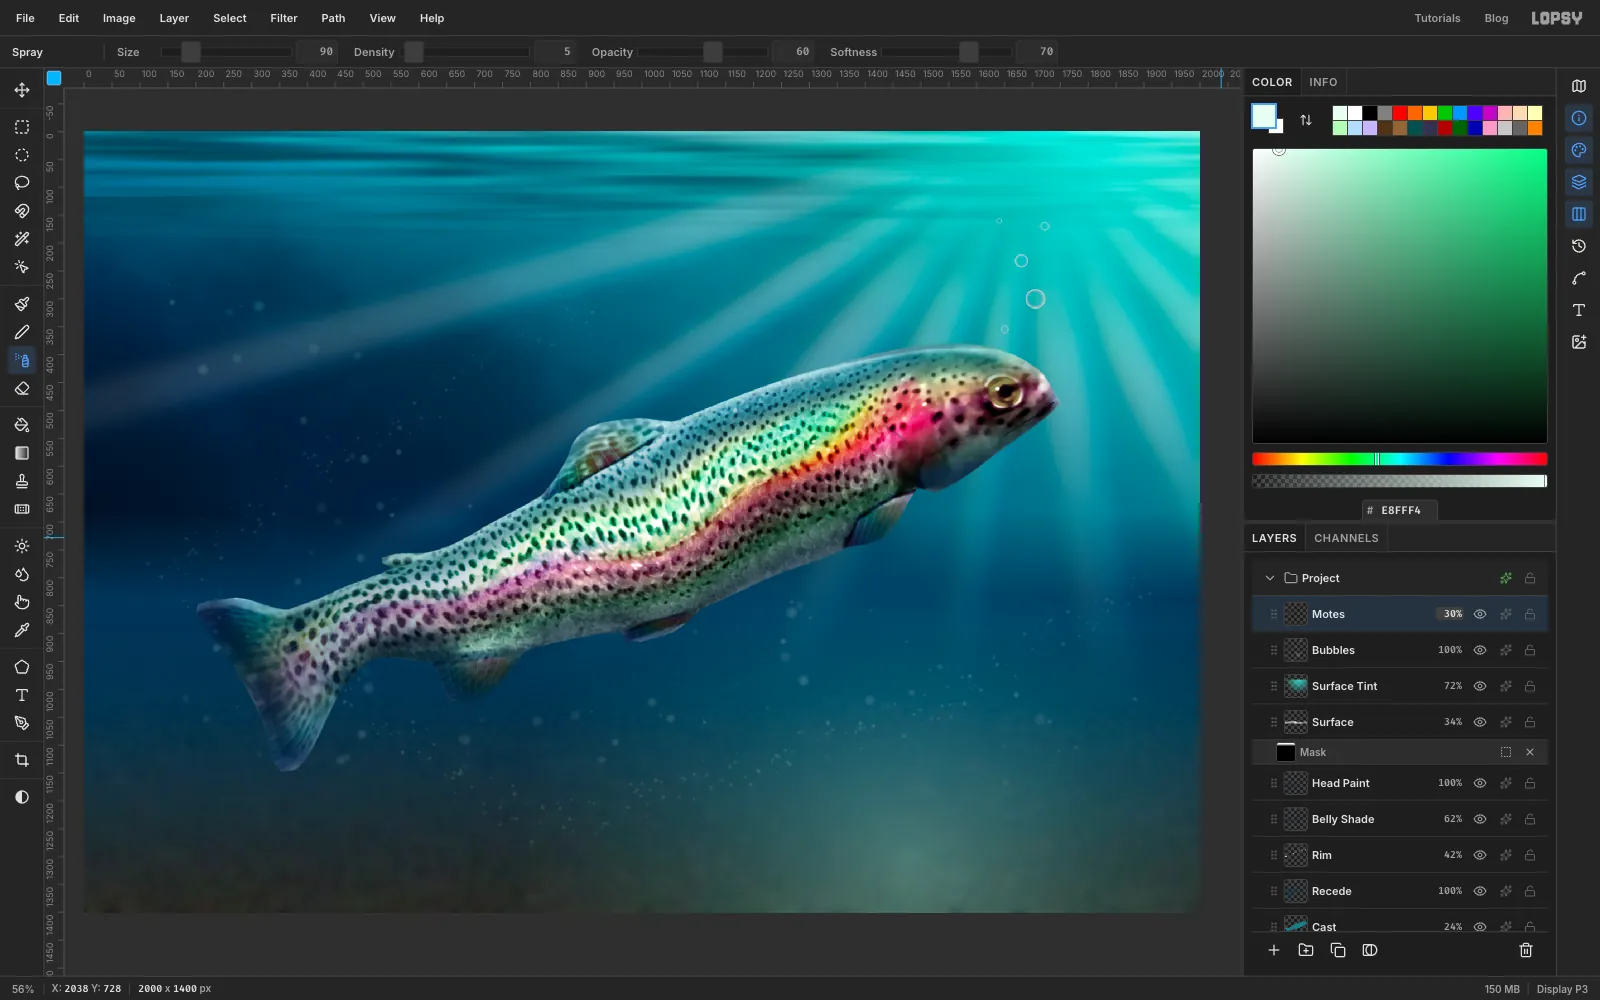
Add a layer named Motes and set the foreground to . Pick the Spray tool with Size 240 and Density 3, and make one long, wandering pass through the lower and left parts of the water, keeping away from the fish's head so nothing competes with the eye. Then set Size to 90 and Density to 5 for a second pass with finer specks.
Run Gaussian Blur… with Radius 2. Set the layer to Screen at 30%.
-
Let the highlights bloom
With Motes active and nothing selected, choose Edit → Copy Merged and press Cmd+V. Rename the new layer Glow and press Cmd+D.
Run Filter → Bloom… with Threshold 66, Soft Knee 50, Radius 42 and Intensity 45. Set the layer's opacity to 70%. The flank's sheen now spills slightly past its edges, as light does in water.
-
Add a vignette and export
Click the Project row at the top of the Layers panel and open its effects drawer with the ✦ button. Click Add Adjustment, choose Vignette and set it to 32. Close the drawer.
Save your work with File → Save Project and export it with File → Quick Export PNG.
The idea works on any shiny subject, whether it's a beetle, a starling or a soap bubble. Start with a quiet base, give it a narrow strip of colour, and let the light on the shape do the rest.