Paint a Vaporwave Fallen Titan on a Neon Grid Sea
Paint a vaporwave scene in Lopsy: a toppled marble head sinking into a neon perspective-grid sea under a striped sun, with glitches, palms and reflections.
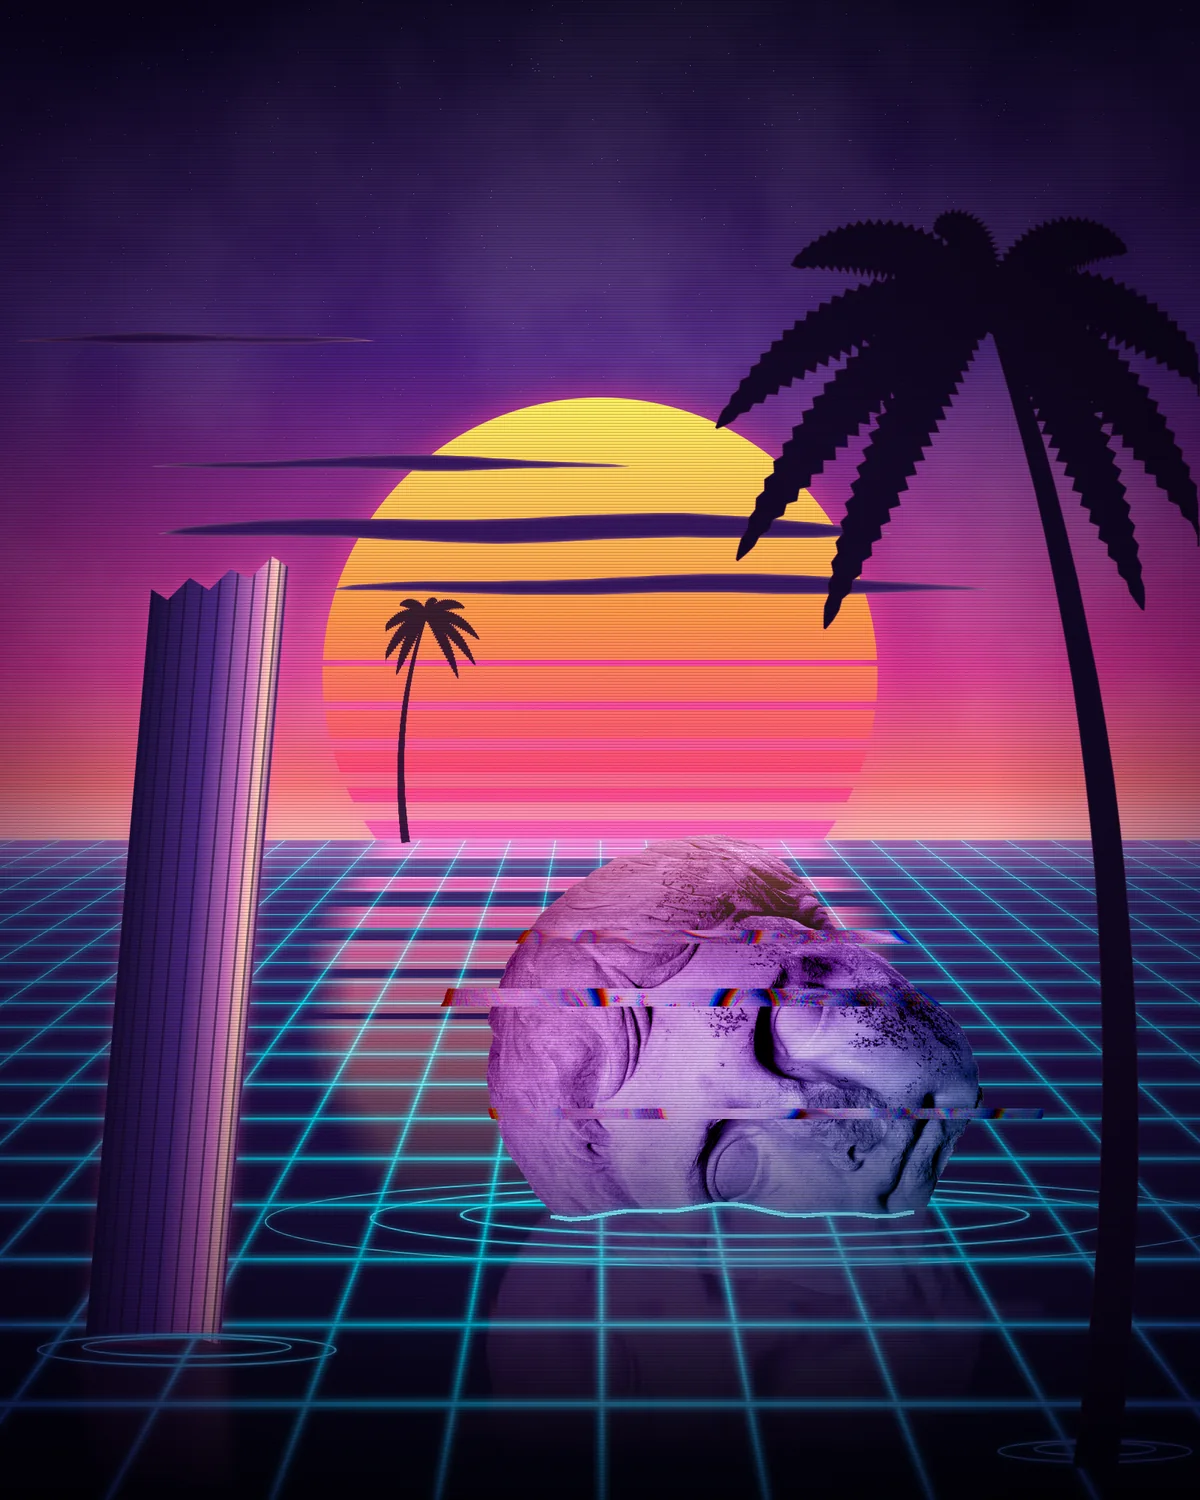
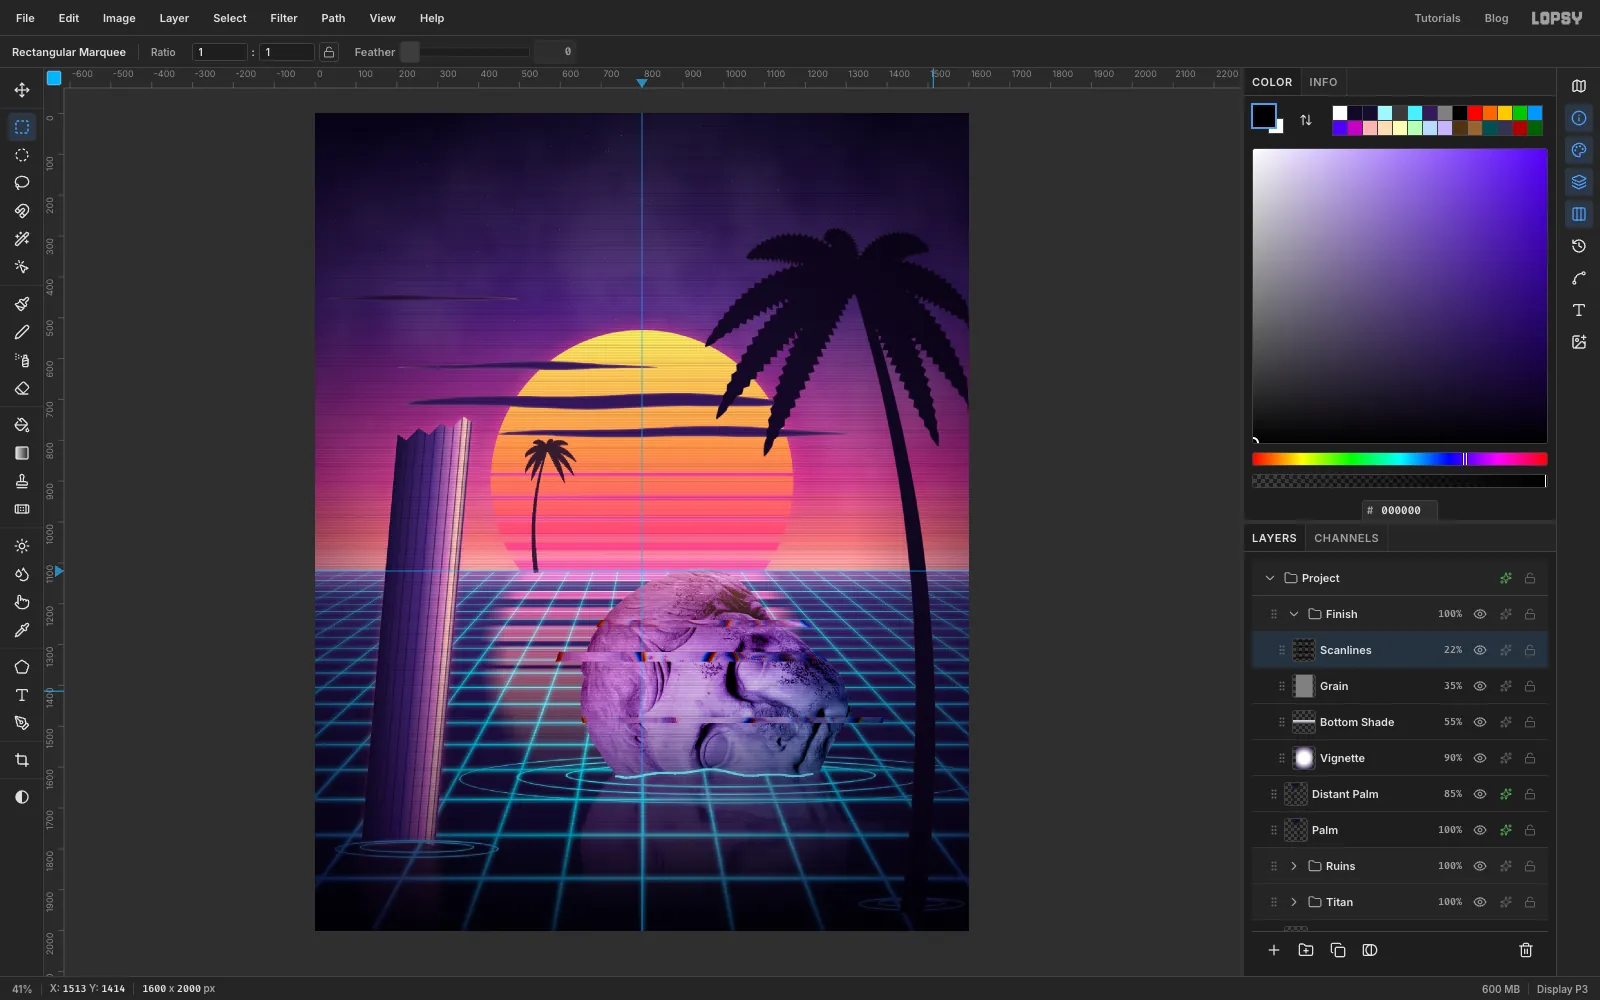
Vaporwave borrows its props from the shopping malls and screensavers of the 1980s and 90s. A Greek or Roman marble head, a striped sunset, palm trees, an endless neon grid, all in sticky pinks, violets and cyans, with a bit of VHS damage on top. In this tutorial you'll put those props into one quiet scene, Fallen Titan. A colossal marble head has toppled into a sea made of a glowing grid and is slowly going under.
It's a 1600 × 2000 px portrait painting with no text. The parts:
- a dusk sky with stars, a striped sun and dark cloud strata
- a neon grid sea, made from a tiny pattern tile that you tip back with the Perspective transform
- a real museum photo of a marble head: cut out, tinted, rim-lit, glitched and half sunk with a layer mask
- reflections, ripple rings and a glowing waterline
- a broken column, two palm silhouettes, then haze, vignette, grain and scanlines
You'll need one photo from Wikimedia Commons. It's public domain (CC0), from the Metropolitan Museum of Art:
- Colossal marble head of the emperor Augustus MET DP337500.jpg, the head seen from the front on a dark backdrop. Download the 960 px wide version.
The palette:
-
Sky
-
Sun
-
glow
-
Clouds
-
cloud rim
-
haze
-
Sea
-
Neon grid
-
ripples
-
waterline
-
Head tint
-
rim
-
edge glow
-
shade
-
Column
-
flutes
-
glow
-
Palm silhouette
-
palm rim
-
Vignette
-
bottom shade
-
Set up the canvas and paint the sky
Open Lopsy. In the New Document dialog choose Pixels and enter
1600×2000.Drop two guides by clicking the rulers:
- Click the left ruler at y
1120. That's the horizon, a little under halfway down. - Click the top ruler at x
800to mark the centre line.
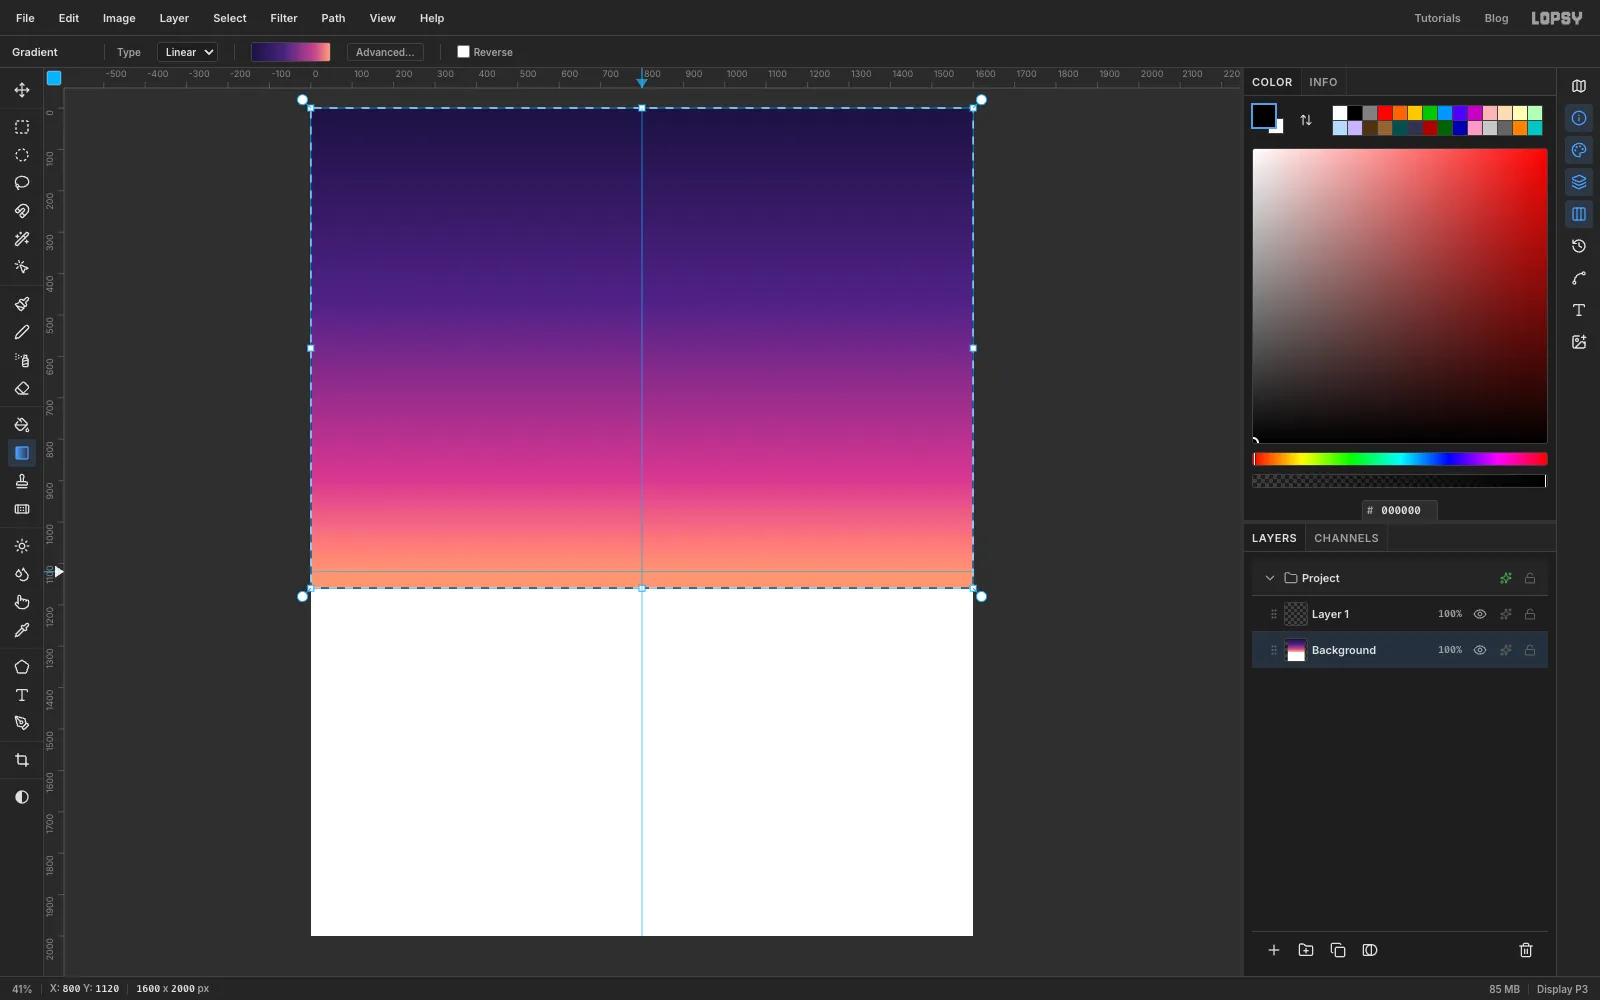
Click the Background layer. With the Rectangular Marquee, select everything from the top of the canvas to just below the horizon guide. Pick the Gradient tool and open Advanced…. Set four stops: , at 42%, at 80% and . Drag from the top edge straight down to the horizon guide.
- Click the left ruler at y
-
Scatter a starfield
Press Cmd+D to deselect and rename
Layer 1toStars. Marquee the top 860 px of the canvas and fill it with mid grey (Edit → Fill).Press Cmd+D to deselect. Choose Filter → Add Noise… with Amount
100, Mono and Gaussian. Then Filter → Threshold… at Level184. Only the brightest specks of noise survive, as white dots on black.Set the layer's blend mode to Screen so the black disappears. To fade the stars out lower down, click Add Mask, then click the mask thumbnail to edit it. Drag a white-to-black gradient from near the top down to about y
760. Click the layer's name to go back to editing pixels.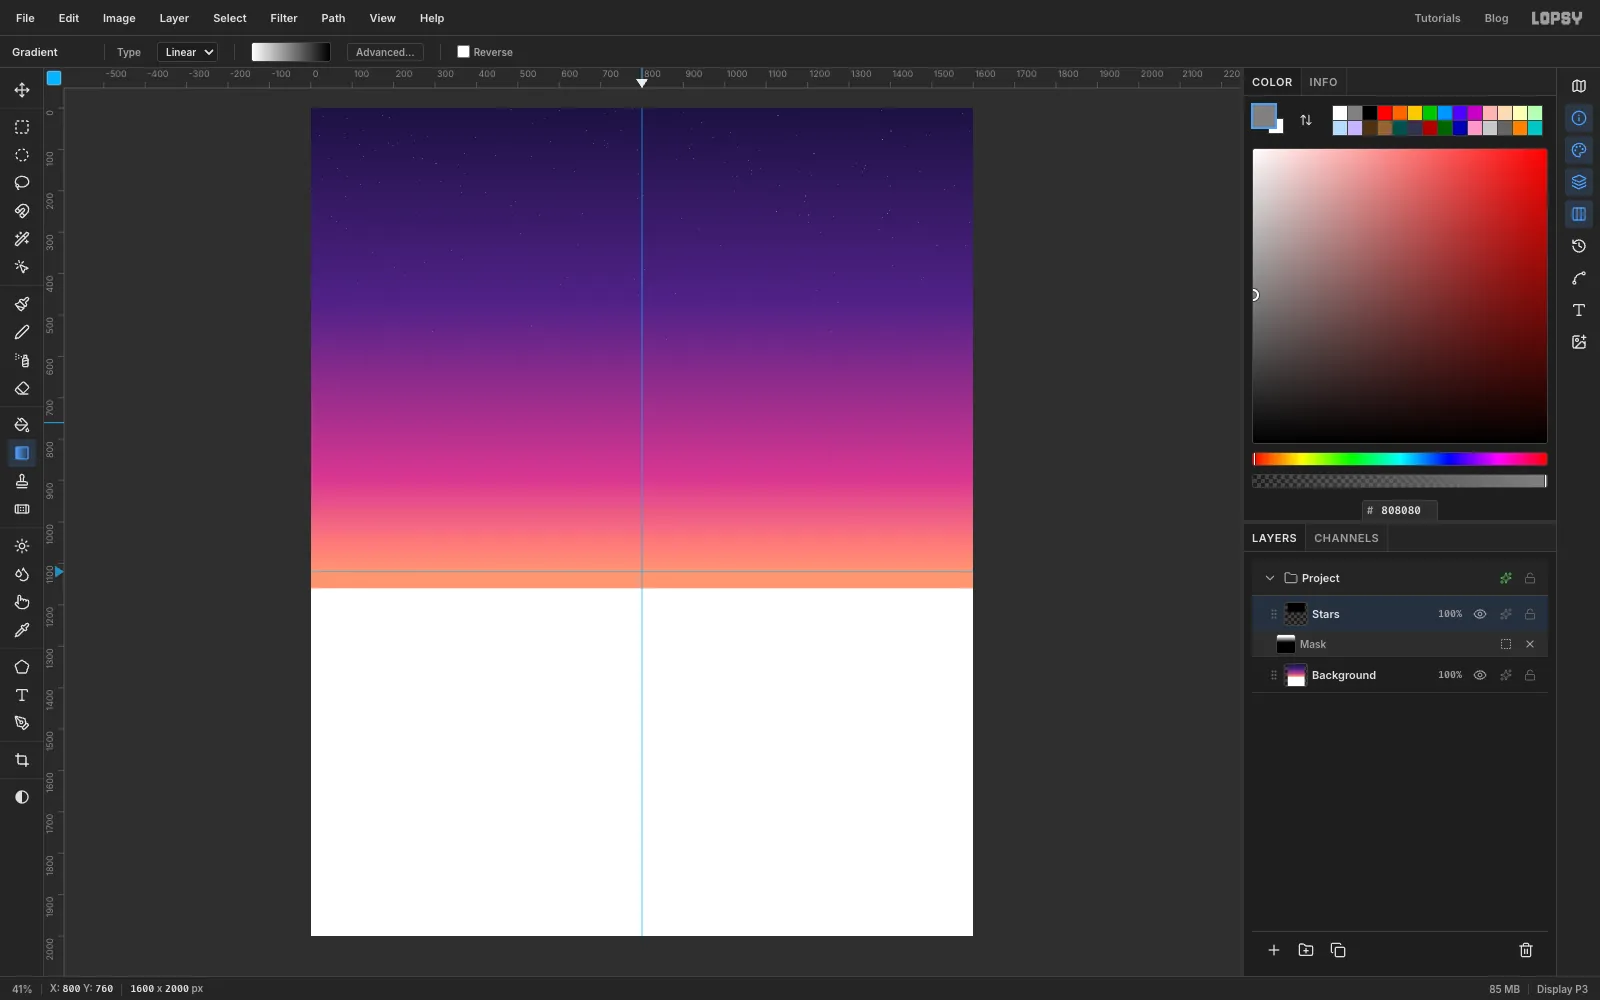
-
Fill the sun
Add a layer named
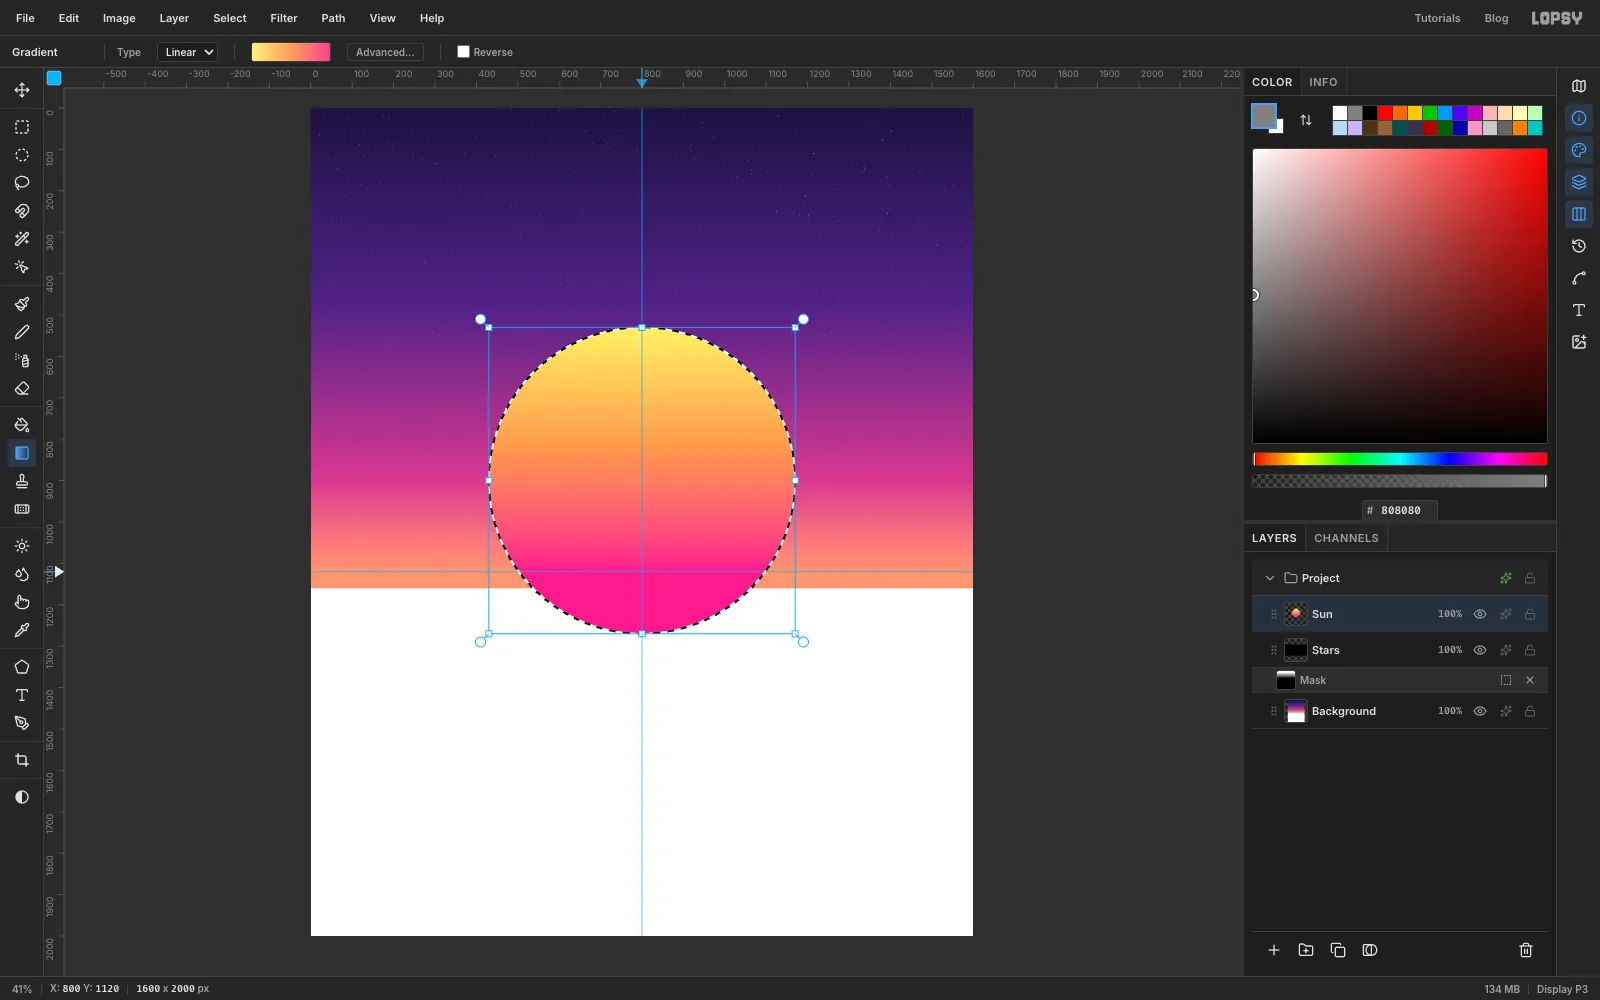
Sun. Choose the Elliptical Marquee and click once on the canvas to open its size dialog. Enter From430,530To1170,1270. That's a 740 px circle on the centre line whose lower part dips below the horizon. The sea will hide that part later.Set the gradient stops to , at 50% and . Drag from the top of the circle down to the horizon guide.
-
Cut the sunset stripes
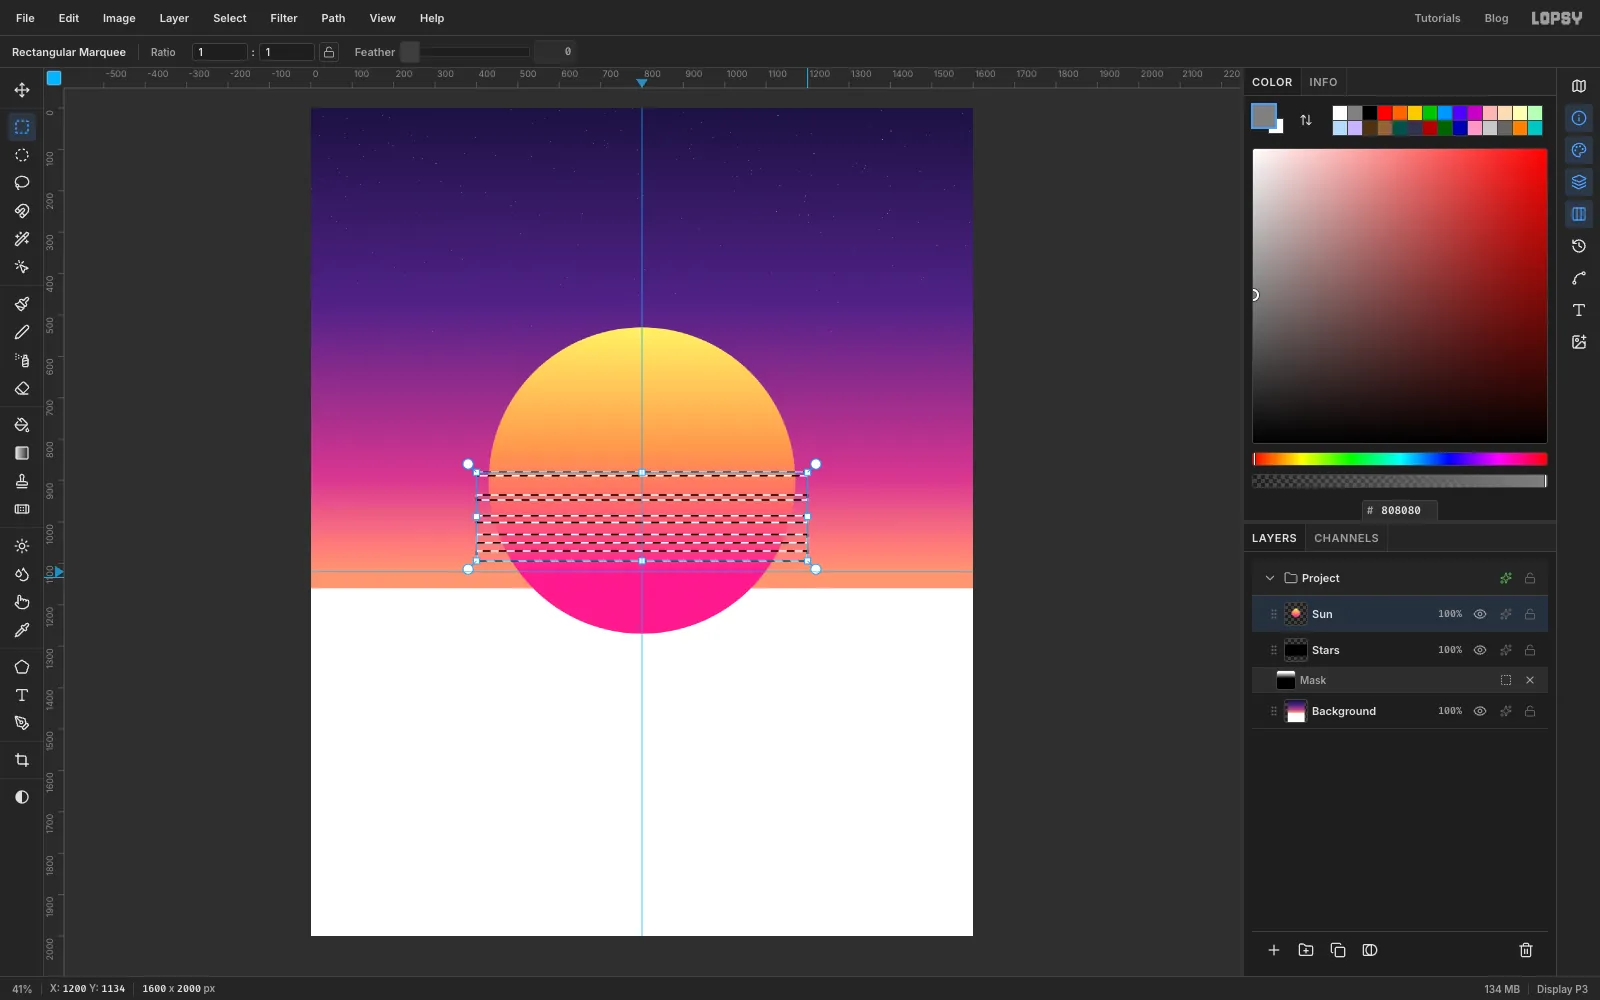
Deselect, then drag a thin, wide marquee across the sun a little below its middle. Hold Shift and drag five more bands below it. Shift adds each one to the selection. Make each band a little thicker than the last (about 8, 12, 16, 20, 24 and 28 px) and the gaps a little narrower, so the stripes crowd together toward the horizon.
Press Delete to cut all six at once.
-
Give the sun a glow
Deselect. Open the Sun layer's Layer Effects (the sparkle icon on its row) and turn on Outer Glow: colour , Size
90, Opacity70.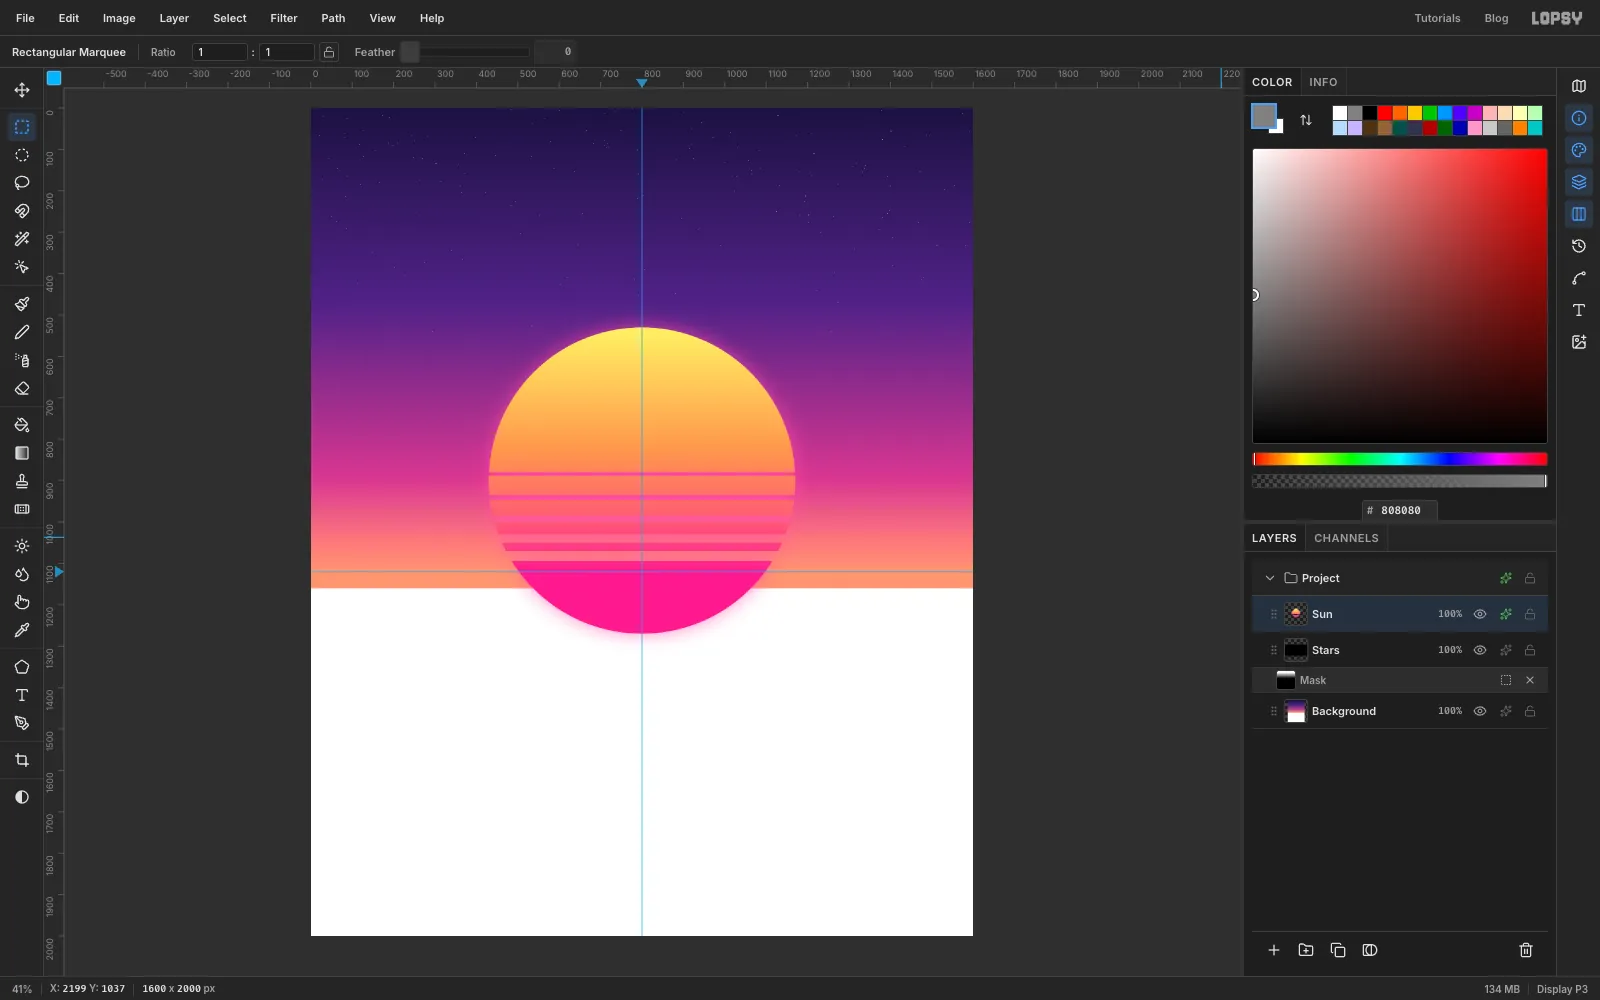
-
Draw cloud strata across the sun
Add a layer named
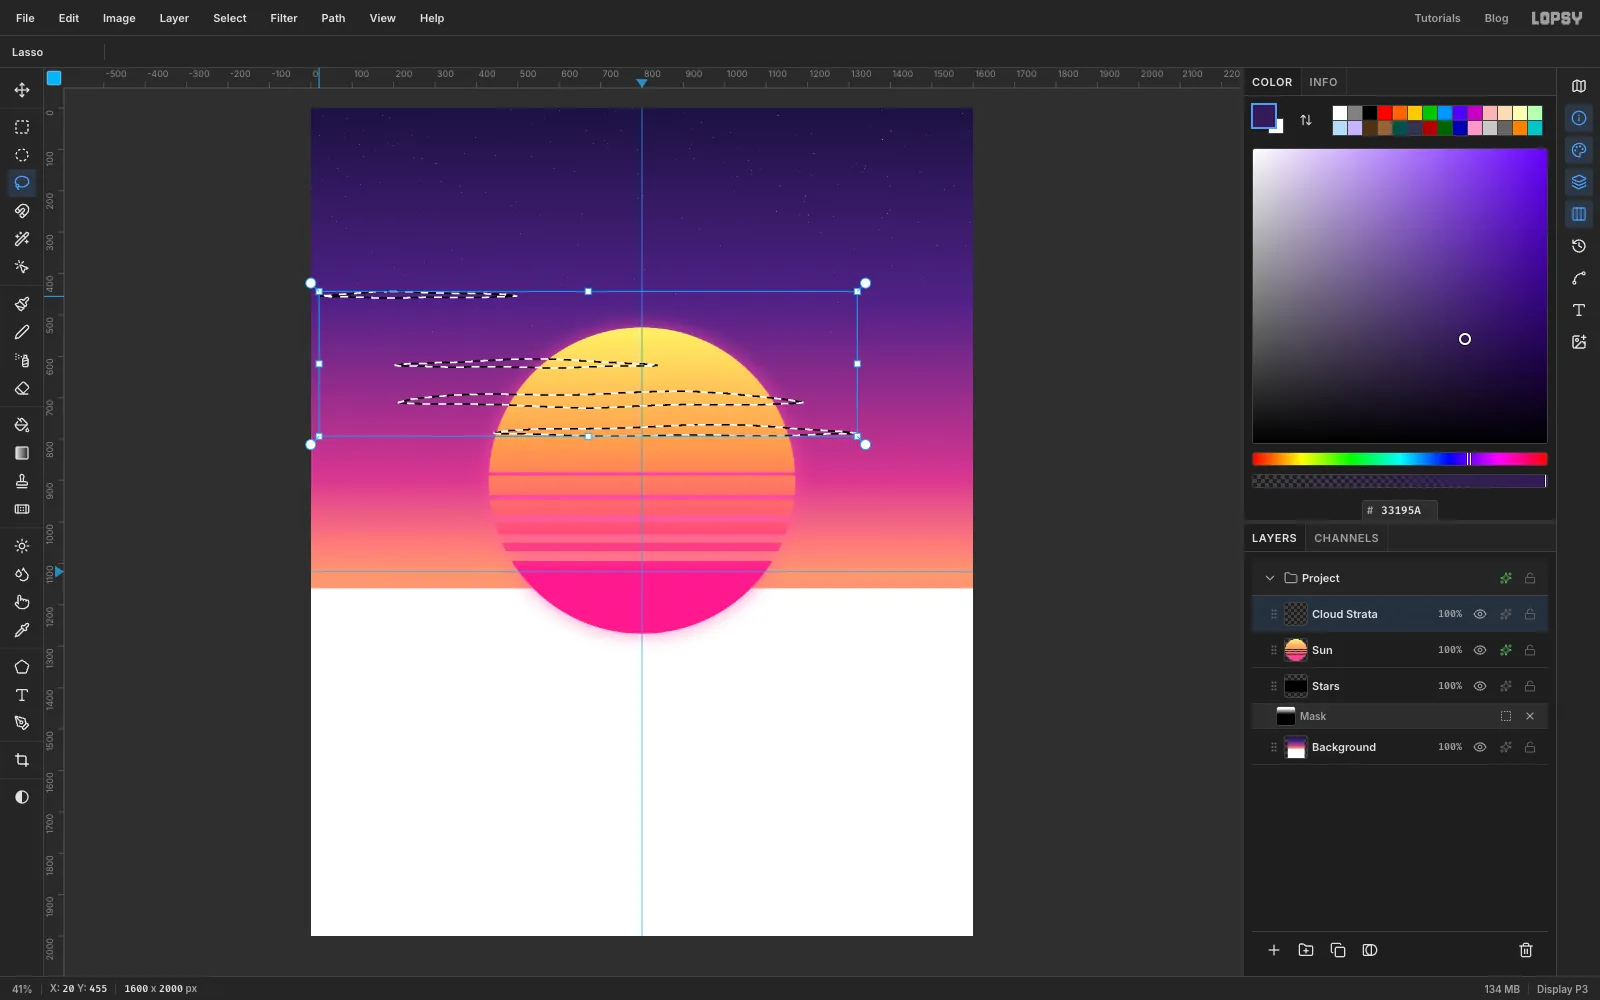
Cloud Strataand set the colour to . With the Lasso, draw a long, thin, lens-shaped cloud across the sun: a gently humped top edge and a flatter, slightly lumpy bottom. Hold Shift and draw three more:- a shorter one just above it
- one lower down that runs off toward the right
- a thin streak in the empty sky at the upper left
Choose Edit → Fill.
-
Light the cloud edges
Deselect and give the clouds an Inner Glow in , Size
8, Opacity70. It reads as the sun catching the edges of the clouds.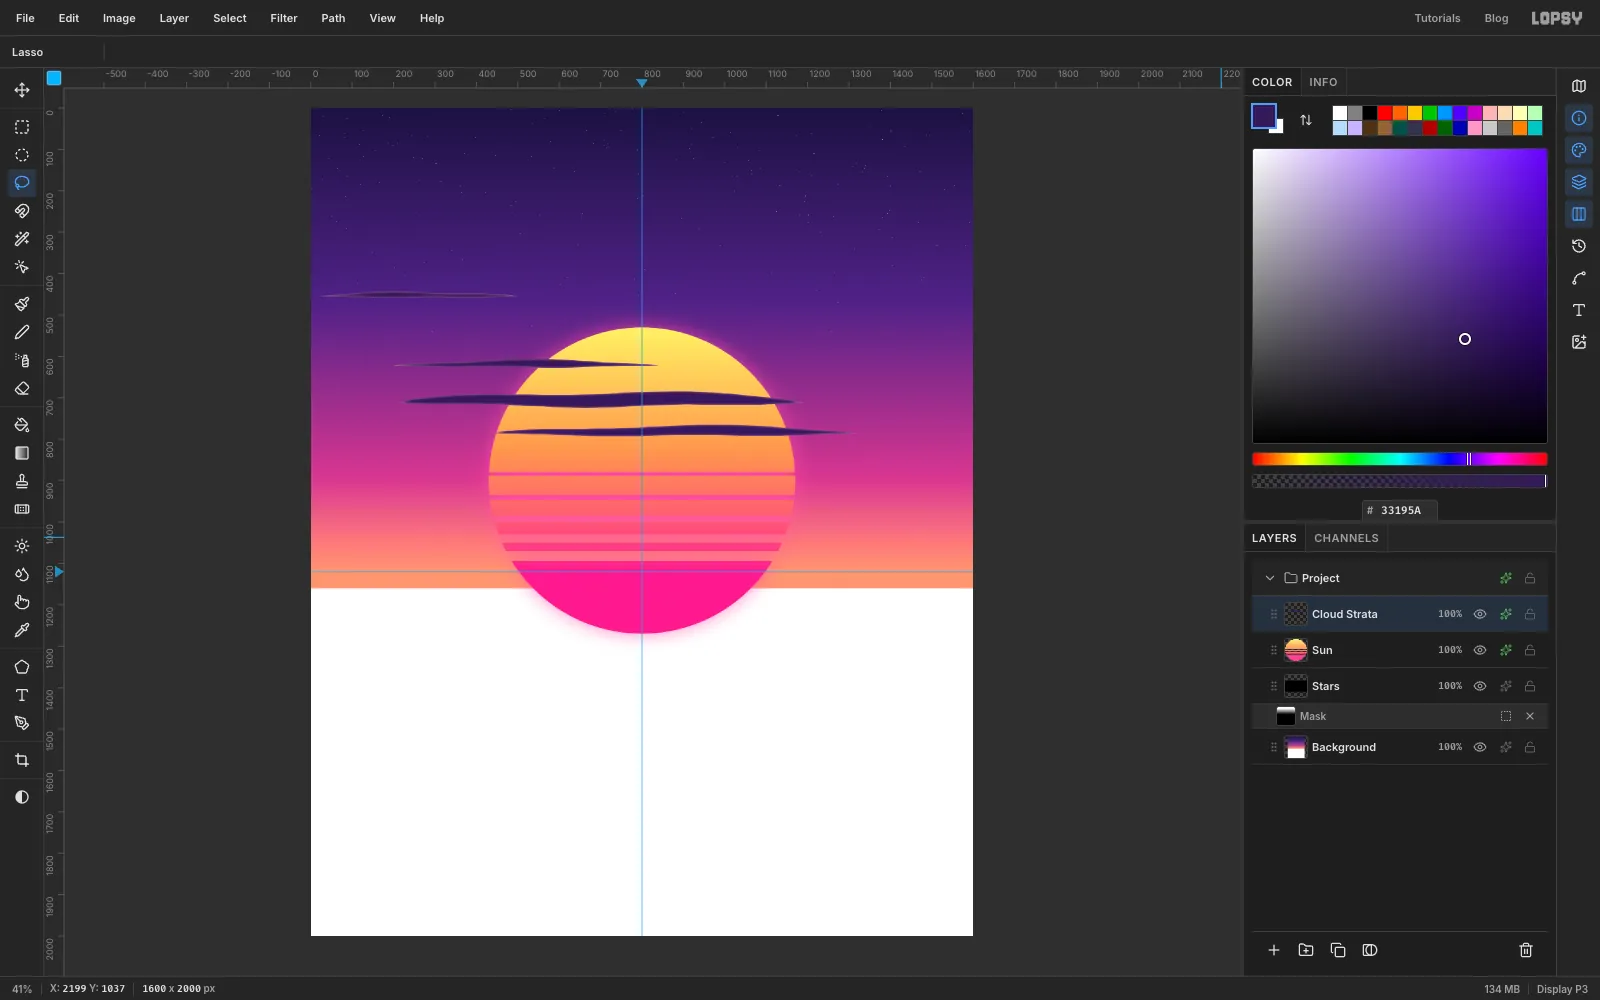
-
Lay down the sea and a horizon haze
Add a layer named
Sea. Marquee everything below the horizon guide and drag a gradient from the horizon to the bottom edge: , at 35%, . This layer hides the bottom of the sun.Add a layer named
Horizon Haze. Marquee a band from about 50 px above the horizon to 30 px below it. Choose Select → Feather… with40, then fill with . Deselect, set the layer to Screen and its opacity to55%.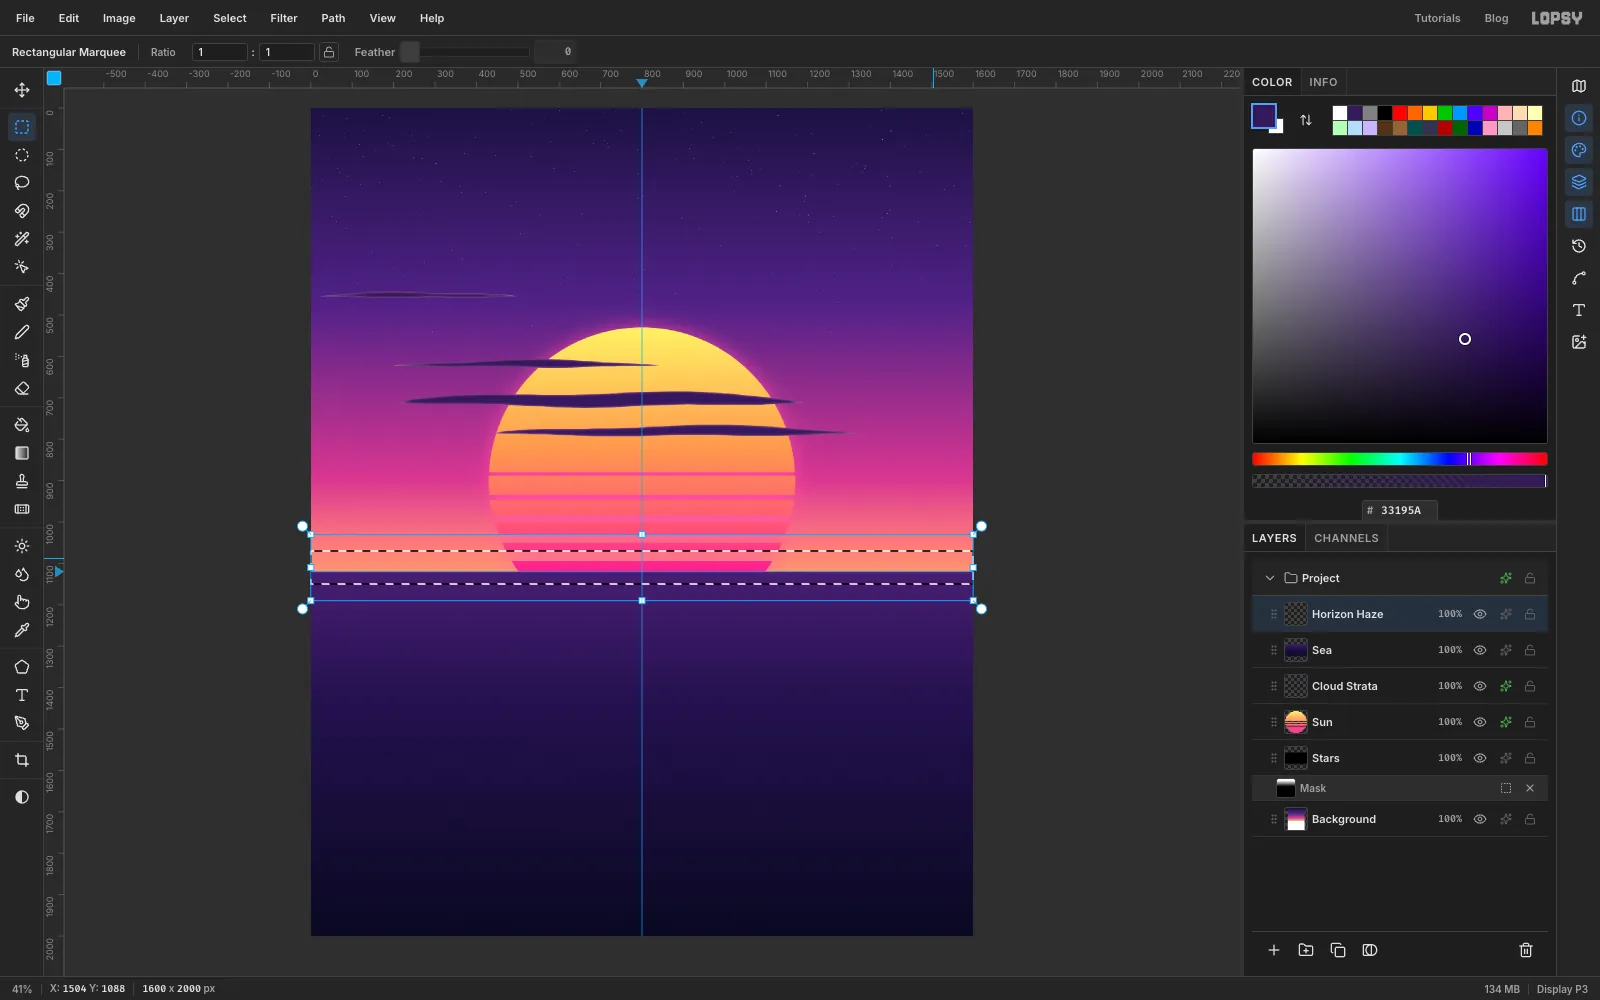
-
Make a grid tile
Add a layer named
Grid Tileand set the colour to . In the top-left corner of the canvas, click once with the Rectangular Marquee to open its size dialog and fill two thin bars, pressing Cmd+D between them:- From
0,0To40,2: a horizontal bar - From
0,0To1,40: a vertical bar
Together they make one corner of a grid cell. The horizontal bar is thicker on purpose: the far rows get squashed by the perspective later and would vanish at 1 px. Select the 40 × 40 px square that contains them and choose Edit → Define Pattern. Then delete the
Grid Tilelayer. The pattern stays defined.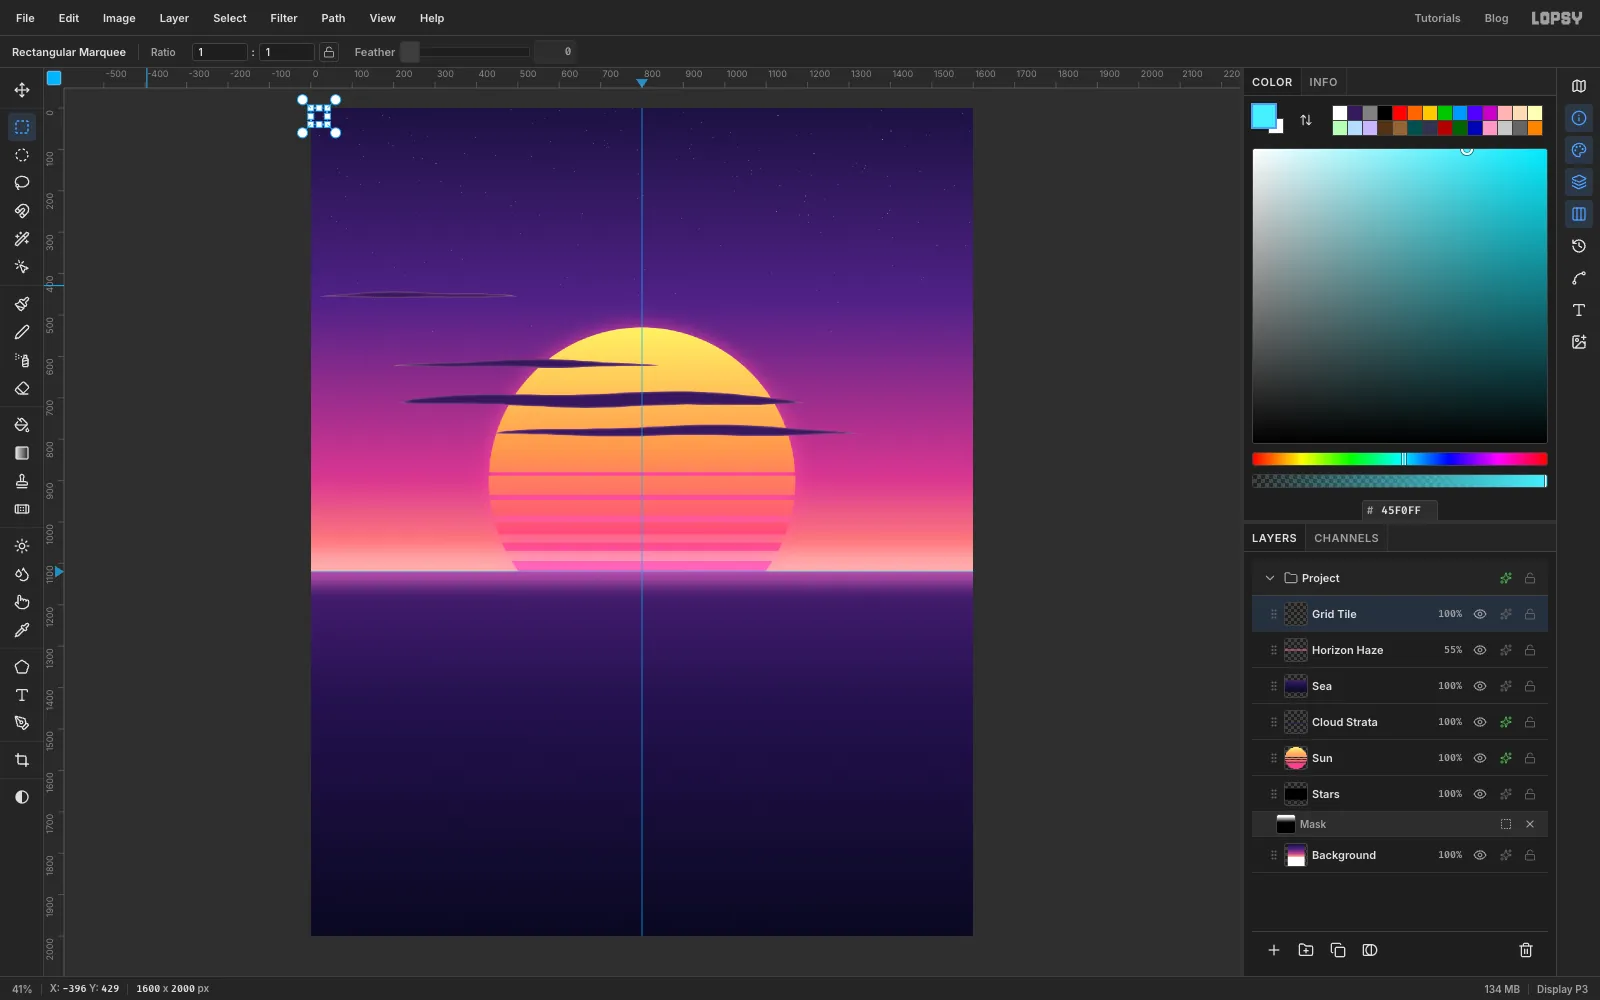
- From
-
Fill the sea with the grid
Click
Horizon Hazeand add a layer namedNeon Gridabove it. Marquee everything below the horizon and choose Edit → Fill with Pattern…. Your grid tile is already selected, so click Apply. You now have a flat grid: rows and columns 40 px apart.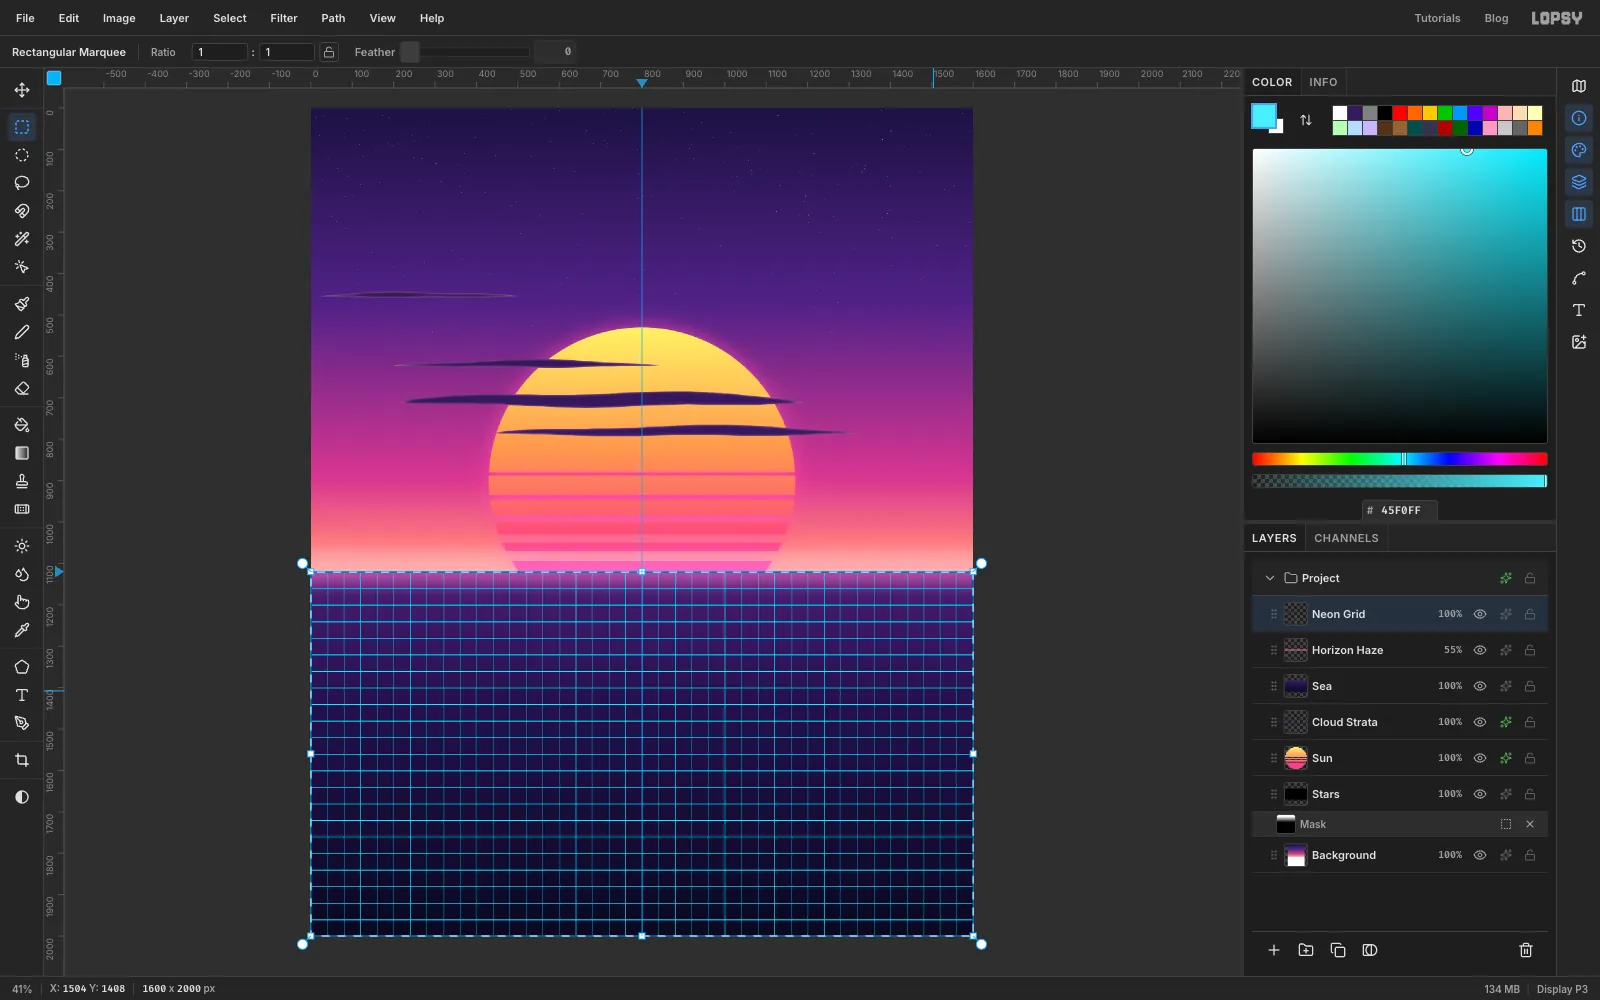
-
Tip the grid back with Perspective
Keep the marquee. Choose View → Zoom Out a few times, until the zoom in the corner reads about
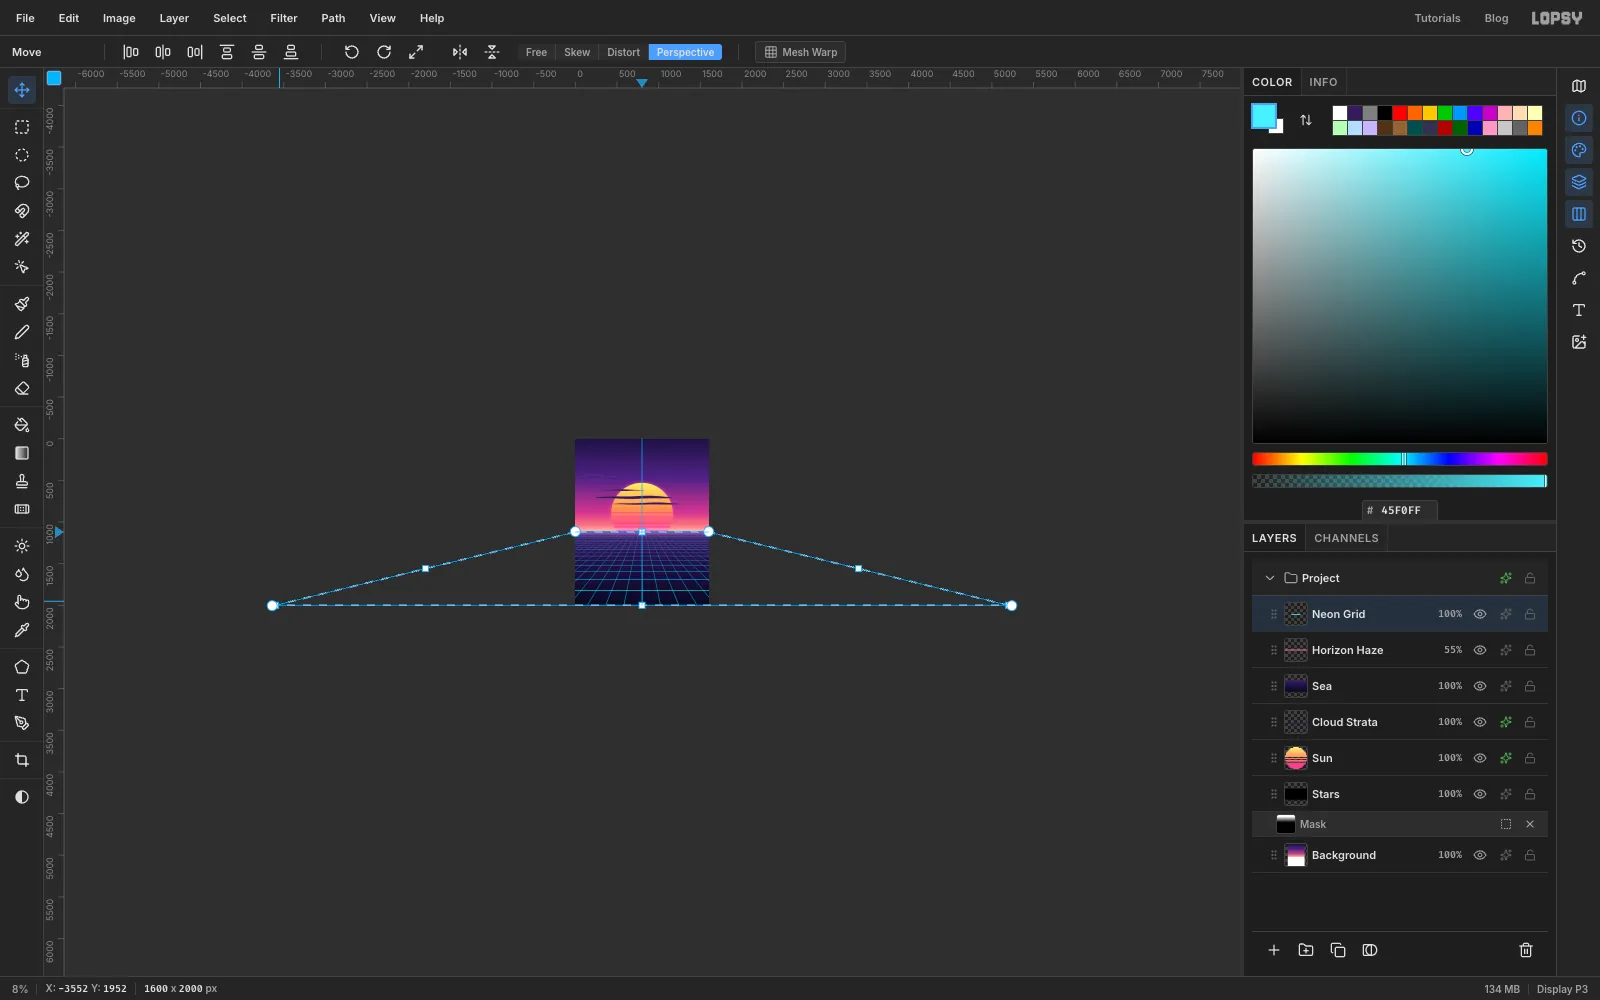
8%and there's plenty of grey pasteboard on both sides. Press V for Move and click Perspective in the options bar.Hover just inside the bottom-left corner of the selection until the cursor turns into a diagonal resize arrow, then drag it far to the left, about two canvas widths. In Perspective mode the bottom-right corner mirrors it, so the bottom edge widens symmetrically.
-
Widen the far edge and commit
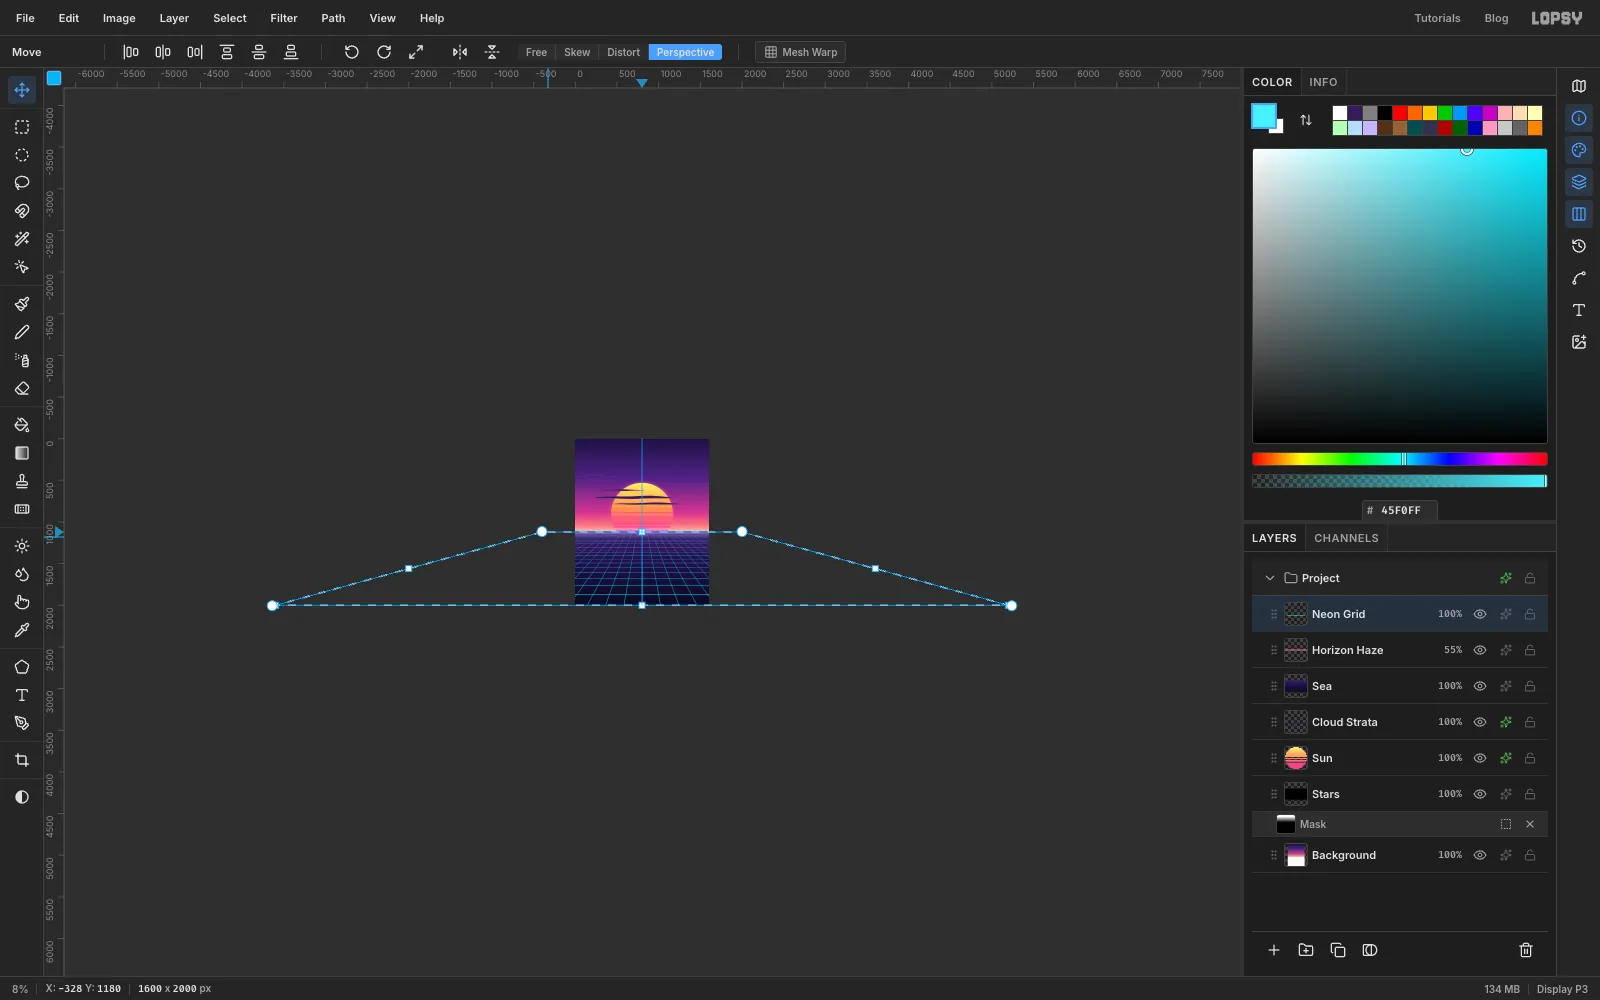
Now drag the top-left corner a little to the left, about a quarter of the canvas width. The top edge then spans the whole canvas, so the far rows run edge to edge along the horizon.
Press Cmd+D to commit and View → Fit to Screen. The transform is projective: the near rows come out tall and the far rows thin, like a real floor.
-
Make the grid glow
Set
Neon Gridto Screen and give it an Outer Glow in , Size14, Opacity80.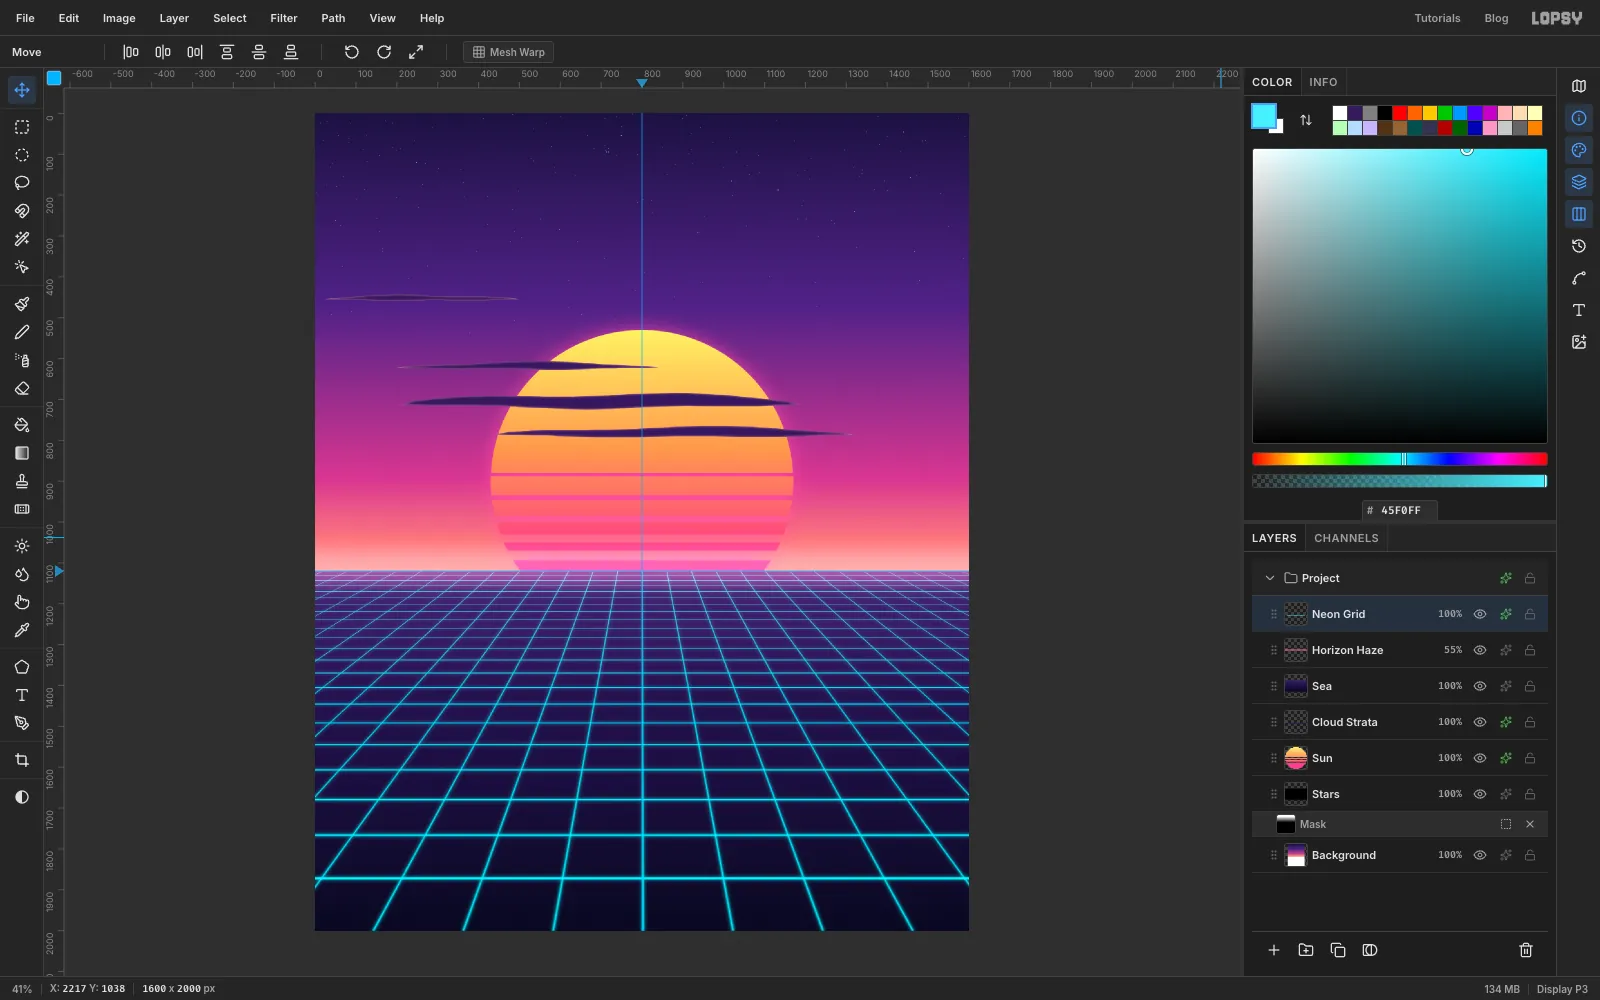
-
Bring in the marble head
With
Neon Gridselected, click New Group and name the groupTitan. Drag the downloaded photo of Augustus onto the canvas. It arrives as a new layer inside the group. Rename itTitan Head.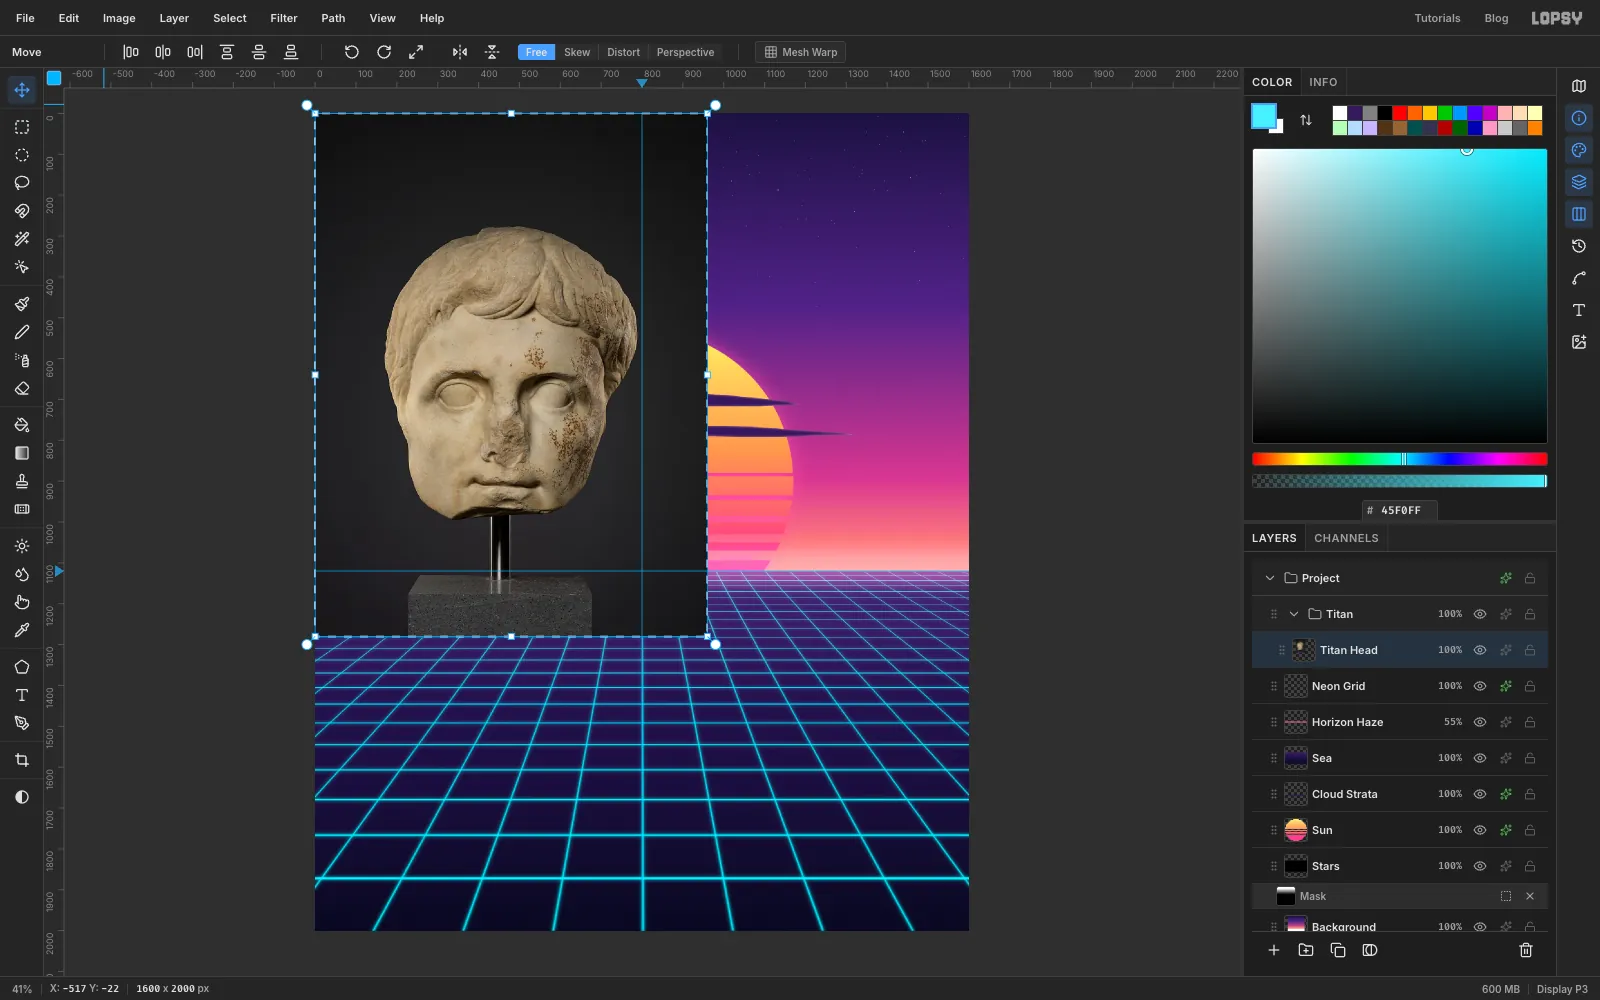
-
Knock out the backdrop
Press Cmd+D. Pick the Magic Wand, set Tolerance to
30with Contiguous on, and click the dark backdrop near a corner of the photo. Press Delete.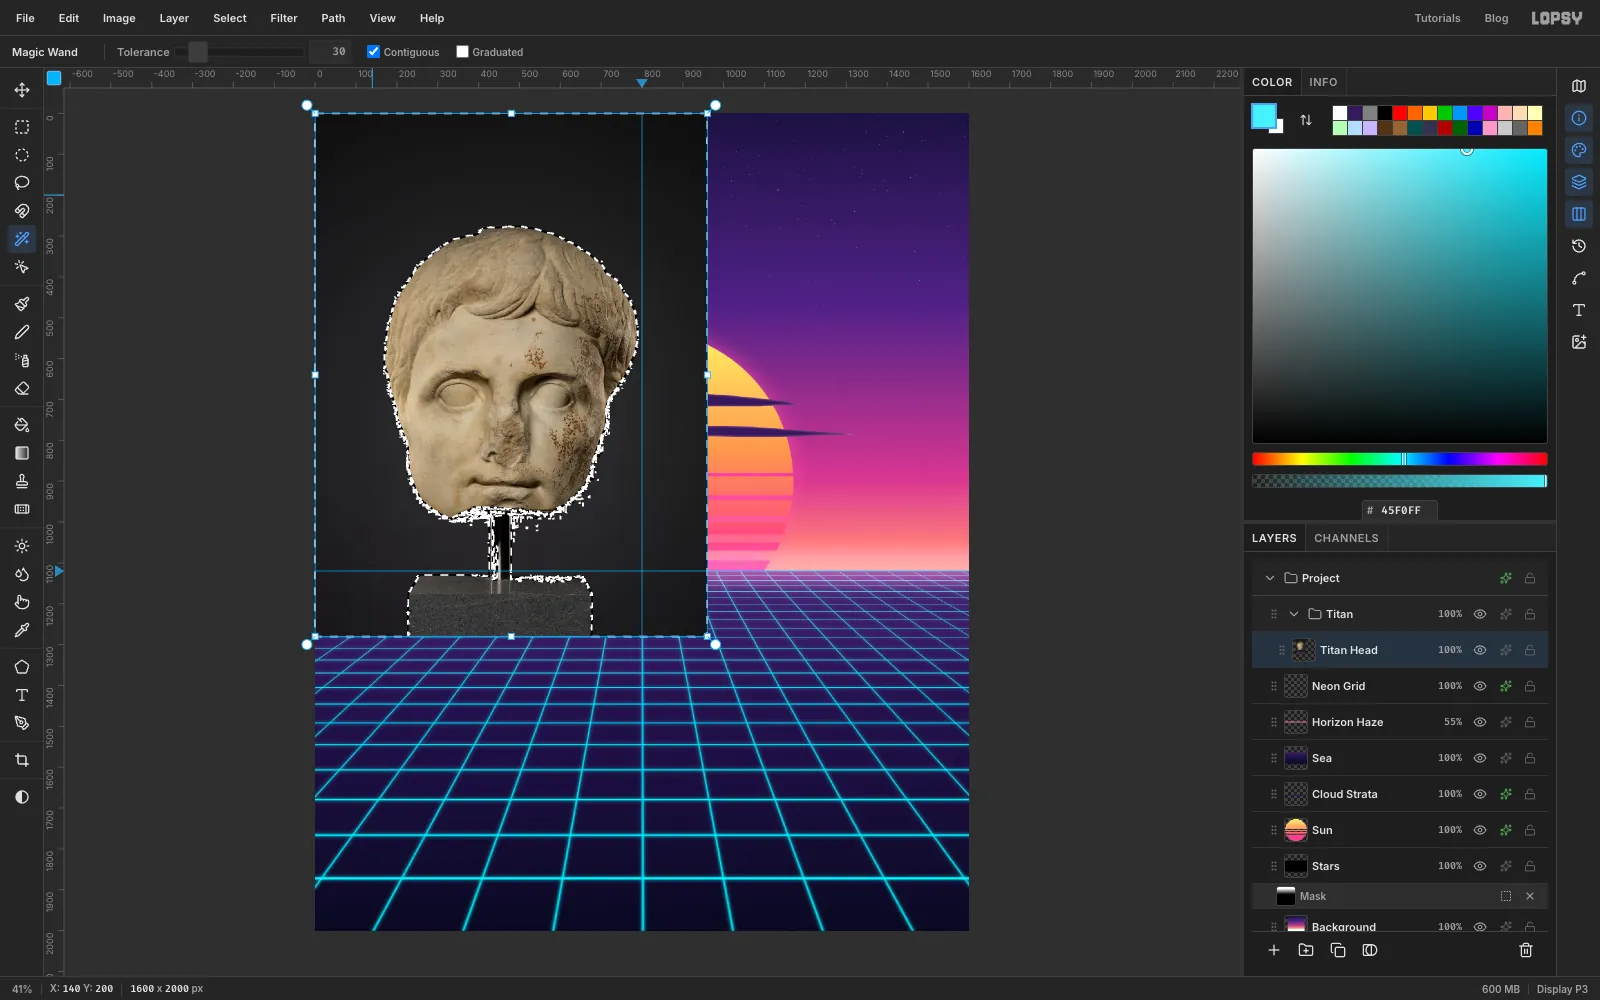
-
Remove the stand and clean the edge
Marquee from just under the chin to the bottom of the canvas and press Delete to get rid of the metal rod and plinth.
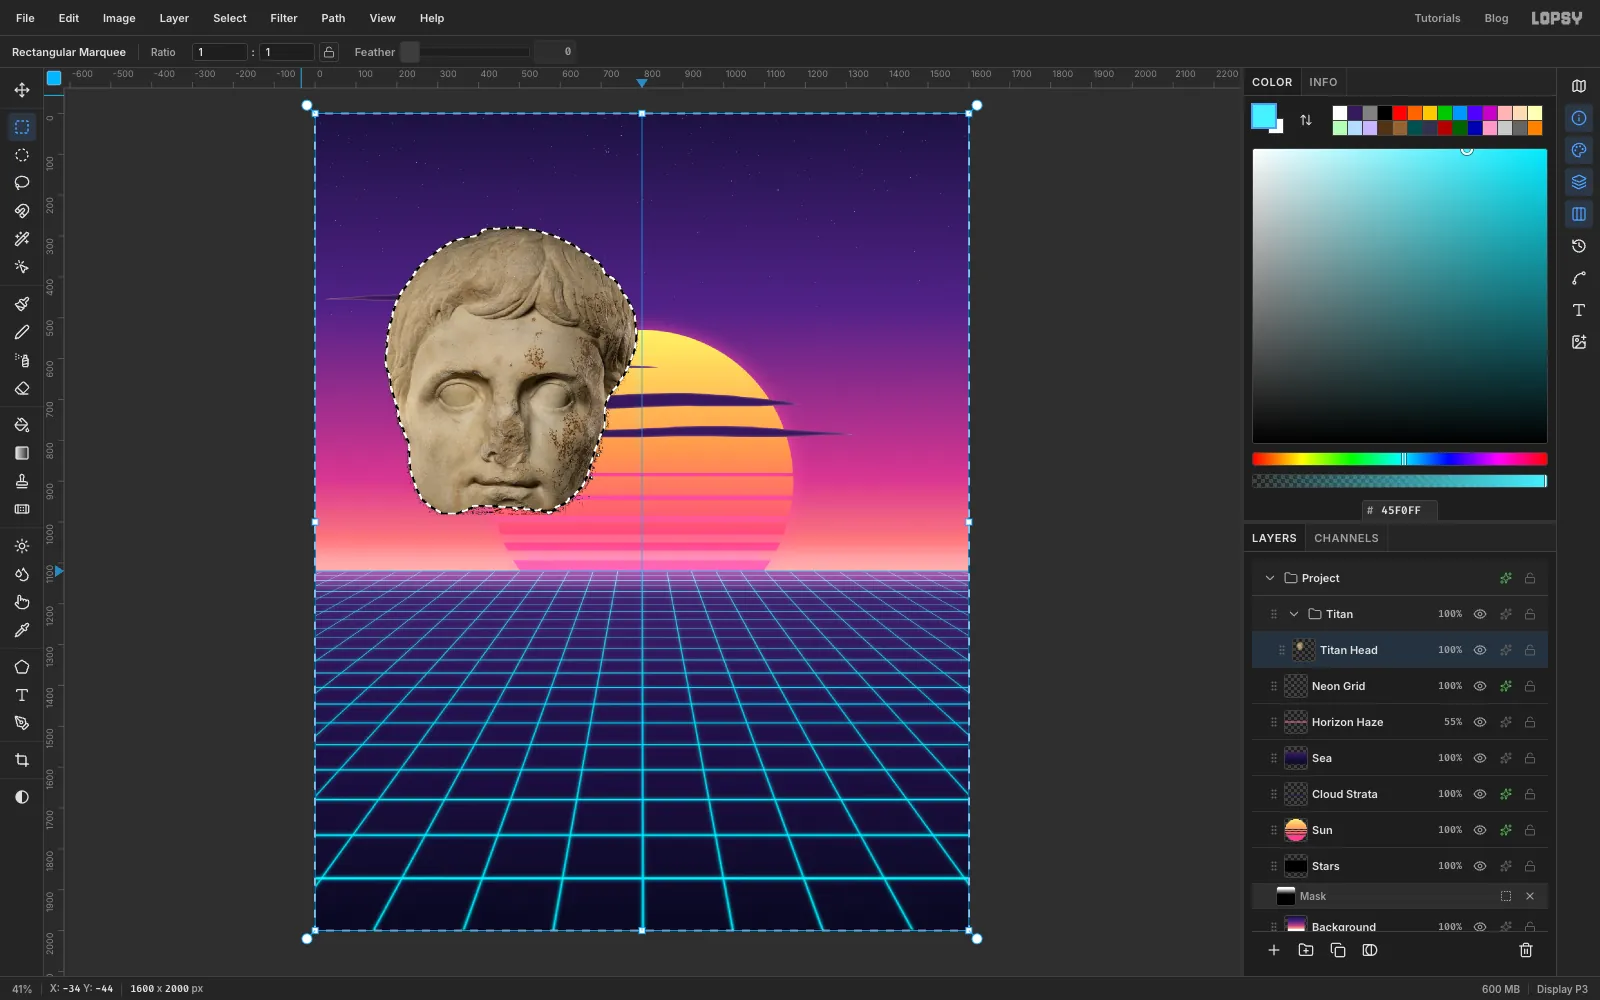
The wand leaves a thin dark rim and a few loose specks. To clean them up:
- Cmd-click the
Titan Headthumbnail to select its pixels. - Choose Select → Shrink… with
3, then Select → Inverse. - Press Delete.
- Cmd-click the
-
Scale and tip the head over
Press Cmd+D, then marquee around the head. With Move, hold Cmd and drag the bottom-right corner handle inward a little, to about 94%.
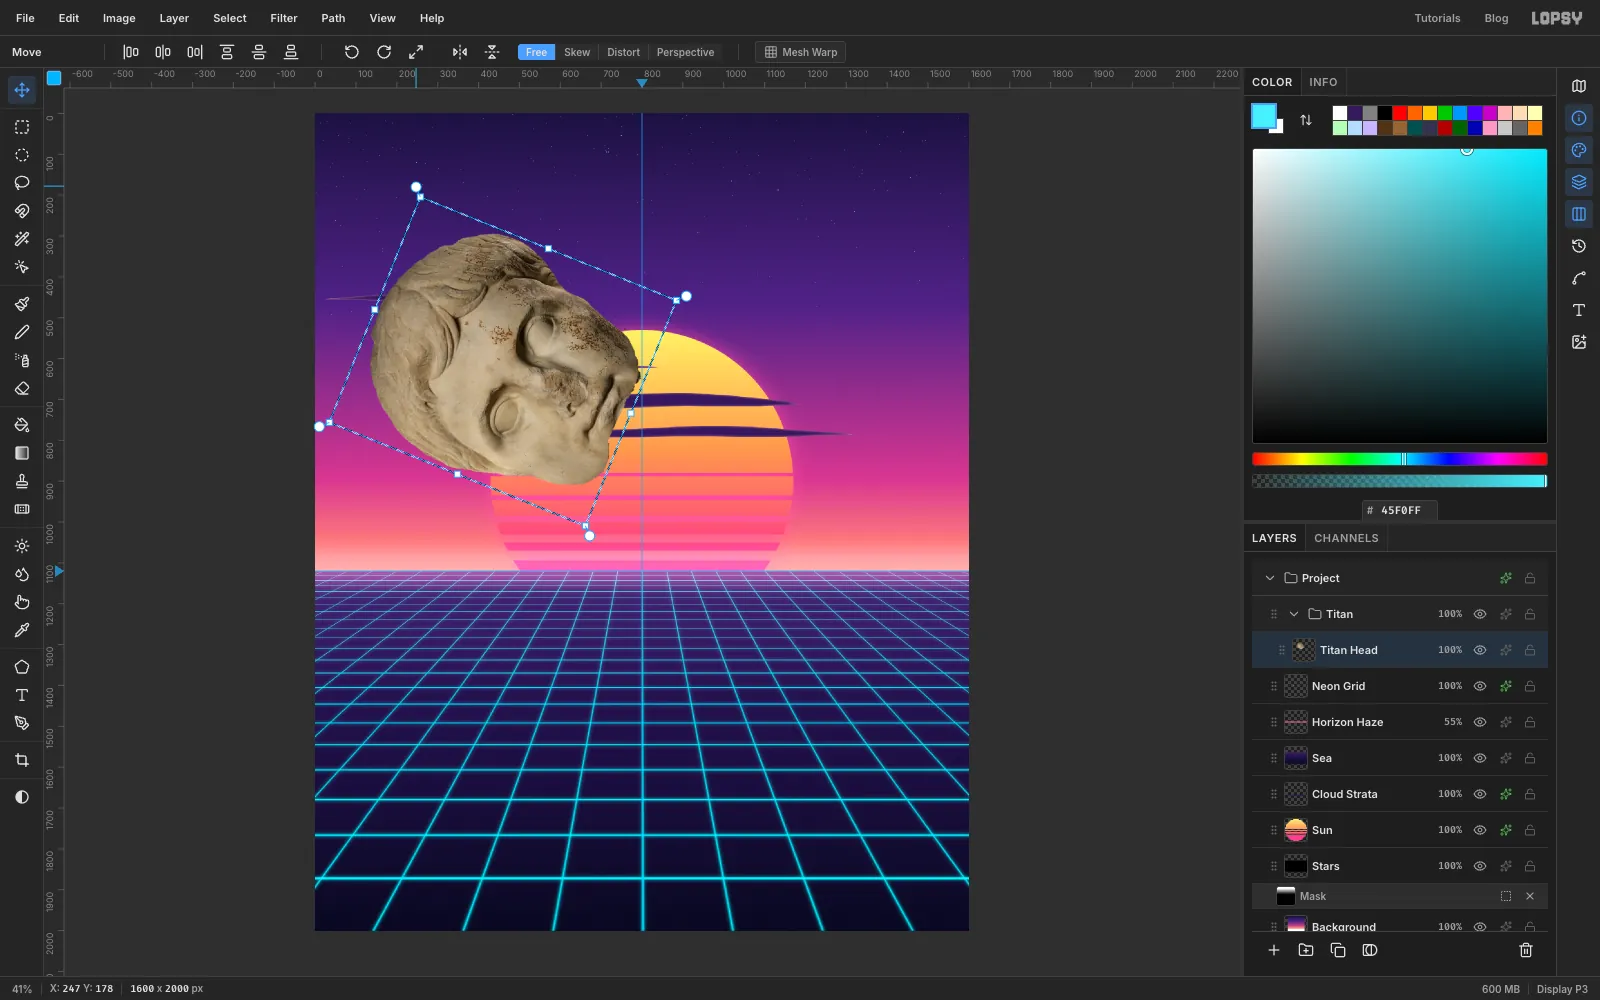
Then drag the rotation handle outside the top-right corner about 68° counter-clockwise, so the head lies on its cheek with its face turned toward the viewer. Press Cmd+D to commit.
-
Place the head in the sea
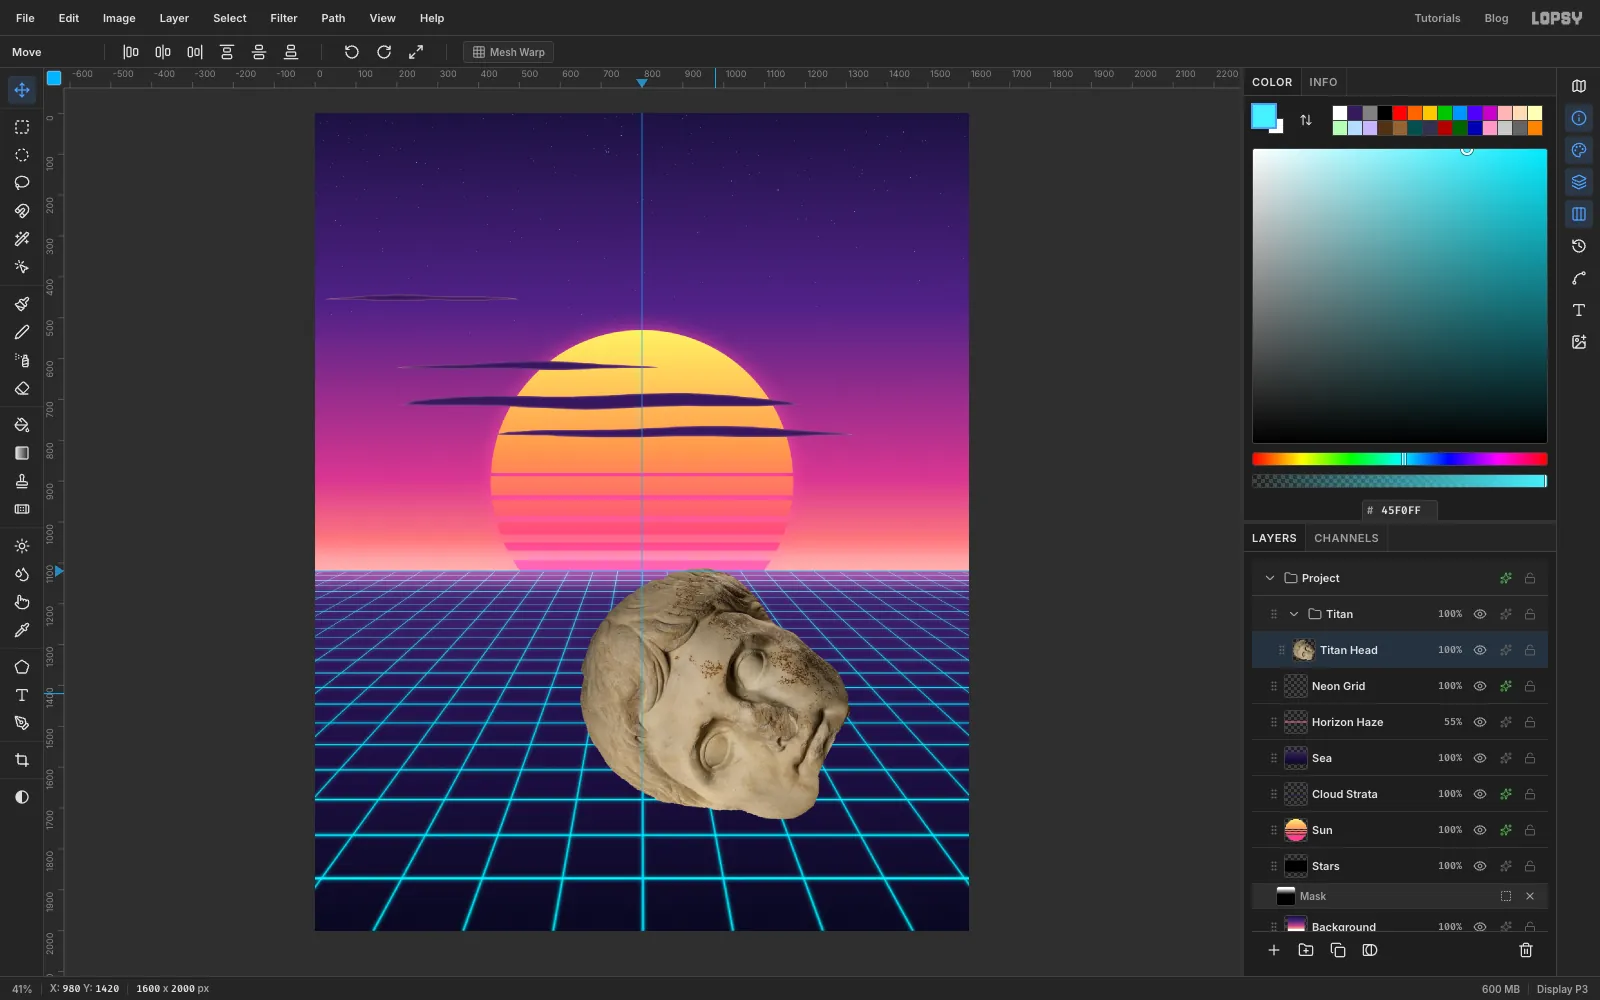
With nothing selected, drag the head with the Move tool so it sits a little right of the centre guide, with the top of the skull just touching the horizon. Placing it off-centre keeps the head and the sun from stacking up into a bullseye.
-
Grey it down
Choose Filter → Desaturate, then Filter → Brightness/Contrast… with Brightness
-4(a touch darker) and Contrast40. Neutral marble takes colour much better than the warm museum stone.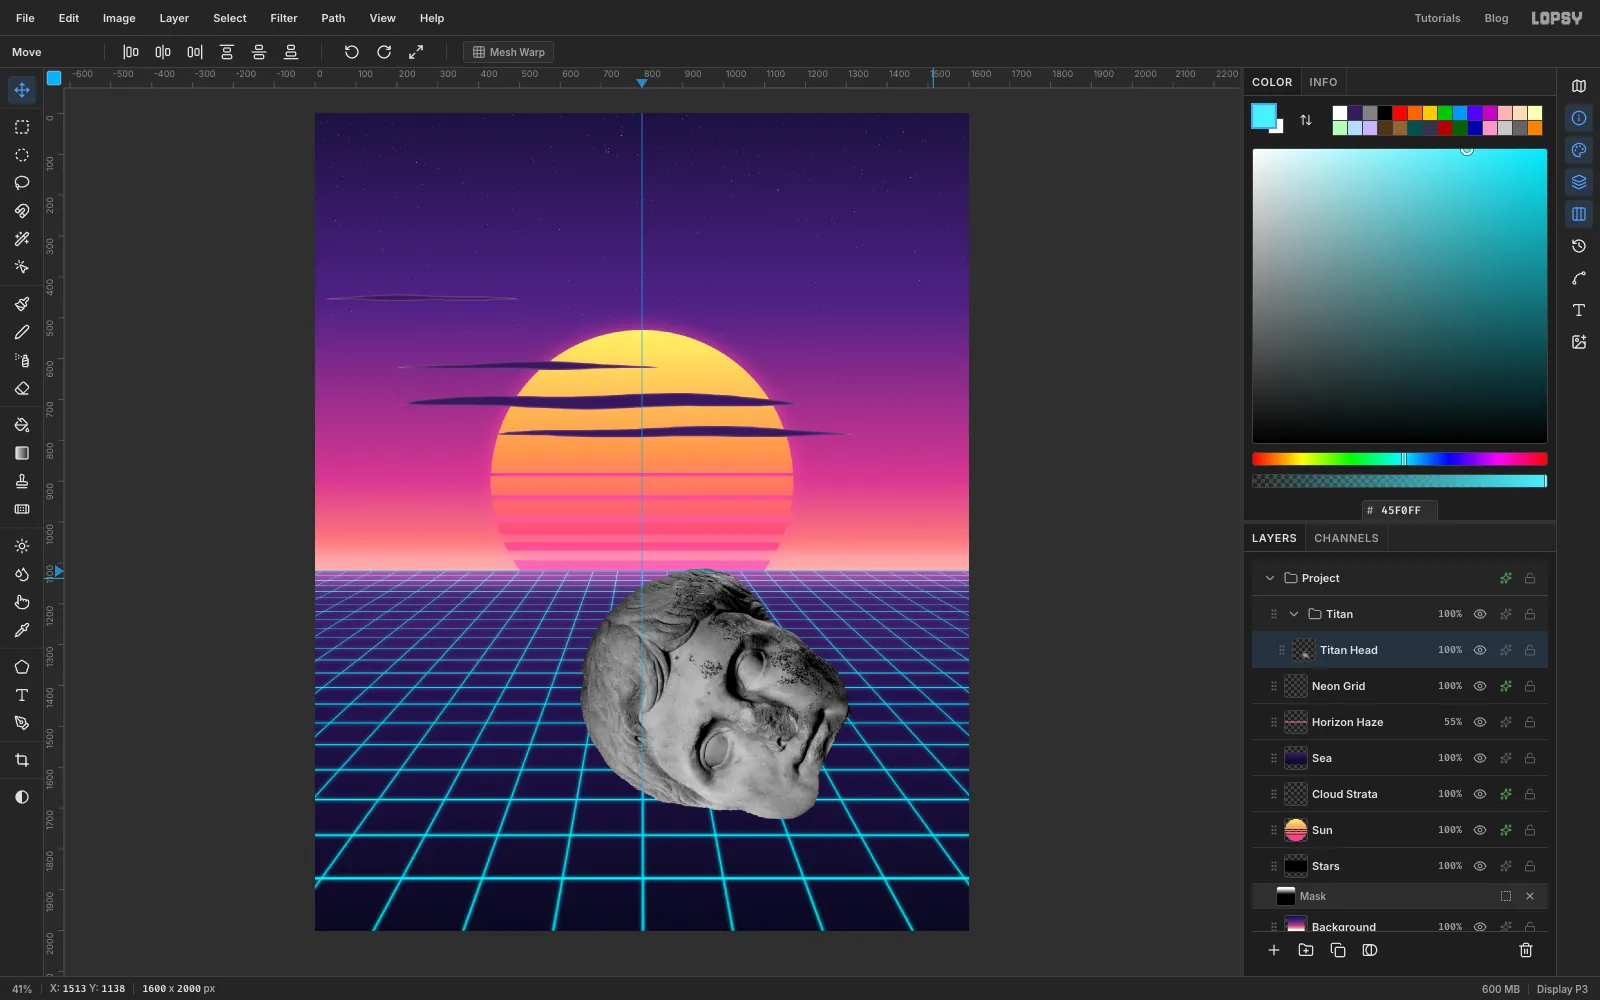
-
Tint it with a Color layer
Cmd-click the head's thumbnail and add a layer named
Titan Tint. Drag a gradient across the head from upper left to lower right: , at 55%, . Deselect.Set the blend mode to Color and the opacity to
62%, then choose Layer → Merge Down to bake the tint into the head.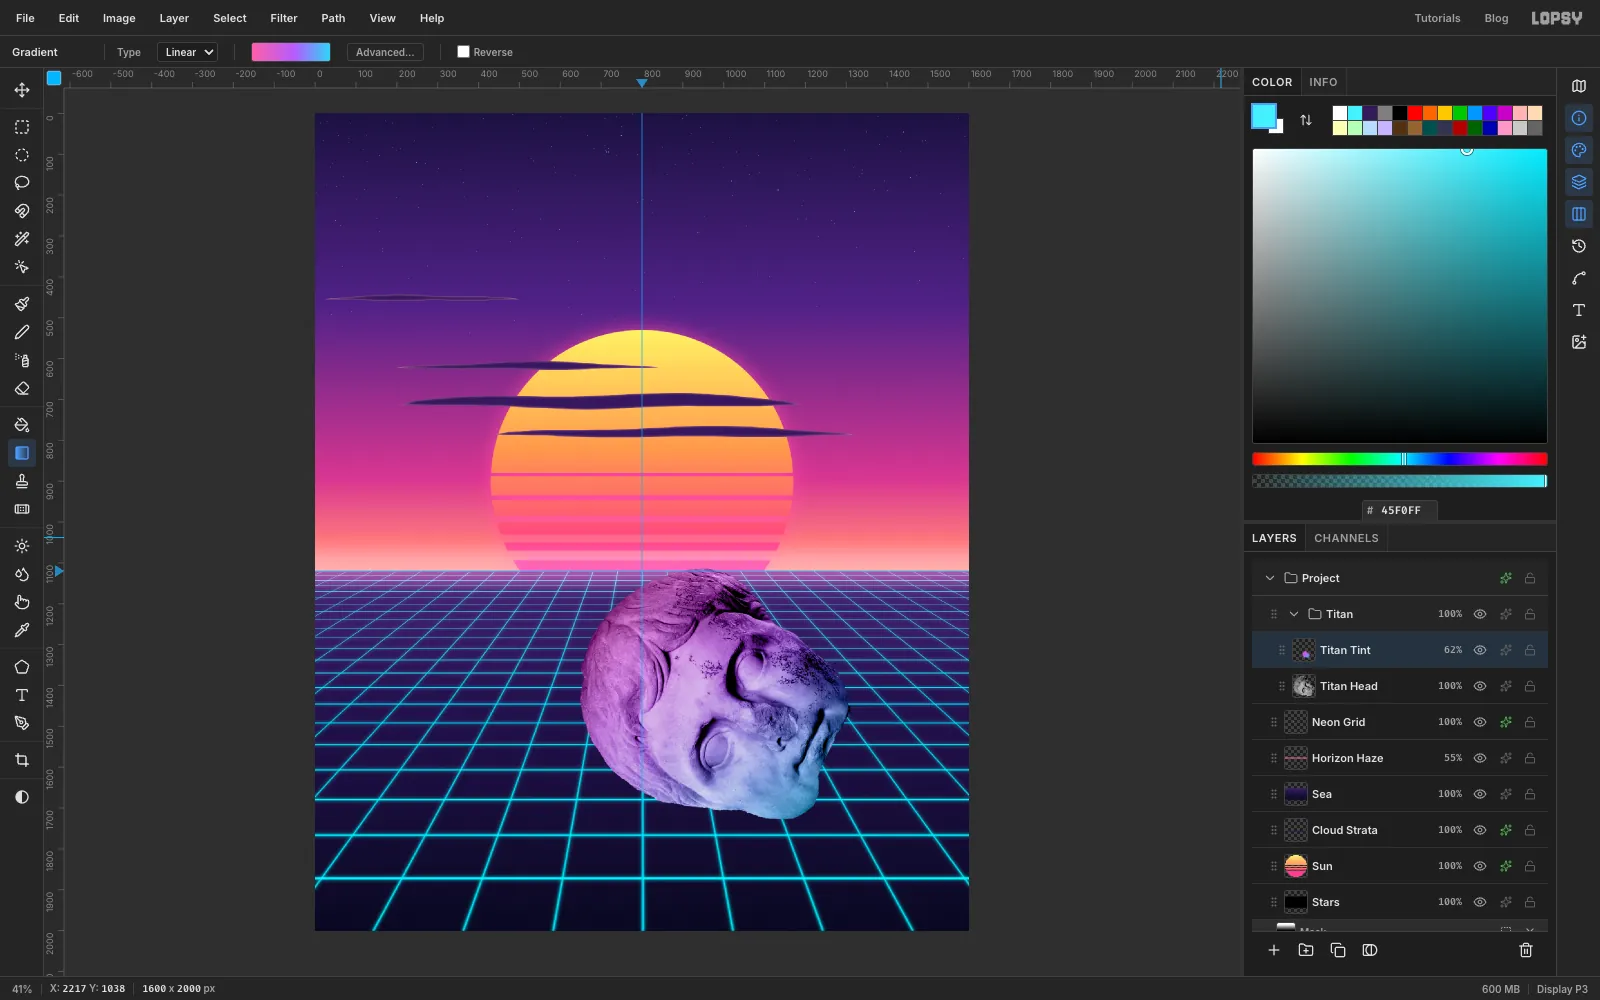
-
Backlight the skull
The sun is behind the head, so the top of the skull should catch its light.
Cmd-click the head's thumbnail again and add a layer named
Rim Light. Open the Gradient tool's Advanced… editor and set just two stops: and black. Drag from the top of the skull down about 170 px. Deselect.Set the layer to Screen at
60%. Black has no effect in Screen mode, so only the top edge brightens. Choose Layer → Merge Down.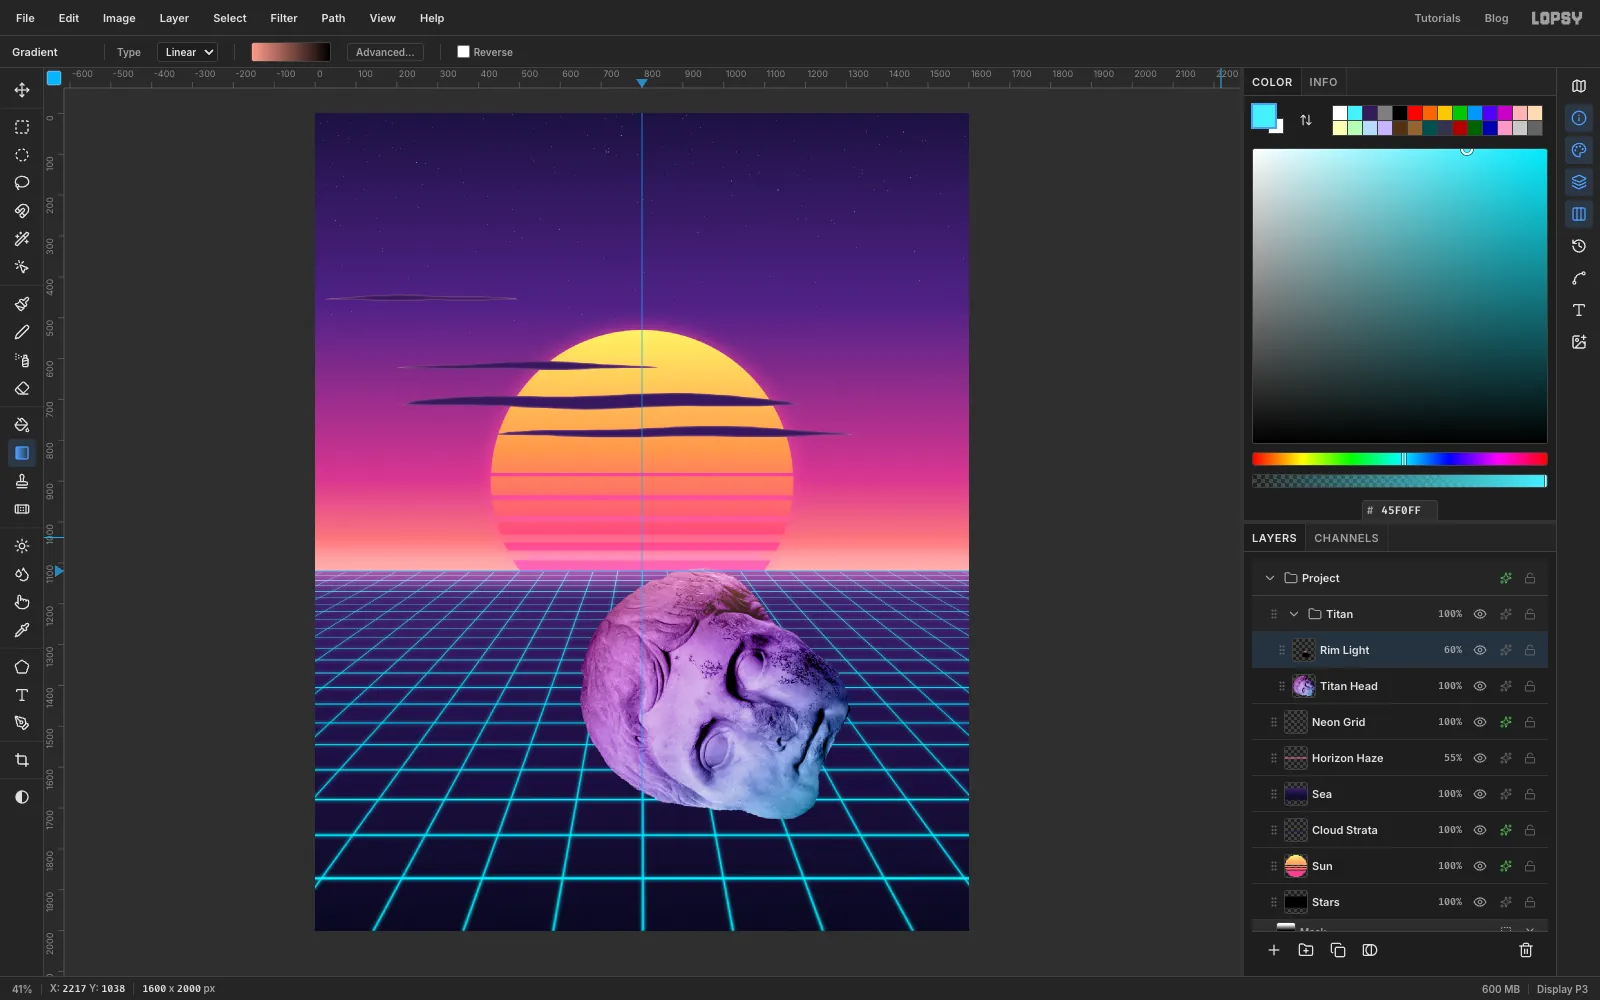
-
Shade the base
Cmd-click the thumbnail, add a layer named
Shade, and set the gradient stops to white and . Drag from the middle of the head down to its lower quarter, where the water will cut it off later (about y1625). Deselect.Set it to Multiply at
45%. White has no effect in Multiply, so only the lower half darkens. Merge Down.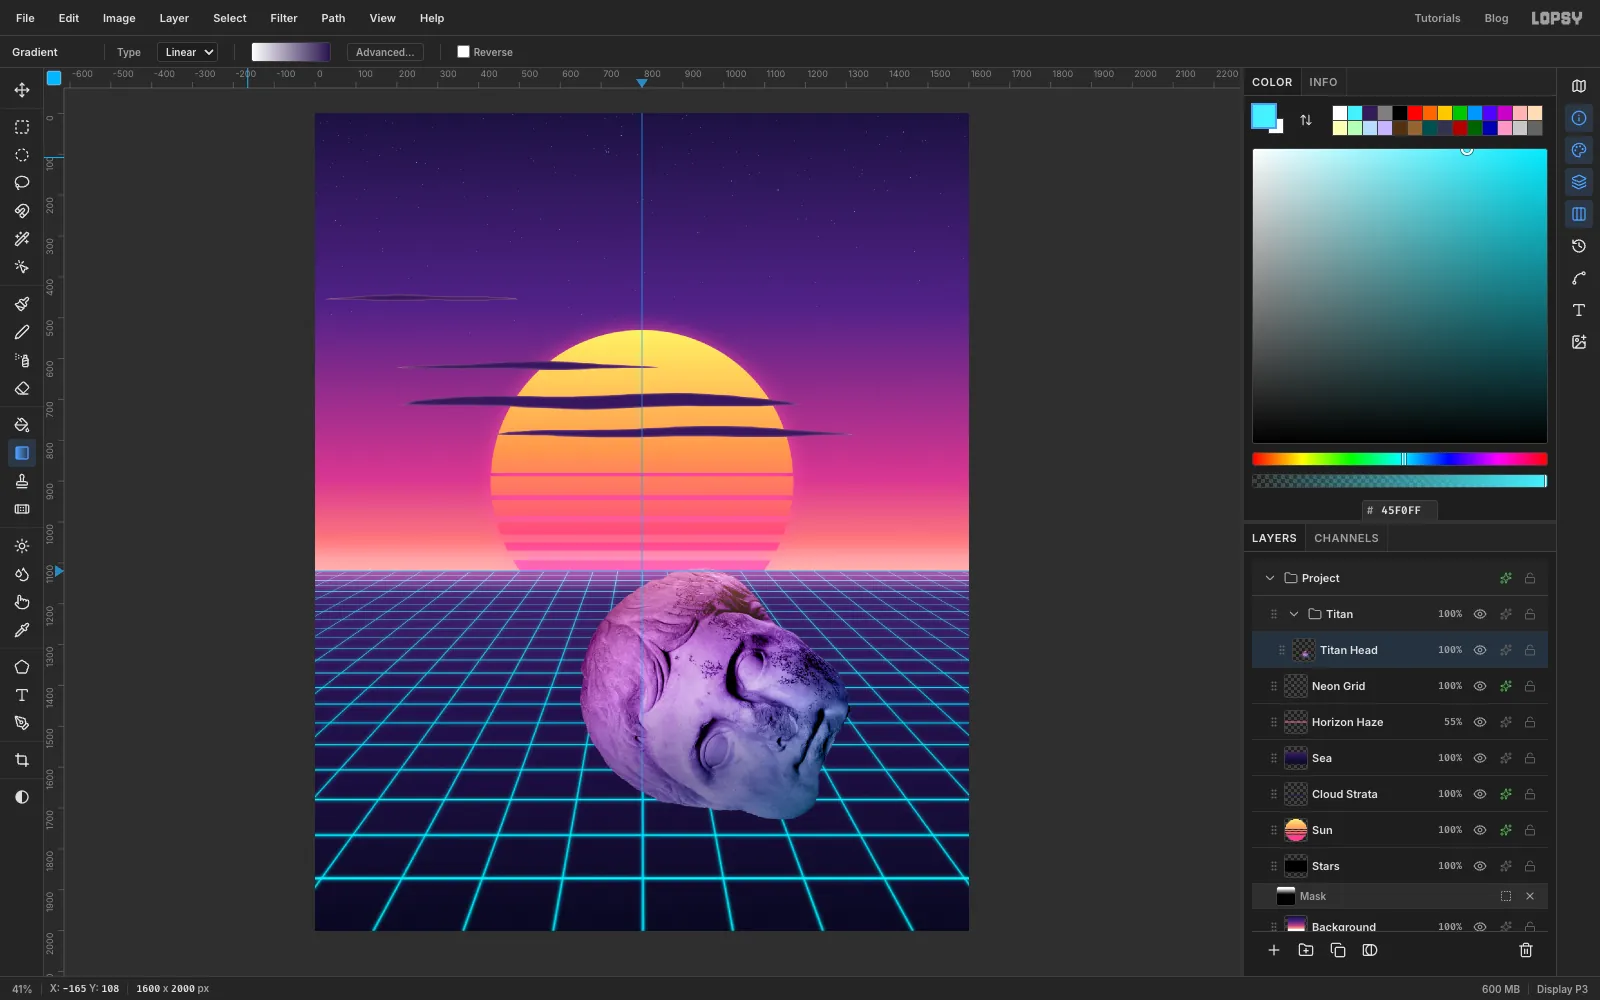
-
Slip a few glitch slices
A glitch slice is a thin band of the image that has jumped sideways:
- Marquee a thin band (15–25 px tall) right across the head, through the forehead.
- Press Cmd+C, then Cmd+V. The band is pasted in place as a new layer.
- With Move, drag it 60–90 px sideways.
- Layer → Merge Down.
Do this three times: across the forehead, across the brow (drag that one the other way) and across the lower face. Keep the slices off the eyes so the face still reads. Copying instead of cutting leaves no holes behind.
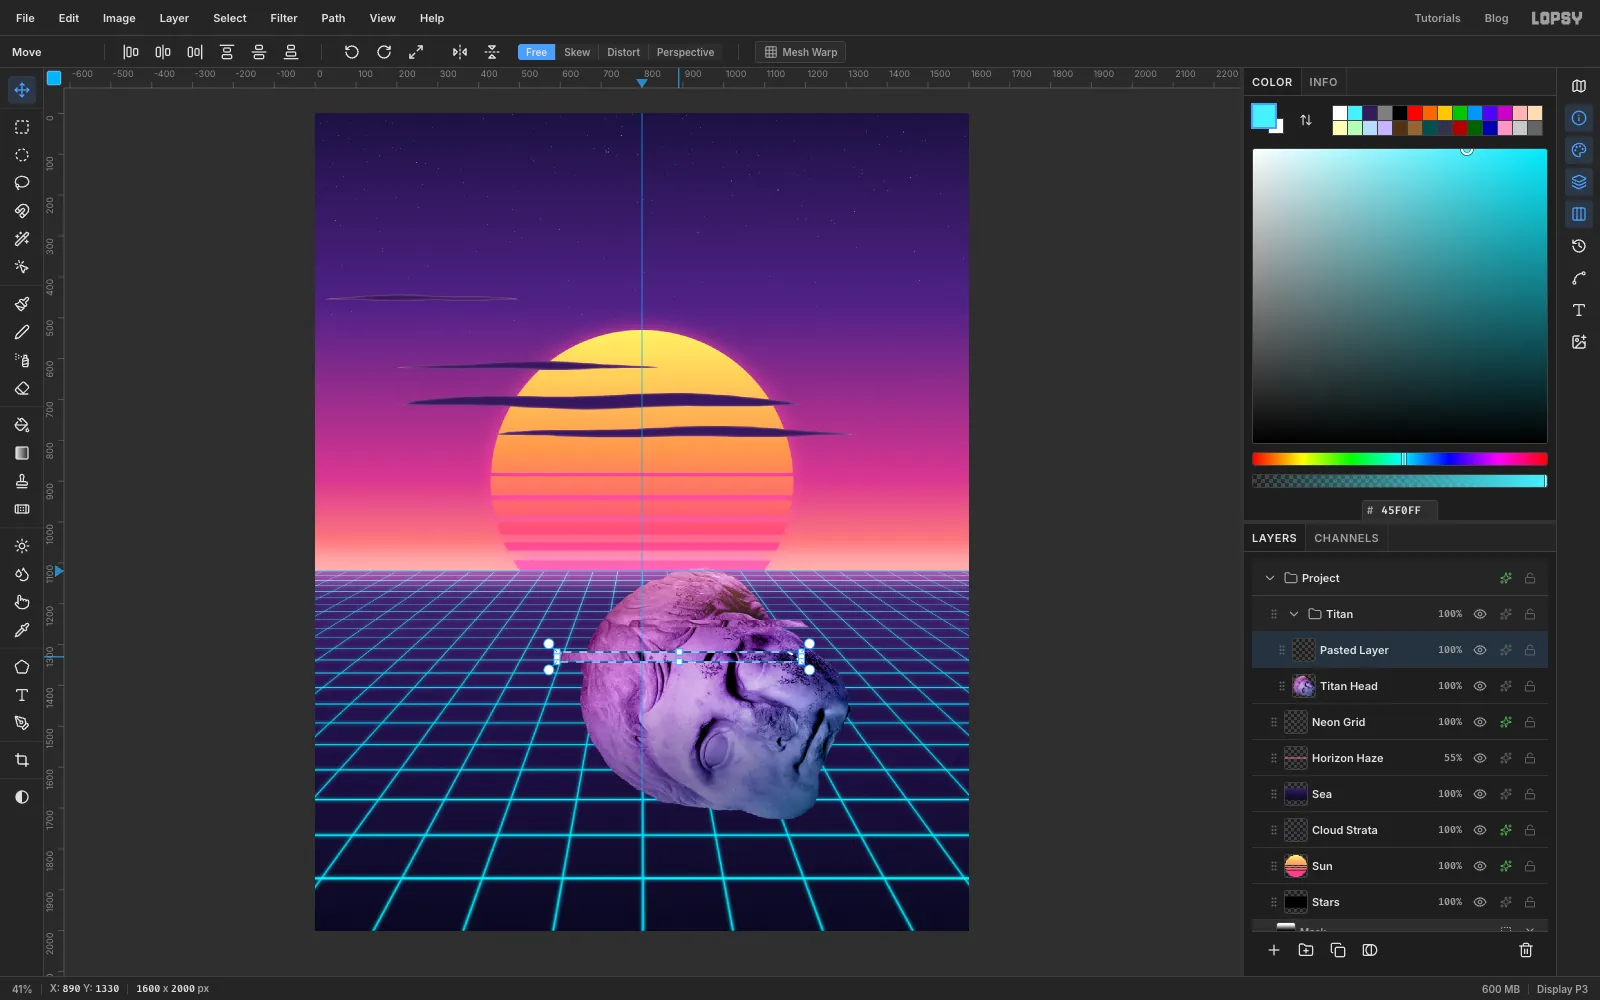
-
Split the colour inside the slices
Select the three bands again. They're easy to find because each one sticks out past the side of the head. Drag a marquee over the first, then Shift-drag over the other two. Choose Filter → Chromatic Aberration… with Amount
5and Direction0. The red and blue channels split apart only inside the slices, which makes them read as signal damage. The rest of the head stays sharp.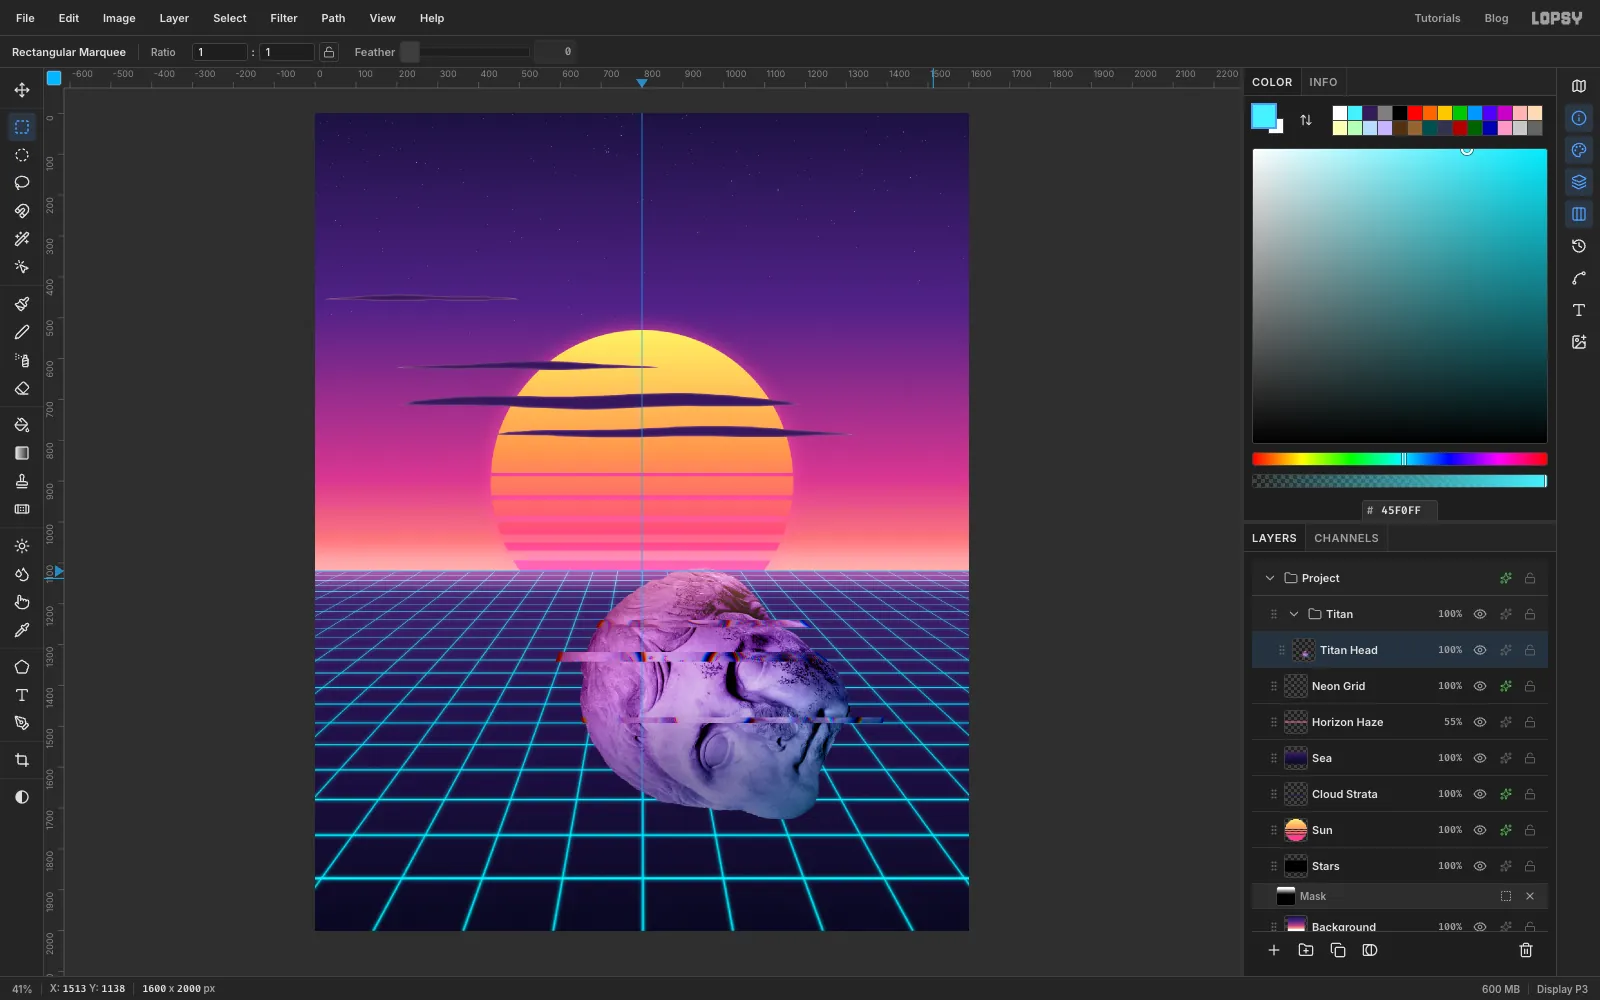
-
Sink the head with a layer mask
Deselect, click Add Mask and click the mask thumbnail. With the Lasso, draw a gently wavy line across the lower quarter of the head and close the lasso around everything below it.
Set the colour to dark grey rather than black and choose Edit → Fill. Grey hides most of the drowned part but lets it show faintly under the grid. Click the layer's name to leave the mask.
Finally, give the head a subtle Inner Glow in , Size
6, Opacity22. It softens the cut-out edge into a faint pink rim.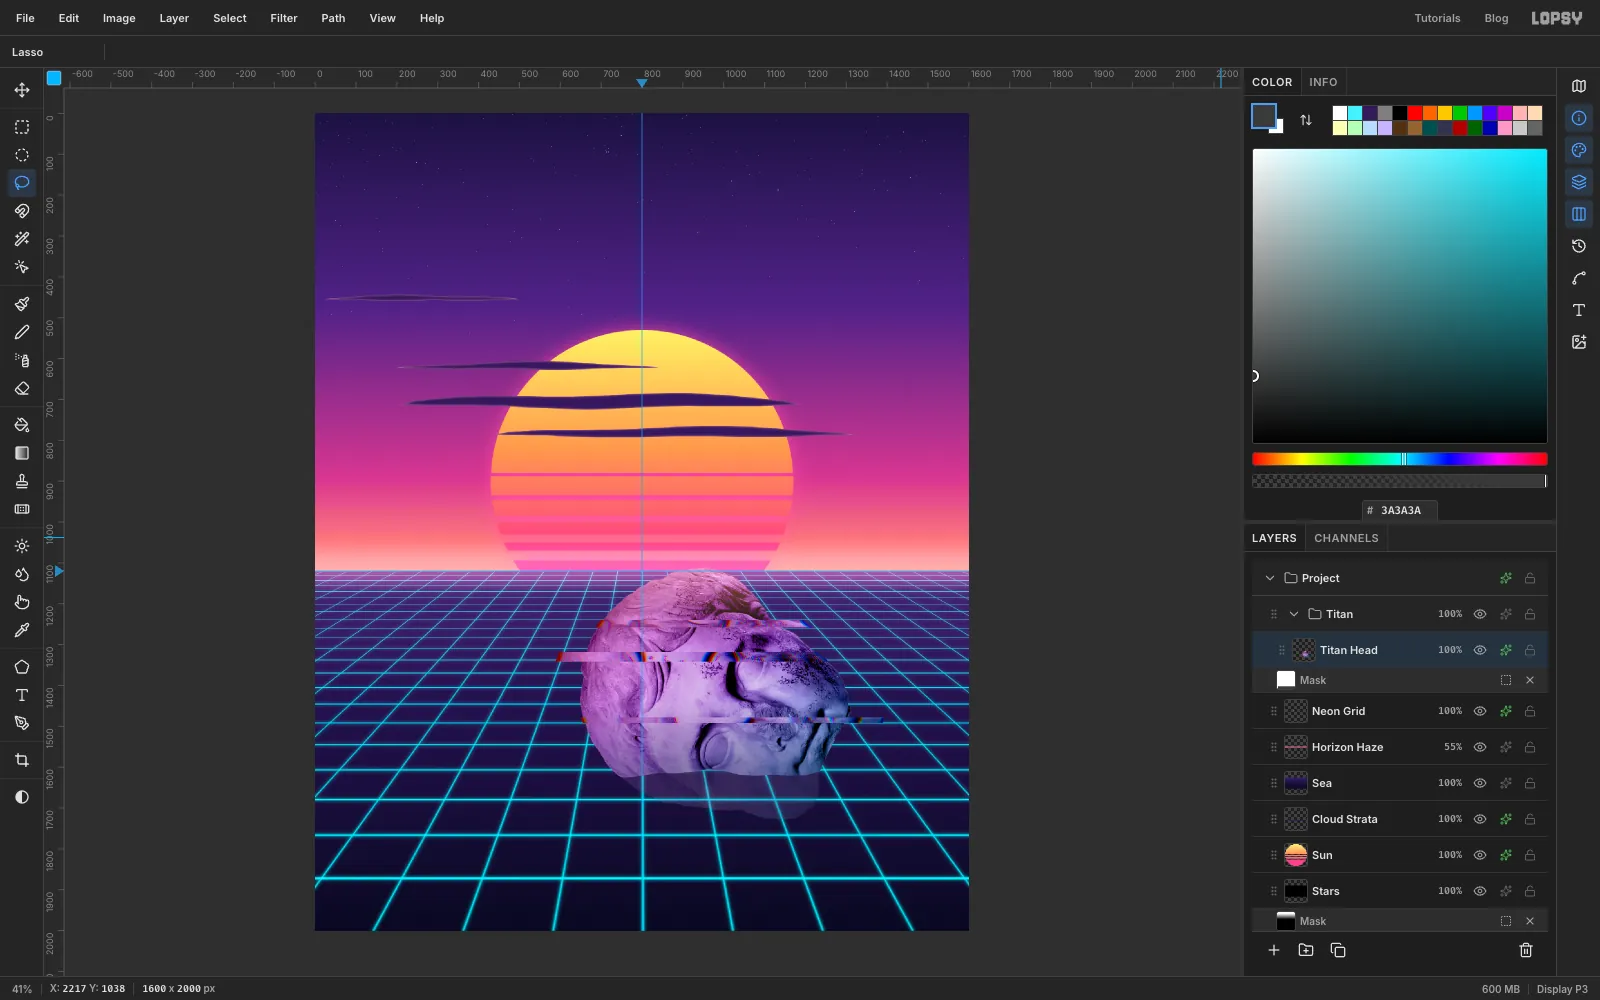
-
Flip a copy for the reflection
Click Duplicate Layer and rename the copy
Titan Reflection. Click the × on its mask row to delete the copied mask. Cmd-click its thumbnail, press V and click Flip Vertical in the options bar.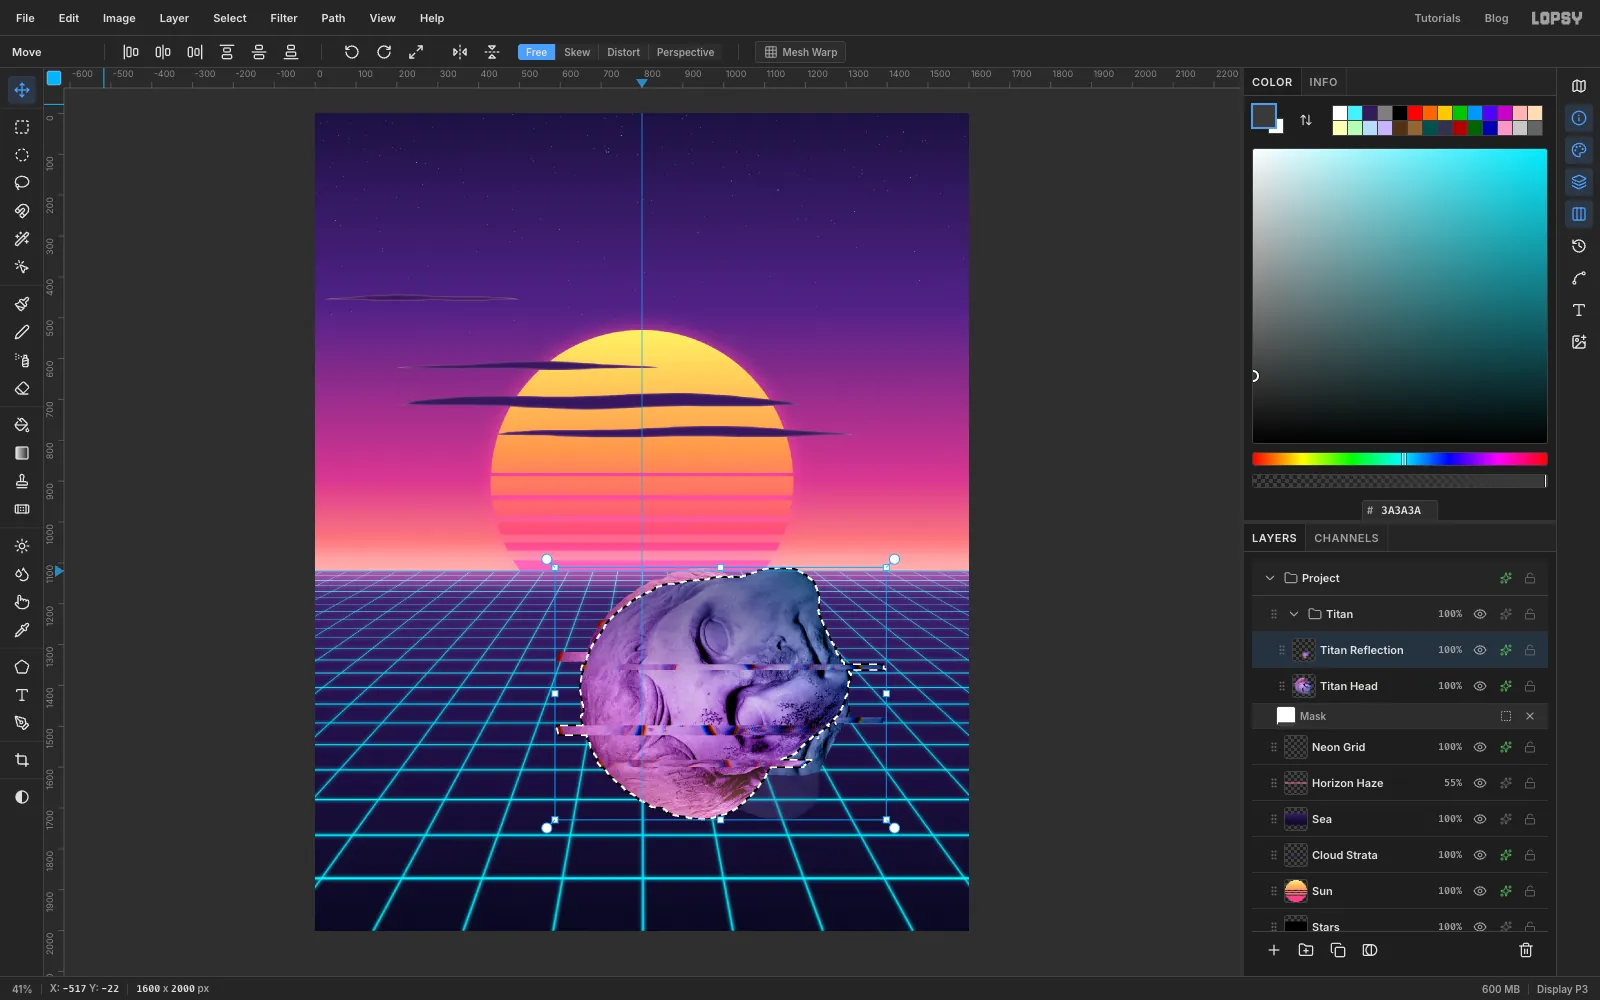
-
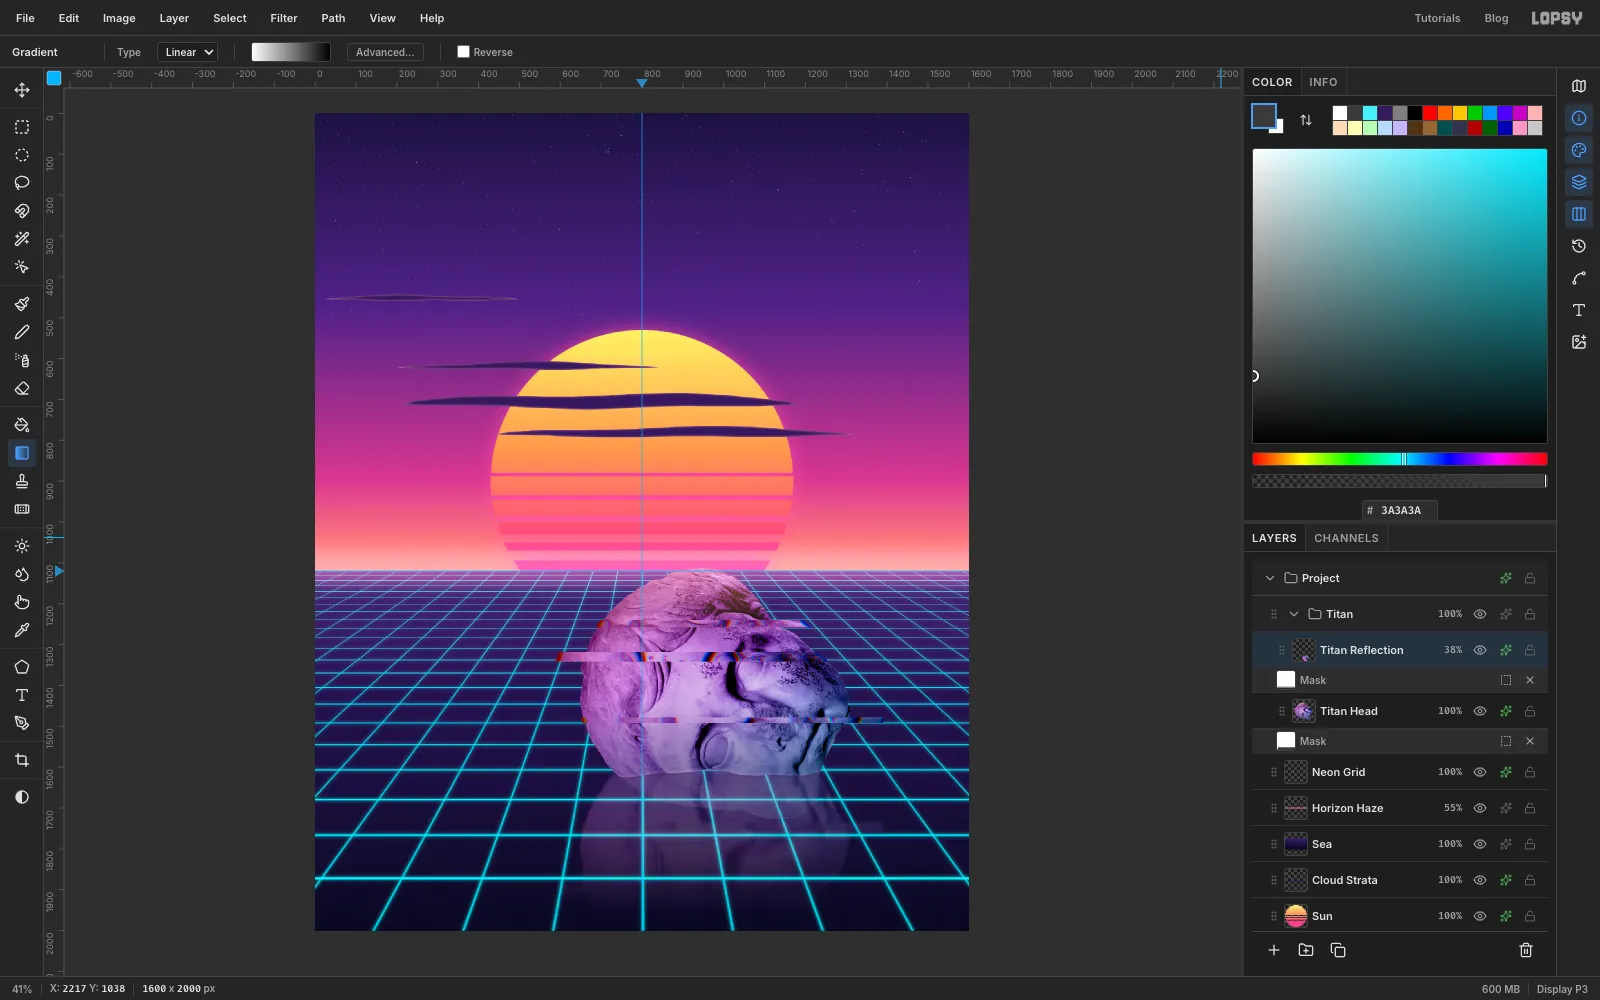
Fade the reflection into the water
Press Cmd+D. Drag the copy straight down until its waterline meets the original's, so the two mirror each other across the water. Lasso everything above the waterline and press Delete.
Then:
- Filter → Motion Blur… with Angle
90and Distance20for vertical streaks. - Add Mask and drag a white-to-black gradient from the waterline to near the bottom of the canvas.
- Set the layer to Screen at
38%and click its name to leave the mask.
- Filter → Motion Blur… with Angle
-
Move the reflection under the head
The copy landed above the head. Drag
Titan Reflectionby its grip (the dotted handle at the left of the row) and drop it just belowTitan Head, under that layer's mask row. The reflection now sits under the head.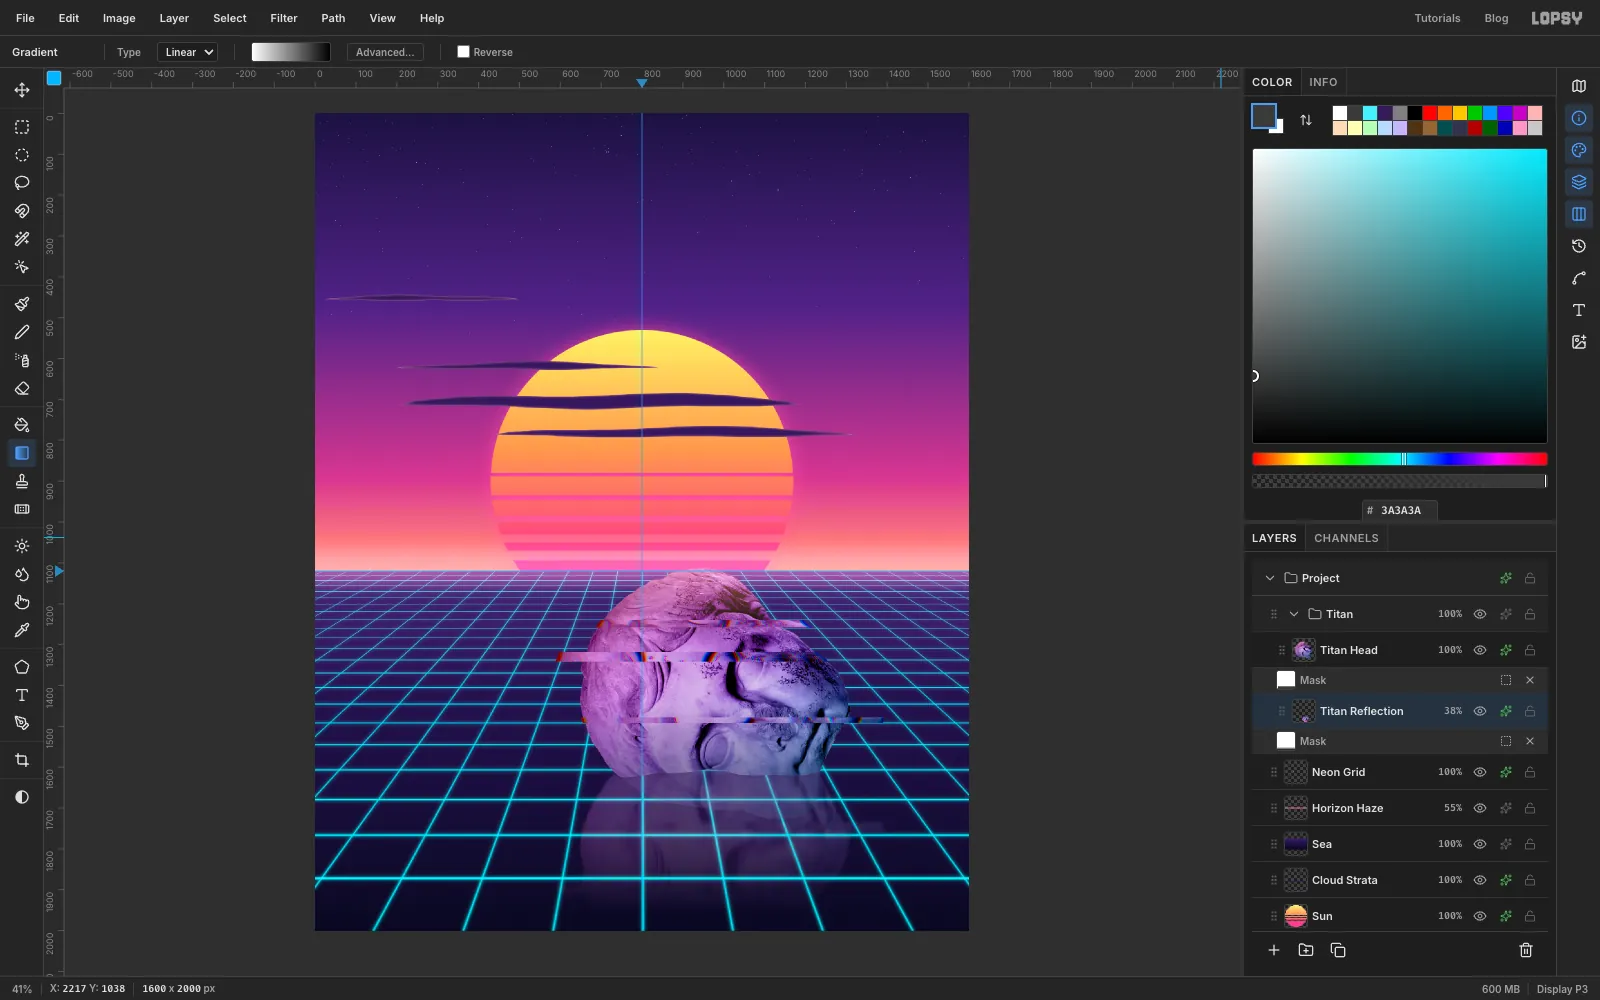
-
Add ripple rings
Select
Titan Reflectionand add a layer namedRipples. It lands between the reflection and the head, so the head hides the far half of each ring.Set the colour to . Each ring is a filled ellipse with a slightly smaller ellipse deleted out of its middle. Work largest first, all centred under the head just below the waterline, at about x
980, y1630:- With the Elliptical Marquee size dialog, select From
340,1569To1620,1689and choose Edit → Fill. - Select From
342,1571To1618,1687and press Delete. That leaves a 2 px ring. - Repeat for a ring 1000 × 88 px (3 px thick) and one 760 × 60 px (4 px thick).
Add two small rings at the bottom right, where the big palm's trunk will stand in the water.
Deselect and give the layer an Outer Glow in , Size
10, Opacity85.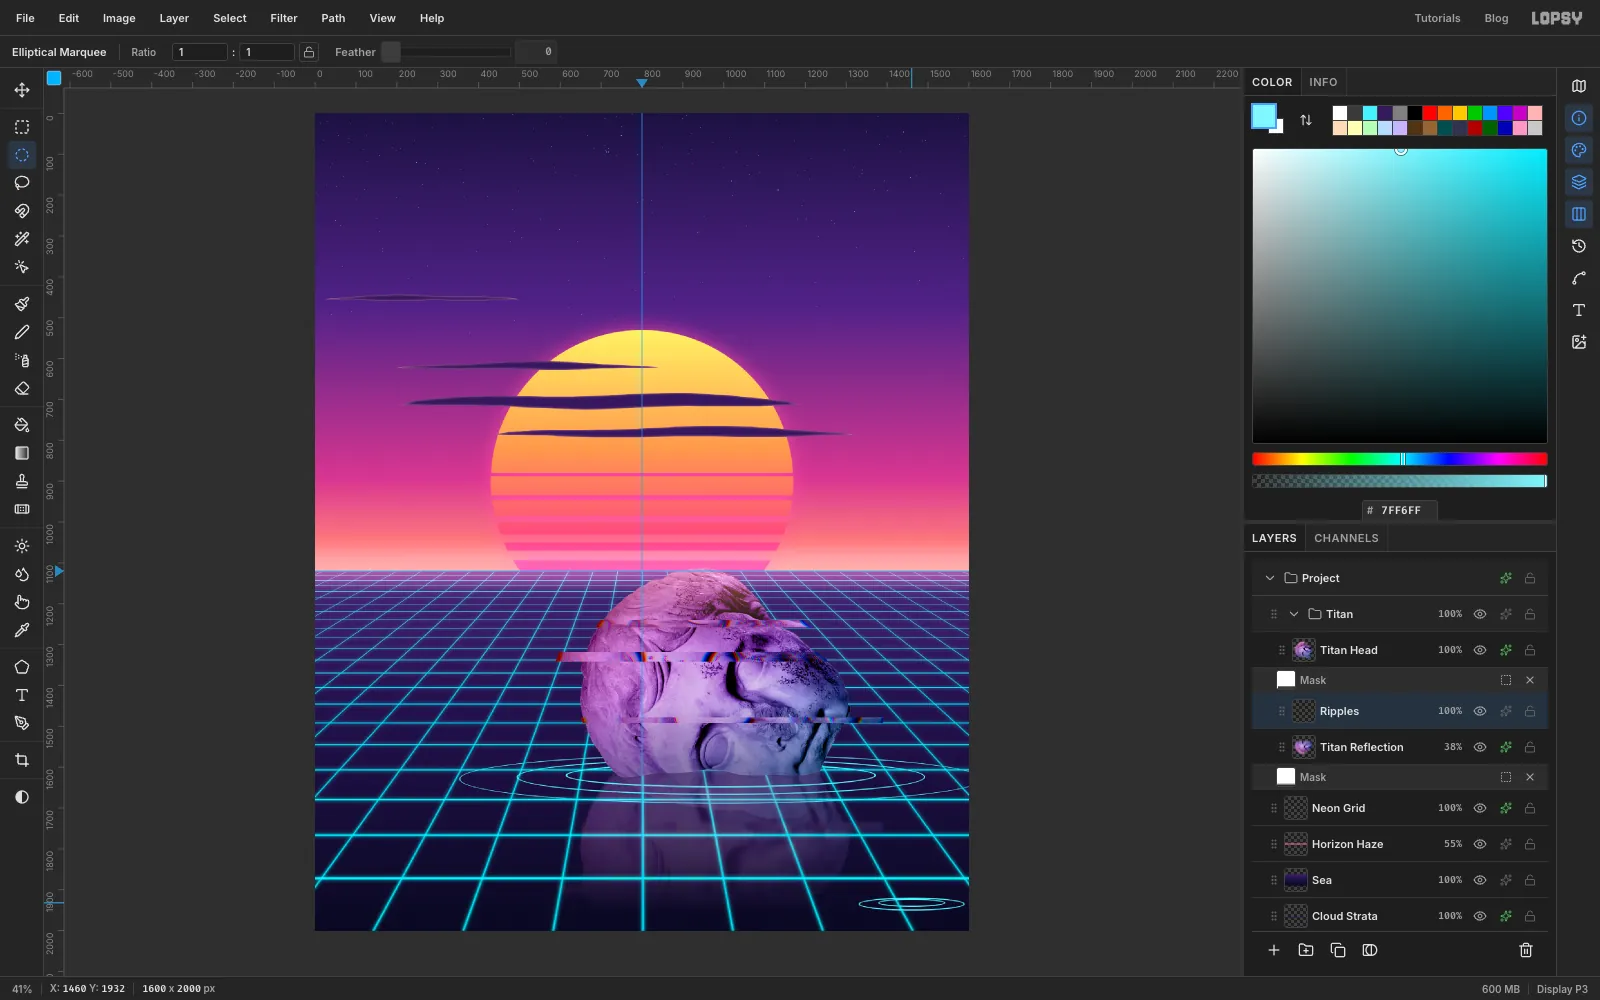
- With the Elliptical Marquee size dialog, select From
-
Draw a glowing waterline
Select
Titan Headand add a layer namedWaterlineabove it. Pick the Pencil with Size5and colour . Click where the waterline meets the left side of the head, then Shift-click every 20–30 px along the wave to the right side. Add an Outer Glow in , Size18, Opacity60.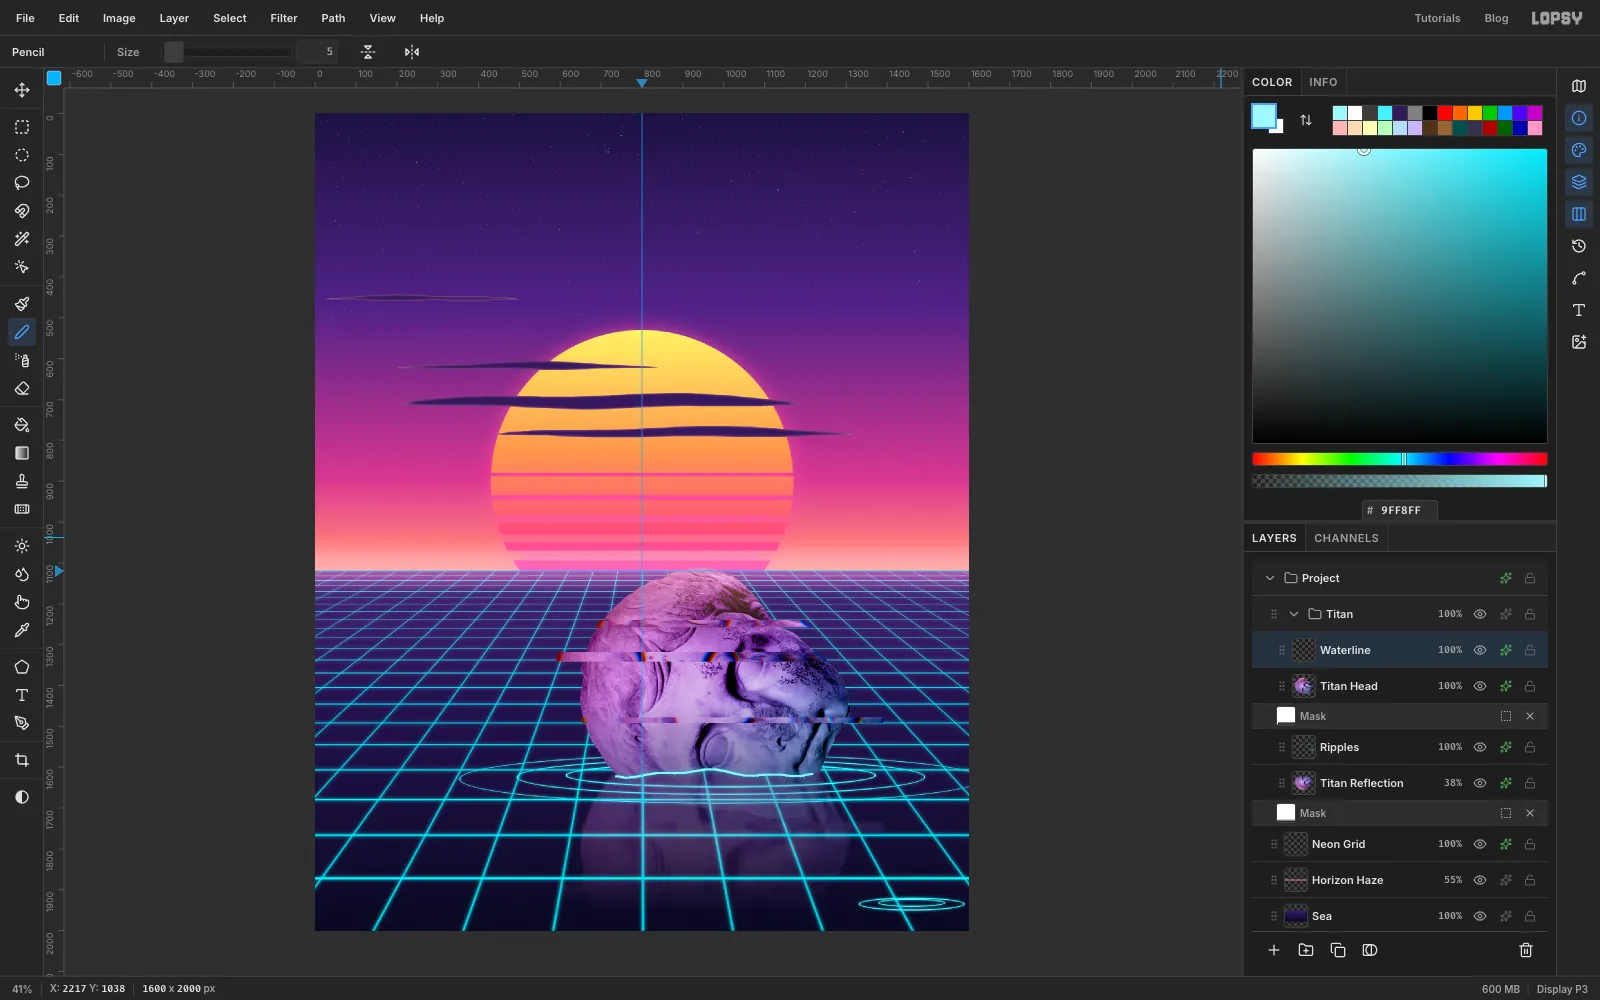
-
Reflect the sun on the water
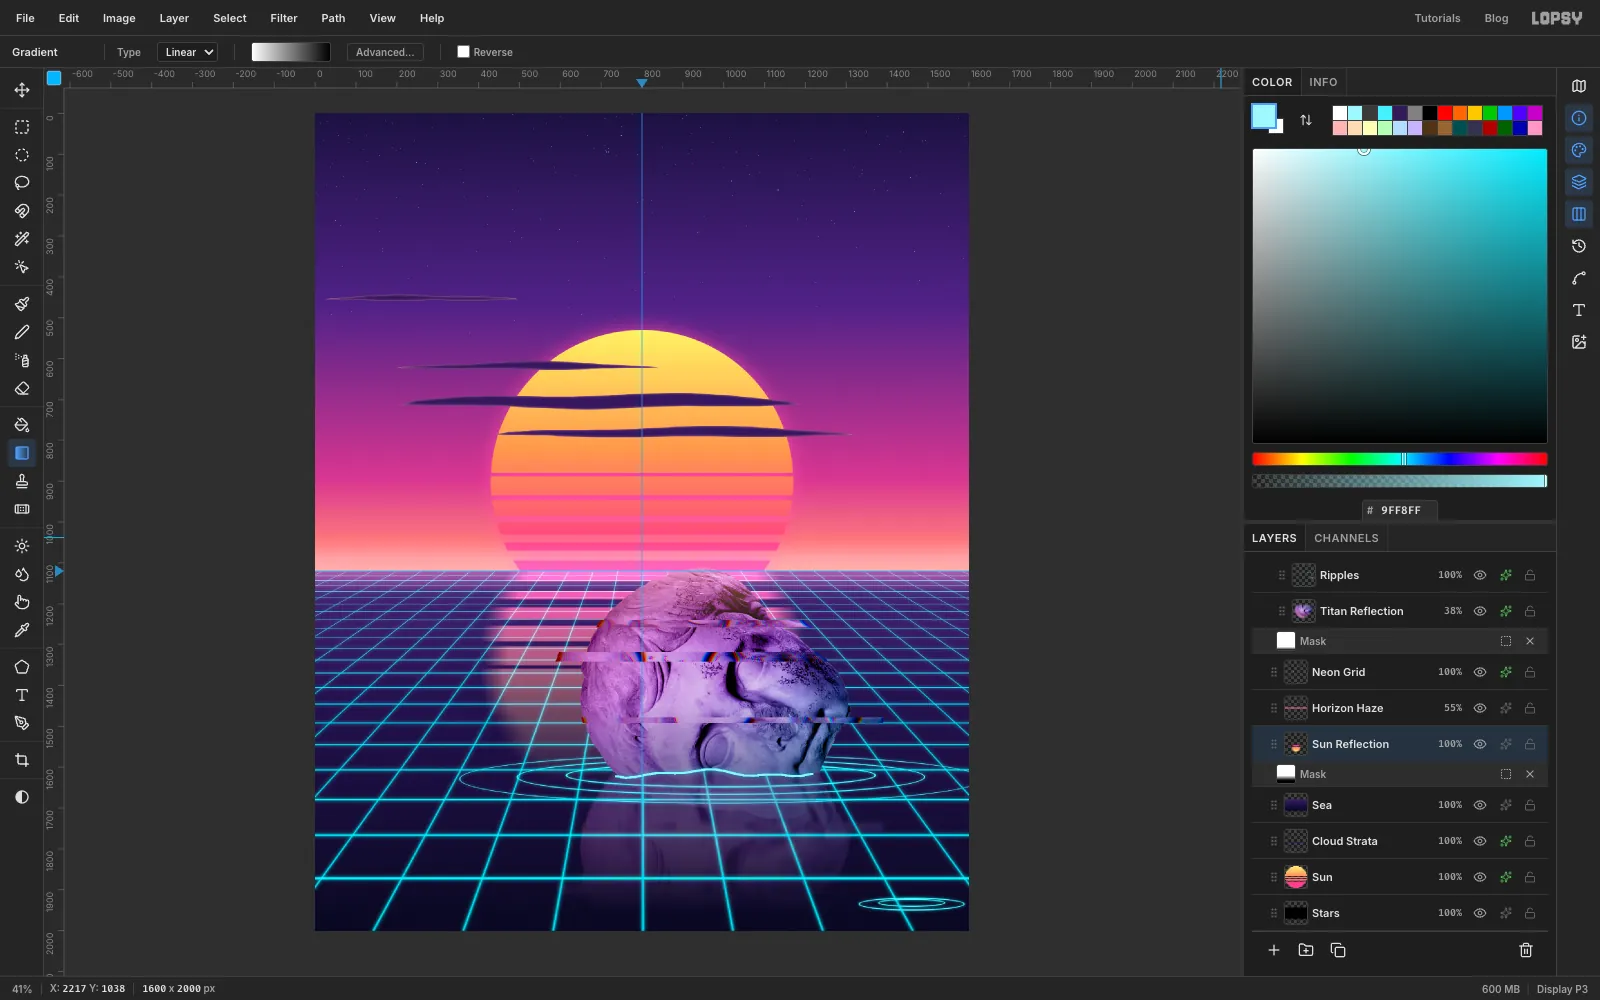
Click the
Sunlayer, marquee the part of the sun above the horizon and press Cmd+C. ClickSeaand press Cmd+V. Rename the pasted layerSun Reflection.- Cmd-click its thumbnail, press V, click Flip Vertical and press Cmd+D.
- Drag it down until its top edge sits on the horizon.
- Apply Filter → Motion Blur… with Angle
0and Distance60. Then Filter → Pixel Stretch… with Amount40, Bands34, Seed11and RGB Split0.35for a VHS shimmer. - Add Mask with a white-to-black gradient about 520 px down from the horizon.
- Set the layer to Screen.
-
Build the column shaft
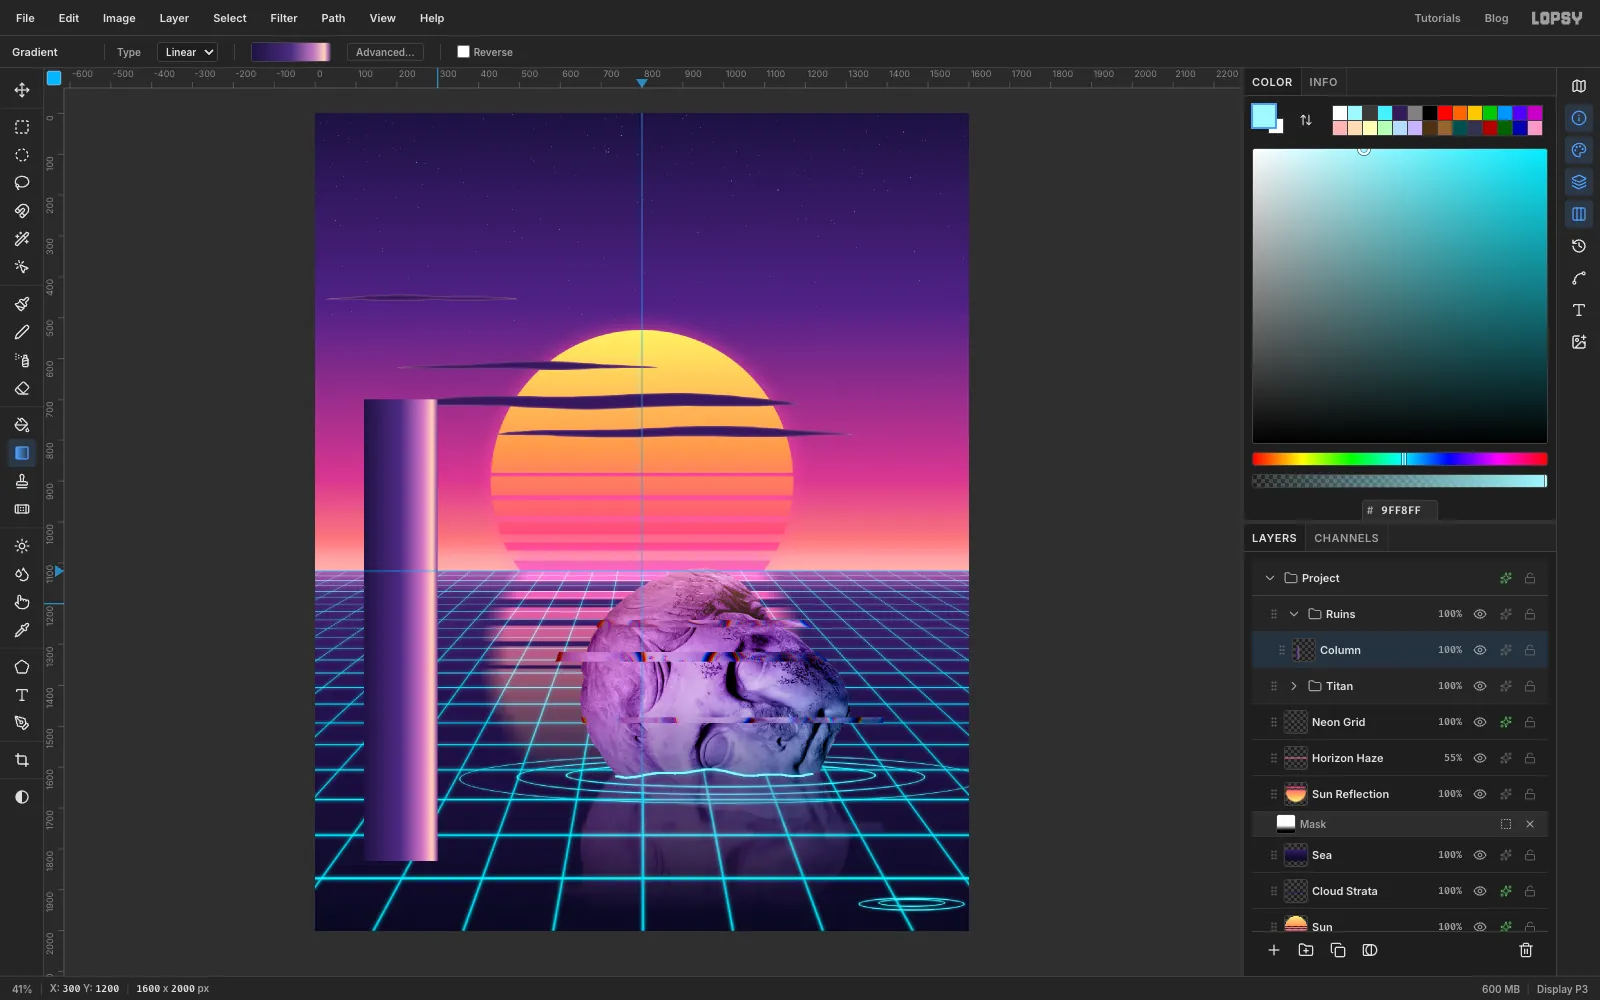
Collapse the
Titangroup, select it and click New Group. Name the new groupRuinsand add a layer namedColumn.Marquee a tall bar about 180 px wide near the left edge, from about a third of the way down to well below the horizon. Drag a gradient across it from left to right: , at 50%, at 80%, at 93%, . The highlight sits on the side facing the sun.
-
Cut the flutes
Add a layer named
Flutes. Pick the Pencil with Size3and colour . For each flute, click at the top of the shaft and Shift-click straight below it at the bottom. Draw eleven, spaced widely in the middle and bunched toward the edges, the way flutes look on a round column.Set the layer to
55%opacity and choose Layer → Merge Down.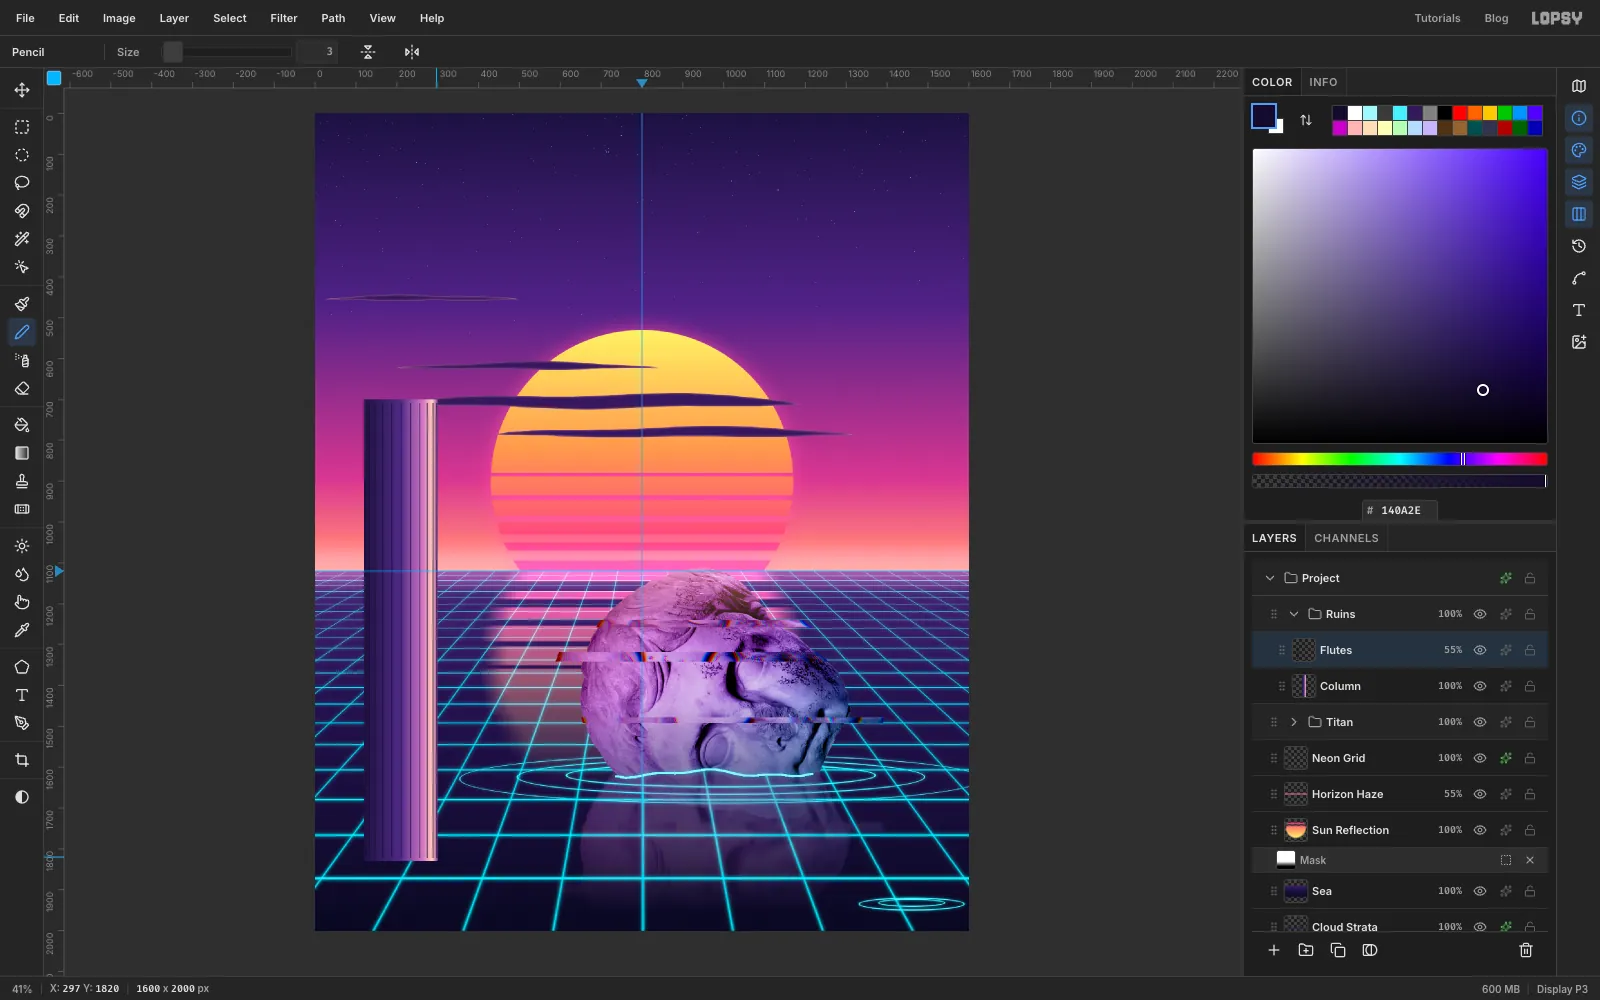
-
Break the top off
With the Lasso, draw an irregular, slanting break across the top of the shaft and close the lasso around everything above it. Press Delete. Do the same with a wavy lasso around the bottom of the shaft, a little lower than the head's waterline because the column stands closer to us.
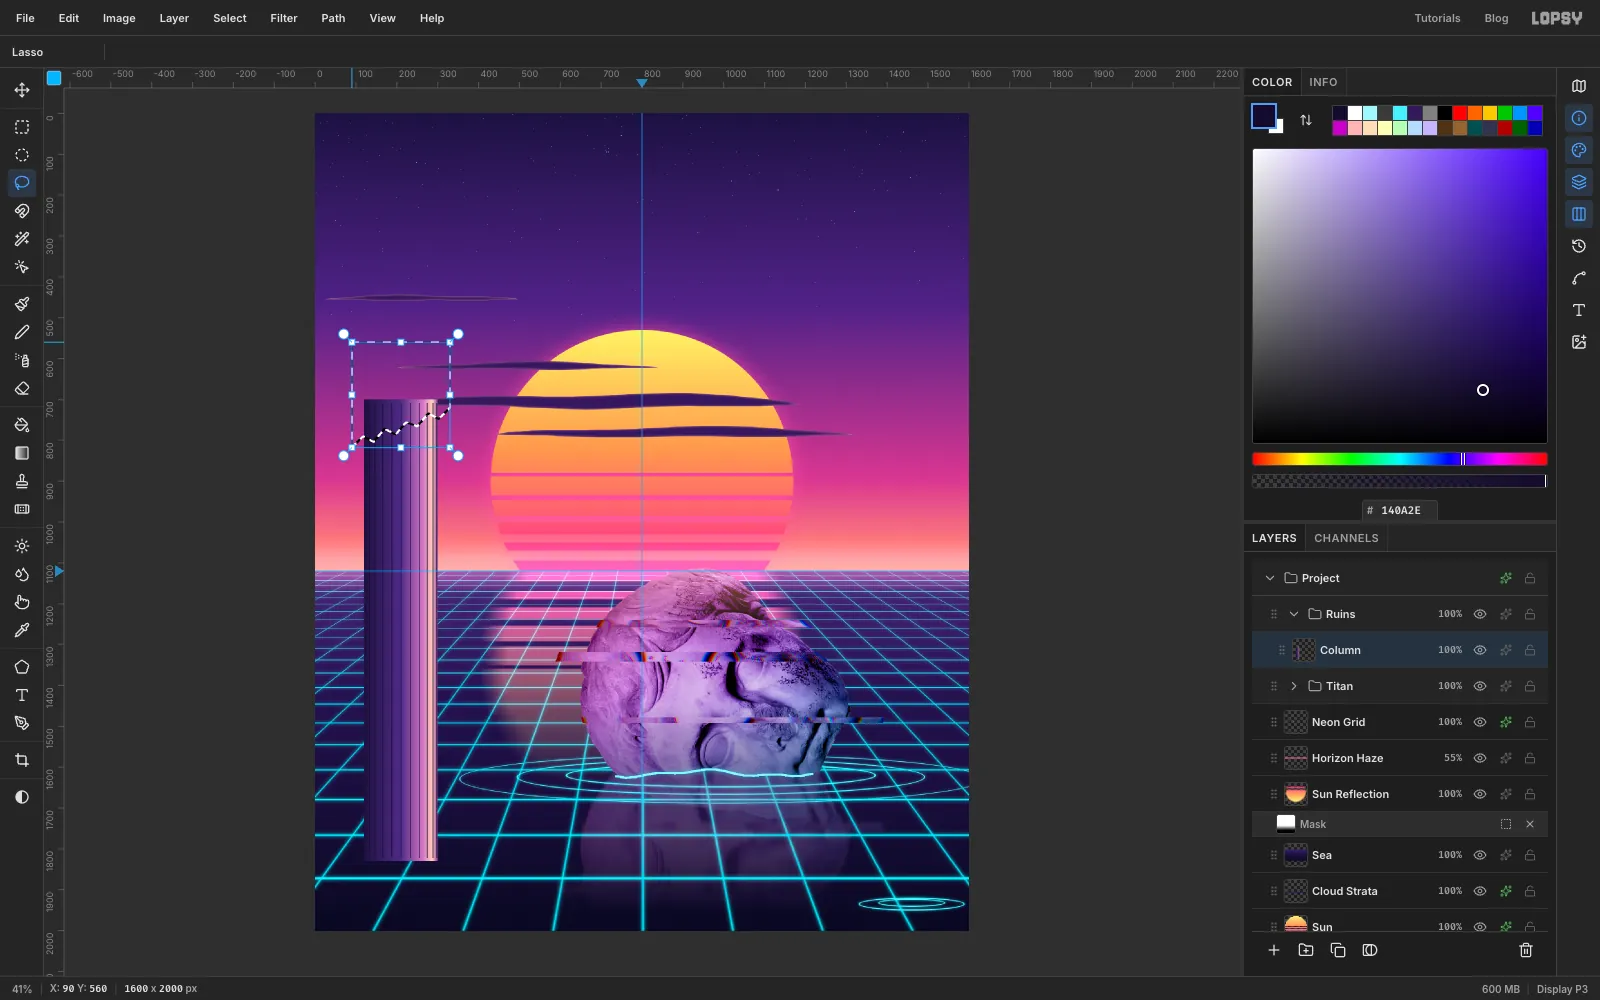
-
Lean it slightly
Marquee around the column and, with Move, drag the top-right rotation handle about 5° clockwise, as if the column has settled into the soft sea floor. Press Cmd+D. Then give it an Outer Glow in , Size
30, Opacity45.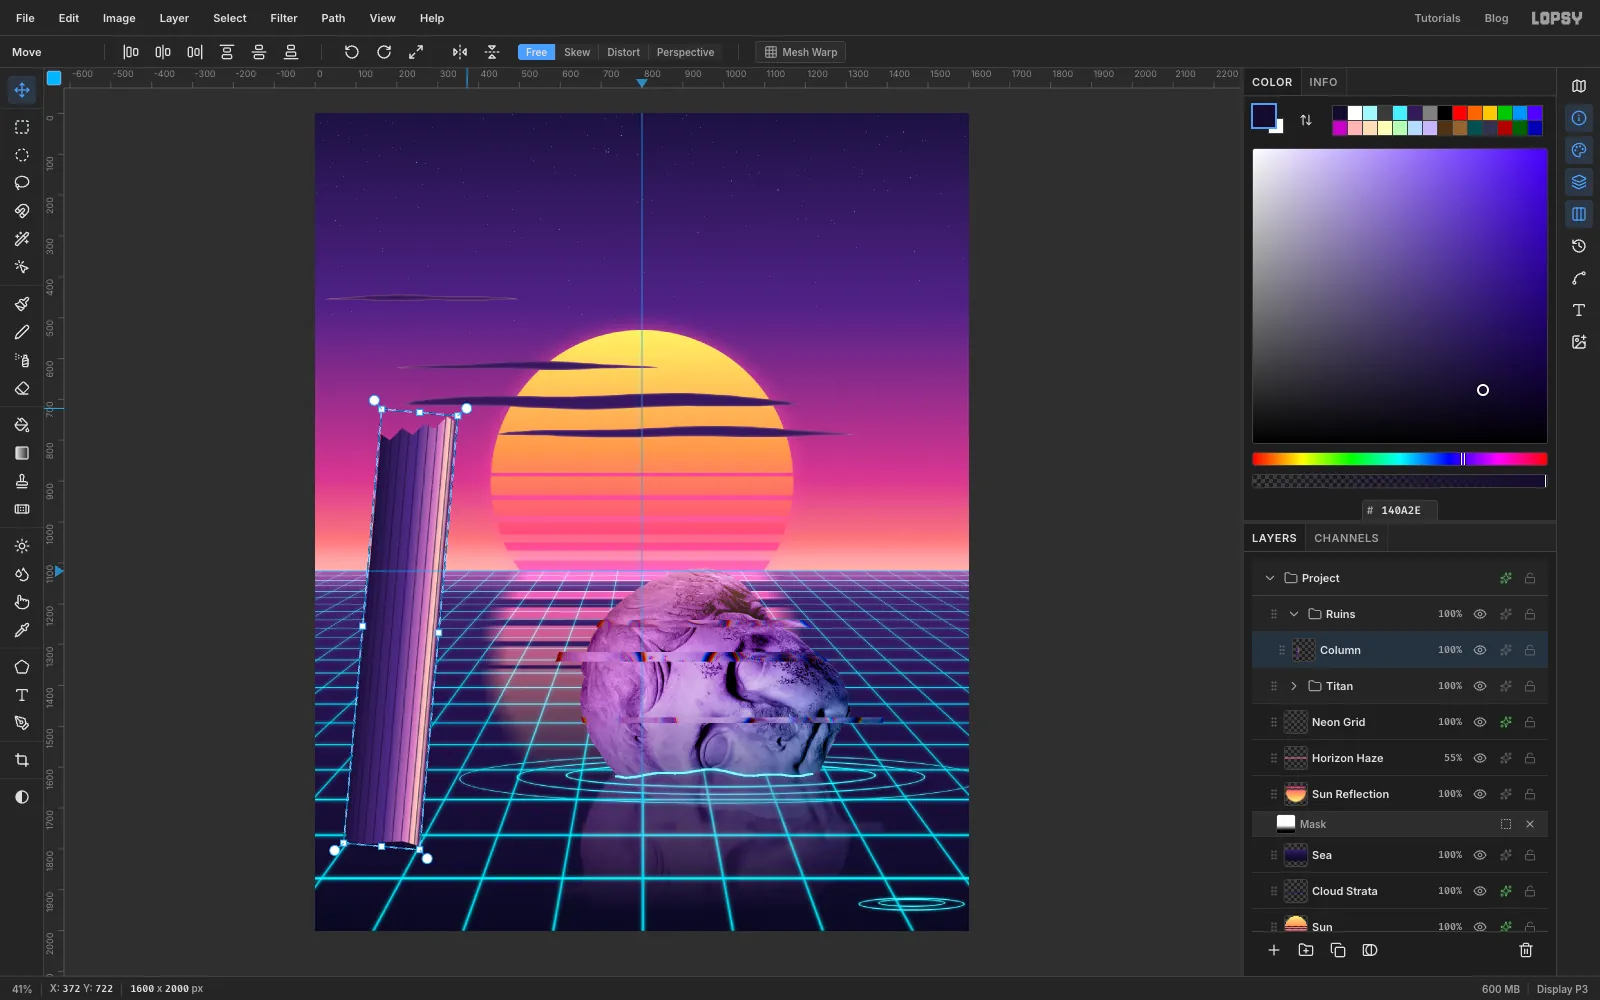
-
Reflect the column
The column gets a fainter reflection, built much like the head's:
- Duplicate Layer, rename the copy
Column Reflection, Cmd-click its thumbnail and Flip Vertical. - Drag it down to mirror the column across its waterline.
- Lasso the part above the waterline and delete it.
- Filter → Motion Blur… with Angle
0and Distance20. A sideways smear suits a thin vertical shape better than streaks along its length. - A fading mask about 220 px tall, then Screen at
28%.
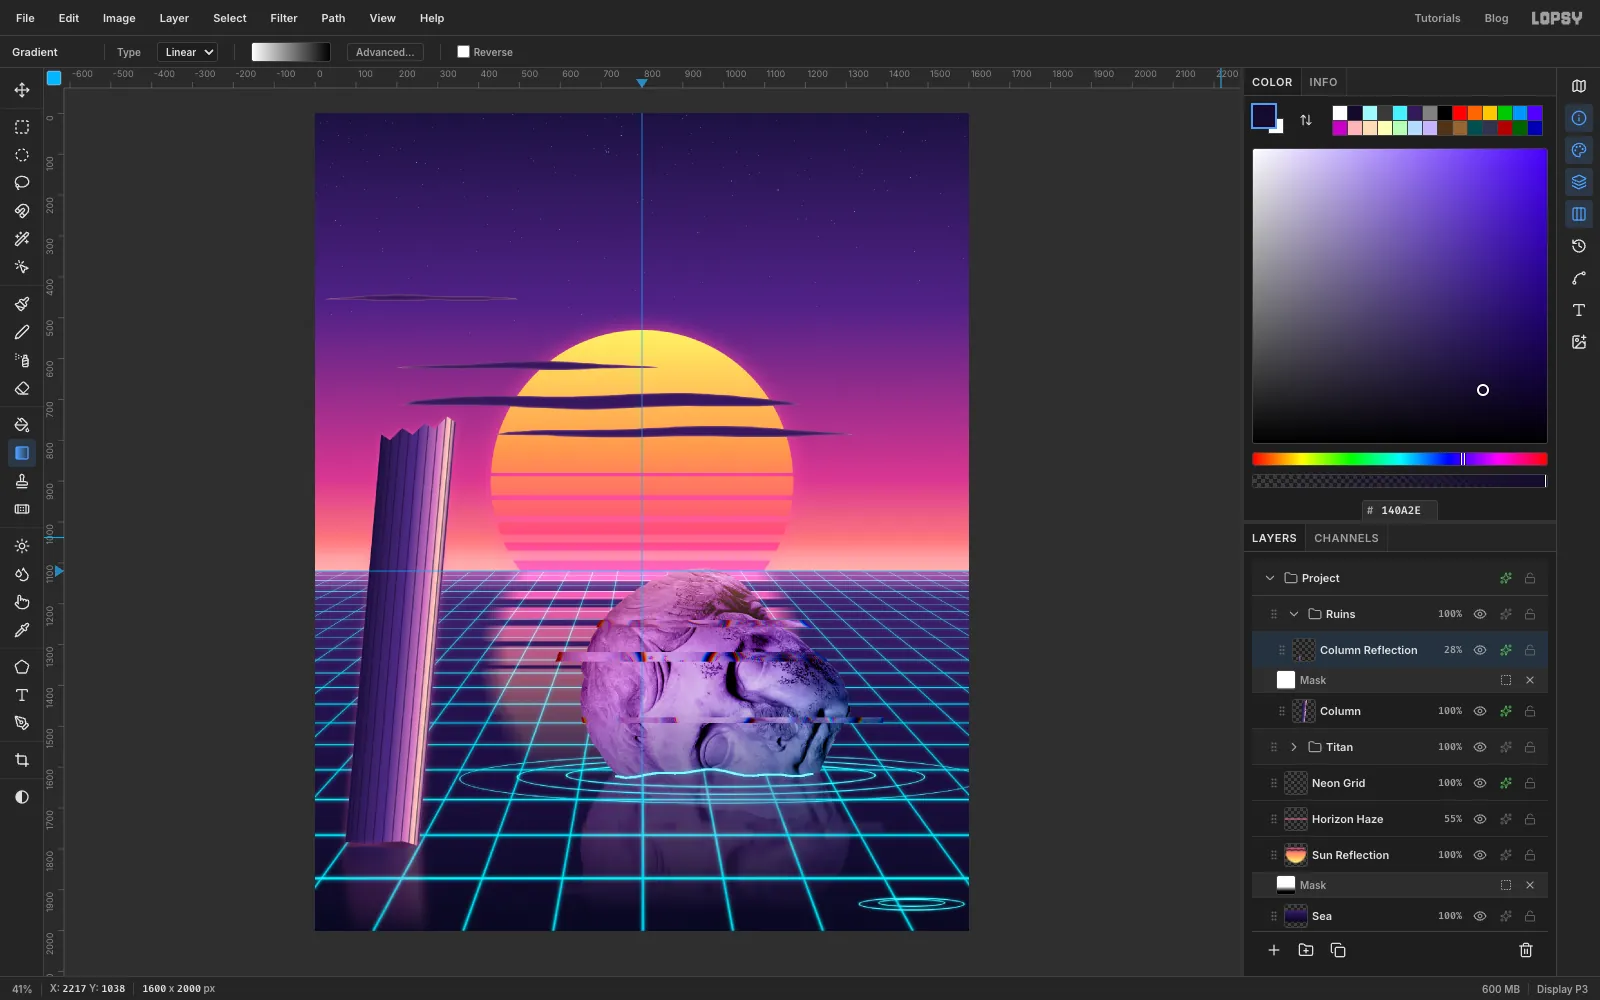
- Duplicate Layer, rename the copy
-
Ring the column's foot
Add a layer named
Column Ripplesand draw two small rings around the column's foot, the same way as the head's: about 400 × 44 and 280 × 28 px. Give the layer a cyan Outer Glow in , Size8, Opacity80.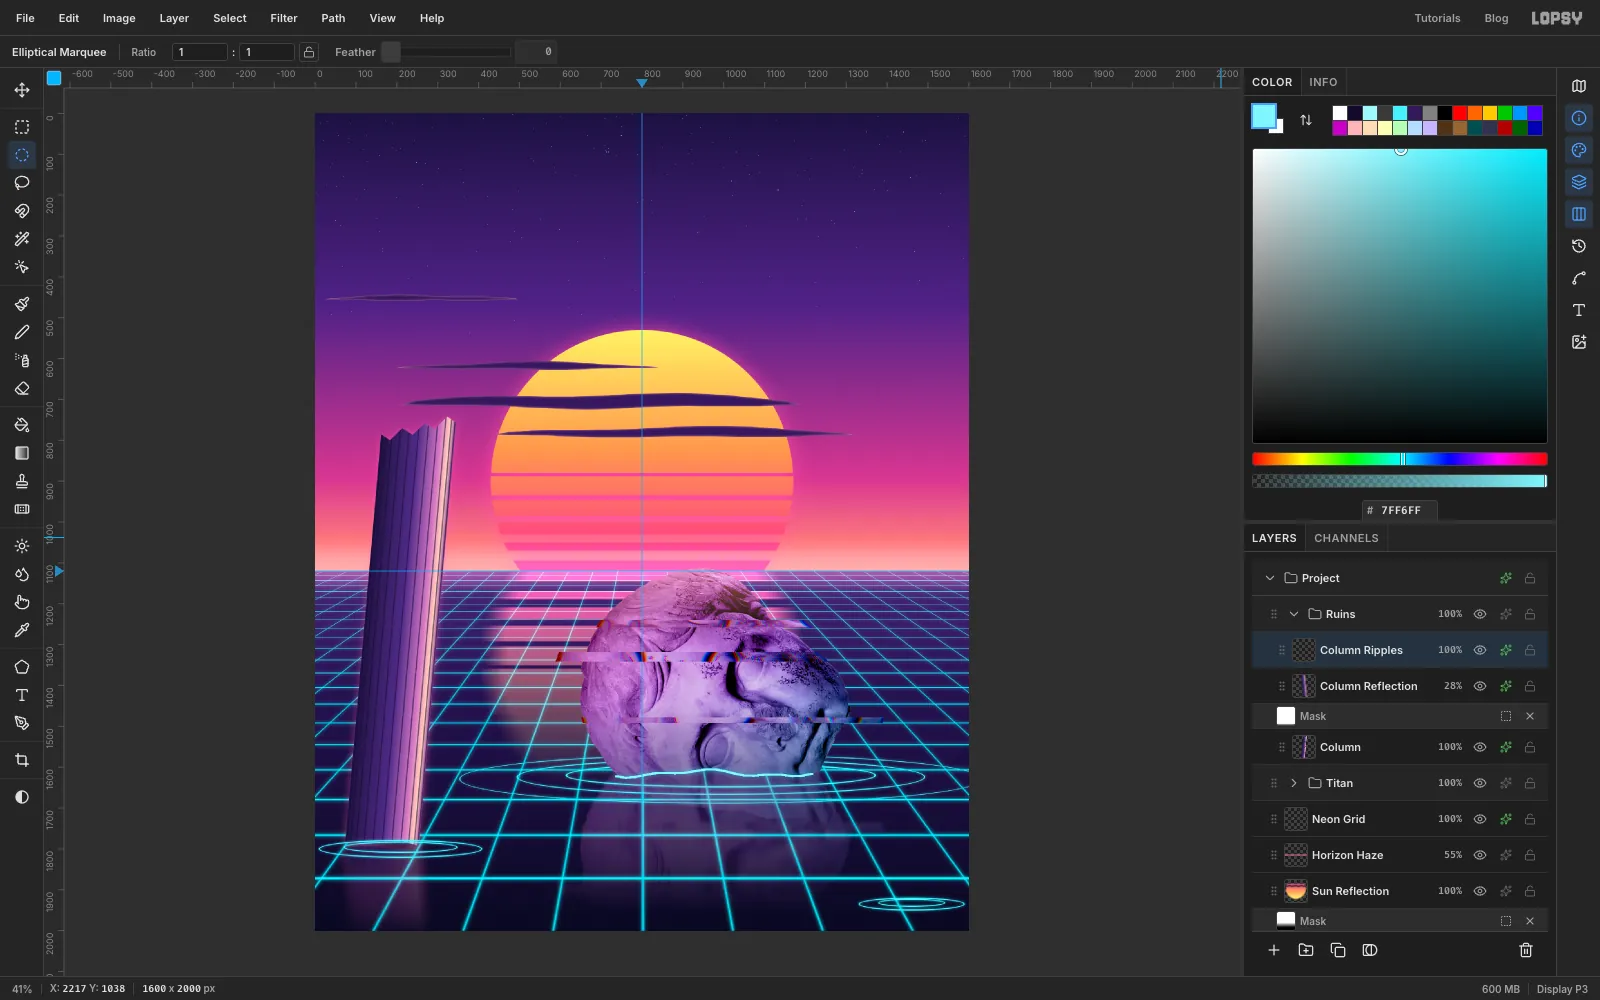
-
Lasso the palm silhouette
Collapse
Ruins, select it and add a layer namedPalmabove it. Set the colour to .With the Lasso, draw the trunk: a long band that starts near the bottom-right corner, bows out to the right and narrows as it rises to a crown about four-fifths of the way across and a fifth of the way down.
Then hold Shift and draw nine fronds from the crown, one lasso each. Make each a narrow blade, about 80 px across at its widest and 250–440 px long, that arches out and droops toward a pointed tip. For the leaflets, zigzag in and out along both edges as you drag, in small even steps of about 15 px, so each edge becomes a fine sawtooth.
Make the fronds pointing up and right a bit shorter, and keep the ones on the left short enough that they only just overlap the edge of the sun.
Choose Select → Feather… with
1to soften the edges, then Edit → Fill.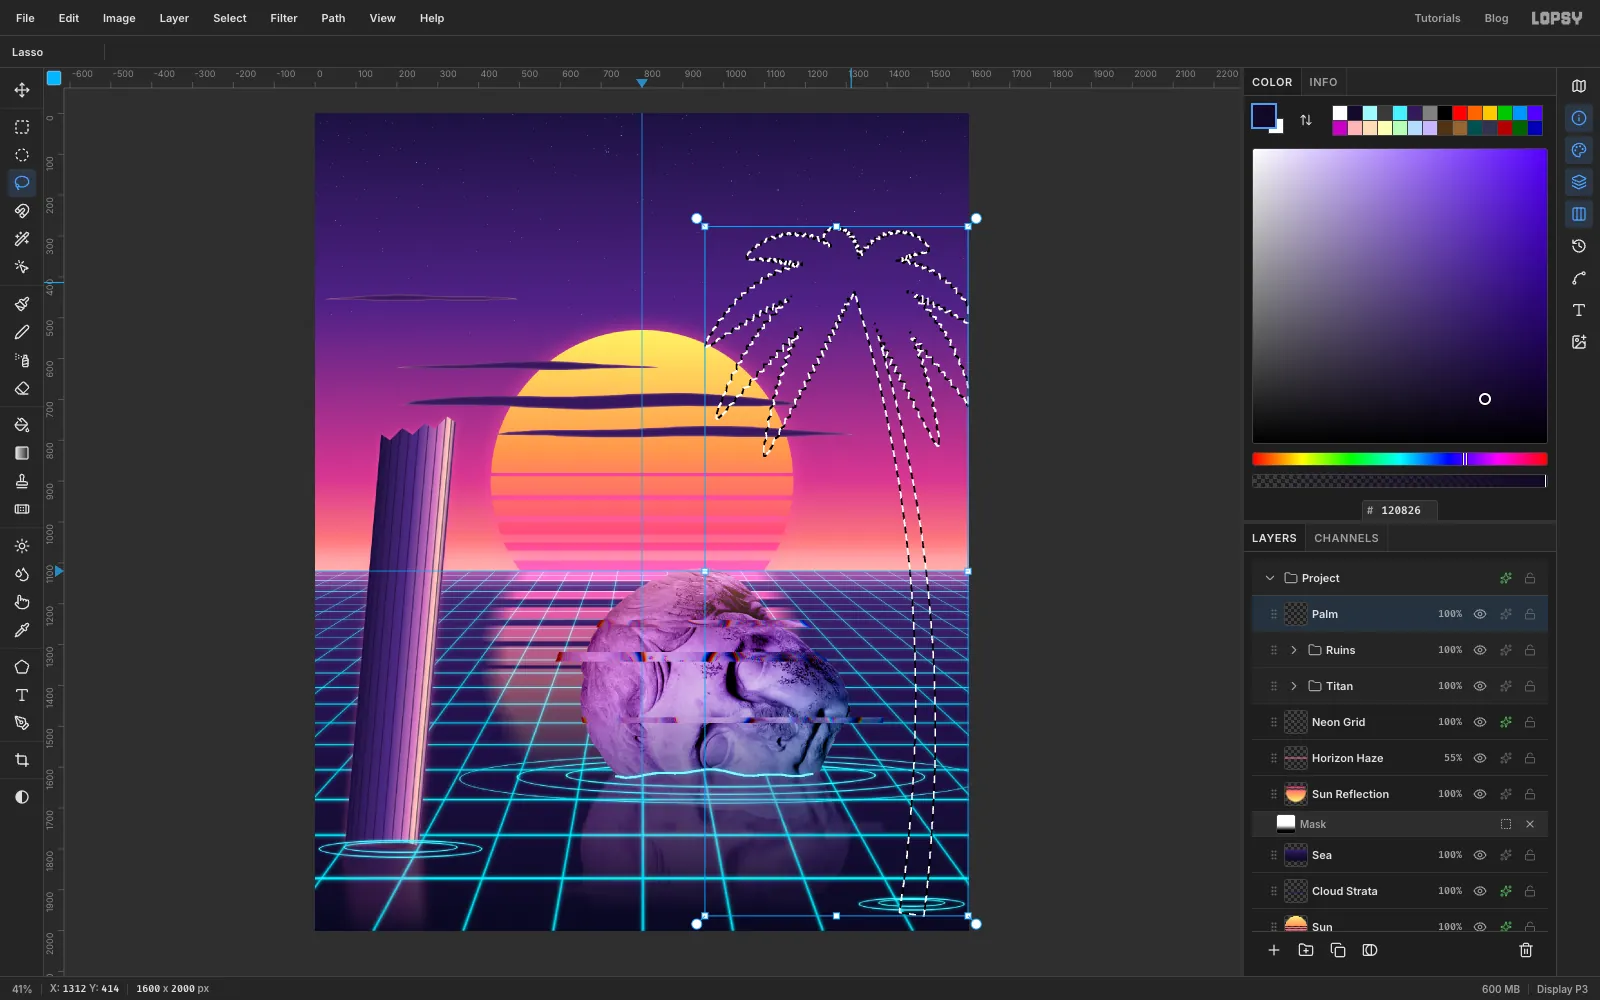
-
Paint the midribs and coconuts
Pick the Brush (the colour is still ), open the brush settings and set Size
11, Hardness100and Taper to about650. Drag from the crown out along the middle of each frond. The stroke thins as it goes, so each frond gets a solid stem that tapers to a point. It joins up the leaflet teeth near the tips.Fill three small circles just under the crown for coconuts. Add an Inner Glow in , Size
3, Opacity40so the silhouette picks up a little sunset.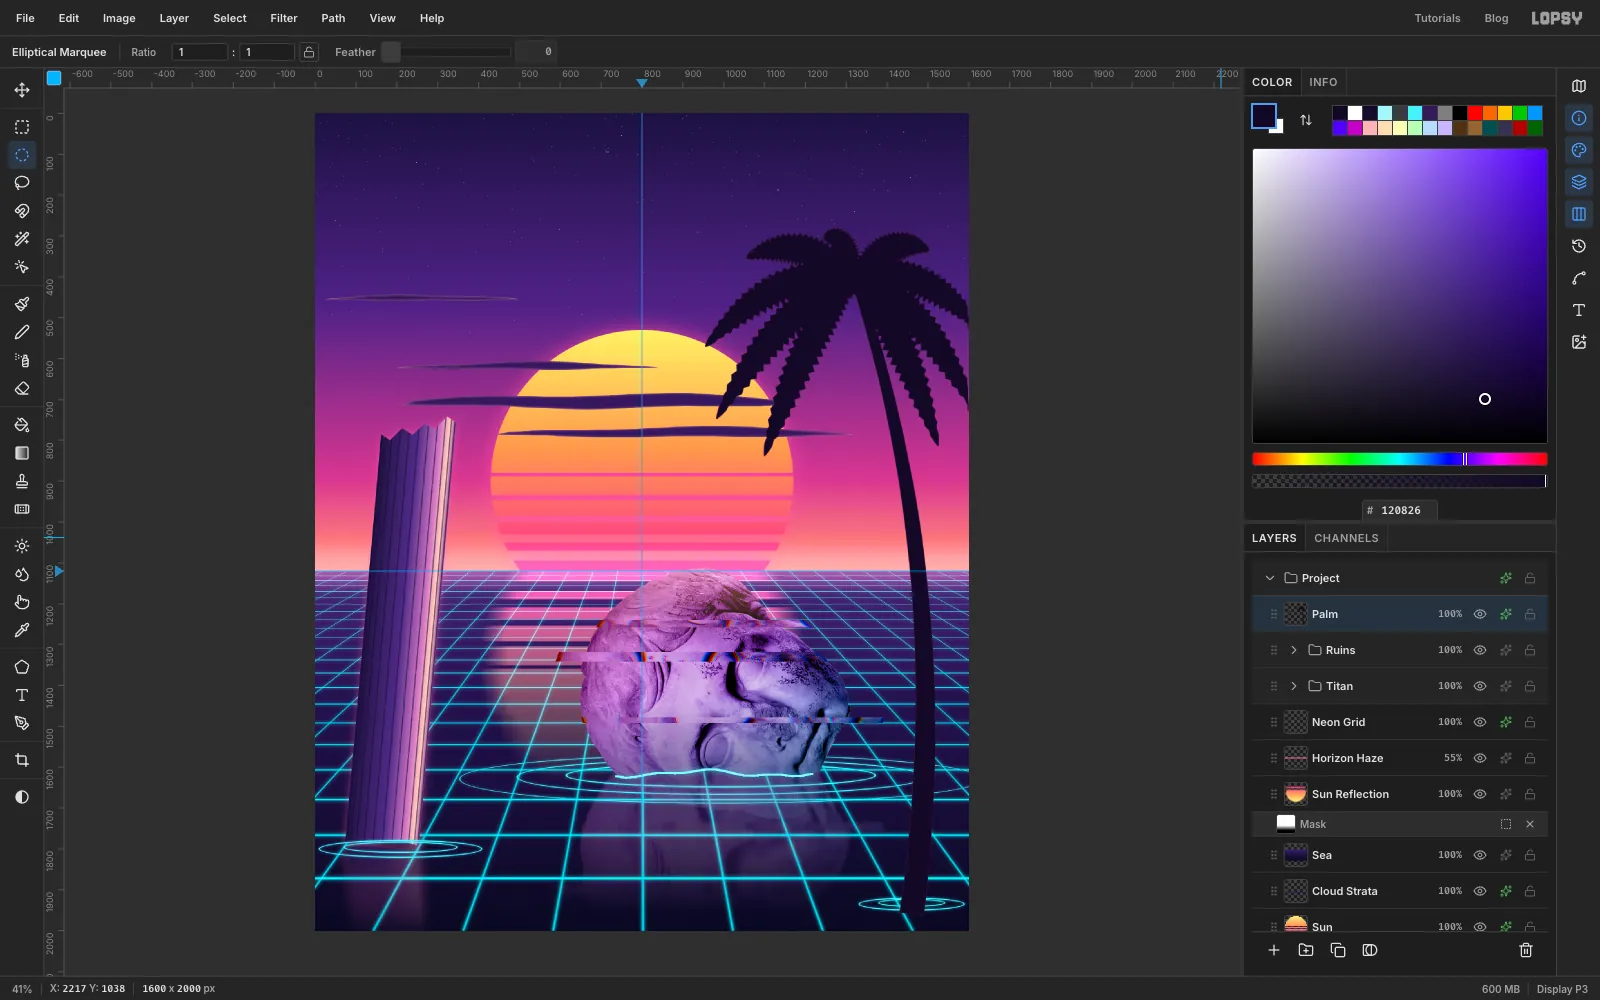
-
Plant a distant palm in front of the sun
Click Duplicate Layer and rename the copy
Distant Palm. Choose Image → Flip Horizontal, which mirrors the layer in place.Marquee around it and, with Move, Cmd-drag the bottom-left corner handle up and to the right until the palm is only about 330 px tall. Press Cmd+D. Drag it over to the left so its foot stands exactly on the horizon in front of the left side of the sun. Set its opacity to
85%.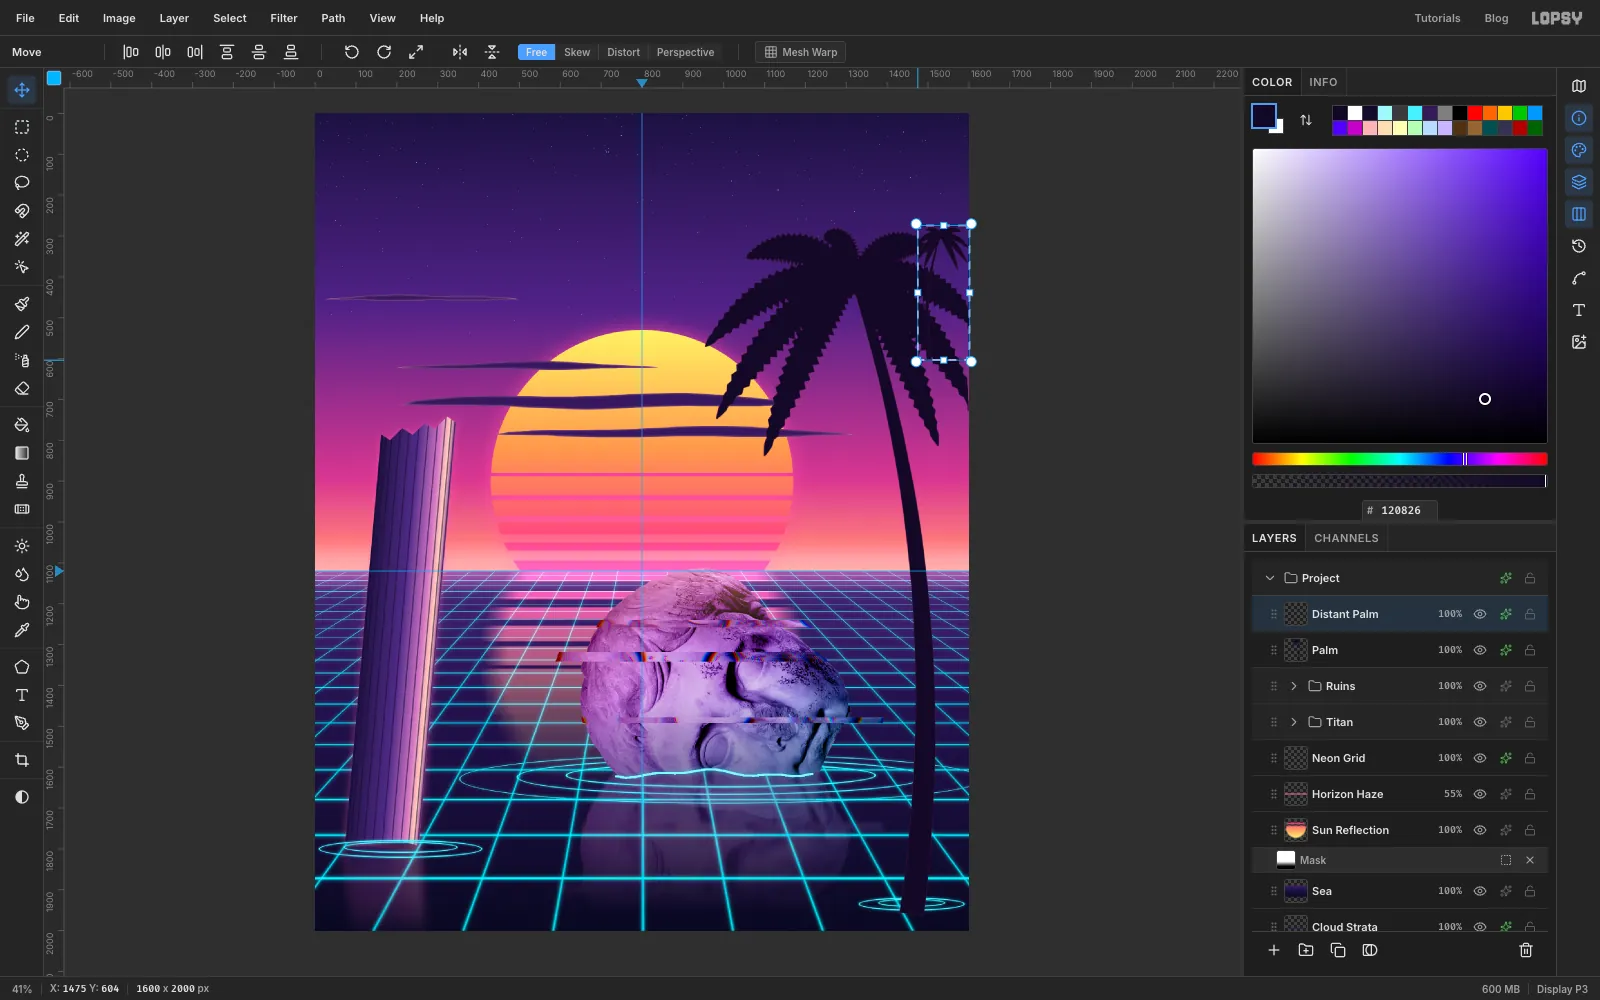
-
Shift the ruins as a group
With the palms in, the column sits a little tight against the left edge. Groups move as one piece: click the
Ruinsgroup's row and drag on the canvas with Move. The column, its reflection and its ripples all slide about 40 px to the right together.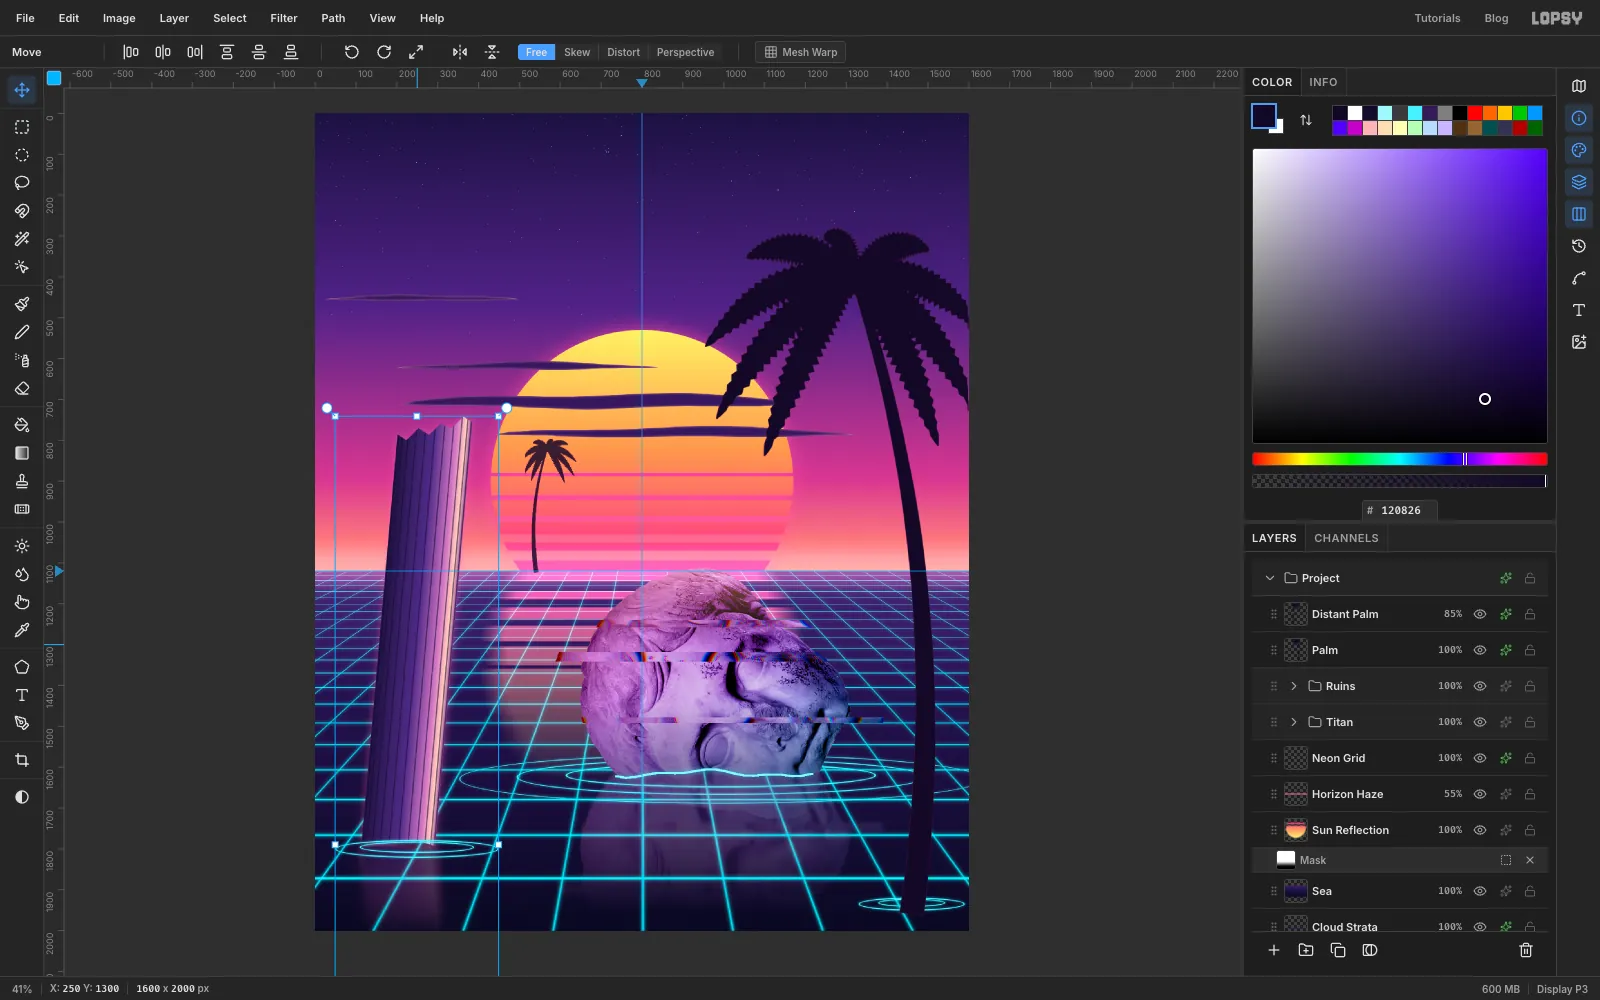
-
Haze the empty sky
Click
Starsand add a layer namedSky Hazeabove it. Marquee the top half of the canvas, Feather it by80, then choose Filter → Clouds… with Scale6. Deselect, set the layer to Screen at14%.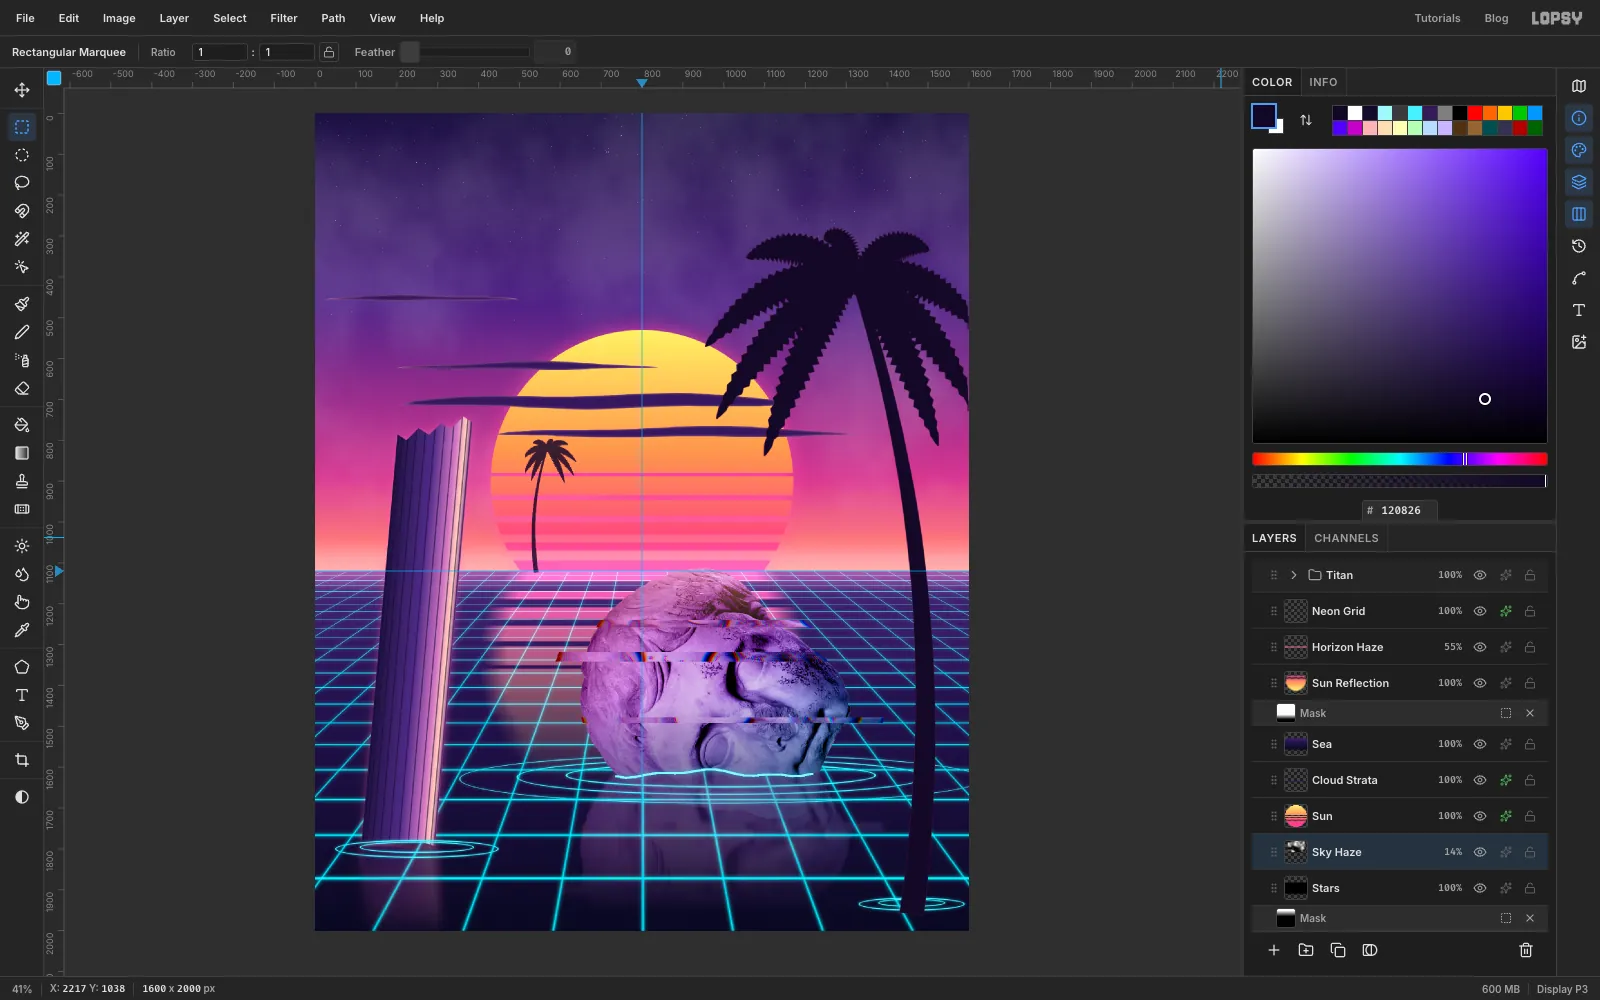
-
Bloom the neon grid
Click
Neon Grid, click Duplicate Layer and rename the copyGrid Glow. Apply Filter → Gaussian Blur… with Radius12and set the copy's opacity to70%. The blurred copy, still on Screen, spreads a soft neon bloom around the sharp lines.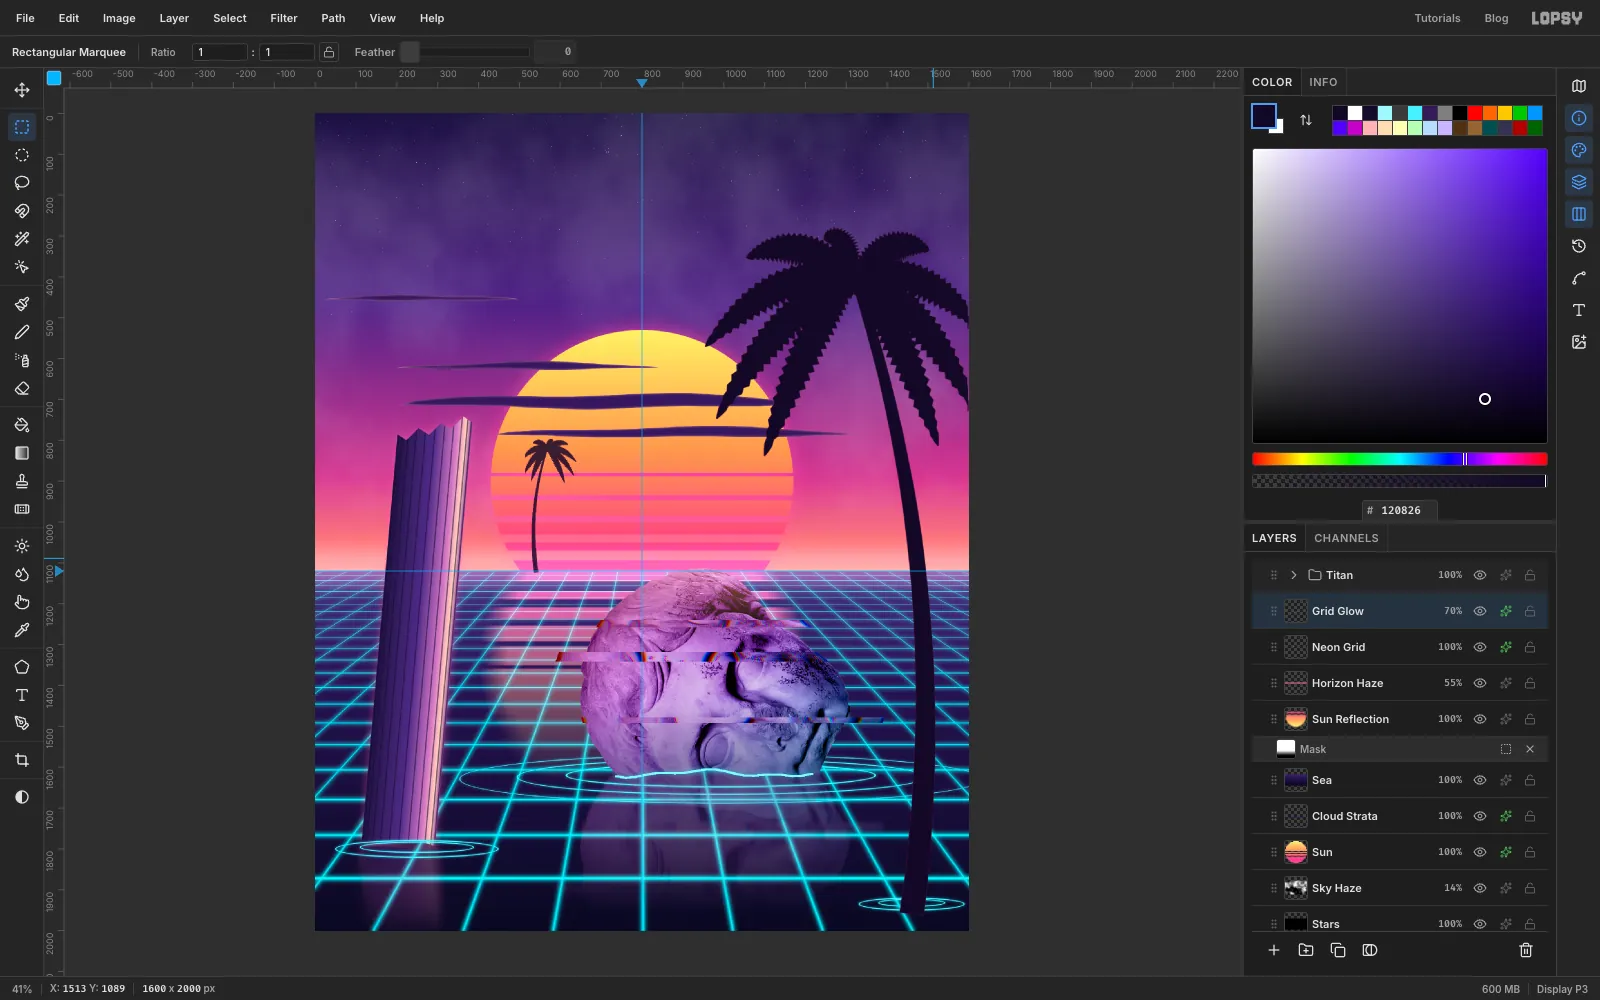
-
Add a vignette and darken the foreground
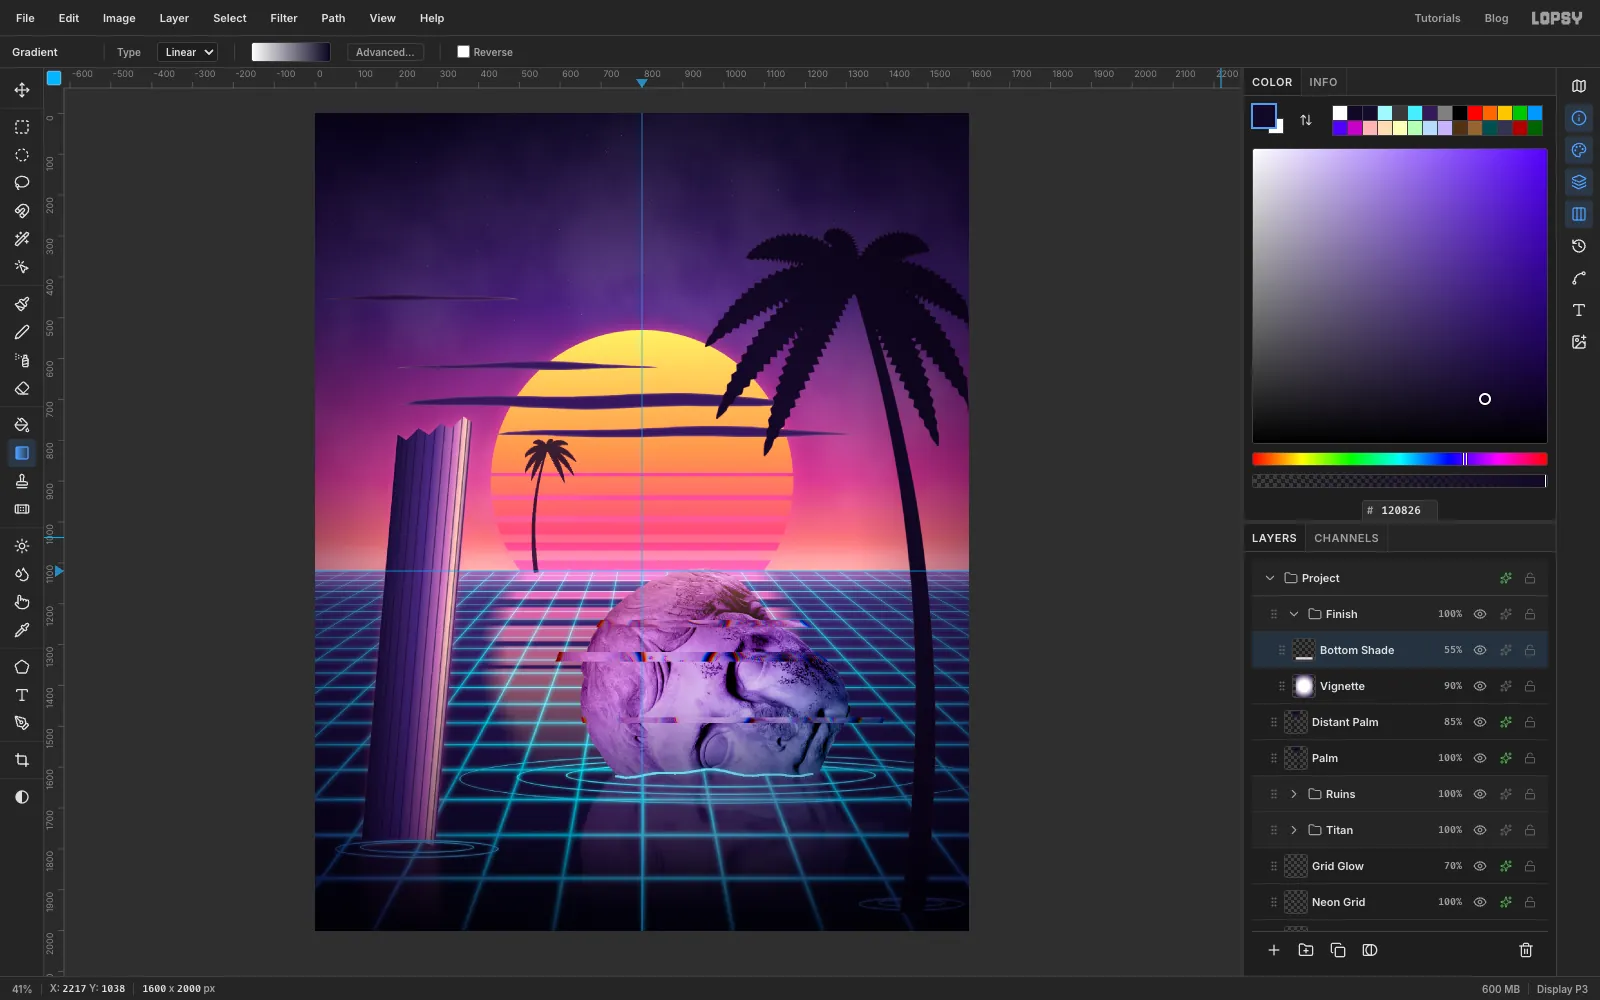
Select
Distant Palmand click New Group. Name itFinish. It holds the layers that sit over everything.- Vignette: add a layer, select all, and drag a radial gradient from just below the centre to past the bottom edge: white, white at 45%, . Set it to Multiply at
90%. - Bottom Shade: add a layer, marquee the bottom 300 px and drag a white-to- gradient down to the bottom edge. Set it to Multiply at
55%. It stops the empty grid at the bottom from pulling the eye.
- Vignette: add a layer, select all, and drag a radial gradient from just below the centre to past the bottom edge: white, white at 45%, . Set it to Multiply at
-
Finish with grain and scanlines
- Grain: add a layer, fill it with , apply Add Noise with Amount
40, Mono and Gaussian, and set it to Overlay at35%. - Scanlines: add a layer and fill a 4 × 1 px black bar in its top-left corner. Select the 4 × 4 px square around it, choose Edit → Define Pattern and press Delete. Select all and use Edit → Fill with Pattern…. Set the layer to
22%opacity.
Save the project with File → Save Project and export the painting with File → Quick Export PNG.
- Grain: add a layer, fill it with , apply Add Noise with Amount