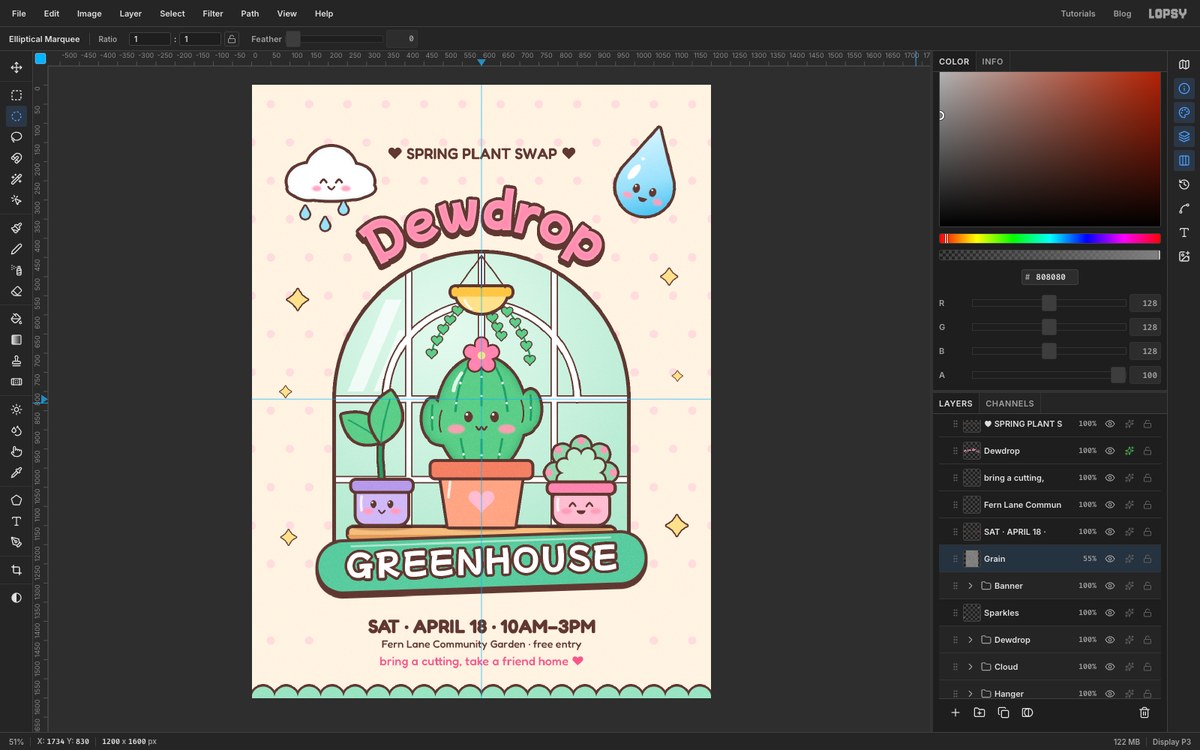
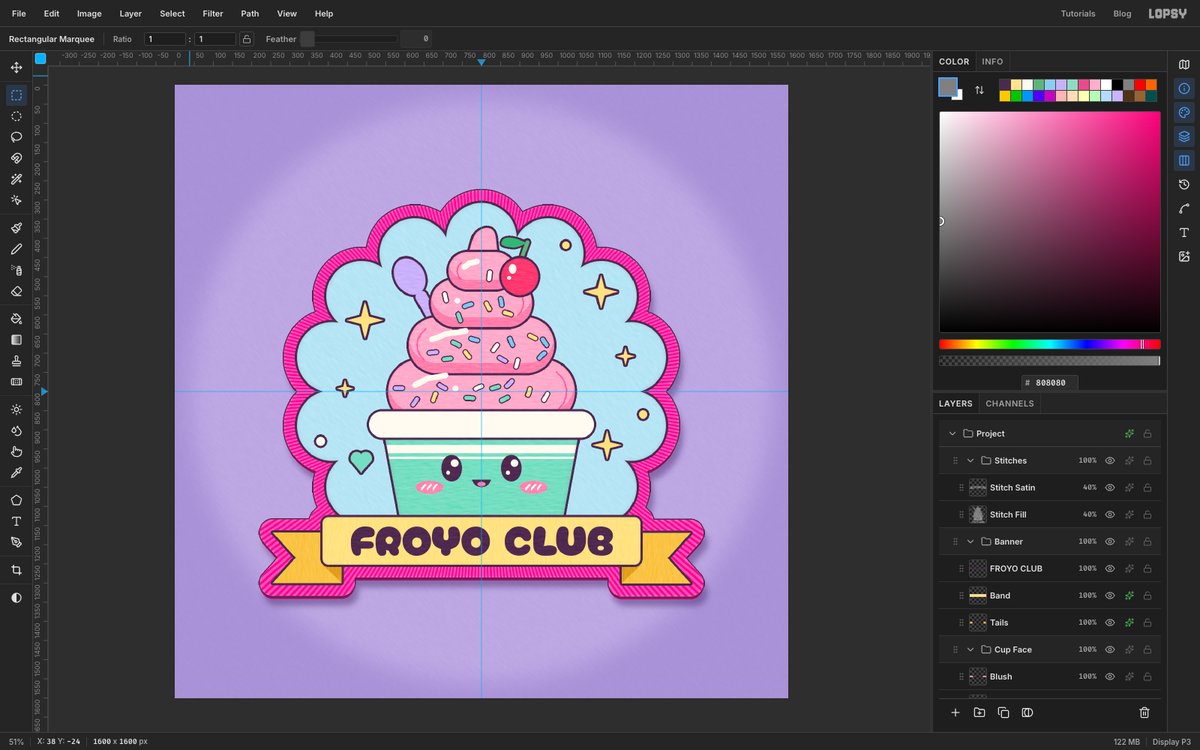
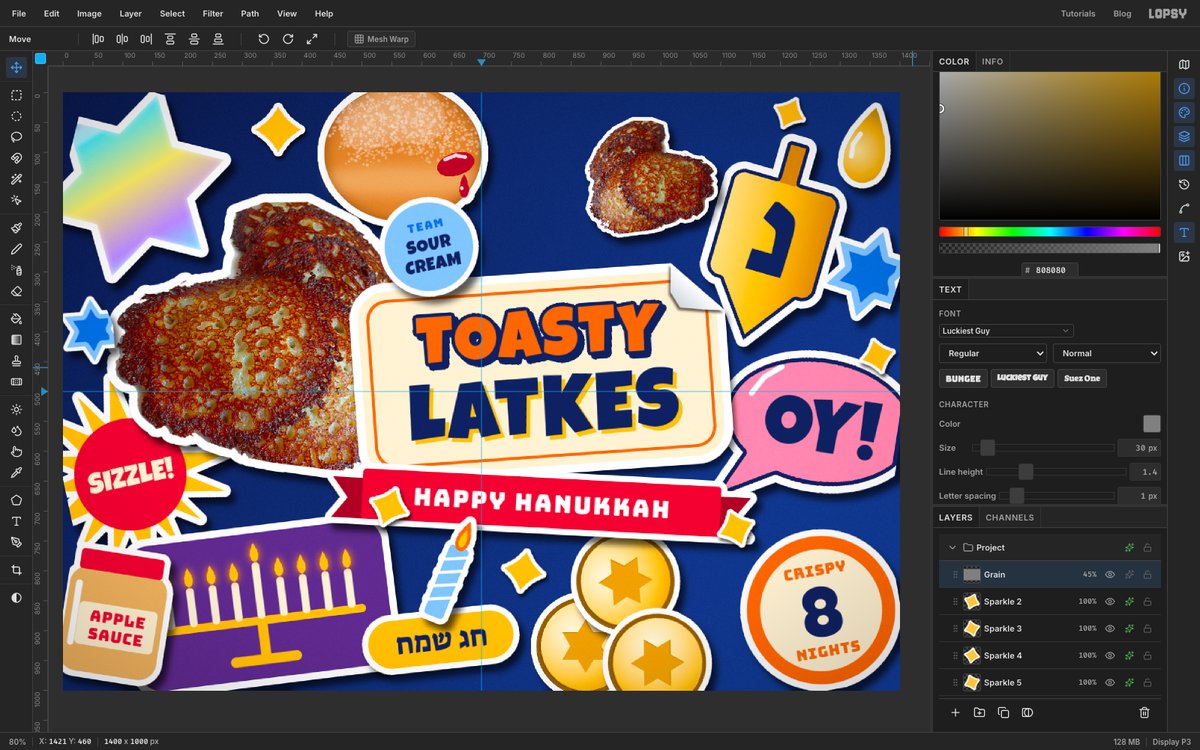
Design a Kawaii Bakery Grand-Opening Poster
Make a cute kawaii poster in Lopsy with a cat-faced cake, gingham pattern, scalloped awning, recoloured macarons, sticker-style type and a ribbon banner.
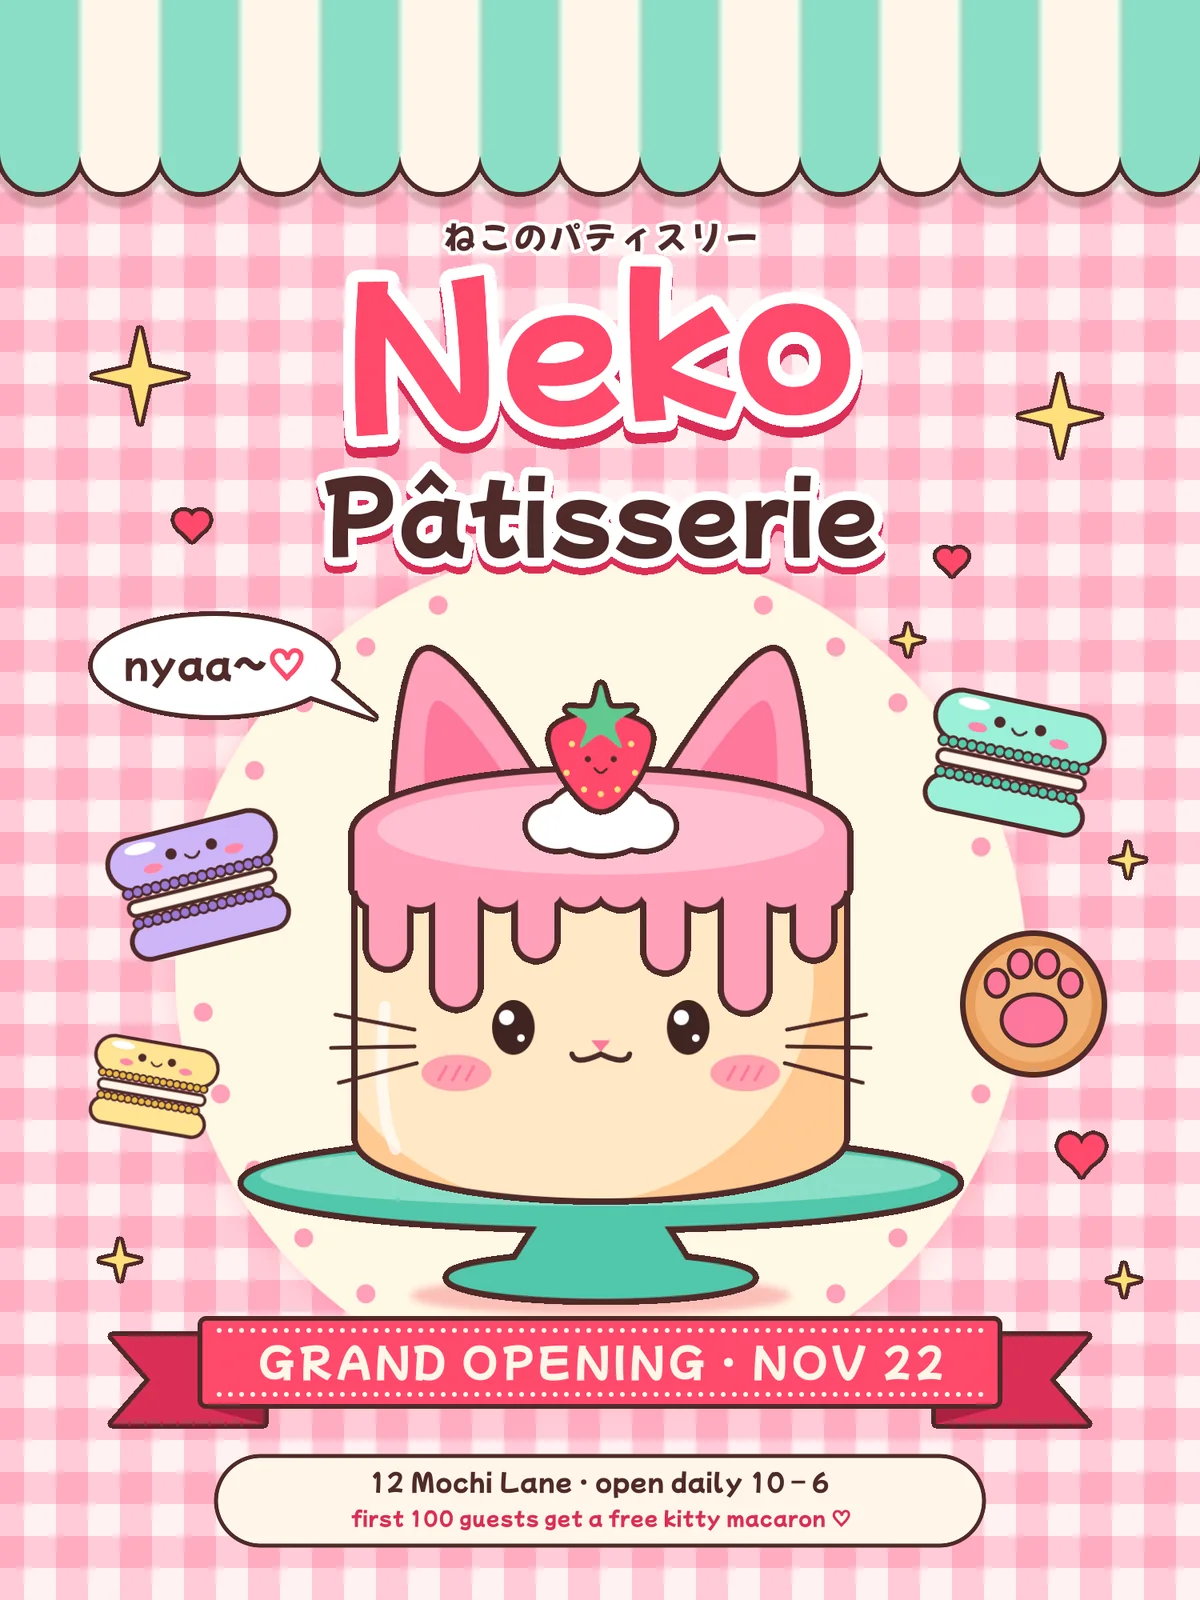
Kawaii (かわいい, "cute") is the Japanese aesthetic behind Hello Kitty, Rilakkuma and thousands of bakery signs. The look is easy to recognise: soft pastel colours, round shapes, thick dark outlines, and faces on everything, from cakes to cookies. The faces are tiny dot eyes with a white catchlight, a little mouth set low, and pink blush ovals on the cheeks. Flat colour with one simple highlight and one simple shadow keeps it graphic.
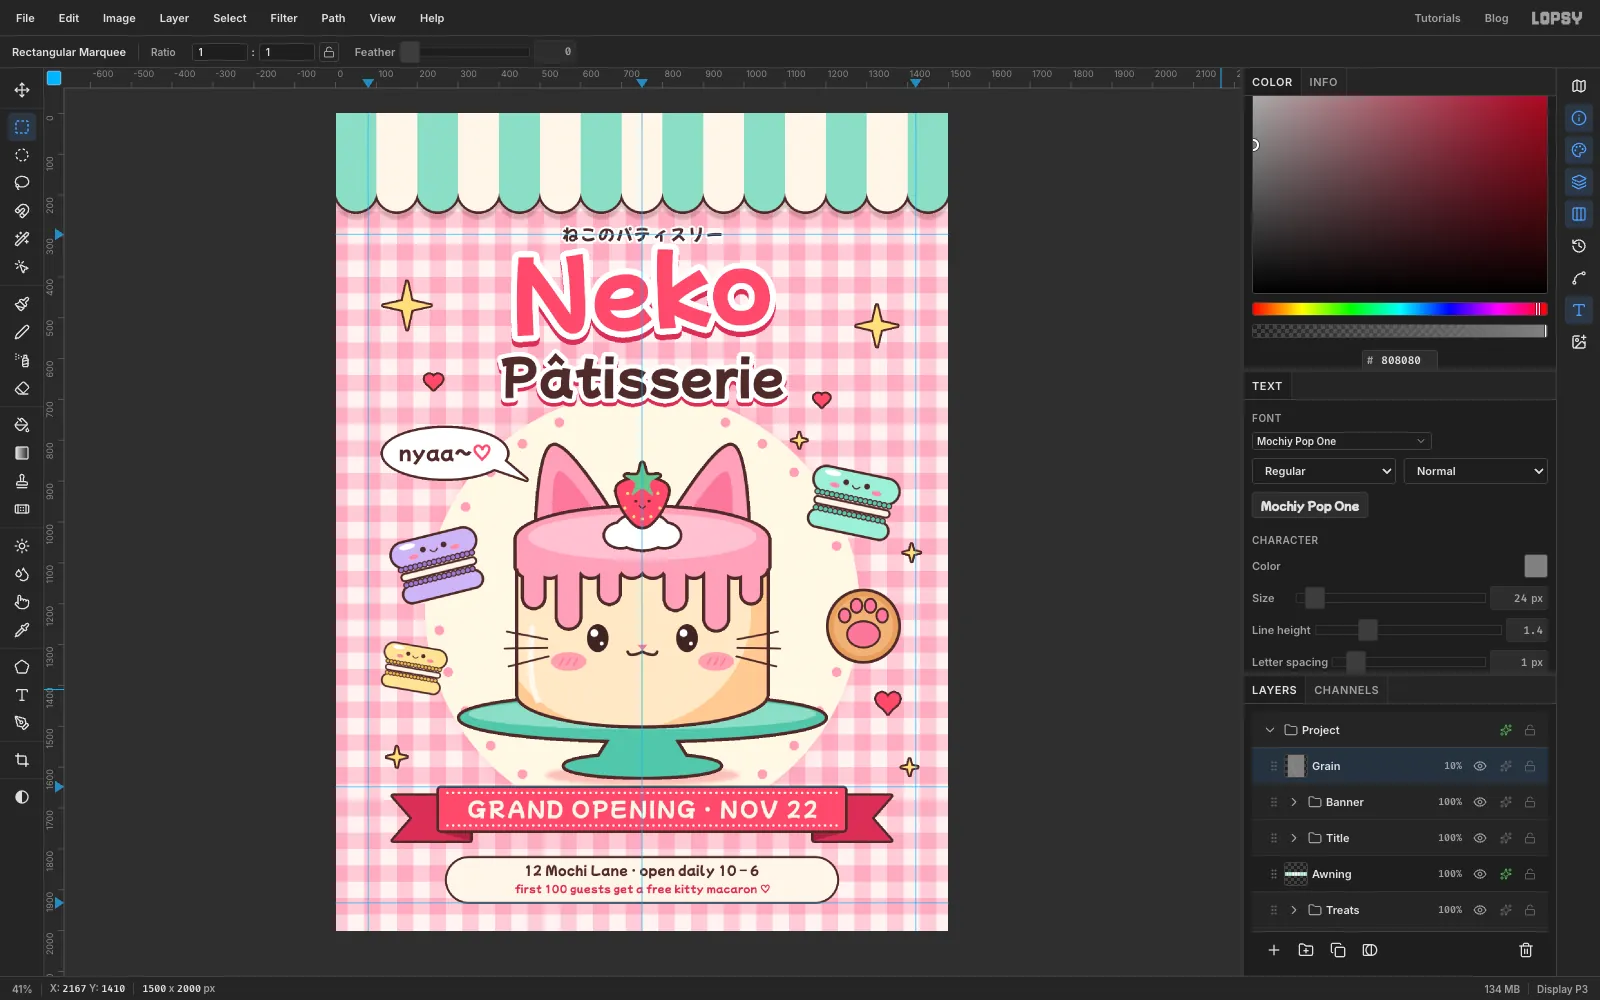
In this tutorial you'll make a 1500 × 2000 px grand-opening poster for Neko Pâtisserie, an imaginary cat-themed pastry shop. ("Neko" is Japanese for cat.) It has:
- a pink gingham background made from a tiny pattern tile, and a striped awning with scalloped edges
- a cream halo with a ring of polka dots, painted in one click with Radial Symmetry
- a cat-faced strawberry cake on a mint cake stand, drawn with selections, the Pen tool and the Stroke effect
- three macarons, one drawn by hand and two pasted copies recoloured with the Magic Wand and Hue/Saturation
- sticker-style title type, a speech bubble, a paw cookie, sparkles, hearts and a ribbon banner
The tools you'll use:
- Define Pattern and Fill with Pattern, the Rectangular and Elliptical Marquee, the Lasso and the Pen tool
- the Brush with Radial Symmetry, and Shift-click straight lines
- the Shape tool's rounded rectangles and ellipses with their own fill and stroke
- the Stroke and Drop Shadow layer effects, and the Multiply and Overlay blend modes
- Copy and Paste, the Magic Wand, Hue/Saturation, Gaussian Blur and Add Noise
- the Move tool's scale and rotate handles, on single layers, on several layers at once, and on live text
- groups, guides and the Text tool, including colouring a single character
The only font is Mochiy Pop One, a free, rounded Japanese Google Font in Lopsy's font picker. It covers both the Latin letters and the Japanese tagline.
The palette:
-
Cocoa outline
-
eyes
-
cream
-
halo
-
Gingham
-
Strawberry
-
leaf
-
Frosting
-
blush
-
stand shadow
-
Mint
-
sponge
-
Lavender
-
butter
-
cookie
-
Make a gingham pattern tile
Gingham is two sets of stripes crossing, darker where they overlap. You'll draw one 80 px repeat and let Lopsy tile it.
- Open Lopsy. In the New Document dialog, set Width to
1500and Height to2000, then click Create. Delete the emptyLayer 1with the bin button at the bottom of the Layers panel. - Click the top ruler at 80, 750 and 1420 to drop vertical guides for the margins and the centre line. Click the left ruler at 296, 1648 and 1932 for the tagline, the banner and the bottom margin. Then turn off View → Snap to Guides, so the small shapes you draw near the guides don't jump onto them.
- Click Add Layer (+) and name the layer
Tile. With the Rectangular Marquee (M), click once on the canvas and enter0, 0to80, 80. TypeFFF3F1in the Color panel's hex field and choose Edit → Fill. - Press Cmd+D, click once and enter
0, 0to40, 80, and fill it with . Deselect again, select0, 0to80, 40and fill that with too. Finally deselect, select the overlap,0, 0to40, 40, and fill it with the darker . - Deselect, select the whole tile again (
0, 0to80, 80) and choose Edit → Define Pattern.
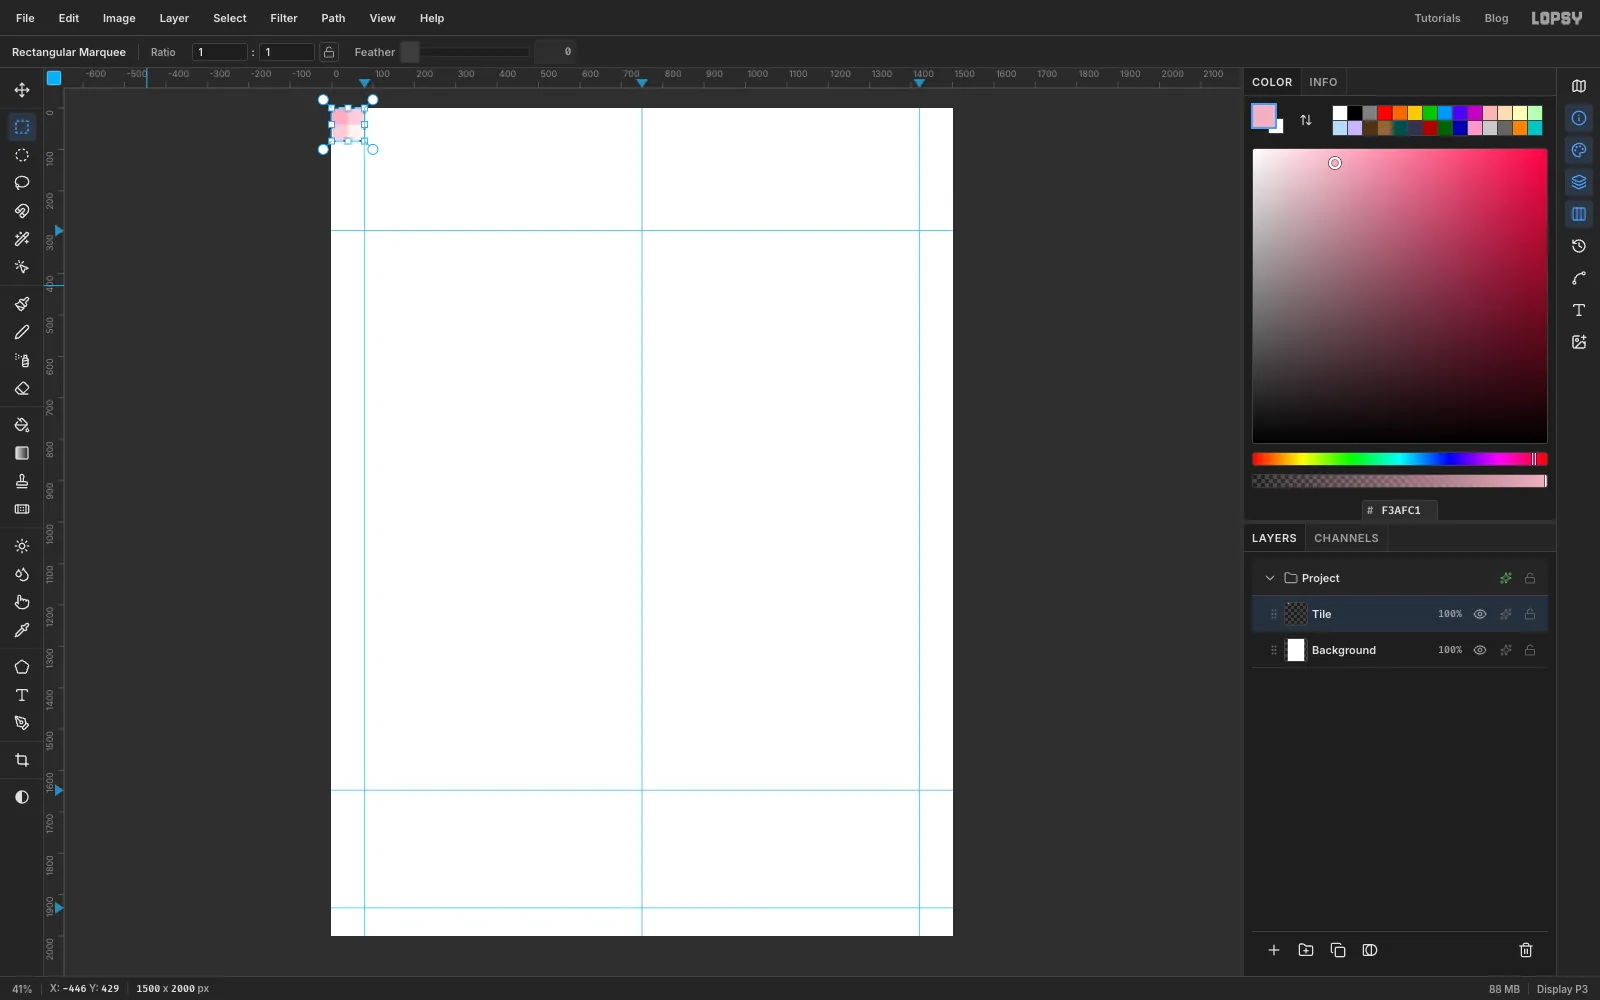
- Open Lopsy. In the New Document dialog, set Width to
-
Fill the background with gingham
- Press Cmd+D, then delete the
Tilelayer. The pattern is saved, so you don't need the layer any more. - Click
Background, press Cmd+A to select everything, and choose Edit → Fill with Pattern…. - Click the gingham tile. Set Horizontal Offset to
87.5% and leave Vertical Offset at0. The offset slides the checks 70 px sideways, so a dark column ends right on the centre guide, behind the middle of the cake. - Click Apply and press Cmd+D.
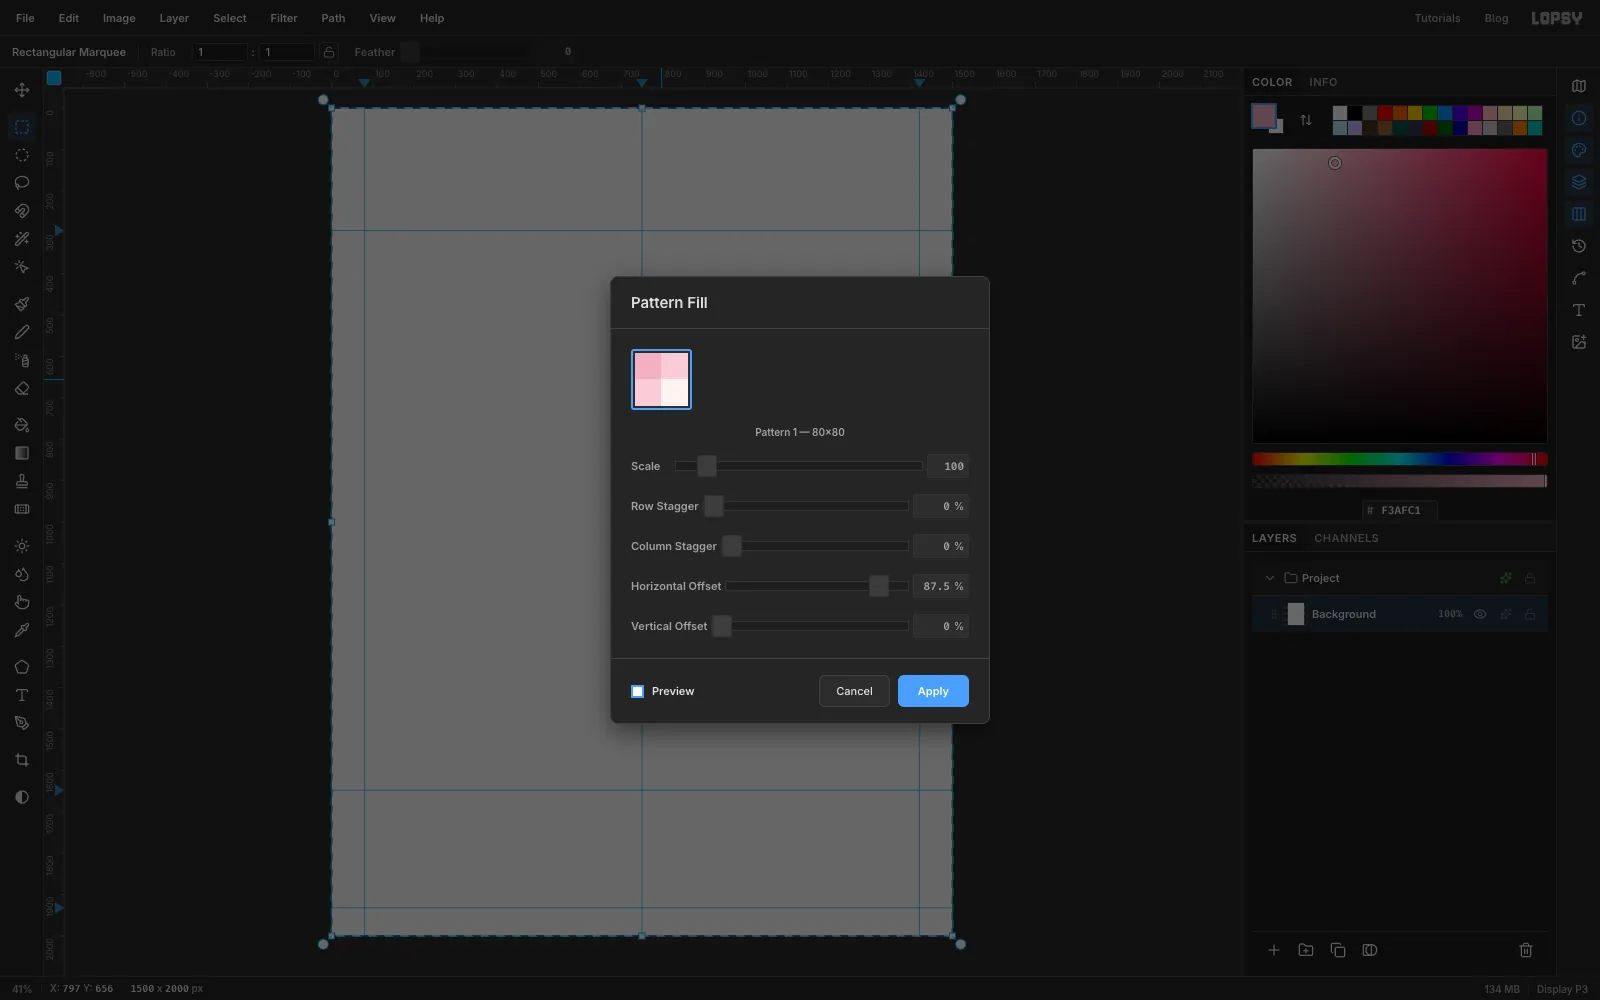
- Press Cmd+D, then delete the
-
Draw the halo and its dot ring
A pale disc behind the hero separates it from the busy gingham.
- Add a layer named
Halo. With the Elliptical Marquee, click once and enter190, 630to1310, 1750, a 1120 px circle. Fill it with and press Cmd+D. - Open the layer's effects (the fx button on its row) and turn on Drop Shadow: Offset X and Offset Y
0, Blur60, Opacity35, colour . That's a soft pink glow rather than a shadow. - Add a layer named
Halo Dots. Pick the Brush (B) and set Size26and Hardness100. - Click the Radial Symmetry button in the options bar and set Segments to
30. Hold Cmd and click the centre of the circle (750, 1190) to move the symmetry centre there. - Set the colour to and click once near the top of the circle, about 34 px inside its edge (
750, 664). Thirty dots appear around the ring. - Click Radial Symmetry again to turn it off.
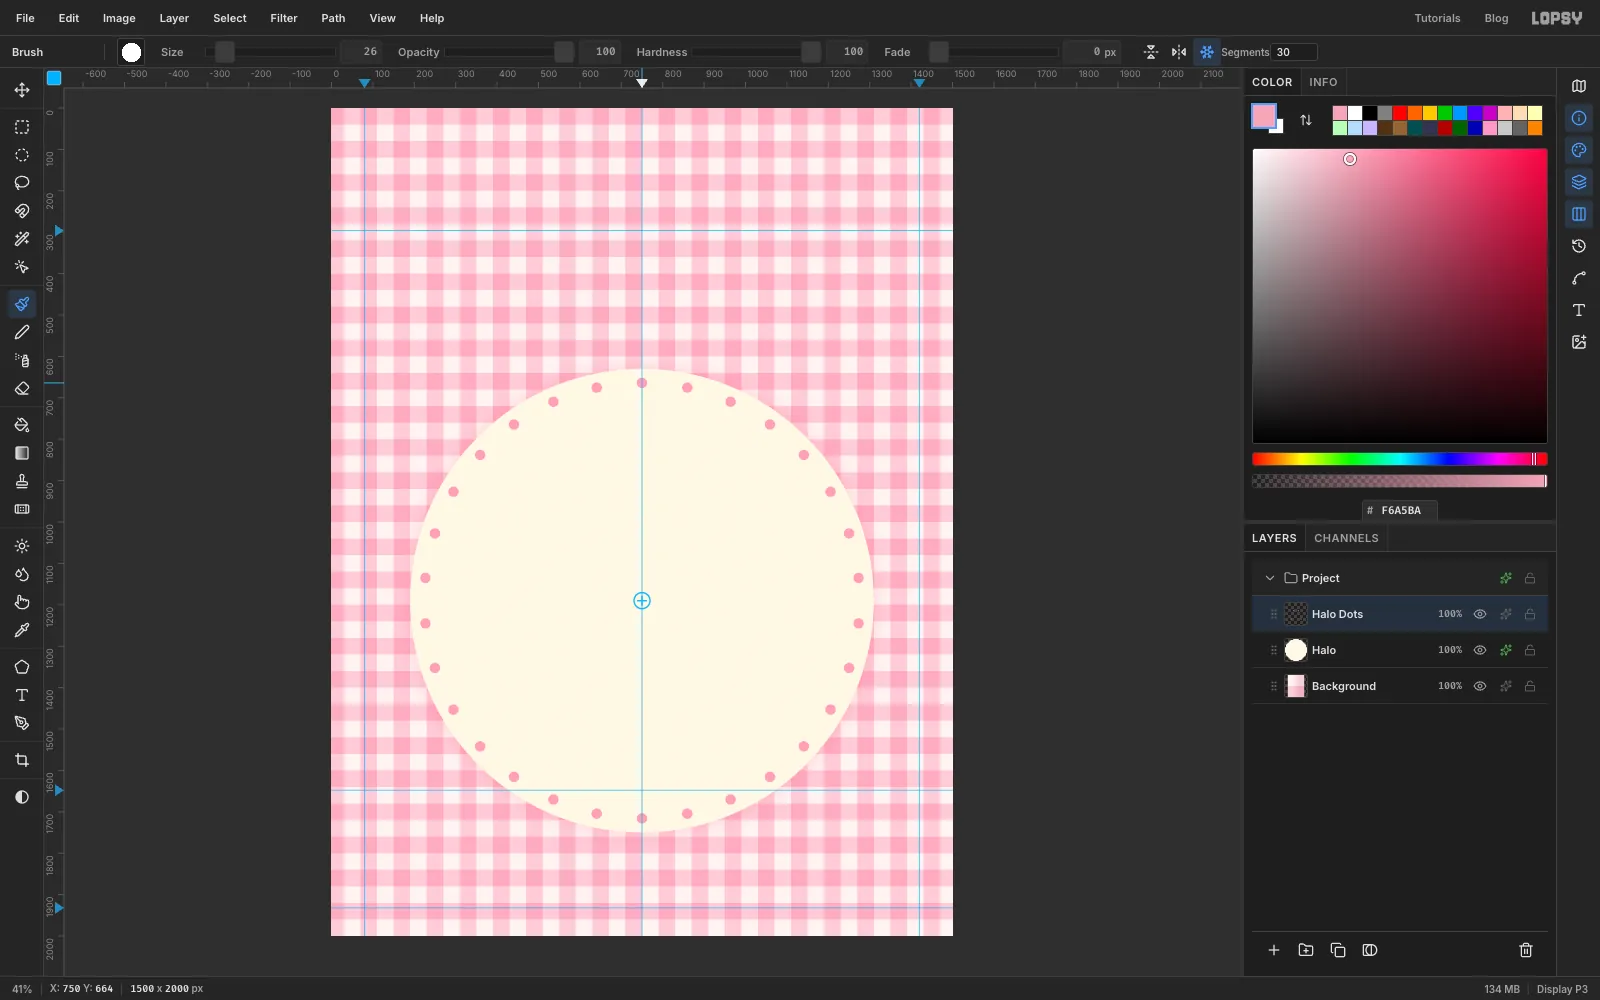
- Add a layer named
-
Build the striped awning
- Add a layer named
Awning. With the Rectangular Marquee, select0, 0to100, 20and fill it with . Deselect, select100, 0to200, 20and fill it with . Deselect, select both (0, 0to200, 20) and choose Edit → Define Pattern. - Deselect, select
0, 0to1500, 190and choose Edit → Fill with Pattern…. Pick the new stripe tile, set both offsets to0, and click Apply. You now have 100 px stripes, starting with mint at the left edge. Press Cmd+D. - Now hang a scallop under each stripe. With the Elliptical Marquee, drag a 100 px circle under the first mint stripe, from
0, 140to100, 240, so its centre sits on the stripes' bottom edge. Hold Shift and drag the same circle under every other mint stripe, 200 px further right each time (200, 140to300, 240, then400, 140to500, 240, and so on). Fill the selection with . - Press Cmd+D and do the same under the cream stripes (
100, 140to200, 240,300, 140to400, 240, and so on), then fill with .
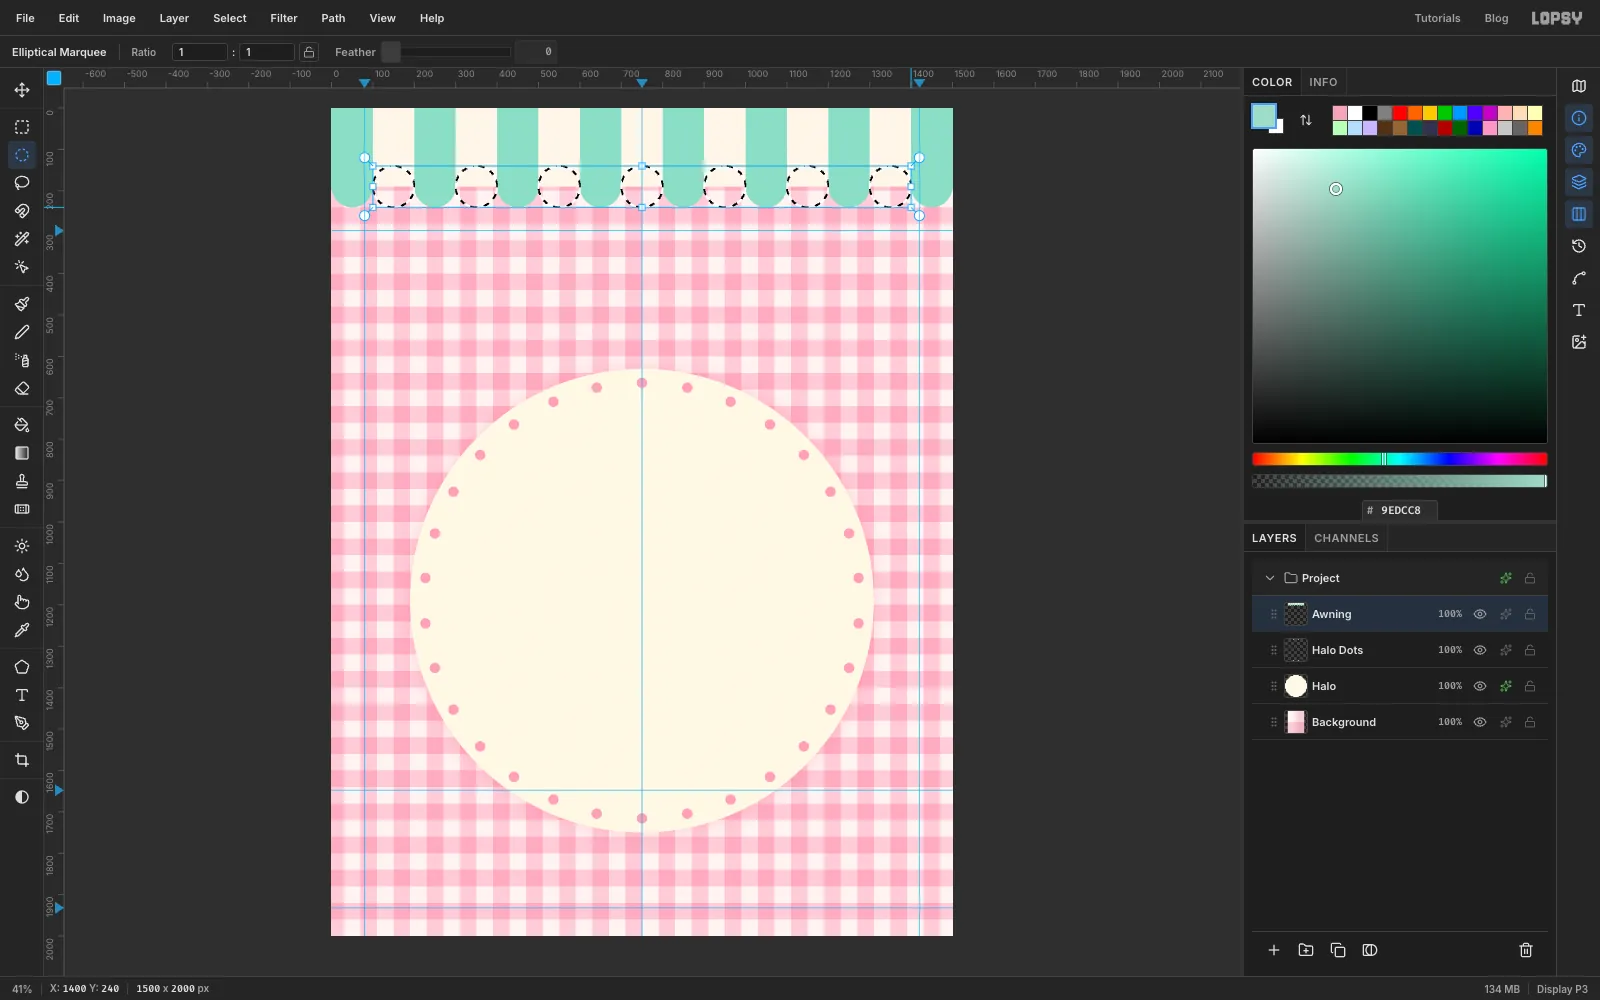
- Add a layer named
-
Outline the awning
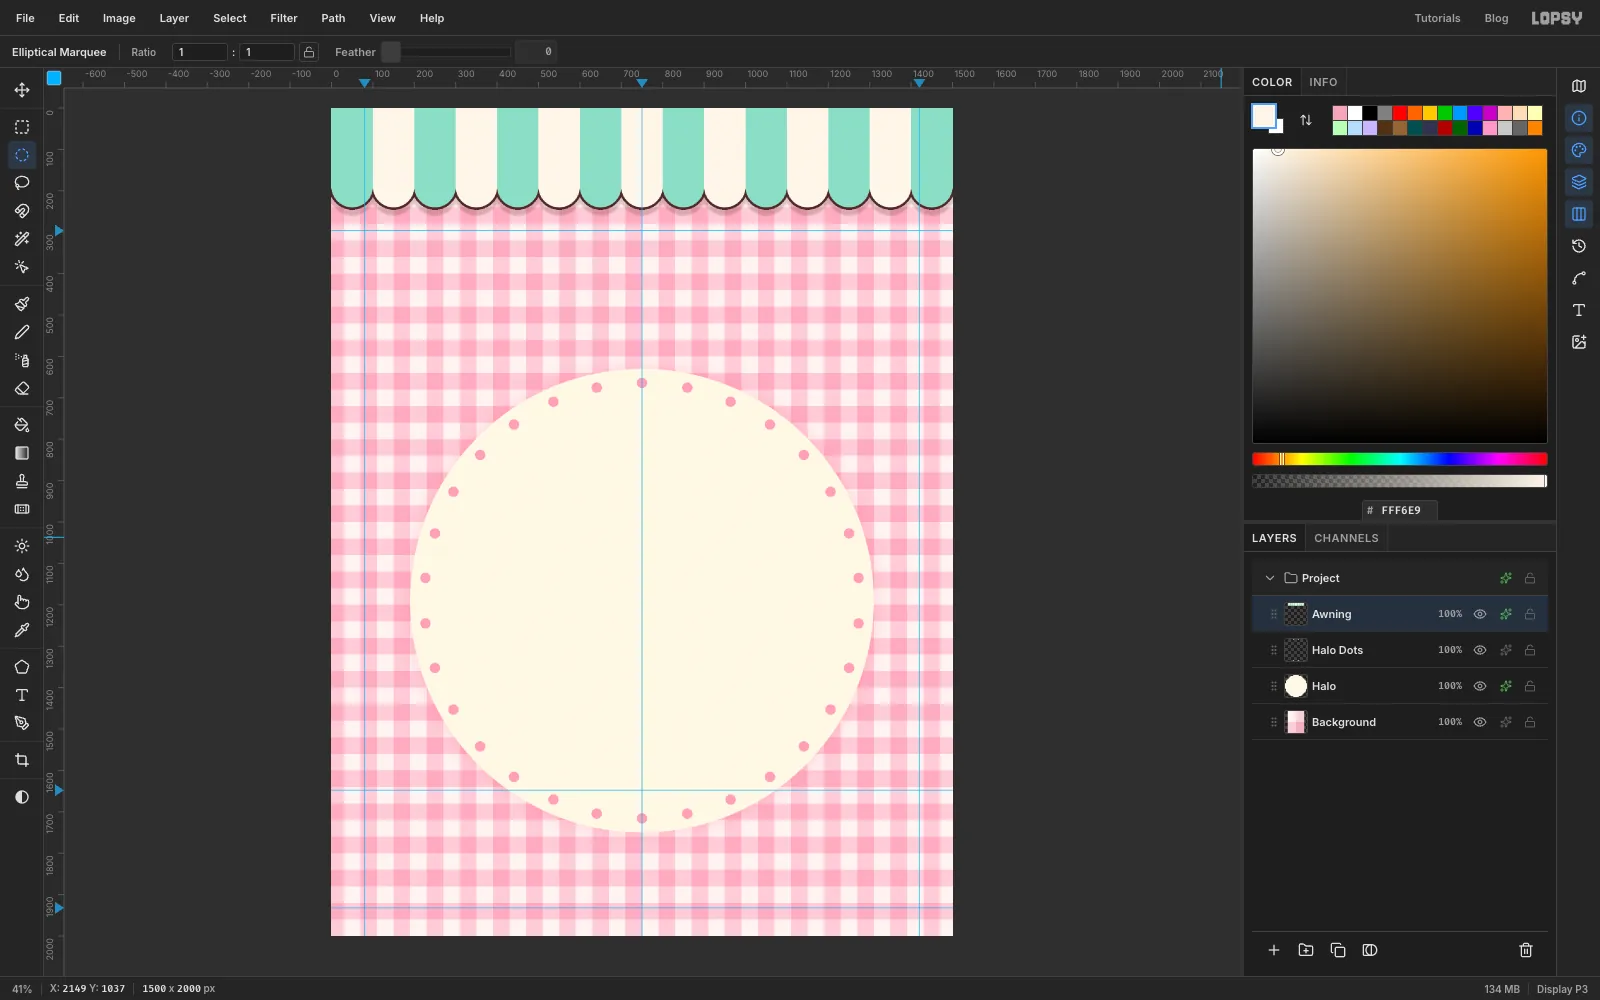
The thick dark outline is what makes everything look kawaii. You'll add it as a layer effect, so it follows the shape exactly.
- Press Cmd+D. Open the
Awninglayer's effects and turn on Stroke: Width6, colour . - Turn on Drop Shadow: Offset X
0, Offset Y14, Blur6, Opacity22, colour .
The stripes inside don't get outlined, only the edge of the whole shape, which is just what an awning needs.
- Press Cmd+D. Open the
-
Draw the cake stand
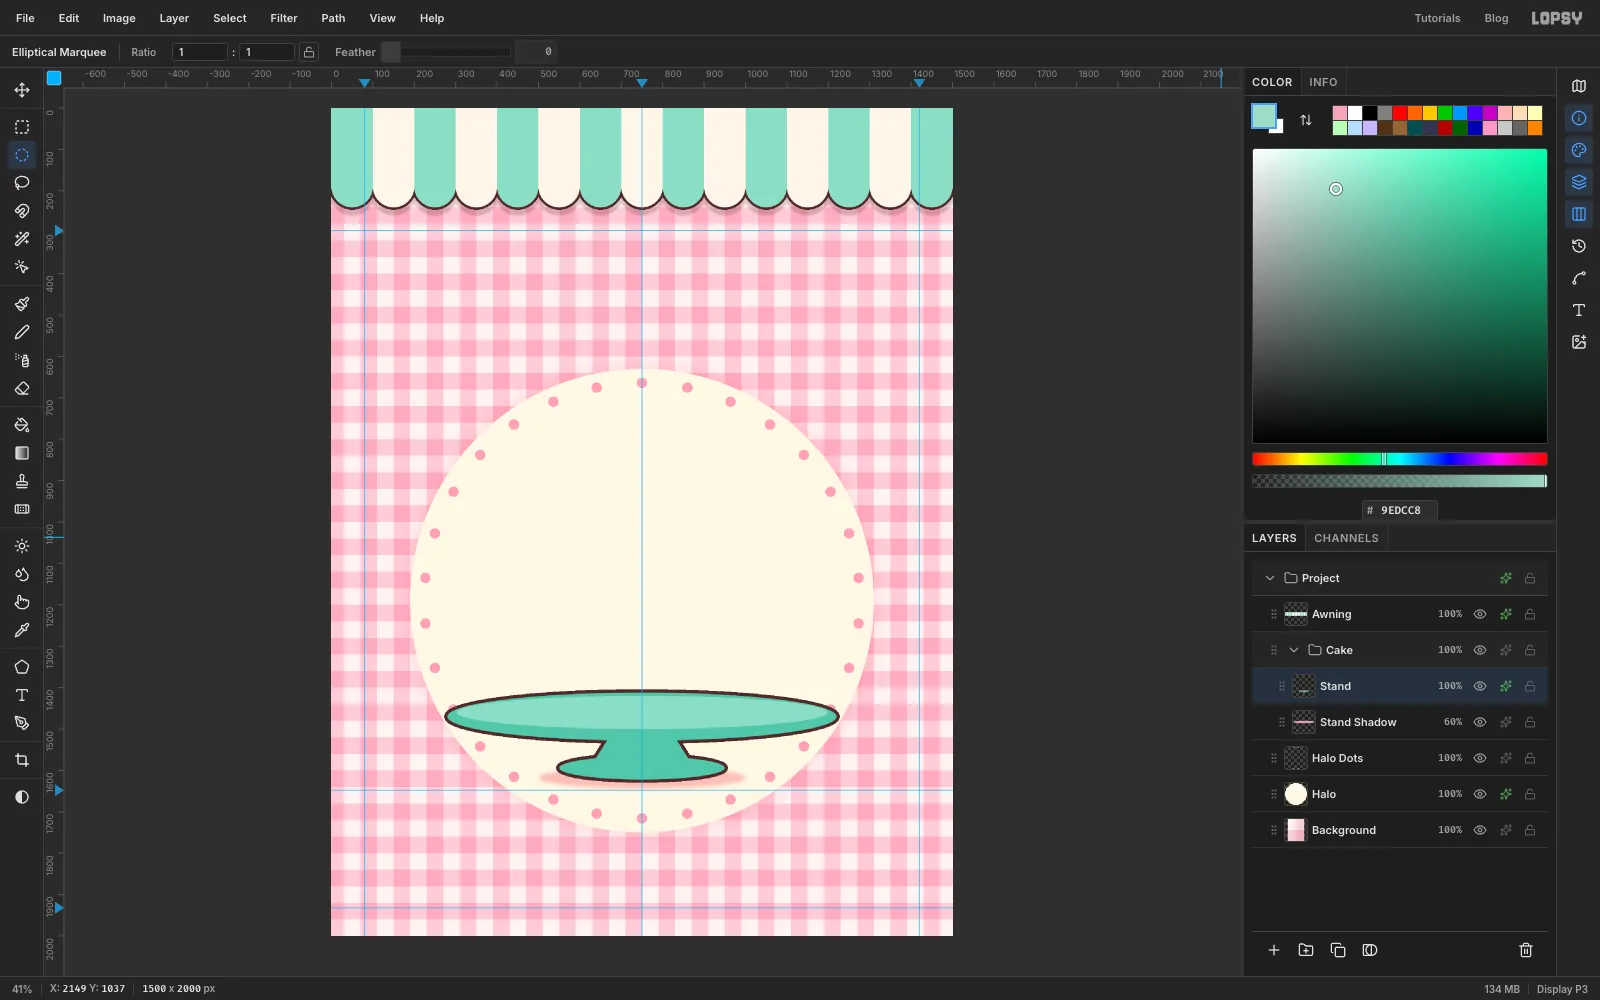
You'll draw the cake full size and scale it down a touch later, once the title is in.
- Click
Halo Dotsand click New Group (the folder button). Name itCake. New layers you add now go inside it. - Add a layer named
Stand Shadow. Select an ellipse from500, 1592to1000, 1644, fill it with and press Cmd+D. Choose Filter → Gaussian Blur… with Radius14, set the layer's blend mode to Multiply and drag its opacity slider to 60%. - Add a layer named
Stand. Select the plate as an ellipse from280, 1412to1220, 1528. Hold Shift and drag the foot from550, 1566to950, 1622. Fill with the darker mint . - Pick the Pen tool (P) and click four corners for the neck:
625, 1592,680, 1505,820, 1505,875, 1592, then click the first point again to close it. In the Paths panel, click Path to Selection, delete the path, and fill with . - Press Cmd+D, select the top of the plate as an ellipse from
302, 1420to1198, 1500, and fill it with the light mint . Deselect and give the layer a Stroke of8in .
- Click
-
Draw the sponge and shade it
- Add a layer named
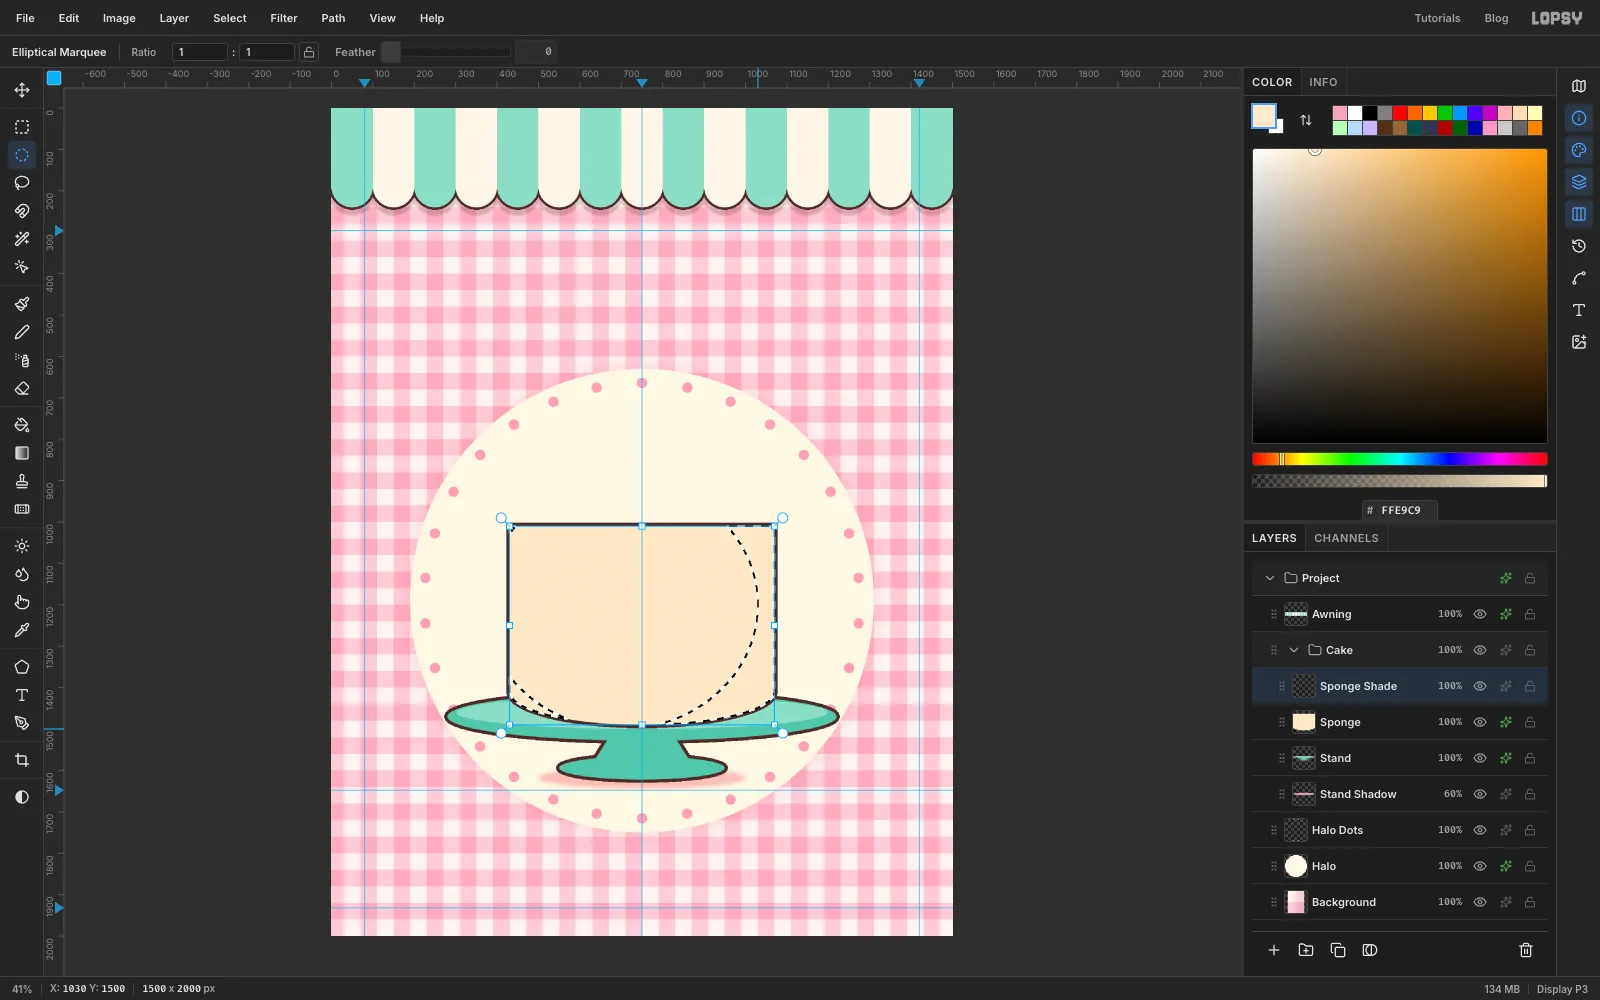
Sponge. Select a rectangle from430, 1010to1070, 1410, then Shift-add an ellipse from430, 1330to1070, 1490for the round bottom. Fill with , deselect and add a Stroke of8in . - Add a layer named
Sponge Shade. Cmd-click theSpongethumbnail to load its shape as a selection. - With the Elliptical Marquee, hold Alt and drag an ellipse from
370, 900to1030, 1500. It's offset a little to the left, so subtracting it leaves a crescent along the right side and bottom. - Fill the crescent with , deselect, set the layer to Multiply and its opacity to 60%.
- Add a layer named
Sponge Shine. With a hard white Brush of size16, drag a gentle curve down the left side of the cake, just inside the outline, from below the drips to just above where the bottom starts to curve. Set the layer's opacity to 70%.
- Add a layer named
-
Select the frosting and its drips
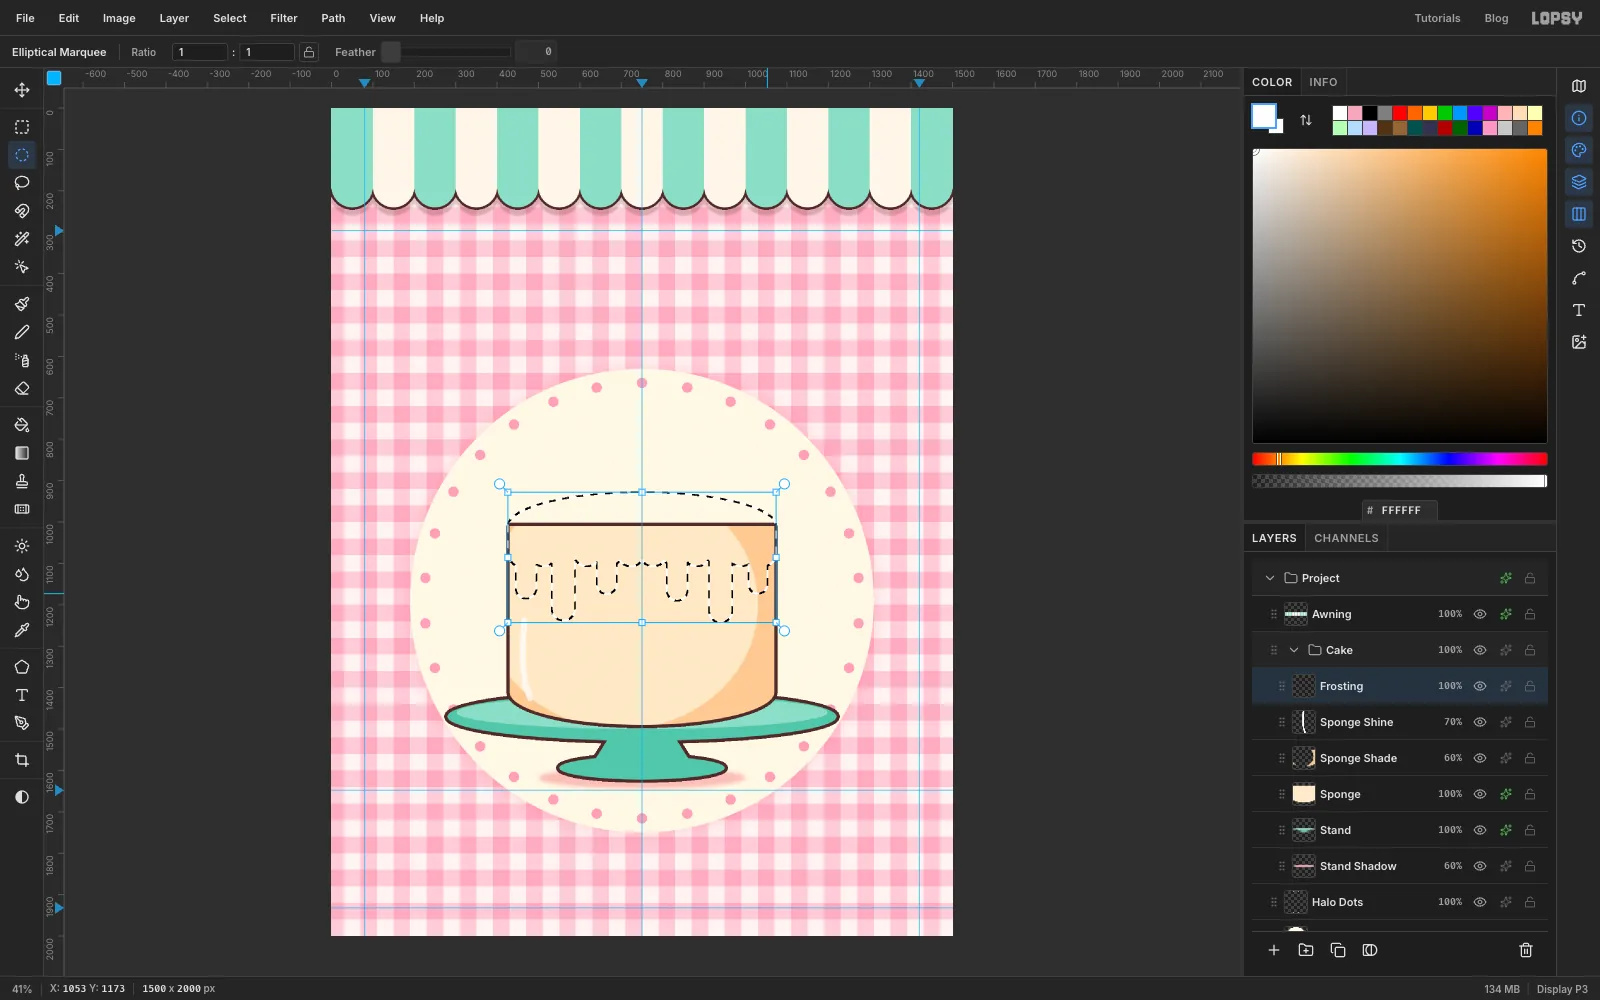
The frosting is one selection built from many small pieces. Hold Shift while dragging every piece after the first, so each one adds to the selection.
- Add a layer named
Frosting. With nothing selected, click once with the Elliptical Marquee and enter426, 928to1074, 1092for the top. - Shift-add a rectangle from
426, 1010to1074, 1085. That's the band down the sides. - Shift-add twelve small ellipses, each about 56 px wide and 44 px tall, side by side along the bottom edge of the band (y 1085), from one side of the cake to the other. They give the band a soft, wavy edge.
- Add six drips. For each one, Shift-add a narrow rectangle from the band down to the drip's end, then a circle the same width centred on its end. Use these centres, ends and widths: x 470 ending at y 1160, 50 px wide; x 560, 1210, 56; x 665, 1150, 48; x 835, 1165, 50; x 940, 1215, 56; x 1030, 1150, 46. Uneven lengths look more natural.
- Add a layer named
-
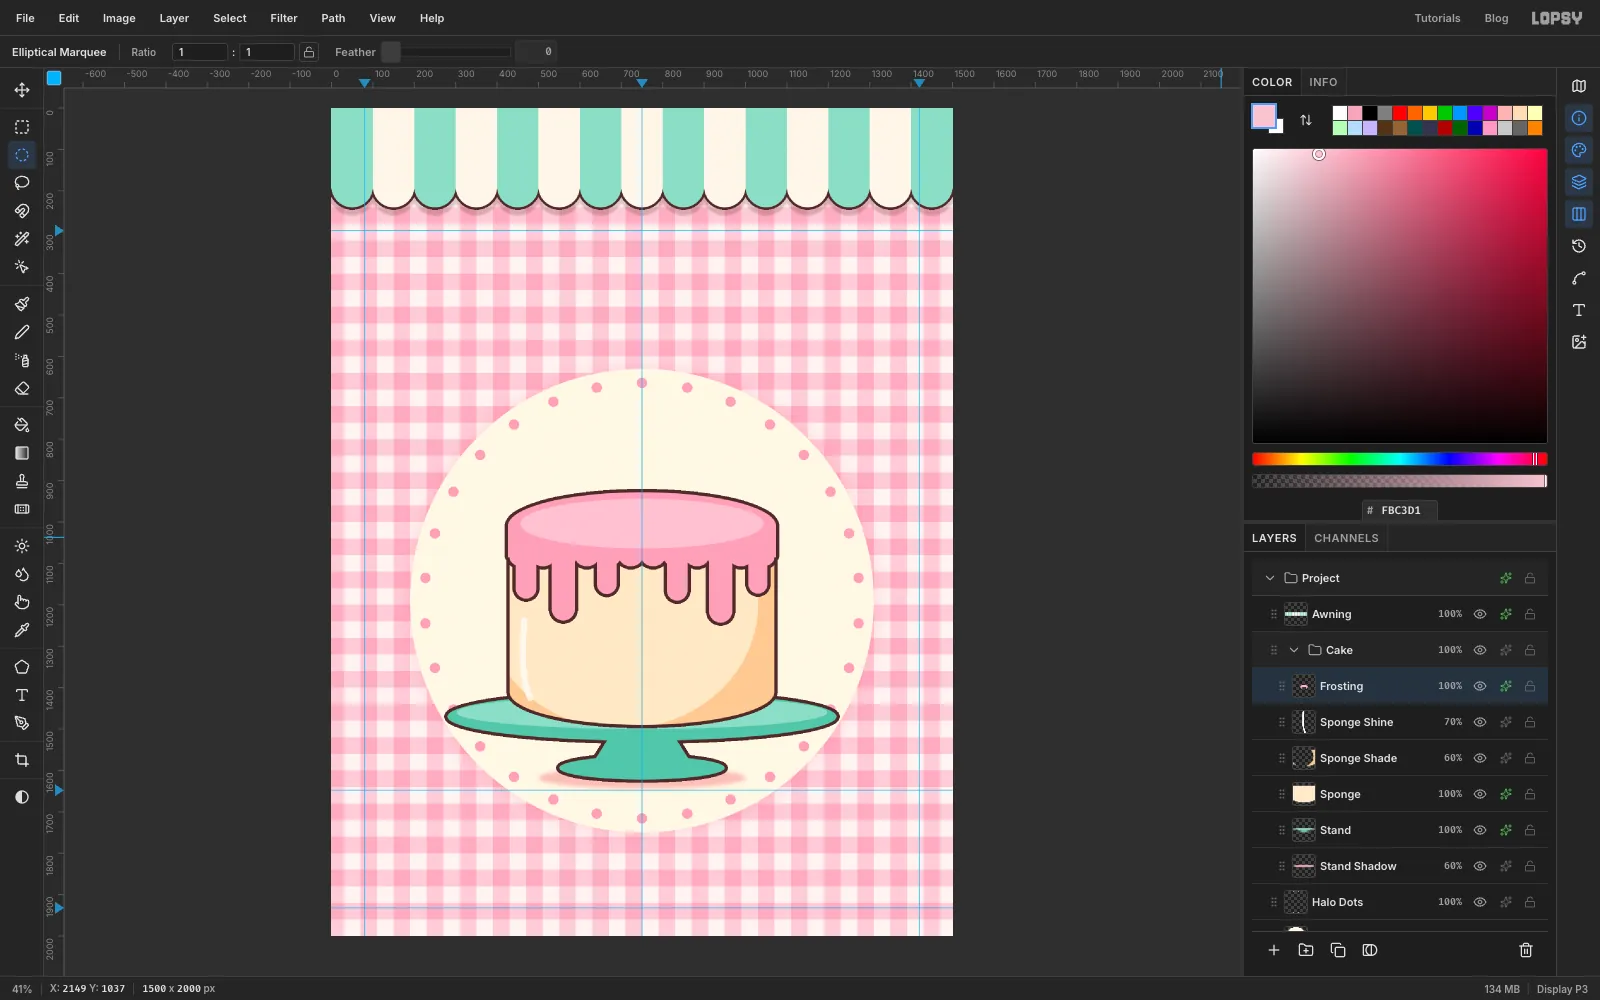
Fill and outline the frosting
- Fill the selection with .
- Press Cmd+D, select the top surface as an ellipse from
456, 944to1044, 1064, and fill it with the lighter . A lighter top and a darker side is all the 3D a kawaii cake needs. - Deselect and add a Stroke of
8in .
-
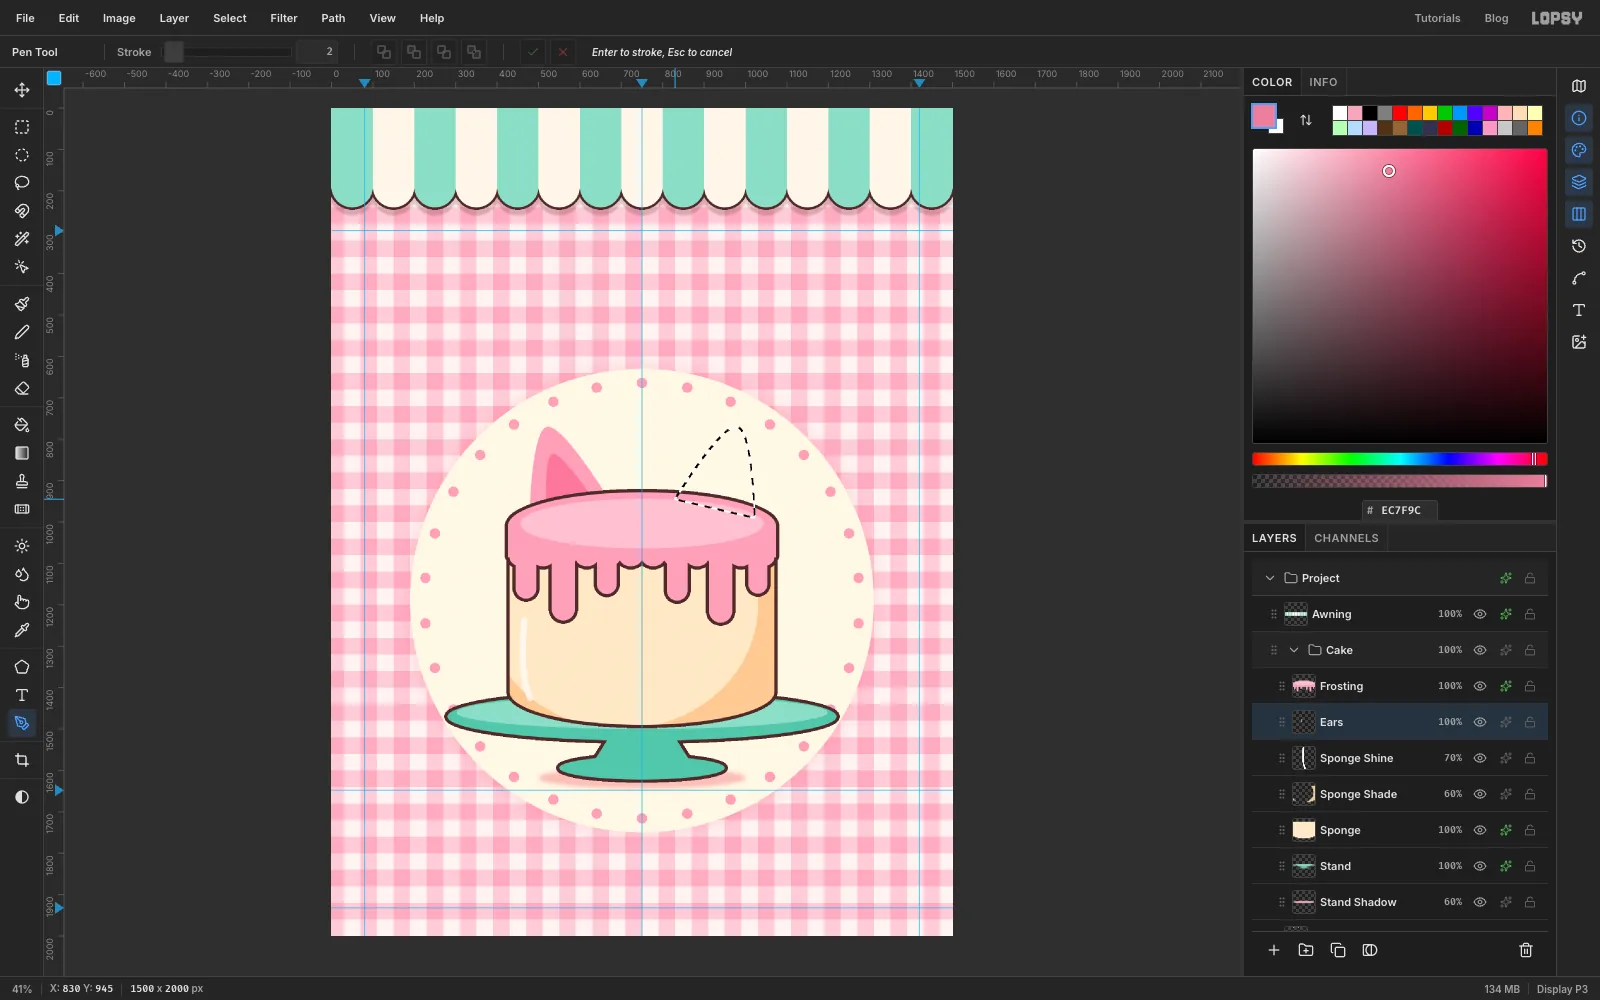
Add the cat ears
The ears sit behind the frosting, so its rim overlaps their bases and they look as if they grow out of the cake.
- Click
Sponge Shineand add a layer namedEars. It lands betweenSponge ShineandFrosting. - With the Pen tool, click
478, 990for the outer base. Press at the tip,520, 770, and drag a little to the right to pull out handles; that rounds the tip. Click670, 945for the inner base and close the path on the first point. Use Path to Selection and fill with . - Draw the inner ear the same way, smaller:
518, 960, tip534, 835,625, 935. Fill it with . - Repeat both for the right ear, mirrored across the centre guide (x becomes 1500 − x):
1022, 990, tip980, 770,830, 945. - Deselect and add a Stroke of
8in .
- Click
-
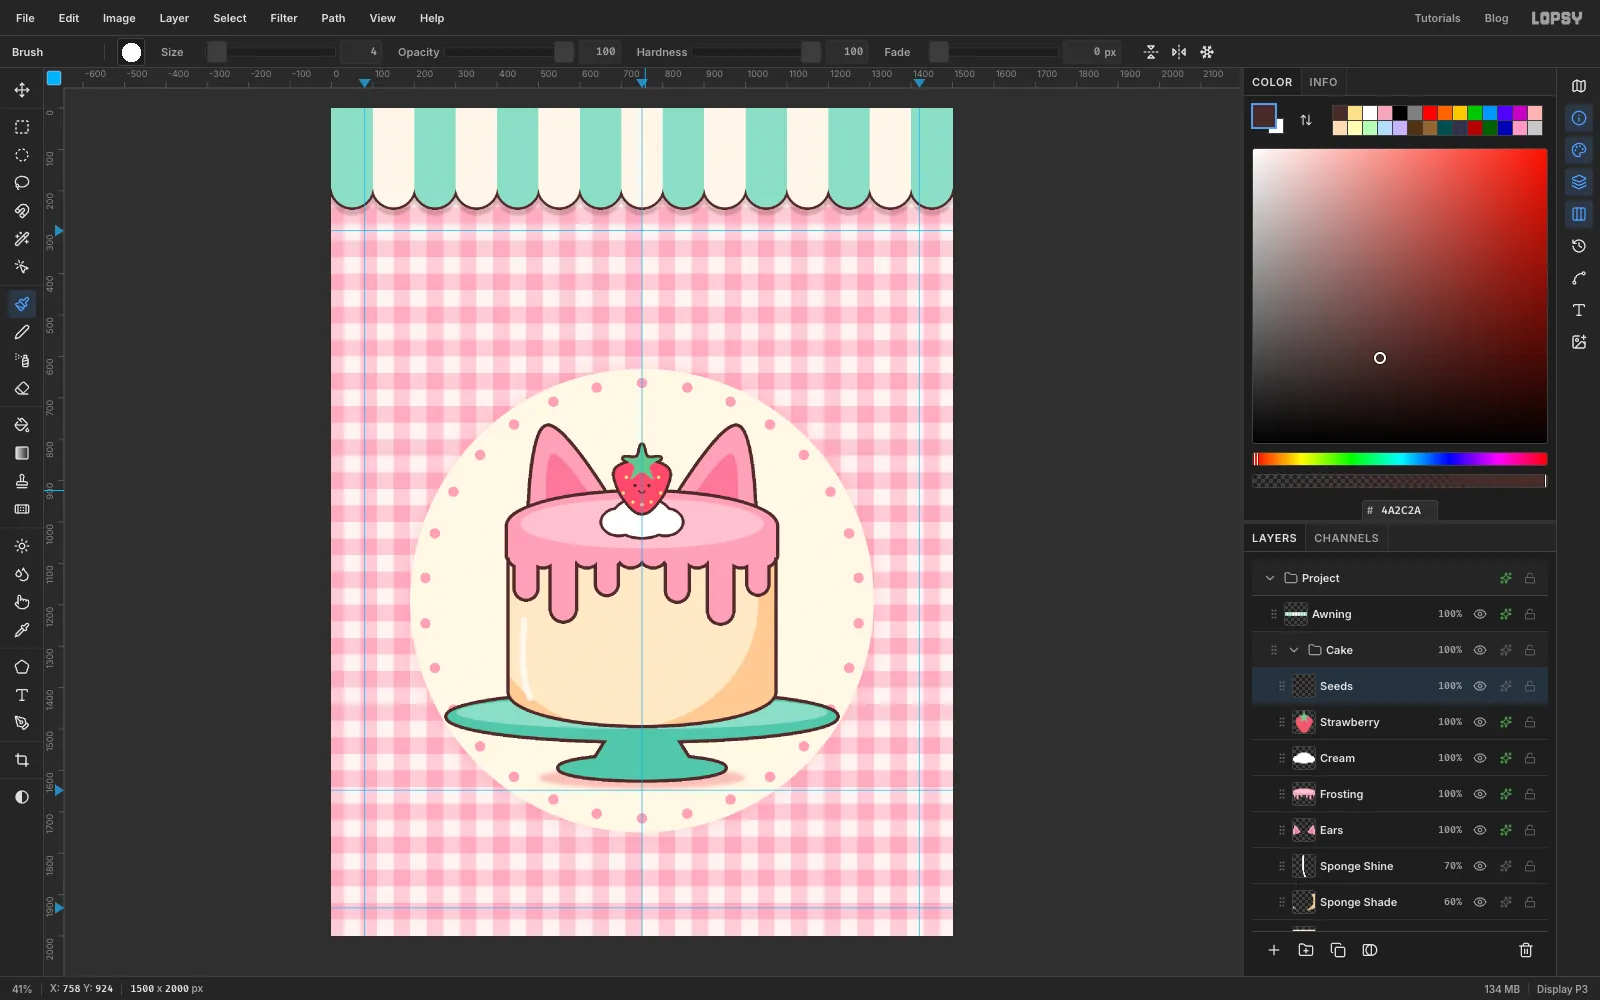
Top it with cream and a strawberry
- Click
Frostingand add a layer namedCream. Select an ellipse from680, 944to820, 1036, then Shift-add two smaller ones either side:654, 970to734, 1030and766, 970to846, 1030. Fill with white, deselect and add a Stroke of7in . - Add a layer named
Strawberry. With the Pen, press at690, 875and drag up a little; press at750, 852and drag to the right; press at810, 875and drag down a little. Then click750, 978without dragging, so the bottom stays pointed, and close the path on the first point. Use Path to Selection and fill with . - With the Pen, click a five-point star over the top of the strawberry, centred at
750, 860: ten clicks, alternating the five tips about 46 px out with five inner corners about 20 px out. Close it, use Path to Selection and fill with . Deselect and add a Stroke of7in . - Add a layer named
Seeds. Click a few dots on the strawberry with a hard Brush of size9in . Then click two eyes in and drag a tiny smile below them with a size4brush.
- Click
-
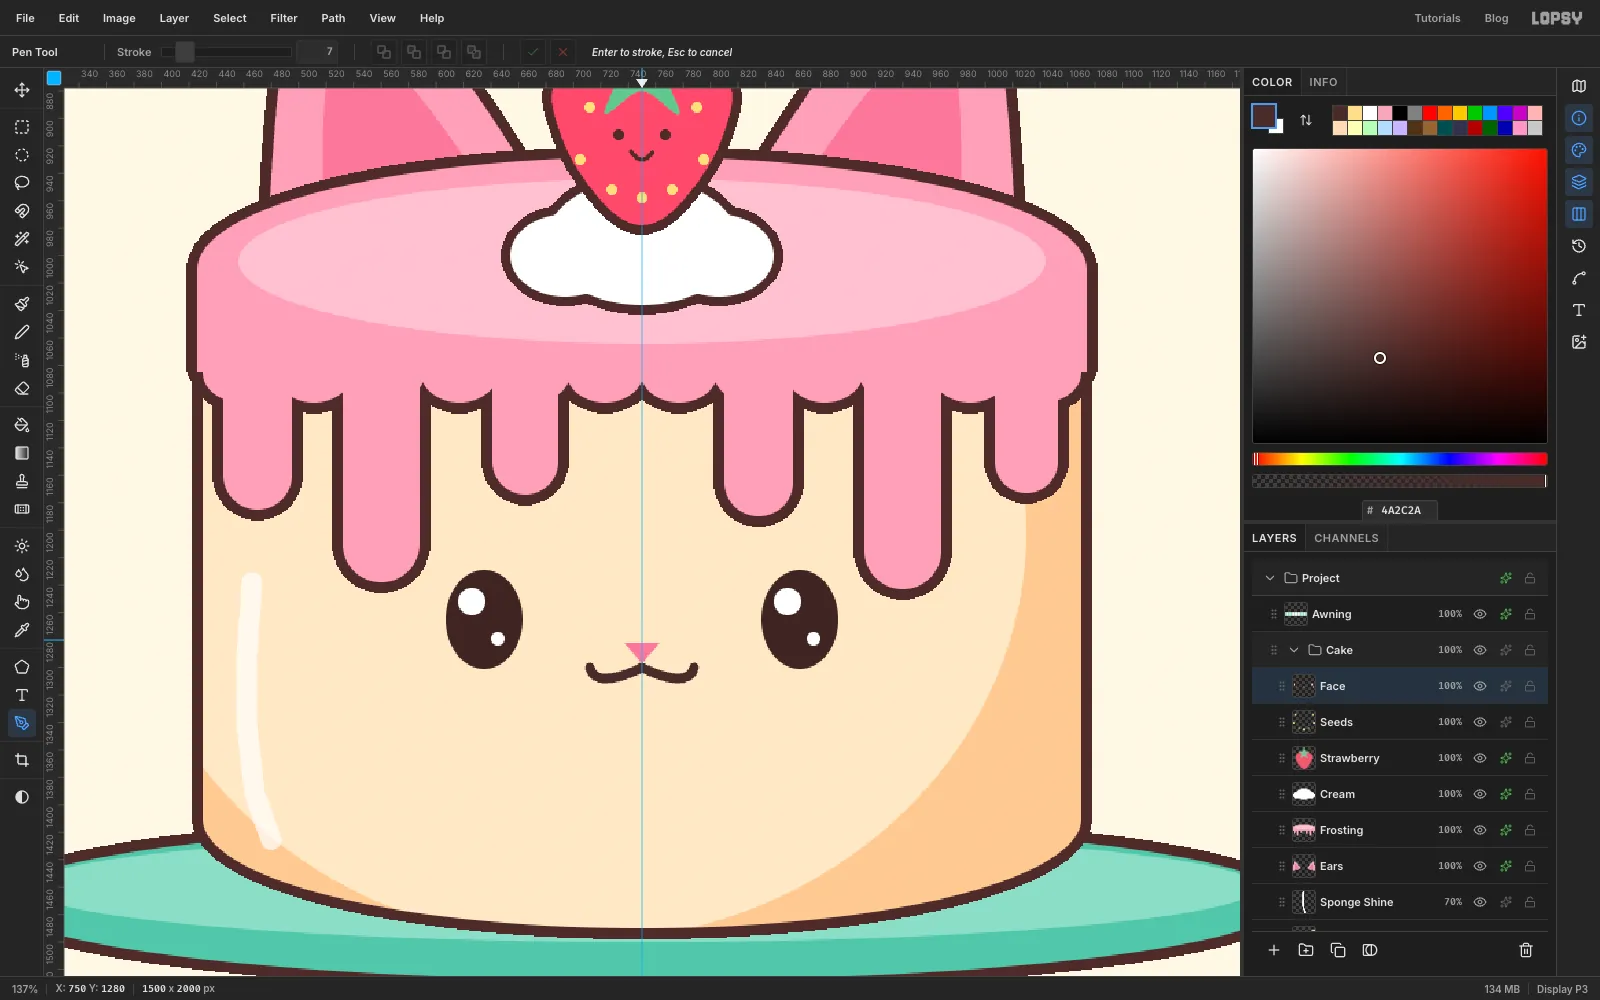
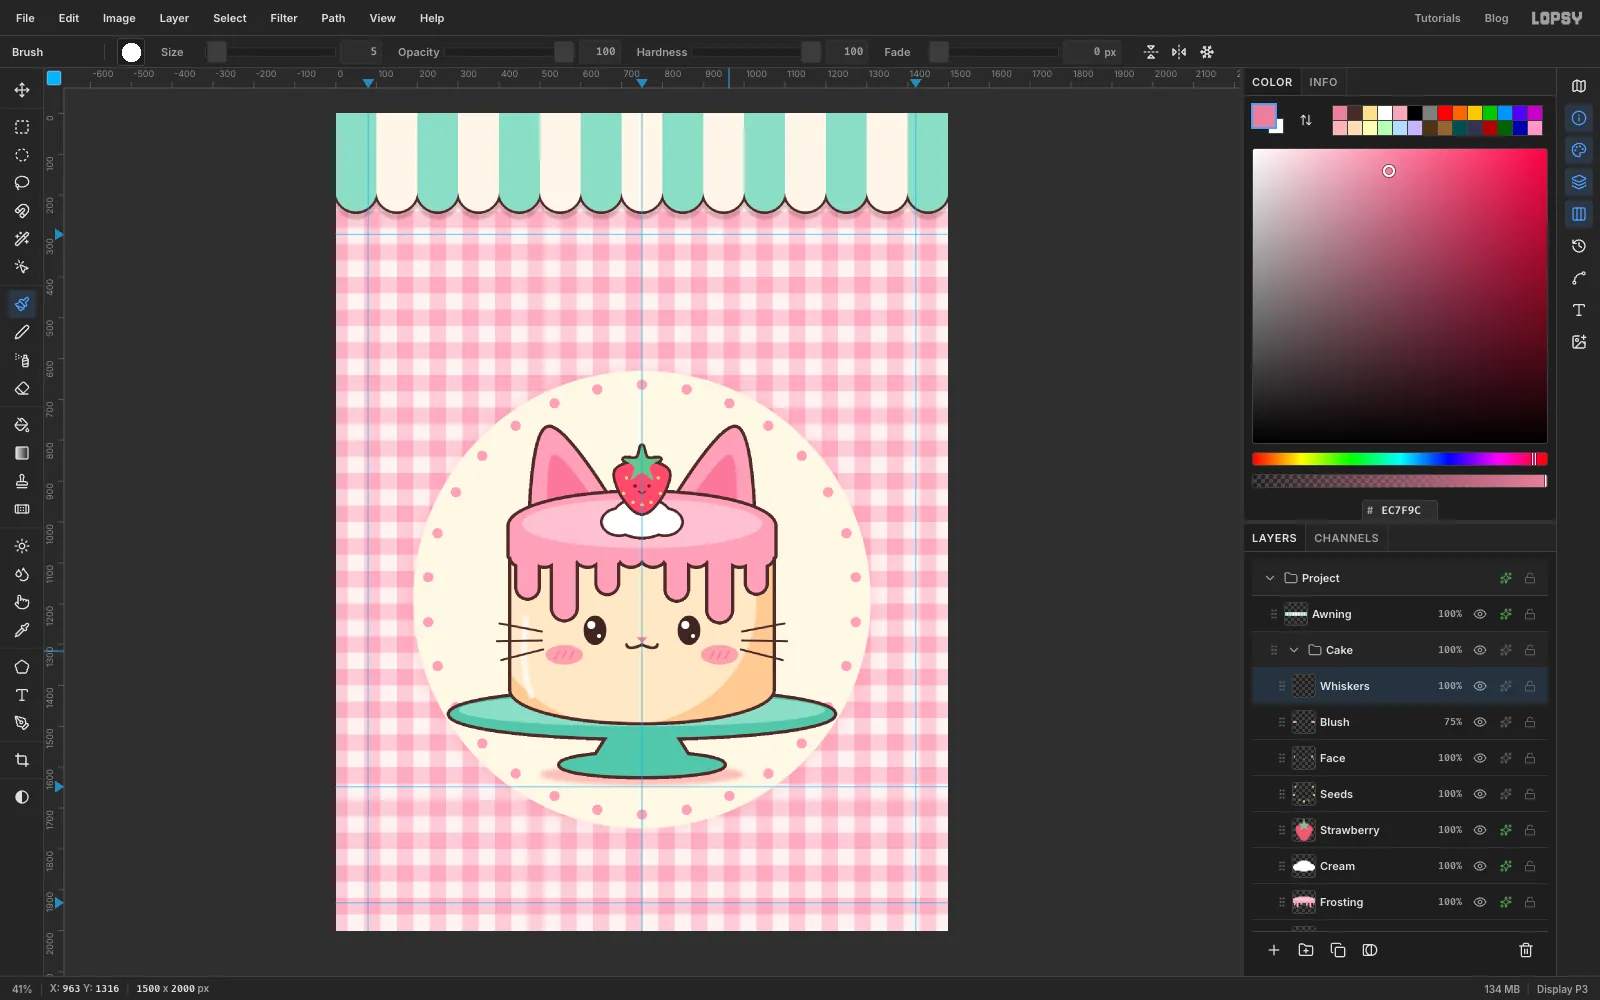
Give the cake a face
- Add a layer named
Face. Select an ellipse from607, 1229to663, 1301for the left eye and fill it with . Deselect, then do the same from837, 1229to893, 1301for the right eye. - Add catchlights in white with the Elliptical Marquee: a 20 px circle above and left of each eye's centre, and a 10 px one below and right. These two dots make the eyes look shiny and alive.
- With the Pen, click a small downward triangle for the nose:
737, 1282,763, 1282,750, 1297. Make it a selection and fill with . - For the "ω" mouth, press Cmd+D, set the colour to and the Pen's Stroke to
7. Press at712, 1300and drag down and to the right to curve the first loop. Click750, 1300without dragging so the middle stays a sharp point. Press at788, 1300and drag up and to the right. Press Enter to stroke the path, then delete it in the Paths panel.
- Add a layer named
-
Add blush and whiskers
- Add a layer named
Blush. Select an ellipse from514, 1301to606, 1349and Shift-add one from894, 1301to986, 1349. Fill with , deselect, and drag the layer's opacity to 75%. - Add a layer named
Whiskers. Pick a hard Brush of size6in . Click at the start of a whisker, then Shift-click its end to draw a straight line. Draw three on each side, starting just inside the cheek and fanning out past the cake's edge: the top one tilting up, the middle one level, the bottom one tilting down, each about 110 px long. - With a size
5brush in , Shift-click three short diagonal ticks on each blush. It's a classic kawaii touch.
- Add a layer named
-
Draw a macaron
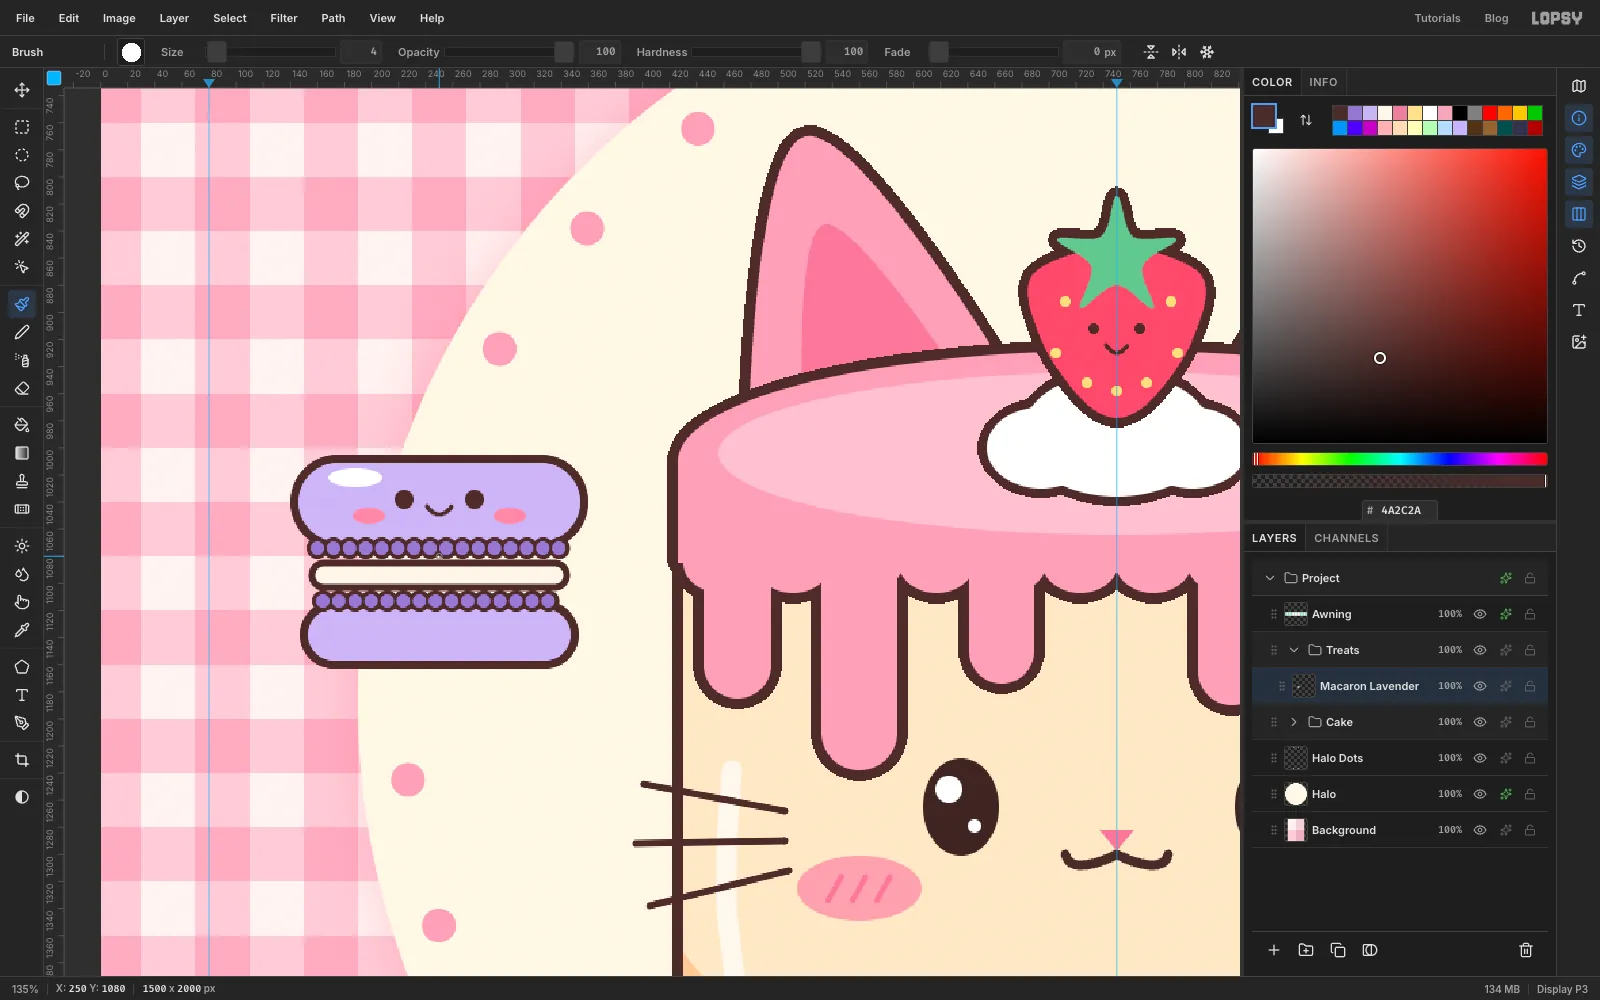
The macarons use the Shape tool, which draws rounded rectangles with their own fill and outline. A shape grows outward from its centre, so you press at the centre and drag to the bottom-right corner.
- Collapse the
Cakegroup, click it and click New Group. Name the groupTreatsand add a layer namedMacaron Lavender. - Pick the Shape tool (U). Set Shape to Rectangle and Output to Pixels. Click the Fill swatch and type
FFF6E9; click the Stroke swatch and type4A2C2A; set Width to5and Corner Radius to9. For the filling, press at250, 1094and drag to344, 1103(188 × 18 px). - Change the fill to
C9B5F2, Width to6and Corner Radius to22, and draw the bottom shell from250, 1138to350, 1160. Set Corner Radius to32and draw the taller top shell from250, 1040to357, 1072. The bigger radius gives it a domed look. - Now the ruffled "feet" that every macaron has. Pick a hard Brush of size
17, open the Brushes window (the brush-tip button at the left of the options bar) and set Spacing to70%. In , click at160, 1074and Shift-click at340, 1074, along the bottom edge of the top shell. Then set the brush to size11and spacing108%, switch to , and Shift-click the same line. The small dabs land on the big ones' centres, so you get a row of outlined beads. Repeat both passes along the top of the bottom shell, from164, 1113to336, 1113. - Add a face on the top shell. Select a small ellipse from
168, 1015to208, 1029and fill it with white for the shine. Click two eyes with a size14brush in at224, 1038and276, 1038. Select two blush ovals,186, 1044to210, 1056and (Shift-added)290, 1044to314, 1056, and fill them with . Finish with a tiny smile between the eyes, drawn with a size4brush.
- Collapse the
-
Copy the macaron and recolour it
- Press Cmd+D. With the Rectangular Marquee, select around the macaron, from
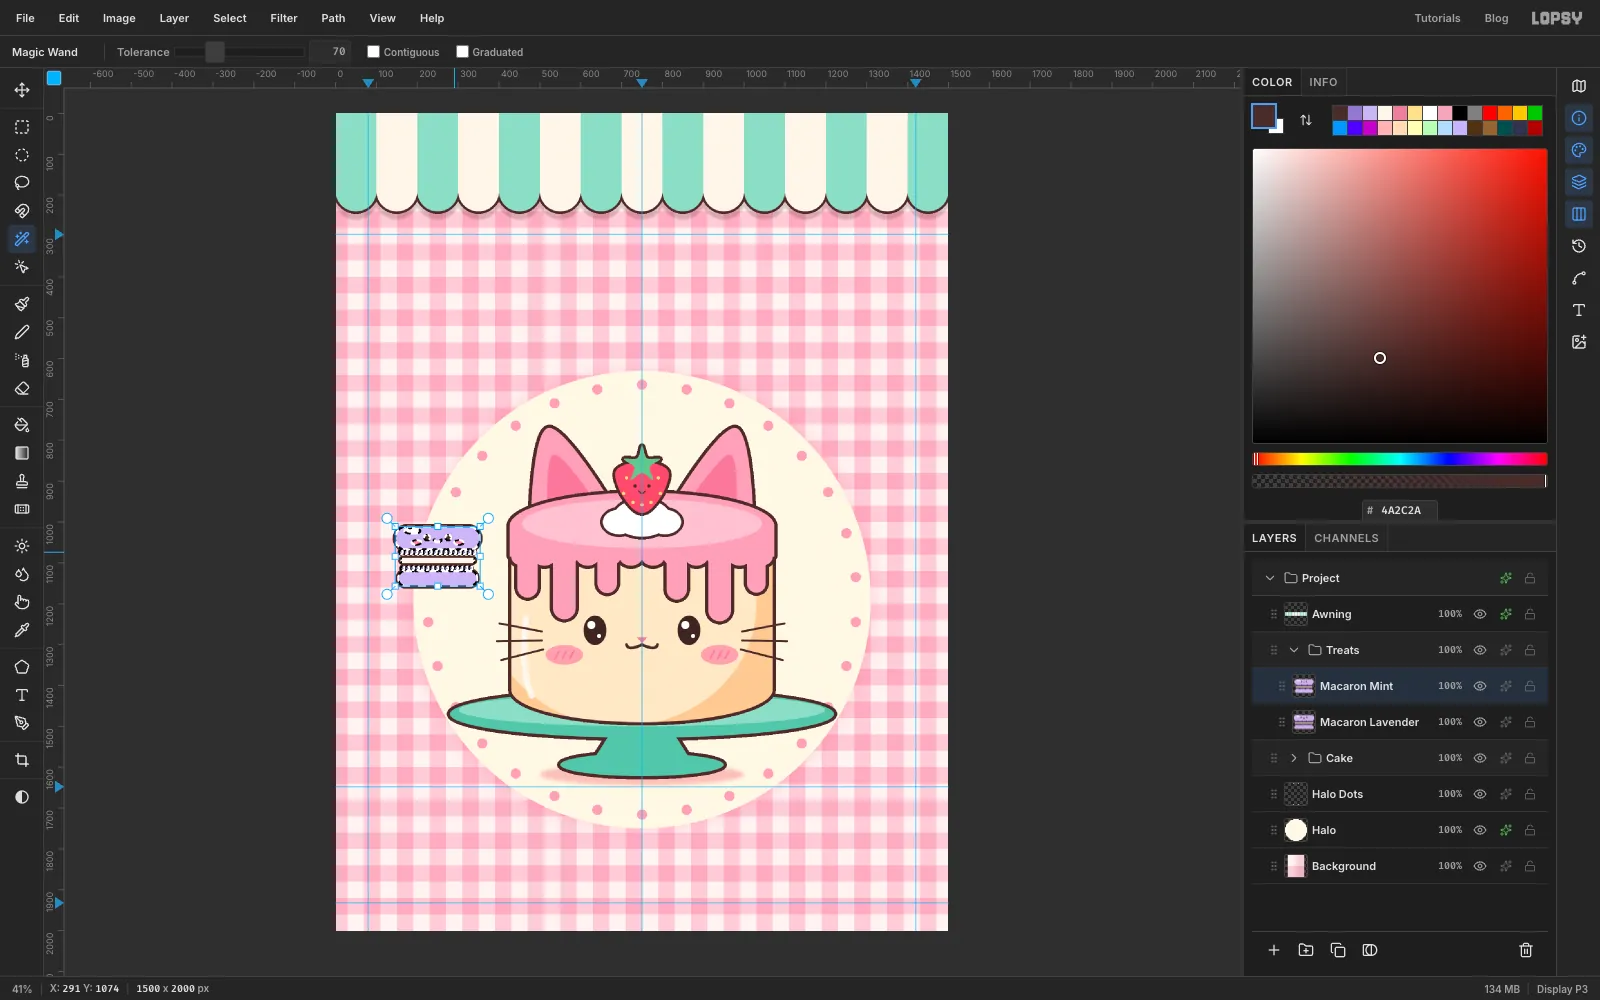
132, 1000to368, 1170. Press Cmd+C and then Cmd+V. The copy lands on a new layer in the same place. Rename itMacaron Mintand deselect. - Pick the Magic Wand (W). Set Tolerance to
70and untick Contiguous. Click the top shell, then Shift-click one of the beads in the feet. Every lavender pixel is selected, but not the brown outlines, the cream filling, the blush or the shine. - Choose Filter → Hue/Saturation…. Set Hue to
-99, Saturation to-6and Lightness to-2, and click Apply. Lavender turns mint, and the face stays the same. - Deselect, click
Macaron Lavenderand repeat for a third copy namedMacaron Butter, this time with Hue144, Saturation55, Lightness-2.
- Press Cmd+D. With the Rectangular Marquee, select around the macaron, from
-
Move, scale and tilt the copies
- Press Cmd+D, click
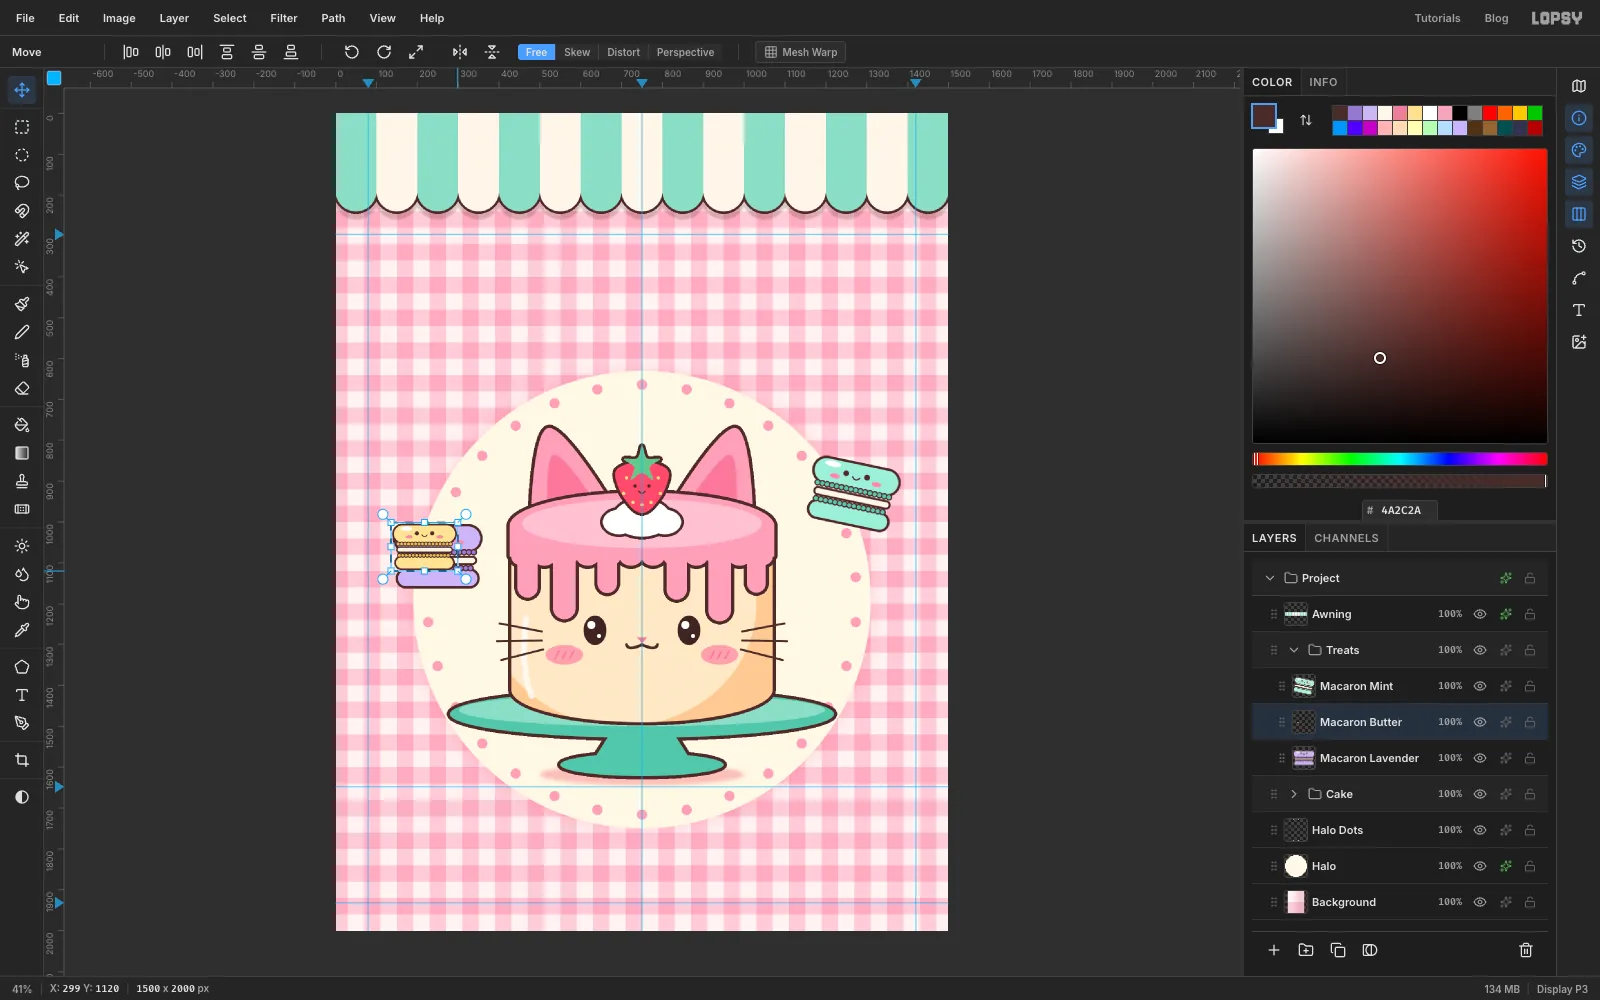
Macaron Mint, and with the Move tool (V) drag it to the right of the cake, centred at about1265, 930. - Draw a marquee around it, then switch back to the Move tool. A small round rotate handle sits just outside each corner of the box. Drag the top-right one clockwise to tilt the macaron about 12°. Press Enter, then Cmd+D.
- Click
Macaron Butter, draw a marquee around it and switch back to the Move tool. Hold Cmd and drag the bottom-right corner handle inward to scale it to about 72%. Press Enter and Cmd+D. Drag it down to the lower left, centred at about190, 1335, and tilt it 10° clockwise the same way. - Tilt
Macaron Lavender14° anticlockwise where it is.
- Press Cmd+D, click
-
Scale the hero down and make room
The cake needs a little more space below for the banner, so you'll shrink it and its halo together.
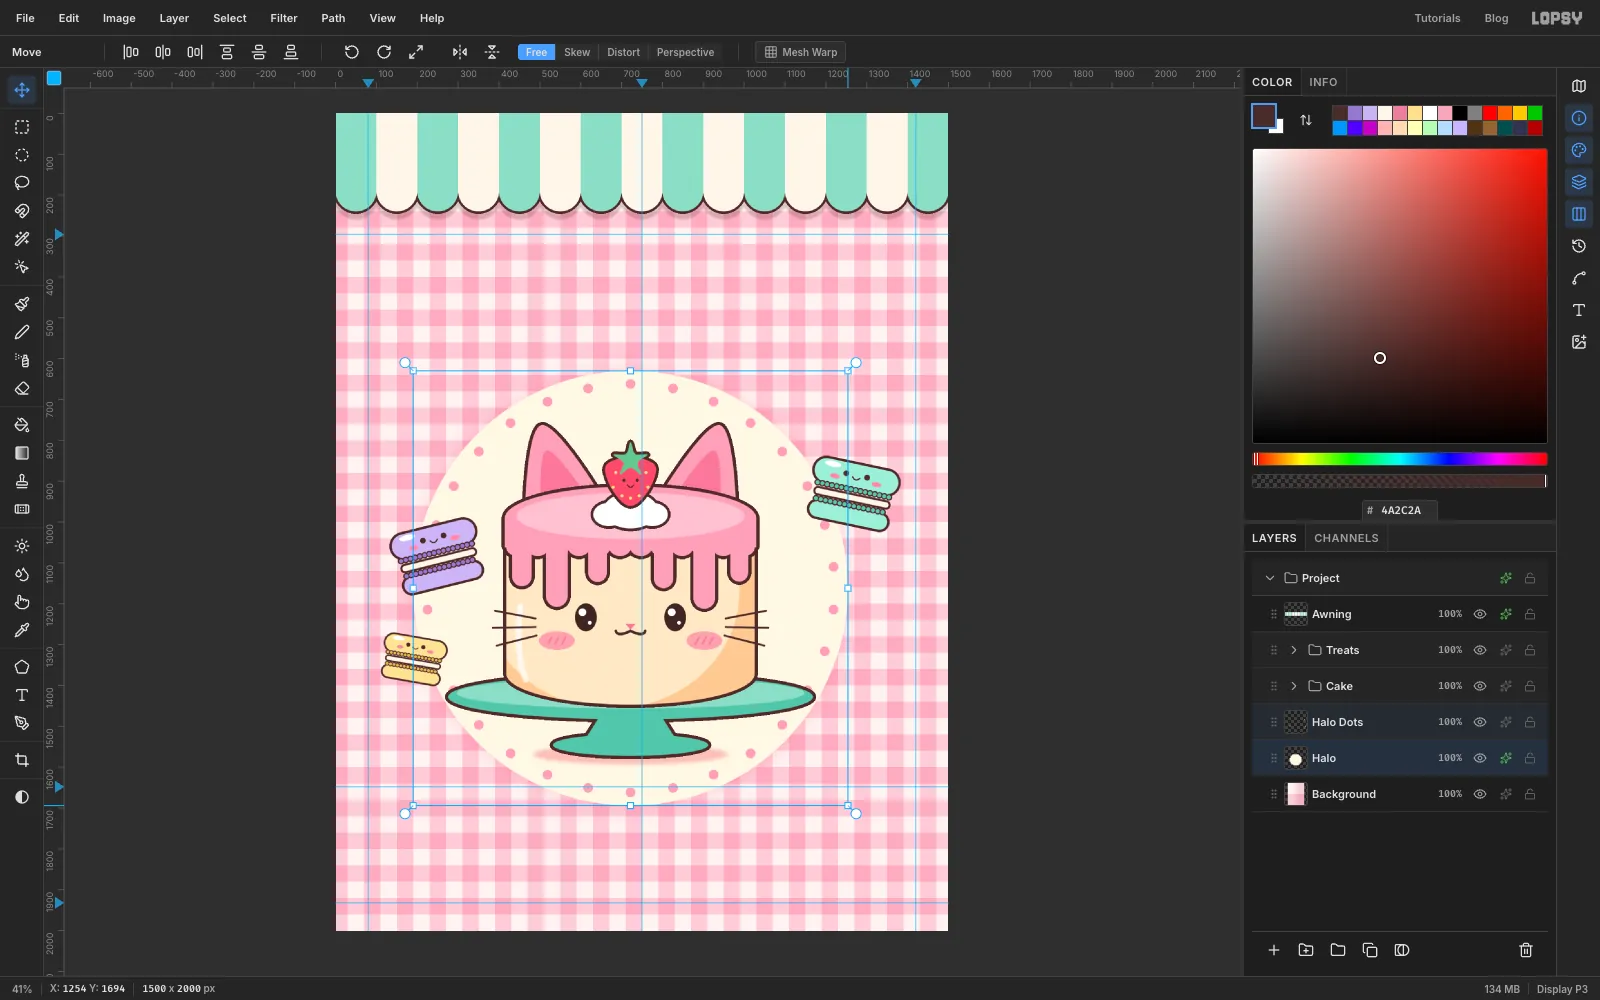
- Collapse both groups. Click
Haloand Shift-clickCakein the Layers panel, soHalo,Halo DotsandCakeare all selected. Make sure nothing is selected on the canvas. With the Move tool, one transform box goes around all three. - Hold Cmd and drag the bottom-right corner handle in to about 95%. Press Enter.
- Drag the three layers so the halo is centred on the 750 guide, with its centre at about y 1212. Then click the
Treatsgroup and drag it straight down about 22 px, so the macarons keep their places around the cake. - Click
Halo Dots. Delete the dots that the title, the banner and the paw cookie will cover: select520, 640to980, 742and press Delete, deselect, select500, 1638to1000, 1690and press Delete, deselect, then select1222, 1136to1272, 1184, press Delete and deselect.
- Collapse both groups. Click
-
Set the title in sticker type
- Click
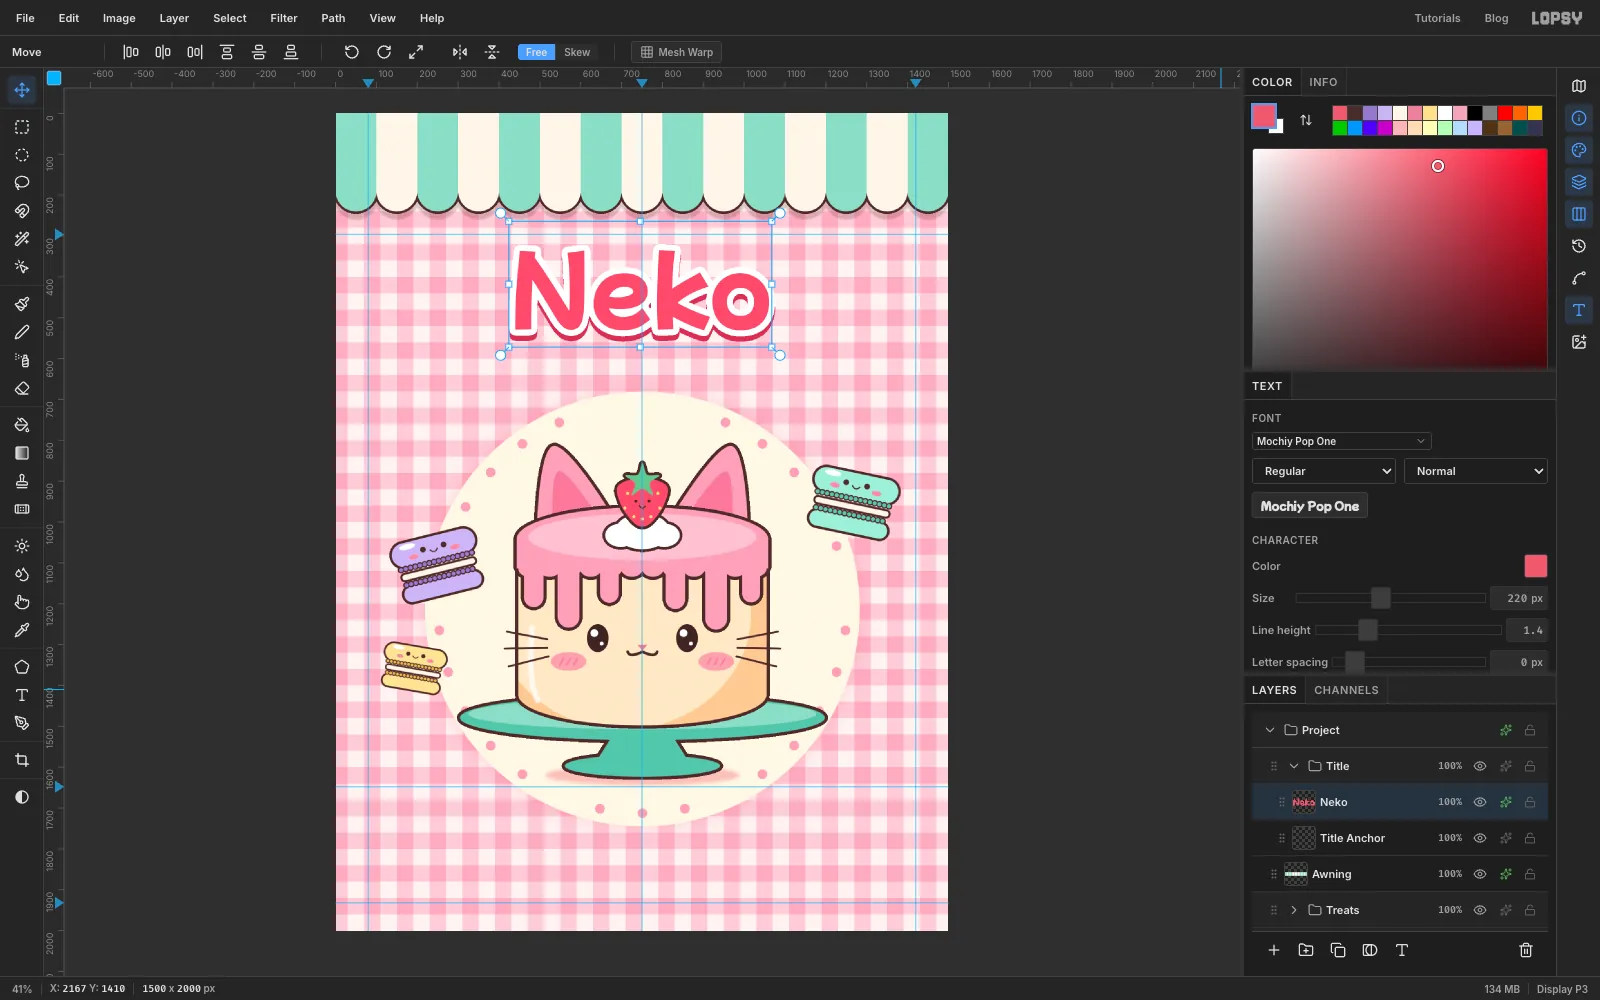
Awningand click New Group. Name itTitleand add an empty layer namedTitle Anchor. New text is created above whatever layer is active, and if that's a text layer, the Text options restyle it instead. A plain raster layer avoids that. - Pick the Text tool (T). Choose Mochiy Pop One in the font picker, set the size to
220and the colour to . Click in the empty space above the halo, typeNekoand press Tab to finish. - With the Move tool, drag it until it's centred on the 750 guide, with the middle of the letters at about y 432. Use the arrow keys for the last few pixels.
- Open its effects. Add a Stroke of
15in white, and a Drop Shadow with Offset X0, Offset Y13, Blur1and Opacity100in . The 1 px blur keeps the hard shadow's edge smooth.
- Click
-
Add the second line, the tagline and a tilt
- Click
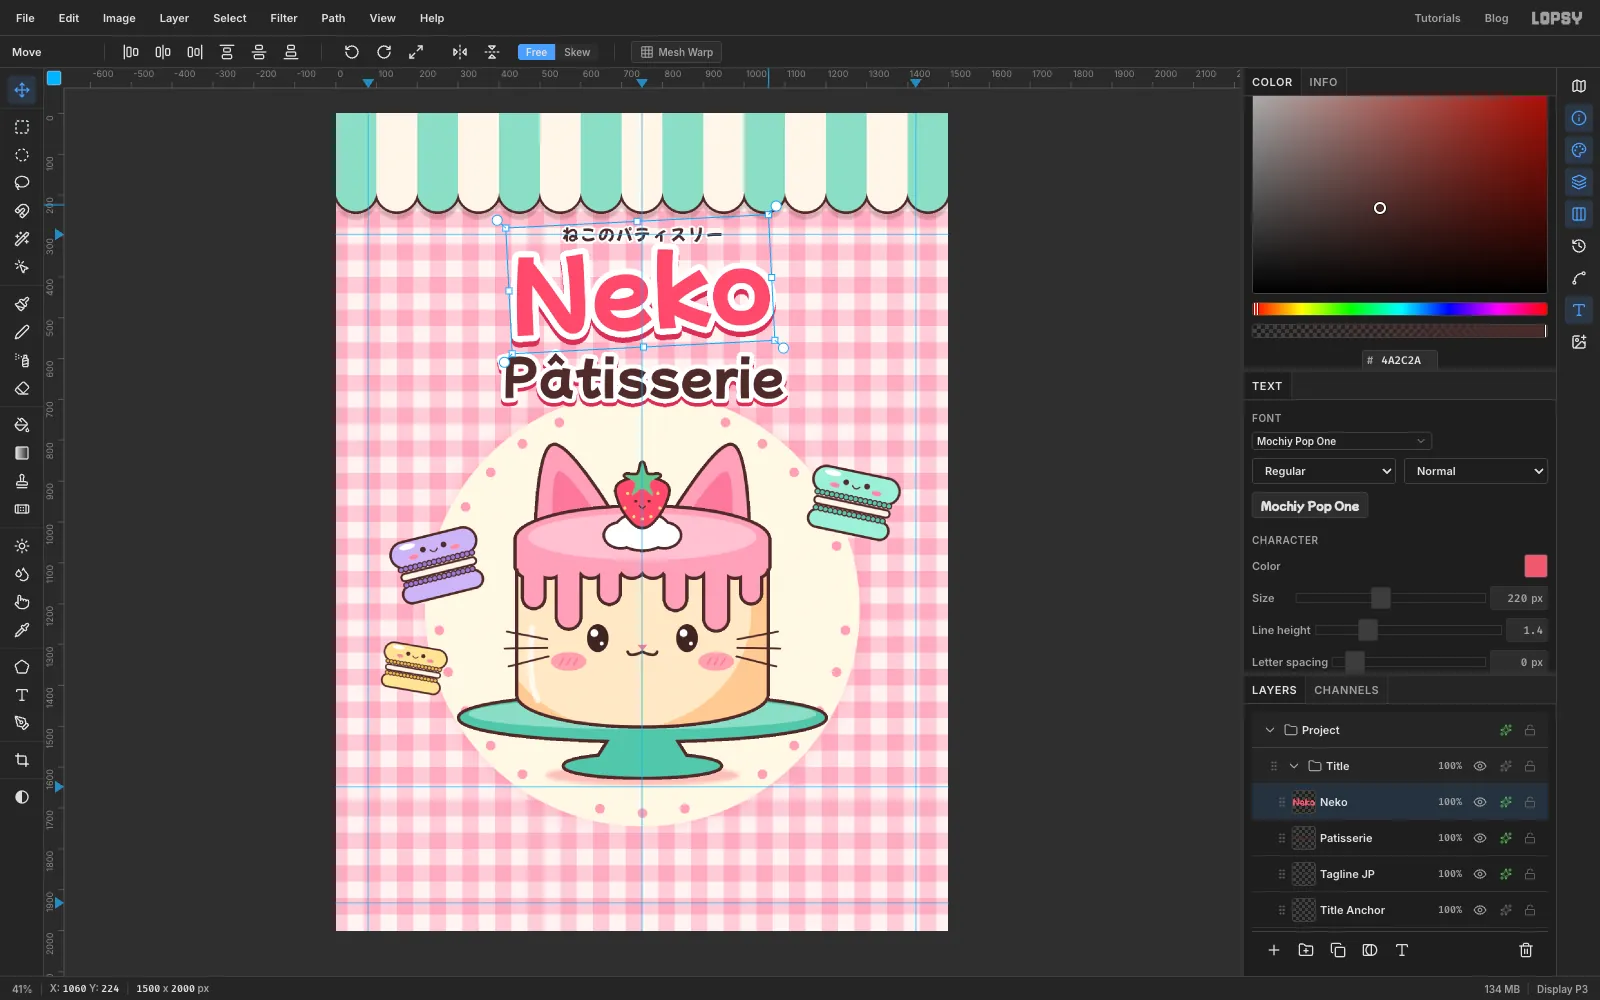
Title Anchor. With the Text tool, click belowNekoand typePâtisseriein Mochiy Pop One, size116, colour , letter spacing2. Rename the layerPatisserieand centre it belowNeko, at about y 642. Give it a white Stroke of11and the same crimson Drop Shadow with Offset Y9. - Click
Title Anchoragain. Click with the Text tool between the awning andNeko, and pasteねこのパティスリー("cat pâtisserie") at size40, letter spacing4, in . Rename itTagline JP, centre it on the 296 guide and give it a white Stroke of5so it stays readable on the gingham. - Click
Nekoand pick the Move tool. Live text gets its own transform box without a marquee. Drag the small round rotate handle just outside its top-right corner anticlockwise to tilt it about 3°, and press Enter. A slight tilt makes the sign feel hand-placed.
- Click
-
Make a speech bubble
- Expand
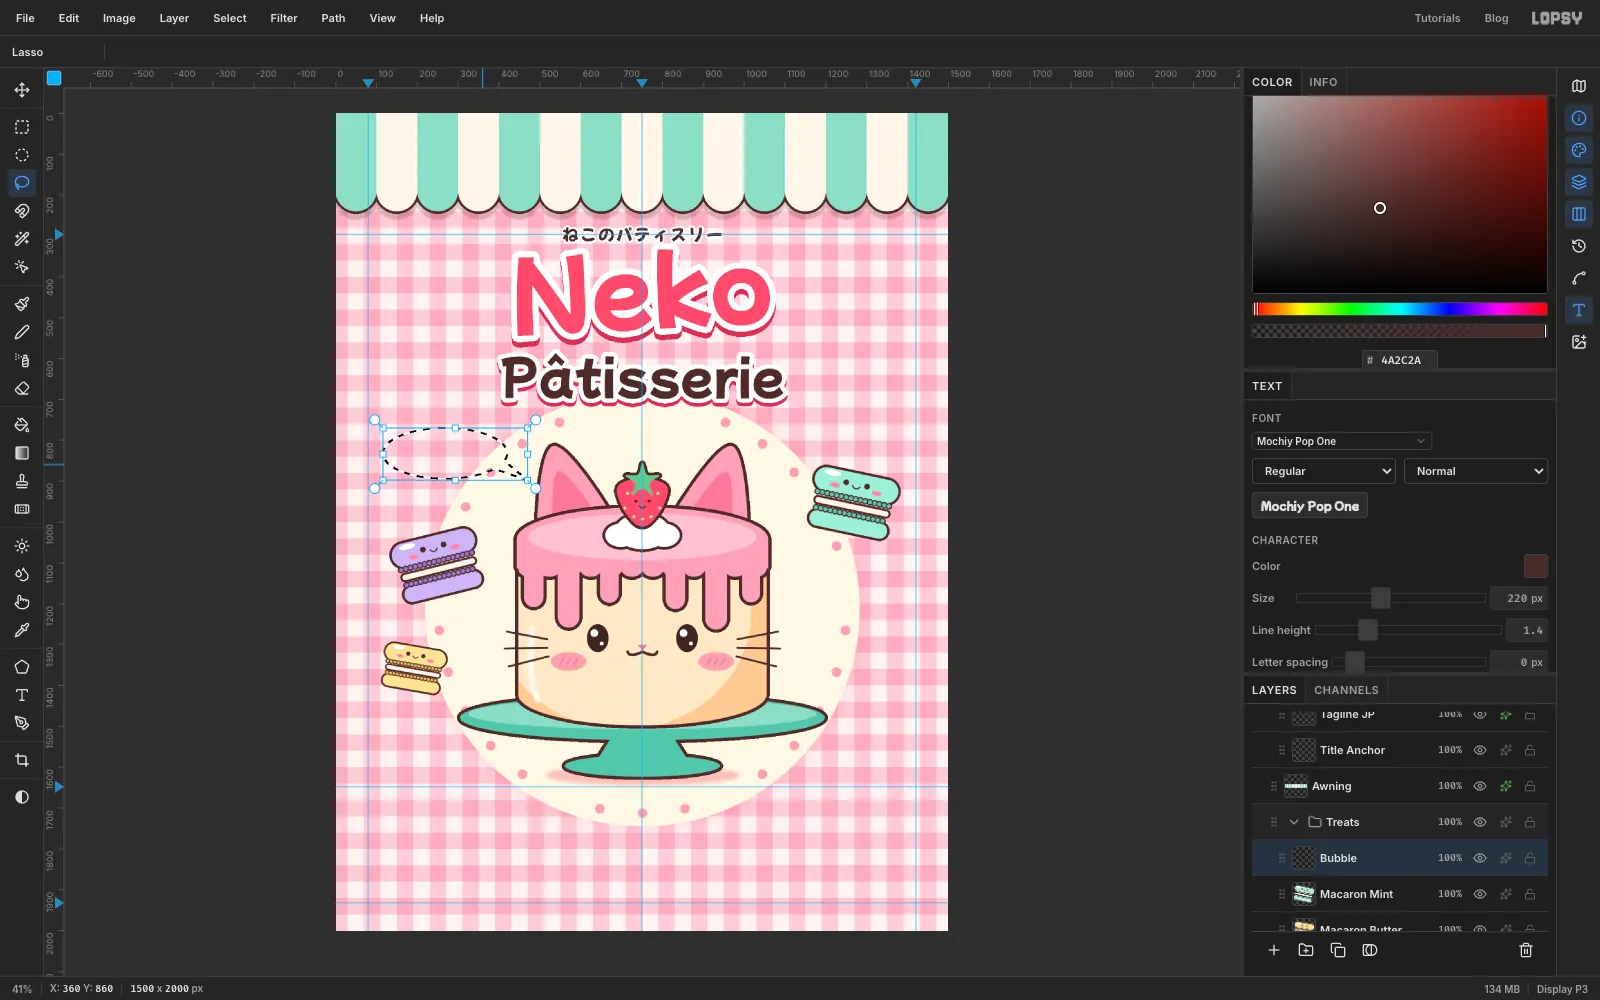
Treats, clickMacaron Mintand add a layer namedBubble. - With the Pen, click three corners for the tail:
360, 860, the tip at470, 898, and395, 835. Close it and use Path to Selection. The tip stops about 20 px short of the cat's ear, so the two outlines don't touch. - With the Elliptical Marquee, Shift-add the bubble from
116, 770to420, 894. - Fill with white, deselect and add a Stroke of
6in .
- Expand
-
Write "nyaa~♡" with a red heart
- Click
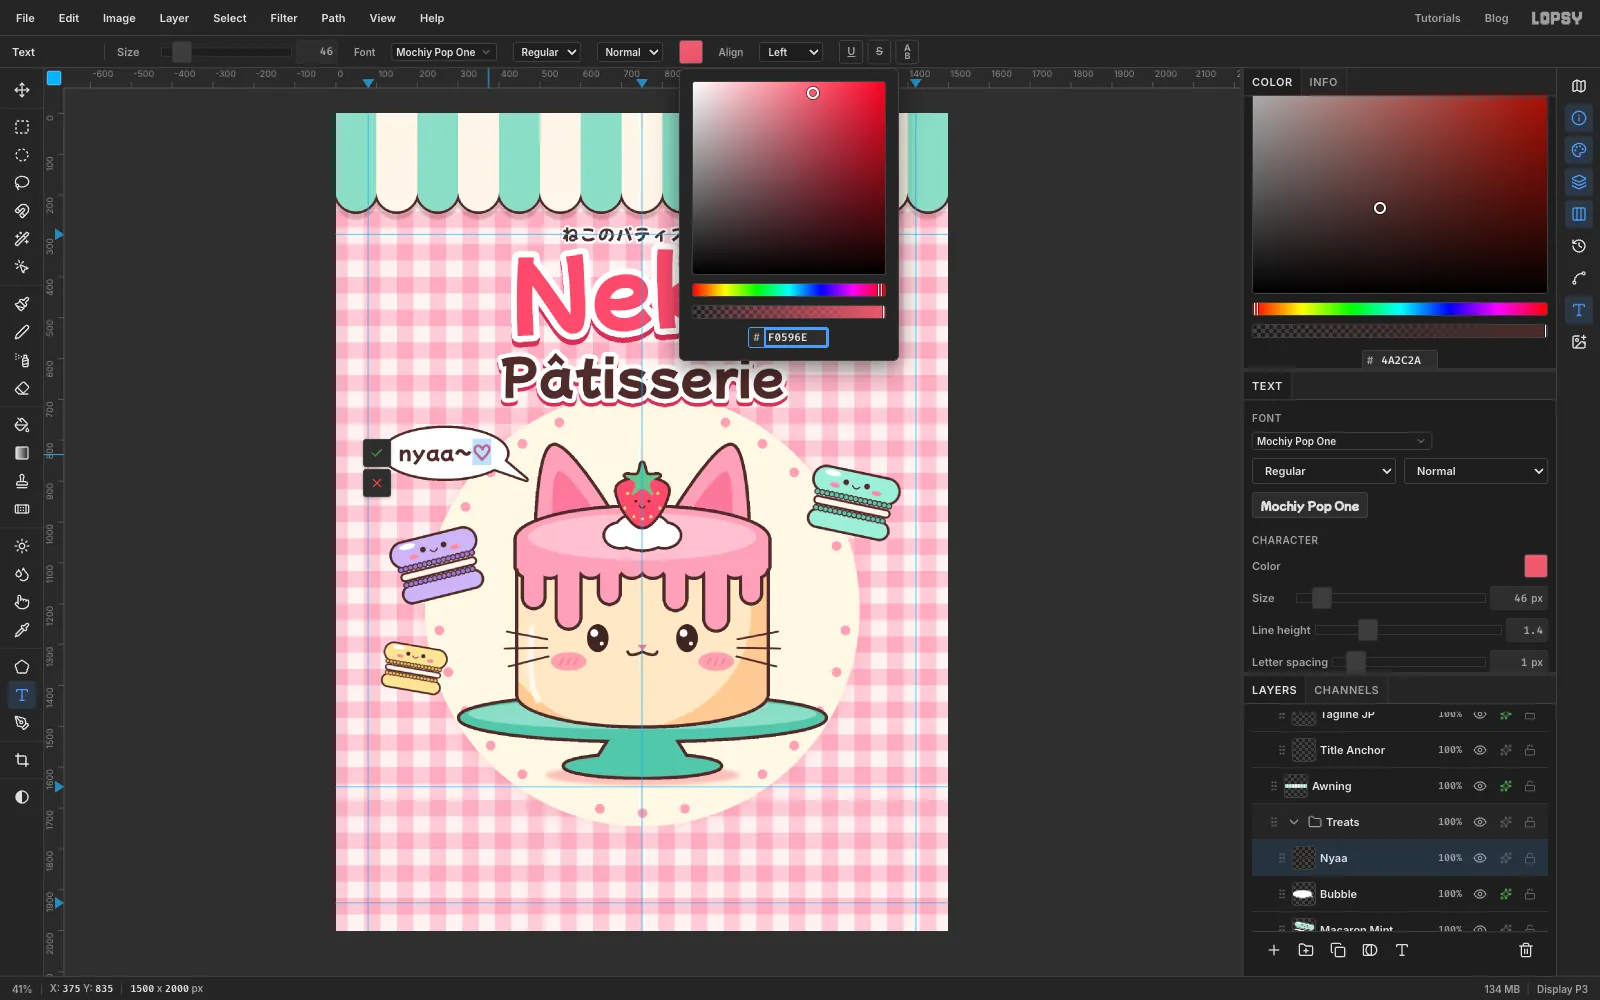
Bubbleand pick the Text tool. Set Mochiy Pop One, size46, colour . Click inside the bubble, typenyaa~and paste a♡after it (copy it from this page). Press Tab, rename the layerNyaaand centre it in the bubble. - With the Text tool, click into the text near its end and press End. Press Shift+Left once to select the heart.
- Click the Text color swatch in the options bar and type
F0596E. Only the heart turns red. Click the swatch again to close it, then click the Move tool to finish editing.
- Click
-
Bake a paw cookie
- Click
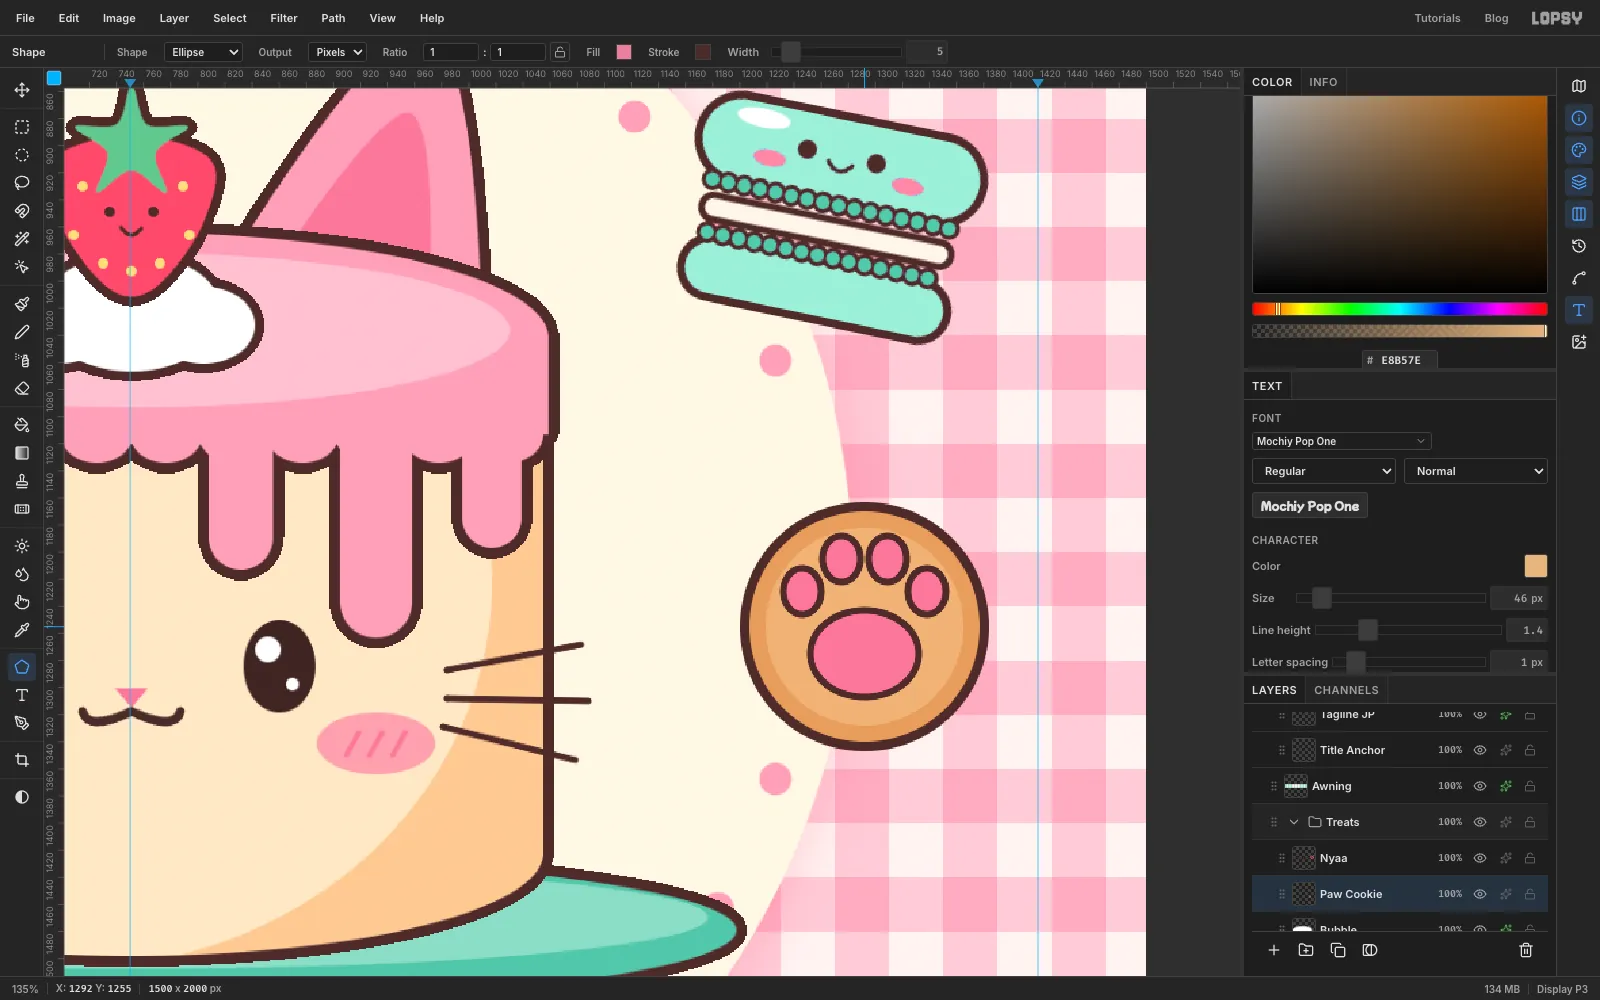
Bubbleand add a layer namedPaw Cookie. Select a circle from1200, 1163to1384, 1347and fill it with . Deselect, select1207, 1170to1377, 1340and fill it with , then deselect, select1219, 1182to1365, 1328and fill it with . These nested fills give a baked-in outline and a toasted rim without any effects. - Press Cmd+D. Pick the Shape tool with Shape set to Ellipse, fill , stroke , Width
5. - For the big pad, press at
1292, 1275and drag to1332, 1307. Add four toes, each pressed at its centre and dragged 14 px right and 17 px down: centres1246, 1229,1275, 1205,1309, 1205and1338, 1229.
- Click
-
Scatter sparkles and hearts
Two big sparkles frame the title. The rest are small, so they don't compete.
- Add a layer named
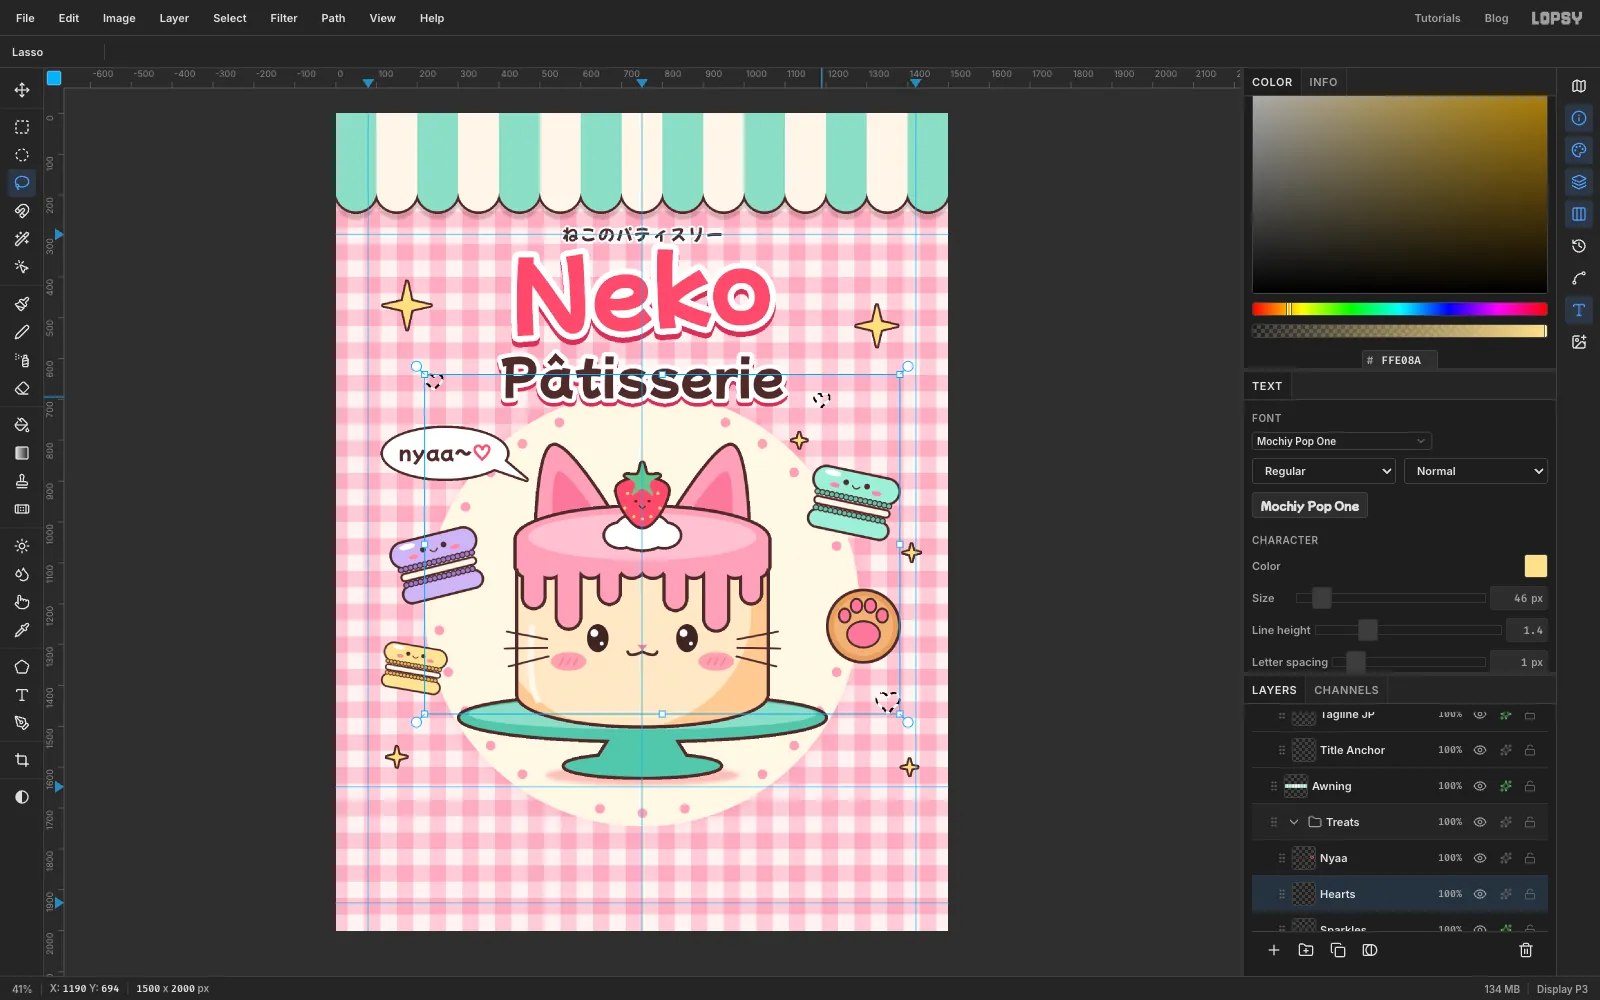
Sparkles. With the Pen, click eight points round a centre for a four-point sparkle: the four tips straight up, right, down and left, and between each pair of tips an inner corner about a quarter as far from the centre. Close the path, use Path to Selection and fill with . - Path to Selection replaces the selection, so draw and fill each sparkle in turn. Make the first two big, beside the title: about 120 px tall centred at
175, 470, and about 105 px tall at1325, 520. Then add four small ones, 40 to 50 px tall: by the right ear, right of the mint macaron, at the bottom left and at the bottom right. Deselect and add a Stroke of5in . - Add a layer named
Hearts. With the Lasso, draw a heart about 45 px wide left ofPâtisserie: start in the dip at the top, loop round the left bump, down to the point, and back up round the right bump. Shift-draw two more: a smaller one right of the title, and a bigger one, about 60 px wide, below the paw cookie. Fill with , deselect and add a Stroke of5in .
- Add a layer named
-
Cut the ribbon's tails
- Collapse
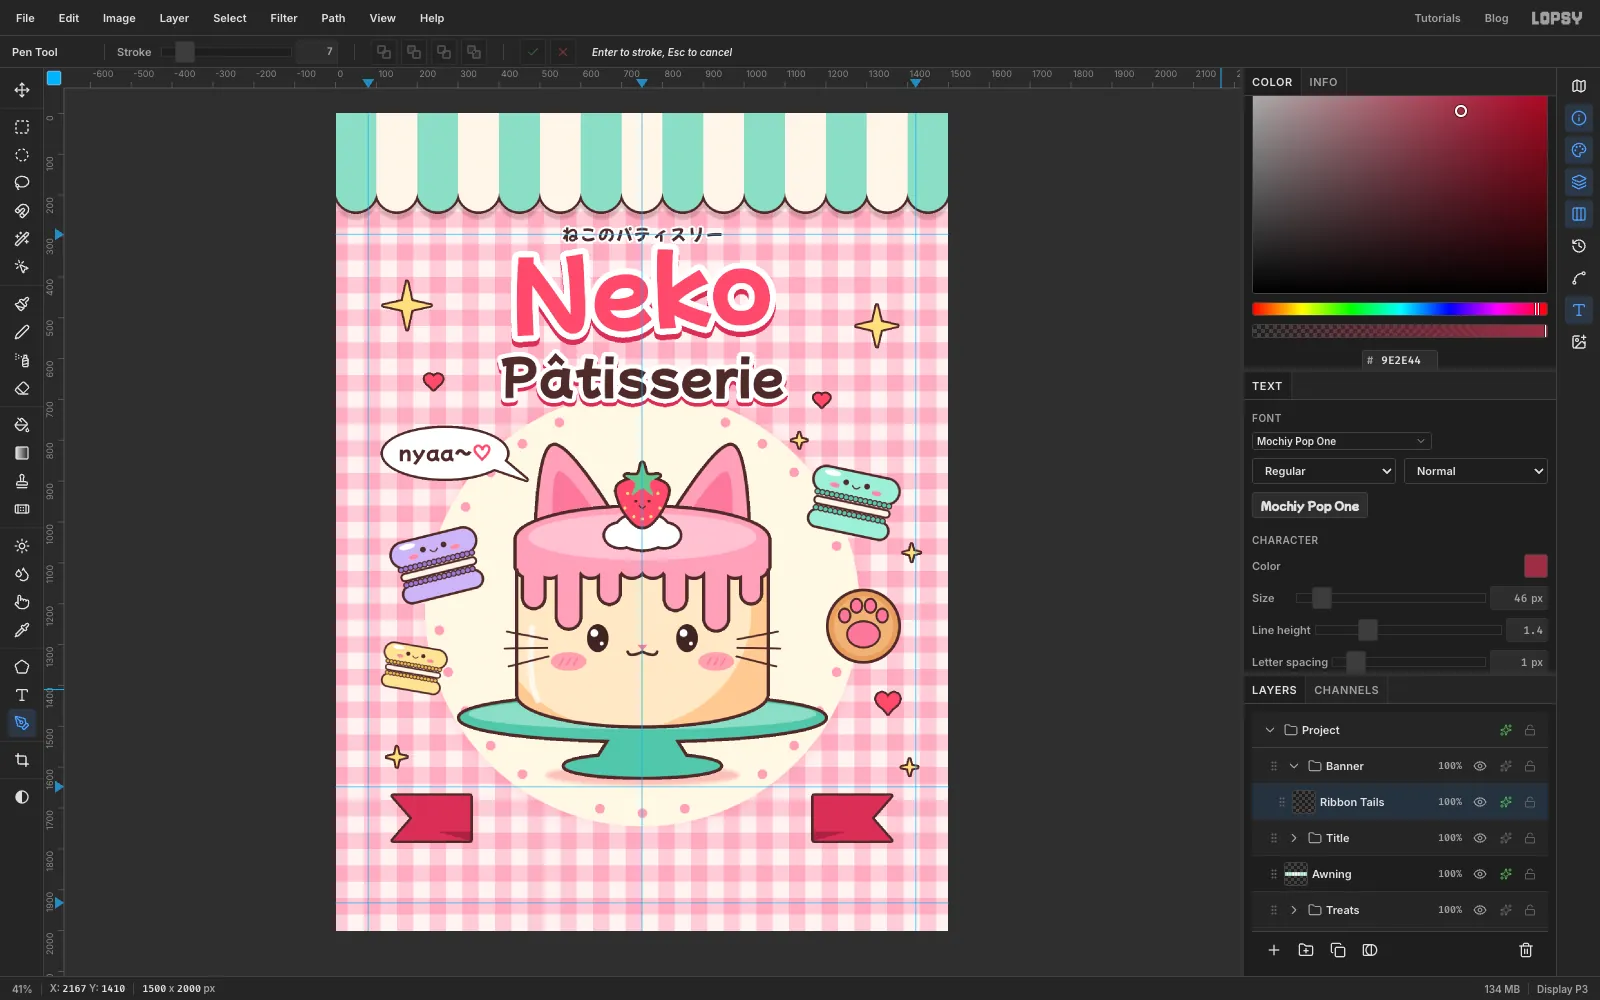
TreatsandTitle. ClickTitle, make a New Group namedBanner, and add a layer namedRibbon Tails. - With the Pen, click the left tail as five corners:
140, 1670,330, 1670,330, 1780,140, 1780, and a notch at188, 1725. Close it, make it a selection and fill with . Draw the right tail as its mirror image (x becomes 1500 − x) and fill it the same way. - Draw the two small folds where the band will tuck in, as triangles from
250, 1758to330, 1758to330, 1780and the mirror on the right. Fill them with the darker . - Deselect and add a Stroke of
6in .
- Collapse
-
Add the ribbon band and its stitching
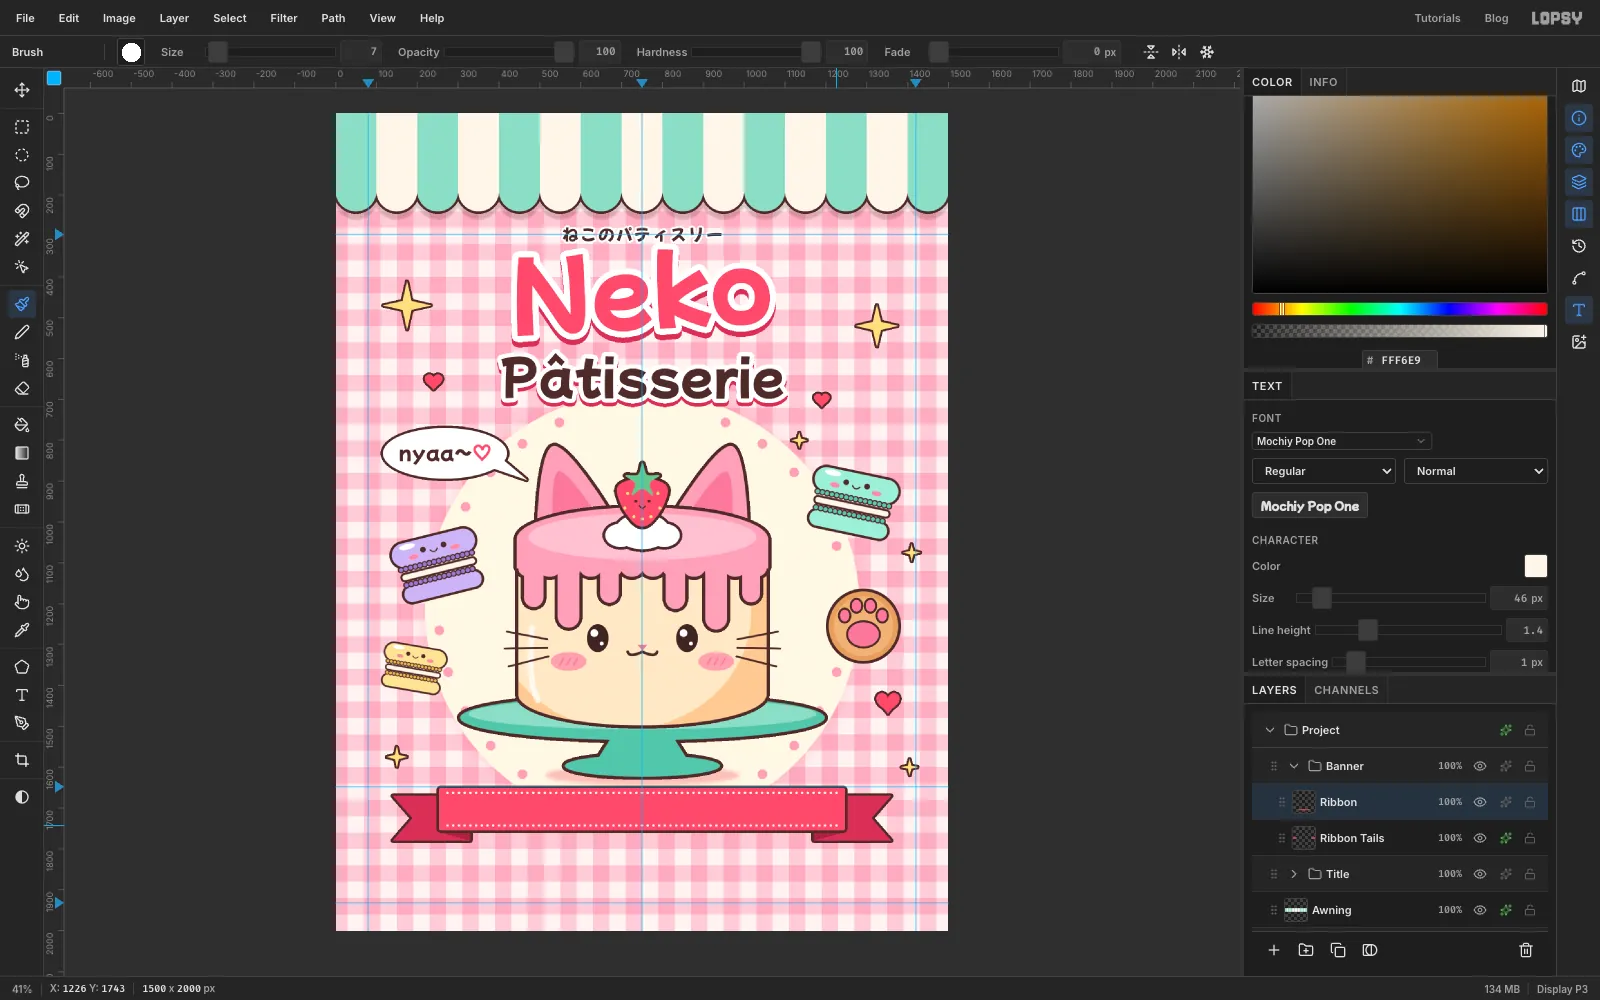
- Add a layer named
Ribbon. With the Shape tool set to Rectangle, fill , stroke , Width6, Corner Radius8, press at750, 1703and drag to1250, 1758for a 1000 × 110 px band. Its ends cover the inner ends of the tails. - For stitching, pick a hard Brush of size
7and set Spacing to260% in the Brushes window, so the dabs separate into dots. In , click at274, 1663and Shift-click at1226, 1663. Draw a second row the same way at y 1743. - With the Text tool, type
GRAND OPENING · NOV 22in Mochiy Pop One, size50, letter spacing4, colour . Centre it in the band, between the two stitch rows.
- Add a layer named
-
Add the info pill
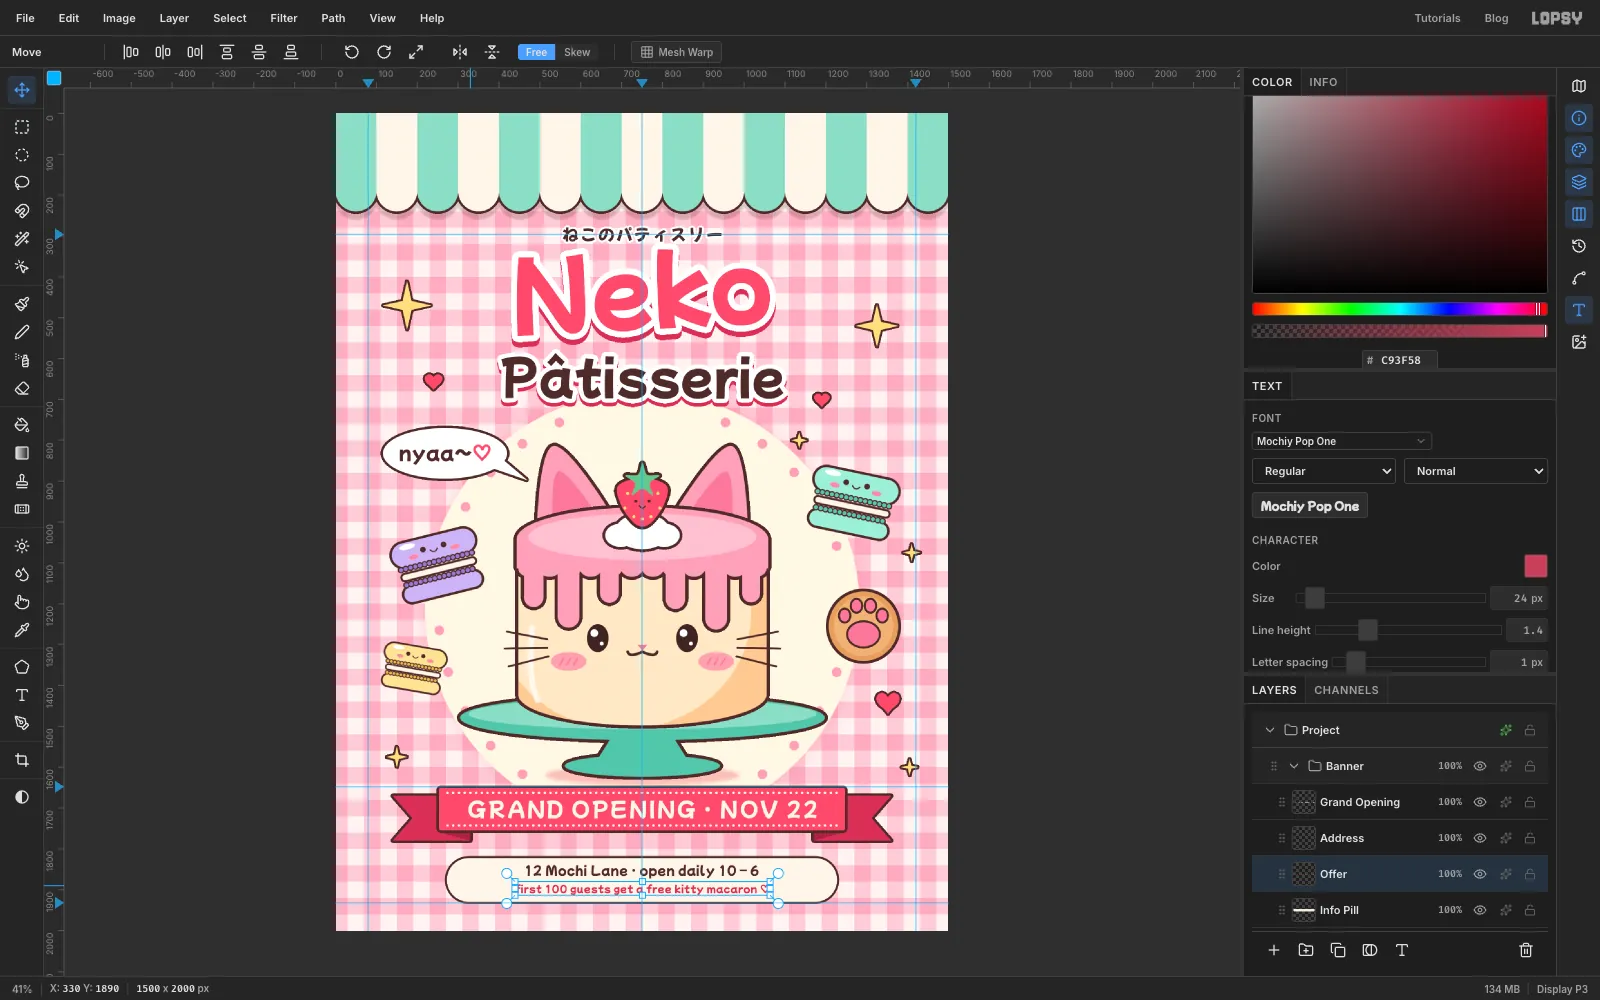
- Click
Ribbonand add a layer namedInfo Pill. Draw a Rectangle shape with fill , stroke , Width5and Corner Radius60, pressing at750, 1876and dragging to1230, 1932(960 × 112 px). The big radius rounds the ends into a pill. - Type
12 Mochi Lane · open daily 10 – 6at size30in and centre it at about y 1855. - Click
Info Pillagain and typefirst 100 guests get a free kitty macaron, then paste a♡at the end. Use size24in and centre it at about y 1899, so both lines have the same space above and below them.
- Click
-
Finish with a paper grain
- Collapse
Banner, click it, and add a layer namedGrain. It sits above everything. - Press Cmd+A, fill with and deselect.
- Choose Filter → Add Noise…, set Amount to
40, choose Mono, and click Apply. - Set the layer's blend mode to Overlay and drag its opacity down to 10%. Overlay leaves the mid-grey invisible, so only a faint printed texture shows over the flat colours.
Save your work with File → Save Project, and use File → Quick Export PNG for the finished poster. If you'd like to see how the layers and groups fit together, open the project from the Follow along box at the top of this page and click through the Layers panel.
- Collapse