Make a Kawaii Plant Poster with Shapes and Layer Effects
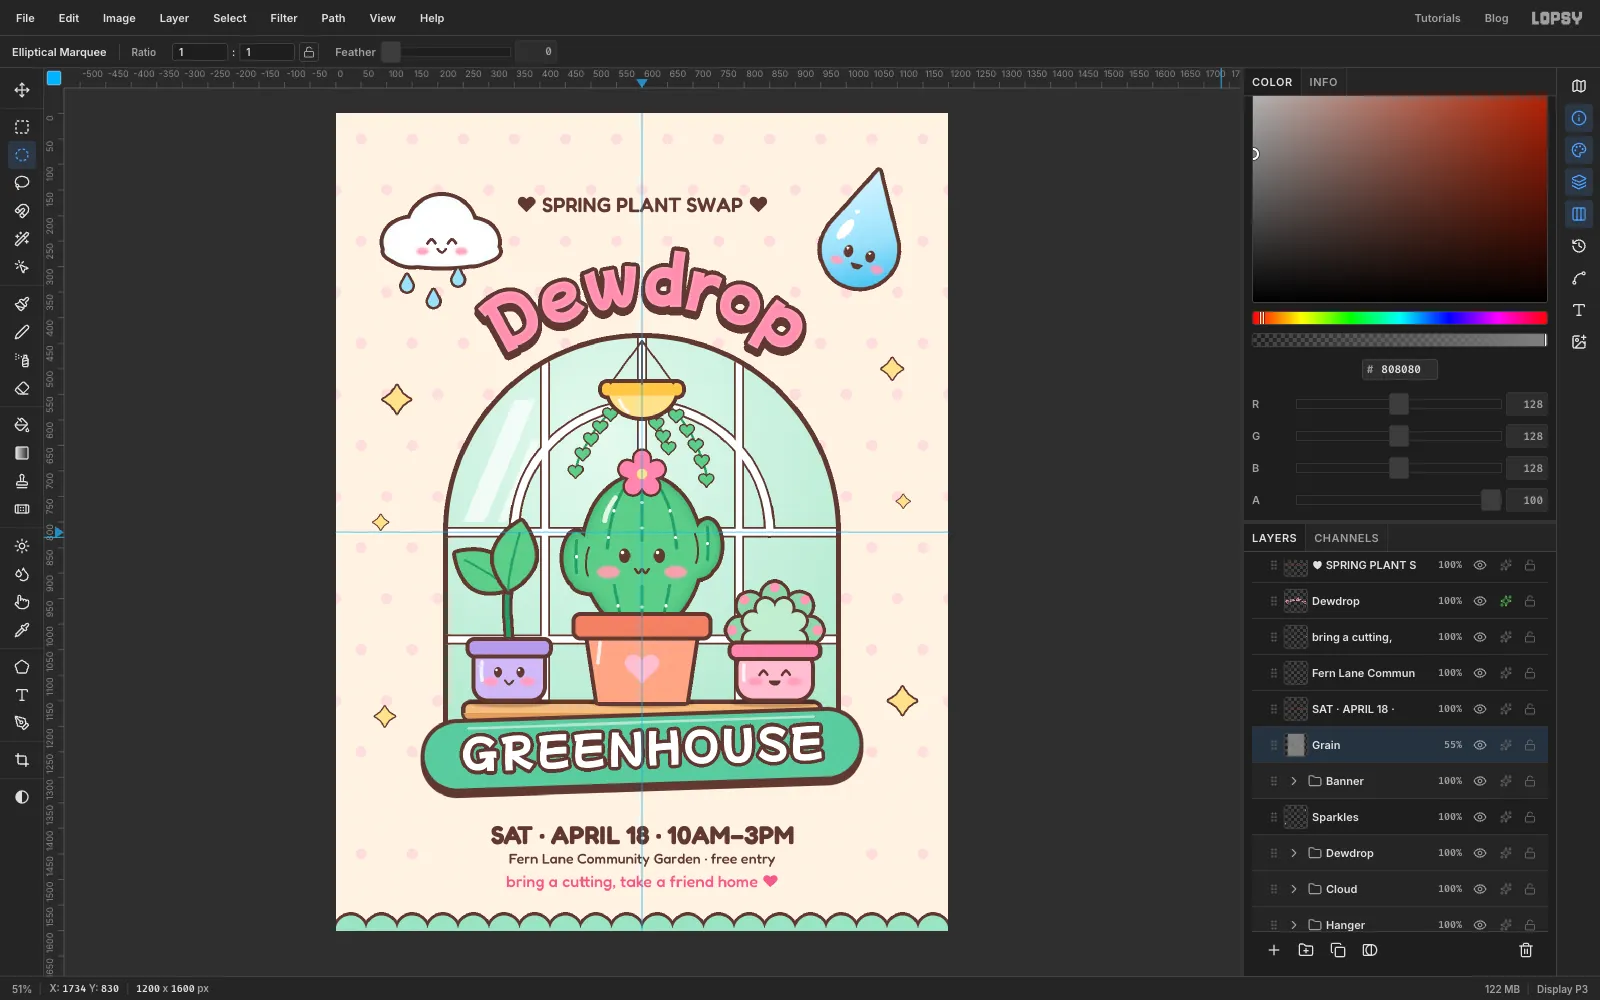
Draw a kawaii greenhouse poster with smiling potted plants. Use thick Stroke outlines, radial symmetry, a custom heart brush, text on a path and pattern fills.
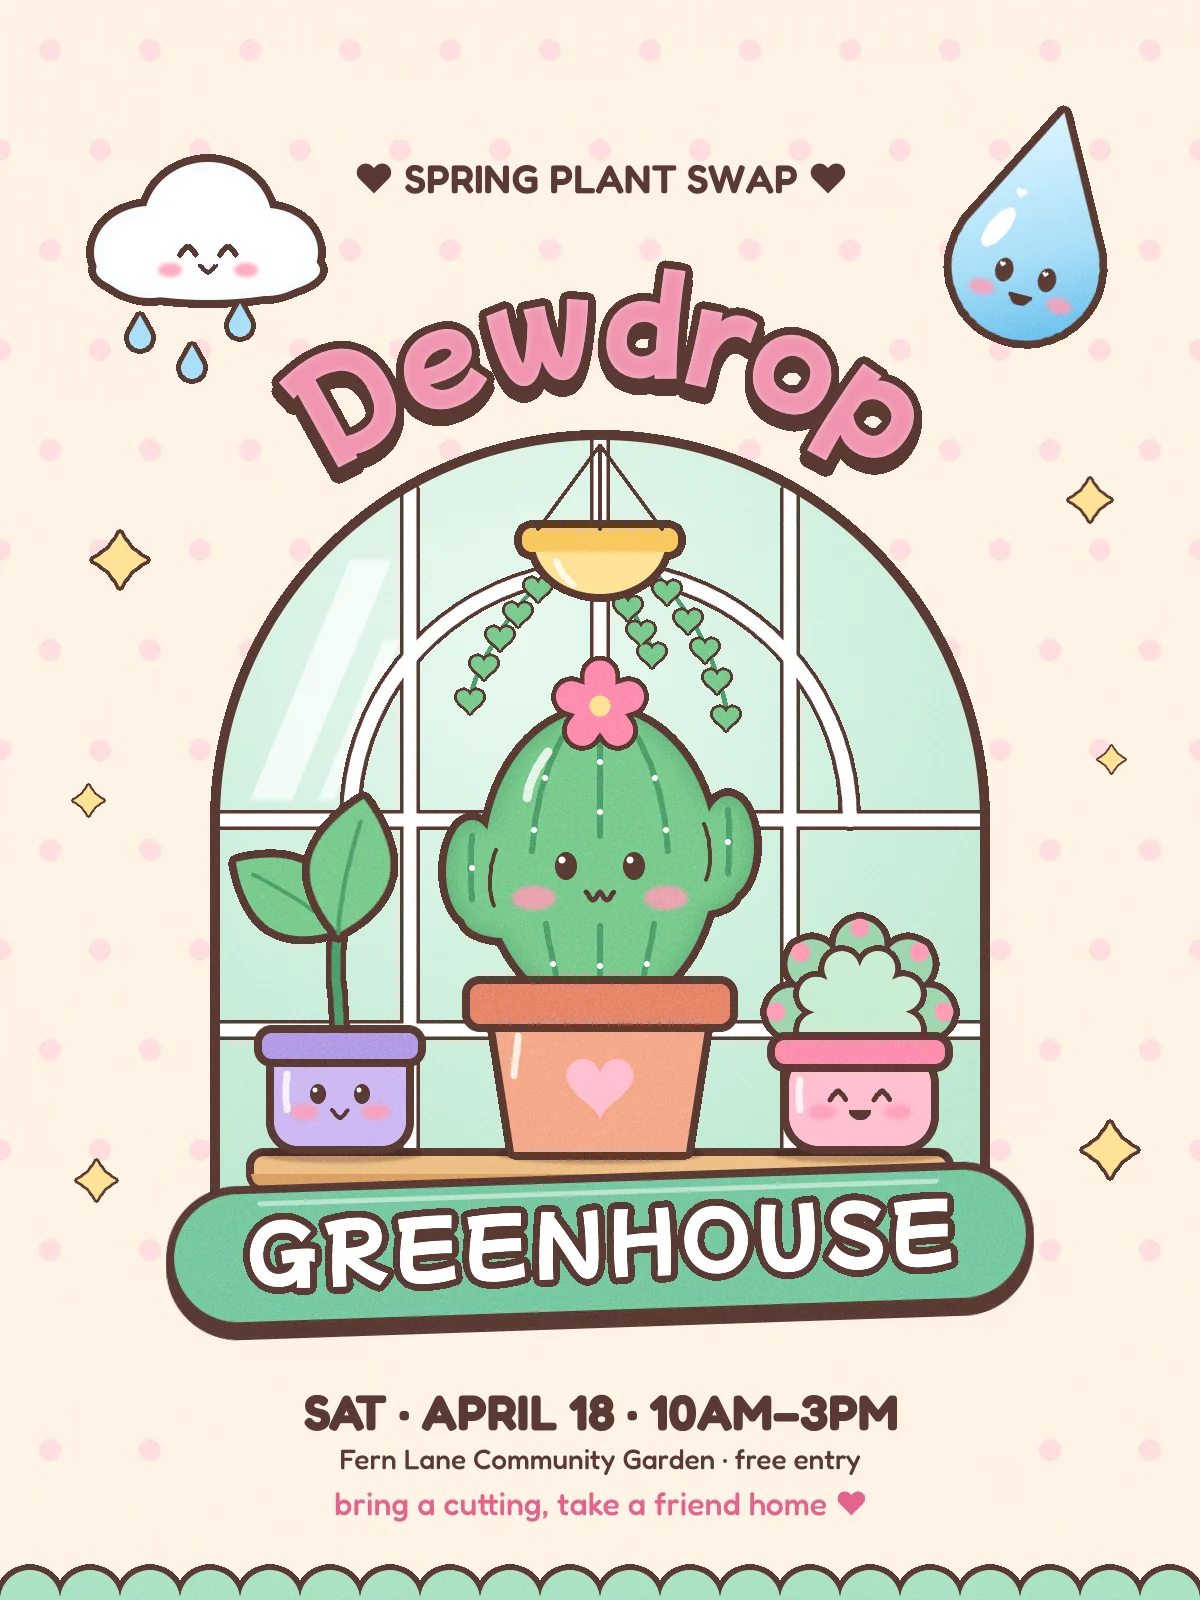
Kawaii ("cute") illustration comes down to a few rules: soft pastel colours, round shapes, one warm outline colour around everything, and little faces with rosy cheeks. In this tutorial you'll make Dewdrop Greenhouse, a 1200 × 1600 poster for a spring plant swap. You'll build a glass greenhouse and give it a cast of plant characters, then frame them with an arched title and a sticker-style banner.
Almost every shape is a selection filled with a flat colour. The kawaii look comes from three layer effects: Stroke for the outlines, Inner Glow for soft shading and Drop Shadow for a chunky sticker edge. Along the way you'll also use Pattern Fill, the Pen tool, Radial Symmetry, a brush you define yourself and text bound to a path.
Name your layers as you go. The finished file has about 60 of them, sorted into groups, one per character.
The palette:
-
Paper
-
polka dots
-
Outline
every outline, face and shadow
-
Glass
-
mint hem
-
banner
-
Leaf
-
leaf dark
-
cactus shade
-
succulent
-
Terracotta
-
rim
-
wood
-
Pink
-
blush
-
bubblegum
-
berry
-
Lavender
-
butter
-
Sky
-
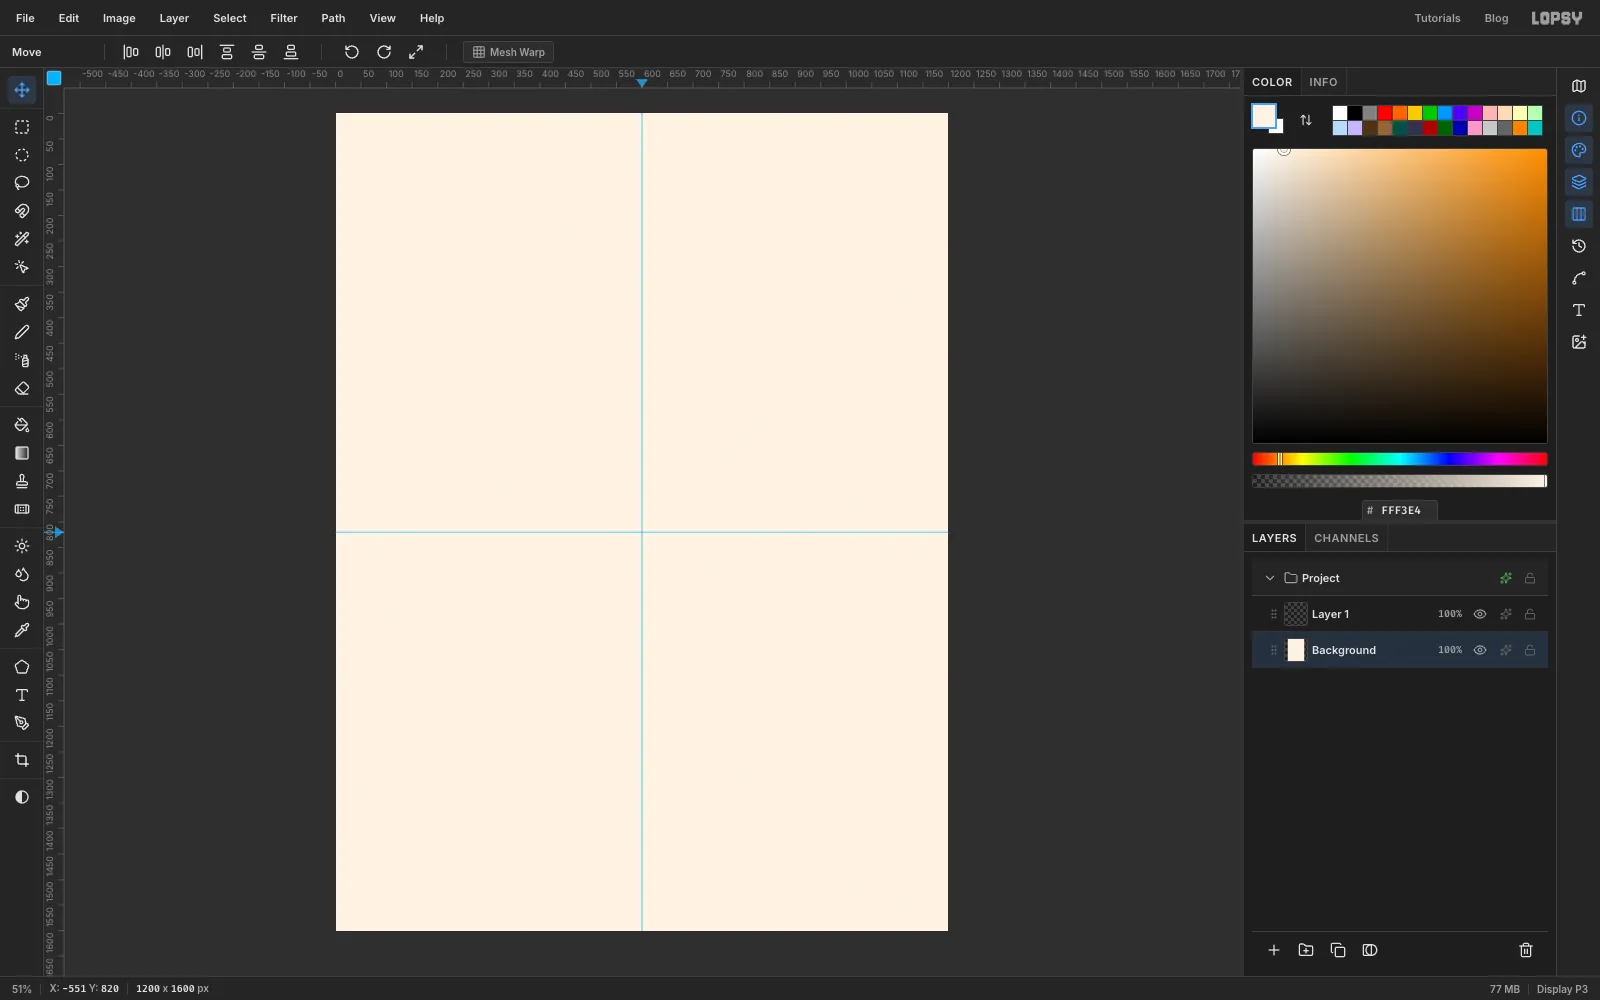
Start a cream canvas with two guides
Open Lopsy. In the New Document dialog, choose Pixels, type
1200×1600and click Create.Click the Background row, set the foreground colour to in the Color panel and choose Edit → Fill.
Click the top ruler at 600 to drop a vertical guide down the centre. Then click the left ruler at 820 for a horizontal guide. That line is where the greenhouse's round roof meets its straight walls, and you'll come back to both guides often.
-
Make a polka-dot tile
Add a layer called
Dot Tile. Pick the Shape tool and set Shape to Ellipse, Output to Pixels, the fill to and the stroke to none (click the stroke swatch, then Remove stroke).A click without a drag opens the Shape Size dialog, and the new shape is centred on the spot you clicked. Watch the X / Y readout in the status bar and click about 50 px in from both the top and left edges, then type
22×22. The dot now sits in the middle of the canvas's top-left 100 px square.With the Rectangular Marquee, select exactly that 100 × 100 px square, from the canvas corner to 100, 100 on the readout. Choose Edit → Define Pattern, then deselect with Cmd+D and delete the
Dot Tilelayer. The pattern is saved, so you don't need the layer any more.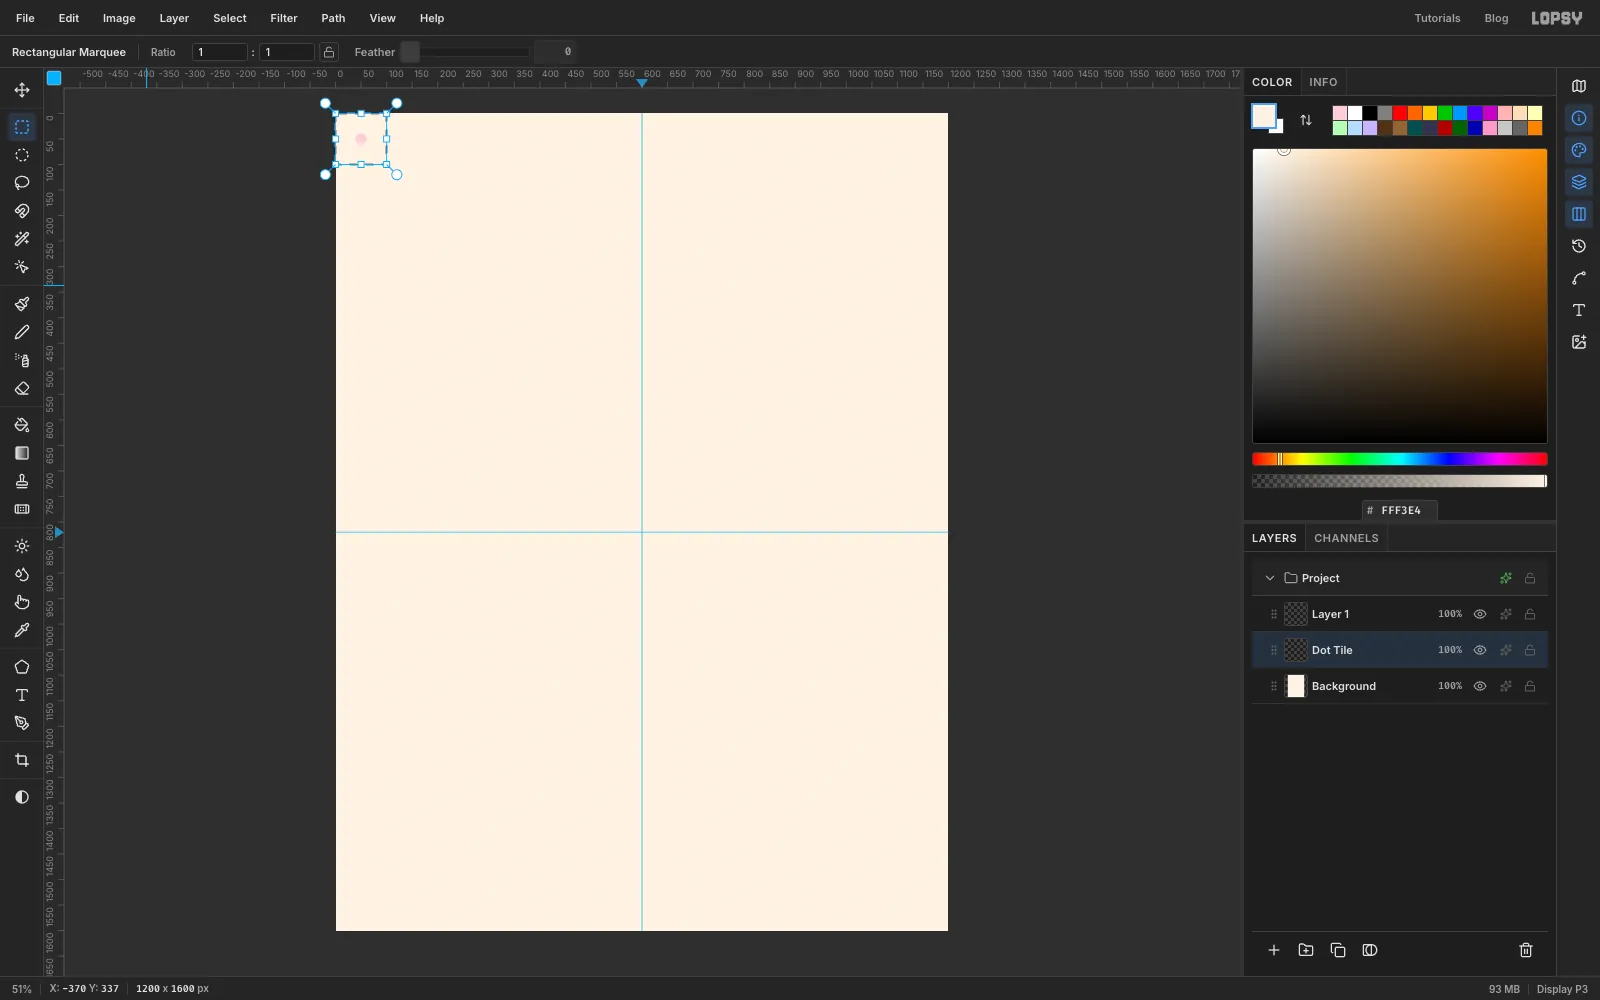
-
Fill the background with staggered dots
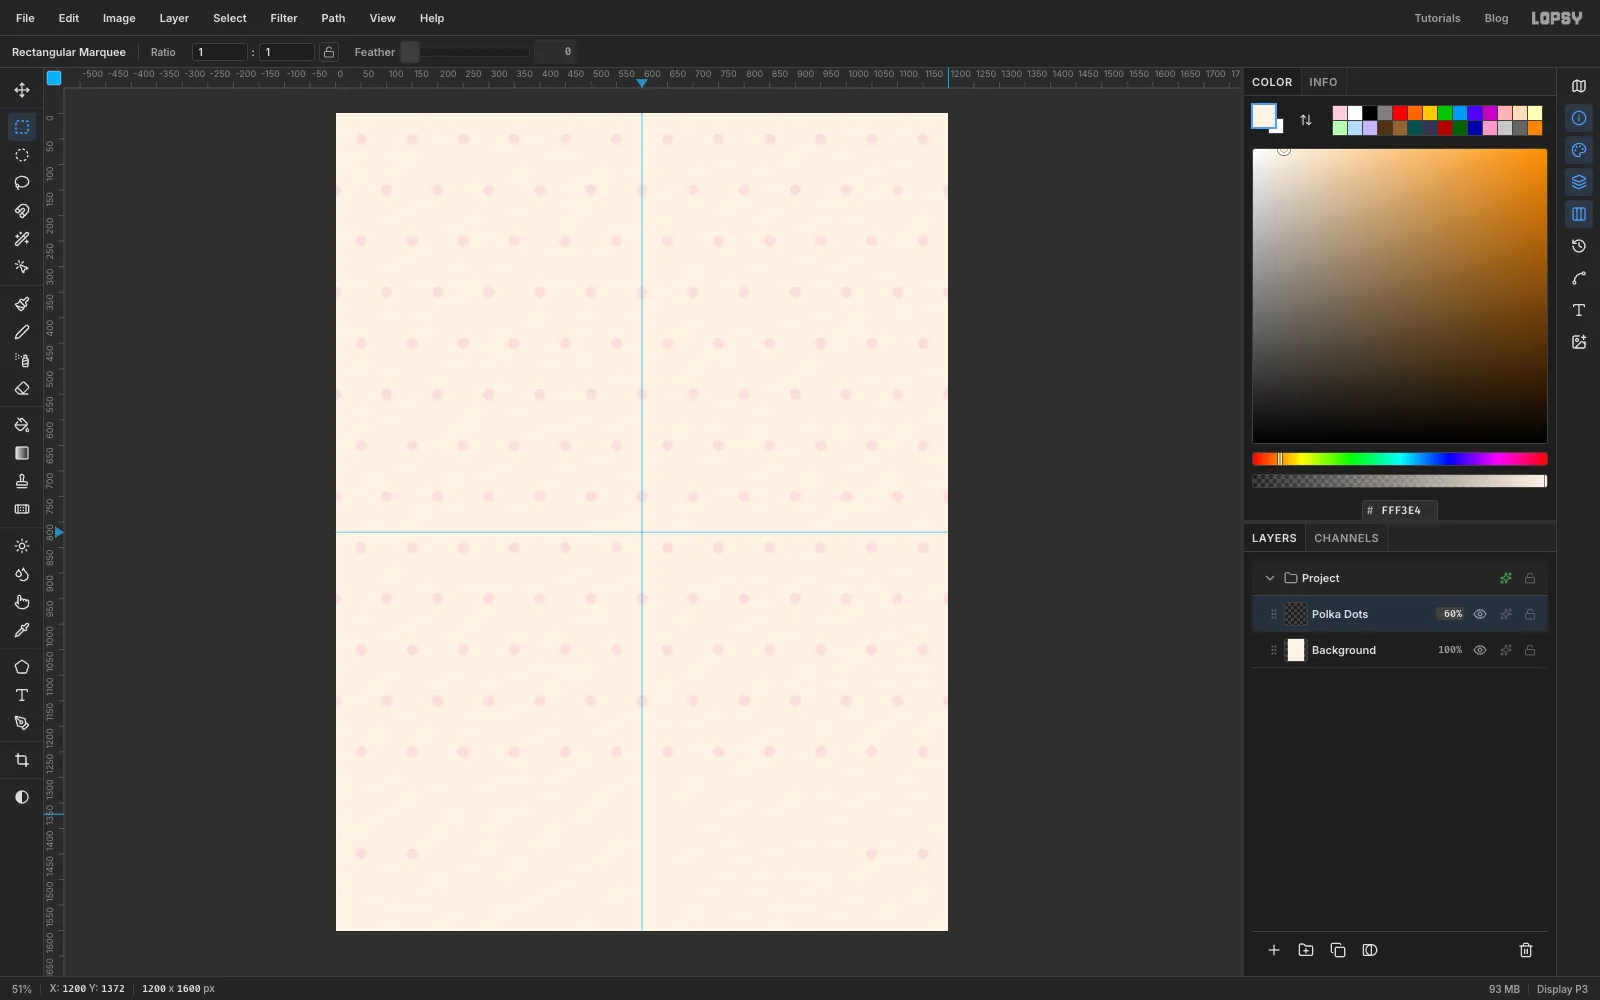
Click the empty
Layer 1and rename itPolka Dots. Choose Edit → Fill with Pattern…, pick your dot pattern and set Row Stagger to50%. Every other row then shifts by half a tile, which gives the classic polka-dot layout. Click Apply.A few clean-ups keep the dots out of the way of the text later. Marquee the bottom row of dots and press Delete. Delete the row about 250 px above the bottom too, because it would peek out under the banner. In the row between those two, delete everything except the dots at the far left and right, which clears space for the date line. Finally, lower the layer's opacity to 60%.
-
Add a scalloped hem
Scallops are another pattern. Add a layer called
Scallop Tile. With the Shape tool, set the fill to , click 30 px in from the left edge and 40 px down from the top, and make a60×60circle.Marquee the 60 × 40 px strip at the very top-left corner of the canvas. Only the top half of the circle is inside it. Choose Edit → Define Pattern, deselect and delete the layer.
Add a layer called
Scallops. Marquee a 40 px band across the full width at the bottom of the canvas and choose Edit → Fill with Pattern… with the new scallop pattern. Deselect, open the layer's effects (the sparkle icon on its row) and turn on Stroke with the colour and a Width of6.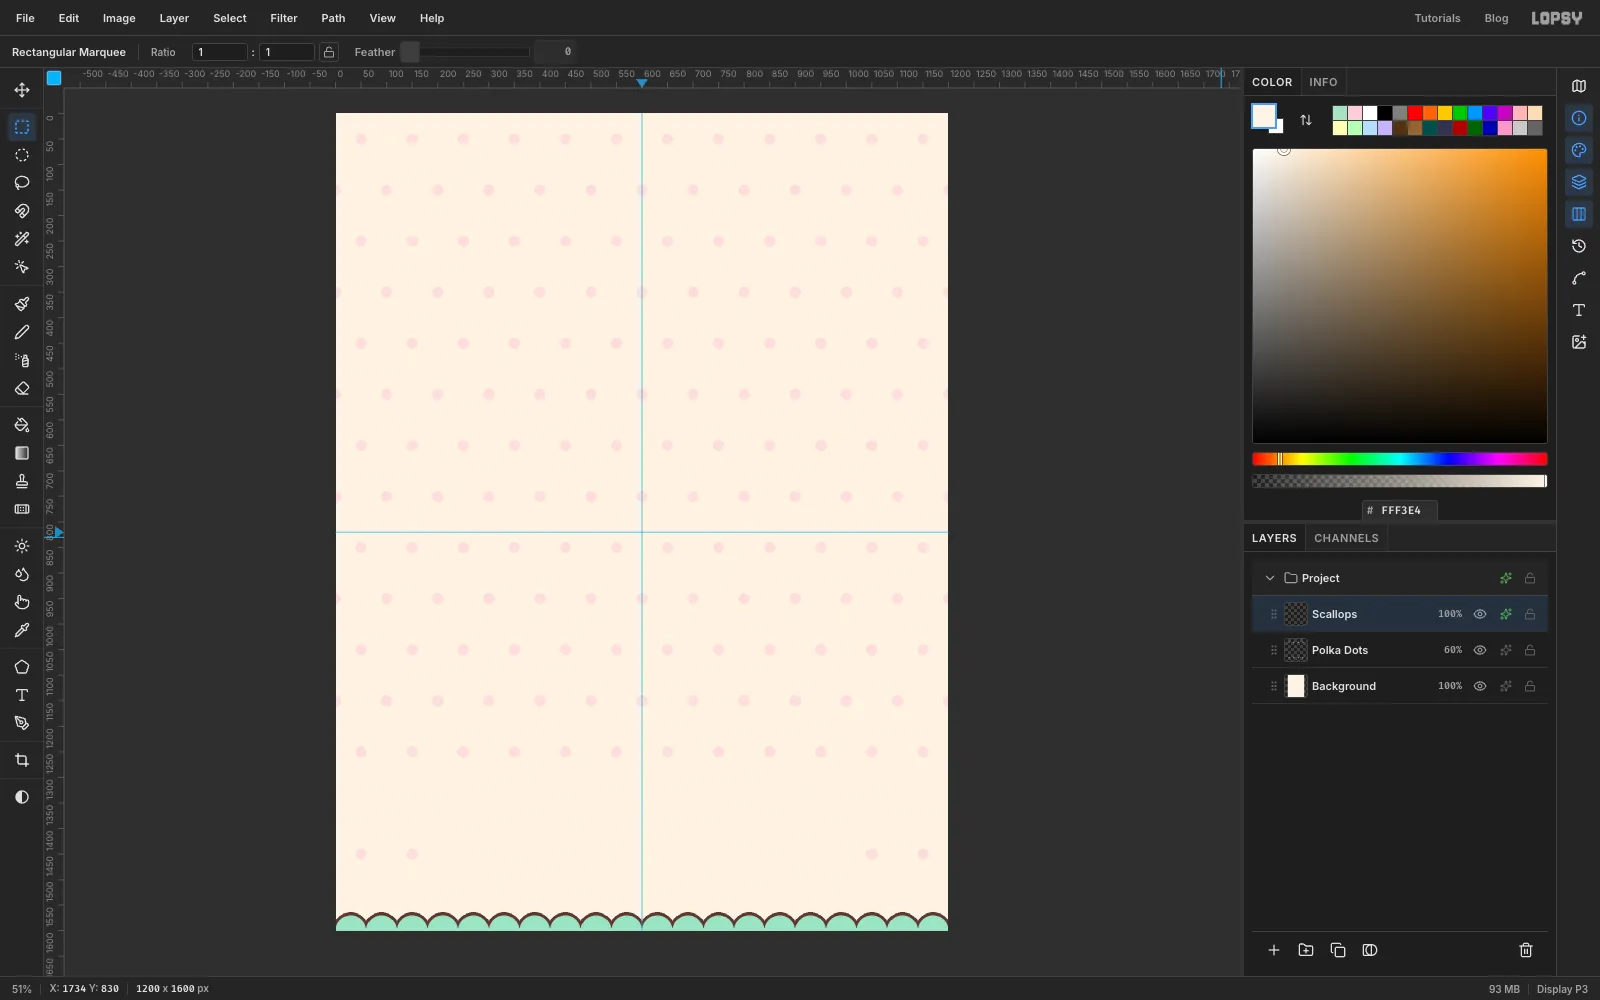
-
Select the greenhouse arch
Add a layer called
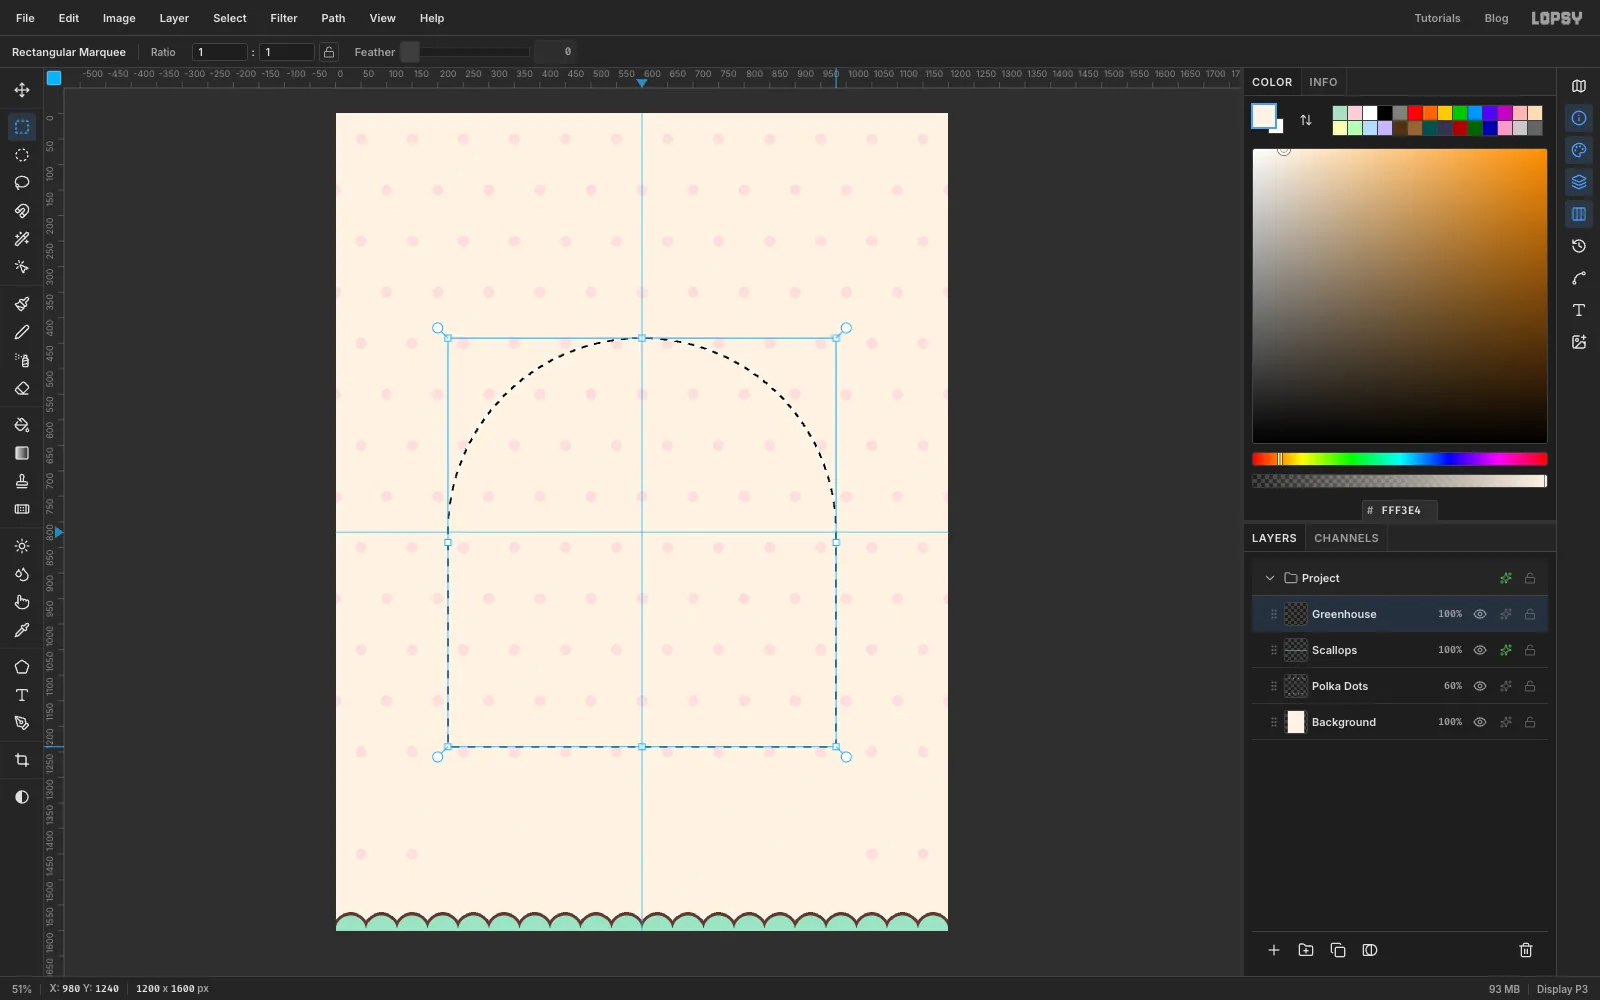
Greenhouse. Pick the Elliptical Marquee. Marquees drag from corner to corner, so start 380 px left of the centre guide and 380 px above the horizontal guide, and drag down and right until the readout shows a 760 × 760 circle. Its middle lands exactly on the cross where your guides meet.Now switch to the Rectangular Marquee, hold Shift and drag a rectangle the same width as the circle. Start where the circle's left edge meets the horizontal guide, and end below its right edge, about 360 px above the bottom of the canvas. Shift adds the rectangle to the circle, so you get one arched-window selection.
-
Fill the glass and outline it
Keep the selection. Pick the Gradient tool, set the type to Radial and click Advanced…. Use two stops, and , and click Done. Drag from a little up and left of the arch's centre out to its bottom-right corner. Because the selection is active, the gradient stays inside the arch.
Deselect, open the layer's effects and turn on Stroke in with a Width of
10. This is the thickest outline in the piece, because the greenhouse frames everything else.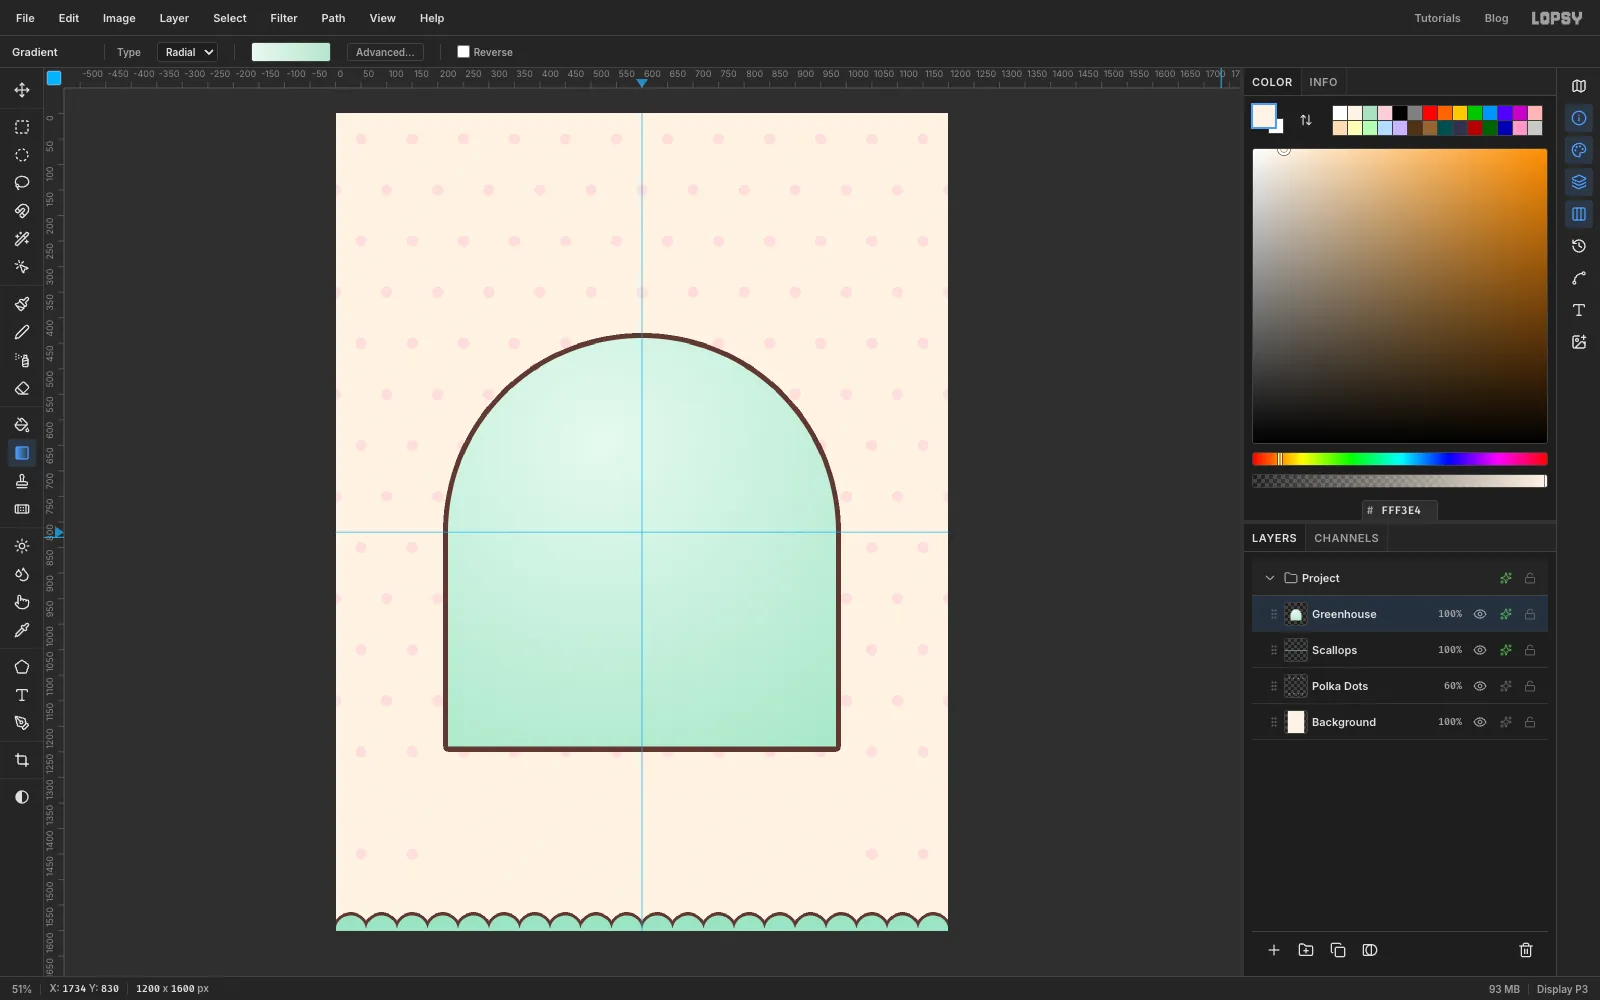
-
Add the glass shine and window bars
First add the glass shine. Add a layer called
Shineand, with the Lasso, draw a long slanted band in the upper-left pane. Hold Shift and draw a thinner band beside it, then fill both with white. Deselect, set the layer's blend mode to Screen in the effects panel and lower its opacity to 70%.Next, add a layer called
Glazing. Pick the Brush, set Size14and Hardness100, and set the foreground to white. Click above the roof on the centre guide, then Shift-click below the floor of the greenhouse to paint a straight bar. Add two more vertical bars halfway between the centre and each wall. Then do the same horizontally, once along the spring-line guide and once halfway between it and the floor. Let the bars run past the frame, because you'll trim them in the next step.For the curved bar, keep
Glazingas the active layer and pick the Pen tool and set Stroke to14in the options bar. Click-drag three anchors along an arch about two thirds the size of the roof. Start on the spring-line guide on the left, put one at the top and finish on the guide on the right. Drag each one's handle along the curve. Press Enter to stroke the path in white.Turn on Stroke for the
Glazinglayer, in with Width4. In the Paths panel, select the arch path and click Delete Path, since you don't need it any more.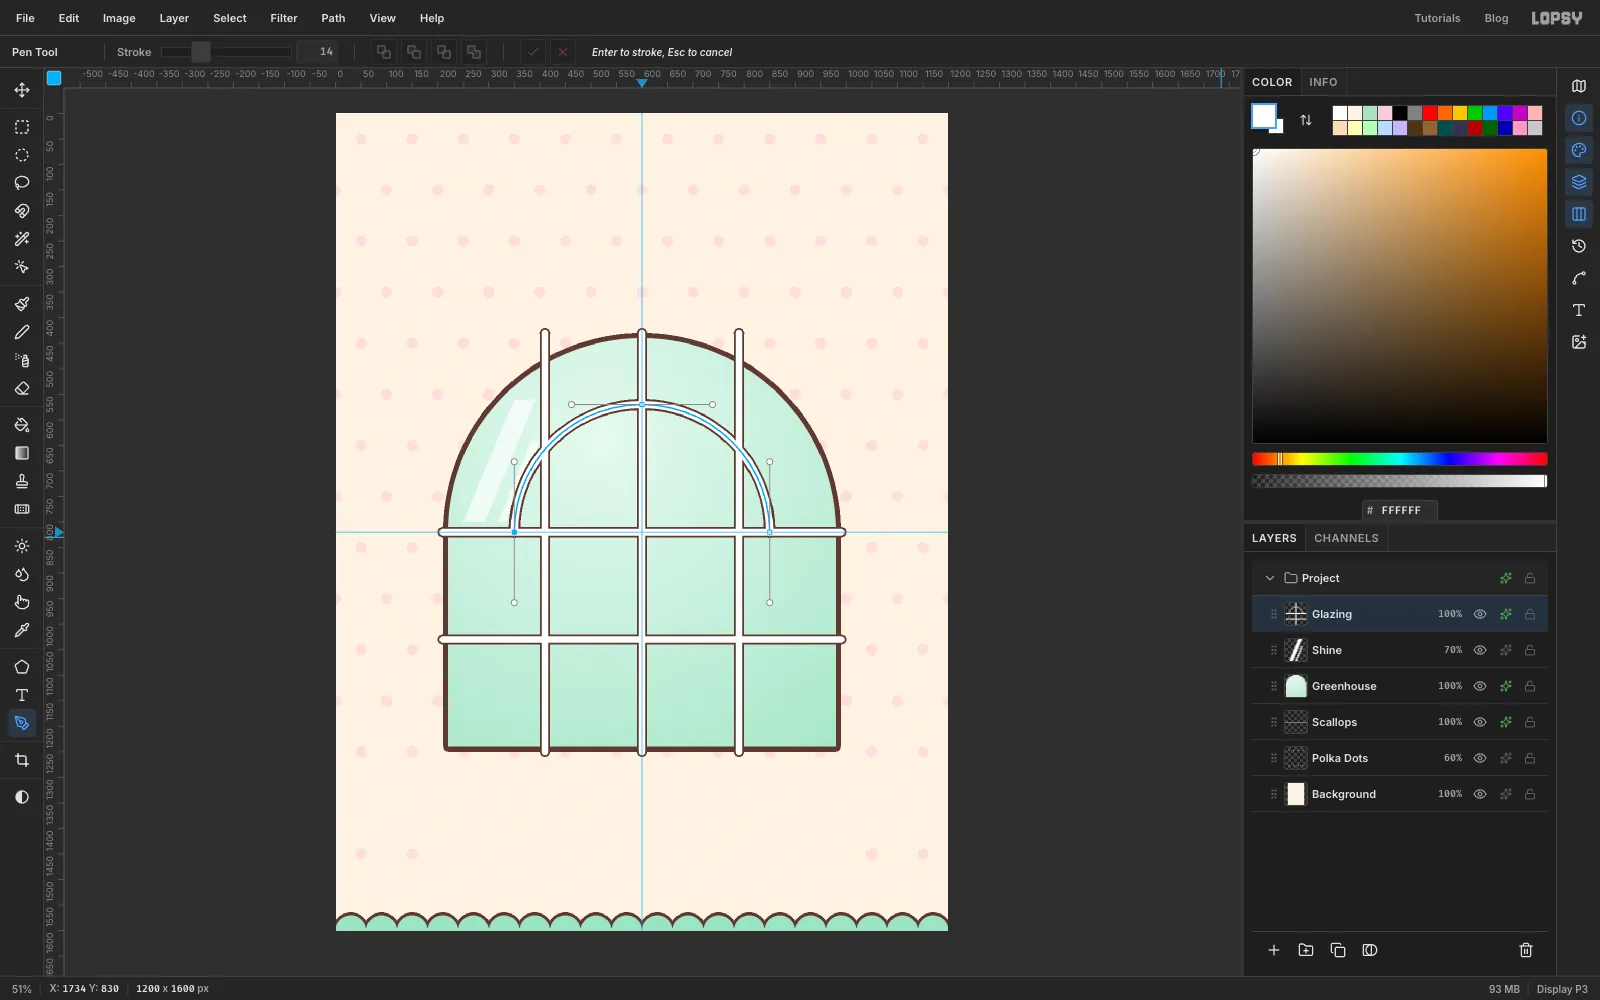
-
Trim the bars to the glass
Cmd-click the
Greenhouselayer's thumbnail to load its shape as a selection. Choose Select → Inverse, so everything outside the glass is selected, and press Delete with theGlazinglayer active. Deselect.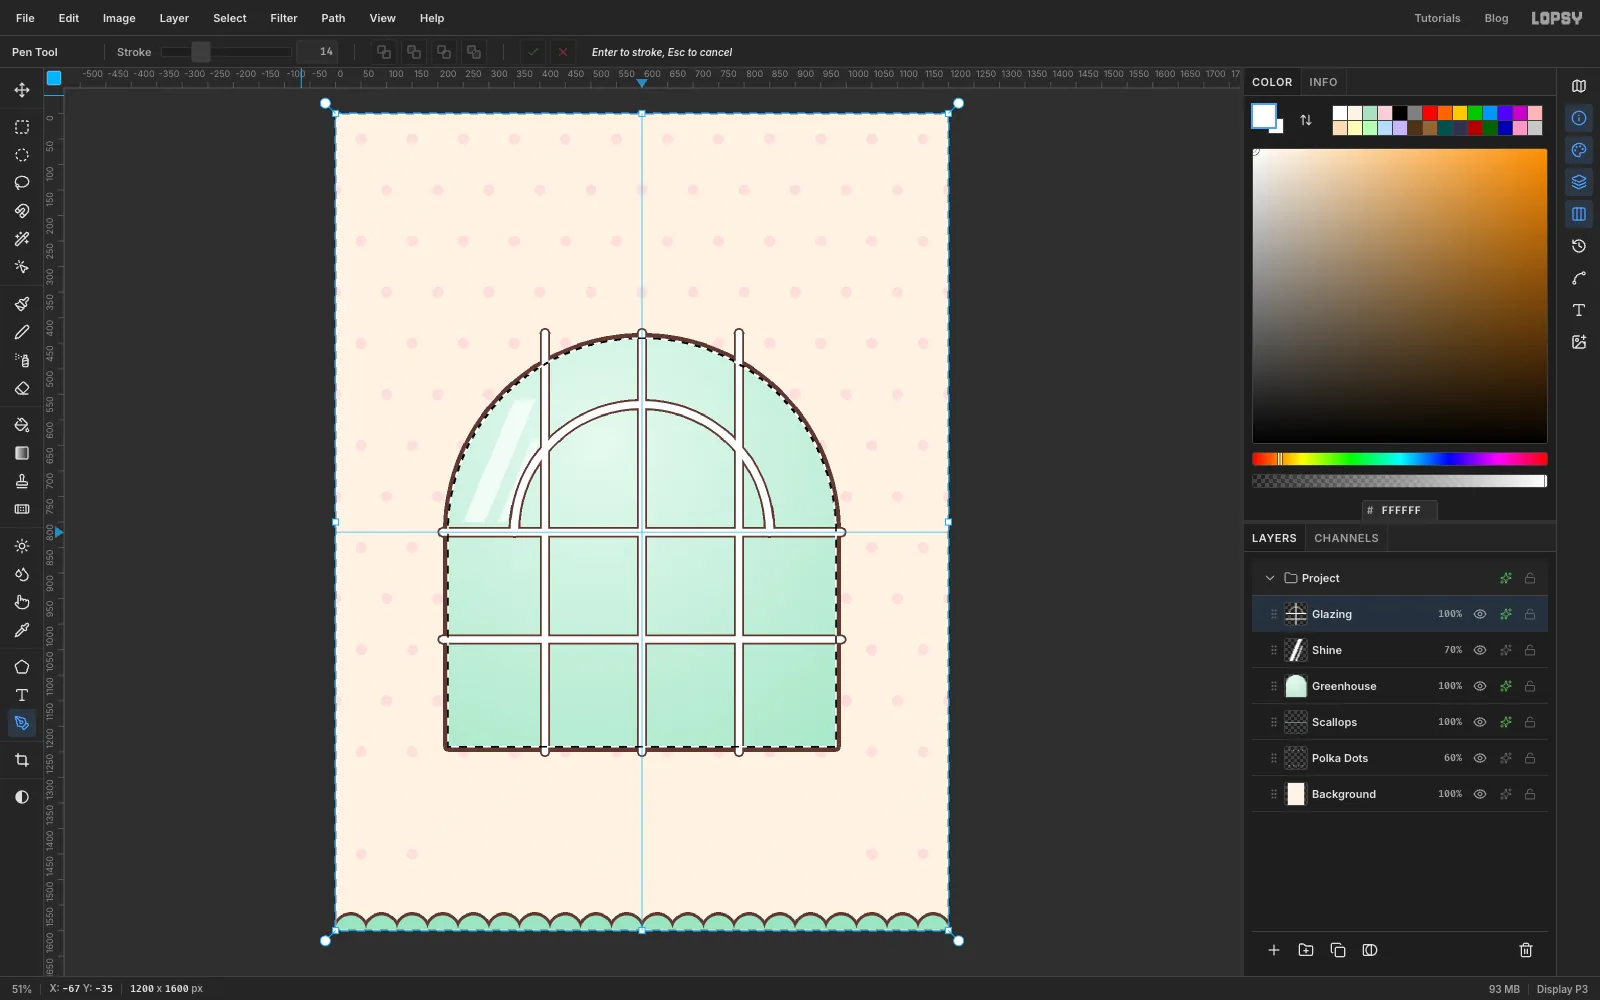
-
Add a wooden shelf
Click the
Glazingrow and add a layer calledShelf. Pick the Shape tool and switch Shape to Rectangle. Set Corner Radius to14, the fill to , the stroke to and the stroke Width to8. Click near the bottom of the greenhouse and make it700×36. It should run almost wall to wall, about 70 px above the floor.To give the shelf a front edge, add a layer called
Shelf Edge. Cmd-click theShelfthumbnail, then choose Select → Shrink… and enter5, which keeps you inside the outline. Pick the Rectangular Marquee, hold Alt and drag a rectangle over the top half of the shelf to subtract it. Fill what's left with .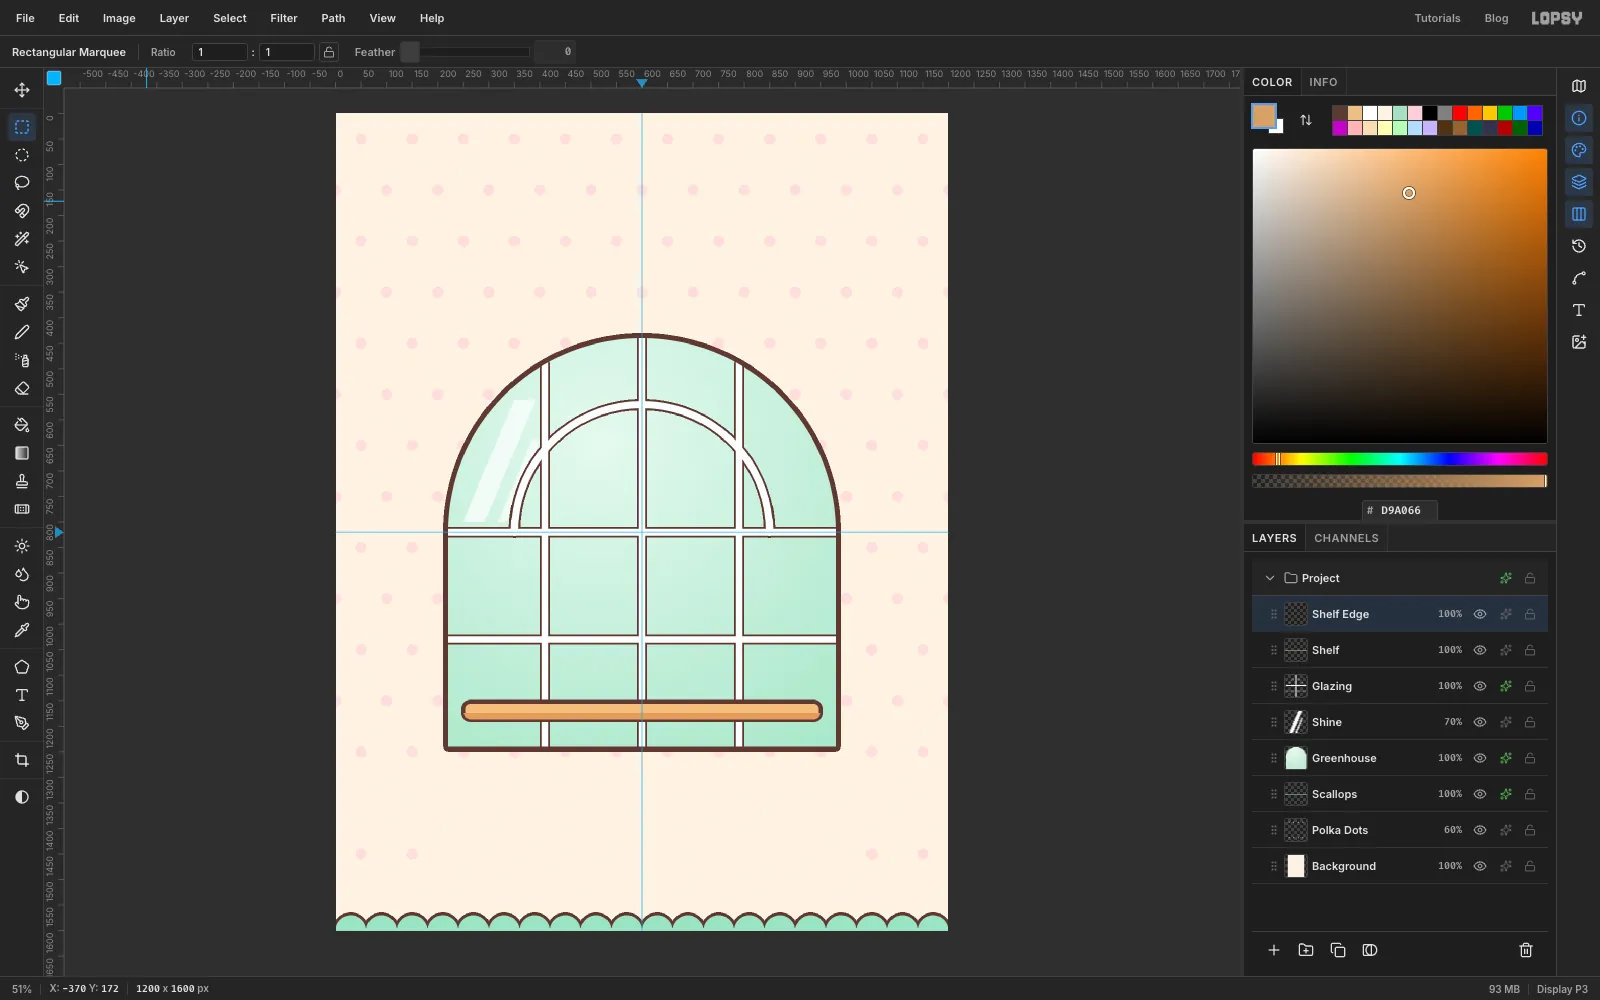
-
Start the cactus with one selection
Every character gets its own group. Click the
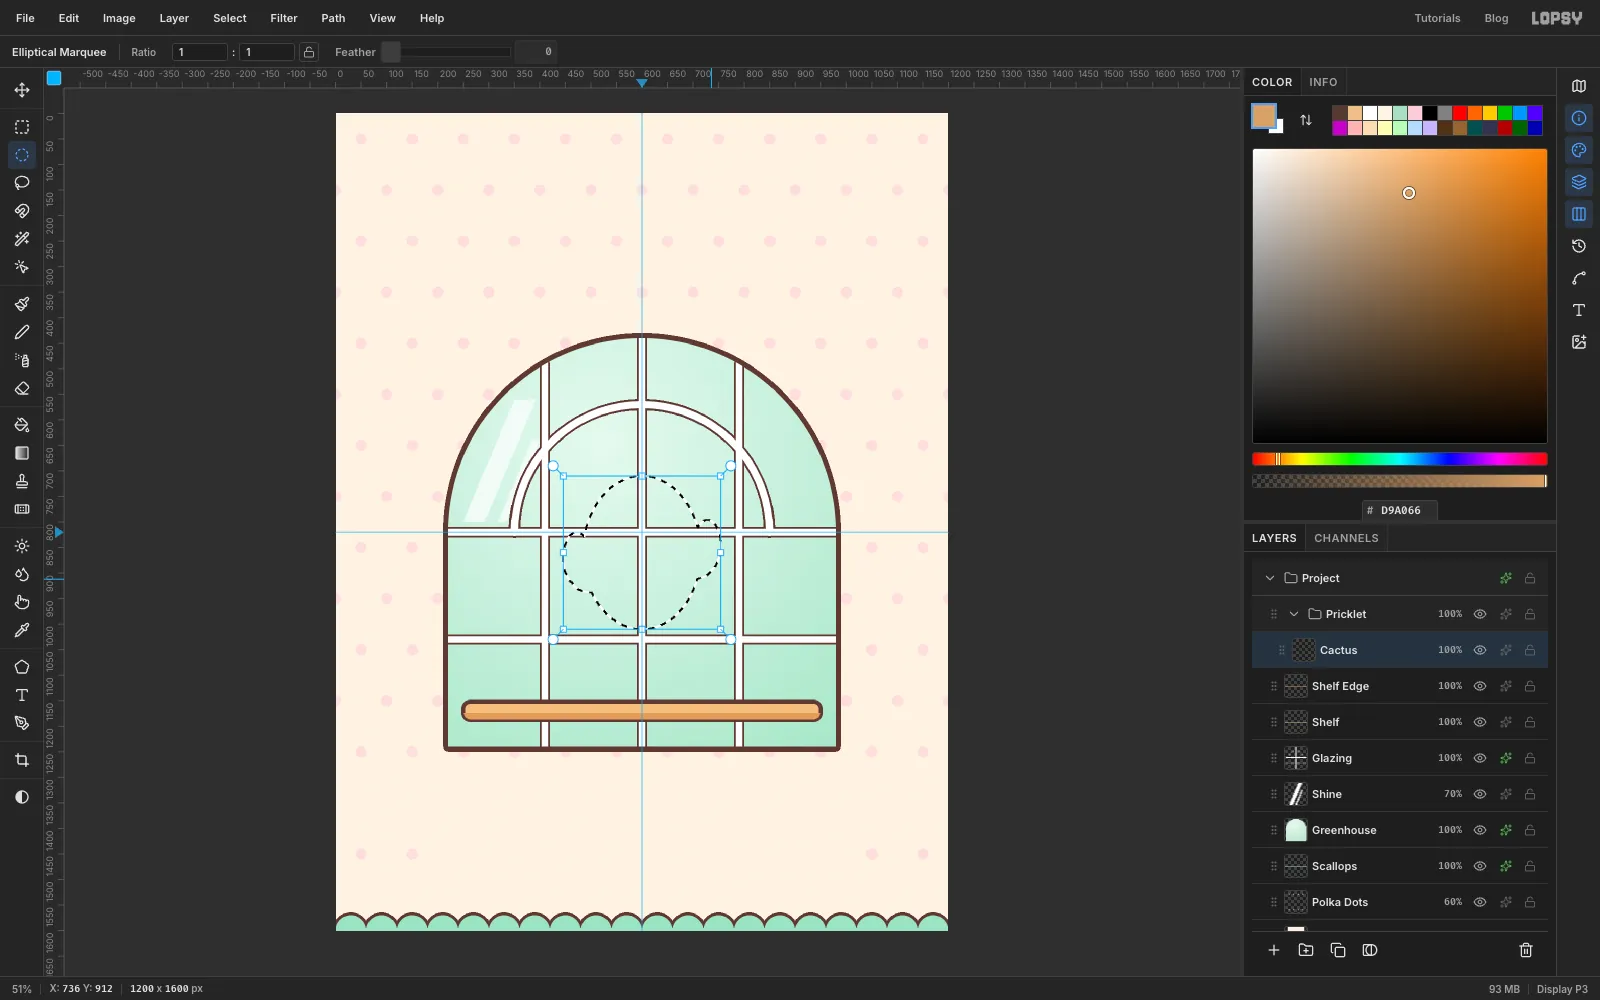
Shelf Edgerow, click New Group in the Layers panel and name the groupPricklet. Add a layer inside it calledCactus.With the Elliptical Marquee, drag a tall oval about 230 × 300 px, with the centre guide running down its middle and its bottom about 140 px above the shelf. Then hold Shift and add the arms. Each arm is a tall, narrow oval about 50 × 100 px that sticks out of the side of the body, plus a short, wide oval that joins it to the body lower down. Make the right arm sit a little higher than the left, so the cactus looks like it's waving.
-
Colour, shade and outline the cactus
Fill the selection with and deselect. In the effects panel, turn on:
- Inner Glow in , Size
34, Opacity45. This darkens the edges, which makes the body look round. - Stroke in , Width
8.
Add a layer called
Ribs. With the Brush at Size7in , draw short curved ribs. Leave a clear band across the body level with the arms, because that's where the face goes, and draw ribs above and below it. Draw one rib down each arm too. Switch the colour to white and click a few spine dots along the ribs.To keep the ribs inside the cactus, Cmd-click the
Cactusthumbnail, choose Select → Inverse and press Delete. Deselect. Finally, with the Brush at Size5in , draw a short curved seam on the body where each arm joins it.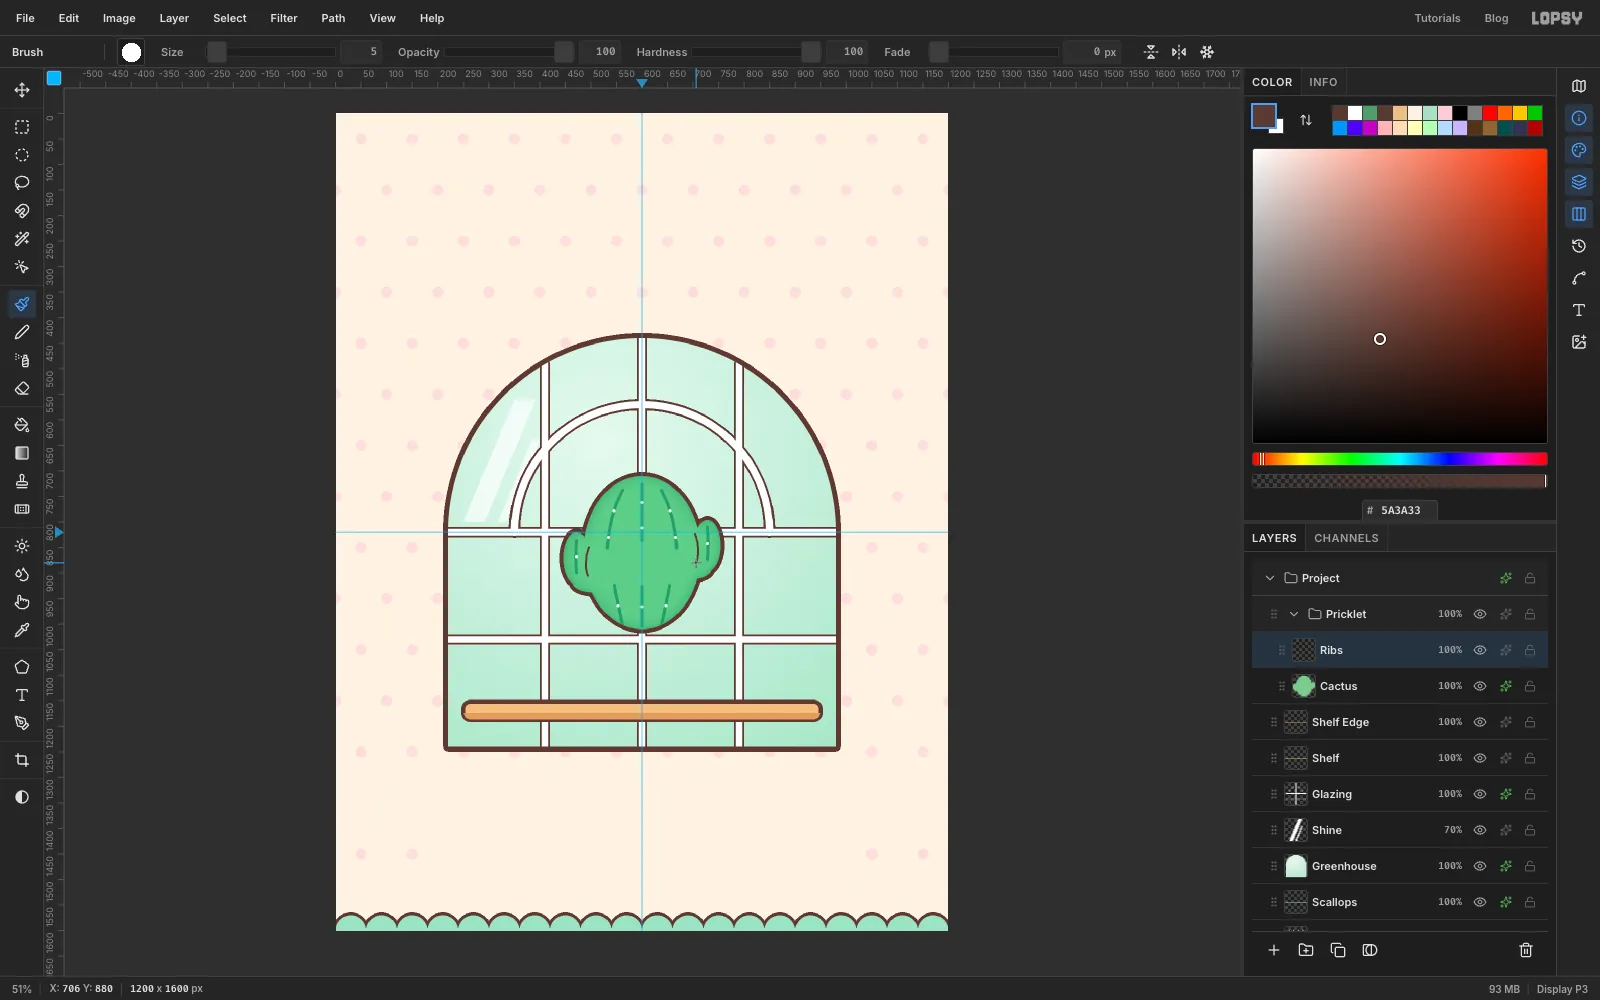
- Inner Glow in , Size
-
Pot the cactus
Add a layer called
Potabove the ribs. With the Lasso, draw a tapered trapezoid under the cactus, wider at the top. Its top edge should cover the bottom of the cactus, and its bottom should rest on the shelf. Fill it with and give it a Stroke in , Width8.For the decal, lasso a small heart in the middle of the pot and fill it with .
Add a layer called
Pot Rim. With the Shape tool (Rectangle, Corner Radius14, fill , stroke , Width8), click on the top of the pot and make it268×48, so it overhangs both sides.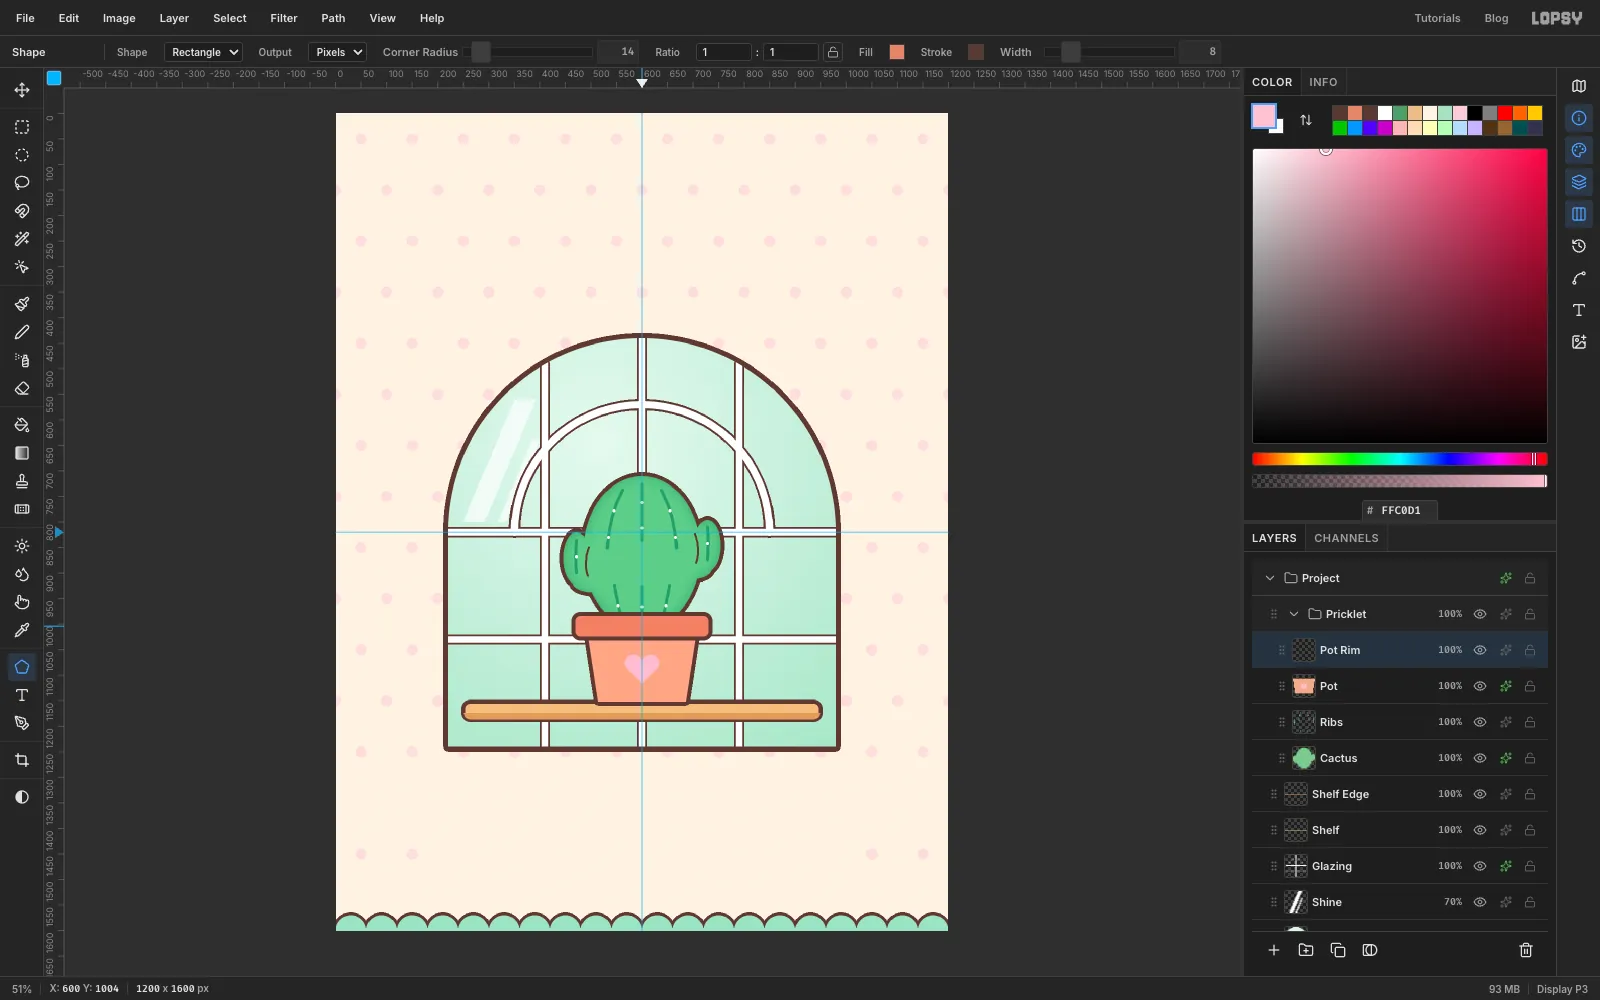
-
Grow a flower with Radial Symmetry
Add a layer called
Flower. Pick the Brush, set Size32and the colour . In the options bar, click Radial Symmetry (the snowflake) and set Segments to5.Cmd-click the top of the cactus to move the symmetry centre there. Then drag a short stroke, about 30 px, straight up from the centre. Lopsy repeats it five times around the centre, which gives five round petals.
Turn Radial Symmetry off again. Switch to , set Size
22and click once in the centre of the flower. Give the layer a Stroke in with Width5.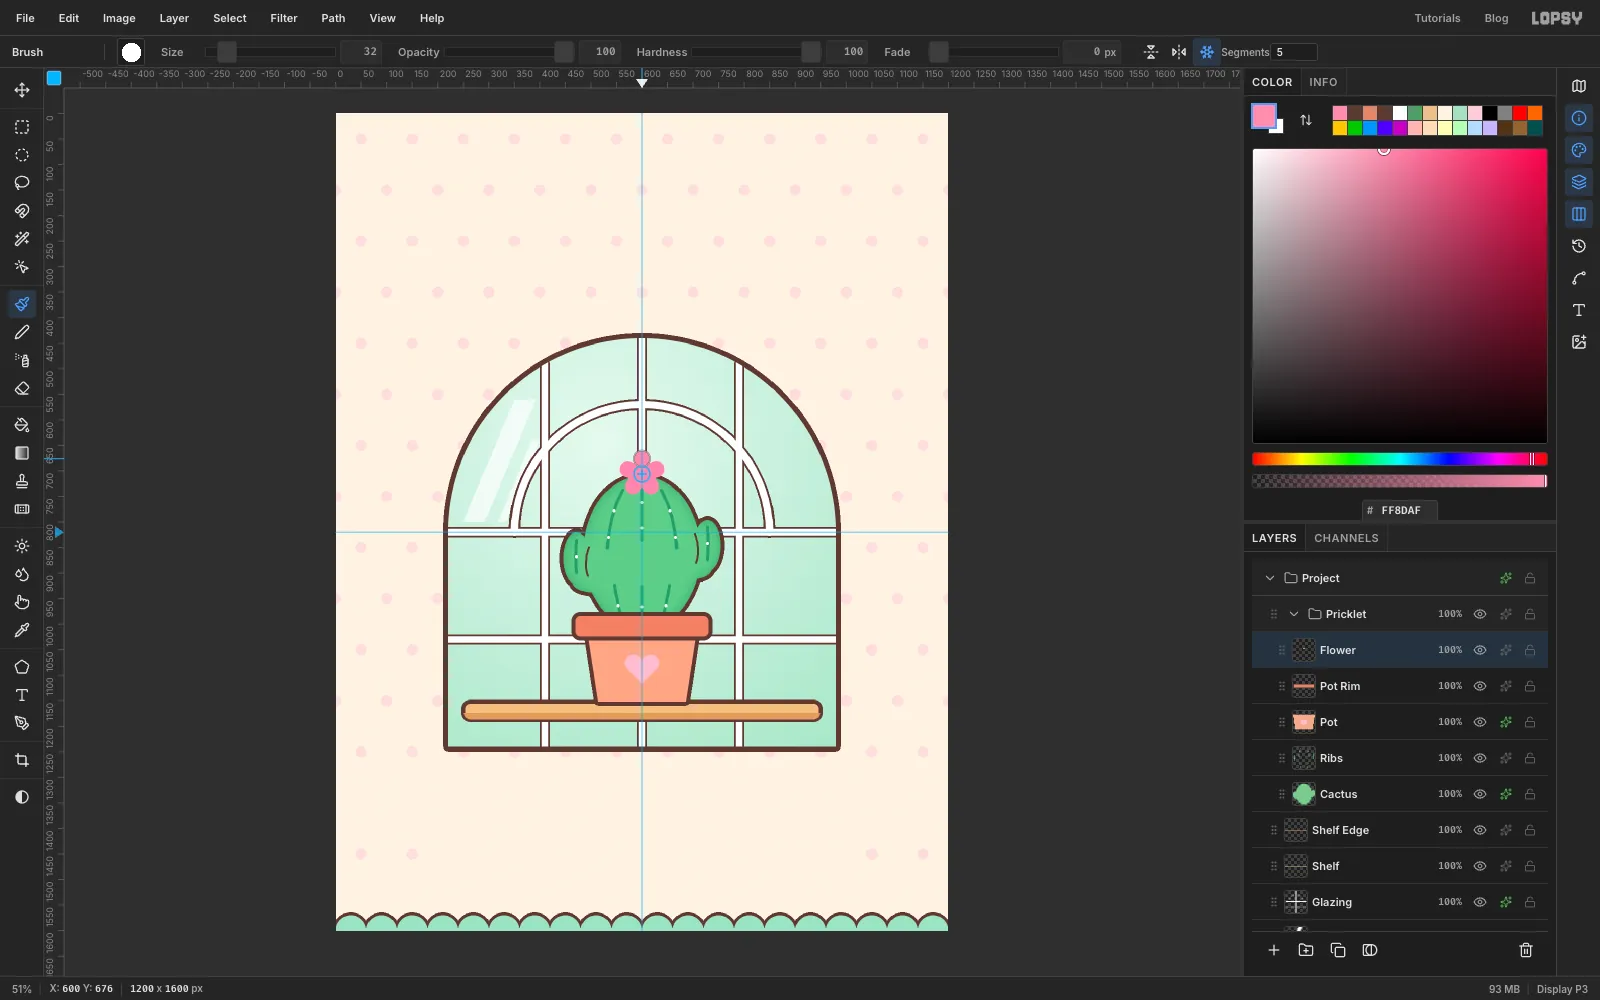
-
Give Pricklet a face
Add a layer called
Face. With the Shape tool (Ellipse, fill , no stroke), click to make two eyes, each22×28. Place them on either side of the centre guide, a little below the middle of the body. Then switch the Brush to white at Size8and click once up and left of each pupil for the catch-lights.For the mouth, set the Brush to Size
6in and draw two tiny dips side by side between the eyes, which makes a little "ω".Blush goes on its own layer,
Blush. Drag a small flat oval under each eye with the Elliptical Marquee, holding Shift for the second one. Choose Select → Feather… with4, fill with and lower the layer to 85%.Last, add a
Shine Markslayer. Use a white Brush at Size10to draw a short curve on the cactus's upper-left shoulder, and one at Size8down the left side of the pot. Set the layer to 80%.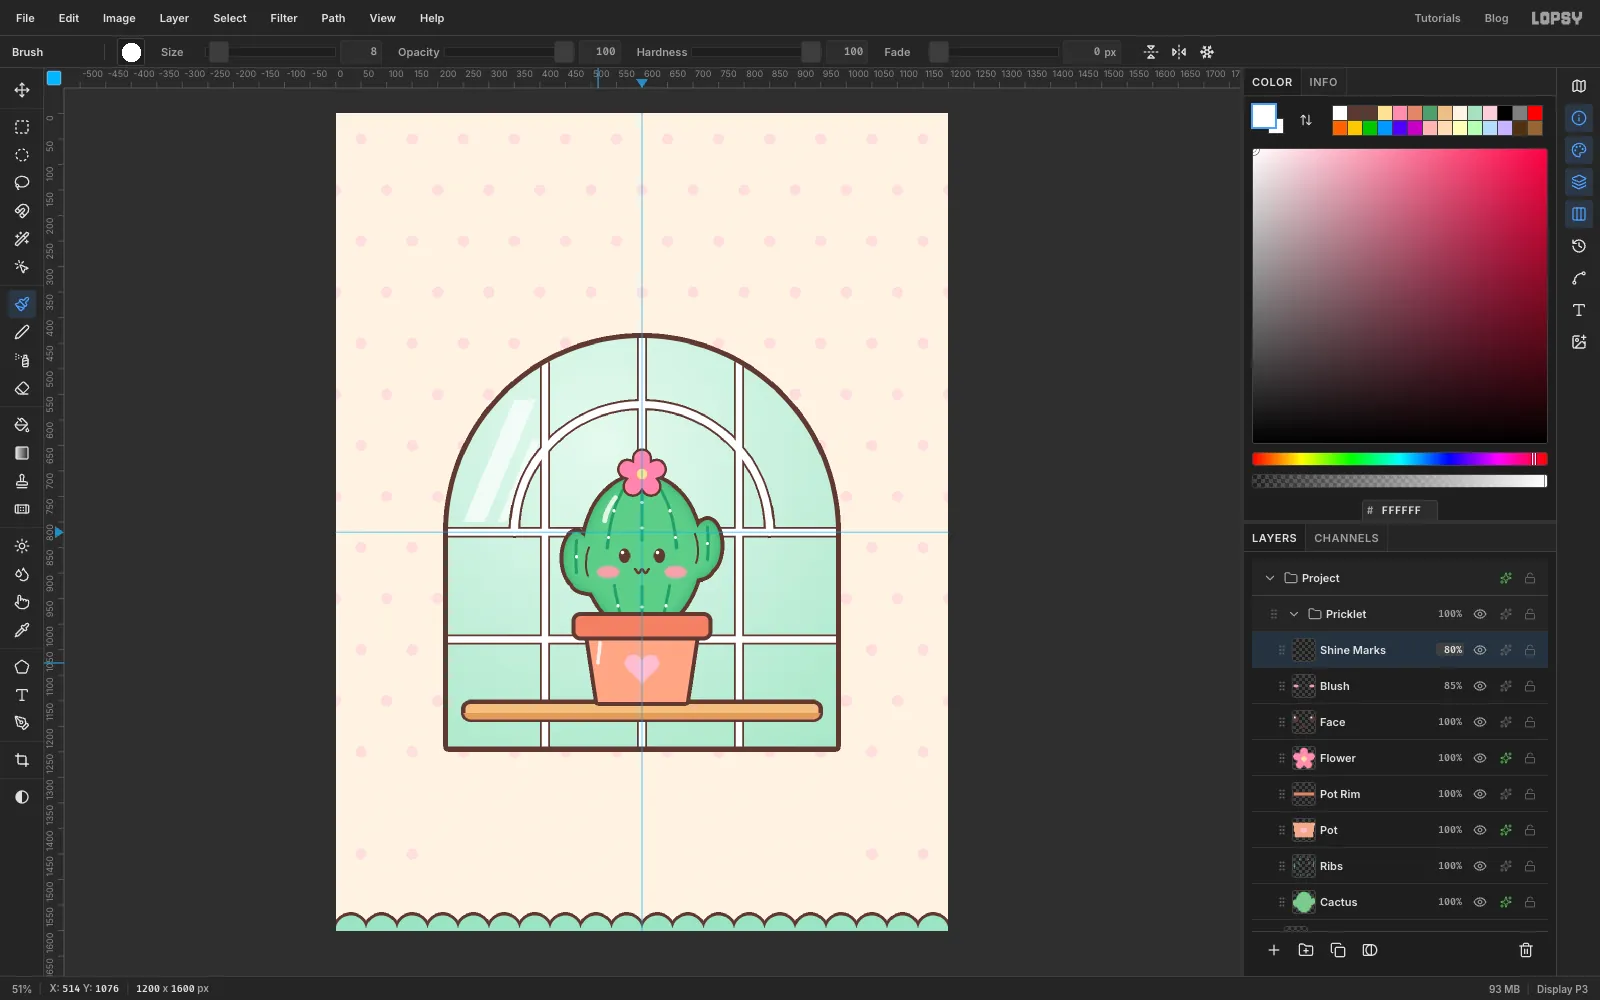
-
Draw a leaf with the Pen tool
Collapse the
Prickletgroup, select it and click New Group again. Call the new groupSprig.Add a layer called
Stem. With the Brush at Size10in , draw a slightly wavy stem about 130 px tall, starting roughly 100 px above the shelf, about halfway between the left wall and the cactus. The mug will hide its base. Give it a Stroke in , Width6.Add a layer called
Leaf. Pick the Pen tool and draw a closed leaf with four anchors:- Click at the top of the stem (the leaf's base).
- Click-drag on the upper side, halfway along, pulling the handle towards the tip.
- Click at the tip, up and to the left.
- Click-drag on the lower side, pulling the handle back towards the base.
- Click the first anchor again to close the path.
In the Paths panel, select the path and click Path to Selection. Fill it with , deselect and delete the path. Draw a vein down the middle with the Brush at Size
5in , then add a Stroke of8in .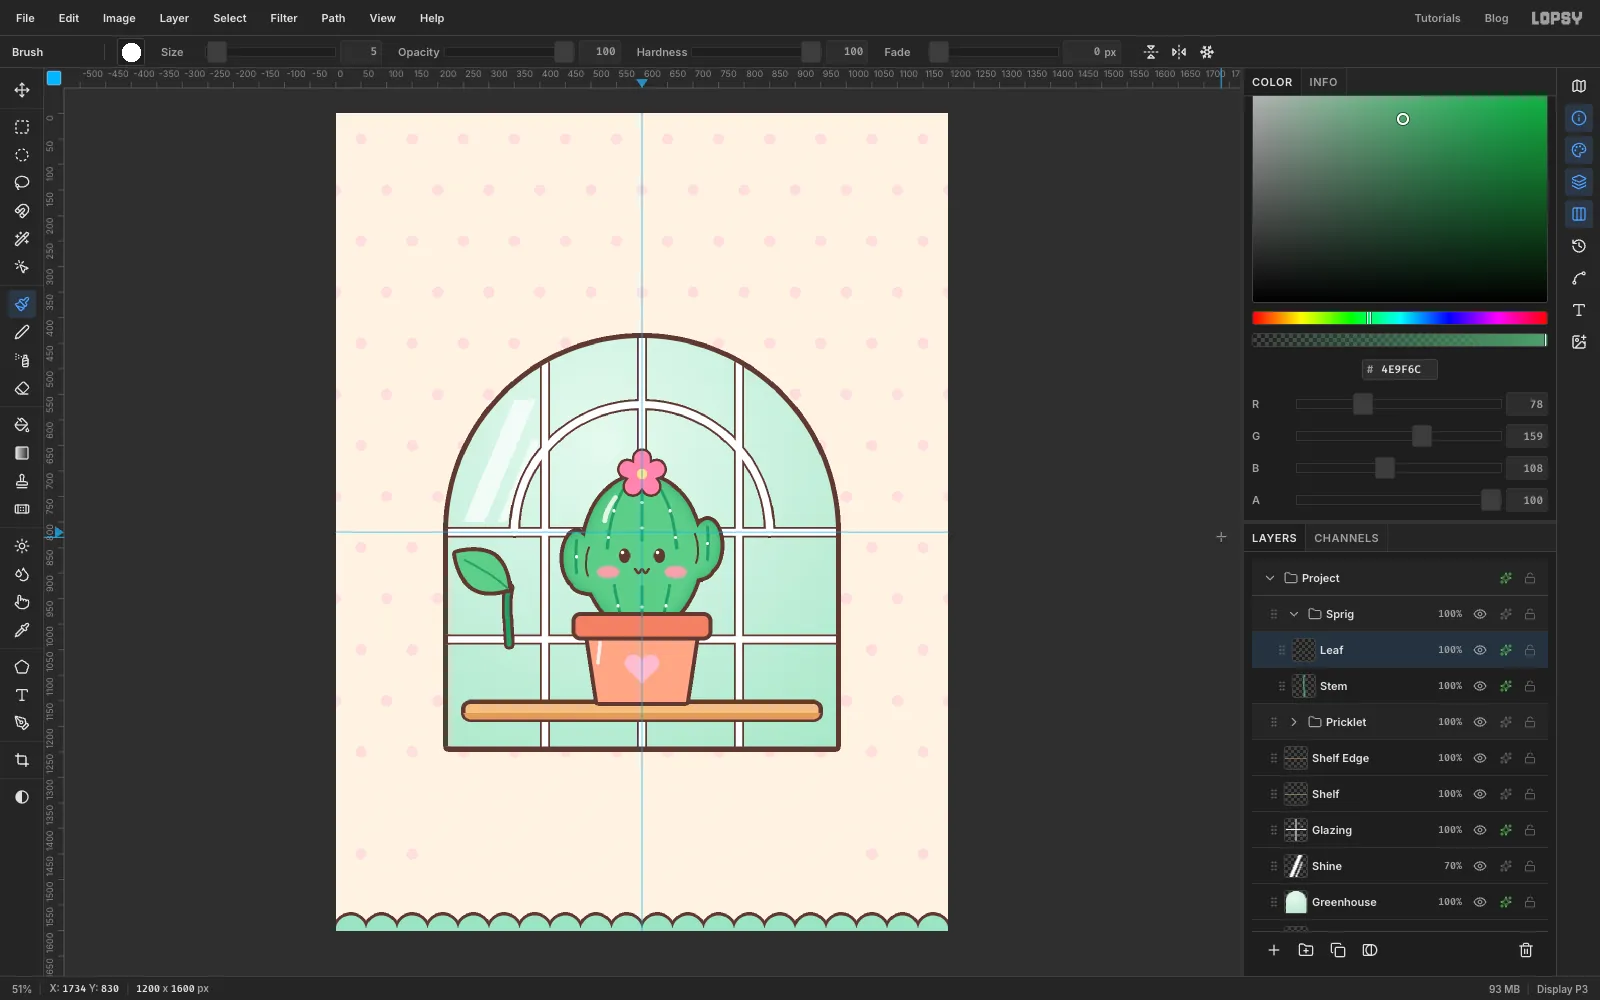
-
Mirror, scale and tilt a second leaf
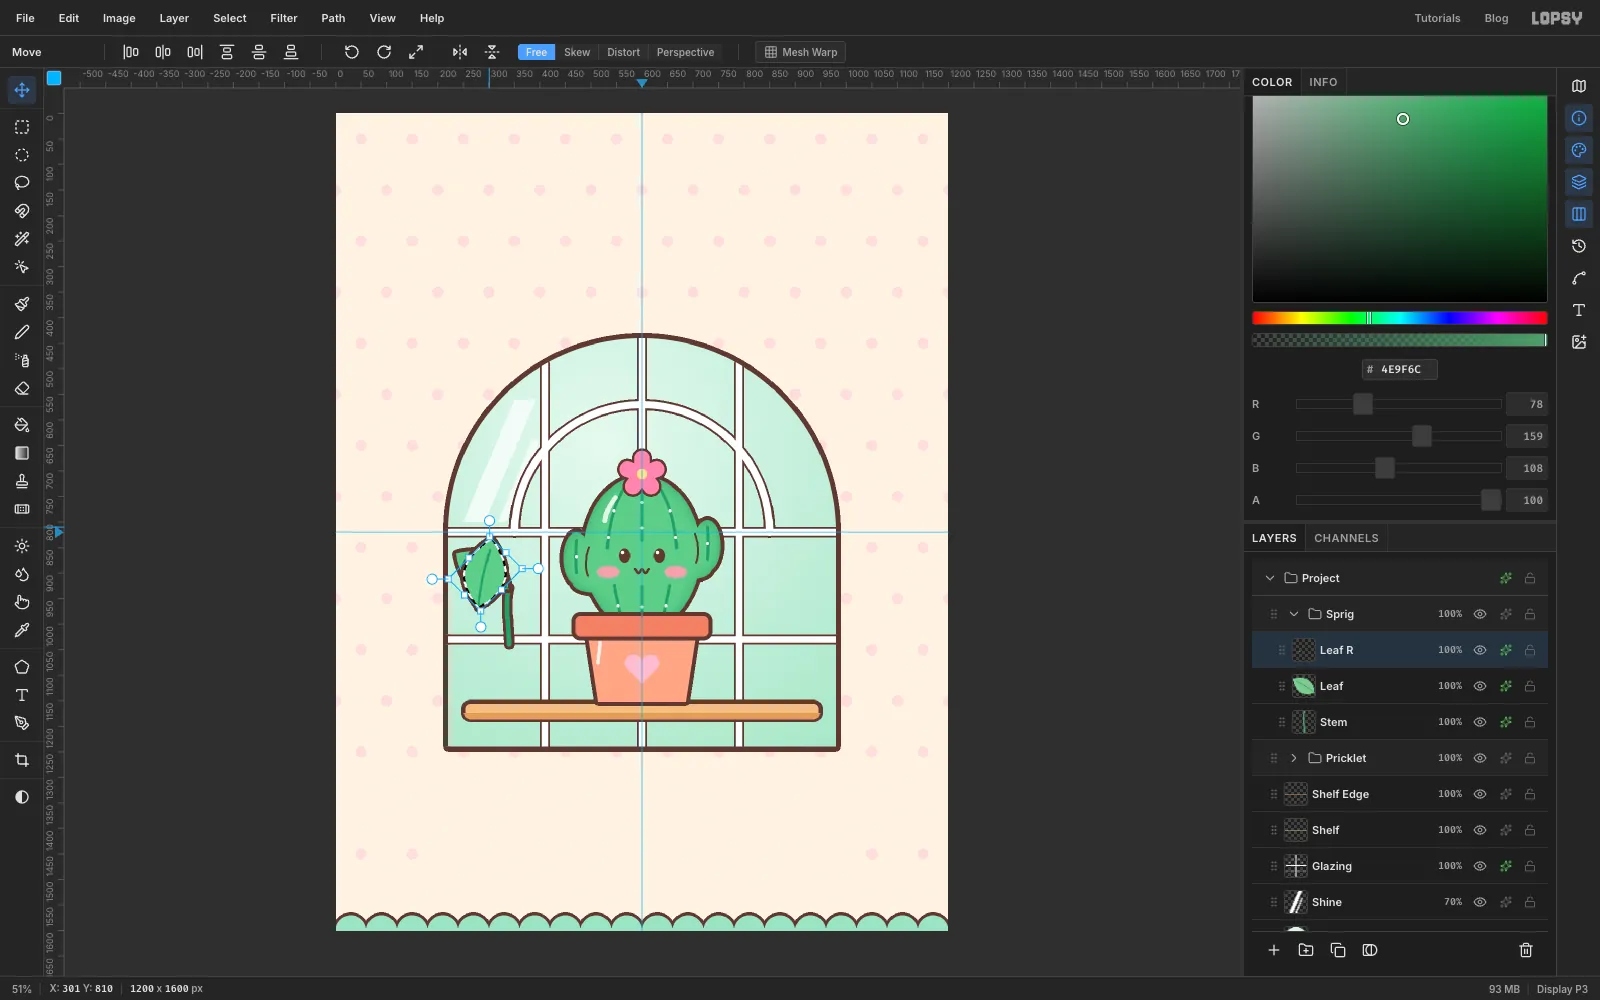
Choose Layer → Duplicate Layer, click the
Leaf copyrow and rename itLeaf R. Marquee around the leaf and pick the Move tool, then work in this order:- Click Flip Horizontal in the options bar.
- Hold Cmd and drag the bottom-right corner handle out to about 110%.
- Move the pointer just outside the top-right corner until the cursor turns into a rotate arrow, then drag anticlockwise about 45°, so the leaf points up rather than sideways.
- Press Cmd+D to commit.
Do it in that order: flip first, then scale and rotate.
-
Slide the leaf into place and add the mug
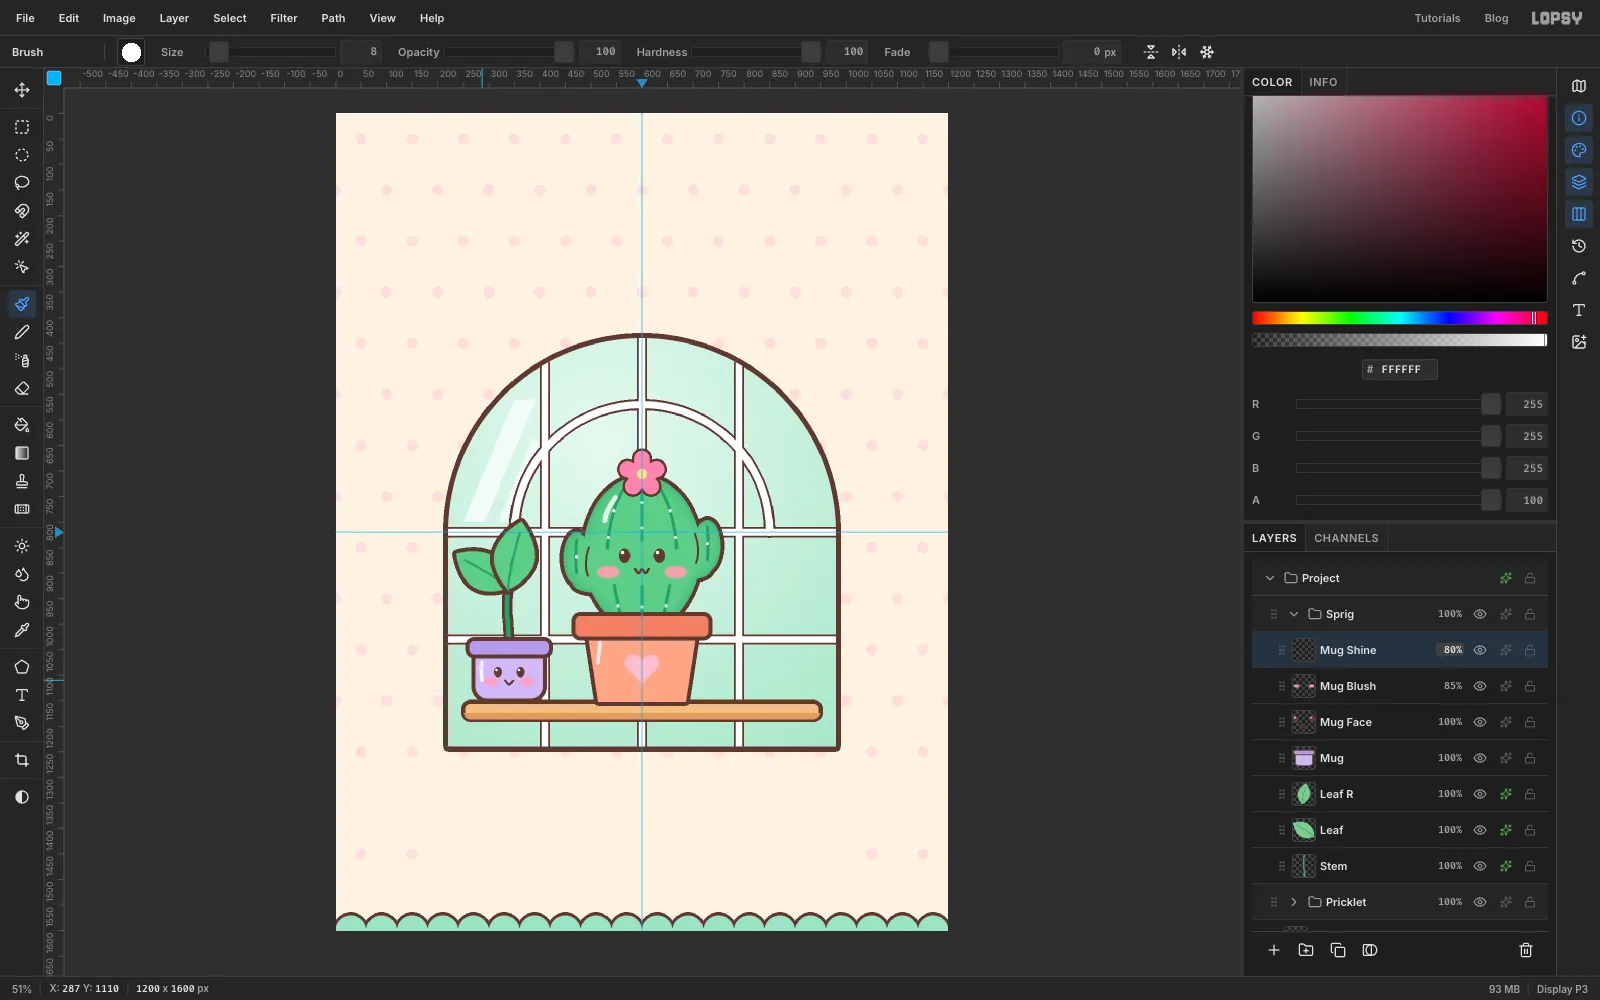
With the Move tool still active, drag
Leaf Rso its base meets the top of the stem, next to the first leaf. Keep its tip clear of the window bars and the cactus.Add a layer called
Mug. With the Shape tool (Rectangle, fill , stroke , Width8):- Set Corner Radius to
28, then click under the stem, about 55 px above the top of the shelf, for a140×108body. Its bottom then rests on the shelf. - Change the fill to and the radius to
14, and click on the body's top edge for a164×34band that covers the stem's base.
Then give the mug a face the same way you did the cactus's:
Mug Face: two16×20eyes with white catch-lights, and a small smile drawn with the Brush at Size5.Mug Blush: feathered by4and set to 85%.Mug Shine: a white stroke down the mug's left side, at 80%.
- Set Corner Radius to
-
Paint a succulent rosette
Collapse
Sprig, select it and make a new group calledEcho. Add a layer calledRosette.Turn Radial Symmetry back on, set Segments to
8and Cmd-click where the rosette's centre should go: halfway between the cactus pot and the right wall, about 160 px above the shelf. Set the Brush to Size50in and drag a short stroke, about 60 px, straight up from the centre: eight fat petals appear. Switch to , Size20, and click once at the tip of the top petal to give every petal a pink tip.Give the layer a Stroke of
7in .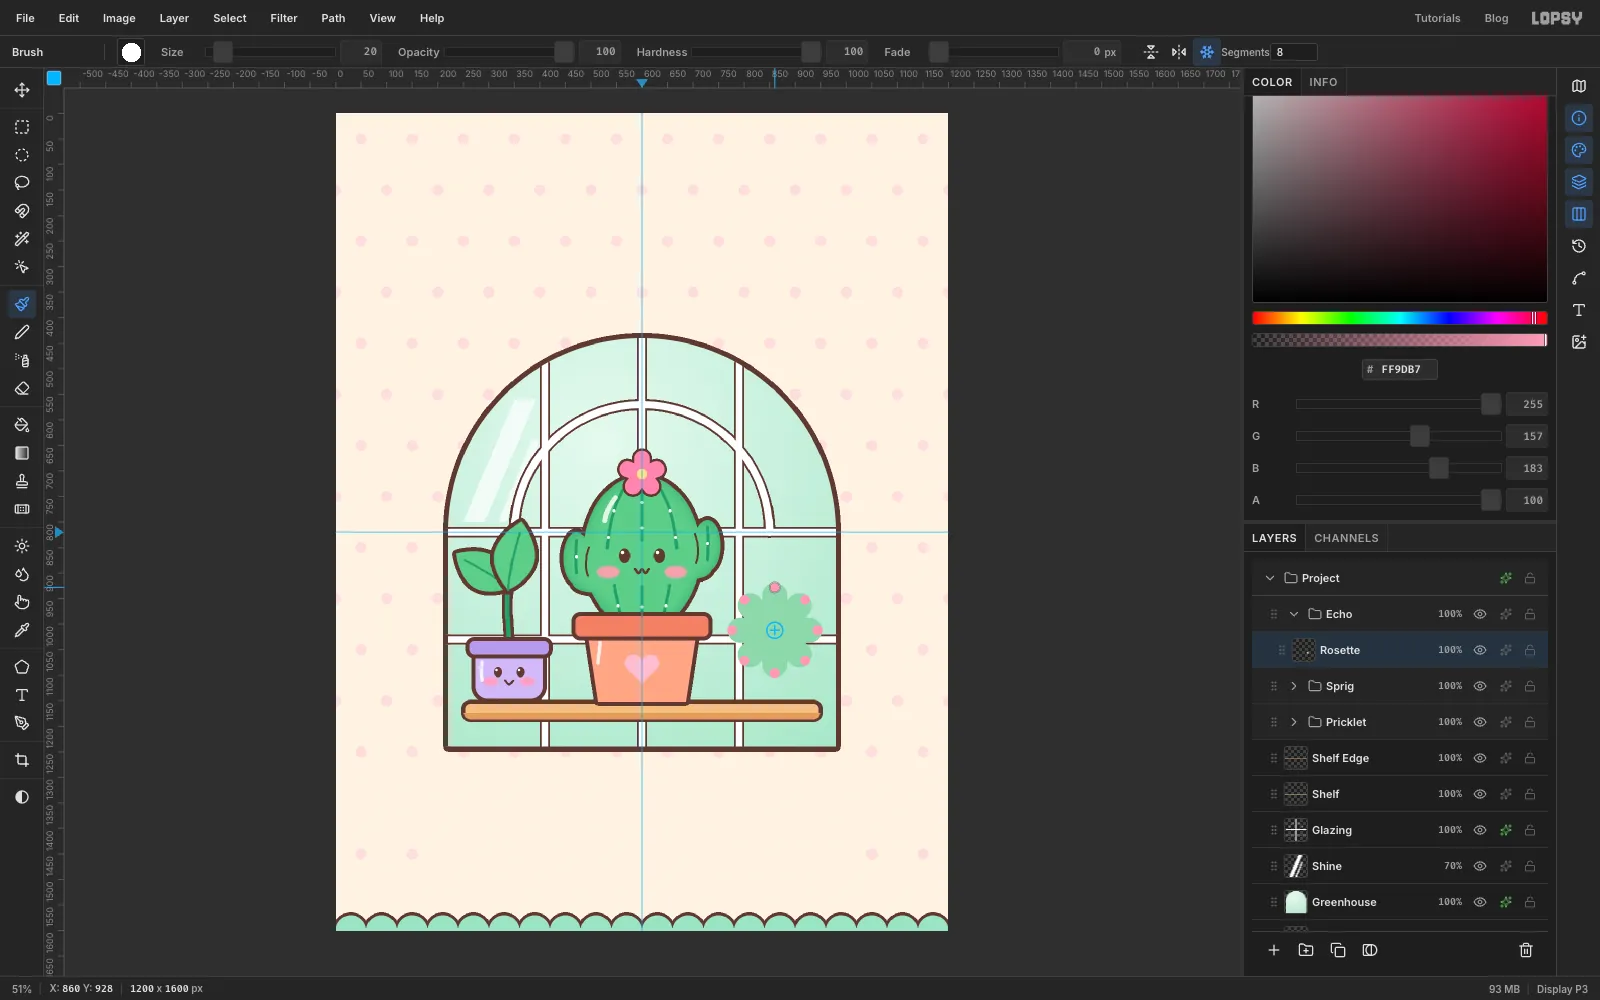
-
Finish the succulent and its bowl
Add a layer called
Rosette Inner. With Radial Symmetry still on, set the Brush to Size36in and drag a stroke from the centre out between two of the outer petals. Turn Radial Symmetry off and give this layer a Stroke of6.Add a layer called
Bowland use the Shape tool again:- A
150×100rectangle with Corner Radius34in . Click just above the shelf, under the rosette, so the bowl covers the rosette's lower petals. - A
178×32rim in , with Corner Radius14. Click on the bowl's top edge so the rim straddles it.
Both get the 8 px brown stroke.
On
Bowl Face, draw two happy closed eyes as small upside-down U shapes with the Brush at Size6. For an open smile, lasso a small half circle and fill it with . AddBowl Blush(feathered by4, 85%) and a whiteBowl Shineat 80%.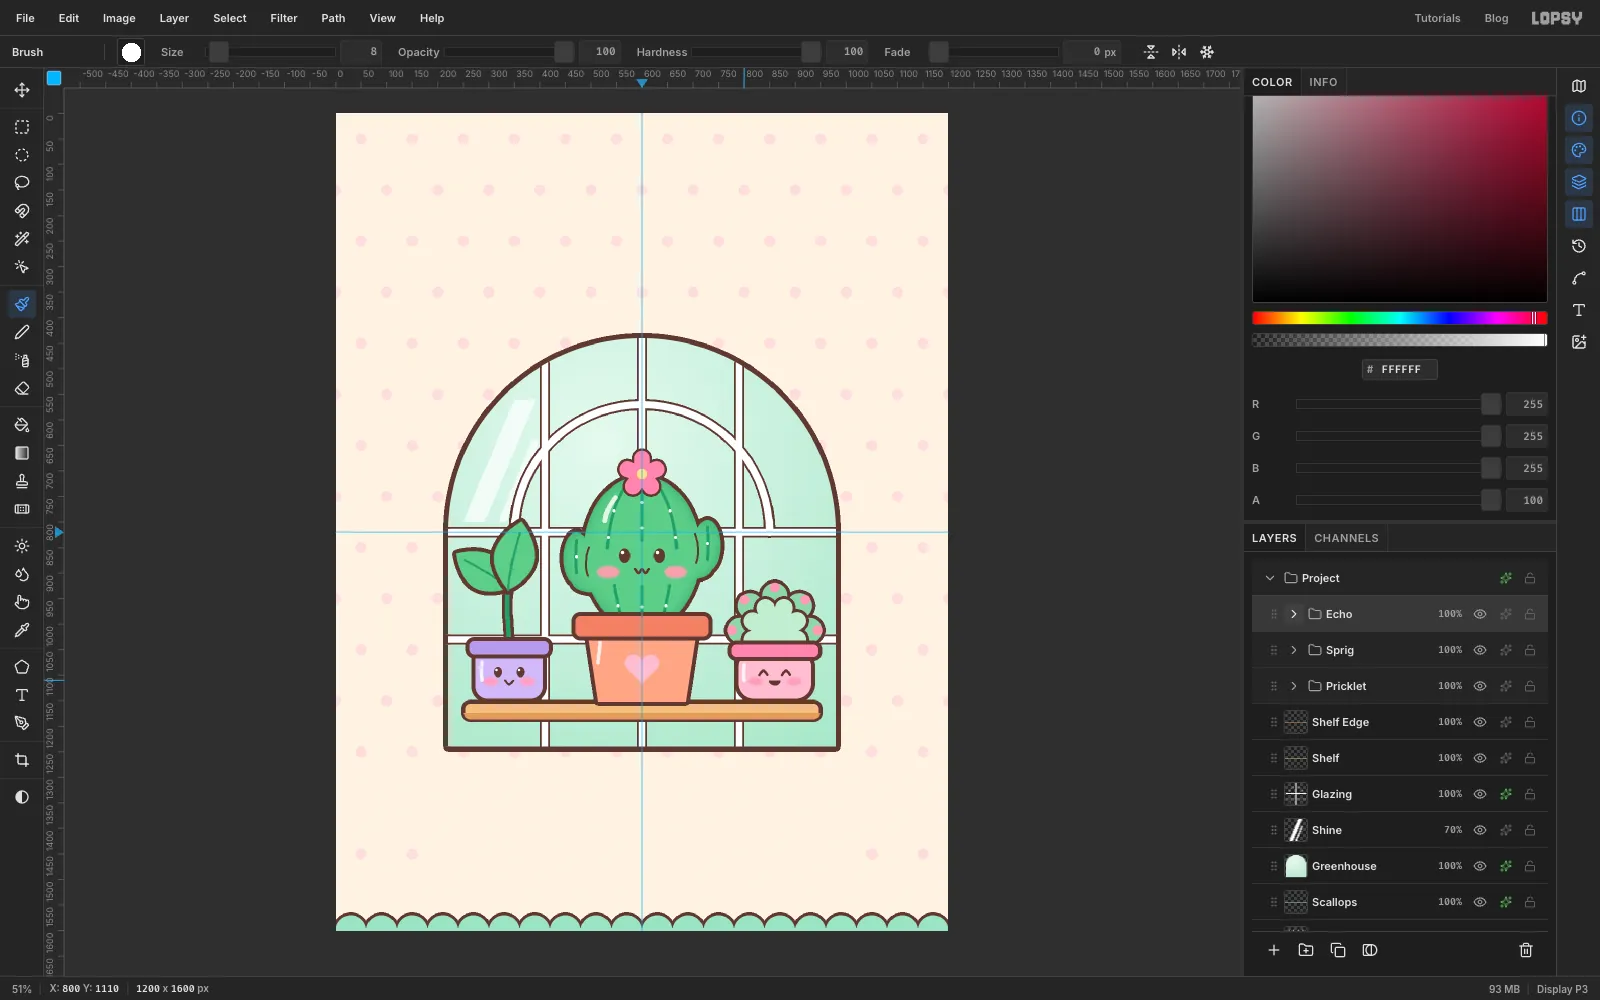
- A
-
Define a heart-shaped brush
Collapse
Echoand select it. Add a scratch layer calledHeart Tipand draw a heart about 80 px wide in an empty corner. Lasso it carefully, or build it from two overlapping circles (Shift-added with the Elliptical Marquee) plus a lassoed V underneath. Fill it with black.Marquee around the heart and choose Edit → Define Brush…. Name it
Heart Leafwhen asked. Lopsy uses black as full paint, so the brush tip is a solid heart. Deselect and delete the scratch layer.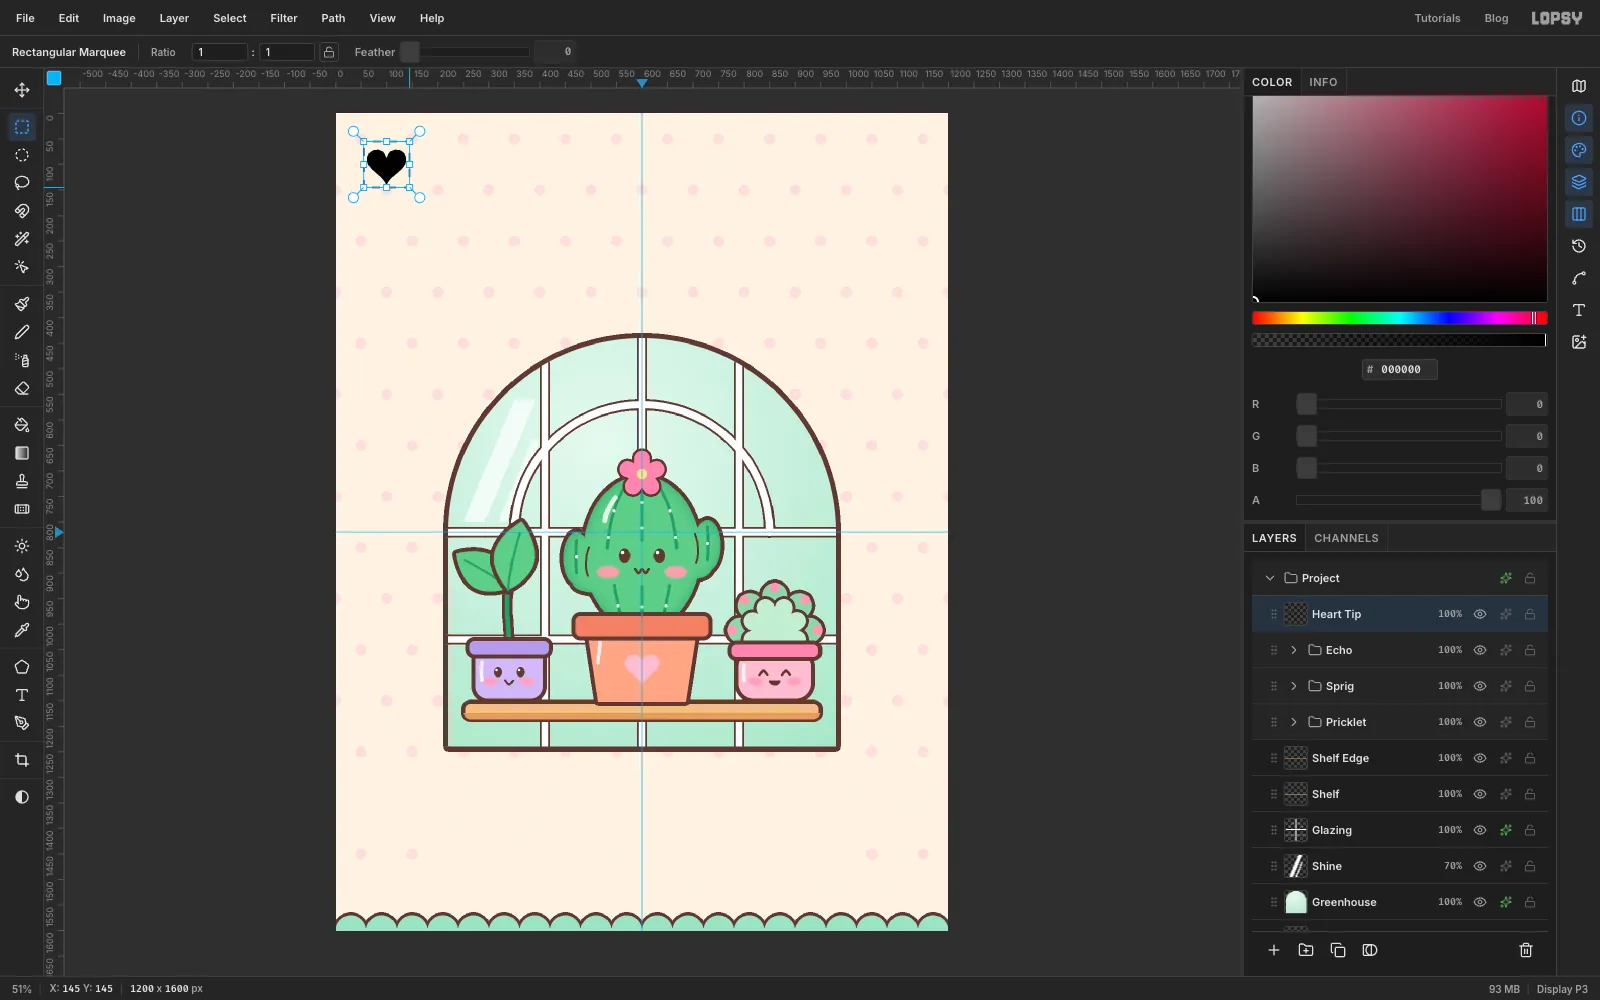
-
Hang a string-of-hearts
Make a new group called
Hangerand add a layer calledVines. With a normal round Brush at Size5in , draw three trailing vines. They all start where the inner arch meets the centre bar, which is where the hanging pot will sit. Sweep one down to the left and two to the right, making the outer right one the longest. End them all well above the cactus flower.Add a layer called
Heart Leaves. With the Brush tool active, click Open brush presets. YourHeart Leaftip is already selected at the end of the list, so close the dialog. Set Size to26and the colour to , then click along each vine, every 30–40 px, to place one heart per click. Give the layer a Stroke of3in .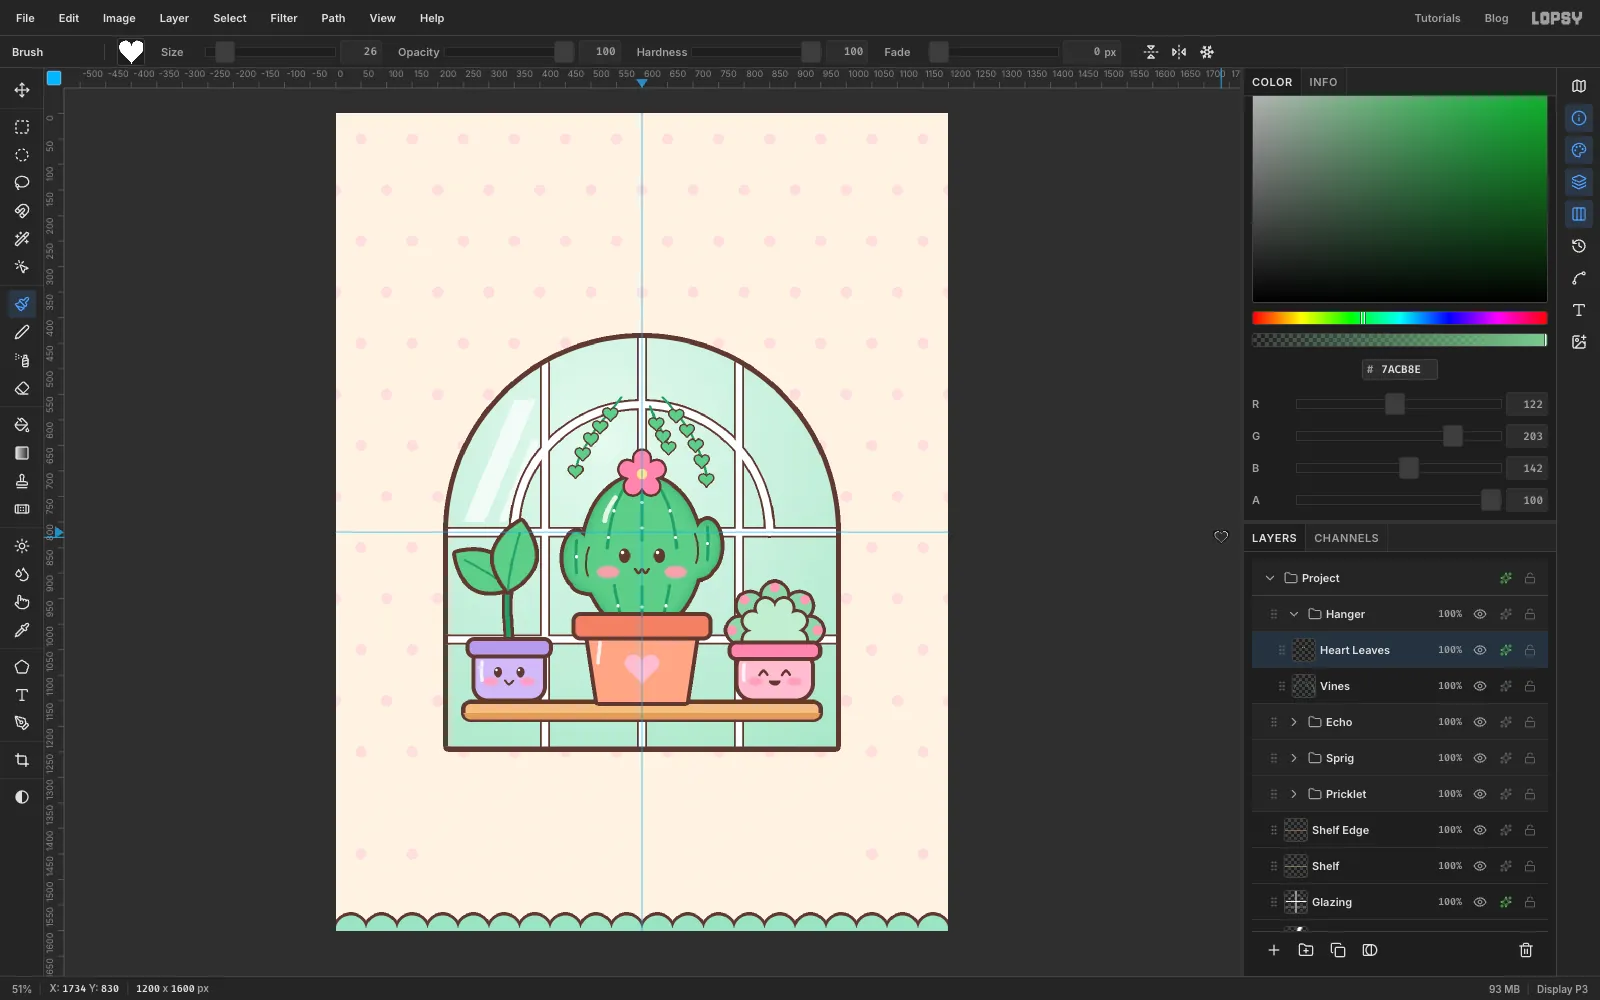
-
Make a bowl from two selections
Add a layer called
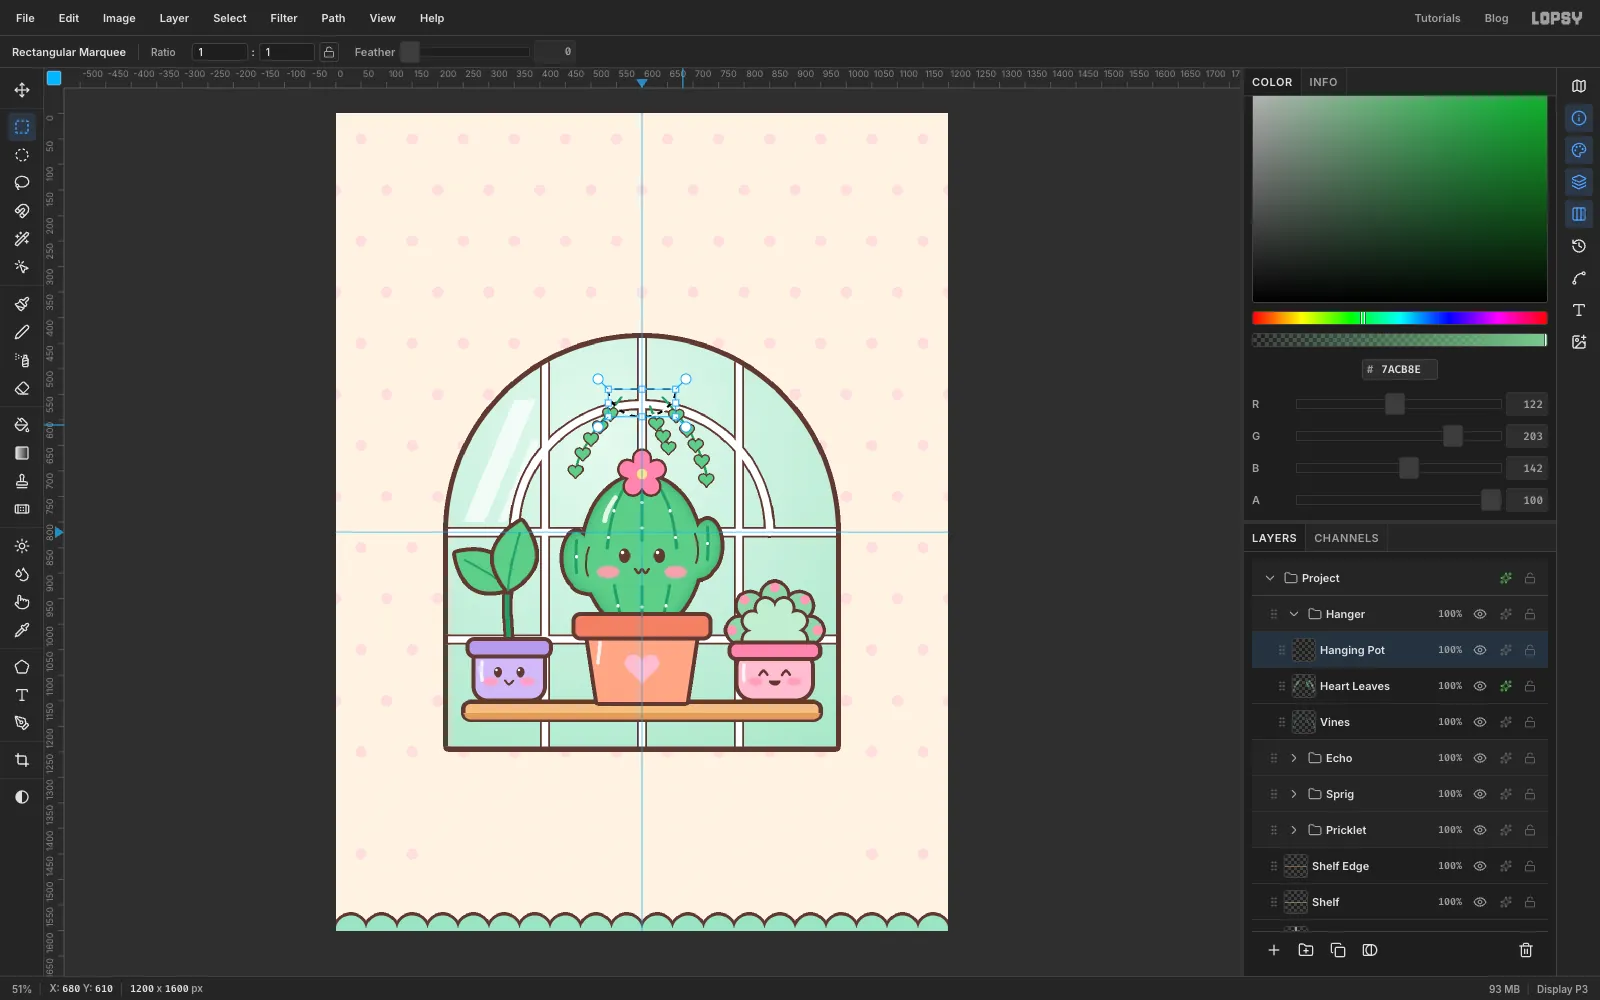
Hanging Pot. With the Elliptical Marquee, drag an ellipse about 130 × 110 px with the centre guide down its middle and its centre where the vines start. Then switch to the Rectangular Marquee, hold Shift+Alt and drag a rectangle over the lower half of it. Shift+Alt intersects the two, so only the bottom half of the ellipse stays selected: a bowl.Fill it with and give the layer a Stroke of
8.
-
Rim and ropes for the hanging pot
On the same layer, use the Shape tool and click on the bowl's flat top edge to add a
156×24rim in with Corner Radius10and no stroke. The layer's Stroke effect outlines the bowl and rim together, so a shape stroke on top would make the rim's outline twice as thick.Leave this pot without a face. Six faces would crowd the poster, and the cactus should be the star. Instead, add a short white shine stroke on a
Hanging Shinelayer.Add a layer called
Ropes. With the Brush at Size4in , draw each rope separately: click at the dome's peak, then Shift-click the rim's left end. Repeat from the peak to the middle of the rim, and from the peak to its right end.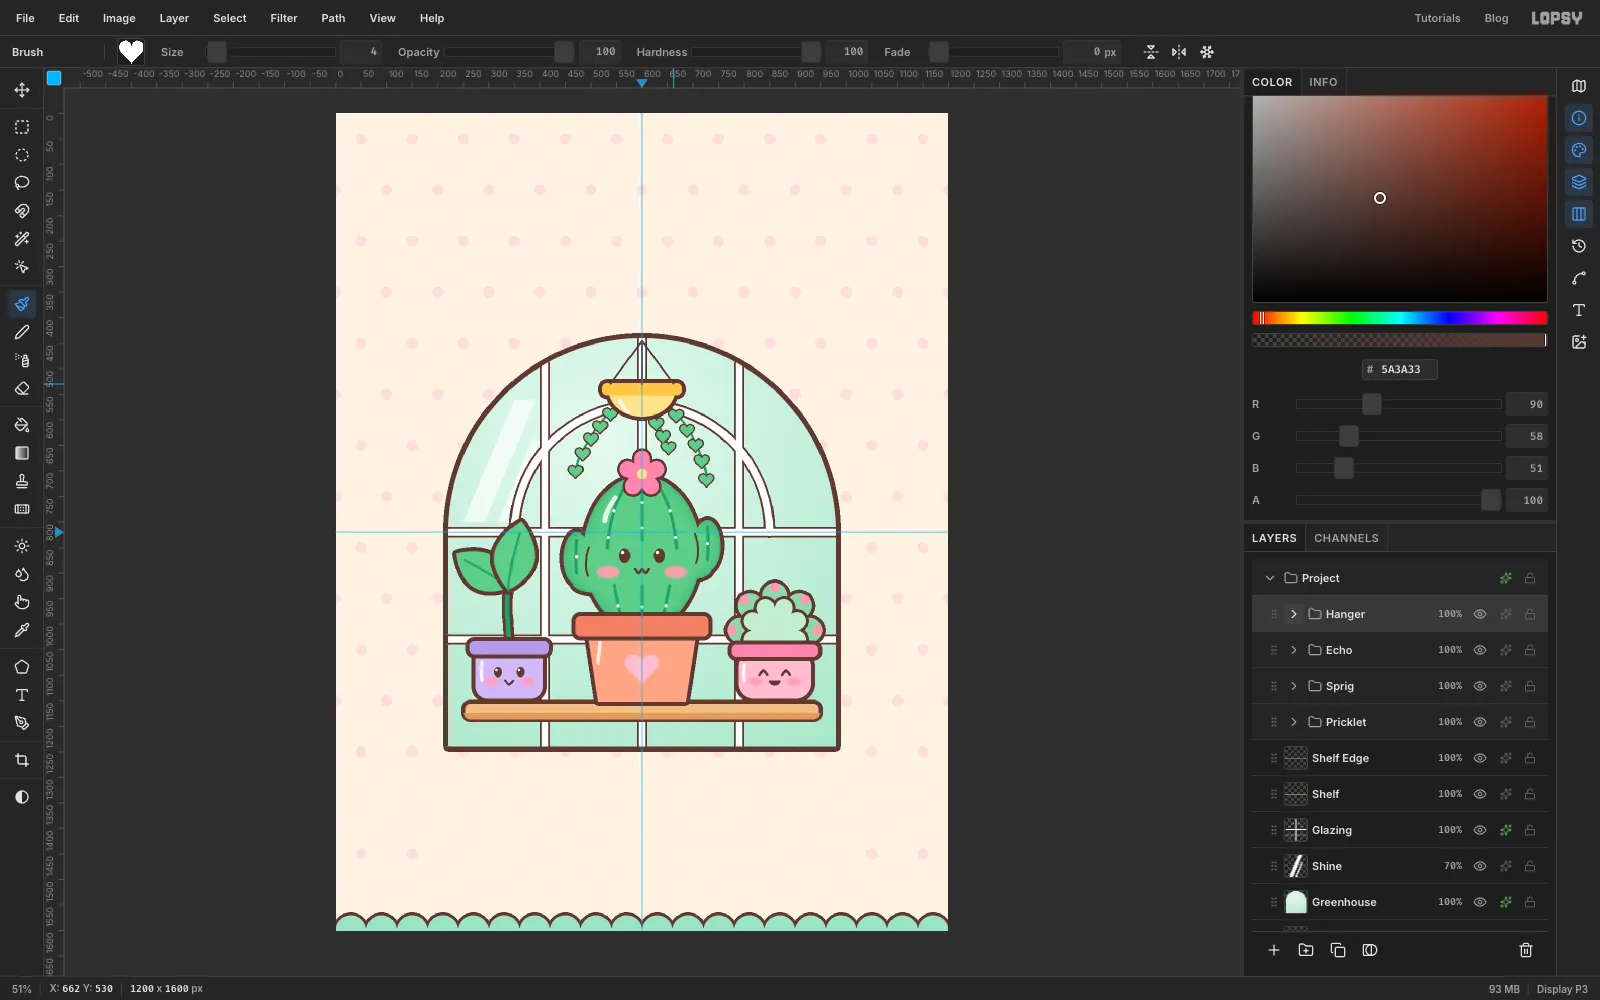
-
Float a happy cloud
Collapse
Hanger, select it and make a group calledCloud. Add a layer calledCloud Body.In the top-left corner, with the Elliptical Marquee, drag one ellipse and Shift-add three more. The whole cloud is about 240 × 150 px:
- two puffs about 100 px across, one on each side;
- a taller 125 px puff in the middle;
- a wide 220 × 60 oval along the bottom to give it a flat base.
Fill with white. Add an Inner Glow in (Size
22, Opacity30) for a hint of blue shade, and a Stroke of8.On a
Cloud Facelayer, use the Brush at Size6in for two happy closed-eye arcs and a small smile. AddCloud Blushthe same way as the cactus's blush (feathered by4, 85%). Under it, on aRaindropslayer, lasso three small teardrops in and give them a Stroke of5. Keep the right-hand drop well away from where the title will go.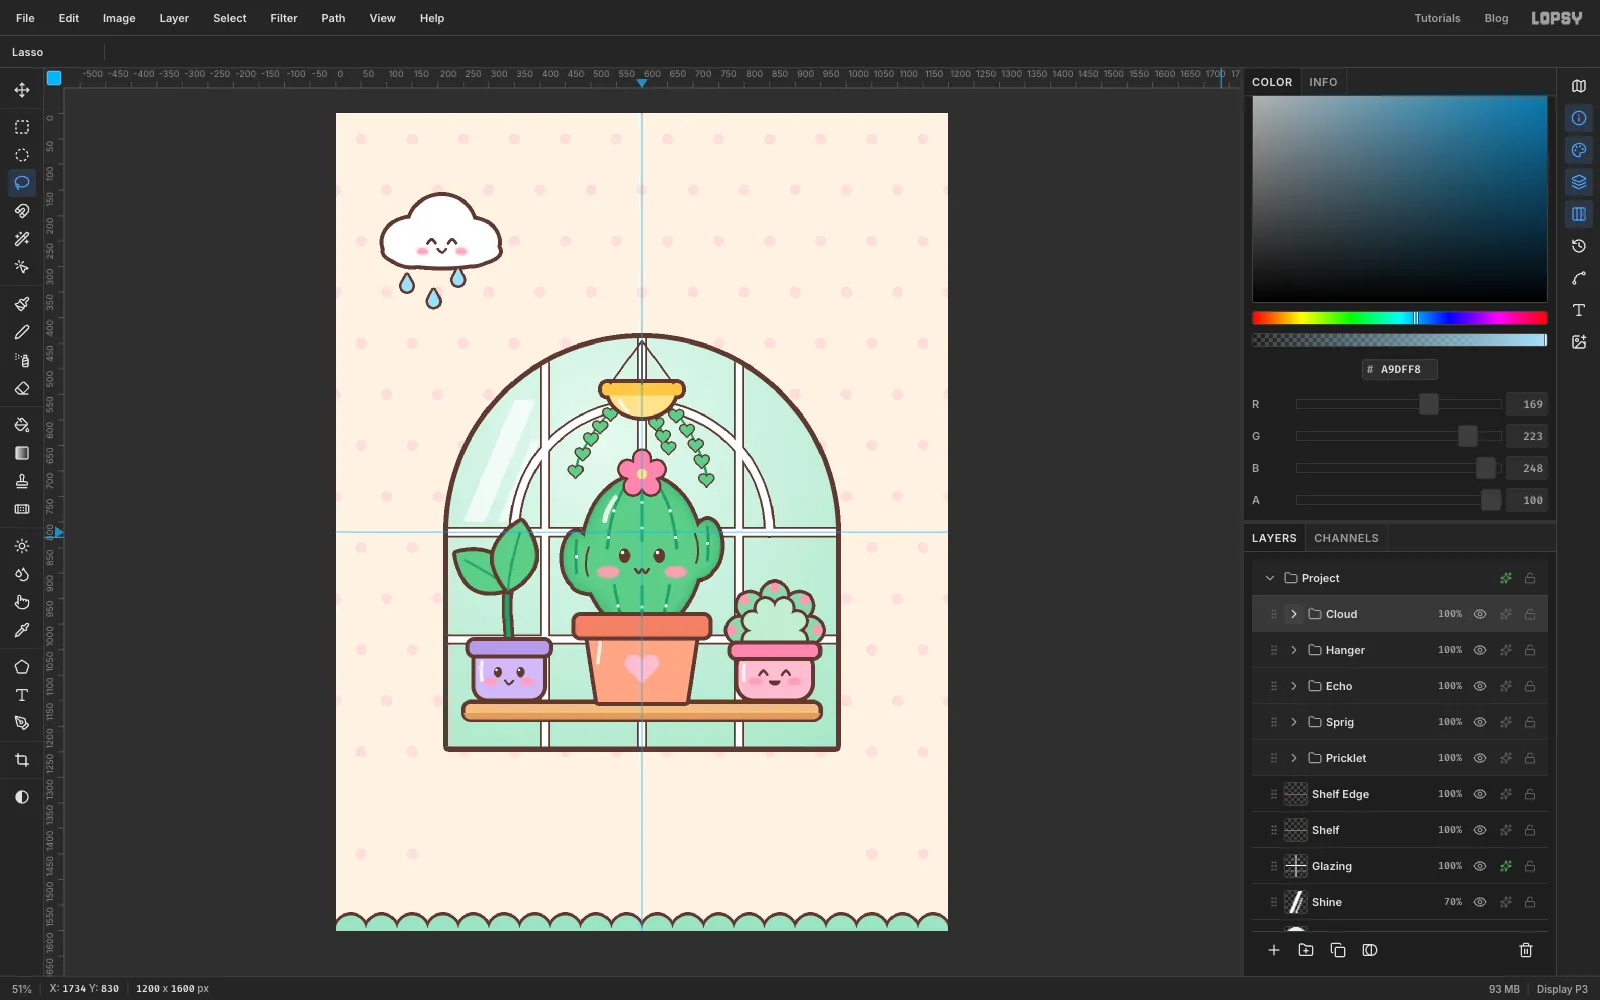
-
Build Dewdrop, the mascot
Make a group called
Dewdropand add a layer calledDrop. In the top-right corner, lasso a teardrop about 150 px wide: a round bottom that narrows to a point at the top.With the selection active, choose the Gradient tool (Linear) with three stops: , at 55% and . Drag from the top-left of the drop to its bottom-right. Deselect and add a Stroke of
8.On a
Glosslayer, lasso a slim tilted oval on the drop's upper left and fill it white, then click a small white dot above it. OnDrop Face, add18×24eyes with catch-lights and a small open half-circle mouth. Put the blush on its ownDrop Blushlayer at 85%.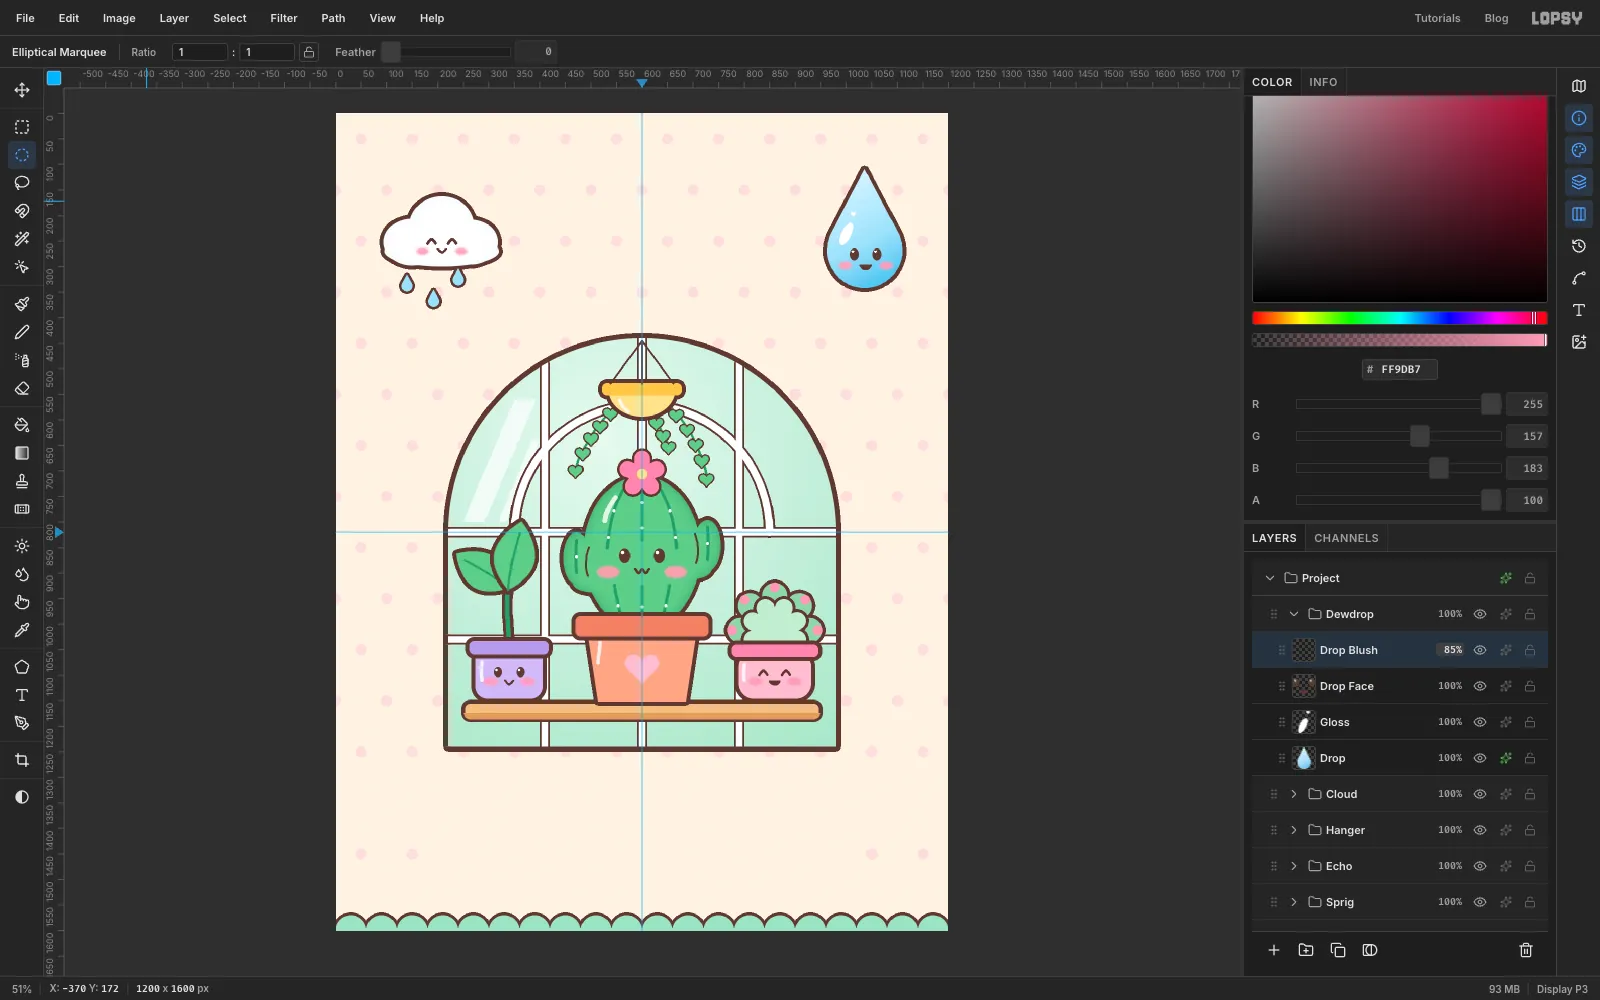
-
Tilt the whole group
Click the
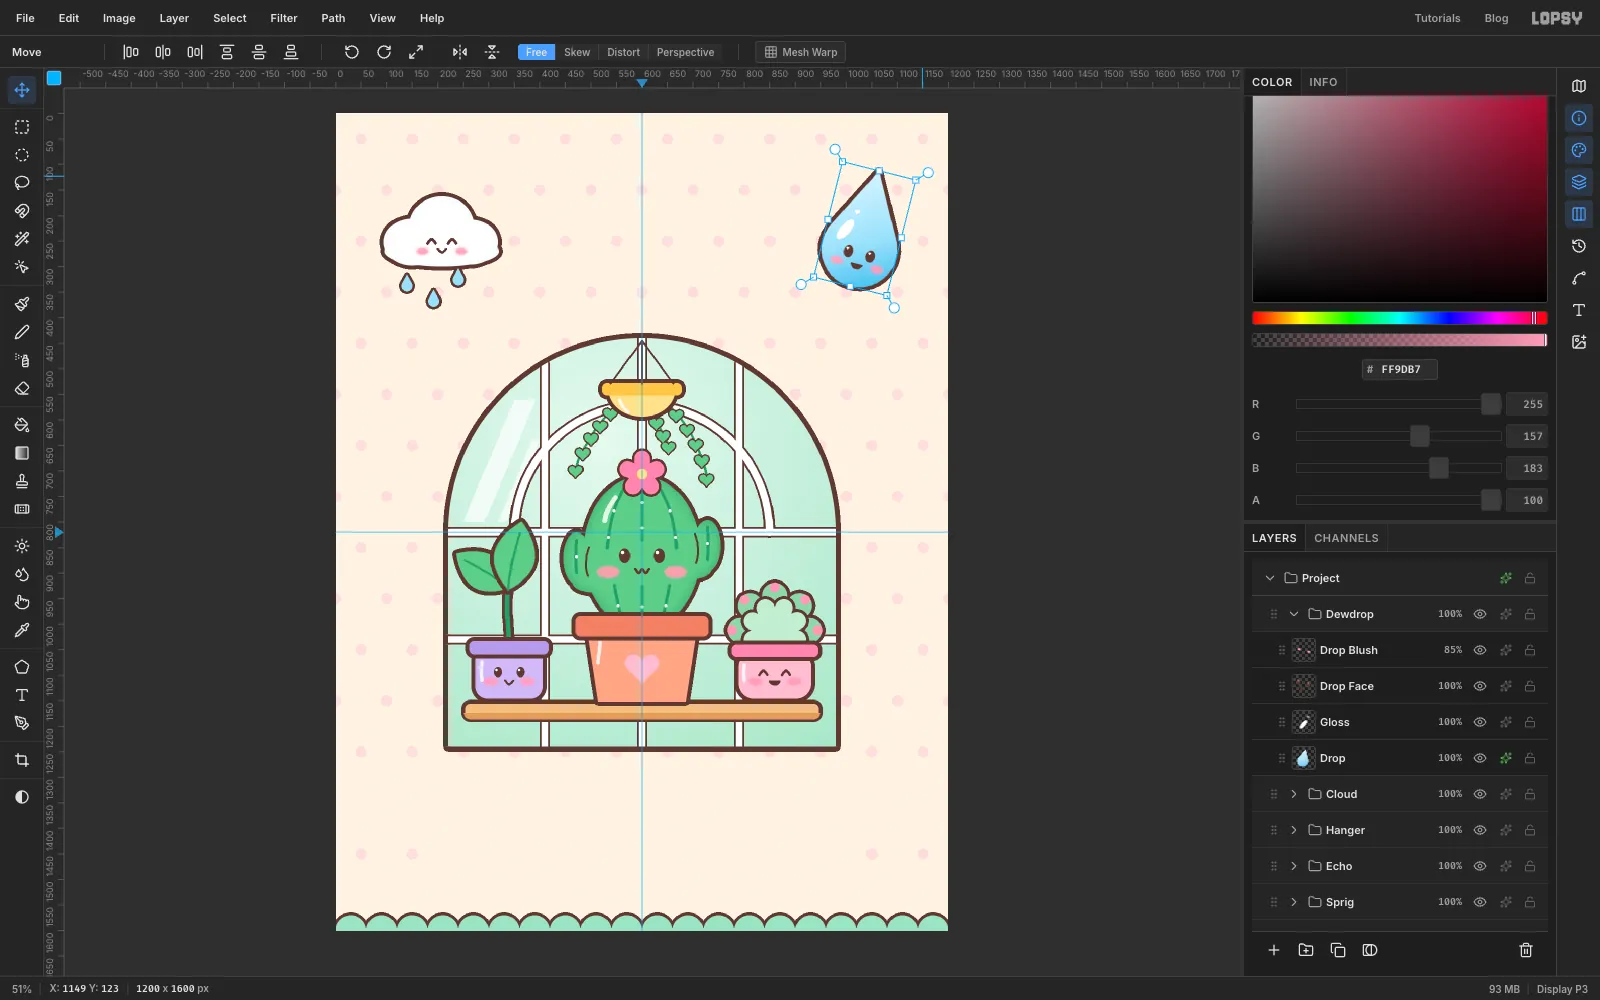
Dewdropgroup row and make sure nothing is selected. With the Move tool, handles appear around everything in the group. Drag the rotation arrow outside the top-right corner clockwise by about 14°, so the drop leans jauntily to the right. Press Cmd+D to commit.The gloss, face and blush all turn together, because the transform applies to the group. Try Cmd+Z and Cmd+Shift+Z: the tilt undoes and redoes as a single step.
-
Scatter sparkles with copy and paste
Collapse
Dewdropand add a top-level layer calledSparkles. On the left of the canvas, about 60 px across, lasso a four-point star with concave, pinched sides like a twinkle, and fill it with and add a Stroke of4. Click Rasterize Layer Style in the effects panel, so the outline becomes real pixels that copy along with the star.To make more, marquee the sparkle, then press Cmd+C and Cmd+V. The copy pastes on a new layer in the same spot. Drag it with the Move tool to a new place, then Cmd-drag a corner handle to make some copies smaller. Place five copies around the outside of the greenhouse, keeping them clear of the title and the faces.
When they're all placed, click the top pasted layer and press Cmd+E (Merge Down) until they're all back on
Sparkles.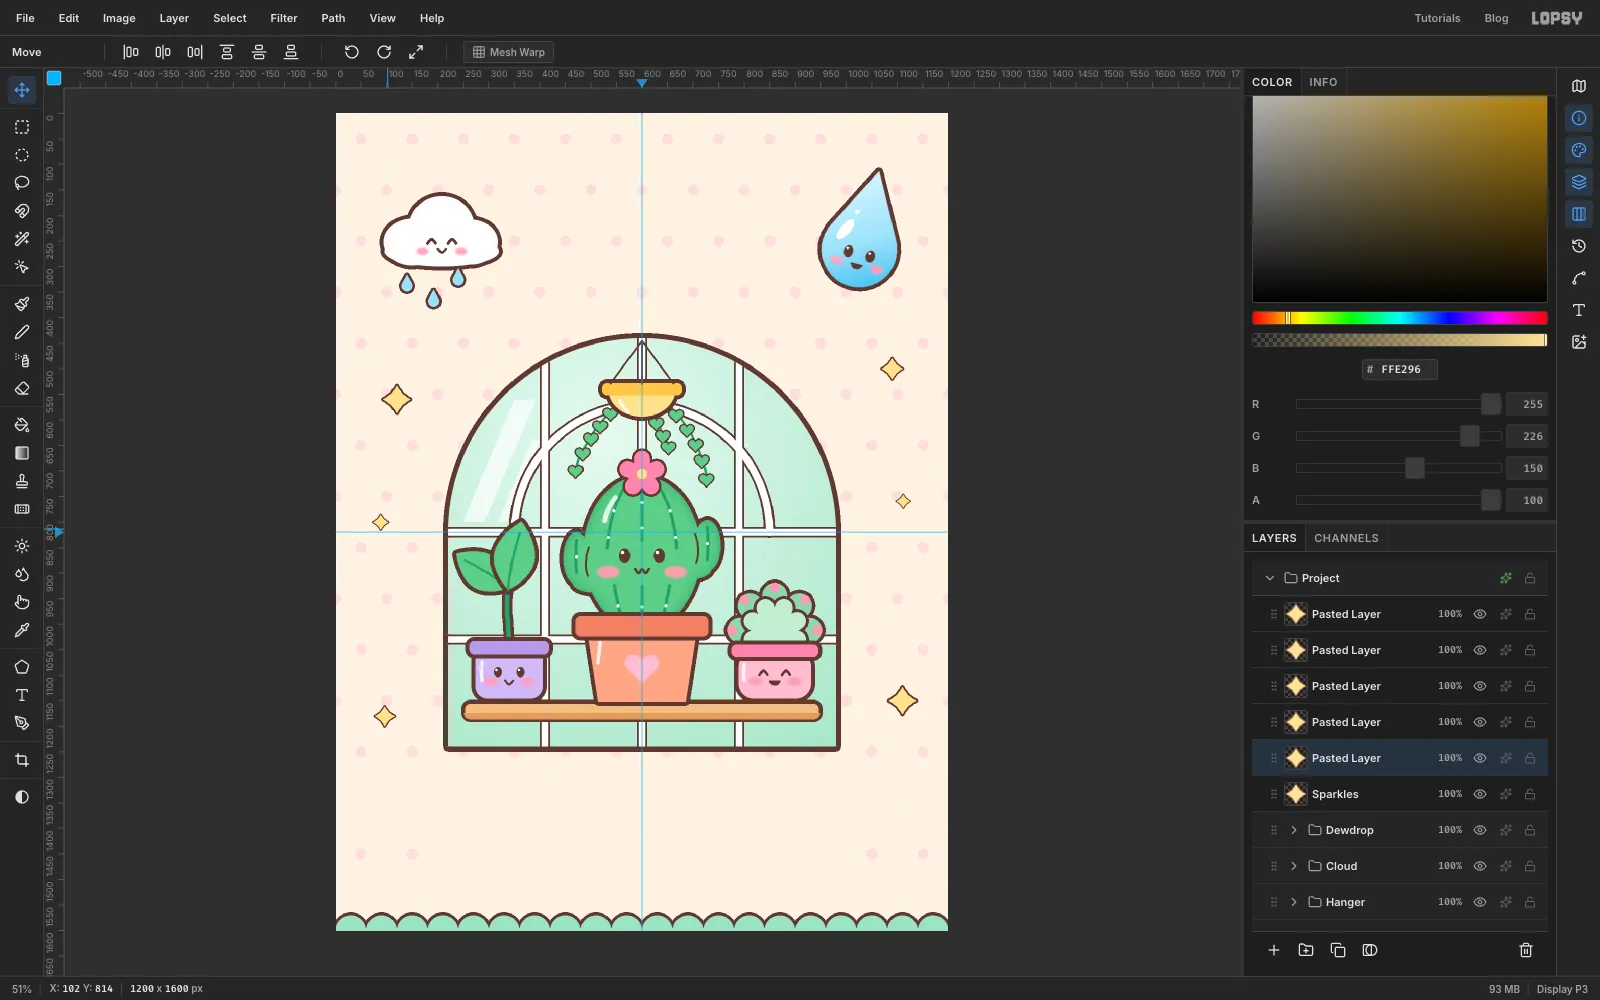
-
Set the kicker
Click the
Sparklesrow first, so the text options don't restyle an existing text layer. Pick the Text tool. In the options bar choose Fredoka, set the weight to SemiBold, Size to40and Align to Center. Set the colour to .Click on the centre guide near the top and type
♥ SPRING PLANT SWAP ♥. Press Tab to commit. Then nudge it with the arrow keys until it sits centred between the cloud and the drop.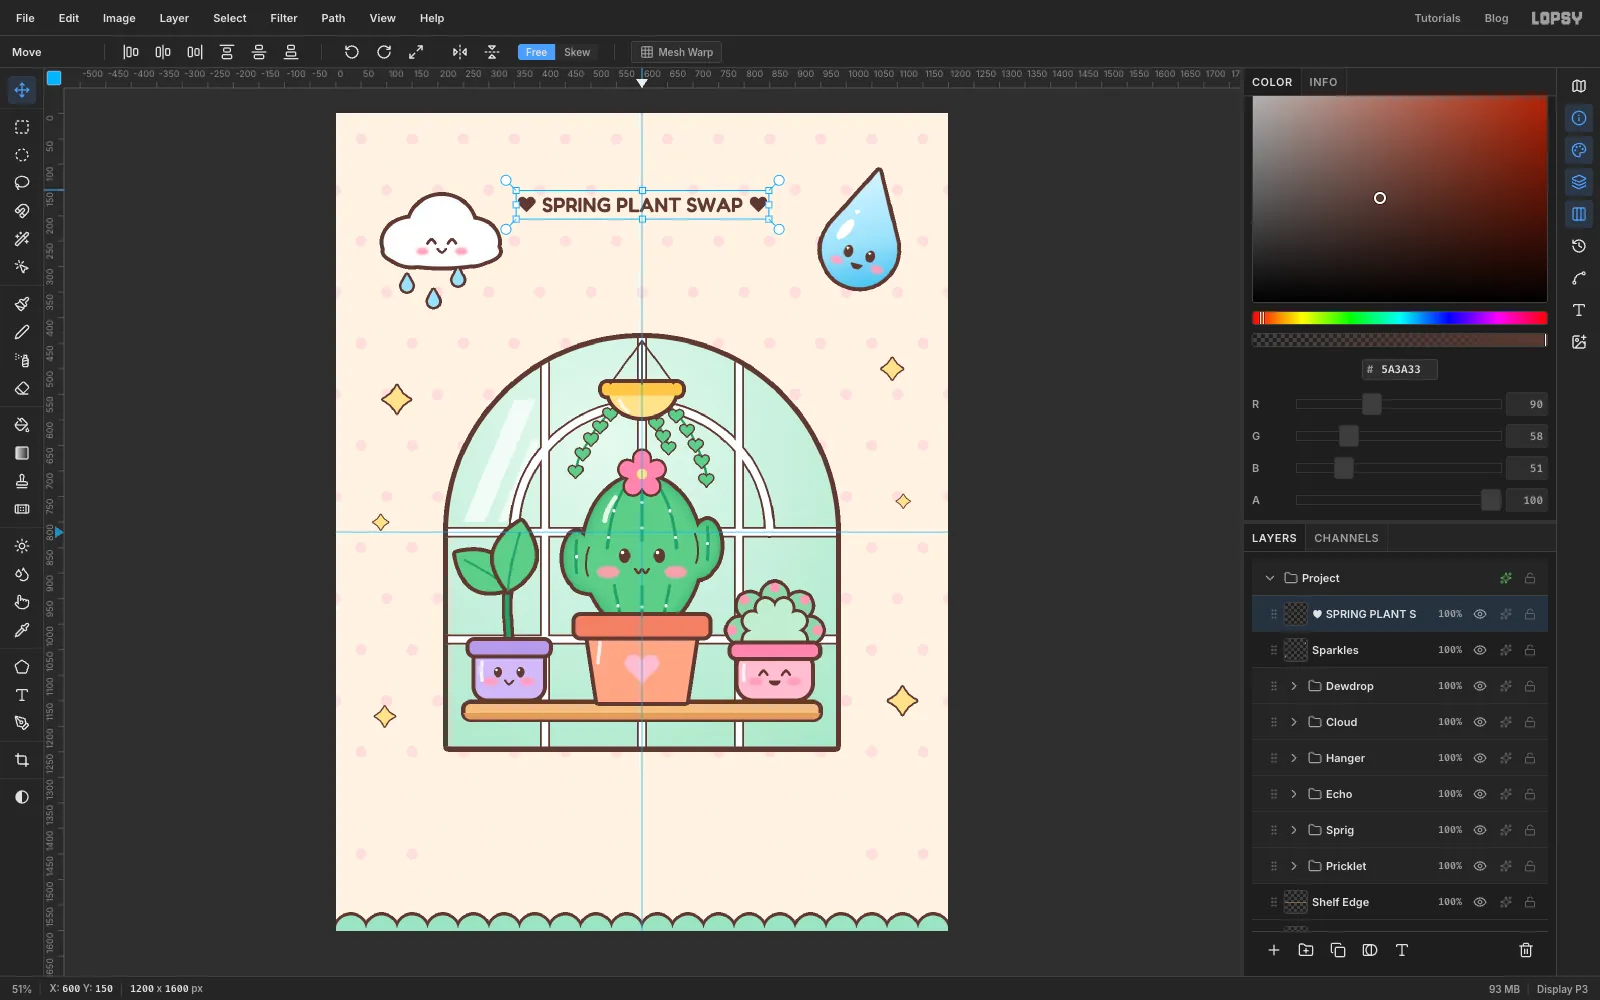
-
Type the title and draw its arc
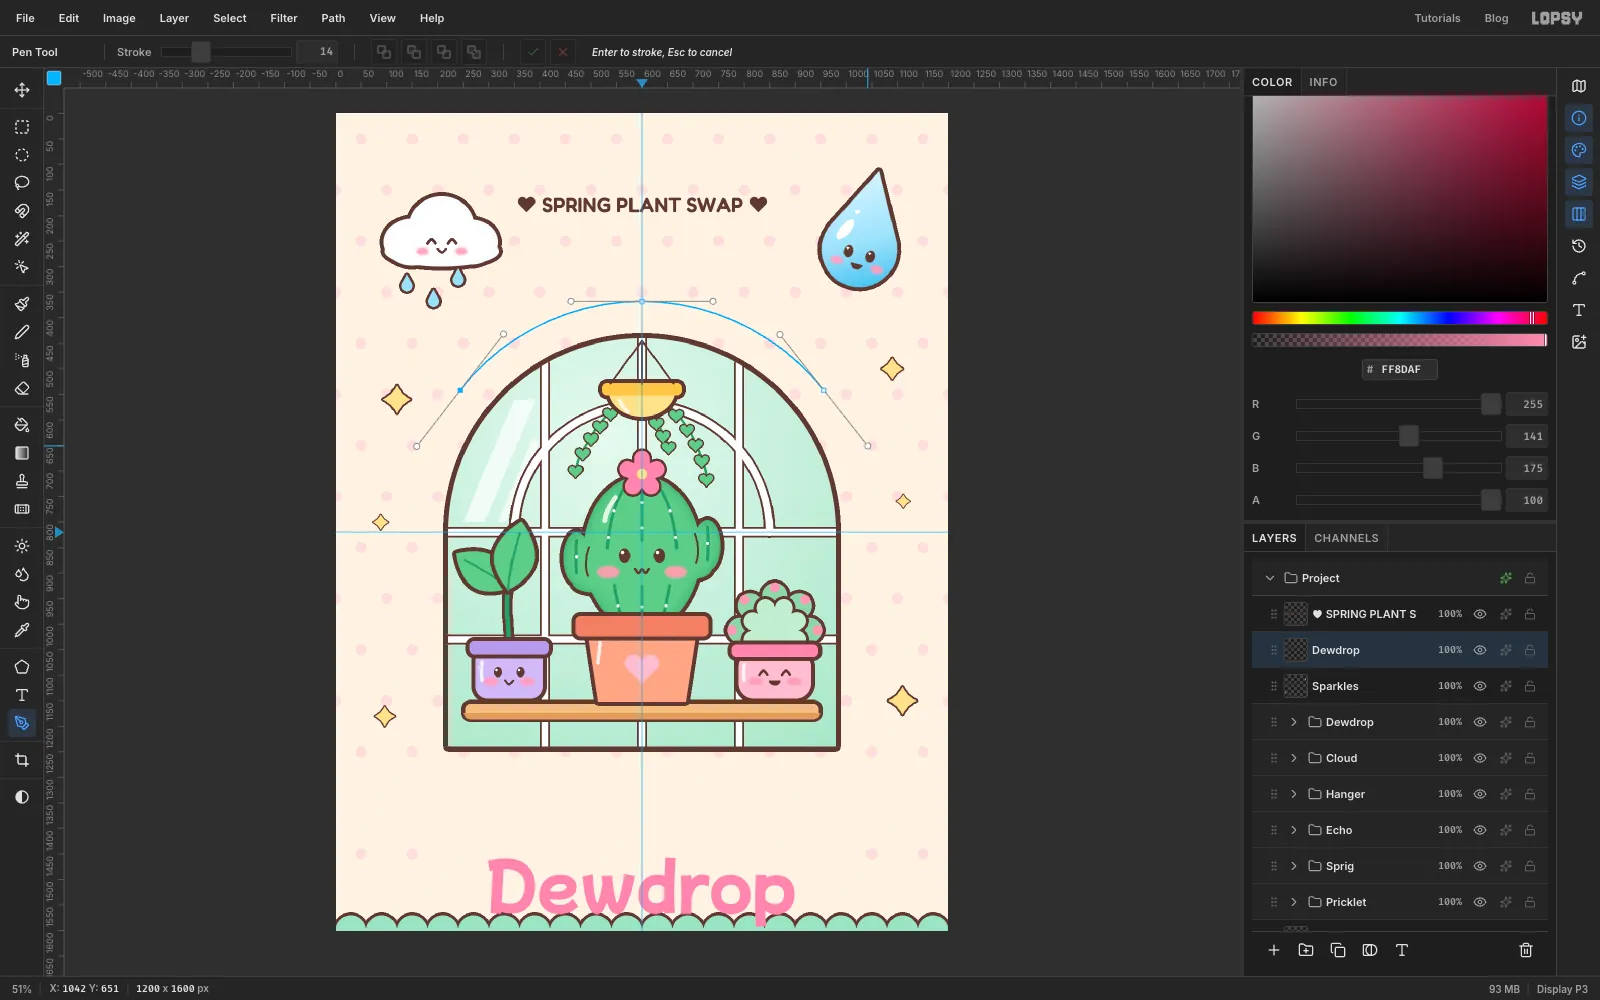
Click
Sparklesagain. Set the font to Mochiy Pop One at Size122, colour , and click in empty canvas near the bottom to typeDewdrop. It's parked there for now.Pick the Pen tool and draw the arc the title will follow. It should be centred on the same point as the greenhouse roof, about 70 px further out. Click-drag three anchors: one on the left above the roof, one above the peak and one on the right. Drag each handle along the curve. Click the ✓ (Commit path) button instead of pressing Enter, because you want a path to bind to, not a stroke.
-
Bend the title along the path
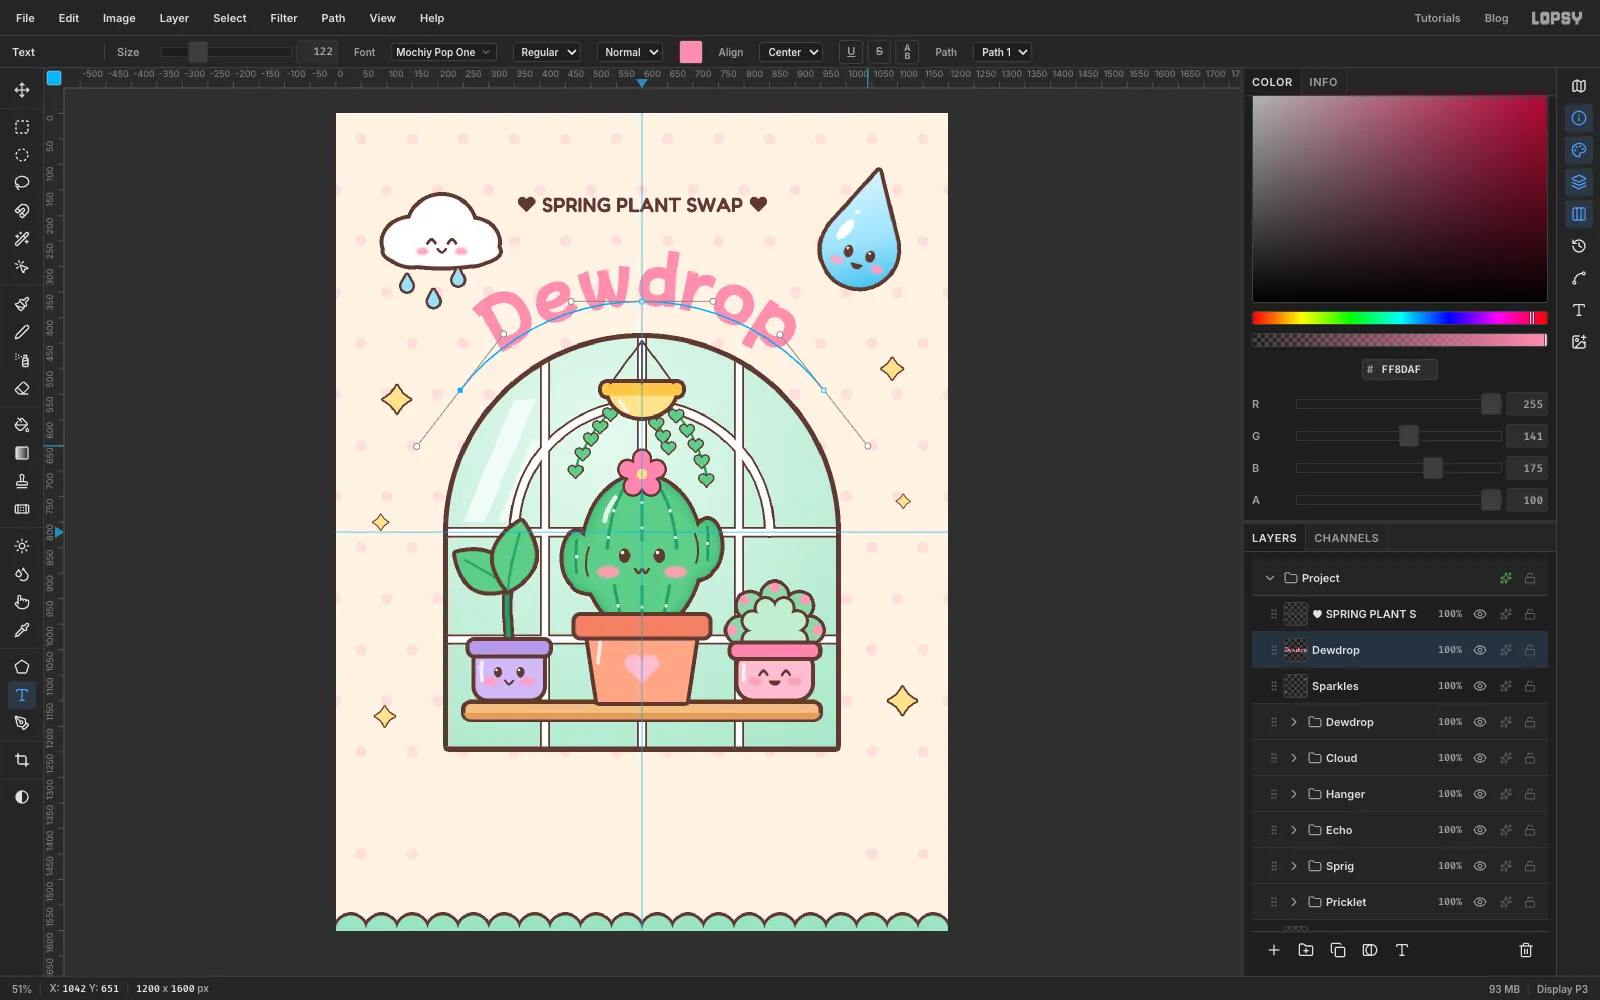
Click the
Dewdroptext layer (the one with the T, not theDewdropgroup that holds the mascot), then pick the Text tool. In the options bar, open the Path dropdown and choose your arc. The letters jump up and flow along the curve, centred because the alignment is still Center.In the Paths panel, click the selected path again to deselect it, which hides its blue outline.
-
Make the title a sticker
Open the title's effects and turn on:
- Stroke in , Width
8. - Drop Shadow in with Offset X
0, Offset Y9, Blur0, Spread0and Opacity100. A hard shadow with no blur gives that chunky sticker edge. - Inner Glow in , Size
12, Opacity55, for a glossy candy look.
Check that the letters keep a steady gap above the dome all the way round. If the descender of the "p" comes close to the roof, redraw the arc a little further out or drop the Size to about
116. The heavy outline and shadow make the word look slightly off-centre, so pick the Move tool and nudge it about 12 px to the right with the arrow keys. The nudge sticks even though the text follows a path.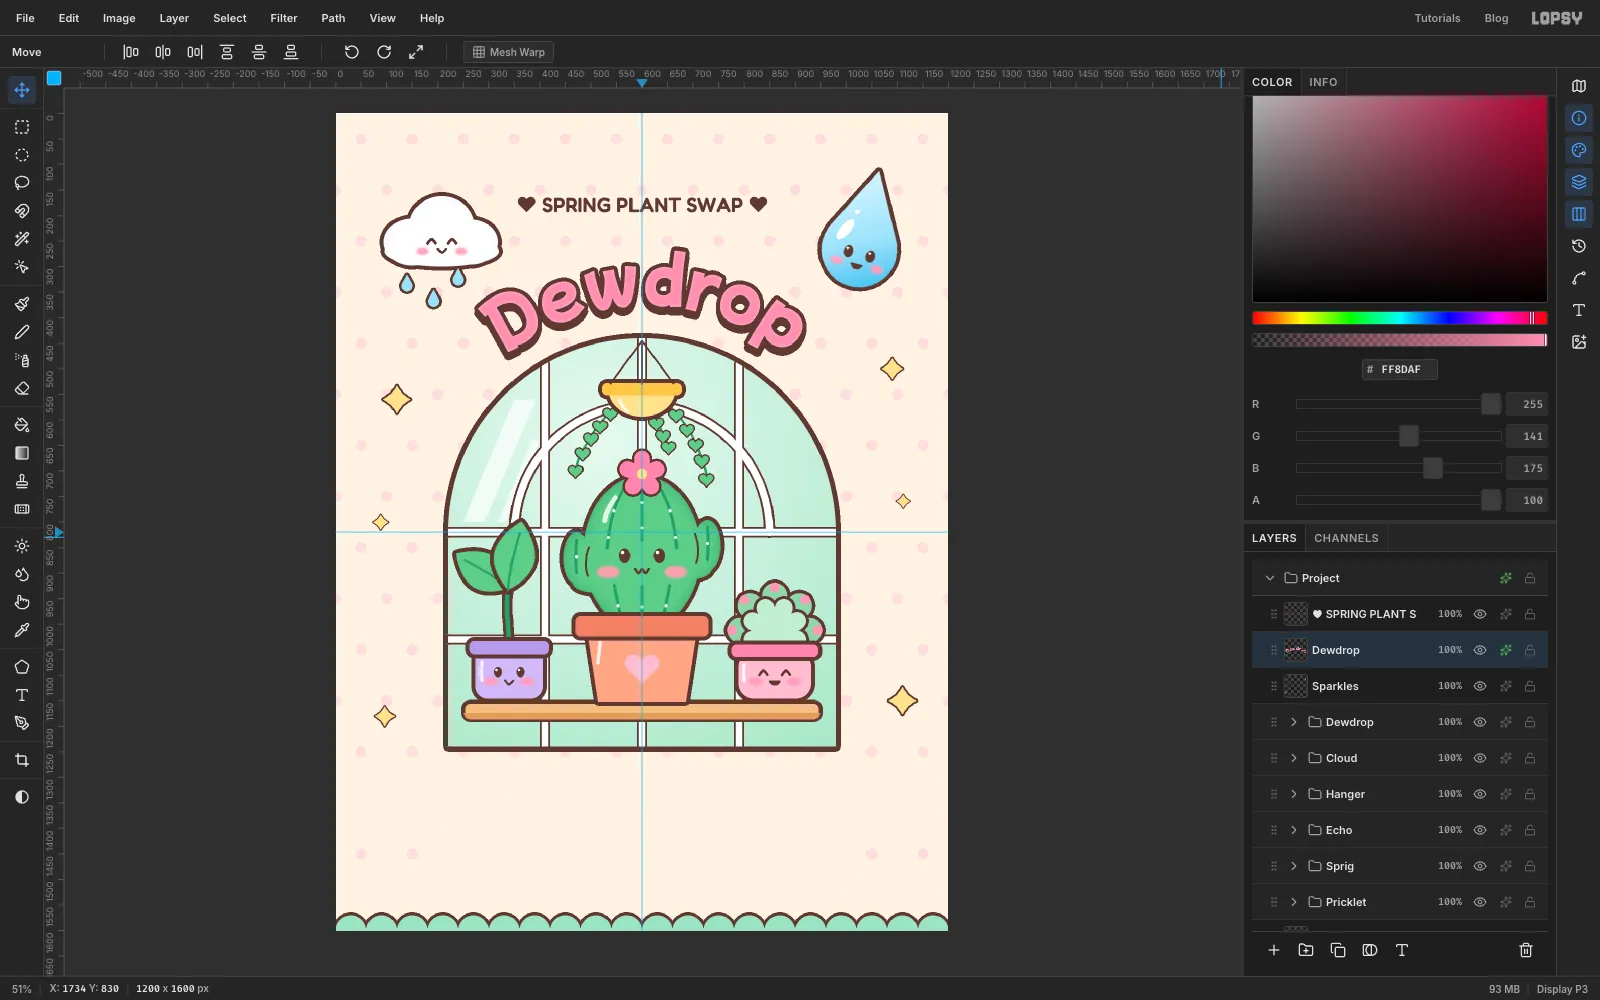
- Stroke in , Width
-
Build the GREENHOUSE banner
Click
Sparklesand make a new group calledBanner. Add a layer calledPill. Use the Shape tool (Rectangle, Corner Radius68, fill , stroke , Width8) and click on the centre guide just under the shelf to make it860×136. A radius of half the height turns the rectangle into a pill. Its top edge should overlap the bottom of the shelf. Add a Drop Shadow like the title's (Offset Y10, Blur0, Opacity100).On a
Pill Shinelayer, Shift-click a white 6 px Brush line just inside the pill's top edge and set the layer to 50%.Click
Pill, set the Text tool to Mochiy Pop One at78in white, and typeGREENHOUSEon the pill. Open the Text panel and set Letter spacing to4, so the outlined letters don't run together. Centre it on the pill with the arrow keys, then add a Stroke of7in .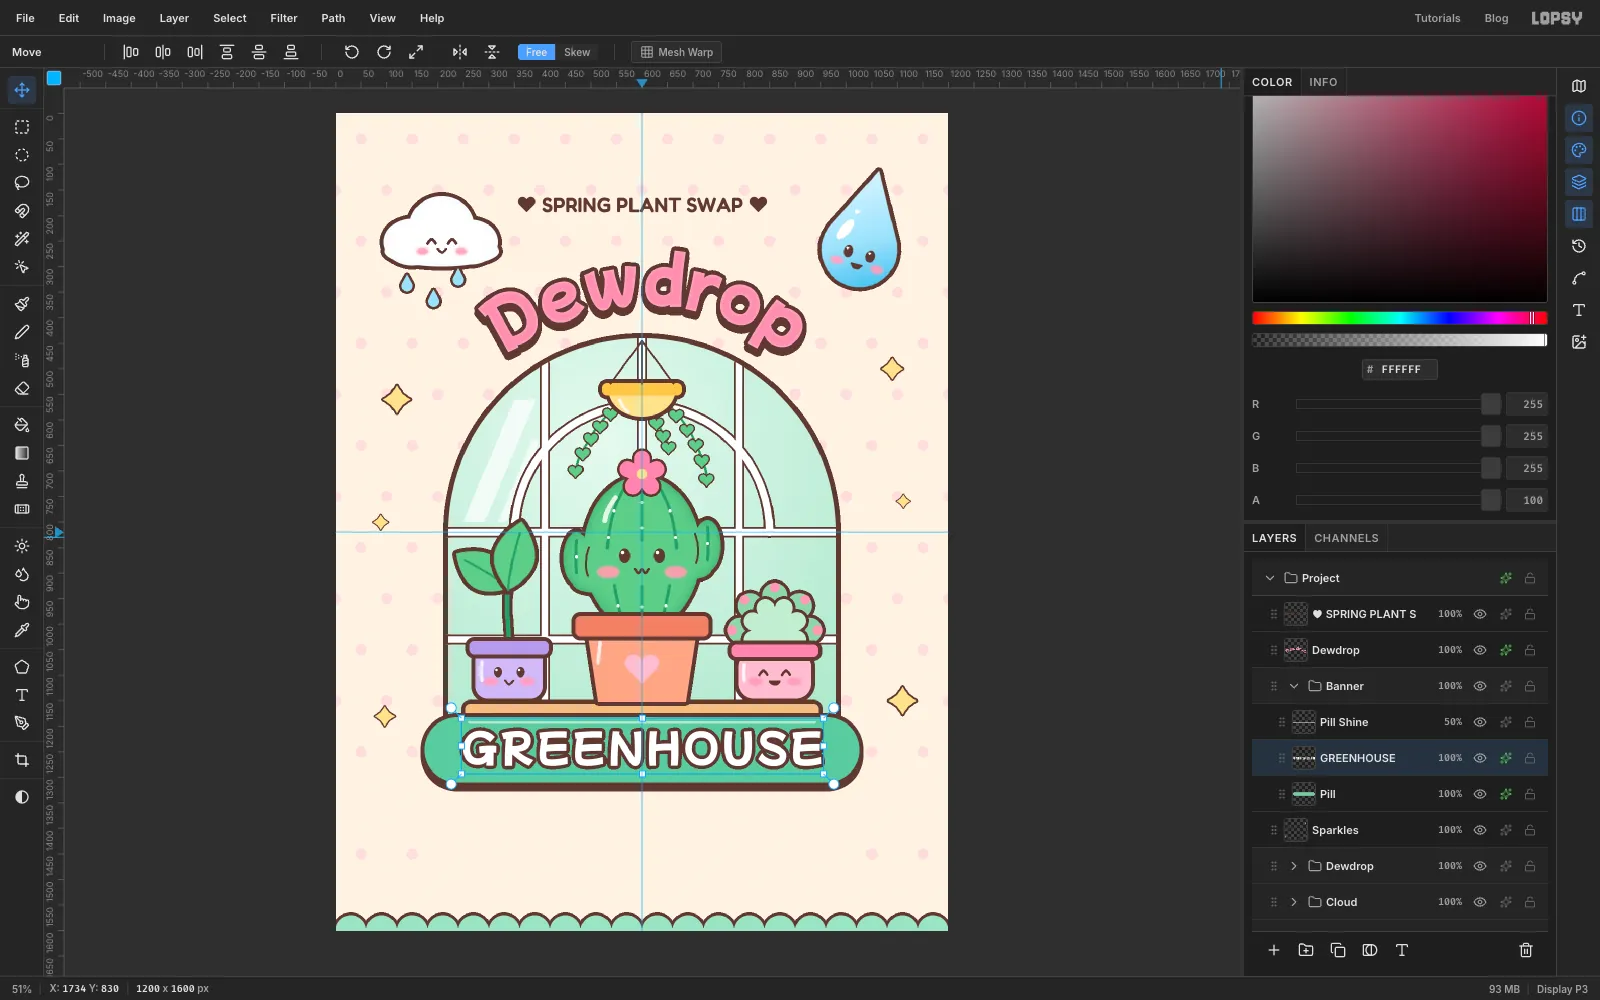
-
Tilt the banner group
Click the
Bannergroup row with nothing selected. With the Move tool, rotate it about 2° anticlockwise, so the right end rises a little, and press Cmd+D. The text stays live and editable even after the group is rotated.Collapse
Banner.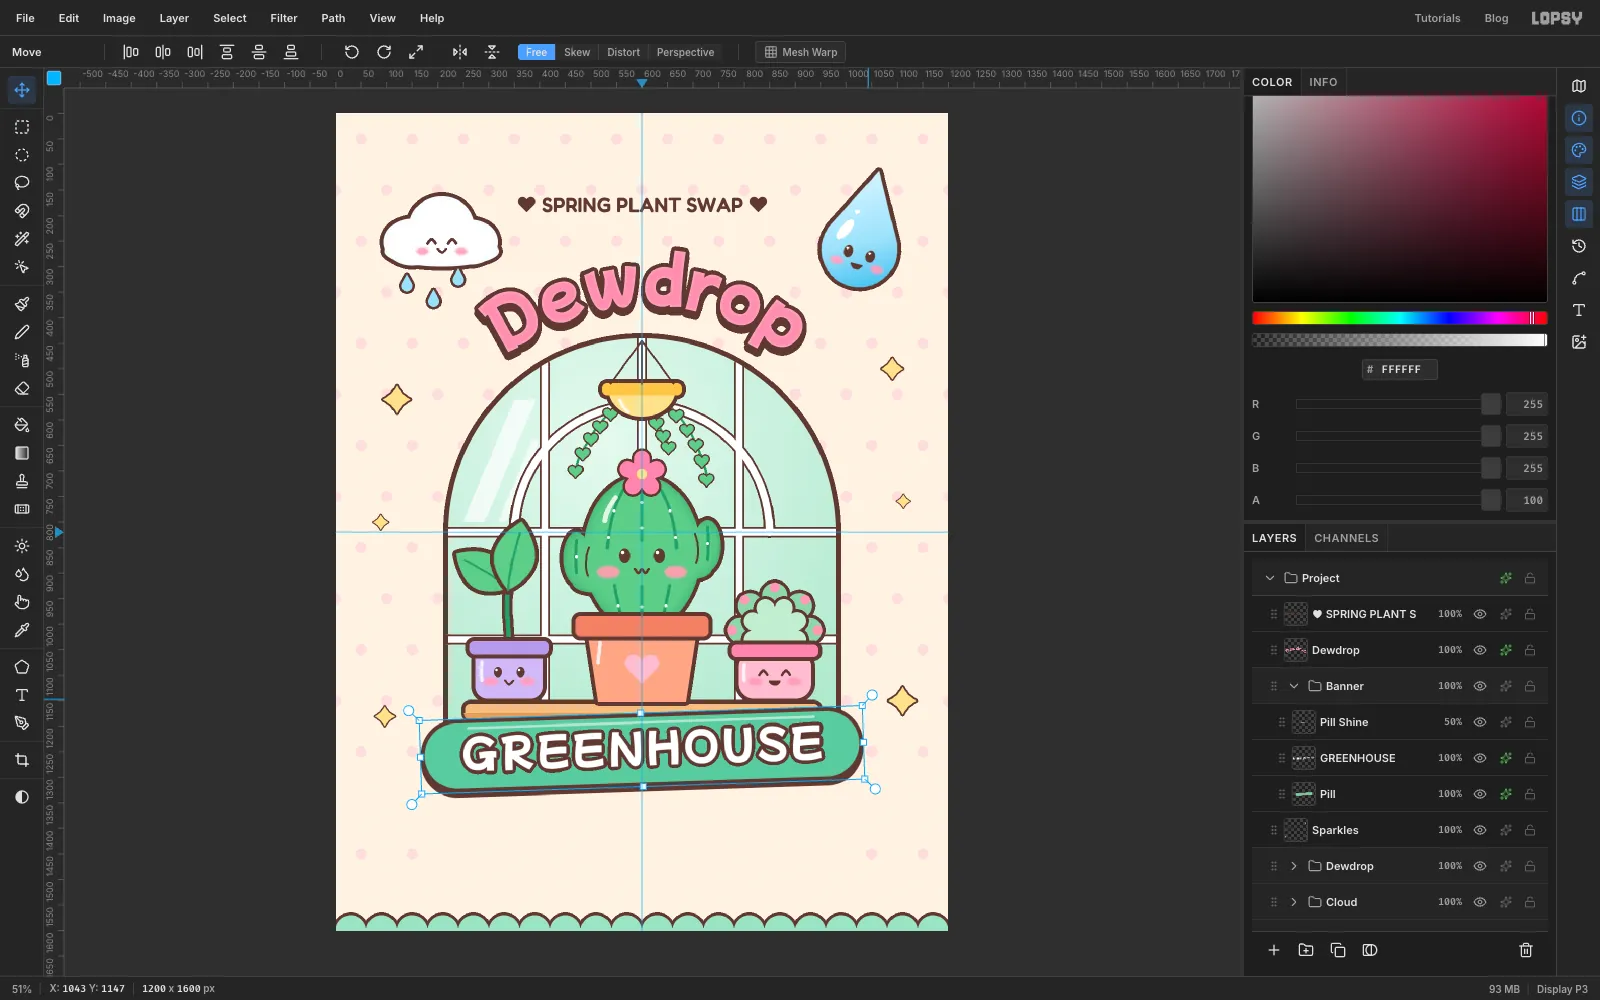
-
Add the event details
The letter spacing you set on GREENHOUSE carries over to new text. With the
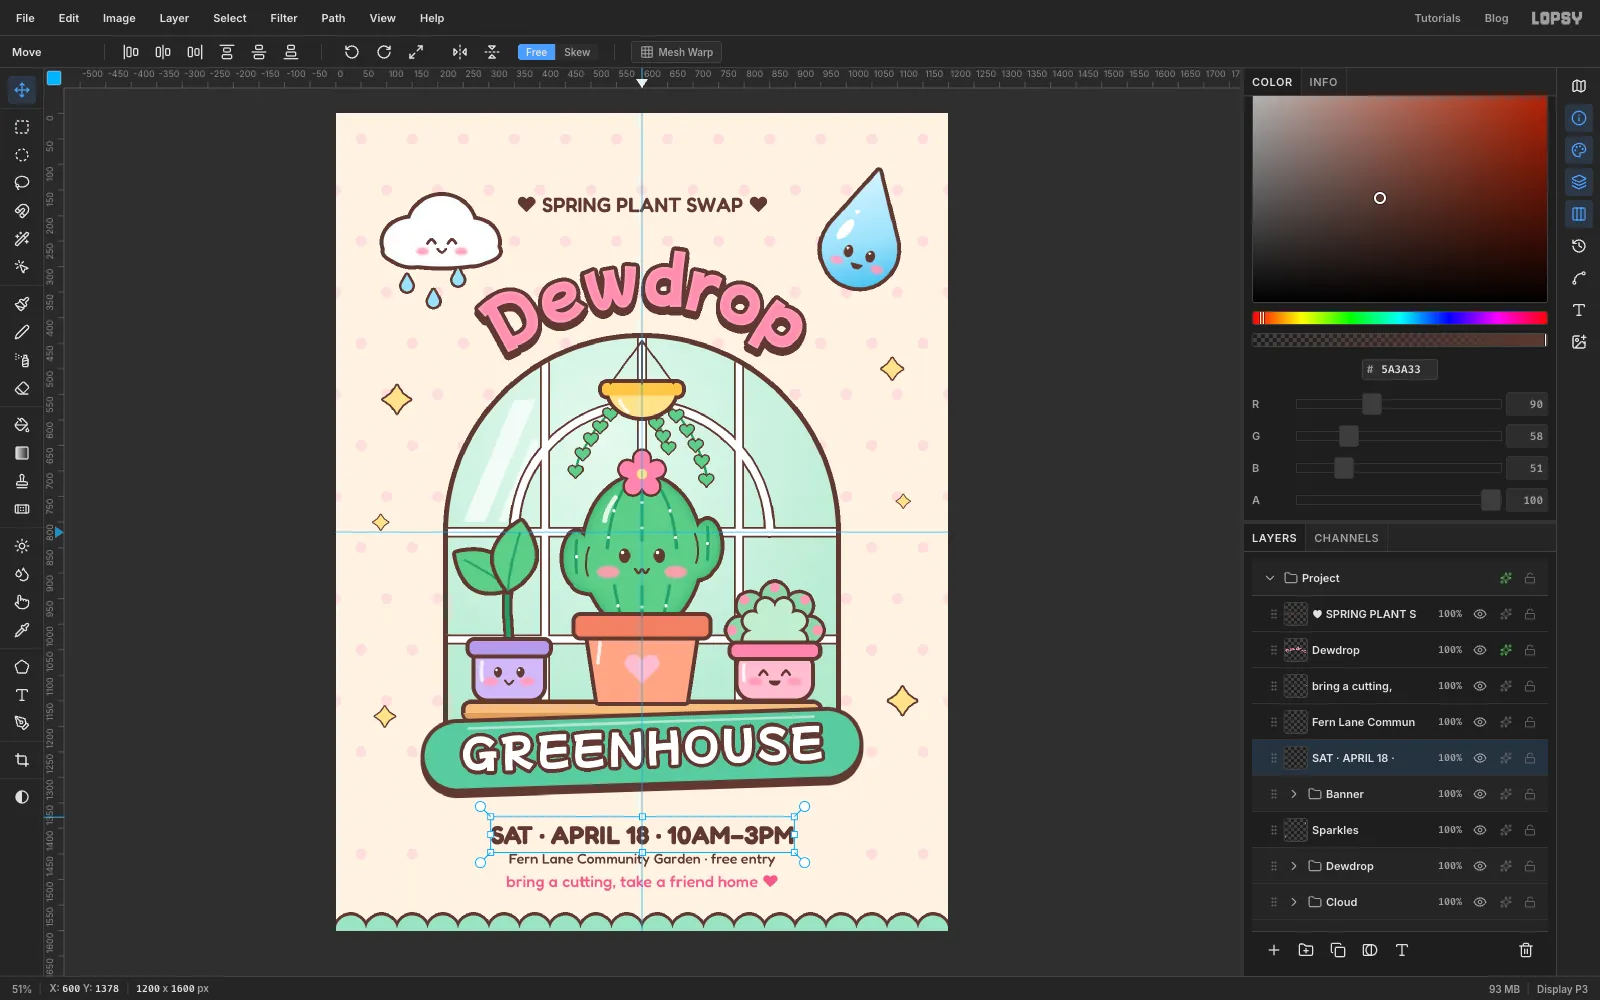
Bannergroup selected and the Text tool active, open the Text panel and set Letter spacing back to0.Create the three lines from the bottom up, so each new click lands in empty canvas rather than on the line you just made. Use Fredoka with Align Center for all of them:
bring a cutting, take a friend home ♥: Medium,32, .Fern Lane Community Garden · free entry: Medium,28, .SAT · APRIL 18 · 10AM–3PM: Bold,50, .
Centre each on the guide. Put the date about 60 px below the banner, the venue about 45 px under the date, and the tagline about 45 px under that, so there's roughly the same space above the date as below the tagline.
-
Finish with shadows and grain
Click
Shelf Edgeand add a layer calledPot Shadows. With the Elliptical Marquee, drag a thin flat oval at the base of each pot, holding Shift to add the second and third. Fill with and run Filter → Gaussian Blur… at4. Set the blend mode to Multiply and the opacity to 30%.For grain, click the
Bannergroup and add a layer calledGrain. It lands above the banner but under the text layers, so the type stays crisp. Fill it with and run Filter → Add Noise… with Amount40and Mode Mono. Set the blend mode to Overlay and the opacity to 55%. Mid grey disappears in Overlay, so only the speckle shows, and it makes the flat pastels look printed.Save with File → Save Project, and export with File → Quick Export PNG.