Make a Sticker-Bomb Hanukkah Card with Die-Cut Stickers
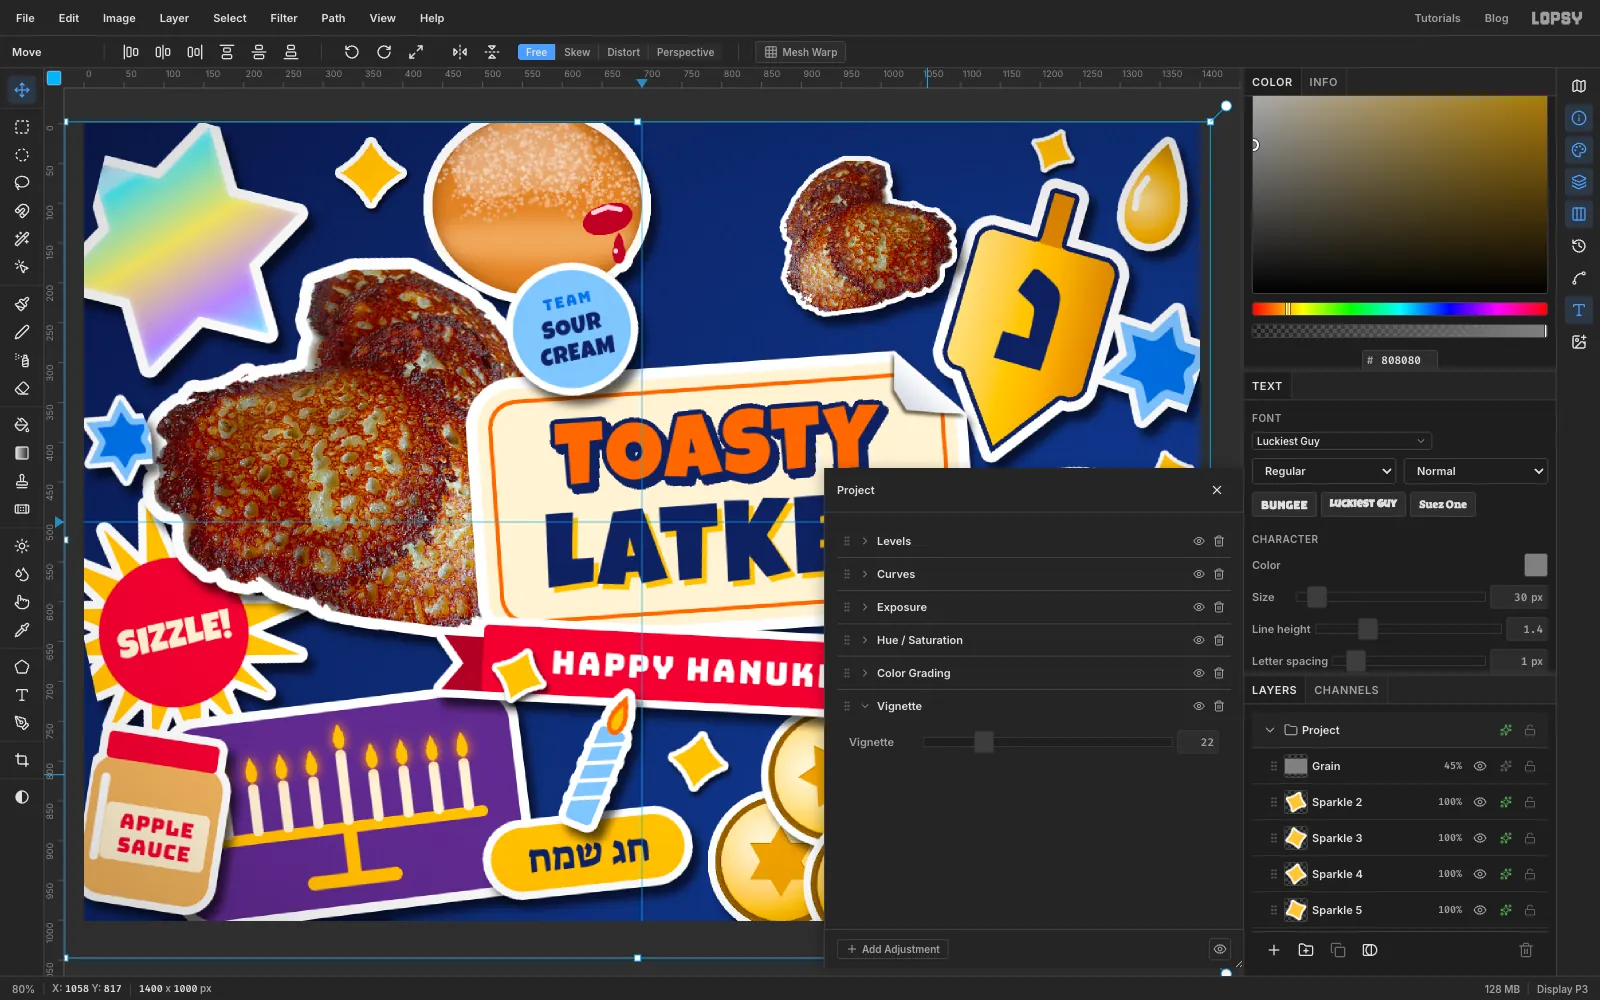
Build a sticker-bomb Hanukkah card in Lopsy: die-cut white borders, a cut-out latke photo, a holographic star, a peeled corner and a pile of embossed gelt.
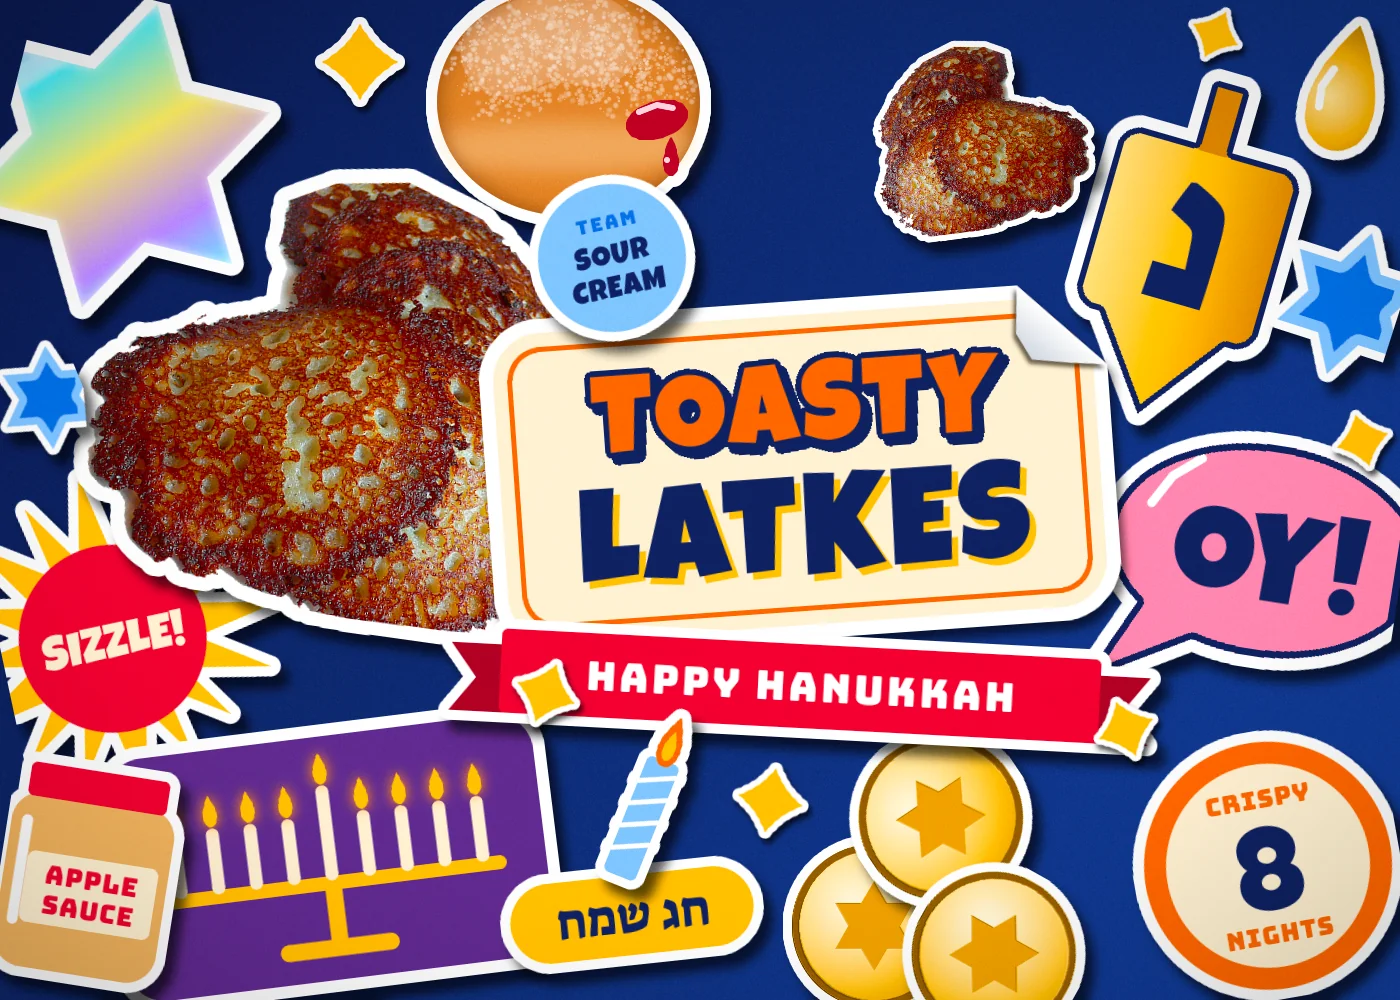
A sticker bomb is what happens to a laptop lid, a skateboard or a guitar case after a few years of collecting stickers: dozens of die-cut vinyl stickers slapped on at odd angles, overlapping each other and running off the edges until hardly any of the surface shows. Every sticker has a thick white border from the die cutter, a little shadow where it lifts off the surface, and its own little world of colour and type.
This tutorial uses that look for a Hanukkah card called Toasty Latkes. You'll make each sticker as flat art on its own layer, then "die-cut" it: load its outline as a selection, grow it, fill a white backing underneath and merge the two. After that you tilt it, give it a shadow and move on to the next one. The stickers are a mix of drawn and photographic:
- a real latke photo, cut out with the Magic Wand and a Lasso intersect
- a holographic Star of David built from two Shape-tool triangles
- a dreidel with a Hebrew letter nun, and a חג שמח (Chag Sameach) pill
- a SIZZLE! starburst made with the Sunburst filter
- a sufganiyah (jelly doughnut) shaded with the Dodge tool and powdered with the Spray tool
- a menorah badge, an OY! speech bubble, embossed gelt coins, an applesauce jar and more
- a title sticker with a peeled-back corner
The card is 1400 × 1000 px. The latke photo is 00 Potato Latkes.jpg by Mark Mitchell on Wikimedia Commons (CC BY 2.0). Open its 1920 px-wide preview in your browser.
The tools you'll use:
- the Shape tool (polygons and rounded rectangles), the Pen tool with Path to Selection, the Lasso, the Elliptical Marquee and the Magic Wand, with Shift to add and Shift+Alt to intersect
- Cmd-click on a layer thumbnail, Select → Grow, Shrink, Feather and Inverse, and Edit → Fill
- the Gradient tool (linear and radial) and its Advanced… stop editor
- the Brush with Shift-click straight lines, the Spray tool and the Dodge tool
- Sunburst, Emboss, Desaturate, Hue/Saturation, Unsharp Mask and Add Noise
- the Move tool's rotate and scale handles and Flip Vertical / Horizontal
- Copy and Paste, Duplicate Layer, Merge Down, dragging rows in the Layers panel, and Group Layers
- live text in Luckiest Guy, Bungee and Suez One (which has Hebrew letters)
- the Drop Shadow, Stroke, Inner Glow and Outer Glow layer effects, the Hard Light and Overlay blend modes, and a Vignette adjustment
The palette:
-
Card
-
Die-cut white
-
cream
-
ink
-
Gold
-
Latke orange
-
red
-
ribbon tails
-
jelly
-
Bubble pink
-
sky
-
blue
-
plum
-
Foil
-
Doughnut
-
crust shadow
-
belt
-
Applesauce
-
oil
Positions are given in document pixels. Hover over the canvas and watch the X and Y readout at the bottom left of the window.
-
Set up the card and the backdrop
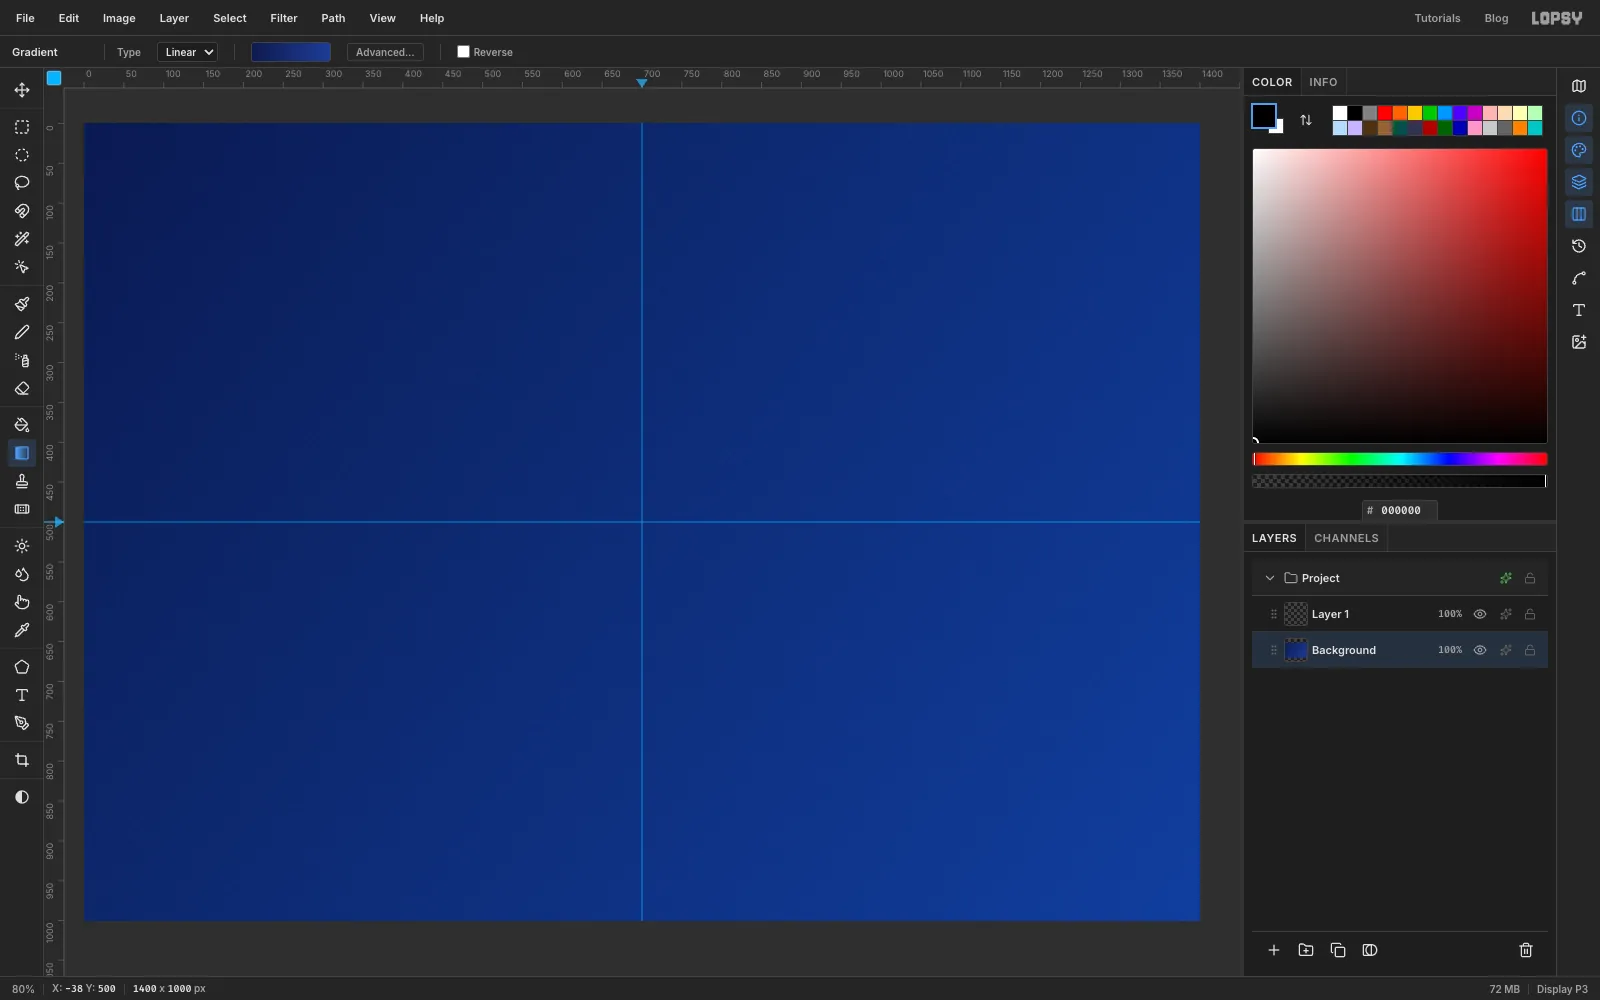
Choose File → New, pick Pixels, and make a 1400 × 1000 document. Click the Background row in the Layers panel.
Pick the Gradient tool, set it to Linear and open Advanced…. Click a stop and type its colour in the Hex field: for the left stop and for the right one. Drag from the top-left corner of the card to the bottom-right corner.
Choose Filter → Add Noise…, set Amount to 6, click Mono and apply. It gives the card a faint printed grain.
Click the top ruler at x 700 and the left ruler at y 500 to drop two guides through the centre. They help you balance the layout as the stickers pile up. Then rename Layer 1 to Star (double-click its name).
-
Build a Star of David from two triangles
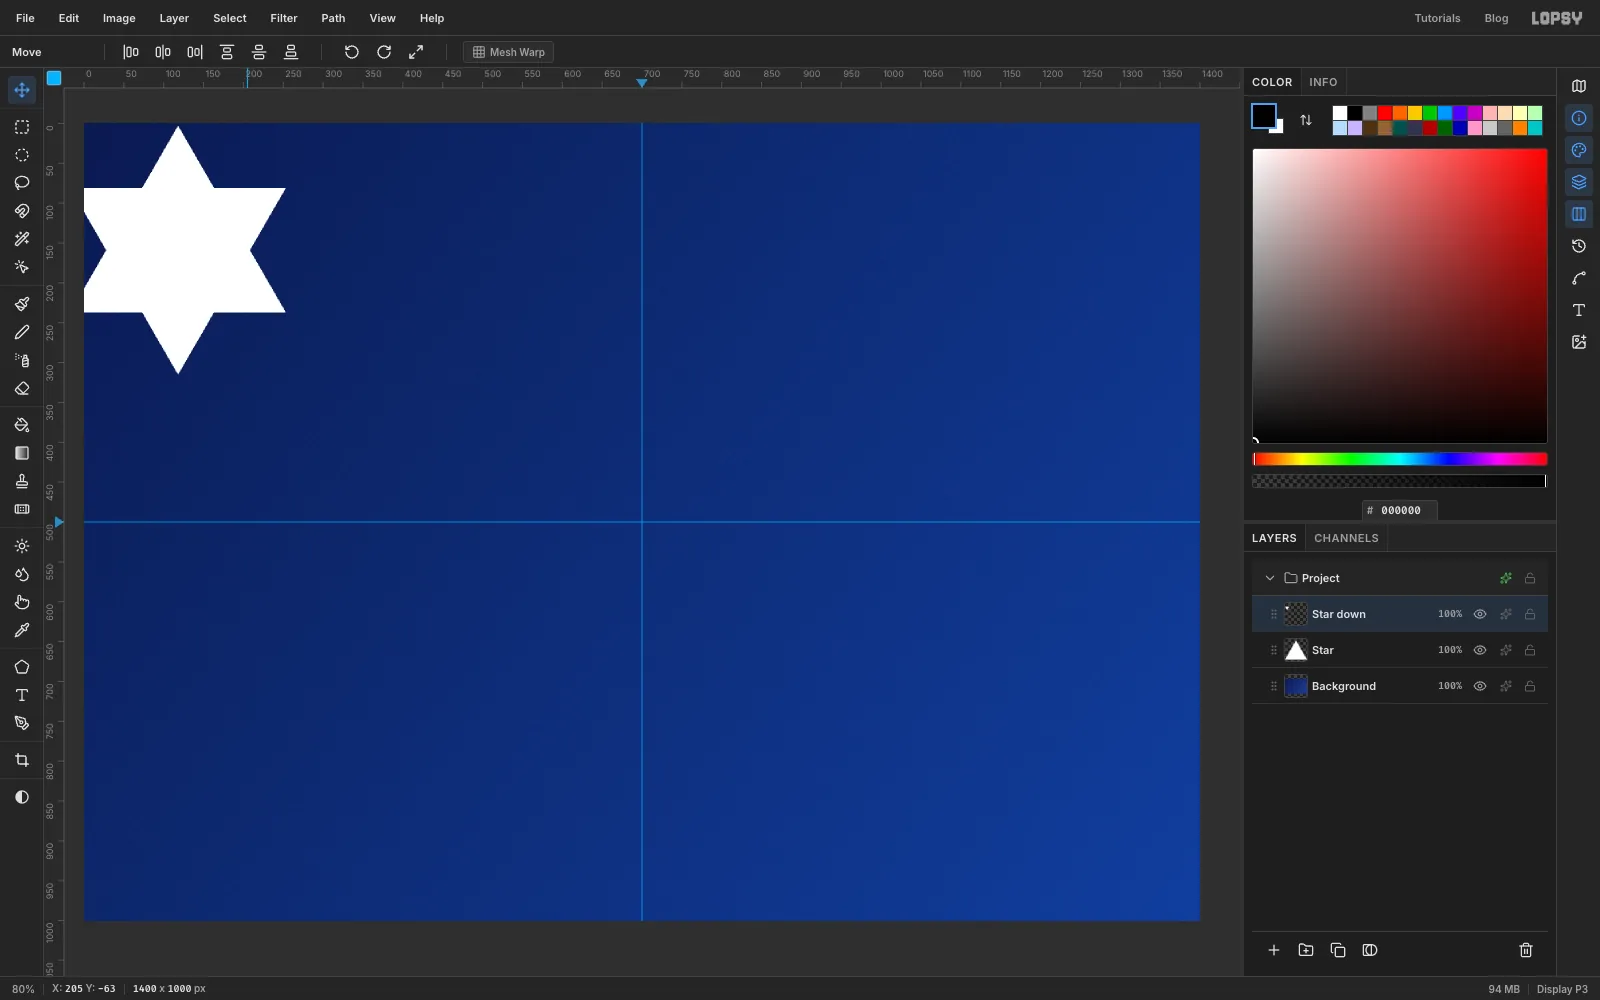
With Star selected, pick the Shape tool (U). In the options bar set Shape to Polygon, Sides to 3, Output to Pixels and Corner Radius to 0. Click the Fill swatch and type
FFFFFF, and remove any stroke.Press at (118, 120) and drag to about (253, 255). The triangle hangs a little off the left edge, which is what you want: stickers on a sticker bomb run off the edges.
Choose Layer → Duplicate Layer and rename the copy Star down. Cmd-click its thumbnail, press V for the Move tool, click Flip Vertical in the options bar, and press Cmd+D.
The flipped triangle now points down but sits too high. A triangle's centre is a third of the way up from its base, so it has to move down by a third of its height. Drag it straight down with the Move tool, watching the Y readout, until the points line up into a six-pointed star. That's about 78 px, a third of the triangle's height. Use the arrow keys for the last few pixels. Choose Layer → Merge Down and rename the result Star.
-
Give the star a holographic foil
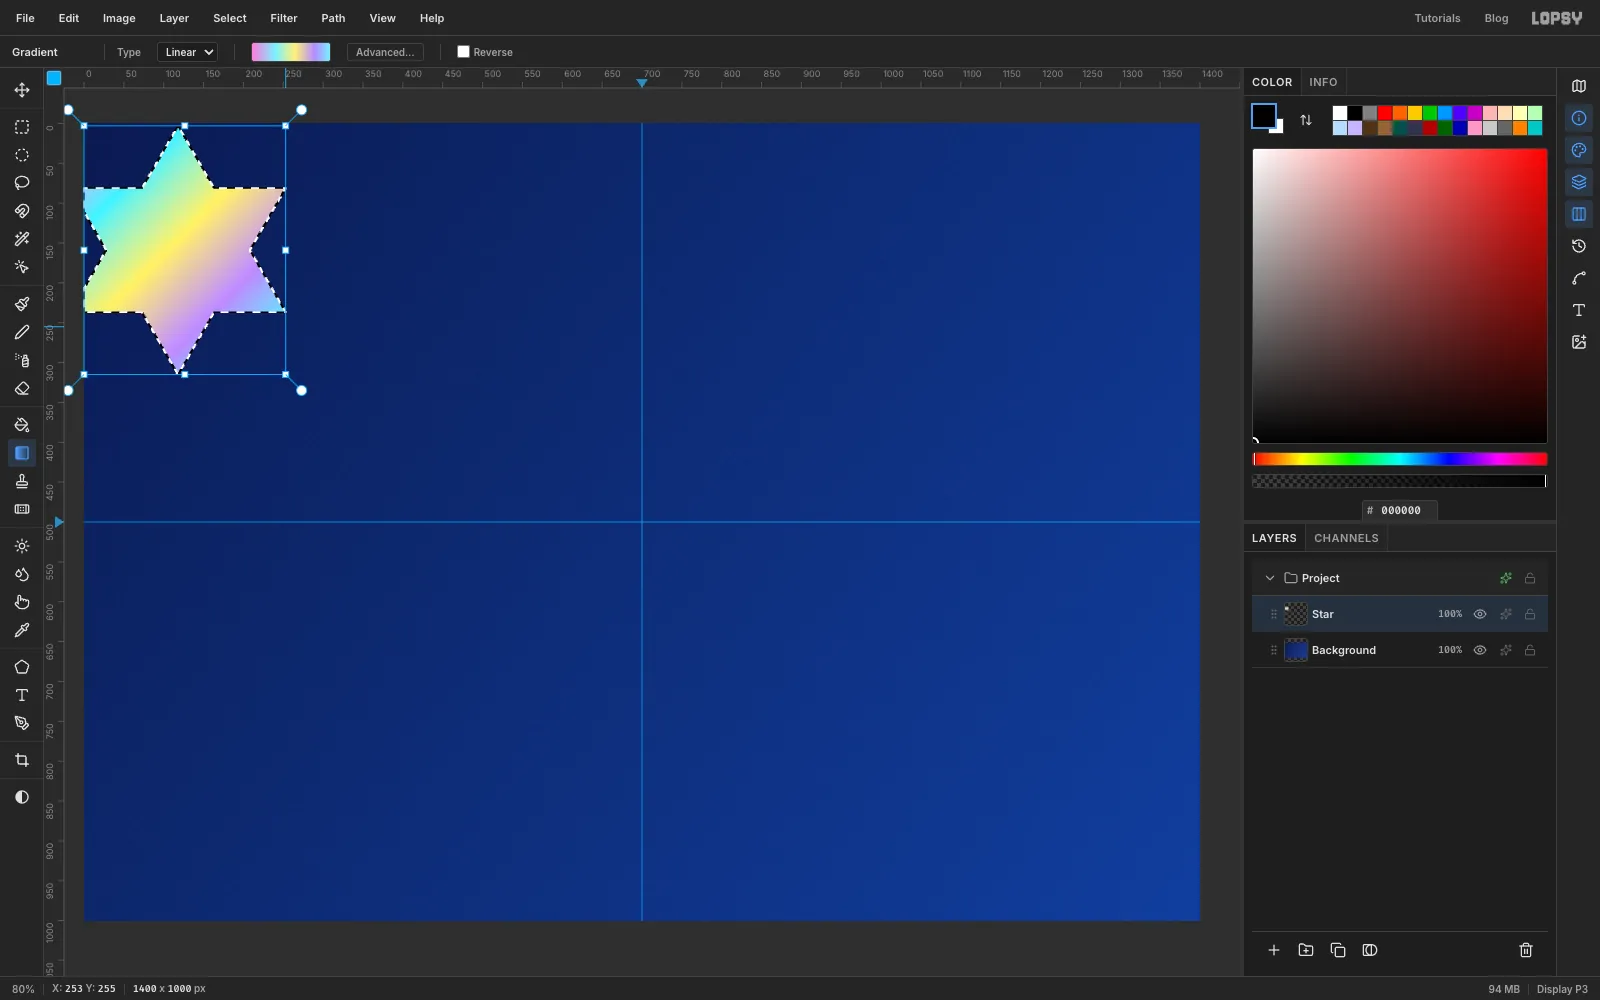
Cmd-click the Star thumbnail to select its shape. Pick the Gradient tool (Linear), open Advanced… and set five stops. Click the bar to add a stop where you click.
- at 0%
- at 30%
- at 55%
- at 80%
- at 100%
Drag from the star's top-left corner to its bottom-right corner.
For the foil glint, add a layer called Glint. Keep the star selected. Pick the Lasso, hold Shift+Alt and drag a diagonal band across the star's upper left. Shift+Alt keeps only the part of the band that lies inside the star. Choose Select → Feather… at 6, fill with white, and press Cmd+D. Set the layer's opacity to 45% and Merge Down into Star.
Open the star's effects drawer (the sparkle icon on its row) and turn on Inner Glow: white, Size 16, Spread 0, Opacity 85. It gives the foil a bright, bevelled edge.
-
Die-cut, shadow and tilt the star
Now the die-cut:
- Cmd-click the Star thumbnail and choose Select → Grow… with 12.
- Click Add Layer, name it Star backing, set the foreground colour to white and choose Edit → Fill. Press Cmd+D.
- Drag the Star backing row by its grip (the dotted handle on the left) and drop it just below Star.
- Click the Star row and choose Layer → Merge Down. The star merges onto its white backing, and the Inner Glow is baked in. Rename the merged layer Star.
Open the effects drawer again and turn on Drop Shadow: colour , Offset X 9, Offset Y 12, Blur 16, Spread 0, Opacity 65. This is the sticker shadow. Use it on every sticker from here on.
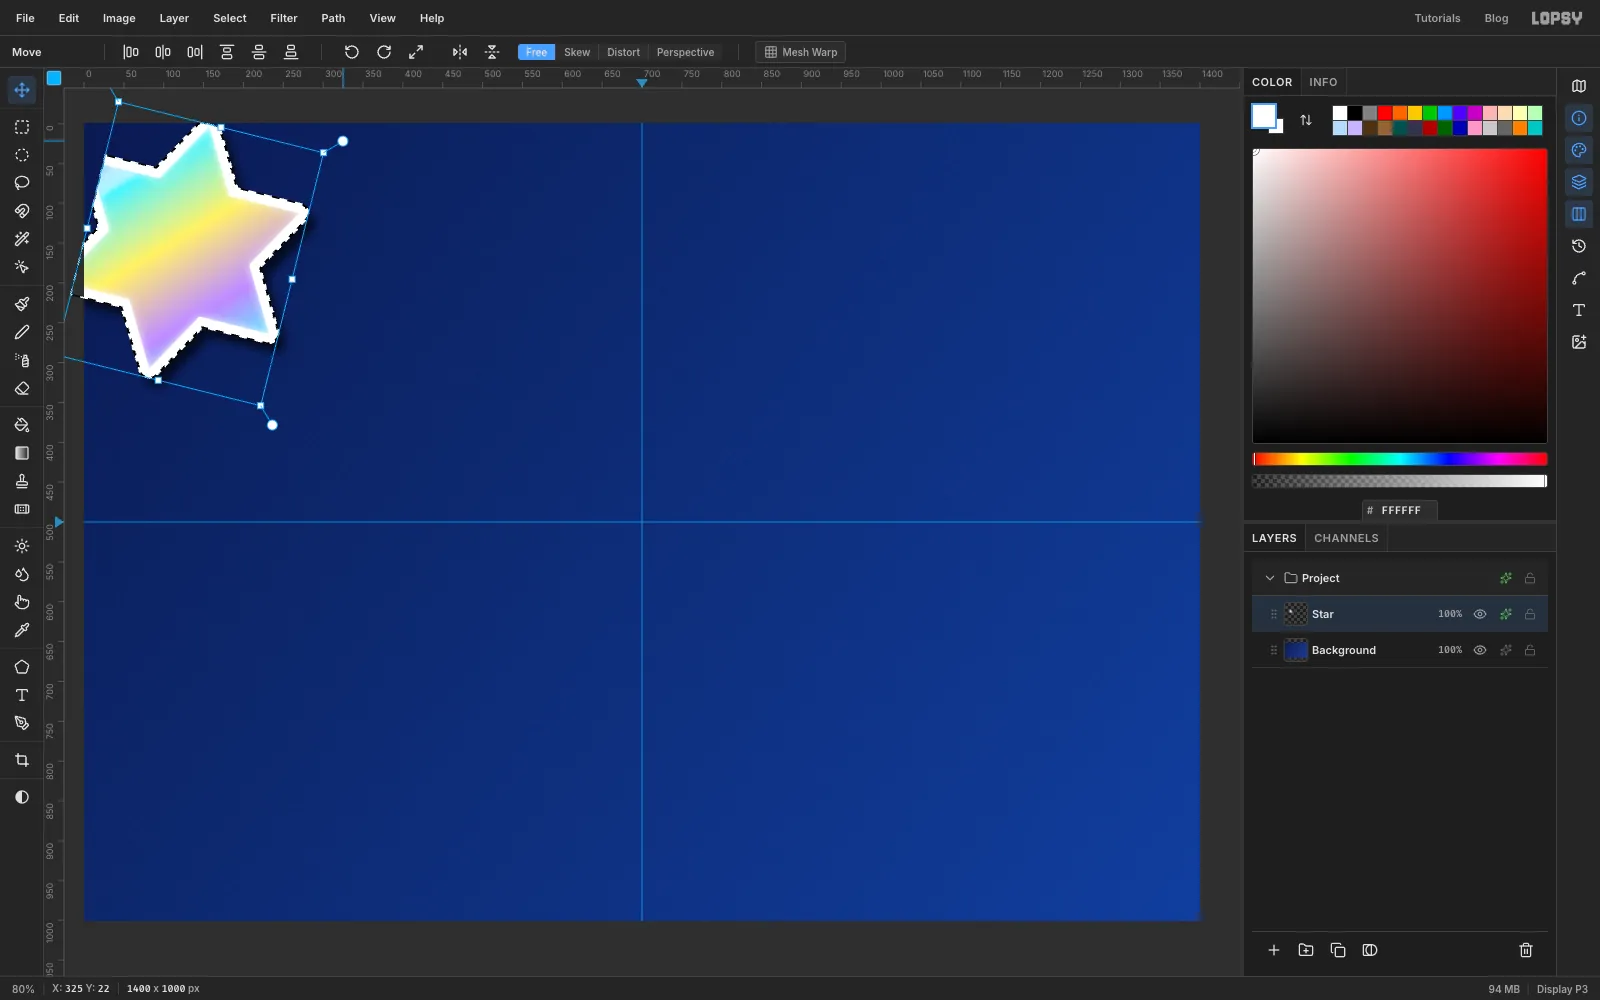
To tilt the sticker, Cmd-click its thumbnail, press V, and drag the round rotation handle just outside the top-right corner about 14° clockwise. Press Cmd+D to commit.
-
Make a starburst with the Sunburst filter
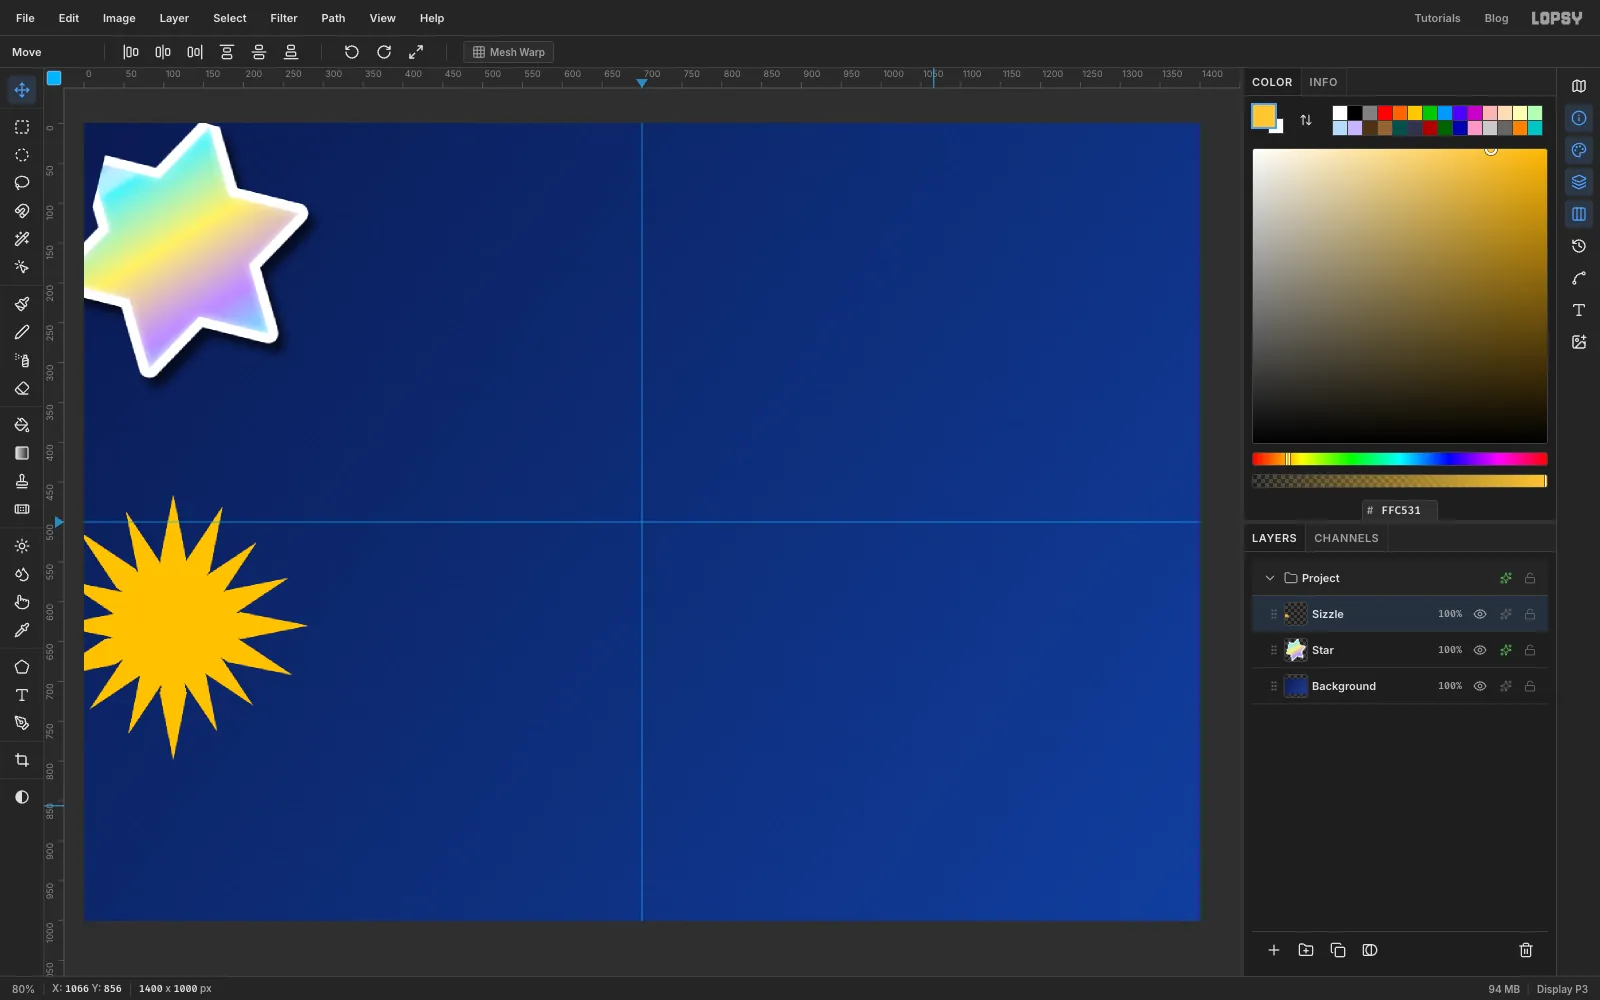
With Star selected, add a layer called Sizzle. Set the foreground colour to and choose Filter → Sunburst…:
- Rays 16, Length 12, Width 100, Taper 100
- Center X 8, Center Y 63
- Jitter 20, Seed 7
Center X and Y are percentages of the card, so the burst is centred at about (112, 632). With Taper at 100 every ray comes to a point and their bases overlap into a solid core. Jitter shortens some rays at random, so the burst looks hand-cut.
-
Add the red disc and the SIZZLE! type
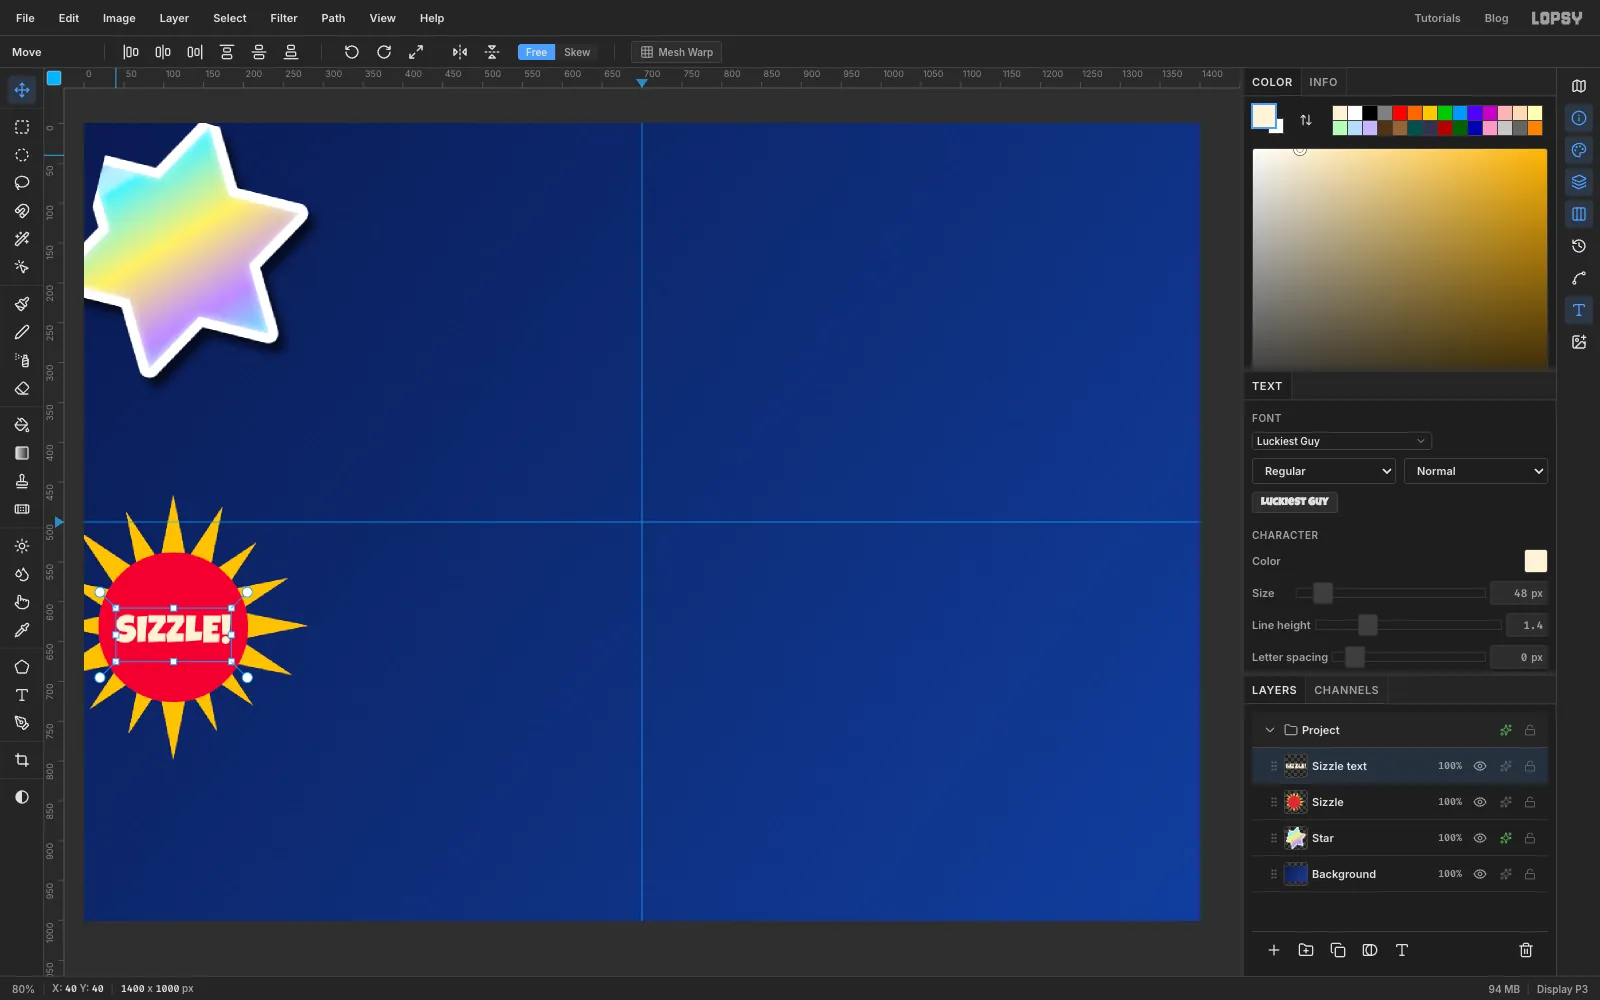
Pick the Elliptical Marquee and drag a 188 px circle centred on the burst, from (18, 538) to (206, 726). Fill it with and press Cmd+D.
Pick the Text tool (T). Before you click, set the font to Luckiest Guy, the size to 48 px and the colour to , and check that Letter spacing in the Text panel is 0. Click in an empty part of the card, type
SIZZLE!and press Tab to commit. Press V and nudge the text with the arrow keys until it sits in the middle of the disc.Choose Layer → Merge Down to merge the text into Sizzle.
-
Die-cut the burst
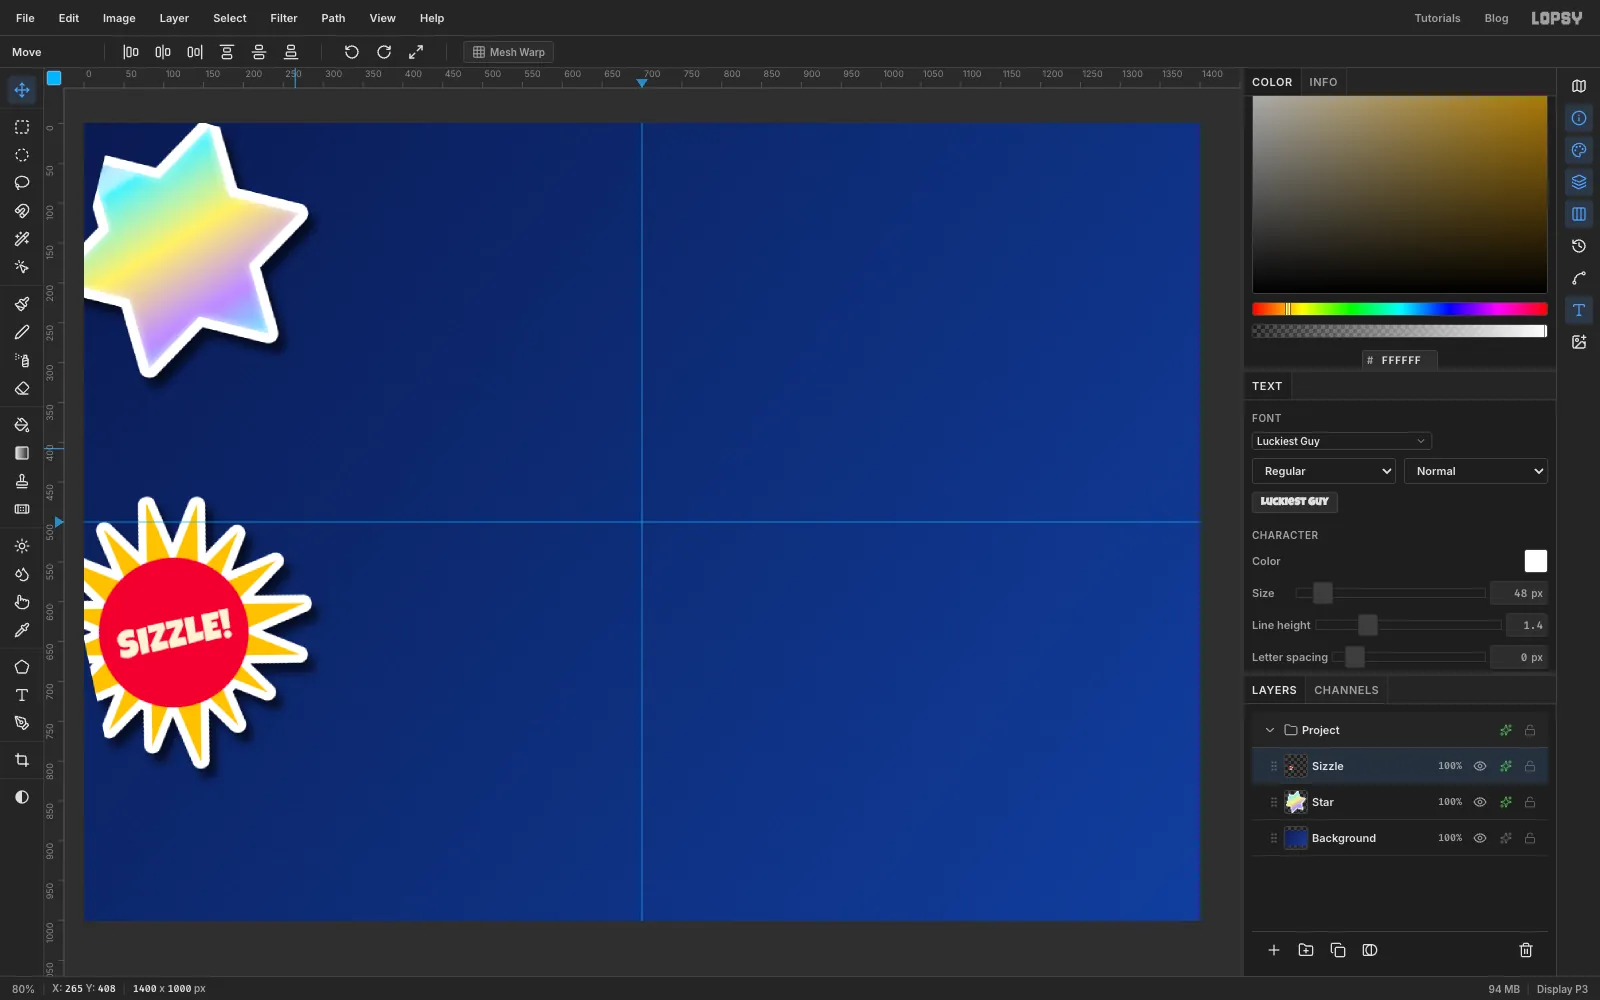
Die-cut Sizzle with Grow 10: Cmd-click its thumbnail, grow the selection, fill a new Sizzle backing layer with white, drag it under Sizzle and Merge Down. The grown border fills in between the rays, which is how a real die cutter treats spiky art.
Add the sticker Drop Shadow, then tilt the sticker about 12° counter-clockwise with its rotation handle and press Cmd+D.
-
Shape the sufganiyah
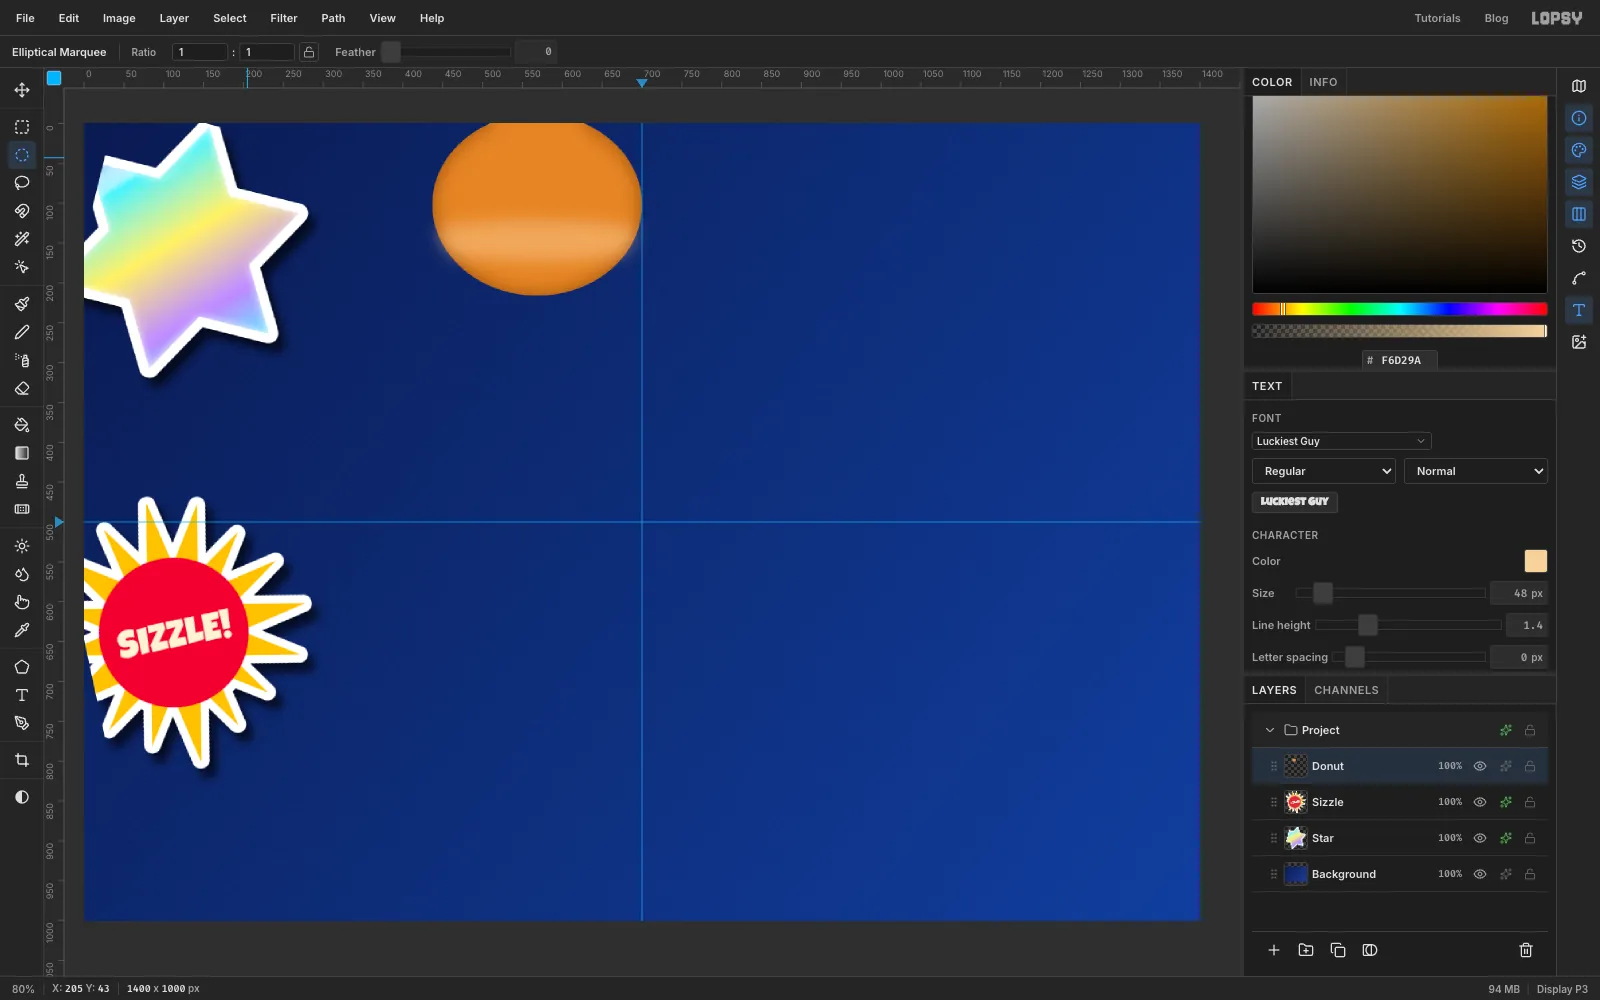
Add a layer called Donut. With the Elliptical Marquee, drag an oval from just above the canvas at (437, −12) to (693, 216). Start the drag on the grey pasteboard so the doughnut runs off the top edge. Fill it with and deselect.
In the effects drawer, turn on Inner Glow: colour , Size 34, Spread 0, Opacity 70. That browns the edges like fried dough. Click Rasterize Layer Style at the foot of the effects list to bake it in.
A sufganiyah has a pale belt where it floated in the oil. Add a layer called Belt and Cmd-click the Donut thumbnail. With the Elliptical Marquee, hold Shift+Alt and drag a wide, flat oval across the lower part of the doughnut, from (405, 122) to (725, 172). Only the overlap stays selected. Choose Select → Feather… at 20, fill with , deselect, set the layer to 45% and Merge Down.
-
Add a highlight and powdered sugar
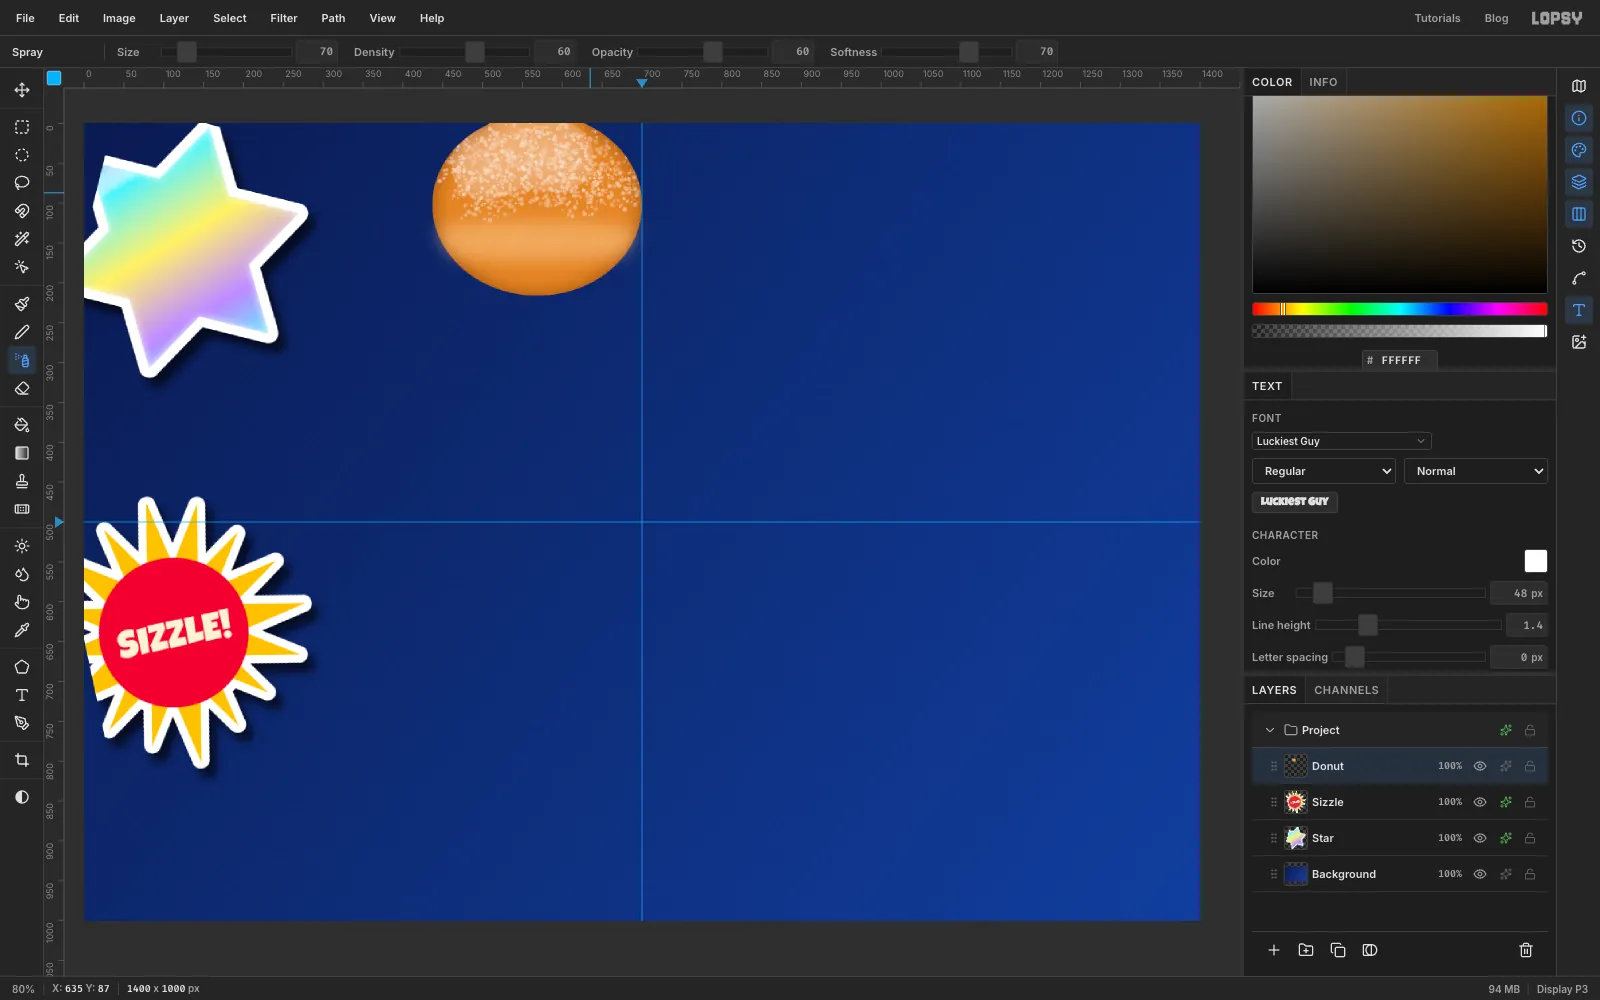
Pick the Dodge tool (O), set Mode to Dodge, Exposure to 35 and Size to 90. Sweep it once across the top of the dome.
Cmd-click the Donut thumbnail so the sugar stays on the doughnut. Pick the Spray tool (J), set the foreground colour to white, Size to 70 and Density to 60. Make two long sweeps across the top half, then press Cmd+D.
-
Squeeze out the jelly
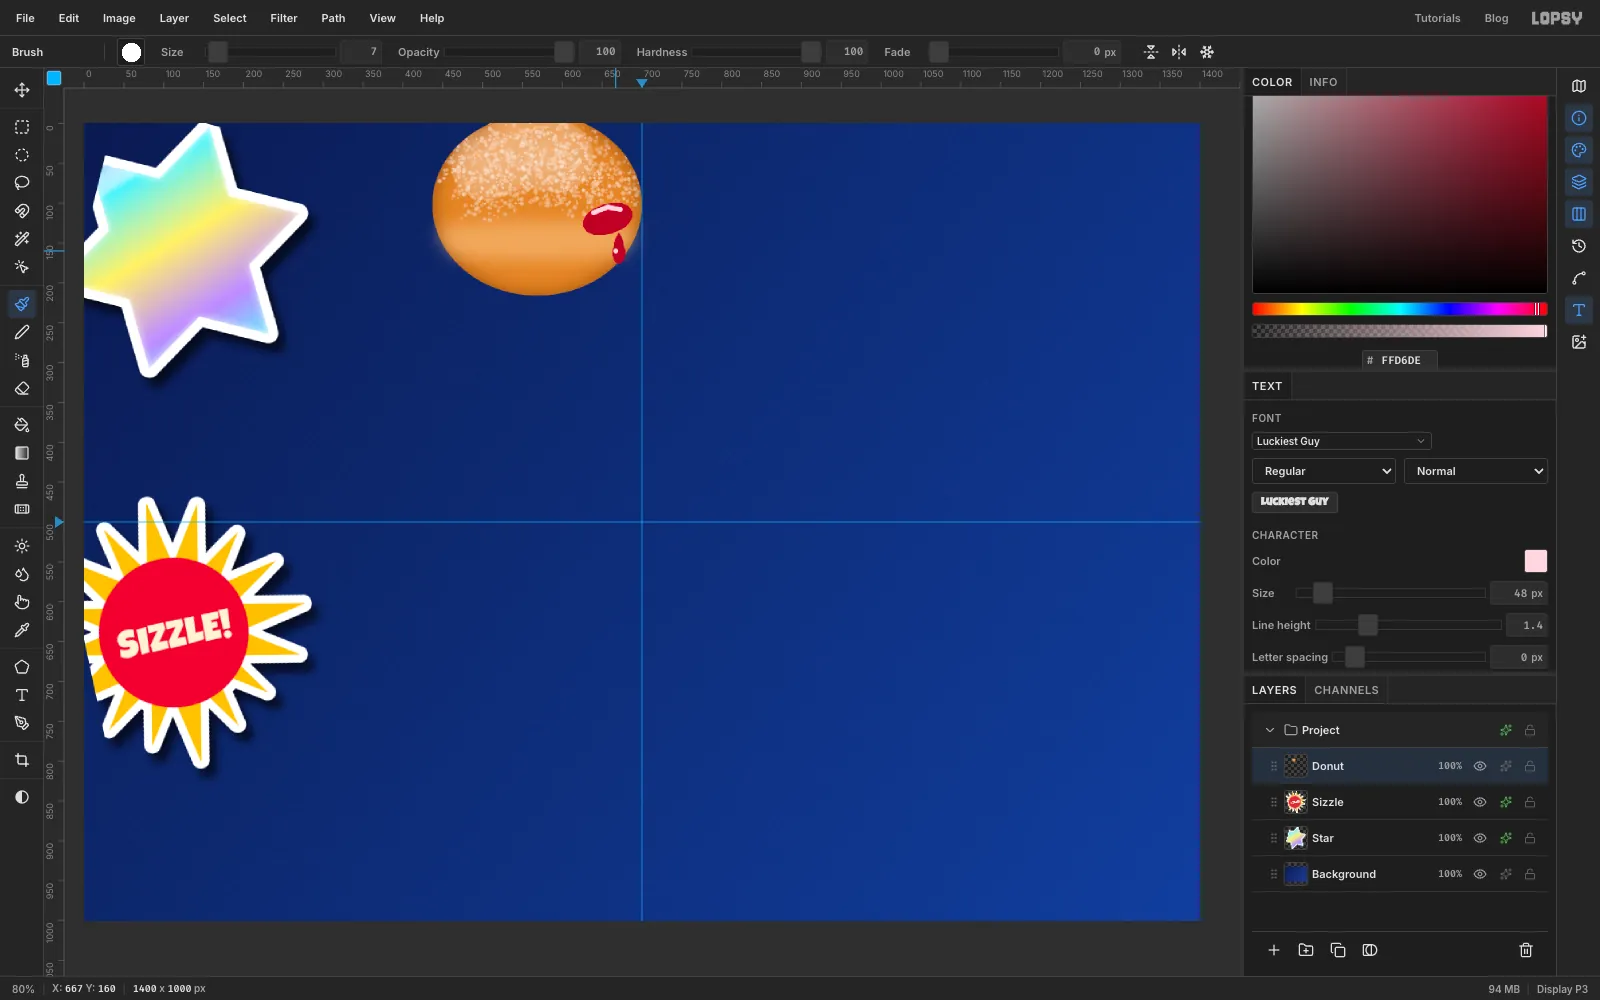
Pick the Lasso and draw a fat, slightly tilted oval about 64 × 38 px on the doughnut's right side, centred near (657, 120). Fill it with . Then lasso a teardrop hanging from its lower right, from about y 136 down to y 176, and fill that with the same red.
Pick the Brush (B). Click the brush-tip thumbnail at the left of the options bar to open the Brushes panel, and on its Shape tab set Size to 7, Hardness to 100, Spacing to 10 and Taper to 0. Set the colour to . Click at the top left of the jelly and Shift-click twice along its top edge for a curved highlight, then click once on the drip for a glint.
Die-cut Donut with Grow 11 and give it the sticker Drop Shadow. Leave it upright.
-
Build the dreidel
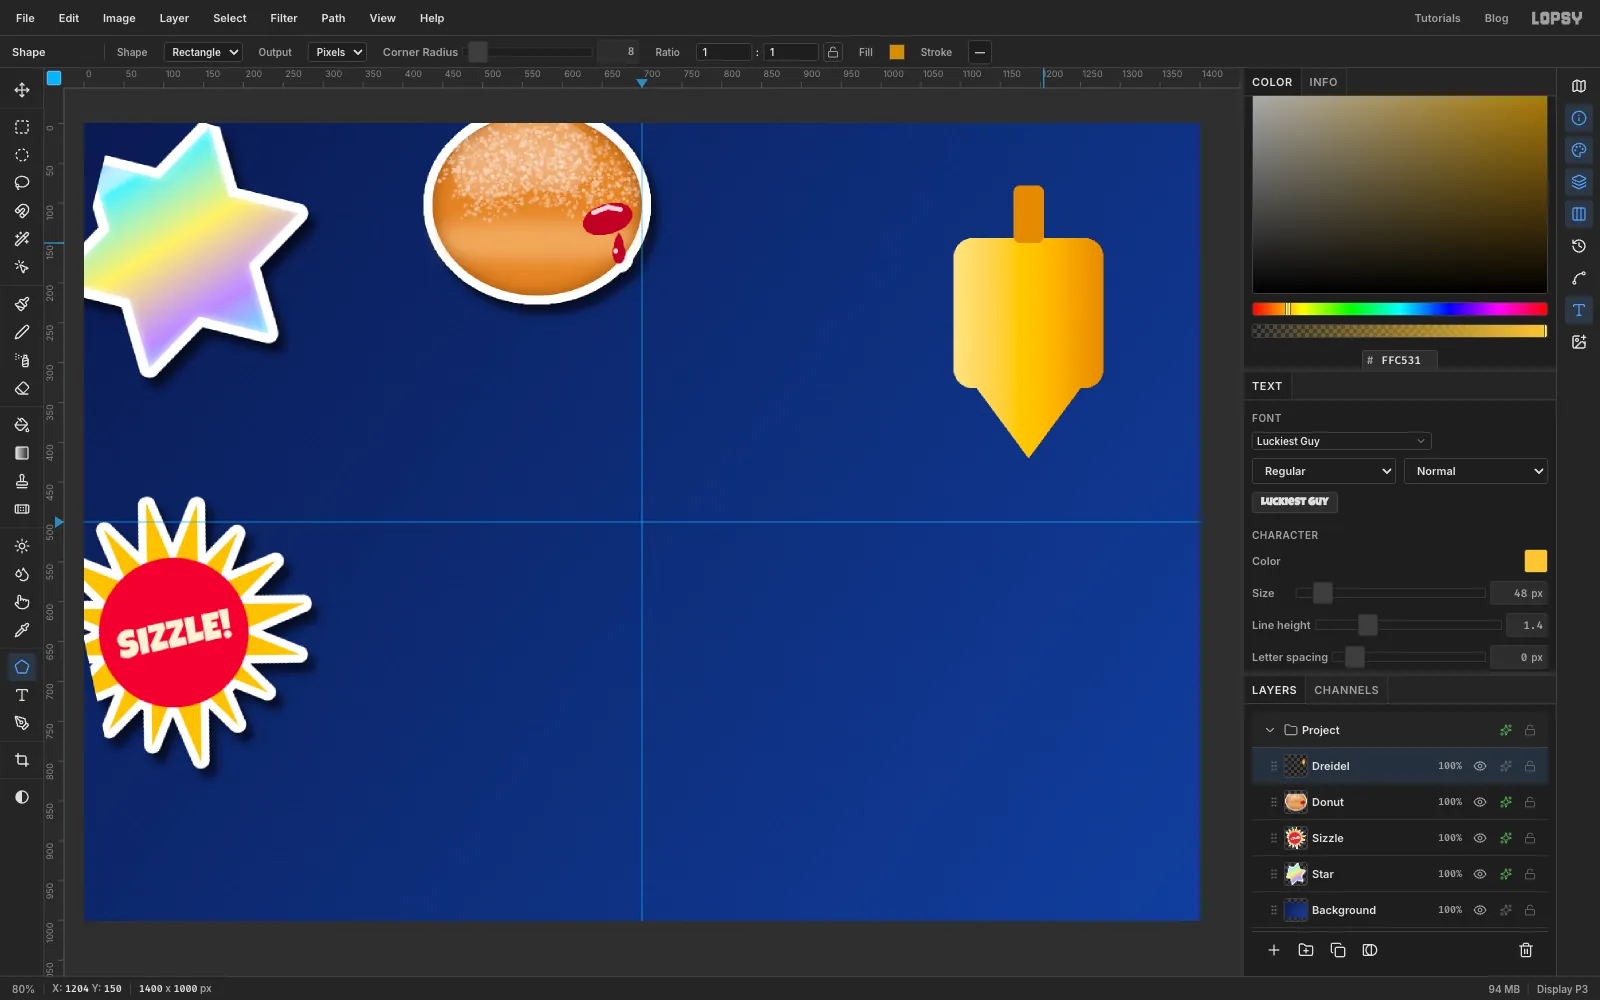
Add a layer called Dreidel. Pick the Shape tool, set Shape to Rectangle, Corner Radius to 24 and the fill to . Press at (1185, 238) and drag out 94 px each way.
For the point, pick the Pen tool (P) and click three corners: (1091, 293), (1279, 293) and (1185, 420). Click the first point again to close the path. In the Paths panel click Path to Selection, then fill with and deselect.
Cmd-click the Dreidel thumbnail. With the Gradient tool (Linear), open Advanced…, select the extra stops left over from the foil and delete them, then set three: at 0%, at 55% and at 100%. Drag from the body's left edge to its right edge. Deselect.
Draw the handle with the Shape tool: Rectangle, Corner Radius 8, fill . Press at (1185, 114) and drag out 19 px across and 36 px down.
-
Add the nun and an ink outline
Click the Dreidel row so the new text lands just above it. Pick the Text tool and set the font to Suez One, 210 px, . Click in empty space and type נ (nun, one of the four letters on a dreidel). If you don't have a Hebrew keyboard, copy the letter and paste it with Cmd+V. Press Tab, then nudge it onto the middle of the body.
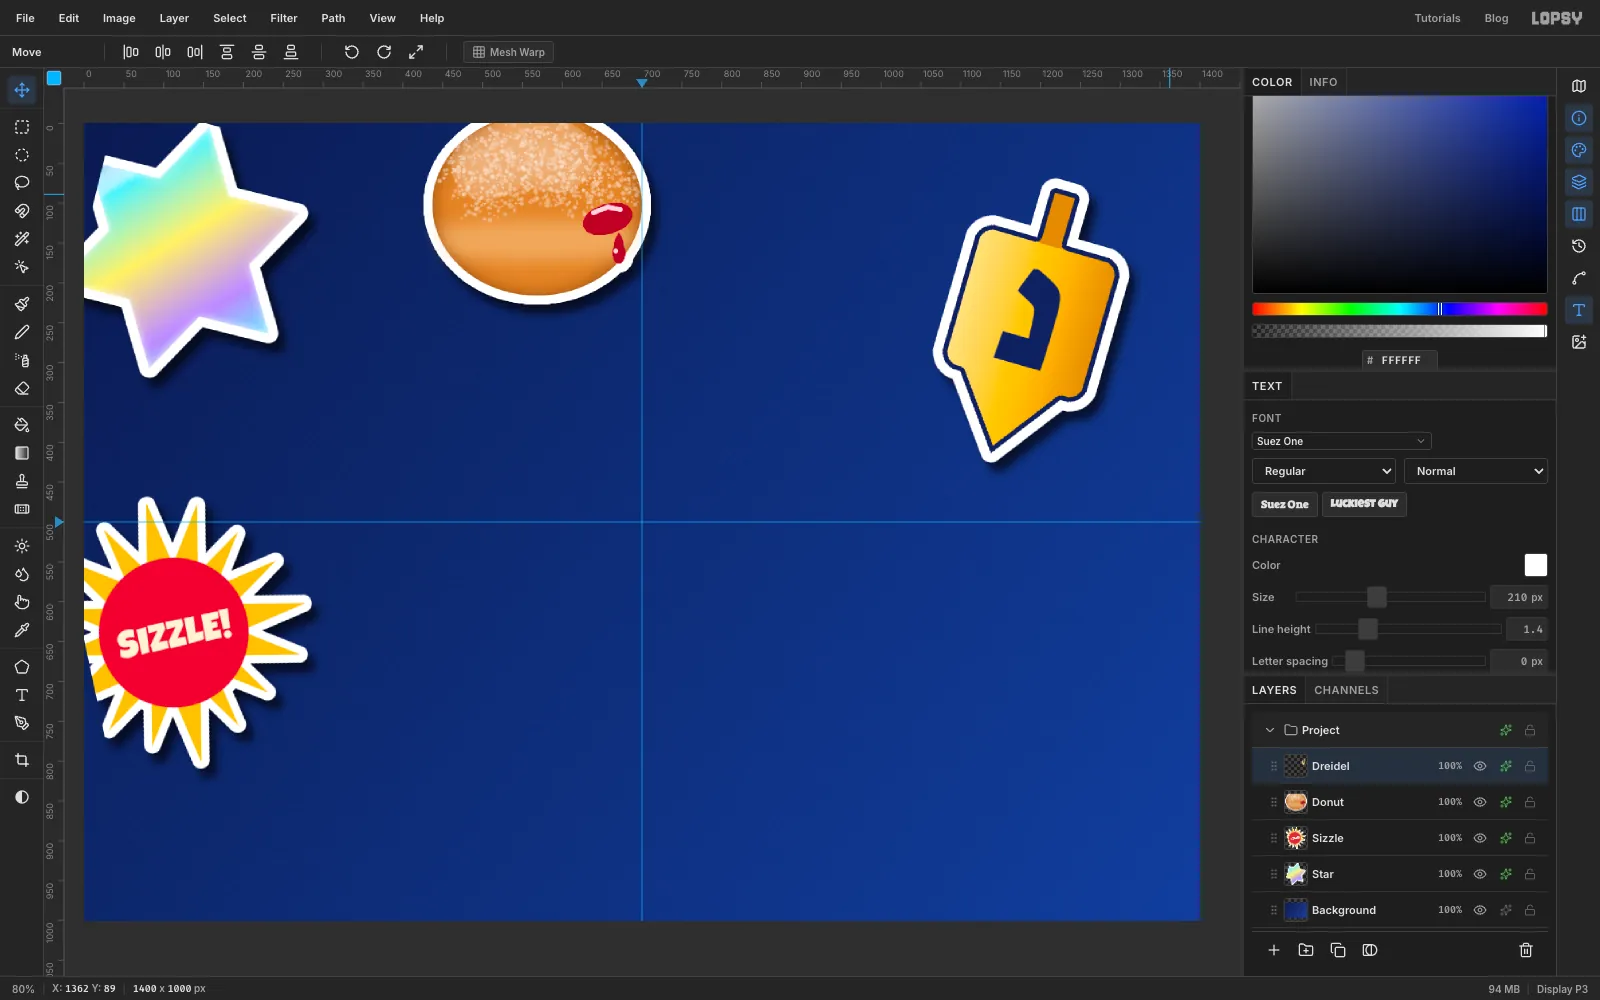
Merge Down into Dreidel. Turn on Stroke: , Width 6, position inside. Die-cut with Grow 12, add the sticker shadow, and tilt the dreidel about 16° clockwise.
-
Paste the latke photo and select the plate
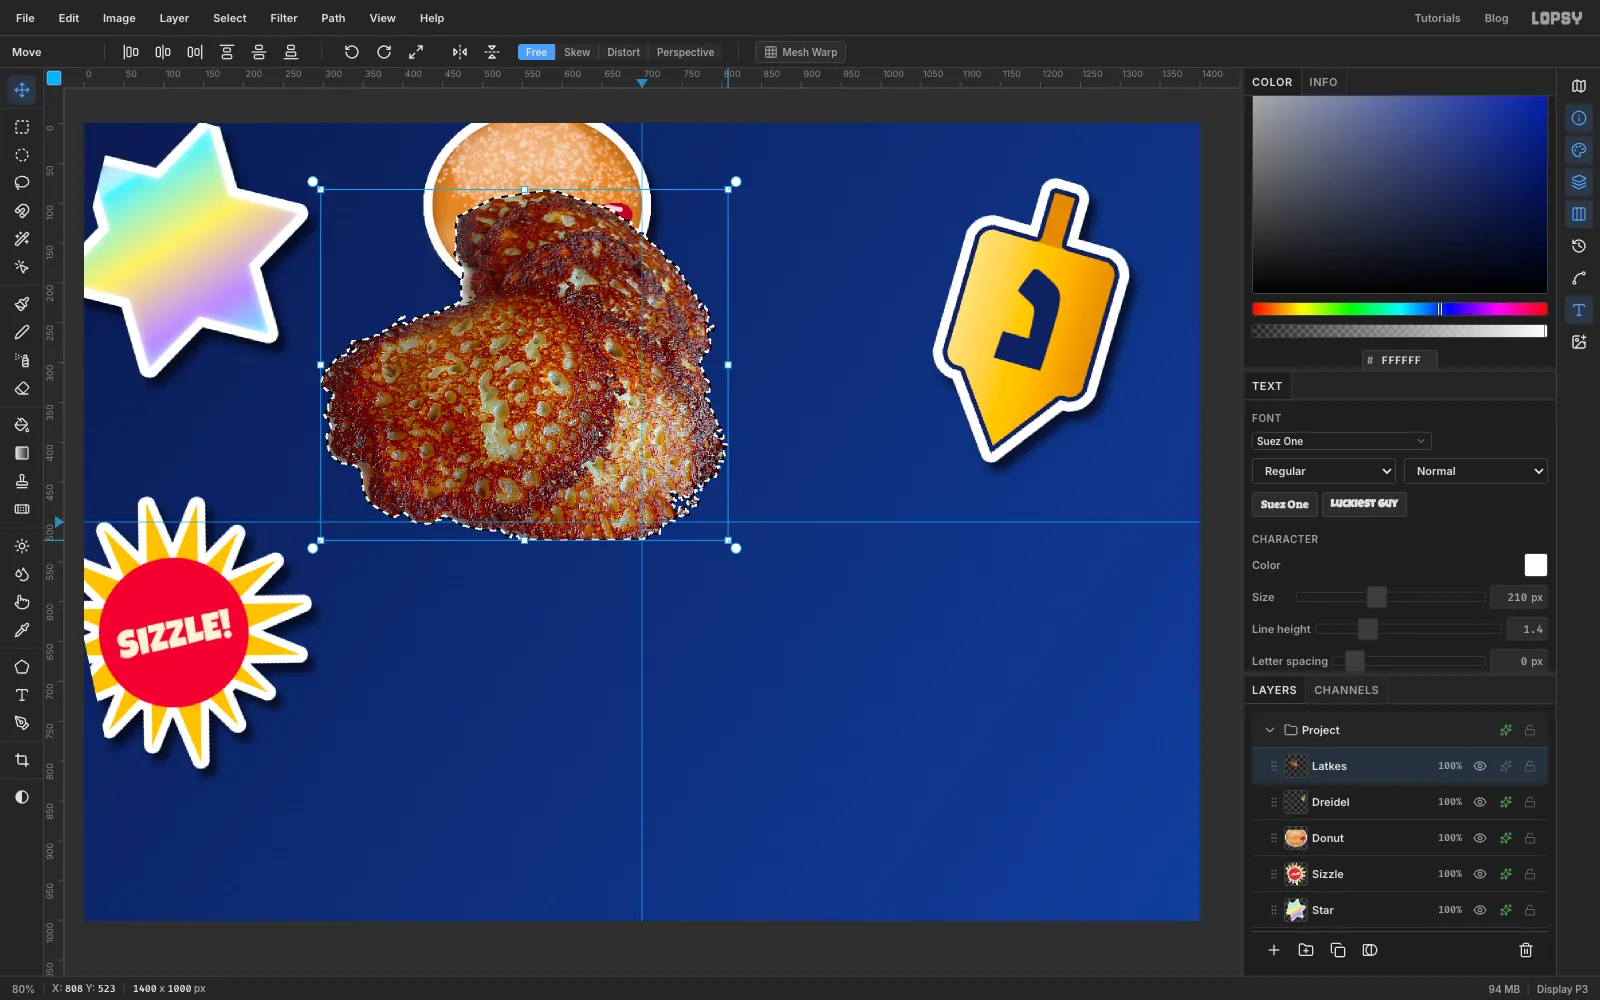
Open 00 Potato Latkes.jpg in your browser, right-click it and choose Copy Image. In Lopsy, click the Dreidel row and press Cmd+V. The photo is too big for the card, so Lopsy shrinks it to fit. Rename the new layer Latkes and press Cmd+D.
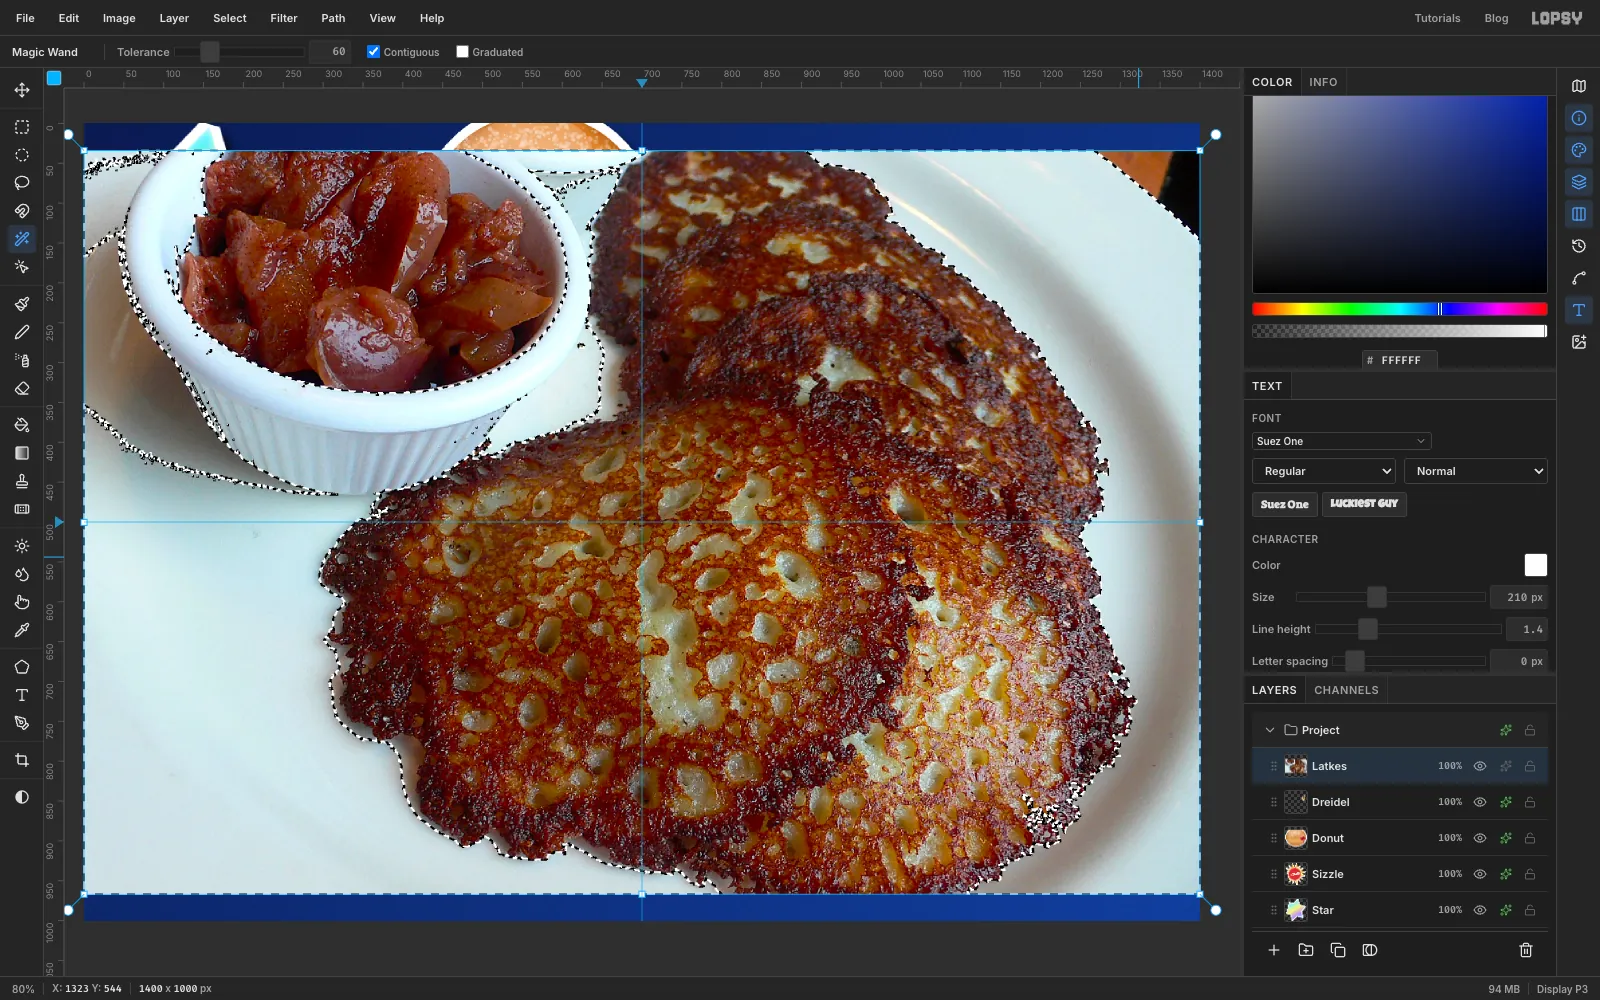
Pick the Magic Wand (W), set Tolerance to 60 and leave Contiguous on. Click the white plate at the lower left. Then Shift-click every other patch of plate you can see:
- the bright rim at the right and top right
- the plate along the bottom edge
- the gap between the bowl and the front latke
- the bowl's white ribbed side
The bowl is white too, so it gets selected with the plate.
-
Keep only the latke stack
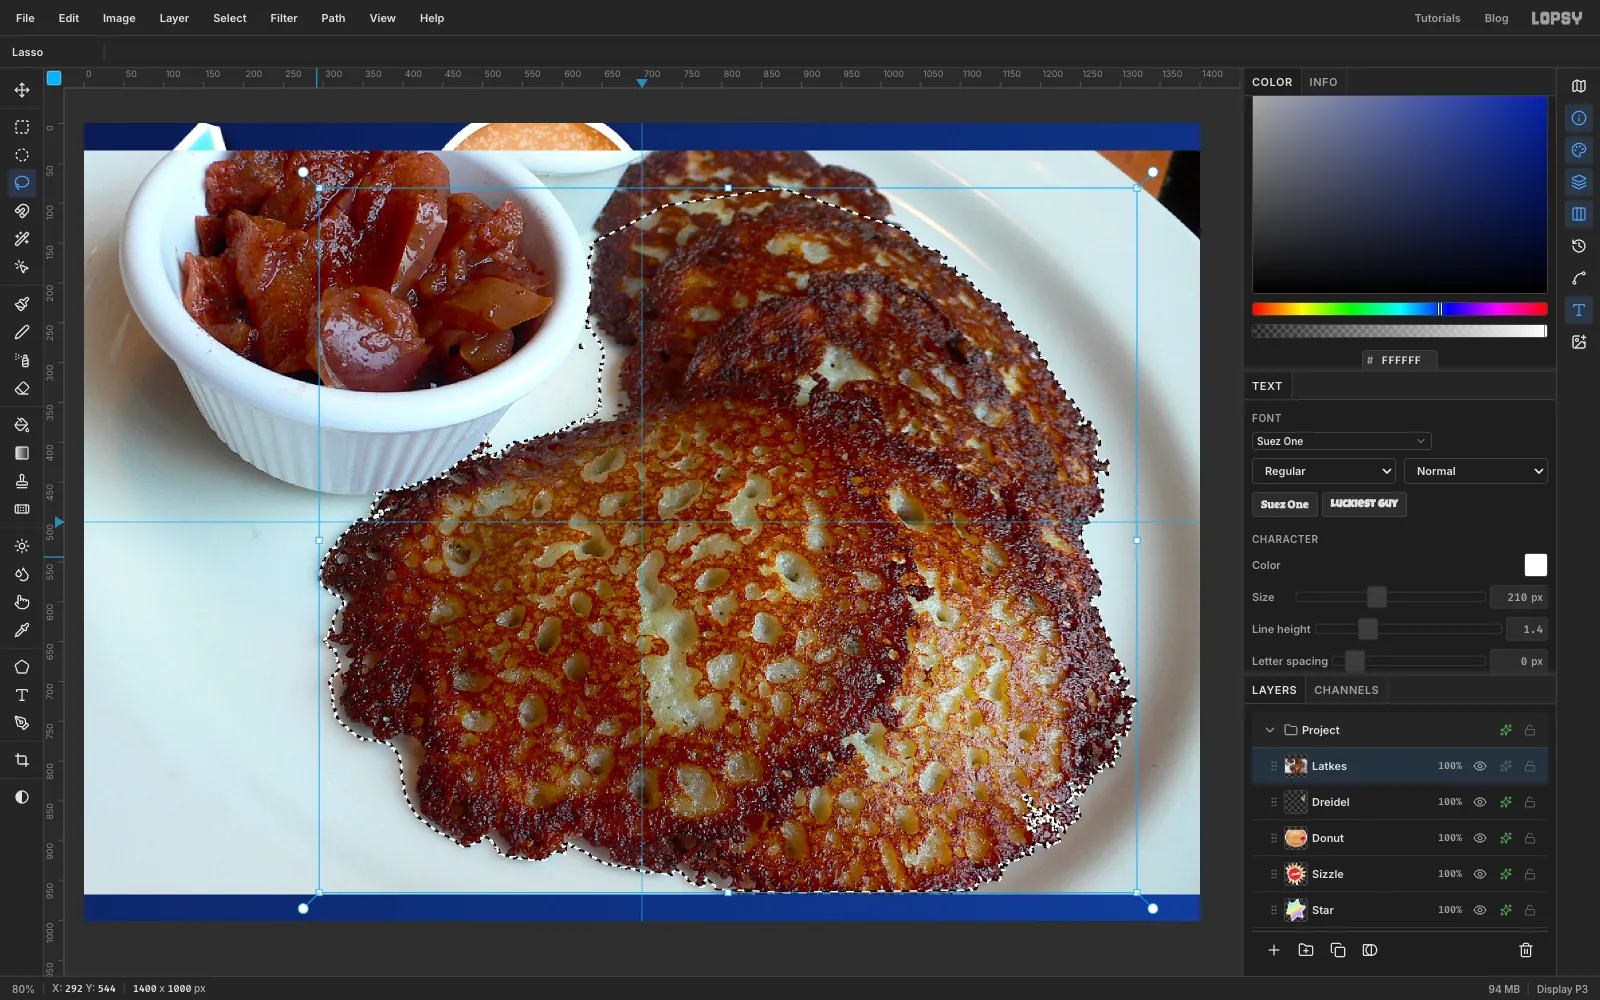
Choose Select → Inverse. Now everything that isn't plate is selected: the latkes, but also the applesauce and the dark corner of the photo.
Pick the Lasso, hold Shift+Alt and draw a loose loop around the latke stack. Stay a little outside the crispy edges, and cut smoothly across the top latke where the photo crops it. Only the latkes stay selected.
Choose Select → Shrink… with 2. That pulls the edge in a couple of pixels so no white plate fringe survives.
-
Delete the background
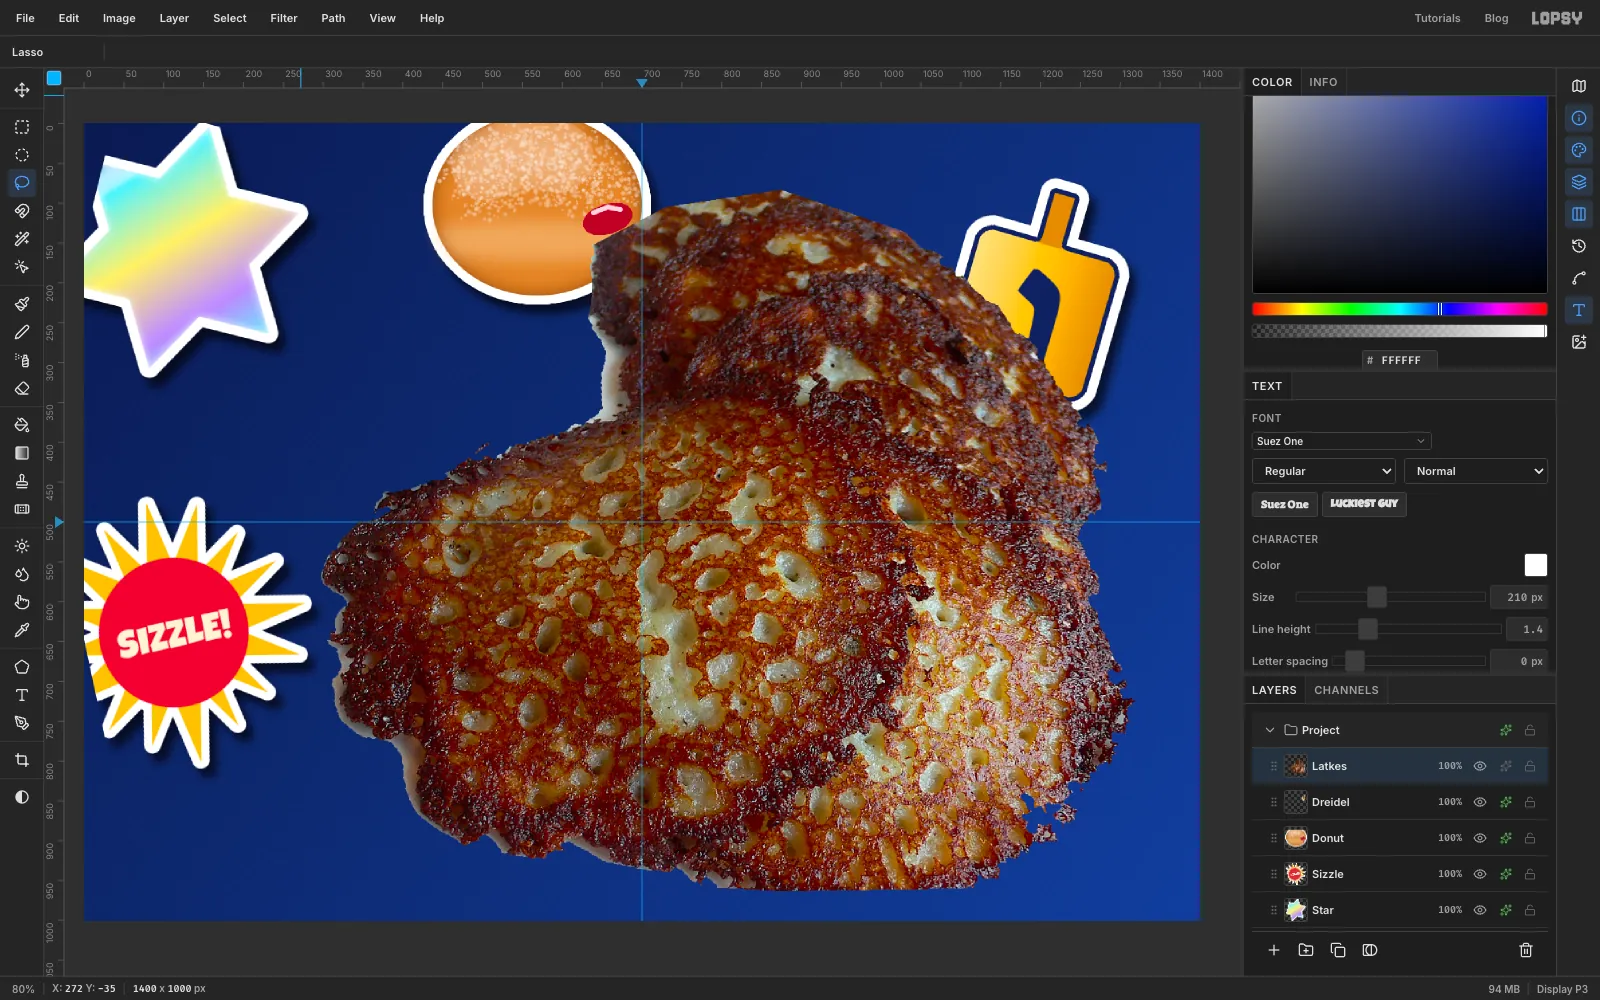
Choose Select → Inverse again and press Delete. Press Cmd+D.
Make the photo pop a little to match the drawn stickers. Choose Filter → Hue/Saturation… with Saturation 18 and Lightness 4, then Filter → Unsharp Mask… with Radius 2 and Amount 0.8.
-
Scale the latkes down
Cmd-click the Latkes thumbnail and press V. Hold Cmd and drag the bottom-right corner handle up and to the left until the box is half its width. Cmd keeps the proportions. Press Cmd+D.
-
Die-cut the latke sticker
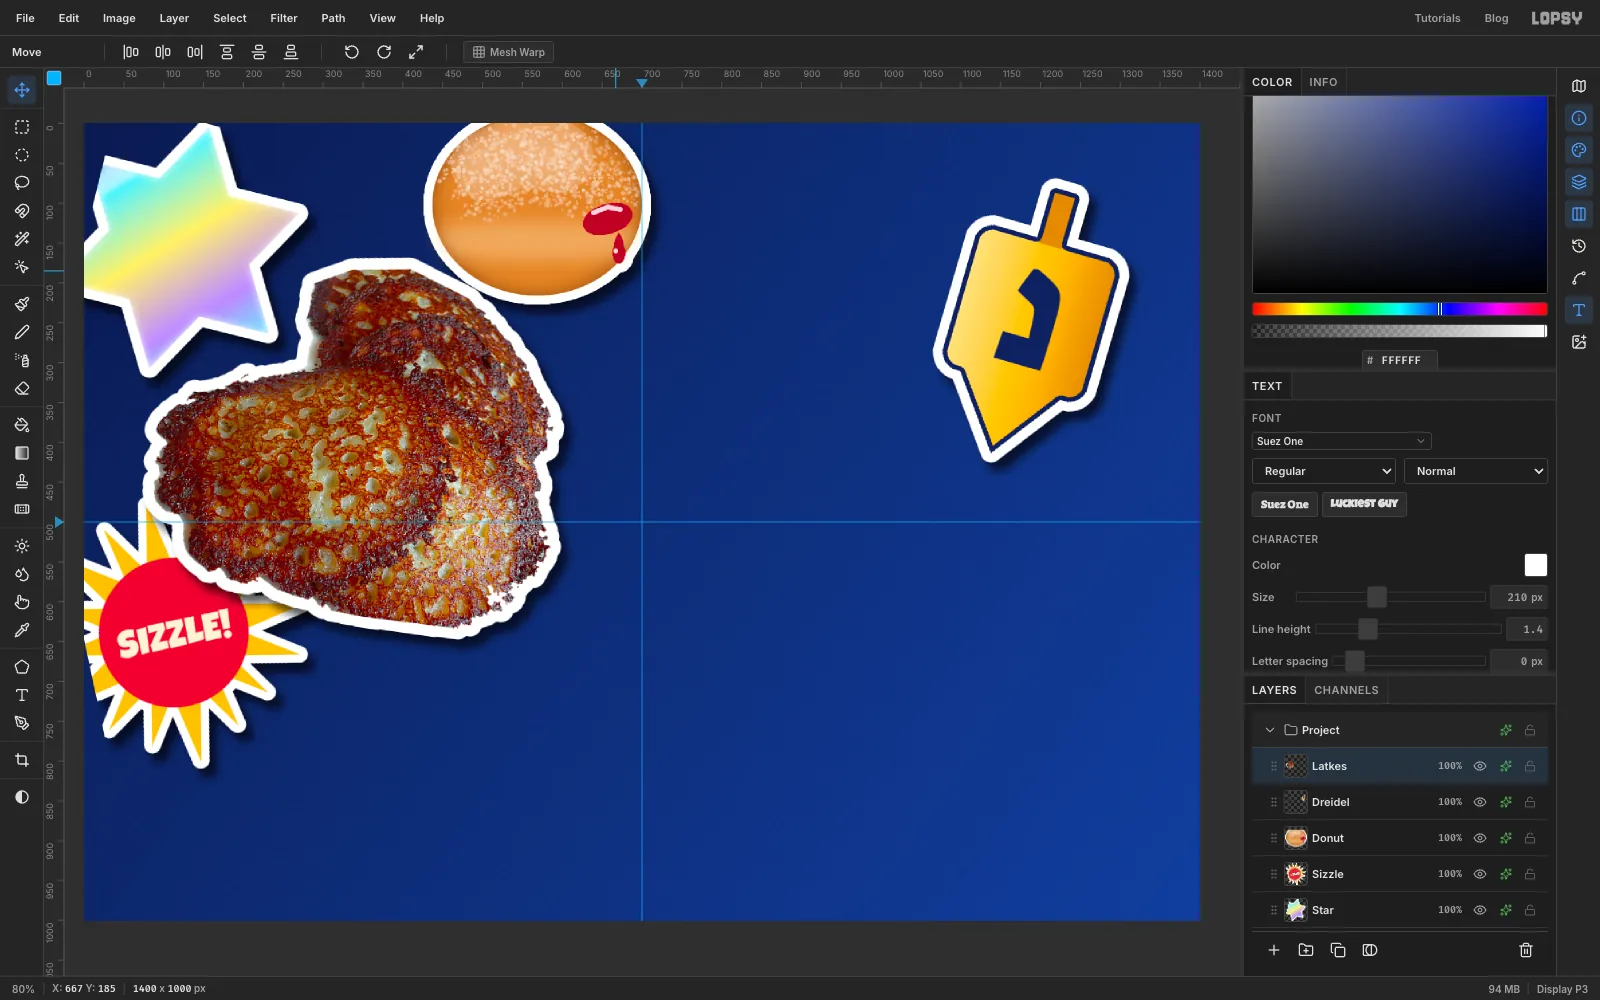
Drag the latkes with the Move tool until they're centred near (345, 395), overlapping the star, the burst and the doughnut. Overlap is what makes a sticker bomb.
Die-cut with Grow 14. The bigger grow smooths the crispy outline into a clean die-cut line. Add the sticker shadow and tilt it about 8° clockwise.
-
Draw the menorah badge
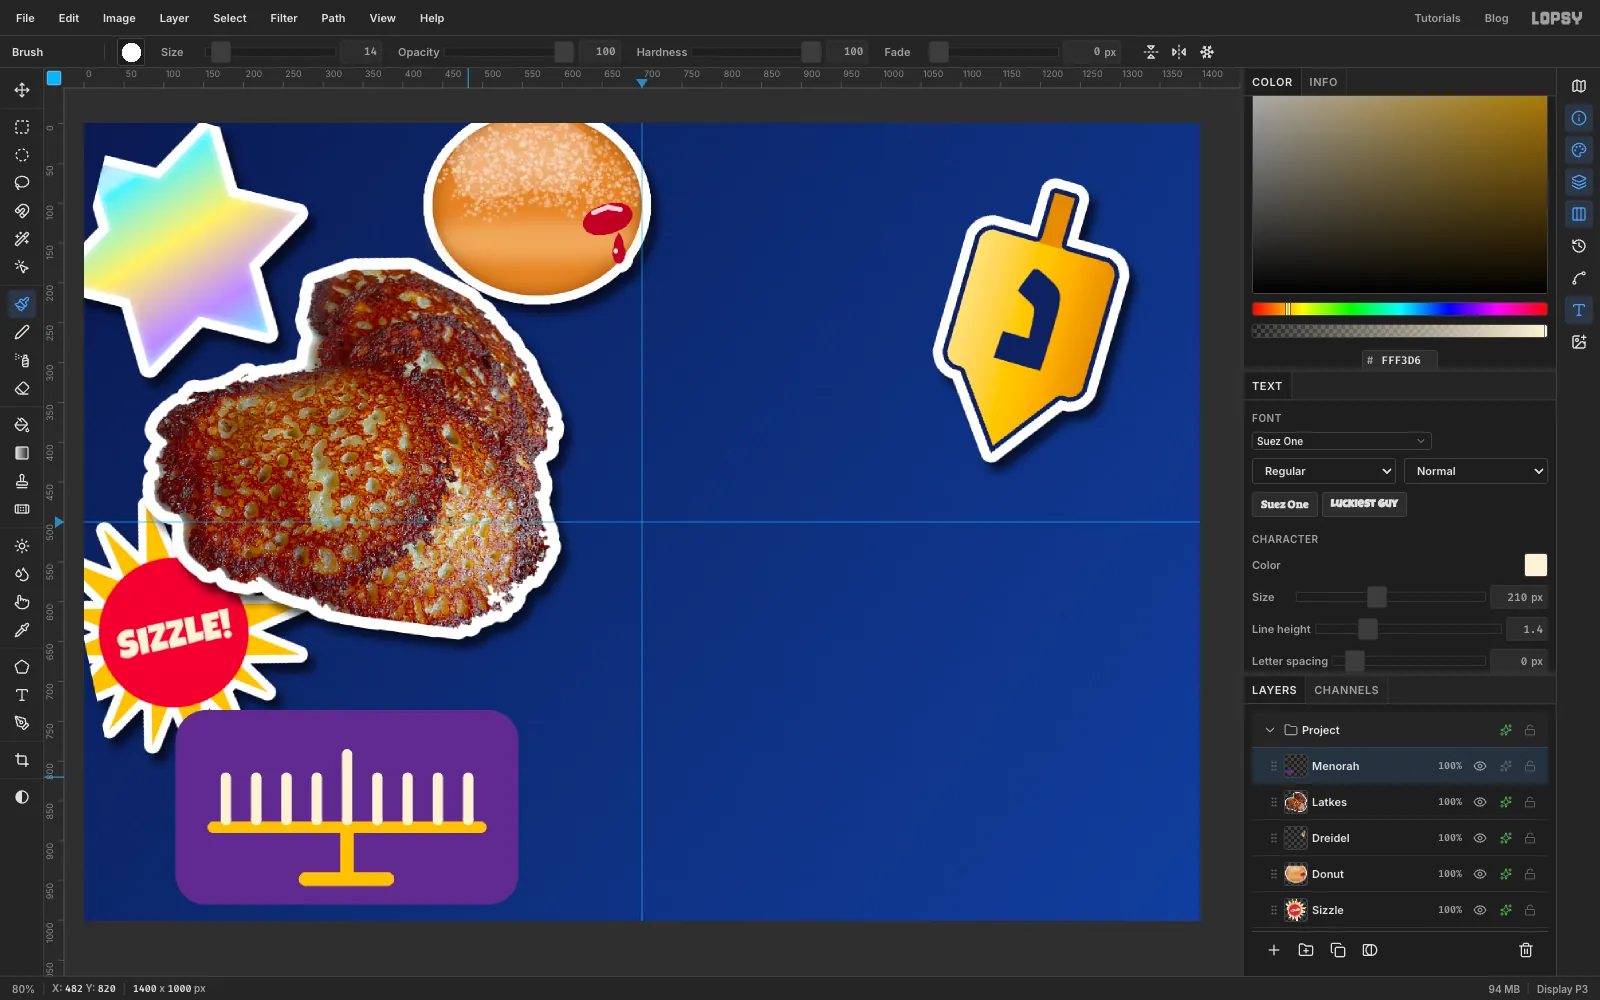
Add a layer called Menorah. With the Shape tool (Rectangle, Corner Radius 38, fill ), press at (330, 858) and drag out 215 px across and 122 px down.
Pick the Brush. In the Brushes panel set Size to 15, Hardness to 100, Spacing to 10 and Taper to 0. Set the colour to . Click at (162, 883) and Shift-click at (498, 883) for the arm. At Size 18, draw the stem from (330, 883) down to (330, 943), and the base from (278, 948) to (382, 948).
Switch the colour to and the size to 14. Draw nine candles as vertical Shift-click lines, about 38 px apart from x 178 to x 482. Each one runs from the arm at y 874 up to y 820. The middle one, the shamash, goes up to y 791.
-
Light the candles
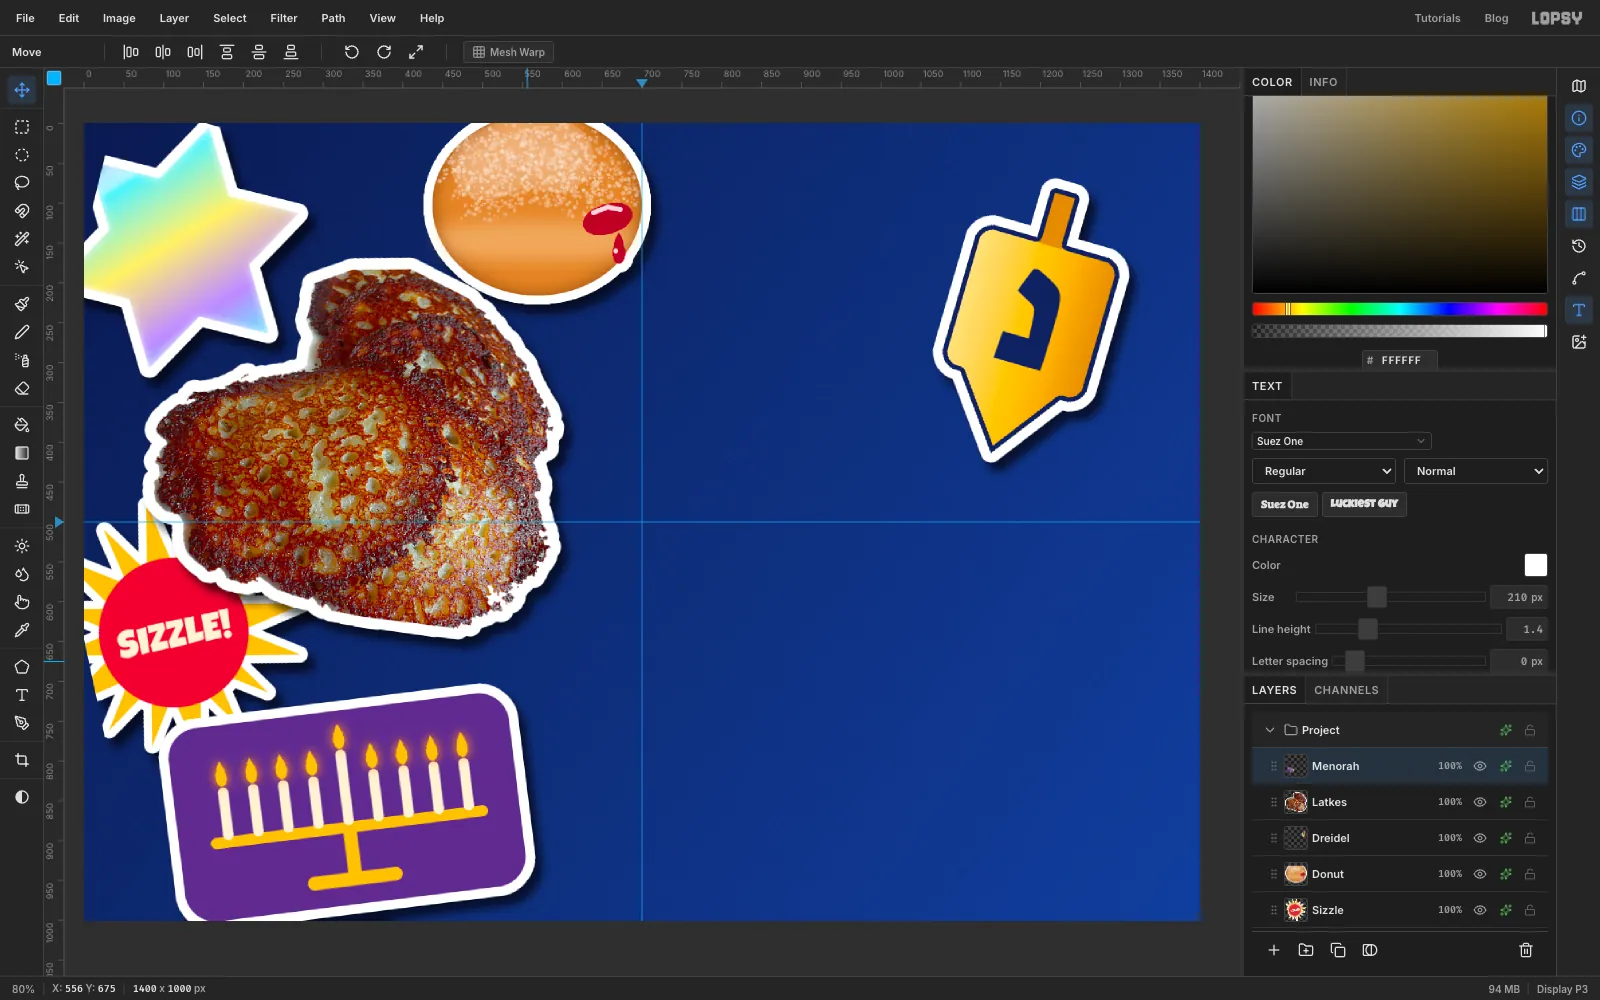
Add a layer called Flames. With the Lasso, draw a small teardrop about 14 px wide and 32 px tall above each candle, with the point at the top, and fill each with . Turn on Outer Glow: , Size 18, Spread 15, Opacity 95.
Merge Down into Menorah. The glow is baked onto the plum badge. Die-cut with Grow 12, add the sticker shadow, and tilt the badge about 7° counter-clockwise.
-
Make the OY! speech bubble
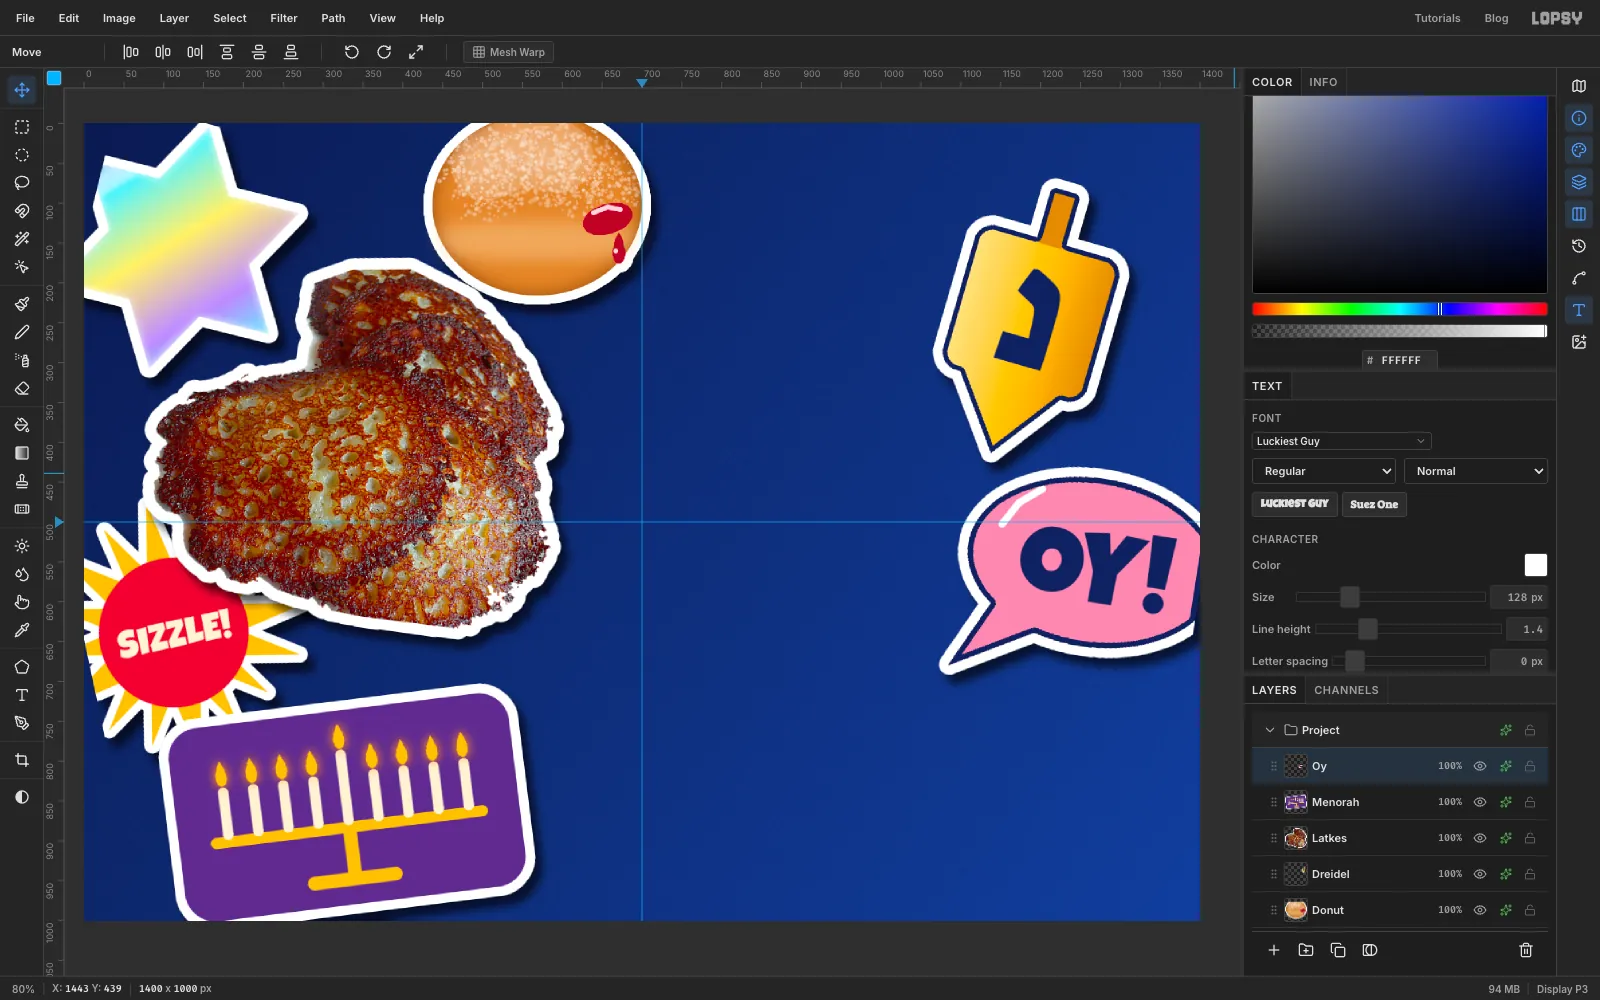
Add a layer called Oy. With the Elliptical Marquee, drag an oval from (1104, 442) to (1420, 654). It runs a little off the right edge. Fill it with . Use the Pen tool to add a tail from (1152, 600) to (1214, 640) to (1102, 704), make it a selection, and fill it pink too.
Set OY! in Luckiest Guy, 128 px, , centred in the bubble, and Merge Down. With a hard 10 px white brush, click and Shift-click a short arc near the bubble's top left for a shine.
Turn on Stroke: , Width 7, inside. Die-cut with Grow 12, add the sticker shadow, and tilt the bubble 9° clockwise.
-
Mint a gelt coin
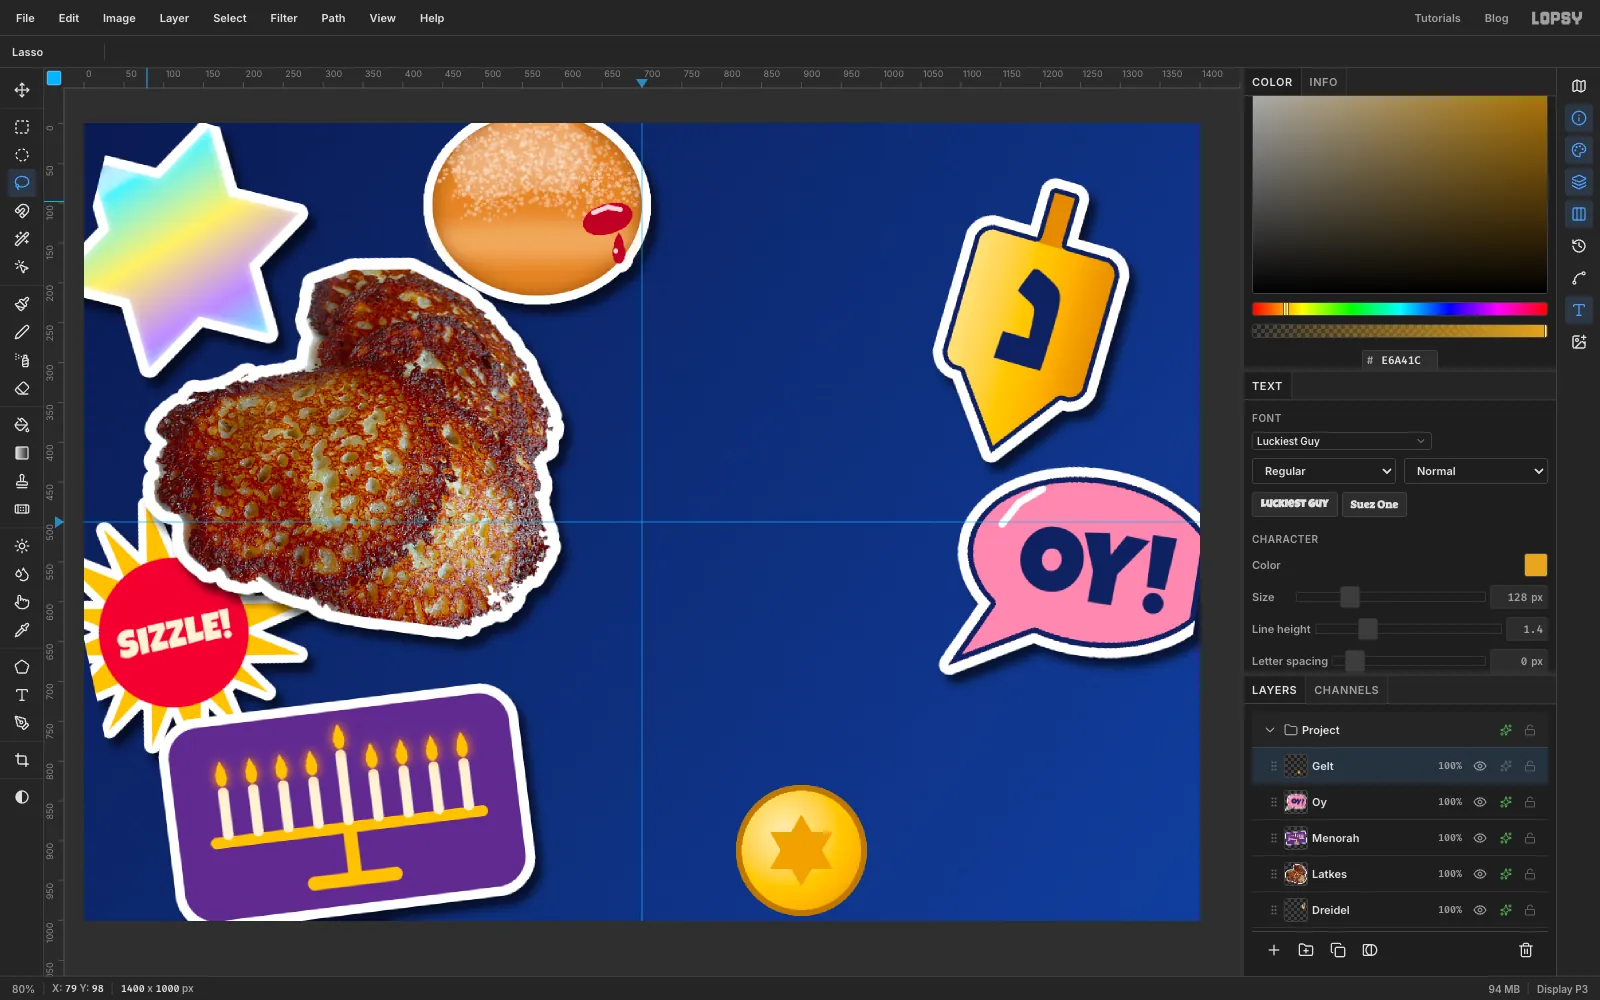
Add a layer called Gelt. Make a circle selection with a 164 px diameter centred on (900, 912). Pick the Gradient tool, set it to Radial, and set stops at 0%, at 55% and at 100%. Drag from (878, 888), just up and left of centre, out to (982, 994). Deselect.
For the rim, add a layer, Cmd-click the Gelt thumbnail, fill with , choose Select → Shrink… with 7 and press Delete. That leaves a 7 px ring. Deselect and Merge Down.
With the Pen tool, click a small six-pointed star: six points 45 px from the centre (one straight up, then every 60°), with an inner corner about 26 px out between each pair. Close the path. Choose Path to Selection and fill with .
-
Emboss the coin
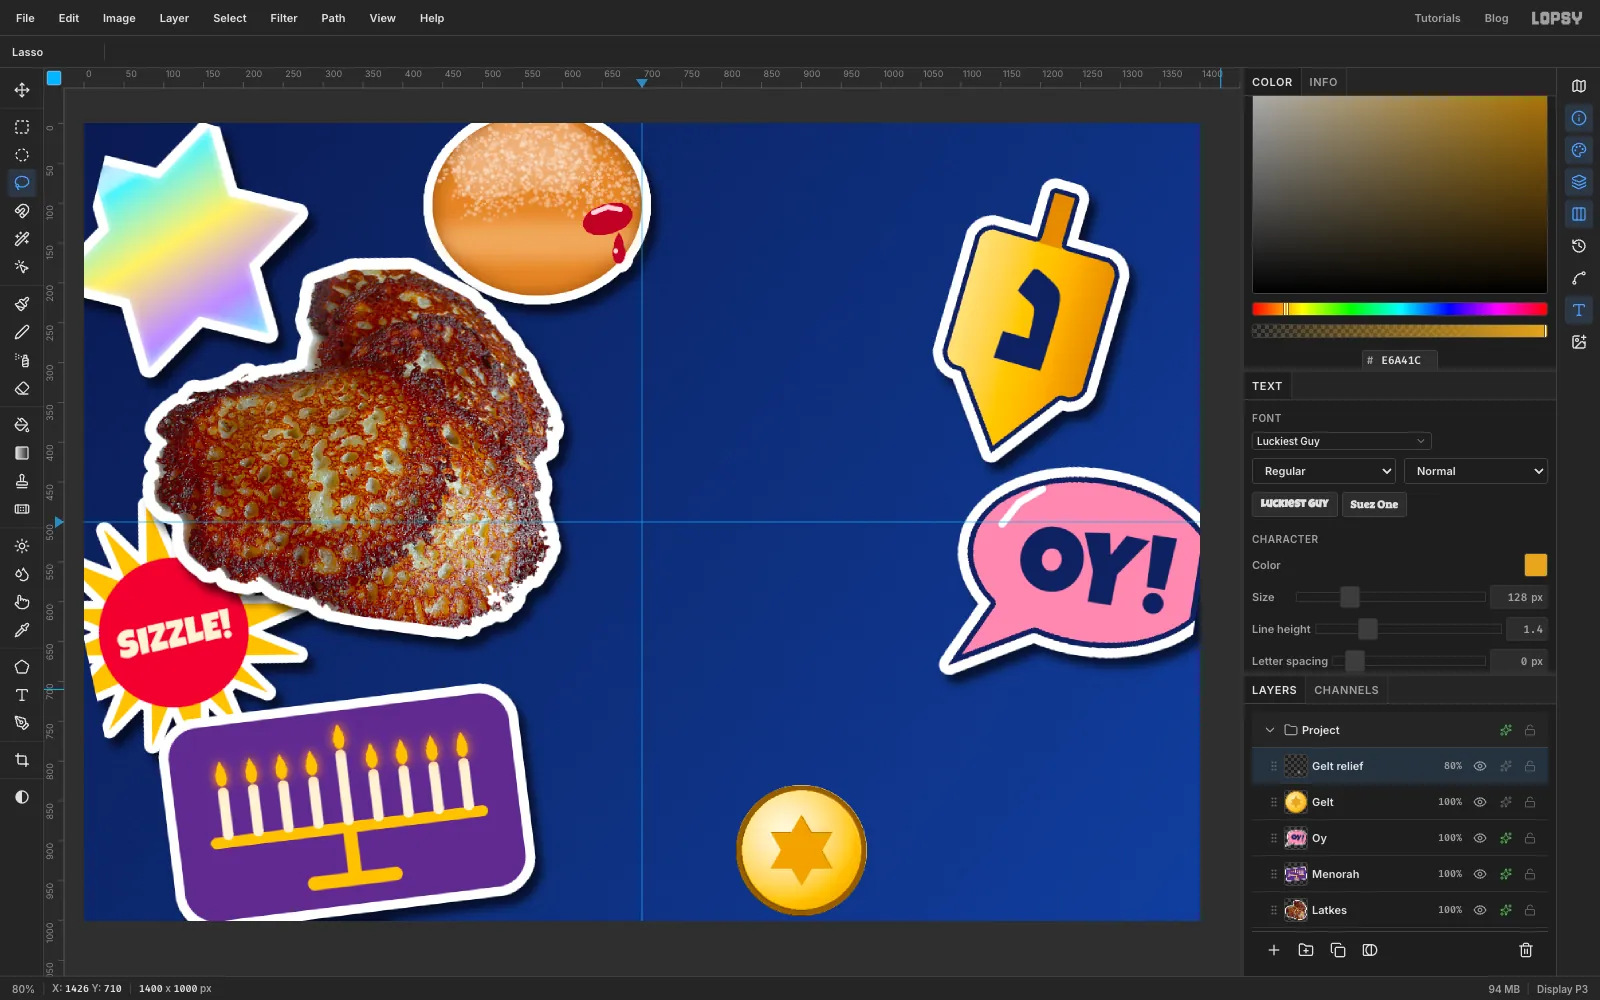
Choose Layer → Duplicate Layer and rename the copy Gelt relief. Choose Filter → Emboss… with Angle 135 and Strength 6, then Filter → Desaturate. Set its blend mode to Hard Light in the effects drawer and its opacity to 80%.
The grey relief now lightens and darkens the gold underneath it, like stamped metal. Desaturating the relief keeps the gold from turning orange. Merge Down, die-cut with Grow 9 and add the sticker shadow.
-
Copy and paste two more coins
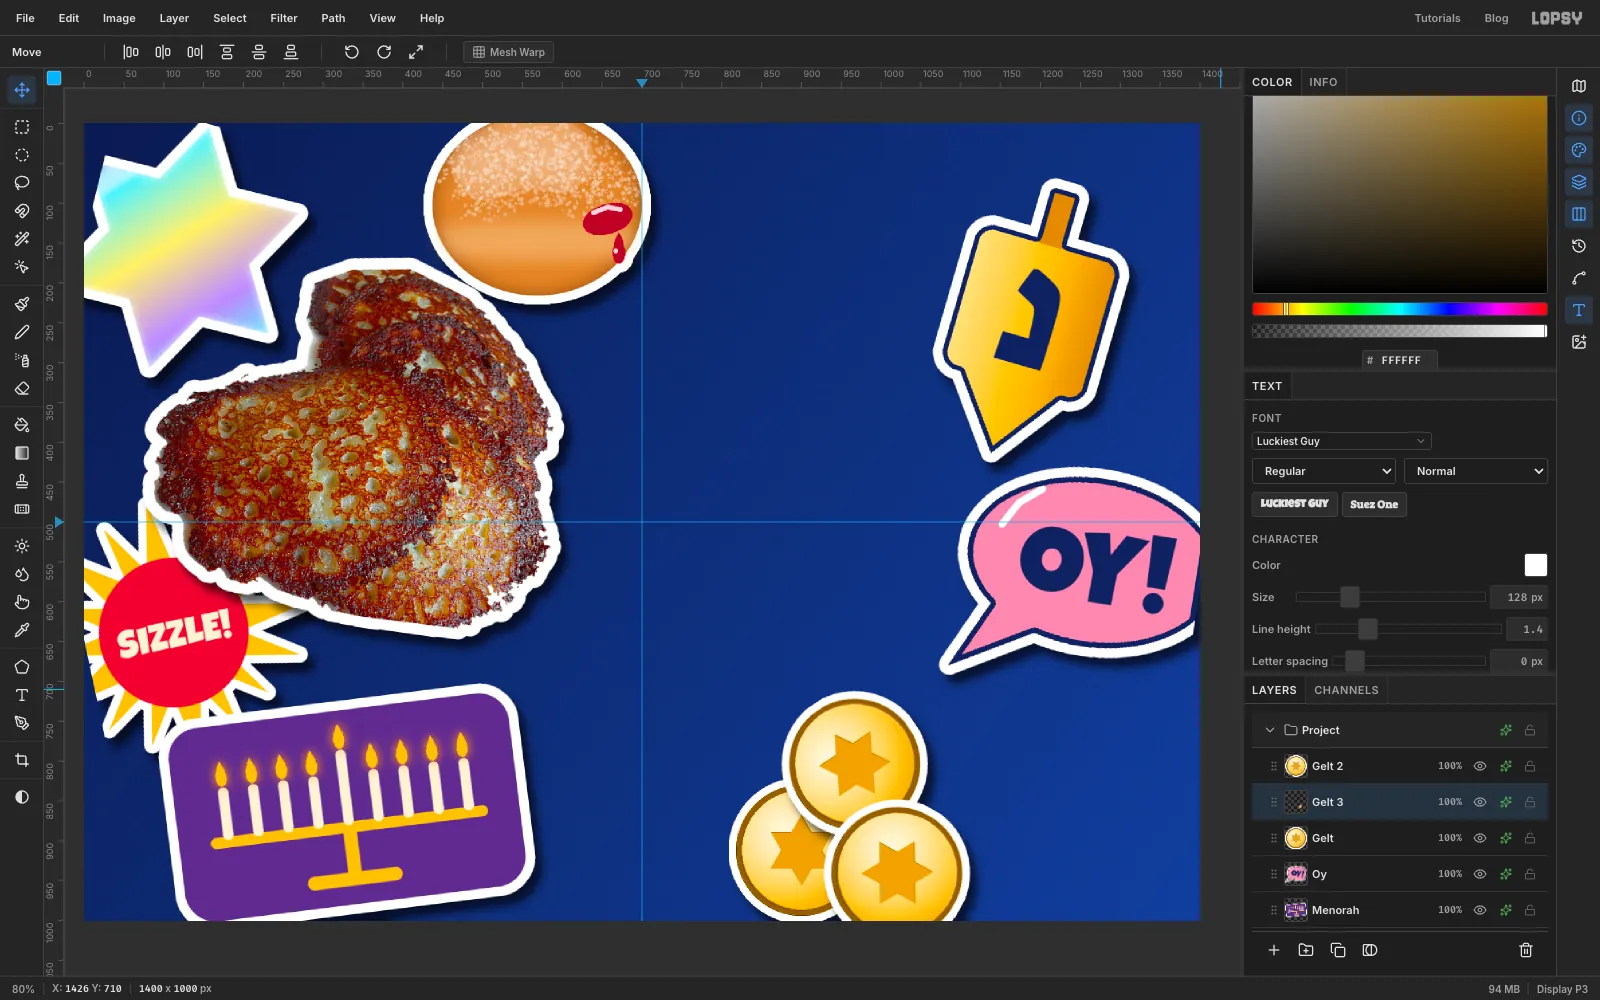
Cmd-click the Gelt thumbnail, then choose Edit → Copy and Edit → Paste. The copy pastes in place on a new layer. Rename it Gelt 2 and press Cmd+D. With the Move tool, drag it about 128 px right and 30 px down. Then tilt it 28° clockwise with its rotation handle and give it the sticker shadow.
Do it again for Gelt 3: paste, drag it about 66 px right and 108 px up, and tilt it 34° counter-clockwise. Pasted copies don't carry the shadow, so add it to each one.
-
Group the pile and move it as one
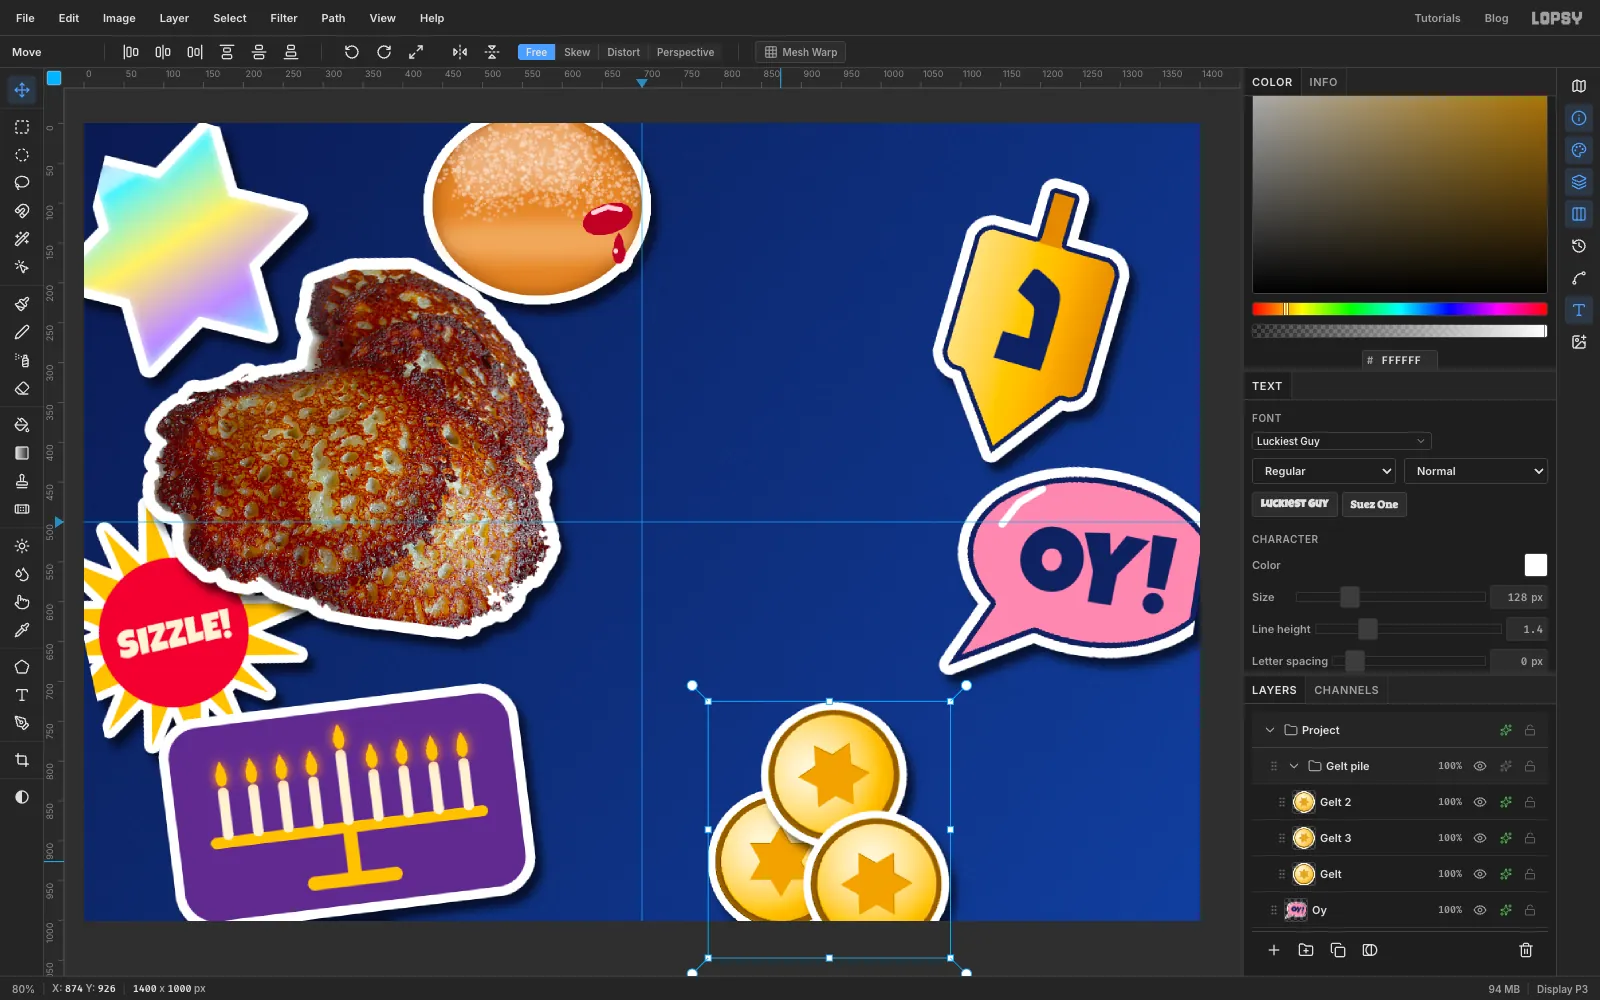
Click Gelt, then Cmd-click the names of Gelt 2 and Gelt 3 (not their thumbnails, which would load a selection instead) so all three are selected. Choose Layer → Group Layers and rename the group Gelt pile.
With the group row selected, the Move tool frames the whole pile. Drag it about 26 px left and 14 px down to tuck it into place. Press Cmd+Z and Shift+Cmd+Z to compare before and after. All three coins move together.
Collapse the group with its chevron before you add the next layer. Otherwise the new layer lands inside the group.
-
Make the CRISPY 8 NIGHTS badge
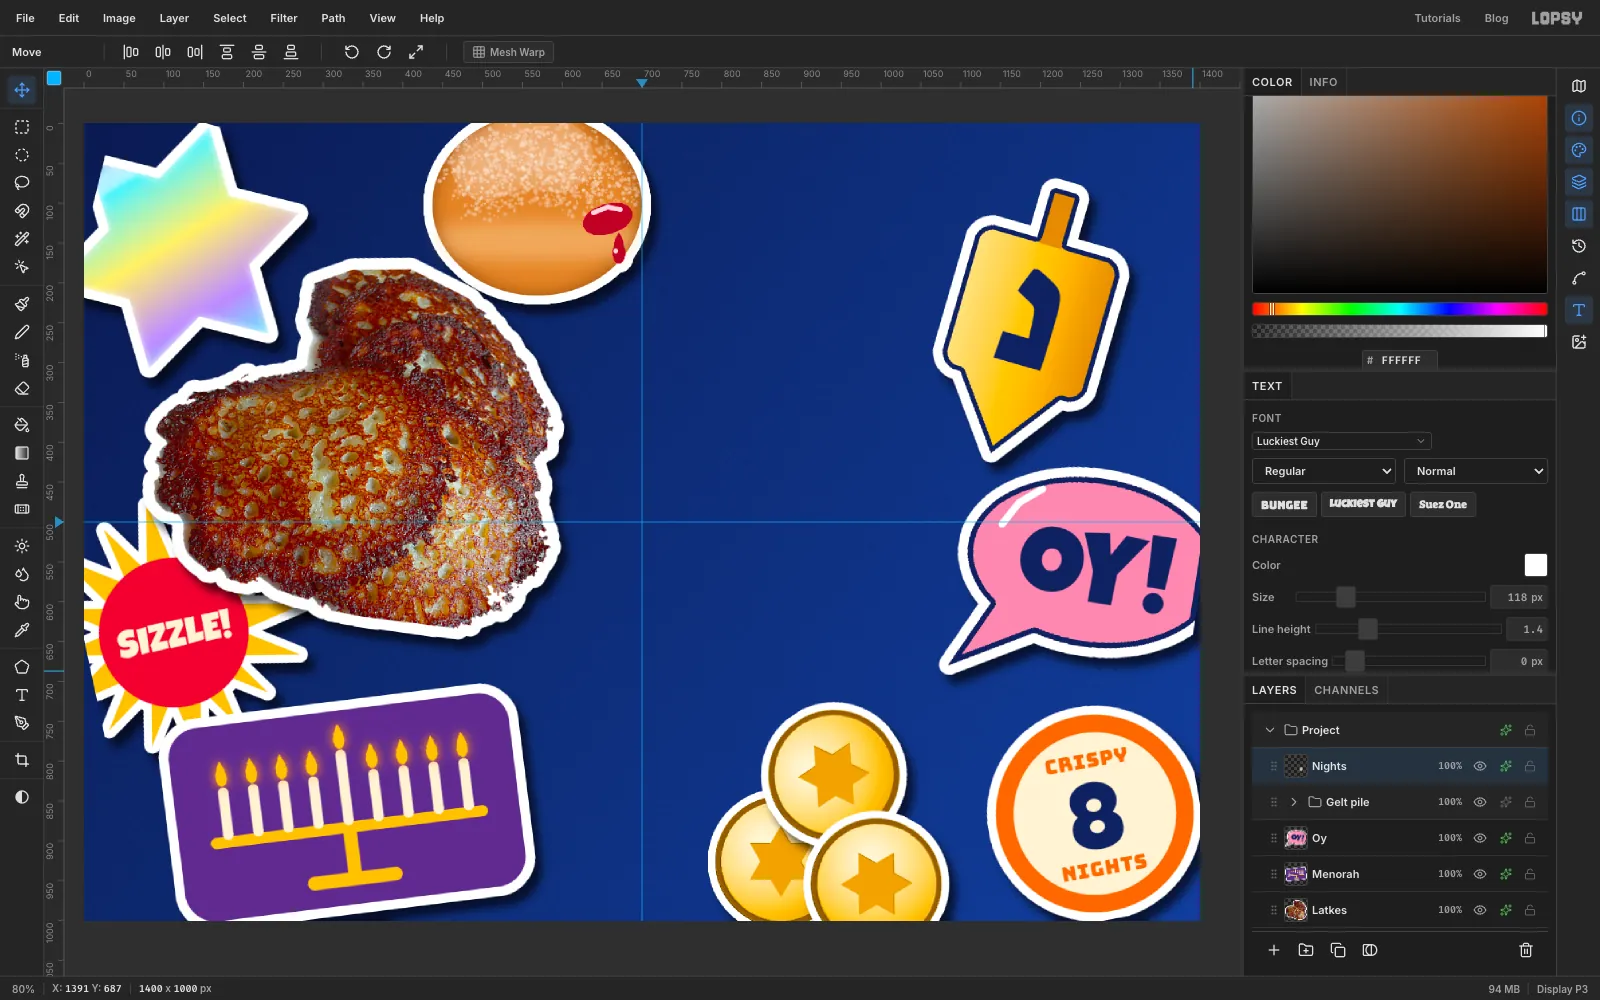
With Gelt pile selected and collapsed, add a layer called Nights. Fill a 248 px orange circle () centred on (1268, 866), then a 204 px cream circle () on the same centre.
Set three pieces of text, clicking the Nights row before each one:
- 8 in Luckiest Guy, 118 px, , centred on the badge
- CRISPY in Bungee, 25 px, , Letter spacing 1, centred 68 px above the middle
- NIGHTS, the same, centred 68 px below the middle
Check that each word clears the orange ring evenly. Click NIGHTS and choose Merge Down, then do the same for CRISPY and 8. Each one sits directly above Nights, so each merges straight into it. Die-cut with Grow 11, add the shadow, and tilt the badge about 10° counter-clockwise.
-
Lay out the title card
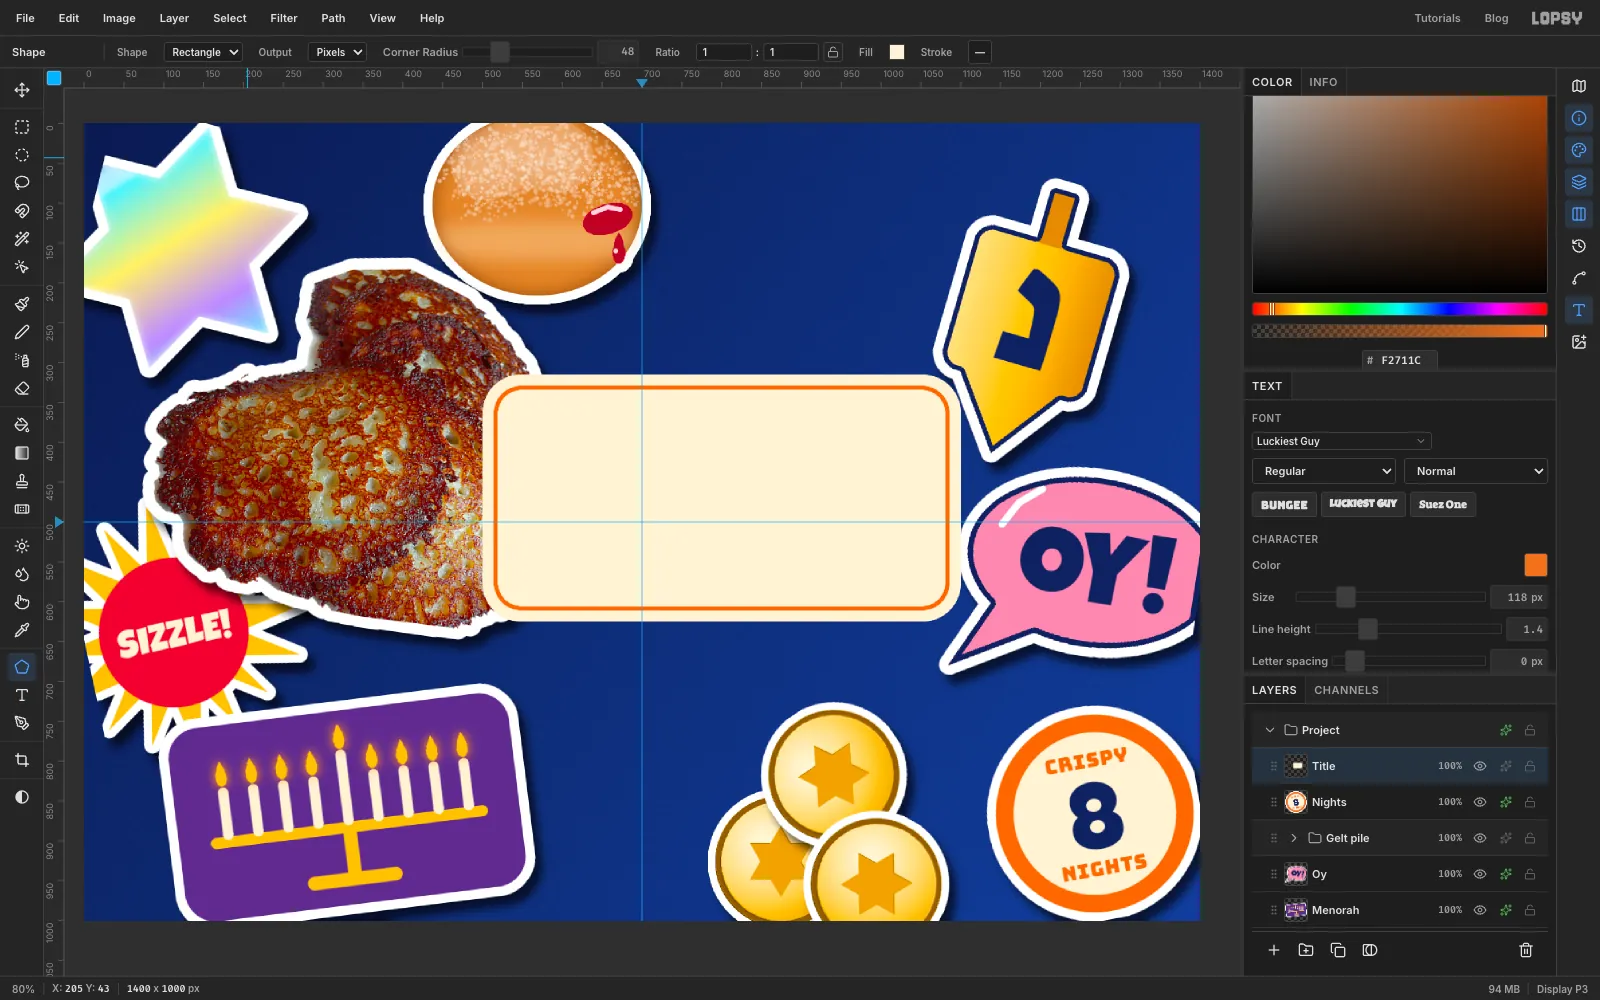
The title goes on near the end so it sits over the earlier stickers. Add a layer called Title. With the Shape tool (Rectangle, Corner Radius 48, fill ), press at (800, 470) and drag out 300 px across and 155 px down.
For the inset frame, add a layer, Cmd-click the Title thumbnail, choose Select → Shrink… with 14 and fill with . Then Shrink by 5 and press Delete. That leaves a 5 px orange line 14 px in from the edge. Deselect and Merge Down.
-
Set TOASTY LATKES
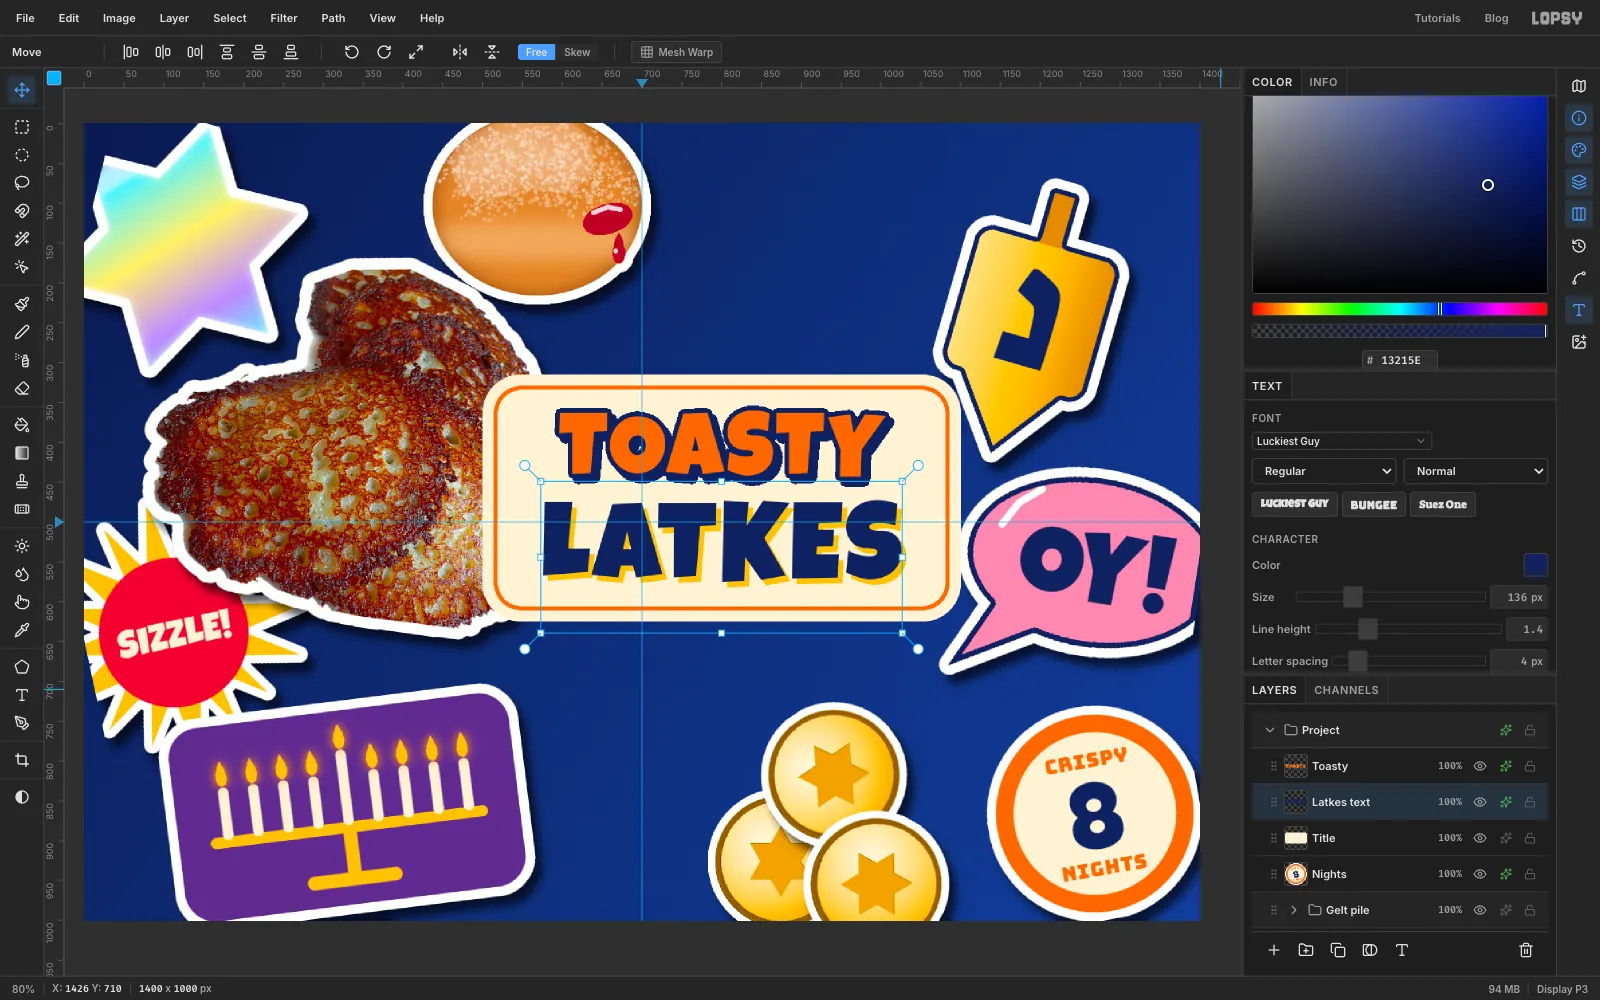
Click the Title row. Set TOASTY in Luckiest Guy, 112 px, , Letter spacing 4. Give it a Stroke (, Width 6, outside) and a hard Drop Shadow (, Offset X 6, Offset Y 7, Blur 0, Spread 0, Opacity 100).
Click the Title row again and set LATKES in Luckiest Guy, 136 px, , Letter spacing 4. Give it a hard Drop Shadow in with the same numbers.
Centre both words on x 800. Then Cmd-click both text rows' names and nudge them up or down together with the arrow keys until the space between the top of TOASTY and the orange frame matches the space between LATKES' gold shadow and the bottom of the frame. In this layout that's about 26 px each. Click the LATKES row and choose Merge Down, then click TOASTY and Merge Down again, so each word merges straight into Title with its own effects baked in.
-
Die-cut the title and cut the corner
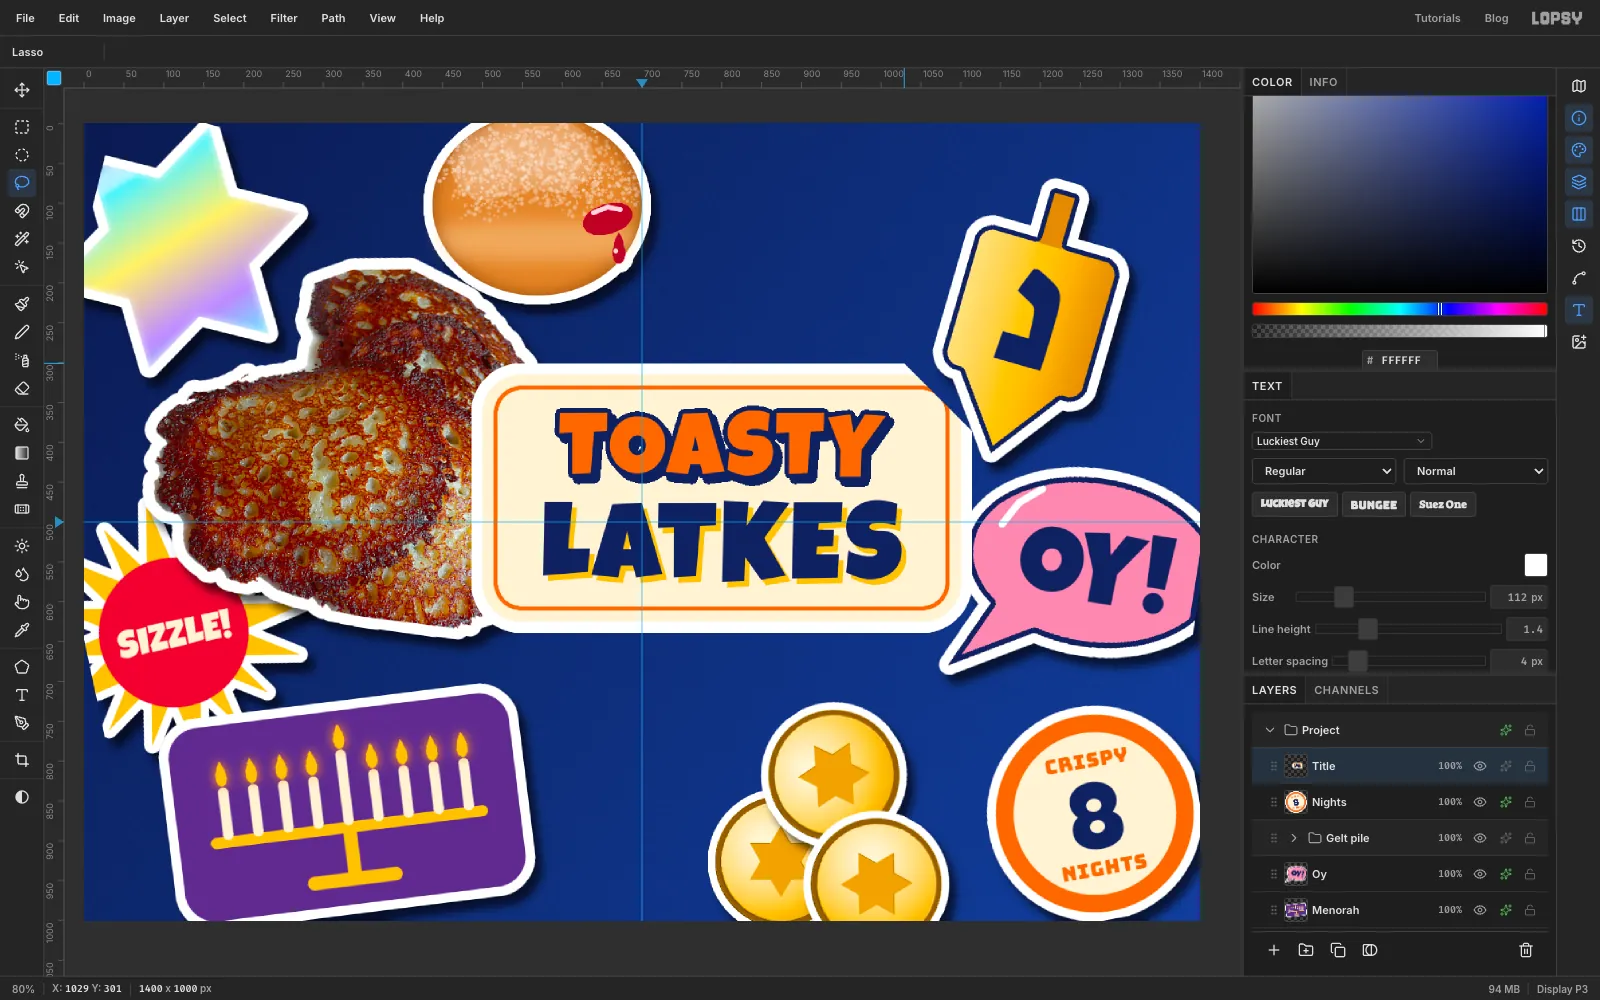
Die-cut Title with Grow 14.
To peel back a corner, first cut it off. With the Pen tool, click a triangle over the top-right corner: start on the top edge 85 px left of the corner, go out past the corner, and finish on the right edge 85 px below it. Make it a selection, press Delete, and deselect.
-
Fold the corner back
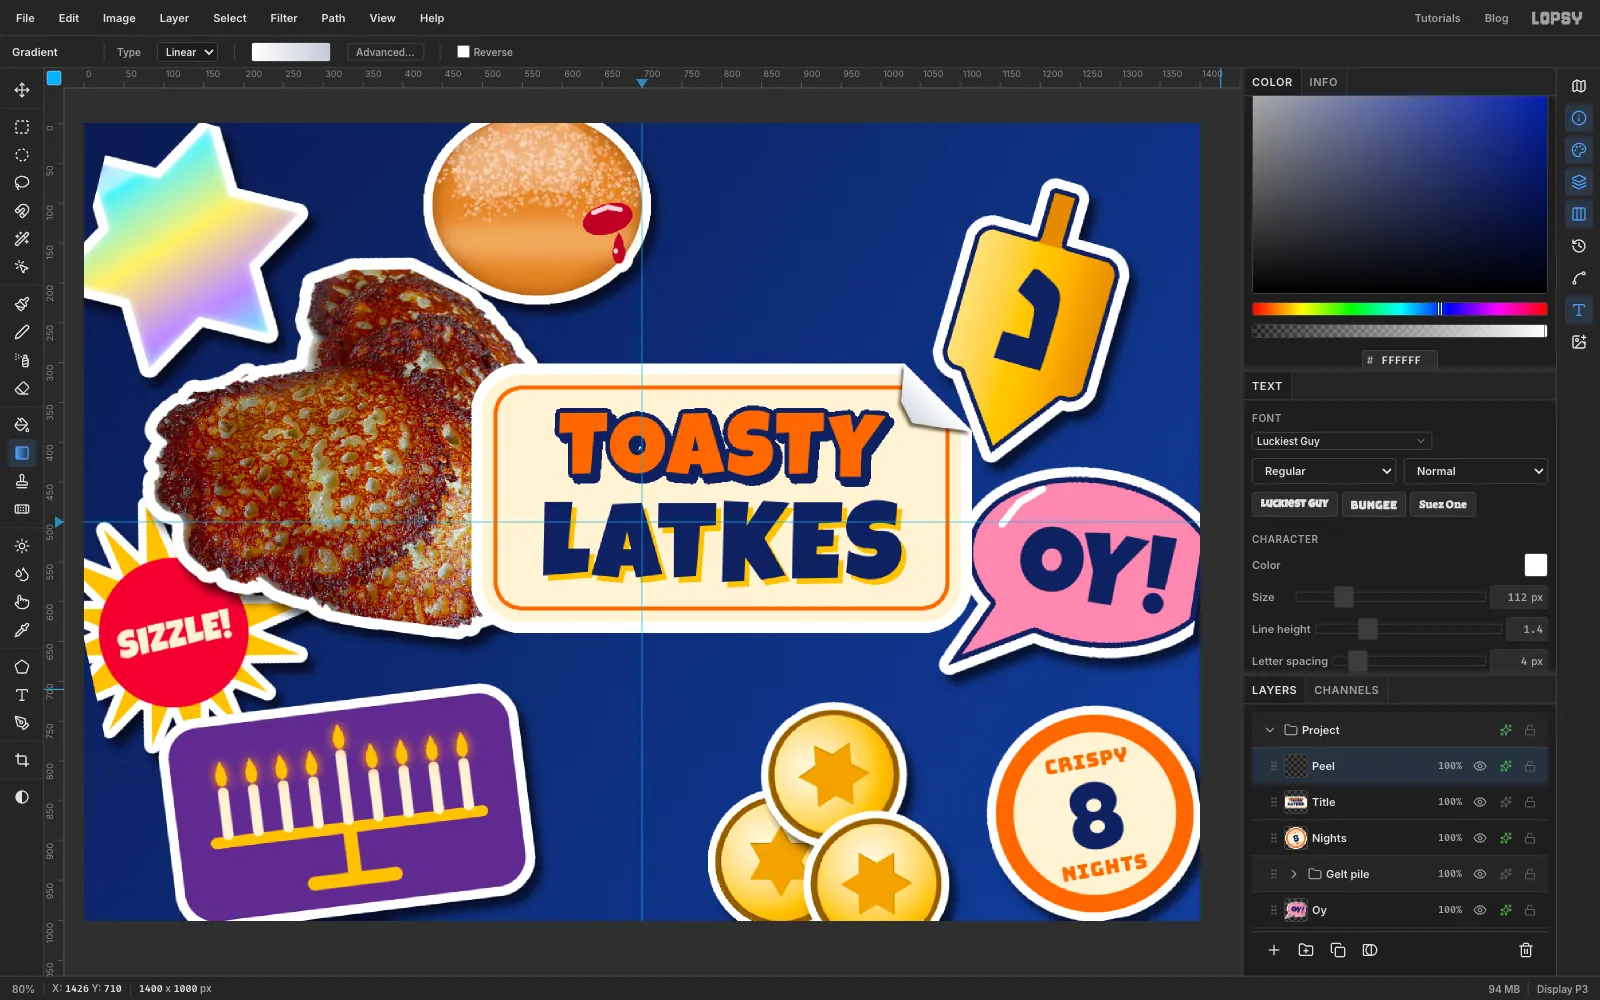
The flap is the cut-off corner folded back over the fold line. Add a layer called Peel. With the Lasso, draw it as a triangle from the two ends of the cut, with its tip pointing down-left into the sticker (the mirror image of the corner you removed). Bow its two long sides outward a little so it looks curled.
Set the Gradient to Linear with two stops, at 0% and at 100%, and drag from the fold to the tip. That's the grey back of the vinyl. Give Peel a Drop Shadow of , Offset X −3, Offset Y 4, Blur 6, Opacity 70, so the flap lifts off the sticker face. Merge Down into Title.
-
Tilt the title
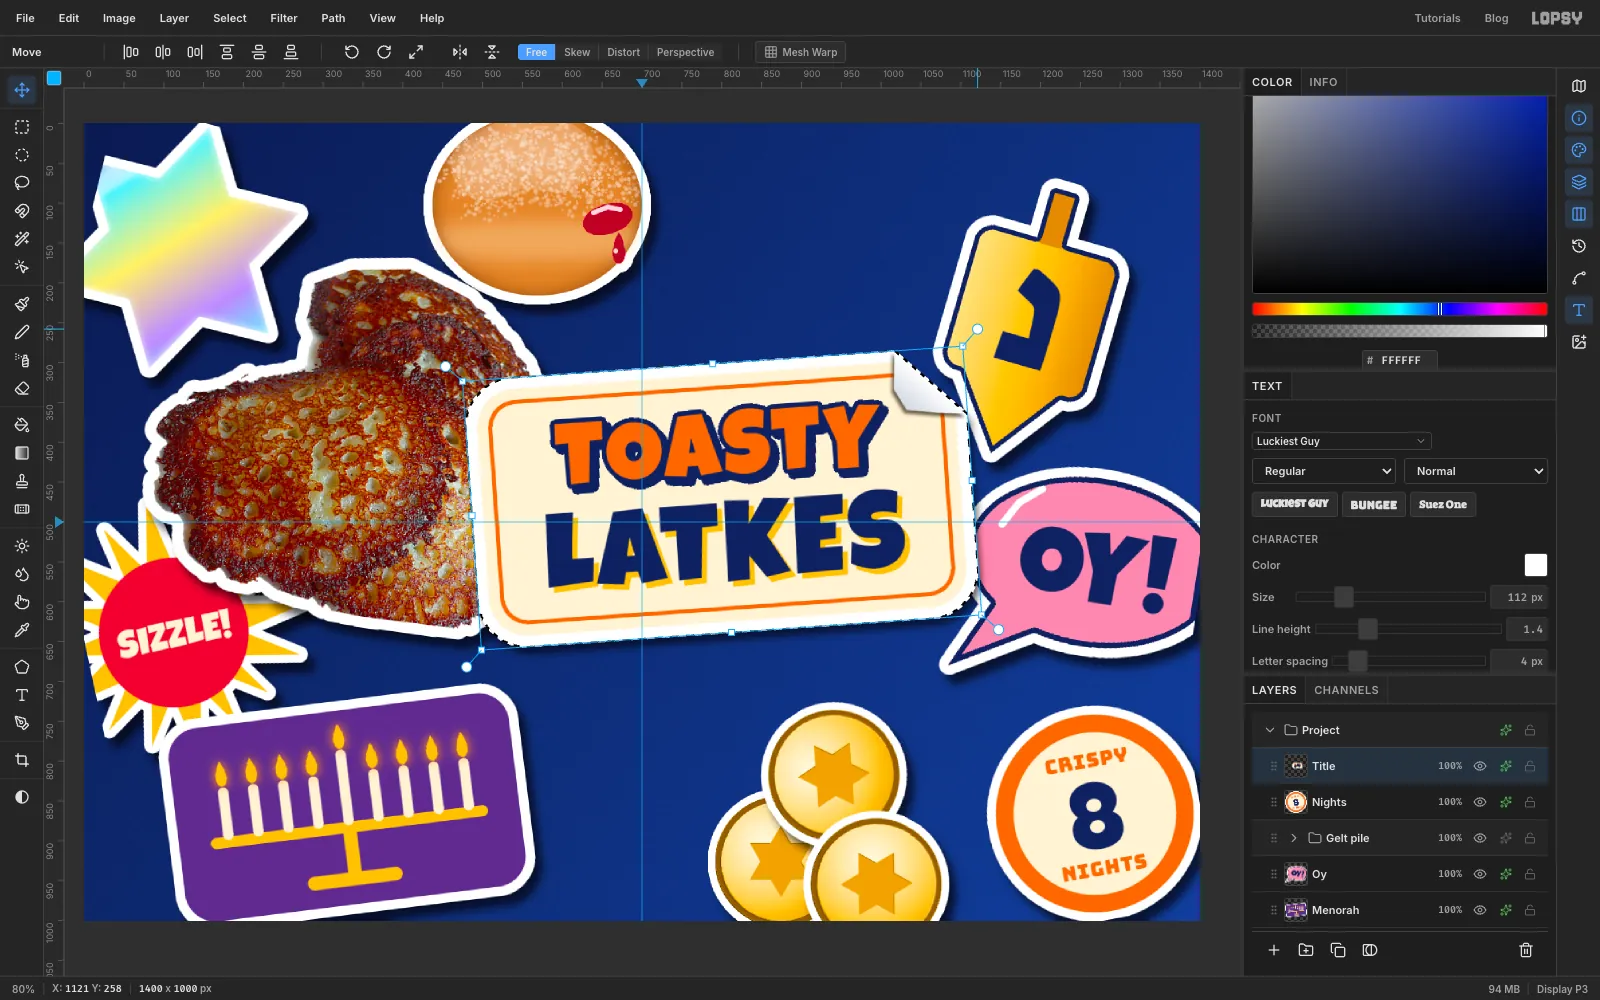
Give Title the sticker Drop Shadow, but a little tighter so the big title sits flatter on the card: Offset X 5, Offset Y 9, Blur 14, Opacity 60. Then tilt it about 4° counter-clockwise and press Cmd+D.
-
Hang the HAPPY HANUKKAH ribbon
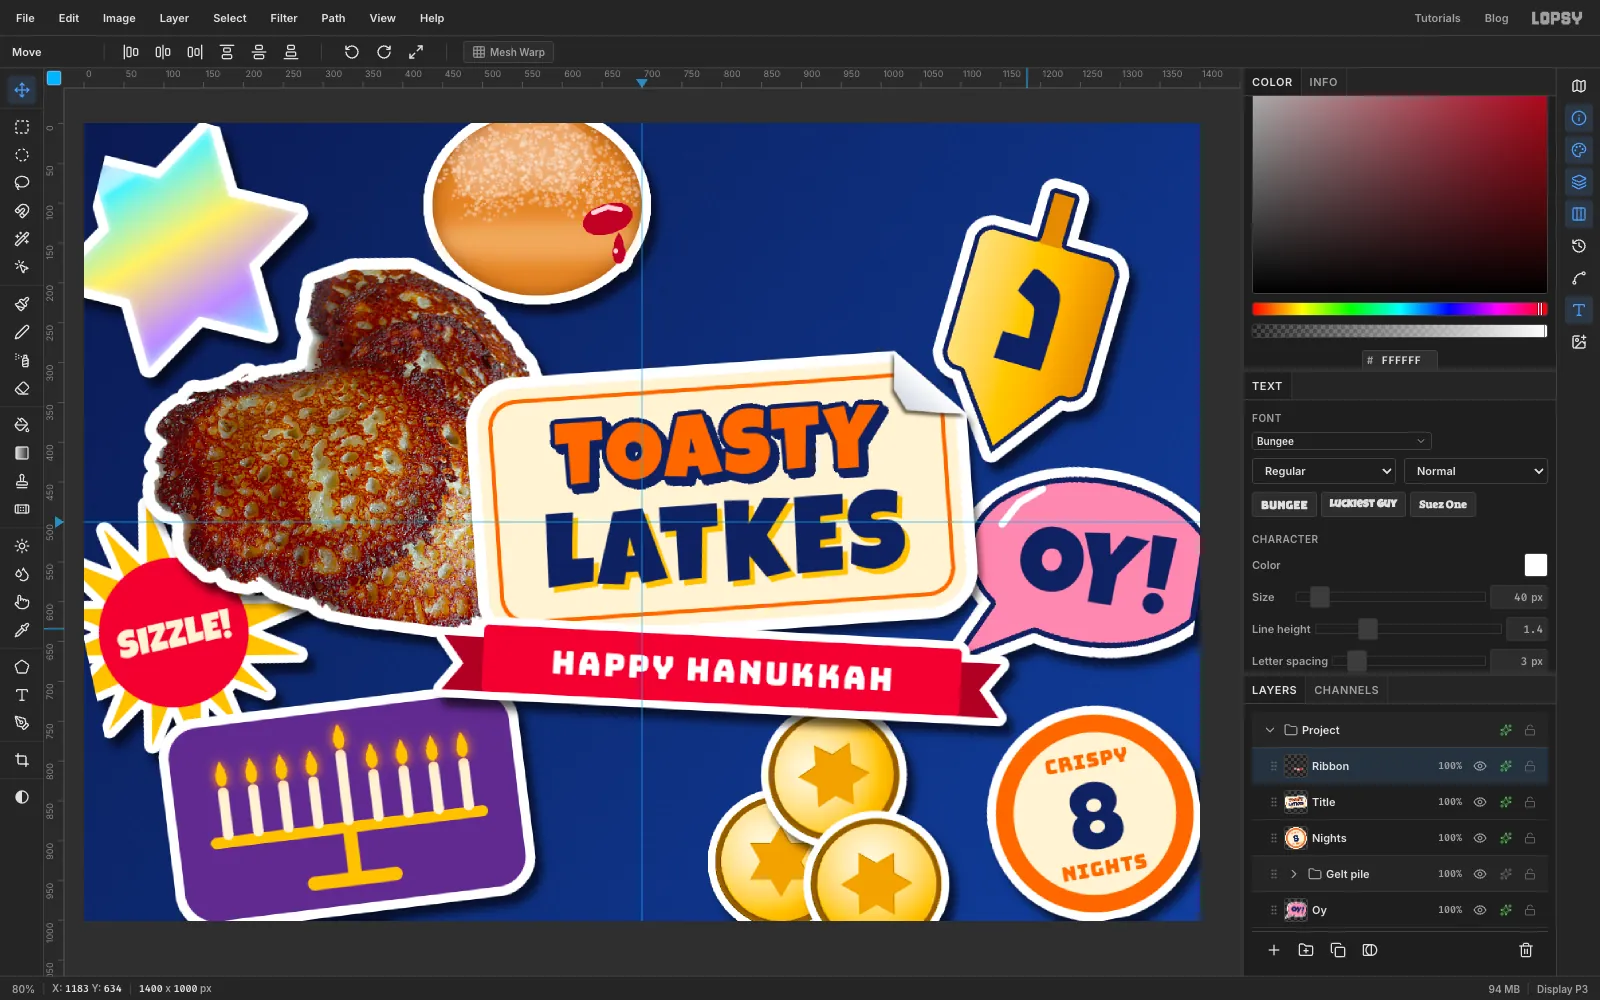
Add a layer called Ribbon. With the Pen tool, draw a notched tail at each end: a 80 × 68 px shape with a V cut into its outer end, spanning x 450–530 on the left and x 1070–1150 on the right, from y 660 to y 728. Fill both with .
Add a layer called Ribbon band. With the Shape tool (Rectangle, Corner Radius 6, fill ), draw a 600 × 84 px band centred on (800, 686). Set HAPPY HANUKKAH in Bungee, 40 px, white, Letter spacing 3, centred on the band.
Merge Down the text into the band, then the band into Ribbon. Die-cut with Grow 10, add the shadow, and tilt the ribbon 3° clockwise so it overlaps the bottom of the title.
-
Add a Chag Sameach pill
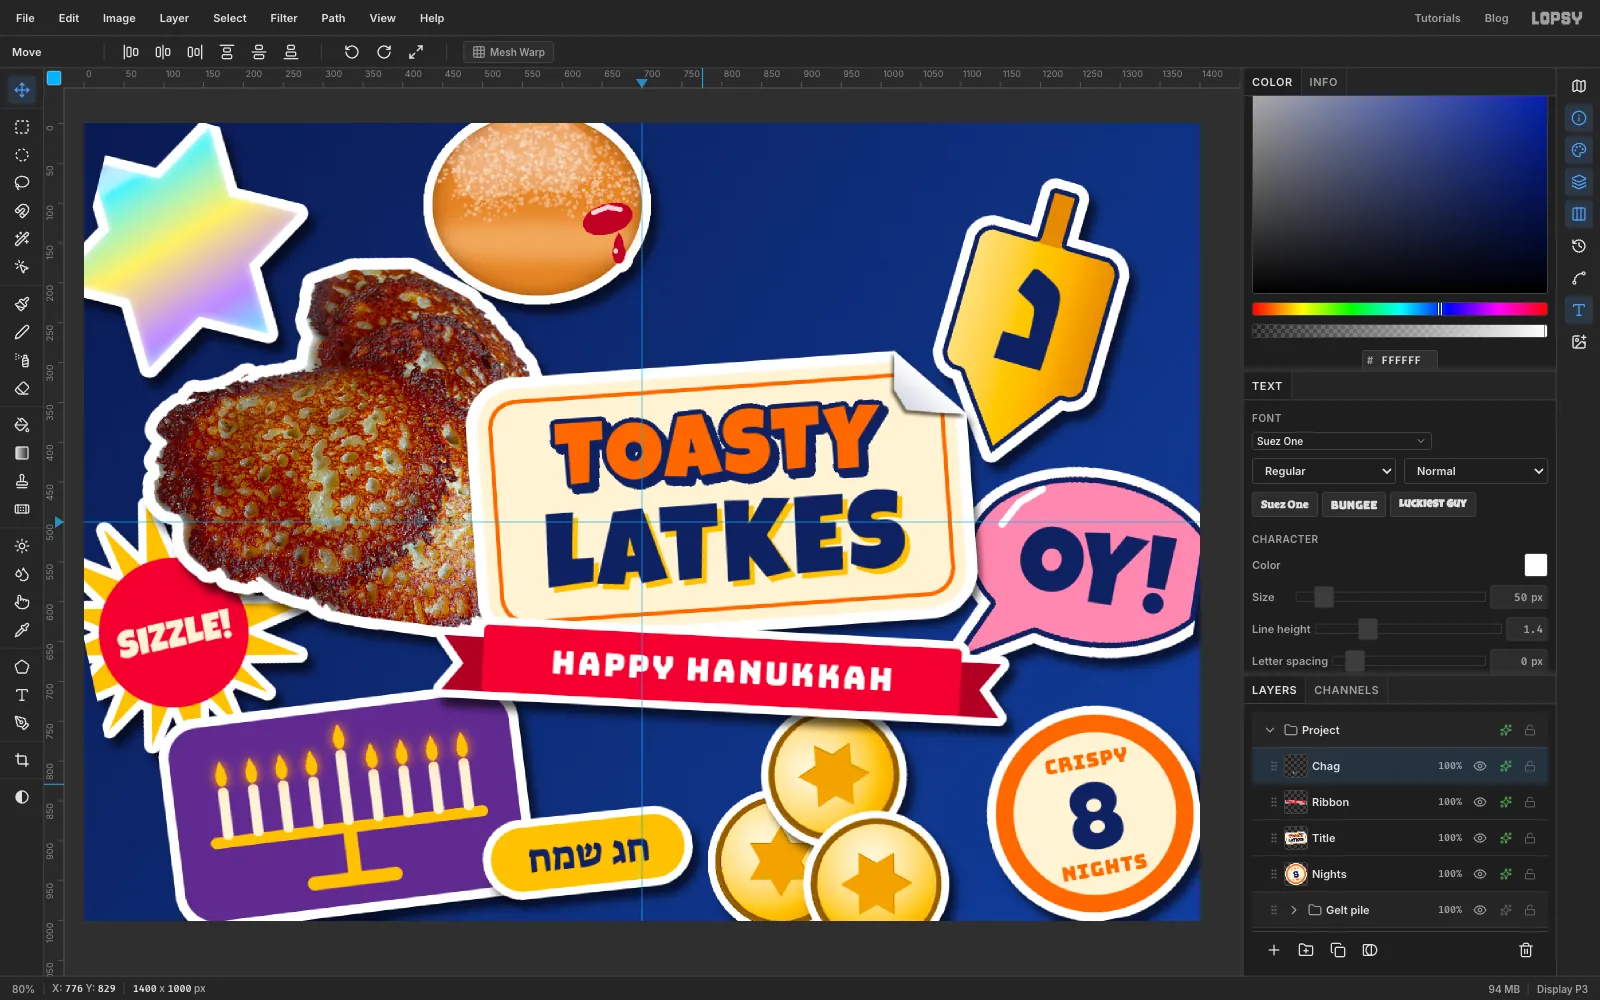
Add a layer called Chag. With the Shape tool (Rectangle, Corner Radius 40, fill ), draw a 244 × 80 px pill centred on (632, 915).
Set חג שמח (Chag Sameach, "happy holiday") in Suez One, 50 px, , Letter spacing 0. Paste it if you can't type Hebrew. Lopsy lays it out right to left, so the first word ends up on the right. Centre it in the pill and Merge Down. Die-cut with Grow 10, add the shadow and tilt it 6° counter-clockwise.
-
Paste a second, smaller latke sticker
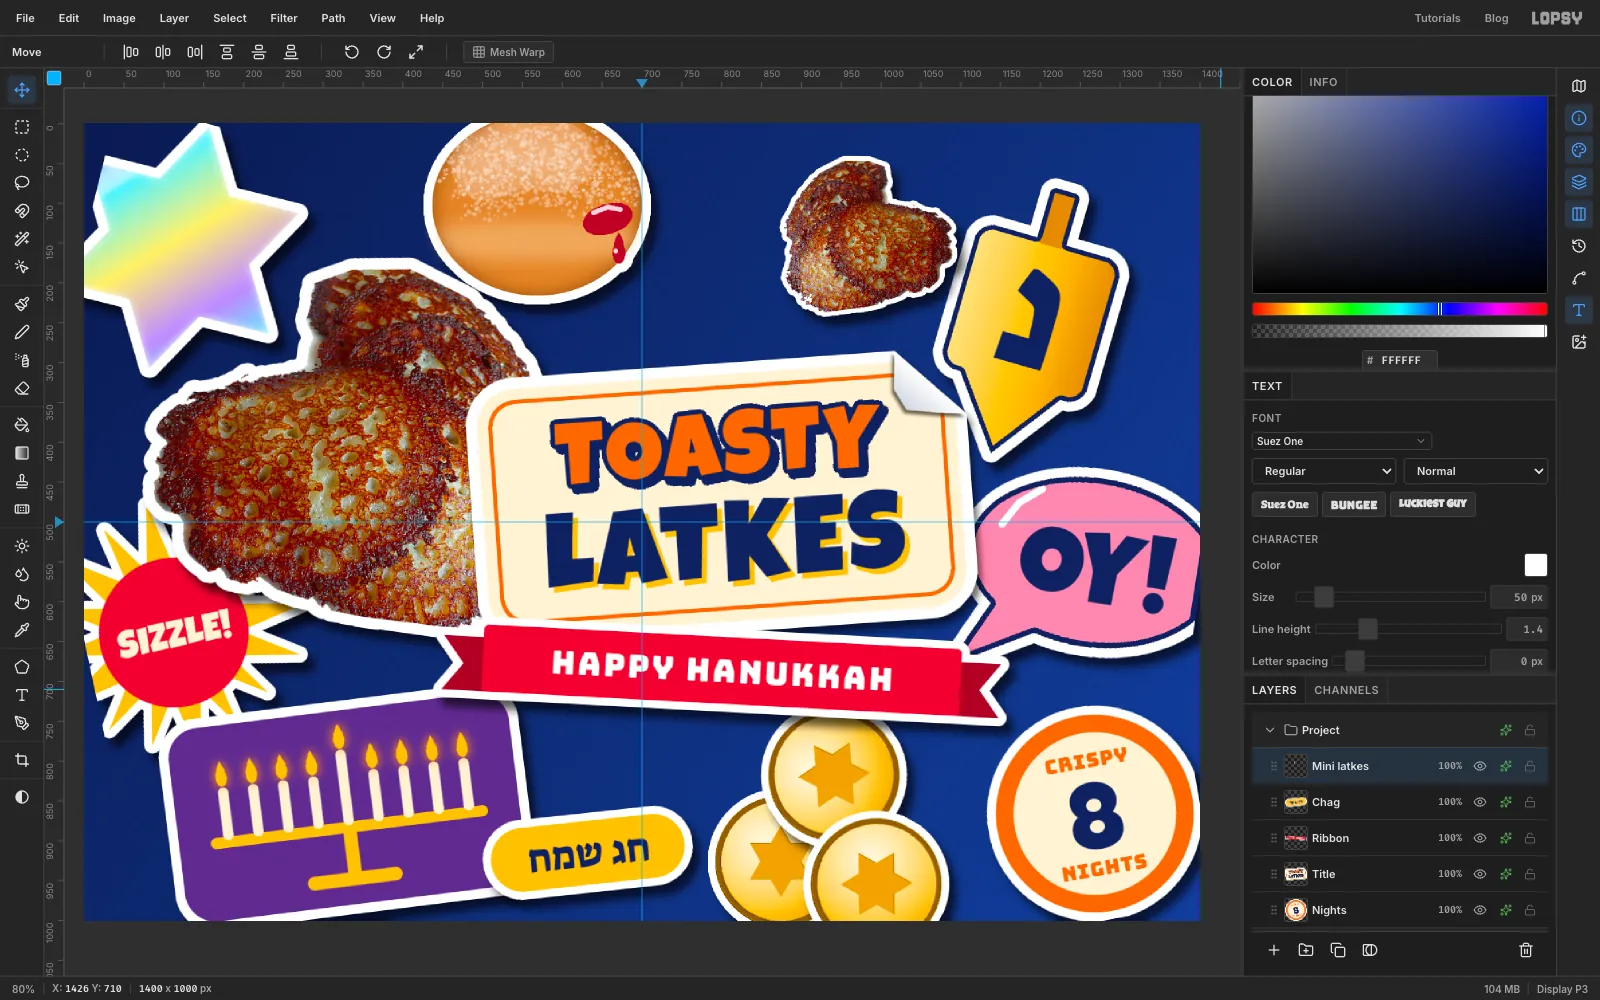
Real sticker bombs often repeat a favourite sticker. Cmd-click the Latkes thumbnail and choose Edit → Copy. Click the Chag row and choose Edit → Paste. Rename the paste Mini latkes.
Cmd-click its thumbnail, press V and click Flip Horizontal in the options bar so it doesn't look like a clone. Press Cmd+D. Then Cmd-click its thumbnail and Cmd-drag a corner to scale it to about 42%. Press Cmd+D.
Drag it up near (950, 88) so it tucks in near the top edge, between the doughnut and the dreidel. Tilt it 20° clockwise and add the sticker shadow.
-
Make an applesauce jar
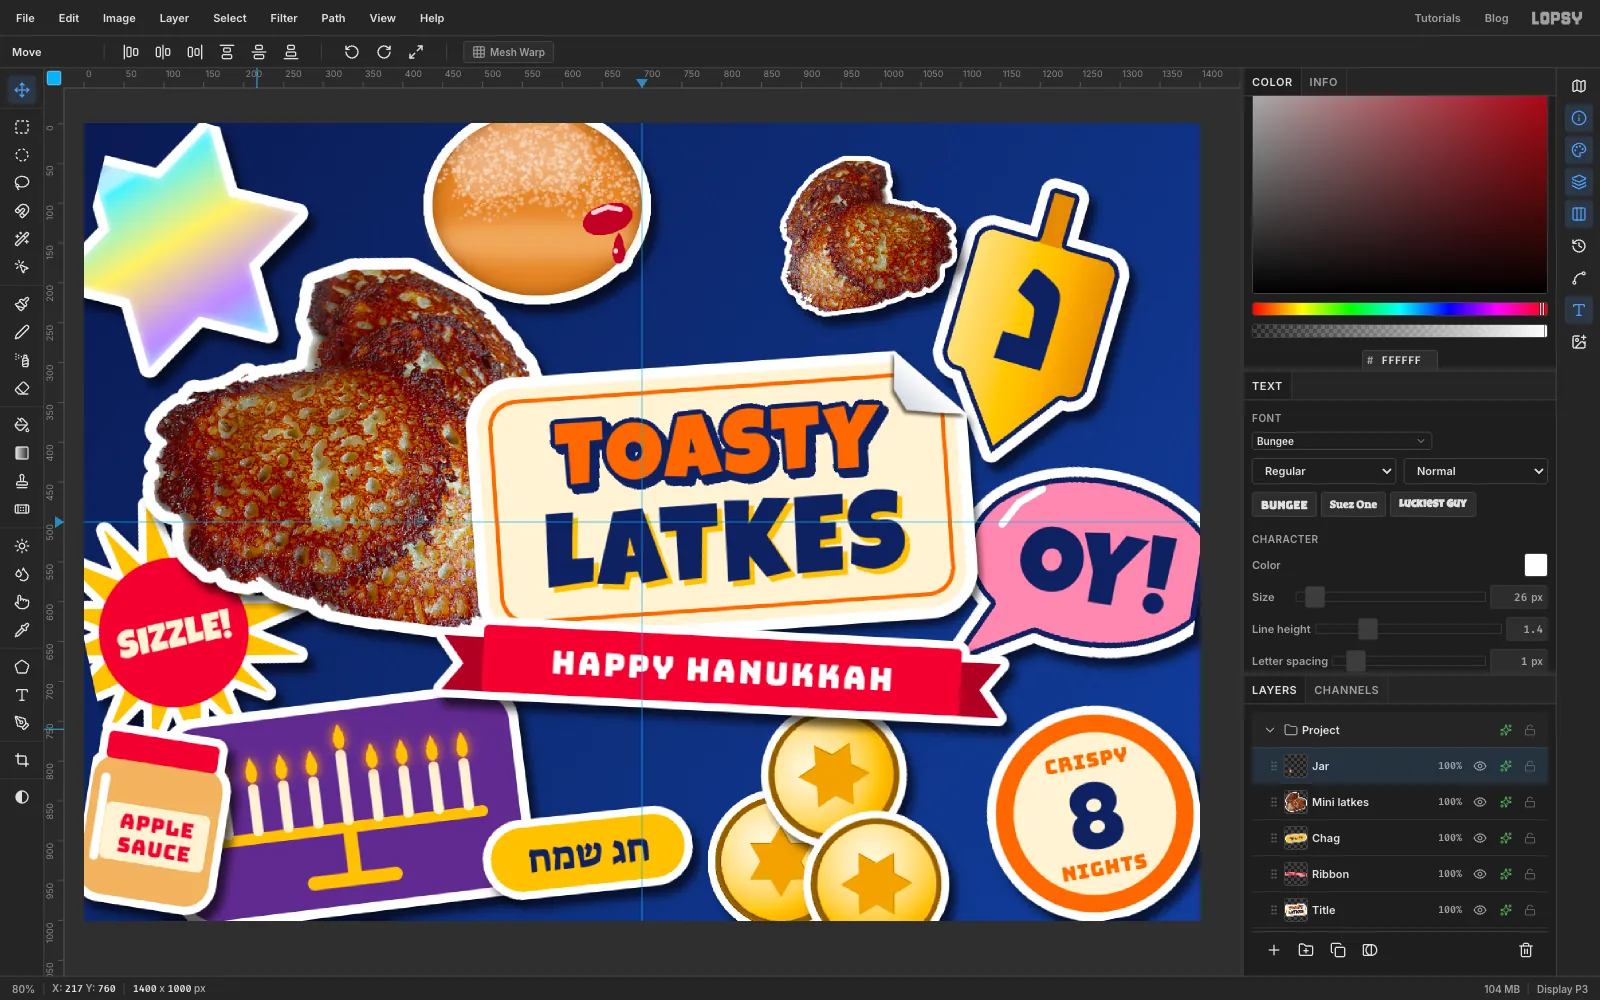
Applesauce or sour cream is the great latke argument, so the card takes both sides. Add a layer called Jar and use the Shape tool (Rectangle):
- the jar: Corner Radius 30, , 164 × 176 px centred on (86, 888)
- the lid: Corner Radius 6, , 140 × 34 px centred on (86, 788)
- the label: Corner Radius 8, , 132 × 72 px centred on (92, 895)
Before the label, draw a 12 px white brush line down the jar's left side, from (20, 830) to (20, 930), for the glass highlight.
Set APPLE and SAUCE in Bungee, 26 px, , Letter spacing 1, centred on the label at y 880 and y 910. Set SAUCE first and APPLE second, clicking the Jar row before each. Then click APPLE and Merge Down, then SAUCE and Merge Down. Die-cut with Grow 10, add the shadow and tilt it 9° clockwise.
-
Add a two-tone star and a drop of oil
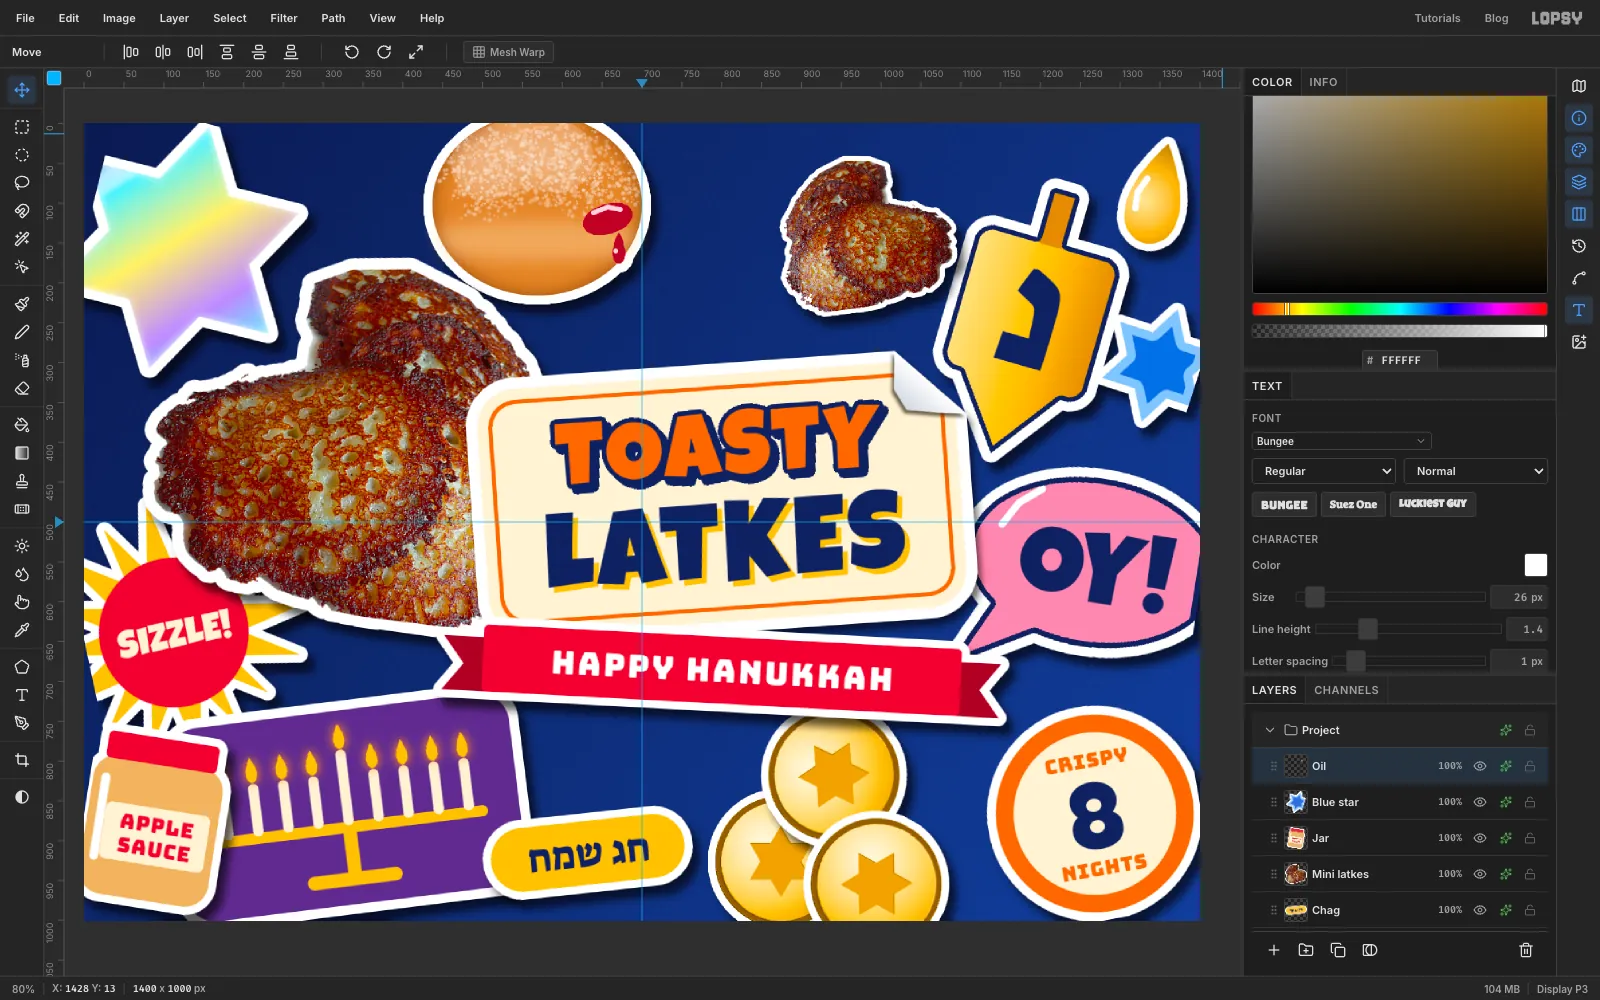
Add a layer called Blue star. Pen a six-pointed star centred on (1350, 300), with points 74 px out and inner corners about 43 px out, make it a selection, and fill it with . Cmd-click its thumbnail, Shrink by 11 and fill with . Die-cut with Grow 9, add the shadow and tilt it 18° clockwise.
The oil is a nod to the Hanukkah story. Add a layer called Oil and lasso a drop with its point at the top, about 70 px wide and 128 px tall, centred near (1345, 88). Fill it with . Cmd-click it and drag a Radial gradient ( at 0%, at 60%, at 100%) from just left of its middle down to its bottom right. Add a white 9 px brush curve on its left side for the shine. Die-cut with Grow 9, add the shadow and tilt it 14° clockwise.
-
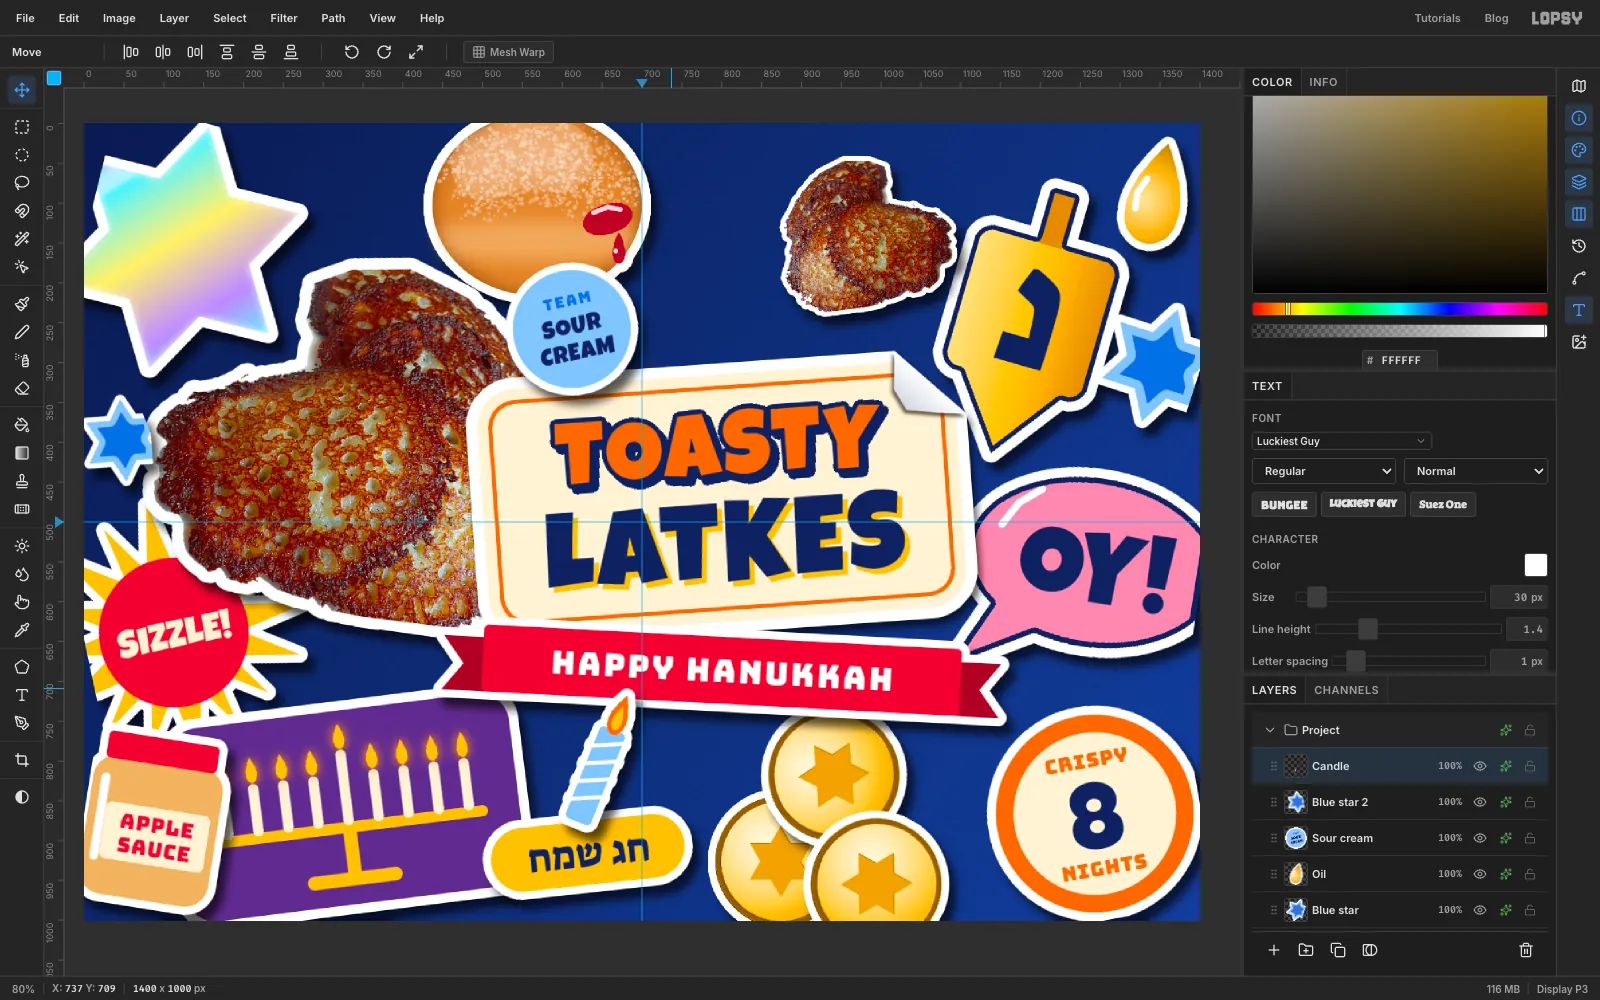
Fill the gaps with Team Sour Cream, a candle and a star
Add a layer called Sour cream and fill a 148 px sky-blue circle () centred on (612, 258), so it tucks against the edge of the latkes. Set three lines, clicking the Sour cream row before each:
- CREAM in Luckiest Guy, 30 px, , Letter spacing 1, 27 px below the centre
- SOUR, the same, 5 px above the centre
- TEAM in Bungee, 19 px, , Letter spacing 2, 37 px above the centre
Click TEAM, SOUR and CREAM in that order, choosing Merge Down after each. Die-cut with Grow 9, add the shadow and tilt it 12° counter-clockwise.
Copy and paste the Blue star, rename the copy Blue star 2, scale it to 70%, move it to the left edge at about (38, 400), tilt it 22° counter-clockwise and add the shadow.
For the candle, add a layer called Candle and draw a 34 × 124 px sky-blue rectangle (Corner Radius 6) centred on (650, 820). With a 6 px white brush, Shift-click four diagonal stripes across it. Lasso a flame on top in with a smaller core inside it. Die-cut with Grow 9, add the shadow and tilt it 22° clockwise.
-
Scatter the sparkles
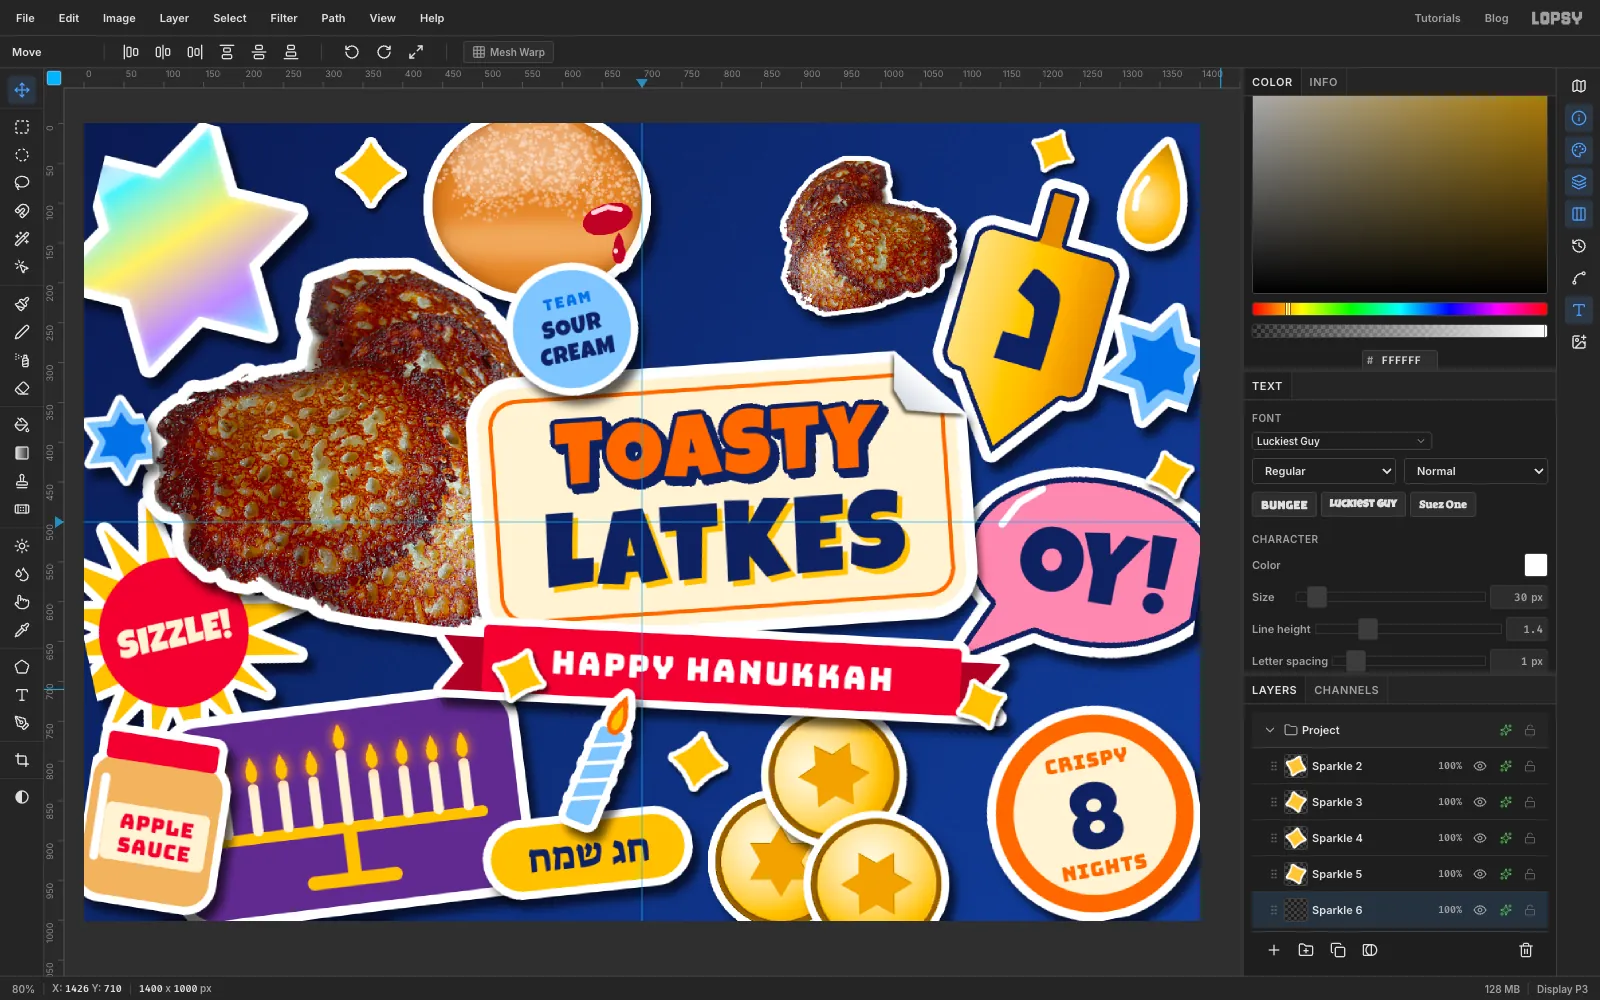
Add a layer called Sparkle and lasso a four-point sparkle, a star with curved, pinched sides, about 80 px across at (360, 62). Fill it with . Die-cut with Grow 7 and give it a smaller shadow: Offset 3 / 5, Blur 8, Opacity 70.
Copy and paste it five times, renaming as you go. Click the original Sparkle row before each paste. Scale each paste down from a corner with Cmd held, drag it into a gap, and tilt it. Pasted copies don't carry the shadow, so give each one the small sparkle shadow too.
- Sparkle 2: 80%, on the ribbon's left end near (545, 692), tilted 20° clockwise
- Sparkle 3: 70%, near (1362, 440), 15° counter-clockwise
- Sparkle 4: 85%, near (770, 800), 10° clockwise
- Sparkle 5: 75%, on the ribbon's right end near (1125, 728), 20° counter-clockwise
- Sparkle 6: 65%, near (1215, 34), 25° clockwise
-
Add print grain
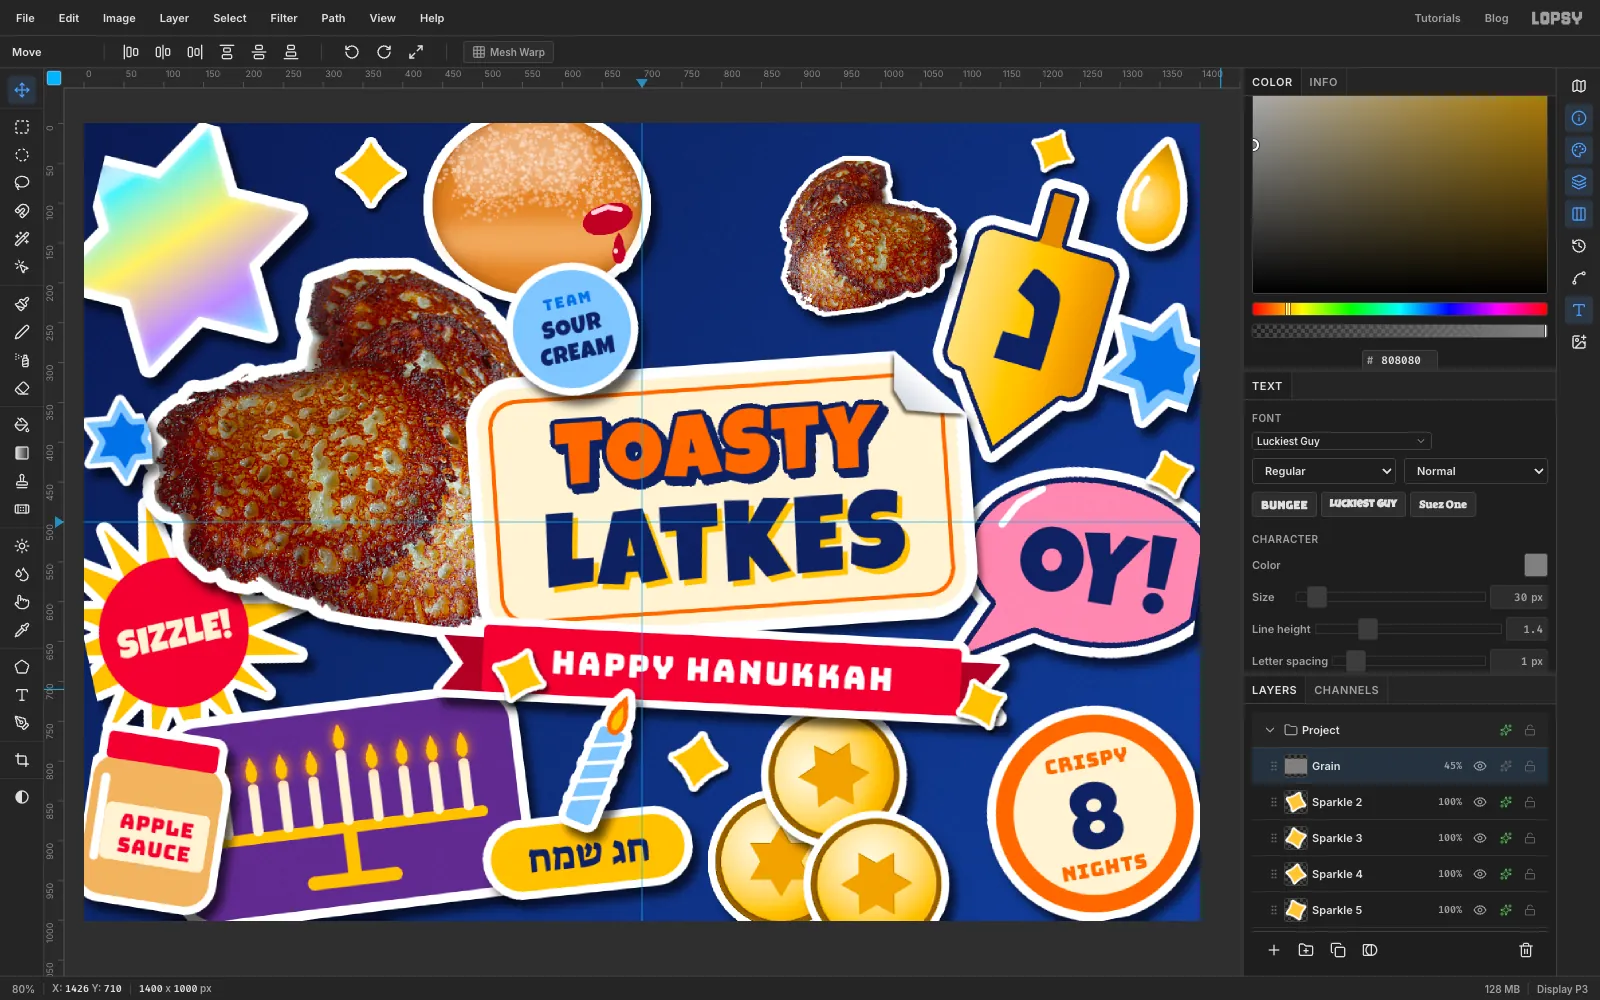
Click the top layer in the Layers panel (one of the sparkles) and add a layer called Grain. Fill it with and choose Filter → Add Noise… with Amount 40, Mono and Gaussian. Set its blend mode to Overlay and its opacity to 45%. Mid grey disappears in Overlay, so only the speckle remains. It roughs up the flat colours and the white borders so they read as printed vinyl.
-
Darken the edges with a vignette
Choose Layer → Adjustment Layer… and close the info box. Lopsy opens the adjustment list for the whole document. Click Add Adjustment, choose Vignette, and set it to 22. The corners settle back and the title pops forward.
Close the drawer. Choose File → Quick Export PNG to export the card, and File → Save Project to keep a
.lopsycopy with every sticker on its own layer.