Design a Kinetic Art Poster with a Spinning Rotorelief
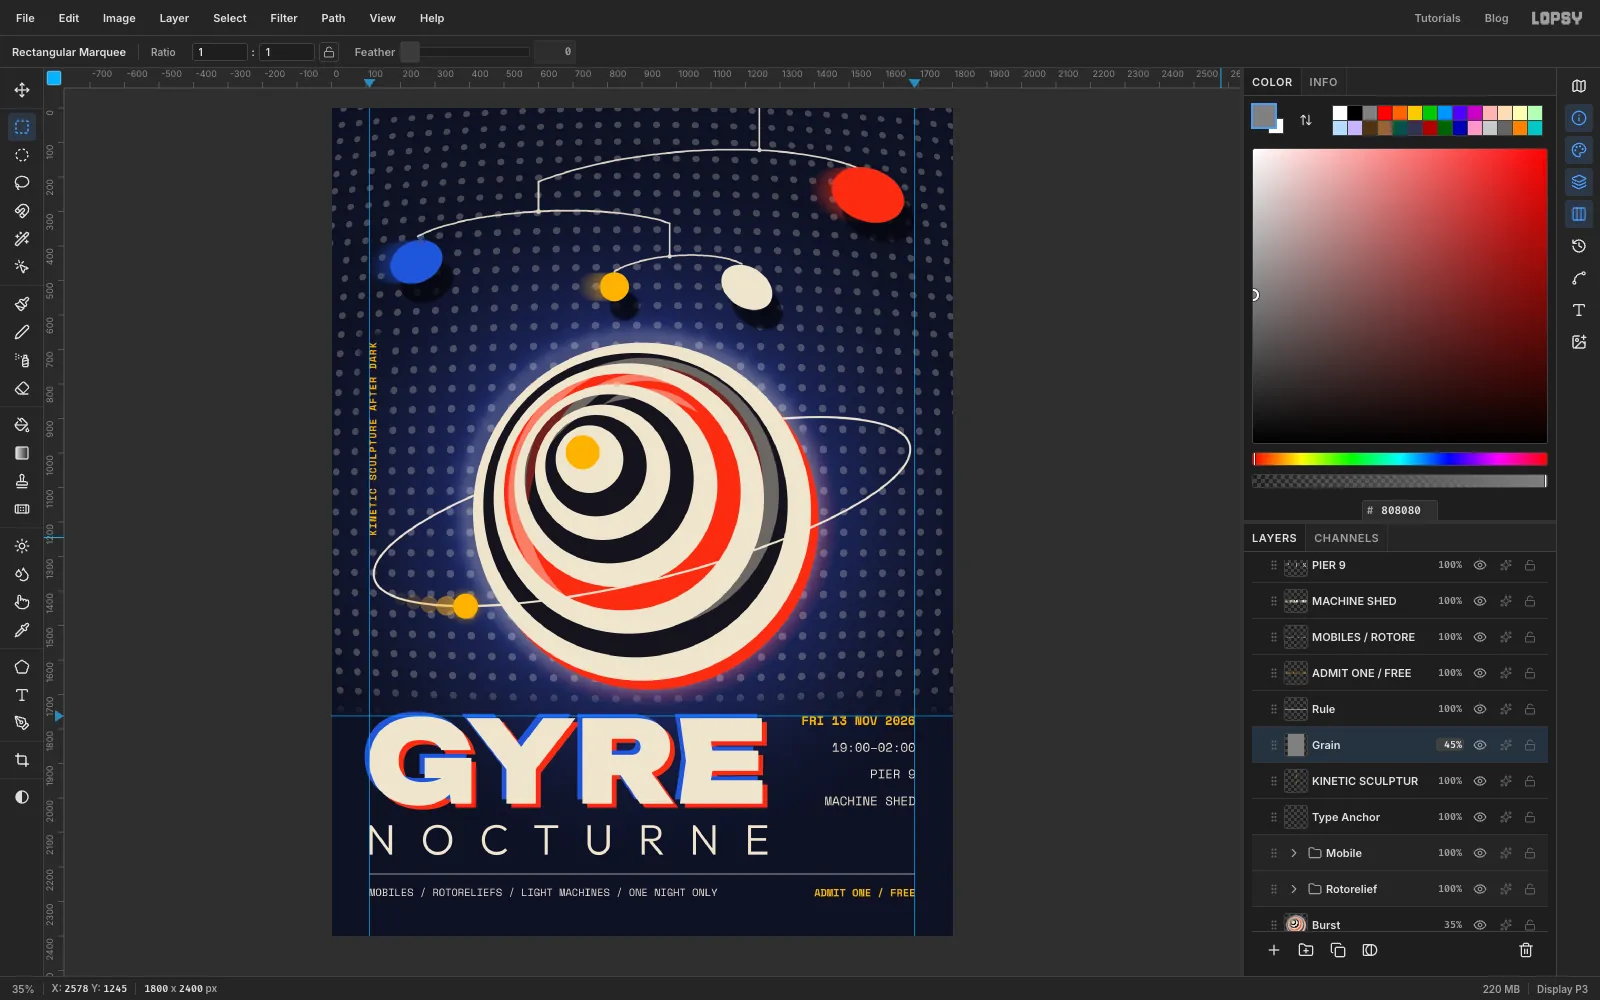
Make a 1960s kinetic art event poster in Lopsy with an eccentric Rotorelief disc, a Calder-style mobile, a stroboscopic orbit and misregistered type.
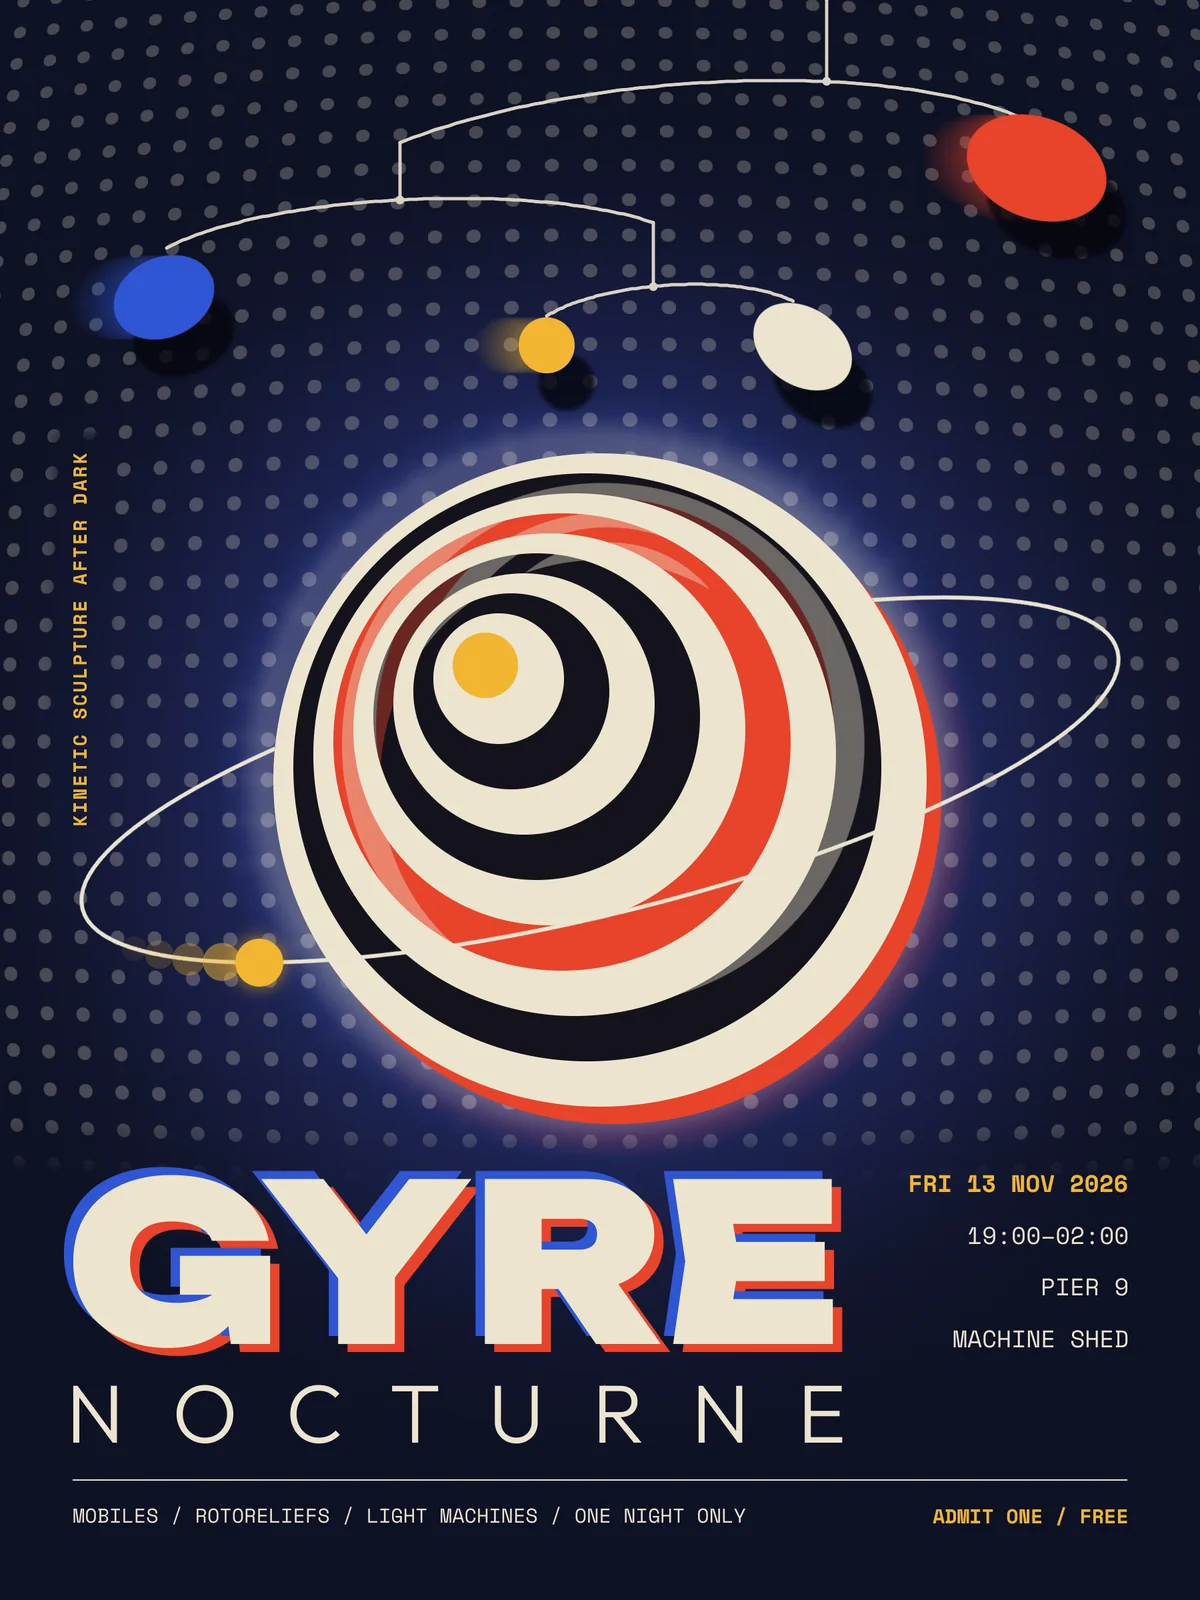
Kinetic art is art that moves, or looks like it does. In 1935 Marcel Duchamp printed his Rotoreliefs, cardboard discs of off-centre circles that seem to swell into cones when you spin them on a record player. Alexander Calder hung balanced arms of painted metal from the ceiling and let the air move them. In 1961 the Stedelijk Museum gathered this work into a show called Bewogen Beweging ("moving movement"). Its poster was a black sheet of white dots.
In this tutorial you'll borrow all three ideas for Gyre Nocturne, a poster for an imaginary one-night show of kinetic sculpture. You'll build it at 1800 × 2400 px (3:4). Along the way you'll use:
- Define Pattern, Fill with Pattern and Lens Distortion for a dot field that bulges
- the Elliptical Marquee's exact-corners dialog to stack nine off-centre circles into a Rotorelief
- the Move tool's rotation handles on a duplicate, with the Lighten blend mode, for a spin ghost
- Copy Merged, Radial Blur and Gaussian Blur for a glow
- the Shape tool's path output, Stroke Path and the Eraser inside a selection for an orbit that passes behind the disc
- brush dabs at falling opacity for a stroboscopic trail
- Shift-click brush lines, rotated pendants, Motion Blur and Drop Shadow for a Calder mobile
- Color Overlay on duplicated text for misregistered type
- Unbounded, Outfit and Space Mono, with letter spacing in the Text panel and a text layer rotated 90°
- Add Noise on an Overlay layer for print grain
The palette:
-
Night ground
-
halo blue
-
Cream
-
wire
-
Ink
-
Vermilion
-
Saffron
-
Cobalt
-
Shadow
New layers always appear above the layer you've selected, so before each section you'll click a layer at the right place in the stack.
A few habits the steps rely on:
- To add a layer, click Add Layer (+) at the bottom of the Layers panel. Double-click a layer's name to rename it.
- "Fill it with cream" means set the foreground colour to cream, then choose Edit → Fill. The fill follows the current selection.
- The Move tool doesn't snap to guides. Drag close, then zoom in and finish with the arrow keys (Shift+arrow moves 10 px at a time).
-
Fill the night ground
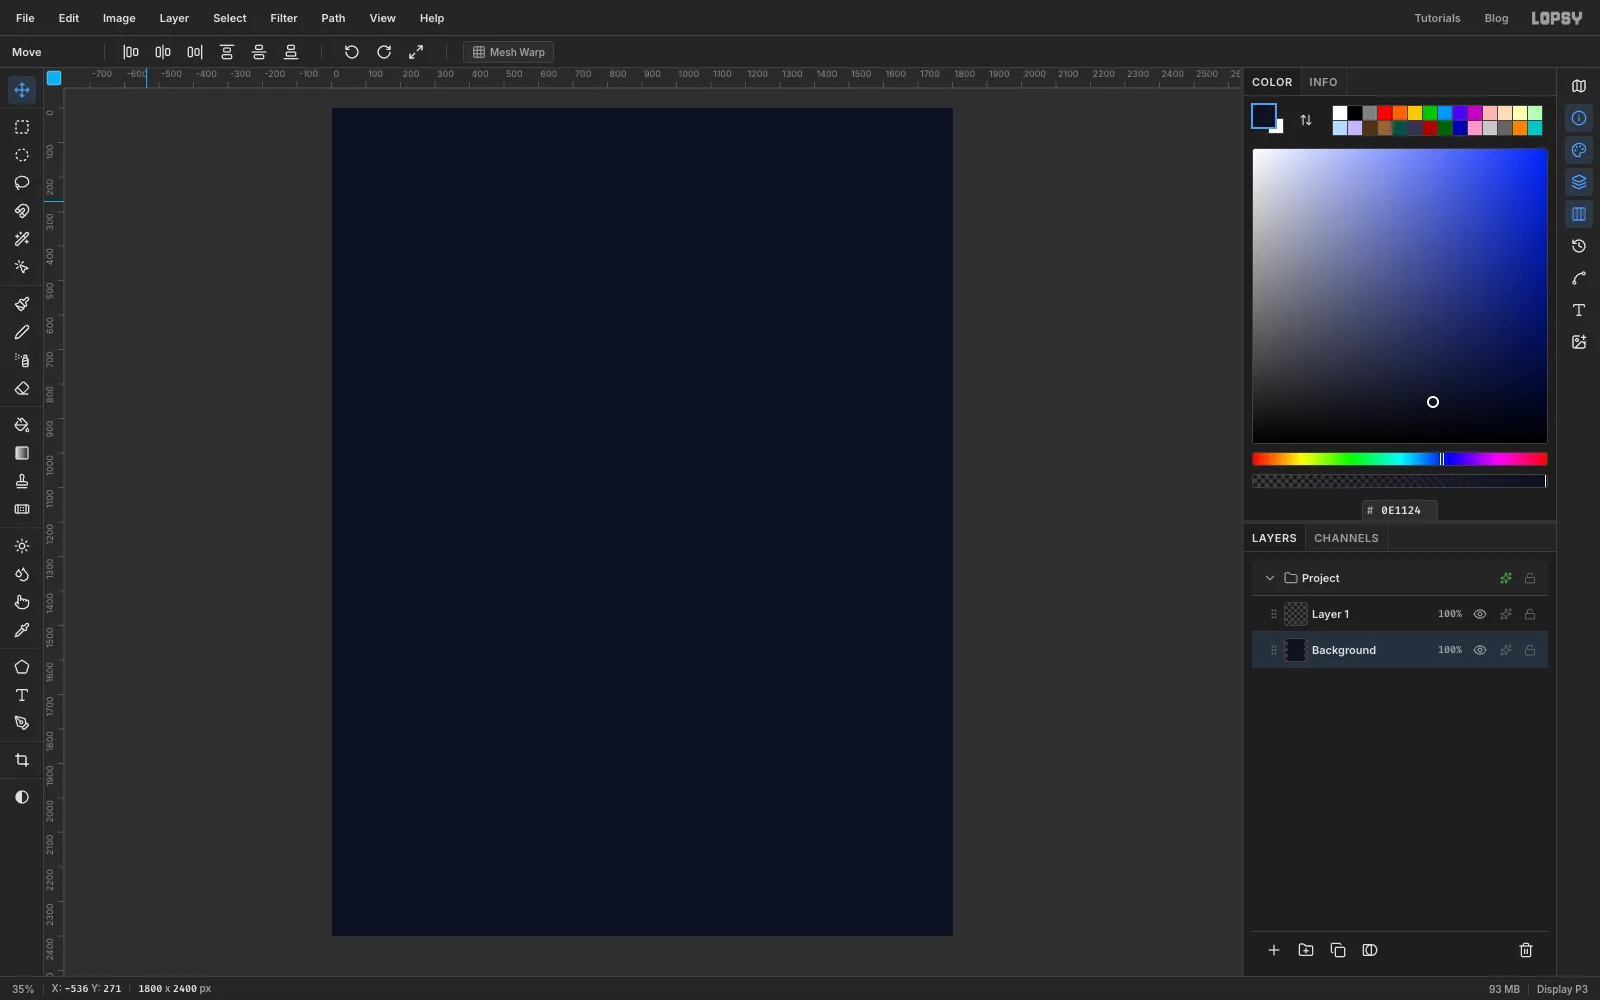
Choose File → New, enter 1800 × 2400, and click Create. Click the Background row, set the foreground colour to , and choose Edit → Fill.
This near-black navy is the "wall" everything hangs on. It's dark enough for the cream and saffron to glow, but it isn't pure black, so the shadows you add later still show.
-
Draw a single dot and save it as a pattern
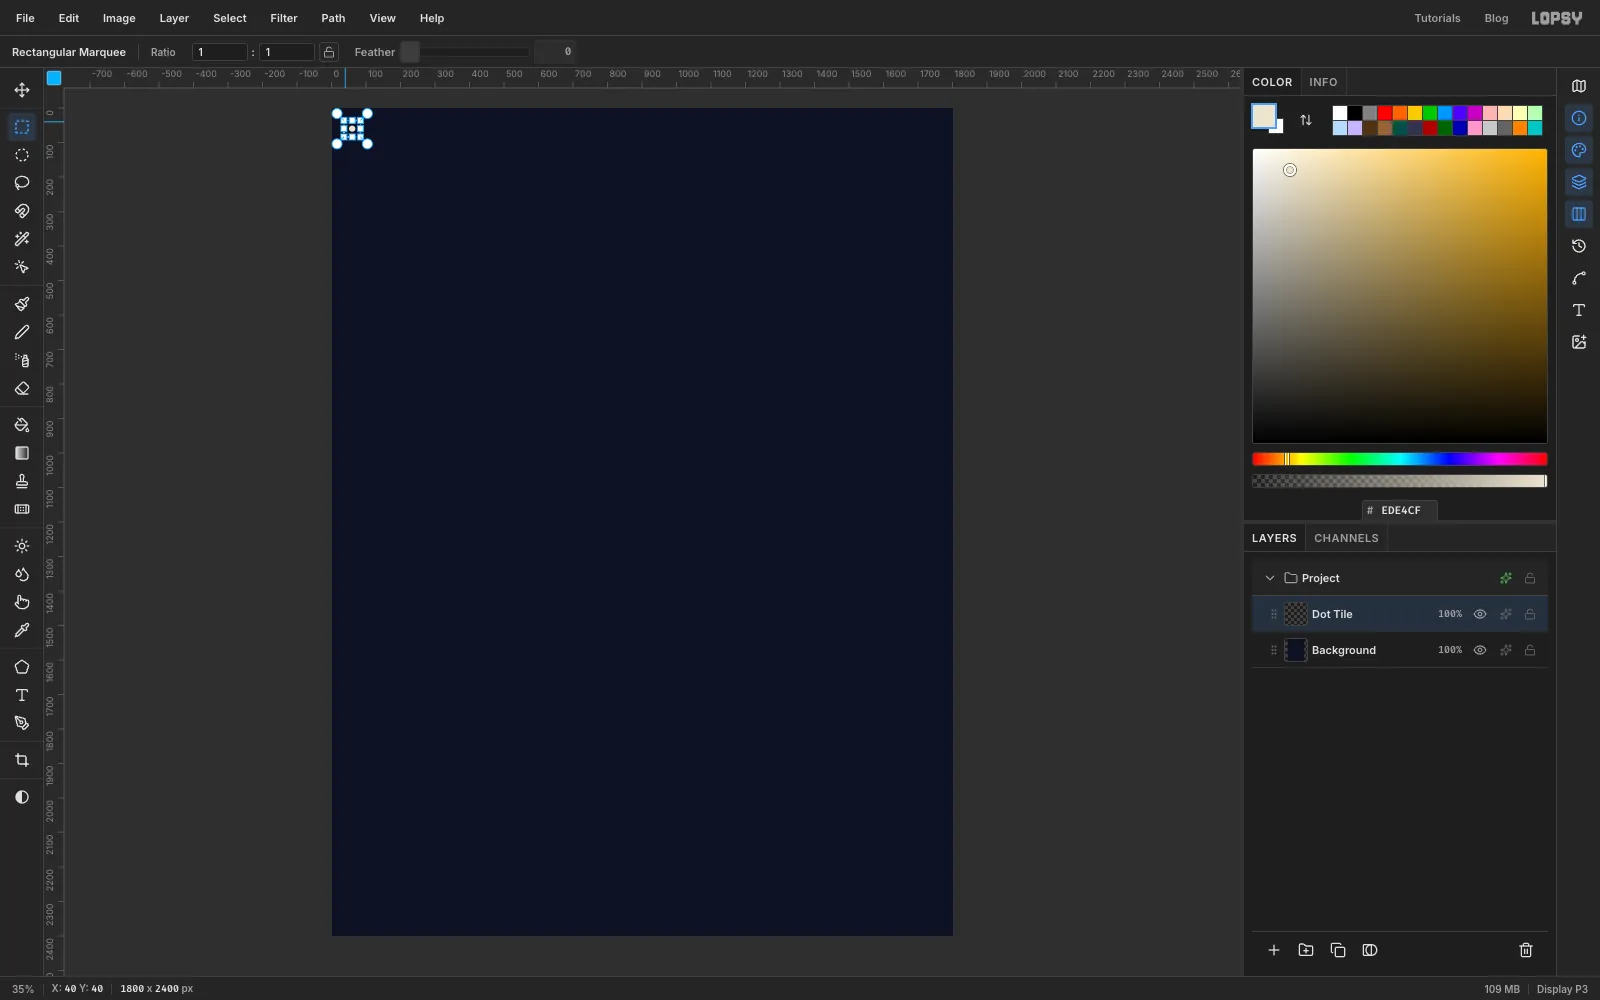
Click Layer 1 and rename it Dot Tile. Zoom in on the top-left corner, because this dot is only 18 px across. Pick the Elliptical Marquee, click the canvas without dragging, and enter From 51, 51 and To 69, 69. Fill it with cream .
Now switch to the Rectangular Marquee and make a 48 px square around the dot, From 36, 36 to 84, 84. Choose Edit → Define Pattern. The selection decides the tile, so the dot is centred in a 48 px cell.
Deselect with Cmd+D and delete the Dot Tile layer with the trash button. The pattern stays.
-
Fill the page with dots
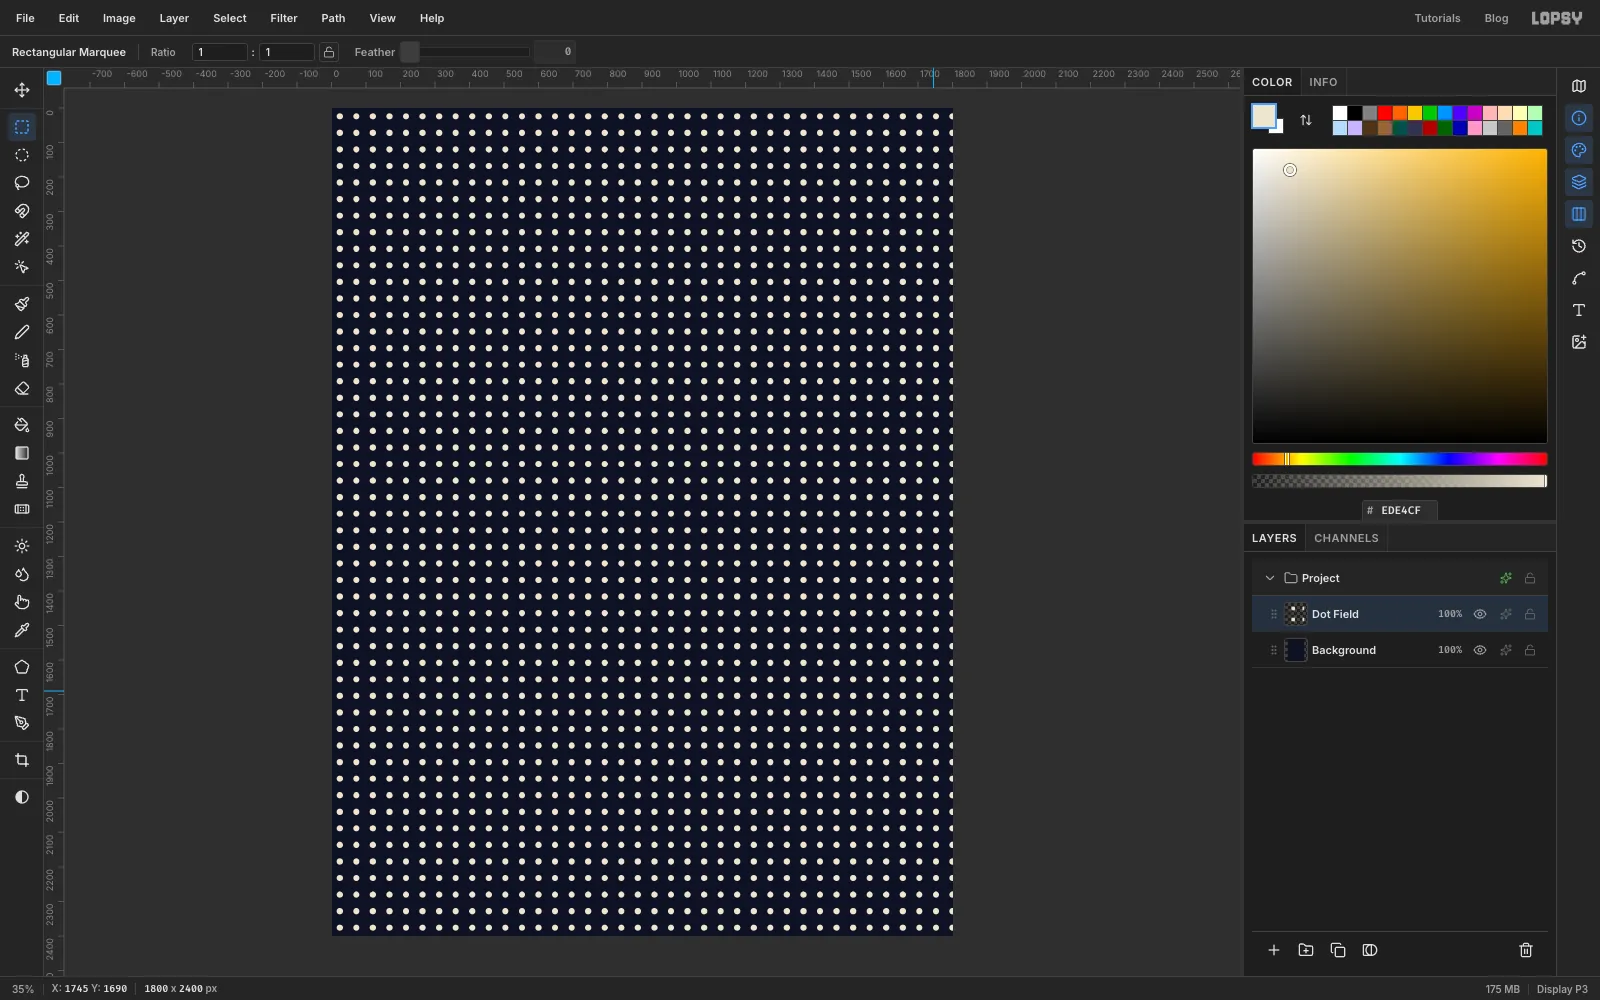
Click Background and add a new layer called Dot Field. Choose Edit → Fill with Pattern…, pick your dot tile, leave Scale at 100%, and click Apply. The whole page fills with a regular grid of dots, like the Bewogen Beweging poster.
-
Bulge the grid with Lens Distortion
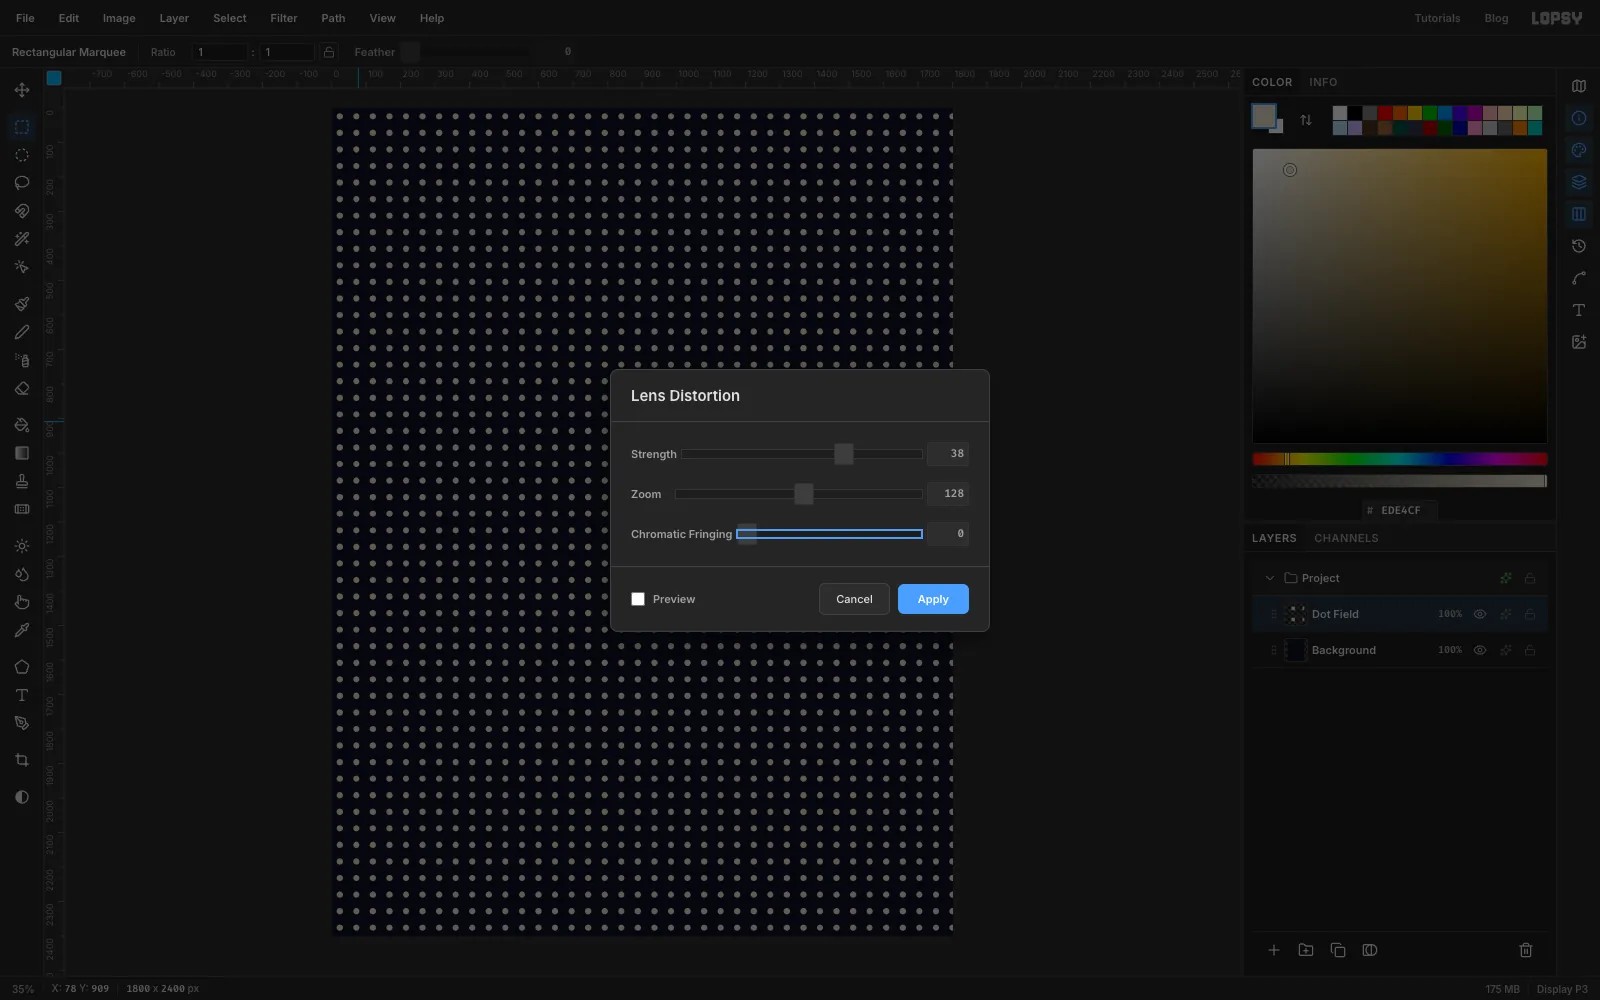
Choose Filter → Lens Distortion… and set Strength to 38 and Zoom to 128. Positive strength is barrel distortion, so the dots swell in the middle of the page and shrink toward the edges, as if a sphere is pushing through the grid. Zoom pulls the edges back in, so the corners don't go transparent. Click Apply.
Set the layer's opacity to 26%. The dots should be a texture, not a pattern that fights the artwork.
-
Knock the dots out behind the type
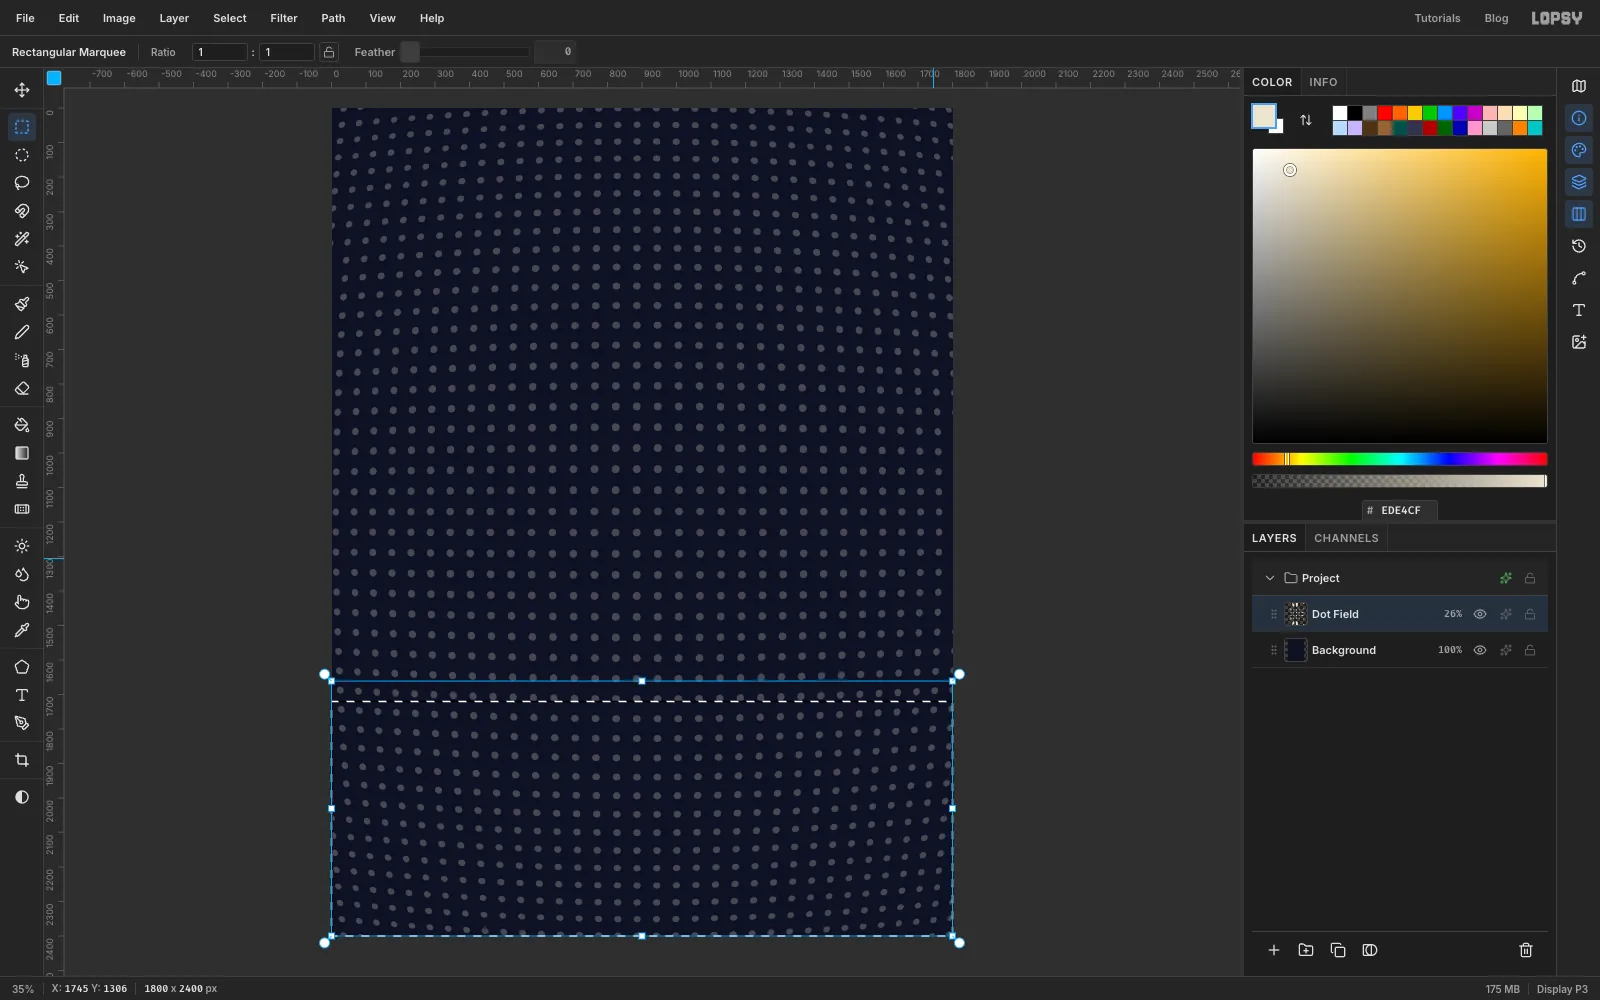
Small type and dots the same size as its strokes don't mix. With the exact-corners dialog, select the rectangle From 0, 1720 to 1800, 2400. Choose Select → Feather…, enter 60, and press Delete. The dots fade out across the bottom of the page instead of stopping at a hard edge.
Do the same for a narrow strip on the left margin, where a vertical tagline will go: From 85, 650 to 160, 1270, Feather 20, then Delete. Deselect.
-
Set up a radial halo gradient
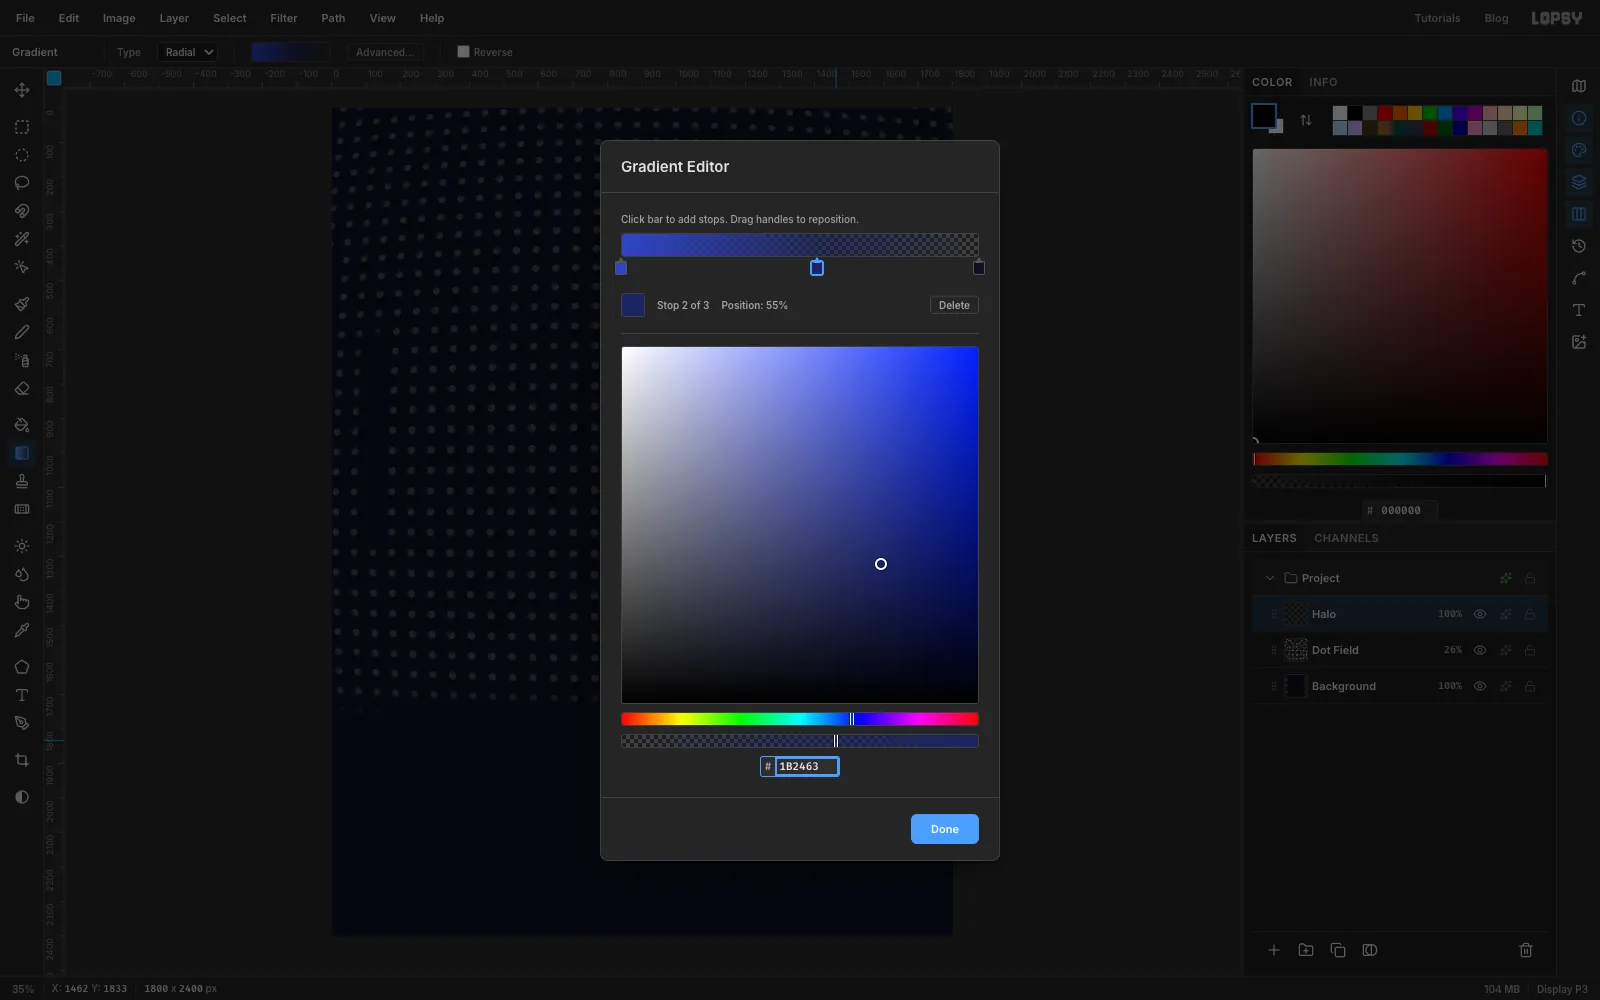
Add a new layer called Halo above Dot Field. Pick the Gradient tool, set Type to Radial, and click Advanced… to open the Gradient Editor. Set three stops:
- at the left end, at full opacity
- at 55%, at 60% opacity (click the bar to add it)
- at the right end, at 0% opacity
Click Done.
-
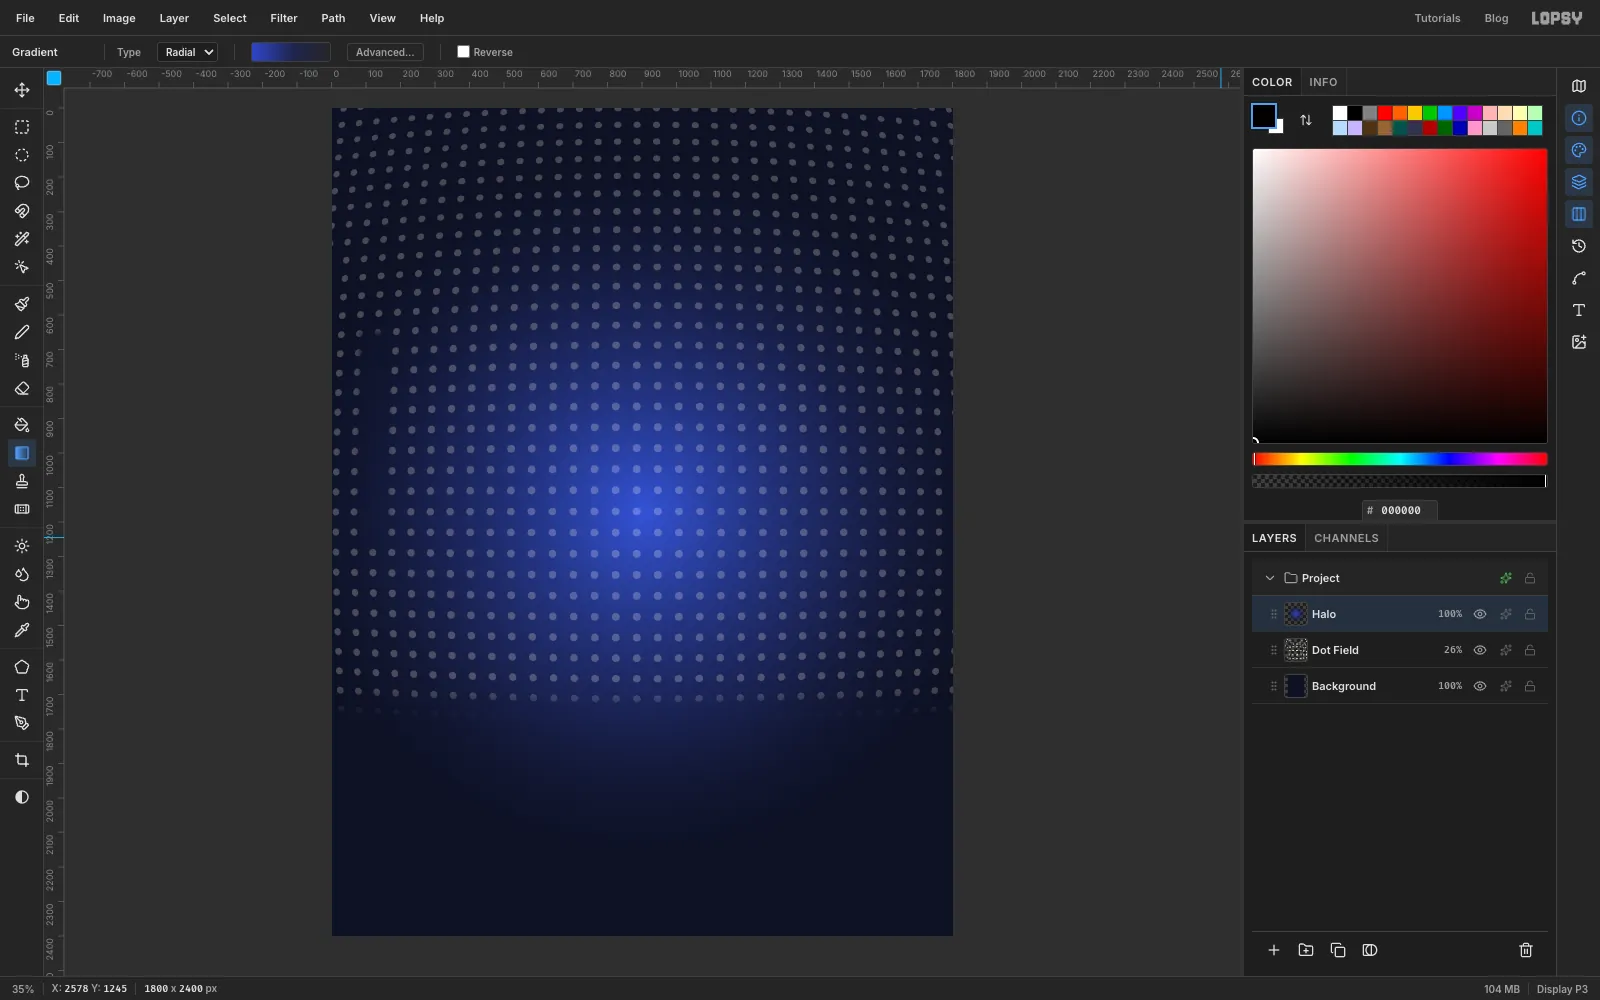
Drag the halo out from the centre
The disc will be centred at 900, 1170, a little above the middle of the page. Drag the gradient from that point straight out to the right, about 1000 px (to the canvas edge and beyond). Set Halo to Screen, so it lights the dots and the ground instead of covering them.
-
Make the disc
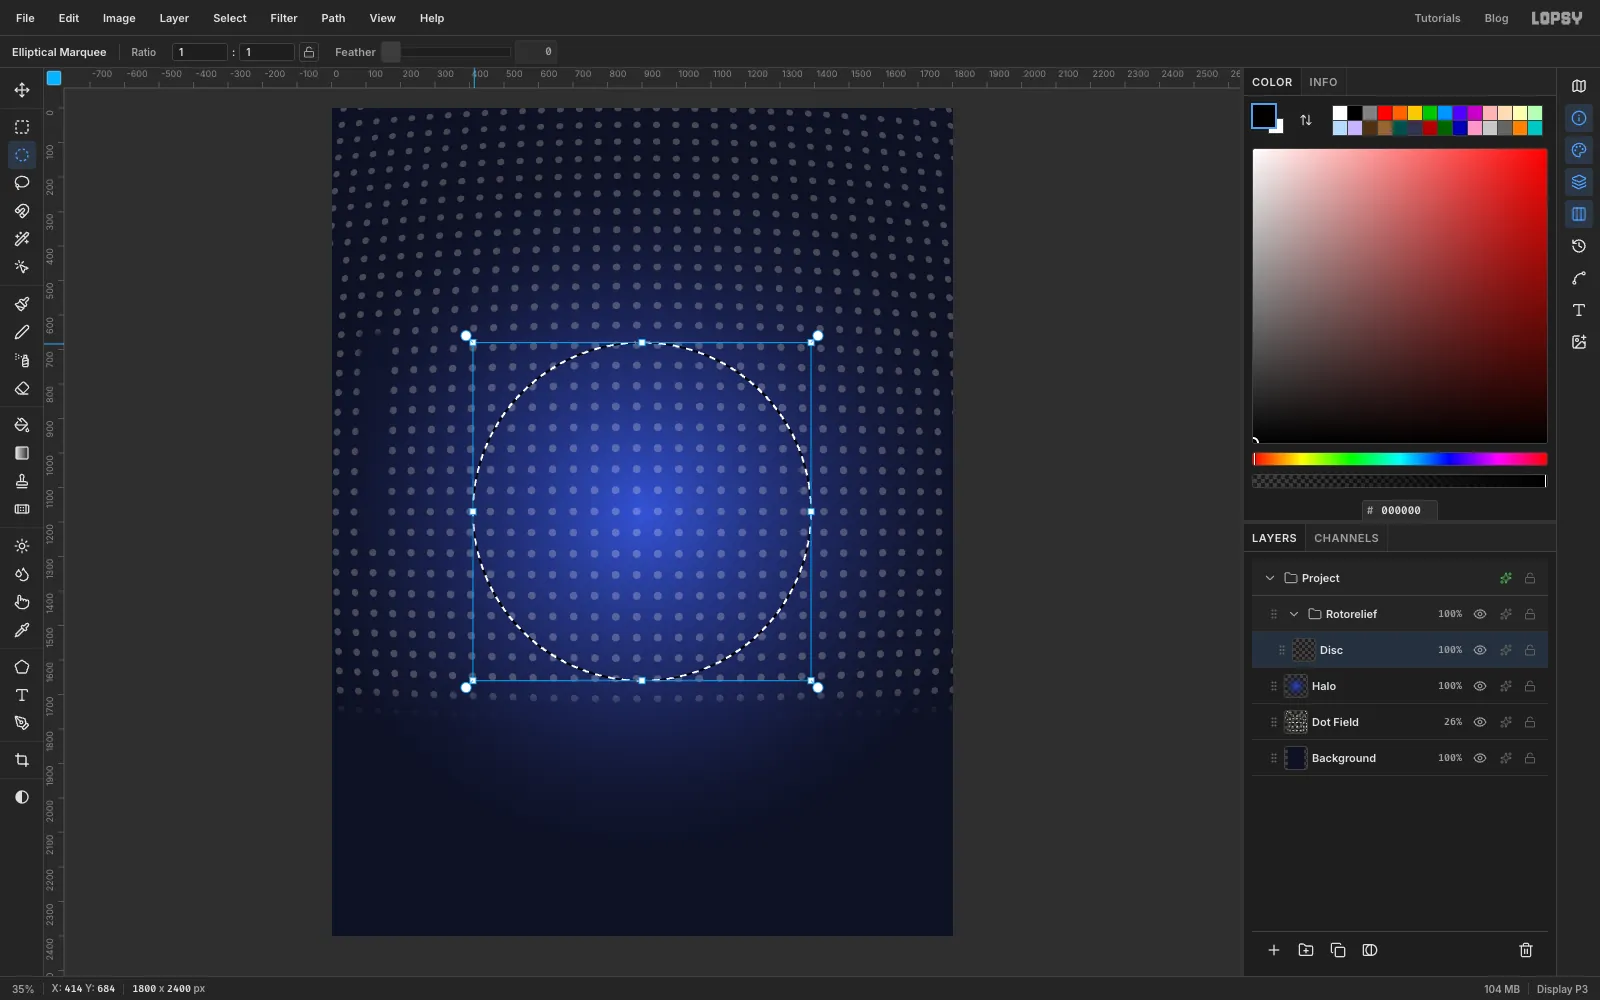
Click New Group in the Layers panel and name the group Rotorelief. Add a layer inside it called Disc.
With the exact-corners dialog, make a circle From 410, 680 to 1390, 1660. That's a radius of 490 around 900, 1170. Fill it with cream and deselect.
-
Stack the first off-centre circles
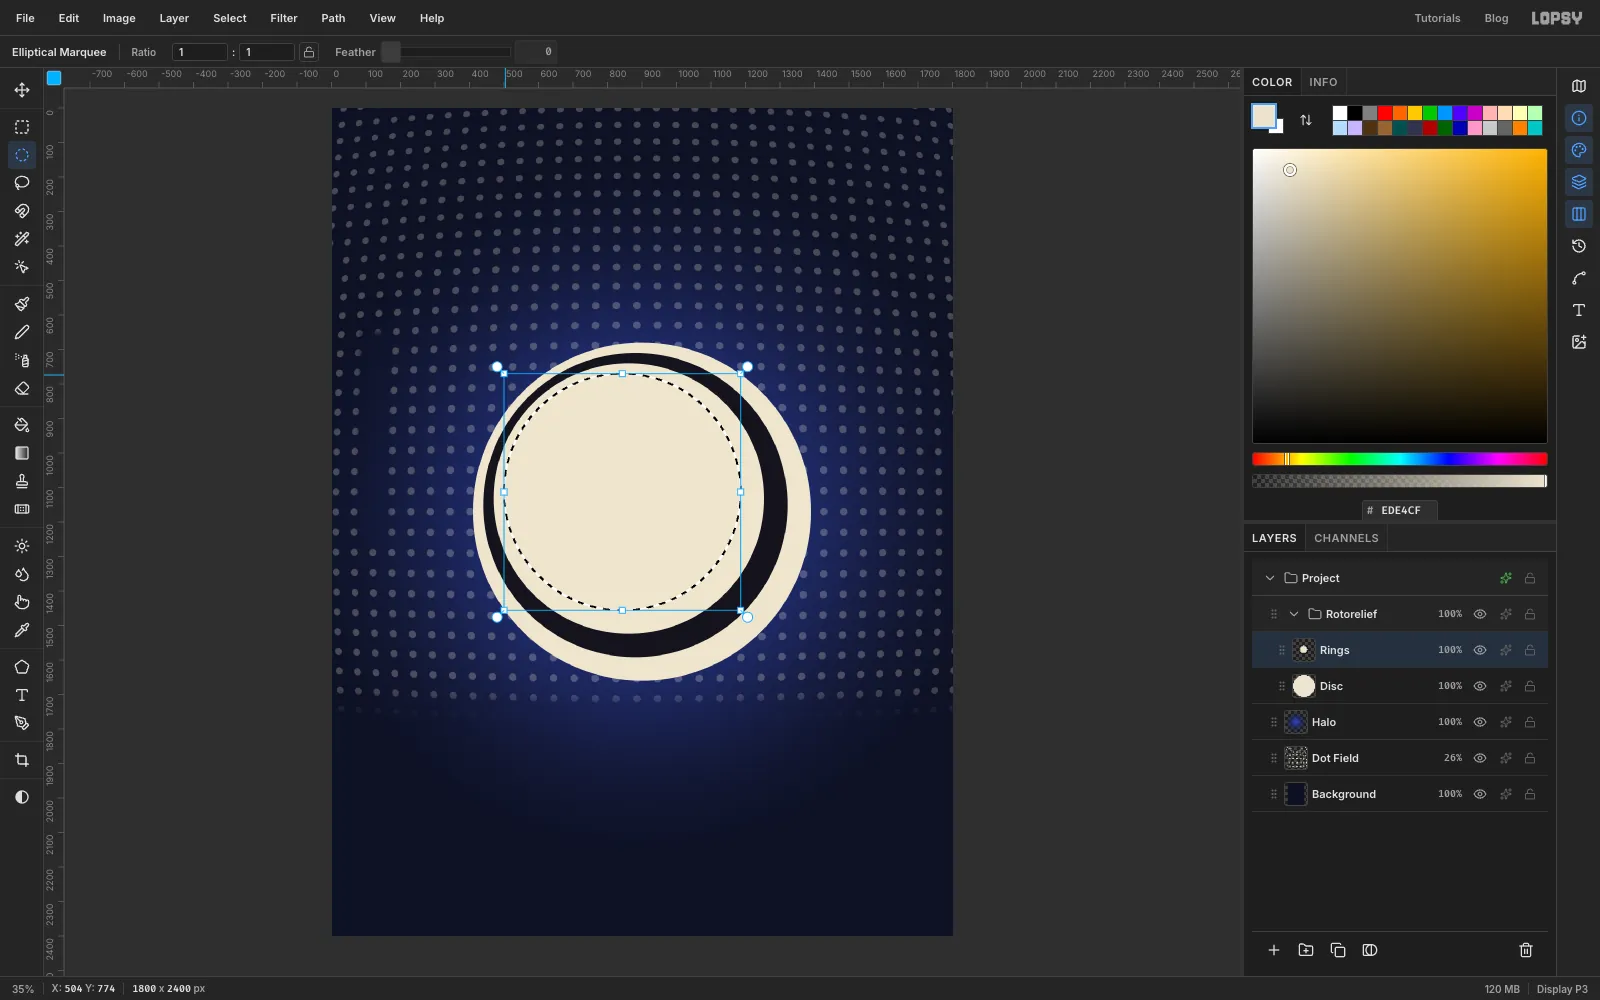
A Rotorelief is a set of circles that shrink while their centres drift to one side. Add a layer called Rings above Disc. You'll draw nine circles on it with the Elliptical Marquee, each filled over the one before. Press Cmd+D after every fill, or the next click won't open the dialog.
Start with From 440, 710 to 1322, 1592 and fill it with ink . For each next circle, add 30 to both From values and take 68 off both To values. That makes each circle 98 px smaller and moves its centre up and to the left. So the second is From 470, 740 to 1254, 1524 (cream), and the third is From 500, 770 to 1186, 1456 (vermilion ).
-
Finish the Rotorelief
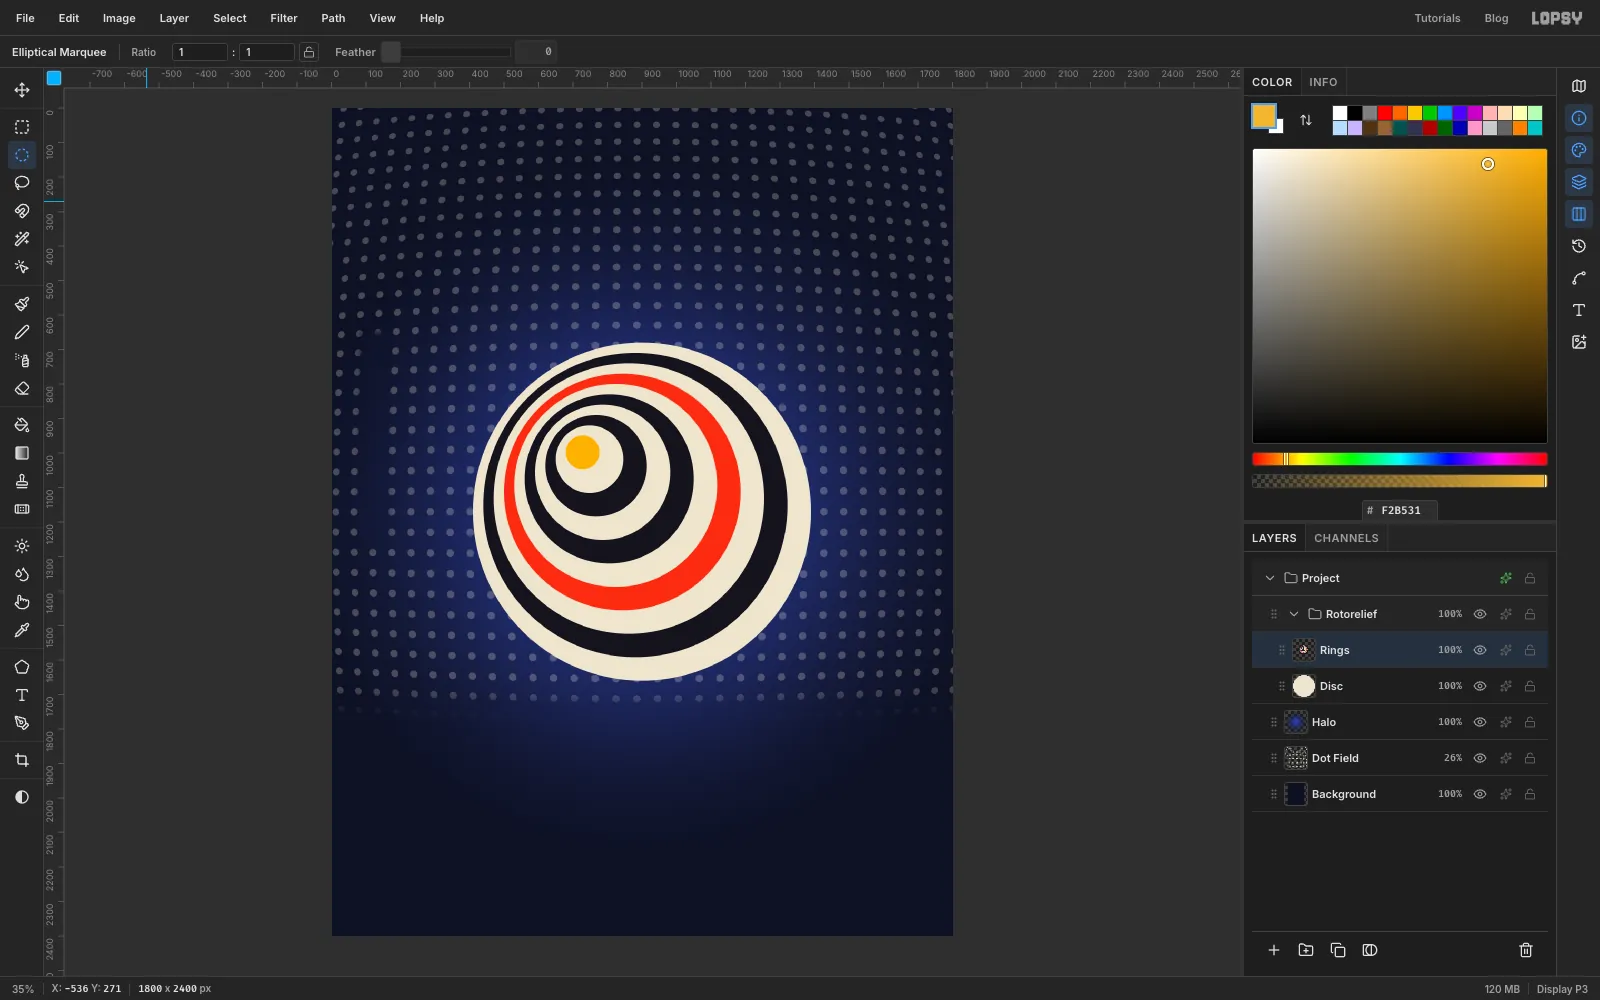
Keep going with the same rule. The full colour order, outside in, is:
- ink
- cream
- vermilion
- cream
- ink
- cream
- ink
- cream
- saffron
The last circle runs From 679, 949 to 777, 1047. Deselect.
The bands are thin at the upper left and thick at the lower right, so the flat disc reads as a cone pointing away from you. That's the illusion Duchamp's discs made when they spun.
-
Add a misprinted shadow
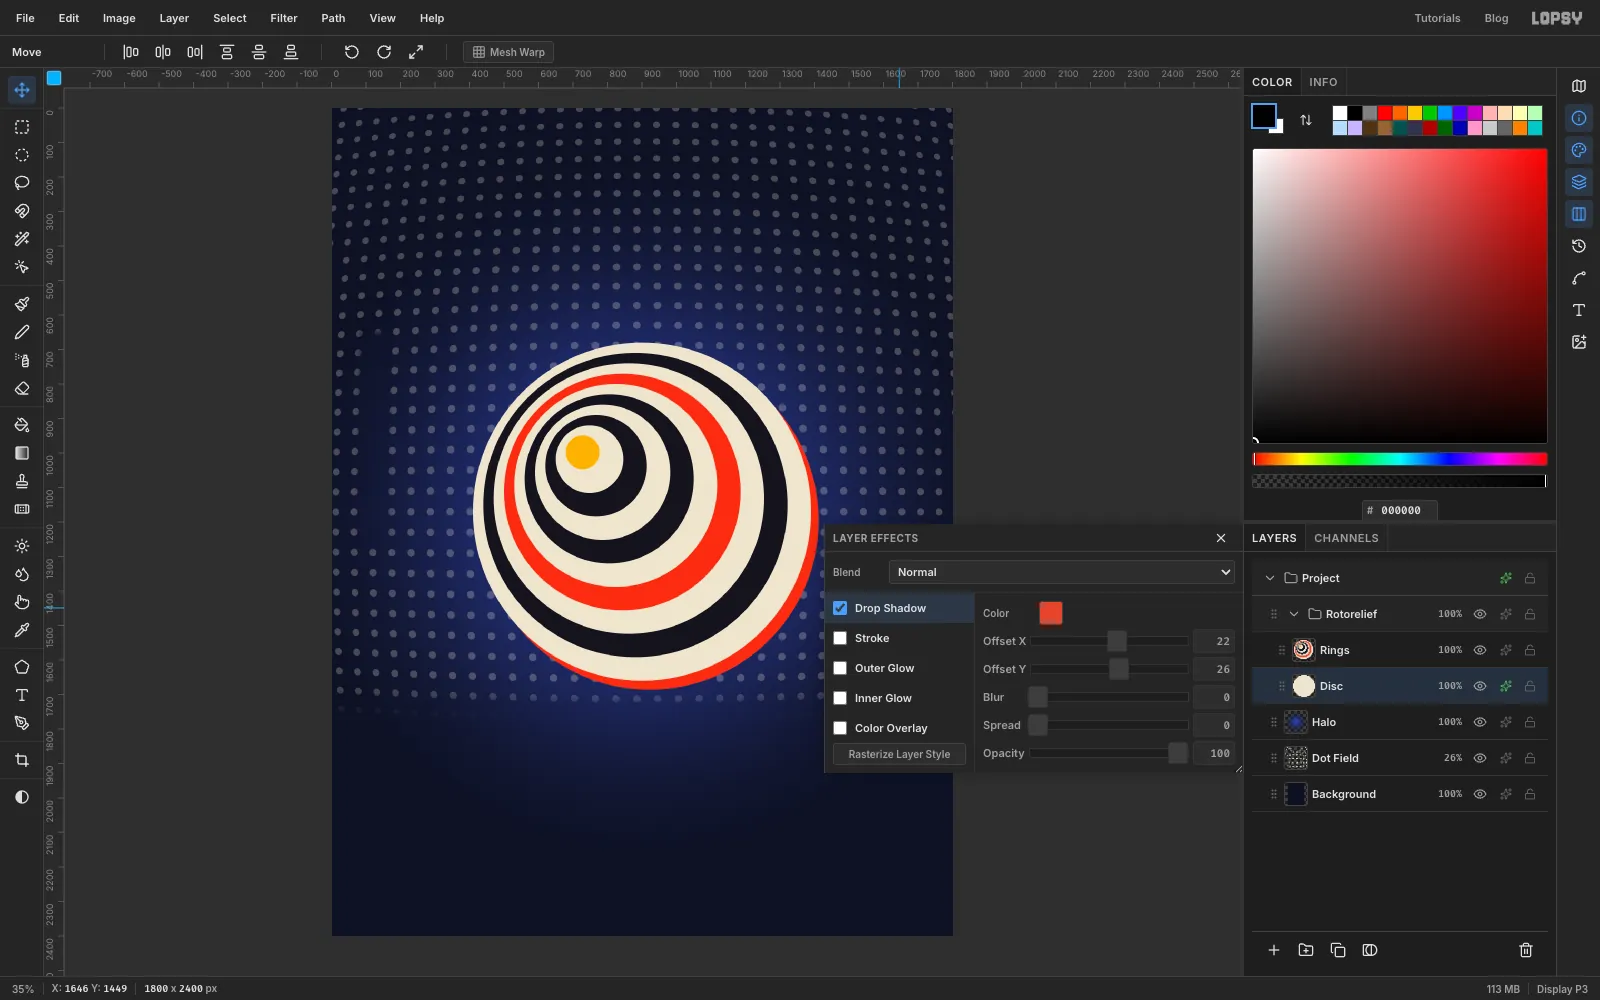
Click Disc, open its effects, and turn on Drop Shadow. Set:
- Offset X 22, Offset Y 26
- Blur 0, Spread 0, Opacity 100
- the colour to vermilion
A hard coloured offset looks like a screen print where the red plate slipped. It also gives the disc a crescent of depth on the lower right.
-
Rotate a copy of the rings
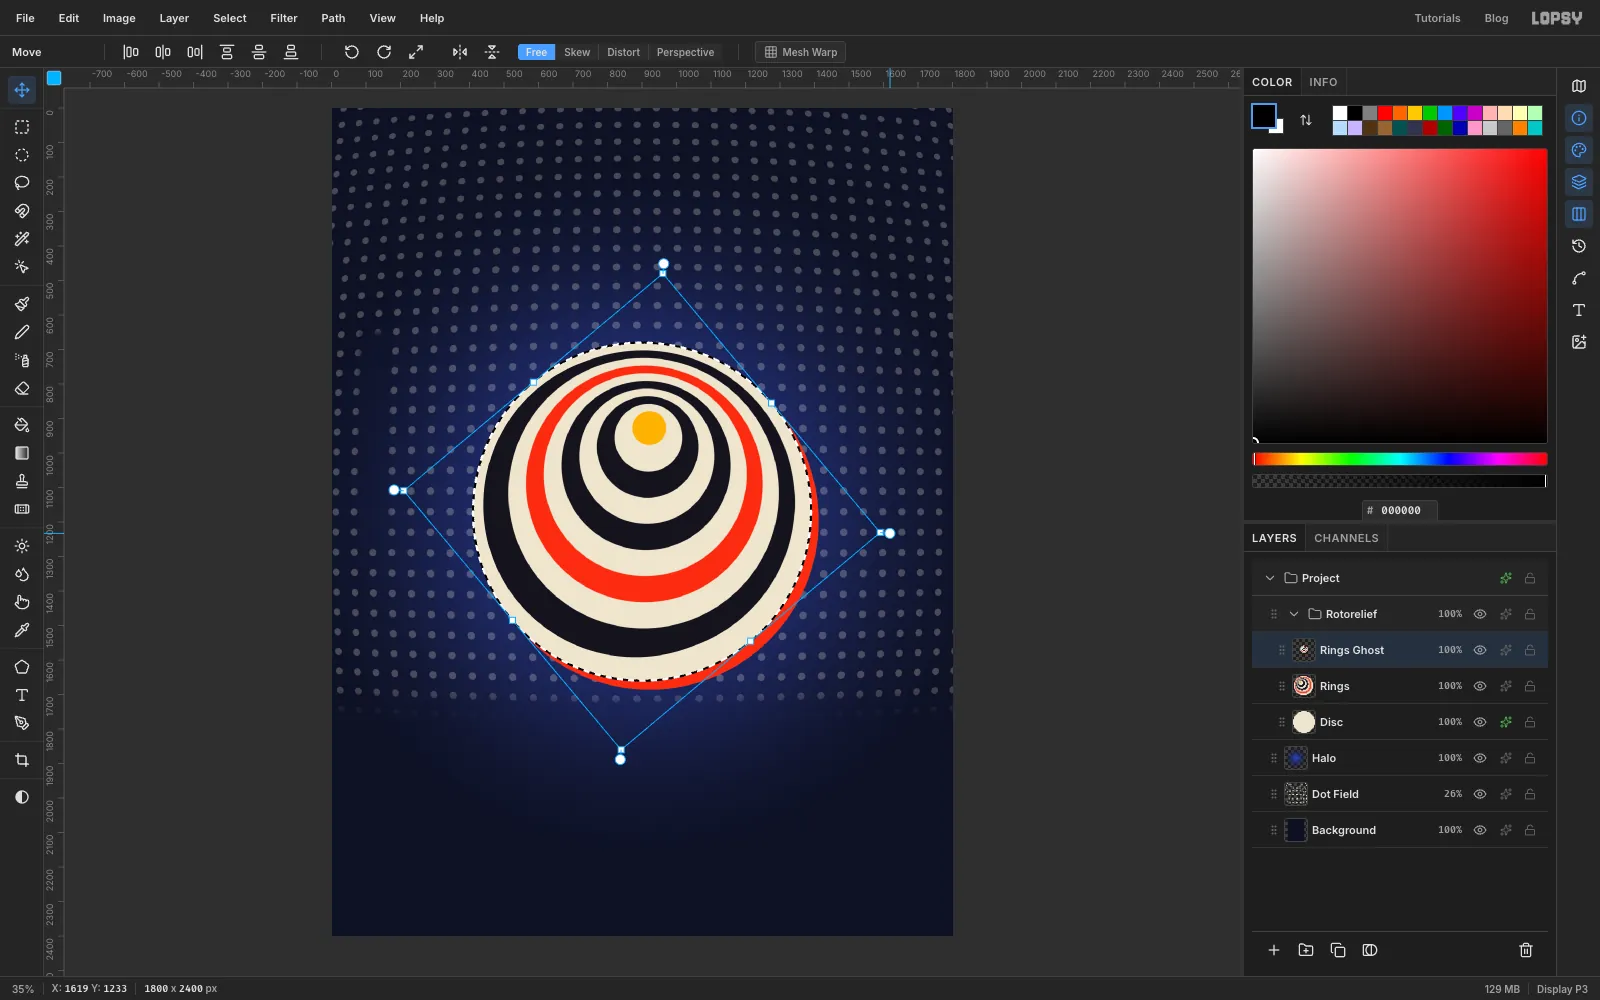
Click Rings, click Duplicate Layer, and name the copy Rings Ghost. With the Elliptical Marquee, select the disc's circle again (From 410, 680 to 1390, 1660), so the transform box is centred on the disc.
Pick the Move tool. Hover just outside the top-right corner of the box, where the cursor turns into the rotate cursor, and drag clockwise about 50°. Because the rings are off-centre, turning them moves the cone sideways, like a single frame of the disc spinning. Press Cmd+D to commit.
-
Blend the ghost on Lighten
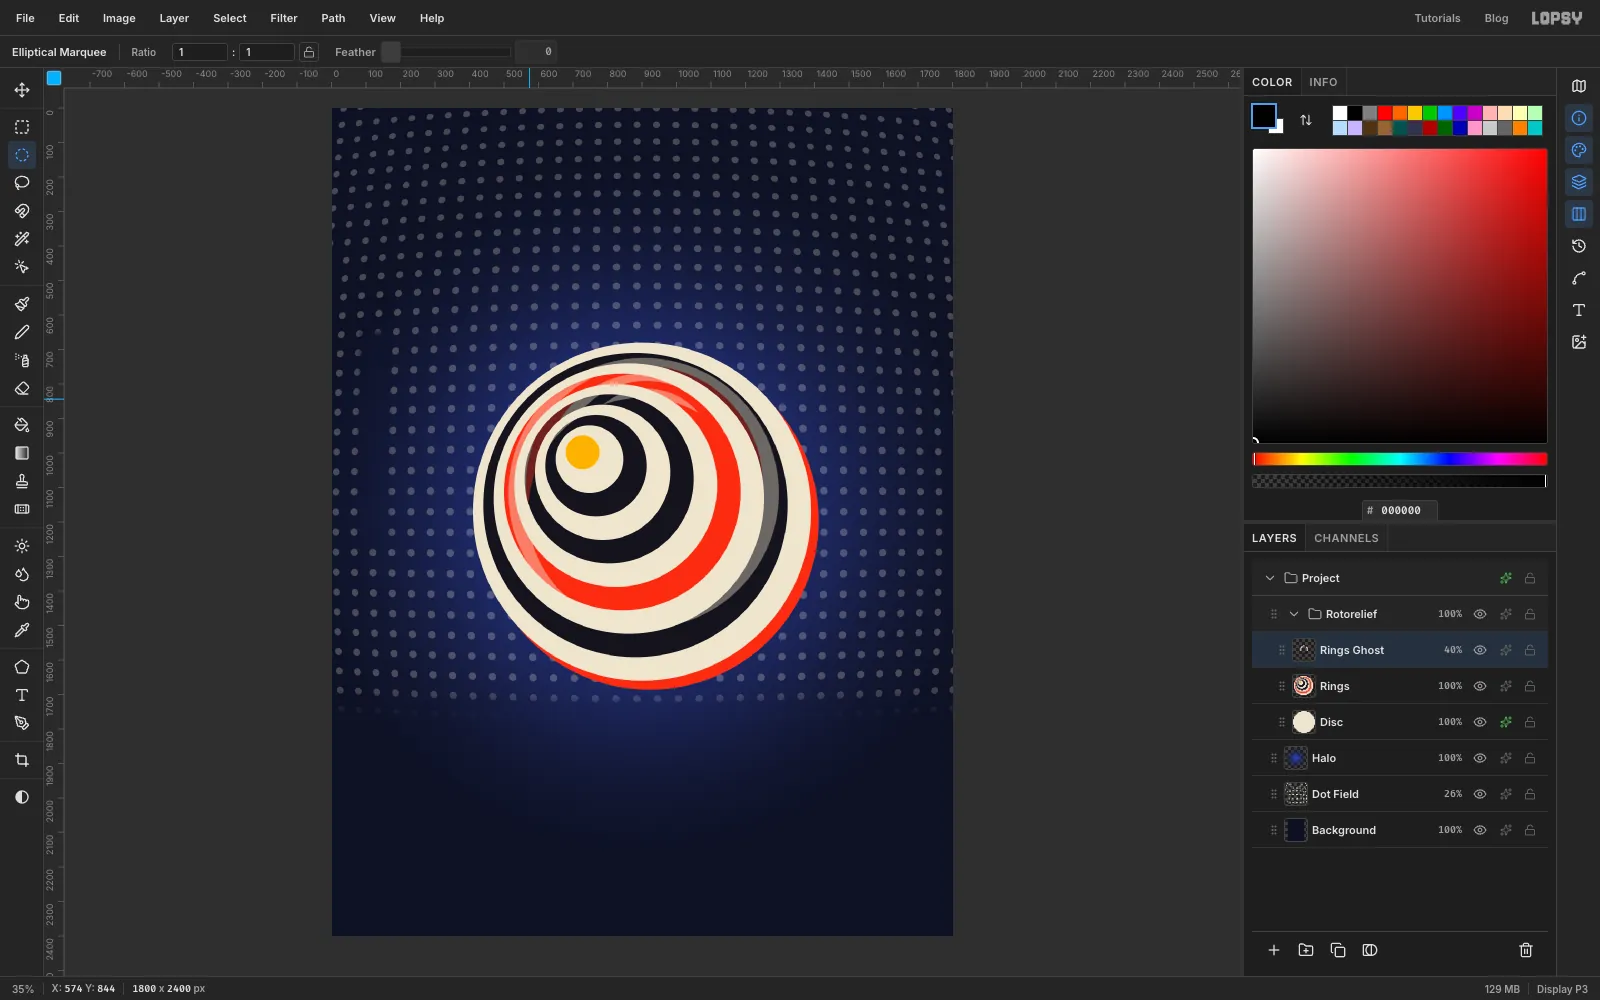
Set Rings Ghost to Lighten at 40%. Lighten only shows the ghost where it's lighter than the rings underneath, so pale arcs appear across the dark bands without darkening anything.
Keep the ghost to the outer rings. Switch back to the Elliptical Marquee and select the circle From 570, 840 to 1230, 1500 (radius 330 around the disc centre), press Delete, and deselect. The middle of the disc stays crisp.
-
Copy the disc and blur it outward
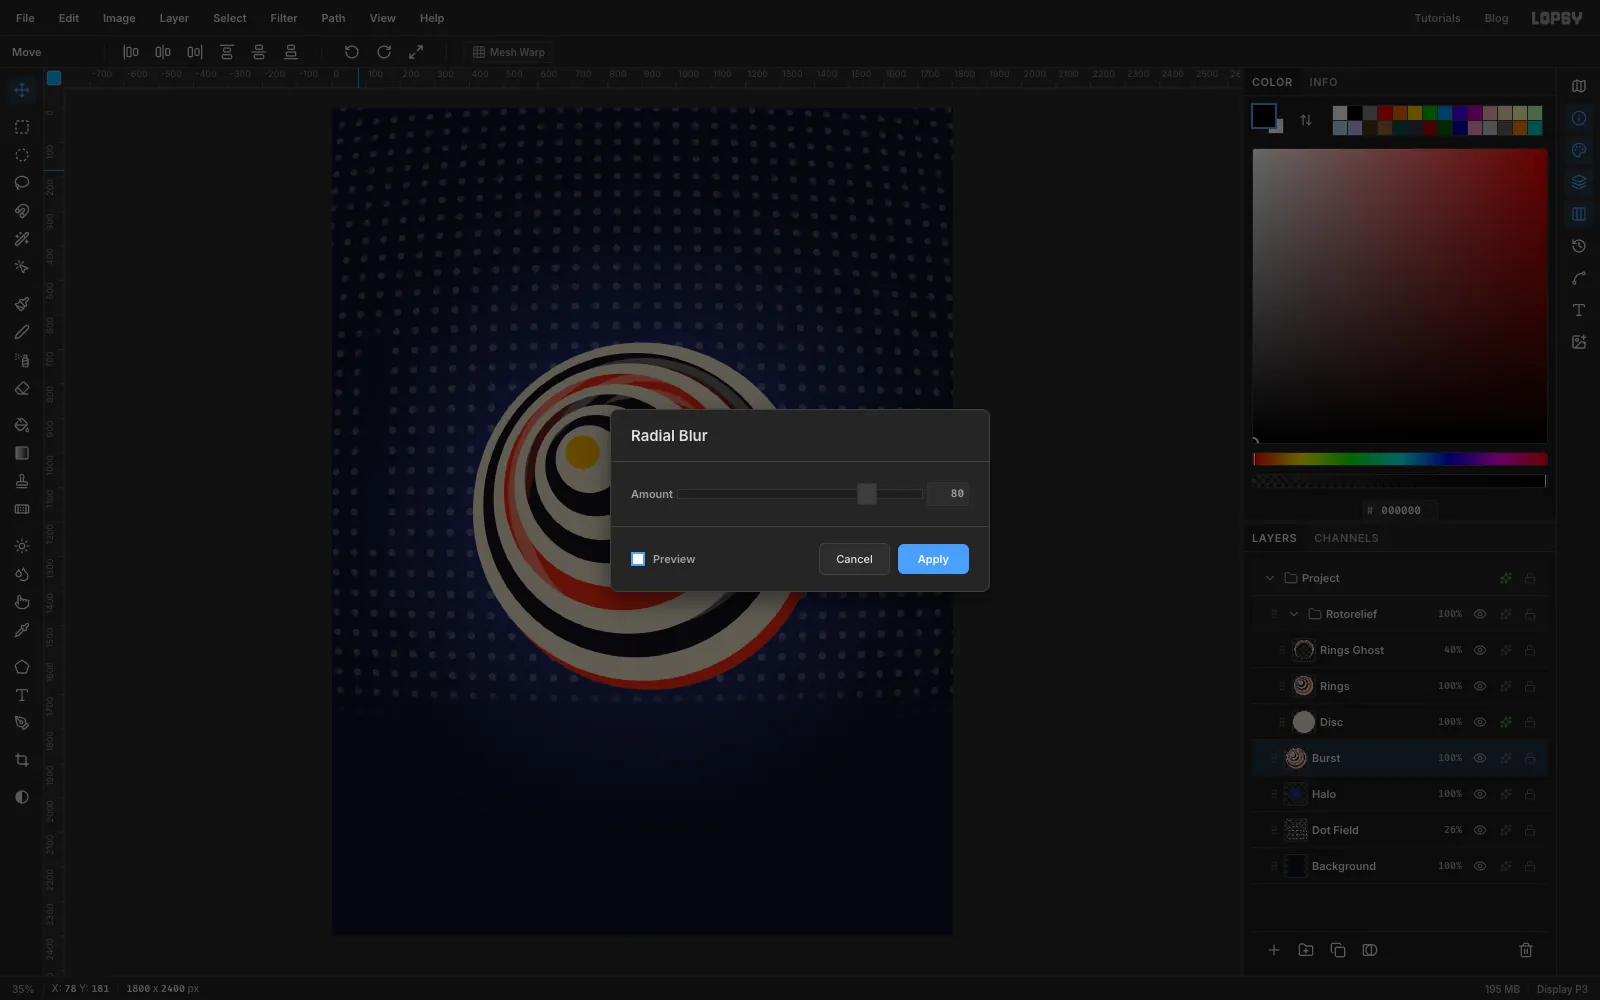
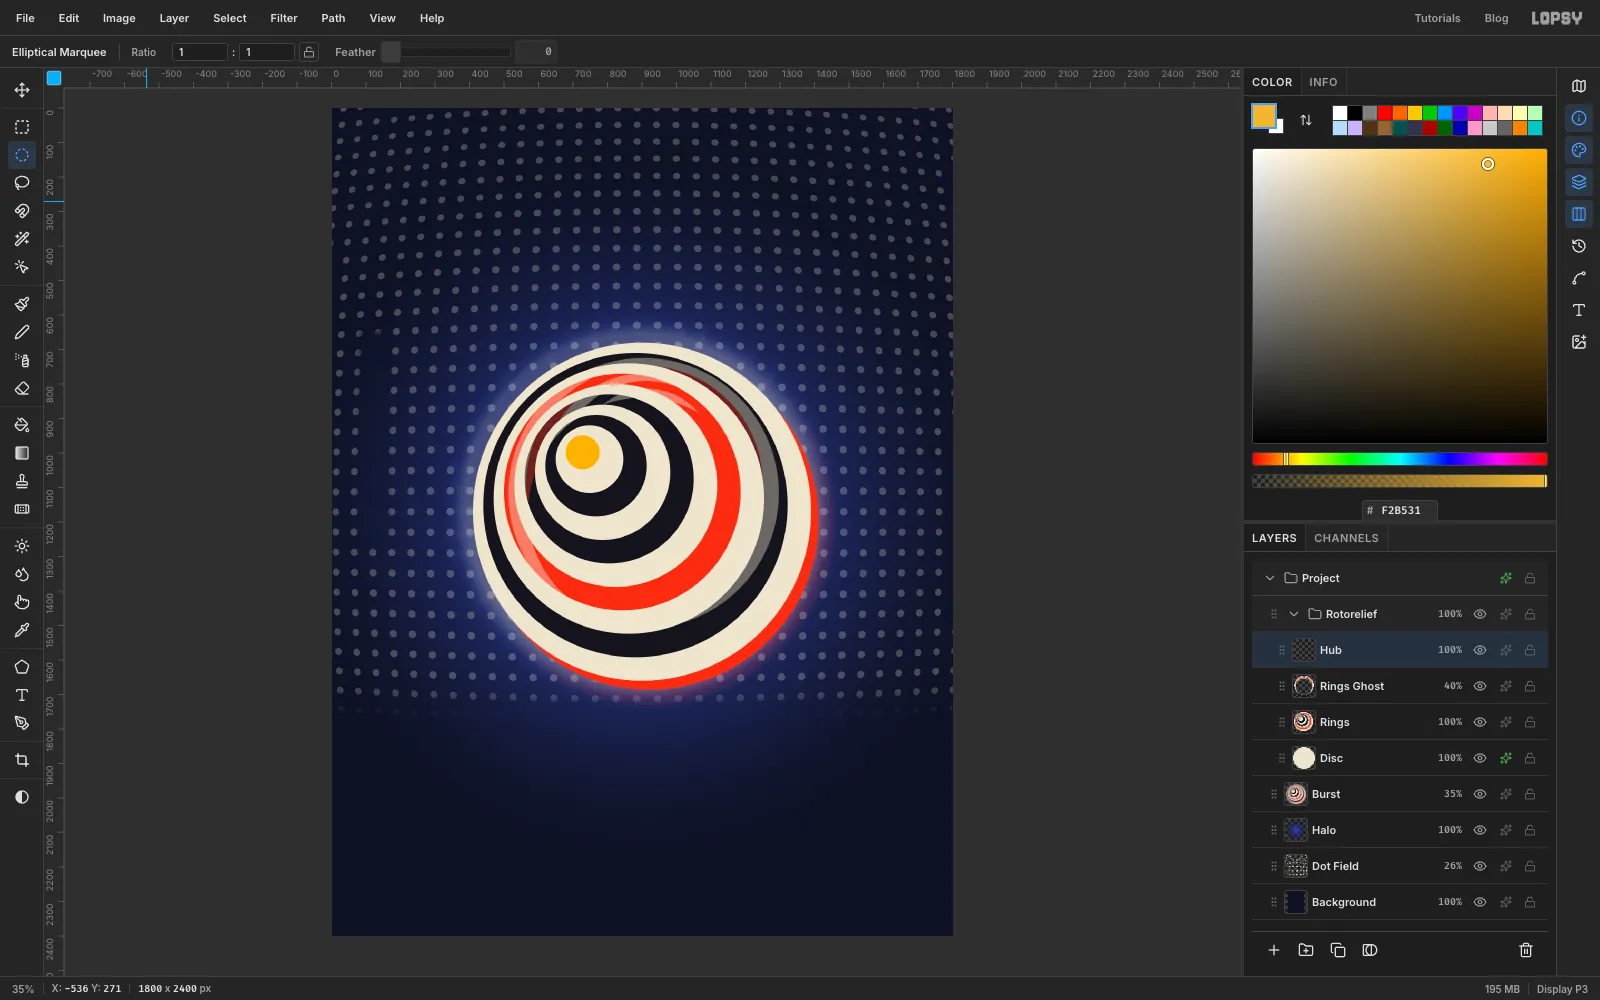
Click Halo, then use the Elliptical Marquee to select a circle slightly bigger than the disc, From 380, 650 to 1420, 1690. Choose Edit → Copy Merged (Cmd+Shift+C) and paste with Cmd+V. The flattened copy lands in place, above Halo and below the group. Rename it Burst and deselect.
Choose Filter → Radial Blur… with Amount 80. Radial Blur zooms toward the centre of the canvas, which is only 30 px below the disc centre, so the disc's colours streak outward into an even corona. Then run Filter → Gaussian Blur… with Radius 14 to soften the bright rim. Set Burst to Screen at 35%.
-
Put a clean hub on top
Click Rings Ghost and add a layer called Hub above it. The paste switched you to the Move tool, so pick the Elliptical Marquee again and select From 679, 949 to 777, 1047, the same box as the ninth circle, and fill it with saffron. Even where the ghost passes over the middle, the hub stays a solid saffron dot. Deselect.
-
Draw the orbit as an ellipse path
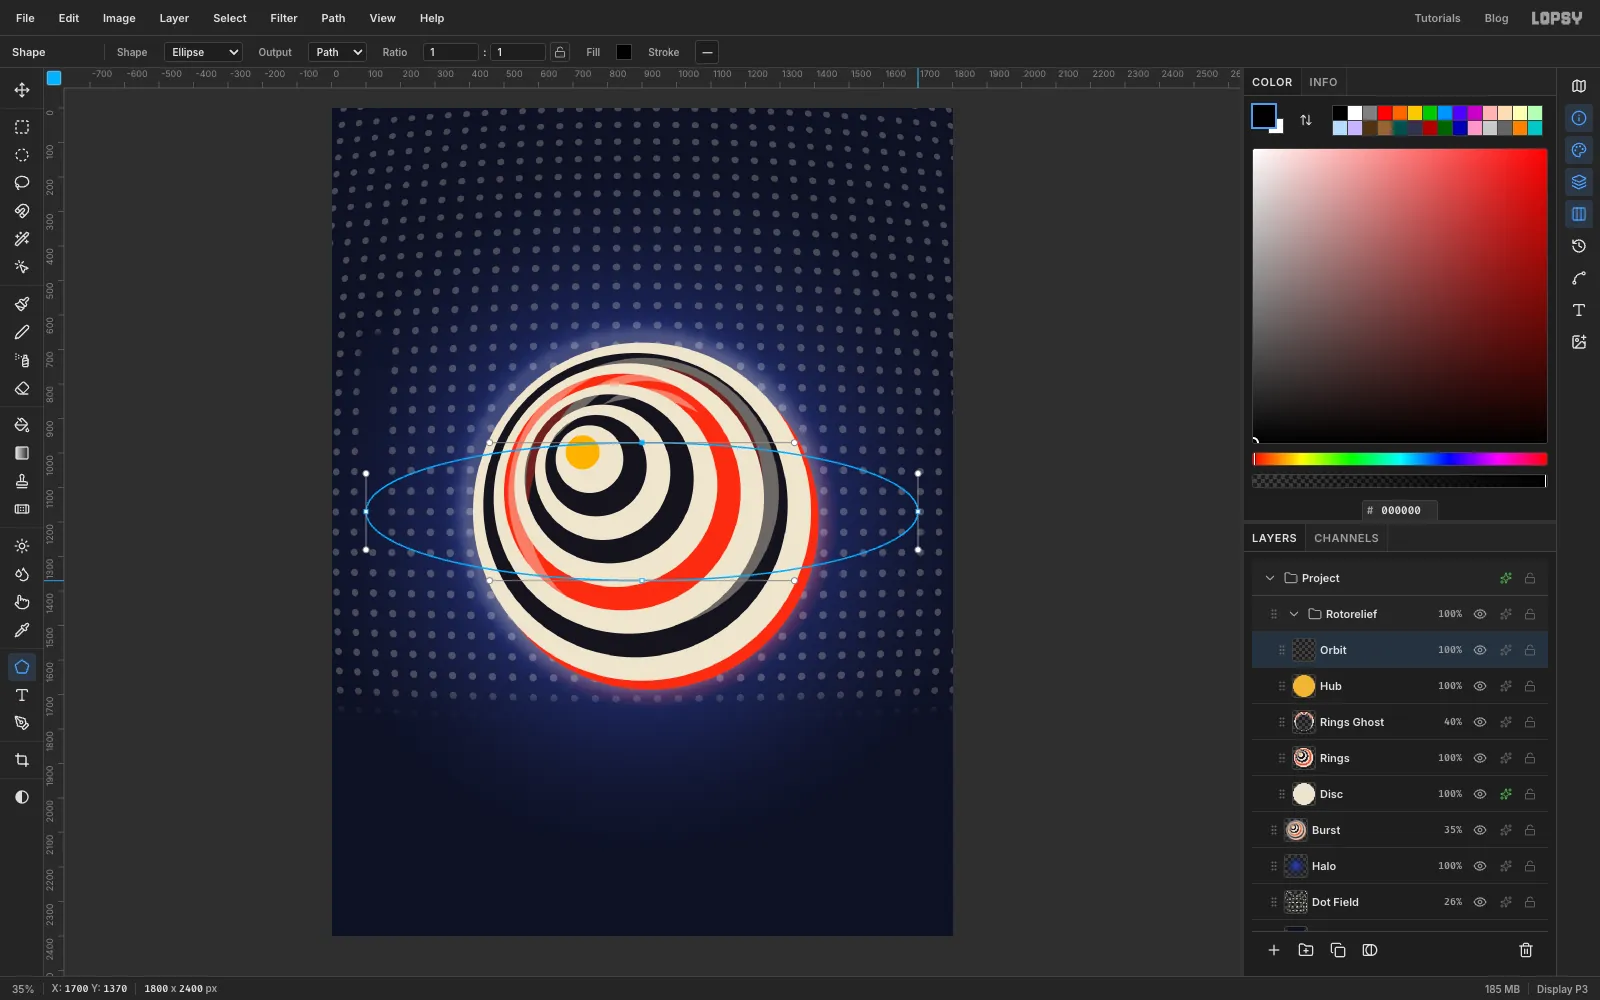
With Hub selected, add a layer called Orbit, so it sits at the top of the Rotorelief group. Pick the Shape tool, set the shape to Ellipse and Output to Path. Shapes draw from the centre out, so press on the disc centre (900, 1170) and drag down and to the right to 1700, 1370. You get a path 1600 px wide and 400 px tall. Nothing is painted yet.
-
Stroke the path
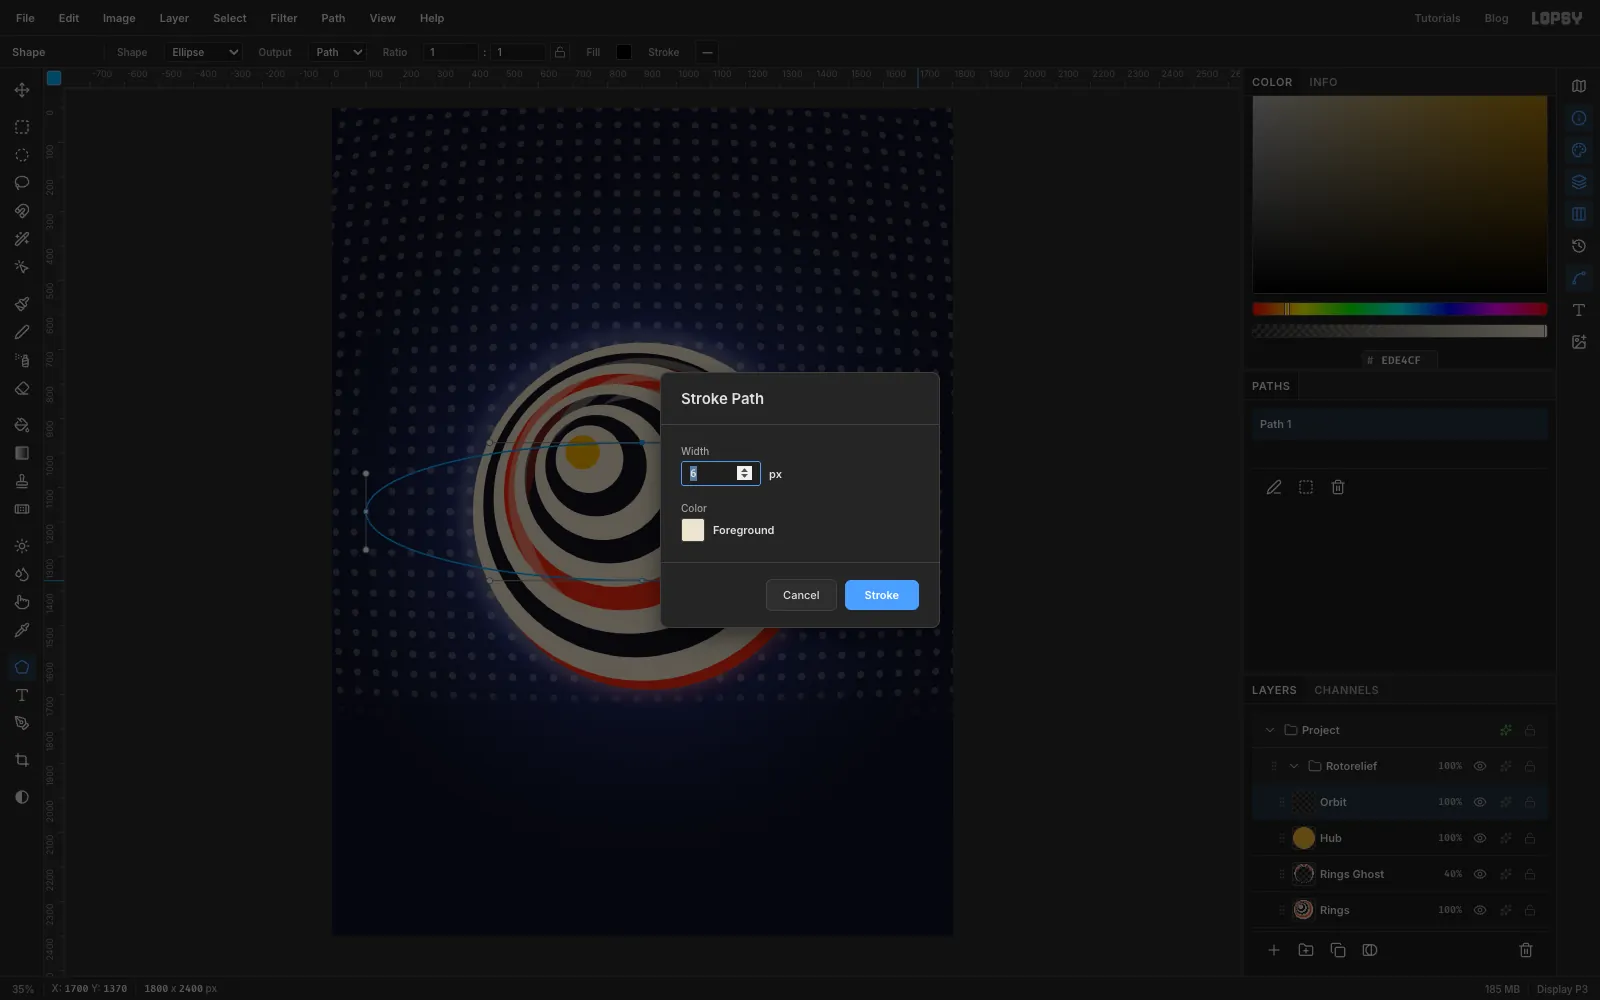
Set the foreground to cream. Open the Paths panel from the panel toolbar on the right; your new path is already selected. Click Stroke Path, enter a Width of 6, and press Enter. The ring is painted onto Orbit.
Click the path row again to deselect it, so its blue outline stops drawing, then close the Paths panel.
-
Tilt the orbit
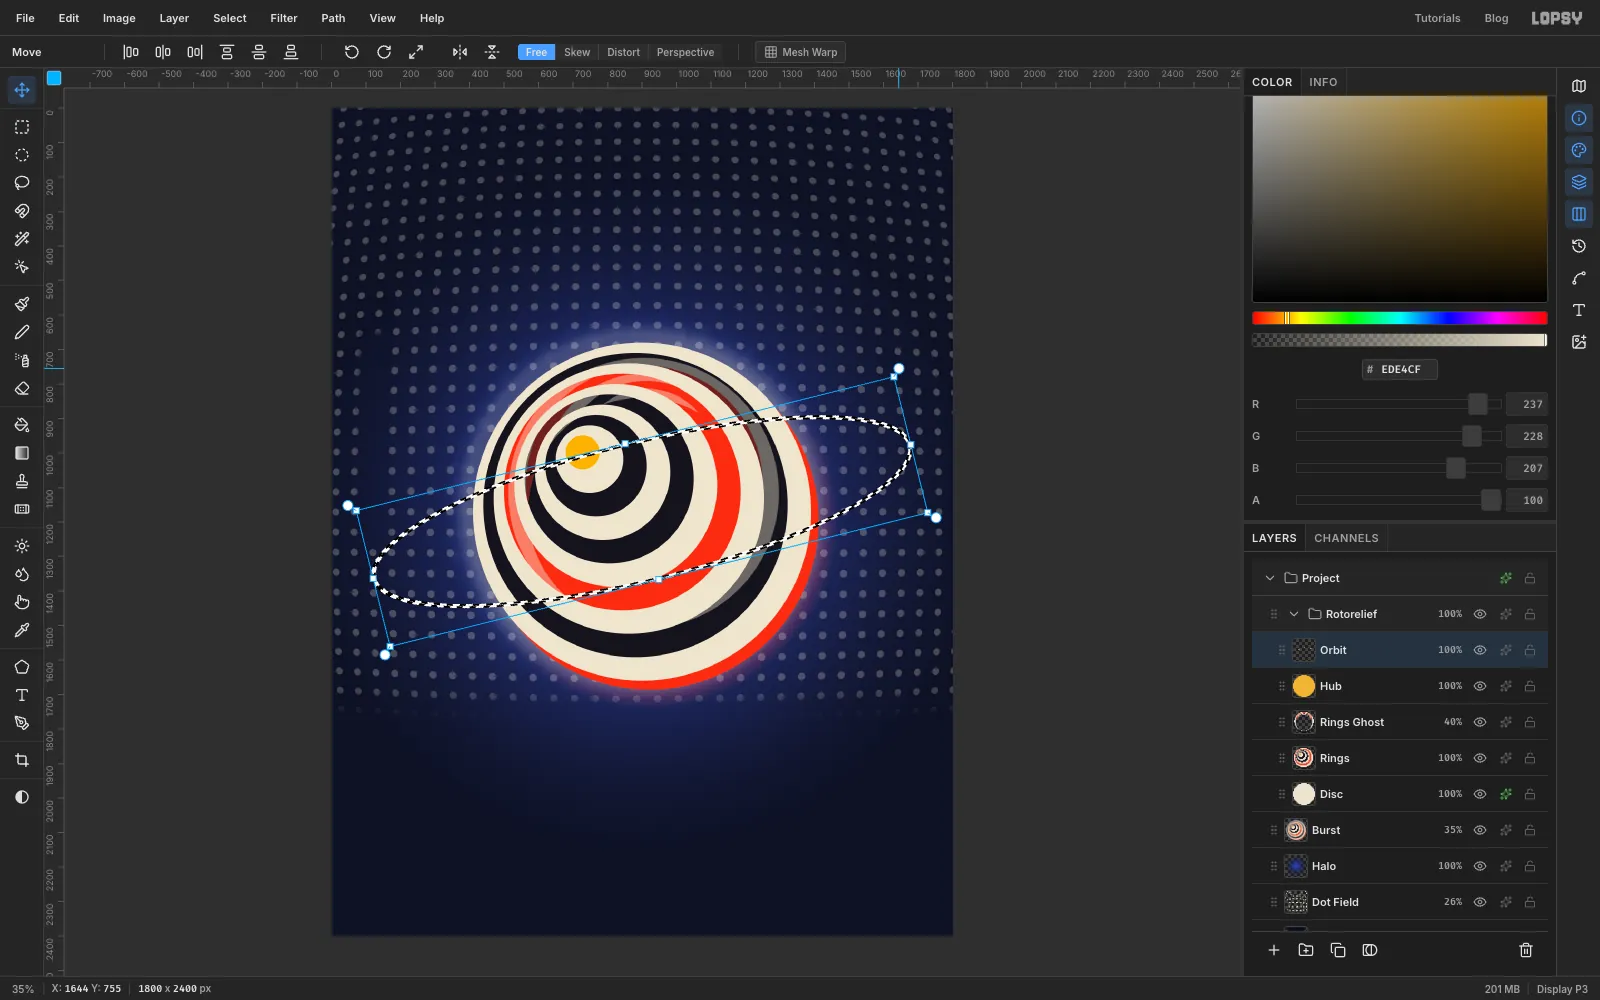
Cmd-click the Orbit thumbnail to select its pixels. With the Move tool, hover just outside the top-right corner until the rotate cursor shows, and drag counter-clockwise about 14°. The left end drops and the right end rises, like the rings of Saturn seen from slightly above. Press Cmd+D.
-
Erase the back of the orbit
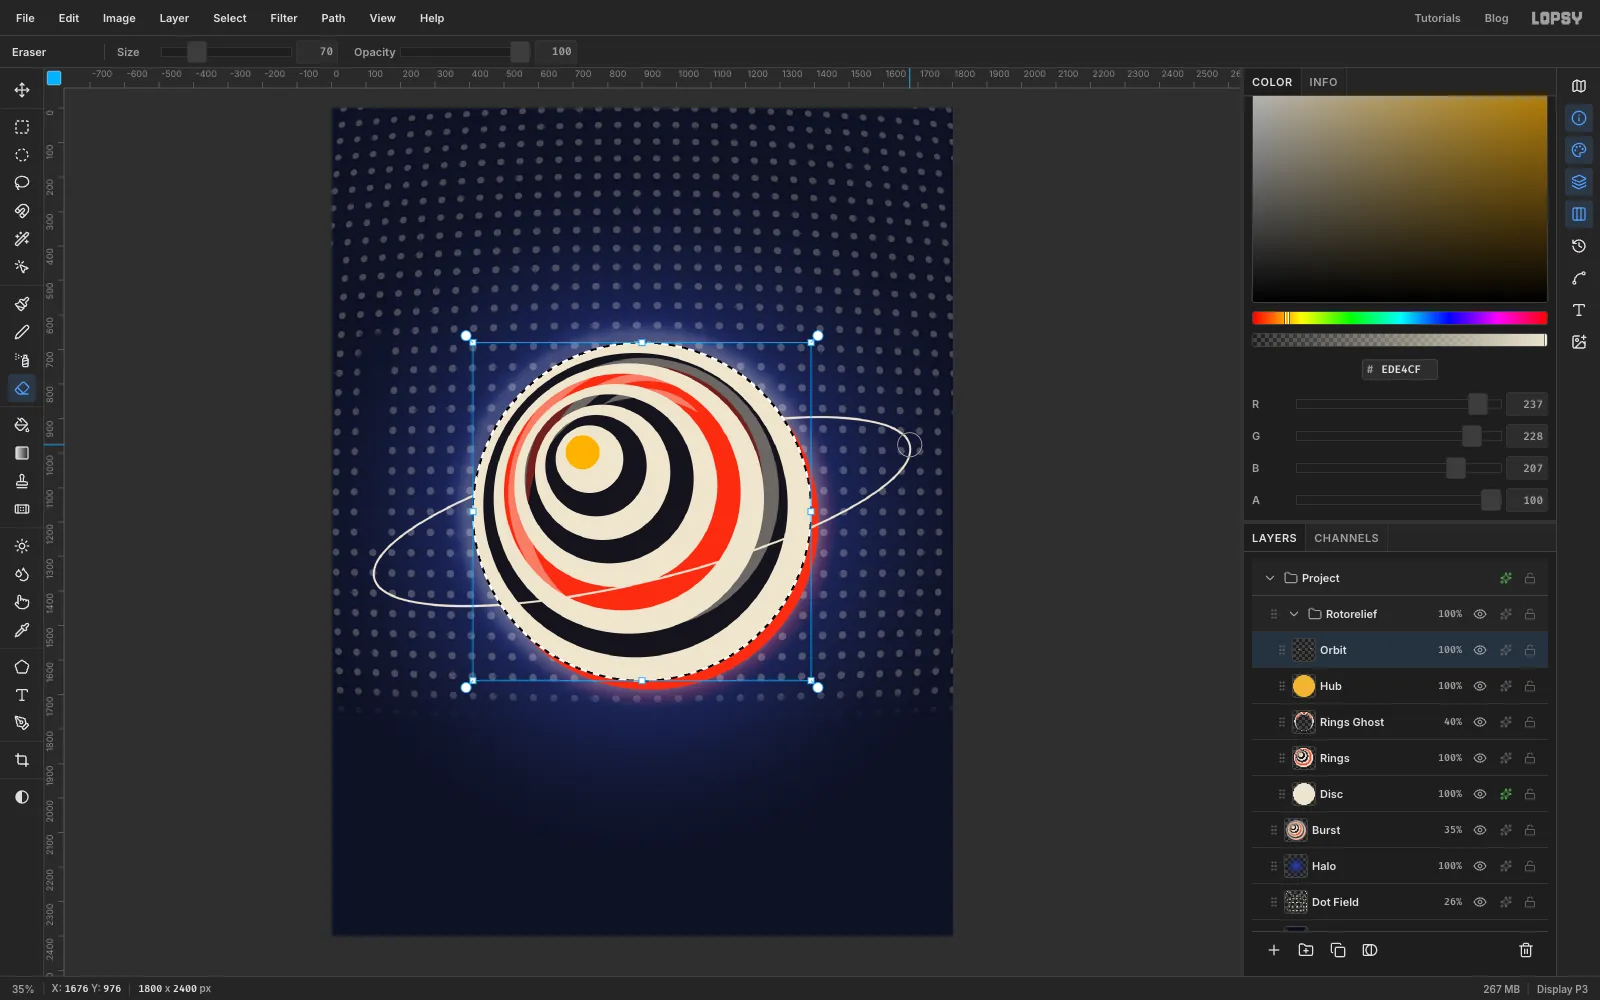
The orbit should pass in front of the disc at the bottom and behind it at the top. Cmd-click the Disc thumbnail to select the disc, then click the Orbit row. Pick the Eraser at Size 70 and drag along the part of the ring that crosses the upper half of the disc.
The eraser only works inside the selection, so the ring vanishes exactly at the disc's edge, and the parts outside the disc are untouched. Deselect.
-
Paint a stroboscopic trail
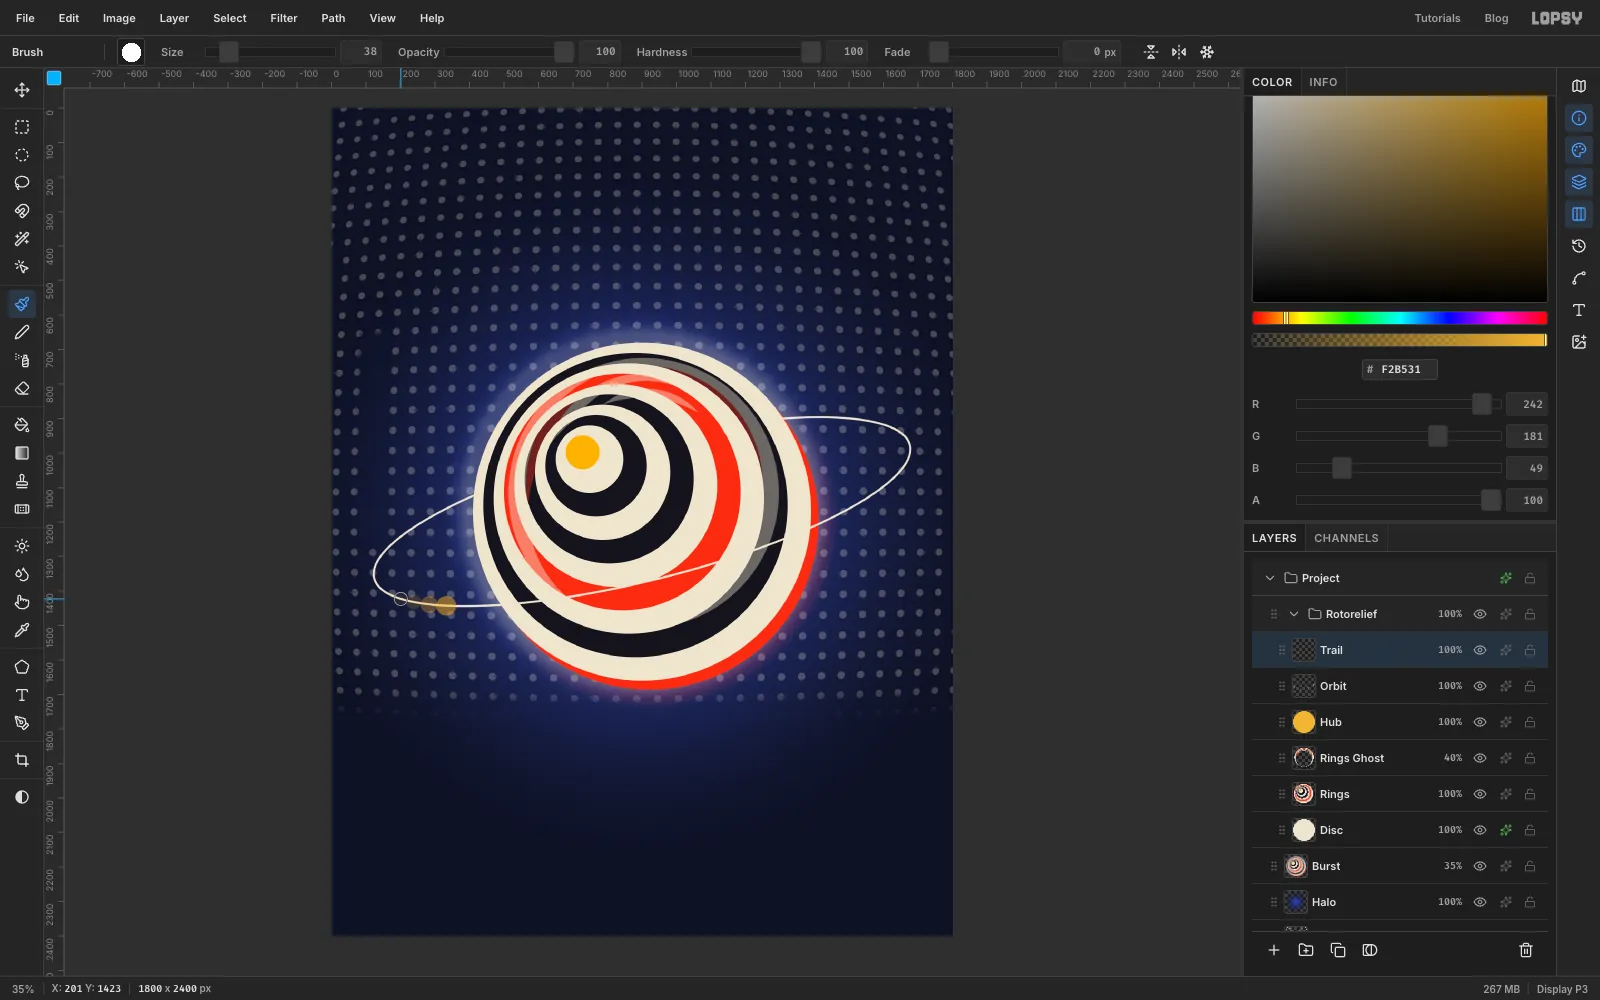
With Orbit selected, add a layer called Trail. Pick the Brush, open the brush settings, and set Hardness 100. Set the colour to saffron.
The satellite will sit on the front of the orbit at about 389, 1444, travelling to the right. Click the first dab on the orbit about 55 px behind that spot (to its left), then each next one about 45 px further back along the ring. Make each smaller and fainter than the last by changing Size and Opacity in the options bar between clicks:
- Size 58, Opacity 50%
- Size 50, Opacity 32%
- Size 44, Opacity 18%
- Size 38, Opacity 9%
It reads like a chronophotograph: the same object caught several times as it moves. Set the brush opacity back to 100% when you're done.
-
Add the satellite
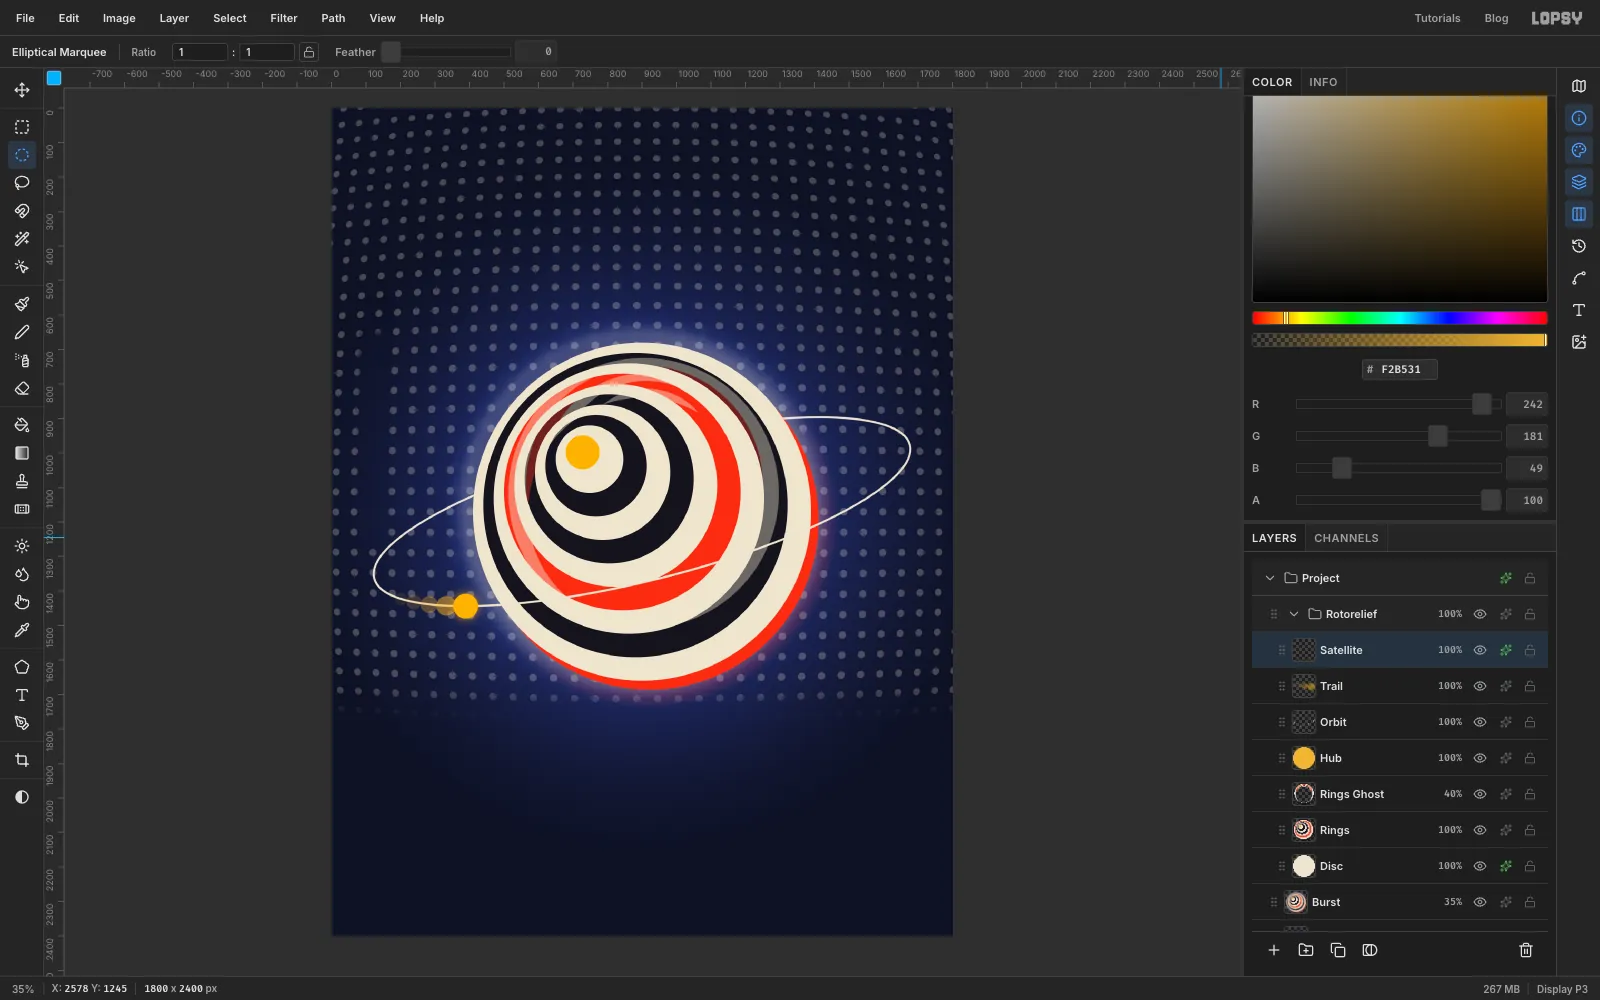
Add a layer called Satellite above Trail. With the Elliptical Marquee, select From 353, 1408 to 425, 1480 and fill it with saffron. Deselect, open the layer's effects, and turn on Outer Glow with Size 40, Opacity 70 and a saffron colour.
The ball sits clear of the disc's rim, so it doesn't look as though it's touching the edge.
-
Bend the mobile's arms
Collapse the Rotorelief group and click it. Click New Group, name it Mobile, and add a layer inside it called Wires.
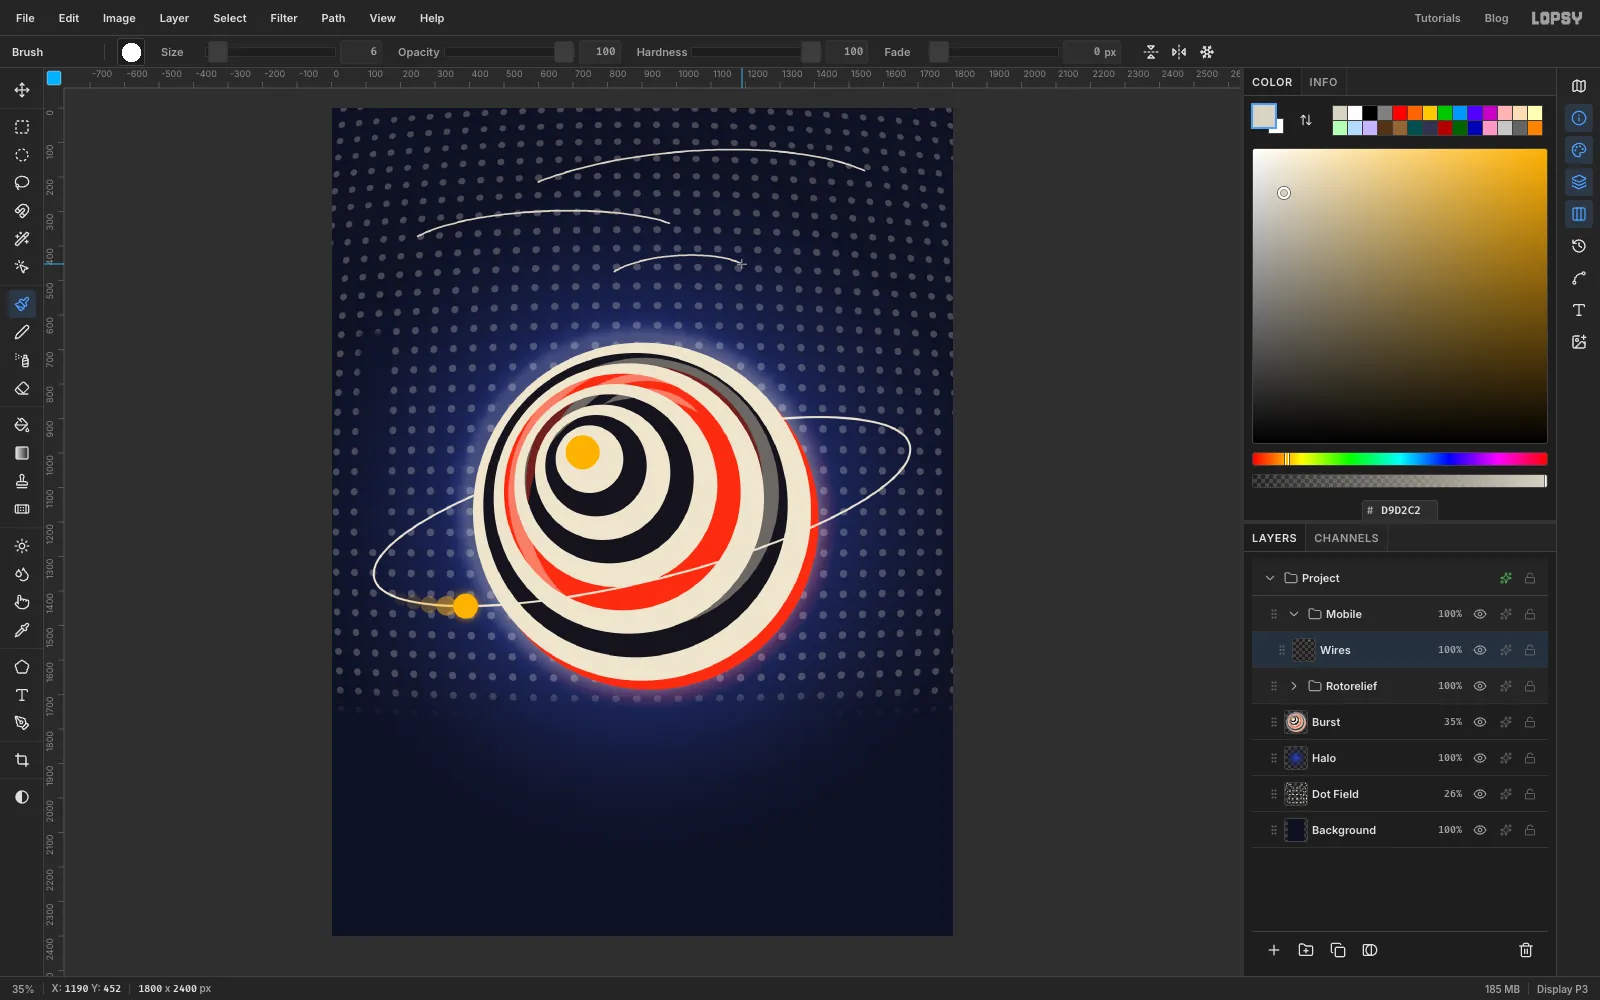
Pick the Brush at Size 6, Hardness 100, in wire . Calder's arms are never straight, so draw each one as a single slow drag with a gentle upward bow. A slight wobble looks hand-made, but if you'd rather have perfect curves, draw each arm with the Pen (click the left tip, drag at the peak to pull out a handle, click the right tip) and use Stroke Path at width 6, as you did for the orbit.
- the top arm, from 600, 214 rising to about 1090, 122 and down to 1545, 182
- the middle arm, from 250, 372 up to about 600, 300 and down to 980, 334
- the bottom arm, from 820, 474 up to about 1000, 428 and down to 1190, 452
-
Hang the arms on drop wires
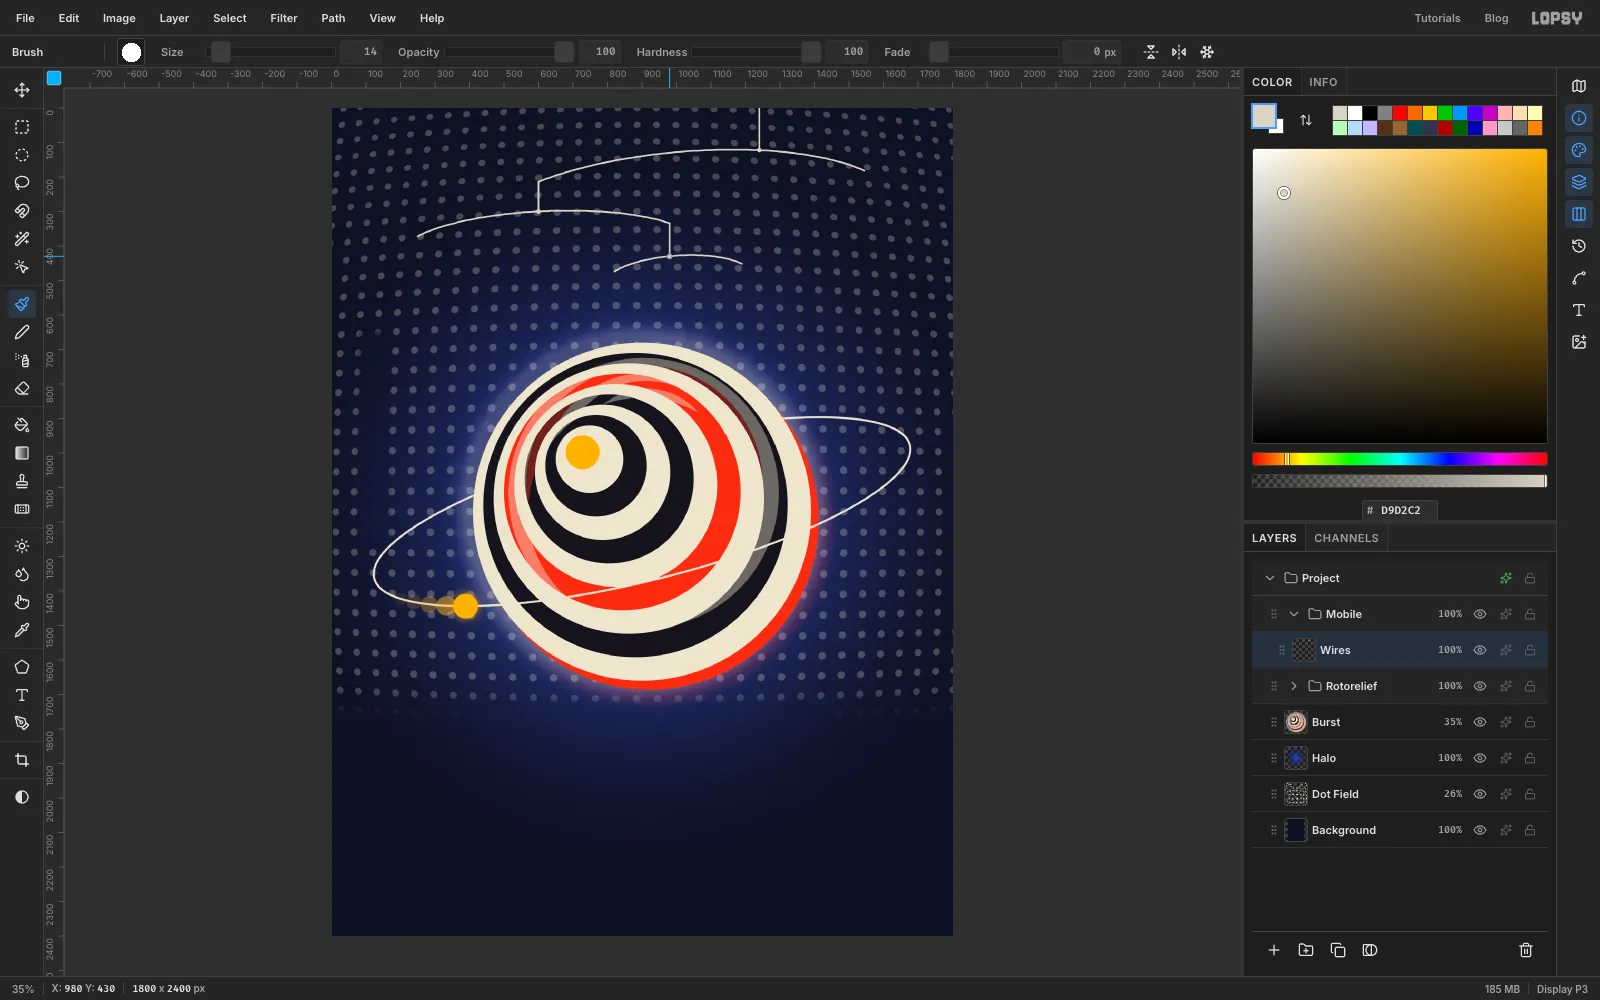
Each arm hangs from the tip of the one above it. With the same brush, click and then Shift-click to draw three straight wires:
- from the top edge at 1240, 0 down to the top arm (about 1240, 122)
- from the top arm's left tip (600, 214) down to the middle arm (600, 300)
- from the middle arm's right tip (980, 334) down to the bottom arm (980, 430)
Set the brush Size to 14 and click once at the bottom of each wire. This adds a small knot where each arm balances.
-
Cut and rotate the first pendant
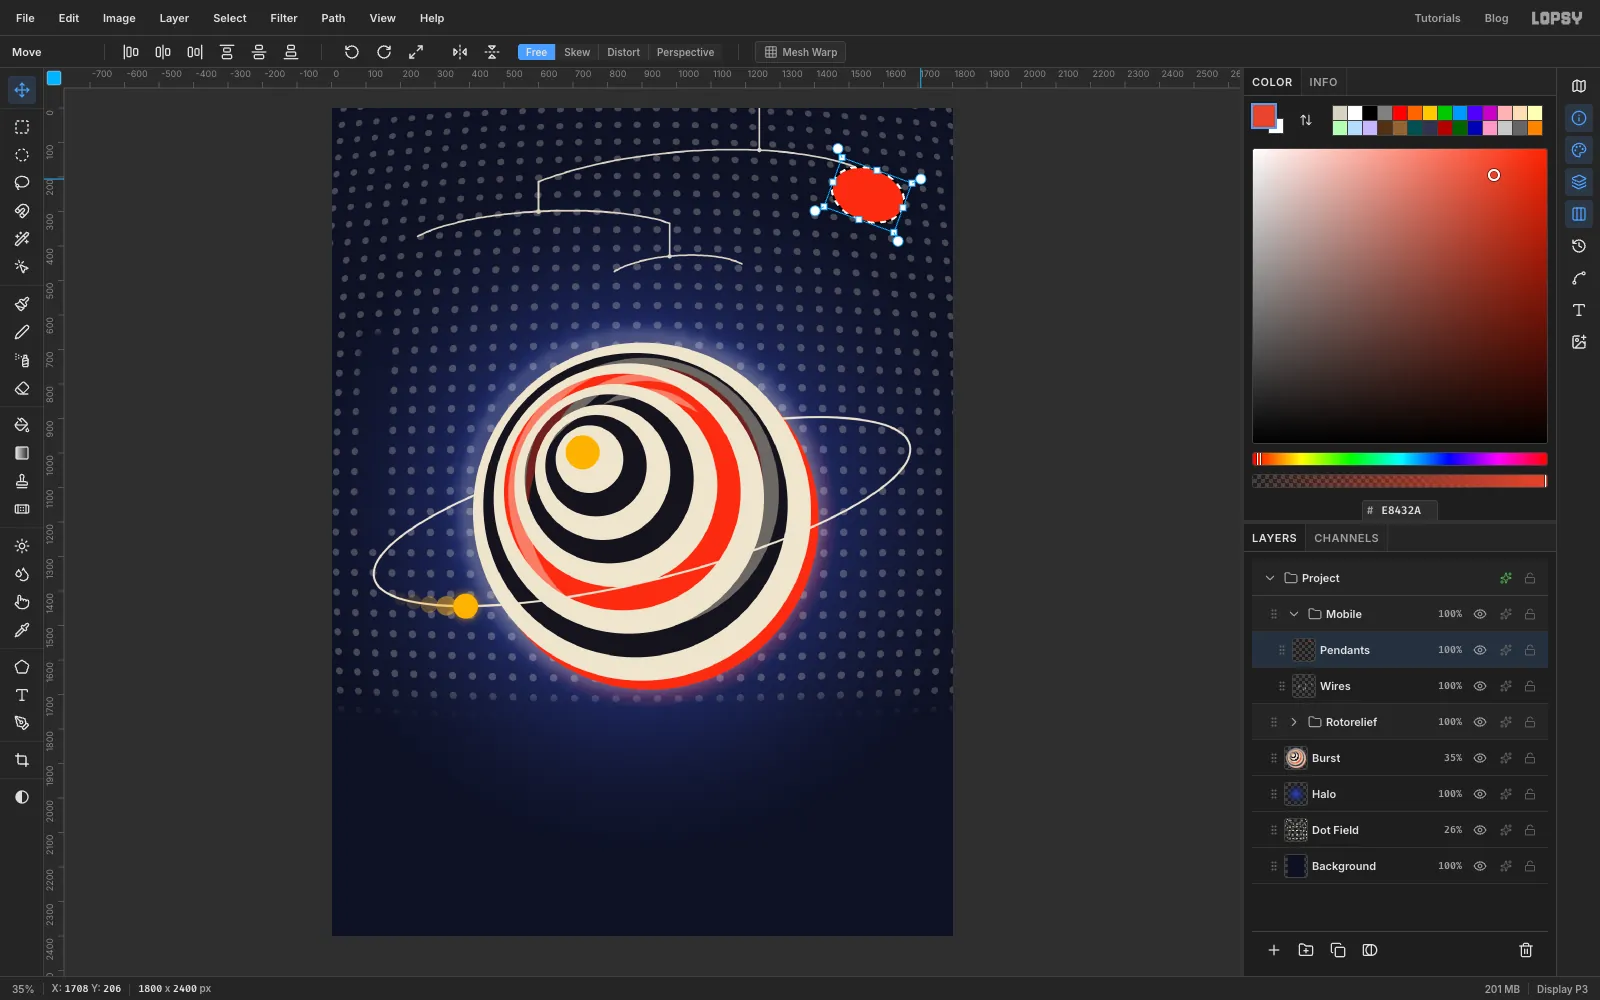
Add a layer called Pendants above Wires. With the Elliptical Marquee, select From 1447, 176 to 1663, 328 and fill it with vermilion. It hangs from the top arm's right tip.
With the selection still active, pick the Move tool and turn the rotation handle about 20° clockwise, so the pendant tilts like a leaf catching the air. Press Cmd+D.
-
Hang the other pendants
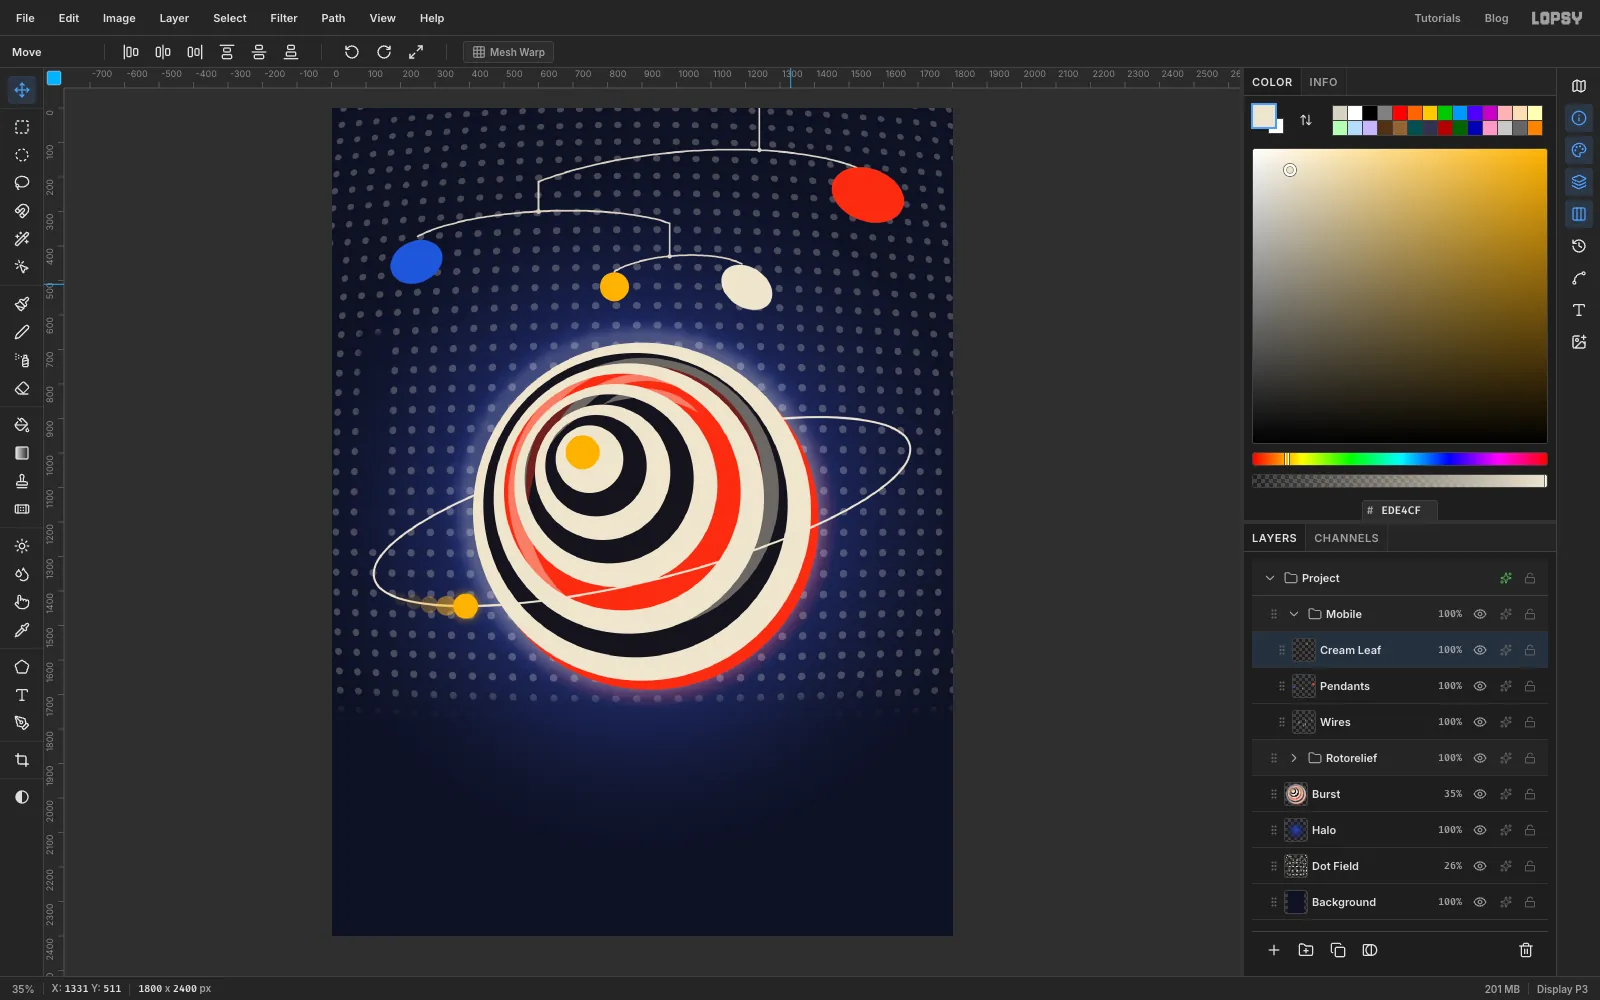
On the same layer, add two more pendants. Each time, switch to the Elliptical Marquee, select, fill, then rotate with the Move tool and press Cmd+D:
- cobalt , From 168, 386 to 324, 506, rotated about 24° counter-clockwise, on the middle arm's left tip
- saffron, a circle From 778, 476 to 862, 560, on the bottom arm's left tip (a circle doesn't need rotating, so just deselect)
The cream pendant, nearest the bottom arm's pivot, should hang still while the others swing, so give it its own layer: add Cream Leaf, select From 1124, 462 to 1284, 578, fill it with cream, and rotate it about 34° clockwise. These are Calder's colours: red, blue, yellow and white.
-
Give the pendants a swing echo
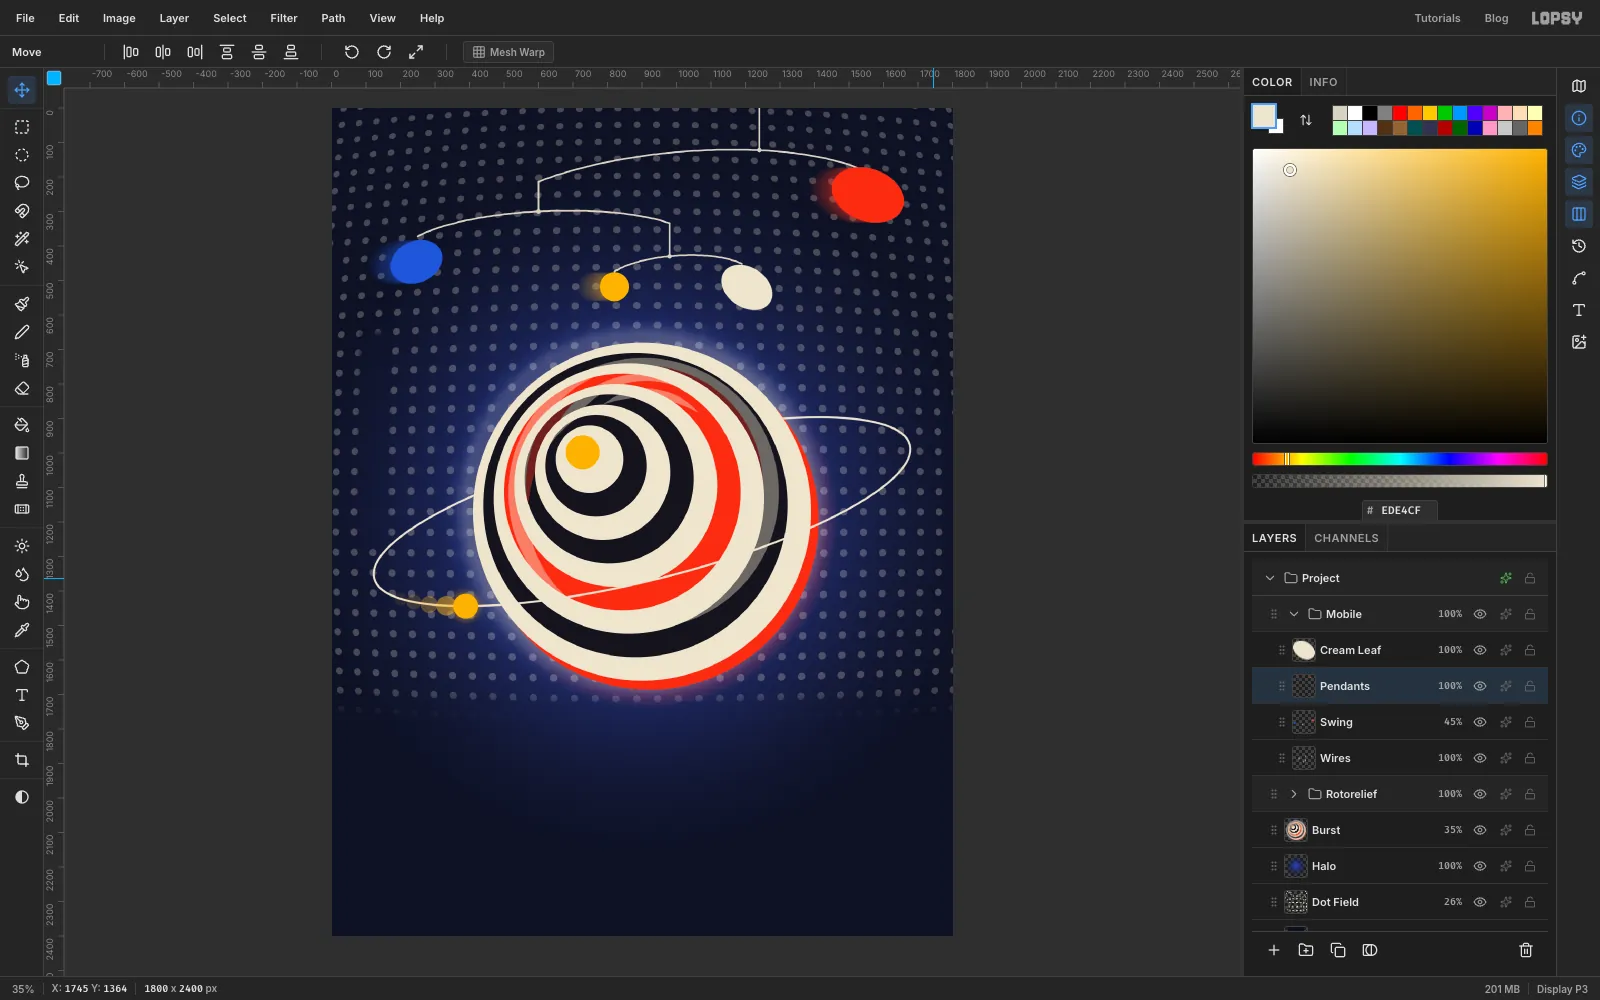
Click Pendants and click Duplicate Layer. The copy sits on top. Click the original underneath and rename it Swing.
On Swing, run Filter → Motion Blur… with Angle 0 and Distance 70. With the Move tool, nudge it 34 px to the left with the arrow keys (Shift moves 10 px at a time). Set it to 45%. Rename the copy on top back to Pendants.
The sharp pendants now drag a soft smear behind them, as if they're swaying to the right. The cream one, on its own layer, stays still.
-
Cast shadows on the wall
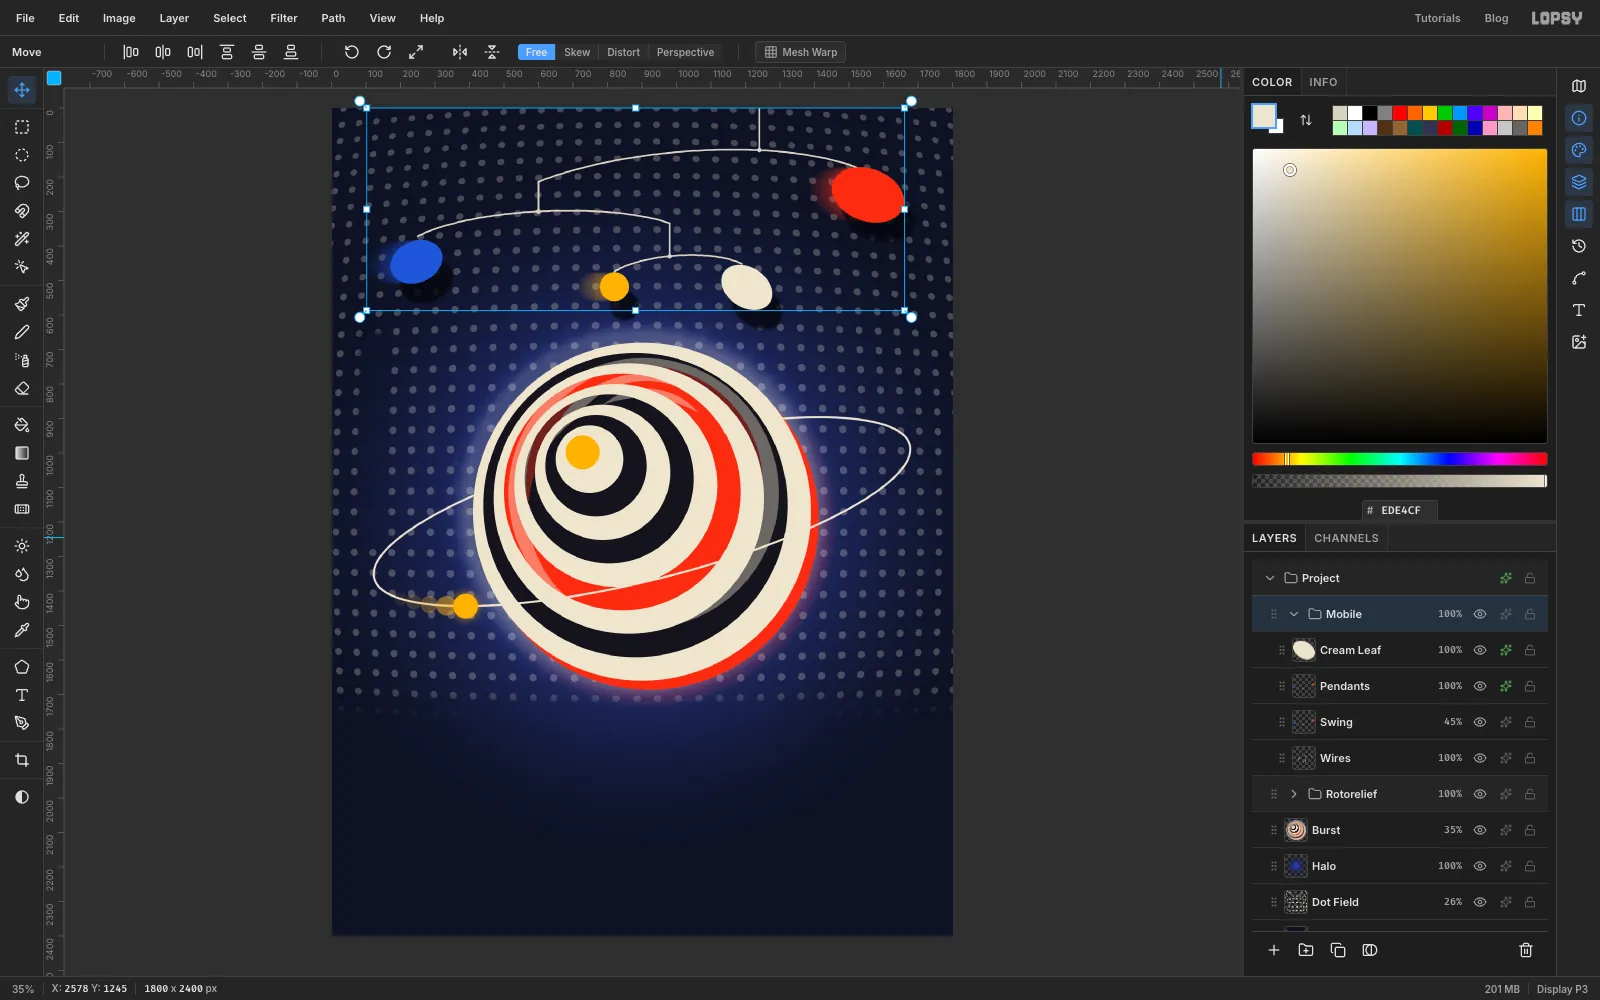
A real mobile throws shadows on the wall behind it. Click Pendants, open its effects, and turn on Drop Shadow:
- Offset X 30, Offset Y 56
- Blur 10, Spread 0, Opacity 80
- colour
Do the same on Cream Leaf. Leave the wires without shadows. Thin shadows of thin lines read as a second set of wires.
-
Type the title
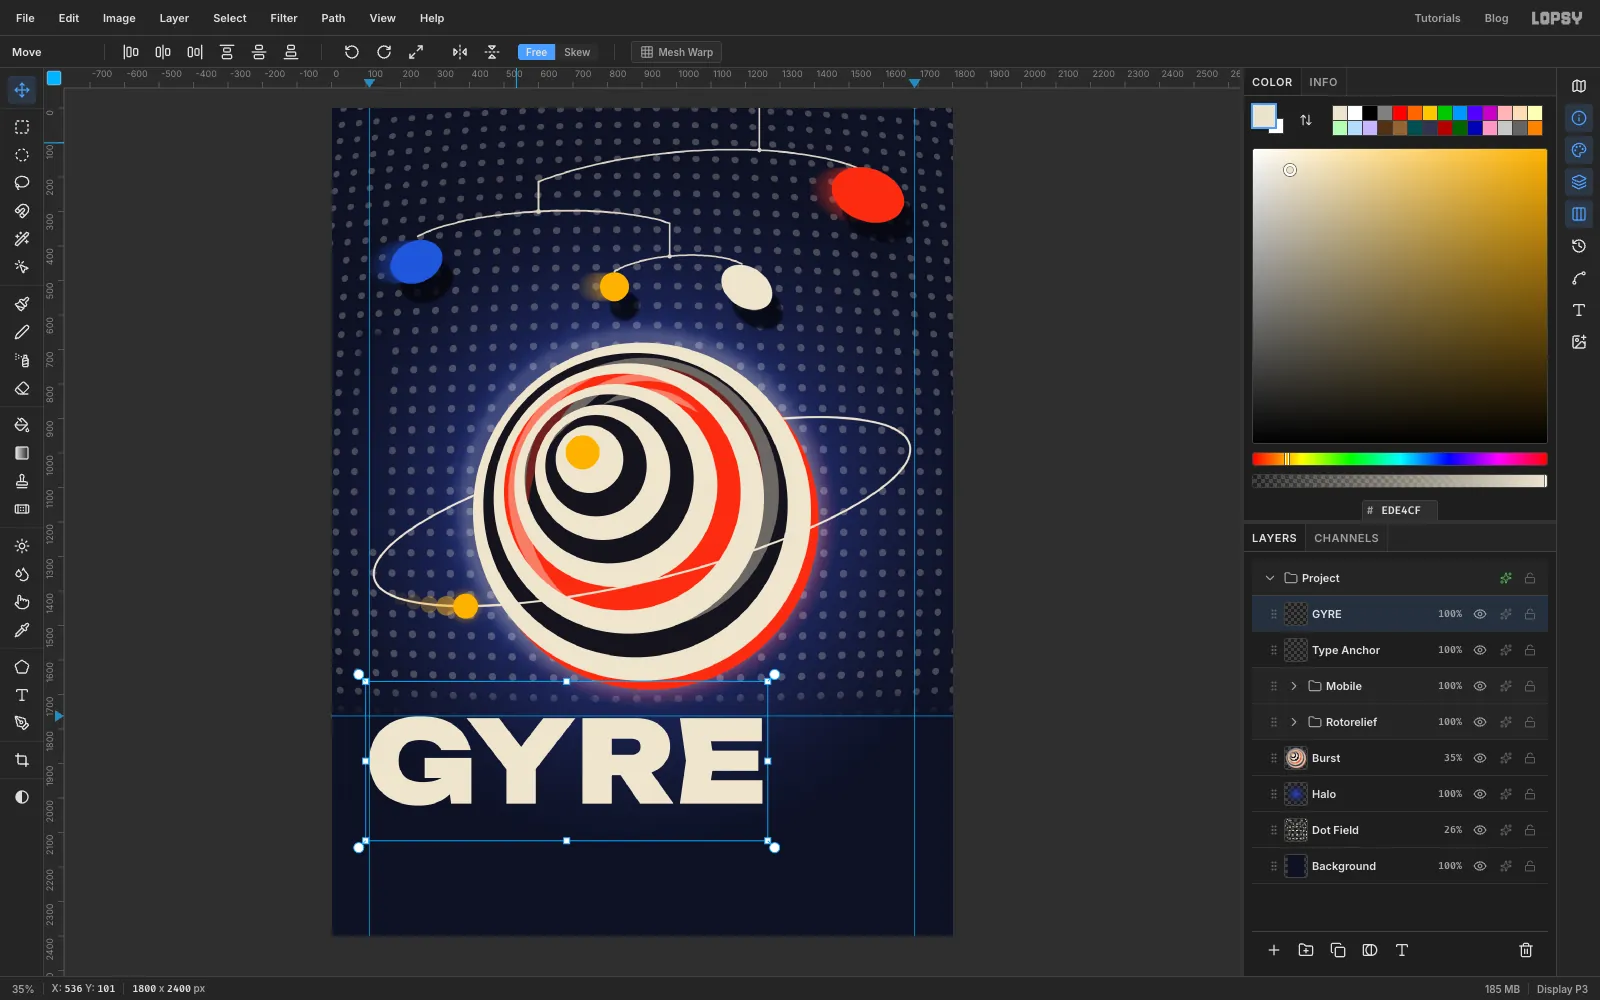
Collapse Mobile. Click the top ruler at 110 and 1690 to drop two vertical margin guides, and the left ruler at 1762 for the top of the title.
Click Mobile and add an empty layer called Type Anchor. Clicking it before each new piece of text keeps the Text tool's settings from restyling the last text layer.
With Type Anchor selected, pick the Text tool and set the font to Unbounded, Black, Size 330, cream. Click in an empty area and type GYRE, then click Commit text. With the Move tool, drag it so its left edge sits on the 110 guide and its cap tops on the 1762 guide, finishing with the arrow keys.
-
Misregister the title
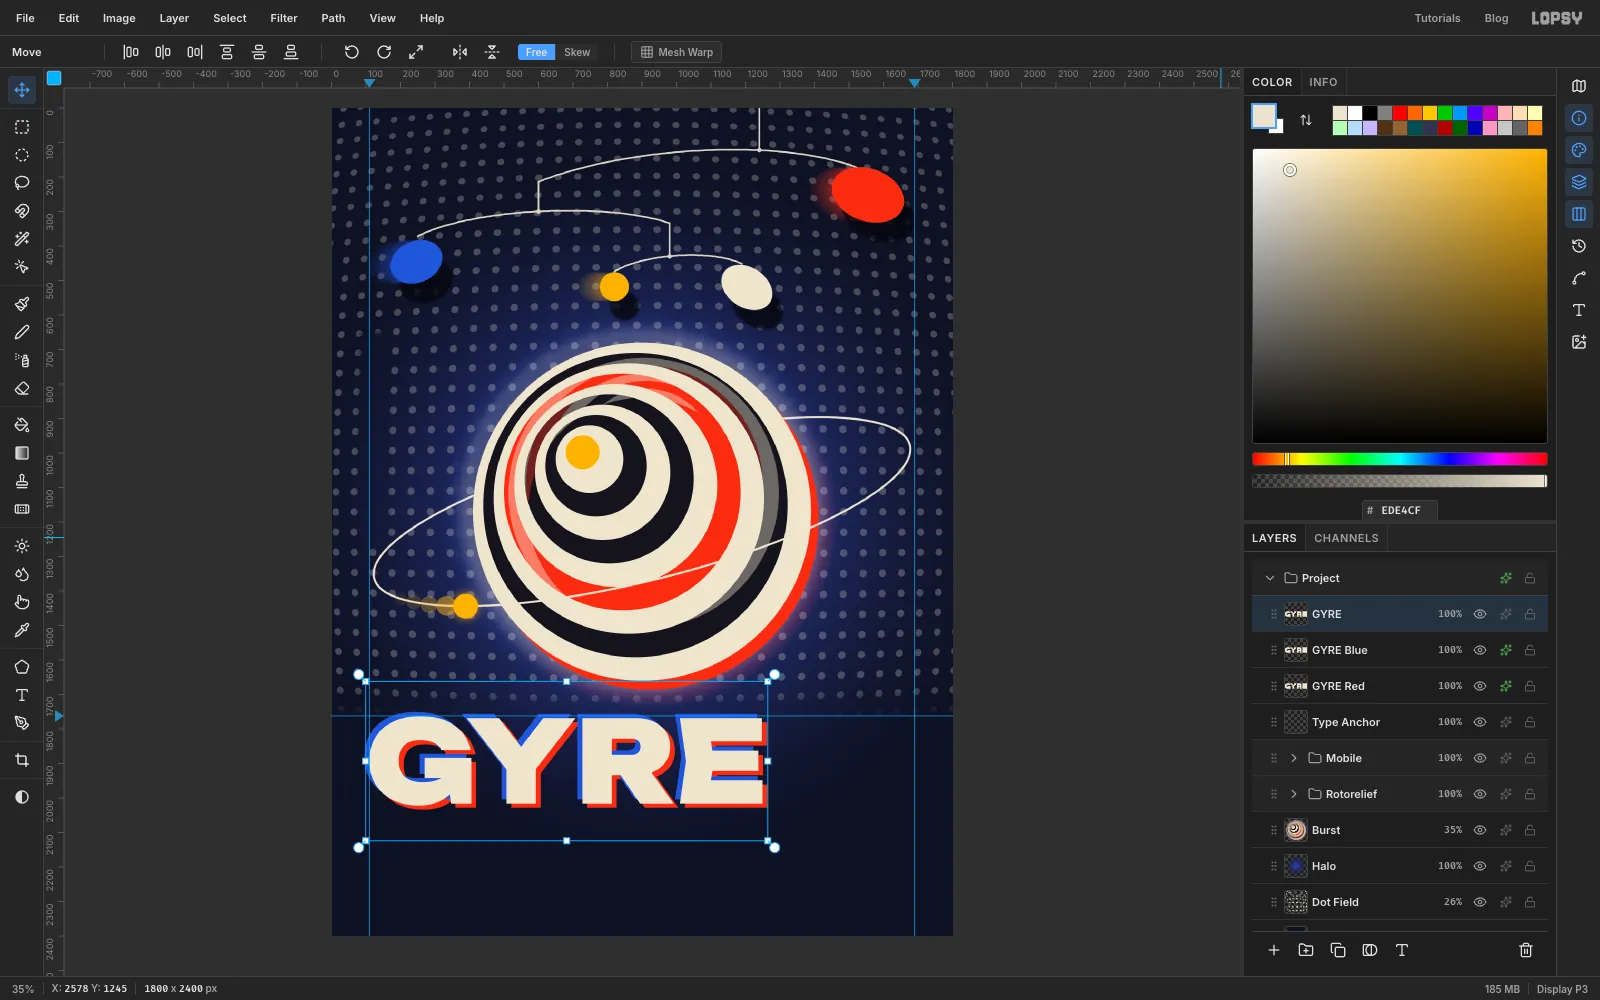
Click Duplicate Layer twice, so there are three GYRE layers. Name the bottom one GYRE Red and the middle one GYRE Blue, and name the top one GYRE.
- GYRE Red: add a Color Overlay in vermilion, then with the Move tool nudge it 14 px right and 12 px down.
- GYRE Blue: add a Color Overlay in cobalt, then nudge it 14 px left and 12 px up.
The cream letters now vibrate between two offset colour plates, like a three-colour print with a loose registration.
-
Track NOCTURNE to the title's width
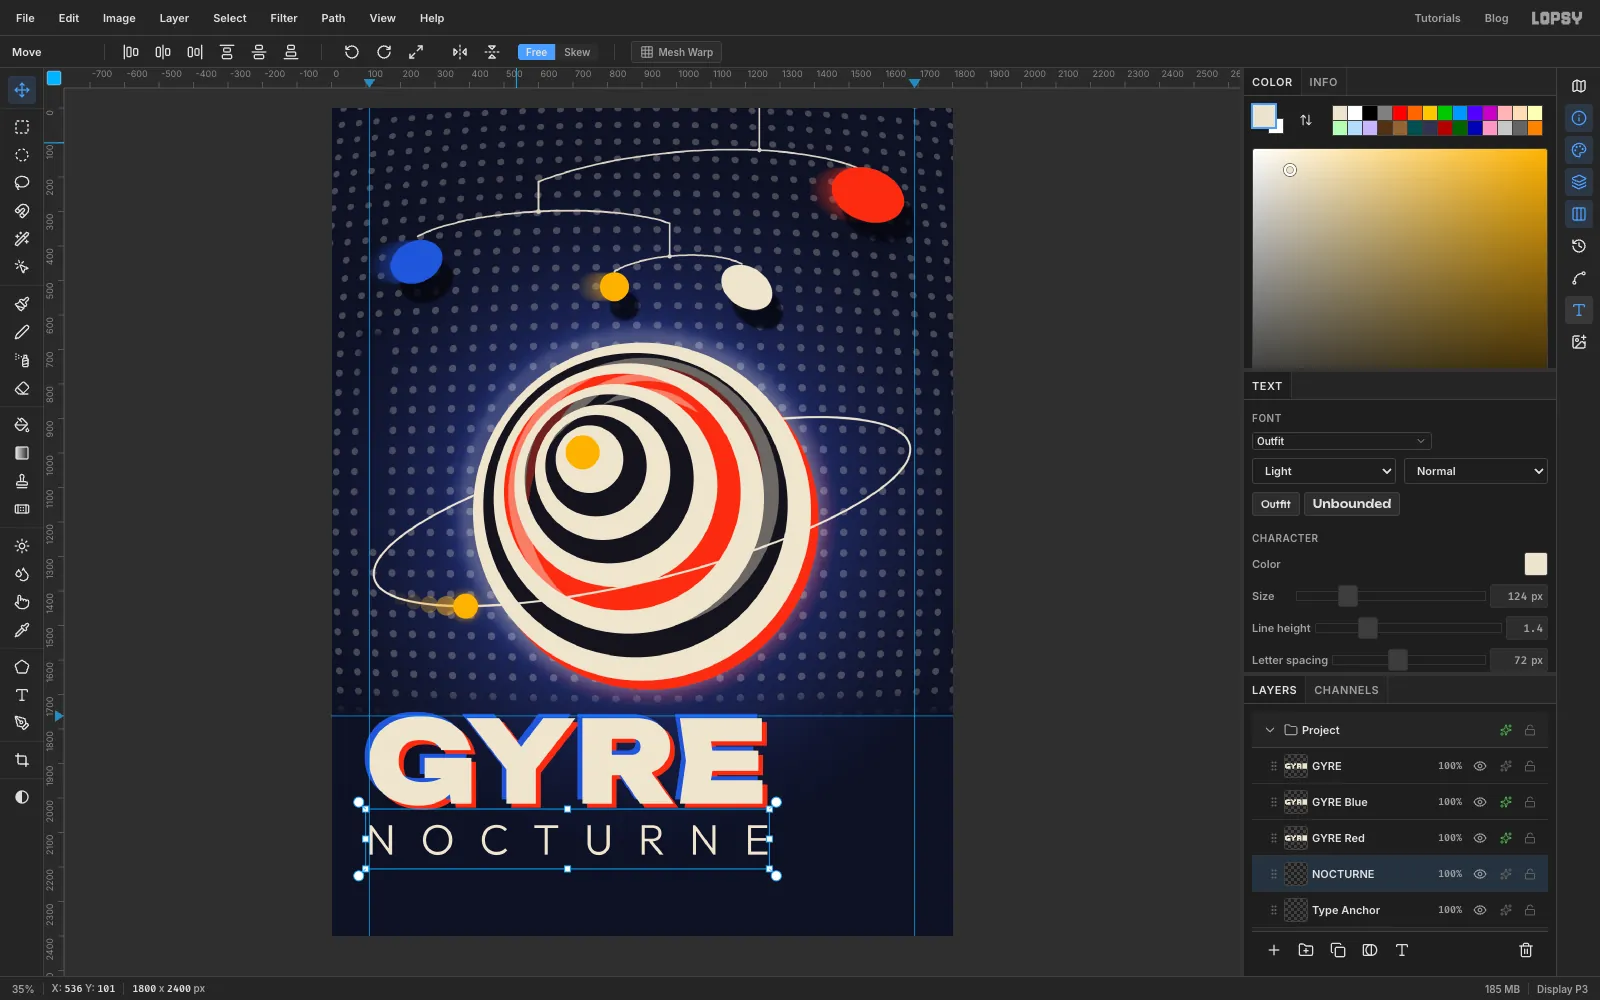
Click Type Anchor. Set the Text tool to Outfit, Light, Size 124, and type NOCTURNE. Commit it.
Open the Text panel from the panel toolbar and raise Letter spacing until NOCTURNE ends where the red E of GYRE ends. Here that's 72 px. Move it so its left edge is on the 110 guide and its top sits 56 px below the bottom of GYRE.
Click Type Anchor and set Letter spacing back to 0 in the Text panel, or the next text you type inherits the wide spacing.
-
Build the info column
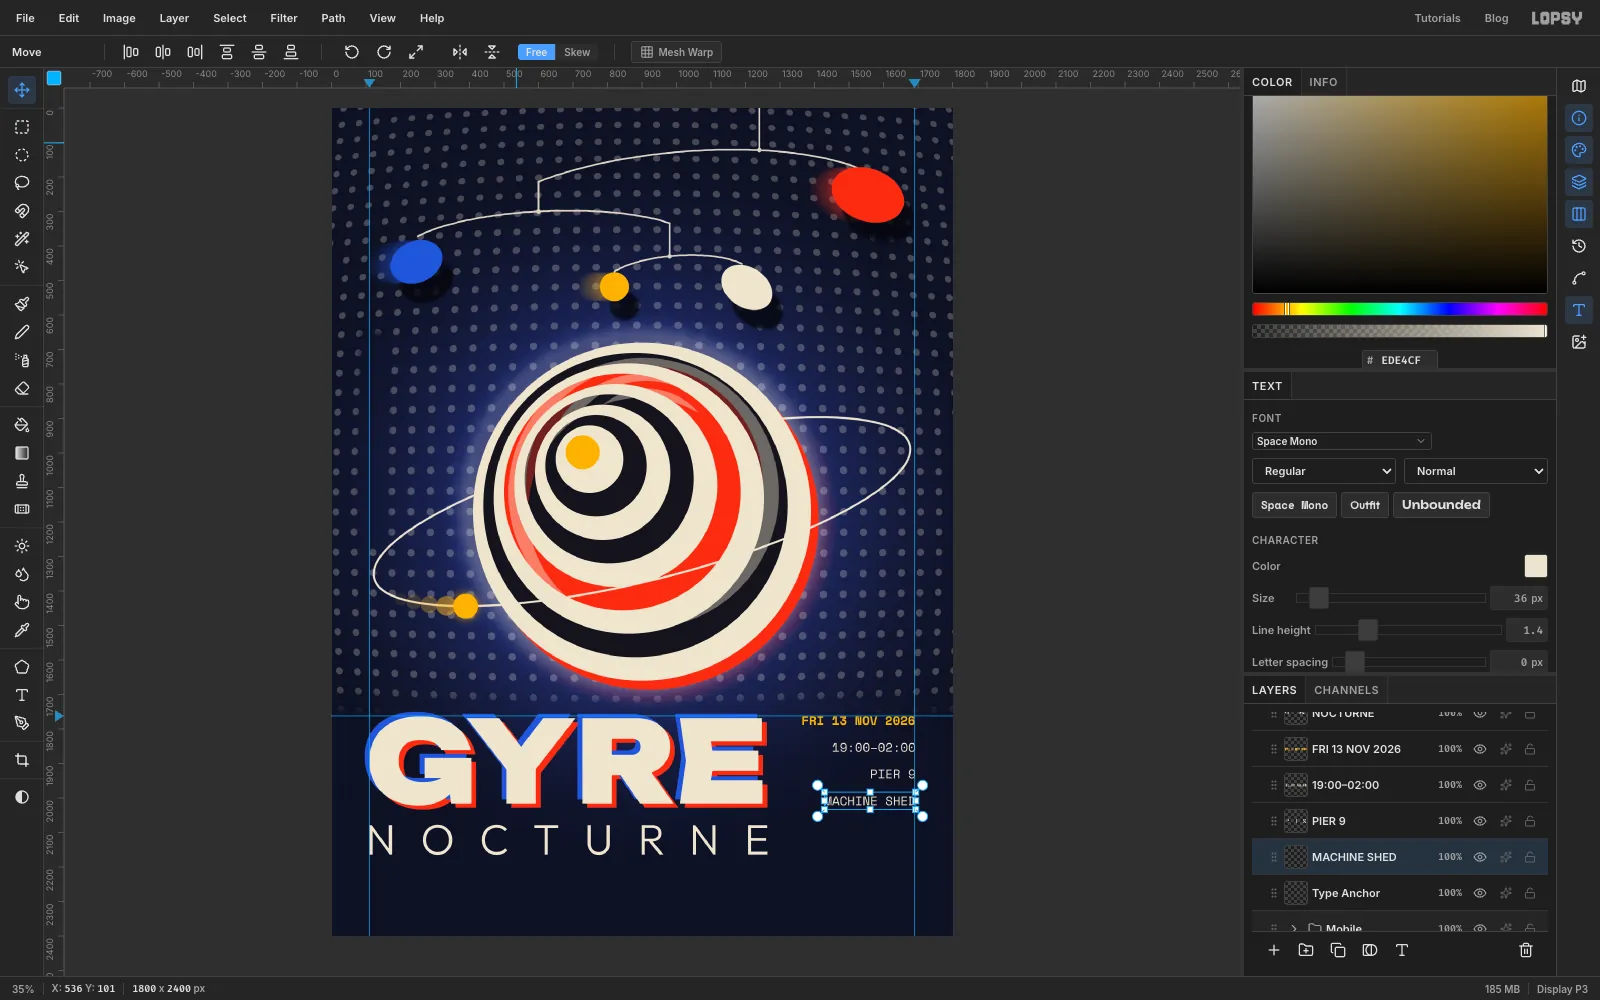
The info column sits to the right of GYRE and spans exactly its cap height. Make four separate text layers in Space Mono at Size 36, clicking Type Anchor before each one. Set Align to Right in the Text options and click on the 1690 guide each time: point text set to Right uses the click point as its right edge.
- FRI 13 NOV 2026, Bold, saffron
- 19:00–02:00, Regular, cream
- PIER 9, Regular, cream
- MACHINE SHED, Regular, cream
Then nudge each line up or down. Put the first line's top on the 1762 guide and the last line's baseline on GYRE's baseline. Space the two middle lines evenly between them, about 78 px apart.
-
Add the rule and the footer
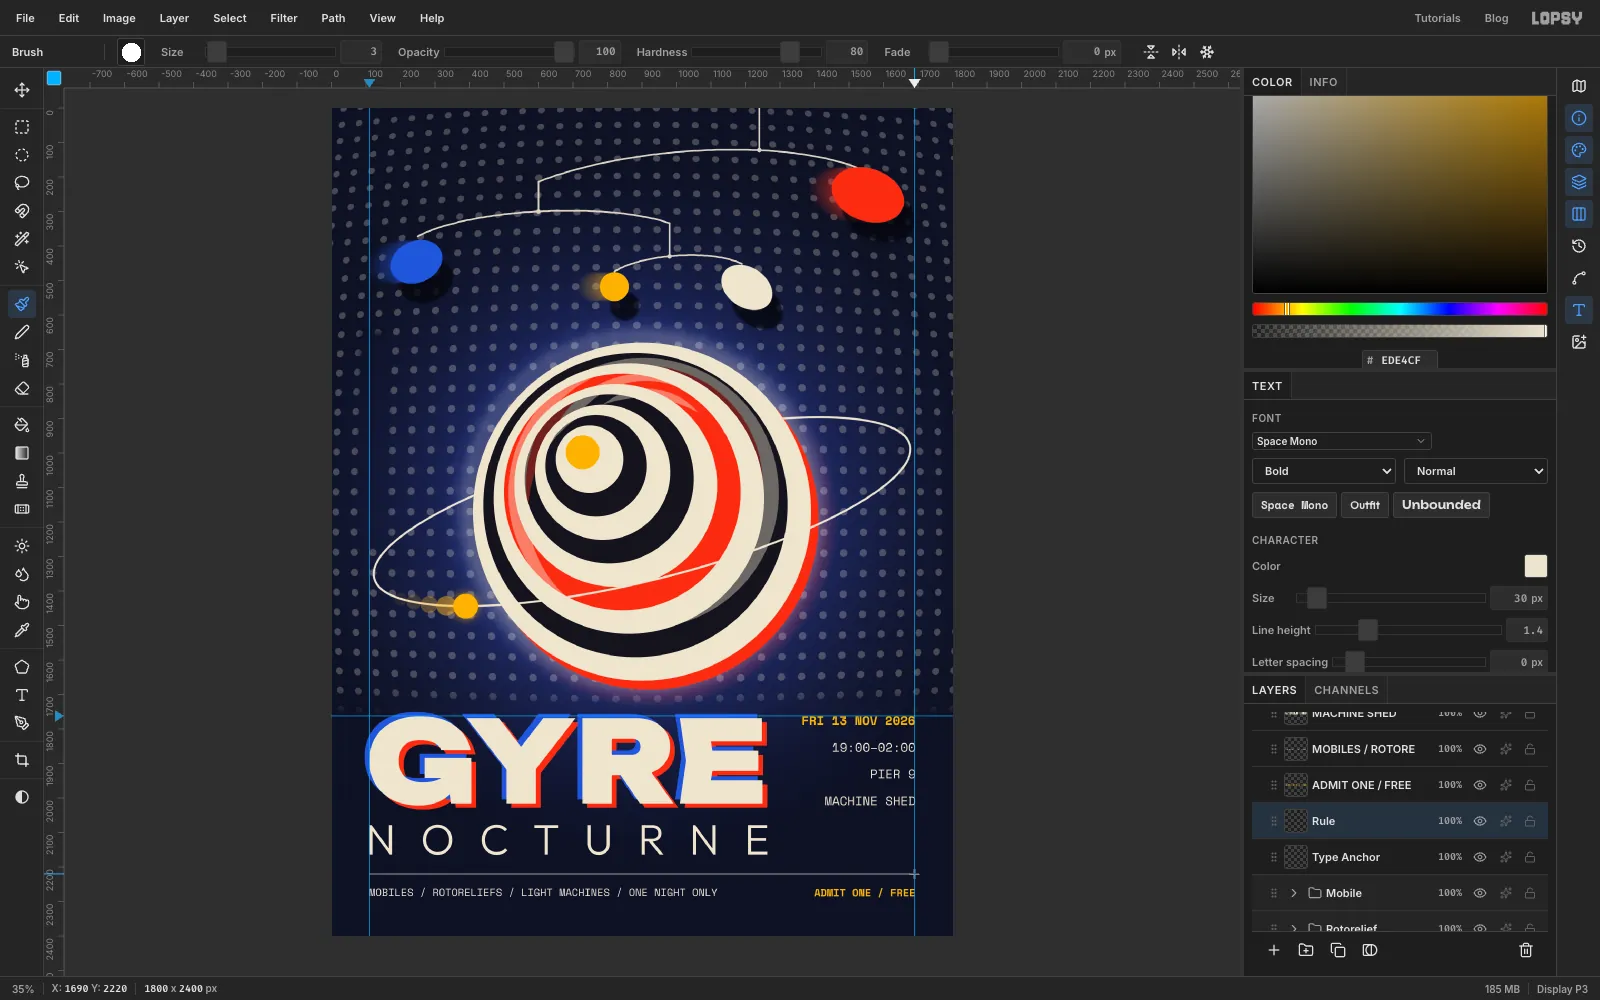
Click Type Anchor, set Align back to Left, and type the footer in Space Mono Regular, Size 30, cream: MOBILES / ROTORELIEFS / LIGHT MACHINES / ONE NIGHT ONLY. Then set Align to Right, click on the 1690 guide, and type ADMIT ONE / FREE in Bold saffron at the same size.
Leave 56 px under NOCTURNE, then put a rule there. Add a layer called Rule, pick the Brush at Size 3 in cream, click on the 110 guide and Shift-click on the 1690 guide. Move the footer 40 px below the rule, with the first line on the left guide and ADMIT ONE / FREE on the same line at the right.
The bottom margin now matches the 110 px side margins.
-
Turn the tagline on its side
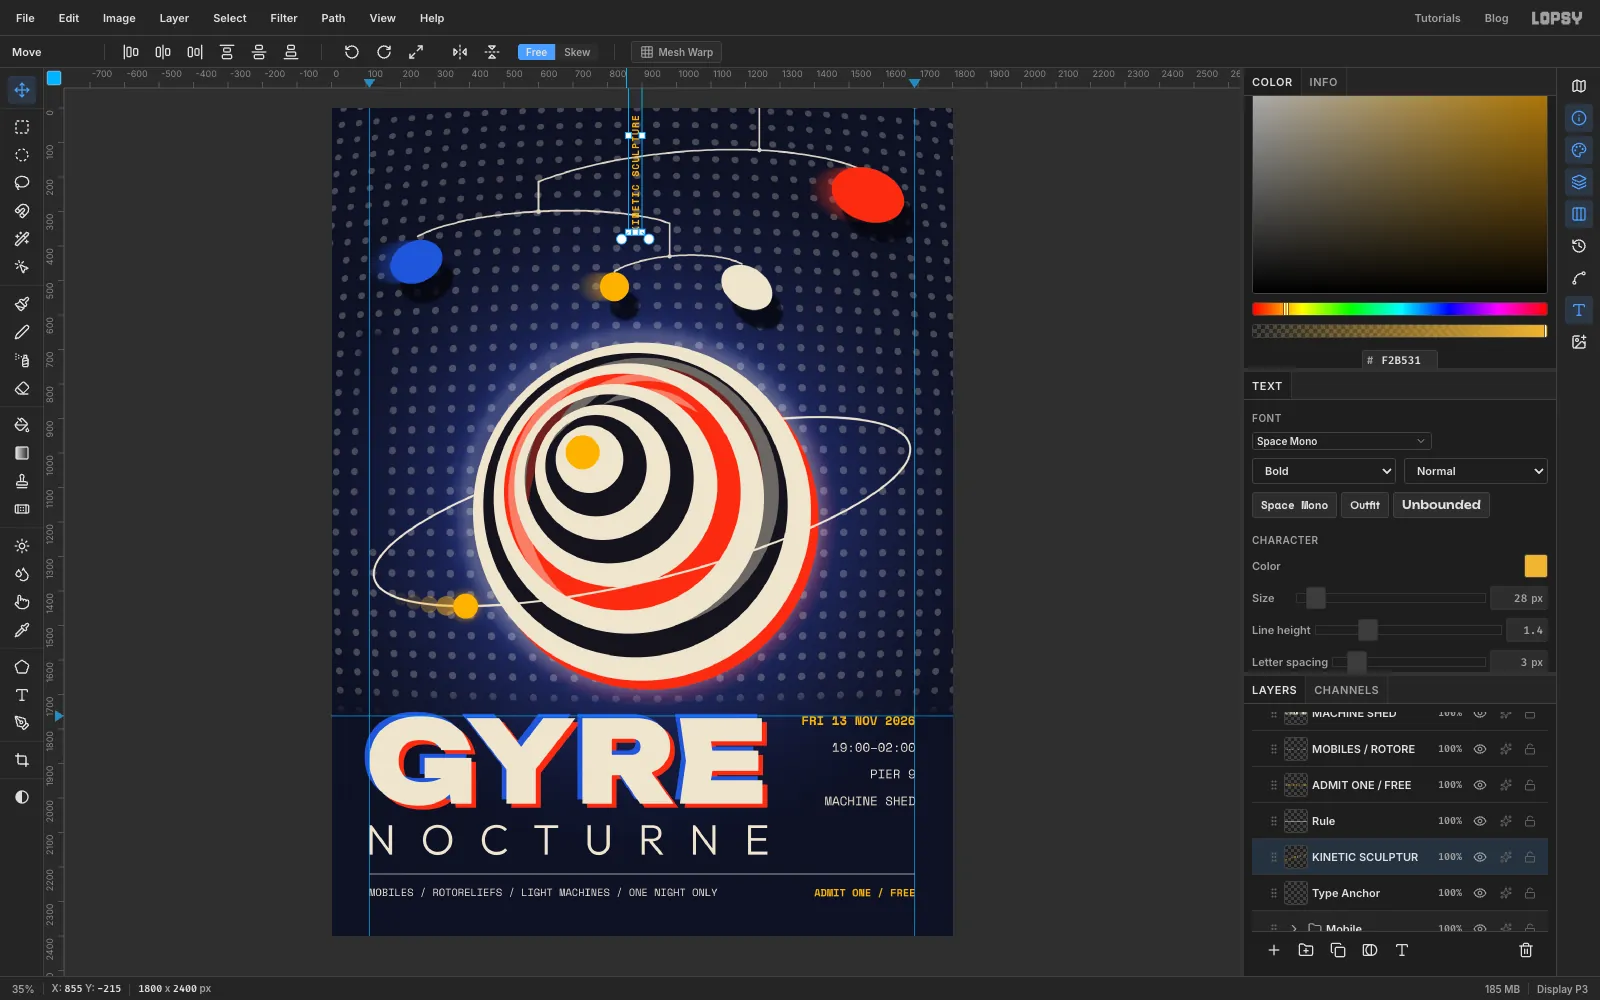
Click Type Anchor, set Align back to Left, and type KINETIC SCULPTURE AFTER DARK in Space Mono Bold, Size 28, saffron. In the Text panel, give it 3 px of letter spacing.
Pick the Move tool. Text layers get rotation handles without a selection. Hold Cmd and drag a corner rotation handle counter-clockwise until the line stands upright. Cmd snaps the angle to 15° steps, so it lands exactly on 90°. The text stays editable.
-
Seat the tagline on the margin
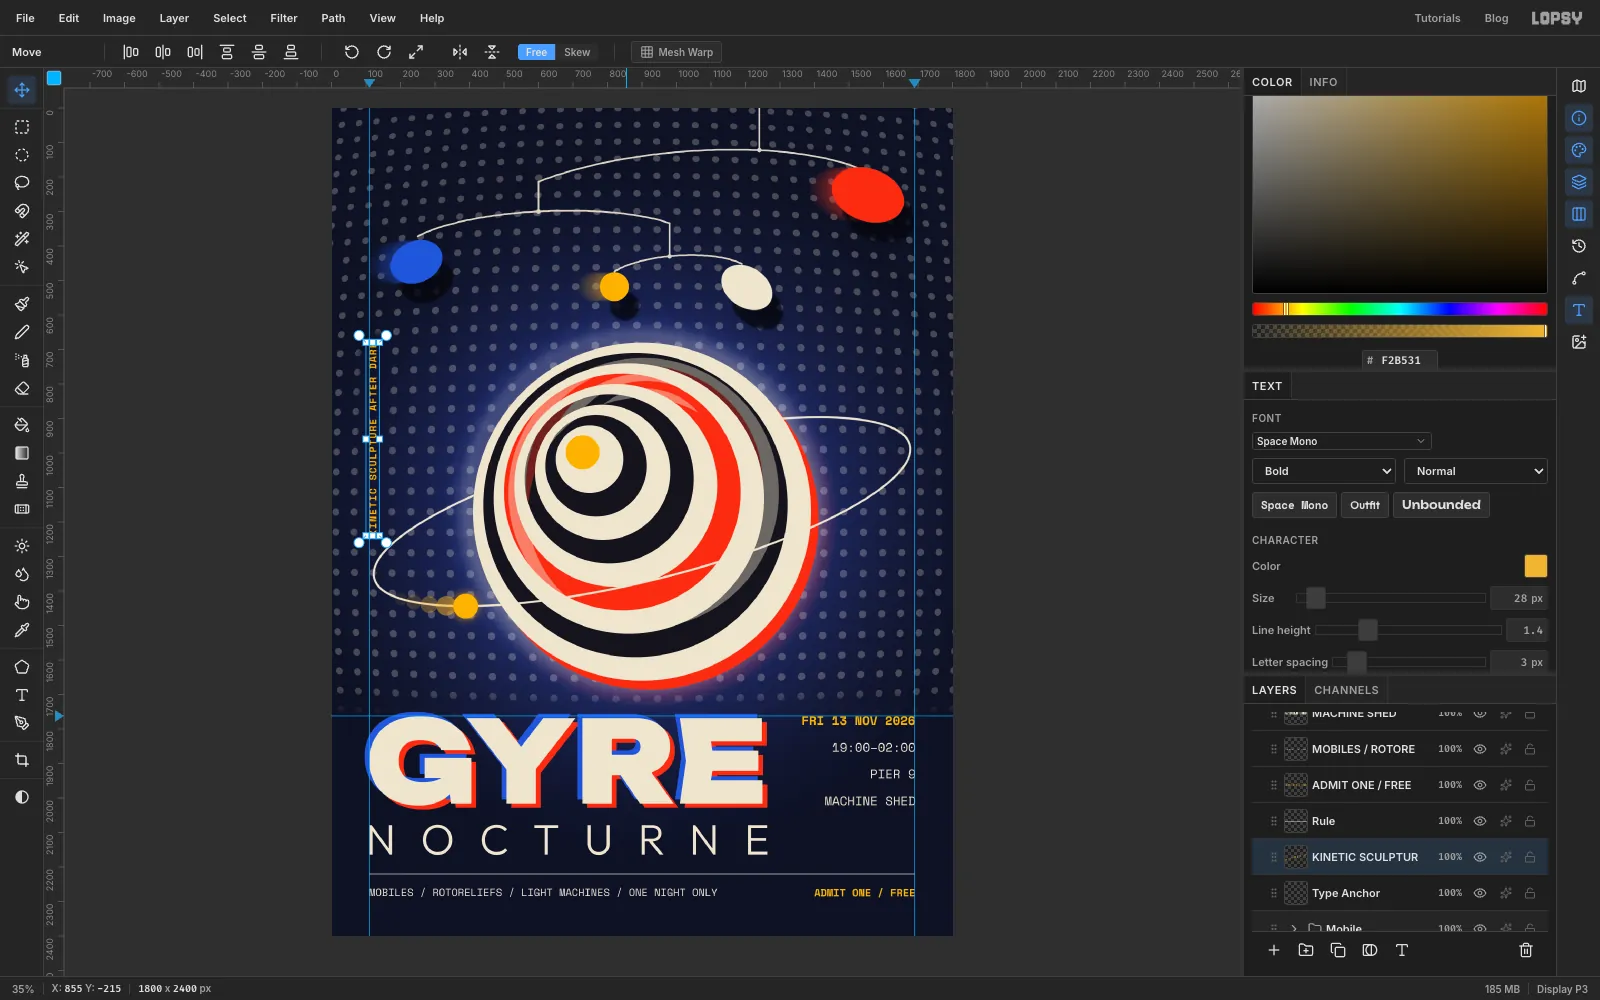
Move the tagline so it sits on the 110 guide, with its top level with the top of the disc at y 680. It now reads bottom to top up the same margin as GYRE, NOCTURNE, the rule and the footer. It sits in the strip you cleared of dots, and well clear of the orbit's left end.
-
Add print grain
Every text layer was created just above Type Anchor, so the tagline is the lowest of them. Click the tagline layer and add a layer called Grain. It lands above the artwork and the tagline but under the rest of the type, so the small letters stay clean. Select the whole canvas, fill it with , and deselect. Run Filter → Add Noise… with Amount 30, Mono and Gaussian. Set Grain to Overlay at 45%. The grey disappears and leaves a fine grain over the artwork.
Hide the guides with View → Show Guides, save with File → Save Project, and choose File → Quick Export PNG.