Paint a Liquid Metal Dragonfly Rising From a Mercury Pond
Turn a dragonfly photo into liquid chrome with a Curves wave and Gradient Map, then pull a mercury strand from a sunset pond with ripples and a reflection.

Chrome is a mirror bent into a shape. It doesn't have a colour of its own. It shows its surroundings in hard bands: a pale crest where it faces the sky, a sharp dark line where the horizon would be, and a glint where the sun hits. Liquid metal adds one more idea. It flows, so it has beads, drips and a meniscus where it meets more of itself.
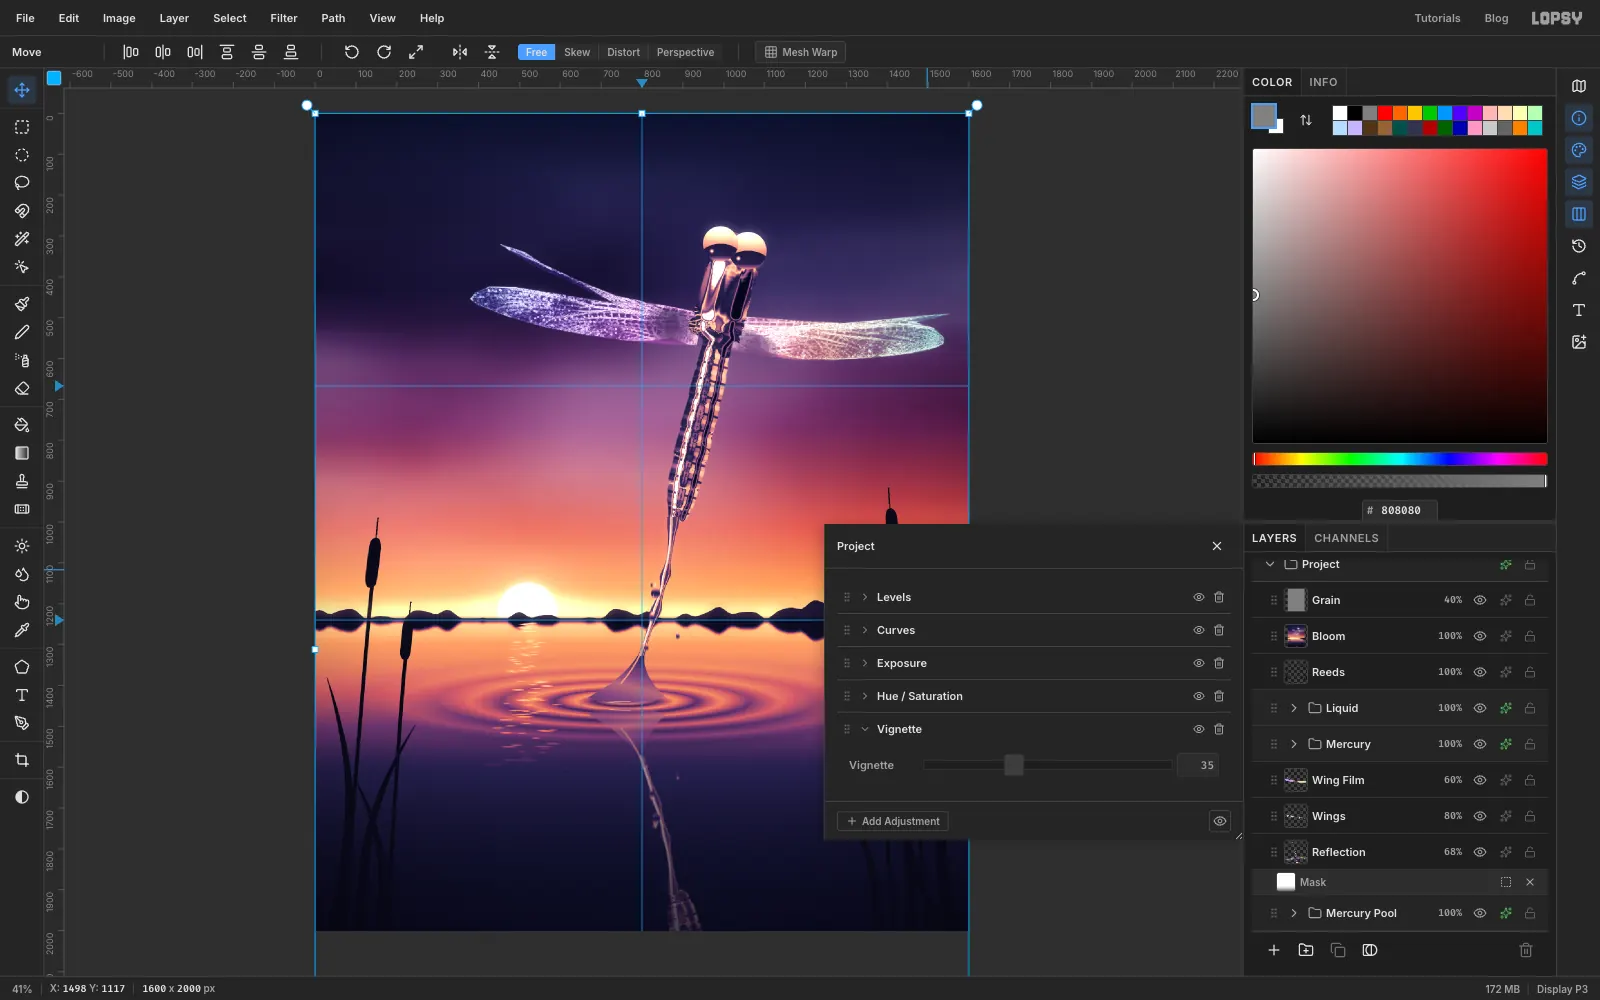
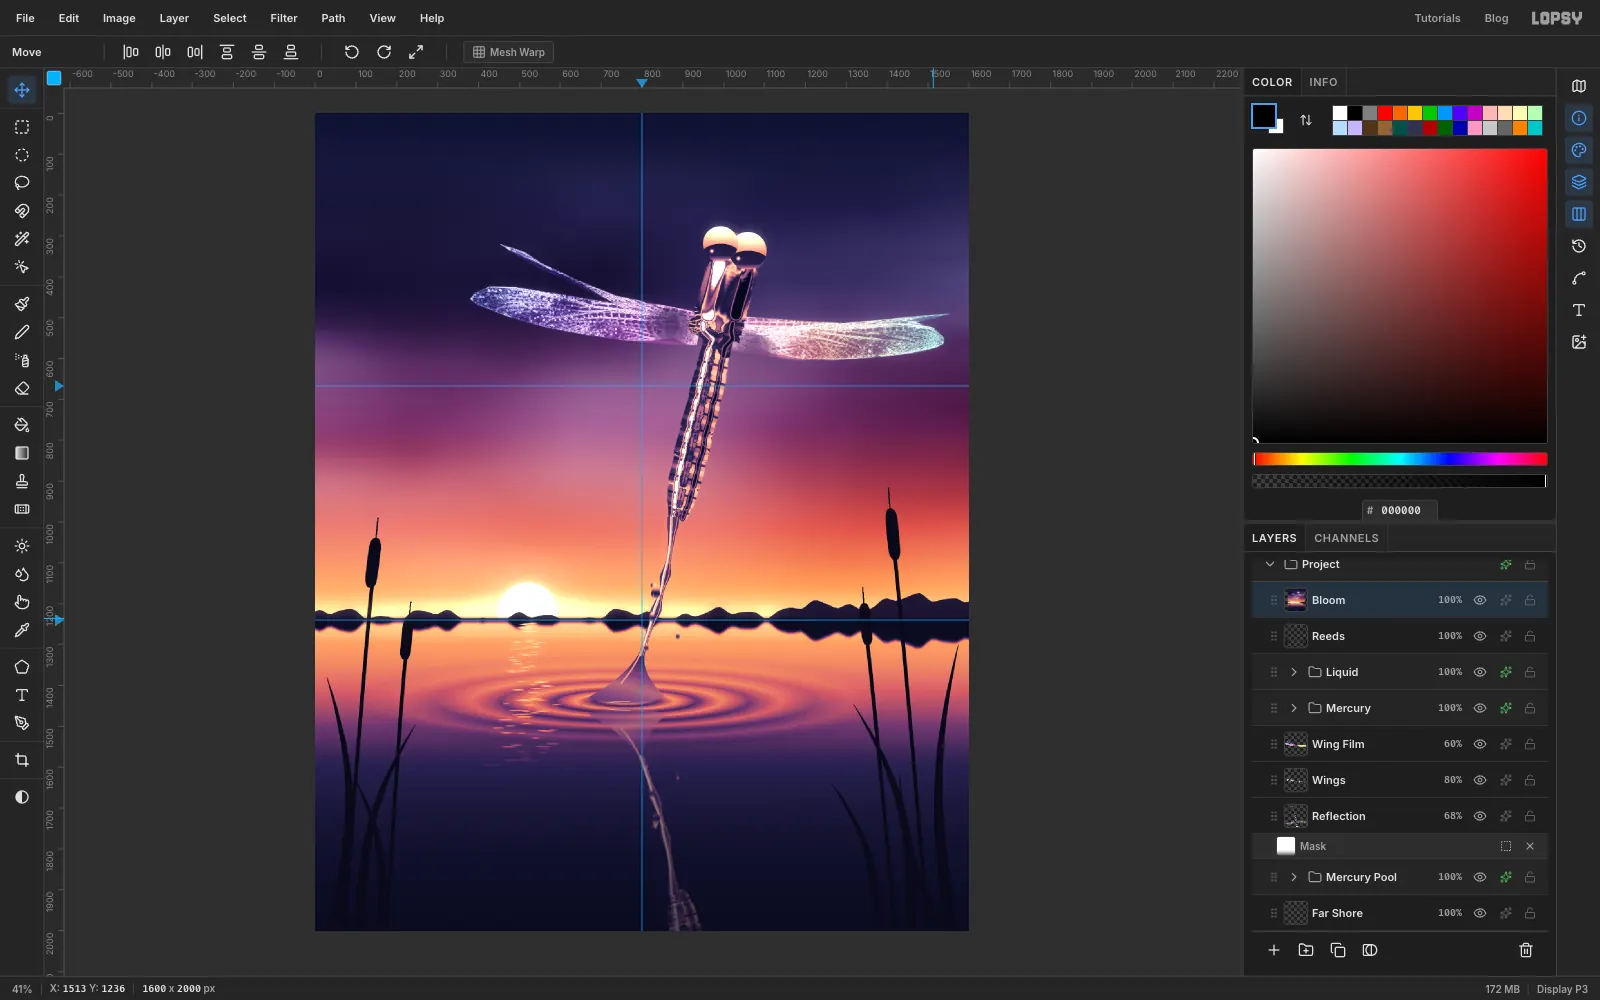
In this tutorial you'll paint Dragonfly Rising, a 1600 × 2000 px digital painting. A dragonfly made of mercury climbs out of a mercury pond at sunset, still joined to the water by a thin pulled strand. The dragonfly starts as a real photo: a CC0 photo of a male Crocothemis servilia by Jeevan Jose on Wikimedia Commons. Two tricks turn it into metal. A Curves adjustment with a wave-shaped curve folds the greys into chrome bands. A Gradient Map on the same group then tints those bands with the sunset colours. Along the way you'll use layer masks, Emboss ripples, Skew, Copy Merged, Mesh Warp and the Pen tool.
The palette:
-
Sky
-
Sun
-
glow
-
Ridge
-
reeds
-
Pool map
-
Chrome map
-
Wing film
-
Paint a sunset sky and set up guides
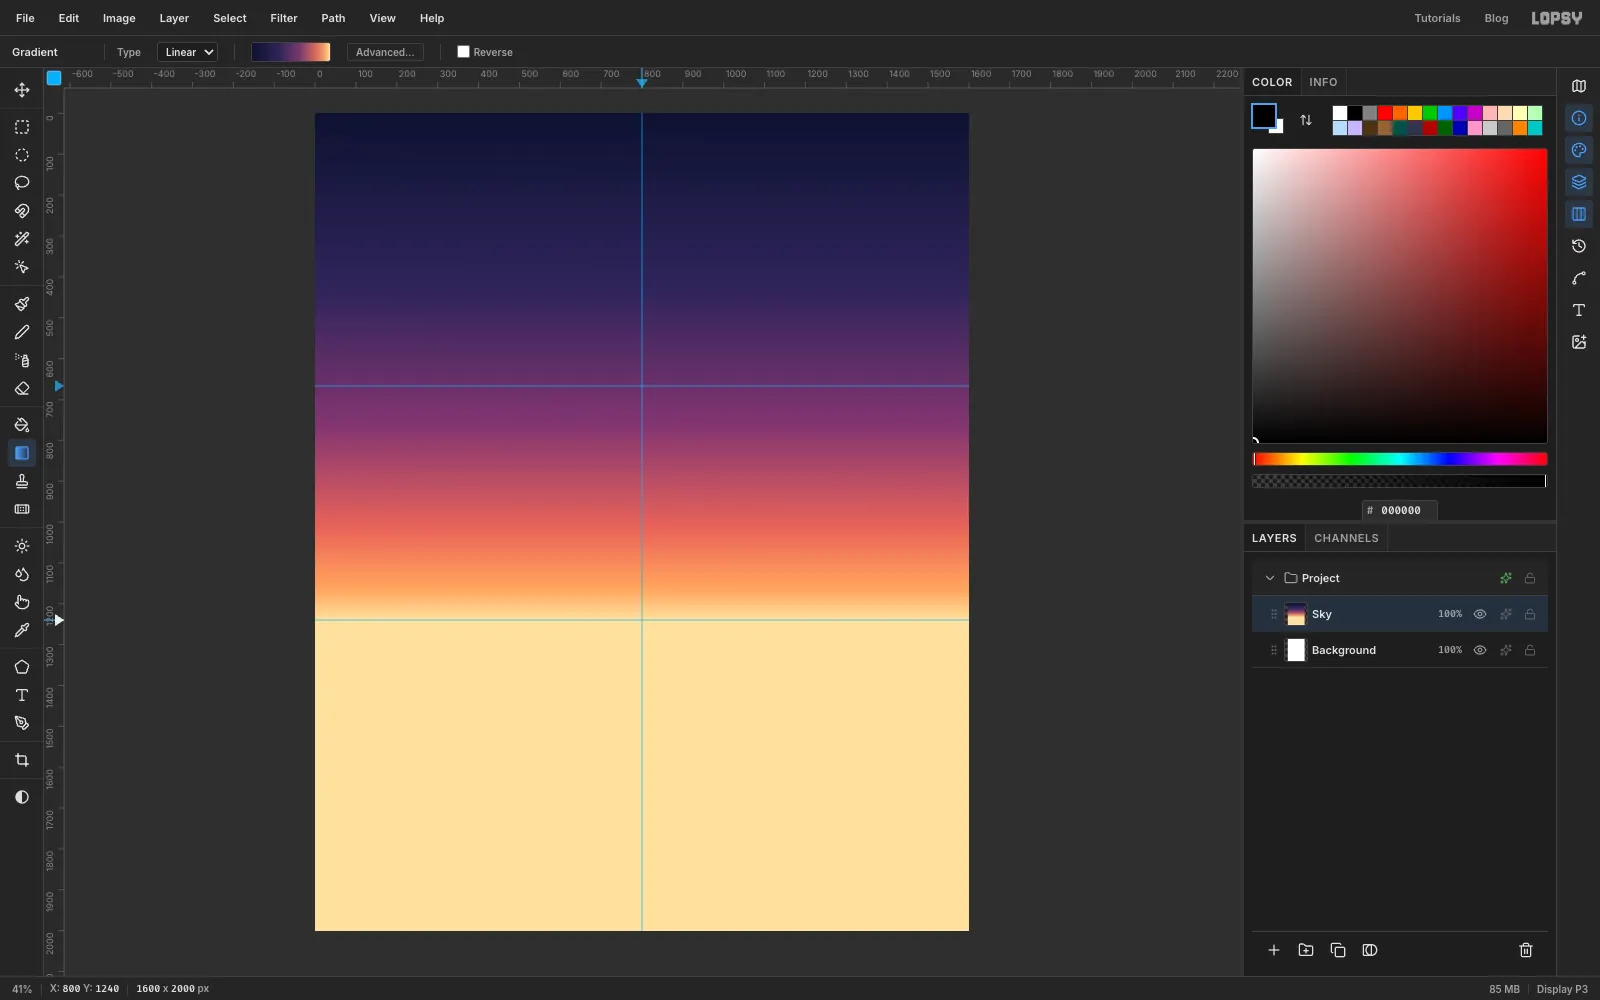
Choose File → New and create a 1600 × 2000 pixel document with a white background. Click the left ruler about three fifths of the way down the canvas (at 1240 px) to drop the horizon guide. Click it again a third of the way down (667 px); it's a thirds line for judging where the wings sit later. Then click the top ruler in the middle (800 px) for a centre line.
Double-click Layer 1 and rename it Sky. Pick the Gradient tool, keep Type on Linear, click Advanced… and set six stops:
- at 0%
- at 35%
- at 62%
- at 82%
- at 94%
- at 100%
Drag straight down from the top edge to the horizon guide. Below the horizon the gradient stays pale gold. The pond will cover that part.
-
Streak some clouds across it
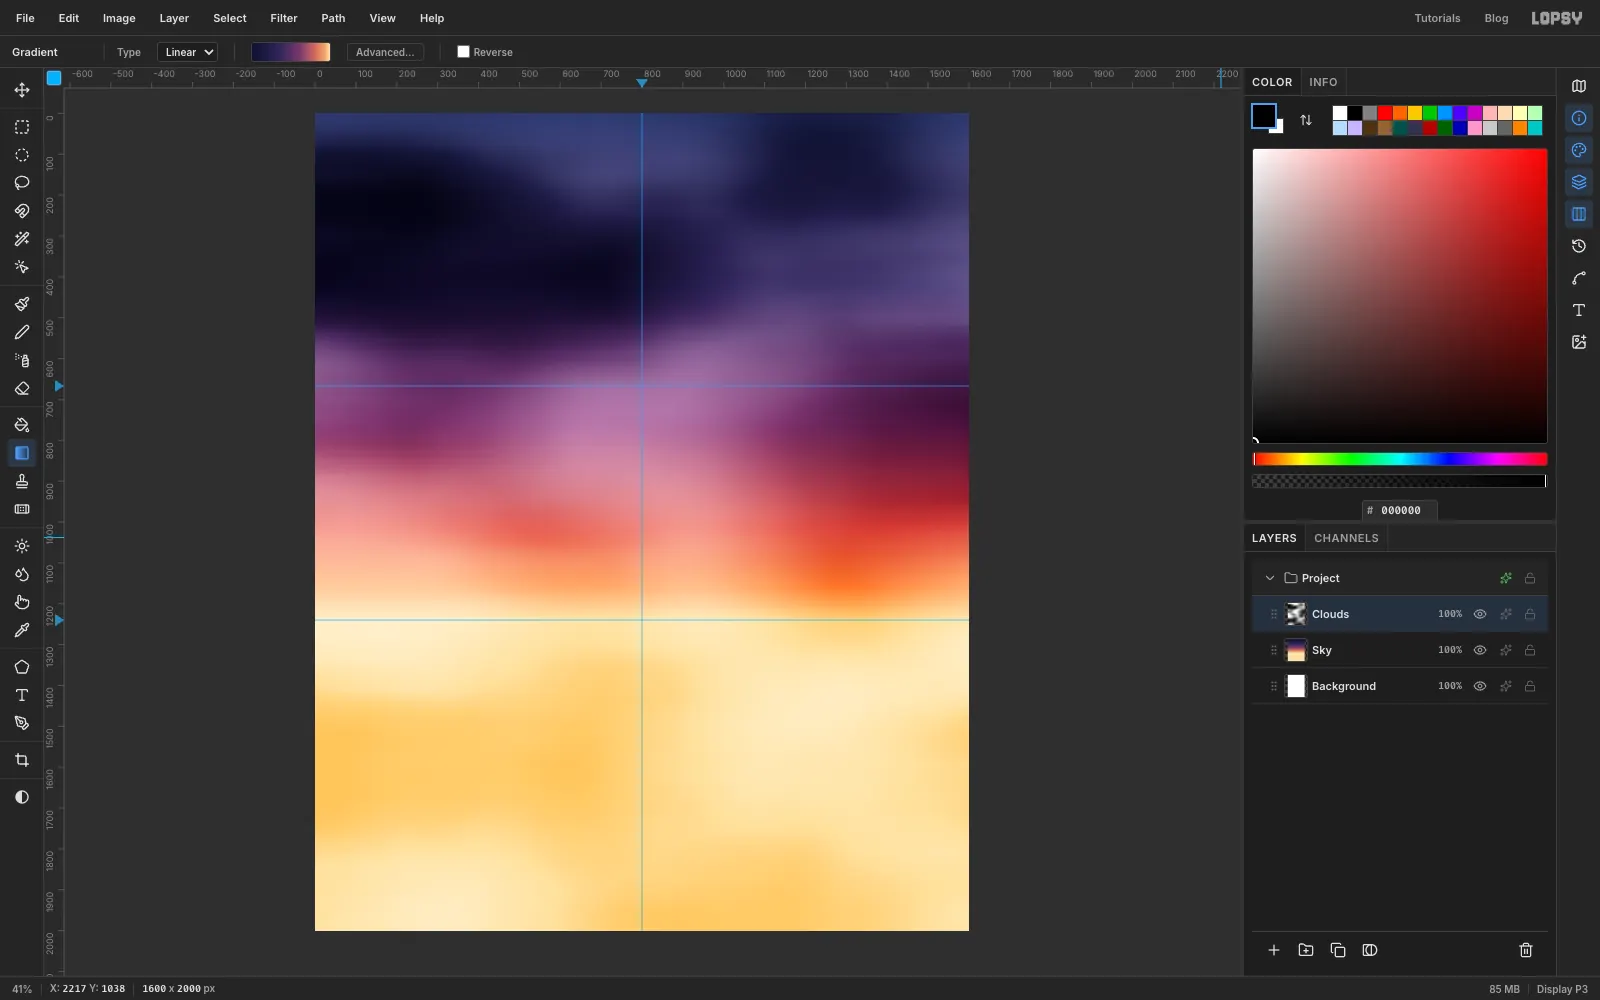
Add a layer named Clouds. Run Filter → Clouds… with Scale 5. Then run Filter → Motion Blur… with Angle 0 and Distance 400, which pulls the blobs into long, flat sunset streaks.
Open the layer's effects (the sparkle button on its row) and set the Blend mode to Soft Light. The grey streaks now only lighten and darken the sky under them.
-
Fade the clouds with a layer mask
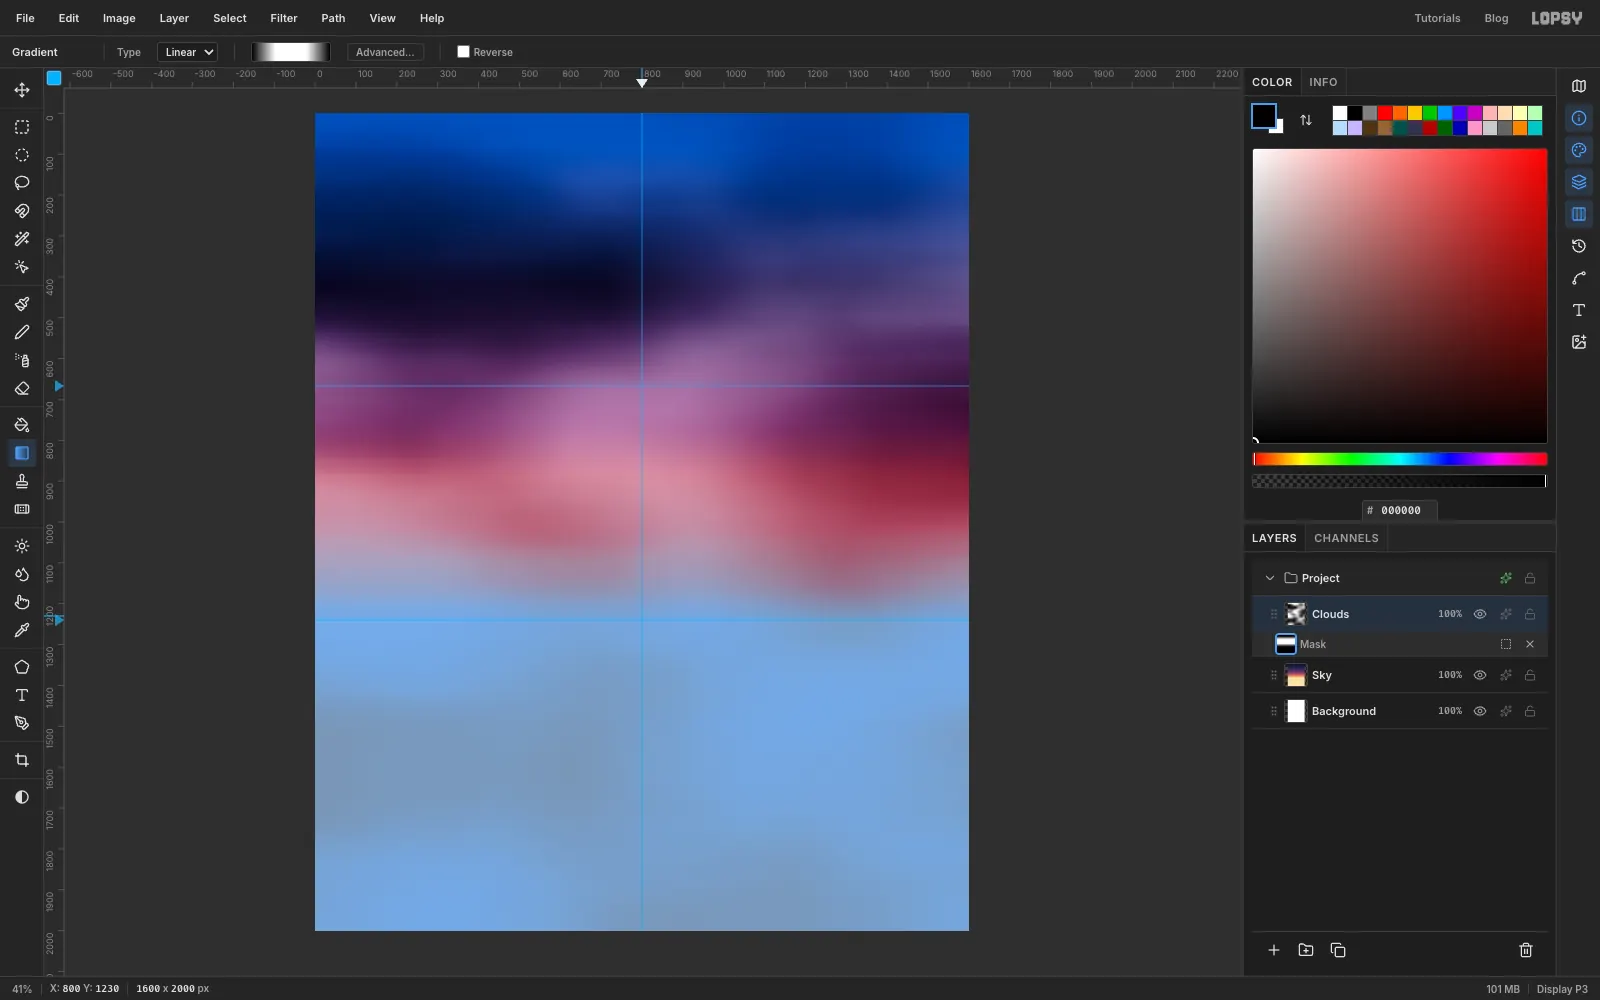
Click Add Mask at the bottom of the Layers panel, then click the mask thumbnail under the Clouds row to edit it. The canvas turns blue while you're in mask mode. That's normal.
With the Gradient tool, set four stops: black at 0%, white at 30%, white at 70% and black at 100%. Drag from just below the top edge down to the horizon. The clouds now fade out at the top of the sky and in the bright glow at the horizon. Click the Clouds layer name to leave mask mode, and lower its opacity to 70%.
-
Set the sun on the horizon
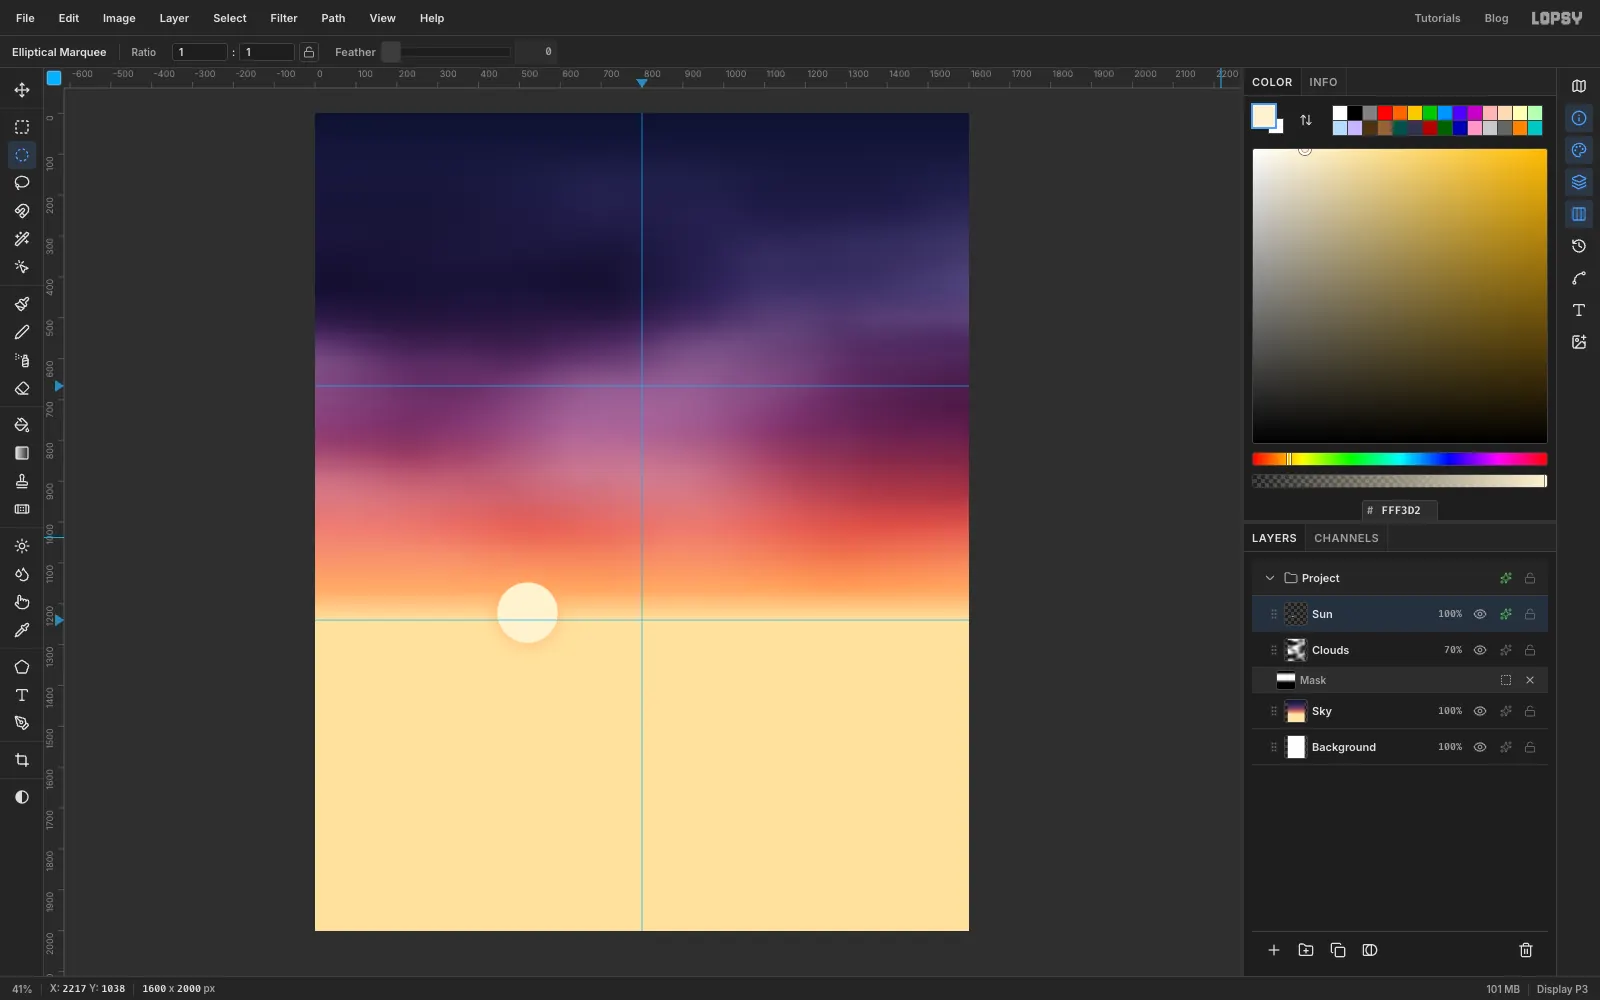
Add a layer named Sun and set the foreground colour to . With the Elliptical Marquee, drag a circle about 150 px across. Centre it just above the horizon guide, about a third of the way in from the left. Choose Edit → Fill, then Select → Deselect.
Open the layer's effects and turn on Outer Glow. Set Size to 140, Opacity to 85 and the colour to . Only the top half of the sun will show once the pond is in.
-
Cut a low ridge along the horizon
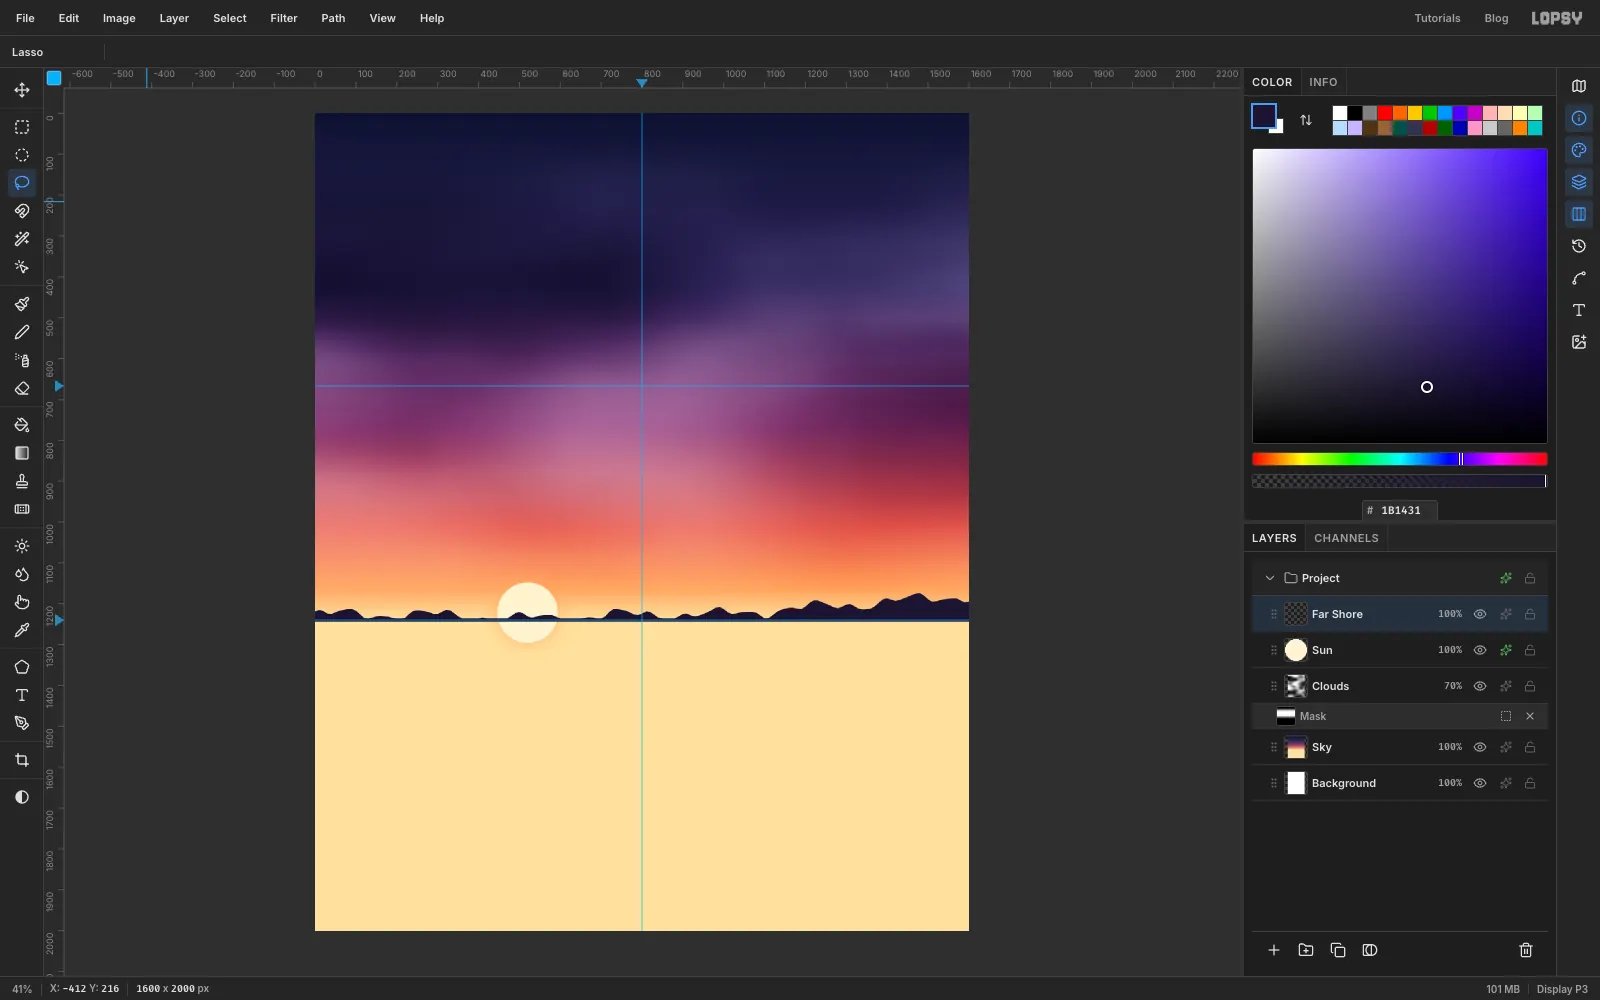
Add a layer named Far Shore and set the foreground to . With the Lasso, draw a gently bumpy ridge along the horizon. Start off the left edge, keep it low near the sun, and let it climb a little toward the right. Then come back along the bottom just under the guide. Fill it and deselect.
-
Start the pond with a snapped marquee
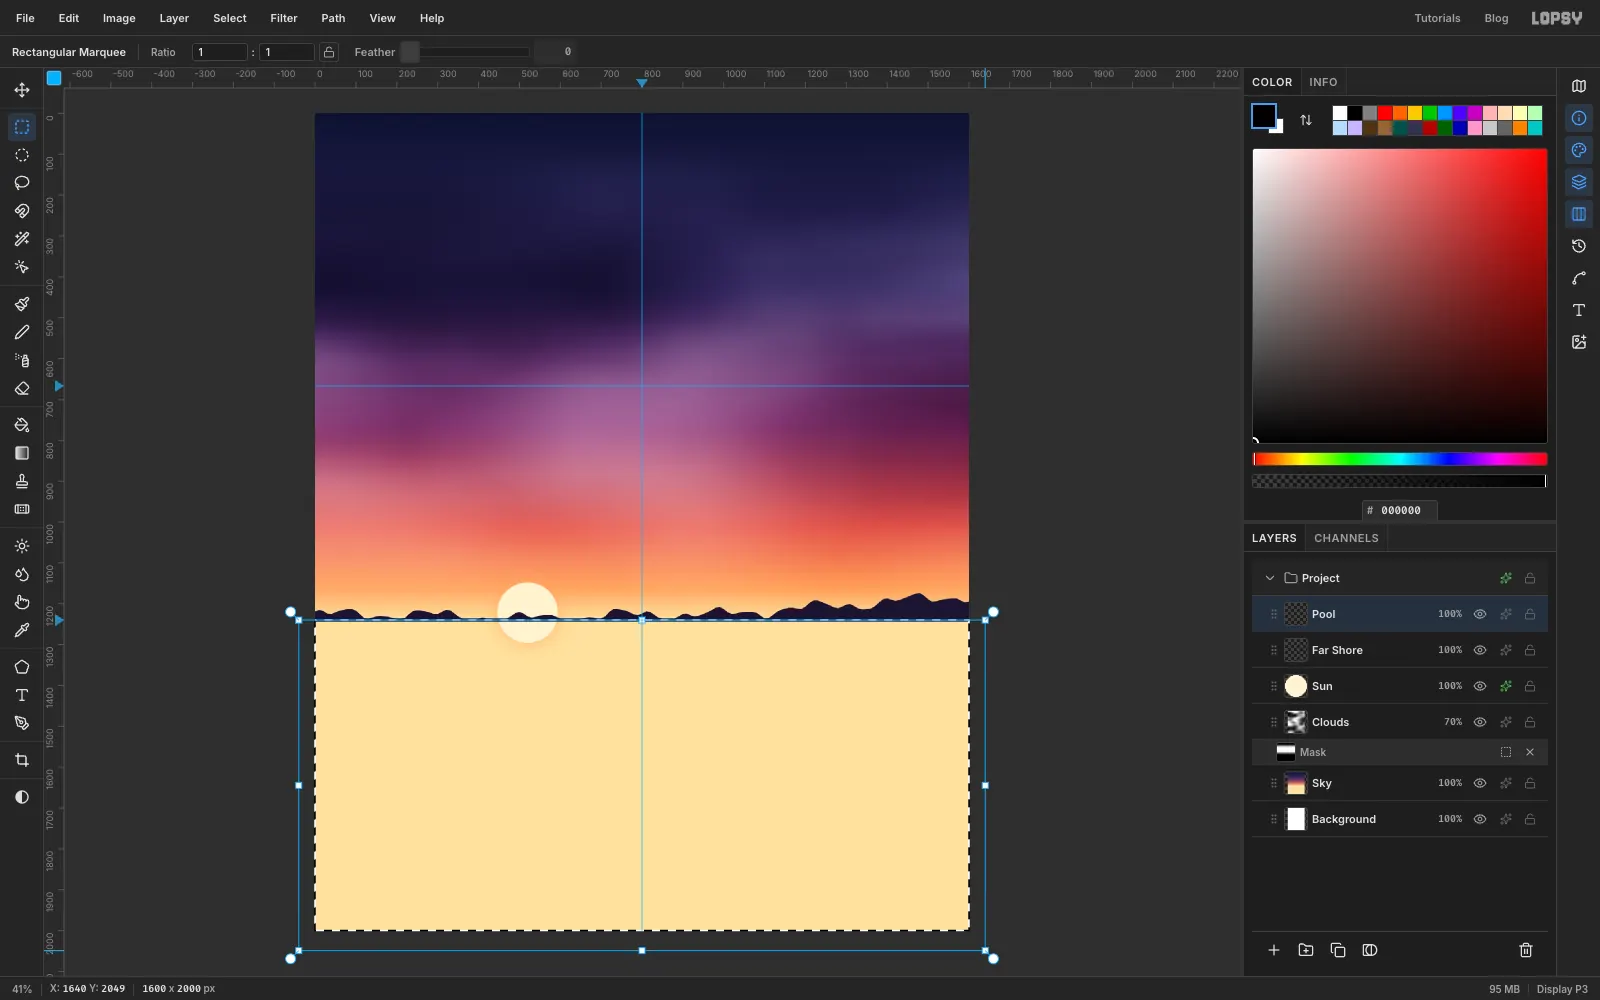
Add a layer named Pool. With the Rectangular Marquee, start the drag just under the horizon guide and outside the left edge. Drag past the bottom right corner. Snap to Guides pulls the top edge onto the horizon, so the water meets the ridge exactly.
-
Paint the water in greys and mirror the ridge
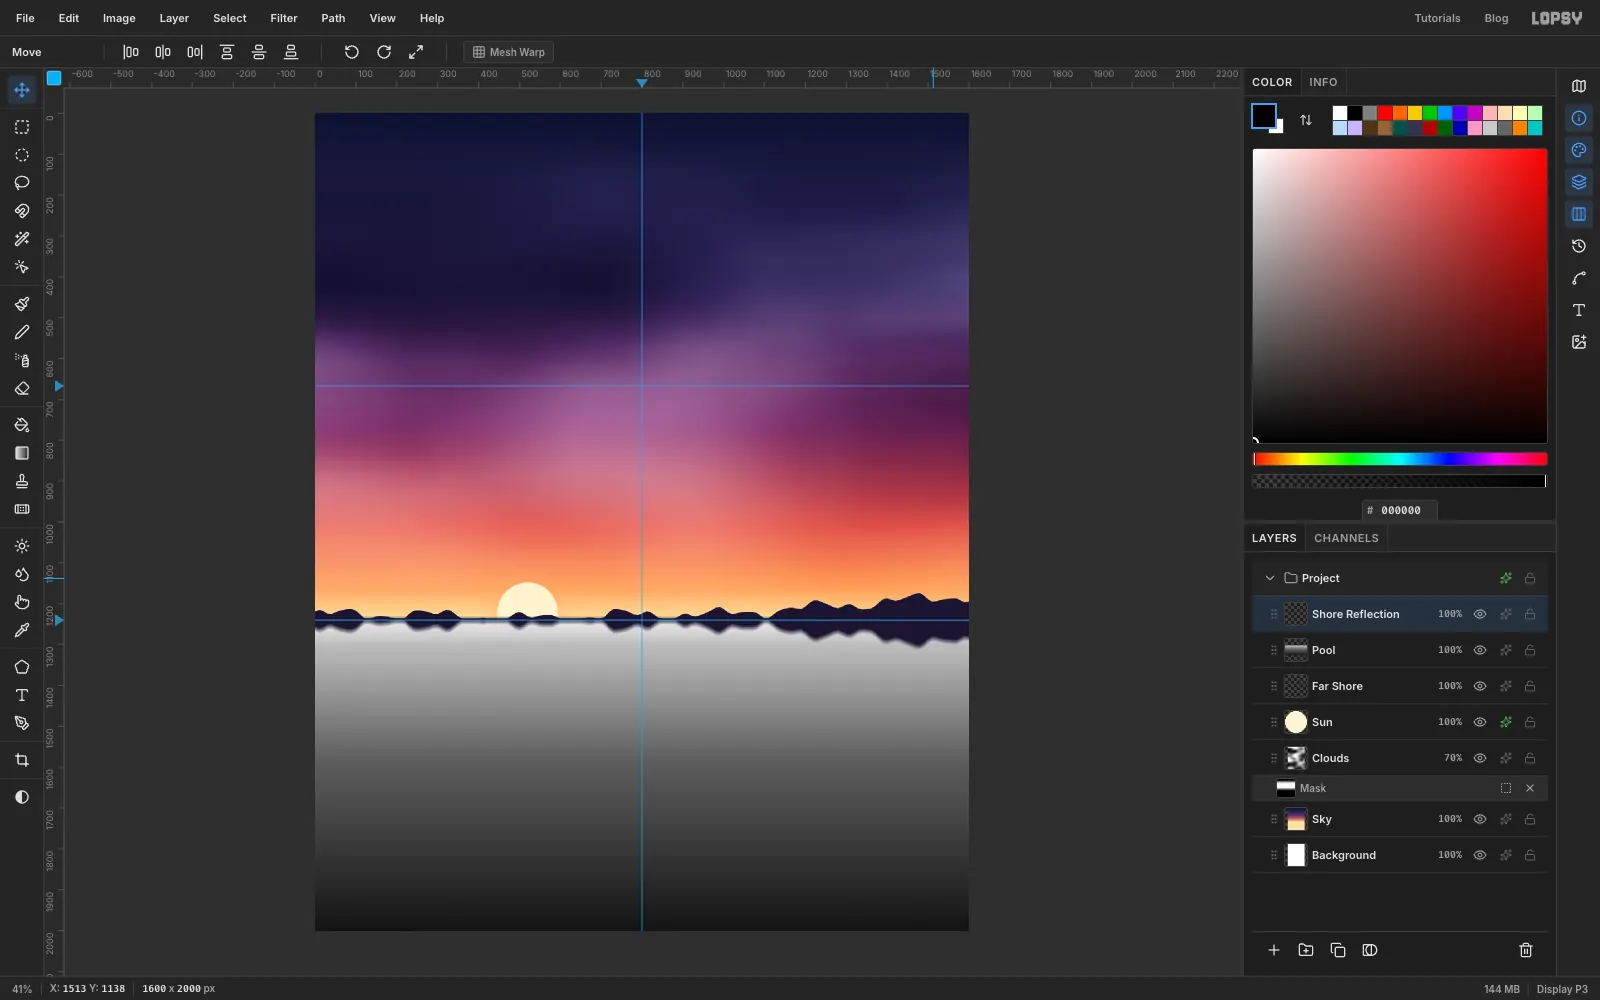
With the marquee still active, make a linear gradient with these stops: at 0%, at 8%, at 45% and at 100%. Drag from the horizon to the bottom edge, then deselect. Near the horizon the water reflects the bright sky. Closer to you it reflects the dark sky overhead.
Now the ridge's reflection. Click Far Shore, press Cmd+A and Cmd+C, deselect, click Pool, and press Cmd+V. Rename the paste Shore Reflection and choose Image → Flip Vertical. Pick the Move tool and nudge the copy with Shift+↓ or Shift+↑ until the upside-down ridge hangs from the horizon line, touching the real one. Finish with Filter → Motion Blur… at Angle 90, Distance 14 to soften it like water.
-
Scatter sun glitter under the sun
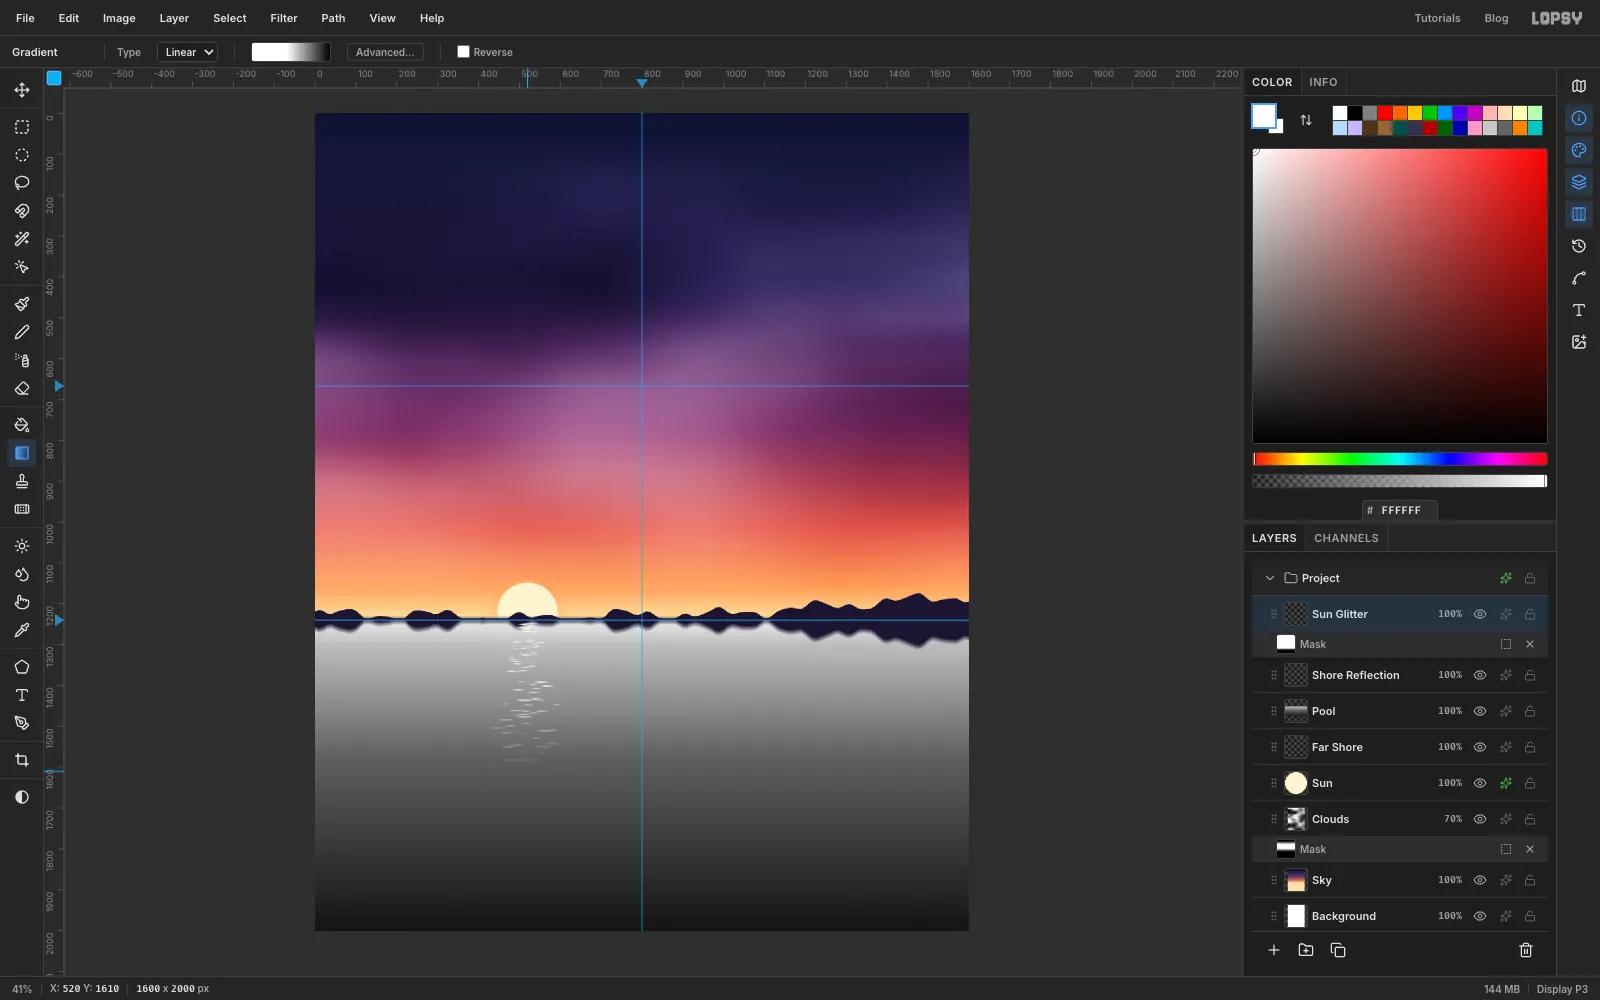
Add a layer named Sun Glitter and pick the Brush with white. Under the sun, paint short horizontal flecks: click, then Shift-click a little to the right. Keep them tiny (size 2–3) and tightly bunched just under the horizon. Make them a little longer, larger (size 4–5) and more spread out as you come down the water. Vary the Opacity between about 35% and 100% as you go. Around a hundred flecks looks right.
Run Filter → Motion Blur… at Angle 0, Distance 14, then Filter → Gaussian Blur… with Radius 1.5. Click Add Mask, then click the new mask thumbnail so you're painting on the mask. Drag a gradient (white, white at 45%, black) from the horizon to about a fifth of the way up from the bottom, so the glitter dies out before the deep water. Click the layer name to leave mask mode.
-
Group the pond and colour it with a Gradient Map
Click Sun Glitter, Shift-click Pool to select all three pond layers, and choose Layer → Group Layers. Rename the group Mercury Pool.
Open the group's effects. Groups show an adjustment stack instead of layer effects. Click Add Adjustment → Gradient Map and set six stops: at 0%, at 30%, at 55%, at 75%, at 90% and at 100%. Every grey in the group now maps to a sunset colour, so the water picks up the sky.
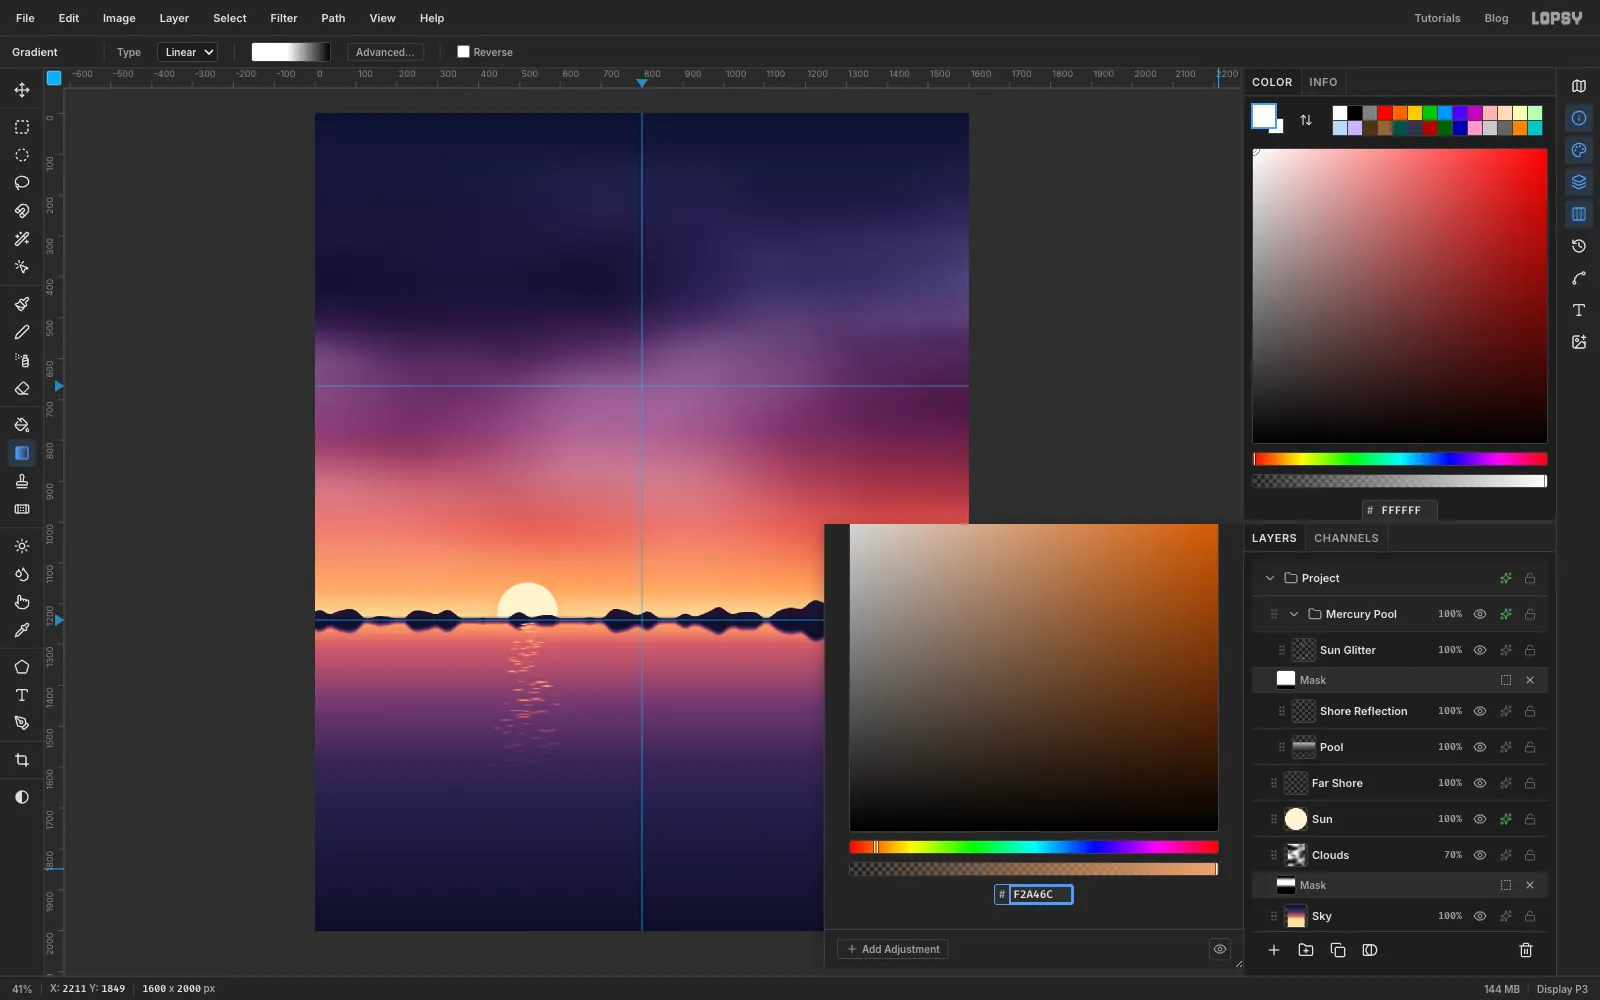
-
Give the water more polish with Curves
Click Add Adjustment → Curves. Click the curve a quarter of the way along and drag that point a little down. Then click about 60% of the way along and lift it a little. This gentle S makes deeper darks and brighter mids, which reads more like polished metal than calm water.
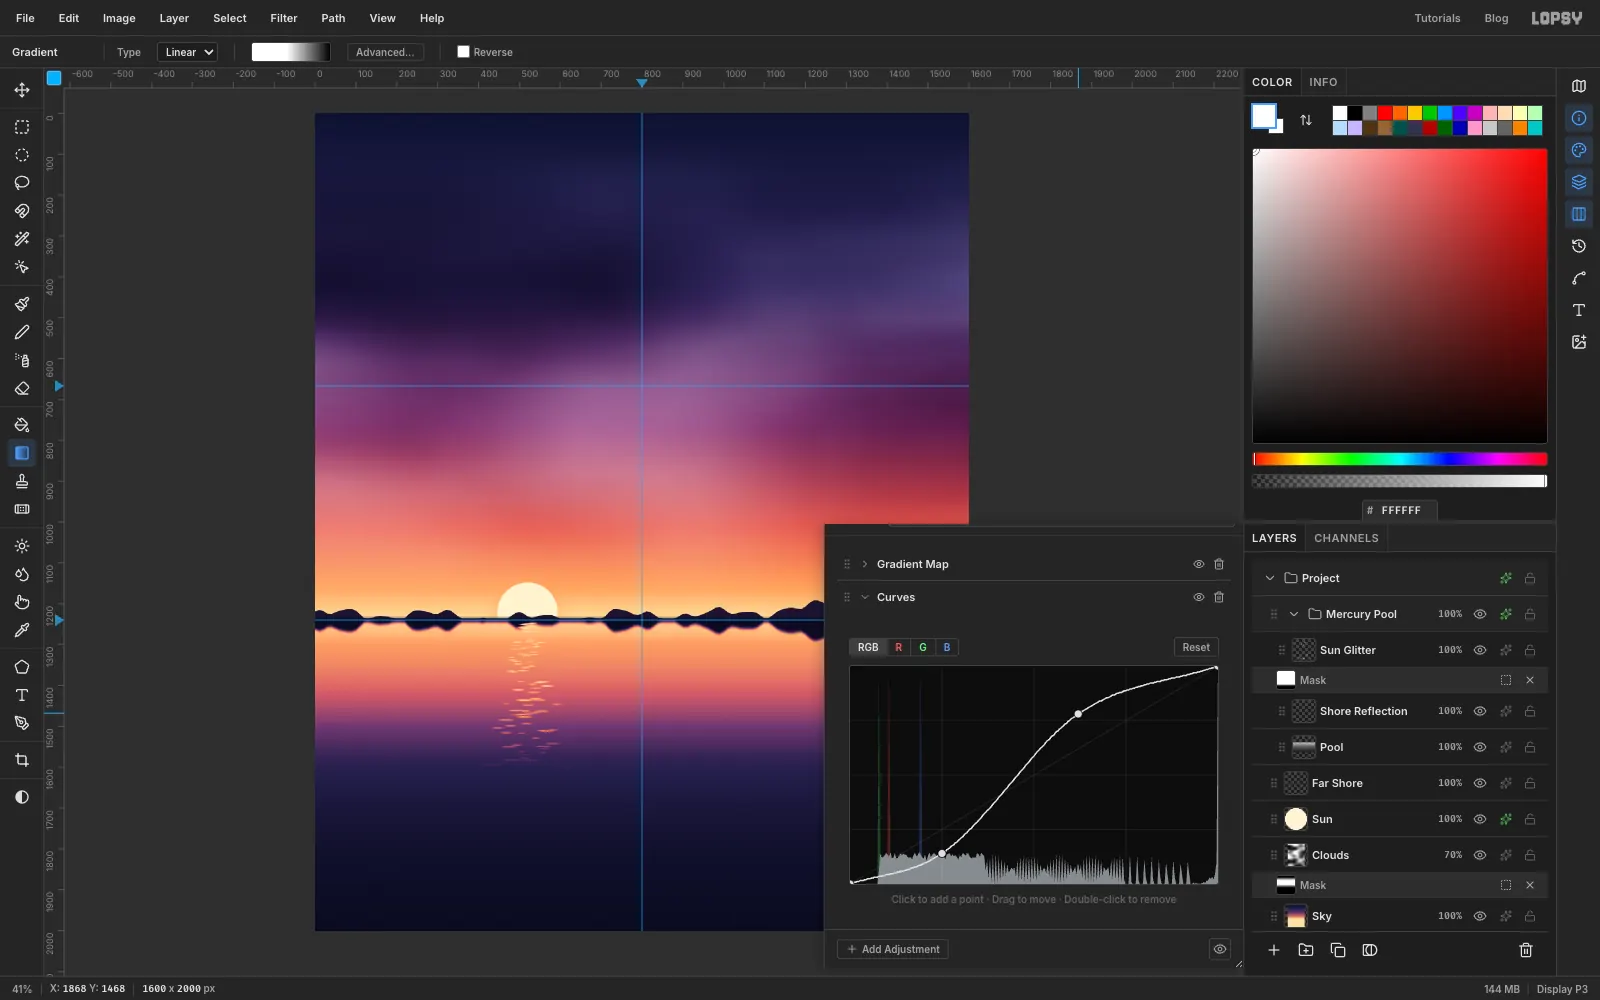
-
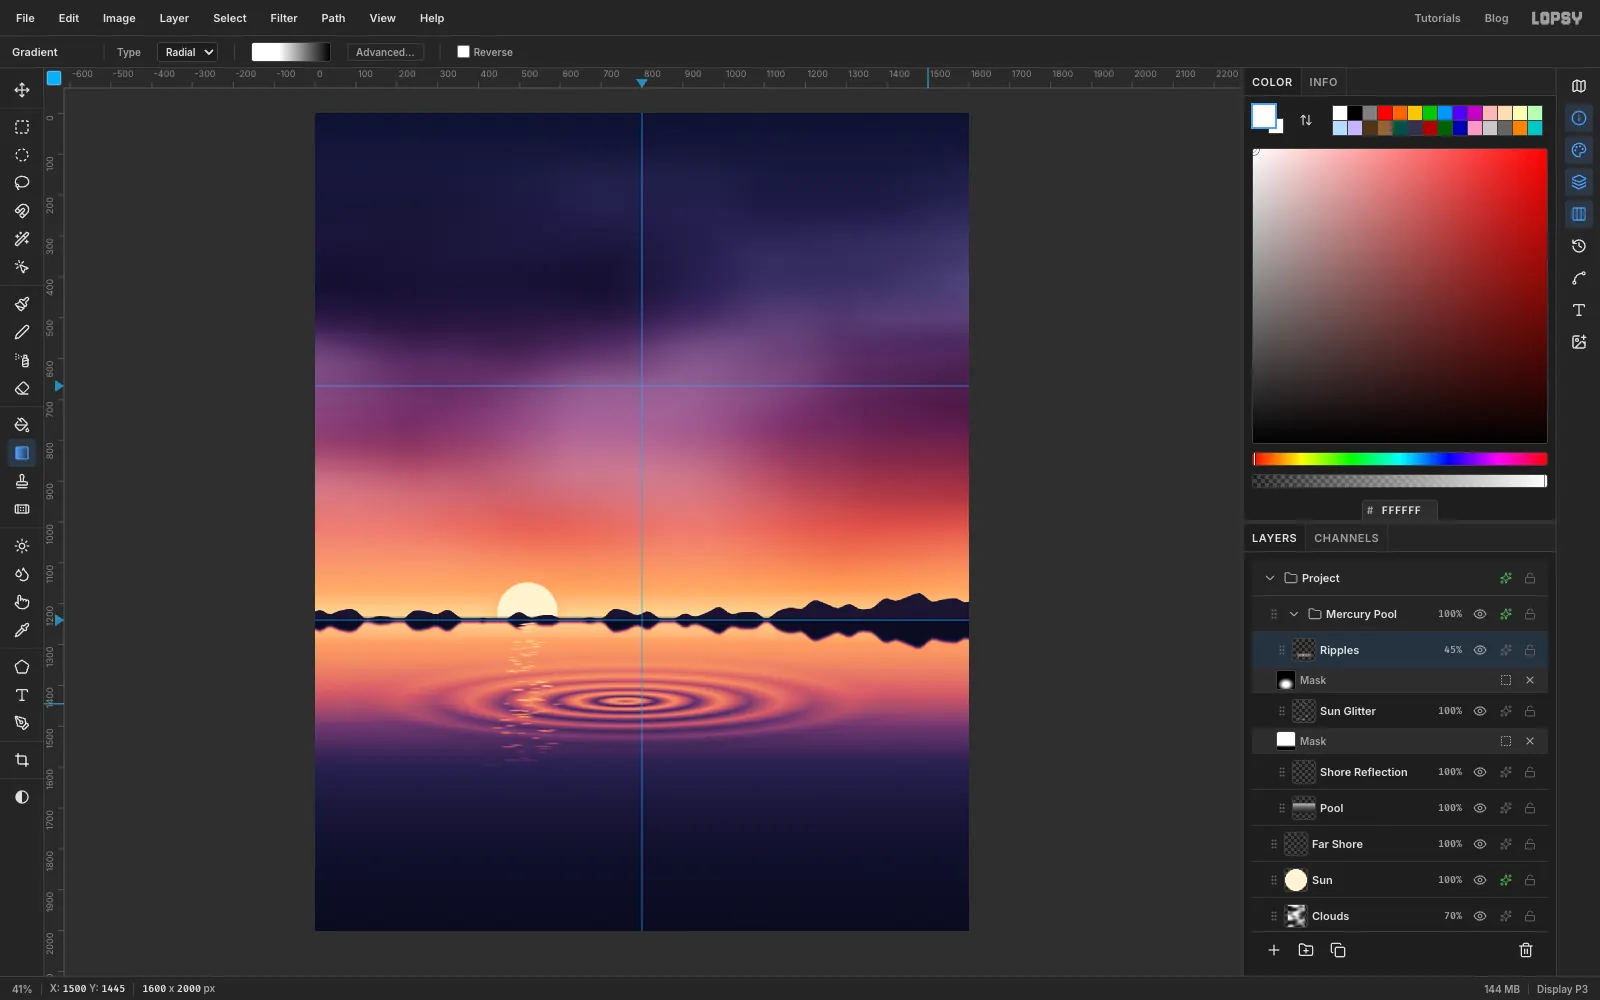
Draw ripple rings with a radial gradient
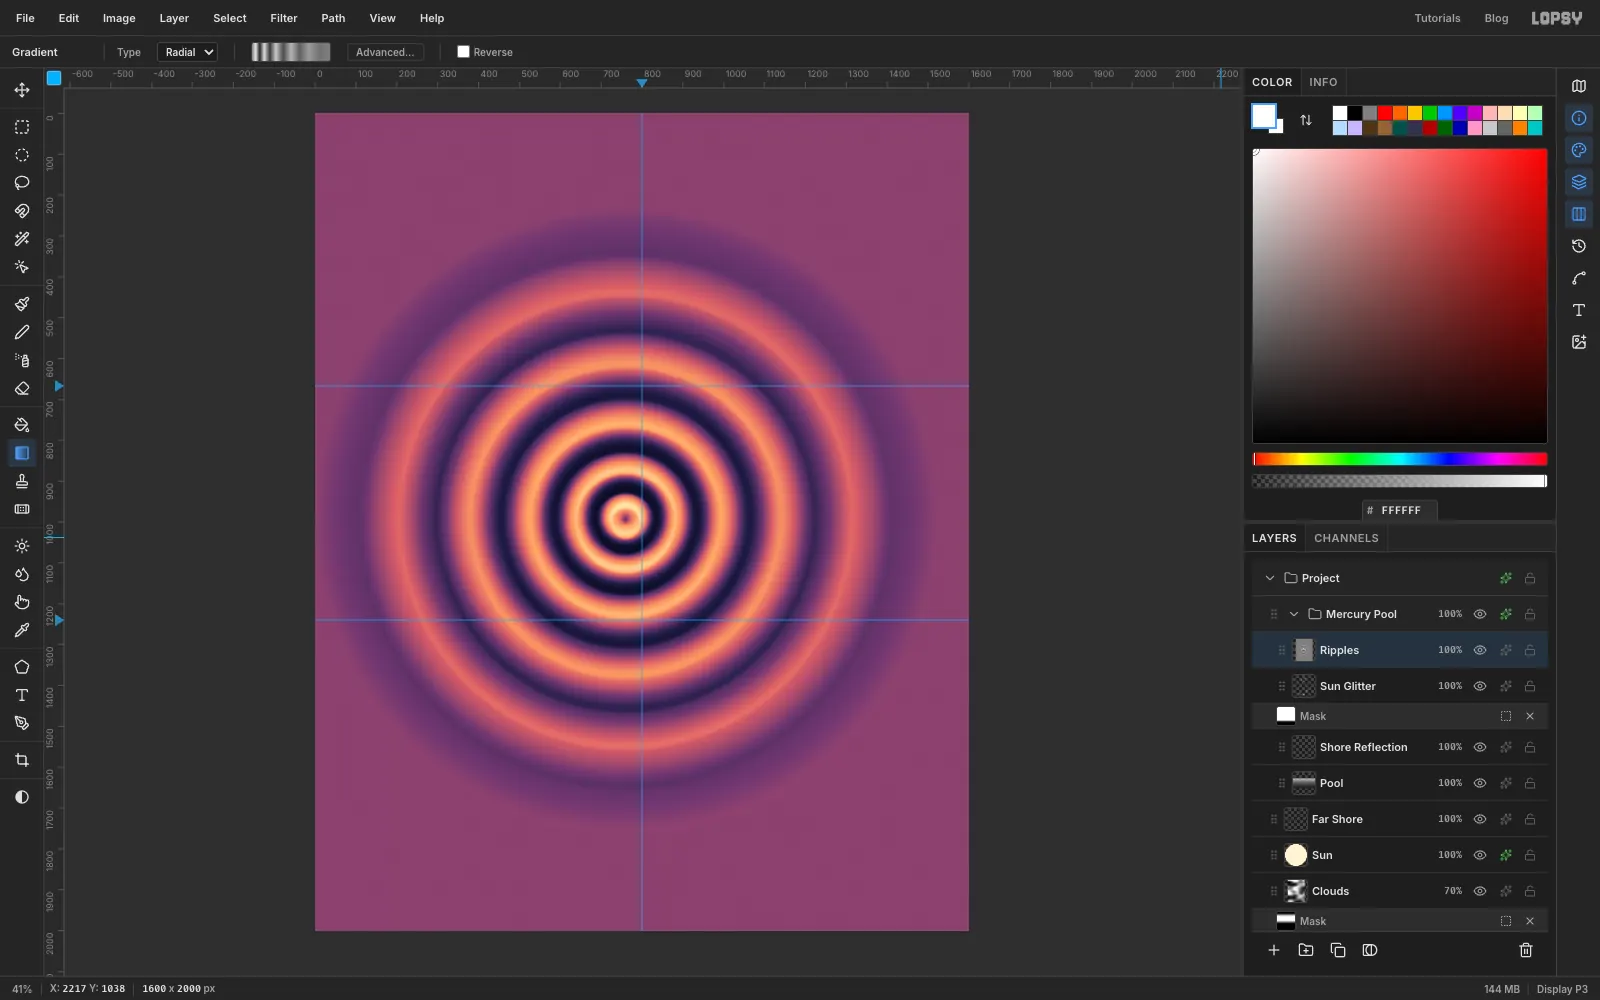
With Mercury Pool selected, add a layer named Ripples. It goes inside the group. Set the Gradient tool to Radial and click Advanced…. Set twelve stops that swing from light to dark and settle toward mid grey at the edge:
- at 0%, at 5%, at 10%
- at 16%, at 23%, at 31%
- at 40%, at 50%, at 61%
- at 73%, at 86%, at 100%
Start the drag just left of the centre line, halfway down the canvas. Drag right to just inside the right edge. Then run Filter → Emboss… with Angle 90 and Strength 60, which turns the bands into lit crests and troughs.
-
Squash the rings flat into perspective
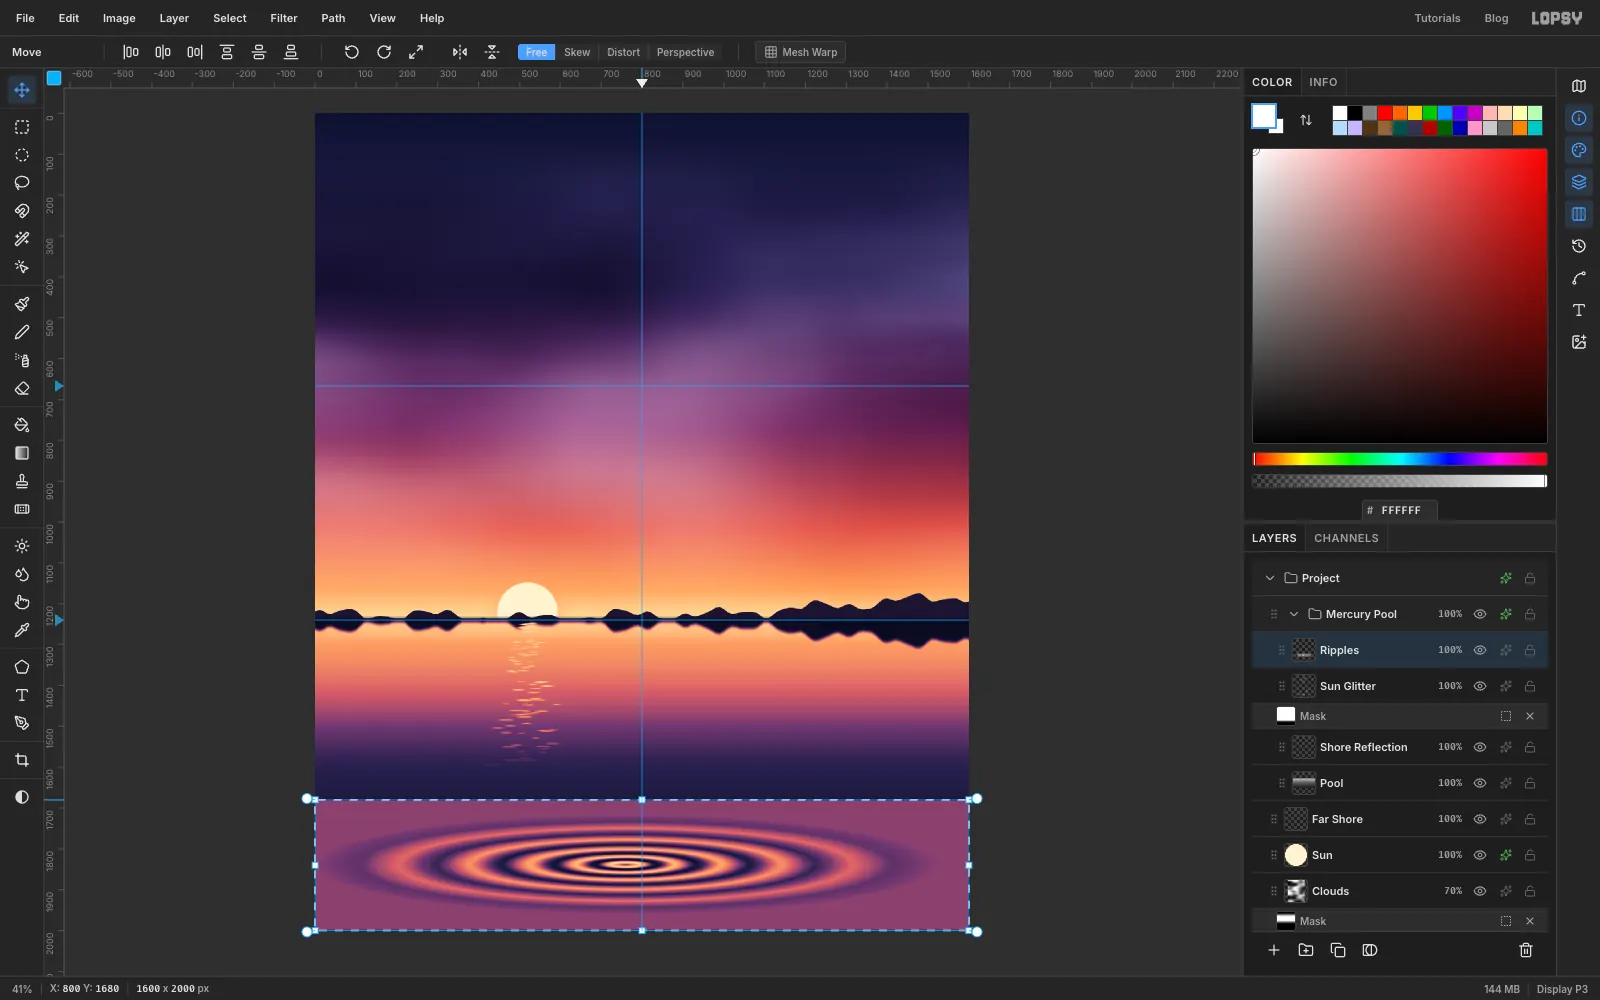
Press Cmd+A and pick the Move tool. Drag the top-middle handle down until the box is only about a sixth of the canvas tall, then press Cmd+D. Seen from a low angle, circles on water become long thin ellipses.
Nudge the band up with Shift+↑ until the centre of the rings sits about 200 px below the horizon, just left of the centre line. The mercury strand will land there later.
-
Blend the ripples into the water
Set the Ripples layer's blend mode to Overlay and its opacity to 45%. The mid grey disappears and only the crests and troughs remain. Because the layer is inside the group, the Gradient Map colours the ripples too.
Click Add Mask and then the new mask thumbnail. The Gradient tool is still on Radial; set three stops: white, white at 35%, black. Drag from the centre of the rings most of the way to the right edge, so the rings fade as they spread, then click the Ripples name to leave mask mode.
-
Paste the reference photo
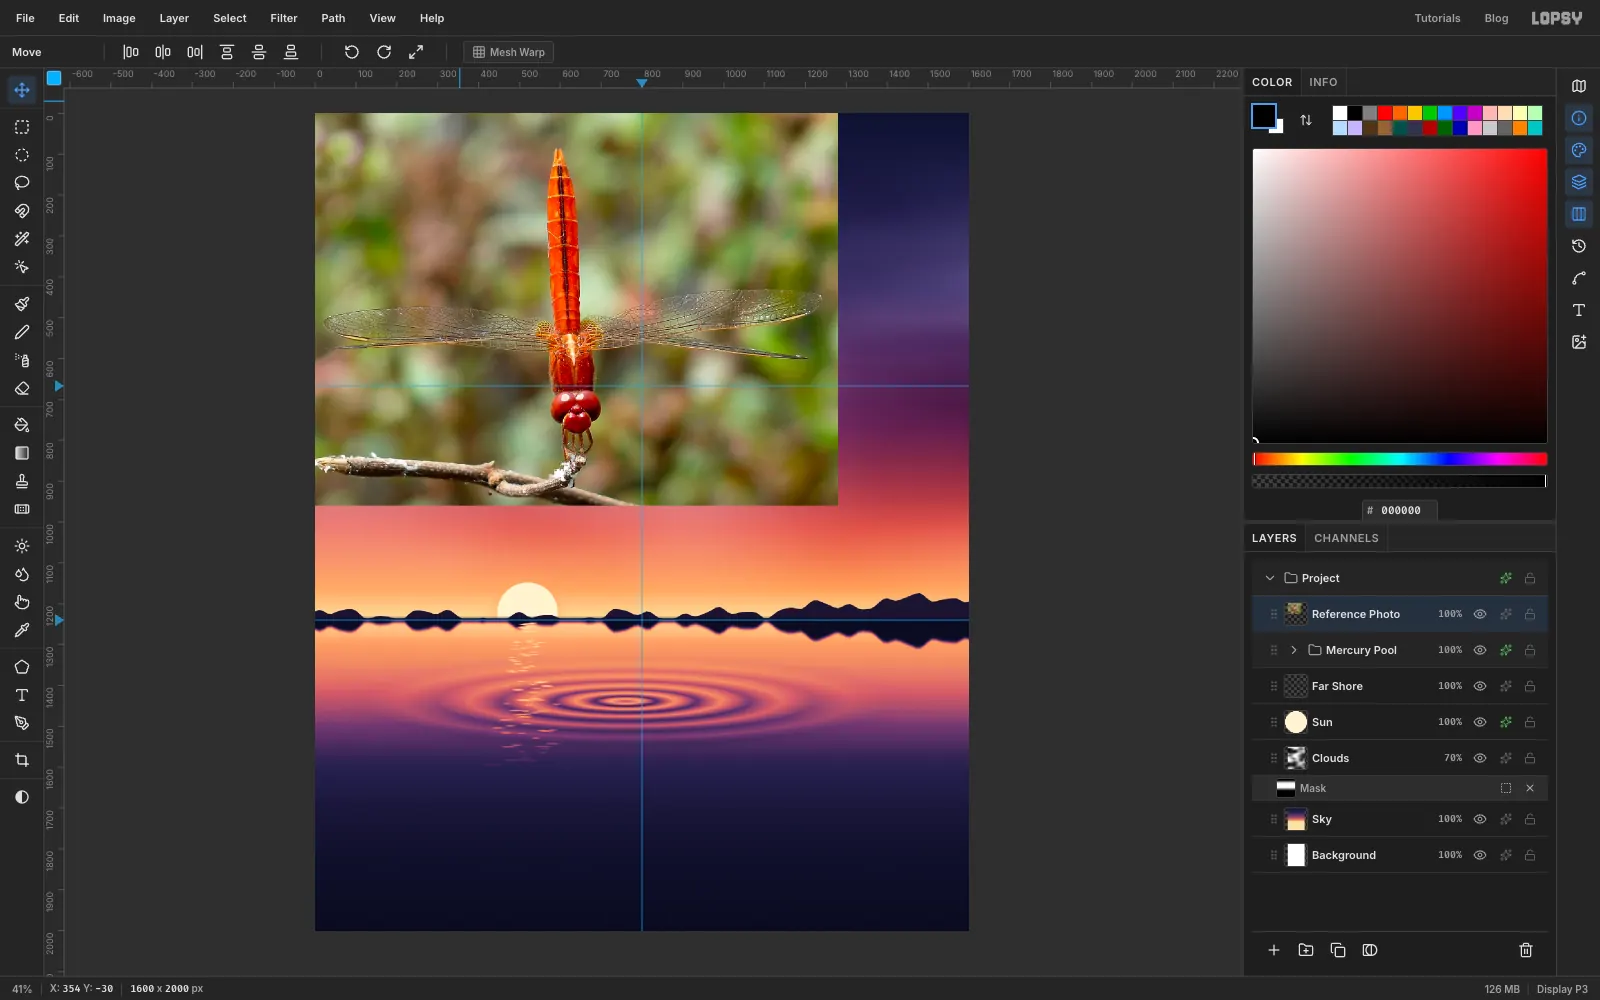
Collapse the Mercury Pool group with its arrow and click it, so the next layer lands above the group rather than inside it. Open the photo's page on Wikimedia Commons (Crocothemis servilia male by kadavoor), open the 1280 px preview, right-click it and copy the image. Back in Lopsy, press Cmd+V. Lopsy drops it in the top-left corner. Rename it Reference Photo.
This photo works well because it's symmetrical, with the wings flat out to the sides. Turned upside down, it becomes a dragonfly climbing with its tail hanging down.
-
Lasso the body
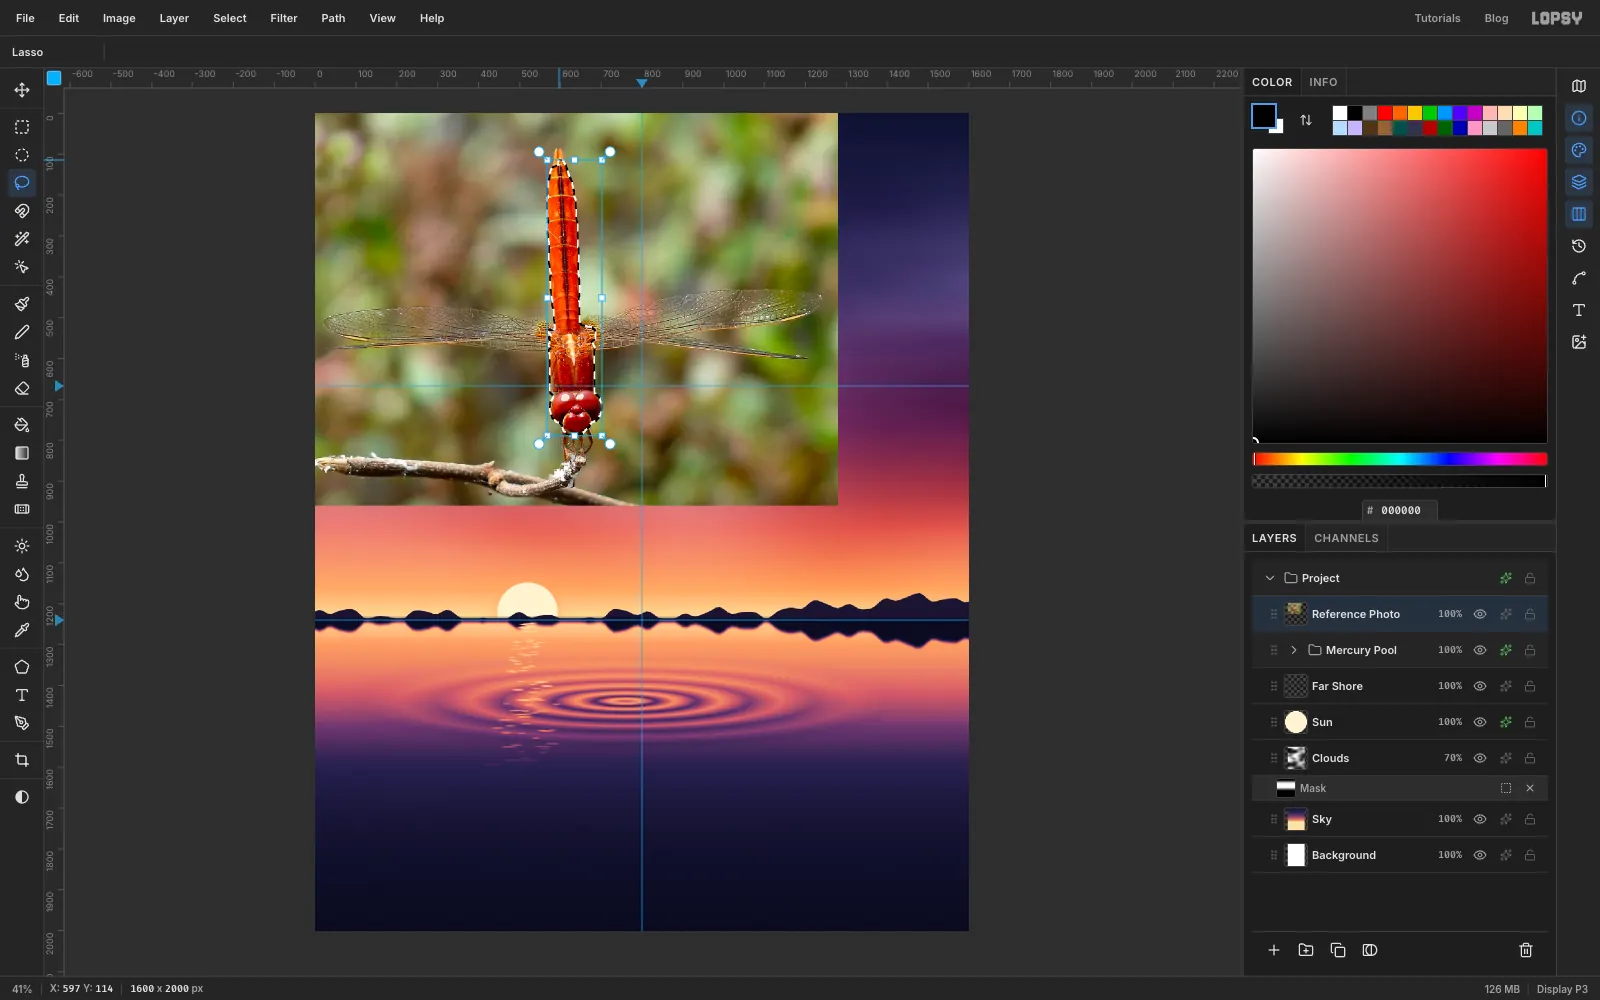
Zoom in and use the Lasso to trace the head, thorax and abdomen. Go round the big eyes and leave the legs and the twig behind. A dragonfly in flight tucks its legs in, so you won't miss them. Press Cmd+C then Cmd+V. The copy pastes in place on its own layer. Rename it Body.
-
Lasso the wings
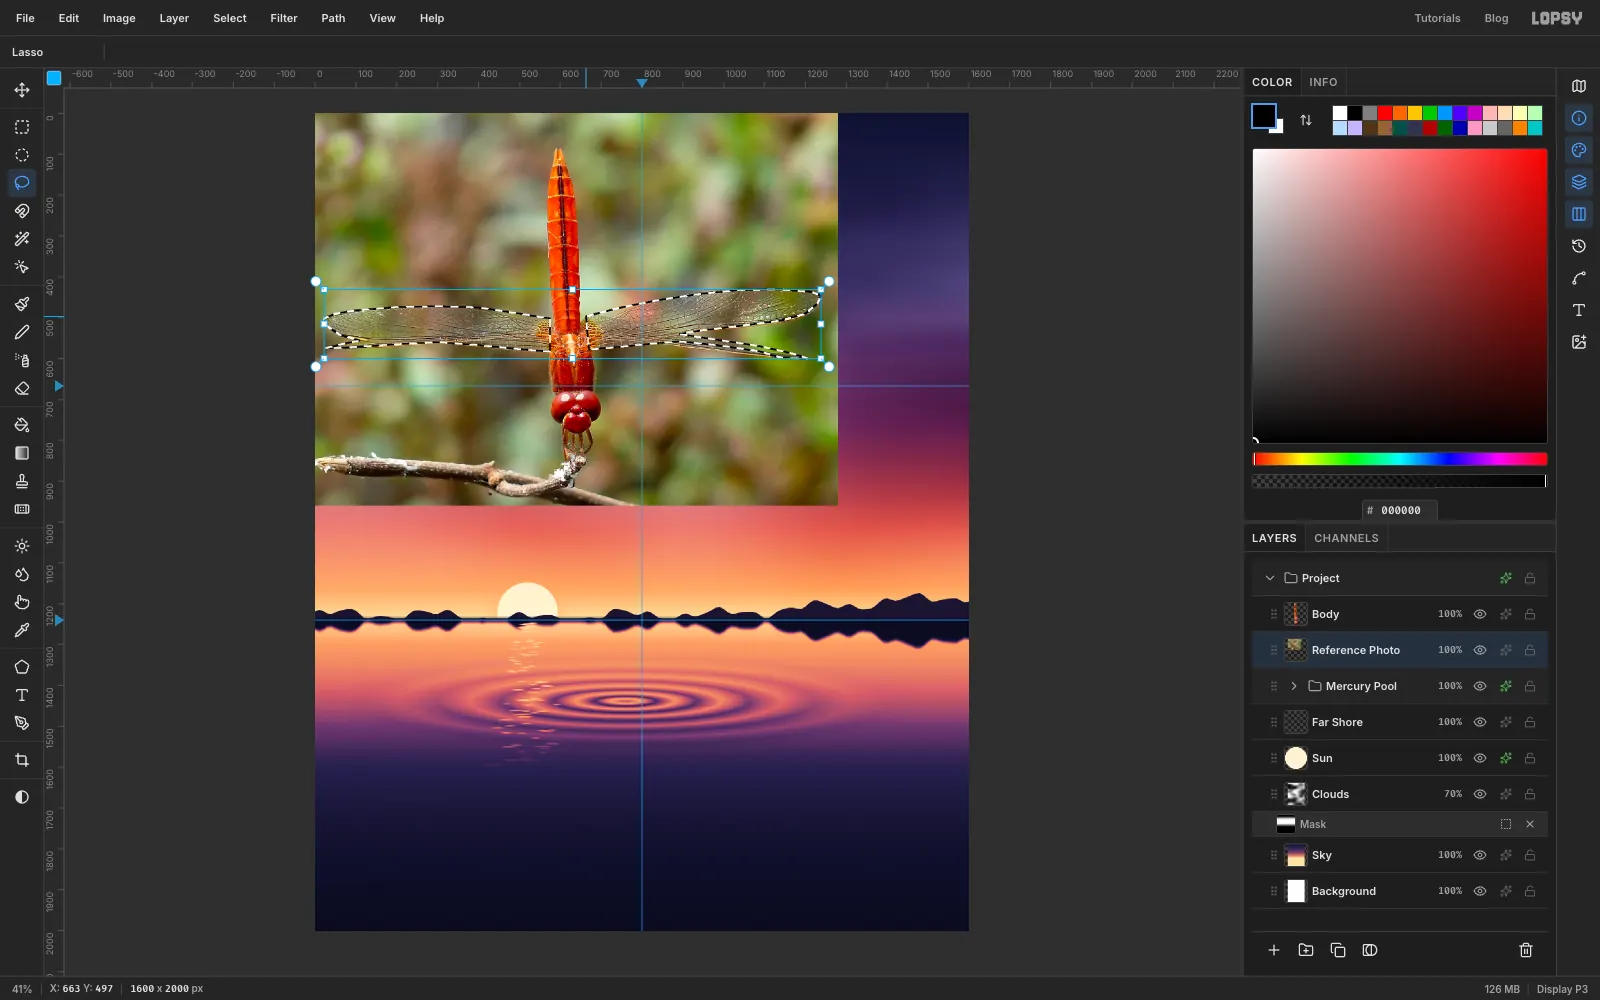
Click Reference Photo again. Lasso the left pair of wings, then hold Shift and lasso the right pair to add it. Stop each shape at the edge of the body. Copy and paste, and rename the new layer Wings.
-
Make the wings a little smaller
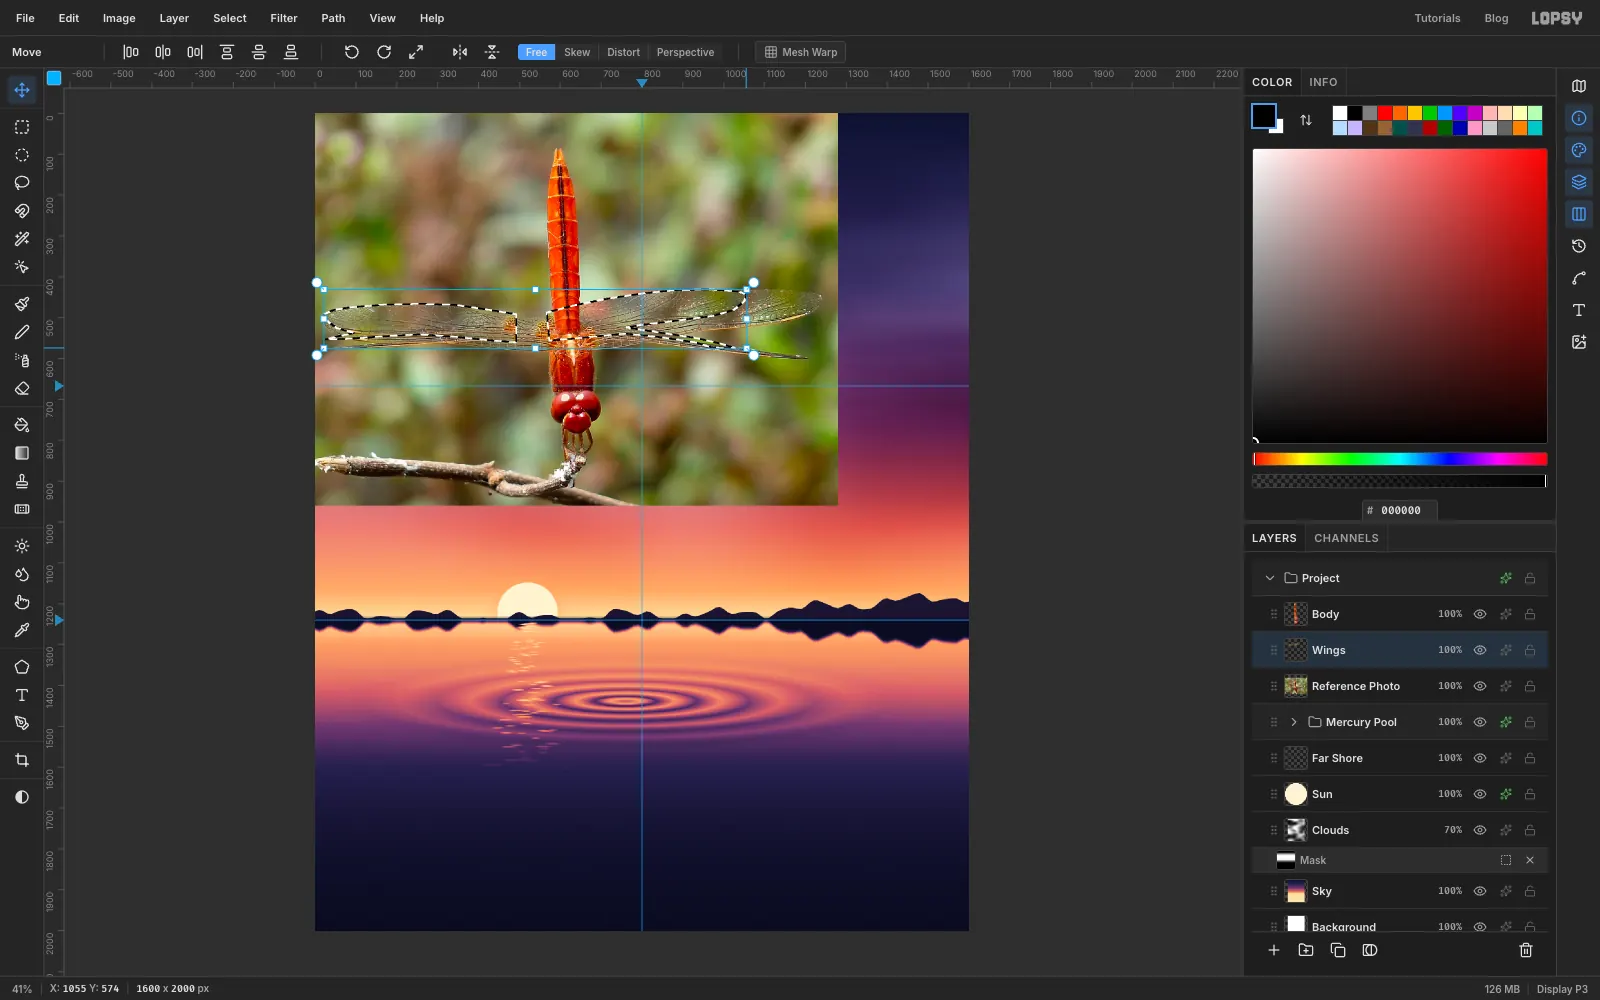
The photo's wings are long for a dragonfly climbing straight up. Cmd-click the Wings thumbnail to select its pixels, pick the Move tool, and Cmd-drag the bottom-right corner handle inward until the wings are about 85% of their width. Holding Cmd keeps the proportions. Then drag inside the box to centre the wings on the body again, and press Cmd+D.
-
Check the cut-outs and delete the photo
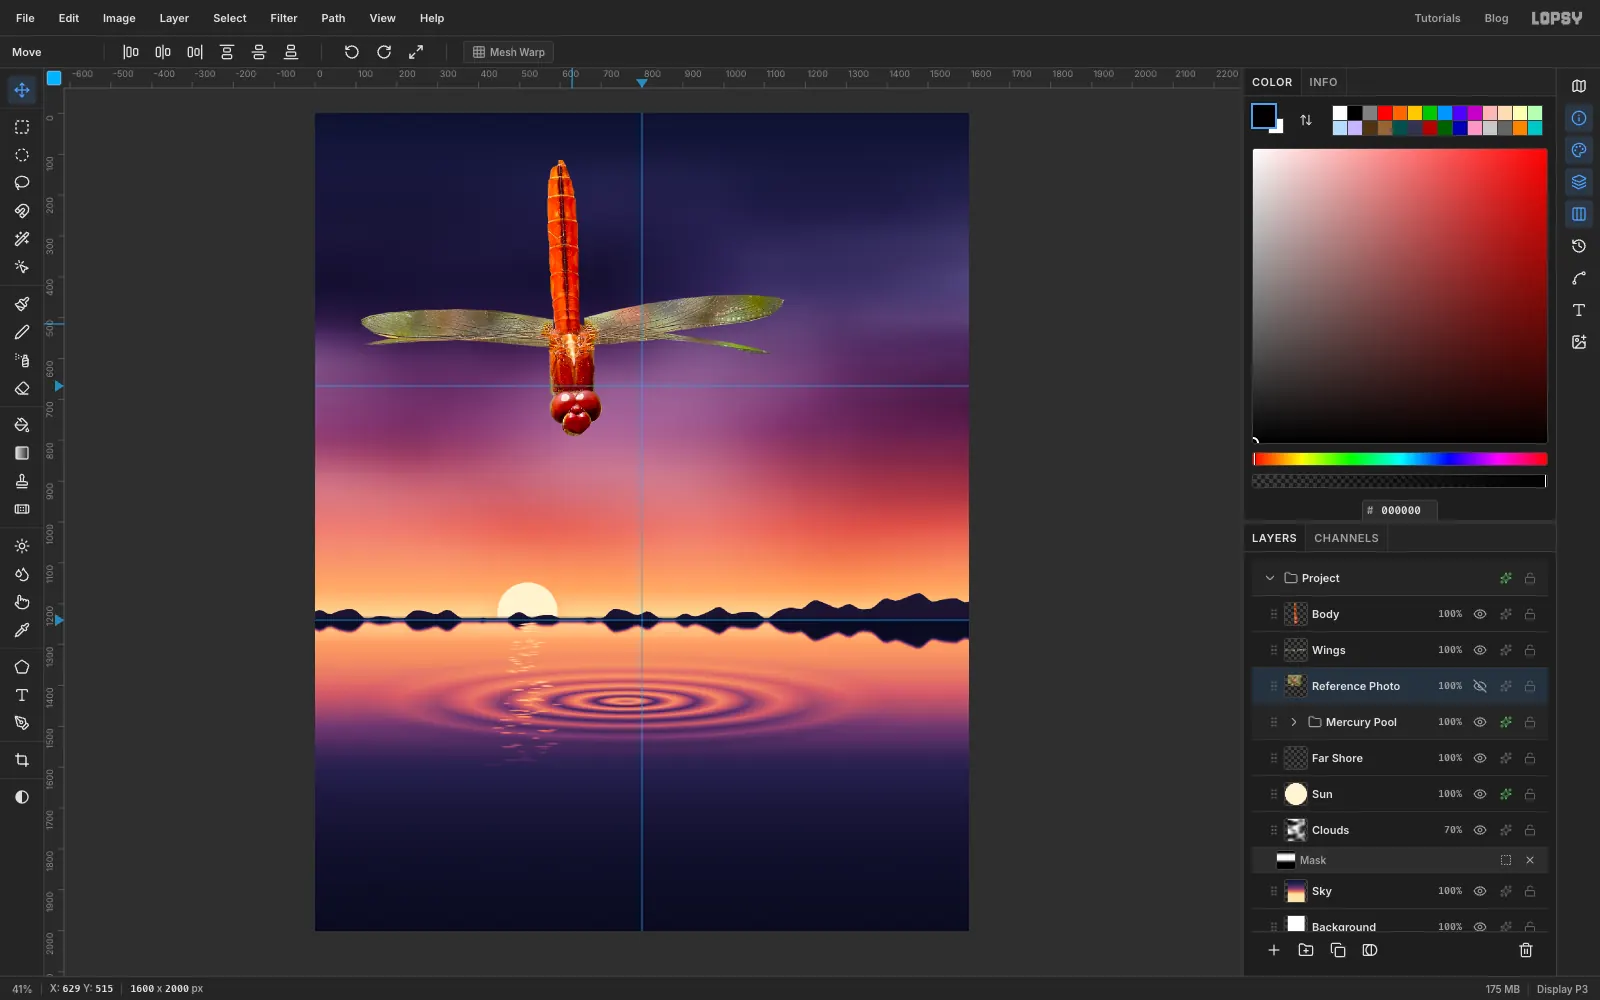
Click the eye on Reference Photo to hide it and check both cut-outs. If anything is missing, show the photo again and fix the selection. When you're happy, select Reference Photo and click Delete Layer.
-
Turn the dragonfly upside down
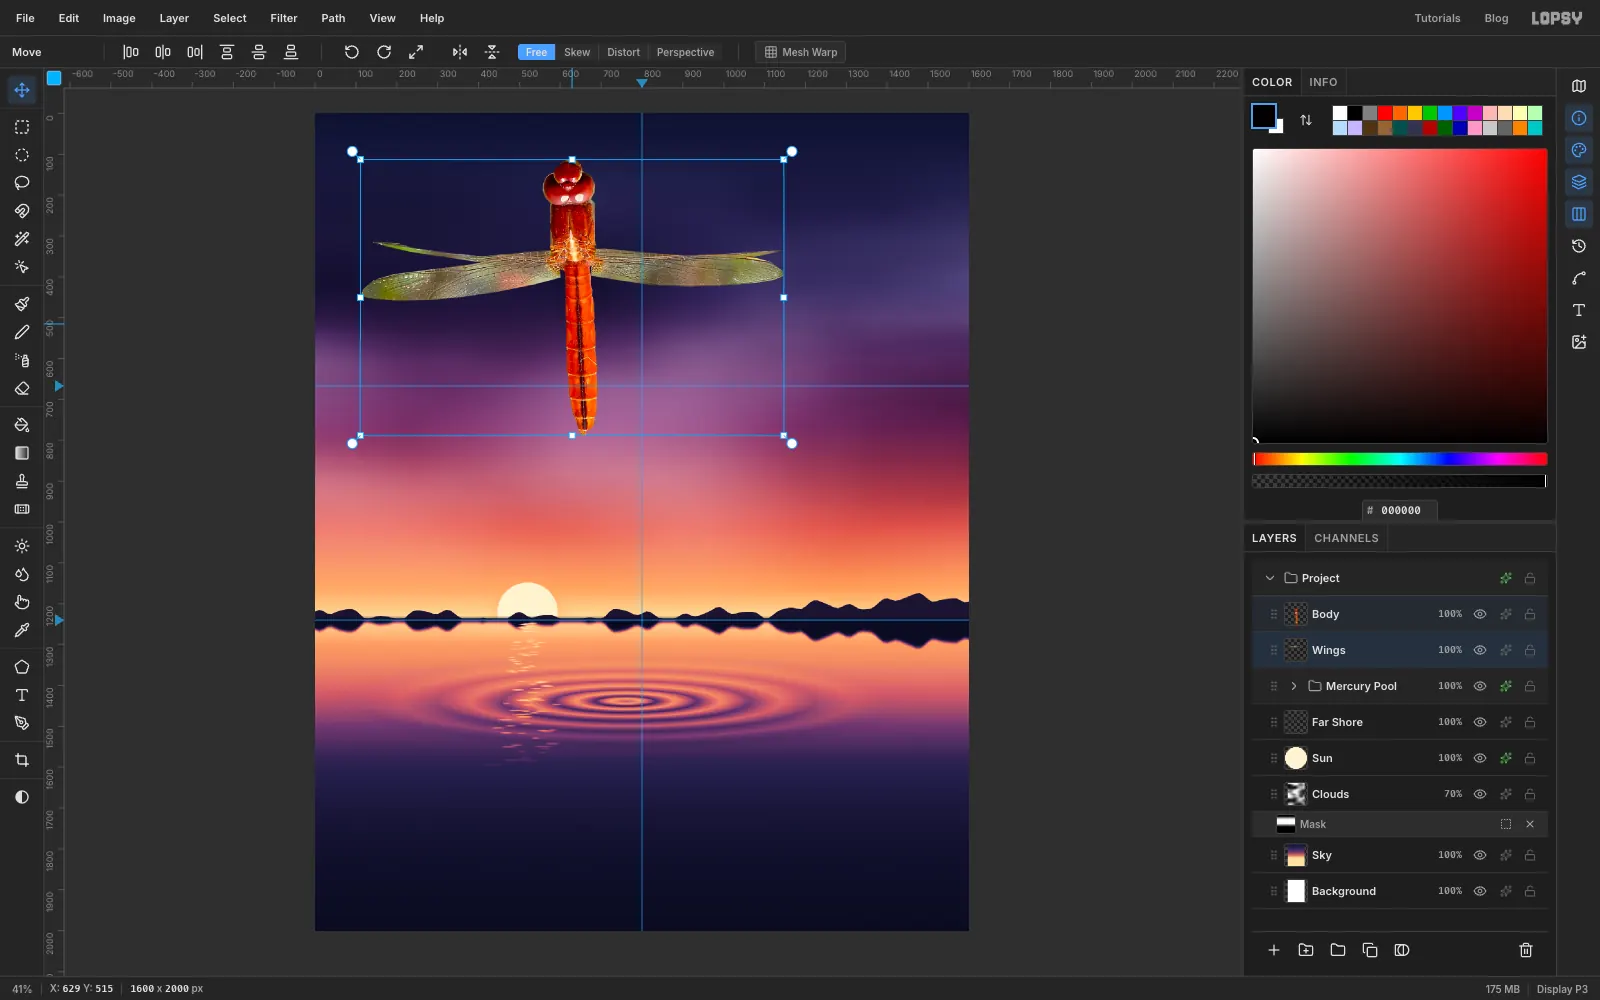
Click Wings and Shift-click Body so both are selected. With the Move tool, click Rotate 90° CW in the options bar twice. Both layers turn together around their shared centre, so the head now leads upward.
-
Scale it up
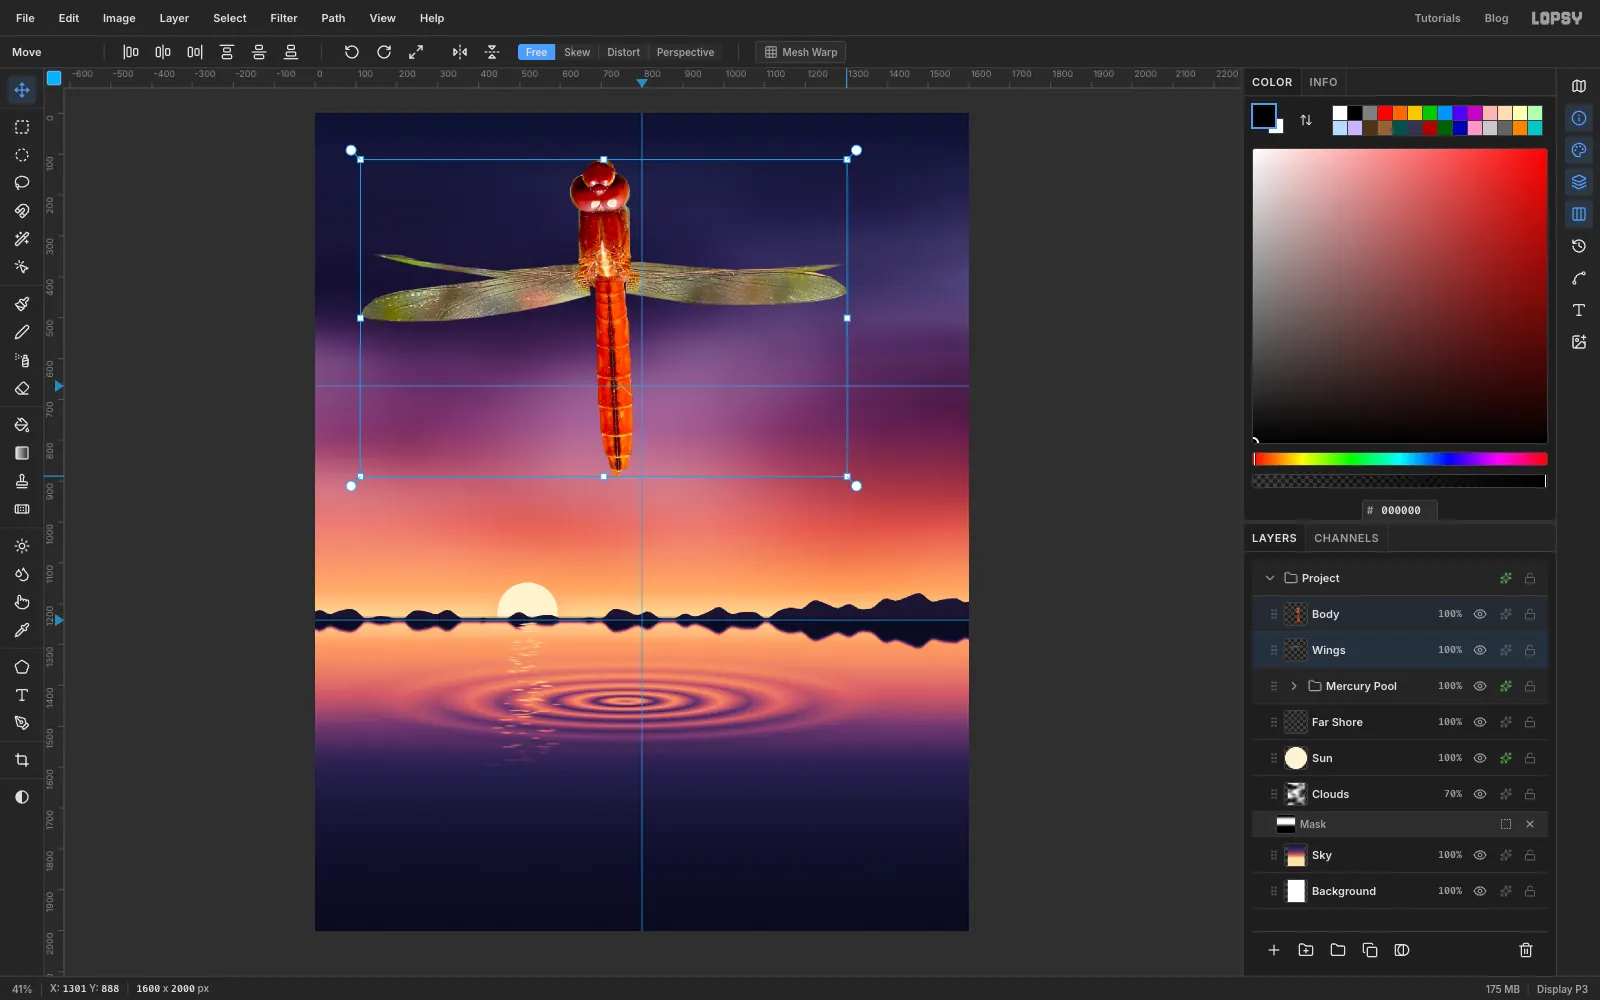
With both layers still selected, Cmd-drag the bottom-right corner handle outward until the dragonfly is about 15% bigger. The wings should span most of the canvas width.
-
Tilt it into a climb
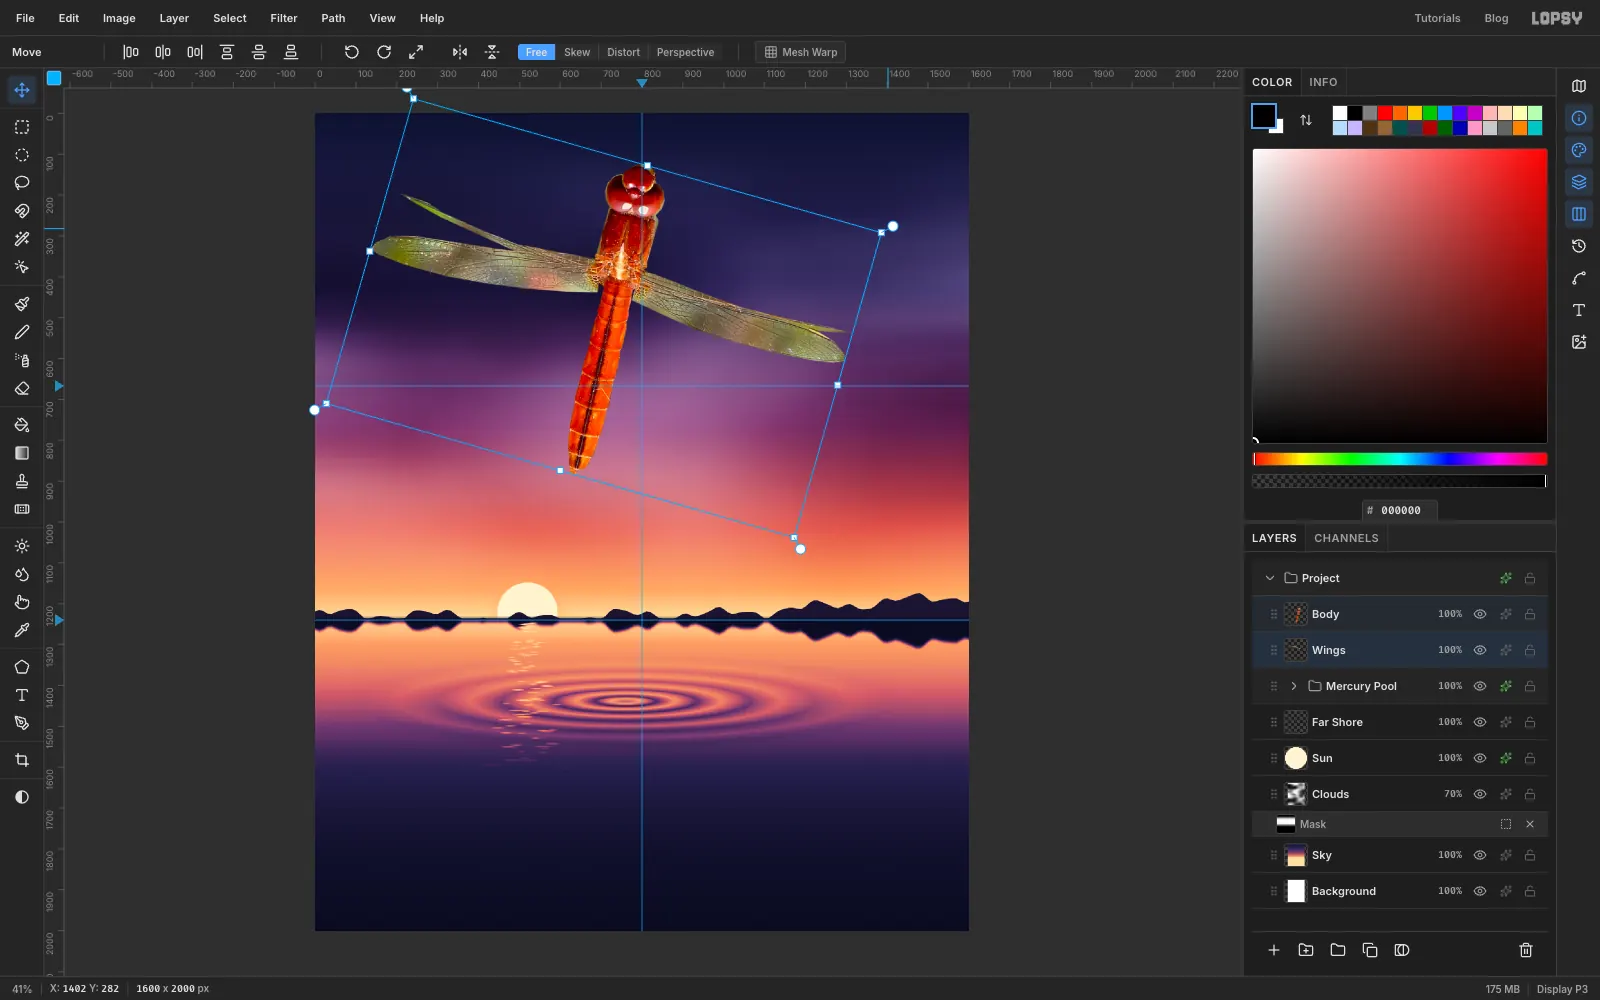
Drag the round rotation handle just outside the top-right corner clockwise, about 16°, so the head leans right. Then drag inside the box to move the dragonfly so the body sits a little right of centre, with the head about an eighth of the way down. The rotate, scale and tilt all happen on the same two-layer box, so don't deselect in between. Press Enter to commit it (with no marquee involved, Enter is the commit key here). The tilt turns a static cross into a diagonal that runs from the pond up to the head.
-
Lift the wings with Skew
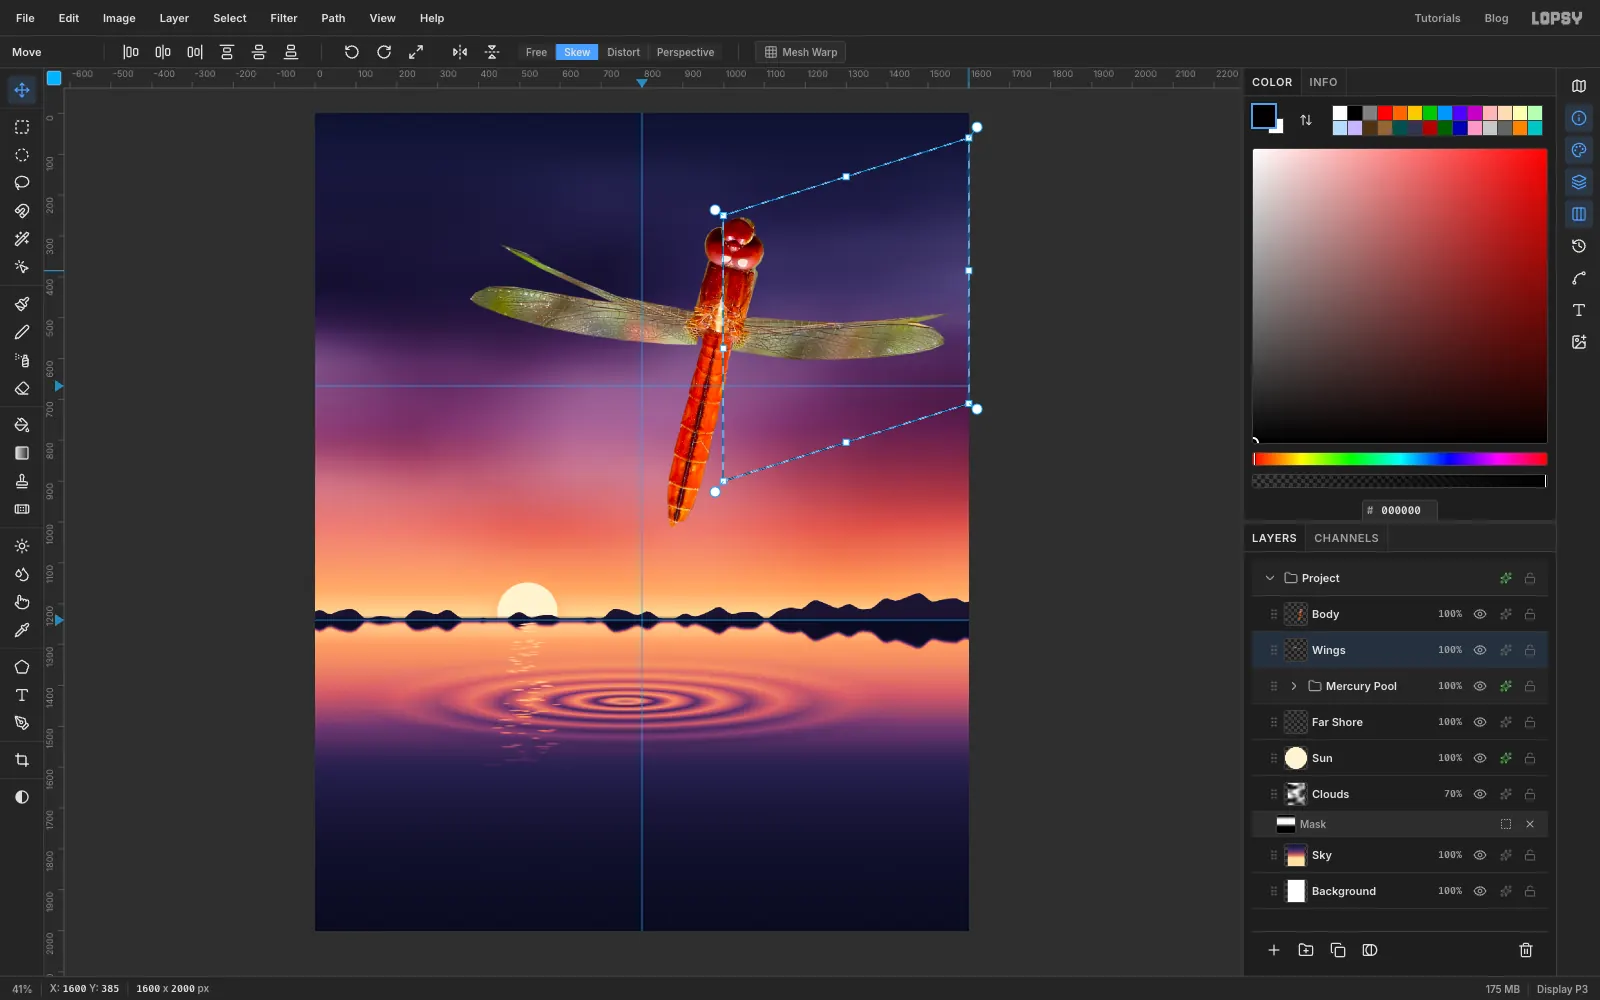
The tilt drops the right wing. Click Wings, and with the Rectangular Marquee, drag a box around the right wings, from just right of the body to the right edge. Pick the Move tool, click Skew in the options bar, and drag the right edge handle up until the right wingtips come up about level with the wing roots. The box's left side stays pinned, so the roots stay on the body while the tips rise. Press Cmd+D to commit.
Then box the left wings, from the left edge of the canvas to the body, and lift the left edge handle just a touch. The tilt already raised that side. The two sides now bank as if the dragonfly were turning into its climb.
-
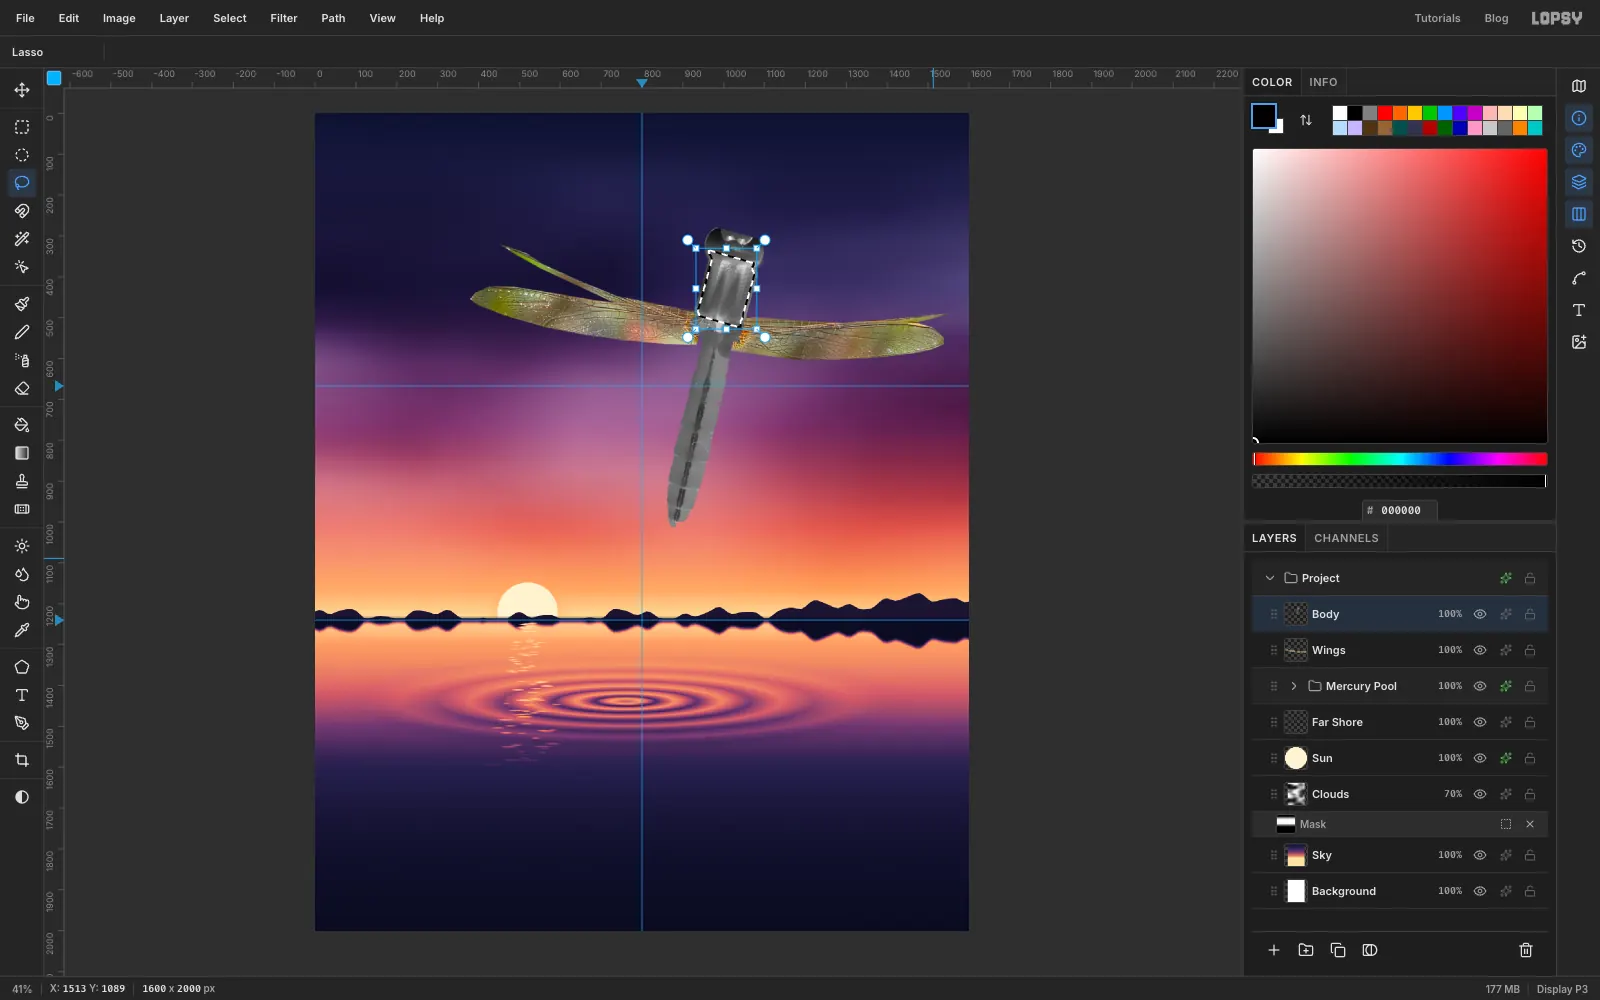
Turn the body grey and melt its texture
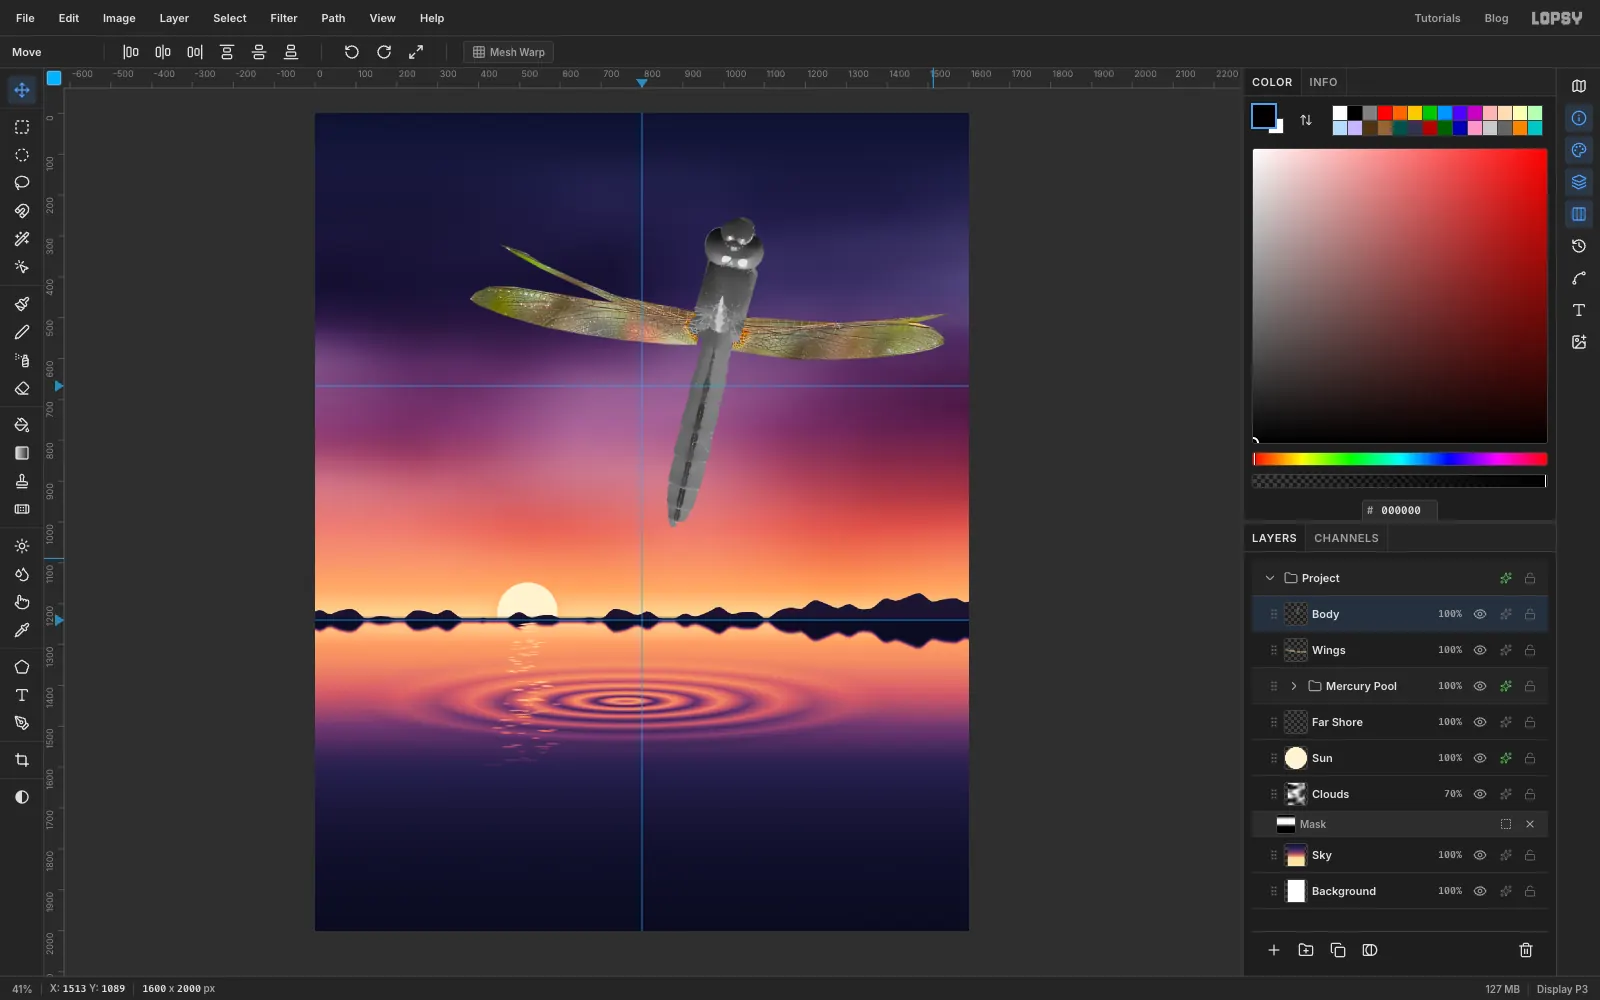
Select Body and choose Filter → Desaturate. Run Filter → Surface Blur… with Radius 20 and Threshold 60, twice. Finish with Filter → Gaussian Blur… at Radius 2. Liquid metal has no fine texture, so smooth everything except the big shapes.
-
Remove the face above the eyes
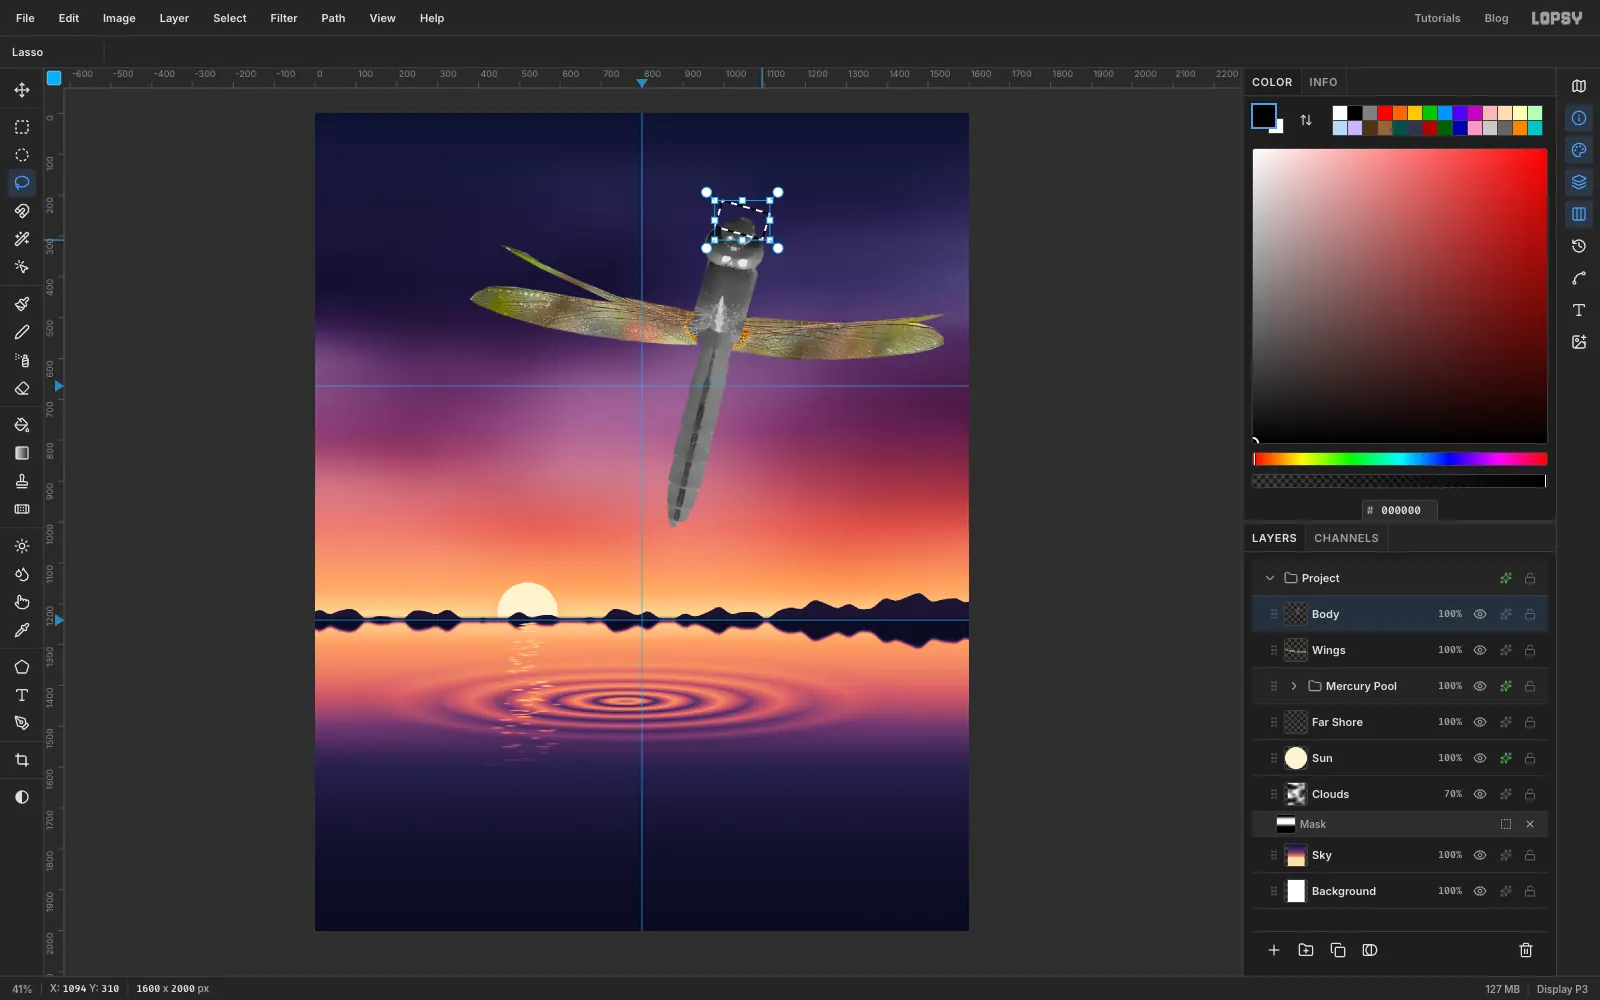
In the photo the face hangs below the eyes. Upside down, it pokes up above them. Lasso around it and press Delete, then deselect.
-
Smudge, burn and soften the thorax
Pick the Smudge tool (Size 56, Strength 80) and drag three strokes down the thorax, from the eyes to the waist, to melt the leftover hairy detail. Switch to the Dodge tool, set Mode to Burn, Size 50, Exposure 35, and brush once over the brightest spot where a wing meets the thorax.
To soften the thorax without blurring its outline, Cmd-click the Body thumbnail and choose Select → Shrink… by 8. Then hold Shift and Alt and lasso around the thorax to keep only the overlap. Choose Select → Feather… by 4, run Gaussian Blur at Radius 6, and deselect.
-
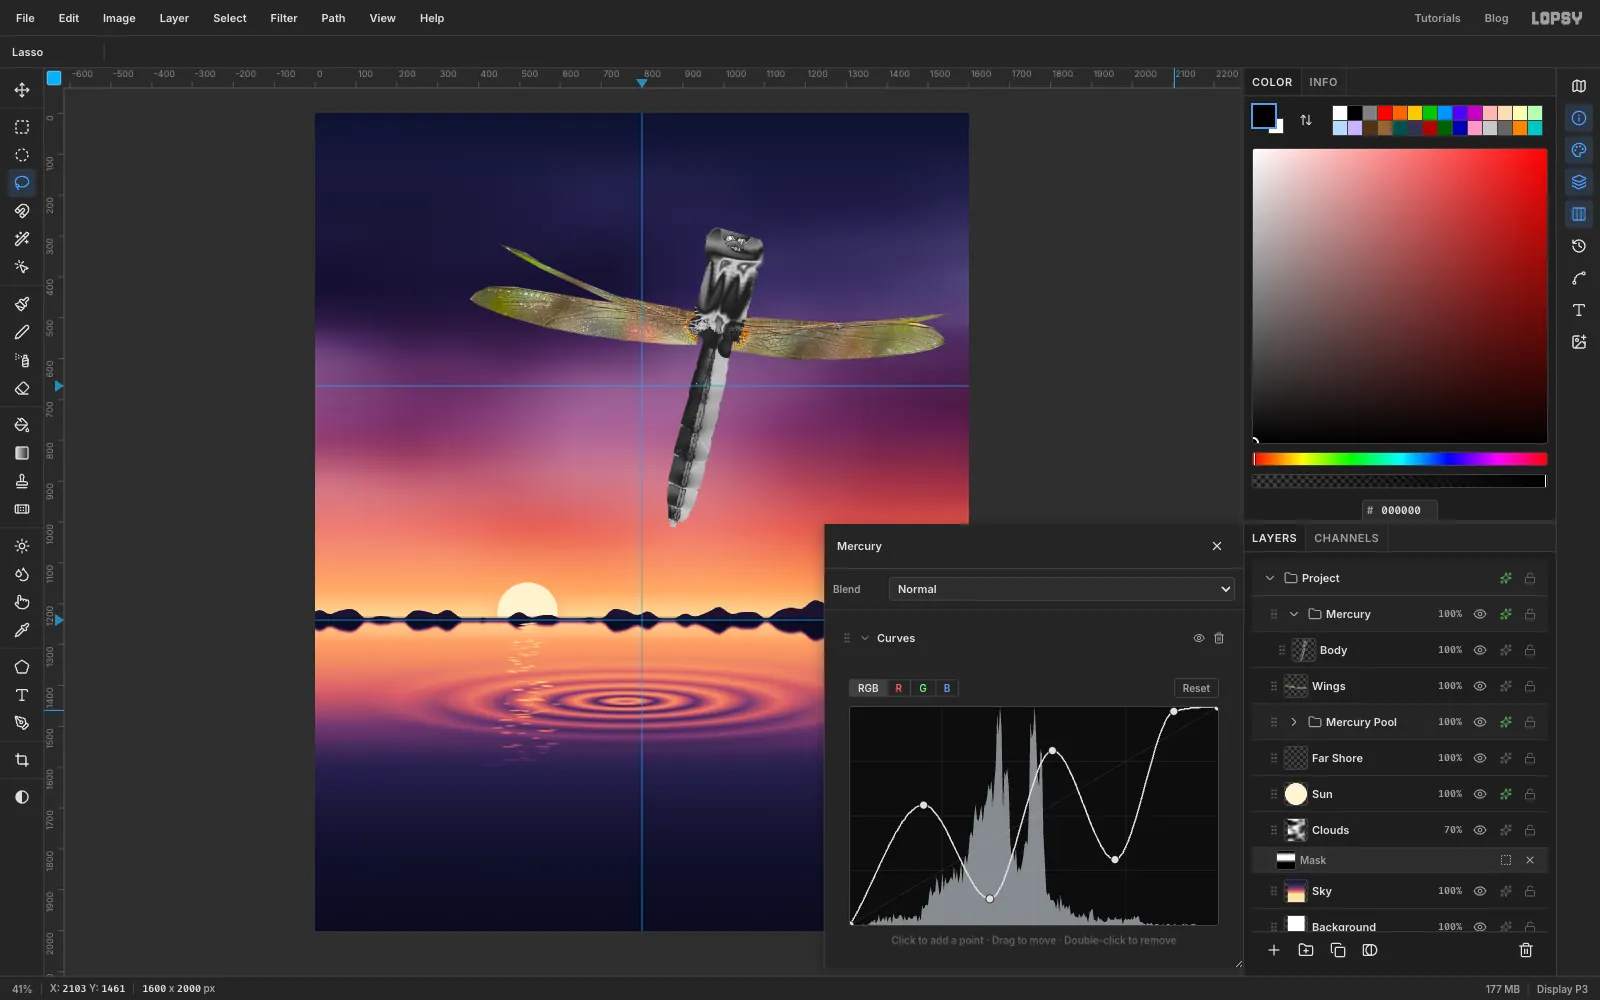
Fold the greys into chrome with a Curves wave
With Body selected, choose Layer → Group Layers and rename the group Mercury. Open its effects and click Add Adjustment → Curves. Click on the curve to add a point and drag it into place, five times, to make a wave:
- at a fifth of the way along, lift it a little above halfway
- at about 40%, pull it almost to the bottom
- just past halfway, push it high
- at about 70%, pull it down to a third
- near the right end, push it nearly to the top
A normal curve keeps light and dark in order. A wave folds them over, so one smooth grey ramp turns into several bright and dark bands. That banding is what makes a surface read as chrome.
-
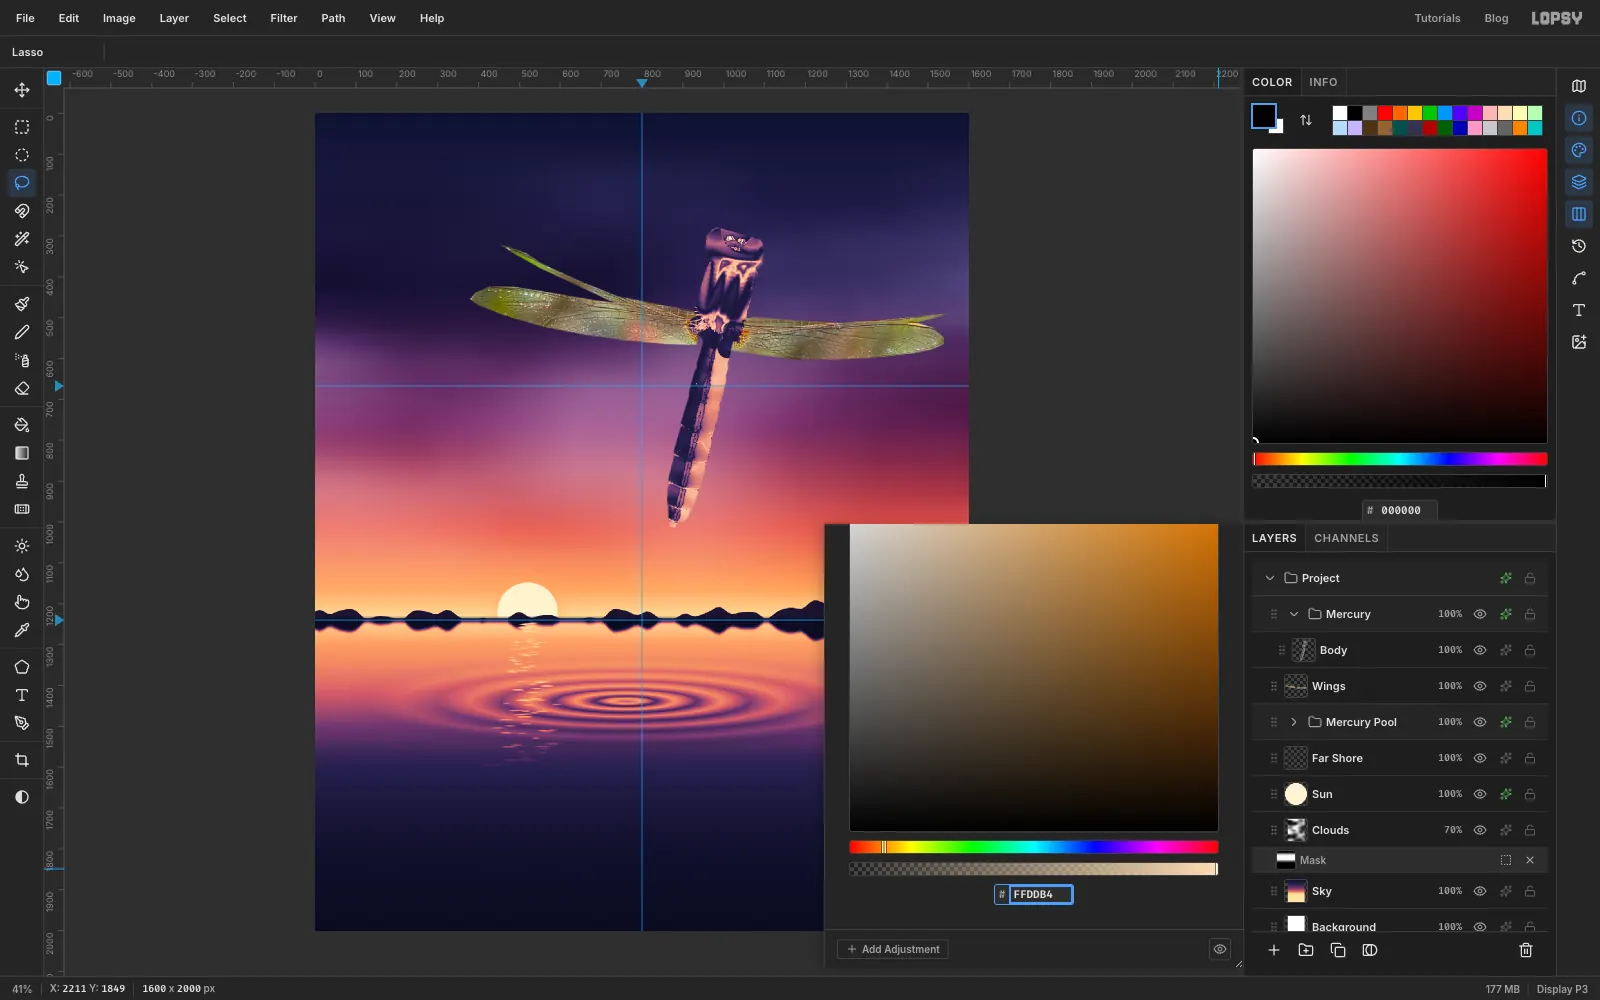
Map the chrome to the sunset
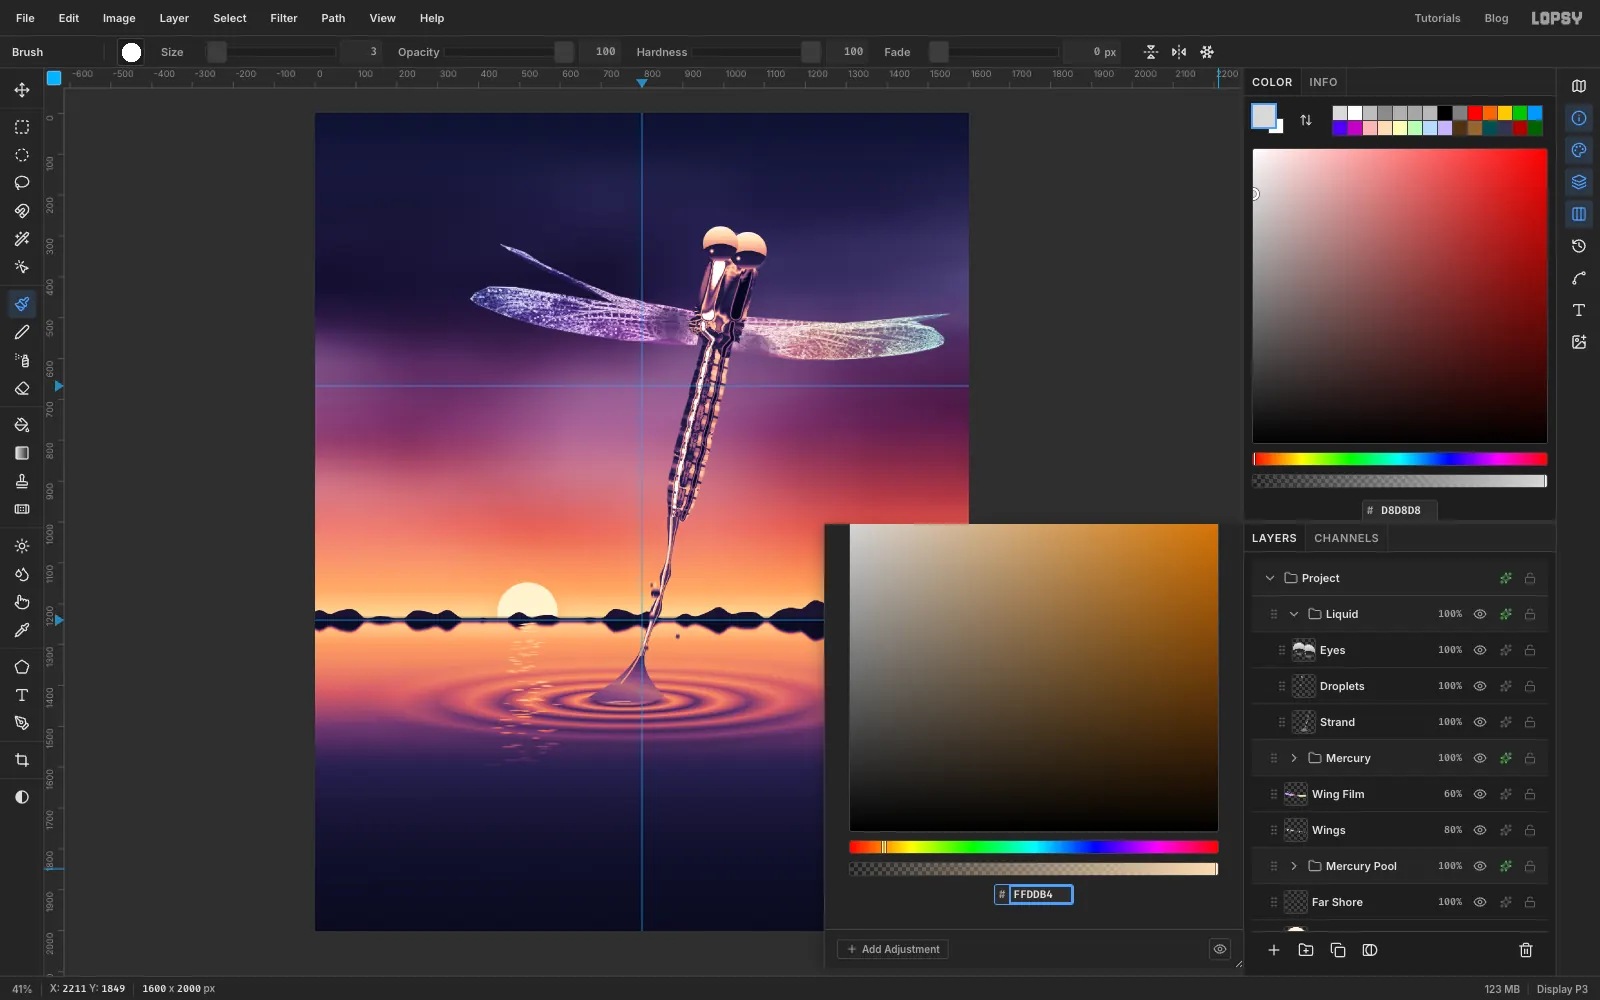
Click Add Adjustment → Gradient Map in the same drawer and set six stops: at 0%, at 22%, at 45%, at 66%, at 84% and at 100%. The chrome now reflects the same indigo, mauve and coral as the sky around it.
-
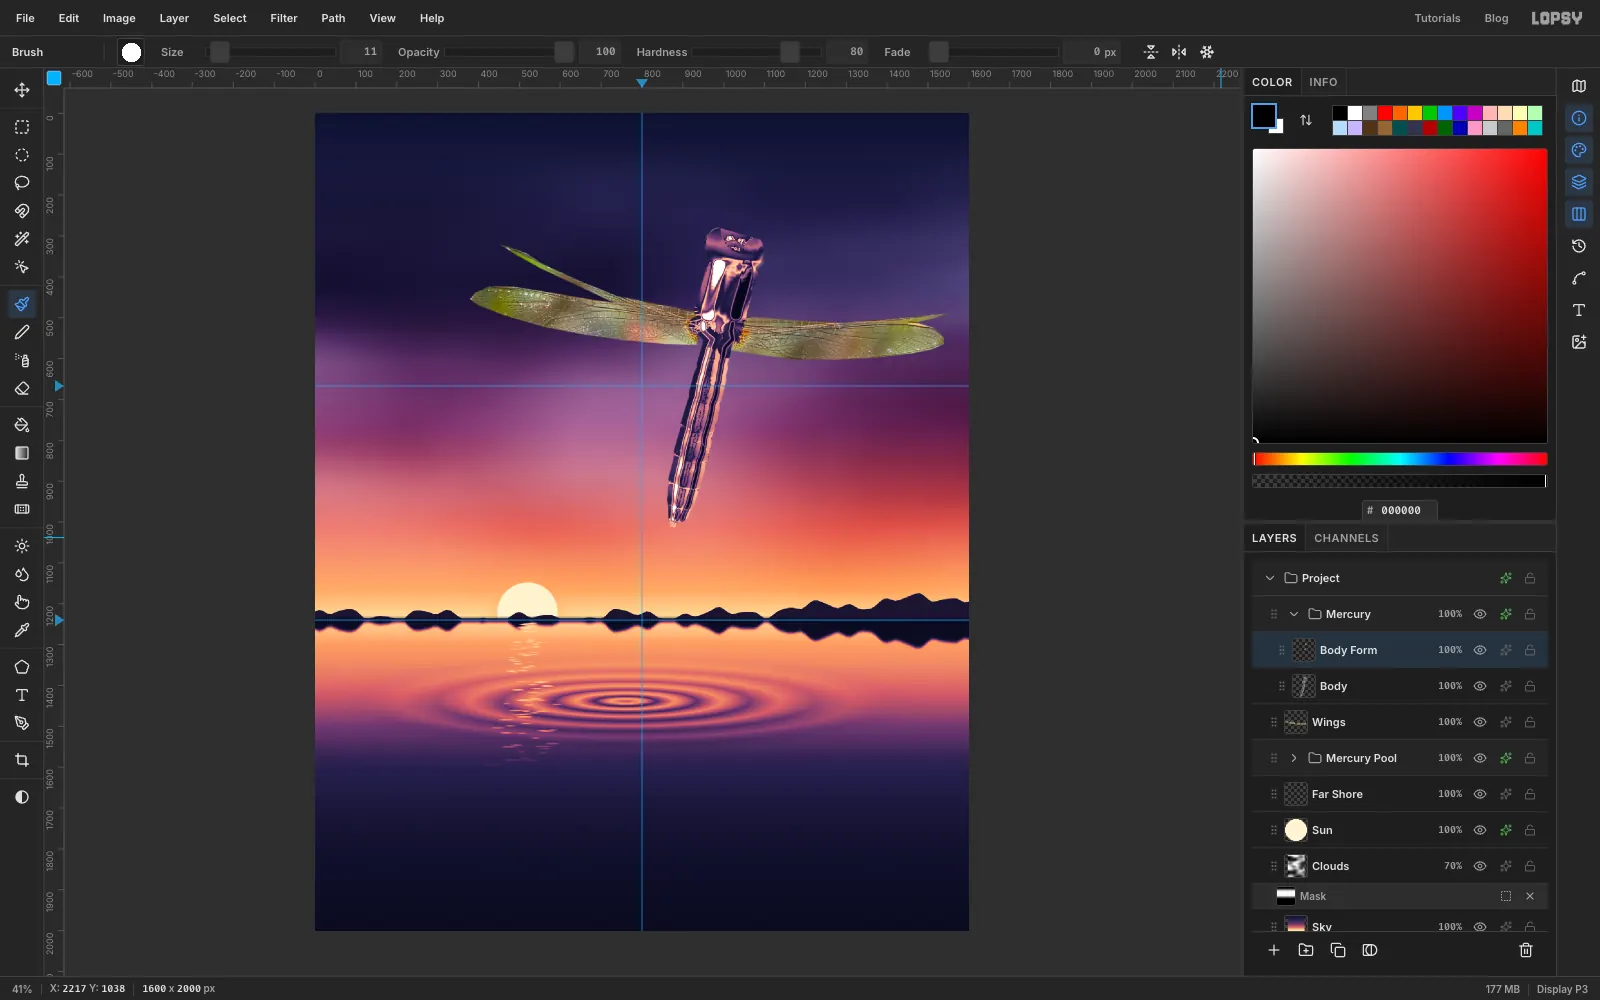
Paint the body's round form
Add a layer named Body Form above Body, inside the Mercury group. Cmd-click the Body thumbnail so you can only paint inside the body. The sun is low on the left, so with the Brush:
- paint a white stroke (size 34) down the left third of the thorax, and a black one (size 30) down its right third
- do the same on the abdomen with sizes 12 and 11
Run Gaussian Blur at Radius 5, deselect, and set the layer to Overlay. The Curves wave turns these soft shades into the crisp bands of a polished cylinder.
-
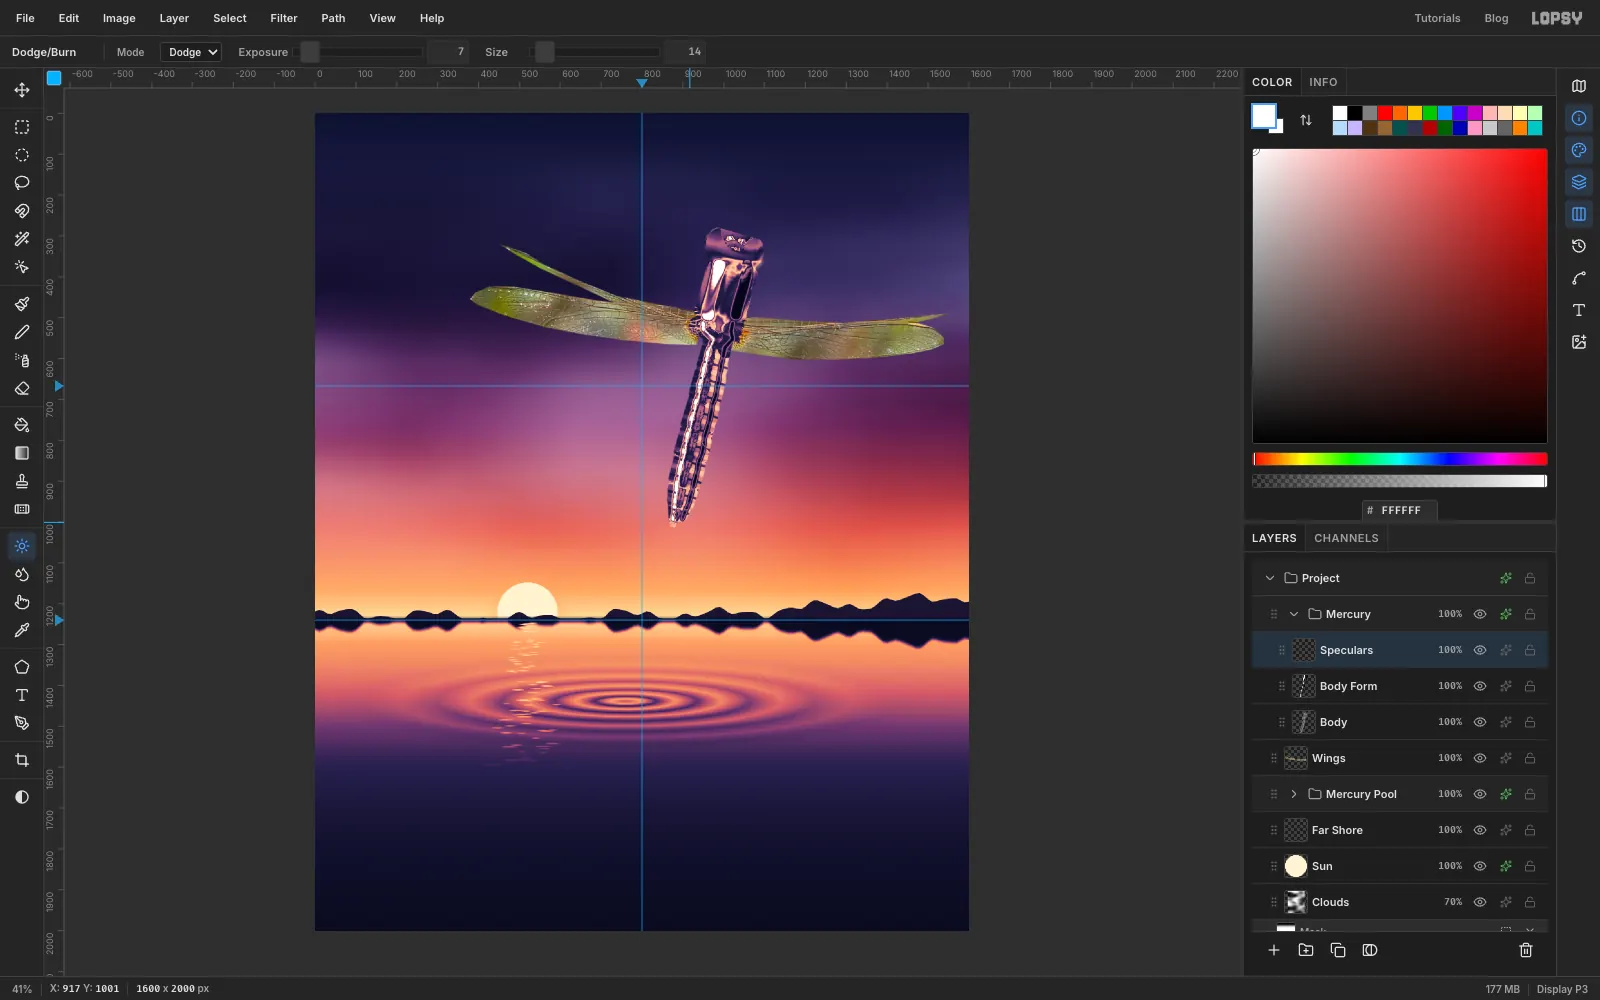
Add speculars and segments
With Body Form active, add a layer named Speculars. It lands inside the Mercury group, above Body Form. Paint one thin white line (size 4) down the left side of the abdomen. Pure white stays white through the Curves wave, so it reads as the sun's glint.
For the segment rhythm, click Body and pick the Dodge tool. In Burn mode (Size 7, Exposure 16), stroke across every other ring of the abdomen, following the tilt. Then switch to Dodge (Size 14, Exposure 7) and stroke just below each groove. Keep these subtle: the wave exaggerates every small change.
-
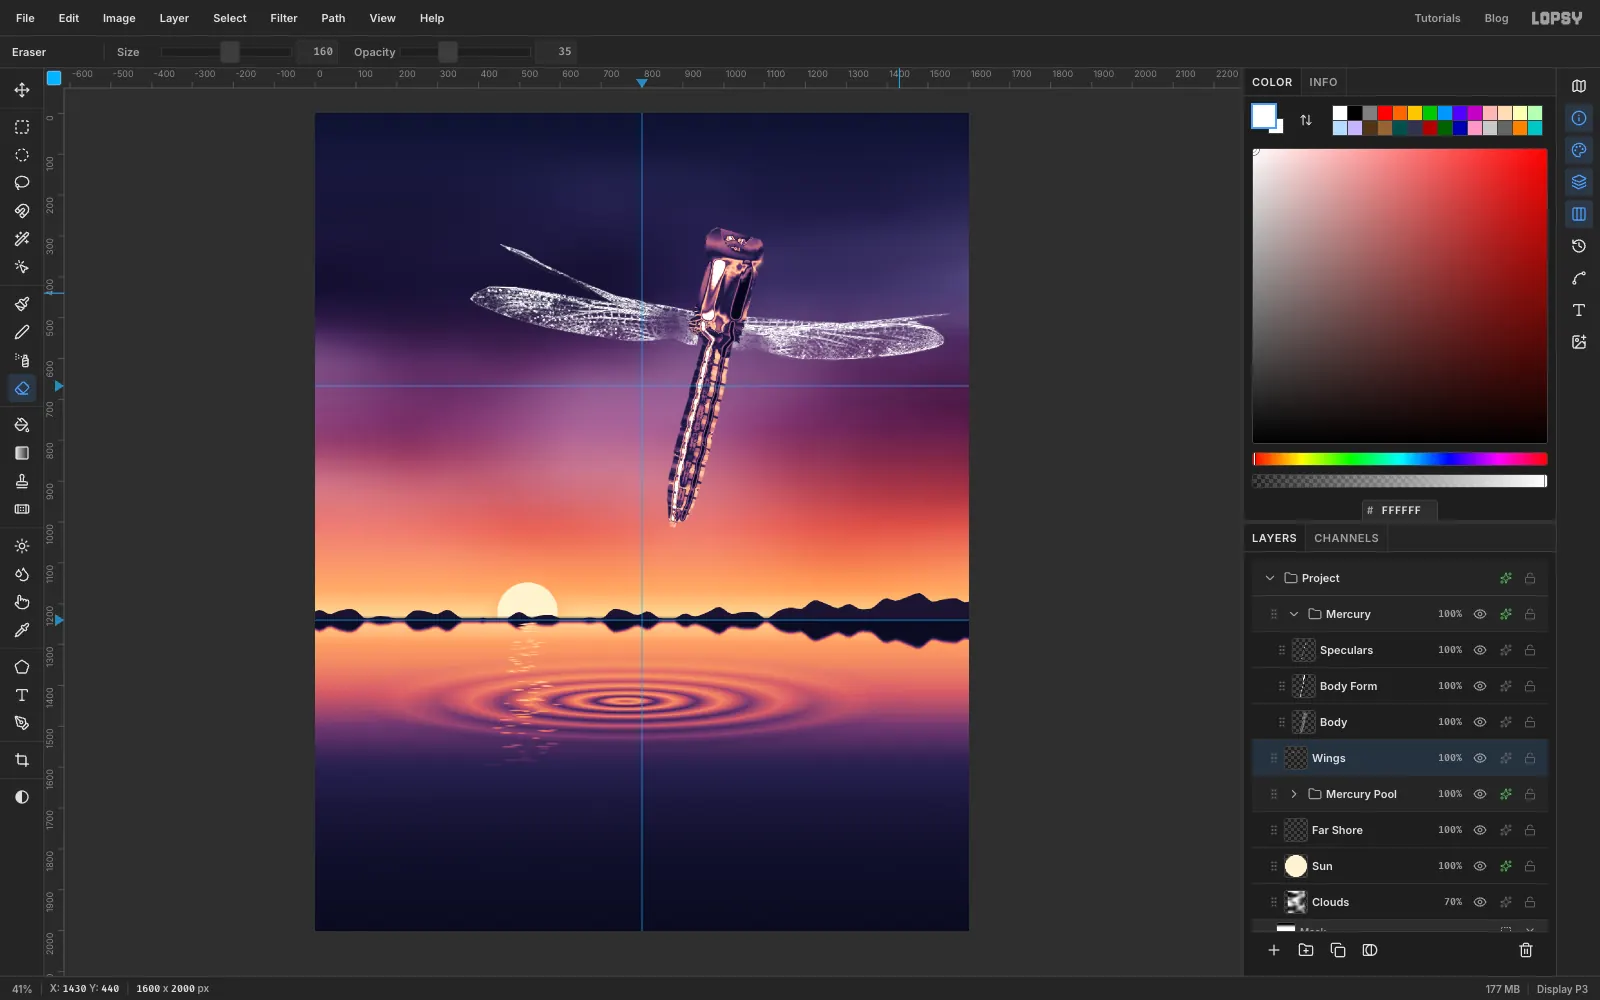
Turn the wings into silver veins
Select Wings and run Filter → Desaturate, then Filter → Find Edges. The smooth green background turns black and only the veins stay bright. Run Filter → Brightness/Contrast… with Brightness 20 and Contrast 45, and set the layer to Screen, which drops the black.
The dense honeycomb at the wing roots gets too bright. Erase it back with a big, soft Eraser (size 90, Opacity 45). Run Gaussian Blur at Radius 1 to calm the venation. Do one pass with a 160 px eraser at 35% over the right wingtip, so the wings don't outshine the body. Set the layer to 80%.
-
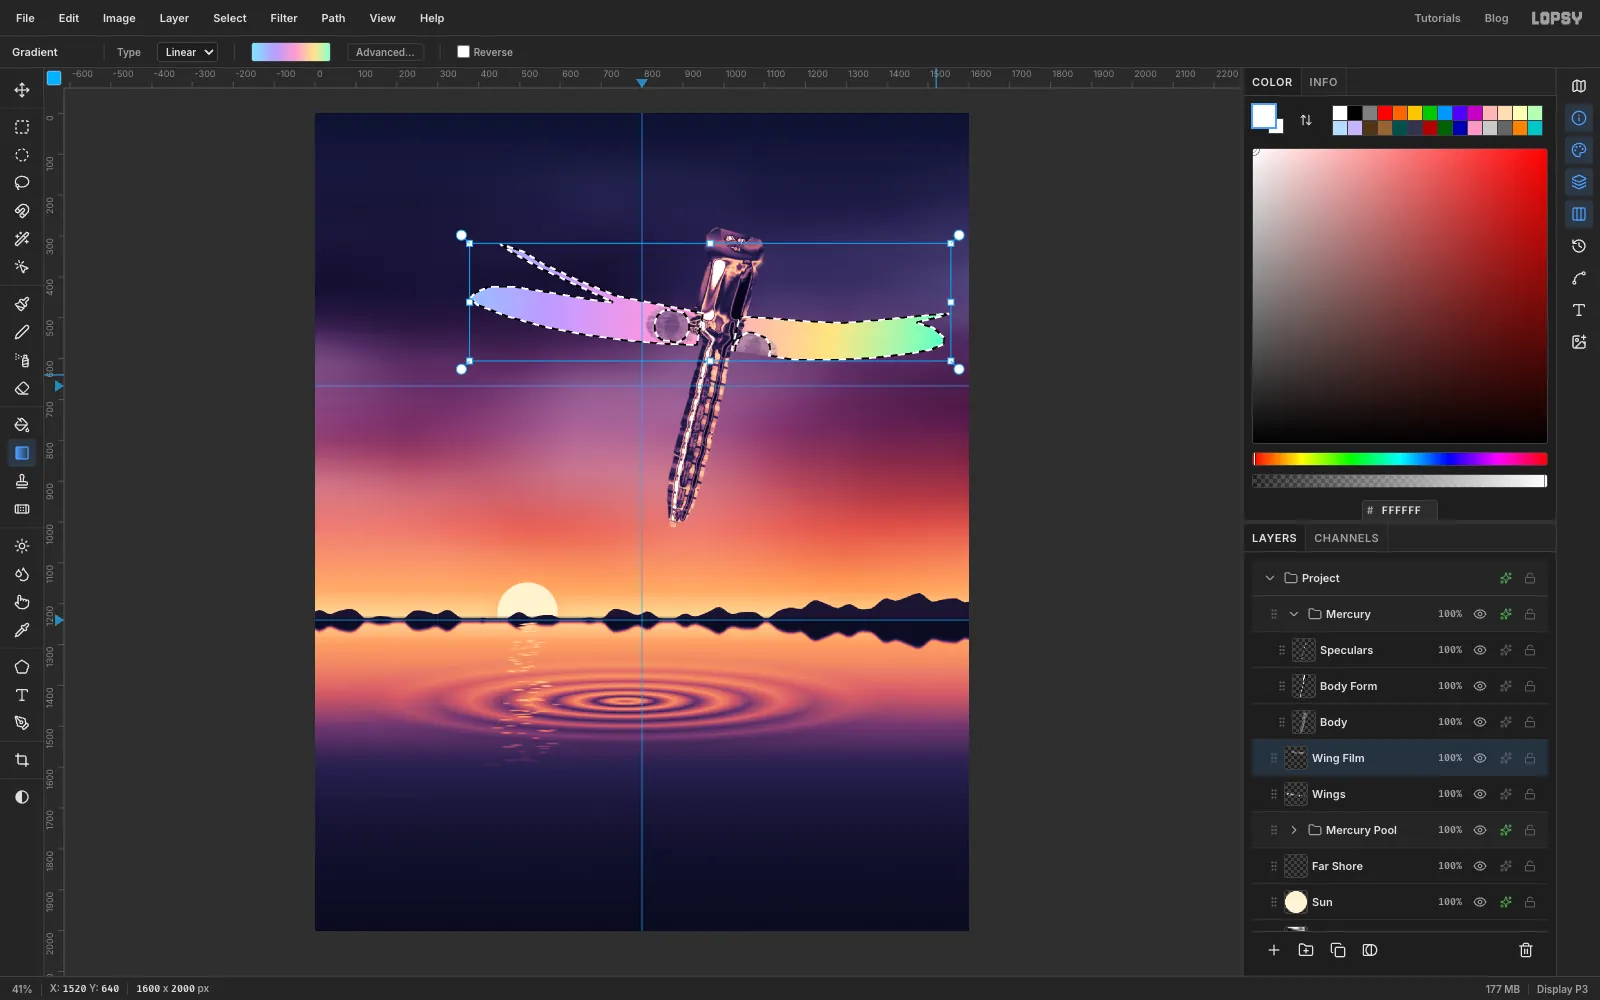
Add an iridescent film
Cmd-click the Wings thumbnail and add a layer named Wing Film. Make a linear gradient: , at 30%, at 55%, at 80% and at 100%. Drag it across the wings from the left tip to the right tip. Deselect, set the layer to Overlay and 60%. The membranes pick up a soap-film shimmer while the veins stay silver.
-
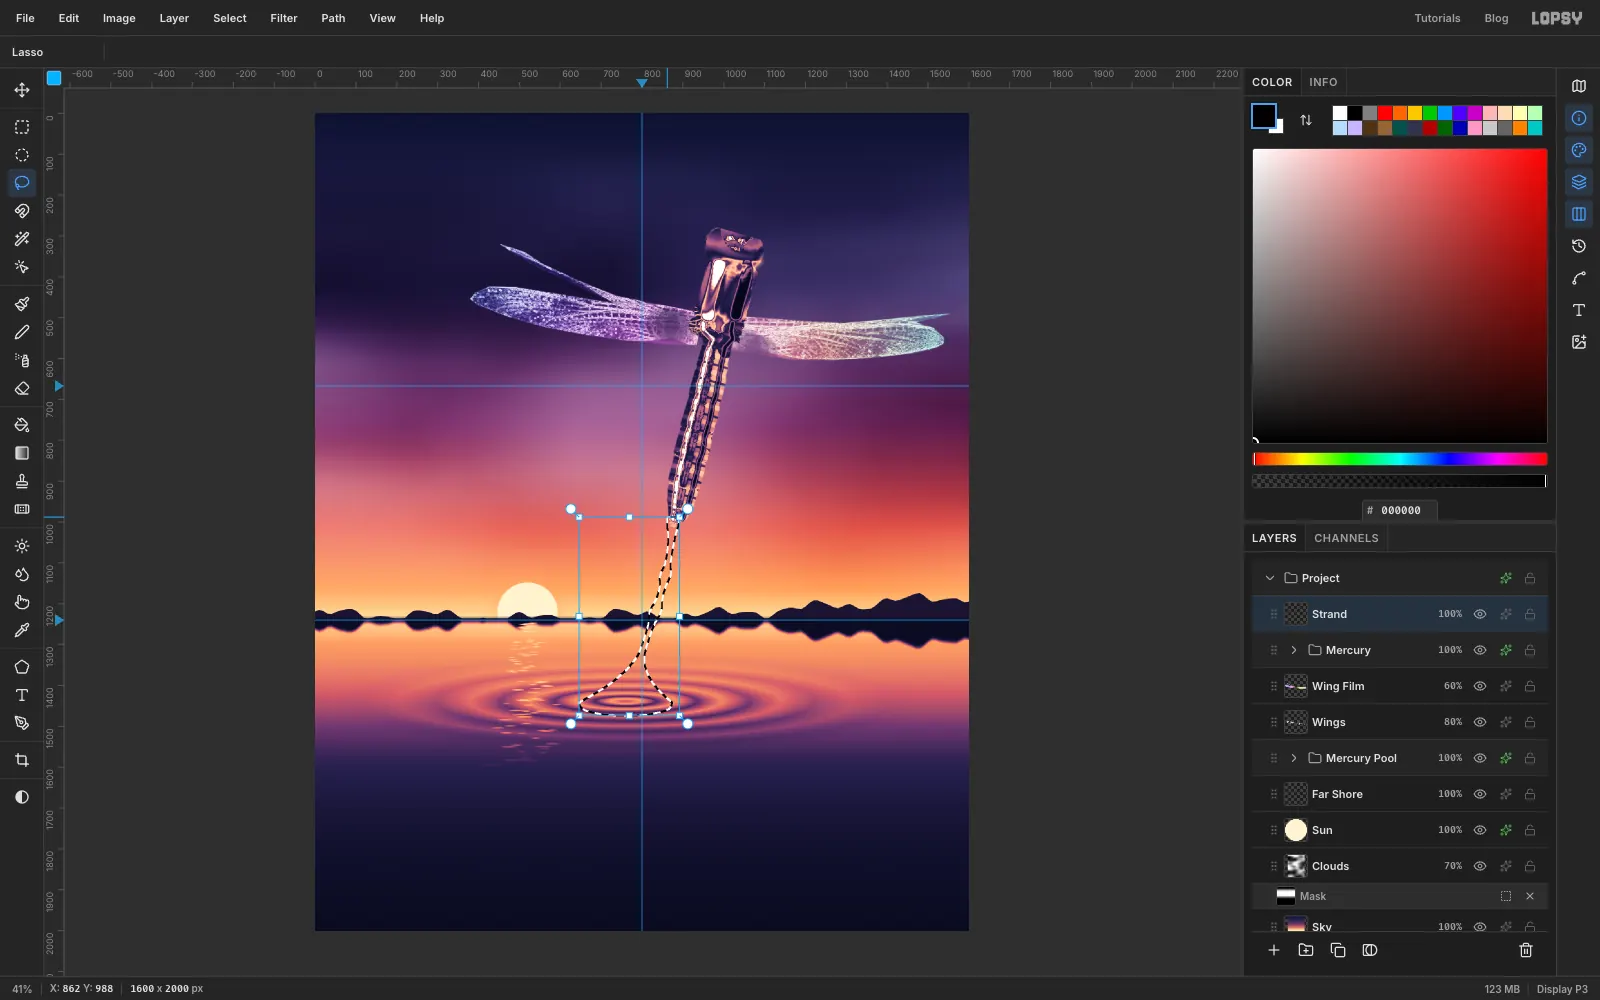
Lasso the mercury strand
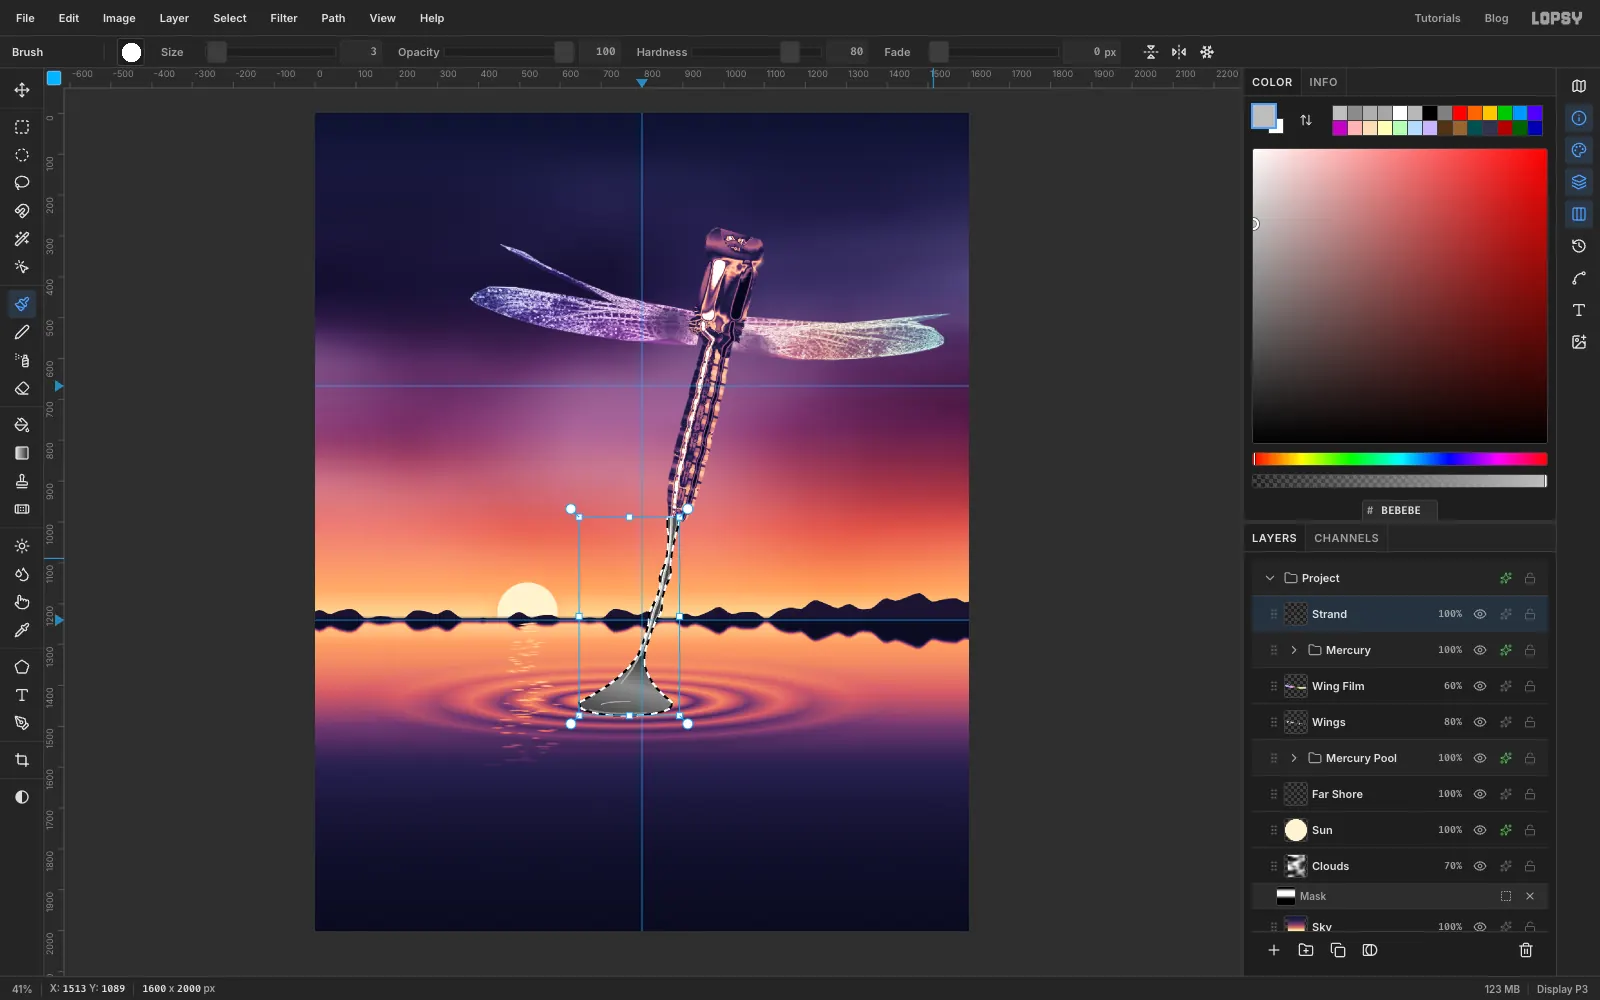
Collapse the Mercury group, click it, and add a layer named Strand. With the Lasso, draw the column of liquid that joins the tail to the water:
- start inside the tail tip, about 30 px wide
- curve down in a gentle S to the centre of the ripples
- pinch it in and out twice on the way, for beads of liquid about to break
- in the last quarter, flare it out in a concave curve to a base about 230 px wide
- close it with a shallow curved edge, like an ellipse seen from the side
-
Shade the strand like a polished rod
Keep the selection. Make a linear gradient: , at 70%, at 86% and at 100%. Drag it from the tail tip to the base. The flare catches some sky where it curves up.
With the Brush:
- paint a light grey (, size 8) stroke down the left third of the column, then a thin white line (size 3) just inside its left edge
- paint a mid grey rim (, size 3) along the right edge
- on the base, brush a soft curve up its sunny left side, a darker arc along its front lip, and a short ring where the base turns up into the column
Blur at Radius 1.5 and deselect. Then run a big (70 px), soft Eraser at 65% along the bottom edge, so the base melts into the water instead of standing on it.
-
Pinch off a teardrop
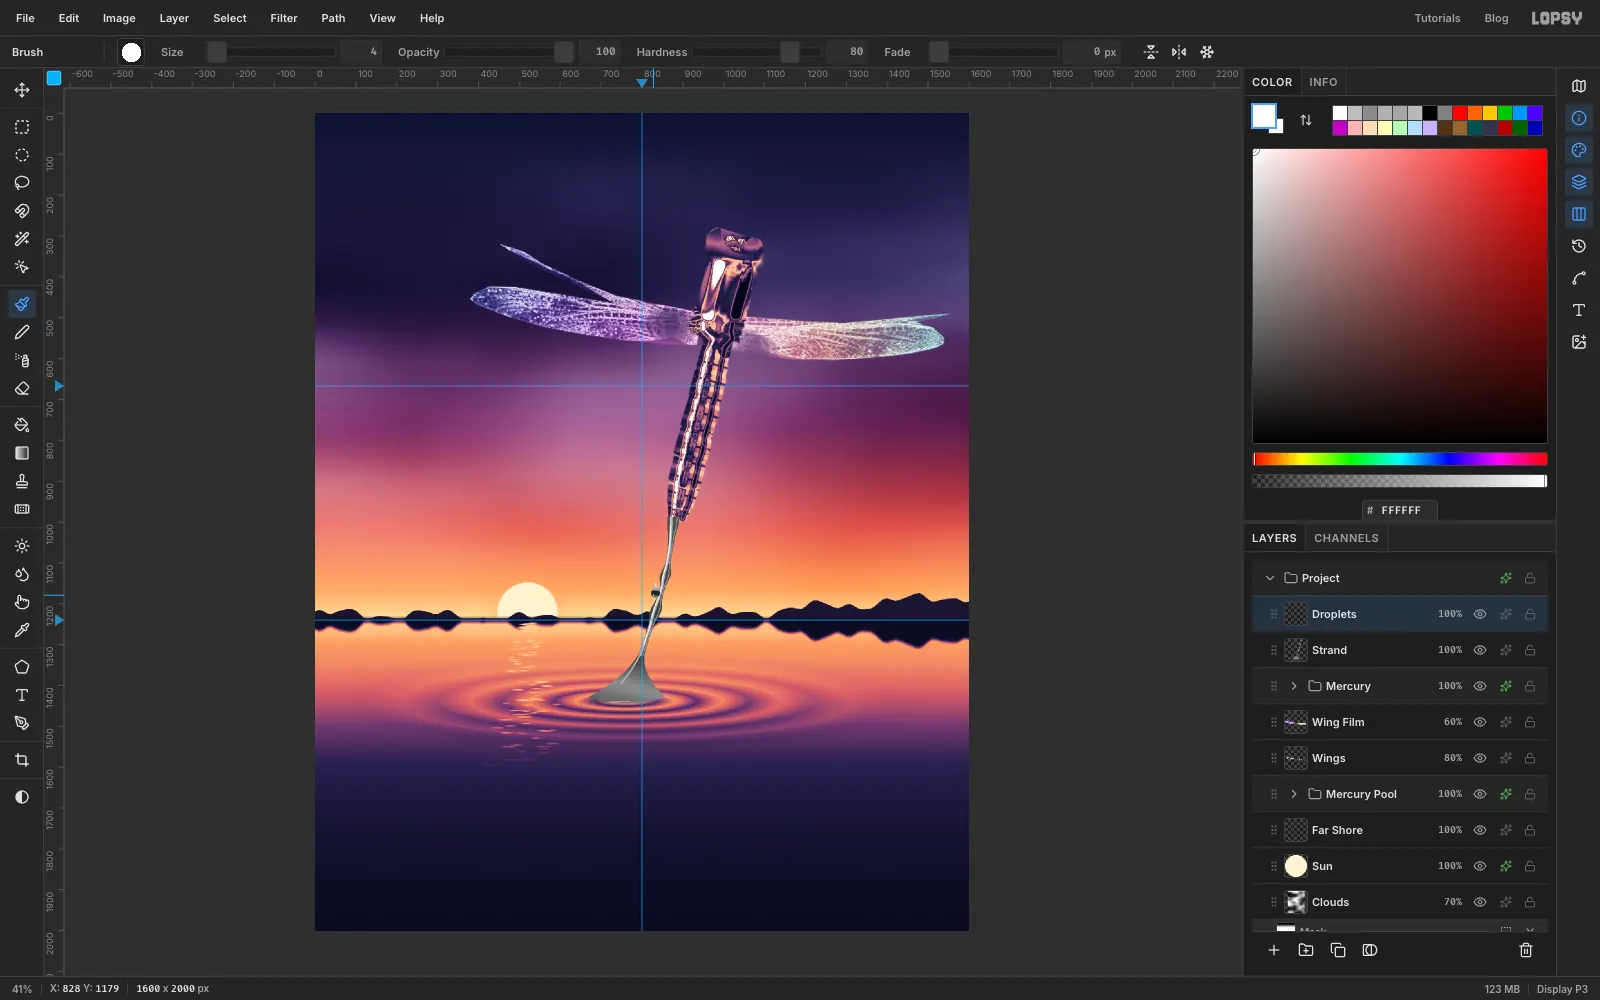
Add a layer named Droplets. Just below and left of the upper bead, lasso a small teardrop with its point up, about 22 px across. Make a linear gradient for a chrome sphere:
- , at 42%, at 50%
- at 58%, at 82%, at 100%
Drag it from the point to the bottom. The sudden drop at 50–58% is the horizon reflected in the drop. Add a tiny white dot on its lower left, facing the sun.
-
Copy and scatter the falling drops
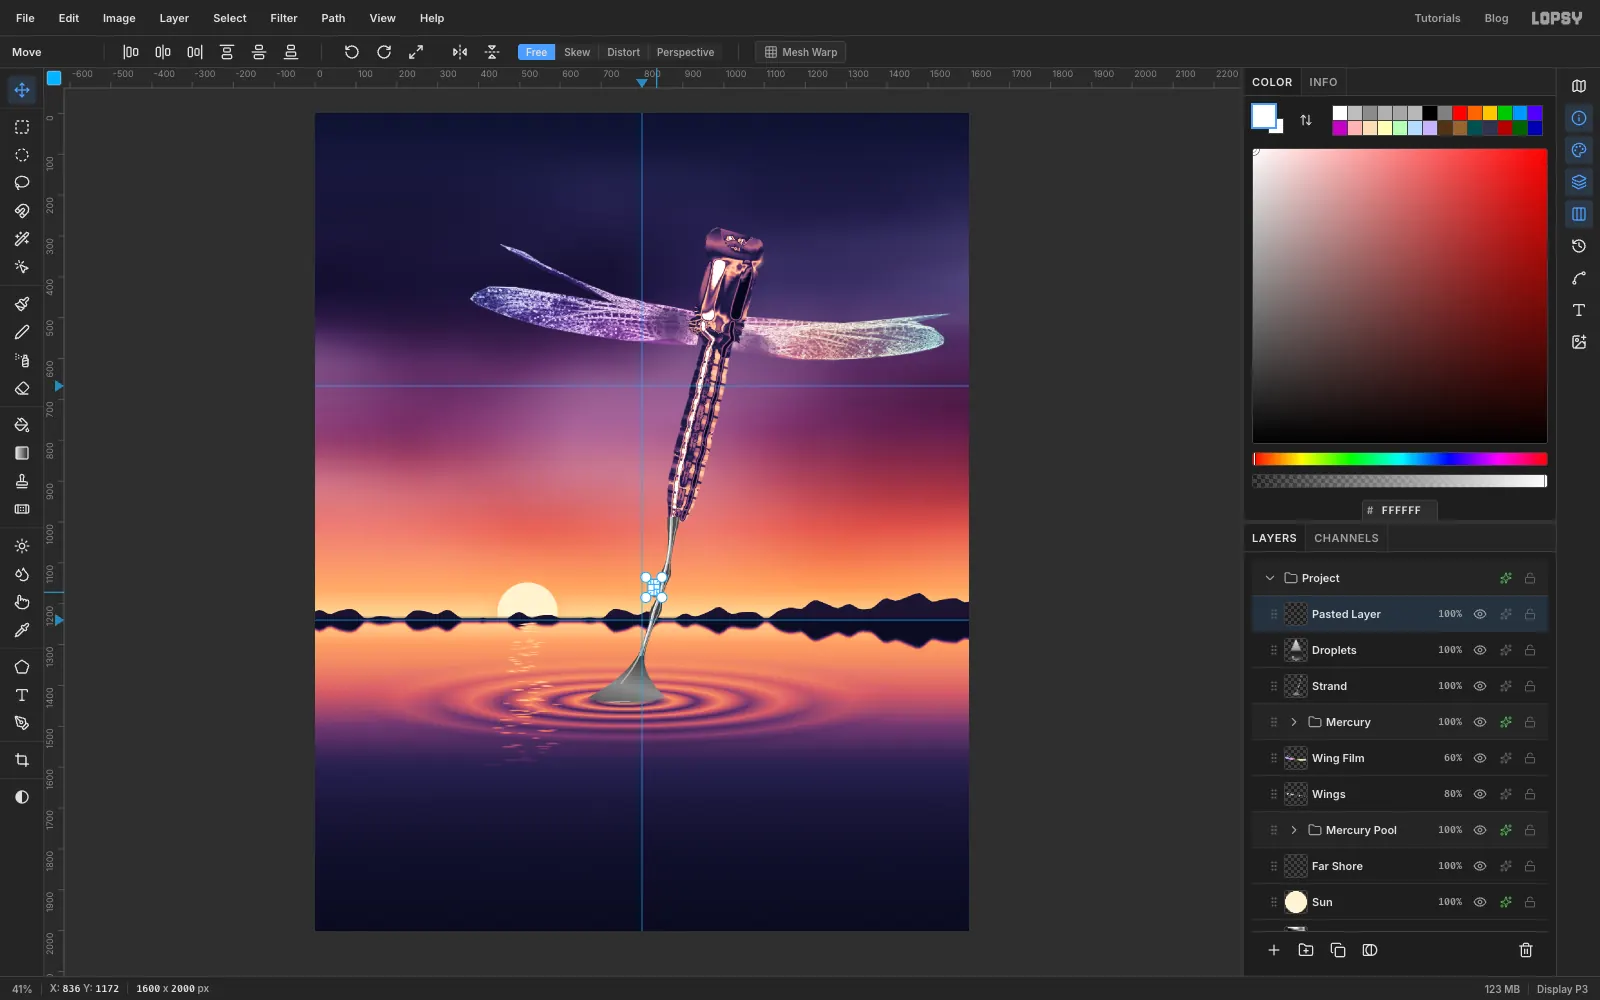
Drag a small marquee round the teardrop, press Cmd+C and Cmd+V. Cmd-drag the copy's corner handle in to shrink it, drag it to a spot below the first drop, and press Cmd+D. Choose Layer → Merge Down to fold it back into Droplets.
Repeat four times. Make each drop smaller as it falls, and spread them a little either side of the strand. Finish with Filter → Motion Blur… at Angle 90, Distance 8, so they streak as they fall.
-
Give it chrome eyes
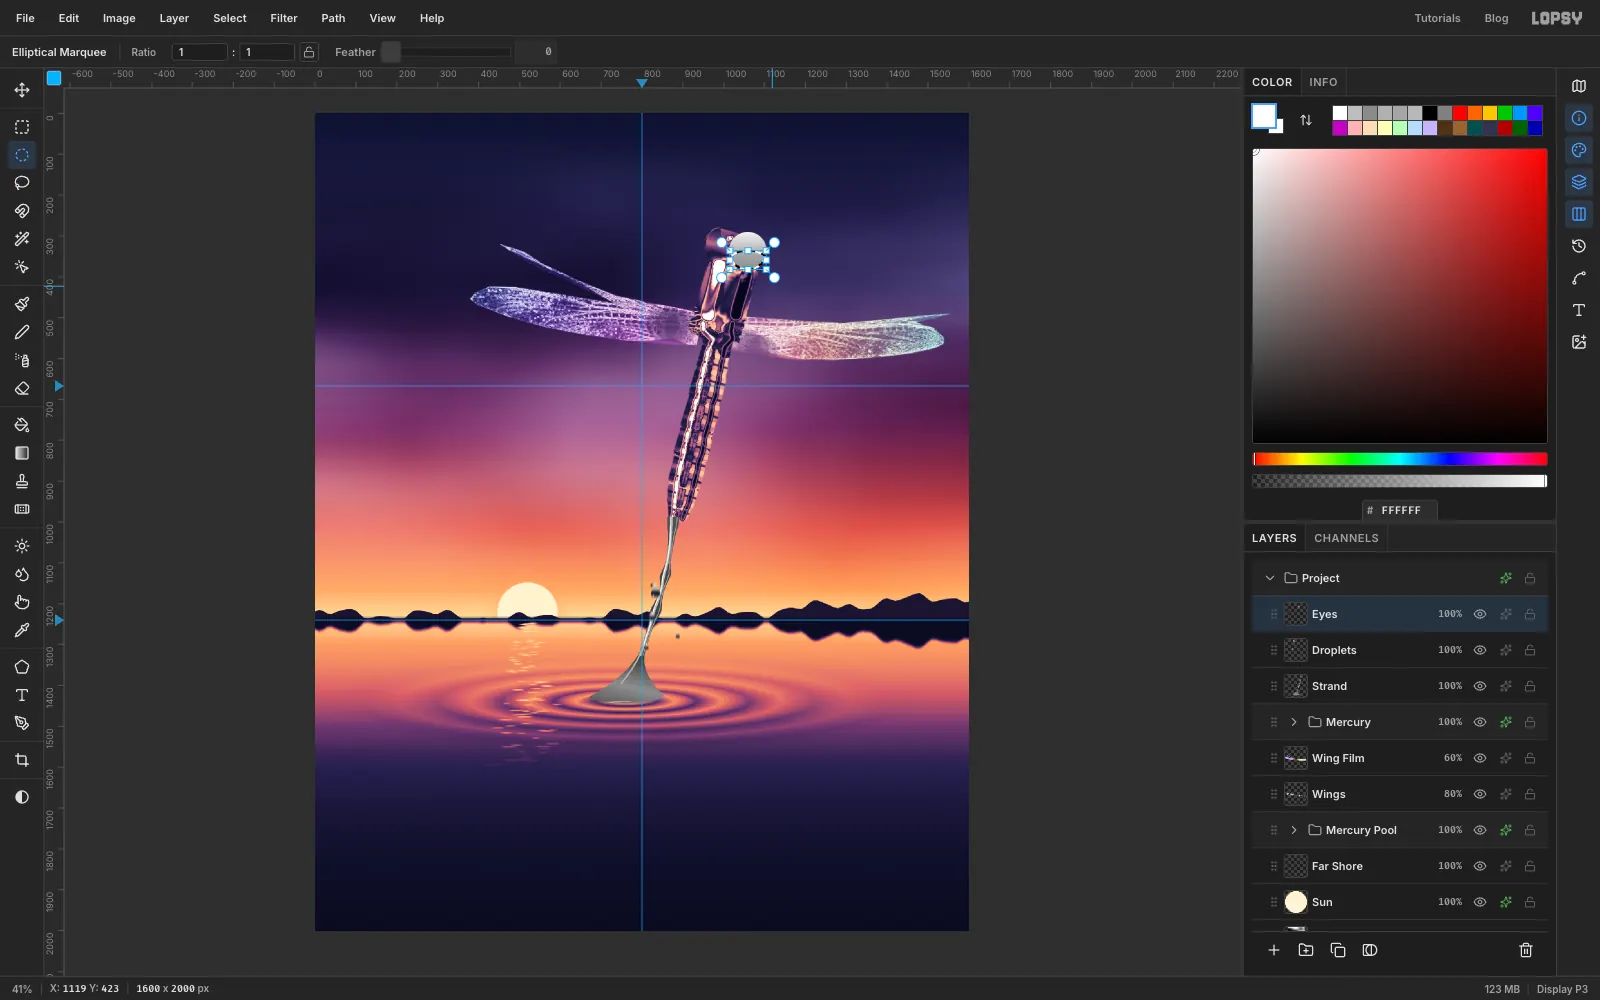
Add a layer named Eyes. Start with the right eye. Drag an elliptical marquee circle over it, about 90 px across, and fill it with a top-to-bottom gradient: at 0%, at 60% and at 100%. That is the sky side of the dome.
Hold Shift and Alt and drag a wider, flatter ellipse whose top edge crosses the middle of the eye. This keeps only the overlap: the lower part of the eye, with an arched top. Fill it with a gradient dragged from the middle of the eye to its bottom: at 0%, at 70% and at 100%. On a sphere the reflected horizon wraps round as a curve, not a ruler line. Drag the same circle again with the Elliptical Marquee and blur it at Radius 1.5. Then repeat for the left eye. Doing the right eye first matters: the left eye is painted on top where they overlap, so it reads as the nearer dome.
With the Brush, click a soft white specular (size 15, Hardness 0) on the lower left of each eye, facing the sun. Then set Hardness back to 100 and stroke a thin rim (size 3) along each eye's upper-right edge.
-
Map the liquid with the same palette
Click Eyes, Shift-click Strand, choose Layer → Group Layers and rename the group Liquid. Add a Gradient Map with the same six chrome stops as the Mercury group, but no Curves wave. Simple shapes like drops and rods look cleaner without the extra folds.
-
Copy just the dragonfly
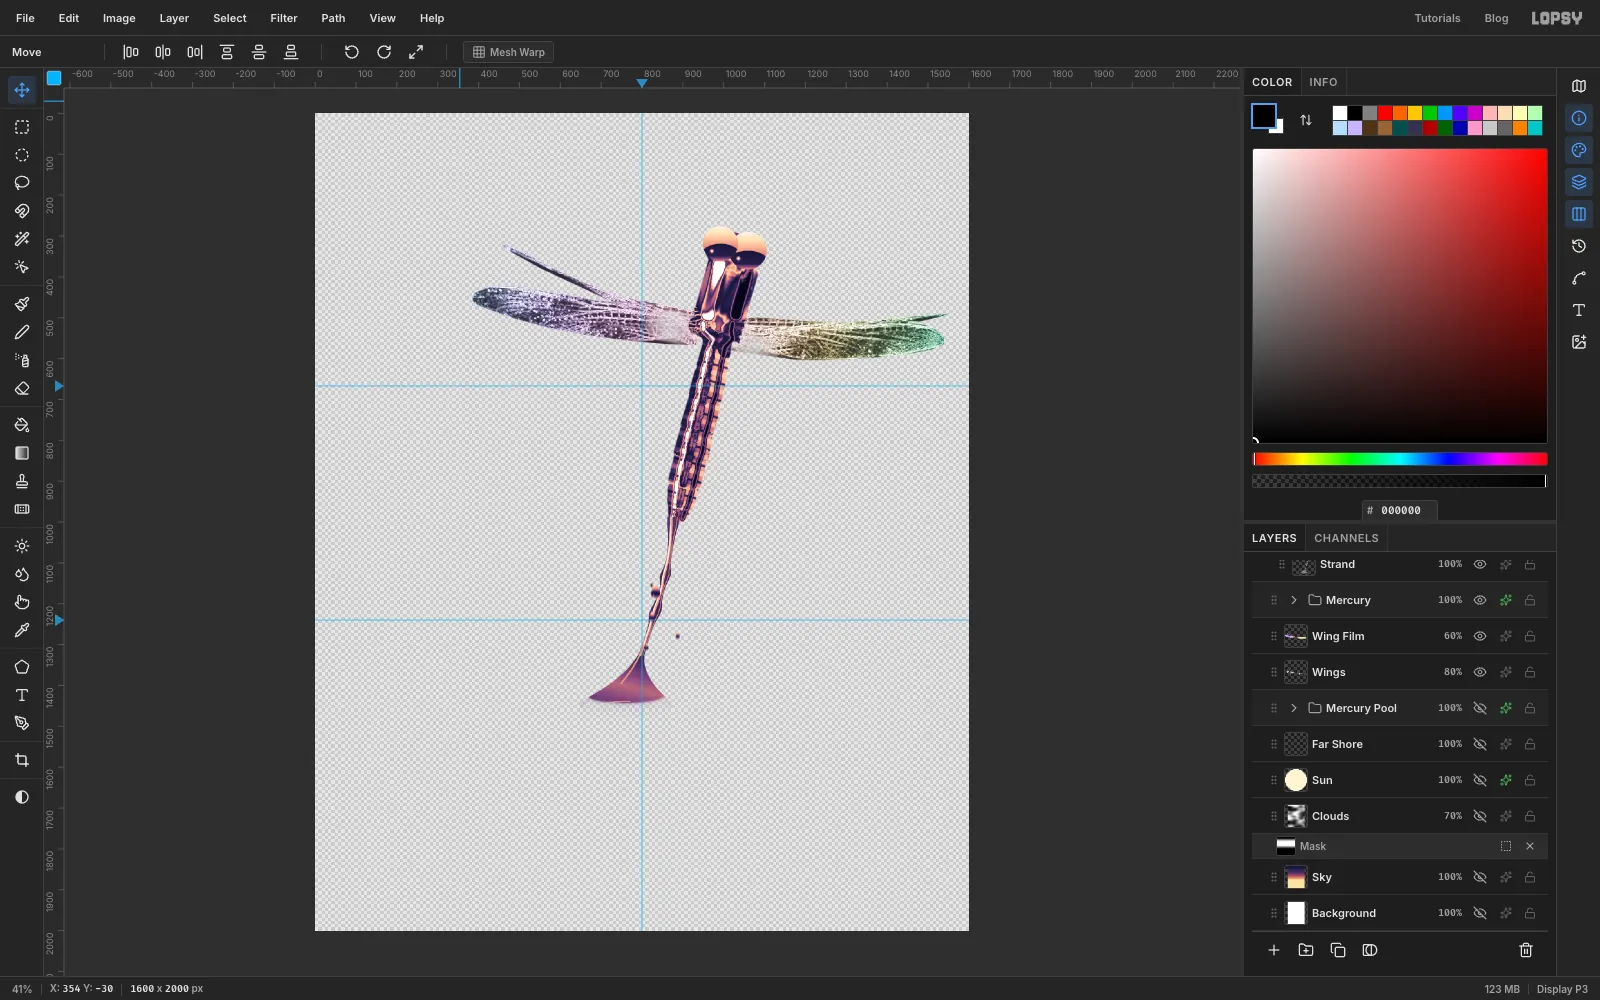
Click the eye icons on Mercury Pool, Far Shore, Sun, Clouds, Sky and Background to hide the scenery. Choose Edit → Copy Merged (Shift+Cmd+C), which copies everything that's visible as one picture. Turn the scenery back on.
-
Flip it into the water
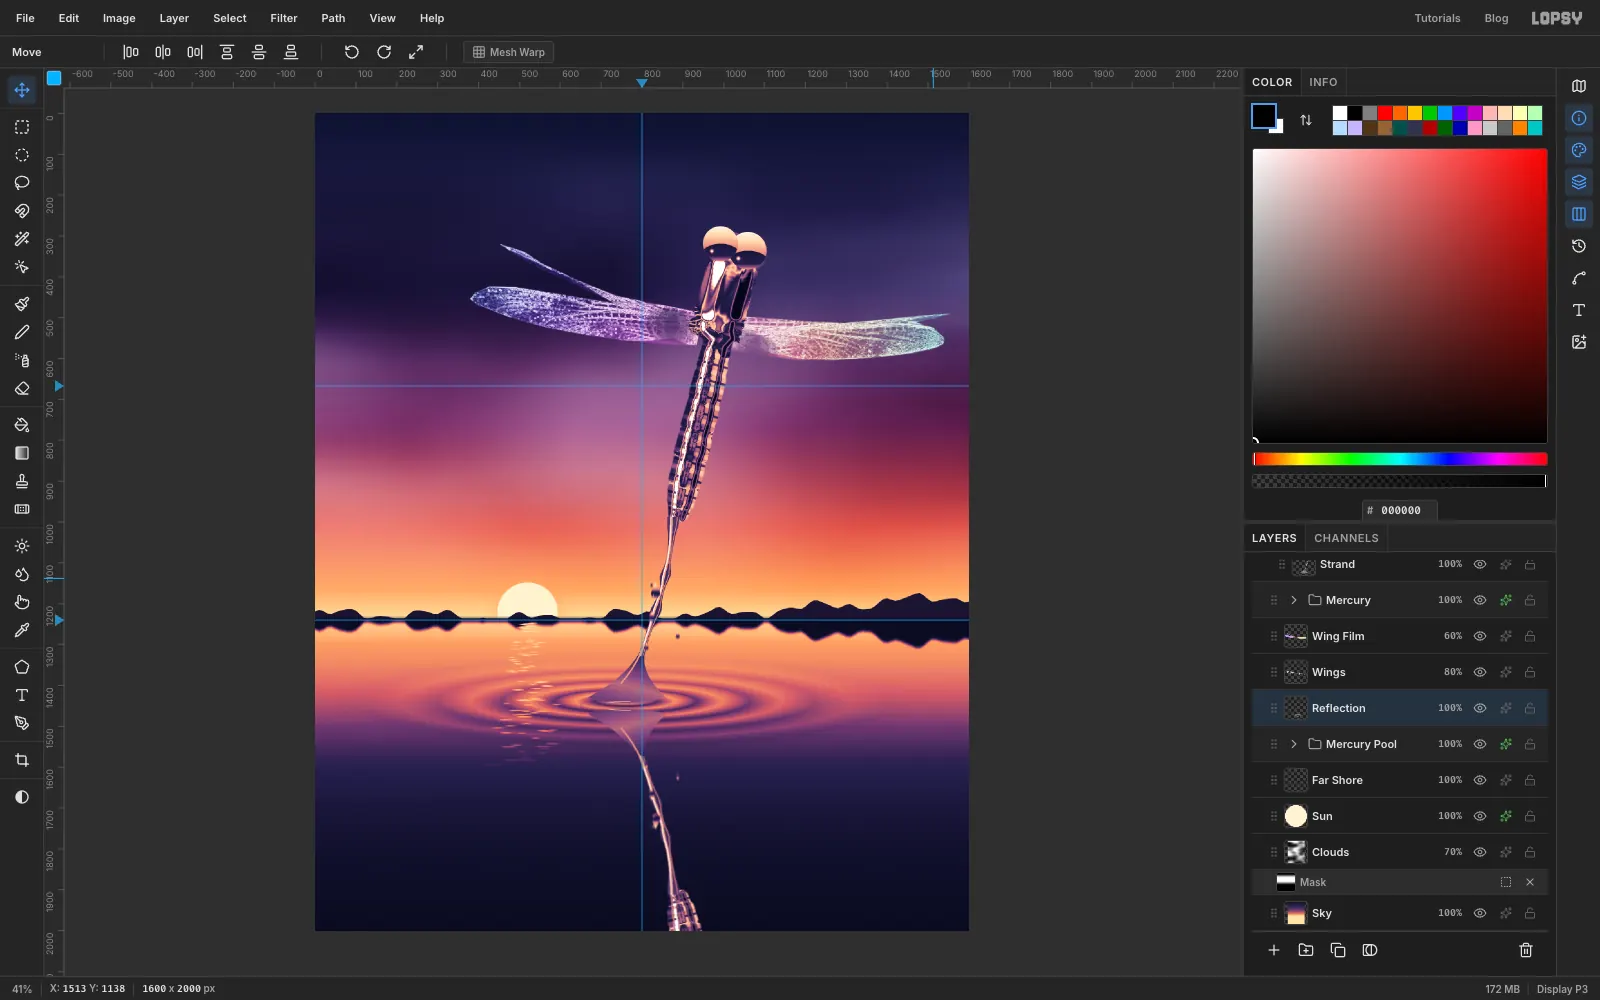
Click Mercury Pool (still collapsed) and press Cmd+V. Rename the paste Reflection and choose Image → Flip Vertical. With the Move tool, nudge it with Shift+↓ or Shift+↑ until the upside-down meniscus touches the real one at the water line. Objects reflect about the point where they meet the water, not about the horizon. Run Motion Blur at Angle 0, Distance 4 to blur it a little sideways.
-
Wobble the reflection with Mesh Warp
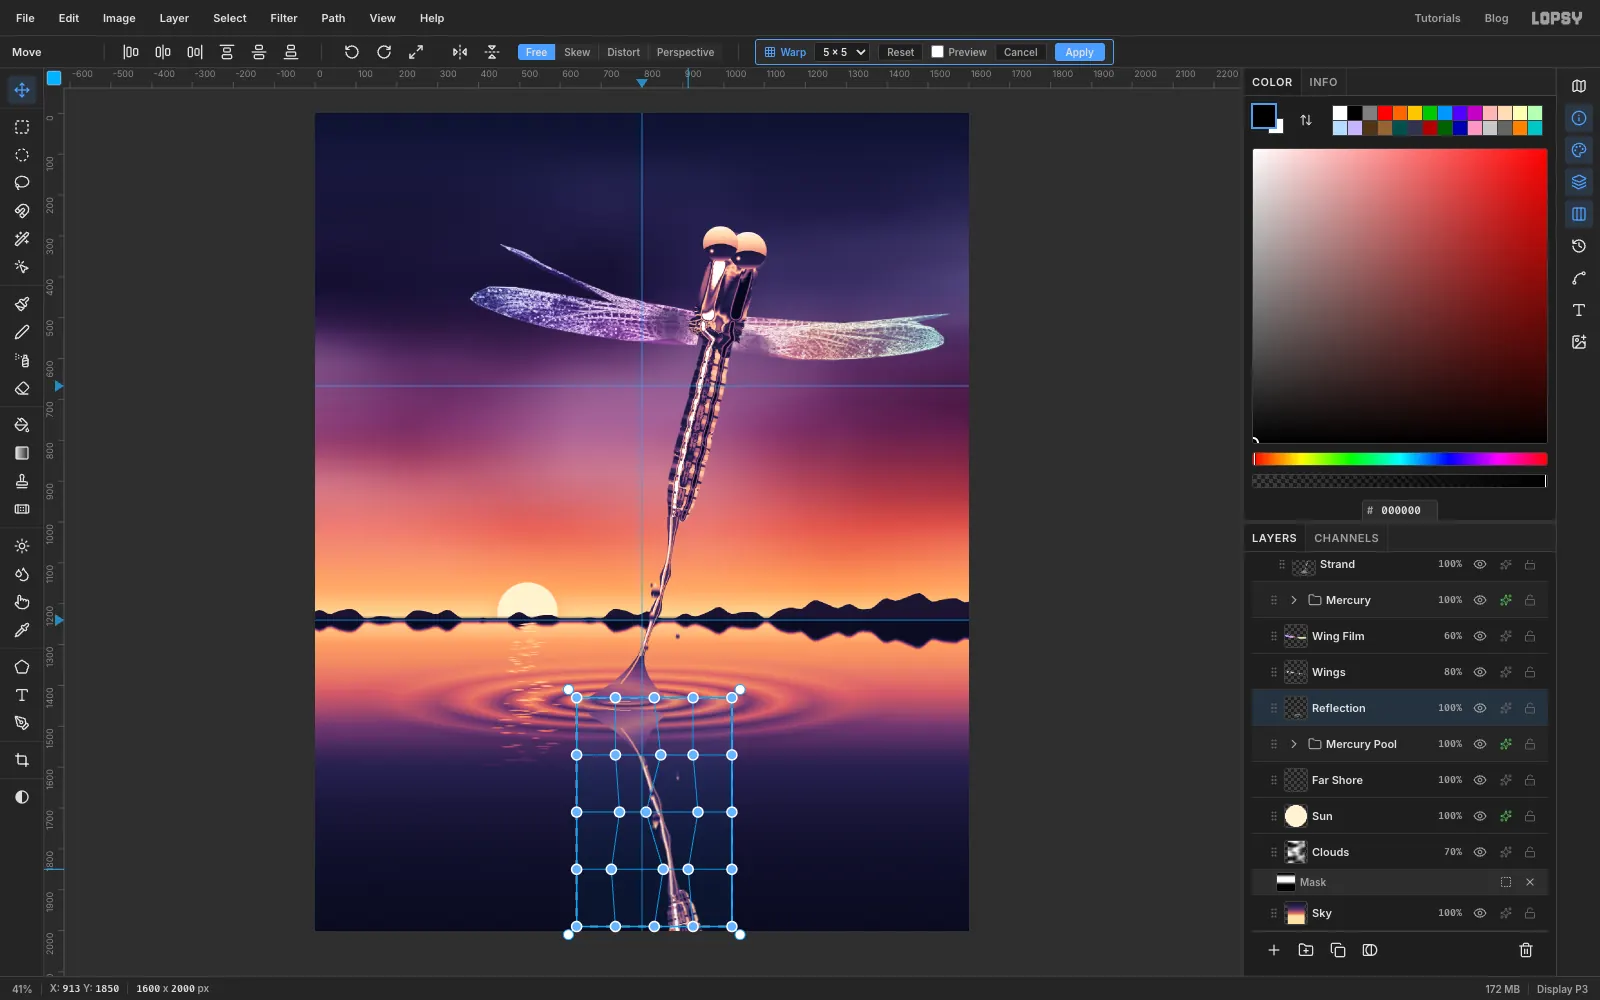
Drag a marquee around the reflection, from the meniscus to the bottom edge. With the Move tool, click Mesh Warp and set the grid to 5 × 5. Drag the inner points a little left and right, alternating as you go down, so the reflection snakes as if the rings were moving under it. Click Apply and deselect.
-
Fade the reflection into the deep water
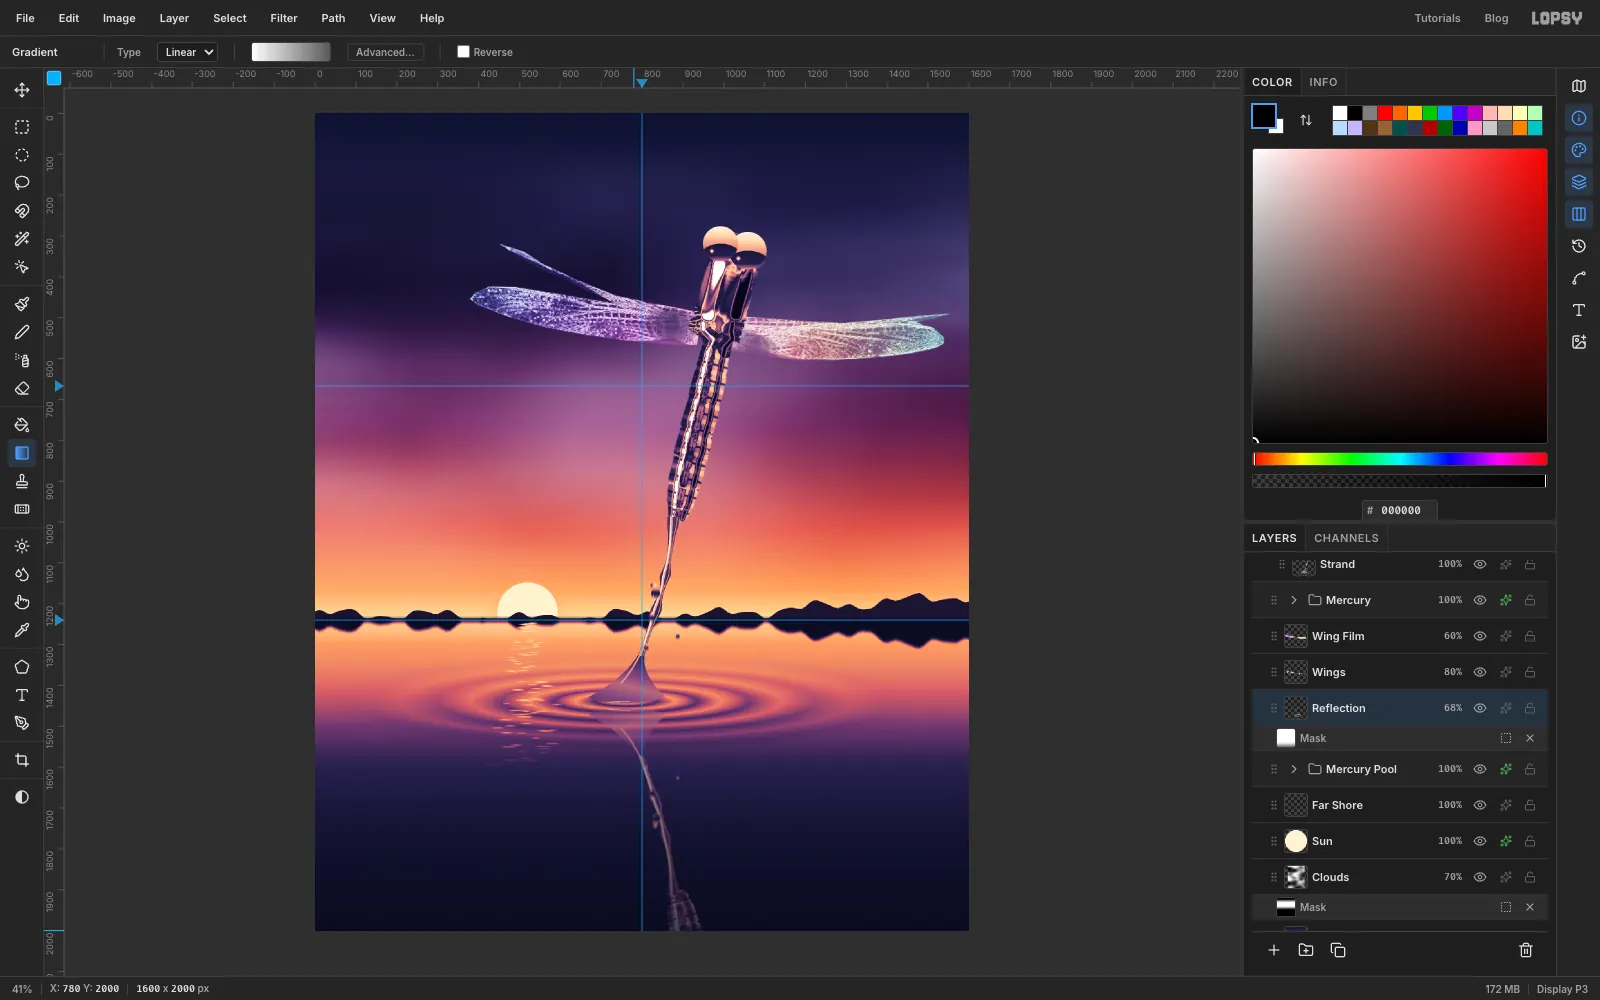
Set Reflection to 68%. Click Add Mask, click the mask thumbnail, and drag a linear gradient from white at the water line to at the bottom edge. Click the layer name to leave mask mode. The reflection is clear near the meniscus and gets darker with depth, but it still fills the bottom of the picture.
-
Draw cattail stems with the Pen
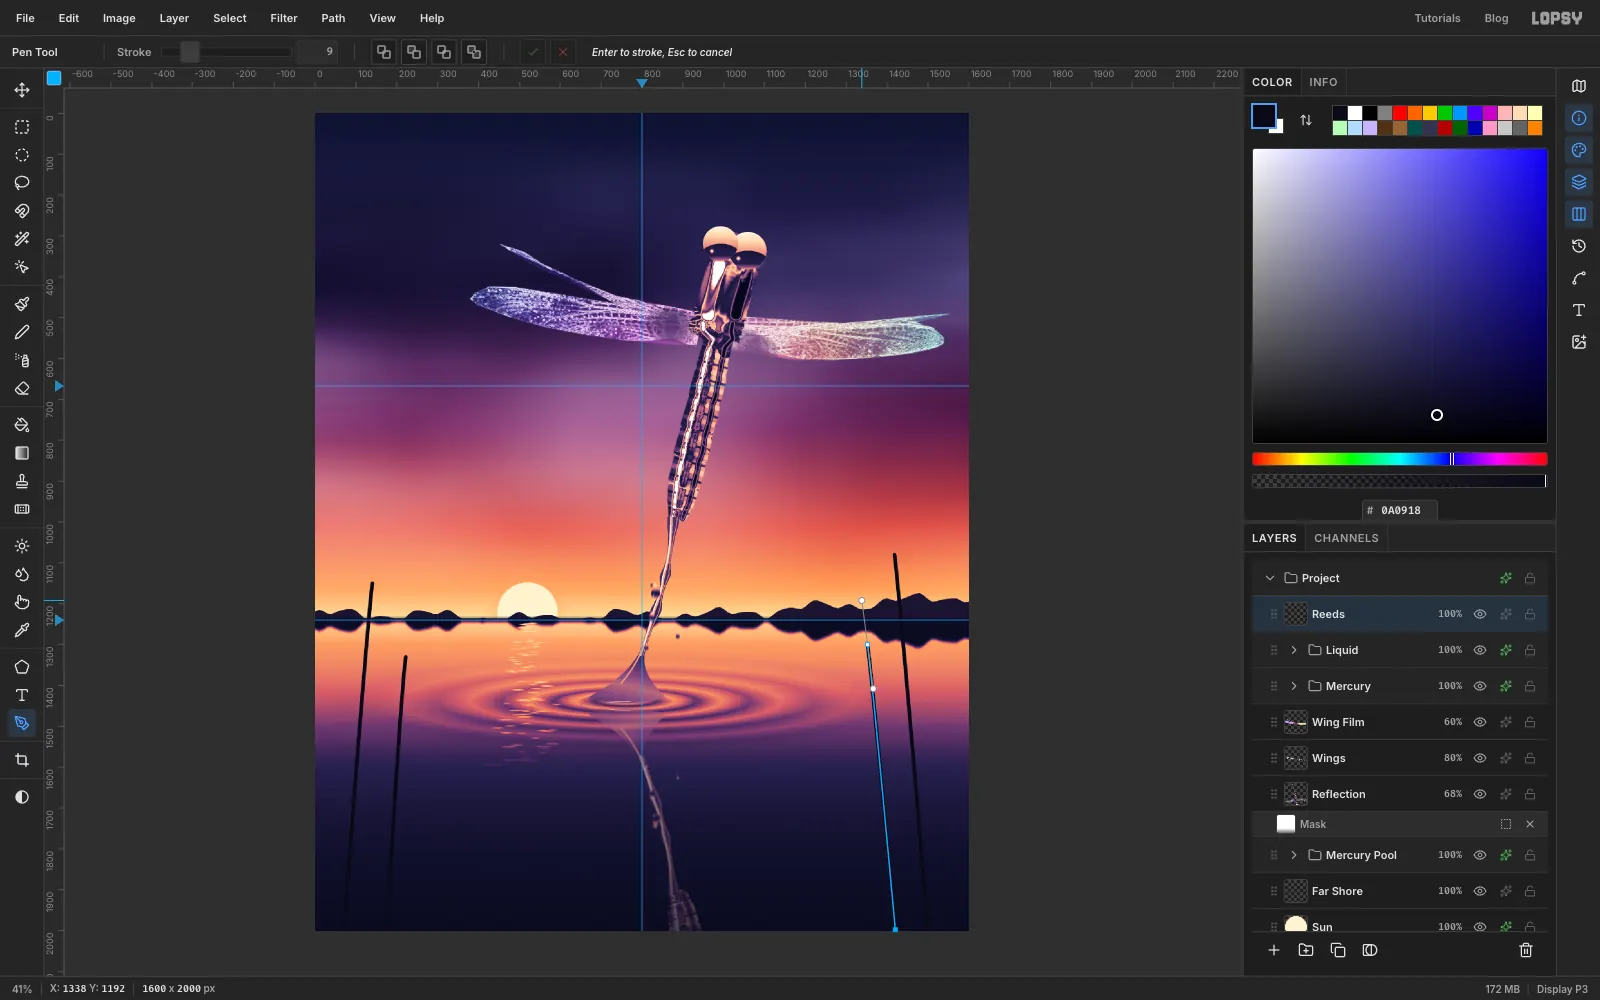
Collapse Liquid, click it, and add a layer named Reeds. Set the foreground to . Pick the Pen tool and set Stroke to 9.
For each stem, click on the bottom edge, then click-and-drag where the stem should end to bend it. Press Enter to stroke the path. Draw two stems on the left, well clear of the sun glitter, and two on the right. Make them different heights.
-
Add leaves and cattail heads
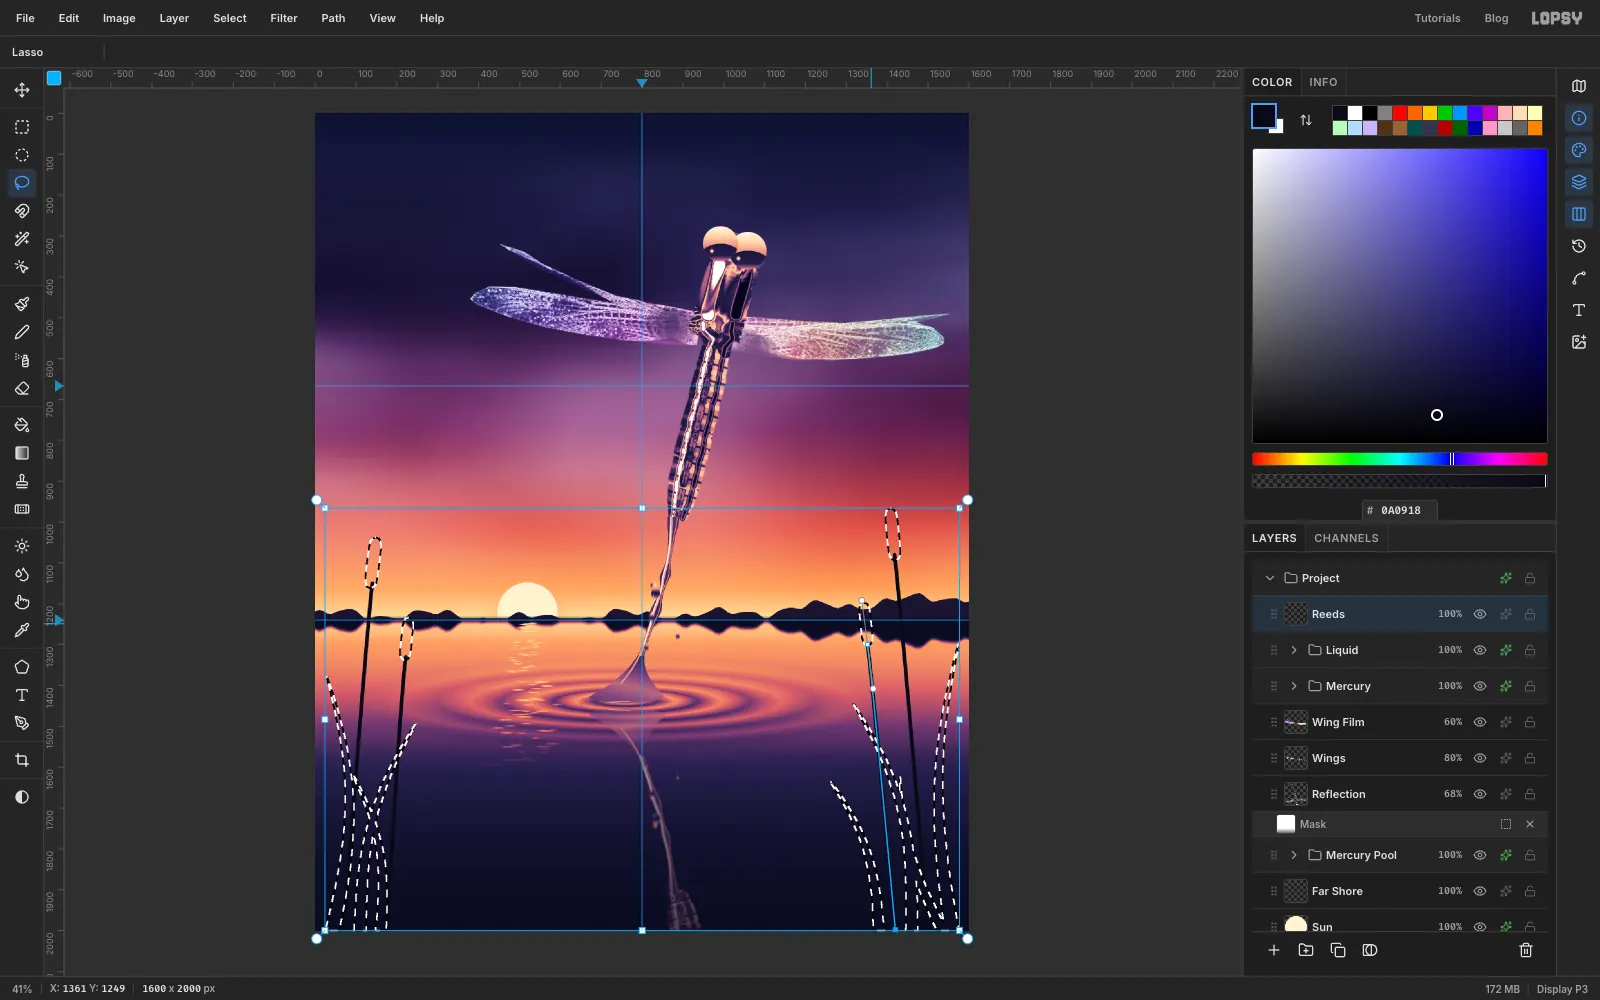
With the Lasso, draw long tapering leaf blades rising from the bottom corners. Hold Shift to add each new blade, and lean them different ways. Add a narrow capsule at the top of each stem for the cattail heads. Fill and deselect. Then use the Pencil at size 3 to Shift-click a short spike above each head.
-
Warm the sun with a haze
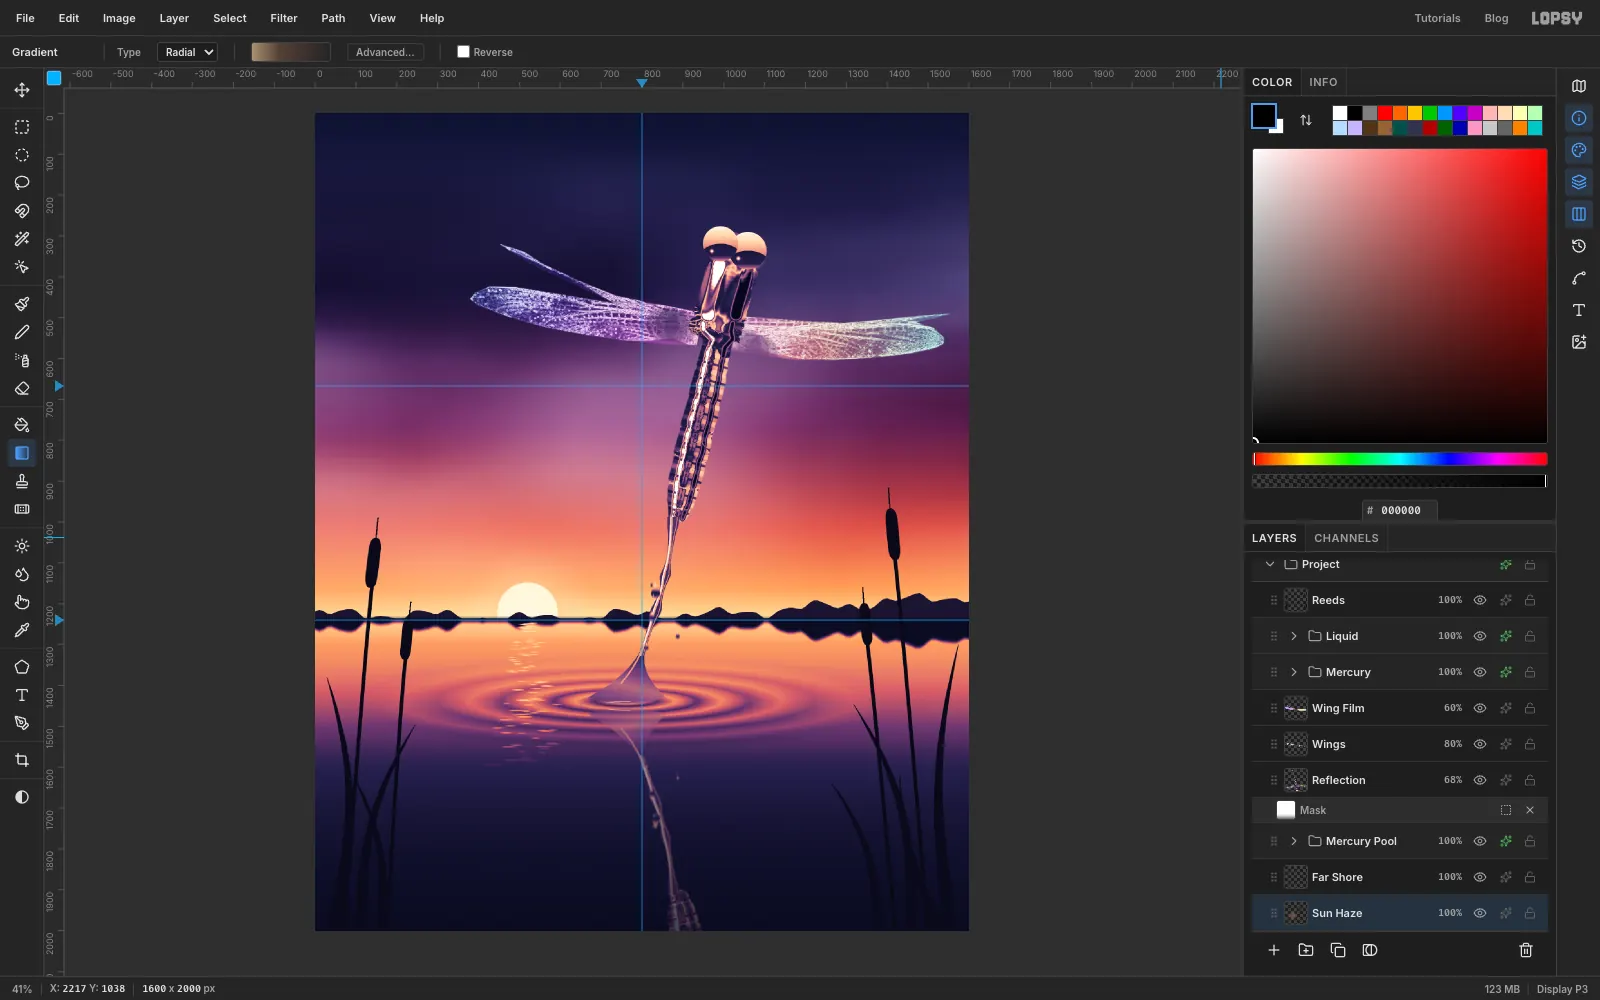
Click Sun and add a layer named Sun Haze. Make a Radial gradient with three stops, setting each stop's opacity with the bar under the colour picker:
- position 0%: , opacity 60%
- position 35%: , opacity 22%
- position 100%: , opacity 0% Drag from the centre of the sun outward about 460 px and set the layer to Screen. Because the haze sits under Far Shore and the pond, the ridge and the water cut the glow off cleanly at the horizon.
-
Bloom the highlights
Click Reeds, the top layer. Choose Edit → Copy Merged, press Cmd+V, and rename the paste Bloom. Run Filter → Bloom… with Threshold 82, Soft Knee 30, Radius 36 and Intensity 35.
Keep it subtle. Too much bloom turns the wings into white smears and washes out the sunset.
-
Finish with grain and a vignette
Add a layer named Grain. Fill it with , run Filter → Add Noise… at Amount 14 with Mono and Gaussian, and set it to Overlay at 40%.
Choose Layer → Adjustment Layer…. It opens the adjustments for the whole document (the top Project group). Dismiss the tip with Got it. Leave the four default adjustments (Levels, Curves, Exposure, Hue / Saturation) alone, click Add Adjustment → Vignette and set it to 35. The darker corners keep the eye on the dragonfly. Export it with File → Quick Export PNG.