Design a Maximalist Absinthe Album Cover in Lopsy
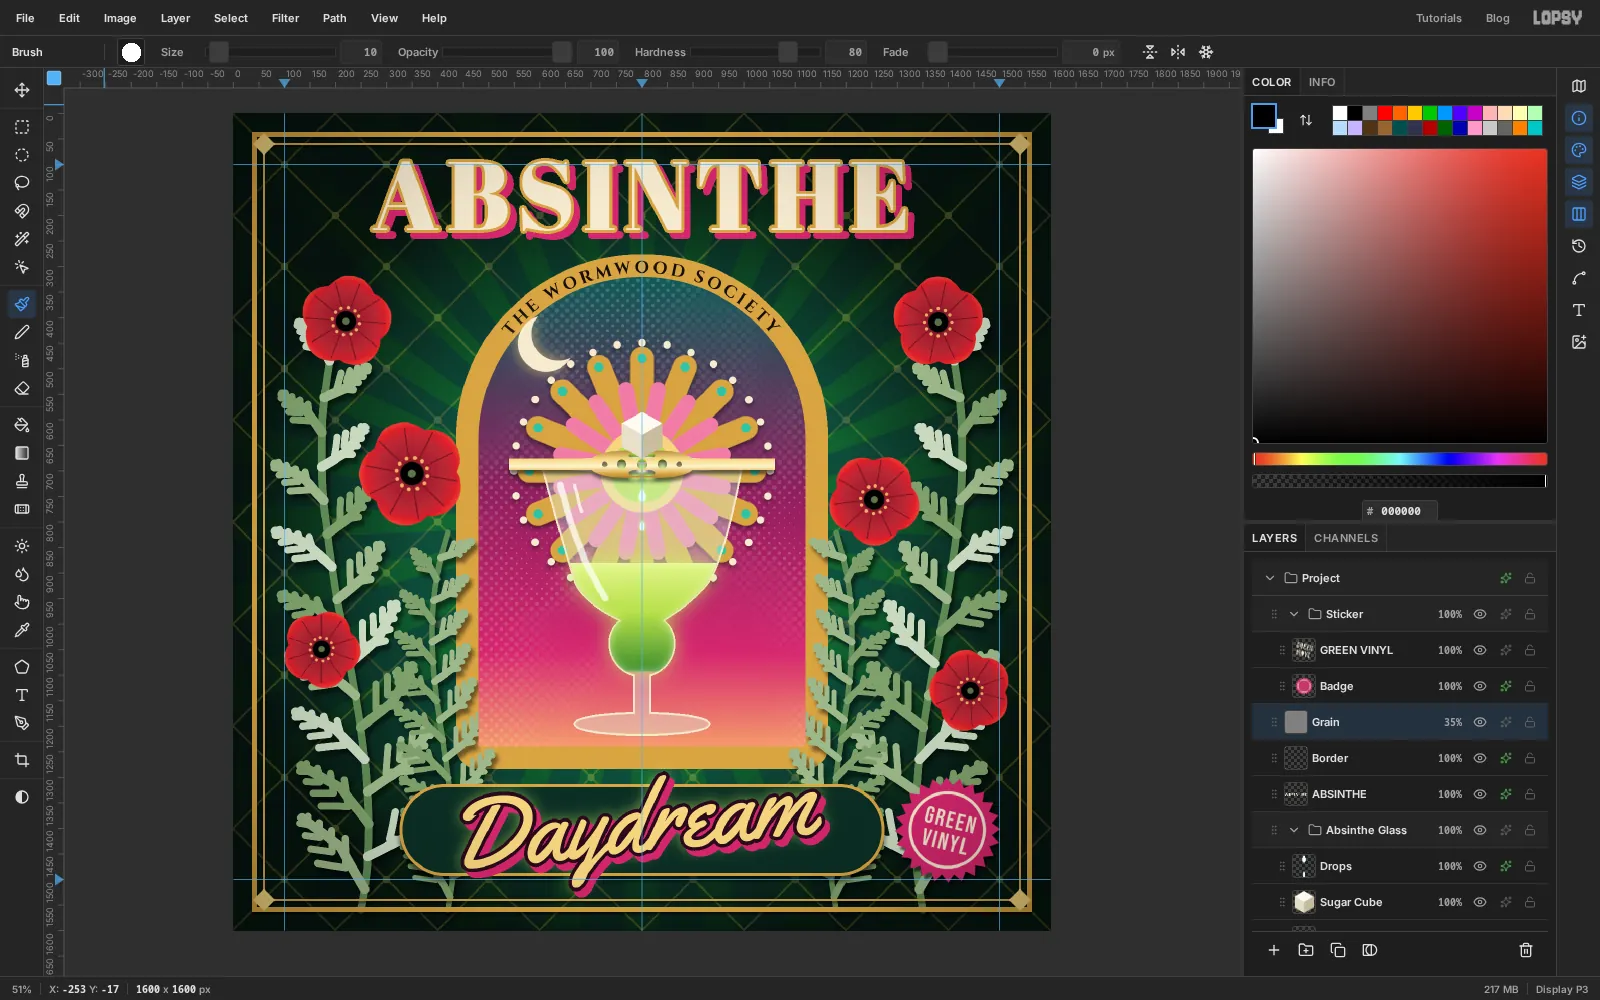
Build a dense, jewel-toned album cover in Lopsy with a radial-symmetry rosette, a Pen-drawn glass, wormwood fronds, text on a path and a Shape-tool cartouche.
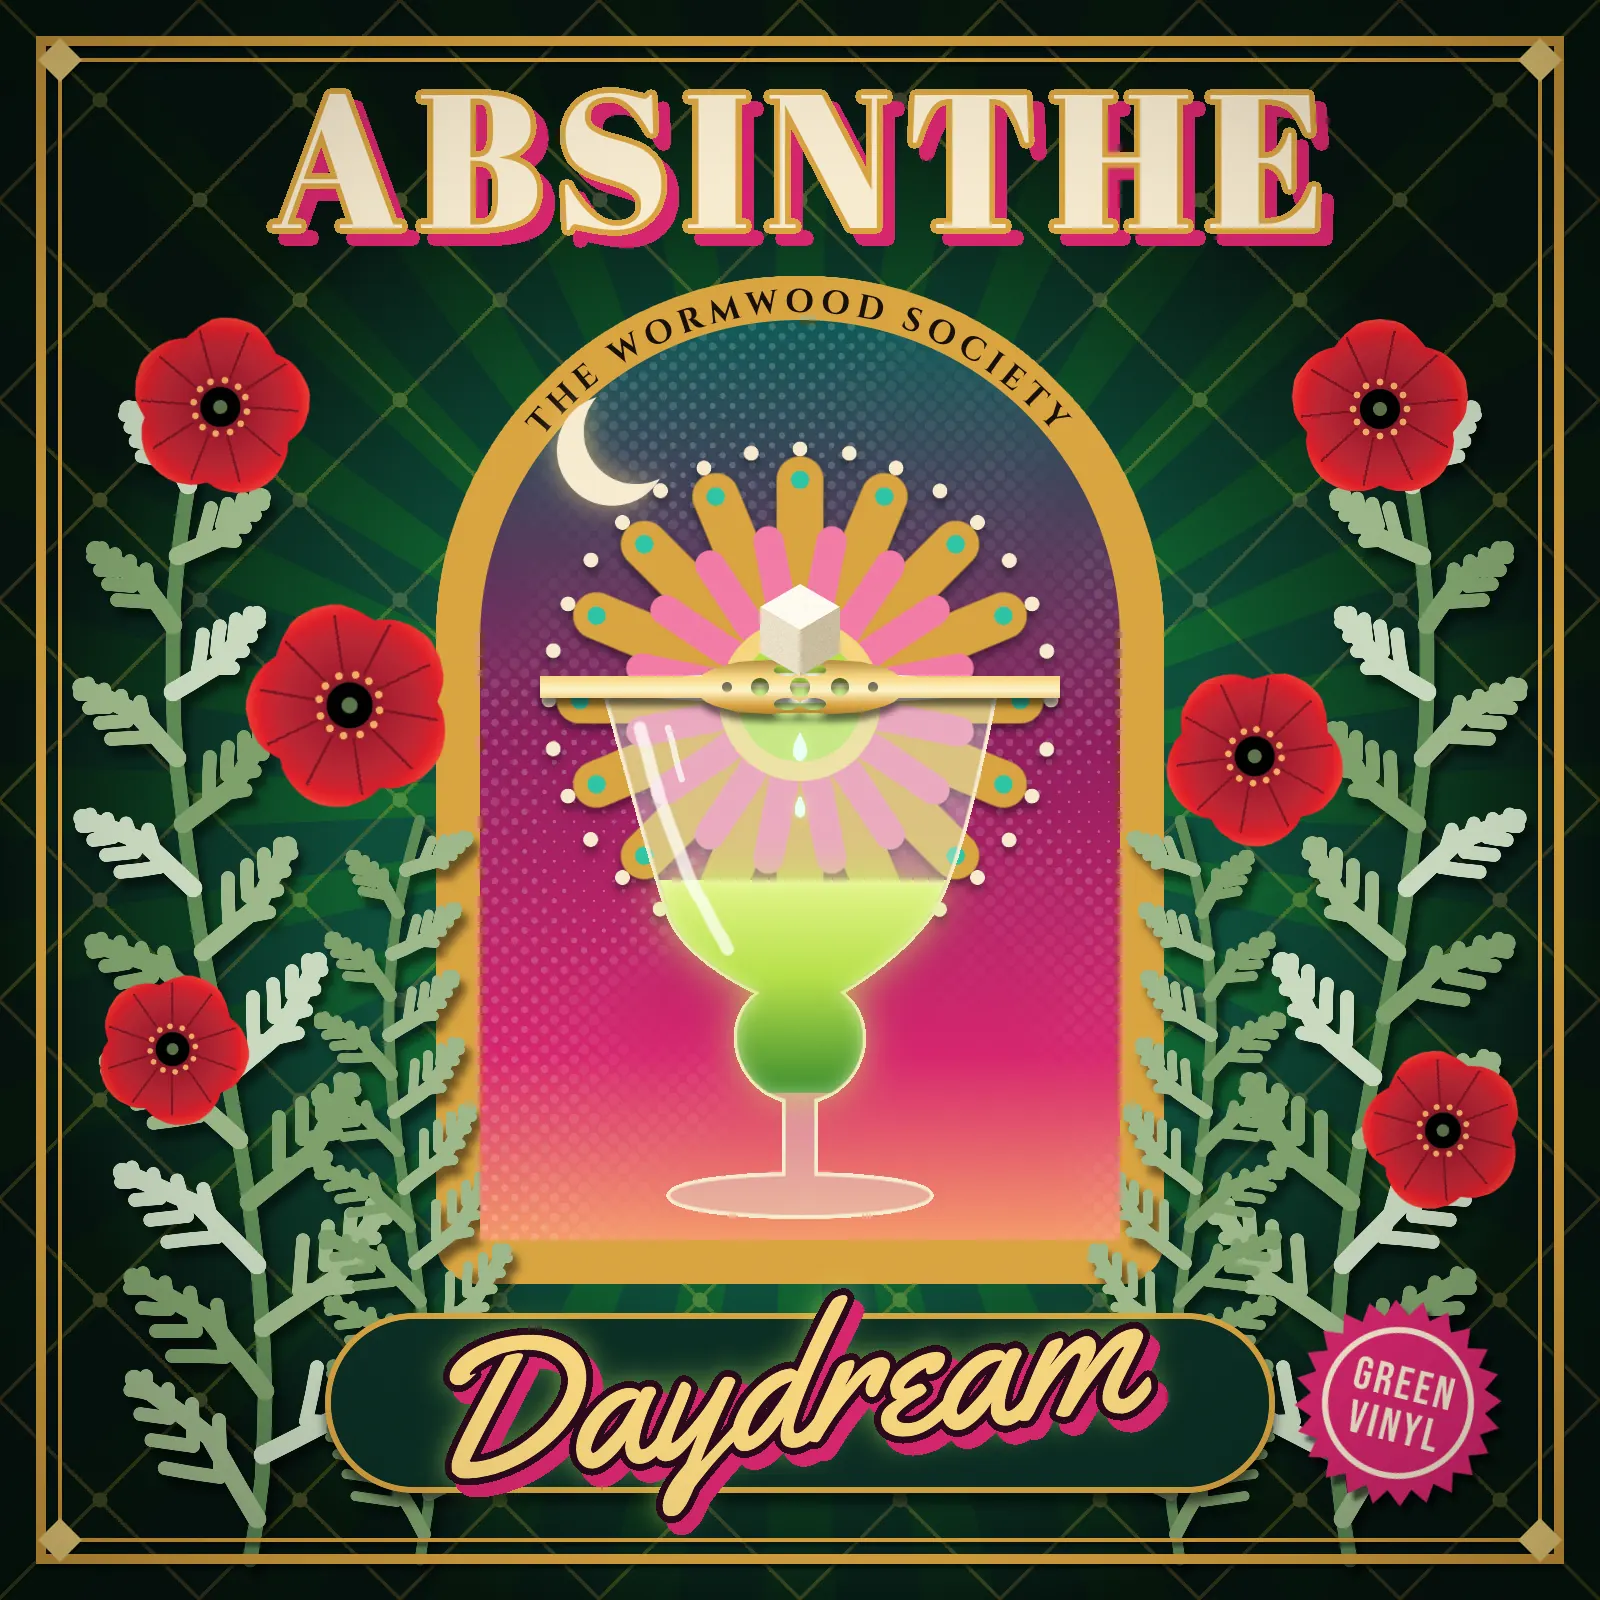
This tutorial builds a square album cover for an imaginary band, The Wormwood Society, and their record Absinthe Daydream. The style is maximalist: pattern on pattern, saturated jewel tones, three typefaces, ornament in every corner. The finished piece is 1600 × 1600 px, a good working size for a 12-inch sleeve or a streaming thumbnail.
Maximalism isn't the same as clutter. Under all the ornament there's a strict structure: a symmetrical arched window in the centre, one hero object inside it (the glass), plants that frame the window from both sides, and type in fixed slots at the top and bottom. Get that skeleton right and you can keep piling on detail without losing the focal point.
Along the way you'll use:
- guides, groups, reordering layers by dragging, and moving, scaling, flipping and rotating with the Move tool's handles
- the Brush with Radial Symmetry, and the Pencil with Shift-click straight lines
- the Pen tool, Path to Selection, and text on a path
- the Rectangular and Elliptical Marquee, the Lasso, adding, subtracting and intersecting selections, and Select → Grow
- the Shape tool's rounded rectangle with a fill and a stroke
- Sunburst, Clouds, Halftone, Add Noise and Hue/Saturation
- Stroke, Drop Shadow, Outer Glow and Inner Glow, the Overlay and Screen blend modes, and a Vignette adjustment
The palette:
-
Velvet
-
Gold
-
light gold
-
cream
-
Dusk sky
-
Absinthe
-
glow
-
Rose
-
fuchsia
-
teal
-
Wormwood
-
Poppy
-
Cartouche
-
ink
-
Set up the canvas and the velvet background
Create a new document
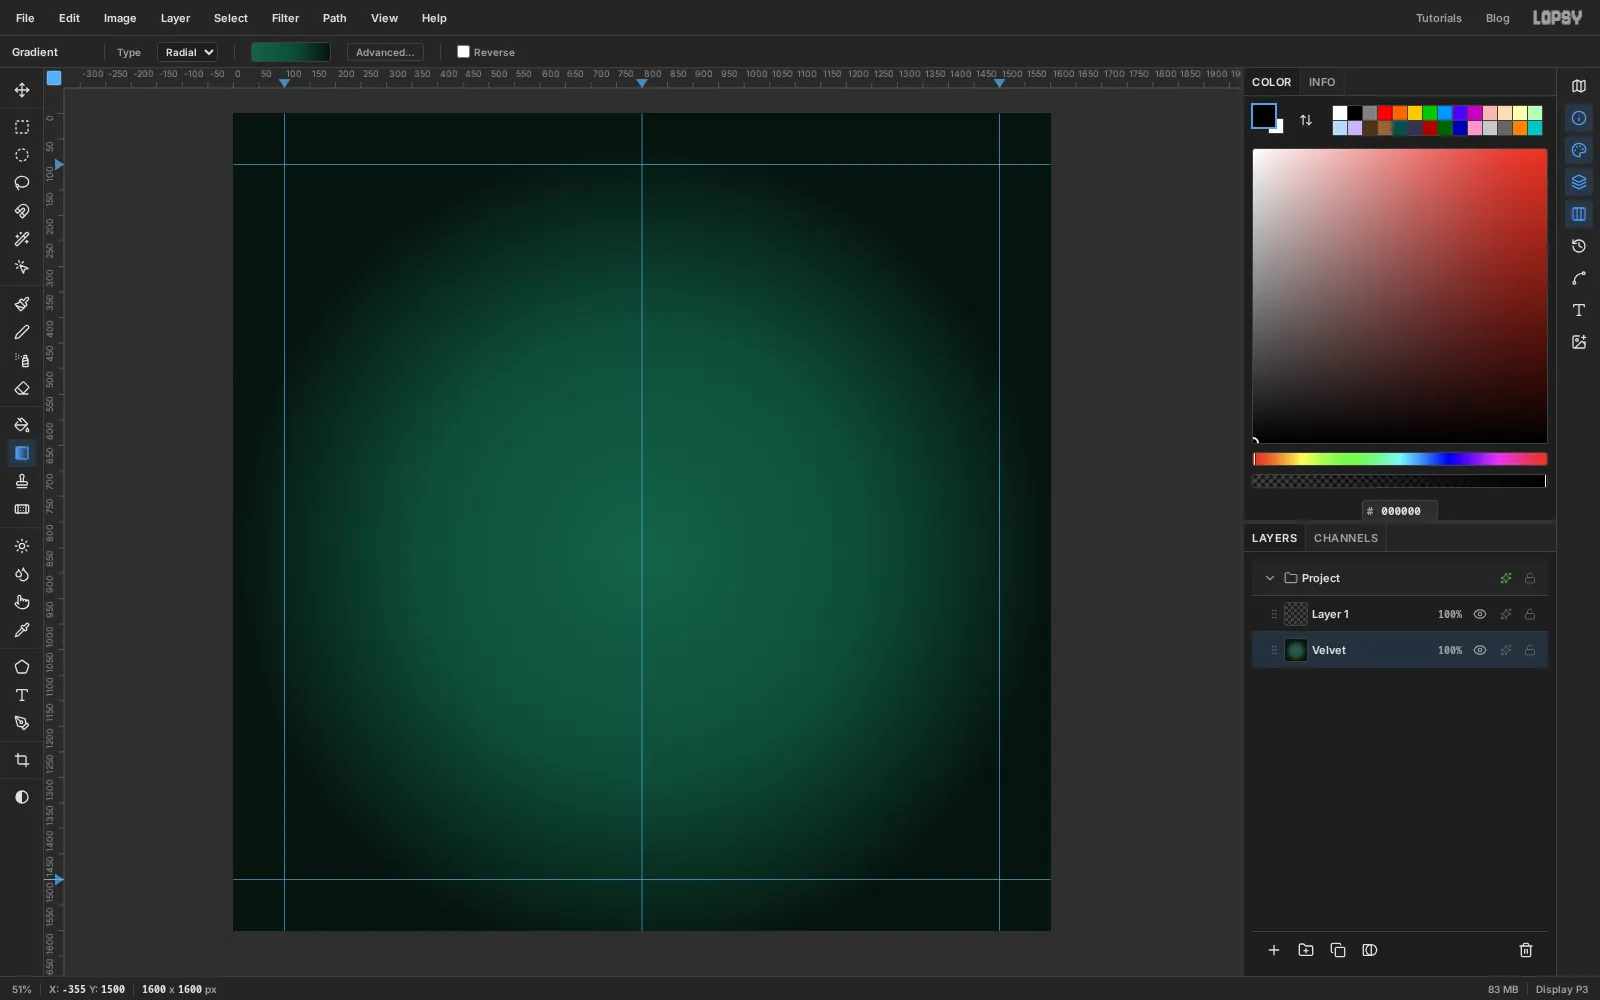
1600×1600px with a white background. Turn on View → Show Rulers, then click the top ruler at x100,800and1500, and the left ruler at y100and1500, to drop five guides. The outer ones mark the margin you'll keep text and badges inside, and the middle one is your centre line.- Double-click the
Backgroundrow and rename itVelvet. - Pick the Gradient tool, set Type to Radial, and in Advanced… make three stops: at the left, at about 55% and at the right.
- Drag from just below the middle of the canvas (
800, 860) straight down past the bottom edge.
The bright spot sits a little low on purpose. The glass will stand there, and the light should seem to come from it.
- Double-click the
-
Draw a gold diamond lattice
The new document also has an empty
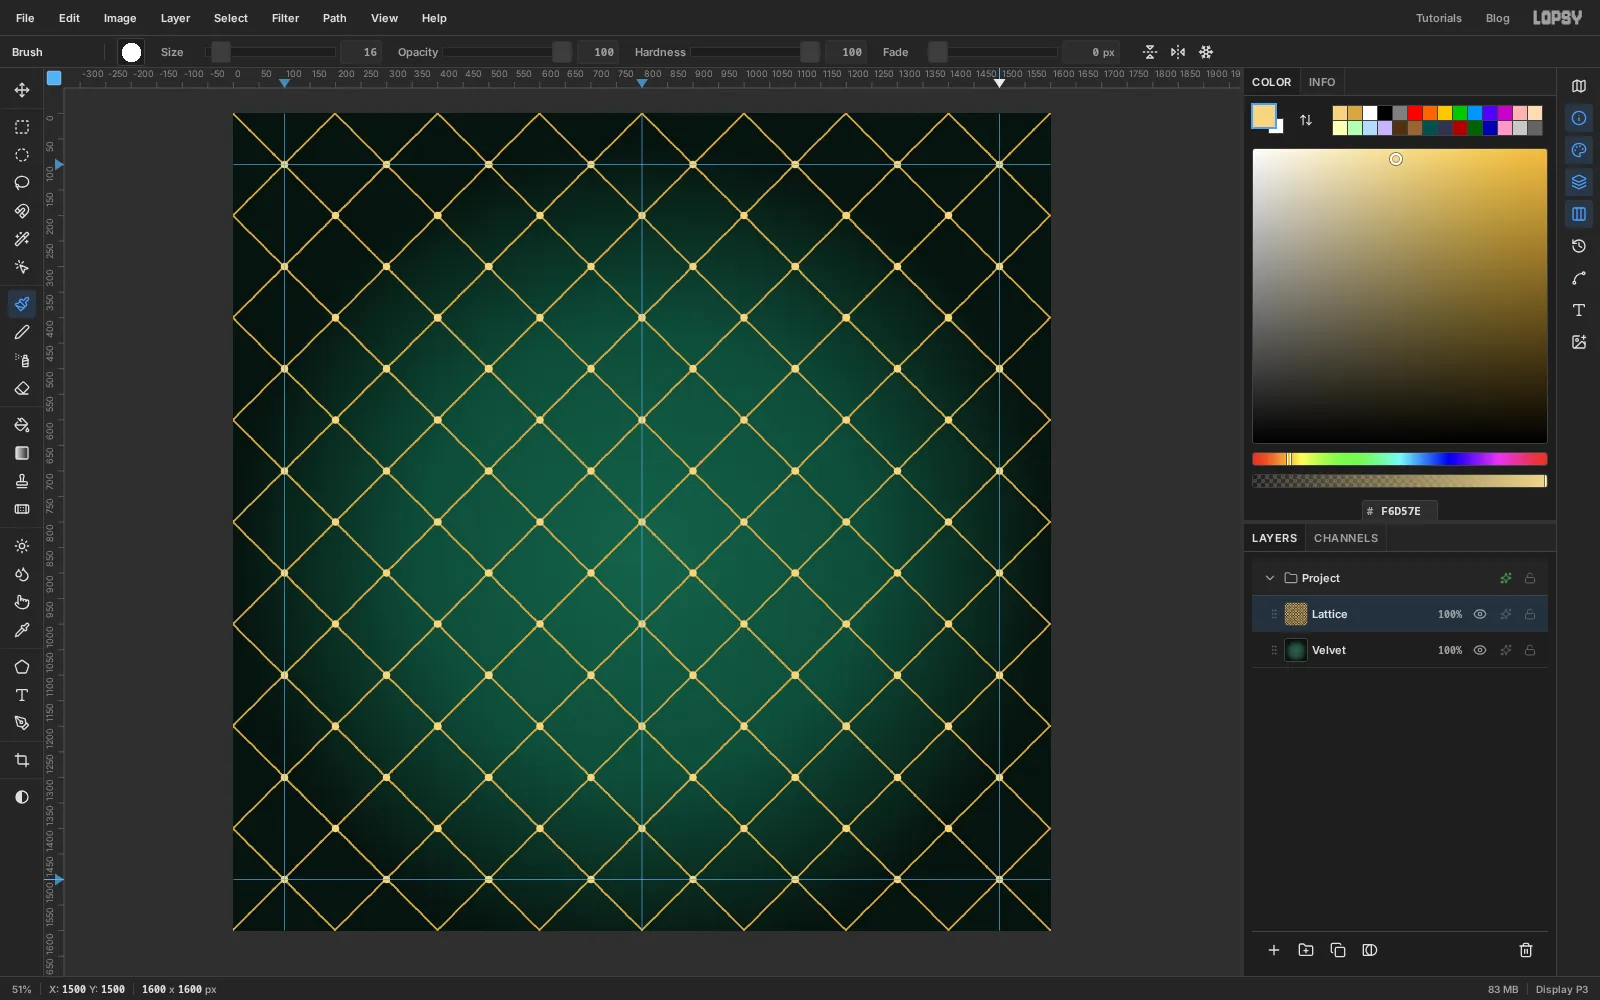
Layer 1. Rename itLattice.- Pick the Pencil (N), set Size
3and the colour to . - Draw 45° lines across the canvas every 200 px. For each line, click where it starts on one edge of the canvas, then hold Shift and click where it ends on another edge. Shift-click joins the two points with a straight line. Start with lines running down to the right (from
0, 200to1400, 1600, from0, 400to1200, 1600, and so on, plus their mirror images starting along the top edge), then do the same in the other direction. - Switch to the Brush (B), set Size
16, Hardness100and the colour to , and click once on every crossing. - Click the opacity on the
Latticerow and set it to30%.
A quiet repeating pattern like this is the bottom layer of every maximalist piece. It fills empty space without asking to be looked at.
- Pick the Pencil (N), set Size
-
Add sunburst rays
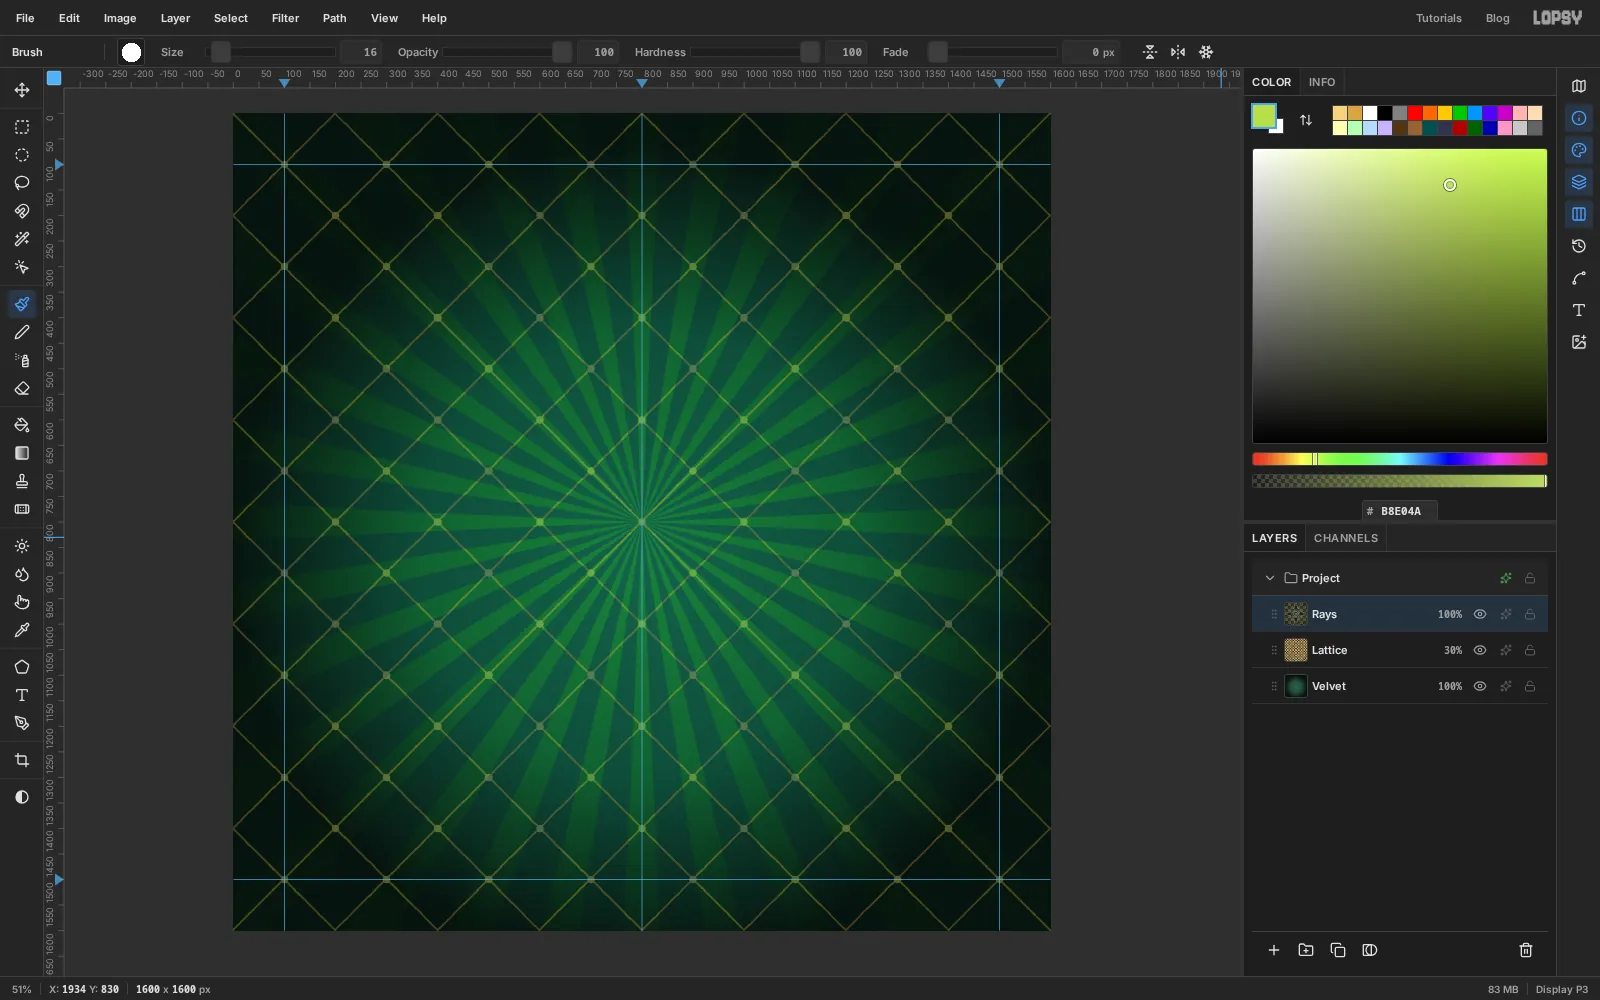
Click Add Layer and name it
Rays. Set the foreground colour to and choose Filter → Sunburst…:- Rays
32, Length120, Width45, Fade75 - Center X
50, Center Y50, Opacity45
Click Apply, then open the layer effects drawer (the ✦ button on the row) and set the blend mode to Overlay. Overlay lightens the green under each ray rather than painting flat yellow-green on top of it, so the rays look like light on velvet.
- Rays
-
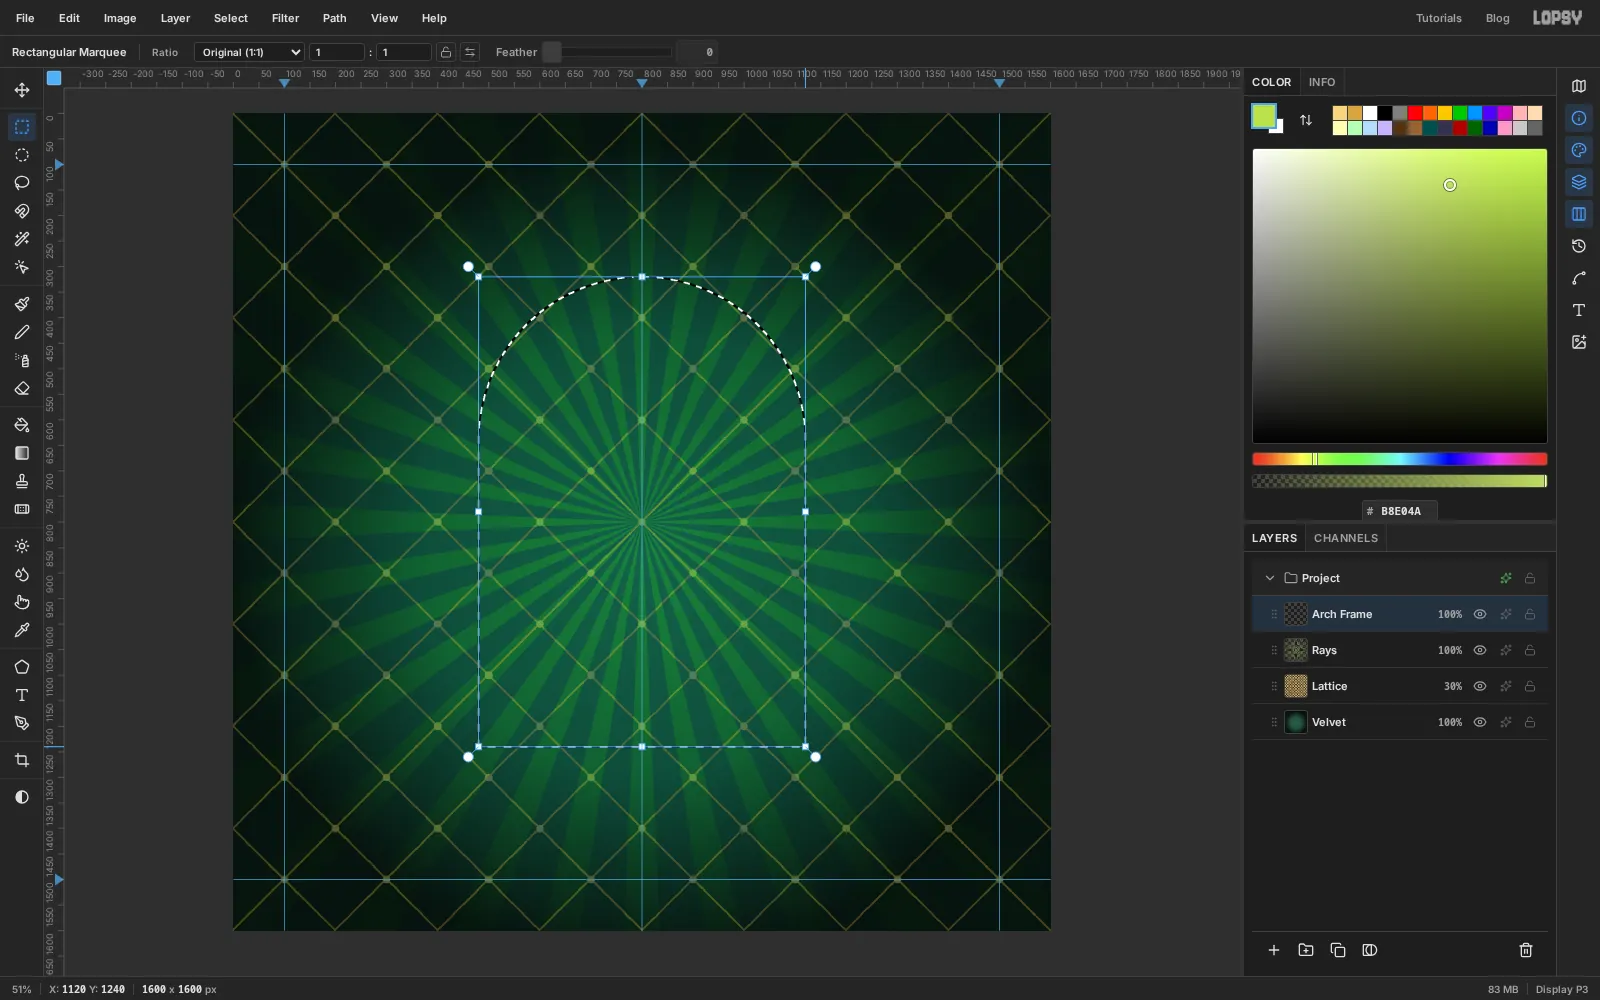
Select the arched window
Click Add Layer and name it
Arch Frame.- Pick the Elliptical Marquee and drag a circle from
480, 320to1120, 960. - Pick the Rectangular Marquee (M), hold Shift and drag from
480, 640(the circle's left edge, halfway down) to1120, 1240. Shift adds the rectangle, and the two shapes merge into an arch.
You'll make this exact selection three more times, so note the numbers.
- Pick the Elliptical Marquee and drag a circle from
-
Paint the frame and the dusk sky
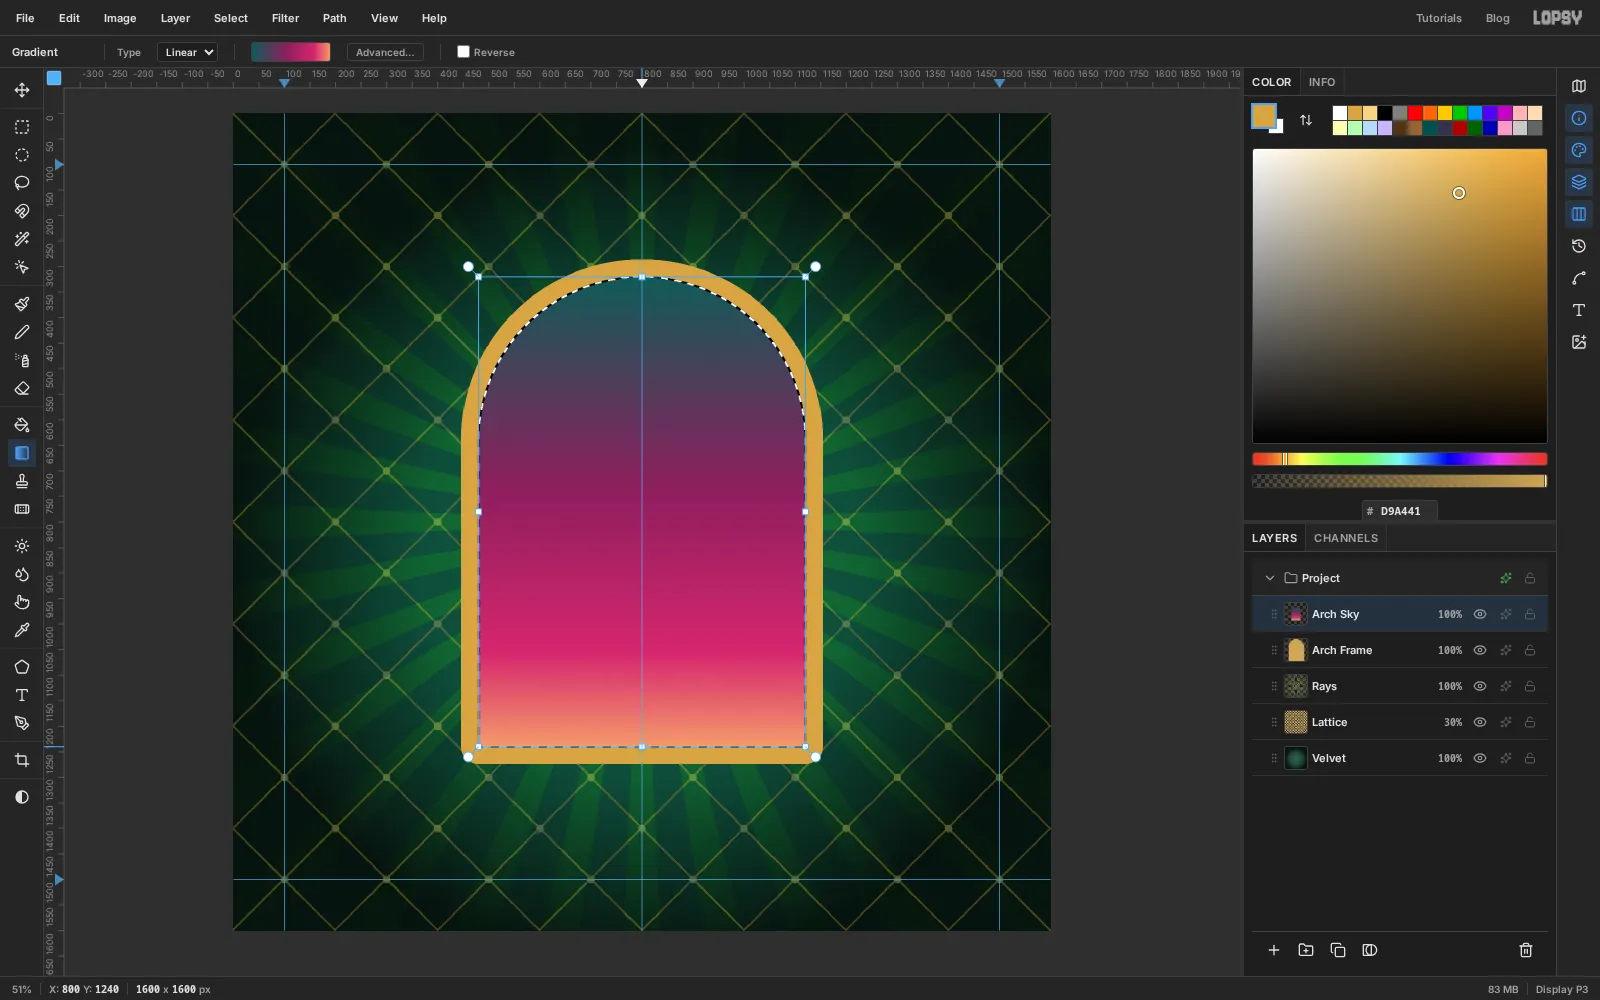
- With the arch still selected, choose Select → Grow…, enter
34and click Apply. Fill with and press Cmd+D. That's a solid gold arch, slightly bigger than the window. - Click Add Layer, name it
Arch Sky, and make the arch selection again (circle, then Shift-rectangle). - Set up a four-stop linear gradient: at the left, at about 45%, at about 80% and at the right. Hold Shift and drag from the top of the arch (
800, 320) to its bottom (800, 1240).
The gold shows as a 34 px frame around the sky. Press Cmd+D.
- With the arch still selected, choose Select → Grow…, enter
-
Add halftone clouds
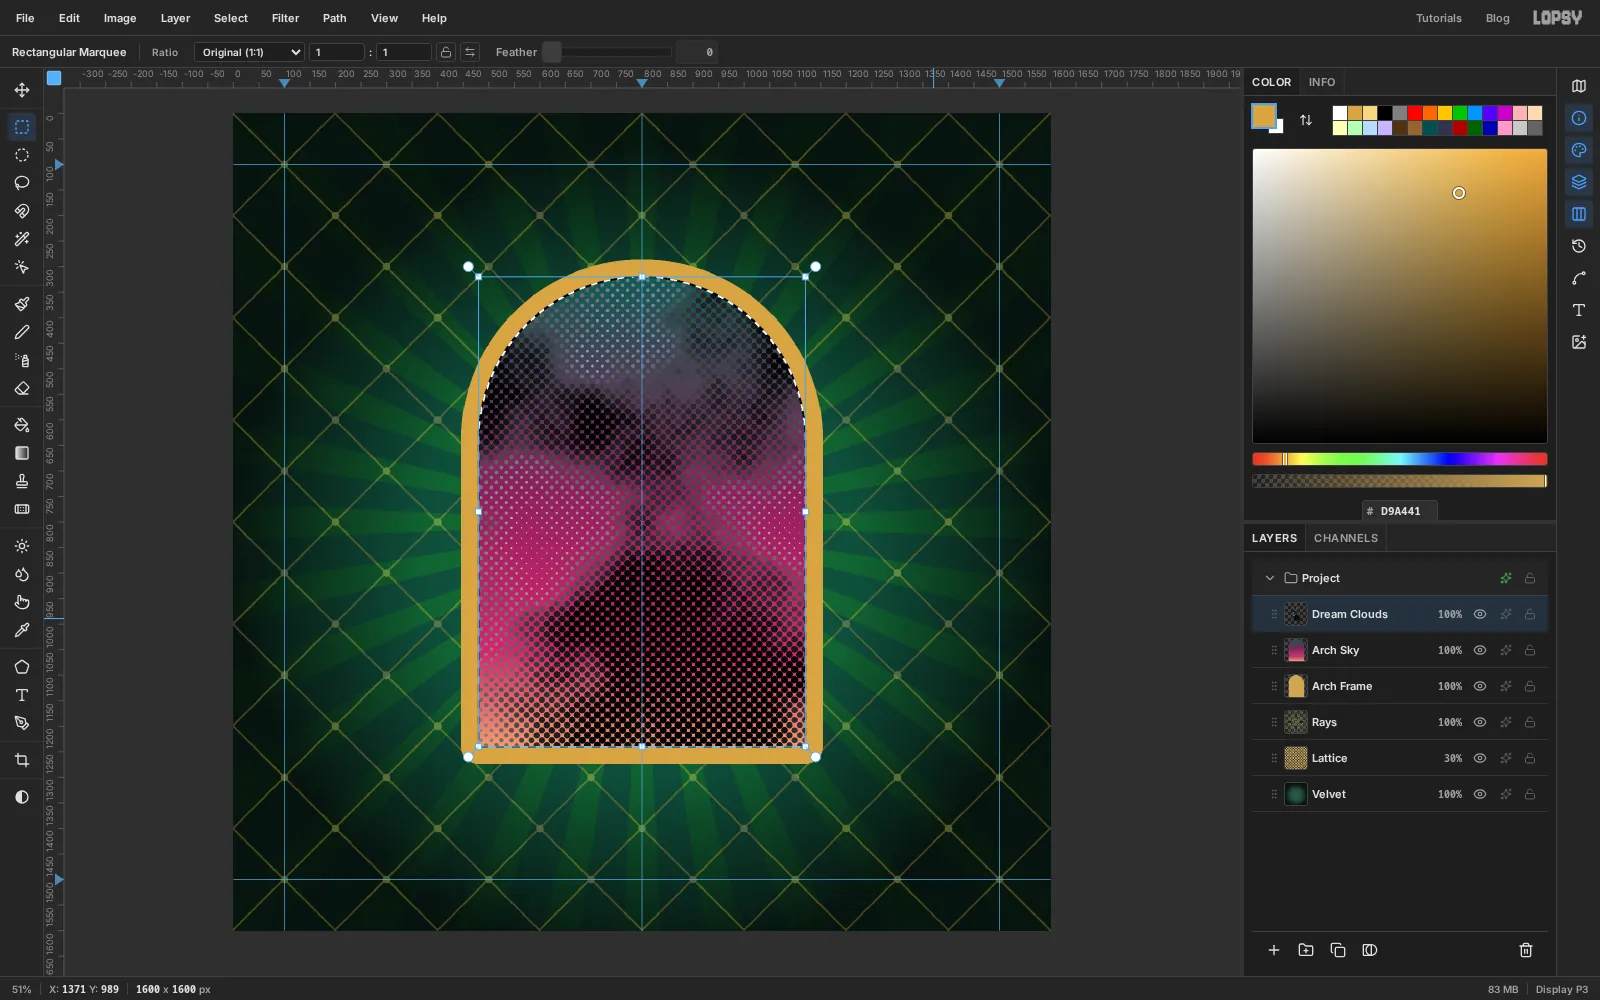
Click Add Layer, name it
Dream Clouds, and make the arch selection again.- Choose Filter → Clouds… with Scale
4. - Choose Filter → Halftone… with Dot Size
14, Angle45and Softness0.5. - Press Cmd+D, set the blend mode to Screen, and set the layer opacity to
35%.
At full strength this looks like a newspaper photo of smoke. At 35% on Screen it becomes a faint printed texture in the sky, the kind of detail people only notice up close.
- Choose Filter → Clouds… with Scale
-
Cut a crescent moon
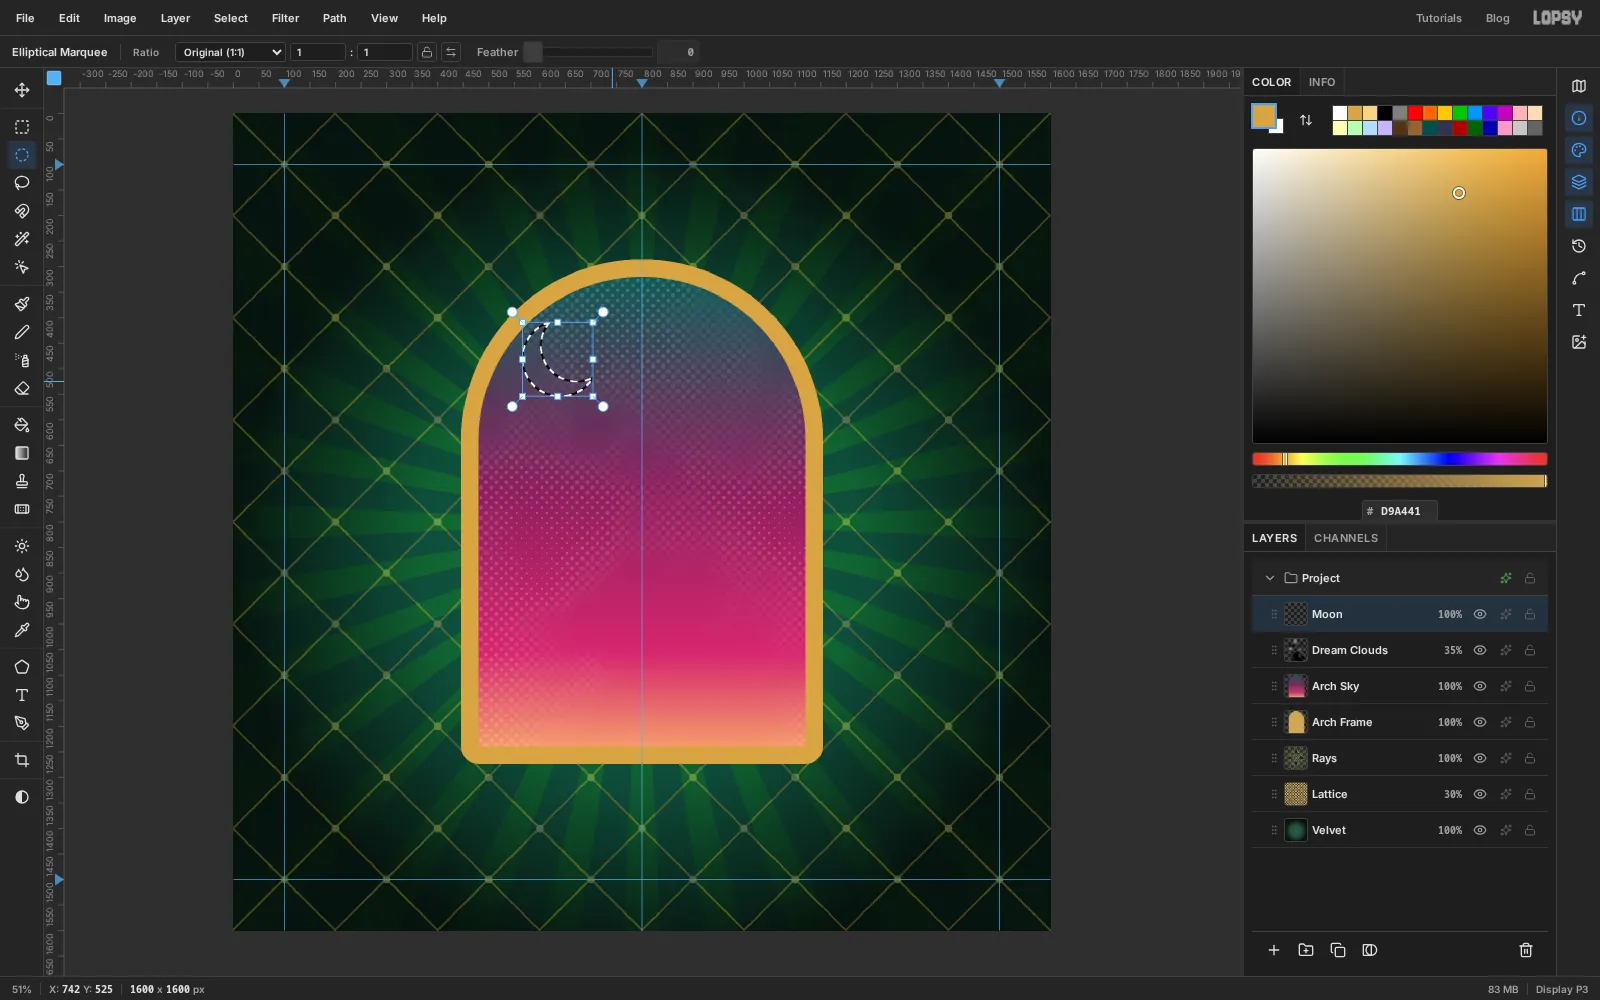
Click Add Layer and name it
Moon.- With the Elliptical Marquee, drag a circle from
566, 406to714, 554. - Hold Alt and drag a second circle from
602, 385to742, 525. It's subtracted from the first and leaves a crescent. - Fill with and press Cmd+D.
- In the effects drawer, turn on Outer Glow with Size
40, Opacity70and the colour .
- With the Elliptical Marquee, drag a circle from
-
Paint the rosette with radial symmetry
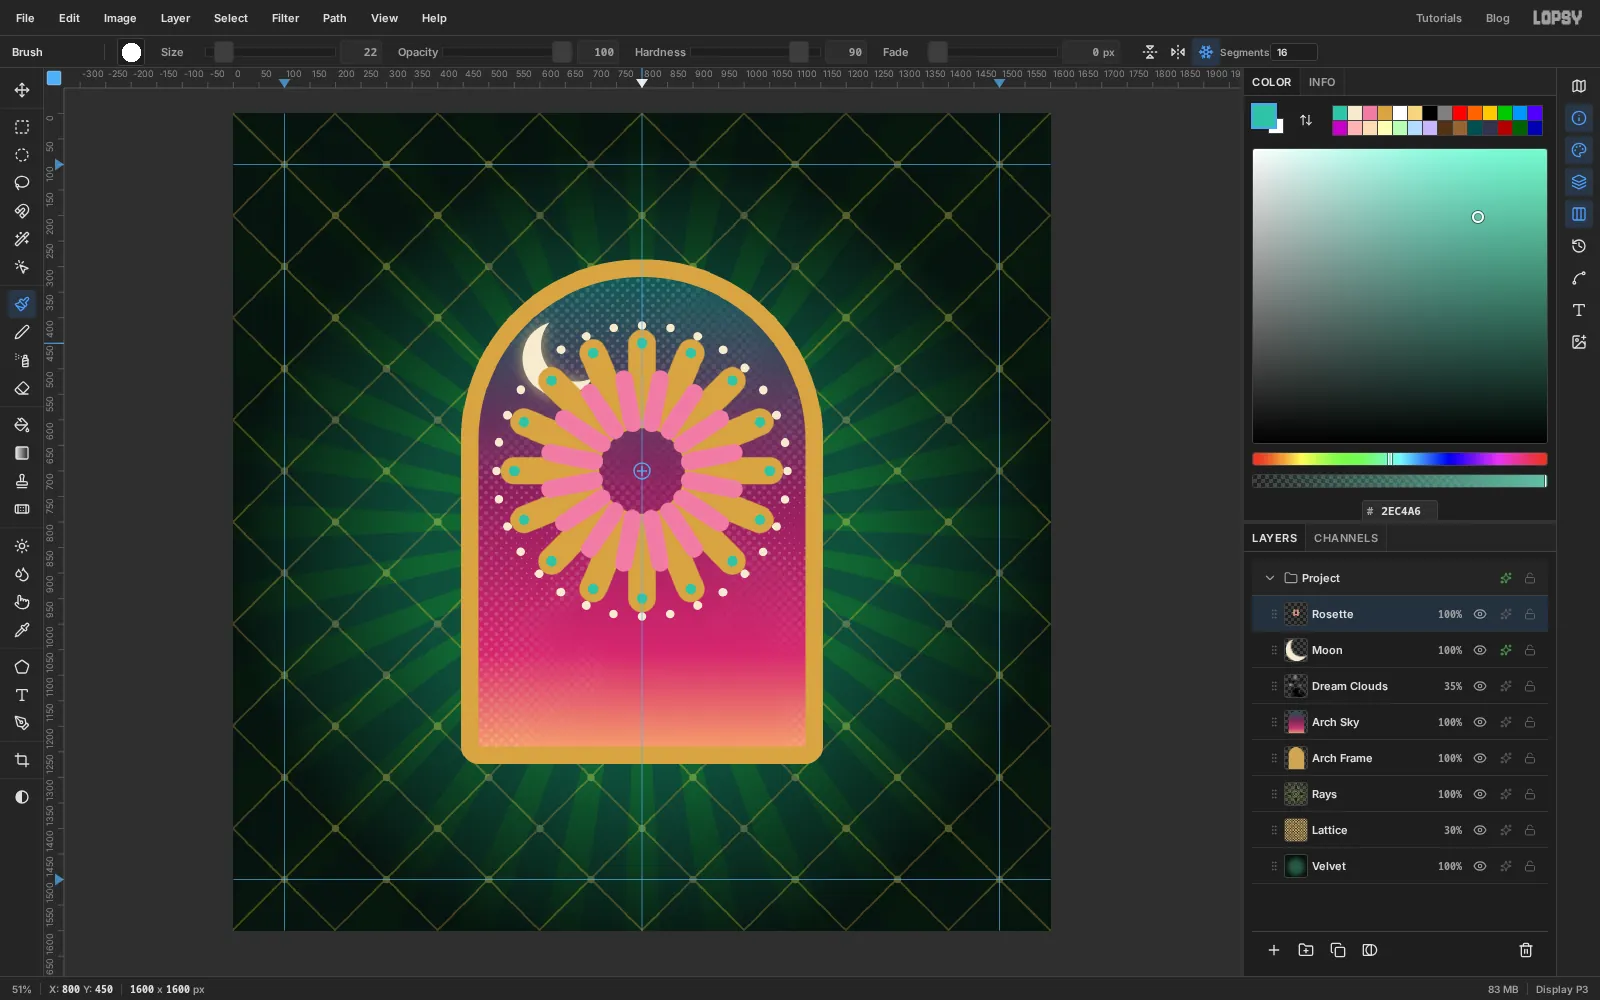
This big flower is the "daydream", a halo behind the glass. Radial Symmetry turns one stroke into sixteen.
- Click Add Layer and name it
Rosette. - Pick the Brush, click Radial Symmetry in the options bar and set Segments to
16. - Hold Cmd and click at
800, 700. That moves the symmetry centre without painting. On Windows and Linux this needs the Windows (Super) key, not Ctrl: Ctrl+click paints a ring of dabs instead. - Set Hardness
90and Opacity100, then paint four strokes. Each one is copied around the centre:
- Gold spokes: colour , Size
56. Drag straight up from800, 590to800, 450. - Pink petals: colour , Size
36. Drag a short stroke between two spokes, from about818, 607out to836, 519. - Cream dots: colour , Size
18. Click once just beyond the tip of a spoke (800, 415) and once beyond the gap next to it (856, 420). - Teal tips: colour , Size
22. Click once on the end of the top spoke (800, 450).
- Click Radial Symmetry again to turn it off.
- Click Add Layer and name it
-
Finish the rosette's centre
On the same layer, use the Elliptical Marquee to drag a circle from
708, 608to892, 792and fill it with , then a smaller one from730, 630to870, 770and fill it with . In the effects drawer, turn on Drop Shadow with Offset X0, Offset Y6, Blur14and Opacity45.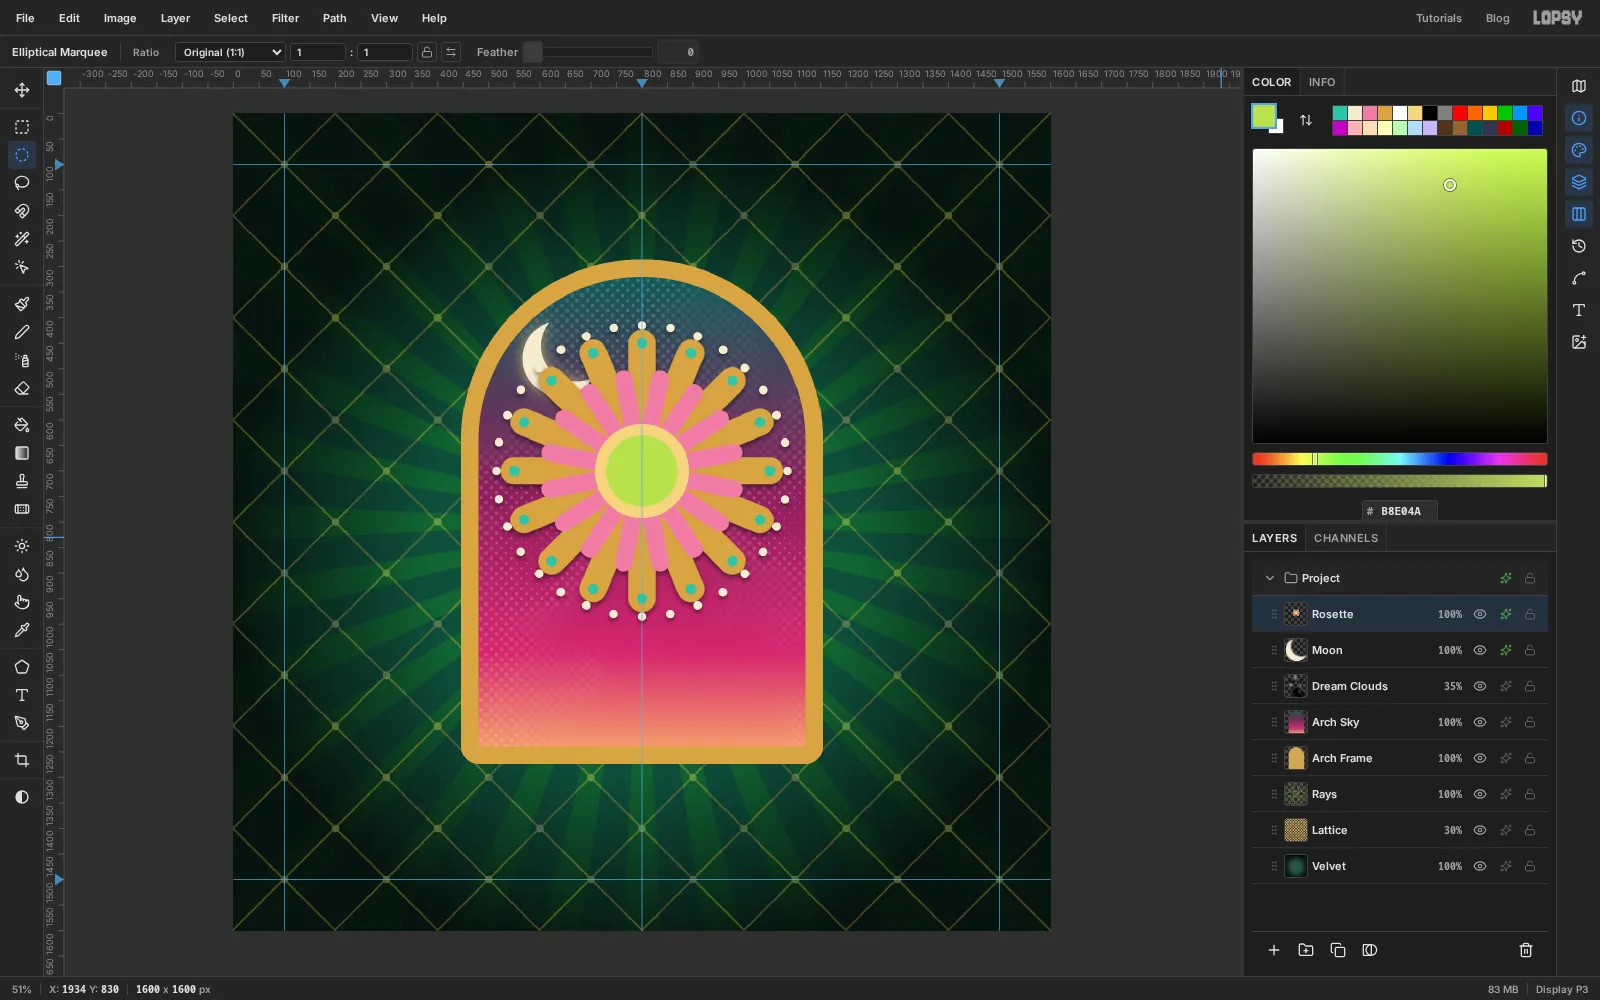
-
Scale the rosette down
The rosette crowds the arch, so shrink it a little.
- Hold Cmd and click the
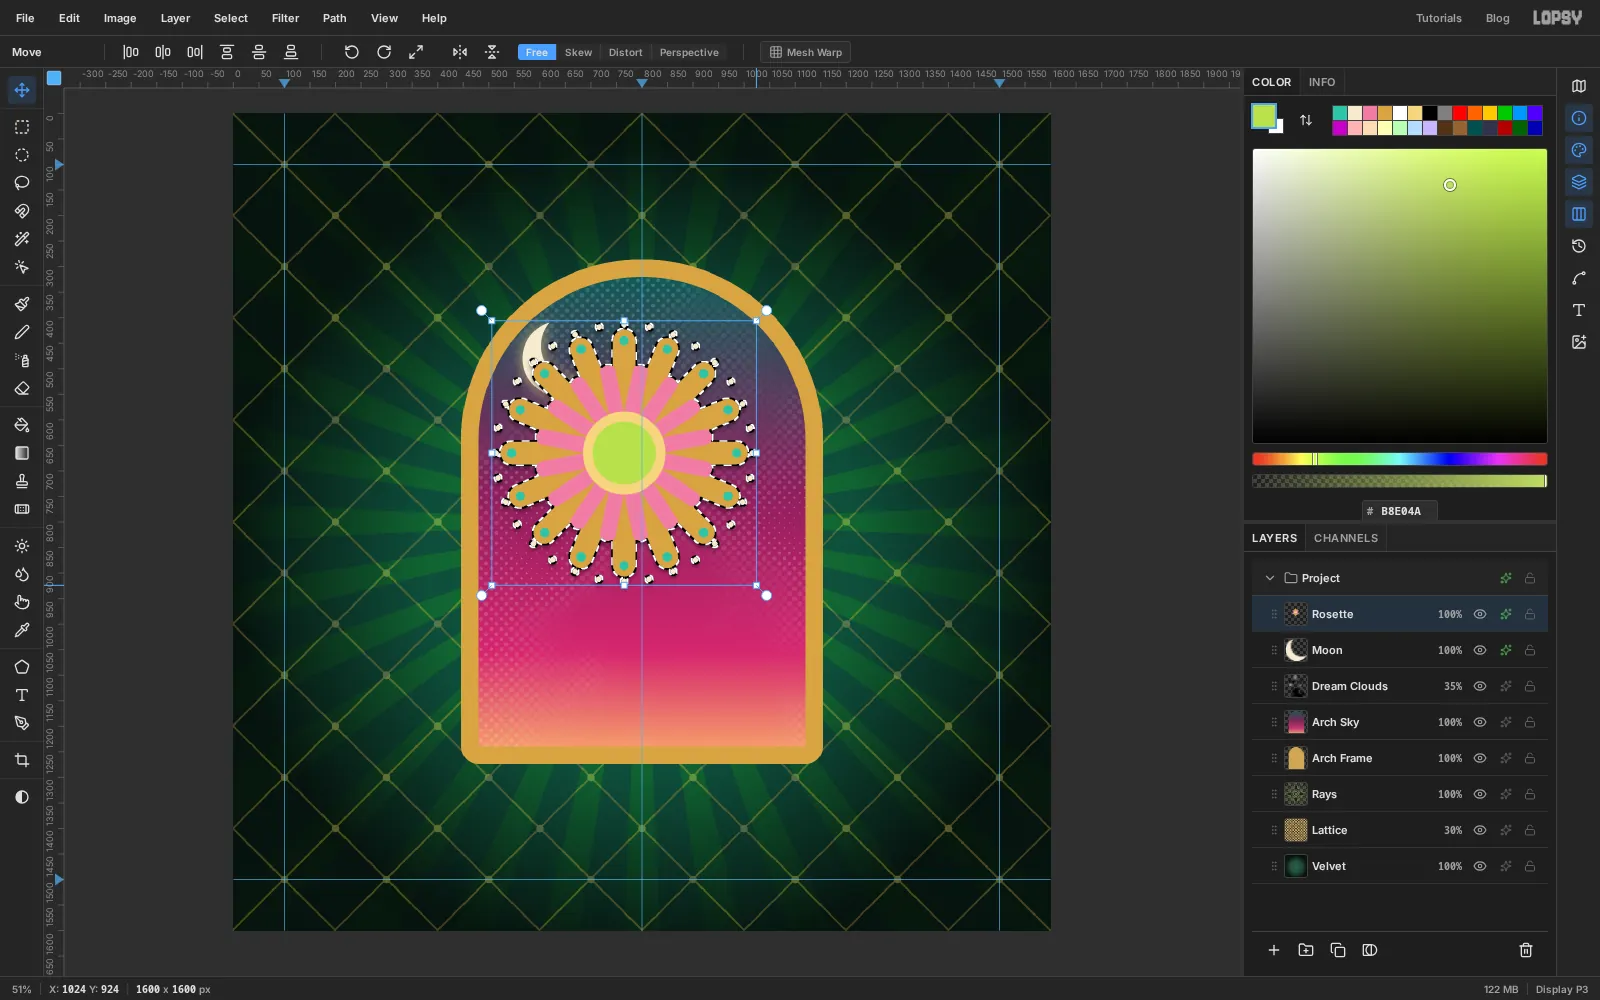
Rosettethumbnail in the Layers panel. That selects exactly its pixels. - Pick the Move tool (V). Handles appear around the selection.
- Hold Cmd and drag the bottom-right corner handle in by about 70 px on each axis. Cmd keeps the proportions, so the rosette scales to about 88%.
- Scaling pins the opposite corner, so the rosette has drifted up and left. Arrow keys nudge the selection 1 px, and Shift + arrow nudges 10 px. Press Shift+→ three times and → five times, then the same with the down arrow, to move it 35 px right and 35 px down so it's centred on
800, 700again. - Press Cmd+D. Dropping the selection applies the transform.
- The moon is now half hidden behind the petals. Shrink it the same way to about 75% (Cmd-click its thumbnail, Cmd-drag a corner in by about 35 px), and nudge it up and left so it tucks into the upper-left of the arch, clear of both the gold frame and the dot ring.
- Hold Cmd and click the
-
Draw the glass with the Pen tool
Absinthe is served in a reservoir glass, a tulip-shaped bowl with a little bulb at the bottom that measures the dose. The Pen tool makes a smooth outline easy.
Click the
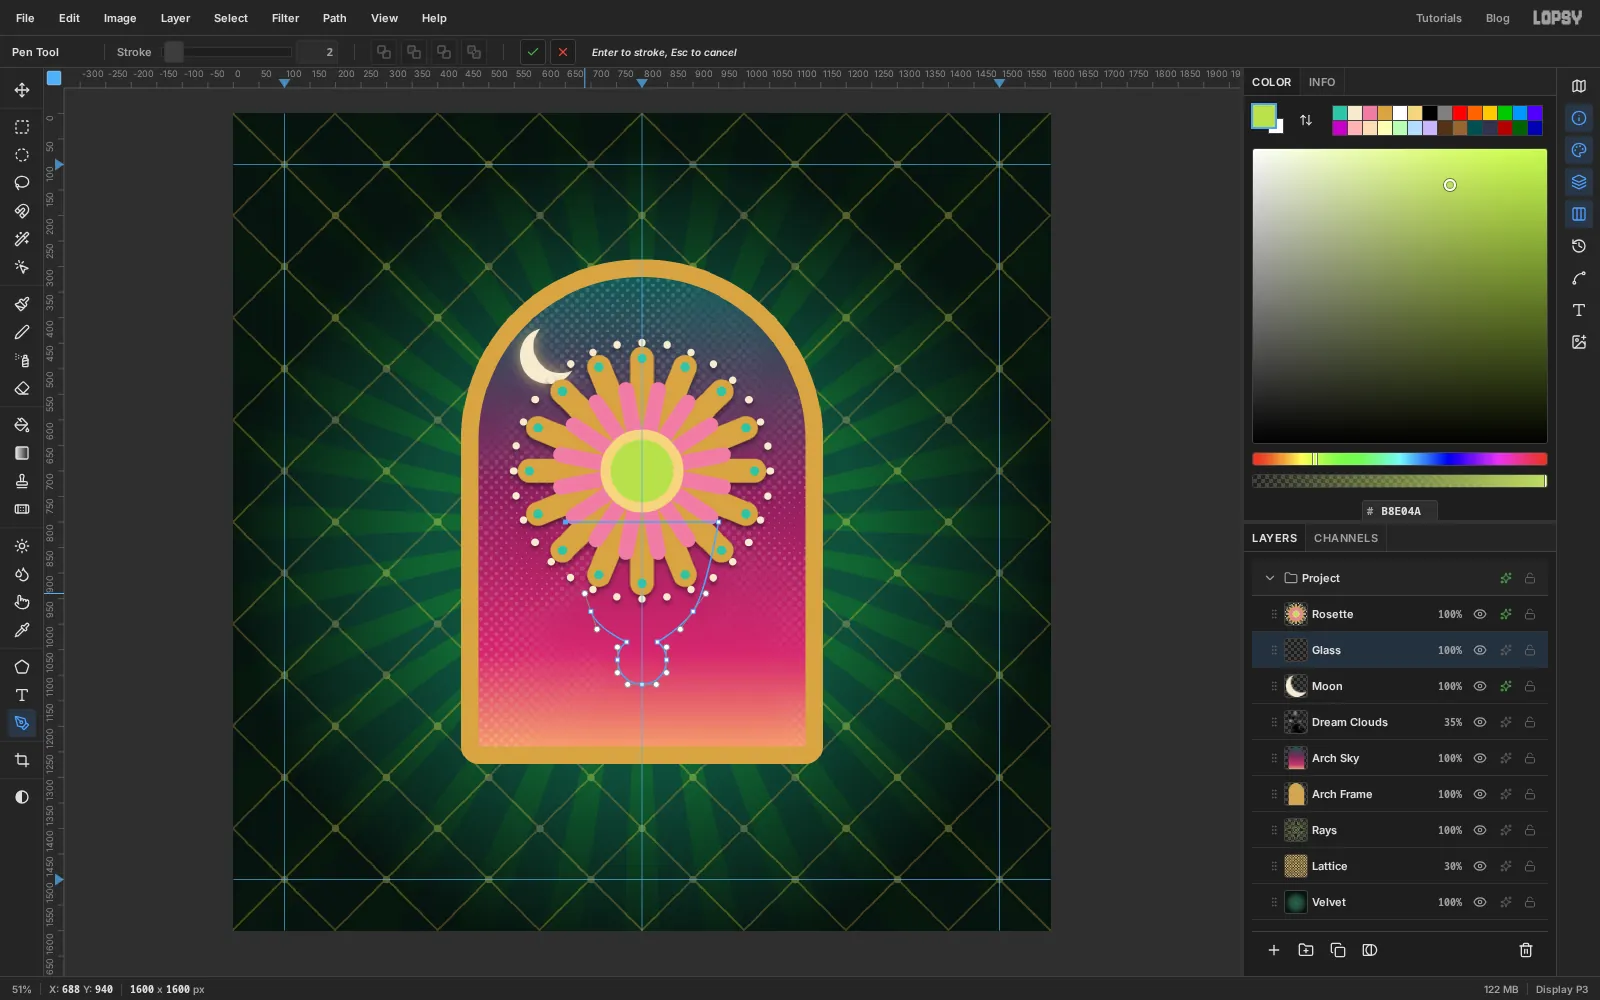
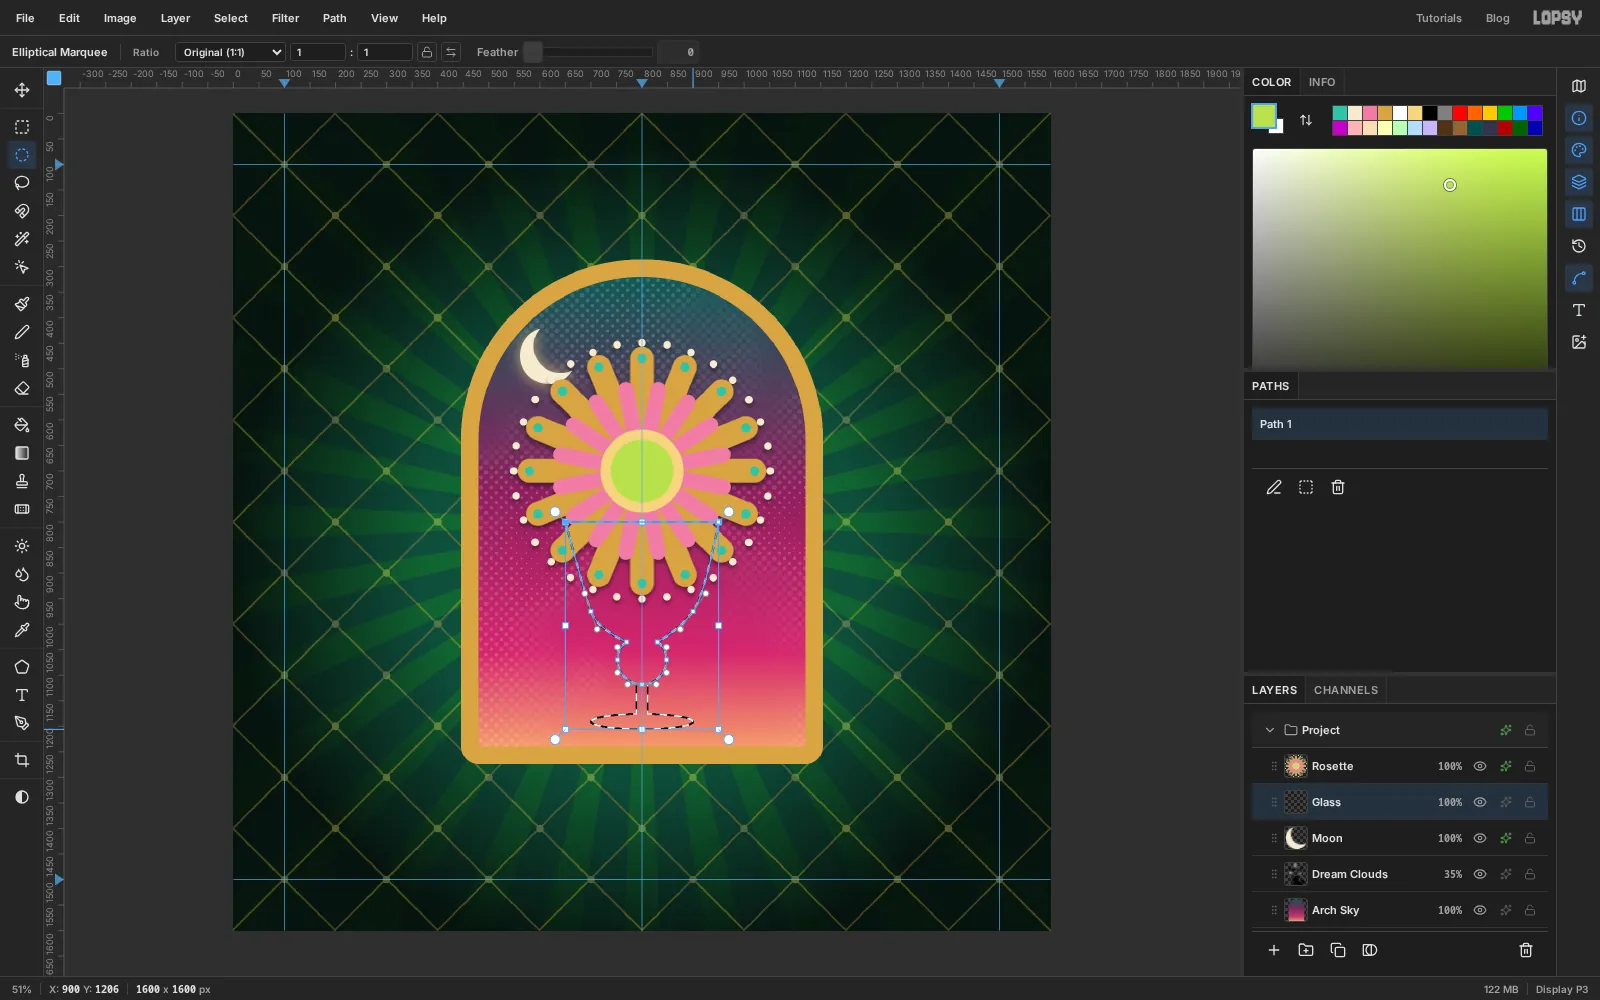
Moonrow, then Add Layer, and name itGlass. It lands under the rosette. That's deliberate: you'll draw the glass first and then practise dragging it into place in the layer stack. Pick the Pen tool (P) and place the anchors in this order. A click makes a sharp corner. A drag pulls out curve handles, and the direction you drag is the direction the curve leaves in.- Click
650, 800and950, 800: the rim. - Drag a short way down and to the left at
900, 975: the right side of the bowl curves in. - Click
830, 1035, where the bowl meets the reservoir. - For the round reservoir, drag down at its right edge (
848, 1070), drag left at its bottom (800, 1118), and drag up at its left edge (752, 1070). Short drags of about 25 px are enough. - Click
770, 1035, then drag a short way up and to the left at700, 975for the left side of the bowl. - Click the first anchor at
650, 800to close the path.
- Click
-
Turn the path into a glass shape
- Open the Paths panel (the curve icon in the right-hand panel bar), click
Path 1, then click Path to Selection, the dashed-square button at the bottom of the panel. - Pick the Rectangular Marquee, hold Shift and drag a thin stem from
789, 1110to811, 1186. - Pick the Elliptical Marquee, hold Shift and drag a flat foot from
700, 1176to900, 1206. - Fill with and press Cmd+D. Click
Path 1again in the Paths panel to deselect it, so its blue outline goes away.
- Open the Paths panel (the curve icon in the right-hand panel bar), click
-
Bring the glass forward and scale it up
The
Glasslayer sits underRosette. In the Layers panel, drag theGlassrow by its grip (the dots on the left) up aboveRosette.The glass is also a bit small for the window. Hold Cmd and click its thumbnail, pick the Move tool, and Cmd-drag the bottom-right handle out to make it about 130% of its size. Then drag the selection so the glass is centred on the middle guide with its foot at about y
1215. The rim lands at about y687, right across the rosette's centre, which makes the rosette look like a sun rising out of the glass. Press Cmd+D.In the effects drawer, turn on Stroke with Width
4and the colour , set the blend mode to Screen, and set the opacity to45%. For now the glass is a pale ghost. You'll firm it up later.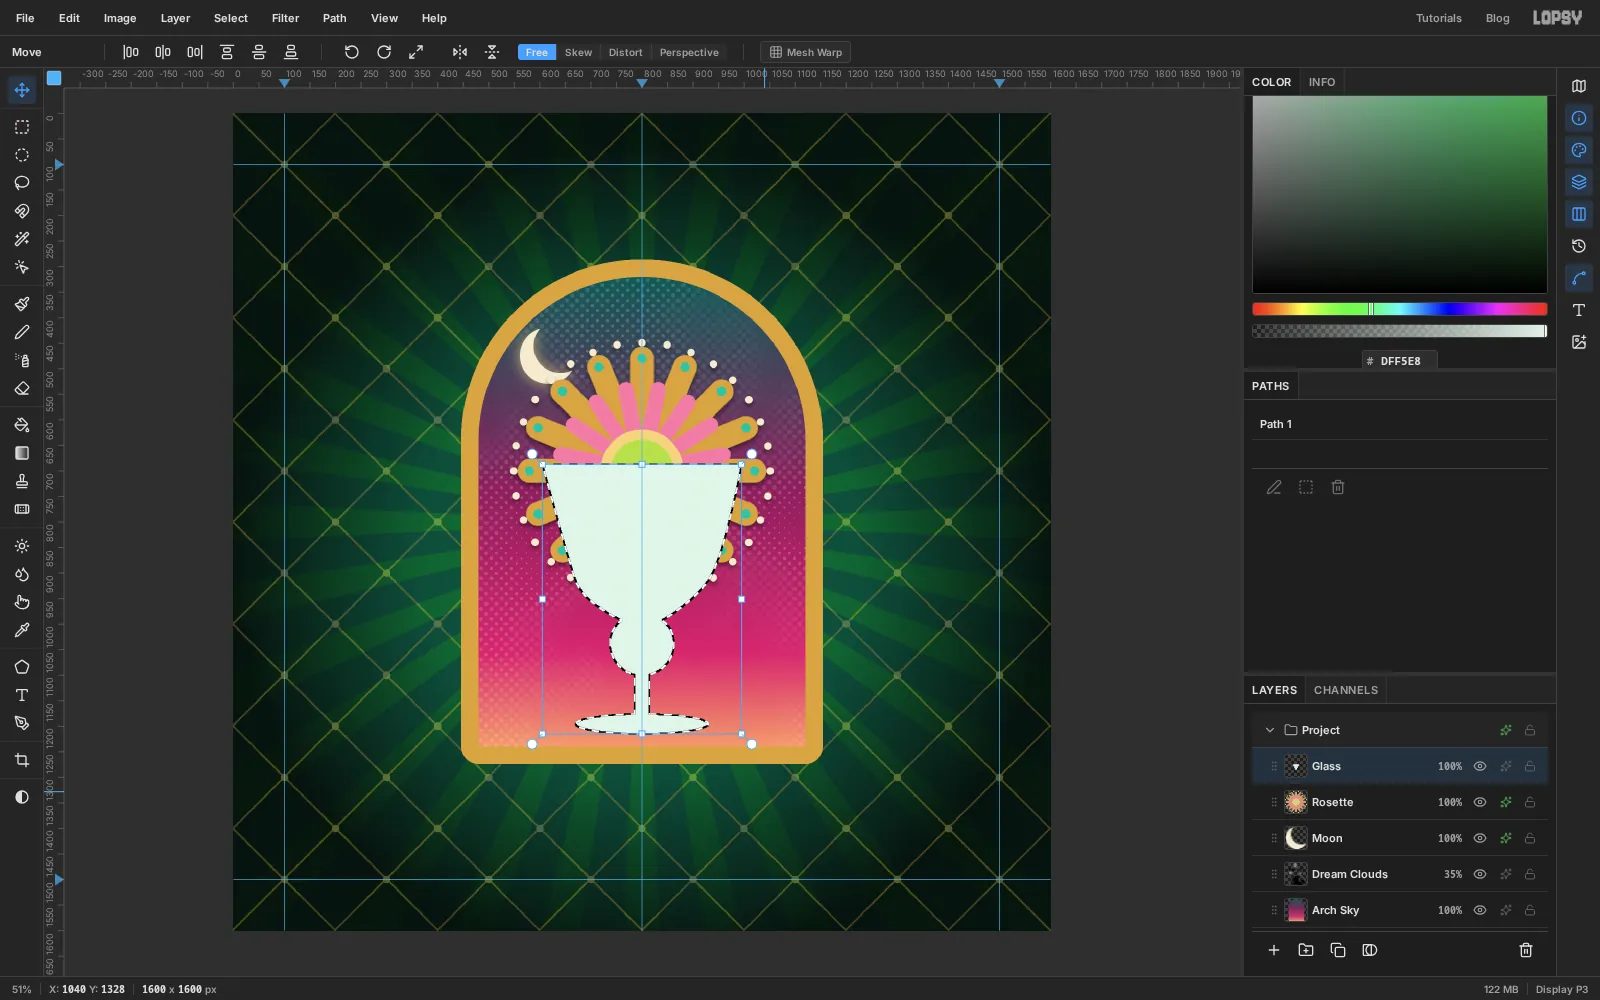
-
Select the liquid with an intersection
Click Add Layer and name it
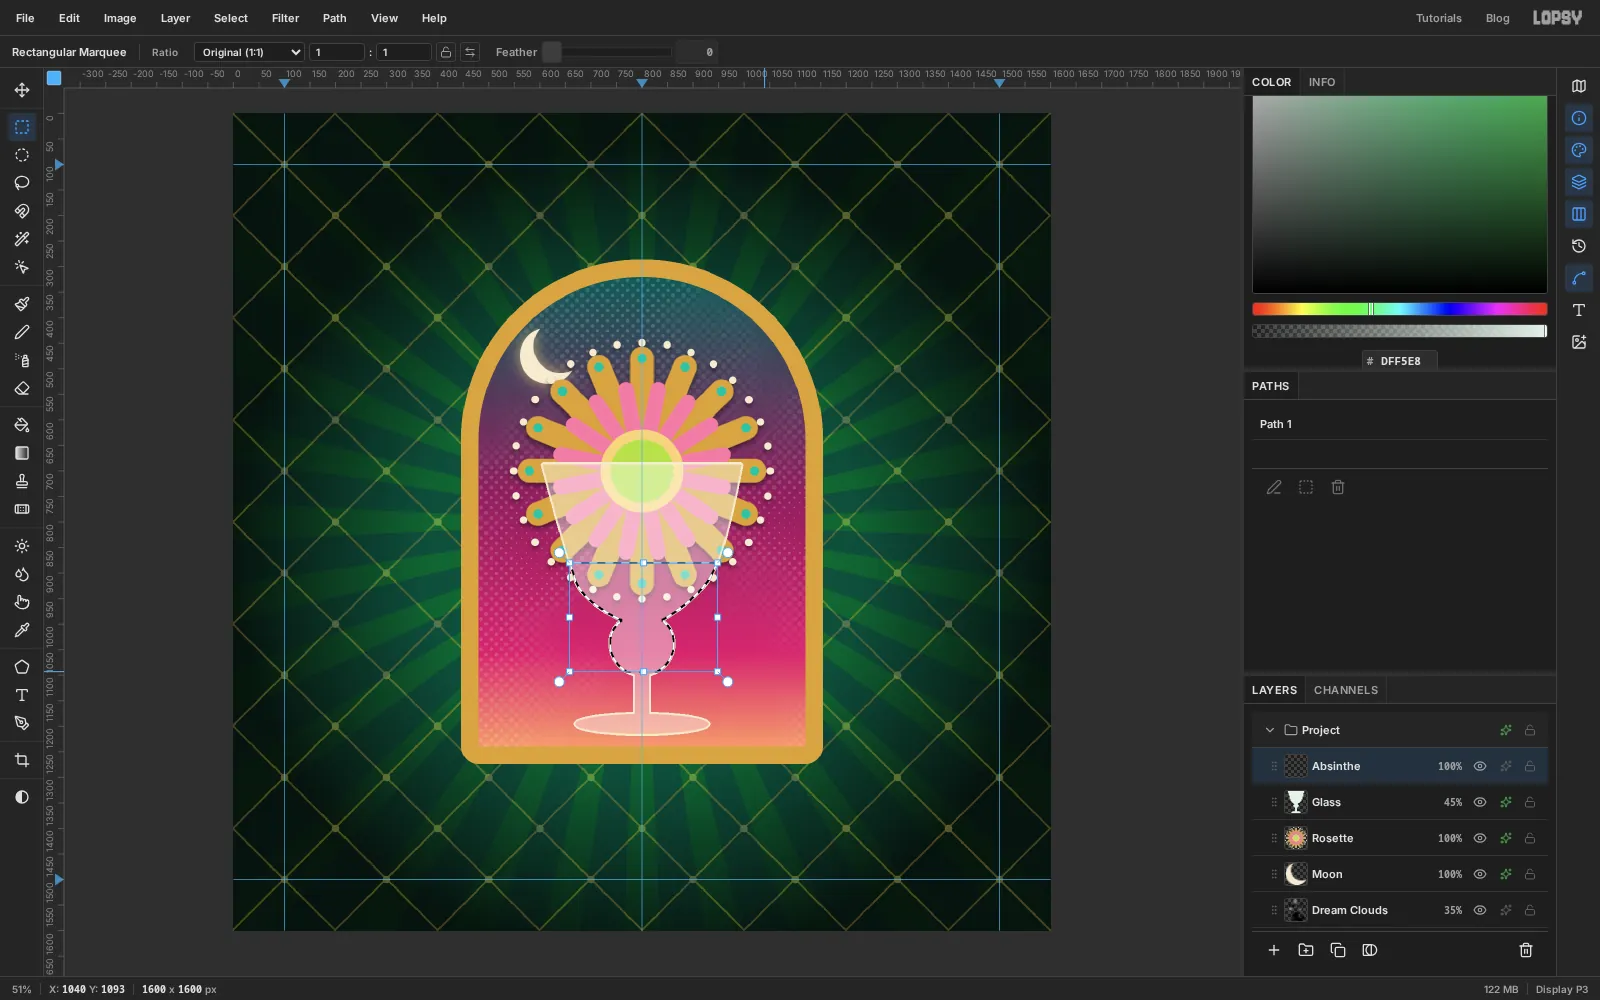
Absinthe.- Cmd-click the
Glassthumbnail to select the glass. - Pick the Rectangular Marquee, hold Shift and Alt together, and drag from
560, 880to1040, 1093. Shift+Alt intersects, keeping only the part of the glass inside the rectangle: the bottom of the bowl and the reservoir, but not the stem.
- Cmd-click the
-
Fill the absinthe and make it glow
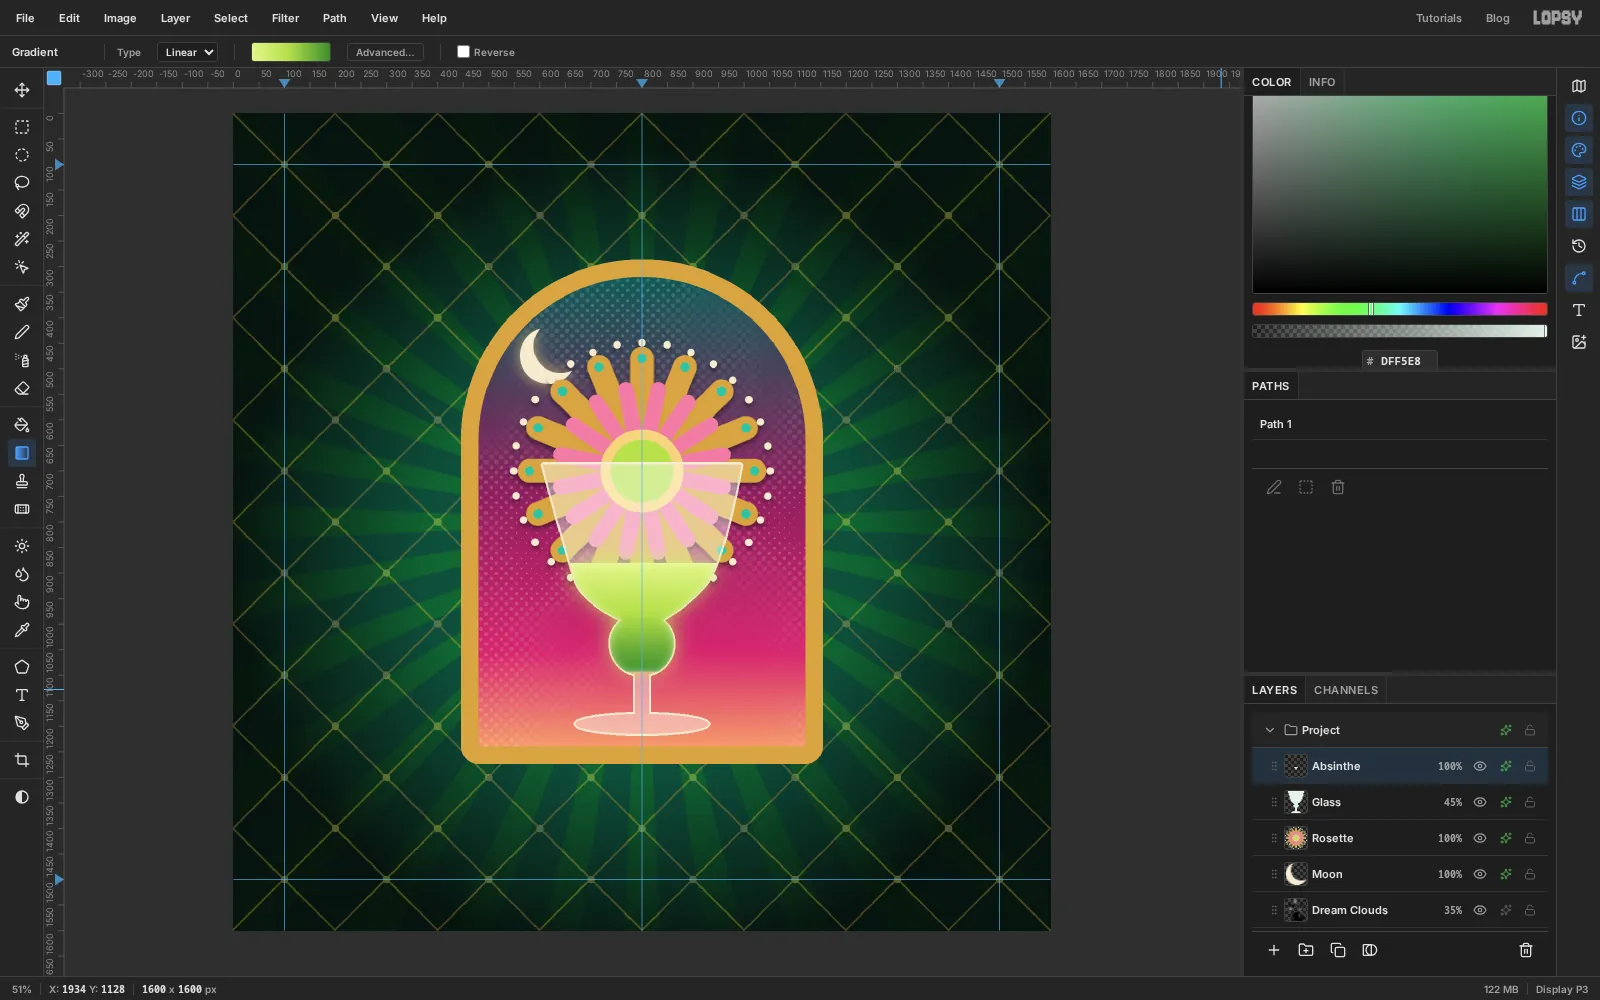
- Set up a three-stop linear gradient: at the left, at about 45% and at the right. Hold Shift and drag from the liquid's surface (
800, 880) down to800, 1093. Press Cmd+D. - In the effects drawer, turn on Outer Glow with Size
70, Opacity80and the colour . - Turn on Inner Glow with Size
24, Opacity60and the colour .
The pale top and dark bottom read as liquid with depth, and the glow is the "green fairy" the drink is famous for.
- Set up a three-stop linear gradient: at the left, at about 45% and at the right. Hold Shift and drag from the liquid's surface (
-
Build the slotted spoon
Click Add Layer and name it
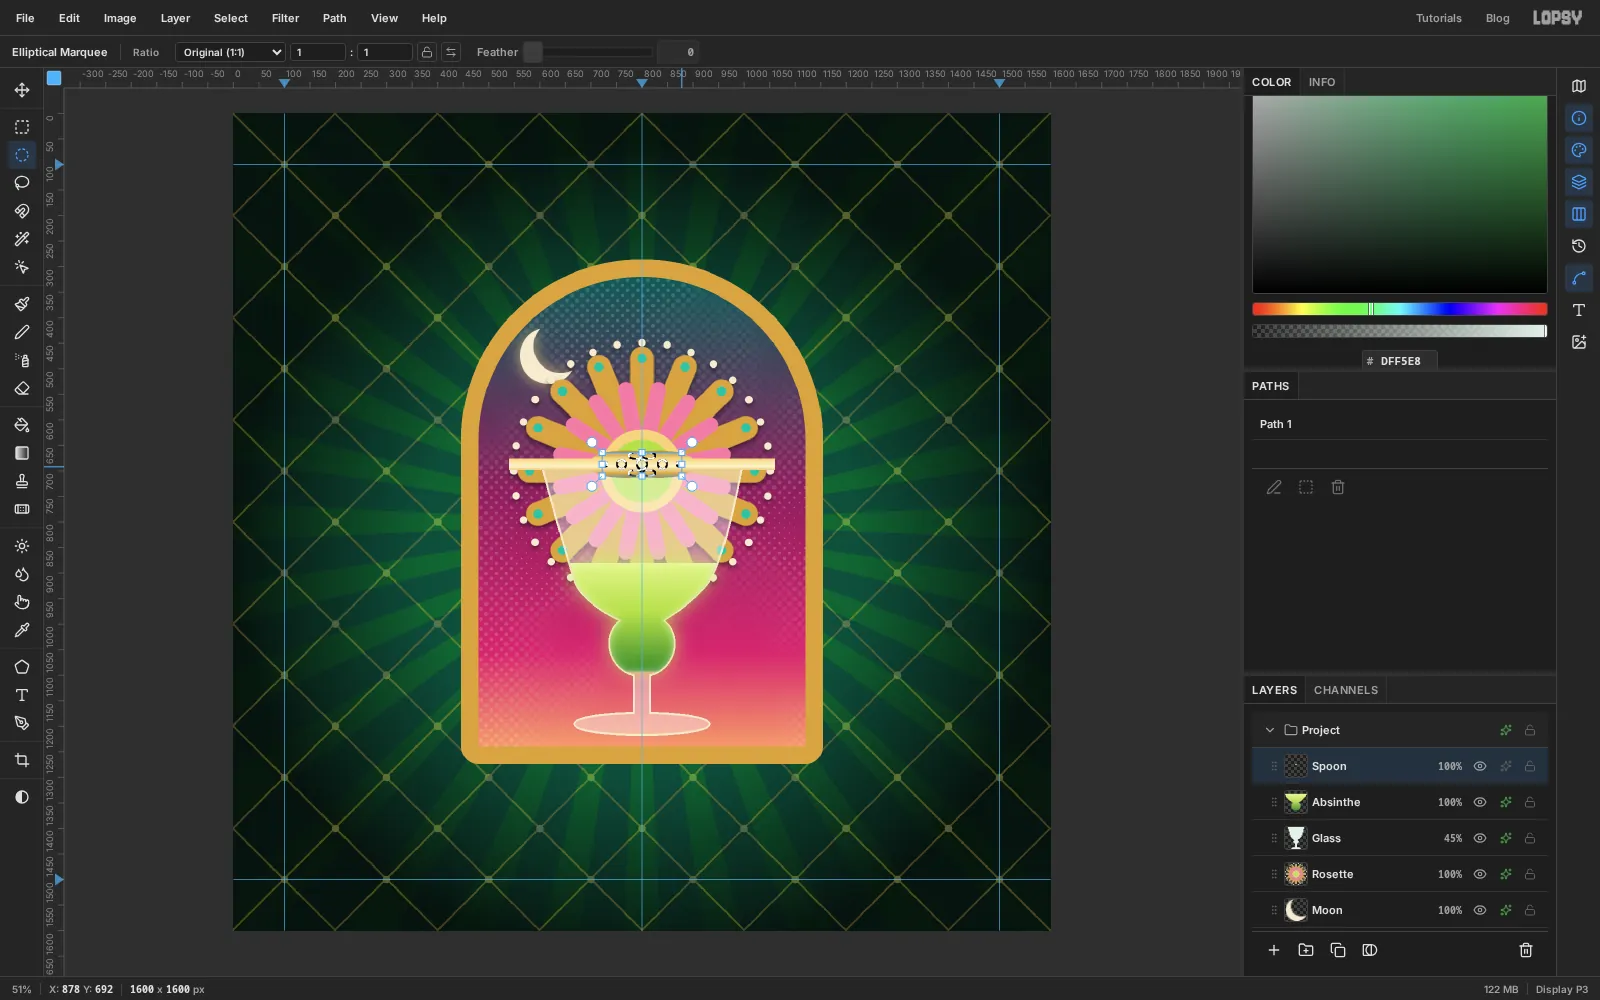
Spoon.- With the Rectangular Marquee, drag the handle from
540, 676to1060, 698. - Pick the Lasso (L), hold Shift and draw a pointed leaf shape around the middle of the handle, about 210 px wide and 60 px tall, centred on
800, 687. - Set up a five-stop gradient for polished gold: , at 35%, at 55%, at 75% and at the right. Shift-drag from
800, 650down to800, 724. Press Cmd+D. - Now punch the slots with the Elliptical Marquee, all centred on the spoon's middle line (y
687). Drag the first hole, then hold Shift for every hole after it so they add up into one selection: three 20 px circles at x760,800and840, two 10 px circles at x727and873, and four 12 px circles, two just above the middle hole (y670) and two just below it (y704), at x780and820. Snap to Guides is on by default, so the edges of those last four nearest the centre guide snap onto it and stretch into neat paired slots. - Press Delete, then Cmd+D. Add a Drop Shadow with Offset Y
8, Blur10and Opacity55.
- With the Rectangular Marquee, drag the handle from
-
Add the sugar cube and the drips
The ritual is to drip ice water over a sugar cube on the spoon.
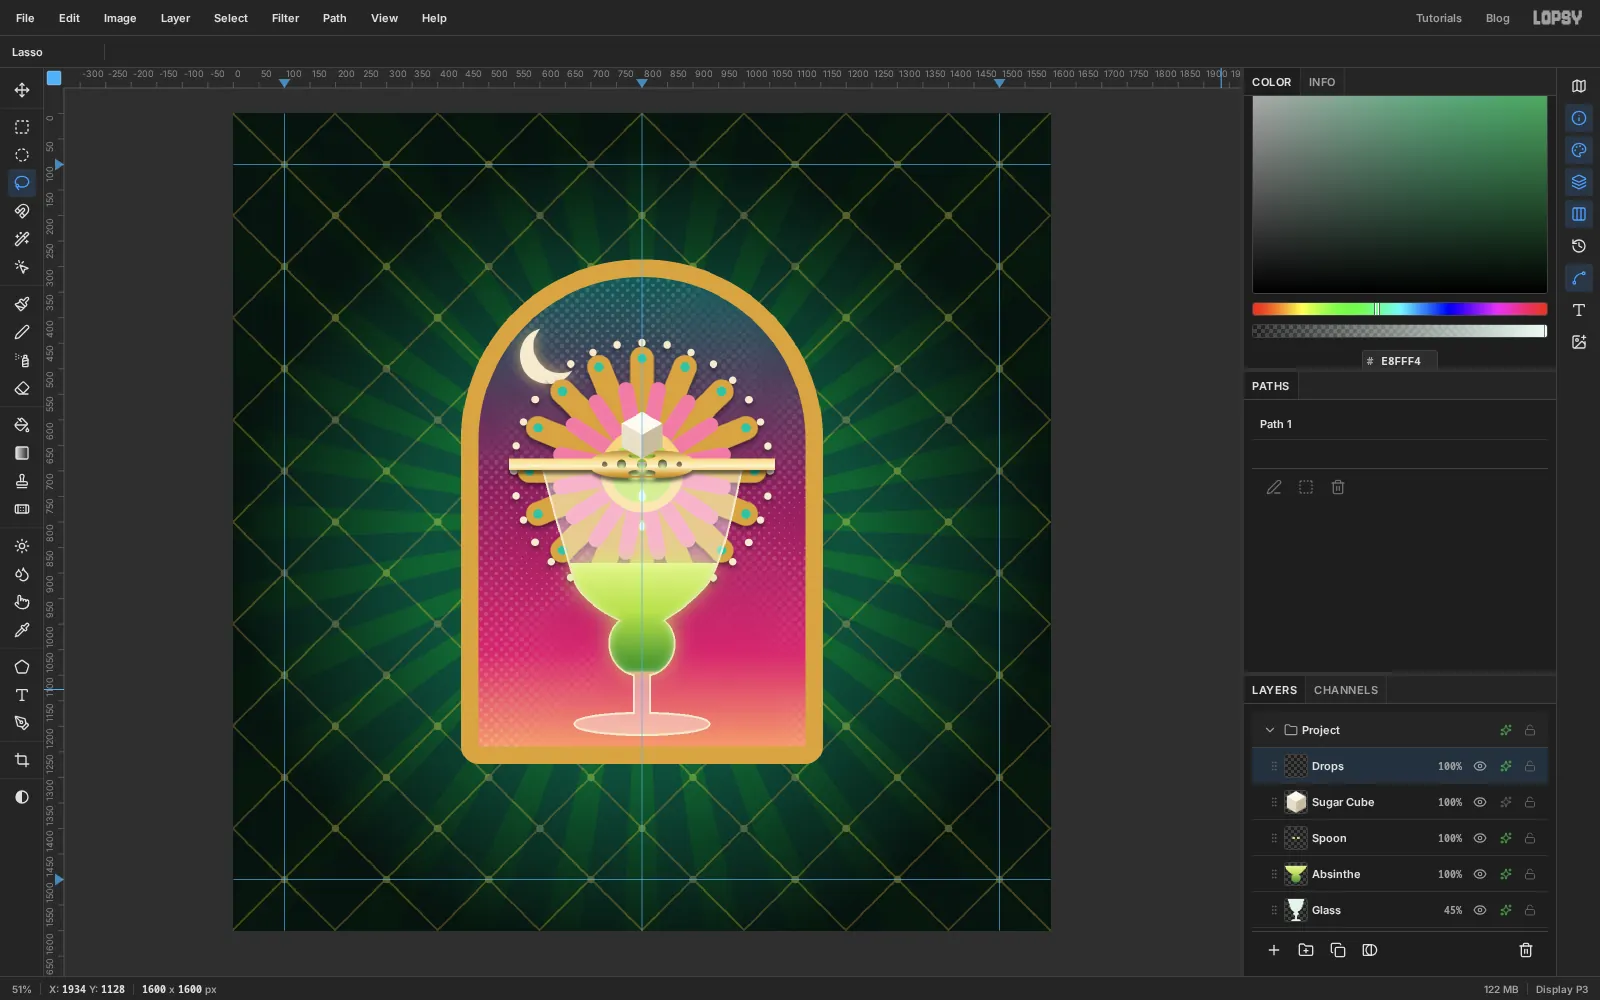
- Click Add Layer and name it
Sugar Cube. The cube has 46 px edges, and its bottom corner rests on the spoon at800, 676. Draw it one face at a time with the Lasso: lasso the top diamond and fill it with , press Cmd+D, lasso the left face below it and fill with , press Cmd+D, then lasso the right face and fill with . - Cmd-click the thumbnail and choose Filter → Add Noise… with Amount
18. Sugar is grainy, and the noise sells it. Press Cmd+D. - Click Add Layer, name it
Drops, and lasso two small teardrops under the spoon at about800, 745and800, 805. Fill with and add an Outer Glow with Size14, Opacity70and the colour .
- Click Add Layer and name it
-
Group the glass
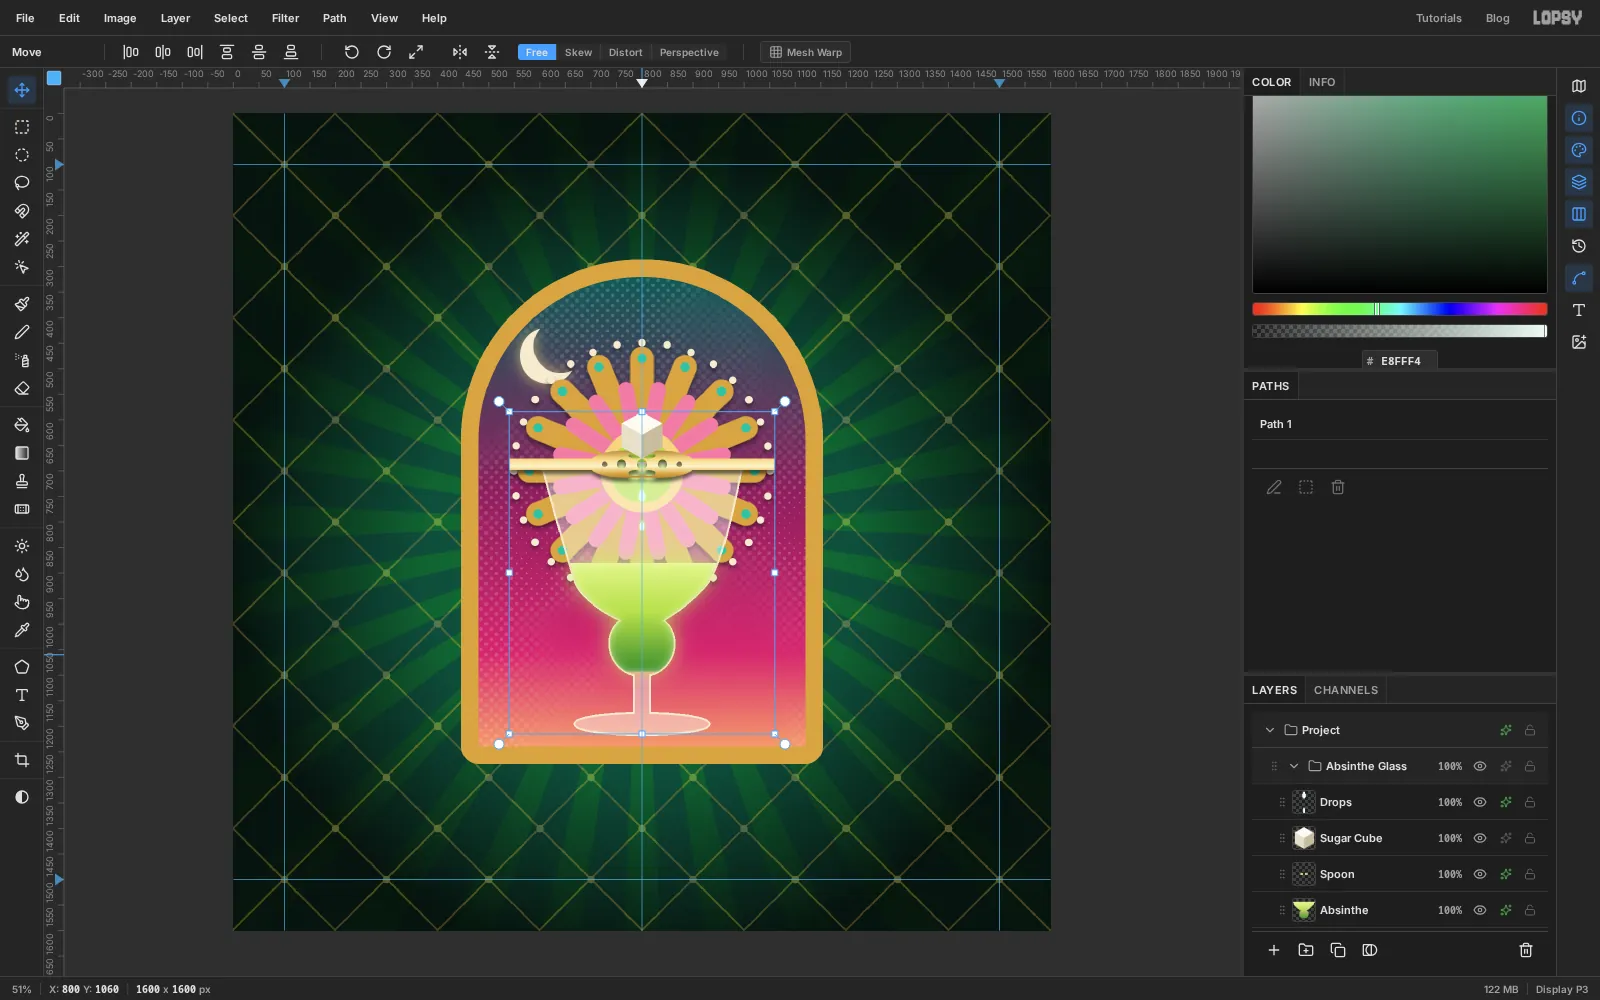
Click the
Glassrow, Shift-click theDropsrow to select all five, and choose Layer → Group Layers. Rename the groupAbsinthe Glass.Now the glass moves as one piece. Click the group row, pick the Move tool and drag on the canvas: the liquid, spoon, cube and drops all travel together. If you try it, press Cmd+Z to put it back. One undo restores the whole group.
-
Paint a wormwood frond
Absinthe is made from wormwood, a silvery plant with feathery leaves. Click the
Arch Framerow and Add Layer, and name itWormwood L. It sits under the sky and over the frame's edge, so the plants look like they grow in front of the wall but behind the window.Pick the Brush with Hardness
90and Opacity100.- Stem: colour , Size
16. Drag one long, gentle S-curve from the bottom edge at250, 1560up to about230, 330, bowing out to the left around y800. - Leaves: at intervals of roughly 80 px up the stem, alternating sides, drag a leaf outwards and upwards at about 50° from the stem. Use Size
20, and make leaves about 190 px long at the bottom and less than half that near the top. - Lobes: along each leaf, add four pairs of short side strokes with Size
15, angled forward like the barbs of a feather. - Change colour every leaf or two between , and , so the frond has light and shade.
Then paint a second, smaller frond on the same layer, from
420, 1560up to about420, 820, three-quarters the size. Finish with a Drop Shadow: Offset X6, Offset Y10, Blur12, Opacity50.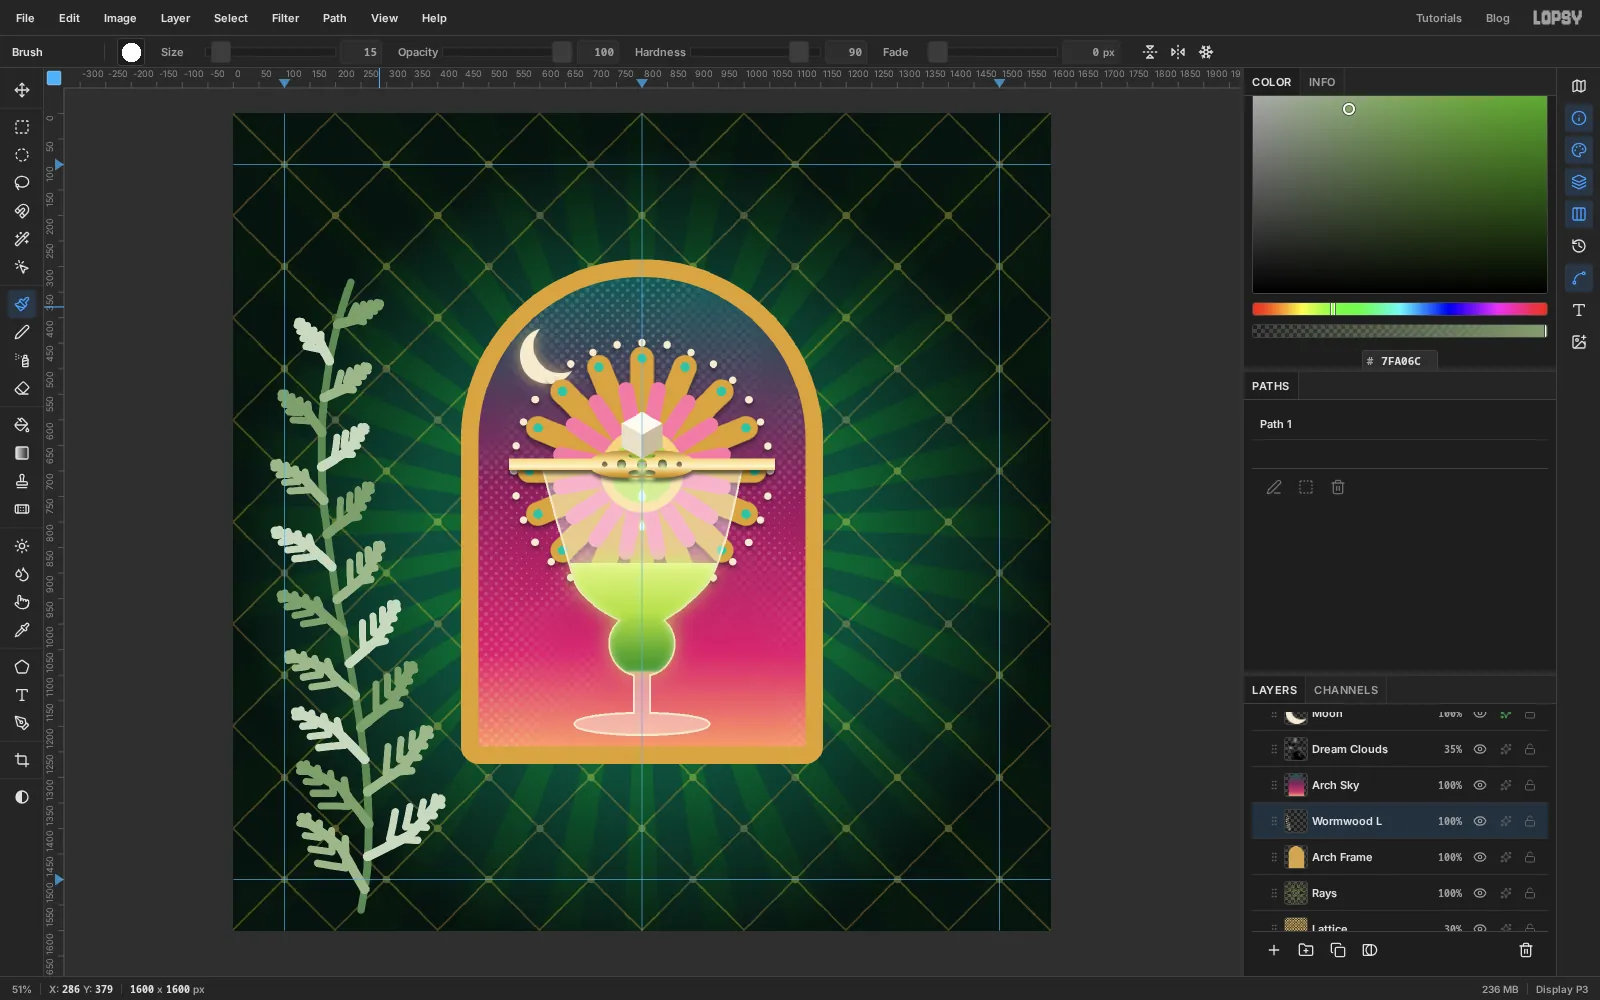
- Stem: colour , Size
-
Mirror the fronds to the right side
- Click Duplicate Layer in the Layers panel footer and rename the copy
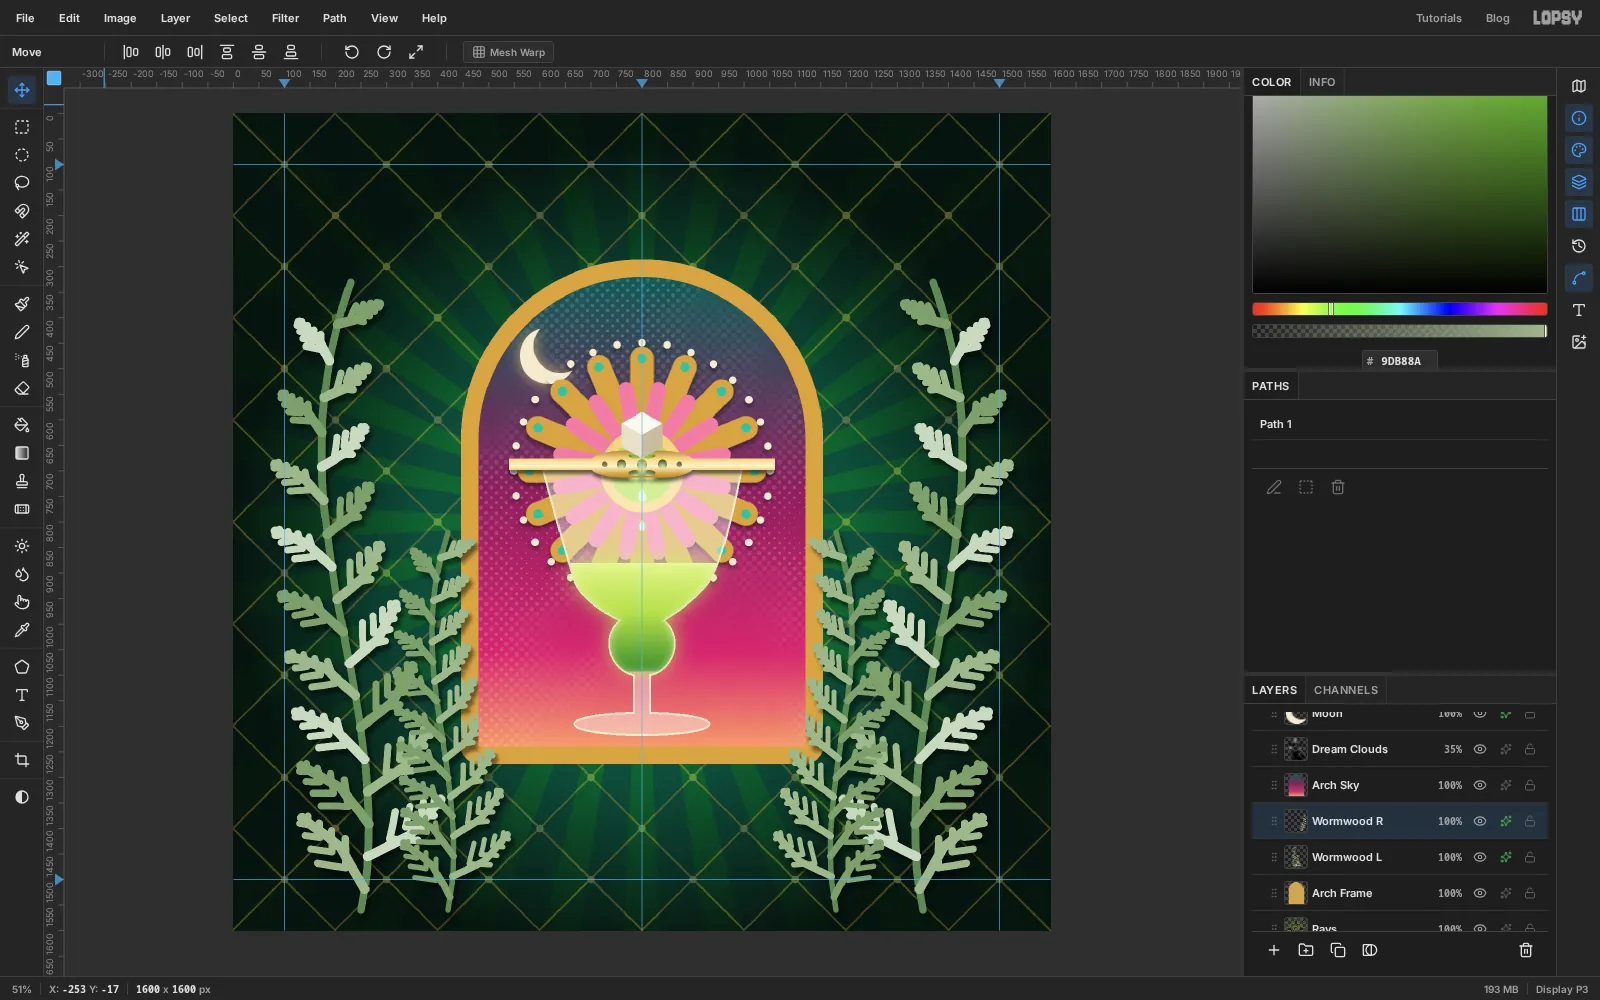
Wormwood R. - Cmd-click its thumbnail, pick the Move tool, and click Flip Horizontal in the options bar.
- Drag the flipped fronds across to the right side until they mirror the left ones. The left fronds span x
72to544, so the copy should span1056to1528. Press Cmd+D.
Exact mirror symmetry looks formal and decorative, like wallpaper or a stained-glass panel. That's the effect you want here.
- Click Duplicate Layer in the Layers panel footer and rename the copy
-
Make a poppy
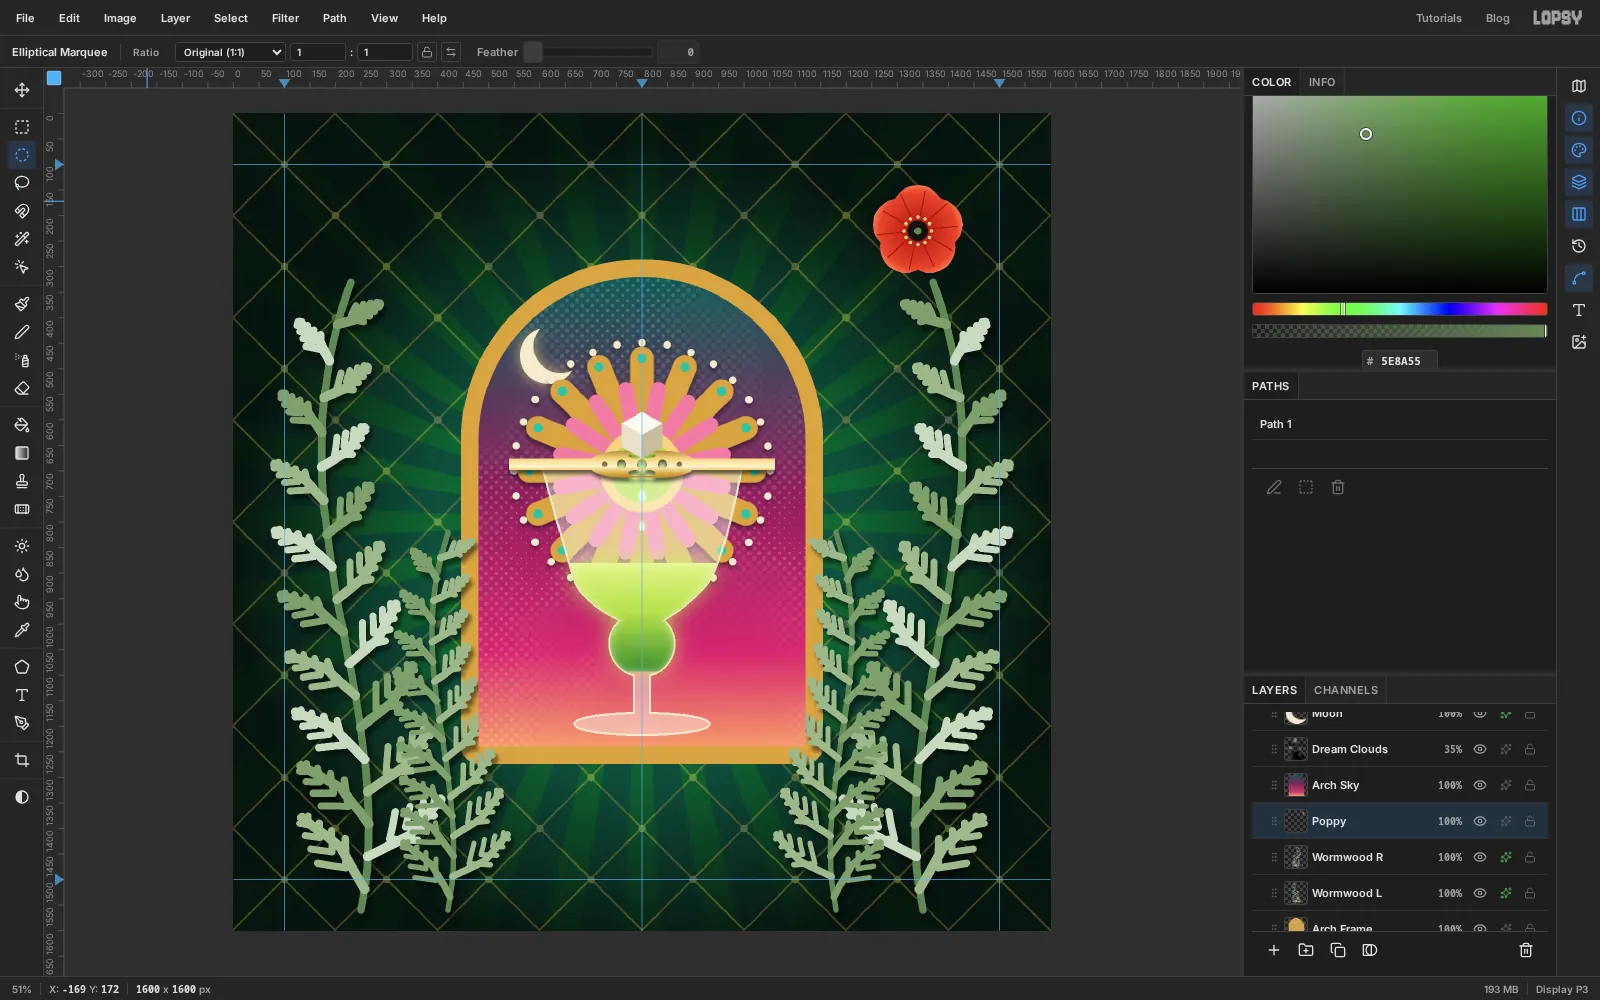
Click
Wormwood R, Add Layer, and name itPoppy. Build it in the empty top-right corner, around1340, 230, and move it later.- Petals: with the Elliptical Marquee, drag five overlapping 100 px circles whose centres sit 40 px out from the middle, evenly spaced like the points of a star. Hold Shift for every circle after the first.
- Set up a radial gradient: , at 35%, at 80% and at the right. Drag from the centre about 95 px down. Press Cmd+D.
- Crinkles: Pencil, Size
2, colour . Draw ten short straight lines from near the centre out towards the petal edges (click, then Shift-click). - Seed head: fill a circle of radius 20 at the centre with . With the Brush at Size
8and colour , click twelve stamens in a ring just outside it. Finish with a tiny circle in the middle.
-
Paste transformed copies
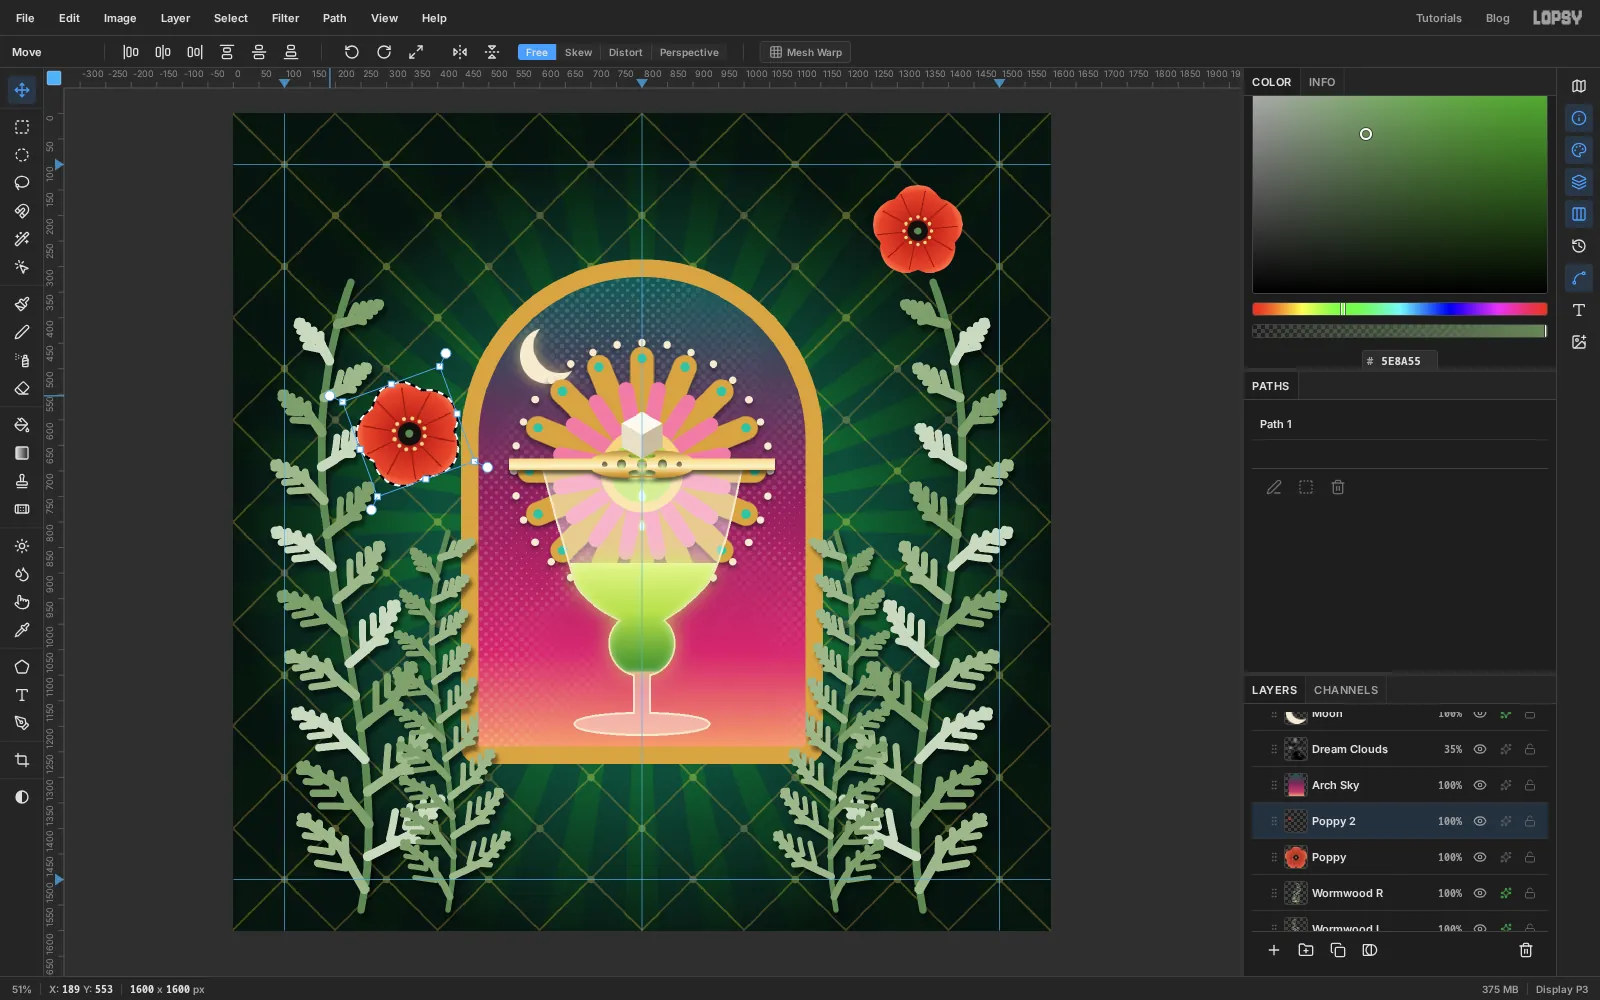
Cmd-click the
Poppythumbnail and press Cmd+C. Then, five times: press Cmd+V, rename the new layer (Poppy 2,Poppy 3and so on), drag it into place, Cmd-click its thumbnail, scale it with a Cmd-drag on a corner handle, and rotate it by dragging just outside a corner.Poppy 2: centre330, 610, 115%, rotated 20° counter-clockwisePoppy 3: centre175, 1050, 85%, rotated 25° clockwisePoppy 4: centre440, 1400, 100%, rotated 10° clockwisePoppy 5: centre1255, 760, 100%, rotated 35° clockwisePoppy 6: centre1440, 1130, 90%, rotated 15° counter-clockwise
There's no angle readout while you rotate, so the angles are approximate. Different sizes and angles stop the copies looking stamped. Press Cmd+D after each one.
-
Place the poppies
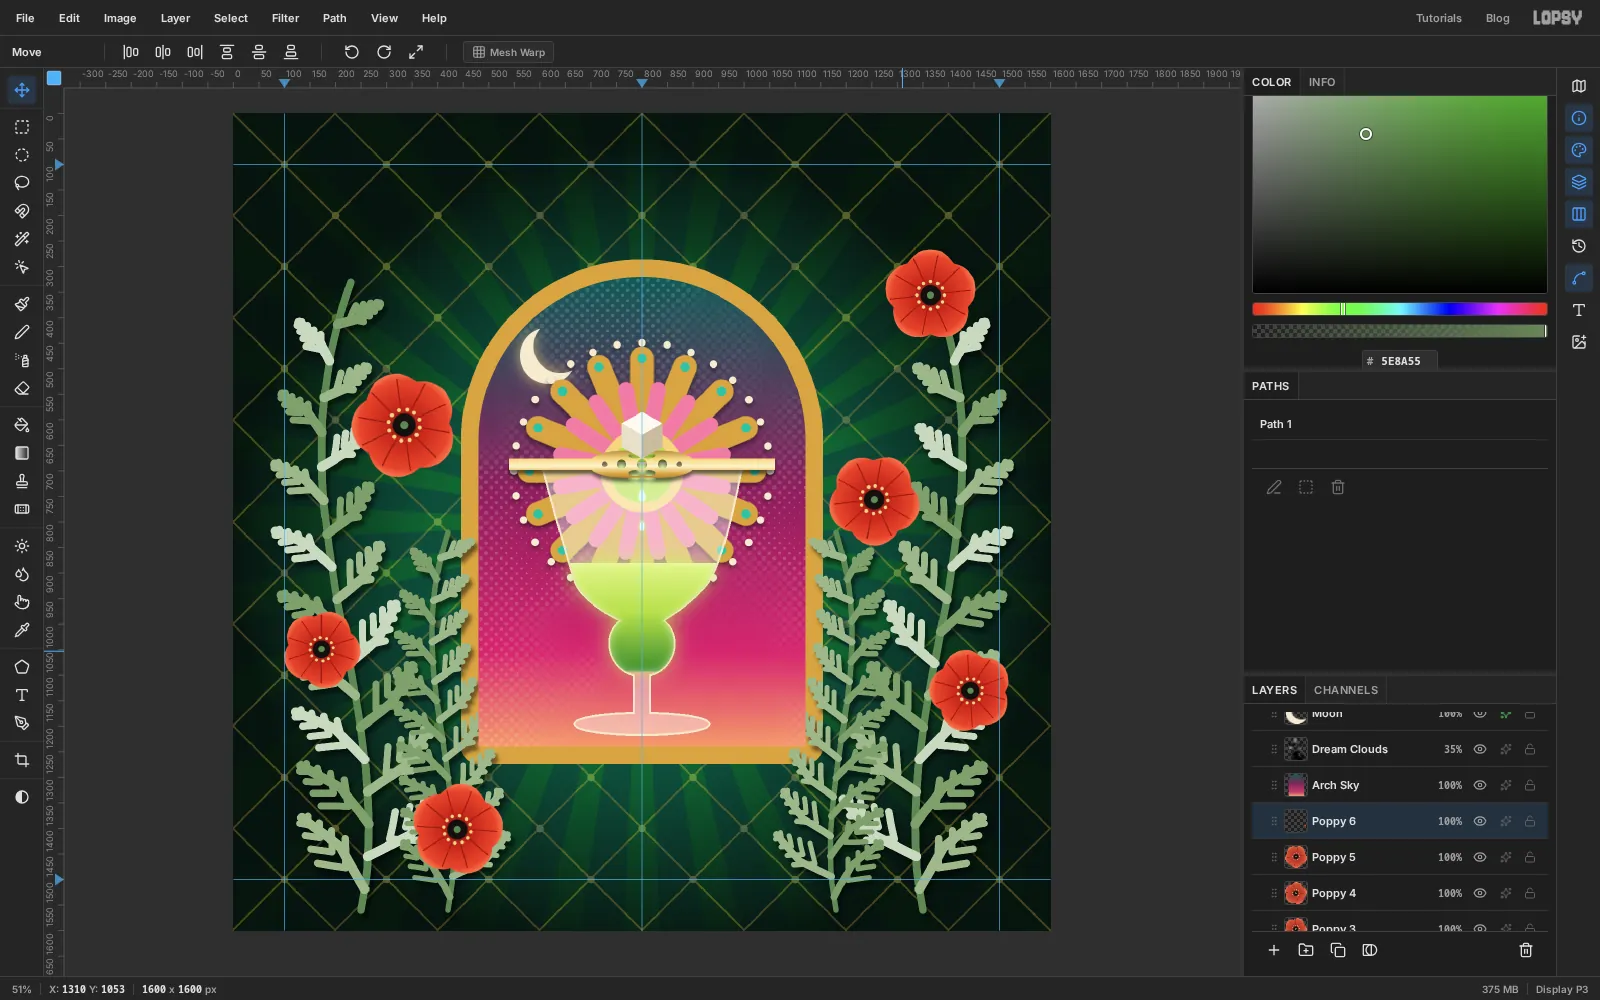
Finally, click the original
Poppyrow and drag it down onto the tip of the right-hand frond, at about1365, 352, so it reads as the flower at the top of the stem.Stand back and check the rhythm. The flowers should sit on the fronds rather than float, alternate in height from side to side, and frame the arch without touching it. Red is the complement of the wormwood greens, so a few blooms go a long way.
-
Set the title
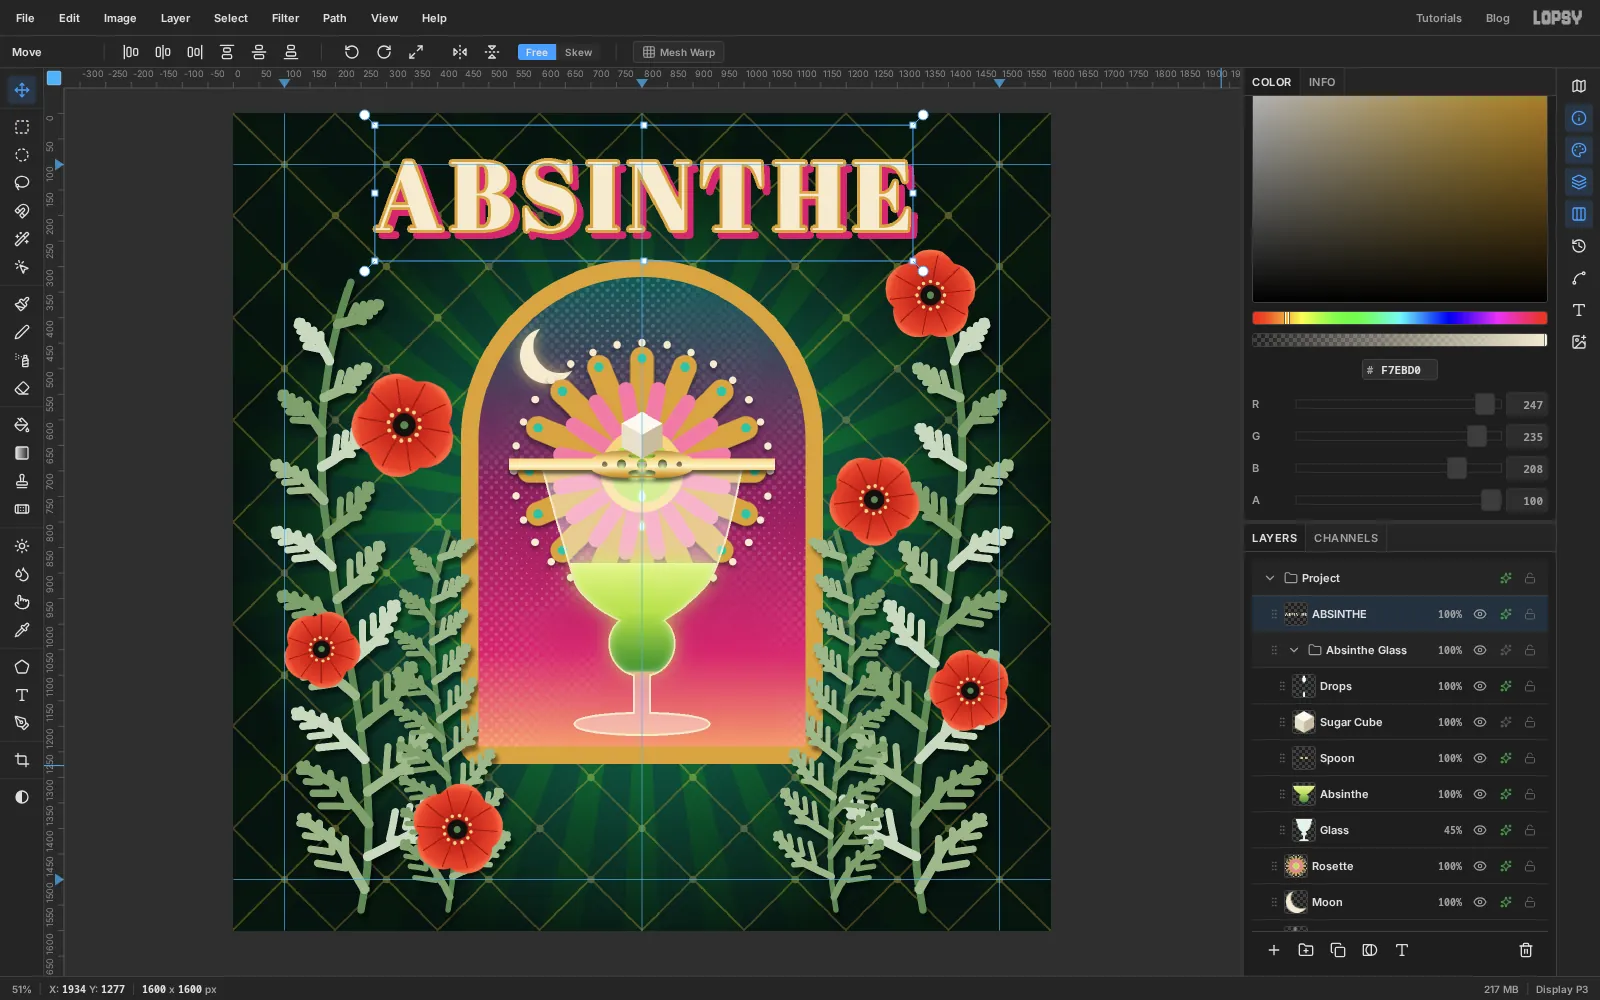
The title goes at the very top of the stack. Clicking the top row won't do it, because the new layer would land inside the
Absinthe Glassgroup, and the Text tool's settings restyle whatever text layer is active. So create the title from a plain raster layer and move it up afterwards.- Click the
Rosetterow. Pick the Text tool (T), set Size190and the font to Abril Fatface, and set the foreground colour to . - Click on empty canvas, type
ABSINTHE, and press Tab to commit. - In the Text panel, set Letter spacing to
14. Wide tracking on all-caps makes a heavy display face feel grand rather than shouty. - Pick the Move tool and drag the title so it's centred on the middle guide with its top at about y
92. - In the effects drawer, turn on Stroke with Width
6and the colour , and Drop Shadow with Offset X12, Offset Y12, Blur0, Opacity100and the colour . A hard, offset shadow in a bright colour is a classic poster trick. - Drag the
ABSINTHErow to the top of the Layers panel, above theAbsinthe Glassgroup.
- Click the
-
Draw an arc for the band name
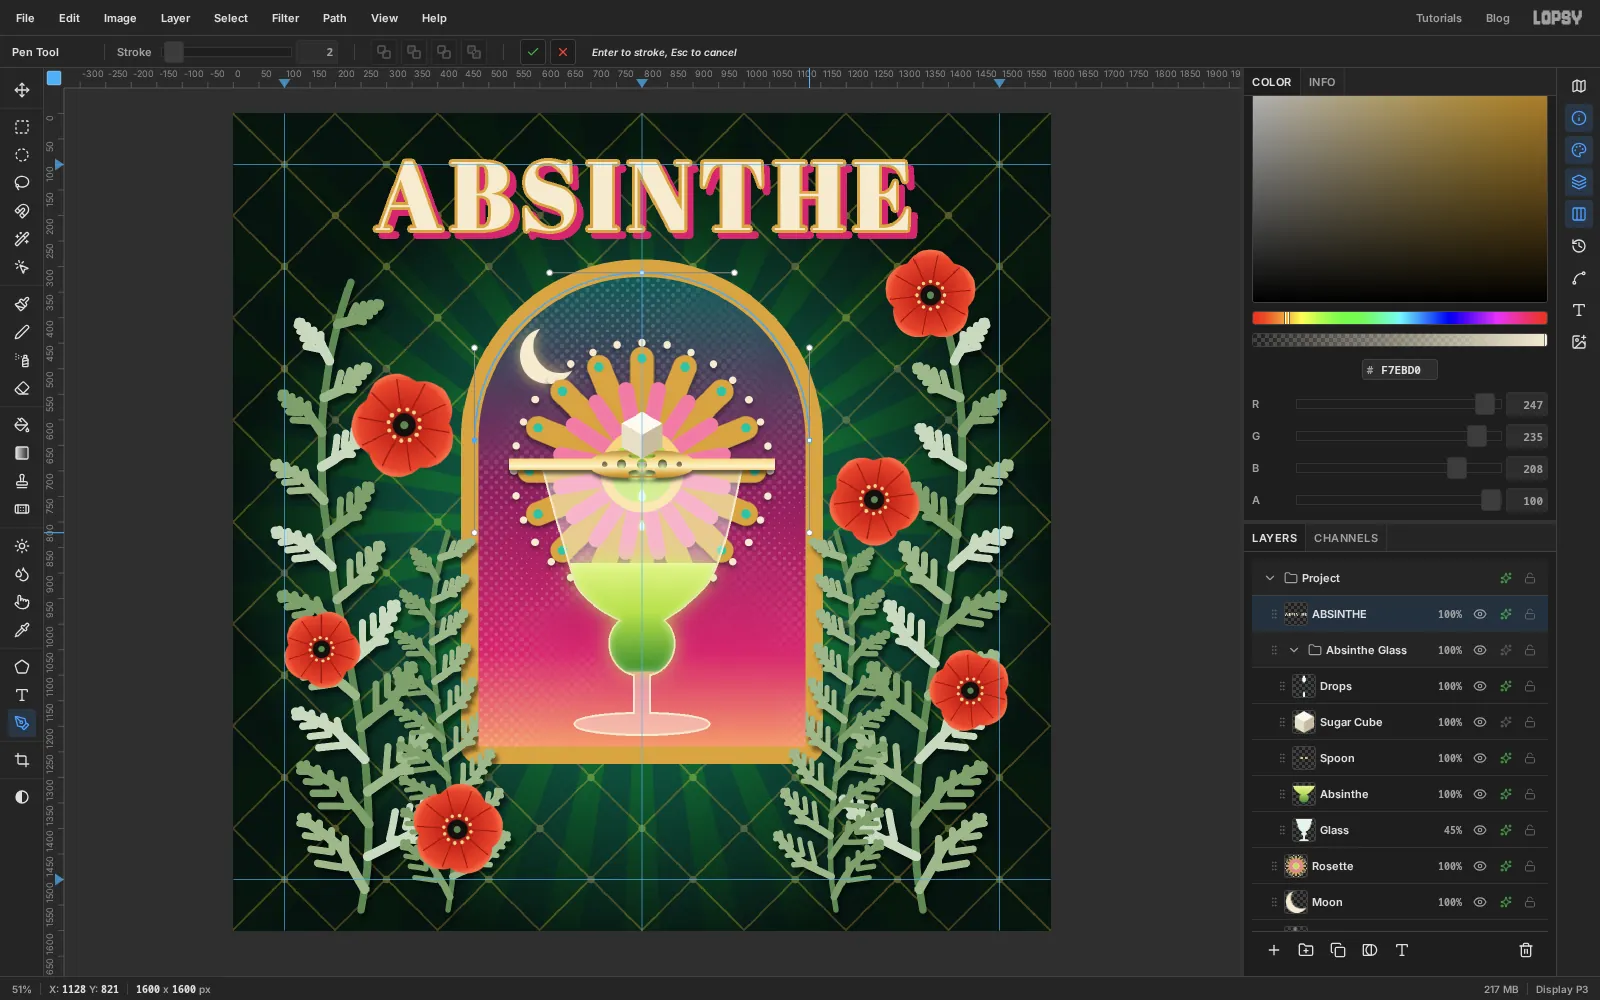
The band name will run along the gold frame. With the Pen tool, place three anchors, dragging each one in the direction the curve travels:
- Drag from
472, 640straight up to472, 459. - Drag from
800, 312straight right to981, 312. - Drag from
1128, 640straight down to1128, 821.
Click the ✓ Commit path button in the options bar. Don't press Enter: Enter would also stroke the path in paint.
- Drag from
-
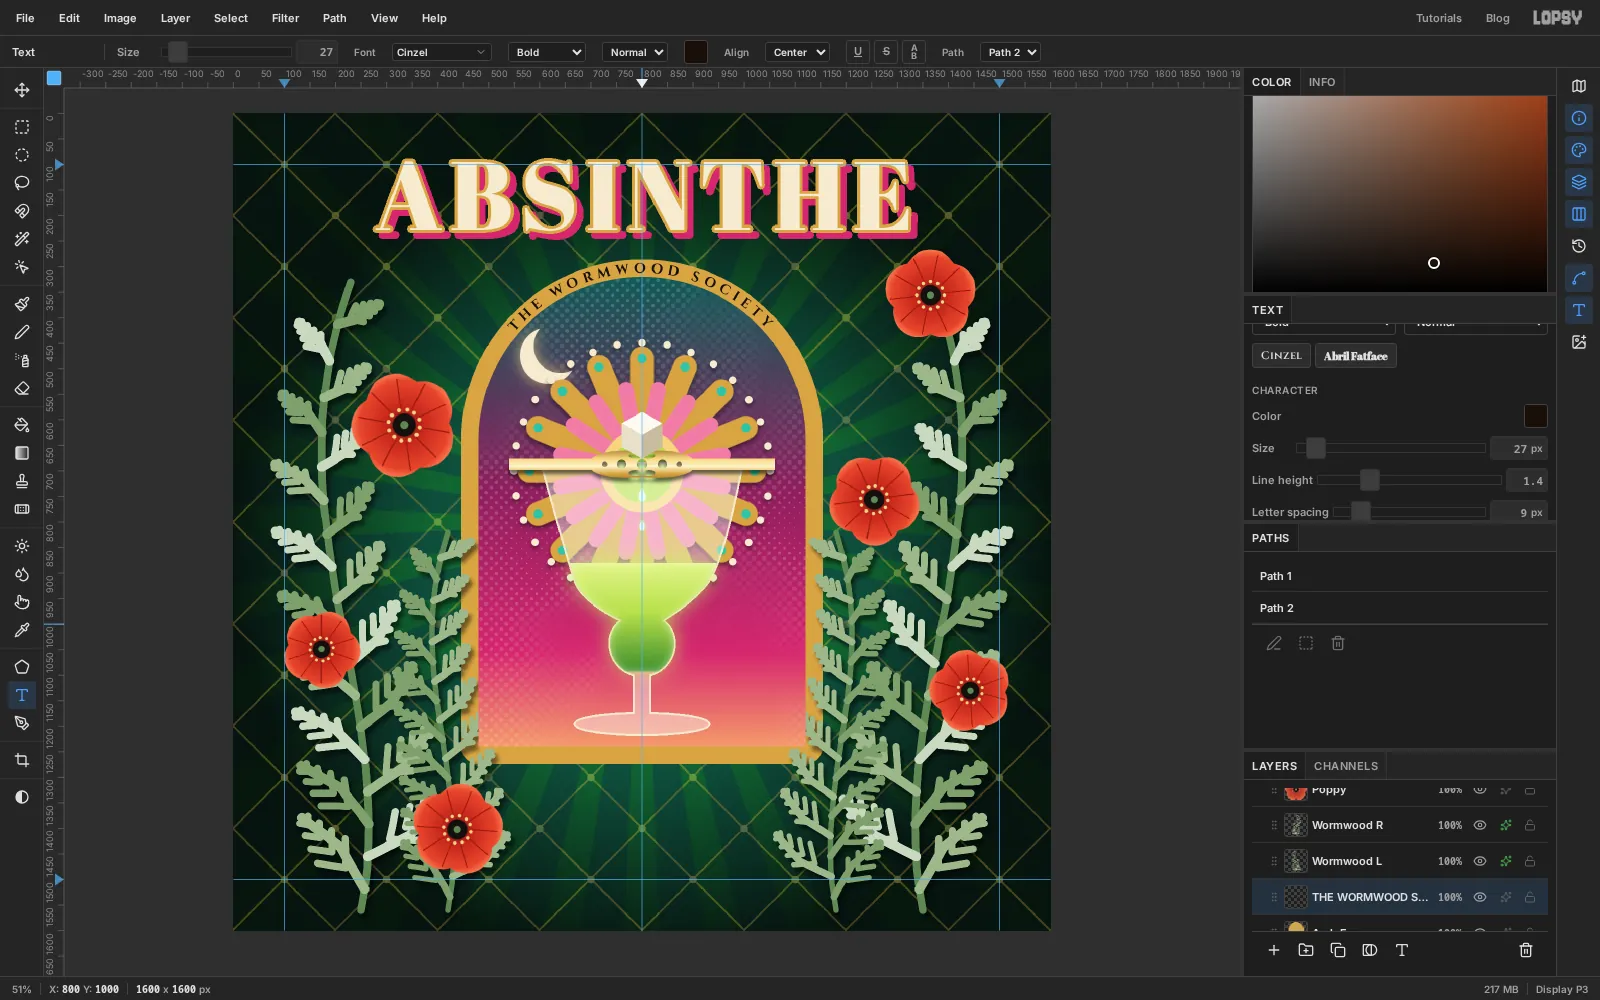
Bind the band name to the path
- Click the
Arch Framerow so the new text sits just above the frame. - Pick the Text tool. Set Size
27, font Cinzel, weight Bold, Align Center and the colour . - Click on empty canvas, type
THE WORMWOOD SOCIETYand press Tab. - In the Text panel, set Letter spacing to
9. - In the options bar, set Path to
Path 2. The letters jump onto the arc, centred on its top.
- Click the
-
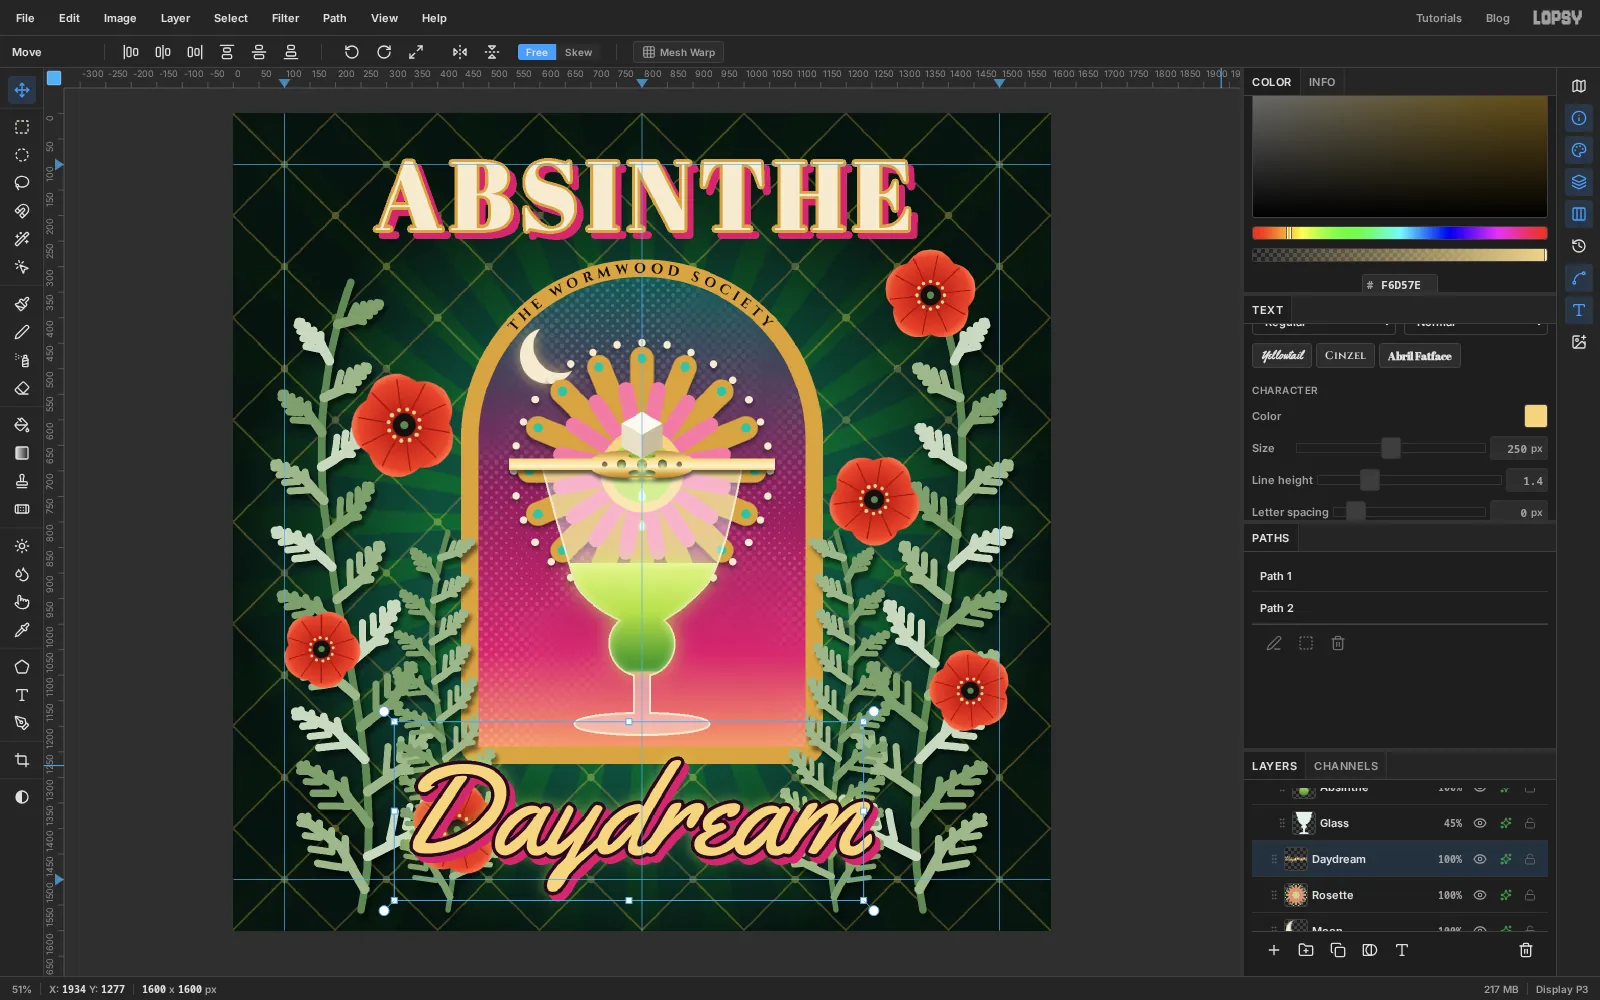
Write "Daydream" in script
The second half of the title is a script, which gives the cover its third voice.
- Click the
Rosetterow. Pick the Text tool, set Size250, font Yellowtail, Align Left, and the colour . - Click on empty canvas, type
Daydreamand press Tab. In the Text panel make sure Letter spacing is0, because tracking breaks the joins of a connected script. - Move it so it's centred on the middle guide at about y
1395. - Add Stroke (Width
7, colour ), Drop Shadow (Offset X10, Offset Y12, Blur0, Opacity100, colour ) and Outer Glow (Size40, Opacity55, colour ).
- Click the
-
Tilt the script
With the Move tool and the
Daydreamlayer active, handles appear around the text box. Drag just outside the top-left corner, where the cursor turns into a curved arrow, and rotate about 6° counter-clockwise so the word rises to the right. The text stays live, so you can still edit it later.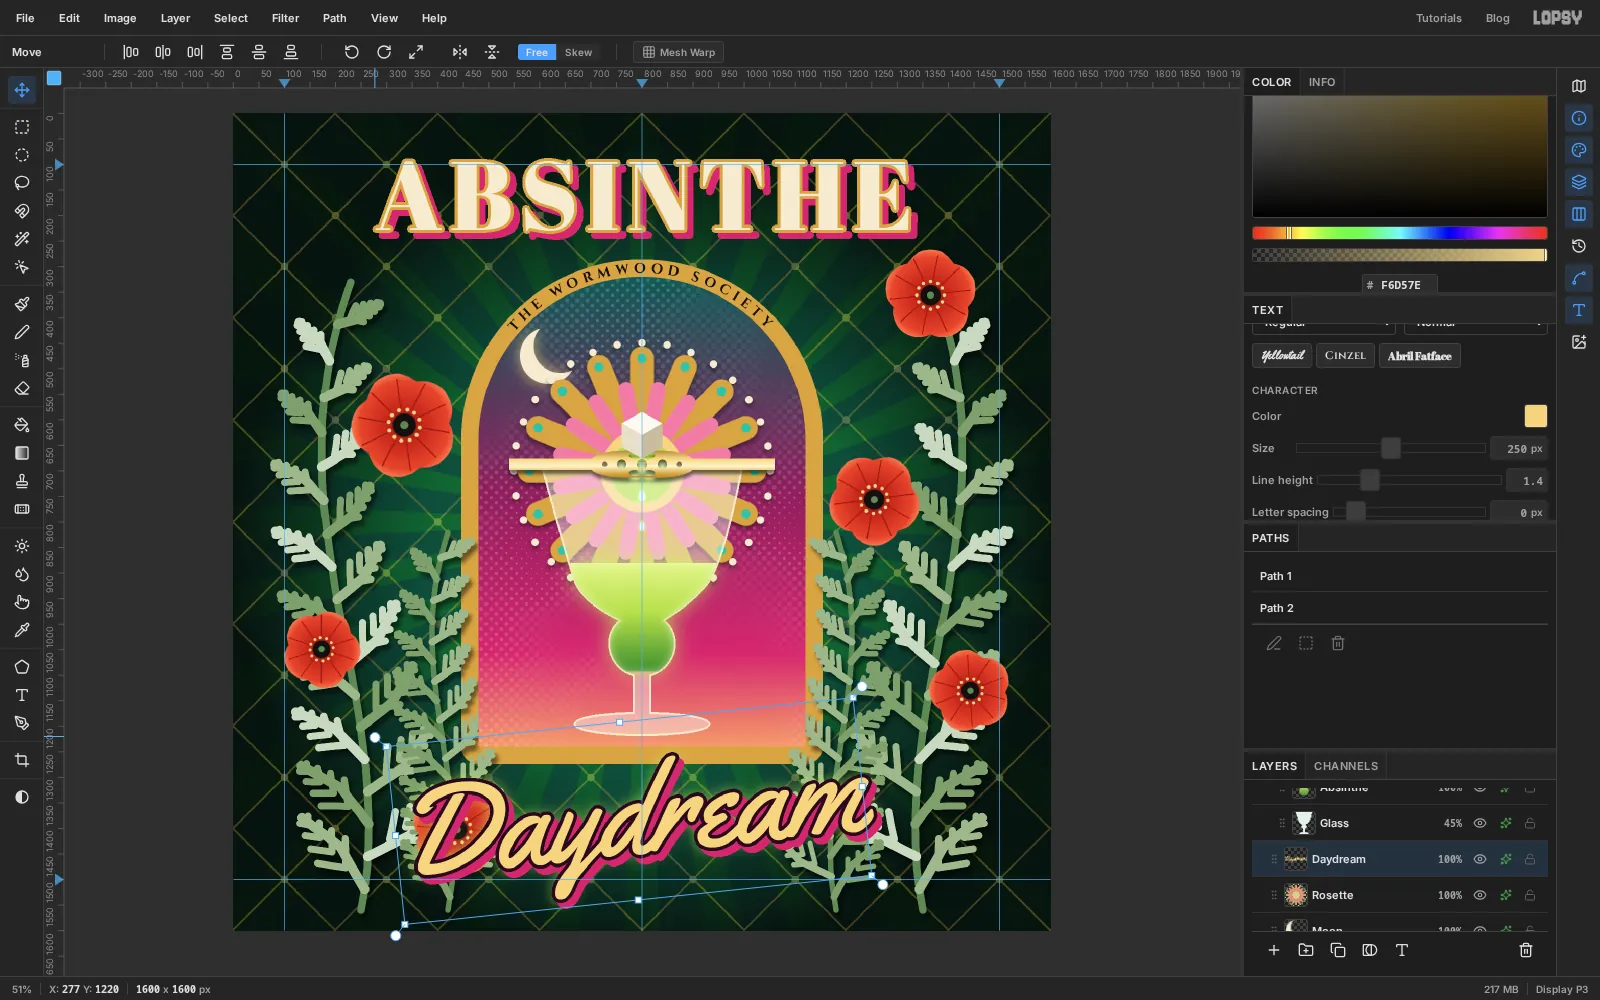
-
Make a starburst badge
A "Green Vinyl" sticker is the kind of small extra a maximalist cover loves.
- Click the
ABSINTHErow, Add Layer, and name itBadge. - Turn off View → Snap to Guides. The badge sits right next to the guides at 1500, and snapping would pull one side of each circle onto them.
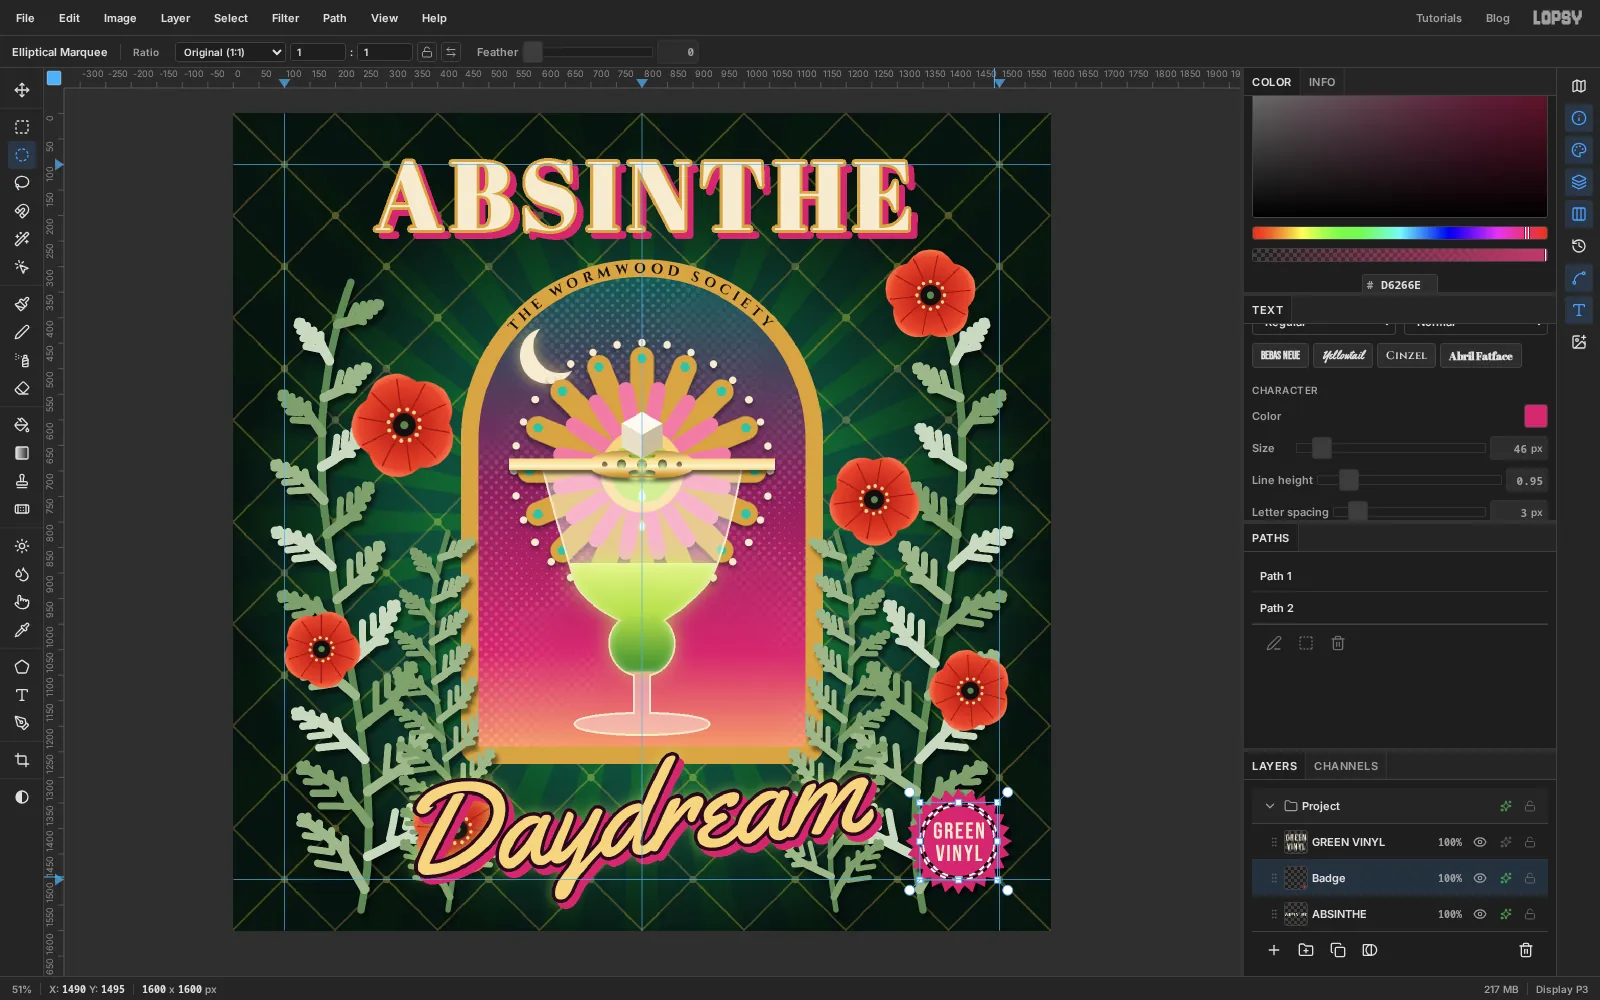
- With the Lasso, drag a zig-zag star of 24 small points around
1420, 1425, about 208 px across, with the valleys about 16 px in from the tips. It doesn't need to be perfect: small irregularities read as a die-cut sticker. Fill with and press Cmd+D. - Drag an Elliptical Marquee circle of radius 76 on the same centre, then hold Alt and drag one of radius 70 to subtract it. Fill with , press Cmd+D, and add a Drop Shadow (Offset X
6, Offset Y8, Blur6, Opacity60). - Pick the Text tool, set Size
46, font Bebas Neue, Align Center and colour . Click empty canvas, typeGREEN, press Enter, typeVINYLand press Tab. In the Text panel set Line height0.95and Letter spacing3, then centre the text on the badge.
- Click the
-
Group and rotate the sticker
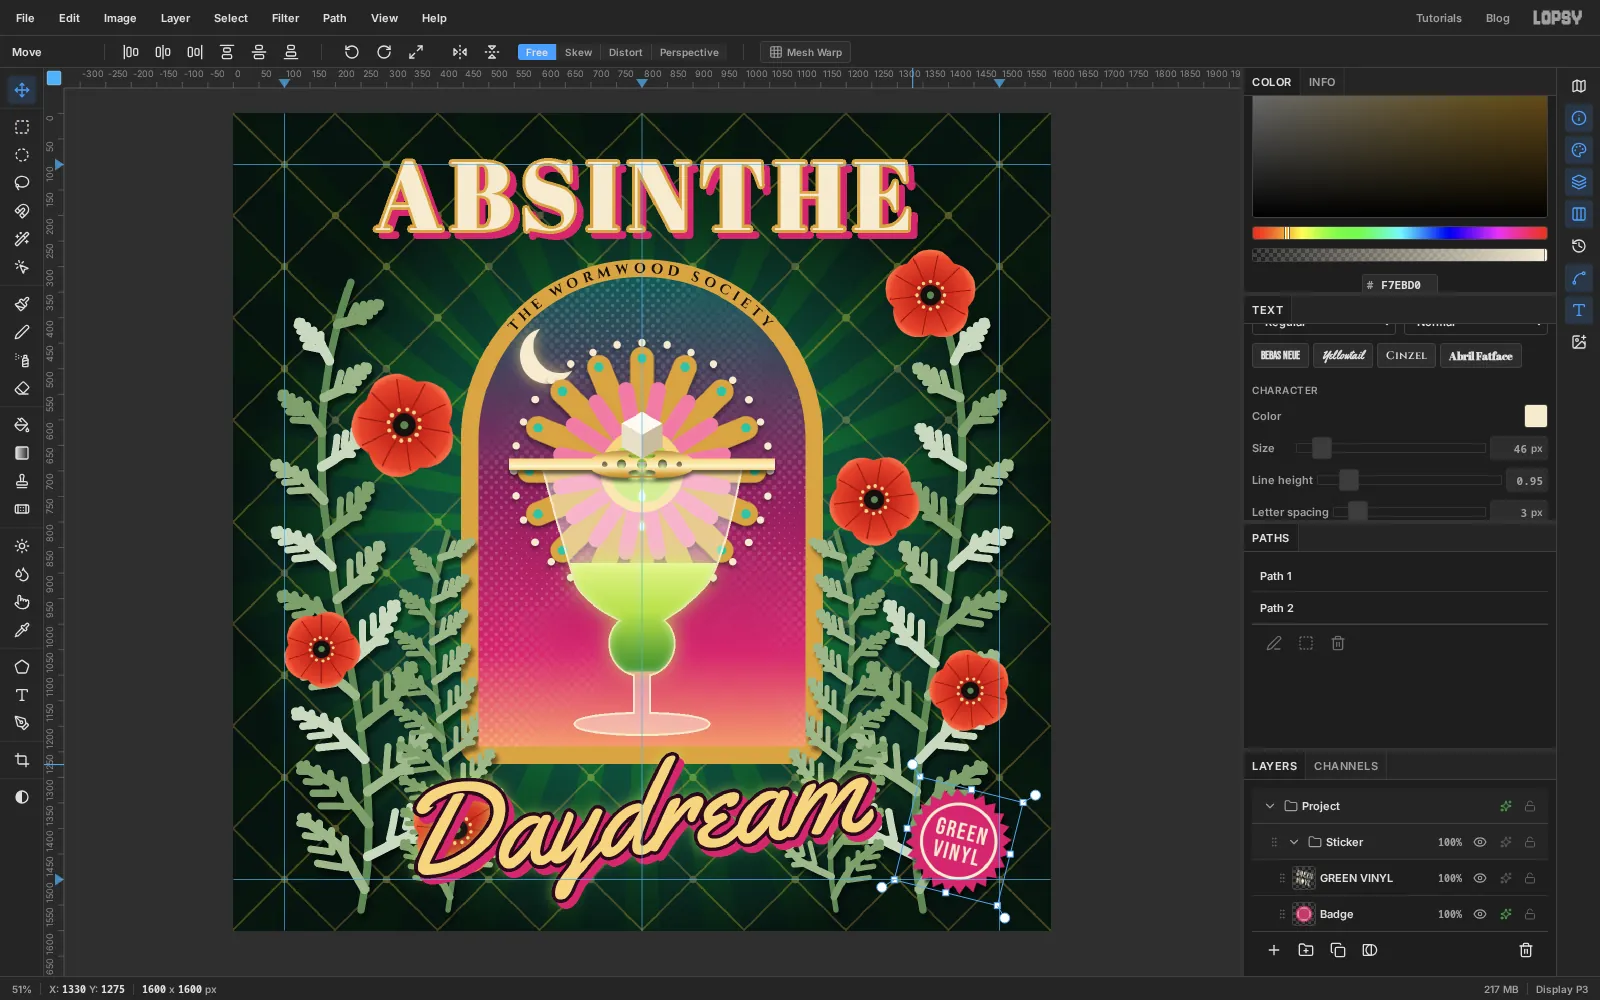
Click
Badge, Shift-clickGREEN VINYL, choose Layer → Group Layers, and name the groupSticker. With the group active, pick the Move tool and drag a corner's rotation zone clockwise about 14°. The starburst and the text turn together, and the text stays editable.Stickers on a real sleeve are never applied straight. The tilt sells it.
-
Add a double gold border
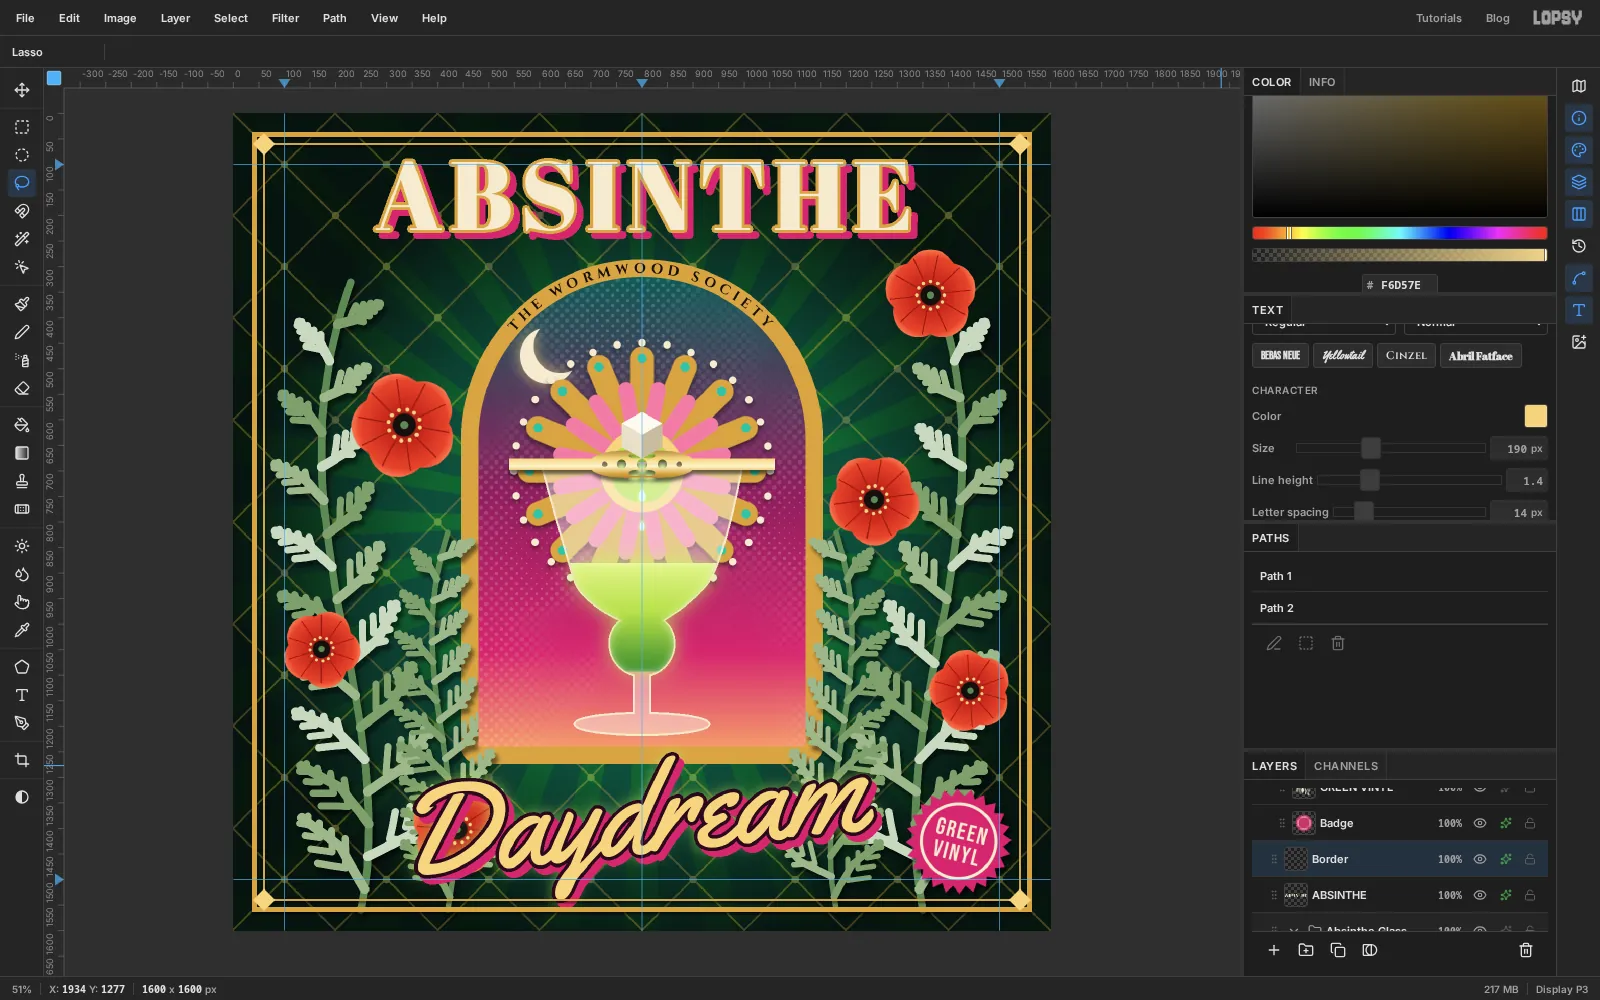
Click the
ABSINTHErow, Add Layer, and name itBorder. With the Rectangular Marquee:- Drag from
36, 36to1564, 1564. - Hold Alt and drag from
46, 46to1554, 1554. That leaves a 10 px band. - Hold Shift and drag from
58, 58to1542, 1542, then hold Alt and drag from62, 62to1538, 1538. That adds a second, 4 px band inside the first. - Fill with and press Cmd+D.
- With the Lasso, draw a small diamond (22 px from centre to point) on each corner of the inner rule, holding Shift after the first. Fill with . Add a small Drop Shadow (Offset Y
4, Blur6, Opacity60).
- Drag from
-
Add film grain
Click
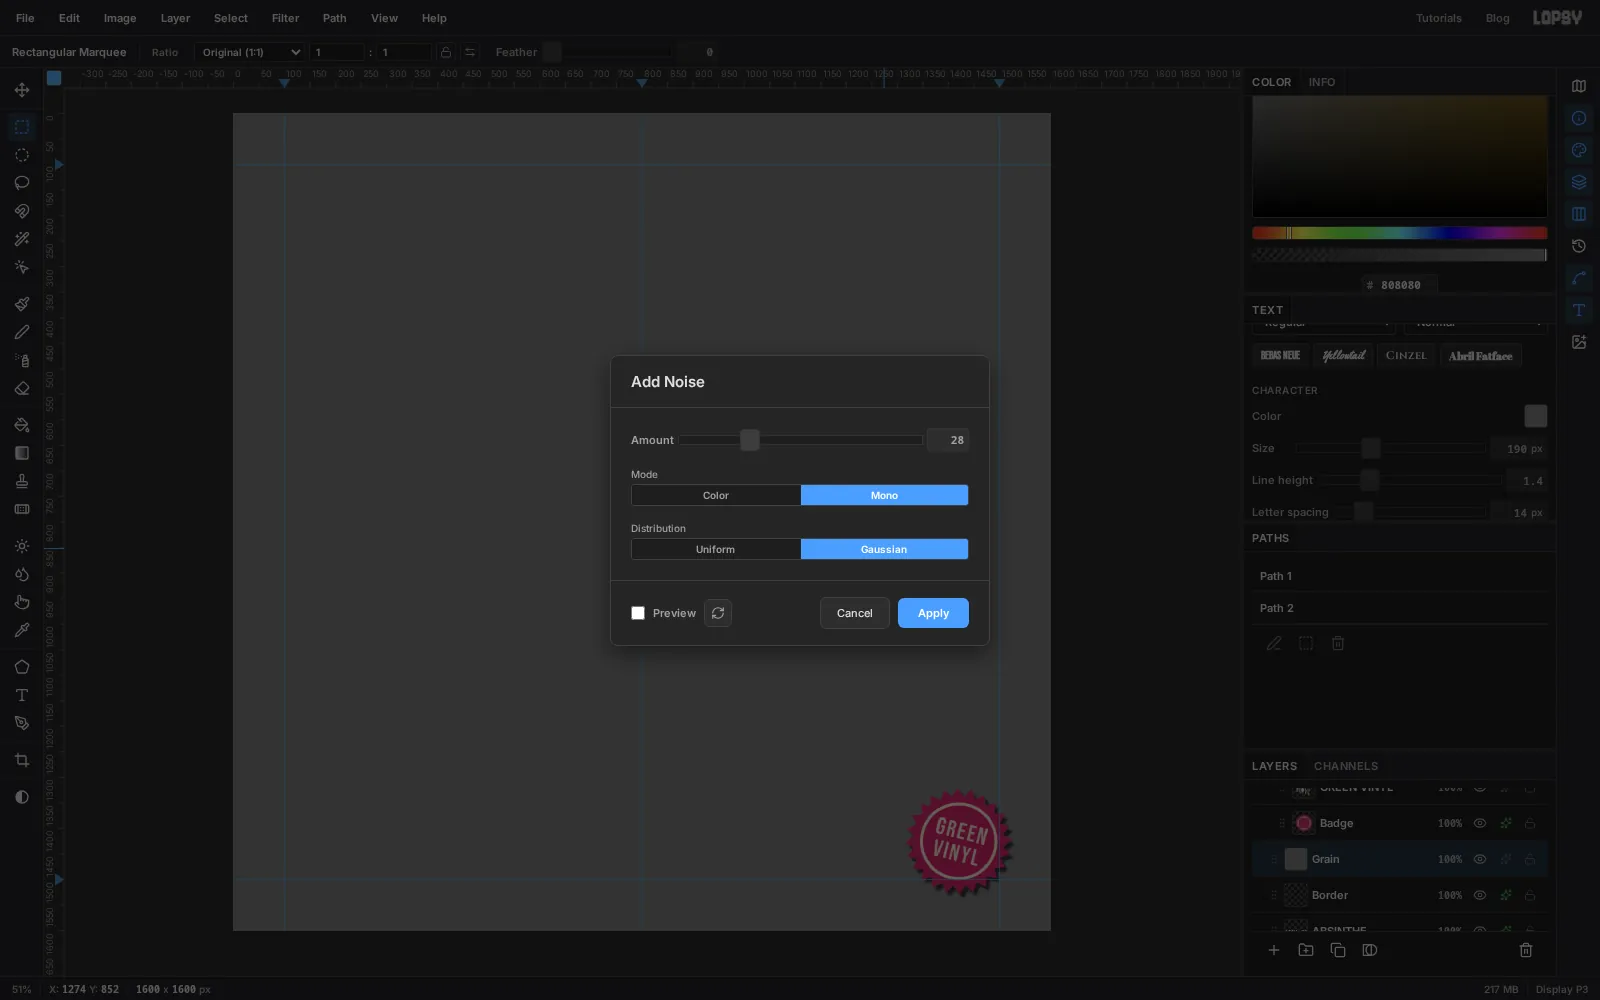
Border, Add Layer, and name itGrain. Fill the whole layer with , then choose Filter → Add Noise… with Amount28, Mono and Gaussian. Click Apply, set the blend mode to Overlay and the opacity to35%.Mid-grey disappears in Overlay, so only the noise shows. Grain ties the flat vector shapes, the halftone sky and the painted fronds together, as if they were all printed on the same paper.
-
Add a vignette
Every document sits inside a root group called
Project. Click its row at the top of the Layers panel and open its drawer (✦). It already lists Levels, Curves, Exposure, Hue / Saturation and Color Grading at neutral settings. Click Add Adjustment → Vignette and set it to40. The corners darken, which pushes the eye towards the glowing glass.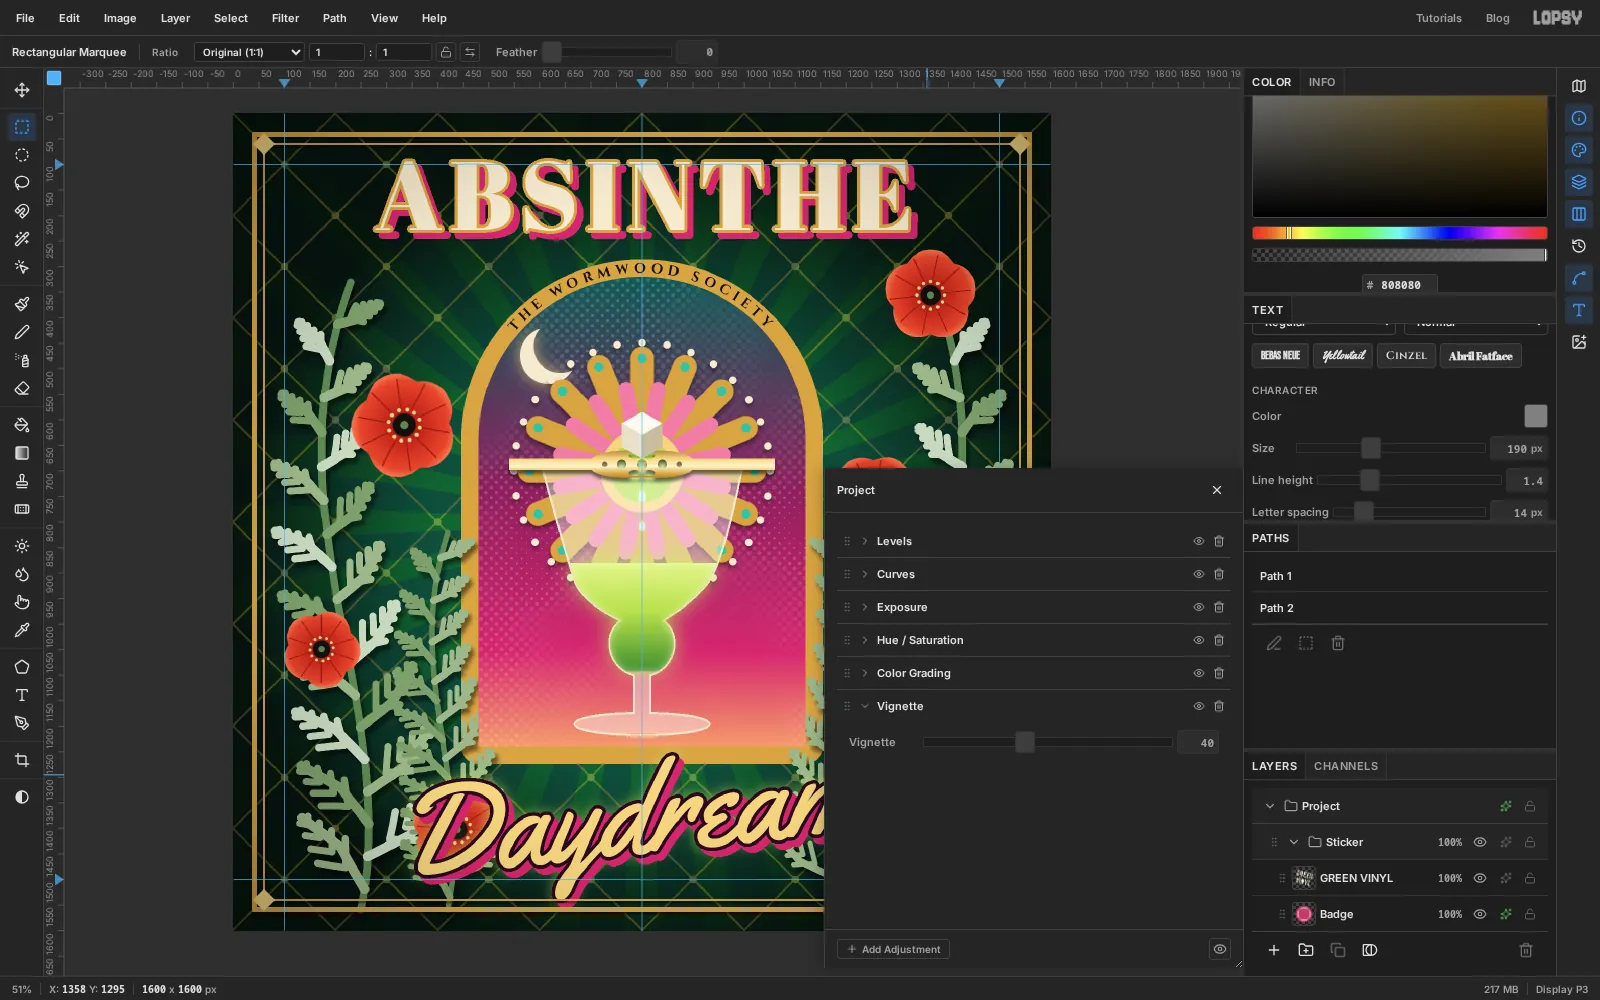
-
Refine: deepen the poppies and rebalance
Step back and look at the whole cover. A few things need tightening.
The orange-red poppies fight the magenta sky. Click each poppy layer in turn and choose Filter → Hue/Saturation… with Hue
-12, Saturation-8and Lightness-6. They become a garnet red that belongs with the pinks.The left side also has fewer flowers near the top. Move
Poppy 4(the one behind the "D" of Daydream) up onto the tip of the left frond at about222, 405. Move the originalPoppydown a little to1380, 405so the two mirror each other, and nudgePoppy 2down to about345, 705so it doesn't touch them. Select theStickergroup and nudge it 22 px up and 22 px left, so the badge's points stay clear of the border. Finally, set theLatticeopacity down to22%so it stops buzzing behind the fronds, and nudgeABSINTHE6 px left: its pink shadow hangs to the right and makes the title look off-centre.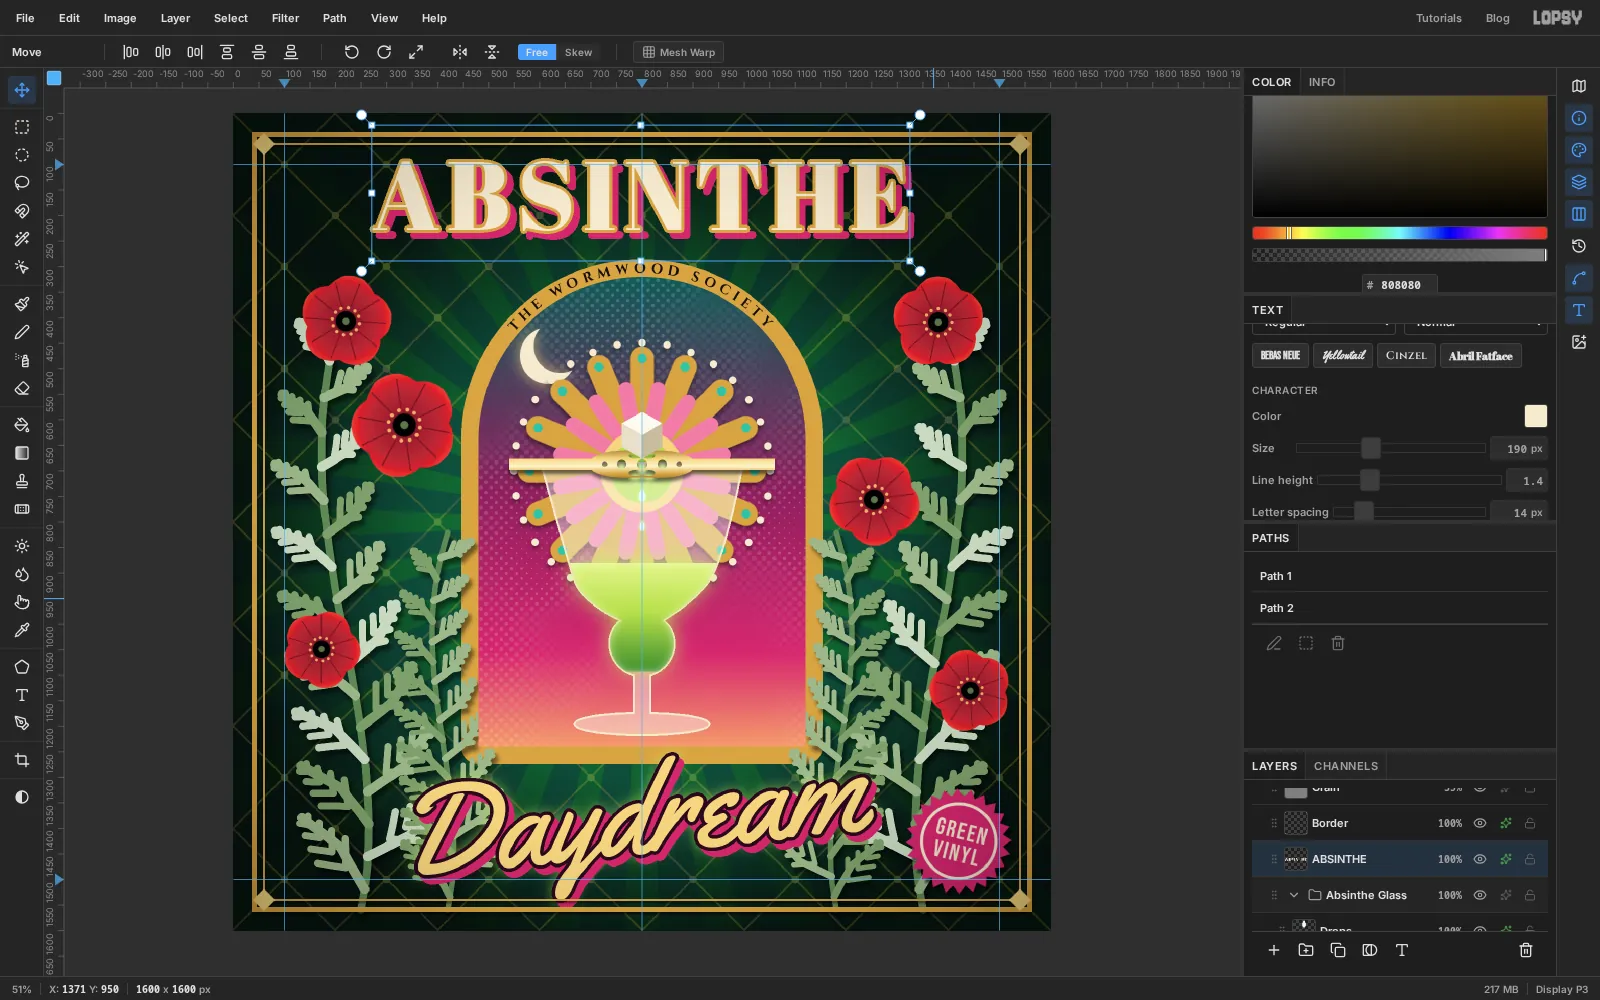
-
Give the script a cartouche
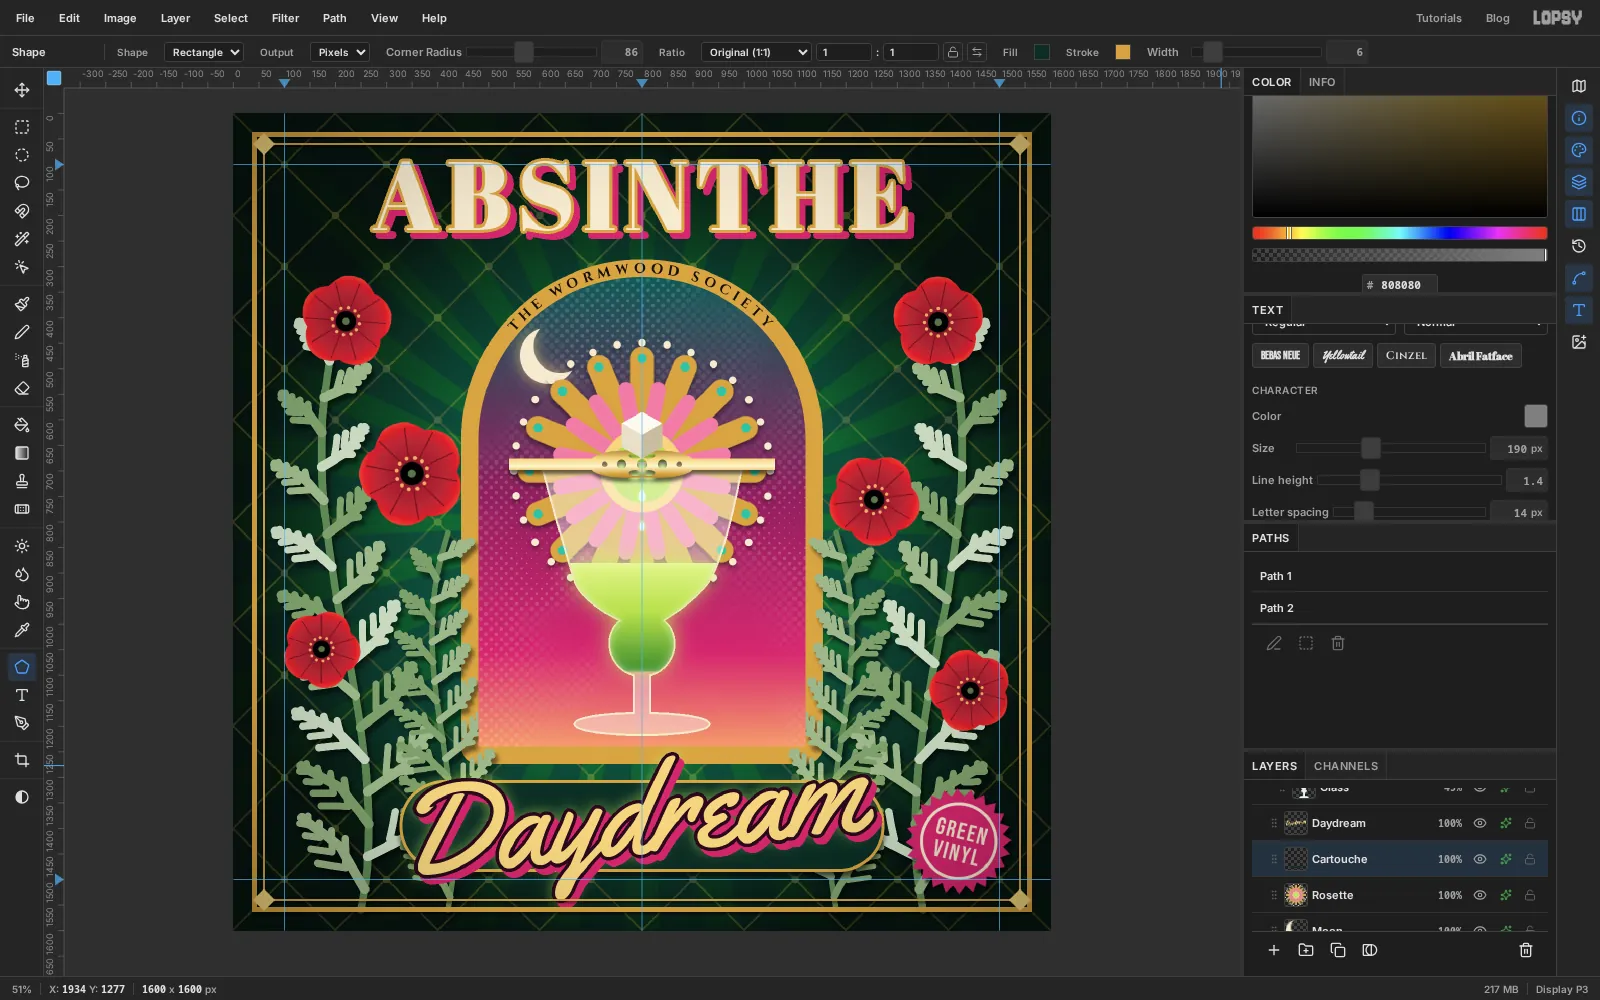
"Daydream" floats on top of everything with no home. A cartouche fixes that.
- Click the
Rosetterow, Add Layer, and name itCartouche. It lands just underDaydream. - Pick the Shape tool (U). Set Shape to Rectangle, Output to Pixels and Corner Radius to
86. Click the Fill swatch and set . Click Add stroke color, set , and set Width to6. - A shape grows from the point you press. Press at the centre of where the script sits (
800, 1395) and drag out to1272, 1482. - Add a Drop Shadow with Offset Y
10, Blur16and Opacity60.
- Click the
-
Resize the type to fit
- Click
Daydreamand, in the Text panel, change Size to196. Re-centre it on the middle guide. The rotation is kept. - The "y" now reaches up towards the arch and down towards the border. With the Move tool, nudge
Daydreamdown about 14 px andCartouchedown 8 px with the arrow keys, so the top of the "y" clears the gold frame and its tail stops well short of the inner border rule. A script letter that breaks out of its band looks deliberate. One that touches the frame looks like a mistake. - Click the
THE WORMWOOD SOCIETYlayer and, in the Text panel, set Size33and Letter spacing6. The band name was too small to read at thumbnail size.
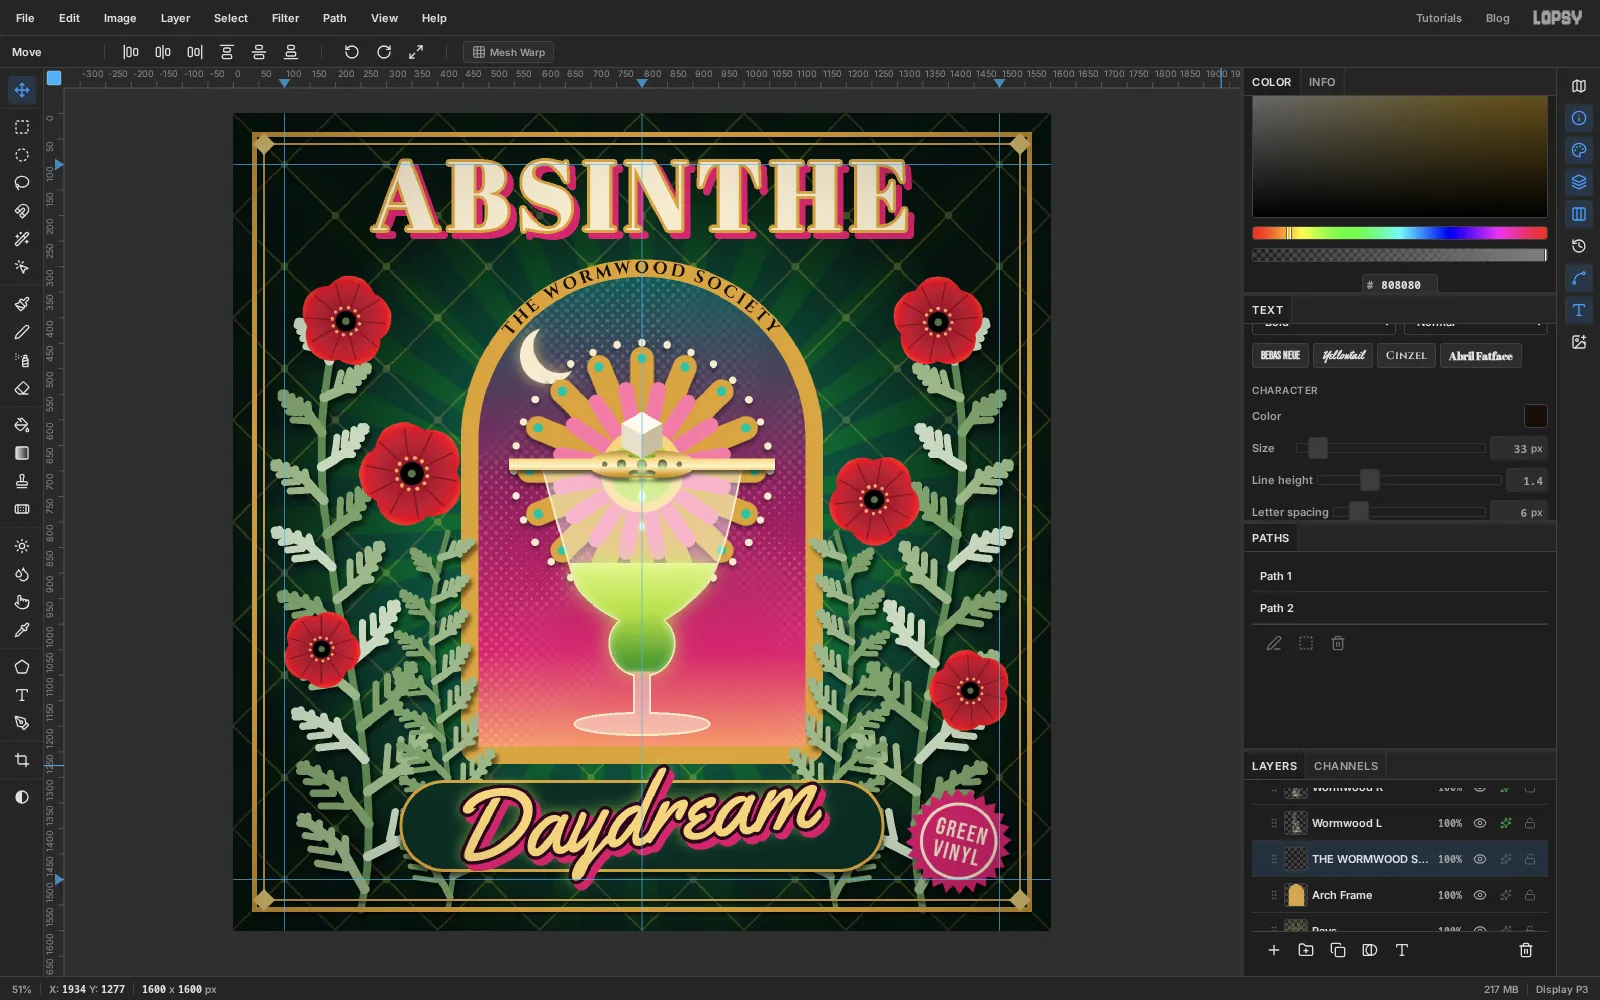
- Click
-
Widen the gold band
At 33 px the band name nearly touches the outer edge of the gold. Click the
Arch Framerow, Cmd-click its thumbnail, choose Select → Grow… with10, fill with and press Cmd+D. Now there's a margin above the letters.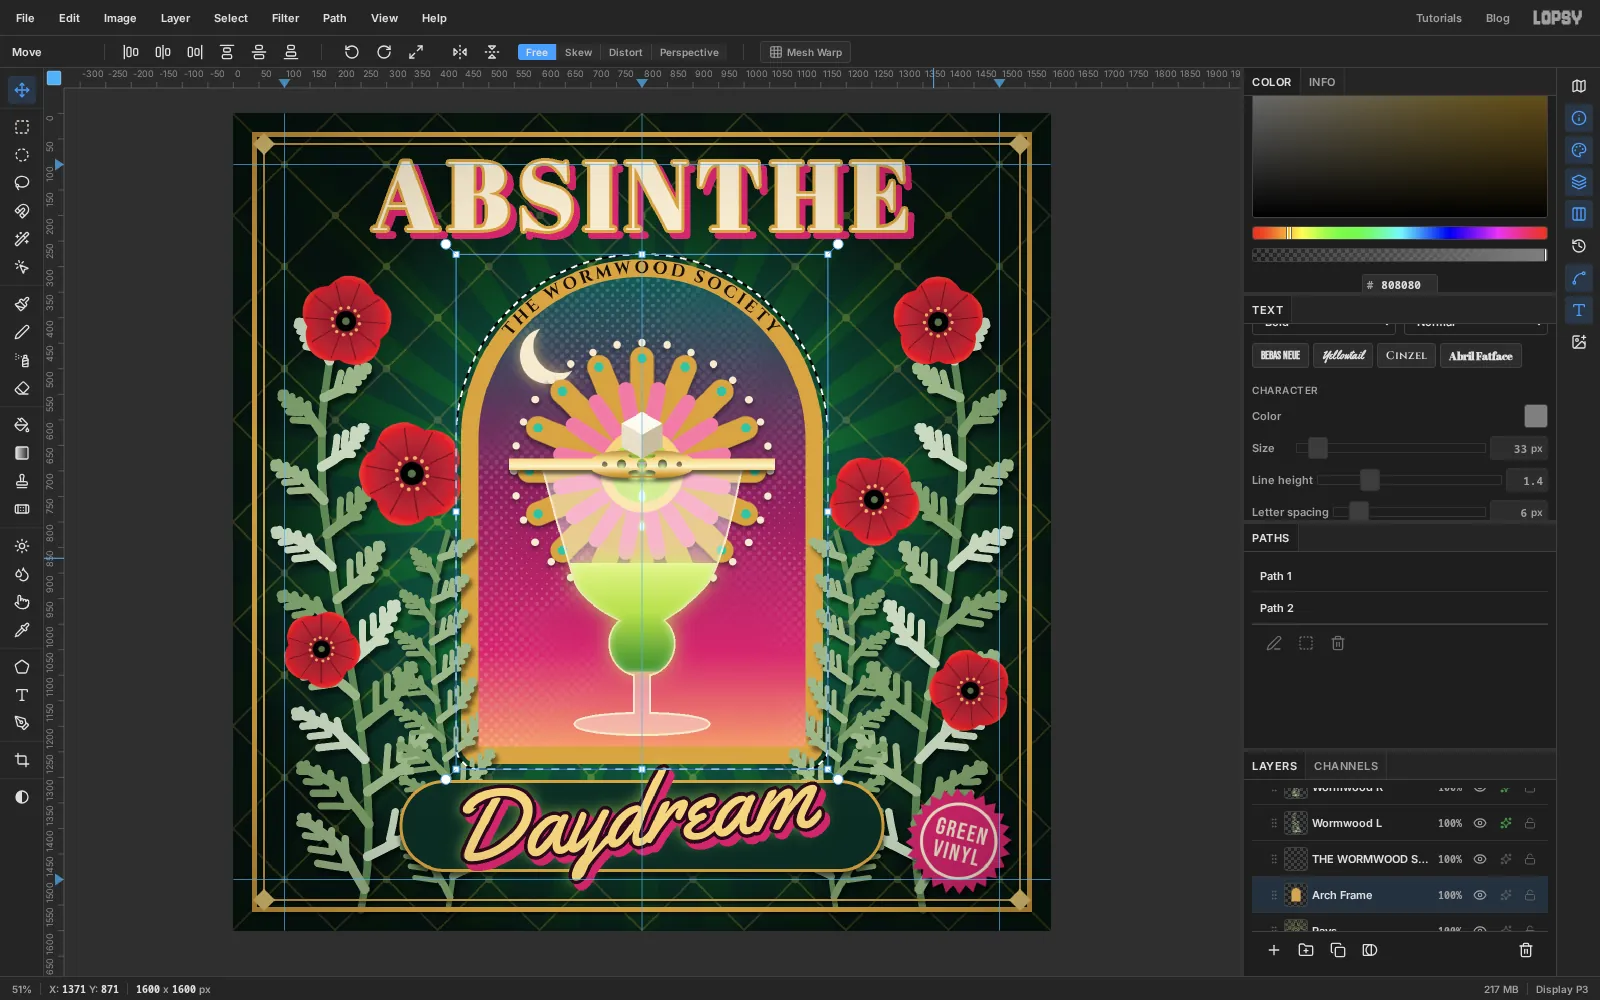
-
Make the glass read as glass
- Click the
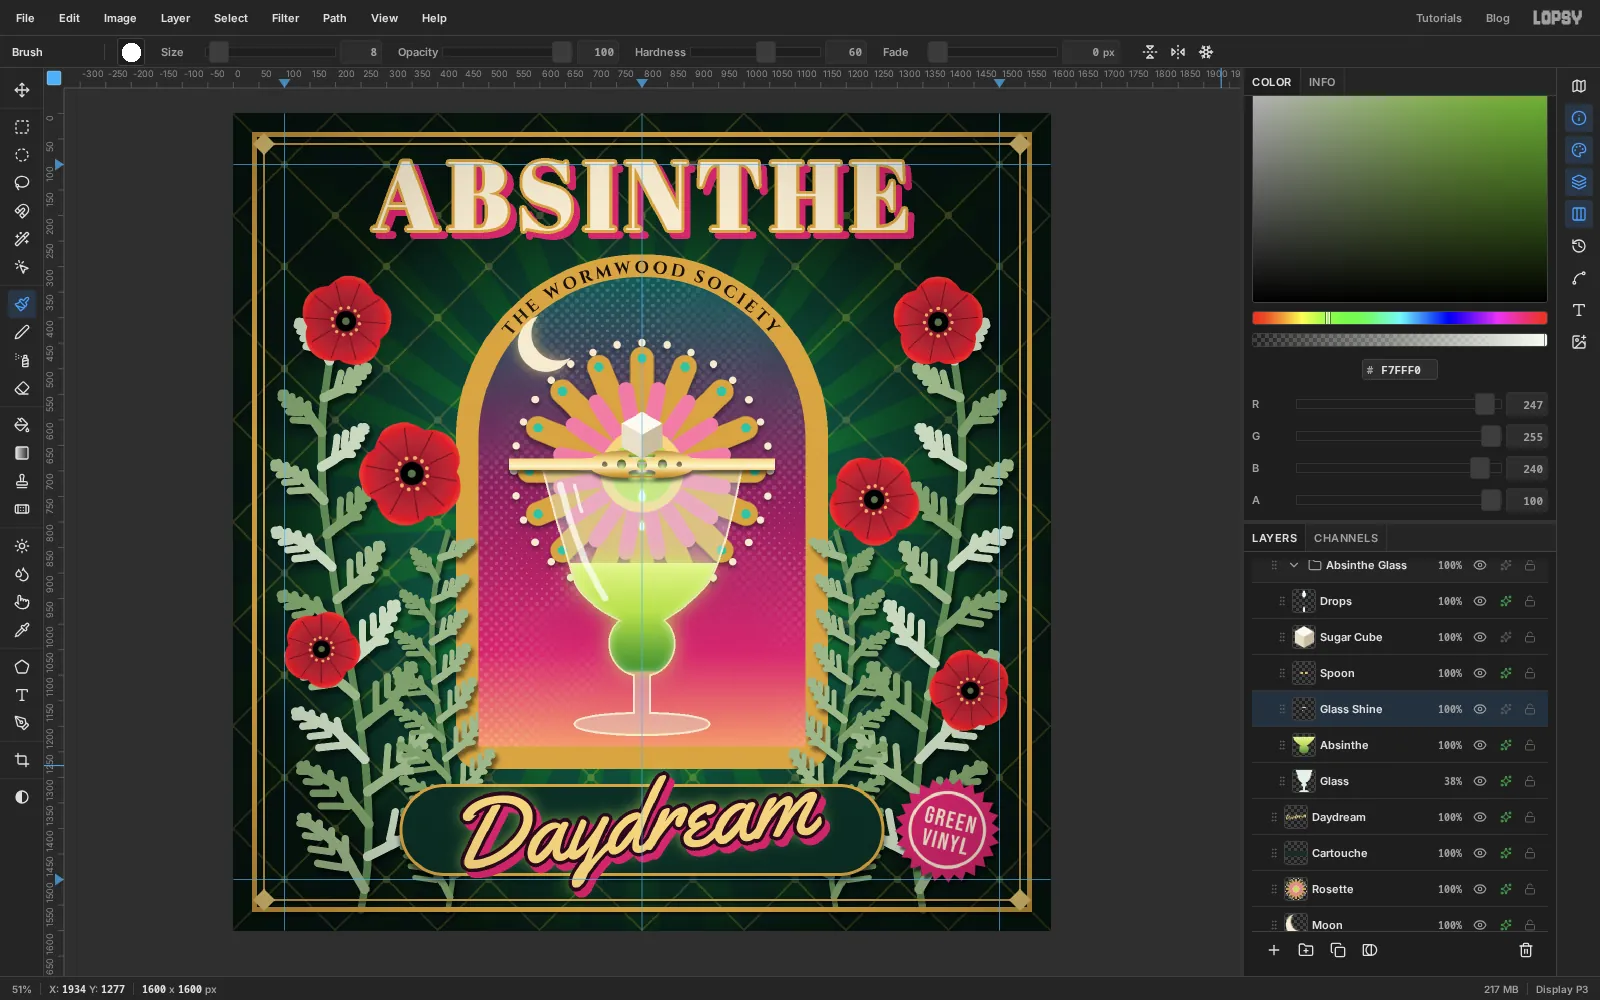
Glassrow. In the effects drawer, set the blend mode back to Normal, then set the opacity to38%. The rosette behind now looks seen through frosted glass instead of cut out. - Click the
Absintherow, Add Layer, and name itGlass Shine. It sits betweenAbsintheandSpoon. - Select an ellipse for the rim, centred on
800, 688, 390 px wide and 30 px tall. Hold Alt and subtract one 378 × 20 px on the same centre. Fill with and press Cmd+D. Most of the ring hides behind the spoon, and the ends give the glass a lip. - Brush, Size
16, Opacity75, Hardness60, colour . Drag one long, slightly curving streak down the left of the bowl from640, 728to728, 950, and a short thin one (Size8) beside it near the top. Set the layer to Screen and the brush opacity back to100.
A single sharp highlight on the curve does more to say "glass" than any amount of transparency.
- Click the
-
Export
Choose File → Quick Export PNG for the finished cover, and File → Save Project to keep every layer, effect, path and live text layer editable.
To take it further, try swapping the jewel tones: an amber velvet and a violet sky turn the same cover into a whisky record. Or replace the poppies with a second, smaller rosette painted with radial symmetry at 8 segments for a more geometric look.