Design a Maximalist Swordfish T-Shirt Graphic
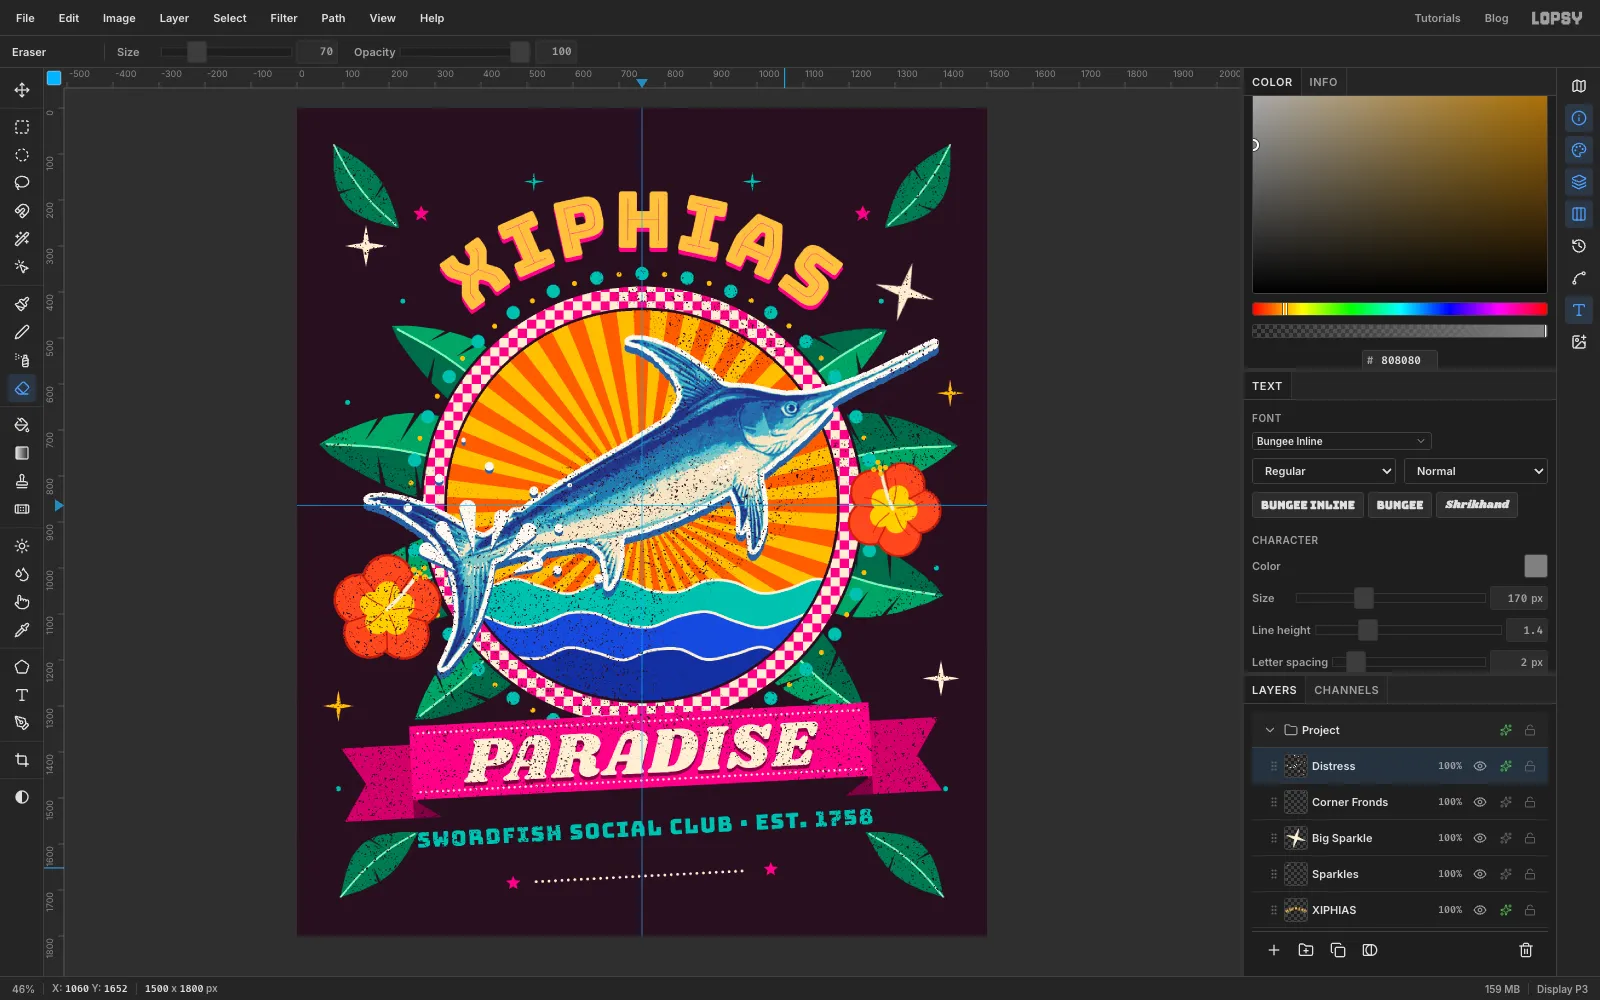
Make a maximalist tee in Lopsy. A recoloured swordfish leaps from a sunburst medallion ringed with checks, beads, banana leaves and hibiscus.
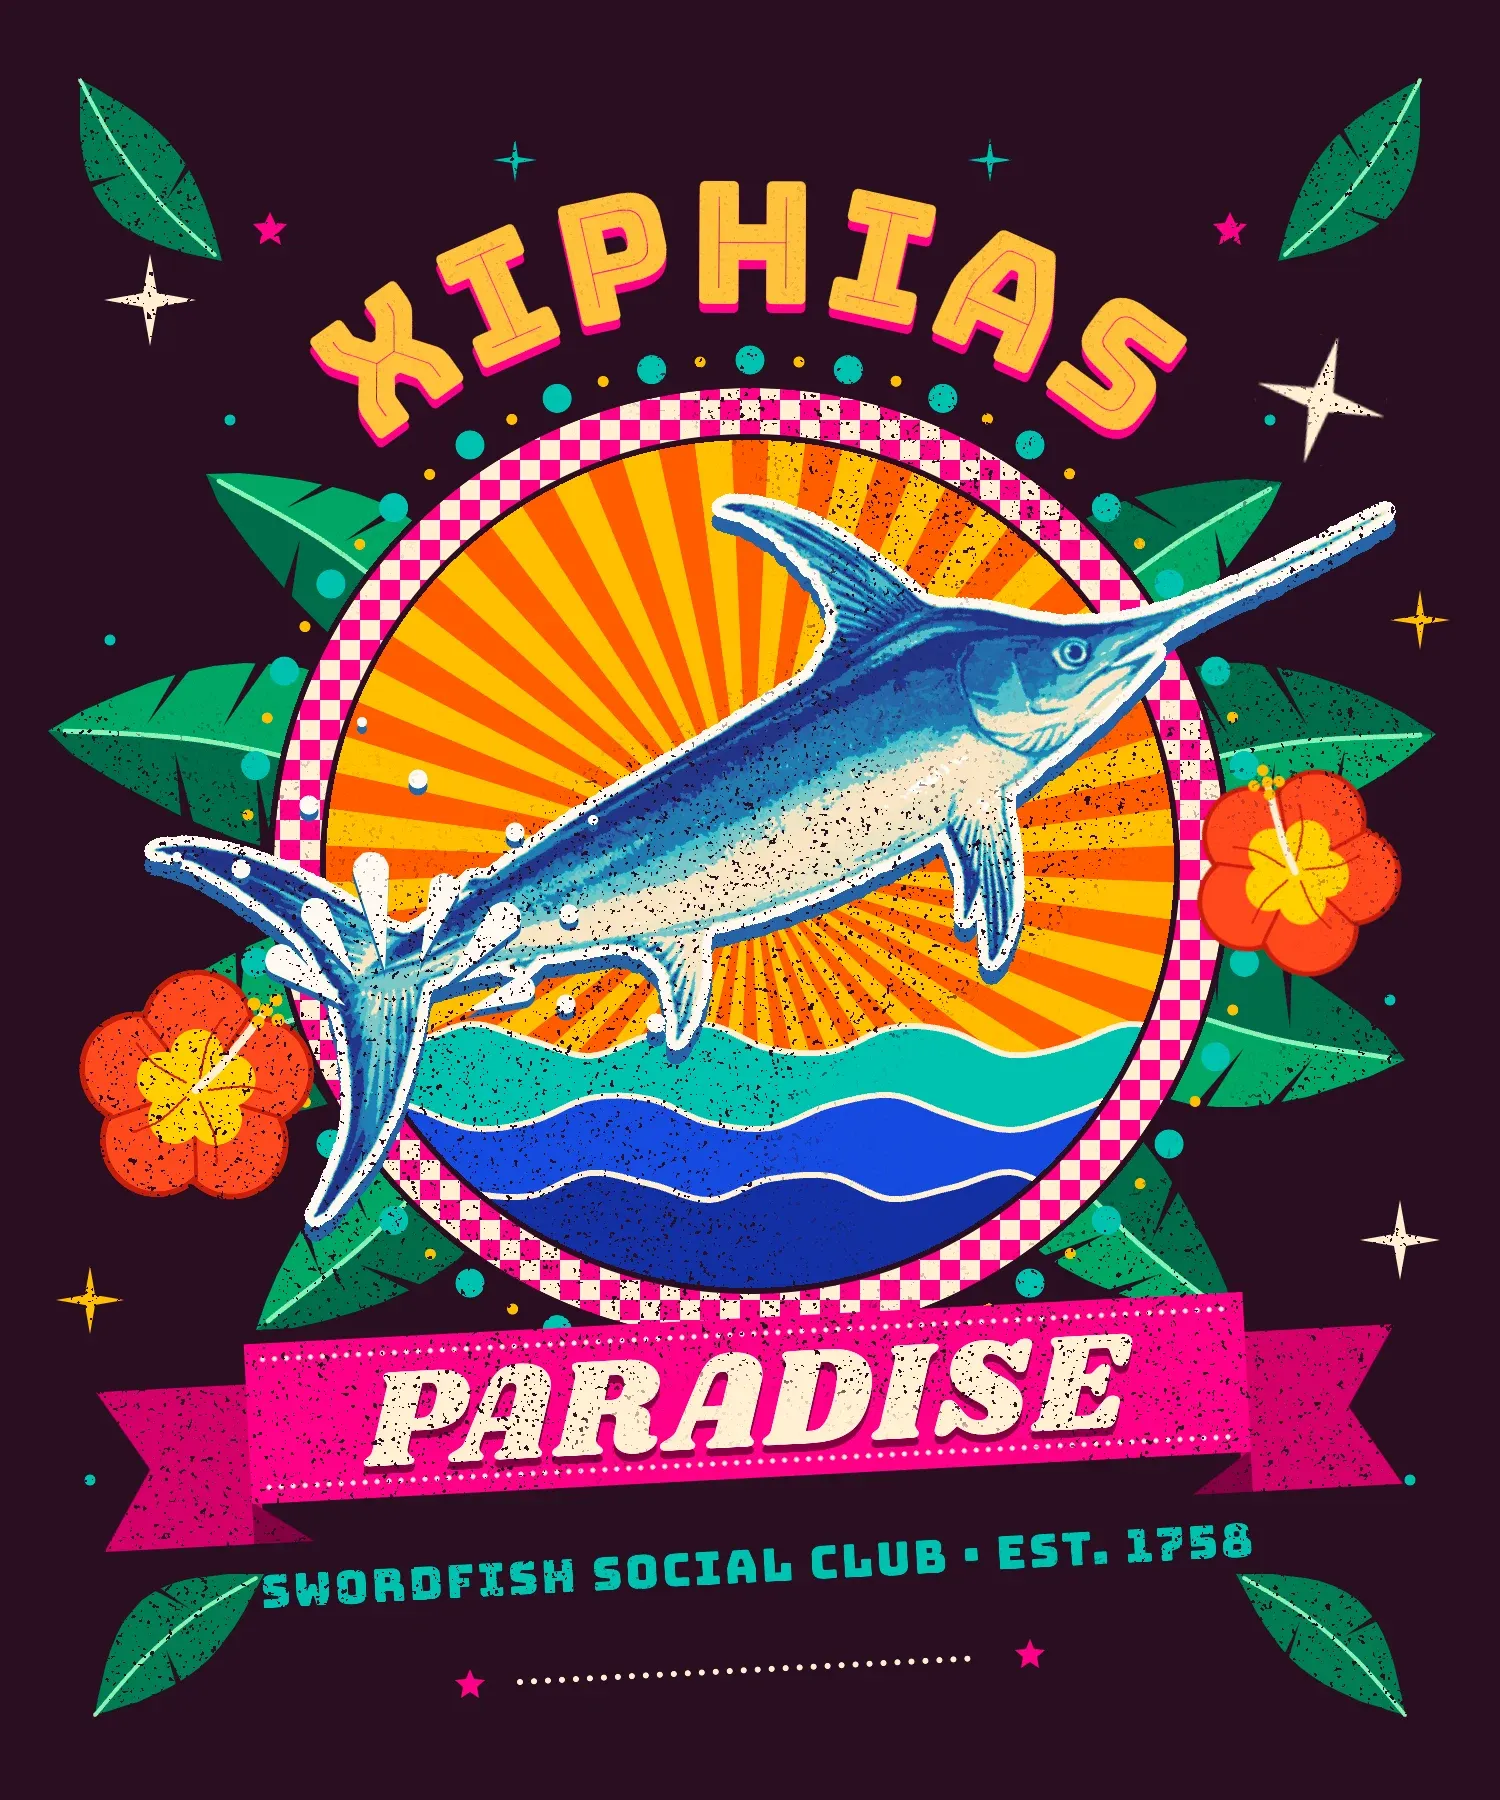
Maximalism is "more is more": layered ornament, clashing colours and something happening in every corner. On a t-shirt it still has to read from across the street, so the trick is to stack lots of detail around one strong silhouette. Here that silhouette is a swordfish. Its Latin name, Xiphias gladius, gives the design its title: XIPHIAS PARADISE, a 1500 × 1800 graphic for a dark plum tee.
You'll build a badge from the inside out:
- a sunburst medallion with waves, a checker ring and a bead ring
- banana leaves and hibiscus flowers fanning out behind and around it
- a painted swordfish, cut out, posterized, recoloured with a Gradient Map and set leaping out of the ring
- a ribbon banner, a title set on an arc, sparkles, and a worn screen-print texture over everything
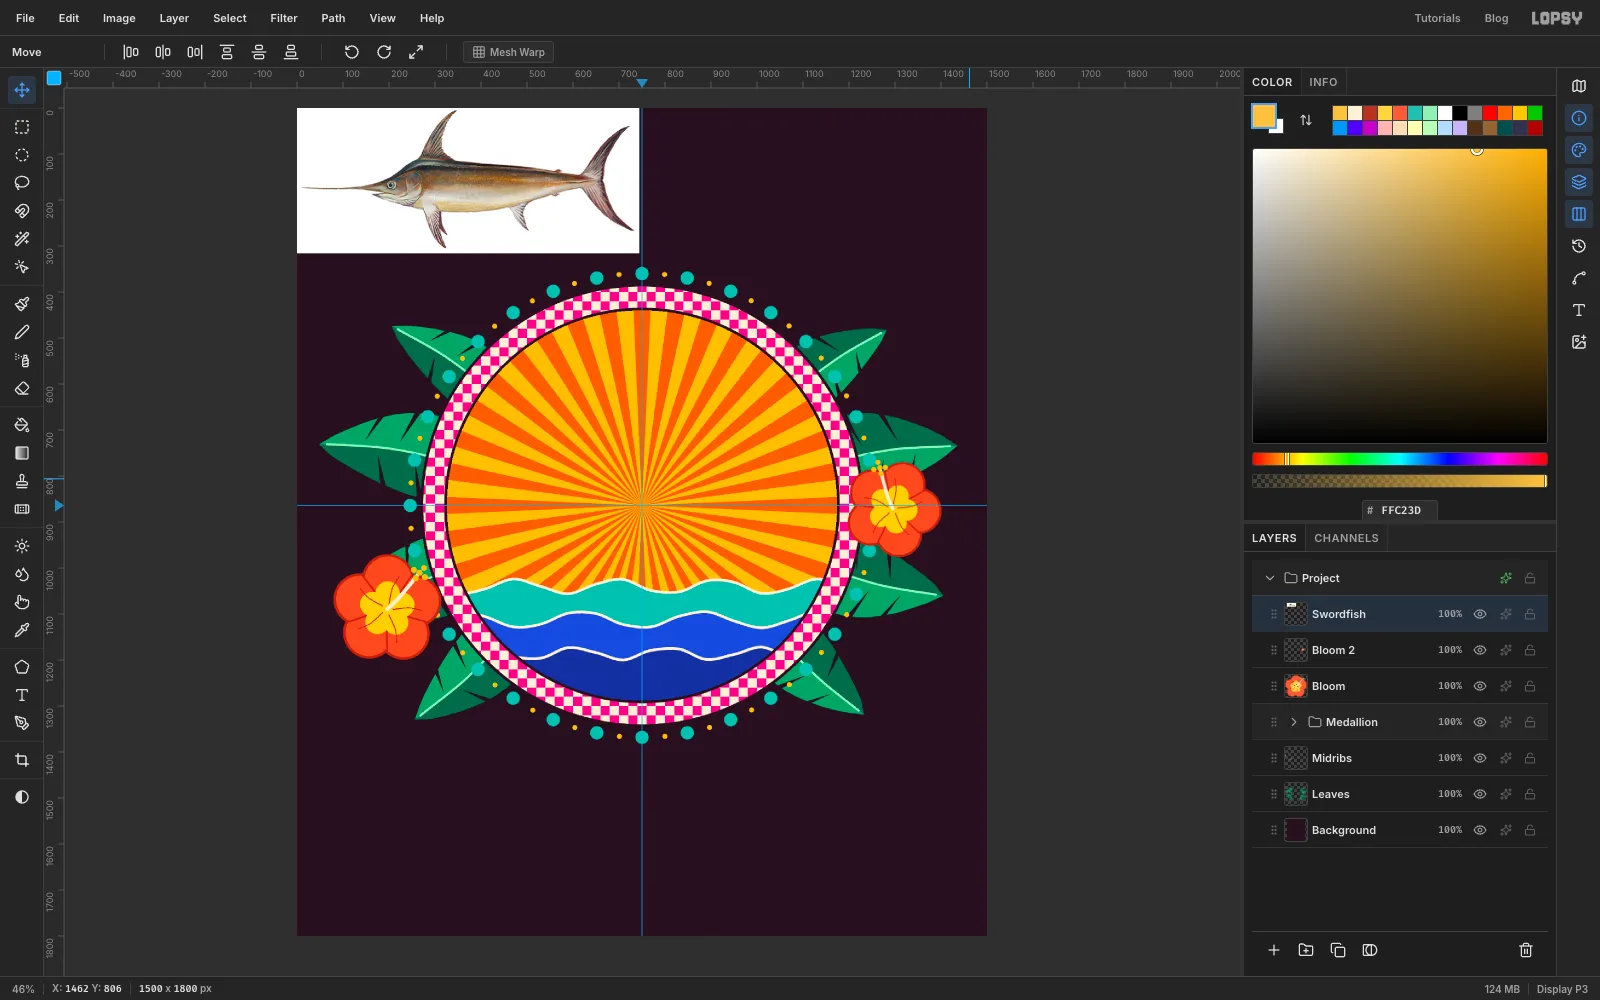
You'll need one image from Wikimedia Commons: Swordfish (Duane Raver).png, a painting by Duane Raver for the U.S. Fish and Wildlife Service. It is in the public domain, so you can use it on a shirt you sell. Download the original file (744 × 316 px). It's small, but the posterize and recolour steps hide the enlargement.
The tools you'll use:
- the Lasso, Magic Wand and the Elliptical and Rectangular Marquee with their exact-size dialogs
- the Pen tool, to stroke lines, to make straight-edged selections with Path to Selection, and to set text on a path
- the Brush with Radial Symmetry, plus Spacing for dotted lines
- Filter → Sunburst, Posterize, Add Noise, Gaussian Blur and Threshold
- Define Pattern and Fill with Pattern
- Copy, Paste, Flip Horizontal, and the Move tool's scale and rotate handles
- groups, a group Gradient Map adjustment and a group rotation
- layer effects: Stroke, Drop Shadow and Color Overlay
- live text in three Google fonts: Bungee Inline, Shrikhand and Bungee
The palette clashes on purpose. Hot pink, tangerine and emerald fight for attention, and the plum ground ties them together:
-
Shirt plum
the background, not an ink
-
Sunburst saffron
-
tangerine
-
Hot pink
-
ribbon tails
-
fold
-
Cream
-
Waves turquoise
-
cobalt
-
deep cobalt
-
Leaves emerald
-
shade
-
midrib mint
-
corner fronds
-
Hibiscus coral
-
rim
-
throat
-
Fish map
-
Set the shirt colour and centre guides
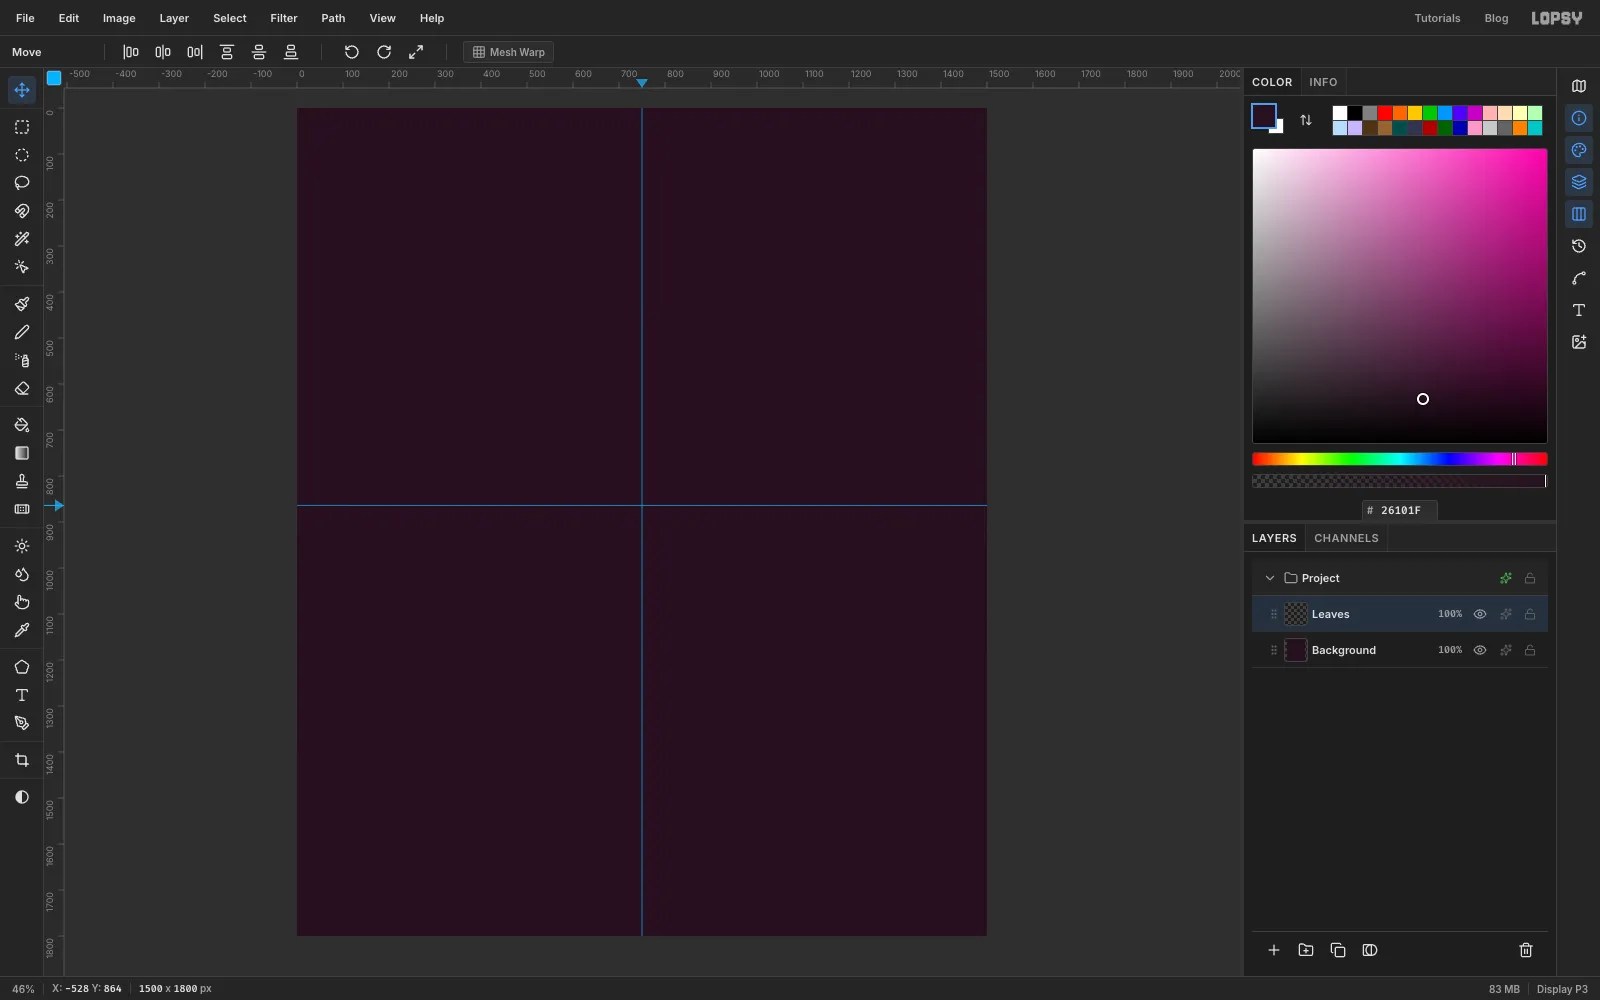
Choose File → New, keep the units on Pixels, and make the document 1500 wide and 1800 high, and leave the background on White (that also gives you an empty Layer 1). Click the Background row, set the foreground to shirt plum and choose Edit → Fill. Designing on the real shirt colour stops the brights from looking washed out later.
Click the top ruler at 750 to drop a vertical guide down the middle. Click the left ruler at 864 for a horizontal guide. The medallion will be centred where they cross, a little below the middle of the canvas, which leaves room for the title on top.
Click the Layer 1 row, double-click its name and rename it Leaves. It stays active for the next few steps.
-
Lasso eight banana leaves
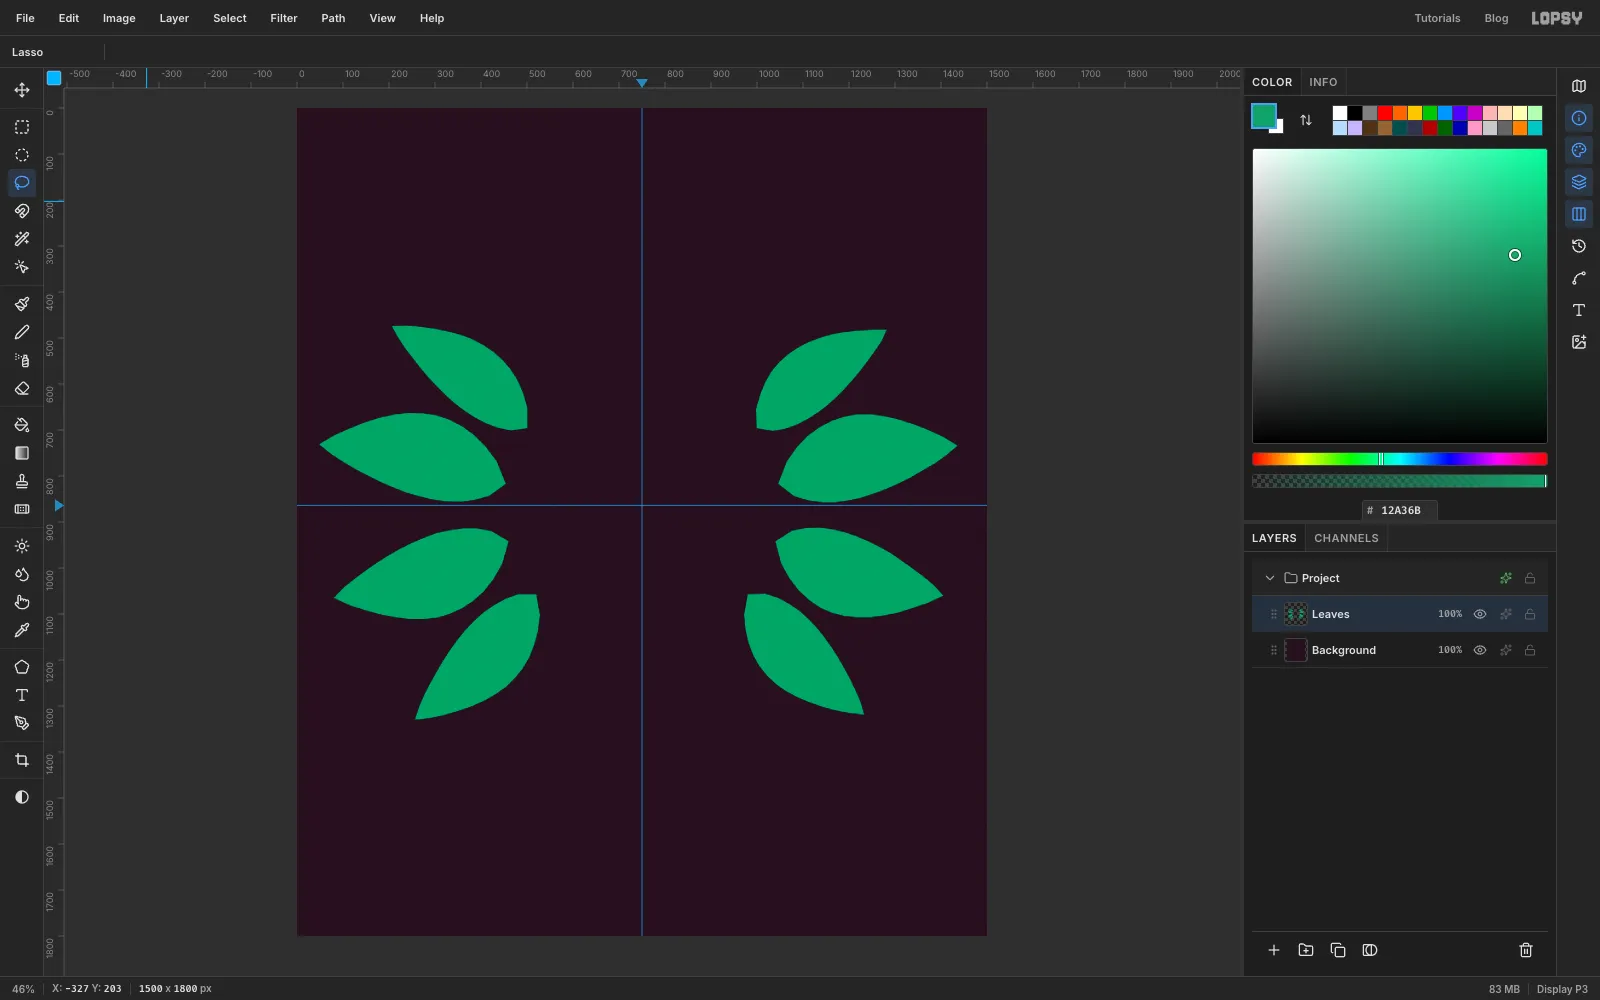
Set the foreground to emerald . Pick the Lasso (L) and draw a long, pointed leaf. Start about 300 px from the guide crossing and drag out past where the medallion's edge will be: wide in the middle, tapering to a point. Choose Edit → Fill and press Cmd+D.
That's the first of four on the left side. Fan them out from about 45° below the horizontal guide to about 40° above it, two below the guide and two above, each 370–420 px long. Then draw four matching leaves on the right. Their inner ends will hide behind the medallion, so only the outer halves need to look good. Keep every tip at least 45 px from the canvas edge, or the print will look cropped.
-
Shade one half of each leaf
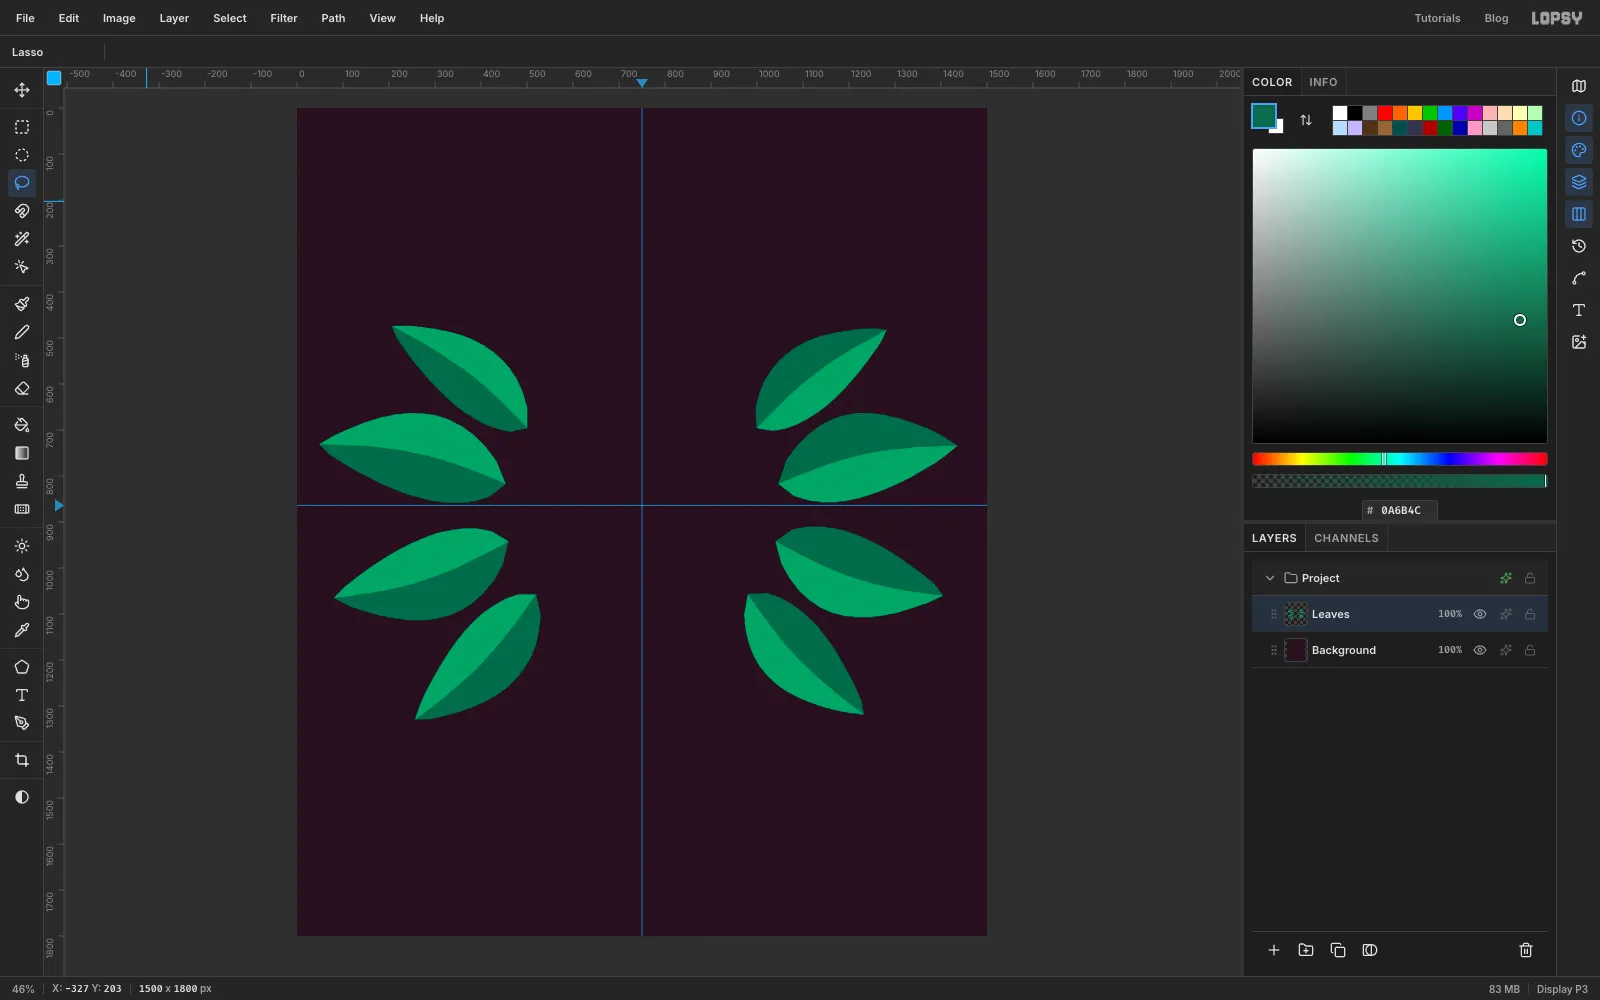
Set the foreground to . For each leaf, lasso from the base along the leaf's centre line to the tip, then back down along one edge, and fill. Shade the lower half of each left-hand leaf and the upper half of each right-hand leaf, so the two sides mirror each other. Two flat tones give you the screen-print look; a gradient here would look like clip art.
-
Tear the leaf edges
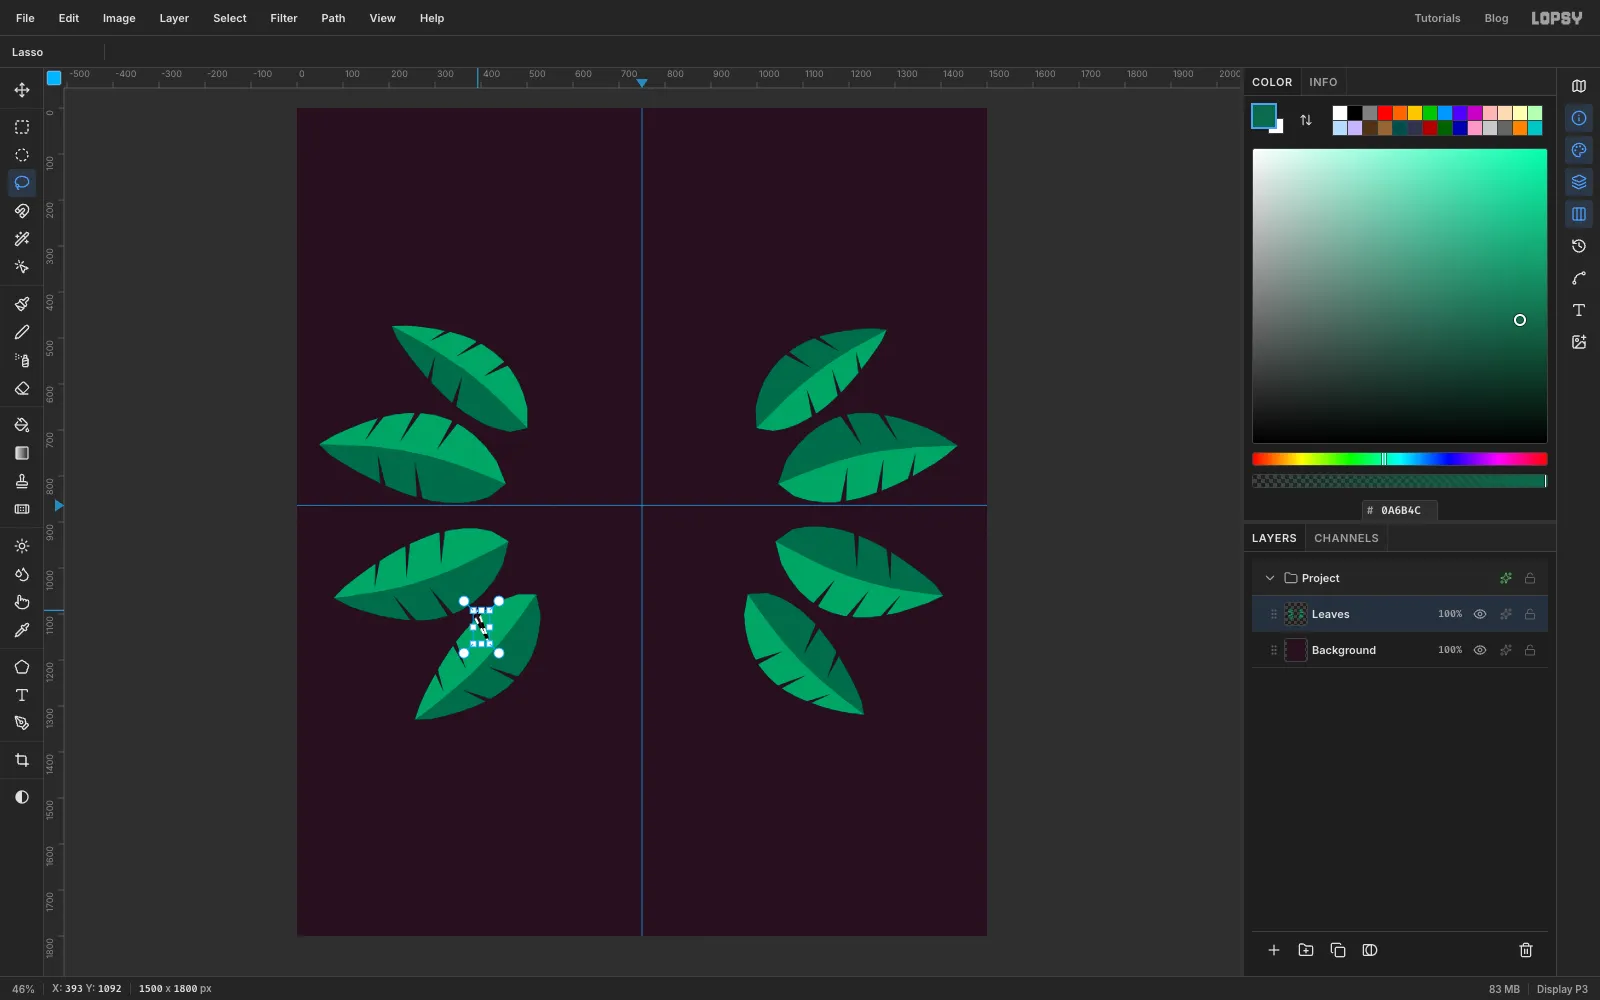
Banana leaves split along their veins. With the Lasso, draw a thin wedge that starts just outside the leaf's edge and points in towards the spine, slanting towards the tip. Press Delete and Cmd+D. Make three tears on one edge of each leaf and two on the other, spaced unevenly.
-
Stroke the midribs with the Pen
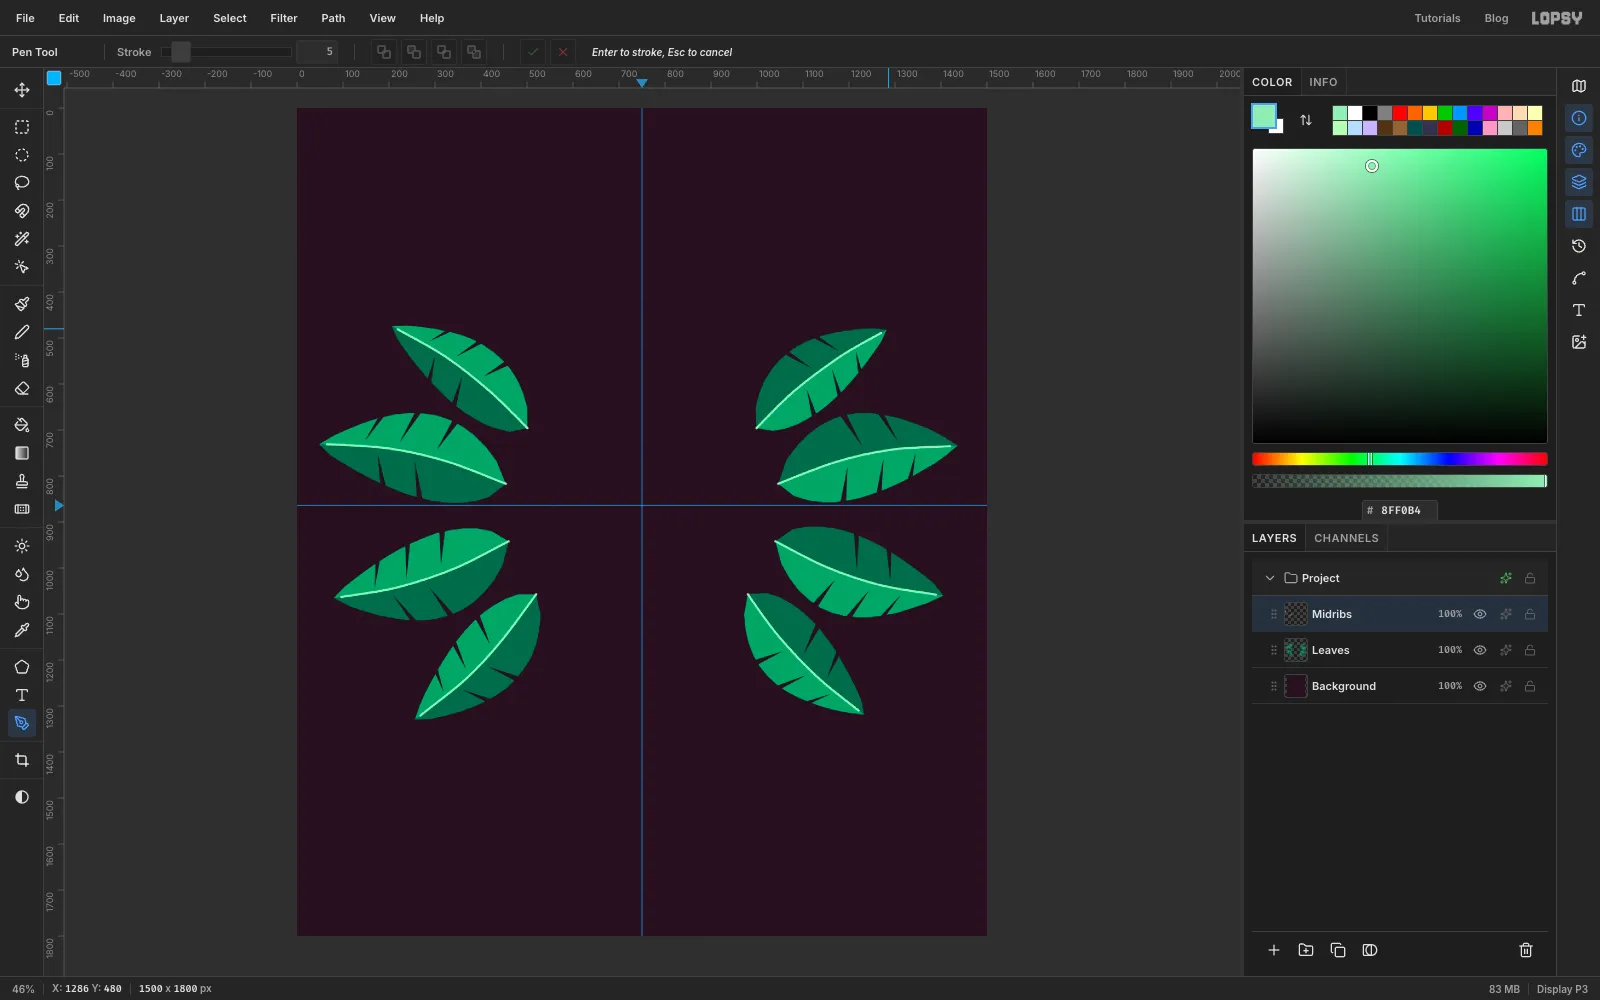
Click Add Layer in the Layers panel and name the layer Midribs. Set the foreground to mint . Pick the Pen (P), set Stroke to 5 in the options bar, and click four points along a leaf's spine, from base to tip. Drag slightly on the middle points to curve the line with the leaf. Press Enter to stroke the path with the foreground colour.
Open the Paths panel (the curve icon in the strip on the right edge of the window) and click Delete Path. A Pen click close to the selected path edits that path instead of starting a new one. Clearing it each time also keeps the Paths list empty for the title arc later. Repeat for all eight leaves.
-
Fill the medallion and burst the rays
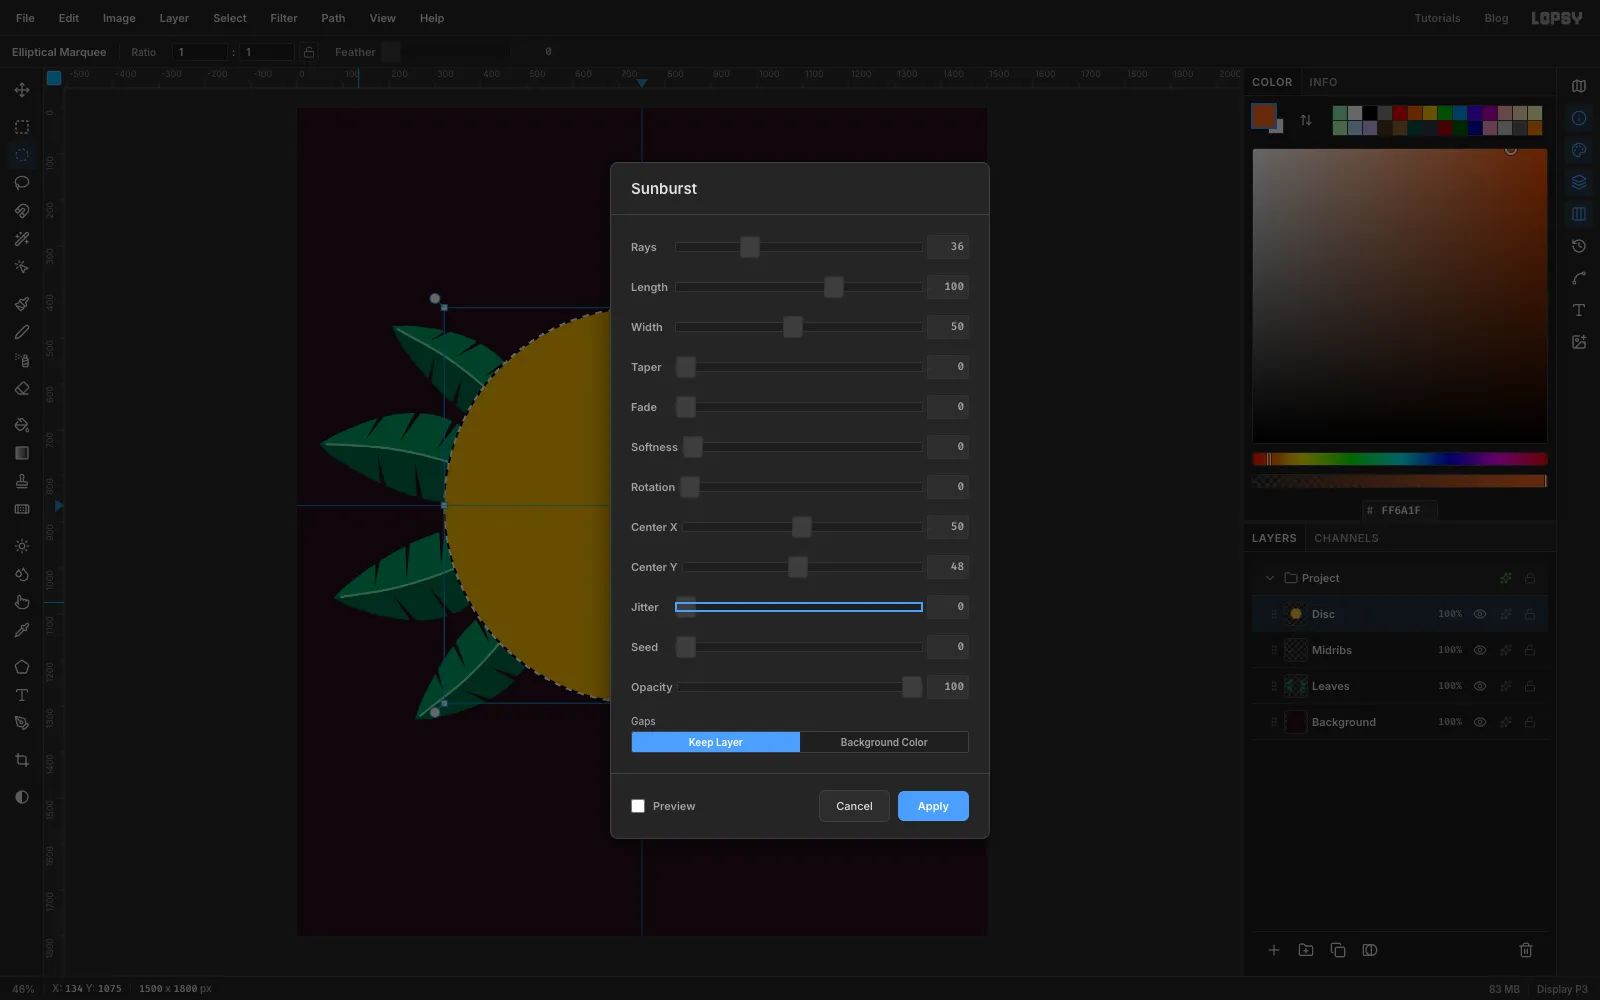
Add a layer called Disc. Pick the Elliptical Marquee and click once on the canvas without dragging to open the exact-size dialog. Set From to 320, 434 and To to 1180, 1294 (an 860 px circle on the guide crossing) and press Enter. Fill it with saffron .
Keep the selection. Set the foreground to tangerine and choose Filter → Sunburst…. Use Rays 36, Length 100, Width 50, Taper 0, Center X 50 and Center Y 48, then click Apply. Center Y 48 puts the burst exactly on the 864 px guide. The rays stay inside the selection, so the disc edge is crisp. Press Cmd+D.
-
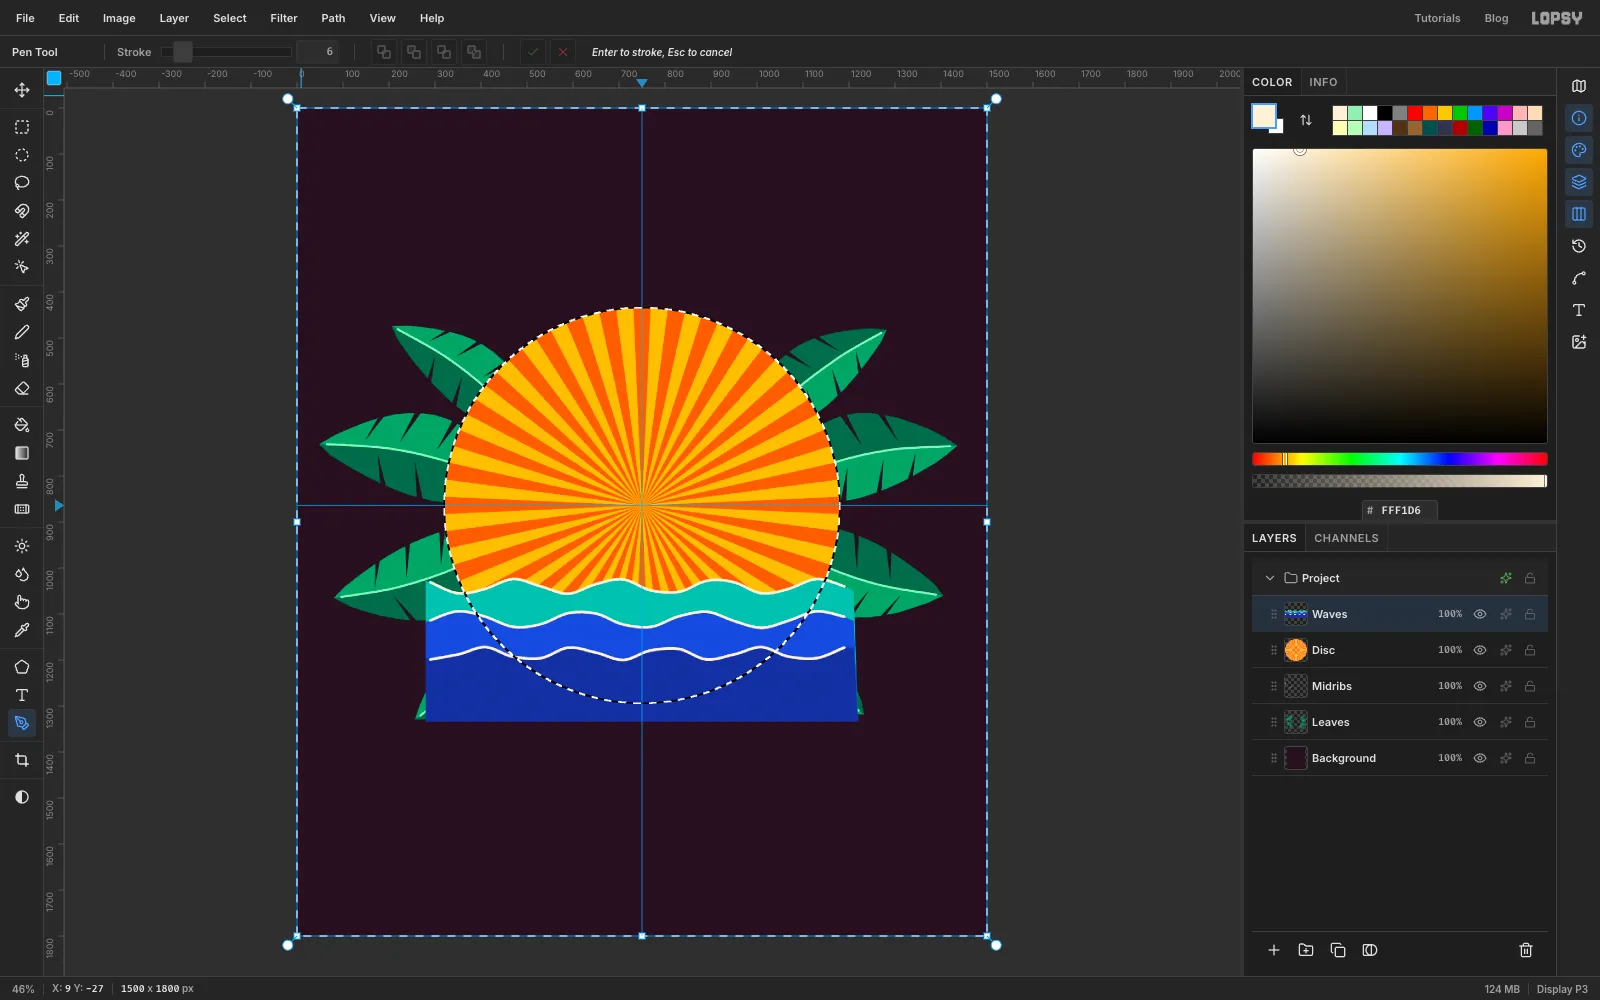
Lay three wave bands over the bottom
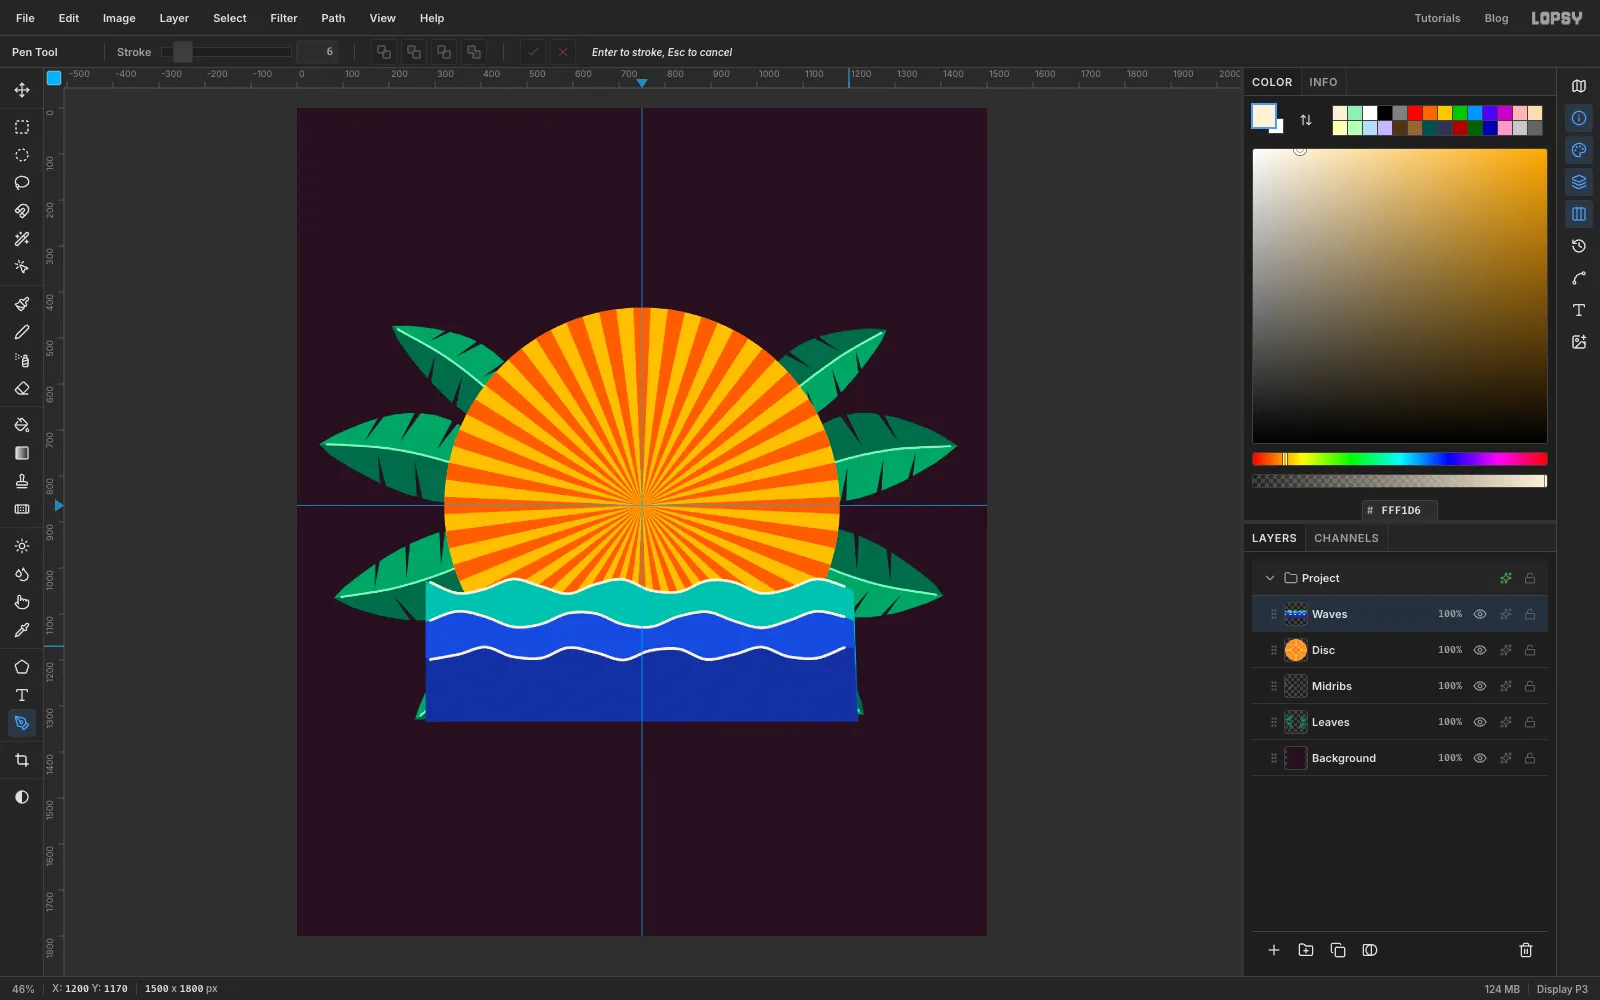
Add a layer called Waves. With the Lasso, draw a band whose top edge is a gentle wave across the lower third of the disc. Let the band run past both sides of the disc and well below it. Fill it with turquoise .
Draw a second band about 70 px lower with a slightly different rhythm and fill it with cobalt . Draw a third band 75 px below that and fill it with deep cobalt . Overlapping bands with offset rhythms look like rolling water.
Set the foreground to cream . With the Pen at Stroke 6, click along the top of each band and press Enter to draw a crest line. Delete each path in the Paths panel after you stroke it. The crests are close together, and a click near a live path would add to it. Don't worry about the overhang; you'll trim it next.
-
Trim the waves to the disc
With Waves still active, Cmd-click the Disc layer's thumbnail to load the circle as a selection. Choose Select → Inverse, press Delete, then Cmd+D. The waves now sit exactly inside the medallion.
-
Make a checker pattern
Add a layer called Checker. First build a 40 px tile in the top-left corner. The marquee's click-once dialog only opens when nothing is selected, so press Cmd+D before each click:
- With the Rectangular Marquee, click once and use the dialog to select 0, 0 to 40, 40. Fill it with hot pink .
- Deselect, then select 20, 0 to 40, 20 and fill it with cream .
- Deselect, then select 0, 20 to 20, 40 and fill it with cream too.
- Deselect, select 0, 0 to 40, 40 again and choose Edit → Define Pattern.
Press Delete to clear the tile and Cmd+D.
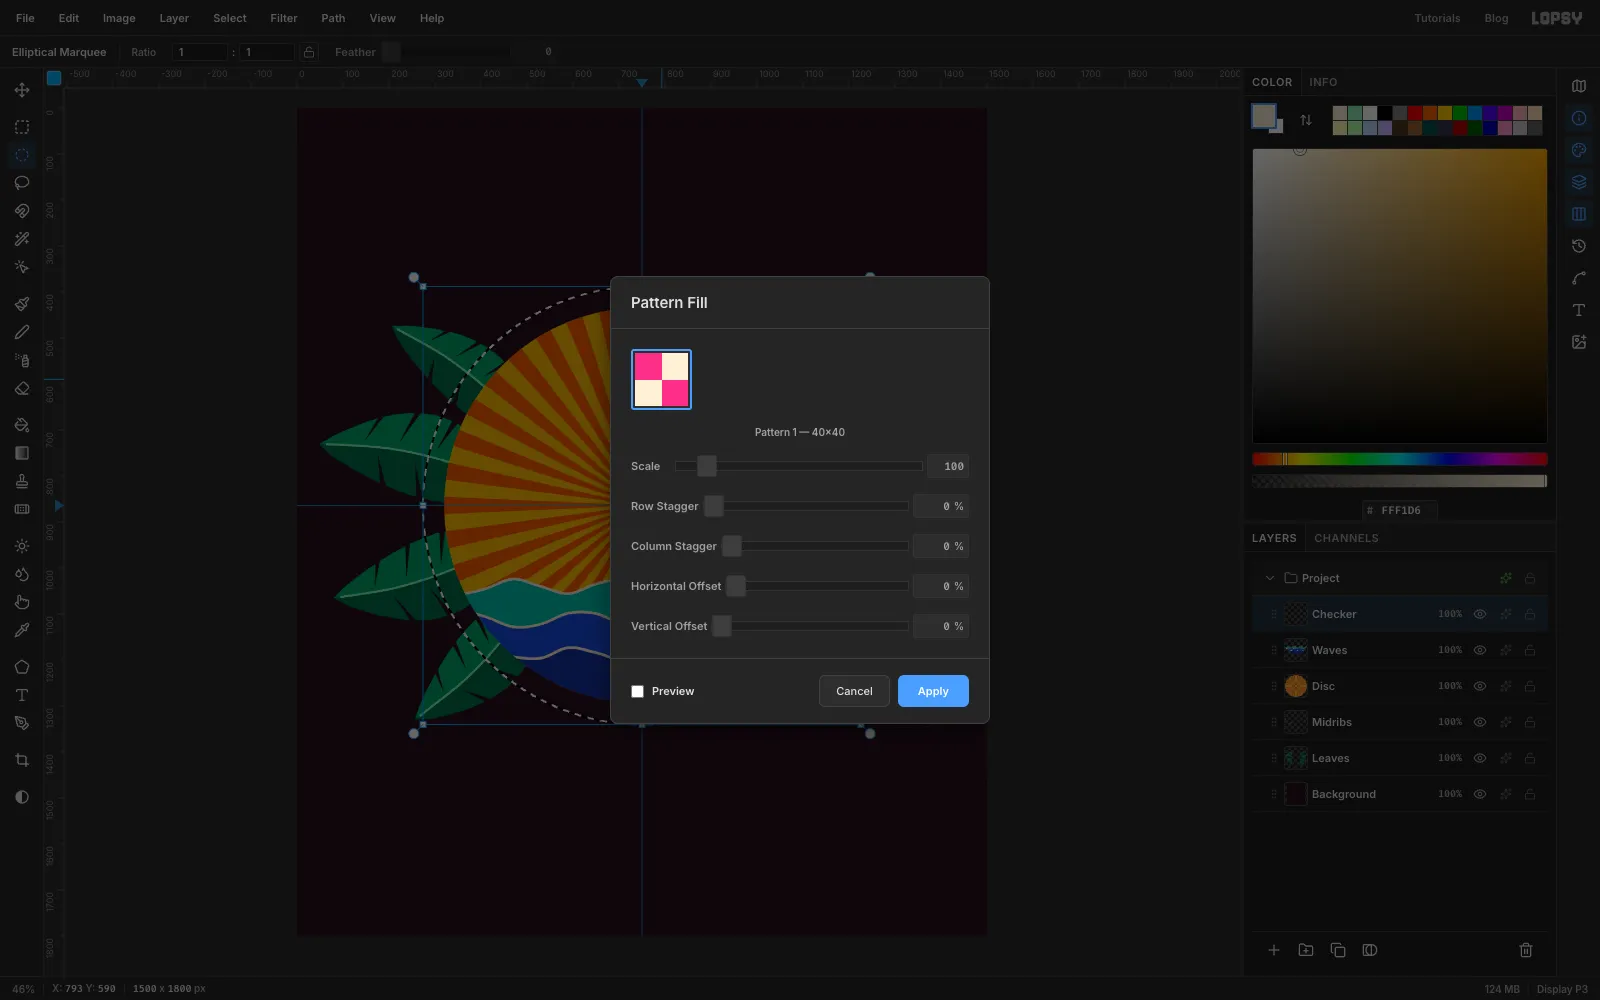
Now pick the Elliptical Marquee, click once, and use its dialog to select 274, 388 to 1226, 1340, a circle 46 px bigger than the disc all round. Choose Edit → Fill with Pattern…, click your checker tile and click Apply.
-
Cut the checker into a ring
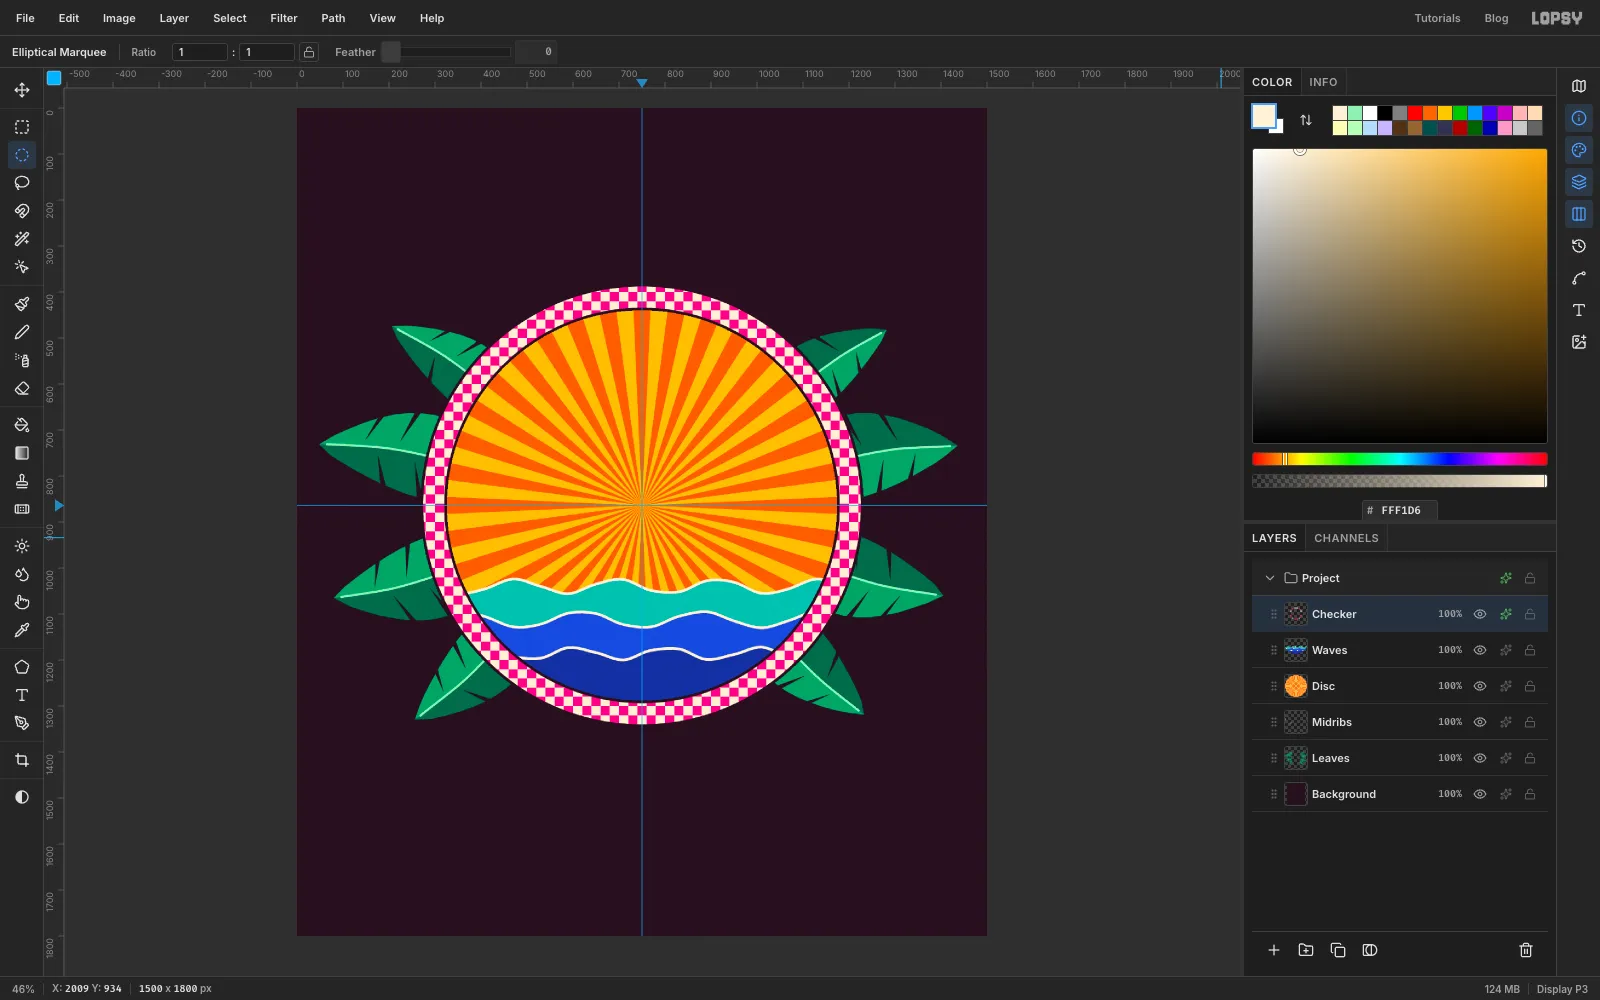
Press Cmd+D, then click once with the Elliptical Marquee and select the disc circle again (320, 434 to 1180, 1294). Press Delete and Cmd+D. You're left with a checker ring.
Click the sparkle button on the Checker row to open its effects. Enable Stroke, set Width 6 and colour plum , and close the drawer. The thin plum outline separates the ring from the rays and the leaves.
-
Bead the ring with Radial Symmetry
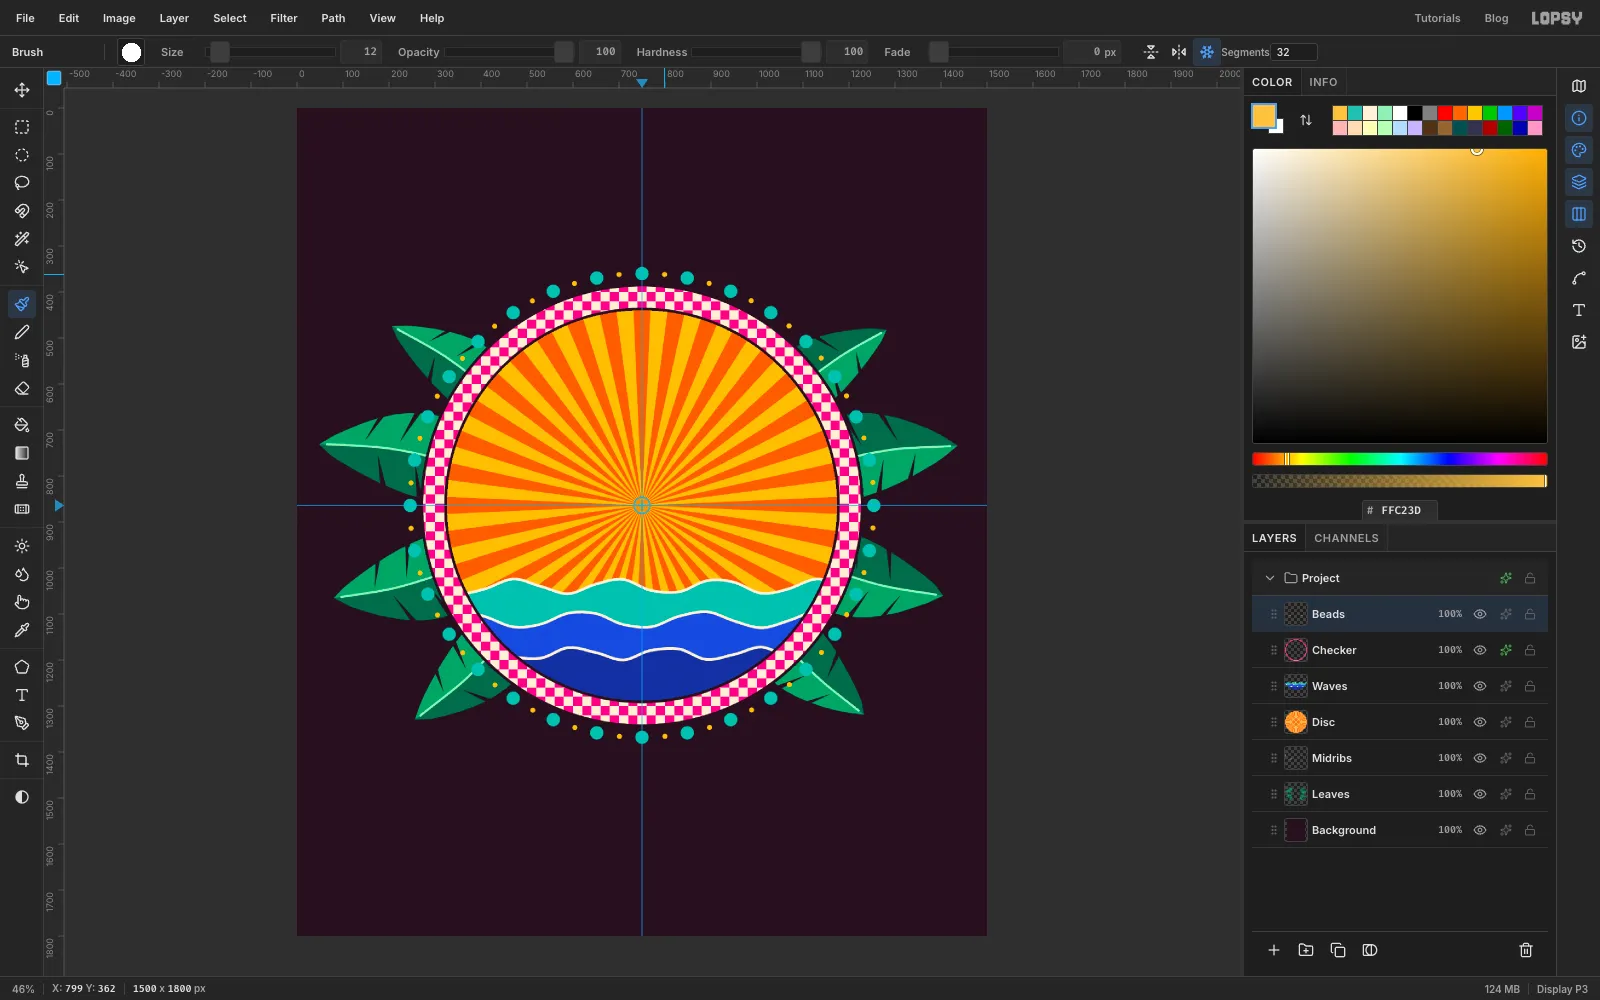
Add a layer called Beads. Pick the Brush (B) and open its presets from the tip button. Set Size 30, Hardness 100 and Spacing 4. Make sure Taper is 0.
Click Radial Symmetry in the options bar and set Segments to 32. Cmd-click the guide crossing to move the symmetry centre there. Set the foreground to turquoise and click once on the vertical guide just outside the checker ring, leaving a small gap. One click makes all 32 beads.
Change the size to 12 and the foreground to saffron . Click once halfway between the top bead and its right-hand neighbour. A small gold dot lands between every pair of beads. Turn Radial Symmetry off.
-
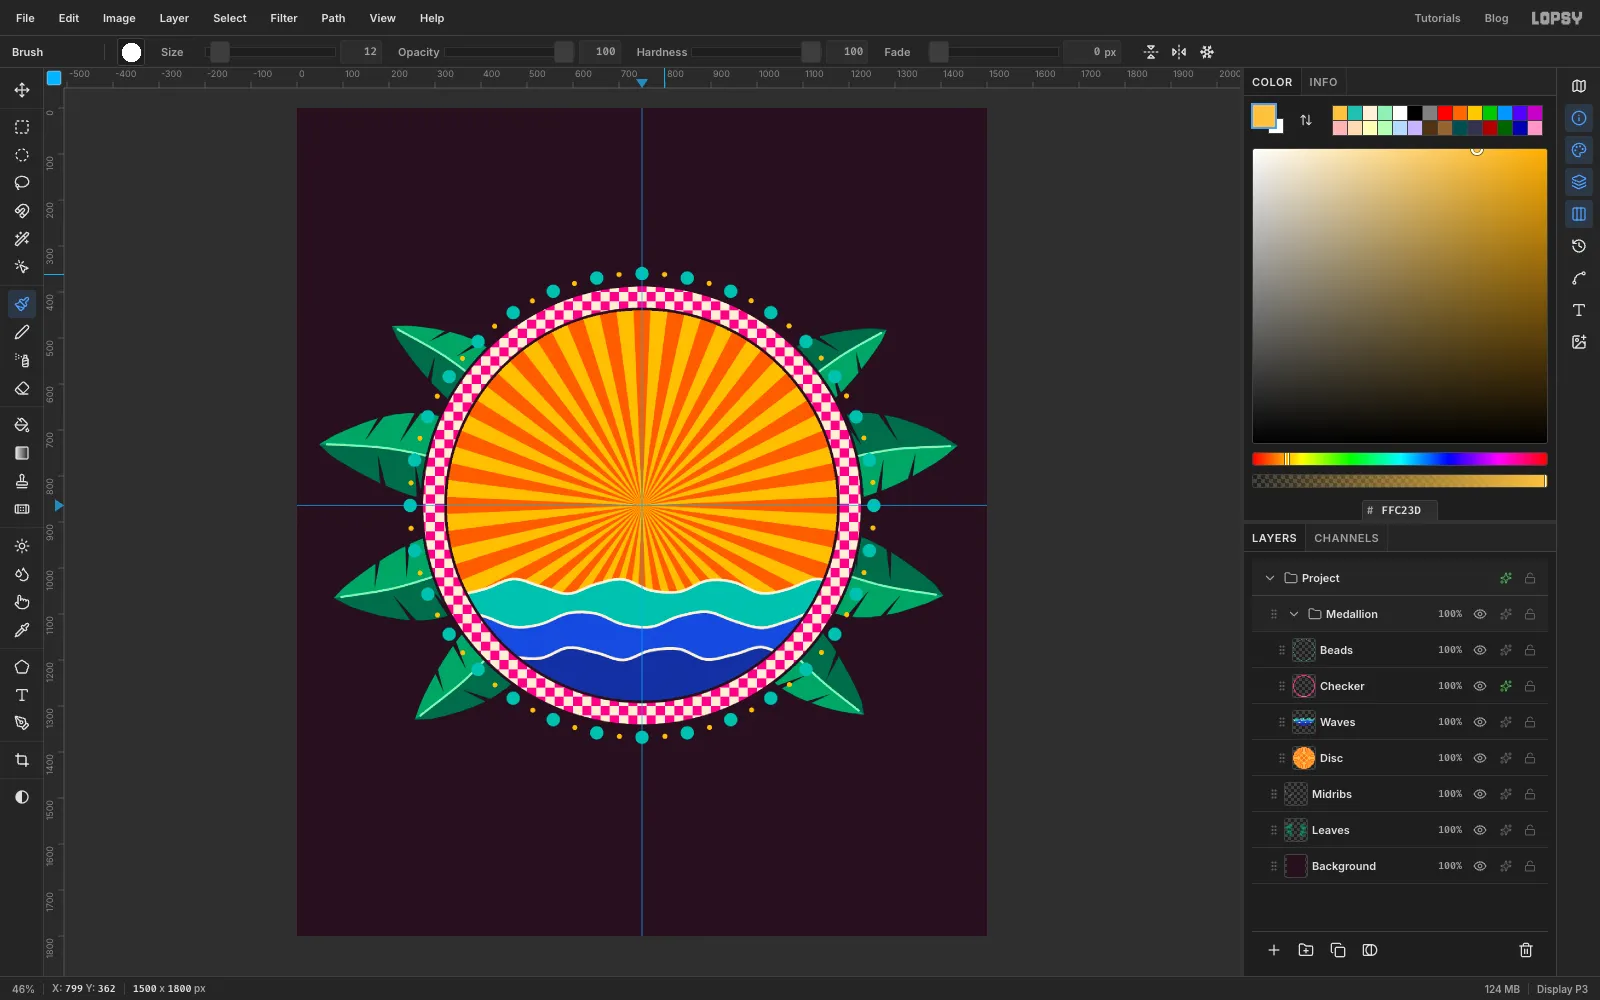
Group the medallion
Click the Disc row, Shift-click the Beads row, and click Group Layers at the bottom of the Layers panel. Rename the group Medallion and click its arrow to collapse it.
-
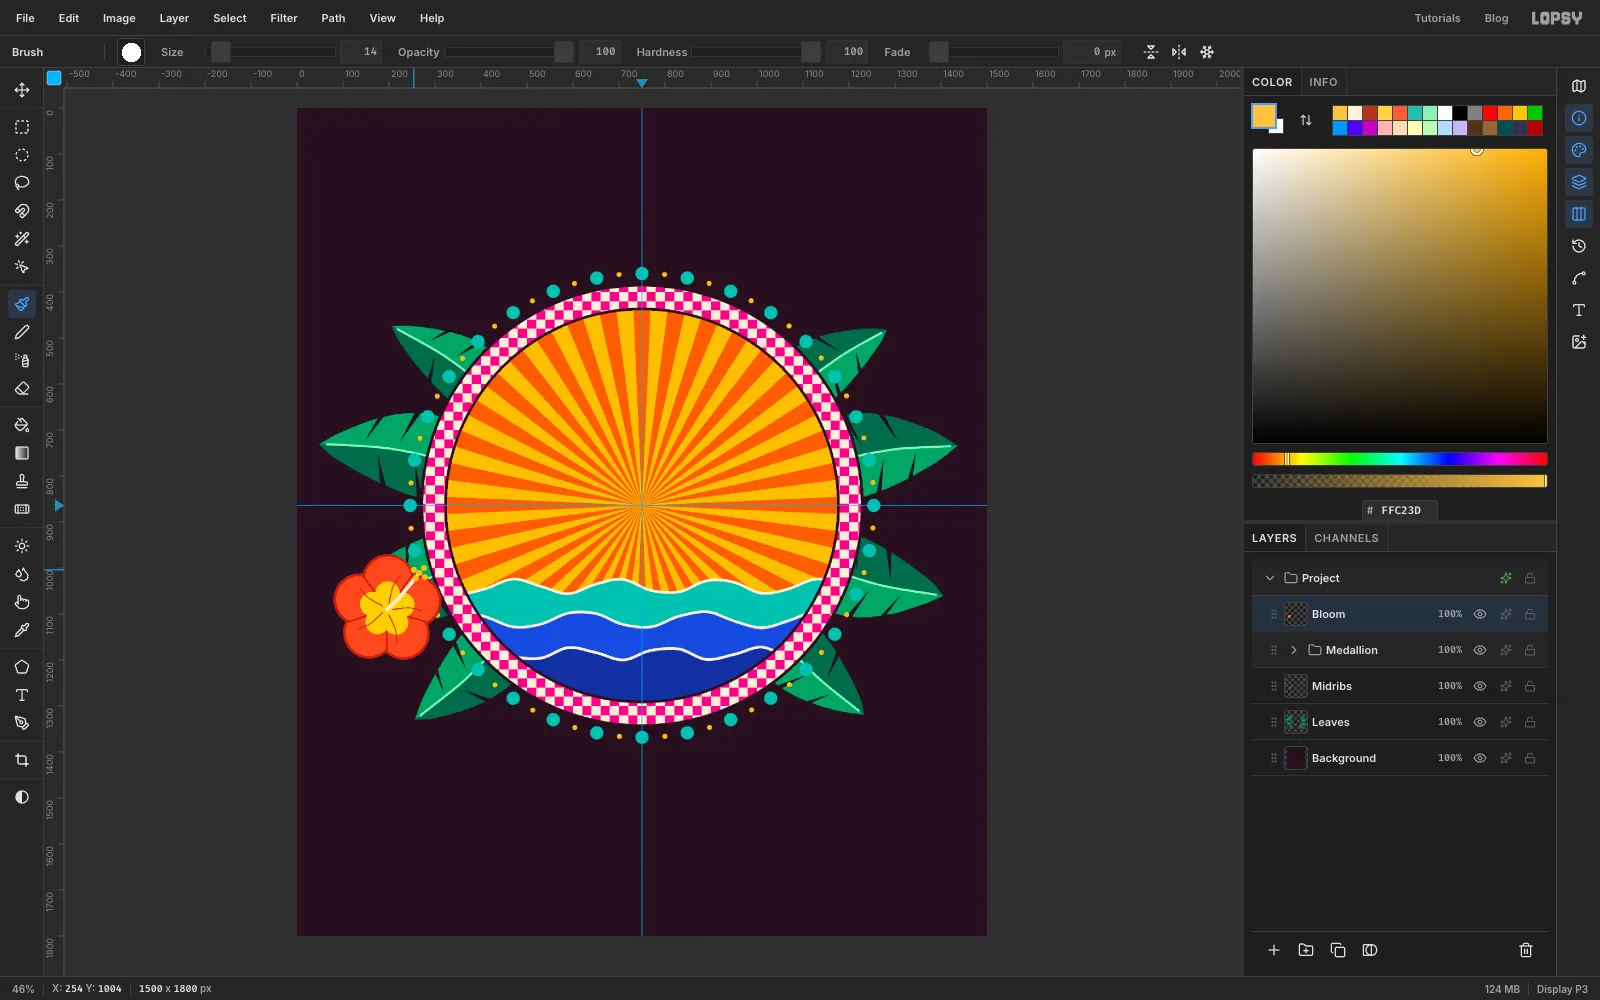
Paint a hibiscus with five-way symmetry
With the collapsed Medallion row active, add a layer called Bloom. The flower sits left of the medallion, centred at about 196, 1090.
Turn Radial Symmetry on, set Segments to 5, and Cmd-click the flower's centre. Each stroke you paint now becomes five petals:
- Rim: Brush size 115, foreground . Drag a short stroke straight up, starting a little above the centre and stopping about a third of the way to the flower's edge.
- Petals: Size 103, foreground coral . Repeat the same stroke. The darker rim peeks out around the edge of each petal.
- Creases: Size 5, foreground . Drag a line from near the centre out almost to the edge, in the notch between two petals.
- Throat: Size 54, foreground . Drag a short stroke up from the centre.
- Veins: Size 3, foreground . Draw a gently curving line out through one petal.
Turn Radial Symmetry off. Finish with a stamen: at size 9 in cream , drag a curve from the centre up and to the right, about 100 px long. Then click five size 14 saffron dots around its tip for pollen.
-
Copy, flip and shrink a second bloom
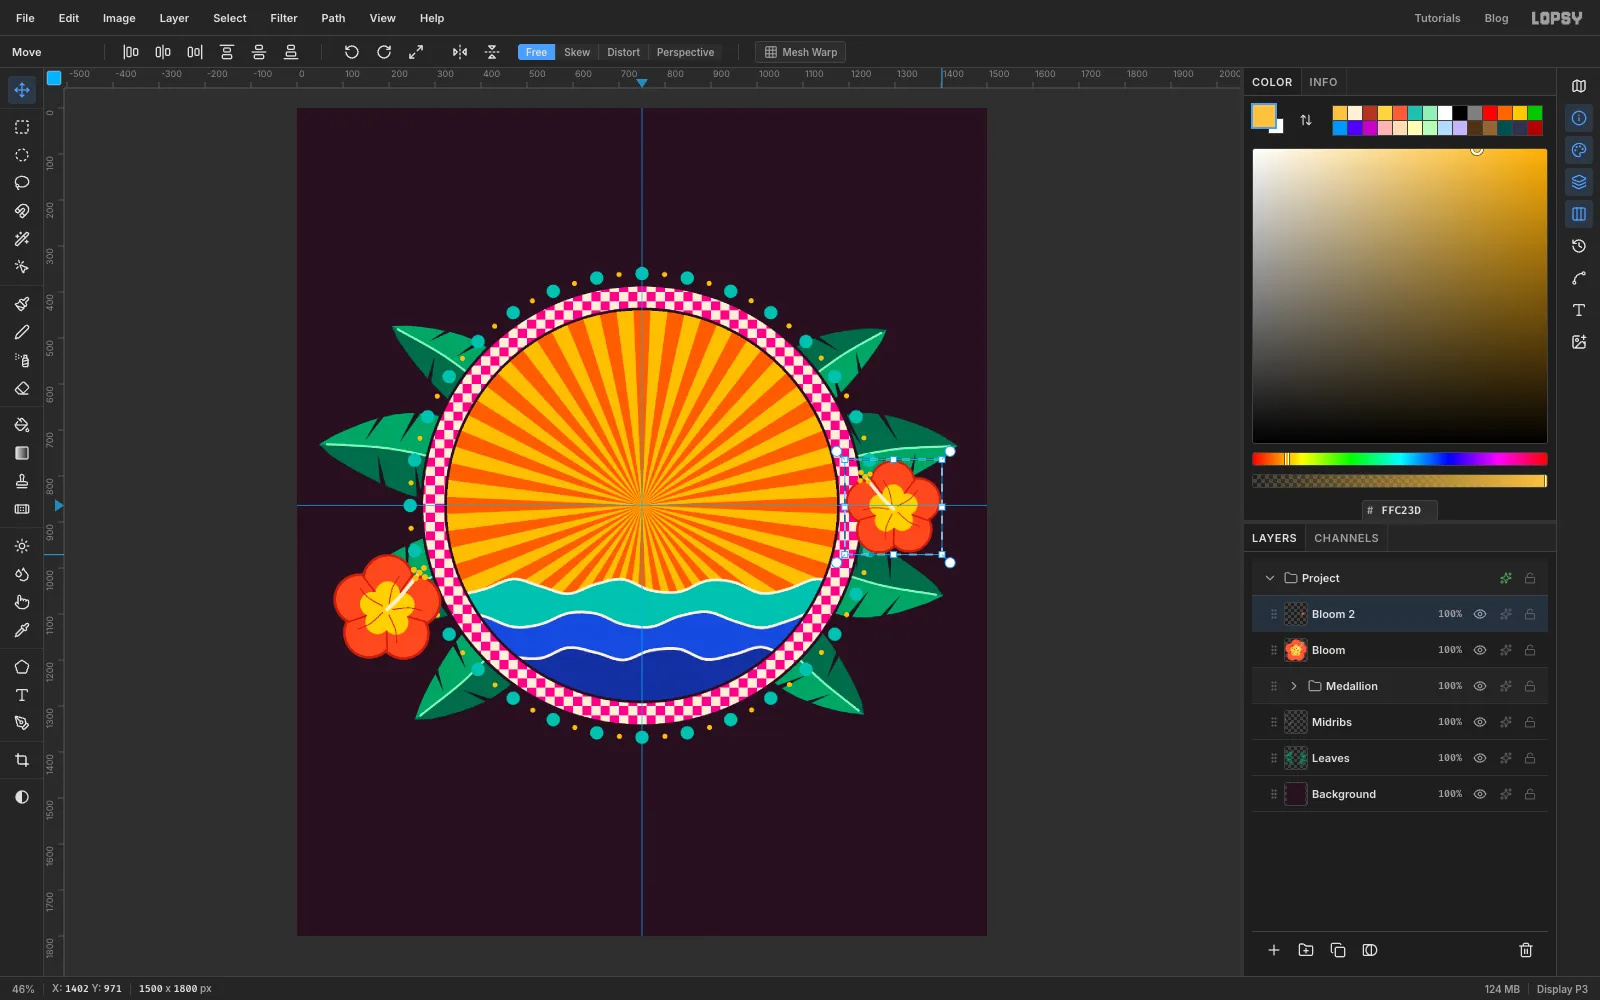
Drag a marquee around the bloom and press Cmd+C, then Cmd+V. Name the pasted layer Bloom 2, choose Image → Flip Horizontal, and press Cmd+D.
Pick the Move tool (V) and drag the copy to the right of the medallion, centred at about 1310, 880, over the leaves. Press Cmd+D, draw a marquee snugly around the flower with the Rectangular Marquee (M), then press V again: the scale handles only move the pixels while the Move tool is active. Cmd-drag the bottom-right corner handle inwards until the flower is about 12% smaller. Cmd keeps the proportions. Press Cmd+D to commit.
-
Turn the second bloom
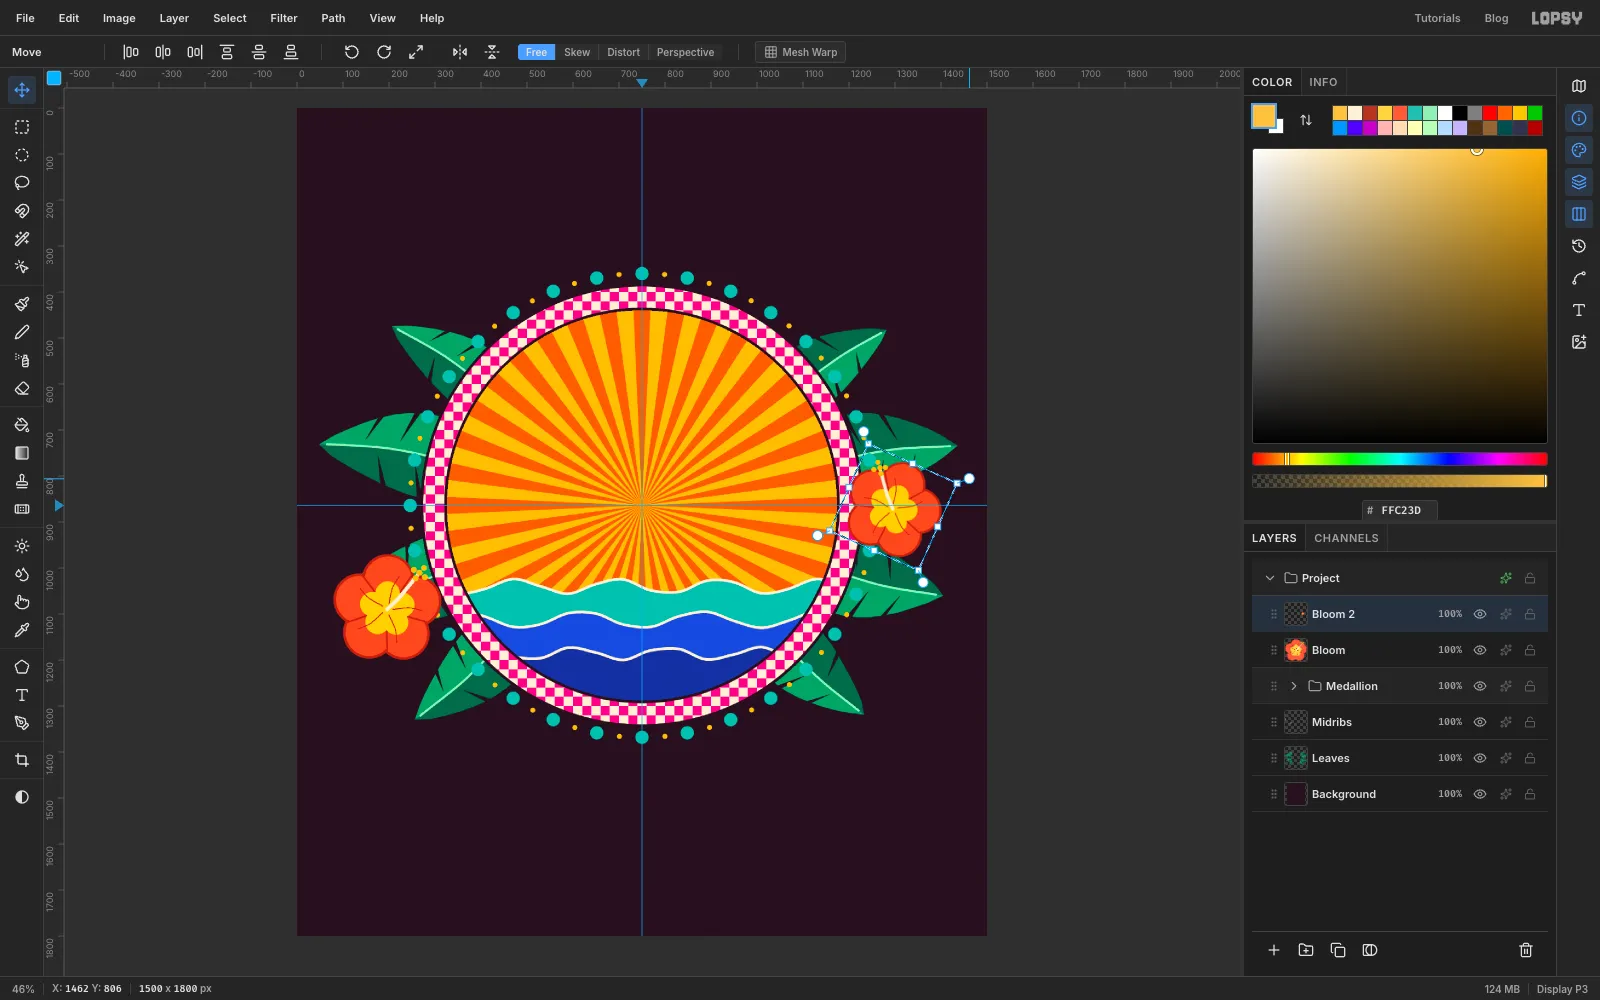
Draw a marquee around the copy again and press V. Hover just outside its top-right corner until the cursor becomes a crosshair, then drag clockwise to turn it about 24°. Press Cmd+D. Now the two flowers don't look stamped from one template.
-
Drop in the swordfish
Click Bloom 2 so the photo lands above it. Drag the downloaded Swordfish (Duane Raver).png from your folder onto the canvas. It arrives at full size in the top-left corner. Rename the layer Swordfish and press Cmd+D.
-
Wand away the white backdrop
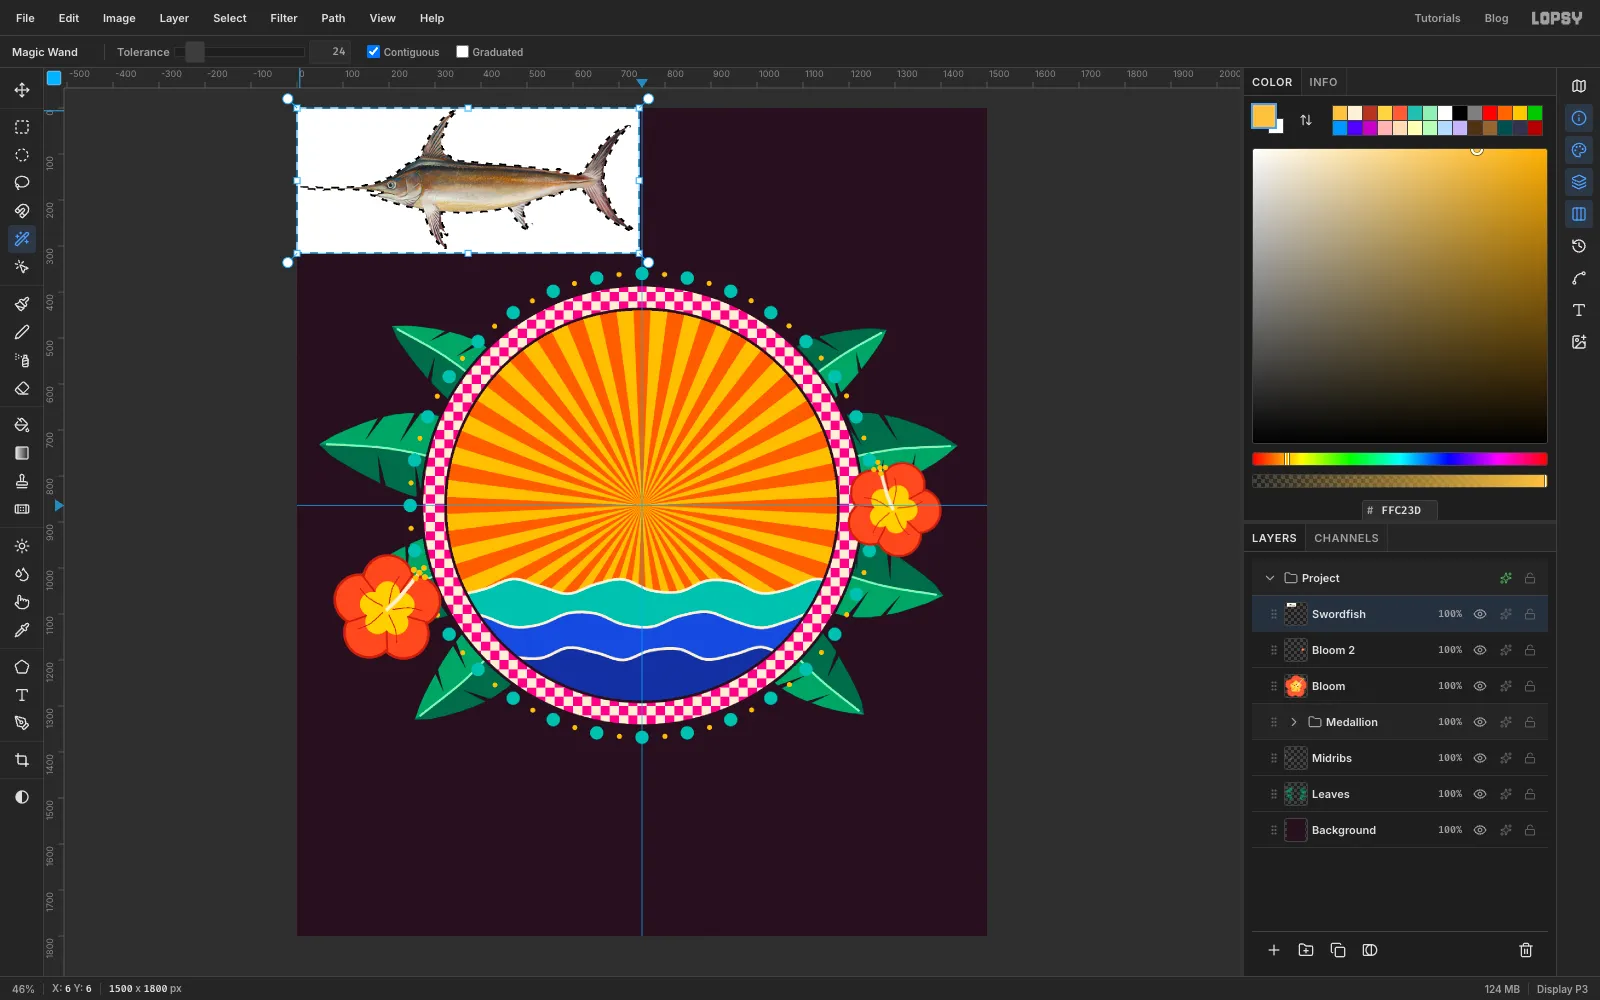
Pick the Magic Wand (W), set Tolerance to 24, and tick Contiguous. Click the white just inside the photo's top-left corner. Contiguous keeps the white highlight in the eye from being selected. Press Delete and Cmd+D.
-
Flip the fish and scale it up
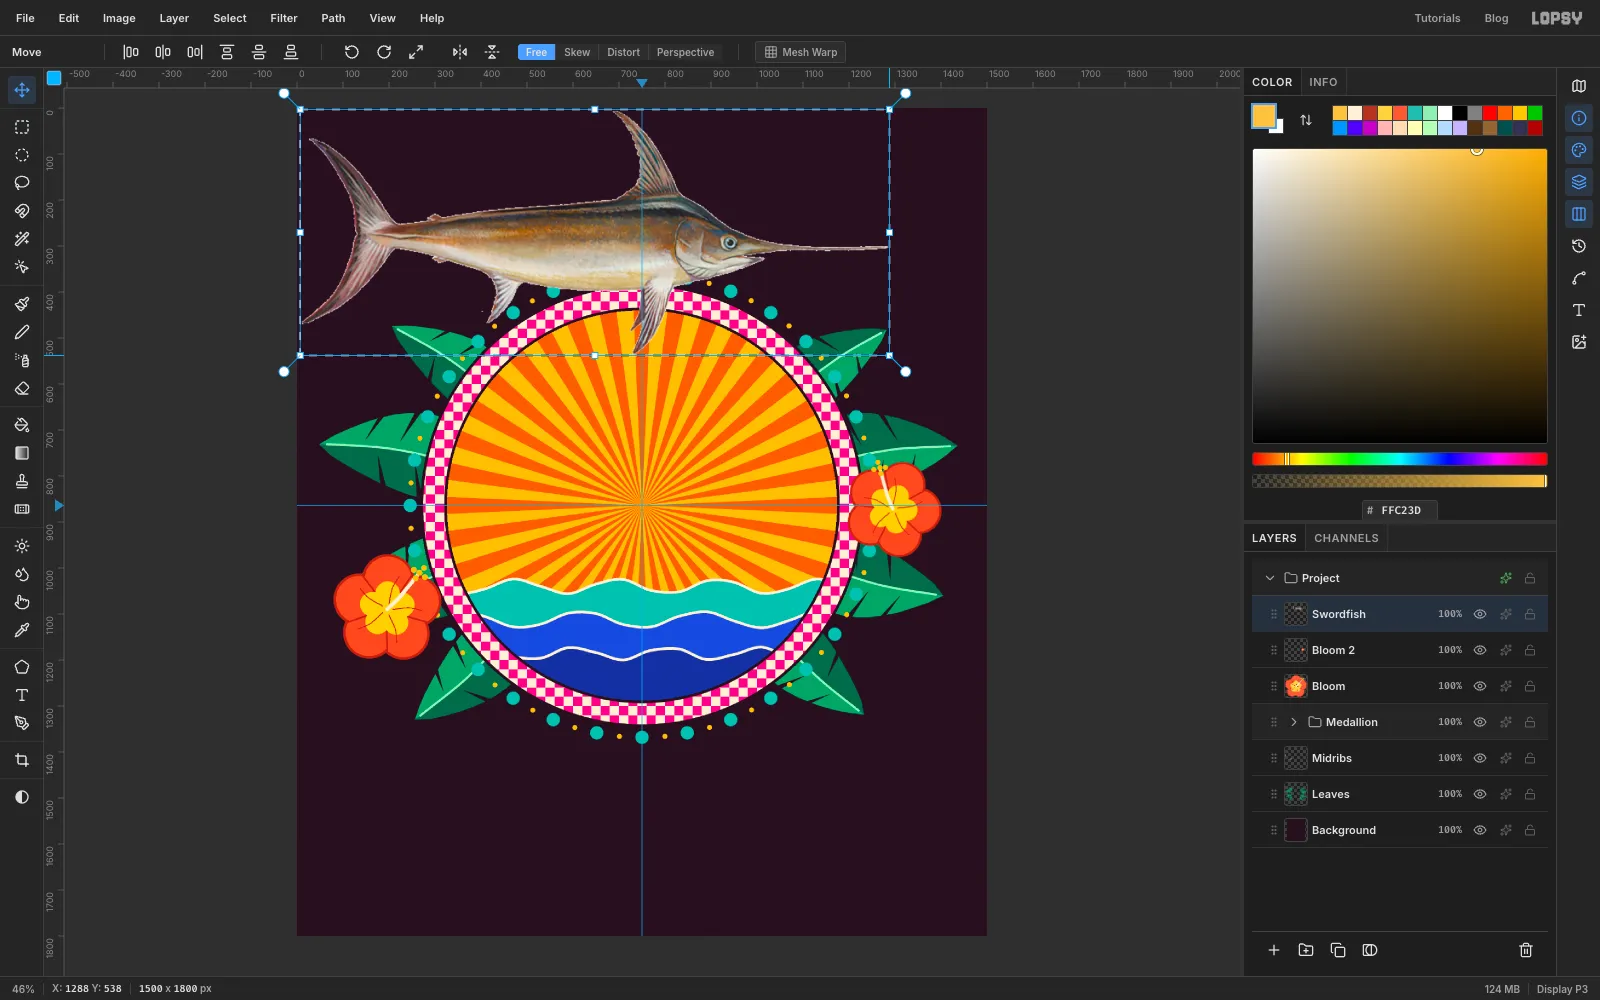
The painting faces left, but the leap should read left to right, so choose Image → Flip Horizontal. Do the flip now, while the layer is a plain upright image, so the later scale and rotation work on the final orientation.
Draw a marquee snugly around the fish and press V for the Move tool. Cmd-drag the bottom-right corner handle out until the fish is about 1310 px long (176%). Watch the top ruler: the tail should reach about x 1310. Press Cmd+D.
-
Posterize the painting
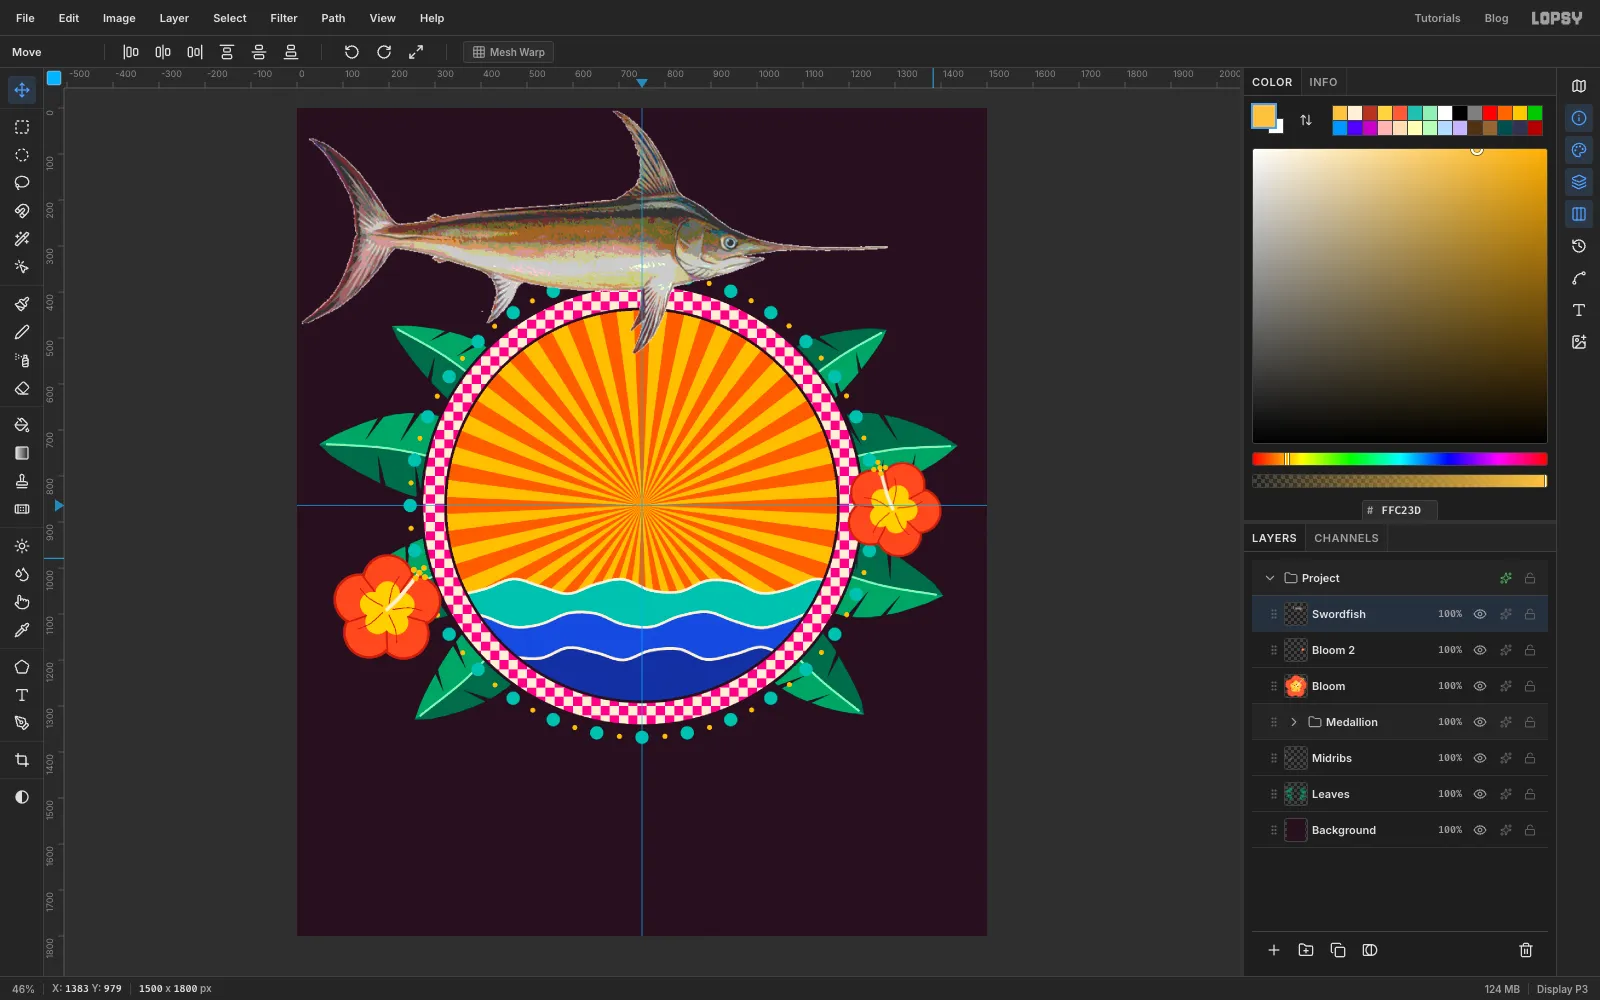
Choose Filter → Posterize… with Levels 6. Posterizing after the enlargement turns the soft, blown-up shading into crisp bands, the way a screen printer separates a photo into a few inks.
-
Rotate the fish into a leap
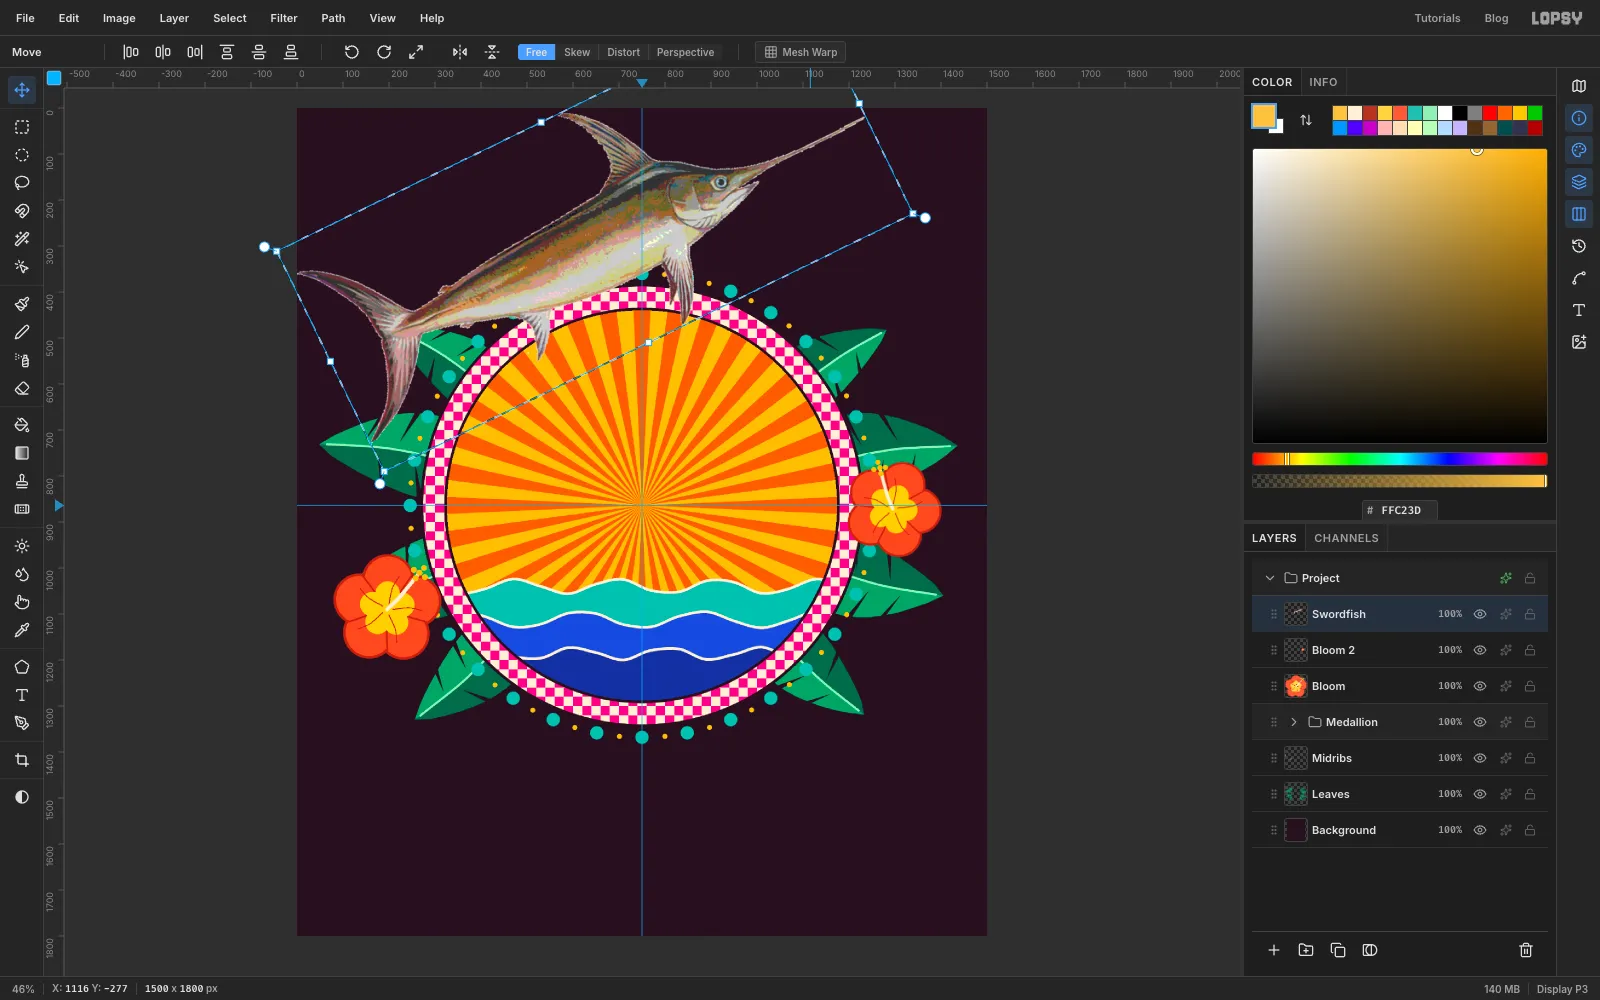
Marquee around the fish again and press V. Grab the rotate handle just outside the top-right corner and drag counter-clockwise until the bill points up and to the right, about 26°. Press Cmd+D.
With the Move tool, drag the fish so its middle sits just right of the guide crossing, at about 770, 860. The bill should break out of the checker ring at the top right and the tail should dip into the waves at the bottom left. Breaking the frame is what makes the badge feel alive.
-
Outline the fish
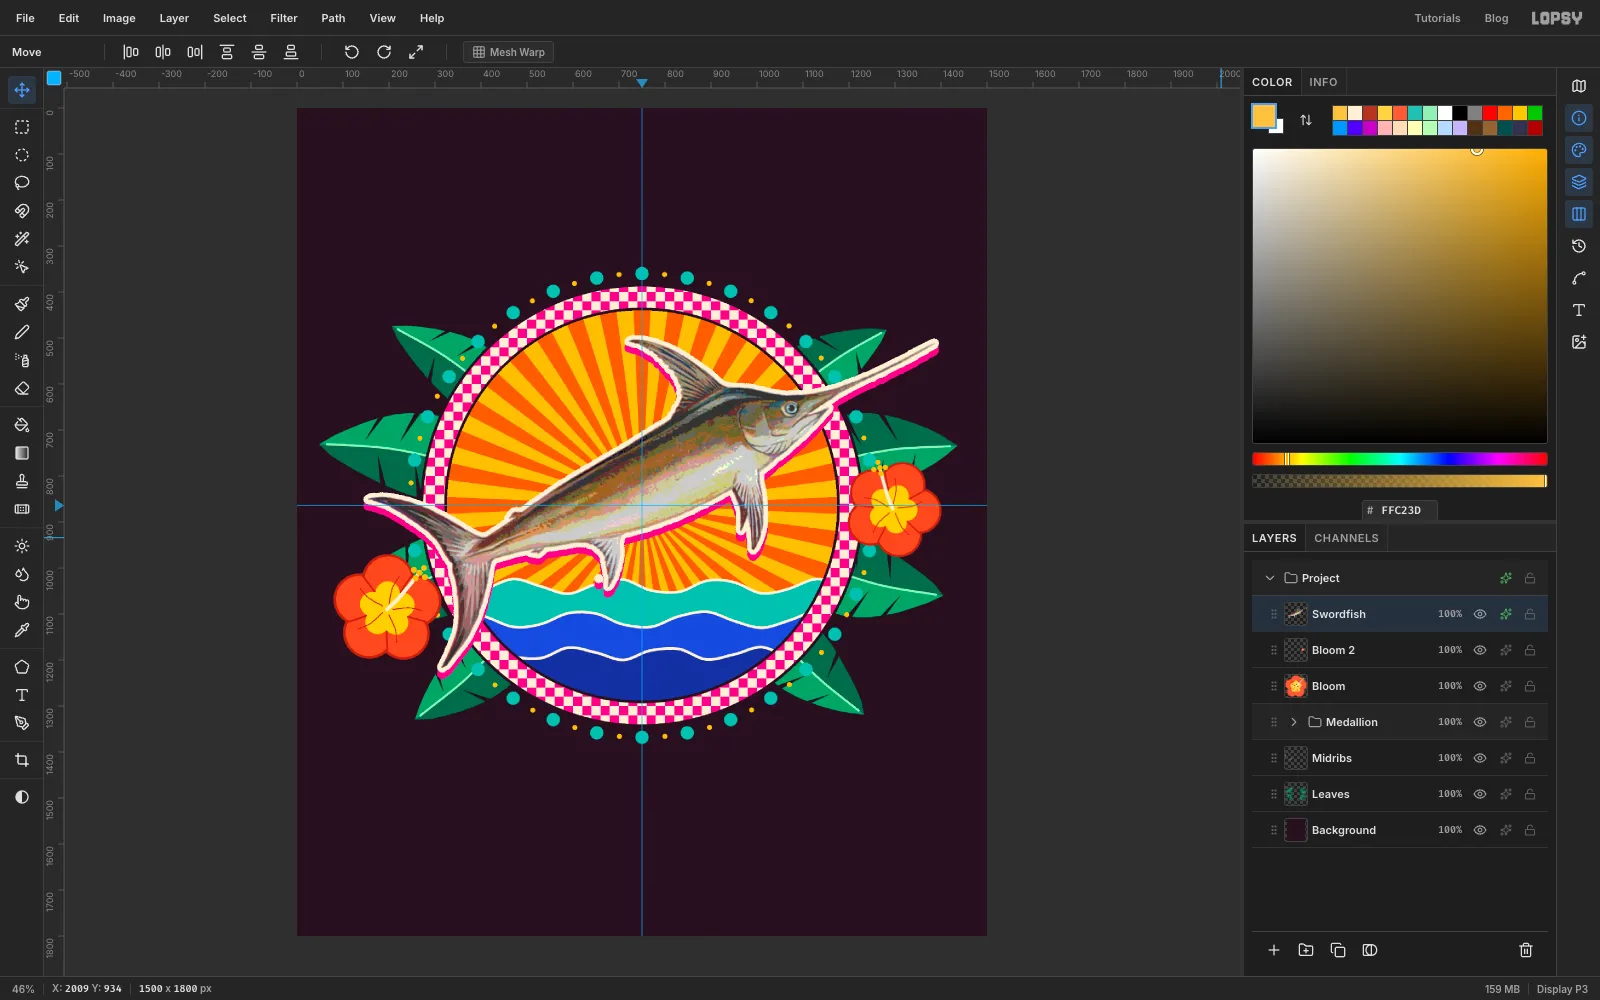
Open the Swordfish effects. Enable Stroke, Width 9, cream . Then enable Drop Shadow with Offset X 0, Offset Y 14, Blur 0, Opacity 100, colour hot pink . Close the drawer.
Keep the shadow straight down. A diagonal offset slides past the tip of the bill, and the bill seems to grow a second blade.
-
Throw up a splash
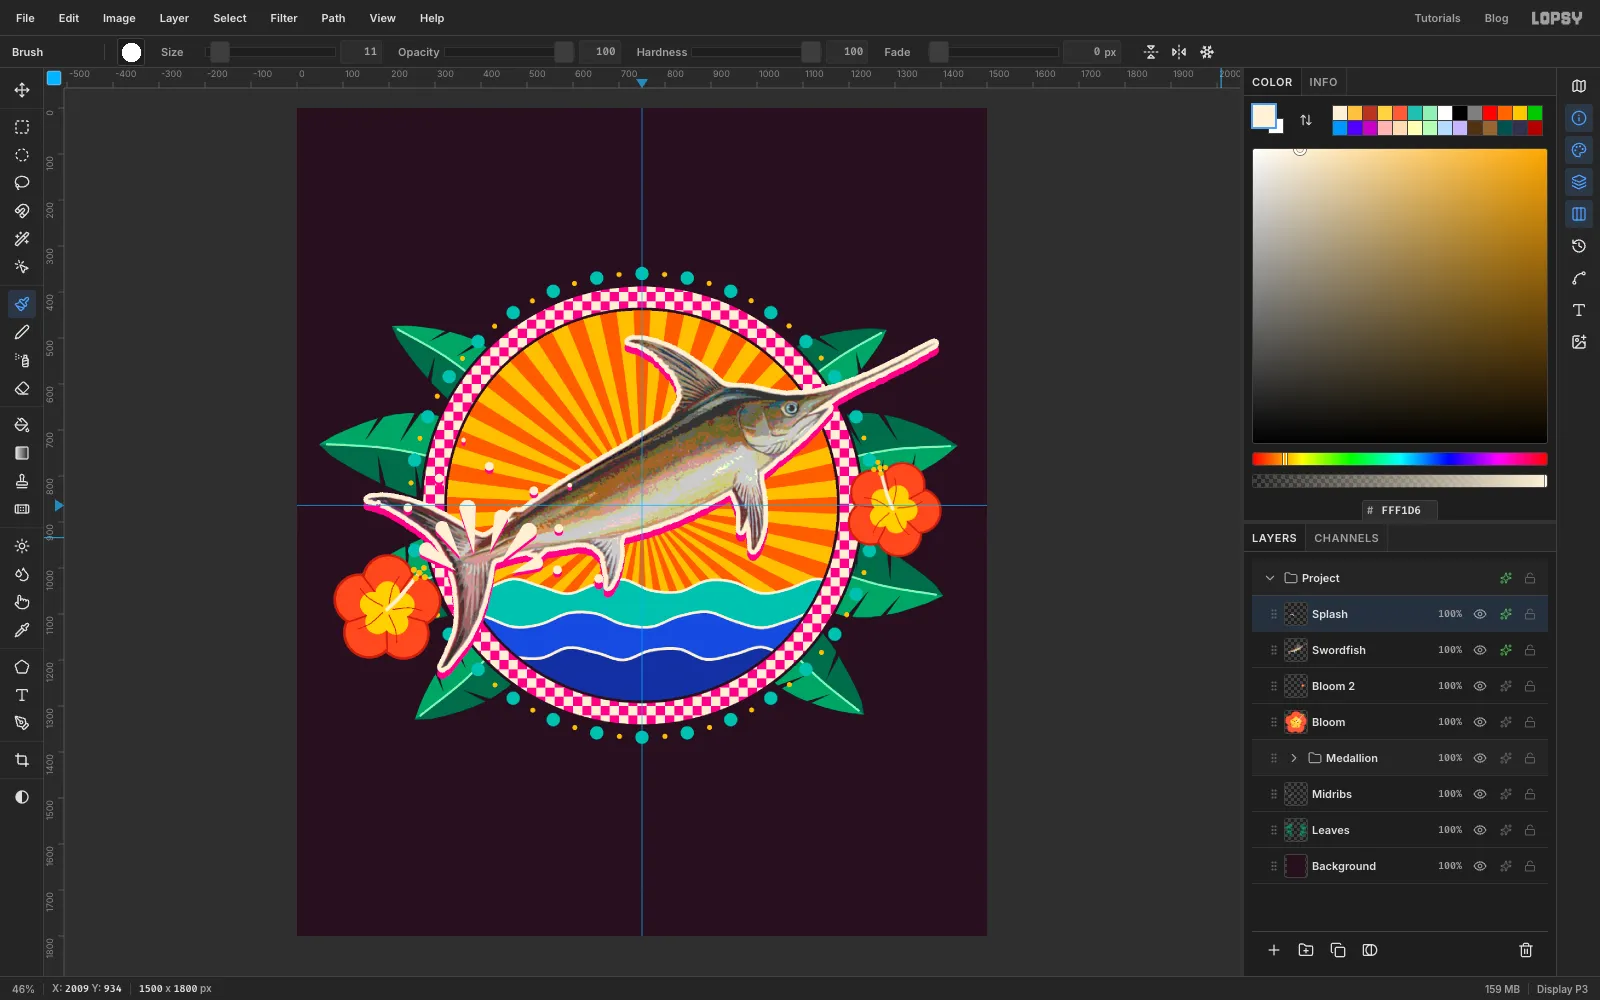
Add a layer called Splash (it lands above Swordfish). Find where the tail crosses the top wave, at about 395, 1040. Set the foreground to cream . With the Lasso, draw six teardrops fanning upward from that point: start each one in a narrow point about 70 px out and swell it into a round end 75–120 px further on. Fill and deselect after each.
Pick the Brush with Hardness 100 and click six size 20 drops in an arc beyond the teardrops. Add three size 11 drops further out. Give the layer a Drop Shadow at Offset X 0, Offset Y 7, Blur 0, Opacity 100, colour hot pink.
-
Recolour the fish with a Gradient Map
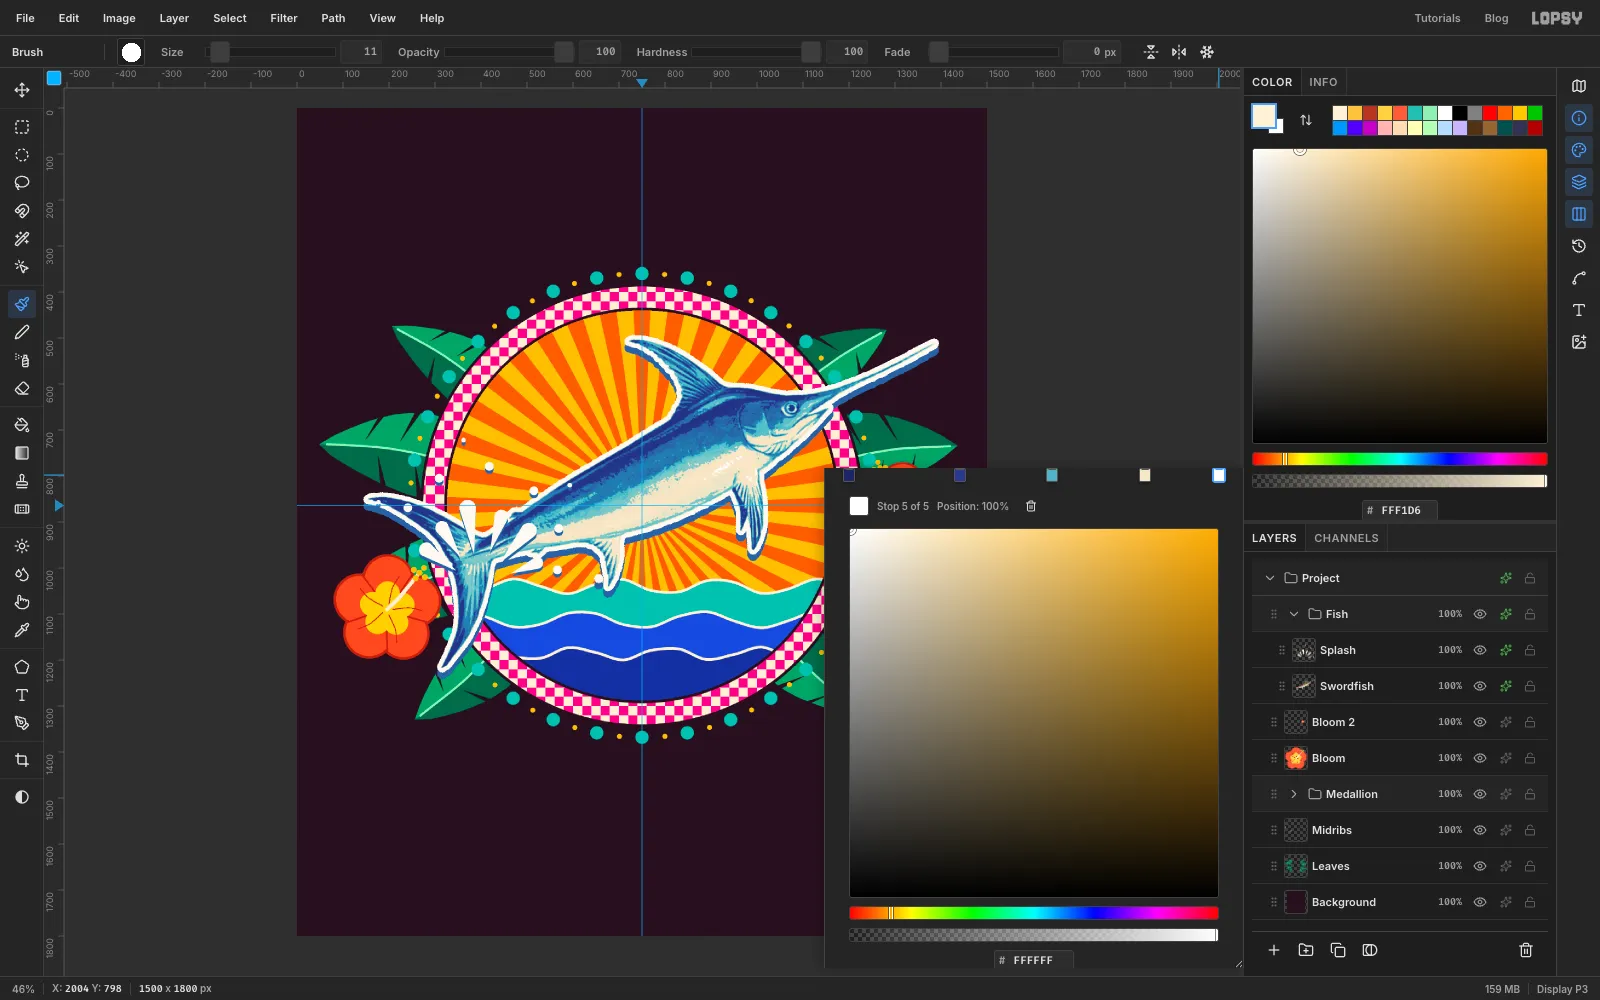
The painted fish is khaki, which disappears against the orange rays. Click Swordfish, Shift-click Splash, click Group Layers, and name the group Fish.
Open the Fish group's effects with the sparkle button on its row, click Add Adjustment and choose Gradient Map. Click the gradient bar three times, at about 30%, 55% and 80%, to add stops. Then click each stop in turn and type its hex code in the drawer's Hex field:
- at 0%
- at 30%
- at 55%
- at 80%
- at 100%
The posterized bands become indigo, teal and cream. The adjustment also maps the cream outline to white and the pink shadow to a deep blue, so the whole fish turns into a cool tritone that pops off the warm sunburst. Close the drawer and collapse the group.
-
Build the ribbon banner
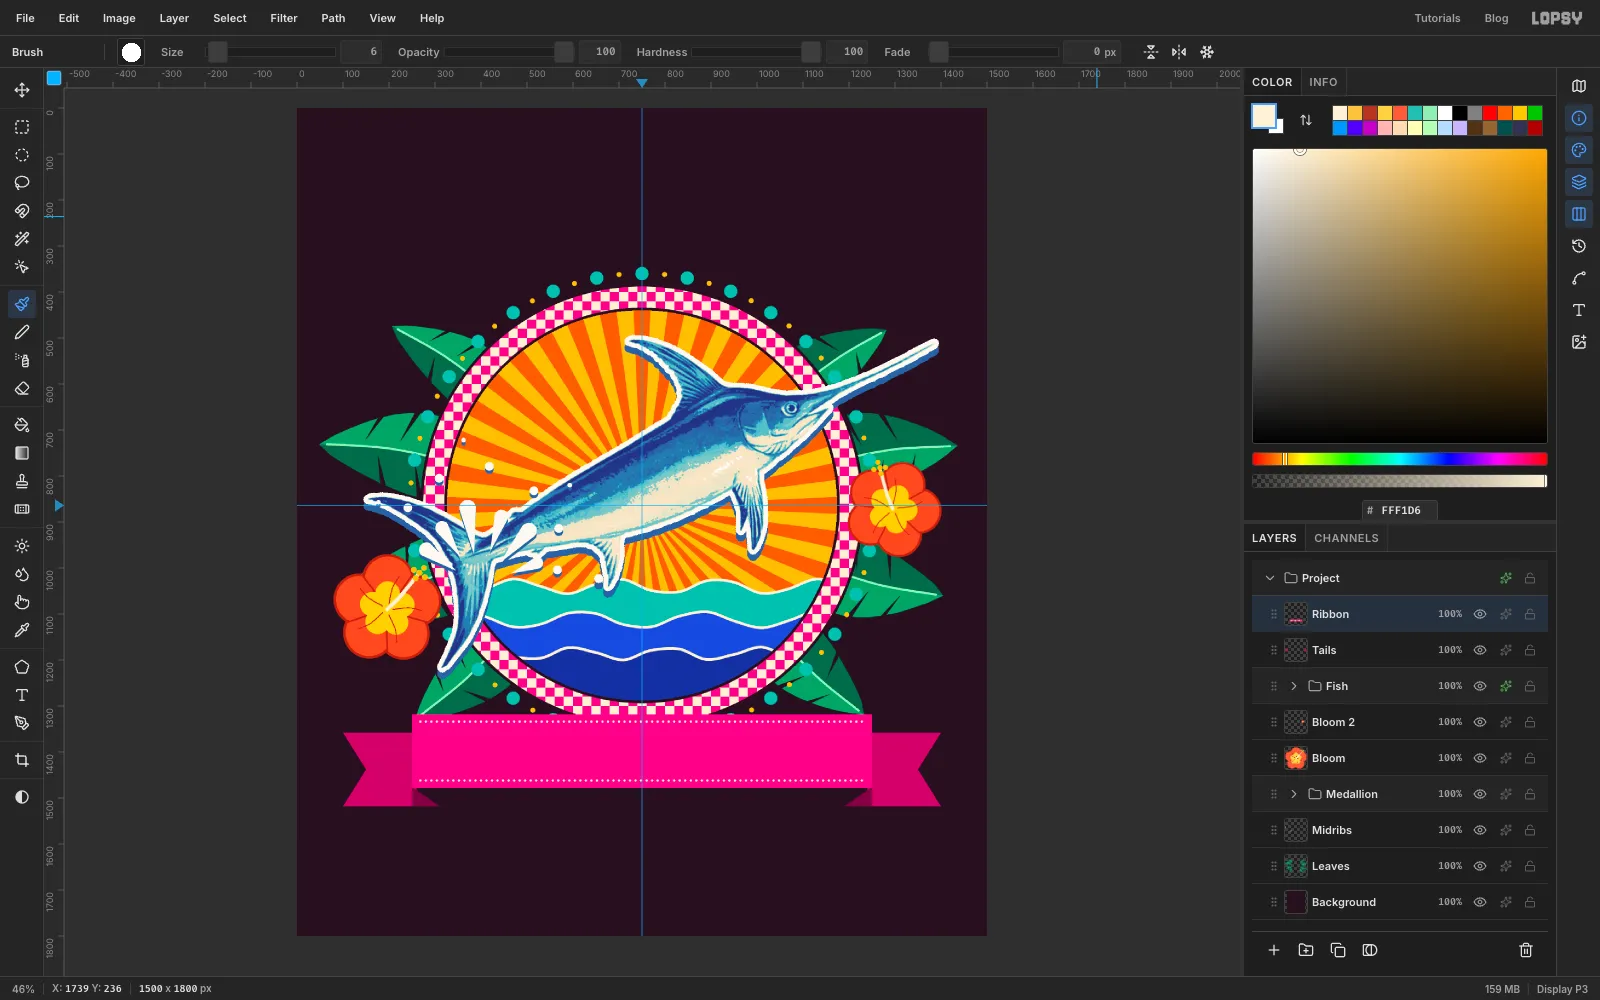
The ribbon sits across the bottom of the medallion, from x 250 to 1250 and y 1318 to 1478. Its swallow-tailed ends hang 40 px lower, tucked behind it. These shapes have straight edges, so draw them with the Pen using plain clicks (no dragging) instead of the freehand Lasso.
Click the collapsed Fish row and add a layer called Tails. With the Pen, click the five corners of the left tail: 260, 1358 (hidden under the ribbon), out to 100, 1358, in to 150, 1438 for the V notch, back out to 100, 1518, and 260, 1518. Then click the first point again to close the shape. In the Paths panel, click Path to Selection, then Delete Path. Fill it with and deselect. Make the right tail the same way, mirrored: 1240, 1358, 1400, 1358, 1350, 1438, 1400, 1518, 1240, 1518.
The folds are small dark triangles where the ribbon turns back into each tail. Pen-click 250, 1476, 310, 1518 and 250, 1518, close the shape, make it a selection and fill it with . Mirror it on the right at 1250, 1476, 1190, 1518 and 1250, 1518.
Add a layer called Ribbon. With nothing selected, click once with the Rectangular Marquee and select 250, 1318 to 1250, 1478 in the dialog. Fill it with hot pink and deselect.
For the stitching, pick the Brush and open its presets: Size 6, Hardness 100, Spacing 200 (the maximum). Spacing that wide turns a stroke into dots. With cream as the foreground, click 18 px in from the top-left corner of the ribbon. Then Shift-click 18 px in from the top-right corner for a straight dotted line. Do the same 16 px above the bottom edge. Set Spacing back to 4.
-
Set PARADISE in the ribbon
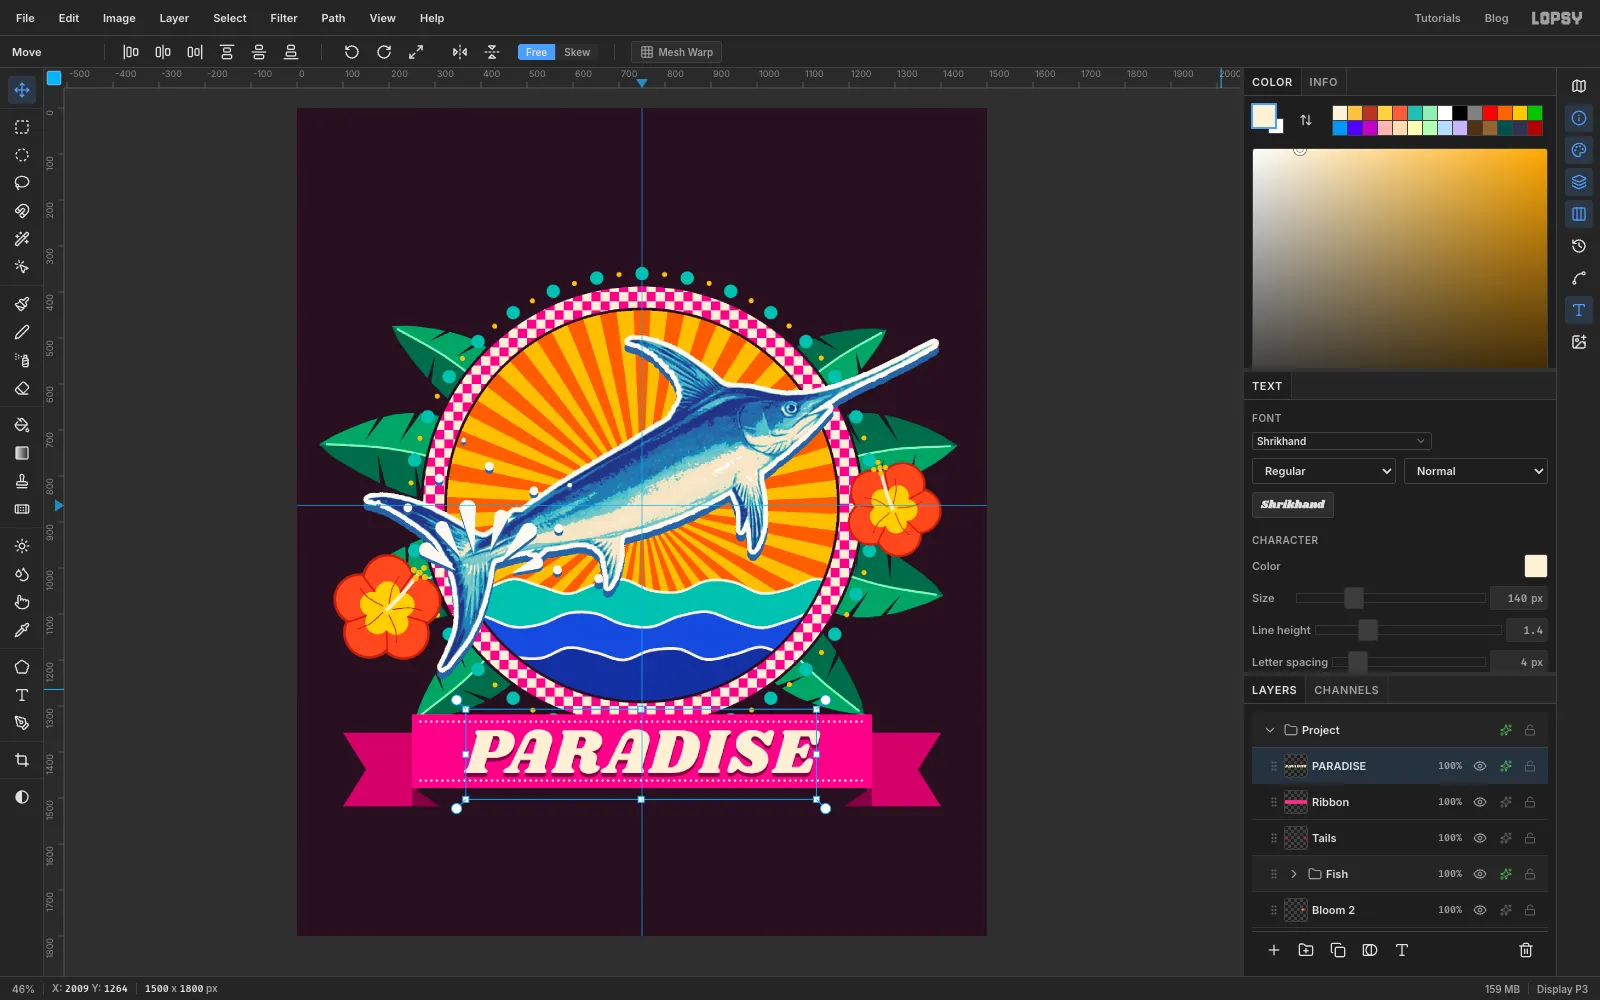
With Ribbon active, pick the Text tool (T). Set the font to Shrikhand, Size 140, colour cream . Click in the empty plum space below the ribbon, type
PARADISEand press Tab to commit. In the Text panel (the T icon in the strip on the right edge of the window), set Letter spacing to 4.With the Move tool, nudge it with the arrow keys (Shift moves 10 px) until the letters sit centred in the ribbon, with the same gap above the caps as below the baseline, clear of both stitch lines. Give it a Drop Shadow: Offset X 0, Offset Y 8, Blur 0, Opacity 100, colour .
-
Add the club line
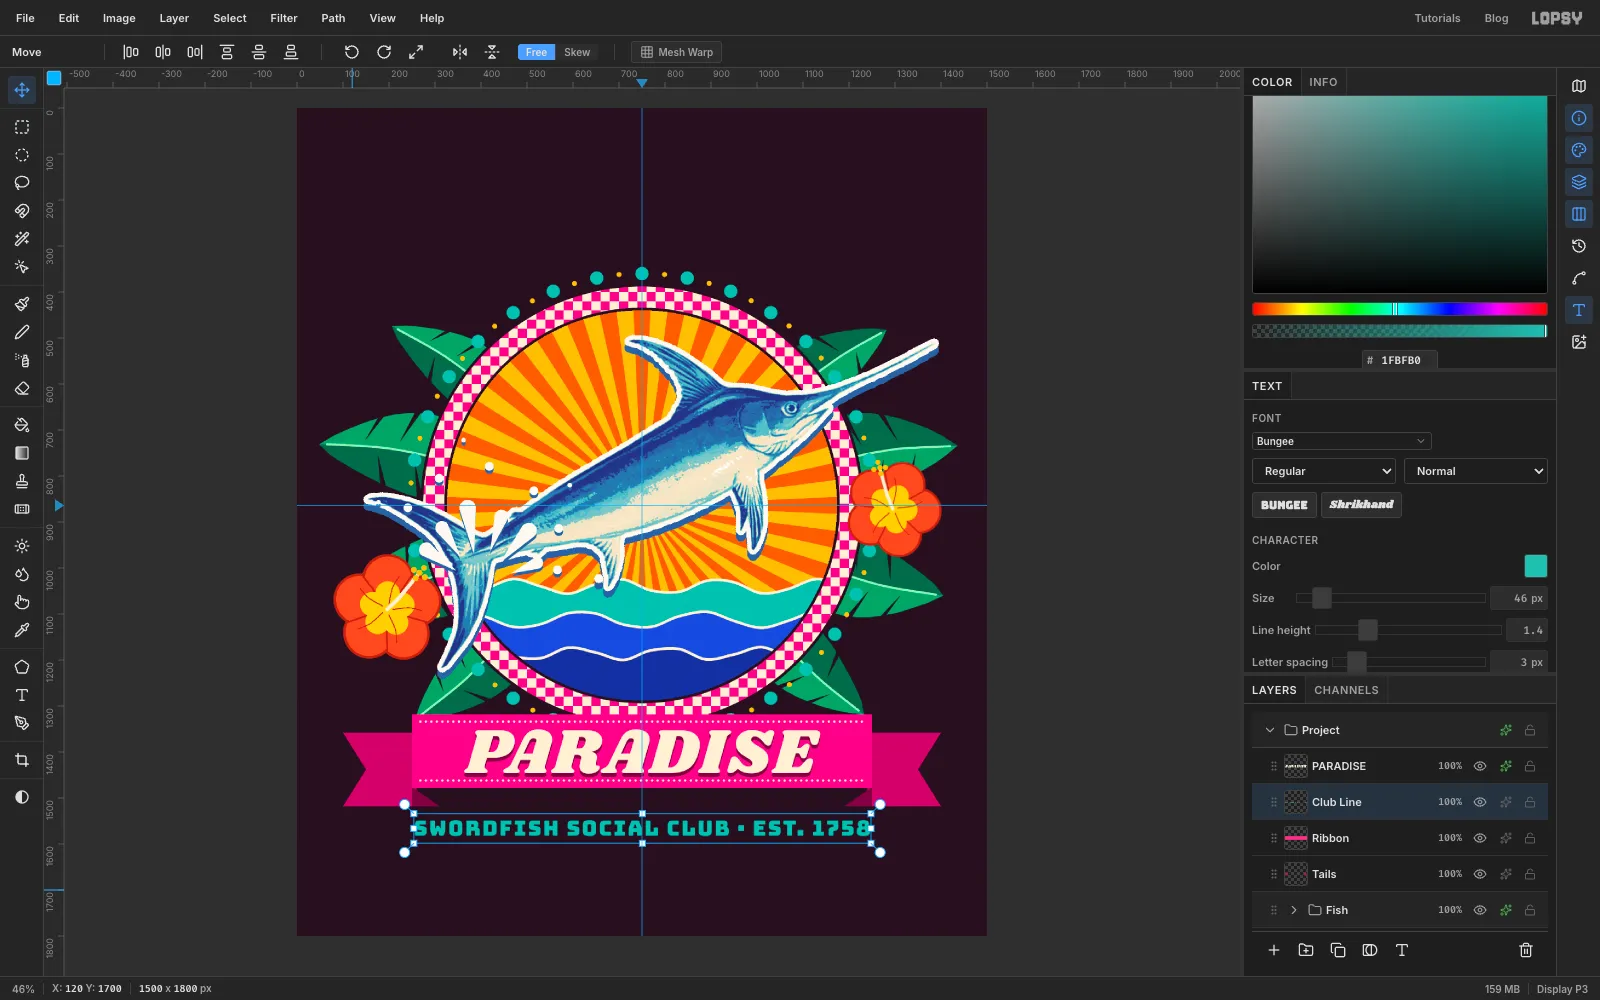
Click Ribbon (a raster layer) so the next text doesn't restyle PARADISE. With the Text tool, set the font to Bungee, Size 46, colour turquoise . Click in empty space near the bottom of the canvas and type
SWORDFISH SOCIAL CLUB · EST. 1758. (Linnaeus named the swordfish in 1758.) Press Tab, then set Letter spacing to 3 in the Text panel.Press V and nudge it with the arrow keys so it's centred on the vertical guide, with its cap tops about 70 px below the ribbon. That's roughly the height of the ribbon's tails, so the two blocks feel like one lockup.
-
Group the banner and tilt it
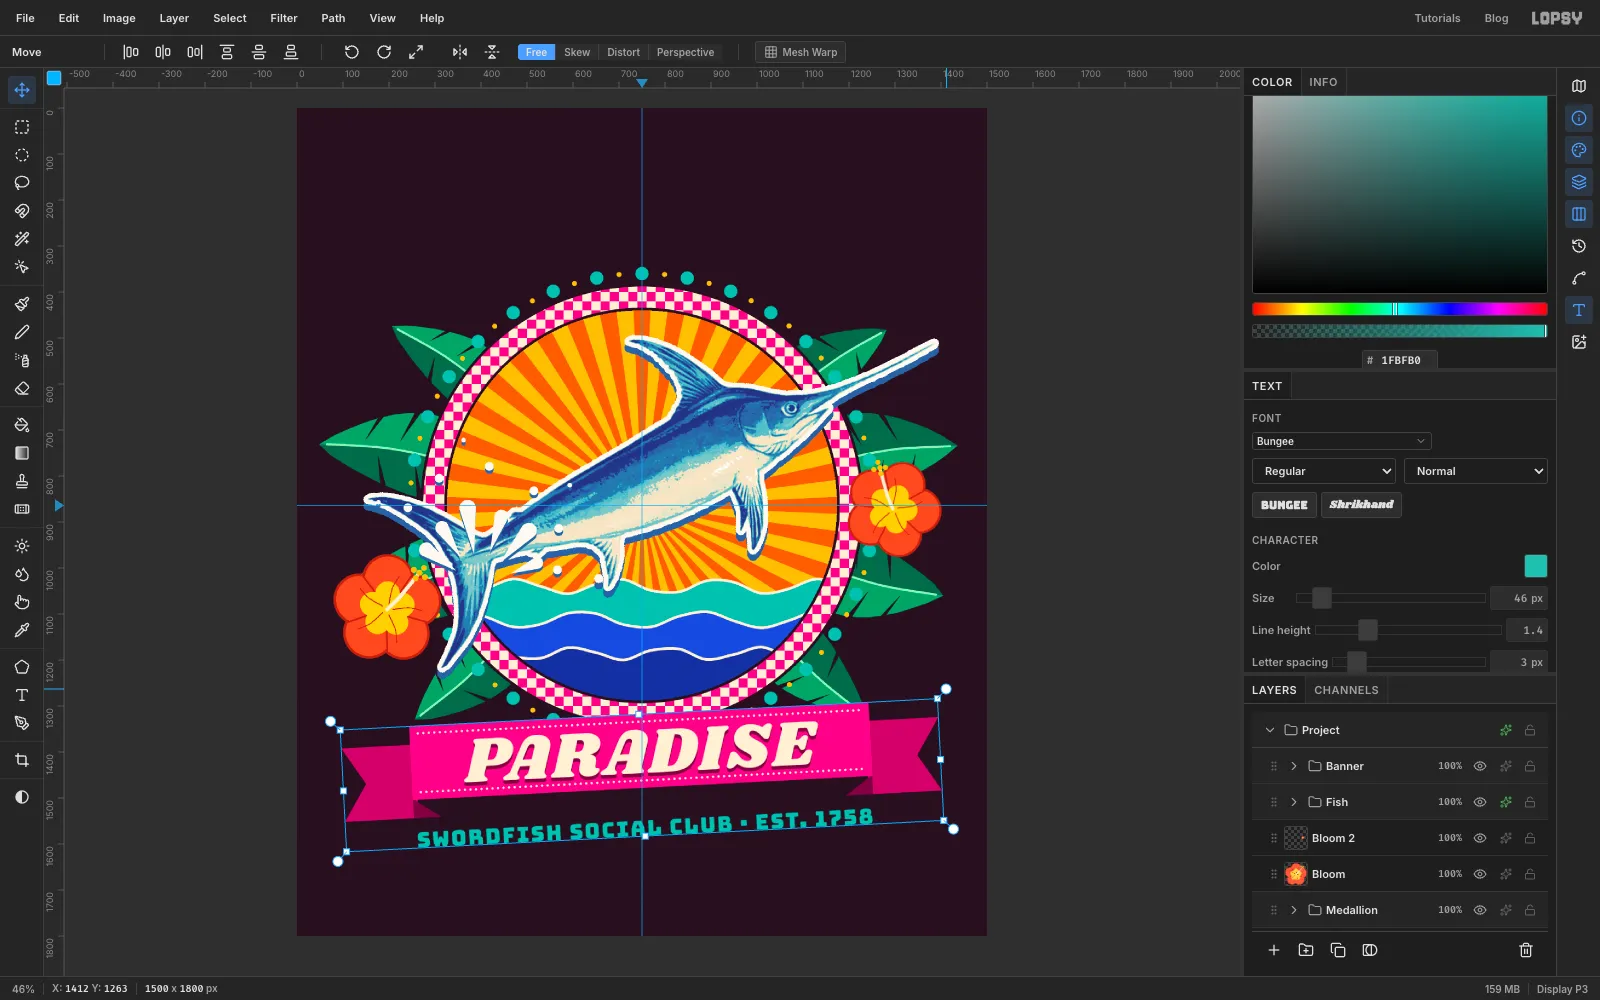
Click Tails, Shift-click PARADISE (the top row of the banner), click Group Layers and name the group Banner. Collapse it.
With the Banner row active and nothing selected, pick the Move tool. Drag the rotate handle just outside the group box's top-right corner counter-clockwise by about 3°, and press Cmd+D. The ribbon, PARADISE and the club line tilt together, and the text stays live. A slight tilt gives the badge some swagger. Anything over 5° starts to look like a mistake.
-
Draw the title's arc
Click the collapsed Banner row and add a layer called Type Anchor. This empty raster layer is somewhere safe to click before you make new text.
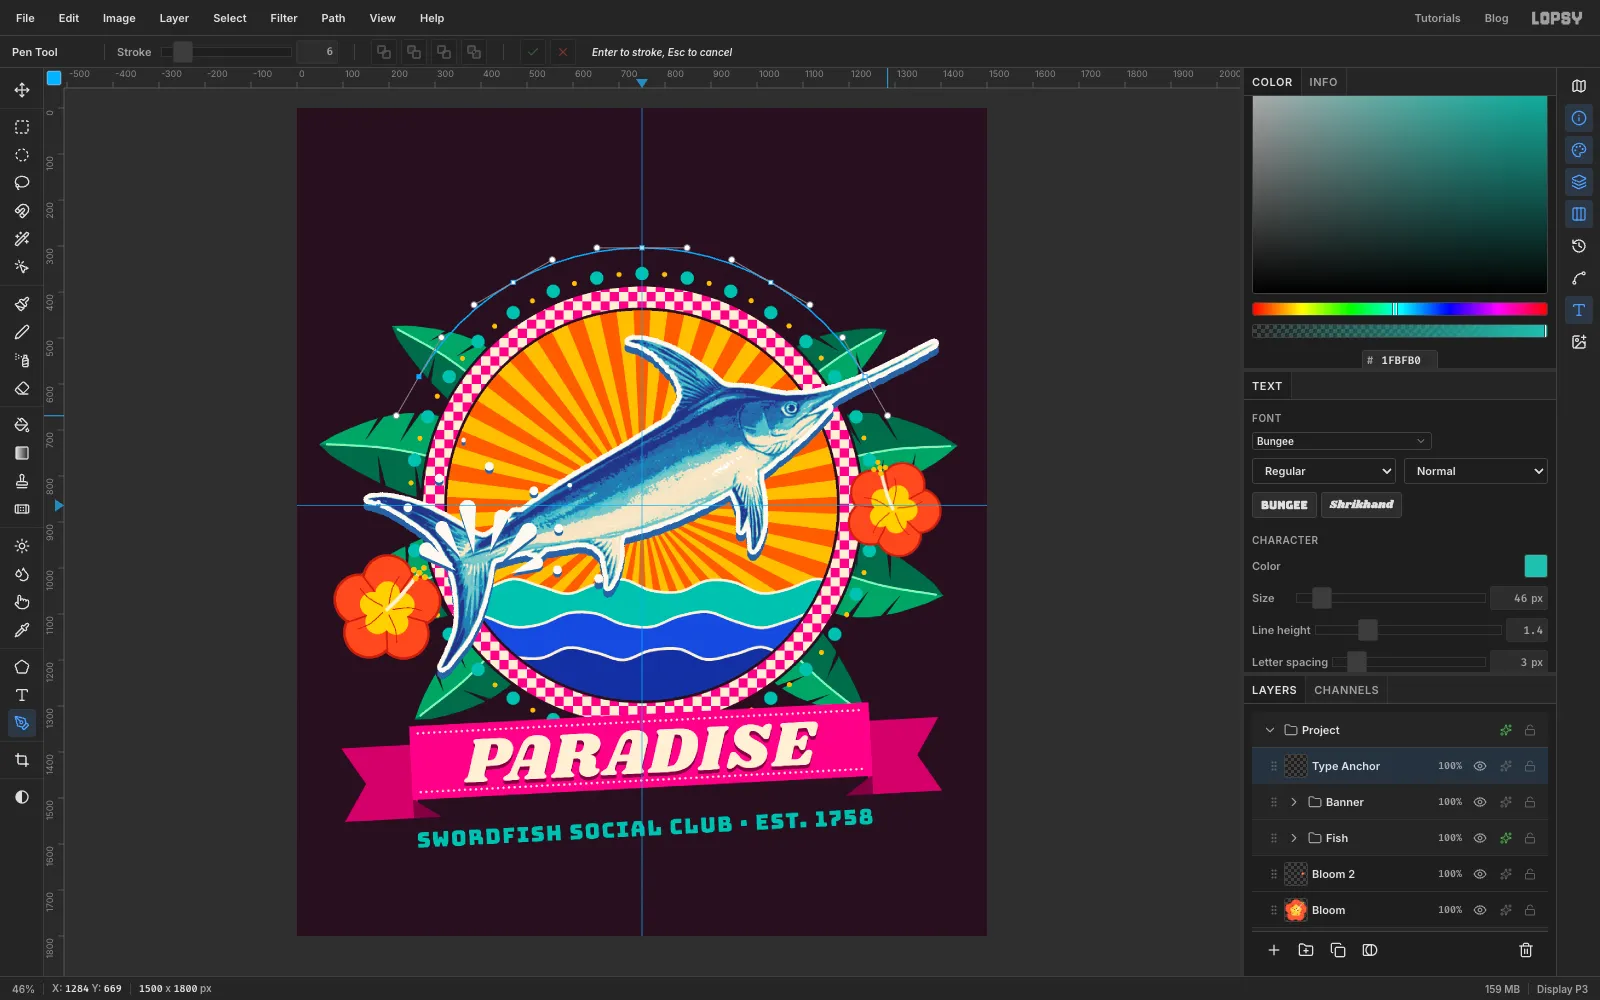
Pick the Pen. Draw an arc concentric with the medallion, 560 px from the guide crossing: click and drag at 265, 584 (lower left), 470, 379, 750, 304 (top centre), 1030, 379 and 1235, 584 (lower right), dragging each handle about 100 px along the curve (left to right) so the segments join into one smooth circle. Click the ✓ Commit path button in the options bar. Don't press Enter, or the Pen will stroke the path.
-
Set XIPHIAS on the arc
Click Type Anchor. Pick the Text tool and set Bungee Inline, Size 170, colour saffron . Click in empty space near the bottom of the canvas, type
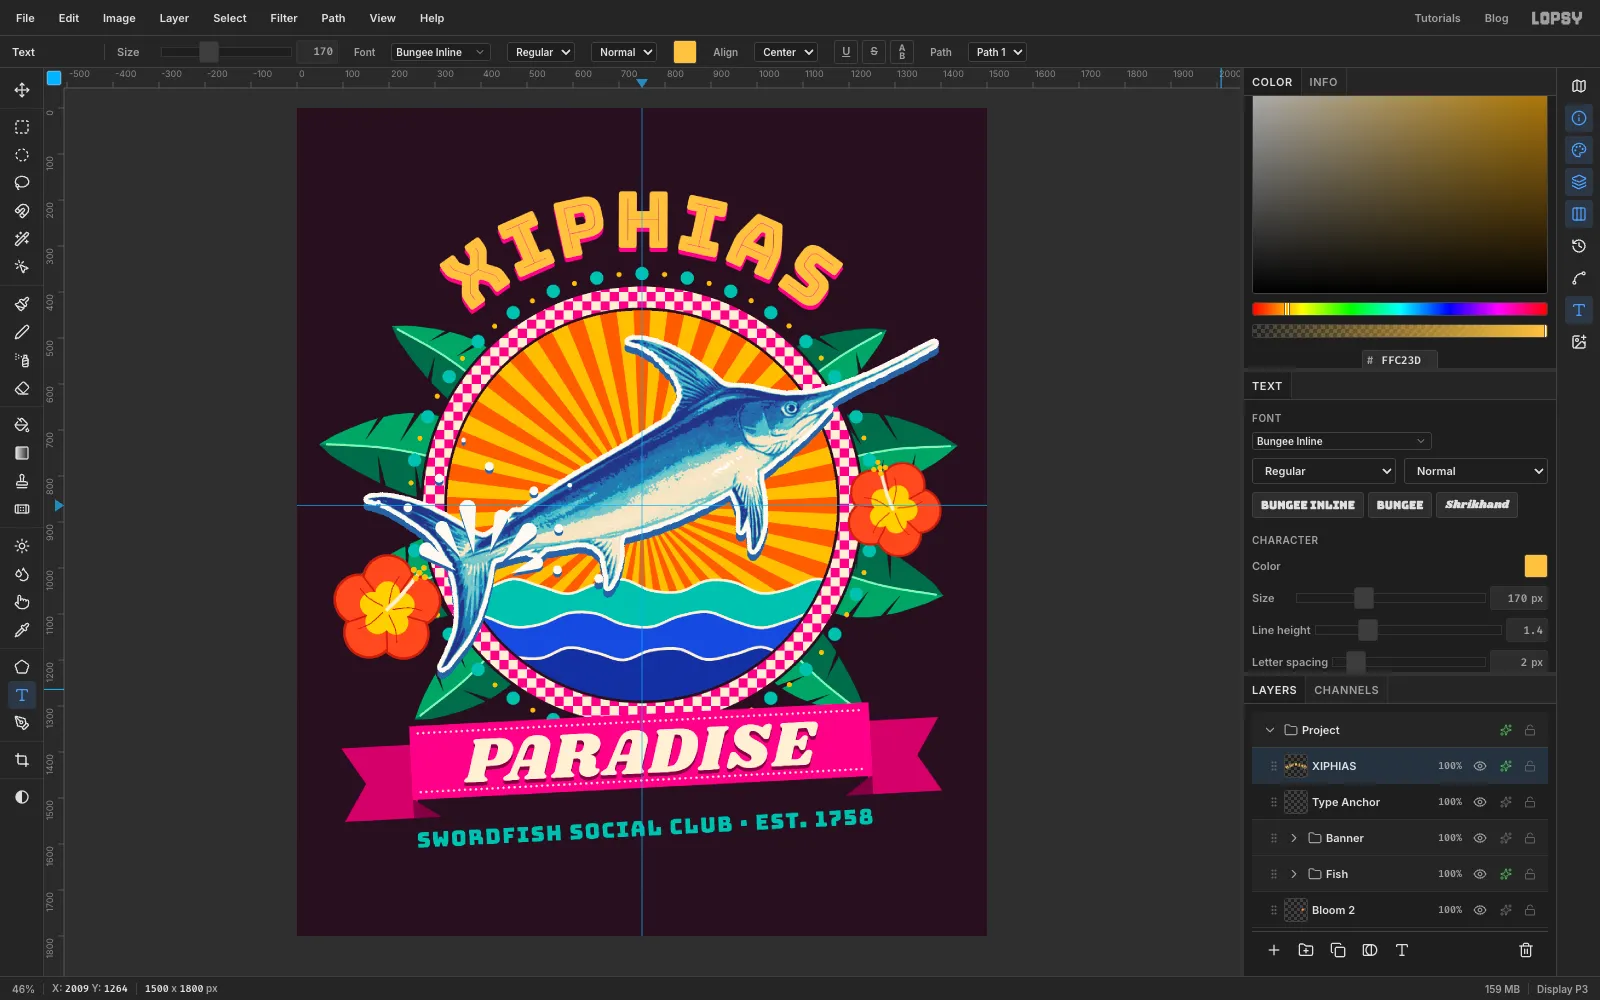
XIPHIASand press Tab. Set Letter spacing to 2 in the Text panel.With the new text layer active and the Text tool still selected, choose your arc in the options bar's Path dropdown. The letters jump onto the curve. Set Align to Center so they spread evenly over the top. In the Paths panel, click the selected path's row to hide its outline.
Add a Drop Shadow: Offset X 0, Offset Y 9, Blur 0, Opacity 100, hot pink. Check the seating: the bottoms of the letters should sit an even 40–50 px above the beads all the way round. If the gap grows towards the ends, your arc isn't quite circular; redraw it with longer handles.
-
Scatter sparkles, stars and corner fronds
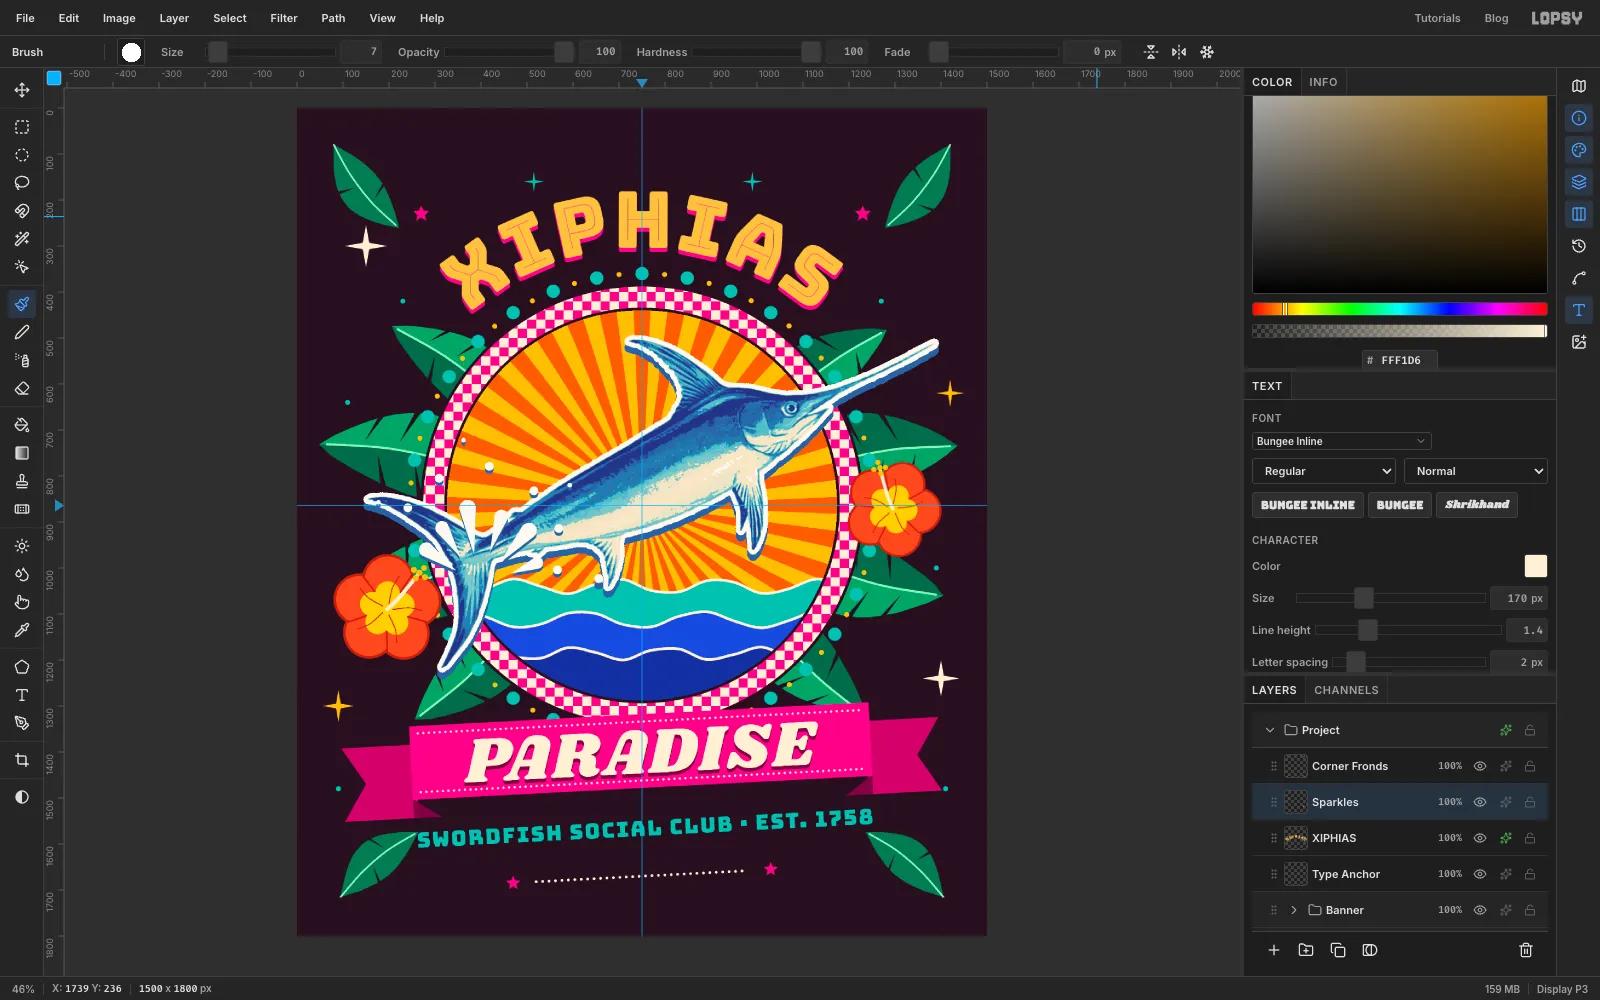
Click the XIPHIAS row and add a layer called Sparkles. The sparkles and stars have straight sides, so draw each one with Pen clicks around its points, close it, click Path to Selection and Delete Path in the Paths panel, then fill and deselect. A four-point sparkle is four long points with the inner corners pulled in close to the centre, to about a fifth of the point length.
- cream , about 90 px across, at the top left around 150, 300
- saffron , about 60 px, beside the bill tip around 1420, 620
- saffron, about 70 px, low on the left around 90, 1300
- cream, about 80 px, low on the right around 1400, 1240
- turquoise , about 45 px, above the title around 515, 160 and 990, 160, clear of the letters
Then add four hot-pink five-point stars, about 35 px across: two flanking the ends of the title around 270, 230 and 1230, 230, and two at 470, 1685 and 1030, 1655, where the dotted rule will end. With the Brush at Size 12, Hardness 100, click six turquoise dots into the empty gaps around the leaves.
Add a layer called Corner Fronds. With the Lasso, draw a small pointed leaf about 220 px long in each corner, pointing diagonally in towards the design and keeping 60–80 px clear of the canvas edges. Fill them with , a darker green that sits back behind the main leaves. Tear two notches into each with thin Lasso wedges and Delete, as you did for the big leaves. Then give each one a midrib: mint , Pen at Stroke 4, four clicks along the spine, Enter, and Delete Path.
Click Sparkles again for the dotted rule. Set the Brush to Size 7 and Spacing 200 in its presets, with cream as the foreground. Click at 520, 1682 and Shift-click at 980, 1658. The rule climbs 3° to match the tilted banner. Set Spacing back to 4.
-
Copy and enlarge one sparkle
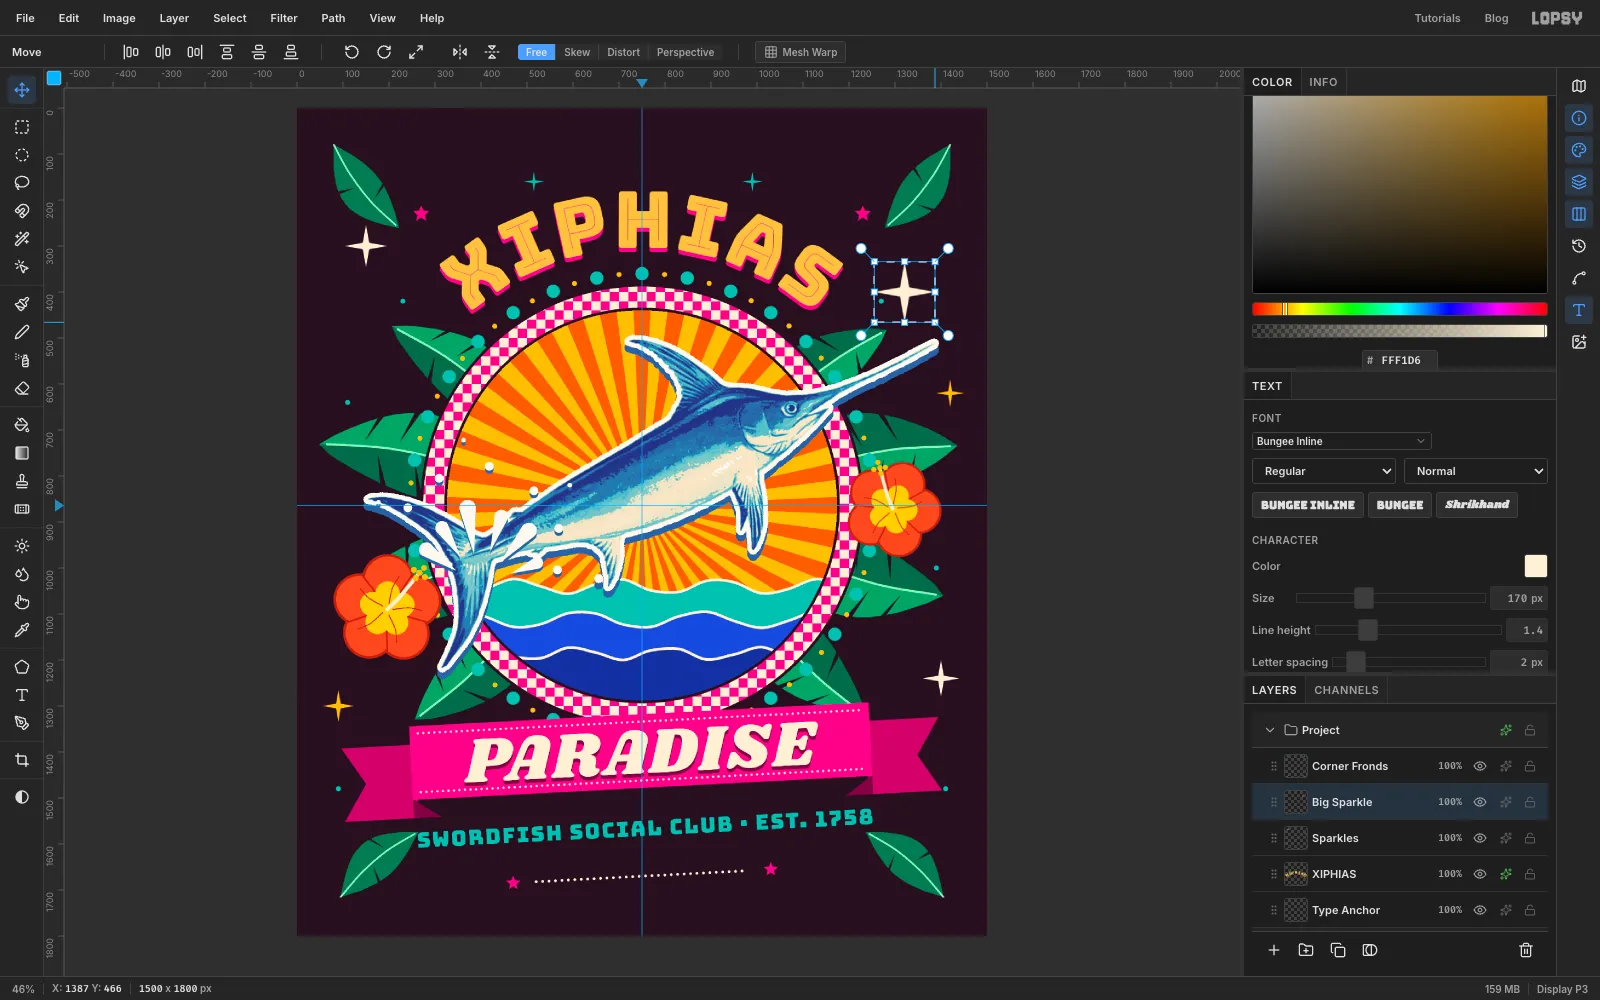
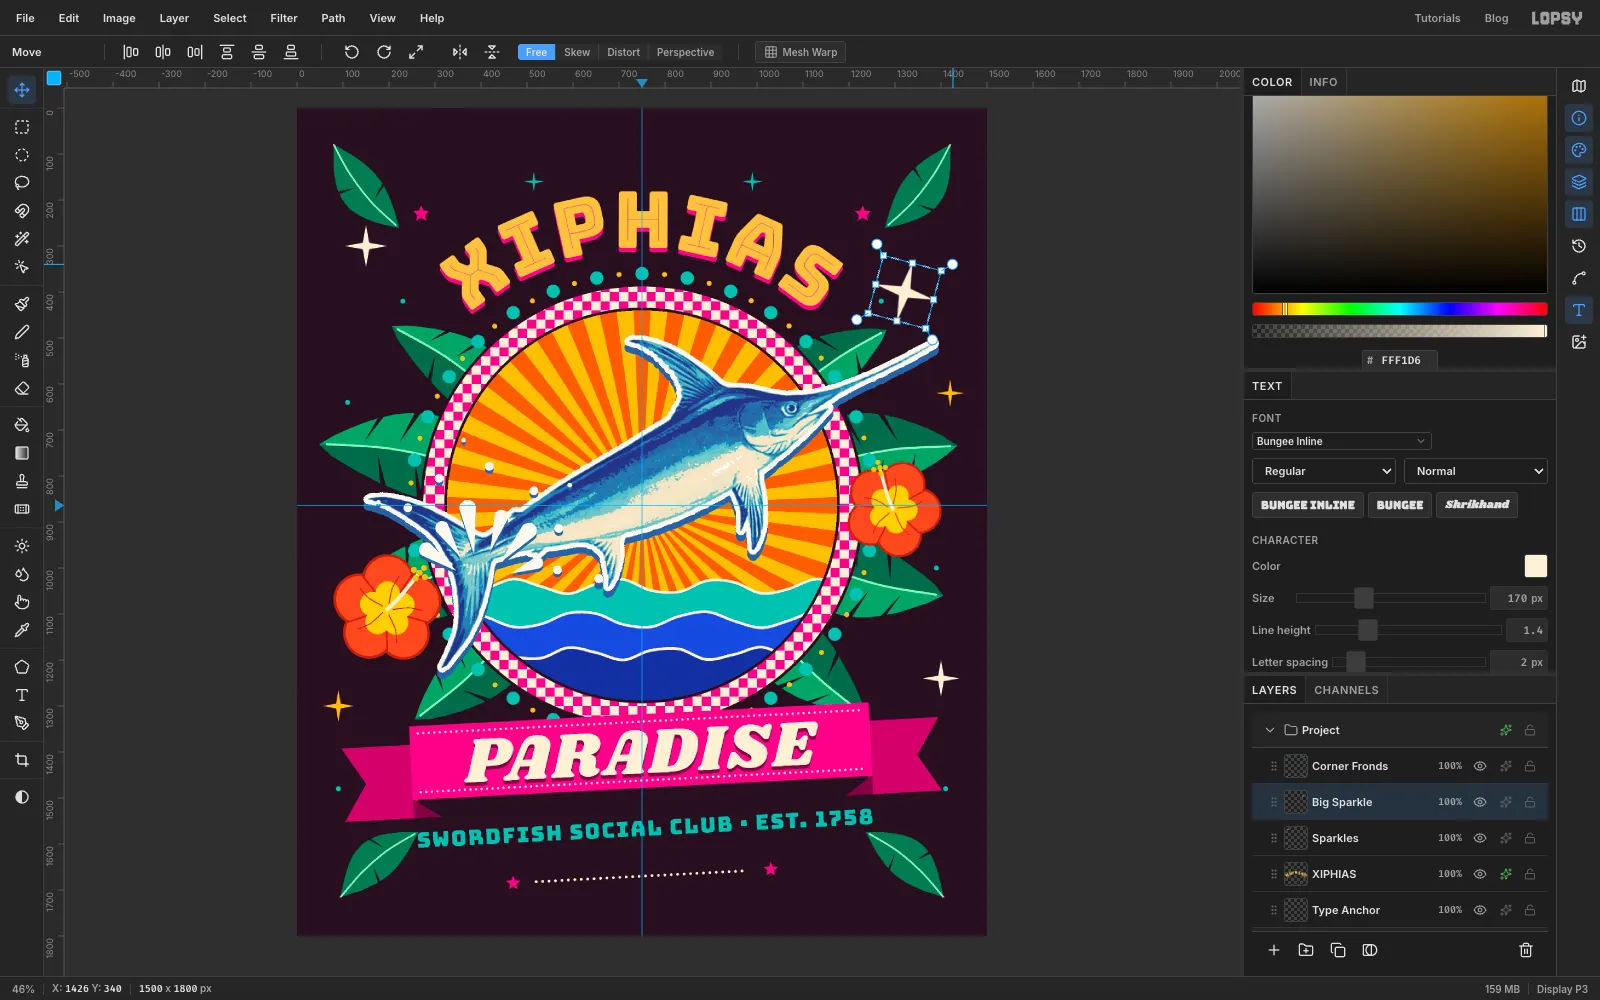
The bill tip needs a glint. Marquee around the cream sparkle at the top left, press Cmd+C and Cmd+V, and name the new layer Big Sparkle. Press Cmd+D.
With the Move tool (V), drag it to about 1300, 380, just above and left of the bill tip, and press Cmd+D. Marquee around it, press V, and Cmd-drag the bottom-right handle out about 40 px so it grows to roughly 1.4×. Press Cmd+D.
-
Tilt the big sparkle
Marquee around the sparkle again, press V, and drag the rotate handle clockwise about 15°. Press Cmd+D. Tipped off the vertical, it looks like a glint catching the bill rather than a sticker placed beside it.
-
Make the worn-ink texture
Screen-printed ink cracks and wears. You'll fake that with a speckle layer in the shirt colour on top of everything.
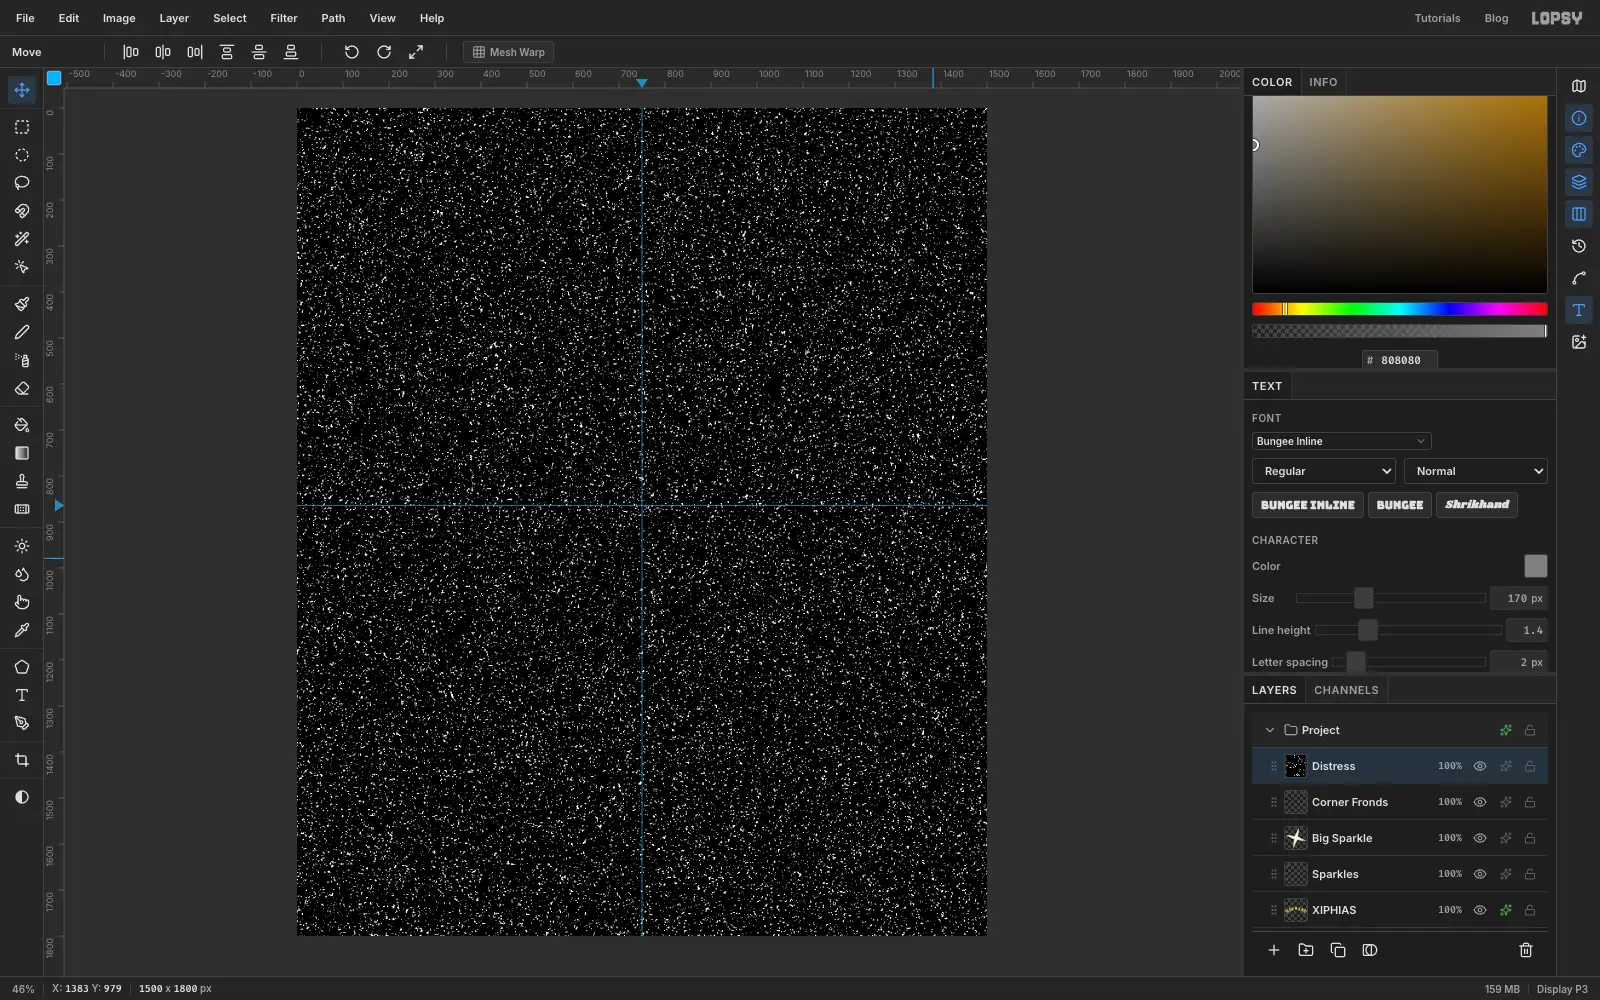
Click Corner Fronds (the top layer) and add a layer called Distress. Set the foreground to mid-grey , choose Edit → Fill with nothing selected, then run:
- Filter → Add Noise… at Amount 100, Mono, Gaussian
- Filter → Gaussian Blur… at Radius 3
- Filter → Threshold… at Level 135
Start from mid-grey: Add Noise moves pixels both ways, so the threshold catches the bright end. The blur clumps the noise first, so you get small irregular flecks instead of single-pixel salt. Only a light scatter of white should be left. If it looks like snow, undo and raise the Threshold level by one or two.
-
Knock the specks out in the shirt colour
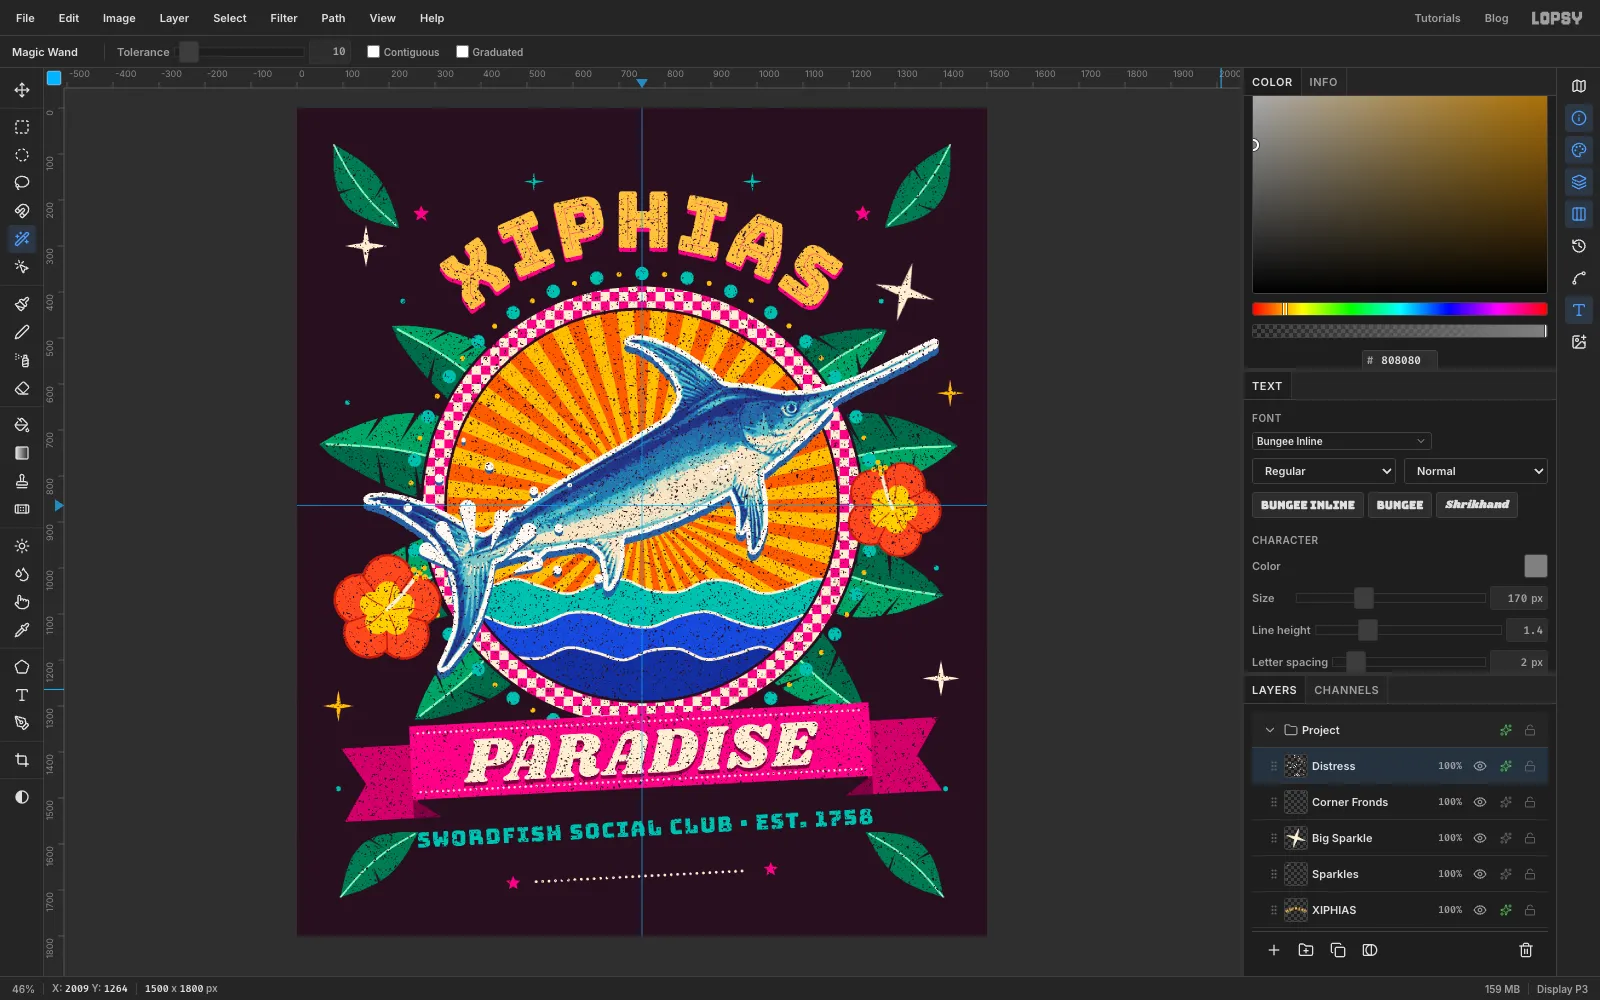
Pick the Magic Wand, untick Contiguous, set Tolerance 10, and click a black area of Distress. Every black pixel is selected. Press Delete and Cmd+D, so only the white flecks remain. Tick Contiguous again.
Open the layer's effects and enable Color Overlay with plum . The flecks now look like holes in the ink where the shirt shows through.
-
Vary the wear with the Eraser
Even speckle looks like a filter. Real wear comes and goes. Pick the Eraser (E) on Distress. The Eraser's dabs overlap and build up, so a single sweep clears almost everything down its middle, even at half opacity. The variety comes from where you sweep and from the soft edge of a big brush, which leaves a fade of specks on either side:
- Size 240, Opacity 55: one sweep across the fish's head and eye, and one along the arc of the title, so the focal points stay clean.
- Size 300, Opacity 70: four or five loose passes over parts of the sunburst, the leaves and the area under the banner. Leave other patches untouched, so some areas look worn and others fresh.
- Size 70, Opacity 100: one pass along the dotted rule, so no dots go missing.
Choose File → Save Project, then File → Quick Export PNG. The export keeps the plum background, which is what you want for a mock-up or a direct-to-garment print on a plum shirt.