Design a Mid-Century Modern Magazine Cover with a Robin
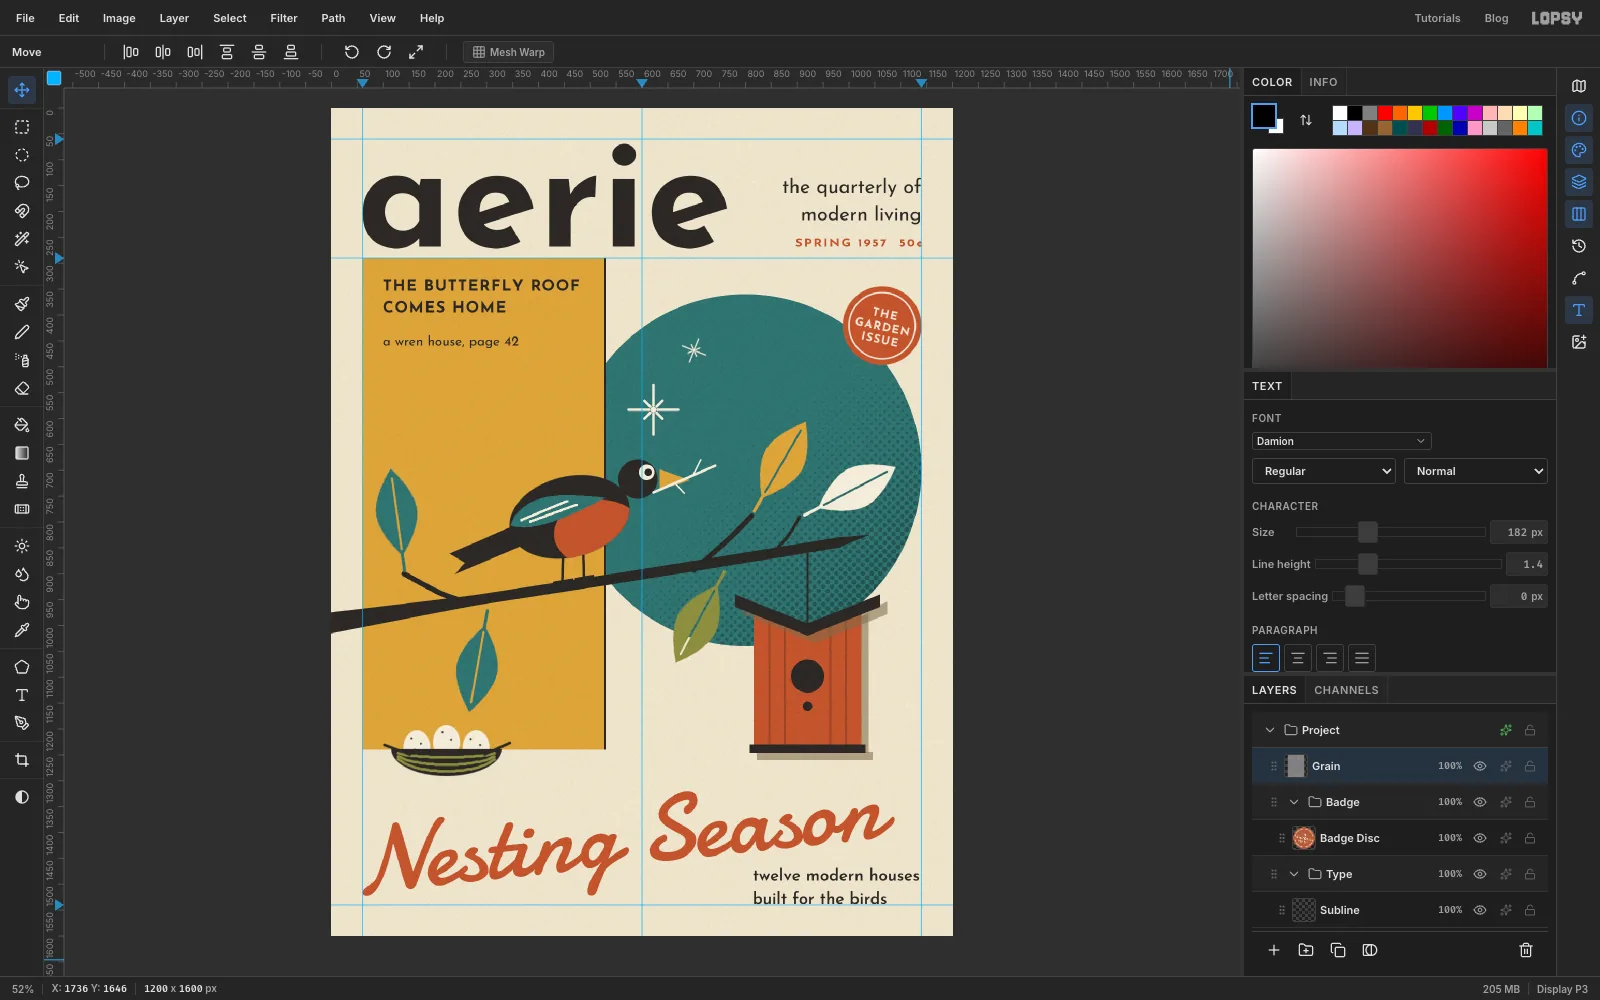
Make a 1950s mid-century modern magazine cover in Lopsy with a Charley Harper-style robin, a butterfly-roof birdhouse, halftone shading, script type and grain.
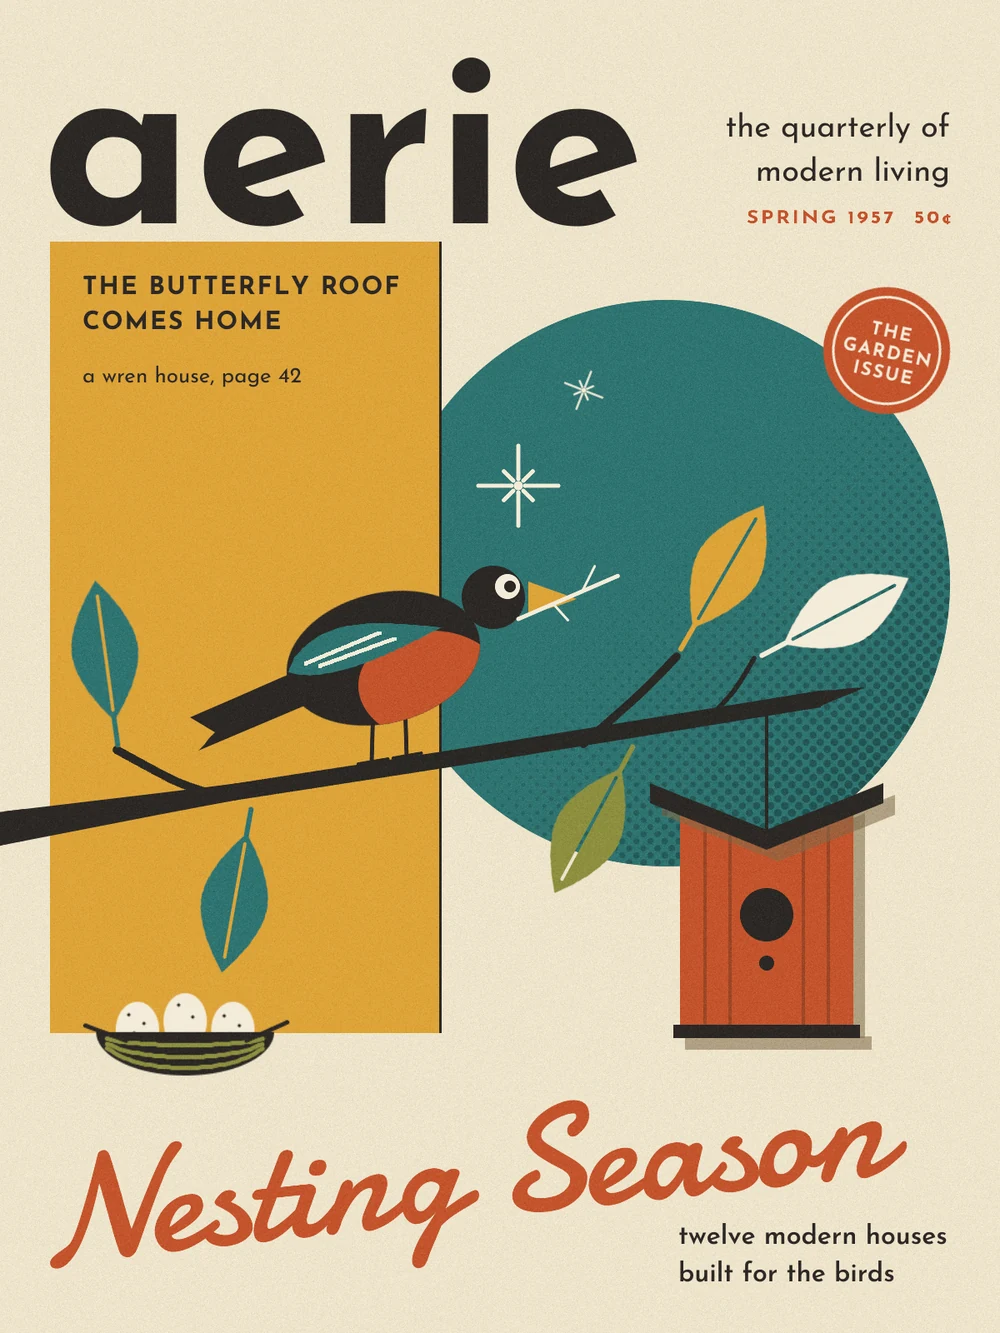
Mid-century magazine covers from the 1950s are full of flat shapes that overlap, a short list of earthy colours, and type that mixes a heavy geometric sans with a loose brush script. The wildlife illustrator Charley Harper called his version of the look minimal realism: draw a bird with the fewest circles, triangles and almond shapes that still read as that bird. This tutorial uses that approach for the spring issue of an imaginary design quarterly called aerie. The cover story is "Nesting Season", so the cover shows a robin carrying a twig towards a modern butterfly-roof birdhouse.
Everything is drawn in Lopsy, with no photos. Most shapes are Lasso, Elliptical Marquee and Shape tool fills. The branch is a Pen path, and the leaves are copied and pasted from one master leaf and turned with the Move tool's rotate handle.
The tools you'll meet along the way:
- Guides from the rulers, plus Show Grid with snapping
- the Shape tool's ellipse, with both a fill and a stroke-only ring
- the Gradient tool and Filter → Halftone for printed shading
- the Pen tool and Enter to stroke a path
- Lasso, Elliptical Marquee, Select → Inverse and Alt-drag to subtract from a selection
- the Brush, Pencil and Eraser, with Shift-click straight lines
- Copy and Paste, the rotate handle and Cmd-drag scaling
- layer effects: Color Overlay and Drop Shadow
- Josefin Sans and Damion text, rotated while it is still live
- layer groups, Merge Down, blend modes, and undo / redo
The palette is warm paper, charcoal ink and five flat inks:
-
Paper
-
ink
-
Teal
-
Mustard
-
Burnt orange
-
siding
-
Olive
-
cream
-
Shadow tan
-
Start with paper and guides
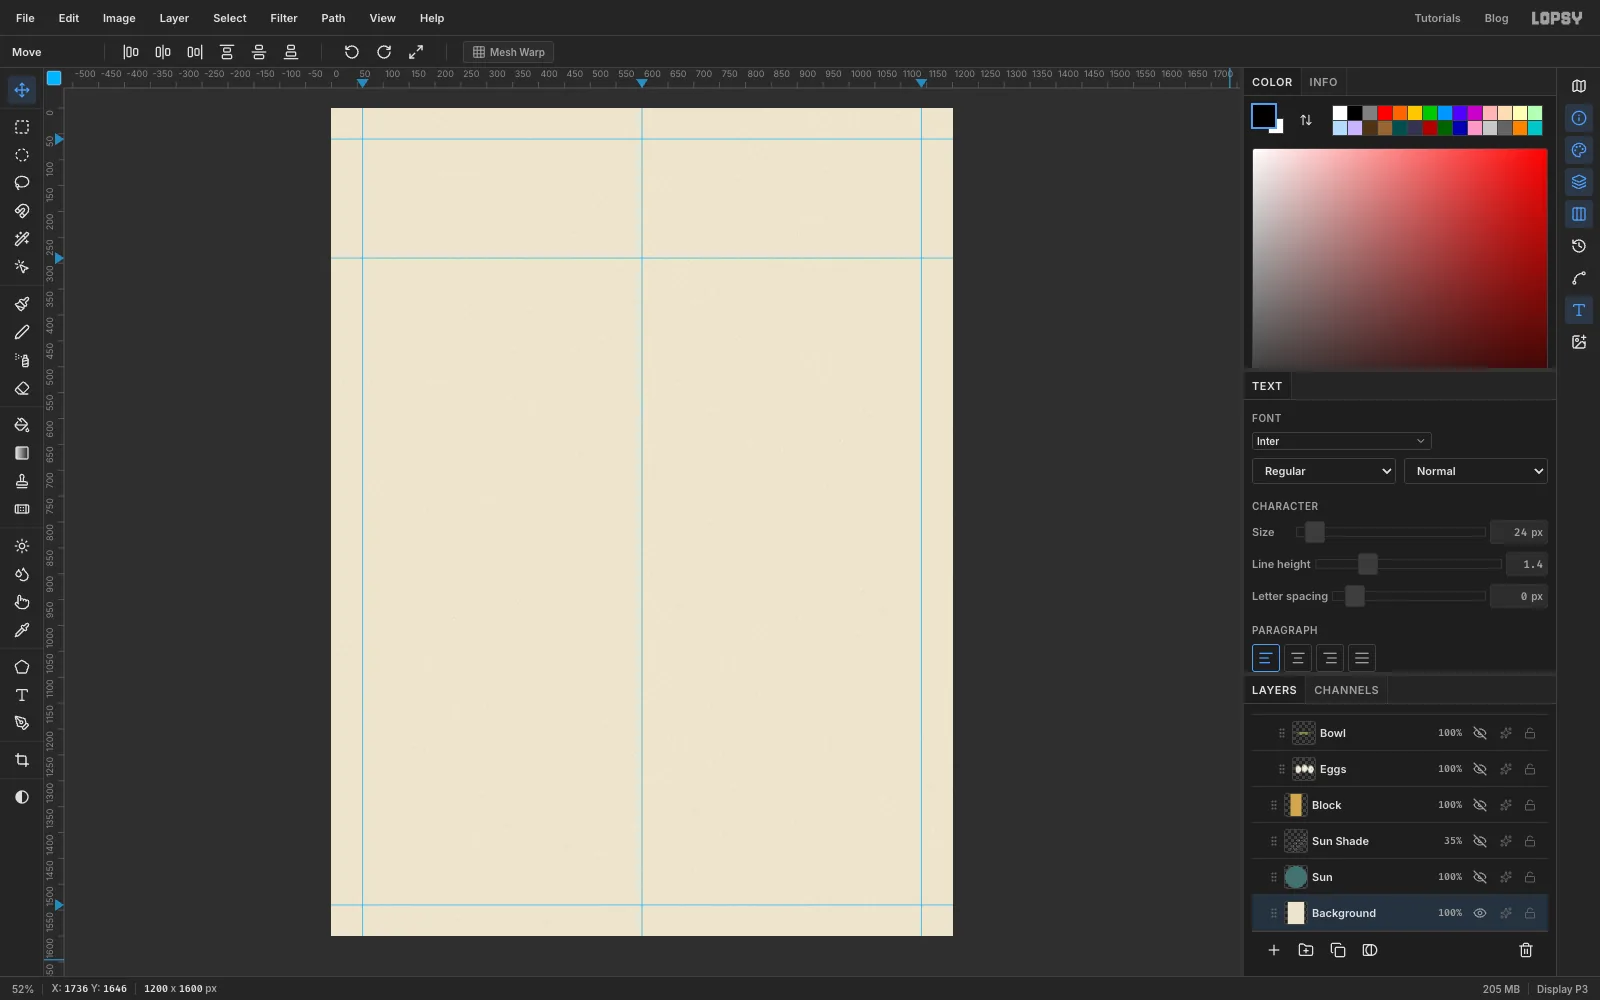
Choose File → New, keep the units on Pixels, type 1200 by 1600 and click Create. Click the Background row, set the foreground colour to paper and choose Edit → Fill. Then open Filter → Add Noise, pick Mono and Gaussian, set Amount to 22 and click Apply. You get a fine, even grain, like uncoated paper.
Now add guides. Click the top ruler at 60, 600 and 1140 to drop vertical guides, then click the left ruler at 60, 290 and 1540. The outer four guides are the page margins. The one at 290 is where the artwork starts under the masthead.
-
Draw the teal sun
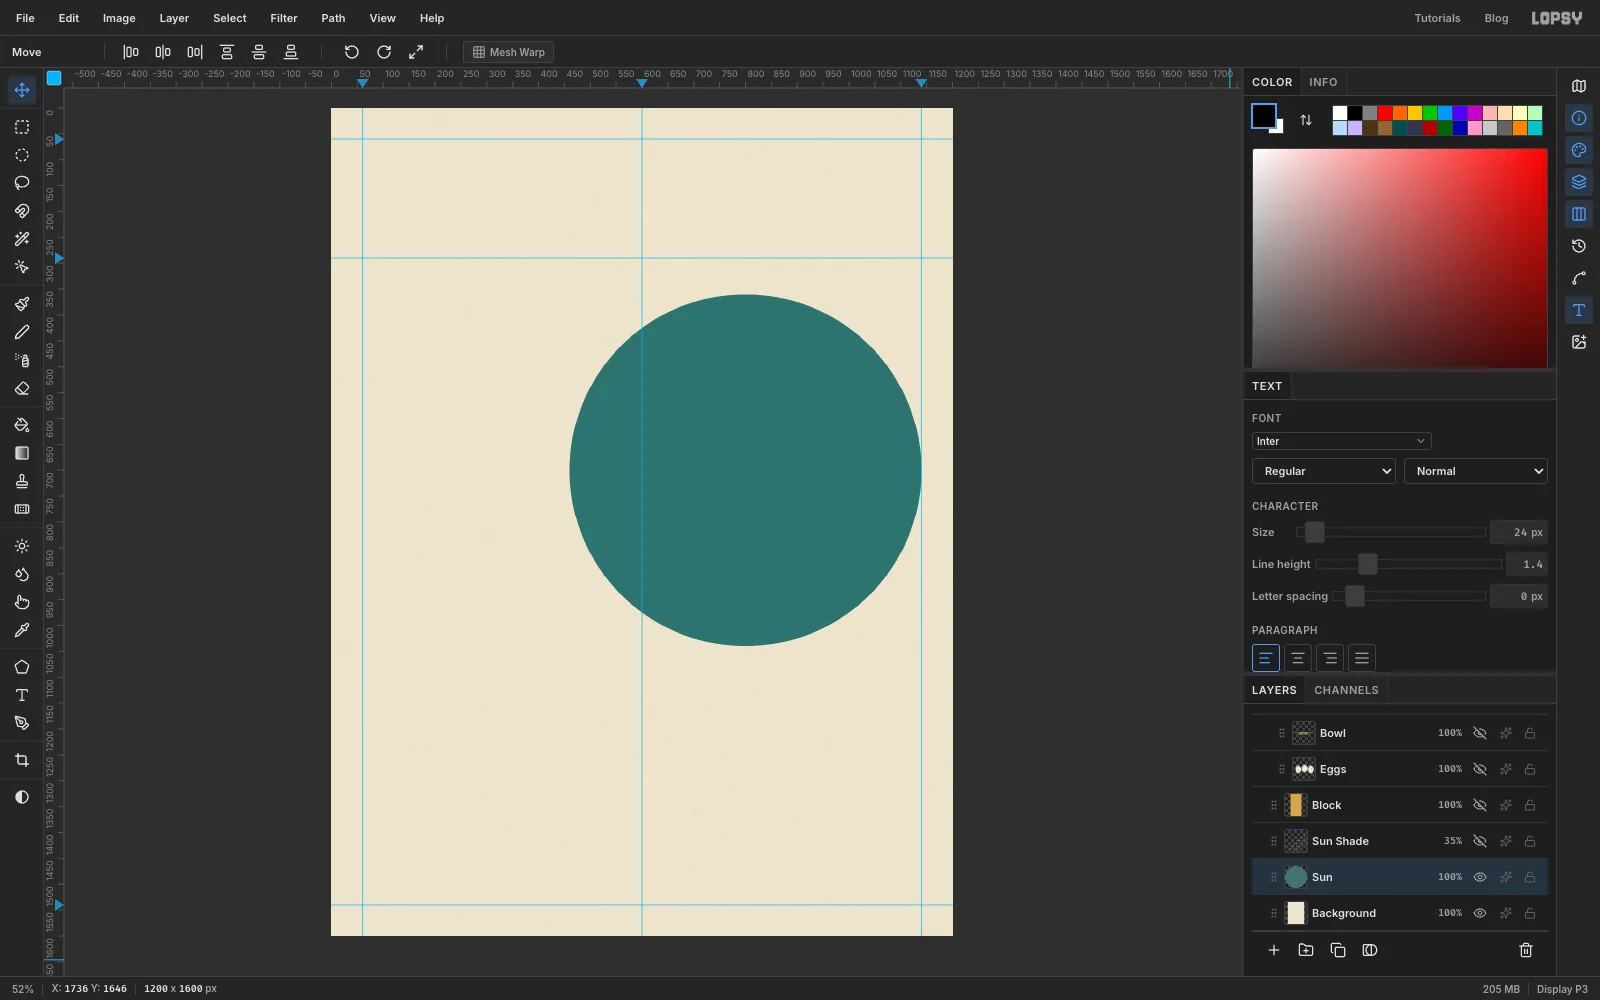
Rename Layer 1 to Sun. Pick the Shape tool and set Shape to Ellipse and Output to Pixels. Click the fill swatch in the options bar and type
417270.The Shape tool grows from the point you press. Press about two-thirds of the way across the page and a little above the middle, at roughly 800, 700. Hold Cmd (or Ctrl) to keep it a perfect circle, and drag outwards until the circle touches the right margin guide. It should be about 680 px across.
-
Shade it with halftone dots
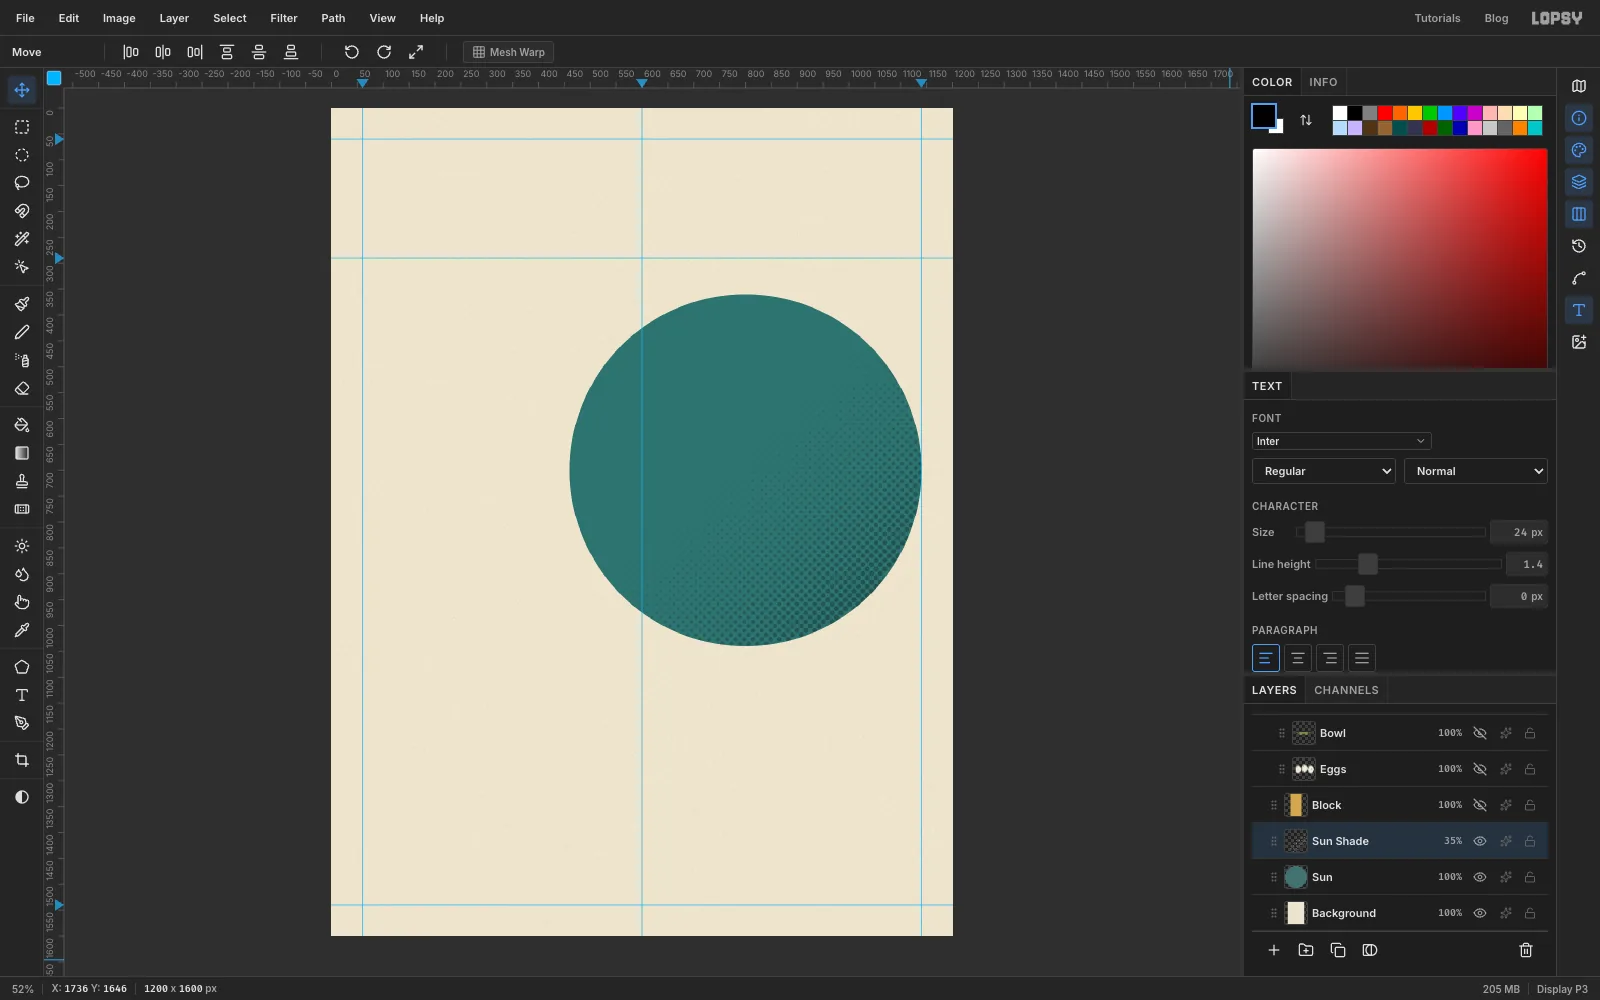
Add a layer called Sun Shade just above Sun. Cmd-click the Sun thumbnail to select the circle. Set the foreground to black and the background to white, choose the Gradient tool (Linear), and drag from the lower-right edge of the circle in towards its centre.
Keep the selection and choose Filter → Halftone. Set Dot Size to 12, Angle to 45 and Softness to 0.6, then apply. Deselect with Cmd+D. Open the effects drawer, set this layer's Blend to Multiply and drop its opacity to 35%. The white disappears, and the black dots turn into a dark teal screen on the shadow side of the sun.
-
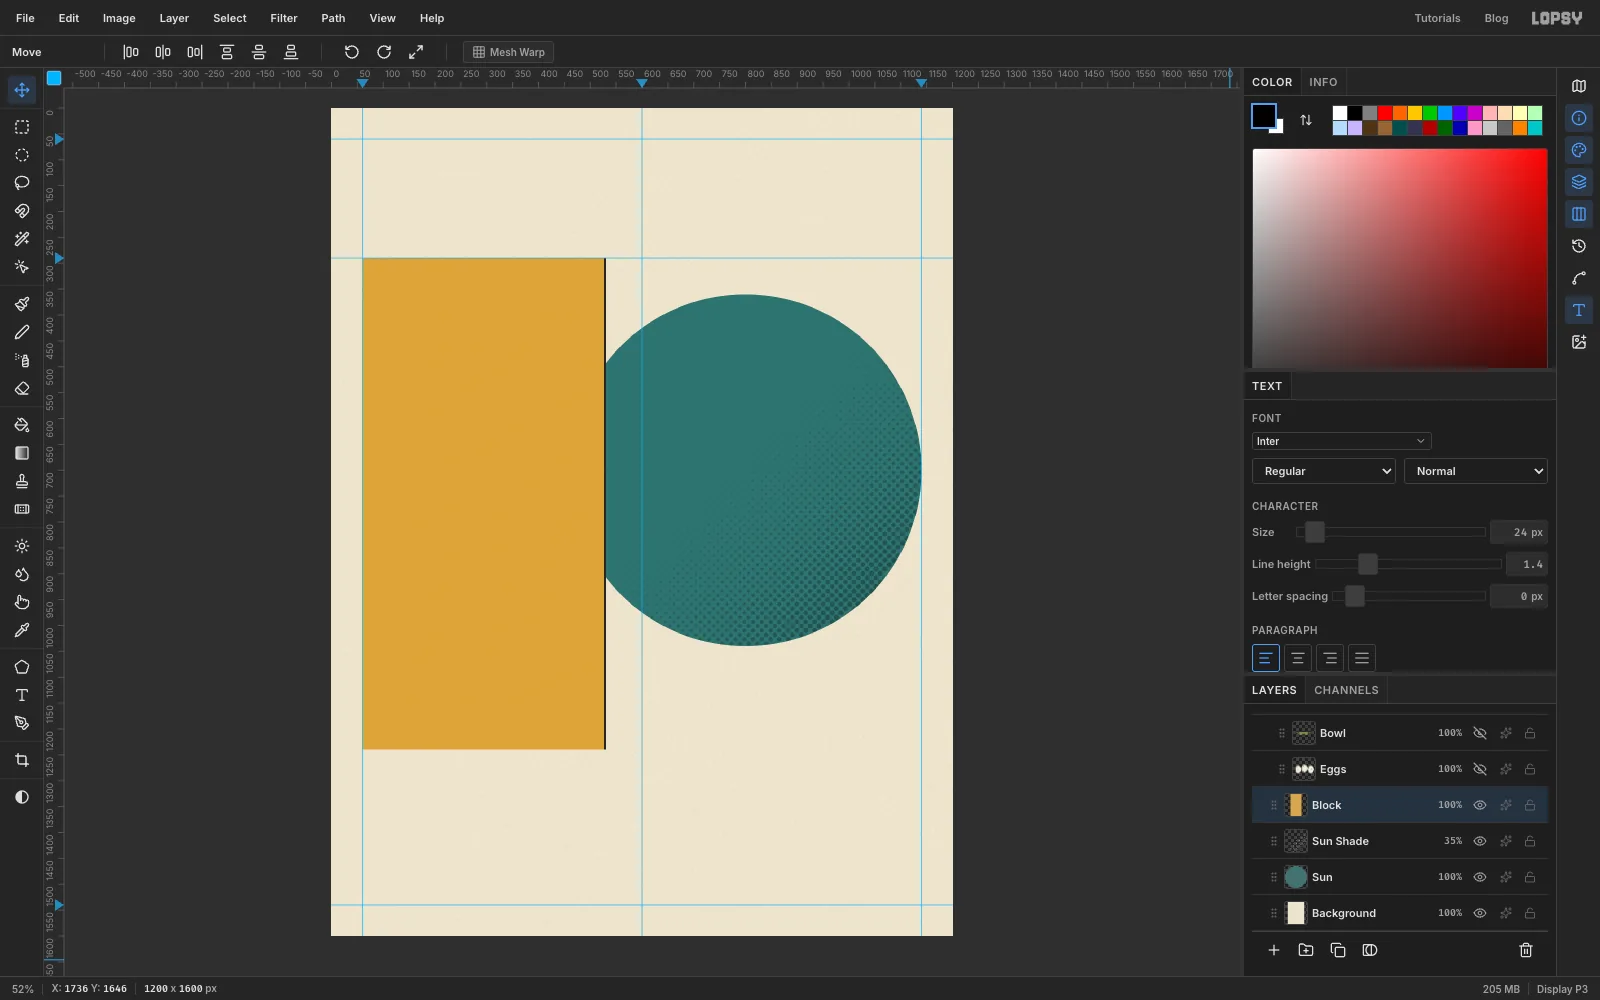
Add the mustard panel
Add a layer called Block above Sun Shade. Take the Rectangular Marquee and drag from the point where the left margin meets the 290 guide. Both edges snap to the guides. Drag down and right to about x 530, y 1240, so the panel covers the left edge of the sun but stops well short of the centre line. Fill it with mustard and deselect.
Overlapping flat shapes are what make this style work. The panel sits in front of the sun, so its straight right edge cuts the circle into a crisp chord. To make the cut look deliberate, pick the Pencil at 3 px in ink . Click the top of the panel's right edge, then Shift-click the bottom to draw a thin keyline down it.
-
Draw the branch with the Pen tool
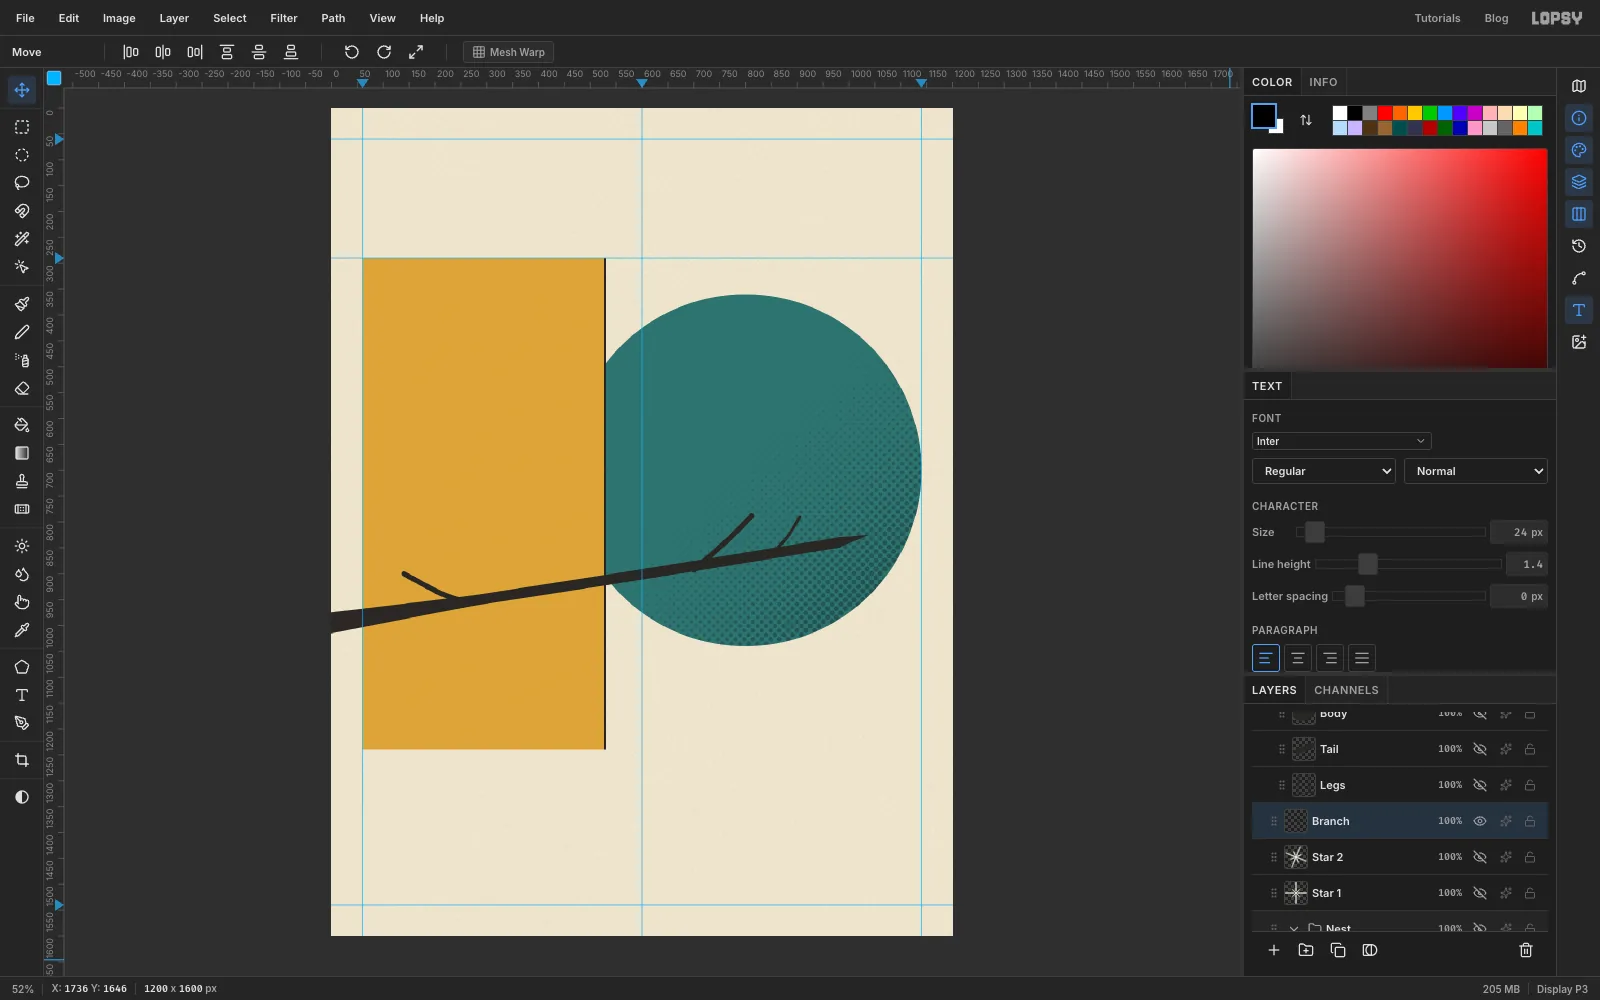
Add a layer called Branch and set the foreground to ink. Pick the Pen tool and set Stroke to 20.
- Click once over the right side of the sun, at about 990, 838, for the tip of the branch.
- Press near the centre line, at roughly 620, 900, and drag a little down and to the left before releasing. This pulls out handles, so the branch bends gently.
- Click on the grey pasteboard just past the left edge of the page, a little lower again.
- Press Enter. Lopsy saves the path to the Paths panel and strokes it onto the layer.
Make the twigs the same way with a Stroke of 10. Start one from the branch just right of the centre line and curve it up and to the right. Start another from near the left end and send it up to the left. Then make one more at Stroke 6, rising from the branch near the right-hand end. Press Enter after each twig.
The stroke is the same width all the way along, and real branches aren't. To thicken the base, use the Lasso to draw a long thin wedge. Make it about 40 px tall at the left edge of the page and narrowing to a point just right of the centre line, then fill it with ink. To sharpen the tip, marquee the rounded end and press Delete, then lasso a small triangle that continues the branch's top and bottom edges to a point, and fill that too.
-
Cut one leaf, and keep a copy
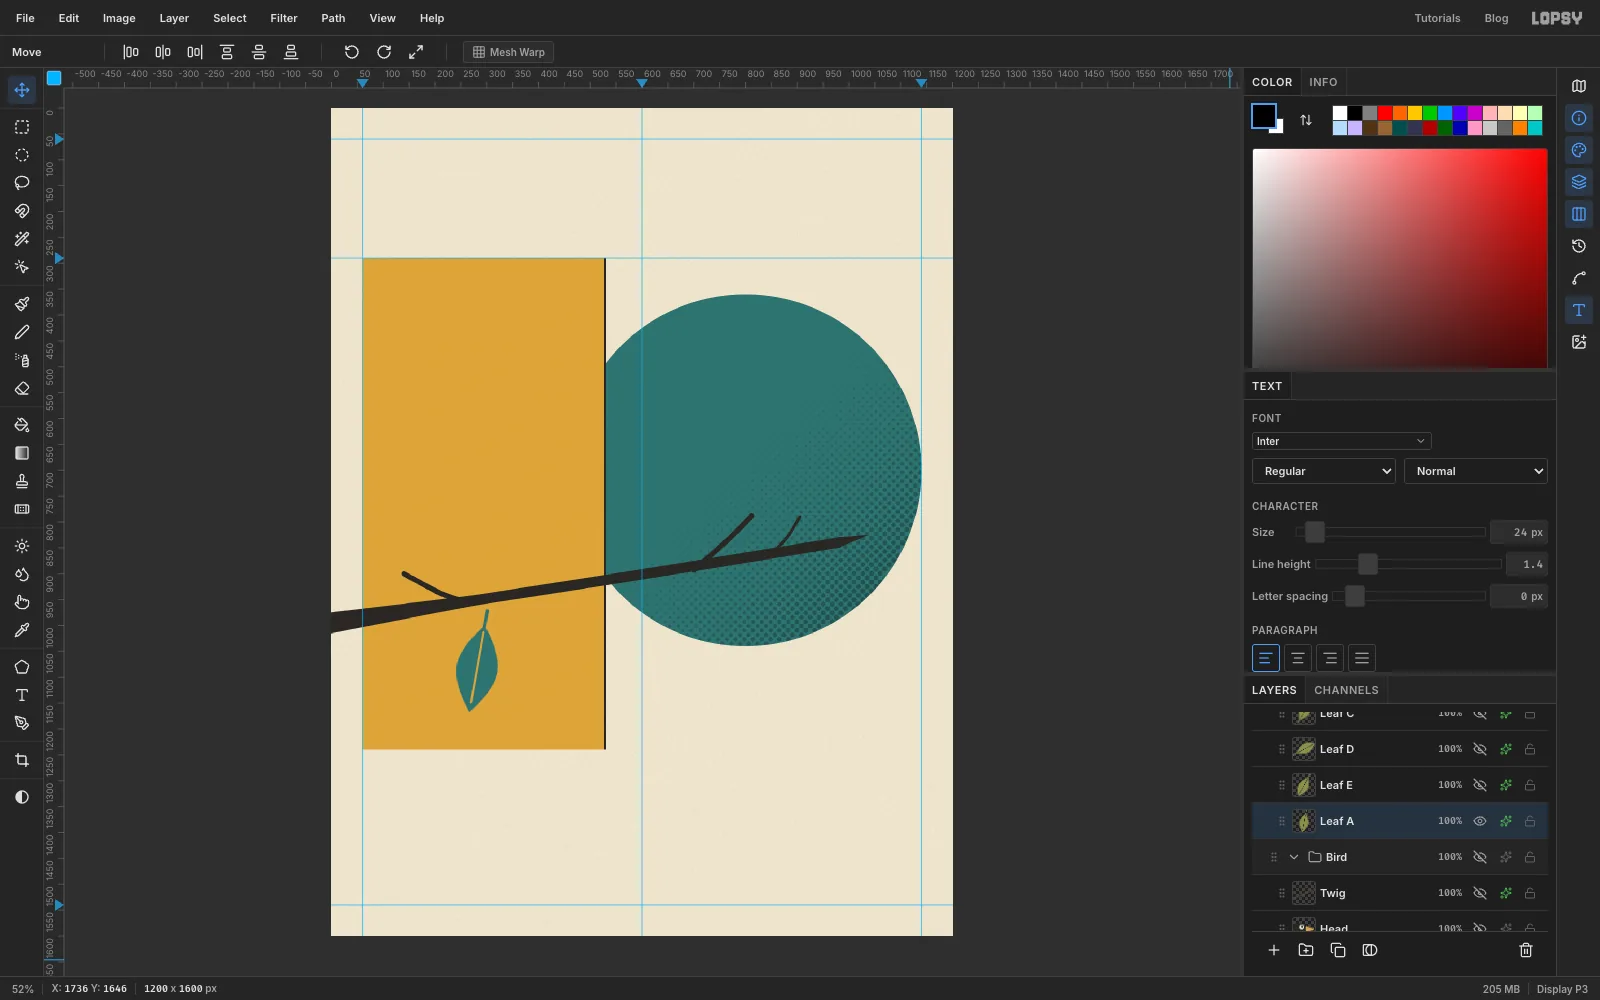
Click the Branch row and use the New Group button to make a group called Leaves, then add a layer inside it called Leaf A. Draw the master leaf in an empty part of the page. With the Lasso, draw an almond shape about 170 px long and 80 px wide, lying flat, that comes to a point at the left and right ends. Fill it with olive .
Pick the Brush at 7 px and add a short stem: click at the left-hand point of the leaf, then Shift-click about 35 px further left. For the vein, take the Eraser at 4 px. Click just inside the stem end and Shift-click near the far tip, so a thin line is cut through the middle and the colour behind shows through.
Before you move it, drag a marquee around the leaf and press Cmd+C. You'll paste copies of it in the next step.
Now place it. With the marquee still round the leaf, switch to the Move tool and drag the round rotate handle about 100° clockwise, so the stem is at the top and the leaf hangs almost straight down. Press Cmd+D to commit, then drag it so the top of the stem touches the underside of the branch on the mustard panel. Finally, open the effects drawer and turn on Color Overlay in teal .
-
Paste, turn and recolour the other leaves
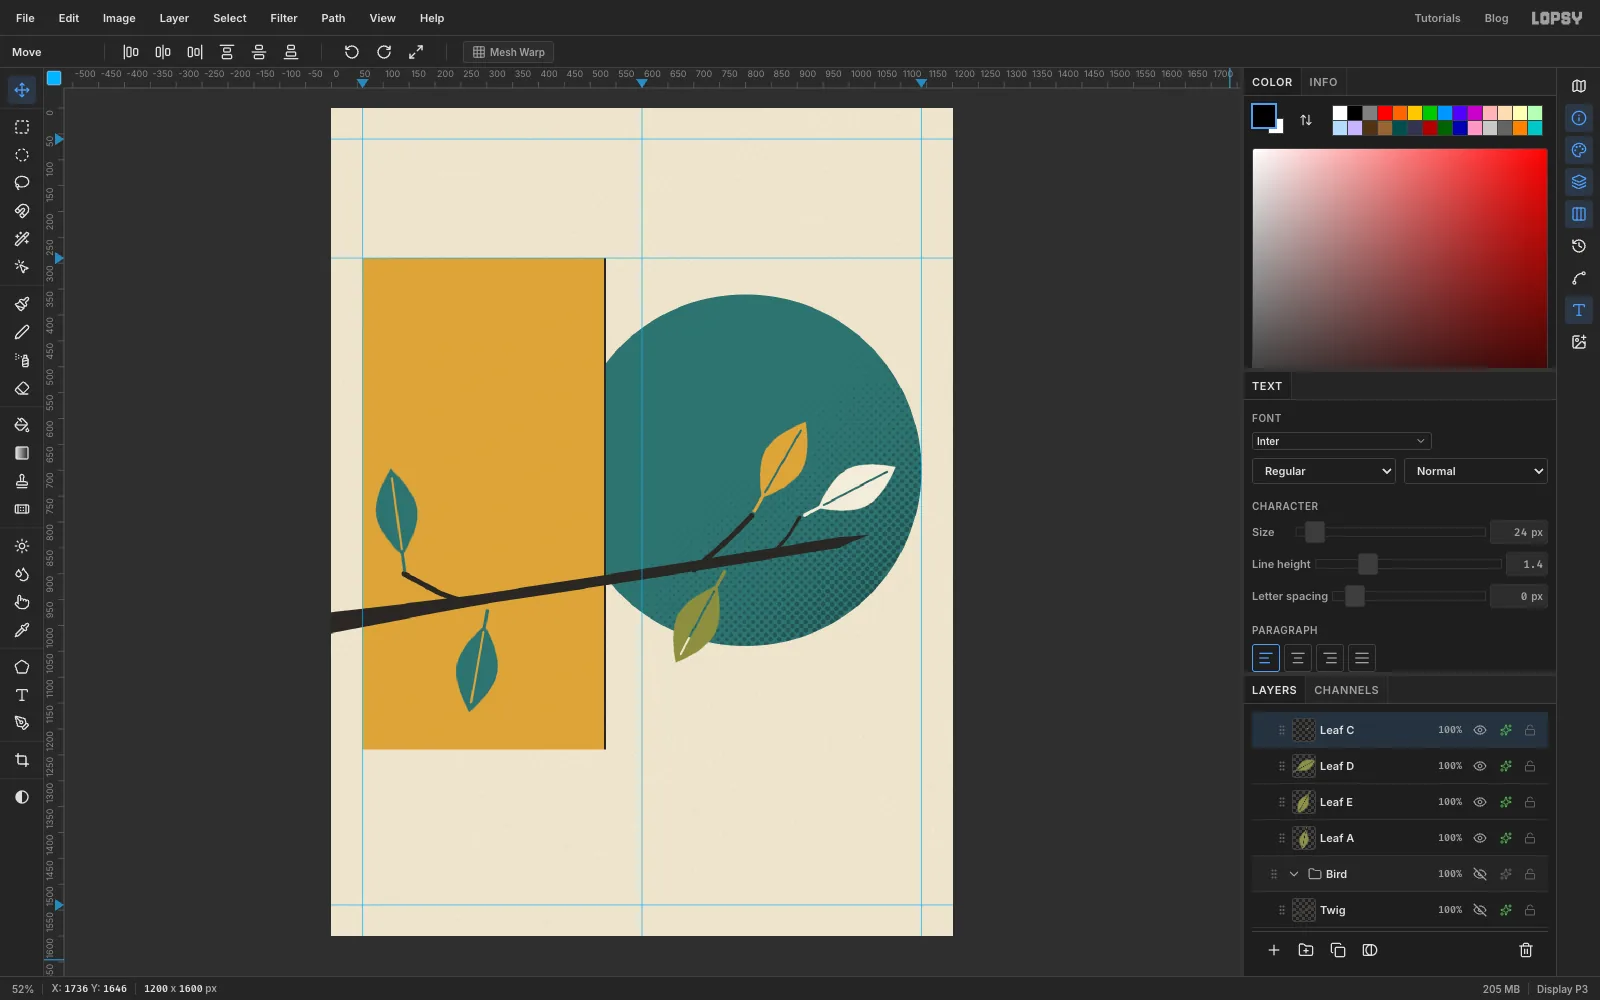
Press Cmd+V. The copy lands on a new layer in the same spot as the original. Rename it, then turn it with the Move tool's rotate handle while it is still in the open, and only then drag it to its twig. Turning it in open space keeps it away from the edges of the page. Repeat for each leaf:
- Leaf B points straight up from the tip of the left-hand twig. Give it a teal Color Overlay.
- Leaf C points up and to the right from the tip of the tallest twig over the sun. Make it mustard.
- Leaf D points right from the end of the short twig. Make it cream .
- Leaf E hangs down and to the left from under the branch, over the bottom of the sun. Leave it olive.
The erased veins let the background show through each leaf, so a teal leaf on mustard and a cream leaf on teal both keep their centre line.
-
Build the robin from simple shapes
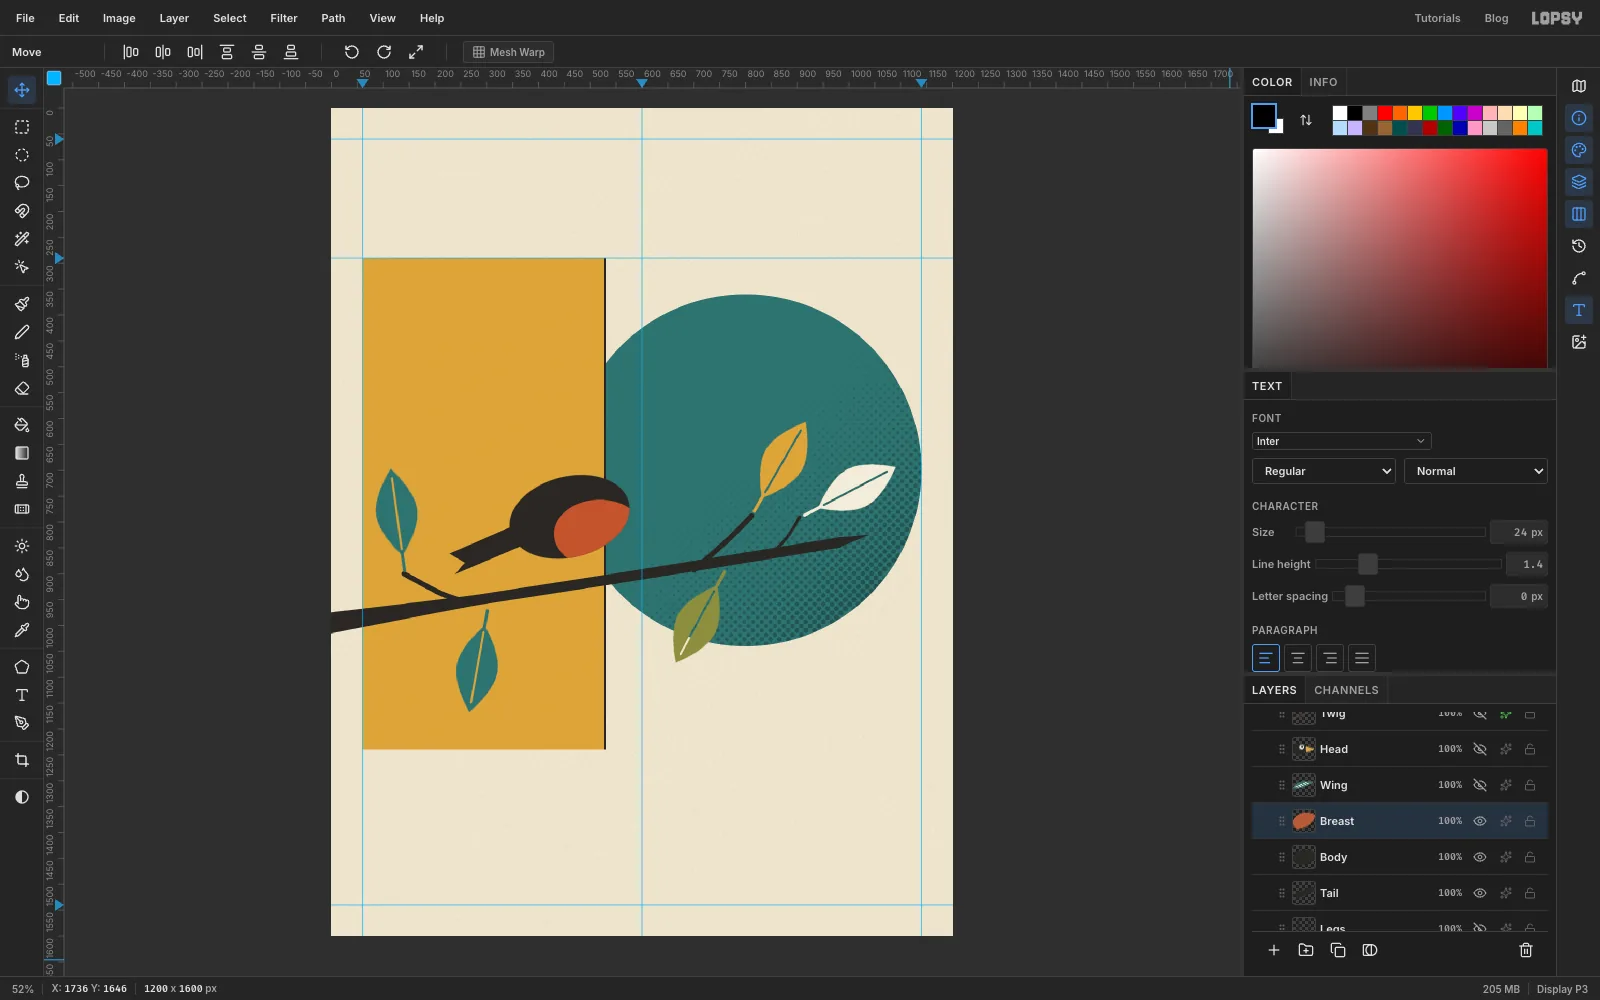
Click the Branch row and make another group called Bird. Work from the back of the bird to the front, with each part on its own layer inside the group, all in ink unless stated:
- Tail: with the Lasso, draw a long wedge pointing down and left from where the body will be. Give it a notch cut into the end.
- Body: use the Elliptical Marquee to draw an oval about 236 × 156 px above the branch, just left of the panel's edge, and fill it. Then marquee around it, switch to the Move tool and turn it about 14° anticlockwise with the rotate handle, so the chest lifts. Commit with Cmd+D.
- Breast: on a new layer, draw a smaller oval over the lower front of the body and fill it with burnt orange . It will spill outside the body. To trim it, Cmd-click the Body thumbnail, choose Select → Inverse and press Delete. Only the part inside the body is left.
-
Add the wing, head, beak and twig
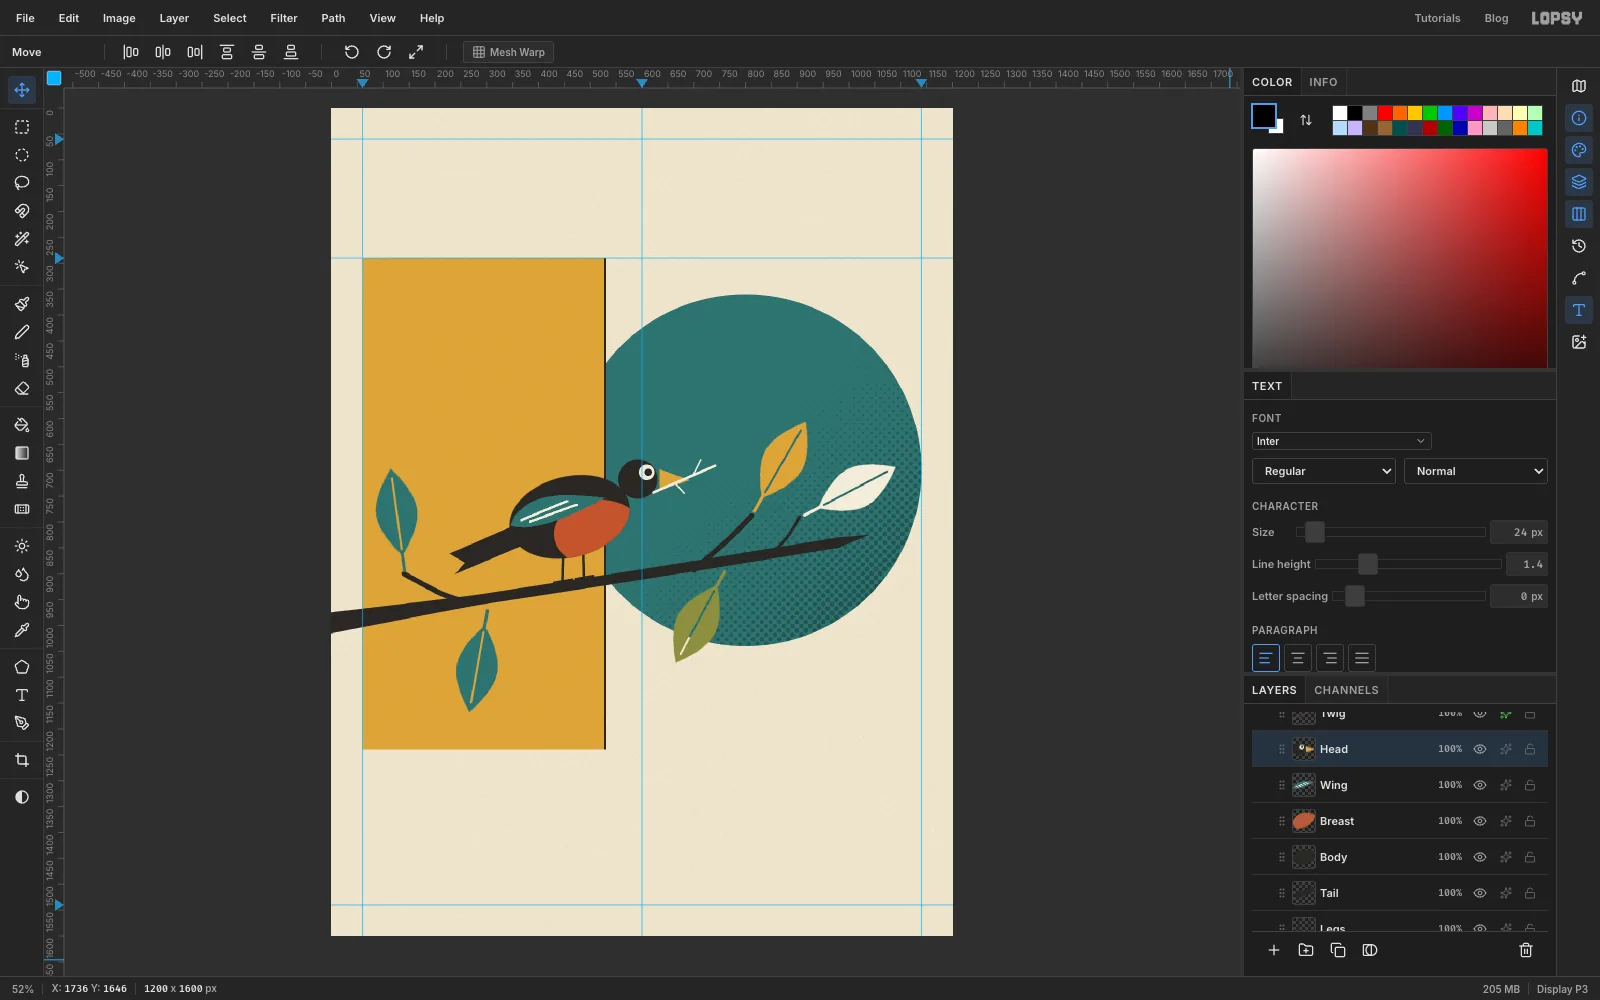
- Wing: lasso a teardrop in teal along the top of the back, with the point towards the tail. Pick the Pencil at 4 px in cream and add two feather lines along it with Shift-click.
- Head: pick the Shape tool's ellipse and set its fill swatch to ink
2A2724, because it still holds the teal from the sun. With Cmd held, drag a circle about 76 px across that overlaps the front of the body, over the teal. Switch the swatch to creamF2ECDBfor an eye about 30 px across, then back to ink for a small pupil just forward of its centre. - Beak: lasso a mustard triangle that points right from the front of the head.
- Twig: on a Twig layer above the head, use the Brush at 6 px to Shift-click a line running through the beak, then add two short forks at 4 px. Paint it in cream ; a brown twig disappears against the teal.
- Legs: on a Legs layer, drag its row below Tail so the legs sit behind the body. Brush two 6 px legs down to the branch, and a 5 px line along the branch for each foot.
Click the Bird group row, choose the Move tool and drag on the canvas to place the whole bird at once. Drag it right until the head and beak sit clear of the panel, on the teal. The branch rises to the right, so move the bird up a few pixels as you go to keep the feet on the bark.
-
Hang a butterfly-roof birdhouse
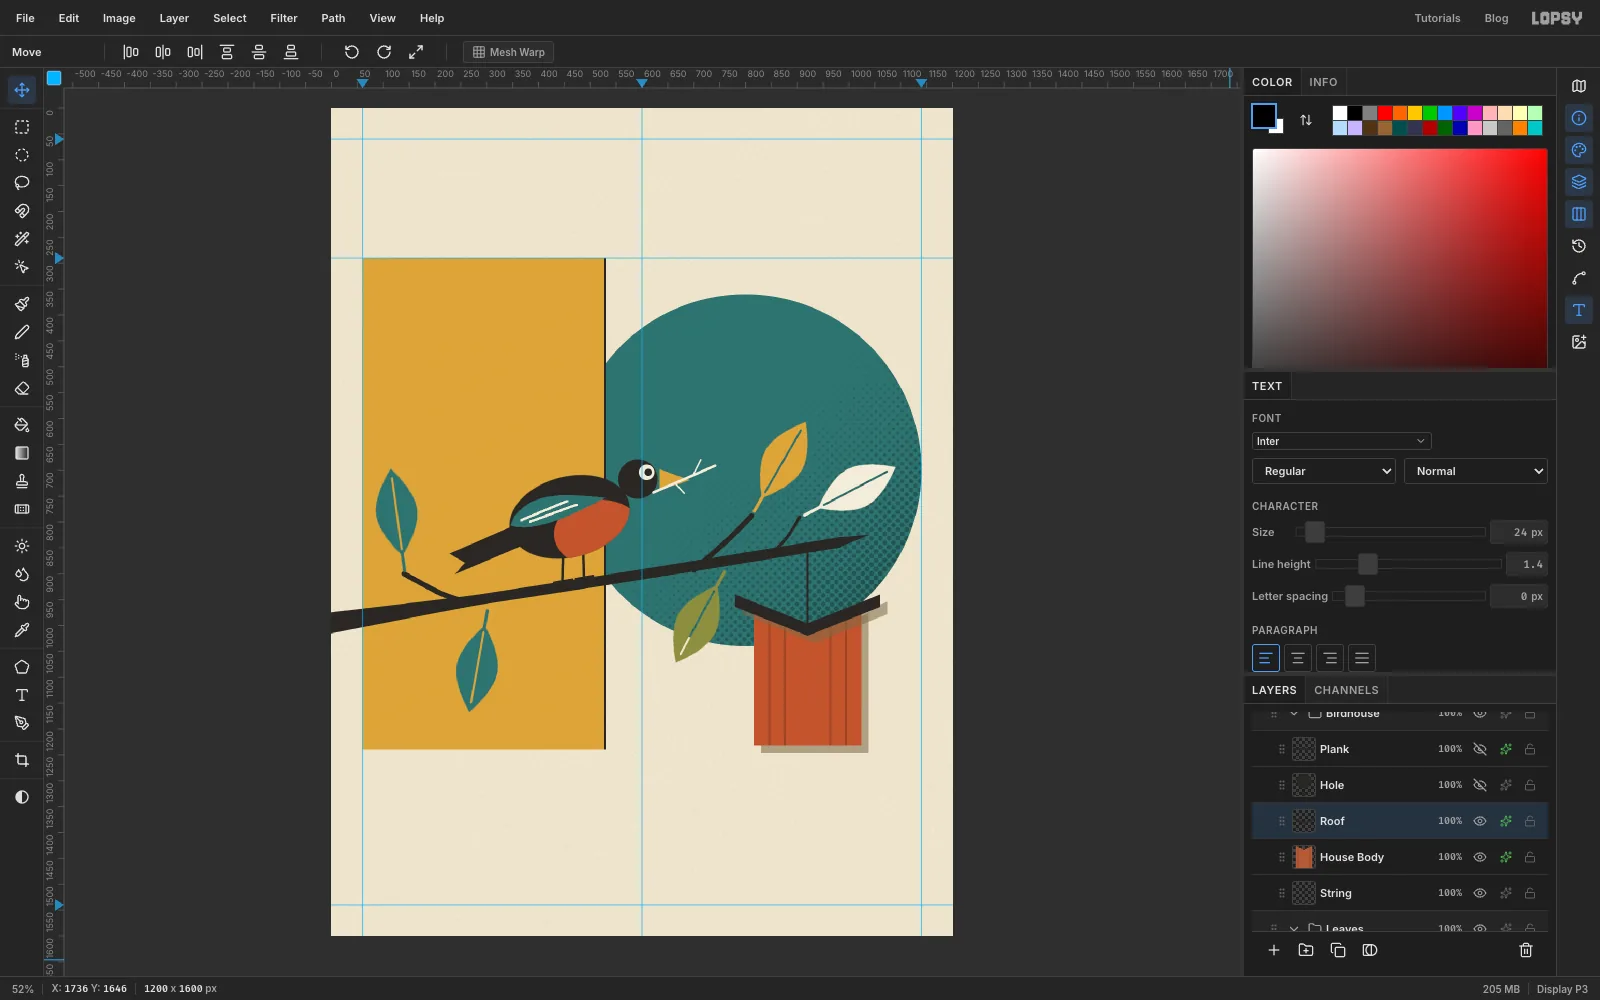
Click the Project row at the top of the Layers panel and make a group called Birdhouse, so it sits above everything you've drawn so far.
- String: use the Pencil at 4 px in ink. Click on the branch above the right-hand third of the page, then Shift-click straight down about 150 px.
- House Body: lasso a box about 208 px wide and 270 px tall whose top dips into a shallow V, like the roof that will sit on it. Fill it with burnt orange.
- Siding: pick the Pencil at 4 px in siding and Shift-click four vertical board lines, two on each side of the centre.
- Roof: on a Roof layer, lasso a V-shaped slab about 24 px thick that is wider than the house. Make the low point of the V meet the bottom of the string, then fill it with ink. That's a butterfly roof, the most mid-century roof there is.
-
Add the entrance, perch and plank
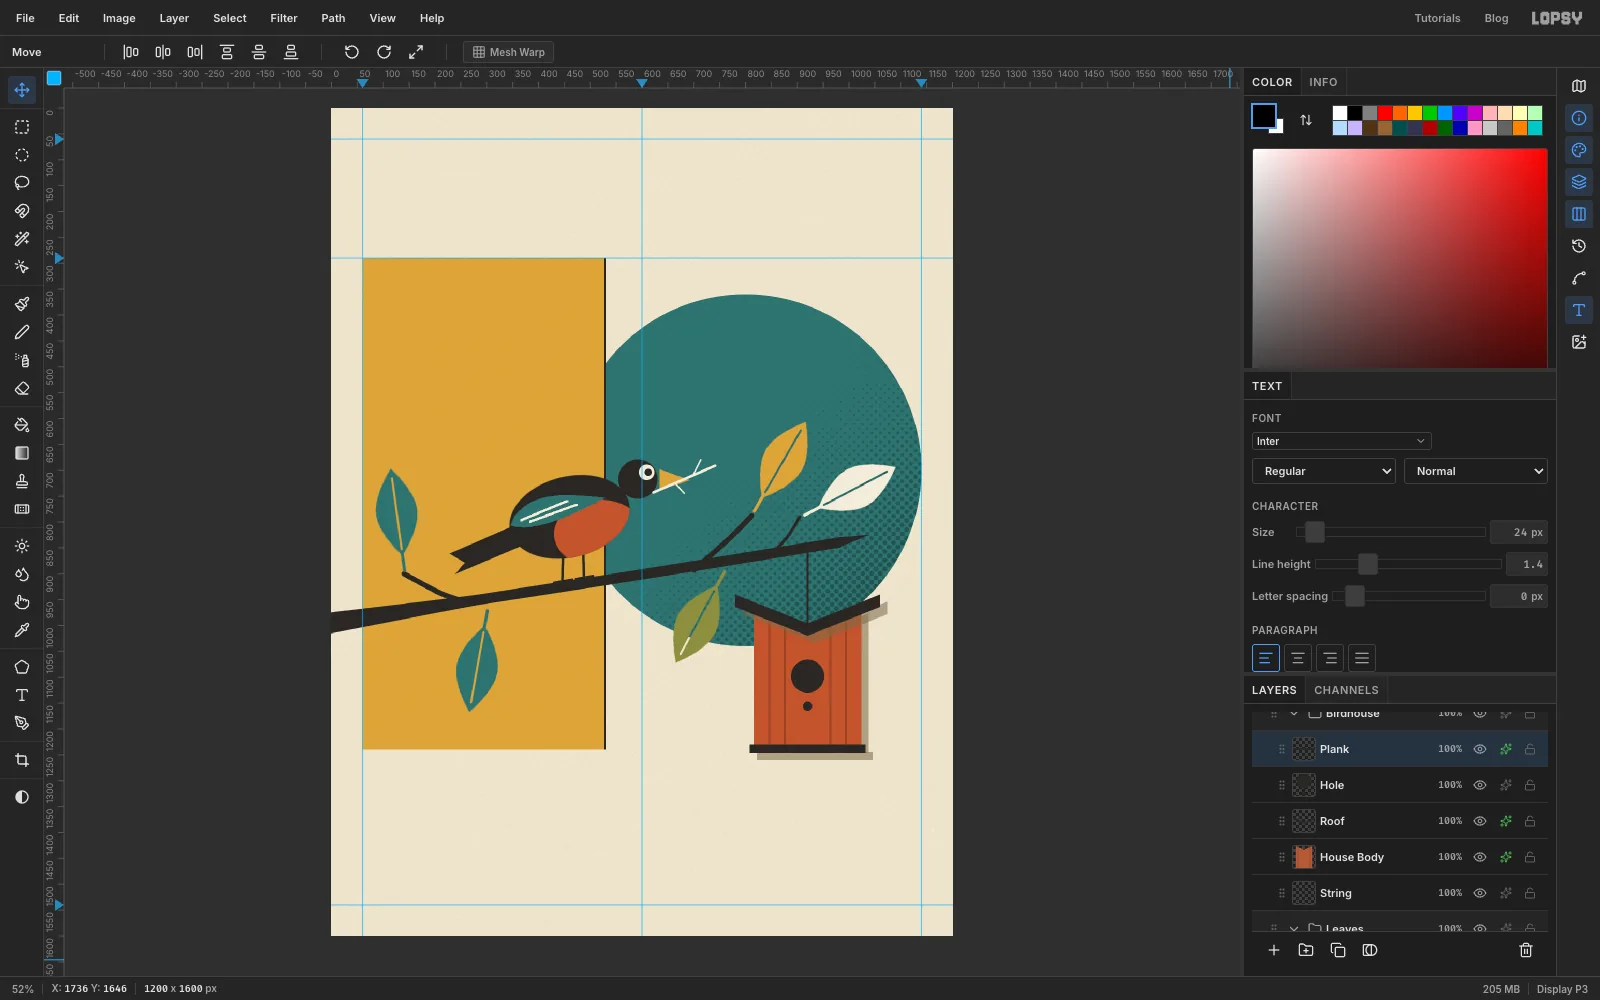
On a Hole layer, use the Shape tool's ellipse in ink to draw a circle about 64 px across for the entrance and an 18 px dot below it for the perch.
For the plank, choose View → Show Grid, which also turns on Snap to Grid. On a Plank layer, marquee a strip about 16 px tall that's a little wider than the house under its base. The corners snap to the grid, so the plank comes out square. Fill it with ink, then turn the grid off again.
Give House Body, Roof and Plank the same Drop Shadow: Offset X and Offset Y 14, Blur 1, Opacity 55 and colour . A blur of 1 keeps the edge hard, like an offset printed shadow. Selecting a group opens its adjustments rather than layer effects, so set the shadow on each layer.
-
Tuck a nest into the corner
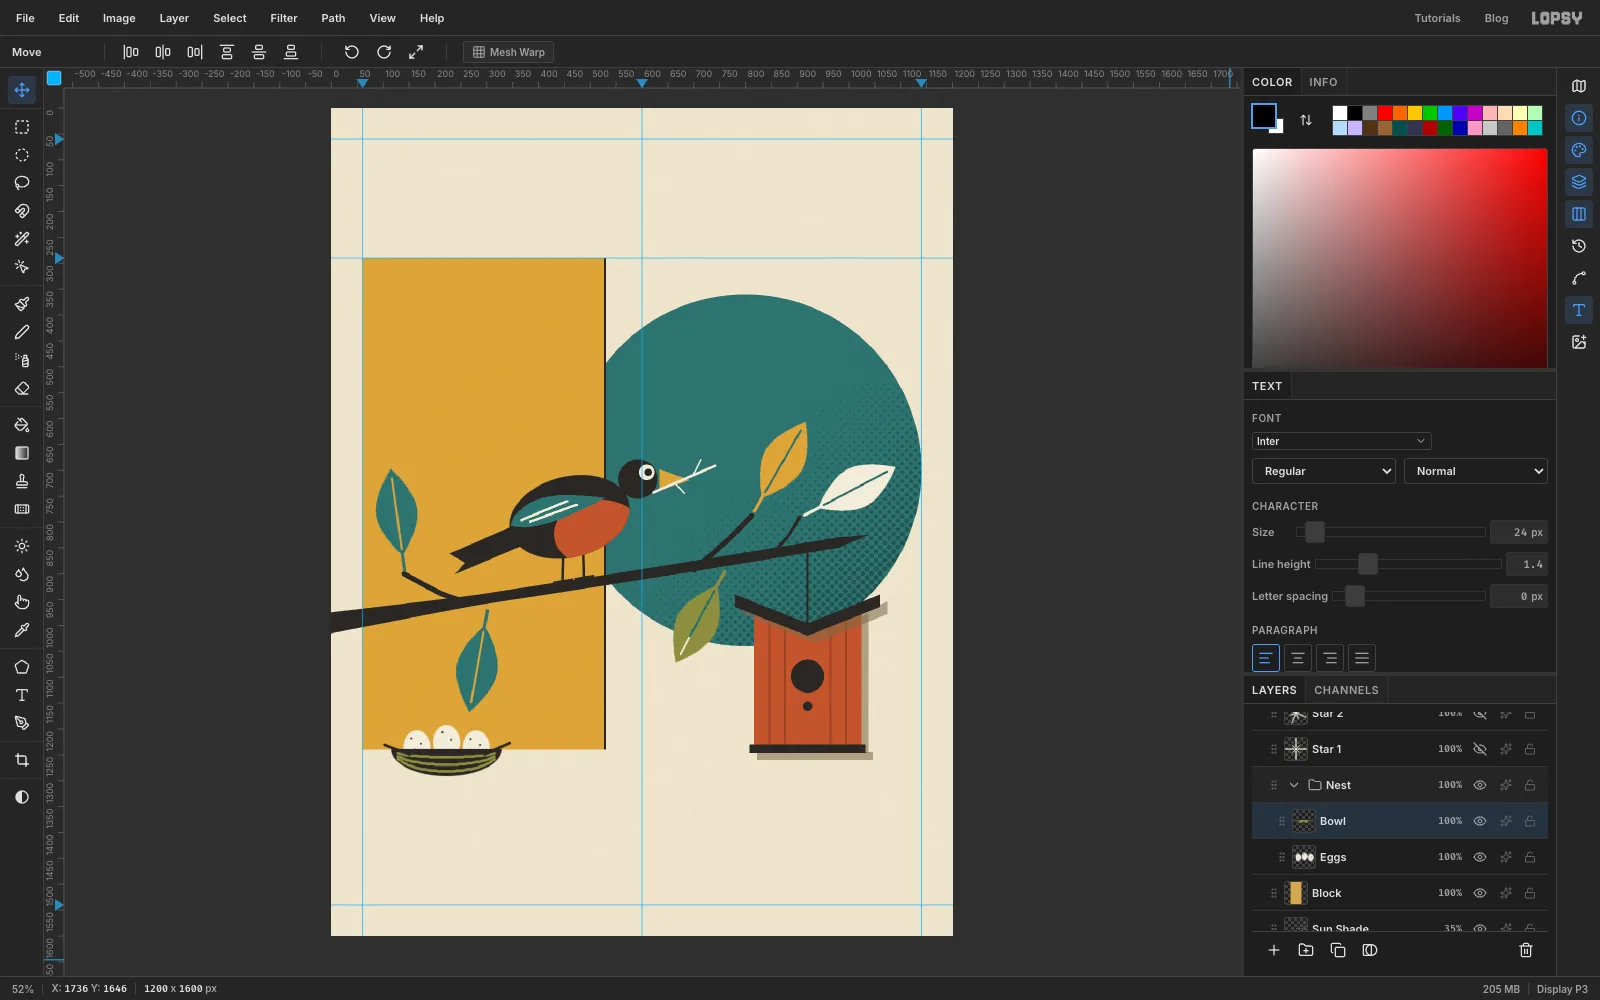
Click the Block row and make a group called Nest.
- Eggs: draw three upright ovals about 40 × 52 px side by side with the Elliptical Marquee, filling each one with cream. Then add a few ink speckles with 4 px Brush clicks.
- Bowl: on a Bowl layer above the eggs, use the Elliptical Marquee to draw a wider oval, about 164 × 80 px, centred on the bottom of the eggs. Switch to the Rectangular Marquee, hold Alt and drag a rectangle across the oval's top half to subtract it. That leaves a bowl shape; fill it with ink. While the selection is still active, drag three curved 5 px Brush strokes in olive across the bowl. The selection keeps them inside it. Switch the foreground back to ink, deselect, and Shift-click two short twig ends poking out of the rim.
Click the Nest group row, choose the Move tool and Cmd-drag the bottom-right corner handle out to make the nest about 30% bigger, then press Cmd+D. Place it so the bowl crosses the panel's bottom edge.
-
Sprinkle atomic starbursts
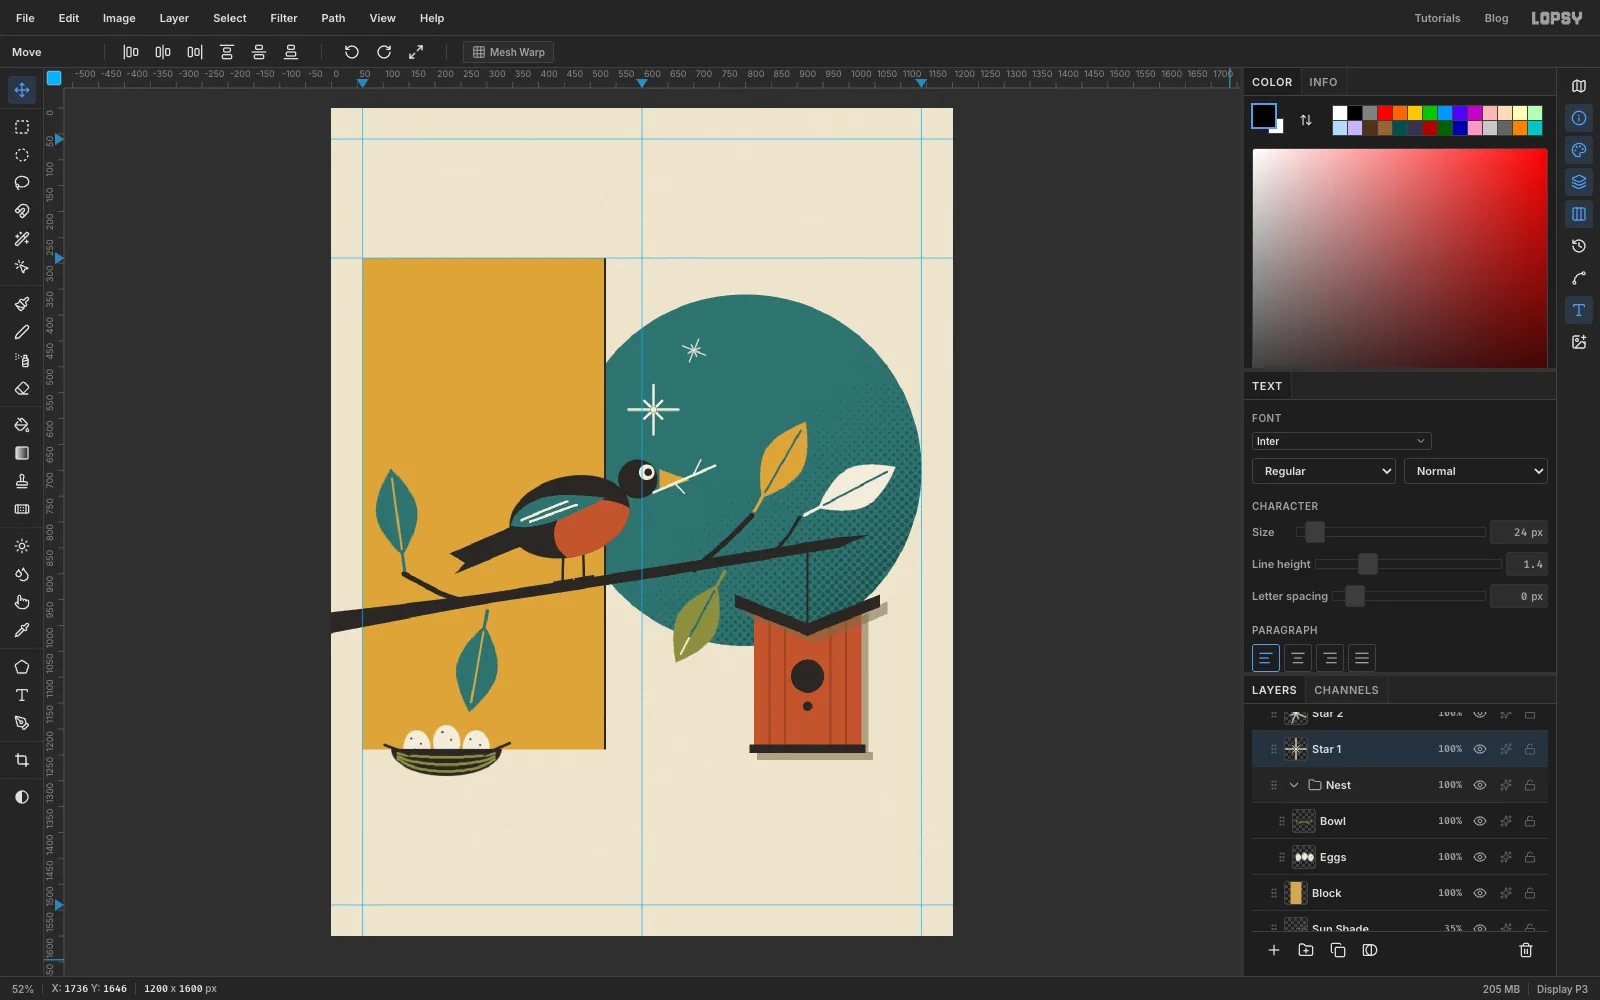
Add a layer called Star 1 above Block. Pick the Brush at 6 px in cream. Starting a little out from a centre point, Shift-click eight rays: four long ones (about 48 px) straight up, down, left and right, and four short ones (about 26 px) on the diagonals. Then click once in the middle with a 12 px brush.
Marquee it, copy and paste to make Star 2. With a marquee round the copy, switch to the Move tool, Cmd-drag a corner handle to shrink it to half size and commit, then turn it about 22°. Put the big star on the teal just above the robin's head, on the centre line, and the small one near the top of the sun.
-
Set the masthead
Click the Project row and make a group called Type. Pick the Text tool and choose Josefin Sans, Bold, at 300 px in ink. Click in the space at the top and type
aerie. With the Move tool, line its left edge up with the left margin guide, and leave about a 20 px gap between the bottom of the letters and the top of the mustard panel.For the kicker, switch the Text tool to Regular at 38, set Align to Right, click in empty space and type
the quarterly of, press Enter and typemodern living. Move it so its right edge sits on the 1140 guide and its tallest letters line up with the tops of the short letters in aerie.Below it, set Bold at 24, burnt orange, with Letter spacing 3 in the Text panel, right-aligned, and type
SPRING 1957, two spaces, then50¢(on a Mac the ¢ sign is Alt+4). Its baseline should line up with the masthead's.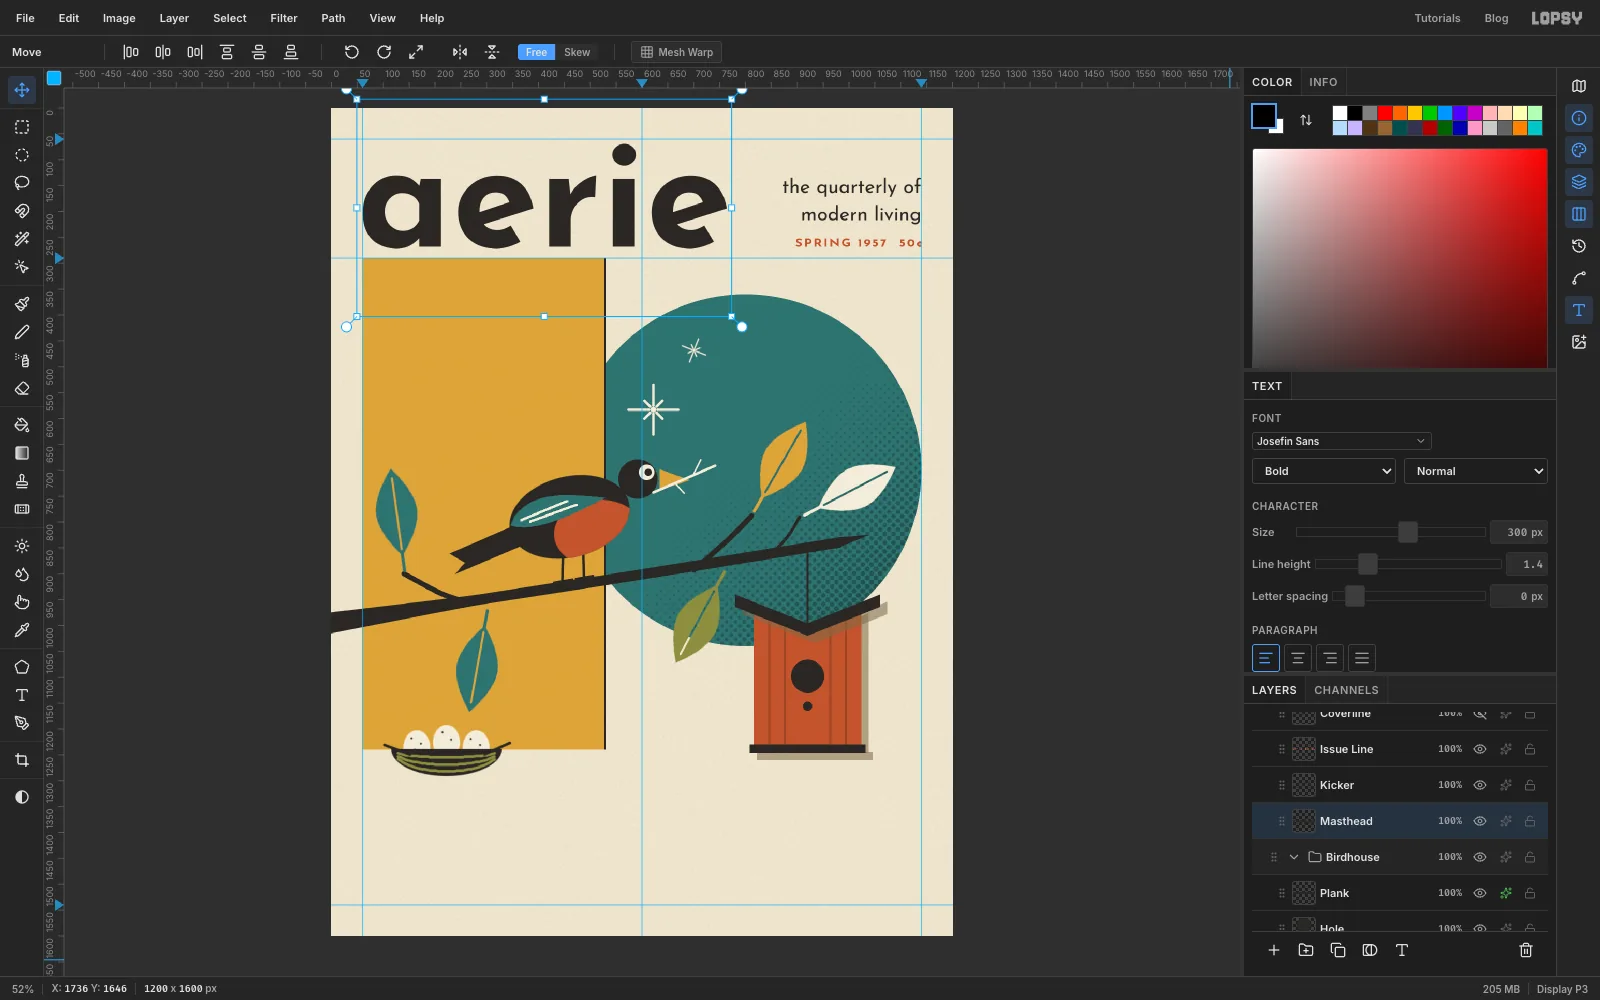
-
Add the coverline
Set the Text tool back to Align Left, Bold at 30, letter spacing 2, in ink. Type
THE BUTTERFLY ROOF, press Enter, and typeCOMES HOME. Move it so it sits 40 px in from both the left and top edges of the mustard panel.About 40 px below it, at Regular 26 with letter spacing 0, type
a wren house, page 42.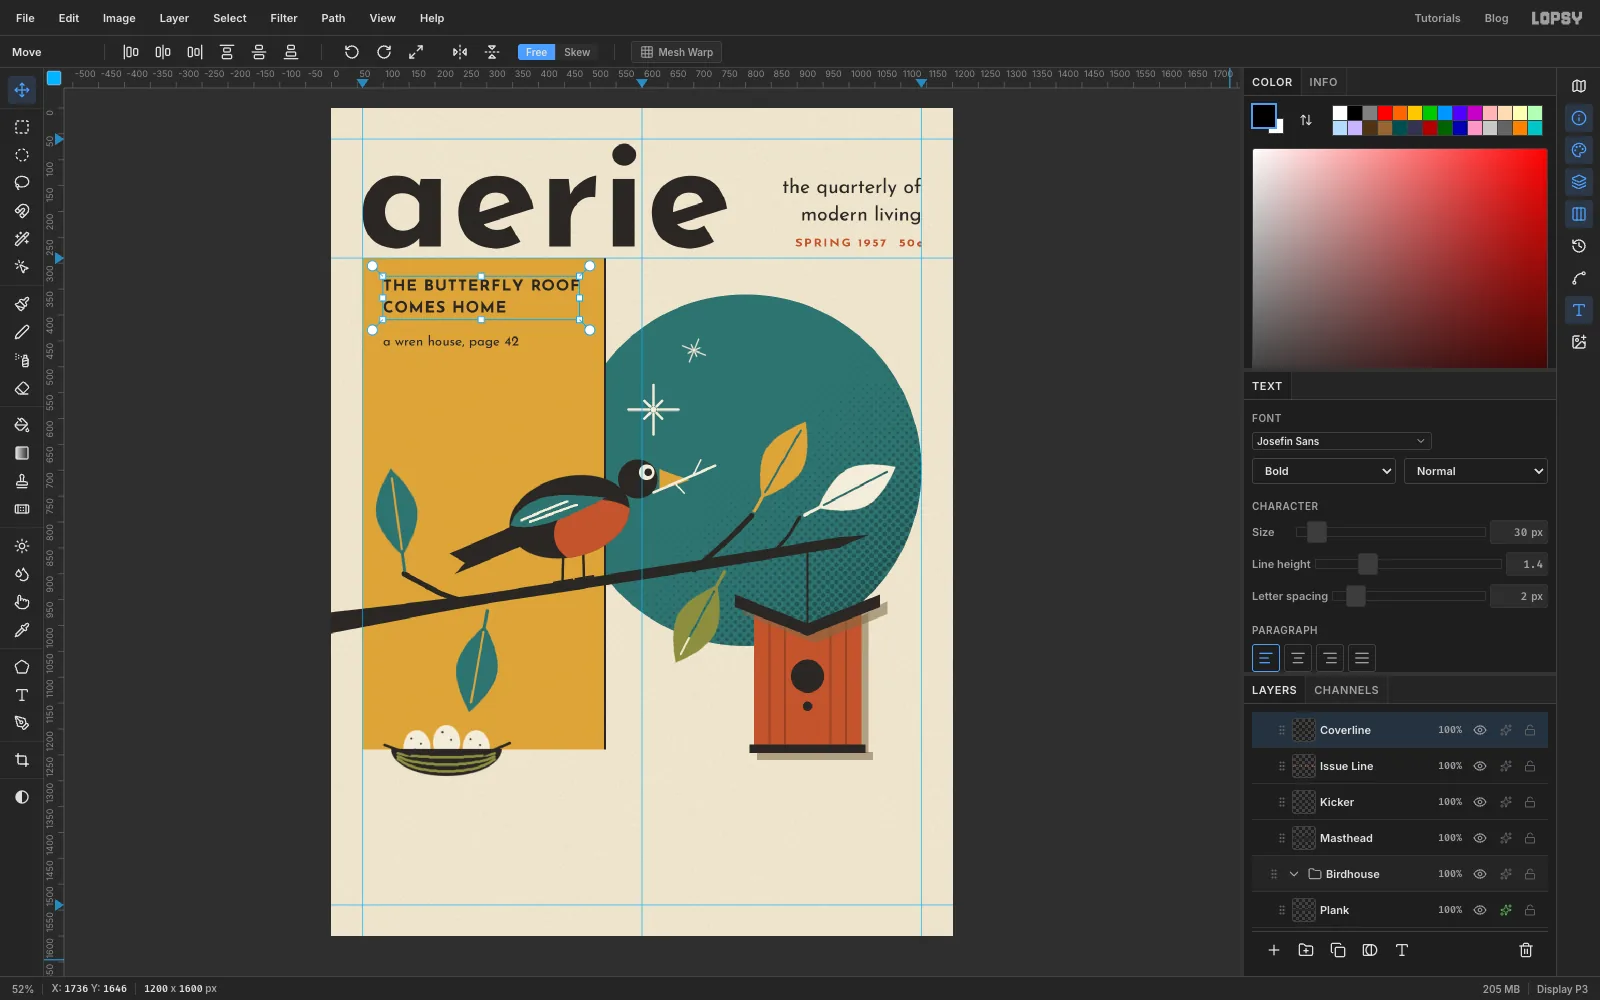
-
Set the cover story in a brush script
Choose Damion at 182 px in burnt orange, set letter spacing to 0 and type
Nesting Seasonin the empty band below the birdhouse. Tracking pulls script letters apart, so keep it at zero.With the Move tool and nothing selected, drag the rotate handle a little anticlockwise, about 6°, and press Cmd+D. The text stays live, so you can still change its font or size. Move it so the N starts on the left margin and the tail of the g finishes about 20 px above the bottom guide.
For the subline, use Josefin Sans SemiBold at 32 in ink. Type
twelve modern houses, press Enter, and typebuilt for the birds. Line its left edge up with the left side of the birdhouse, keep it about 40 px below the end of Season, and rest its bottom on the bottom guide.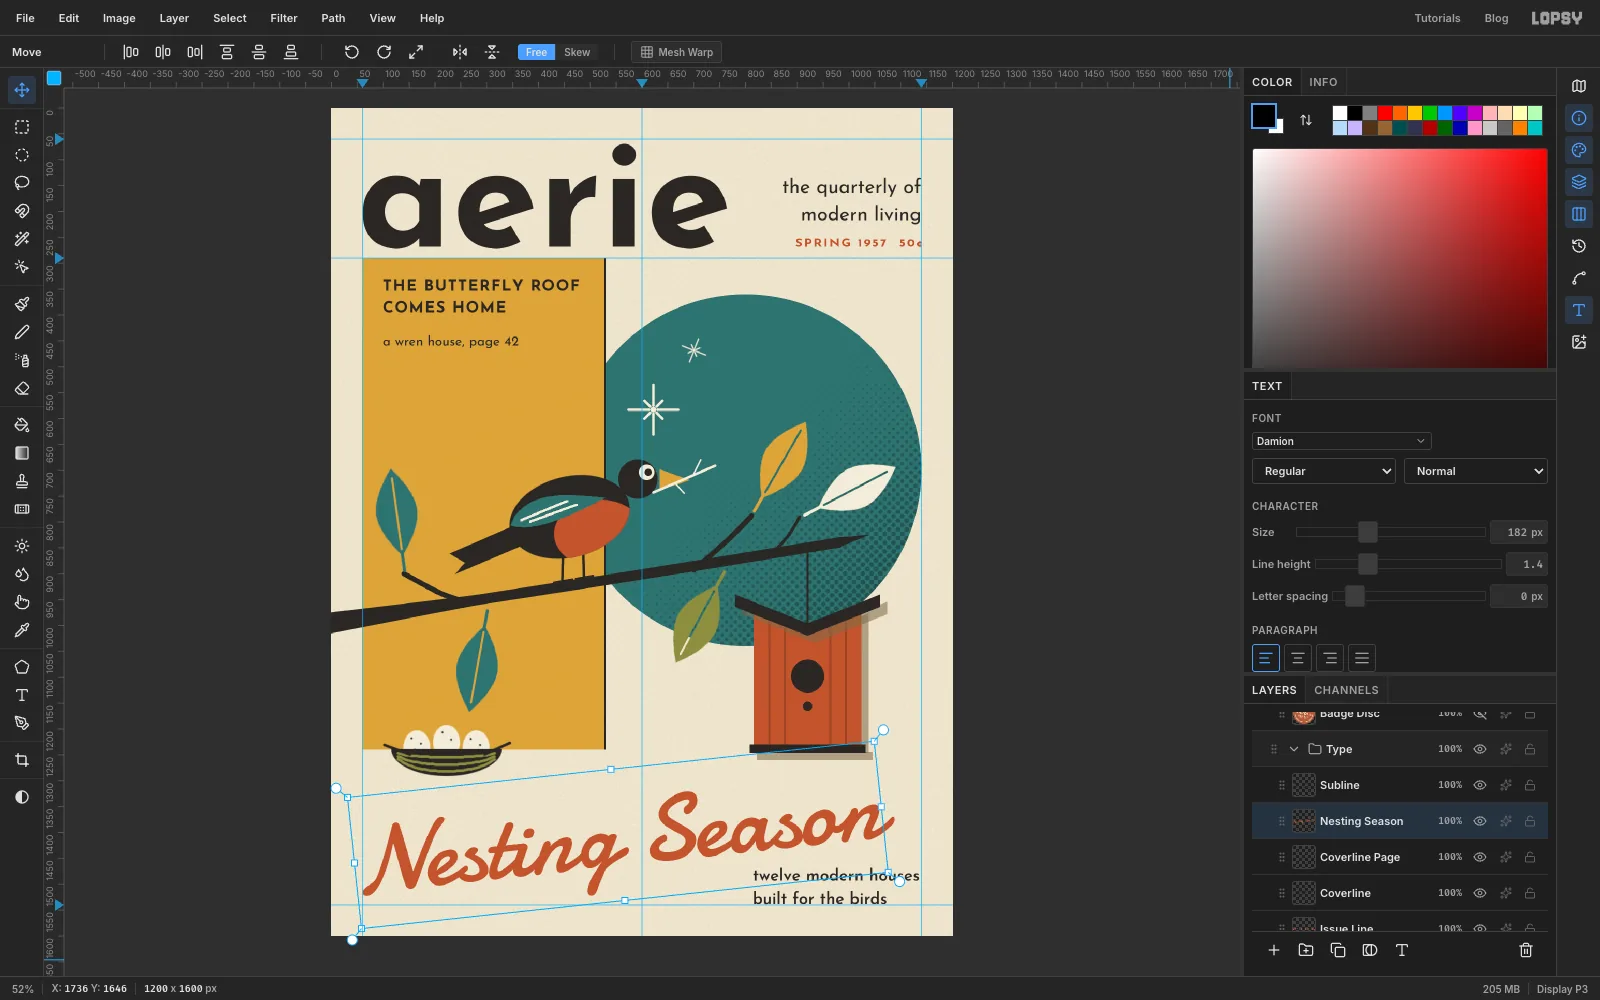
-
Stamp on a badge
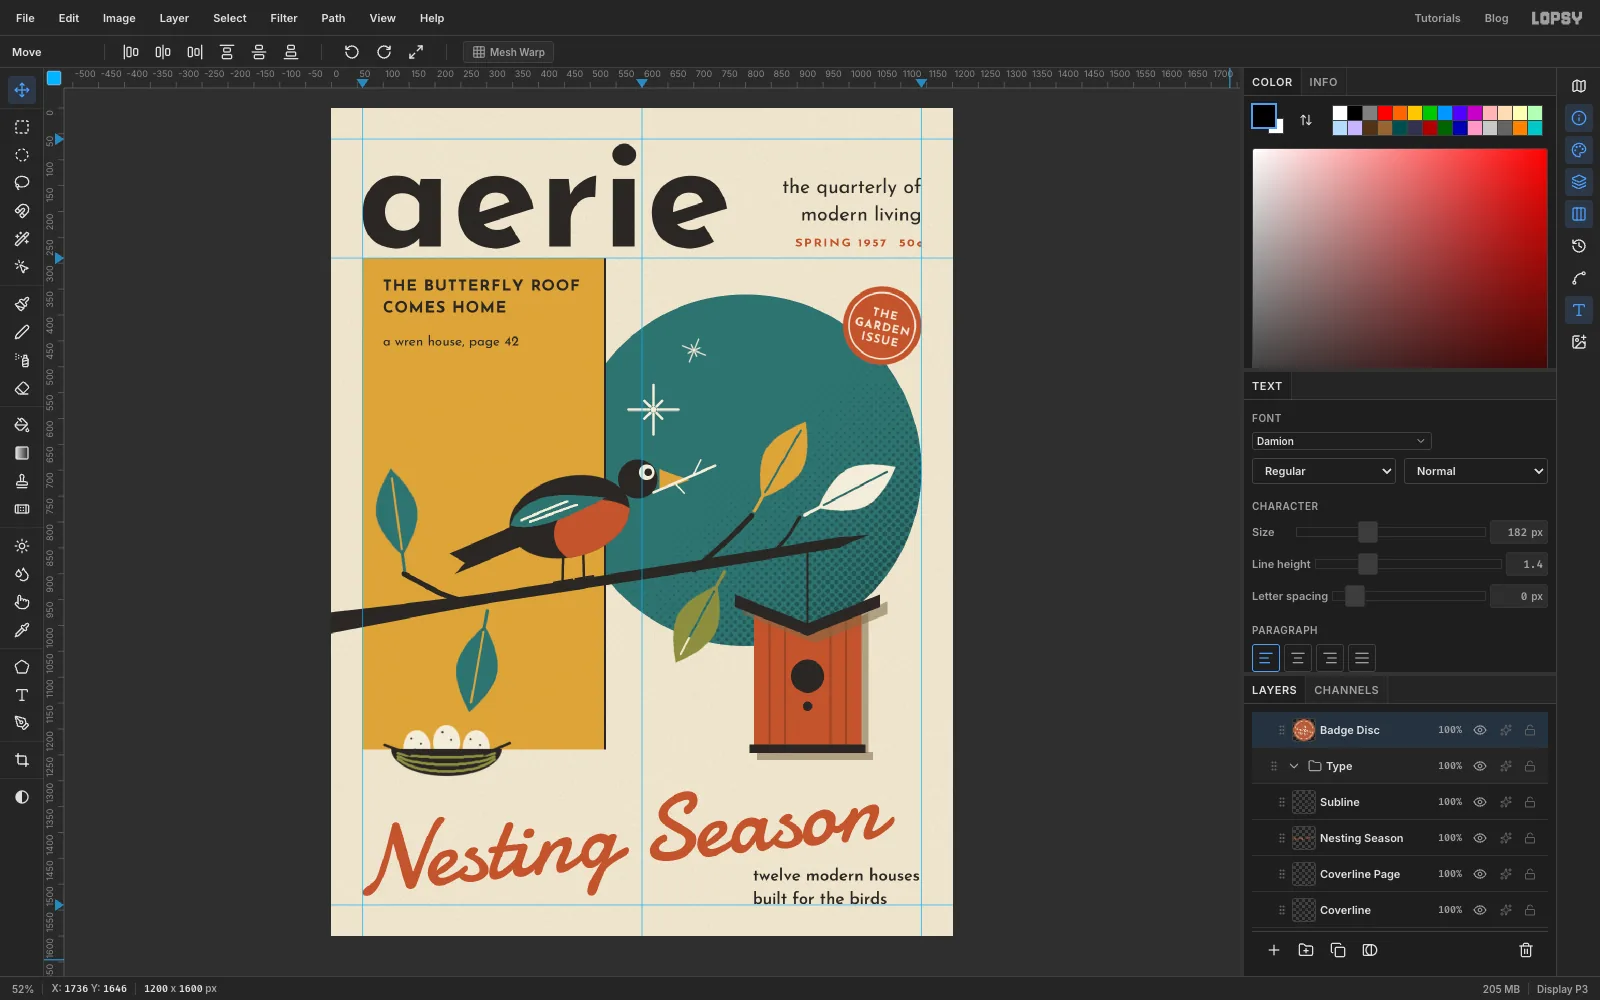
Click Project, make a group called Badge, and add a layer called Badge Disc. With the Shape tool's ellipse and Cmd held, draw a burnt orange circle about 152 px across. For the inner ring, click Add stroke color, type
F2ECDBand set Width to 3. Then click the fill swatch and choose Remove fill. Draw a second circle about 128 px across from the same centre.Pick the Text tool with Align Center, Josefin Sans Bold at 22 in cream, and type
THE,GARDENandISSUEon three lines. Set Letter spacing to 2 and Line height to 1.15, then centre the text in the disc. Click the Rasterize Layer button at the bottom of the Layers panel (it appears while a text layer is selected), then choose Layer → Merge Down to merge the text into the disc.Marquee the badge and turn it about 12° clockwise with the Move tool's handle, then commit. Move it so its right edge sits on the 1140 guide and it clearly overlaps the top-right of the sun, by about 30 px. A badge that only just touches the sun looks like a mistake.
-
Finish with grain
Click Project and add a layer called Grain at the very top. Fill it with mid grey , then run Filter → Add Noise at 60, with Mono and Gaussian. In the effects drawer set its Blend to Soft Light. The grey disappears, and only a fine grain is left over the flat inks.
Save the project with File → Save Project, and export the cover with File → Quick Export PNG.