Paint a Neo-Expressionist Alligator Party Invitation
Paint a raw, Basquiat-style party invitation in Lopsy with textured brushes, drips, a crowned alligator from a public-domain photo and crossed-out type.
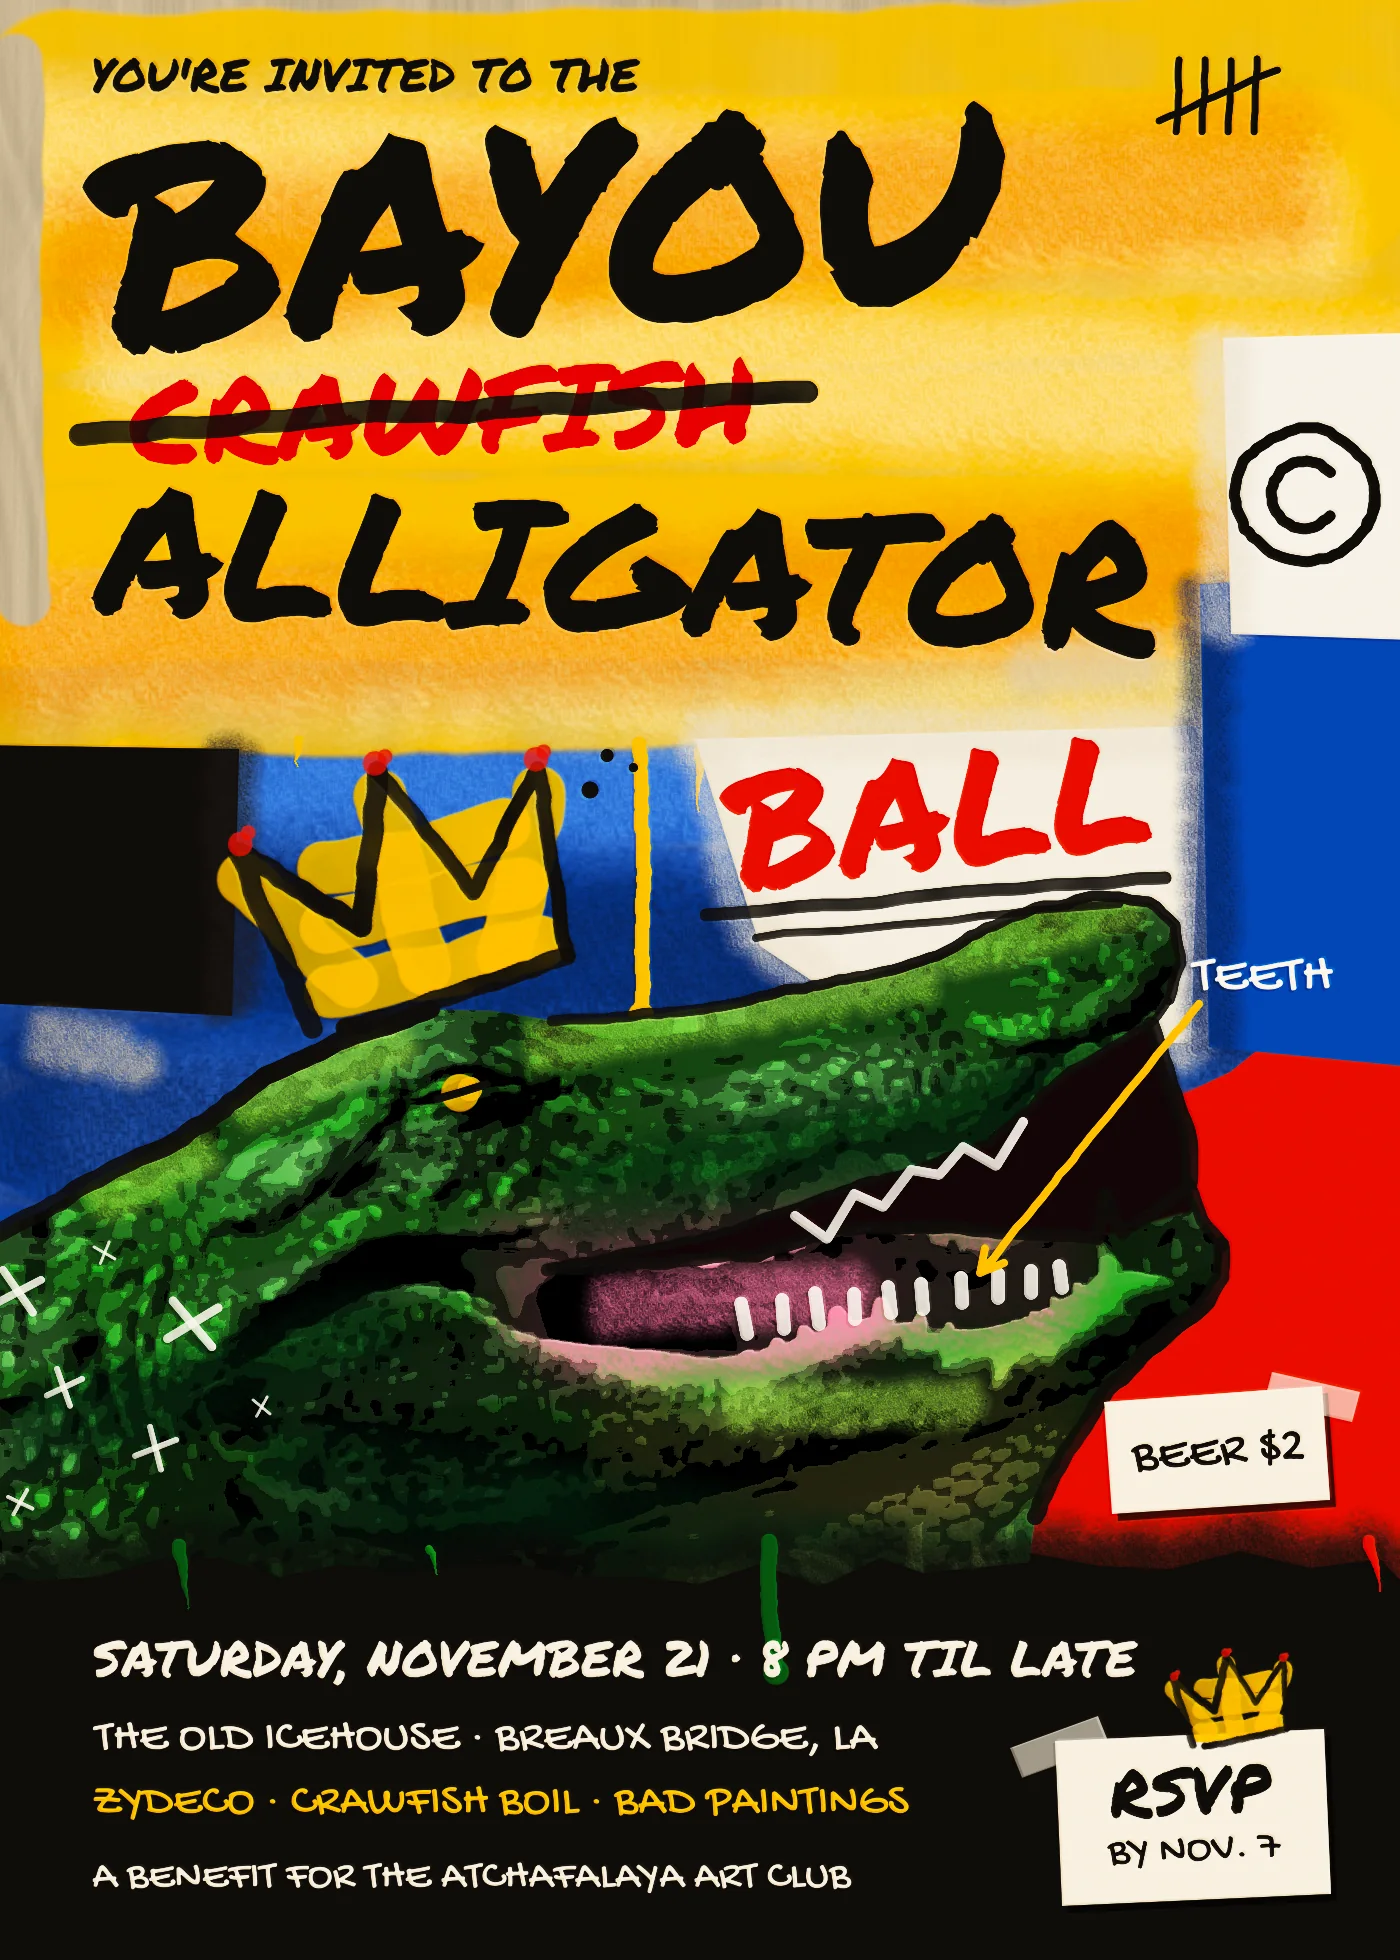
Early-80s New York neo-expressionism, from Jean-Michel Basquiat, Julian Schnabel and their circle, looks fast and unplanned. Slabs of house paint leave bare canvas between them. Words are written out and then crossed out. Crowns, teeth and copyright signs sit on top of everything else. In reality it's carefully built. Each layer of paint partly covers the one under it, and the crossed-out word is the one you end up reading.
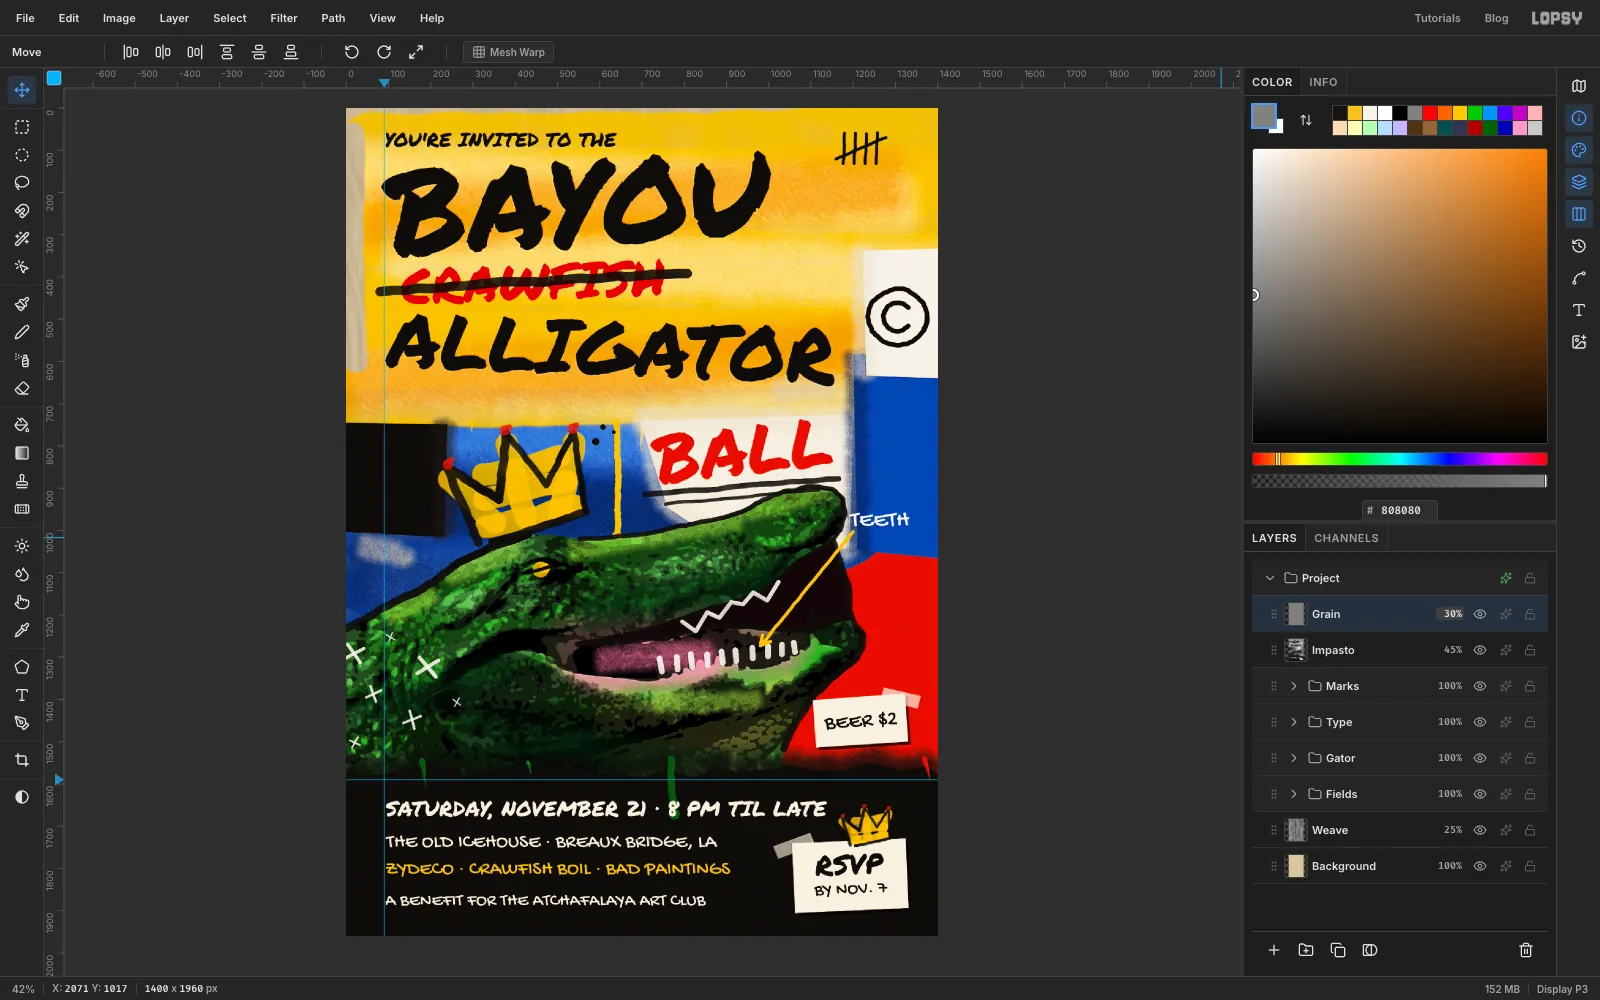
In this tutorial you'll use that approach for a party invitation: the Bayou Alligator Ball, an imaginary art-club benefit in Louisiana. The word Crawfish gets written into the title and then crossed out. You'll paint the colour fields with textured brushes and repaint a public-domain alligator photo until it looks painted. Then you'll crown the alligator and letter the invitation in marker. The card is 1400 × 1960 px, a 5 × 7 portrait.
Along the way you'll use:
- Add Noise and Fibers to make a raw-canvas ground
- the Brush with the Grain texture, plus the Chalk preset, the Taper setting and Scatter for flicks
- the Smudge and Eraser tools
- guides, a Rectangular Marquee snapped to a guide, the Lasso, Select → Inverse and Select → Feather
- the Move tool's Flip Horizontal, rotation and scale handles, and copy and paste
- Desaturate, Oil Paint, Brightness/Contrast, Posterize and Emboss
- Multiply and Overlay blend modes, layer opacity and a hard Drop Shadow
- text in Permanent Marker and Gochi Hand
The palette:
-
Raw canvas
-
grain grey
-
Cadmium yellow
base, light and orange
-
Cobalt
base, light and dark
-
Vermilion
-
bright red
-
Ink black
fill and slab edge
-
Dirty white
-
bone white
-
cream
-
Crown yellow
-
white
-
Gator green
-
shadow green
-
lime
-
Drip greens
-
Pink
-
belly
-
mouth
-
Prime a raw canvas
Choose File → New, enter 1400 × 1960 and click Create. Click the Background row, set the foreground to raw canvas , choose Select → All and Edit → Fill, then deselect.
Choose Filter → Add Noise…, set Amount to
9, and click Mono and Gaussian. Click Apply. The fine speckle stops the beige from looking like a flat digital fill.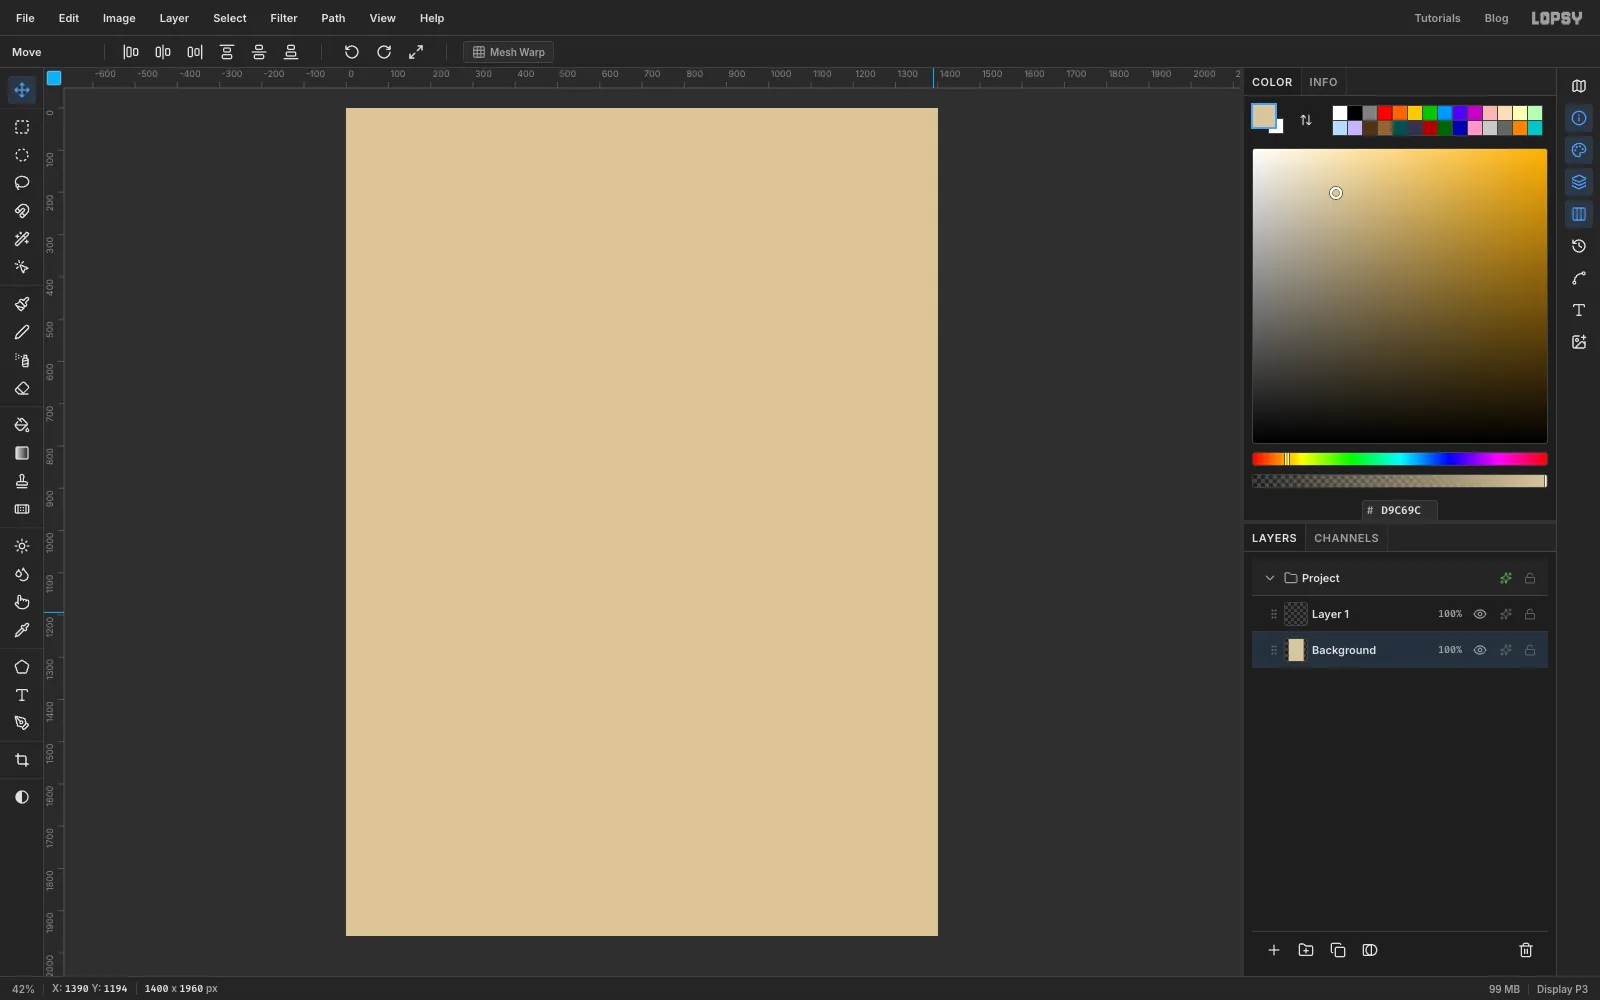
-
Weave it with Fibers
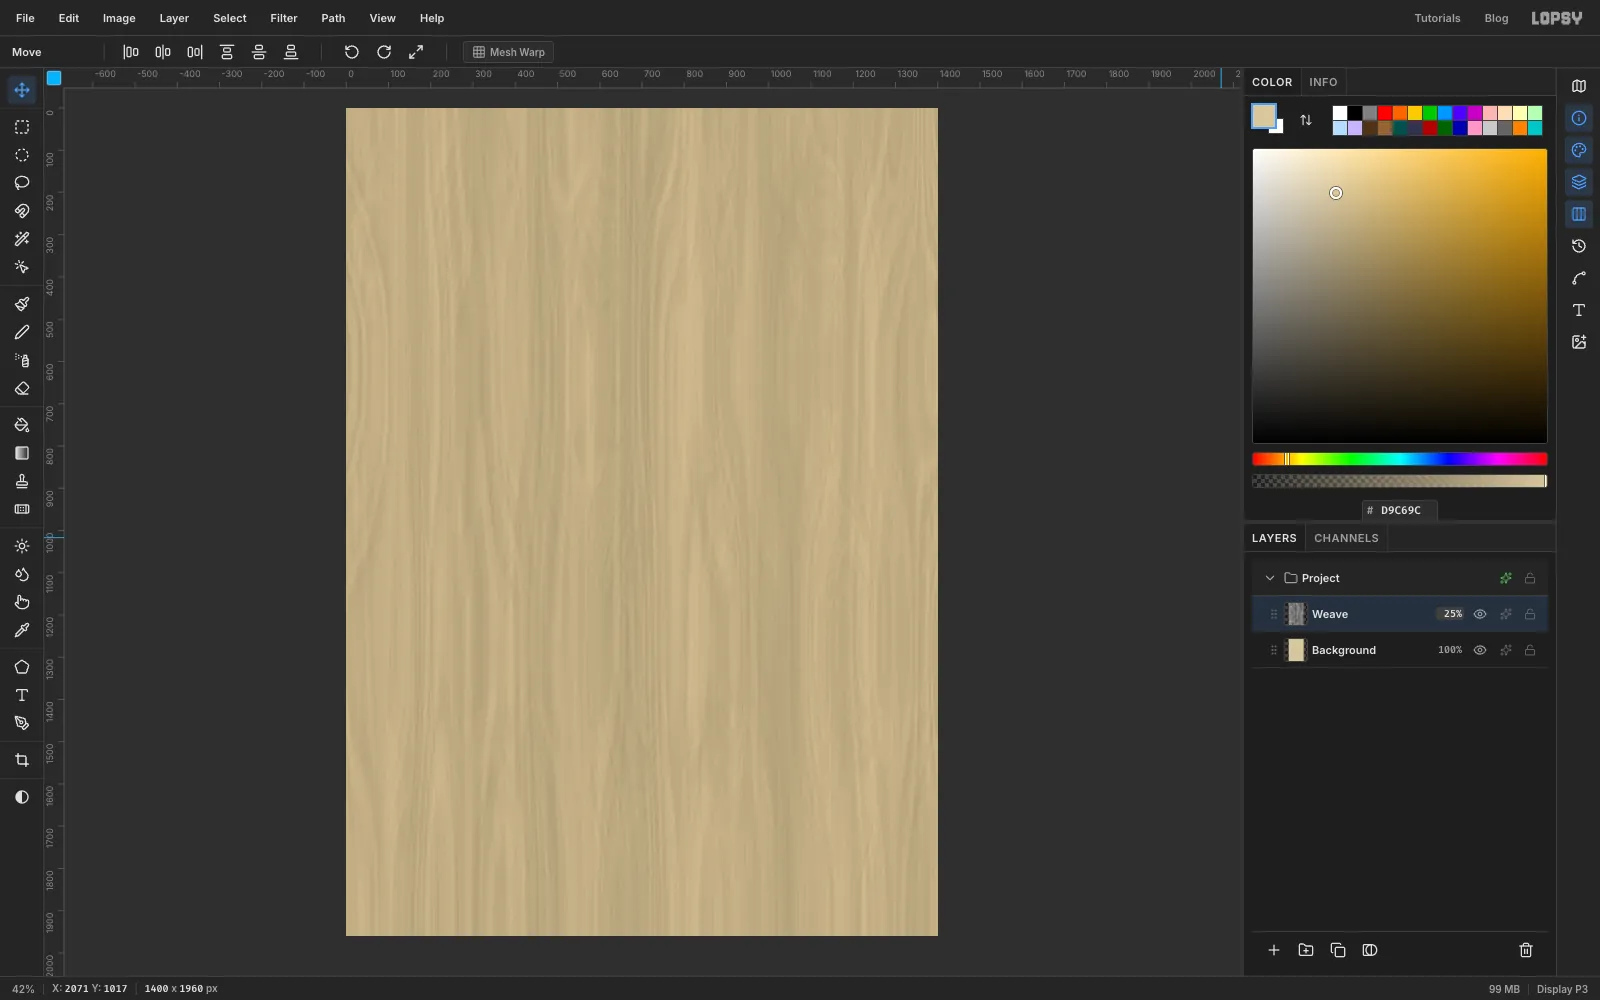
A new document comes with an empty Layer 1 above Background. Click it, rename it Weave (double-click the name), and choose Filter → Fibers… with Variance
24and Strength10. Click Apply. In the layer's effects drawer (the sparkle icon on its row), set Blend to Multiply, then click the opacity on its row and set it to25%.Most of the canvas will be painted over. The weave shows only where the paint leaves gaps, which is what you want.
-
Block in the blue field
Click the New Group button, name the group Fields, and add a layer named Blue inside it. Set up the textured brush with Size
190and Hardness90, in cobalt .Paint back-and-forth horizontal strokes from about
y 730down to abouty 1650. The black band will cover everything below1590. Let each stroke overlap the last by about half its width. Wobble the ends so the edges stay ragged. The Grain texture leaves the paint slightly uneven, like a dry roller.Switch to the chalk brush at Size
130in light blue and drag a few long strokes across the band. Then add two or three at Size150in dark blue . The dry chalk marks give the field visible brushwork.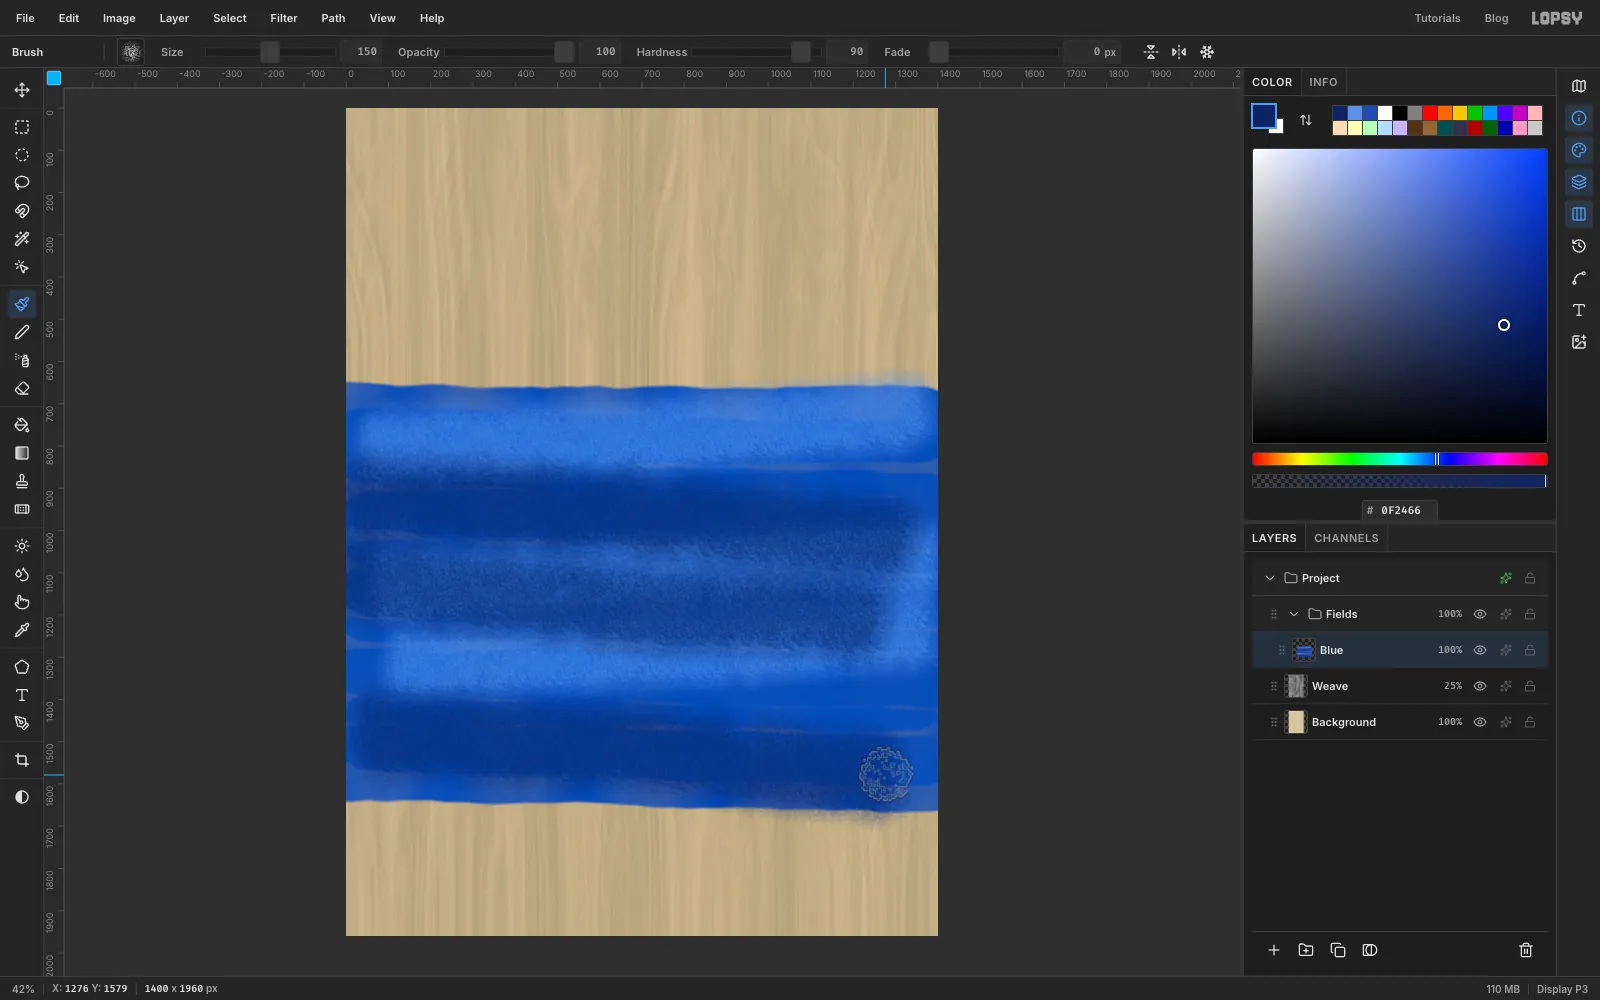
-
Paint the yellow field
Add a layer named Yellow above Blue. With the textured brush at Size
190in yellow , scrub horizontal strokes from just below the top edge down to abouty 750. Leave a thin strip of raw canvas along the top. Let the bottom edge overlap the blue.Add movement with the chalk brush at Size
120, Opacity90. Use two or three strokes of pale yellow , then two of orange .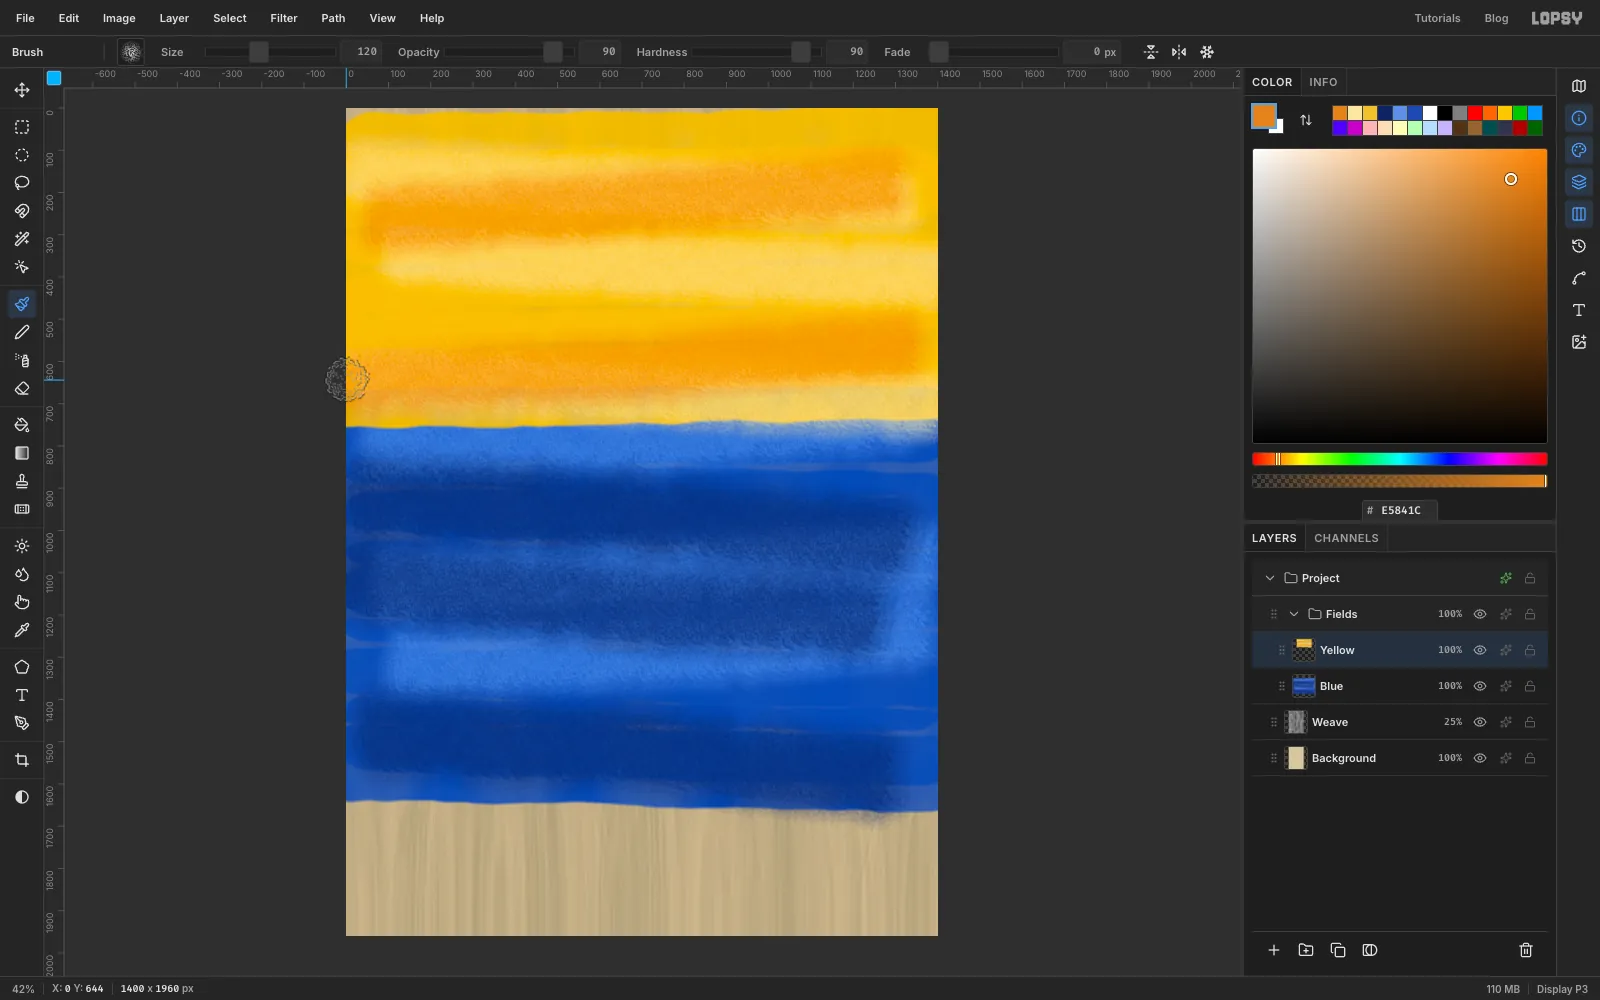
-
Let the yellow drip
Choose the Hard Round preset. Paint four drips straight down from the bottom edge of the yellow, at about
x 120,300,640and700. Make each one a different length and width, and let them wobble a little:- For the long ones (about 240 and 270 px), use Size
22and16. At the end of each, bump the size up to about34and28and click once for a bead of paint. - For the short ones (40 and 90 px), use Size
10and12. In the Brushes panel's Shape tab, set Taper to about two thirds of the drip's length, so the drip thins to a point.
Set Taper back to
0when you're done.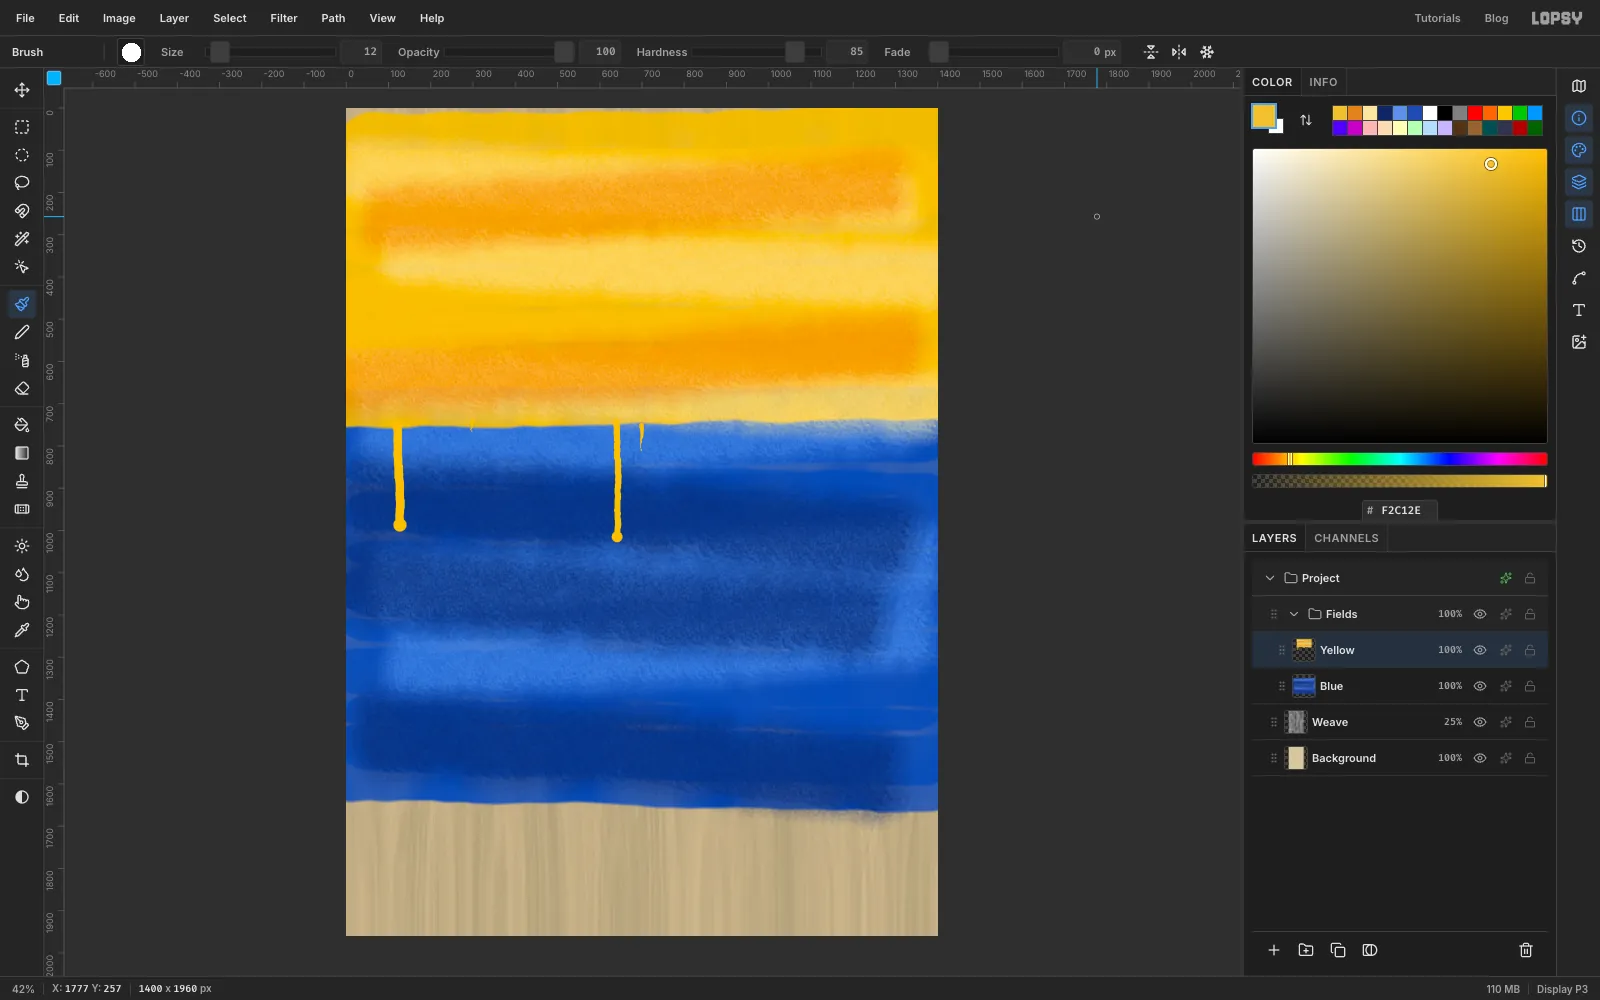
- For the long ones (about 240 and 270 px), use Size
-
Paint a red patch
Add a layer named Red. With the textured brush at Size
170in vermilion , scrub a patch about 600 px wide at the lower left, from abouty 1150to the bottom of the blue. Add a few lighter strokes with the chalk brush at Size120in , Opacity70. You'll move this patch in a moment.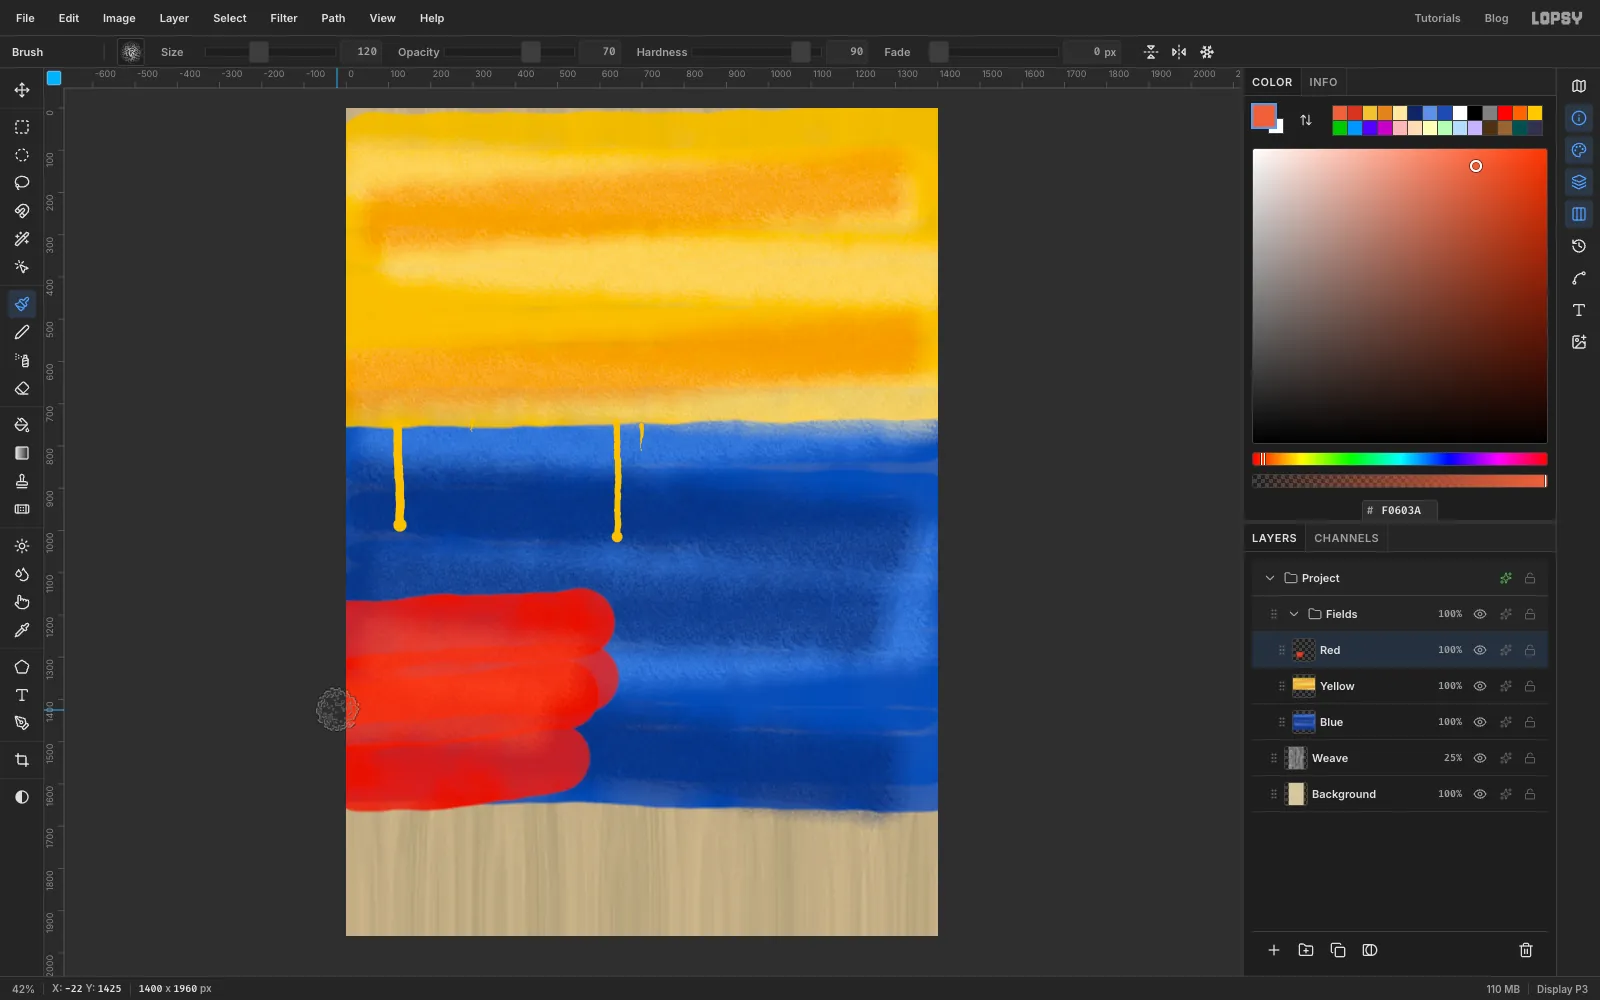
-
Lay the black band on a guide
Click the left ruler at
1590to drop a horizontal guide. Add a layer named Black. With the Rectangular Marquee, drag from just left of the canvas at the guide down past the bottom-right corner. The marquee snaps to the guide. Fill it with ink black and deselect.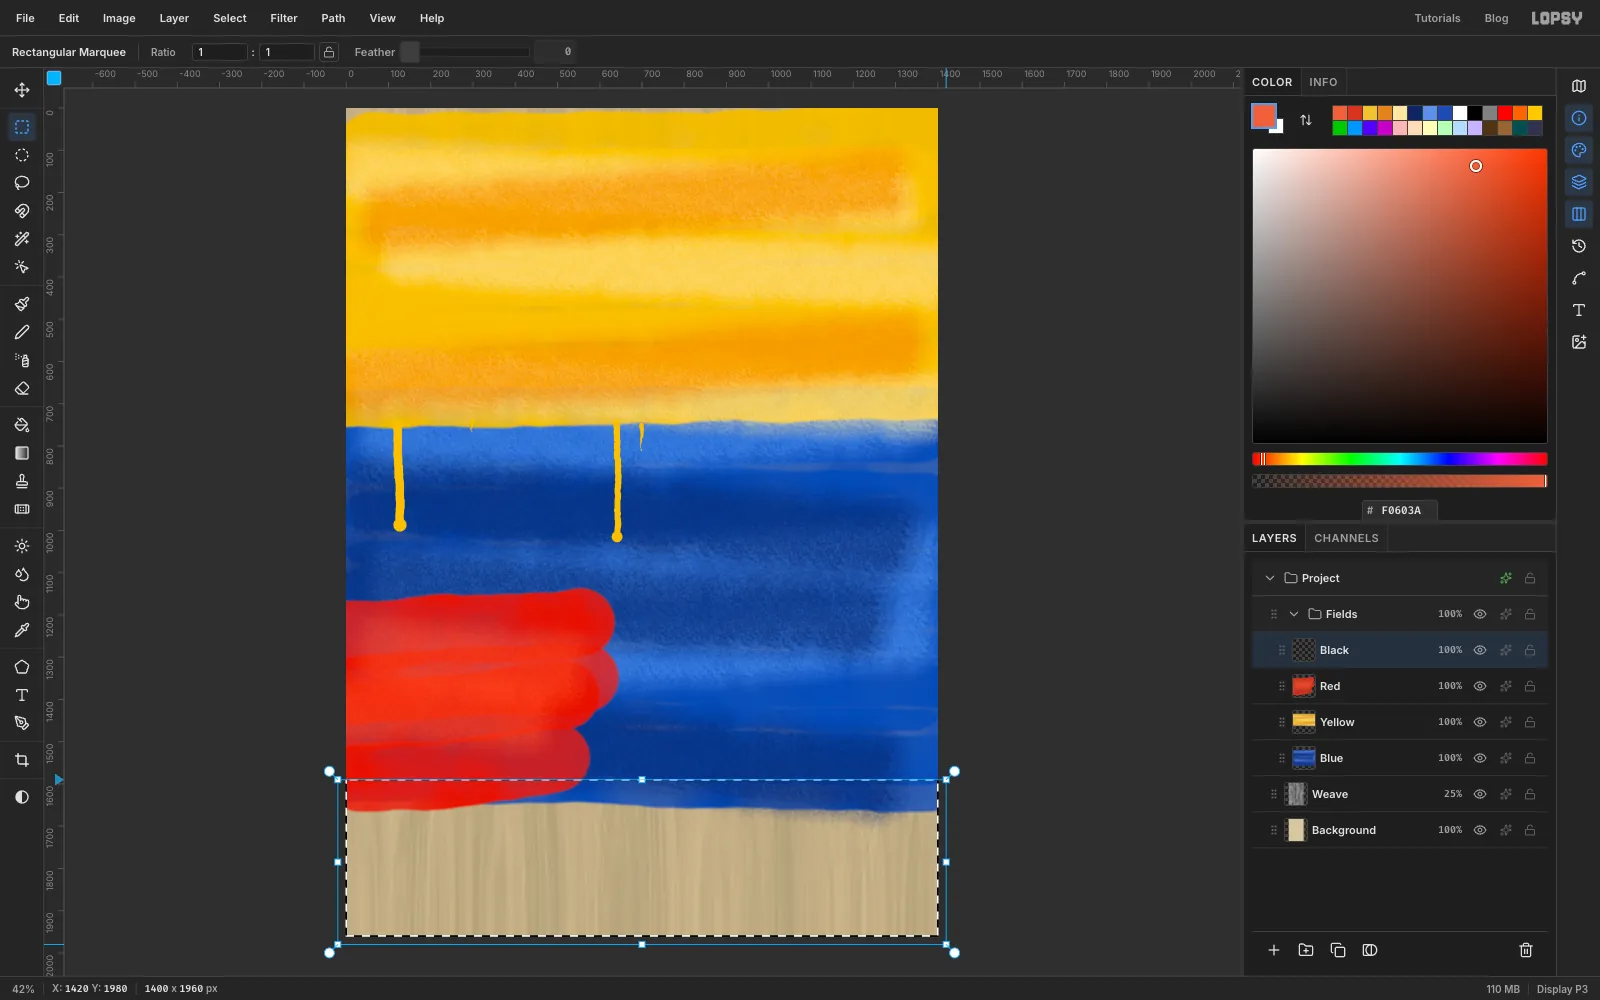
-
Rough up the band edge
A ruler-straight edge looks digital. With the Lasso, draw a wavy line along the top of the band, rising and falling by about 20 px. Close the selection below the guide and fill it with black.
Then drag the chalk brush at Size
70along the new edge so it breaks up into dry bristle marks.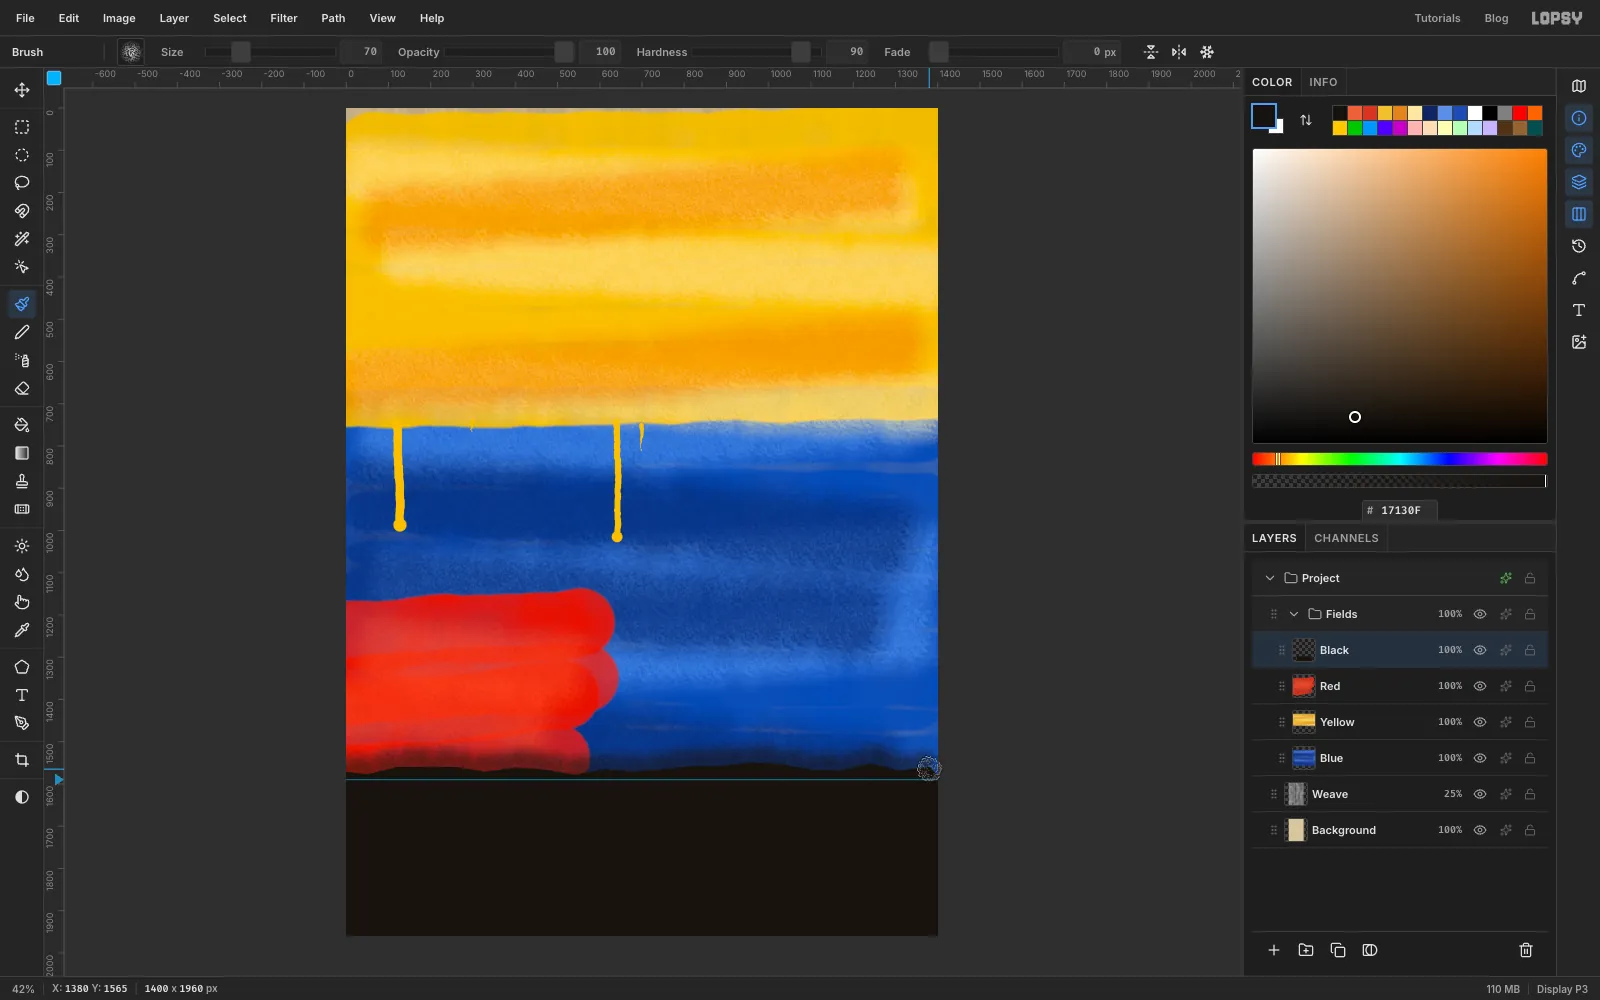
-
Flip the red patch
The alligator will cover the lower left, so the red needs to move to the right. Click the Red row and Cmd-click its thumbnail to select its pixels. Choose the Move tool and click Flip Horizontal in the options bar, so the rounded brush ends face left. Press Cmd+D.
Then drag the patch about 860 px to the right, so it sits against the right edge.
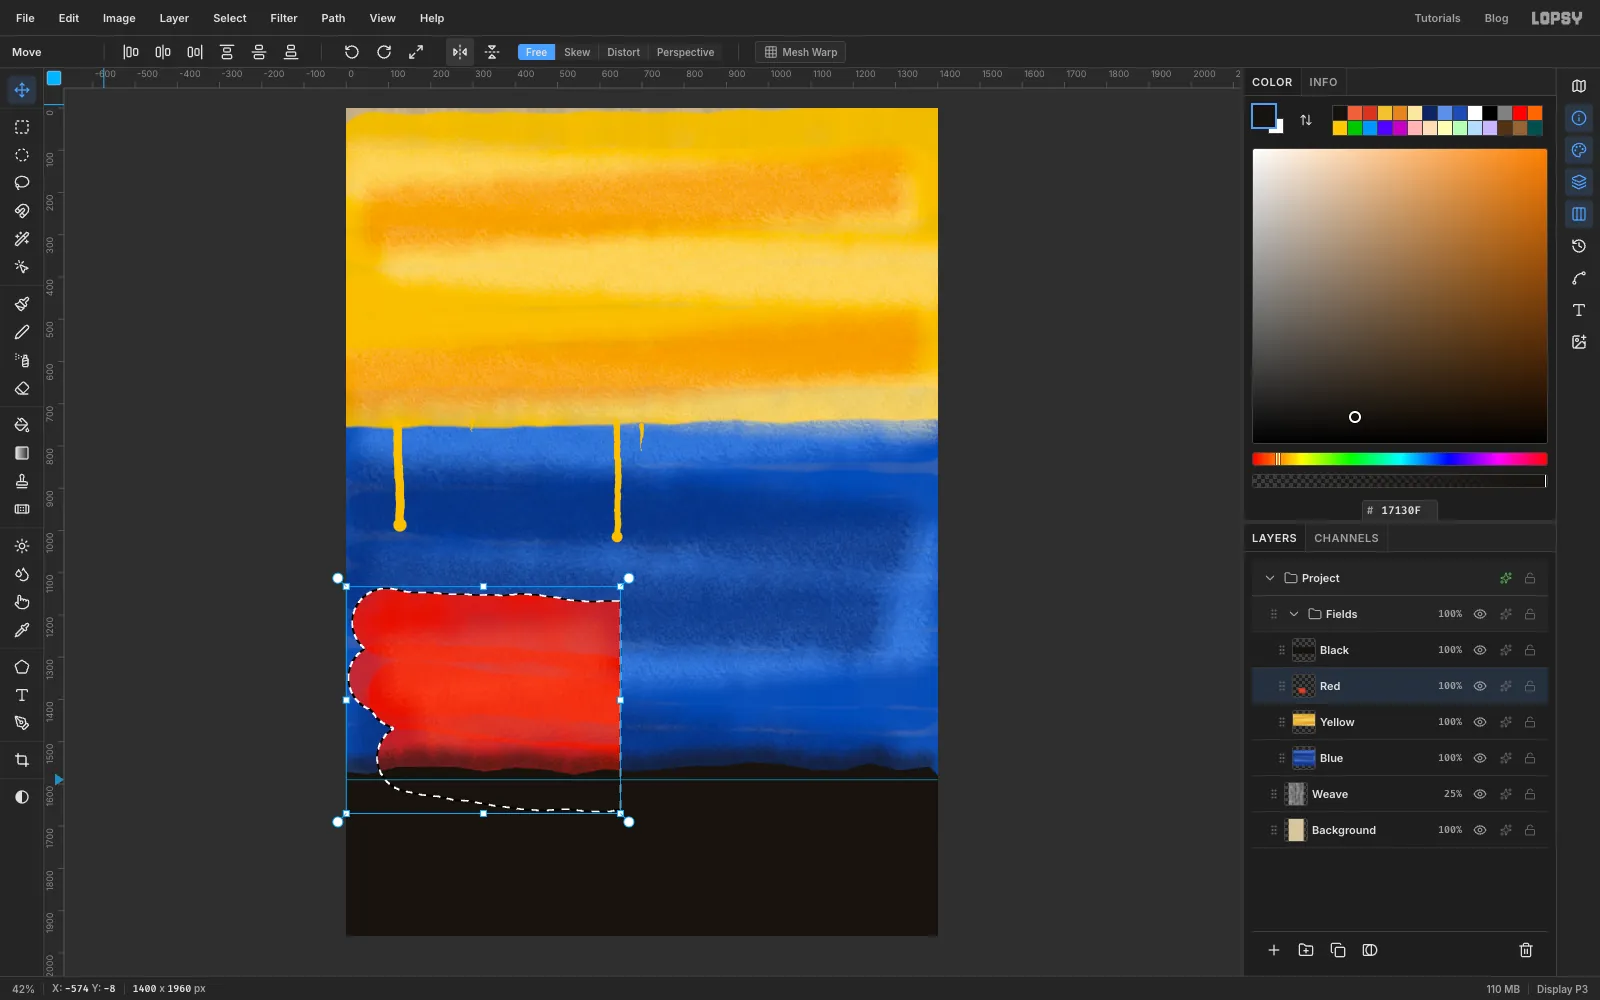
-
Push the red up on a slant
Horizontal yellow, blue and red bands read like a flag. Break them up. With Red still selected, use the Lasso to draw a shape that starts on the patch's left edge at about
y 1280, climbs diagonally to the right edge at abouty 950, runs down the right side and comes back along the bottom. Fill it with vermilion and deselect.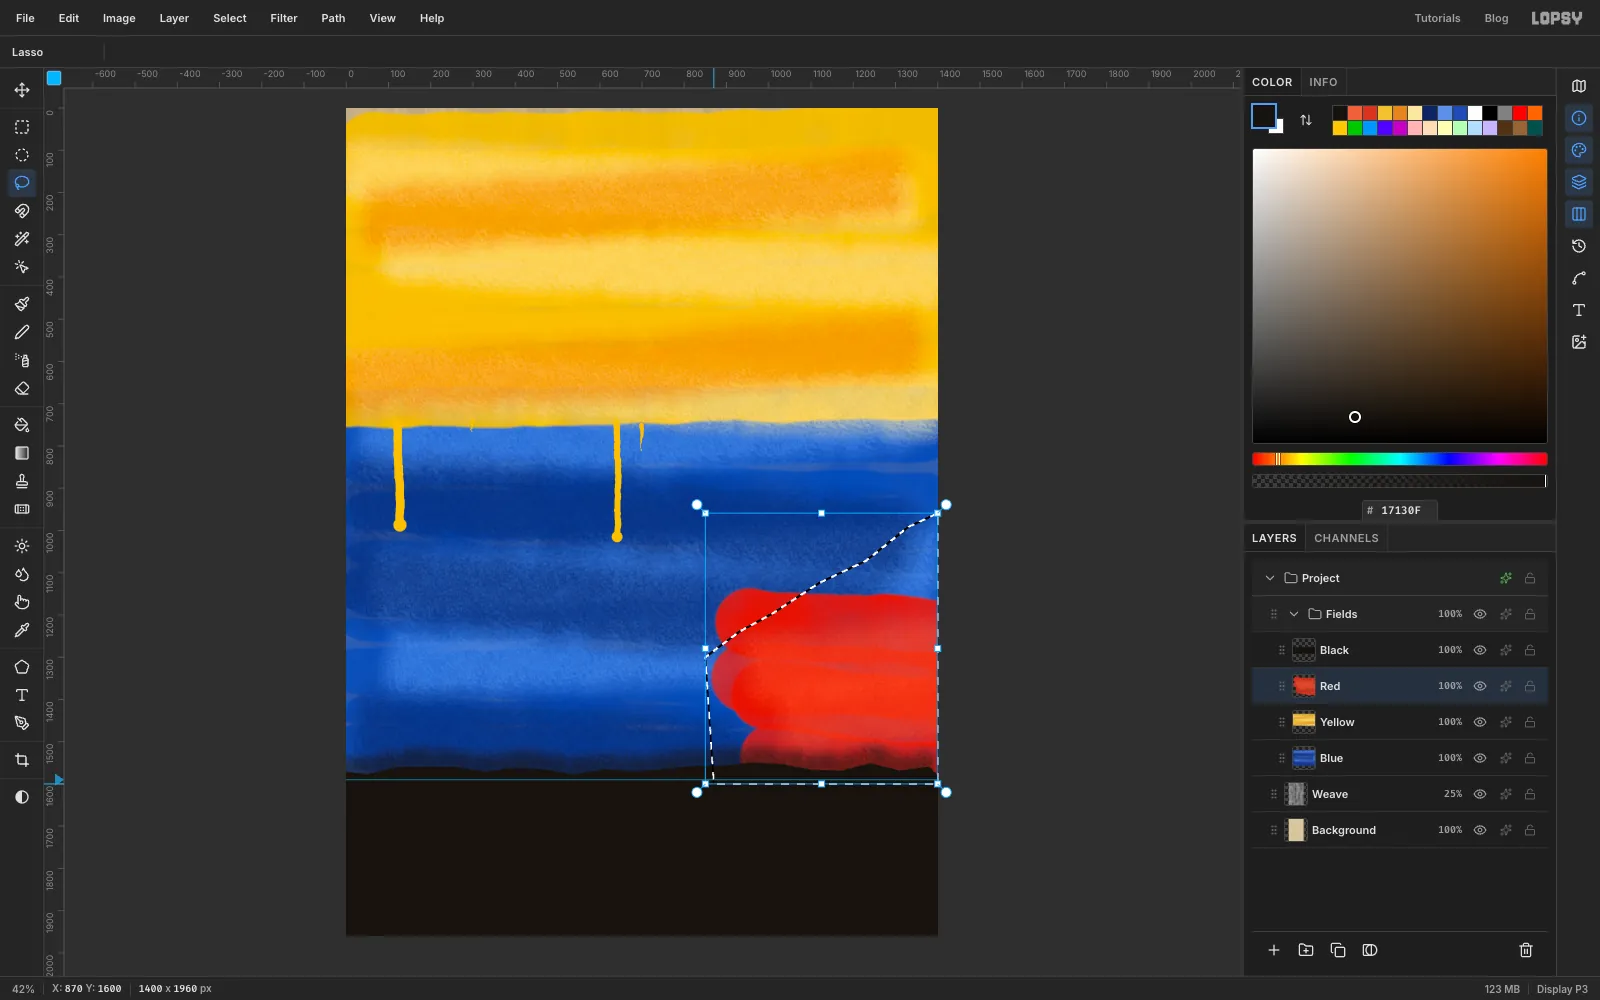
-
Smudge the red into the blue
Choose the Smudge tool with Size
70and Strength70. Drag three short strokes up and to the right across the diagonal edge. Each one pulls a tongue of red into the blue.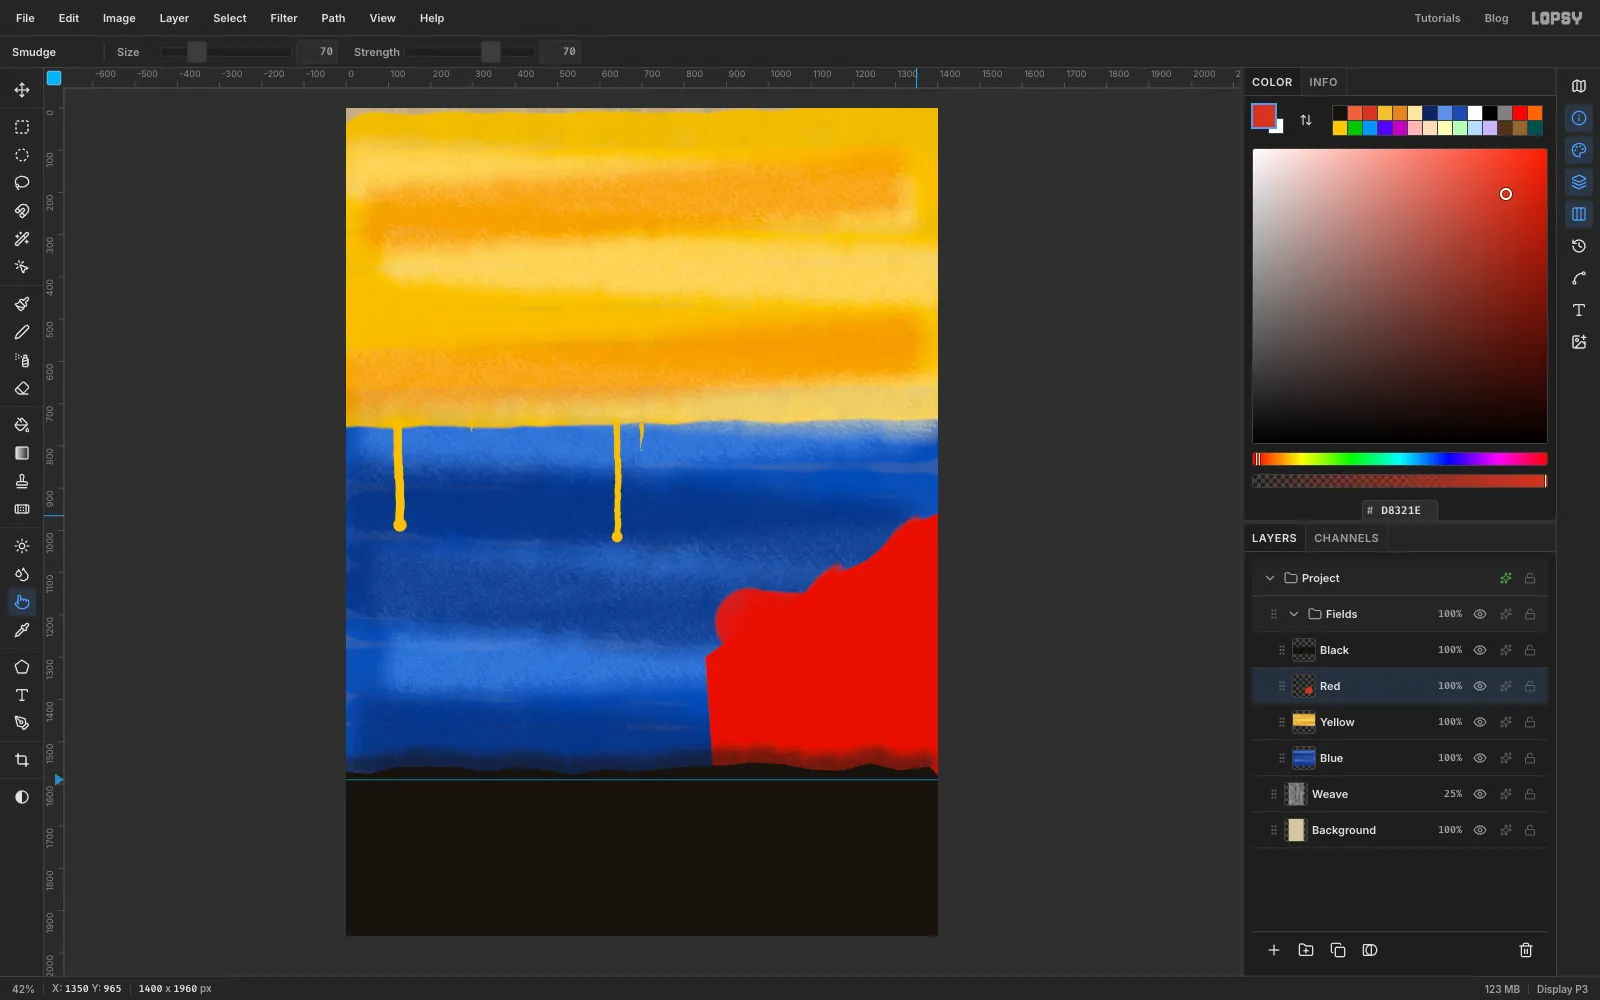
-
Paint over the stripes with slabs
Click Red and add a layer named Overpaint. Each slab works the same way: lasso a rough four- or five-sided shape, fill it, deselect, then drag the chalk brush (Size
44) along each edge in a slightly darker shade so the edge looks brushed, not cut.Start with dirty white , edged in , slanting from about
700, 740across to1200, 740and down to abouty 1045. This is where the word BALL will sit.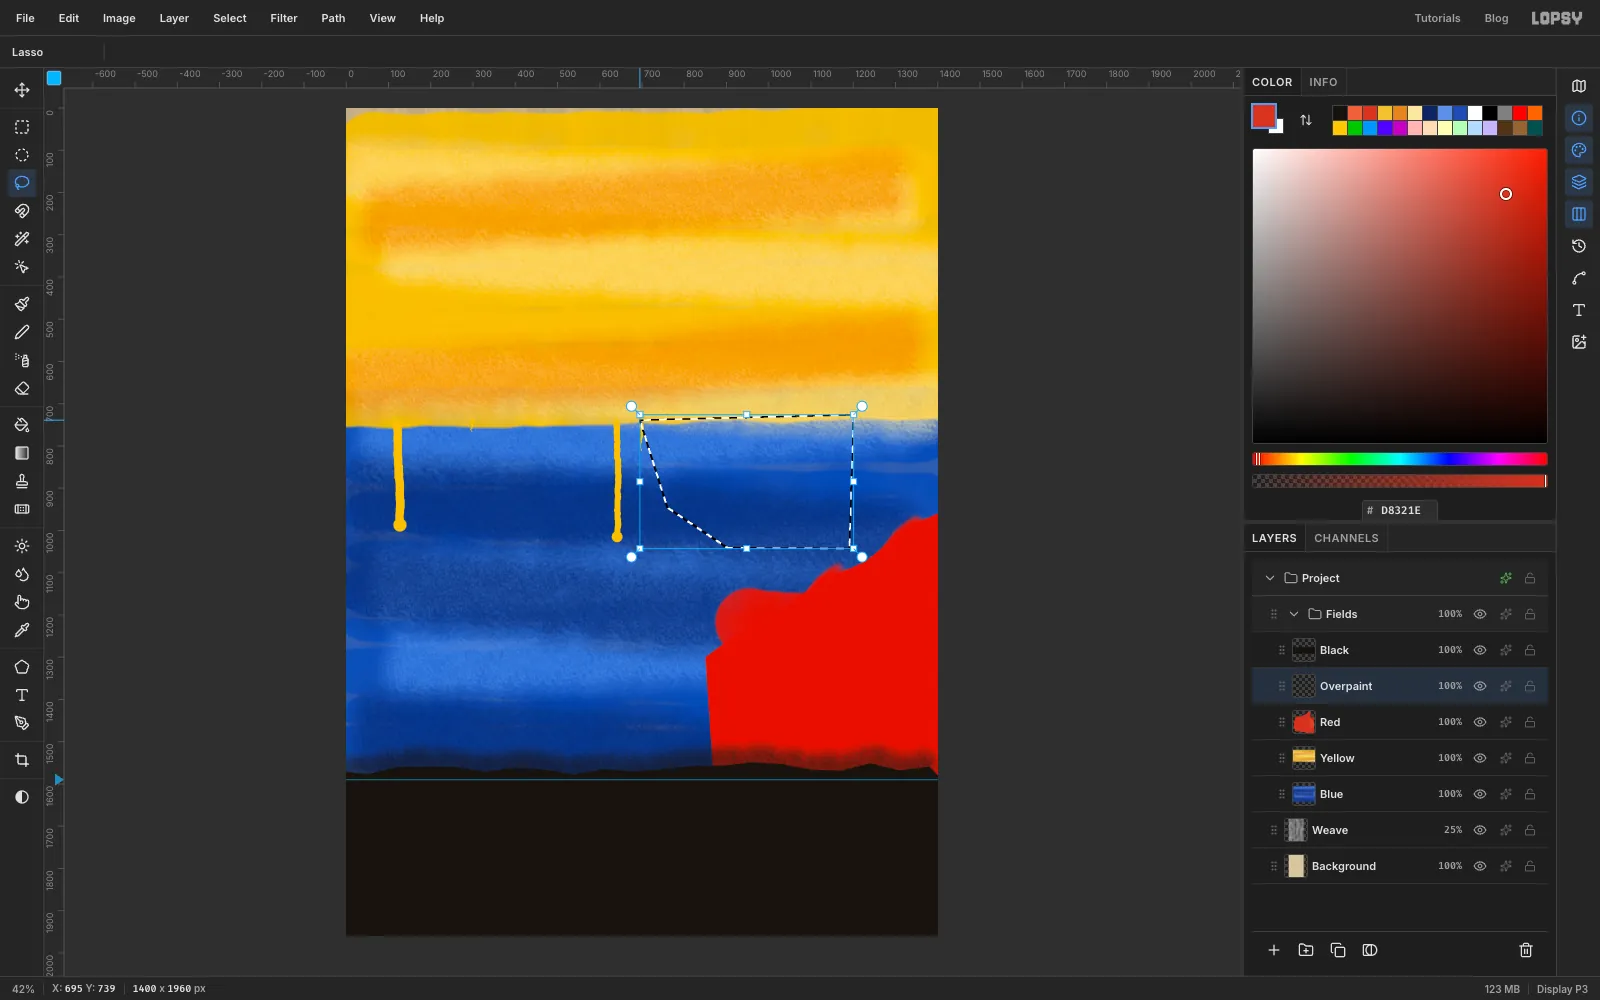
-
Finish the slabs
Add three more slabs the same way:
- a blue block about 200 px wide against the right edge, from about
y 585toy 1070, in with dark blue edges - a black block on the left, about 236 px wide from
y 742toy 1010, with edges - a bone white block about 180 px wide against the right edge, from about
y 340toy 640, in
The slabs overlap the yellow, the blue and the red, and the stripes stop reading as stripes. Finally, with the chalk brush at Size
46in raw canvas , drag three short strokes inside the fields. They look like bare canvas showing through the paint.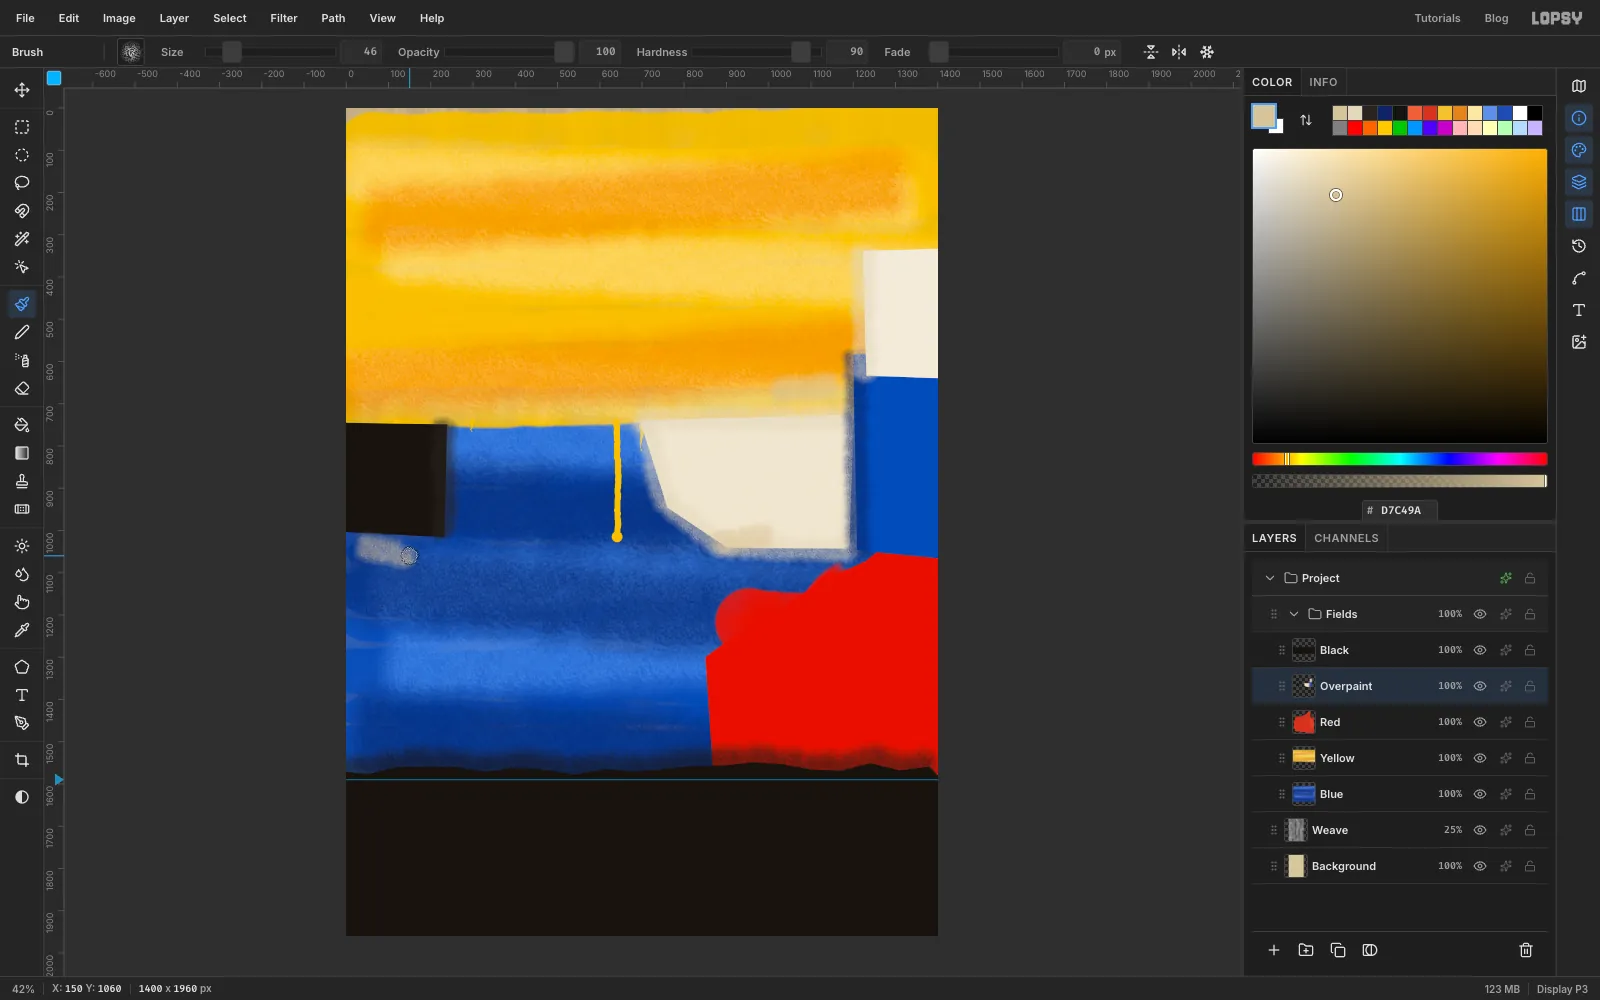
- a blue block about 200 px wide against the right edge, from about
-
Add a copyright mark and scrape back
Basquiat stamped © and ™ all over his paintings. Choose the Hard Round preset at Size
12in black. On Overpaint, draw a circle about 140 px across in the white block, then a smaller C inside it.Click the Yellow row and choose the Eraser at Size
60. Drag it down the left edge from the top to abouty 600. The Weave layer shows through as a strip of bare linen.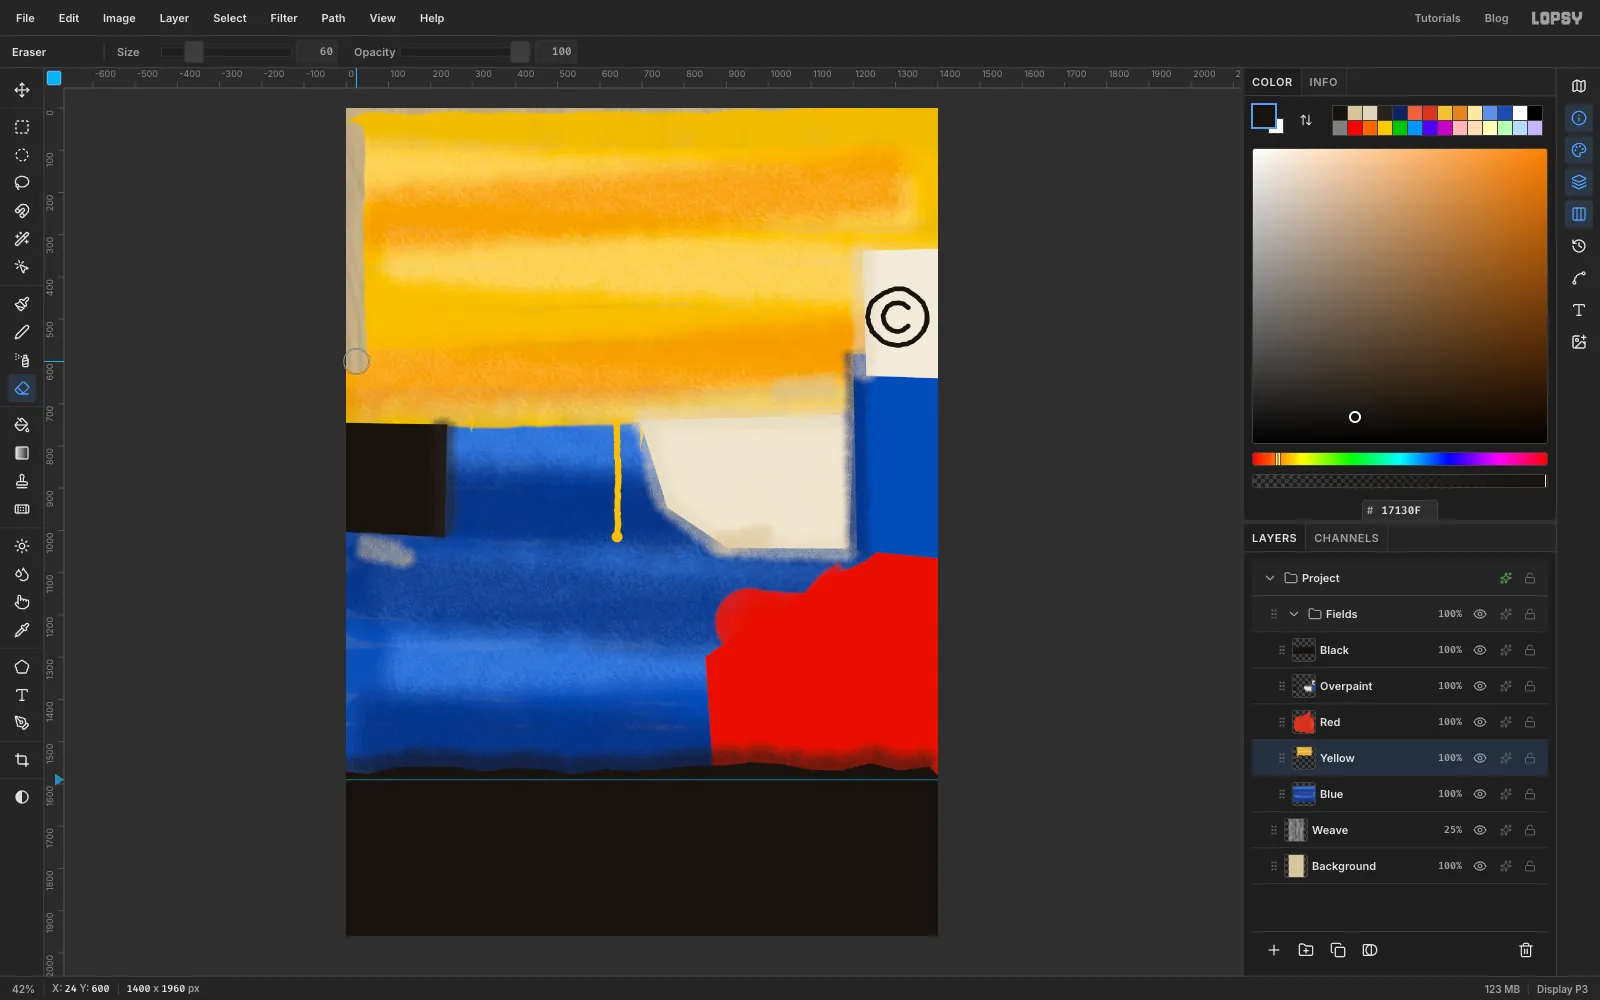
-
Paste in the alligator photo
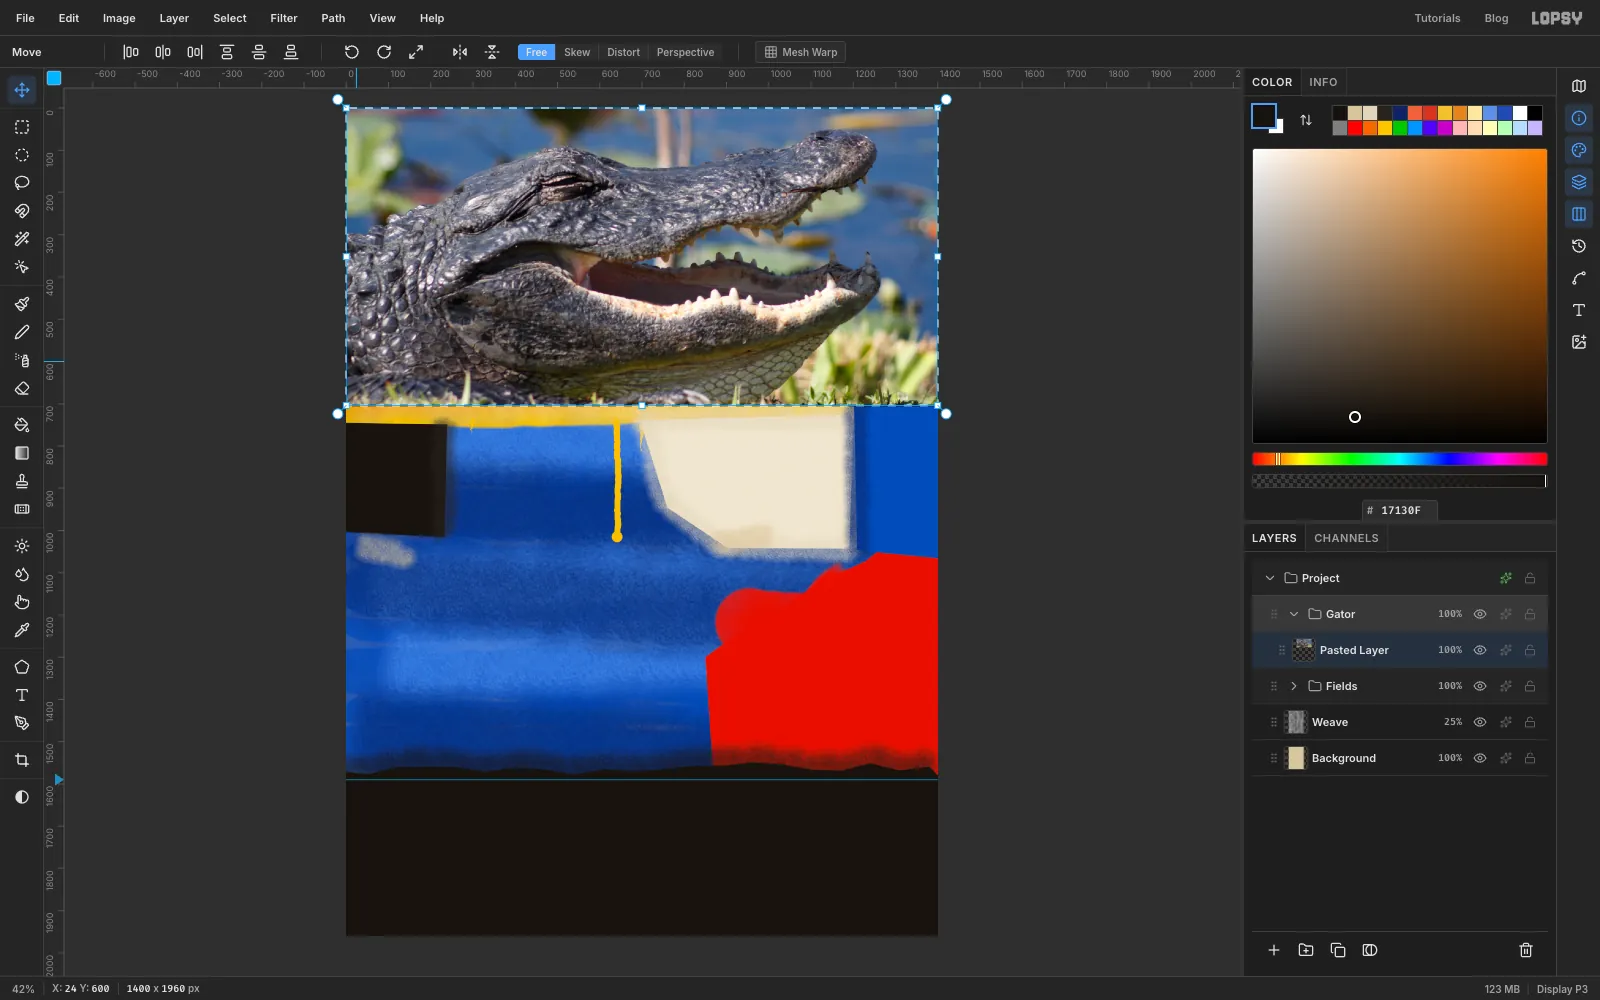
This tutorial uses American Alligator Mouth Open.jpg), a public-domain Everglades National Park photo on Wikimedia Commons. In any image viewer, crop it to the head and jaws, trimming the sky above the snout, and scale it to 1400 px wide. Then copy it.
Collapse Fields, click it, and click the New Group button. Name the group Gator. Press Cmd+V. The photo lands as a new layer across the top of the canvas. Rename the layer Gator Photo and deselect.
-
Trace the head with the Lasso
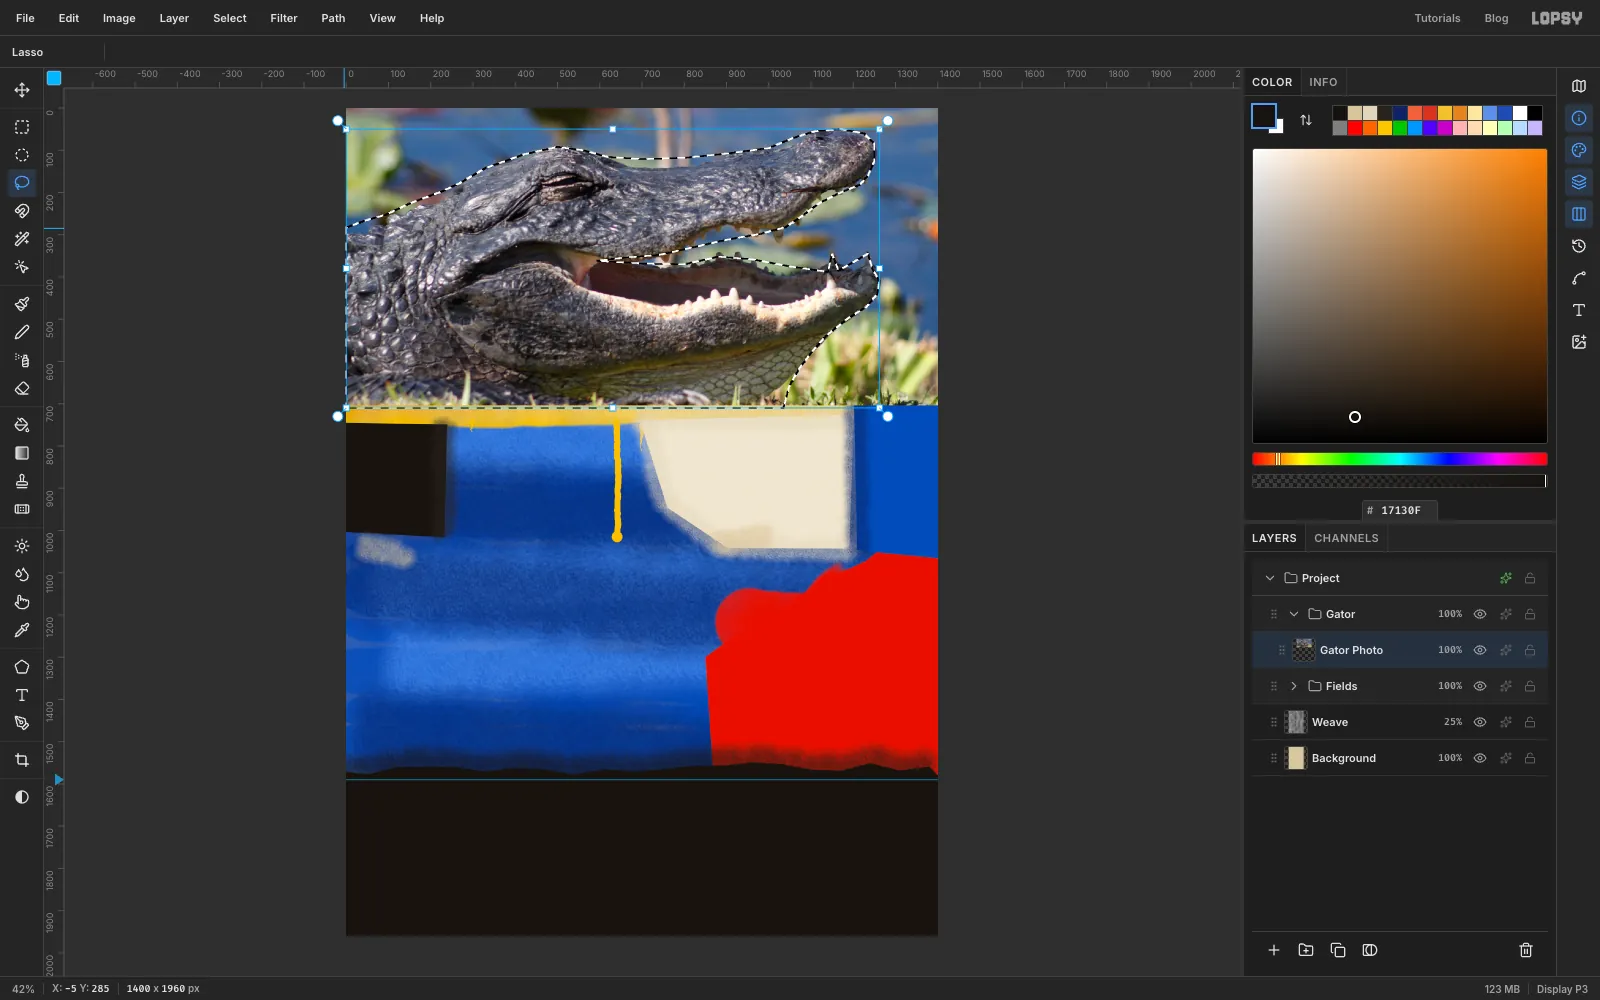
Choose the Lasso and trace slowly around the head:
- Start where the neck leaves the left edge.
- Go along the top of the skull and the snout.
- Go into the open mouth, along the underside of the upper jaw and back along the top of the lower jaw.
- Go out round the chin.
- Finish with a straight run along the bottom of the photo.
You don't need to follow every scale. The outline will be painted over.
-
Cut out the head
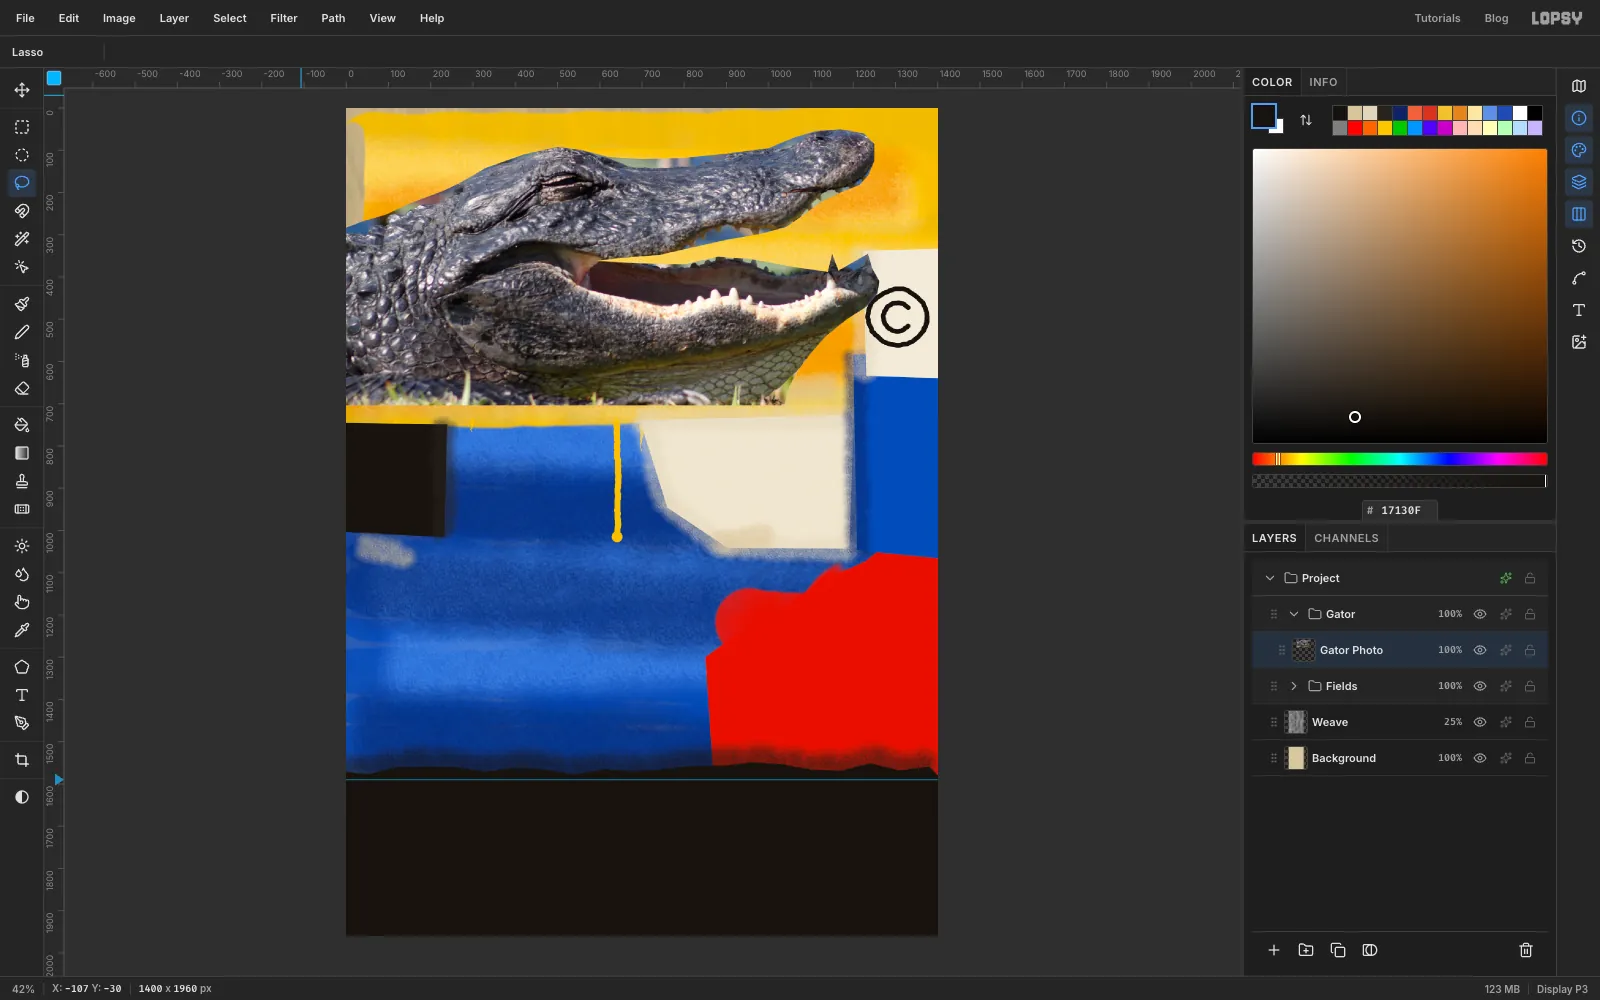
Choose Select → Inverse and press Delete to clear the background. Deselect.
-
Move and rotate the alligator
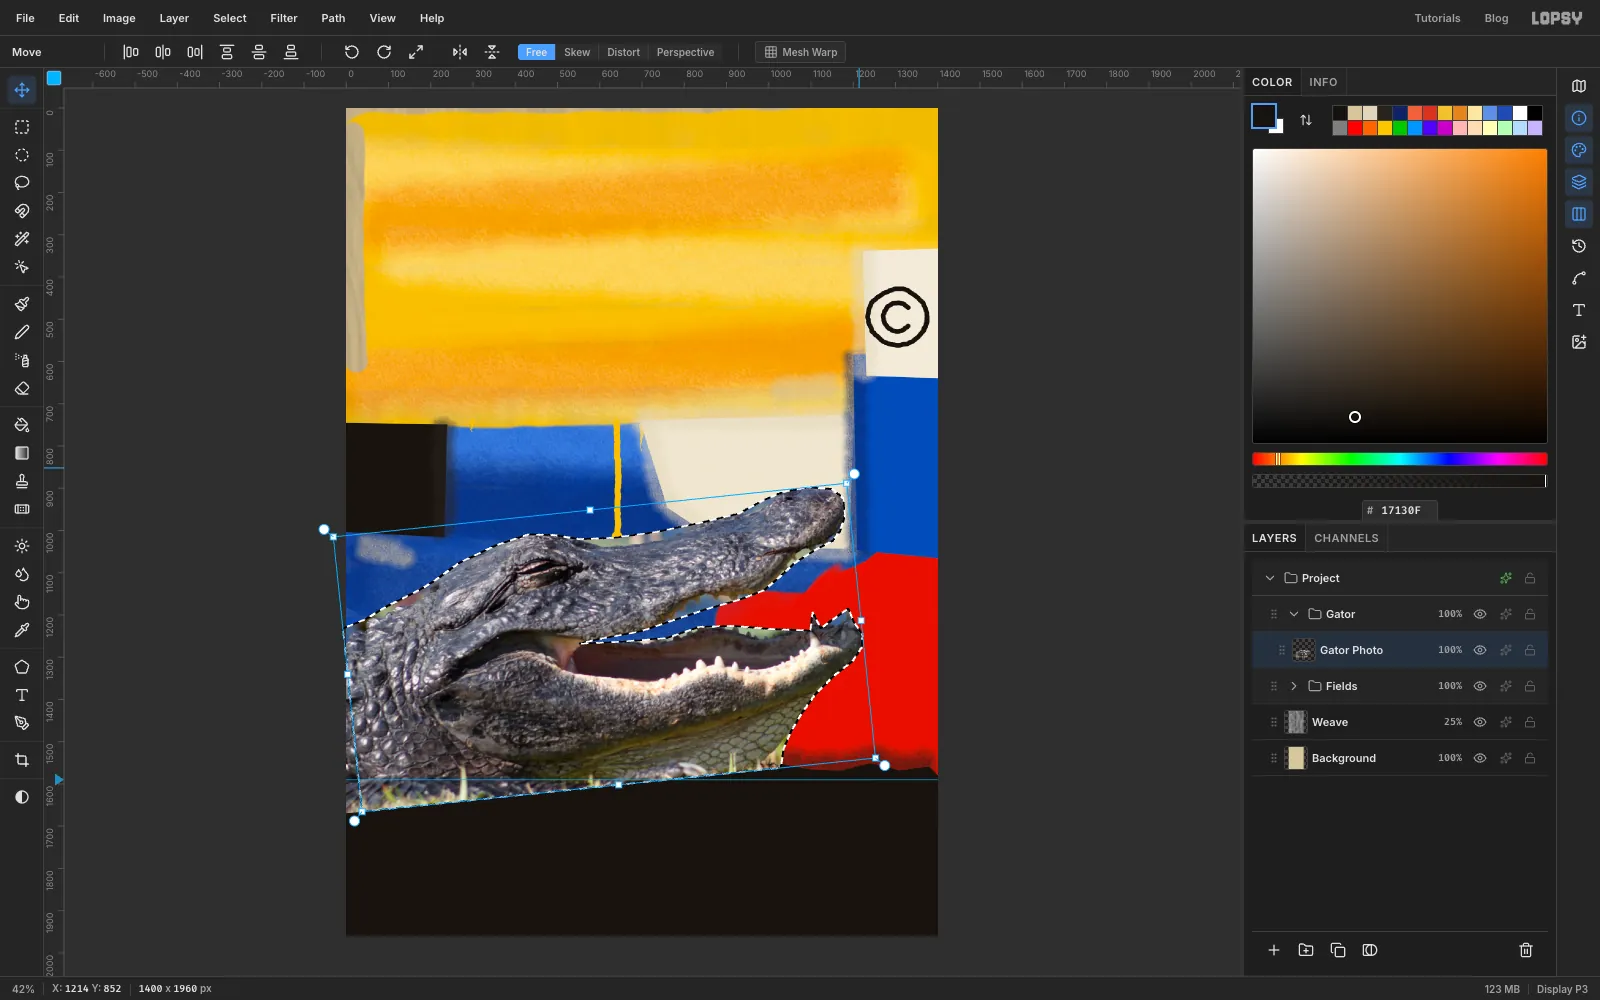
With the Move tool, drag the head down and a little left, so the neck hangs about 40 px off the left edge and the bottom of the photo sits on the band.
Cmd-click the Gator Photo thumbnail to show the transform handles. Drag the round rotation handle outside the top-right corner upward, about 6°, so the snout rises. Press Cmd+D to commit.
-
Trim the bottom edge
The rotation tilted the photo's straight bottom edge into the band. With the Rectangular Marquee, select from about
y 1578down past the bottom of the canvas, press Delete and deselect.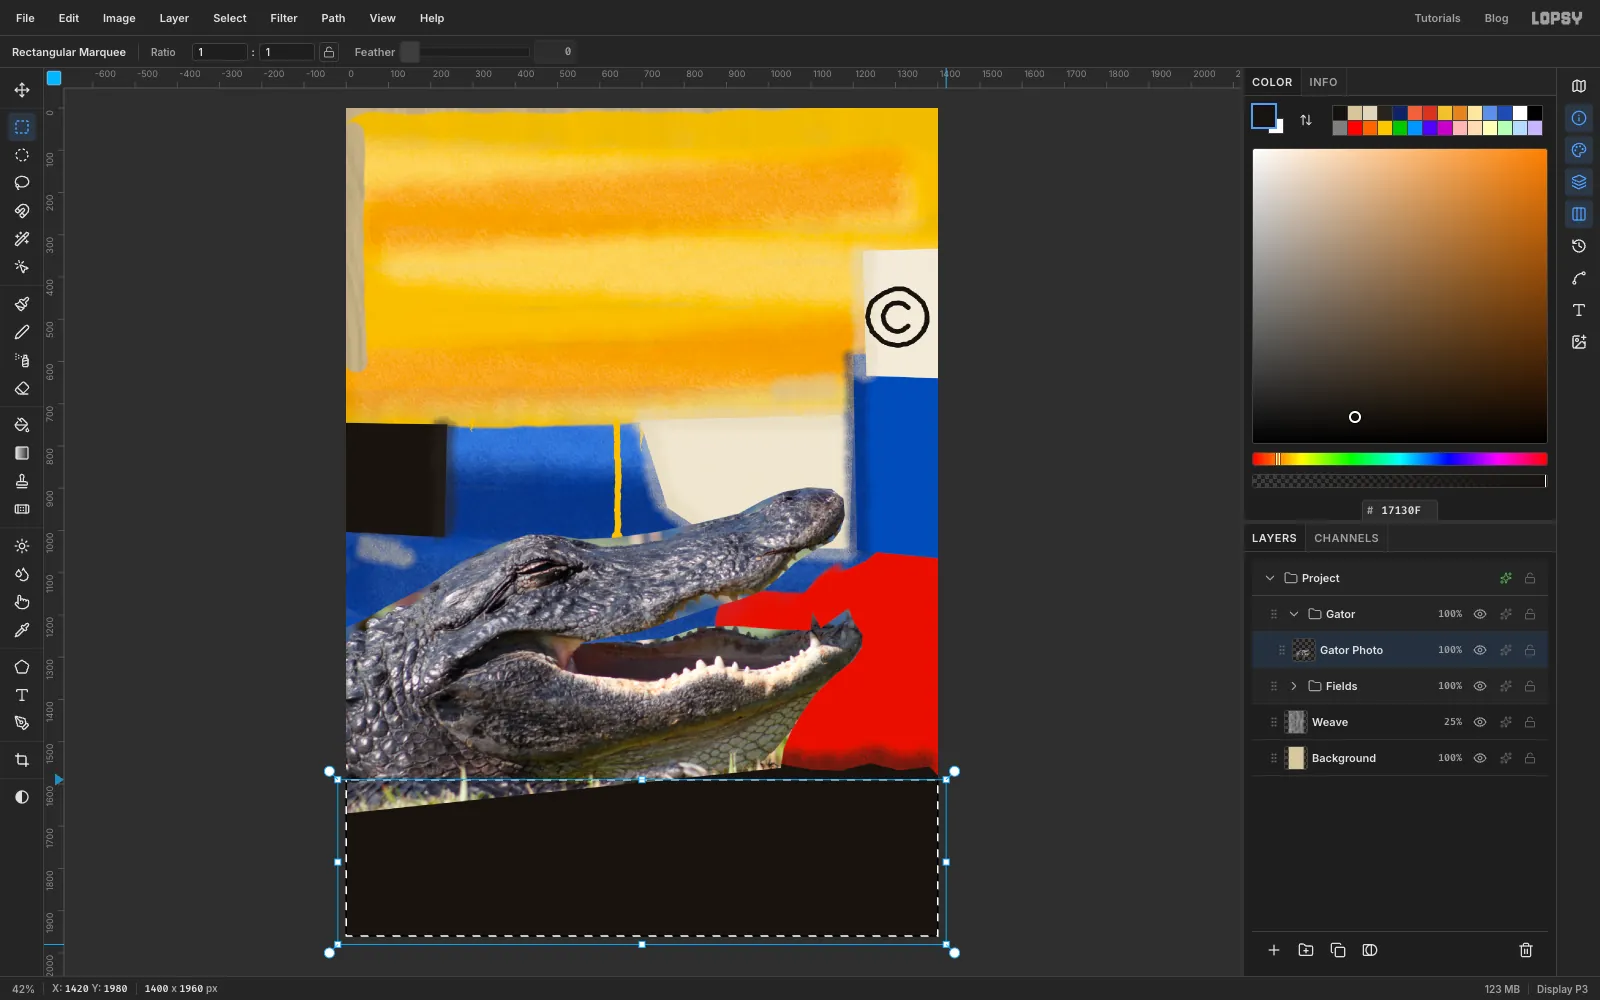
-
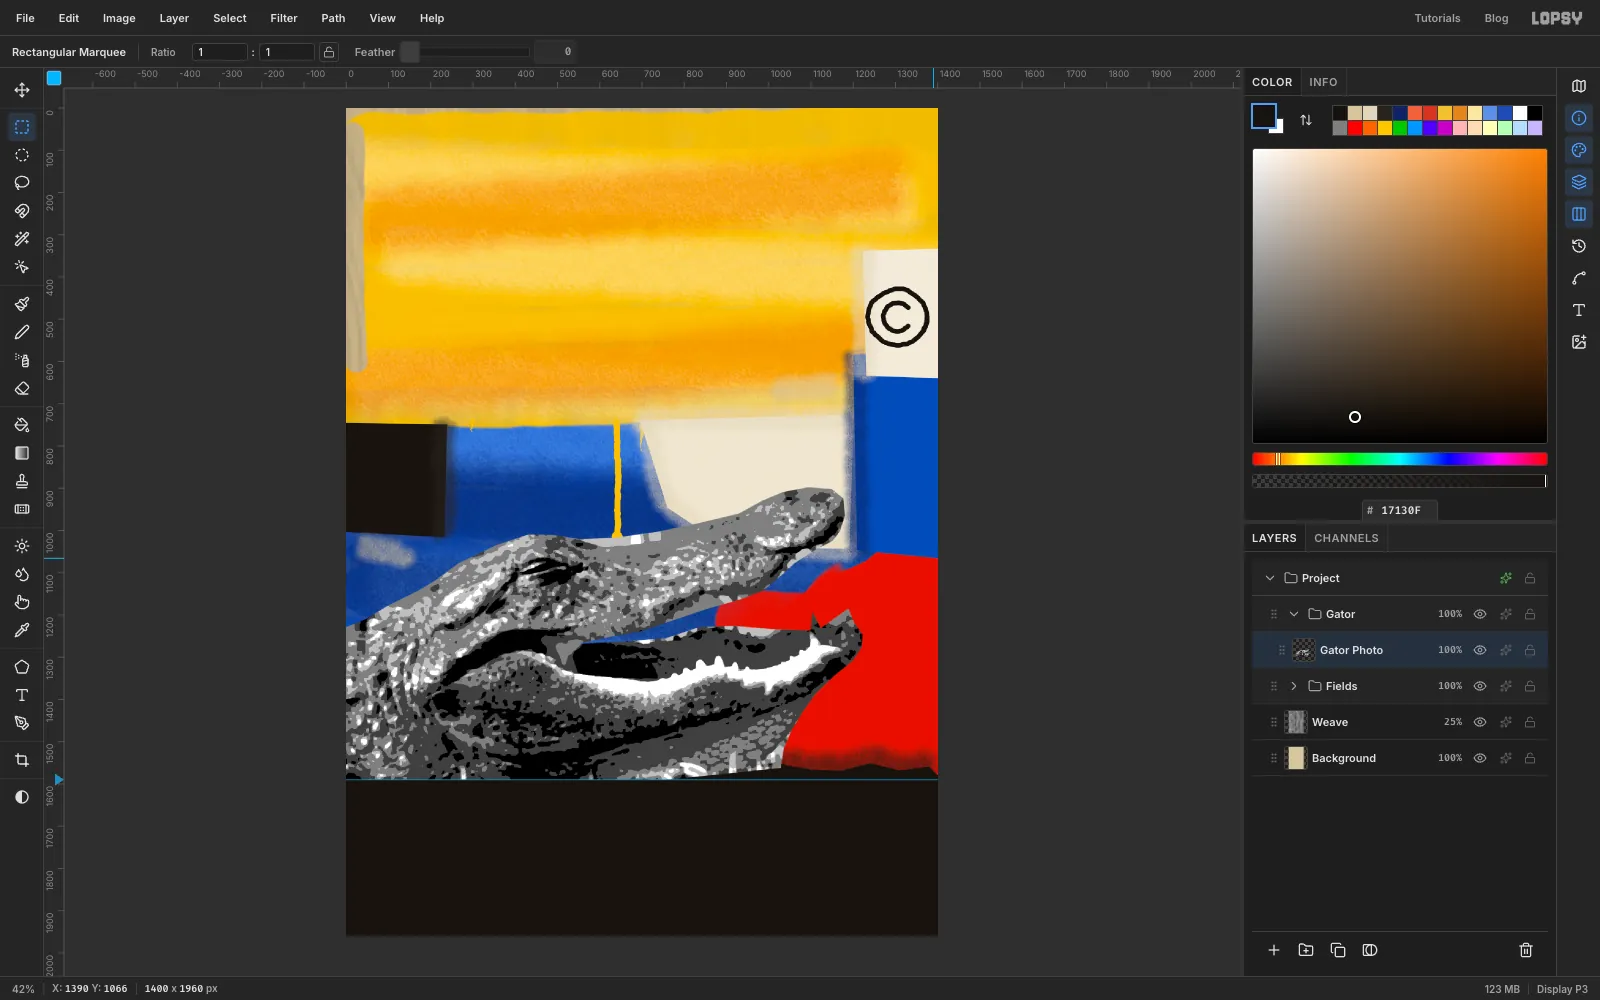
Turn the photo into an underpainting
With Gator Photo selected, run these in order:
- Filter → Desaturate
- Filter → Oil Paint…: Radius
4, Sharpness1.0 - Filter → Brightness/Contrast…: Brightness
10, Contrast50 - Filter → Posterize…: Levels
5
Running Oil Paint before Posterize matters. Oil Paint smooths the scales into rounded blotches, and Posterize then turns them into a few flat tones. The other way round, Oil Paint smears the flat posterized tones into small square blocks.
-
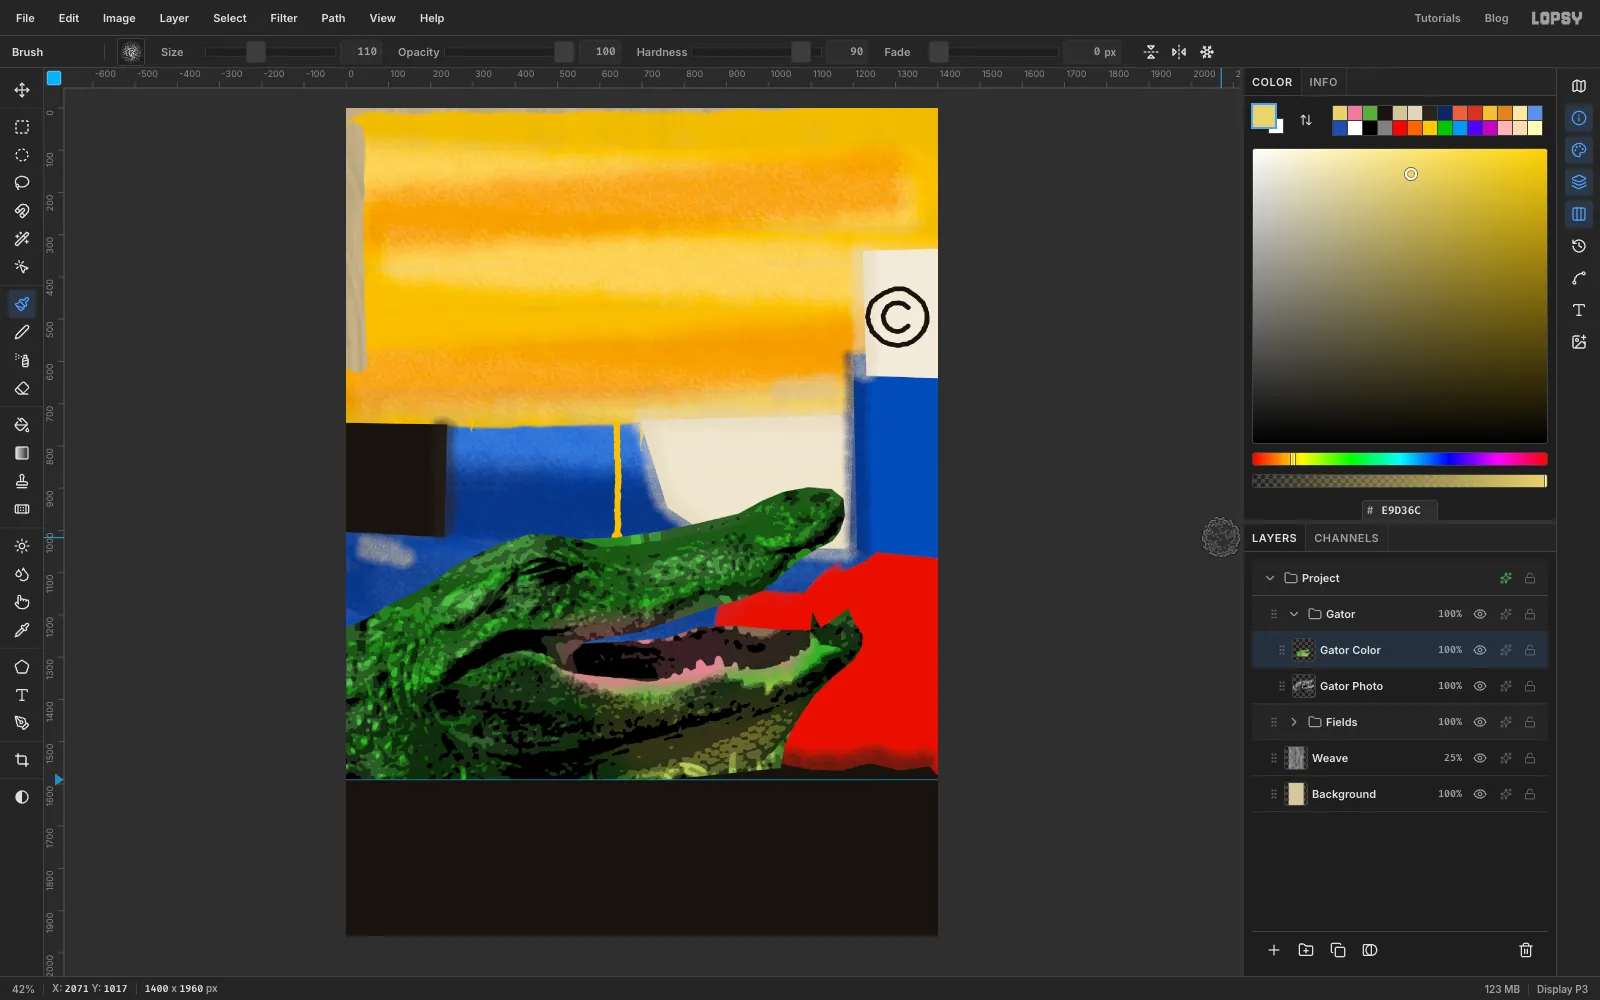
Wash in colour with Multiply
Cmd-click the Gator Photo thumbnail and add a layer named Gator Color. The selection keeps the paint on the head. Paint with the textured brush at Size
160in green , in long strokes across the whole head. Then:- with the chalk brush at Size
120, two strokes of pink along the inside of the mouth - at Size
110, two strokes of belly yellow along the lower jaw
Deselect and set the layer's Blend to Multiply. The grey tones underneath turn the flat colours into shaded greens.
- with the chalk brush at Size
-
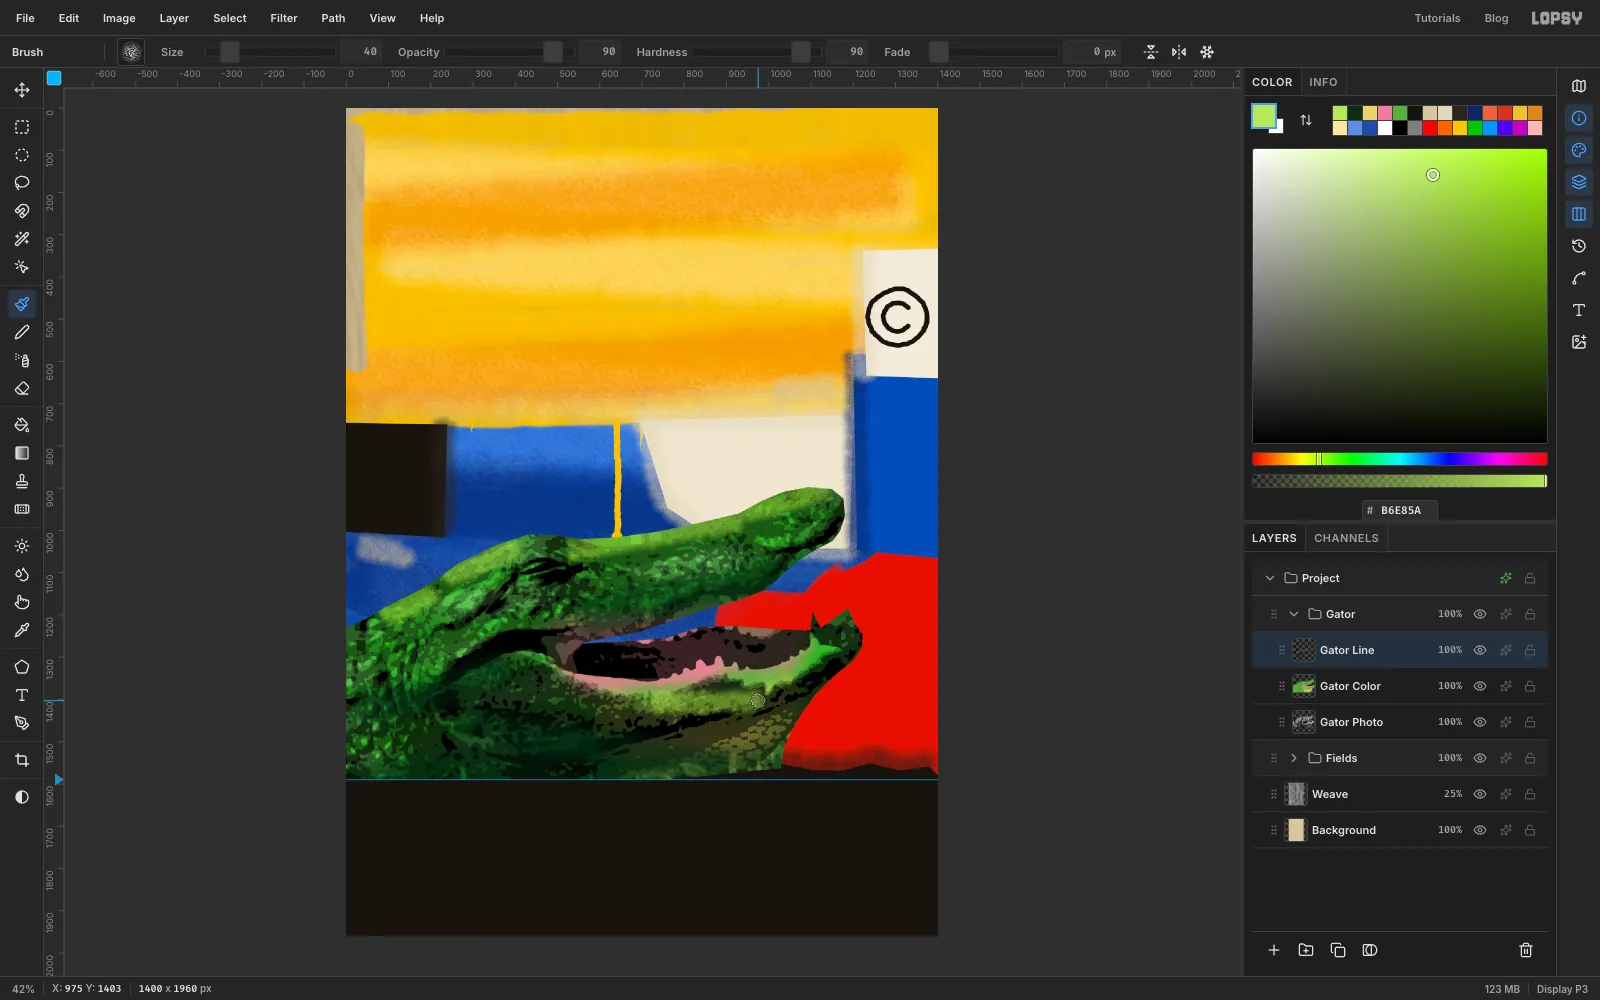
Overpaint shadows and ridges
Cmd-click the Gator Photo thumbnail again and add a layer named Gator Line.
- With the chalk brush at Size
70and Opacity85in shadow green , drag a few strokes through the shadows: under the jaw, along the neck and along the bottom of the belly. - At Size
40and Opacity90in lime , add short streaks along the top of the snout and the skull.
Deselect.
- With the chalk brush at Size
-
Fill the mouth and draw the outline
With the Lasso, select the gap between the jaws and close it with a straight edge at the snout. Choose Select → Feather…
3so the edge isn't razor sharp, and fill it with . Deselect and add a short pink chalk stroke (Size50) inside for a tongue.Now draw the outline with the textured brush in black, in five separate strokes so the line changes weight as it goes. Use a heavy Size
20along the neck, thin it to12over the skull and snout and9under the upper jaw, then thicken it again to14along the lower jaw and18round the chin. Leave small gaps between the strokes.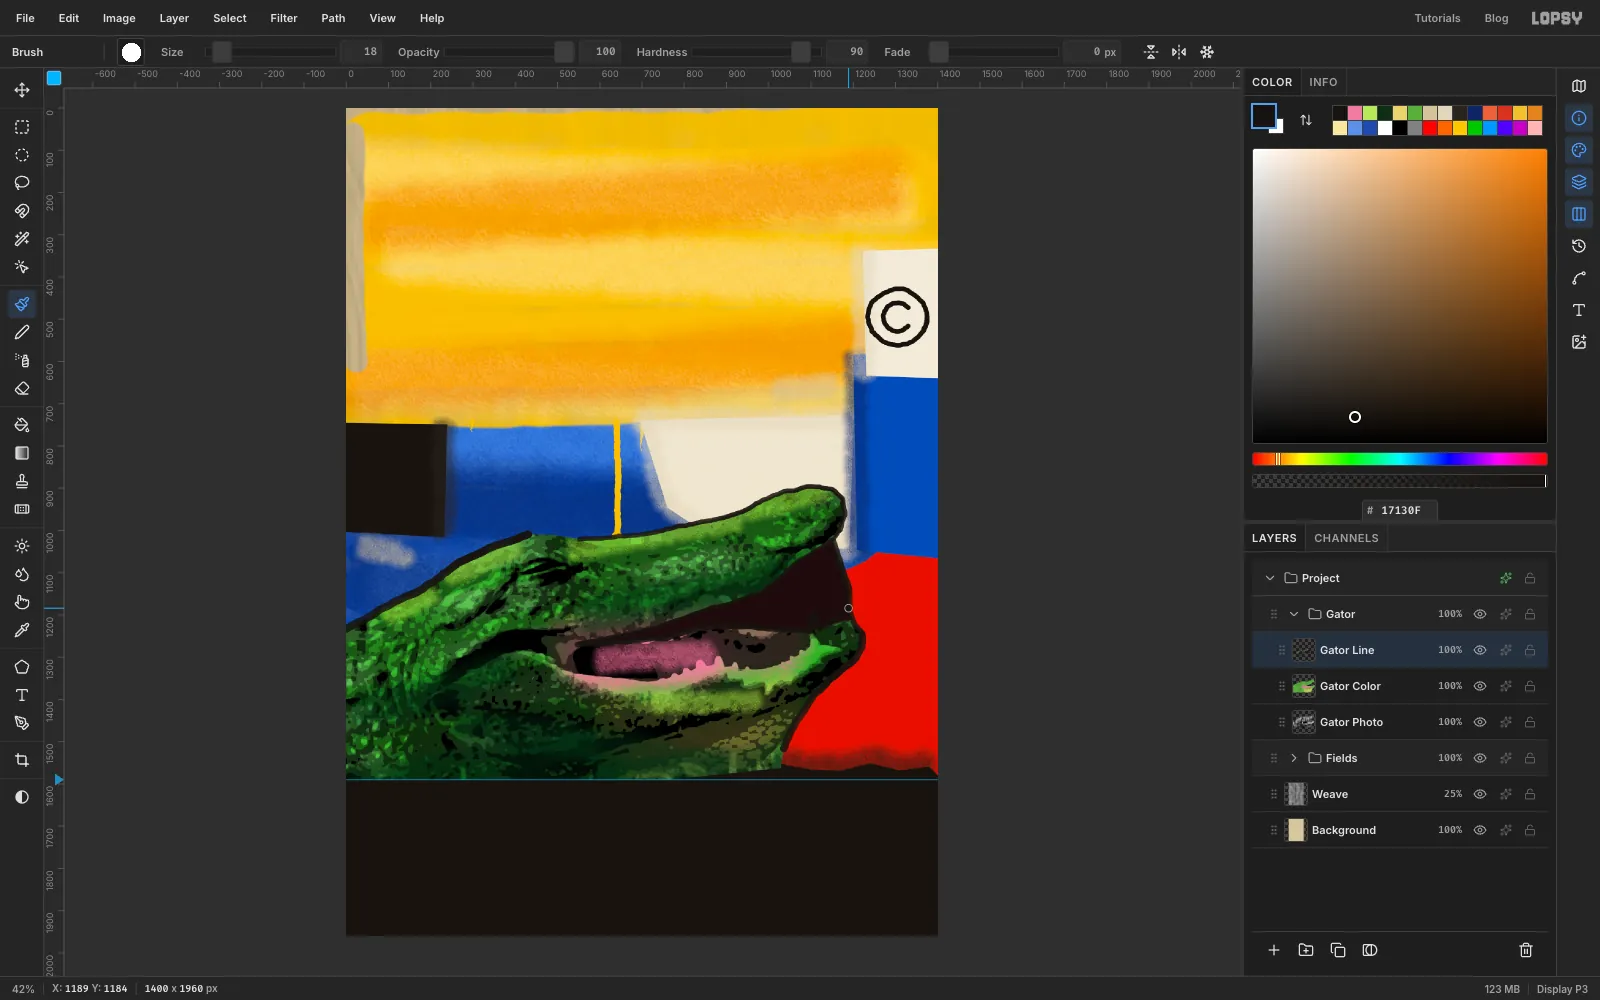
-
Paint the teeth
With the textured brush at Size
11in white, click where the upper jaw meets the mouth corner. Then Shift-click a zigzag along the underside of the jaw toward the snout. Make the points uneven, 18 to 38 px deep, and end on a point.For the lower teeth, switch to Size
15and paint a short upward stroke over each tooth in the photo, about 25 to 30 px tall.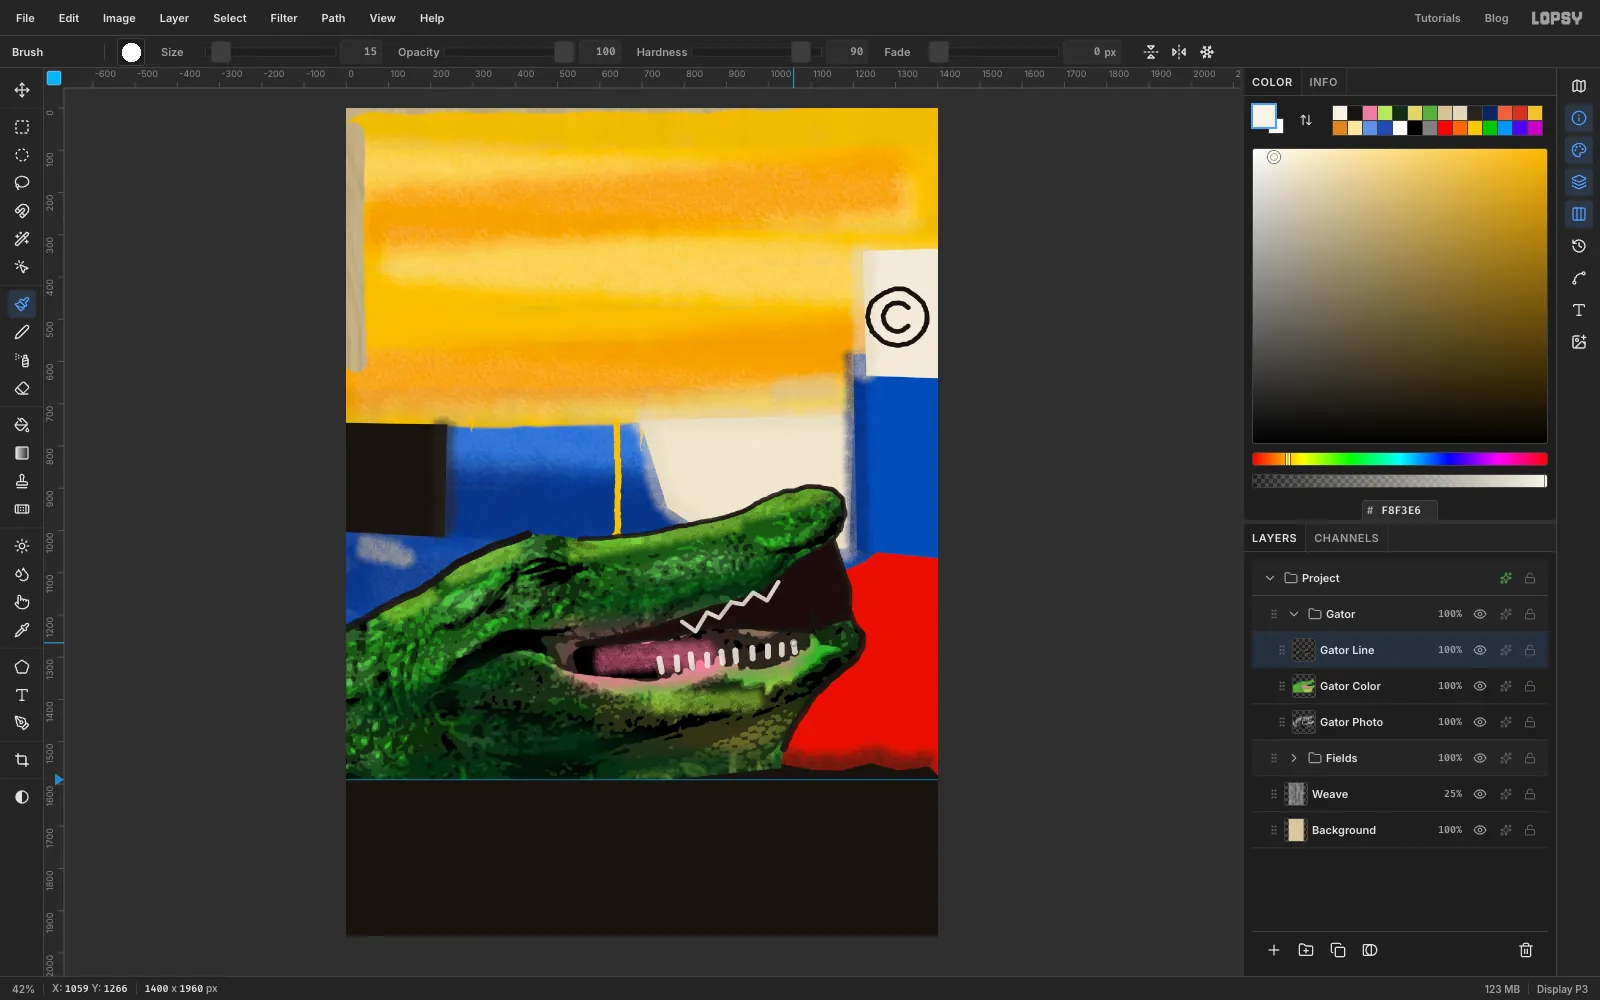
-
Add scale marks and an eye
Paint about nine crosses on the neck with the textured brush in white. For each one, click one end of a stroke and Shift-click the other. Vary the size (roughly 20 to 60 px across), the brush size (4 to 10) and the angle, so they don't look stamped.
For the eye, click once with the textured brush at Size
40in crown yellow . Click again at26slightly to the upper right so the eye isn't a perfect circle. Draw a short black slit through it with the Hard Round brush at Size9.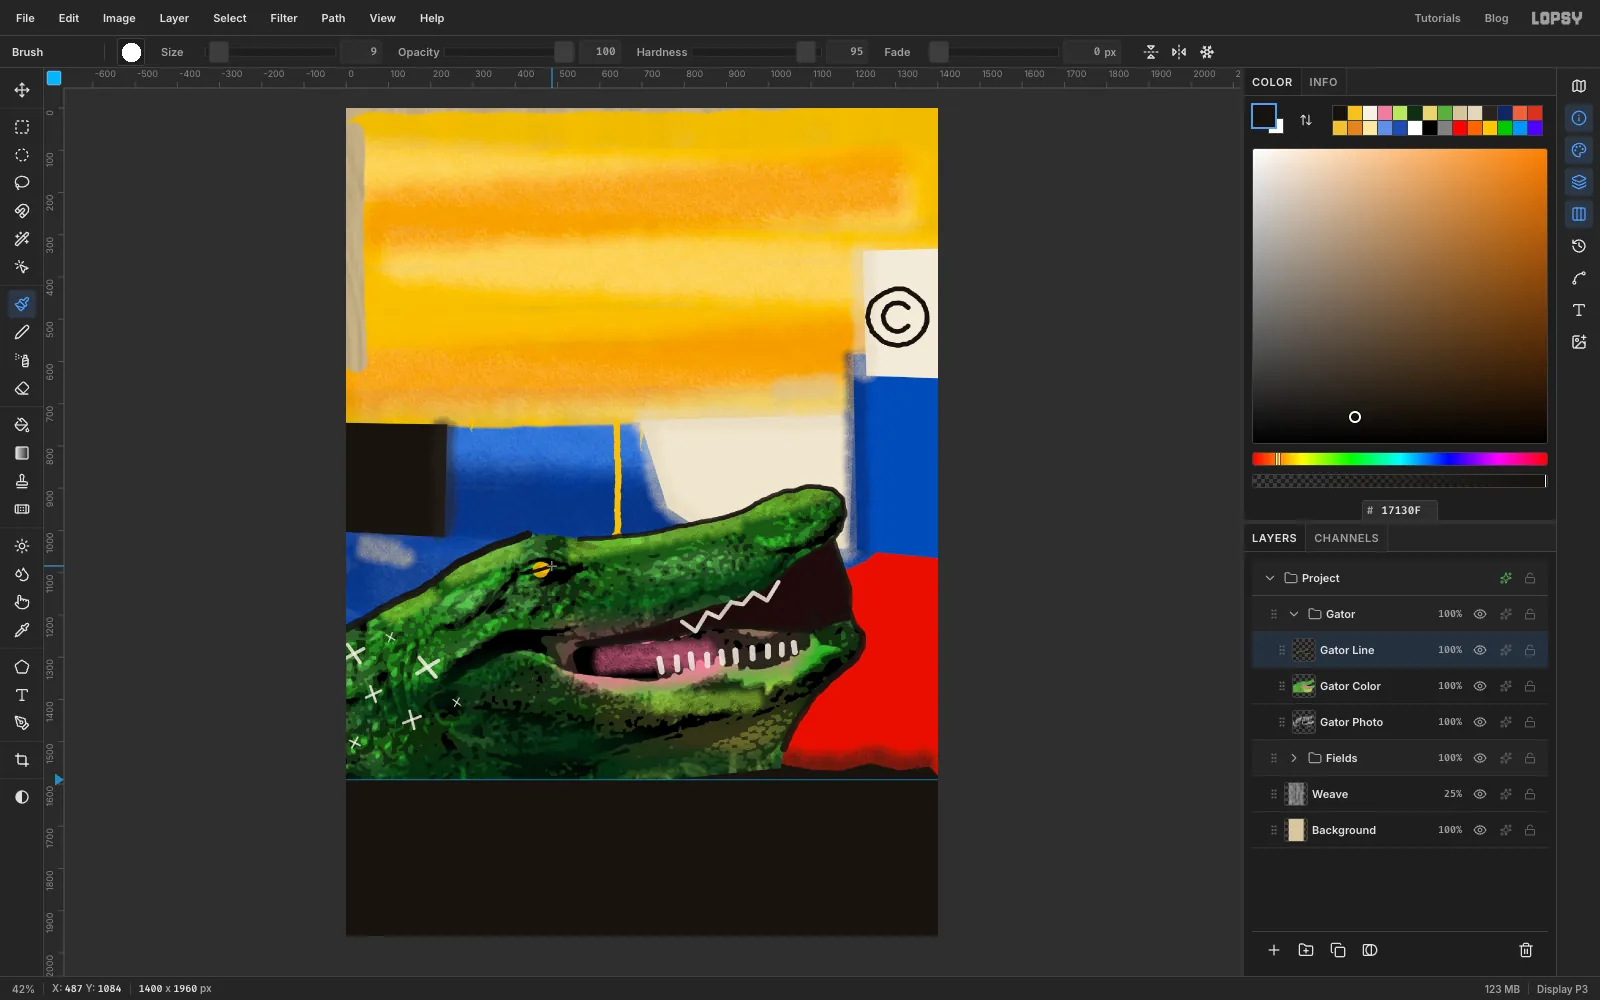
-
Crown the king of the bayou
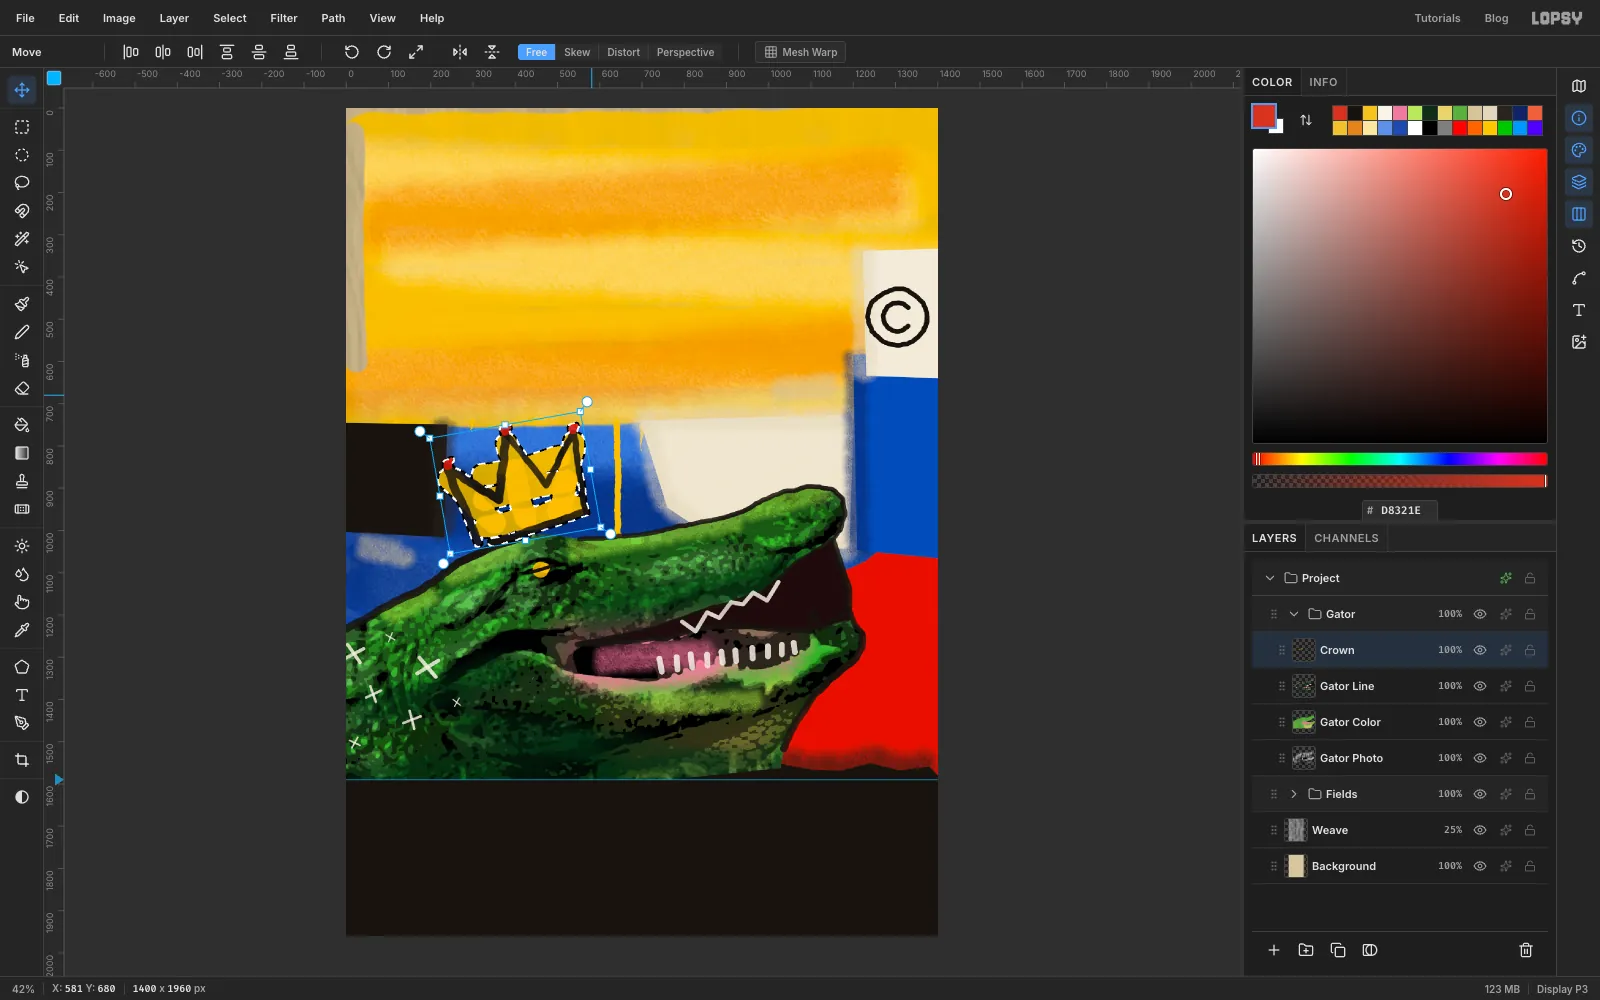
Add a layer named Crown. On top of the head, scrub three horizontal strokes of crown yellow with the textured brush at Size
56, about 260 px wide. Then pull a short stroke up into each of three points. The fill should miss the outline in places.Draw the outline over it with the textured brush in black, in three strokes:
- Size
22up the left side and the first point - Size
16over the other two points - Size
20back along the base
Put a red blob on each point with the Hard Round brush in vermilion: click at Size
26, then again at16, slightly off-centre.Choose the Move tool, Cmd-click the Crown thumbnail, drag the rotation handle to tilt the crown about 10° to the left, and press Cmd+D.
- Size
-
Rough edge and drips into the band
The trimmed photo still ends in a straight line. Add a layer named Band Edge at the top of Gator. Lasso a ragged strip that wavers between about
y 1556andy 1590and runs across the full width. Fill it with black, then drag the chalk brush at Size50along it.With the Hard Round brush, paint four drips down into the band, all starting at about
y 1546:- dark green at
x 180, about 110 px long, Size16 - lighter green at
x 430, about 50 px, Size9 - dark green at
x 770, about 130 px, Size18, ending in a bead clicked at Size28 - vermilion at
x 1370, about 90 px, Size14, from the red field
For the three without a bead, set Taper to about two thirds of the drip's length first. Set it back to
0afterwards.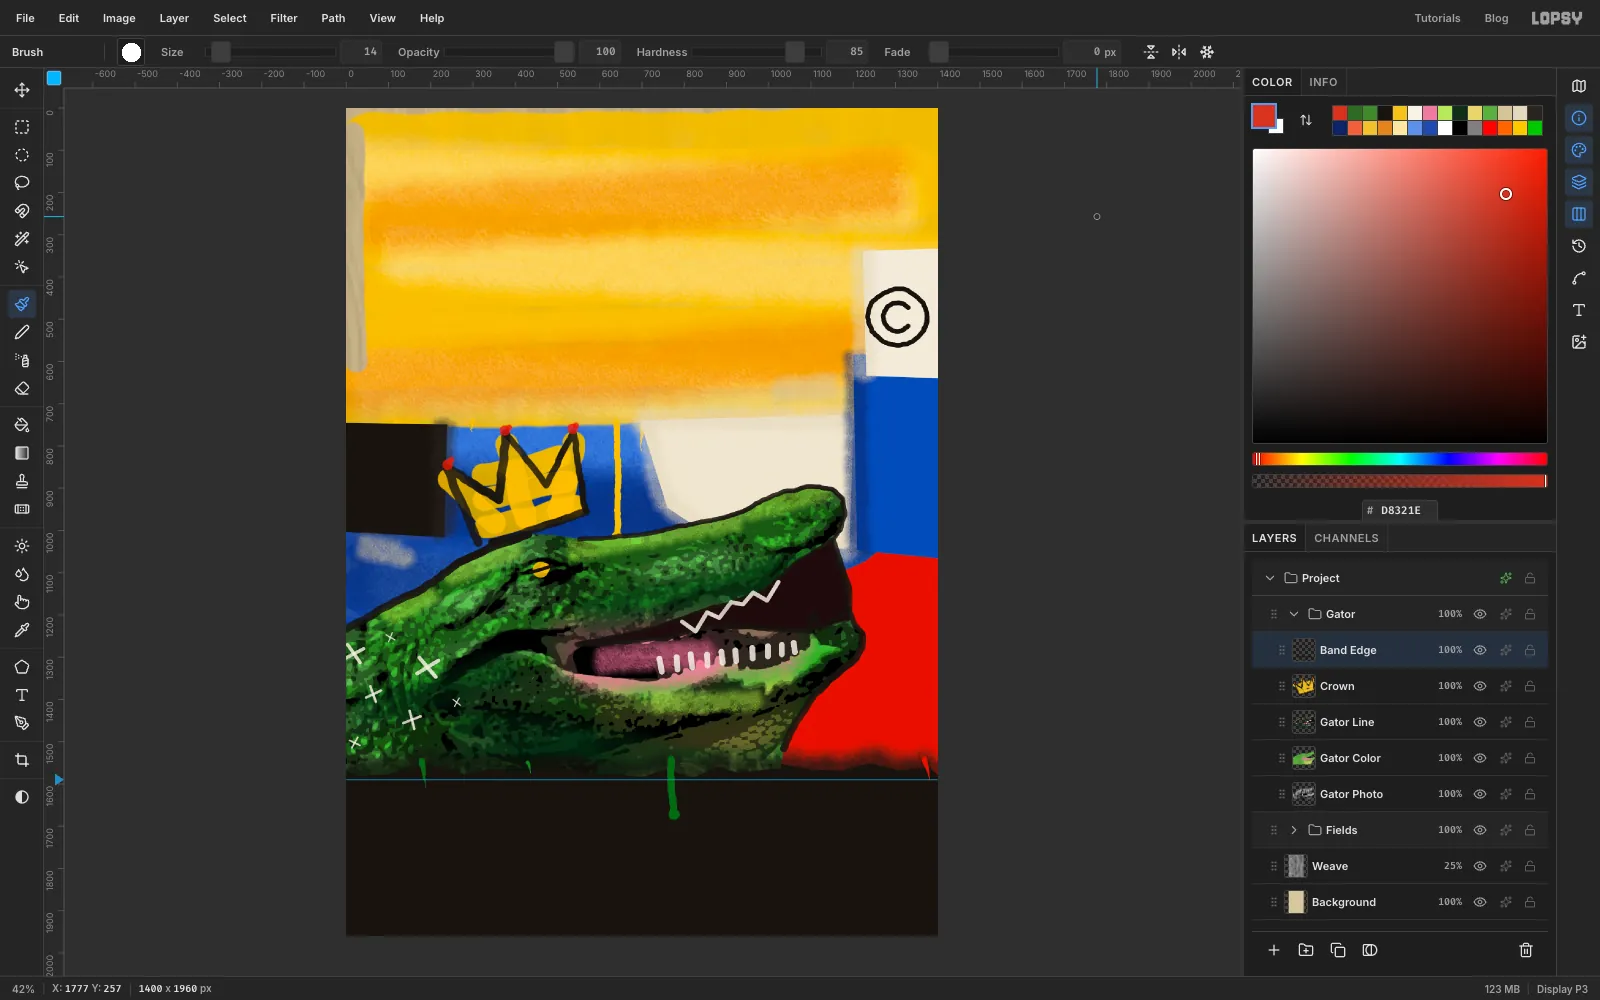
- dark green at
-
Set the title
Collapse Gator, click it, and click the New Group button. Name it Type. Click the top ruler at
90to drop a vertical guide for the left margin.Choose the Text tool, pick Permanent Marker, set Size to
46, and set the foreground to ink black. Click in the yellow and typeYOU'RE INVITED TO THE. Press Tab to commit. With the Move tool, use the arrow keys to line its left edge up with the guide, about 60 px from the top.Click the Type group row before each new piece of type, so the options don't restyle the last layer. Then make
BAYOUat Size280and nudge it to sit just under the first line.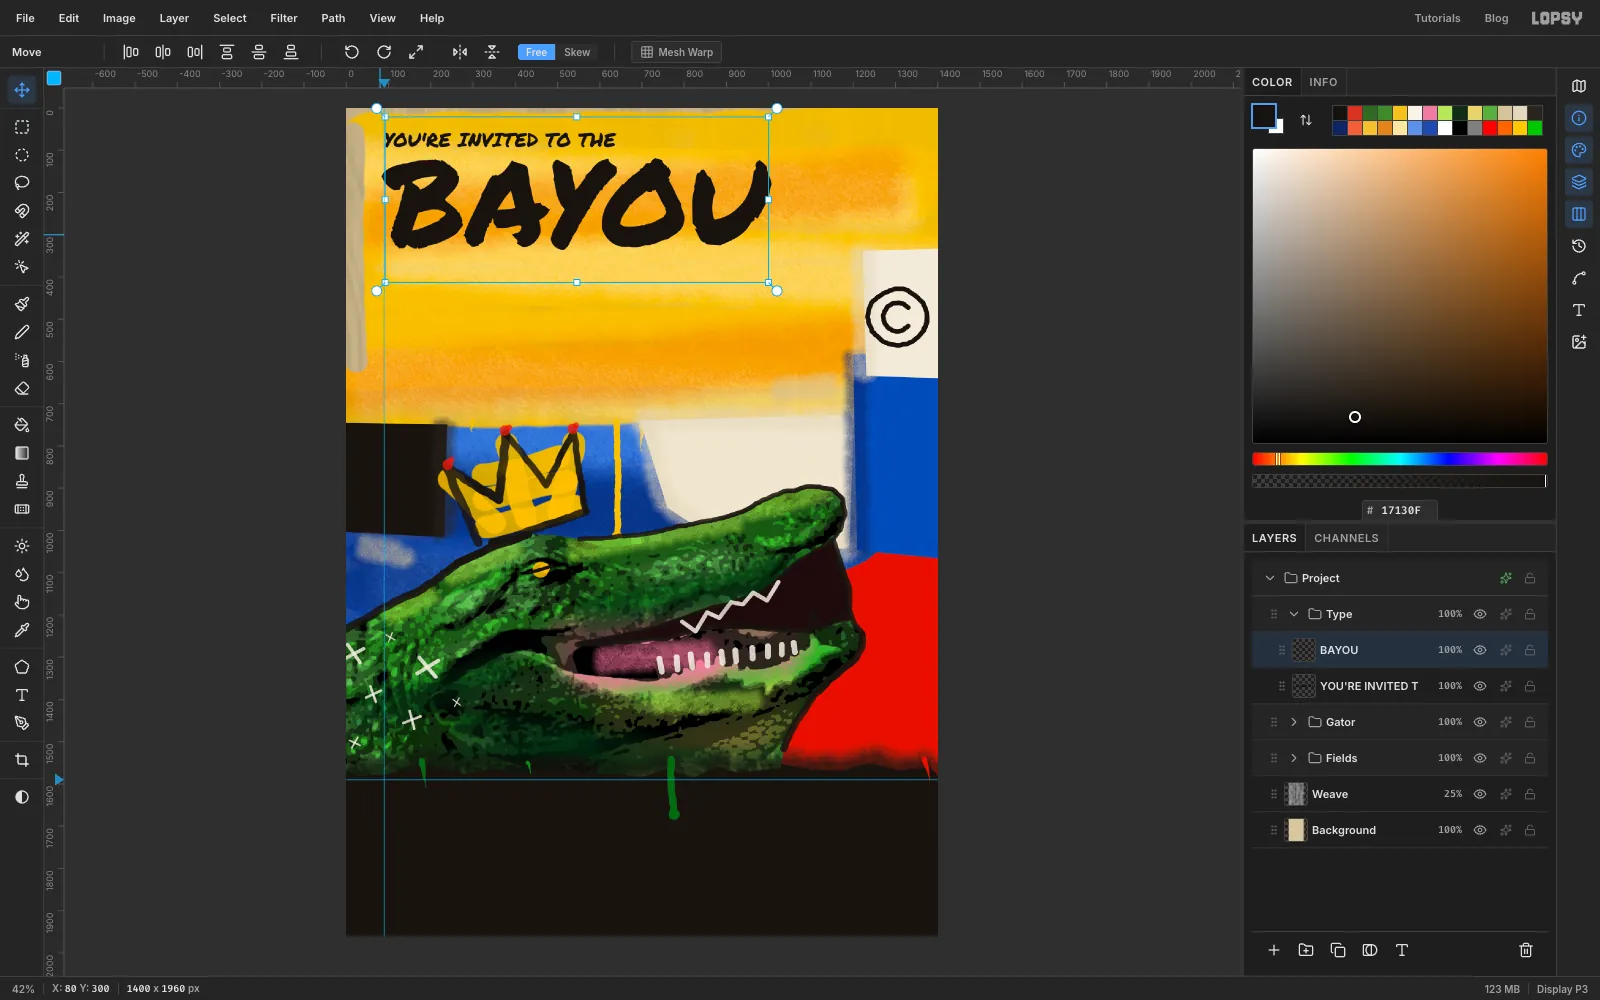
-
Tilt the title
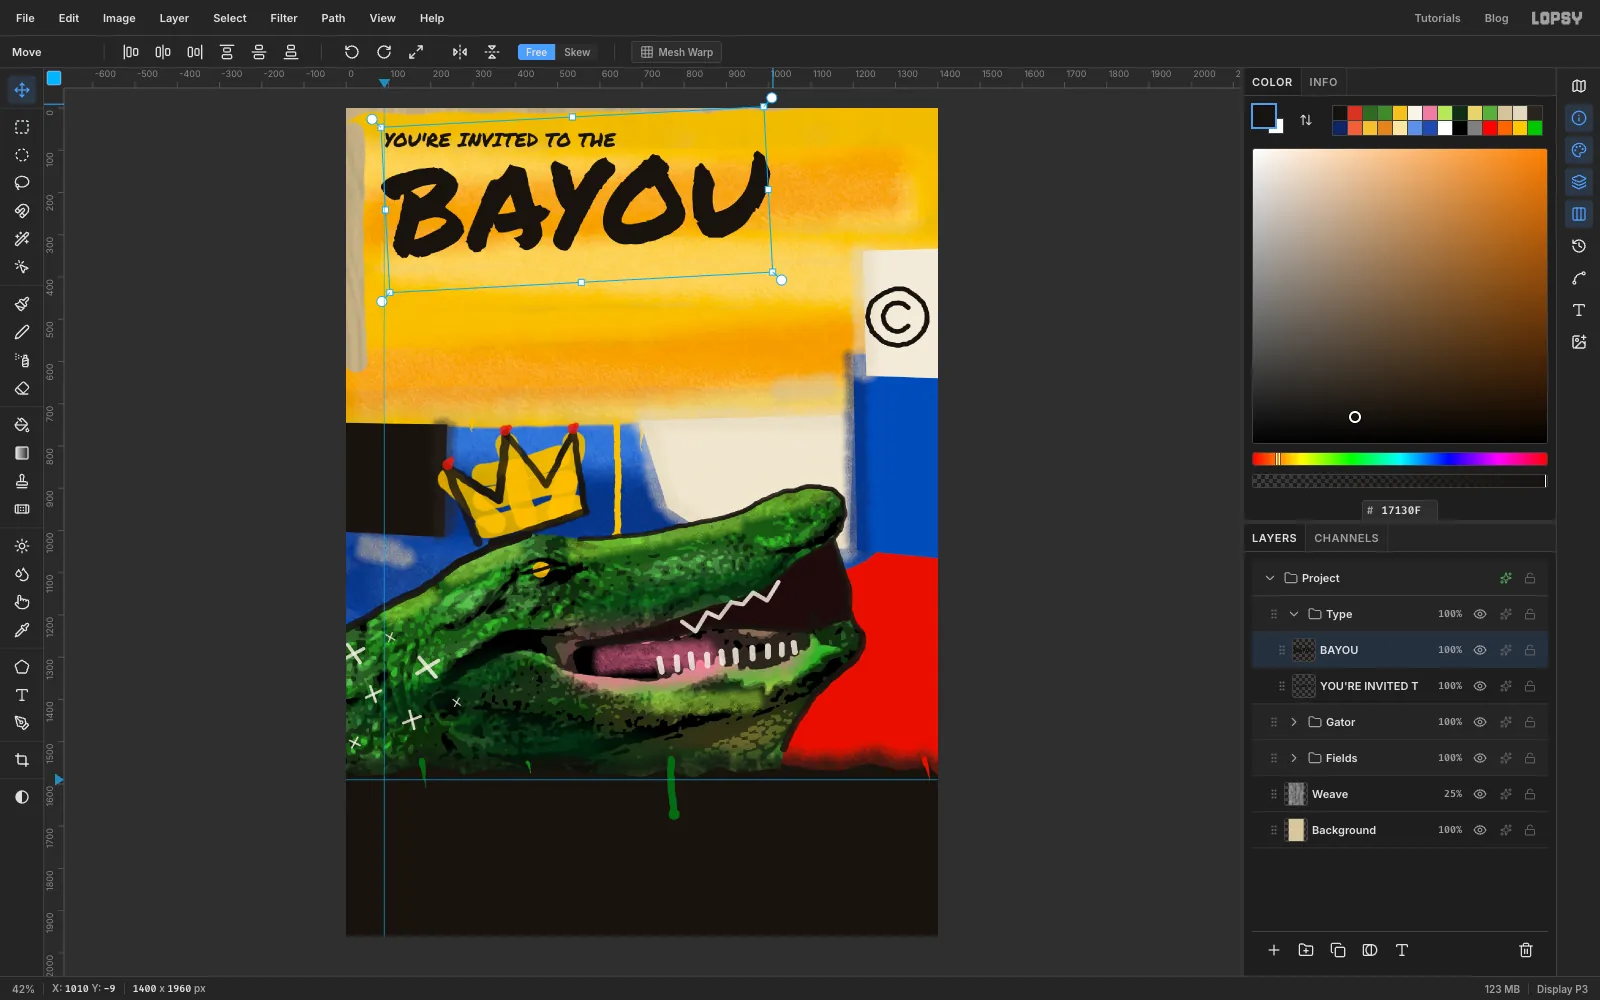
With the Move tool and BAYOU selected, drag the rotation handle at its top-right corner to tilt the word about 3° counter-clockwise. Small, different tilts on each line make the lettering look hand-placed.
-
Cross out one word
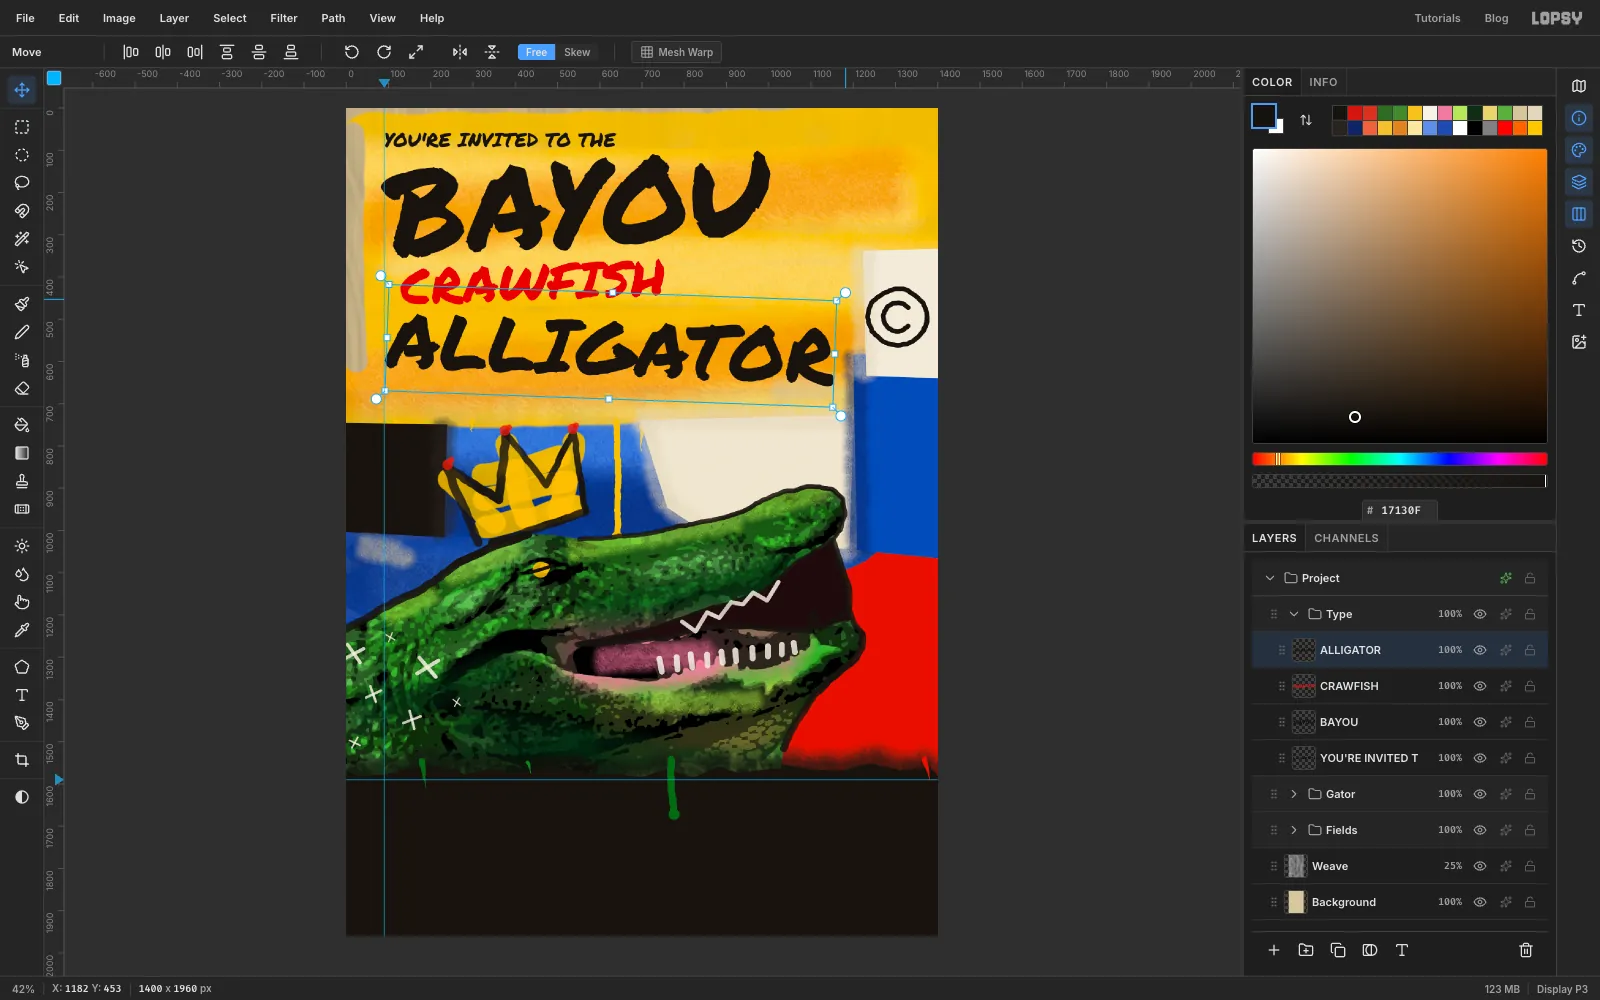
Make
CRAWFISHat Size118in bright red . Place it under BAYOU, indented about 40 px from the guide, and tilt it about 2° counter-clockwise. Then makeALLIGATORat Size180in black. Place it under CRAWFISH with about 40 px of air between them, and tilt it about 2° clockwise.You'll strike out CRAWFISH in a moment. The joke only works if the word stays big enough to read through the strike.
-
Put BALL on the white slab
Make
BALLat Size160in vermilion and place it on the dirty-white slab, just above the snout. Tilt it about 6° counter-clockwise so it rises with the alligator. Red on dirty white is the strongest contrast on the page, so give it no outline or effect.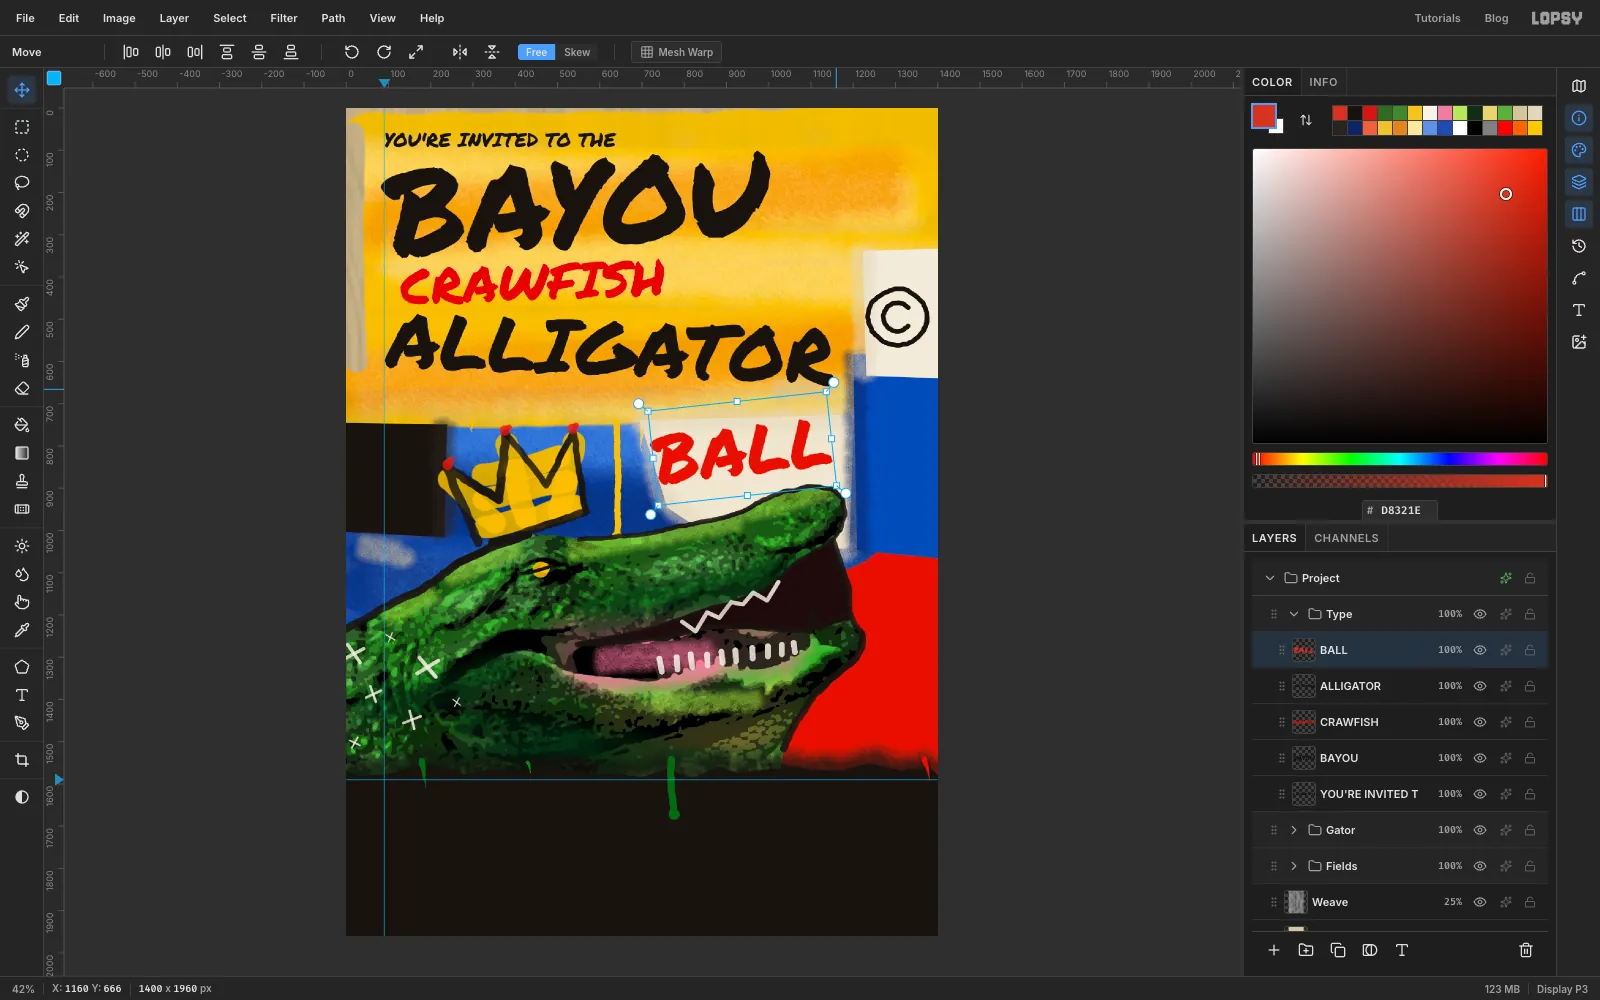
-
Set the details in the band
Set each of these lines on the guide in the black band:
SATURDAY, NOVEMBER 21 · 8 PM TIL LATEin Permanent Marker50, cream , about 50 px below the band's edgeTHE OLD ICEHOUSE · BREAUX BRIDGE, LAin Gochi Hand46, creamZYDECO · CRAWFISH BOIL · BAD PAINTINGSin Gochi Hand46, yellowA BENEFIT FOR THE ATCHAFALAYA ART CLUBin Gochi Hand42, cream
Leave about 20 px between lines. Keep lines 2–4 ending before about
x 950so the RSVP card fits at the right.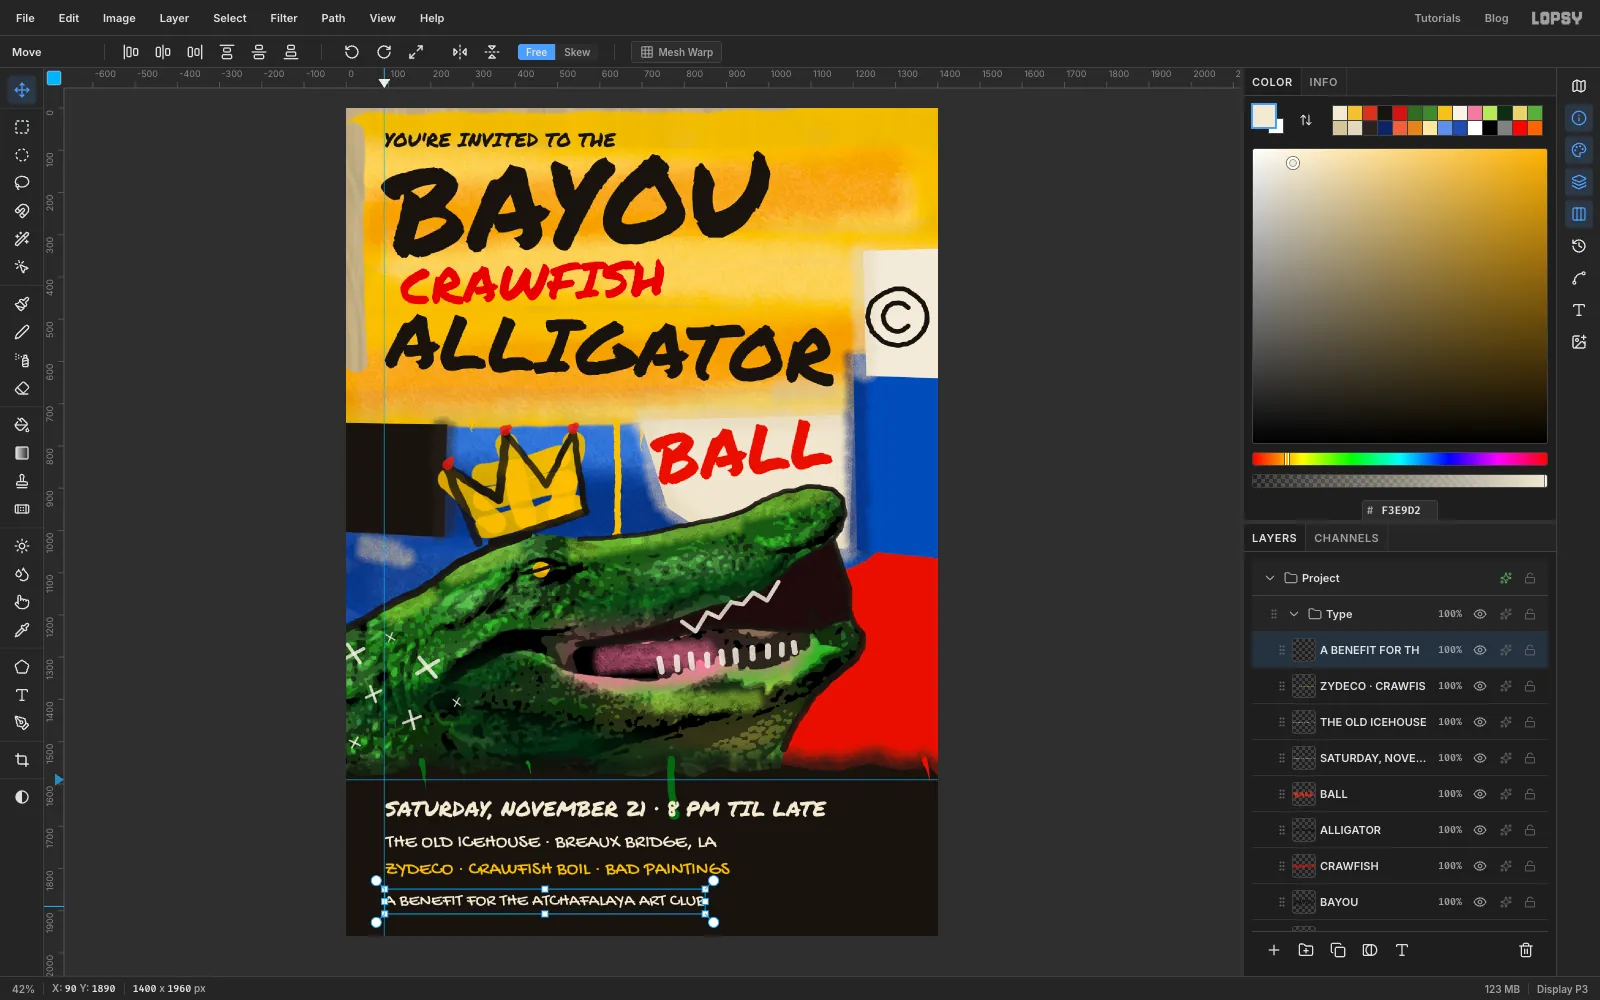
-
Strike out CRAWFISH
Collapse Type, click it, and click the New Group button again. Name the group Marks and add a layer named Scrawl.
With the textured brush at Size
24in black, make one fast stroke through the middle of CRAWFISH. Start a little left of the C and finish past the H, rising slightly. One bar keeps the word readable. Two parallel bars look like they were drawn with a ruler.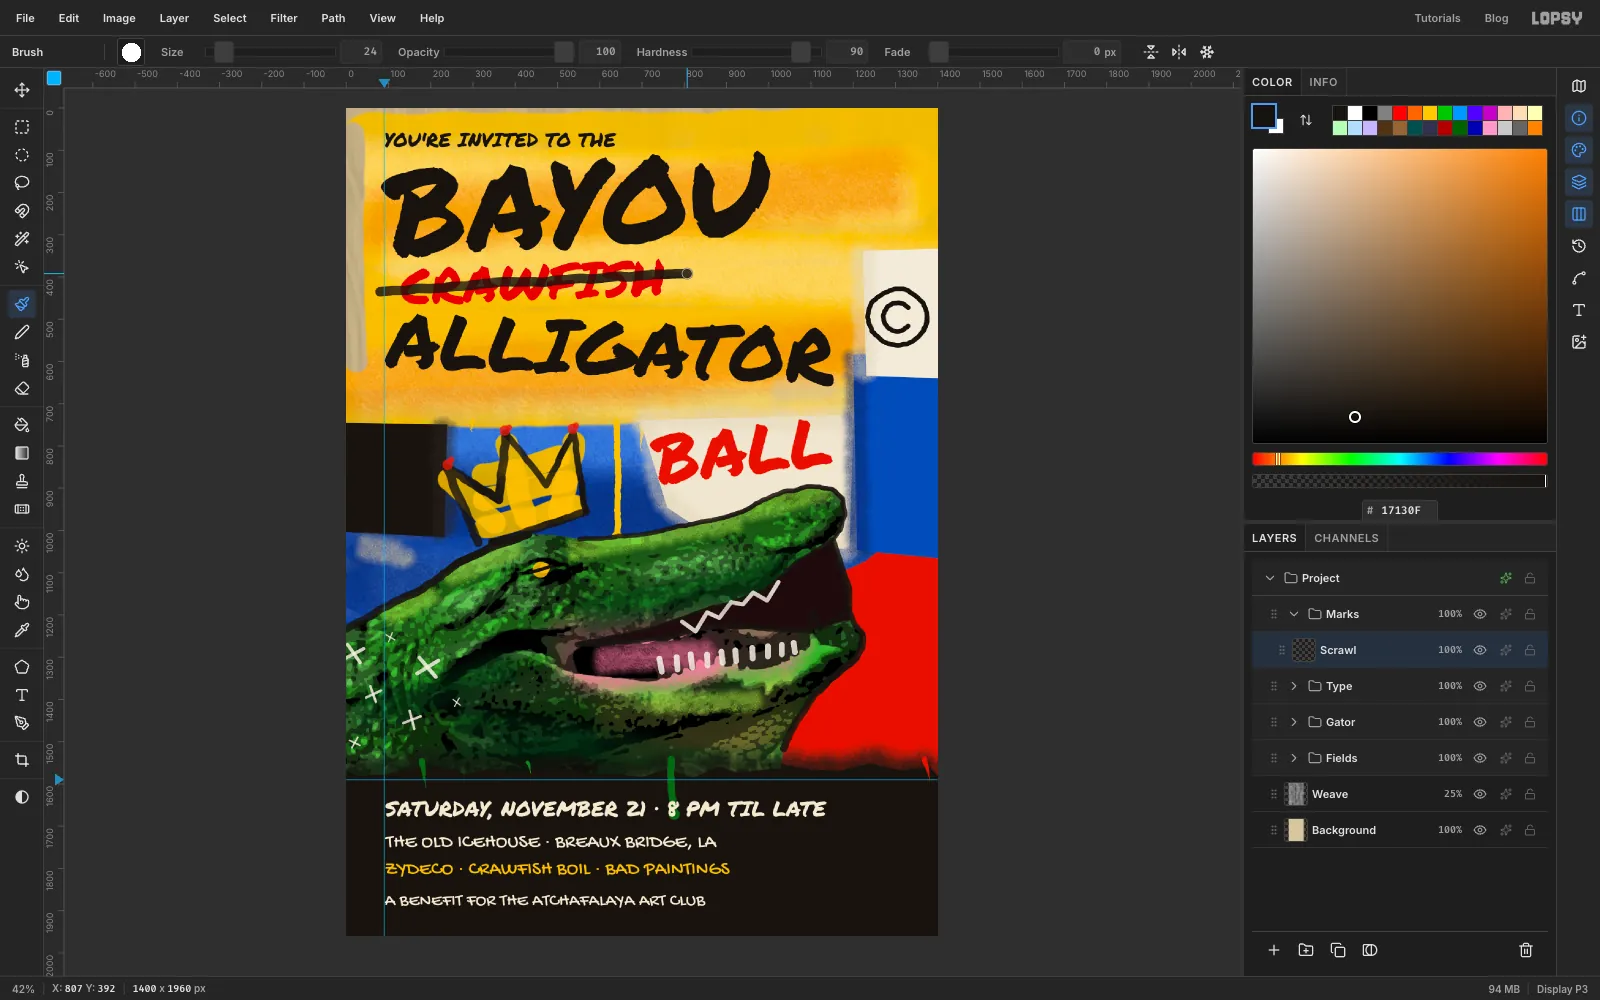
-
Underline BALL and count the days
Under BALL, draw a slanting line with the textured brush at Size
14. Then add a shorter one at9that isn't parallel to it.For the tally, choose the Hard Round brush at Size
8. Make four tally marks in the top-right corner and one slash across them, using a click and a Shift-click for each.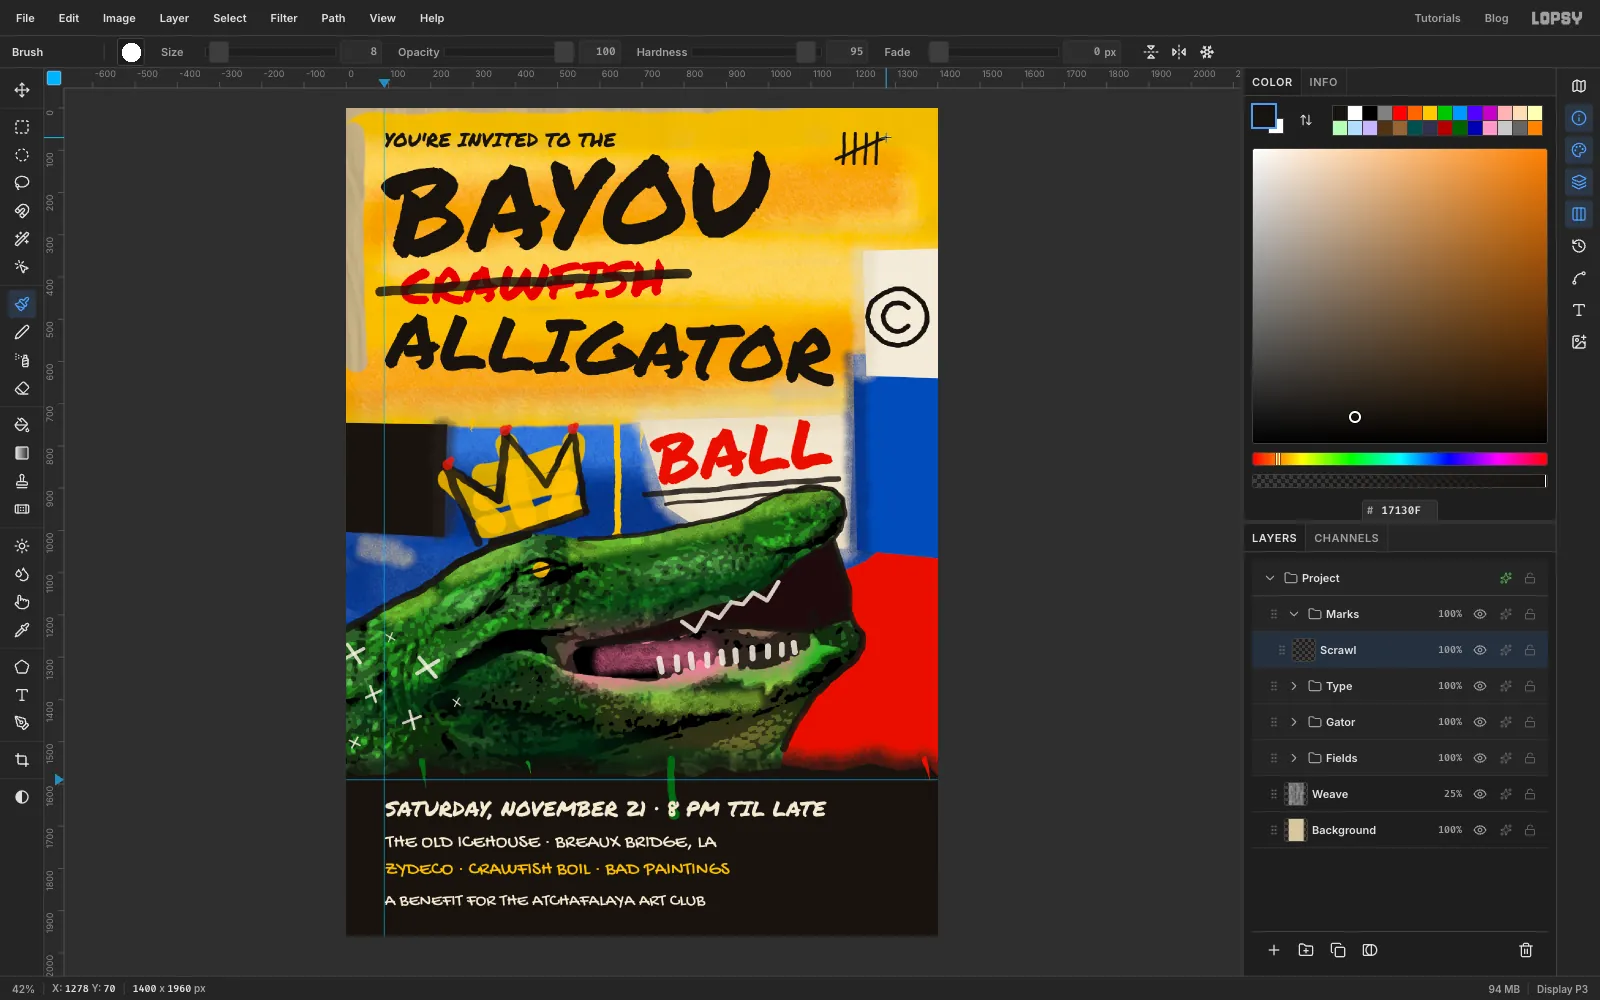
-
Label the teeth
Click Marks and set
TEETHin Gochi Hand54, white, on the blue block, at least 70 px in from the right edge. Click Scrawl. With the Hard Round brush at Size9in crown yellow, click just below the label and Shift-click on the lower teeth. Add two short strokes at the tip for an arrowhead. Yellow shows up on the blue and on the dark mouth.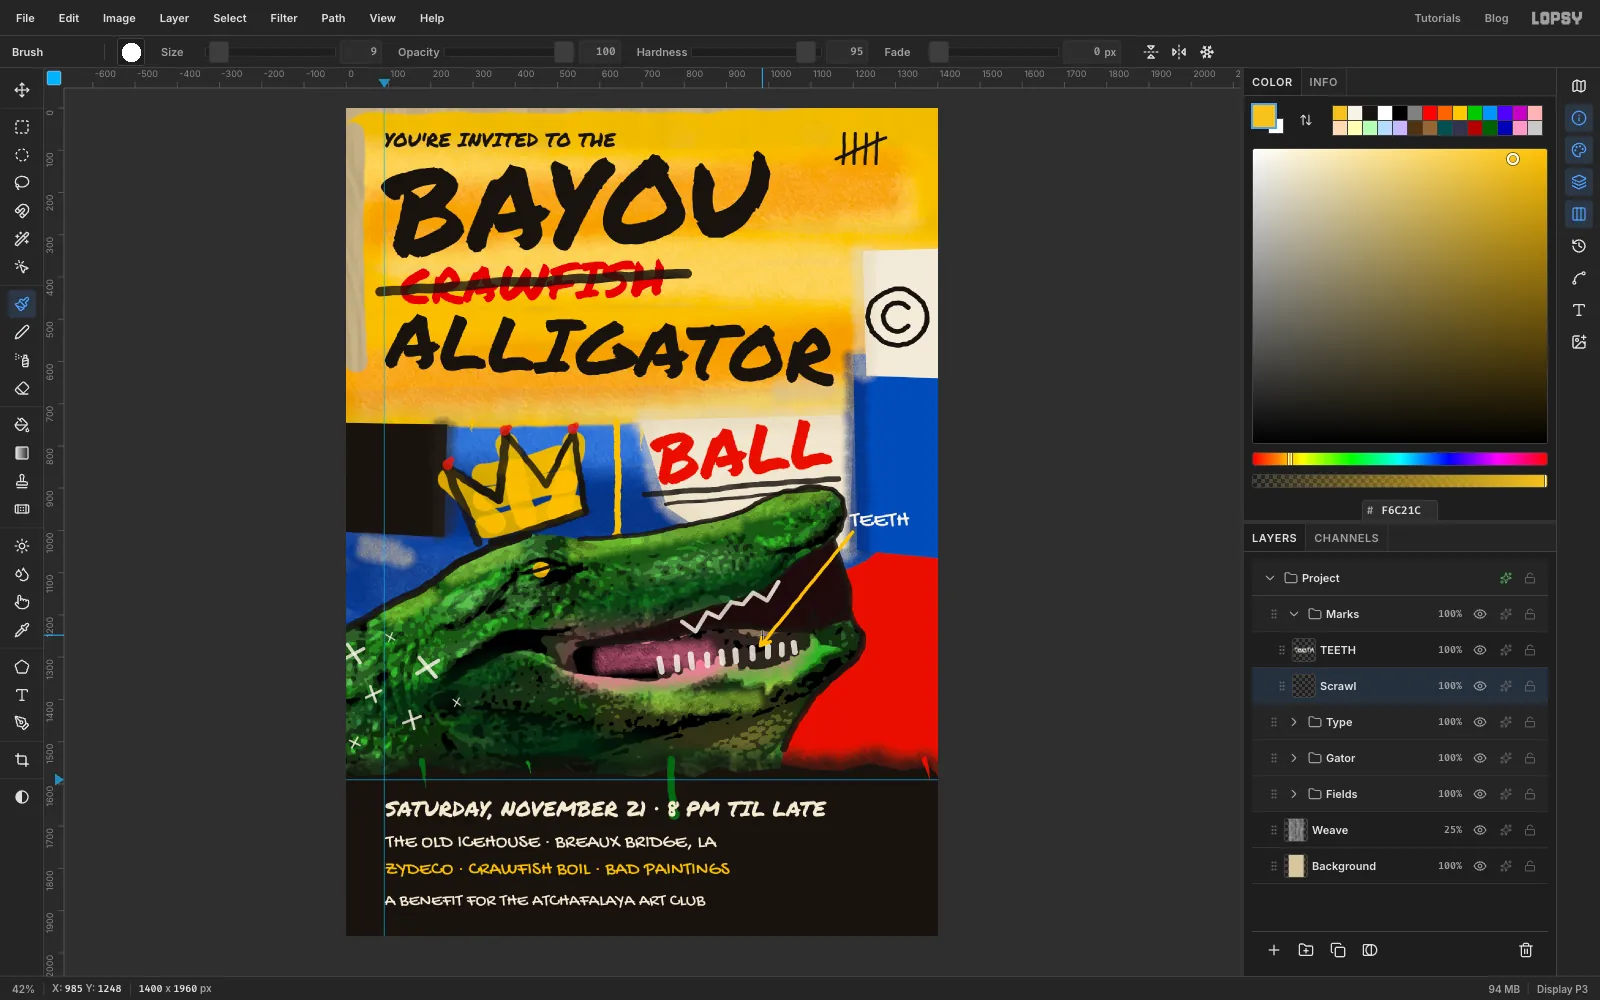
-
Tape on a price patch
Add a layer named Patch. Lasso a slightly tilted quadrilateral over the red field, about 220 × 115 px, keeping it at least 70 px from the right edge. Fill it with cream and deselect.
In its effects drawer, turn on Drop Shadow with Offset X
6, Offset Y7, Blur1and Opacity60. That gives a hard, cut-paper shadow.Click Marks and set
BEER $2in Gochi Hand50, black. Tilt it about 4° to match the patch and nudge it to the centre, with even space on every side.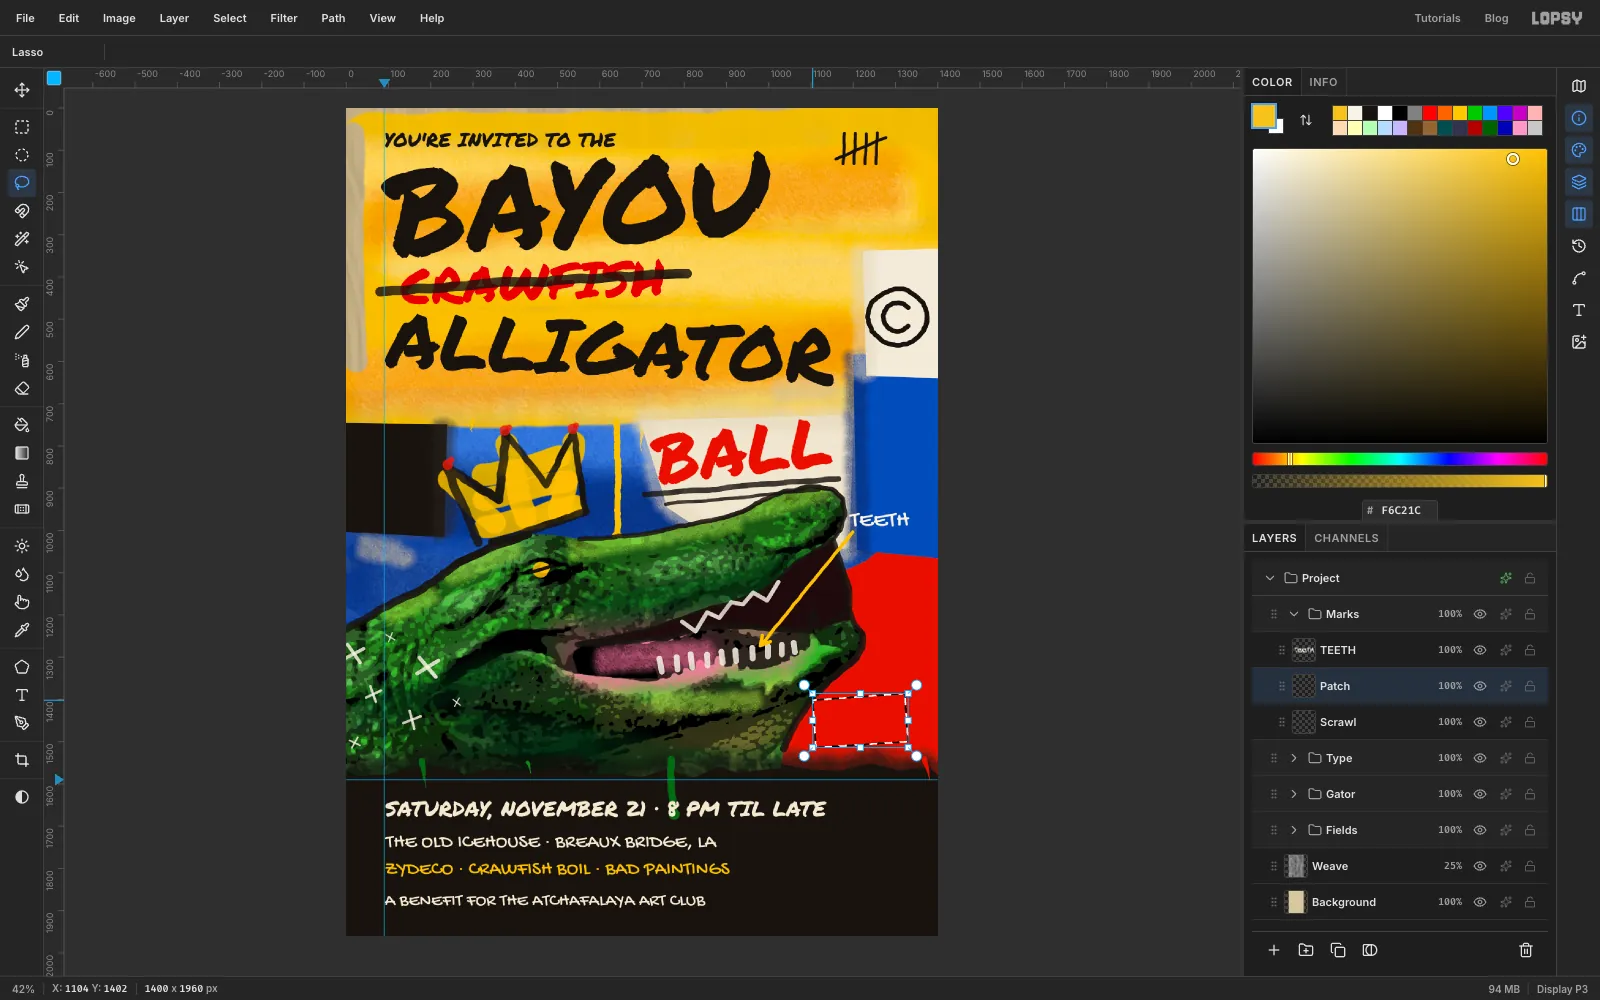
-
Make the RSVP card
Click Patch and add a layer named RSVP Card. Lasso a card about 270 × 165 px in the bottom-right of the band, tilted about 2.5° counter-clockwise. Fill it with cream and give it the same hard drop shadow.
Set
RSVPin Permanent Marker66andBY NOV. 7in Gochi Hand42, both black. Tilt both 2.5° to match the card. Centre them on the card with about 18 px between the two lines, and leave equal space above and below the pair.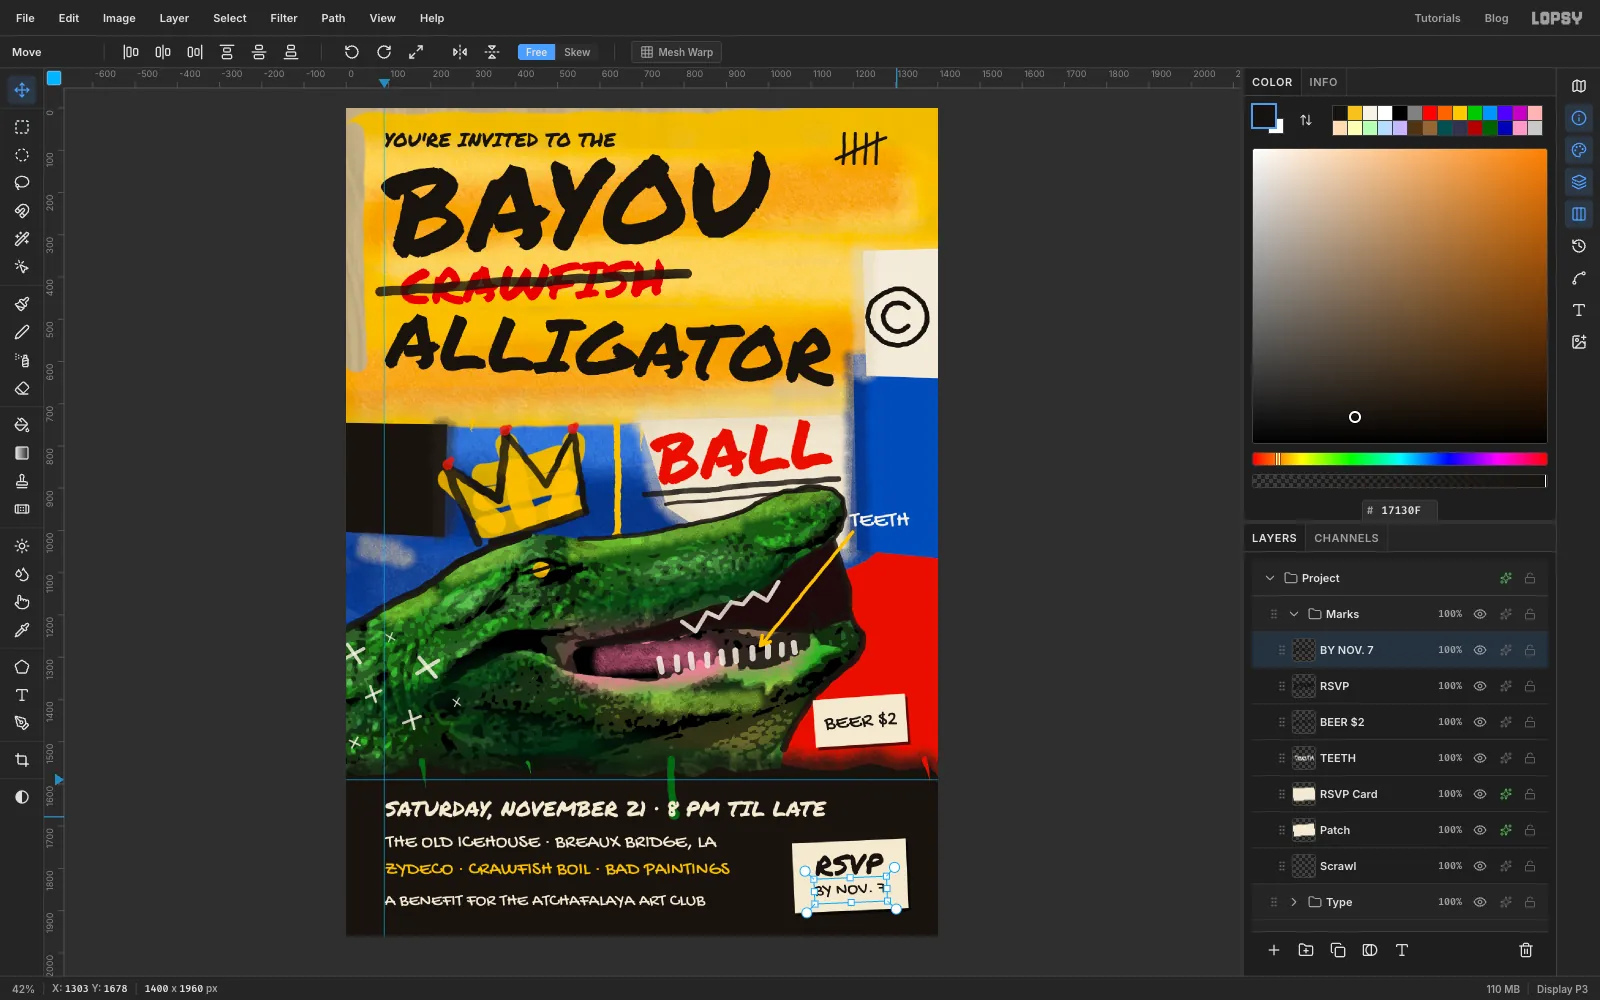
-
Copy the crown for the card
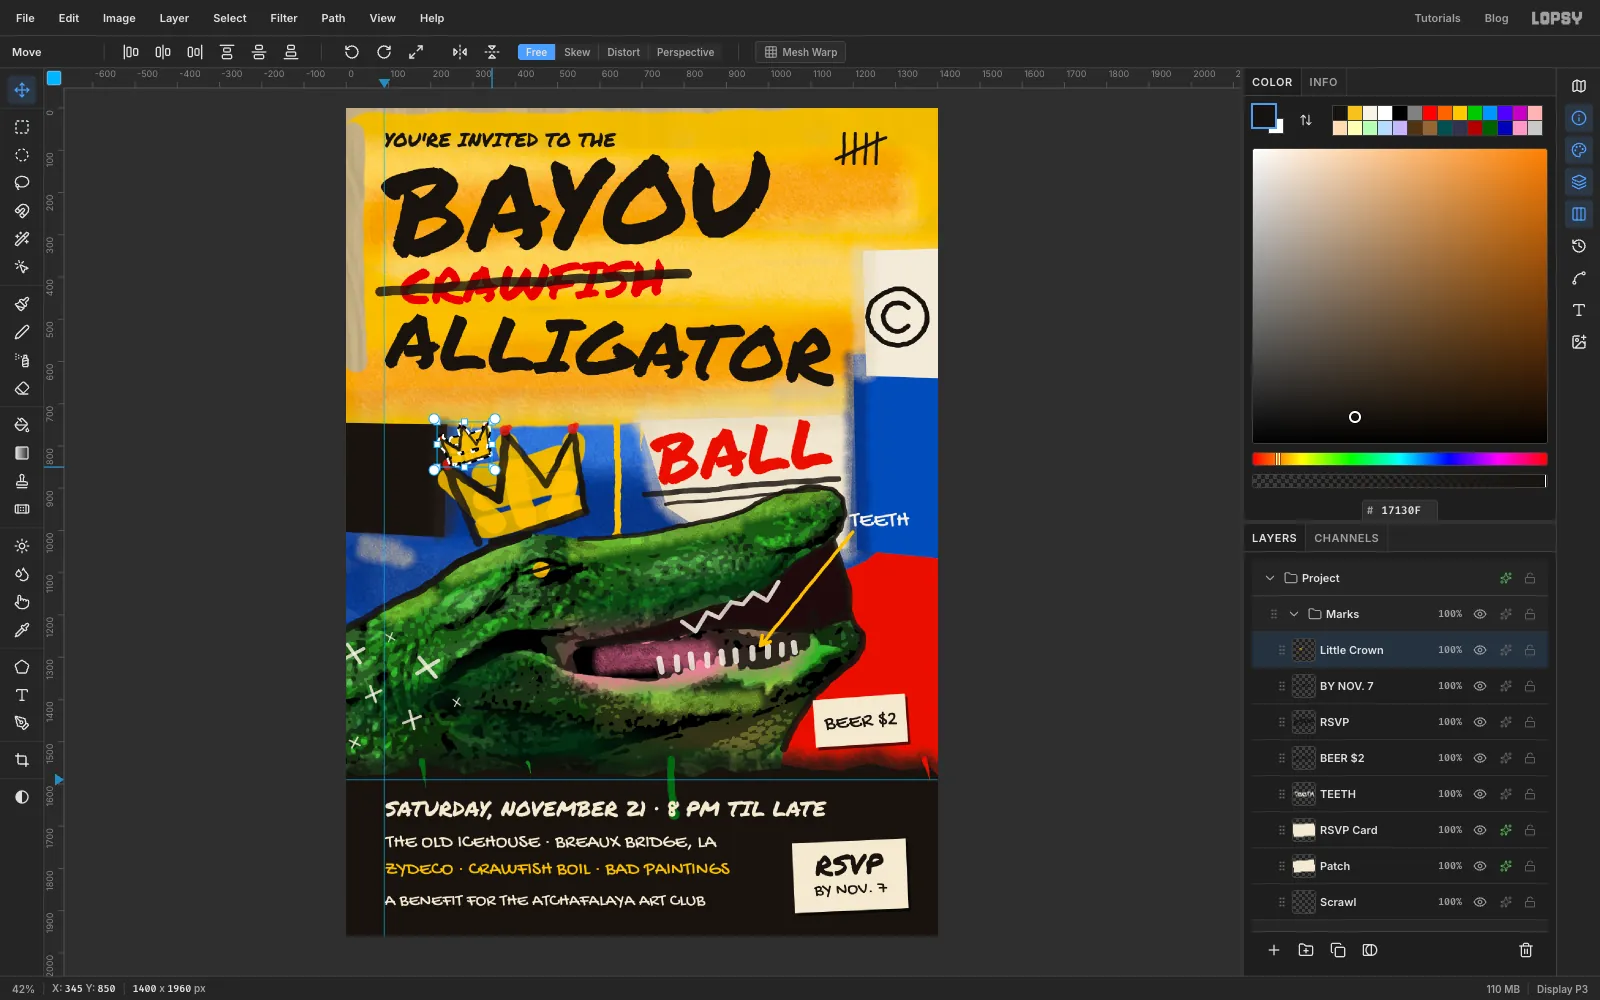
Expand Gator, click Crown, Cmd-click its thumbnail and choose Edit → Copy. Collapse Gator, click Marks and choose Edit → Paste. The copy lands exactly on top of the original, already selected, with the Move tool active. Rename it Little Crown.
Drag a corner handle toward the opposite corner until the copy is about a third of the size, then press Cmd+D.
-
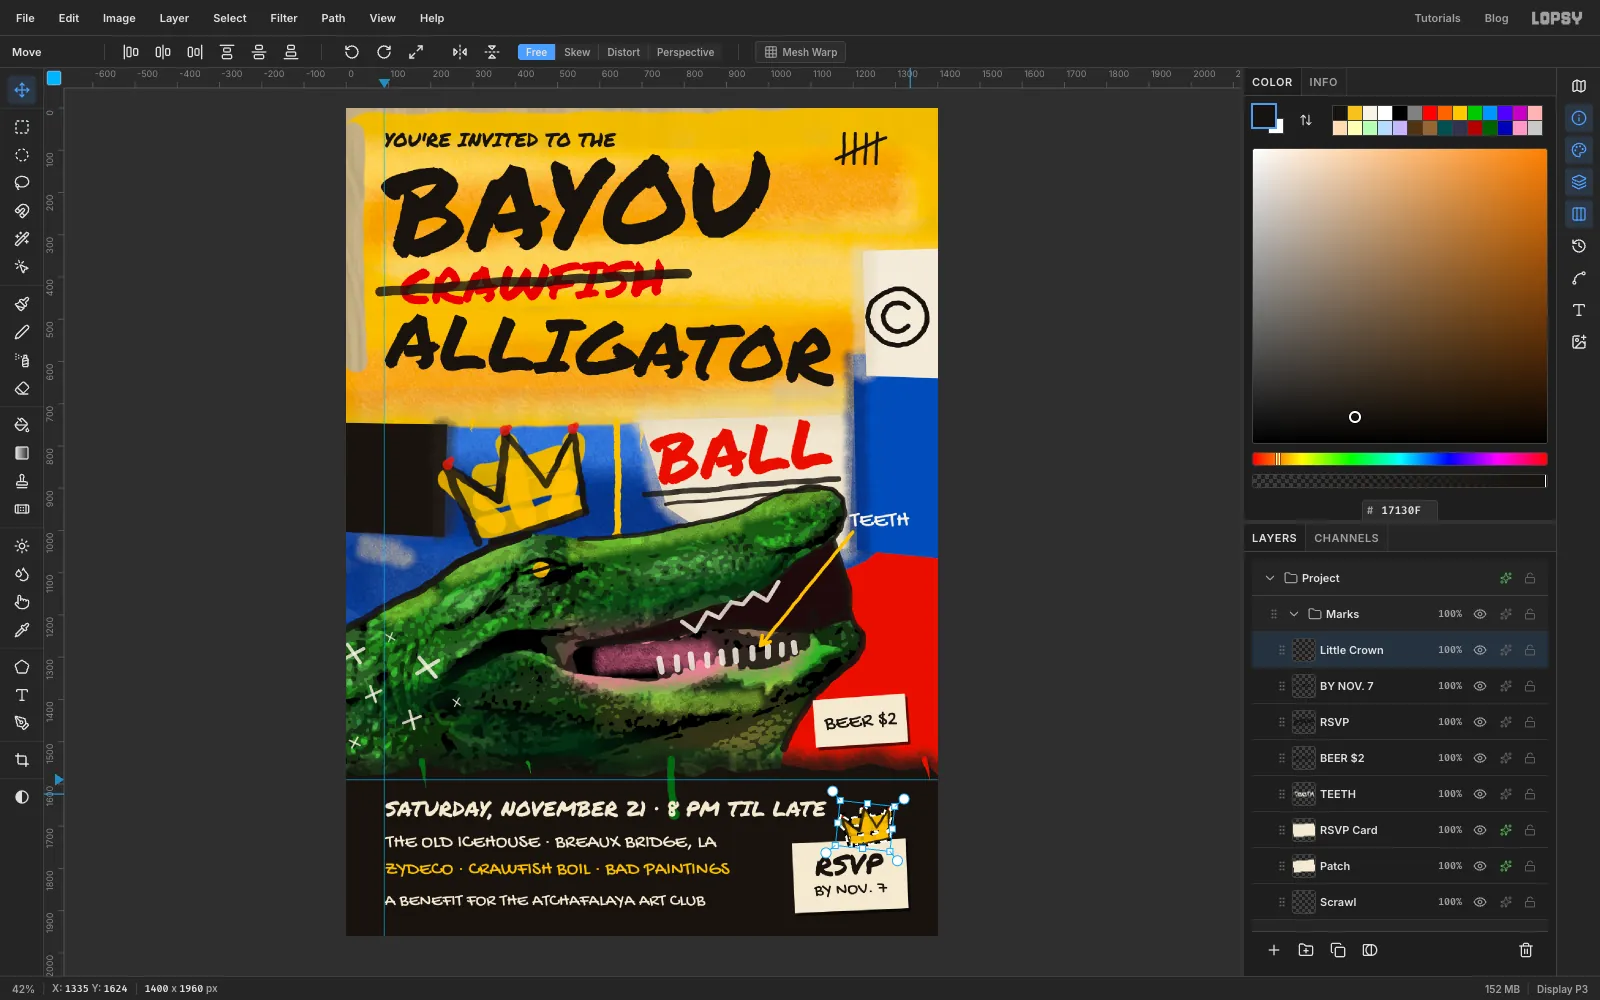
Crown the card
Drag the little crown so it sits centred on the top edge of the RSVP card, clear of the date line. Cmd-click its thumbnail, tilt it about 6° clockwise and press Cmd+D.
-
Tape the card and the patch down
Add a layer named Tape. Lasso a small tilted strip, about 90 × 30 px, across the card's top-left corner and fill it with cream. Then lasso a second strip across the beer patch's top-right corner and fill that too. Deselect, and set the layer's opacity to
60%so the strips look like masking tape.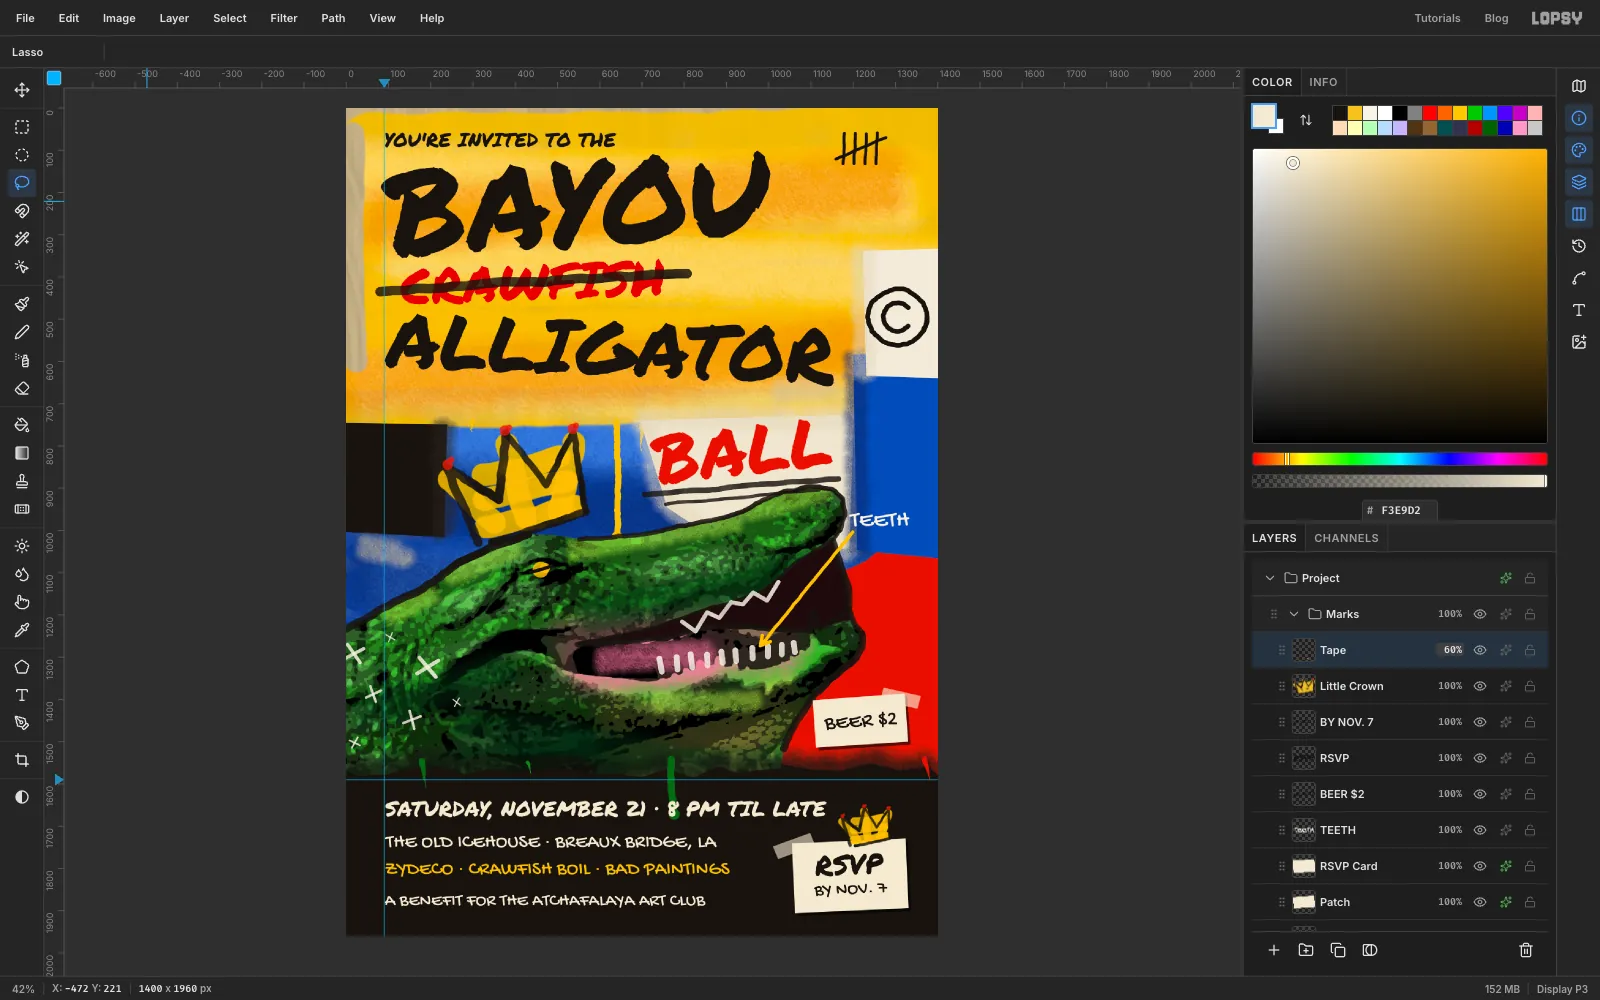
-
Flick a little paint
Click Scrawl and pick the Hard Round preset at Size
18in black. In the Brushes panel, set Spacing to200on the Shape tab, and Scatter to100and Size Jitter to90on the Dynamics tab. Flick one short stroke near the crown so it leaves a few scattered dots of different sizes. Pick Hard Round again to put the settings back.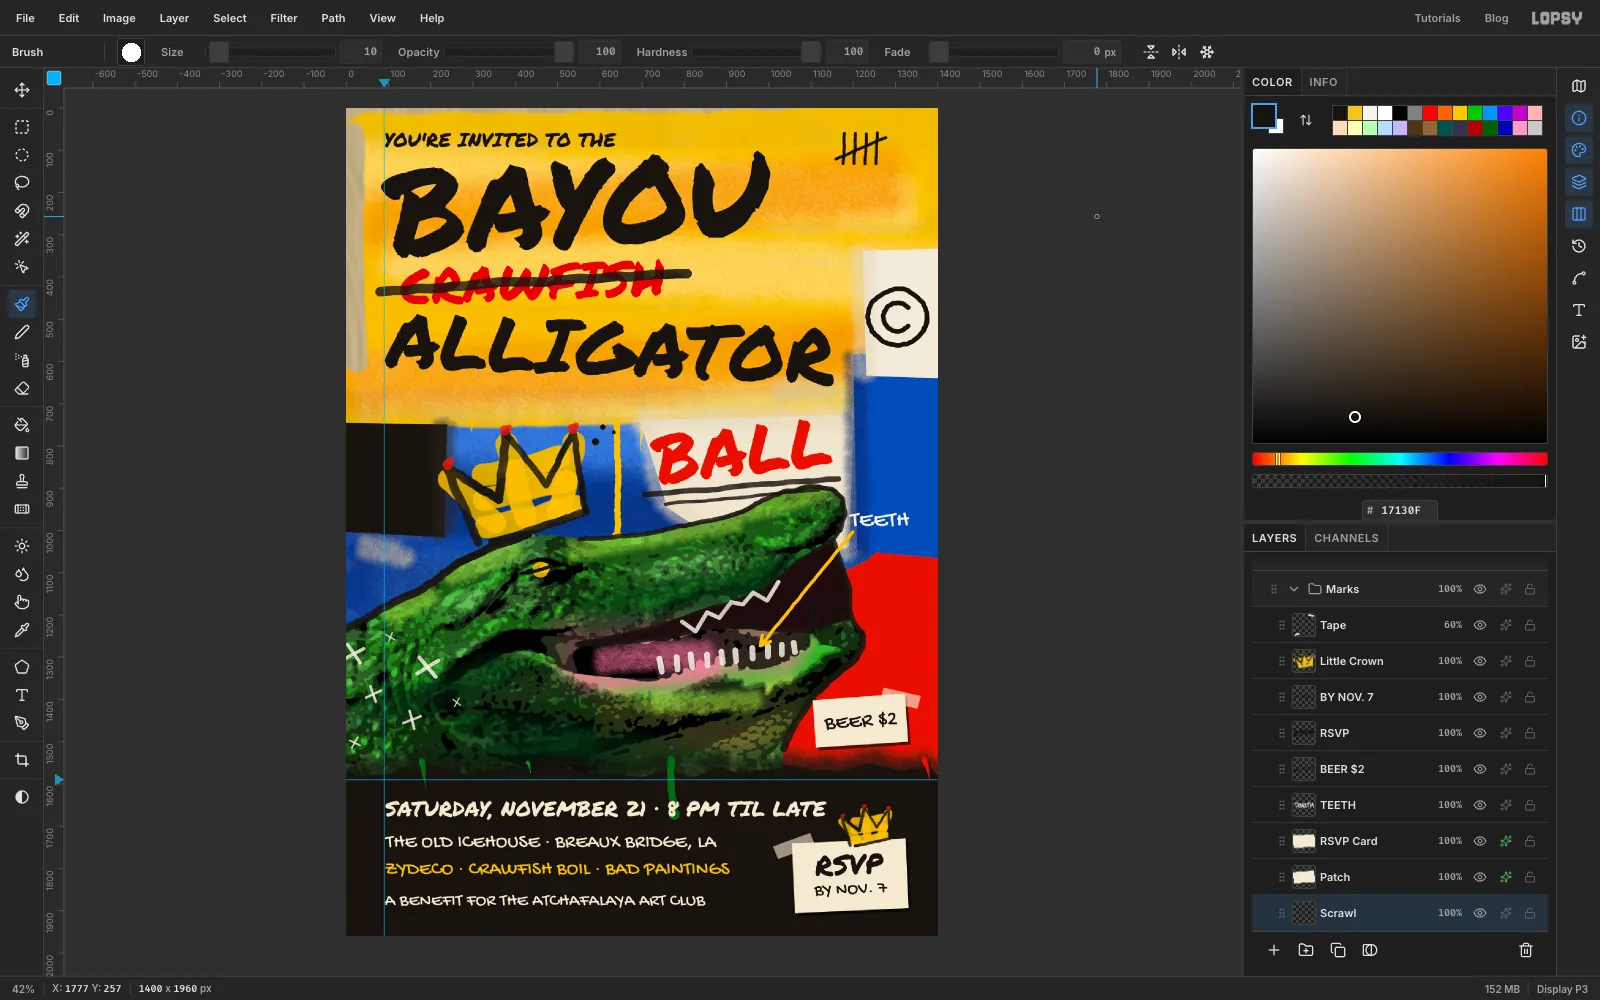
-
Raise the paint with Emboss
Collapse Marks and click it. Choose Select → All, then Edit → Copy Merged, deselect and choose Edit → Paste. Name the new layer Impasto.
Choose Filter → Emboss… with Angle
135and Strength30. Click Apply, then Filter → Desaturate. Set its Blend to Overlay and opacity to45%. Lopsy's Emboss adds its light and shadow on top of the picture, so this layer is a grey copy of the artwork with raised edges. In Overlay it deepens the contrast a little and catches every brush edge, drip and letter like thick paint.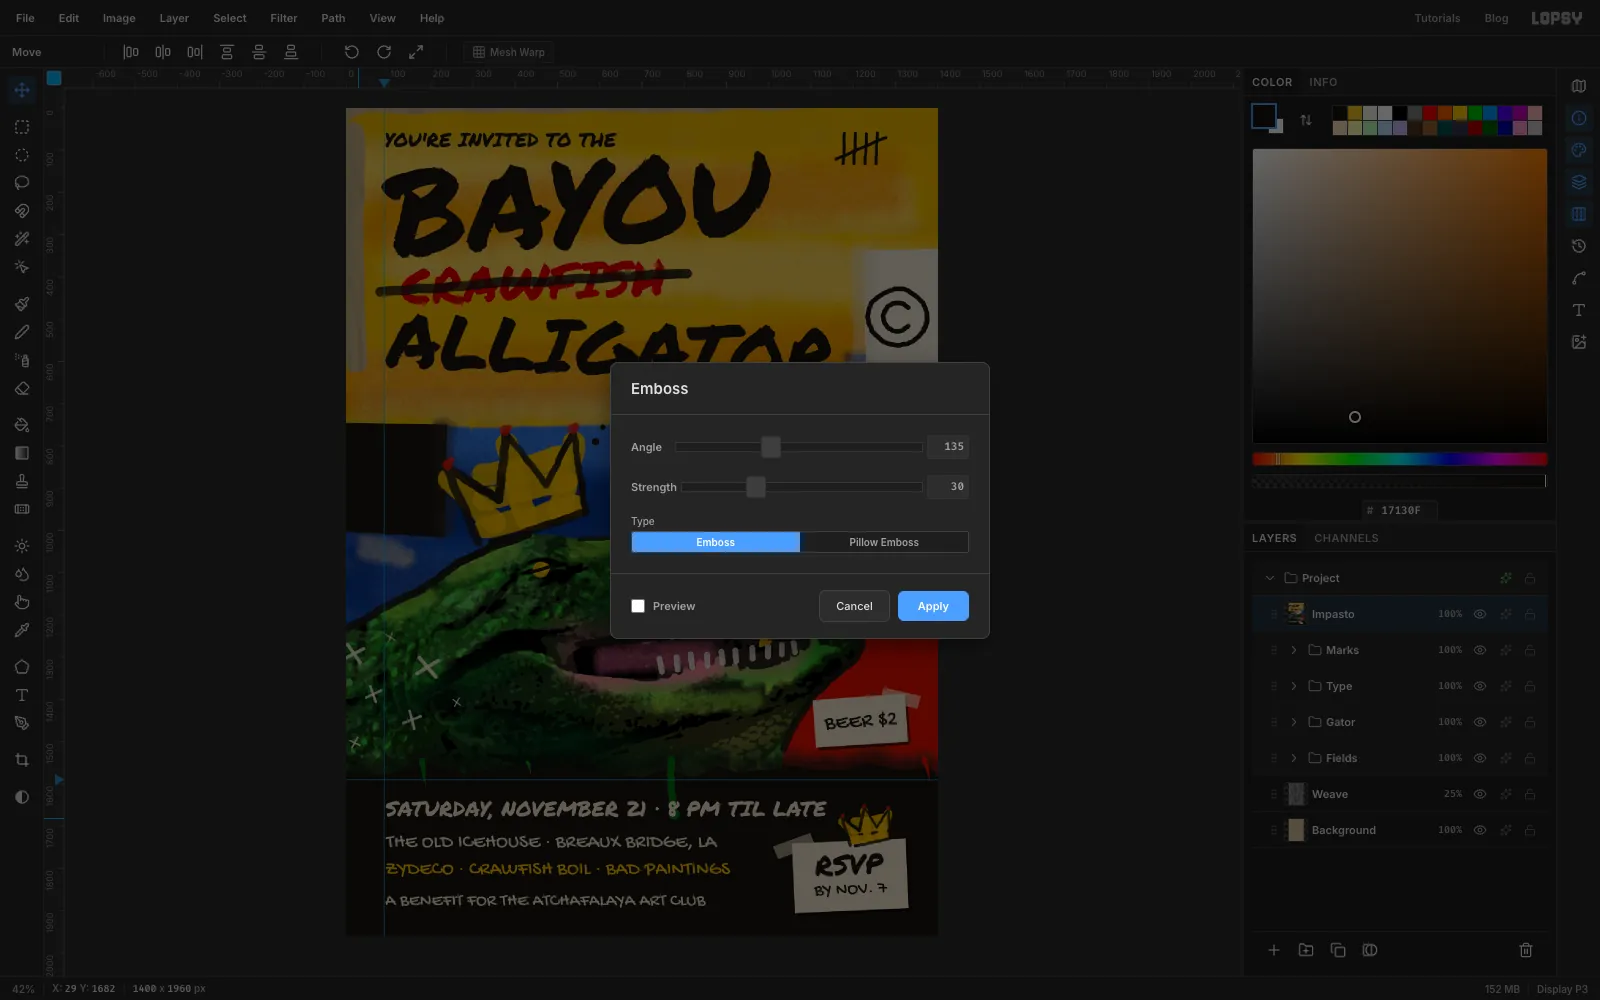
-
Finish with grain
Add a layer named Grain. Choose Select → All, fill it with grey , deselect, and choose Filter → Add Noise… with Amount
22, Mono and Gaussian. Set its Blend to Overlay and its opacity to30%.Export with File → Quick Export PNG, and save the project with File → Save Project so you can change the date for next year's ball.