Paint a Neo-Expressionist Zine Cover with an Inverted Tower
Paint a raw neo-expressionist zine cover in Lopsy with multi-colour bristle brushes, an inverted water tower, a halftone xerox and hand-painted lettering.
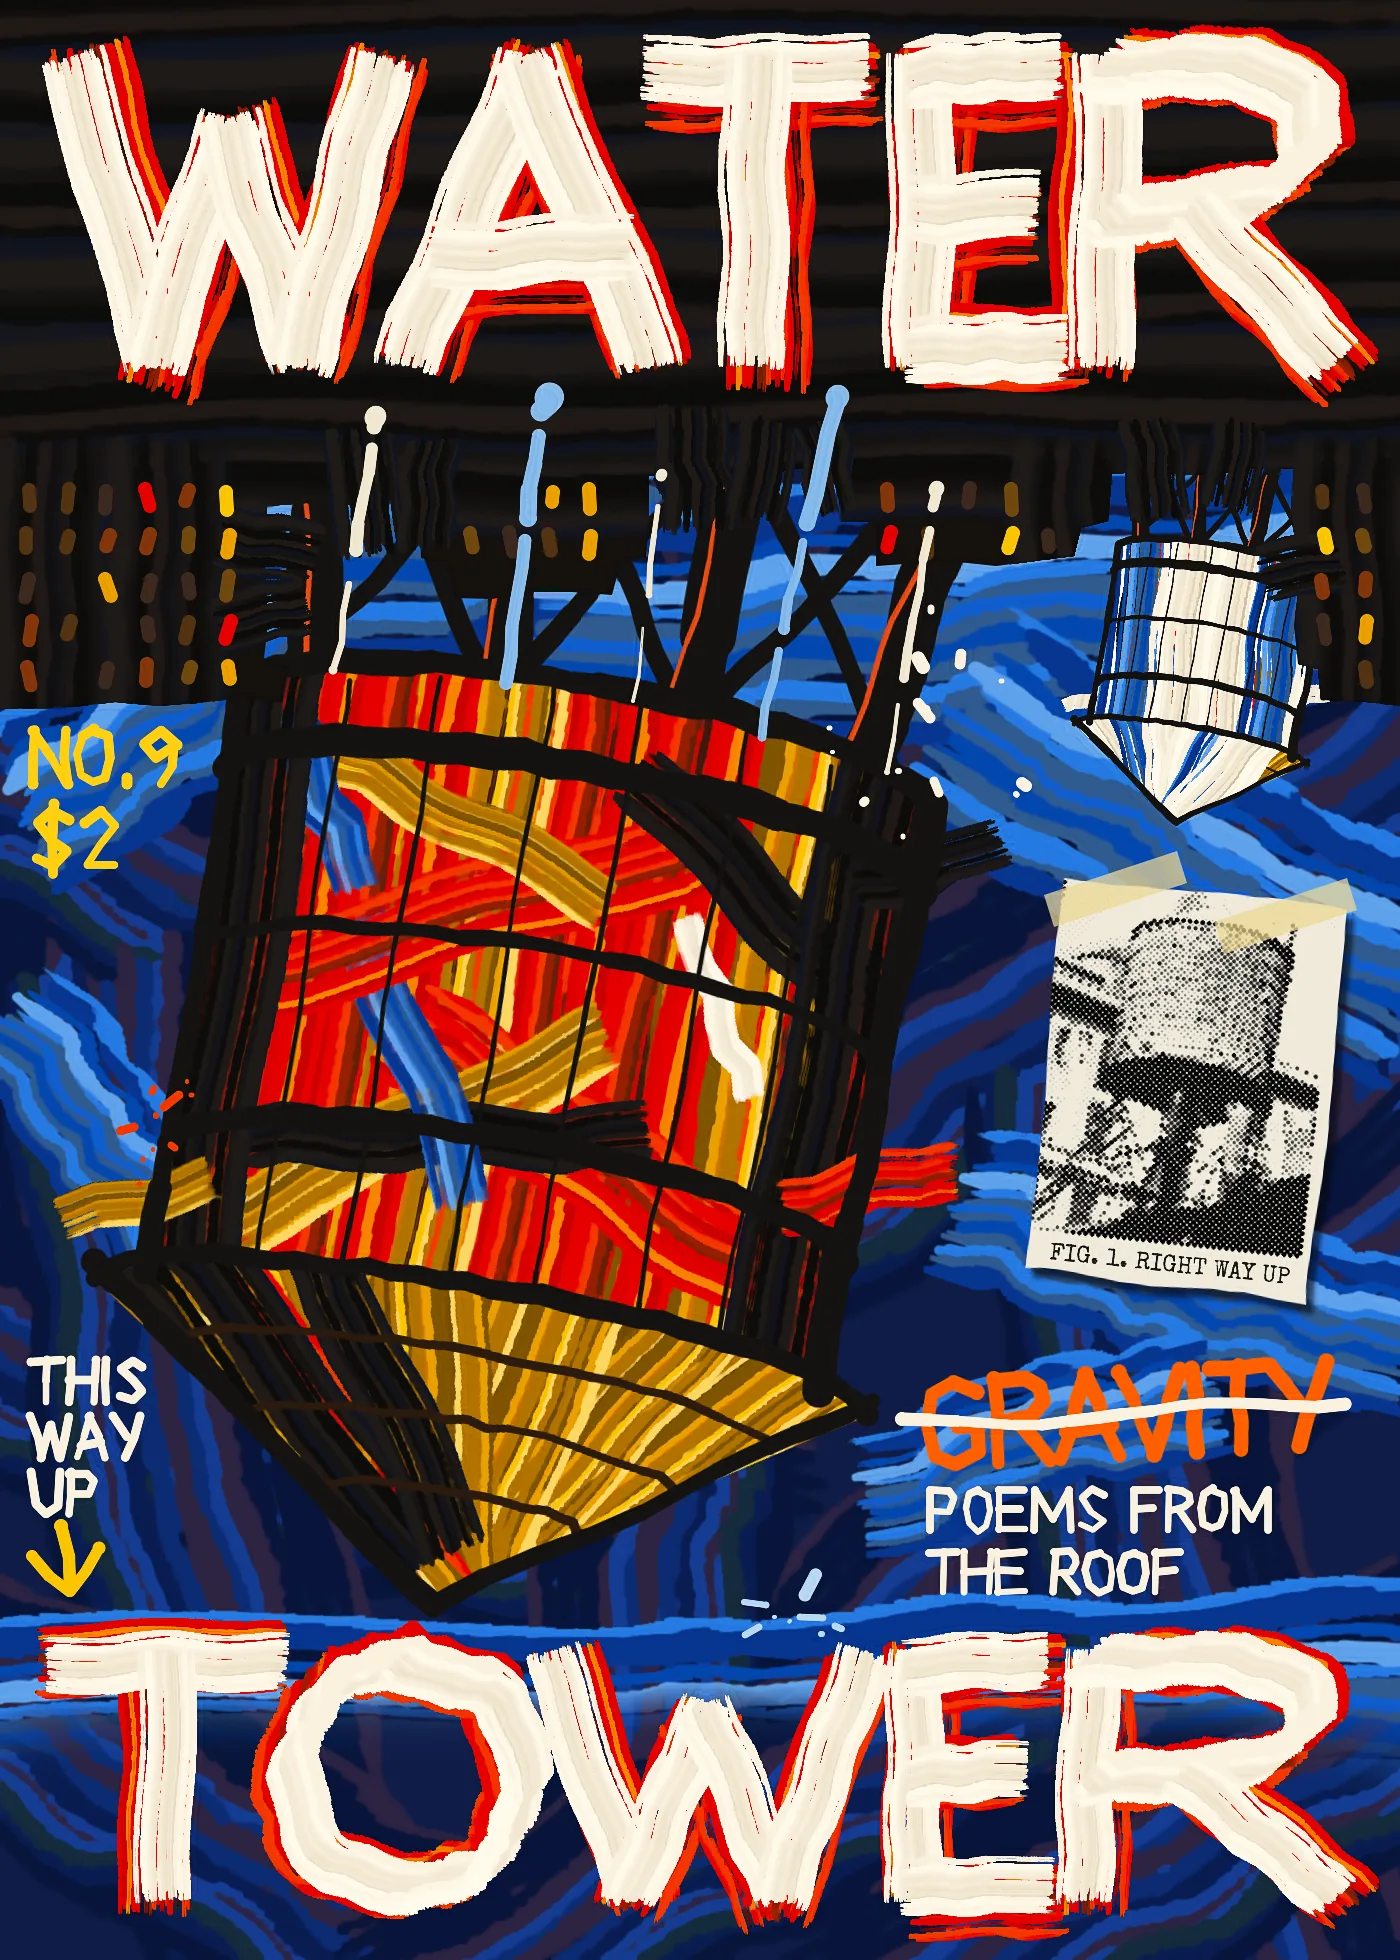
Neo-expressionism was painting's loud comeback around 1980. Painters like Georg Baselitz, Anselm Kiefer and Jean-Michel Basquiat went back to big figures, crude drawing and thick, fast paint. Baselitz added a famous trick: from 1969 on he painted his subjects upside down, so that the viewer has to look at the paint before the picture.
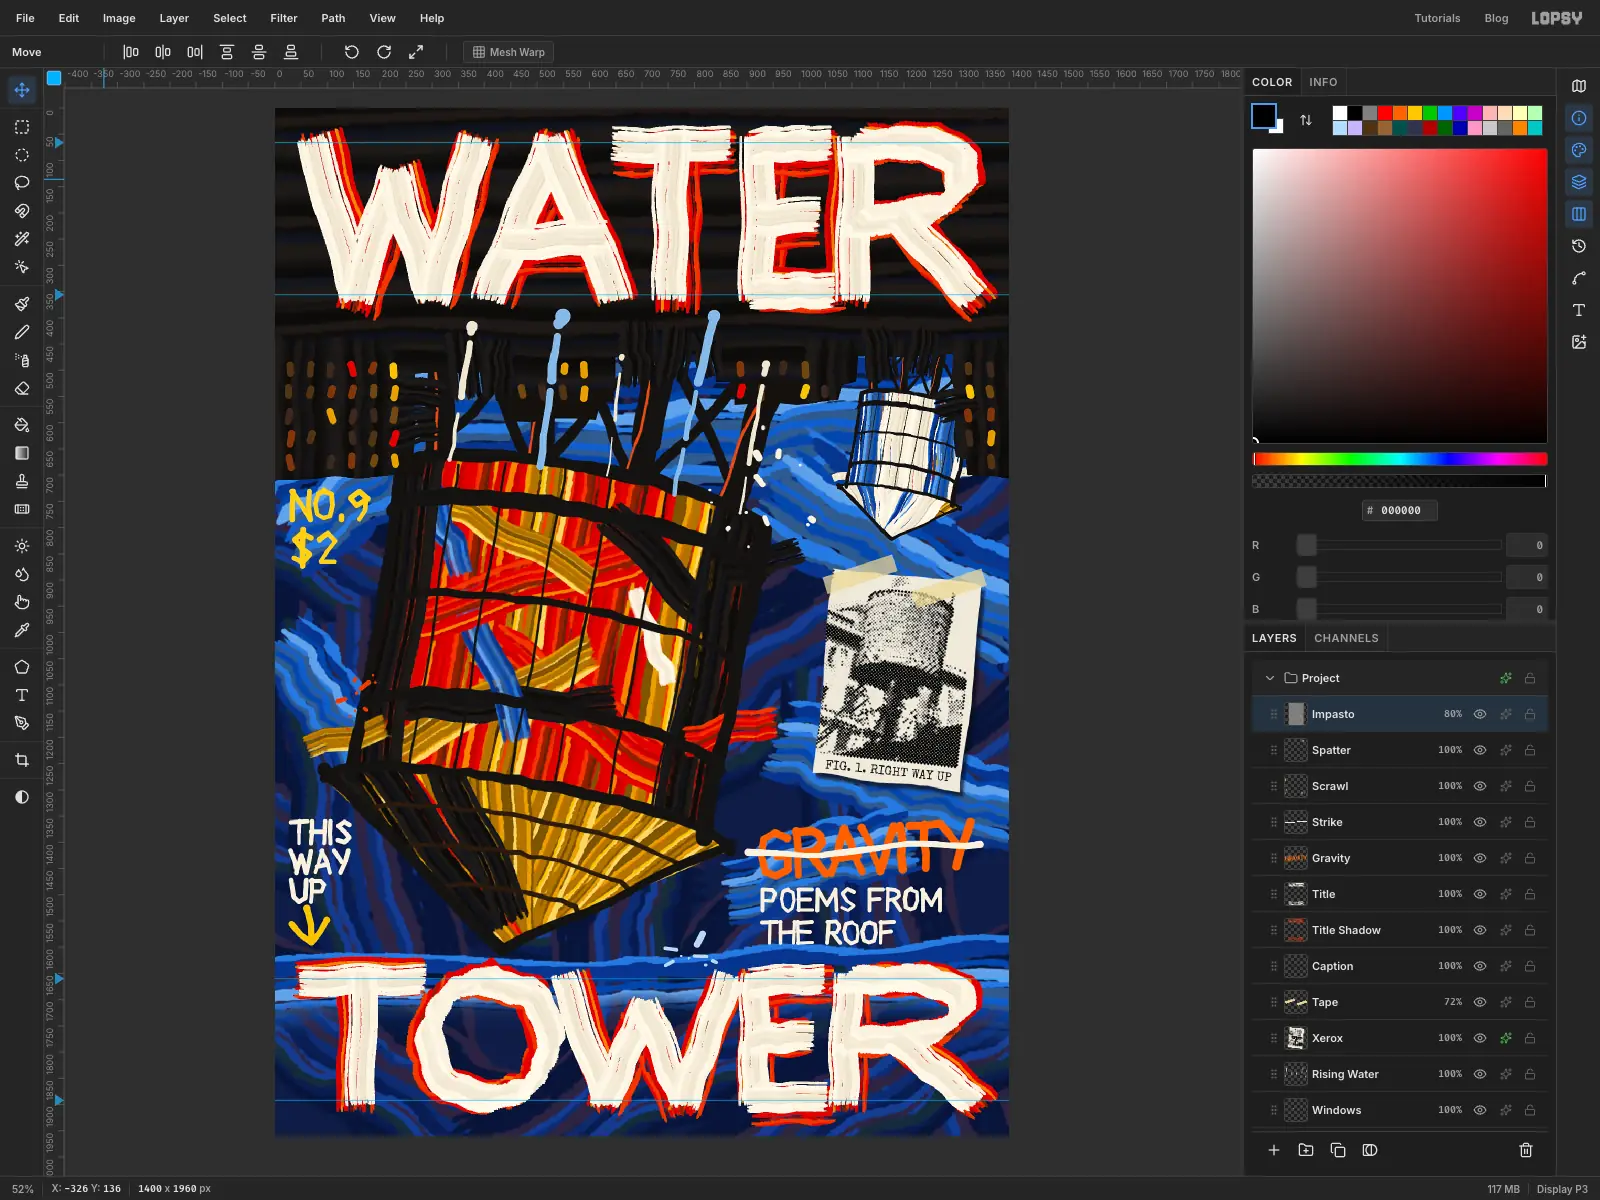
In this tutorial you'll borrow that trick for Water Tower, an invented poetry zine on a 1400 × 1960 px page. A New York rooftop water tower hangs upside down from the skyline. Its paint runs rise instead of falling. A taped xerox of a real tower is the only thing on the page that's the right way up, and the word GRAVITY has been crossed out.
The main idea to take away is the brush. Lopsy's Define Color Brush captures a tip with several colours in it, so a single stroke drags dark, mid and light bristles side by side, with dry gaps between them. It looks far more like a loaded house-painter's brush than a stroke of one colour does.
Along the way you'll use:
- Edit → Define Color Brush…, the Brushes modal's angle dial, Size Jitter and Angle Jitter
- the Lasso and Rectangular Marquee to keep paint inside a shape, or let it escape
- Oil Paint, Gaussian Blur, Add Noise, Invert, Desaturate, Brightness/Contrast, Halftone and Emboss
- a layer mask painted with a soft brush
- New Group, Duplicate Layer, and rotating and scaling a whole group with the Move tool
- Copy, Copy Merged, Paste, Merge Down and Cmd-clicking thumbnails to select a layer's pixels
- guides, Drop Shadow, the Overlay blend mode and layer opacity
- live Text in Special Elite, rotated with its handle
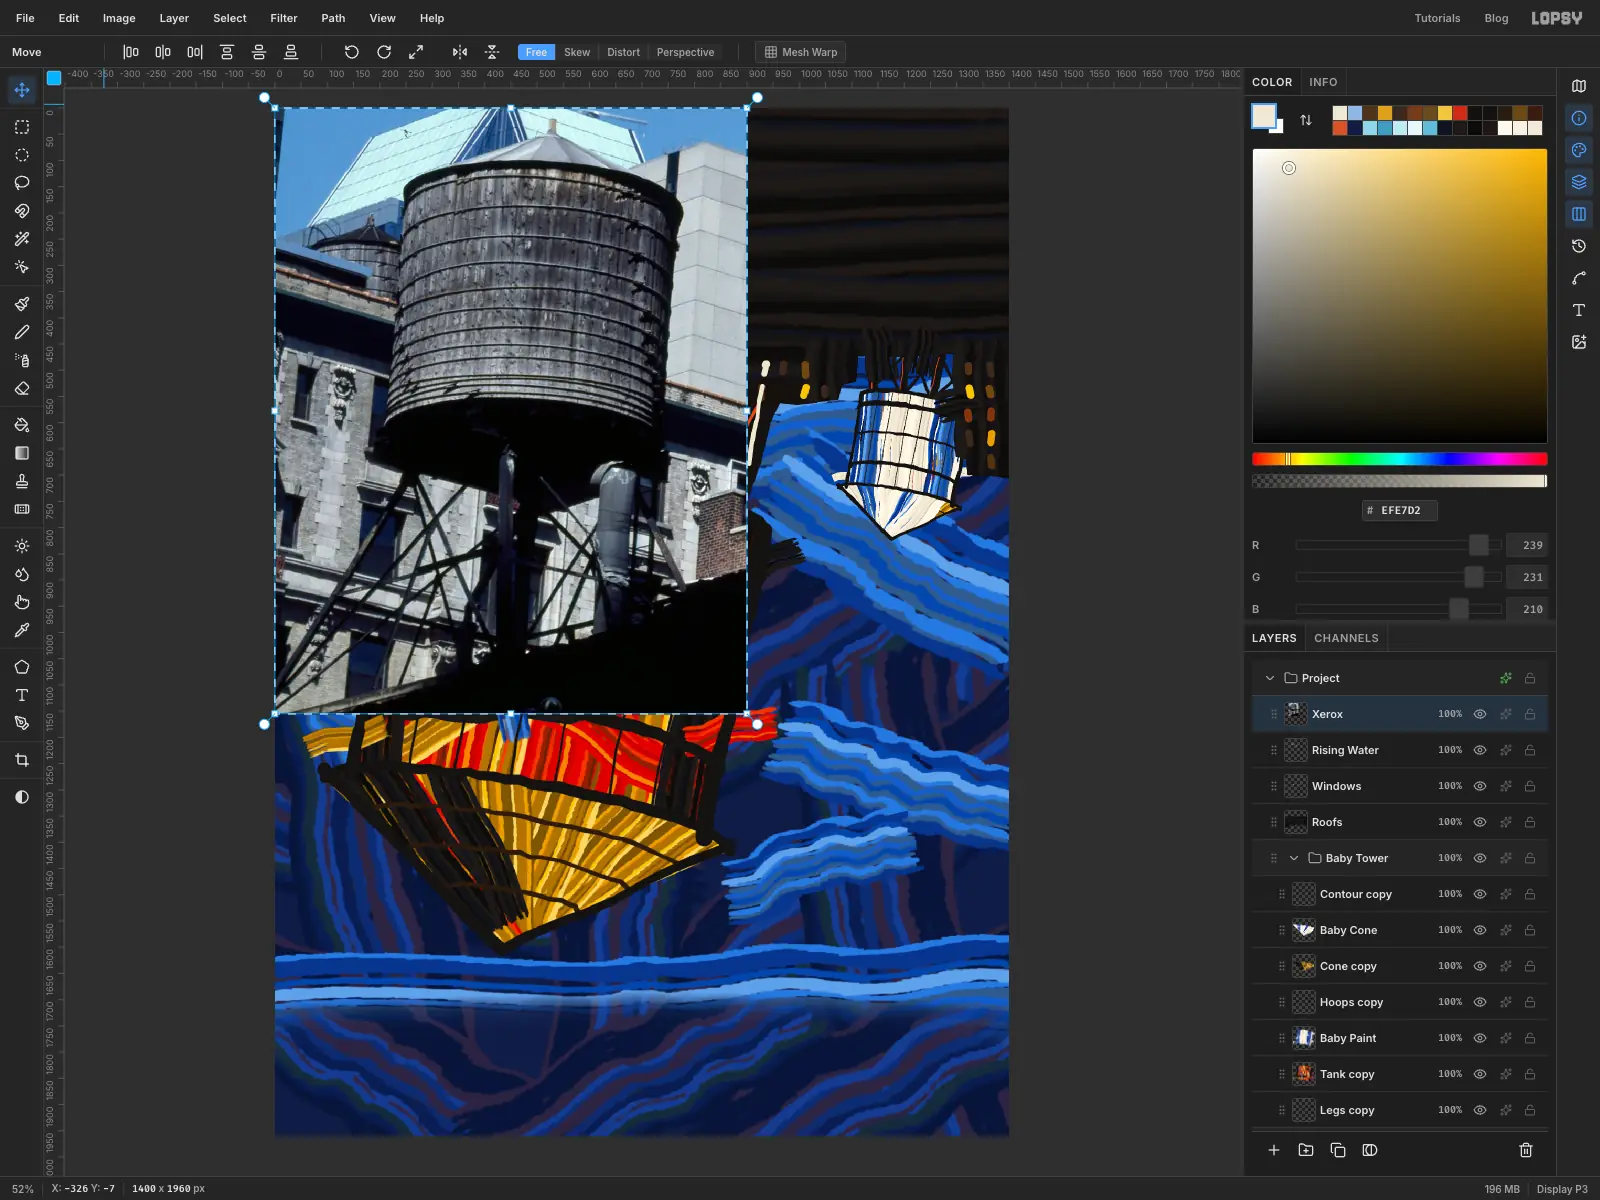
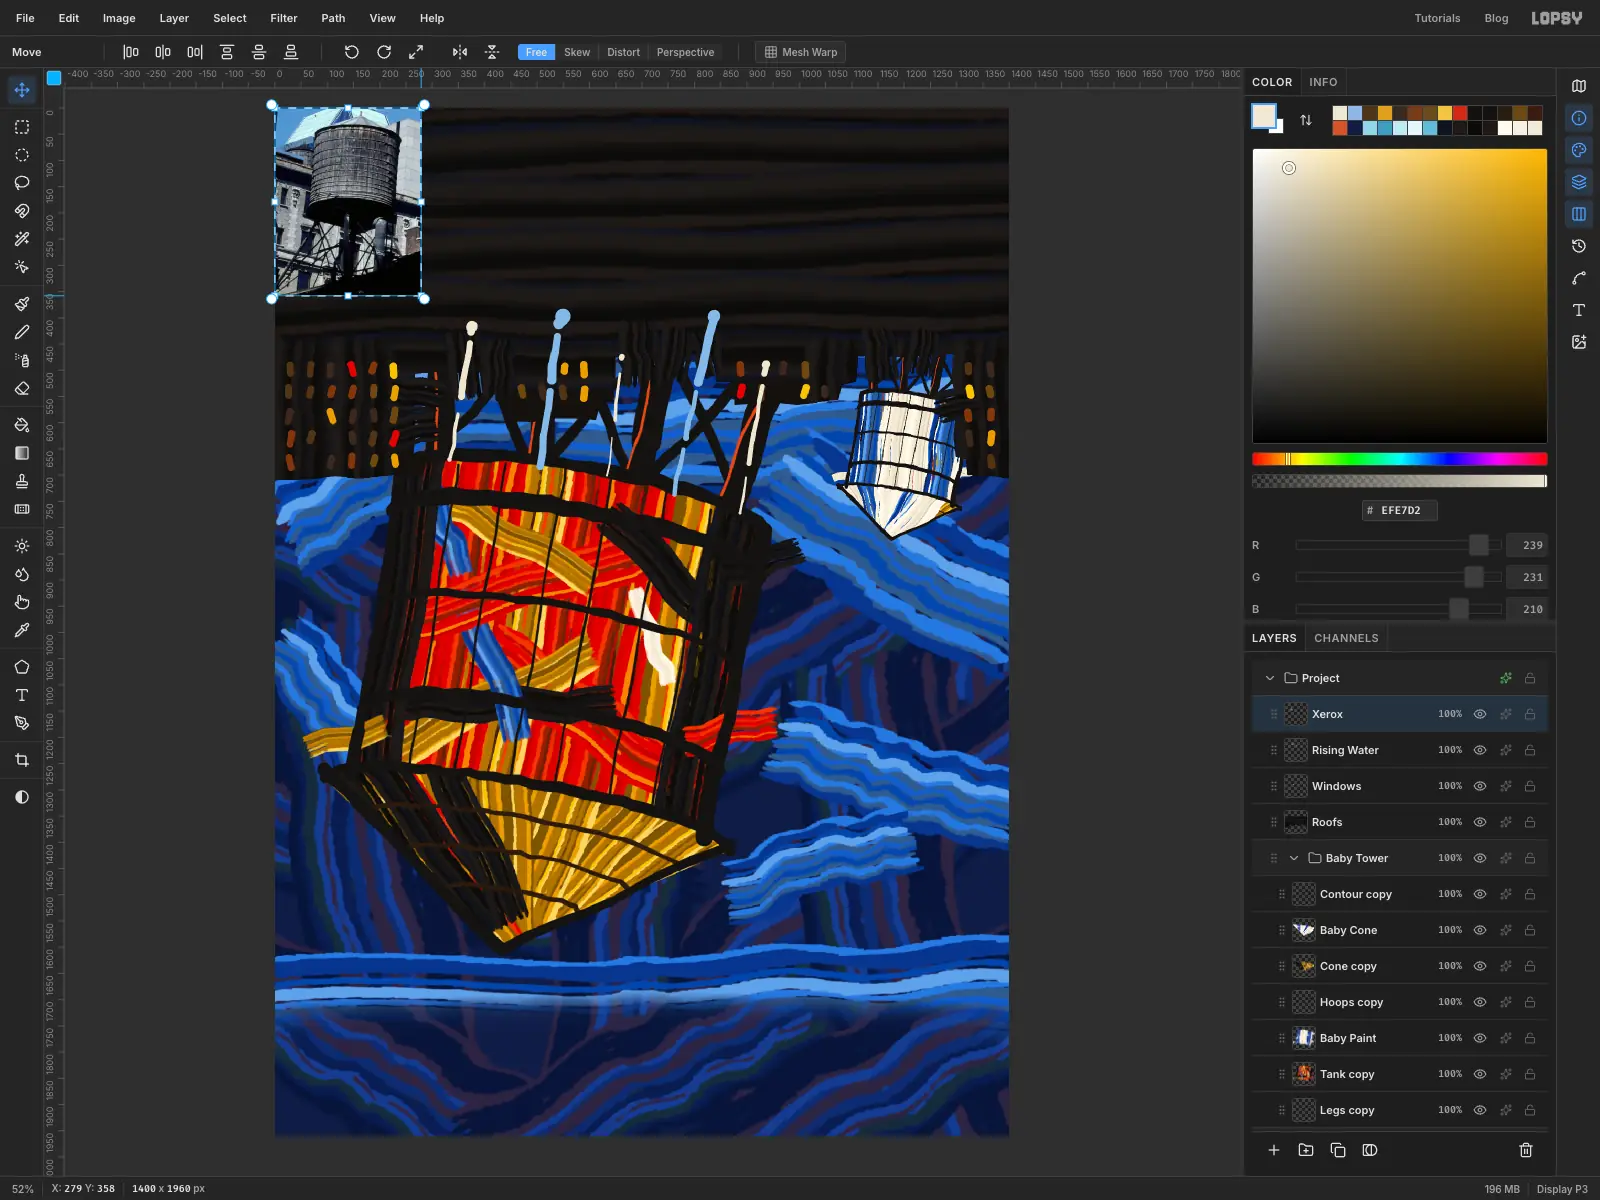
You'll also need a photo of a water tower for the collage. I used this public domain Carol M. Highsmith photograph from the Library of Congress, cropped in an image viewer to the wooden tank at its lower left, legs included.
The palette:
-
Raw canvas
-
Sky underpaint
-
Deep brush
-
Cobalt brush
-
Cadmium brush
-
Ochre brush
-
Bone brush
-
Tar brush
-
Tank umber
-
cone umber
-
roof black
-
Rising paint
-
Lettering
-
Xerox paper
-
tape
-
caption
-
Prime a raw canvas
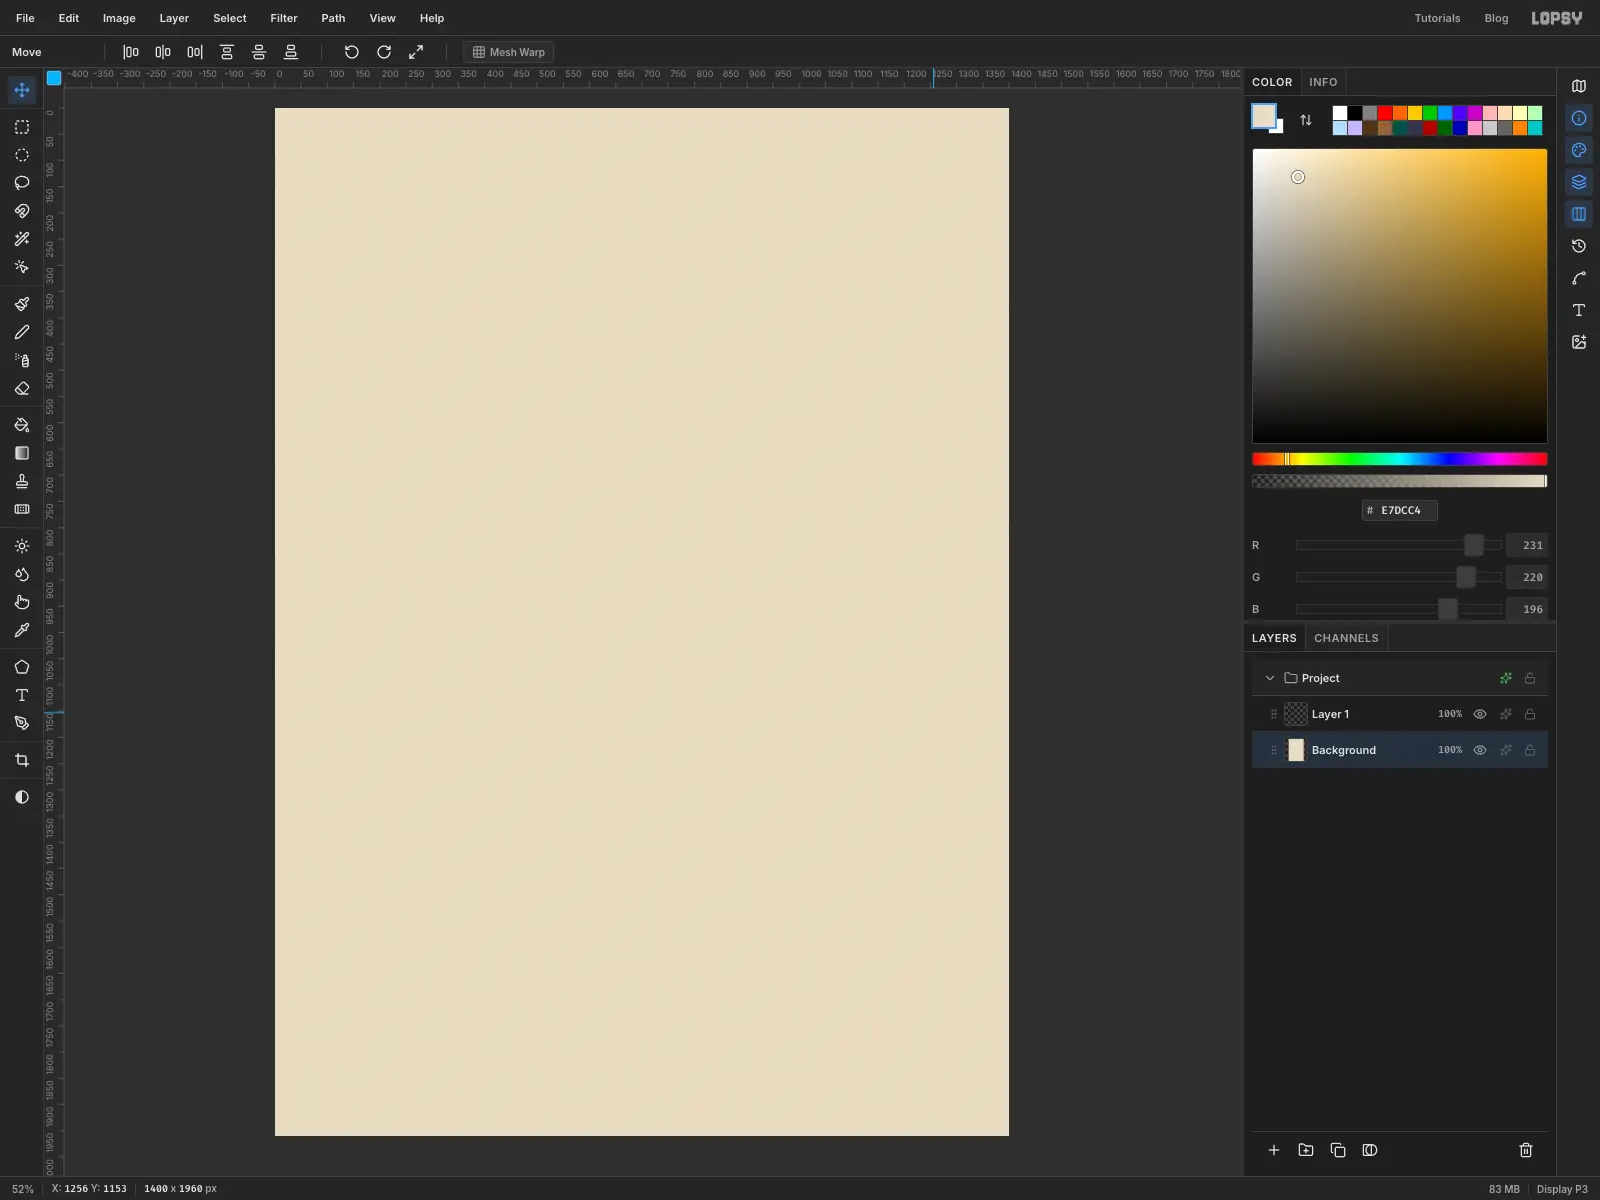
Create a new document, 1400 × 1960 px. Select the Background layer, set the foreground colour to raw canvas , and choose Edit → Fill.
Open Filter → Add Noise…, choose Mono, set the Amount to 14 and apply it. It's a small touch, but the grain stops the page looking like an empty screen.
-
Make six loaded brushes
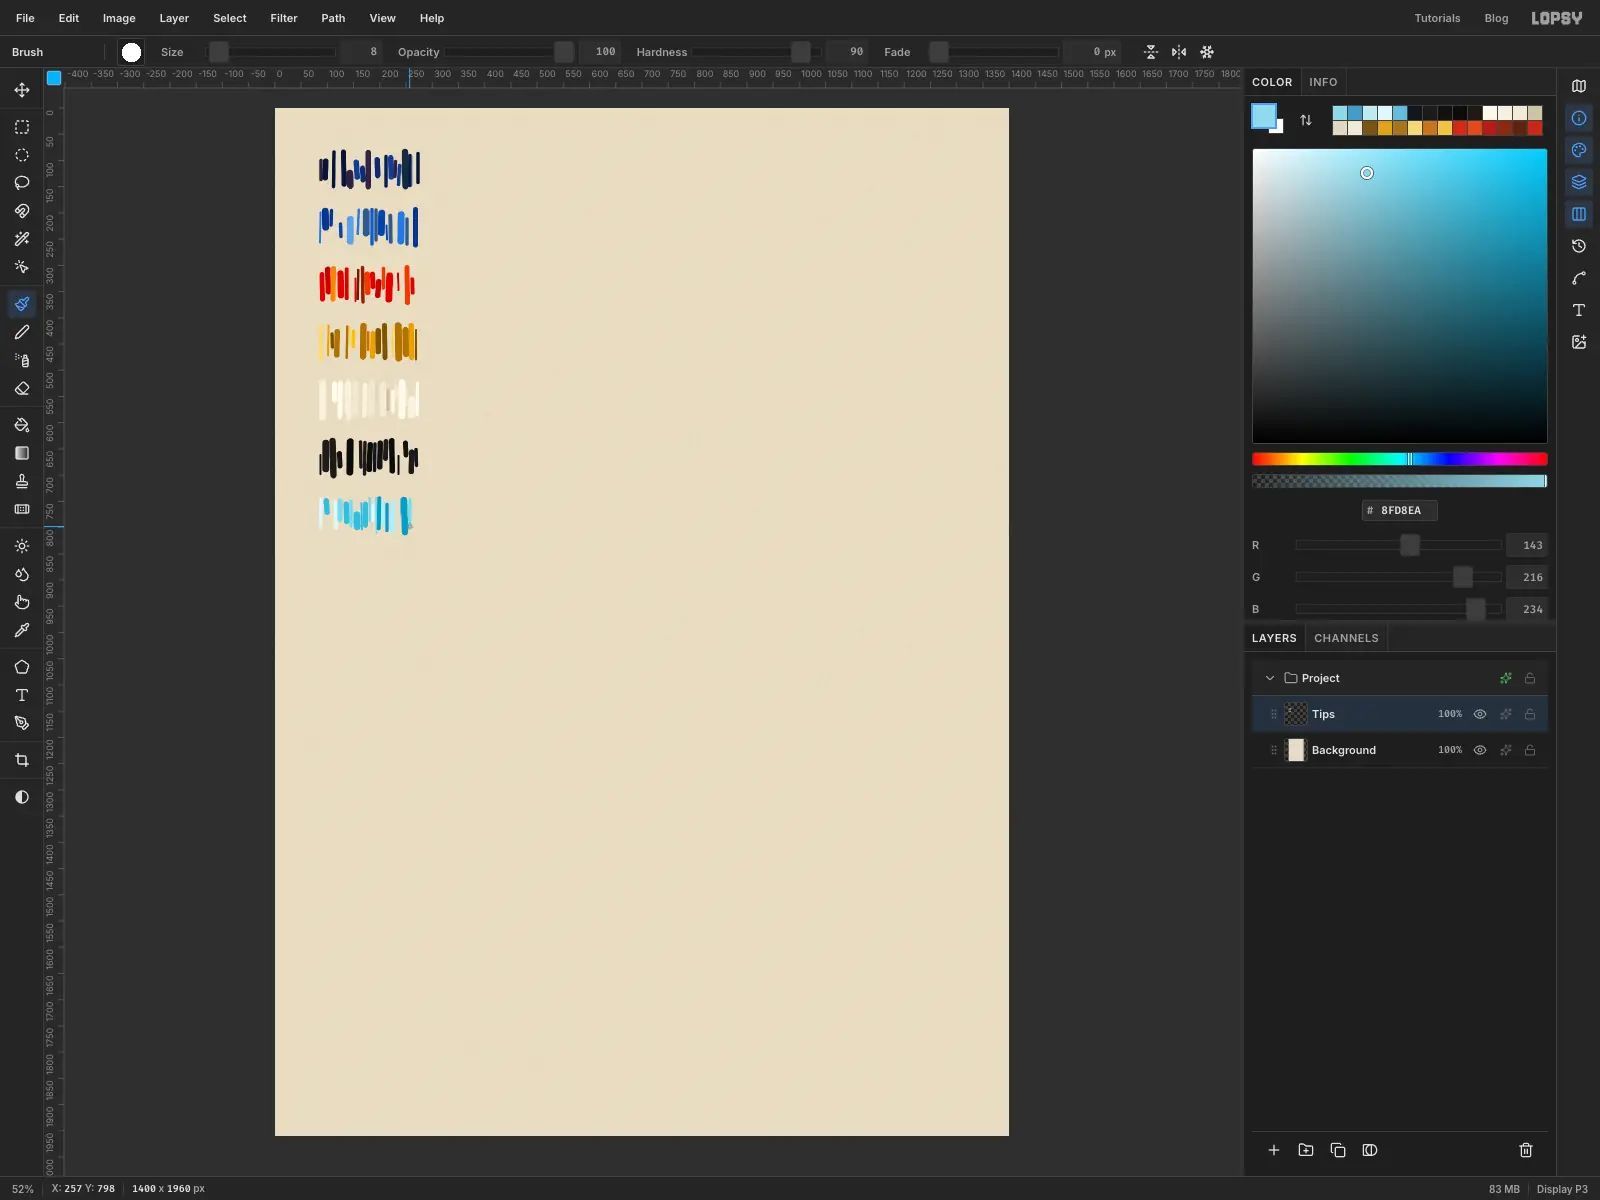
Click Layer 1, the empty layer your new document came with, and rename it Tips (double-click a layer's name to rename it). Paint only on this layer: the transparent gaps are what make the dry streaks. Pick the Brush, open the Brushes modal from the tip thumbnail in the options bar, click the Hard Round preset, and set Hardness to 90 and Spacing to 10. Close the modal.
Near the top left of the canvas, paint a row of 15 to 18 short vertical strokes, side by side, in a strip about 200 px wide and 70 px tall. Change the brush Size between 5 and 14 as you go, and the colour too, using the first brush in the palette list. Make some strokes only a third of the strip's height and let their ends stagger. Leave a few gaps of 5 to 10 px: they're what will make the dry streaks.
Paint five more rows below it, one for each of the other brushes. The screenshot also shows a seventh row in pale blue, which I made for the water and ended up not using, so you can skip it.
Now draw a marquee around the first row and choose Edit → Define Color Brush…. Name it Deep. Repeat for Cobalt, Cadmium, Ochre, Bone and Tar. Deselect, then click the eye on the Tips layer to hide it. Keep the layer: custom brushes don't live in the project file, so this is how you'd get them back after a reload.
Throughout this tutorial, "add a layer" means clicking + under the Layers panel and renaming the new layer. Each layer's opacity is the percentage in its row, and its effects are the sparkle icon next to its eye.
-
Underpaint the sky
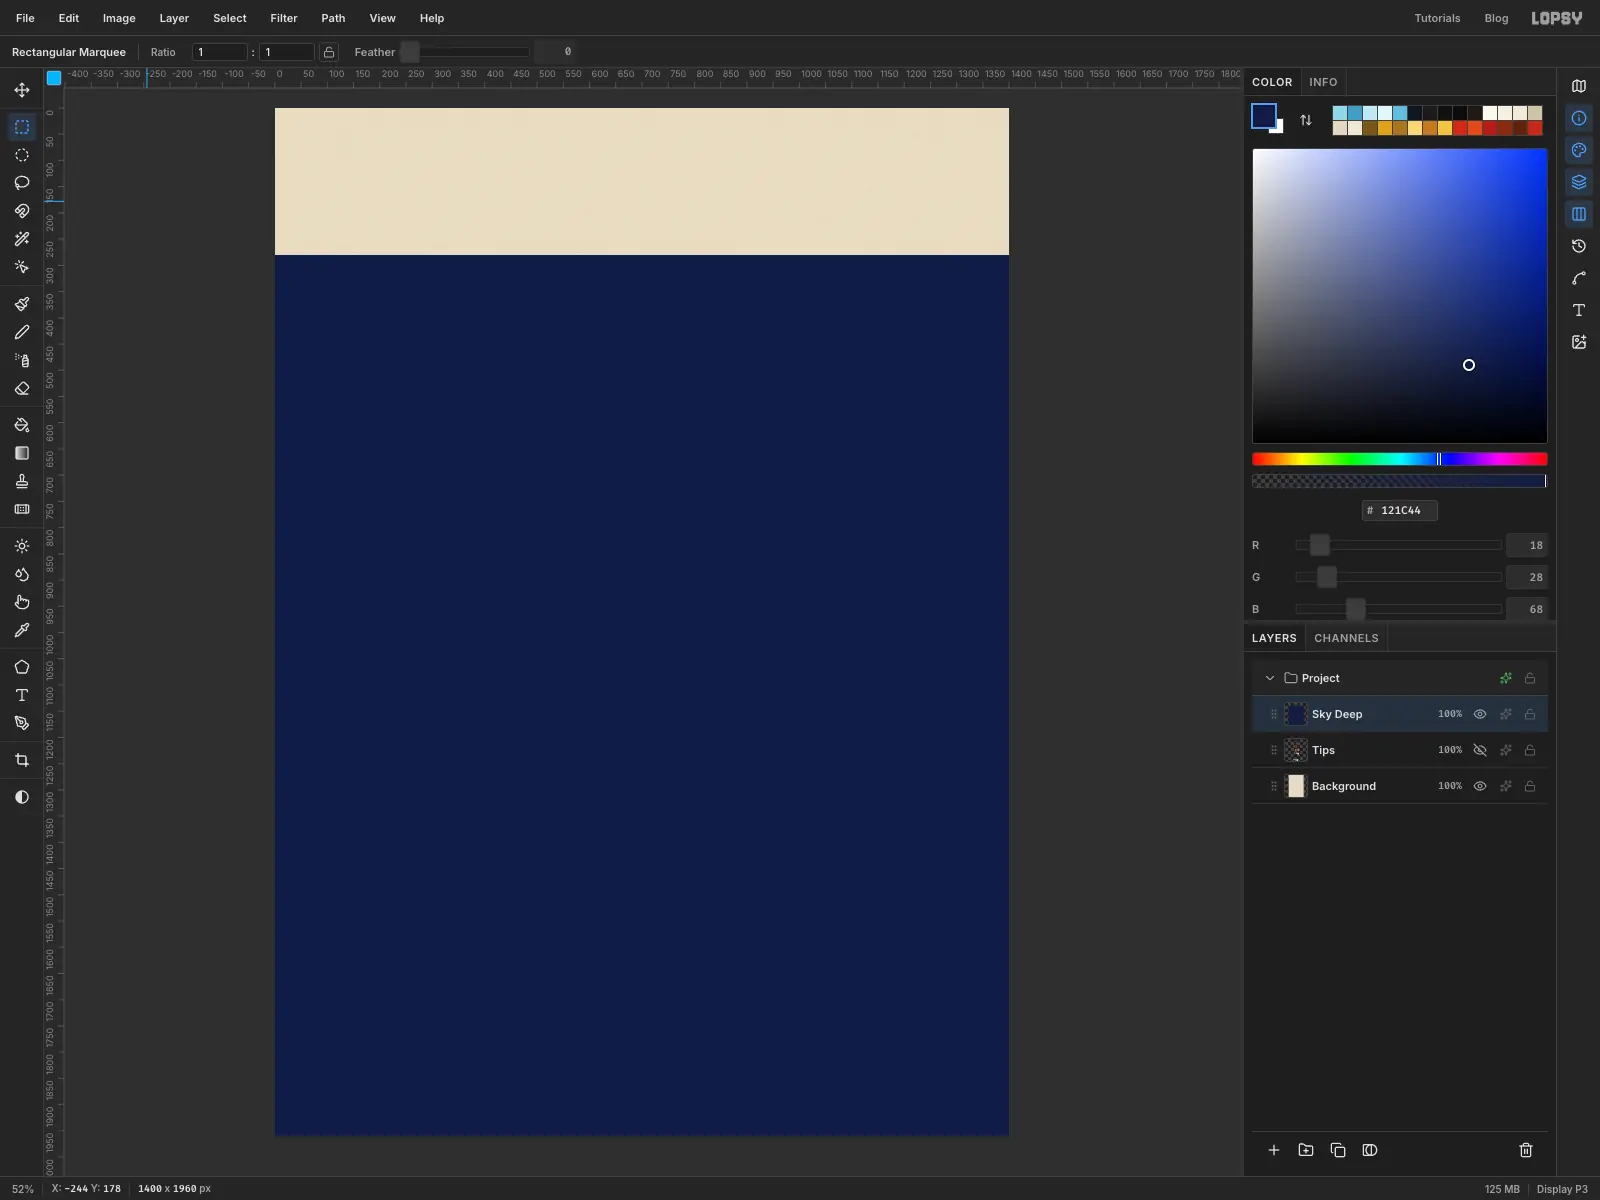
Add a layer called Sky Deep. Set the foreground to , marquee everything below the top seventh of the page, fill it, and deselect with Cmd+D.
This dark ground is what shows through the brush's gaps. Later you'll cover the bare strip at the top with rooftops.
-
Cross the sky with big strokes
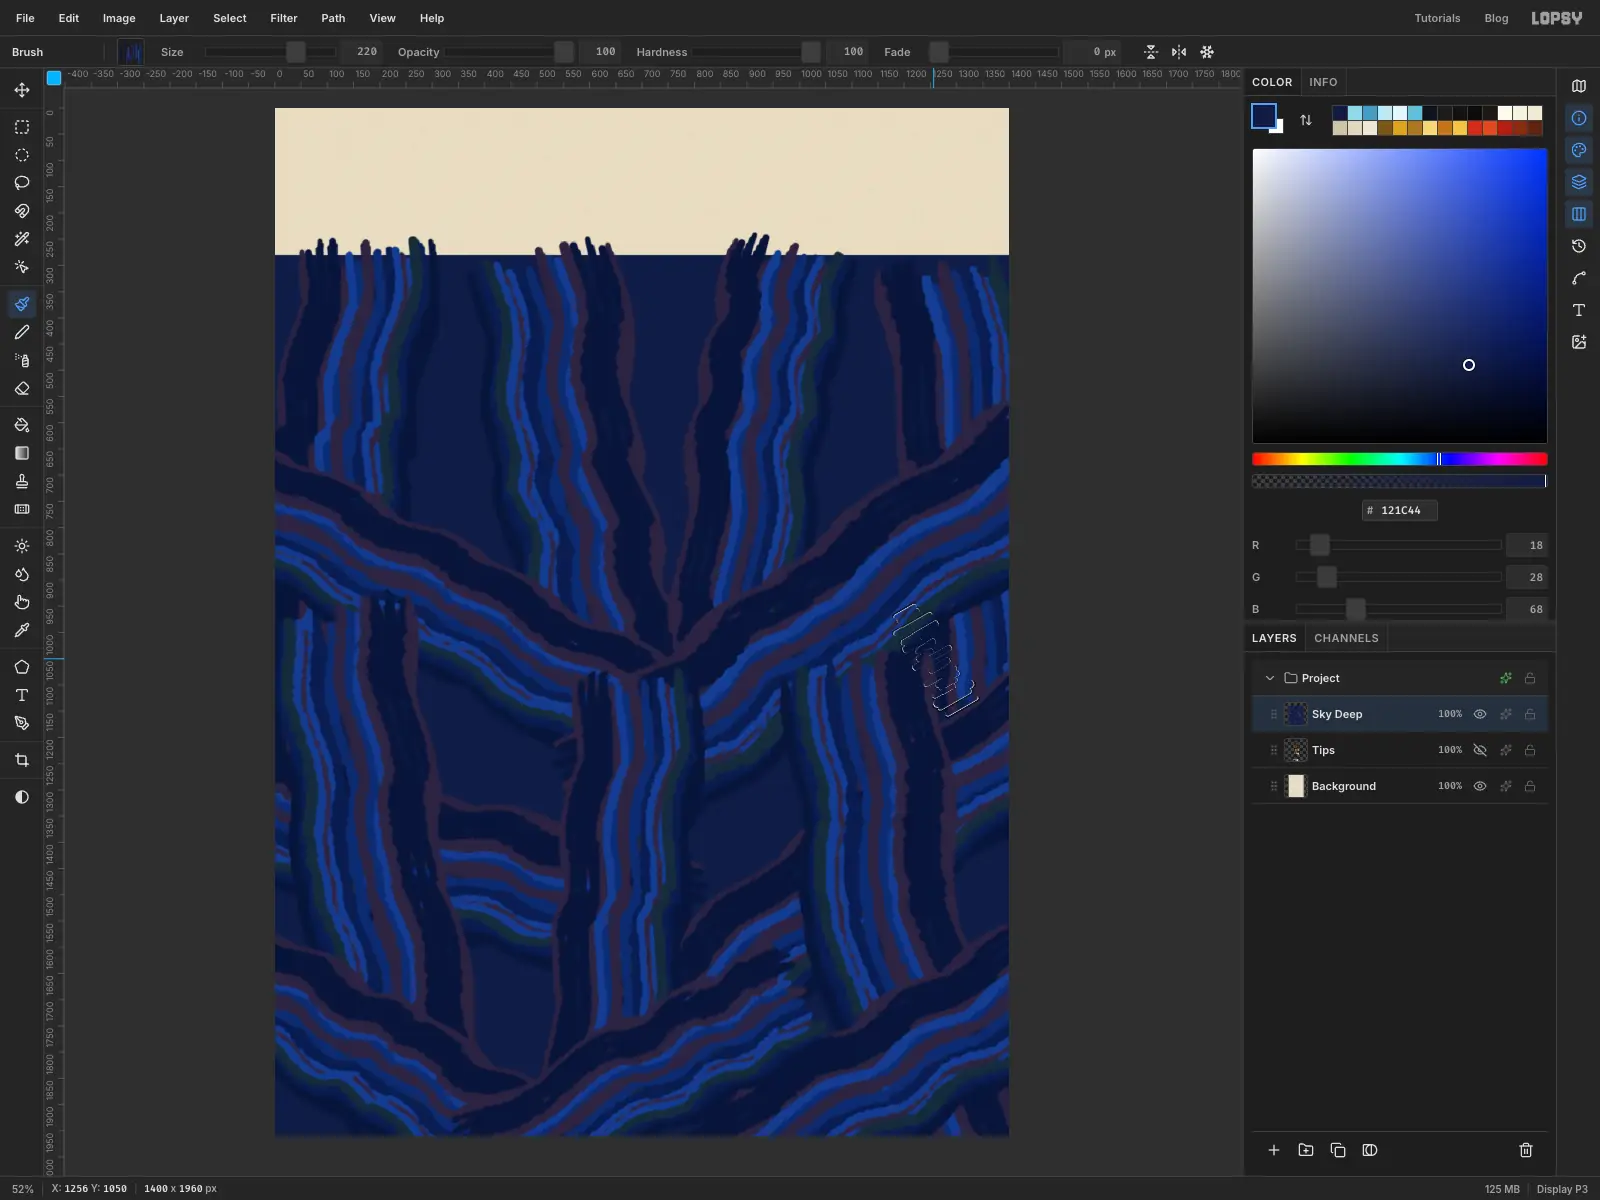
Pick the Brush, open the Brushes modal, and click your Deep brush on the Presets tab. On the Dynamics tab set Angle Jitter to 3, and on the Shape tab set Spacing to 2. Clicking a preset overwrites all these settings, including the size and the dial below. So from here on, "load Cobalt" means: pick the Brush, click that preset, reapply Angle Jitter 3 and Spacing 2, set the dial and size, and close the modal, because it covers the canvas. Colour brushes ignore the foreground colour.
The tip is a row of bristles, so it's widest when the row lies across the stroke. The angle dial on the Shape tab sets this: leave it at 0° for up-and-down strokes, 90° for side-to-side strokes, 45° for strokes that lean like /, and 135° for strokes that lean like \. Get in the habit of turning it before each change of direction.
With Size between 200 and 290, paint about a dozen long strokes across the sky. Go down from the top, across from both sides, and diagonally up and down from the bottom corners, and run them right off the bottom edge so the paint bleeds. Don't let them all run the same way, or the sky turns into wallpaper.
Apply Filter → Oil Paint… at Radius 4, then Filter → Gaussian Blur… at Radius 2. Together they melt the stepped edges into something closer to wet paint.
-
Sweep cobalt across the top
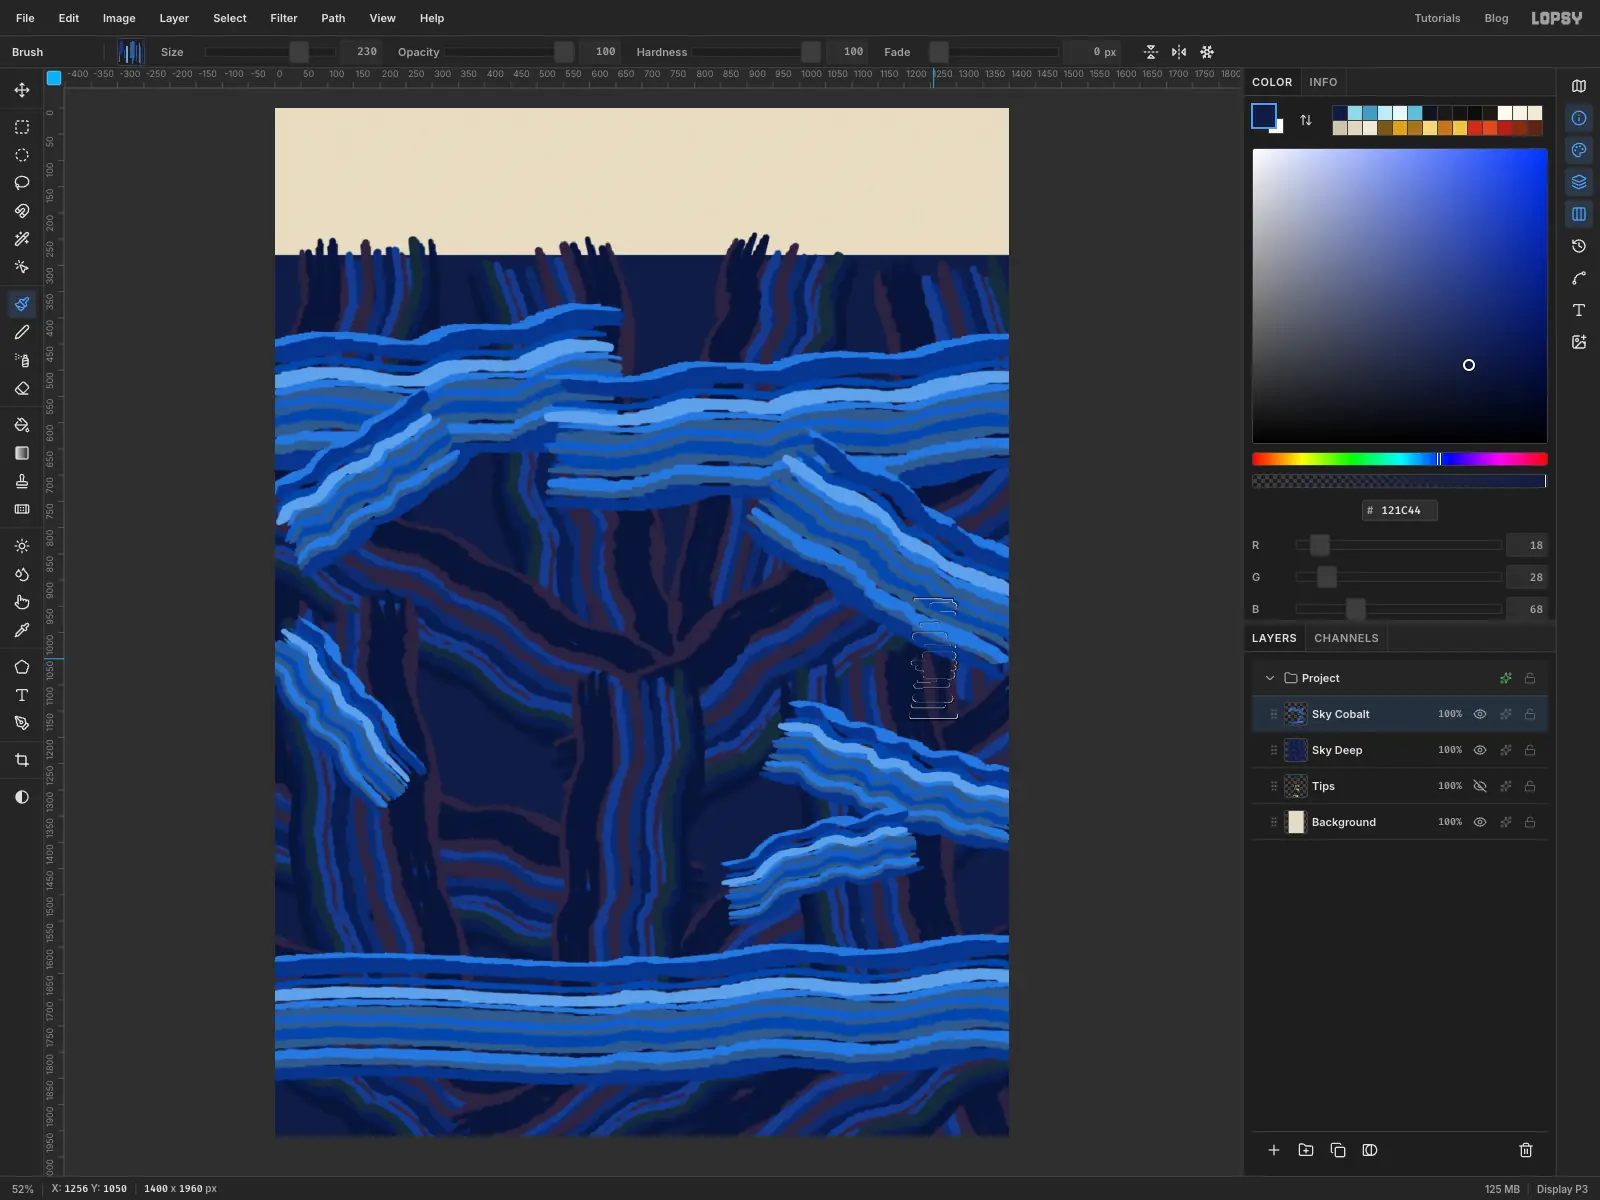
Add a layer called Sky Cobalt and load the Cobalt brush. Paint two long sweeps side to side across the upper part of the sky at Size 240 or so. Add four or five shorter ones at Size 120 to 230, around the middle of the left and right edges, as in the screenshot. Finish with one more sweep right across the foot of the page at Size 230.
The light paint high up is there for a reason: the black rooftops and tower legs you'll add next need something pale to stand against. Apply Oil Paint at Radius 4 and Gaussian Blur at Radius 2 again.
-
Fade the cobalt with a mask
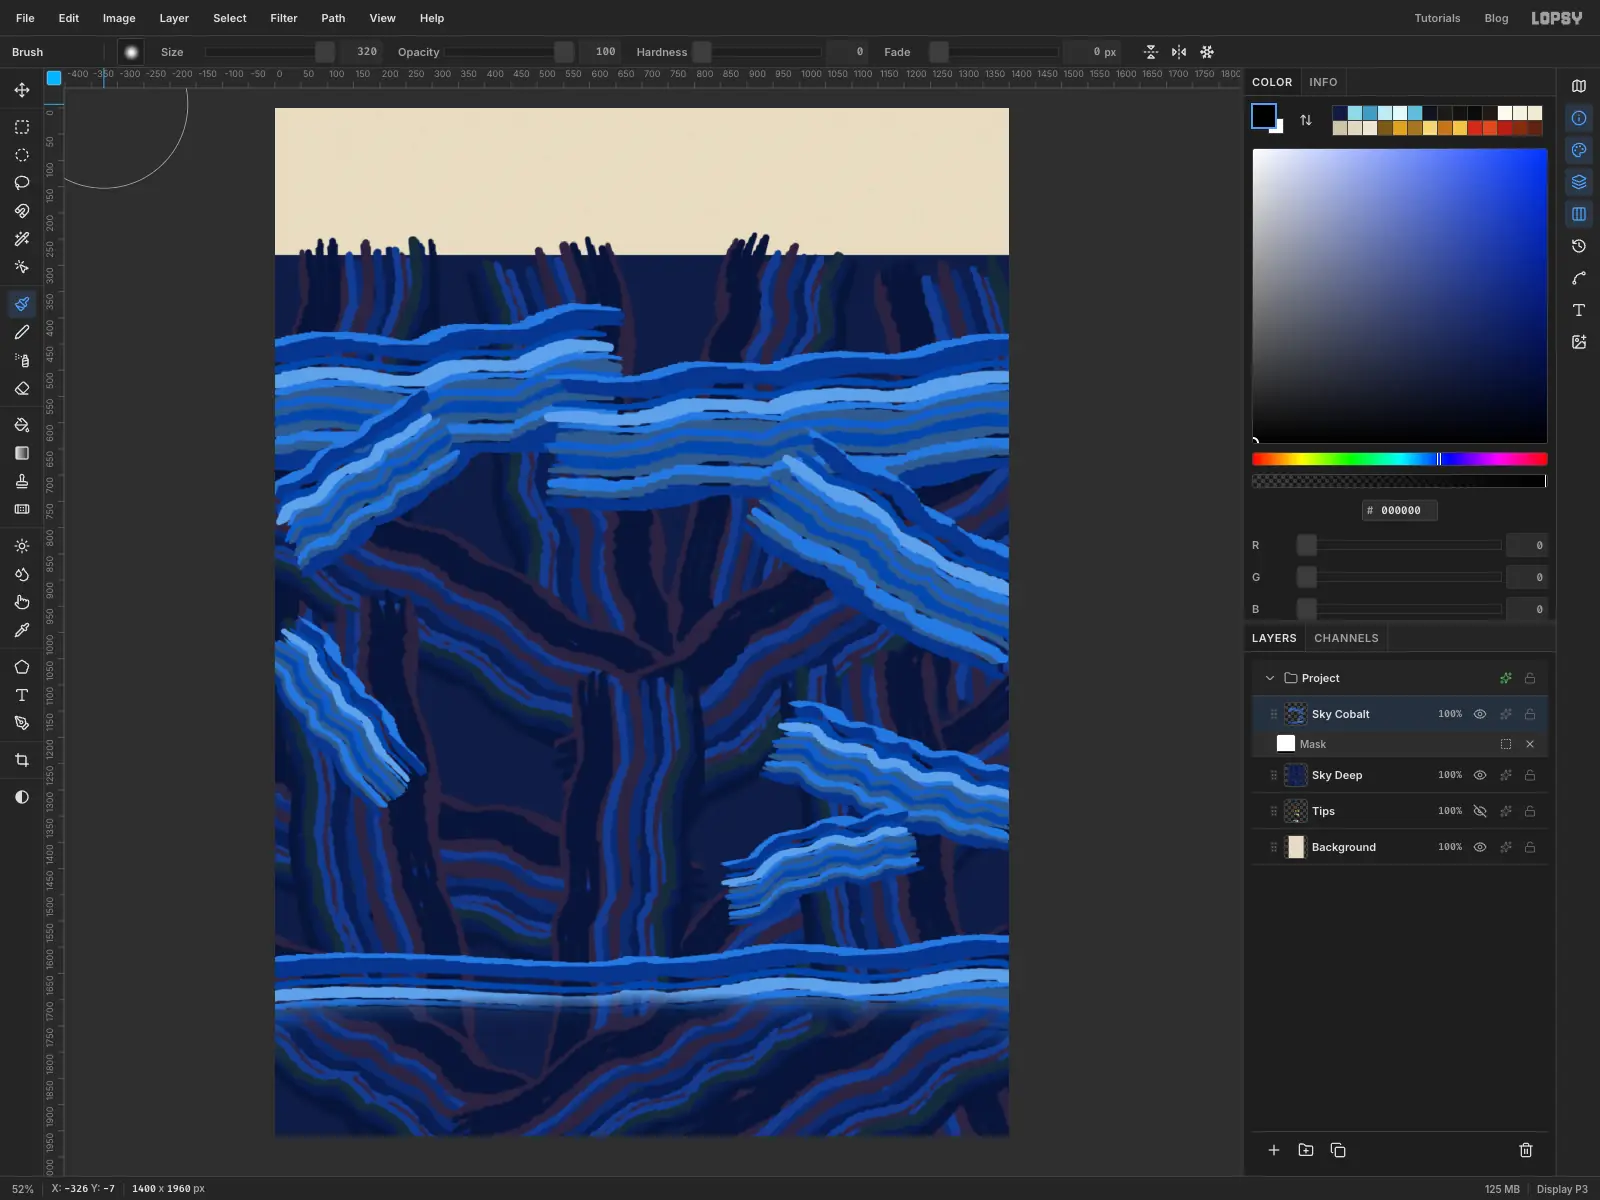
The word TOWER is going across the bottom of the page and it needs a dark ground, so that last sweep should fade away. With Sky Cobalt selected, click Add Mask at the bottom of the Layers panel, then click the mask row's Edit mask button so that you're painting on the mask.
Click the Soft Round preset, set Size to 320, set the foreground to black, and drag one stroke across the page near the bottom. Click the Sky Cobalt layer's name to go back to painting pixels.
-
Paint the legs, the right way up
Baselitz turned his subject upside down before painting it, but you can make things easier for yourself. You'll paint the tower upright, in a group, and flip the group afterwards.
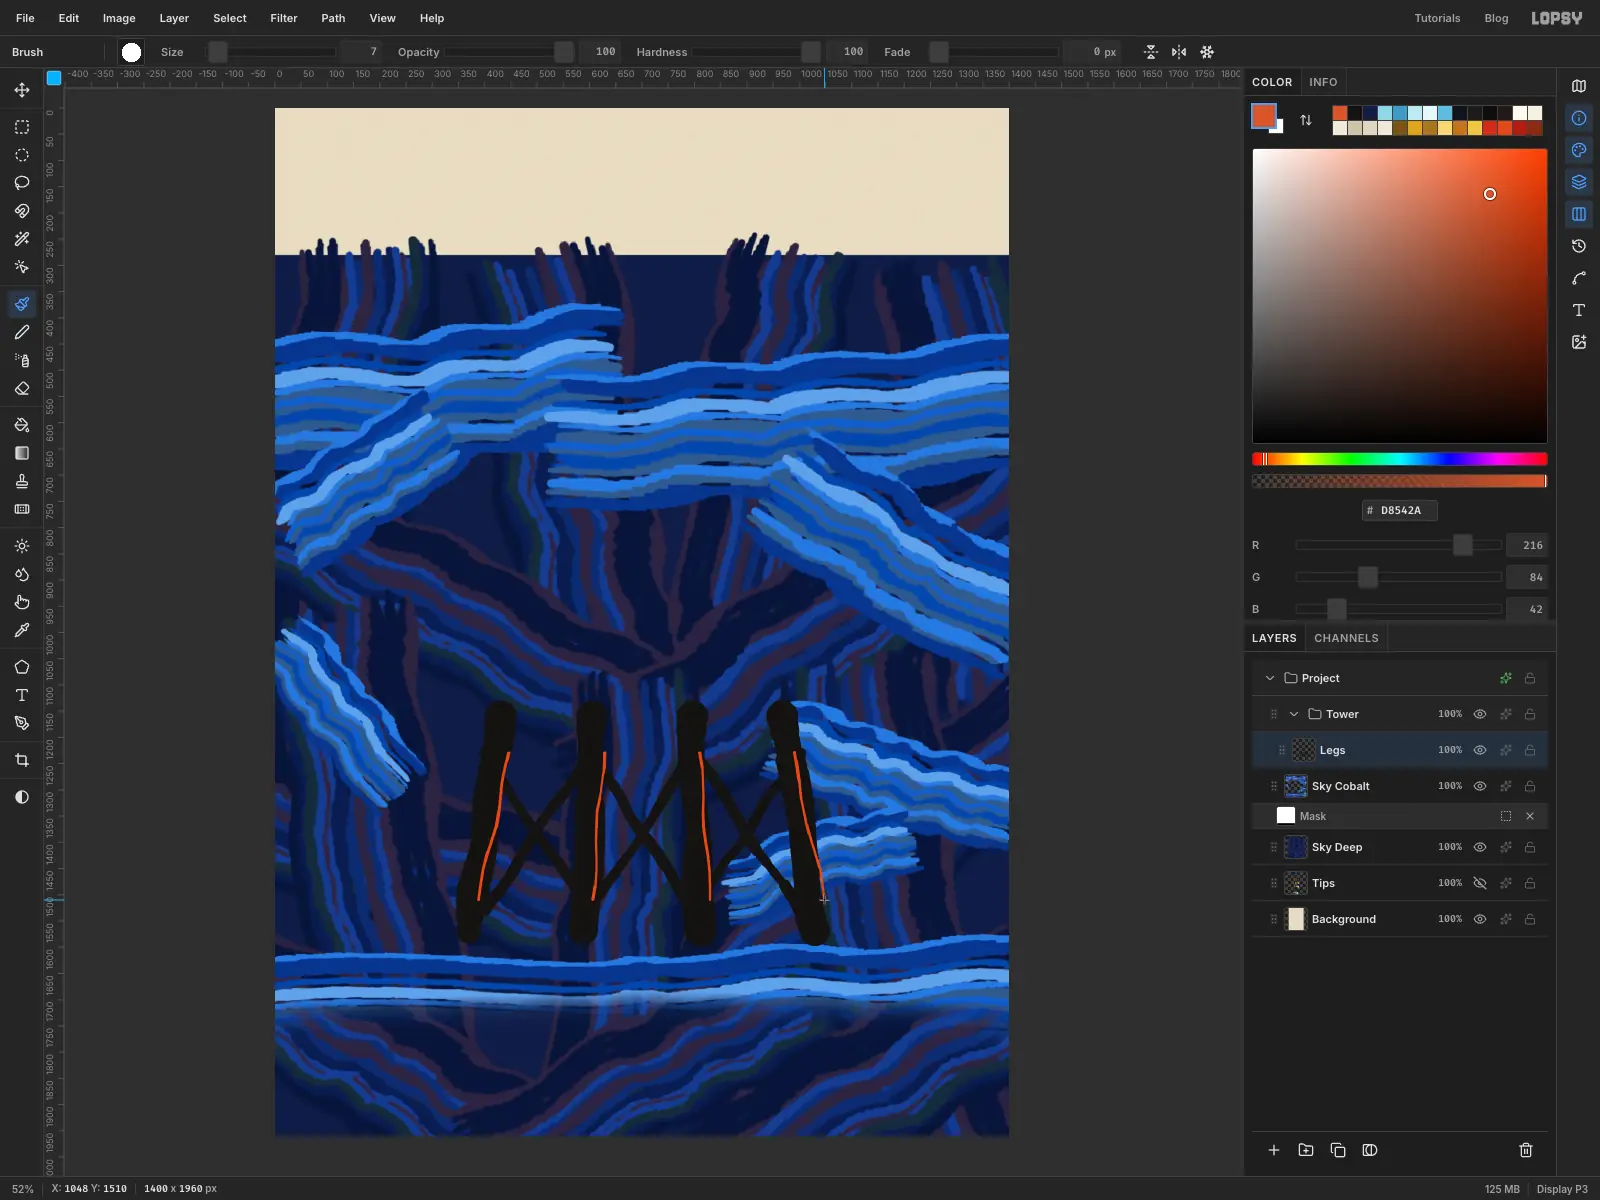
Click New Group in the Layers panel and name it Tower. Layers you add while it's selected go inside it. Add a layer inside it called Legs.
You need a second kind of brush for lines, because at small sizes the colour brushes' gaps turn into thin wires. I'll call this one the oil stick: in the Brushes modal click Hard Round, set Size Jitter to 30 on the Dynamics tab and Spacing to 4 on the Shape tab. Its width wanders as you draw, a bit like a greasy crayon. Whenever a step asks for the oil stick, go back to these settings.
With the oil stick at Size 62 and colour , paint four legs splaying out from about 60% of the way down the page to about 80%. Drop the size to 24 and draw an X between each pair of legs. Then pick orange-red at size 7 and draw a thin line down one side of each leg.
-
Lasso the tank and underpaint it
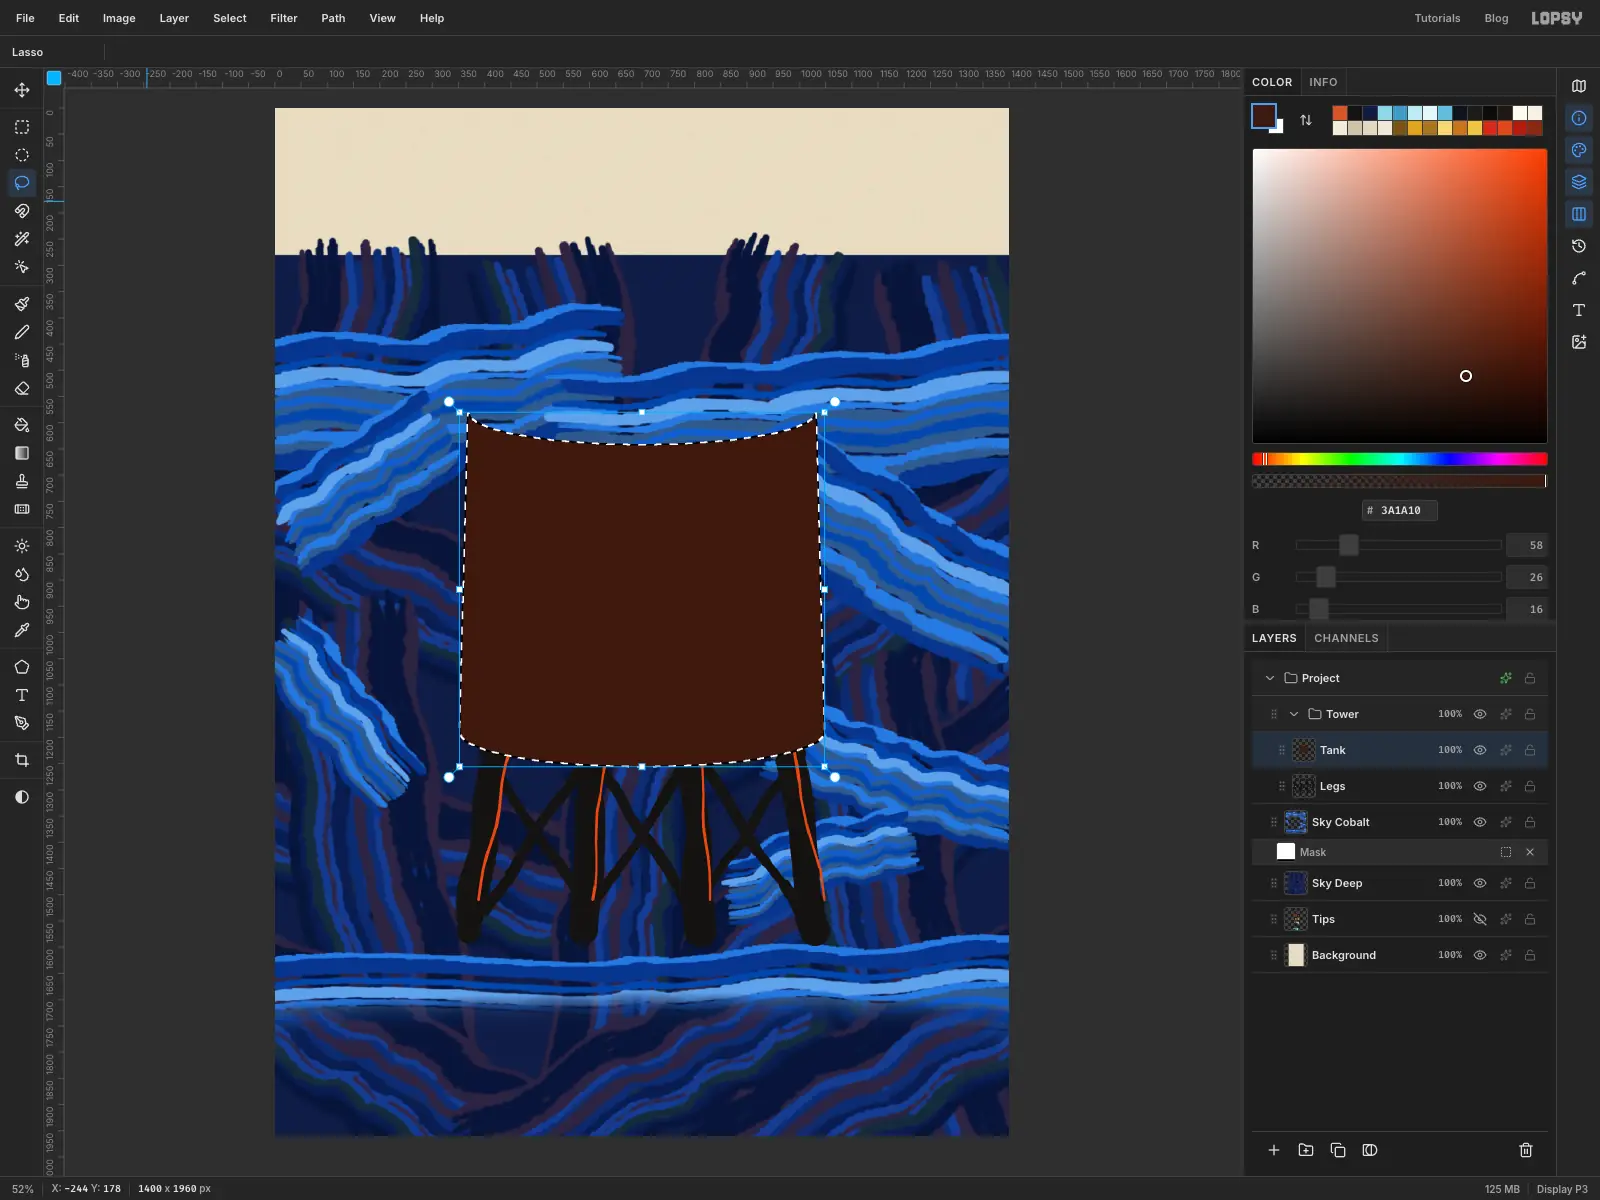
Add a layer called Tank. With the Lasso, draw a barrel above the legs, about half the page wide and nearly as tall as it is wide, its top and bottom edges curving gently downward in the middle. Fill it with dark umber and keep the selection active.
-
Pull down the staves
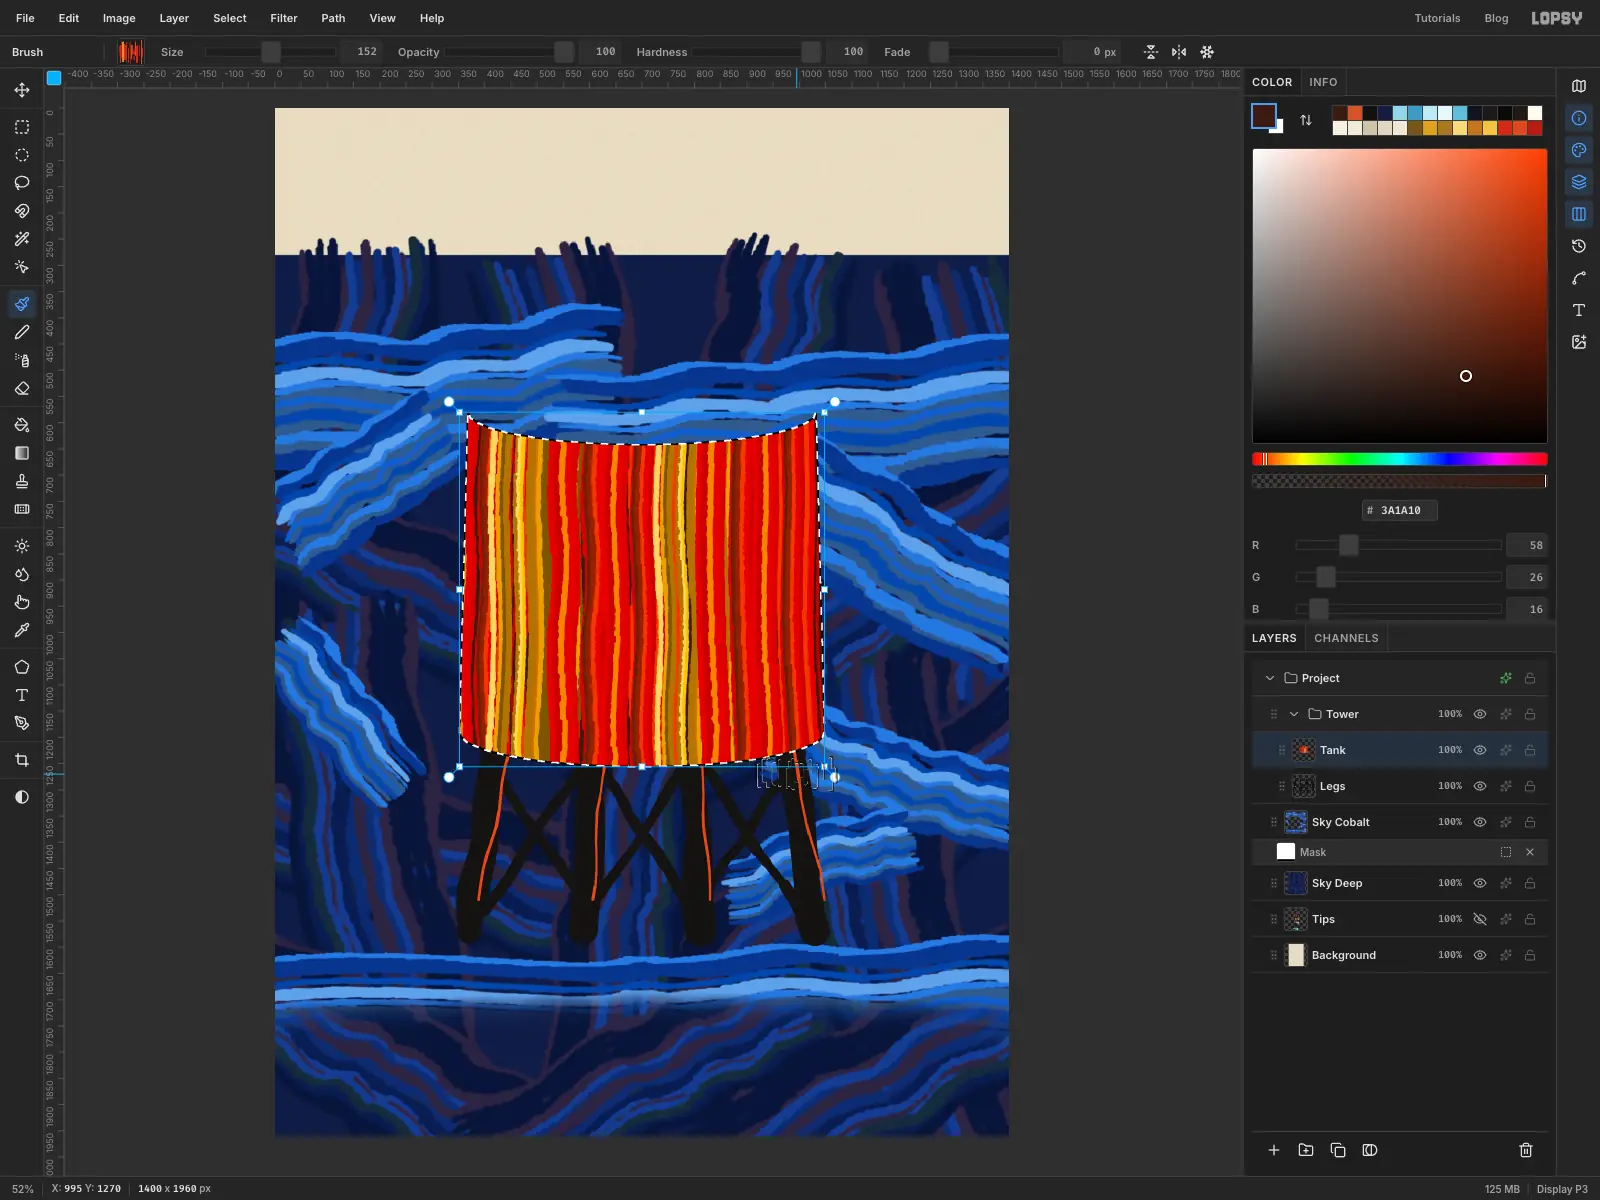
Load the Cadmium brush with the dial at 0°. Paint seven vertical pulls across the barrel, from above its top to below its bottom, at Size 130 to 190. Swap in Ochre for a couple of the pulls. The lasso keeps the paint inside, and the umber shows through the dry gaps.
At this stage it'll look like a deck chair. The next step fixes that.
-
Scrub across the stripes
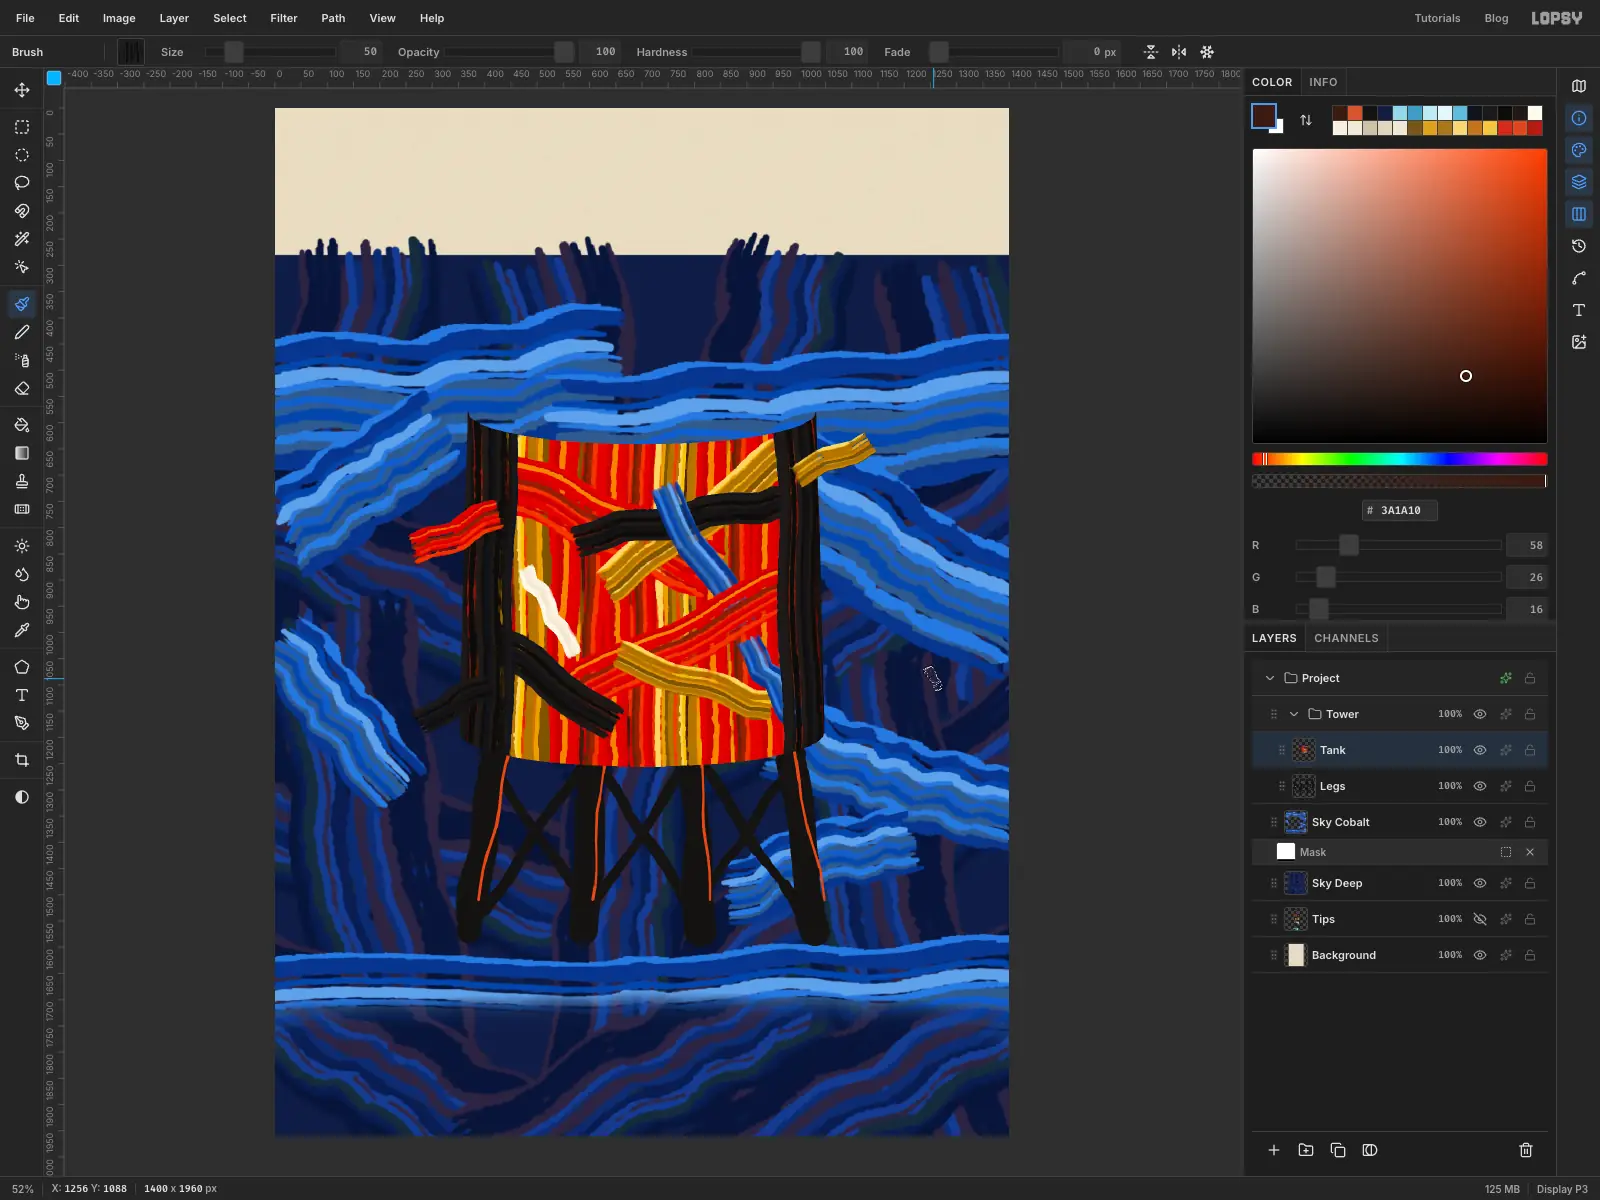
Still inside the selection, scrub across the stripes in every direction, turning the dial as you go. Use nine strokes or so: big red diagonals at Size 90 to 110, ochre at 54 to 70, black Tar at 60 to 70, two slashes of Cobalt at about 50, and one short slash of Bone at 30. No stripe should survive the full height of the tank.
Paint a dry Tar stroke down each side, Size 110 on the left and 90 on the right, to round the barrel.
Now deselect with Cmd+D and paint three short strokes that begin on the tank and run past its outline into the sky: Cadmium at Size 58 to the left, Ochre at 44 to the upper right, and Tar at 50 to the lower left. Neo-expressionist paint doesn't stay inside the lines. Finish with Oil Paint at Radius 3.
-
Add hoops and seams
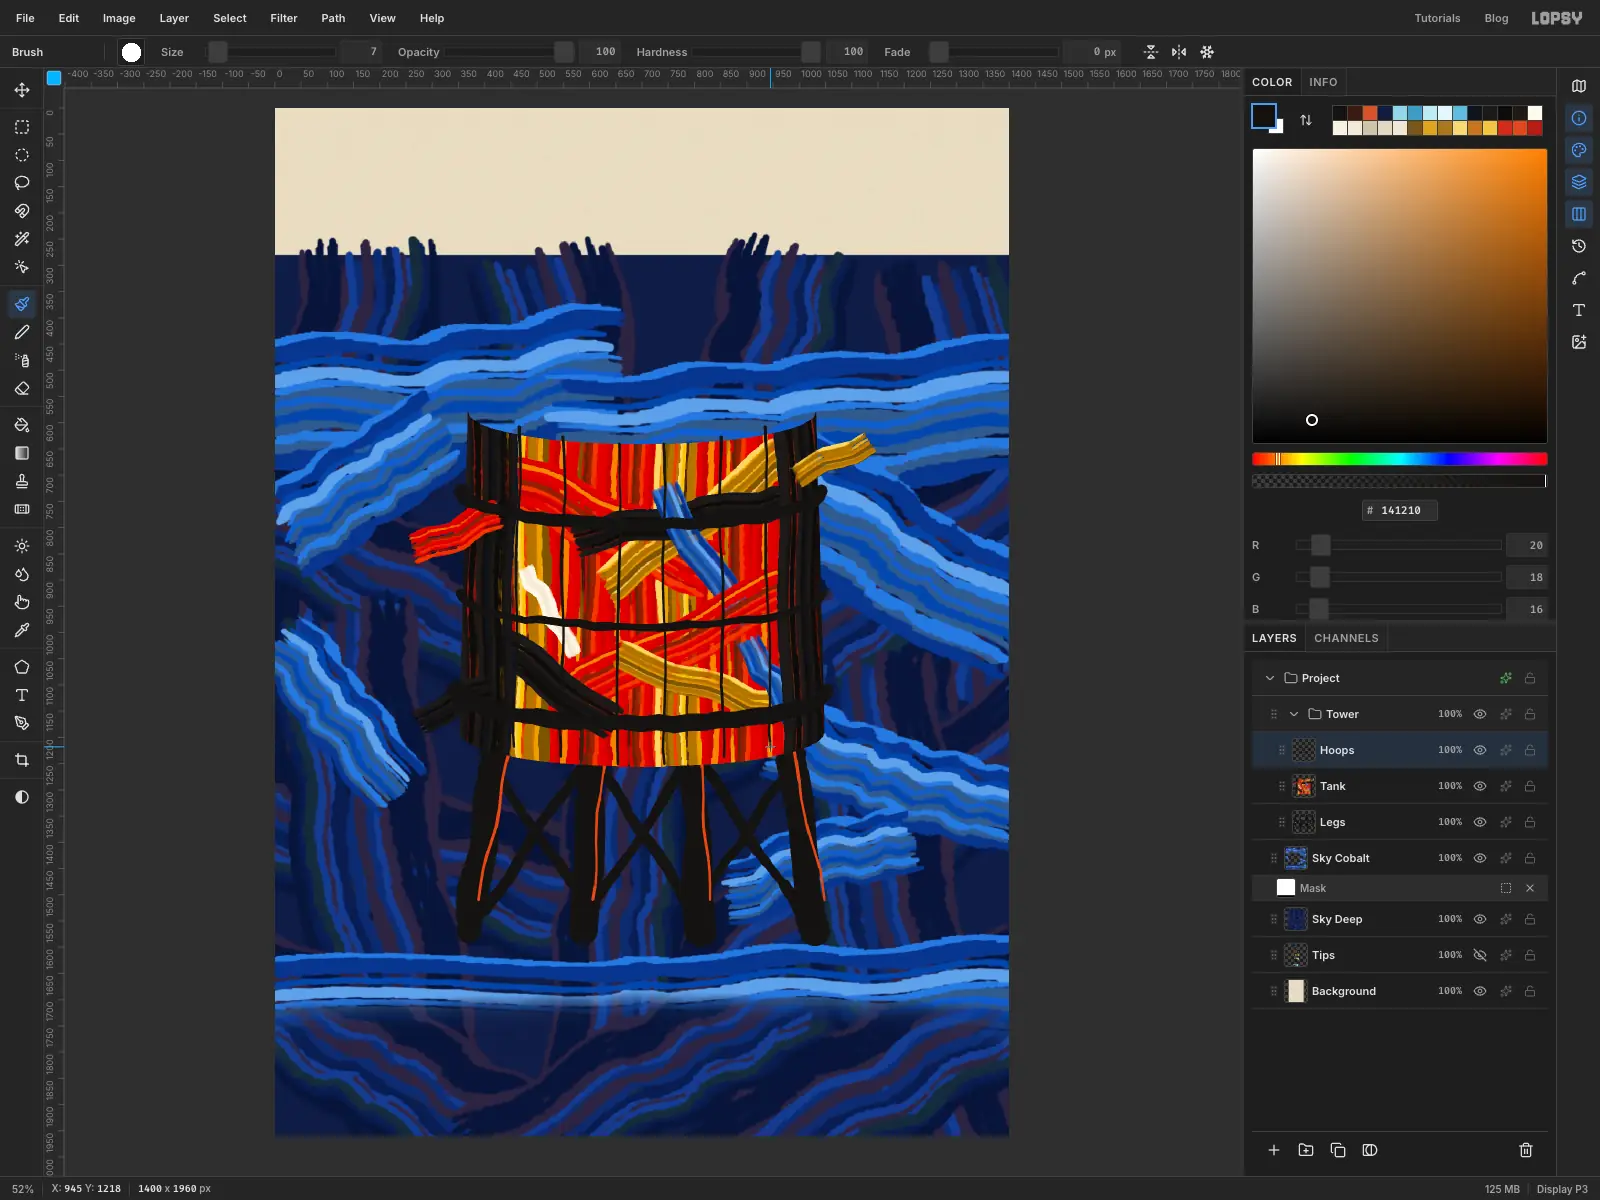
Add a layer called Hoops. With the oil stick in , draw three hoops across the tank, curving the same way as its edges. Vary the weights: Size 30, 18 and 38.
Then draw six thin seams from top to bottom at Size 7, following the staves. They hold the shape together under all that scrubbing.
-
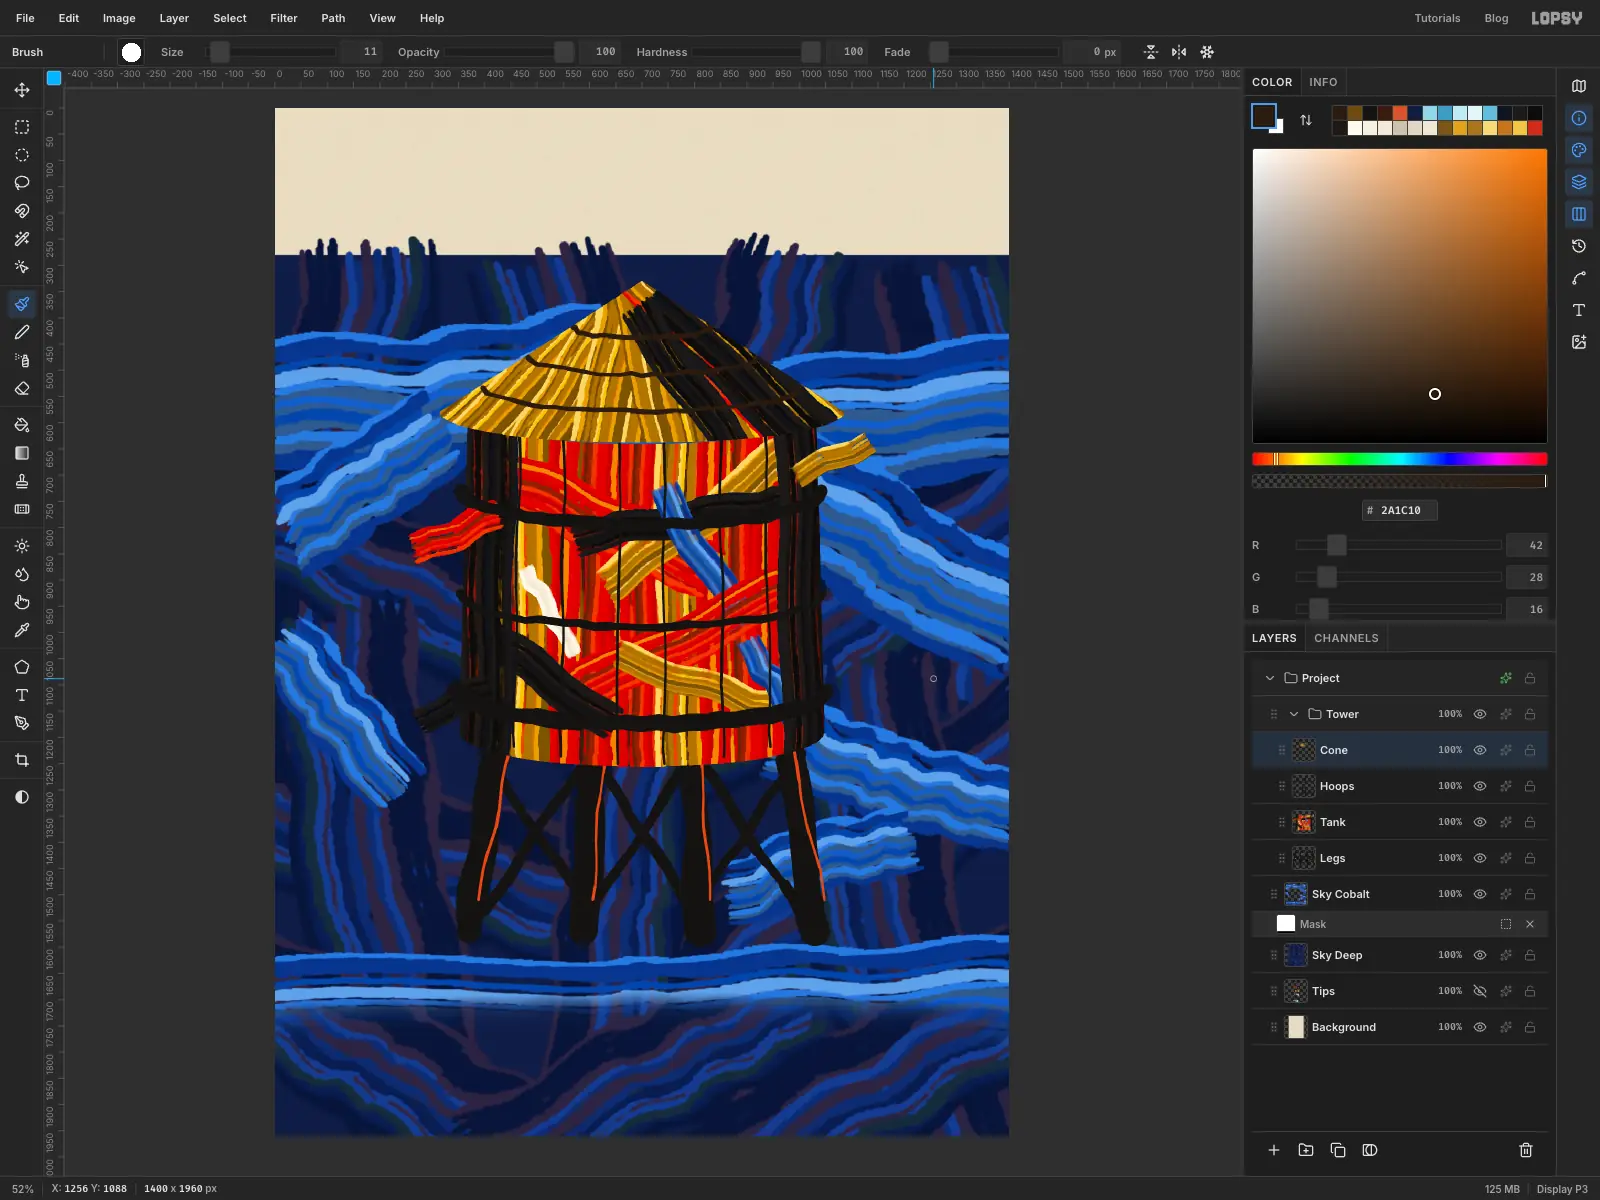
Build the cone
Add a layer called Cone. Lasso a wide triangle on top of the tank, with a curved bottom edge and a little overhang at each side. Fill it with and keep the selection.
Load Ochre and paint eight strokes from the point of the cone out to the rim, at Size 90 to 130, turning the dial for each ray. Make one of them Cadmium. Next drag Tar down one side, once at Size 120 and once at 70, to put that side in shadow.
Pick the oil stick at Size 11 in and draw three arcs across the cone, a third, a half and three quarters of the way down. Without them the bright rays read as a beam of light; with them it's a shingled roof. Deselect and apply Oil Paint at Radius 2.
-
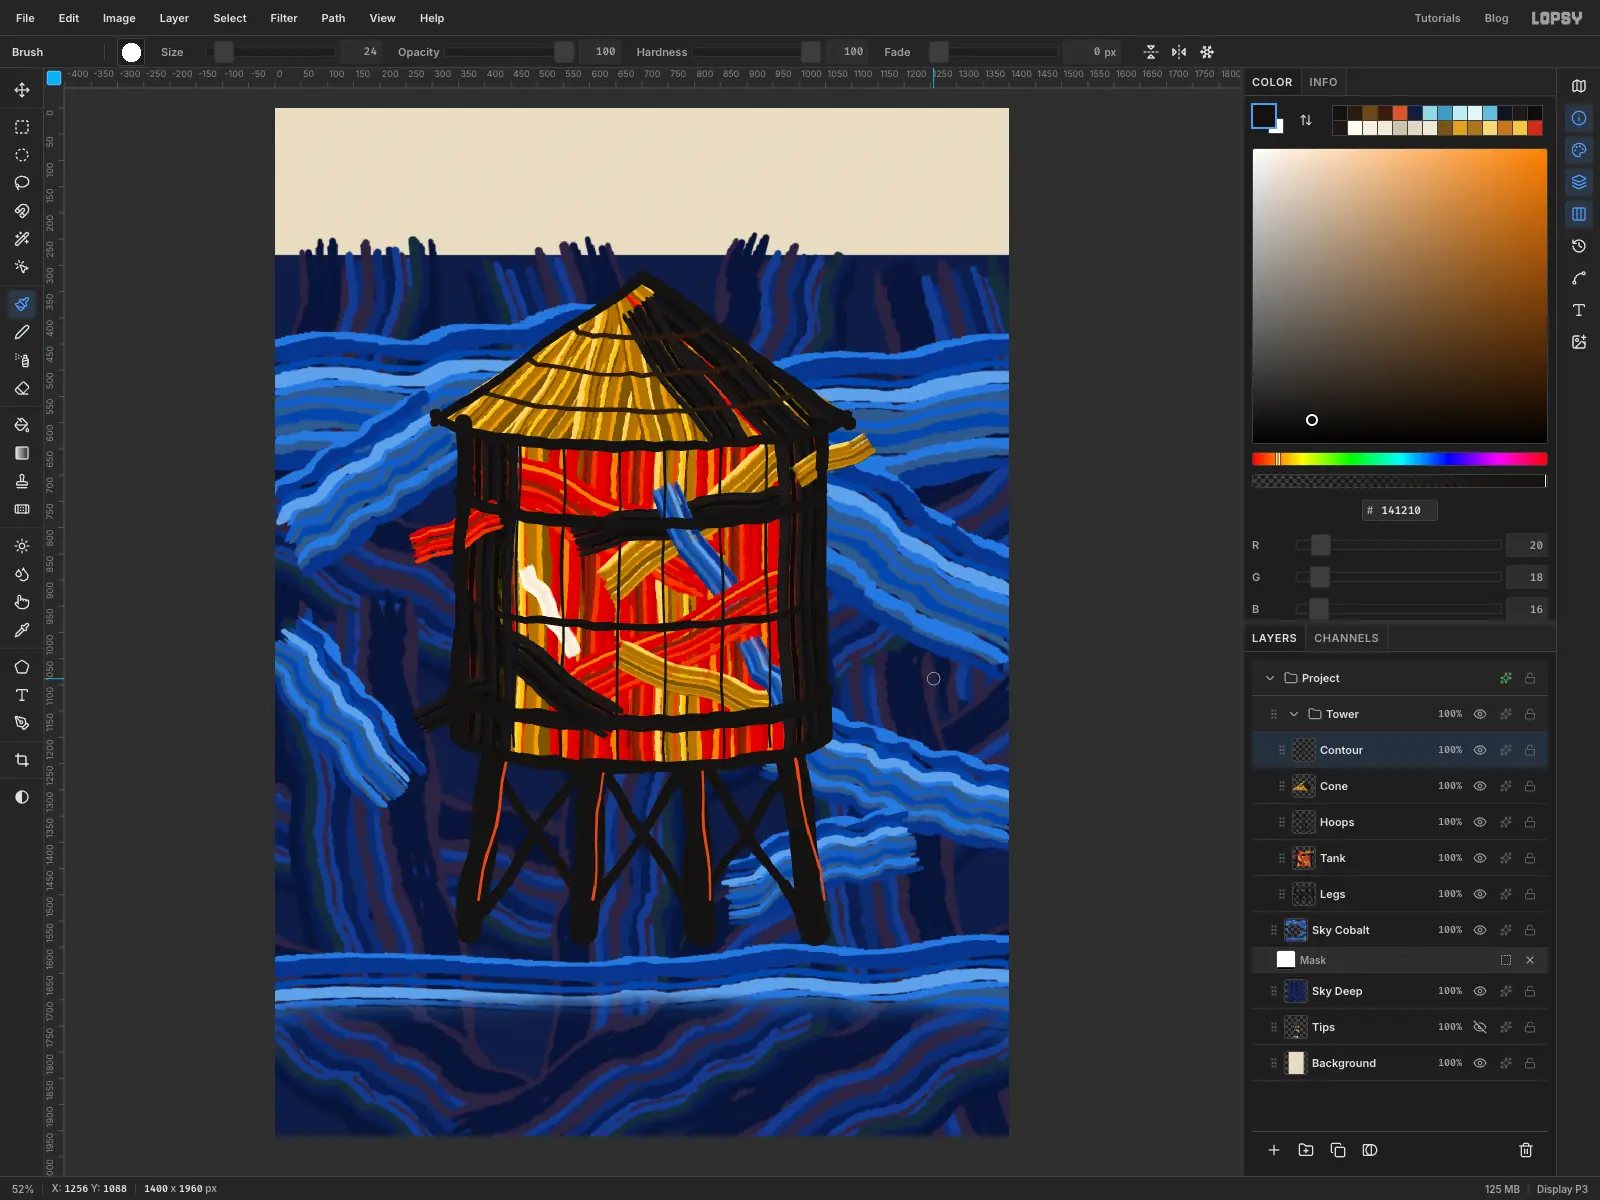
Draw a black contour
Add a layer called Contour. With the oil stick in , draw around everything by hand: the tank's sides and bottom edge, the two slopes of the cone and its rim. Use sizes from 22 to 34, heavier on the left of the tank and the right slope of the cone.
Different weights on each side make it look drawn rather than stroked. Apply Oil Paint at Radius 1 to take the shine off the lines.
-
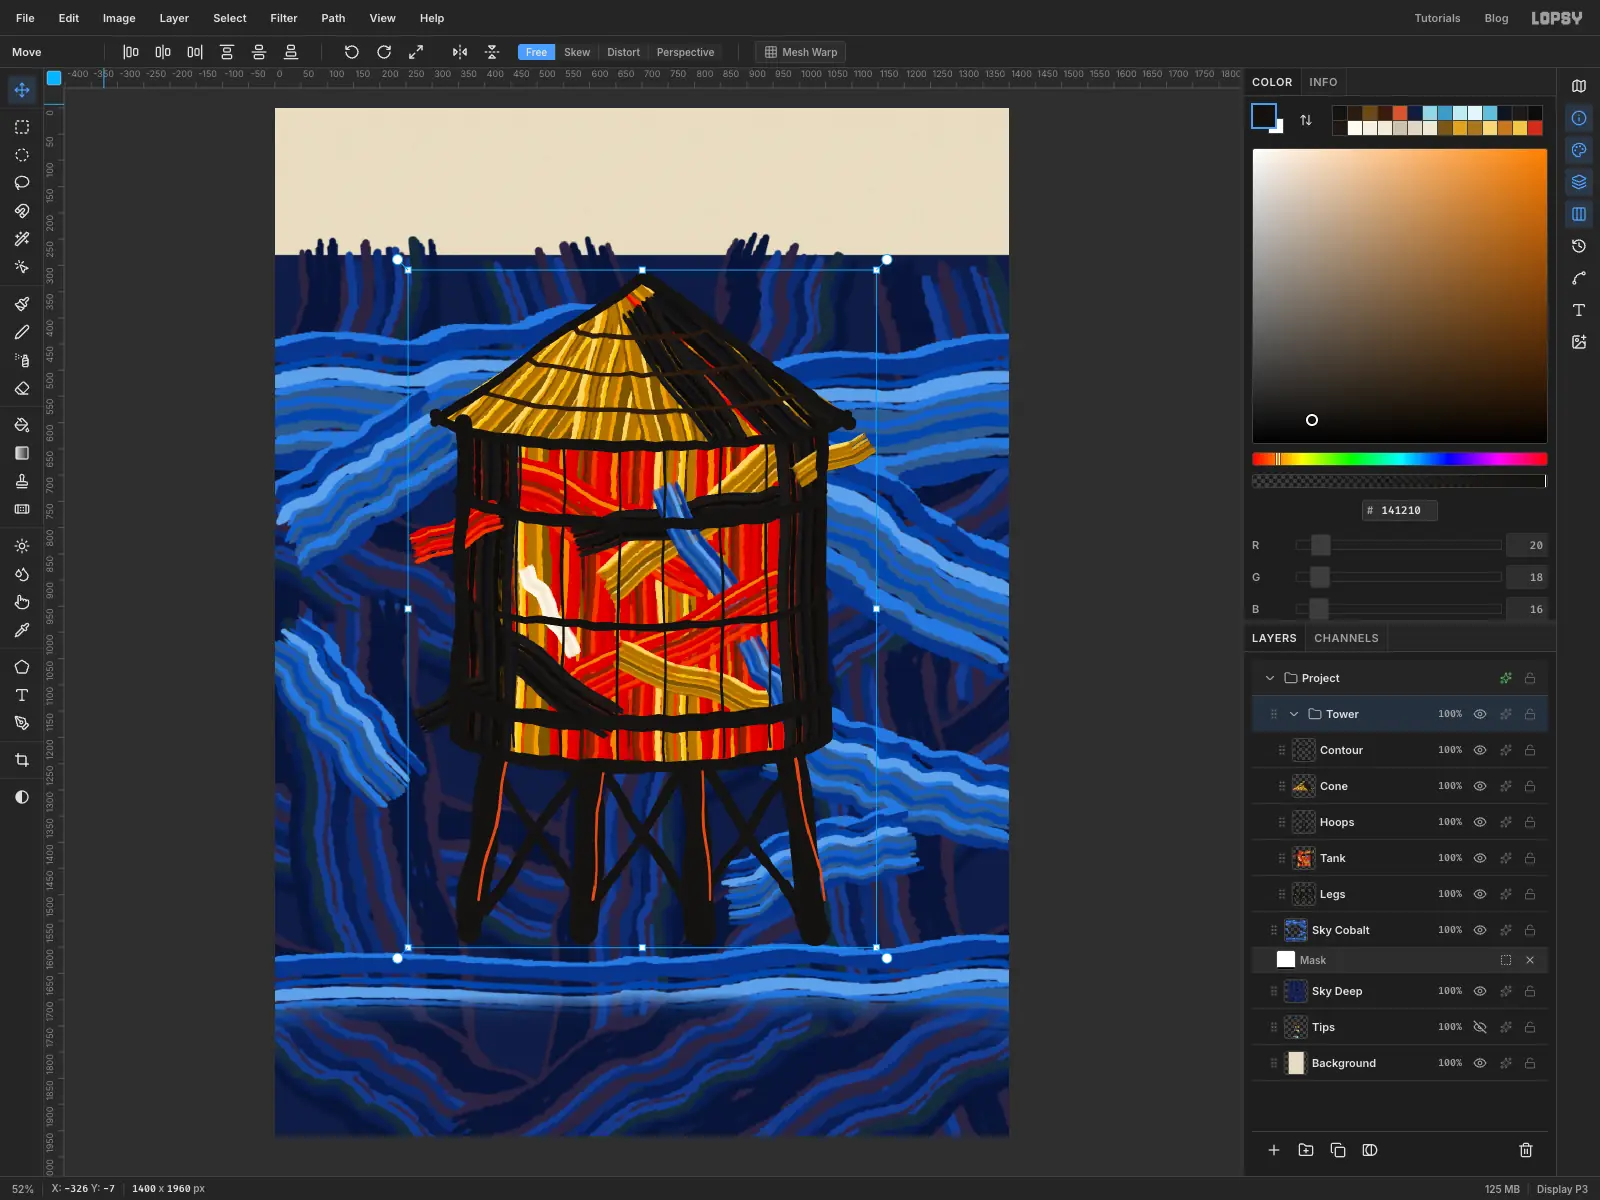
Select the whole group
Click the Tower group's row in the Layers panel, press Cmd+D to make sure nothing is selected, and switch to the Move tool (V). The handles now frame all the group's layers, and anything you do transforms them together.
-
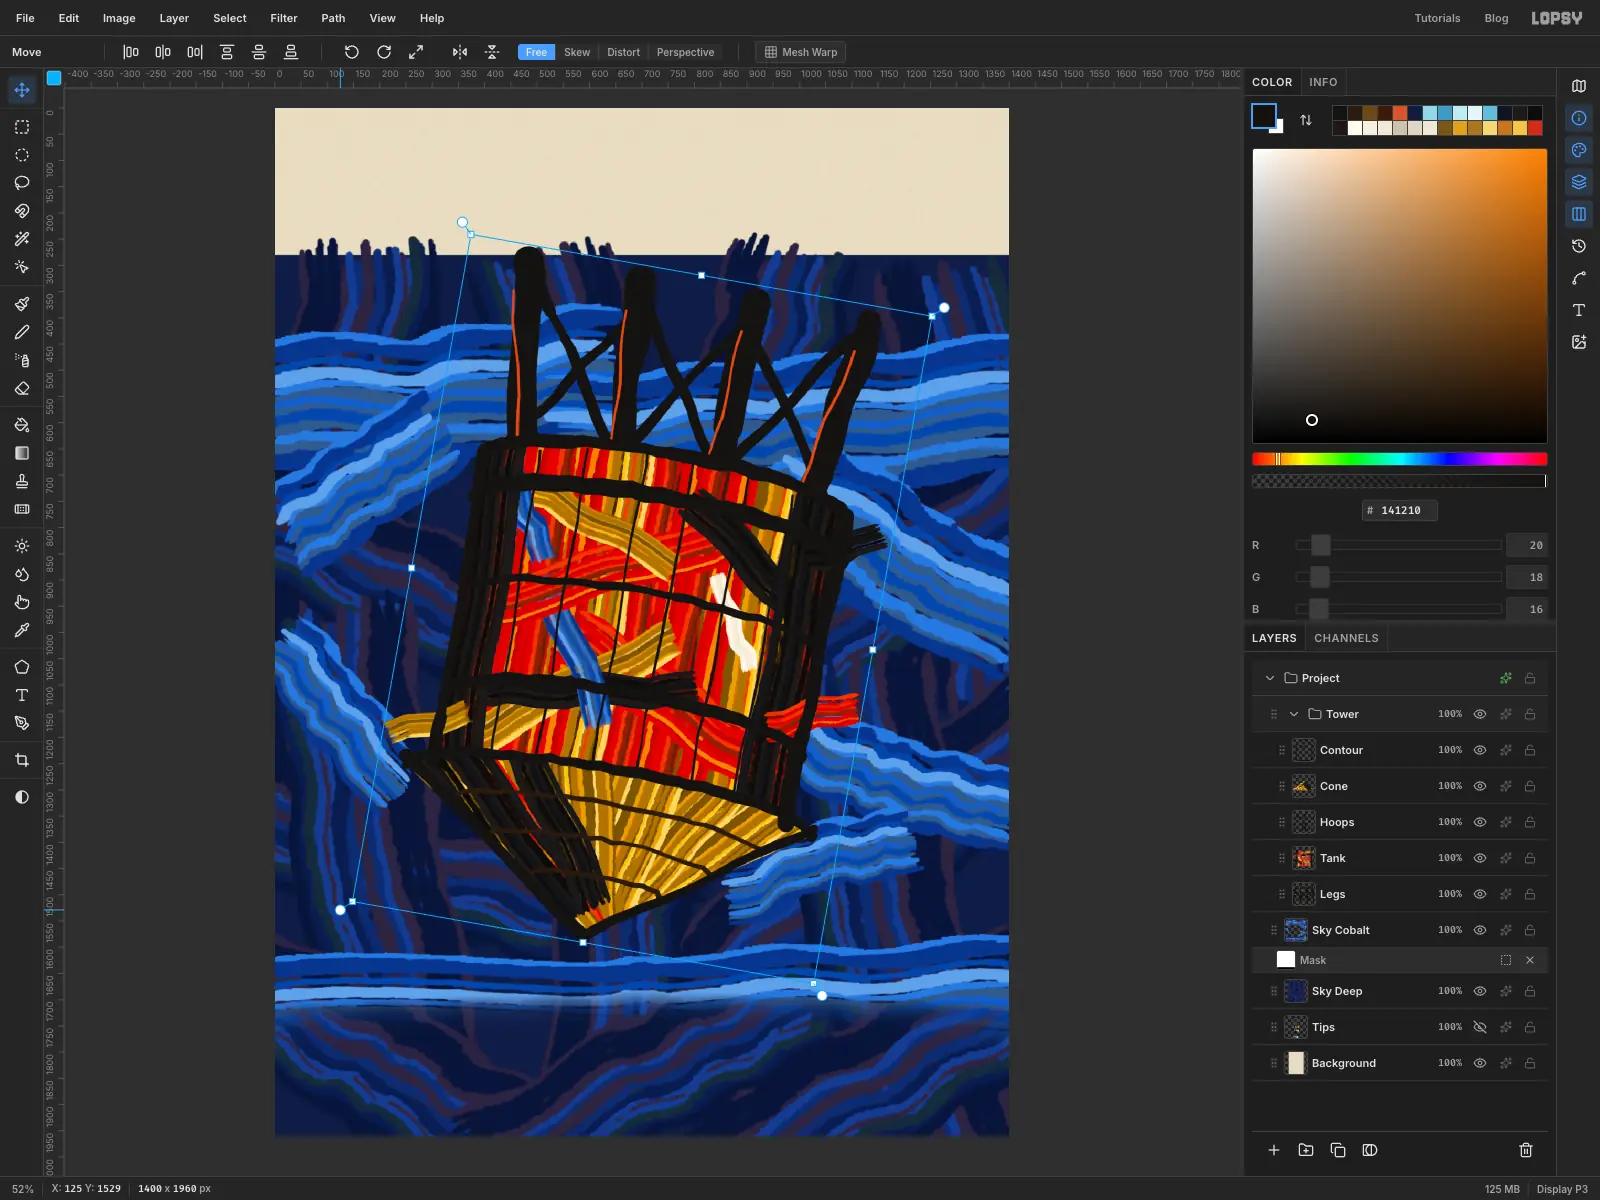
Turn the world over
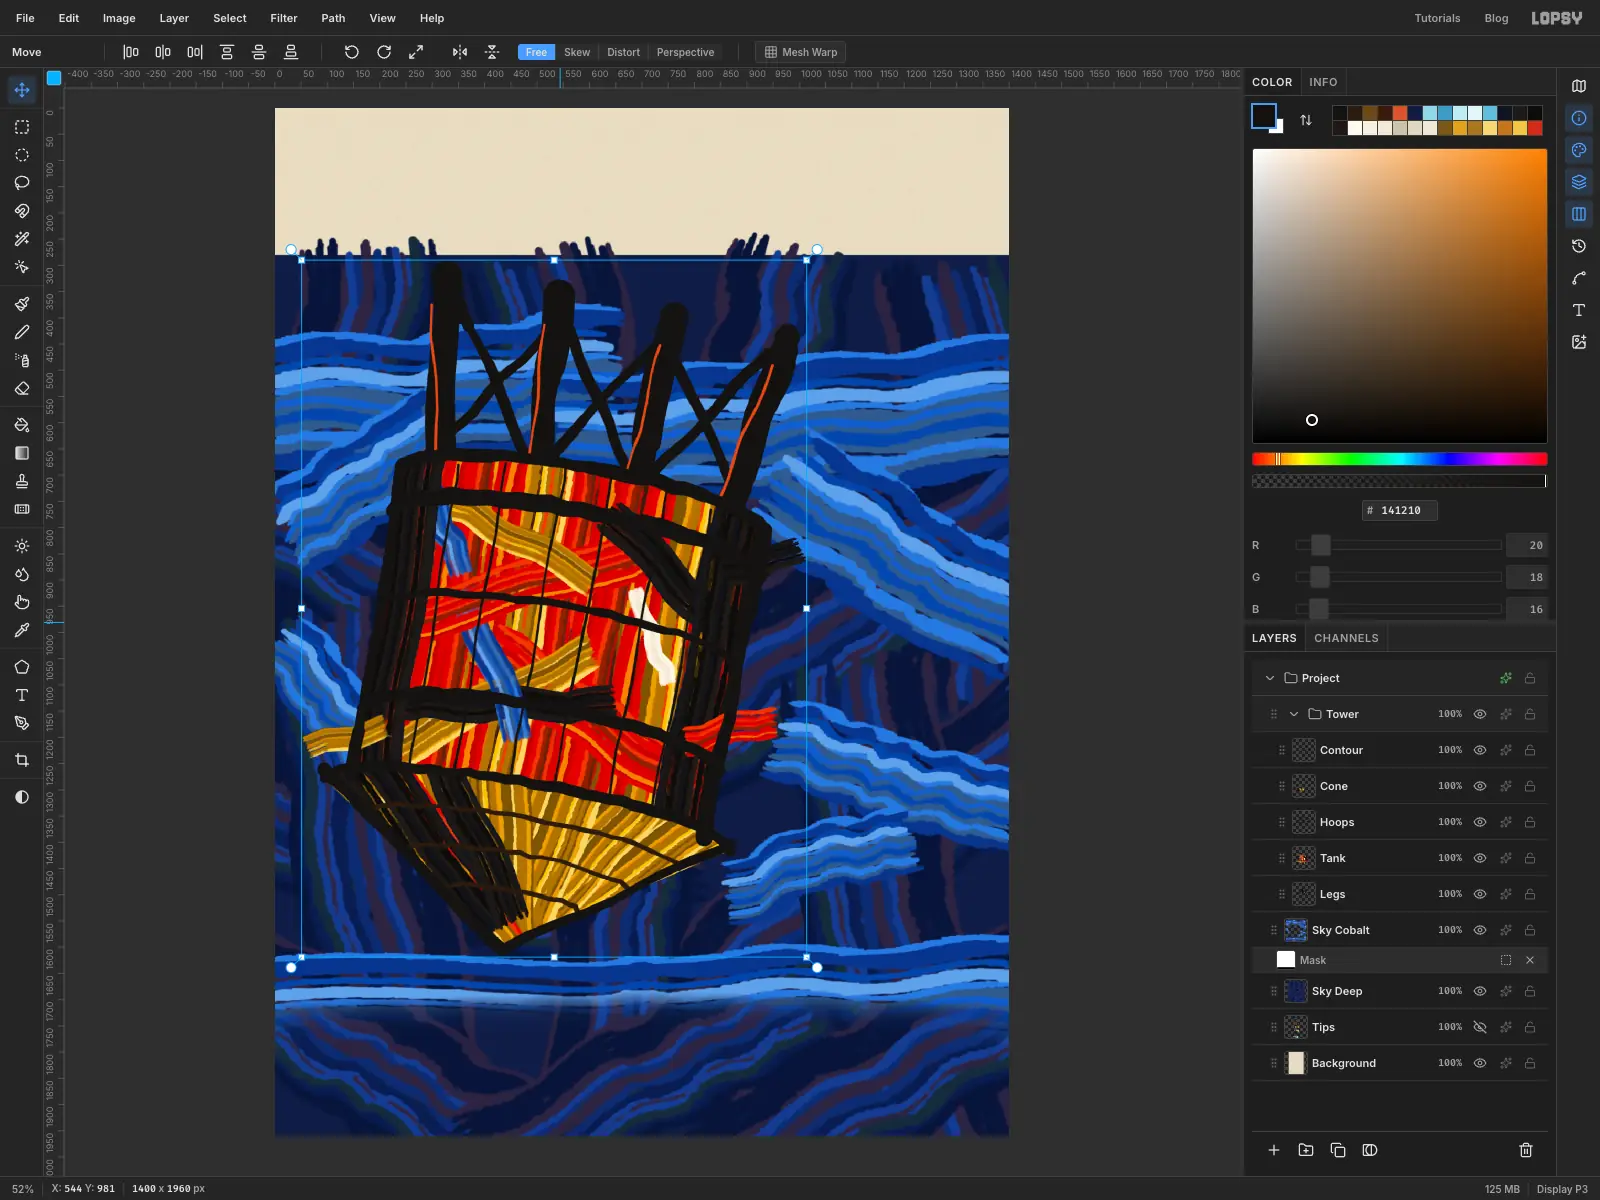
Grab the round rotation handle just outside the top-right corner of the box. Drag it clockwise, all the way past the half-turn, and stop about 10° beyond it. The legs should end up at the top, leaning a little to the right, and the cone's point at the bottom, a little to the left.
Don't stop at exactly 180°. That tilt makes the tower feel as if it's actually falling.
-
Place the tower
Drag from inside the box to slide the tower down and left. Put the tip about four-fifths of the way down the page and about a third of the way across, because that's where the O of TOWER will go. Press Esc to finish. In Lopsy, Esc keeps a transform rather than cancelling it.
-
Duplicate and shrink a second tower
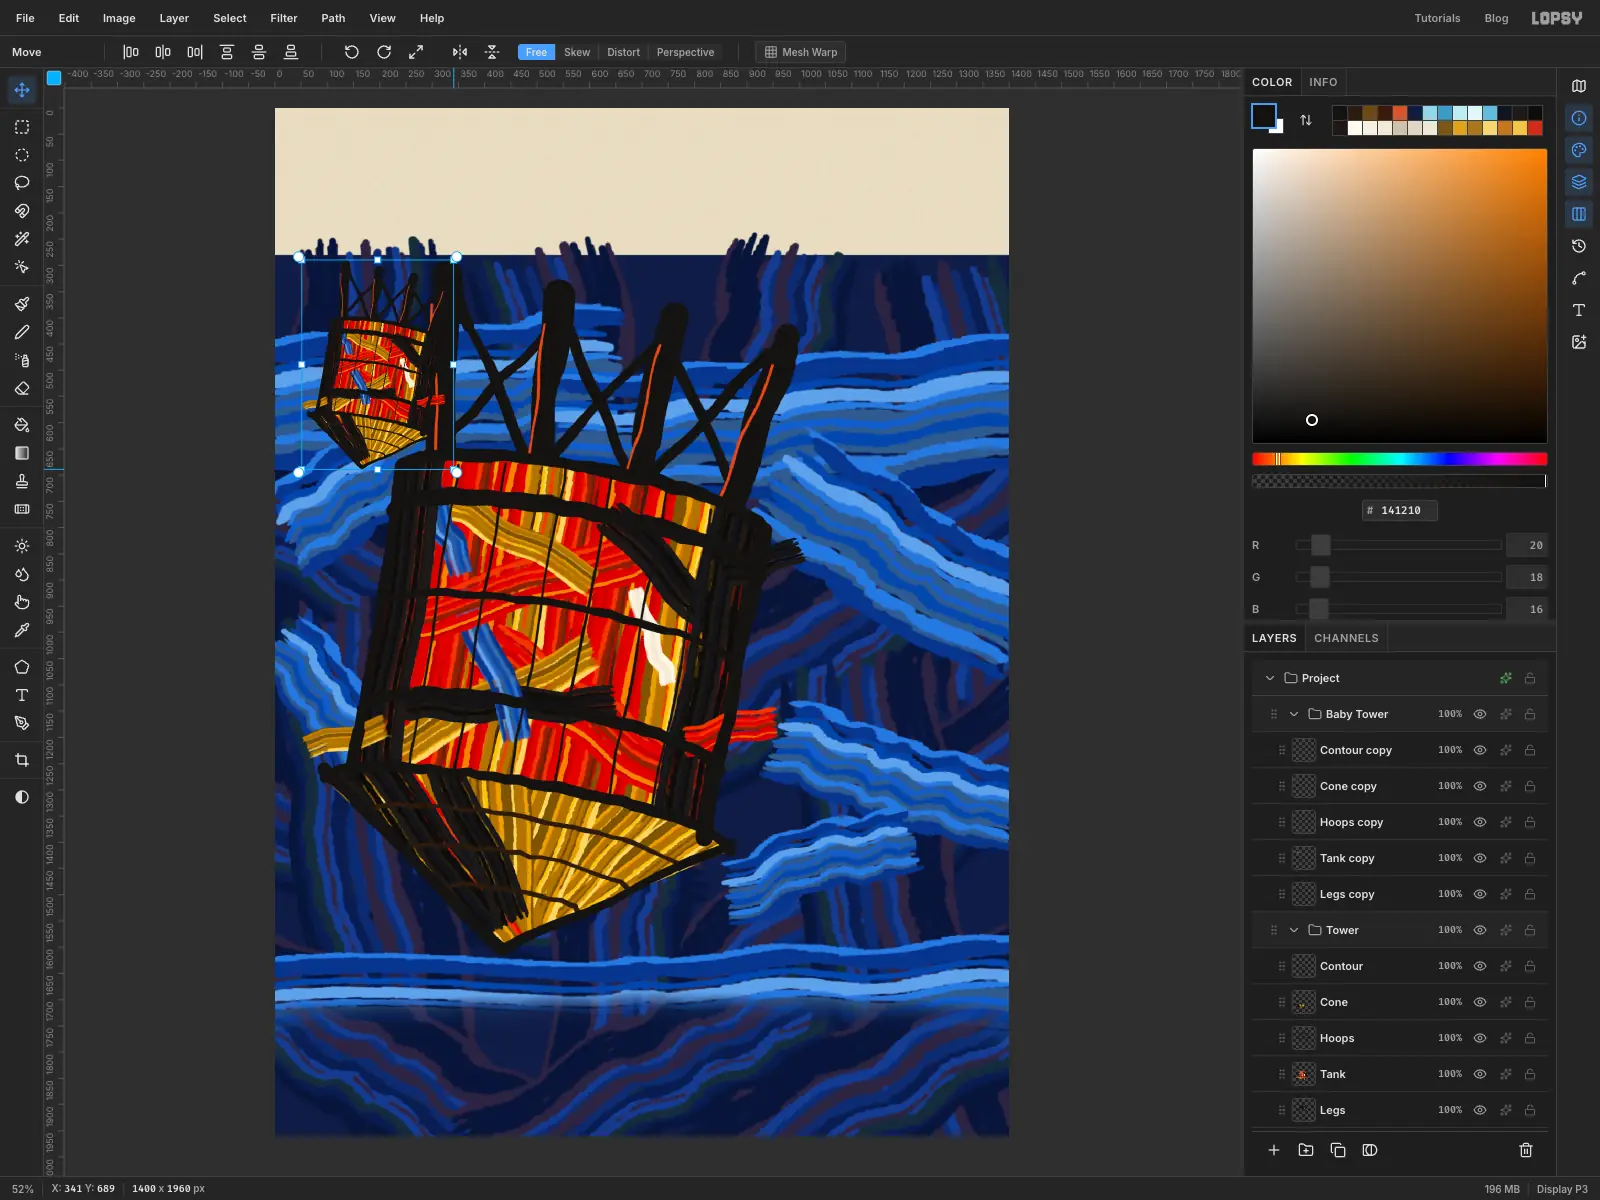
With the Tower group still selected, click Duplicate Layer and rename the copy Baby Tower. Press Cmd+D. Then, with the Move tool, hold Cmd, so it keeps its proportions, and drag the bottom-right corner handle inward until the copy is about 30% of its size.
-
Repaint it paler
Drag the small tower to the upper right and press Esc.
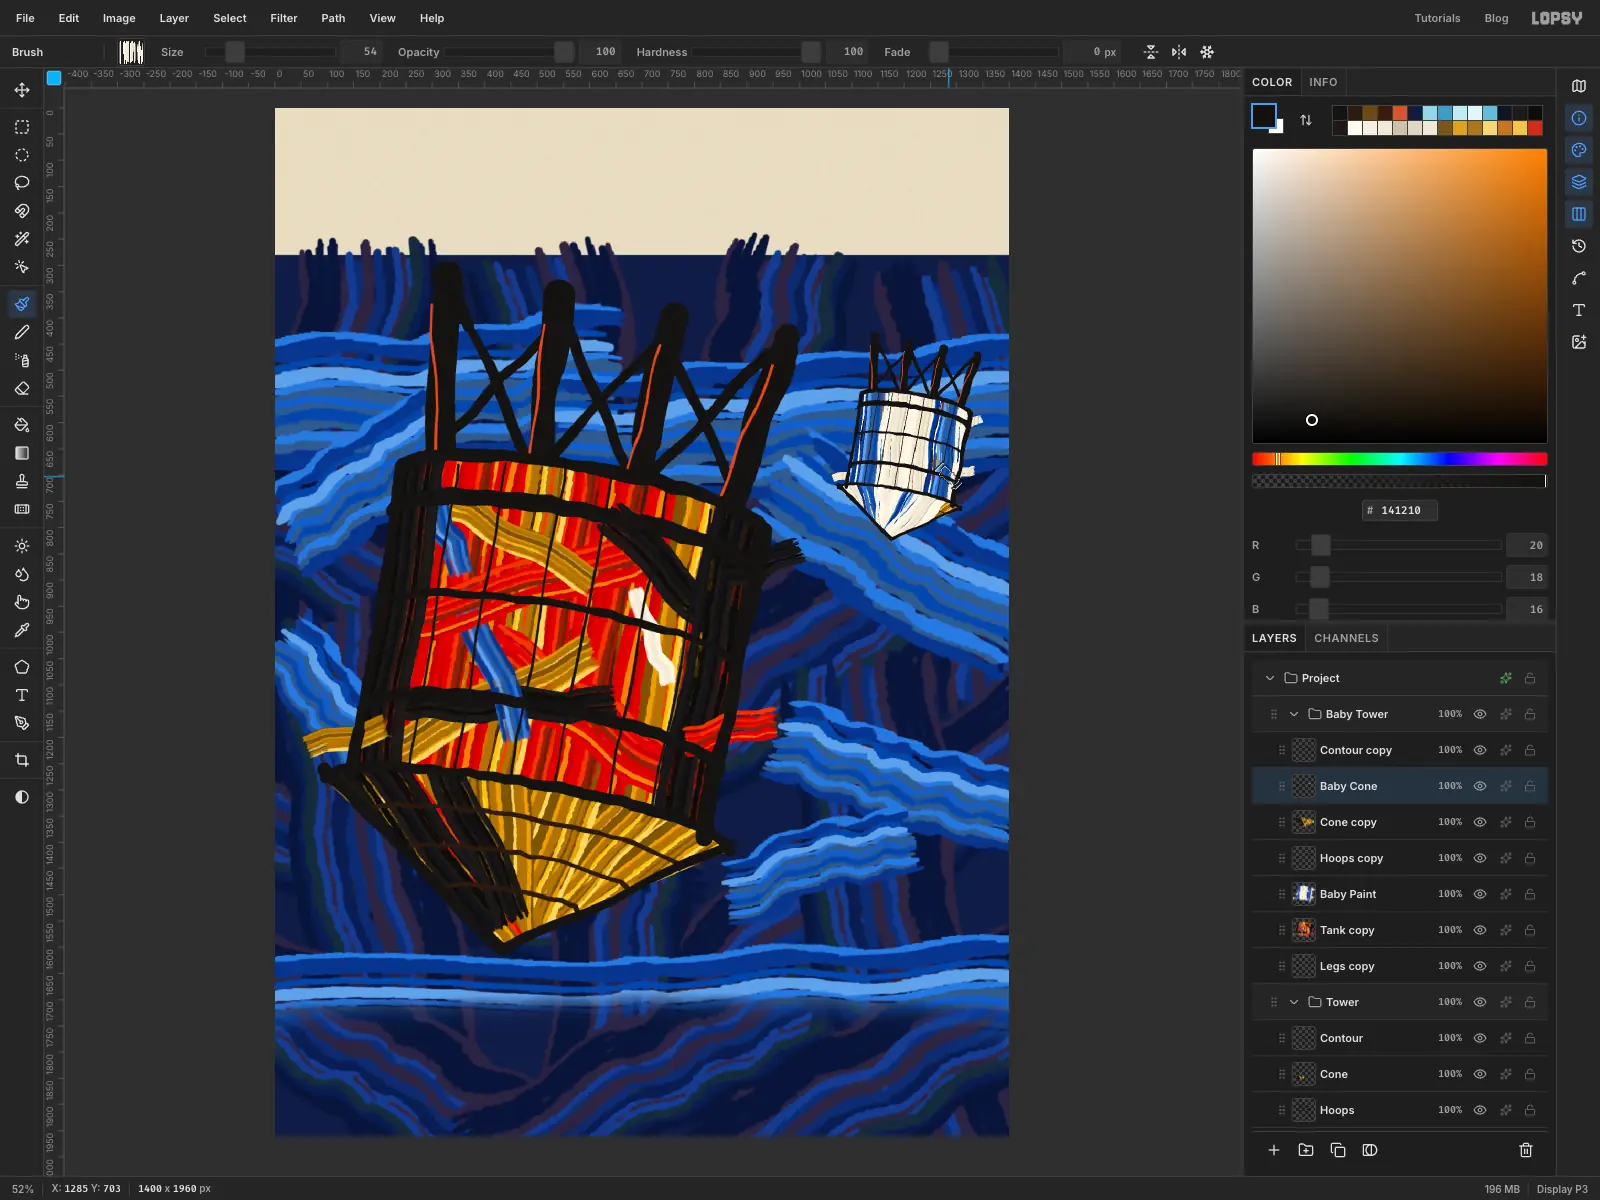
An exact small copy looks like clip art, and distant things are paler anyway. Click the Tank copy layer inside the group and add a layer above it called Baby Paint. Cmd-click the Tank copy thumbnail to select its pixels, then load Bone and paint six strokes down the tank at Size 60, with a couple in Cobalt. Press Cmd+D.
Do the same for the roof: click Cone copy, add a layer called Baby Cone, Cmd-click Cone copy, and fan six strokes of Bone and Cobalt from the tip to the rim at Size 54. Deselect.
-
Cut out the skyline
Click the Project row at the very top of the Layers panel and add a layer called Roofs, so that it sits above both towers.
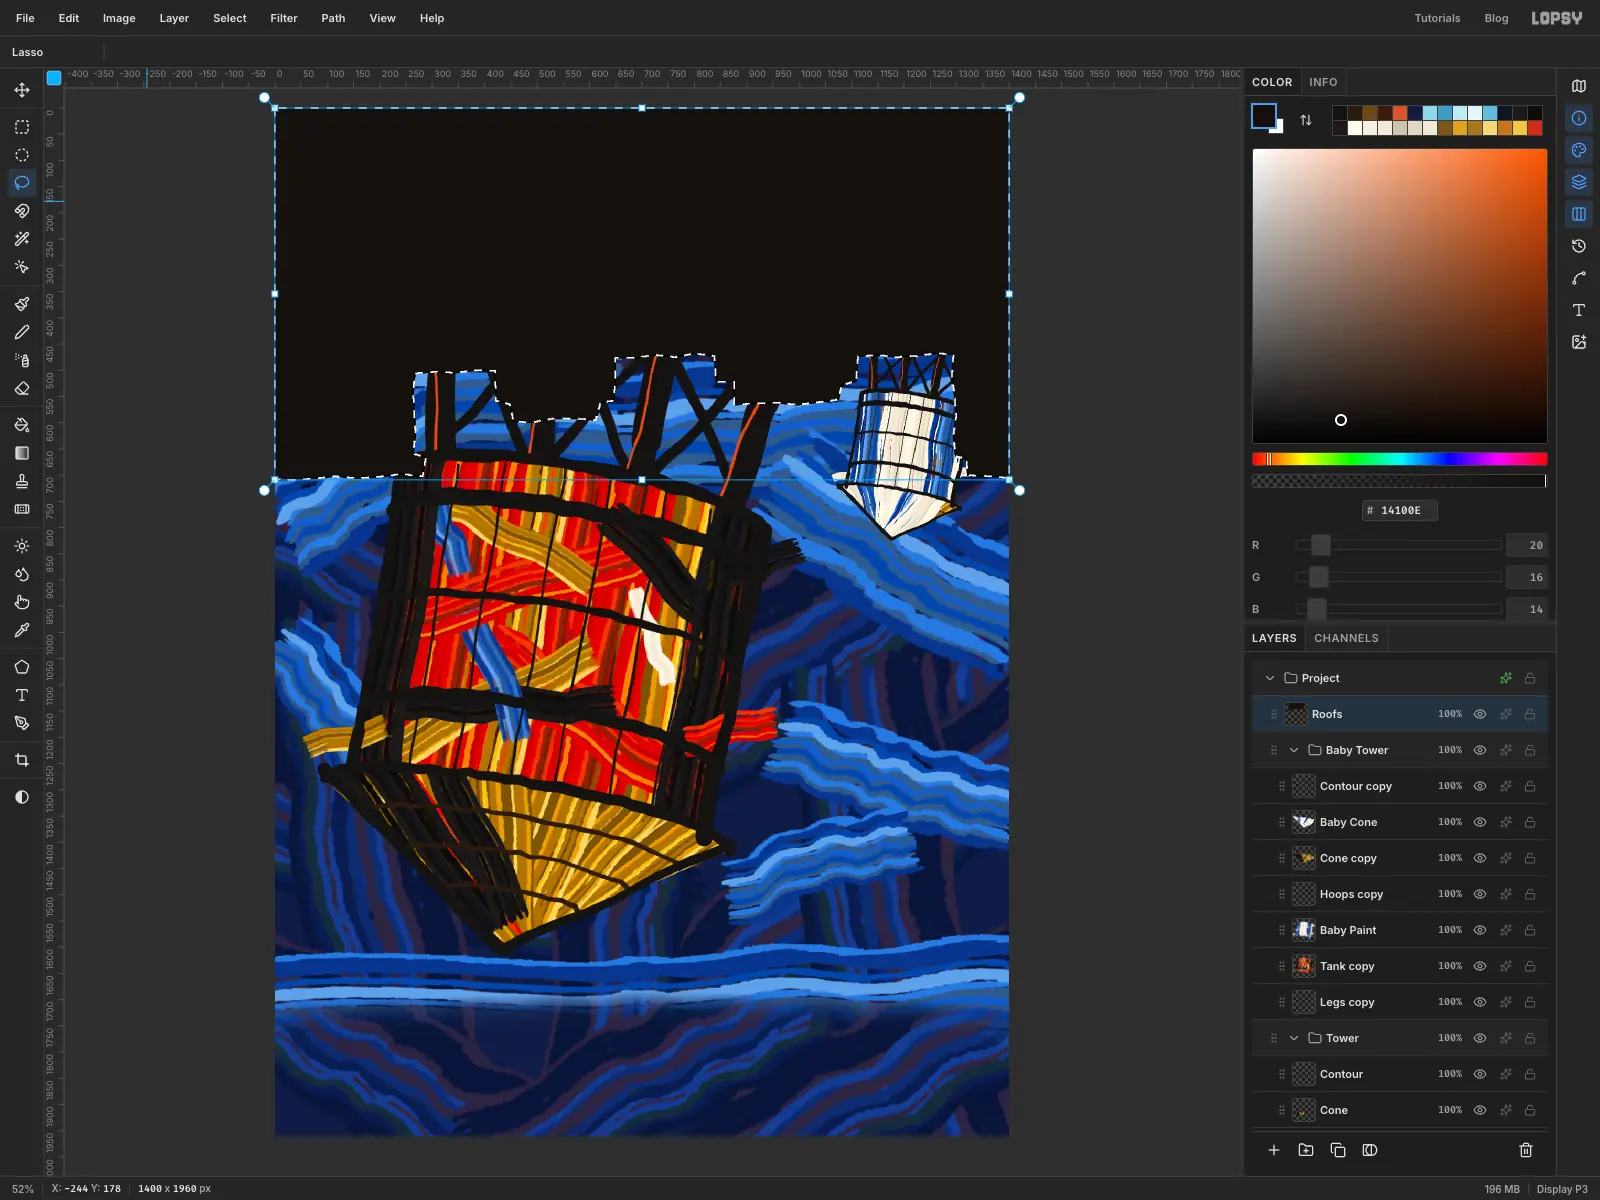
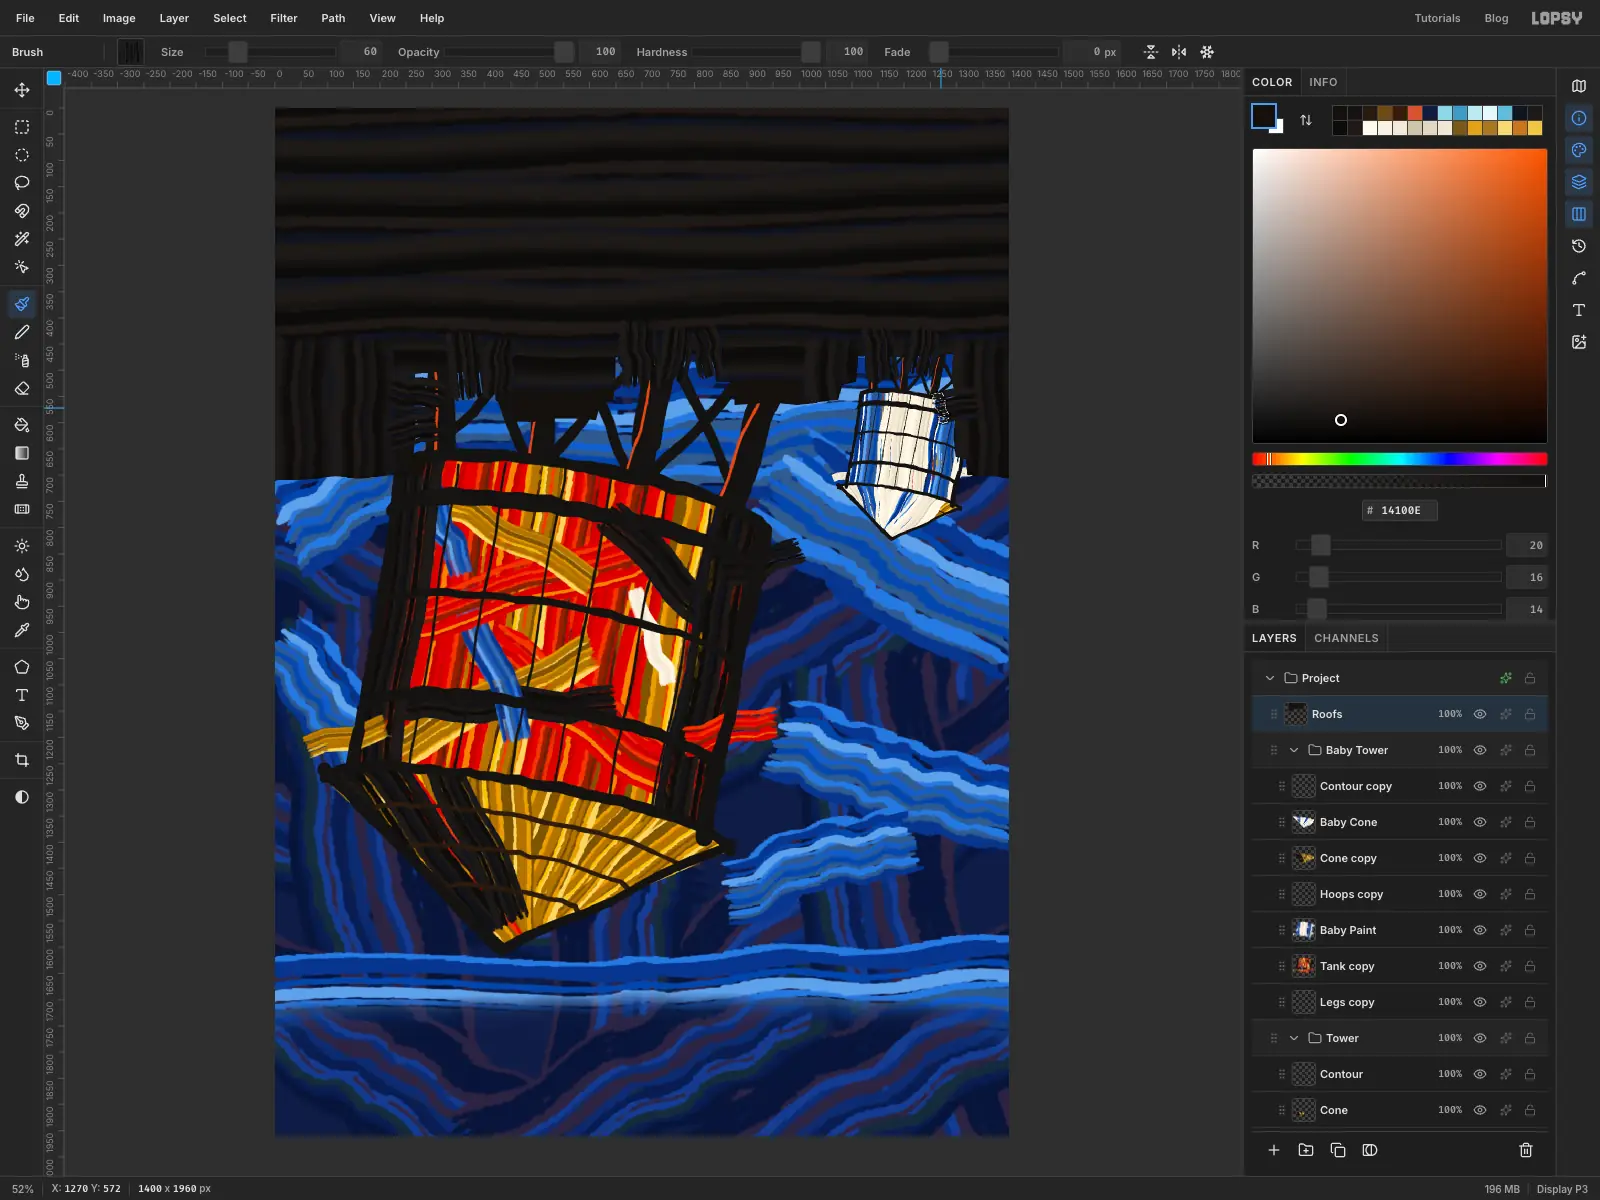
Set the foreground to . With the Lasso, draw the skyline upside down: start off-canvas at the top, and let four buildings of different depths hang down across the page. Give them stepped cornices at their lower ends. The tallest should drop a third of the way down the page at the far left and far right. Keep the ones over the big tower's legs shallow, but the tips of the legs must disappear into the black, or the tower floats. Leave a notch for the small tower to hang from. Fill it and keep the selection.
-
Paint the roofs
Load Tar with the dial at 90°, and paint five strokes from side to side at Size 200, top to bottom through the selection. Turn the dial to 0° and paint a few strokes down through the hanging buildings at Size 120. Deselect and apply Oil Paint at Radius 6.
The lasso left the edges too clean. Paint a handful of short Tar strokes across them, at Size 50 to 75, running 20 or 30 px past the line, with the dial turned to suit each one.
-
Scatter small windows
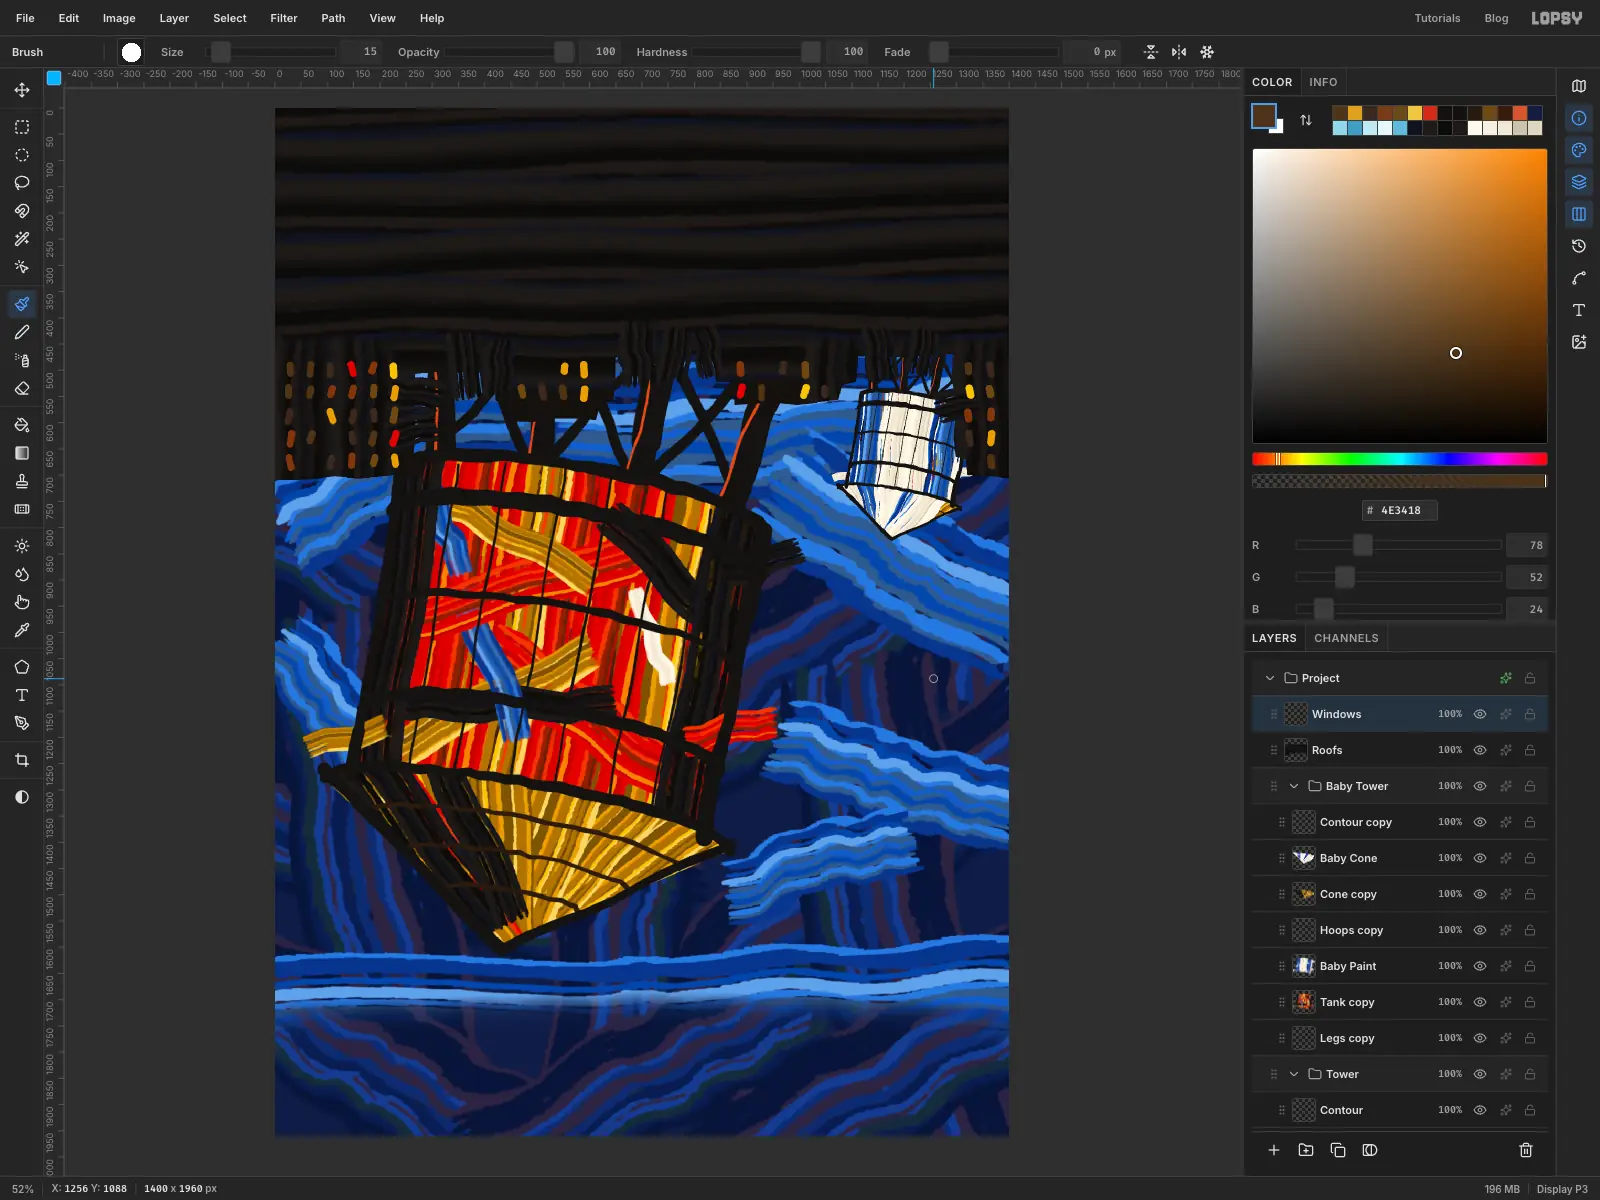
Add a layer called Windows and pick the oil stick at Size 15. On each building paint rows of short vertical dashes, about 15 px tall. Skip one here and there, and don't line them up too well.
Most should be dim (, , , ), with only about one in six lit (, , ). Apply Oil Paint at Radius 2.
-
Let the paint run upward
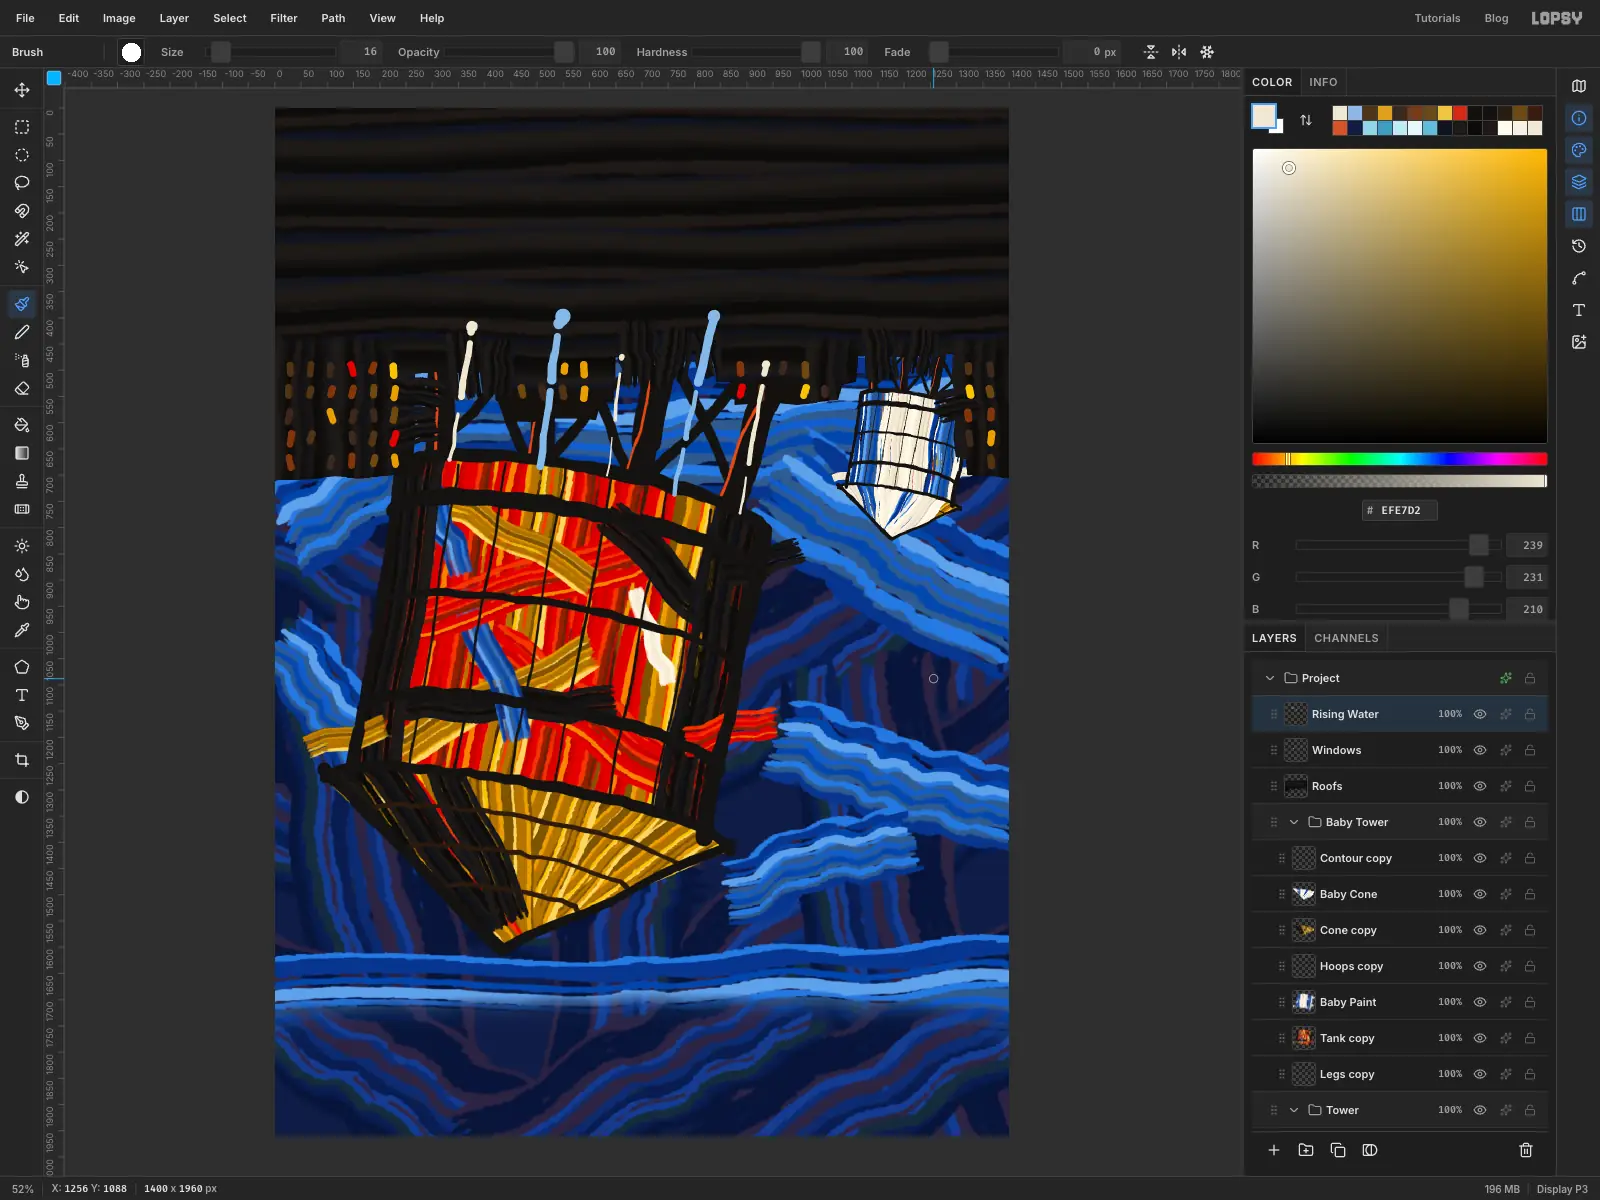
Add a layer called Rising Water. Here's the joke of the cover: the tower's upside down, so its paint runs up.
With the oil stick, pick pale blue , cream or blue for each run, and paint five of them from the tank's rim up along the lean of the legs, over the rooftops. Paint each run in broken lengths, leaving small gaps, and make each length a little fatter than the last: Size 5 or so at the tank, up to 22 at the top of the widest. Then turn the size up by a third or so and click once at the top to add a bead, the blob of paint a real run carries at its leading end.
Stop them all about a fifth of the way down the page, then apply Oil Paint at Radius 2.
-
Paste the photo
Copy your cropped photo, then press Cmd+V to paste it as a new layer, and rename it Xerox. Mine was 900 × 1155 px.
-
Scale it down
The paste left the photo selected, with handles around it. Pick the Move tool, hold Cmd and drag the bottom-right corner handle inward until the photo is about 280 px wide. Press Esc and deselect.
Scale it first and add the halftone second, or the dots will shrink into mush.
-
Run it through the copier
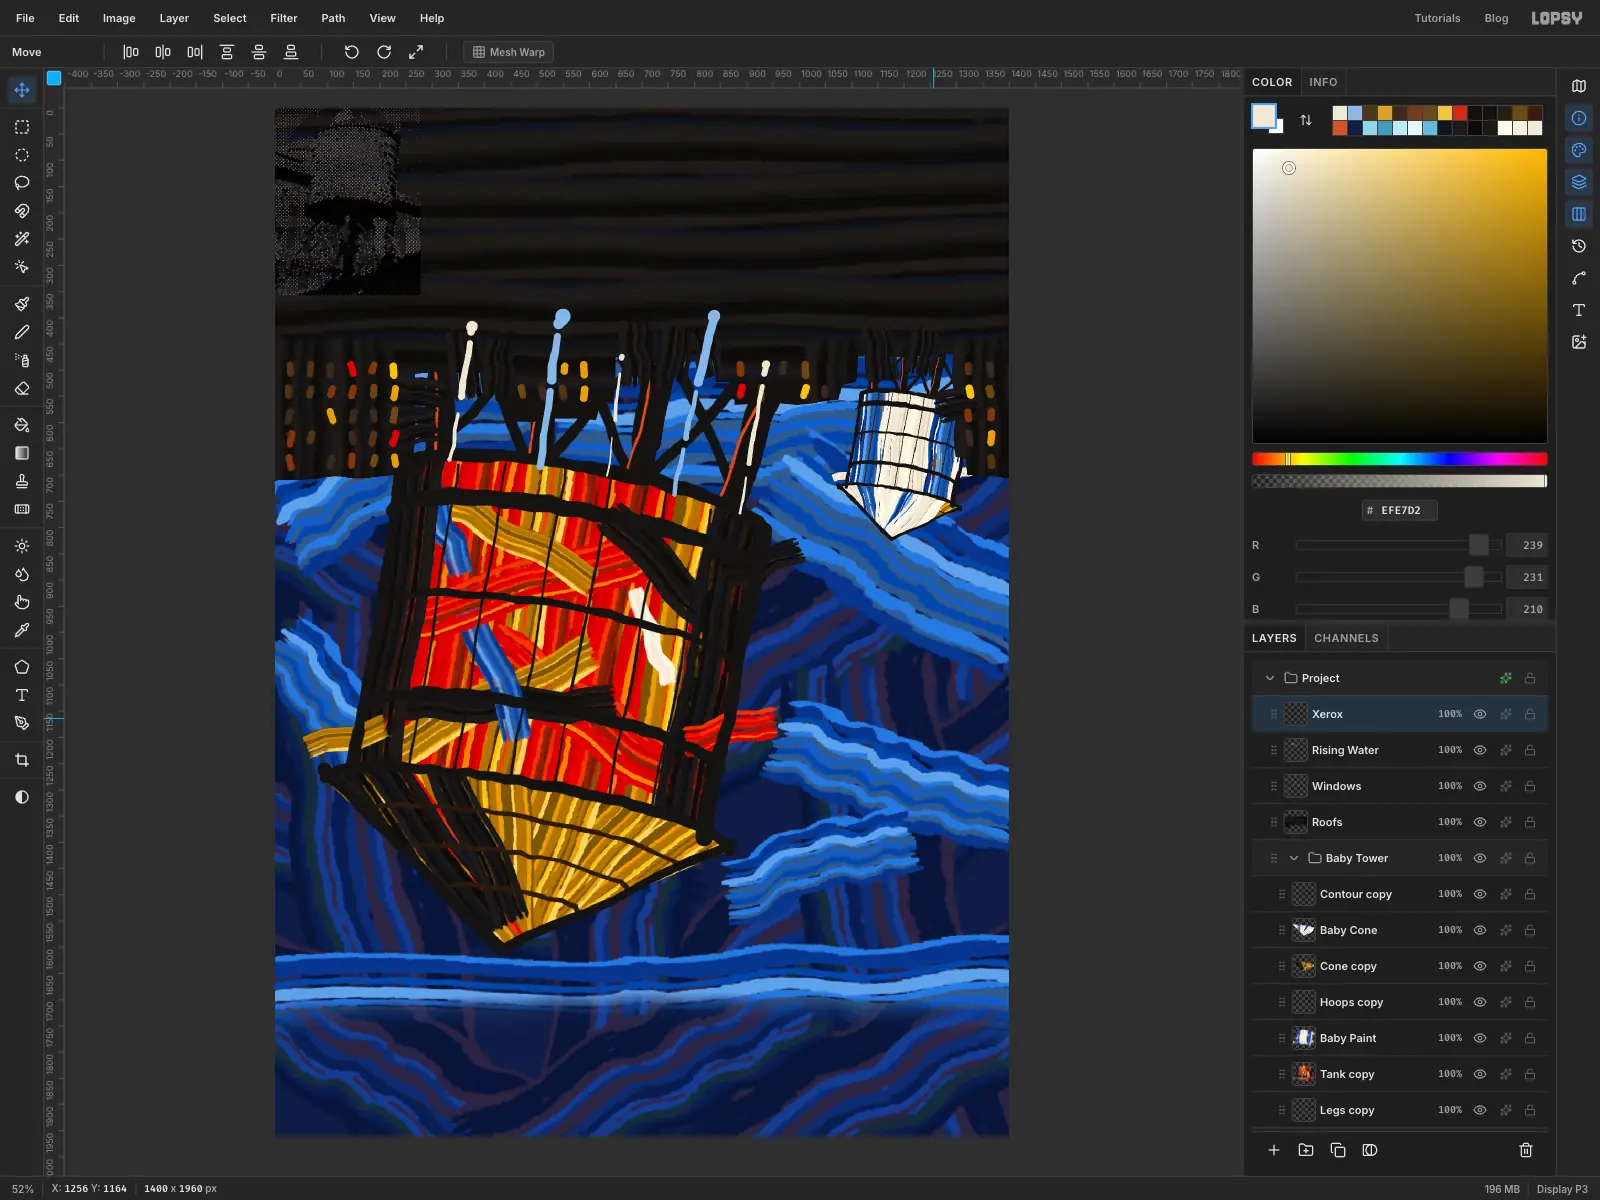
Apply these to the Xerox layer, in order:
- Filter → Desaturate
- Filter → Brightness/Contrast…, with Brightness 12 and Contrast 45
- Filter → Halftone…, with Dot Size 5, Density 1.1, Angle 45 and Softness 0.5
-
Put it on torn paper
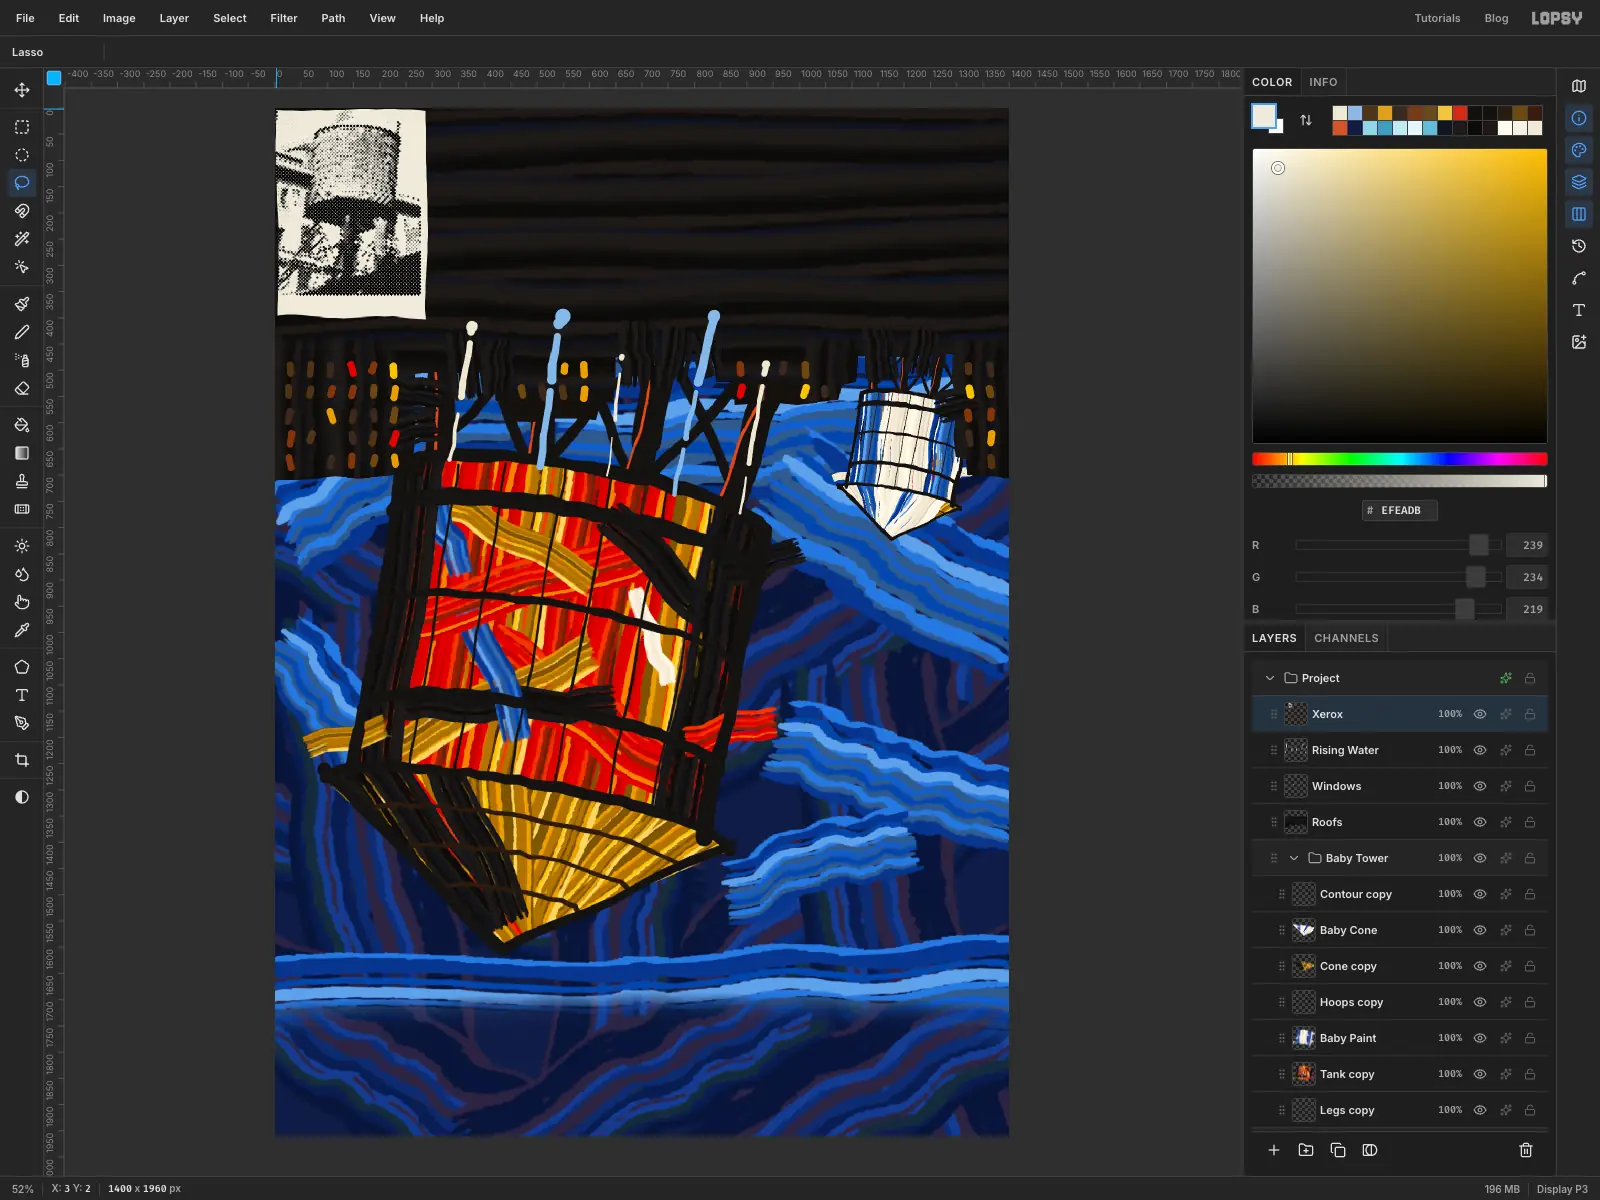
Halftone leaves transparent gaps, so it needs paper. Click Rising Water and add a layer called Xerox Paper, which lands just under the photo. Drag a marquee from the page's top-left corner to a little past the photo's right edge, with an extra-deep margin of about 45 px at the bottom for a caption. Fill it with and deselect.
Click the Xerox layer and choose Layer → Merge Down, then name the result Xerox. Draw a slightly shaky Lasso just inside the paper's edge, press Cmd+Shift+I to invert the selection, press Delete, and deselect.
-
Tilt the xerox into place
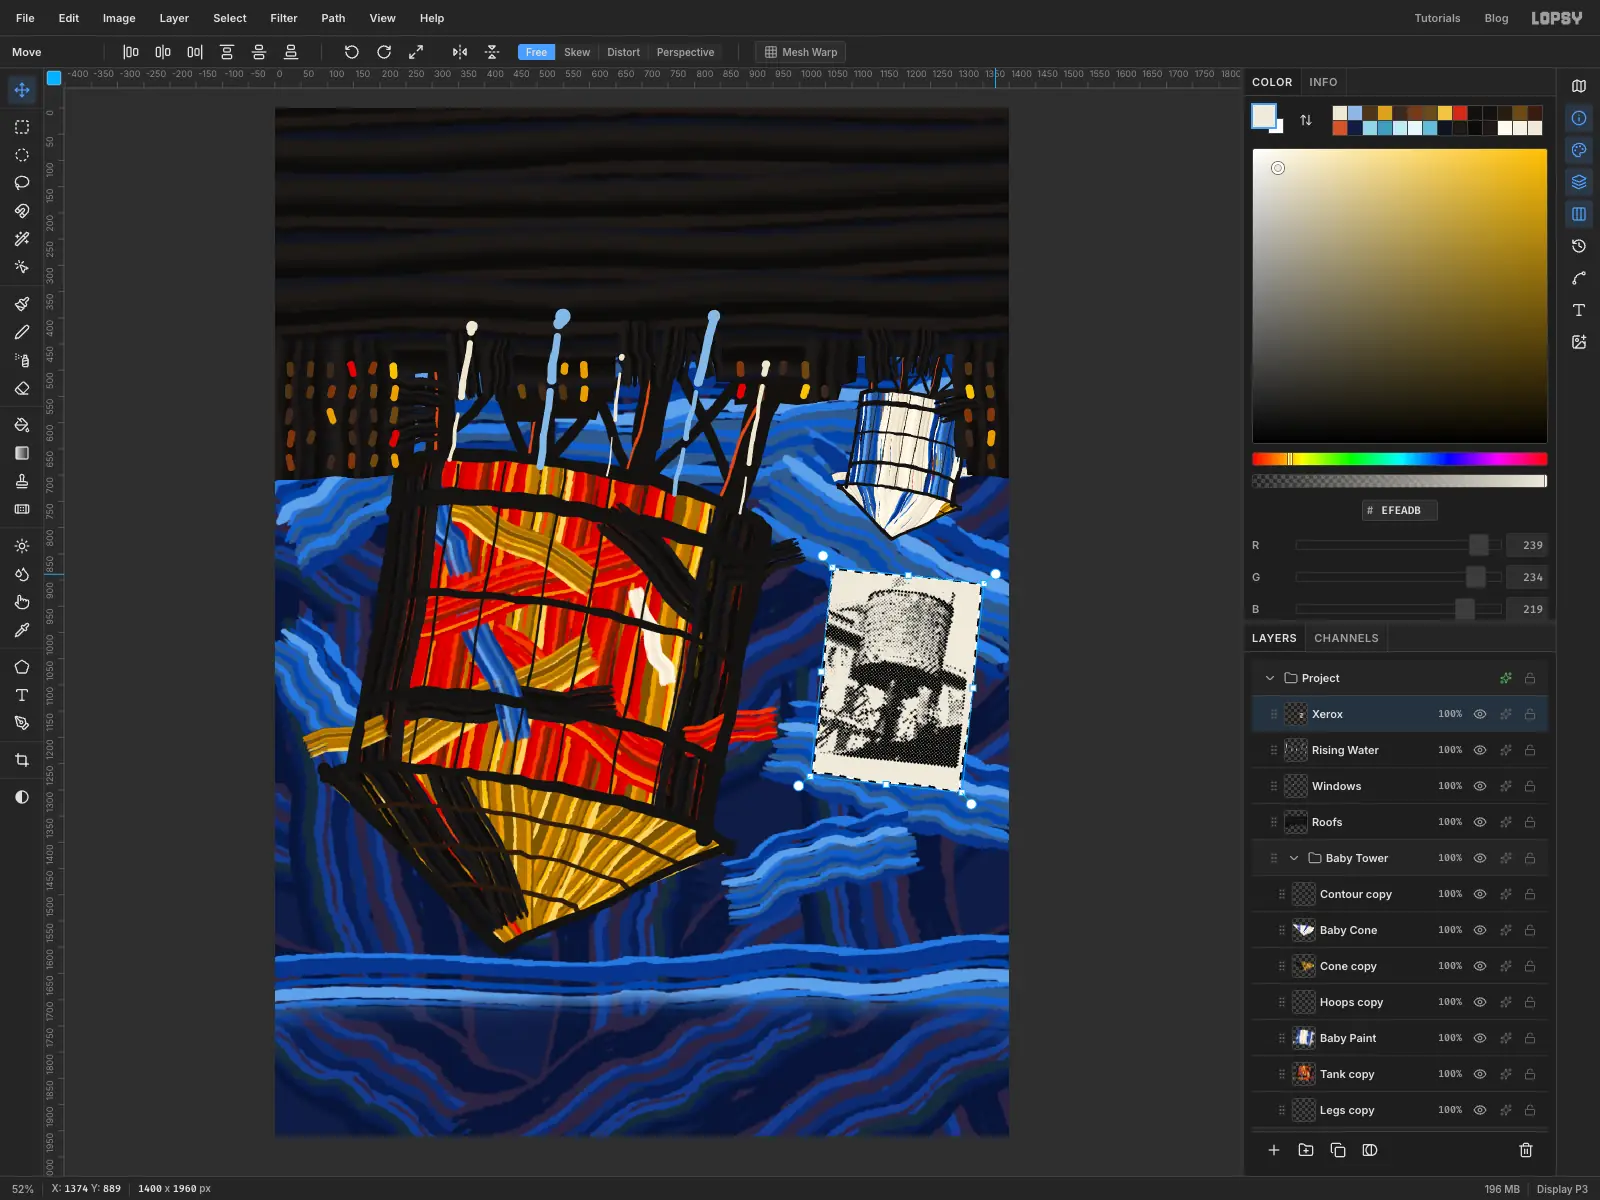
Cmd-click the Xerox thumbnail. With the Move tool, drag the sheet to the right of the tank, under the small tower. Then drag the rotation handle a few degrees clockwise, to about 6°. Press Esc and deselect.
Open the layer's effects and turn on Drop Shadow, with Offset X 7, Offset Y 10, Blur 8, Opacity 65 and a shadow colour of . Close the effects drawer, because it sits over the canvas and swallows clicks.
-
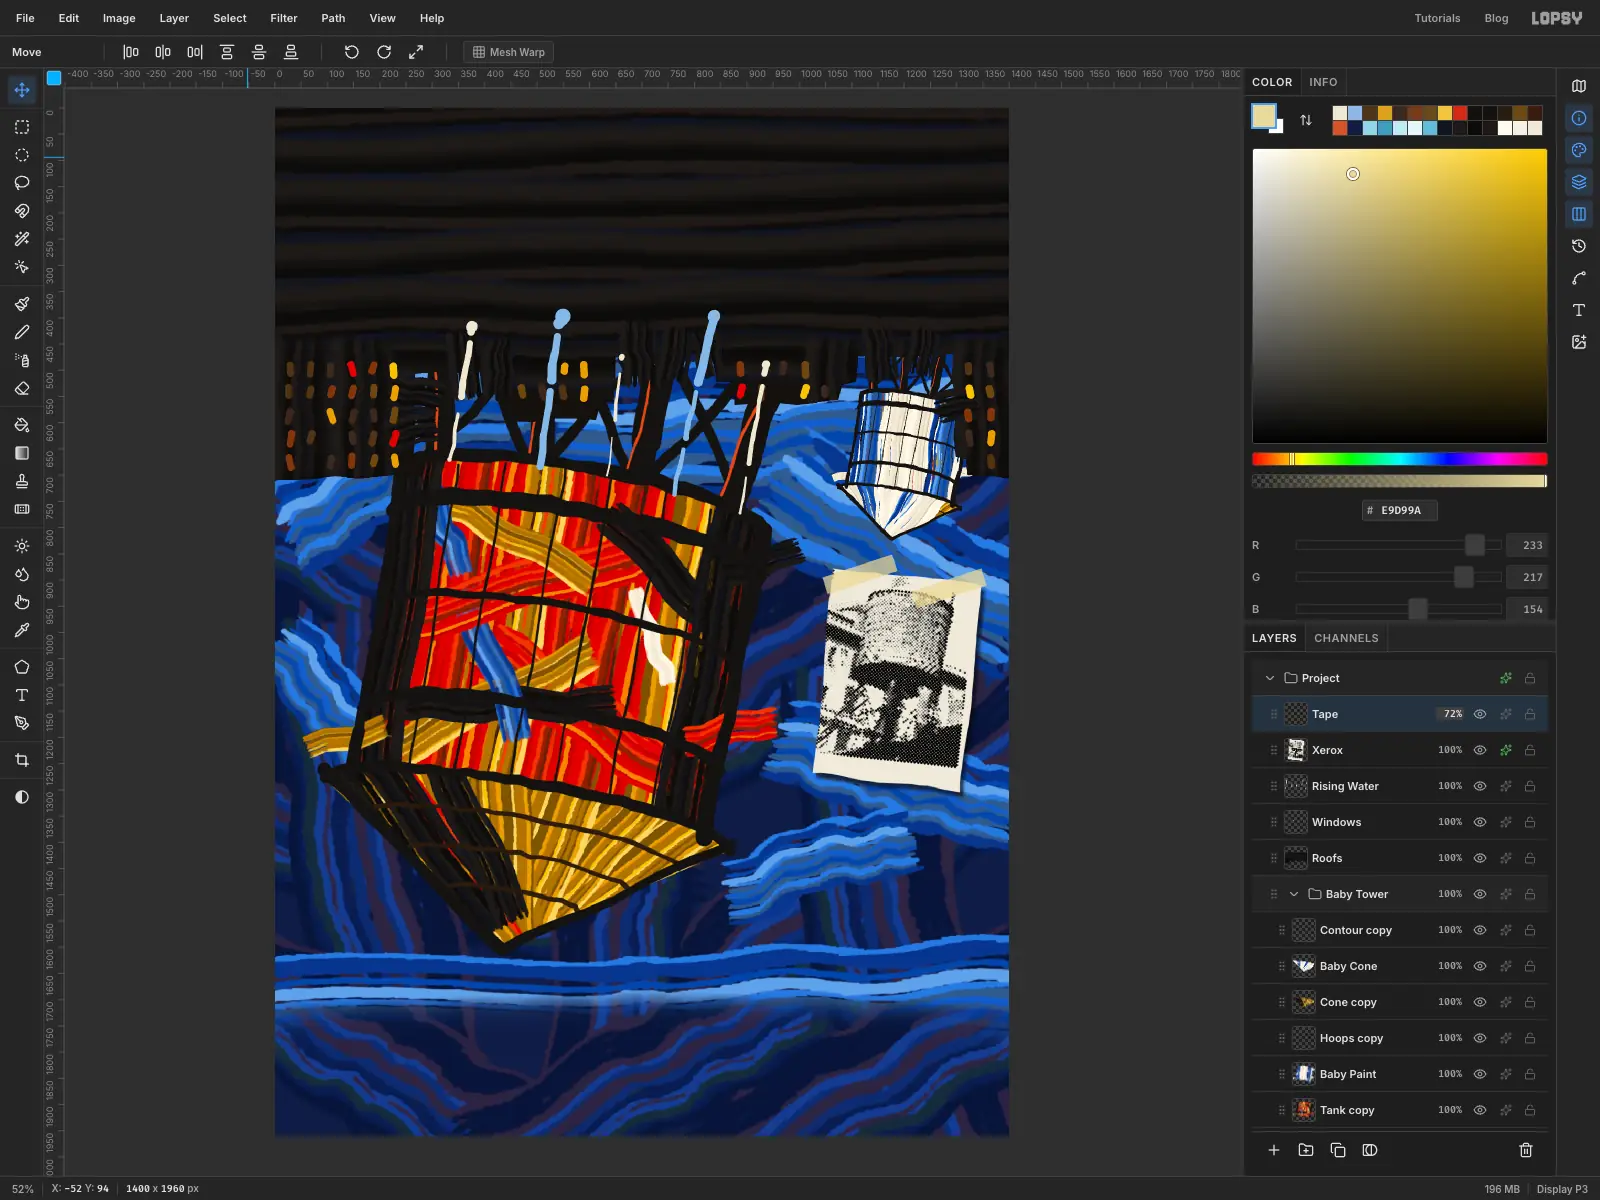
Tape it down
Add a layer called Tape and set the foreground to . Lasso a strip about 140 px long, tilted up to the right, across the sheet's top-left corner, and fill it. Its edges don't need to be perfect.
Press Cmd+C, then Cmd+D, then Cmd+V to paste a copy on its own layer. Drag the copy across to the top-right corner with the Move tool and press Esc. Choose Layer → Merge Down to put both strips on one layer, then press Cmd+D to clear the selection, or it will clip everything you paint next. Rename it Tape and set the layer's opacity to 72%.
-
Mark out the masthead
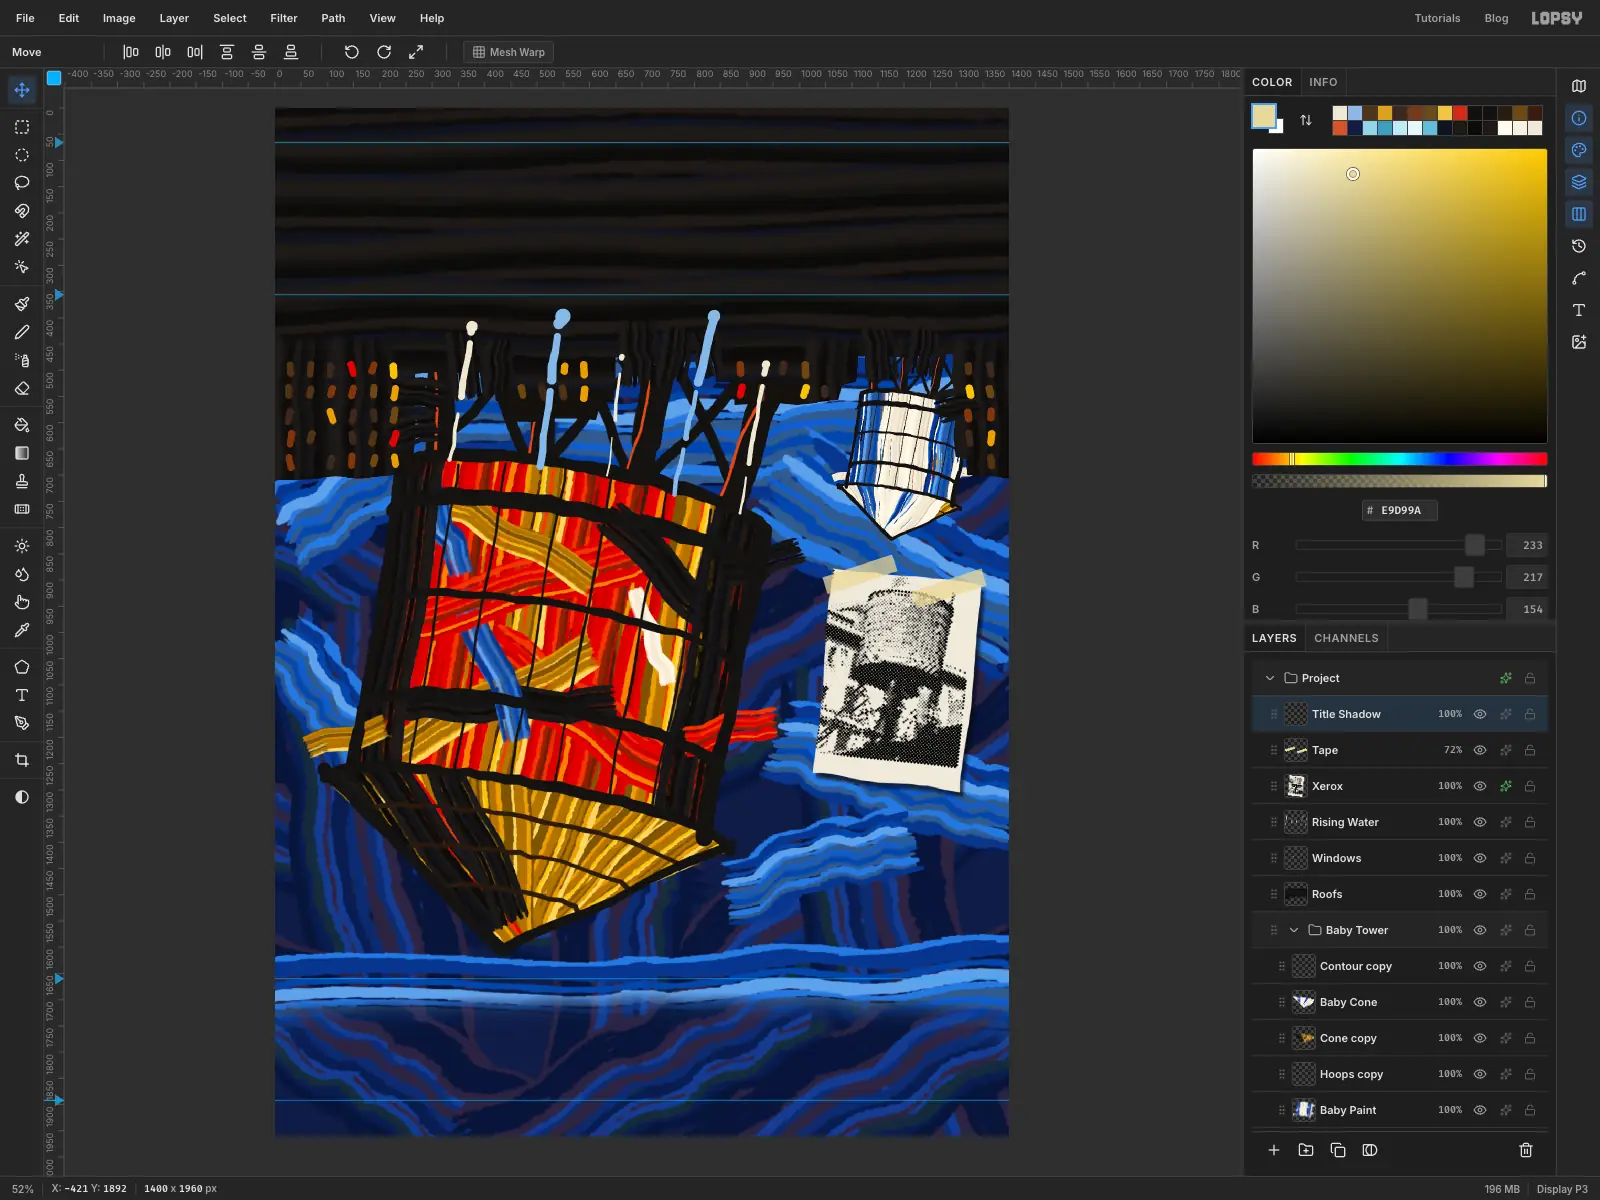
Add a layer called Title Shadow. Click the left ruler to drop four guides: a pair near the top of the page, about 290 px apart, and a pair near the bottom, about 230 px apart, leaving a similar margin. They mark the top and bottom of WATER and TOWER.
-
Underpaint the letters in red
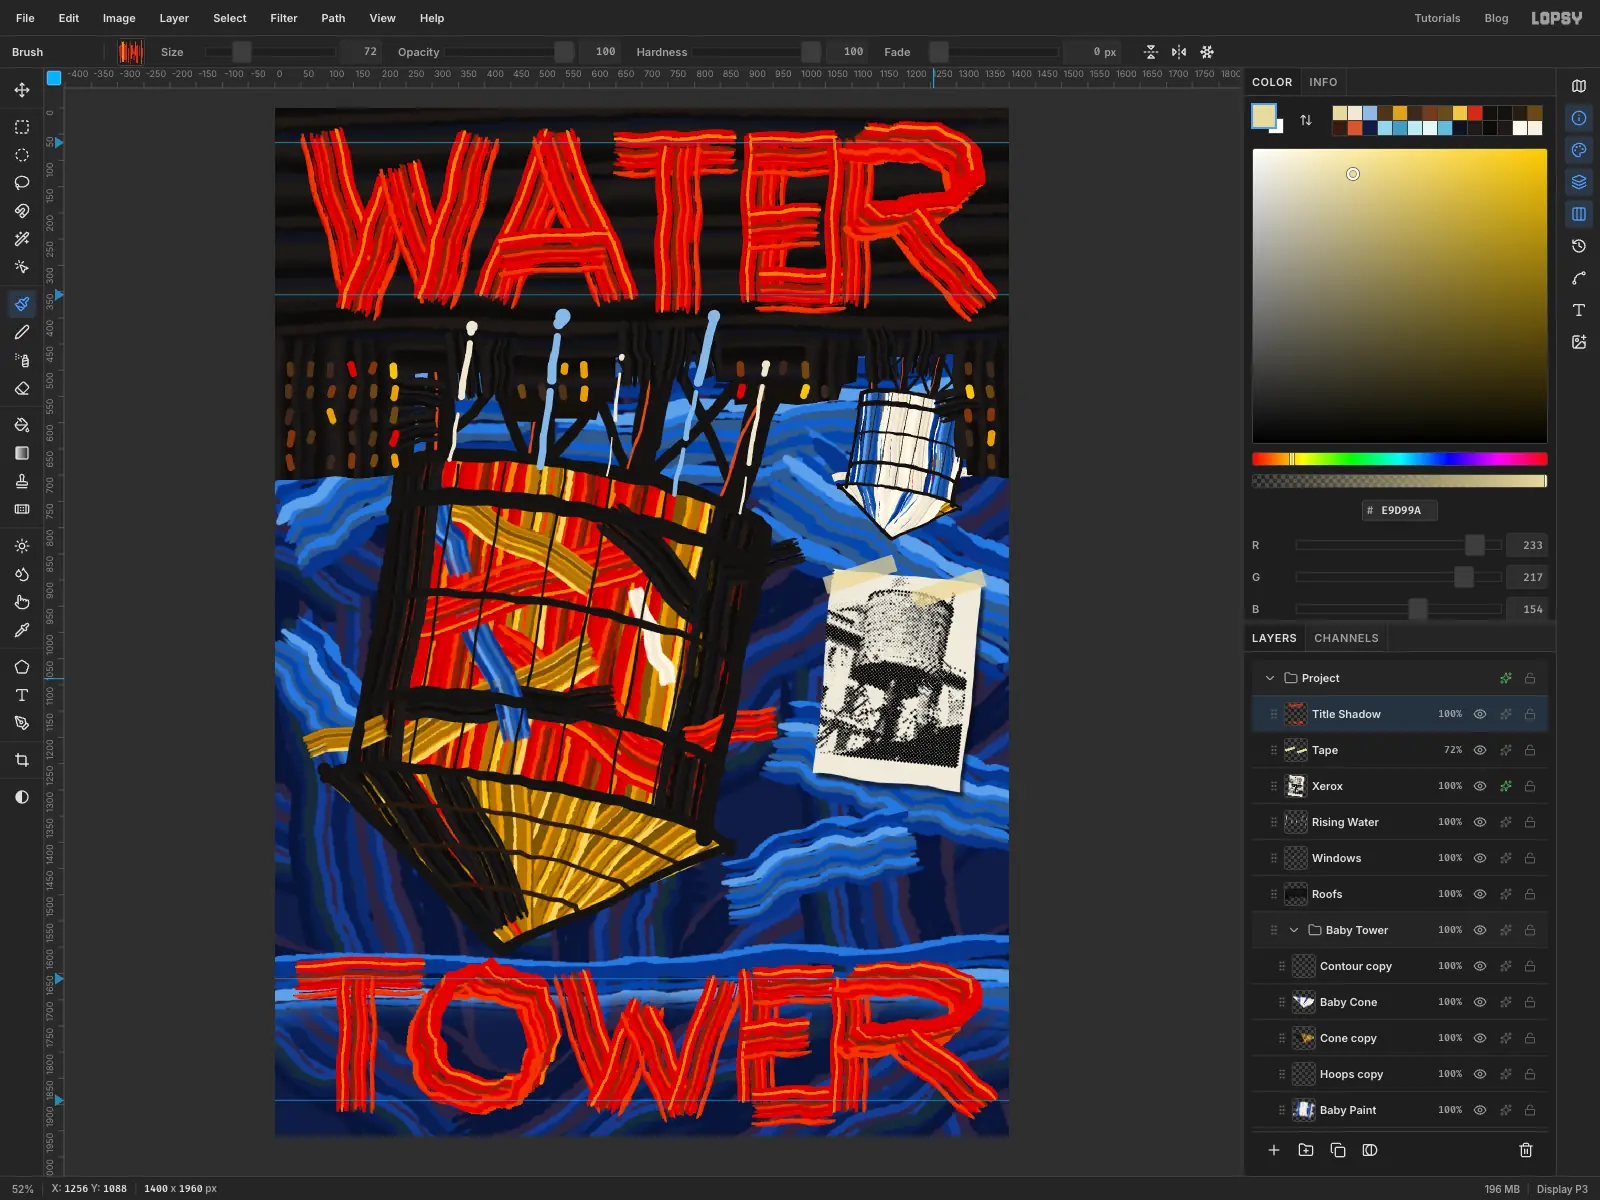
Now for the fun part: you'll paint the title. Load Cadmium and write WATER at Size 84, between the top guides, filling the page's width. Write TOWER at Size 72 between the bottom guides.
Use one quick stroke for each straight part of a letter, turning the dial so that the row of bristles lies across the stroke: W takes four strokes, A three, T two and E four. For the curves of R and O, set the dial to 135° and draw the whole curve in one go.
Don't worry about neatness. Do leave clear gaps between T and E in WATER and between W and E in TOWER, or they'll fuse. Apply Oil Paint at Radius 3.
-
Paint the letters again in bone
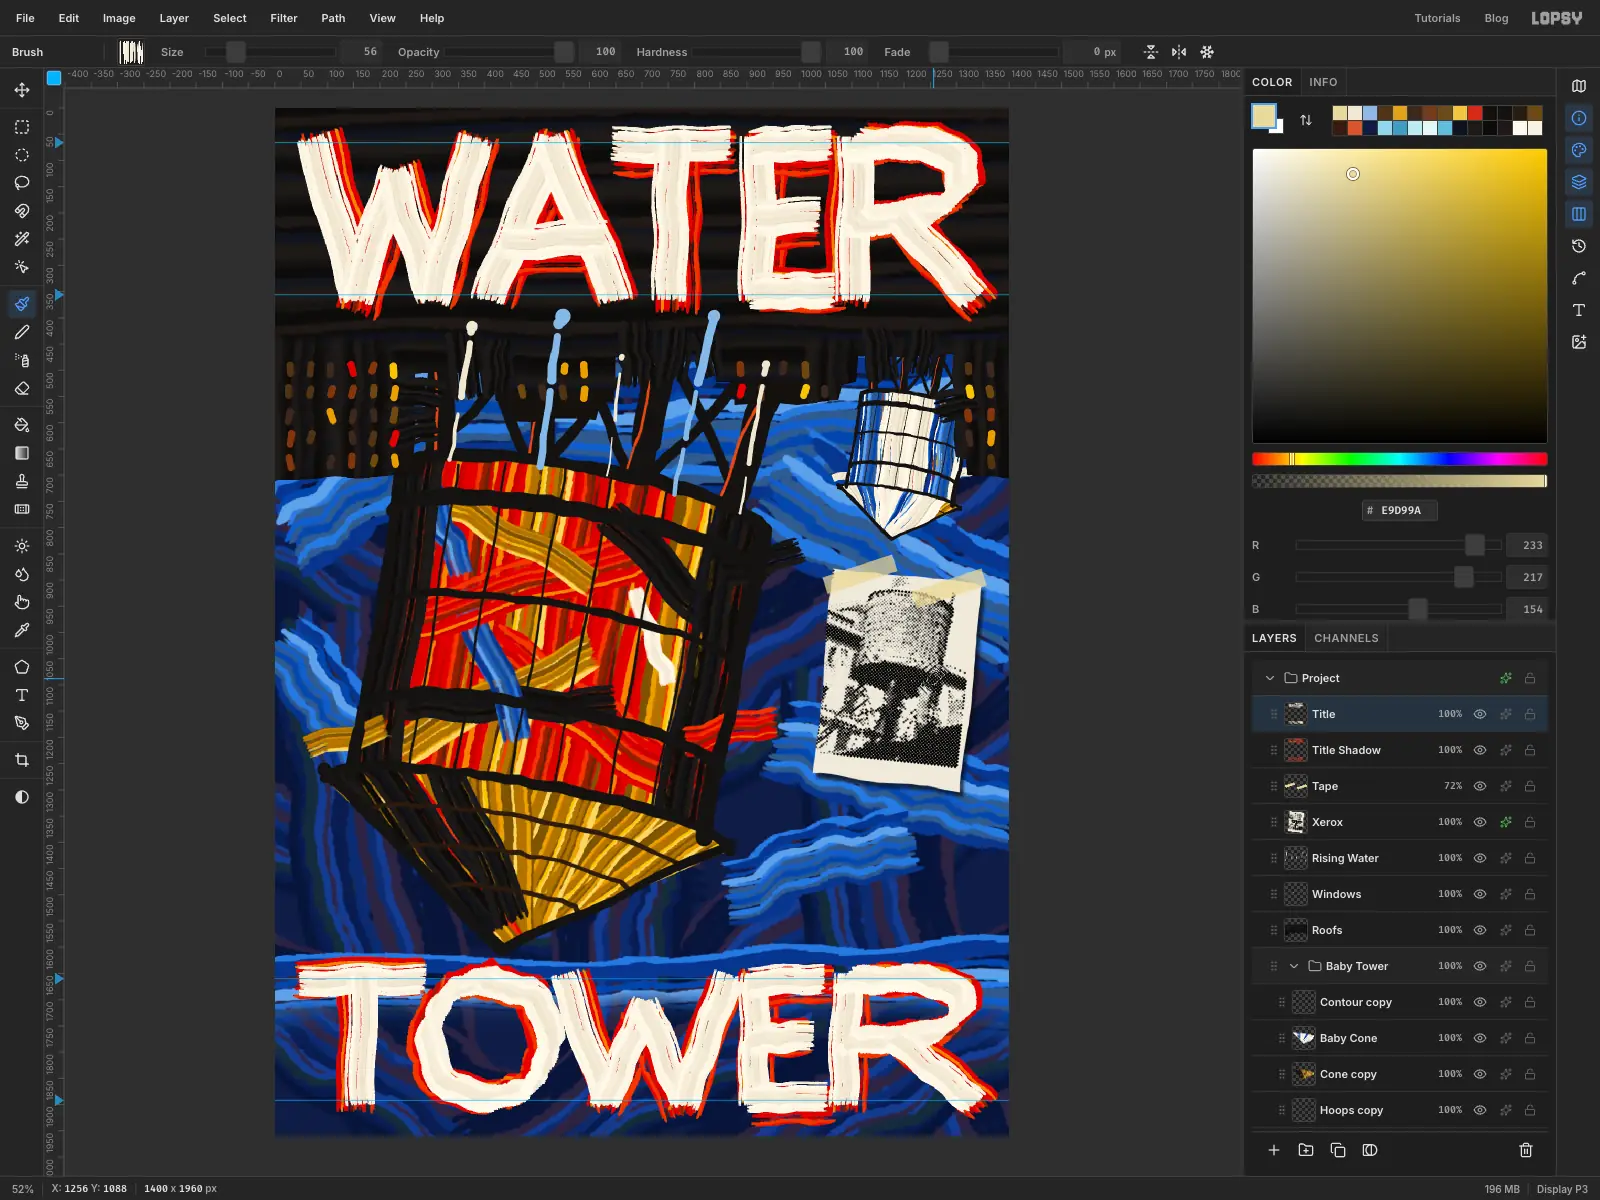
Add a layer called Title and load Bone. Paint both words again over the red, a little narrower: Size 66 for WATER and 56 for TOWER.
Because you're repainting by hand, the two passes won't line up, and that's the point. Red shows on different sides of each stroke and through the dry streaks, which a drop shadow can't do. Apply Oil Paint at Radius 3.
-
Scrawl GRAVITY and tilt it
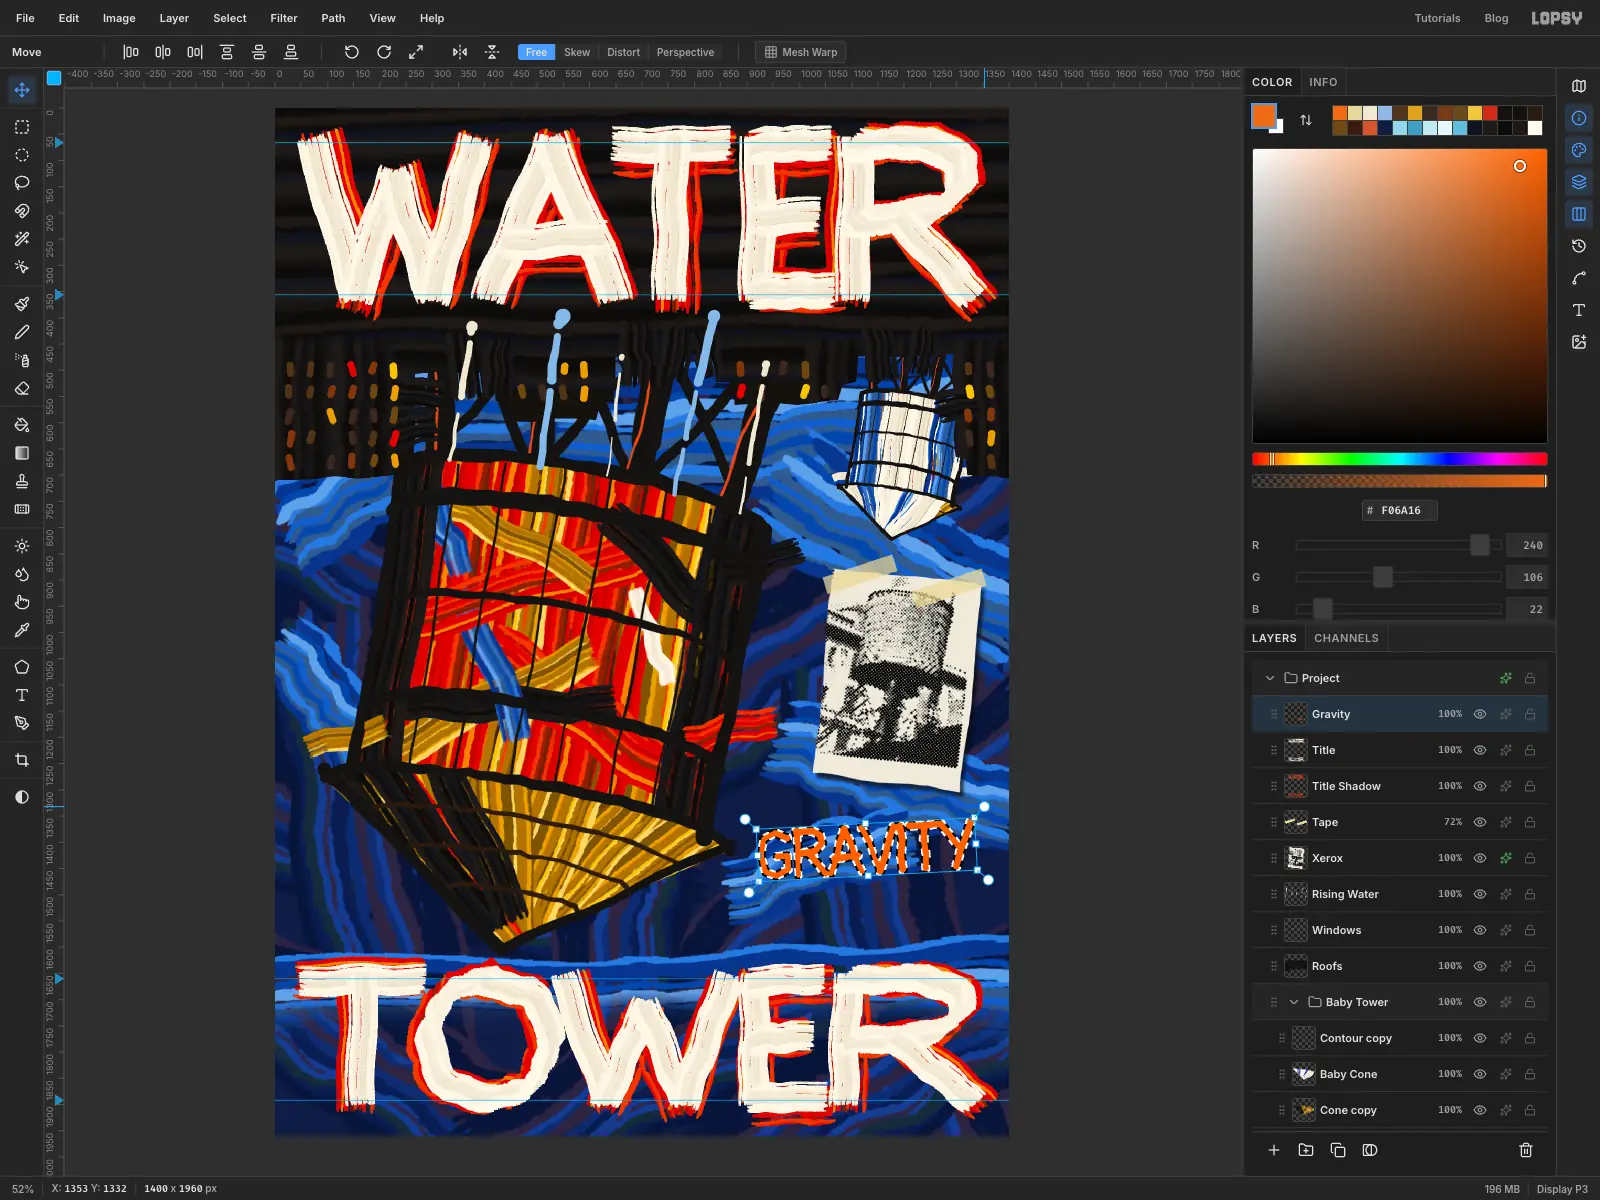
Add a layer called Gravity. With the oil stick at Size 17 in orange , hand-letter GRAVITY in capitals about 85 px tall in the space under the xerox. Leave some air below the paper. Apply Oil Paint at Radius 1.
Cmd-click the layer's thumbnail and use the Move tool's rotation handle to tip the word about 3° anticlockwise. Press Esc and deselect.
-
Cross it out
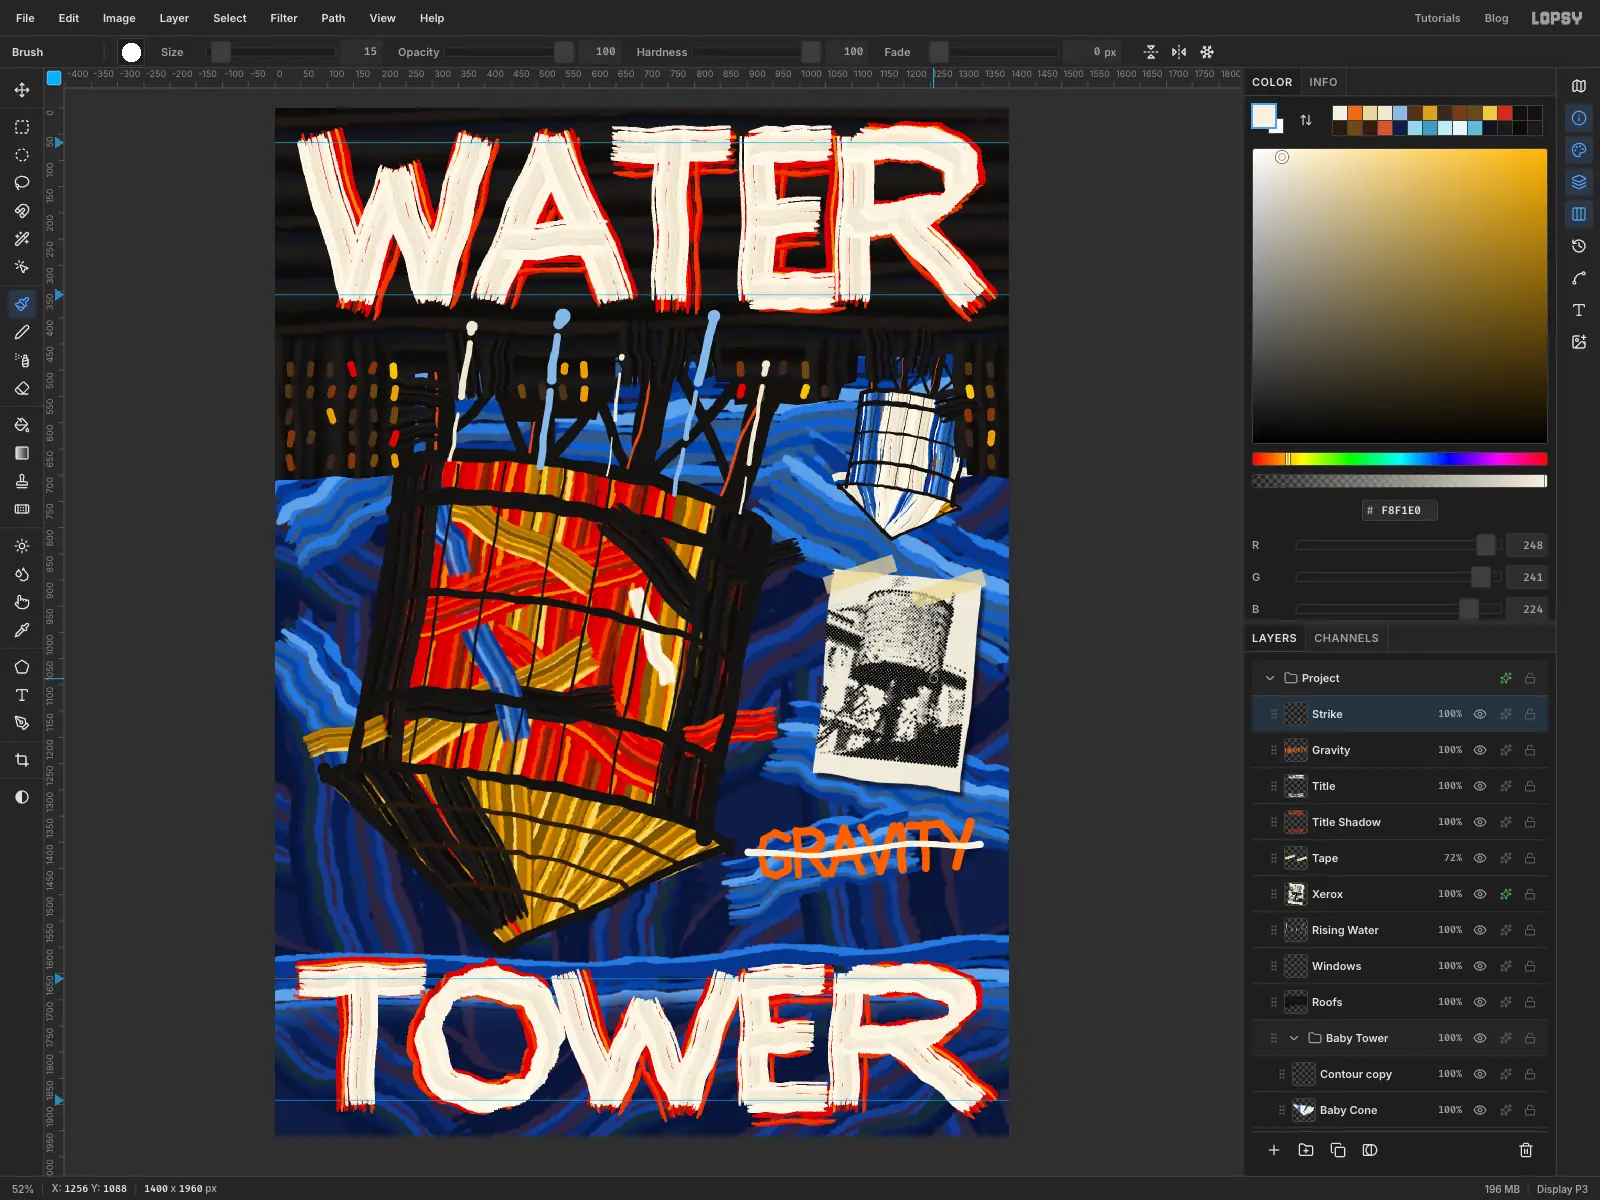
Add a layer called Strike. With the oil stick at Size 15 in cream , drag one rough line through the word, starting and ending well past it. Keep it to one stroke, and let your hand wobble. Apply Oil Paint at Radius 1.
-
Hand-letter the small type
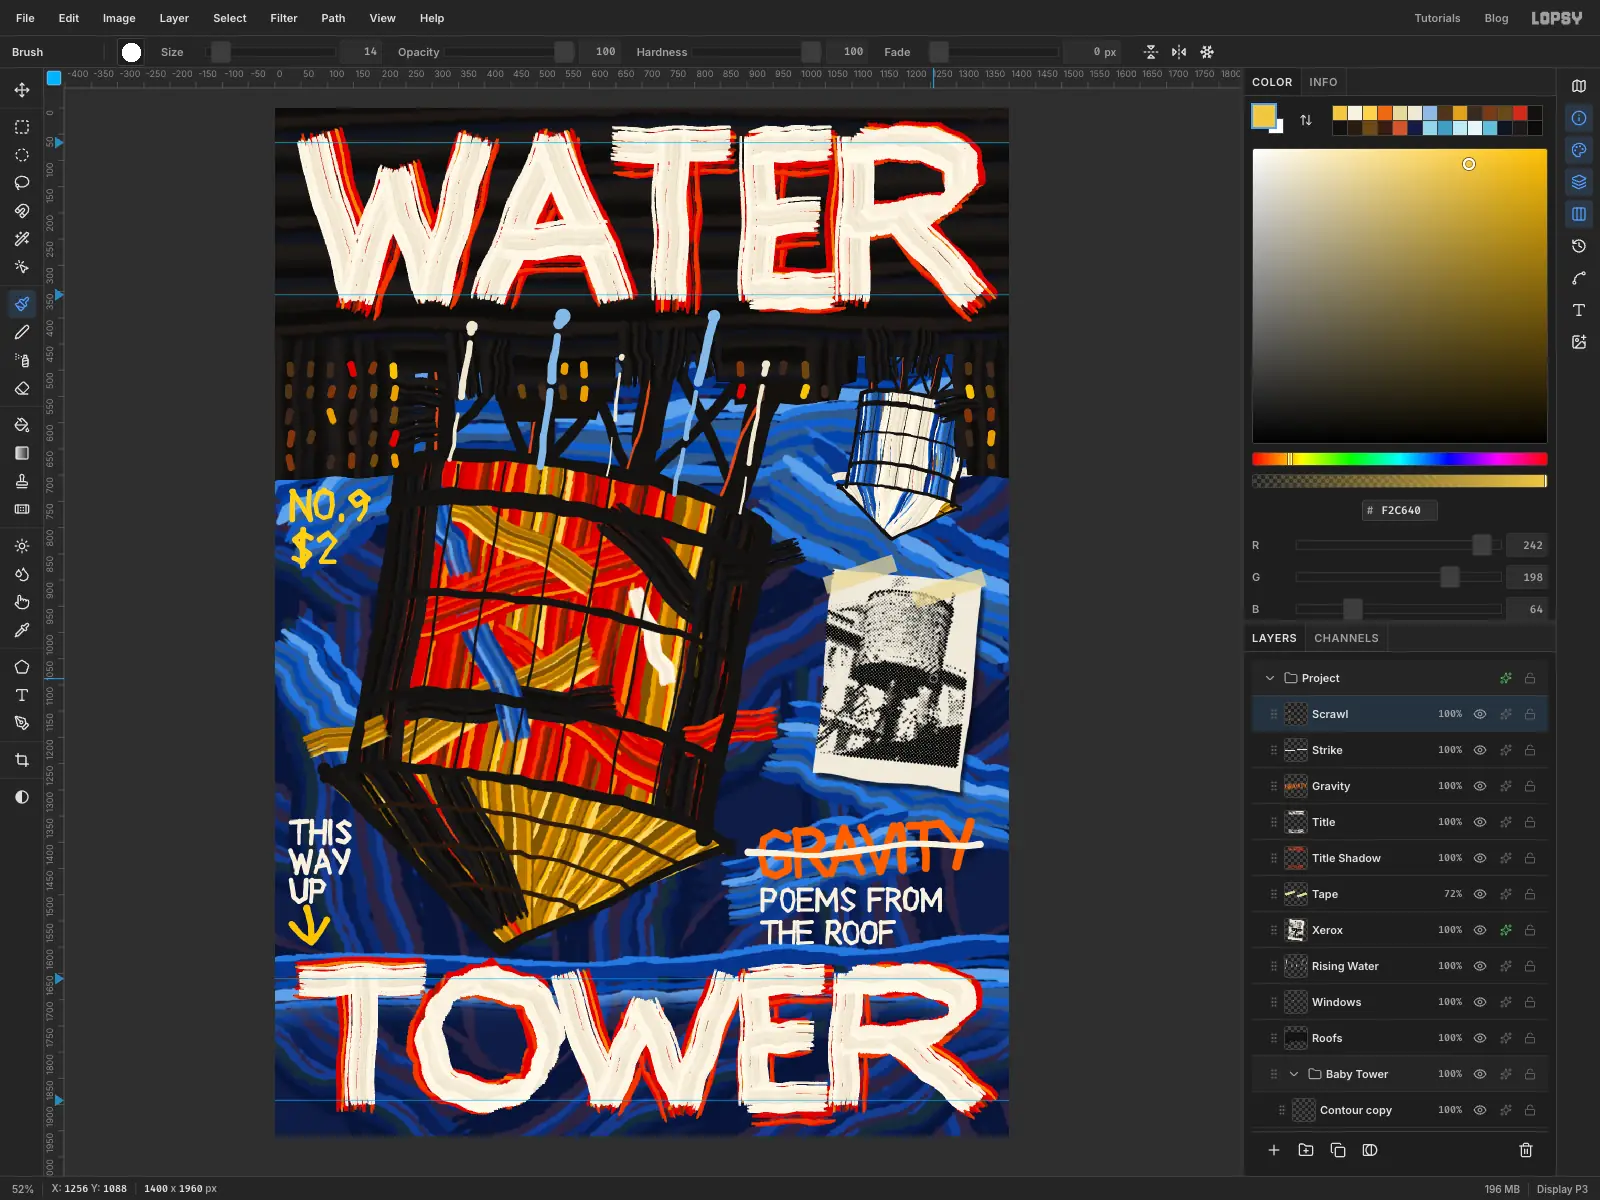
A tidy font would look out of place next to all that paint, so letter the rest by hand too. Add a layer called Scrawl. With the oil stick:
- POEMS FROM and THE ROOF on two lines under GRAVITY, in cream , letters about 40 px tall, at Size 9
- NO.9 and $2 on the left, under the hanging building, in yellow , letters about 54 px tall, at Size 12
- THIS, WAY, UP stacked in the space below the cone's left corner, in cream, letters about 42 px tall, at Size 10
Under THIS WAY UP, paint a down-pointing arrow in at Size 15, stopping well clear of the T of TOWER. It's the other half of the joke. Apply Oil Paint at Radius 1.
-
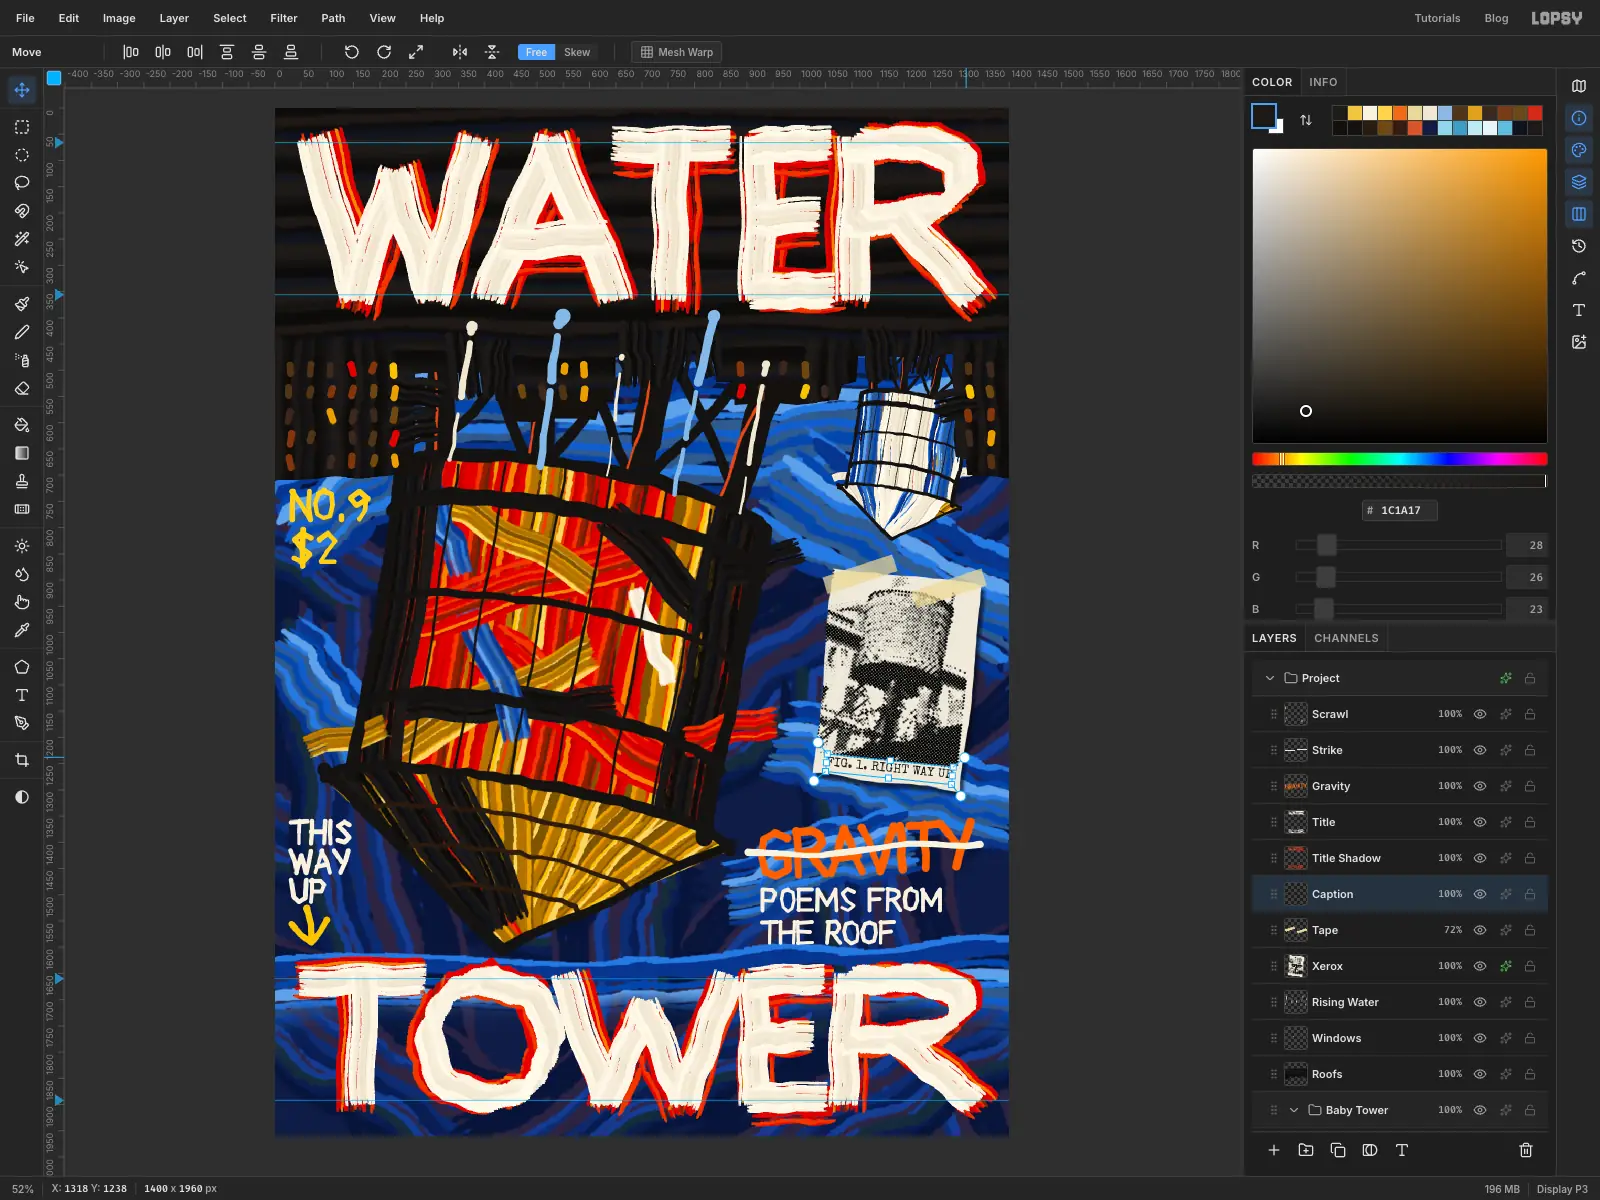
Type the caption
The xerox is the one mechanical thing on the page, so its caption should be typed. Click the Tape layer first, so the caption lands just above the xerox in the stack.
Pick the Text tool. Set Size to 24, choose Special Elite from the font list, set the colour to , and click in the deep margin at the bottom of the xerox. Type
FIG. 1. RIGHT WAY UPand press Tab to commit. Name the layer Caption.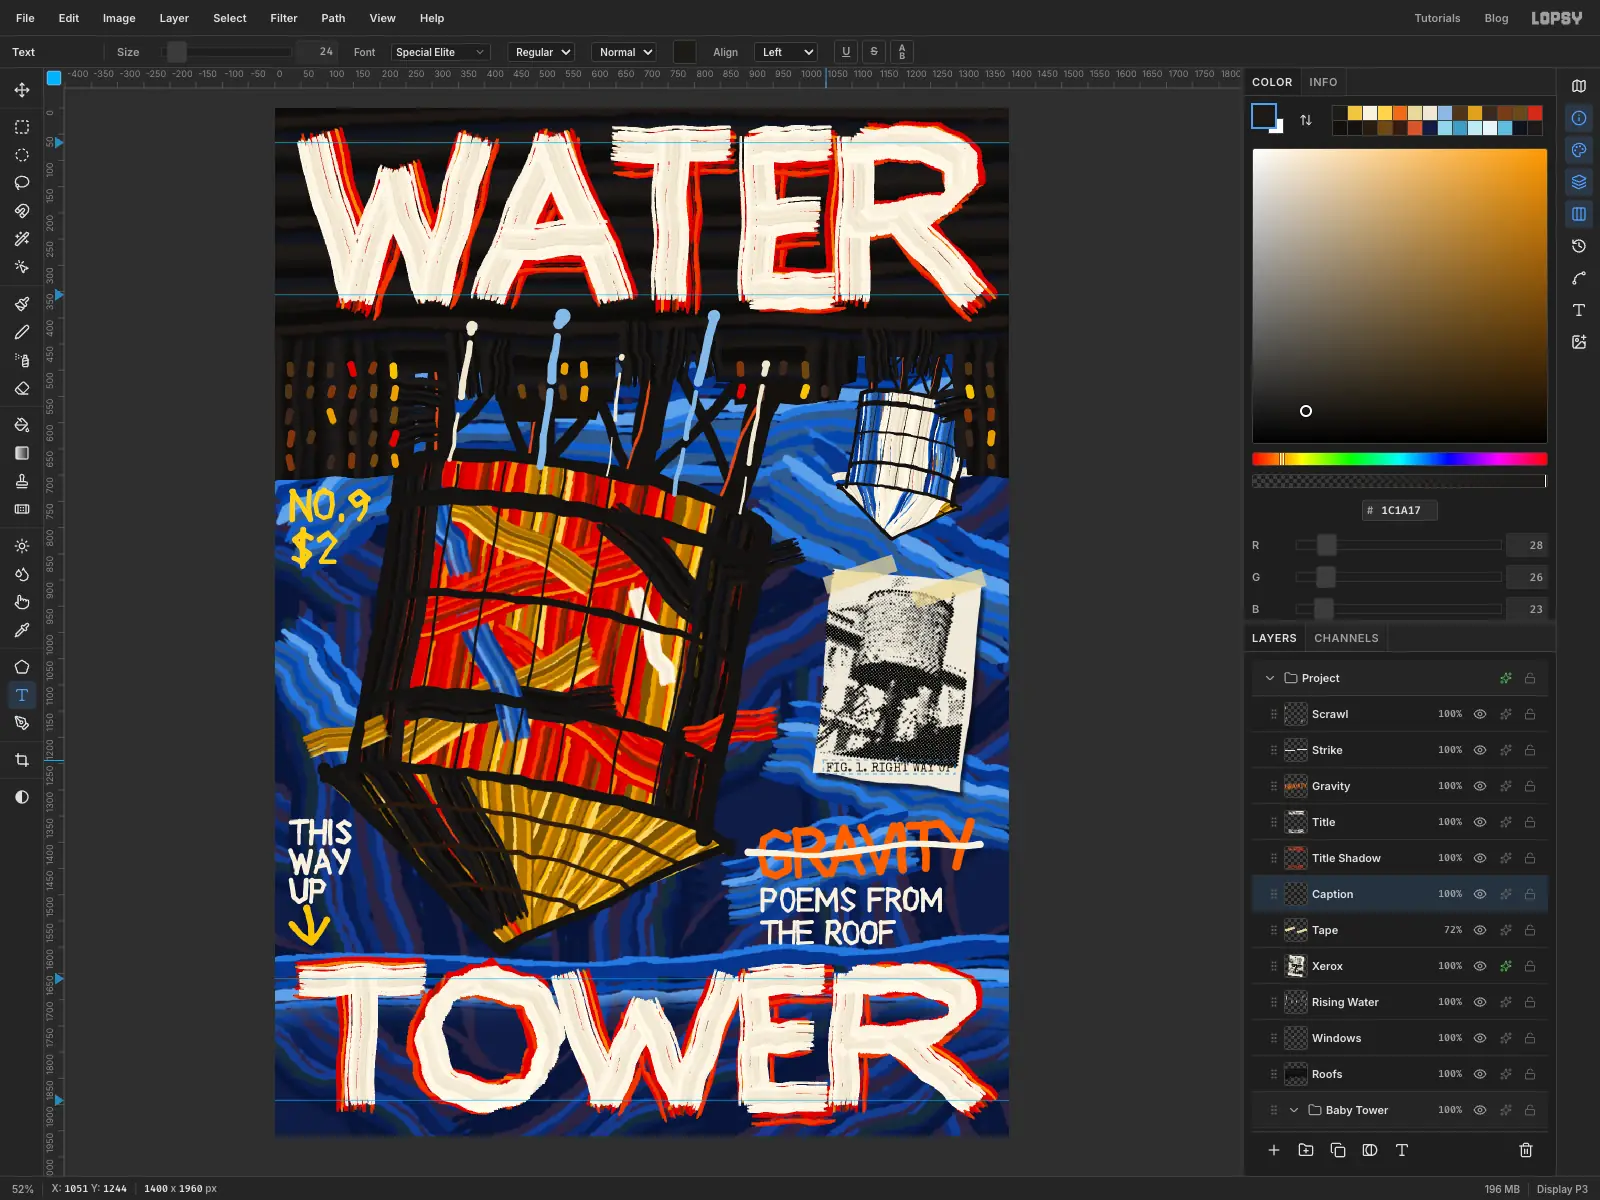
-
Tilt and seat the caption
Switch to the Move tool, which frames the text with its own handles. Drag the rotation handle about 6° clockwise, to match the paper's tilt, and press Esc.
Use the arrow keys to fine-tune it, with an even gap above and below. It stays live text, so you can still fix a typo.
-
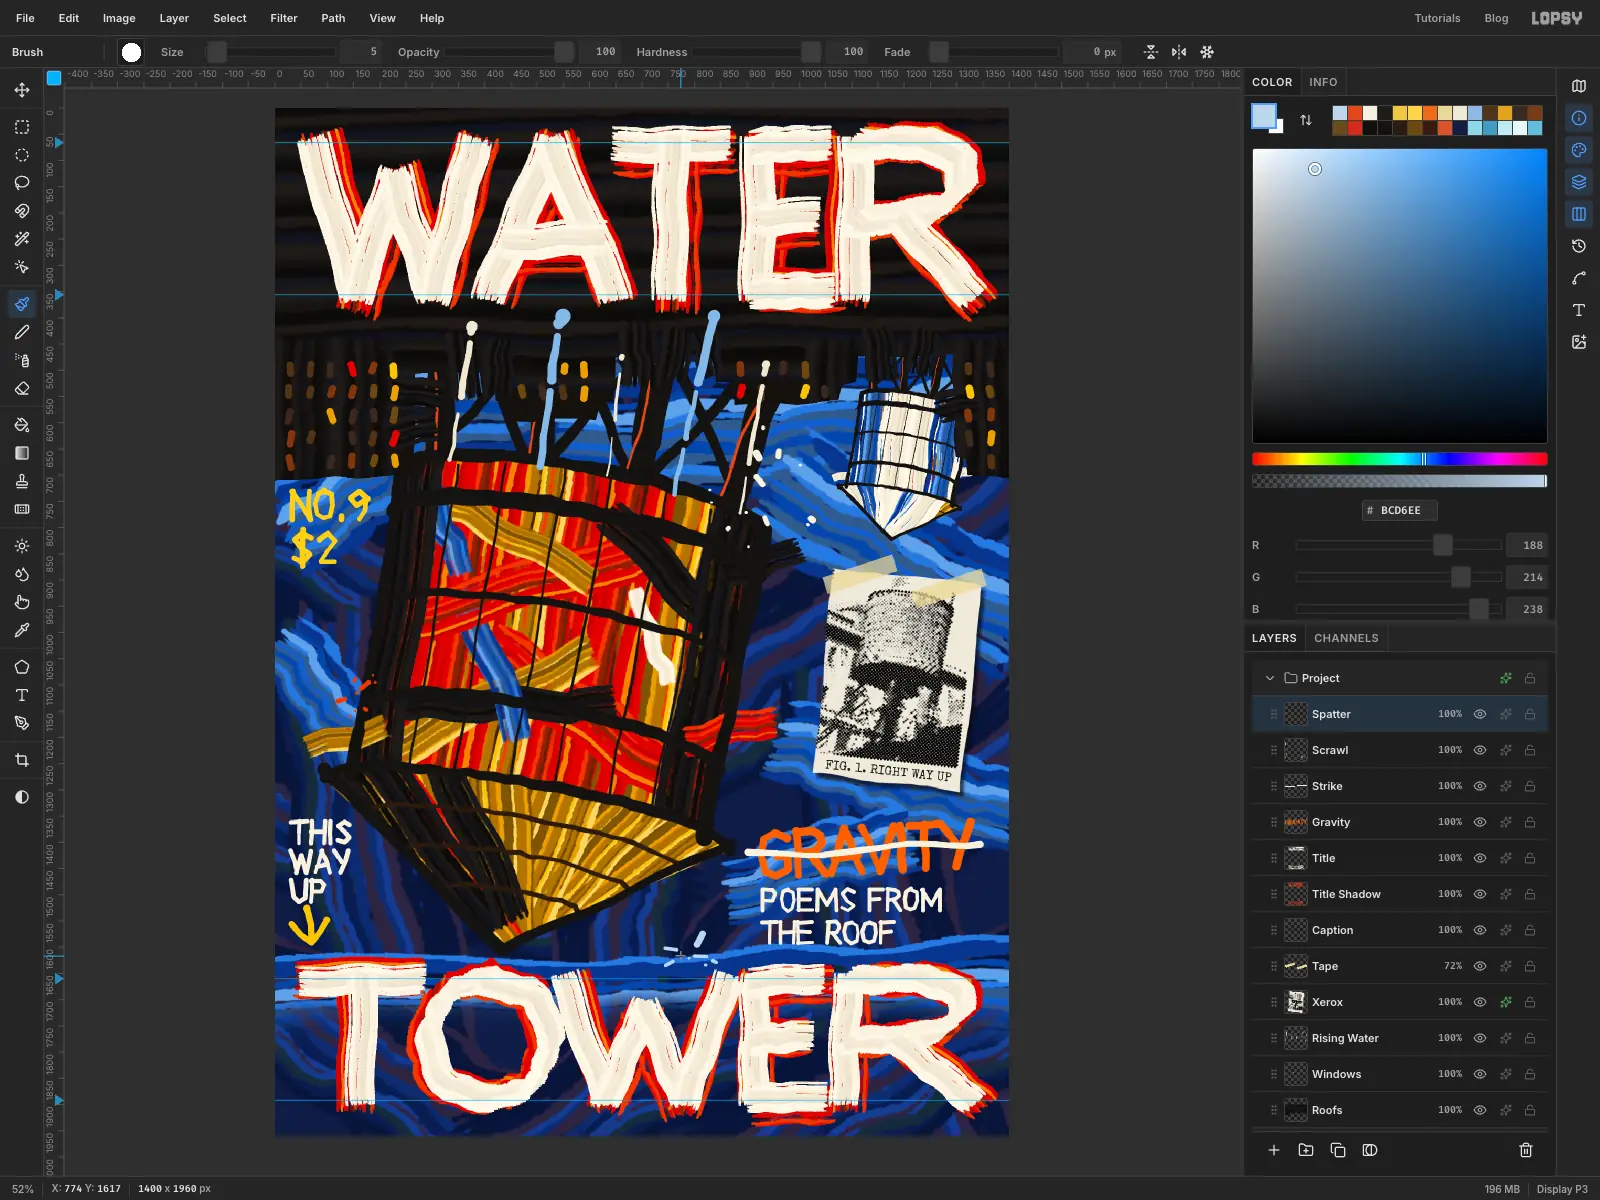
Flick some paint
Click the Scrawl layer and add a layer called Spatter, so it sits at the top of the stack. With the oil stick, make quick dots and very short flicks in three places: a dozen or so in cream by the upper right of the tank, fewer in on its left, and a handful in under the cone. Use Size 5 for most, and go up to 16 for a few. Don't overdo it, because long, thin marks read as stray lines.
-
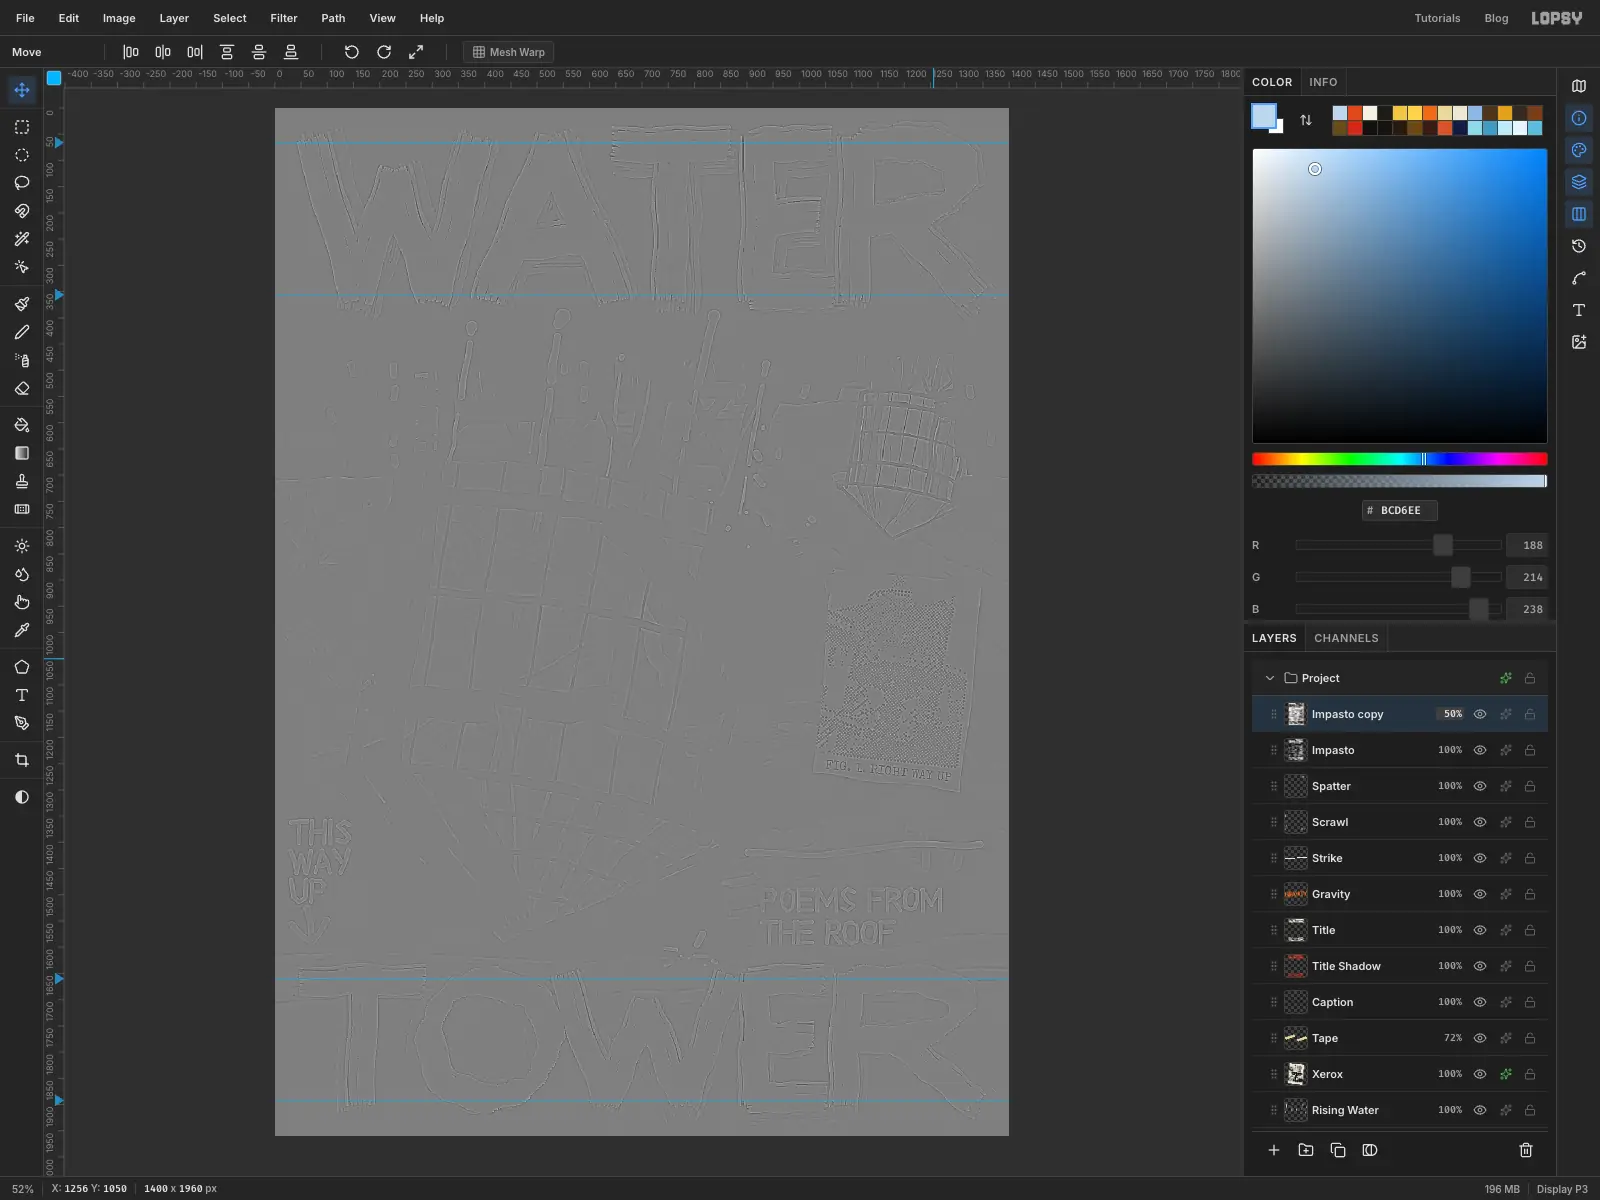
Build a high-pass layer
The picture is finished, but the paint is flat. This last trick gives it thickness.
With Spatter selected, press Cmd+A, then Cmd+Shift+C for Copy Merged, then Cmd+D, then Cmd+V, then Cmd+D again. Name the new top layer Impasto and apply Filter → Desaturate.
Click Duplicate Layer, apply Filter → Invert to the copy, apply Gaussian Blur at Radius 4, and set that layer's opacity to 50%. The picture collapses into flat grey with faint edges, which is the classic high-pass trick. Choose Layer → Merge Down and name the result Impasto.
Keep that radius small. A big one puts a soft halo around every letter.
-
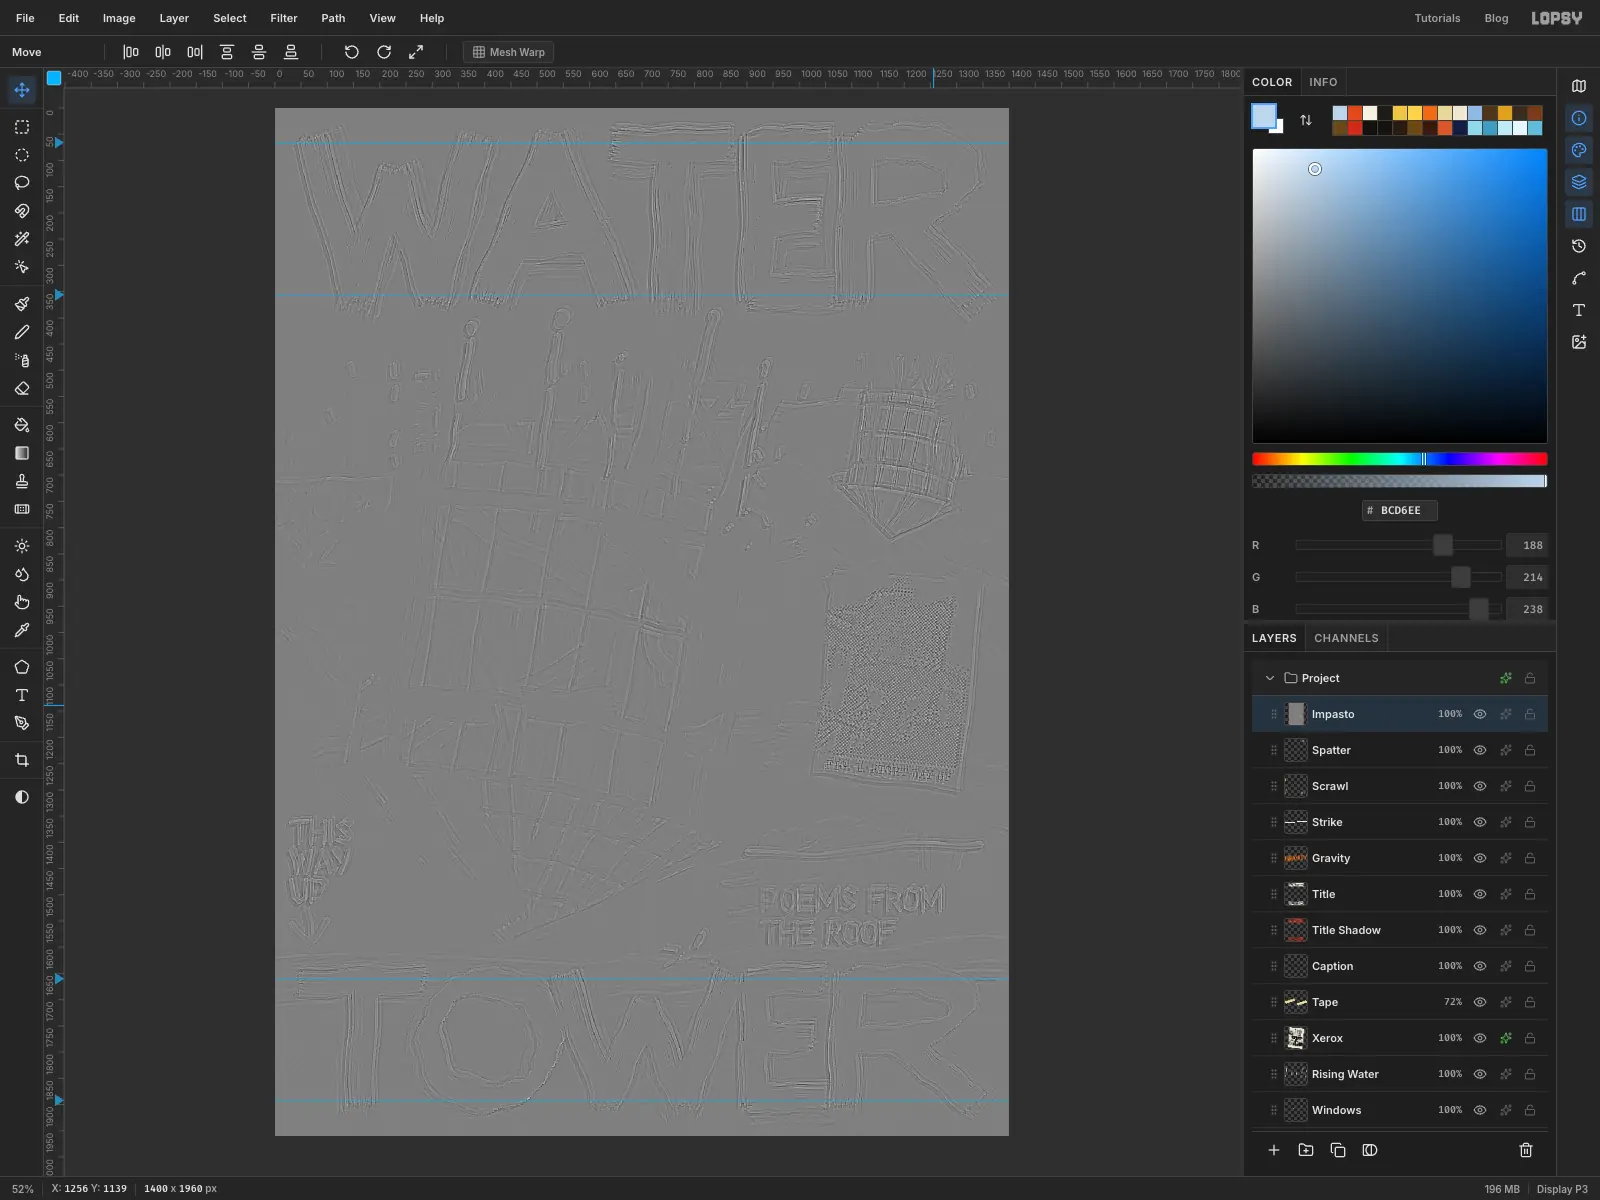
Emboss the brushstrokes
Apply Filter → Emboss… with Strength 60 and Angle 135. The bristle streaks and the edges of the letters now stand up like ridges of paint, lit from one side.
-
Blend it in and export
Open the Impasto layer's effects, set its blend mode to Overlay, and set its opacity to 80%. Overlay ignores flat mid grey, so the colours stay put and only the ridges catch the light.
Save the project with File → Save Project and export the cover with File → Quick Export PNG.
Try it on your own subject: paint something ordinary, in a group, then turn the group over before you decide it's finished. You may be surprised at what you notice.