Design a Neo-Pop Sushi Bar Website Landing Page
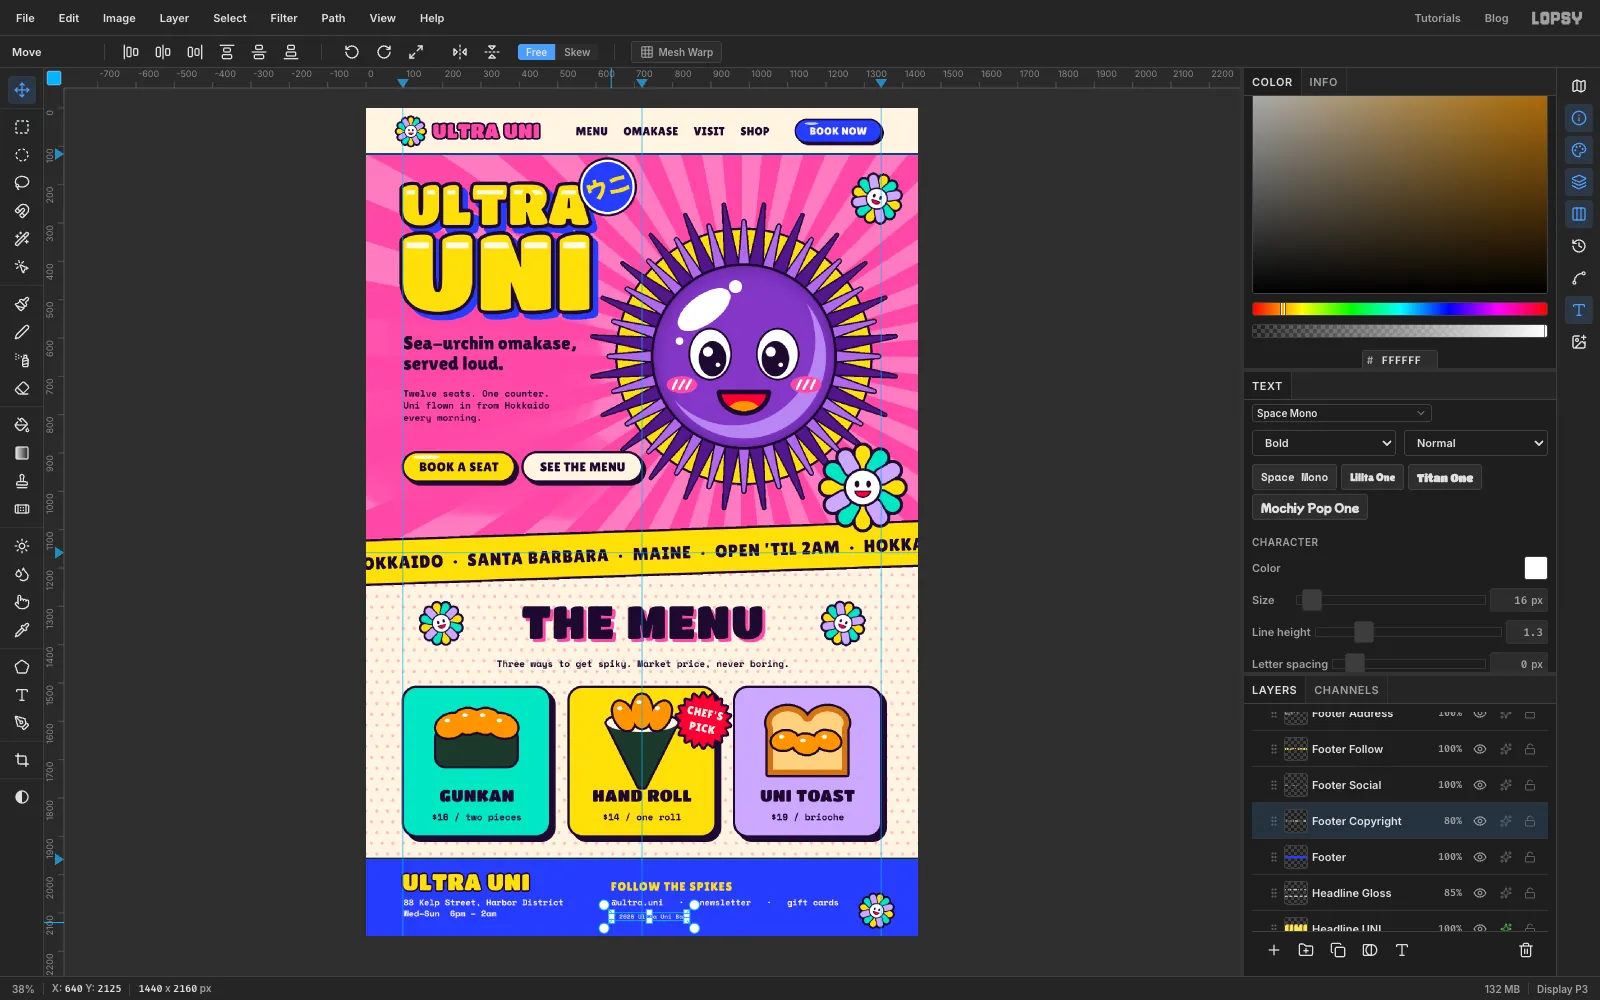
Design a neo-pop landing page for a sea-urchin sushi bar in Lopsy, with a glossy kawaii mascot, smiling flowers, a sunburst hero and sticker-style buttons.
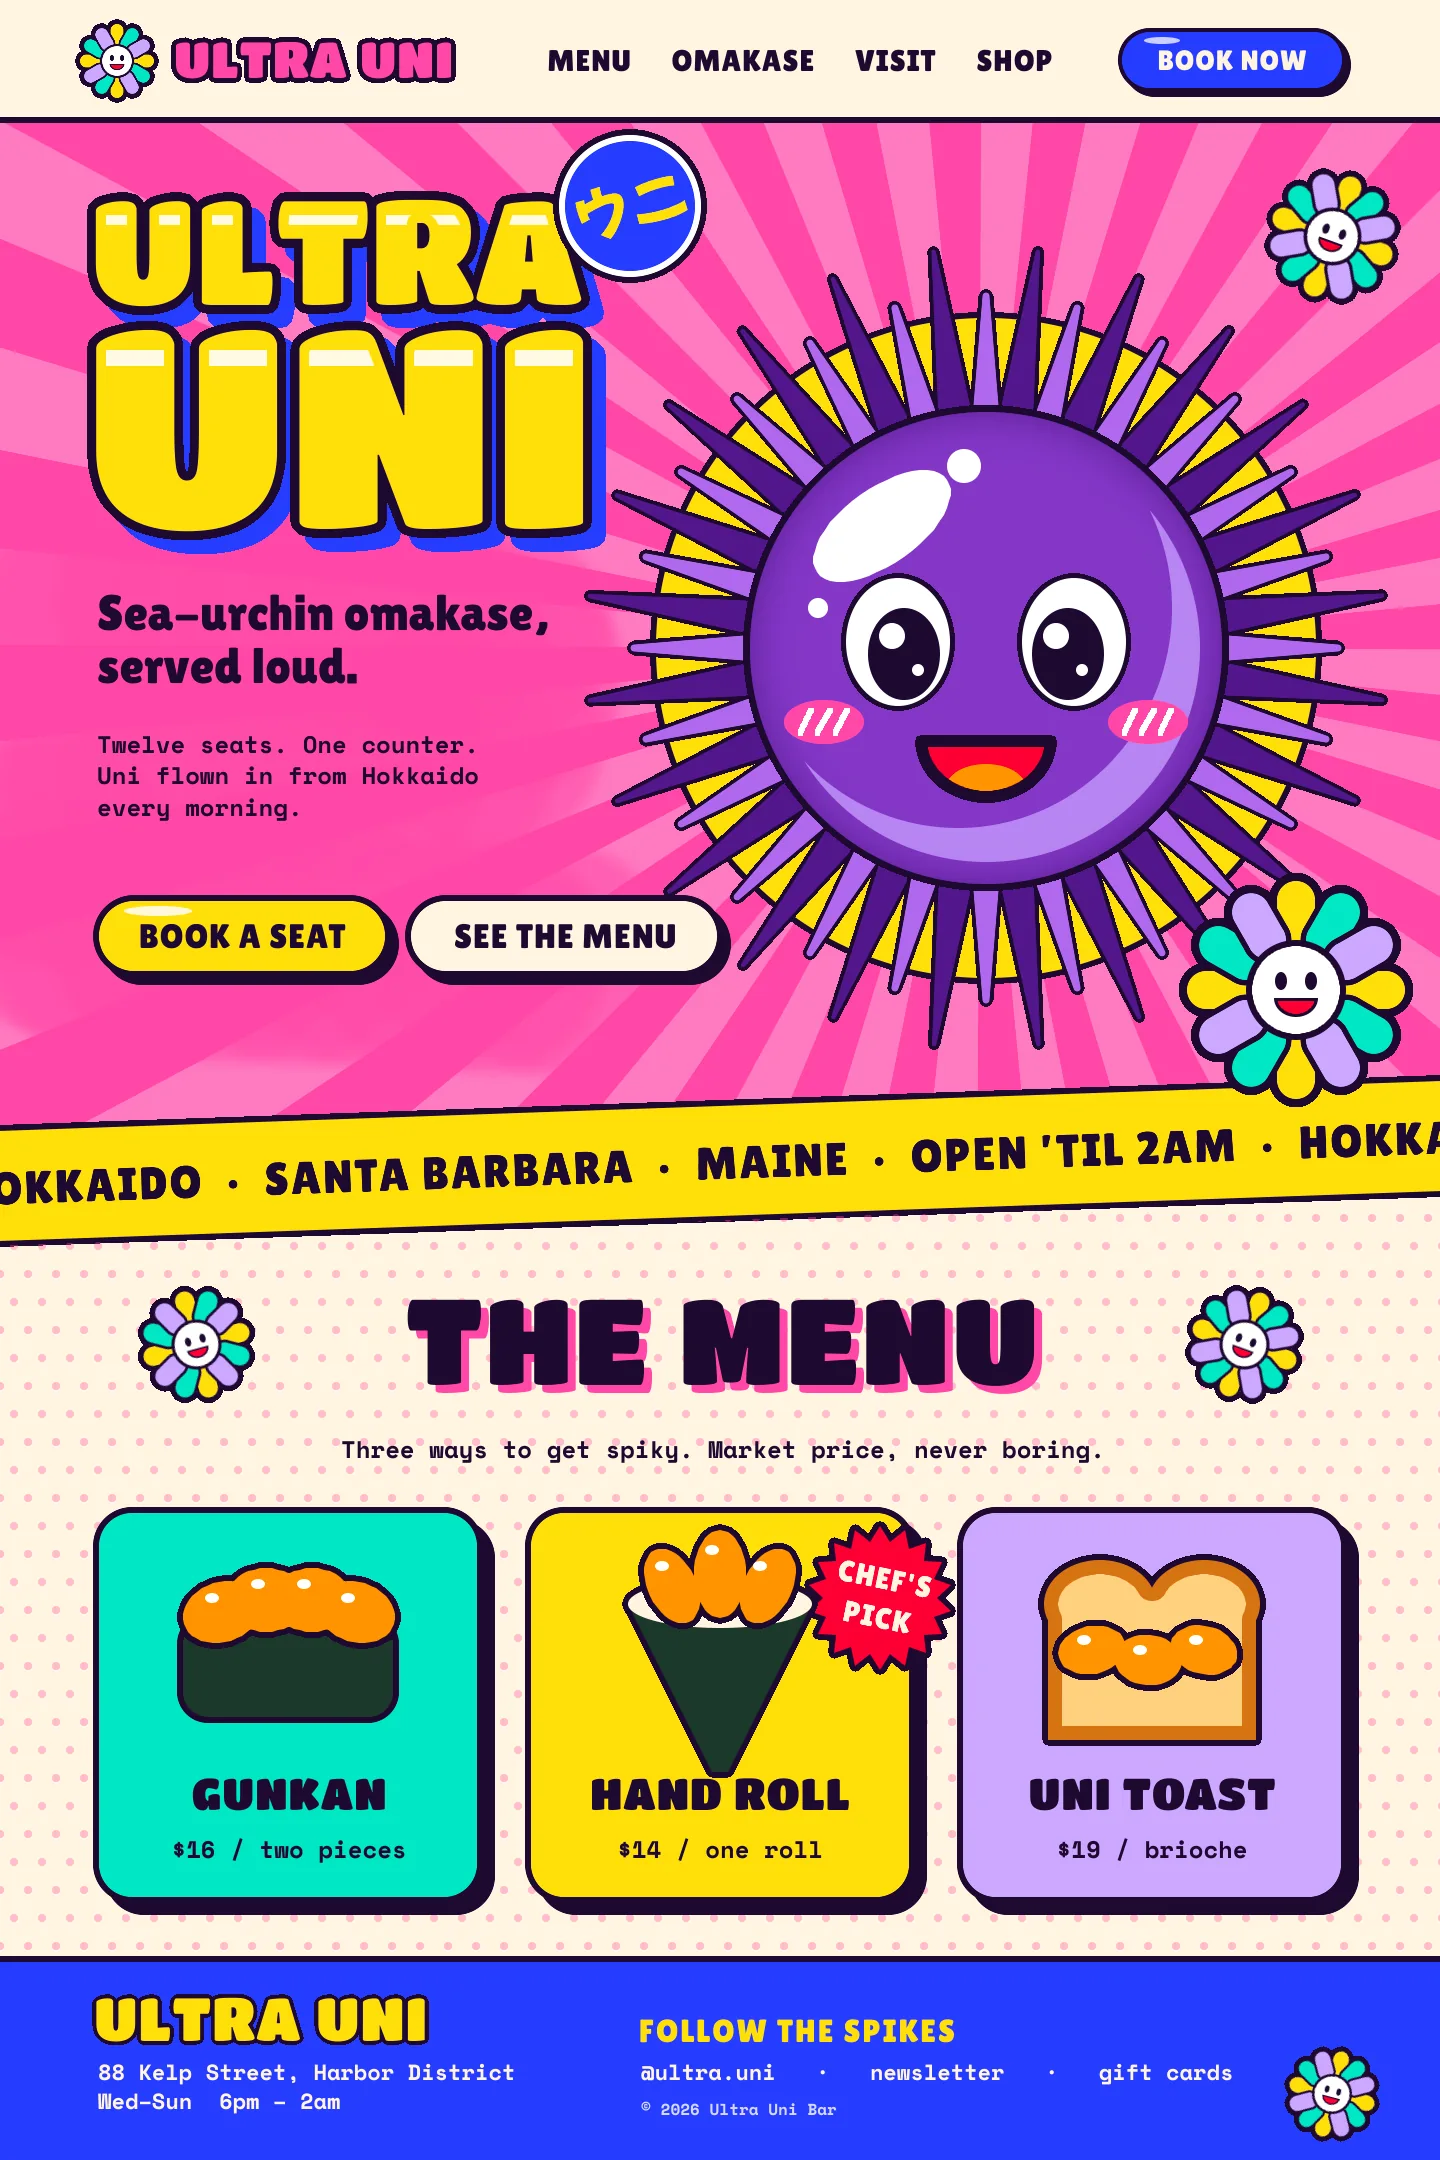
Neo-pop is pop art after the 1980s: flat, loud colour, heavy black outlines, cartoon mascots, smiling flowers, and the glossy, blown-up shine of a balloon sculpture. It's sweet and a little unsettling at the same time, which makes it perfect for a restaurant that wants to be remembered. In this tutorial you'll design the landing page for Ultra Uni, a made-up twelve-seat sea-urchin bar, as a 1440 × 2160 px desktop comp.
The page has five parts, top to bottom: a cream nav bar, a pink hero with the mascot Uni-chan, a tilted ticker band, a menu of three cards and a cobalt footer. You'll build the mascot and the flowers by hand, then set the type on top.
Along the way you'll use:
- guides, the exact-corners dialog for marquees, Edit → Fill and Select → Shrink
- the Brush with Radial Symmetry and Taper, the Pencil with Shift-click lines, and the Eraser
- the Lasso and the marquees with add, subtract and intersect (Shift, Alt and Shift+Alt)
- Filter → Sunburst, Edit → Define Pattern and Fill with Pattern
- the Shape tool for discs, pill buttons and cards with rounded corners
- Stroke, Drop Shadow and Inner Glow effects
- groups, a group move, copy and paste, scaling with Cmd-drag and rotating with the Move tool
- text in Titan One, Lilita One, Mochiy Pop One and Space Mono, centred inside shapes and rotated
The palette:
-
Hero pink
-
ray pink
-
cream
-
Urchin violet
-
dark spines
-
light spines
-
rim light
-
Sun yellow
-
uni orange
-
grin red
-
Mint
-
cobalt
-
ink
-
Nori
-
crust
-
brioche
-
Set up the page and the hero band
Choose File → New, set the size to 1440 × 2160 px and click Create. Click the
Backgroundrow, set the foreground to and choose Edit → Fill.Drop the guides. Click the top ruler at 96, 720 and 1344: the two outer ones are the page margins and the middle one is the centre line. Then click the left ruler at 120 (bottom of the nav bar), 1160 (bottom of the hero) and 1960 (top of the footer).
Double-click
Layer 1's name and rename itHero Pink. Pick the Rectangular Marquee (M) and drag from just off the left edge on the 120 guide to just off the right edge on the 1160 guide. Set the foreground to and choose Edit → Fill. Keep the selection.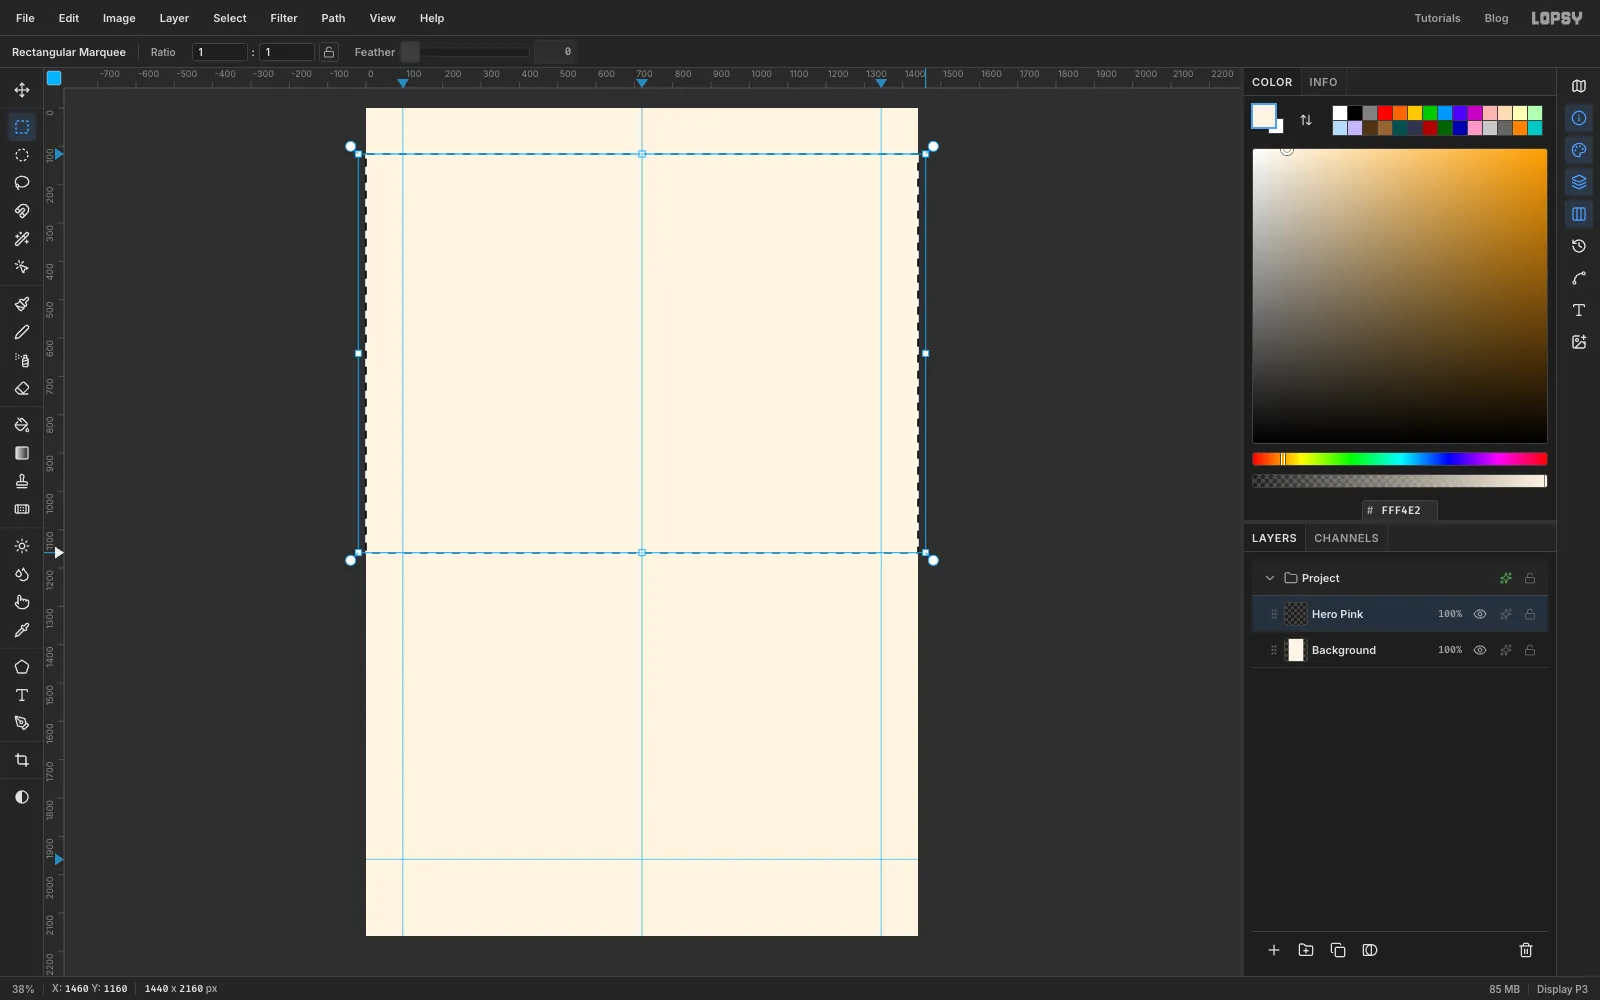
-
Paint the sunburst
Click Add Layer at the bottom of the Layers panel and name the new layer
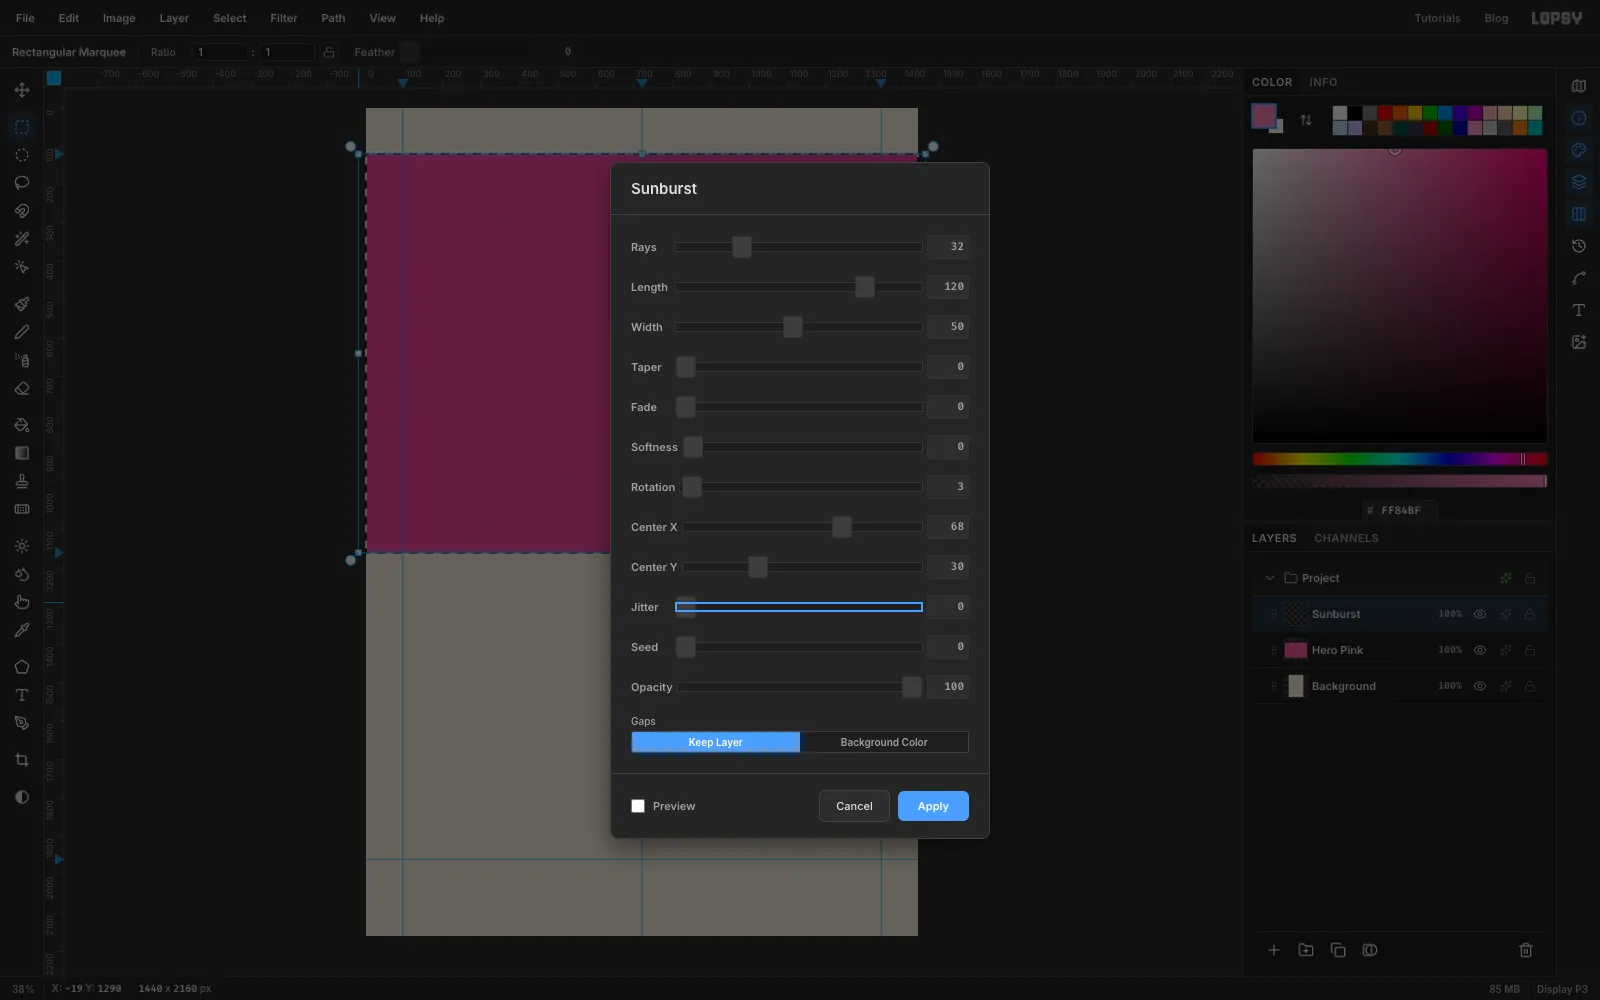
Sunburst. Set the foreground to , a lighter pink. Sunburst paints in the foreground colour.Choose Filter → Sunburst… and set:
- Rays
32, Length120, Width50, Taper0, Rotation3 - Center X
68and Center Y30, so the rays burst from about 980, 648, where the mascot's face will go
Click Apply and press Cmd+D. The selection you kept confines the rays to the hero.
- Rays
-
Lay in the ticker band, footer and rules
Click Add Layer and name it
Ticker Band. Pick the Lasso (L) and drag around a long band about 110 px deep that runs off both sides of the page and rises gently to the right: its top edge goes from about y 1132 at the left edge to y 1080 at the right, and its bottom edge from y 1242 to y 1190. It crosses the bottom of the hero. Lasso slowly along each edge and it'll come out nearly straight. Fill it with and press Cmd+D.Click the ✦ button on the
Ticker Bandrow to open the effects drawer, tick Stroke, and set Width to6and the colour to ink . Close the drawer.Click Add Layer and name it
Footer. Drag a marquee from the 1960 guide down past the bottom of the page and fill it with cobalt .Click Add Layer and name it
Rules. Pick the Pencil (N) at Size6, set the foreground to ink, click the left edge on the 120 guide and Shift-click the right edge. Do the same along the 1960 guide.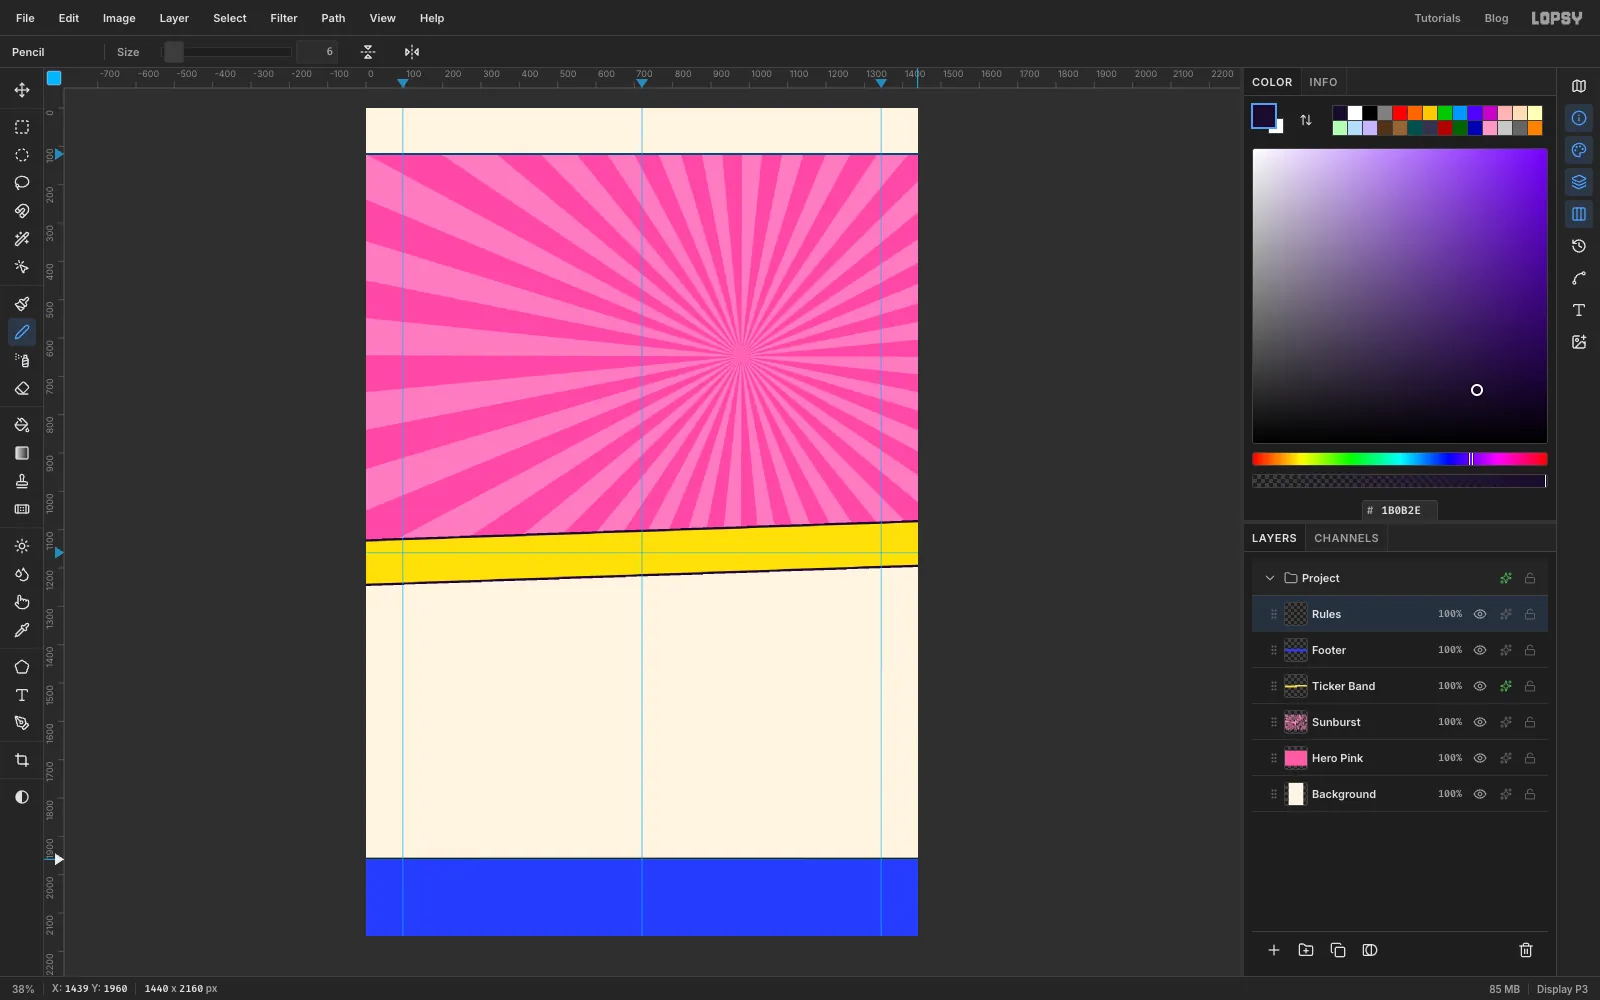
-
Start the mascot with a halo and dark spines
Uni-chan lives in a group. You'll draw him a little up and left of the ray centre, then nudge the whole group into place at the end.
Click the
Sunburstrow, then New Group, and name itUni-chan. With the group selected, click Add Layer and name the layerHalo. New layers go inside the selected group.Press Cmd+D, pick the Elliptical Marquee and click once on the canvas without dragging. The exact-corners dialog opens. Type From
632, 294to1292, 954and press Enter. Fill the circle with , press Cmd+D and giveHaloa Stroke of Width6in ink.Click Add Layer and name it
Spines Back. Pick the Brush (B) and set Size46and Hardness100. Open the brush settings and on the Shape tab set Taper to260and Spacing to2. Taper shrinks the brush as the stroke goes on, so each spine starts thick and ends in a point.Turn on Radial Symmetry in the options bar and set the segments to
24. Cmd-click at 962, 624 to put the symmetry centre in the middle of the halo. Set the foreground to . Click at 1131, 646, then Shift-click at 1359, 676. That draws one spine from near the centre outwards, and symmetry repeats it 24 times around the circle.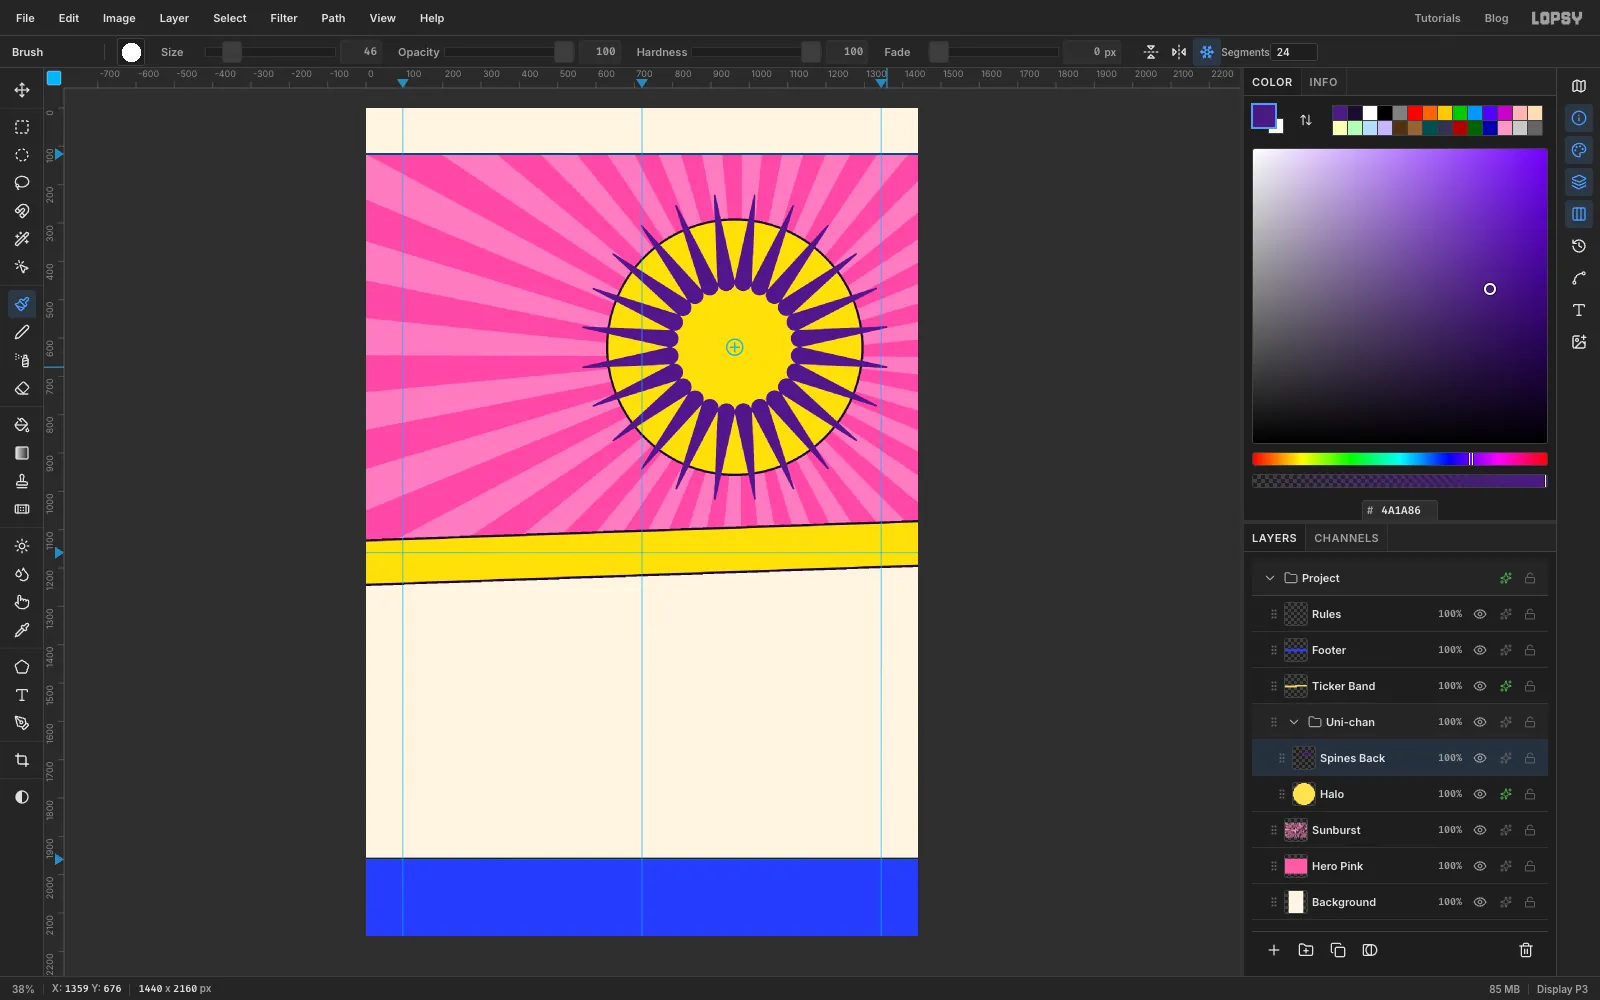
-
Add the light spines
Click Add Layer and name it
Spines Front. Set the brush Size to38, Taper to230and the foreground to . Click at 1132, 624 and Shift-click at 1314, 624. These spines sit halfway between the dark ones and stop short of them, so you get two rows.Turn Radial Symmetry off and set Taper back to
0, or it will surprise you on the next stroke.Give both spine layers a Stroke of Width
4in ink. The thinner line keeps the spines spiky rather than chunky.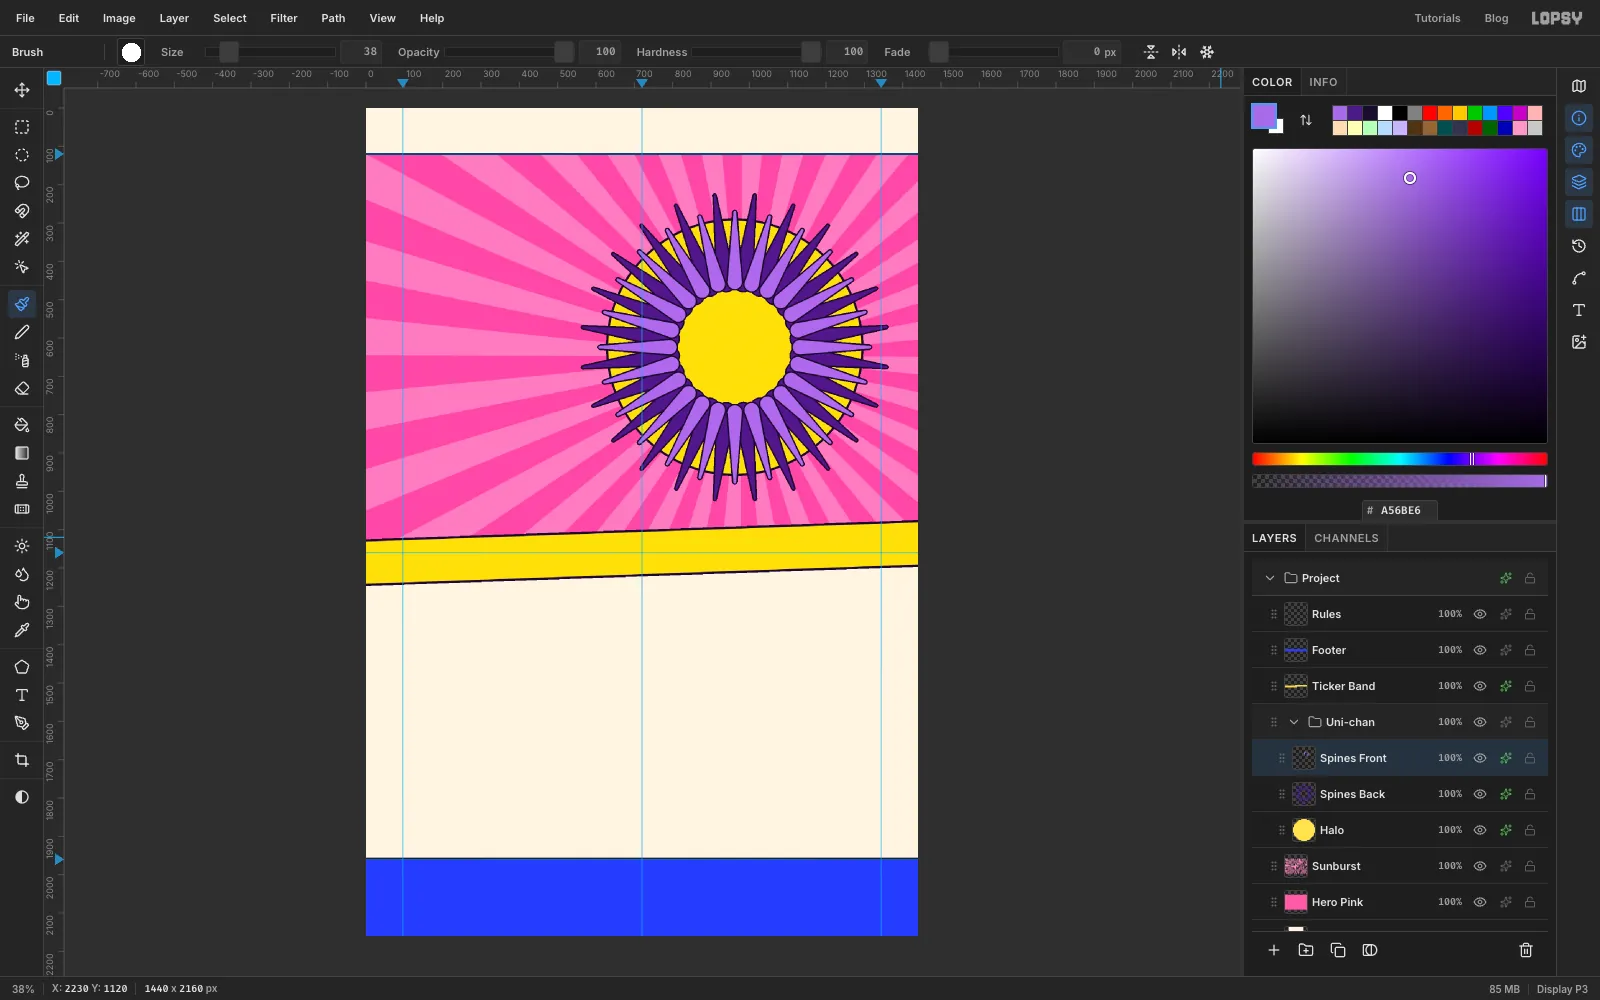
-
Make the body a glossy ball
Click Add Layer and name it
Body. In the exact-corners dialog make a circle from726, 388to1198, 860, fill it with and press Cmd+D.Open the effects drawer. Add a Stroke of Width
7in ink. Then tick Inner Glow and set Size80, Spread0, Opacity85and the colour to . A dark inner glow shades the edge of the disc, so it reads as a ball rather than a flat circle. Close the drawer.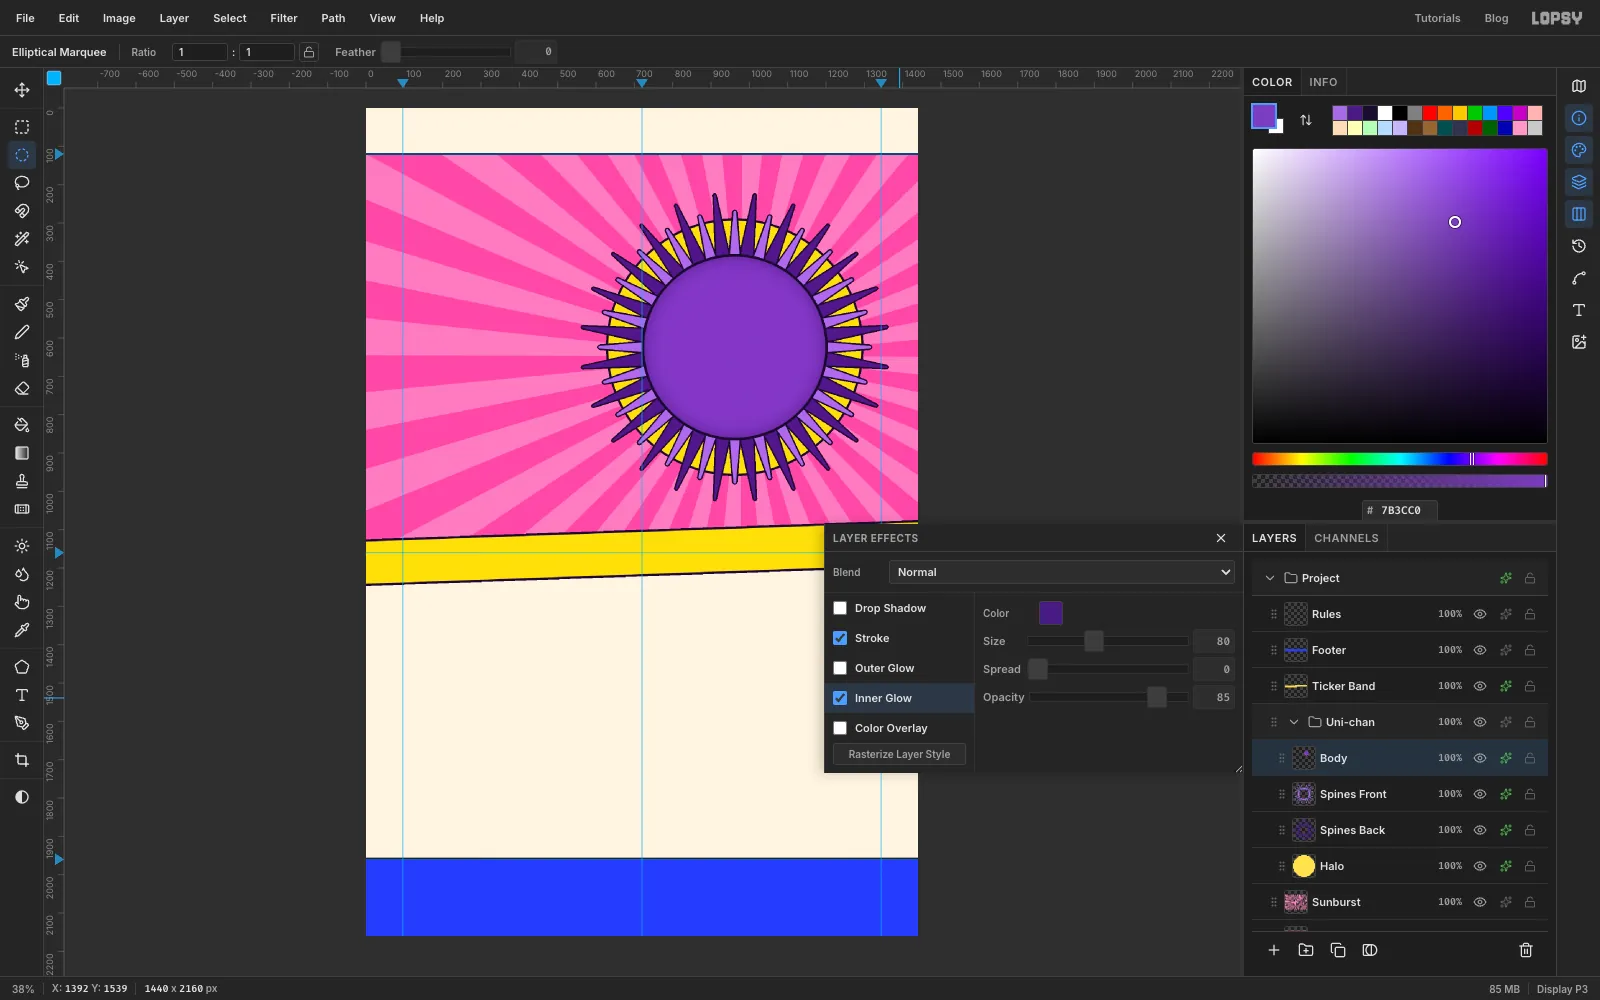
-
Add a rim light
Click Add Layer and name it
Rim Light. With the Elliptical Marquee, drag a circle about 428 px across centred on the middle of the body, from about 748, 410 to 1176, 838. Then hold Alt and drag a slightly bigger circle shifted up and left, from about 708, 364 to 1148, 804. Alt subtracts it, which leaves a crescent along the lower right.Fill the crescent with , press Cmd+D and set the layer's opacity to
70%. Light bouncing up into the underside of a shiny ball is half of what makes it look glossy.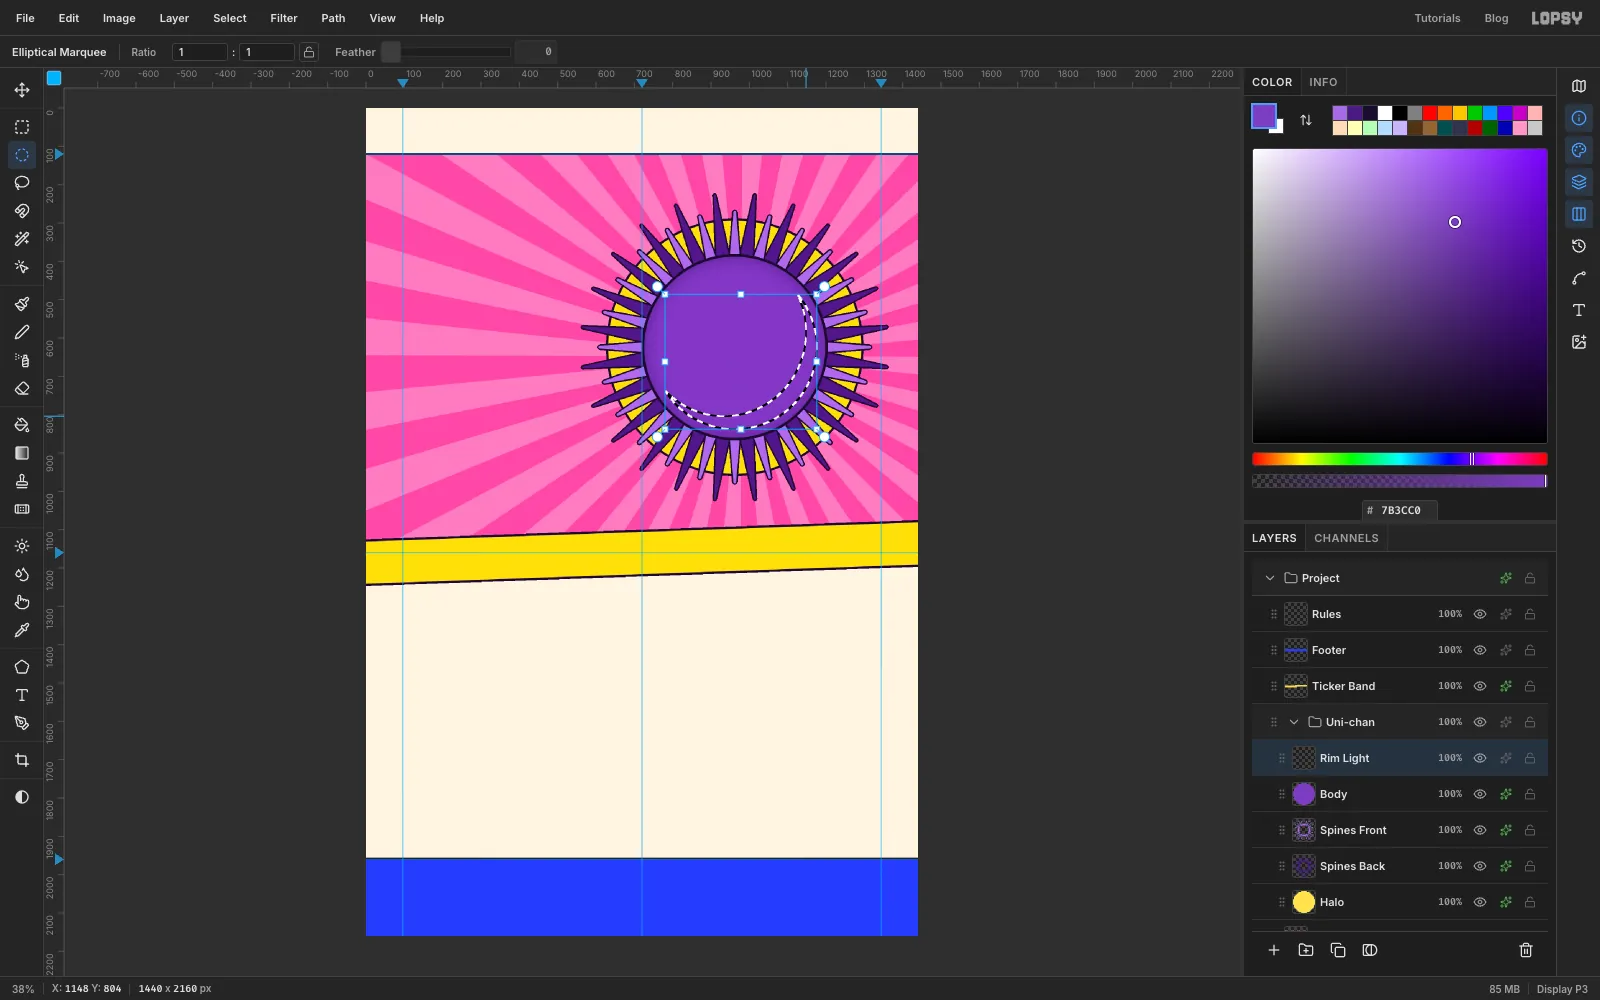
-
Add the Koons shine
The other half is a hard, bright highlight. Click Add Layer and name it
Gloss. With the Lasso, draw a tilted oval about 160 × 76 px at the top left of the ball, centred near 858, 502 and leaning about 35° the same way as the ball's curve. Switch to the Elliptical Marquee, hold Shift and drag two small circles: one from 923, 425 to 957, 459 and one from 784, 574 to 804, 594.Fill with white and press Cmd+D. Keep the highlight crisp, without any blur. Neo-pop shine looks like a reflection on lacquer, not a soft glow.
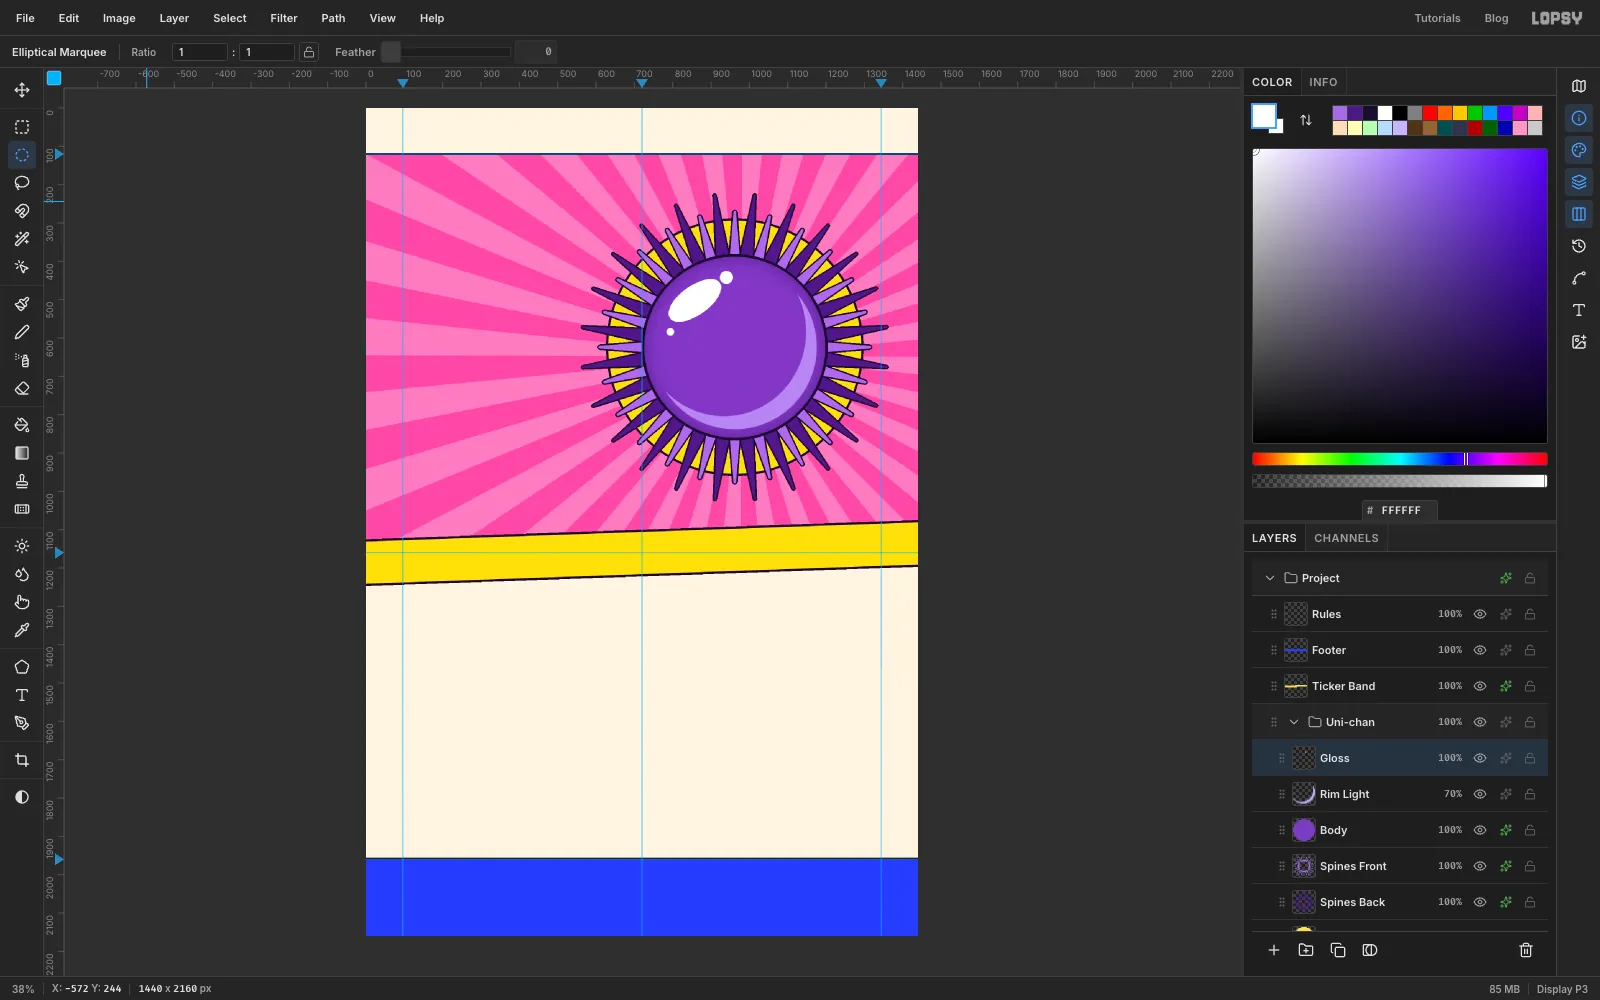
-
Draw the eyes
Click Add Layer and name it
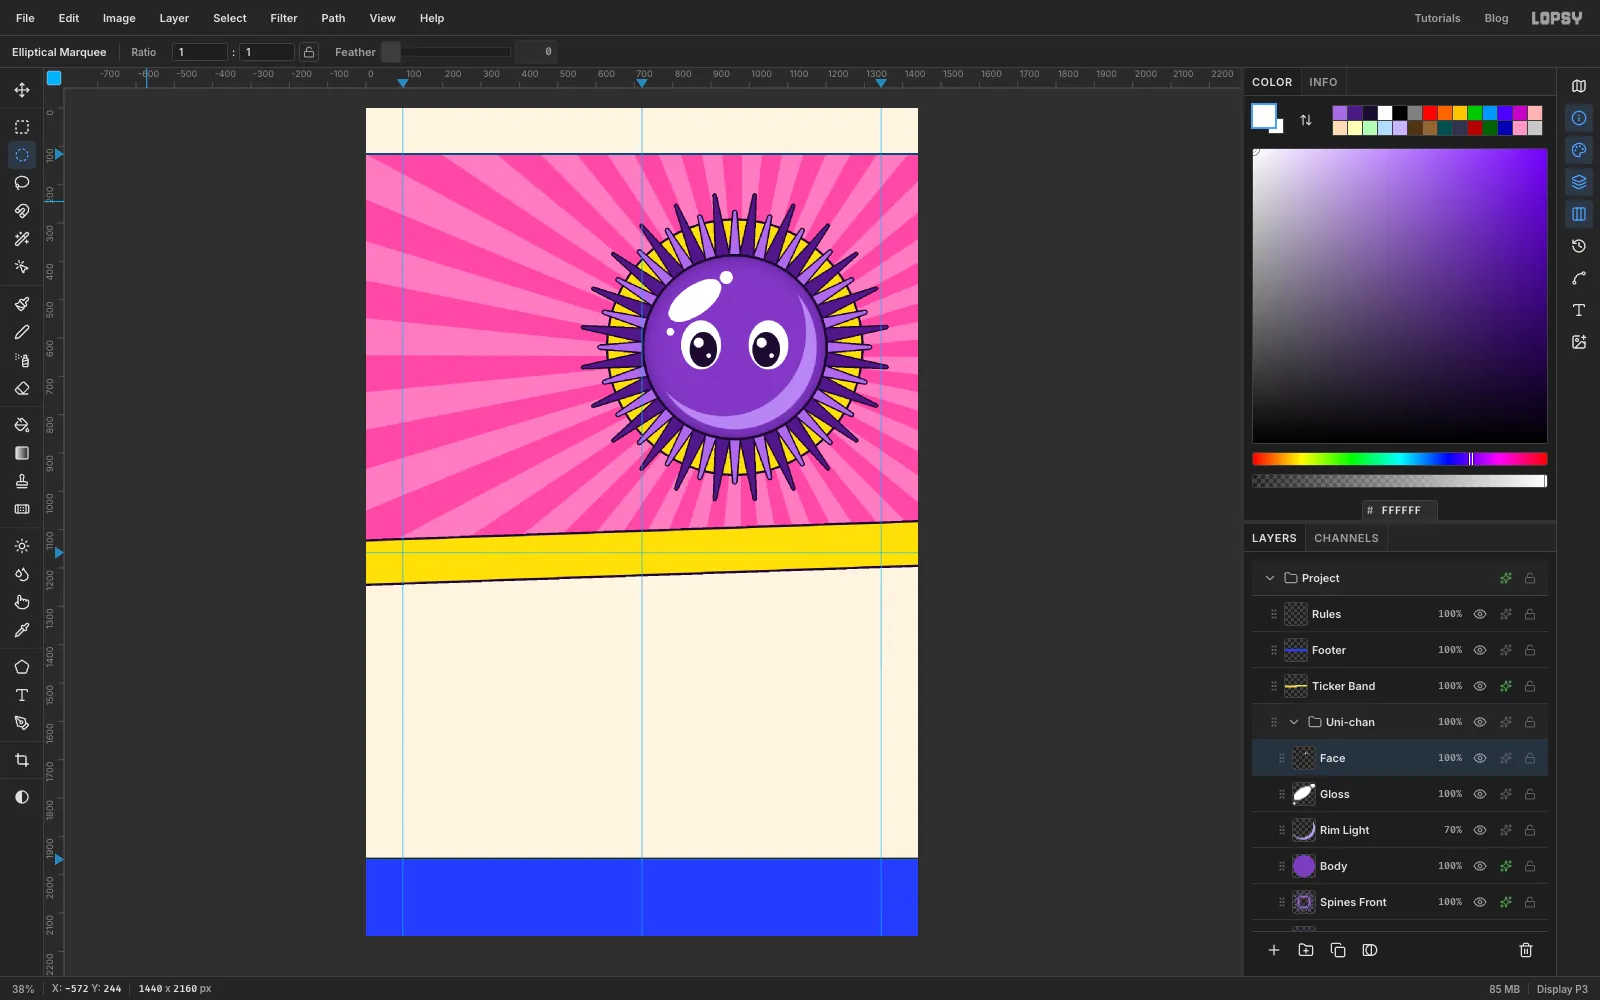
Face. With the Elliptical Marquee's exact-corners dialog, fill each shape in turn, pressing Cmd+D and clicking once again between them:- White eyes: From
822, 554to926, 682, and from998, 554to1102, 682 - Ink pupils, a little lower and inwards: from
844, 584to916, 676, and from1008, 584to1080, 676 - White sparkles at the top left of each pupil: from
855, 599to881, 625, and from1019, 599to1045, 625 - Tiny white sparkles at the bottom right: from
888, 640to900, 652, and from1052, 640to1064, 652
Two sparkles per eye, one big and one small, is the classic kawaii trick. It makes the eyes look wet and shiny.
- White eyes: From
-
Cut a grin with an intersection
Still on
Face, drag an elliptical marquee from 896, 658 to 1028, 774. Switch to the Rectangular Marquee (M). The selection stays. Hold Shift and Alt together and drag a rectangle from 872, 716 down to 1052, 794. Shift+Alt keeps only where the two overlap, which is the bottom half of the oval: a wide, open grin.Fill it with ink. Choose Select → Shrink…, shrink by
7and fill with red , which leaves an ink lip all round. Switch back to the Elliptical Marquee, hold Shift and Alt again and drag a small oval from 922, 740 to 1002, 788: that keeps only the part of the oval inside the mouth. Fill it with orange for the tongue, and press Cmd+D.Give
Facea Stroke of Width5in ink. It outlines the eyes and the mouth in one go.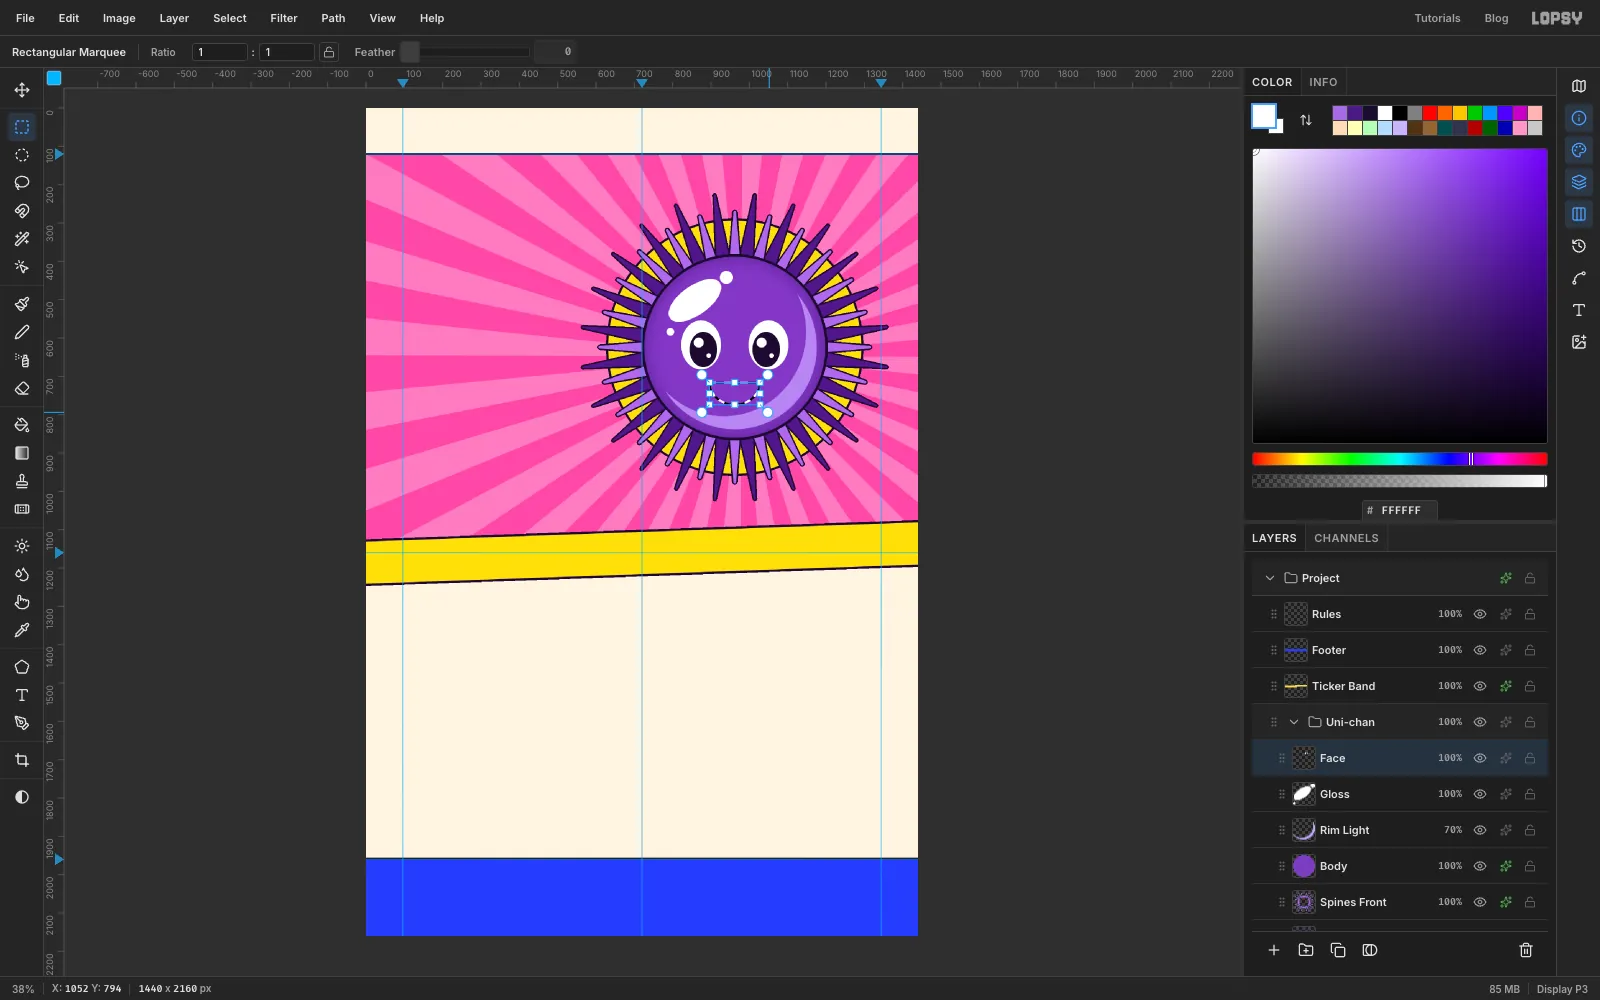
-
Add the blush
Click Add Layer and name it
Blush. Fill two pink ovals in just outside and below the eyes: from760, 676to840, 720, and from1084, 676to1164, 720. Press Cmd+D.Pick the Pencil at Size
5, set the foreground to white and draw three short slashes across each cheek: click near the top right of a slash and Shift-click about 26 px down and to the left. Those manga-style hatch marks say "blushing" much louder than a soft pink blur would.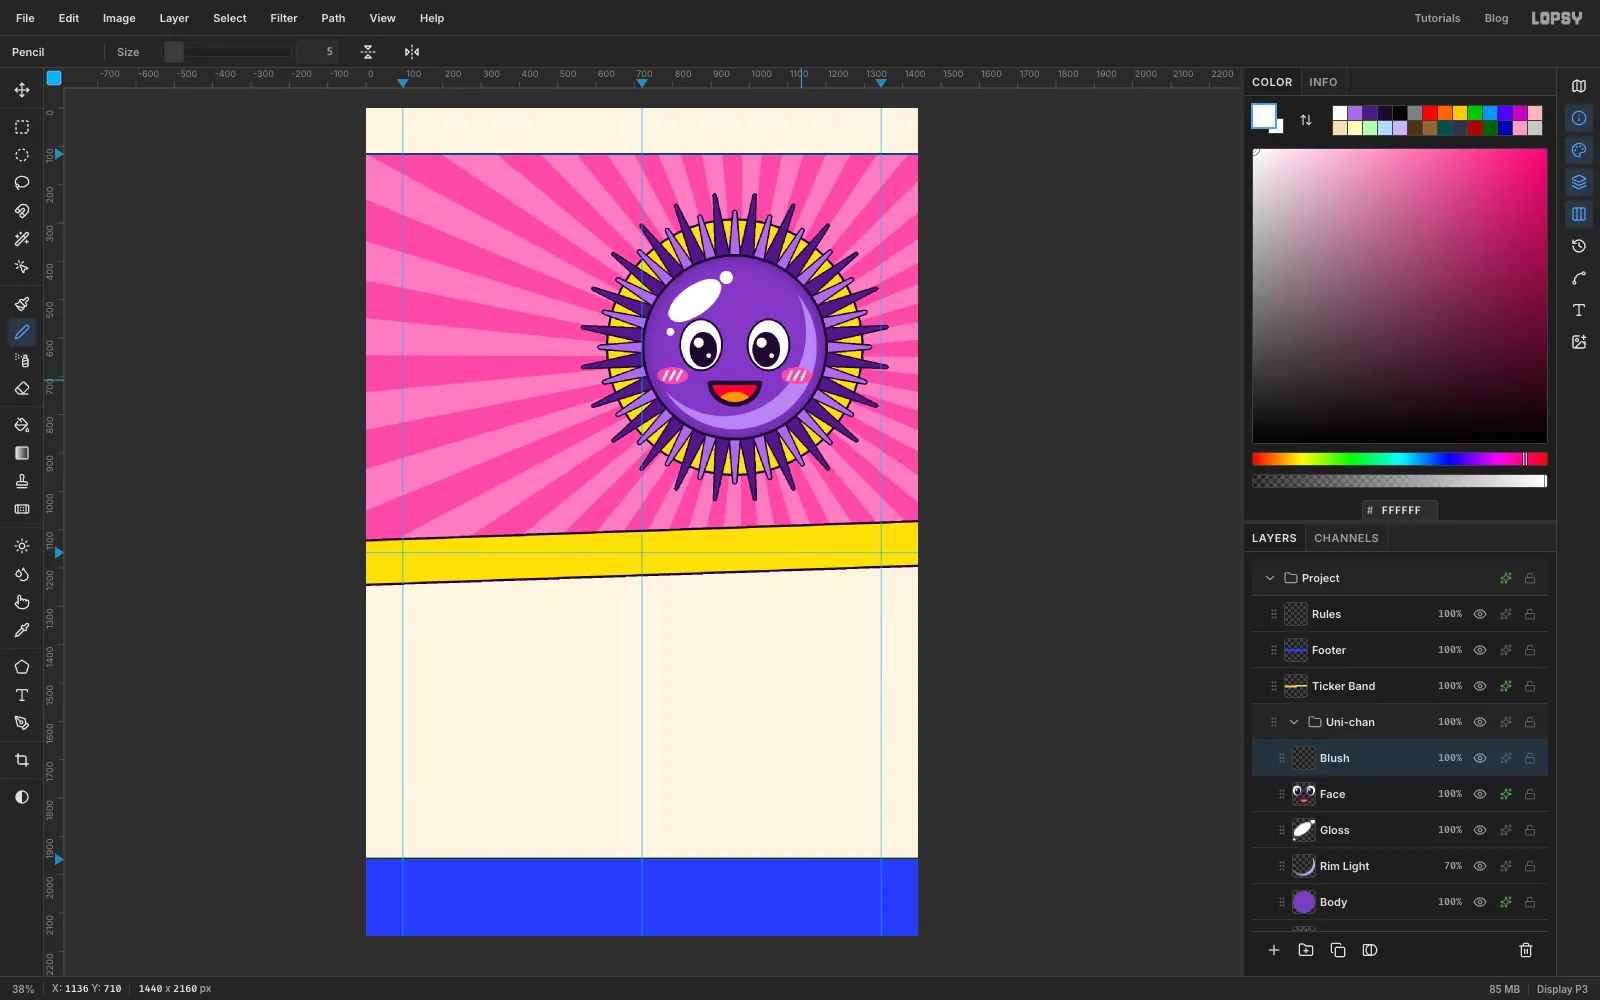
-
Move the whole mascot into place
Click the
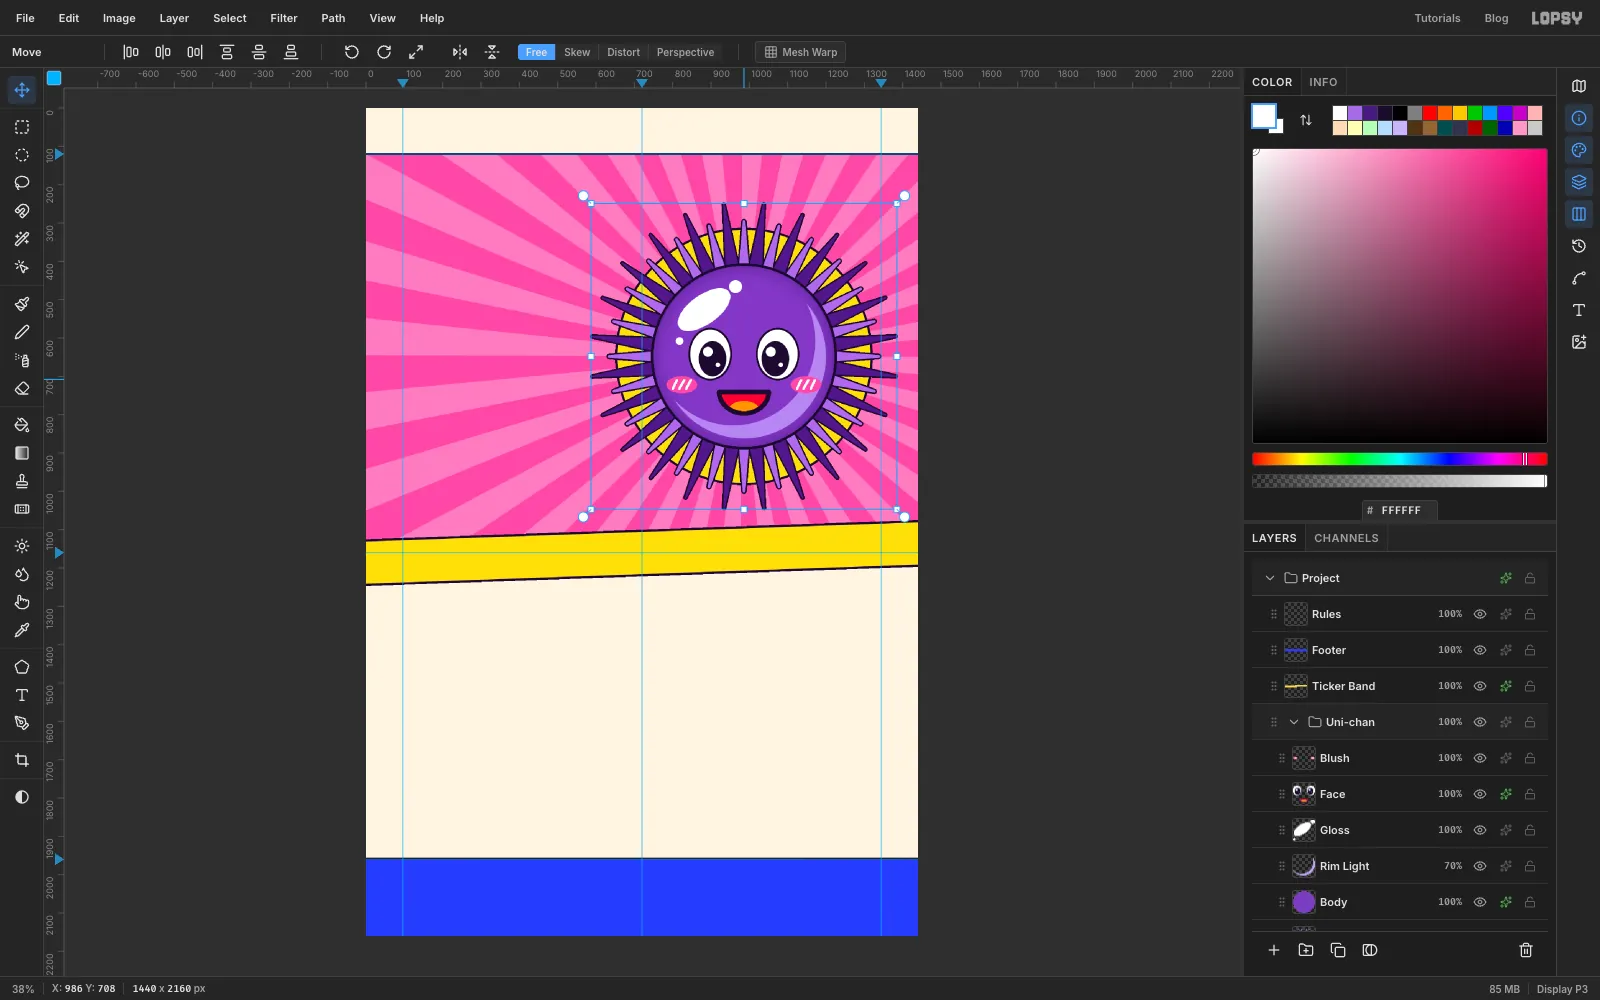
Uni-changroup row in the Layers panel, so the group itself is selected rather than one of its layers. Pick the Move tool (V) and drag the mascot 24 px right and 24 px down. Every layer in the group moves together, so the body's centre now sits at 986, 648, right where the sunburst rays meet.Press Cmd+Z and Cmd+Shift+Z once each if you want to see it jump back and forth. Nothing inside the group shifts out of line.
-
Paint the first smiling flower
The flowers sit on top of everything, so click the
Rulesrow, click New Group and name the groupFlowers. Click Add Layer and name itFlower A.Pick the Brush at Hardness
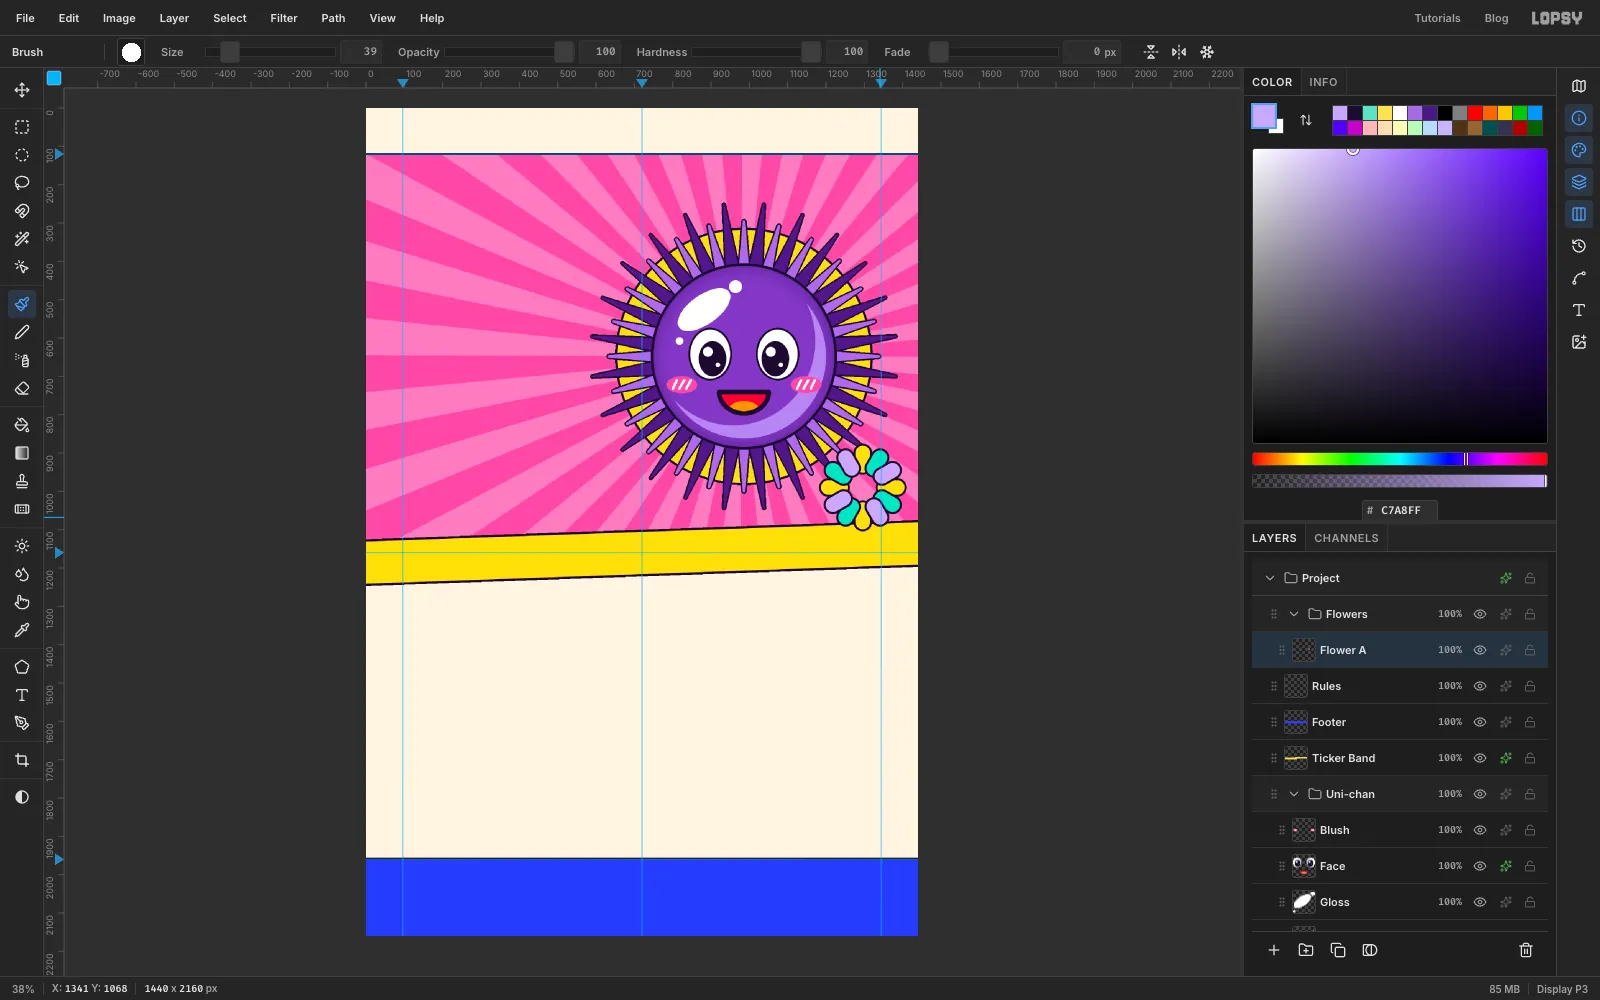
100, turn on Radial Symmetry with4segments, and Cmd-click at 1296, 990 to set the centre. Each petal is two strokes on the same line, an ink one and then a slightly thinner coloured one on top, which leaves an outline:- At Size
50in ink, click 1354, 990 and Shift-click 1386, 990. Then at Size39in yellow , click and Shift-click the same two points. - Repeat on the line from 1346, 1019 to 1374, 1035 in mint .
- Repeat on the line from 1325, 1040 to 1341, 1068 in lilac .
Each pass paints four petals 90° apart, so three passes give twelve. Each pass overlaps the previous one a little, so the petals look tucked under each other. Turn Radial Symmetry off when you're done.
- At Size
-
Give the flower a face
With the exact-corners dialog, fill an ink circle from
1246, 940to1346, 1040. Choose Select → Shrink…, shrink by6and fill with white. Press Cmd+D and fill two tiny ink ovals for eyes, from1275, 972to1287, 990and from1305, 972to1317, 990.The smile uses the same trick as Uni-chan's grin. Drag an elliptical marquee from 1274, 979 to 1318, 1017. Switch to the Rectangular Marquee, hold Shift and Alt and drag from 1266, 998 to 1326, 1038, which keeps the bottom half of the oval. Fill with ink, shrink by
3and fill with red. Press Cmd+D and add a Stroke of Width3in ink toFlower A.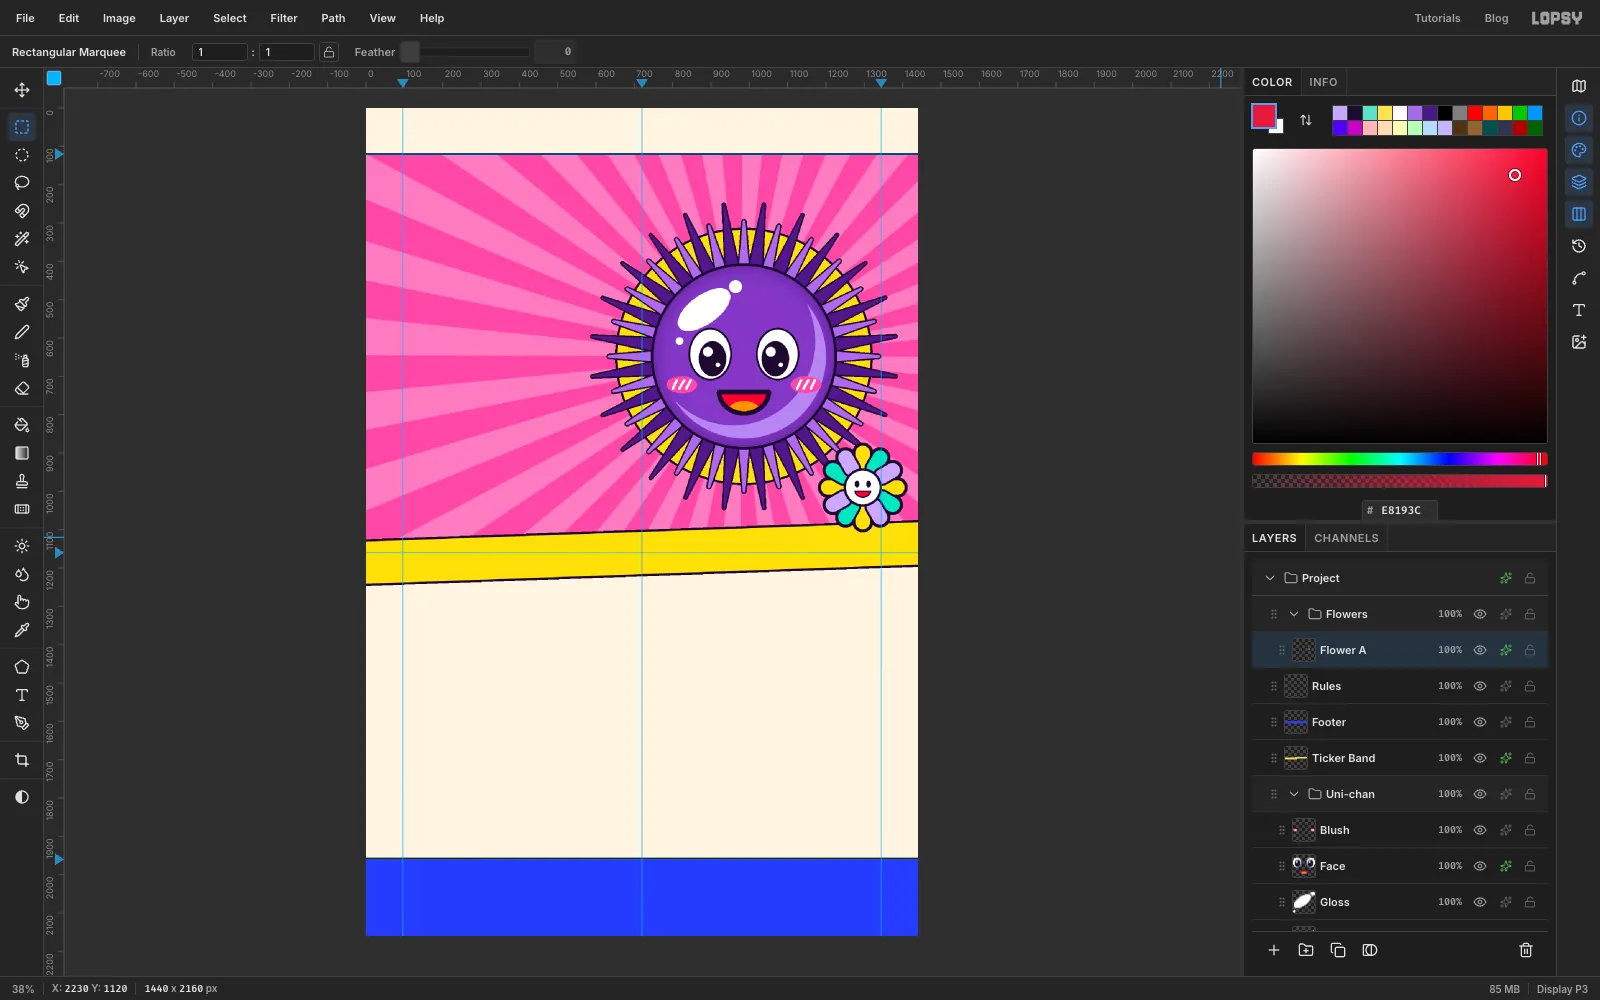
-
Paste and shrink a copy
With
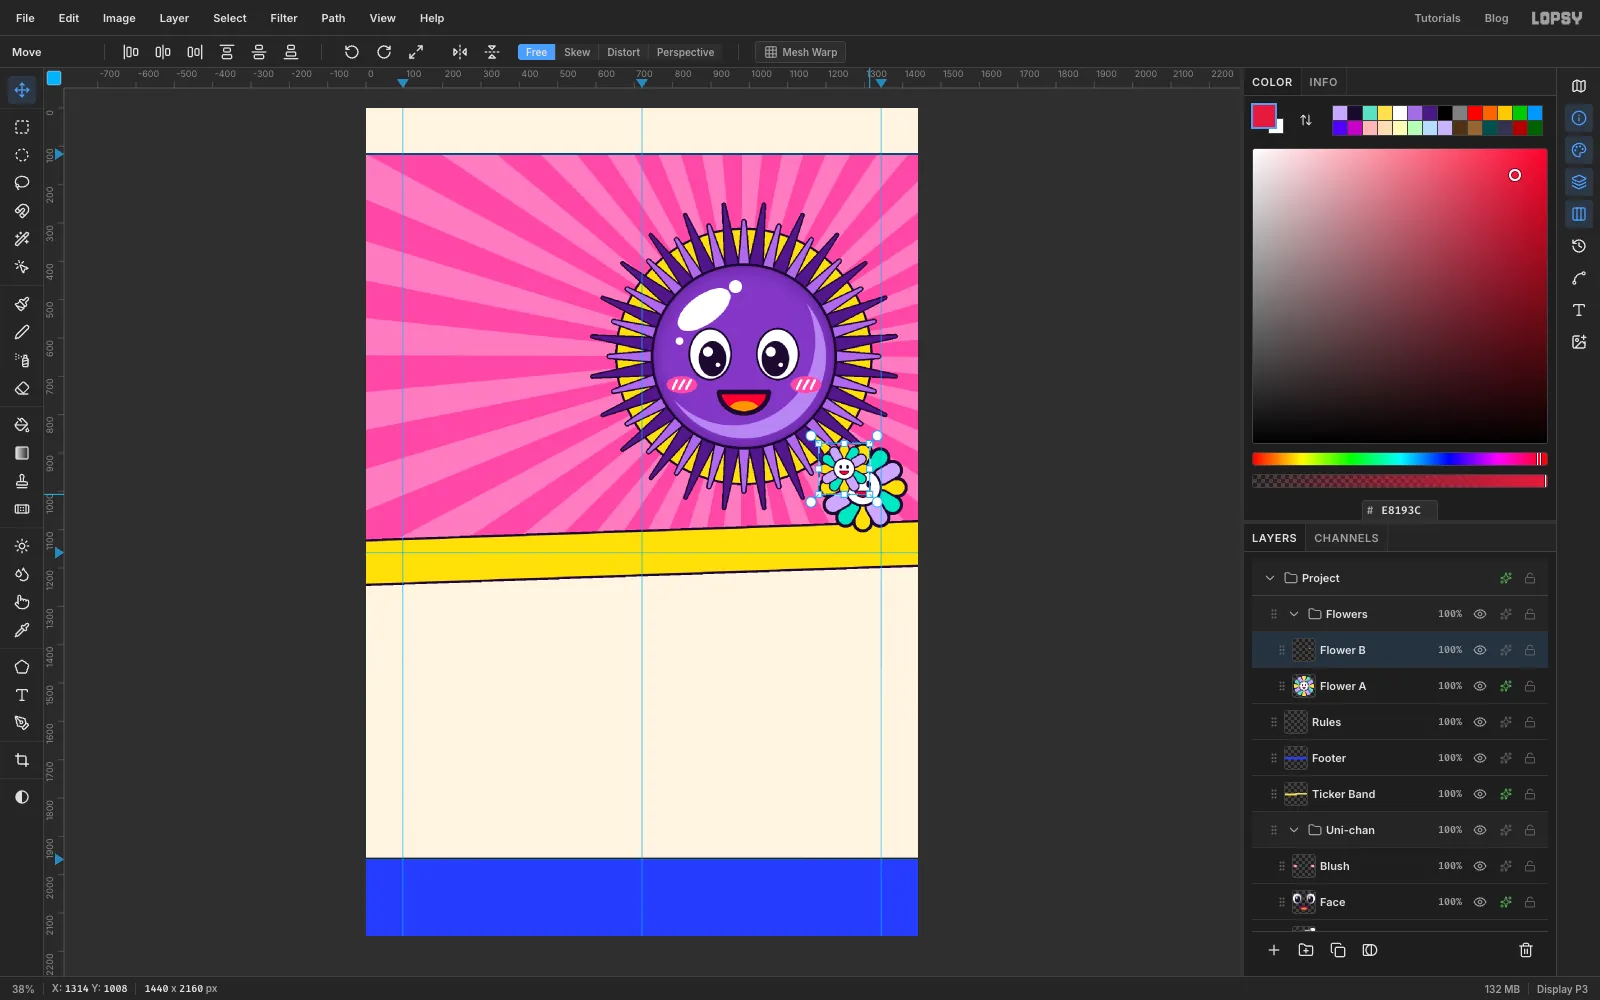
Flower Aselected, drag a marquee just around the flower and press Cmd+C, then Cmd+V. The copy is pasted in place on a new layer. Rename itFlower B.Pasting doesn't leave a selection, so draw the marquee around the flower again. Switch to the Move tool, hold Cmd and drag the bottom-right handle up and left until the box is a bit over half its size (about 58%). Holding Cmd keeps the proportions. Press Enter, then Cmd+D.
-
Move and tilt the copy
With the Move tool, drag the small flower to the top right of the hero, so it's centred near 1332, 236. Draw a marquee around it again, then drag the round rotate handle just outside the top-right corner to turn it about 20° clockwise. Press Enter and Cmd+D. Give
Flower Bits own Stroke of Width3in ink. Effects don't come across in a paste.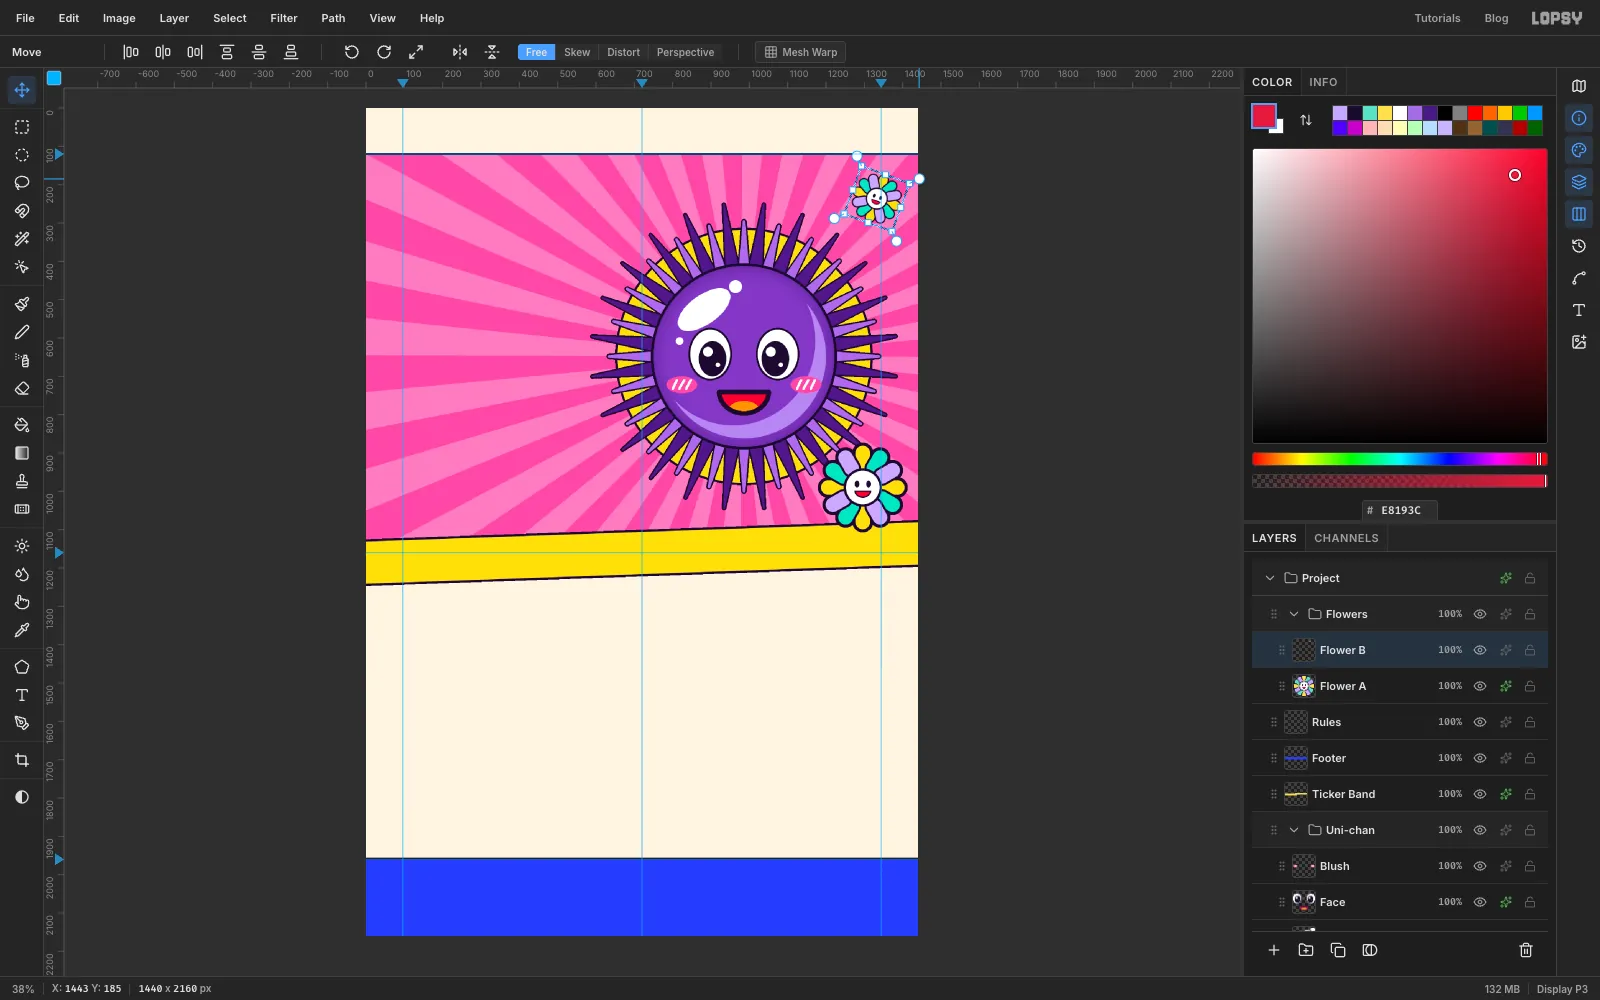
-
Scatter four more flowers
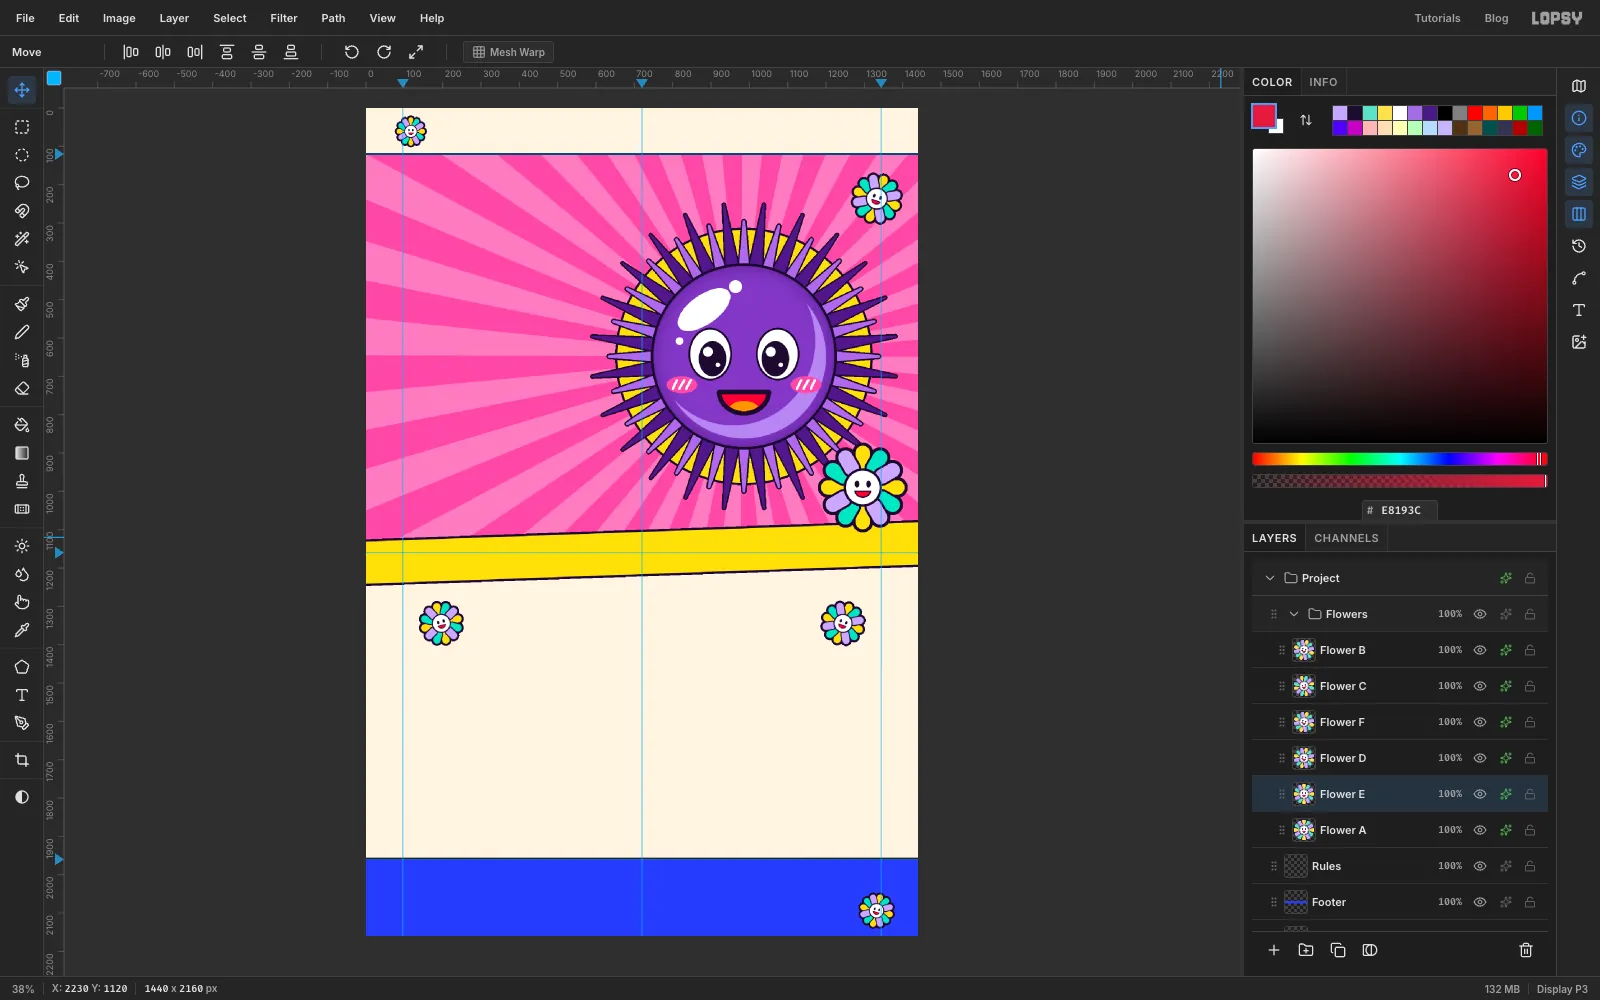
Repeat the copy, paste, scale, move and rotate steps four more times, always copying from
Flower A, and give each copy its own Stroke of3in ink:Flower Cat 50%, turned about −15°, centred near 196, 1344 (left of where the menu heading will go)Flower Dat 40%, turned about 15°, centred near 1330, 2094 in the footerFlower Eat 34%, not rotated, centred on 116, 60 in the nav bar, where it becomes the logo markFlower Fat 50%, turned about 20°, centred near 1244, 1344 (right of the menu heading)
Scale each copy before you move it towards the bottom or an edge. If a pasted copy hangs off the canvas when you press Enter, the part outside is cut off.
-
Set the headline
Click the
Ticker Bandrow, a plain raster layer, before you make any type. If a text layer is selected, changing the font and size restyles that layer instead.Pick the Text tool (T), choose Titan One at Size
280and set the colour to . Click at about 96, 222 and typeUNI, then press Tab to commit. Rename the layerHeadline UNI. ClickTicker Bandagain, set the size to146, click at about 96, 146 and typeULTRA. Rename itHeadline ULTRA. UNI goes first because the big word's text box is tall: ULTRA's click point sits above it, so it can't land inside UNI's box by accident.Both words come out about 485 px wide, so they stack as a solid block. With the Move tool and the arrow keys (Shift moves 10 px), line up the left edge of both words with the 96 guide, put the top of
ULTRA's letters at y 200 and the top ofUNIat y 330.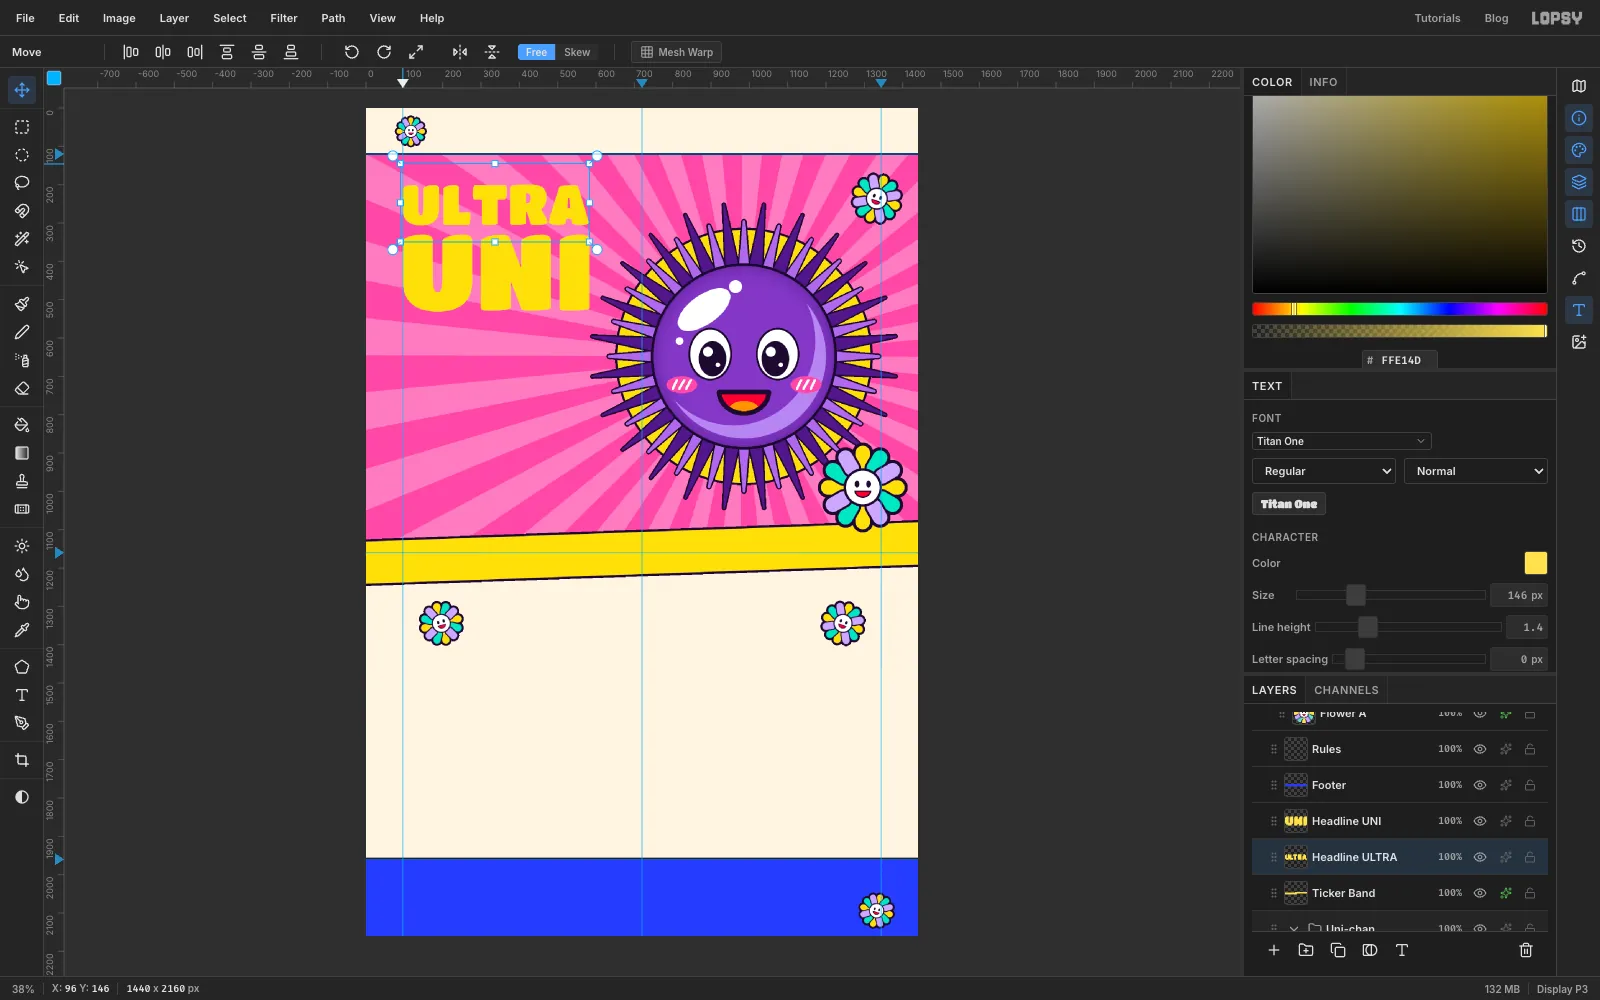
-
Outline the headline and drop a hard shadow
Click
Headline UNIand open its effects drawer. Add a Stroke of Width9in ink. Then tick Drop Shadow and set Offset X14, Offset Y14, Blur0, Spread0, Opacity100and the colour to cobalt . With zero blur the shadow becomes a solid offset block, like a sticker sitting on the page. GiveHeadline ULTRAthe same two effects.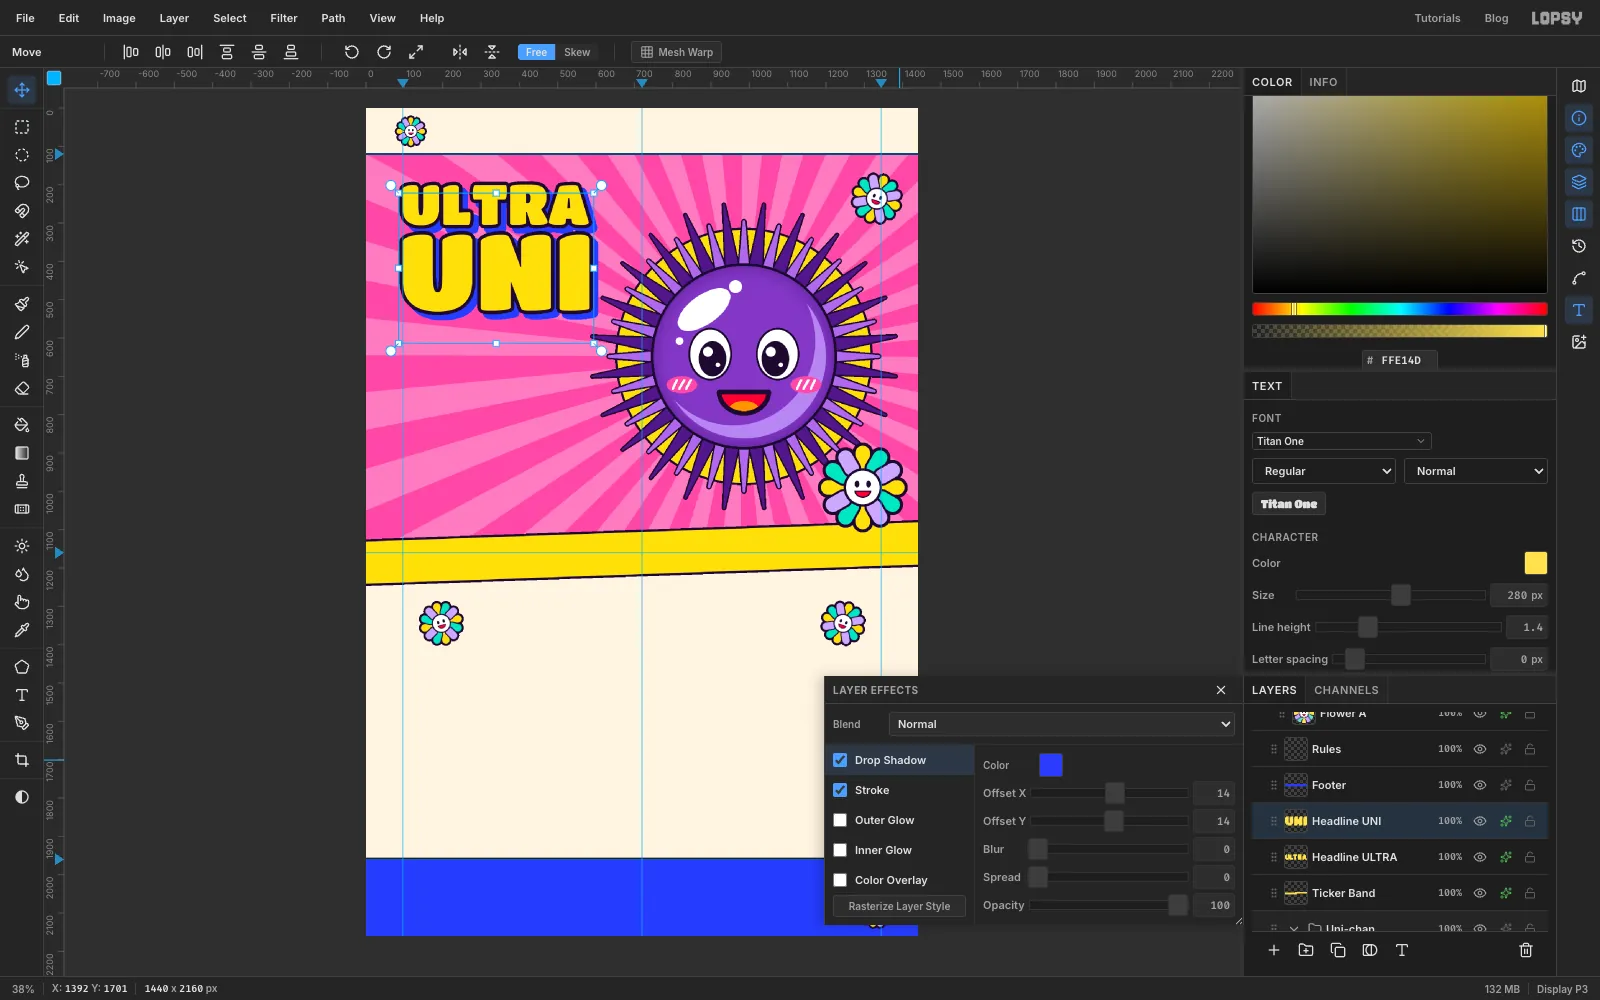
-
Make the ウニ sticker
Click
Headline ULTRA, then Add Layer, and name itSticker Disc. Pick the Shape tool (U) and set Shape to Ellipse and Output to Pixels. Set the fill swatch to cobalt , the stroke swatch to white with Width6. Shapes draw from the centre, so press at 630, 206 and drag to about 698, 274 for a circle 136 px across that overlaps the top corner of the A.Give
Sticker Disca Stroke effect of Width6in ink, so it gets an ink ring outside the white one, like every other outline on the page.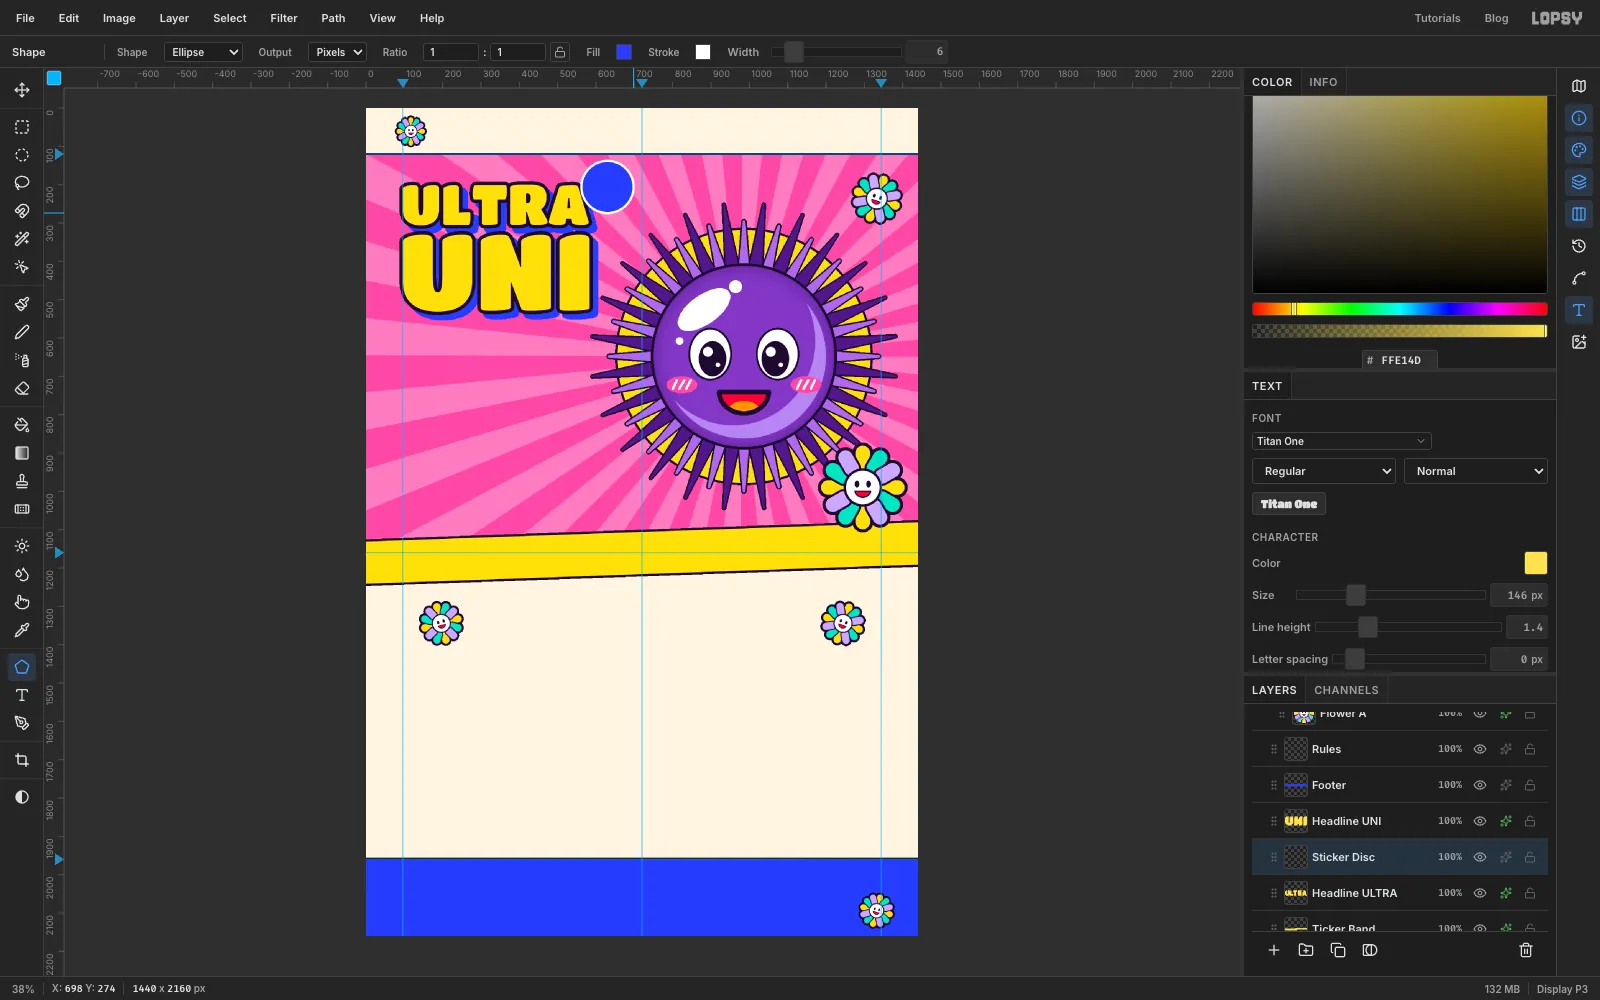
-
Rotate the katakana
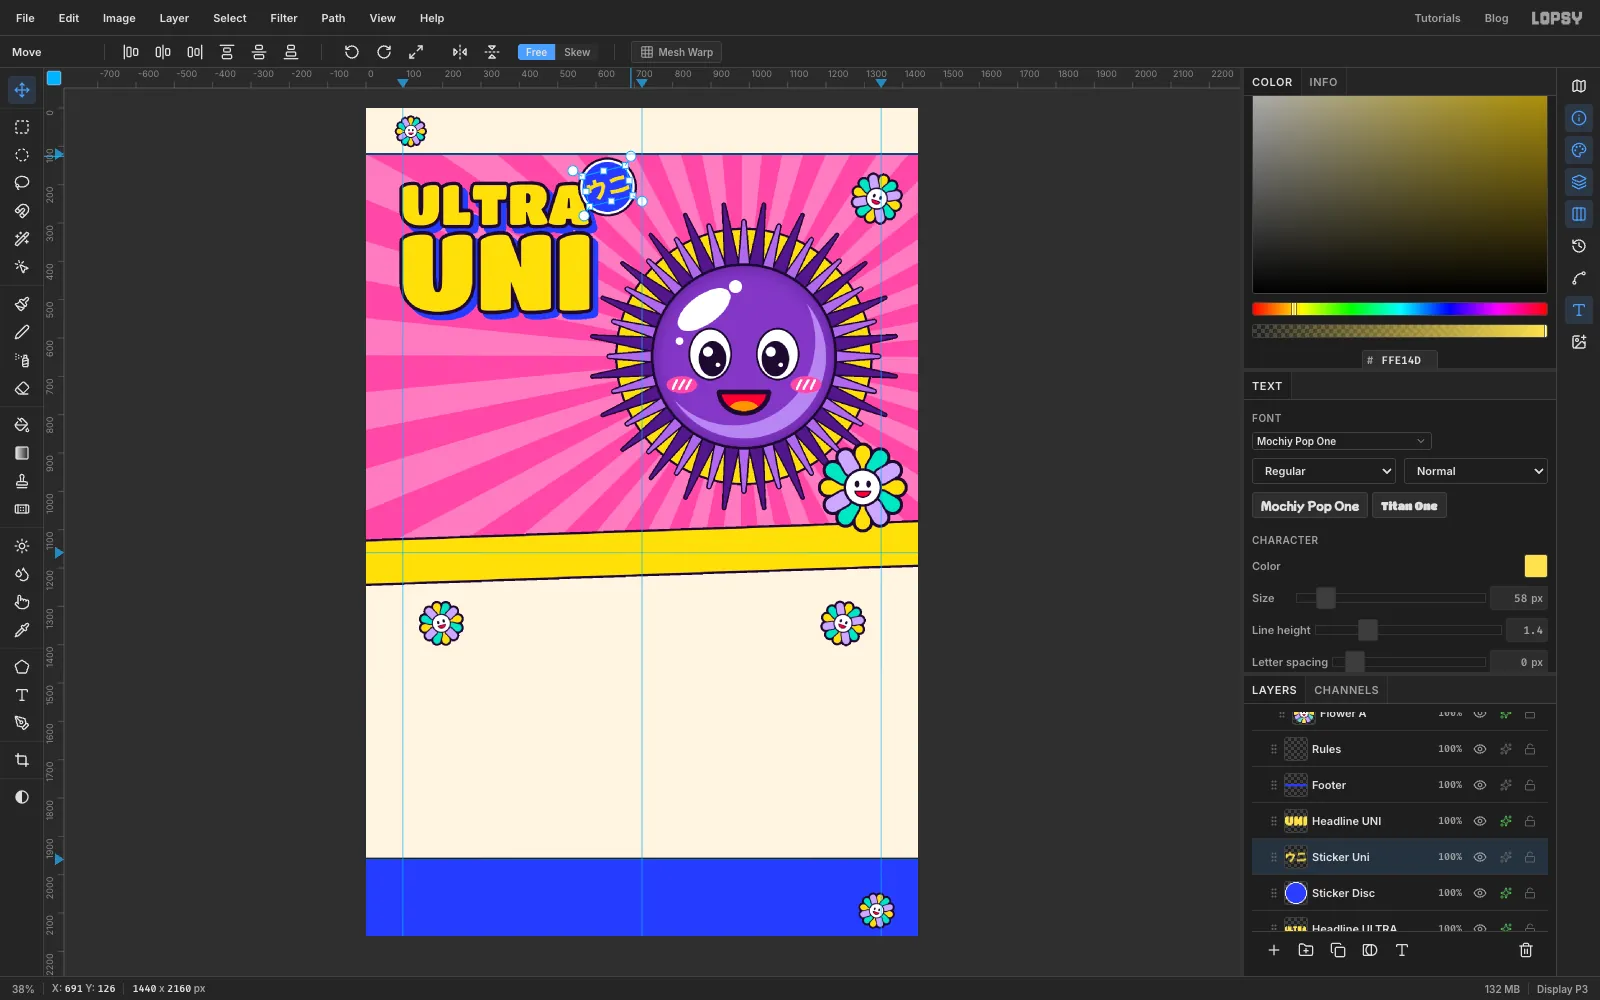
With
Sticker Discselected, pick the Text tool, choose Mochiy Pop One at Size58, Align centre, colour , click in the disc and typeウニ("uni" in katakana). If you don't have a Japanese keyboard set up, copy it from this page and paste it with Cmd+V. Press Tab and rename the layerSticker Uni.Switch to the Move tool and nudge the letters with the arrow keys until they're centred in the disc, with equal space above and below. Then drag the rotate handle outside the text box's top-right corner about 14° anticlockwise and press Enter. The text stays editable after rotating.
-
Calm the rays behind the copy
Small text on stripes is hard to read. Click
Sunburst, pick the Eraser (E) and set Size260and Opacity55. In one stroke without letting go, zigzag across the left of the hero from about y 600 to y 960, staying left of about x 560. The rays fade there, but don't disappear, so the hero still feels like one piece.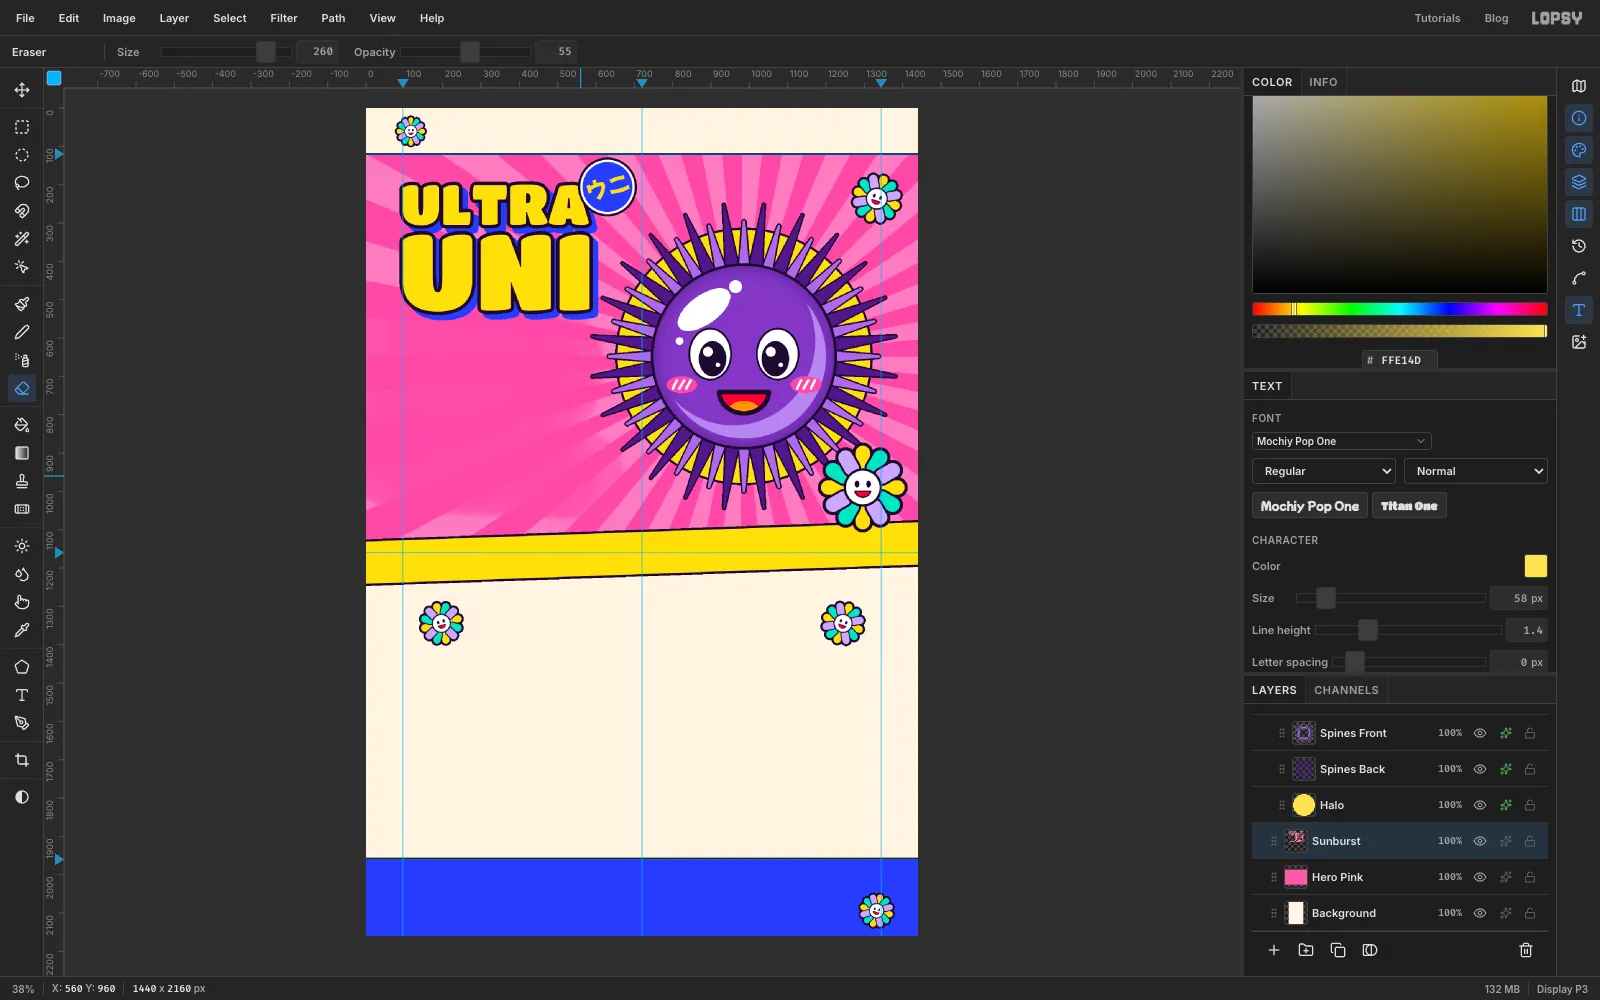
-
Write the copy and add the buttons
Click
Ticker Band. With the Text tool in Lilita One at Size50, ink, click in empty space at about 96, 640 and typeSea-urchin omakase,, press Return and typeserved loud.. Don't click higher up: a click insideUNI's text box edits the headline instead. Press Tab, rename the layerSubhead, and in the Text panel set Line height to1.05. Move the block so its left edge sits on the 96 guide and its top at y 594.Click
Ticker Bandagain. In Space Mono, Bold, Size24, click at about 96, 780 and typeTwelve seats. One counter./Uni flown in from Hokkaido/every morning.on three lines. Rename itBody Copy, set Line height to1.3, and move it so its left edge is on the 96 guide and its top at y 736.For each button, click
Ticker Band, then Add Layer, name itPill BookorPill Menu. With the Shape tool on Rectangle, fill yellow for the first and cream for the second, stroke ink at Width6, Corner Radius38. Drag from the centre (242, 936 for the first, 564, 936 for the second) out by 146 px across and 38 px down, giving pills 292 × 76 px. Give each pill a Drop Shadow of 8, 8, Blur0, Opacity100in ink.With the pill layer selected, use Lilita One at Size
34, Align centre, ink, Letter spacing1, and typeBOOK A SEATandSEE THE MENU. Rename themLabel BookandLabel Menu. Move each label so it's centred on its pill, the same distance from the top and bottom edges.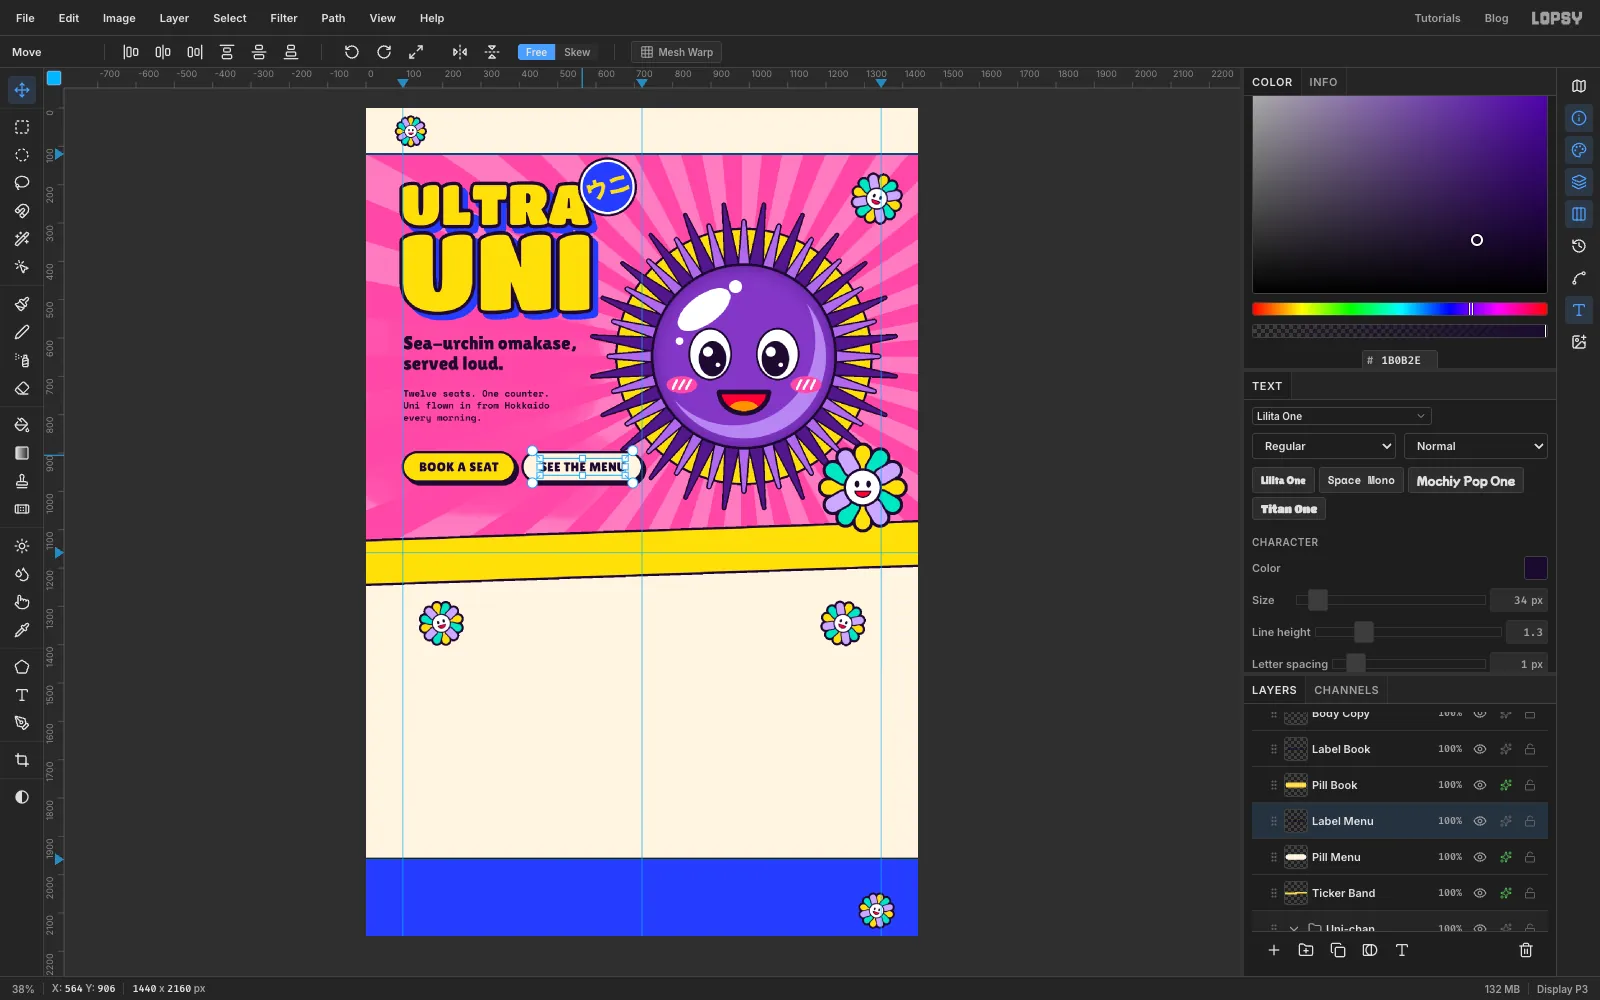
-
Put a shine on the headline
Click
Headline UNI, then Add Layer, and name itHeadline Gloss. Cmd-click theHeadline ULTRAthumbnail to select its letters, choose Select → Shrink… and shrink by10, so the shine stays inside the outline.Pick the Rectangular Marquee, hold Shift and Alt and drag a rectangle across the whole word in a thin band near the top of the letters, from y 215 to y 225. Only the parts of the letters inside the band stay selected. Fill with white and press Cmd+D. Do the same for
Headline UNIwith a band from y 350 to y 366. Set the layer's opacity to85%.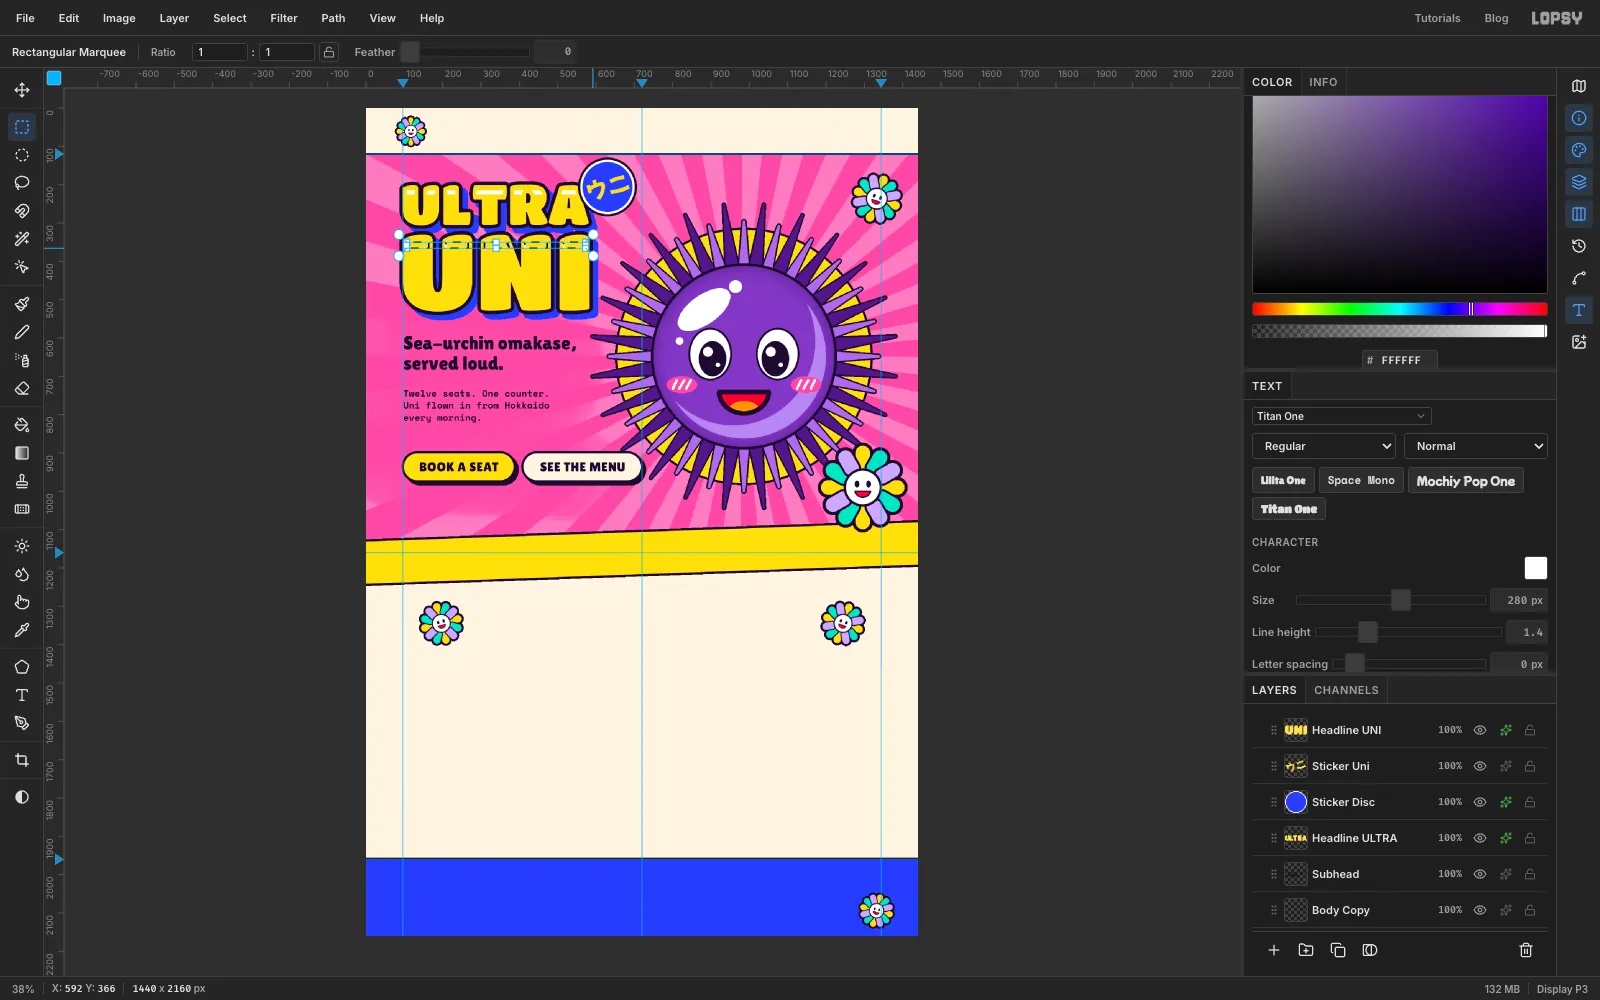
-
Add shine to the yellow button
Click
Label Book, the top layer of the two buttons, then Add Layer, and name itButton Gloss. With the Elliptical Marquee, drag a thin streak inside the top left of the yellow pill, from 124, 906 to 192, 916. Fill with white, press Cmd+D and set the layer to80%. Leave the cream button plain: white on cream wouldn't show, and one shiny button tells people which one to press.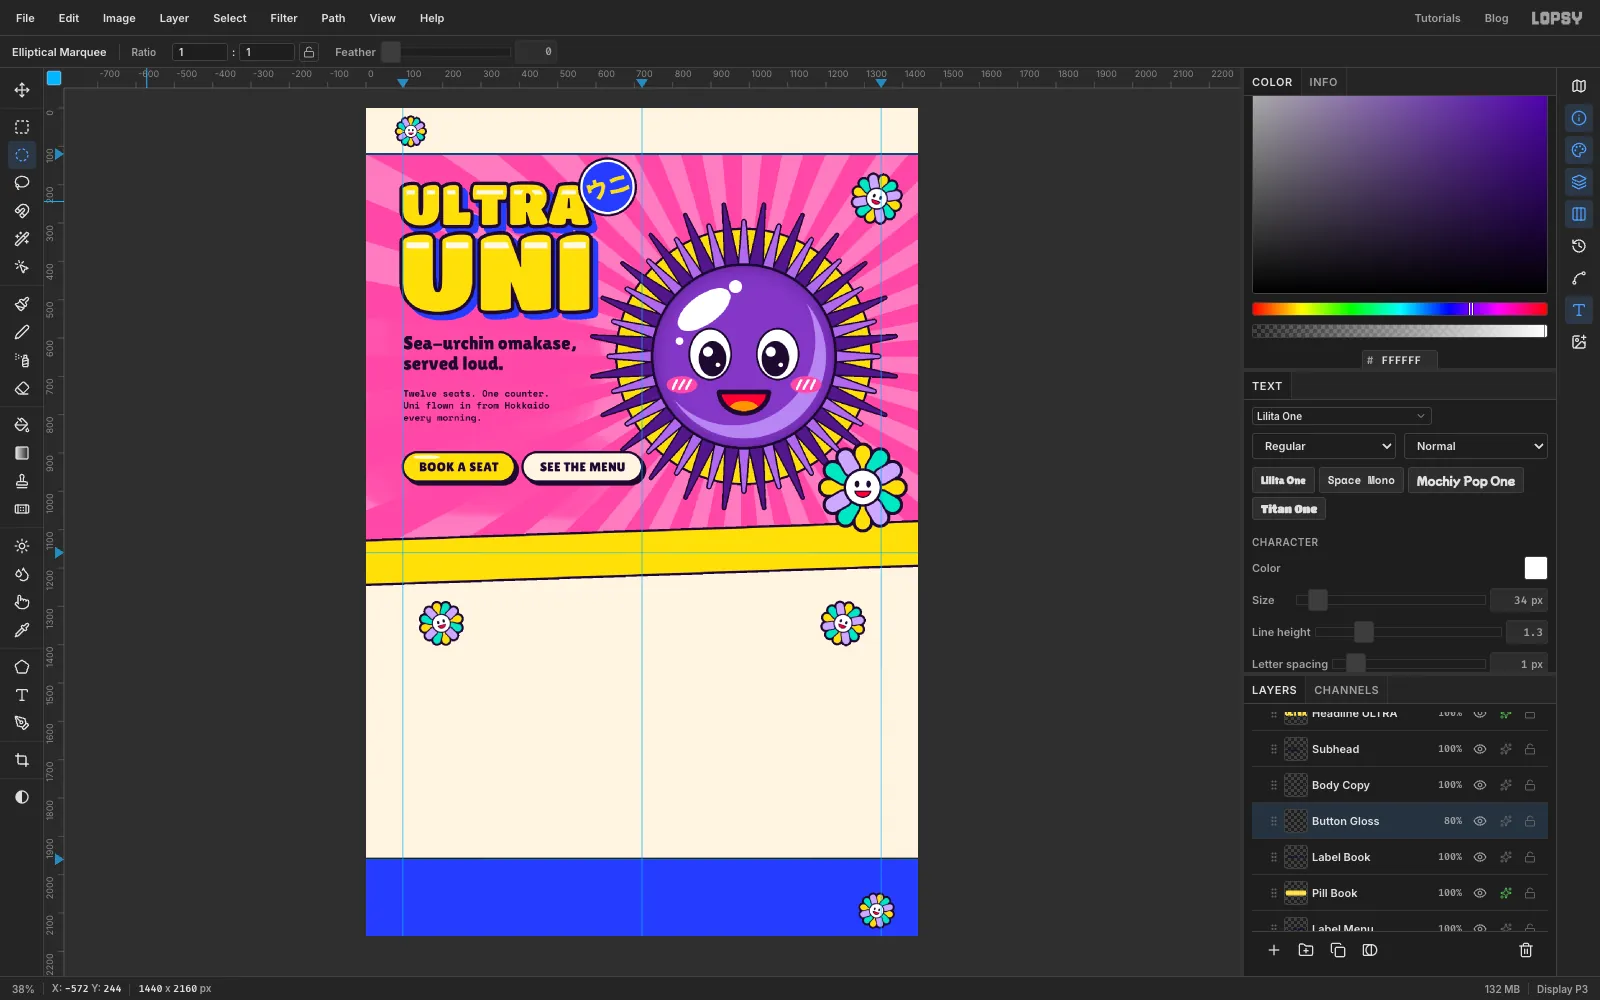
-
Run the ticker text along the band
Click
Ticker Band. In Lilita One at Size46, ink, Letter spacing2, click near the left end of the band and type:HOKKAIDO • SANTA BARBARA • MAINE • OPEN ’TIL 2AM • HOKKAIDO • SANTA BARBARA • MAINEIt's much longer than the page, which is what you want. A ticker should look like it's sliding past. Rename the layer
Ticker Text. Move the line so it starts about 40 px off the left edge and sits in the middle of the band. Then drag the text box's rotate handle about 2° anticlockwise so the letters follow the band's slope, and press Enter.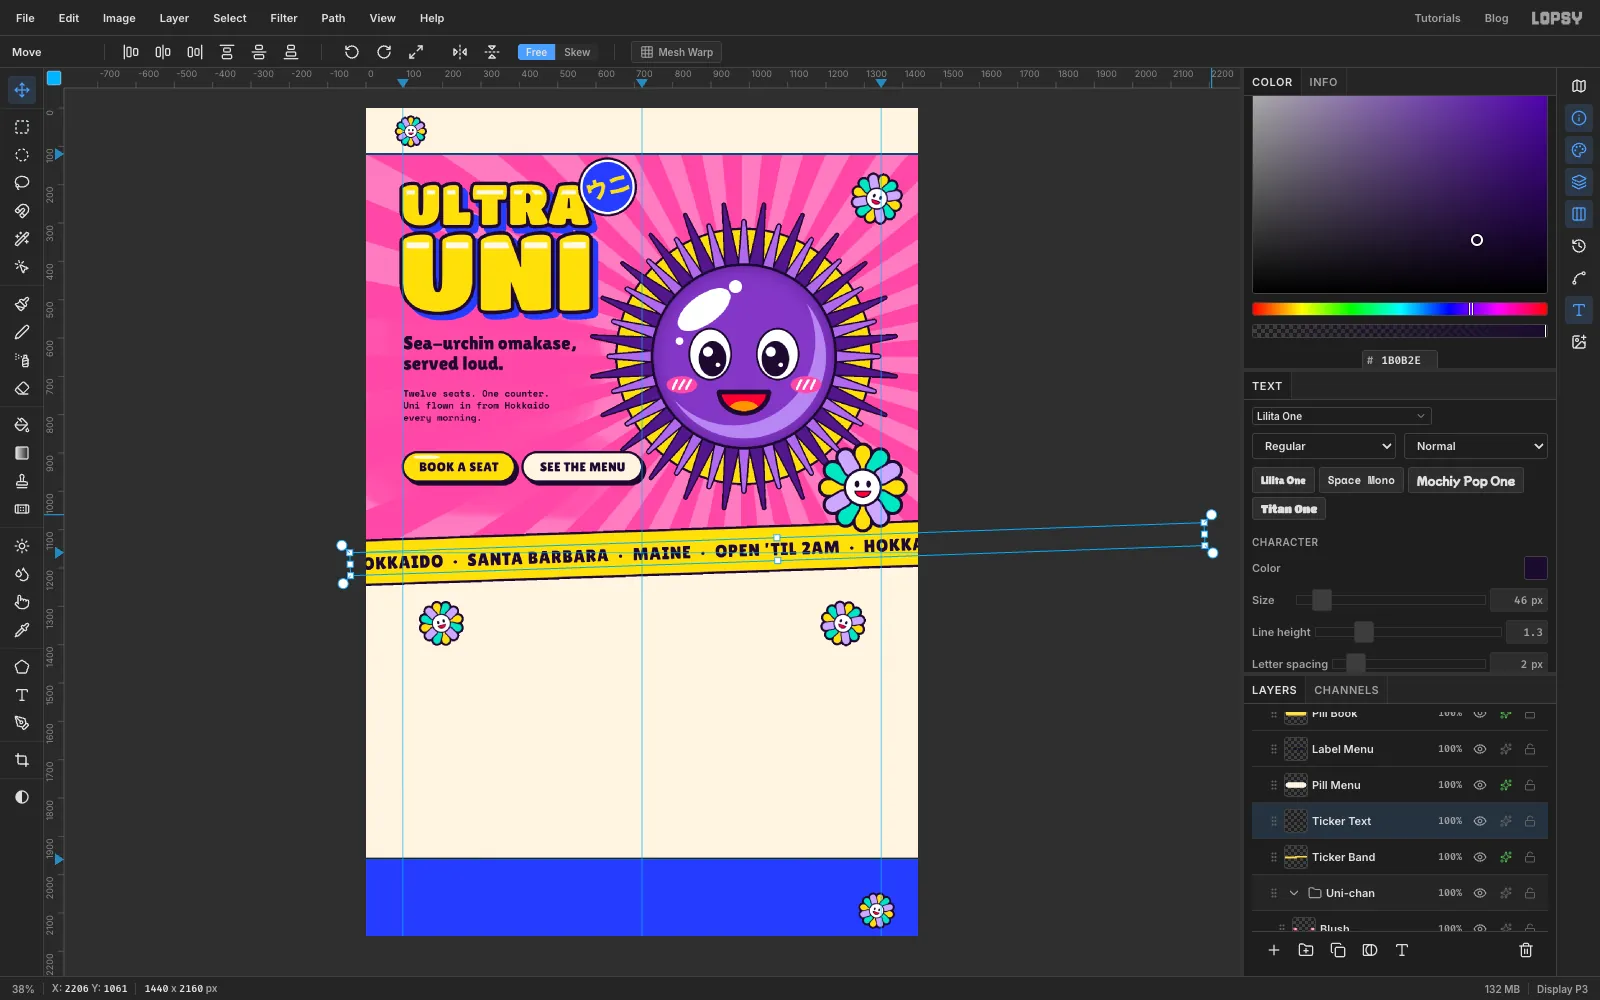
-
Start the menu section
Click the
Footerrow, then New Group, and name the groupMenu. Click Add Layer and name itMenu Anchor. It stays empty. You'll click it before making each piece of text, so the type always lands in the group.With
Menu Anchorselected, set Titan One at Size120, ink, Align centre, Letter spacing2, and typeTHE MENU. Rename itMenu Headingand centre it on the 720 guide with its top at y 1300, and give it a Drop Shadow of 8, 8, Blur0in hot pink . ClickMenu Anchoragain and add a centred tagline in Space Mono Bold at24:Three ways to get spiky. Market price, never boring.with its top at y 1440.Now make a pattern tile. Click Add Layer and name it
Dot Tile. In the exact-corners dialog, fill a circle from 10, 10 to 18, 18 with hot pink . Draw a marquee from 0, 0 to 28, 28 and choose Edit → Define Pattern. Press Cmd+D and delete theDot Tilelayer with the bin button. The pattern is saved, so you don't need the layer any more.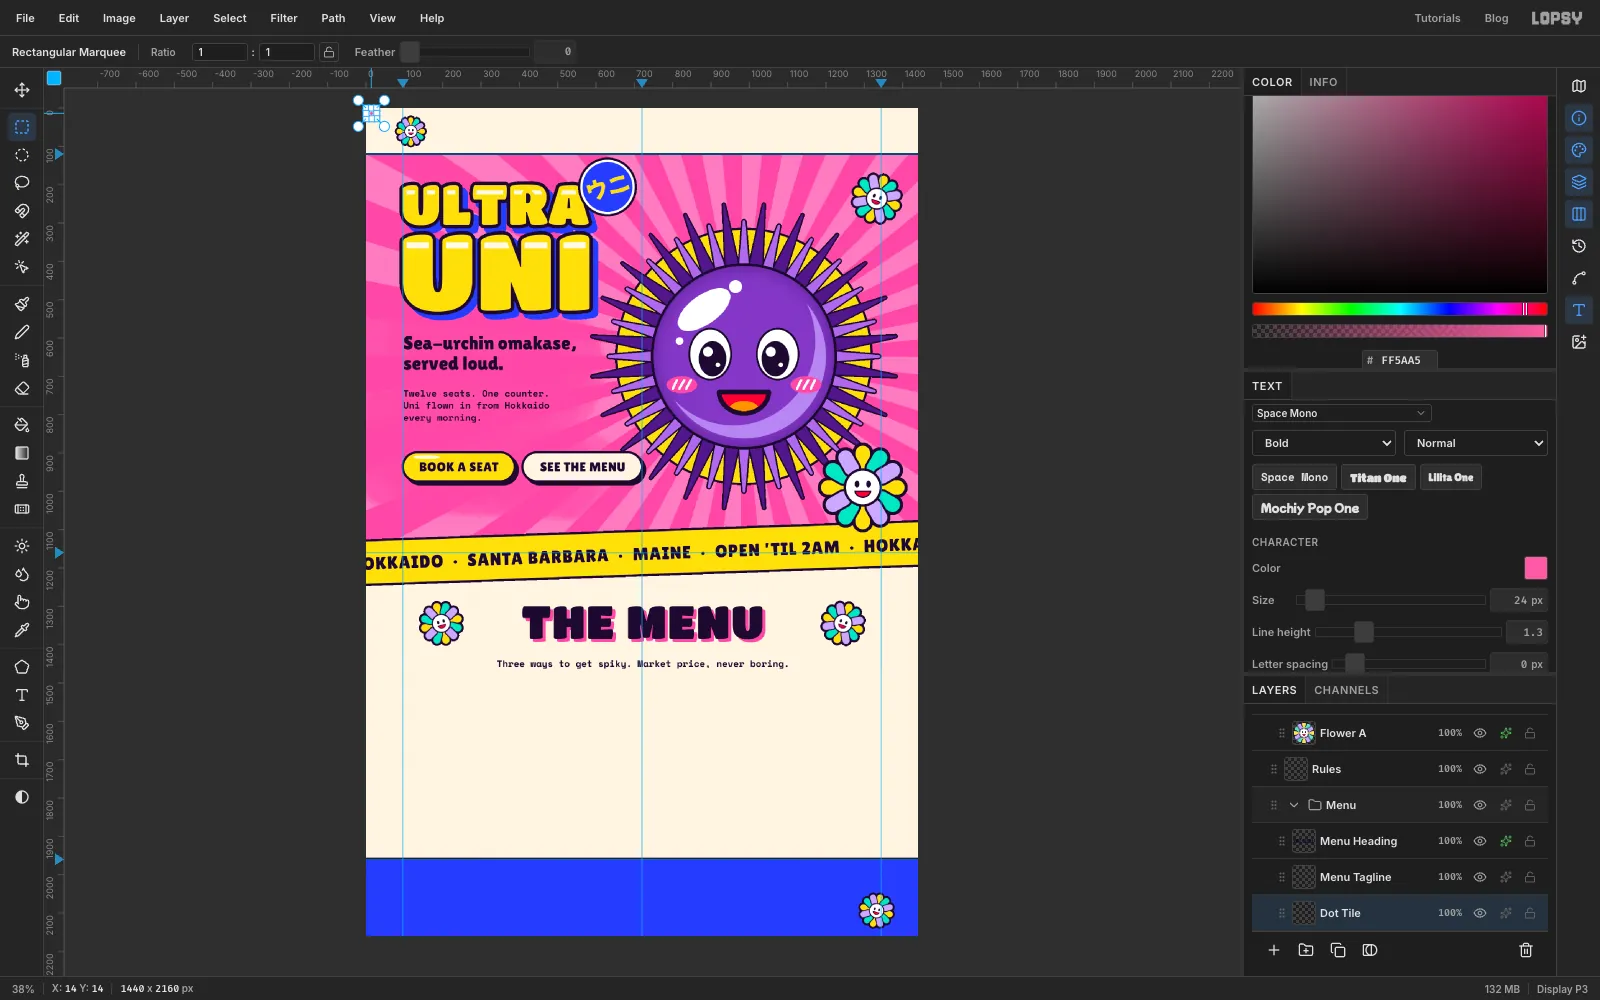
-
Pour the dot pattern
Click
Menu Anchor, then Add Layer, and name itMenu Dots. With the Lasso, select the cream area between the ticker band and the footer, running off both sides of the page. Follow the band's bottom edge along the top, and run the bottom edge just above the 1960 guide.Choose Edit → Fill with Pattern…, click your dot pattern and set Row Stagger to
50, so every other row shifts half a tile, like a halftone screen. Click Apply, press Cmd+D and set the layer's opacity to35%. It gives the cream some texture without fighting the cards.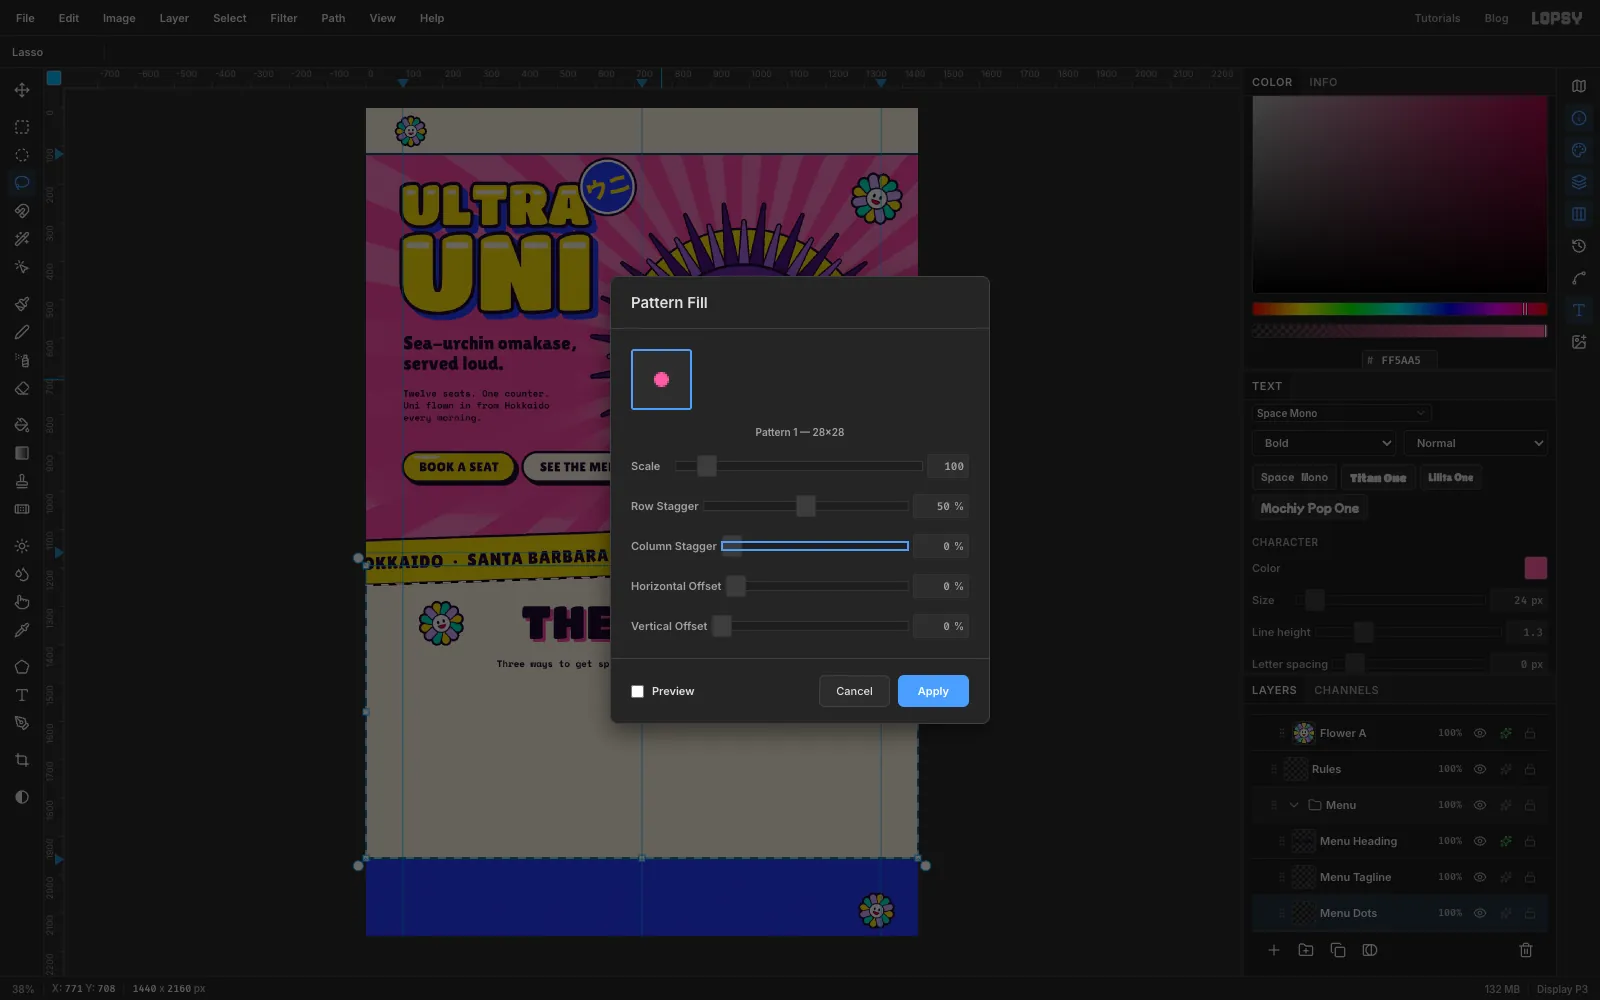
-
Draw the three cards
For each card, click
Menu Dots, then Add Layer, and name itCard Gunkan,Card Hand RollorCard Toast. Use the Shape tool on Rectangle, stroke ink at Width6, Corner Radius36, and fill mint , yellow and lilac .The cards are 384 × 390 px with 48 px gutters, centred on 288, 720 and 1152 at y 1705. Drag each from its centre 192 px across and 195 px down. The outer cards' edges snap to the 96 and 1344 margin guides, which keeps the grid honest. Give each card a Drop Shadow of 12, 12, Blur
0, Opacity100in ink.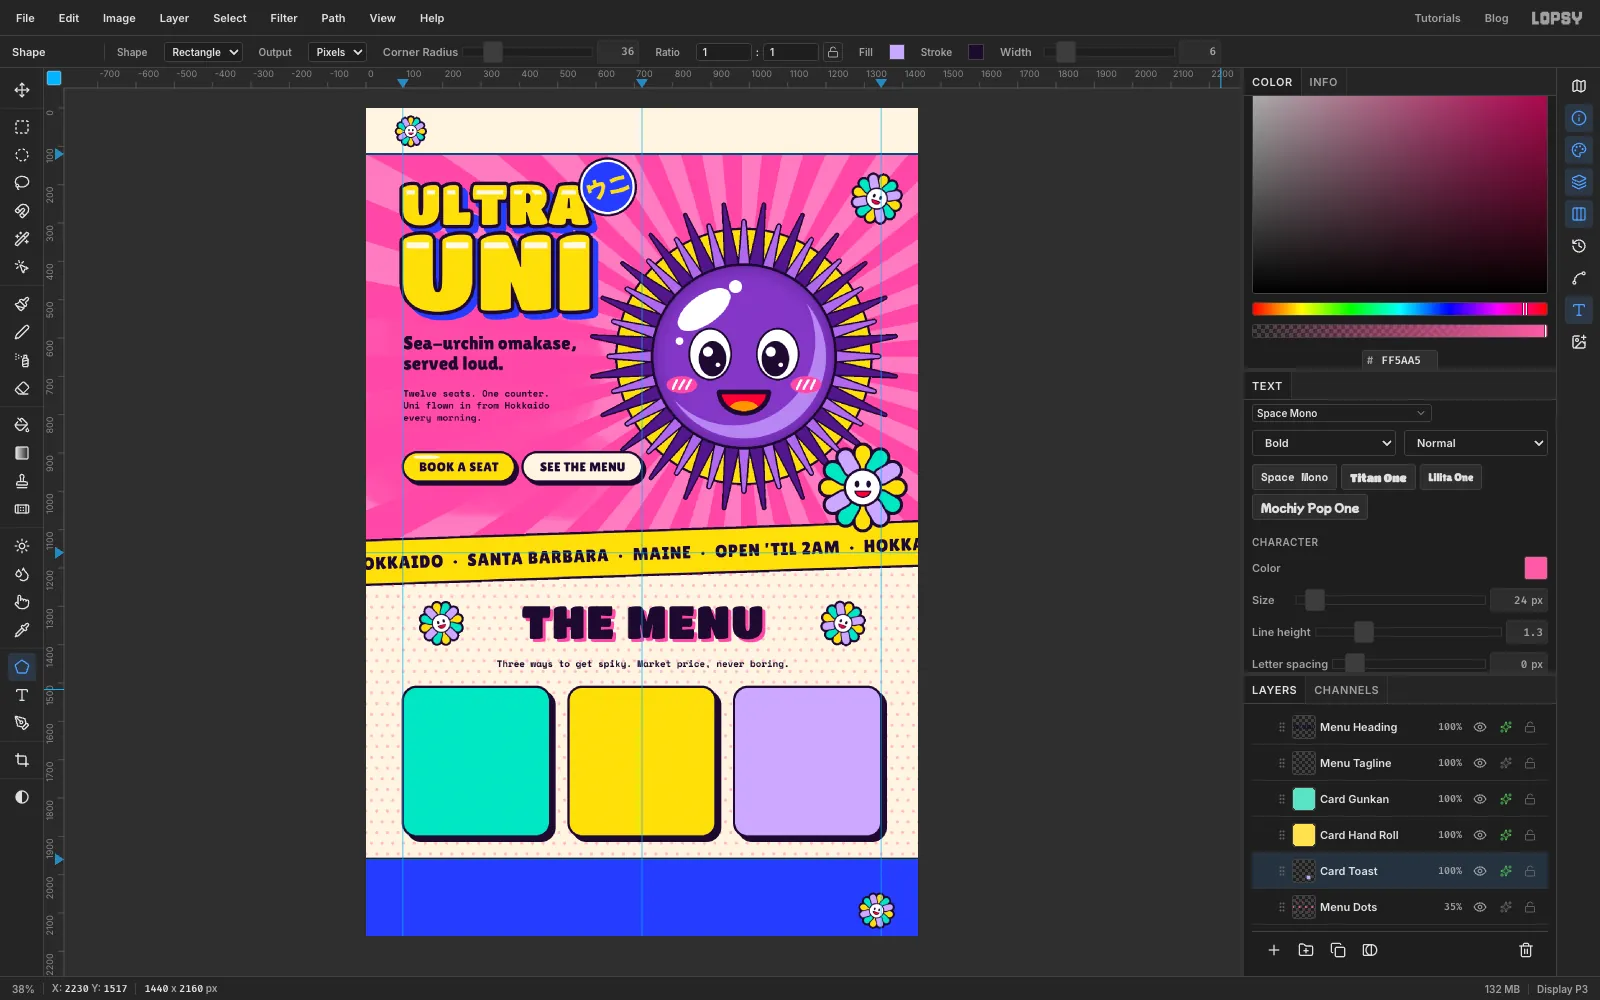
-
Draw the gunkan
Click
Card Gunkan, then Add Layer, and name itGunkan Nori. With the Shape tool, draw a rounded rectangle in nori green with an ink stroke of6and Corner Radius28, centred on 288, 1668, 216 × 104 px.Click Add Layer and name it
Gunkan Uni. Uni comes in soft tongue-shaped lobes. With the Lasso, draw four ovals about 80 × 60 px side by side along the top of the nori, centred around y 1600–1612, holding Shift from the second one on to add them. Tilt the outer two outwards a little. Fill with orange and press Cmd+D. Then, with the Elliptical Marquee and Shift, drag a small oval about 14 × 10 px near the top left of each lobe and fill them white. Press Cmd+D and give the layer a Stroke of6in ink.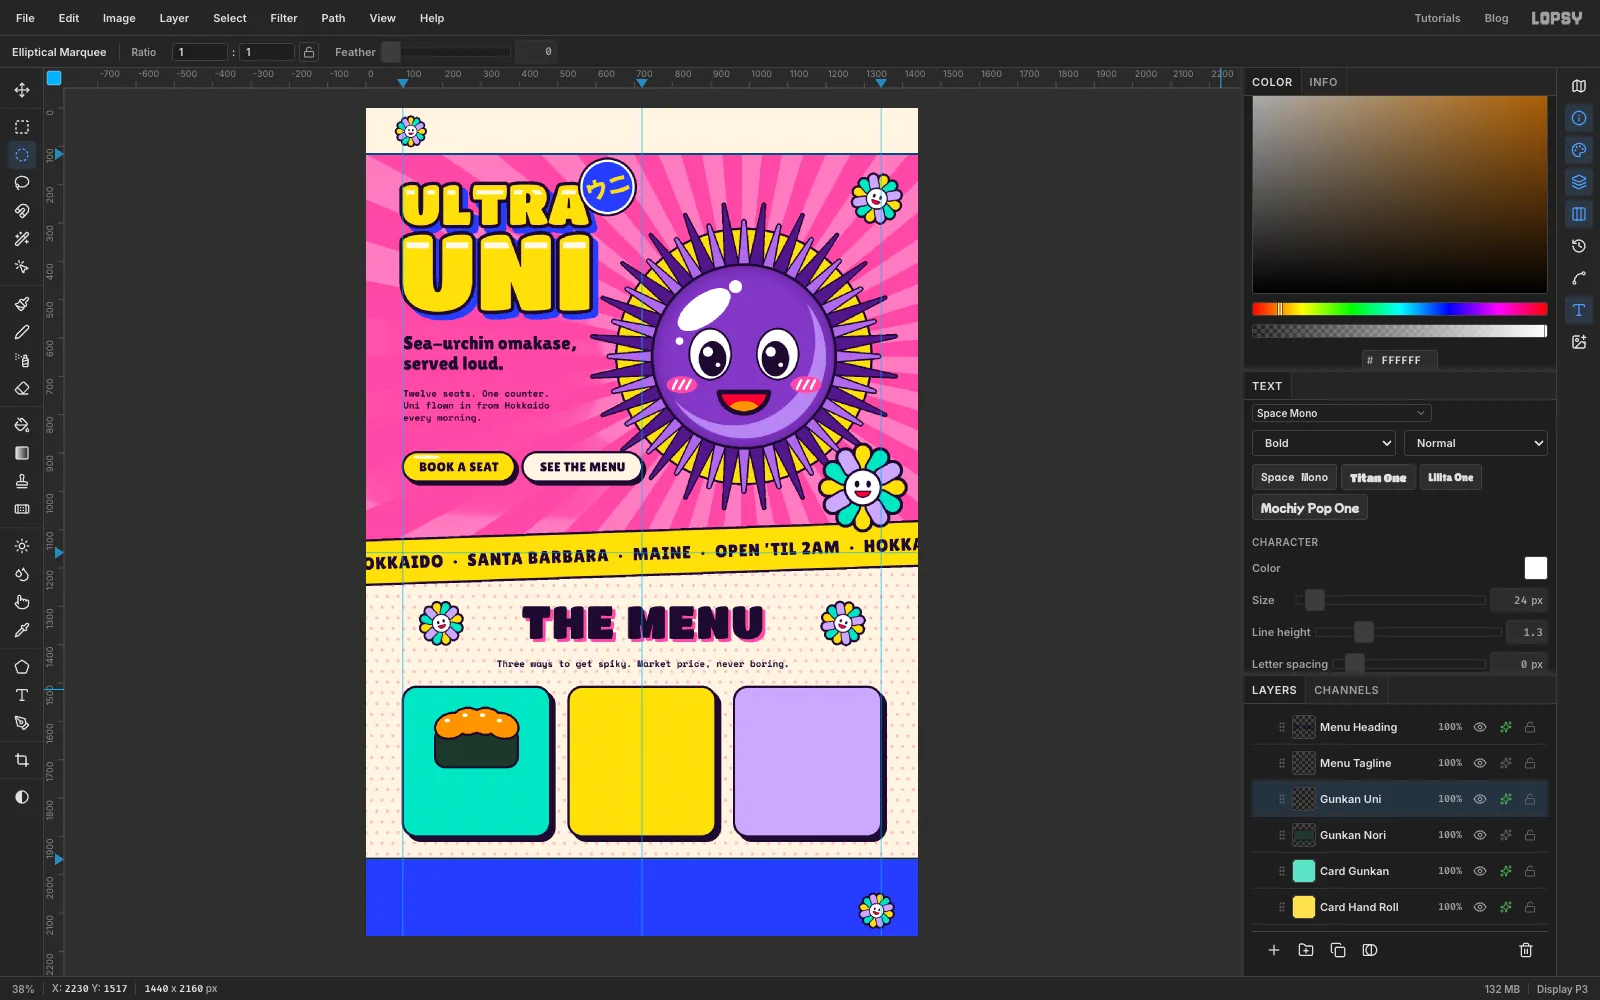
-
Draw the hand roll and start the toast
Click
Card Hand Roll, then Add Layer, and name itRoll Cone. With the Lasso, draw a cone about 184 px wide at y 1604, centred on the card, narrowing to a blunt tip about 16 px wide at y 1772. Fill with nori green. Then, with the exact-corners dialog, fill an ellipse from628, 1580to812, 1628with cream for the rice. Press Cmd+D and add a Stroke of6in ink.Click Add Layer and name it
Roll Uni. With the Lasso, holding Shift from the second one on, draw three tall lobes fanning out of the rice: a centre one about 52 × 88 px standing straight at 720, 1574, and two about 48 × 80 px leaning out on either side at 672, 1586 and 768, 1586. Fill with orange and press Cmd+D. Add a small white oval near the top left of each lobe, as on the gunkan, and a Stroke of6in ink. Keep the tops of the lobes inside the card, below its top edge.Now the toast. Click
Card Toast, then Add Layer, and name itToast Slice. Drag a rectangle marquee from 1048, 1600 to 1256, 1740. Hold Shift and drag two ellipses 112 × 88 px centred on 1100, 1604 and 1204, 1604. Added together they make the domed top of a slice of bread.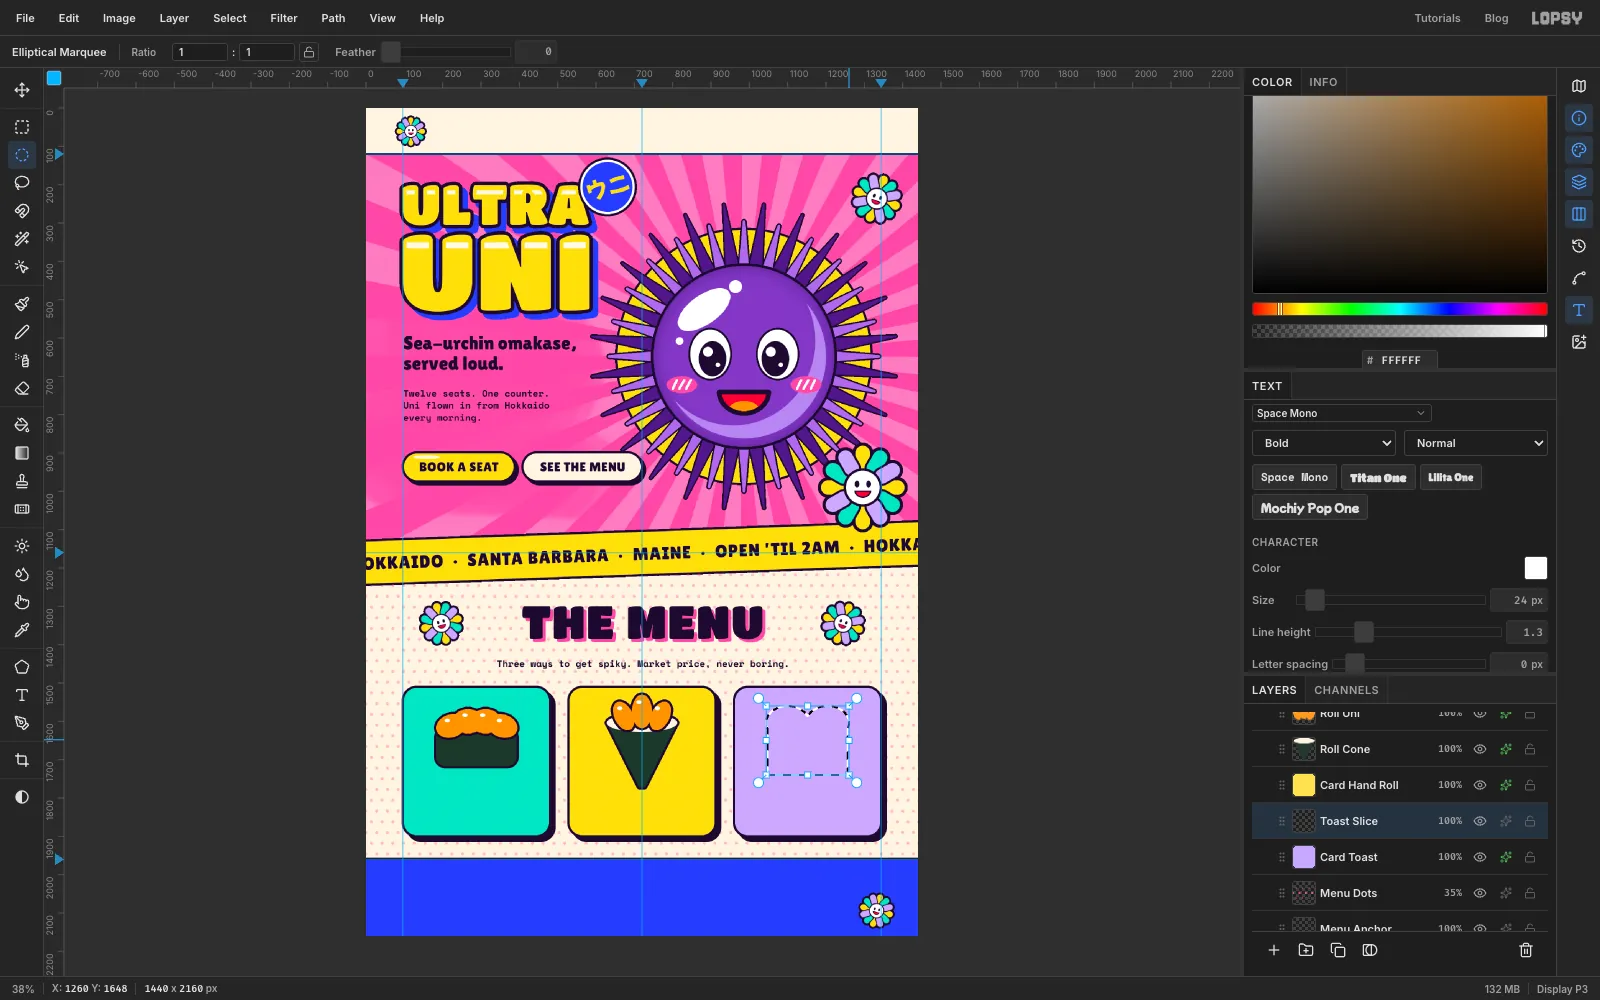
-
Finish the toast
Fill the selection with crust , choose Select → Shrink…, shrink by
14and fill with brioche . The crust is what's left of the first fill. Press Cmd+D and add a Stroke of6in ink.On a new layer
Toast Uni, lay three orange lobes about 68 × 50 px across the toast at around y 1650–1660, each tilted a little differently, with a gloss dot on each and the same ink stroke as the other foods.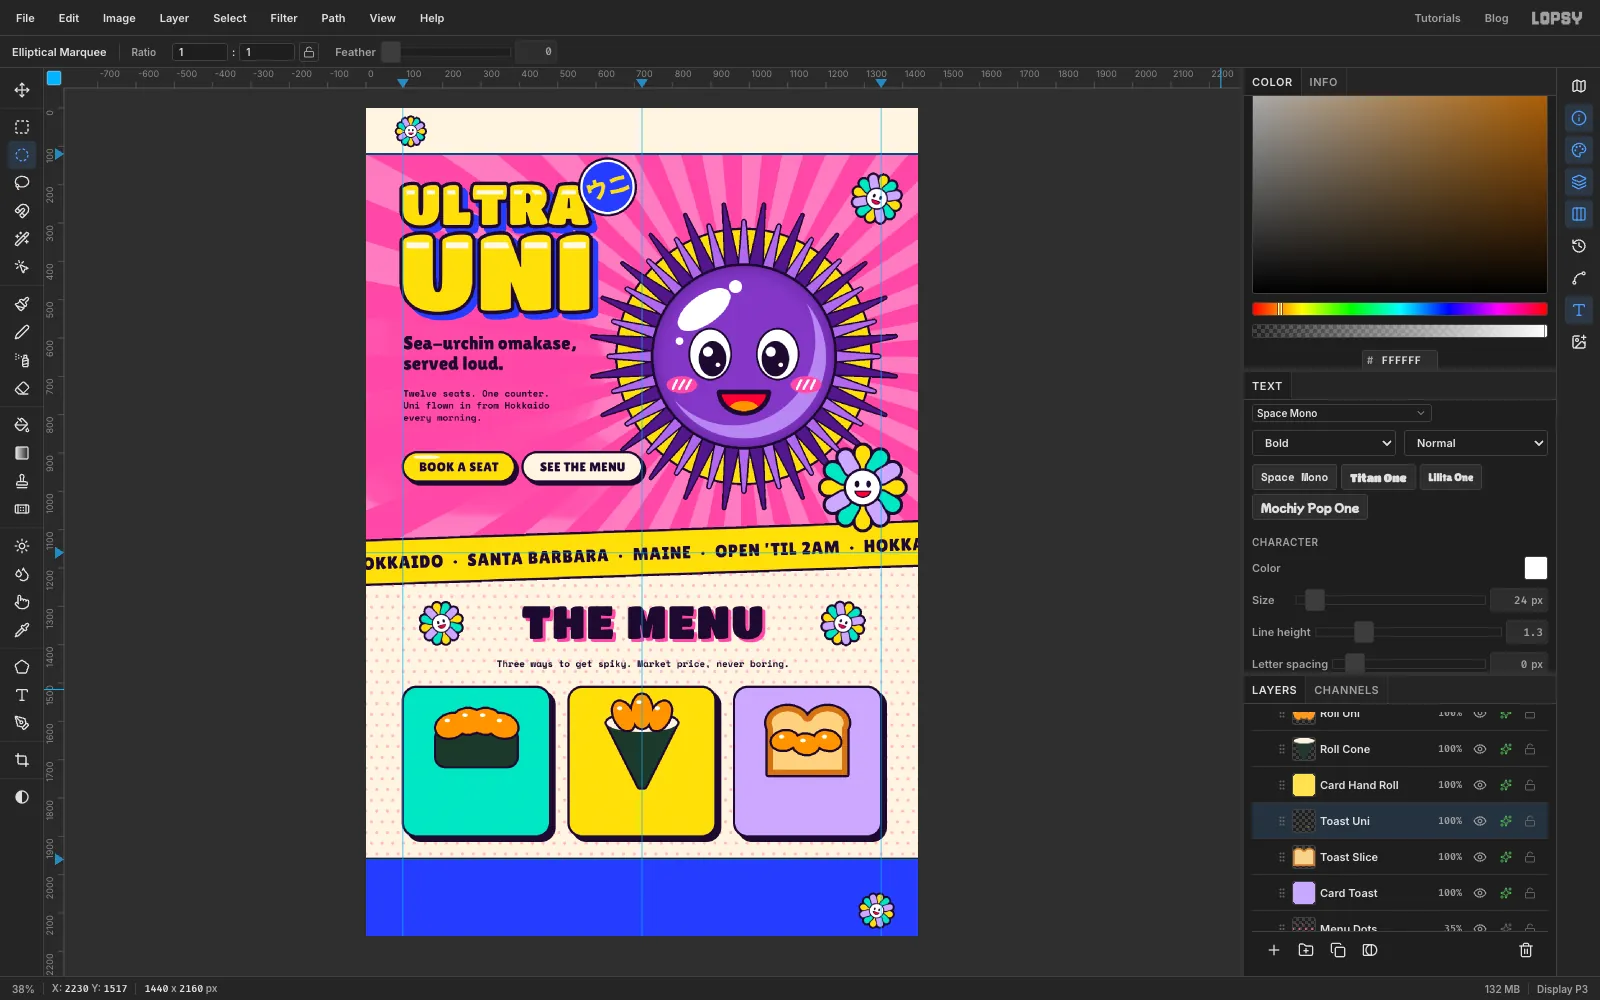
-
Name and price the dishes
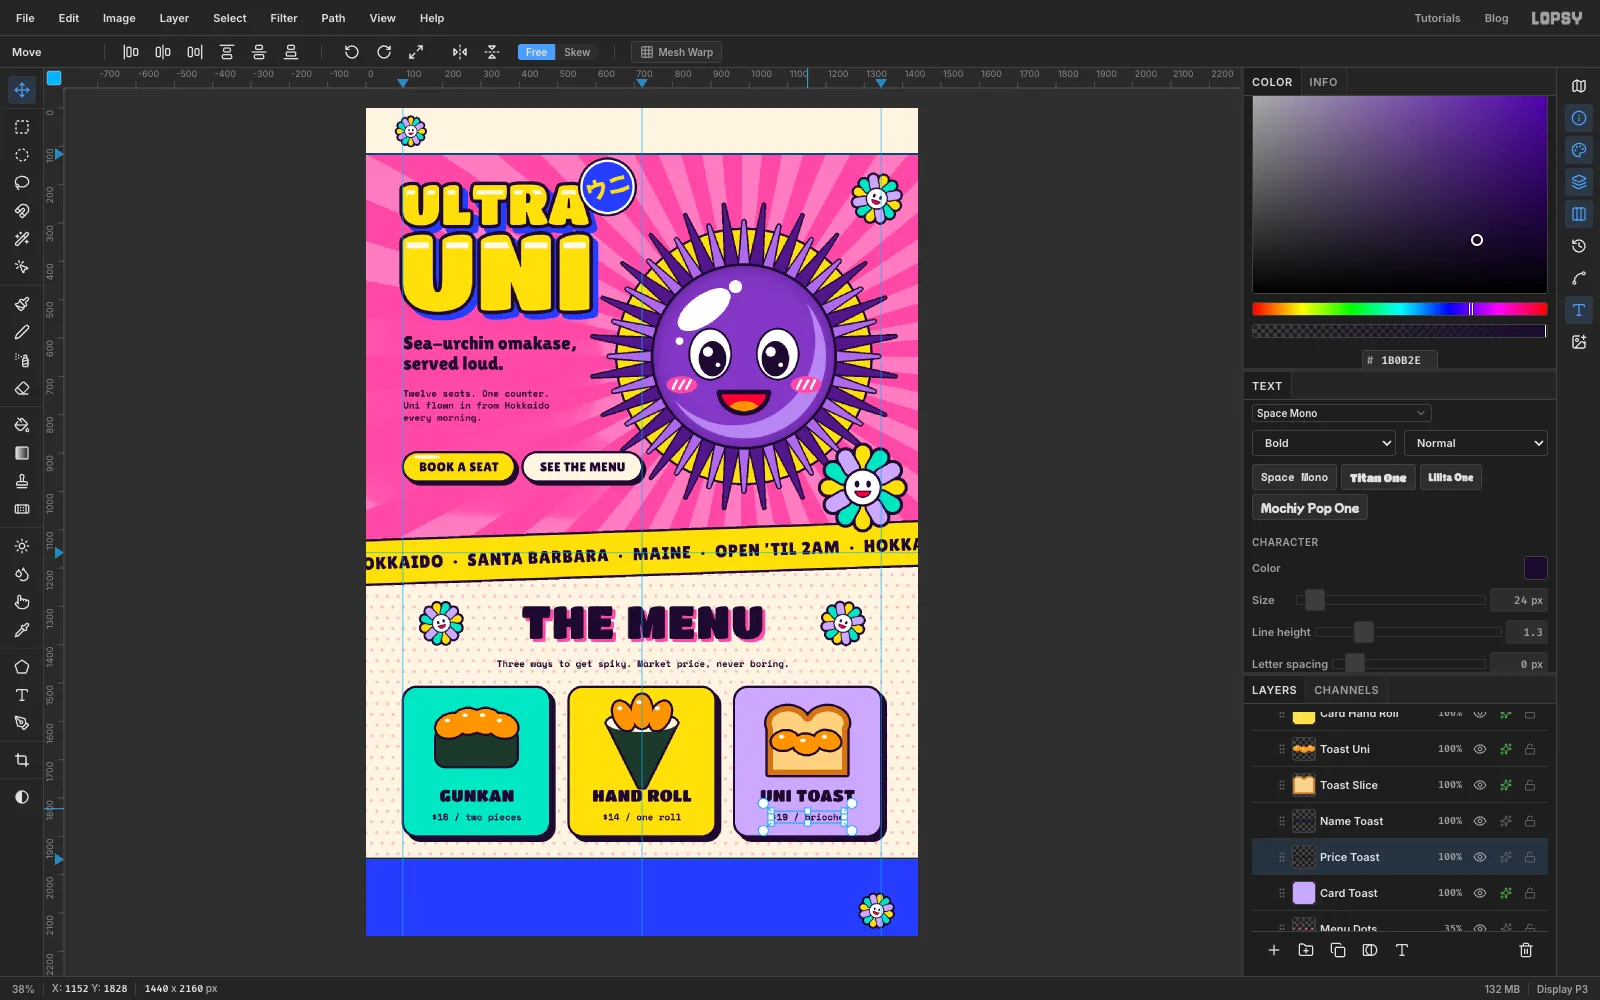
For each card, click the card's layer and add two lines of text, both centred on the card. Name the layers after the card, like
Name Hand RollandPrice Hand Roll:- The name in Titan One at Size
44, Letter spacing1:GUNKAN,HAND ROLL,UNI TOAST, with the top of the letters at y 1778 - The price in Space Mono Bold at
24:$16 / two pieces,$14 / one roll,$19 / brioche, top at y 1838
That leaves about 36 px between the price and the bottom of the card.
- The name in Titan One at Size
-
Add a Chef's Pick starburst
Click
Price Hand Roll, then Add Layer, and name itBurst. With the Lasso, draw a starburst centred on 880, 1598, over the yellow card's top-right corner: zigzag out to about 72 px and back in to about 57 px, 18 times round. Keep it clear of the lilac card next door. Fill with red , press Cmd+D and add a Stroke of6in ink.With
Burstselected, set Lilita One at Size30, Align centre, cream, Letter spacing1, and typeCHEF'S, Return,PICK. Press Tab. Switch to the Move tool, nudge it to the middle of the burst with the arrow keys, then rotate it about 12° clockwise with the rotate handle and press Enter. The burst sits below the tagline and inside the gutter, so nothing collides.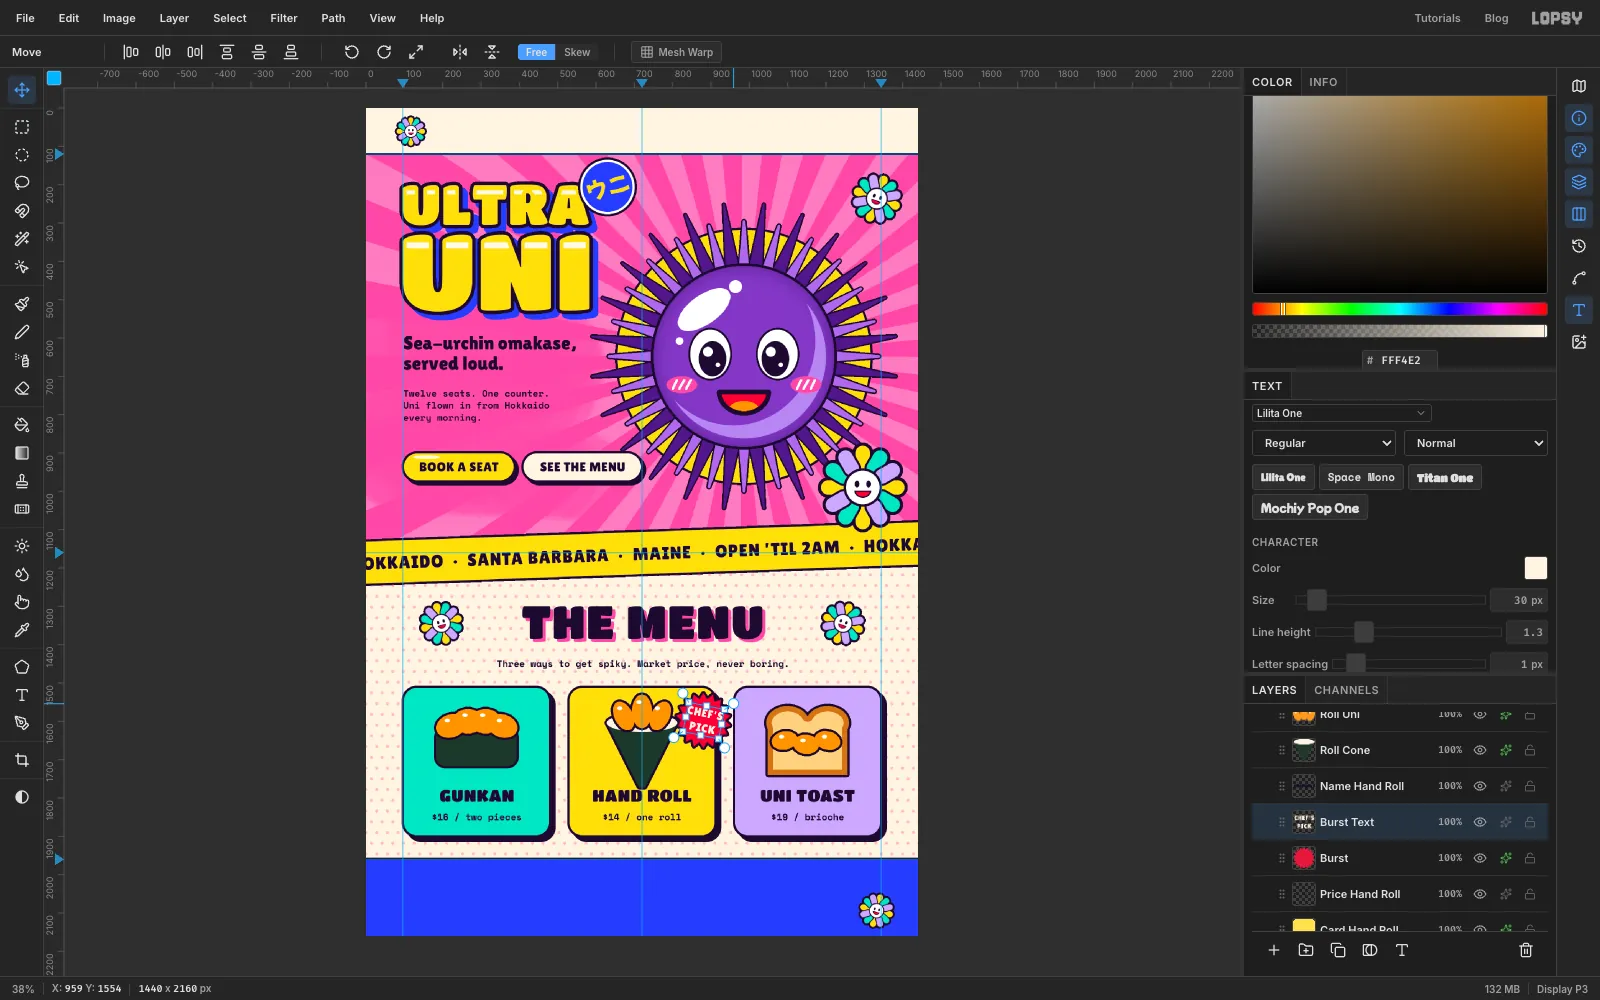
-
Fill in the nav bar
Click
Rules. For the logo, use Titan One at Size50, pink , Letter spacing1, and typeULTRA UNI. Move it so it starts at x 176, just right of the flower, and is centred on y 60. Add a Stroke of Width5in ink.Click
Rulesagain and typeMENU OMAKASE VISIT SHOP(six spaces between words) in Lilita One at30, centred on x 800 and y 60.For the button, click
Rules, then Add Layer, and name itNav Button. Draw a Shape rectangle in cobalt with an ink stroke of4and Corner Radius30, from the centre 1232, 60 out 112 px across and 30 px down, so its right end lands on the 1344 margin guide. Add a Drop Shadow of 5, 5, Blur0in ink. TypeBOOK NOWin Lilita One at28, cream, centred on the pill. Click Add Layer, name itNav Gloss, and with the Elliptical Marquee fill a small white streak inside the pill's top-left end, above the letters, from 1144, 36 to 1180, 44, and set it to 75%.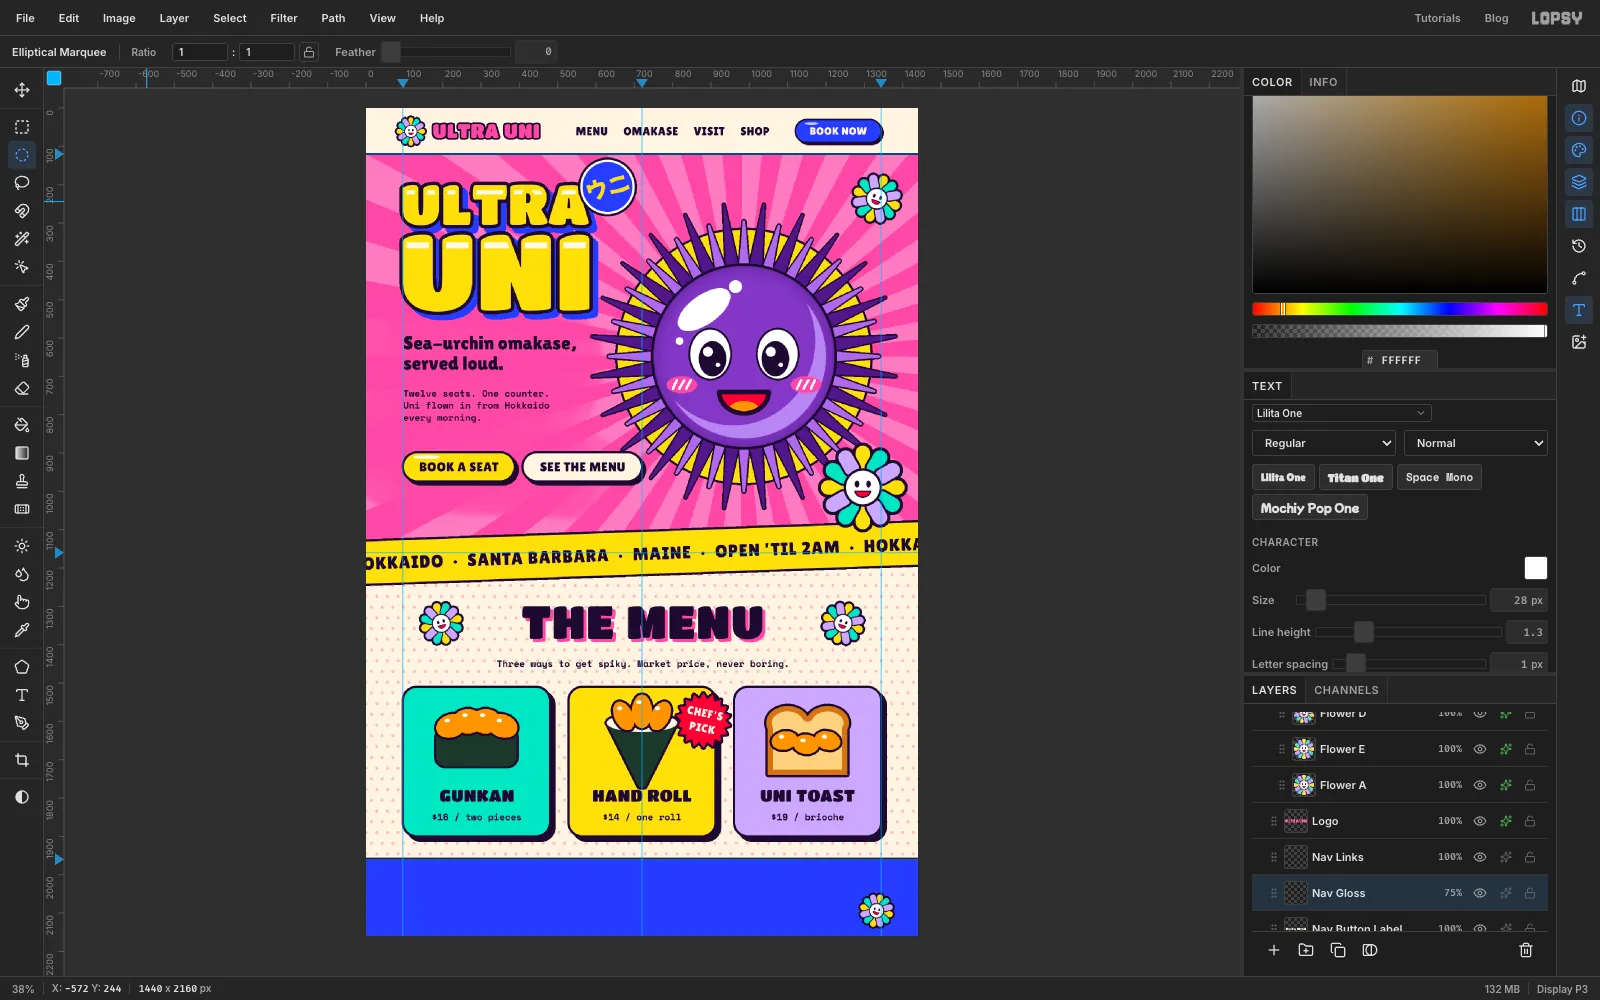
-
Finish the footer
Click
Footerbefore each line of text and set them all left-aligned:ULTRA UNIin Titan One at60, yellow, with a Stroke of4in ink, starting at x 96 with its top at y 1998- The address on two lines,
88 Kelp Street, Harbor District/Wed–Sun 6pm – 2am, in Space Mono Bold at22, cream, top at y 2064 FOLLOW THE SPIKESin Lilita One at32, yellow, Letter spacing2, starting at x 640, sitting on the same baseline as the footer logo@ultra.uni · newsletter · gift cardsin Space Mono Bold at22, cream, at x 640, top at y 2064, the same as the address, so the two columns line up© 2026 Ultra Uni Barin Space Mono Bold at16, white, at x 640, top at y 2102, with the layer at 80% opacity
When you place type in the footer, click below the logo rather than on it, or the click edits the logo instead.
Save your work with File → Save Project, and export with File → Quick Export PNG.