Design a Neon Sign Iron-On Patch
Design a neon-sign iron-on patch in Lopsy. Trace a flamingo photo into Pen-tool tubes, add glowing type and give it a satin-stitch merrowed border.
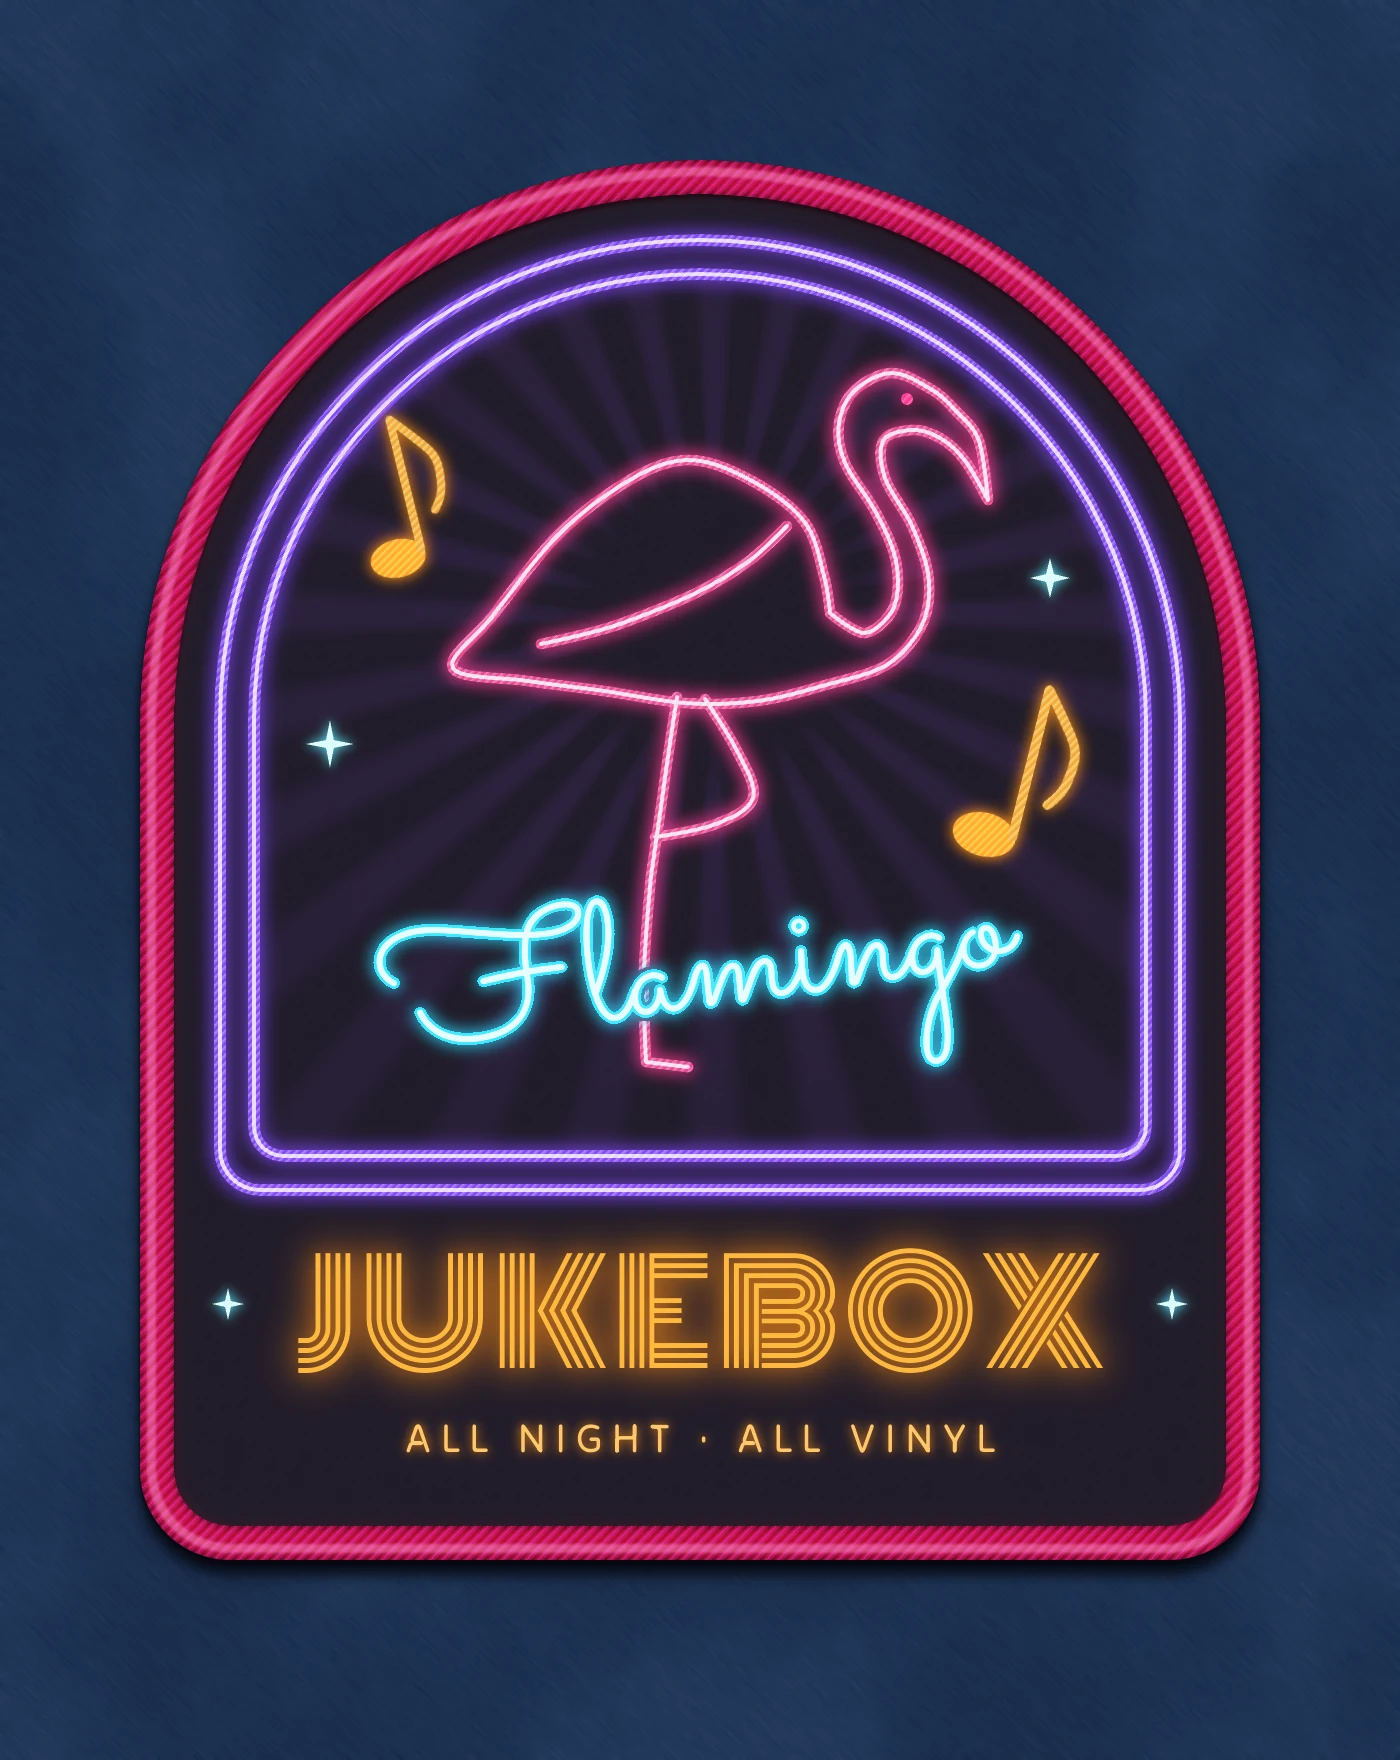
Embroidered patches and neon signs have more in common than you'd think. Both draw with lines of colour on a dark ground, and both work best with simple, bold shapes. Many patch makers stitch neon designs in fluorescent satin thread, with the lightest thread down the middle of each "tube" so it seems to glow.
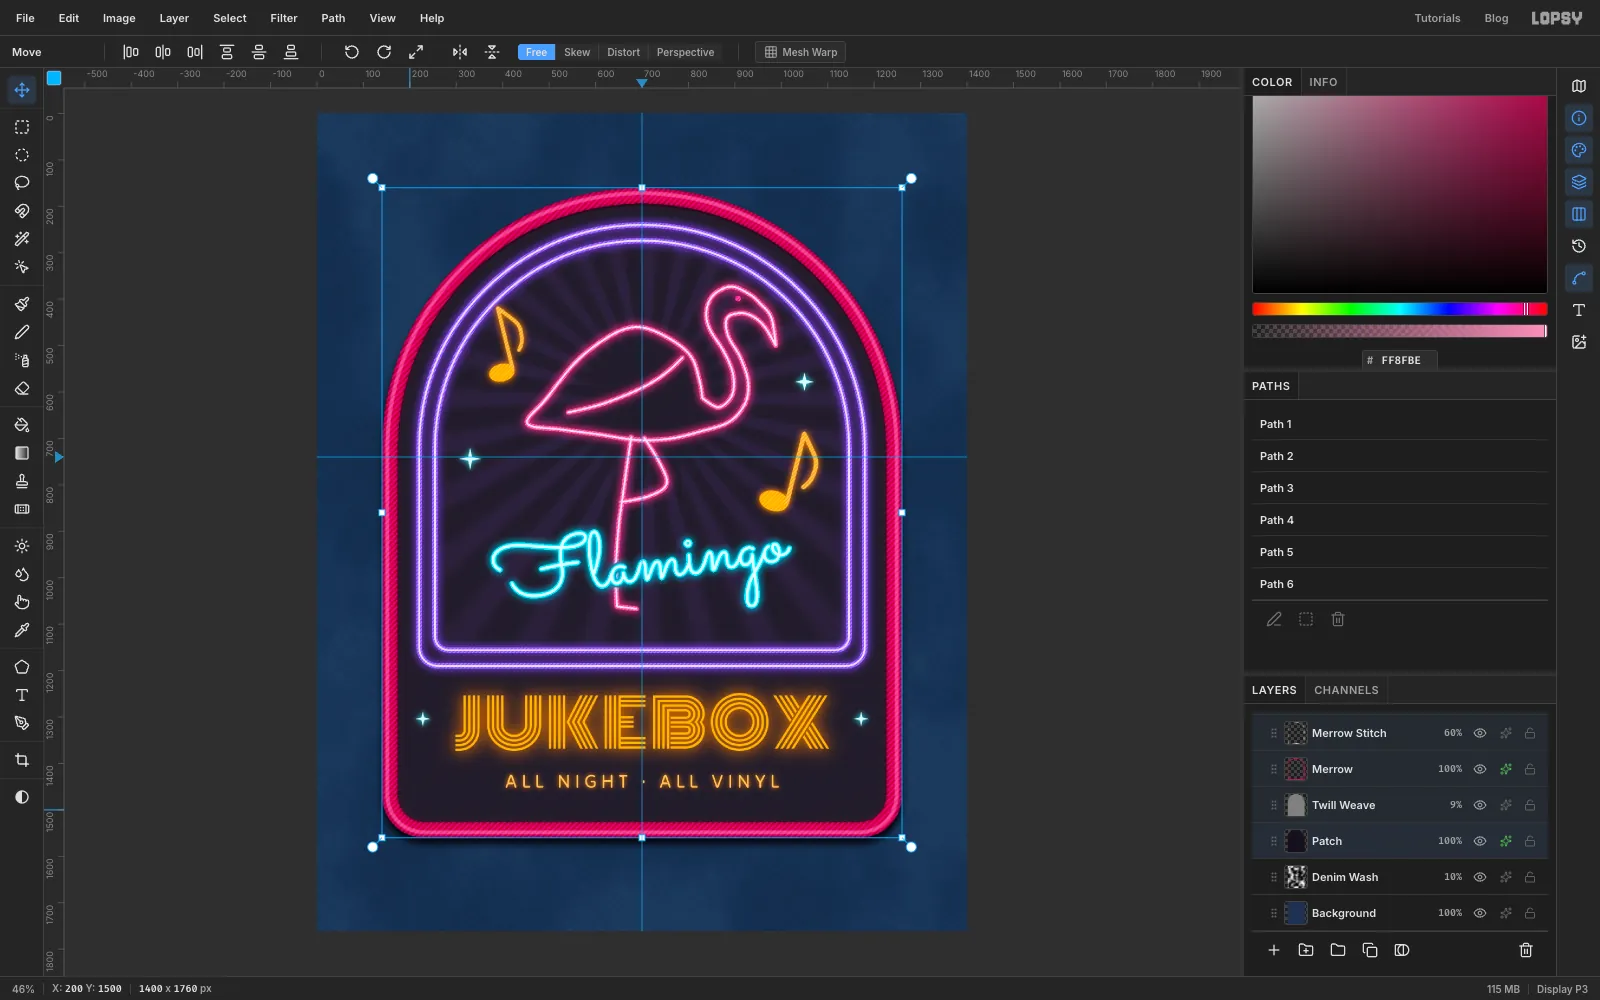
In this tutorial you'll make a patch for Flamingo Jukebox, an imaginary late-night bar. The patch is shaped like the top of a jukebox and sits on a piece of denim, so it looks like it's ironed onto a jacket. The pink flamingo is traced from a public-domain photo (Lisa Cox / USFWS, Flamingo standing, on Wikimedia Commons). Each neon tube is a Pen-tool path stroked twice: once in colour and once with a thin white-hot core. The document is 1400 × 1760 px.
Along the way you'll use:
- Add Noise, Motion Blur and Clouds for denim and twill
- the exact-corners marquee dialog, Shrink, Grow and Inverse for the patch shape
- Define Pattern and Fill with Pattern for satin stitches
- the Pen tool, Stroke Path and Path to Selection for every tube
- Sunburst for jukebox light rays
- dropping in a reference photo and scaling it with the transform handles
- text in Sacramento, Monoton and Tilt Neon, rotated with its handle
- Stroke, Outer Glow, Inner Glow and Drop Shadow
- copy and paste, rotate and scale, groups, and a multi-layer nudge
- Copy Merged, Brightness/Contrast and Gaussian Blur for a halation glow
The palette:
-
Denim
-
Twill
-
weave grey
-
Merrow
-
merrow sheen
-
merrow shade
-
Violet tube
-
violet core
-
violet glow
-
rays
-
Flamingo pink
-
pink core
-
pink glow
-
Script core
-
cyan outline
-
cyan glow
-
Amber
-
tagline
-
amber glow
-
Sparkle
-
sparkle glow
-
Make the denim
Choose File → New, enter 1400 × 1760 and click Create. Click the Background row, set the foreground to denim and choose Edit → Fill.
Choose Filter → Add Noise…, pick Mono and Gaussian, set Amount to
50and click Apply. Then choose Filter → Motion Blur… with Angle45and Distance20. The speckles smear into fine diagonal threads, like the twill of a denim jacket.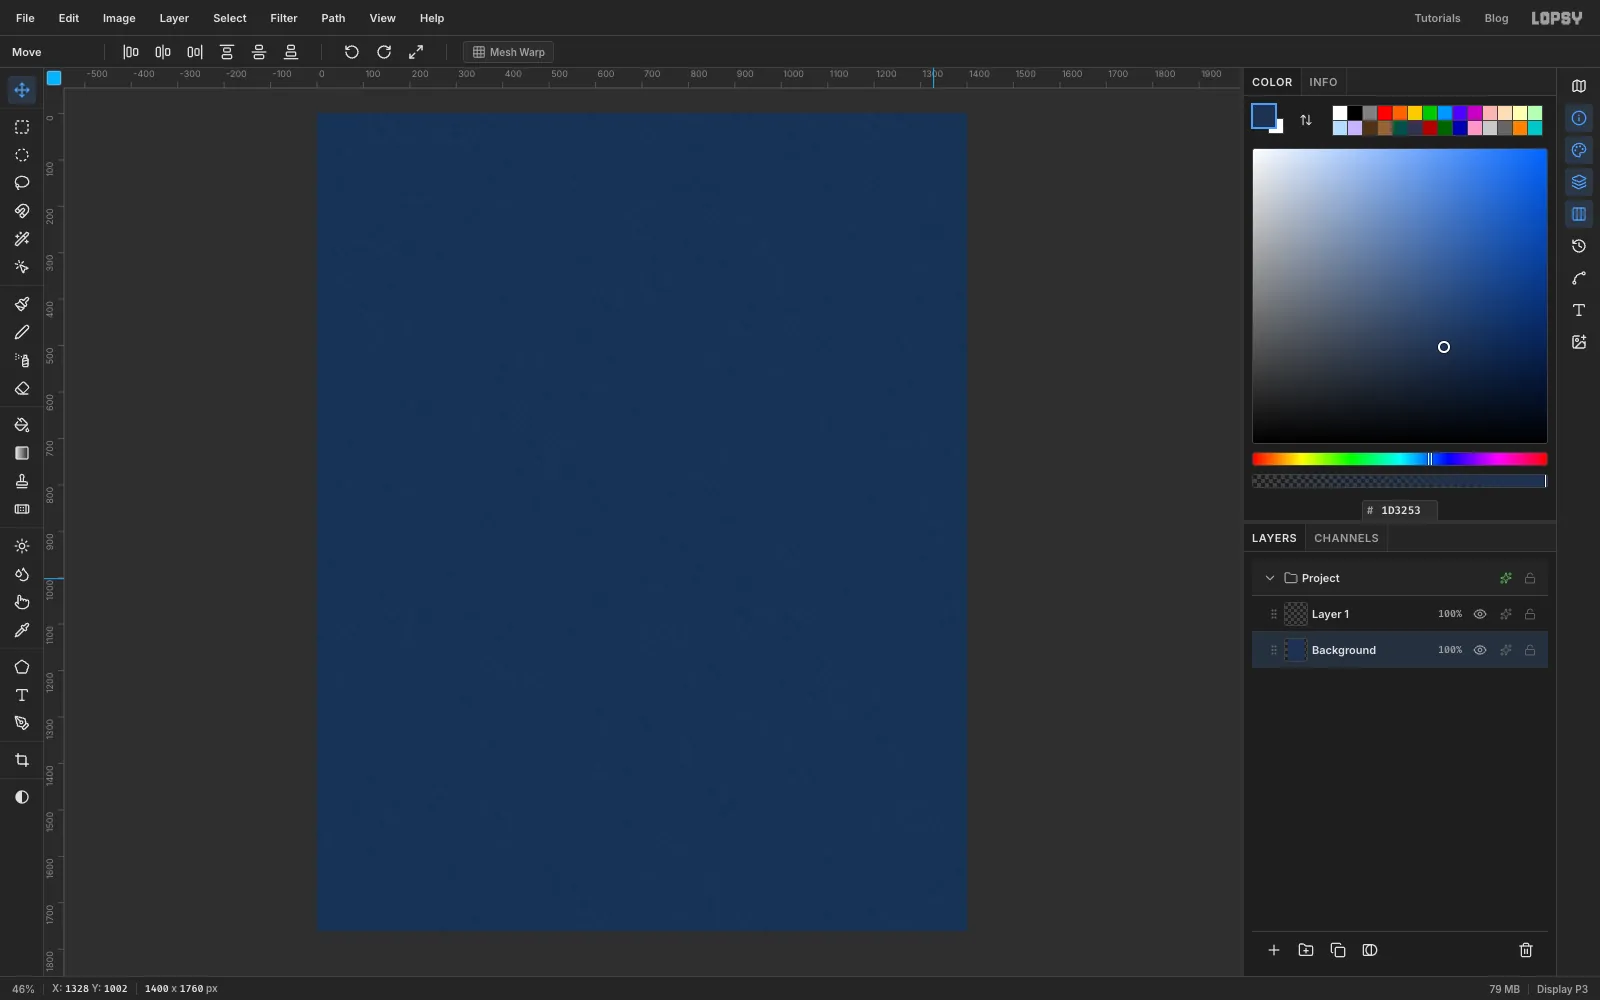
-
Fade the denim
Click Layer 1 and rename it Denim Wash. Set the foreground to white and choose Filter → Clouds… with Scale
7. Set the layer's Blend to Soft Light and its opacity to 10%. The clouds become gentle fading, like a jacket that's been washed a hundred times.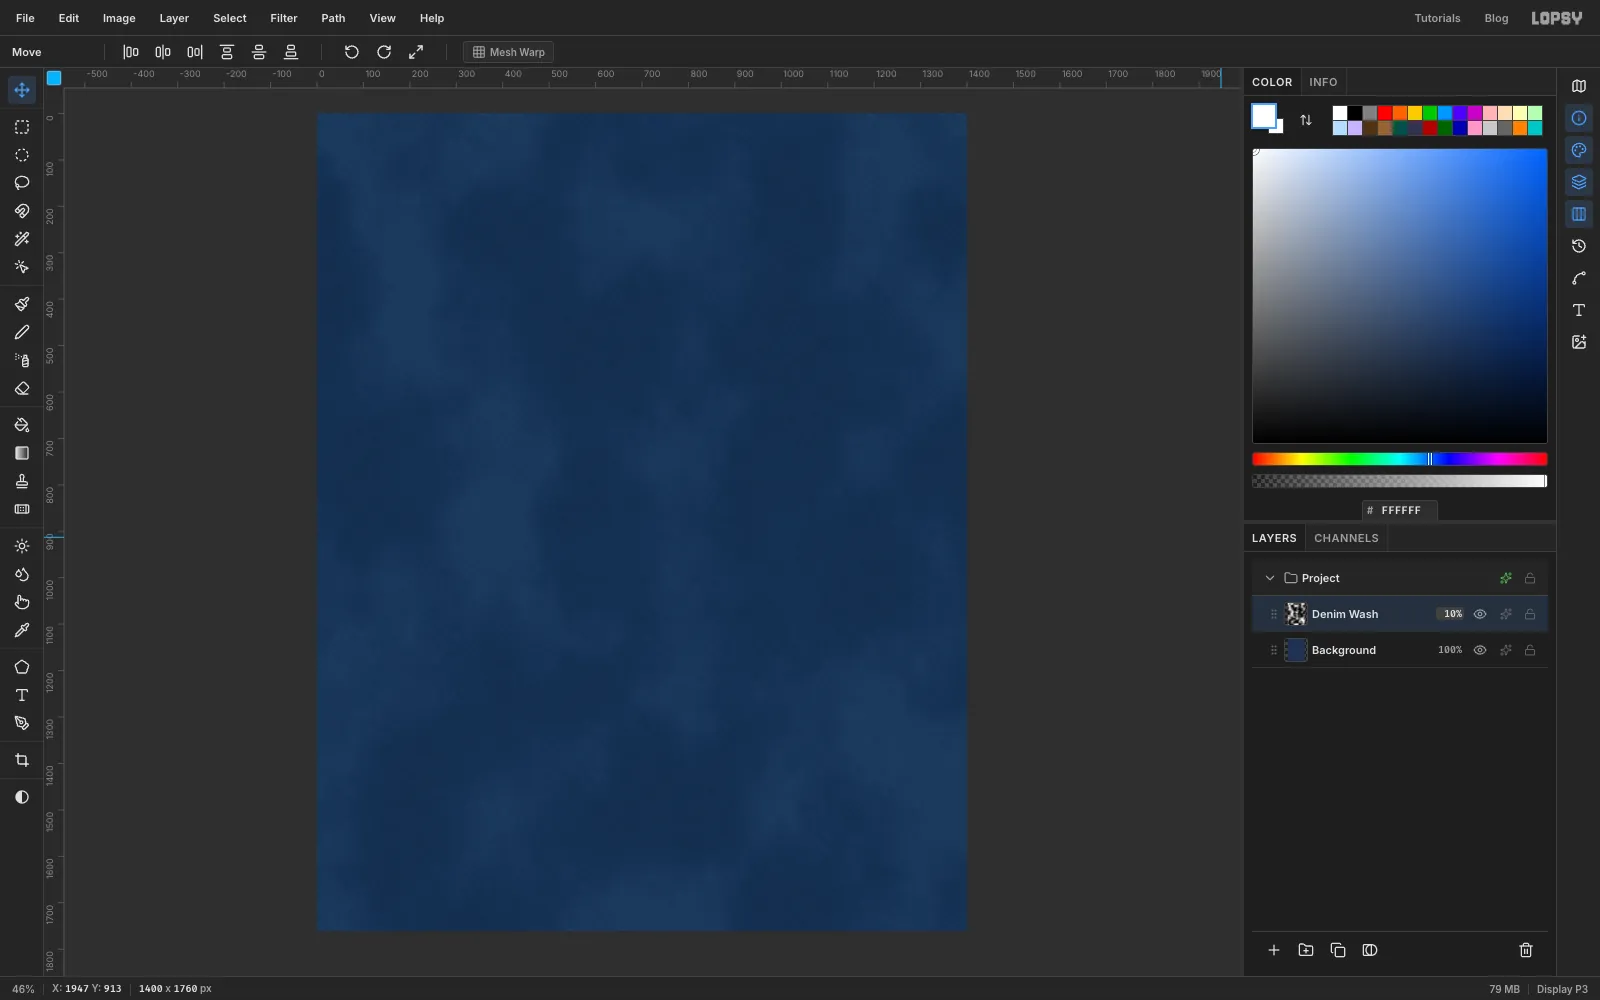
-
Drop two guides
Click the top ruler at
700to drop a vertical guide down the middle. Then click the left ruler at740. That's the centre of the arch you're about to draw.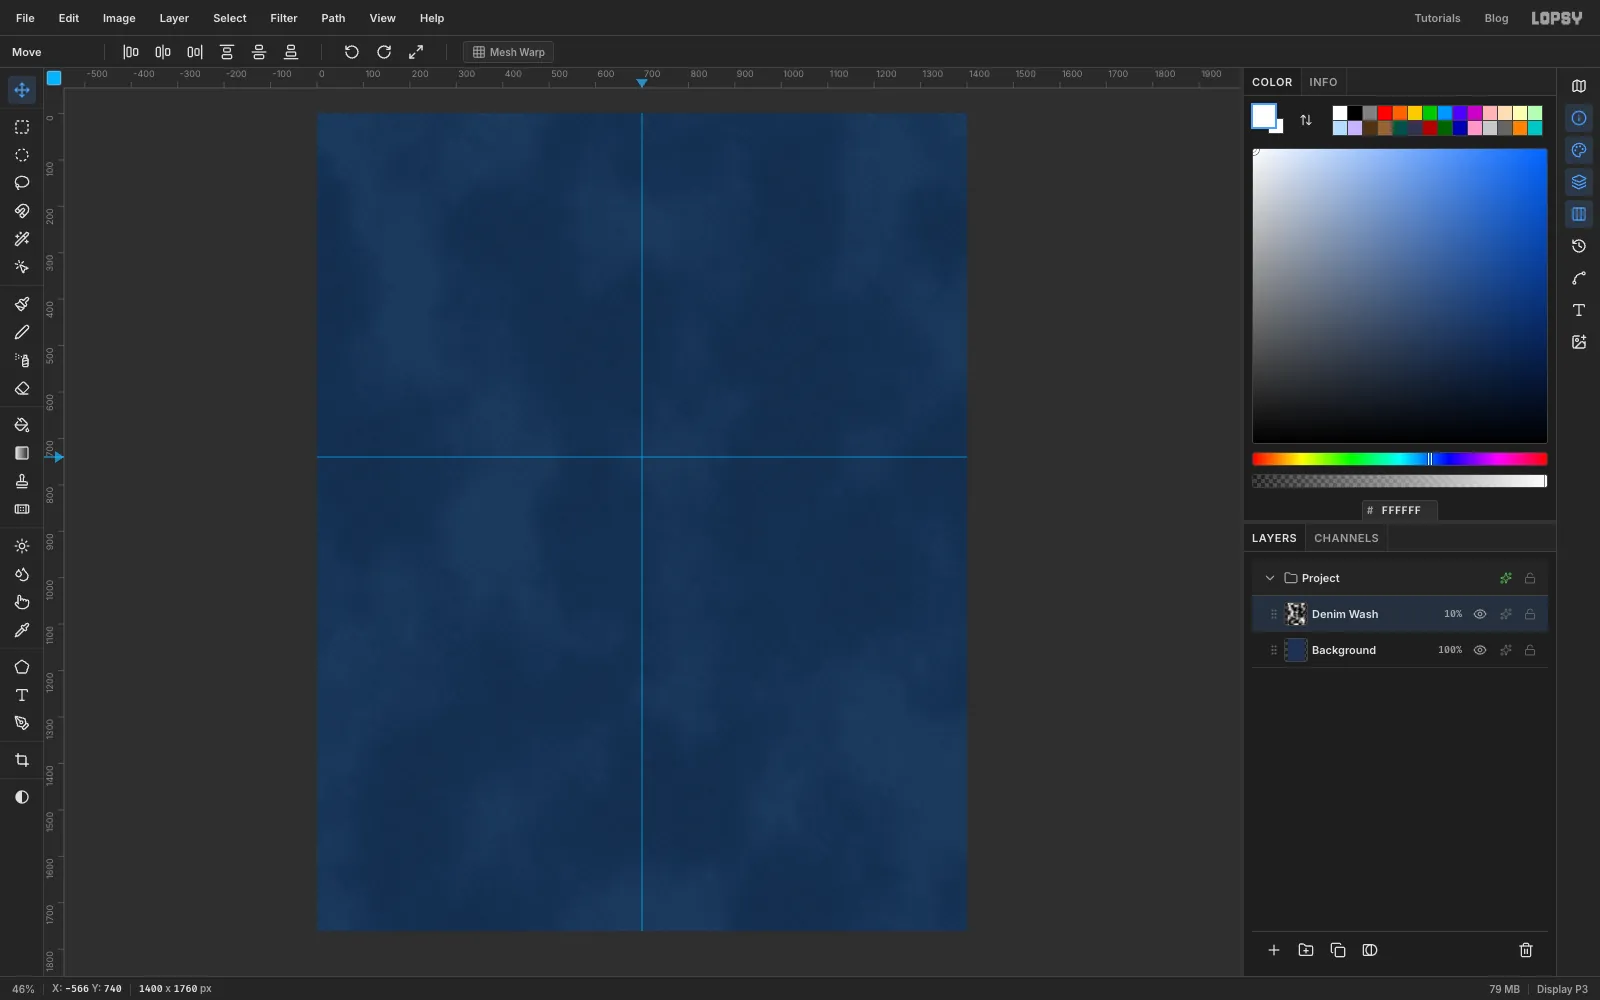
-
Draw the arch top
Click Denim Wash and add a new layer named Patch. Set the foreground to twill black . Pick the Elliptical Marquee, click the canvas once and select from
140, 180to1260, 1300. That's a circle of radius 560 centred on the guides. Choose Edit → Fill.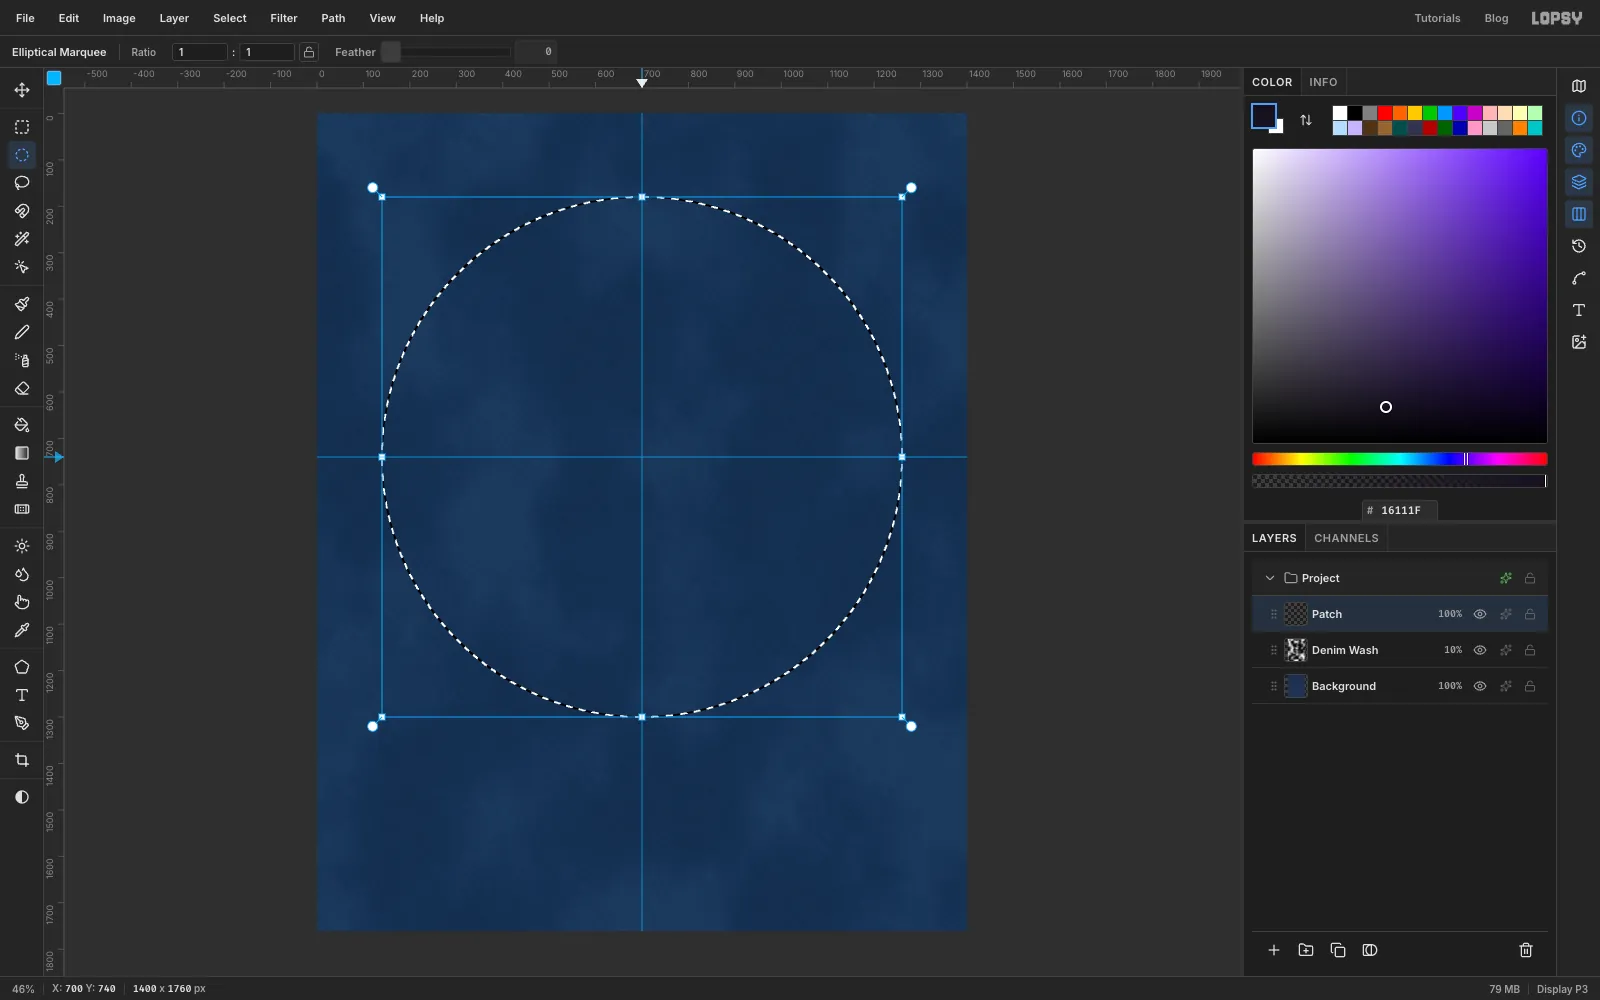
-
Add the rectangle below
Deselect, pick the Rectangular Marquee, click once and select from
140, 740to1260, 1580. Fill it too. The circle and the rectangle merge into an arch: the shape of a 1950s jukebox top.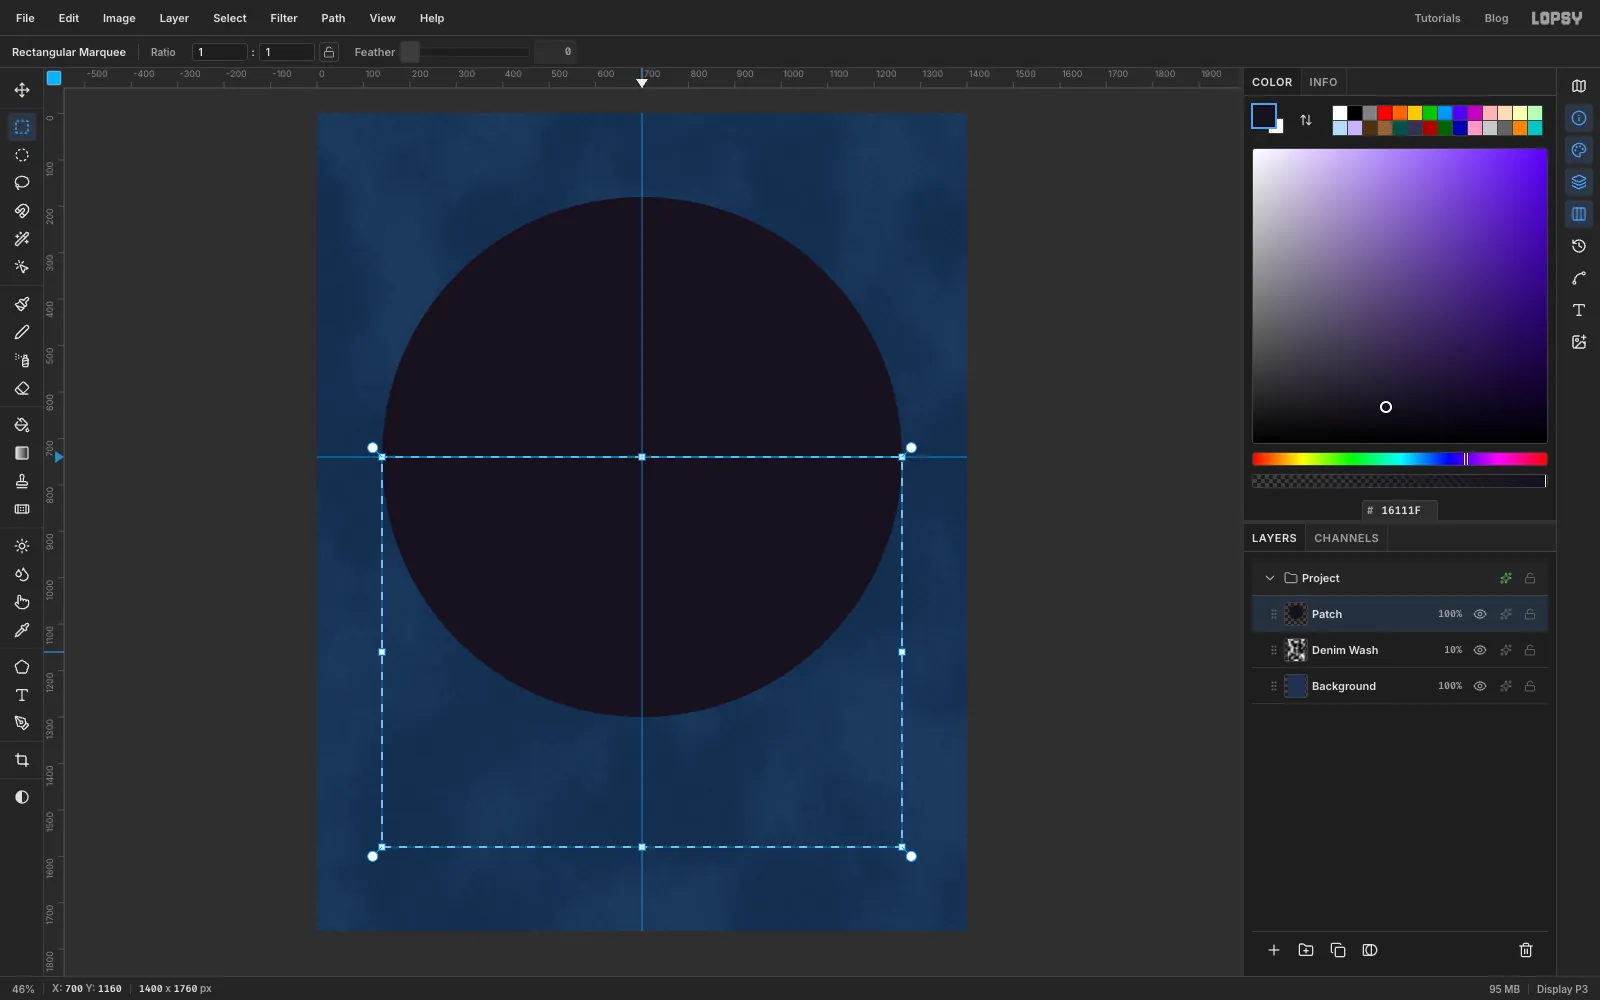
-
Round the bottom corners
Deselect, then Cmd-click the Patch thumbnail to select the arch. Choose Select → Shrink…
90, then Select → Grow…90. Shrinking and growing by the same amount rounds the square bottom corners and leaves the curved top alone. Choose Select → Inverse, press Delete to trim the corners off, and deselect.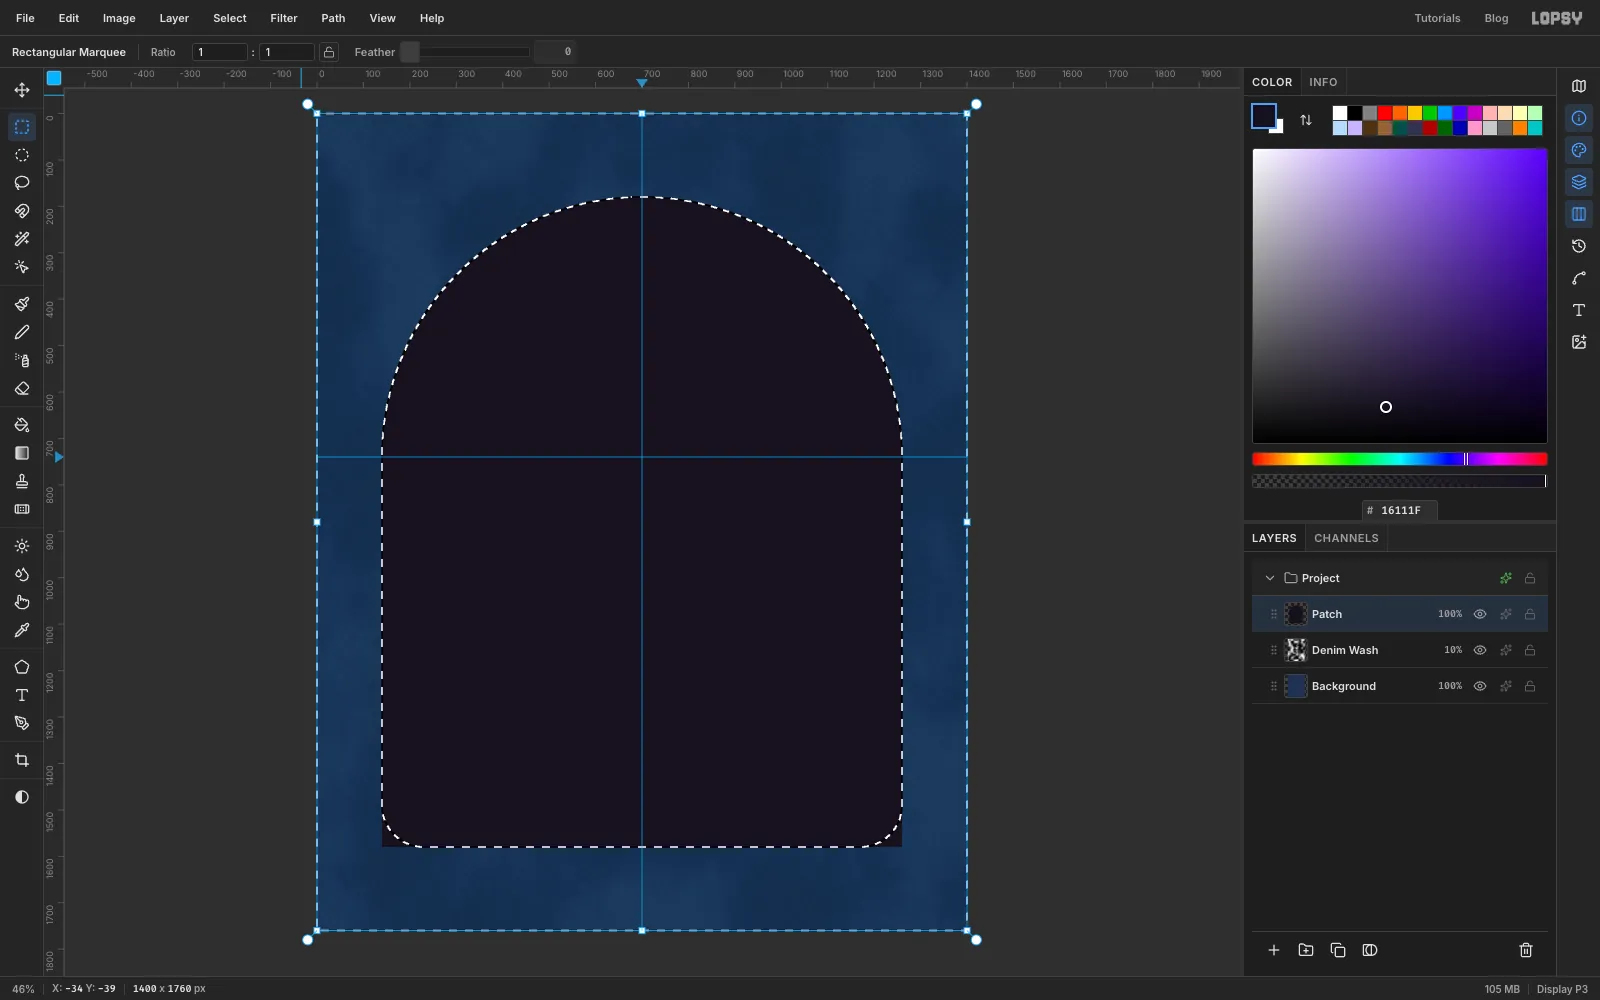
-
Shadow and twill
Open Patch's effects and turn on Drop Shadow: Offset X
0, Offset Y14, Blur18, Spread20, Opacity100and the colour . The patch now sits on the fabric instead of being printed on it.Add a layer named Twill Weave, Cmd-click the Patch thumbnail and fill the selection with grey . Run Add Noise… (Mono, Gaussian, Amount
70), then Motion Blur… at Angle135and Distance9, so the weave runs the opposite way to the denim. Deselect, set Blend to Screen and the opacity to 9%. You only want a hint of it.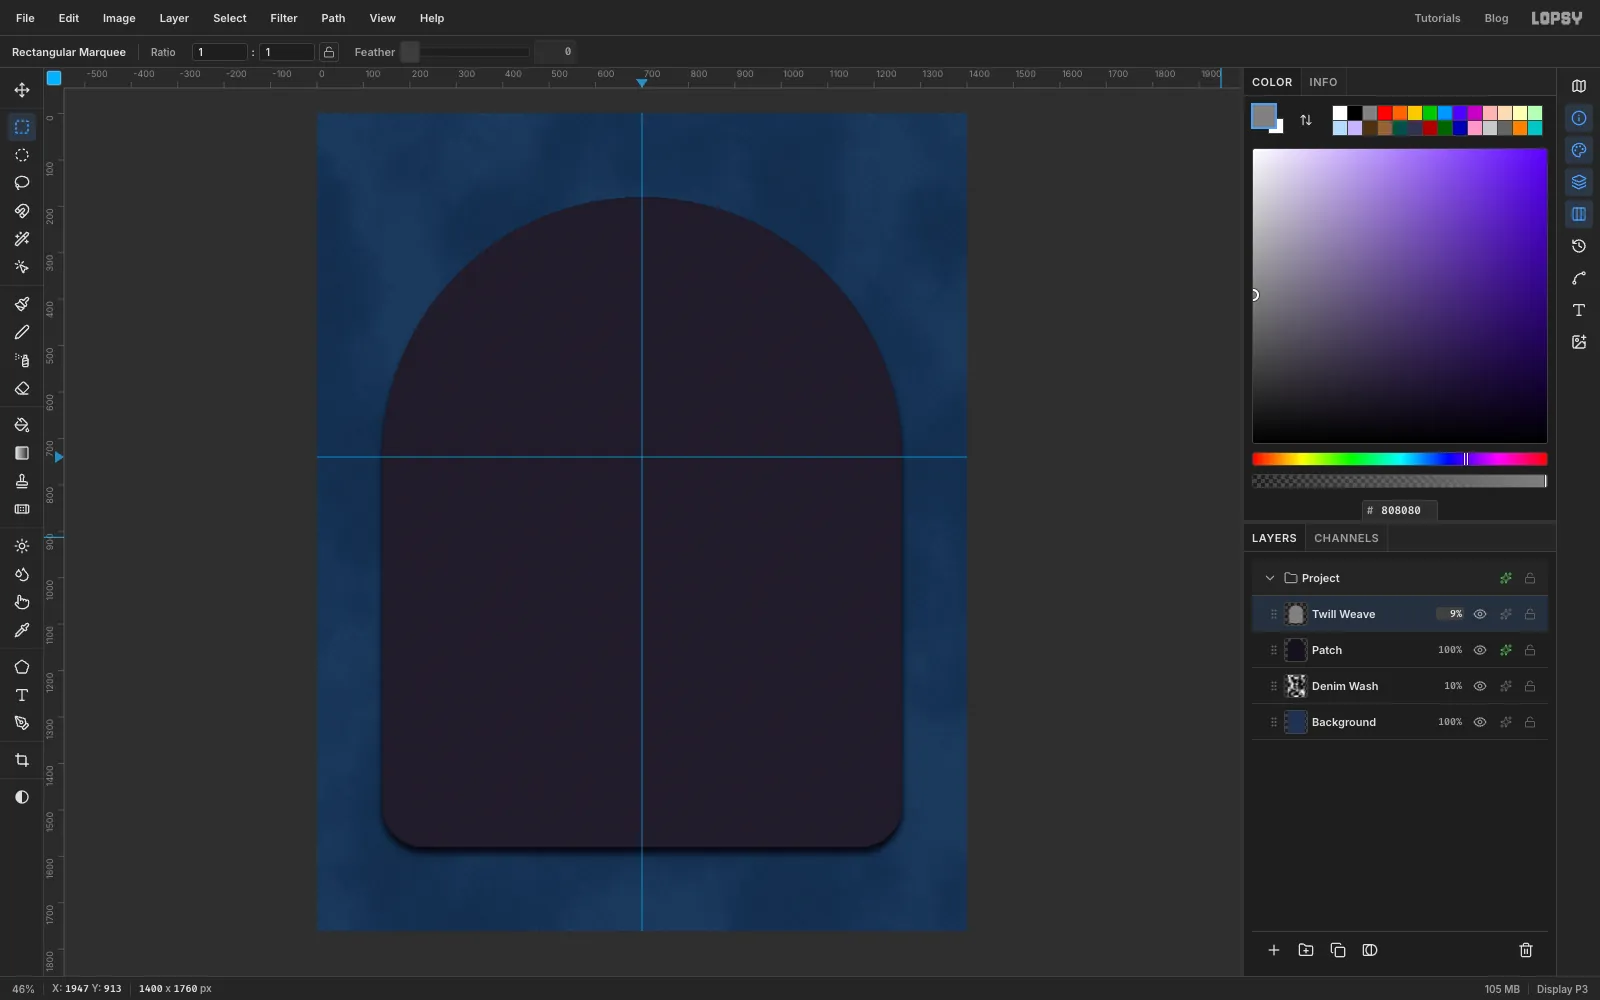
-
Cut the merrow ring
The merrow is the thick, wrapped border stitched around a patch. Add a layer named Merrow, Cmd-click the Patch thumbnail and fill it with raspberry . Choose Select → Shrink…
34, press Delete and deselect. You're left with a 34 px ring.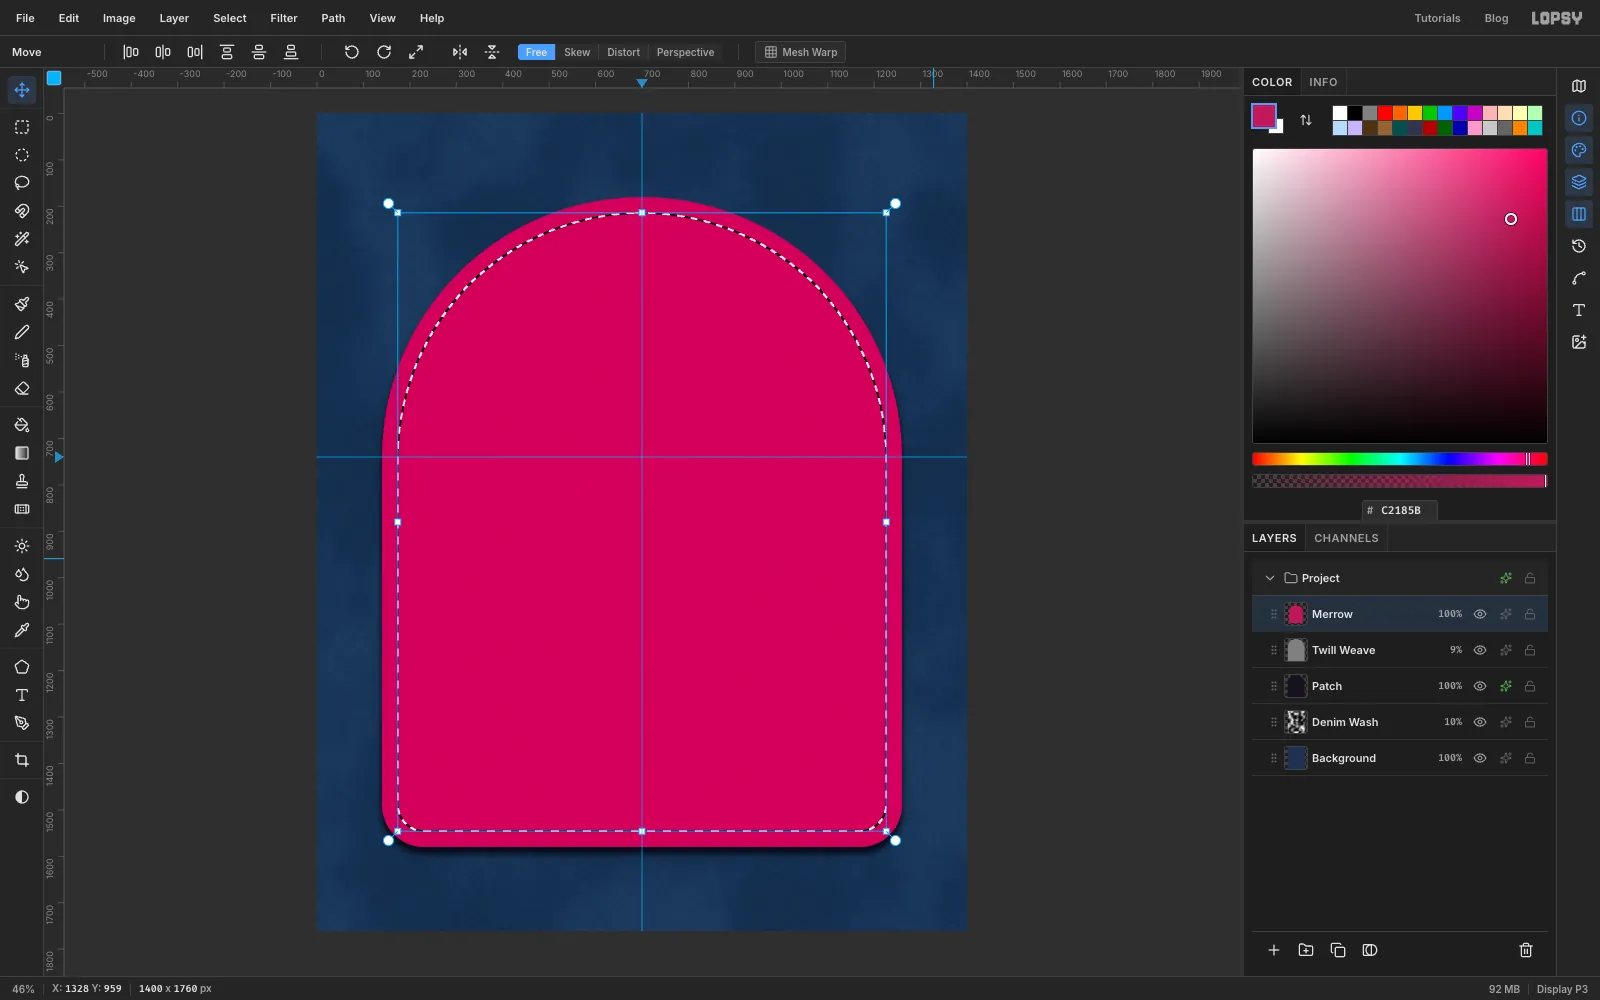
-
Draw a satin-stitch tile
Add a layer named Stitch Tile and zoom right in on the top left of the canvas. With the exact-corners dialog, select from
40, 40to56, 56and fill it with grey . Deselect.Pick the Pencil, set Size to
3and the foreground to . Click the bottom-left pixel of the tile, then Shift-click the top-right pixel to draw a diagonal groove. Click once in the top-left and the bottom-right pixels too, so the groove carries on across the tile's edges. Switch to Size2and light grey , and draw two short diagonals parallel to the groove: one from40, 47to47, 40, and one from48, 55to55, 48.Select the tile again (
40, 40to56, 56) and choose Edit → Define Pattern. Deselect and delete the Stitch Tile layer, then press Cmd+0 to fit the page back on screen.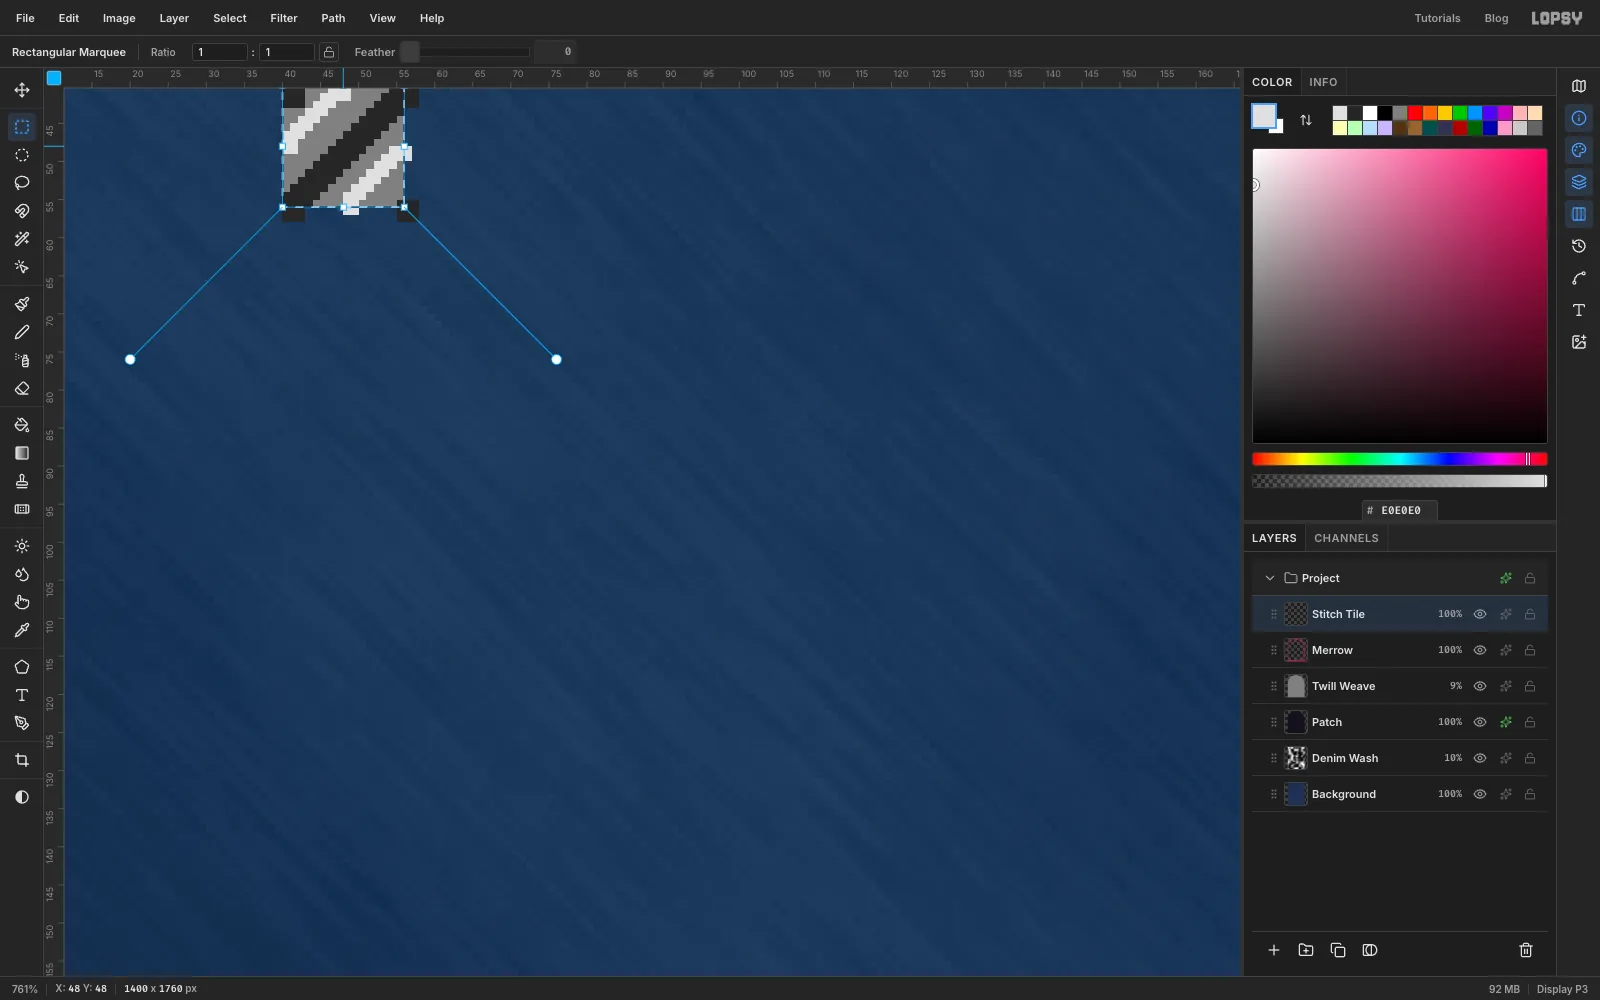
-
Stitch the merrow
Add a layer named Merrow Stitch, Cmd-click the Merrow thumbnail and choose Edit → Fill with Pattern…. Pick your tile, set Scale to
75and click Apply. Deselect, set Blend to Overlay and the opacity to 60%. The grey disappears in Overlay and leaves slanted thread highlights.Click Merrow and give it an Inner Glow in (Size
14, Spread0, Opacity80), which darkens both edges so the border looks rolled. Add a Drop Shadow in with Offset Y4, Blur6and Opacity65.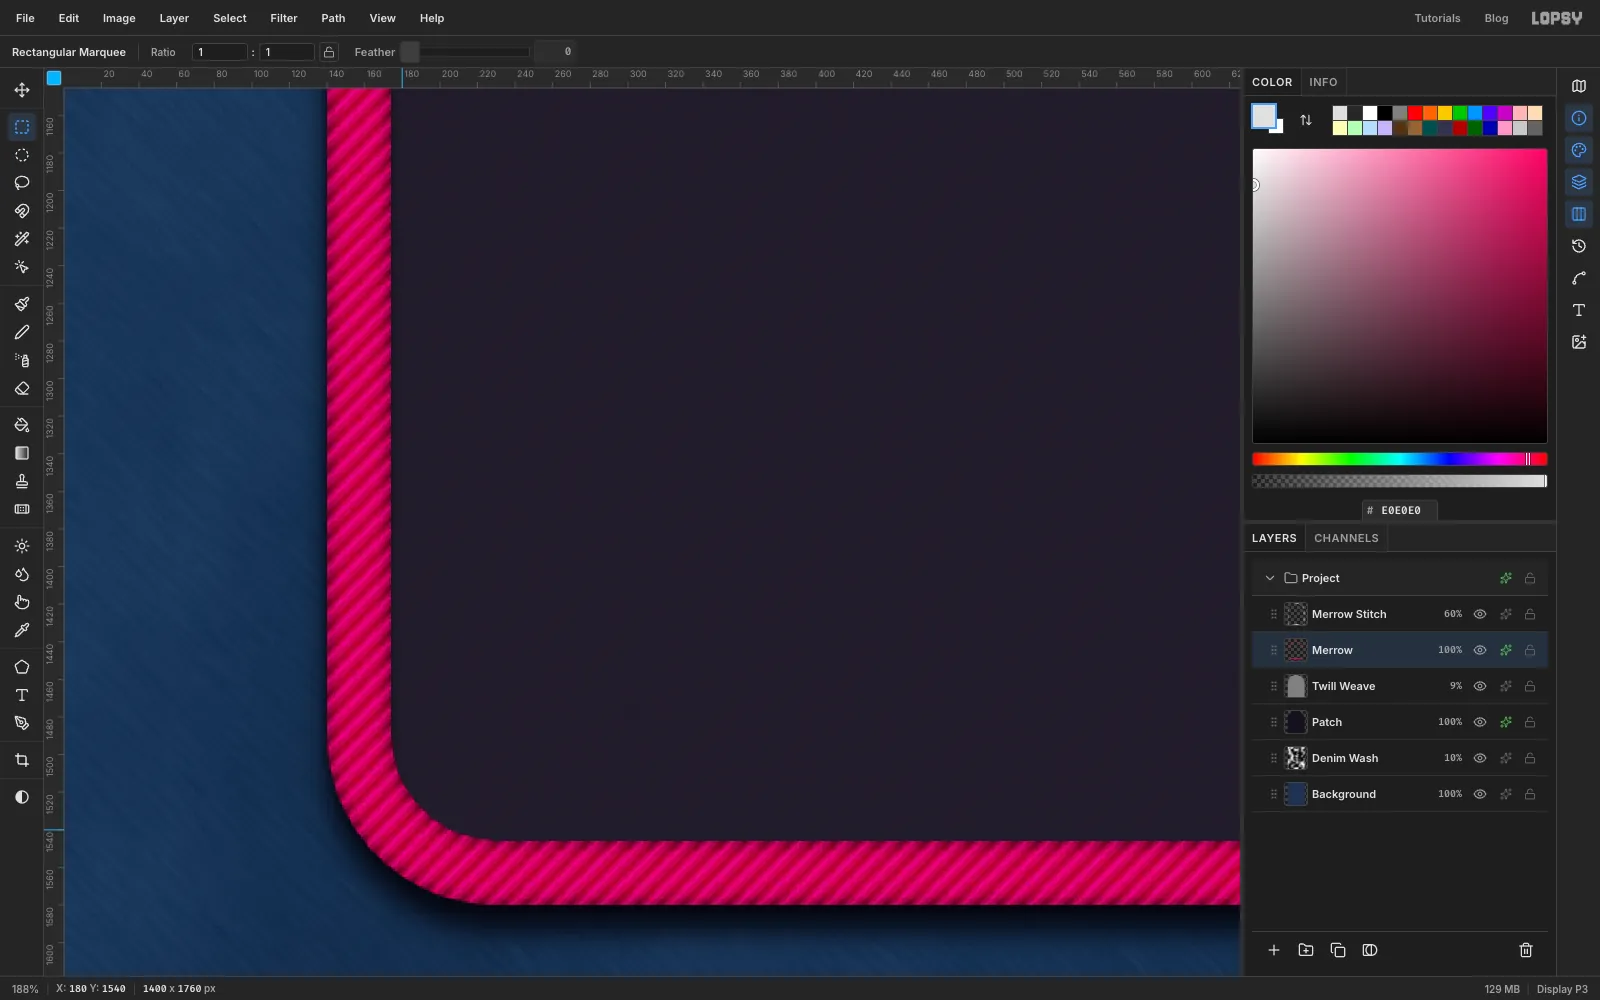
-
Draw the outer window with the Pen
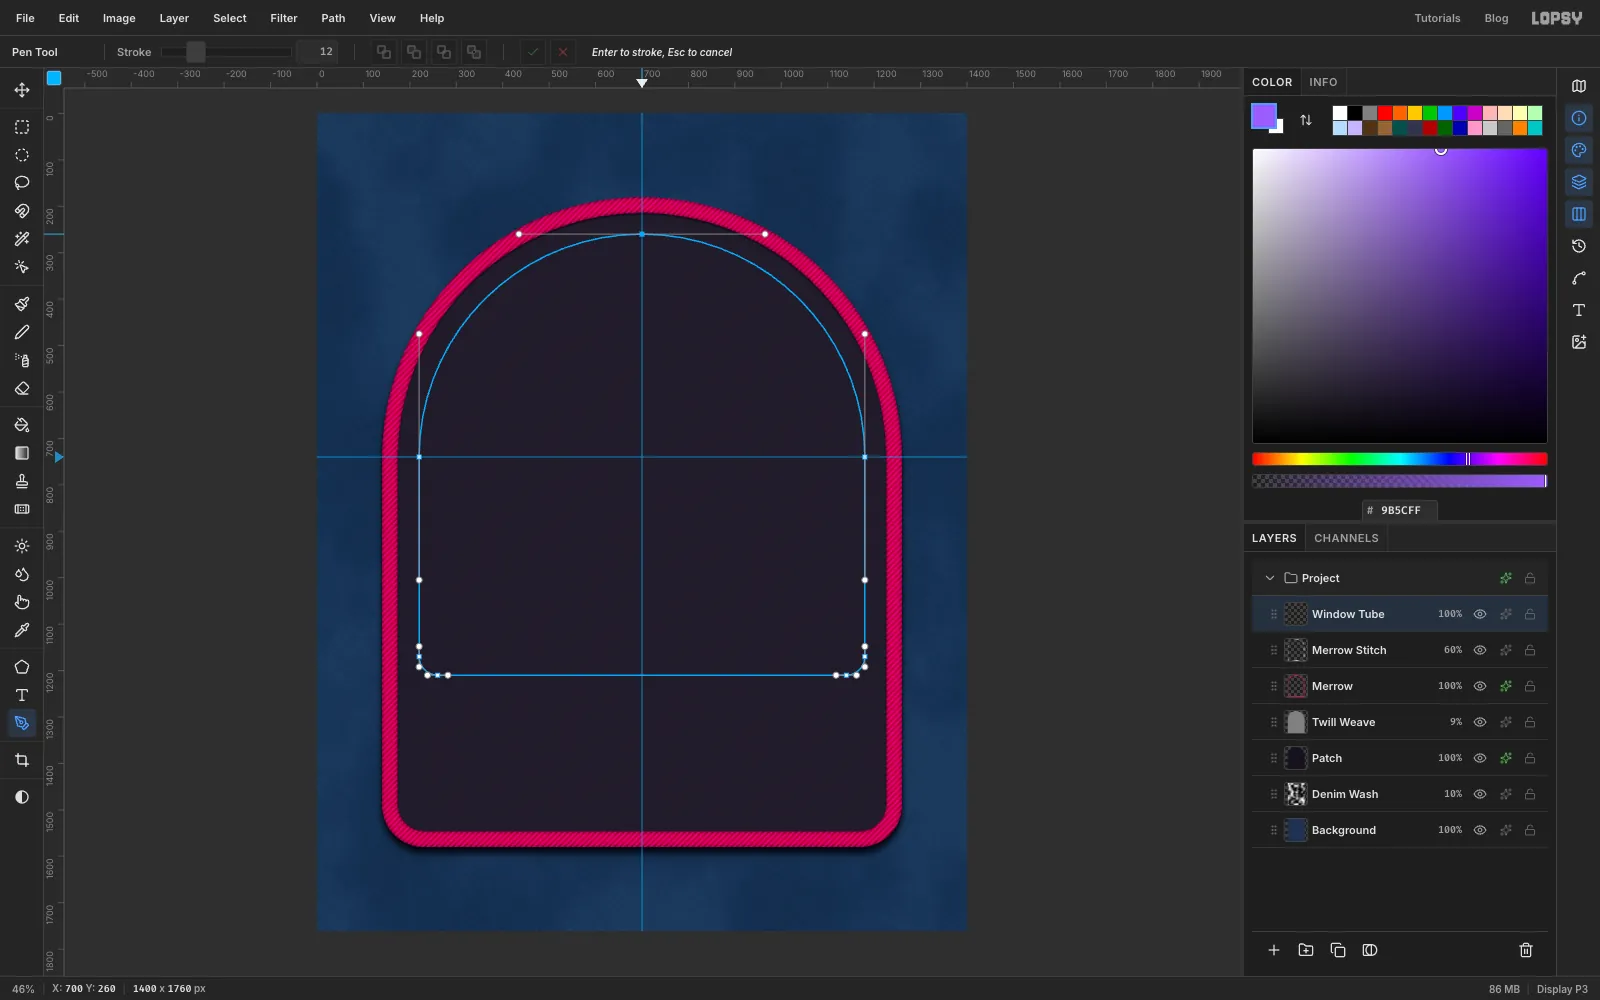
Add a layer named Window Tube and set the foreground to violet . Pick the Pen tool and set Stroke to
12in the options bar.To draw a curve with the Pen, press on the anchor point and drag in the direction you're travelling. That pulls out handles. A plain click makes a sharp corner. Go clockwise:
- press at
700, 260(the top) and drag right about 265 px - press at
1180, 740and drag straight down about 265 px - press at
1180, 1170and drag down about 22 px - press at
1140, 1210and drag left about 22 px - press at
260, 1210and drag left about 22 px - press at
220, 1170and drag up about 22 px - press at
220, 740and drag up about 265 px
Finally click the first anchor to close the path. A drag of about 0.55 × the radius makes a near-perfect quarter circle. That's why the long drags are 265 px for a 480 px arch and the short ones 22 px for the 40 px corners.
- press at
-
Stroke both window tubes
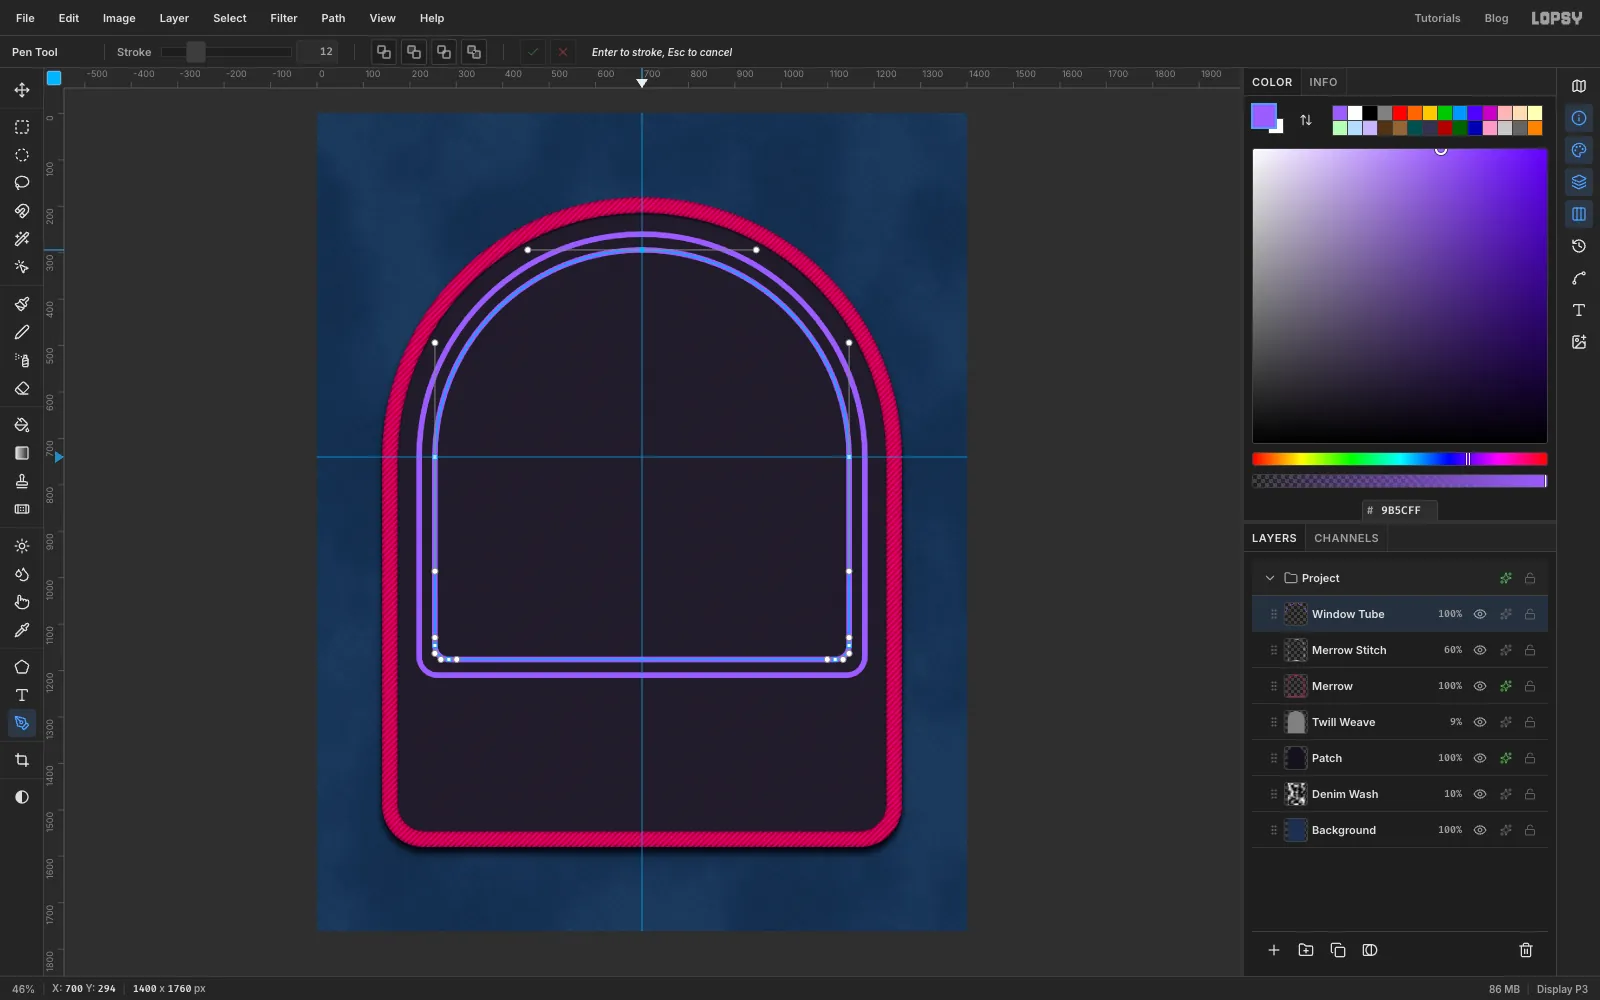
Press Enter to stroke the closed path in violet. Then draw a second window 34 px inside the first, the same way:
- press at
700, 294and drag right about 246 px - press at
1146, 740and drag down about 246 px - press at
1146, 1146and drag down about 17 px - press at
1116, 1176and drag left about 17 px - press at
284, 1176and drag left about 17 px - press at
254, 1146and drag up about 17 px - press at
254, 740and drag up about 246 px
Click the first anchor to close it and press Enter again.
If a tube wobbles, Cmd+Z removes the stroke and a second Cmd+Z removes the path. Cmd+Shift+Z brings both back exactly as they were.
- press at
-
Add the white-hot cores
A real neon tube is brightest in the middle. Add a layer named Window Core and set the foreground to pale lavender . Open the Paths panel, click Path 1 and click the Stroke Path button at the bottom of the panel. Enter Width
4and click Stroke. Do the same for Path 2.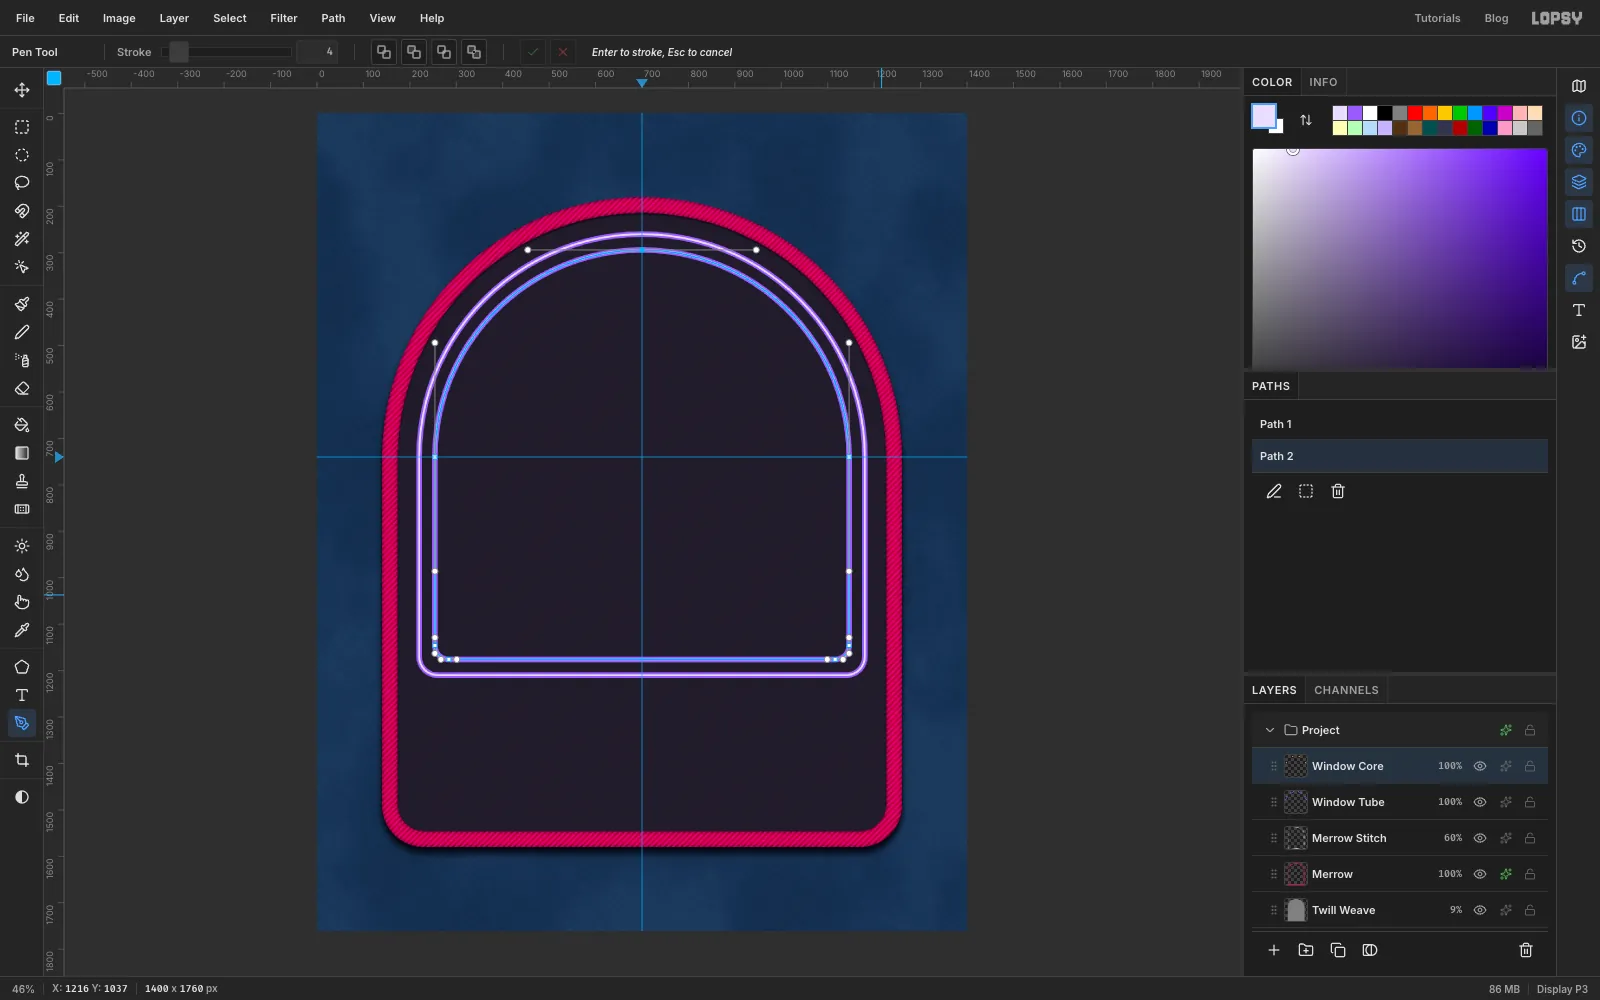
-
Make the window glow
Click Window Tube and turn on Outer Glow with the colour , Size
26, Spread10and Opacity85. The cores stay crisp because they sit on their own layer above the glow.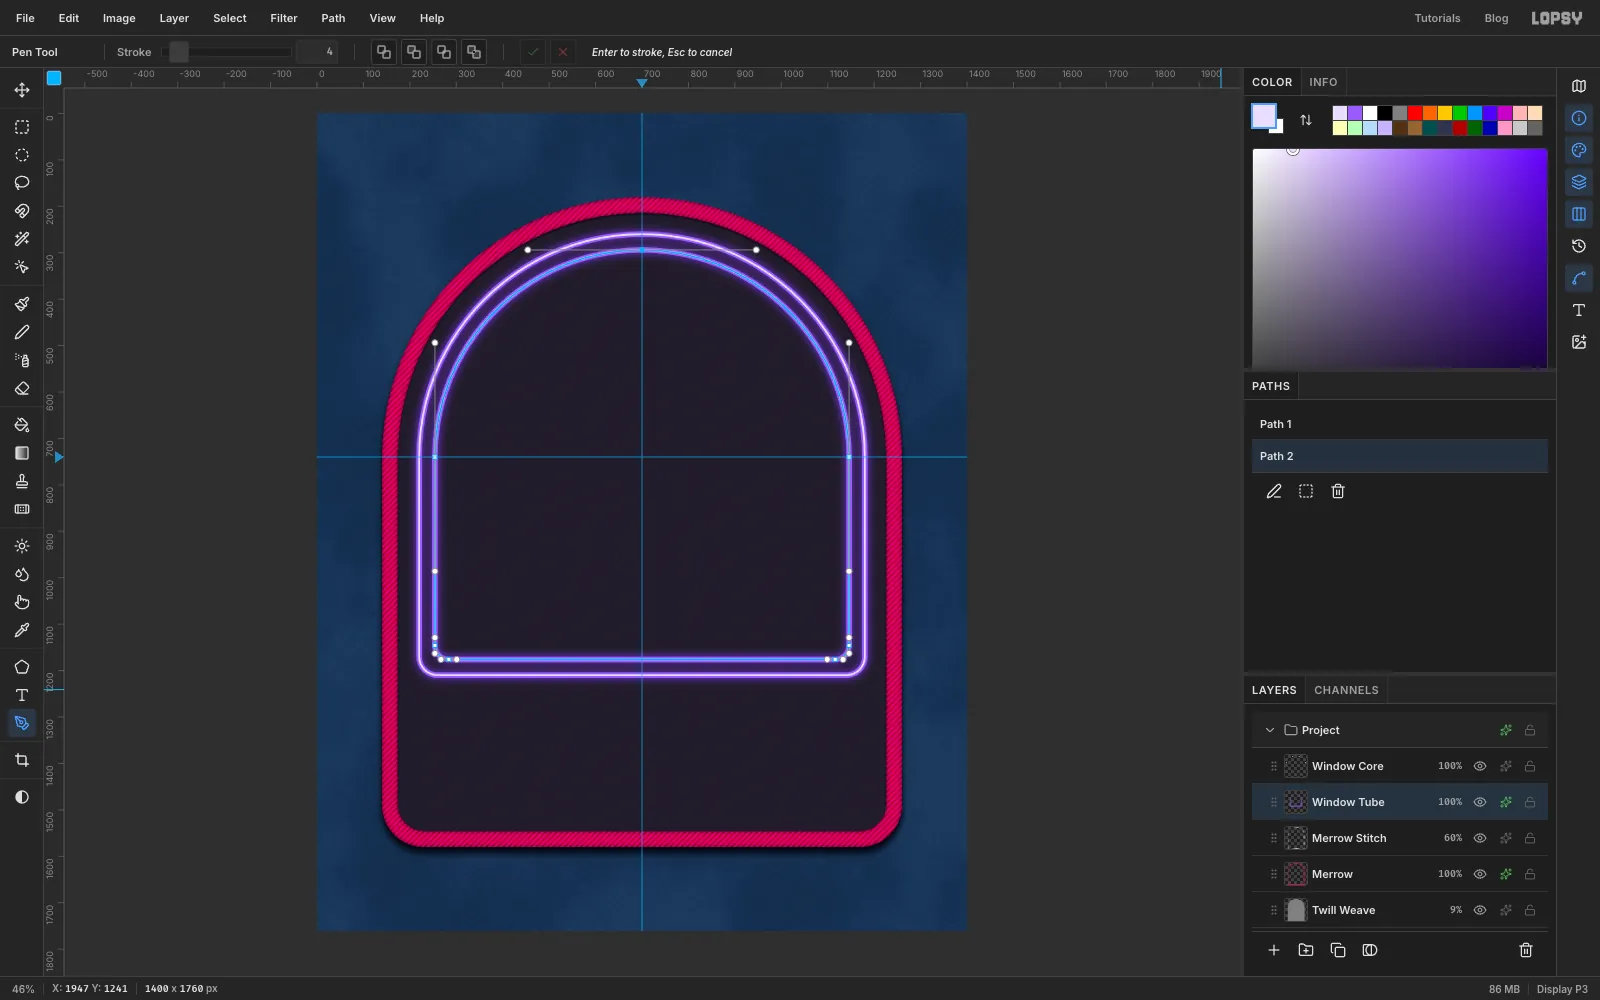
-
Paint the jukebox rays
Click Merrow Stitch and add a layer named Rays, so the rays sit under the tubes. In the Paths panel click Path 2 and click Path to Selection. Set the foreground to and choose Filter → Sunburst…: Rays
28, Length100, Width45, Taper0, Fade70, Softness60, Center X51and Center Y36(percentages of the canvas, so the rays radiate from about714, 634). Click Apply. Because the inner window is selected, the rays stay inside it.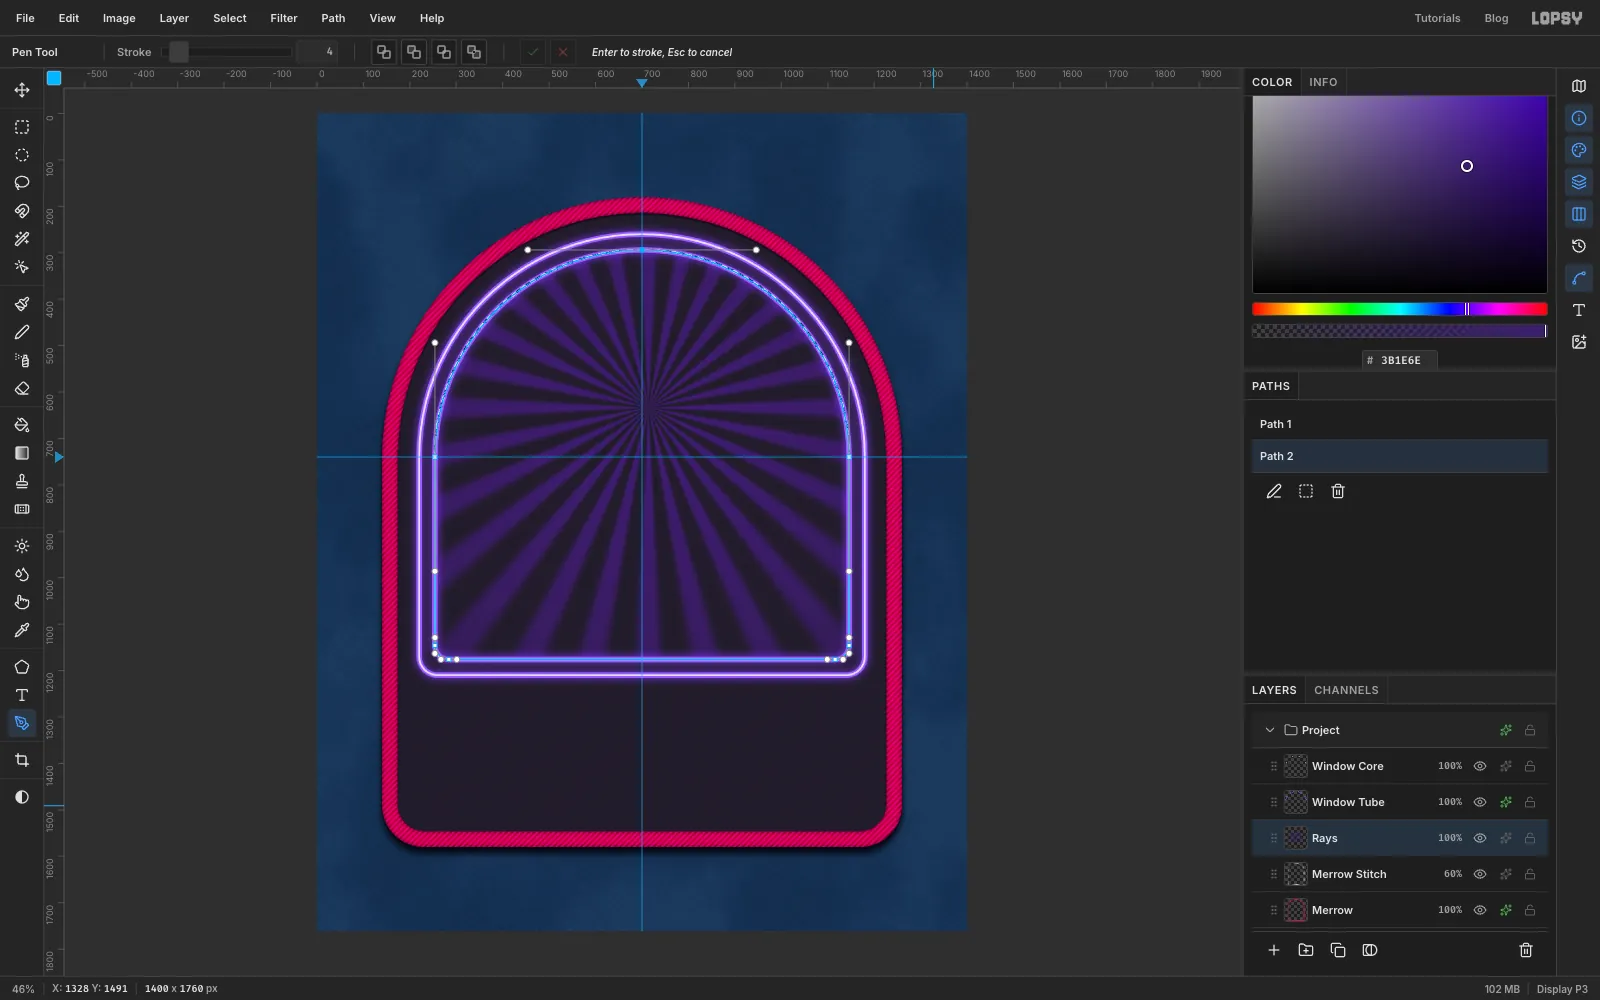
-
Clear the centre of the rays
Deselect. All the rays meet at one point, and that knot of lines would fight with the bird. Set the marquees' Feather to
50, then select an ellipse from570, 490to870, 790and press Delete. Deselect and set Feather back to0. Set Rays to Screen at 22%.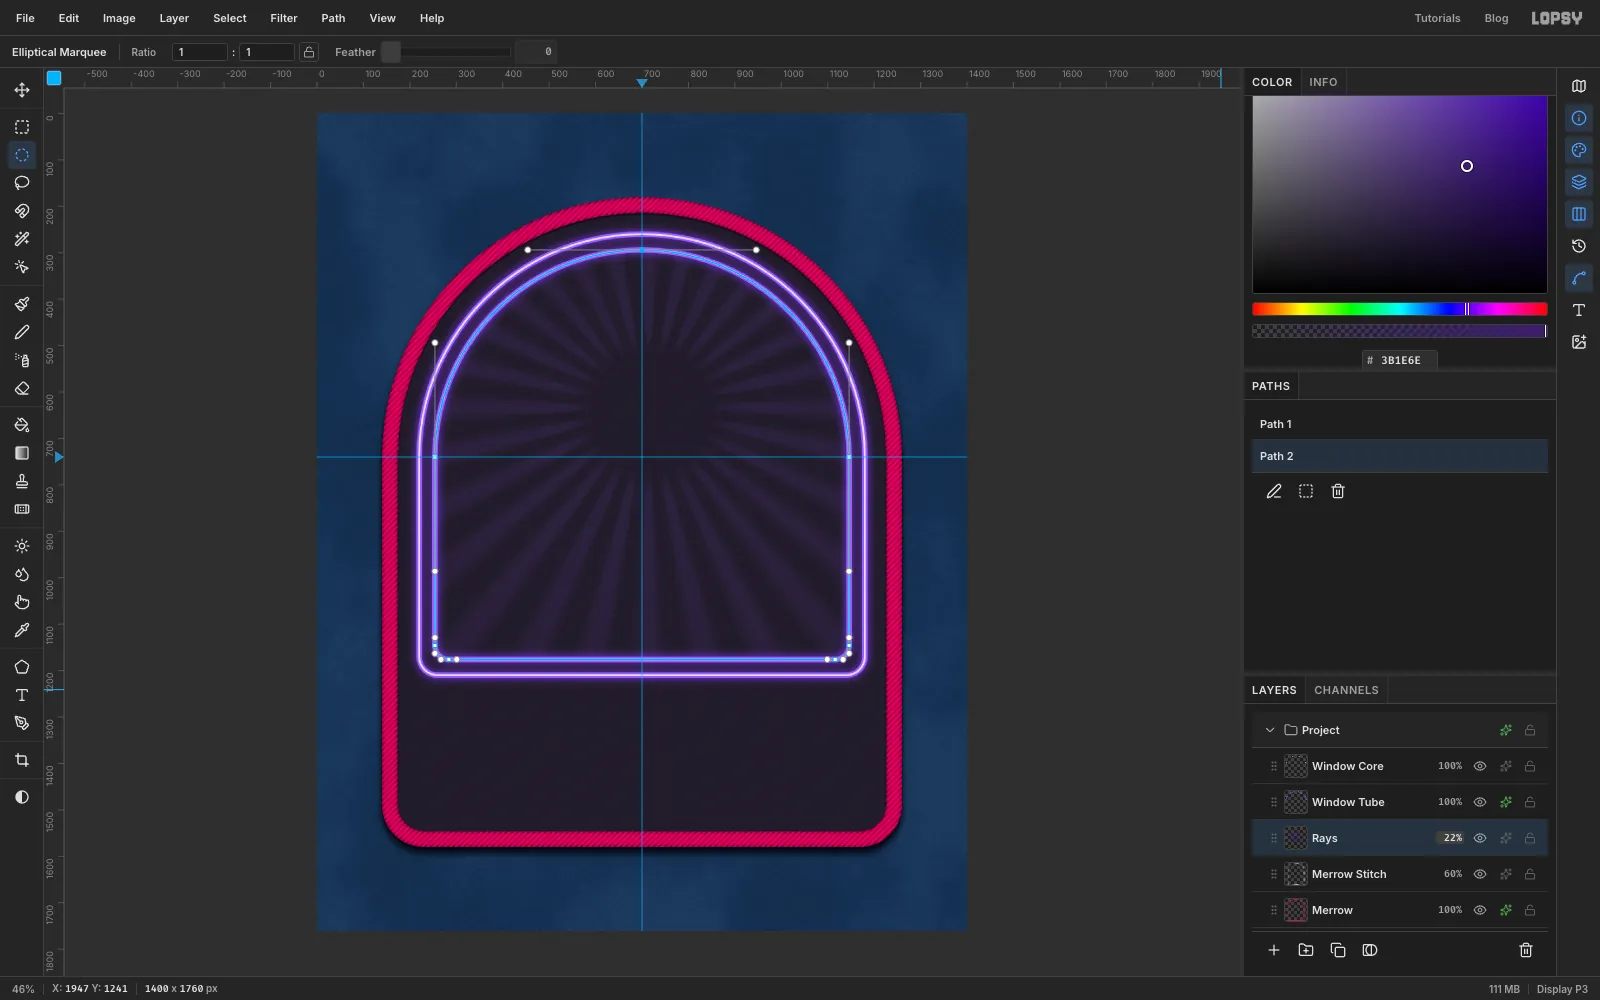
-
Drop in the reference photo
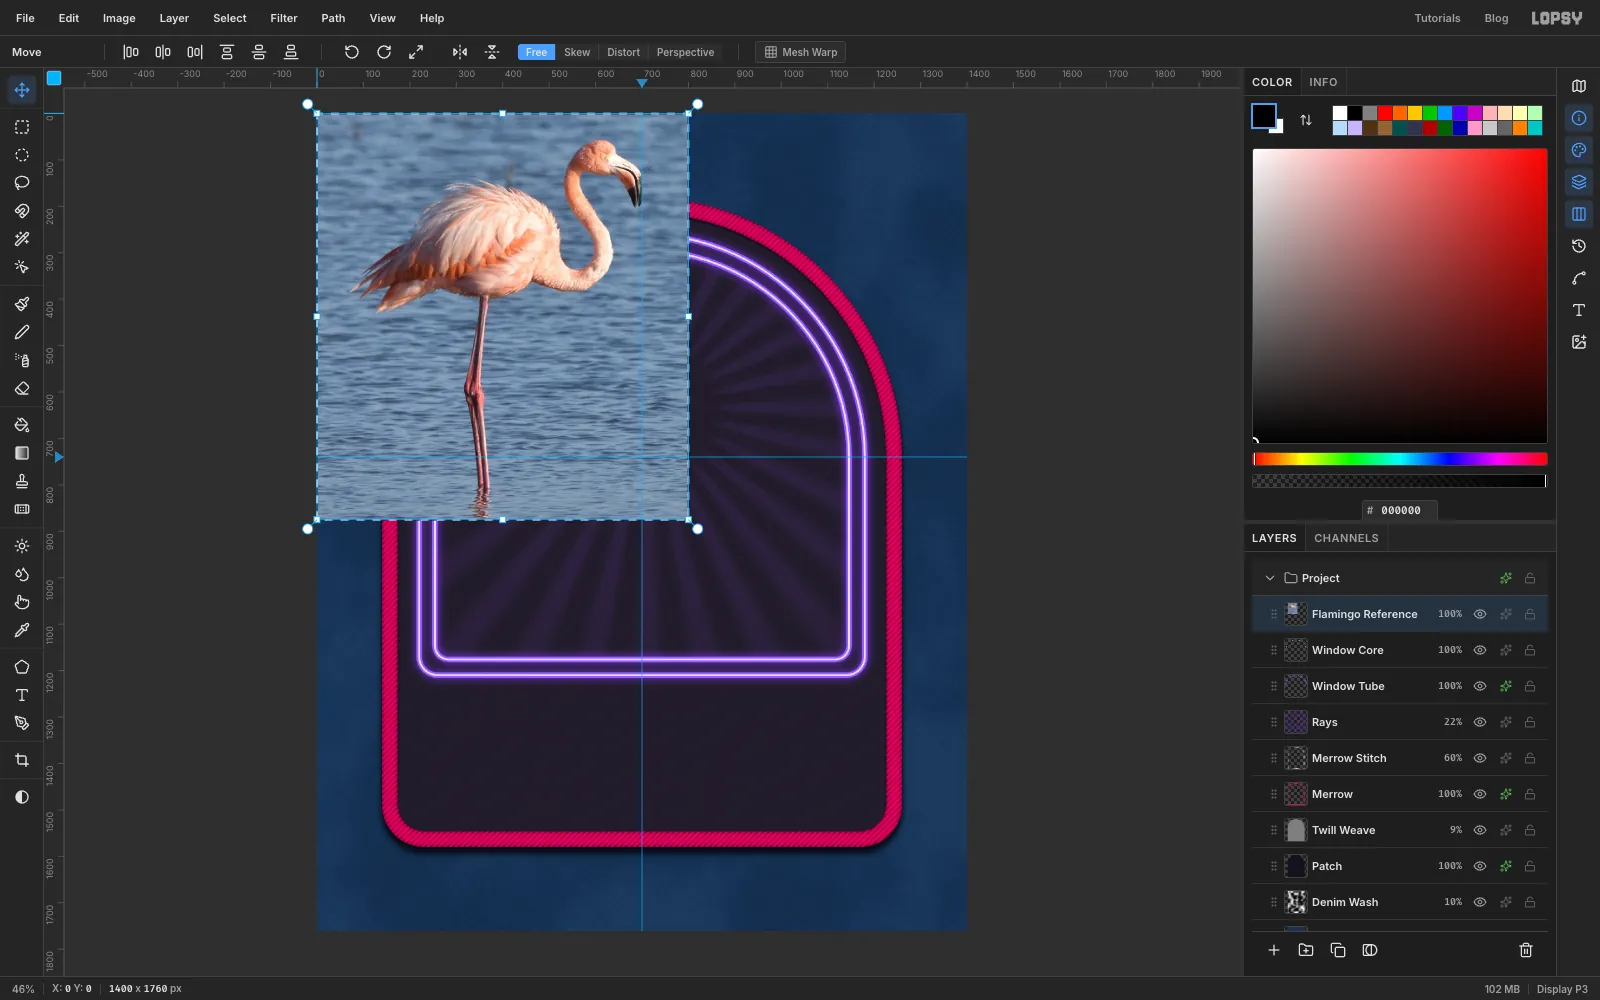
Download the photo from Wikimedia Commons.jpg) and crop it to the bird, about 800 × 875 px with a little water around it. Click Window Core, so the photo and your tracing go above the window tubes, then drag the photo from your desktop onto the canvas. It arrives as a new layer at the top-left corner, already selected, with the Move tool active. Rename the layer Flamingo Reference.
-
Scale the photo
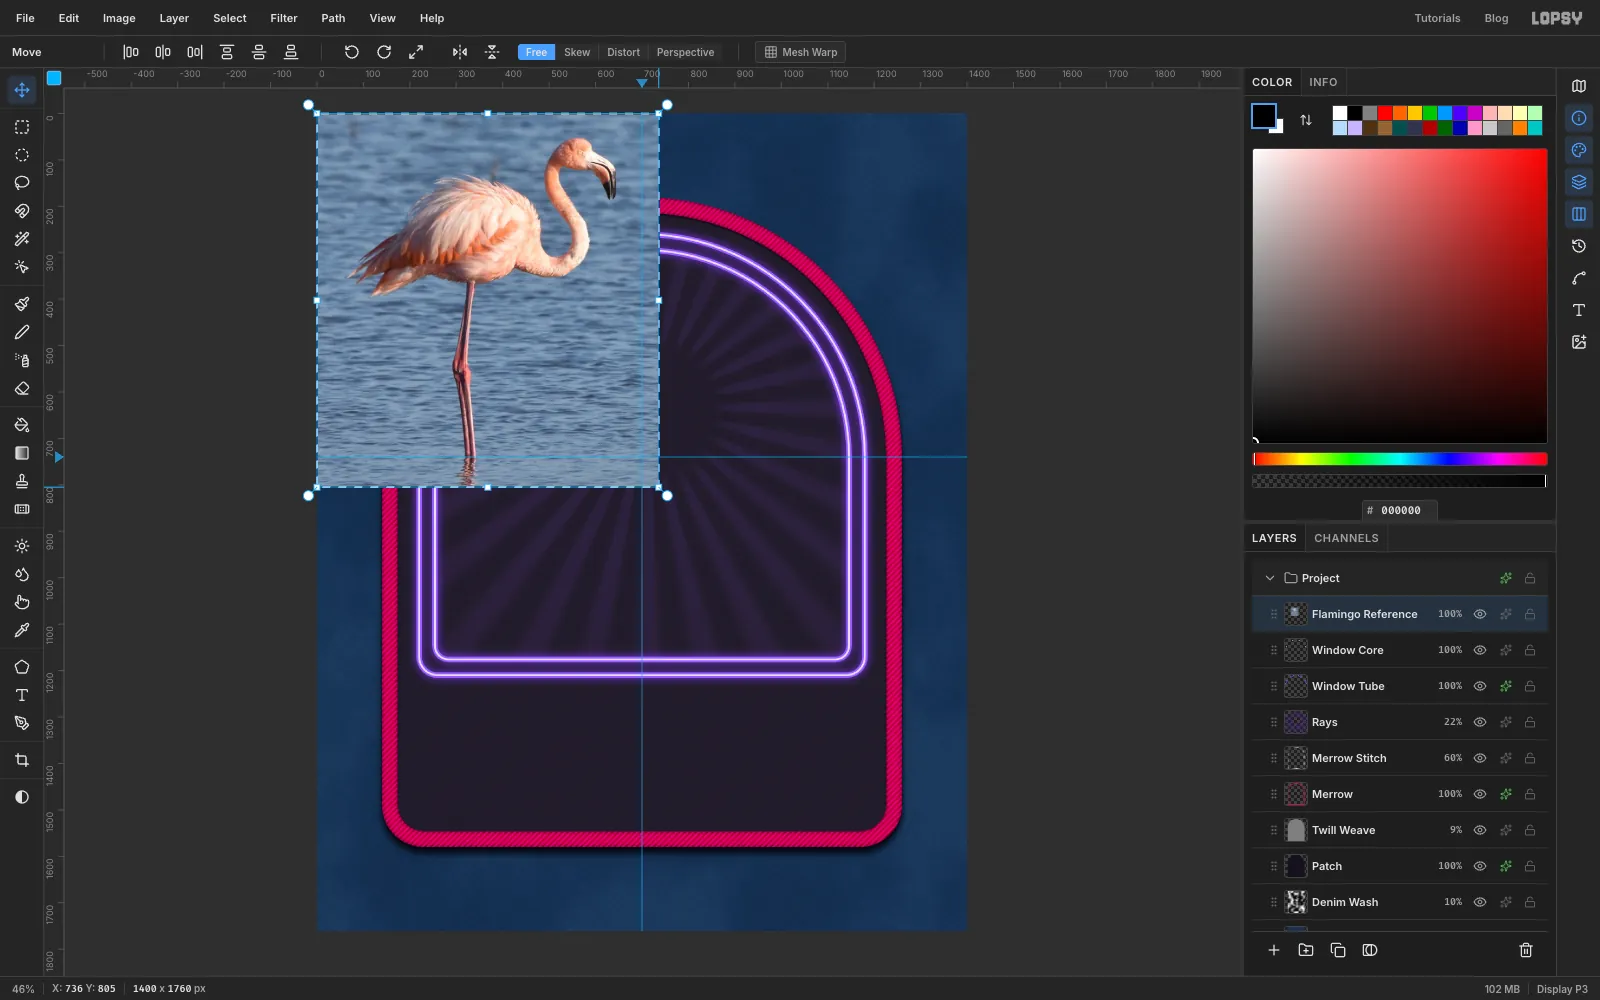
Hold Cmd and drag the bottom-right corner handle up and to the left. Cmd keeps the proportions. Stop when the photo is about 736 × 805 px, 92% of its size.
-
Place and fade the photo
Drag the photo so its top-left corner is at about
344, 340. That puts the bird's head well clear of the window tubes. Press Cmd+D to commit the transform and set the layer's opacity to 45%, so your tubes will stand out against it.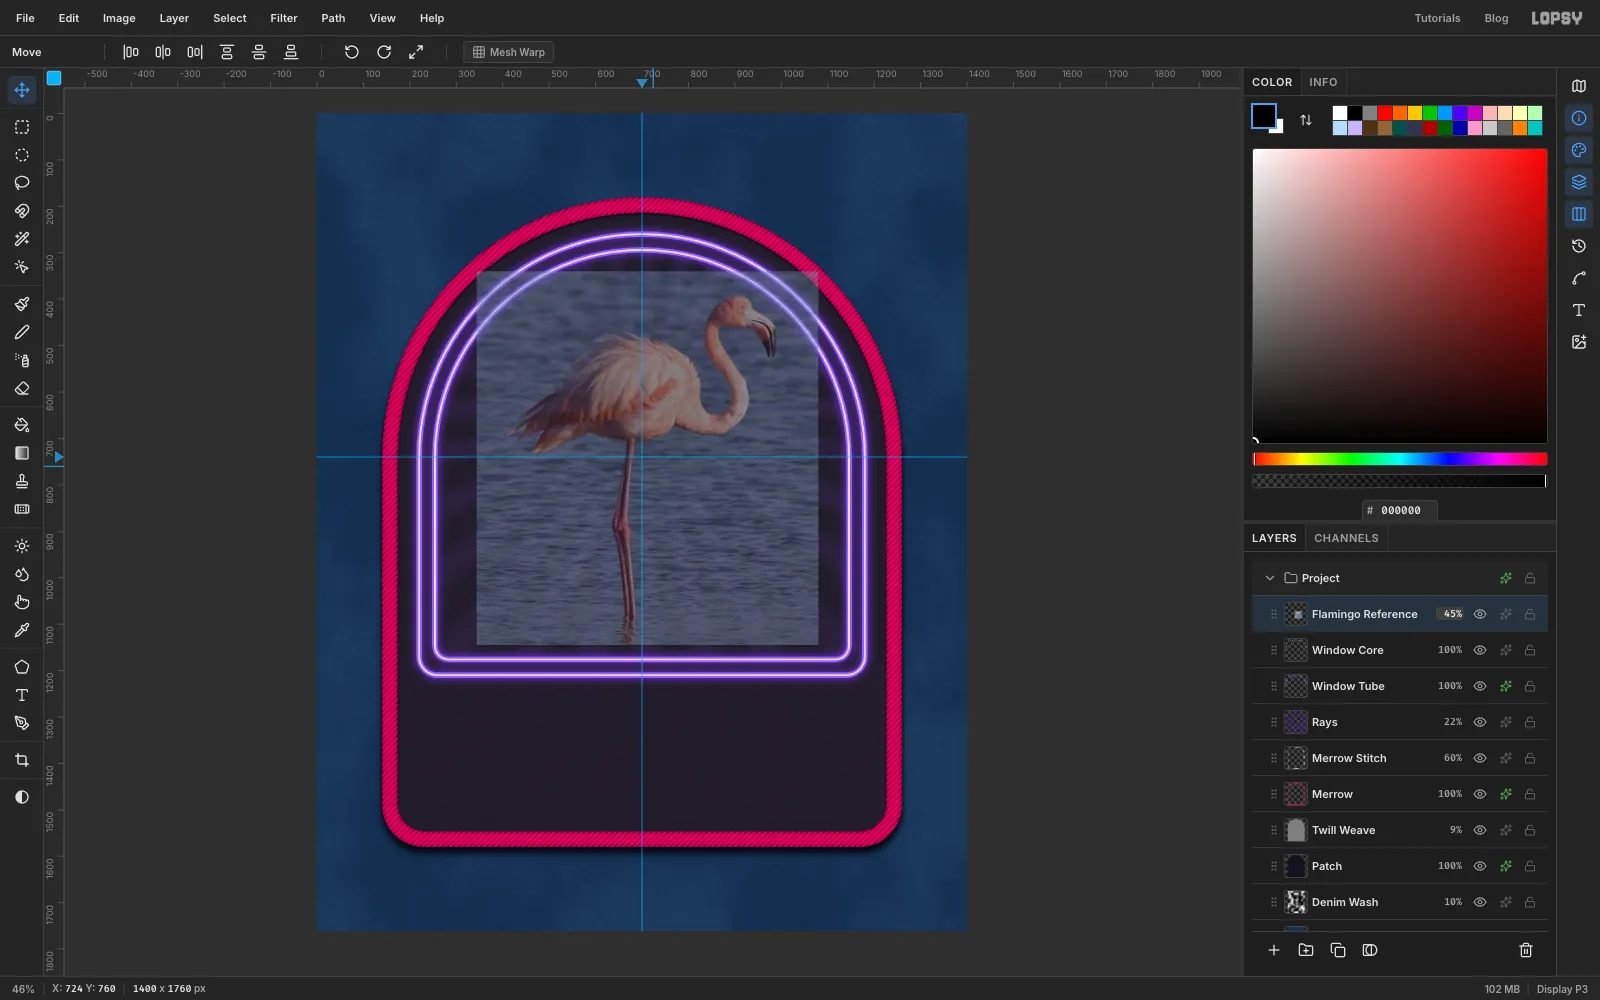
-
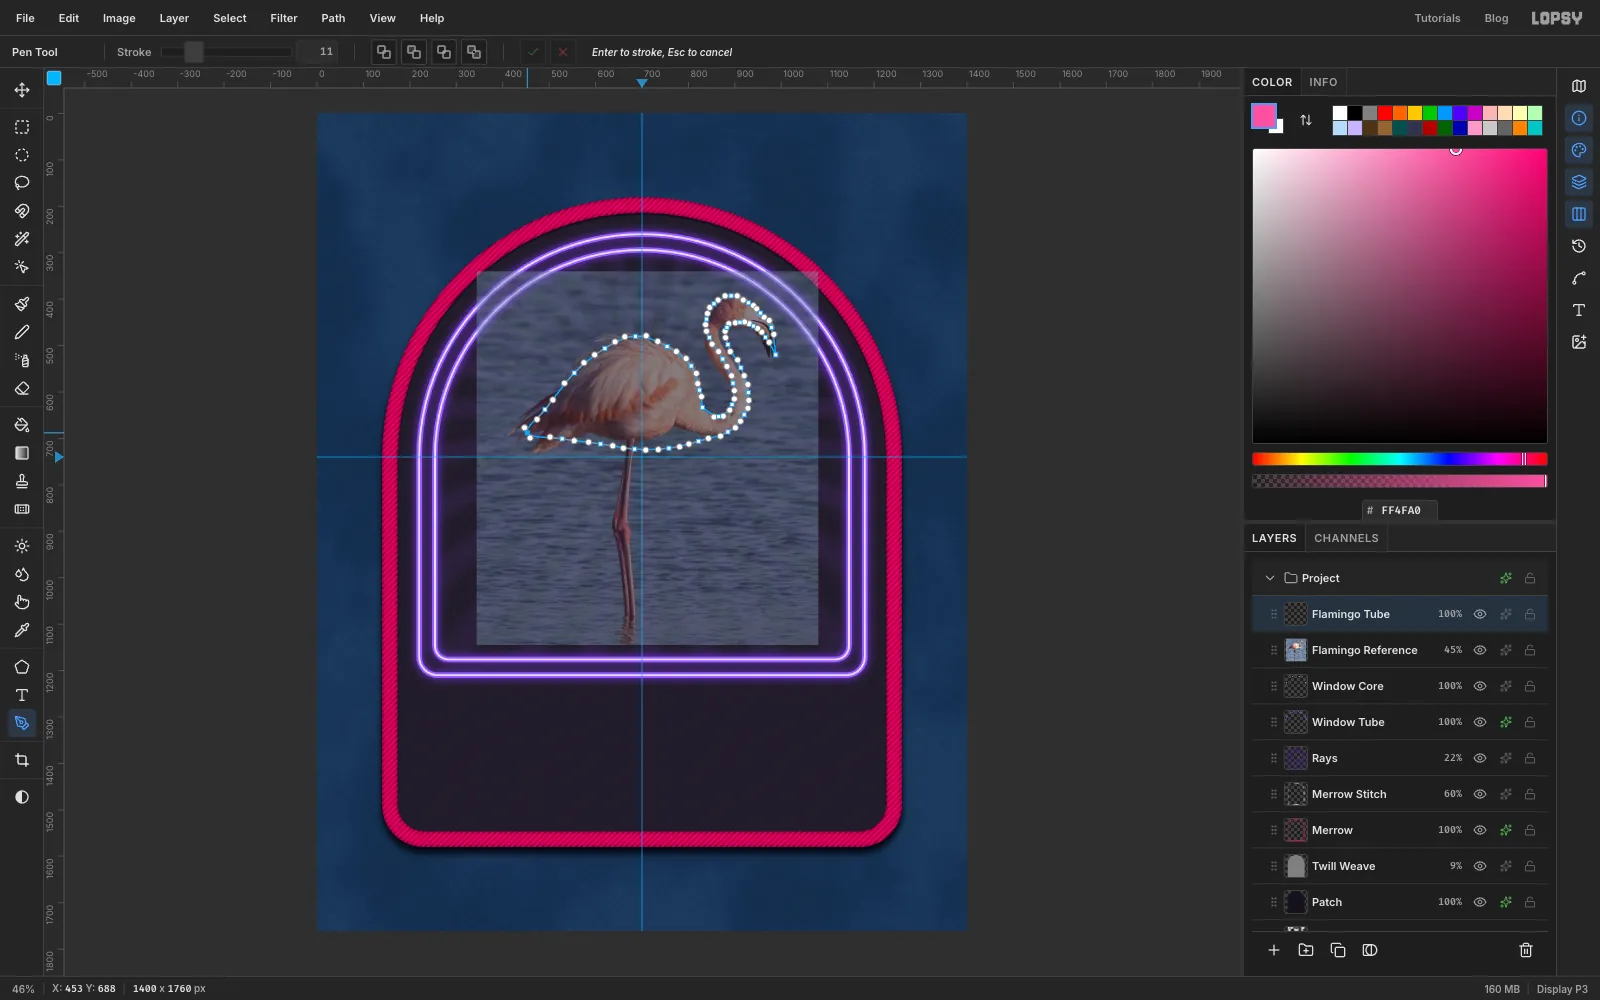
Trace the flamingo outline
Add a layer named Flamingo Tube, set the foreground to flamingo pink and set the Pen's Stroke to
11. Now trace the outline of the body, neck and head as one closed path:- Start at the tail tip and go clockwise along the back, about one anchor every 70 px, dragging each one along the curve.
- Make plain clicks (sharp corners) at only two places: where the front of the neck leaves the chest, and at the tip of the beak.
- Come back along the underside of the beak and the throat, down the front of the neck, and along a gently sagging belly to the tail.
- Click the first anchor to close the loop.
Don't follow every feather. A neon sign is a simplified drawing, so round off anything fluffy.
-
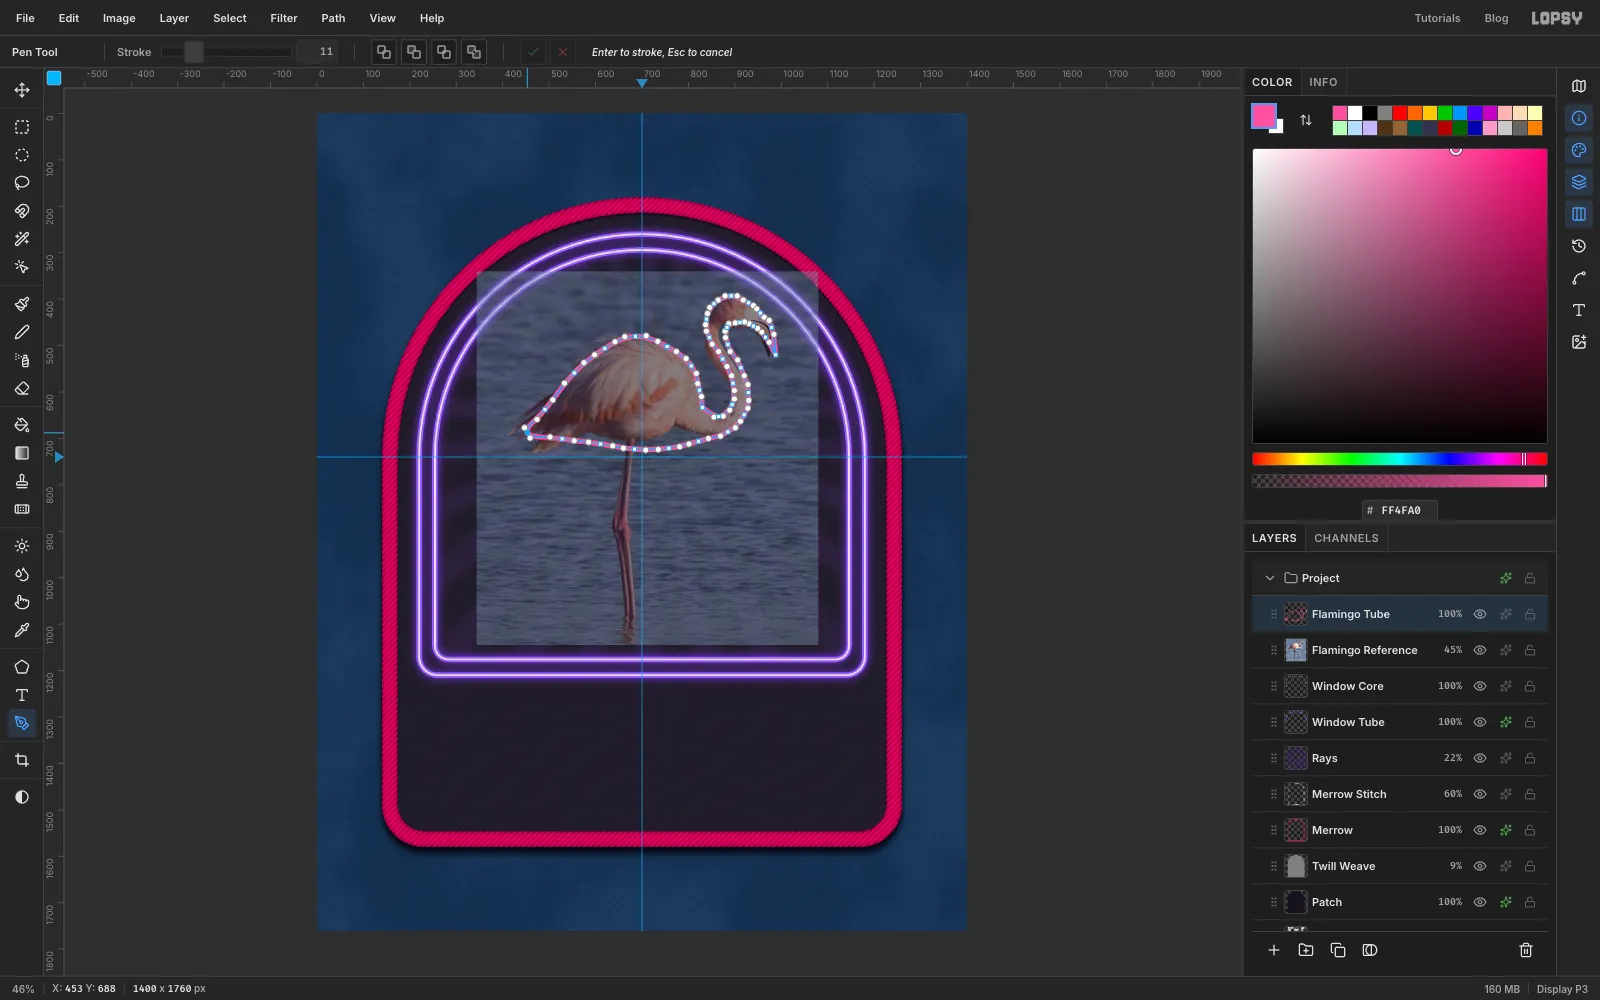
Stroke the outline
Press Enter to stroke the outline. Zoom in and check the tube runs smoothly. If a curve kinks, undo and drag that anchor's handle further.
-
Add the wing and legs
Draw three open paths with the Pen, pressing Enter after each one to stroke it:
- Wing: one long curve from the rear of the body up to the shoulder.
- Standing leg: from the belly straight down, with a plain click at the joint halfway down, and a short foot pointing forward.
- Folded leg: from the belly forward to a rounded knee, then back to meet the standing leg at the joint. Flamingos tuck one leg up, and the folded "4" shape is the classic neon flamingo pose.
For the eye, use the Elliptical Marquee to select a 12 px circle from
901, 413to913, 425and fill it.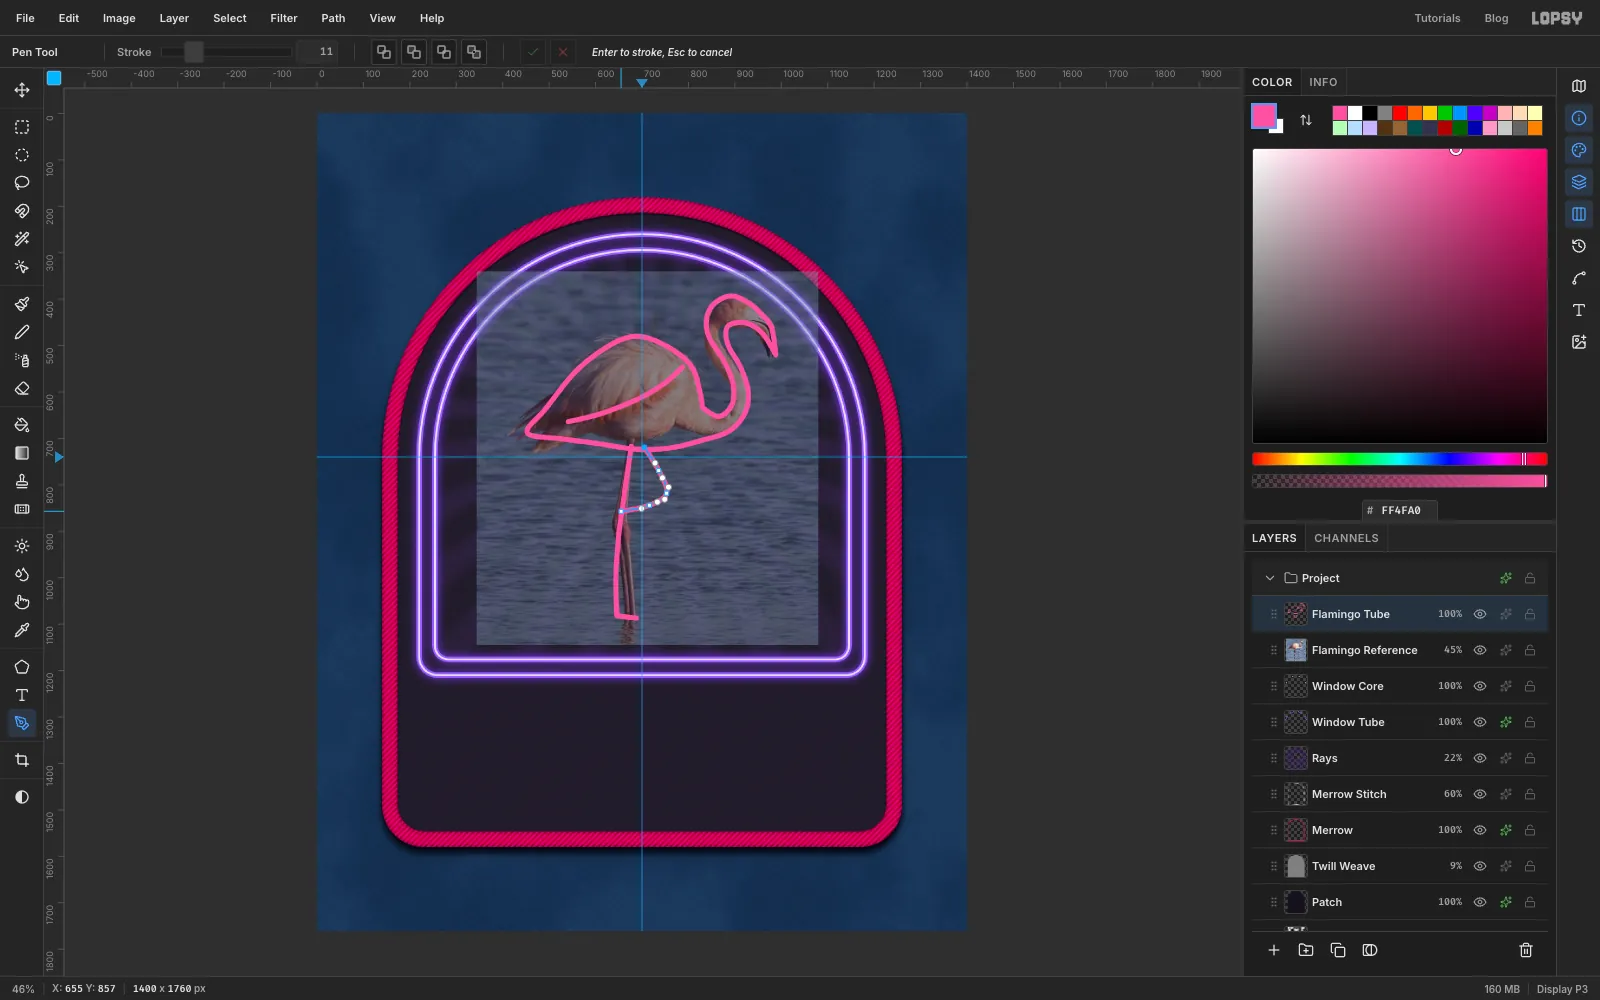
-
Add the flamingo cores
Add a layer named Flamingo Core and set the foreground to . In the Paths panel the flamingo paths are Path 3 (the outline), Path 4 (the wing), Path 5 (the standing leg) and Path 6 (the folded leg). Click each in turn and use Stroke Path with Width
4. Then click the highlighted row once more to deselect it, so its blue path outline stops showing on the canvas.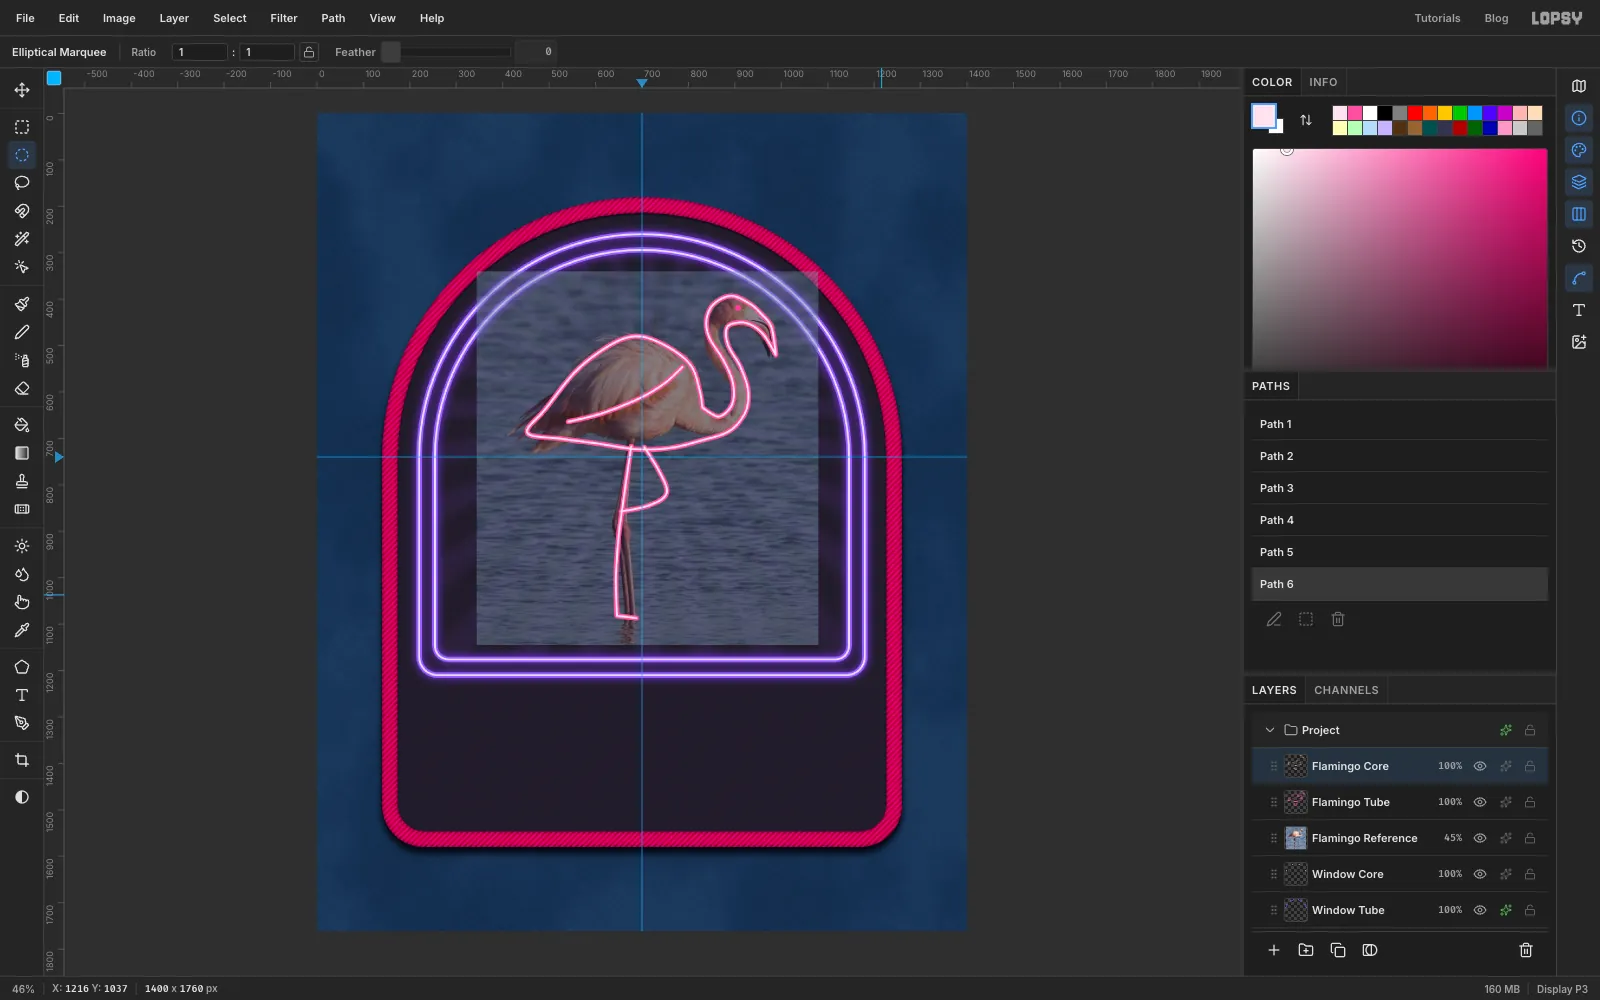
-
Light the flamingo
Click Flamingo Tube and turn on Outer Glow in with Size
24, Spread12and Opacity90. Then click the eye icon on Flamingo Reference to hide the photo. Keep the layer in case you want to trace something else later.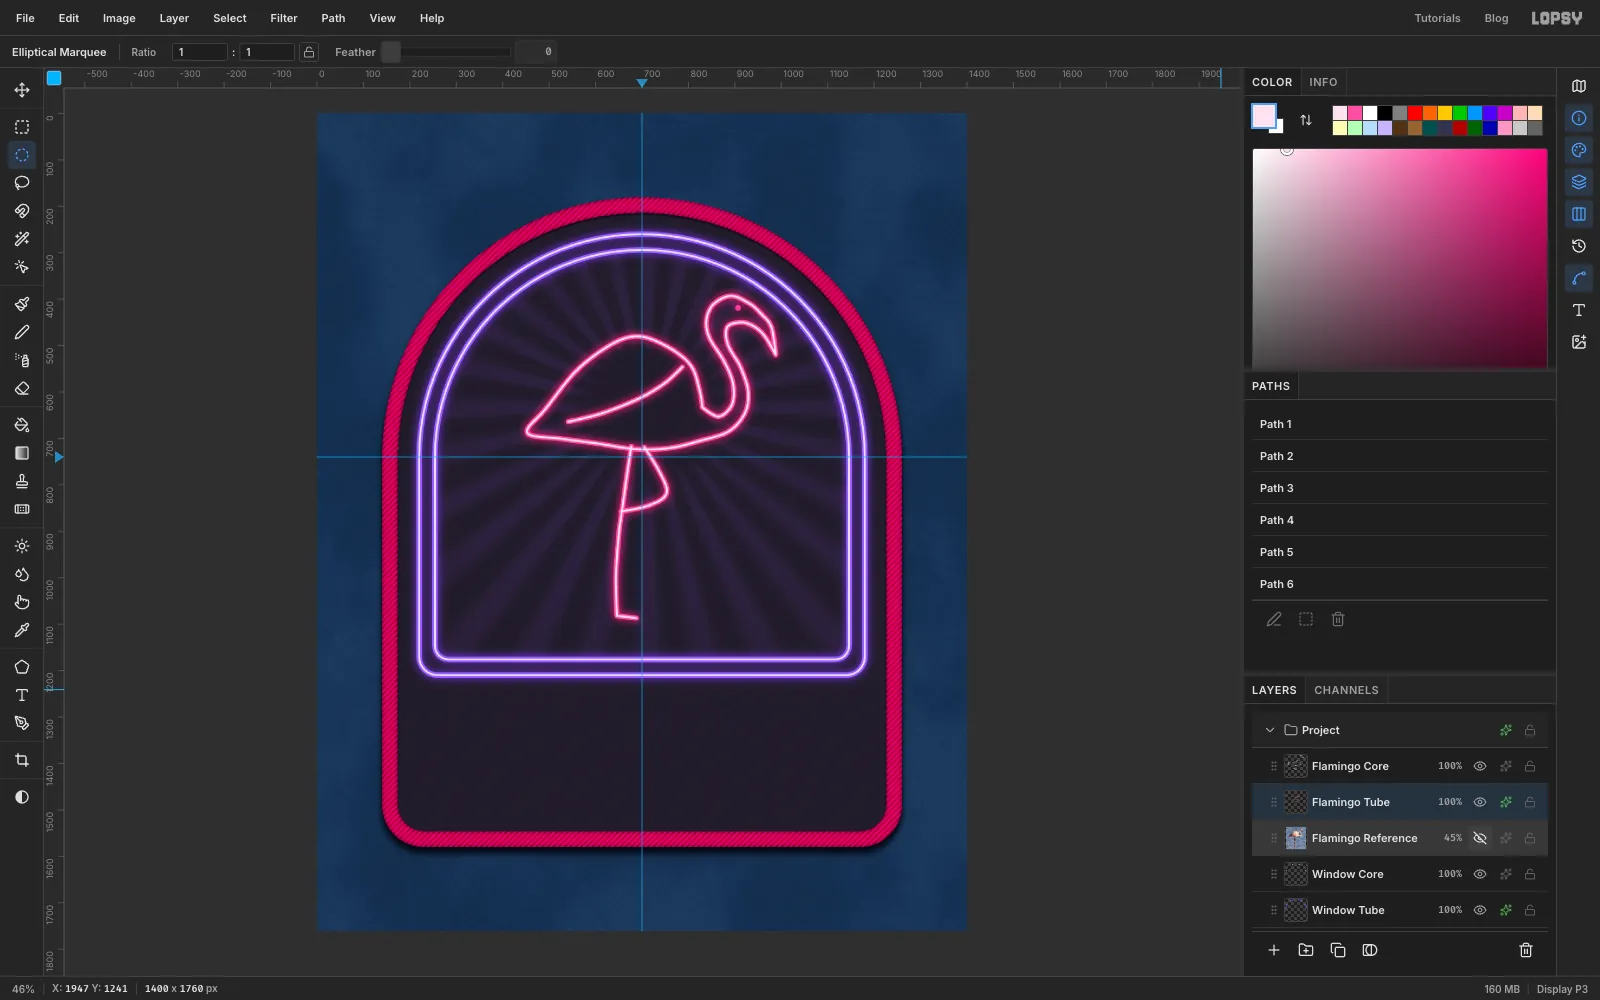
-
Group the flamingo
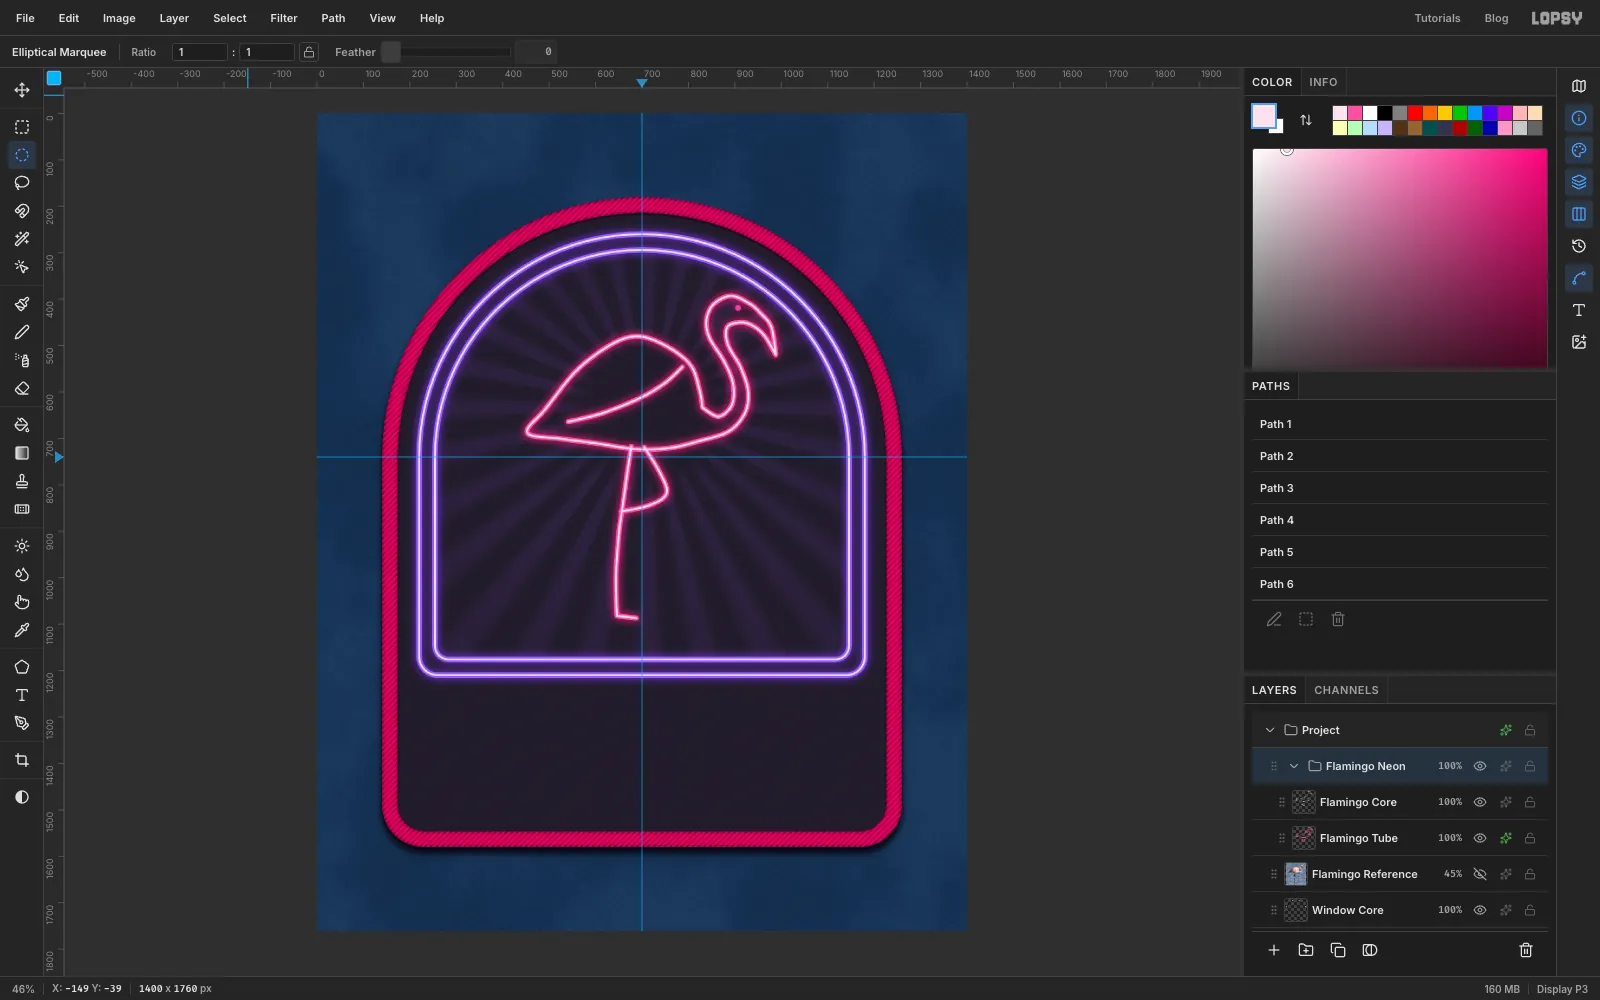
Click Flamingo Core, Shift-click Flamingo Tube and choose Layer → Group Layers. Rename the group Flamingo Neon and collapse it with its arrow. Click the collapsed group so the type you add next lands above it rather than inside it.
-
Set the tagline
Start with the bottom panel. Text you click near existing type edits it, so work from the bottom up. Pick the Text tool and choose Tilt Neon at size
40. In the Text panel set Letter spacing to10, and set the foreground to . Click near330, 1430, typeALL NIGHT · ALL VINYLand press Tab to commit.Switch to the Move tool and nudge the line with the arrow keys until its centre sits at about
700, 1458.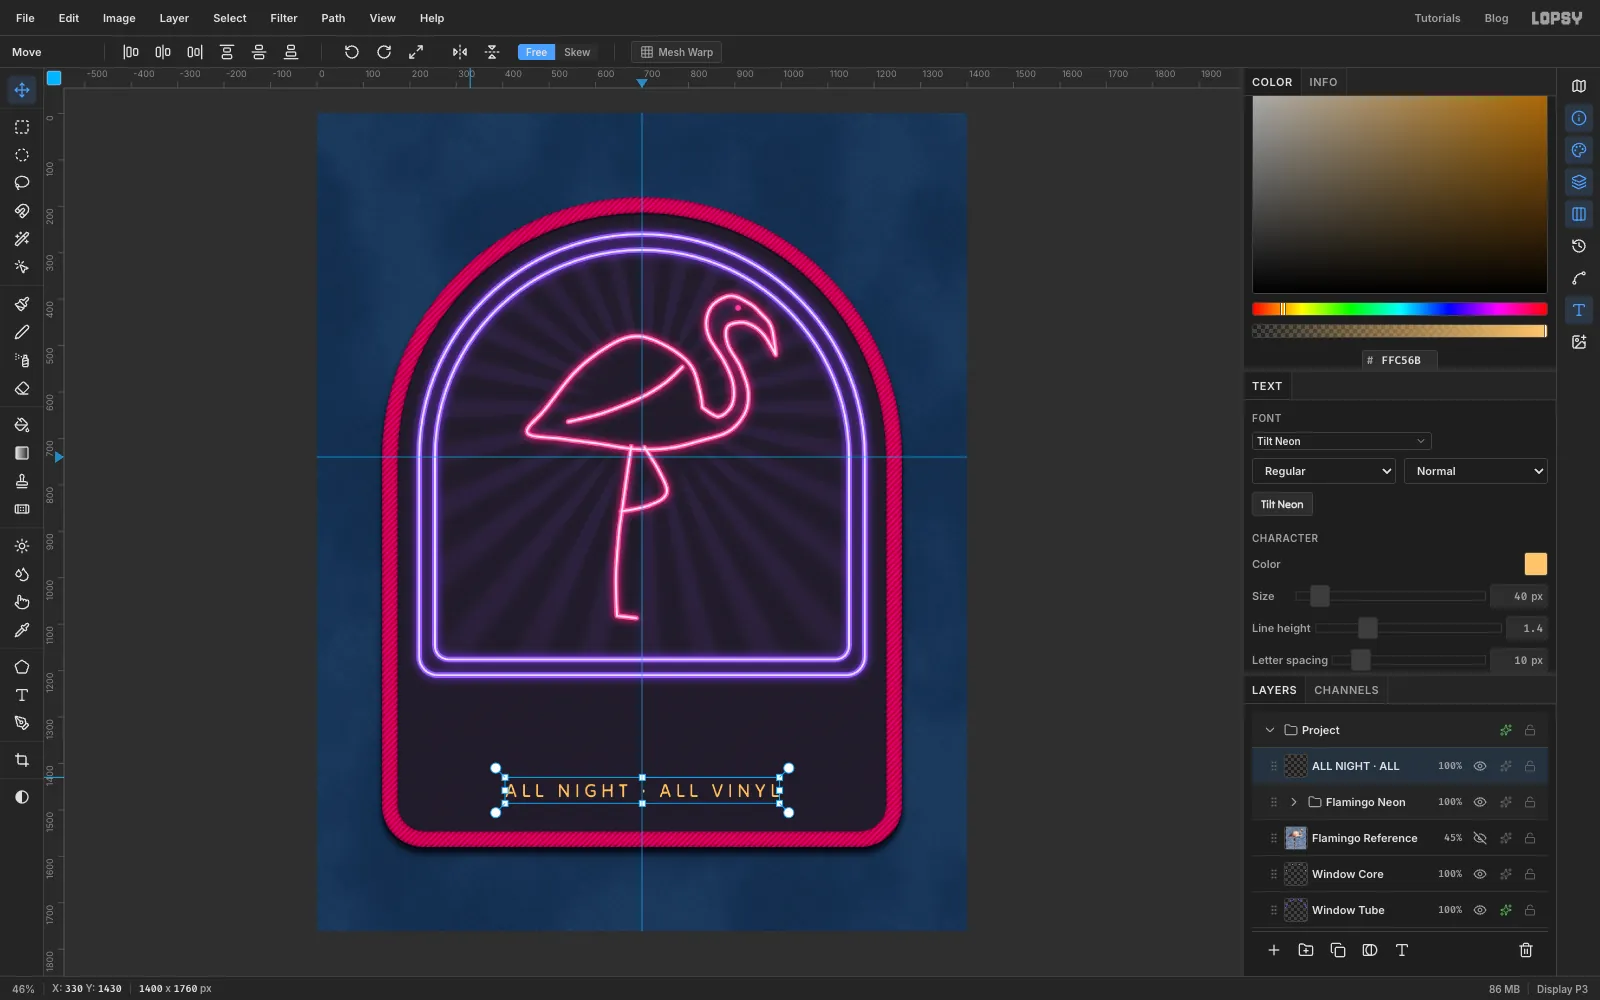
-
Set JUKEBOX
Click the Flamingo Neon group again. Pick the Text tool and choose Monoton at
142with Letter spacing4and amber . Click near300, 1250, typeJUKEBOXand press Tab. Monoton's letters are already made of parallel lines, so they look like bent glass tubing. Nudge the word so its centre sits at about700, 1330, with equal space above and below.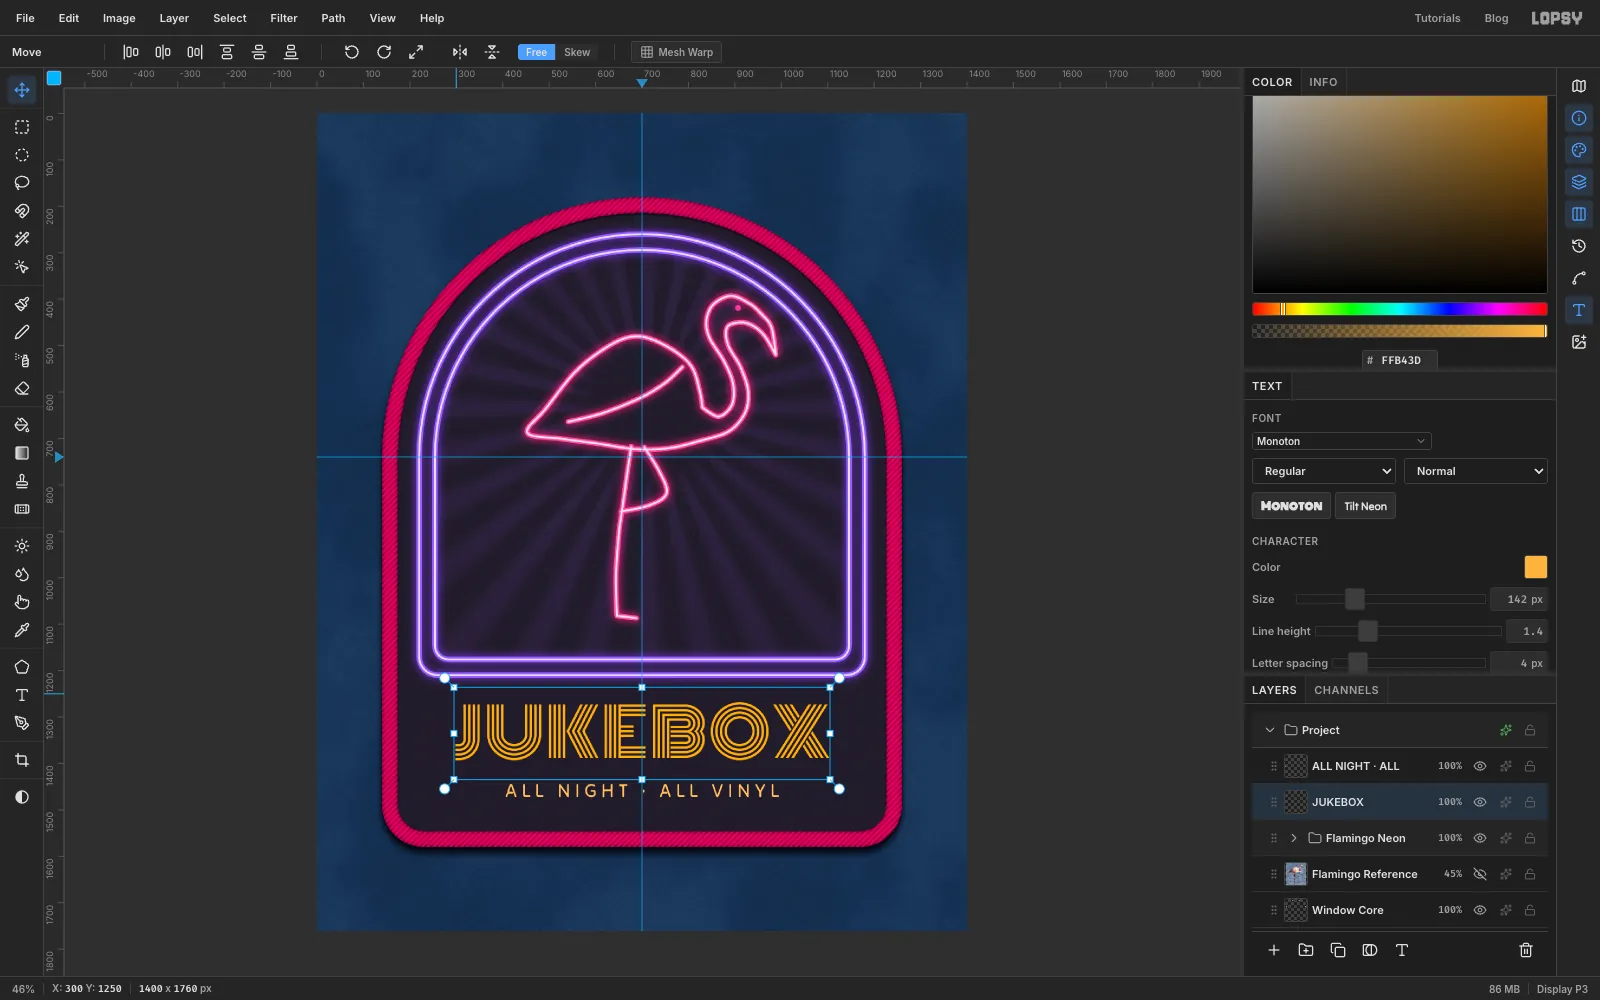
-
Write the script
Click Flamingo Neon once more and pick Sacramento, a script whose letters are a single line of even width, just like a neon tube. Set the foreground to and Letter spacing to
0. Click anywhere in the empty top of the window, typeFlamingoand press Tab.With the text layer selected, change Size until the word is about 640 px wide (around
171). Switch to the Move tool and nudge it with the arrow keys so its centre sits at about697, 1000, across the flamingo's legs.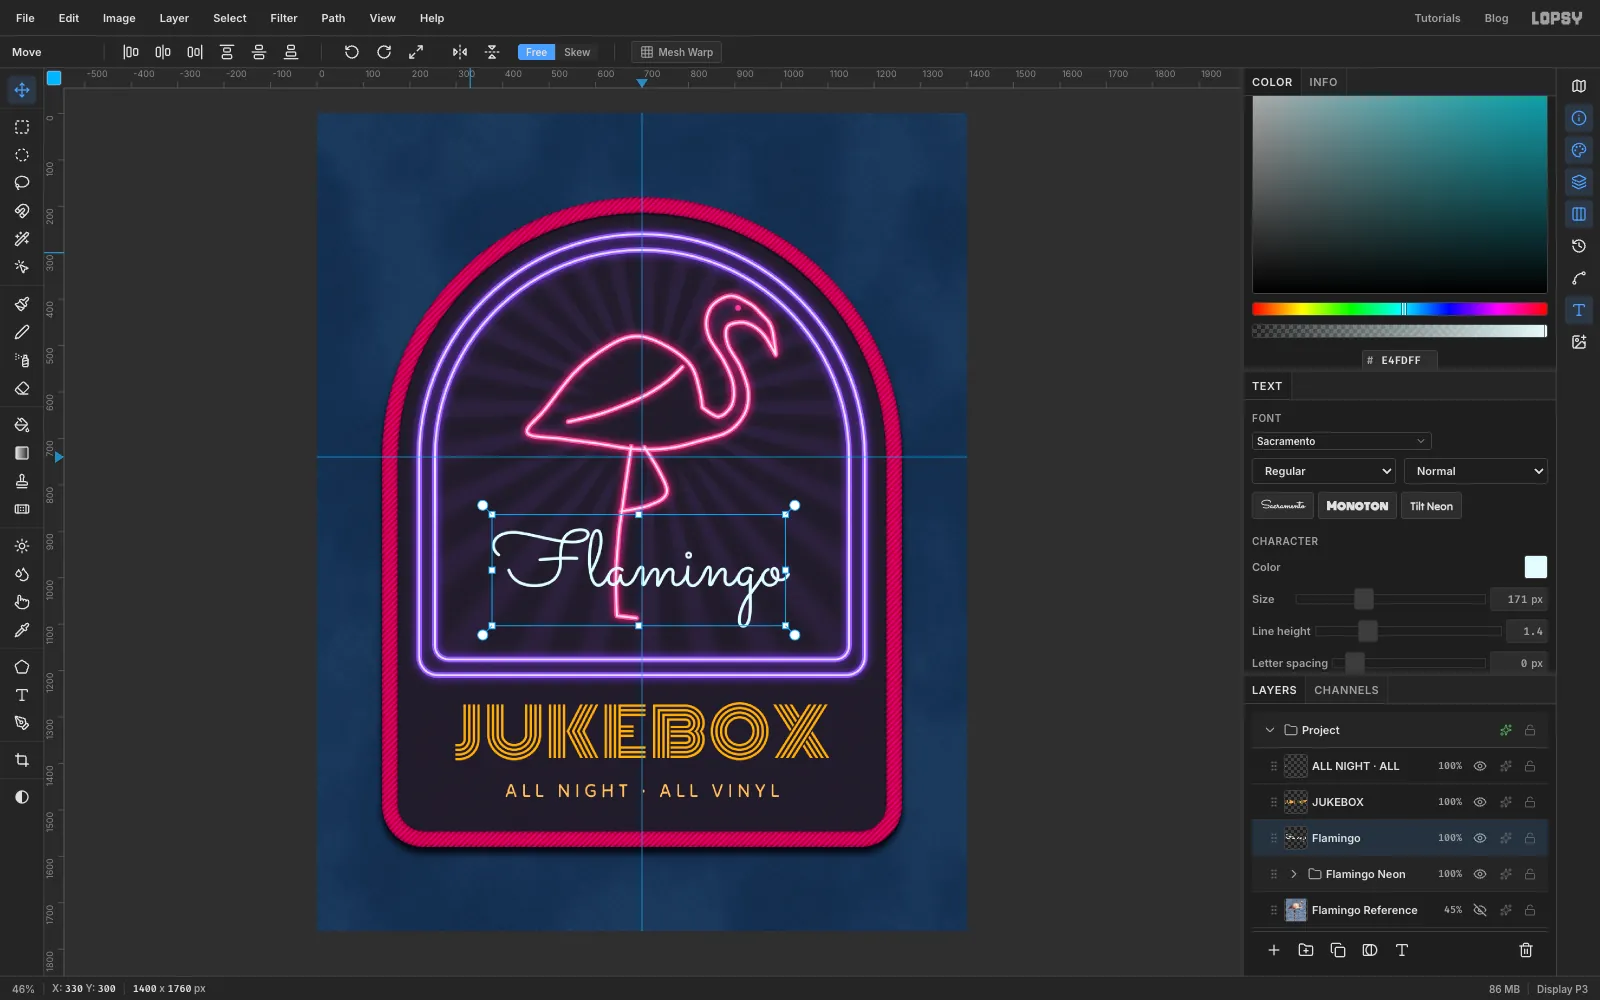
-
Tilt the script
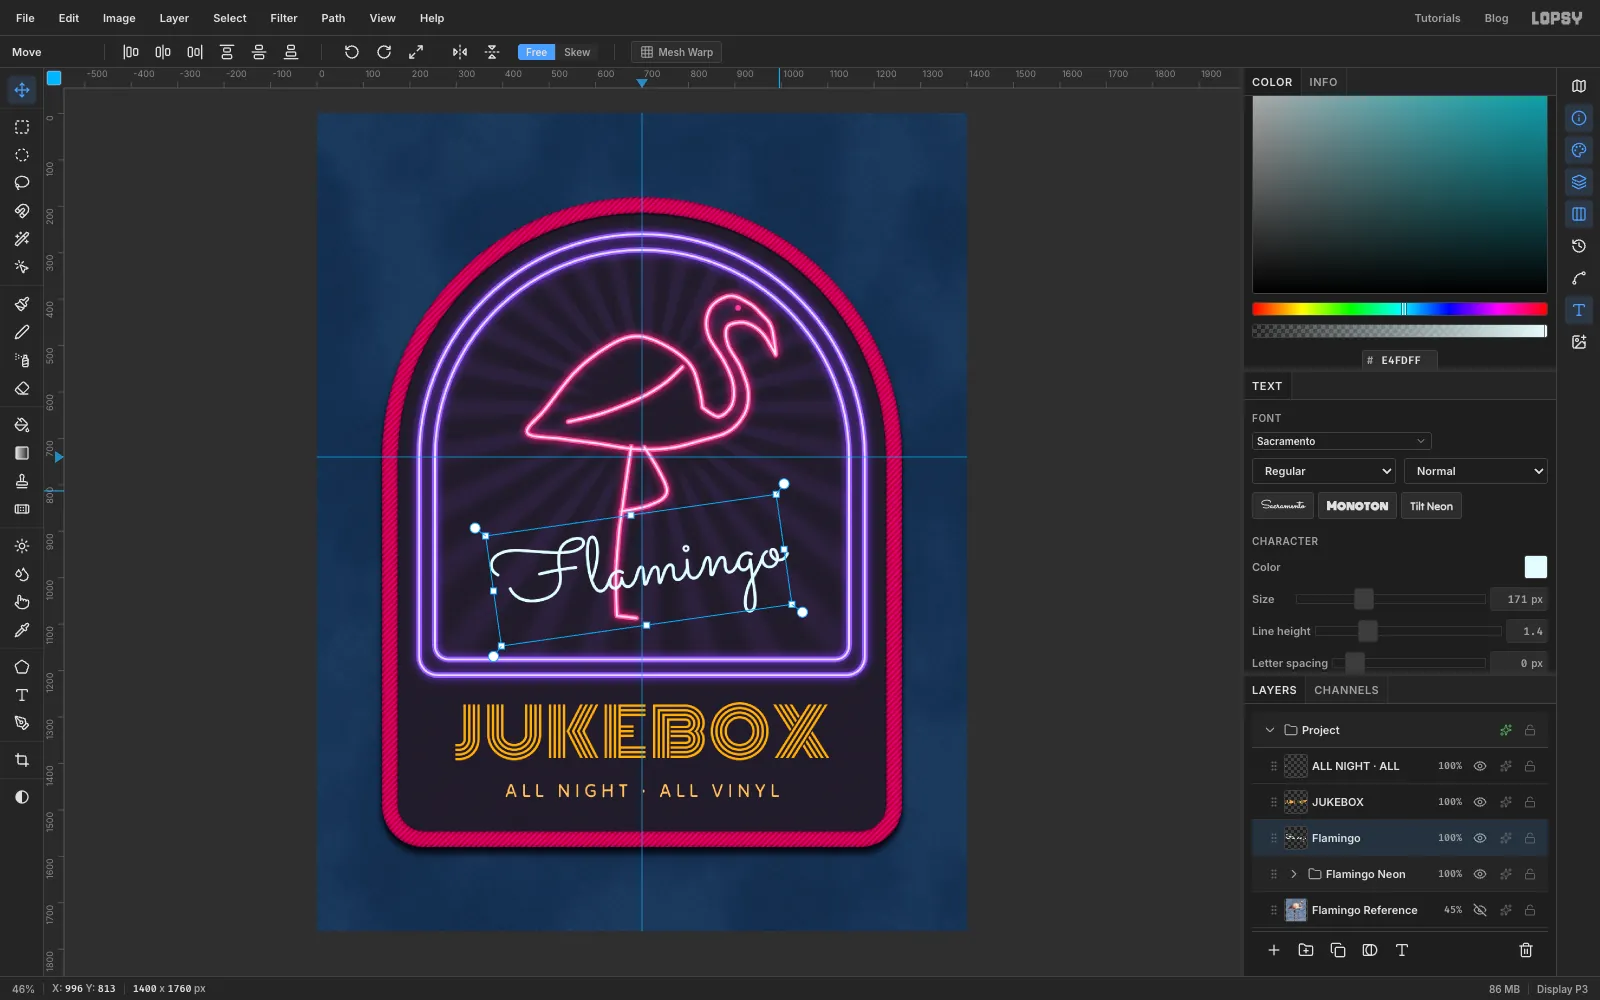
With the Move tool, hover just outside the script's top-right corner until the cursor becomes a crosshair, then drag up to tilt the word about 8° counter-clockwise. Signs often run their script uphill like this. Press Cmd+D to commit, and nudge it back to the centre.
-
Turn the type into neon
Effects make the type look like tubes. On Flamingo, turn on Stroke in cyan with Width
3. The pale fill becomes the hot core and the stroke becomes the coloured glass. Then add an Outer Glow in : Size22, Spread10, Opacity85.Give JUKEBOX an Outer Glow in with Size
56, Spread14and Opacity100. Give the tagline a smaller one in the same colour: Size14, Spread6, Opacity80.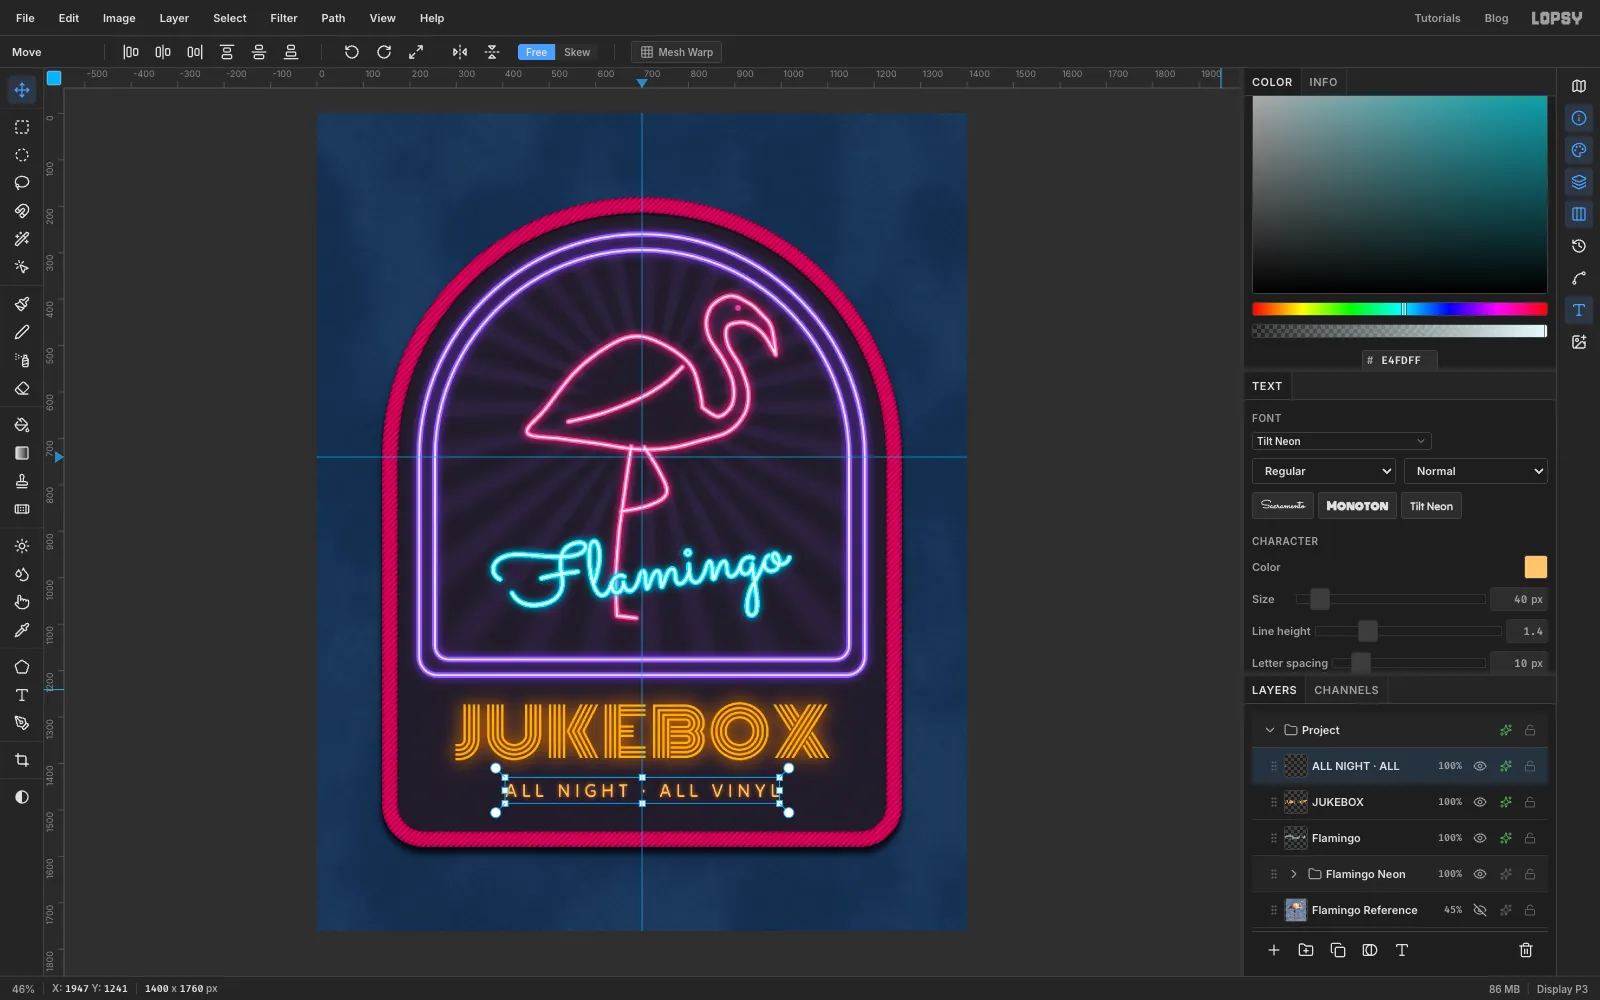
-
Select the script
Real neon signs hide a tube by painting it black where it passes behind another one. Do the same so the leg goes behind the script.
Cmd-click the Flamingo text thumbnail to select its letters, and choose Select → Grow…
6. Expand Flamingo Neon and click Flamingo Tube.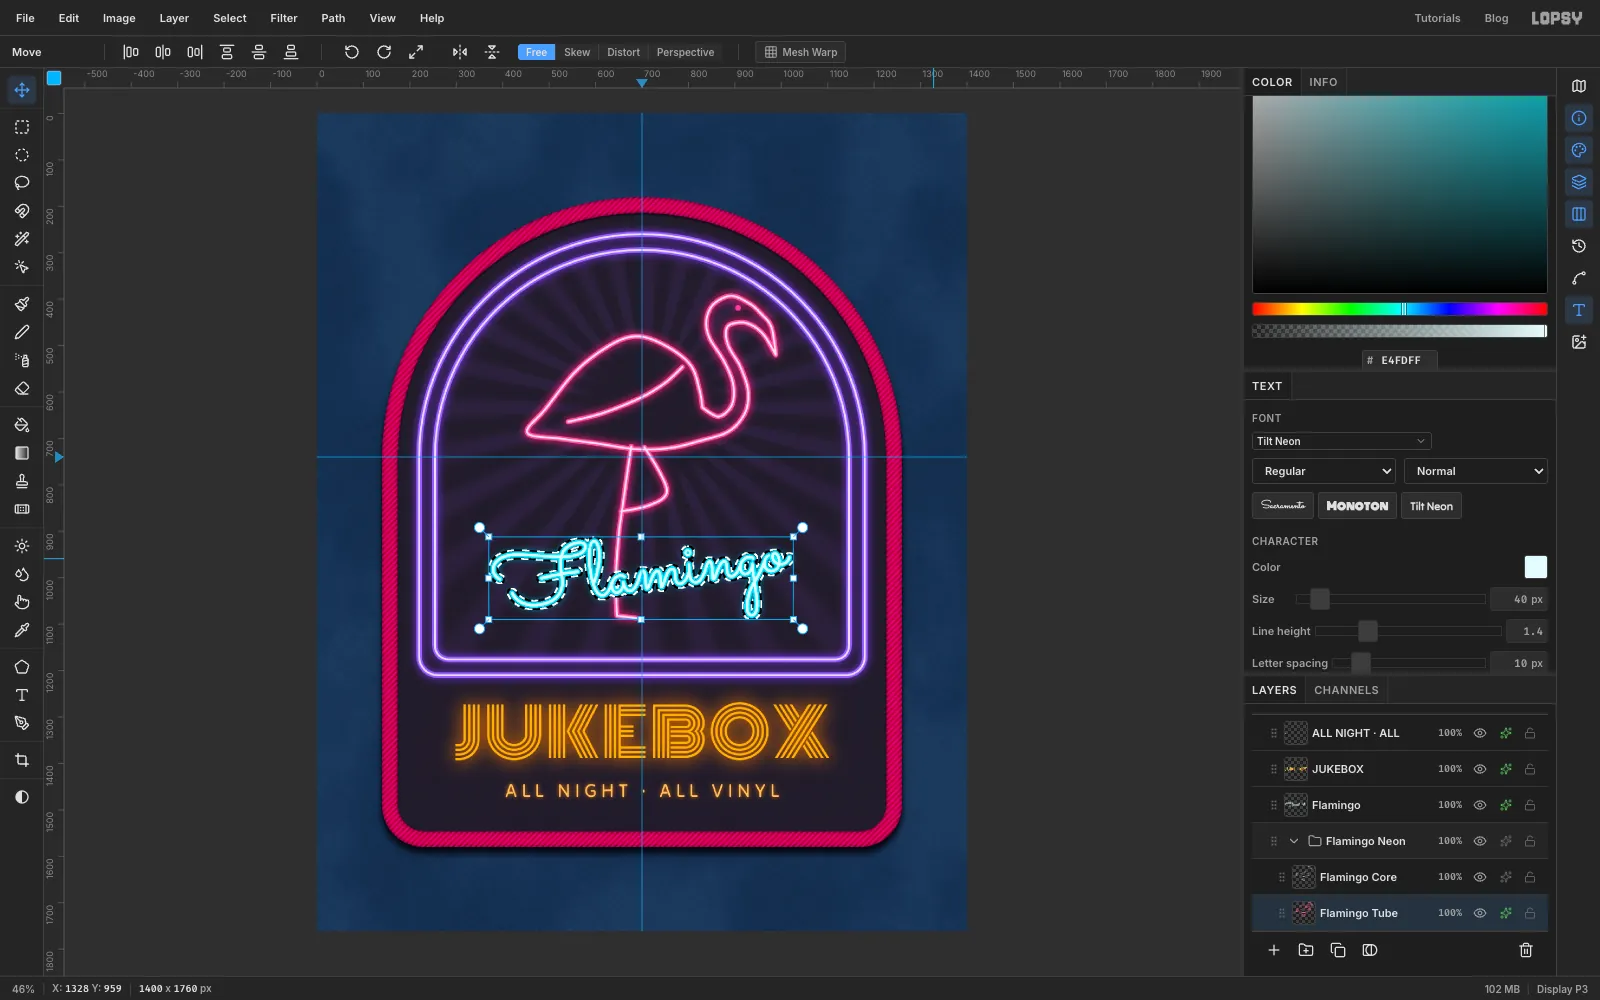
-
Break the leg behind the letters
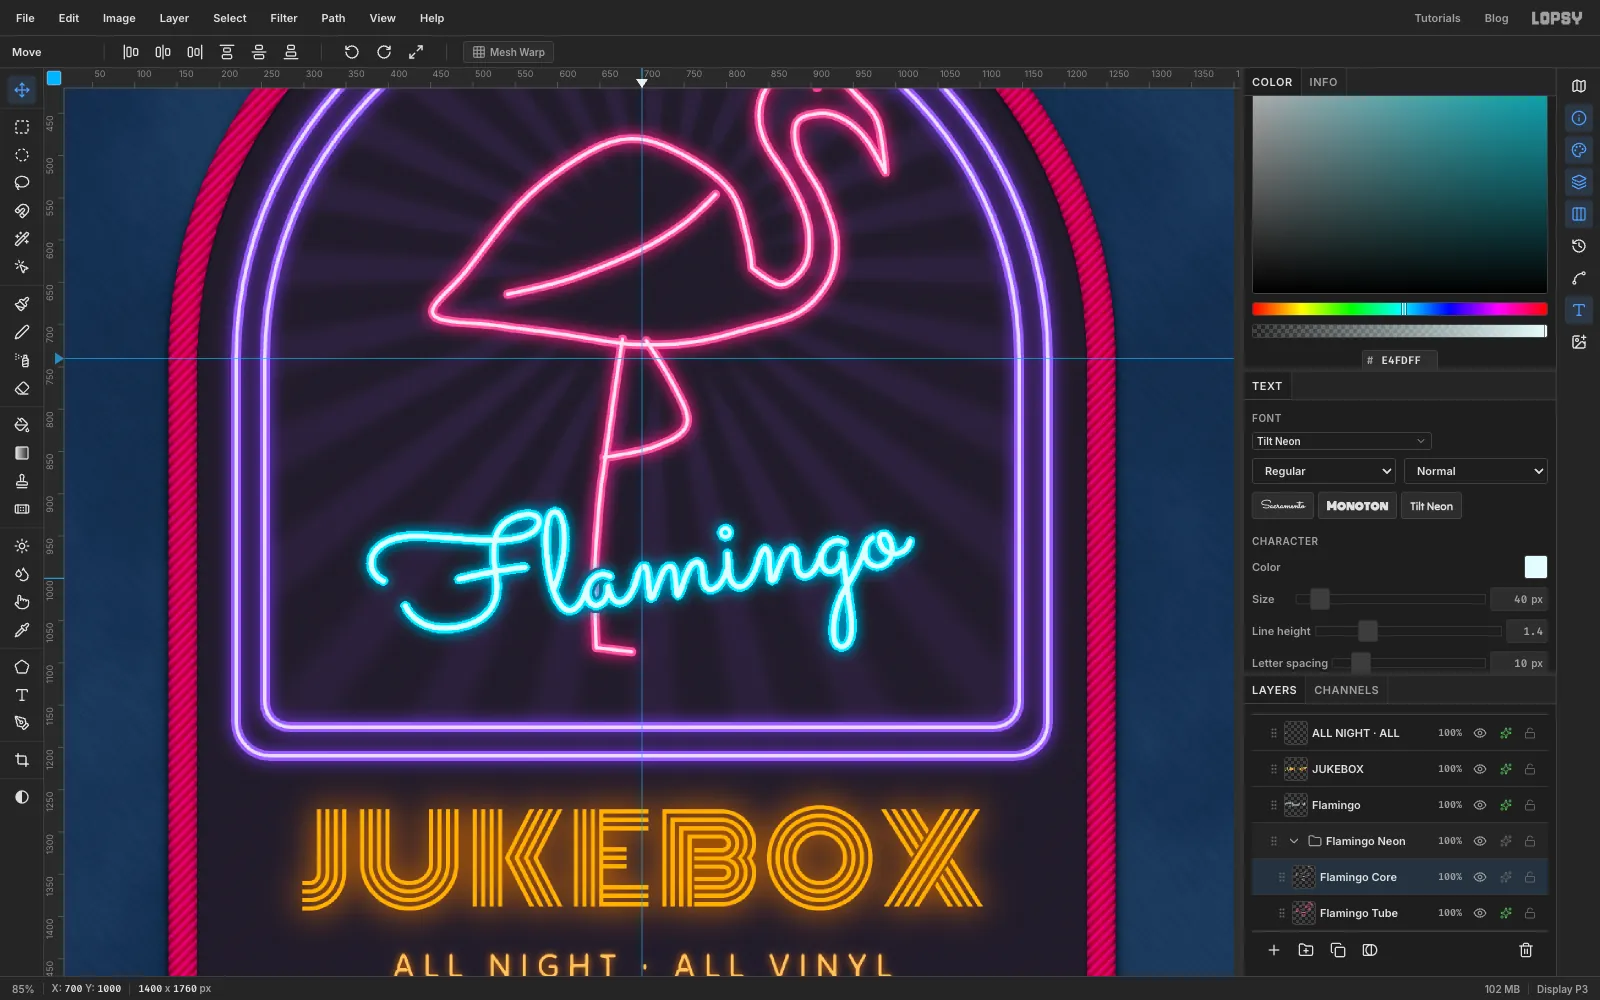
Press Delete. Click Flamingo Core and press Delete again, then deselect. The leg now stops just short of each letter it crosses and carries on through the gaps between them, as if it runs behind the script.
-
Draw an eighth note
Collapse Flamingo Neon again and click the tagline layer, so the ornaments go on top. Add a layer named Note A and set the foreground to amber . Select an ellipse from
968, 846to1032, 890and fill it for the note head. Deselect.With the Pen at Stroke
10, draw the stem and flag as one path: click at1028, 864, click straight up at1028, 712, press at1062, 754and drag down and to the right about 17 px, press at1068, 796and drag straight down about 16 px, click at1054, 824, and press Enter. Then click Delete Path in the Paths panel. The stroke stays, and the canvas is clear for the next path.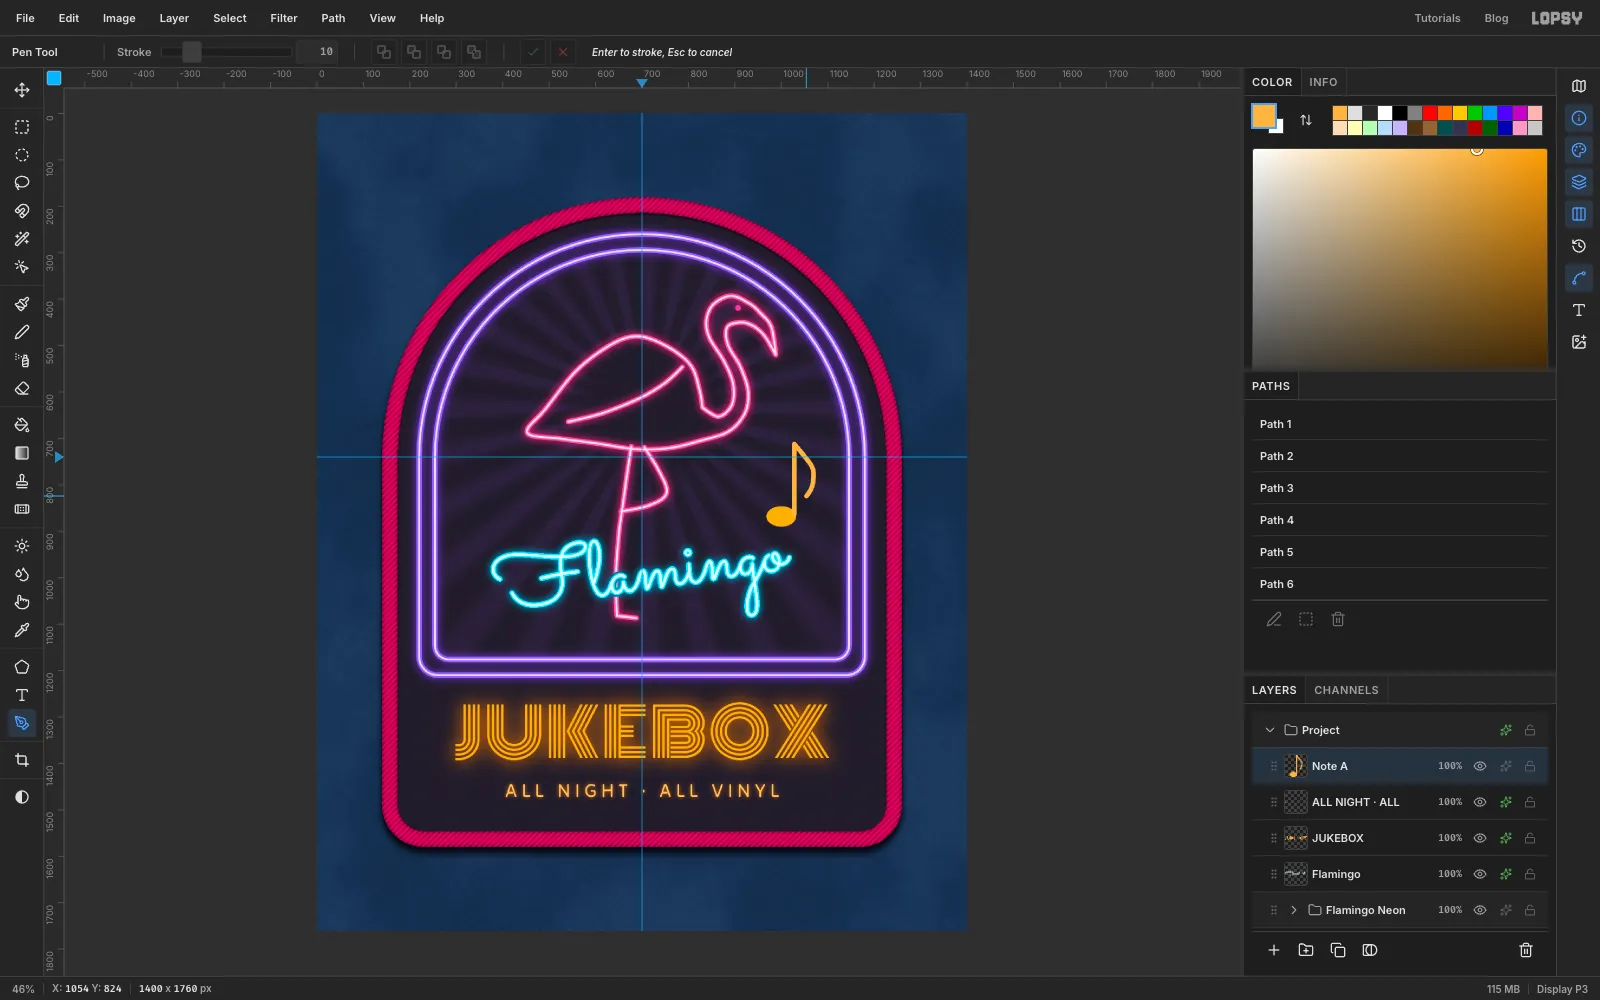
-
Tilt the note
Select a rectangle around the note, from
950, 693to1095, 908. With the Move tool, drag the top-right rotate handle clockwise about 14°, so the note leans out towards the edge of the window. Press Cmd+D to commit.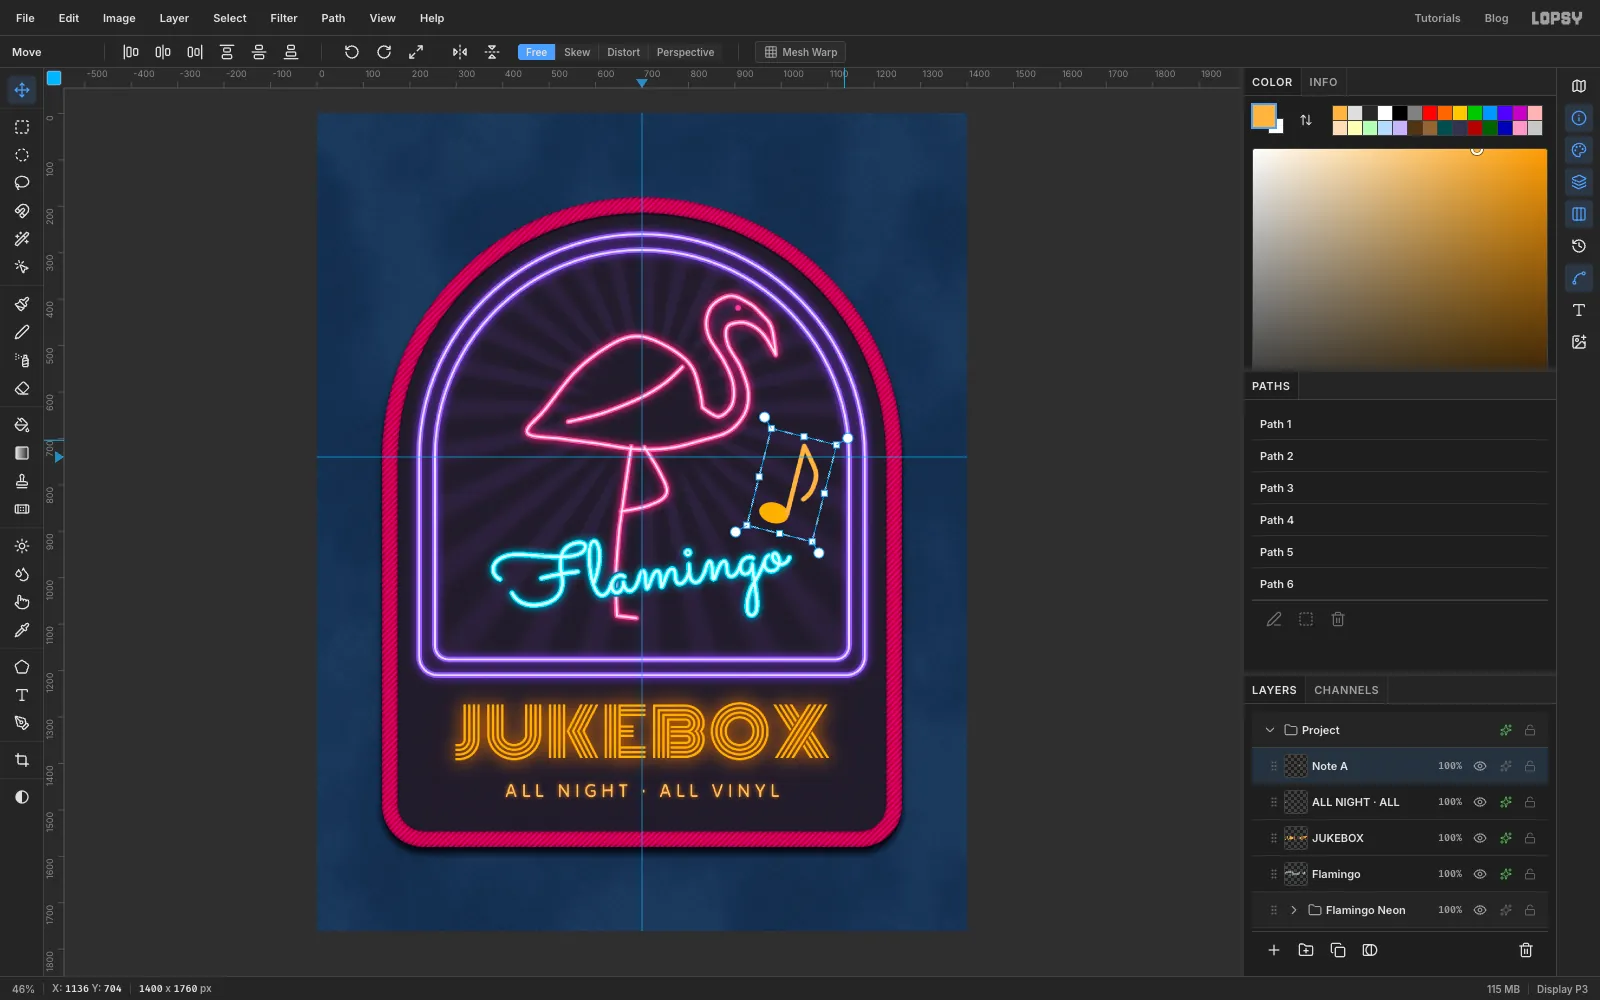
-
Copy the note
Select a slightly bigger rectangle,
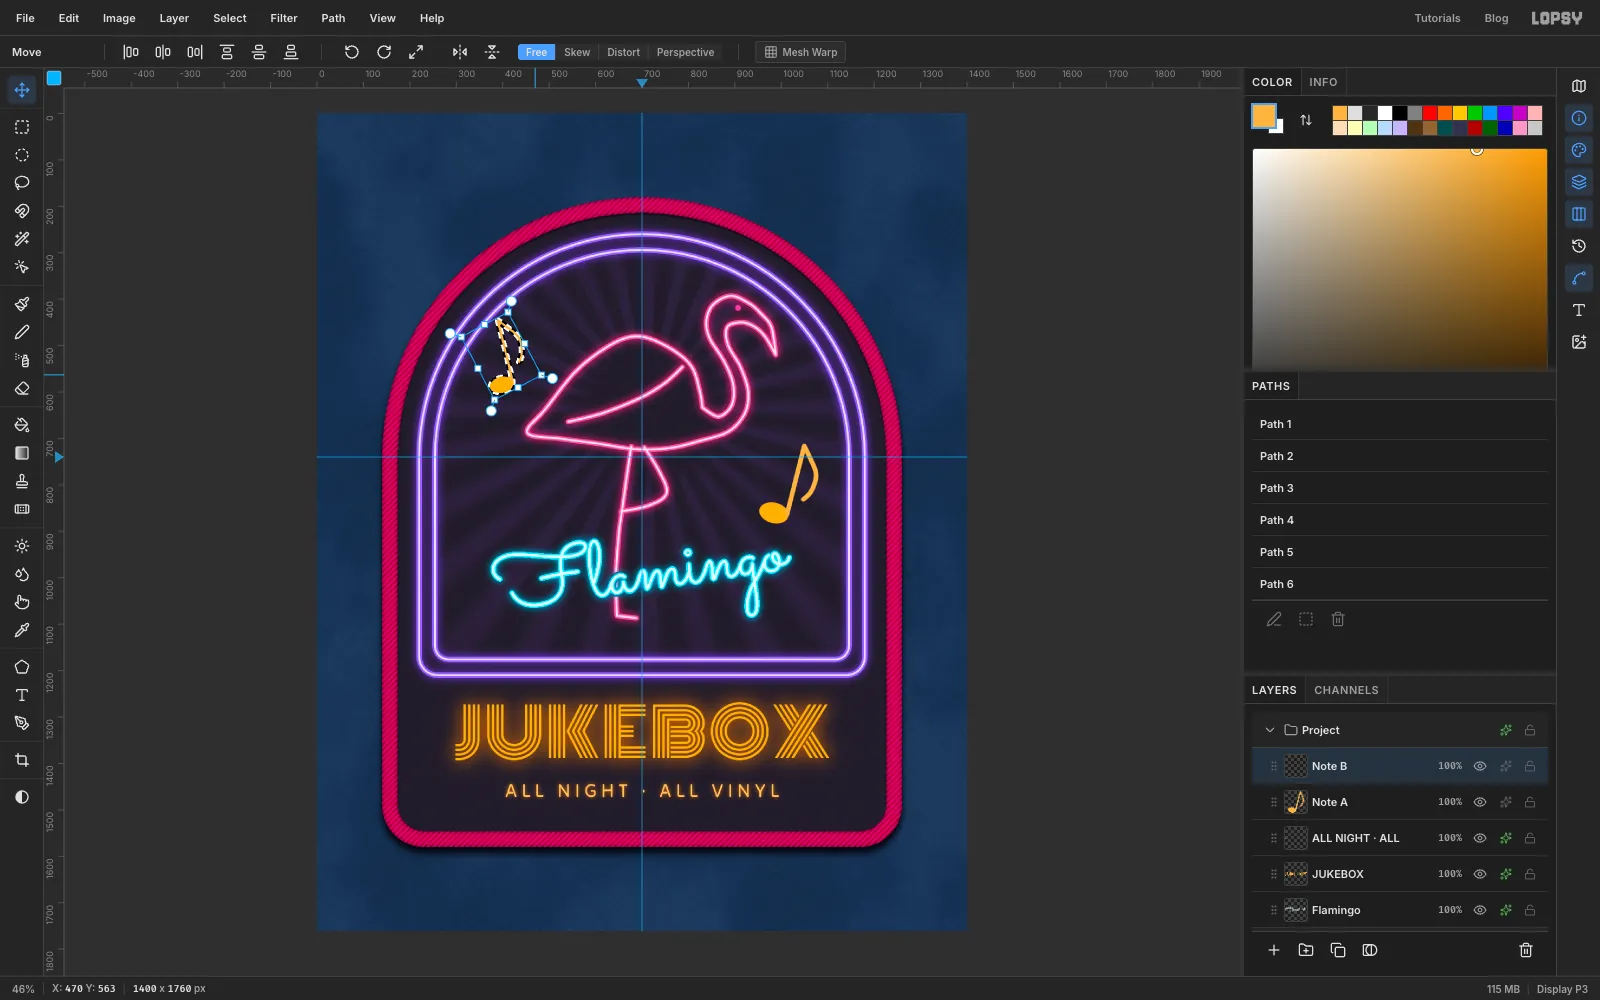
925, 668to1120, 923, and press Cmd+C then Cmd+V. The copy lands in place on a new layer. Rename it Note B and drag it up and to the left until the note head sits at about392, 606, above the tail.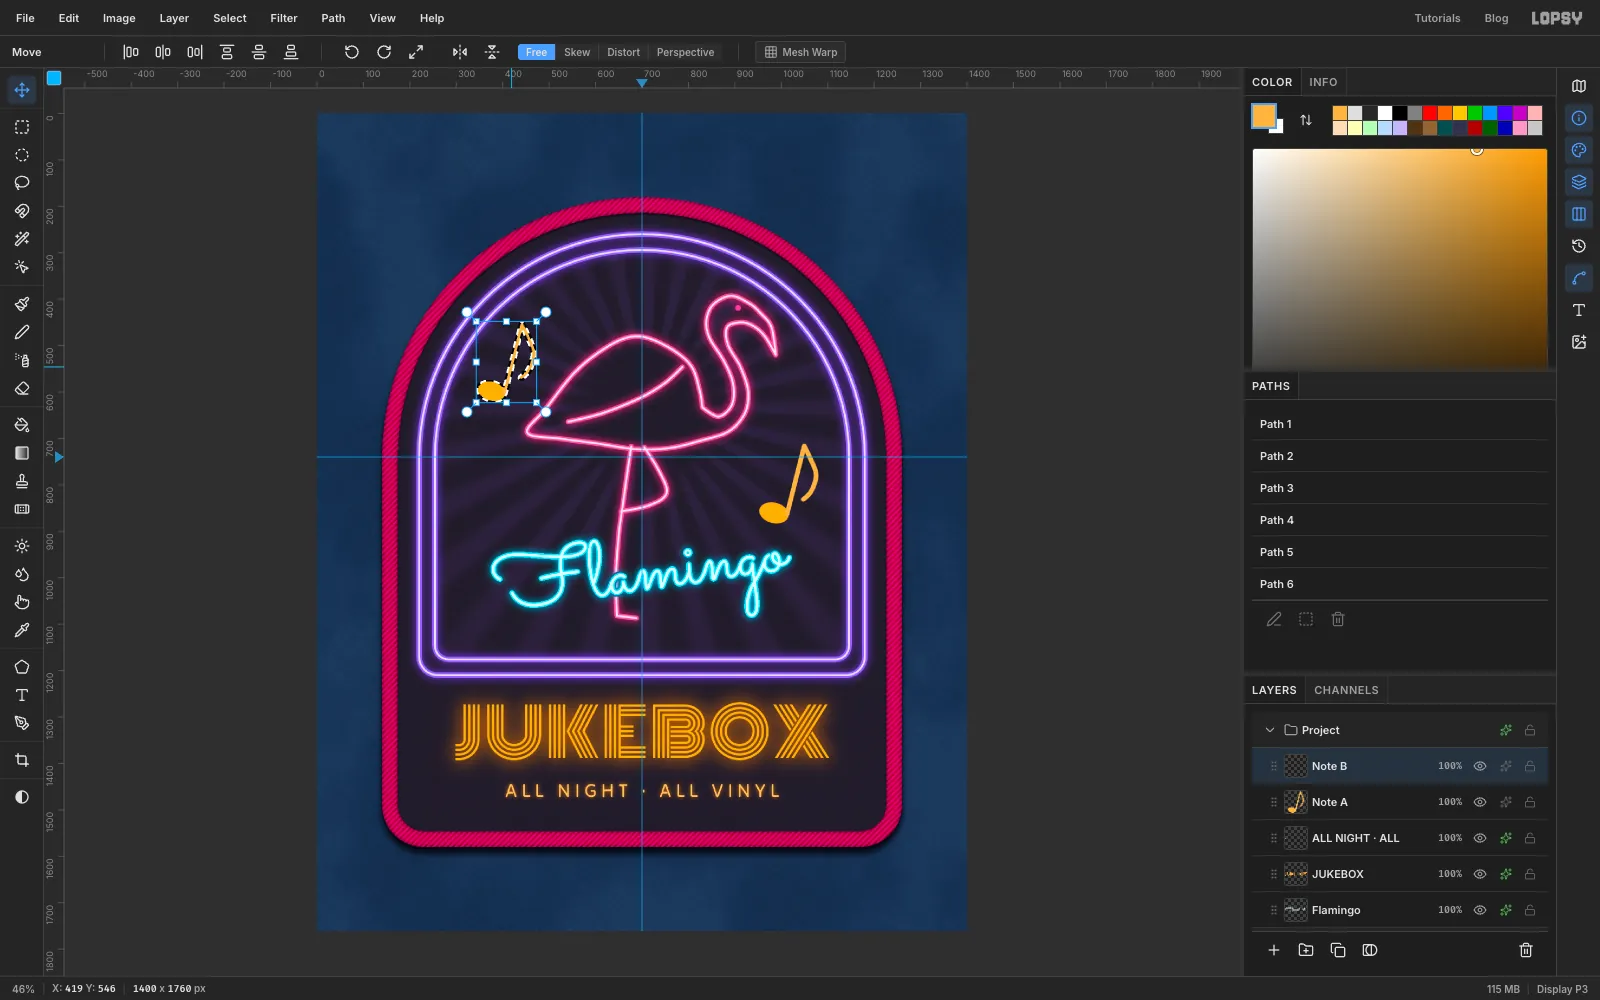
-
Turn and shrink the copy
Drag the copy's top-right rotate handle about 28° counter-clockwise, so it leans out to the left. The two notes now splay away from the bird, as if the music is bursting out of it. Then hold Cmd and drag the bottom-right corner handle in to shrink it by about 15%. Press Cmd+D.
-
Light the notes
Give Note A and Note B each an Outer Glow in with Size
18, Spread10and Opacity85.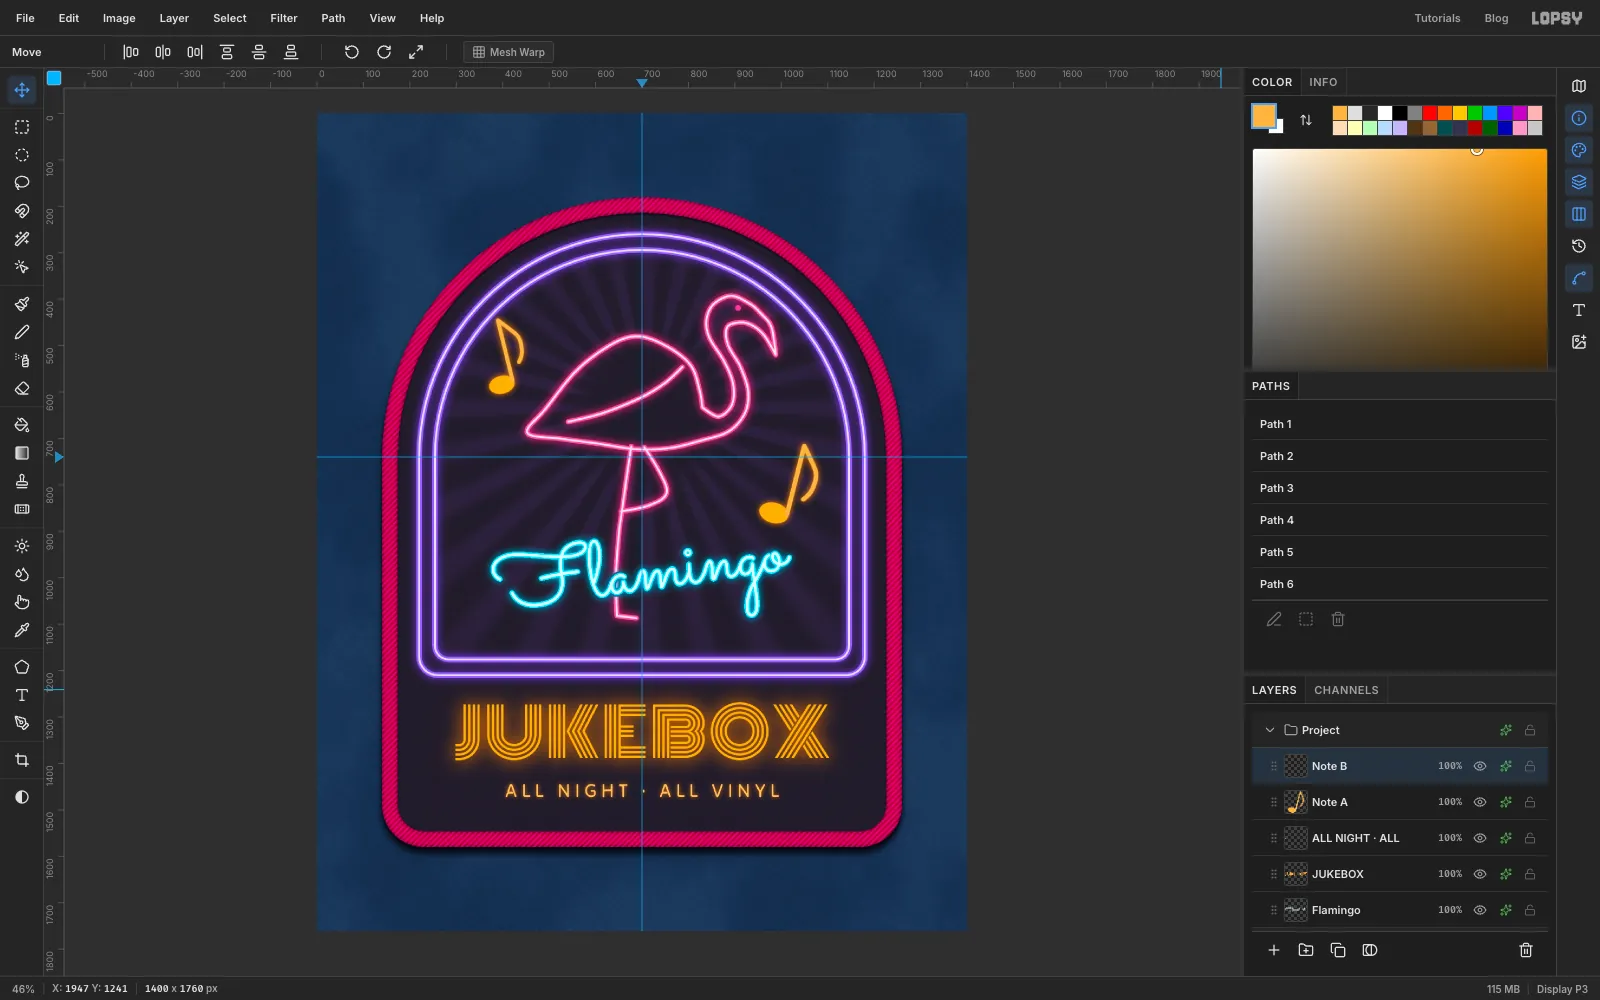
-
Draw the first sparkle
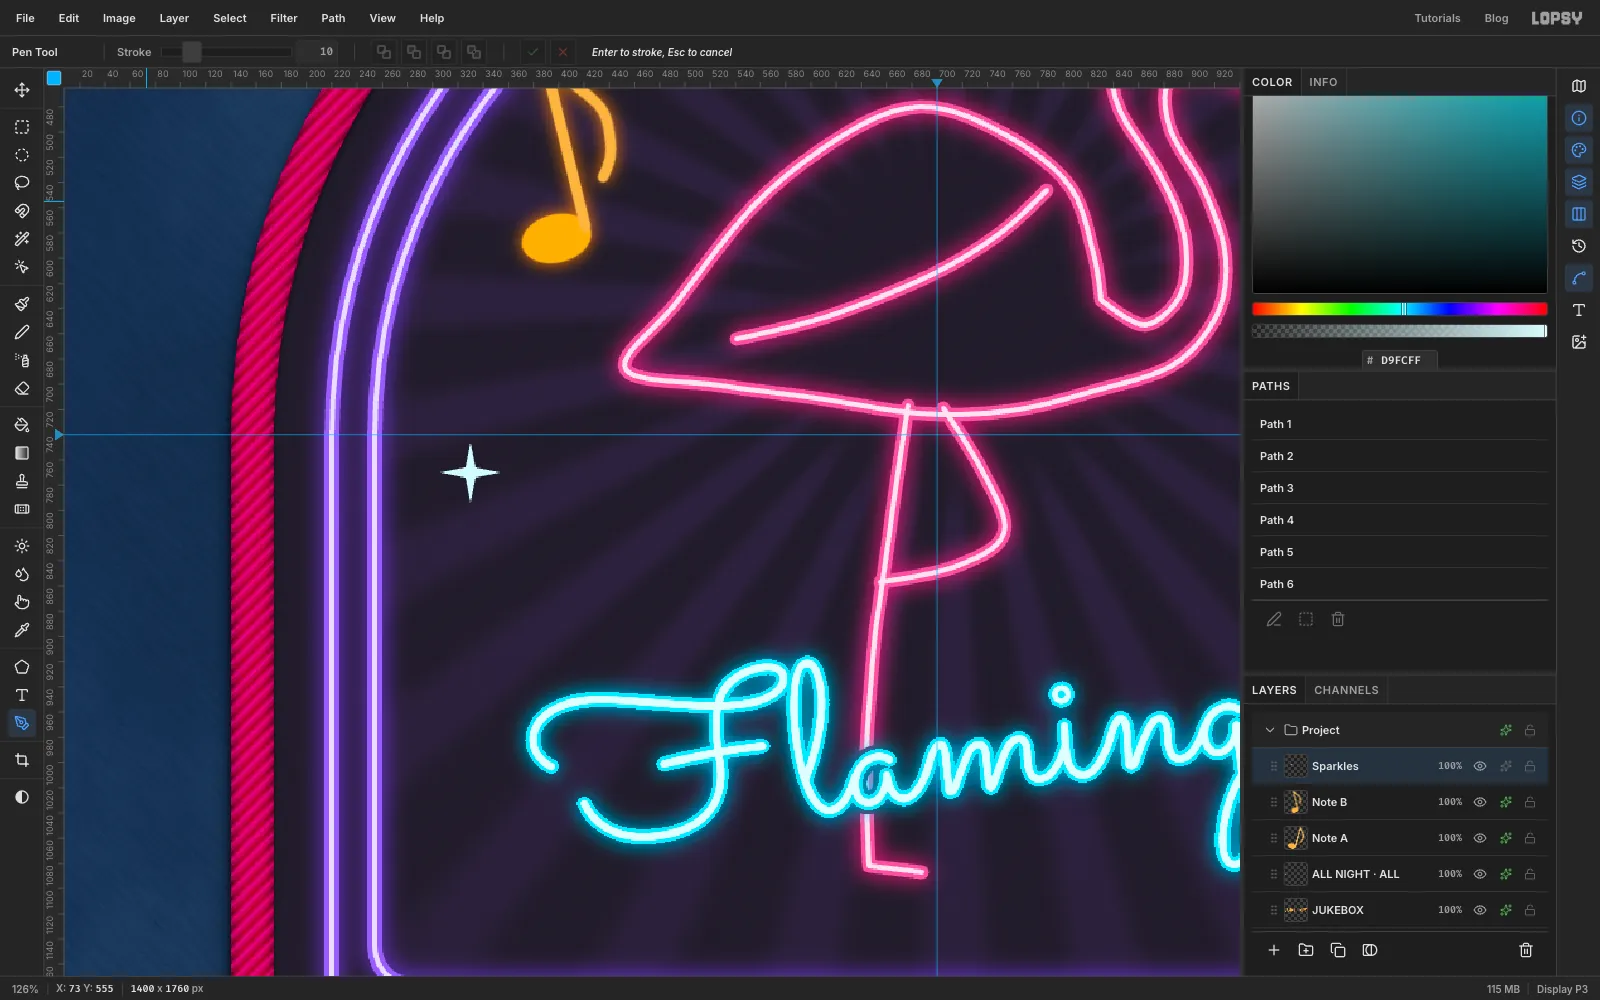
Click Note B and add a layer named Sparkles. Set the foreground to . Zoom in on
330, 770, left of the body. A sparkle is a Pen star made of eight plain clicks, going clockwise:- the top point at
330, 746, 24 px above the centre - an inner corner at
334, 766, about 6 px from the centre on the diagonal - the right point at
354, 770 - an inner corner at
334, 774 - the bottom point at
330, 794 - an inner corner at
326, 774 - the left point at
306, 770 - an inner corner at
326, 766
Click the first point again to close the star. The new path is selected, so click Path to Selection in the Paths panel, choose Edit → Fill, deselect, and click Delete Path.
- the top point at
-
Add three more sparkles
Draw three more the same way, smaller: points 20 px out (inner corners 5 px) around
1050, 604below the beak, and points 16 px out (inner corners 4 px) around228, 1330and1172, 1330, either side of JUKEBOX. Give the layer an Outer Glow in : Size14, Spread20, Opacity90.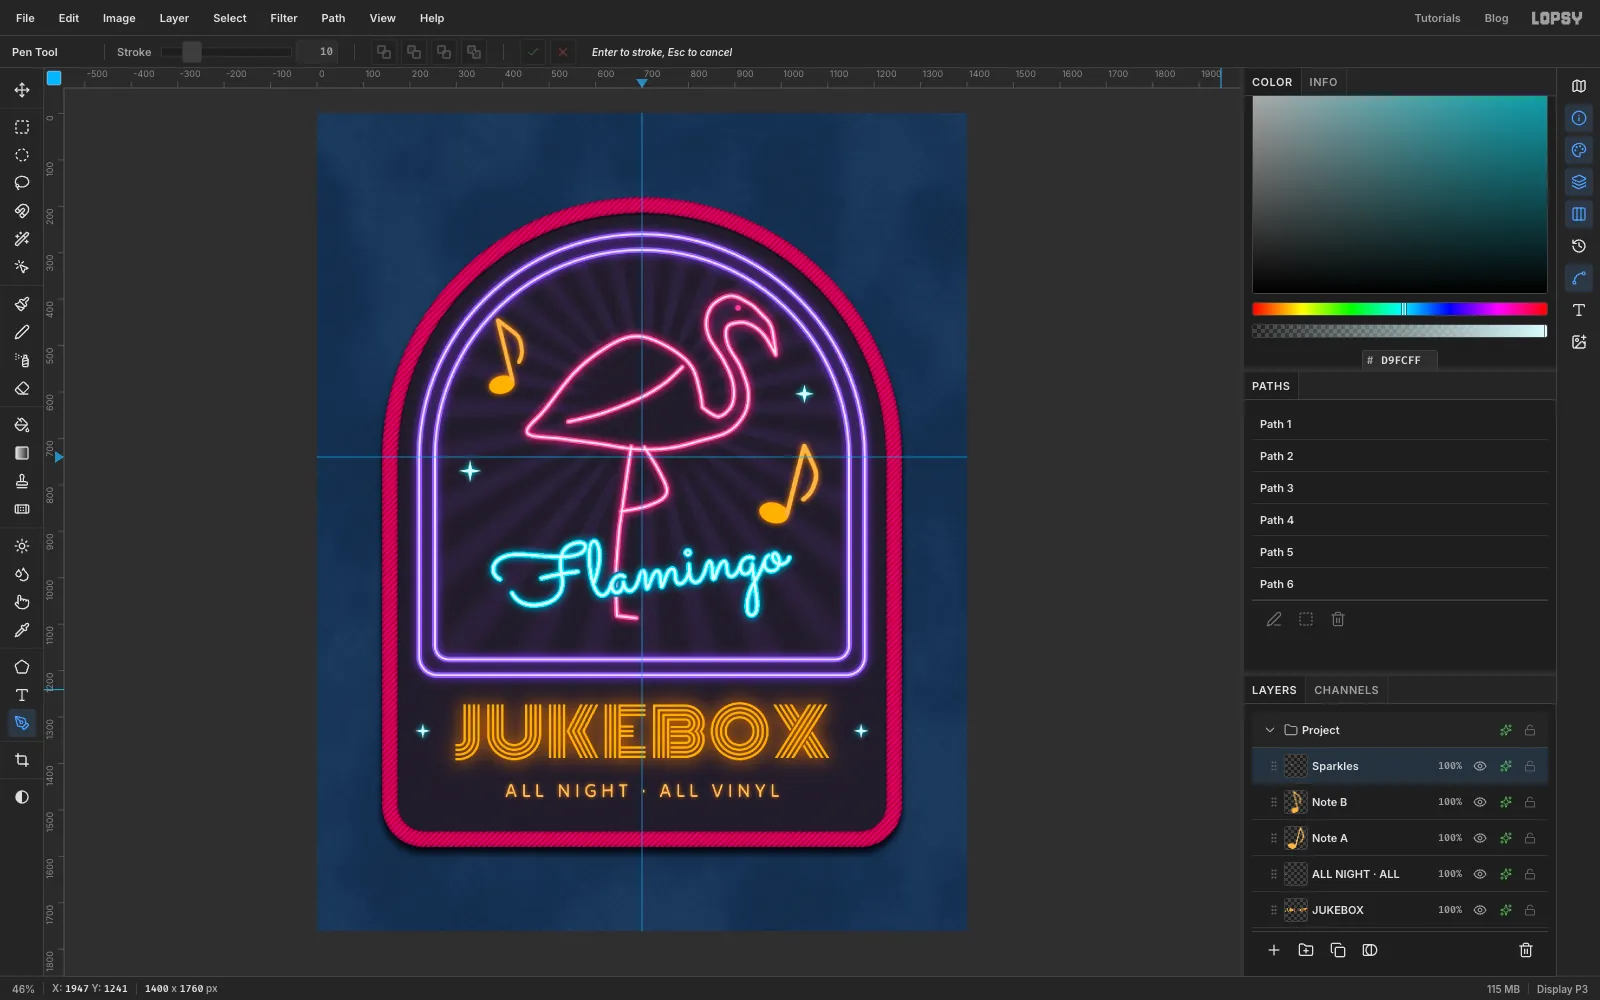
-
Group the ornaments
Click Sparkles, Shift-click Note A and choose Layer → Group Layers. Name the group Ornaments. Now the ornaments move as one. With the group selected and the Move tool active, press Up six times to lift them all 6 px, so the right note gets a little more room above the script.
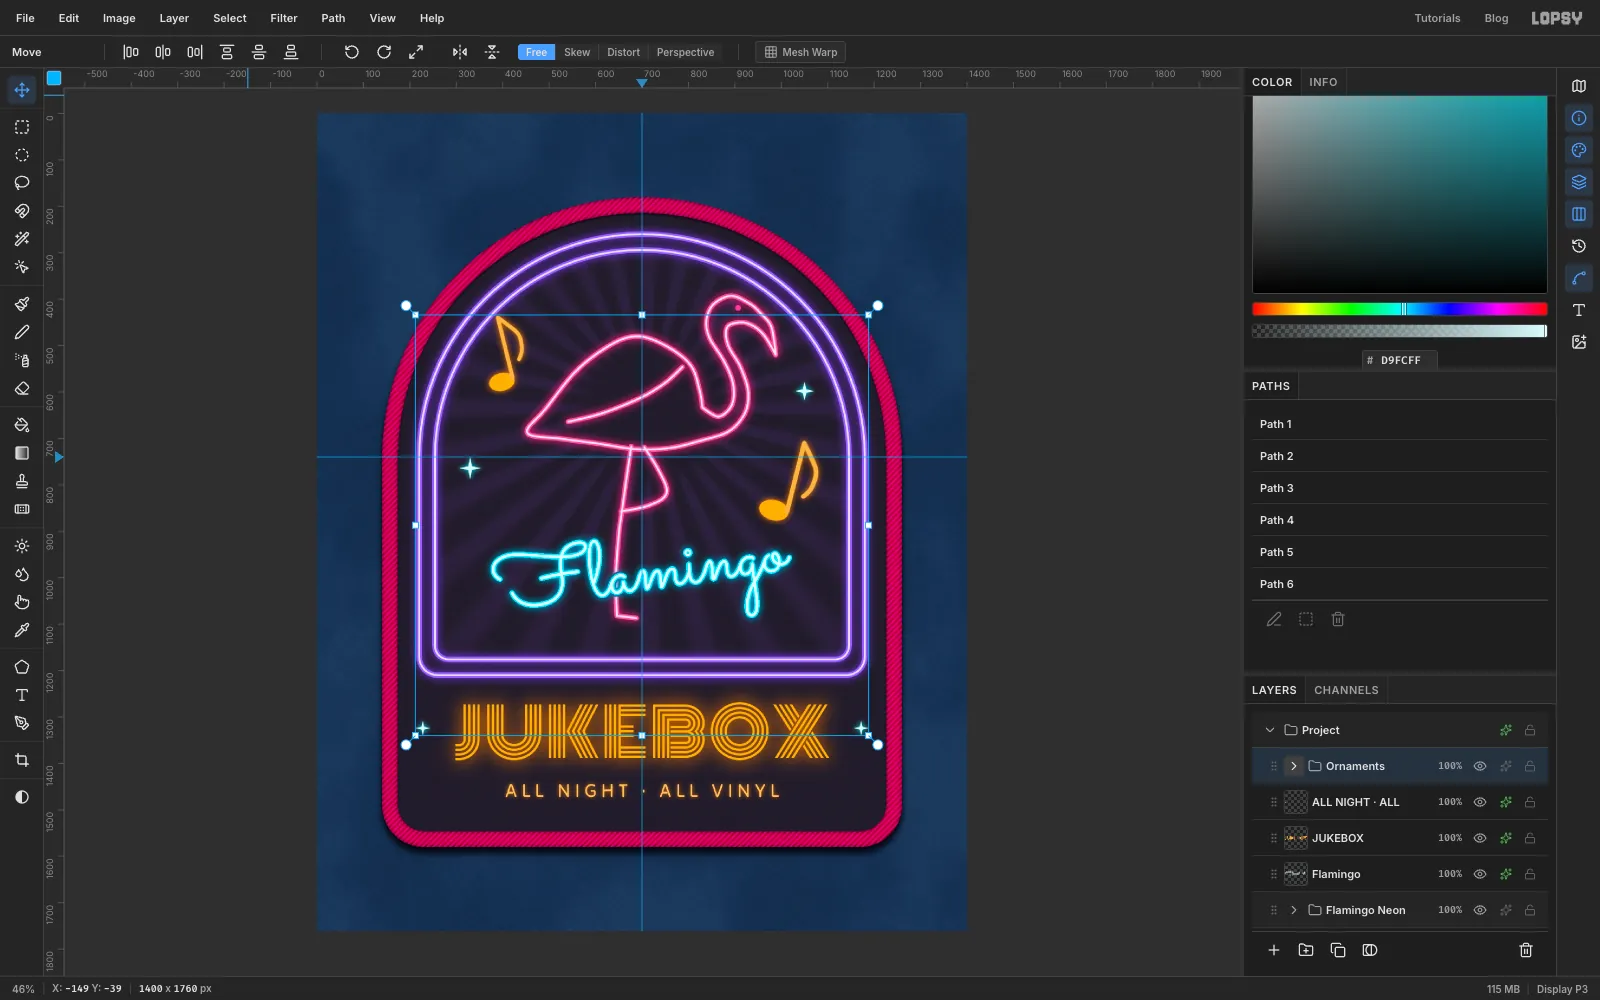
-
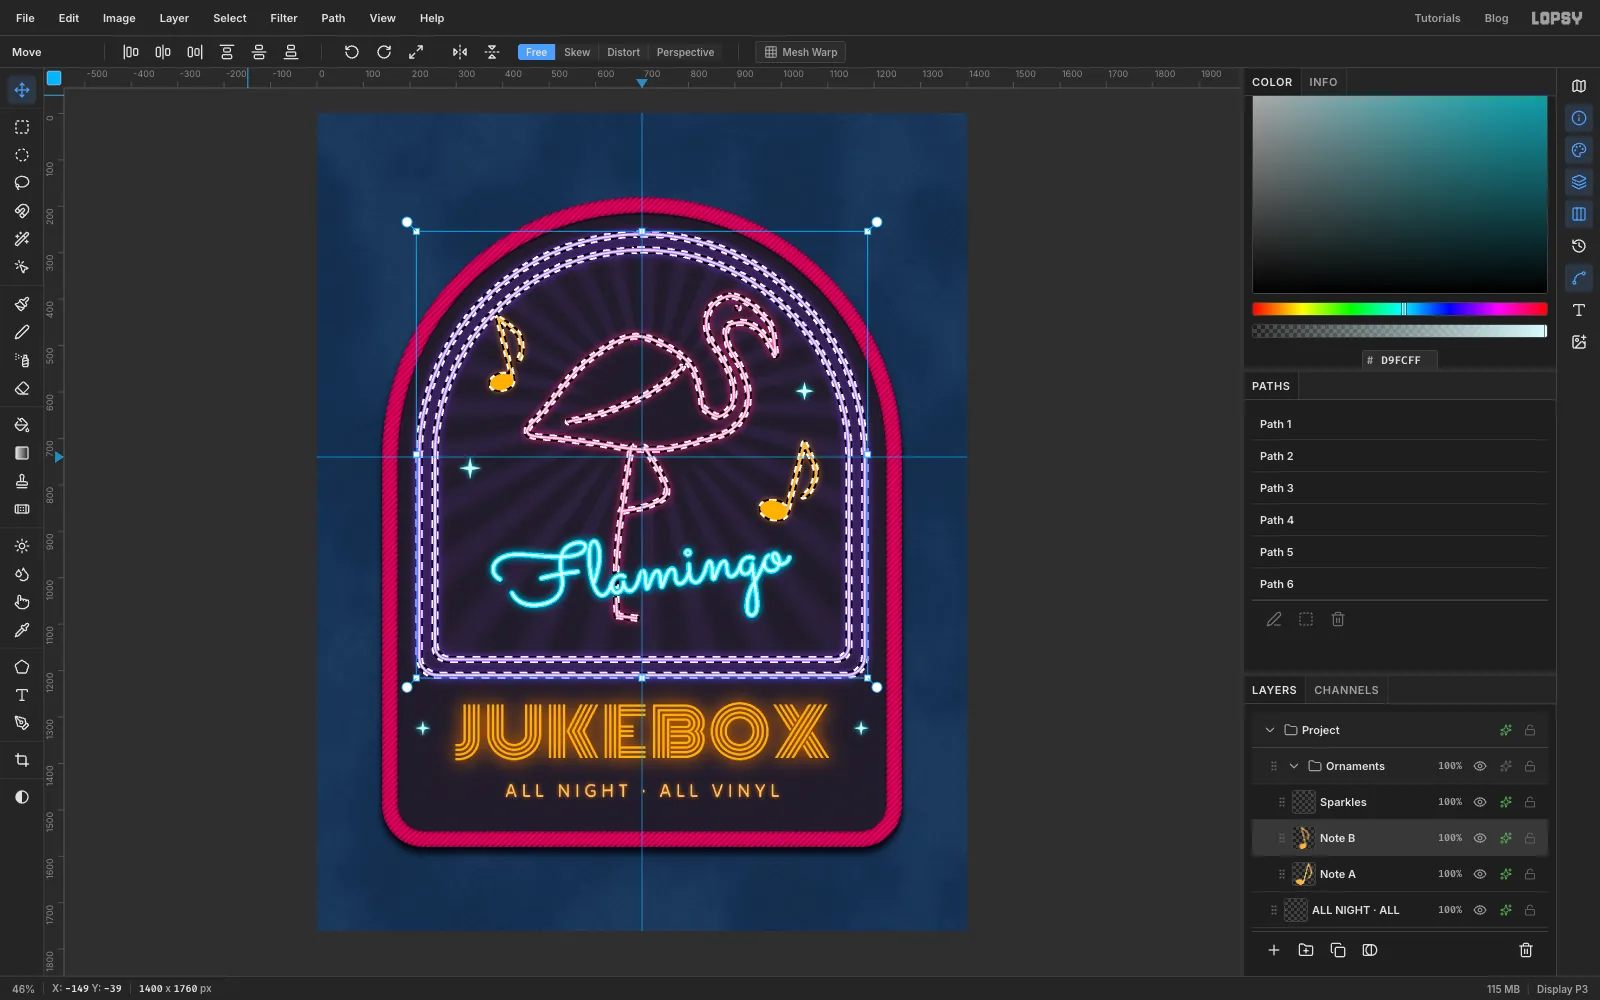
Select every tube
Next, give the tubes a satin-stitch texture. Cmd-click the Window Tube thumbnail. Then Cmd+Shift-click the Flamingo Tube, Note A and Note B thumbnails to add them, expanding the groups to reach them.
-
Stitch the tubes
Collapse the groups, click Ornaments and add a layer named Satin Stitch. Choose Edit → Fill with Pattern… with your stitch tile at Scale
50. Deselect, set Blend to Overlay and the opacity to 45%. Up close every tube now looks like satin thread. At normal size it still reads as glowing glass.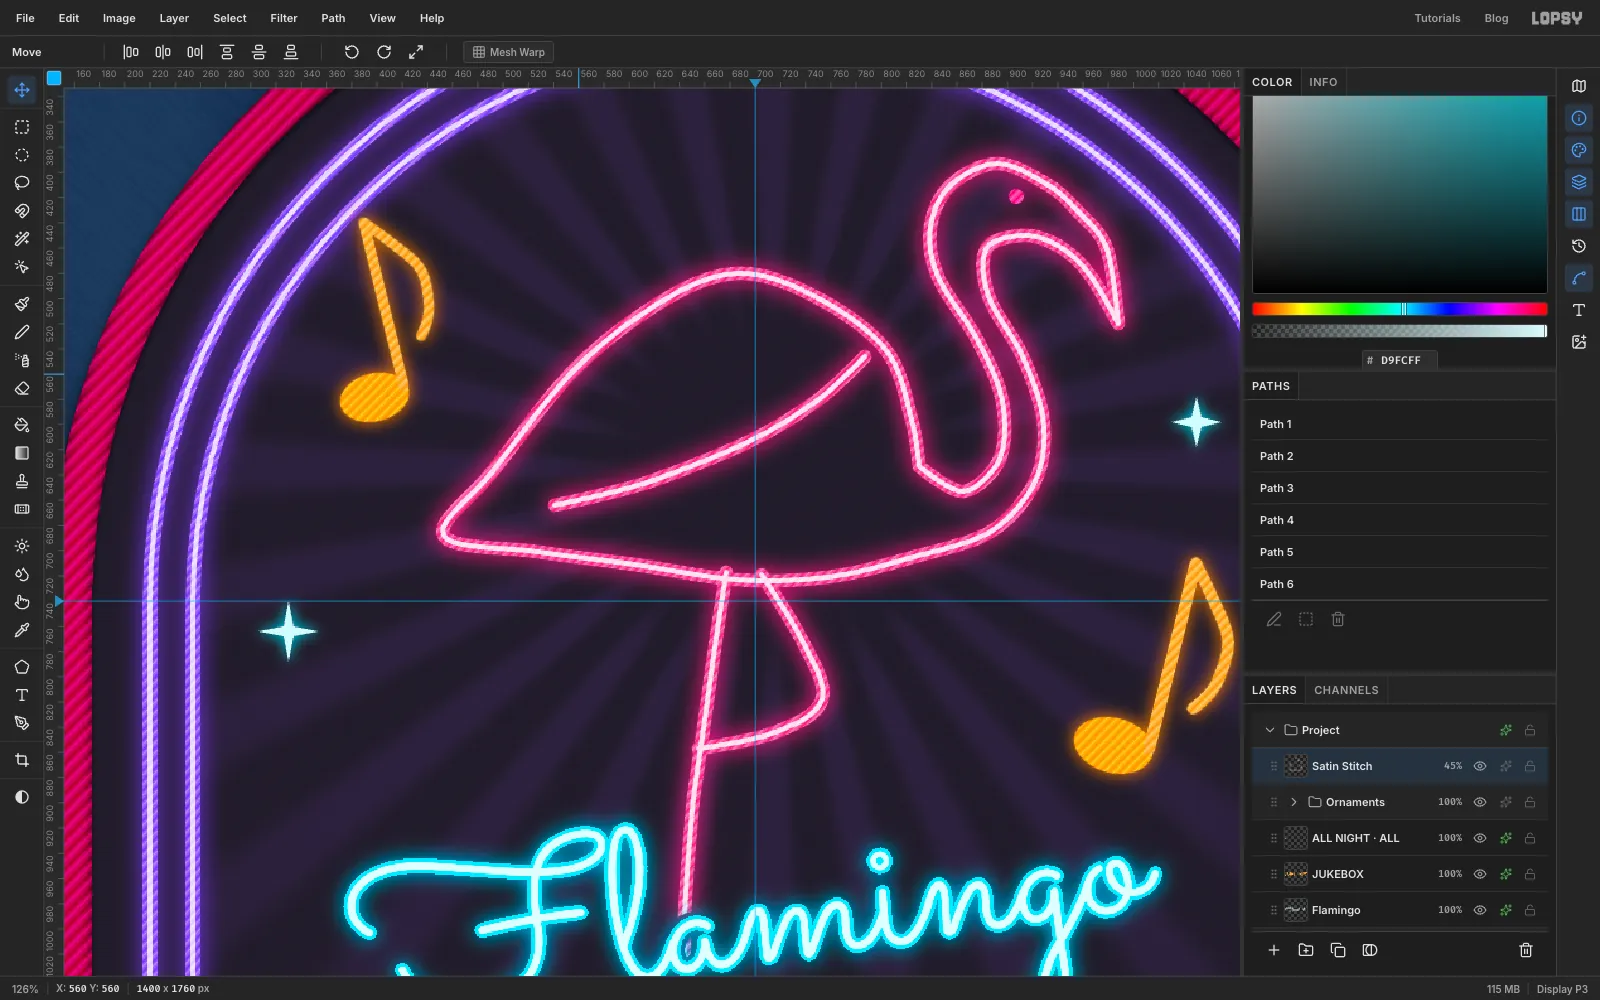
-
Add halation
Real neon lights up the air around it. Press Cmd+A, choose Edit → Copy Merged and press Cmd+V. Rename the pasted layer Halation and deselect.
Choose Filter → Brightness/Contrast… with Brightness
-40and Contrast70. That crushes the dark twill to black, so only the lit tubes will glow. Then run Gaussian Blur… at Radius26. Cmd-click the Patch thumbnail (this loads the selection but keeps Halation as the active layer), choose Select → Inverse and press Delete so the glow stays on the patch. Deselect and set Blend to Screen at 35%.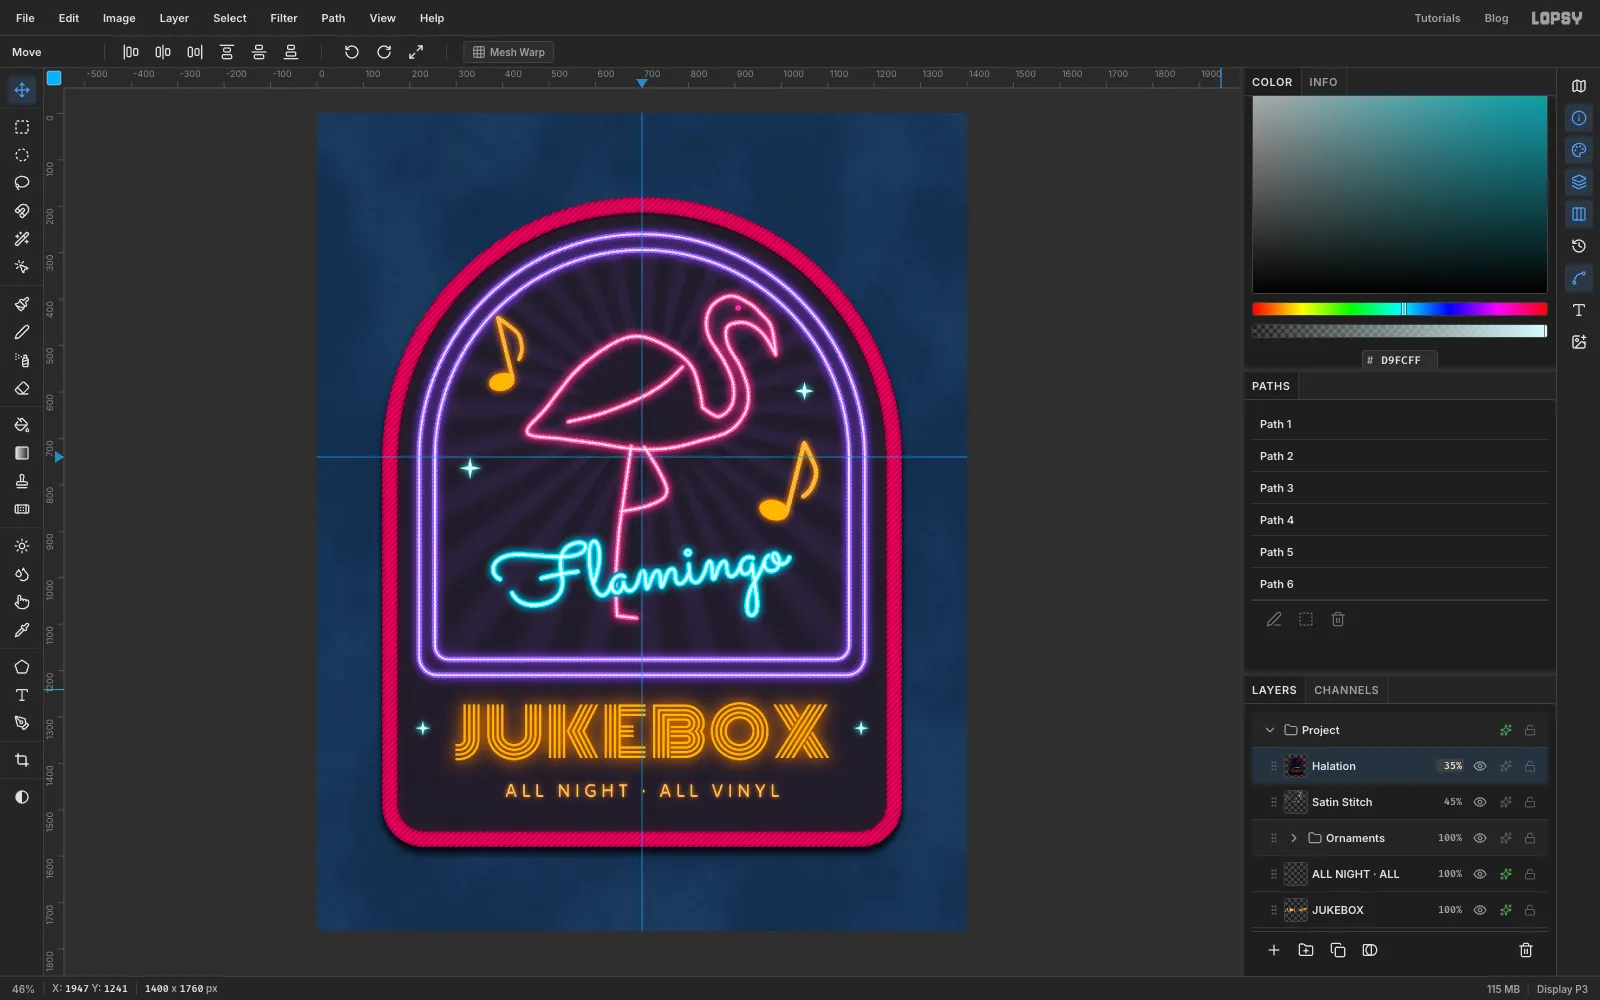
-
Give the merrow a sheen
Click Merrow Stitch and add a layer named Merrow Sheen. Cmd-click the Patch thumbnail, choose Select → Shrink…
7and fill with . Choose Select → Shrink…9and press Delete, which leaves a thin band near the outer edge. Deselect, run Gaussian Blur… at4, and set the layer to Screen at 45%. The border now catches the light like a rolled cord.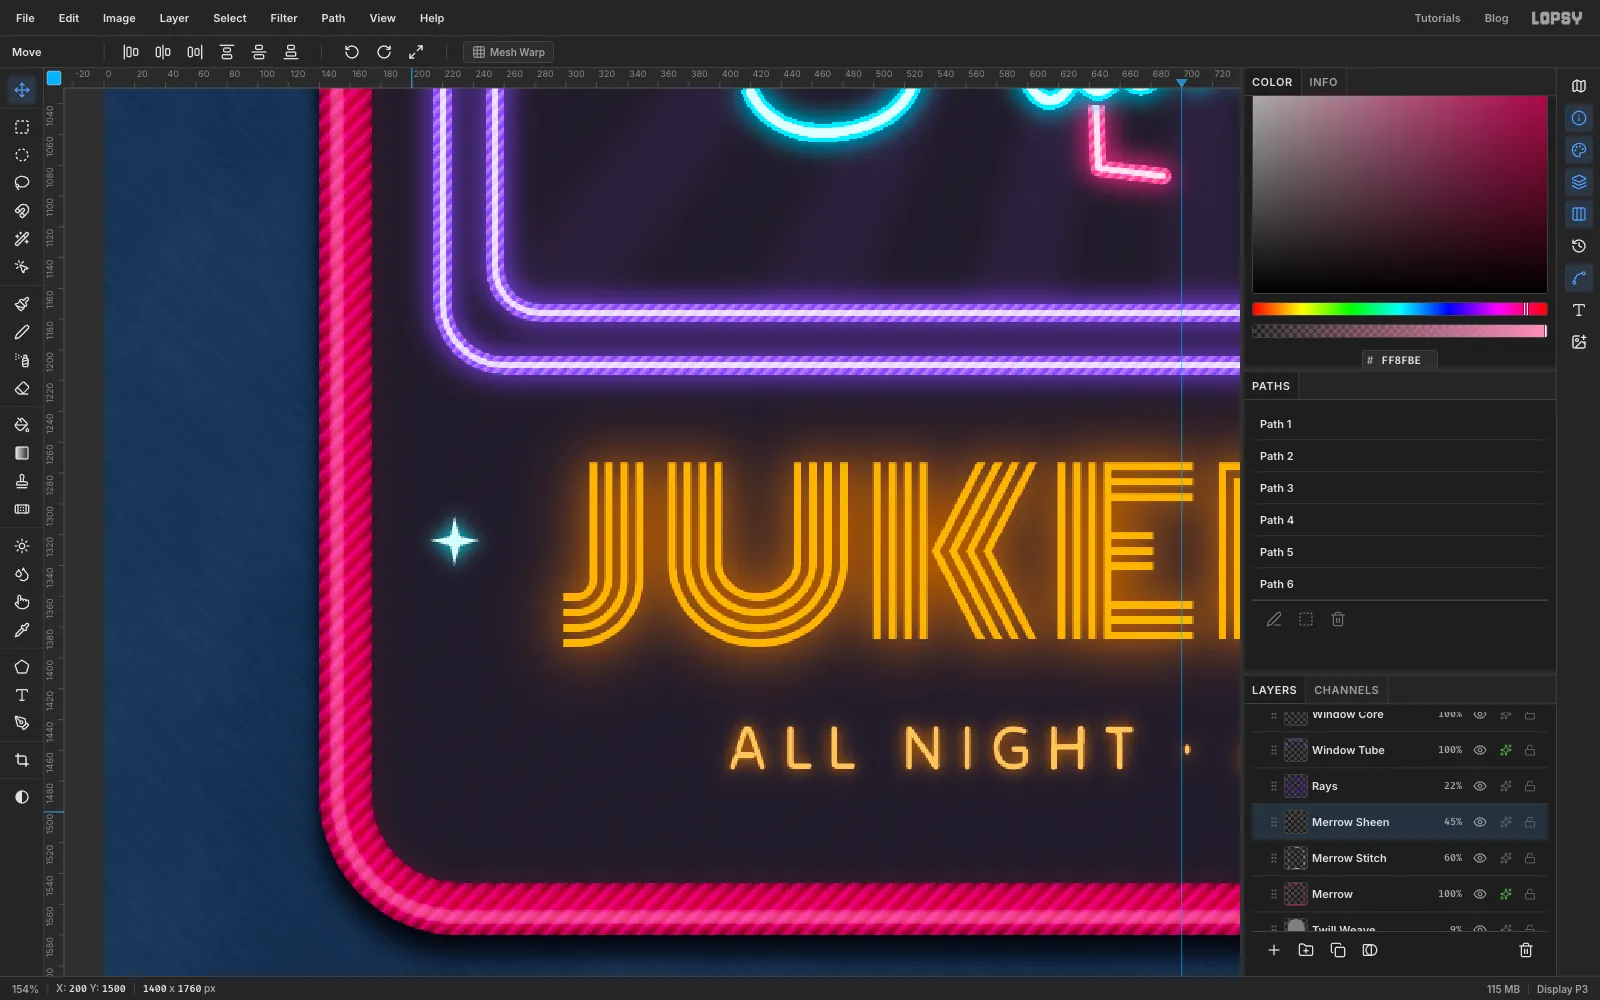
-
Lift the patch
The patch has equal 180 px margins above and below, but the drop shadow adds weight underneath, so it looks low. Designers lift things slightly above the true centre (the optical centre) to fix this. Click Halation at the top, then Shift-click Patch to select every patch layer at once. Leave Background and Denim Wash out. With the Move tool, press Shift+Up twice to move the whole patch up 20 px together.
Export with File → Quick Export PNG, and save the project with File → Save Project. To make a matching patch for another bar, swap the script and redraw the bird.