Design a Vintage Neon Motel Sign Flyer
Build a glowing 1950s neon motel sign flyer in Lopsy, with Pen-tool tubes, hot cores, chaser bulbs, a backlit reader board and a wet-road reflection.

The great roadside motel signs of the 1950s were built to be seen from a car at sixty miles an hour. They used onion domes, boomerang cabinets, arrows ringed with chasing bulbs, and a reader board for the week's specials. At dusk the neon came on against a still-blue sky. After a desert storm the whole sign hung upside down in the wet road.
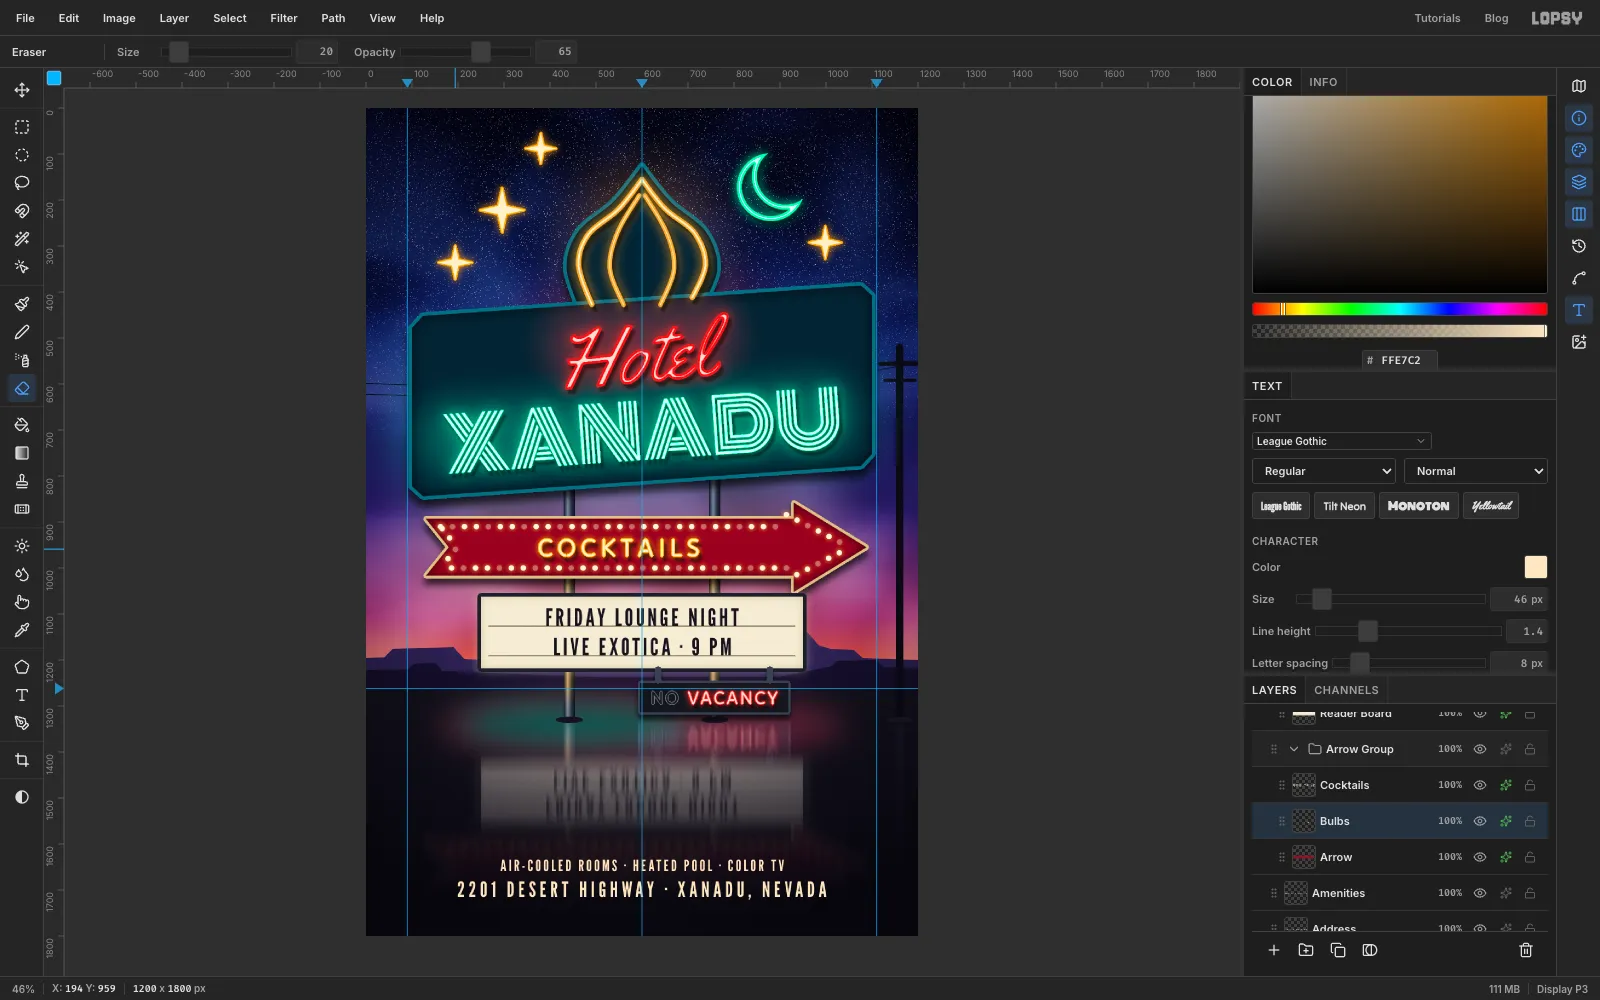
In this tutorial you'll build that moment in Lopsy as a flyer for Hotel Xanadu, a made-up motel on a desert highway that runs a Friday lounge night. The flyer is 1200 × 1800 px, the 2:3 shape of a printed flyer.
Along the way you'll learn a neon recipe you can reuse anywhere:
- each tube is a Pen stroke with an Outer Glow and a small Drop Shadow, so it seems to stand off the metal behind it
- the white-hot core comes from loading the tube as a selection, shrinking it and filling it with a pale tint
- the light spills onto the cabinet, the poles and the wet ground
The tools you'll use:
- guides, the Reference drawer, and the Rectangular and Elliptical Marquee's exact-corner dialog
- the Pen tool, Path to Selection and Enter-to-stroke
- the Gradient, Brush, Pencil and Eraser
- Select → Shrink and Feather, plus Cmd-click to load a layer's shape
- Copy, Copy Merged, Paste, Flip Vertical, and the Move tool's scale and rotate handles
- the filters Add Noise, Threshold, Clouds, Motion Blur and Gaussian Blur
- layer masks, and the Screen, Soft Light, Overlay and Multiply blend modes
- the layer effects Stroke, Outer Glow, Inner Glow and Drop Shadow
- groups, and live text in Yellowtail, Monoton, Tilt Neon and League Gothic
The palette:
-
Sky
-
Mesas
-
road
-
Cabinet teal
-
cabinet trim
-
Red neon
-
red core
-
Mint neon
-
mint core
-
Amber neon
-
amber core
-
Bulbs
-
bulb glow
-
Arrow crimson
-
arrow trim
-
Reader board
-
board glow
-
board frame
-
board letters
-
rails
-
Vacancy box
-
box trim
-
unlit tube
-
Telephone pole
-
pole light
-
Ground light
-
vignette
-
Footer cream
-
Set up the flyer, guides and a reference photo
Choose File → New, keep the units on Pixels, and make the document 1200 wide and 1800 high.
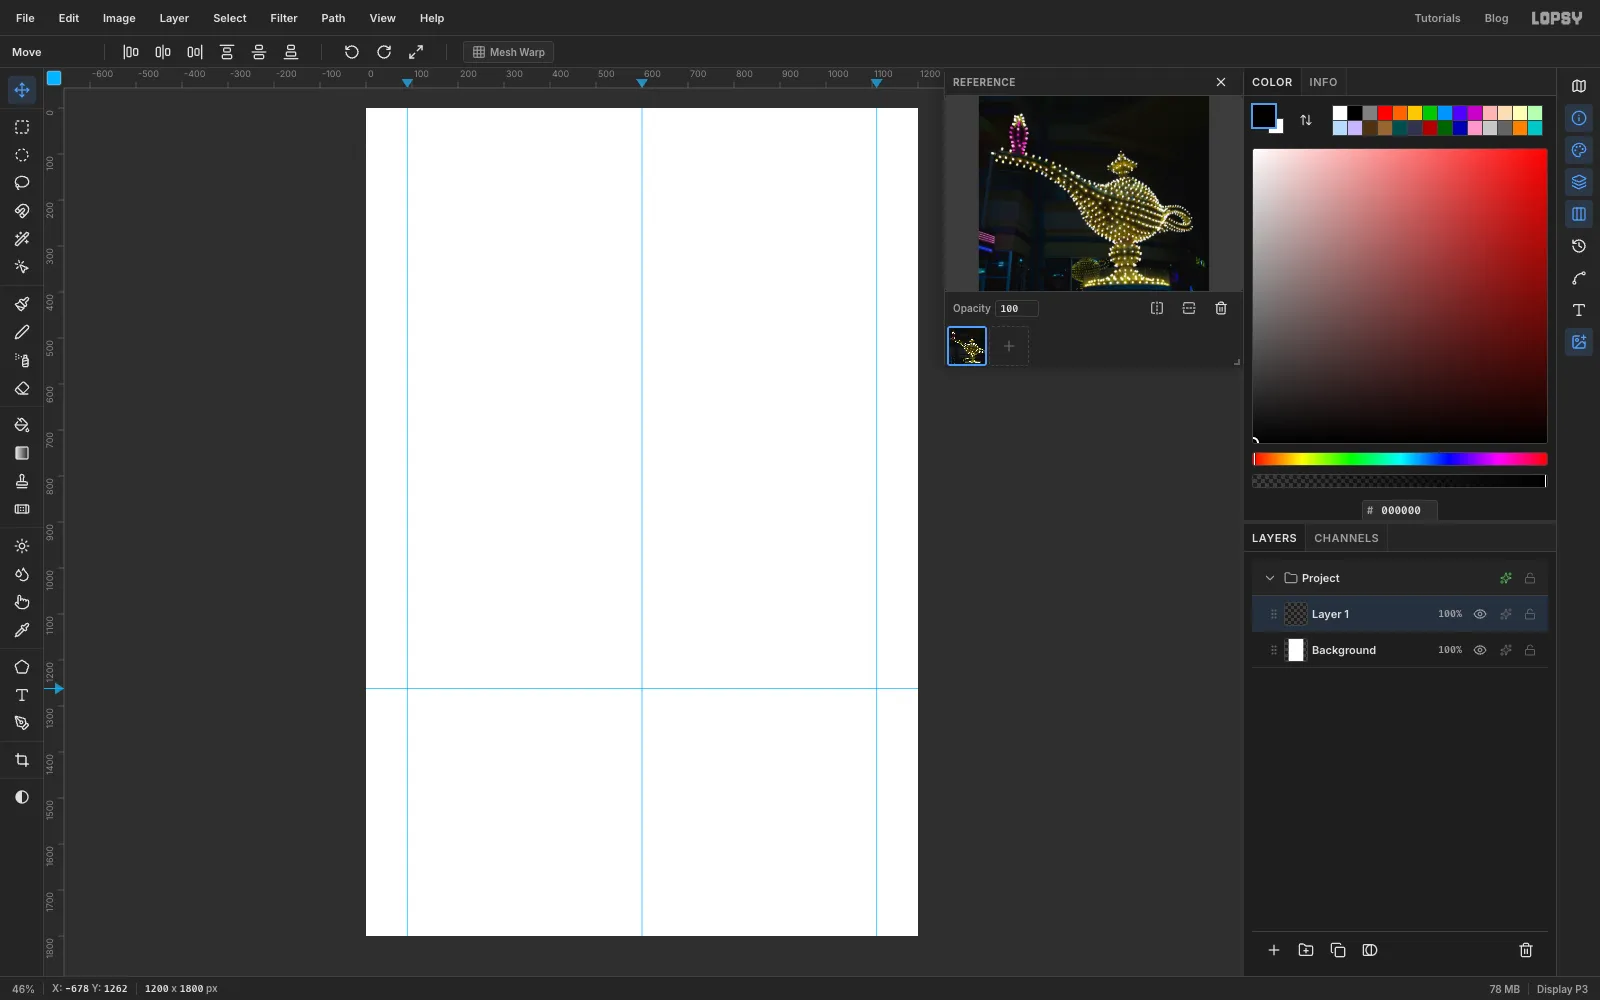
Click the top ruler to drop vertical guides at 90, 600 and 1110. The outer two mark the sign's edges and the middle one is the centre line. Click the left ruler at 1262 for the horizon. Everything above it is sky and everything below it is road.
Real signs are the best teacher. Open the Reference drawer from the right-hand toolbar and load a photo of vintage neon. This one is Carol M. Highsmith's Old Motels and Historic Neon Art, Las Vegas, Nevada from the Library of Congress, which is in the public domain. Look at how the bulbs sit in rows and how the glow fades into the dark. Close the drawer when you're done.
-
Paint the blue-hour sky
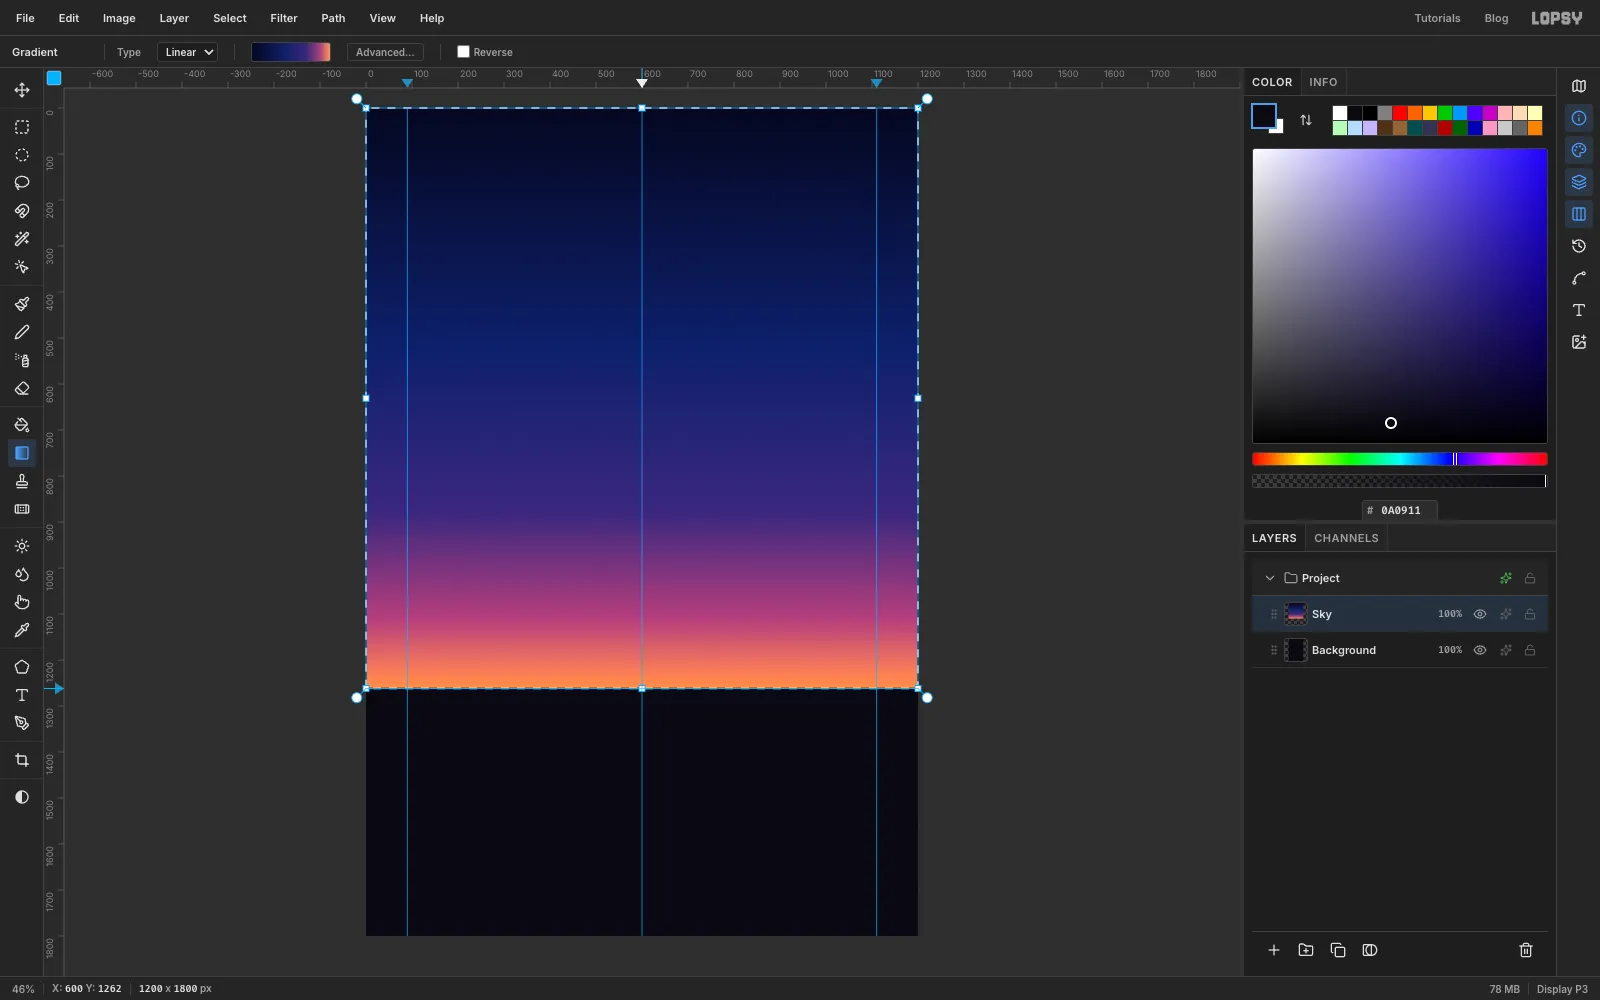
Click Background, set the foreground to and choose Edit → Fill. That's the road colour.
Click Layer 1 and rename it Sky. Pick the Rectangular Marquee and drag a selection from the top-left corner of the canvas down to the right edge at the horizon guide.
Pick the Gradient tool, set it to Linear and open Advanced…. Build five stops: at the left end, at 42%, at 70%, at 88% and at the right end. Click Done, then drag from the top edge of the canvas straight down to the horizon guide. Hold the drag vertical so the bands stay level.
-
Sprinkle stars with noise and Threshold
Press Cmd+D to deselect. Click Add Layer and name the layer Stars.
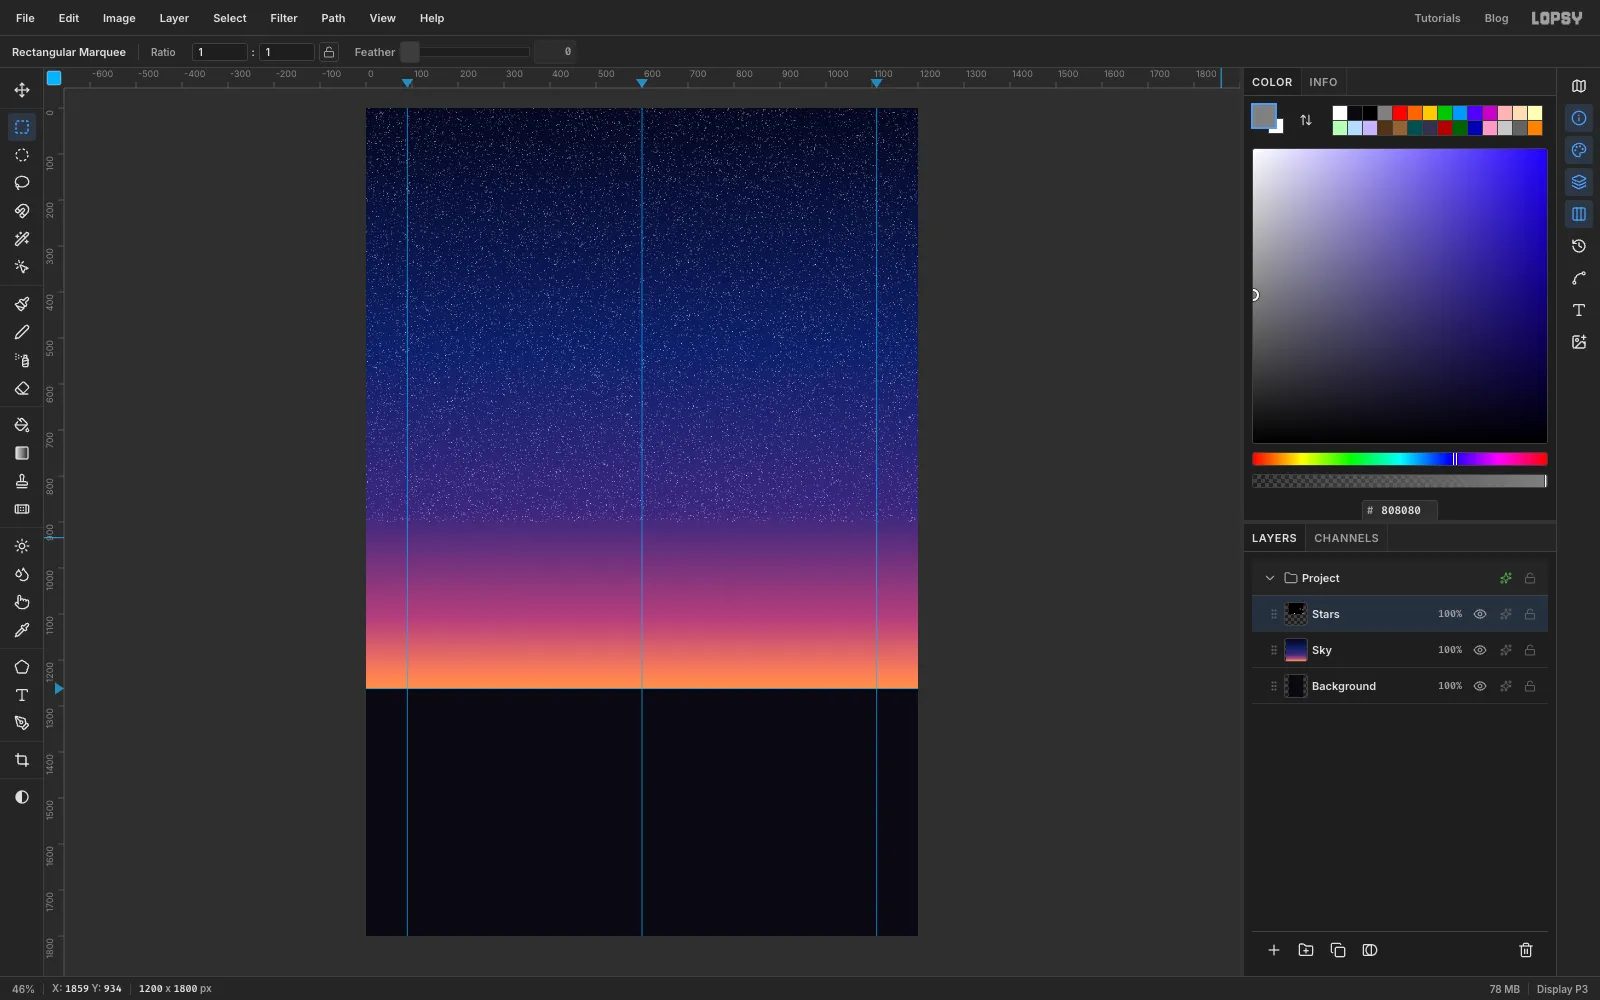
Draw a marquee over the top half of the canvas, from the top-left corner to the right edge at about y 900. Set the foreground to mid-grey , choose Edit → Fill, and deselect.
Choose Filter → Add Noise… with Amount 100, Mono and Uniform. Then choose Filter → Threshold… and set Level to 176. Only the brightest specks of noise turn white, and the rest go black.
Open the layer's effects (the ✦ button on its row) and set Blend to Screen. The black disappears and the white specks stay as stars.
-
Fade the stars with a layer mask
Stars disappear into the glow near the horizon, so fade them out with a mask.
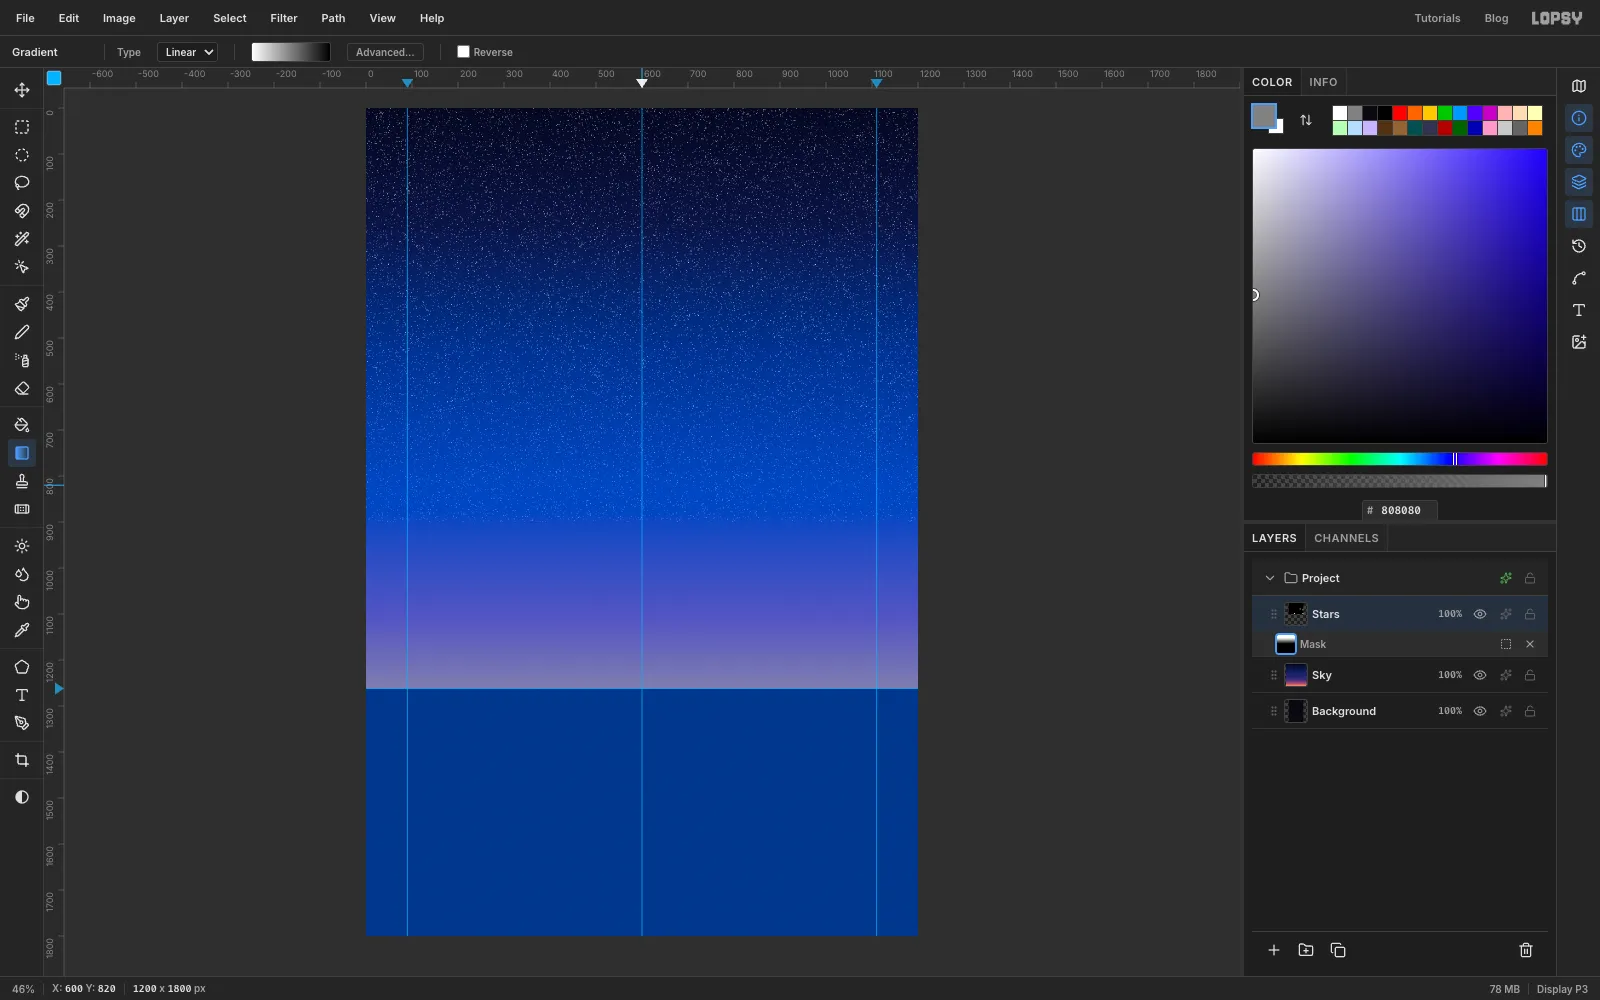
With Stars active, click Add Mask at the bottom of the Layers panel, then click the new mask thumbnail to edit the mask. The canvas shows the masked-out area as a blue overlay.
Pick the Gradient tool. In Advanced…, make a two-stop gradient from white to black . Drag from about y 250 straight down to about y 820. Click the layer's name to stop editing the mask.
-
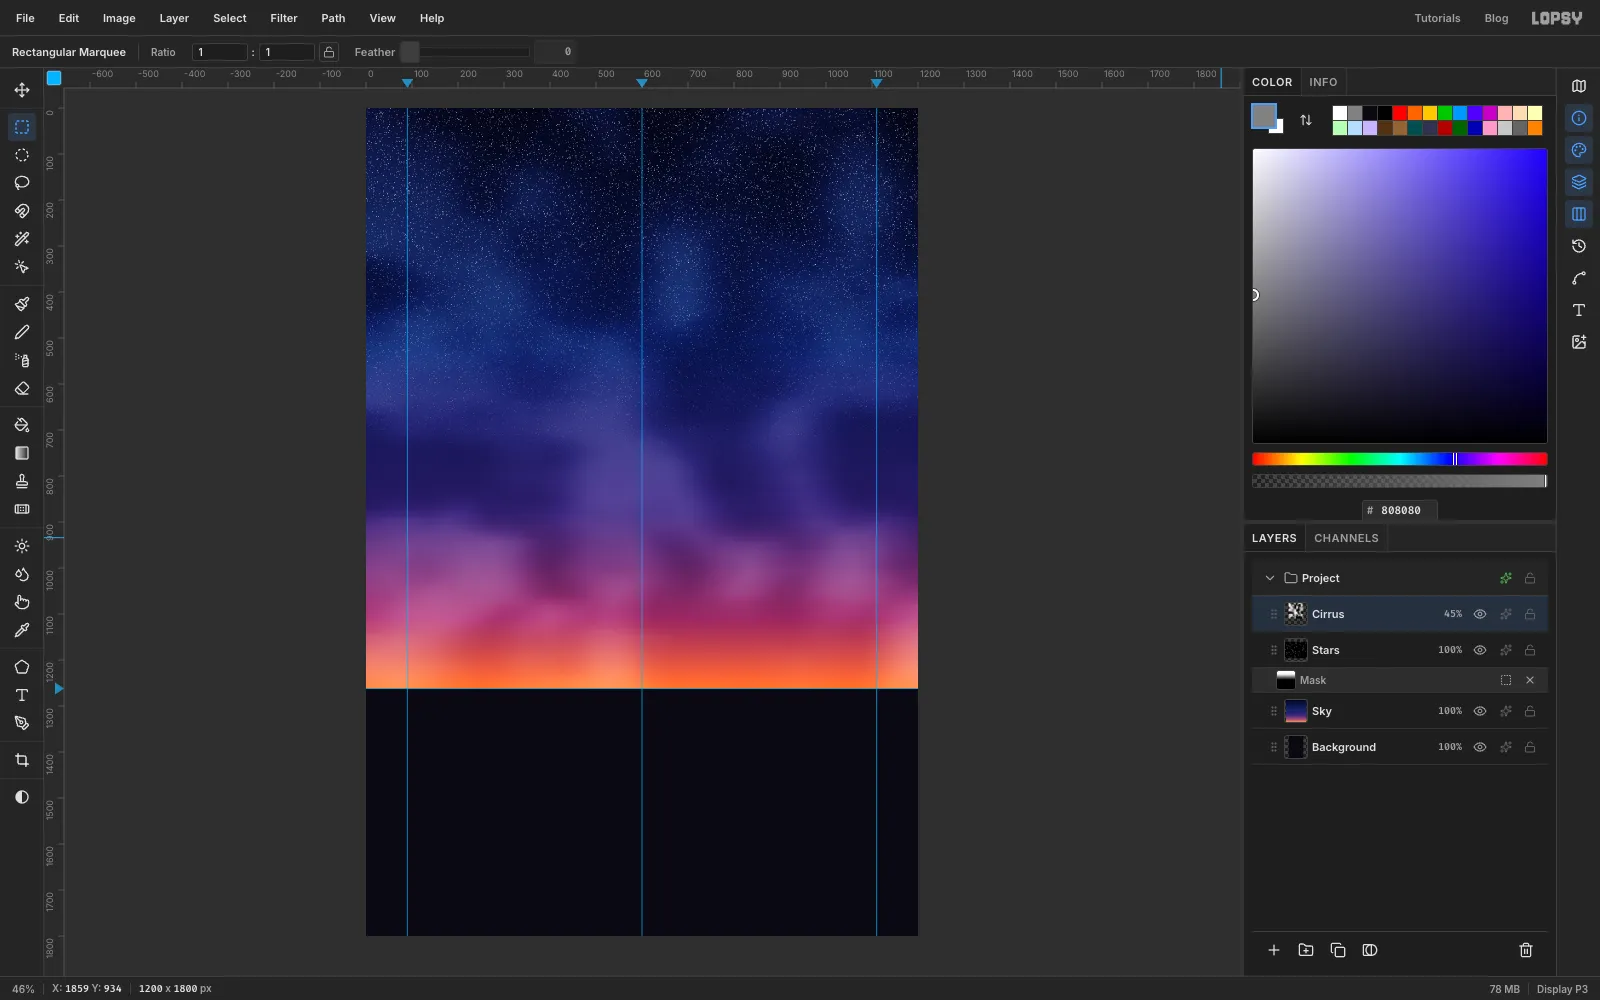
Streak in some cirrus cloud
Click Add Layer and name the layer Cirrus. Draw a marquee over the whole sky, from the top-left corner to the right edge at the horizon guide.
Choose Filter → Clouds… with Scale 9, then deselect. Choose Filter → Motion Blur… with Angle 0 and Distance 100 to stretch the clouds into long, thin streaks.
Open the effects, set Blend to Soft Light, and set the layer's opacity to 45% from the opacity button on its row. The clouds now only lighten and darken the gradient beneath them.
-
Trace the far mesas with the Pen
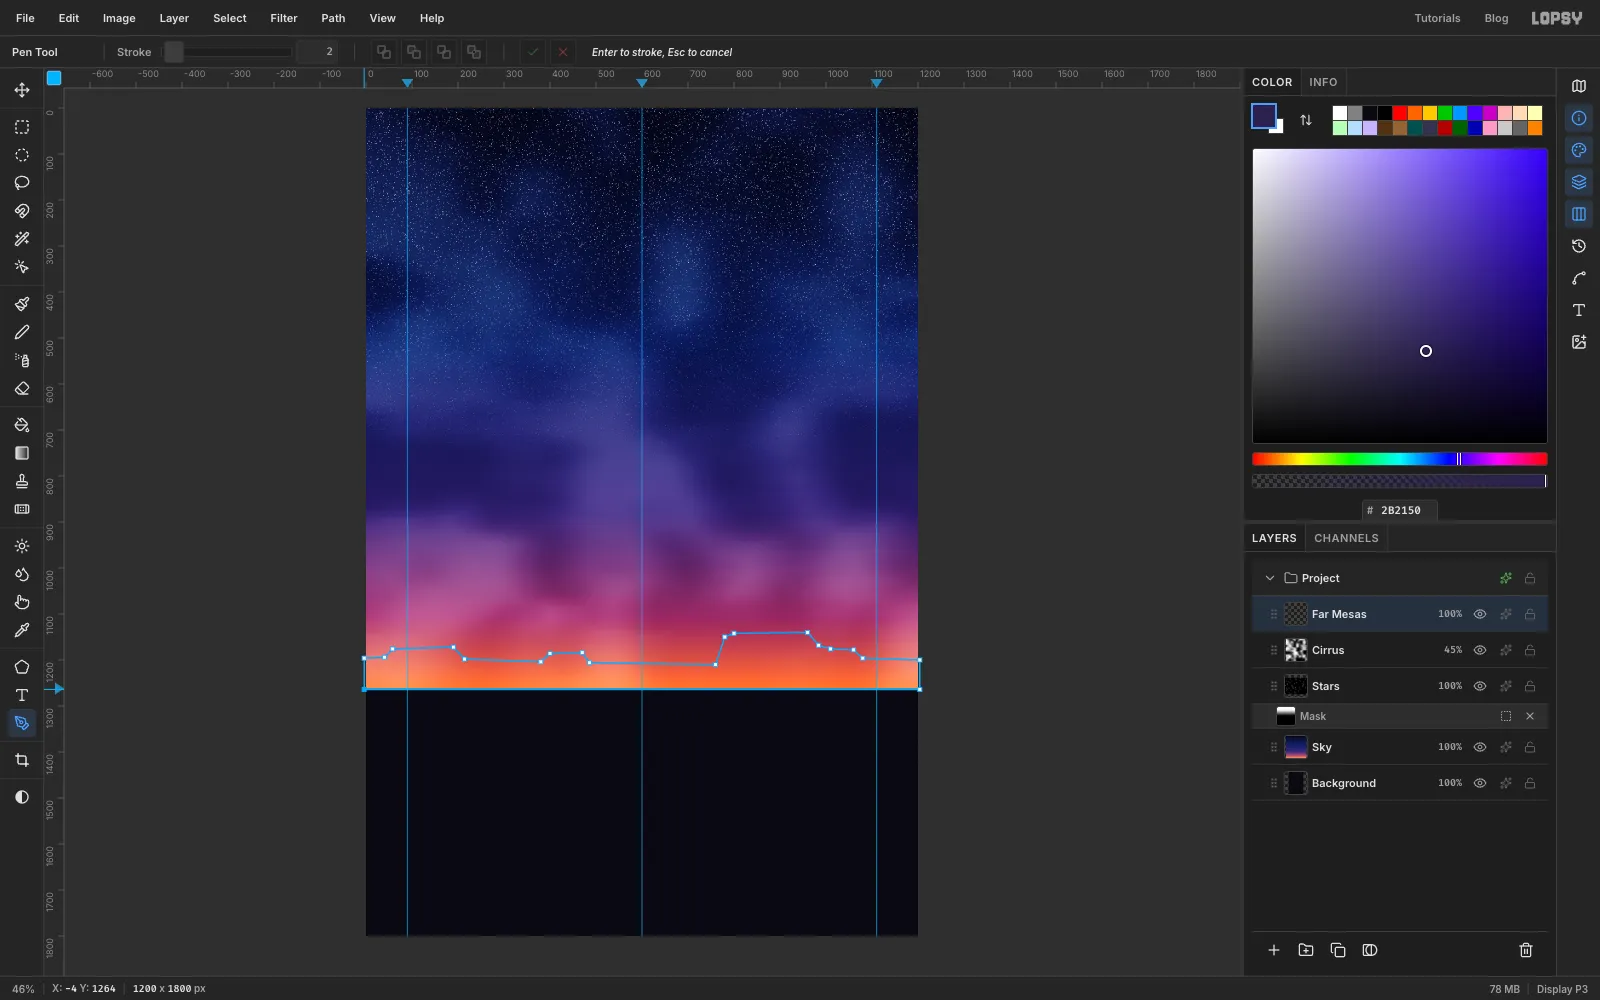
Click Add Layer and name the layer Far Mesas. Set the foreground to .
Pick the Pen tool. Mesas are flat-topped with steep sides, so use plain clicks, which make sharp corners. Start just off the left edge on the horizon guide, then click your way along the skyline:
- a low mesa on the left, about 90 px tall
- a long, gentle stretch through the middle, where the sign will cover it
- a tall butte about 120 px high between x 780 and x 1000
- a lower shoulder off the right edge
Come back along the horizon guide and click the first anchor to close the path.
Open the Paths panel and click Path to Selection, then Delete Path. Choose Edit → Fill and deselect.
-
Add the near mesas and a telephone pole
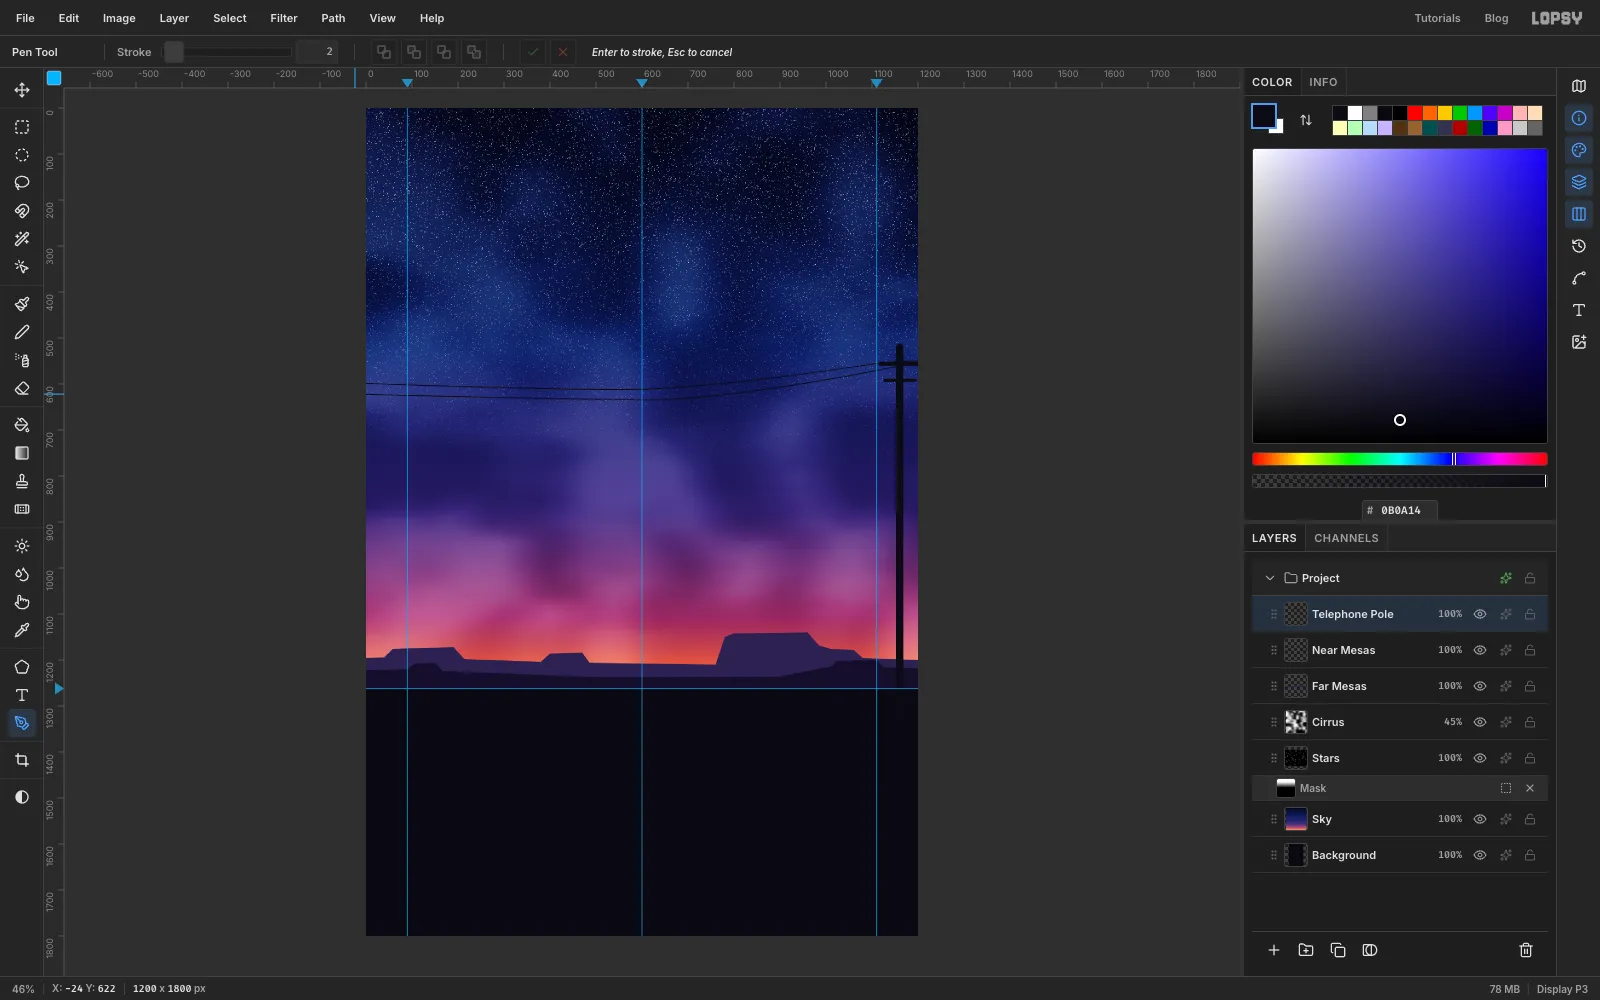
Click Add Layer and name it Near Mesas. Set the foreground to the darker . Trace a lower, nearer ridge the same way, only 30–60 px tall, with a small bump on each side. Fill it and delete the path as before.
Click Add Layer and name it Telephone Pole. Set the foreground to . With the Pen tool, set Stroke to 16 in the options bar, click at the foot of the pole, 40 px in from the right edge and just below the horizon, then click again straight above it, a little over a quarter of the way down the canvas (about y 520). Press Enter to stroke the path, then delete it in the Paths panel. If you leave it selected, your next click would edit it instead of starting a new path.
In the same way, stroke a 9 px crossarm across the pole at y 556, from x 1118 to x 1204, and a 7 px one, a little shorter, about 36 px below it.
For the wires set Stroke to 2. Click just off the right edge, then click the left end of the top crossarm. Now press at about x 560, a little lower (y 612), and drag to the left to pull out curve handles. Finally click just off the left edge. Press Enter. Draw a second wire through the right end of the crossarm, sagging a bit lower. Delete the paths when you're done.
-
Build the steel poles
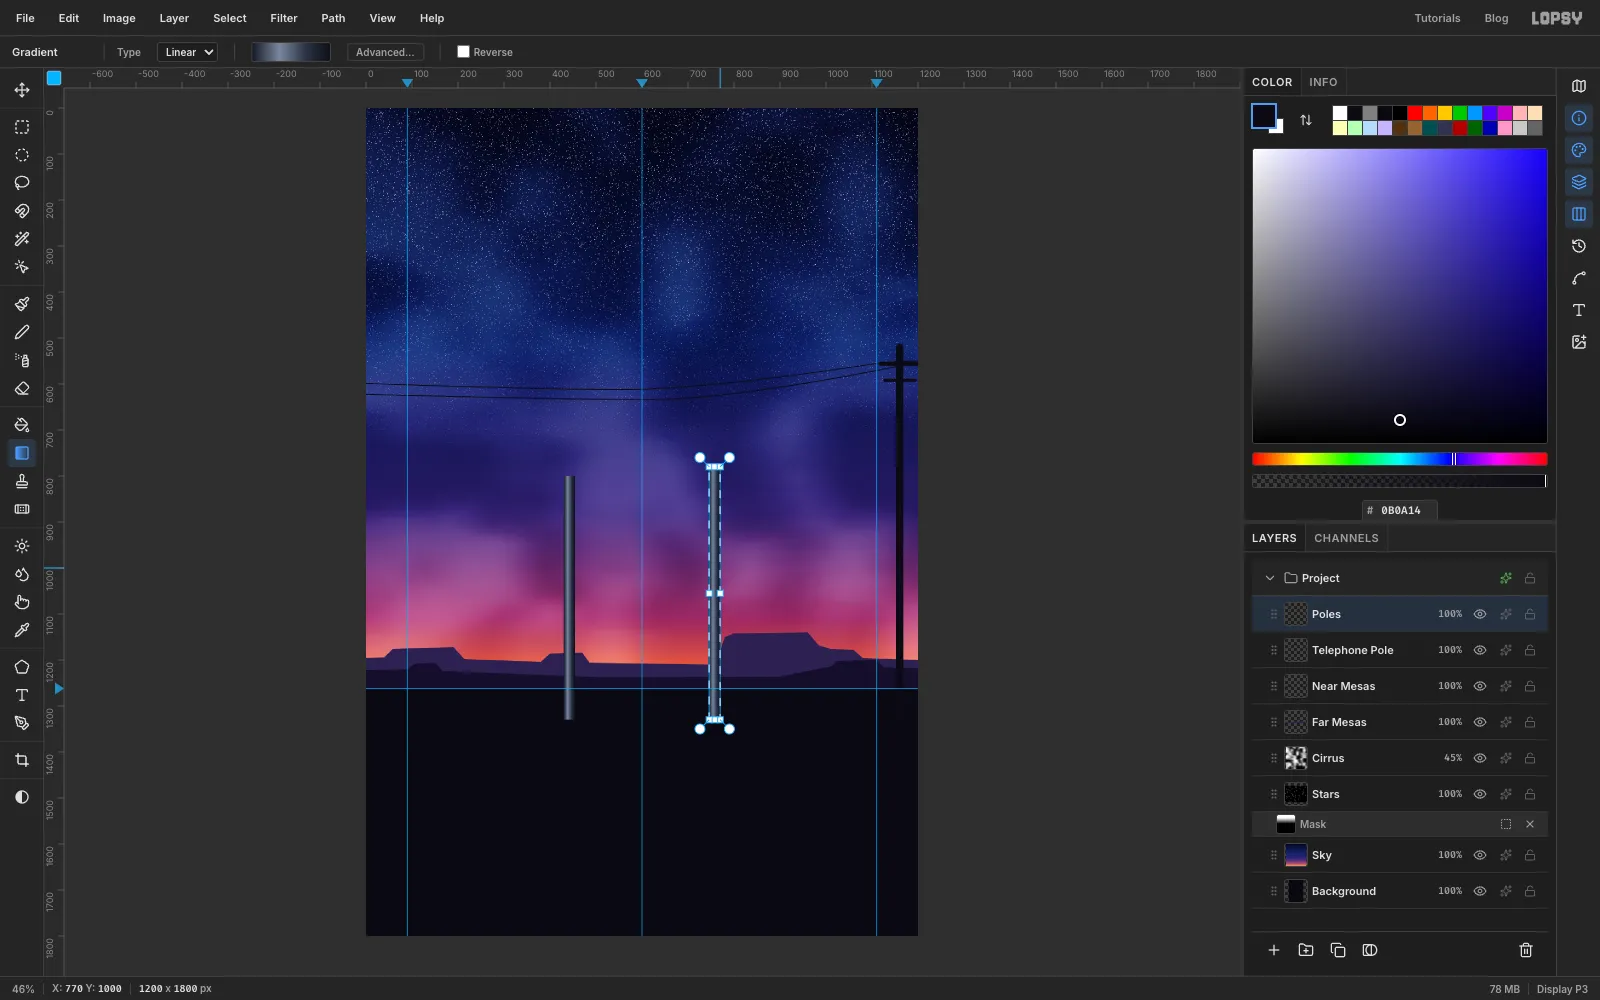
Click Add Layer and name it Poles.
Pick the Gradient tool and build a four-stop steel gradient in Advanced…: at the left end, at 35%, at 70% and at the right end.
Pick the Rectangular Marquee and click once on the canvas without dragging. That opens the exact-corners dialog. Enter From 430, 800 and To 454, 1330. Switch to the Gradient tool and drag across the pole from its left edge to its right edge.
Click once with the marquee again and make the second pole, From 746, 780 and To 770, 1330. Drag the gradient across it the same way, then deselect.
-
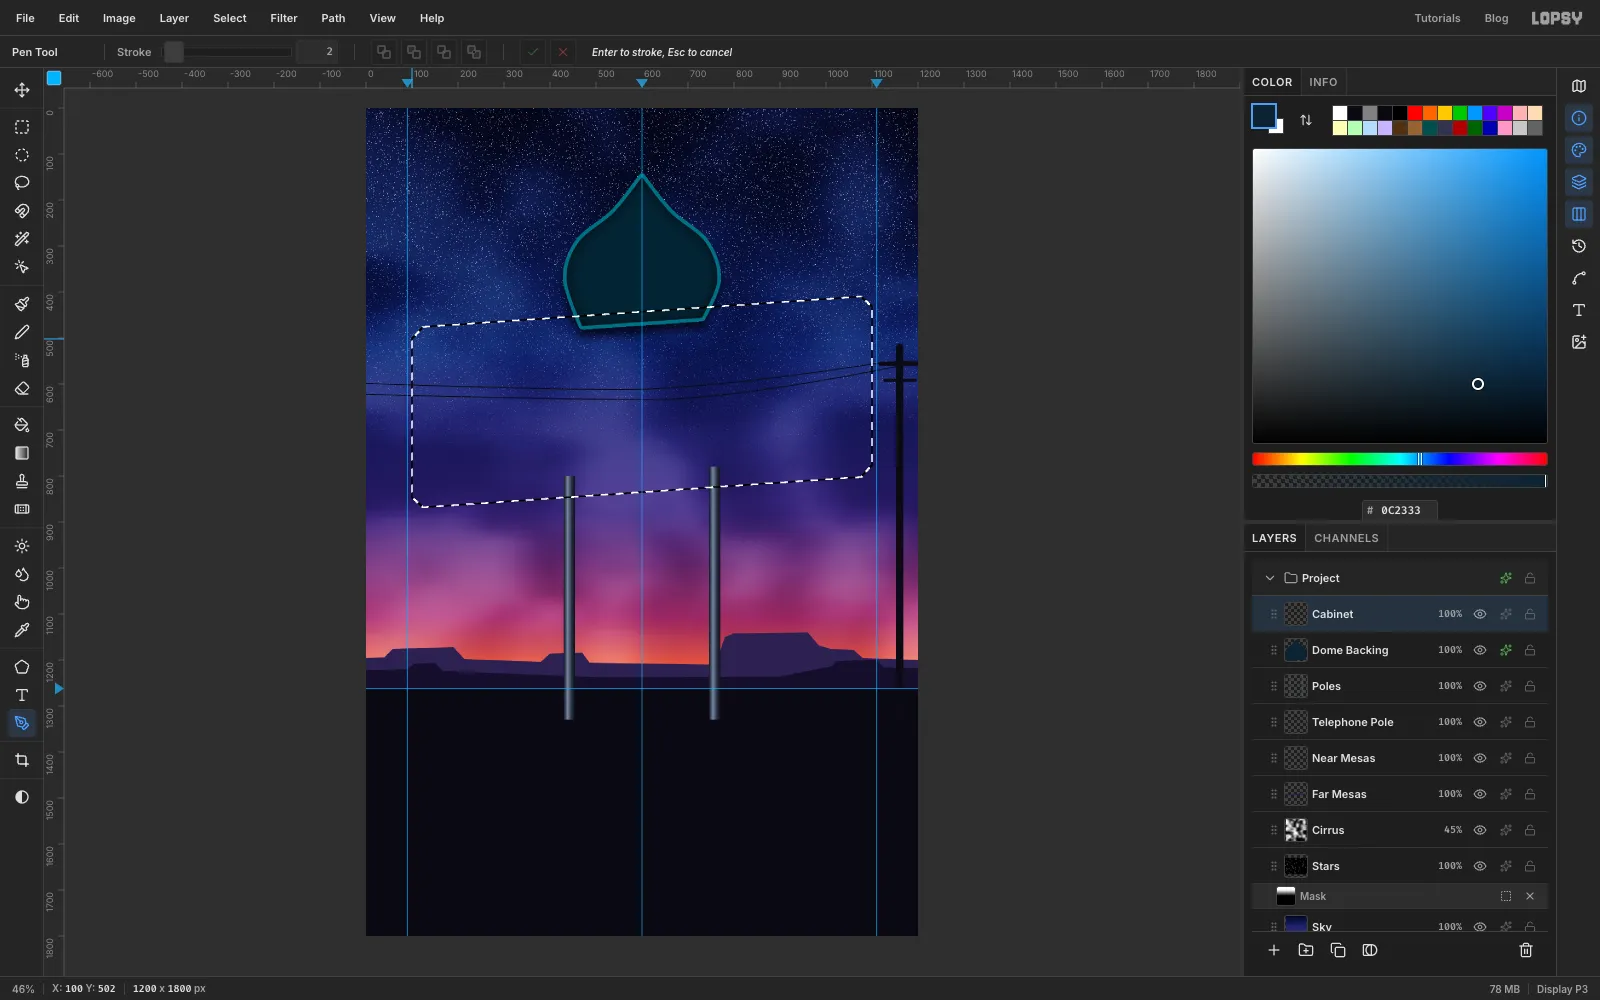
Cut the dome backing and the cabinet
Click Add Layer and name it Dome Backing. Set the foreground to cabinet teal .
With the Pen tool, draw an onion dome centred on the middle guide:
- Click a sharp corner at the bottom left (about x 470, y 474).
- Press and drag to place smooth anchors up the left side. Bulge out to about x 436 at y 372, then curve in to about x 462 at y 292 and x 540 at y 226.
- Click a sharp corner at the tip (x 600, y 150).
- Come back down the right side as a mirror image.
- Click a sharp corner at the bottom right (about x 730, y 456).
- Click the first anchor to close the path.
Use Path to Selection, delete the path, Edit → Fill and deselect.
Click Add Layer and name it Cabinet. Its top edge rises to the right, from about (124, 476) to (1076, 410), and its bottom edge runs parallel to it, from (124, 868) to (1076, 802). With the Pen, click these eight corners in order, which clips each corner with a small bevel: (100, 502), (124, 476), (1076, 410), (1100, 432), (1100, 776), (1076, 802), (124, 868), (100, 846). Click the first anchor to close it, then use Path to Selection and Delete Path as before. Fill the selection with the same teal and deselect.
-
Turn the cabinet into painted sheet metal
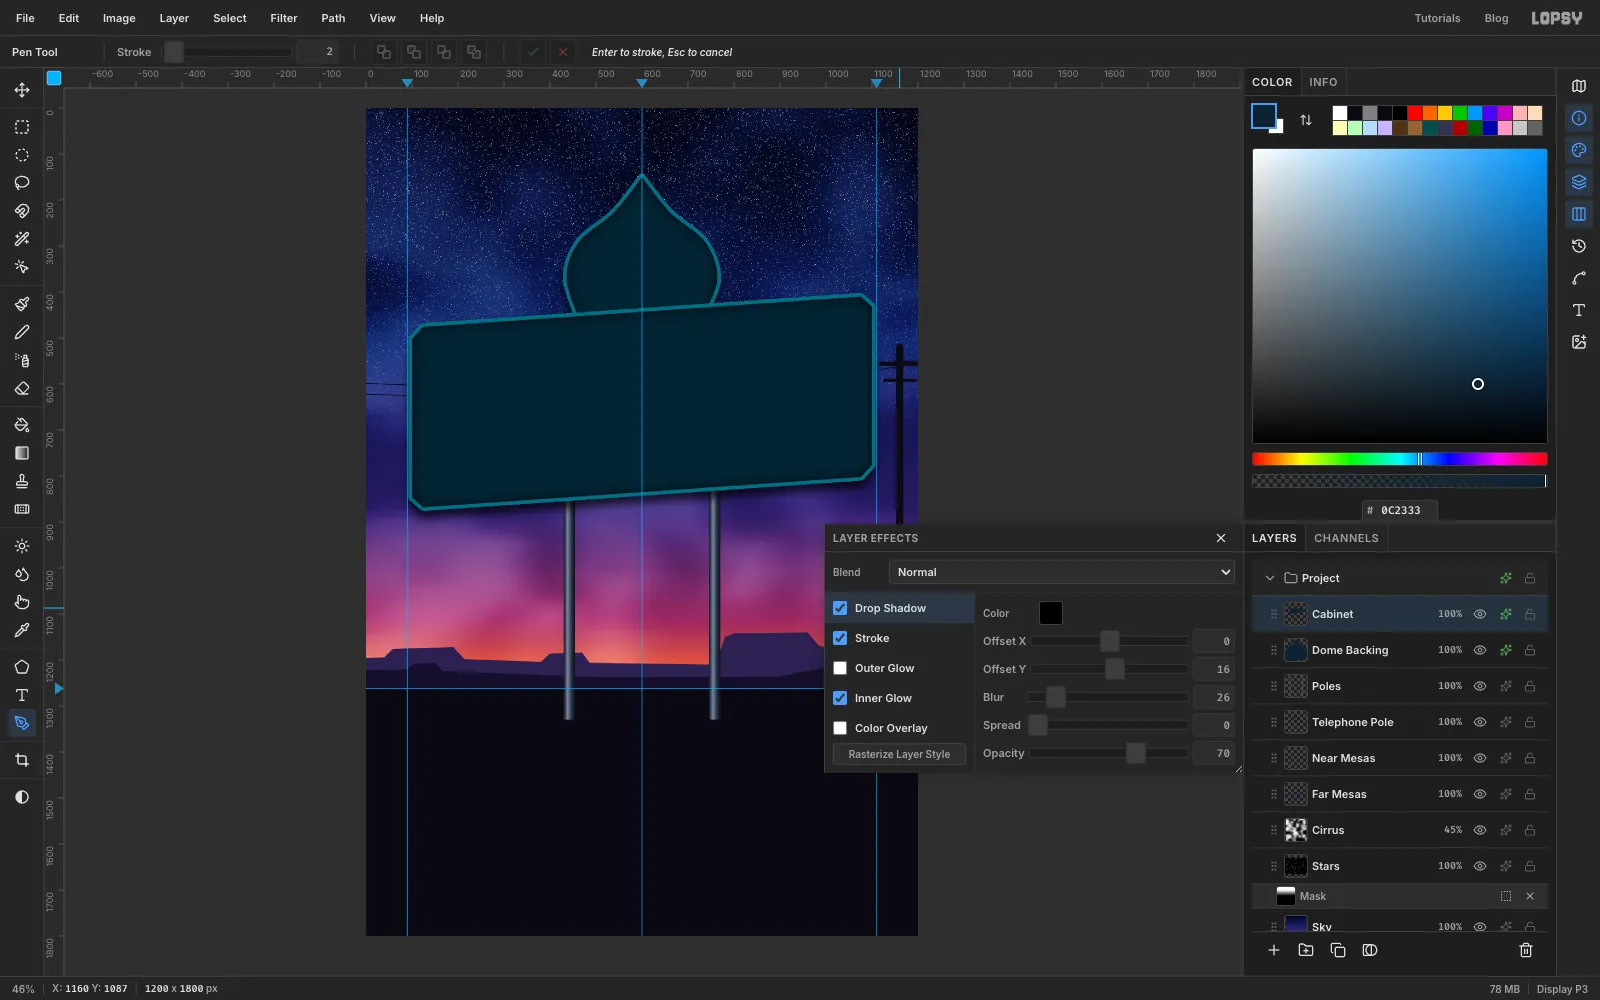
With Cabinet active, open its effects and turn on:
- Stroke: Width 8, position outside, colour , for the folded metal rim
- Inner Glow: colour black , Size 40, Opacity 70, for depth at the edges
- Drop Shadow: black, Offset X 0, Offset Y 16, Blur 26, Opacity 70
Give Dome Backing exactly the same three effects. The two shapes now read as one riveted steel sign.
-
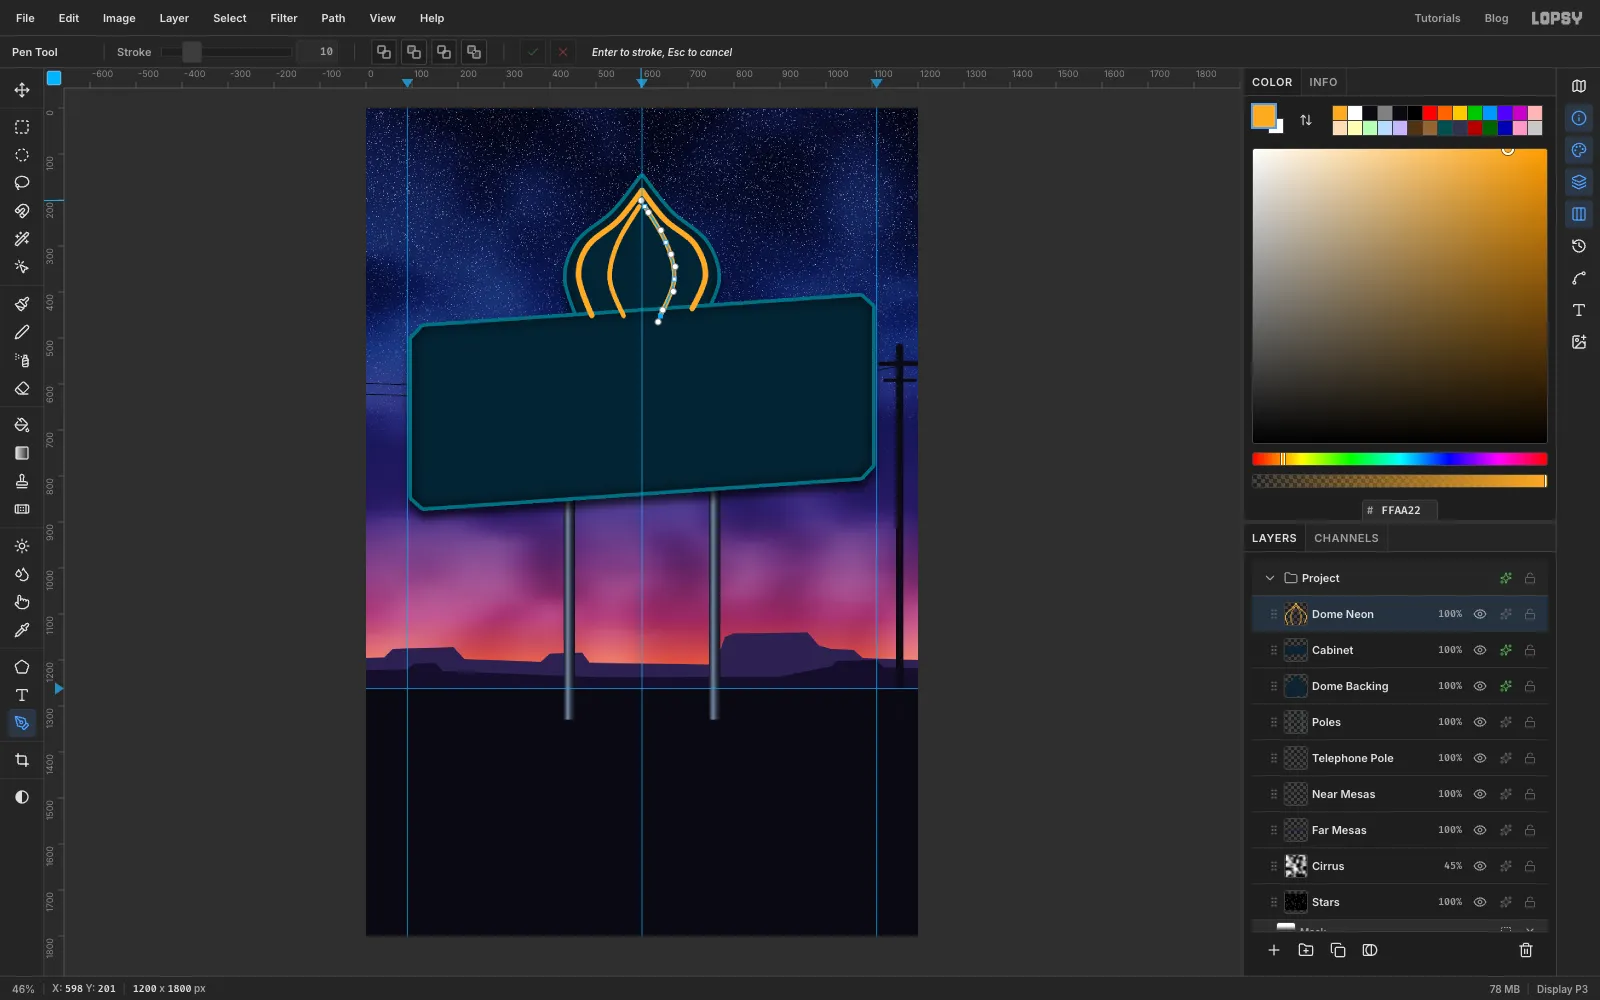
Bend the amber dome tubes
Click Cabinet, then click Add Layer and name the new layer Dome Neon. Set the foreground to amber .
Pick the Pen, set Stroke to 12, and trace a smaller onion about 30 px inside the backing. Start with a sharp corner at the bottom left, use smooth anchors up and over to a sharp corner at the tip, and come down to a sharp corner at the bottom right. Don't close it: a neon tube ends where it plugs into the cabinet. Press Enter to stroke it.
Set Stroke to 10 and draw two ribs with smooth anchors. The left rib starts on the cabinet's top edge at about (560, 452), bows out through (530, 372) and (548, 292), and ends just under the tip at (594, 214). The right rib is its mirror image across the centre guide. Press Enter after each one.
After each Enter, delete the path in the Paths panel so your next click starts a fresh path instead of editing the last one.
-
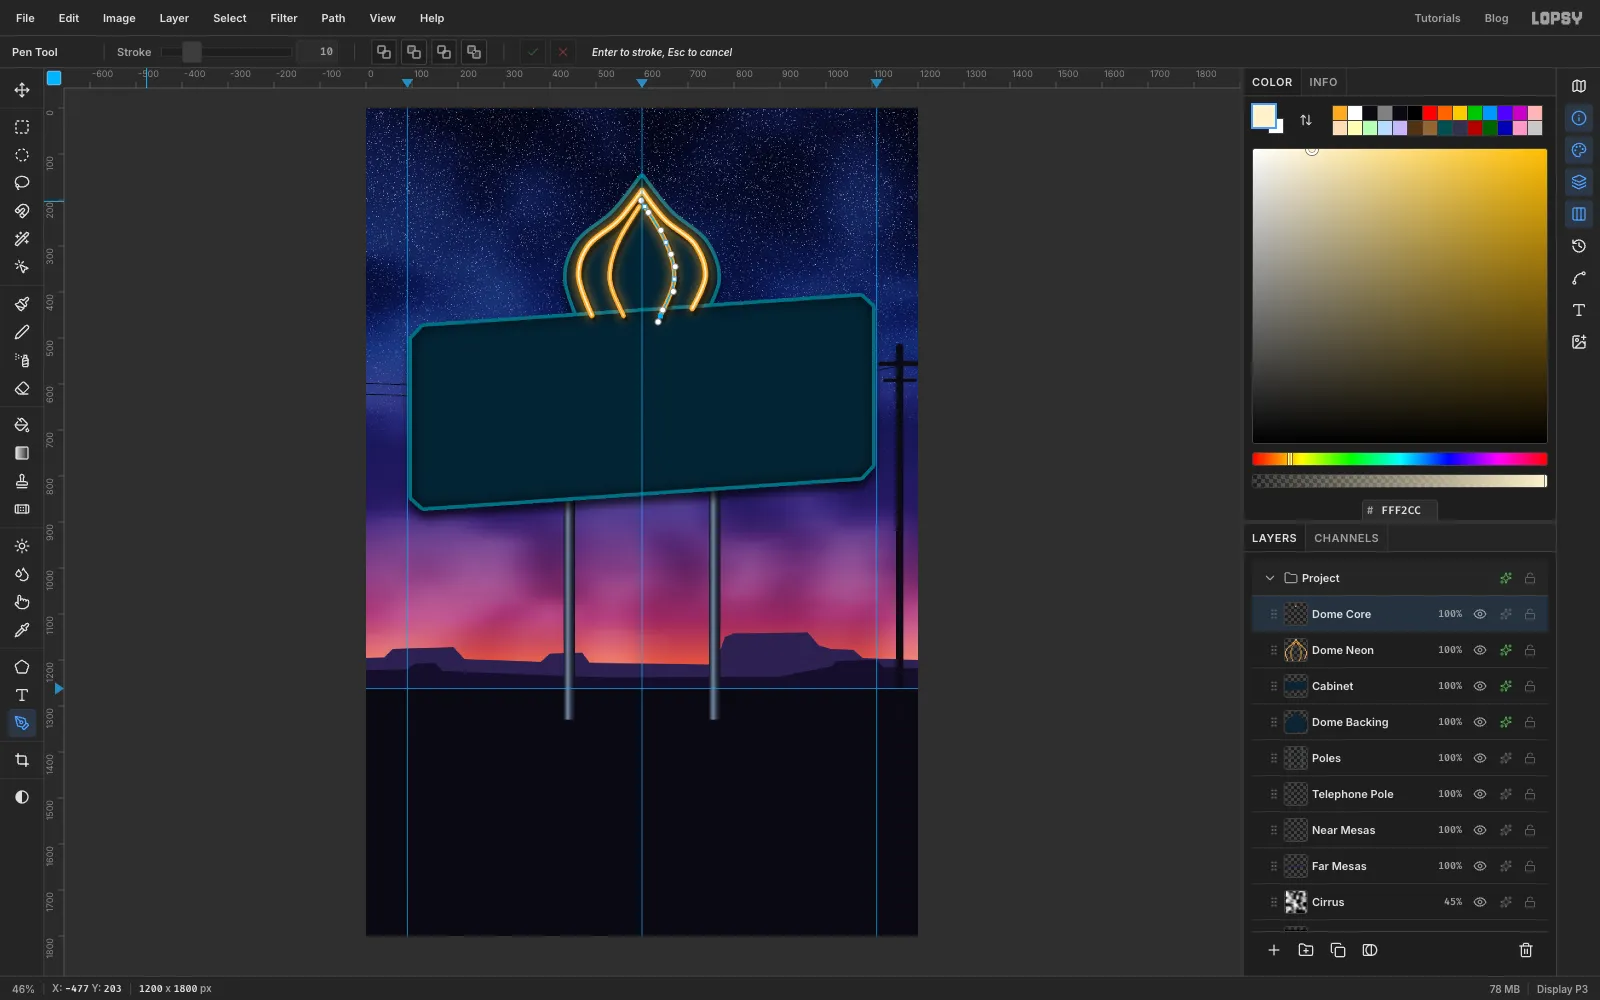
Light the tubes and give them a hot core
Open the effects for Dome Neon and turn on:
- Outer Glow: colour , Size 34, Spread 6, Opacity 90
- Drop Shadow: black, Offset X 6, Offset Y 10, Blur 8, Opacity 55
The small shadow makes the tubes stand off the metal.
Real neon is brightest in the middle of the glass. Cmd-click the Dome Neon thumbnail to load the tubes as a selection, then choose Select → Shrink… and shrink by 4 px. Click the Dome Neon row, click Add Layer and name the new layer Dome Core. Set the foreground to amber core , choose Edit → Fill and deselect.
You'll use this glow-plus-core recipe for every tube on the sign.
-
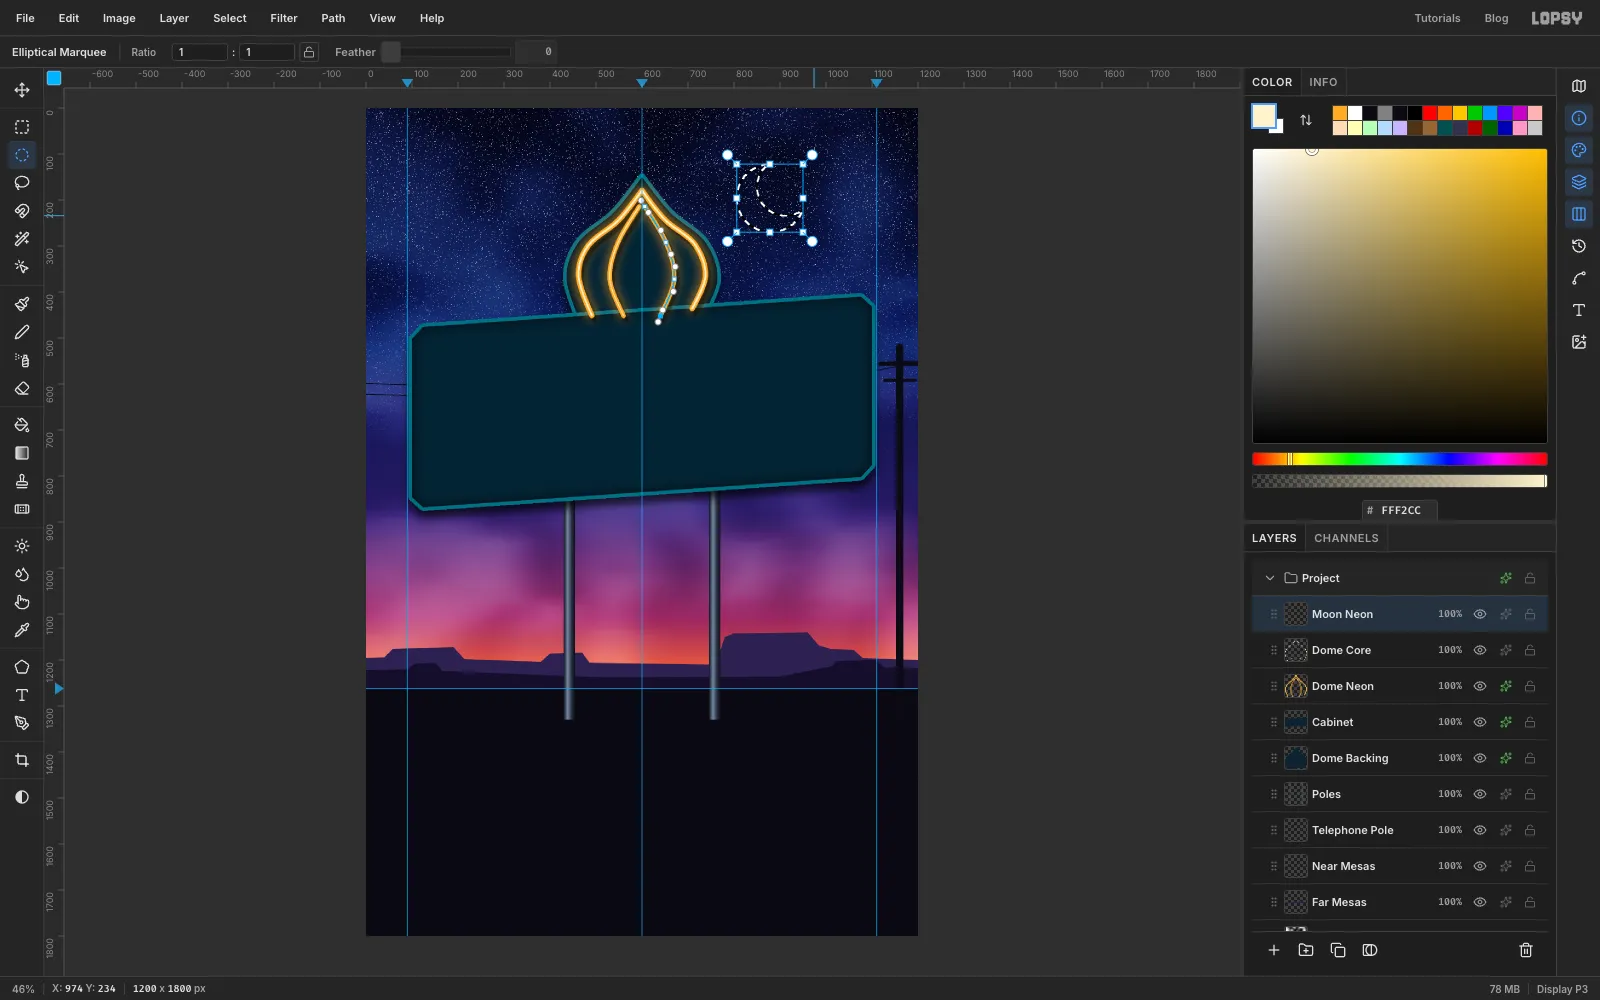
Hollow a crescent moon out of two circles
Click Add Layer and name it Moon Neon.
Pick the Elliptical Marquee, click once on the canvas to open the corner dialog, and make a circle From 806, 122 To 954, 270. Now hold Alt and drag a slightly smaller circle, about 124 px across, centred about 30 px up and to the right of the first one (from about (850, 110) to (974, 234)). It bites the crescent out of the first circle.
Set the foreground to mint and choose Edit → Fill. Choose Select → Shrink… by 11 px and press Delete. Only an 11 px ring of glass is left. Deselect.
Give the moon the tube effects in mint: Outer Glow at Size 32, Spread 6, Opacity 90, and the same Drop Shadow. Then make its hot core: Cmd-click the thumbnail, Shrink by 4, click Moon Neon, Add Layer (Moon Core), and fill it with .
-
Draw a sparkle and paste smaller copies
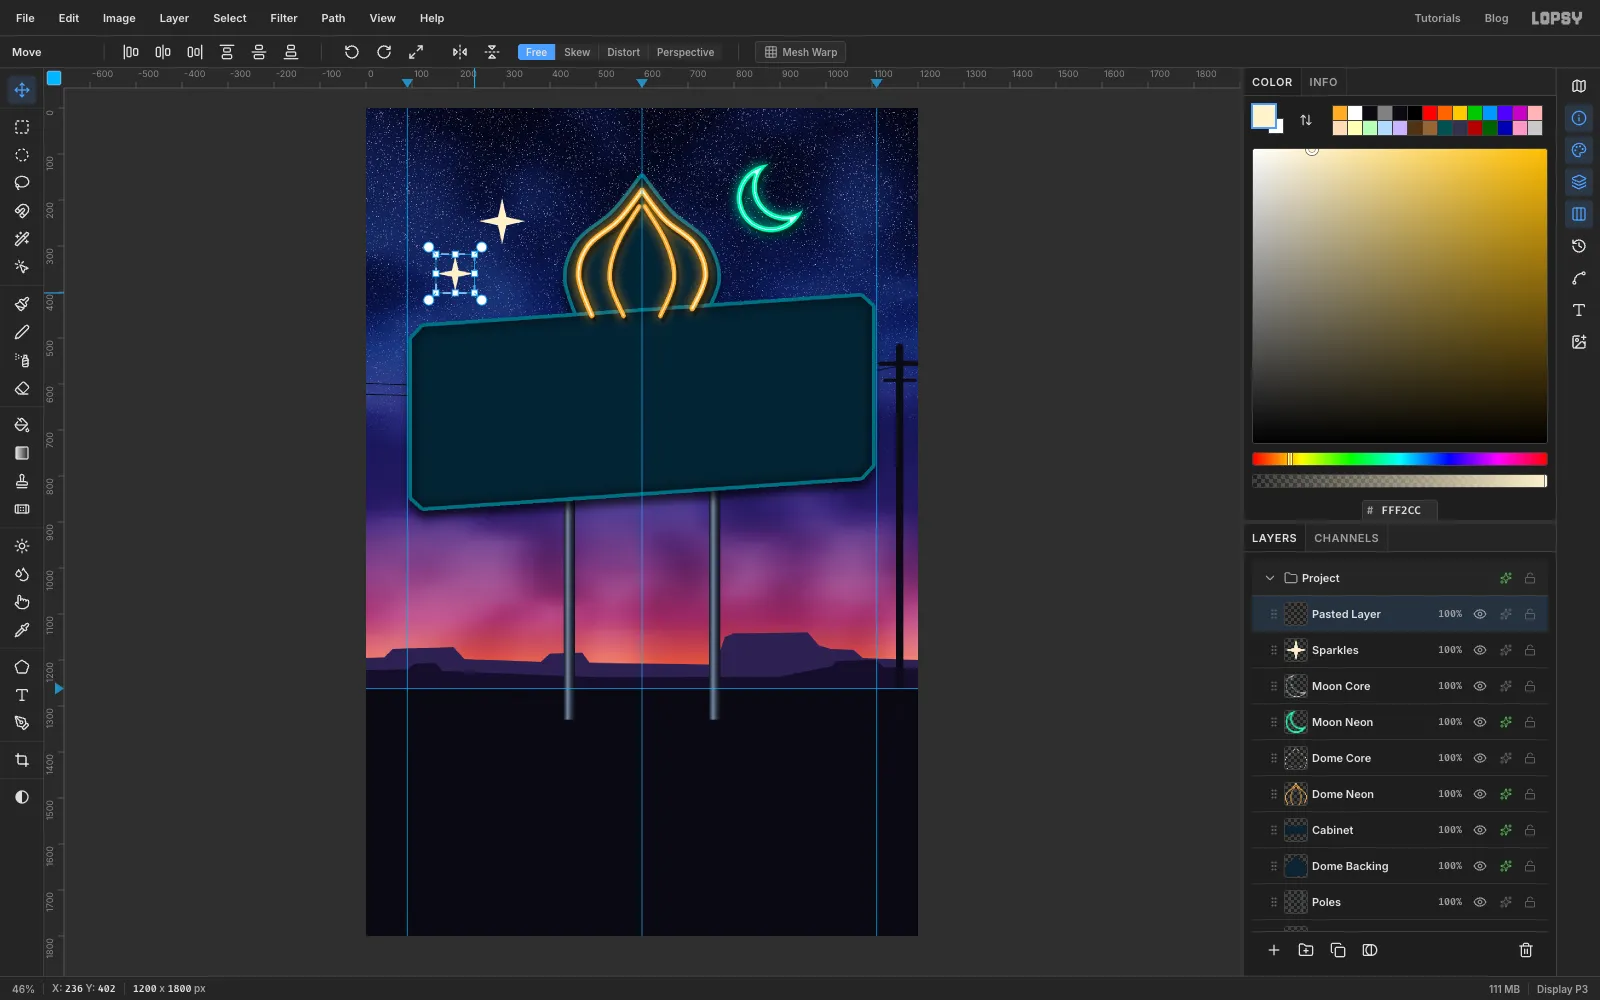
Click Add Layer and name it Sparkles. Set the foreground to .
With the Pen, click eight sharp corners for a four-point star centred at about (296, 246). The points sit 50 px out and the pinched corners only 13 px from the centre. Close the path, use Path to Selection and Delete Path, fill it and deselect.
Now duplicate it:
- Draw a marquee around the sparkle. Press Cmd+C, then Cmd+V. The copy lands on a new layer in the same spot, and Lopsy switches to the Move tool.
- Drag the copy down and to the left, to about (206, 372).
- Draw a marquee around the copy. With the Move tool, hold Cmd and drag its bottom-right corner handle inward to shrink it to about 55%. Press Cmd+D to commit.
-
Scatter the sparkles
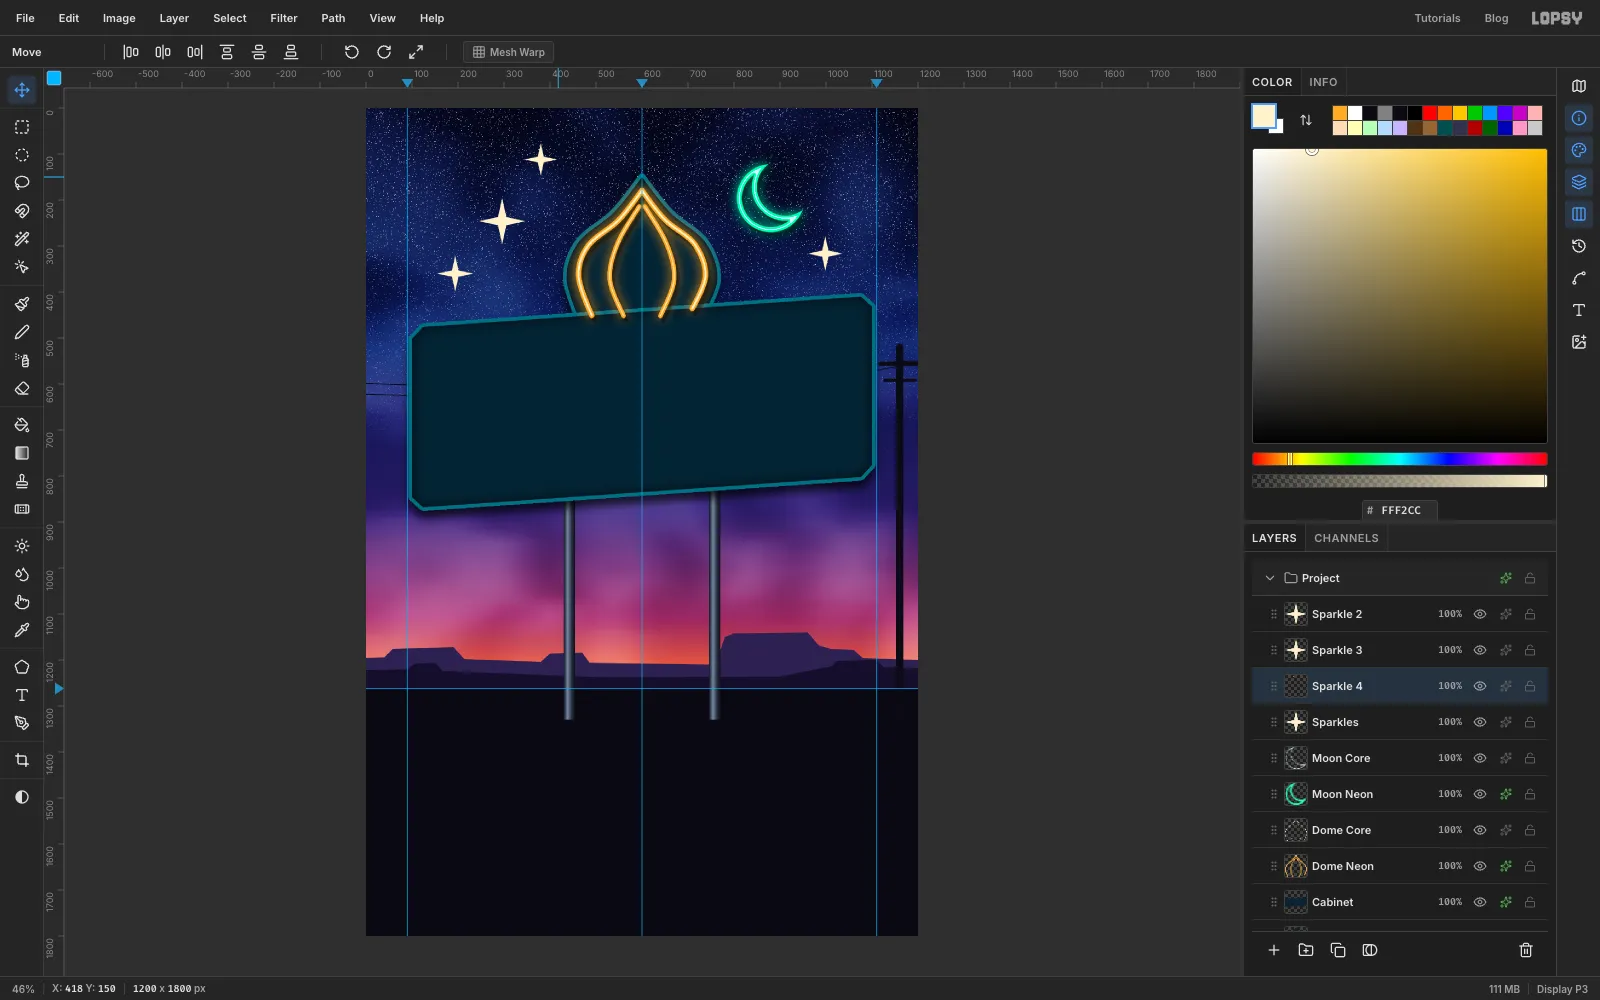
Click the Sparkles row and draw the marquee around the big original again before each copy, so you always copy it rather than a small one. Paste two more: one at about (1012, 330) at 50%, and one high above the dome at about (396, 128) at 40%.
Click the top pasted layer and choose Layer → Merge Down three times, until all four sparkles are on Sparkles. Then give that layer a Stroke of Width 3, outside, in , and an Outer Glow in at Size 24, Spread 4, Opacity 85.
-
Set "Hotel" and "XANADU"
Click the Dome Core row first. The Text tool restyles whatever text layer is active, so start each new text from a normal layer.
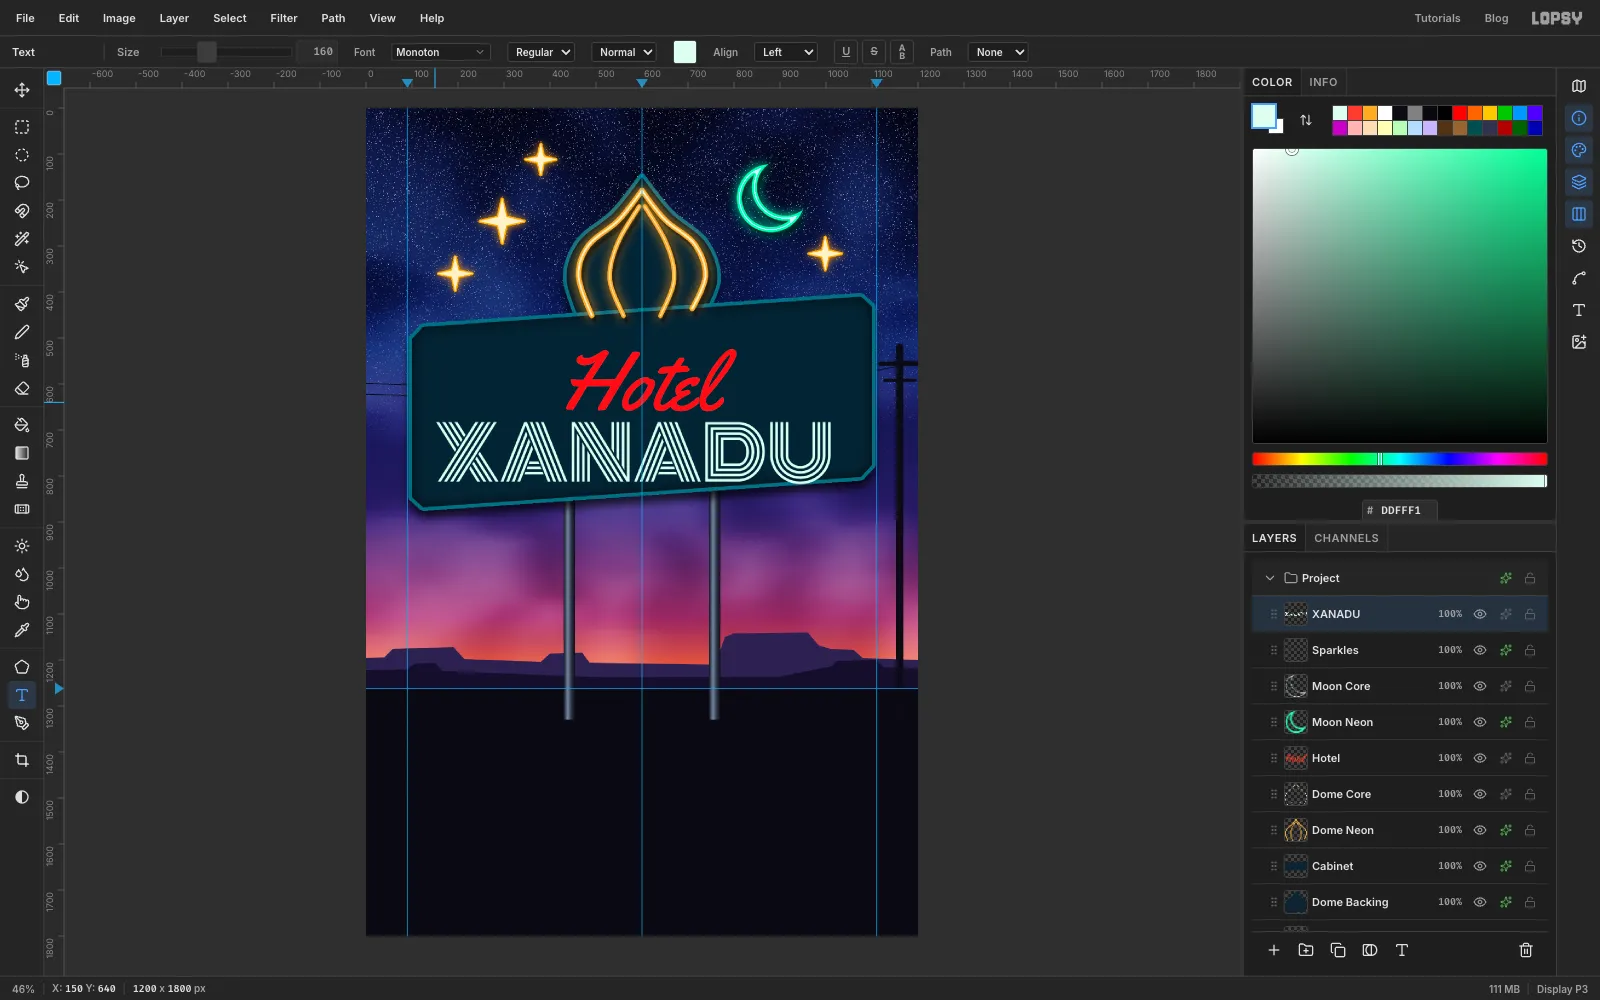
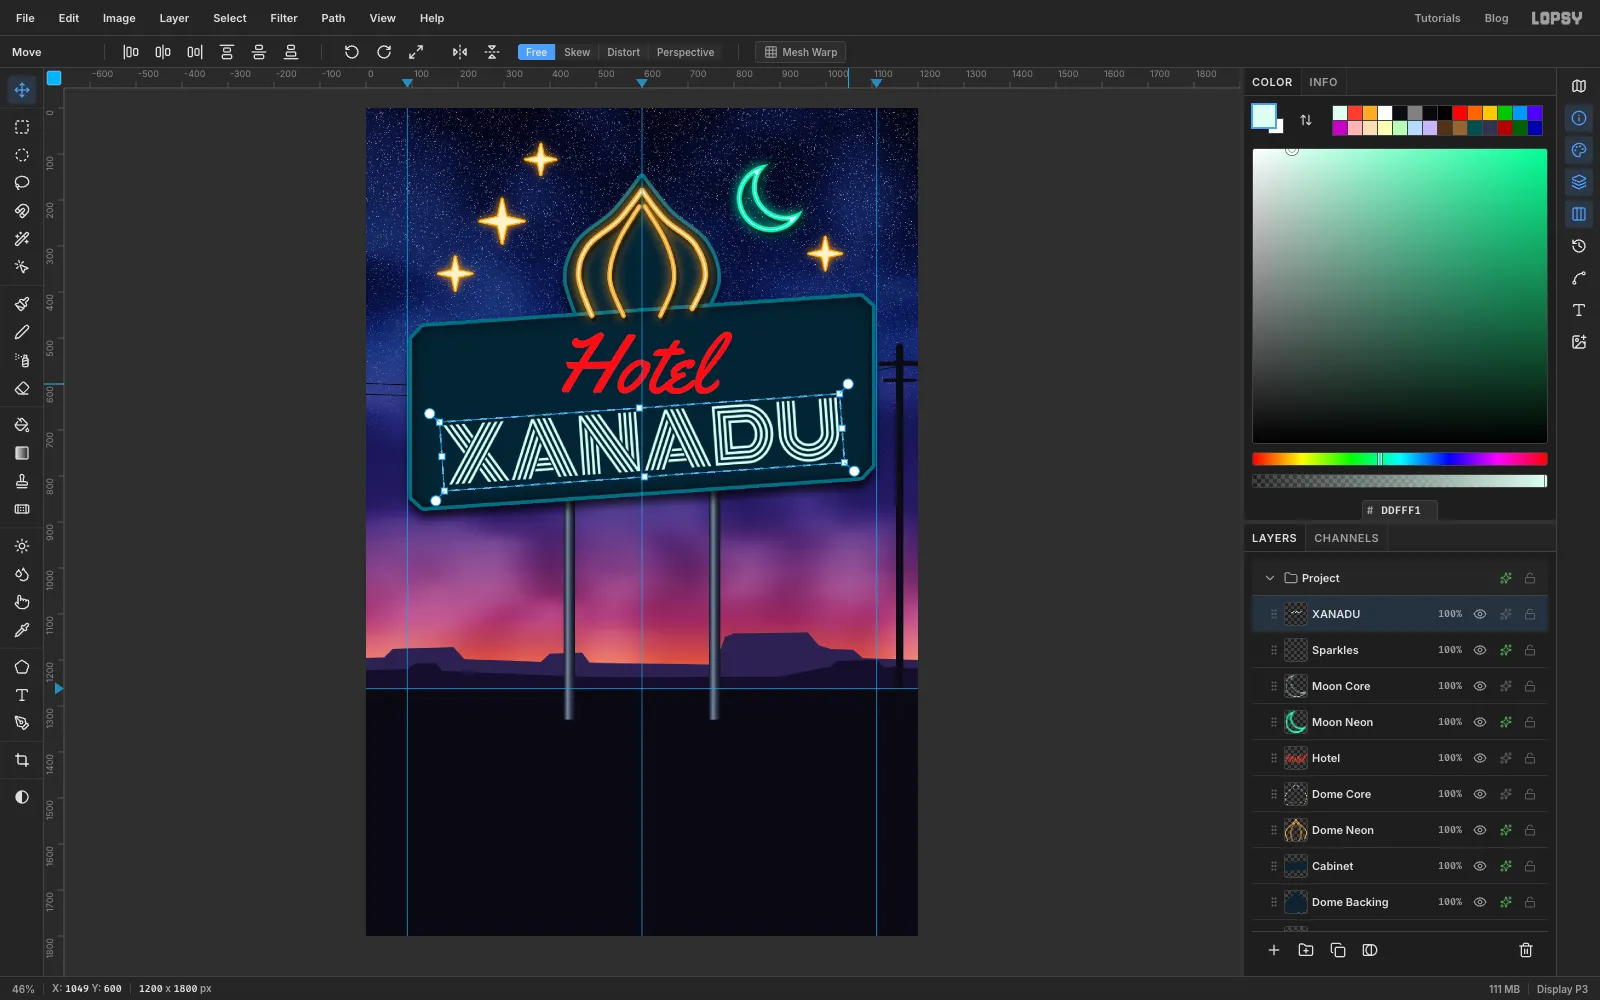
Pick the Text tool. Choose Yellowtail, size 180, set the colour to red , click near the top of the cabinet, type Hotel, and press Tab to commit. Make sure Letter spacing in the Text panel is 0. Double-click the layer name and rename it Hotel.
Click the Sparkles row. Choose Monoton, size 160, colour mint core , click at the left of the cabinet, type XANADU and press Tab. Rename the layer XANADU. Monoton is drawn as bundles of parallel lines, so it already looks like bent tubing.
Click Rasterize Layer at the bottom of the Layers panel for each word. Then move them with the Move tool. XANADU goes centred on the middle guide, with even margins of about 65 px each side. Hotel goes just right of centre, with roughly equal space above and below it.
-
Tilt the words to match the cabinet
The cabinet rises about 4° to the right, so the type should too.
Click the XANADU row, then draw a marquee a little bigger than the word. With the Move tool, press just outside the marquee's top-right corner, where the pointer turns into a rotate arrow, and drag upward until the word lines up with the cabinet's top edge (about 4°). Press Cmd+D to commit.
Click the Hotel row and do the same, but tilt it a touch more (about 6°). That gives the script a little lift.
-
Make the type glow
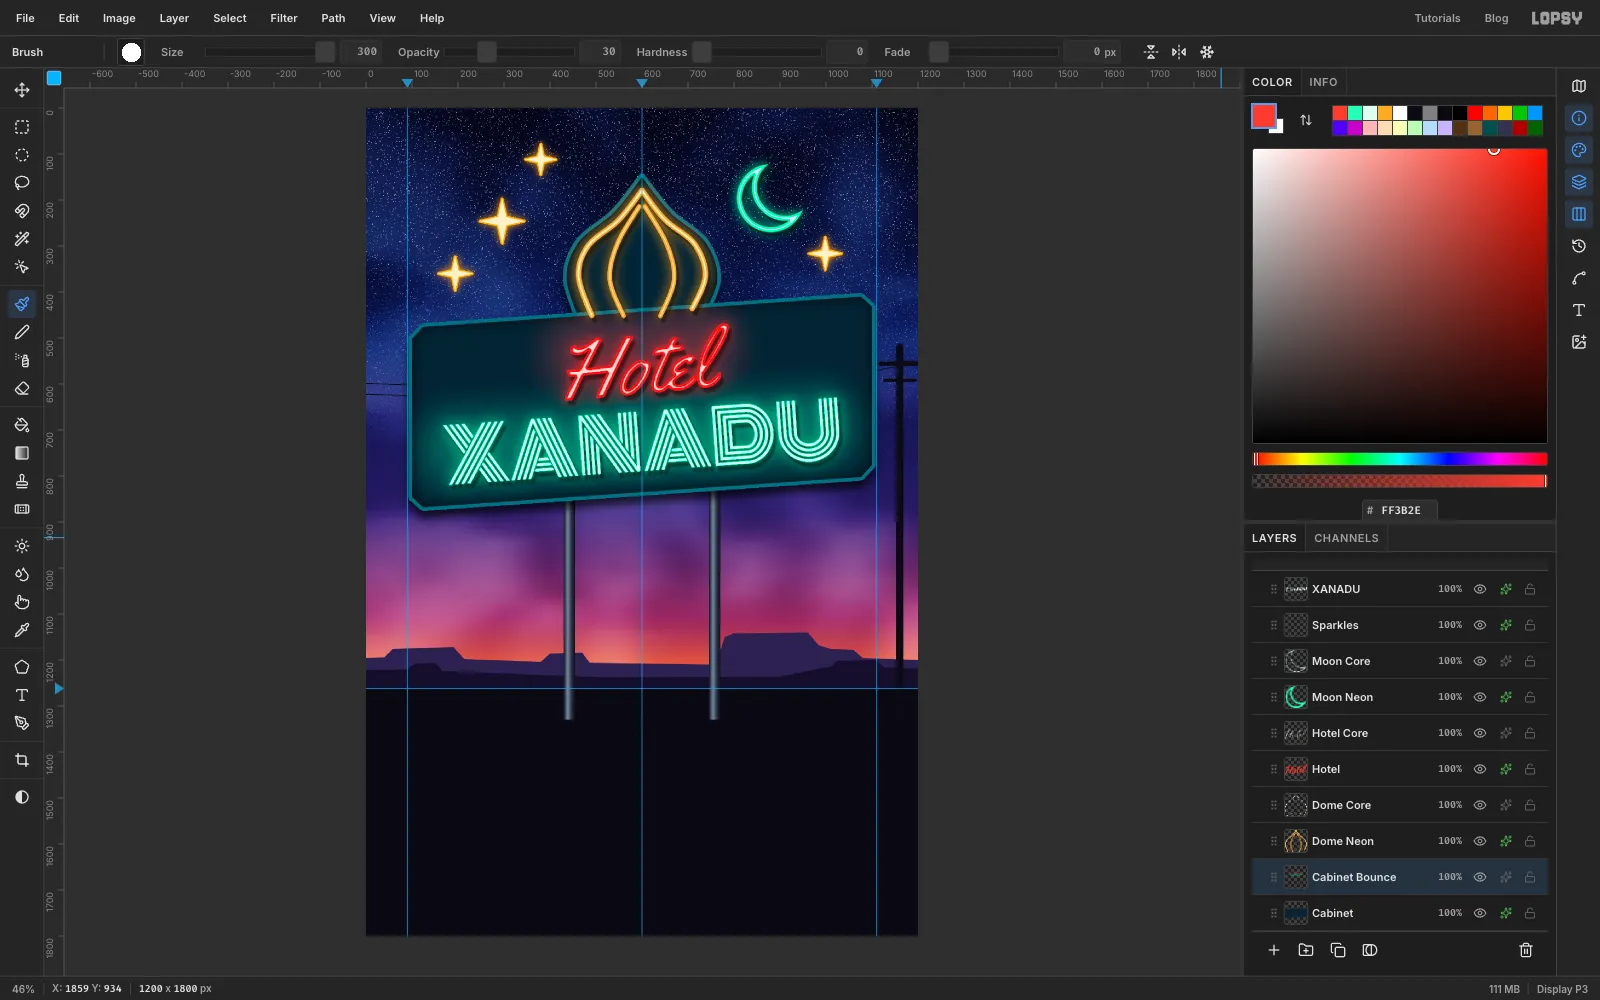
Hotel gets the tube recipe. Give it an Outer Glow in at Size 36, Spread 6, Opacity 80, plus the usual Drop Shadow. Then Cmd-click its thumbnail, Shrink by 5, click Hotel, Add Layer (Hotel Core) and fill with .
XANADU's pale fill is already the core. Give it a Stroke of Width 1, outside, in , an Outer Glow in at Size 45, Spread 6, Opacity 75, and the Drop Shadow.
Neon also tints the metal around it. Click Cabinet, click Add Layer and name it Cabinet Bounce. Cmd-click the Cabinet thumbnail, then click the Cabinet Bounce row.
Pick the Brush and open its settings. Set Size 300, Hardness 0, Spacing 10, Opacity 30 and Taper 0. Paint one sweep of mint under XANADU and one of red behind Hotel. Deselect, and set the layer's Blend to Screen.
-
Cut the arrow and ring it with bulbs
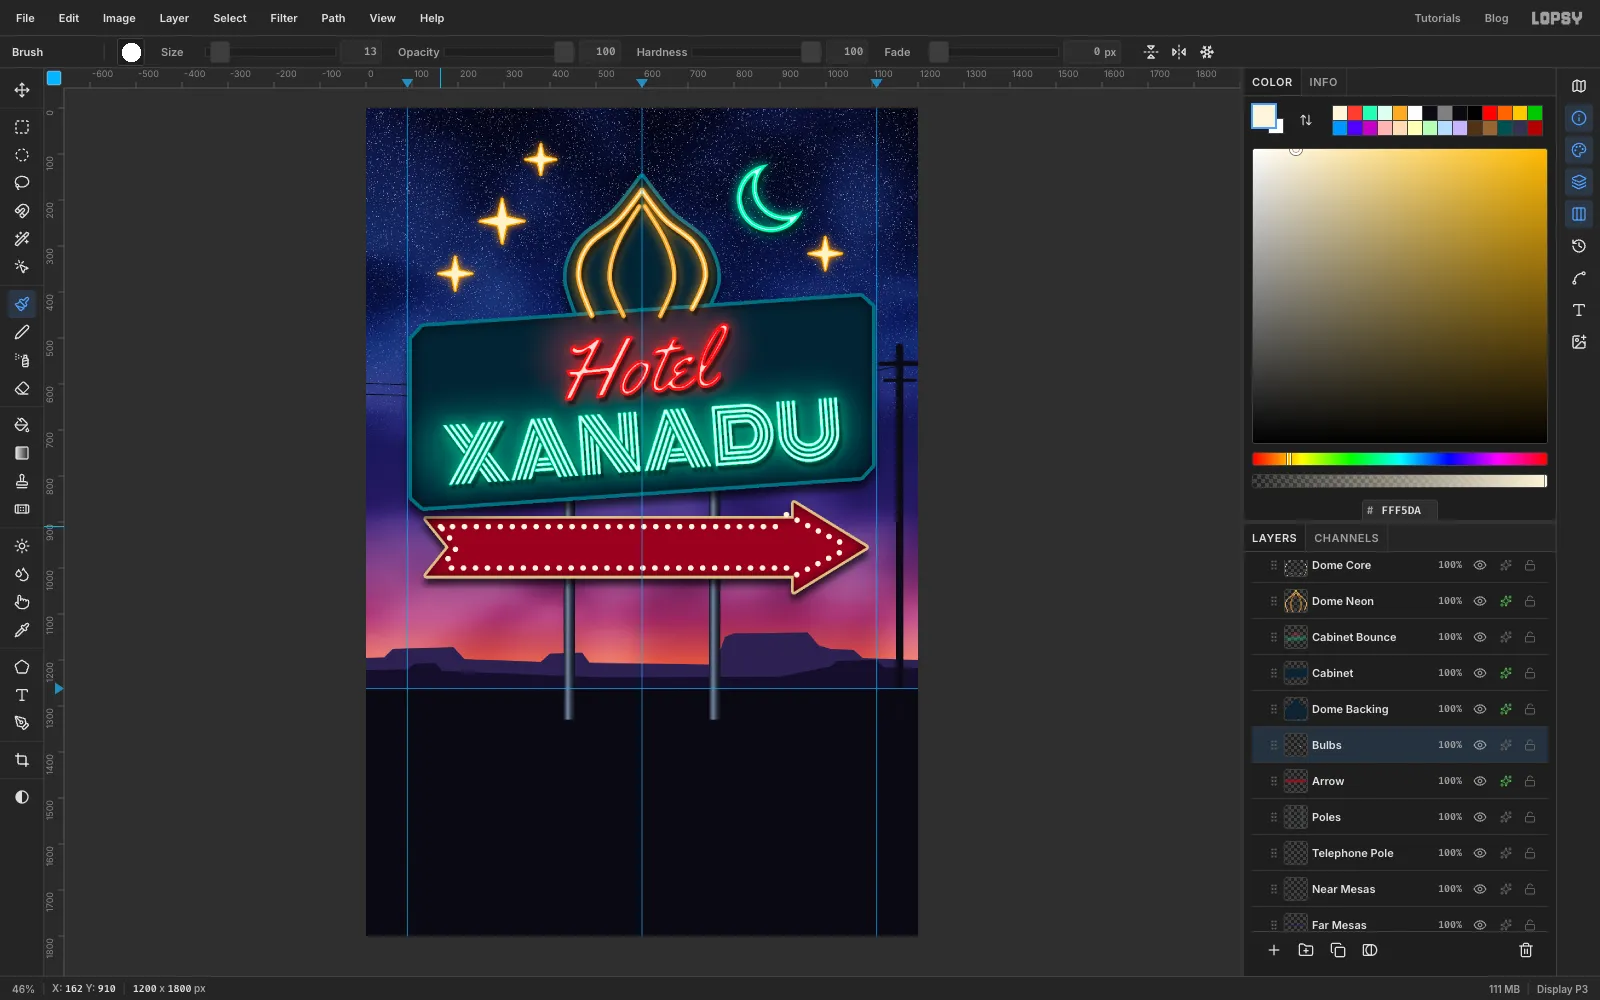
Click Poles, then click Add Layer and name the new layer Arrow. It sits behind the cabinet but in front of the poles. Set the foreground to .
With the Pen, click the eight corners of an arrow:
- the shaft runs from x 130 to x 930, between y 893 and y 1017
- the head flares out to y 858 and y 1052, with its tip at (1088, 955)
- the tail is notched in to (180, 955)
Use Path to Selection and Delete Path, fill it and deselect. Add effects:
- Stroke: Width 6, outside,
- Inner Glow: black, Size 30, Opacity 60
- Drop Shadow: Offset X 0, Offset Y 14, Blur 22, Opacity 70
Click Add Layer and name it Bulbs. Pick the Brush and open its settings. Set Size 13, Hardness 100, Opacity 100, and Spacing 200: at 200% the dabs separate into a row of bulbs.
Set the foreground to . Click at the start of the run, about 17 px inside the arrow's top-left corner. Then hold Shift and click your way around the arrow, about 17 px inside its edge, back to the start. Every Shift-click lays a straight row of bulbs.
-
Light the bulbs and add COCKTAILS
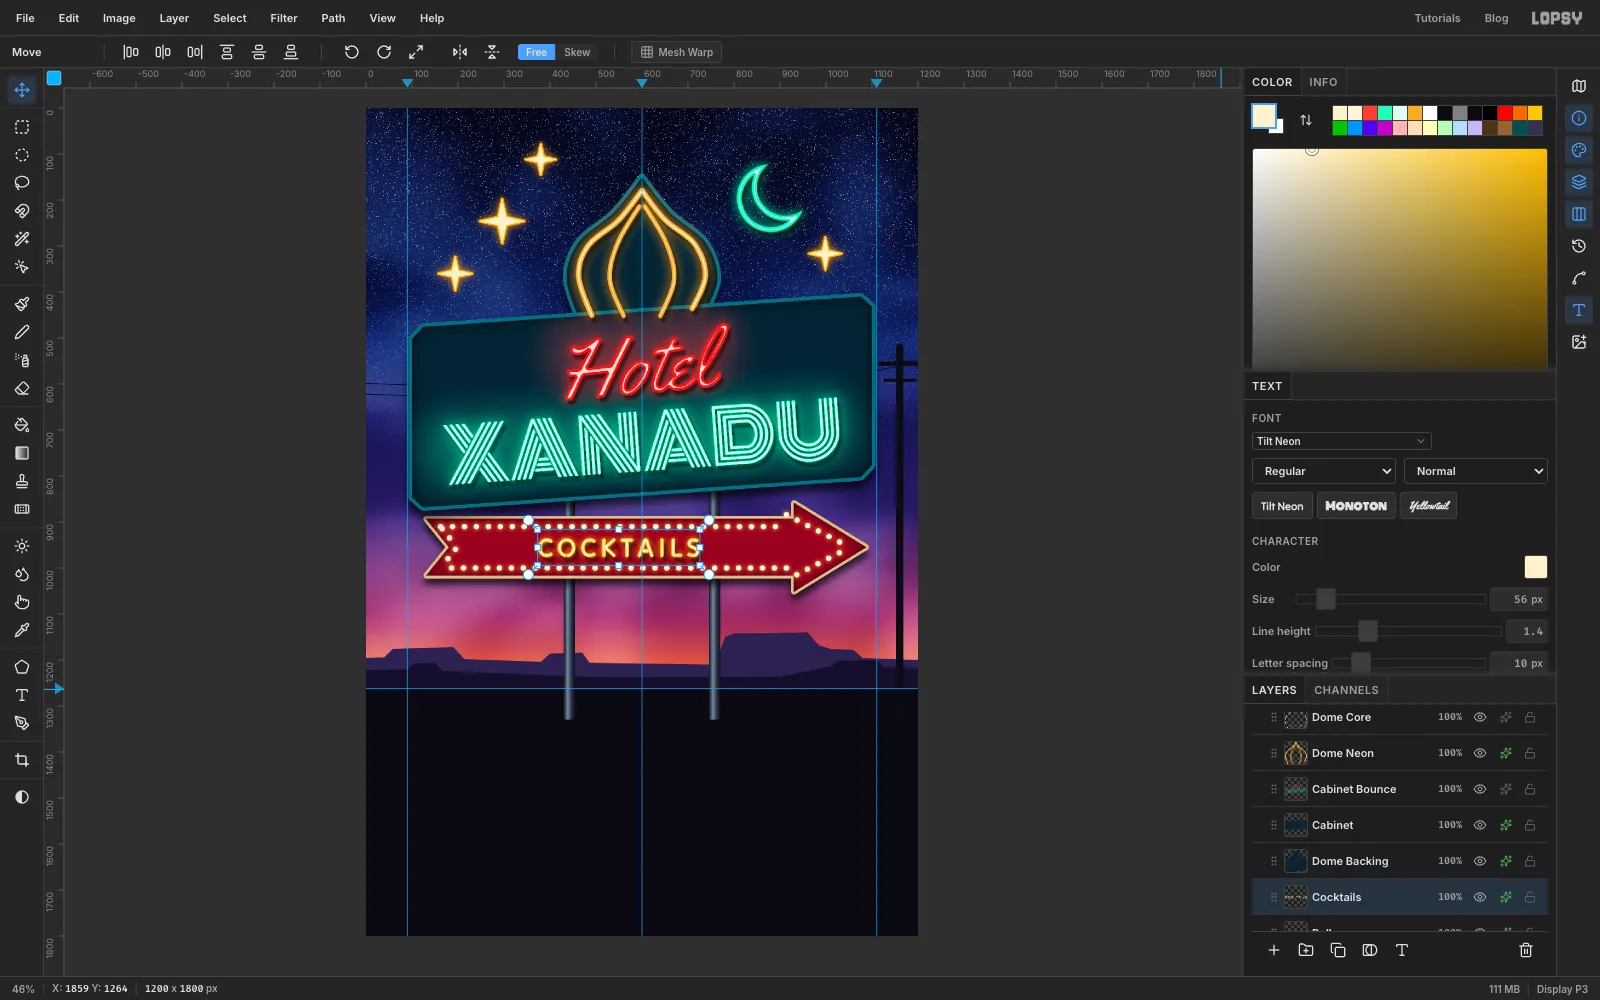
Give Bulbs an Outer Glow in at Size 16, Spread 10, Opacity 95.
With Bulbs still active, pick the Text tool. Choose Tilt Neon, size 56, colour , click on the left part of the shaft, and type COCKTAILS. Press Tab, rename the layer Cocktails, and set Letter spacing to 10 in the Text panel. Move it so it sits midway between the two bulb rows, centred on the shaft's straight part rather than on the whole arrow, so it balances against the head.
Give it a Stroke of Width 2, outside, in , an Outer Glow in at Size 20, Spread 6, Opacity 90, and the tube Drop Shadow.
-
Hang a backlit reader board
Click Cocktails, then Add Layer and name it Reader Board. With the marquee's corner dialog make From 250, 1062 To 950, 1218. Fill it with and deselect.
Add effects:
- Stroke: Width 8, outside,
- Inner Glow: , Size 26, Opacity 55, so the light falls off toward the frame
- Outer Glow: , Size 30, Spread 0, Opacity 35
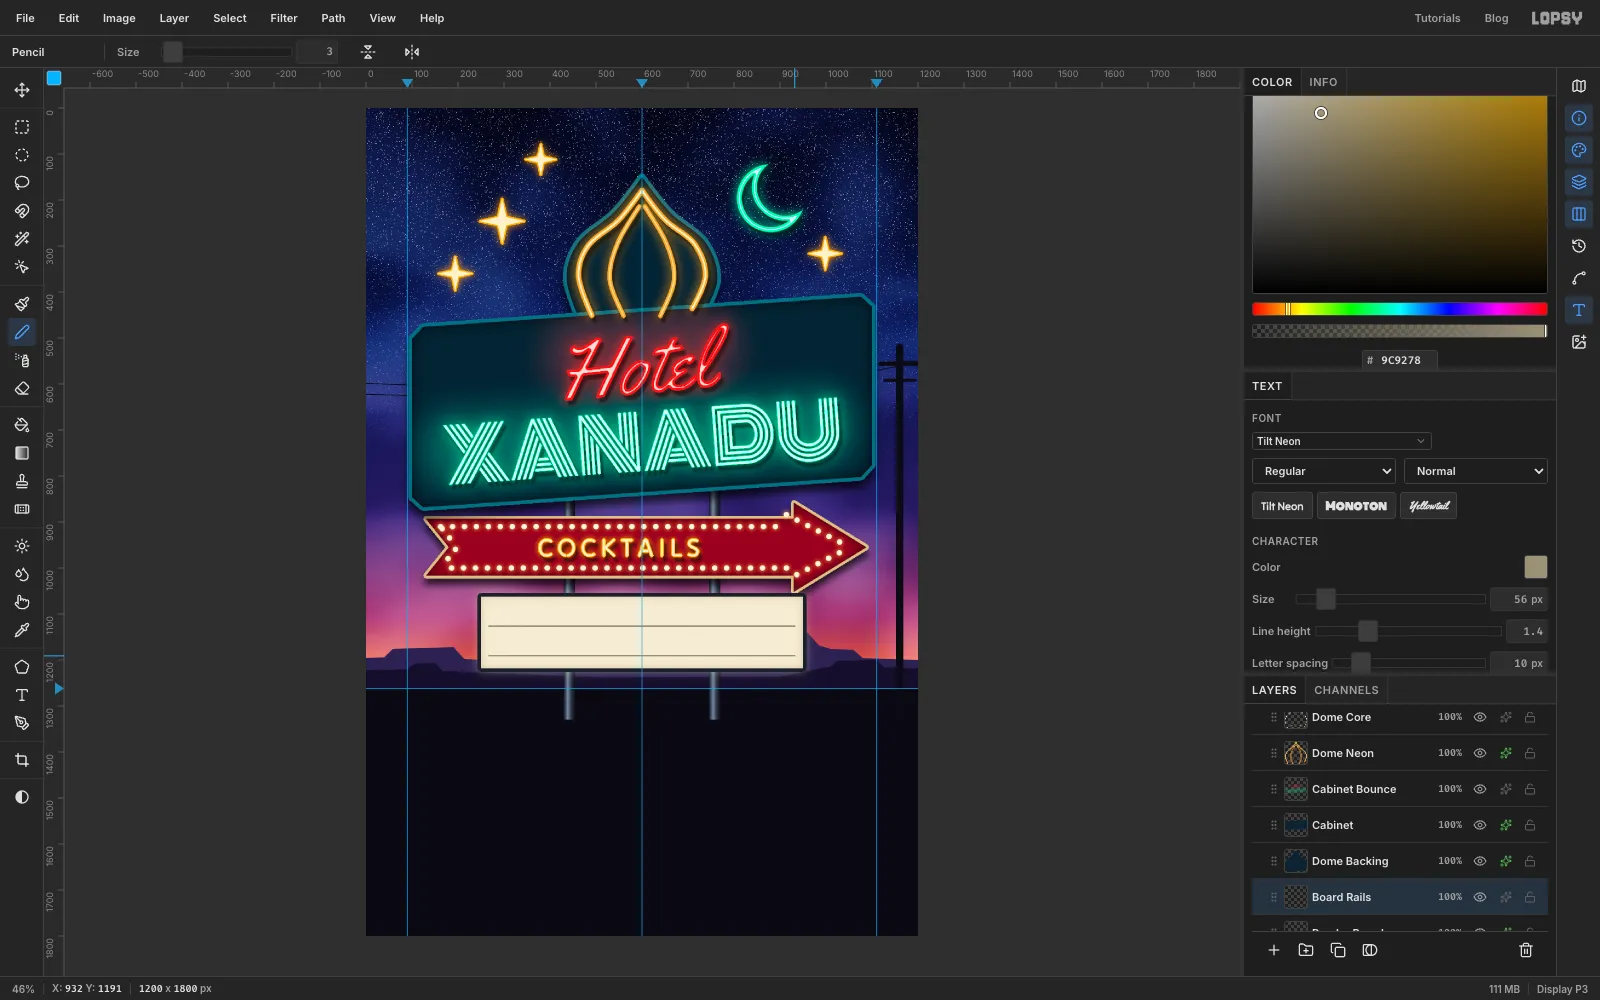
Real reader boards have ledges the letters sit on. Click Add Layer and name it Board Rails. Pick the Pencil, set Size 3 and the foreground to . Click 18 px in from the board's left edge at y 1127, then Shift-click 18 px in from the right edge. Draw a second rail at y 1191.
-
Seat the letters on the rails
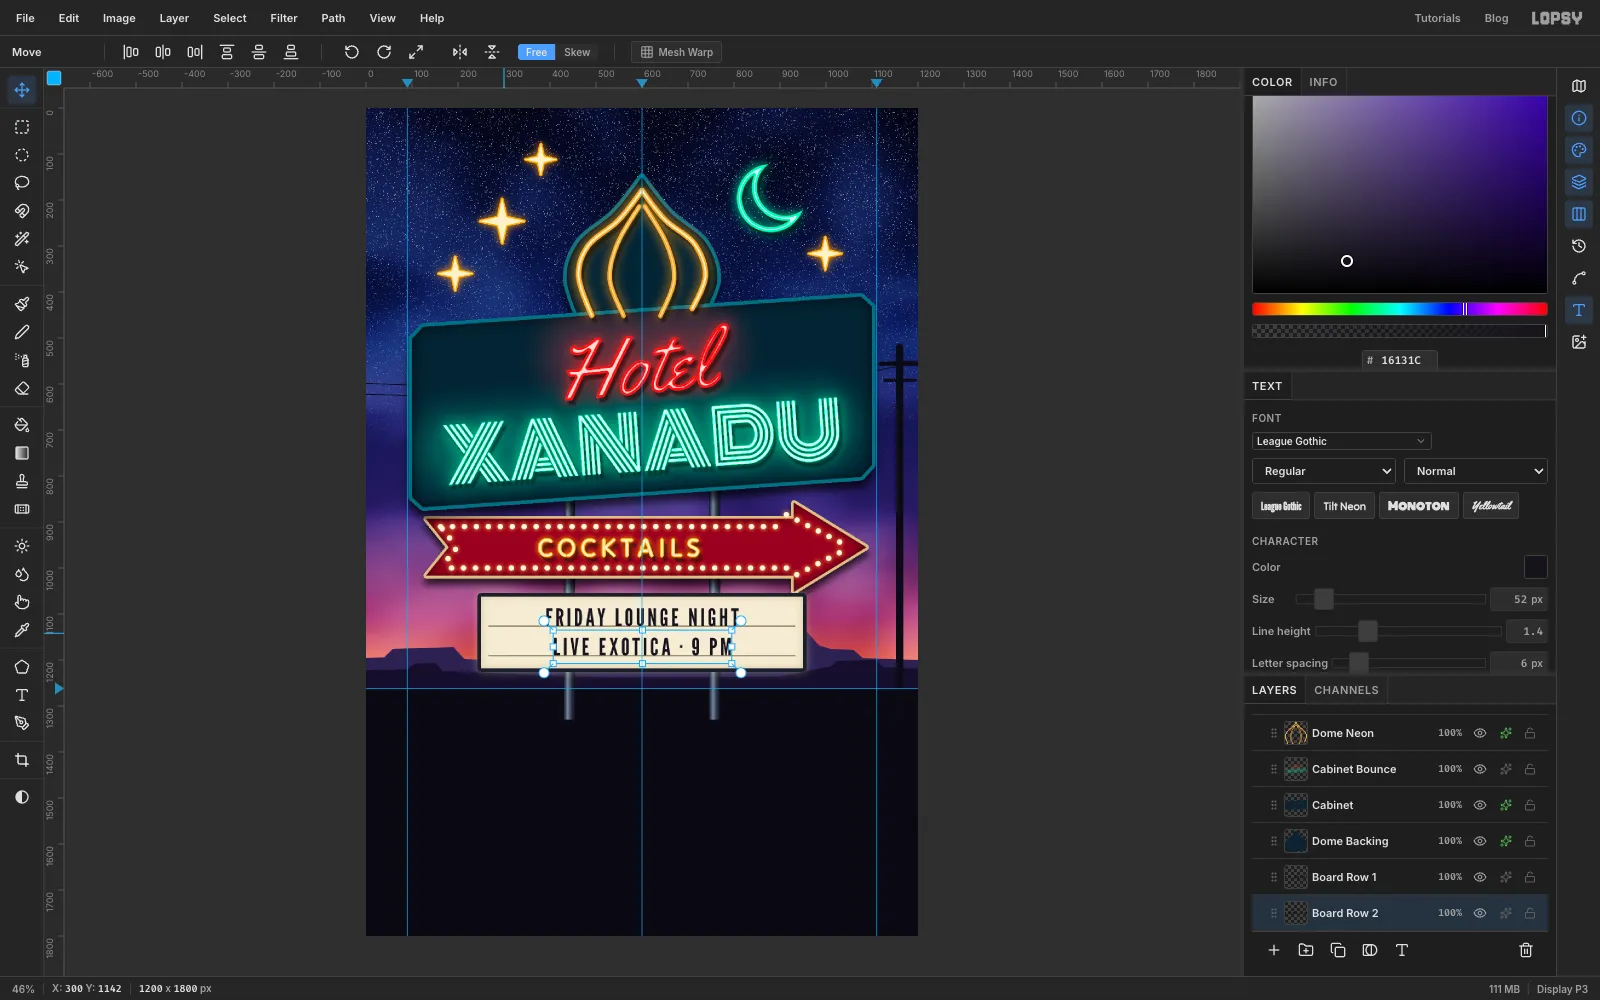
With Board Rails active, pick the Text tool. Choose League Gothic, size 52, colour , and type FRIDAY LOUNGE NIGHT. Press Tab, rename the layer Board Row 1, and set Letter spacing to 6.
Click Board Rails again and type LIVE EXOTICA · 9 PM with the same font, size and colour. Press Tab, rename it Board Row 2, and set Letter spacing to 6 again.
Move each line so it's centred on the middle guide and its letters sit right on their rail. Zoom in to check: the bottoms of the letters should touch the rail without a gap or overlap, and the space above the top line should match the space below the bottom rail.
-
Add NO VACANCY with the NO switched off
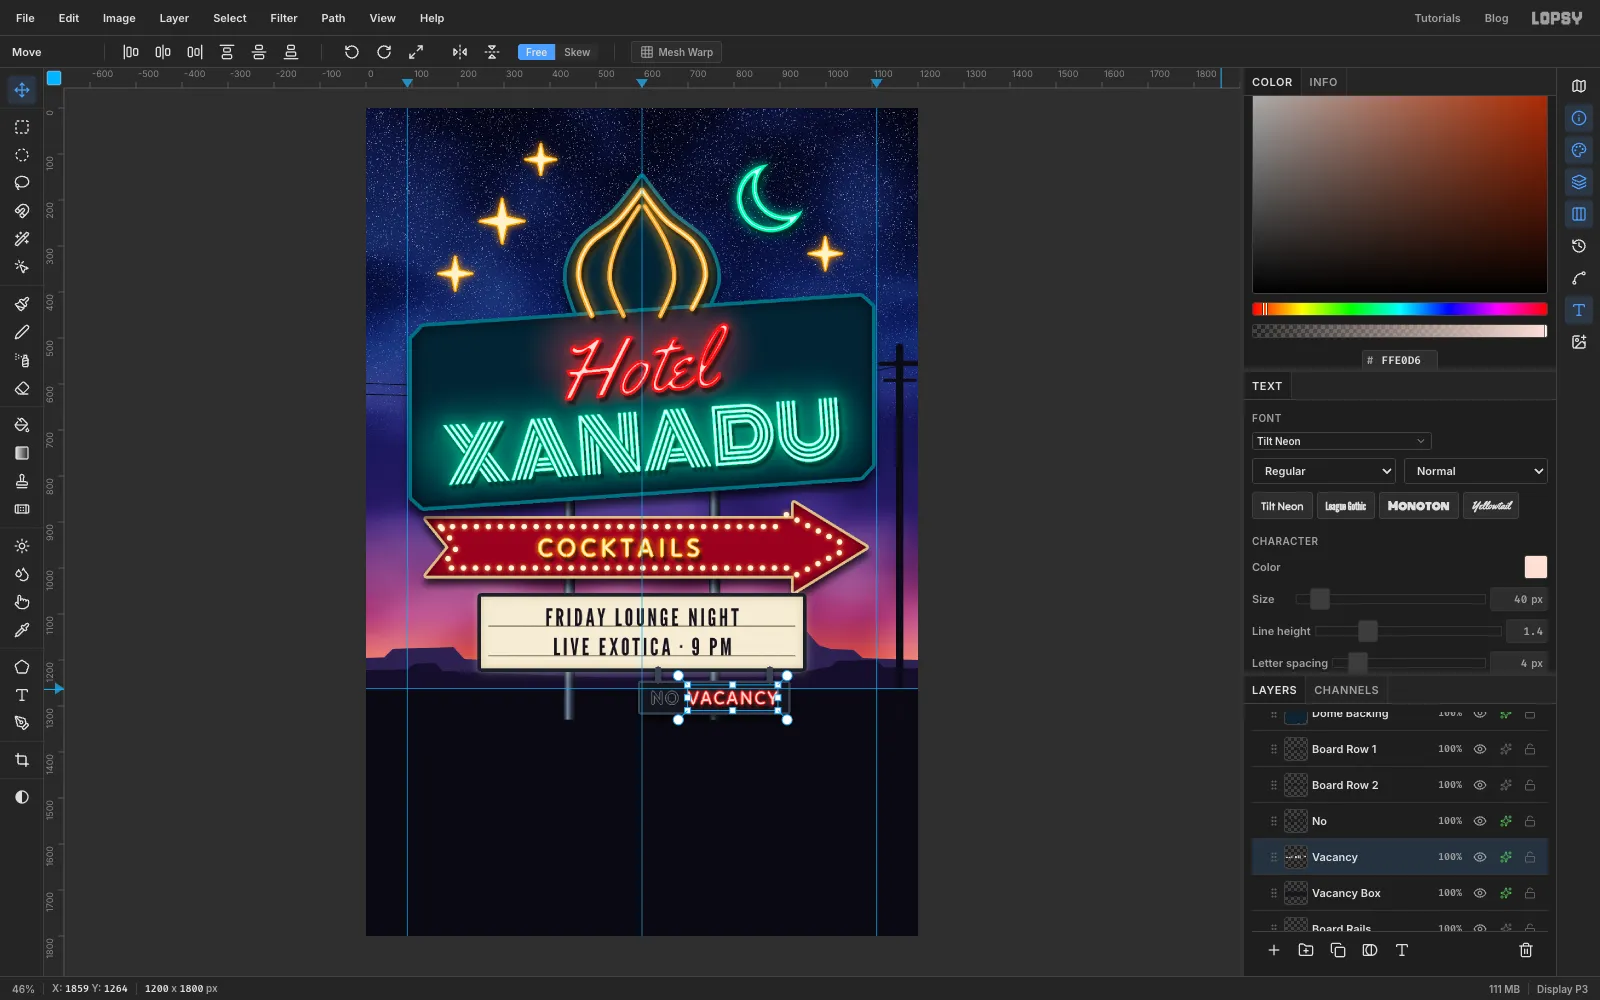
Click Board Rails, then Add Layer and name it Vacancy Box. Use the marquee dialog for From 596, 1250 To 918, 1314, fill it with , and deselect. Give it a Stroke (Width 5, outside, ) and a Drop Shadow (Offset Y 10, Blur 16, Opacity 70).
Hang it from the board. Pick the Pencil, set Size 4 and the foreground to . Draw two short vertical rods from the bottom of the board to the top of the box, 40 px in from each end of the box.
Now set the words in Tilt Neon, size 40. After each word, press Tab, rename the layer after the word, and set Letter spacing to 4.
- Click Vacancy Box, type NO in the box colour (rename it No), and give it a Stroke of Width 2, outside, in grey . With no glow it reads as a dark glass tube that's switched off.
- Click Vacancy Box again and type VACANCY in (rename it Vacancy). Give it a red Stroke (Width 2, outside, ), an Outer Glow in at Size 18, Spread 6, Opacity 90, and the tube Drop Shadow.
Leave about a word space between the two words and centre the pair in the box.
-
Spill the neon light into the sky
Click Telephone Pole, then Add Layer and name it Light Spill. It sits behind the whole sign.
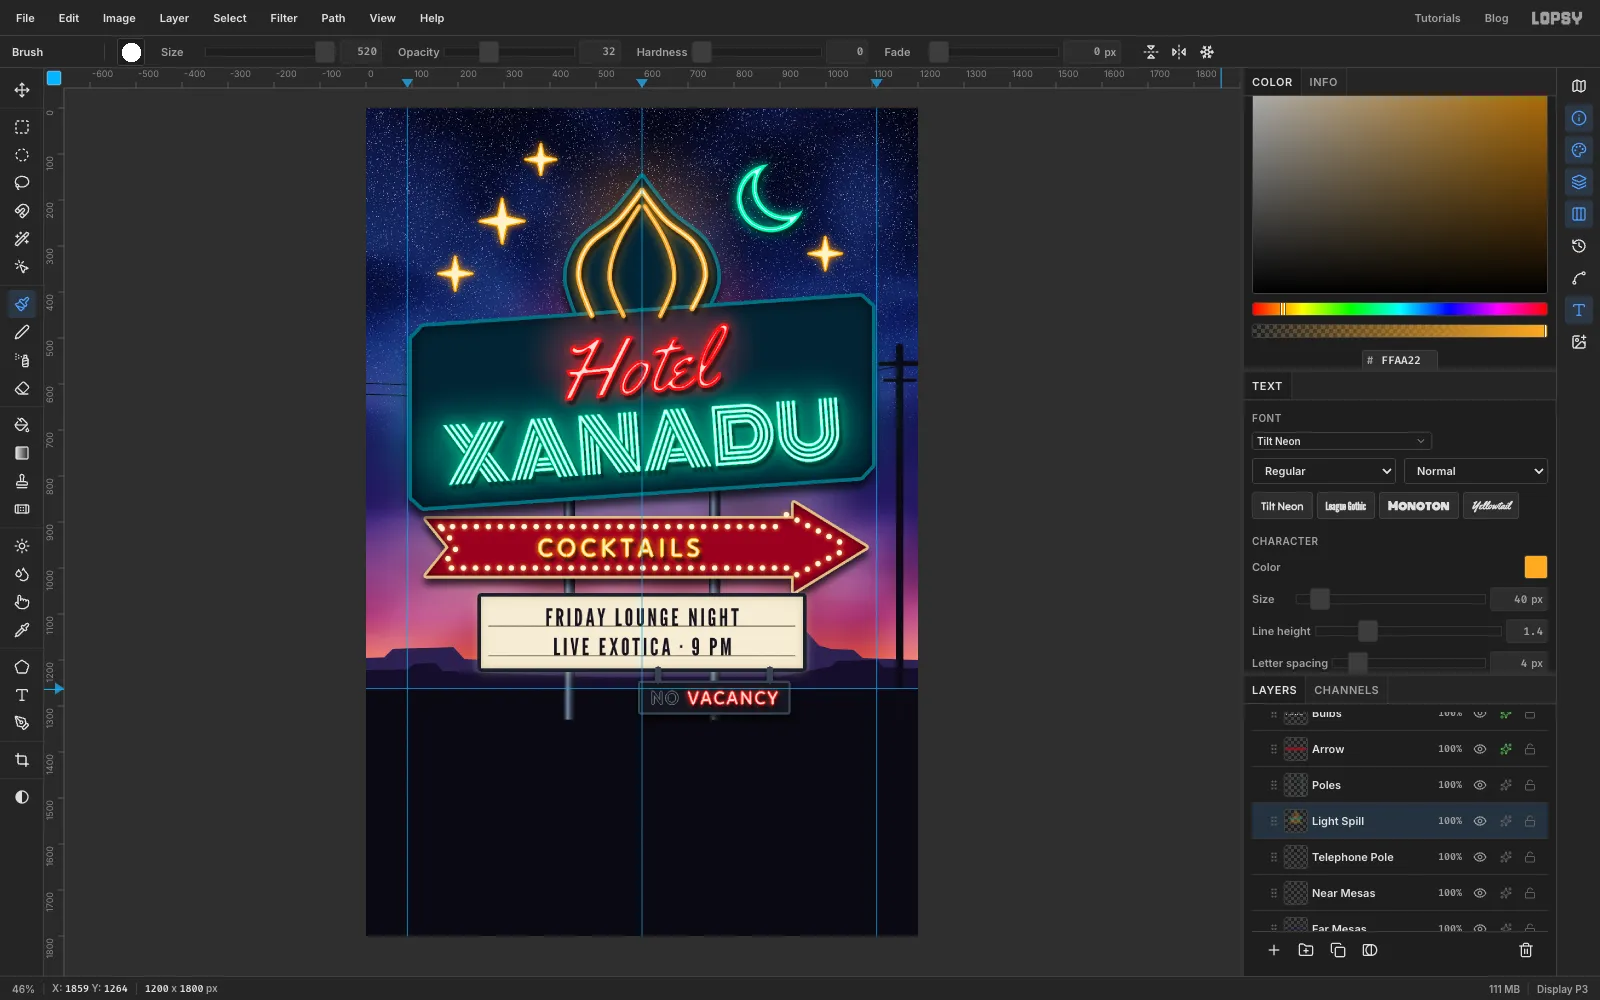
Pick the Brush and set Size 520, Hardness 0, Spacing 10 and Opacity 32. Paint broad strokes of colour behind each neon:
- mint behind XANADU
- red behind Hotel
- amber above the dome and behind the arrow
Set Blend to Screen.
-
Group the sign
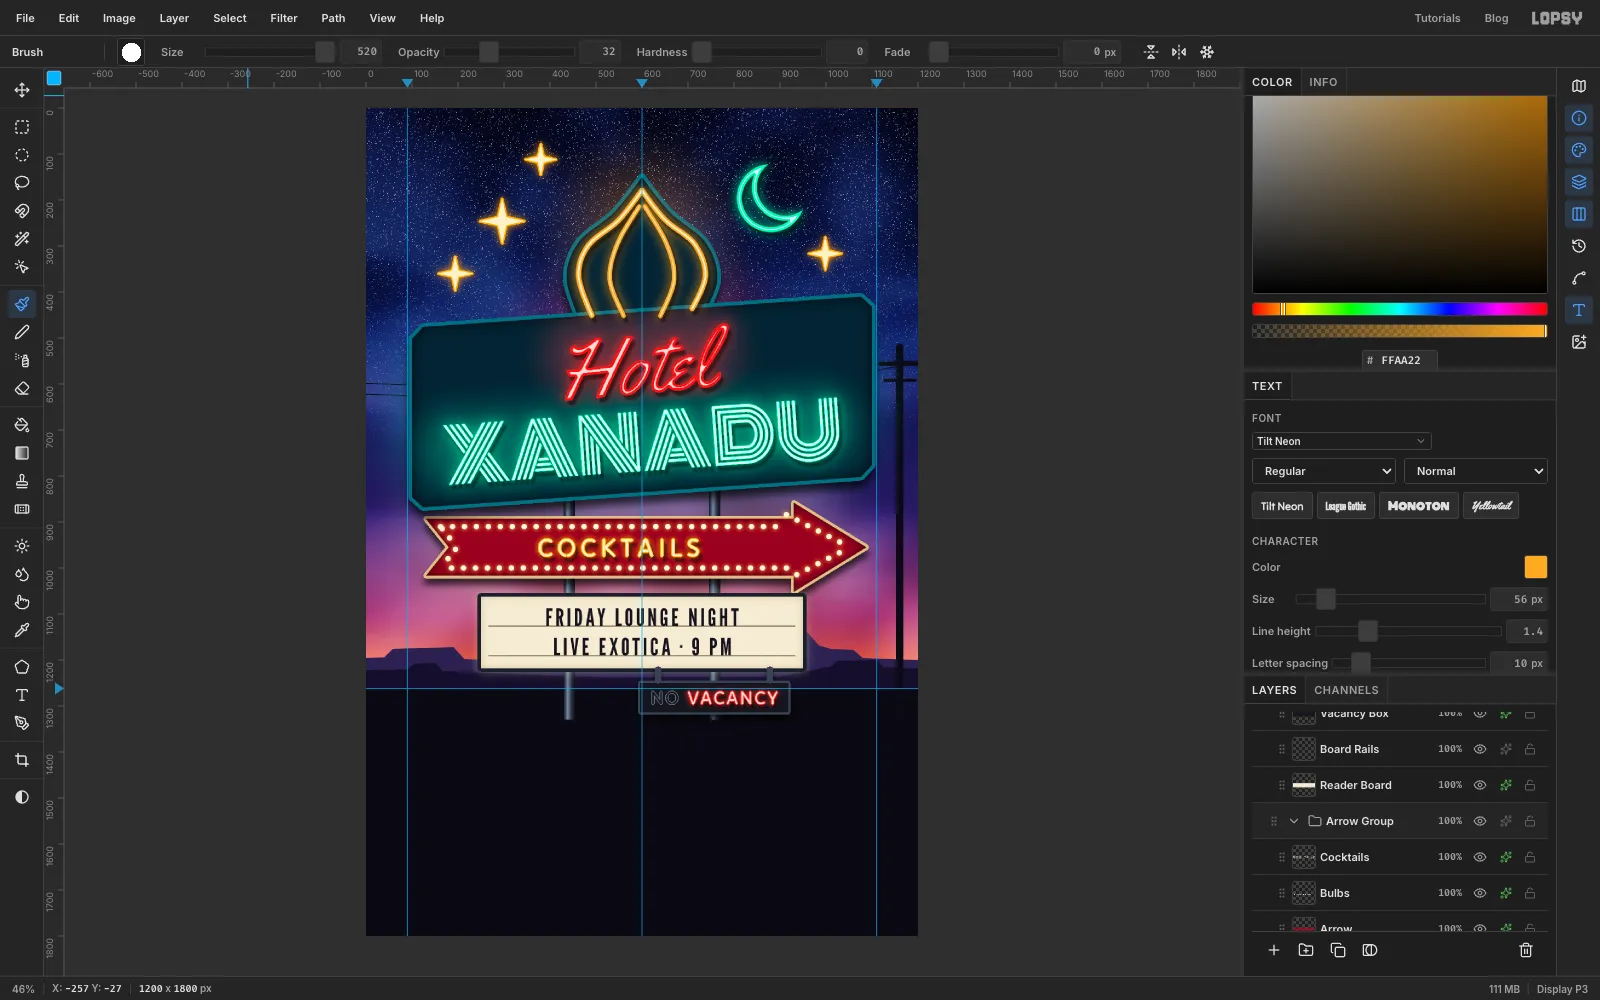
Groups keep the sign easy to move. Click XANADU at the top of the stack, then Shift-click Dome Backing. Choose Layer → Group Layers and rename the group Neon Head.
Do the same from Board Row 1 down to Reader Board (name it Reader Board Group), and from Cocktails down to Arrow (Arrow Group).
-
Nudge the whole head up
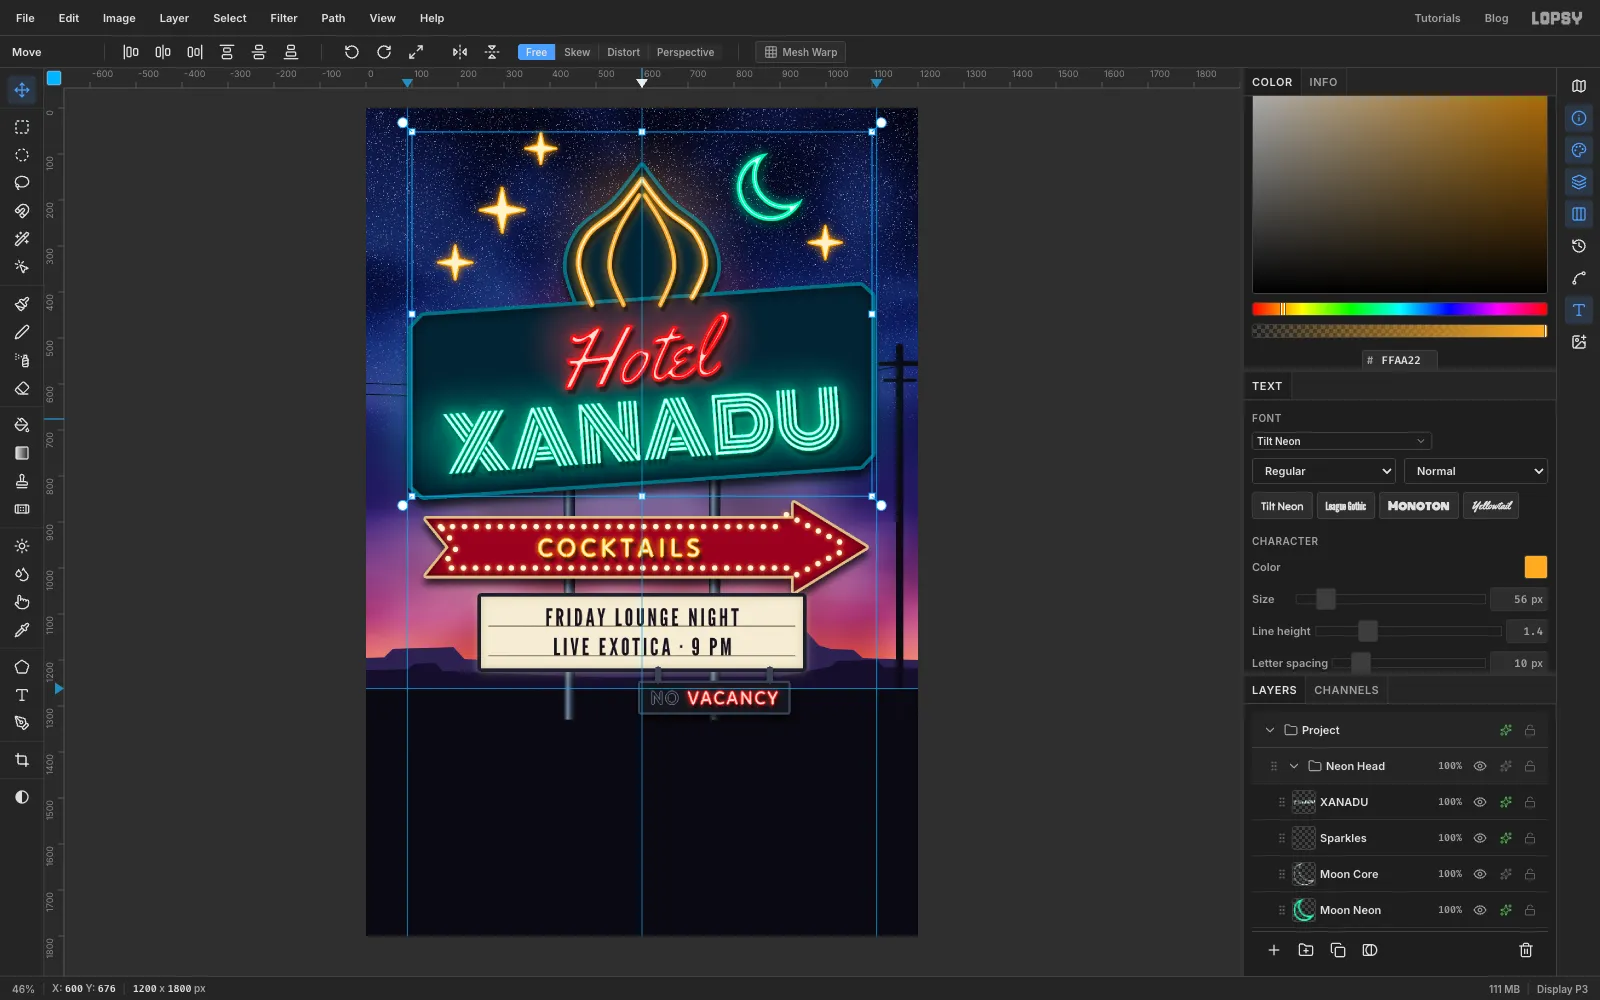
Click the Neon Head group's row and pick the Move tool. Drag anywhere on the cabinet and lift the whole head, dome, sparkles, moon and all, by about 24 px. That gives the arrow some breathing room.
Press Cmd+Z and Cmd+Shift+Z a few times to compare. Everything in the group moves together, and nothing else on the canvas changes.
-
Lay the road, spill light on the poles and plant the footings
Click Near Mesas, then Add Layer and name it Asphalt. Marquee from the horizon guide to the bottom-right corner, fill it with and deselect. Choose Filter → Add Noise… with Amount 12, Mono and Gaussian for a fine grit.
Click Poles, then Add Layer and name it Pole Spill. Cmd-click the Poles thumbnail and click the Pole Spill row. Set the Brush to Size 160, Hardness 0, Opacity 70, and the foreground to . Paint a stroke across both poles just under the arrow, and another near the ground. Deselect and set Blend to Overlay. The steel now picks up the arrow's warm light.
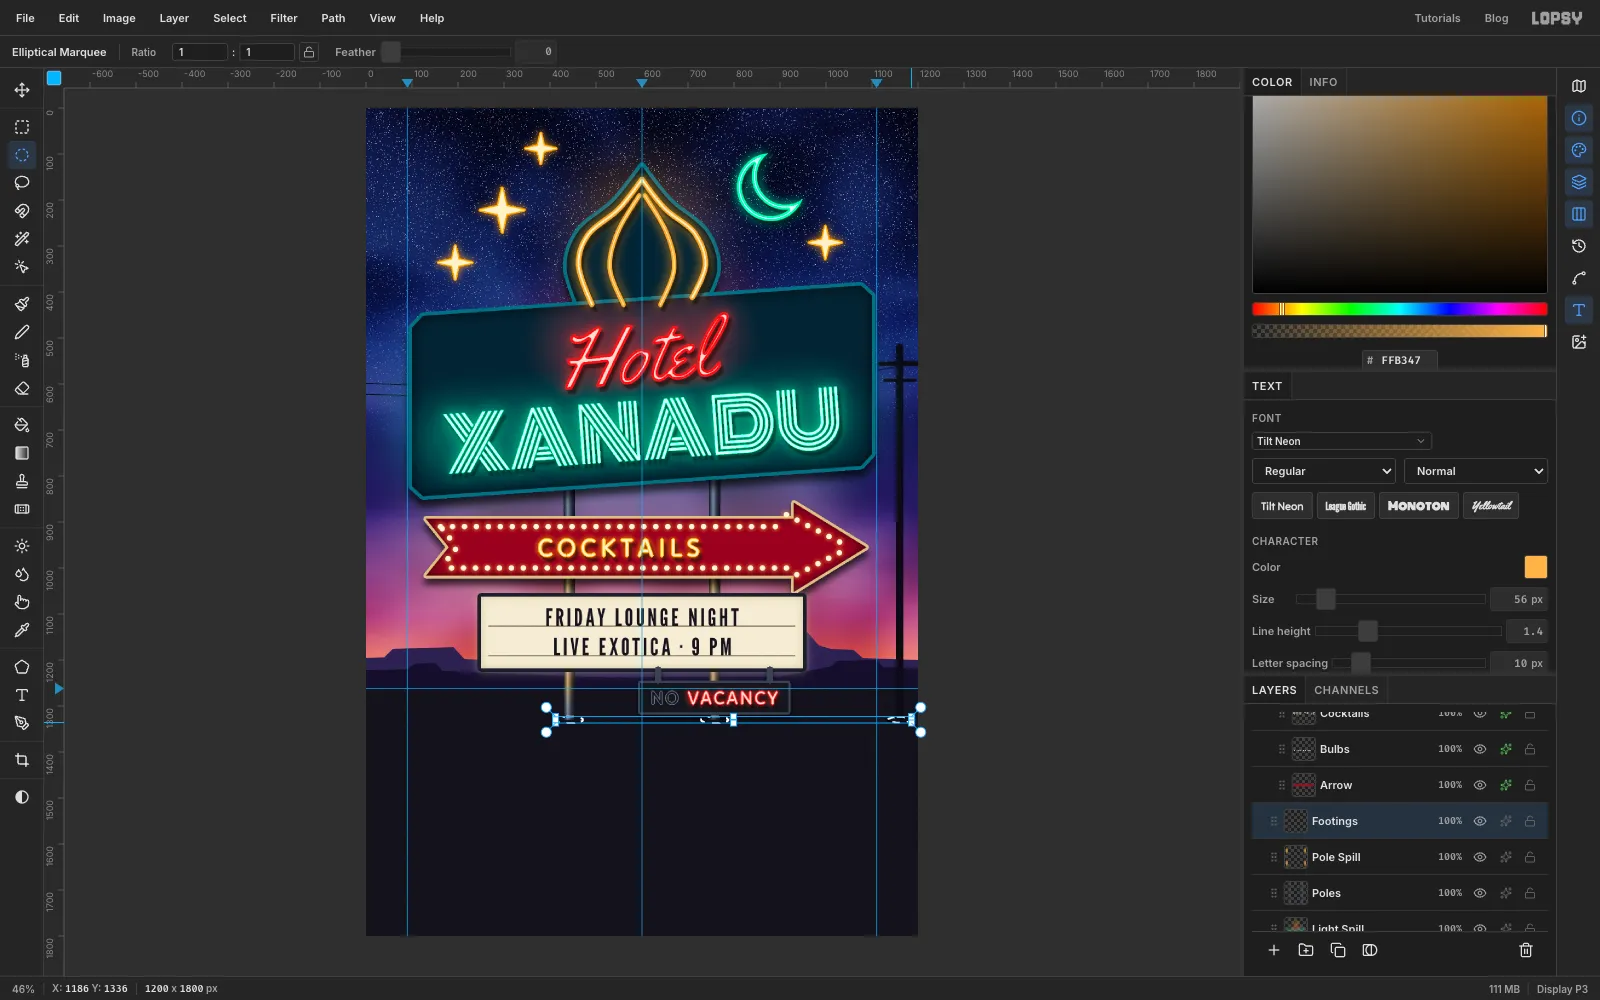
Click Add Layer and name it Footings. With the Elliptical Marquee's dialog, make From 412, 1323 To 472, 1337 under the left pole. Hold Shift and drag two more ellipses to add them: one from about (728, 1323) to (788, 1337) under the right pole, and a slightly smaller one from about (1134, 1324) to (1186, 1336) under the telephone pole. Fill the selection with and deselect.
-
Copy just the sign for its reflection
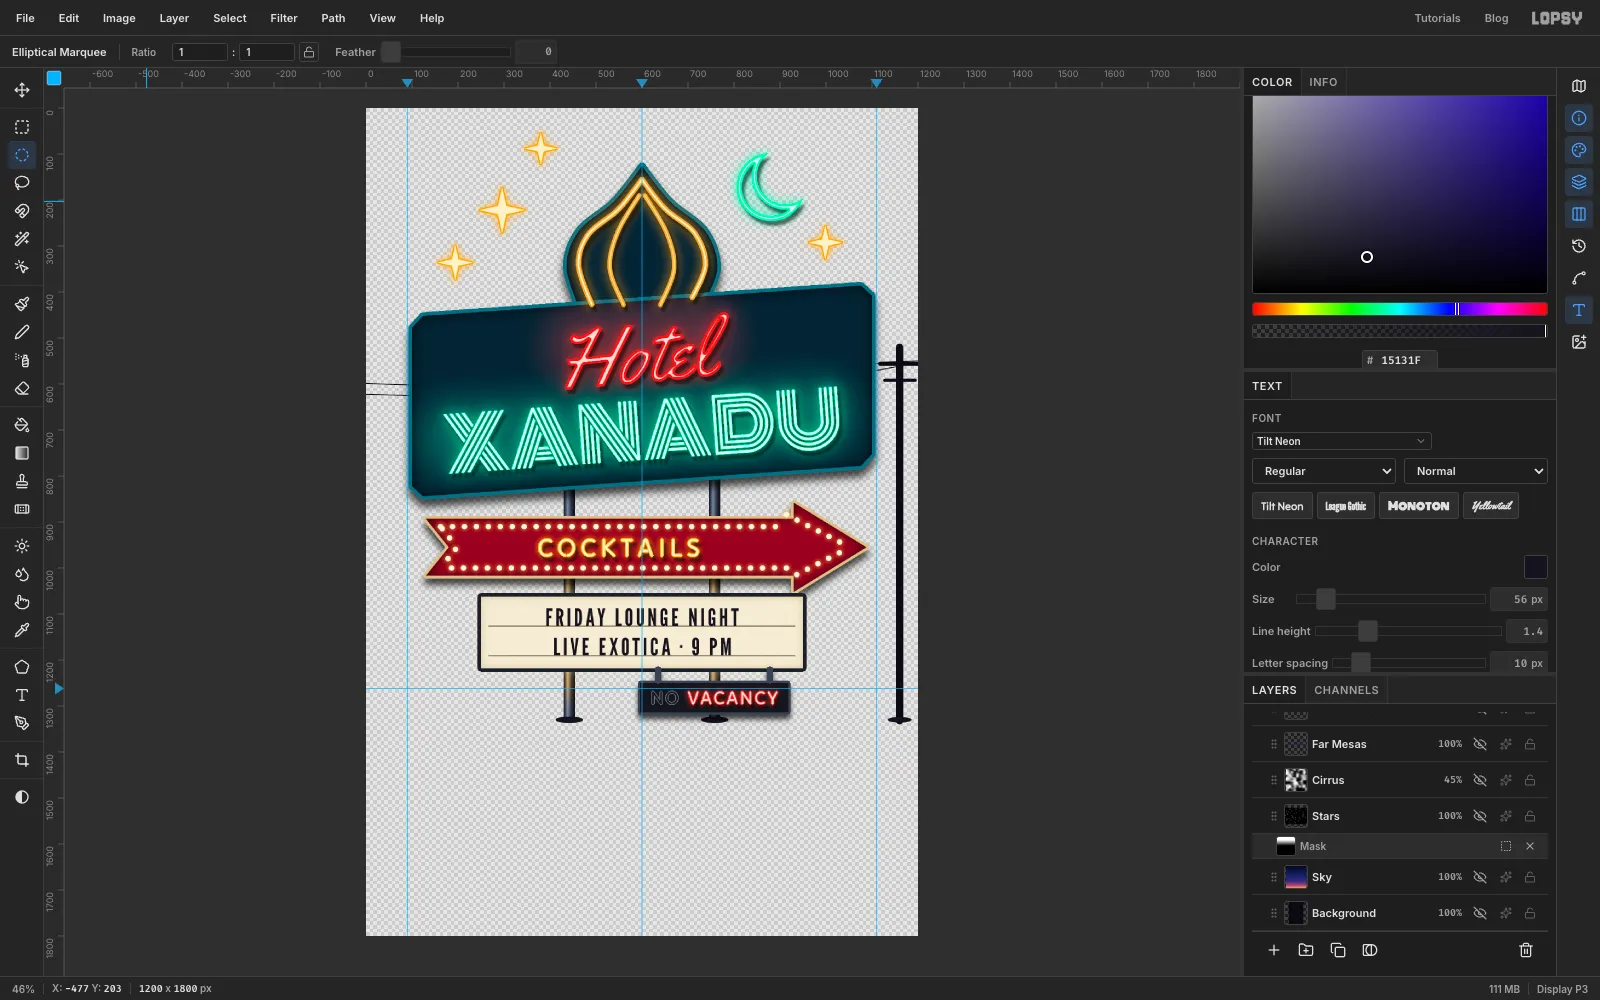
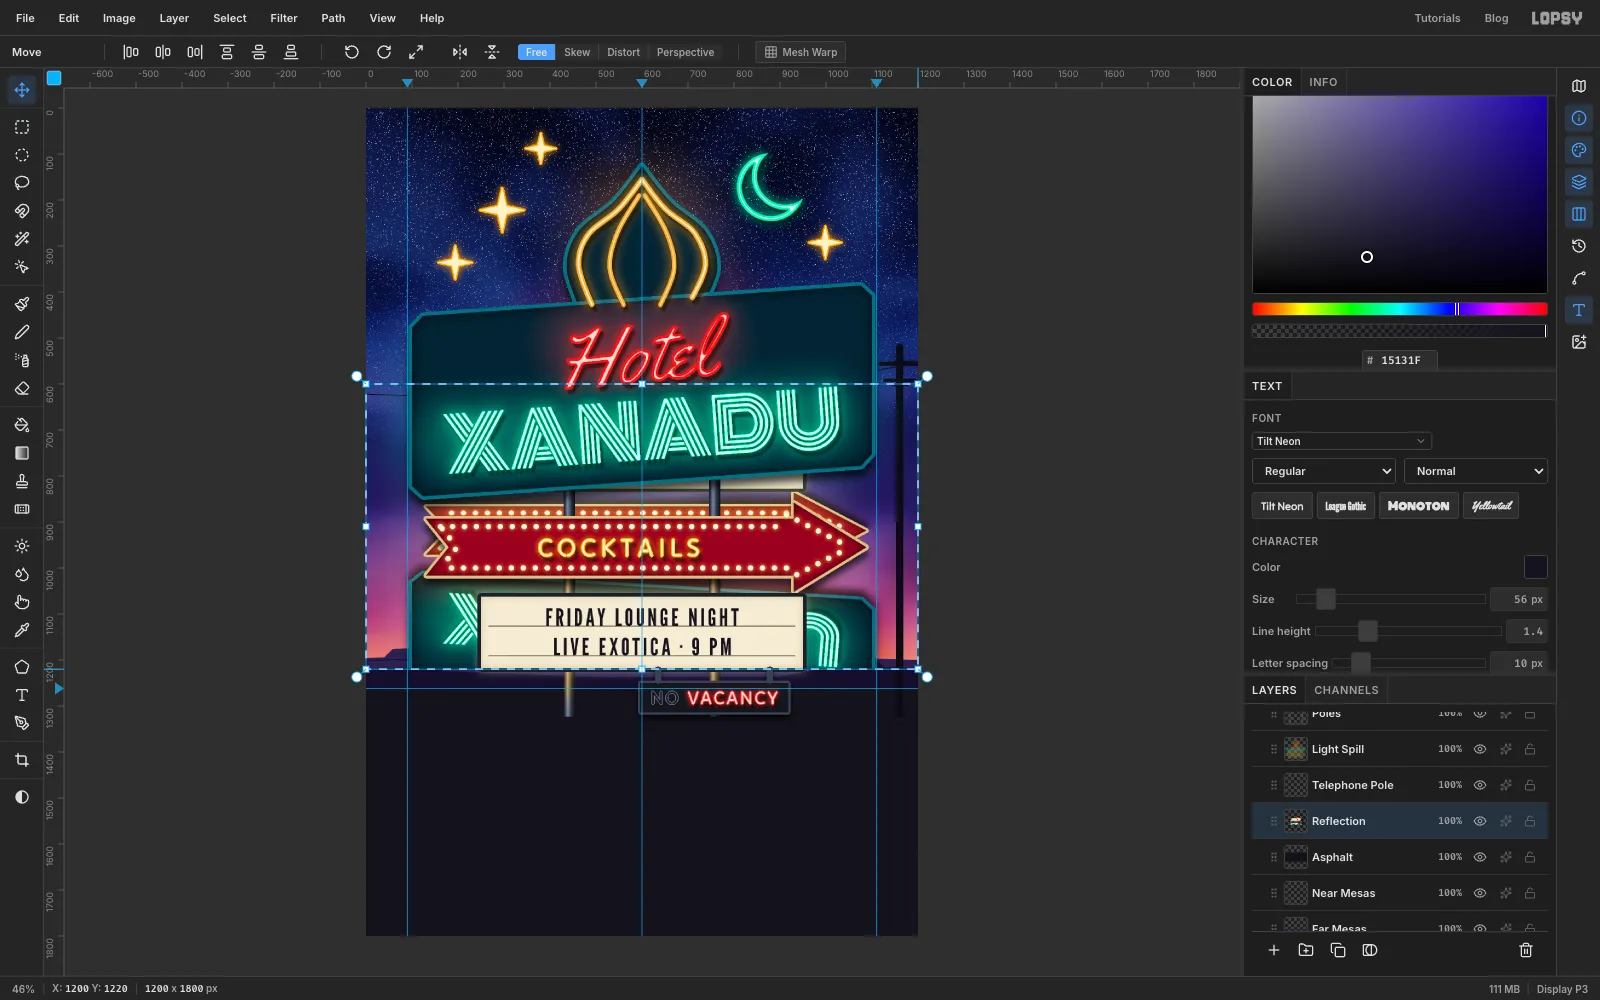
A wet road reflects the bright sign, not the dark sky. So hide everything behind the sign before copying. Click the eye on Light Spill, Asphalt, Near Mesas, Far Mesas, Cirrus, Stars, Sky and Background.
With the marquee dialog, select From 0, 600 To 1200, 1330. That's the lower half of the sign, down to the footings. Choose Edit → Copy Merged, press Cmd+D, and click the eyes again to show the hidden layers.
-
Flip and squash the reflection
Click Asphalt and press Cmd+V. The copy lands in place above the road. Rename it Reflection and choose Image → Flip Vertical.
Reflections in a wet road look a little shorter than the real thing. Marquee the same area again (From 0, 600 To 1200, 1330). With the Move tool, drag the bottom-right handle straight up by about 110 px, without Cmd, to squash it to about 85% of its height. Press Cmd+D.
Now drag the layer straight down until its top edge sits on the footings at y 1330.
-
Smear it into wet asphalt
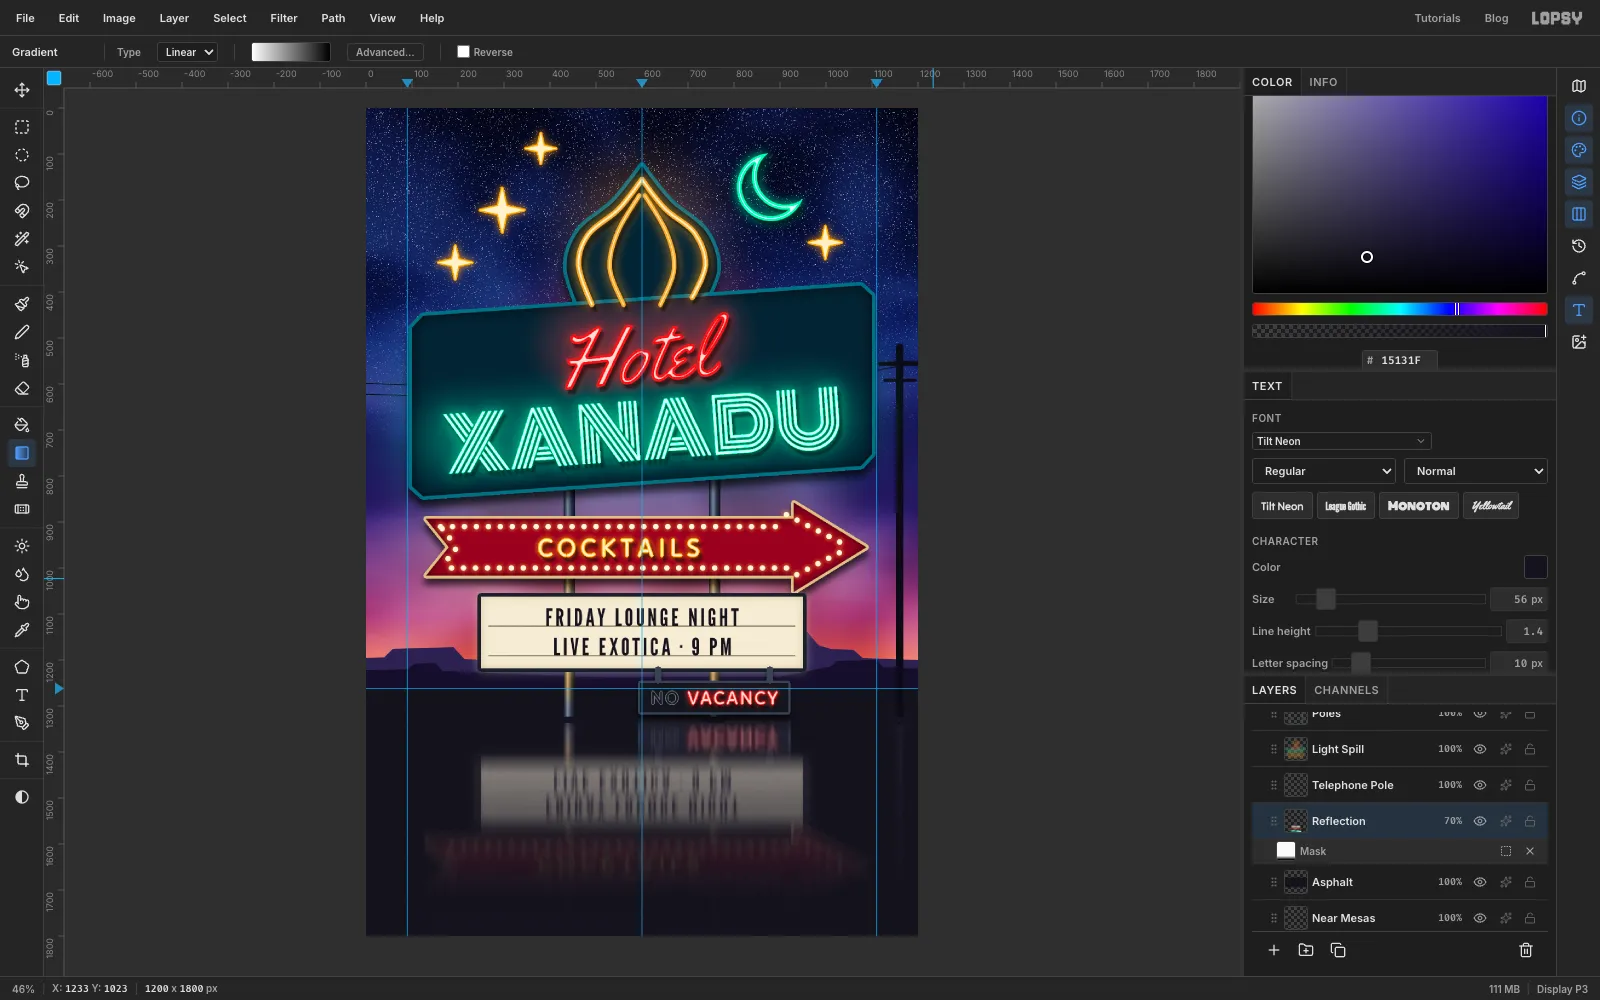
Choose Filter → Motion Blur… with Angle 90 and Distance 45 to drag the light into vertical streaks. Then add Filter → Gaussian Blur… with Radius 2. Set the layer's Blend to Screen and its opacity to 70%.
Click Add Mask, then click the mask thumbnail. Pick the Gradient tool, set it to Linear, and in Advanced… set two stops again: at the left end and at the right. Drag from the footings (y 1330) straight down to about y 1710, so the reflection fades into the distance.
While you're still in the mask, choose Filter → Add Noise… (Amount 40, Mono). Then choose Filter → Motion Blur… with Angle 0 and Distance 80. The noise smears sideways into ripples that break up the reflection. Click the layer's name when you're done.
-
Pool the light on the road and add the footer
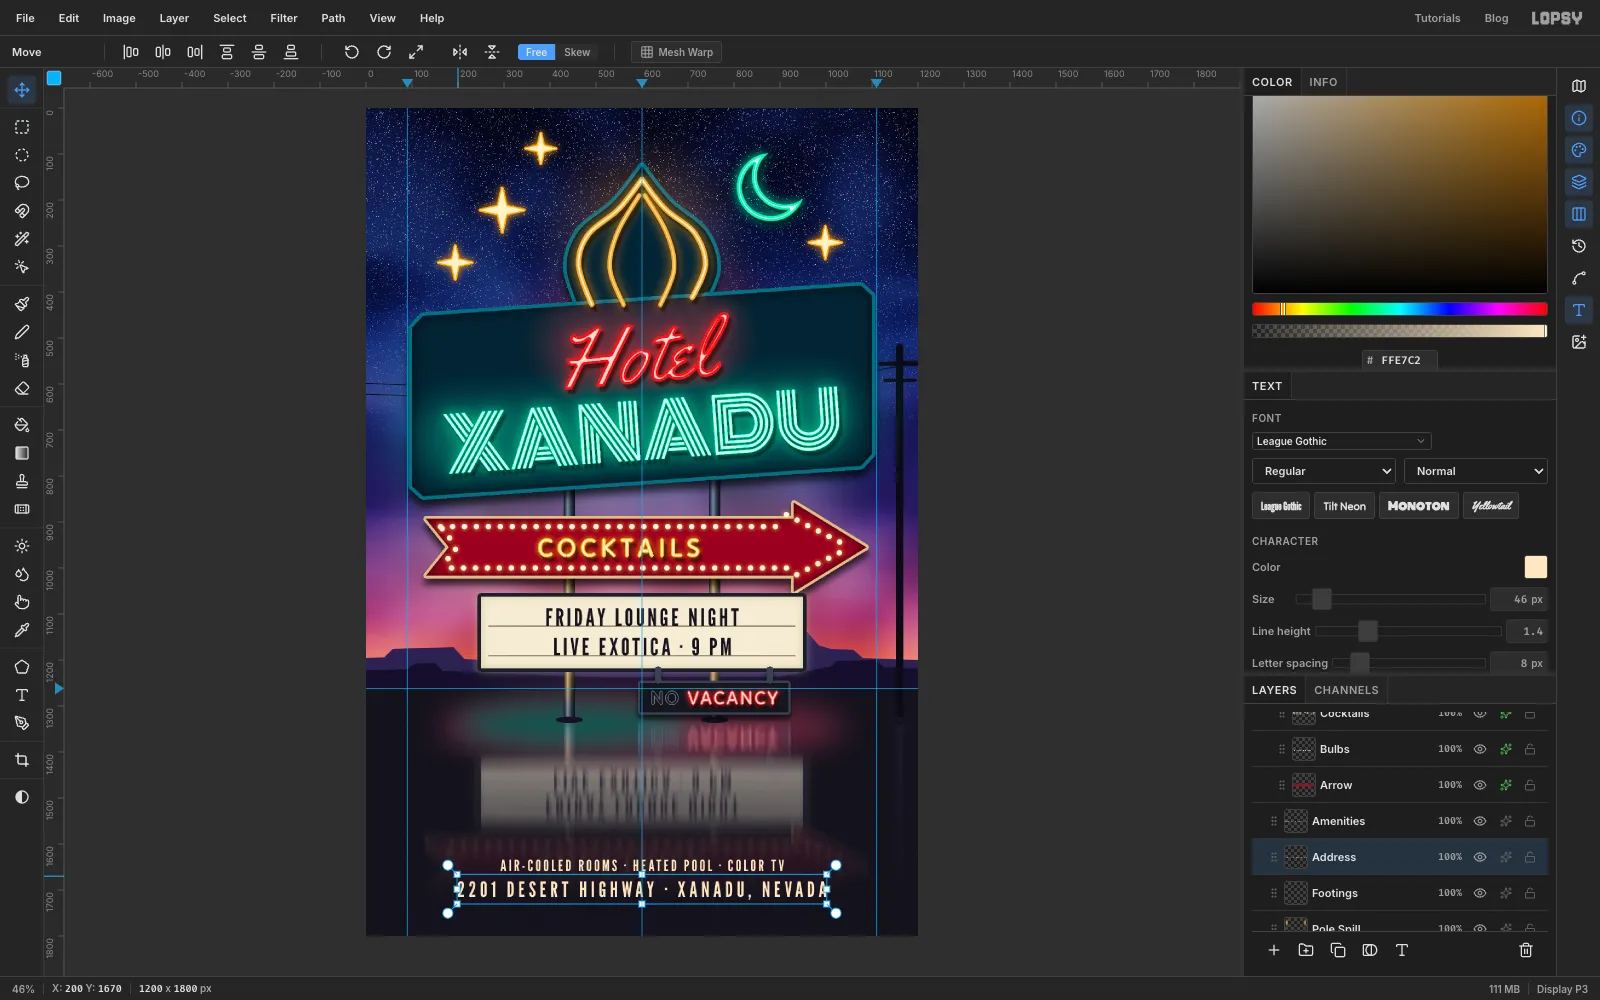
With Reflection active, click Add Layer and name it Ground Spill. Use the Elliptical Marquee's dialog for From 160, 1270 To 1040, 1420, then choose Select → Feather… with 70 px. Fill with .
Make a smaller ellipse under the left pole, From 200, 1290 To 700, 1390, feather it by 70 and fill it with . Deselect, set Blend to Screen and the opacity to 28%.
Now the footer. Click Footings so the new text starts from a normal layer. Pick the Text tool with League Gothic, size 34, colour . Type AIR-COOLED ROOMS · HEATED POOL · COLOR TV, press Tab, rename it Amenities, and set Letter spacing to 5. Centre it on the middle guide, about 150 px above the bottom edge.
Click Footings again, set size 46, type 2201 DESERT HIGHWAY · XANADU, NEVADA, press Tab, rename it Address and set Letter spacing to 8. Centre it just below the first line, about 100 px above the bottom edge.
-
Darken the edges of the sky
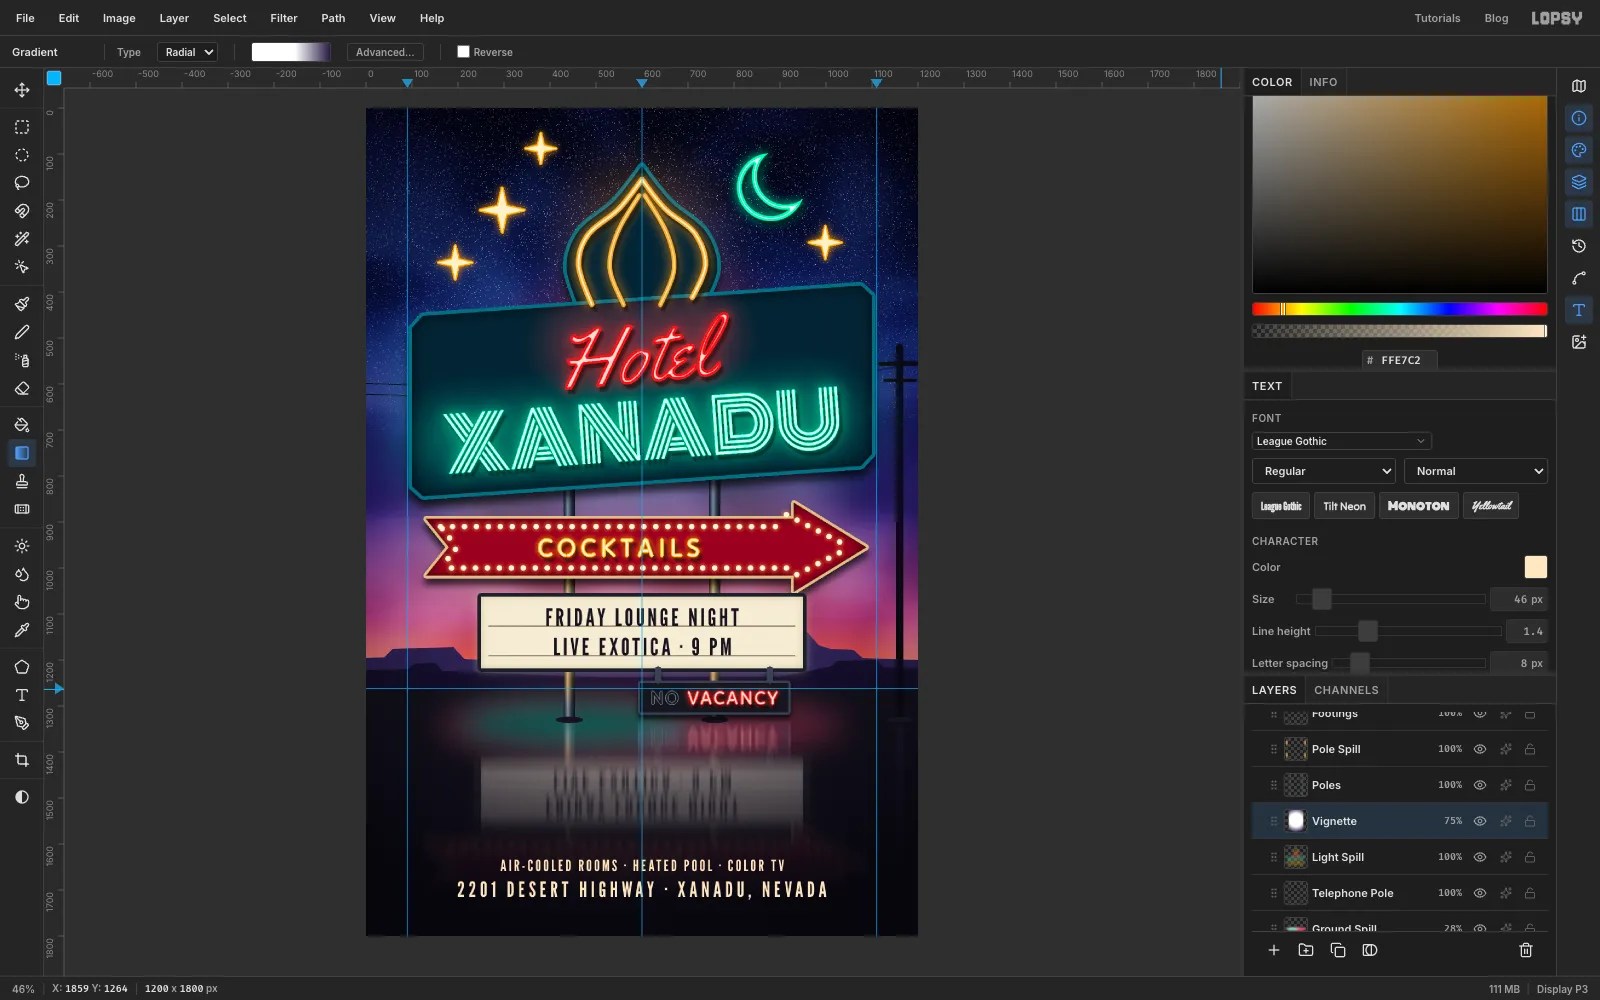
Click Light Spill, then Add Layer and name it Vignette. It sits behind the sign so the neon stays bright.
Pick the Gradient tool, switch it to Radial, and make a three-stop gradient in Advanced…: white at the left end, white again at 55%, and at the right end. Drag from the middle of the sign (about 600, 820) straight down to the bottom edge. Set Blend to Multiply and the opacity to 75%.
-
Make the bulbs chase
Chaser bulbs light in turns, so a photo always catches some of them dim. Click Bulbs and pick the Eraser. Set Size 20 and Opacity 65%. The Eraser has no hardness setting, which is fine: a 20 px eraser covers a whole 13 px bulb.
Click every third bulb, working around the arrow. Each click leaves a dimmer bulb with a weaker glow.
Choose File → Save Project to keep the layers, then File → Export… for a PNG to print or post.